Posted on Leave a comment

Crispy Zucchini Chips Recipe: Air Fryer, Oven, Panko, Keto & Dehydrator Methods

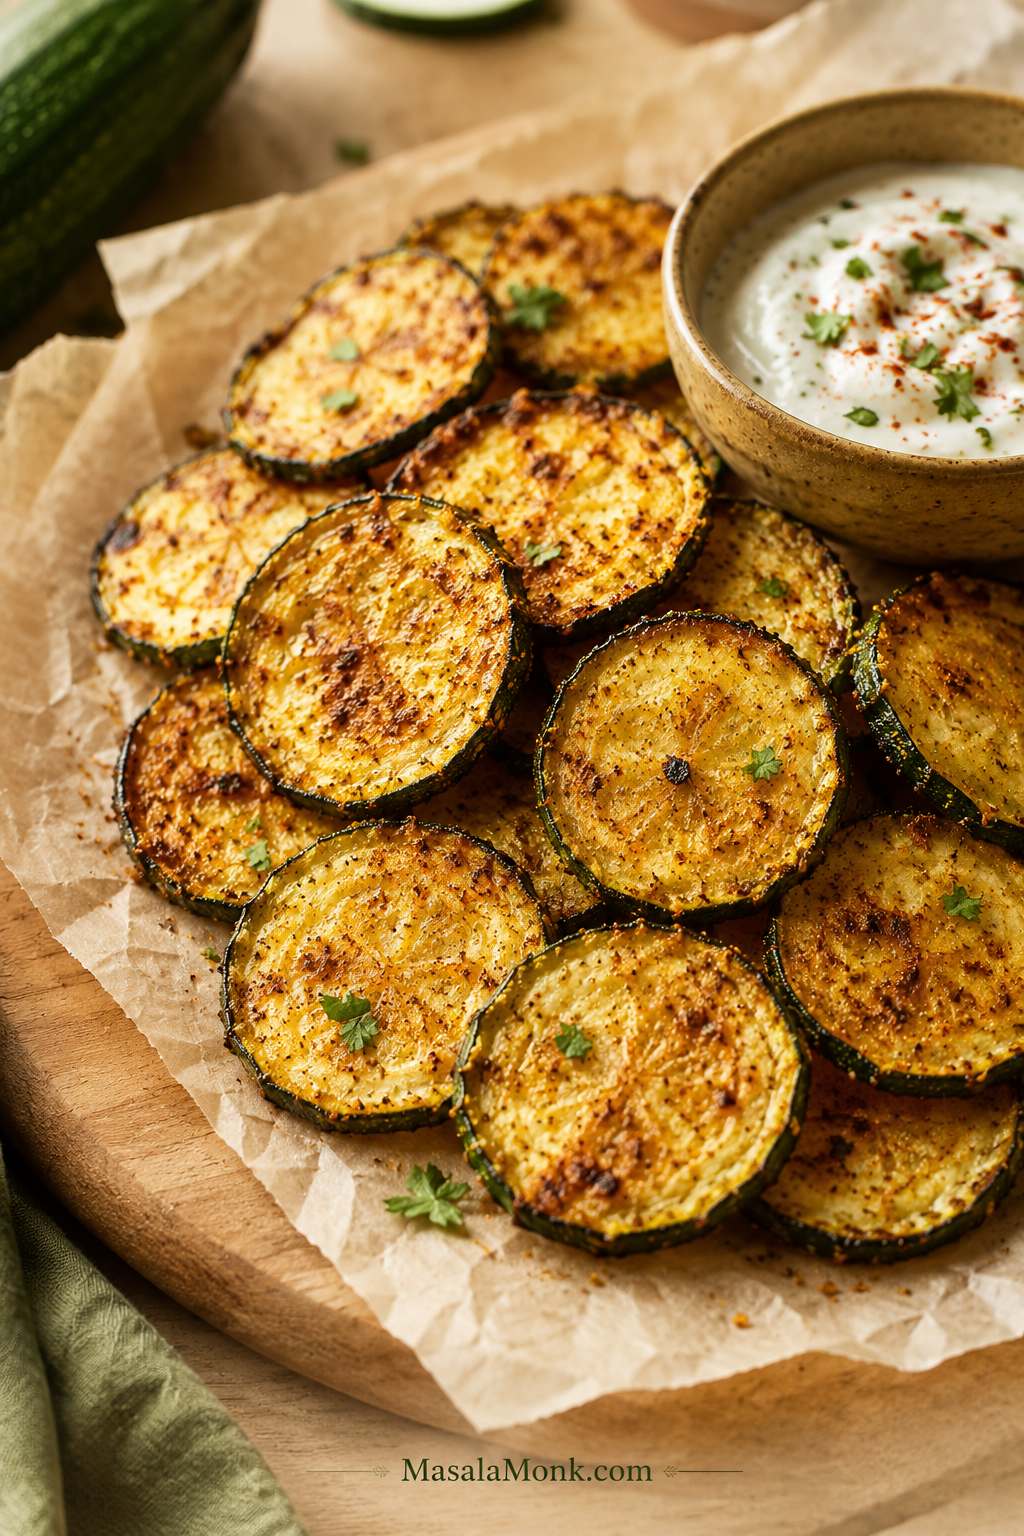
These crispy zucchini chips are golden at the edges, tender in the center, and best dipped while the parmesan still has its crunch.

Zucchini chips sound easy until you pull them from the oven or air fryer and find the same annoying problem: browned edges, soft centers, and slices that look like chips but bend like roasted zucchini.

If that has happened to you, the problem was probably not just the cooking time. Zucchini is naturally tender and water-rich, so it needs a little help before it can become crisp. Even slicing, a short salting step, proper drying, light oil, enough space, and the right heat make the difference between limp slices and a snack you actually want to keep reaching for.

Most zucchini chips recipes are not actually disagreeing with each other. They are making different snacks. This guide starts with the easiest crisp-edged air fryer parmesan version, then shows when to use the oven, panko, keto/no-breadcrumb, or dehydrator method for the texture you actually want. If you already know the texture you want, compare the styles first.

These will not behave exactly like packaged potato chips, and that is okay. The win is a crisp-edged, salty bite that lets zucchini be zucchini without turning limp.

Quick Answer: How to Make Crispy Zucchini Chips

To make crispy zucchini chips, slice the zucchini evenly, salt the slices briefly, pat them very dry, season lightly, and cook in a single layer. Start with air fryer parmesan zucchini chips at 370°F / 188°C for 10–12 minutes, then cool them spread out for a few minutes so the cheese can firm. Need amounts and steps? Jump to the recipe card.

Seasoning helps, but the real win happens before the zucchini hits the heat. If the slices go in wet, they soften before the edges can firm up. Use only a little oil or oil spray, avoid crowding, and do not judge the final texture until the chips have cooled for a few minutes.
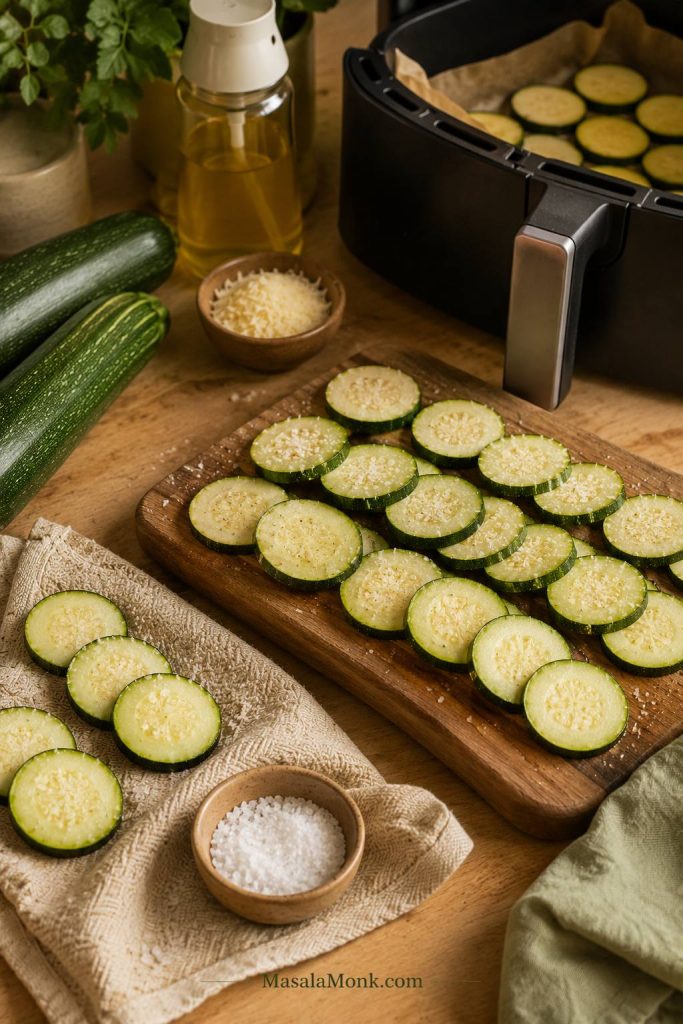
Sliced zucchini, salt, parmesan, oil spray, towel, and air fryer basket arranged on a wooden surface.
Before the air fryer or oven does any work, set the zucchini up for success with even slices, salt, towels, light oil, and parmesan.

Best first batch: air fryer parmesan zucchini chips.

The crispness rule: slice evenly, salt briefly, pat very dry, cook in one layer, and cool spread out.

Crispy Air Fryer Parmesan Zucchini Chips Recipe

This is the first batch to make because parmesan gives zucchini a shortcut to crisp edges. The slices still need salting and drying, but the cheese browns quickly, firms as it cools, and turns a soft vegetable into something snackable without breadcrumbs or a long oven bake.

Texture: crisp parmesan edges, tender centers, and a salty snack bite. Not packaged potato-chip snap, but much better than limp zucchini rounds.

Yield4 servings

Prep Time20 minutes

Cook Time10–12 minutes

Total Time30–35 minutes

Ingredients

  • 2 medium zucchini, about 400 g / 14 oz total
  • ½ tsp fine salt, about 3 g, for salting the zucchini
  • 1 tbsp olive oil or avocado oil, 15 ml, or use oil spray
  • ½ tsp garlic powder, about 1.5 g
  • ½ tsp paprika or smoked paprika, about 1 g
  • ¼ tsp black pepper, about 0.5 g
  • ⅓ cup finely grated parmesan, about 30 g
  • Extra salt only if needed, after cooking

Instructions

  1. Slice the zucchini. Slice into even rounds, about ⅛ inch / 3 mm for thinner chips or slightly thicker if your air fryer tends to blow thin slices around.
  2. Salt the slices. Arrange the zucchini on a towel or in a colander. Sprinkle with the salt and let rest for 15–20 minutes.
  3. Dry very well. Pat the slices dry with a clean kitchen towel or paper towels. The surface should look matte, not shiny-wet.
  4. Season lightly. Toss the zucchini with oil, garlic powder, paprika, black pepper, and finely grated parmesan. The slices should look lightly glossy, with seasoning clinging to the surface instead of sliding around.
  5. Arrange in the air fryer. Place slices in a single layer in the basket. Cook in batches if needed; it is better to cook two quick batches than one crowded soft batch.
  6. Air fry. Cook at 370°F / 188°C for 10–12 minutes, flipping or shaking gently halfway, until the parmesan smells toasted, the edges look dry, and the slices feel lighter. Start checking around 8 minutes.
  7. Remove finished chips early. If some slices are golden before others, remove them and keep cooking the softer pieces.
  8. Cool before serving. Spread the chips out for a few minutes. The parmesan firms up and the edges crisp more as they cool.
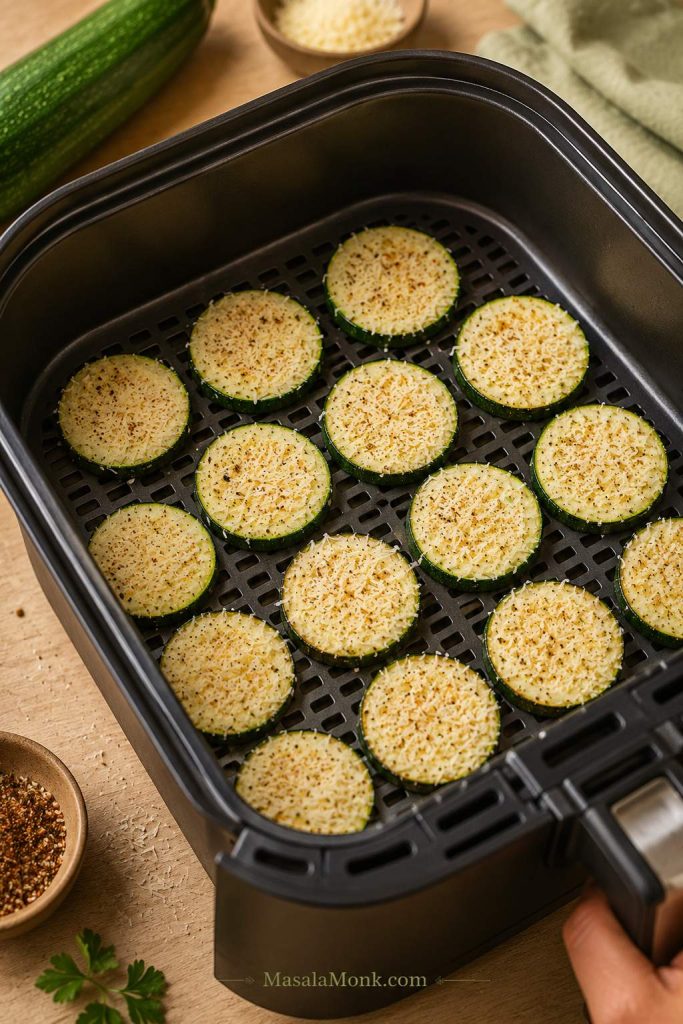
Parmesan-coated zucchini rounds arranged in one layer inside an air fryer basket.
For air fryer zucchini chips, keep the rounds in one layer. Hot air needs open gaps to dry the edges instead of steaming the centers.

Recipe Notes

  • Use finely grated parmesan for the most reliable crisping.
  • Smaller or thinner slices may finish first; pull them out early.
  • Do not add extra salt until after cooking, especially if using parmesan.
  • No air fryer? Use the hot oven parmesan method.
  • Serve soon after cooling, while the parmesan edges are still crisp.
  • Re-crisp leftovers in the air fryer or oven, not the microwave.

Why this works: salting gives the slices a better start, parmesan browns quickly, and cooling lets the cheese firm up. That is why the chips often feel crisper after a few minutes on the plate than they do straight from the air fryer. If they still come out soft, use the soggy-chip fixes.
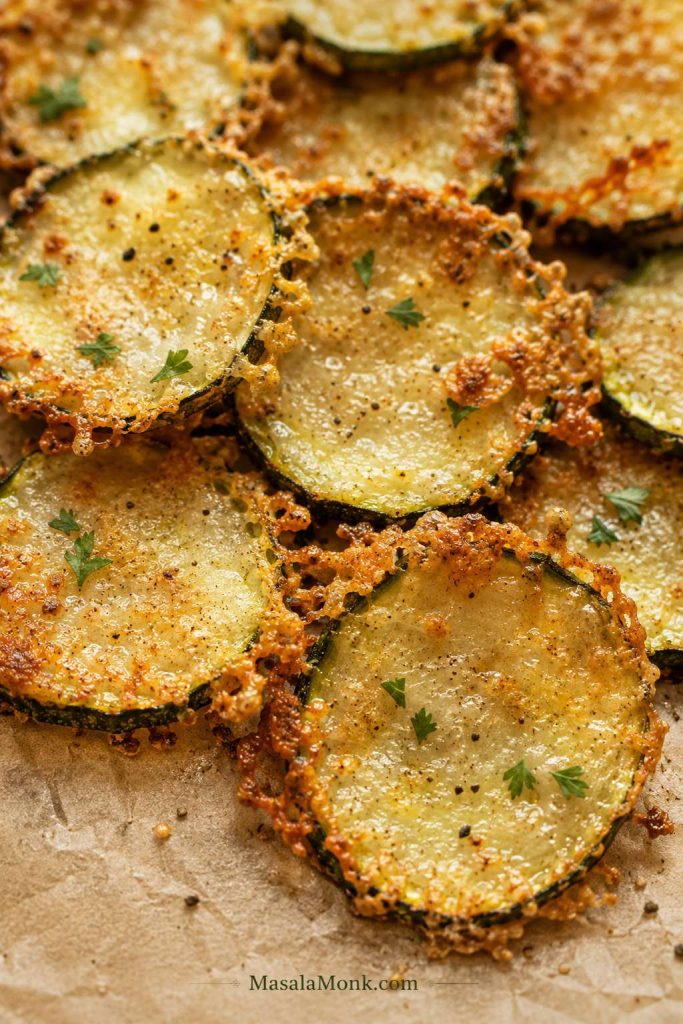
Close-up of parmesan zucchini chips with golden lacy cheese edges on parchment.
With parmesan zucchini chips, the best sign is a lacy golden edge. Let them cool briefly so the cheese can firm and crisp.

The first successful batch feels obvious in hindsight: the slices look lighter, the parmesan smells toasted, and the edges firm up while you are getting the dip. A few softer pieces are normal. At their best, they taste salty and cheesy, with crisp edges and tender centers.

The first crisp one is the cook’s tax. Eat it while the edges are still at their best.

Want a Different Texture? Choose Your Zucchini Chip Style

From here, the same idea can shift into oven trays, panko coating, keto chips, or make-ahead dehydrated chips. You do not need to master every version today. Choose the one that matches what you want to eat: the air fryer method for speed, the panko method for crunch, or the dehydrator method for make-ahead chips.

Thin chips dry. Parmesan rounds crisp. Panko rounds crunch. Once you know which style you are making, the times stop looking random.
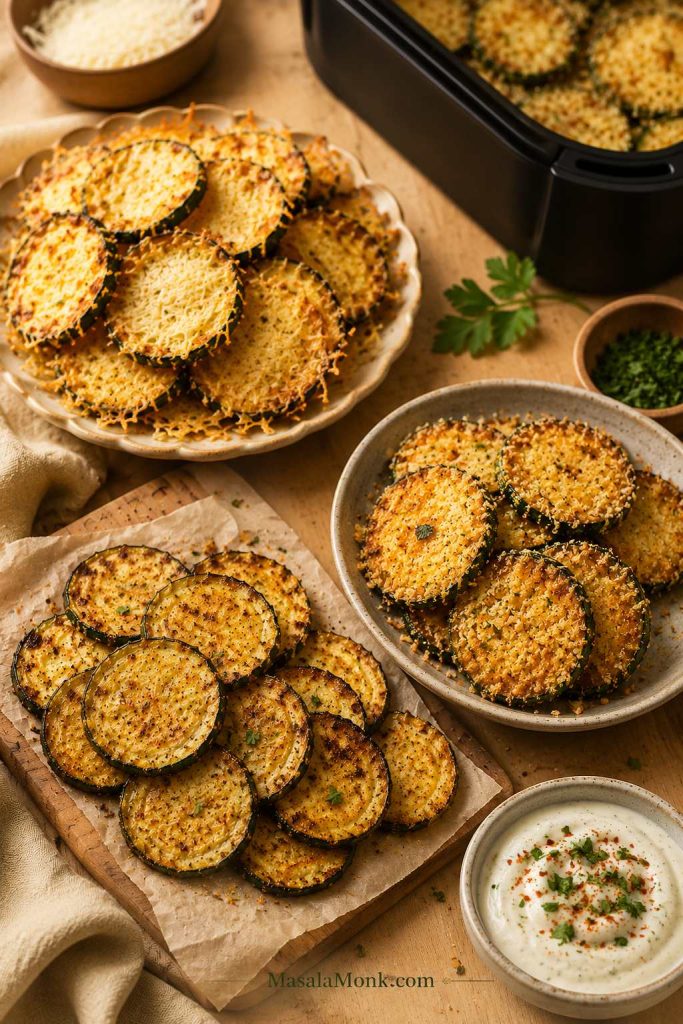
Three zucchini chip styles shown together: thin plain chips, parmesan rounds, and panko-coated rounds.
Not every zucchini chip should look the same: thin chips dry, parmesan rounds crisp at the edges, and panko rounds bring the loudest crunch.
If You Want…Make ThisWhy It Works
The easiest first tryFast cheesy: air fryer parmesanParmesan helps the edges crisp quickly and adds salty, snacky flavor.
The crunchiest appetizerCrunchy appetizer: panko roundsPanko creates a crisp coating while the zucchini stays tender inside.
Keto or no-breadcrumb snackLow-carb: plain or parmesanParmesan gives better low-carb crispness than almond flour alone.
Larger sheet-pan batchSheet-pan: oven-bakedA baking sheet gives the slices more room than most air fryer baskets.
The most chip-like thin slicesThin veggie chips: low oven or dehydratorSlower heat gives thin slices time to turn light and crisp.
A sturdy dipperSturdy dippers: panko or thick parmesanThin plain chips are delicate; coated rounds hold up better.

Best choice guide: air fryer parmesan for the first batch, low oven or dehydrator for the most chip-like thin texture, panko for party crunch, parmesan for keto, and dehydrator or low-and-slow oven for better storage.

This is the kind of tray that disappears by the edges first: the lacy parmesan pieces, the extra-golden rounds, the ones everyone says they are “just testing.”

Why Zucchini Chips Turn Soggy

Most failed batches come down to one problem: the slices steam before they crisp. Already dealing with a limp tray? Skip to the troubleshooting table.

Zucchini carries a lot of moisture. When the slices are too thick, too crowded, or too wet, that moisture gets trapped. Instead of crisping at the edges, the zucchini softens. That is how you get chips that look browned but still bend in the middle.

If your last batch came out limp, you are not alone. This vegetable can make even a good recipe feel unpredictable until you give the slices a better start.
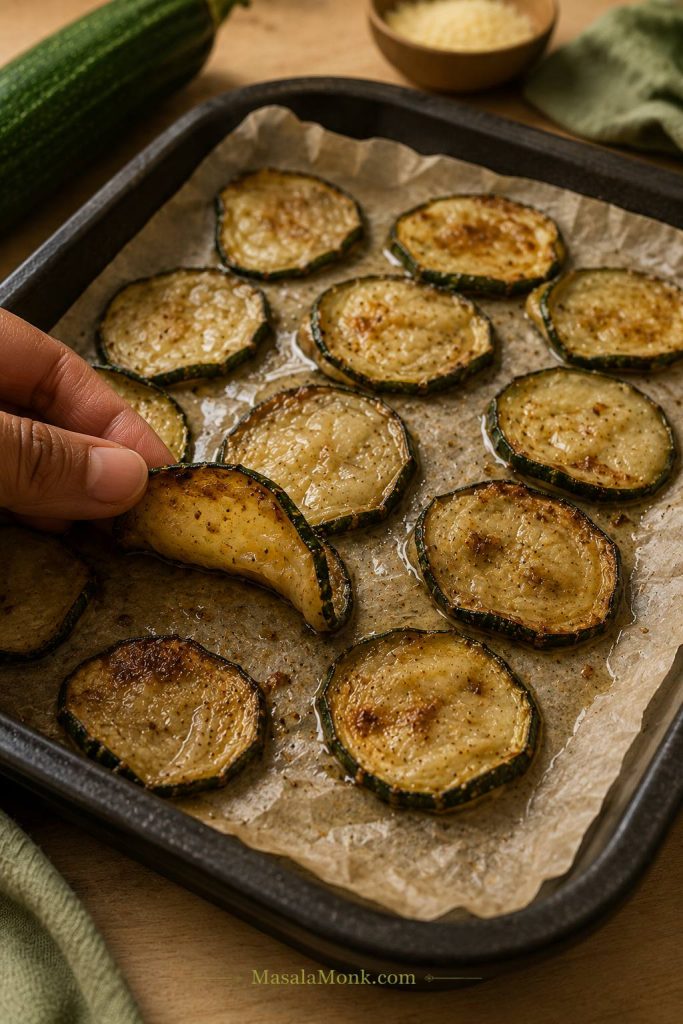
Soft browned zucchini chip being bent above a tray of limp zucchini slices.
If zucchini chips brown but still bend, they probably steamed before they crisped. Next time, go thinner, drier, or less crowded.

The rule that saves most batches: slice evenly, salt briefly, pat very dry, cook with space, and cool the chips spread out. That matters more than adding extra oil.

Once you solve that, the reward is simple: golden edges, better seasoning, and chips that feel like a snack instead of a side dish.

The Mistakes That Keep Zucchini Chips Soft

If a batch stays limp, the fix usually points back to one of these habits. This is not about being fussy; it is about giving zucchini a fair chance to crisp.

  • You salted but did not dry. Salting brings moisture to the surface; drying removes it. If the slices still look shiny, press them between towels before cooking.
  • You used too much oil. Glossy is good. Wet or slick is not. Too much oil coats the surface and keeps the chip soft.
  • You crowded the basket or pan. Overlapping slices steam each other. Cook in batches if needed.
  • You sliced unevenly. Thin pieces brown first while thick pieces stay soft. Pull the crisp ones early instead of waiting for the whole tray to match.
  • You used wet flavors too early. Lemon juice, hot sauce, fresh garlic paste, and watery marinades belong after cooking.
  • You piled them hot. Stacked chips lose their edge quickly. Spread them out for a few minutes first.
  • You expected every method to crunch the same way. Thin chips dry, parmesan rounds crisp, and panko rounds crunch. Choose the texture first.

Why These Ingredients Help Zucchini Chips Crisp

The ingredient list is short, but every item has a job. Medium zucchini gives you neat slices, salt draws moisture to the surface so you can pat it away, oil helps browning, parmesan firms into crisp edges, and panko gives the loudest crunch.
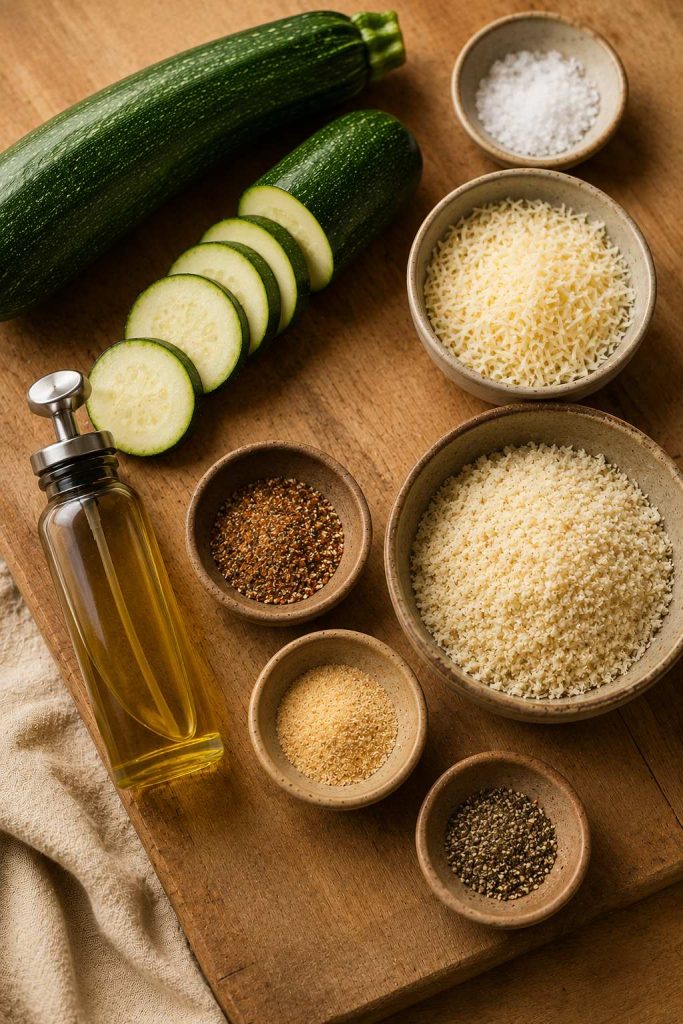
Zucchini, salt, grated parmesan, panko, oil spray, and spices arranged on a wooden board.
Keep the ingredient list simple, but choose each one for a job: salt manages moisture, parmesan builds crisp edges, and panko adds crunch.
  • Best zucchini: medium, firm zucchini with fewer watery seeds. Oversized zucchini can stay soft in the center.
  • Best crisping helper: finely grated parmesan. It clings better than large shreds and sets as it cools.
  • Best crunch coating: panko. Use it for appetizer-style rounds, not thin delicate chips that need to stay light.
  • Best oil approach: a light toss or spray. Glossy is enough; greasy slices soften.
  • Best seasoning type: dry spices and dried herbs. Save lemon juice, hot sauce, and fresh garlic paste for after cooking.

If you only have a very large zucchini, cut it lengthwise and scoop out the soft, seedy center if it looks watery. Use the firmer outer flesh for chips. And if you are comparing it with cucumber, remember that zucchini and cucumber are different vegetables, even though they can look similar at first glance.

Equipment That Actually Helps

You do not need a perfect kitchen setup here. A sharp knife, a clean towel, and enough space on the tray will get you most of the way there.

  • Mandoline or sharp knife: for even thickness.
  • Kitchen towels or paper towels: for drying after salting.
  • Parchment or wire rack: for oven batches and cooling.
  • Oil spray: for a light coating without greasiness.
  • Tongs: for pulling finished chips early.
  • Dehydrator: optional, but helpful for dry, make-ahead veggie chips.

Dry towels, even slices, and a little patience will do more for crispness than another spoonful of seasoning.

How Thin Should You Slice Zucchini for Chips?

Thickness decides whether you get a delicate chip, a cheesy round, or a sturdy dipper.
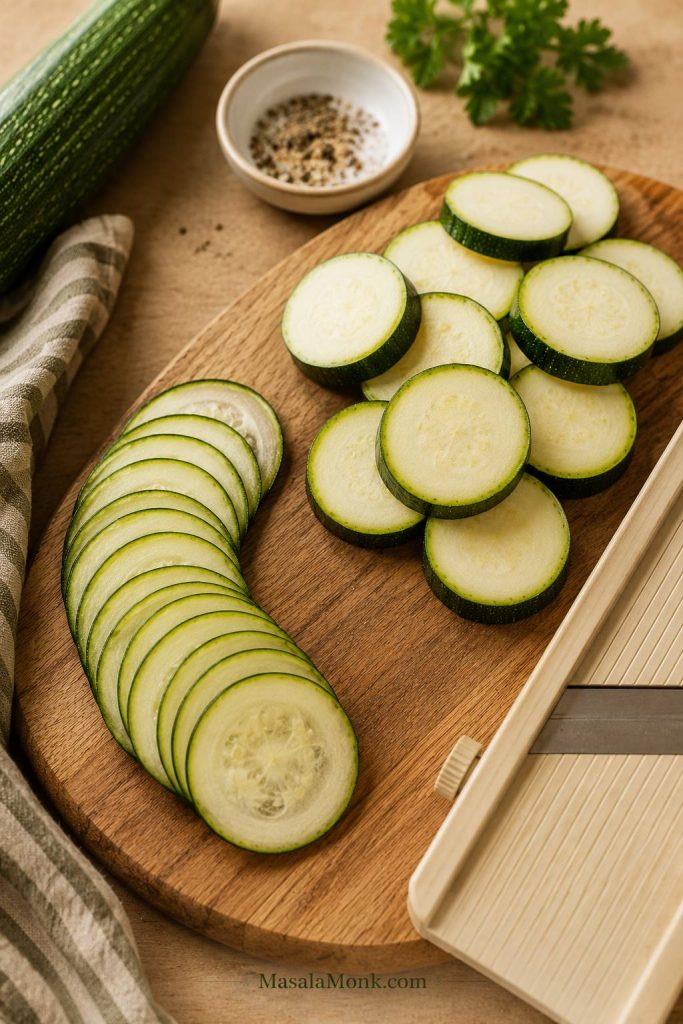
Thin zucchini slices and thicker zucchini rounds shown on a cutting board with a slicing tool.
Slice thickness decides the snack: thin rounds make delicate chips, while thicker rounds hold parmesan or panko coatings better.

For thin plain chips, aim for about ⅛ inch / 3 mm. These slices dry better, but they can burn quickly or fly around in some air fryer baskets.

For breaded or panko chips, slice closer to ¼ inch / 6 mm. Thicker rounds hold the coating better and are less fragile. They will be crunchy outside and tender inside, not dry all the way through; see the panko method if that is the texture you want.

For parmesan chips, either thickness can work. Choose thinner slices for a more chip-like result, or slightly thicker slices for a snacky zucchini round with crisp cheese edges.

A good batch will not all finish at the same second. Pull the crisp ones early. That is not fussiness; that is how zucchini behaves.

Should You Salt Zucchini First?

Yes. It is the small step that makes the biggest difference, especially if your zucchini is juicy or your last batch came out soft.

Salt draws moisture to the surface so you can pat it away before the zucchini hits the air fryer, oven, or dehydrator. It also helps breaded coatings stick because the slices are not slippery.

Here is the simple way to do it:

  1. Slice the zucchini evenly.
  2. Spread the slices on a clean towel or place them in a colander.
  3. Sprinkle with salt.
  4. Let them rest for 15–30 minutes.
  5. Pat very dry with a clean kitchen towel or paper towels.

You should see moisture on the surface after the rest. That is good. It means the water is on the towel instead of trapped in the chip.
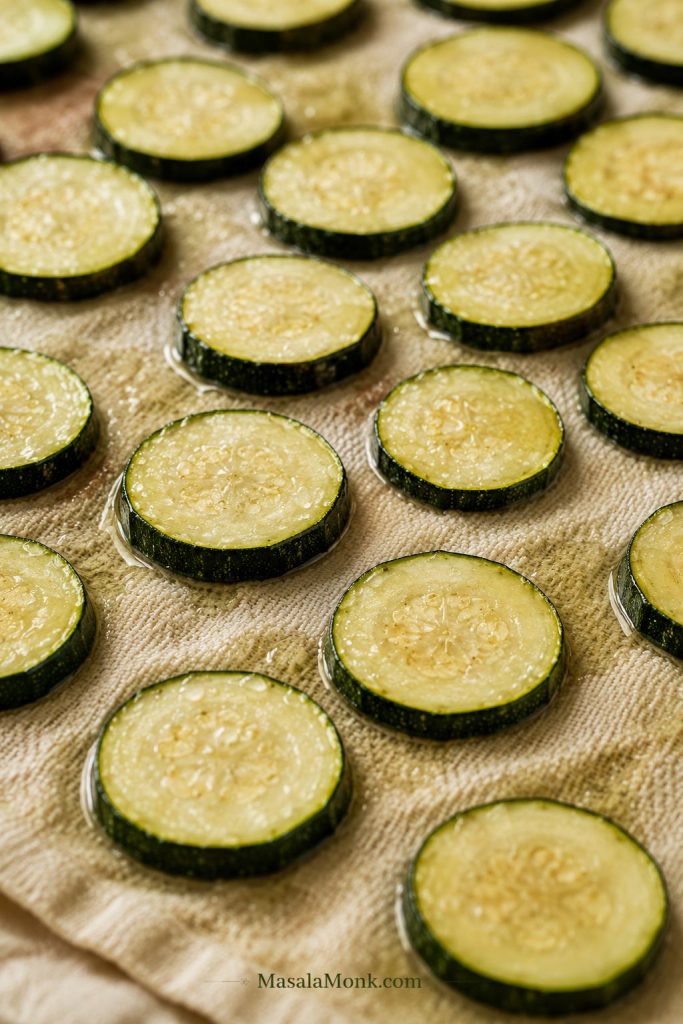
Salted zucchini rounds resting on a towel with moisture beads visible on the surface.
After salting, moisture should bead on the zucchini surface. That is the water you want on the towel, not trapped inside the chip.

You do not need to rinse if you used a light amount of salt. If you salted heavily, rinse quickly and dry extremely well. For thin low-and-slow chips, you can rest the zucchini longer, even up to 45–60 minutes, but for most batches, 20–30 minutes is enough.
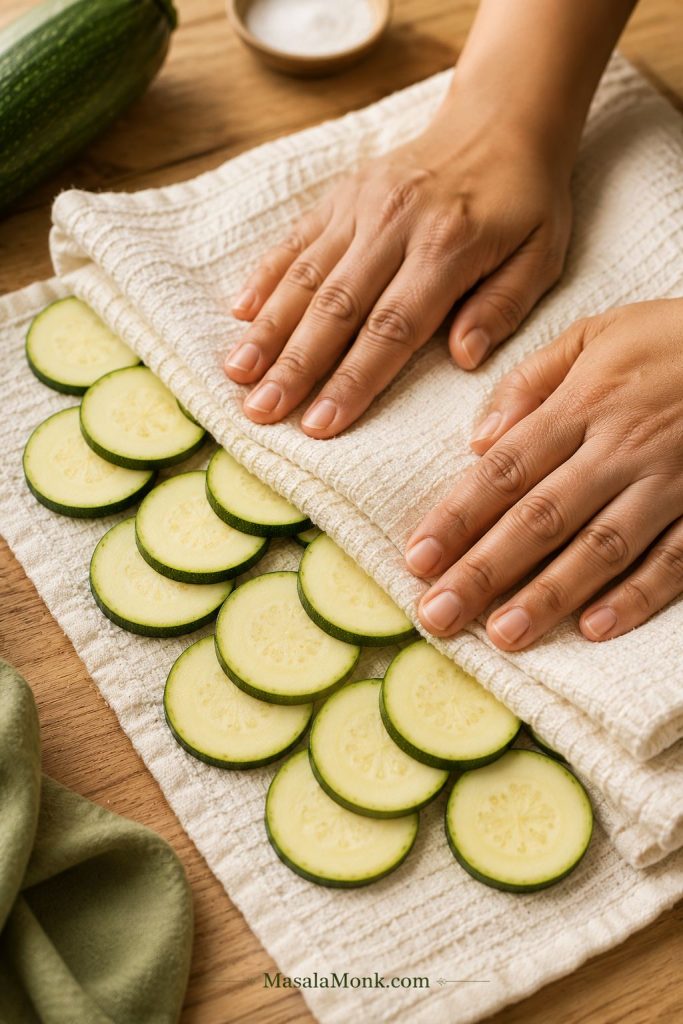
Do not skip the drying after salting. Pat away the surface moisture before cooking, or the slices will steam. Next, see how spacing changes the result in the air fryer and oven methods.

Hands patting zucchini rounds dry between clean towels before cooking.
Once the slices release moisture, press them until they look matte. Shiny zucchini usually means softer chips later.

Air Fryer Zucchini Chips: What Matters Most

The air fryer moves hot air, not magic. If the slices overlap, steam wins.
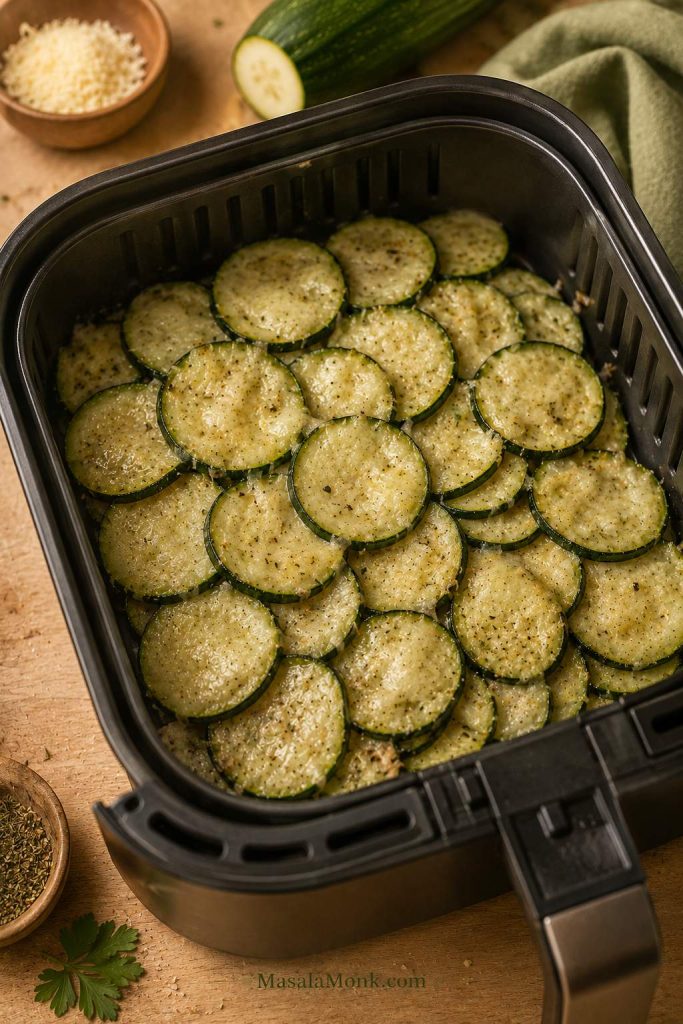
Overlapping zucchini rounds crowded inside an air fryer basket.
A crowded air fryer basket traps steam fast. Even well-seasoned zucchini chips stay soft when the slices overlap this much.

This is the weeknight version: quick heat, toasted parmesan, and a snack that is ready before anyone gets impatient. Good air fryer chips have browned parmesan around the edges, a garlic-paprika aroma, and enough firmness to dip gently after they cool for a few minutes.

Air Fryer StyleTemperatureTimeWhat to Look For
Plain thin chips370°F / 188°C12–18 minutesEdges dry and lightly browned
Parmesan chips370°F / 188°C10–12 minutesCheese is golden and edges are crisp
Panko chips400°F / 204°C10–12 minutesPanko is golden and crunchy

Very thin slices may finish early; thicker slices may need a few more minutes. Pull the early winners. Waiting for the whole basket to match is how the best chips become bitter.

The second batch is usually better because you already know how fast your air fryer runs.

If very thin chips fly around: slice them slightly thicker next time or use an air fryer rack or mesh insert if your model allows it. Overcrowding the basket will hold them down, but it will also trap steam.

Oven Zucchini Chips: Hot and Fast vs Low and Slow

The oven only looks confusing because thin chips and coated rounds need completely different treatment. Use a hot oven, around 425°F / 218°C, for parmesan or panko-coated rounds that need quick browning. For thin plain slices, a low oven around 225–235°F / 107–113°C gives the zucchini time to dry out.

Hot oven batches should smell toasted and look golden at the edges. Low oven batches should look drier, lighter, and slightly curled.
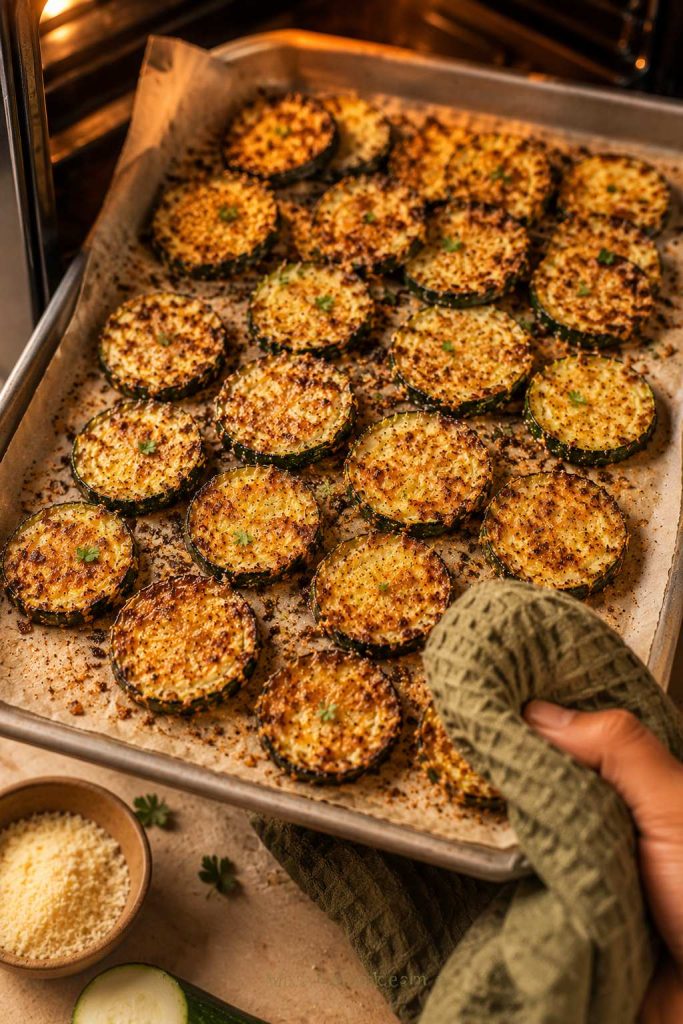
Golden baked zucchini chips on a parchment-lined sheet pan being pulled from the oven.
Baked zucchini chips need steady heat and enough tray room. Look for golden tops, drier centers, and edges that lift slightly.

Hot Oven Parmesan or Panko Chips

  1. Preheat the oven to 425°F / 218°C.
  2. Slice zucchini into ¼-inch / 6 mm rounds for panko chips, or slightly thinner for parmesan chips.
  3. Salt, rest, and dry the slices.
  4. Coat with parmesan or panko mixture.
  5. Arrange in a single layer on a parchment-lined baking sheet.
  6. Spray lightly with oil.
  7. Bake for 25–30 minutes, flipping halfway, until golden and crisp at the edges.

The chips should look lighter, slightly curled at the edges, and golden where the cheese or coating touches the heat. If they only look browned but still bend like roasted zucchini, give them more time.
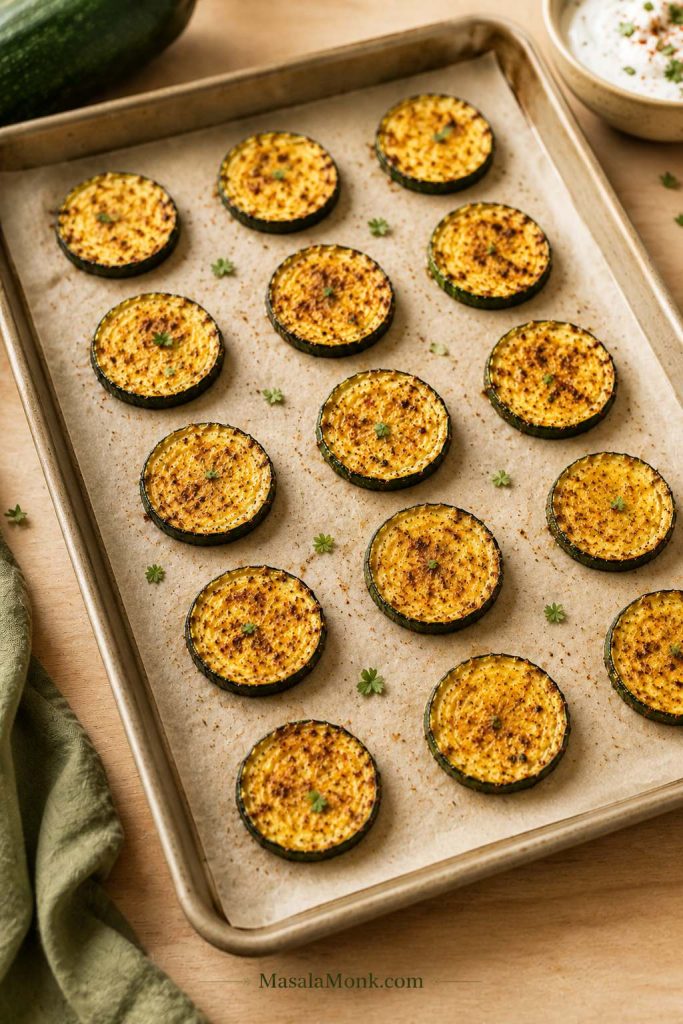
Zucchini rounds arranged with space between them on a parchment-lined sheet pan.
On a sheet pan, visible gaps are not wasted space. They let heat move around each zucchini slice so the edges can firm.

Low-and-Slow Thin Zucchini Chips

  1. Preheat the oven to 225–235°F / 107–113°C.
  2. Slice zucchini thinly, about ⅛ inch / 3 mm.
  3. Salt for 20–30 minutes, then pat very dry.
  4. Use very little oil, or just a light spray, then add dry seasoning.
  5. Spread in a single layer on parchment or a wire rack set over a baking sheet.
  6. Bake for 70–120 minutes, rotating trays halfway.
  7. Start checking around 70 minutes, then remove dry pieces every 10–15 minutes as needed.
  8. Cool completely before serving.

They are done when the centers stop looking wet, the edges curl slightly, and the slices feel light. If they still bend like roasted zucchini, they need more time.
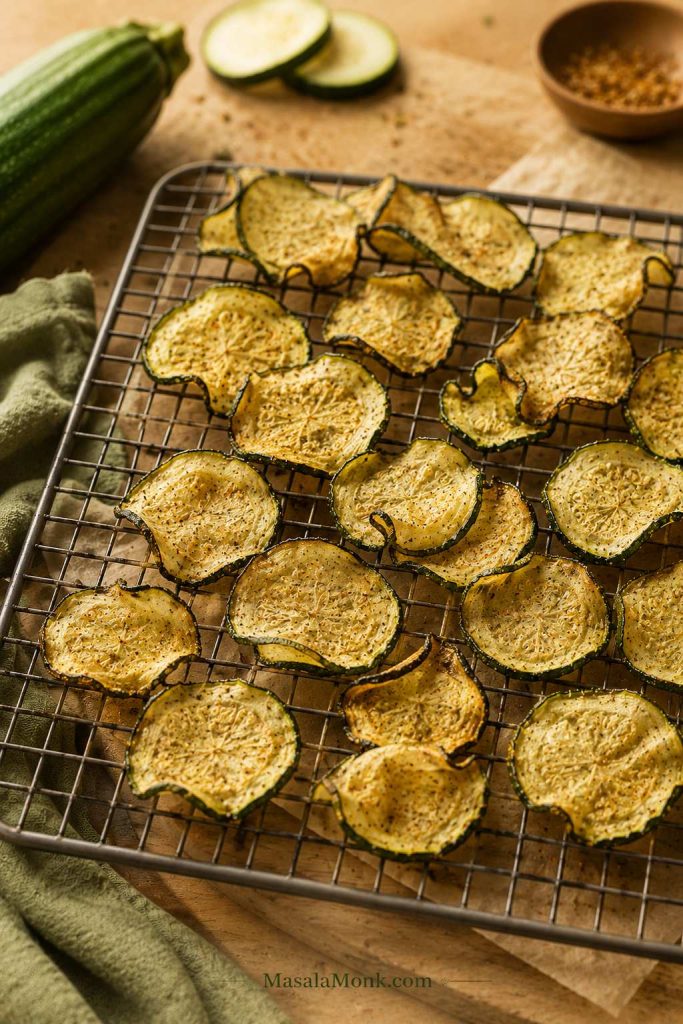
Thin lightly curled zucchini chips cooling on a wire rack.
Low-and-slow zucchini chips should look light, thin, and slightly curled. Cooling them on a rack keeps the undersides from softening.

Dehydrator Zucchini Chips

The dehydrator is not the fastest route, but it is the one to choose if you want chips that stay crisp after the first hour. This is the quiet, patient version: less hot-snack energy, more crisp pantry-snack payoff.

  1. Slice zucchini very thin and even.
  2. Salt lightly for 20–30 minutes, then pat dry very well.
  3. Use very little oil or skip oil completely.
  4. Season lightly with garlic powder, paprika, pepper, or dried herbs.
  5. Arrange in a single layer on dehydrator trays.
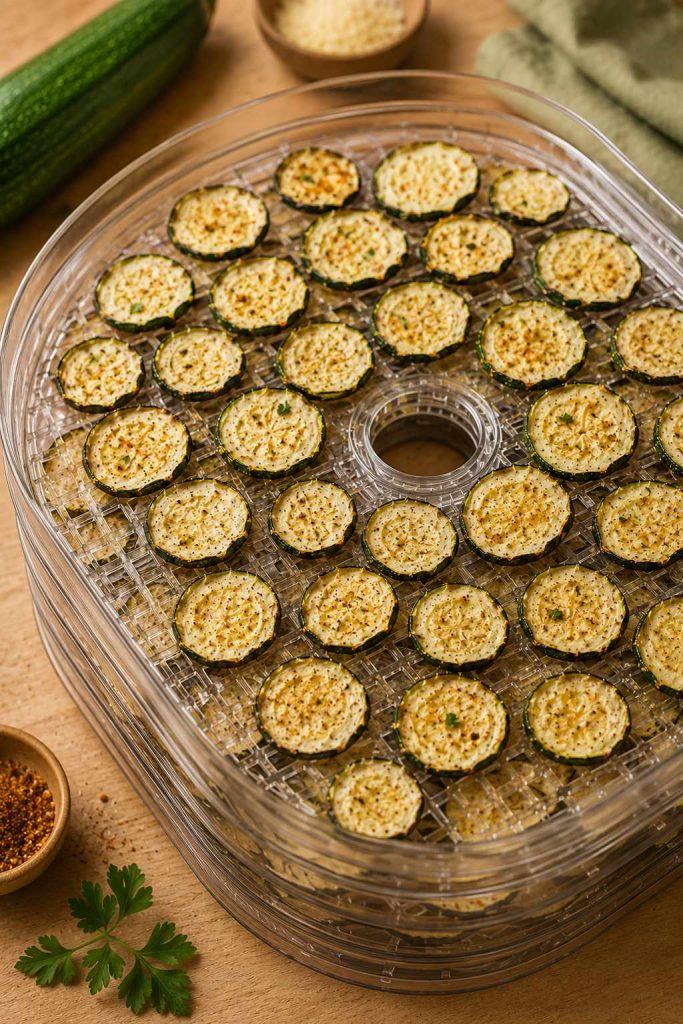
  6. Dehydrate at 135–150°F / 57–66°C for 4–8 hours.
  7. Rotate trays if your dehydrator heats unevenly.
  8. Cool completely before storing.
Thin zucchini slices arranged in a single layer on a dehydrator tray.
For dehydrator zucchini chips, single-layer spacing is the method. Thin slices dry more evenly and store better after they cool.

Use salt lightly here; dehydrated chips taste saltier as they dry. Humid kitchens, thicker slices, and crowded trays will push the timing toward the longer end.

Home-drying guidance supports the same idea used here: a single layer and steady dehydrator temperature help the slices dry evenly.

Cool one chip, then test it. Warm zucchini can lie to you. Fully dried chips should snap or feel crisp after cooling, not leathery. For keeping that texture, use the storage and re-crisping guide.
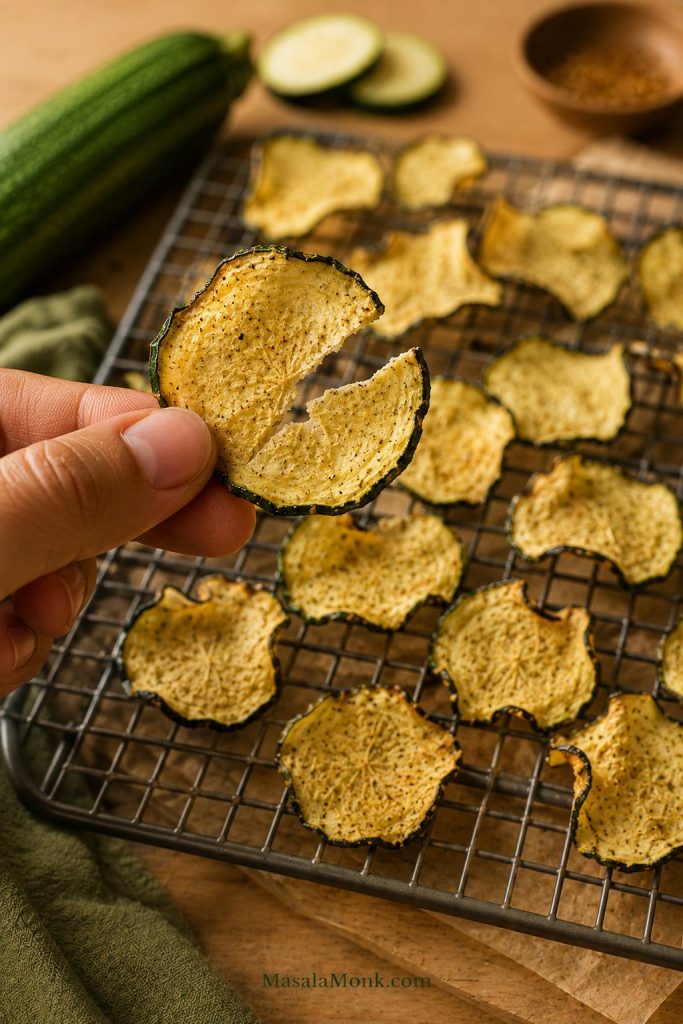
Hand holding a thin dried zucchini chip above a rack of dehydrated zucchini chips.
Cool one chip before testing. A dehydrated zucchini chip should feel dry and crisp, not warm, leathery, or bendy.

Parmesan Zucchini Chips: How to Get Lacy, Crisp Edges

Parmesan chips are done when the cheese looks golden and lacy at the edges, not pale and melted. If the parmesan smells sharp, bitter, or turns dark brown before the zucchini looks lighter, the heat is too high or the slices need more drying before cooking.

Finely grated parmesan works best because it clings in a thin layer and firms as it cools. Big shreds melt into patches. Too much cheese can also form a heavy blanket instead of a crisp edge, so use enough to coat lightly, not bury the zucchini.
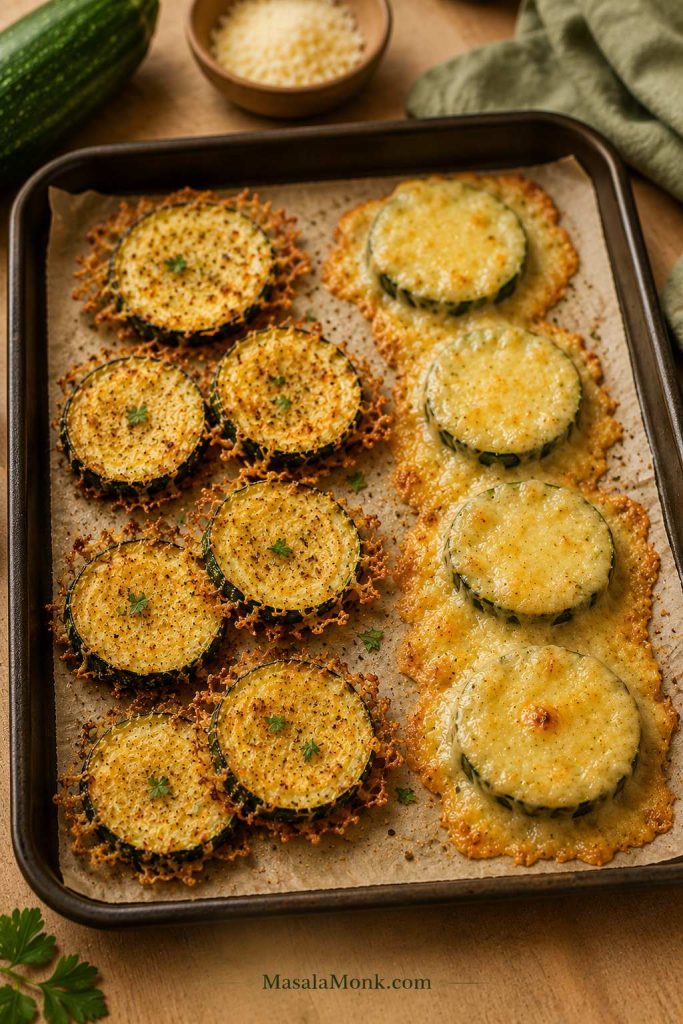
Zucchini rounds on a tray showing light lacy parmesan coating beside heavy melted cheese coating.
Parmesan helps, but too much can act like a blanket. A lighter coating gives zucchini chips better lacy edges and cleaner crisping.
  • Use finely grated parmesan, not big shreds.
  • Look for golden, lacy edges instead of dark brown spots.
  • Pull the tray or basket if the cheese smells bitter.
  • Let the chips cool spread out so the cheese can firm.
  • Add extra salt only after tasting; parmesan already brings salt.

Parmesan chips are especially good with something tomatoey on the side. A small bowl of marinara sauce makes them feel closer to a crispy zucchini appetizer than a plain vegetable snack.

Breaded or Panko Zucchini Chips

When you want the kind of crunch people hear across the table, use panko. Treat this version as crispy zucchini rounds, not thin vegetable chips. They are golden outside, tender inside, and strong enough for thick dips.

Panko crisps better than regular breadcrumbs because the flakes are larger and airier. Finished panko rounds should sound crisp when tapped with tongs, even though the zucchini inside stays tender.

This is the party version: golden crumbs outside, soft zucchini inside, and enough crunch to scoop a thick dip without collapsing.
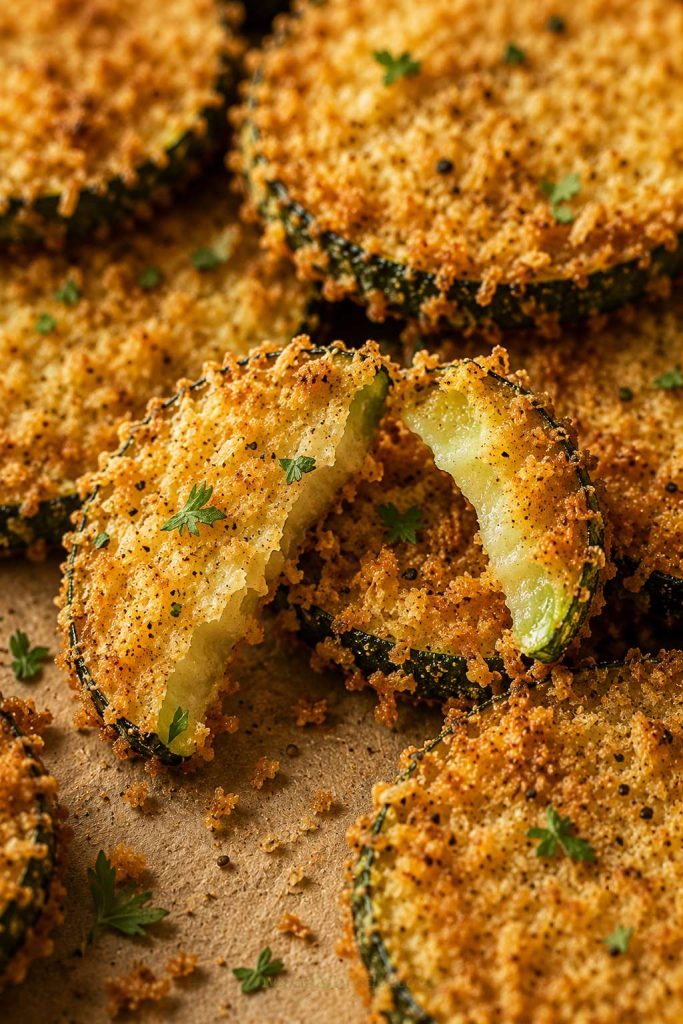
Broken panko-coated zucchini chip showing a crunchy golden coating and tender zucchini center.
With panko zucchini chips, the coating turns golden and crisp while the zucchini inside stays tender.

Panko Ingredients

  • 2 medium zucchini, sliced into ¼-inch / 6 mm rounds
  • ½ cup all-purpose flour, about 60 g
  • 2 large eggs, beaten
  • 1 cup panko breadcrumbs, about 55–60 g
  • ½ cup finely grated parmesan, about 45 g
  • 1 tsp Italian seasoning or dried oregano
  • ½ tsp garlic powder
  • Oil spray

Panko Method

  1. Salt the zucchini rounds briefly and pat them dry.
  2. Set up three bowls: flour, beaten eggs, and panko mixed with parmesan and seasoning.
  3. Coat each slice in flour, then egg, then panko mixture.
  4. Press gently so the coating sticks.
  5. Arrange in a single layer and spray lightly with oil.
  6. Bake at 425°F / 218°C for 25–30 minutes, or air fry at 400°F / 204°C for 10–12 minutes, checking early because panko can brown quickly.
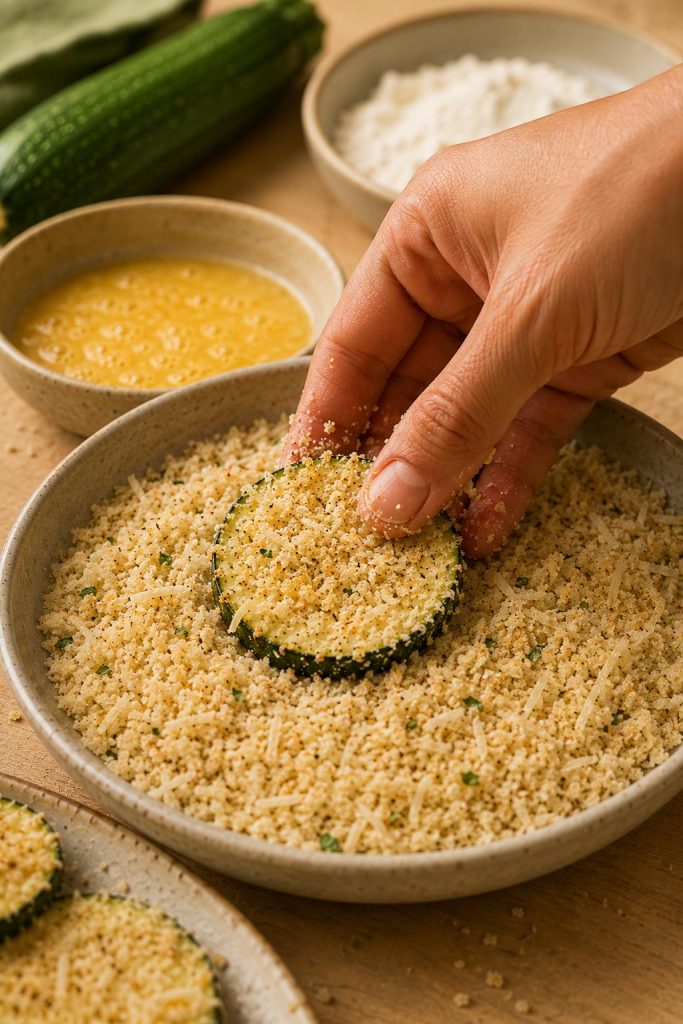
Hand pressing a zucchini round into panko crumbs during breading.
For panko zucchini chips, press the crumbs onto dry slices gently. That contact helps the coating cling and brown into a crunchy shell.

If the coating falls off, the zucchini was probably too wet before breading. Salt, drain, and dry the slices well before coating. For more soft-chip fixes, check the troubleshooting table.

The panko version is especially good with buffalo chicken dip or spinach artichoke dip. If you want something simpler, a warm cheese sauce works too.

Keto and No-Breadcrumb Zucchini Chips

If breadcrumbs are off the table, parmesan is the easiest way to get real edge crispness. Plain zucchini can dry nicely, but parmesan gives the snack more structure and a salty bite.

Almond flour can work, but it does not behave like panko. It tends to feel heavier and less crisp, so use it lightly or pair it with parmesan instead of expecting a breadcrumb-style crunch.

If you are building a bigger low-carb snack plate, these parmesan chips can sit alongside other keto chips, cucumber sticks, olives, cheese, and a creamy ranch or garlic yogurt dip.

Dry Seasonings That Work Best

Keep the wet flavors for later. Before cooking, dry spices are your friend.

  • Garlic parmesan: garlic powder, black pepper, and finely grated parmesan.
  • Ranch-style: garlic powder, onion powder, dried dill, parsley, and black pepper.
  • Chili lime: chili powder, garlic powder, lime zest, and a squeeze of lime after cooking.
  • Smoky paprika: smoked paprika, garlic powder, black pepper, and a little parmesan.
  • Italian herb: dried oregano, basil, garlic powder, black pepper, and parmesan.
  • Spicy parmesan: garlic powder, paprika, cayenne, black pepper, and finely grated parmesan.

Taste before adding more salt at the end, especially with parmesan. If you like heat, keep hot sauce or other wet sauces for after cooking; they work better as a finishing touch than as a pre-cook coating.

What to Serve with Zucchini Chips

The dip depends on the style of chip. Thin plain chips are delicate, so they work better with lighter dips like ranch, garlic yogurt, or tzatziki. Parmesan chips are great with marinara or salsa verde. If you want something sweeter and brighter, mango salsa also works.

For a snack board, pair warm zucchini chips with one creamy dip, one bright dip, and a few crunchy extras like cucumber sticks, carrot sticks, crackers, or olives. The contrast is what makes the board work: warm chips, cool dip, crisp edge, creamy finish.

How to Store and Re-Crisp Zucchini Chips

Fresh is best, but leftovers are not hopeless. You just have to bring the dry heat back.

They are best while the cheese has just firmed, the edges still crackle lightly, and the centers are still warm. As they sit, zucchini continues to soften, so even a crisp batch can lose some texture.

Do not seal in the steam you just worked so hard to remove. Spread hot chips out for a few minutes before piling them into a bowl or container.

Same-Day Storage

If you are serving them within a few hours, cool them completely first. Keep them loosely covered rather than sealing them while warm.

Overnight Storage

Refrigerate parmesan or panko chips in an airtight container once fully cool. They will lose some crispness, but you can revive them in the oven or air fryer.

Make-Ahead Chips

Choose low-and-slow oven chips or dehydrator chips if you need something that stores better. They hold up longer because they are dried more thoroughly.

How to Re-Crisp Them
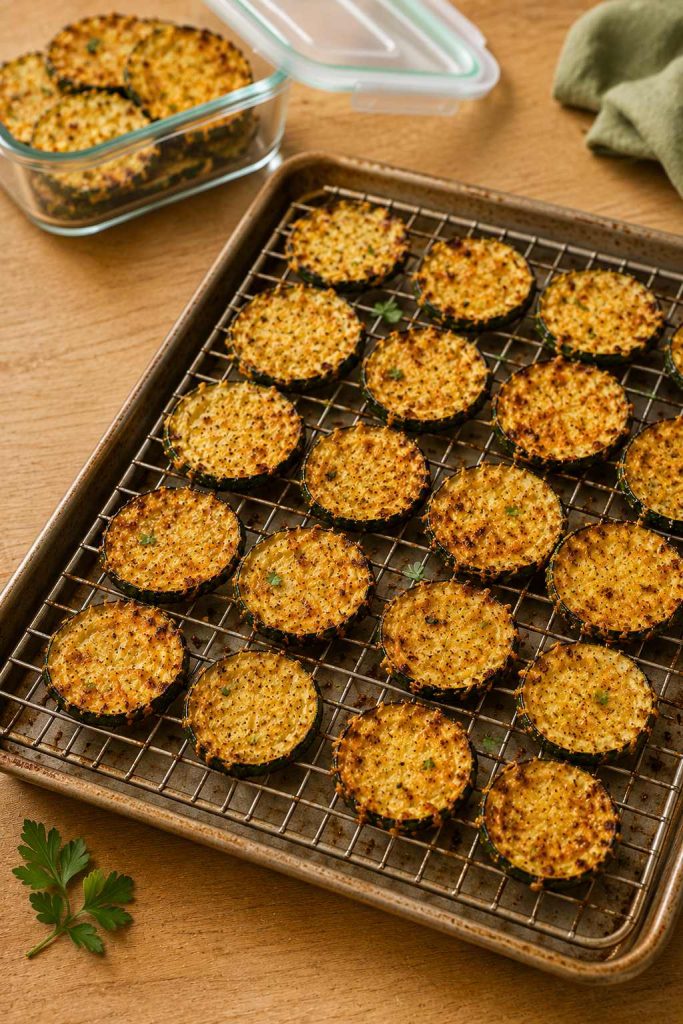
Leftover zucchini chips spread on a rack with an open storage container nearby for re-crisping.
To re-crisp zucchini chips, spread them out and bring back dry heat. The air fryer or oven works better than a microwave.
  • Air fryer: re-crisp at 350–370°F / 175–188°C for 3–5 minutes, checking often.
  • Oven: bake at 350°F / 175°C for 8–10 minutes, uncovered, until the edges crisp again.

Re-crisped chips will not be exactly like fresh, but dry heat can still bring back that salty edge. The microwave is the one option to skip; it softens zucchini instead of reviving it.

Troubleshooting: Soggy, Burnt, Oily, or Uneven Chips

A soft tray is not a failed recipe. It is usually one adjustment away: drier slices, less oil, more space, or a few more minutes.

Quick Fixes for Soft or Uneven Zucchini Chips

ProblemRight NowNext Batch
Chips are soggyRe-crisp uncovered in the air fryer or oven.Salt longer, pat very dry, use less oil, and avoid crowding.
Chips are soft in the middleCook a few minutes longer at moderate heat.Slice thinner or use a lower, slower oven method.
Edges burned but centers stayed softRemove the burnt pieces and lower the heat slightly.Slice more evenly and check earlier.
Chips stayed softSpread them out and cook a few minutes more.Use a single layer and cook in batches.
Chips feel oilyDrain briefly on a towel and re-crisp with dry heat.Use oil spray or toss with less oil.

Fixes for Coating, Salt, and Air Fryer Problems

ProblemRight NowNext Batch
Parmesan burnedPull the basket or tray before the cheese turns bitter.Use finely grated parmesan, less cheese, or slightly lower heat.
Parmesan stuck to the trayLet it cool briefly before lifting.Use parchment for oven chips or a light oil spray for air fryer chips.
Panko coating fell offServe the loose crumbs as a crunchy topping.Dry zucchini well before breading and press the coating gently.
Panko browned but zucchini stayed wateryReturn the soft pieces to the oven or air fryer for a few minutes.Use ¼-inch / 6 mm slices and dry them better before coating.
Chips taste too saltyServe with an unsalted dip or yogurt sauce.Use less salt before cooking, especially with parmesan.
Chips taste bitterRemove dark pieces and serve the lighter ones.Lower heat slightly and add delicate seasonings after cooking.
Air fryer chips flew aroundPause and settle the chips if needed.Slice slightly thicker or use a rack/mesh insert.
Chips softened after coolingRe-crisp in the air fryer or oven.Cool spread out before storing or serving.

If the first tray bends, do not panic. Moisture usually won the first round, and the next batch often only needs one or two adjustments.

Frequently Asked Questions

Why are my zucchini chips soggy?

Zucchini chips turn soggy when moisture gets trapped. Slice evenly, salt briefly, pat very dry, use little oil, and cook in a single layer.

Why are my air fryer zucchini chips not crispy?

The slices may be wet, thick, crowded, or coated with too much oil. Cook in batches and pull finished pieces early instead of waiting for every slice to match.

Do you have to salt zucchini first?

You do not absolutely have to, but it helps a lot. Even a 15–20 minute rest gives the slices a better start before they hit the heat.

Do they get crispier as they cool?

Yes, especially parmesan chips. The cheese firms as it cools, so give the chips a few minutes before judging the texture.

Air fryer or oven: which is better?

Choose the air fryer for speed and small batches. Use the oven for larger trays, panko-coated chips, and low-and-slow thin chips.

Can I bake zucchini chips without breadcrumbs?

Yes. Use thin slices, salt and dry them well, then bake low and slow at 225–235°F / 107–113°C. Add finely grated parmesan if you want crisp edges without breadcrumbs.

What is the best no-breadcrumb coating?

Finely grated parmesan is the easiest no-breadcrumb coating because it browns, firms as it cools, and adds salty flavor.

How thin should I slice the zucchini?

Slice about ⅛ inch / 3 mm for thin plain chips and about ¼ inch / 6 mm for breaded or panko rounds.

Are zucchini chips keto?

Plain and parmesan versions can be keto-friendly. Panko or regular breadcrumb-coated chips are not keto unless you use a low-carb coating.

Can I use yellow squash or courgette?

Yes. Courgette is another name for zucchini, and yellow summer squash can also work. If you actually have cucumber, use it fresh in a cucumber salad instead of baking it into chips.

Should I peel the zucchini?

No. The skin adds color, helps the slices hold together, and gives better texture.

Can I use frozen zucchini?

Frozen zucchini is not ideal for chips because it releases too much liquid after thawing. Use fresh zucchini for this recipe.

Are these the same as zucchini fries?

No. Chips are usually sliced into rounds, while zucchini fries are cut into thicker sticks and often breaded.

Can I use a dehydrator for zucchini chips?

Yes. Slice very thin, salt and dry the slices, season lightly, and dehydrate at 135–150°F / 57–66°C for 4–8 hours.

How do I store zucchini chips?

Cool them completely first. Store fully dried chips airtight, refrigerate parmesan or panko leftovers, and re-crisp in the air fryer or oven.

Final Thoughts

Zucchini chips stop feeling random once you stop treating every version like the same snack. Thin chips need drying time, parmesan rounds need a light coating and a cool-down, and panko rounds need enough thickness to hold their crunch.

Your first batch teaches you what your zucchini and air fryer are doing. Usually, the next one is the keeper.

When the edges finally crisp, the whole thing clicks: not a packaged potato chip, not a limp roasted round, but a golden, salty zucchini snack that actually earns its dip.
Back to top

Posted on 2 Comments

Garlic Mashed Potatoes Recipe

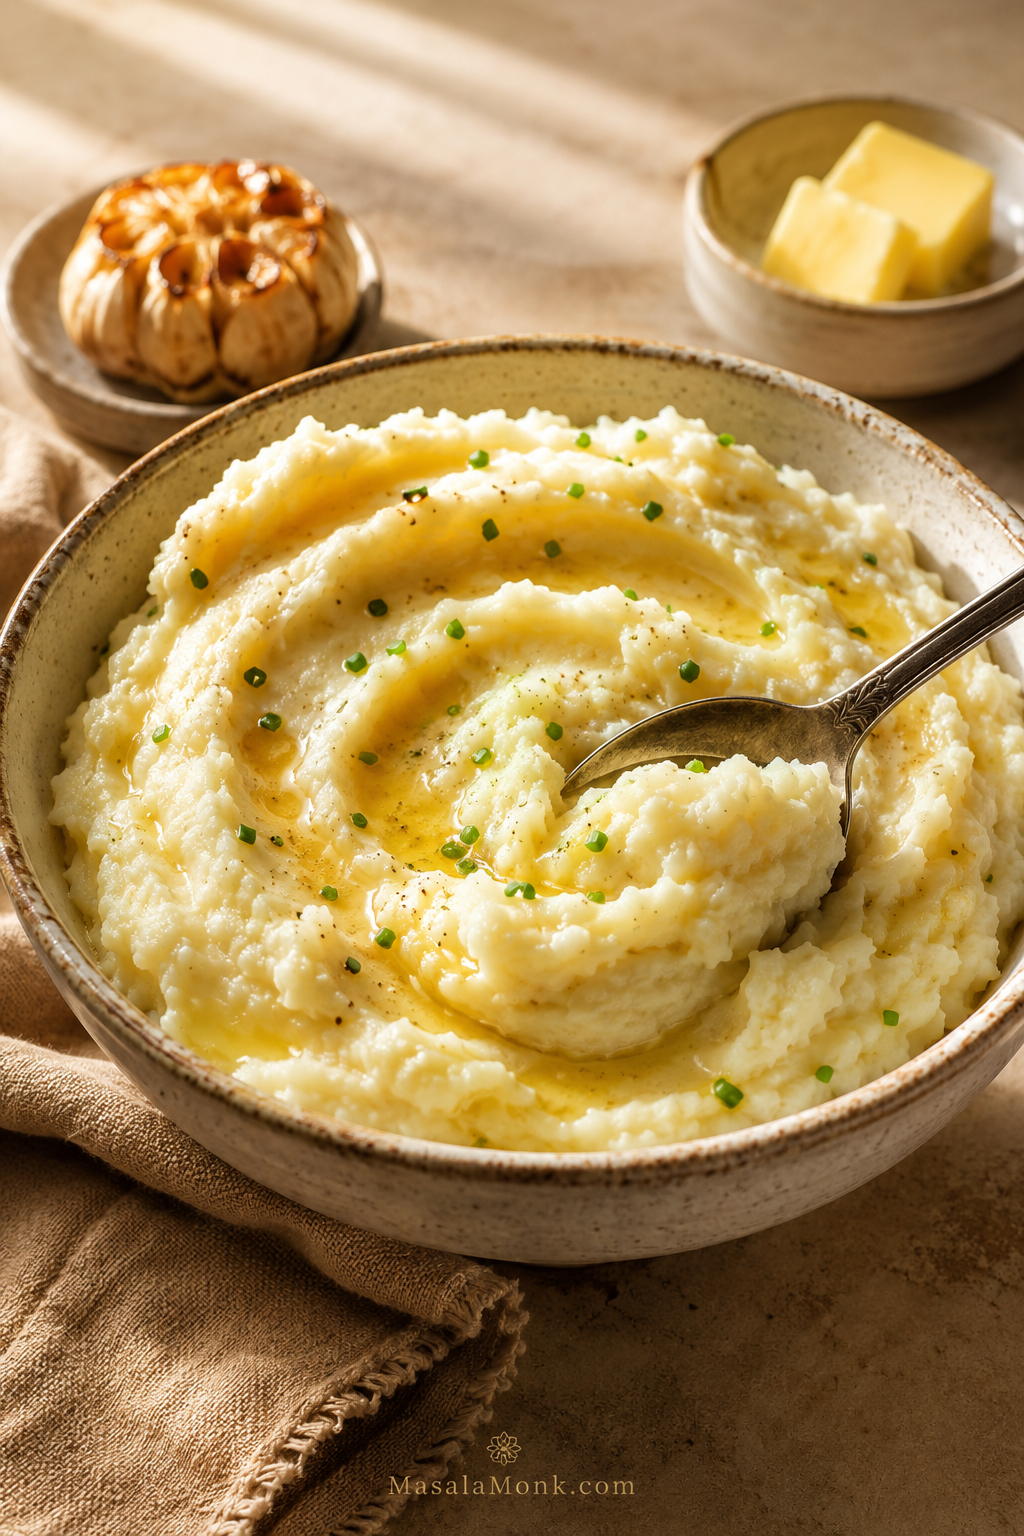
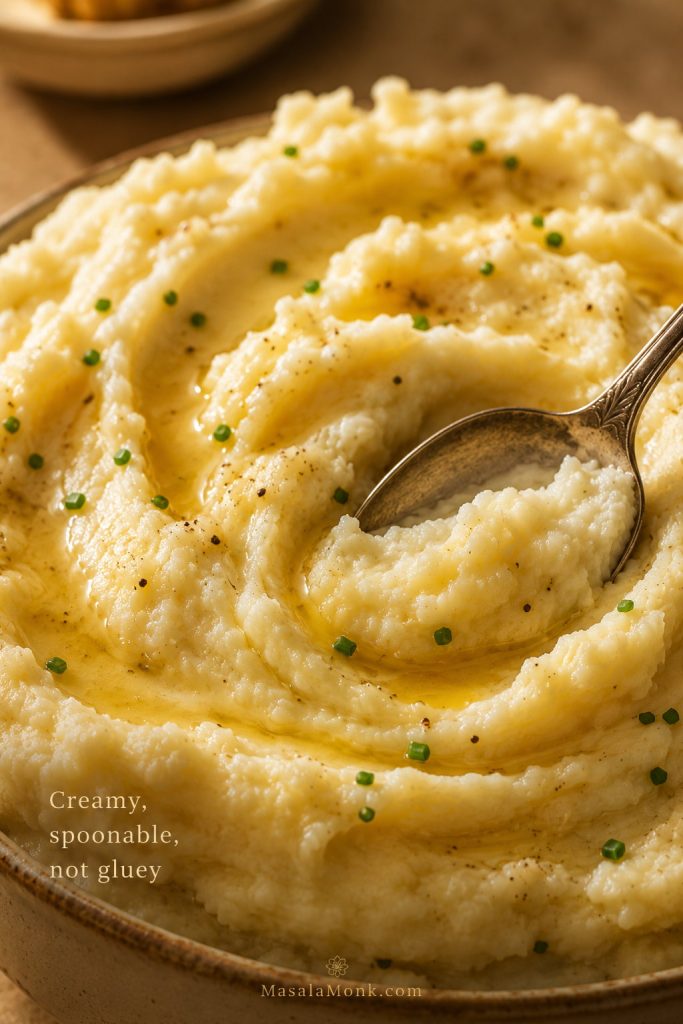
Creamy garlic mashed potatoes in a ceramic bowl with melted butter, chives, and a spoon pulling through soft swirls.

These garlic mashed potatoes are the kind you want under a spoonful of gravy: soft buttery ridges, mellow garlic in every bite, and enough body to hold melted butter without turning stiff, sticky, or gluey.

The secret is simple. Start with good potatoes, cook them until they are truly tender, let the extra steam escape after draining, then fold in warm garlic butter and milk while the potatoes are still hot. That gives you creamy spoonfuls, fluffy edges, and garlic flavor that runs through the whole bowl instead of sitting in sharp little pockets.

The goal is not restaurant-perfect smoothness at any cost. Instead, it is a warm, spoonable bowl that tastes buttery, garlicky, and comforting from the first bite to the last — the kind of mashed potatoes that make gravy, roast chicken, steak, or mushrooms feel like a complete meal.

Serve them with roast chicken, steak, meatloaf, mushrooms, turkey, gravy, or a holiday table. They are especially good beside a slow cooker roast chicken because the soft potatoes catch all those garlic-herb juices.

Make the classic version first, then use the variations below for roasted garlic mashed potatoes, garlic parmesan mashed potatoes, red skin mashed potatoes, no-milk mashed potatoes, dairy-free mashed potatoes, or a richer sour cream and cream cheese version.

In This Garlic Mashed Potatoes Recipe

Start with the classic creamy method, then adjust the potato, garlic, dairy, batch size, and make-ahead details to fit your meal.

Quick Answer: How to Make Garlic Mashed Potatoes

To make creamy garlic mashed potatoes, boil 2½ lb / 1.1 kg Yukon Gold potatoes in salted water until very tender. Drain them well, return them to the warm pot for a minute so excess moisture can steam off, then mash gently with warm garlic butter and milk.

For the garlic butter mixture, warm 6 smashed garlic cloves with 6 tbsp / 85 g butter and ¾ cup / 180 ml whole milk or half-and-half. Strain the garlic out for a smooth, rounded flavor, or mash the softened cloves into the potatoes if you want a deeper garlic taste. Finish with salt, pepper, and optional sour cream.

The full recipe takes about 35 minutes. For the best texture, use hot potatoes, warm dairy, enough salt, and a masher or ricer instead of a blender or food processor.

Best basic formula: 2½ lb Yukon Gold potatoes + 6 garlic cloves + 6 tbsp butter + ¾ cup warm milk or half-and-half + salt + optional ¼ cup sour cream.
Close-up of garlic mashed potatoes with a spoon drag, melted butter in the ridges, and small chive flecks.
Look for soft ridges that hold butter without looking stiff or pasty. That is the visual cue for creamy mashed potatoes that are spoonable, not gluey.

Garlic Mashed Potatoes at a Glance

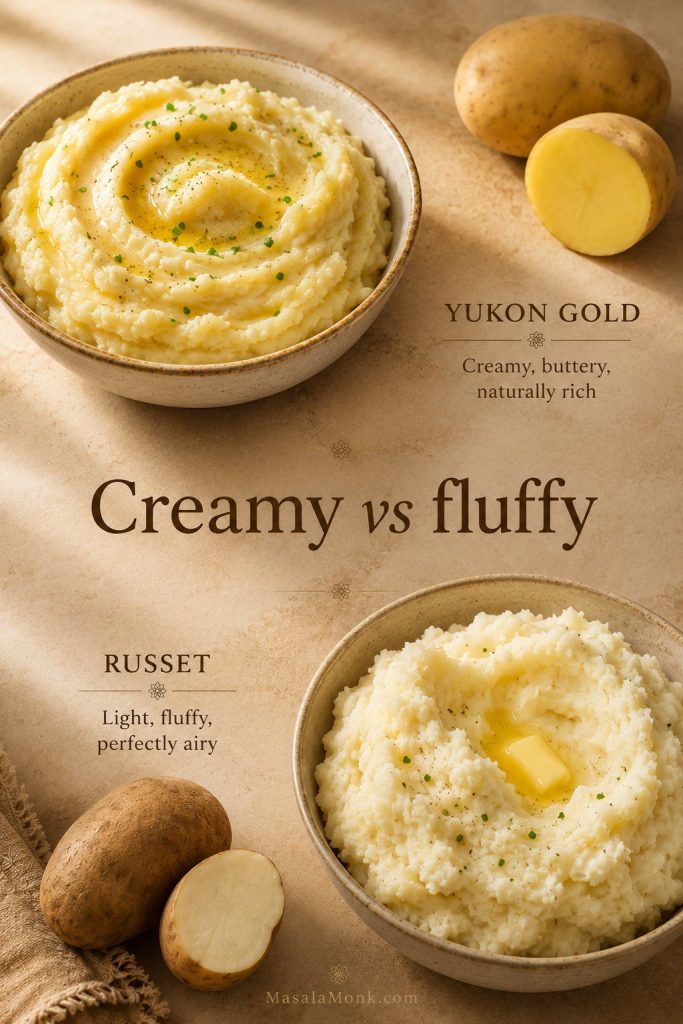
  • Best potato: Yukon Gold for creamy and buttery, russet for lighter and fluffier, red potatoes only for rustic skin-on mash.
  • Best garlic method: Warm smashed garlic in butter and milk for smooth everyday flavor.
  • Best texture rule: Drain well, steam-dry briefly, use warm dairy, and stop mixing once creamy.
  • Best tool: Potato masher for homestyle texture, ricer for smoother potatoes.
  • Make-ahead: Best within 2 days, with leftovers refrigerated for 3–4 days.

Which Version Should You Make?

The classic recipe is the best place to start, but different meals call for different mashed potatoes. Use this quick guide if you already know the flavor or texture you want.

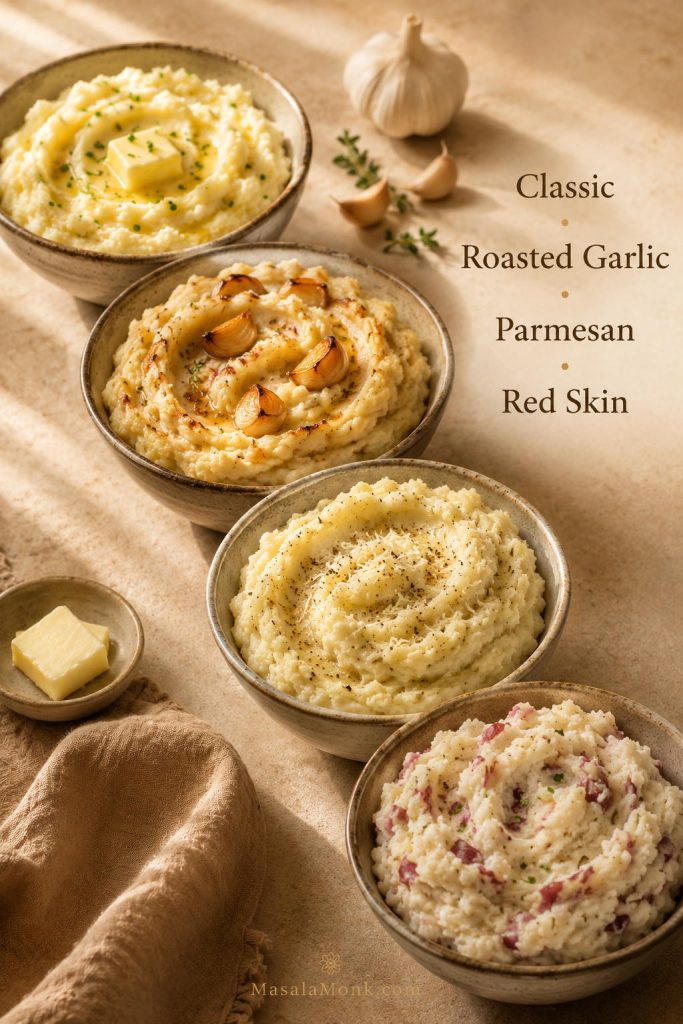
Four small bowls of mashed potatoes showing classic, roasted garlic, parmesan, and red skin versions.
Choose the version by the meal: classic for gravy, roasted garlic for deeper flavor, parmesan for savory richness, and red skin mashed potatoes for rustic texture.
If You Want… Make This Version Best For
Classic creamy mashed potatoes Main recipe Weeknights, holidays, gravy
Sweeter, softer garlic flavor Roasted garlic version Turkey, roast beef, dinner parties
Bigger garlic flavor Mash in the softened garlic cloves, add roasted garlic, or finish with a little garlic powder Garlic lovers, steak dinners, bold savory sides
Steakhouse-style flavor Garlic parmesan version Steak, chicken, mushrooms
No peeling Red skin version Rustic weeknight dinners
Tangier, richer potatoes Sour cream or cream cheese version Make-ahead meals, holiday sides
No milk or dairy-free Broth, olive oil, or dairy-free butter version Dairy-free guests, lighter sides
A smaller dinner batch Small batch version Steak night, dinner for two or three
A bigger holiday bowl Double batch Thanksgiving, Christmas, Easter, potlucks

Why This Garlic Mashed Potatoes Recipe Works

Good mashed potatoes should feel generous before you even add gravy. They should be warm, soft, buttery, and seasoned all the way through. In this recipe, each step protects that texture.

The method works because it avoids the three things that ruin mashed potatoes: raw garlic, wet potatoes, and overmixing. The garlic is warmed so it tastes smooth instead of sharp. After draining, the potatoes are dried briefly so they do not water down the butter. Everything is folded together gently, so the mash stays silky instead of tightening into paste.
Cooking the potatoes until completely tender also matters. If the potatoes are still firm in the center, you will have to keep mashing to chase out lumps, and that extra work can make the potatoes heavy. When they are cooked properly, they mash easily and absorb the warm dairy without a fight.

A potato masher gives you a cozy homemade texture, while a ricer gives you a smoother, fluffier bowl. Either way, the goal is the same: stop once the potatoes are spoonable, soft, and able to hold gentle swirls.

Ingredients for Garlic Mashed Potatoes

You do not need many ingredients, but small choices make a big difference. Warm dairy blends better than cold milk, enough butter carries the garlic flavor, and the right potato keeps the mash creamy instead of pasty.

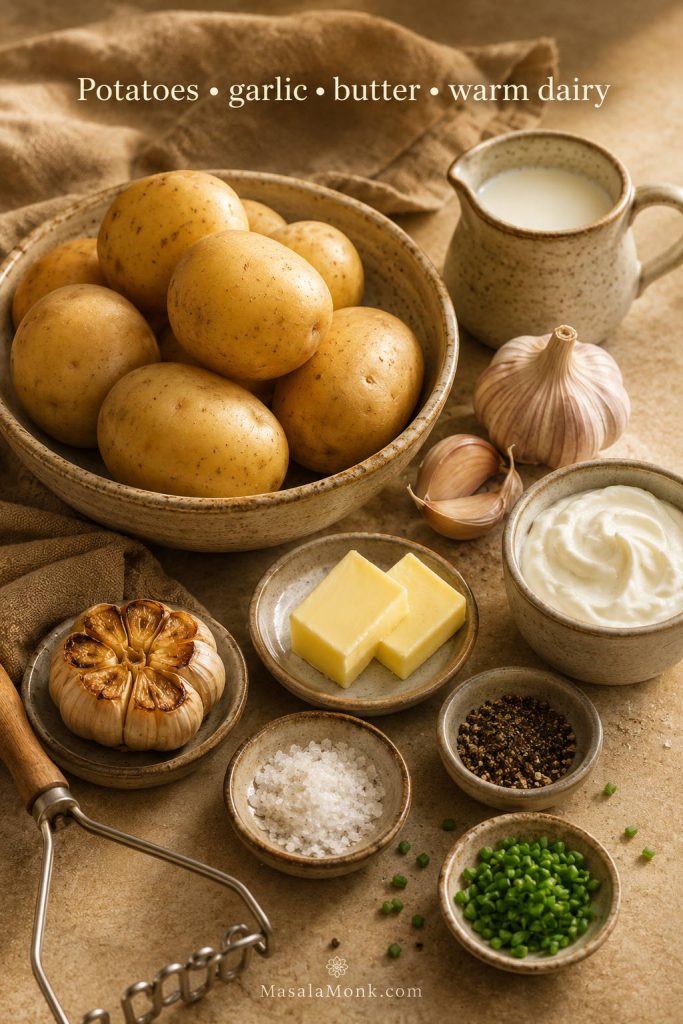
Yukon Gold potatoes, garlic, butter, milk, sour cream, salt, pepper, chives, and a potato masher arranged on a counter.
Even a simple garlic mashed potatoes recipe depends on balance: starchy potatoes for structure, butter for richness, and warm dairy so everything folds together smoothly.

Potatoes

Yukon Gold potatoes are the best default. They have a naturally creamy texture and a buttery flavor, so they make the recipe taste rich without needing a huge amount of cream.

Russets make a lighter, fluffier mash. Red potatoes work well when you want a rustic, skin-on version, but they should be mashed gently because they are waxier.

Garlic

Use 6 garlic cloves for the main batch. Smashed cloves warmed in butter and milk give the potatoes a mellow garlic flavor. If you love a stronger garlic note, mash the softened cloves into the potatoes instead of straining them out.

Butter

Use 6 tbsp / 85 g unsalted butter. Butter gives the potatoes richness and helps carry the garlic into every bite. If you use salted butter, season carefully at the end.

Milk or Half-and-Half

Use ¾ cup / 180 ml whole milk or half-and-half. Whole milk keeps the potatoes lighter. Half-and-half makes them richer and more holiday-worthy. Warm it before adding it to the potatoes.

Sour Cream

Sour cream is optional, but it adds a gentle tang and a fuller texture. Use ¼ cup / 60 g for balance, or up to ½ cup / 120 g if you want a tangier, richer mash.

Salt, Pepper, and Herbs

Salt the cooking water, then season again after mashing. Potatoes need salt in layers; otherwise, they can taste flat. Black pepper, white pepper, chives, parsley, and a little melted butter are all good finishing touches.

Salt reality: If the potatoes taste creamy but flat, they usually need more salt before they need more garlic. Add salt in small pinches, stir gently, and taste again.

Best Potatoes for Garlic Mashed Potatoes

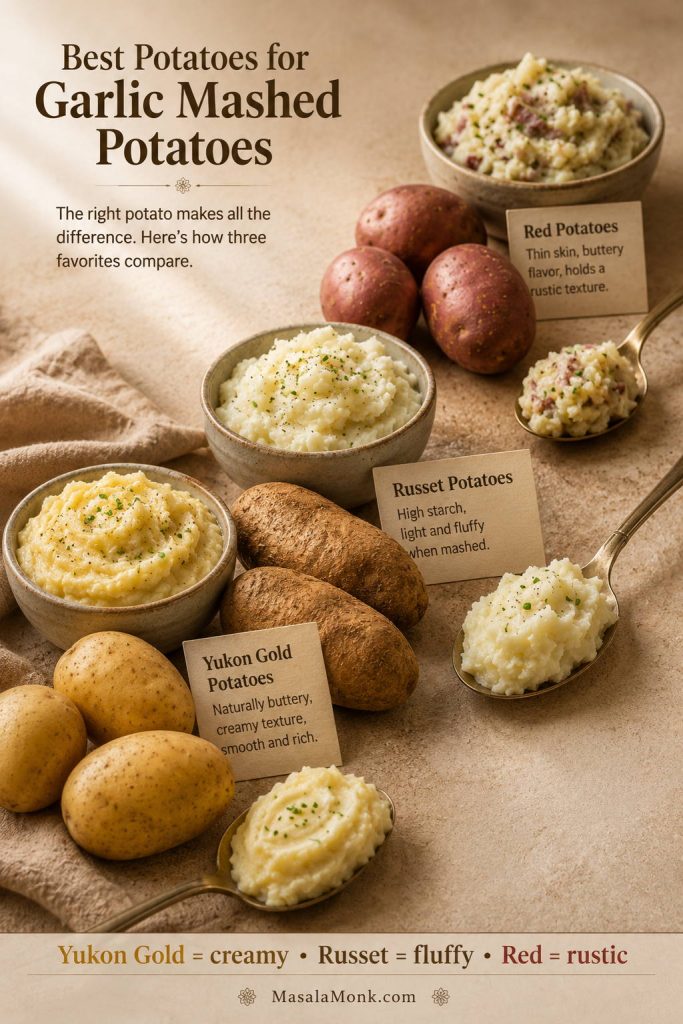
Because texture is the goal, the best potato depends on whether you want creamy, fluffy, or rustic mashed potatoes. Yukon Gold is the easiest choice for a smooth, buttery bowl. Russet is better for a lighter texture. Red potatoes are best when you want skins and a little more bite.

Yukon Gold, russet, and red potatoes shown with different mashed potato textures.
Before choosing a potato, choose the texture. Yukon Gold leans creamy, russet leans fluffy, and red potatoes are best when you want a skin-on rustic mash.
Potato Best For Texture How to Use It
Yukon Gold Classic creamy mashed potatoes Buttery, smooth, rich Use as the default for this recipe.
Russet Fluffy mashed potatoes Light, airy, absorbent Use alone or mix with Yukon Gold.
Yukon + Russet Balanced texture Creamy with fluffy edges Use half and half for a very reliable batch.
Red Potatoes Red skin mashed potatoes Rustic, slightly chunky, skin-on Mash gently and avoid electric mixing.

Think of the potato choice as a texture choice, not a strict rule. Yukon Gold gives the creamiest, most buttery everyday mash. Russet gives you a lighter, fluffier bowl that absorbs butter and milk easily. Red potatoes work when you want skins and a rustic texture, but they are not the best choice for perfectly smooth garlic mashed potatoes.

Yukon Gold vs Russet: Creamy or Fluffy?

If you are choosing between Yukon Gold and russet potatoes, pick by texture first. Yukon Gold gives a creamier bowl, while russets make the mash lighter and more absorbent.

Side-by-side comparison of Yukon Gold mashed potatoes and russet mashed potatoes with cut potatoes nearby.
Yukon Gold gives a buttery, creamy mash, while russets absorb butter and milk more easily for a lighter, fluffier bowl.

For potato choice, higher-starch potatoes such as russets and Yukon Golds are usually better for a smooth, fluffy mash, while waxier red potatoes are better kept rustic. Better Homes & Gardens explains why chefs often prefer russets and Yukon Golds for creamy mashed potatoes.

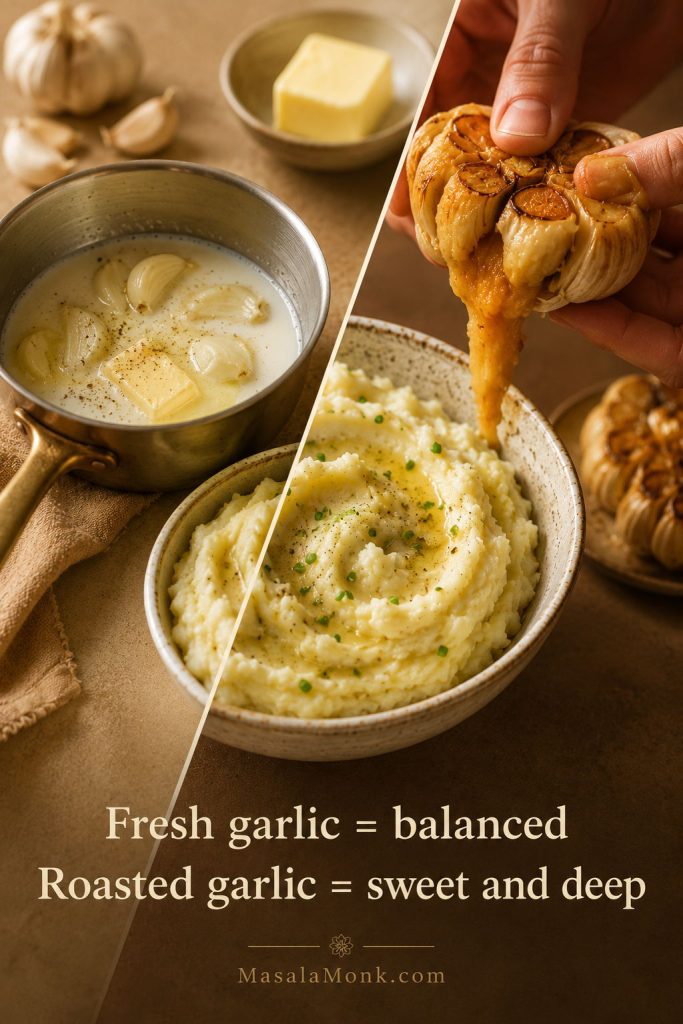
Fresh Garlic vs Roasted Garlic vs Garlic Powder

Garlic can taste sweet, sharp, mellow, or bold depending on how it is added. That is why one garlic mashed potatoes recipe can taste completely different from another.

Fresh garlic warming in butter and milk beside roasted garlic being squeezed, with mashed potatoes between them.
For a weeknight bowl, fresh garlic in warm butter keeps the flavor rounded. For a deeper holiday-style side, roasted garlic adds sweetness and depth.
Garlic Method Flavor Best Use How Much to Use
Garlic warmed in butter and milk Smooth, rounded, balanced Best everyday method 6 cloves for 2½ lb potatoes
Garlic boiled with potatoes Soft and simple Quick shortcut 5–6 cloves
Roasted garlic Sweet, deep, mellow Holiday or special version 1 whole head garlic
Garlic powder Bold, familiar garlic flavor Flavor boost or backup ¼–½ tsp
Raw minced garlic Sharp and harsh Usually best avoided Sauté first if using

The main method uses garlic warmed in butter and milk because it gives the best balance of speed and flavor. Roasted garlic is deeper and sweeter, but it adds extra time. Garlic powder is useful when the finished potatoes taste good but need a little more punch.

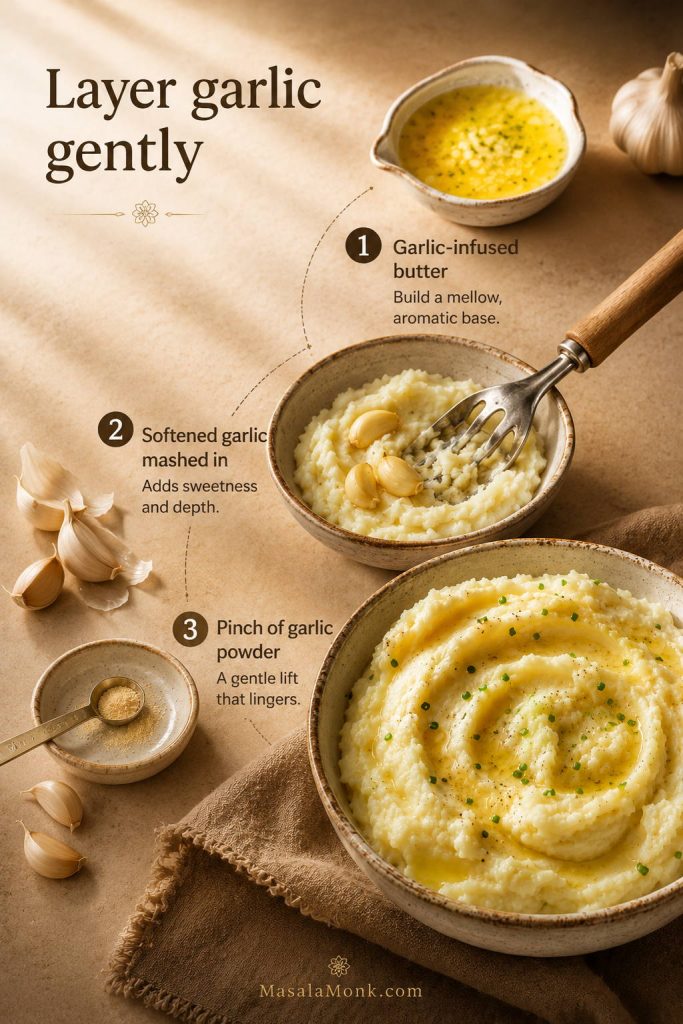
How to Build More Garlic Flavor Without Raw Bite

If you want the garlic to stand out more, layer it instead of only adding more raw garlic. Warm smashed cloves in the butter and milk, mash in the softened cloves, and add a tiny pinch of garlic powder only if the finished potatoes still taste too mild. That gives you deeper garlic flavor without the harsh bite of raw minced garlic.

Garlic-infused butter, softened garlic cloves, garlic powder, and mashed potatoes arranged as a flavor-layering setup.
If the potatoes need more garlic, layer the flavor gradually instead of adding raw garlic. Infused butter, softened cloves, and a tiny pinch of garlic powder add depth without harshness.

Avoid stirring raw minced garlic straight into mashed potatoes. It can taste hot and harsh, especially if the potatoes are mild. If you want to use minced garlic, cook it gently in the butter first.

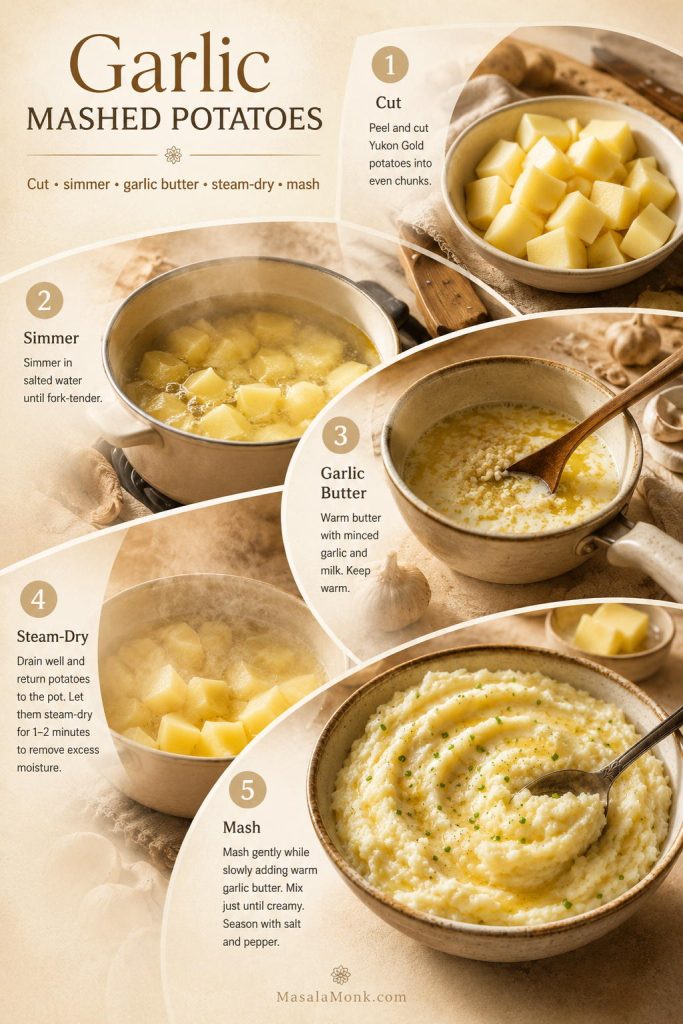
How to Make Garlic Mashed Potatoes

This method keeps the potatoes creamy and the garlic smooth. The steps are simple, but the little details make the bowl taste much better.

Step-by-step process showing cut potatoes, simmering, garlic butter, steam-drying, and gentle mashing.
The sequence matters because texture is built in stages: tender potatoes first, dry potatoes next, then warm garlic butter and gentle mashing.

Step 1: Cut the potatoes evenly

Peel the potatoes and cut them into 1 to 1½-inch chunks. Even pieces cook at the same pace, which helps you avoid hard centers and lumpy mashed potatoes.

Step 2: Start in cold salted water

Put the potatoes in a large pot and cover them with cold water by about 1 inch. Add a generous spoonful of salt. Starting cold helps the potatoes cook evenly from edge to center.

Step 3: Simmer until very tender

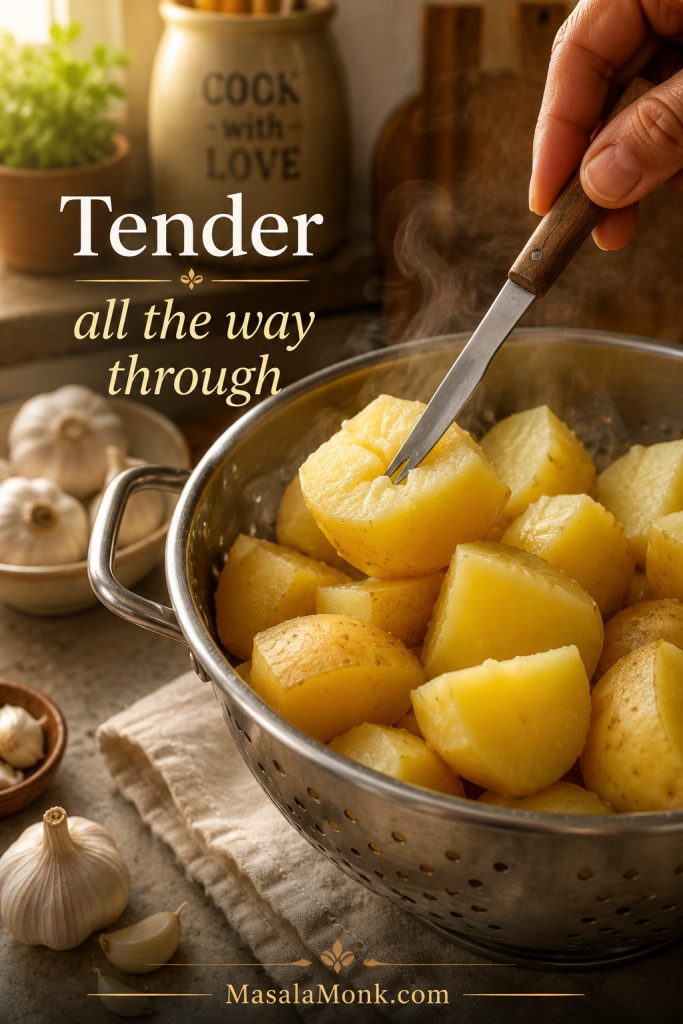
Bring the water to a boil, then reduce to a steady simmer. Cook for 15–20 minutes, or until a knife slides through the potatoes with no resistance. If the potatoes are undercooked, the mash will stay lumpy no matter how much you stir.

A fork testing a tender cooked potato chunk over a pot or colander.
A fork should slide through easily before you drain the pot; otherwise, firm centers can force extra mashing and make the texture heavier.

Step 4: Warm the garlic, butter, and milk

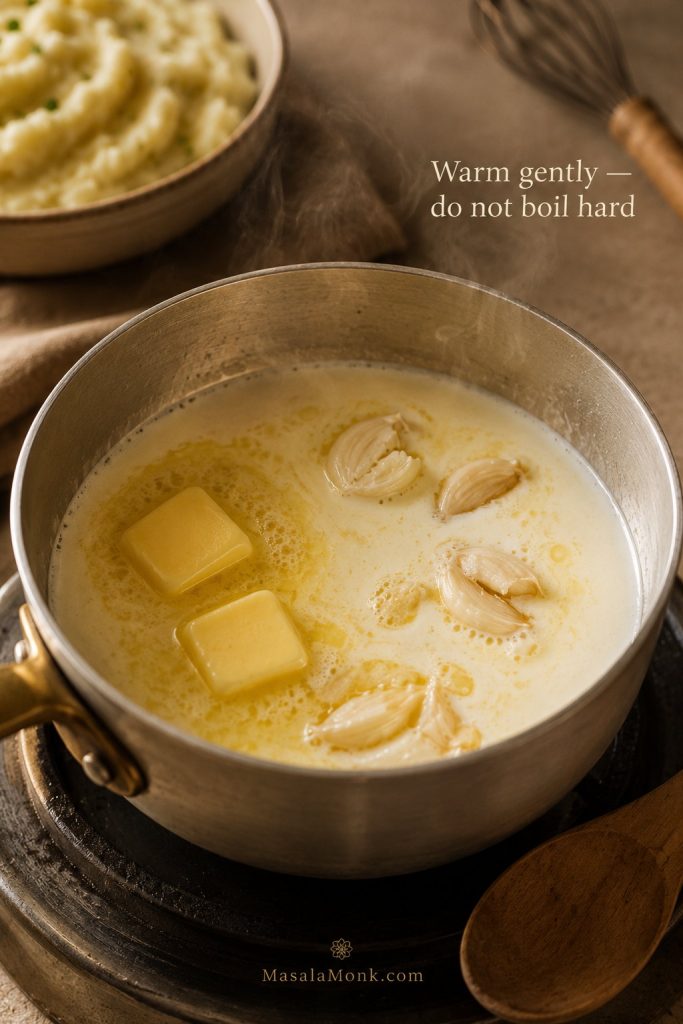
While the potatoes cook, add the butter, milk or half-and-half, and smashed garlic cloves to a small saucepan. Warm over low heat until the butter melts and the garlic smells mellow. Keep the mixture warm and fragrant, but do not let it boil hard or scorch.

Smashed garlic cloves warming gently in butter and milk in a small saucepan.
Keep the pan gentle here. Low heat lets the garlic perfume the butter and milk without turning sharp, bitter, or scorched.

Step 5: Drain and steam-dry

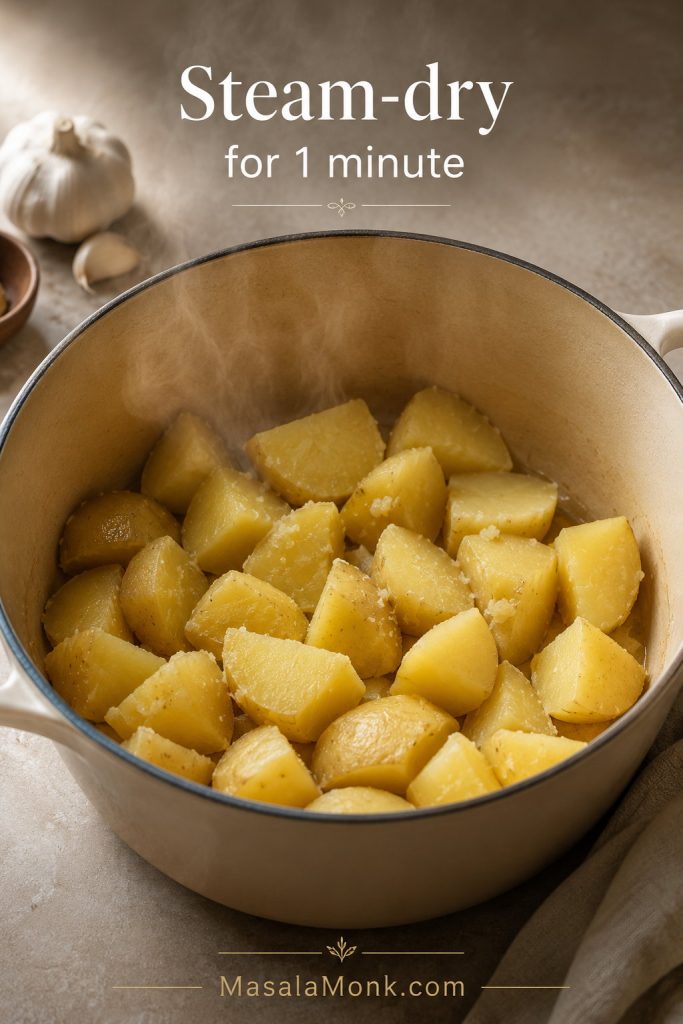
Drain the potatoes well, then return them to the warm empty pot for about 1 minute. Gently shake the pot or stir once so extra moisture can evaporate. This keeps the finished potatoes from tasting loose or watery.

Drained Yukon Gold potato chunks steaming in a warm pot before mashing.
Once drained, let the potatoes steam-dry briefly in the warm pot so the final mash tastes rich instead of watery.

Step 6: Mash gently

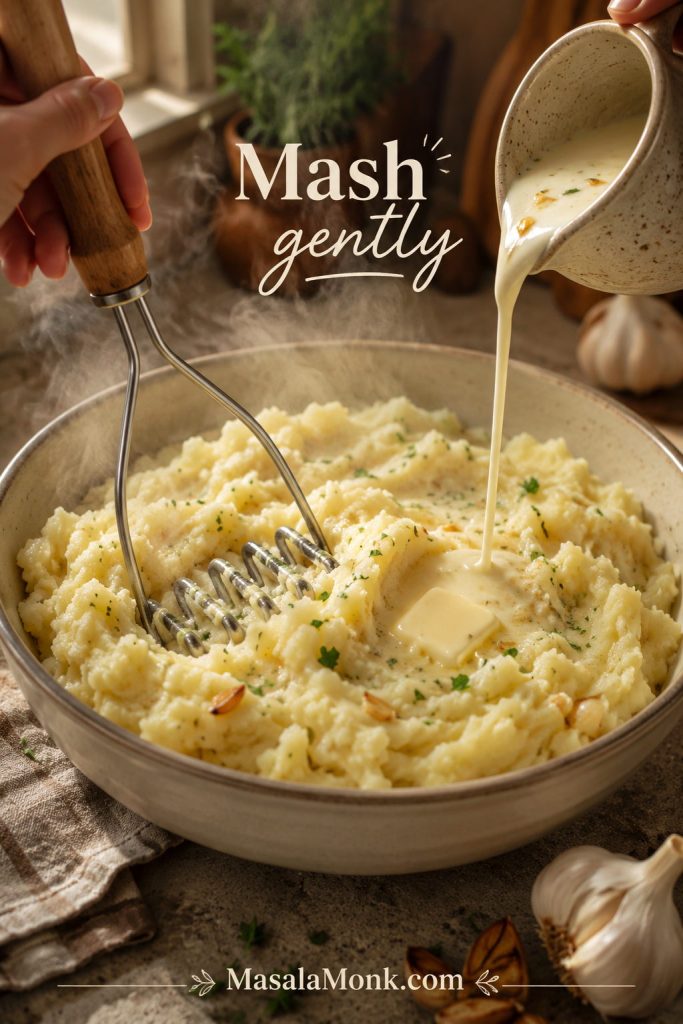
Mash the hot potatoes with a potato masher, or pass them through a ricer. Add the infused butter-milk mixture gradually, then strain out the garlic for a smoother background flavor or mash the softened cloves in for a deeper garlic taste.

Warm garlic butter being folded into hot potatoes with a masher or spoon.
Add the warm garlic butter gradually, then stop once the potatoes are creamy. Too much mixing can turn a soft mash tight and gluey.

Step 7: Finish and serve

Fold in sour cream if using, then season with salt and pepper. Taste before serving. The finished potatoes should hold soft swirls but still spoon easily. Transfer them to a warm bowl and finish with melted butter, chives, parsley, or extra pepper.

Common Garlic Mashed Potato Mistakes

Often, mashed potato problems happen before the bowl reaches the table. Avoid these mistakes and the final texture will be much easier to control.

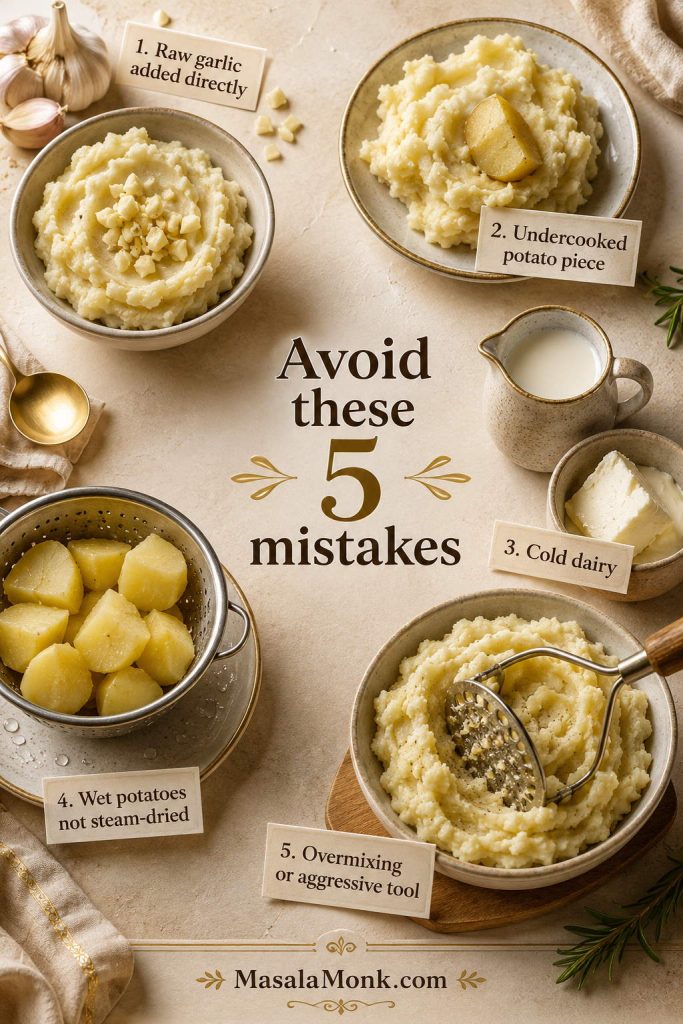
Small scenes showing raw garlic, cold dairy, wet potatoes, undercooked potatoes, and overmixing.
Most mashed potato problems start early, so avoid raw garlic, cold dairy, wet potatoes, firm centers, and aggressive mixing before they ruin the texture.
  • Using raw garlic: It can taste sharp and harsh. Warm it gently in butter or roast it first.
  • Undercooking the potatoes: Firm centers lead to lumps and extra mashing.
  • Adding cold dairy: Cold milk or cream cools the potatoes and makes blending harder.
  • Skipping the steam-dry step: Wet potatoes can taste watery and loose.
  • Overmixing: Too much stirring, blending, or whipping can make potatoes gluey.

How to Make Them Creamy, Not Gluey

Because gluey mashed potatoes usually come from overmixing, aggressive blending, or wet potatoes, a silky bowl needs a gentler touch.

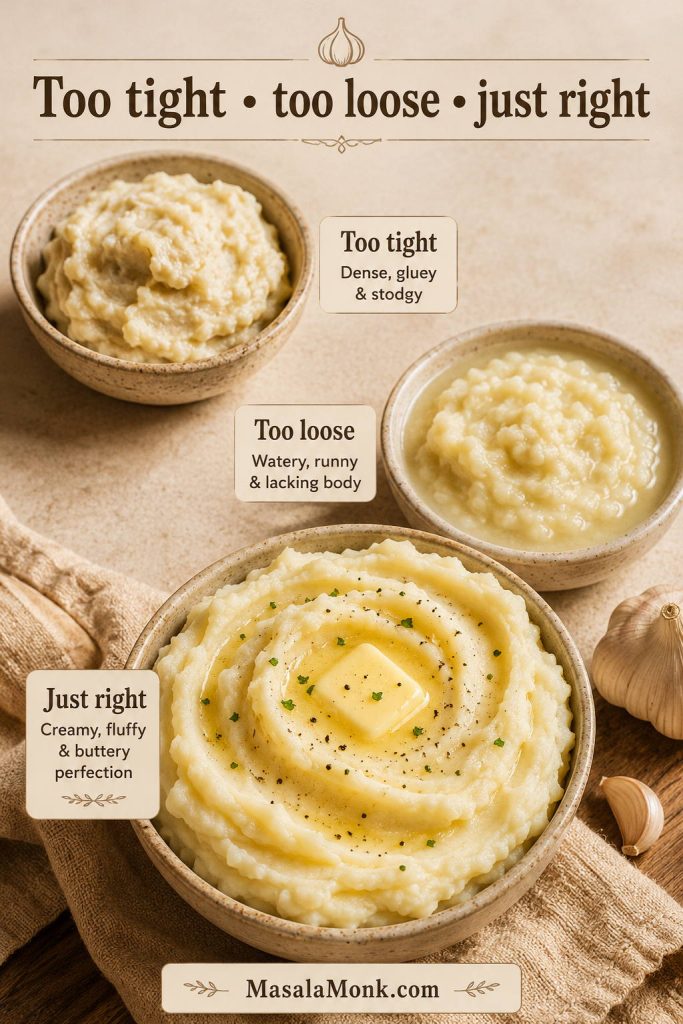
Three mashed potato textures compared: too tight, too loose, and just right.
The best texture sits between loose and tight: soft enough to spoon, thick enough to hold swirls, and never worked into paste.

Cook them all the way through

Potatoes should be tender enough to mash easily. If they are still firm in the center, you will have to work them too much, and that extra mixing can make the texture heavy.

Let extra moisture escape

After draining, return the potatoes to the warm pot for a minute. This tiny step makes the mash taste more concentrated and helps the butter and milk blend in properly.

Use warm dairy

Warm milk, cream, or half-and-half folds into hot potatoes more smoothly than cold dairy. It also keeps the potatoes from cooling too quickly while you mash.

Choose the right tool

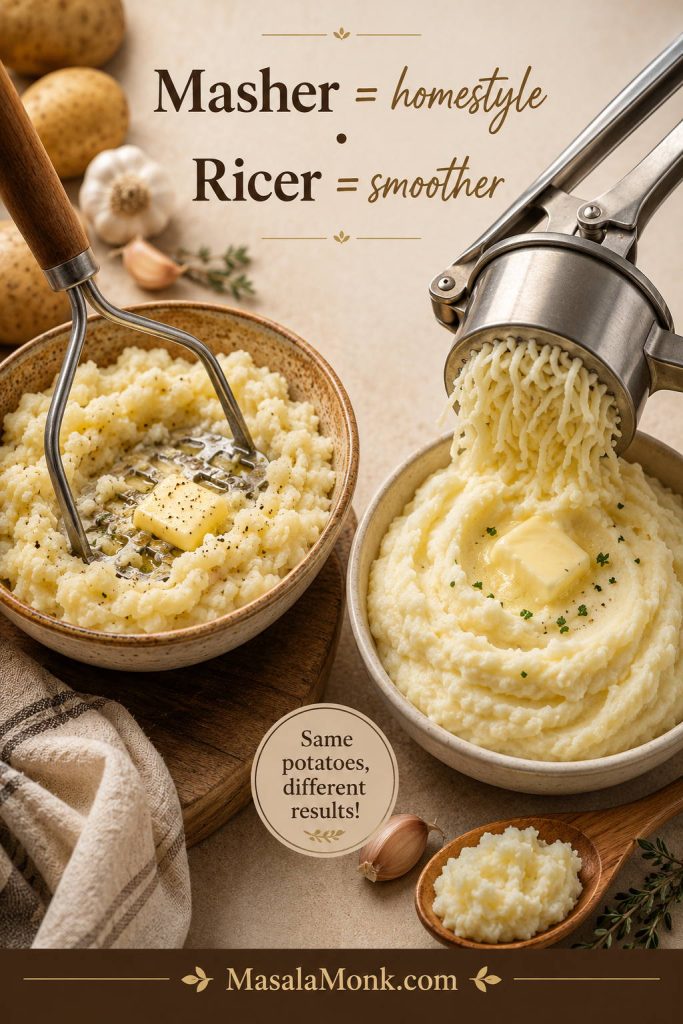
A potato masher gives a cozy homemade texture. A ricer makes the smoothest, fluffiest potatoes. A blender or food processor can turn potatoes sticky, so leave those tools for soups and sauces.

Potato masher and ricer shown with homestyle mashed potatoes and smoother riced potatoes.
Use a masher for homestyle garlic mashed potatoes, or use a ricer when you want a smoother, fluffier texture.

Stop once they look right

When the potatoes are creamy and the dairy has disappeared into the mash, stop stirring. Extra mixing rarely makes mashed potatoes better; it usually makes them tighter.

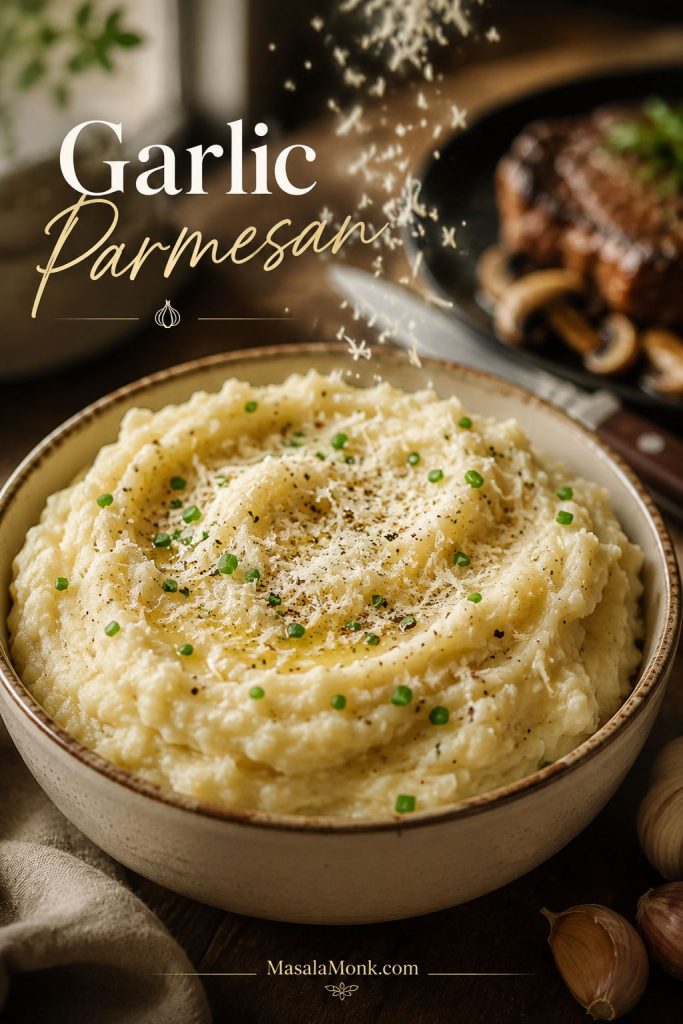
Garlic Parmesan Mashed Potatoes

Garlic parmesan mashed potatoes are savory, salty, and a little more steakhouse-style. Make the main recipe, then fold in ½ to ¾ cup finely grated parmesan while the potatoes are still hot.

Garlic parmesan mashed potatoes with grated parmesan, black pepper, melted butter, and chives.
Parmesan adds salt, nuttiness, and a savory edge, so garlic parmesan mashed potatoes pair especially well with steak, mushrooms, roast chicken, or pan sauce.

Add the cheese after mashing so it melts smoothly into the potatoes. Since parmesan brings salt, season lightly at first and adjust after the cheese is fully mixed in. For a bolder garlic-parmesan flavor, add ¼ tsp garlic powder with the warm butter and milk.

This version is especially good with steak, roast chicken, meatballs, mushrooms, or a simple pan sauce. It gives the potatoes a deeper savory finish without making them feel like a completely different dish.

Roasted Garlic Mashed Potatoes

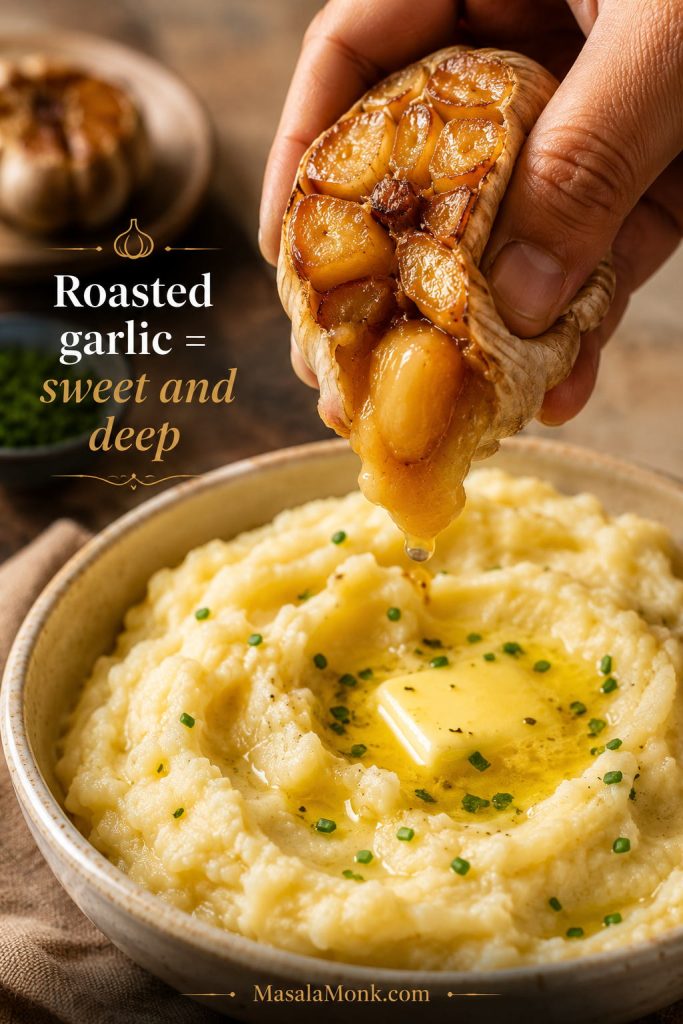
Roasted garlic mashed potatoes taste deeper, sweeter, and more holiday-worthy than the classic version. The garlic loses its sharp edge in the oven, turns soft and golden, then melts into the potatoes like a savory spread.

Roasted garlic being squeezed into hot mashed potatoes with a creamy finished bowl nearby.
Roast the garlic until the cloves turn soft and golden, then mash them in while the potatoes are hot so the flavor spreads evenly.

To make roasted garlic mashed potatoes, slice the top off 1 whole head of garlic, drizzle with a little olive oil, wrap in foil, and roast at 400°F / 200°C for 40–45 minutes, until the cloves are soft and golden. Squeeze the roasted cloves into the hot potatoes and mash them in with the warm butter and milk.

One whole head of roasted garlic sounds like a lot, but roasted garlic is much softer than fresh garlic. It melts into the potatoes and gives them a round, almost sweet savory flavor.

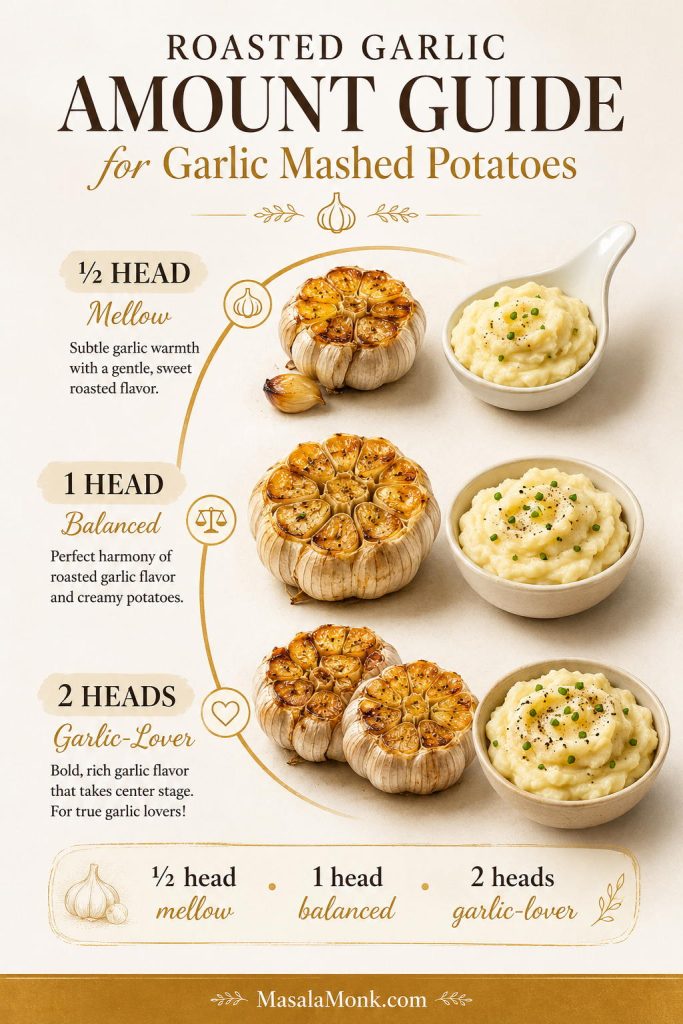
How Much Roasted Garlic Should You Use?

Use one roasted garlic head for a balanced batch. Go down to half a head for a gentler family-style bowl, or use two heads only when you want roasted garlic to be the main flavor.

Roasted Garlic Amount Flavor Level Best For
½ head Gentle and mellow Family dinners or lighter garlic flavor
1 whole head Balanced roasted garlic flavor Classic roasted garlic mashed potatoes
2 heads Deep garlic-lover flavor People who want roasted garlic to be the main flavor
Roasted garlic guide showing half a head, one head, and two heads for mashed potatoes.
Start with one roasted garlic head for balance. Use less for a gentle background flavor, or use more when you want roasted garlic to lead.

For the best flavor, mash the roasted cloves while the potatoes are still hot, then taste before adding garlic powder. Roasted garlic brings sweetness and depth, while garlic powder brings sharper garlic punch. Used together carefully, they make the potatoes taste fuller without turning harsh.

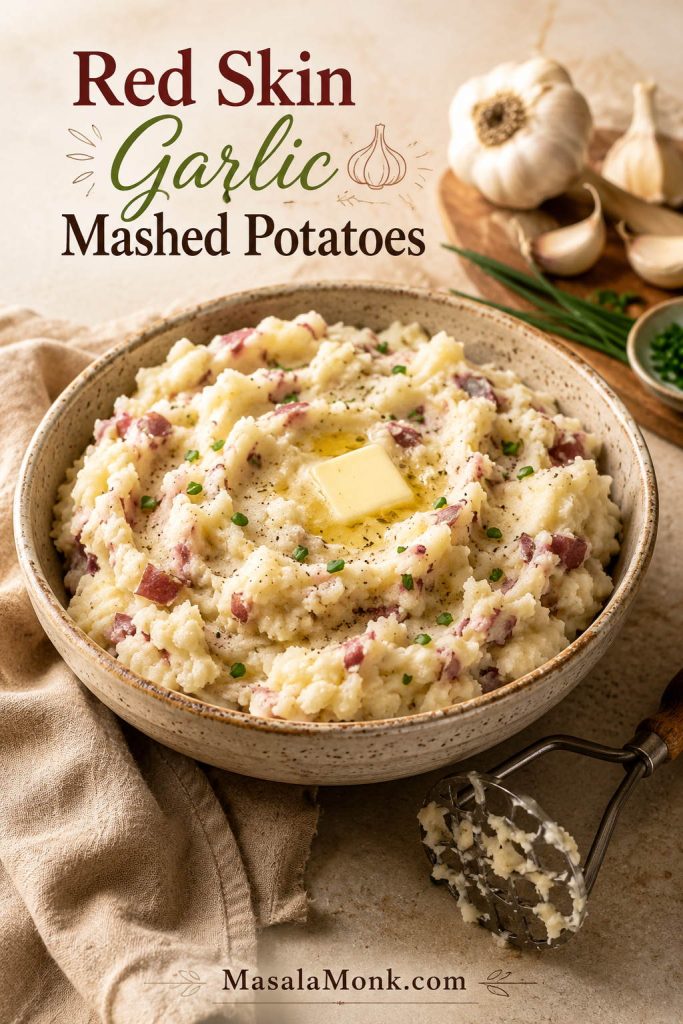
Red Skin Garlic Mashed Potatoes

Red skin garlic mashed potatoes are more rustic than the classic Yukon Gold version. They are slightly chunky, a little more textured, and lovely when you want a no-peel side dish.

Red potatoes are not wrong for mashed potatoes; they are just a different style. Use them when you want a skin-on, homestyle bowl, not when you want the smoothest, fluffiest mash.

Rustic red skin mashed potatoes with visible potato skins, melted butter, chives, and a hand masher nearby.
Red potatoes work best when the mash stays a little chunky and rustic because that texture makes the skins feel intentional instead of tough.

Use 2 lb / 900 g red potatoes, scrubbed well. Leave the skins on if they are thin and tender. Mash with 5–7 garlic cloves, 6 tbsp / 85 g butter, ½ cup / 120 ml milk or half-and-half, and optional ¼ cup / 60 g sour cream.

Keep this version gently mashed rather than perfectly smooth. Red potatoes can get sticky if they are overworked, so use a hand masher and stop while there is still a little texture.

Sour Cream, Cream Cheese, and Heavy Cream Versions

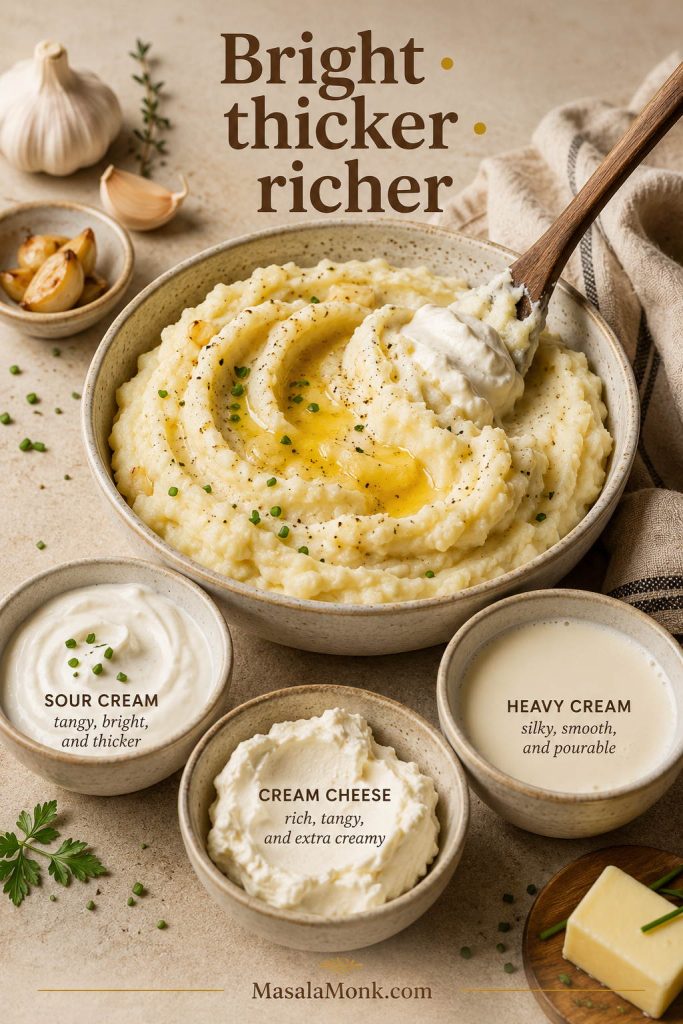
These add-ins change the mood of the bowl: sour cream makes it tangier, cream cheese makes it thicker and richer, and heavy cream gives it more of a holiday-table feel. Add them after the potatoes have been mashed with the warm garlic butter and milk.

Choose sour cream when you want brightness, cream cheese when you want a thicker make-ahead mash, and heavy cream when you want a richer holiday bowl. For everyday garlic mashed potatoes, half-and-half is usually the easiest middle ground.

Garlic mashed potatoes with sour cream, cream cheese, and heavy cream in small bowls around the main bowl.
Use sour cream when the mash needs brightness, cream cheese when it needs body, and heavy cream when you want a richer holiday-style bowl.
Add-In Amount for 2½ lb Potatoes What It Does
Sour Cream ¼–½ cup / 60–120 g Adds tang and creaminess
Cream Cheese 4 oz / 115 g, softened Makes the mash thicker and richer
Heavy Cream Use instead of milk Creates a denser holiday-style texture
Half-and-Half Use instead of milk Gives a balanced creamy finish
Garlic Herb Cheese 3–5 oz / 85–140 g Adds rich, herby flavor

If you are making the potatoes ahead, cream cheese is especially useful because it helps the mash reheat with a thicker, smoother body. If you want a lighter everyday version, stick with milk or half-and-half and use sour cream only as a small finishing touch.

Garlic Mashed Potatoes Without Milk

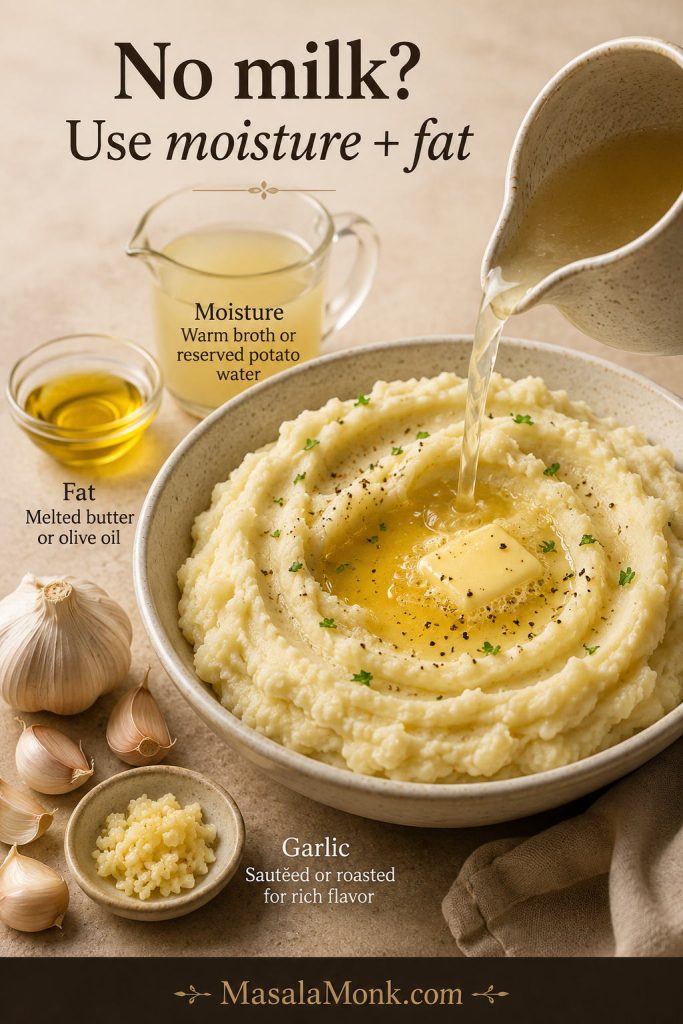
You can make garlic mashed potatoes without milk. They will not taste exactly the same, but they can still be rich, smooth, and flavorful if you use warm liquid and enough fat.

The important thing is not milk itself; it is moisture plus fat. Broth or potato water loosens the mash, while butter, olive oil, or dairy-free butter keeps it from tasting dry.

Garlic mashed potatoes with broth or potato water, butter or olive oil, and garlic for a no-milk version.
Without milk, the same rule still applies: add moisture to loosen the mash and fat to keep it rich.
No-Milk Option Use This Result
Butter + potato water 6 tbsp butter + ½ cup reserved cooking water Simple, rich, potato-forward
Broth + olive oil ½ cup warm broth + 3–4 tbsp olive oil Savory and lighter
Dairy-free butter + plant milk Dairy-free butter + unsweetened oat or almond milk Creamier vegan-style mash

For the best no-milk flavor, warm the garlic in butter, olive oil, or dairy-free butter before adding it to the potatoes. If you are using broth, add it gradually. You can always loosen thick potatoes, but it is harder to fix a watery bowl.

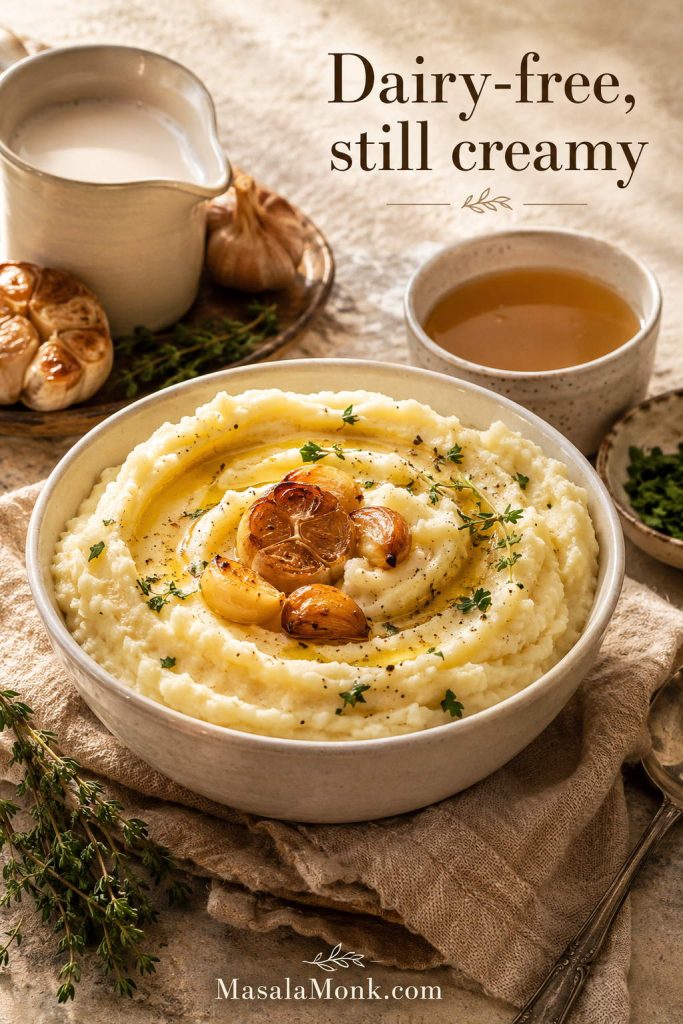
Dairy-Free or Vegan Garlic Mashed Potatoes

For a dairy-free version, use Yukon Gold potatoes, roasted or sautéed garlic, olive oil or dairy-free butter, warm vegetable broth, and optional unsweetened plant milk. Oat milk works well when it is plain and unsweetened. Almond milk can also work, but avoid anything sweetened or vanilla-flavored.

A good dairy-free formula for 2½ lb potatoes is 5–6 garlic cloves, 4 tbsp olive oil or dairy-free butter, and ½ to ¾ cup warm vegetable broth or unsweetened plant milk. Add the liquid slowly and stop when the potatoes are spoonable.

Dairy-free mashed potatoes with roasted garlic, olive oil, vegetable broth, plant milk, and herbs.
Roasted garlic and olive oil help dairy-free garlic mashed potatoes taste full and rounded, even without cream or butter.

Roasted garlic is especially good here because it adds sweetness and depth without needing cream. Finish with chives, parsley, black pepper, and a small drizzle of olive oil.

If you are looking for a lower-carb mash instead of a potato-based dairy-free version, you may also like MasalaMonk’s keto cauliflower mashed potatoes.

Small Batch and Holiday Scaling

The main recipe makes 6 servings, which works well for a family dinner or a modest holiday side. For a smaller dinner or a bigger table, scale the recipe with the same basic ratio and adjust the warm liquid at the end.

Small Batch Garlic Mashed Potatoes

For 2–3 servings, make a half batch. This is the right size for steak night, roast chicken for two, or a smaller dinner where you do not want a refrigerator full of leftovers.

Ingredient Small Batch Amount
Yukon Gold potatoes 1¼ lb / 565 g
Garlic cloves 3 cloves
Butter 3 tbsp / 42 g
Milk or half-and-half ⅓ cup / 80 ml, plus more if needed
Sour cream 2 tbsp, optional
Salt and pepper To taste

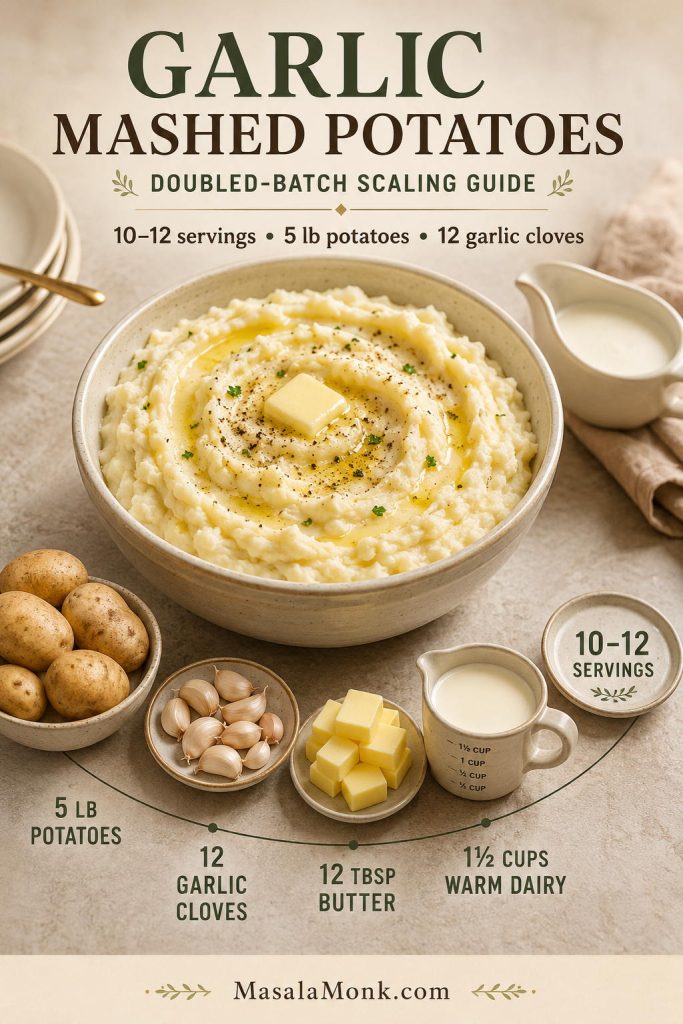
How to Scale for a Holiday Table

For 10–12 servings, double the main recipe: use 5 lb / 2.25 kg potatoes, 12 garlic cloves, 12 tbsp / 170 g butter, and 1½ cups / 360 ml milk or half-and-half. Start with slightly less liquid, then add more after mashing until the potatoes are soft enough to spoon but still hold gentle swirls.

Holiday mashed potato scaling guide with a large bowl and ingredients for 10 to 12 servings.
For a holiday batch, scale the ingredients carefully and make the potatoes slightly softer than usual so they stay spoonable as they sit.

When scaling up, use a large enough pot so the potato pieces cook evenly. If the pot is crowded, the potatoes may cook unevenly and the bottom pieces can soften before the top pieces are ready.

For a fuller holiday plate, these potatoes pair naturally with a creamy green vegetable side like MasalaMonk’s green bean casserole.

Make-Ahead Garlic Mashed Potatoes

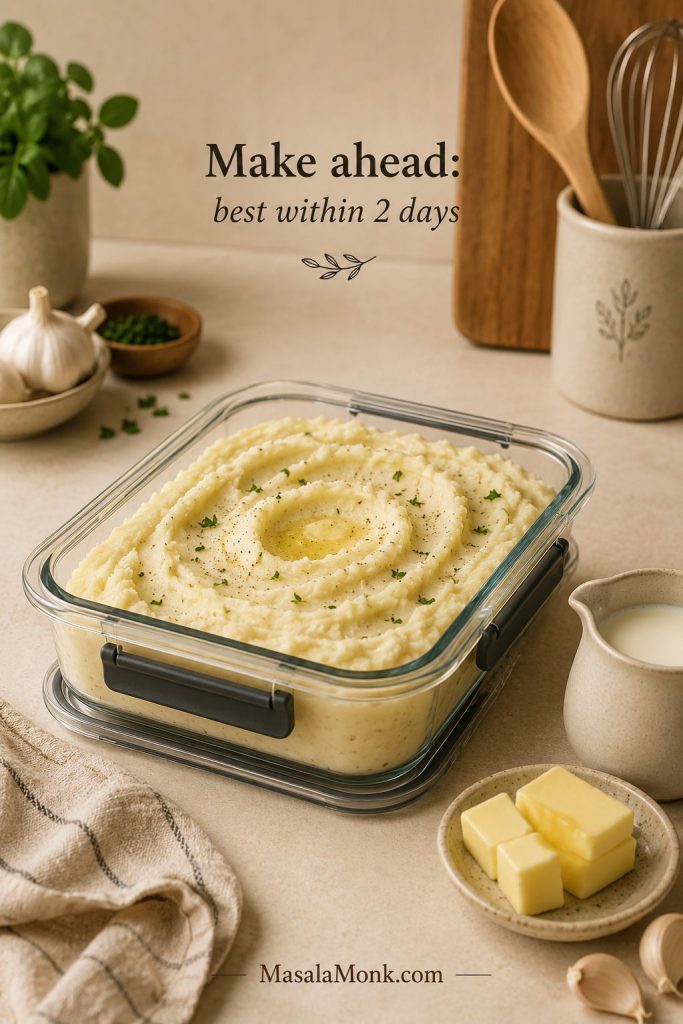
Garlic mashed potatoes can be made ahead, which is helpful for holidays, dinner parties, and busy evenings. Since mashed potatoes firm up as they cool, make them slightly softer than you want them at serving time.

Garlic mashed potatoes stored in an airtight container with butter and milk nearby for reheating.
Make-ahead garlic mashed potatoes work best when you plan for reheating, so keep butter and warm dairy nearby to refresh the texture before serving.

How far ahead can you make them?

For the best texture, make them up to 2 days ahead. They can be refrigerated for 3–4 days, but they are creamiest when reheated within the first couple of days. For general leftover safety, the USDA recommends refrigerating leftovers for 3–4 days and reheating them to 165°F.

How to store them

Let the potatoes cool, then transfer them to an airtight container. If you want to reduce drying, press a piece of parchment or plastic wrap against the surface before covering.

How to reheat them

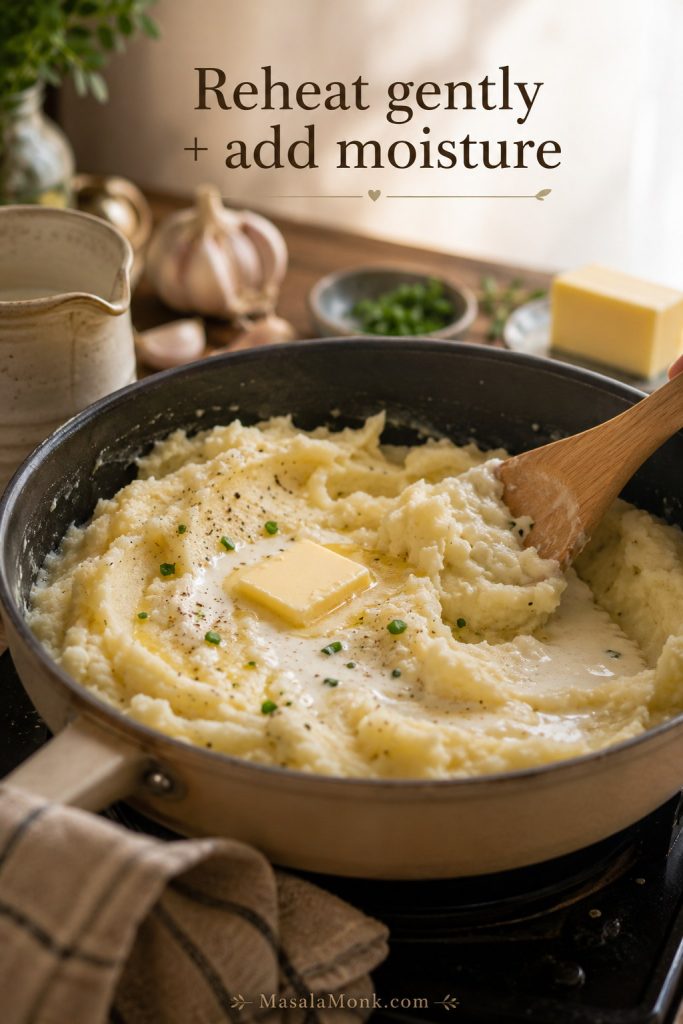
Reheat gently with extra butter and a splash of warm milk, cream, broth, or half-and-half. Stir slowly and avoid whipping. For oven reheating, place the potatoes in a covered baking dish and warm at 325°F / 160°C, stirring once or twice and adding more liquid as needed.

Garlic mashed potatoes being reheated gently with warm milk or cream and butter in a pot.
Reheat slowly and add moisture back gradually. Warm milk, cream, broth, or butter helps cold mashed potatoes become creamy again.

The gentlest way to revive cold mashed potatoes is to warm a little milk, cream, or broth first, then fold the chilled potatoes into it slowly. This loosens the mash without forcing you to whip it, which helps protect the texture.

How to keep them warm

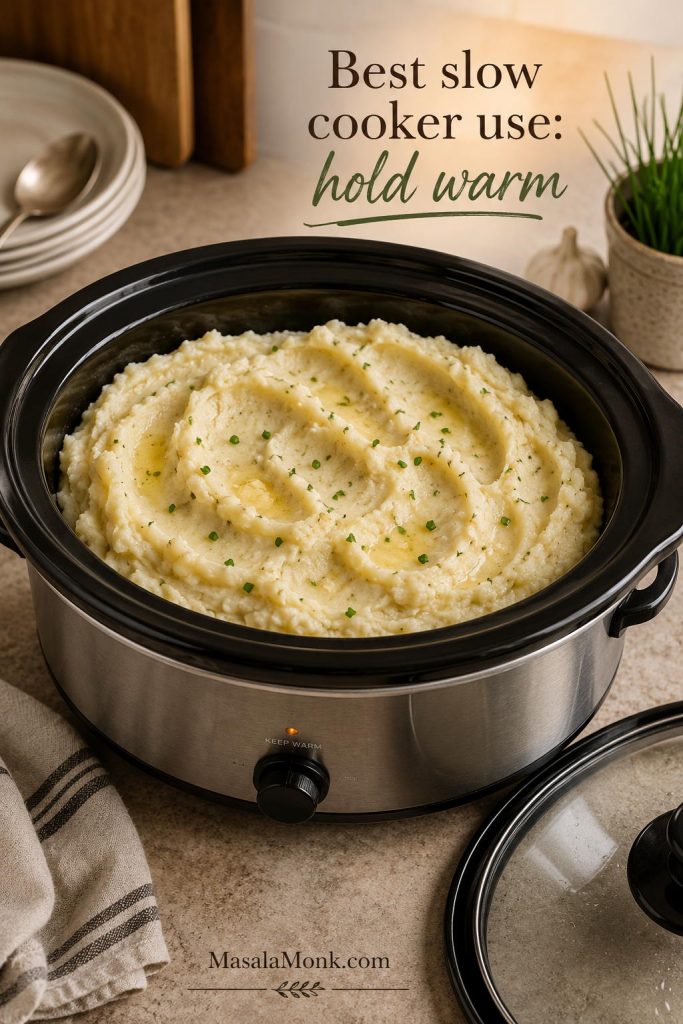
For a holiday meal, transfer hot mashed potatoes to a buttered slow cooker and hold on the warm setting. Stir occasionally and add a splash of warm milk or broth if they thicken too much. Avoid holding them on high heat, because the edges can dry out.

Can you freeze garlic mashed potatoes?

You can freeze them, although the texture may change after thawing. Mashed potatoes with enough butter, cream, sour cream, or cream cheese freeze better than lean versions. Reheat slowly and stir in extra warm dairy or broth to bring back creaminess.

If you end up with extra mashed potatoes, turn them into something crisp the next day. MasalaMonk’s croquettes recipe includes a potato croquette method that works beautifully with leftover mash.

Slow Cooker and Instant Pot Garlic Mashed Potatoes

The stovetop method gives the most control, while slow cooker and Instant Pot notes are useful when the stove is full or you are cooking for a crowd.

Method Best Use Texture
Stovetop, then hold warm Best overall method for holidays and company Creamiest and easiest to control
Cook fully in slow cooker When the stove is full Useful, but usually denser
Instant Pot Fast cooking Soft and convenient, but less controlled than stovetop

Slow Cooker Method

The slow cooker is most useful for keeping finished mashed potatoes warm. For the best texture, make the potatoes on the stovetop first, then hold them warm in a buttered slow cooker.

Garlic mashed potatoes held warm in a slow cooker with butter, chives, and soft spoon marks.
Once the potatoes are finished, a buttered slow cooker keeps them warm without taking up burner space during a crowded meal.

Add the hot mash to the buttered insert, cover, and keep on warm. Stir gently before serving and add a splash of warm milk, cream, or broth if the potatoes thicken while they sit.

If you want to cook the potatoes fully in the slow cooker, use peeled potato chunks, garlic, salt, butter, and a small amount of broth or water. Cook until the potatoes are fully tender, then mash with warm dairy. The texture is usually denser than stovetop mashed potatoes, but the method is useful when the stove is full.

If the slow cooker is already out for dinner, these potatoes are a natural side for a saucy main like MasalaMonk’s slow cooker pork loin. Make the potatoes on the stovetop, then hold them warm while the rest of the meal finishes.

Instant Pot Method

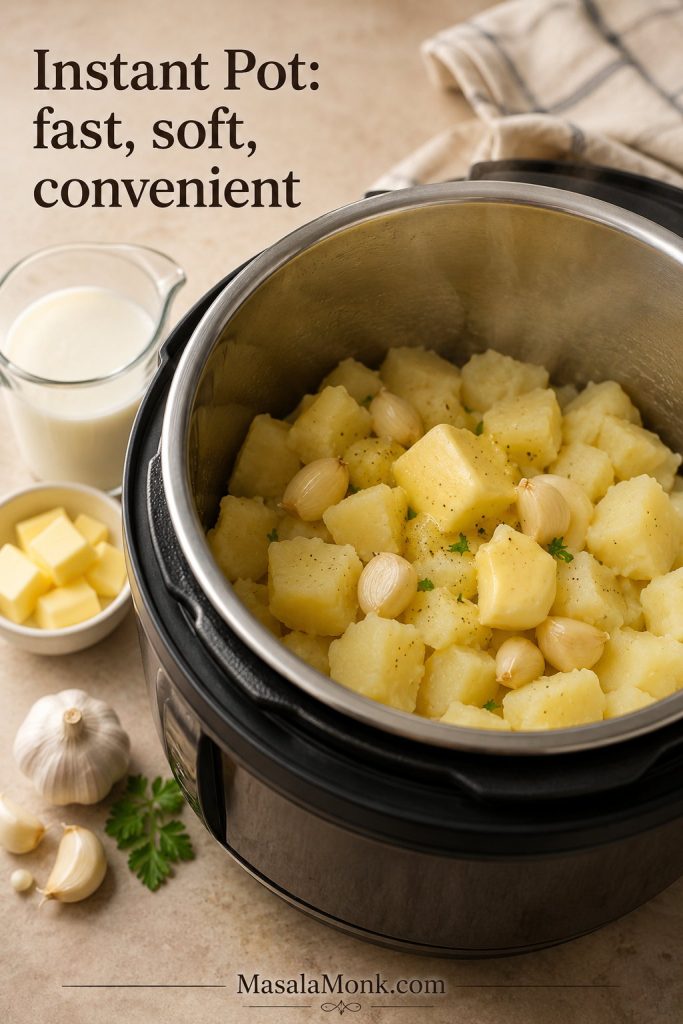
For Instant Pot garlic mashed potatoes, use about 2 lb / 900 g potatoes, 5–6 garlic cloves, 1 cup water or broth, and salt. Cook on high pressure for about 8 minutes, then quick release. Drain if needed, or mash in the remaining liquid if only a small amount is left. Add butter and warm milk or half-and-half after cooking.

Cooked potato chunks and garlic in a pressure cooker insert with butter and warm milk nearby.
Pressure cooking saves time, but tenderness still matters; check the potatoes before mashing so you do not chase lumps later.

Pressure cooker timing can vary depending on potato size, so cut the potatoes evenly and check that they are fully tender before mashing.

Troubleshooting Garlic Mashed Potatoes

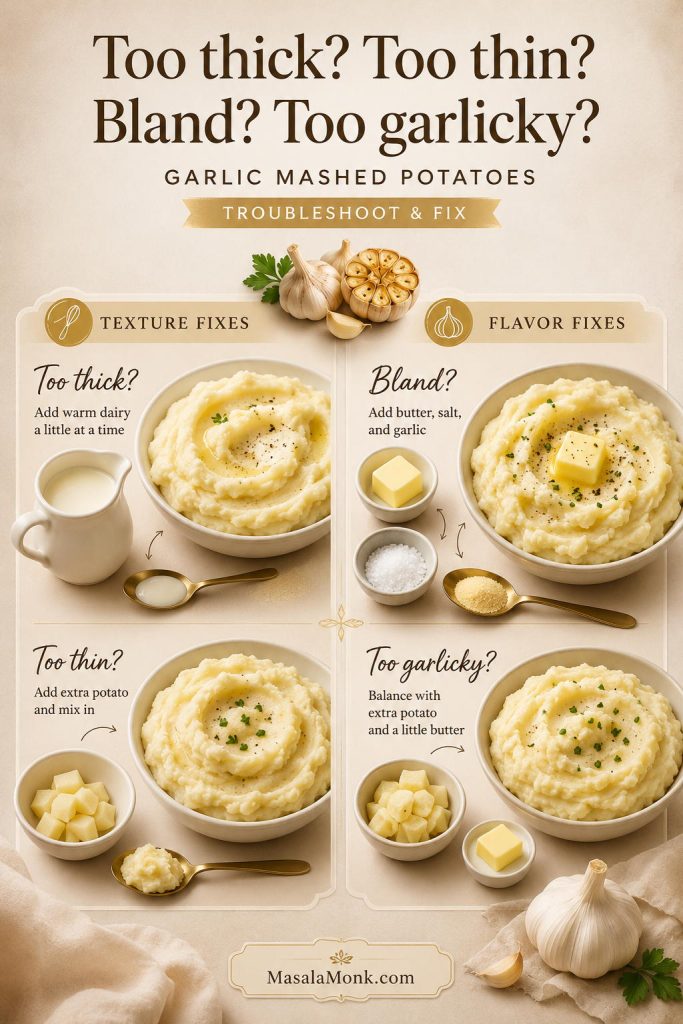
If the bowl is not perfect, do not panic and do not keep whipping. Most mashed potato problems get worse with more mixing. Instead, first decide what is wrong: texture, moisture, seasoning, or garlic strength. Then fix that one thing gently.

Check the Texture Before You Add More

Before adding anything, taste and check the texture separately. A bowl can be bland but perfectly creamy, or well-seasoned but too thick, so fix only the problem you actually have.

Troubleshooting guide for mashed potatoes with fixes for thick, thin, bland, and too-garlicky potatoes.
Start with texture before you change the flavor. A splash of warm dairy, extra potato, salt, or garlic should fix the specific problem you see.

Texture and Moisture Fixes

Problem Likely Cause How to Fix It
Gluey Overmixed, blended, or processed too hard Stop mixing. Then fold in warm butter or cream and serve as a rustic mash.
Lumpy Potatoes were undercooked Next time, cook until a knife slides through easily. For small lumps, a ricer can help.
Too thick Not enough warm liquid Add warm milk, cream, or broth 1–2 tbsp at a time. After each addition, stir gently and check again.
Too thin Too much liquid or potatoes were not dried Warm gently uncovered to evaporate moisture. If available, add more mashed potato to bring back body.
Watery Potatoes were not drained or steam-dried well Warm gently in the pot and stir carefully. Next time, steam-dry after draining.

Flavor and Garlic Fixes

Problem Likely Cause How to Fix It
Bland Not enough salt, butter, or garlic Add salt gradually first. Then add more butter, parmesan, garlic butter, or herbs if needed.
Too garlicky Garlic was raw or harsh Add more potato, butter, cream, sour cream, or parmesan to soften the flavor.
Not garlicky enough Garlic was too soft or strained out Add garlic powder, roasted garlic, or extra garlic butter in small amounts. However, taste after each addition because garlic powder gets strong quickly.
Bitter or harsh garlic Garlic scorched, was old, or was added raw Use fresh cloves, warm them gently over low heat, or switch to roasted garlic next time.

Once mashed potatoes turn gluey, there is no perfect way to reverse the texture. At that point, stop mixing, add flavor, and serve them as a thicker homestyle mash. Leftovers can also become potato cakes, mashed potato pancakes, or a casserole topping.

What to Serve with Garlic Mashed Potatoes

A bowl of garlic mashed potatoes can carry a simple dinner, so you do not need much else on the plate. They are soft enough for gravy, rich enough for steak, and comforting enough to sit beside roast chicken, mushrooms, or green beans.

They are especially good with anything rich enough to drag through the potatoes: roast chicken drippings, mushroom pan sauce, turkey gravy, steak juices, garlicky butter, or extra melted butter settling into the ridges.

Weeknight dinners

Holiday mains

  • Roast turkey
  • Roast beef
  • Baked ham
  • Turkey gravy
  • Green bean casserole
  • Roasted carrots or Brussels sprouts

Steakhouse-style dinner

  • Steak with pan sauce or chimichurri
  • Garlic butter mushrooms
  • Roasted asparagus
  • Creamed spinach
  • Red wine gravy

For a cozy everyday plate, serve them with roast chicken, a spoonful of pan juices, and something green. For a richer dinner, add steak, mushrooms, or gravy, then let the soft swirls catch the butter, sauce, and juices. That is where these garlic mashed potatoes do their best work.

Garlic mashed potatoes served with roast chicken, gravy or pan juices, green beans, and mushrooms.
The best pairings give the potatoes something rich to catch, whether that is gravy, roast chicken juices, mushroom sauce, or melted butter.

Garlic Mashed Potatoes Recipe

Creamy, buttery garlic mashed potatoes made with Yukon Gold potatoes, warm garlic butter, milk or half-and-half, and optional sour cream. The method keeps the potatoes smooth, flavorful, and not gluey.

Prep Time15 minutes
Cook Time20 minutes
Total Time35 minutes
Yield6 servings
CourseSide Dish
CuisineAmerican
MethodStovetop
Best ToolMasher or ricer

Equipment

  • Large pot or Dutch oven
  • Colander
  • Small saucepan
  • Potato masher or potato ricer
  • Spatula or wooden spoon

Ingredients

  • 2½ lb / 1.1 kg Yukon Gold potatoes, peeled and cut into 1 to 1½-inch chunks
  • 6 garlic cloves, smashed and peeled
  • 6 tbsp / 85 g unsalted butter
  • ¾ cup / 180 ml whole milk or half-and-half
  • ¼ cup / 60 g sour cream, optional
  • 1½–2 tsp fine salt, plus more for the cooking water
  • ¼ tsp black pepper or white pepper
  • Chives or parsley, optional
  • Extra melted butter, optional for serving

Instructions

  1. Cook the potatoes. Add the potato chunks to a large pot and cover with cold water by about 1 inch. Salt the water generously. Bring to a boil, then reduce to a steady simmer and cook for 15–20 minutes, until the potatoes are very tender. The potatoes are ready when a knife slides through the center with no resistance.
  2. Warm the garlic butter and milk. While the potatoes cook, combine the butter, milk or half-and-half, and smashed garlic cloves in a small saucepan. Warm over low heat until the butter melts and the garlic smells mellow. The mixture should smell fragrant and garlicky, not scorched or boiled.
  3. Drain and dry. Drain the potatoes well. Return them to the warm empty pot for about 1 minute so excess moisture can steam off.
  4. Mash. Mash the hot potatoes with a potato masher, or pass them through a ricer. Add the warm garlic butter and milk gradually. For a softer garlic flavor, strain out the garlic. For stronger flavor, mash the softened garlic into the potatoes.
  5. Finish. Fold in sour cream if using. Season with salt and pepper. Taste and adjust until the potatoes are creamy, buttery, and well seasoned. The finished potatoes should hold soft swirls but still spoon easily.
  6. Serve. Spoon into a warm bowl and finish with melted butter, chives, parsley, or extra black pepper.

Notes

  • Use Yukon Gold potatoes for the creamiest texture.
  • Use a ricer for smoother, fluffier mashed potatoes.
  • Avoid a blender, food processor, or aggressive electric mixing.
  • For garlic parmesan mashed potatoes, fold in ½–¾ cup finely grated parmesan after mashing.
  • For roasted garlic mashed potatoes, use 1 whole head roasted garlic for balanced flavor, or 2 heads only if you want roasted garlic to be the main flavor.
  • For red skin mashed potatoes, use red potatoes, leave the skins on, and keep the texture rustic rather than perfectly smooth.
  • Serve hot. Mashed potatoes thicken as they sit, so loosen with a splash of warm milk or broth before serving if needed.
  • For the most inviting bowl, make shallow swirls on top and let melted butter settle into the ridges before serving.
  • Store leftovers in an airtight container in the refrigerator for 3–4 days.
  • Reheat gently with extra butter and a splash of warm milk, cream, or broth.
  • Freezing is possible, but the texture may change after thawing.

FAQs About Garlic Mashed Potatoes

What is the best potato for garlic mashed potatoes?

Yukon Gold potatoes are the best default because they are creamy, buttery, and forgiving. Russets make a fluffier mash, while red potatoes are better for rustic red skin mashed potatoes.

Fresh garlic or roasted garlic: which tastes better?

Fresh garlic warmed in butter and milk gives a balanced everyday flavor. Roasted garlic tastes sweeter, deeper, and more mellow. Use fresh garlic when you want speed, and roasted garlic when you want a richer holiday-style side dish.

How much garlic should I use?

Use 6 garlic cloves for 2½ lb / 1.1 kg potatoes. If using roasted garlic, use 1 whole head because the flavor is softer. If the finished potatoes need more punch, add ¼–½ tsp garlic powder.

Are garlic mashed potatoes and garlic whipped potatoes the same?

People often use the names loosely, but garlic whipped potatoes are usually smoother and lighter. For a whipped-style texture, use a ricer or mash very well by hand, then fold in warm dairy. If you use a hand mixer, keep it on low and stop quickly so the potatoes do not become gummy.

Why did my mashed potatoes turn gluey?

They were probably overmixed or blended too aggressively. Potatoes release starch when worked too much. Use a masher or ricer, add warm dairy gradually, and stop once the potatoes are creamy.

How do you make garlic mashed potatoes creamier?

Use Yukon Gold potatoes, warm milk or half-and-half, enough butter, and optional sour cream. Also make sure the potatoes are fully cooked and steam-dried before mashing.

Do garlic mashed potatoes need sour cream?

Not necessarily. Butter and warm milk or half-and-half are enough for a creamy batch. Sour cream adds tang and body, so use it when you want a richer flavor.

Can I make garlic mashed potatoes with cream cheese?

For a thicker, richer batch, add 4 oz / 115 g softened cream cheese after mashing. It is especially useful for make-ahead garlic mashed potatoes because it helps the texture reheat with more body.

Can I boil garlic with the potatoes?

Boiling garlic with the potatoes gives a soft, simple garlic flavor. For a smoother and more rounded taste, warm smashed garlic in butter and milk. For a sweeter holiday-style version, use roasted garlic.

What should I do if my mashed potatoes are not garlicky enough?

Add garlic flavor gradually. Mash in the softened garlic cloves if you strained them out, add a little roasted garlic, or stir in ¼ tsp garlic powder. Taste before adding more because garlic powder gets strong quickly.

What can I use instead of milk?

You can use half-and-half, heavy cream, warm broth, reserved potato cooking water, unsweetened plant milk, or a mix of broth and olive oil. Add any liquid gradually so the potatoes do not become too loose.

Are red potatoes good for this recipe?

Red potatoes are good for rustic, skin-on mashed potatoes. They are not the best choice for an ultra-smooth mash because they are waxier. Mash them gently and avoid electric mixing.

How far ahead can I make them?

For the best texture, make them up to 2 days ahead. Store in an airtight container in the refrigerator, then reheat gently with extra butter and a splash of warm milk, cream, or broth.

How do I reheat garlic mashed potatoes without drying them out?

Reheat slowly and add moisture back in. Use a splash of warm milk, cream, broth, or half-and-half, plus a little butter. Stir gently and avoid whipping them aggressively.

Back to top
Posted on 6 Comments

Air Fryer Hash Browns: Frozen Shredded, Patties, and Homemade

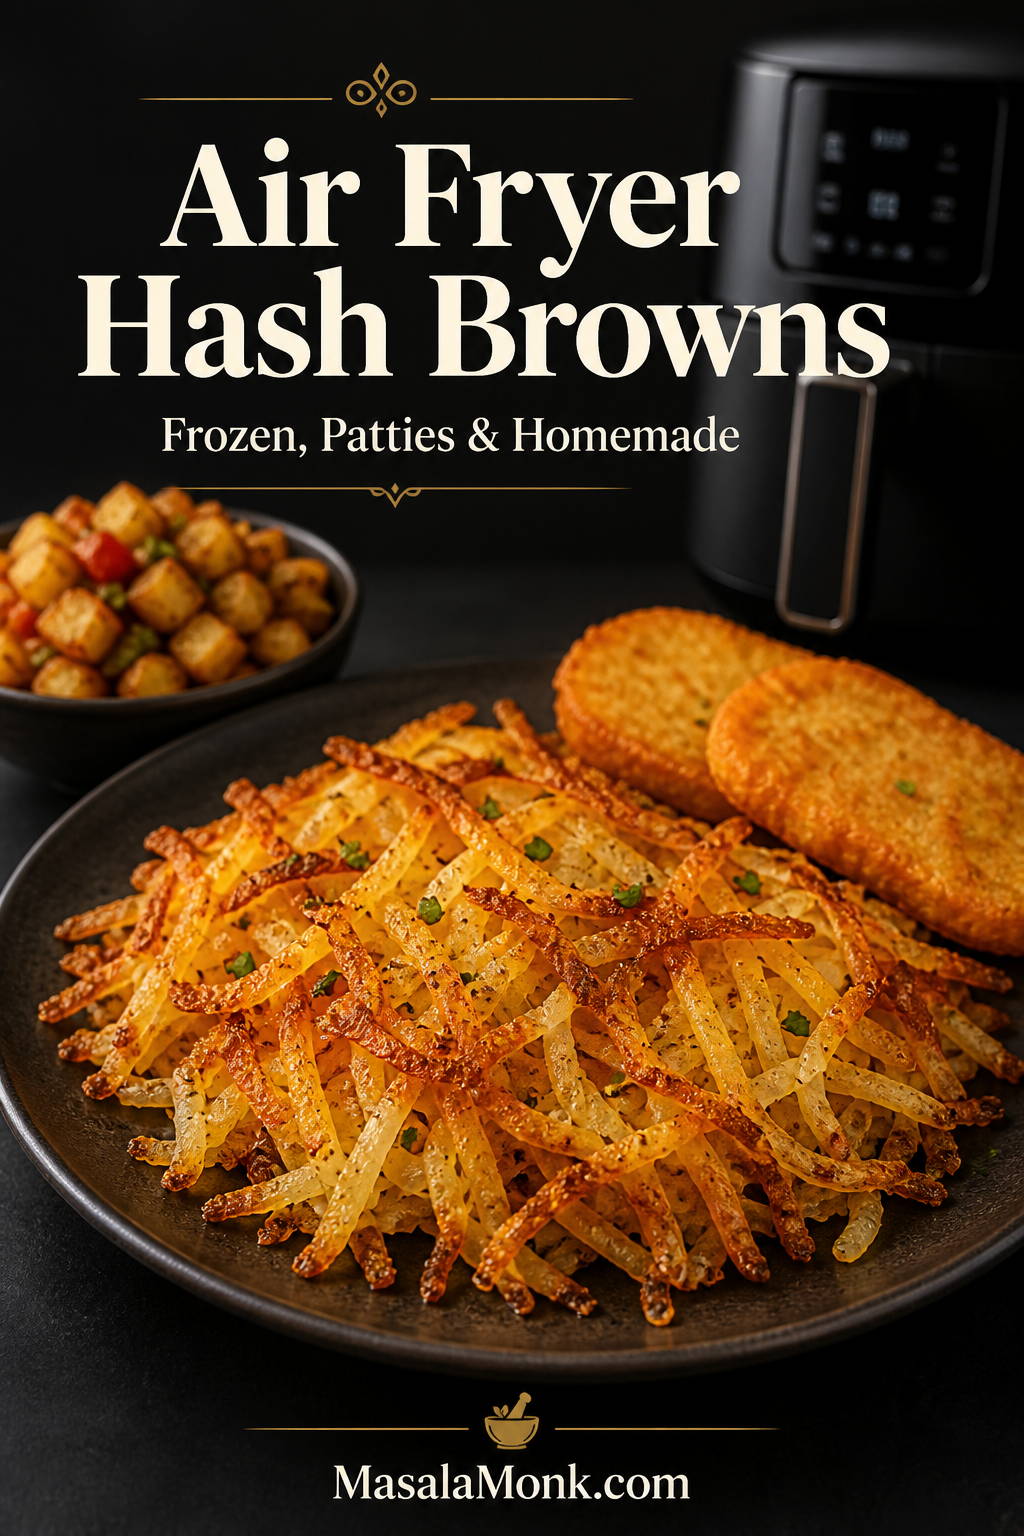
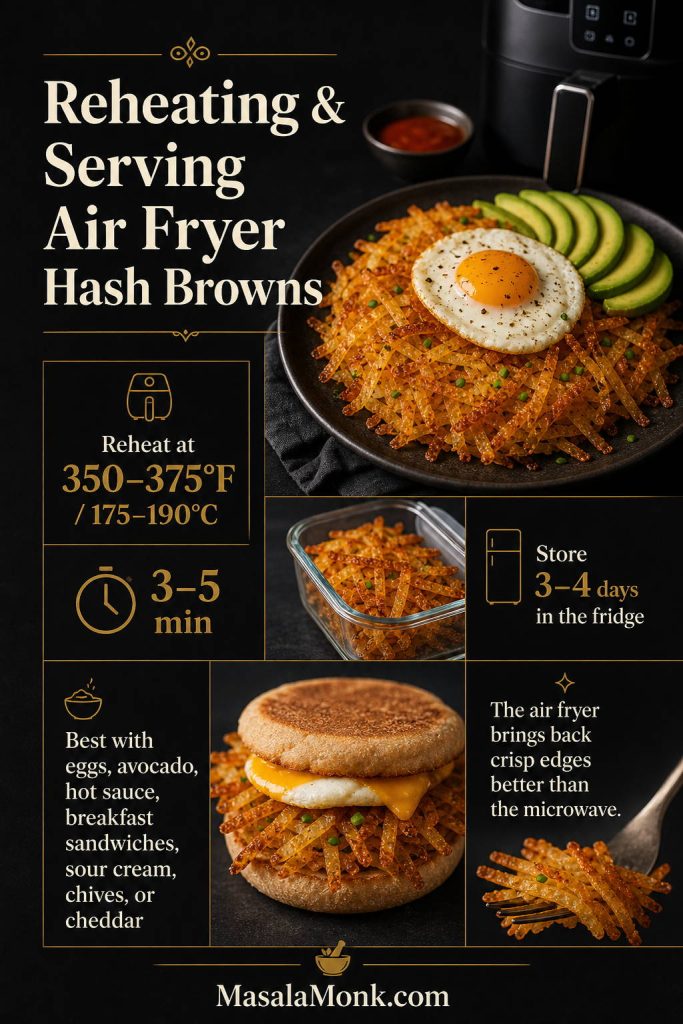
Golden crispy air fryer hash browns served on a dark plate, with loose shredded hash browns in the center and smaller supporting sections showing hash brown patties and diced breakfast potatoes against a dark editorial background.

Crispy air fryer hash browns are one of those small breakfast wins that feel much bigger than the effort: golden edges, tender potato centers, and no skillet babysitting. Once you know which temperature works for each hash brown style, the air fryer does most of the work.

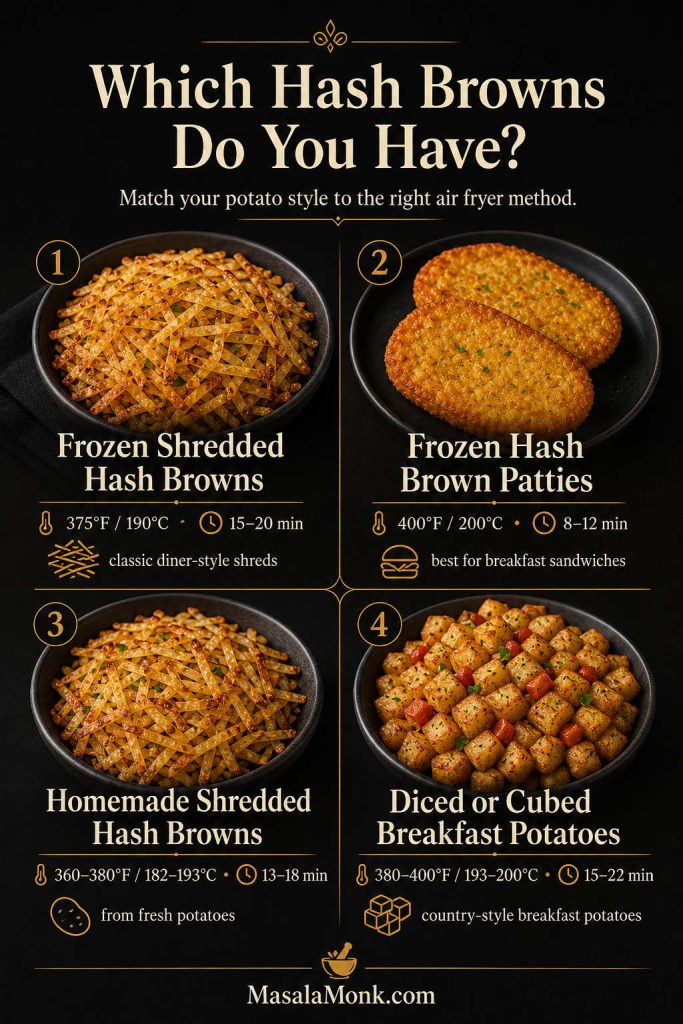
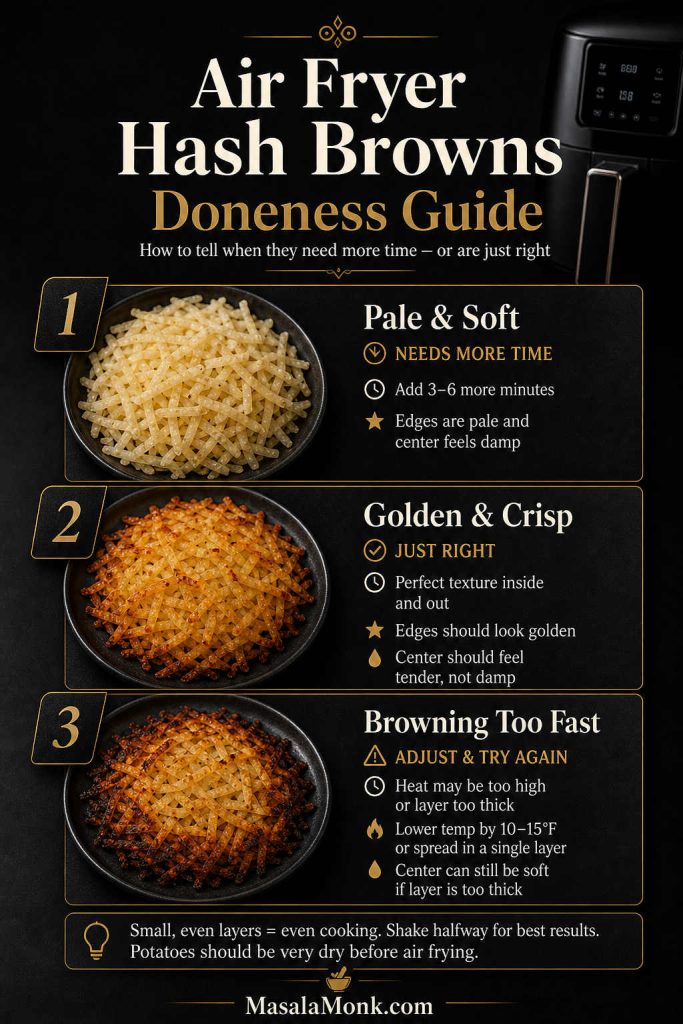
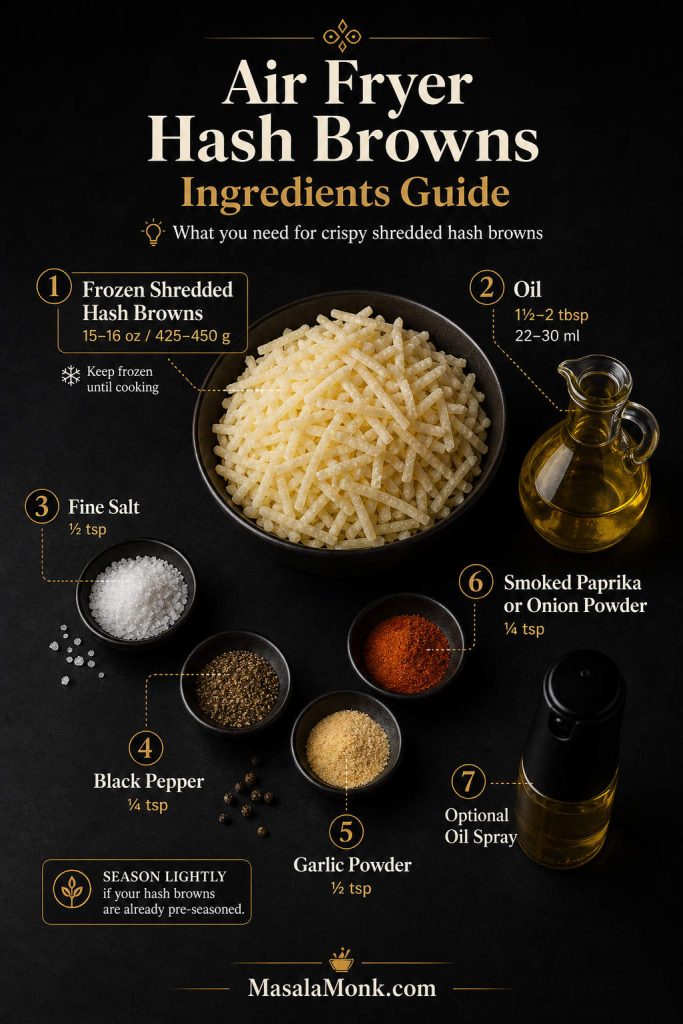
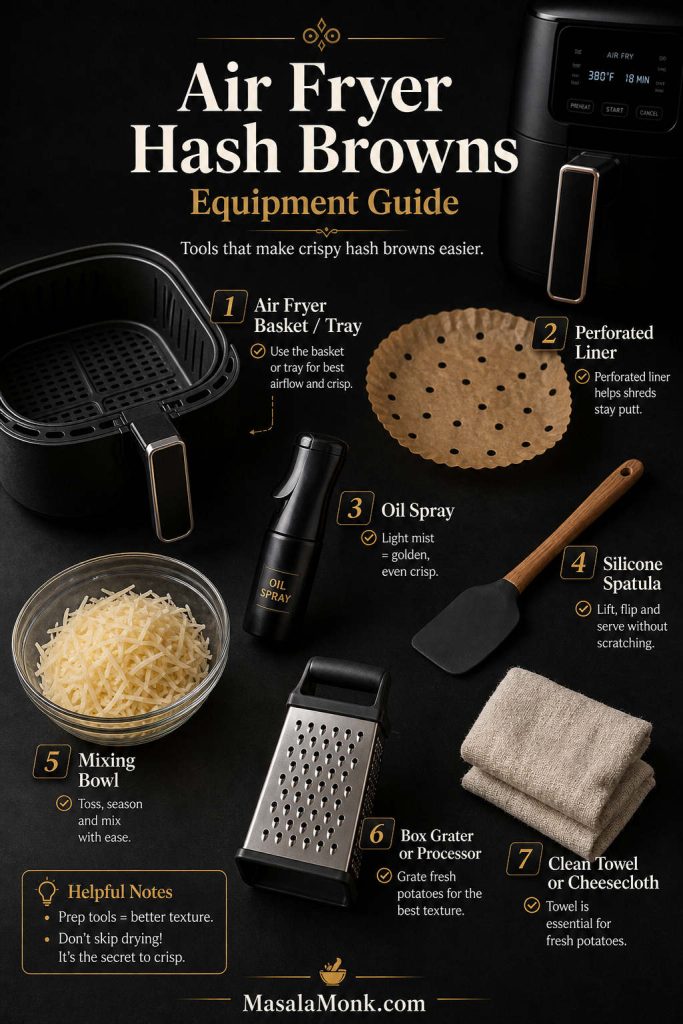
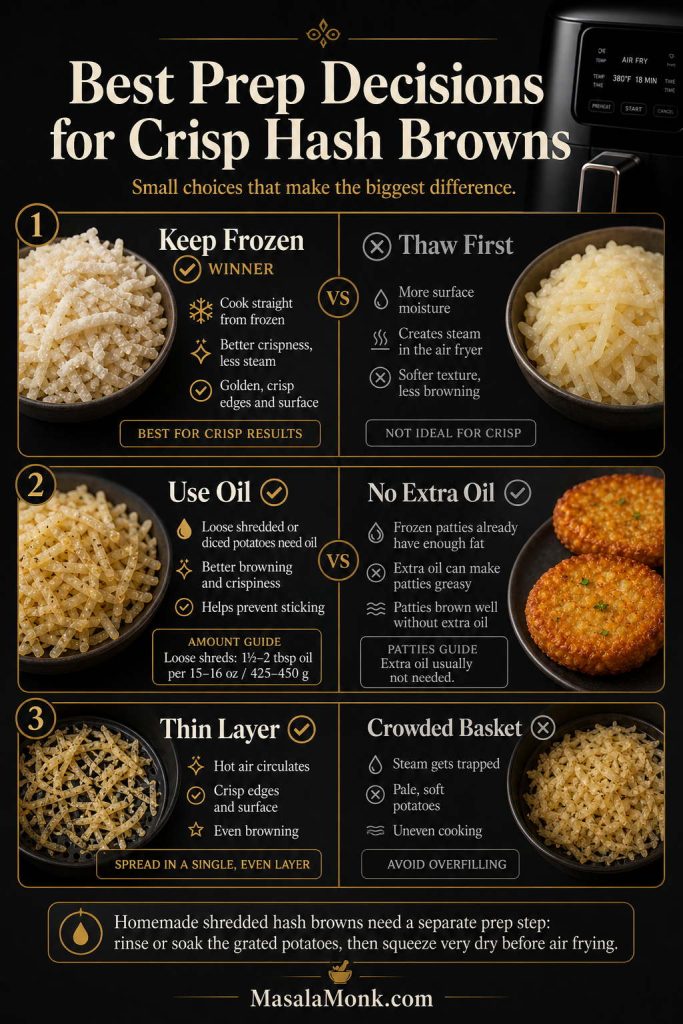
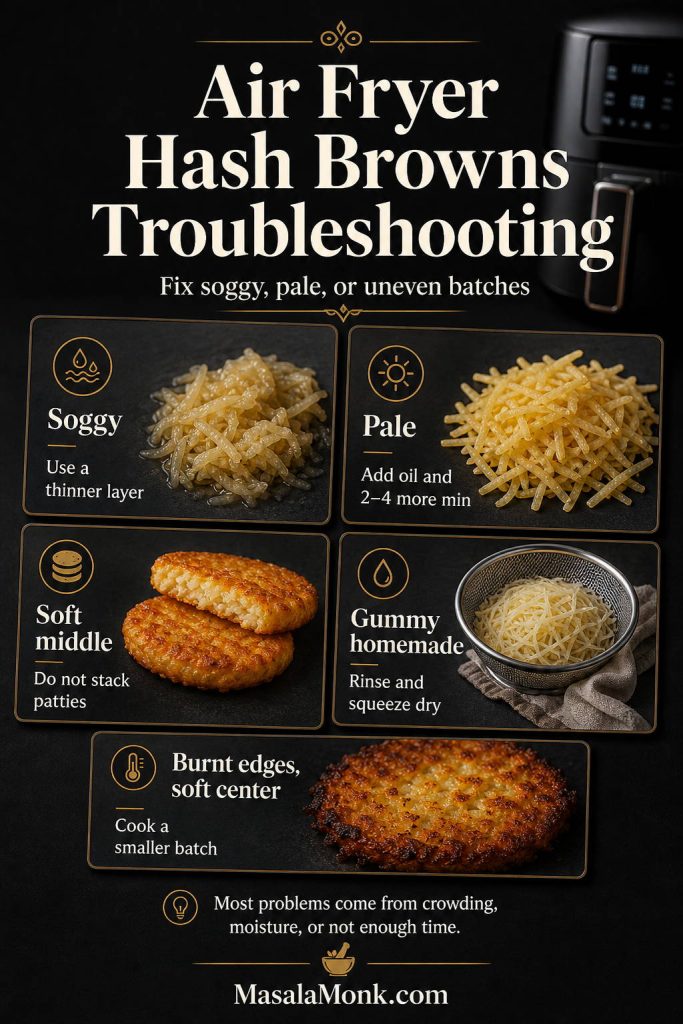
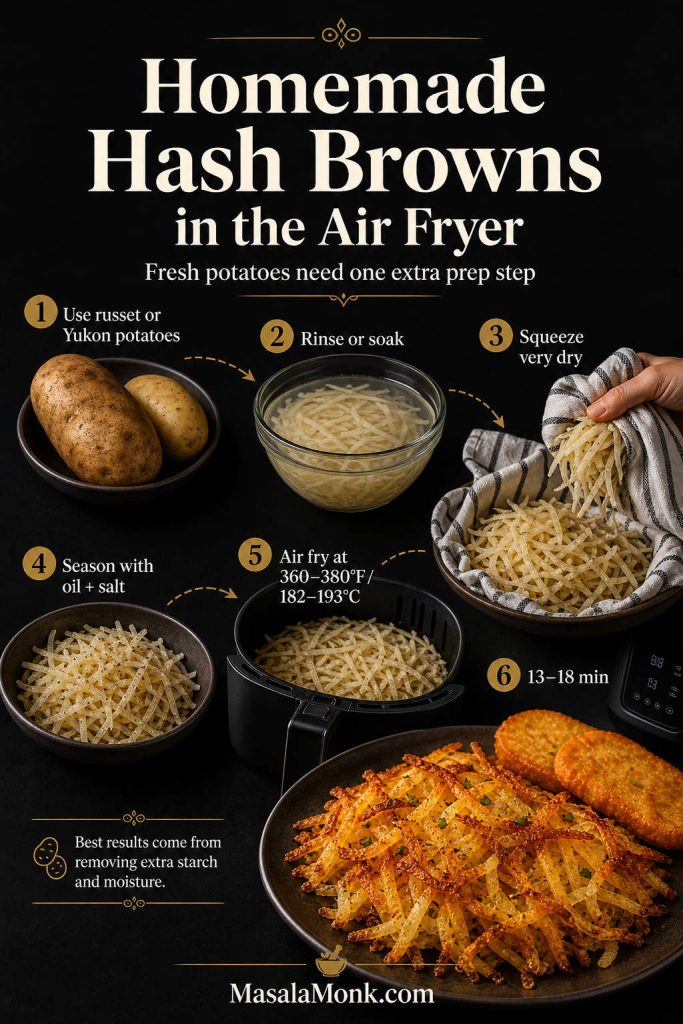
Loose frozen shredded hash browns need a thin layer, a little oil, and regular shaking. Frozen hash brown patties cook faster because they are already shaped and usually contain some oil. Meanwhile, homemade hash browns need one extra step before cooking: the grated potatoes must be rinsed or soaked, then squeezed very dry so they crisp instead of steaming.

This guide gives you the right air fryer time and temperature for frozen shredded hash browns, frozen patties, homemade shredded hash browns, diced breakfast potatoes, and leftovers. You will also learn when to use oil, why thawing usually hurts crispness, how to tell when each style is done, and how to fix hash browns that turn out soggy or pale.

Quick Answer: How Long to Cook Hash Browns in the Air Fryer?

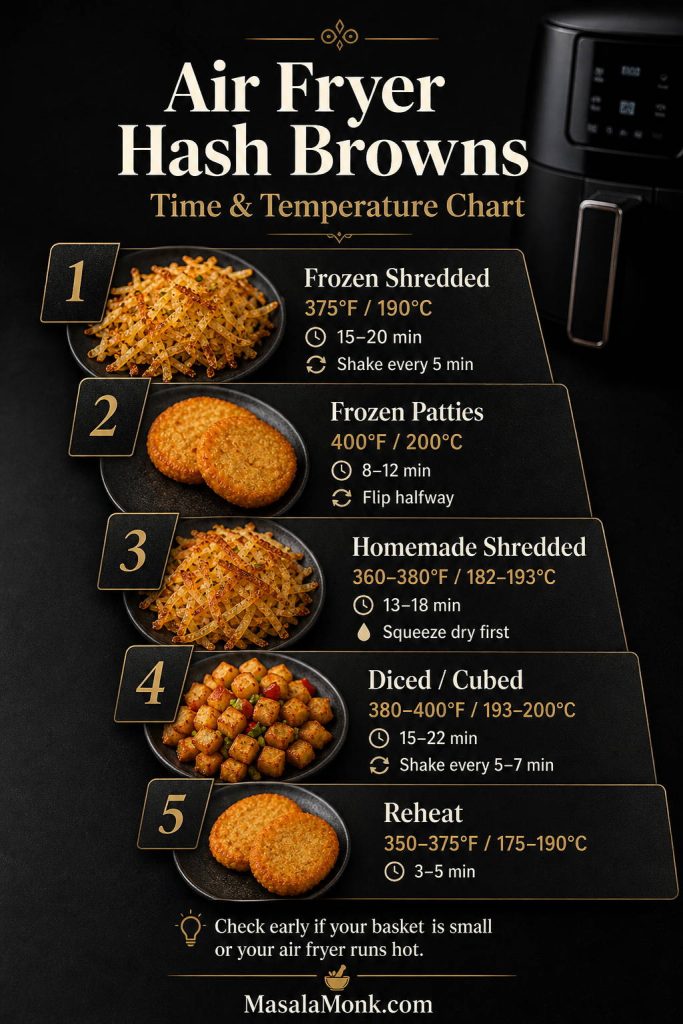
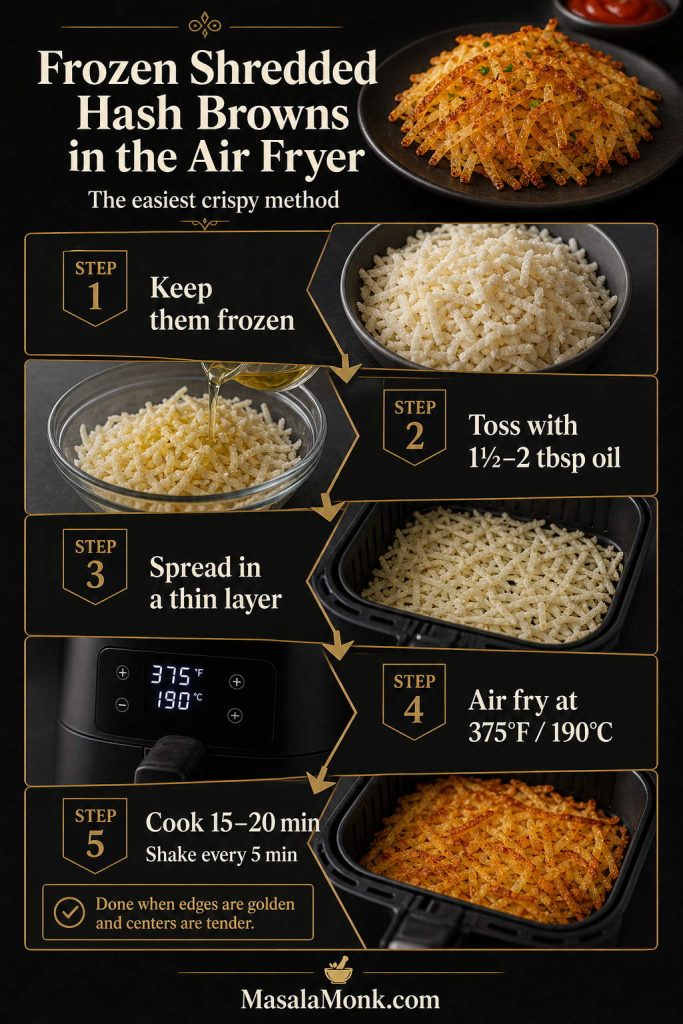
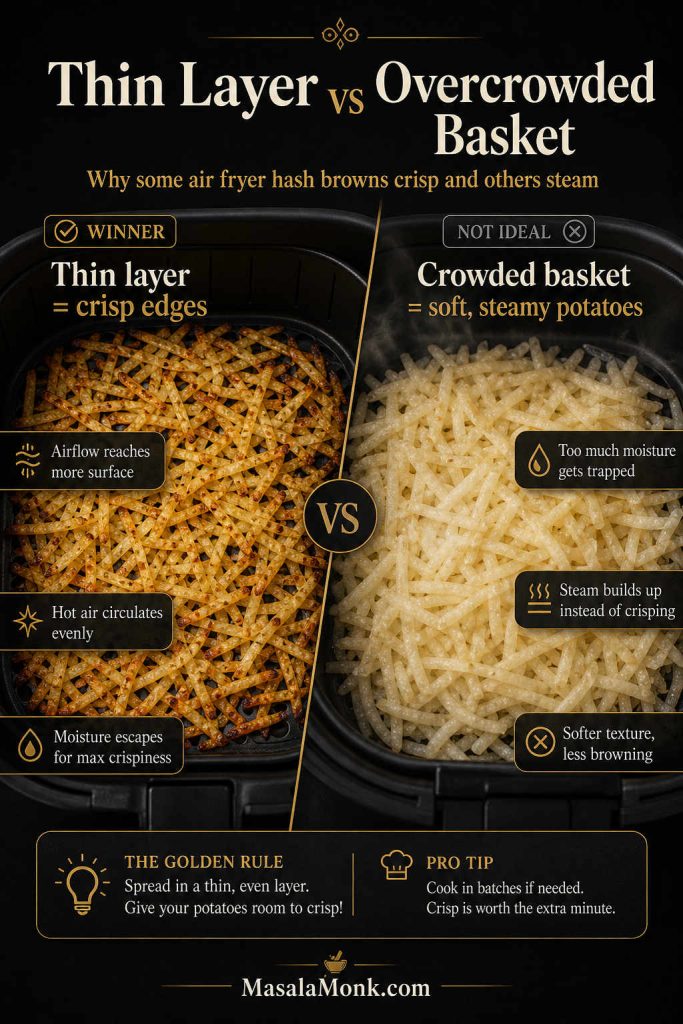
Frozen shredded hash browns take 15–20 minutes at 375°F / 190°C. Toss the potato shreds with a little oil, spread them in a thin layer, and shake or flip every 5 minutes so they crisp evenly.

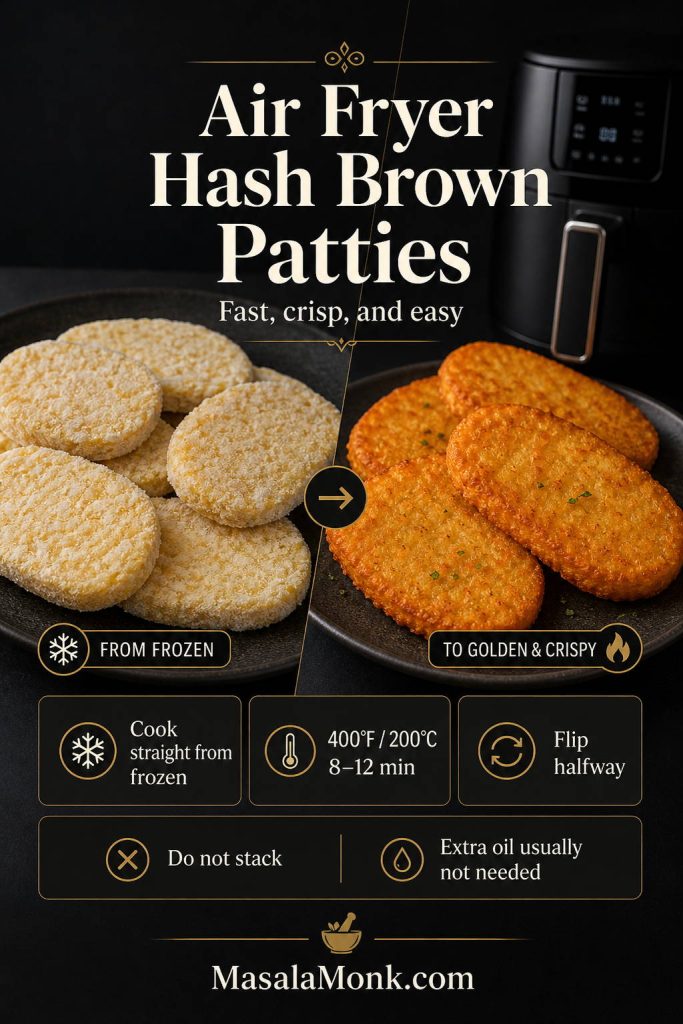
Frozen hash brown patties take 8–12 minutes at 400°F / 200°C. Cook them from frozen in a single layer and flip halfway through.

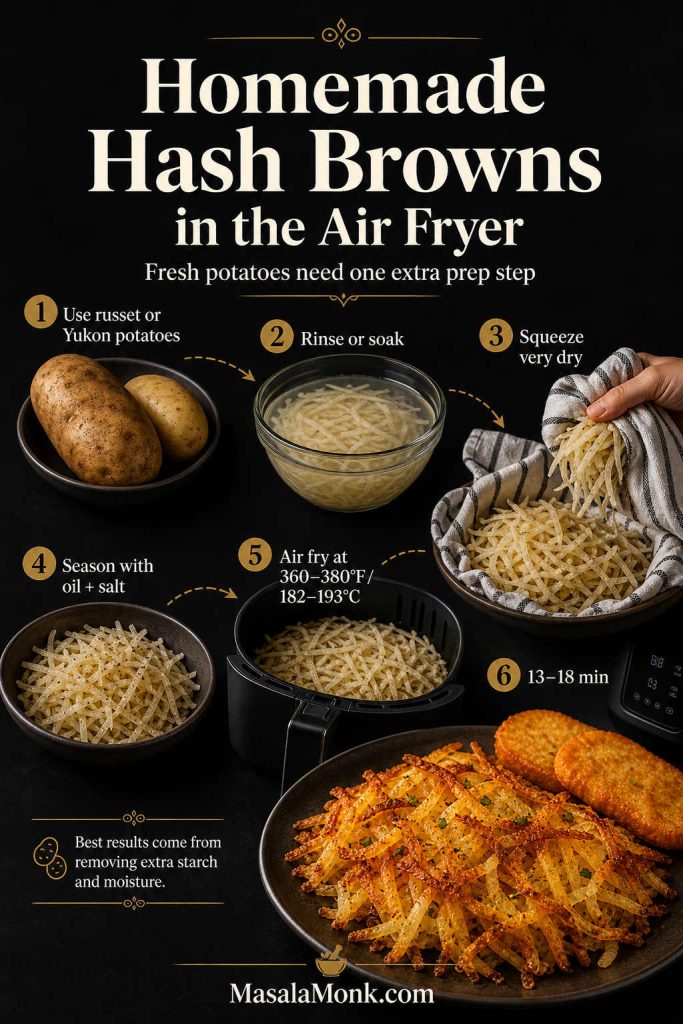
Homemade shredded hash browns take about 13–18 minutes at 360–380°F / 182–193°C. Fresh potatoes need to be rinsed or soaked, then squeezed very dry before they go into the air fryer.

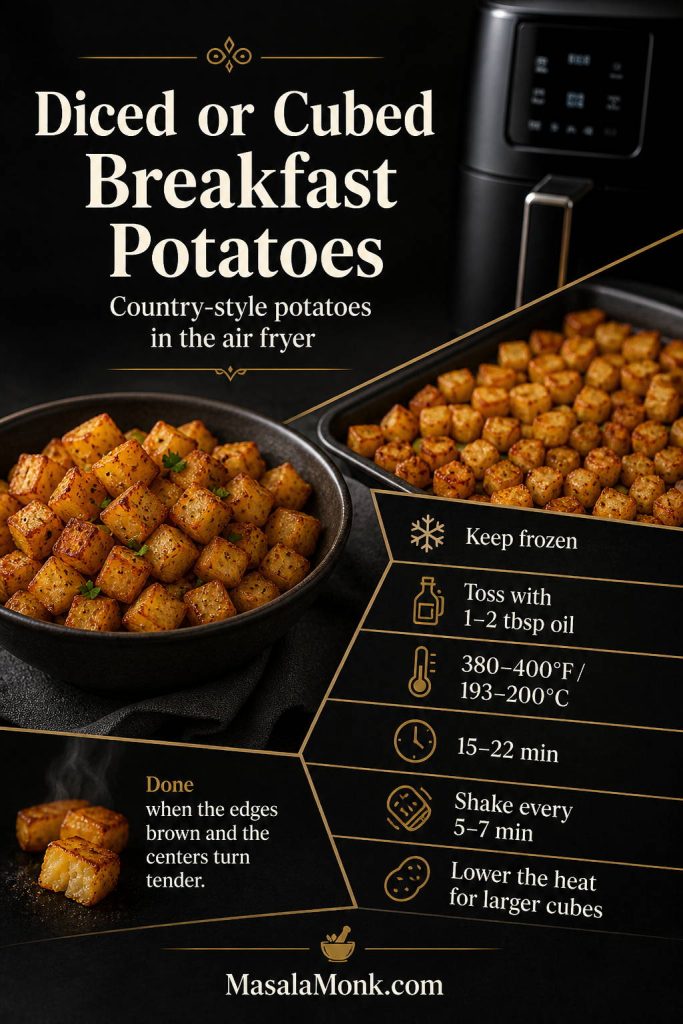
Frozen diced or cubed breakfast potatoes take 15–22 minutes at 380–400°F / 193–200°C. Shake every 5–7 minutes and use the lower temperature for larger cubes.

If your first batch is a little pale or a little soft, do not start over. Most air fryer hash brown problems can be fixed with a thinner layer, a few more minutes, or a quick shake halfway through cooking.

Best starting point: For classic loose, crispy air fryer hash browns, use 15–16 oz / 425–450 g frozen shredded potatoes, 1½–2 tbsp oil, and 375°F / 190°C for 15–20 minutes, shaking every 5 minutes.

Which Hash Browns Do You Have?

Start here before choosing a method. The timing changes because each style has a different shape, moisture level, and surface area.

Infographic titled Which Hash Browns Do You Have showing four air fryer options: frozen shredded hash browns, frozen hash brown patties, homemade shredded hash browns, and frozen diced or cubed breakfast potatoes, each with a short time and temperature guide.
Start by identifying the hash brown style you have, because frozen shredded potatoes, patties, homemade shreds, and diced breakfast potatoes all need different air fryer timing and handling.
If you have… Use this air fryer method Best for
Loose frozen shredded hash browns 375°F / 190°C for 15–20 minutes Crispy diner-style shredded potatoes
Frozen hash brown patties 400°F / 200°C for 8–12 minutes Breakfast sandwiches or quick plate sides
Fresh grated potatoes Rinse, squeeze dry, then cook at 360–380°F / 182–193°C for 13–18 minutes Homemade hash browns from scratch
Frozen diced or cubed breakfast potatoes 380–400°F / 193–200°C for 15–22 minutes Country-style potatoes and crisp potato cubes
Leftover cooked hash browns 350–375°F / 175–190°C for 3–5 minutes Bringing back crisp edges

Best Method for Crispy Air Fryer Hash Browns

For the classic loose, crispy hash brown texture, frozen shredded hash browns are the easiest and most reliable starting point. Use 15–16 oz / 425–450 g frozen shredded potatoes, toss them with 1½–2 tbsp oil, spread them in a thin layer, and air fry at 375°F / 190°C for 15–20 minutes, shaking every 5 minutes.

The best batch should taste like classic diner hash browns with extra crisp edges: golden and frilly on the outside, tender in the center, salty enough to eat plain, and sturdy enough for eggs, ketchup, hot sauce, or a breakfast sandwich.

If you enjoy crisp potato recipes, MasalaMonk’s crispy homemade French fries guide is a useful companion because it also focuses on moisture control, hot cooking, and getting the potato surface properly browned.

Use frozen patties when you want the fastest option, homemade shredded potatoes when you want a from-scratch version, and diced or cubed potatoes when you want country-style breakfast potatoes with crisp edges.

Air Fryer Hash Browns Time and Temperature Chart

Use this chart as your main guide. Air fryer models vary, so check a few minutes early the first time you cook a new bag, basket size, or potato style.

Hash brown type Amount Temperature Time Flip or shake? Oil?
Frozen shredded hash browns 15–16 oz / 425–450 g 375°F / 190°C 15–20 minutes Shake or flip every 5 minutes Yes, 1½–2 tbsp / 22–30 ml
Frozen hash brown patties 4 patties 400°F / 200°C 8–12 minutes Flip halfway Usually no
Homemade shredded hash browns 1 lb / 450 g potatoes 360–380°F / 182–193°C 13–18 minutes Optional, depending on layer thickness Yes, 1–2 tbsp / 15–30 ml
Frozen diced or cubed breakfast potatoes 16 oz / 450 g 380–400°F / 193–200°C 15–22 minutes Shake every 5–7 minutes Yes, 1–2 tbsp / 15–30 ml
Reheating cooked hash browns Any amount in one layer 350–375°F / 175–190°C 3–5 minutes Optional No
Basket size matters: In a smaller air fryer, 15–16 oz / 425–450 g shredded hash browns may need two batches. In a wider basket, the same amount can spread thinner and crisp faster.
Time and temperature chart infographic for air fryer hash browns comparing frozen shredded hash browns, frozen hash brown patties, homemade shredded hash browns, frozen diced or cubed breakfast potatoes, and reheating times.
Use this air fryer hash browns chart as your quick reference, since it helps you compare the best time and temperature for shredded potatoes, patties, homemade hash browns, diced potatoes, and leftovers in one glance.
Doneness guide infographic for air fryer hash browns showing three stages: pale and soft hash browns needing more time, golden and crisp hash browns that are done, and hash browns browning too fast on the edges while the center stays soft.
Use color and texture as your doneness guide: pale potatoes need more time, golden edges usually mean the hash browns are ready, and dark edges with a soft center often mean the layer is too thick.

What Is the Best Temperature for Air Fryer Hash Browns?

The best temperature depends on the potato format. A single number does not work equally well for patties, loose shreds, diced potatoes, and homemade grated potatoes.

  • 400°F / 200°C is best for frozen hash brown patties because patties are compact and already shaped. As a result, higher heat helps crisp the outside quickly.
  • 375°F / 190°C is better for frozen shredded hash browns because loose potato shreds need enough time to dry, brown, and crisp without burning at the edges too fast.
  • 360–380°F / 182–193°C works well for homemade hash browns because fresh grated potatoes hold more moisture. Therefore, slightly gentler heat gives them time to cook through after they are squeezed dry.
  • 380–400°F / 193–200°C works best for diced or cubed potatoes because cube size matters. Smaller diced potatoes can handle 400°F / 200°C for faster browning, while larger cubes often do better at 380°F / 193°C so the centers turn tender before the edges get too dark.

If the potatoes look cooked but pale, add a few more minutes before increasing the heat. However, if the edges are browning too fast while the center stays soft, the layer is probably too thick.

Ingredients You Need

You only need potatoes, a little fat, and seasoning. However, the best ingredient list depends on the style of hash browns you are cooking. Start with the group that matches what you have, then adjust the seasoning after cooking while the potatoes are still hot.

Ingredients guide infographic for air fryer hash browns showing frozen shredded hash browns, oil, fine salt, black pepper, garlic powder, smoked paprika or onion powder, and optional oil spray arranged on a dark background.
Air fryer hash browns need only a short ingredient list, yet the exact mix changes with the potato style, so shredded potatoes often need oil and seasoning while patties usually need much less.

Frozen Shredded Hash Browns

  • Frozen shredded hash browns, 15–16 oz / 425–450 g: Keep them frozen until cooking so they do not release extra moisture before they hit the hot air fryer basket.
  • Oil, 1½–2 tbsp / 22–30 ml: Olive oil, avocado oil, or a neutral cooking oil all work. Because loose potato shreds dry out as they cook, a light coating of oil helps them brown more evenly.
  • Fine salt, ½ tsp: Start lightly, especially if your frozen hash browns are already seasoned.
  • Black pepper, ¼ tsp: Add a small amount before cooking, then adjust at the end if the potatoes need more bite.
  • Garlic powder, ½ tsp: This gives the hash browns a savory breakfast flavor without adding fresh garlic, which can burn in the air fryer.
  • Smoked paprika or onion powder, ¼ tsp: Either one adds deeper flavor. For a simpler batch, skip both and stay with salt, pepper, and garlic powder.

Frozen Hash Brown Patties

  • Frozen hash brown patties, 4: Cook them straight from frozen and keep them in a single layer.
  • Oil spray, optional: Most patties already contain enough oil to crisp. Still, a light spray can help if the surface looks dry or pale halfway through cooking.
  • Salt, optional: Since many frozen patties are already salted, taste after cooking before adding more.

Homemade Shredded Hash Browns

  • Russet or Yukon potatoes, 1 lb / 450 g: Russets crisp well and give you a more classic hash brown texture. Yukon potatoes, meanwhile, have a creamier center.
  • Oil or melted butter, 1–2 tbsp / 15–30 ml: Oil gives better crispness, while butter adds richer flavor. If using butter, watch the edges because it browns faster.
  • Fine salt, ½ tsp: Season only after the grated potatoes have been rinsed and squeezed dry.
  • Black pepper, ¼ tsp: Add it with the salt, then adjust after cooking if needed.
  • Garlic powder or onion powder, ¼–½ tsp: Use either one for a more savory homemade hash brown without adding wet ingredients.

Equipment

You do not need much equipment, although a few small tools make the process easier.

  • Air fryer basket or tray: A basket-style air fryer is easiest for shaking loose shredded potatoes.
  • Mixing bowl: Use it to coat shredded or diced potatoes evenly with oil and seasoning.
  • Oil spray: This helps with sticking and browning, especially if your basket is not very nonstick.
  • Silicone spatula: Helpful for pressing, lifting, and flipping sections of shredded potatoes.
  • Box grater or food processor: Needed only for homemade hash browns from fresh potatoes.
  • Clean towel or cheesecloth: Essential for squeezing moisture from grated potatoes.
  • Perforated parchment or silicone liner: Useful if loose shreds fall through the basket holes.
Equipment guide infographic for air fryer hash browns showing an air fryer basket, perforated parchment or liner, oil spray, silicone spatula, mixing bowl, box grater, and towel or cheesecloth used for squeezing potatoes dry.
A few simple tools make air fryer hash browns easier to handle; for example, perforated parchment helps with loose shreds, while a towel or cheesecloth is especially helpful for homemade potatoes.

Frozen Shredded Hash Browns in the Air Fryer

Loose frozen shredded hash browns are the main method in this guide because they give you the classic diner-style texture: crisp edges, soft potato centers, and a loose shredded finish. They need more attention than patties because the potato shreds can clump, steam, or fall through the basket if the layer is too thick.

How to Cook Frozen Shredded Hash Browns

  1. Keep them frozen. Do not thaw the potatoes first.
  2. Toss with oil and seasoning. Add 15–16 oz / 425–450 g frozen potato shreds to a bowl with 1½–2 tbsp / 22–30 ml oil, salt, pepper, and garlic powder.
  3. Spread in a thin layer. Aim for about ½ inch / 1.25 cm thick. If your basket is small, cook in two batches.
  4. Air fry at 375°F / 190°C for 15–20 minutes. Shake, stir, or flip sections every 5 minutes.
  5. Crisp to taste. Add 2–4 minutes at the end if the potatoes are cooked but not golden enough.
Step-by-step infographic for frozen shredded hash browns in the air fryer showing frozen potatoes tossed with oil and seasoning, spread in a thin layer, air fried at 375 degrees Fahrenheit, and shaken during cooking until golden and crisp.
Frozen shredded hash browns crisp best when they stay frozen, get a light coating of oil, and cook in a thin layer; as a result, the edges brown well while the center stays tender instead of steamy.

The biggest mistake is using too much potato in one batch. As a result, the potatoes trap steam instead of crisping. A thin layer, meanwhile, gives you better browning and a cleaner shredded texture.

When the potatoes are ready, the outer shreds should look golden and crisp, while the center should feel tender rather than wet or starchy. If the middle still looks damp after 15 minutes, spread the potatoes out again and cook a few minutes longer before serving.

Air Fryer Hash Brown Patties

Frozen hash brown patties are the easiest air fryer version because they are already shaped, compact, and usually contain enough oil to brown well. They are ideal for breakfast sandwiches, quick sides, and busy mornings.

They also work especially well inside breakfast sandwiches. For more filling ideas, sauces, and make-ahead combinations, see MasalaMonk’s breakfast sandwich recipes.

How to Cook Frozen Hash Brown Patties

  1. Set the air fryer to 400°F / 200°C. Preheat if your model works better that way.
  2. Add the patties in one layer. Do not stack or overlap them.
  3. Air fry for 8–12 minutes. Flip halfway through.
  4. Add time for extra crispness. Cook 2–3 minutes longer if you want deeper browning.
  5. Season after cooking. Many frozen patties are already salted, so taste before adding more.
Infographic for air fryer hash brown patties showing frozen patties placed in a single layer in the air fryer, cooked at 400 degrees Fahrenheit, flipped halfway, and served golden brown.
Frozen hash brown patties usually crisp faster than loose shreds, so a single layer and one halfway flip are often all you need for evenly browned, crisp-edged potatoes.

The patties should be golden on both sides and crisp around the edges. If they look pale after 8 minutes, keep cooking rather than removing them too early. Because patties are already shaped, they usually need more time, not more oil.

Patties vs shredded: Frozen patties usually need little or no added oil. Loose shredded hash browns need oil because the potato shreds dry and brown differently.

Homemade Hash Browns in the Air Fryer

Homemade air fryer hash browns taste fresher than frozen ones, but they need proper prep. Freshly grated potatoes hold water and surface starch. If that moisture stays in the potatoes, the hash browns can turn soft, gummy, or pale.

Rinsing removes excess surface starch, while squeezing removes water. Both steps matter: starch can make the potatoes gummy, and water makes them steam. The Idaho Potato Commission’s classic hash brown guide also points to the same core technique: rinse out excess starch, squeeze out as much water as possible, keep the potatoes thin, and cook hot for crisp results.

How to Make Homemade Shredded Hash Browns

  1. Grate the potatoes. Use 1 lb / 450 g russet or Yukon potatoes.
  2. Rinse or soak. Rinse the grated potatoes under cold water until the water looks clearer, or soak them for 10–20 minutes and rinse again.
  3. Squeeze very dry. Wrap the potatoes in a clean towel or cheesecloth and squeeze out as much water as possible.
  4. Season after drying. Toss with 1–2 tbsp / 15–30 ml oil or melted butter, salt, pepper, and optional garlic powder.
  5. Spread thinly. Press into an even layer in the air fryer basket.
  6. Air fry at 360–380°F / 182–193°C for 13–18 minutes. Check early and add time as needed for browning.
Infographic for homemade hash browns in the air fryer showing grated fresh potatoes being rinsed, squeezed dry in a towel, seasoned, spread in the basket, and cooked until crisp.
Homemade hash browns turn out much better when the grated potatoes are rinsed or soaked, then squeezed very dry, because less starch and moisture means a crisper air fryer finish.

For one large pressed layer, avoid moving the potatoes too early. However, if you want looser breakfast-style hash browns, stir or flip sections partway through cooking.

Homemade Hash Brown Patties Variation

Homemade hash brown patties are possible, although they are more of a variation than the main method here. Mix squeezed-dry shredded potatoes with a little starch, shape them into thin patties, chill or freeze until firm, then air fry until crisp.

A good starting point is 500 g / 1.1 lb grated potatoes, 1 tbsp cornstarch, 1 tbsp rice flour if you want extra crispness, 1 tbsp oil, 2–3 tbsp melted butter, salt, pepper, and garlic powder. Shape into patties about 1 cm thick, chill until firm, then cook at 400°F / 200°C for 13–15 minutes.

Diced or Cubed Hash Browns in the Air Fryer

Diced or cubed hash browns are often sold as frozen breakfast potatoes, country potatoes, or cubed potatoes. They need more time than patties because the pieces are thicker. However, they can still get crisp edges if they are tossed with oil and shaken during cooking.

  1. Use 16 oz / 450 g frozen diced or cubed potatoes. Do not thaw.
  2. Toss with 1–2 tbsp / 15–30 ml oil. Add salt, pepper, garlic powder, paprika, or your favorite breakfast potato seasoning.
  3. Spread in one layer. A little overlap is fine, but avoid a deep pile.
  4. Air fry at 380–400°F / 193–200°C for 15–22 minutes. Use 400°F / 200°C for smaller diced potatoes or faster browning. Use 380°F / 193°C for larger cubes so the centers have more time to turn tender.
  5. Shake every 5–7 minutes. Add 3–5 extra minutes if the cubes are large, crowded, or still firm in the center.
Infographic for diced or cubed breakfast potatoes in the air fryer showing seasoned potato cubes cooked in the basket with notes about 380 to 400 degrees Fahrenheit and shaking during cooking.
Diced or cubed breakfast potatoes need a little more time than patties; however, they still brown beautifully when tossed with oil, spread out well, and shaken a few times during cooking.

The cubes are done when the edges are browned and the centers are fully tender. When the outside browns before the middle softens, lower the temperature to 380°F / 193°C and cook a few minutes longer. For pale but tender potatoes, raise the heat near the end or add 2–3 more minutes.

Beyond breakfast, MasalaMonk’s air fried chilli garlic potato bites are another crisp air fryer potato idea with a snack-style, spicy finish.

Do You Need to Thaw Hash Browns First?

No. For most air fryer hash browns, frozen is better than thawed. Loose shredded potatoes, patties, and diced breakfast potatoes can all go straight into the air fryer.

Thawing often adds surface moisture, especially with shredded potatoes. That extra water can make the hash browns steam before they brown. If your frozen hash browns are stuck together in a block, break them apart as much as possible instead of fully thawing them.

Homemade hash browns are different because they start fresh, not frozen. The key is still moisture control: rinse or soak the grated potatoes, then squeeze them dry before adding oil and seasoning.

Prep decision infographic for crisp air fryer hash browns comparing keep frozen versus thaw first, use oil versus no extra oil, and thin layer versus crowded basket, with a homemade shredded potato note at the bottom.
The best prep decisions for crisp hash browns are simple but important: keep frozen potatoes frozen, use oil on loose shreds or diced potatoes, and avoid crowding so the hot air can circulate properly.

Oil or No Oil?

The oil question depends on the style. Patties and loose shredded potatoes do not cook the same way in the air fryer.

Type Oil needed? Why
Frozen hash brown patties Usually no Many frozen patties already contain oil and crisp well on their own.
Frozen shredded hash browns Yes Oil helps the loose potato shreds brown instead of drying out or staying pale.
Homemade shredded hash browns Yes Fresh potatoes need fat for crisp edges and better color.
Diced or cubed breakfast potatoes Yes Oil helps the thicker potato edges brown evenly.

You can make oil-free air fryer hash browns, but they usually turn out drier and less golden. For the best texture, use a small amount of oil on loose shredded or diced potatoes, and skip extra oil on patties unless the surface looks dry or pale.

How to Make Air Fryer Hash Browns Extra Crispy

Extra crispiness comes from airflow, surface dryness, and enough time. Therefore, focus on the layer first before adding more seasoning or turning the heat higher.

  • Use a thin layer. Loose shredded hash browns should not be piled too deep. Around ½ inch / 1.25 cm is a useful guide.
  • Do not overcrowd the basket. If the potatoes steam, they will soften before they crisp.
  • Use oil for shredded or diced potatoes. Patties can often cook without it, but loose potatoes need help browning.
  • Shake or flip regularly. Shredded hash browns should be moved every 5 minutes. Patties usually need one flip halfway through.
  • Add time at the end. If the potatoes are cooked but not crisp enough, cook 2–4 minutes longer.
  • Serve immediately. Hash browns soften as they sit, especially if they are stacked on a plate.
Comparison infographic showing thin-layer hash browns on one side with crisp golden edges and overcrowded hash browns on the other side looking pale and steamy, with labels explaining the difference.
A thin layer gives hash browns the airflow they need for crisp edges, whereas an overcrowded basket traps steam and leaves the potatoes softer, paler, and less evenly cooked.

For another deep dive into air fryer crisping, MasalaMonk’s air fryer chicken wings guide follows the same bigger principle: dry surfaces, enough airflow, and the right finish make the difference between soft and crisp.

Common Air Fryer Hash Brown Mistakes

If your hash browns come out soft, pale, or uneven, it usually does not mean the method failed. Most problems come from a few small air fryer habits that are easy to fix.

If your air fryer results are inconsistent across recipes, MasalaMonk’s common air fryer mistakes guide is a useful side read for crowding, airflow, temperature, and limp results.

  • Adding too many shredded potatoes to the basket: A thick pile steams instead of crisping.
  • Thawing frozen hash browns first: Thawed potato shreds often release extra moisture.
  • Skipping oil on loose shredded or diced potatoes: These styles need some fat for better browning.
  • Moving homemade hash browns too early: Let them firm up before flipping or stirring.
  • Stacking patties: Frozen patties need direct airflow on both sides.
  • Serving them too late: Hash browns lose crispness as they sit and steam on the plate.

Why Are My Air Fryer Hash Browns Soggy?

If your hash browns are soft instead of crisp, the problem is usually moisture, crowding, or not enough air circulation. Use this table to fix the most common issues.

Problem Likely reason Fix
Loose shredded hash browns are soggy The layer is too thick or the potatoes were not moved during cooking. Keep the layer thin and shake or flip every 5 minutes.
Hash browns are pale Not enough oil, not enough time, or temperature too low. Use a light coating of oil and add 2–4 minutes.
Patties are soft in the middle They were stacked, crowded, or not cooked long enough. Cook in one layer at 400°F / 200°C and flip halfway.
Homemade hash browns are gummy The fresh potatoes kept too much starch and moisture. Rinse or soak the grated potatoes, then squeeze very dry.
Edges burn but the middle is soft The potato layer is too thick. Use a thinner layer or cook in batches.
Shreds fall through the basket The air fryer basket holes are too wide. Use perforated parchment, a silicone liner, or a tray-style basket.
Hash browns stick to the basket Not enough oil or the potatoes were moved too early. Spray the basket lightly and let the potatoes firm up before flipping.
Troubleshooting infographic for air fryer hash browns showing common problems such as soggy shredded hash browns, pale potatoes, soft patties, gummy homemade hash browns, and burnt edges with soft centers, along with fixes.
If your air fryer hash browns come out soggy, pale, gummy, or uneven, the fix is usually small—less crowding, better moisture control, or a few more minutes—rather than a whole new method.

Storage and Reheating

Air fryer hash browns taste best right after cooking, but leftovers can still be reheated well. The air fryer is much better than the microwave when you want to bring back crisp edges.

  • Refrigerate: Store cooked hash browns in an airtight container for 3–4 days.
  • Reheat refrigerated hash browns: Air fry at 350–375°F / 175–190°C for 3–5 minutes.
  • Reheat frozen homemade patties: Air fry at 375–400°F / 190–200°C for 5–8 minutes.
  • Avoid stacking while cooling: Steam softens the crisp surface.

For food safety, refrigerate leftovers quickly and eat them within 3–4 days. If you are checking temperature, FoodSafety.gov lists 165°F / 74°C for reheating leftovers.

For homemade shaped patties, freeze them in a single layer first. Once firm, transfer them to a freezer bag so they do not stick together.

Infographic for reheating and serving crispy hash browns showing leftover hash browns being reheated in the air fryer and serving suggestions such as eggs, avocado, hot sauce, sour cream, cheddar, and breakfast bowls.
The air fryer is the easiest way to reheat hash browns because it quickly brings back crisp edges; meanwhile, toppings like eggs, cheddar, avocado, salsa, or hot sauce make them more satisfying.

What to Serve with Air Fryer Hash Browns

Air fryer hash browns work with almost any breakfast plate. Keep it simple with air fryer hard-boiled eggs, avocado, and hot sauce, or turn the hash browns into the crispy base for a bigger brunch bowl.

  • Fried, scrambled, or poached eggs
  • Breakfast sandwiches with eggs, cheese, and sauce
  • Avocado, hot sauce, and lime
  • Sausage, bacon, or vegetarian breakfast patties
  • Baked beans or grilled tomatoes
  • Sour cream, chives, and cheddar
  • Ketchup, hot sauce, or spicy mayo
  • Breakfast bowls with eggs, cheese, salsa, and greens

To make the meal more filling, use the hash browns as the crisp base and add eggs, cheese, sautéed vegetables, and a spoonful of salsa or hot sauce on top.

For a snack-style plate, top crispy patties with sour cream, chives, cheddar, hot sauce, or a little chaat masala for a sharper MasalaMonk-style finish.

More Potato Ideas

If potatoes are the main event, MasalaMonk’s potato appetizers guide has more crisp, cheesy, party-friendly potato options for brunch spreads, snacks, and sides.

Once you know your hash brown style, the method is simple: keep frozen potatoes frozen, keep loose shreds thin, give patties direct airflow, and use a few extra minutes when the color is not there yet. That is usually all it takes to move from soft potatoes to crisp, golden hash browns.

Crispy Air Fryer Hash Browns

This crispy air fryer hash browns recipe starts with frozen shredded potatoes because they give the easiest classic breakfast texture: golden edges, tender centers, and loose crispy shreds. The notes below include quick adjustments for frozen hash brown patties, homemade shredded hash browns, diced breakfast potatoes, and reheating.

Prep Time5 minutes
Cook Time15–20 minutes
Total Time20–25 minutes
Servings4

Ingredients

  • 15–16 oz / 425–450 g frozen shredded hash browns, not thawed
  • 1½–2 tbsp / 22–30 ml olive oil, avocado oil, or neutral oil
  • ½ tsp fine salt, plus more to taste
  • ¼ tsp black pepper
  • ½ tsp garlic powder
  • ¼ tsp smoked paprika or onion powder, optional
  • Oil spray, for the basket if needed

Instructions

  1. Preheat if needed. Set the air fryer to 375°F / 190°C. Some models do not need preheating, but preheating helps if your air fryer runs cool.
  2. Season the hash browns. Add the frozen shredded hash browns to a mixing bowl. Toss with oil, salt, pepper, garlic powder, and optional smoked paprika or onion powder.
  3. Spread in the basket. Lightly spray the basket if needed. Spread the potatoes in a thin, even layer, around ½ inch / 1.25 cm thick. Cook in batches if your basket is small.
  4. Air fry. Cook for 15–20 minutes, shaking, stirring, or flipping sections every 5 minutes.
  5. Crisp to taste. Once the potatoes are golden and cooked through, add 2–4 minutes if you want deeper crisp edges.
  6. Serve immediately. Taste and adjust salt while hot.

Recipe Notes

  • Frozen hash brown patties: Cook from frozen at 400°F / 200°C for 8–12 minutes, flipping halfway. No oil is usually needed.
  • Homemade shredded hash browns: Grate 1 lb / 450 g potatoes, rinse or soak, squeeze very dry, toss with oil and seasoning, then air fry at 360–380°F / 182–193°C for 13–18 minutes.
  • Diced or cubed breakfast potatoes: Toss 16 oz / 450 g frozen diced or cubed potatoes with 1–2 tbsp / 15–30 ml oil and air fry at 380–400°F / 193–200°C for 15–22 minutes, shaking every 5–7 minutes.
  • Extra crispy: Keep the layer thin, avoid overcrowding, and add a few minutes at the end.
  • Storage: Refrigerate leftovers for 3–4 days. Reheat in the air fryer at 350–375°F / 175–190°C for 3–5 minutes.
Saveable recipe card infographic for crispy air fryer hash browns showing frozen shredded hash browns, oil, seasonings, the 375 degree Fahrenheit temperature, 15 to 20 minute cooking time, and a note to shake every 5 minutes.
This crispy air fryer hash browns recipe card gives you the core shredded-potato method in one place, so you can quickly save the temperature, timing, and shaking pattern for repeatable results.

FAQs About Air Fryer Hash Browns

Do frozen hash browns work in the air fryer?

Frozen shredded hash browns, frozen hash brown patties, and frozen diced potatoes all work well in the air fryer. Cook them from frozen rather than thawing first so they crisp instead of steaming.

How long do frozen shredded hash browns take in the air fryer?

Frozen shredded hash browns usually take 15–20 minutes at 375°F / 190°C. Shake or flip them every 5 minutes so the potato shreds brown evenly.

What is the best air fryer temperature for hash brown patties?

Frozen hash brown patties usually crisp best at 400°F / 200°C for 8–12 minutes. Flip them halfway through, then add 2–3 minutes if you want deeper browning.

Should frozen hash browns be thawed before air frying?

Keep frozen hash browns frozen before air frying. Thawing can add surface moisture, especially with loose shredded potatoes, which makes them steam before they crisp.

Do you need to preheat the air fryer for hash browns?

Preheating helps hash brown patties and loose shredded hash browns start crisping faster, but it is not always required. If your air fryer runs hot or preheats automatically, check early. If your first batch turns out pale, preheat the next batch for 2–3 minutes before adding the potatoes.

Why are my air fryer hash browns not crispy?

The most common reasons are overcrowding, too much moisture, not enough oil for shredded potatoes, or not enough cooking time. Use a thinner layer, toss loose potatoes with oil, and add a few extra minutes if needed.

How do you make homemade hash browns in the air fryer?

Grate the potatoes, rinse or soak them, squeeze them very dry, then season with oil and salt. Air fry at 360–380°F / 182–193°C for 13–18 minutes, checking early for browning.

How long do diced hash browns or breakfast potatoes take?

Frozen diced or cubed hash browns usually take 15–22 minutes at 380–400°F / 193–200°C. Shake every 5–7 minutes and use the lower temperature for larger cubes.

Do hash brown patties need extra oil?

Most frozen hash brown patties already contain enough oil to crisp in the air fryer. A light spray helps only if the surface looks dry or pale during cooking.

Should hash brown patties be stacked in the air fryer?

Keep frozen hash brown patties in a single layer so hot air can reach both sides. Stacking traps steam between the patties, which leaves the middle surfaces soft instead of crisp.

Does parchment paper work for air fryer hash browns?

Perforated parchment or an air fryer-safe liner can help with loose shredded hash browns that fall through wide basket holes. Avoid solid parchment that blocks airflow, and do not preheat with loose parchment inside the basket because it can lift toward the heating element.

What is the best way to reheat hash browns?

The air fryer is the best way to bring back crisp edges. Reheat cooked hash browns at 350–375°F / 175–190°C for 3–5 minutes, depending on thickness.

Why do homemade hash browns turn gummy?

Homemade hash browns usually turn gummy when the grated potatoes hold too much starch and water. Rinse or soak the potatoes first, then squeeze them very dry before adding oil and seasoning.

Which oil works best for air fryer hash browns?

Olive oil, avocado oil, and neutral cooking oils all work. Use enough to lightly coat loose shredded or diced potatoes, but skip extra oil for frozen patties unless they look dry.

Do frozen shredded hash browns go straight into the air fryer?

Frozen shredded hash browns go straight into the air fryer without thawing. Toss them with oil and seasoning, spread them in a thin layer, and cook at 375°F / 190°C for 15–20 minutes, shaking every 5 minutes.

Posted on 1 Comment

Ceramic vs Teflon (PTFE) Cookware: Safety, Heat Limits, Durability & Which to Buy

Ceramic vs Teflon (PTFE) cookware cover—hand holding a PTFE pan with omelette, beige ceramic plate with tomatoes on a green background.

Choosing between ceramic vs Teflon (PTFE) cookware shouldn’t feel like a chemistry exam, yet it often does. From the first search—ceramic vs nonstick, is ceramic better than non stick, which is better: non stick or ceramic?—you meet a maze of claims, temperature myths, and durability debates. Let’s clear the air immediately: at everyday heat, PTFE delivers the slickest glide and usually lasts longer; meanwhile, ceramic-coated (sol-gel) provides a PFAS/PTFE-free surface that many cooks prefer, even if it needs replacing sooner. Either way, respect the basic rules: avoid empty preheats and keep the pan at or below 260 °C / 500 °F (see the Teflon™ safety guidance from Chemours for practical limits and care advice: safety page).


Plain-English Glossary: what we mean by “ceramic,” “PTFE,” and “PFAS”

Before we get deeper into this blog post, it’s important to clarify and explain a few terms which are often used in the industry.

Also Read: How to Choose The Best Cookware For Your Kitchen

PTFE (often marketed as Teflon™)

  • What it is: A fluoropolymer that creates the classic low-friction non-stick surface many people call “Teflon.” (“Teflon™” is a brand; the material is PTFE.)
  • What it feels like in use: Very slick, needs little oil, and—at sensible heat—keeps releasing food for a long time.
  • Care basics: Keep it ≤ 260 °C / 500 °F, don’t preheat empty, use soft tools, hand-wash. See the brand’s safety guidance on everyday use via the Teflon™ safety page (Chemours).
  • What it is not: PFOA (an older processing aid, now phased out by major U.S. producers under the EPA program). PTFE is the coating; PFOA was a past aid, not the cooking surface.

PFAS (the big chemical family)

  • What it is: An umbrella group of fluorinated chemicals with many members; PTFE is one of them. The term covers a wide range of substances, not just cookware coatings.
  • Why you see it on labels: Policy and consumer interest have pushed brands to declare whether a product’s coating contains any fluorinated chemistry.
  • Where to learn more: The ECHA PFAS hub gives a practical overview of the family and the EU’s restriction process.

PTFE-free non-stick (what many “ceramic” pans mean)

  • What it is: A non-stick coating that does not use PTFE. Most modern examples are ceramic-coated surfaces made with a silica-based sol-gel.
  • What it feels like in use: Glass-smooth when new; over time, it usually needs a little more oil as the film wears.
  • Why choose it: You want non-stick without a fluoropolymer coating.
  • What to check: Packaging should state “PTFE-free” or “no fluoropolymer coating.” If it only says “PFOA-free,” that doesn’t automatically mean it’s PTFE-free.

Ceramic-coated / sol-gel (not pottery)

  • What it is: A thin, glass-like film baked onto a metal pan (aluminum or steel). Think of it as a hard, slick clearcoat—not a clay pot.
  • How it cooks: Responsive and smooth at first; with repeated high heat or abrasive scrubbing, the surface can become less slippery sooner than PTFE.
  • Care basics: Moderate heat, soft tools, gentle cleaning. Treat it like a finish, not armor.
  • What it is not: Traditional ceramic cookware (stoneware, porcelain). Those are thick ceramic bodies; “ceramic-coated” skillets are metal with a thin coating.

Why this glossary matters:

  • When a label says “PFAS-free,” it claims no fluorinated chemicals in the coating.
  • When it says “PTFE-free,” it means no fluoropolymer coating—but other PFAS may or may not be present unless the brand states PFAS-free explicitly.
  • When it says “PFOA-free,” that tells you a past processing aid isn’t used, but it doesn’t tell you whether the pan’s coating is PTFE or ceramic. Read the spec sheet so you’re comparing like-for-like.

Ceramic vs Teflon: the quick picture you can cook with

Non stick should make food move on your terms. Ceramic pans vs nonstick (PTFE) cookware feel similar when new; both are smooth and forgiving. However, after months of breakfasts and hurried cleanups, differences show. Ceramic’s silica-based sol-gel film can lose slickness faster with repeated heat and abrasion. Conversely, PTFE’s ultra-low surface energy keeps eggs, dosas, and crêpes gliding with less oil—so long as you keep the heat sensible. Thus, for everyday breakfast duty and delicate fish, ceramic vs Teflon typically tilts toward PTFE for longevity.

Still, the difference between ceramic and non stick isn’t only performance. It’s also chemistry and comfort level. If you want to avoid PFAS entirely, ceramic makes that easier. If you care most about a low-friction glide that stays stable, PTFE is the pragmatic choice.

Also Read: Perfect Dosa Idly Batter: Your Guide to Fluffy Idlis and Crispy Dosas


What these coatings really are (and why that matters)

Ceramic vs nonstick: the materials story

Ceramic non stick isn’t pottery. It’s a thin sol-gel coating—think a glass-like network—applied over metal. Because it cures into a hard film, it feels crisp and clean out of the box. Even so, the film ages: repeated heating and scouring raise surface roughness, and the pan demands a touch more oil. That’s why you often hear ceramic frying pan vs non stick stories that begin with “amazing at first” and end with “fine, but less slippery.”

PTFE vs ceramic: the low-friction advantage

PTFE is a fluoropolymer known for exceptionally low surface energy. Consequently, food releases with minimal force and keeps doing so across many cycles. Respect its ceiling—260 °C / 500 °F—and never preheat empty. Follow those habits and a PTFE skillet usually retains slickness longer than a comparable ceramic pan. For brand-side clarity on limits and myths, see Teflon™ Myths & FAQ (here).

Also Read: The Copper Cookware Journey


Safety made plain: heat, PFOA, and what changed recently

Heat sanity check: Keep any non-stick at or below 260 °C / 500 °F. Don’t preheat empty. Use ventilation. Those three habits keep you well below temperatures where PTFE begins to fume and where any coating—PTFE or ceramic—ages fast.

Ceramic vs Teflon safety: first principles

Two points simplify the anxiety. First, PTFE ≠ PFOA. PTFE is the non stick coating; PFOA was a legacy processing aid. In the United States, major producers phased out PFOA under the EPA’s 2010/2015 PFOA Stewardship Program; the agency’s summary sits here: EPA fact sheet. Hence, modern branded PTFE cookware is generally made without PFOA.

Second, classification headlines need context. In December 2023, the International Agency for Research on Cancer (IARC) evaluated PFOA as carcinogenic to humans (Group 1) and PFOS as possibly carcinogenic (Group 2B). The 2025 Volume 135 page expands details (see IARC’s news note and Volume 135). That assessment addresses PFOA/PFOS exposure, not typical use of today’s PFOA-free PTFE pans.

Also Read: Buying a Cast Iron Skillet? 5 Warnings Before You Invest

Heat control: where ceramic vs non stick actually converges

In practice, both coatings demand moderate burners. Clinical and manufacturer sources align: PTFE can begin to fume near 260 °C / 500 °F; polymer-fume fever in people typically appears around 350 °C / 662 °F, and pyrolysis accelerates above ~400 °C / 752 °F. Therefore, cook low-to-medium, use your hood, and avoid empty preheats. A concise clinical summary lives on StatPearls / NCBI Bookshelf: polymer fume fever. Ceramic coatings, while PFAS-free, also suffer with sustained high heat; their film roughens and release declines. In short, ceramic vs non stick is less about “which survives abuse” than “which you treat kindly.”


Ceramic pans vs nonstick in real kitchens: how performance ages

Ceramic non stick vs non stick (PTFE): month-two and beyond

The first weeks often feel close. A ceramic pan vs non stick PTFE skillet both flip omelettes and glide pancakes. Gradually, though, ceramic’s sol-gel surface needs more fat to prevent micro-sticking. Meanwhile, PTFE keeps its advantage—provided you stick to the basics: ≤ 260 °C / 500 °F, soft tools, and hand-washing. That’s why ceramic nonstick vs regular nonstick discussions usually land on a simple conclusion: ceramic for PFAS-free, PTFE for long-term glide.

Ceramic coated pans vs Teflon: searing, saucing, and fond

What about dinner? Searing steaks or using a broiler is rough on any non stick. Here, ceramic cookware vs Teflon vs stainless steel becomes an easy triangle: stainless (or carbon steel) for the high-heat sear and fond, then PTFE (or ceramic) for sticky sauces and delicate finishes. Rather than forcing one pan to do everything, assign roles and watch the coatings last longer.


Substrate matchups: ceramic non stick vs stainless steel, aluminum, and more

Ceramic non stick pans vs stainless steel

Uncoated stainless excels at browning, Maillard depth, and pan sauces. It does not promise effortless release. Consequently, ceramic vs non stick cookware is really a choice between coated convenience and uncoated versatility. Many cooks keep both: a stainless sauté for fond and a PTFE skillet for eggs.

Ceramic non stick vs aluminum non stick (and vs stainless steel)

Bare aluminum spreads heat evenly but typically receives a coating to become non stick. Therefore, ceramic non stick vs aluminum non stick usually reduces to coating type (sol-gel vs PTFE) and quality. If you want a PFAS-free message, pick ceramic; if you want longevity, PTFE still tends to prevail—again, at sensible heat.

Also Read: Classic vs. Authentic Alfredo: 5 Essential Recipes


Air fryers, griddles, and specialty appliances

Ceramic vs Teflon air fryer: respect the hotspots

Air fryers introduce another variable: proximity to heating elements. Local hotspots can exceed your setting near the coil. Consequently, ceramic vs Teflon air fryer comparisons need caution. Choose PTFE for the slickest cleanup if you run conservative temps; choose ceramic for PFAS-free peace of mind. In both cases, stick to the appliance rating, avoid metal tools, and clean with non-abrasive pads.

Ceramic griddle vs nonstick griddle; ceramic vs non stick skillet

Flatbreads, pancakes, and sandwiches highlight small technique differences. A nonstick griddle with PTFE often keeps a wider comfort zone over months of use. A ceramic griddle works well early and still performs later with a bit more oil. Likewise, a ceramic vs non stick skillet shows the same arc: similar at first, diverging slowly as cycles accumulate.

Also Read: 12 Common Air Fryer Mistakes You Could Be Making


Marketing language, decoded without the hype

Ceramic coated cookware vs Teflon; ceramic vs Teflon vs granite; titanium and friends

Labels sound fancy. “Granite,” “diamond,” and “titanium” often refer to reinforcements or brand families—not necessarily different base chemistries. Hence, ceramic coated vs non stick is a structural question: Is this sol-gel ceramic or PTFE? Read the tech sheet, not just the box.

GreenPan vs Teflon; Greblon coating vs Teflon; George Foreman ceramic vs Teflon

Brand lines evolve across years and models. Some Greblon lines are PTFE; others are ceramic. Some “eco-ceramic” lines are sol-gel. Even George Foreman grills have used different finishes. Therefore, confirm the current coating on the exact model you plan to buy.

Ceramic coated vs ceramic cookware; ceramic vs ceramic coated cookware; ceramic vs non ceramic

Strictly speaking, “ceramic cookware” might mean pottery or stoneware. Most “ceramic non stick” skillets are metal pans with a ceramic-like sol-gel film. Meanwhile, ceramic vs non ceramic usually means “coated vs uncoated.” As a result, define your terms first, then compare like-for-like.


Heat habits that actually extend lifespan (for both coatings)

Because routine beats marketing, build a short ritual that protects either surface:

  1. Preheat briefly on low–medium, not full blast. Give the pan 10–20 seconds, then add fat and food.
  2. Respect the ceiling—≤ 260 °C / 500 °F. The figure appears in manufacturer guidance and plain-language explainers; see Teflon™ safety for the brand view (safety page).
  3. Cool before cleaning. Thermal shock fatigues both coating and base.
  4. Use soft tools. Wood, silicone, or nylon on the cooktop; non-abrasive pads in the sink.
  5. Retire damaged pans. Deep scratches, flaking, or rough patches signal the end of the line.

With those habits, ceramic vs Teflon becomes a calm, predictable choice rather than a noisy argument.

Also Read: 10 Examples of Egg Dishes, with 2 Eggs


Regulations in 2025: why labels keep shifting

Policy never flips your omelette, yet it shapes packaging and claims. In the European Union, a broad PFAS restriction continues to advance. The European Chemicals Agency (ECHA) announced a timeline in August 2025 and aims to complete the scientific evaluation by end-2026; track updates via the timeline announcement and the PFAS hot-topics hub.

In the United States, the federal anchor is the earlier PFOA phase-out, but states diverge. In October 2025, California’s governor vetoed a bill that would have broadly banned PFAS in cookware and several other product categories, citing concerns over affordability and scope. For coverage and reactions, see The Guardian’s reporting (story 1, story 2). Expect more “PFAS-free” claims, stricter documentation requests from retailers, and a steady shift in brand language.


Buying quickly, but wisely (without turning it into a spreadsheet)

Here’s a simple, narrative way to decide—no checkboxes, just honest alignment with how you cook:

  • If your day starts with eggs or crêpes, and you want results with little oil, PTFE is the path of least resistance. Months later, it still glides—assuming you respect heat.
  • If you value PFAS/PTFE-free cookware above all, ceramic fits your priorities. You’ll likely add a little more fat after a while and replace the pan sooner; nonetheless, you’ll feel good about the chemistry profile.
  • If you sear hard or broil often, neither coating is ideal for that step. Use uncoated cast iron or carbon steel for the high-heat moment, then move to PTFE vs ceramic for sticky sauces and gentle finishes.
  • If you love one-pan dinners, PTFE gives you the widest margin for error at moderate heat. Ceramic can do it too; it simply rewards a gentler burner and softer cleaning.
  • If you batch-cook on a griddle, a nonstick (PTFE) griddle tends to keep a forgiving surface across months of use. A ceramic griddle works well early and remains useful later with slightly more oil.

In short, the answer to is ceramic cookware better than nonstick or is ceramic better than Teflon becomes personal: do you prize chemistry or longevity?

Also Read: Top 10 Iron Rich Vegetables to Help Cure Anemia & Boost Hemoglobin


Final word: put your pan where it performs

After all the research, ceramic vs Teflon (PTFE) cookware comes down to how you cook, not just what the box promises. For the slickest glide and the longest non stick life at everyday heat, PTFE remains the practical winner. For a PFAS/PTFE-free option that shines on low–medium burners, ceramic delivers—just expect a shorter slickness window. Either way, technique beats hype. Preheat with patience. Ventilate. Use soft tools. Hand-wash. Retire tired pans. With that rhythm, ceramic vs non stick stops being a debate and becomes a calm, confident choice that fits your kitchen.


FAQs

1) Is ceramic cookware better than nonstick?

In short, it depends on what you value. Ceramic (sol-gel) is PTFE-free and feels glass-smooth when new; however, it usually loses slickness sooner. Traditional nonstick (PTFE) stays slippery longer at everyday heat; conversely, it isn’t ideal for very high-heat searing. Choose chemistry preference (ceramic) or longevity/slickness (PTFE).

2) Which is better: non stick or ceramic?

Generally, for eggs, crêpes, and delicate fish, PTFE wins on effortless release and lifespan. Ceramic still works beautifully at low–medium heat; nonetheless, expect to use a touch more oil as months pass.

3) Ceramic vs Teflon (PTFE) Cookware: what’s the real difference?

Ceramic uses a silica-based sol-gel film baked onto metal; Teflon (PTFE) is a fluoropolymer coating. Moreover, ceramic is PTFE-free; PTFE is the classic ultra-low-friction surface that tends to last longer when used within temperature limits.

4) Ceramic pans vs nonstick: which lasts longer?

Typically, PTFE lasts longer in day-to-day kitchens. Ceramic can still serve well; even so, repeated high heat and abrasive cleaning shorten its slickness window faster.

5) PTFE vs ceramic: which is safer?

Both are considered safe at normal cooking temperatures when used correctly. Therefore, keep heat moderate, avoid empty preheats, ventilate, and retire damaged pans. Safety hinges more on how you cook than on the logo.

6) Ceramic coated pans vs Teflon: do I need different care?

Yes—though there’s overlap. Use soft tools, hand-wash, and avoid harsh scourers. Additionally, keep either type at sensible heat; ceramic, especially, benefits from gentle burners and non-abrasive cleaning.

7) Are ceramic frying pans better than Teflon for breakfast?

Often not over time. PTFE’s lower sticking threshold helps omelettes glide with less oil month after month; ceramic works early on, yet gradually needs more fat. Consequently, many breakfast-heavy cooks prefer PTFE.

8) Ceramic cookware vs non stick: which handles searing?

Neither coating loves intense searing or broilers. Instead, use uncoated cast iron or carbon steel for high-heat tasks; then, return to ceramic or PTFE for sticky sauces and gentle finishes.

9) Does ceramic cookware have Teflon?

No—“ceramic-coated” typically means PTFE-free. Importantly, confirm you’re buying a ceramic (sol-gel) coating rather than a ceramic-sounding marketing name over PTFE.

10) Ceramic cookware vs Teflon vs stainless steel: when should I use each?

Think in roles. Stainless excels at browning and fond; PTFE rules easy release; ceramic offers a PTFE-free option for moderate heat. Ultimately, a mixed toolkit covers every job.

11) Ceramic frying pan vs non stick pan: which is more heat tolerant?

Marketing can imply high tolerance; however, real-world guidance for both is similar: moderate burners, no empty preheats, and avoid direct flames licking the sides. Exceeding limits ages any coating quickly.

12) Ceramic non stick vs aluminum non stick vs stainless steel—what’s the difference?

Aluminum is a great heat conductor but needs a coating (ceramic or PTFE) for release. Stainless is uncoated and excels at searing; similarly, it demands technique to prevent sticking. Consequently, pick based on recipe and cleanup needs.

13) Ceramic or non stick: which is better for low-oil cooking?

For sustained low-oil cooking, PTFE usually maintains glide with less fat. Ceramic can deliver low-oil results when new; nonetheless, a little extra oil may be needed as the coating ages.

14) Ceramic vs Teflon (PTFE) cookware: which coating is more durable with daily use?

PTFE generally resists sticking for longer under repeated cooking and gentle cleaning. Ceramic durability improves if you keep heat modest, avoid stacking scratches, and wash softly.

15) Ceramic nonstick vs regular nonstick: is there a taste or odor difference?

Usually no. However, overheating any coating can produce off-odors and faster wear. Therefore, stay within recommended temperatures for clean flavors and longer life.

16) Ceramic vs non stick skillet: what size and base should I buy?

Choose a flat, thick base for even heat—28–30 cm suits most homes. Additionally, ensure the base matches your cooktop (including induction if needed). A snug lid helps with gentle finishes on either coating.

17) Ceramic vs Teflon air fryer baskets: which cleans easier?

PTFE baskets often wipe clean with less effort, especially after months of use. Ceramic baskets clean well when new; even so, avoid abrasives and keep temps within the appliance rating to preserve slickness.

18) Ceramic coated cookware vs Teflon: will acidic foods damage them?

At moderate heat, tomato sauces and citrus are fine on both. Conversely, prolonged high heat is tougher on any coating—keep flames reasonable and stir often.

19) Is ceramic coating better than Teflon for health?

If your priority is avoiding fluoropolymer coatings altogether, ceramic aligns with that preference. Otherwise, at everyday temperatures and with good ventilation, both are considered safe when used as directed.

20) Ceramic vs non stick griddle: which is best for pancakes and dosa?

Over months, a PTFE griddle usually keeps a wider margin for error and needs less oil. Ceramic still works; nonetheless, expect to refresh with a light oil film as the surface ages.

21) Ceramic vs Teflon vs “granite” or “titanium”: are those different chemistries?

Often those words are brand lines or reinforcements, not a new base chemistry. Consequently, verify whether the pan uses PTFE or ceramic underneath the marketing term.

22) Ceramic coated vs ceramic cookware: are they the same?

No. “Ceramic-coated” skillets are metal pans with a thin glass-like film. “Ceramic cookware” can also mean pottery/stoneware. Different materials, different behavior.

23) Is ceramic non stick better than Teflon for beginners?

Beginners often find PTFE more forgiving because it releases with less oil and tolerates small timing errors. Even so, ceramic suits beginners who keep heat modest and clean gently.

24) Which lasts longer: ceramic non stick pan vs Teflon (PTFE) cookware pan?

All else equal, PTFE pans tend to outlast ceramic in non-stick performance at everyday heat. Therefore, if longevity is your top priority, PTFE is the safer bet.

25) Ceramic vs non stick cookware: what’s the smartest combo for a small kitchen?

Go with a PTFE skillet for breakfast and quick, sticky dishes; add one uncoated pan (stainless or cast iron) for searing and oven work. Meanwhile, if you want a PTFE-free option, keep a ceramic skillet for low–medium tasks. This trio covers nearly everything without clutter.


Further reading (already linked inline)

Posted on 1 Comment

Metabolism Boosting Spices: 10 Best Options + Easy Mixes

Hands arranging small wooden bowls of metabolism boosting spices - turmeric, ground ginger, cayenne, cinnamon sticks, cumin seeds, fenugreek, saffron, and black peppercorns on a wooden table—ingredients for simple spice mixes that support satiety and steady energy.

Sometimes the smallest changes do the most. Metabolism boosting spices won’t remake a meal on their own; however, they can gently steady appetite, nudge post-meal thermogenesis, and smooth out energy across the day. When you season consistently—and when you pair flavor with simple routines—those quiet nudges begin to add up. Moreover, you’ll find they slot into foods you already enjoy, which means adherence feels natural rather than forced.


How metabolism boosting spices actually help

To begin with, think of spices as adjustable dials rather than switches. Some, like cayenne, appear to slightly increase energy expenditure after eating; others, like cinnamon, help blunt post-meal glucose bumps; still others, like fennel and saffron, tend to soften snack impulses. In other words, these aren’t fireworks; they’re guardrails. Furthermore, a pinch at breakfast, another at lunch, and something warm in the evening often leads to fewer crashes, fewer “is there anything sweet?” moments, and—eventually—more predictable days.


Cayenne (Capsaicin): a warm spark among metabolism boosting spices

There’s a particular magic to cayenne: a little warmth, a little color, and suddenly a simple plate feels vibrant. Within the world of metabolism boosting spices, cayenne earns its place because a tiny pinch can lift thermogenesis without requiring you to set your tongue on fire.

Use it today. Stir ⅛–¼ teaspoon into scrambled eggs; alternatively, whisk a pinch into lemon-ginger tea on cool mornings; or dust roasted carrots, sweet potato, or chickpeas right before they leave the oven. Additionally, finish dal tadka with a whisper of cayenne so the aroma stays lively. If you’re spice-sensitive, pair it with tomato or yogurt to soften the heat.

Keep it delicious. Cayenne loves citrus, garlic, and creamy textures. Consequently, olive oil + cayenne + lemon zest on grain bowls tastes intentional with almost no work.

Why it belongs here. A meta-analysis in the British Journal of Nutrition associated capsaicin with modest but significant reductions in body weight, BMI, and waist circumference in adults with overweight or obesity (Zhang et al., 2023). Moreover, mechanistic reviews describe capsaicin’s thermogenic pathways in detail (Zheng et al., 2017, Bioscience Reports).

Related MasalaMonk read: Cayenne Pepper for Weight Loss: Spicing Up Your Diet Plan! 🌶️ and then balance warmth and brightness with Cinnamon & Lemon for Belly Fat: Benefits, Evidence & Usage Tips.


Ginger: cozy, versatile, and quietly powerful for metabolism boosting spices

Ginger is the weekday friend that always shows up. Because it slips into tea, stir-fries, soups, chutneys, and smoothies, you can lean on it repeatedly without getting bored. Meanwhile, many people notice that ginger’s gentle heat calms “just a bite” impulses between meals.

Use it today. Grate ½–1 tsp fresh ginger into quick sautés; or simmer slices with water and lemon for a pre-lunch tea; or blend ¼ tsp ground ginger into a curd-and-berry smoothie; finally, stir a little into tomato curries or lentil soups right before serving.

Flavor pairings. Ginger brightens citrus; it mellows beautifully with honey; and, notably, it pairs seamlessly with soy-garlic-chili profiles. In Indian-style broths, ginger + black pepper + turmeric deliver warmth without heaviness.

What to expect. A synthesis in Nutrition Reviews pooling 27 randomized trials found ginger associated with reductions in body weight (~1.5 kg), BMI, waist circumference, and body-fat percentage compared with control (Rafieipour et al., 2024).

Keep going: build a comforting ritual with Turmeric, Ginger & Cinnamon Tea for Weight Loss and explore everyday uses in Ginger and Its Stunning Health Benefits.


Cinnamon (prefer Ceylon): breakfast’s best friend in metabolism boosting spices

Open a jar of cinnamon and the morning changes. Suddenly, oats, yogurt, and coffee feel like a plan rather than a scramble. In practice, cinnamon’s cozy sweetness helps many people steady the first half of the day; consequently, snacking tends to cool down.

Use it today. Stir ¼–½ tsp into oats or curd; additionally, dust it over coffee; or blend into a protein-and-fiber smoothie (banana + curd + ground flax); or simmer with stewed apples/pears and spoon over yogurt. In savory cooking, add a tiny pinch to tomato gravies or slow-cooked beans.

Smart notes. If you use cinnamon daily, prefer Ceylon (lower coumarin). Cassia, by contrast, works well in bolder dishes in smaller amounts.

What to expect. Controlled-trial syntheses report small but significant improvements in weight, BMI, and waist–hip ratio with cinnamon compared with control (Yazdanpanah et al., 2020, Clinical Obesity; Mousavi et al., 2020, Clinical Nutrition ESPEN).

Next steps: kitchen-level ideas live in Cinnamon for Weight Loss and Cinnamon Water to Reduce Belly Fat.


Turmeric + Black Pepper: the absorption duo of metabolism boosting spices

Turmeric has a reputation; yet, without pepper, much of it doesn’t land. Because piperine in black pepper dramatically improves curcumin absorption, this partnership is the rare “1 + 1 = 3” in seasoning.

Use it today. Stir ½ tsp turmeric into dals, soups, scrambled eggs, or golden milk; subsequently, finish with freshly cracked pepper and a little fat (ghee, olive oil, or coconut milk). Add pepper at the end so aromatics—and piperine—stay vivid.

Why the pairing matters. An umbrella review with updated analyses in the American Journal of Clinical Nutrition linked curcumin with reductions in BMI, weight, and waist circumference, with bioavailability-enhanced forms performing best (Unhapipatpong et al., 2023). Additionally, classic pharmacokinetic work showed 20 mg piperine increased curcumin bioavailability roughly twenty-fold in humans (Shoba et al., 1998, Planta Medica).

More ideas: practical pairing notes appear in Exploring the Science Behind Turmeric & Ginger for Effective Weight Loss.


Cumin (Jeera): a subtle cornerstone of metabolism boosting spices

Some flavors are so foundational that you miss them only when they’re absent. Cumin is that flavor. Freshly toasted and ground, it makes food taste “finished,” which—interestingly—often encourages smaller, more satisfying portions.

Use it today. Toast whole cumin seeds until fragrant; then cool, grind, and keep the jar beside your salt. Sprinkle ½ tsp on raita or chopped salads; fold into chickpea salads and lemony rice; or simmer jeera water in the morning and sip slowly.

Keep it bright. A squeeze of lime over cumin-forward dishes keeps them lively. Likewise, a handful of herbs (cilantro, mint) makes the same bowl feel new.

What to expect. In a three-month study within a reduced-calorie plan, 3 g/day cumin powder mixed into yogurt improved weight, BMI, waist, fat mass, and lipids versus control (Complementary Therapies in Clinical Practice: Zare et al., 2014). Related work in Annals of Nutrition & Metabolism reported benefits for weight-management markers in overweight adults (Taghizadeh et al., 2015).

Build a morning rhythm: sip ideas from Morning Metabolism Boost: 5 Green Tea & Spice Infusions.


Fenugreek (Methi): fullness first in metabolism boosting spices

Fenugreek is the quiet nudge toward “that’s enough.” Because its subtle bitterness gently raises satiety, it’s perfect for moments when second helpings usually appear out of nowhere.

Use it today. Soak a spoon of whole seeds overnight and chew before lunch; alternatively, whisk ½ tsp powdered methi into chapati flour; or temper a pinch in tadkas, sambars, and rustic tomato gravies. Additionally, a light fenugreek tea 20–30 minutes before your usual snack window can take the edge off.

Balance the taste. If bitterness feels new, add lemon or a touch of honey in drinks; in curries, rely on onion-tomato bases and a little fat to round it out.

What to expect. In a randomized, placebo-controlled, three-way crossover trial, fenugreek tea reduced short-term appetite ratings in overweight women versus control (Clinical Nutrition Research: Bae et al., 2015). Although the trial was brief, the satiety signal is practically useful.

Pair with brightness: a morning start using Lemon–Ginger–Turmeric Water complements methi beautifully. Also more about it in our post Fenugreek: An Appetite Suppressant for Weight Management.


Saffron: a graceful curb on grazing within metabolism boosting spices

Saffron doesn’t shout; it elevates. Because it turns simple sips into something special, it often softens the “I need a snack” itch without feeling punitive.

Use it today. Steep 3–4 strands in hot water; then add to milk with a hint of cardamom; or crumble into delicate broths; or fold into basmati rice with peas and toasted nuts. Notably, the luxury of saffron makes small portions feel complete.

What to expect. A double-blind trial linked a standardized saffron extract with less snacking and greater weight loss over eight weeks among mildly overweight women versus placebo (Nutrition Research: Gout et al., 2010). For broader context—and supplement-quality notes—see the overview by Mashmoul et al., 2013 (Journal of Nutrition & Food Sciences).

Also Read: Saffron: The Golden Spice for Weight Loss and Appetite Control


Ajwain (Carom): digestive support in the family of metabolism boosting spices

Ajwain is the friend you invite to keep things comfortable. Although it’s not a direct fat-loss driver in human trials yet, its digestive profile makes heavier meals feel lighter; therefore, it helps you stay consistent.

Use it today. Dry-roast and grind; add a tiny pinch to buttermilk, raita, or the jeera–ajwain–saunf mix below; sprinkle over roasted cauliflower with lemon and cilantro; or fold into paratha dough for a delicate, minty-herbal edge.

Evidence status. Weight-change trials in humans are limited. Nevertheless, a broad review describes thymol-rich seeds, digestive support, and antimicrobial notes (Boskabady et al., 2014, Iranian Journal of Basic Medical Sciences).

Also Read: Ajwain Benefits for Weight Loss: Unraveling the Secrets


Fennel (Saunf): a gentle evening finish among metabolism boosting spices

Fennel tastes like dessert’s cousin—sweetly herbal, soothing, and perfect for closing the kitchen. No wonder, many people find that a fennel ritual reduces night-time rummaging.

Use it today. Chew 1 tsp after dinner; or brew a light tea; or crush lightly and add to spice mixes; or bloom in oil for tomato-based sauces. Furthermore, fennel tea plus a slow 10-minute walk is a remarkably effective “day is done” signal.

What to expect. In the same crossover work that tested fenugreek tea, fennel tea lowered short-term hunger ratings in overweight women compared with control (Clinical Nutrition Research: Bae et al., 2015). Because the study was brief, consider fennel appetite support rather than a primary driver.

Also Read: Guide to Fennel Seeds and Weight Loss


Black Pepper (Piperine): the multiplier inside metabolism boosting spices

Freshly cracked pepper is habit-forming—in the best way. While it doesn’t appear to raise 24-hour energy expenditure on its own, it does multiply turmeric’s usefulness; therefore, it’s the “always add” move whenever curcumin is in the picture.

Use it today. Grind pepper over any turmeric dish—dal, soups, eggs, or golden milk—right at the end. Additionally, finish salads, eggs, and roasted veg with a quick crack to tie flavors together.

What to expect. Whole-room calorimetry found no change in 24-hour energy expenditure with black pepper alone (Functional Foods in Health & Disease: O’Connor et al., 2013). Conversely, piperine boosted curcumin bioavailability roughly twenty-fold in humans (Shoba et al., 1998, Planta Medica), which is why pepper belongs in every turmeric recipe.

Do Read: 8 Benefits of Black Pepper for Weight Loss


Two metabolism boosting spices blends you’ll actually use all week

Jeera–Ajwain–Saunf Powder (all-purpose, digestion-forward)

You’ll need: cumin (2 tbsp), ajwain (1 tbsp), fennel (1 tbsp)
Method: First, dry-roast each spice separately over medium heat until fragrant. Next, cool completely. Then grind to a fine powder and store airtight.
How to use: Stir ½ tsp into raita; sprinkle over cucumber–tomato salads; whisk ¼ tsp into warm water after meals 1–2×/day; add a pinch to paratha dough or khichdi.
Variations: Prefer a softer finish? Tilt the blend toward fennel. Want a minty nip? Nudge the ajwain slightly higher. If reflux flares, keep ajwain modest and pair with yogurt or buttermilk.

Turmeric–Ginger Tea (pepper-boosted)

You’ll need: water (250 ml), grated ginger (½ tsp or ¼ tsp powder), turmeric (½ tsp), a pinch of black pepper, optional cinnamon stick, lemon
Method: Simmer water with ginger and turmeric for 5 minutes. Then turn off heat, add pepper, steep 1 minute, strain, and finish with lemon.
How to use: One cup with breakfast or before a brisk walk works well. If evenings are your soft spot, let this be your “kitchen is closed” cue.
Why pepper matters: as noted earlier, piperine multiplies curcumin’s availability in humans, which is exactly why this pairing belongs in a plan built around metabolism boosting spices.


A 14-day, zero-overwhelm rotation (to make metabolism boosting spices stick)

Swap freely as life happens; nevertheless, this structure keeps momentum while steadily weaving metabolism boosting spices into everyday meals.

Day 1

Breakfast: Oats with curd, chia, and cinnamon; additionally, finish with a light crack of black pepper on top if you swirl in turmeric.
Lunch: Lemon-cumin cucumber salad alongside dal tempered with turmeric + pepper; moreover, add a squeeze of lime for lift.
Evening: Fennel tea; consequently, the gentle sweetness helps close the kitchen without cravings.

Day 2

Breakfast: Soft ginger scramble with a whisper of cayenne; alternatively, fold ginger into besan for a quick chilla.
Lunch: Chickpea salad dressed with toasted cumin, garlic, and lemon; furthermore, scatter herbs for freshness.
Dinner: Turmeric–ginger tea (pepper-boosted); meanwhile, keep portions calm with a small side of yogurt.

Day 3

Breakfast: Curd, banana, and cinnamon with ground flax; consequently, the combo rides steady till lunch.
Lunch: Tomato–ginger soup finished with ghee infused with turmeric + pepper; likewise, add a side of steamed veg.
Evening: Warm saffron milk with a hint of cardamom; afterward, lights low to signal “day is done.”

Day 4

Breakfast: Avocado toast with cayenne and cracked black pepper; additionally, a squeeze of lemon brightens the heat.
Lunch: Khichdi sprinkled with jeera–ajwain–saunf powder; meanwhile, a carrot salad adds crunch.
Dinner: Fennel tea and a slow 10-minute walk; consequently, late-night snacking fades.

Day 5

Breakfast: Smoothie (curd, berries, ginger, cinnamon); besides that, add chia for extra fiber.
Lunch: Grilled vegetables tossed with cumin and lemon; alternatively, serve over quinoa.
Evening: Turmeric–ginger tea (pepper-boosted); then, kitchen closed.

Day 6

Breakfast: Masala omelette (tomato, onion, ginger) finished with turmeric + pepper; likewise, a side of fruit.
Lunch: Lentil soup brightened with lime and toasted cumin; additionally, a cucumber salad cools things down.
Dinner: Light saffron broth; consequently, you end satisfied, not stuffed.

Day 7

Breakfast: Warm curd bowl with stewed apples and cinnamon; meanwhile, walnuts add crunch.
Lunch: Dal–rice with ghee infused with turmeric + pepper; furthermore, sprinkle fresh coriander.
Evening: Ginger–fennel tea; finally, an easy book instead of screens.

Day 8

Breakfast: Ginger-spiked besan chilla; subsequently, a spoon of mint raita.
Lunch: Raita seasoned with jeera–ajwain–saunf alongside a mixed-veg pulao; in the end, finish with lemon.
Dinner: Saffron tea; nonetheless, if hungry, add a few almonds.

Day 9

Breakfast: Overnight oats with cinnamon and orange zest; consequently, a bright, steady start.
Lunch: Tomato dal tempered with turmeric + pepper; likewise, a quick salad with toasted cumin.
Evening: Fennel tea; additionally, a short stretch helps digestion.

Day 10

Breakfast: Poha with grated ginger and a pinch of cayenne; alternatively, swap cayenne for extra lemon if sensitive.
Lunch: Quinoa salad with cumin–garlic–lemon dressing; moreover, toss in chickpeas.
Dinner: Turmeric–ginger tea (pepper-boosted); then, kitchen lights off.

Day 11

Breakfast: Curd with berries and cinnamon; meanwhile, pumpkin seeds add texture.
Lunch: Mixed beans with warm cumin vinaigrette; additionally, chopped onions and herbs for bite.
Evening: Saffron milk; consequently, dessert cravings soften.

Day 12

Breakfast: Savory masala oats with ginger; finally, a last-minute dusting of black pepper.
Lunch: Simple dal with a cucumber–onion salad dusted with jeera–ajwain–saunf; furthermore, add lemon.
Dinner: Fennel tea; alternatively, brew fenugreek tea if evenings are your snack window.

Day 13

Breakfast: Smoothie (curd, spinach, ginger, cinnamon); moreover, a teaspoon of flax keeps it satisfying.
Lunch: Roasted cauliflower with ajwain + cumin + lemon; likewise, a spoon of yogurt steadies spice.
Evening: Turmeric–ginger tea (pepper-boosted); consequently, appetite winds down naturally.

Day 14

Breakfast: Eggs with tomatoes and turmeric, finished at the table with black pepper; additionally, toast on the side.
Lunch: Chickpea curry rounded with cumin and coriander; meanwhile, a fresh salad for crunch.
Evening: Ginger–fennel tea to close the day; finally, a calm bedtime routine seals the habit.


How to keep it flexible: If a day runs long, simply swap the evening sip (fennel, saffron, or turmeric–ginger with pepper) for whichever you can make fastest; meanwhile, carry forward the skipped choice to tomorrow. Consequently, you maintain rhythm while continuing to layer metabolism boosting spices into meals you already cook.


Buying, storing, grinding: the unsexy wins behind metabolism boosting spices

First, buy whole (cumin, fennel, pepper) and grind weekly; aroma—and satisfaction—jump immediately. Second, toast before grinding: a minute in a dry pan releases oils and multiplies flavor; cool fully before grinding. Third, store smartly: dark jars, cool cupboards, tight lids; heat, light, and air steal flavor. Finally, finish smart: add pepper and delicate aromatics near the end so volatile compounds don’t vanish into steam.


Troubleshooting (and effortless swaps)

  • Too hot? Swap cayenne for cinnamon or cumin; keep ginger mostly in tea rather than dry rubs.
  • Too bitter? Temper fenugreek with lemon or a touch of honey; in curries, lean on onion-tomato bases and a little fat.
  • Bored already? Rotate regions: dal one night, cumin-lemon salad the next, ginger-miso broth later in the week.
  • No time? Keep toasted-ground cumin on the counter, fennel by the kettle, and a pepper mill next to the salt—one twist, one pinch, done.
  • No progress yet? Revisit sleep, protein, and steps; metabolism boosting spices make good habits easier, but they don’t replace fundamentals.

Safety and comfort come first

Because your kitchen should make life easier, adjust spices to your context. If you’re pregnant or breastfeeding, on anticoagulants or glucose-lowering medication, or managing reflux or gallbladder issues, tailor doses and check with your clinician as needed. Generally speaking:

  • With reflux, go lighter on cayenne and ginger; lean on cinnamon, fennel, and cumin.
  • On blood thinners, be cautious with turmeric + pepper and avoid concentrated curcumin supplements unless advised.
  • When adjusting glucose-lowering meds, introduce fenugreek carefully and watch for appetite or glycemic shifts.
  • For any spice, start tiny (⅛ tsp), then step up slowly.

Keep exploring (reader-friendly companions)

A closing nudge

None of these is a miracle on its own. Together—and, above all, repeatedly—they tilt your meals in the right direction. A little heat here, a calmer morning there, a cup that closes the kitchen at night: that’s how change actually looks. Pick two ideas that feel easy this week, make them yours, and keep going. The rest will follow.

FAQs

1) Do metabolism boosting spices actually work for fat loss?

Yes—just not like magic. Firstly, spices such as cayenne, ginger, cinnamon, turmeric (with black pepper), cumin, and saffron can nudge thermogenesis, tame appetite, and smooth post-meal energy. Secondly, these nudges are modest; however, they compound when you use them daily alongside balanced meals and movement. Consequently, think “steady assist,” not “instant fat burner.”

2) What spice boosts metabolism the most?

It depends on what you’ll use consistently. Cayenne (capsaicin) offers a gentle thermogenic lift; meanwhile, ginger and cinnamon help with appetite and post-meal comfort. Moreover, turmeric plus black pepper improves curcumin’s impact, while cumin and saffron support satiety and portions. In short, the “best” metabolism boosting spice is the one you’ll enjoy multiple times a week.

3) Which spices burn belly fat specifically?

No spice targets belly fat directly. Nevertheless, fat burning spices can help reduce overall body fat by supporting better adherence—fewer snack attacks, steadier energy, and more satisfying meals. Consequently, belly fat often decreases as part of overall loss when routines stay consistent.

4) What spices increase metabolism for beginners?

Start simple: cinnamon at breakfast, turmeric + black pepper at lunch, and ginger or fennel tea in the evening. Additionally, keep cumin nearby to finish salads and lentils. Importantly, begin with tiny amounts, then scale by taste; meanwhile, track how your appetite and energy respond.

5) Is there a single “spice that burns fat” fast?

Not really. However, a cayenne pinch can warm meals immediately; ginger can curb grazing; and saffron may lower snack urges. Moreover, cinnamon pairs well with protein and fiber for steadier mornings. Ultimately, sustainability beats speed—choose what you can repeat.

6) Do spicy foods boost metabolism more than mild ones?

Often, yes—capsaicin from chilies can increase thermogenesis a bit. Even so, intensely spicy food isn’t required. Instead, a modest sprinkle of cayenne or a mildly spiced curry can be enough. Furthermore, comfort matters: if heat bothers you, choose cinnamon, cumin, turmeric + pepper, ginger, fennel, or saffron for gentler support.

7) How should I use turmeric for weight loss?

Use turmeric with black pepper and a little fat. Firstly, stir ½ tsp turmeric into dal, soup, or eggs; secondly, finish with freshly cracked pepper; finally, include ghee/olive oil/coconut milk so curcumin absorbs better. Additionally, a small turmeric-ginger tea (pepper-boosted) works as an easy daily ritual.

8) Does turmeric speed up your metabolism on its own?

Turmeric helps more when paired with black pepper; otherwise, much of its curcumin isn’t absorbed well. Consequently, you’ll see better results from the duo. Meanwhile, if you’re sensitive to pepper, start with a very small pinch and build up gradually.

9) Is cinnamon good for losing weight?

Cinnamon pairs wonderfully with breakfast protein and fiber, which can reduce rebound hunger. Moreover, it makes oats, curd, and smoothies feel satisfying. Nevertheless, use modest doses and favor Ceylon cinnamon if you use it daily. In short, cinnamon supports the routine that supports the result.

10) What about cumin (jeera) for weight loss?

Cumin is the quiet over-achiever. Toast, grind, and sprinkle ½ tsp on raita, salads, chickpeas, or lentils. Additionally, jeera water in the morning can become a calming habit. While results are modest, the flavor makes portions feel complete; consequently, grazing often drops.

11) Can ginger help with metabolism and fat loss?

Ginger adds cozy warmth and, for many, reduces snack urges. For example, grate it into stir-fries or brew a quick tea 20–30 minutes before your “danger window.” Furthermore, pair ginger with a short walk; together, they often quiet that “just a bite” loop.

12) Are saffron and appetite suppressant spices useful?

Saffron can help some people snack less. A few strands in warm milk or tea feel luxurious; therefore, smaller portions still feel satisfying. Meanwhile, appetite-calming spices like fennel or fenugreek can also help you pause, reassess hunger, and stop earlier—especially at night.

13) Which spices boost metabolism without causing acidity?

Choose cinnamon, cumin, fennel, and saffron first. Additionally, turmeric + black pepper can work if you keep doses small and add fat. Conversely, go lightly with cayenne or strong ginger if you’re reflux-prone; nonetheless, tiny amounts folded into moist dishes are often tolerated.

14) What’s the simplest “weight loss spice mix” I can make at home?

Try a jeera–ajwain–saunf blend. To begin, dry-roast cumin (2 tbsp), ajwain (1 tbsp), and fennel (1 tbsp) separately, then grind and store airtight. Next, use ½ tsp in raita or ¼ tsp in warm water after meals. Moreover, adjust ajwain down if you prefer gentler digestion support.

15) Is black pepper itself a metabolism booster?

Alone, black pepper doesn’t seem to raise 24-hour energy expenditure meaningfully. However—and this is crucial—piperine enhances turmeric’s curcumin absorption, which makes the turmeric + pepper duo a practical everyday move. Consequently, keep a grinder beside your salt and finish dishes at the table.

16) Do “fat burning spices” help if my diet isn’t perfect?

They help most when the basics are steady. Even so, spices can reduce cravings, steady energy, and improve meal satisfaction, which, in turn, makes better choices easier. Additionally, they require almost no time: one pinch, one stir, done. Therefore, think of them as low-effort momentum.

17) How many times per day should I use metabolism boosting spices?

Twice is great; three times is excellent. For instance, cinnamon at breakfast, turmeric + pepper at lunch, and ginger or fennel in the evening. Moreover, keep cumin handy to finish salads or lentils. Importantly, small amounts used daily beat large doses used rarely.

18) Can I lose weight with spices but without exercise?

You can make progress with food habits alone; however, movement amplifies your effort. Meanwhile, even short walks—5 to 10 minutes after meals—improve how you feel and how your body handles food. Consequently, pair your spice routine with light activity whenever possible.

19) Are there side effects or people who should be cautious?

Yes, and it’s wise to personalize. For example, if you’re pregnant or breastfeeding, on blood thinners or glucose-lowering meds, or dealing with reflux/gallbladder issues, start small and check with your clinician. Additionally, listen to comfort: if something feels off, scale back and swap to gentler options.

20) What’s a realistic timeline to notice changes?

Give it 2–4 weeks of consistent seasoning to feel steadier energy and fewer snack impulses. Subsequently, look for small changes: slightly smaller portions, calmer afternoons, and easier evenings. Eventually, as meals feel “enough,” overall intake trends down—and results follow.

21) Which spices suppress appetite most naturally?

Different people respond to different cues. Nevertheless, saffron, fennel, and fenugreek stand out for many. Meanwhile, ginger helps when used before a walk or as a pre-meal tea. Additionally, cinnamon with protein/fiber at breakfast often reduces mid-morning grazing.

22) What’s the best bedtime spice routine for late-night cravings?

Go gentle and soothing. For instance, fennel tea after dinner is light and sweetly herbal; alternatively, saffron milk feels special without being heavy. Furthermore, a turmeric–ginger tea (pepper-boosted) can be calming if you tolerate it well. Consequently, late-night nibbling usually fades.

23) Which spices should I focus on for belly fat and metabolism if I only choose three?

Choose what fits your day:

  • Cinnamon for breakfast stability and fewer sugar crashes.
  • Turmeric + black pepper for a lunch or dinner anchor.
  • Ginger (or fennel at night) for snack control.
    Moreover, add a cumin sprinkle where you can—it’s an easy bonus.

24) What’s the easiest way to keep this going long-term?

Anchor habits to cues you already have. For example, crack pepper whenever you see turmeric; meanwhile, keep cinnamon by your coffee canister; additionally, place fennel near the kettle. Consequently, you’ll season on autopilot and stick with metabolism boosting spices without thinking.