Posted on 2 Comments

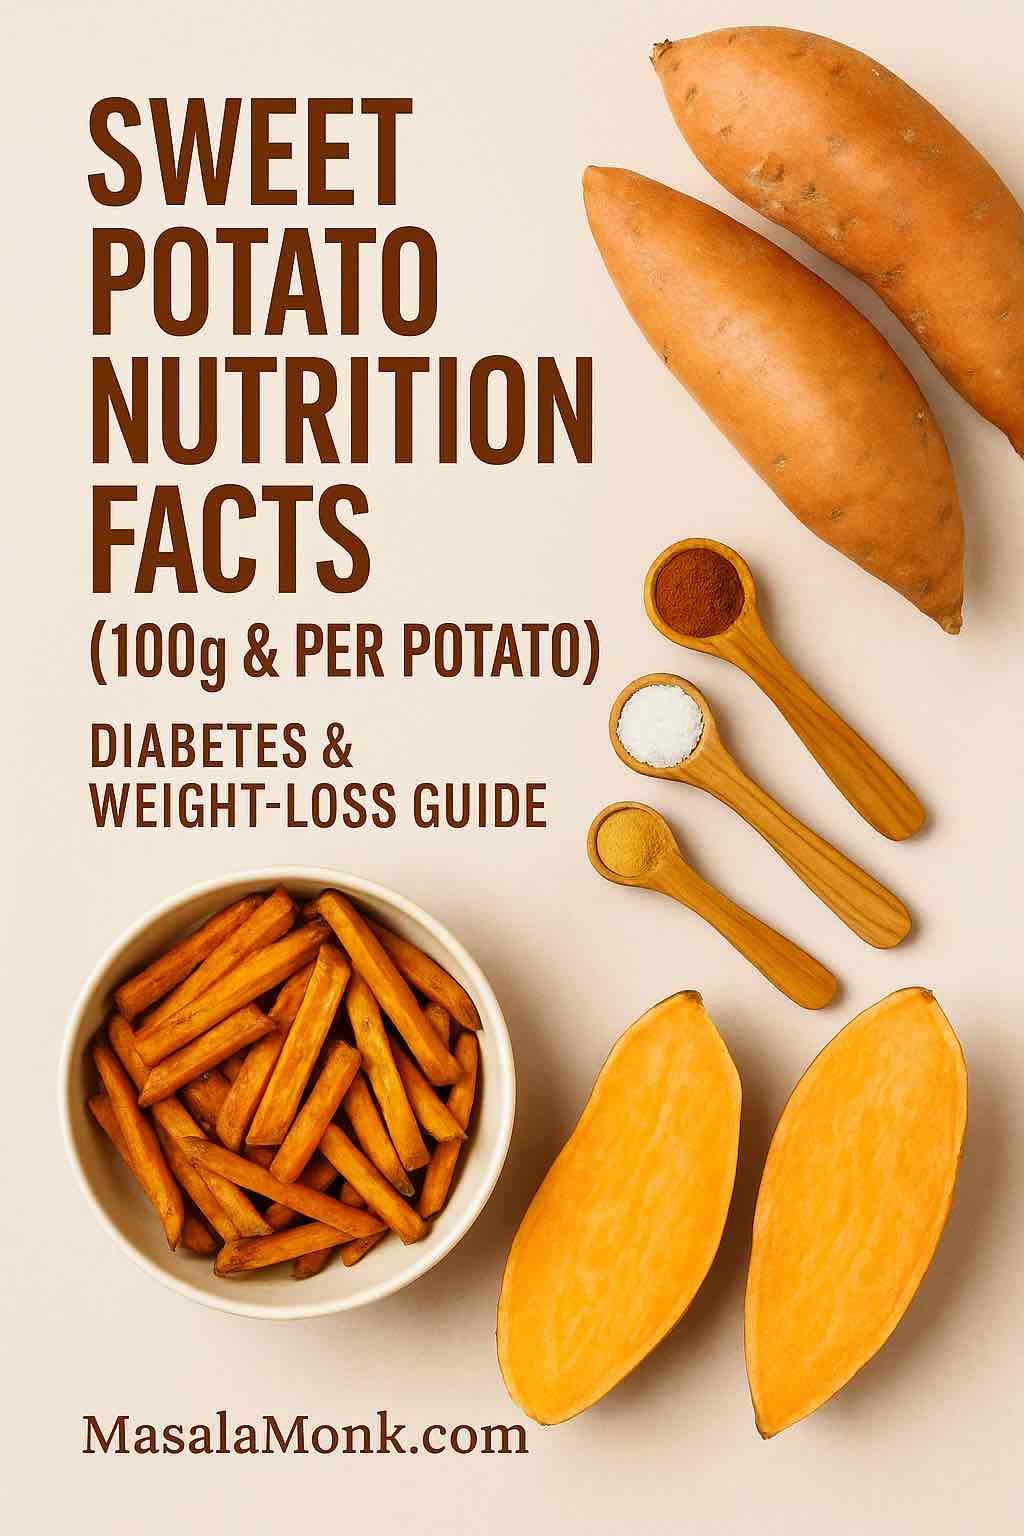
Sweet Potato Nutrition Facts (100g & Per Potato) — Diabetes & Weight-Loss Guide

Sweet potato nutrition facts (100g & per potato) with healthier fries—diabetes-friendly portions and weight-loss tips | MasalaMonk

If you came here for sweet potato nutrition facts, you’re in exactly the right place. Right from the first bite, sweet potatoes deliver comfort; yet, underneath that velvet sweetness lies a nutrition profile that’s both practical and powerful. In this guide, you’ll find per-100 g numbers, per-potato estimates, and deeply usable advice for type 2 diabetes, weight management, and smarter fries. Moreover, you’ll get cooking methods that truly change the numbers, guidance on skins and fiber, clarity on white vs. purple vs. “yams,” and elegant meal blueprints that turn information into dinner. When you want to double-check any figure, lean on authoritative resources like USDA FoodData Central and MyFoodData’s baked sweet potato profile.


Sweet Potato Nutrition Facts (Per 100 g, Cooked): The Label You Can Trust

To begin, let’s ground the discussion in sweet potato nutrition facts per 100 g cooked (typical baked or boiled). These ranges are realistic for home cooks and menu planners:

  • Calories: ~86–103 kcal
  • Carbohydrates: ~20–21 g
    • of which fiber: ~3.0–3.3 g
  • Protein: ~1.6–2.0 g
  • Fat: ~0.1–0.2 g
  • Potassium: ~337 mg
  • Vitamin A (RAE): ~700+ μg (primarily as beta-carotene)
  • Vitamin C: ~2–3 mg
  • Manganese: ~0.3 mg

Additionally, sweet potatoes provide smaller but notable amounts of vitamin B6, copper, magnesium, and pantothenic acid—micronutrients that often slip under the radar yet support energy metabolism and skin integrity. Numbers shift slightly by variety and method; nevertheless, this label-style snapshot is a sturdy, real-world baseline. For raw-to-cooked changes, micronutrient depth, or amino-acid profiles, verify in USDA FoodData Central or the readable label at MyFoodData.

Cook’s note: Keep the skin on whenever possible. It lifts fiber without effort, helps retain water-soluble vitamins, and—delightfully—holds seasonings on the surface.


Sweet Potato Nutrition Facts (Per Potato): What a “Potato” Actually Means

Because shoppers pick tubers—not grams—here are sweet potato nutrition facts per potato using edible-portion estimates. Consequently, you can portion intelligently without a scale:

SizeExample edible weightCaloriesCarbsFiber
Small~120 g~103 kcal~24 g~3–4 g
Medium~160 g~138 kcal~32 g~4–5 g
Large~220 g~189 kcal~44 g~6–7 g

If you’re counting carbohydrates, ½ medium sweet potato is roughly 15–20 g carbs, which dovetails with the common “one carb choice” teaching in diabetes education. For precise cooked forms (boiled flesh only, baked with skin, mashed with milk), cross-check the specific entries on MyFoodData.


Sweet Potato Nutrition Facts for Type 2 Diabetes: The Sensible Playbook

Principle #1: budget carbohydrates rather than banning foods. Because carbohydrates influence blood glucose most, the American Diabetes Association recommends carb counting and flexible planning rather than rigid restrictions: see Carb Counting & Diabetes. Additionally, the CDC offers an accessible orientation to the 15-gram carb choice concept here: Carb Counting to Manage Blood Sugar.

Now, apply those principles to sweet potato nutrition facts:

  • Portion first. Begin with ½ medium (~15–20 g carbs). Then, test your glucose response; consequently, you’ll discover your personal tolerance.
  • Method matters. Boiled or steamed sweet potato often yields a gentler immediate glycemic impact than baked, roasted, or fried versions. Moreover, cooling and reheating can increase resistant starch, which behaves more like fiber.
  • Pair smart. Combine your portion with lean protein (eggs, fish, tofu, paneer) and non-starchy vegetables. A drizzle of olive oil, a scatter of nuts, or a dollop of yogurt slows digestion and improves satisfaction.
  • Keep the skin. The extra fiber supports steadier post-meal glucose and better satiety.

For an easy visual, the ADA’s Meal-Planning & Plate Method lays out a reliable template you can reuse nightly. And if you’re comparing tubers on principle, here’s a thoughtful editorial look at texture, nutrients, and kitchen behavior: The Potato Debate: White vs Sweet.


Glycemic Index (GI) & Glycemic Load (GL): Making Sweet Potato Nutrition Facts Practical

Because blood sugar response matters, let’s add GI and GL to your sweet potato nutrition facts so you can act with confidence.

Quick definitions (warm + simple):

  • Glycemic Index (GI) estimates how fast a carb food raises blood glucose per gram of carbohydrate.
  • Glycemic Load (GL) captures both speed and size of the carb hit:
    ∗∗GL=(GI×netcarbsingrams)÷100∗∗**GL = (GI × net carbs in grams) ÷ 100**∗∗GL=(GI×netcarbsingrams)÷100∗∗
    (Net carbs = total carbs − fiber.)
  • GL guide: ≤10 = low, 11–19 = medium, ≥20 = high.

Read our post about Glycemic Index (GI) VS Glycemic Load (GL) to understand the concept better. Another insightful read can be Glycemic Index and Secrets of Weight Loss.

Typical GI by Cooking Method (variety matters, so think in ranges)

Preparation (cooked)Typical GI range*Why it varies
Boiled / Steamed~45–60Moist heat keeps starches less available; often gentler on glucose.
Baked / Roasted~60–80Dry heat concentrates sugars and promotes caramelization.
Mashed (warm)~65–80More surface area + warmth = faster digestion.
Fries (deep-fried)~70–85High heat and low moisture push GI upward.
Cooled then reheated (any method)slightly lower vs hot freshCooling can increase resistant starch, acting more like fiber.

*GI for sweet potatoes varies widely by cultivar (orange, Japanese, purple), ripeness, and test protocol. Use these as directional ranges, then let your meter be the final judge.

GL Examples You Can Use Tonight

Using the nutrition baselines from your post (per 100 g: ~20.5 g carbs, ~3.1 g fiber~17.4 g net carbs; ½ medium potato: ~16 g carbs, ~2.4 g fiber~13.6 g net carbs):

  • Per 100 g, boiled (assume GI 50):
    GL ≈ 50 × 17.4 ÷ 100 = ~8.7Low
  • Per 100 g, baked/roasted (assume GI 70):
    GL ≈ 70 × 17.4 ÷ 100 = ~12.2Medium
  • ½ medium potato, boiled (GI 50):
    GL ≈ 50 × 13.6 ÷ 100 = ~6.8Low
  • ½ medium potato, baked (GI 70):
    GL ≈ 70 × 13.6 ÷ 100 = ~9.5Low-to-Medium
  • Restaurant fries, ~150 g serving (assume 33 g carbs, 3 g fiber → 30 g net; GI 75):
    GL ≈ 75 × 30 ÷ 100 = ~22.5High

How to Use GI/GL Without Overthinking It

  • Prefer moist heat (boil/steam) on days you want the calmest glucose curve; cool, then reheat when you meal-prep.
  • Scale portions: starting at ½ medium potato keeps GL low for most people.
  • Pair smart: protein + non-starchy veg + a little healthy fat (olive oil, nuts, yogurt) soften the spike, even when you choose baked wedges.
  • Save fries for “sometimes”: delicious, yes—yet their GL is high, especially in restaurant-size servings.

In short, GI tells you how fast; GL tells you how much. Together with your sweet potato nutrition facts, they make plate decisions wonderfully clear.


Sweet Potato Nutrition Facts for Weight Management: Satiety Without the Sulk

Crucially, sweet potato nutrition facts sketch a food that satisfies per calorie. At ~86–103 kcal per 100 g cooked and ~3 g fiber per 100 g, sweet potatoes deliver structure, subtle sweetness, and volume—the sensory trifecta behind portion control.

Three tactics make the difference:

  1. Season boldly, cook simply. Skip butter-and-sugar habits in favor of olive oil, citrus, chilli, pepper, and herbs. Consequently, you’ll highlight the vegetable’s inherent sweetness and keep calories reasonable.
  2. Swap refined sides. Replace bread baskets, sugary casseroles, or frosting-heavy “bakes” with roasted wedges, yogurt-lightened mash, or warm salads. Therefore, you quietly elevate micronutrients while controlling energy.
  3. Build contrast. Crisp edges plus cooling yogurt, crunchy seeds, and fresh herbs trick your brain (in the best way) into perceiving abundance at modest portion sizes.

For a dive into portions and recipe swaps, read our post on Benefits of Sweet Potatoes for Weight Loss.


Cooking Methods Through the Lens of Sweet Potato Nutrition Facts

As we know cooking transforms both numbers and experience, think of method as a dial you can tune to your goals:

  • Boiling/Steaming: Often the gentlest immediate glycemic impact. Salt after cooking; finish with olive oil and herbs to keep flavors lifted without calorie creep.
  • Baking/Roasting: Drives surface caramelization and intensifies sweetness. Consequently, employ acids (lime, vinegar), heat (chilli), and bitter notes (rocket/greens) to balance the richer flavor and keep portions natural.
  • Cooling & Reheating: Encourages resistant starch formation; some diners notice smoother post-meal curves. Use this for meal prep—roast on Sunday, reheat during the week.
  • Frying: A weekend treat. Meanwhile, air-frying or high-heat baking mimics crispness with a fraction of the fat—perfect for weeknights.

Because method interacts with variety, don’t be surprised if an orange, moisture-rich cultivar behaves differently from a denser Japanese type. Keep your meter (or your hunger cues) as the final judge.


Fries & Chips, But Make Them Honest (Still Rooted in Sweet Potato Nutrition Facts)

Let’s address the question everyone cares about: can fries fit? Yes—if you control fat, salt, and portion, and if you respect what sweet potato nutrition facts tell you about calories and carbs.

Air-Fryer/Baked Sweet Potato Fries (serves 2)

  • You need: 2 small sweet potatoes (skins on), 2 tsp olive oil, pinch salt, paprika/garlic powder.
  • Method: Slice into thin batons. Toss evenly with oil and seasoning. Spread in a single layer. Air-fry at 200 °C for 12–15 minutes (shake once) or bake at 220 °C for 20–25 minutes until the edges caramelize.
  • Why it aligns with your goals: You use far less oil than deep-frying, you keep the fiber-rich skins, and you choose the portion. For baseline macro estimates, consult the label-style sweet potato nutrition facts at MyFoodData.

Additionally, when you crave a full “fries night,” partner your plate with something protein-forward that won’t torpedo your numbers: see 5 High-Protein Vegan Air-Fryer Ideas. If crispness still misbehaves, troubleshoot with 12 Air-Fryer Mistakes to Avoid.


Fiber, Skins, and a Happier Gut (Explained with Sweet Potato Nutrition Facts)

Since sweet potato nutrition facts reveal both soluble and insoluble fiber (roughly ~3 g/100 g cooked), leaving skins on is an elegant uplift—no supplements needed. Fiber supports gut regularity, blunts post-meal glucose, and enhances fullness. However, fiber works best with adequate fluids and light movement; therefore, sip water through the day and consider a brisk 10-minute walk after meals.

If you puree, consider “fold-backs”: stir finely chopped, well-scrubbed skins back into mash for delicate speckles of texture. Likewise, roasted skin shards make a clever garnish on soups and salads. For detailed fiber comparisons by method or variety, search USDA FoodData Central and pick the exact entry that matches your cooking style.


Purple, White & “Yams”: What Color and Botany Actually Mean

Even within the umbrella of sweet potato nutrition facts, color and species signal important differences:

  • Orange sweet potatoes (common globally): Headline-level beta-carotene (→ vitamin A), moist flesh, and classic sweetness.
  • Purple sweet potatoes: Packed with anthocyanins, the same pigment family found in blueberries. Although research is ongoing, rotating colors plausibly diversifies antioxidant intake—deliciously so.
  • White sweet potatoes: Milder sweetness, paler flesh, and lower provitamin A than orange types; however, they still provide fiber and potassium.
  • True yams (Dioscorea): A different plant entirely. In many markets, “yam” is used colloquially for sweet potatoes; nonetheless, true yams are usually far lower in vitamin A and have a different texture. When labels confuse, confirm via the USDA FoodData Central search.

Variety does influences both flavor and glycemic response, it’s worth experimenting. Japanese sweet potatoes (often denser and sweeter), for instance, roast beautifully and pair well with sharp, lemony greens.


Micronutrient Nuance: Beyond Calories and Carbs

While sweet potato nutrition facts headline beta-carotene and potassium, a deeper glance reveals subtler helpers:

  • Vitamin B6: Supports amino-acid metabolism and neurotransmitter synthesis; useful when your plate leans protein-forward.
  • Copper & Manganese: Trace minerals that, nevertheless, contribute to antioxidant defenses and connective tissue health.
  • Vitamin C: Modest amounts still aid collagen formation and iron absorption—helpful if your diet is plant-centric.

Moreover, because vitamin A from beta-carotene is fat-soluble, a minimal amount of healthy fat (olive oil, seeds, tahini) enhances absorption. Consequently, that drizzle of oil is more than a flavor move; it’s functional nutrition.

Also Read: Iron Deficiency Anemia Symptoms: 15 Signs You Are Iron Deficient


Athlete & Active-Life Angle: Fuel, Recovery, and Convenience

For active people, sweet potato nutrition facts map neatly onto pre- and post-workout needs:

  • Before training: A small serving (e.g., 100–150 g cooked) delivers easily digestible carbs with a modest fiber load—enough for steady energy without heaviness.
  • After training: Pair roasted cubes with a protein source (chicken, eggs, Greek yogurt, tofu) and greens to replenish glycogen while supporting muscle repair.
  • On the go: Bake a tray on Sunday; consequently, you can build fast bowls with eggs or chickpeas all week. The cool-then-reheat rhythm also encourages resistant starch formation, which some athletes find gentler on the gut.

We know that travel derails routines, pack a little jar of spice mix (smoked paprika, chilli, garlic powder) and tiny olive-oil bottle; hotel-microwaved sweet potato with a pinch of salt and that blend is surprisingly satisfying.

Also Read: 10 Delicious Plant-Based Protein Sources for High-Protein Meal Prep


Breakfast, Lunch, and Dinner: Blueprints You’ll Actually Use

Breakfast (choose one; rotate across the week):

  • Yogurt-Mash Bowl: Warm 100 g mashed sweet potato, top with Greek yogurt, roasted seeds, cinnamon, and a drizzle of honey if desired. Consequently, you get a macro balance that feels like brunch.
  • Egg-and-Hash Skillet: Pan-crisp diced sweet potato with onions and cumin; crack in two eggs; finish with coriander and lime. Moreover, it reheats well for packed mornings.
  • Smooth(-ish) Not-Juice: Blend roasted sweet potato with yogurt, water, ginger, and a squeeze of orange. However, avoid juicing (which removes fiber and concentrates sugars); keep the fiber in the blender.

Lunch (simple but composed):

  • Two-Texture Salad: Roast cubes until char-speckled; toss warm with rocket, toasted seeds, and lime-tahini dressing. Additionally, it packs neatly for the office.
  • Tray-Bake Power Plate: Roast sweet potato wedges beside chicken thighs or tofu; add a quick cucumber-herb salad. Therefore, you achieve a restaurant-clean composition with Tuesday-night effort.
  • Chaat-Inspired Bowl: Boiled cubes, thick yogurt, tamarind, mint chutney, roasted chana, and herbs. Meanwhile, spice and tang provide big satisfaction without big calories.

Dinner (crowd-pleasing and meter-friendly):

  • Coconut-Ginger Soup: Simmer chunks with ginger and garlic; add coconut milk; blitz to velvet. Finish with lime zest and chopped peanuts. Consequently, it’s luxurious without cream.
  • Silky Mash with Yogurt & Chives: Boil, drain thoroughly, mash with Greek yogurt, olive oil, and chives; serve with pan-seared fish or grilled paneer.
  • The Honest Fry Night: Air-fried batons + grilled protein + zingy slaw. For protein ideas that travel well between cuisines, browse 5 High-Protein Vegan Air-Fryer Ideas.

Portioning by Goal: A Quick Reference Using Sweet Potato Nutrition Facts

Everyone’s goals differ, use this goal-based portion guide anchored to sweet potato nutrition facts:

  • Weight maintenance: 100–150 g cooked (≈ 86–130 kcal) as a side, 1× daily. Pair with protein and veg.
  • Weight loss: 75–125 g cooked (≈ 65–110 kcal) as a side, focusing on texture contrast and acid to enhance satisfaction.
  • Endurance training days: 150–250 g cooked across meals (timed pre-/post-workout).
  • Type 2 diabetes (general starting point): ½ medium (~15–20 g carbs) at a time, paired sensibly; adjust based on meter readings.

Naturally, these are templates. Therefore, keep an eye on satiety, performance, and any clinical markers you track.

Also Read: 5 Sweet Potato Appetizers Ideas to Inspire the Chef in You


Shopping, Storage, and Zero-Waste Notes (Guided by Sweet Potato Nutrition Facts)

Choosing: Look for firm roots with smooth skin; avoid wet spots or deep cuts. Small-to-medium sizes cook more evenly and portion neatly.

Storing: Keep them in a cool, dark, ventilated place—not the fridge. Refrigeration can alter texture and flavor after cooking.

Prepping: Scrub well. If you peel, upcycle the skins: pan-crisp in a teaspoon of oil with salt and chilli for a savory garnish or snack.

Batching: Roast extra; cool completely; refrigerate. Moreover, cooled sweet potato reheats well, slips into salads and hashes, and—helpfully—may develop resistant starch through the cool-then-reheat cycle.

Also Read: How to Make Pineapple Chia Pudding: A Refreshing Low-Carb Breakfast Option


Myth-Busting with Sweet Potato Nutrition Facts

  • “Sweet potatoes are automatically low-GI.”
    Not automatically. Variety and method matter; therefore, boiled/steamed tends to be gentler than baked/fried, and portions still count. If you use a CGM or meter, your data trumps broad claims.
  • “White potatoes bad; sweet potatoes good.”
    Too binary. Both can fit a balanced plate when portioned and paired. For a 100 g side-by-side, try the MyFoodData comparison tool; meanwhile, for culinary context, see The Potato Debate: White vs Sweet.
  • “Fries are always unhealthy.”
    Context decides. Air-fryer or oven fries with minimal oil and skins-on can align with both diabetes-aware and weight-conscious eating—especially alongside lean protein and salad.
  • “Yams = sweet potatoes.”
    Not quite. “Yam” is often a nickname; however, true yams are different and generally lower in vitamin A. When in doubt, verify via USDA FoodData Central.
  • “Juicing sweet potatoes is better than eating them.”
    Not necessarily. Juicing strips fiber, which matters for satiety and glycemic control. Consequently, if you prefer a drinkable format, blend roasted sweet potato into smoothies so the fiber remains.

Sensory Science: Why These Dishes Feel So Satisfying

Understanding why sweet potato nutrition facts translate into real satisfaction helps you cook with intent:

  • Texture contrast (crisp edges + creamy interiors) engages more senses, which, in turn, increases fullness signals.
  • Aromatics (ginger, garlic, warm spices) and acids (lime, vinegar) brighten perceived sweetness so you need less added sugar.
  • Temperature play (hot wedges against cool yogurt) reads as indulgent even at modest calories.
  • Color rotation (orange, purple, white) keeps boredom at bay while diversifying antioxidants.

Therefore, if you build plates with contrast, color, and acid, you’ll feel like you ate more than the calorie math suggests—an invaluable trick for both weight management and contentment.

Suggested Read: Coconut Water Cocktails: 10 Easy, Refreshing Drinks


Putting It All Together: A Weeknight Plate That Loves You Back

Finally, let’s pull the threads tight and turn sweet potato nutrition facts into a plate you’ll actually repeat:

  • A tray of skin-on wedges hits a 220 °C oven for about 22 minutes.
  • At minute 10, paprika-garlic chicken thighs (or tofu slabs) slide onto the same tray for the remaining 12 minutes.
  • On the counter, a bowl of lemon-zested Greek yogurt waits with a swirl of olive oil, salt, and black pepper.
  • A peppery green salad gets tossed at the end with lime and chilli flakes.

Consequently, dinner lands as a four-part, high-satisfaction composition: crisp-tender wedges, juicy protein, cooling creaminess, and bright greens. It looks restaurant-polished, eats comfort-first, and fits smart nutrition without feeling like homework.

In short:
Treat 100 g as your mental ruler. Keep skins when you can. Boil or steam for calm days; roast when you crave drama; air-fry when fries call your name. Additionally, pair with protein, flood the plate with vegetables, and let acid and heat carry flavor so portions stay comfortable. If you live with diabetes, let your meter be the critic that matters. If you’re trimming calories, remember that texture and seasoning do the heavy lifting for satisfaction.


Source Hubs You Can Trust

And for internal, reader-friendly context, don’t miss:


Editor’s note: Values vary by cultivar and preparation; use these figures as practical averages. For medical advice, always consult your clinician.


1) What are the key sweet potato nutrition facts per 100 g?

Warmly put: per 100 g cooked you’ll usually see ~86–103 kcal, ~20–21 g carbs, ~3 g fiber, ~1.6–2 g protein, and standout vitamin A. Moreover, these numbers make portioning simple—and delicious.

2) How many calories and carbs are in one sweet potato?

Typically, a small (~120 g) is ~103 kcal/~24 g carbs; a medium (~160 g) is ~138 kcal/~32 g carbs; a large (~220 g) is ~189 kcal/~44 g carbs. Therefore, starting with ½ medium keeps carbs near 15–20 g.

3) Are sweet potatoes good for type 2 diabetes?

Yes—however, portions and method matter. Boil or steam for gentler spikes, pair with protein and non-starchy veg, and keep the skin for fiber. In short, your meter will confirm how the sweet potato nutrition facts fit your day.

4) Do sweet potatoes help with weight loss?

They can—because fiber aids fullness and the calorie density is modest. Additionally, season boldly (citrus, chilli, herbs) and cook simply (roast, boil, air-fry) so satisfaction stays high while calories stay reasonable.

5) What’s healthier: sweet potato fries baked/air-fried or deep-fried?

Baked/air-fried, hands down. Consequently, you use far less oil, keep skins for fiber, and control salt and portion. For even better results, shake the basket halfway and serve with a protein-rich main.

6) Does the skin actually add meaningful nutrition?

Absolutely. Notably, leaving skins on bumps fiber and helps preserve water-soluble vitamins. Therefore, scrub well and keep them on for wedges, fries, and mash-with-texture.

7) Are purple sweet potatoes more nutritious?

They’re different, not automatically “better.” Purple varieties bring anthocyanins (antioxidants), while orange types excel at beta-carotene (vitamin A). Moreover, rotating colors broadens your nutrient palette without any fuss.

8) Are yams the same as sweet potatoes?

No. Meanwhile, many markets use “yam” loosely, but true yams (Dioscorea) are a different plant and generally lower in vitamin A. For clarity, rely on the sweet potato nutrition facts on your package or database.

9) What’s the best serving size for everyday eating?

As a side, 100–150 g cooked (≈86–130 kcal) suits most balanced plates. For diabetes management, start with ½ medium and adjust. Additionally, add protein and a pile of non-starchy veg to round things out.

10) Do sweet potatoes help with constipation?

Often, yes. Because they offer ~3 g fiber/100 g, they can support regularity—especially with skins on. Finally, pair with fluids and a short post-meal walk for best results.

11) Are sweet potatoes good for eyesight?

They can be supportive. Thanks to high beta-carotene (provitamin A), they contribute to healthy vision as part of a varied diet. However, balance matters—mix in leafy greens and other colorful veg, too.

12) What are the sweet potato nutrition facts for fries or chips?

Homemade baked/air-fried fries generally land ~120–160 kcal per 100 g (oil-dependent), with ~22–27 g carbs and ~3–4 g fiber. Deep-fried restaurant servings, by contrast, can quickly double calories; consequently, home control wins.

13) Is juicing sweet potatoes a good idea?

Not really. Because juicing removes fiber, you lose one of the best parts of the sweet potato nutrition facts. Instead, blend roasted sweet potato into smoothies so the fiber—and satisfaction—stay intact.

14) Are sweet potato noodles healthy?

They can be, yet remember they’re mostly starch. Therefore, treat them like any noodle: mind portions, add protein (eggs, tofu, chicken), and load the bowl with vegetables to balance the sweet potato nutrition facts.

15) Which cooking method best supports steady blood sugar?

Generally, boiling or steaming is gentler than baking or frying. Additionally, cooling and reheating can increase resistant starch. Therefore, on days you want calm curves, choose moist heat and pair wisely.

16) Can I eat sweet potatoes daily?

You can, provided portions fit your goals and the rest of your diet stays varied. Moreover, rotate with other starches (beans, whole grains) and colors (purple/orange/white) so you don’t lean on one nutrient profile alone.

17) What’s the healthiest way to make mashed sweet potatoes?

Boil, drain well, then mash with Greek yogurt, a drizzle of olive oil, salt, and chives. Consequently, you get creamy texture, extra protein, and all the comfort—without the heavy cream.

18) Do sweet potato leaves have benefits?

They’re edible and nutrient-rich in many cuisines. However, availability varies; if you find them, sauté like spinach with garlic and a squeeze of citrus to complement the core sweet potato nutrition facts on your plate.

19) Are white sweet potatoes less nutritious?

They’re simply different—typically milder and lower in provitamin A than orange types, yet still a solid source of carbs, fiber, and potassium. Additionally, they roast beautifully and balance spicy mains.

20) How do I use sweet potato nutrition facts to build a plate?

Start with your target portion (e.g., 100–150 g cooked). Then, add lean protein (egg, chicken, fish, tofu) and double the volume with non-starchy veg. Finally, finish with acid (lime, vinegar) and herbs so smaller portions feel abundant.

21) What about healthy casseroles—do they ever fit?

They can, if you tame sugar and fat. For example, skip marshmallows and syrup; instead, bake slices with olive oil, salt, warm spices, and toasted nuts. Consequently, you keep the sweet potato nutrition facts on your side.

22) Are sweet potato supplements worth it?

Whole foods are usually the better bet. Notably, supplements can’t replace the fiber, water, and synergy of real ingredients. Therefore, default to food first unless a clinician suggests otherwise.

23) How do sweet potato nutrition facts compare with white potatoes?

Both are wholesome. Sweet potatoes lead in beta-carotene; white potatoes can be higher in vitamin C (and sometimes potassium). Moreover, method and portion influence the health impact more than the label alone.

24) Any quick meal ideas that respect the numbers?

Absolutely: roasted wedges with lemony yogurt and herbs; black-bean & sweet-potato tacos; coconut-ginger soup; or air-fried batons with a grilled protein and crunchy slaw. Additionally, batch-roast on Sunday to save time all week.

25) Final word—how do I keep this simple?

In short, let sweet potato nutrition facts guide, not police. Choose 100–150 g cooked as your mental ruler, keep skins on, pick boiling/steaming for gentler days, and, finally, balance every plate with protein and colorful vegetables.
Posted on 7 Comments

12 Common Air Fryer Mistakes You Could Be Making

12 COMMON AIR FRYER MISTAKES YOU COULD BE MAKING

Air fryers have gone from trendy gadgets to everyday essentials in just a few short years. They promise the best of both worlds — crisp, golden fries and snacks with a fraction of the oil. Whether it’s fries, samosas, pakoras, or even roasted vegetables, the air fryer has become the go-to tool for anyone who wants indulgent flavors without the guilt of deep frying.

But here’s the reality check: owning an air fryer doesn’t automatically guarantee perfect results. Many first-time users — and even seasoned home cooks — find themselves frustrated. Instead of crunchy fries, they end up with soggy sticks. Instead of juicy chicken, they pull out pieces that are dry outside and raw inside. Sometimes the fryer smokes, smells odd, or just doesn’t deliver the promised magic.

Sound familiar? If so, you’re not alone. The truth is that air fryers aren’t foolproof. They’re powerful tools, but like any tool, they only shine when you use them correctly. The smallest mistakes can have a big impact — from overcrowding the basket to skipping the preheat, from choosing the wrong oils to ignoring safety basics.

The good news? These mistakes are easy to fix. With a little know-how, you’ll start producing crispy, delicious, healthy results every time. That’s why we’ve put together this guide: to walk you through the 12 most common air fryer mistakes and, more importantly, show you how to avoid them.

So let’s start by understanding how this kitchen wonder actually works.


🍳 Understanding Your Air Fryer: How It Works & Why Mistakes Happen

To get the best out of your air fryer, it helps to know what’s happening inside it. Unlike deep frying, where food is submerged in hot oil, or baking, where heat radiates slowly from oven walls, air fryers use a powerful heating element and a high-speed fan to push hot air around your food.

This process mimics frying by creating the Maillard reaction — the browning effect that gives fries their crunch and roasted chicken its golden color. The magic lies in air circulation. When food is surrounded by rapidly moving hot air, the surface crisps while the inside stays moist.

But this efficiency also makes air fryers less forgiving:

  • Airflow is everything. Block it, and food won’t crisp.
  • Moisture matters. Extra water leads to steaming, not frying.
  • Temperature precision is key. Air fryers heat fast, so even small mistakes can overcook food.
  • Surface contact counts. Oil, seasonings, and basket setup affect results.

Understanding these principles makes the common mistakes much clearer. Overcrowding stops airflow. Skipping preheating delays crisping. Using too much oil smothers food instead of helping it brown.

Now, let’s dive into the 12 biggest mistakes air fryer users make — and the simple fixes that will change your cooking game forever.


❌ Mistake #1: Overcrowding the Basket

The Problem: Many try to save time by piling food into the fryer basket.

The Consequence: Overcrowding blocks air circulation. Fries end up limp, chicken undercooked, and veggies taste steamed instead of roasted.

The Fix: Cook in smaller batches. Keep food in a single layer with space between pieces. If you need to cook a lot, it’s better to do two quick rounds than one disappointing big batch. Racks can help you layer food while keeping air flowing.

Pro Tip: Shake the basket halfway through to give every piece a chance at golden crispness.


❌ Mistake #2: Skipping the Preheat

The Problem: People assume air fryers don’t need preheating because they’re small.

The Consequence: Without preheating, food cooks unevenly. Fries go limp, breading won’t set, and meats release moisture before crisping.

The Fix: Preheat your fryer for 3–5 minutes before adding food. Many models have a preheat function; if not, run it empty at your target temperature.

Pro Tip: Preheating shortens cooking time and ensures consistent results.


❌ Mistake #3: Forgetting to Shake or Flip

The Problem: Air fryers push hot air from the top down, so the bottom layer cooks slower.

The Consequence: Food ends up browned on one side and pale on the other. Fries clump together, and proteins cook unevenly.

The Fix: Shake or flip food halfway through. Smaller foods like fries just need a quick shake; larger foods like chicken thighs need flipping with tongs.

Pro Tip: Use your fryer’s halfway timer beep (if it has one) as a reminder.


❌ Mistake #4: Using the Wrong Amount of Oil

The Problem: Some avoid oil entirely, while others overdo it.

The Consequence: No oil = dry, baked texture. Too much oil = soggy, greasy results that smoke.

The Fix: Use just 1–2 teaspoons per batch. Toss food in oil before cooking or mist with a refillable spray bottle for even coverage.

Pro Tip: Apply oil to the food, not the basket — it’s more effective.


❌ Mistake #5: Not Cleaning After Every Use

The Problem: People assume the fryer only needs occasional cleaning.

The Consequence: Grease and crumbs burn during the next use, causing smoke, bad smells, and bitter flavors. Over time, residue damages the coating.

The Fix: Clean after every session. Let it cool, then wash or wipe the basket and drawer. Do a deep clean weekly. Avoid metal scrubbers that scratch.

Pro Tip: Use parchment liners or silicone mats to make cleanup easier, but don’t skip cleaning.


❌ Mistake #6: Cooking at the Wrong Temperature

The Problem: Many crank the fryer to max heat or play it too safe with low temps.

The Consequence: Too hot burns the outside while leaving the inside raw. Too low makes food limp and chewy.

The Fix: Follow tested air fryer recipes. As a general rule, reduce oven temps by 20°C and cooking times by 20–25%. Use a thermometer for meat.

Pro Tip: Start hot for searing, then lower the temperature to finish cooking evenly.


❌ Mistake #7: Not Drying Food First

The Problem: Damp veggies, potatoes, or marinated meats go straight into the fryer.

The Consequence: Extra moisture turns to steam, preventing crisping. Fries taste boiled, meats go rubbery, veggies soften instead of roasting.

The Fix: Pat food dry before seasoning and cooking. For marinated items, let them rest so excess liquid drains.

Pro Tip: Dry food holds seasonings better, giving more flavor and crunch.


❌ Mistake #8: Using Aerosol Spray Cans

The Problem: Aerosol sprays like PAM are convenient but contain propellants.

The Consequence: These chemicals break down nonstick coatings, causing sticking and shortening your fryer’s life.

The Fix: Use a refillable oil mister with natural oils like olive, avocado, or ghee.

Pro Tip: Mist food lightly, not heavily — a thin coat is enough.


❌ Mistake #9: Ignoring Food Size & Cut

The Problem: Ingredients are cut into random shapes and sizes.

The Consequence: Thin pieces burn while thick pieces stay raw. Fries, for example, turn out uneven if sizes vary.

The Fix: Cut food into uniform sizes. Use slicers or cutters for consistency.

Pro Tip: Smaller, evenly cut pieces crisp faster — adjust time accordingly.


❌ Mistake #10: Limiting Yourself to Frozen Foods

The Problem: Many only use fryers for frozen fries or nuggets.

The Consequence: This limits the fryer’s true versatility. It can roast, bake, toast, and even dehydrate.

The Fix: Try new recipes — roasted veggies, chickpeas, paneer tikka, muffins, or reheating leftovers.

Pro Tip: Air fryers reheat pizza or parathas far better than a microwave — crisp, not soggy.


❌ Mistake #11: Neglecting Safety Setup

The Problem: Fryers are often placed against walls, under cabinets, or on unstable surfaces.

The Consequence: Poor ventilation risks overheating. Weak surfaces can warp or melt.

The Fix: Place on a flat, stable, heat-safe surface with 6 inches of clearance on all sides. Always unplug after use.

Pro Tip: Allow it to cool fully before cleaning or moving to prevent accidents.


❌ Mistake #12: Skipping Accessories

The Problem: Many stick to the basket alone.

The Consequence: Without racks, skewers, or liners, you miss out on layered cooking, kebabs, muffins, and easier cleanup.

The Fix: Invest in simple accessories. Racks let you cook more at once, liners keep things tidy, and silicone molds expand your options.

Pro Tip: Skewers make kebabs or veggie sticks effortless in the fryer.


⚡ Health Tips for Smarter Air Frying

  • Choose the right oils: Avocado, olive, mustard oil, or ghee work best for health and high smoke points.
  • Avoid over-relying on frozen foods: Whole foods like veggies, beans, and proteins give better nutrition.
  • Watch your portions: Air-fried food is lighter, but calories still add up. Balance with roasted vegetables or salads.

🔥 Safety Tips Every User Should Know

  • Leave 6 inches of clearance around the fryer.
  • Place it on a flat, heat-resistant surface.
  • Let it cool before cleaning.
  • Always unplug after use.

🚫 What NOT to Air Fry

  • Wet batters → they drip and burn.
  • Leafy greens → they blow around and scorch.
  • Uncoated cheese → melts into a mess.
  • Popcorn → cooks unevenly, risks burning.

🎯 Conclusion: Master Your Air Fryer

The air fryer is one of the most versatile tools in your kitchen — but only if you use it right. By avoiding these 12 common mistakes, following smart health tips, and respecting basic safety rules, you’ll transform soggy, disappointing batches into crispy, golden, healthy meals.

Air frying isn’t just about convenience — it’s about unlocking new possibilities. From snacks to mains to reheated leftovers, your fryer can do far more than you think. Once you master these basics, you’ll wonder how you ever lived without it.

So go ahead, preheat that basket, spread out those fries, and give your food the space and care it deserves. Perfect crunch is waiting.


❓ Frequently Asked Questions (FAQs) About Air Fryers

1. Do you need to preheat an air fryer every time?

Yes, most recipes benefit from preheating. It ensures the basket is hot before food goes in, which helps create a crispy outer layer and reduces cooking time. Skipping preheat often leads to soggy or uneven results.


2. Can you put aluminum foil or parchment paper in an air fryer?

Yes, but with care. Use perforated parchment paper or poke holes in foil so air can circulate freely. Avoid covering the entire basket surface, or you’ll block airflow and reduce crisping.


3. Why does my air fryer smoke?

Excess oil, greasy foods, or leftover crumbs from previous cooking are the usual culprits. Clean the basket regularly, avoid using too much oil, and choose oils with high smoke points like avocado or peanut oil.


4. Can you cook raw meat in an air fryer?

Absolutely. Chicken, fish, kebabs, and even steak can be cooked from raw in the fryer. Just ensure you use a food thermometer to check the internal temperature for safety.


5. Why are my fries soggy in the air fryer?

The most common reasons are overcrowding, skipping preheating, or not drying the potatoes before cooking. Always cut evenly, pat them dry, toss with a little oil, and spread them in a single layer for the crispiest fries.


6. What foods should not be cooked in an air fryer?

Avoid wet batters (like tempura), leafy greens (they fly around and burn), loose cheese, and popcorn. These either don’t cook well or can damage your fryer.


7. How much oil do you really need in an air fryer?

Usually 1–2 teaspoons per batch. A light misting or toss is enough to help food crisp without making it greasy. Too much oil creates smoke and soggy textures.


8. Can you bake in an air fryer?

Yes! Muffins, cupcakes, small cakes, and cookies all bake beautifully in air fryers. Use silicone molds or small pans that fit in the basket. Just remember, cooking time will usually be shorter than in an oven.


9. Do air fryers use a lot of electricity?

No, they’re energy efficient. Air fryers heat up quickly and cook faster than ovens, which means they generally use less power overall.


10. How often should you clean your air fryer?

Clean the basket and drawer after every use to prevent grease buildup. Do a deeper clean once a week, wiping down heating elements and the interior to keep it in top shape.

Posted on Leave a comment

Inalsa 5.5L Digital Air Fryer Review

INALSA 5.5L DIGITAL AIR FRYER REVIEW

Introduction

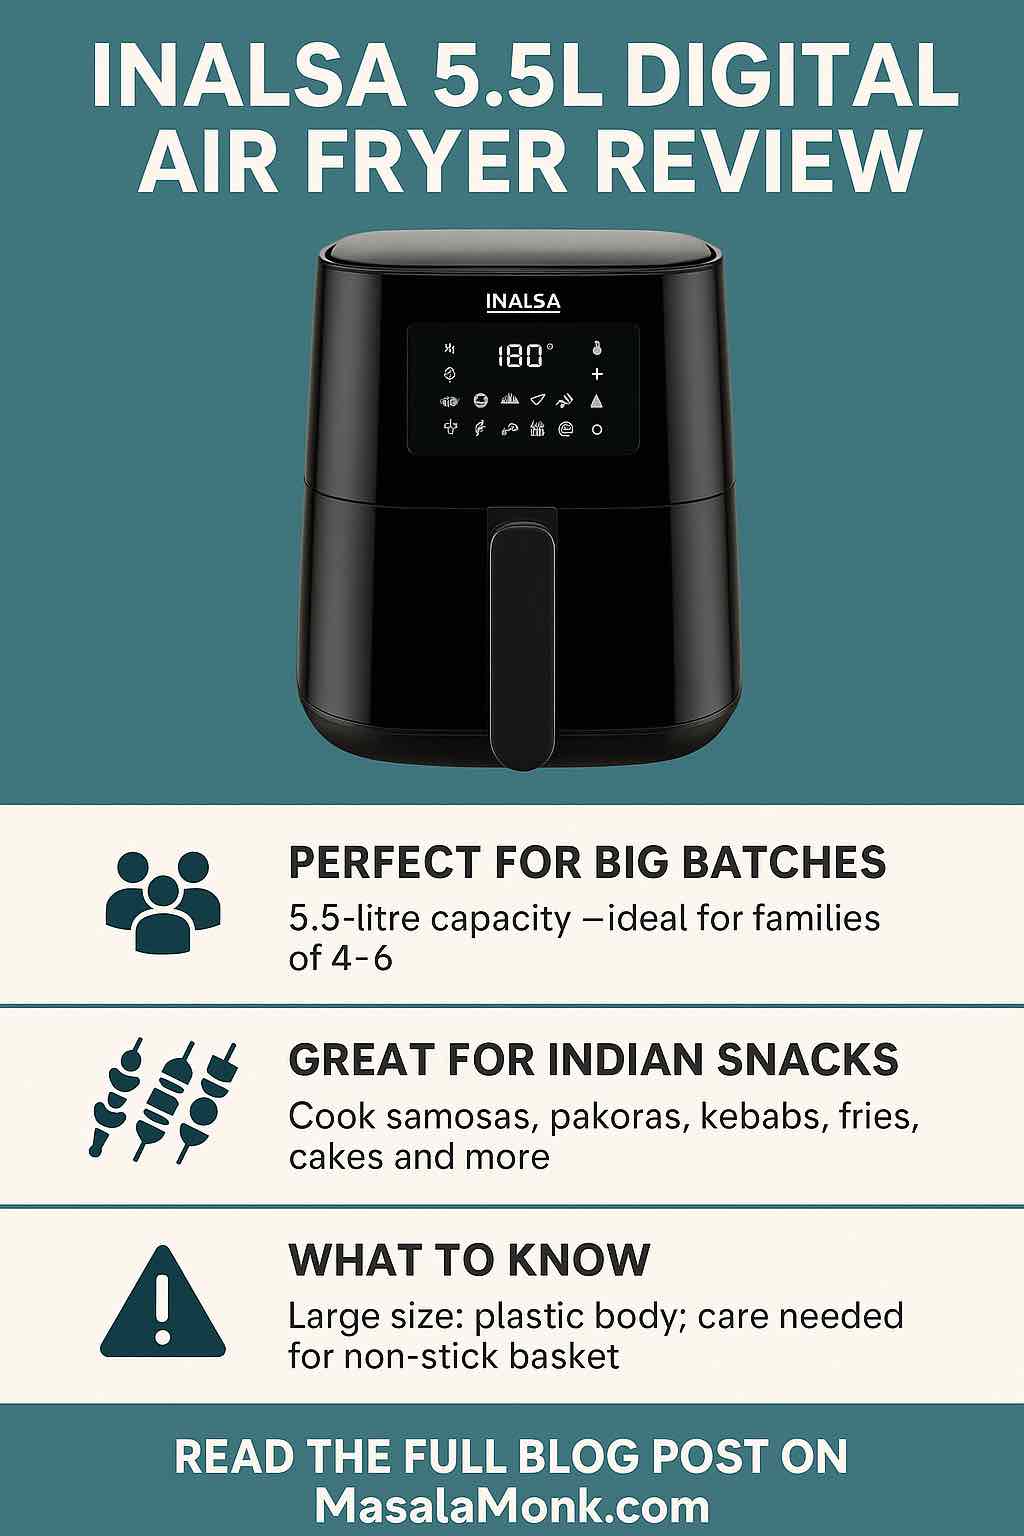
If you’re tired of cooking snacks in small batches or want to feed a family in one go, the Inalsa 5.5L Digital Air Fryer is built for you. One of the largest and most powerful air fryers in its price range, it combines a massive 5.5L capacity with a user-friendly digital panel—perfect for Indian families, entertainers, or anyone who doesn’t want to compromise on batch size or versatility.

Does it truly deliver on big-batch promise, healthy cooking, and value for money? Here’s a deep dive based on Amazon reviews, user forums, and practical Indian kitchen experience.


Key Specs & Highlights

  • Capacity: 5.5 litres (serves 4–6+ people in one go)
  • Power: 1700W (high wattage for fast, even cooking)
  • Controls: Touchscreen digital panel with 8–10 preset modes
  • Temperature Range: 80°C to 200°C, manually adjustable
  • Timer: Up to 60 minutes, auto shut-off with audible alarm
  • Basket: Deep, wide, non-stick, removable, dishwasher safe (but hand-wash recommended)
  • Body: Plastic build, black with silver accents, LED display
  • Weight: About 5.5–6 kg
  • Accessories: Some models include grill rack, skewers, or baking tray (check package before buying)
  • Warranty: 2 years (Inalsa India)
  • MRP: ₹5,500–₹7,000 (see best offer)

Who Is the Inalsa 5.5L Digital Air Fryer For?

  • Large families (4–6 people)
  • Home entertainers and batch cooks
  • People who want digital controls and preset convenience
  • Indian kitchens that love snacks—samosa, pakora, fries, tandoori, kebabs, cakes, and more

It’s NOT ideal for tiny kitchens, bachelors, or anyone needing a very compact appliance.


First Impressions: Design, Build & Setup

Unboxing the Inalsa 5.5L Digital Air Fryer, you’ll immediately notice its large size and stylish design—a statement piece on your kitchen counter. The basket is deep and sturdy, and the digital touch panel feels responsive and modern.
Setup is simple: Just plug in, rinse the basket, and you’re ready to start cooking.


Indian User Experiences: What Buyers Are Saying

⭐ Why People Love It

  • Batch Cooking Freedom: “Easily made fries for 6 people at once. Samosas, paneer tikka, chicken wings—no more waiting in line for snacks!”
    Amazon Buyer, Mumbai
  • Preset Simplicity: “The touch panel is so easy—even my dad uses it. Presets for fries, chicken, and cake save time.”
    Amazon Review, Bangalore
  • Family Health Upgrade: “With cholesterol in the family, this air fryer is a lifesaver. Less oil, same crunch.”
    Amazon Review, Gurgaon
  • Cleans Up Quick: “Basket is huge, comes out easily. Dishwasher safe, but I just soak and wipe—done in a minute.”
    YouTube Reviewer, Delhi

⚠️ What You Should Know Before Buying

  • It’s BIG: Needs a decent amount of counter space. Check measurements if your kitchen is cramped.
  • Plastic Body, Handle Heats Up: Basket and handle are sturdy, but handle can get warm with big batches. Don’t overload.
  • Non-stick Needs Care: Only use soft sponges/wooden utensils. Steel spatula will ruin coating.
  • Panel Is Sensitive: Wet or greasy fingers can cause “ghost touches.” Keep away from steam/sink.
  • Presets Not India-Specific: Great for fries, chicken, cake, pizza, but samosa/tikki/namkeen will require some experimenting.
  • Instruction Booklet Is Basic: You’ll want to look up Indian air fryer recipes online or on YouTube.
  • Service Is Decent but Not Fast: Metros get quicker help, smaller towns may wait a week or two for spares.

Performance for Indian Food: Batch Cooking Without Compromise

Outstanding For:

  • Samosas/Pakoras/Cutlets:
    12–15 at once, crisp with little oil. Preheat for 3 min, cook at 180°C, shake once for even browning.
  • French Fries/Potato Wedges:
    Up to 1kg, best with soaked/dried potatoes. Single layer = max crunch!
  • Chicken Tikka/Kebabs:
    8–10 skewers in a go; grill rack delivers “tandoor-style” results. Baste with ghee/oil for real color.
  • Fish Fry/Drumsticks/Wings:
    Big family batches; juicy inside, crisp outside in 15–20 min at 180–200°C.
  • Roasted Peanuts/Namkeen:
    Huge batch ready in 8–10 min; shake for even roasting.
  • Cakes/Breads:
    Deep enough for 6-inch cake tins or a round loaf; 25–35 min at 160–170°C. Use parchment for easy removal.

Good For:

  • Reheating pizza, rotis, parathas, garlic bread:
    Brings back crunch, better than a microwave.

Not Ideal For:

  • Tiny kitchens or single servings:
    The basket is so big that very small quantities may not cook as evenly.

Cleaning & Maintenance: Real-World Tips

  • Removable basket fits most sinks. Non-stick is easy to rinse—avoid steel wool or harsh scrubbers.
  • Dishwasher safe, but hand-washing preserves the coating longer.
  • Let basket cool before washing. Protects the non-stick and handle.
  • Panel and body: Wipe with damp cloth, avoid placing near stove or steam (protects digital panel).
  • Racks/skewers: Soak, then scrub with a soft brush—no hassle.

“After masala foods, just soak the basket 5–10 min, wipe, and it’s spotless. Lasted over a year so far.”
Amazon Review, Hyderabad


Pros & Cons Table

ProsCons
Massive 5.5L capacity—perfect for big families & partiesBulky; takes up counter space
High power (1700W) for fast, even cookingPlastic body; handle may warm up
Touchscreen with multiple presetsNon-stick may peel if abused
Batch cook Indian snacks, tikkas, fries, cakes, pizzaPresets not tuned for Indian recipes
2-year warranty; spares available from InalsaDigital panel sensitive to moisture
Quick clean-up; basket is easy to washCustomer service can be slow in some towns
Often comes with grill rack/skewers (check seller)Instruction manual is basic

How to Get the Best Out of Your Inalsa 5.5L Air Fryer

  • Preheat 3 min for every batch—crispier results, especially with Indian snacks.
  • Single-layer for fries/pakora: Overcrowding = uneven browning.
  • Flip or shake halfway: Even if using presets, manual shake gives best results.
  • Use grill rack for tandoori/kebab: Skewer and baste for restaurant-like color.
  • Baking? Always use parchment or silicone liner for cakes/breads.
  • Keep it dry: Don’t use with wet hands; protect digital panel from steam/splash.
  • Handle gently, let cool before cleaning, and avoid sharp utensils.
  • Check package for extras (racks/skewers); not all sellers include the same accessories.

Who Should Buy the Inalsa 5.5L Digital Air Fryer?

  • Best for:
    Families of 4+, entertainers, meal preppers, and Indian kitchens that cook a lot in a single go.
  • Also ideal for:
    People who love digital presets and don’t want to babysit their fryer.
  • Not ideal for:
    Bachelors, couples, or kitchens with very little counter space.

Final Verdict: Is the Inalsa 5.5L Air Fryer Worth It?

The Inalsa 5.5L Digital Air Fryer is one of the best large-capacity air fryers for Indian homes. It cooks big batches of samosas, fries, kebabs, cakes, and more in a single round, and the digital panel makes it easy for the whole family. Yes, it’s bulky and you’ll need to be careful with the non-stick coating, but for busy Indian families, it’s a game-changer.

Ready to upgrade your kitchen and batch cook the smart way?
Buy the Inalsa 5.5L Digital Air Fryer on Amazon India →


(Affiliate Disclosure: If you buy via our link, we may earn a small commission at no extra cost to you. Thank you for supporting honest, practical Indian kitchen reviews!)

See How Other Top Air Fryers Compare:


FAQs for Inalsa 5.5L Digital Air Fryer

1. What is the actual capacity of the Inalsa 5.5L Digital Air Fryer?
It has a spacious 5.5-litre basket—ideal for preparing snacks or meals for 4–6 people in a single batch.


2. Does it come with digital controls and presets?
Yes, it features a touchscreen digital panel with 8–10 preset cooking modes (fries, chicken, cake, fish, steak, pizza, etc.), plus manual time and temperature adjustment.


3. Is the basket dishwasher safe?
The non-stick basket is removable and claimed as dishwasher safe, but hand-washing with a soft sponge helps extend its life.


4. Can I use this air fryer for Indian snacks like samosas, pakoras, and tikkis?
Absolutely! You can batch-cook samosas, pakoras, cutlets, paneer tikka, kebabs, fries, and more. Use a light oil spray for best results.


5. Is the Inalsa 5.5L Air Fryer good for baking cakes or bread?
Yes, the deep basket fits a 6-inch cake tin or small loaf pan. Use the bake or cake preset and line the pan with parchment paper for easy removal.


6. How much counter space does it need?
It’s larger than most air fryers (approx. 38x28x32 cm), so check your kitchen counter before purchasing.


7. Does the non-stick coating last?
The coating lasts well with proper care—only use wooden/plastic spatulas and avoid metal utensils or harsh scrubbers. Let the basket cool before cleaning.


8. What should I do if the digital panel is unresponsive?
Always use dry hands, keep the fryer away from steam or water sources, and clean the panel gently with a soft cloth.


9. Is there a warranty, and what about service support?
It comes with a 2-year warranty from Inalsa India. Keep your invoice for claims. Service is generally prompt in metros, but smaller towns may experience delays for spare parts.


10. Who should buy the Inalsa 5.5L Digital Air Fryer?
It’s perfect for families of 4–6, home entertainers, and anyone who wants to cook large batches quickly and easily. Not ideal for single users or very small kitchens.

Posted on Leave a comment

Philips NA231/00 Air Fryer Review

PHILIPS NA231/00 AIR FRYER

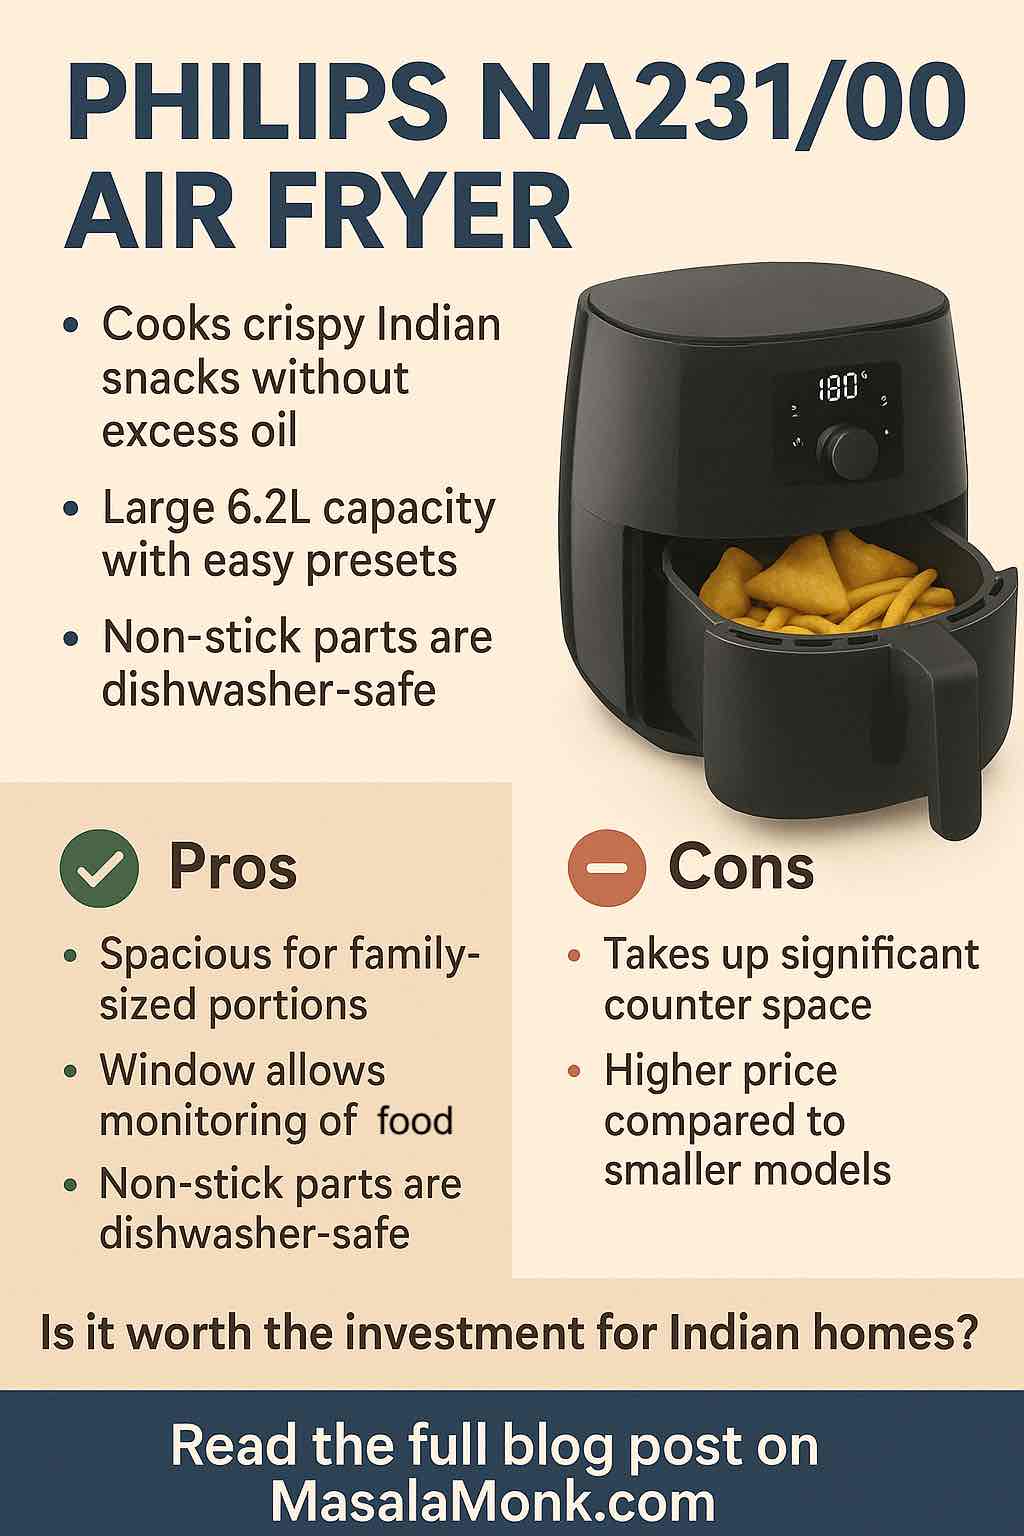
Air fryers have stormed Indian kitchens, promising crispy snacks with much less oil. If you’re searching for a model that balances big capacity, trusted brand value, and ease of use, the Philips NA231/00 Air Fryer is probably on your radar. But is it really the best fit for Indian cooking styles, family use, and day-to-day kitchen life?

In this in-depth review, I’ll cover the specs, real user pros and cons, unique challenges, Indian buyer insights, and honest verdict—so you can decide if it’s right for you.

Check Latest Price and Deal for this Air Fryer on Amazon India here.

This post uses Affiliate links to this product from Amazon, you get the same price and we get a small commision, which helps us sustain and bring such research for you.


Quick Overview: Philips NA231/00 Key Features

FeatureDetails
Capacity6.2 litres (family-sized)
Power1700W Rapid Air Technology
ControlsDigital touchscreen, 13 preset menus
Special FeatureSee-through cooking window with light
CleaningNon-stick, dishwasher-safe basket
Build404 × 309 × 308 mm; ~5.3 kg
Warranty2 years (India)
Price Range₹9,000–₹10,000 (may vary with offers) – Current Price on Amazon
Key Features of Philips NA231/00 Air Fryer

Why the Philips NA231/00 Stands Out

1. Massive Capacity for Indian Families

With a 6.2 L basket, this air fryer is ideal for family gatherings, festive meals, or anyone who prefers batch cooking. Users report fitting 8 chicken drumsticks, 800g of French fries, or several kathi rolls in a single go. Unlike compact models, there’s less batch rotation—saving time and effort for large households.

2. Intuitive Digital Controls & Presets

The touchscreen is responsive, with 13 built-in preset menus for common dishes. For beginners, this makes cooking approachable—especially with the unique see-through window and internal light, letting you watch food without opening the basket. This feature is especially popular among Indian users who like to check doneness visually, whether it’s aloo tikki or paneer tikka.

3. Healthier Results, Indian Style

Philips’ Rapid Air Technology ensures your food is cooked with up to 90% less oil—but still delivers a crispy finish. Multiple Indian reviewers confirm impressive outcomes for samosas, kababs, even dal bati—dishes traditionally deep-fried or baked.


Real Indian User Experiences: The Good & The Noteworthy

What Users Love

“This is the best airfryer you can buy … Ideal for big families … The digital display and dials are super convenient … it looks very smart on the kitchen slab.”
Alisha Sachdeva, New Delhi

  • Strong Build Quality: Daily users note its durability and the ease of frequent cleaning.
  • Works for Indian Recipes: One Flipkart reviewer made “amazing dal bati” and another praised the crispiness of homemade samosas.
  • Beginner-Friendly Window: The see-through glass is a hit for first-time users or those cooking delicate snacks.

Common Challenges (And Real-World Fixes)

Despite its strengths, the Philips NA231/00 isn’t perfect. Here’s what Indian buyers actually face:

1. Cleaning and Smoke Buildup

While the non-stick basket is dishwasher safe, repeated air frying of oily or marinated foods (think tandoori) can cause grease to splatter onto the heating coil. If not cleaned regularly, this results in smoke and sometimes triggers kitchen smoke alarms.
Pro tip: Wipe the basket, drip tray, and coil area after every heavy use. Consider using air fryer parchment paper to reduce mess.

2. Bulk and Kitchen Space

At over 5kg and with a sizable footprint, this air fryer dominates smaller kitchen counters. Several users recommend measuring your available counter space before buying, especially if your kitchen is compact.

3. Non-Stick Coating Over Time

Long-term Indian reviewers note that the non-stick coating may start to degrade after a year or two, particularly if cleaned with metal scrubbers or harsh sponges.
Pro tip: Stick to soft cloths, and use a bit of oil spray on the basket for sticky foods.

4. Electrical Load

At 1700W, it draws substantial power. If your kitchen wiring is old or you run many appliances at once, check with an electrician first to avoid tripping breakers.

5. Batch Cooking & Capacity Planning

Some Indian families found that even with a 6.2L basket, batch cooking is sometimes needed for large gatherings or parties. A Redditor from r/IndianFood summed it up:

“Get the one with the highest capacity that you can keep on your counter … the first batch ends up cooling down before the next one finishes. It’s annoying.”


Pros & Cons Table

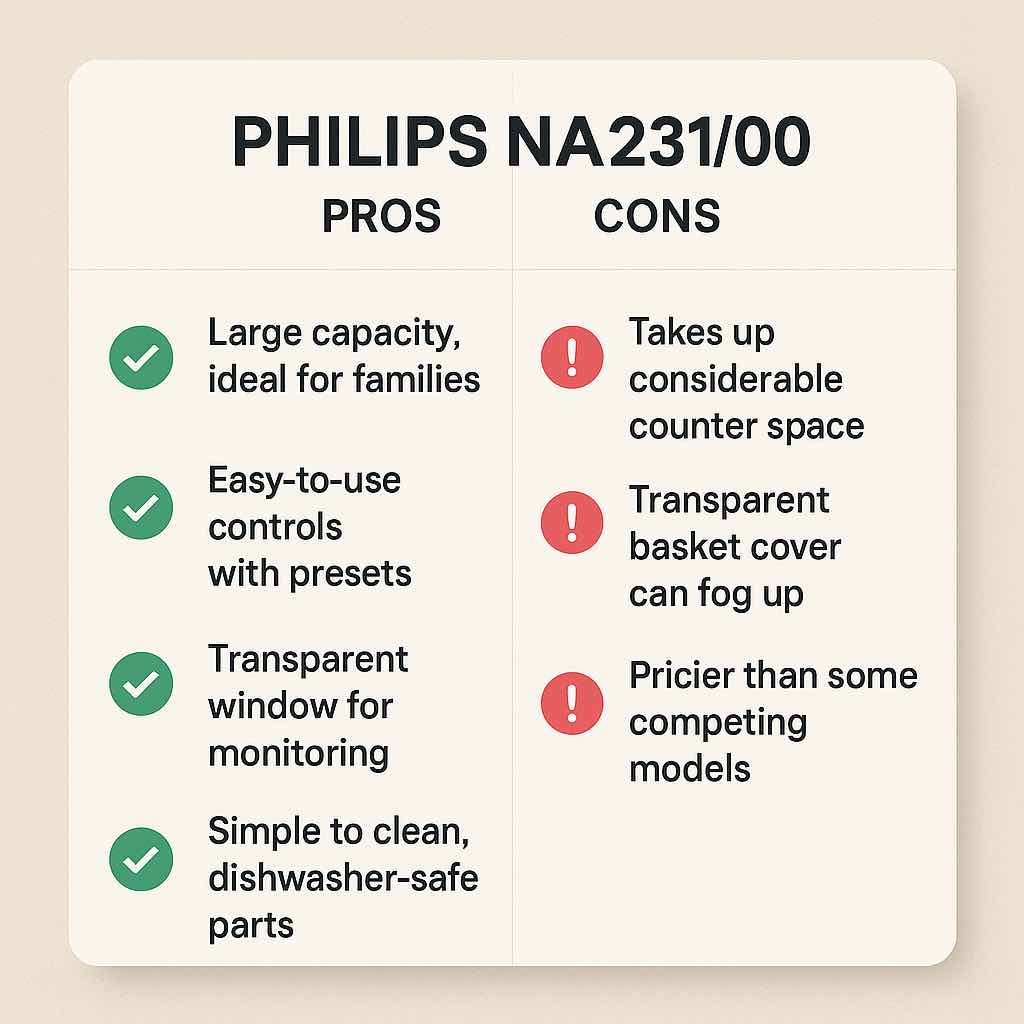
ProsCons
Large 6.2L basket fits big family mealsBulky for small kitchens
Touchscreen, 13 presets, and see-through windowNon-stick may degrade after 1–2 years
Very easy to clean (dishwasher-safe parts)Needs regular cleaning to prevent smoke
Excellent for Indian dishes (samosa, dal bati, tikka)High power (1700W) can stress old electrical circuits
Fast, even, oil-free cookingControls lack “pause” function mid-cycle
Highly recommended for gifting and daily usePrice is on higher side compared to generic brands
Pros and Cons of Philips NA231/00 Air Fryer

Tips for Best Experience (Indian Context)

  • Preheat for crispy results: Use the preheat function for best results on cutlets, fries, and tikki.
  • Don’t overload: Spread food in a single layer for uniform cooking.
  • Adjust presets for Indian food: Reduce the preset temperature or time slightly for lighter, thinner snacks.
  • Regular wipe-down: Keep the heating coil and air outlets clean to prevent smoking.
  • Try air fryer parchment: Minimizes sticking and cleaning for marinated or cheesy items.

Final Verdict: Who Should Buy the Philips NA231/00?

The Philips NA231/00 is ideal for families of 4–7, foodies who batch-cook, and those who love variety—from aloo tikki to grilled chicken. It’s a “set and forget” device once you learn a few tricks, and long-term Indian owners are highly satisfied with both performance and results.

Recommended for:

  • Medium to large Indian families
  • Health-conscious snackers
  • Gifting for weddings/housewarmings

Consider alternatives if:

  • You have a tiny kitchen or rarely cook for more than 2
  • You want a budget pick or smaller device (see Philips HD9200/90 or Inalsa Fry 4L)

User Review Highlights

“Had craving for Dal Bati, and made the bati in air fryer, amazing amazing results … Superb product for Indian dishes too.” — Flipkart
“Used daily by me and my daughters; use of air fryer paper keeps cleanup easy.” — Reddit
“Highly recommended; works for all snacks, not just fries!” — Flipkart


Buy the Philips NA231/00 Air Fryer

Affiliate Link: Buy Now on Amazon India


Have questions or want to share your own air fryer experience? Drop a comment below!

Discover More Top Air Fryers in India:

FAQs for Philips NA231/00 Air Fryer

1. What is the actual capacity of the Philips NA231/00 Air Fryer, and is it enough for Indian families?
The NA231/00 has a 6.2-litre basket, making it ideal for families of 4–7 members or for batch cooking. It easily fits 8–10 cutlets or 800g of fries at once—more than enough for most Indian meals.


2. Is the Philips NA231/00 suitable for Indian snacks like samosas, pakoras, and tikkis?
Yes! With minor tweaks to time and temperature, you can make samosas, pakoras, paneer tikka, and more. Use a light oil spray for extra crispiness.


3. How easy is it to clean the air fryer after oily or sticky Indian dishes?
The non-stick basket is dishwasher safe, and most users find daily cleaning easy. However, it’s important to regularly wipe the drip tray and heating coil after heavy use to avoid grease buildup and smoke.


4. Does the air fryer produce a lot of smoke or odor during use?
Not usually, but if grease accumulates on the heating coil or basket, it can cause smoke. Clean after every use, especially after cooking oily foods. The initial “plastic smell” goes away after a couple of uses.


5. Is the appliance bulky or difficult to store in small kitchens?
The NA231/00 is larger and heavier (over 5 kg, big footprint). It needs a dedicated spot on your kitchen counter and may not suit very small kitchens.


6. What kind of power outlet is needed for the Philips NA231/00?
It requires a standard 16A power socket (like a microwave or water heater) due to its 1700W power rating. Avoid using it on overloaded or old wiring.


7. How durable is the non-stick coating?
With careful use (no metal scrubbers or sharp tools), the coating can last 1–2 years or longer. Some users report peeling if harsh cleaning is done.


8. Are spare parts and service centers available in India?
Yes, Philips has a good service network in India. Baskets and accessories are available online or via official service centers.


9. Can I bake cakes or reheat leftovers in the air fryer?
Absolutely! The air fryer can bake, grill, roast, and reheat with great results. Many users bake sponge cakes, cupcakes, and even make pizza bases.


10. Is it worth the price compared to cheaper brands?
If you want reliability, build quality, and support, Philips is worth the extra cost. Budget brands may be smaller or lack after-sales support. For families and regular use, the NA231/00 is a smart investment.

Posted on 3 Comments

How to reduce the Glycemic Impact (GI) of Rice?

REDUCE THE GLYCEMIC IMPACT oF RICE

Rice. It’s comfort, it’s tradition, it’s at the heart of countless global cuisines. But for anyone keeping an eye on blood sugar, rice’s glycemic impact can feel like a guilty secret. The good news? There’s a lot you can do—without giving up your favorite dishes!

In this comprehensive post, we’ll break down how rice affects your blood sugar, why the glycemic index (GI) matters, and—most importantly—exactly what you can do in the kitchen to lower rice’s impact. Whether you’re managing diabetes, insulin resistance, or just want healthier carbs, these tips will transform the way you cook and eat rice.


What is the Glycemic Index (GI) and Why Should You Care?

The glycemic index ranks carbohydrate-containing foods based on how rapidly they raise blood glucose after eating. High-GI foods (like white rice, white bread, and many breakfast cereals) cause quick spikes in blood sugar; low-GI foods digest more slowly, leading to steadier energy and less strain on your body.

Rice’s GI can range widely—from the low 50s (brown, basmati) to the high 90s (sticky, jasmine, or overcooked white rice). The trick? You have more control over rice’s GI than you might think.


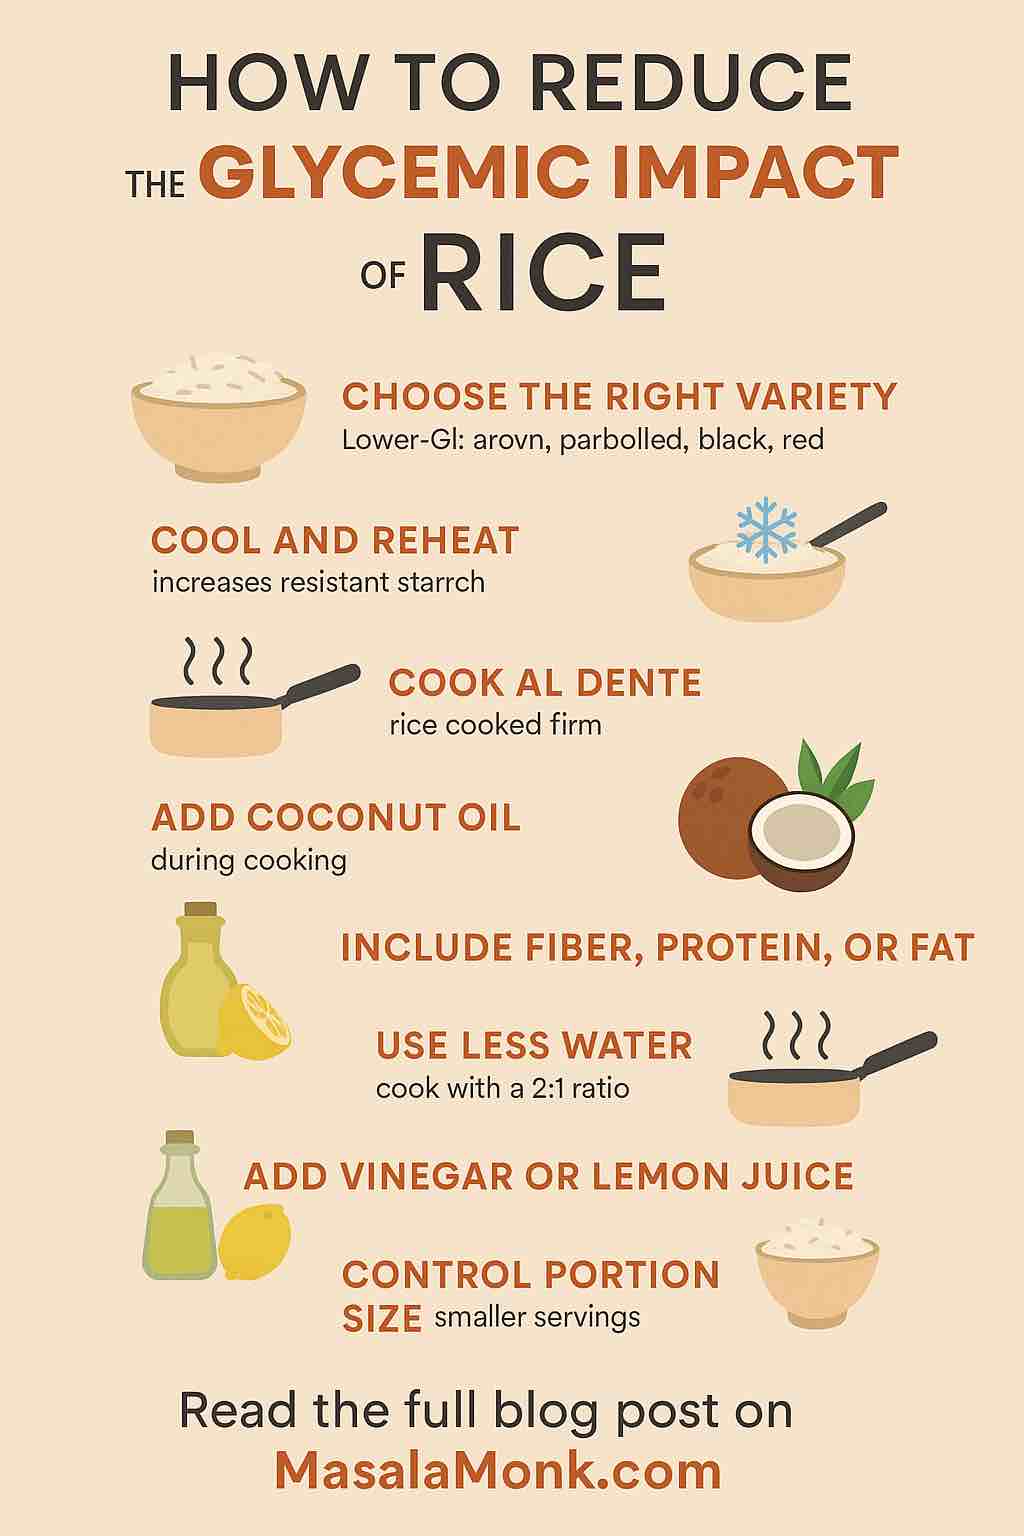
1. Pick the Right Rice Variety

Not all rice is created equal! Here’s a quick cheat sheet:

TypeTypical GI Range
Basmati50–58
Parboiled53–60
Brown/Black/Red50–60
Jasmine/Short-grain70–89
Glutinous/Sticky80–98

Why the difference?
Lower-GI rices like basmati and brown have higher amylose content—a type of starch that resists digestion, slowing glucose release.

Pro tip:
If you can find it, look for parboiled rice (sometimes labeled “converted rice”) or even heirloom types like Pokkali or Kuruva—recent studies show these have some of the lowest GI scores!


2. The Game-Changer: Cook, Cool, and Reheat

If you take away just one tip, let it be this. The process of cooking, cooling, and reheating rice increases something called resistant starch (RS)—carbohydrates that resist digestion and act like fiber in your gut.

Here’s how it works:

  1. Cook rice as you normally would.
    (Choose basmati, brown, or parboiled for best results.)
  2. Cool it quickly.
    Spread the rice out so it doesn’t steam itself soggy. Once at room temp, cover and refrigerate for 12–24 hours.
  3. Reheat to serve.
    Use a microwave, steamer, or stovetop. Reheating does NOT destroy resistant starch!

What’s the science?
Studies show this method can drop the glycemic response by 15–40%—with some varieties, even more. One study saw post-meal blood sugar drop from 152 to 125 mmol·min/L simply by chilling and reheating rice.


3. Cooking Tweaks: Less Water, Al Dente, and More

  • Cook rice ‘al dente’ (slightly firm): Mushy rice = more digestible = higher GI. Slightly undercooked grains retain more resistant starch.
  • Use less water: A 2:1 water-to-rice ratio is better than flooding your pot. This also helps create firmer, lower-GI rice.

4. Add a Spoonful of Science: Coconut Oil or Vinegar

Coconut Oil Method

  • Add 1 teaspoon of coconut oil to the water before cooking your rice.
  • Cool, refrigerate overnight, and then reheat.
  • Sri Lankan researchers found this method increased resistant starch by up to 60%.

Acid It Up

  • A splash of vinegar or squeeze of lemon juice on your rice, or a salad dressing with acid on the side, can lower the meal’s GI by 15–20%. The acid slows gastric emptying and modifies starch digestion.

5. Pair Smart: Fiber, Fat, and Protein Are Your Friends

Never eat rice alone! Combining rice with protein (chicken, beans, tofu), fiber (vegetables, legumes), or healthy fats (avocado, nuts, olive oil) slows the absorption of glucose.

Easy meal ideas:

  • Brown rice with lentils and greens
  • Sushi with avocado and fish
  • Stir-fried rice with eggs and veggies

6. Mind Your Portions (Think Glycemic Load)

GI is just part of the picture. Glycemic load (GL) considers how much you actually eat. Even high-GI foods can have a modest impact if the portion is small. A half-cup serving of rice, especially when mixed with protein and fiber, is less likely to cause spikes than a heaping bowl.


7. Safe Storage is Key

Refrigerate cooked rice quickly. Don’t leave it at room temp for hours—it can harbor Bacillus cereus, a food-poisoning bug. Store in the fridge in small, shallow containers and reheat thoroughly.


8. Myth Busting: Does Freezing Cut Calories?

You might’ve seen viral claims that freezing rice “halves the carbs.” The reality: cooling increases resistant starch and may slightly lower calorie absorption, but the effect is modest. Still, every bit helps—plus you get a bonus boost for gut health!


Quick Reference: How to Lower Rice’s Glycemic Impact

TipEffectHow To Do It
Choose lower-GI rice15–25% lowerBasmati, parboiled, brown, red, black rice
Cook-cool-reheat15–40% lowerRefrigerate 12–24h, then reheat
Add coconut oil while cookingup to 60% more RS1 tsp per cup of rice, chill and reheat
Acid (vinegar/lemon)~15–20% lower GIAdd to rice or eat alongside
Pair with fiber/protein/fatSignificantly lower peakEat rice with beans, greens, eggs, avocado, etc.
Keep portions moderateLowers overall GL1/2 cup cooked rice per meal

Kitchen Cheat Sheet: How I Lower the GI of My Rice

  1. Pick brown basmati rice.
  2. Rinse well and cook with 2:1 water and a pinch of salt.
  3. Add a teaspoon of coconut oil during cooking.
  4. Cool quickly and refrigerate overnight.
  5. Reheat for lunch the next day—top with lentils, sautéed spinach, and a dash of lemon juice.
  6. Enjoy delicious rice without the blood sugar rollercoaster!

Final Thoughts

Rice doesn’t have to be off-limits! By making these science-backed tweaks—choosing the right variety, using the cook-cool-reheat method, pairing wisely, and keeping portions sensible—you can enjoy all your favorite rice dishes while keeping your blood sugar steady.

Try these methods and share your results—what works best for you? If you have favorite recipes or hacks, leave them in the comments! Your rice just got a whole lot healthier.

10 FAQs: Reducing the Glycemic Impact of Rice


1. Q: Does brown rice always have a lower glycemic index than white rice?
A: Usually yes, but not always. While brown rice typically has more fiber and a lower GI than white rice, some white rice varieties (like parboiled or basmati) can have a GI similar to or even lower than some brown rices. Always check the variety.


2. Q: Is cooling and reheating rice safe?
A: Yes, if handled correctly. Cool rice quickly after cooking, store it in the refrigerator within 1 hour, and reheat thoroughly before eating. This prevents bacterial growth, especially Bacillus cereus.


3. Q: Can I use the cook-cool-reheat method with all types of rice?
A: Yes, but it works best with high-amylose varieties (like basmati and parboiled). Very sticky or glutinous rices may not see as much resistant starch increase.


4. Q: Does adding vinegar or lemon juice to rice change the taste?
A: A small amount of vinegar or lemon juice can brighten flavors without overpowering the dish. If you’re concerned, try adding it to a salad or side, rather than directly to the rice.


5. Q: Will these methods actually reduce the calories in rice?
A: The main benefit is lower glycemic impact. While increasing resistant starch can modestly reduce the amount of digestible calories, the effect on total calories is small.


6. Q: How much rice should I eat to keep my blood sugar steady?
A: Keep portions moderate—about 1/2 cup cooked rice per meal. Always combine with protein, fiber, and healthy fats for best results.


7. Q: Is rinsing rice before cooking necessary for lowering GI?
A: Rinsing removes some surface starch, which may slightly lower GI, but the effect is less significant than using lower-GI varieties or the cook-cool-reheat method.


8. Q: Can I freeze rice instead of refrigerating it to increase resistant starch?
A: Yes! Freezing rice after cooking and then reheating it also increases resistant starch—just be sure to cool it quickly and store safely.


9. Q: Will adding coconut oil to rice make it taste like coconut?
A: In small amounts, coconut oil is usually undetectable in flavor, especially if you’re using sauces or spices.


10. Q: Are there any risks for people with diabetes using these techniques?
A: Yes—lower glycemic response means your usual medication or insulin dose may need adjustment. Always monitor your blood sugar and consult your healthcare provider before making significant dietary changes.