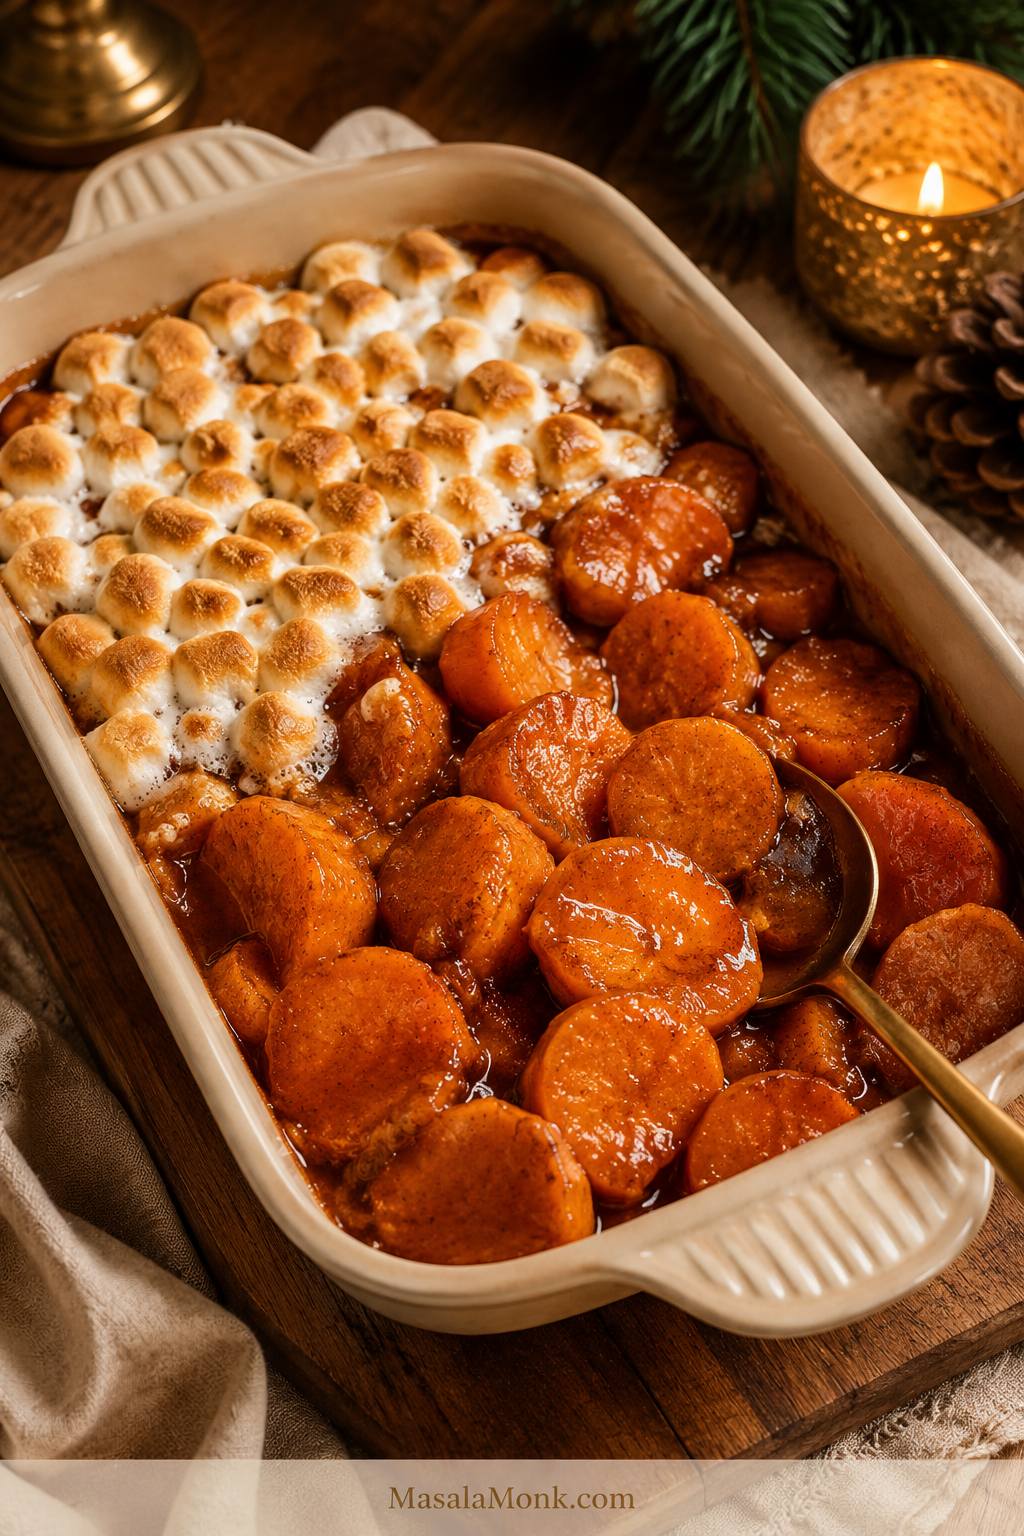
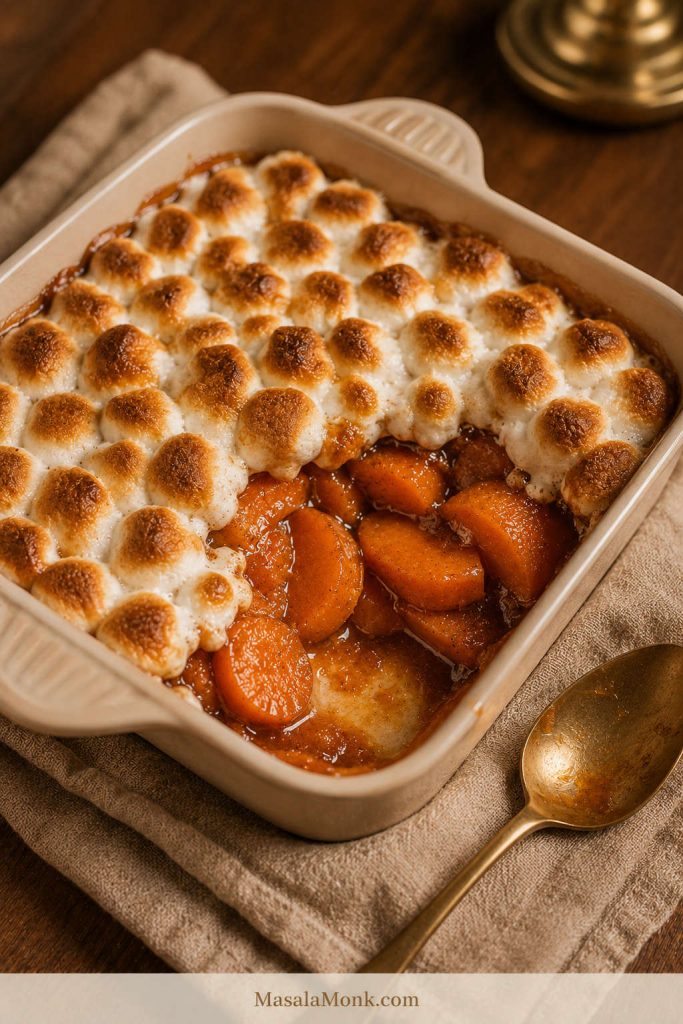
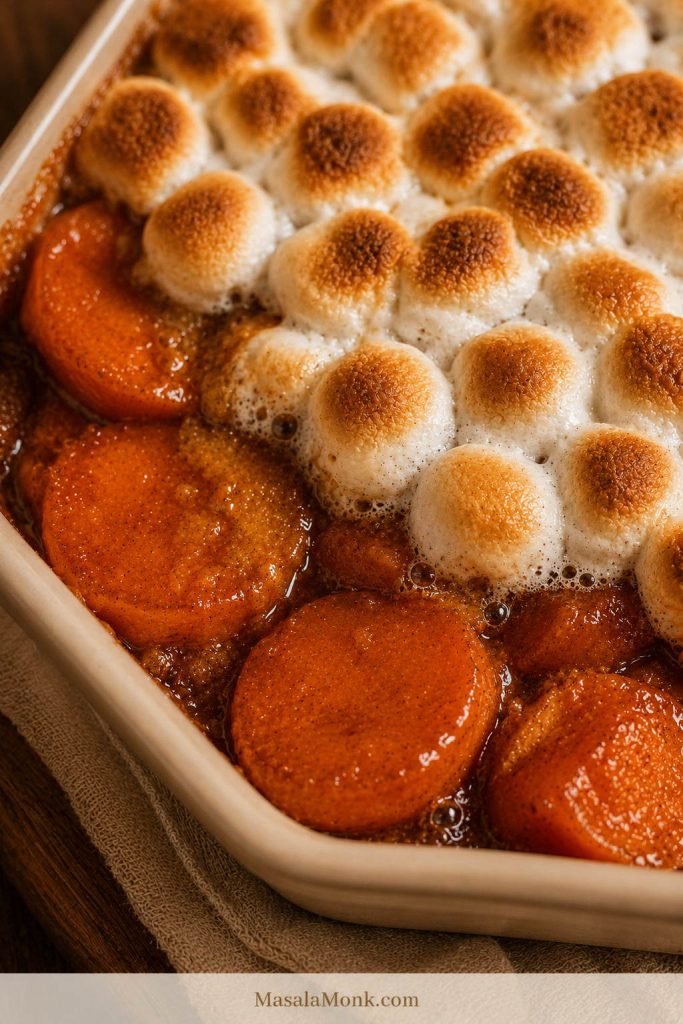
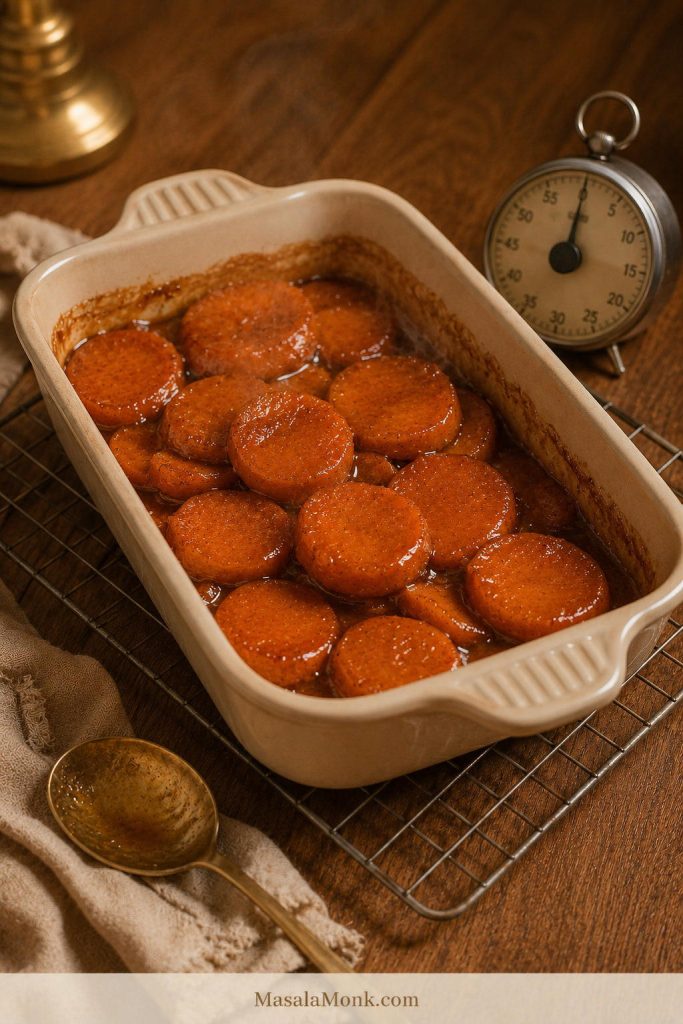
Candied yams are one of those sides people remember by texture: soft orange slices, a shiny brown sugar glaze, warm spice, and maybe a toasted marshmallow topping. This version keeps that familiar comfort, but gives you the cues that prevent watery sauce, mushy canned yams, burnt sugar, or marshmallows that disappear into the dish.
Fresh or canned, oven or stovetop, marshmallows or not — this recipe is built around the same goal: soft, buttery yams, a spoonable brown sugar glaze, and no thin liquid pooling at the bottom of the pan. This is the kind of side dish people expect to taste familiar, not reinvented.
For many tables, candied yams are not the place for wild reinvention. Use this recipe as a steady base, then finish it the way your family remembers it.
- Make a smooth butter, brown sugar, and spice glaze, then stir in vanilla off the heat.
- Bake covered at 350°F / 175°C for 35–40 minutes.
- Uncover and bake 20–25 minutes more, basting once.
- Add marshmallows only during the final 8–12 minutes, if using.
- Rest 10 minutes so the sauce turns shiny and spoonable.
The full guide below covers fresh, canned, stovetop, marshmallow, no-marshmallow, and make-ahead versions, but the basic idea stays the same: soften the yams, thicken the sauce, and give it a short rest.
Quick Answer: What Are Candied Yams?
Candied yams are a sweet side dish made with orange-fleshed sweet potatoes, butter, brown sugar, cinnamon, nutmeg, vanilla, and sometimes marshmallows. At the table, they eat like soft sweet potatoes in a buttery brown sugar sauce.
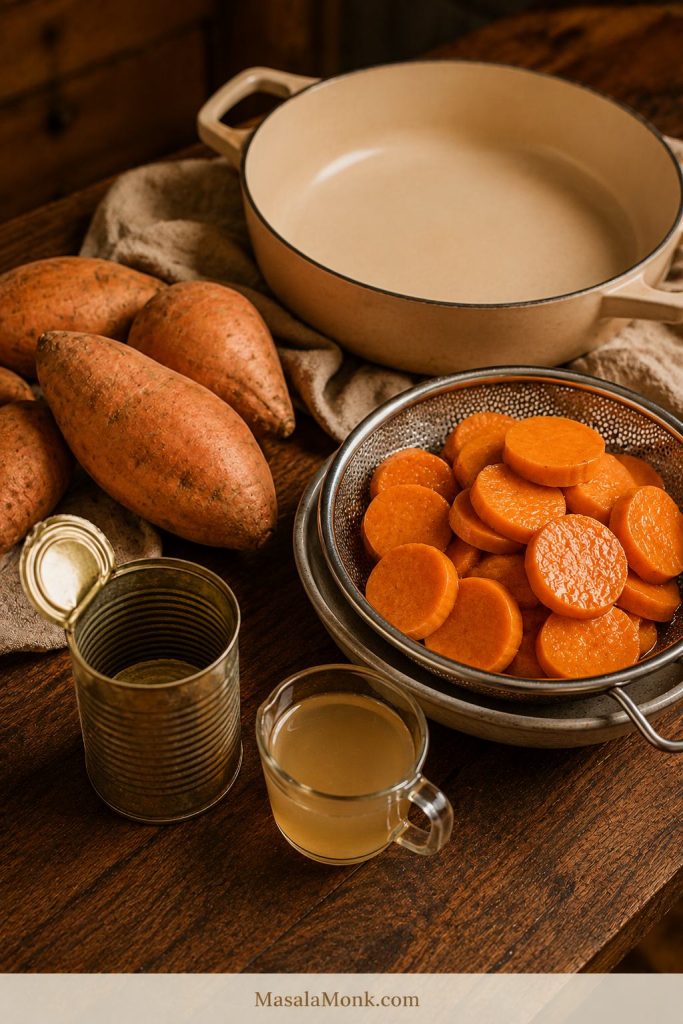
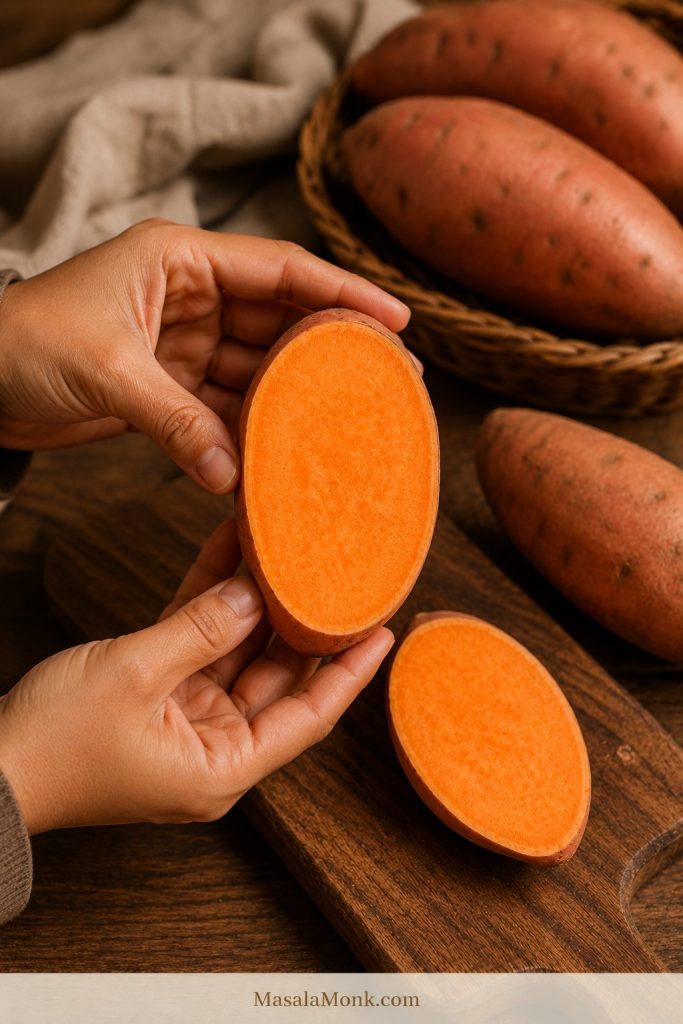
In most U.S. grocery stores, the “yams” used for candied yams are actually sweet potatoes, and they are exactly what you want here. For the classic orange color and soft texture, look for sweet potatoes labeled as garnet yams, jewel yams, red yams, or simply yams.
Here, there is no need to hunt for true yams. Buy orange-fleshed sweet potatoes, even if your store labels them yams. They soften into the glaze instead of staying dry or starchy.
Why This Recipe Works
The difference here is that the recipe is built around texture cues, not just time: covered heat to soften, uncovered heat to reduce, and a short rest so the sauce clings.
Thick slices hold their shape, a smooth saucepan glaze prevents grainy sugar, covered baking softens the yams, uncovered baking reduces the extra liquid, and resting helps the brown sugar butter mixture cling instead of pool.
Think of it as steam first, reduction second, rest last. That order keeps the yams tender without leaving a watery pool underneath.
The watery batches usually have one thing in common: too much liquid and not enough uncovered time. Often, the best batches look a little loose straight from the oven, then settle into a glossy coating after the rest.
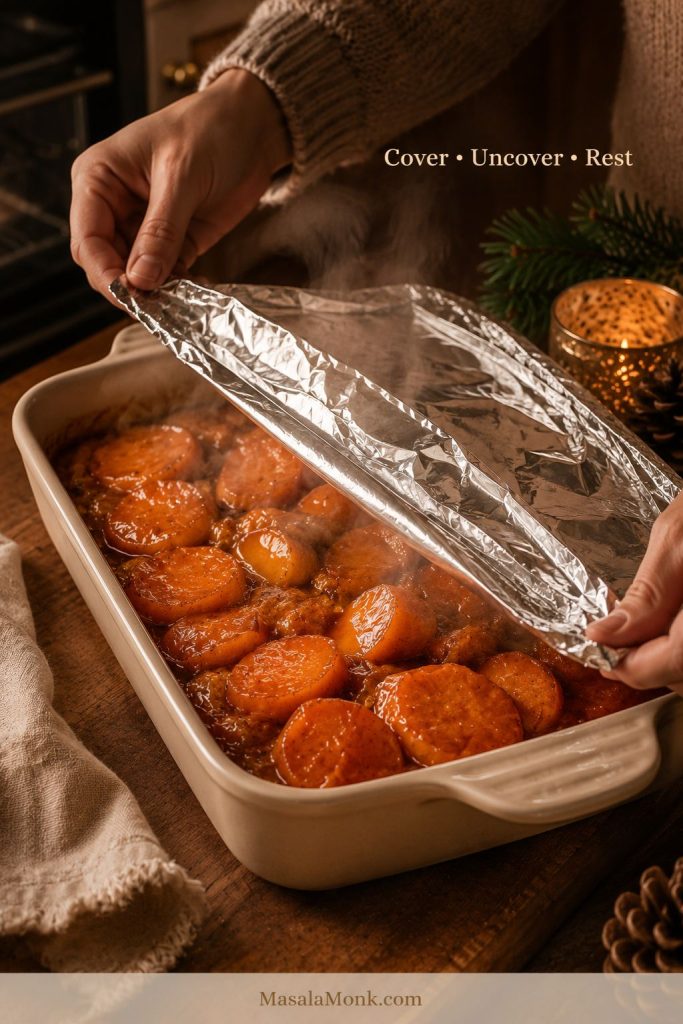
- Fresh yams: cover, uncover, rest.
- Canned yams: drain, coat, heat, stop.
- Marshmallows: tender first, toast last.
- Sauce: shiny and spoonable, not watery or caramel-thick.
Candied Yams Quick Facts
| Fact | Detail |
|---|---|
| Servings | 8 |
| Main oven temp | 350°F / 175°C for fresh sweet potatoes |
| Fresh bake time | 35–40 minutes covered, then 20–25 minutes uncovered |
| Best baking dish | 9×13-inch / 23×33 cm glass or ceramic dish |
| Rest time | 10 minutes before serving |
| Marshmallow timing | Final 8–12 minutes for fresh yams; 5–8 minutes for canned yams |
Which Candied Yams Method Should You Use?
Start with the method that fits the day. Maybe you have time for fresh sweet potatoes. Or maybe the oven is crowded with turkey, ham, stuffing, green bean casserole, or another side. You may already have canned yams in the pantry.
Fresh yams give you the prettiest slices. Canned yams give you speed. Stovetop cooking gives you control. Marshmallows give you nostalgia. None of those choices are wrong.
| Method | Best For | Approx. Time | Key Cue |
|---|---|---|---|
| Fresh baked candied yams | Best texture, neat slices, holiday table presentation | 60–70 minutes | Uncover long enough for the sauce to reduce |
| Canned baked candied yams | Fast shortcut, pantry version, smaller batch | 20–30 minutes | Drain well and heat gently |
| Stovetop candied yams | Oven is full, spoon-coated finish, Southern-style cooking | 50–65 minutes | Keep the heat medium-low |
| Crockpot candied yams | Freeing oven space and holding a side dish warm | 3–4 hours on low | Expect a thinner syrup |
| Marshmallow finish | Classic Thanksgiving-style topping | 5–12 minutes | Add only at the end |
As a default, use the fresh baked version when texture matters, canned yams when speed matters, and stovetop cooking when the oven is full. If you are starting with cans, keep the rhythm even simpler: drain, coat, heat, stop.
Are Candied Yams Actually Sweet Potatoes?
Most of the time, yes. In the United States, the orange “yams” sold in regular grocery stores are usually orange-fleshed sweet potatoes. True yams are starchier, drier, and less common in everyday U.S. supermarkets. The Library of Congress explanation of sweet potatoes and yams is useful if you want the longer background.
For this recipe, buy orange sweet potatoes or yams labeled garnet, jewel, red yam, or simply yam. That naming confusion matters less than the flesh color here. Orange, moist sweet potatoes give the classic color, sweetness, and soft texture people expect in candied yams.
Ingredients You’ll Need
The ingredient list is simple because candied yams are not trying to be fancy. What matters is balance: enough brown sugar to feel candied, enough butter to feel rich, enough salt and citrus to keep the sweetness from going flat.
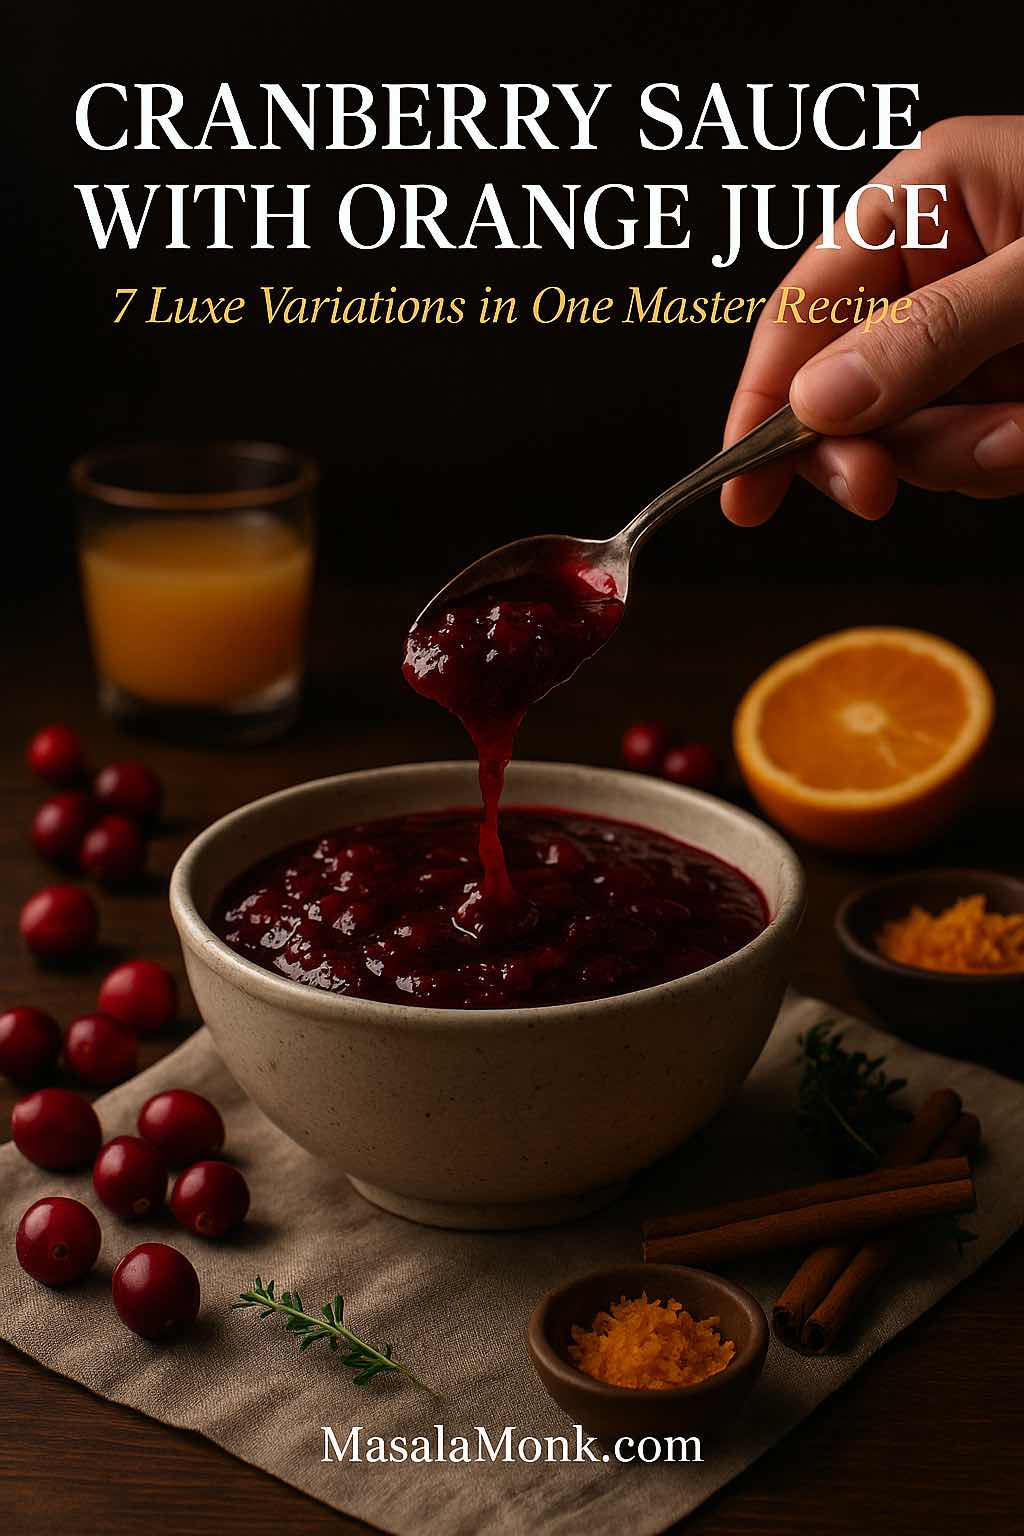
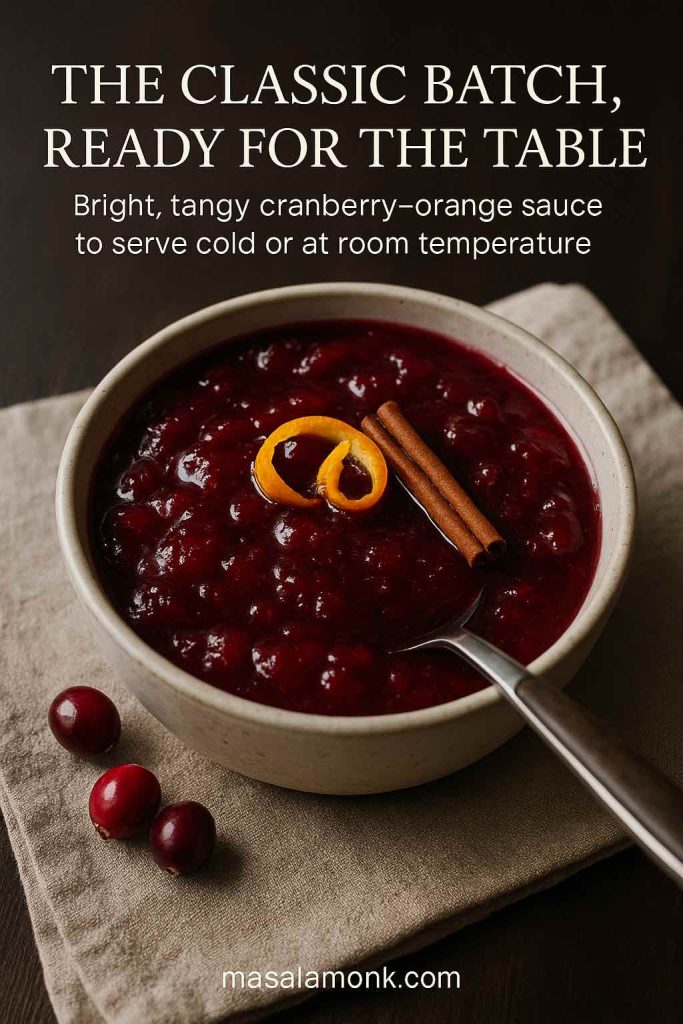
Brown sugar gives the sauce depth, butter gives it body, and salt keeps the dish balanced. Vanilla, warm spices, and a little orange juice or lemon juice round out the flavor. If you like that orange-bright flavor, the same idea works beautifully in cranberry sauce with orange juice.
Ingredient Amounts and Cues
| Ingredient | Amount | Why It Matters |
|---|---|---|
| Orange sweet potatoes / yams | 3 lb / 1.35 kg | The base of the dish. Use orange sweet potatoes for the classic color and texture. |
| Unsalted butter | 1/2 cup / 113 g | Makes the sauce rich and smooth. |
| Brown sugar | 3/4 cup / 150 g, or up to 1 cup / 200 g for a sweeter style | Gives the deep caramel-like sweetness. |
| Maple syrup or orange juice | 1/4 cup / 60 ml | Maple gives deeper flavor; orange juice gives brightness. |
| Water | 2–4 tbsp / 30–60 ml | Helps the sugar dissolve into a smooth sauce. |
| Cinnamon | 1 tsp | The main warm spice. |
| Nutmeg | 1/4 tsp | Adds classic warmth. |
| Ginger | 1/4 tsp, optional | Adds a little extra spice without taking over. |
| Salt | 1/2 tsp | Balances the sugar and butter. |
| Vanilla extract | 1–2 tsp | Rounds out the brown sugar mixture. Add it off the heat. |
| Lemon juice or apple cider vinegar | 1–2 tsp, optional | Useful if you want a sweet-but-not-cloying finish. |
| Mini marshmallows | 2–3 cups, optional | Add at the end for a toasted topping. |
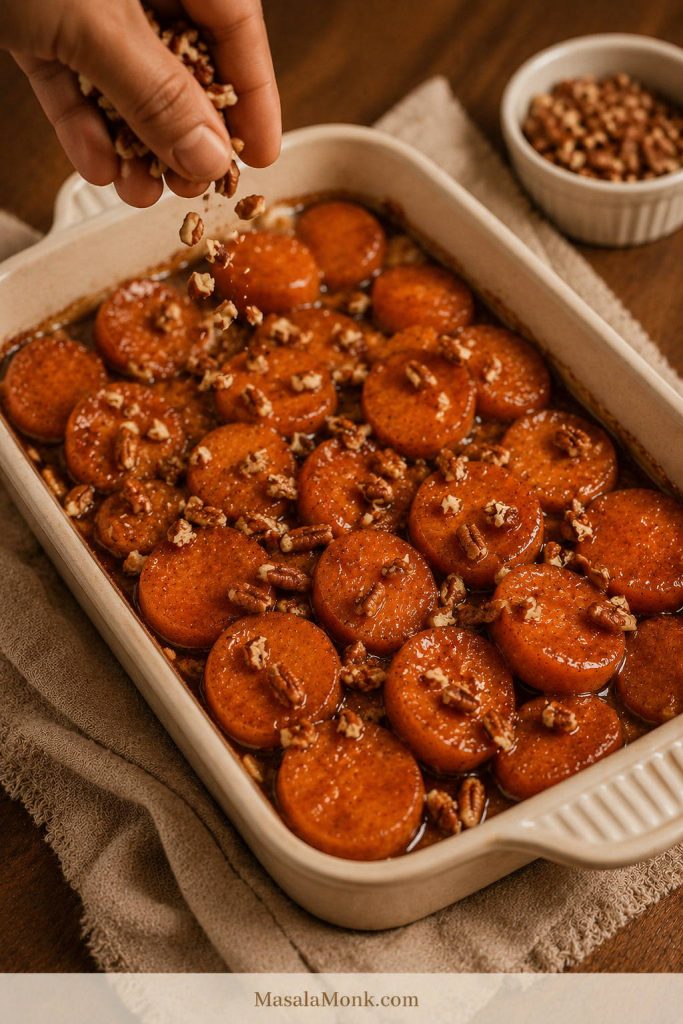
| Chopped pecans | 1/2 cup, optional | Adds crunch. Best added near the end so they stay crisp. |
Small Ingredient Choices That Matter
When the balance is right, the coating tastes buttery and warm, not just sugary, and the sweet potatoes stay tender enough to spoon but firm enough to hold.
If you are tempted to use a ready spice blend, keep it gentle. A small pinch of apple pie spice can work because it usually leans on cinnamon, nutmeg, and warm baking spices, but too much can make the yams taste more like dessert than a side dish.
How to Make Candied Yams
This is the version to make when you want the dish to look generous on the table: tender slices, glossy sauce, and enough structure that the yams do not collapse when you spoon them out. For the fresh baked version, the rhythm is simple: cover, uncover, rest.
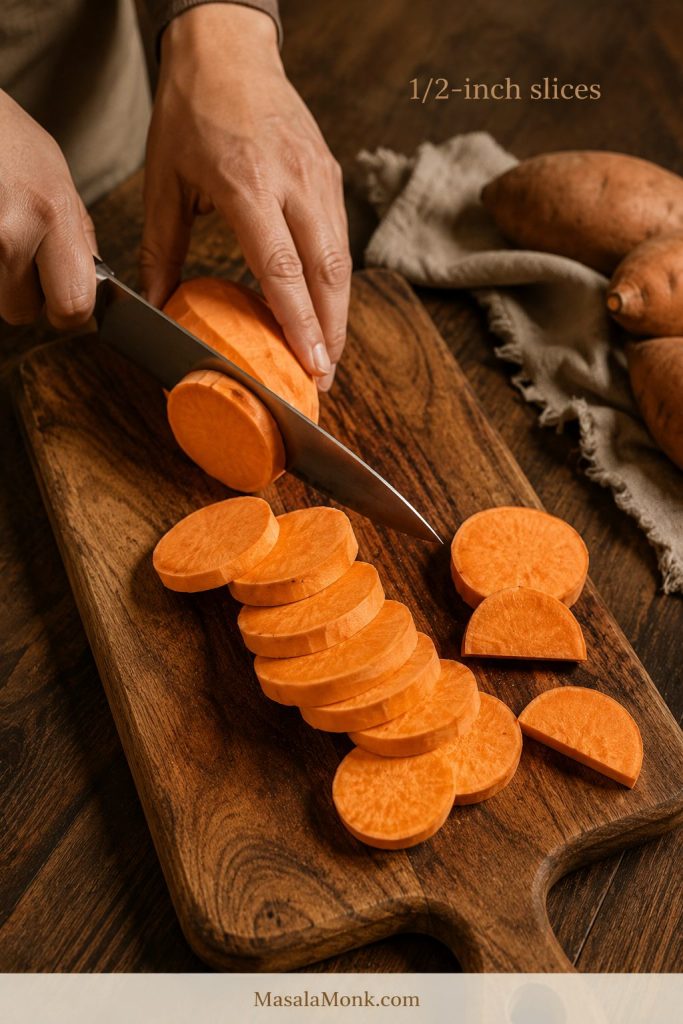
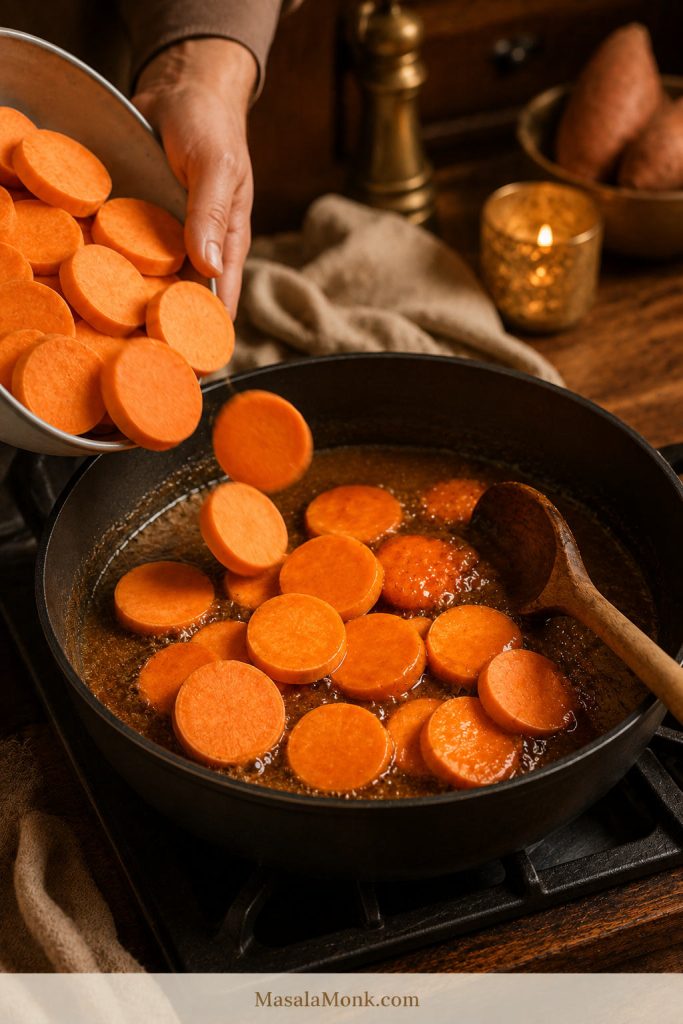
1. Prep the sweet potatoes
Peel the sweet potatoes and slice them into 1/2-inch / 1.25 cm rounds. If the sweet potatoes are very wide, cut the rounds into half-moons so they are easier to serve.
Thin slices tend to soften before the syrup has time to reduce, while very thick slices need longer and can make the edges overcook. The best texture comes from slices that are thick enough to hold together but thin enough to soften in the covered bake.
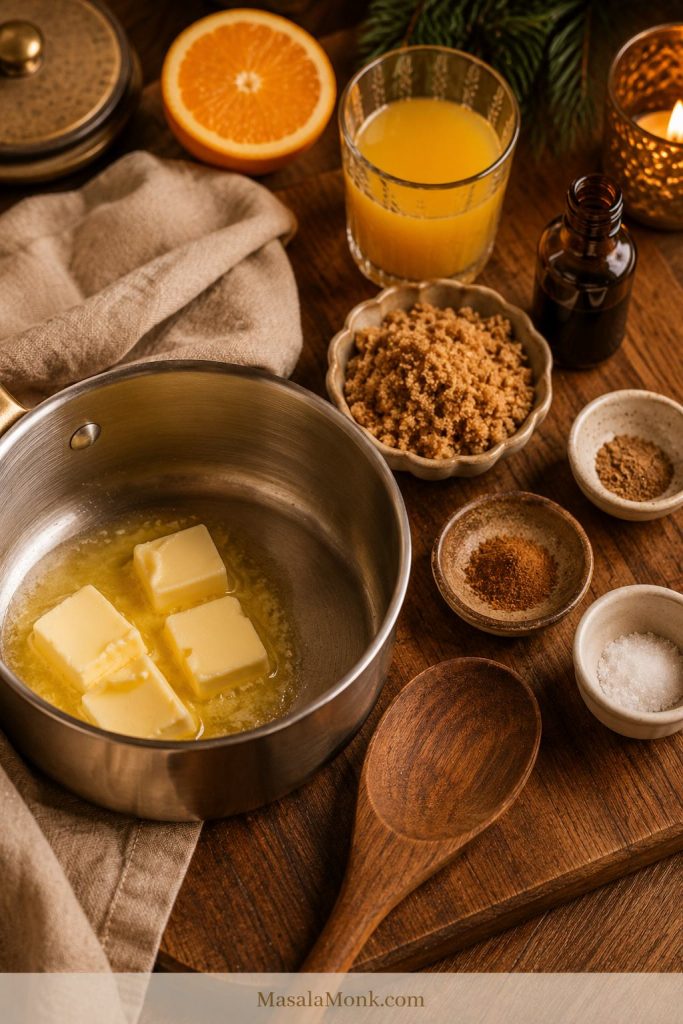
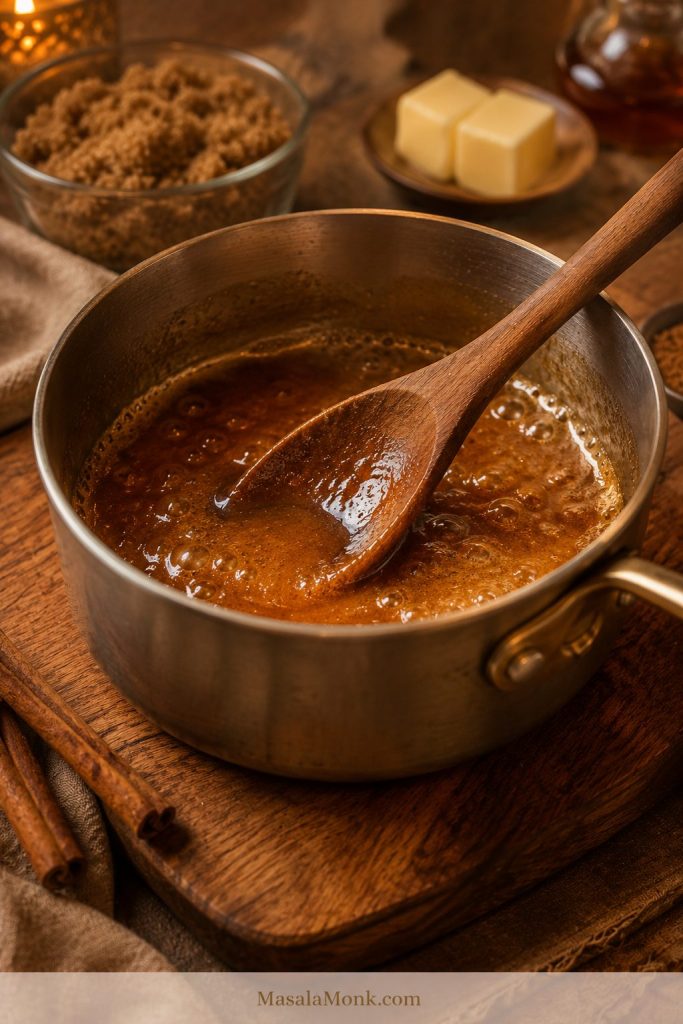
2. Make the brown sugar butter glaze
Melt the butter in a saucepan over medium heat. Add the brown sugar, maple syrup or orange juice, water, cinnamon, nutmeg, ginger if using, and salt. Stir until the sugar dissolves and the mixture looks smooth and shiny.
Let it bubble gently for 1–2 minutes, then remove it from the heat and stir in the vanilla. If using lemon juice or apple cider vinegar, stir it in now.
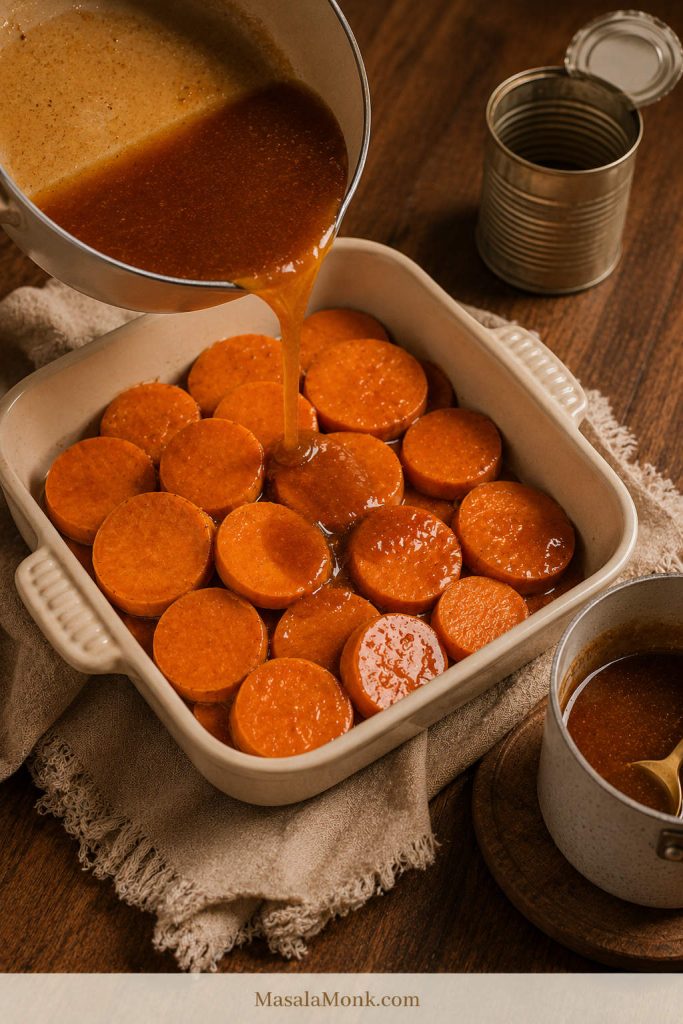
3. Arrange and coat the yams
Place the sliced sweet potatoes in a greased 9×13-inch / 23×33 cm baking dish. Pour the warm glaze over the top, then gently turn the slices or spoon the brown sugar mixture over them so they are coated.
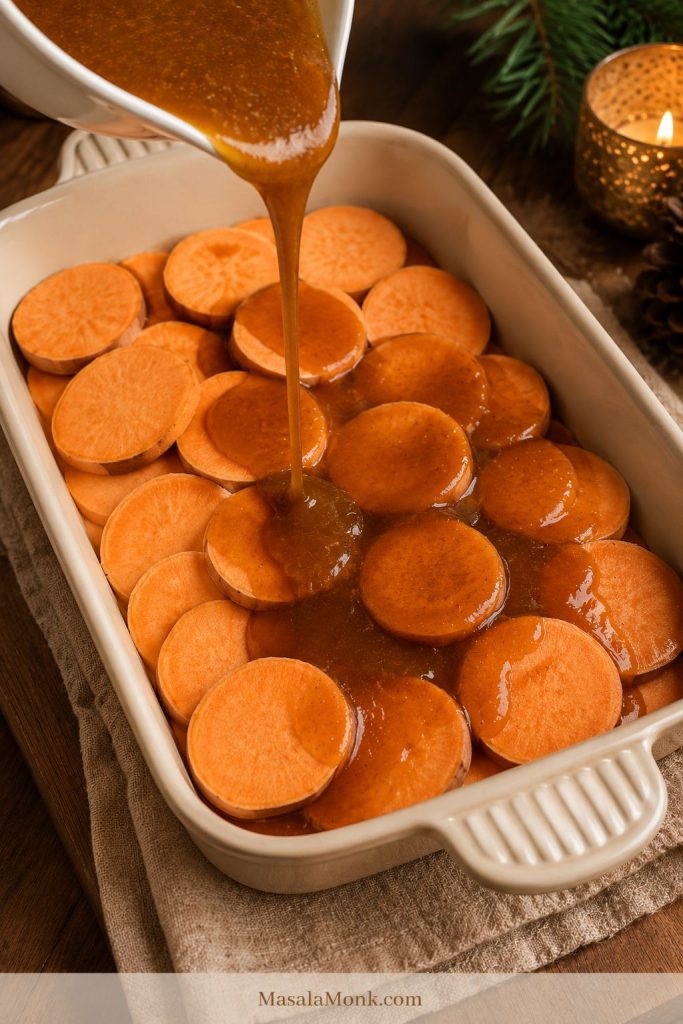
The slices do not have to be in one perfect layer, but avoid packing them so tightly that the sauce cannot move around them. A little space helps the edges bubble slowly and the syrupy coating thicken without scorching.
4. Bake covered
Cover the dish tightly with foil and bake at 350°F / 175°C for 35–40 minutes. The yams should begin to soften, but they should not be falling apart yet.
During the covered stage, steam softens the sweet potatoes without drying them out. It also gives the buttery syrup time to soak into the slices.
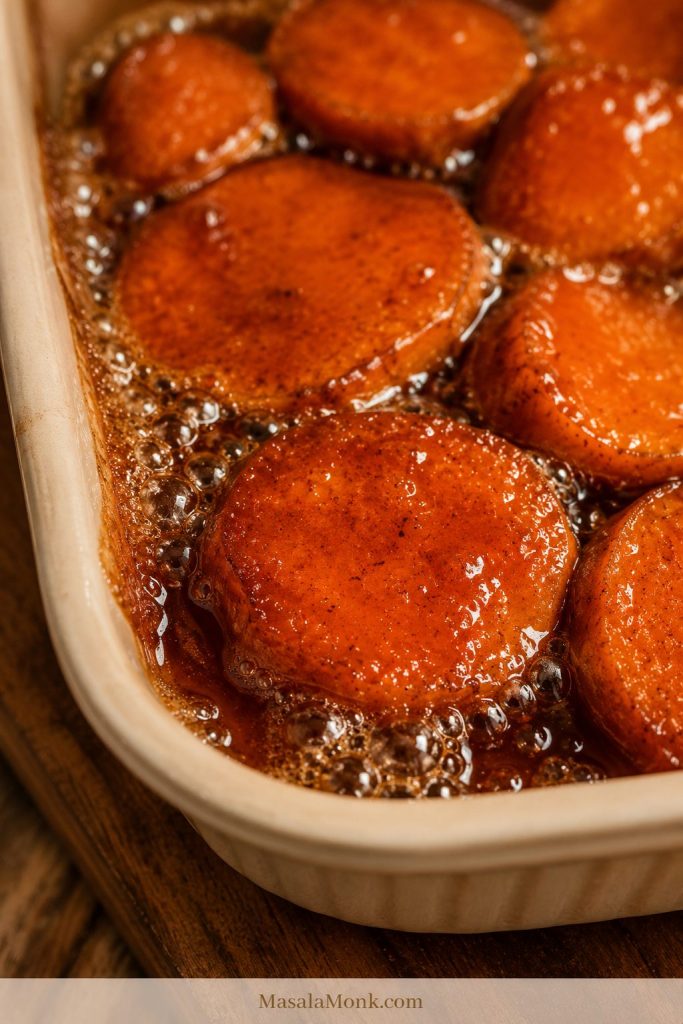
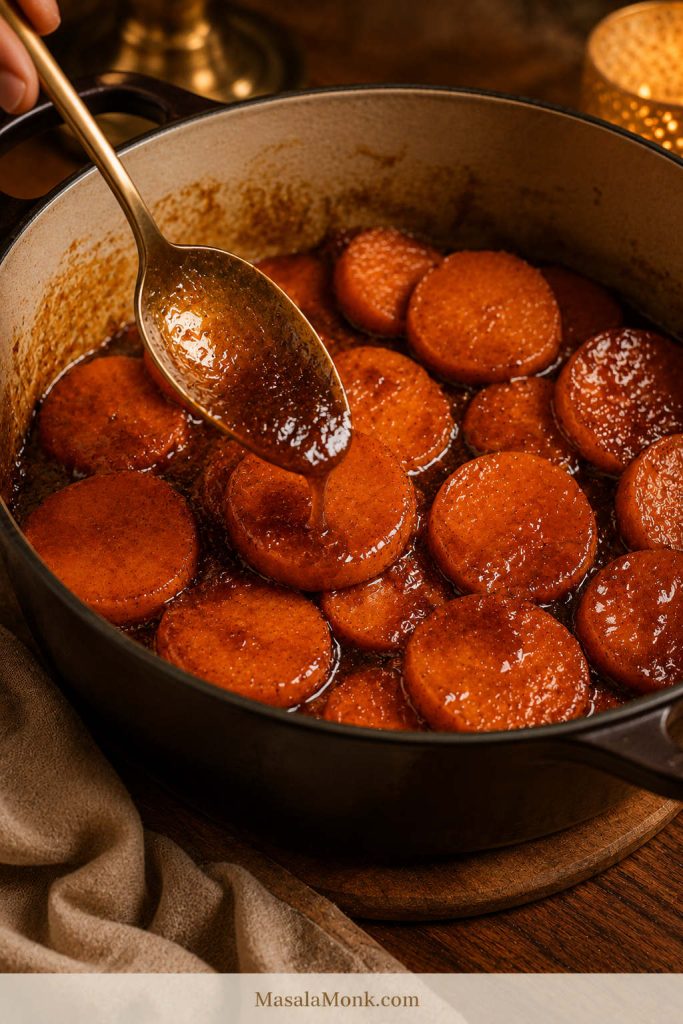
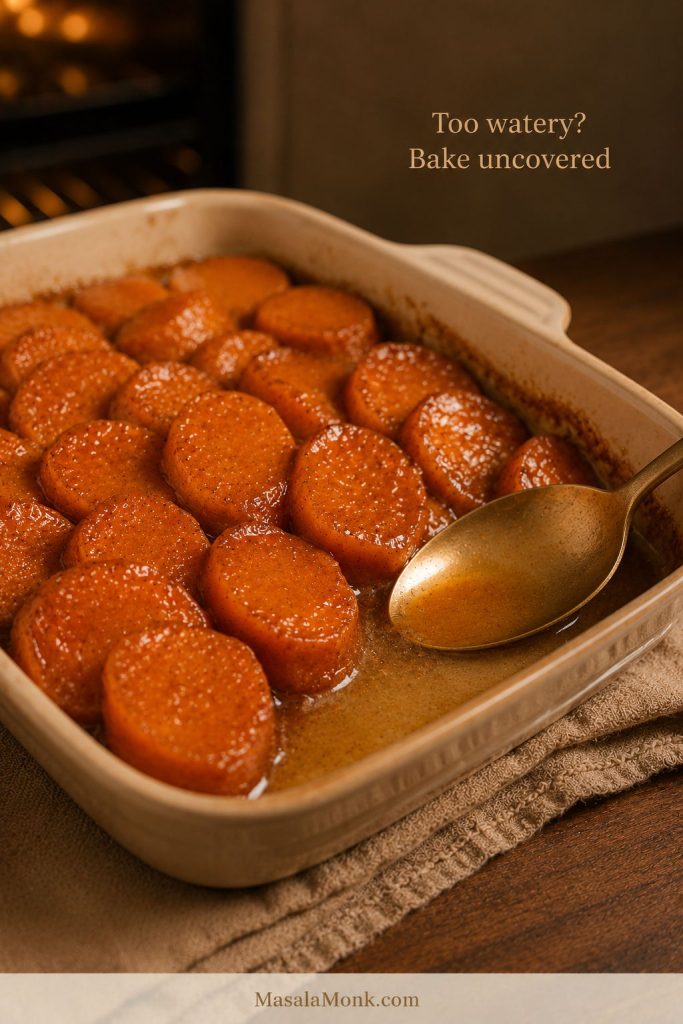
5. Bake uncovered
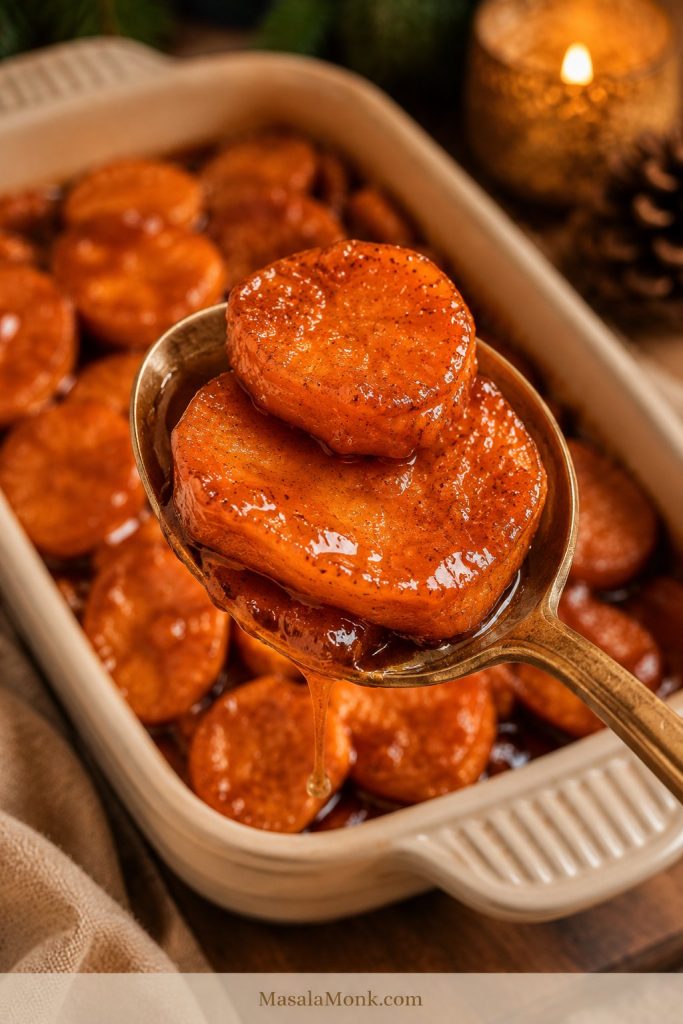
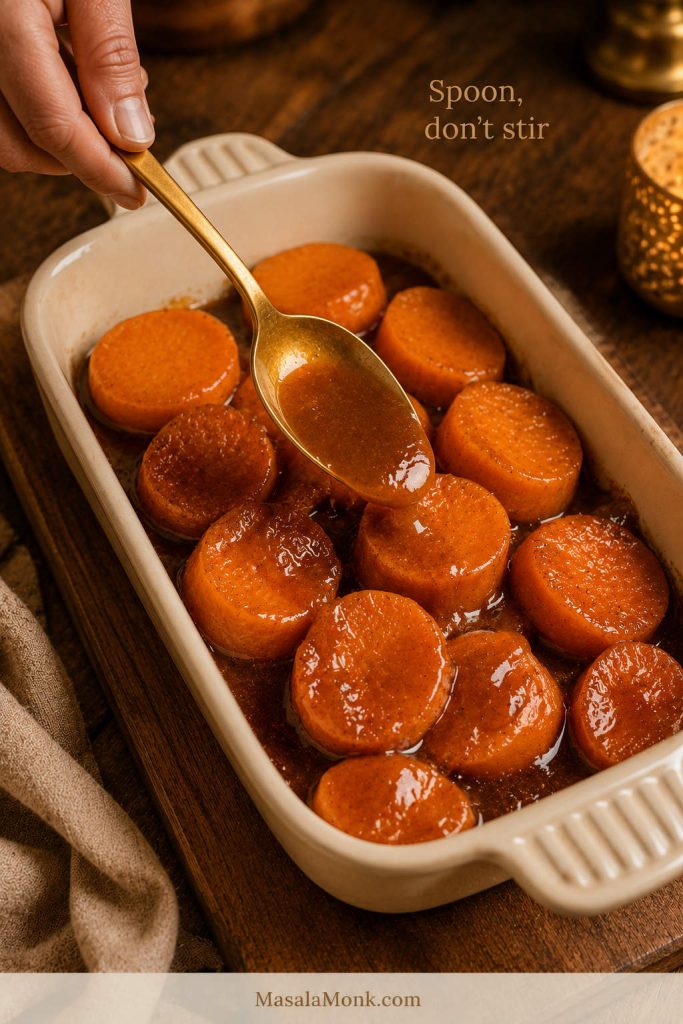
Remove the foil, spoon the sauce over the yams, and bake uncovered for another 20–25 minutes. By the end of baking, the edges should bubble slowly and the top slices should look lacquered, not dry.
The yams are ready when they are fork-tender and a spoon drags a shiny trail over the slices instead of leaving thin liquid behind. They do not need to look perfect at every stage; by the time they rest, they should be tender, coated, and sitting in a glossy coating. If the dish still looks loose, give it another 5–10 minutes uncovered.
If the edges darken too quickly or the syrup starts to smell scorched instead of buttery and spiced, move the dish away from the hottest part of the oven.
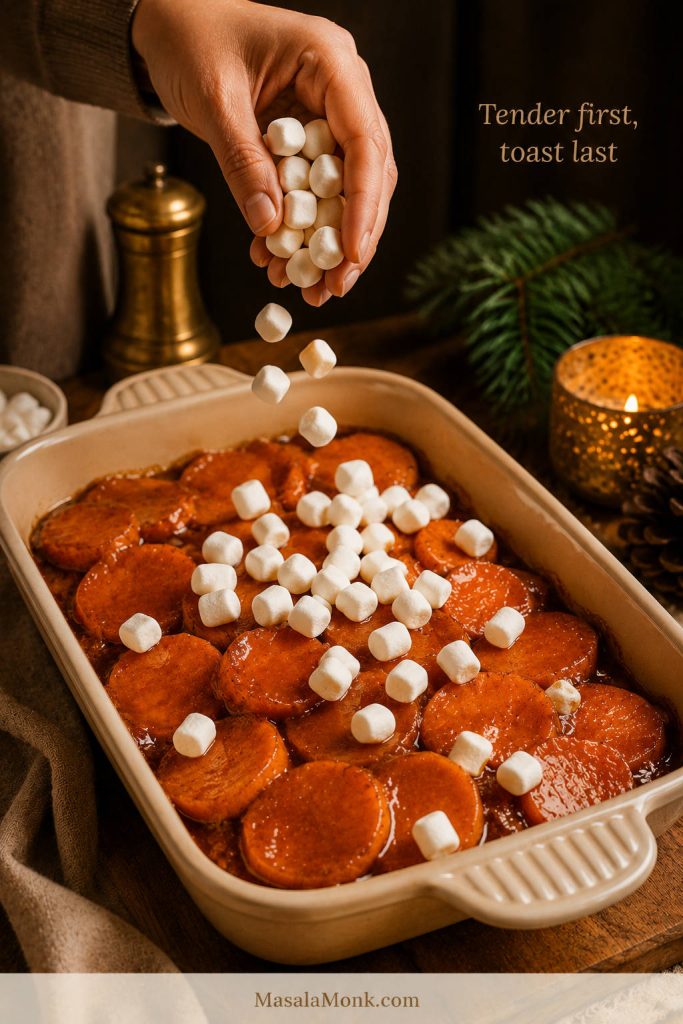
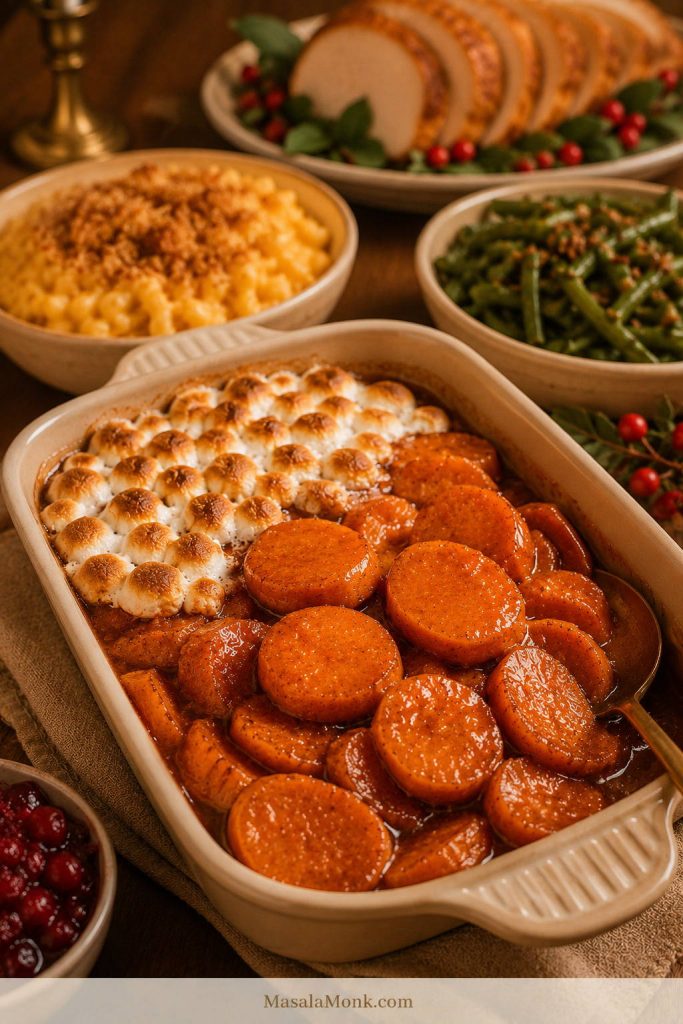
6. Add marshmallows if you want them
If using marshmallows, scatter them over the yams during the final 8–12 minutes of baking. They should puff into a soft golden blanket, with toasted tops and a little give underneath. For deeper browning, use the broiler for a few seconds at the end.
Marshmallows brown fast, so this is the one moment to stay by the oven.
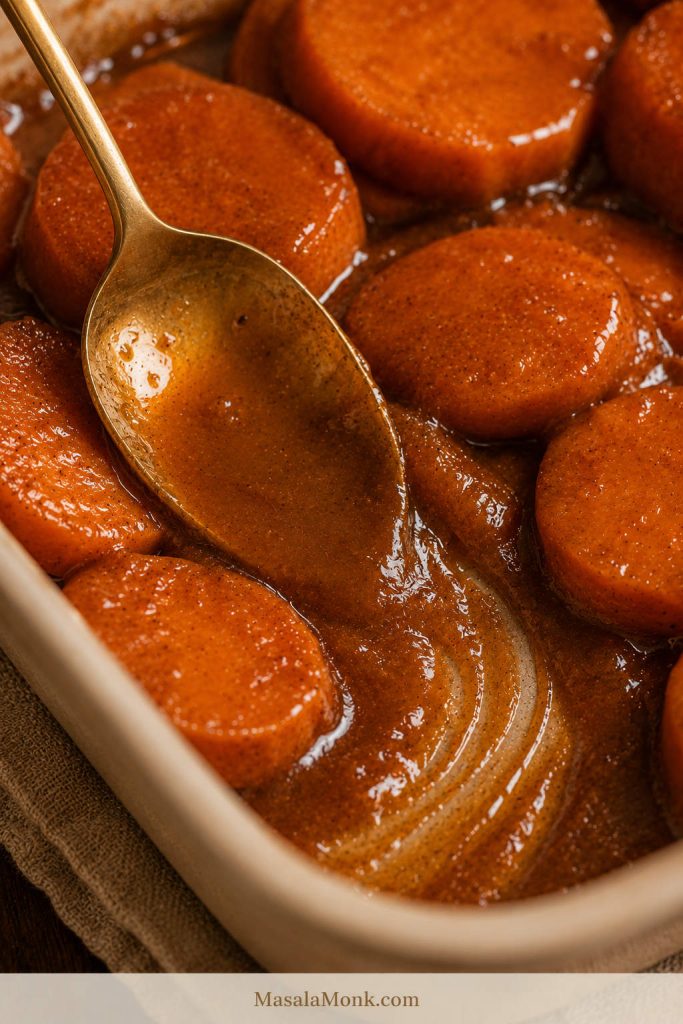
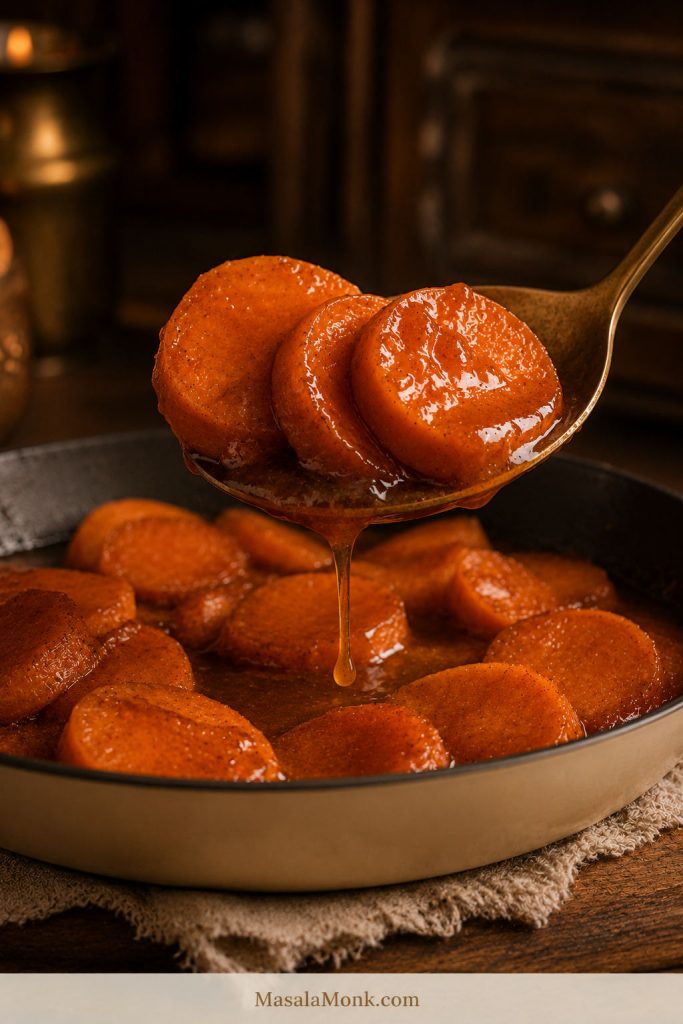
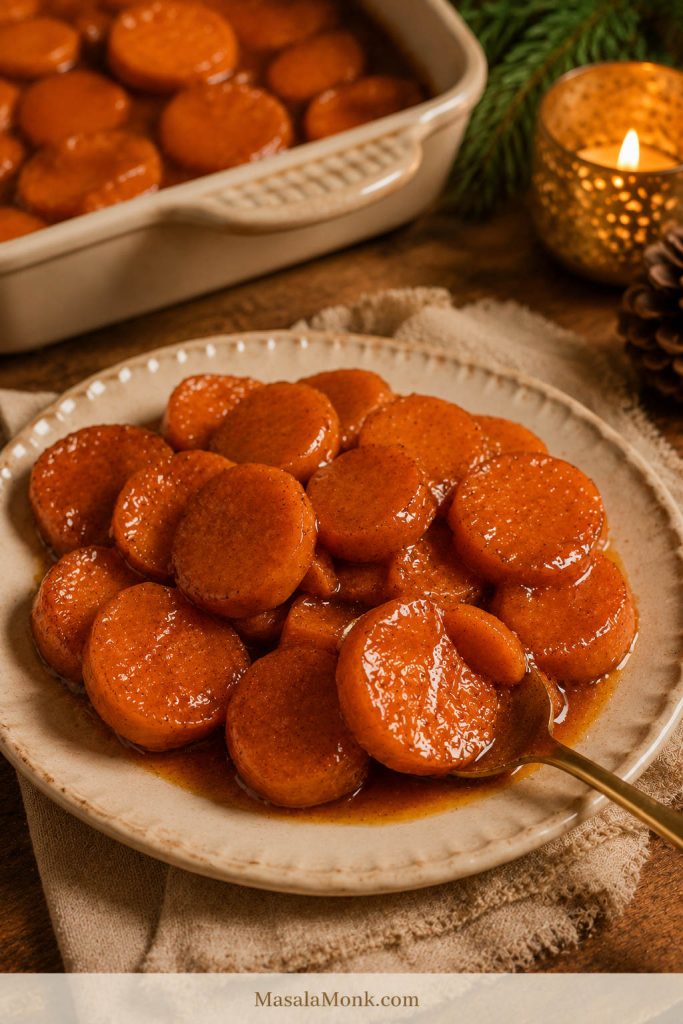
7. Rest before serving
Let the dish rest for about 10 minutes before serving. Give the brown sugar sauce a chance to settle before deciding it is too thin. A short rest is part of the recipe, not just waiting time, and the resting section explains why it works.
After that rest, the slices are easier to lift and the sauce clings better. Serve the yams warm, not straight-from-the-oven hot, so the glossy coating has time to settle. The dish should smell like butter, brown sugar, cinnamon, and sweet potatoes — not scorched sugar.
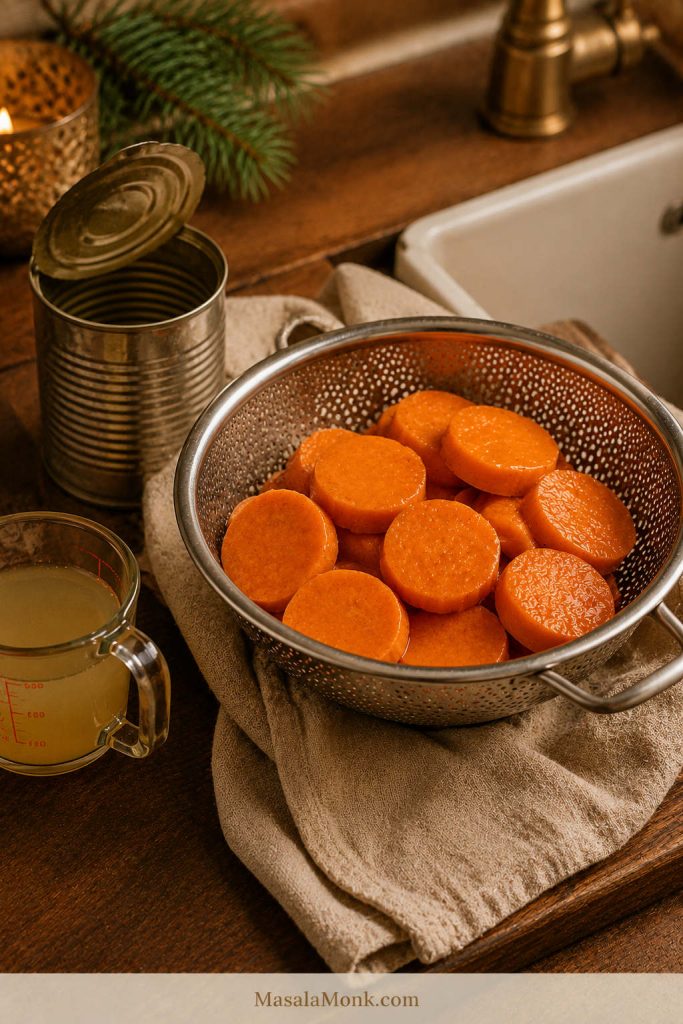
How to Make Candied Yams with Canned Yams and Marshmallows
Canned yams are not a shortcut you need to apologize for. For many families, they are the version that actually tastes familiar. The only trick is to remember that they are already cooked, so you are simply warming, coating, and finishing them.
With canned yams, keep the rhythm even simpler: drain, coat, heat, stop. Add marshmallows at the end if you want that classic topping.
Canned-Yam Timing
| Batch Size | Canned Yams | Dish | Oven | Timing |
|---|---|---|---|---|
| Small batch | 1 can, 29 oz / 822 g, drained | 8×8-inch / 20×20 cm | 375°F / 190°C | 15 minutes, then 5–8 minutes with marshmallows |
| Larger batch | 1 large can, 40 oz / 1.13 kg, drained | 9×13-inch / 23×33 cm | 375°F / 190°C | 18–20 minutes, then 5–8 minutes with marshmallows |
| Double-can batch | 2 cans, 29 oz / 822 g each, drained | 9×13-inch / 23×33 cm | 375°F / 190°C | 20–22 minutes, then 5–8 minutes with marshmallows |
Drain well. A few tablespoons of canning liquid can loosen a thick sauce; the full can usually makes the dish watery.
Warm the butter, brown sugar, cinnamon, nutmeg, salt, and vanilla into a quick glaze, pour it over the drained canned yams, and bake only until hot. With canned yams, gentleness matters most. Stirring breaks them down faster than baking does.
How to keep canned yams from getting mushy
- Leave large pieces large. Smaller pieces break down faster.
- Use less sugar if the yams are packed in syrup. Start lower, then adjust next time if you want them sweeter.
- Rinse only if the syrup is very heavy. Draining is usually enough. Rinsing helps only if you want a less sweet version.
- Spoon instead of stirring. Tilt the dish gently or ladle sauce over the top.
- Bake uncovered if the syrup looks loose. This helps extra moisture evaporate.
- Make canned yams closer to serving time if presentation matters. They soften more as they sit.
Quick glaze for canned yams
| Can Size | Butter | Brown Sugar | Spices and Vanilla |
|---|---|---|---|
| 29 oz / 822 g can | 3 tbsp | 1/3 cup if packed in syrup, 1/2 cup if packed in water or light syrup | 1/2 tsp cinnamon, pinch nutmeg, pinch salt, 1 tsp vanilla |
| 40 oz / 1.13 kg can | 4 tbsp | 1/2 cup | 3/4 tsp cinnamon, pinch nutmeg, pinch salt, 1 tsp vanilla |
| 2 cans, 29 oz / 822 g each | 5–6 tbsp | 2/3 cup if packed in syrup, 3/4 cup if packed in water or light syrup | 1 tsp cinnamon, 1/4 tsp nutmeg, 1/4 tsp salt, 2 tsp vanilla |
If your canned yams are very sweet already, start with the lower sugar amount. You can always make the next batch sweeter, but it is harder to rescue a dish that has become cloying.
Stovetop Candied Yams, Southern-Style
Southern-style candied yams are often less about a casserole and more about tender sweet potatoes coated in a buttery brown sugar syrup. Some versions are baked, some are made on the stovetop, some finish with marshmallows, and some stay plain and glossy.
When the oven is full, the stovetop is often the easiest way to stay in control of the sauce. It is also a good choice if you like a spoon-coated finish because you can watch it reduce in real time, baste the slices, and stop when the yams are tender but still holding together.
The flavor usually leans brown sugar, butter, cinnamon, nutmeg, vanilla, and sometimes citrus. Done well, it tastes rich without becoming flat: enough sugar to feel candied, enough salt and spice to keep every bite balanced.
Use the widest heavy-bottomed skillet or Dutch oven you have. A wide pan gives the sweet potatoes enough room to cook evenly, and a heavy base helps protect the sugar from scorching.
How to make candied yams on the stove
- Melt the butter in a wide skillet or Dutch oven over medium-low heat.
- Add brown sugar, maple syrup or orange juice, water, cinnamon, nutmeg, ginger if using, and salt.
- Stir until the sugar starts to dissolve and the glaze looks smooth.
- Add the 1/2-inch / 1.25 cm sweet potato slices and gently coat them.
- Cover and cook over medium-low heat for 35–45 minutes, basting every 10–15 minutes. Start checking at 35 minutes.
- When the yams are almost tender, uncover and simmer for 7–15 minutes more so the syrup thickens.
- Finish with vanilla off the heat. Add lemon juice or apple cider vinegar if the sauce tastes too sweet.
Stovetop Reduction Cues
Keep the stovetop version patient and gentle; high heat can burn the sugar before the potatoes soften. If the pan looks dry at any point, lower the heat before adding more liquid.
Stay close during the uncovered reduction stage. The syrup can move from shiny to scorched quickly once the extra moisture cooks off.
Stir as little as possible. Use a spoon to baste the slices or gently shake the pan instead of stirring like a stir-fry. This keeps the sweet potatoes from breaking apart.
Can I Bake Candied Yams at 375°F?
Yes. The main recipe uses 350°F / 175°C for steady, even softening, but 375°F / 190°C works if you need a slightly faster bake. Check earlier, baste once or twice, and watch the edges so the sugar does not dry out before the yams are tender.
Candied Yams with Marshmallows
For marshmallows, the timing is everything: tender first, toast last. Marshmallows are the part people notice first, so they deserve a little timing. Add them too early and they disappear into the sauce; add them at the end and you get the soft, golden topping people remember.
If your family expects marshmallows, let them be the finish, not the sauce.
When to Add Marshmallows
- At 350°F / 175°C, add marshmallows for the final 8–12 minutes.
- For 375°F / 190°C, add them for the final 5–8 minutes.
- In a 400°F / 200°C oven, watch closely and check after 5 minutes.
- Under the broiler, they may brown in 30–90 seconds.
You want the topping puffed, soft, and lightly golden — not fully dissolved into the glaze.
The best marshmallow topping comes from adding them when the yams are already hot, so they puff quickly instead of sinking into the sauce.
Mini marshmallows are easiest because they scatter evenly and brown quickly. Large marshmallows can work, but cut them in half or use fewer so the topping does not become too thick.
For pecans and marshmallows together, add the pecans near the end, then scatter marshmallows over the top. This keeps the nuts from sitting under foil for too long and turning soft.
How to make candied yams without marshmallows
To make candied yams without marshmallows, simply skip the topping and focus on the glaze. Bake uncovered until the yams are tender and the brown sugar butter sauce looks shiny and spoonable. For a little finish without marshmallows, add pecans near the end, a small pinch of orange zest, or nothing at all.
If your table loves the glossy plain version, stop before the topping and let the brown sugar butter sauce shine. The plain version is often the best choice when you want the sweet potatoes, butter, brown sugar, and warm spices to be the main flavor.
Small Things That Make a Big Difference
These are the small choices that prevent most candied-yam problems before they start.
- Keep slices about 1/2 inch thick. Thin slices soften quickly and can fall apart before the sauce thickens.
- Drain canned yams well. A few tablespoons of liquid can loosen the syrup, but the full can may make it watery.
- Handle canned yams gently. Spoon sauce over them instead of stirring hard.
- Save marshmallows for the end. They need just enough time to puff and brown.
- Let the sauce rest before judging it. It thickens after the dish cools slightly.
- Use a deeper baking dish. A flat sheet pan spreads the syrup too thin for this style.
Thanksgiving Timing Plan
On a holiday table, candied yams should not be the dish that makes the day harder. They can wait, reheat, hold their sauce, and still feel special when they come to the table warm and glossy.
The best part of this dish is that it does not need to be dramatic at the last minute. Make it ahead, reheat it gently, and save the marshmallows for the final finish.
For storage and reheating details, use the make-ahead section before planning the serving-day schedule, especially if your oven also needs time for macaroni and cheese or other baked sides.
| When | What to Do |
|---|---|
| 2 days before | Buy sweet potatoes or yams, butter, brown sugar, spices, marshmallows, and pecans if using. |
| 1 day before | Bake the fresh candied yams without marshmallows. Cool, cover, and refrigerate. |
| Serving day | Reheat covered at 350°F / 175°C until hot, usually 20–25 minutes. |
| Final 8–12 minutes | Add marshmallows or pecans and bake until puffed, golden, and hot. |
| When the oven is full | Use the stovetop method, or reheat the baked yams once the oven opens up. |
| Using canned yams | Make them closer to serving time for the best texture and cleanest presentation. |
If you are transporting candied yams, keep the marshmallows off until you reheat, if possible. Marshmallows soften as they sit, and they look best when added close to serving.
Crockpot Candied Yams
Crockpot candied yams are helpful when the oven is full, but the sauce will usually stay thinner than baked or stovetop versions. Use fresh sweet potatoes, not canned, for the best shape. Cook on low for 3–4 hours, then reduce extra liquid in a small saucepan if needed. Add marshmallows only before serving.
Variations
- No marshmallows: keep the top plain and let the brown sugar butter sauce shine.
- Pecan topping: add chopped pecans near the end so they stay crisp instead of steaming under the foil.
- Orange juice glaze: use it instead of maple syrup for a brighter, less heavy glaze.
- Maple finish: use maple syrup for a deeper, rounder flavor.
- Pineapple version: add well-drained pineapple near the end so it does not thin the sauce too much.
- Less sweet: reduce brown sugar to 3/4 cup and add lemon juice or apple cider vinegar.
- Vegan version: use plant-based butter and skip marshmallows unless they are vegan.
Keep variations simple. Candied yams are already rich, so one or two upgrades are usually enough. Pecans and marshmallows work well together. Orange juice and maple syrup are both good, but you do not need every sweet ingredient in the same dish.
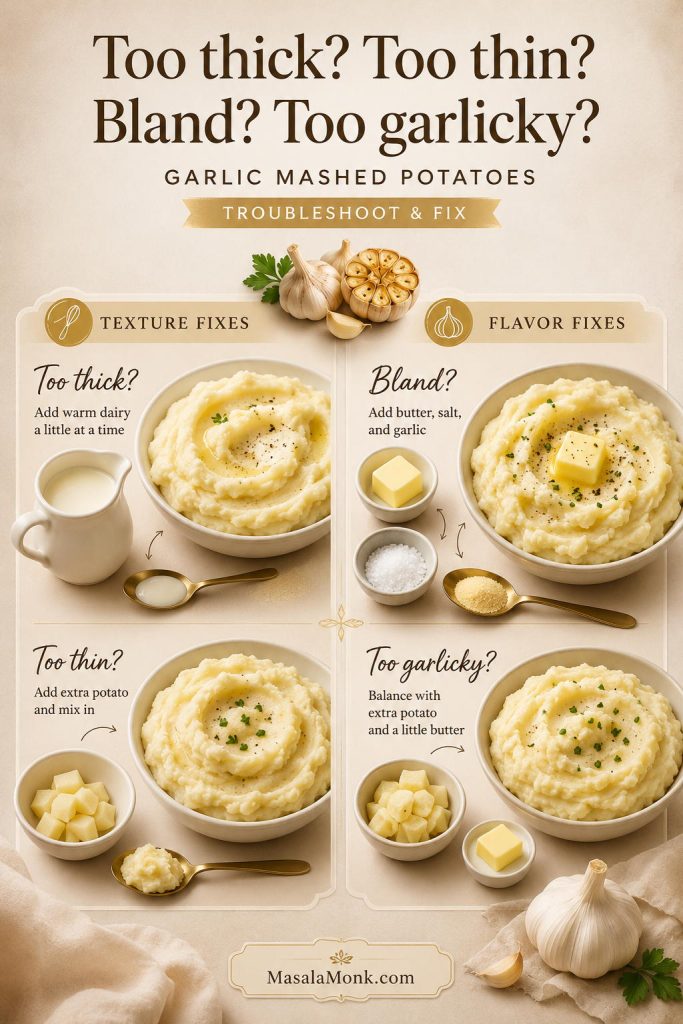
Troubleshooting Candied Yams
Most candied-yam problems are fixable because they usually come from one of four things: too much liquid, too much heat, too much time, or too much stirring.
They often look worse in the pan than they taste on the plate. If the dish tastes good but looks loose, pause before changing anything. Rest it, then reduce it if needed. Hot sauce almost always looks thinner than settled sauce, so check why the sauce thickens after resting before extending the bake time.
Quick Fixes by Problem
| Problem | Why It Happened | How to Fix It |
|---|---|---|
| Yams are watery | Too much liquid, canned yams were not drained, or the dish stayed covered too long | Bake or simmer uncovered until the sauce reduces. Spoon out extra liquid if needed. |
| Yams are mushy | Slices were too thin, overcooked, or canned yams were stirred too much | Use 1/2-inch slices for fresh yams and handle canned yams gently. |
| Sauce is thin | It has not reduced enough, or it is still very hot | Bake uncovered longer and let the dish rest for 10 minutes before serving. |
| Sugar burned | Heat was too high or the pan was too shallow | Use a deeper baking dish or lower heat. Spoon sauce over the yams during baking. |
| Butter separated | The sugar did not dissolve fully into the butter mixture | Simmer the glaze until smooth before pouring it over the yams. |
| Too sweet | Heavy syrup canned yams or too much sugar | Add a little salt, orange juice, lemon juice, or apple cider vinegar. Use less sugar next time. |
| Marshmallows disappeared | They were added too early | Add marshmallows only in the final 5–12 minutes. |
| Pecans got soggy | They were baked under foil too long | Add pecans near the end or sprinkle them on before the marshmallows. |
Why the sauce thickens after resting
The sauce often looks loose when the dish first comes out of the oven. That does not mean it failed. As the butter-sugar mixture cools slightly, it becomes thicker and clings better to the sweet potatoes. Give the dish 10 minutes before deciding it is too thin.
Make Ahead, Storage, and Reheating
Can you make candied yams ahead?
Yes. For the best texture, make the fresh version up to 1 day ahead. Bake the yams without marshmallows, cool, cover, and refrigerate. Add marshmallows only when reheating before serving.
Canned yams are more delicate, so they are best made closer to serving time. If you do make them ahead, reheat gently and avoid stirring.
How to reheat candied yams
Reheat covered at 350°F / 175°C for 20–25 minutes, or until hot. If the sauce is very thick, add a small splash of water or orange juice before reheating. Add marshmallows near the end and bake until puffed and golden.
How long do leftovers last?
Store leftover candied yams in an airtight container in the refrigerator for 3–4 days. The texture will soften as they sit, especially if you used canned yams or marshmallows. For general leftover safety, the USDA FSIS leftovers guide is a helpful reference.
Can you freeze candied yams?
You can freeze them without marshmallows, but the texture may soften after thawing. For a special meal, refrigeration and reheating usually gives a better result than freezing.
What to do with leftovers
Leftover candied yams can be served again as a side dish, mashed into oatmeal, spooned over pancakes or waffles, folded into muffin batter, or used like a sweet potato pie-style filling. If they have marshmallows on top, the texture will be softer, but the flavor will still be good.
What to Serve with Candied Yams
Because candied yams are sweet and buttery, they work best beside something savory, salty, green, or tangy.
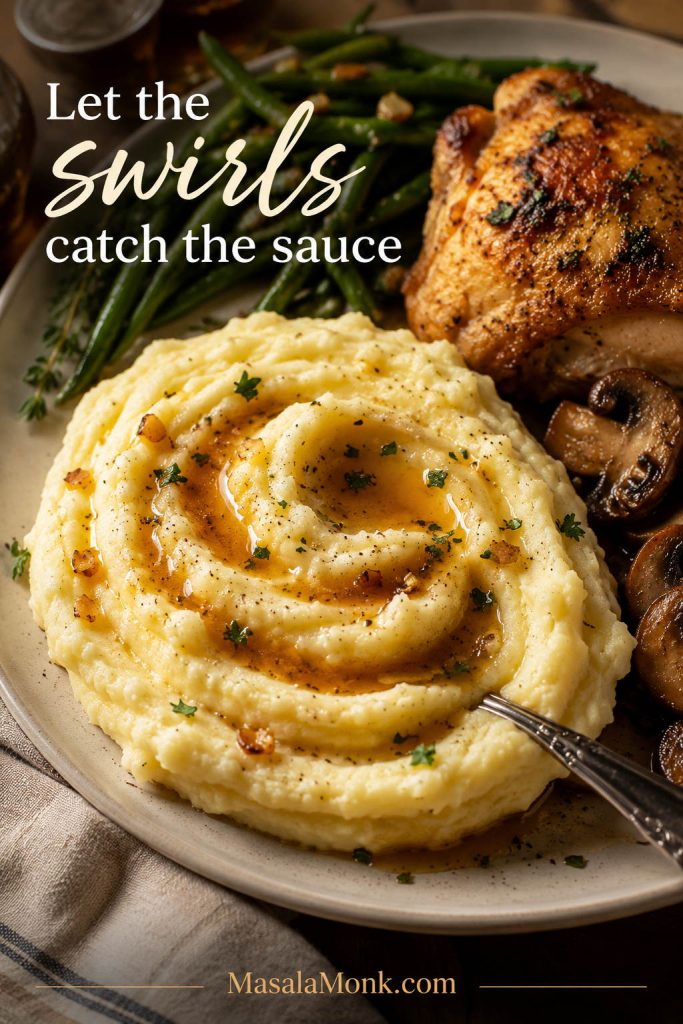
They pair well with roast turkey, baked ham, roast chicken, stuffing or dressing, green beans, cranberry sauce, collard greens, mac and cheese, garlic mashed potatoes, and cornbread.
For a Southern-style plate, candied yams also work beside richer mains like smothered pork chops, especially when you want something sweet to balance gravy, greens, and cornbread.
Candied Yams vs Sweet Potato Casserole
Candied yams are usually sliced or chunked sweet potatoes cooked in a brown sugar butter glaze. Sweet potato casserole is usually mashed or whipped, then baked with marshmallows, pecans, or streusel on top.
The two dishes can overlap, especially when marshmallows are involved, but candied yams are more about tender pieces in sauce, while casserole is creamy and scoopable. If you want that creamy version instead, use this sweet potato casserole recipe.
Frequently Asked Questions
Are candied yams actually sweet potatoes?
In most U.S. grocery stores, yes. The orange “yams” used for this dish are usually sweet potatoes, and they are exactly what you want for soft, classic candied yams.
Do you peel sweet potatoes for candied yams?
Yes, peel them for the classic soft, glossy dish. Sweet potato skins can turn chewy in a brown sugar glaze, and peeled slices give candied yams their traditional smooth texture.
Is brown sugar or white sugar better for candied yams?
Brown sugar is better for this version because it gives the glaze deeper flavor and a softer caramel-like finish. White sugar makes a cleaner, sweeter glaze with less depth. You can use a mix if you want a more candy-sweet style.
Can I make candied yams with canned yams?
Yes. Drain canned yams well, use a smaller sauce, bake at 375°F / 190°C only until hot, and avoid stirring. Canned yams are already cooked, so the goal is coating and warming, not softening.
Do I drain canned yams before making candied yams?
Yes, drain them first. A few tablespoons of the liquid can loosen a thick glaze, but the full can usually makes the dish watery.
Should I rinse canned yams?
Usually, no. Draining is enough unless the yams are packed in very heavy syrup and you want a less sweet dish.
Can I make candied yams on the stove?
Yes. Cook fresh 1/2-inch sweet potato slices in a wide skillet with the glaze over medium-low heat, covered until tender and uncovered at the end until the glaze coats the slices.
Do I need to boil sweet potatoes first?
No, not for this baked version. Slicing the sweet potatoes evenly and baking them covered first lets them soften in the sauce. Boiling first can save time, but it also makes the pieces easier to overcook.
When do I add marshmallows?
Add marshmallows near the end, once the yams are tender and the sauce has started to thicken. At 350°F / 175°C, the final 8–12 minutes is usually enough. If you add them too early, they melt into the sauce instead of forming a toasted topping.
Can I use large marshmallows?
Large marshmallows work, but mini marshmallows brown more evenly. If using large ones, cut them in half or use fewer so the topping does not become too thick.
How do I keep candied yams from getting watery?
Drain canned yams well, keep added liquid modest, bake uncovered long enough for the sauce to reduce, and let the dish rest before judging the texture.
How do I keep canned yams from getting mushy?
Handle them gently and do not bake them too long. Canned yams need heat, not more cooking, so spoon the sauce over them instead of stirring.
Can I make candied yams ahead for Thanksgiving?
Yes. Make the fresh version 1 day ahead without marshmallows, refrigerate, then reheat covered at 350°F / 175°C until hot. Add marshmallows only during the final few minutes before serving.
Can I double this recipe?
You can double it, but use two baking dishes instead of piling everything too deeply into one pan. Crowding the yams traps steam and makes it harder for the sauce to reduce.
Candied Yams Recipe
Soft orange sweet potatoes baked in a brown sugar butter glaze until tender, shiny, and spoon-coated — with canned-yam, stovetop, marshmallow, no-marshmallow, and make-ahead notes included.
Ingredients
- 3 lb / 1.35 kg orange-fleshed sweet potatoes or yams
- 1/2 cup / 113 g unsalted butter
- 3/4 cup / 150 g packed brown sugar, or up to 1 cup / 200 g for a sweeter style
- 1/4 cup / 60 ml maple syrup or orange juice
- 2–4 tbsp / 30–60 ml water
- 1 tsp ground cinnamon
- 1/4 tsp ground nutmeg
- 1/4 tsp ground ginger, optional
- 1/2 tsp salt
- 1–2 tsp vanilla extract
- 1–2 tsp lemon juice or apple cider vinegar, optional
- 2–3 cups mini marshmallows, optional
- 1/2 cup chopped pecans, optional
Instructions
- Preheat the oven to 350°F / 175°C. Grease a 9×13-inch / 23×33 cm glass or ceramic baking dish.
- Peel the sweet potatoes and slice them into 1/2-inch / 1.25 cm rounds or half-moons.
- In a saucepan over medium heat, melt the butter. Add brown sugar, maple syrup or orange juice, water, cinnamon, nutmeg, ginger if using, and salt. Stir until smooth and shiny.
- Simmer the glaze gently for 1–2 minutes. Remove from heat and stir in vanilla. Add lemon juice or apple cider vinegar if using.
- Arrange the sweet potatoes in the baking dish. Pour the glaze over the top and gently coat the slices.
- Cover tightly with foil and bake for 35–40 minutes, until the yams begin to soften.
- Remove foil, spoon sauce over the yams, and bake uncovered for another 20–25 minutes, until fork-tender and shiny.
- If using marshmallows, add them during the final 8–12 minutes of baking. Bake until puffed and lightly golden.
- Rest for 10 minutes before serving so the sauce can thicken slightly. Serve warm, not piping hot.
Notes
- Main cue: fresh or canned, the yams should be fork-tender and coated in sauce, not sitting in watery liquid.
- Canned yams: bake drained canned yams at 375°F / 190°C: 15 minutes for a 29 oz / 822 g can, 18–20 minutes for a 40 oz / 1.13 kg can, or 20–22 minutes for two 29 oz / 822 g cans. Add marshmallows for the final 5–8 minutes. Canned yams need heat, not more cooking.
- Stovetop method: cook sliced fresh sweet potatoes with the glaze ingredients in a wide skillet over medium-low heat for 35–45 minutes covered, then uncover and reduce for 7–15 minutes.
- No marshmallows: skip the topping and bake uncovered until the sauce is glossy and spoonable.
- Make-ahead: bake without marshmallows, refrigerate, reheat covered, and add marshmallows before serving.
- Less sweet: use 3/4 cup brown sugar and add lemon juice or apple cider vinegar for balance.
Final Thoughts
Candied yams do not need to be complicated. Once the slices are soft, the sauce is shiny, and the marshmallows go on only at the end, the dish feels exactly how it should: familiar, sweet, buttery, and ready to be passed around the table.
When it works, the dish lands exactly where it should: soft slices, glossy sauce, warm spice, and that familiar sweet-buttery smell that makes people reach for the spoon.
Some families want the glossy plain version. Others want marshmallows browned until the corners catch. A few want pecans, orange juice, stovetop yams, or the canned version because that is the one that was always on the table.
Use this recipe as the steady base, then finish it the way your table remembers it. If your family has a must-have candied-yam tradition, I’d love to hear which version shows up every year.