Posted on Leave a comment

Seafood Boil Sauce Recipe: Garlic Butter Cajun Sauce for Shrimp, Crab & Crawfish

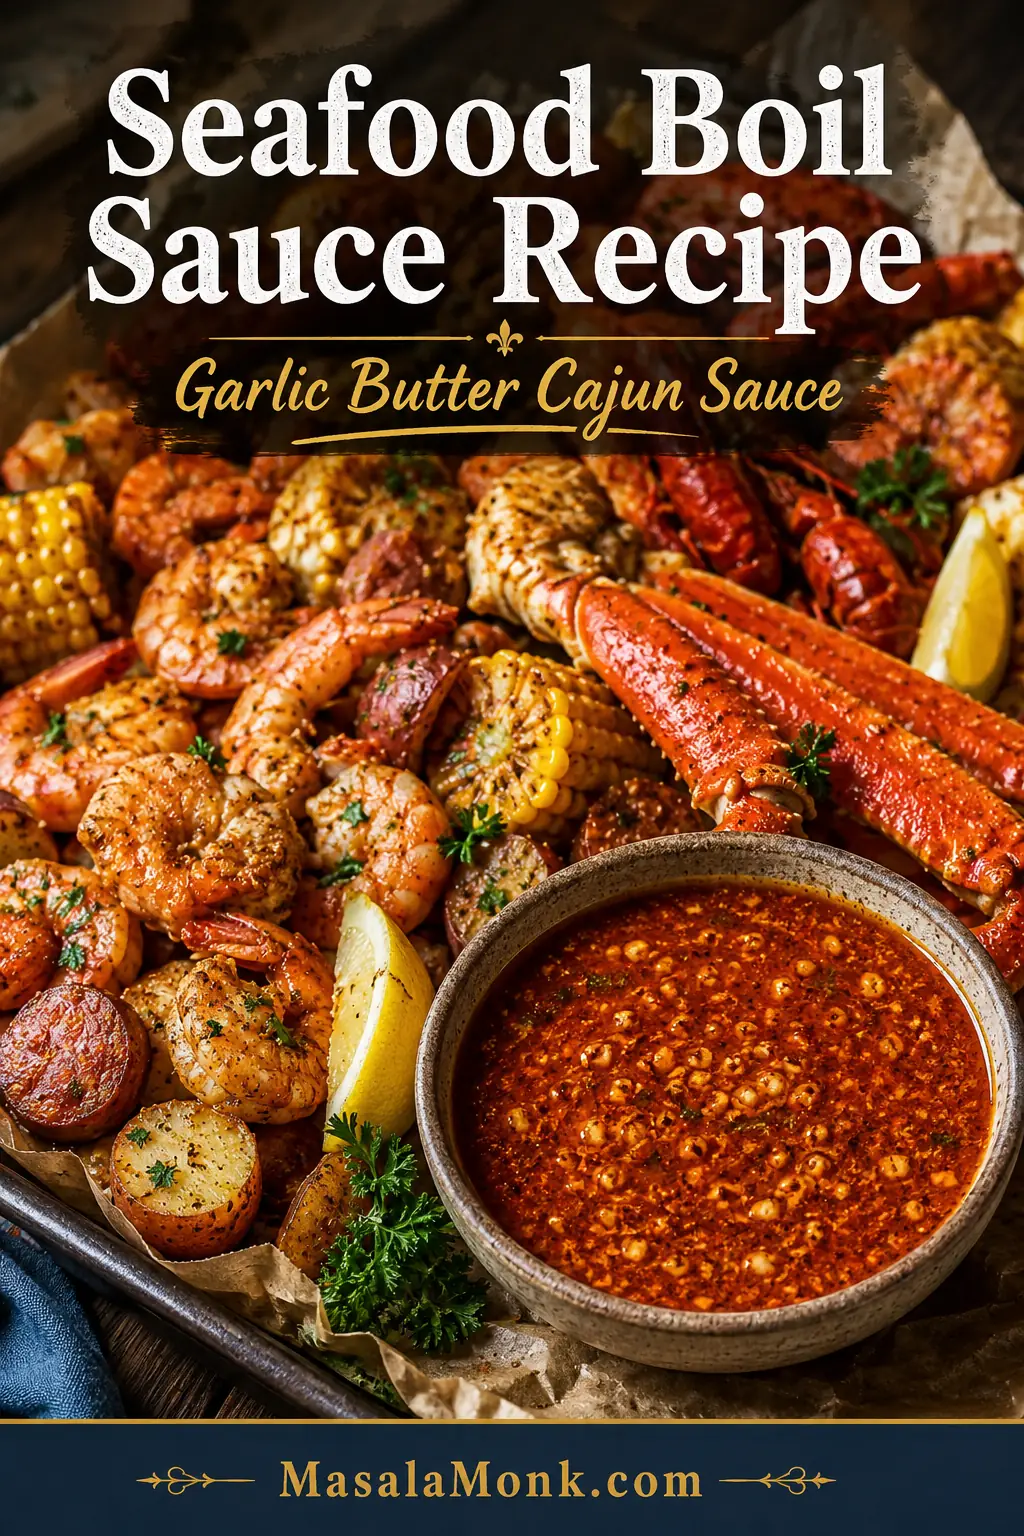
A tray of shrimp, crab legs, corn, baby potatoes, sausage, lemon wedges, parsley, and red-orange garlic butter Cajun seafood boil sauce.

A great seafood boil sauce should do more than taste buttery. It should cling to crab legs, gloss over shrimp, soak into corn and potatoes, and leave enough garlicky Cajun butter at the bottom of the tray for one last swipe of bread.

This is the sauce that turns a pile of boiled seafood into the messy, glossy, pass-the-napkins kind of meal. It is rich, garlicky, smoky, lemony, a little spicy, and easy to adjust for dipping, pouring, tossing, or serving on the side.

The goal is not just heat or butter. The goal is a sauce that tastes bold but still lets the seafood taste like seafood. The base is simple — butter, garlic, Cajun seasoning, Old Bay, smoked paprika, lemon, and a splash of broth or reserved seafood boil liquid — but the control is what makes it work.

Quick Answer: What Is Seafood Boil Sauce?

Seafood boil sauce is a bold garlic butter sauce made with butter, garlic, Cajun seasoning, Old Bay seasoning, lemon juice, paprika, and a little heat. It should taste rich first, then garlicky and smoky, with enough lemon to make every bite of shrimp, crab, corn, and potatoes feel bright instead of heavy.

For a thick dipping sauce, use less liquid. For a pour-over sauce, add more broth, seafood stock, or reserved seafood boil liquid. For a seafood boil bag sauce, keep it medium-thick so it coats shrimp, crab, crawfish, corn, potatoes, and sausage without becoming watery.

Butter-Broth-Lemon Rule

Use the butter-broth-lemon rule: butter softens, broth loosens, and lemon brightens. Choose your sauce style first — thick and buttery for crab-leg dipping, loose and glossy for shrimp and corn, or medium-thick for seafood boil bags. The recipe below starts in the middle so you can adjust either way.
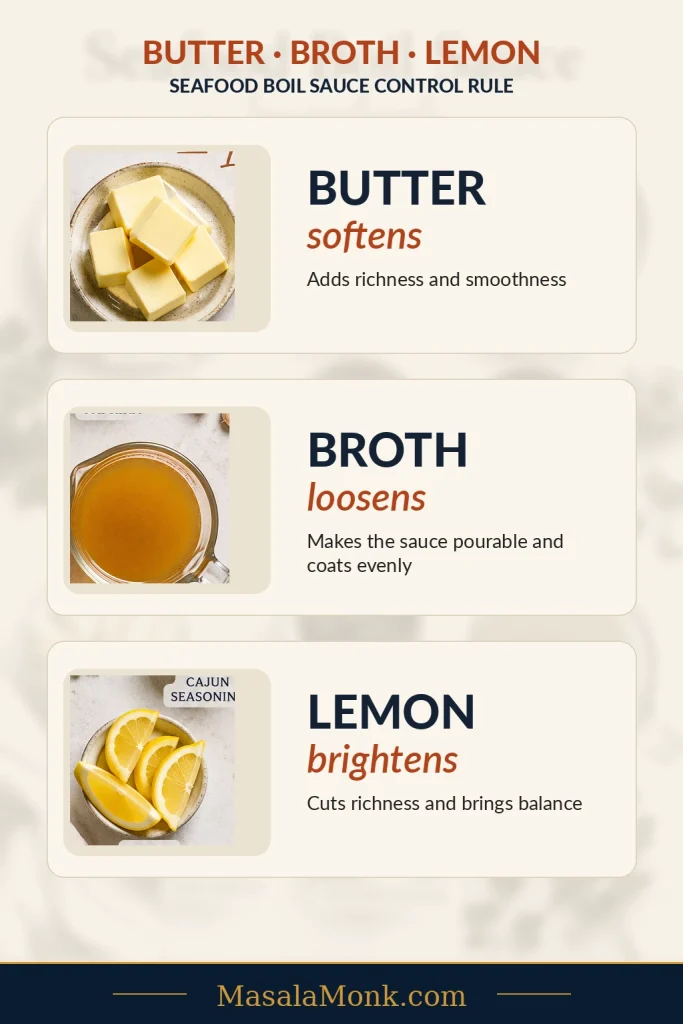
Butter, broth, and lemon showing the butter-broth-lemon rule for seafood boil sauce.
When the sauce needs a fix, this is the fastest rule to remember: butter softens, broth loosens, and lemon brightens.

The best version is bold, glossy, and adjustable: rich enough for crab, bright enough for shrimp, loose enough for corn and potatoes, and balanced enough that it does not hide the seafood.

Make It Now: Seafood Boil Sauce Recipe

This is the main garlic butter Cajun seafood boil sauce. It makes about 2 cups / 480 ml, enough for about 2½–3 lb / 1.1–1.35 kg seafood as a light-to-generous pour-over sauce, depending on how much corn, potatoes, sausage, and eggs are on the tray.

You only need one pan, low heat, and about 20 minutes. Melt the butter, soften the aromatics, bloom the spices, loosen with broth, then finish with lemon.

Prep time: 10 minutes
Cook time: 12 minutes
Total time: 22 minutes
Yield: About 2 cups / 480 ml sauce
Serves: 4–6 as pour-over sauce, 8–10 as dipping sauce because dipping uses less per person
Equipment: Large skillet or medium saucepan, whisk, measuring spoons, microplane or garlic press

Scaling: Double the sauce for a large tray or seafood boil bag. Keep the heat low and use a wider pan so the garlic and spices cook evenly.

Before you pour: Taste the sauce with one shrimp, potato, or piece of corn. The salt order is simple: season first, loosen second, salt last.

Ingredients

IngredientUS MeasureMetric
Unsalted butter1 cup / 2 sticks / 8 oz226 g
Garlic, minced or grated8–10 cloves30–40 g
Yellow onion, very finely minced½ small onion / about ⅓ cup50–60 g
Cajun seasoning1½ tablespoons12–15 g
Old Bay seasoning2 teaspoons5–6 g
Smoked paprika1 tablespoon6–7 g
Onion powder1 teaspoon2–3 g
Brown sugar1–2 teaspoons4–8 g
Hot sauce1–2 teaspoons5–10 ml
Reserved seafood boil liquid, seafood stock, low-sodium chicken broth, or vegetable broth½ cup120 ml
Lemon juice2 tablespoons30 ml
Lemon zest1 teaspoonOptional
Fresh parsley, chopped2 tablespoons6–8 g

Optional heat: Add ¼–½ teaspoon cayenne or red pepper flakes if you want a spicier Cajun butter sauce.

Salt note: Do not add extra salt until the sauce is finished and tasted. Cajun seasoning, Old Bay, broth, and reserved boil liquid can all bring salt.

Measurement note: Gram weights for seasoning blends are approximate because Cajun seasoning and seafood seasonings vary by brand. Use the spoon measures first, then adjust after tasting.

Instructions

  1. Melt the butter in a large skillet or medium saucepan over low to medium-low heat.
  2. Add the finely minced onion and cook for 3–4 minutes, until softened and glossy but not browned.
  3. Add the garlic and cook for 60–90 seconds, just until fragrant. Keep it pale, not brown.
  4. Stir in the Cajun seasoning, Old Bay, smoked paprika, onion powder, brown sugar, and optional cayenne or red pepper flakes.
  5. Cook the spices in the butter for 30–60 seconds, until the butter smells toasty and the spices look absorbed into the butter, not sandy on the surface.
  6. Slowly whisk in the reserved boil liquid, stock, or broth.
  7. Let the sauce gently simmer for 3–5 minutes, stirring often, until glossy and spoonable.
  8. Turn off the heat. Stir in the lemon juice, lemon zest, hot sauce, and parsley.
  9. Taste and adjust. Add more lemon for brightness, broth for a looser sauce, butter for richness, or hot sauce for more heat.
  10. Taste with one shrimp, potato, or piece of corn before coating the full seafood tray.
  11. Serve warm as a dipping sauce, pour-over sauce, or seafood boil bag sauce.

Important: Keep the sauce at a gentle simmer and it stays glossy. A hard boil can make the butter separate and the garlic taste harsh.

The sauce should look bold before it tastes aggressive: red-orange, glossy, garlicky, and loose enough to spoon over the tray without drowning the seafood.

Seafood Boil Sauce Success Cues

Use these cues while cooking. They matter more than the clock.
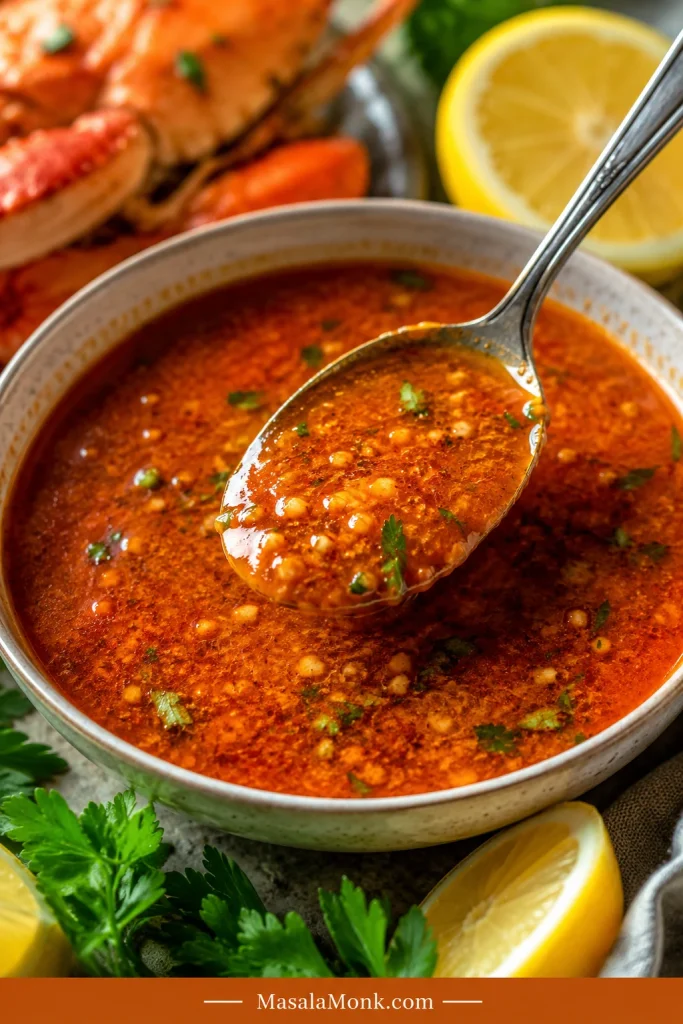
A close-up bowl of red-orange garlic butter Cajun seafood boil sauce with parsley, garlic, and lemon.
The finished sauce should look glossy and spoonable, with visible spice and garlic but no greasy separation.
CueWhat You Want
GarlicFragrant and pale, not brown
OnionSoft, glossy, and slightly translucent
SpicesToasty and buttery, not dry or sandy
Sauce textureGlossy and spoonable, not broken or greasy
SaltBold and savory, not sharp or harsh
HeatWarm Cajun spice first, extra fire only if you want it
LemonBright enough to cut the butter
Finished sauceButtery, garlicky, smoky, lemony, and easy to drizzle

When the sauce hits these cues, it tastes big without tasting heavy — rich enough for crab, bright enough for shrimp, and loose enough to find its way into the corn and potatoes.

Adjust, Fix and Serve the Sauce

Use the rest of this guide to choose the right texture, adjust the flavor, fix common problems, and store leftovers safely.

Dipping Sauce vs Pour-Over Sauce

This is where the sauce becomes yours. Some people want a thick bowl of butter for crab legs; others want a loose, glossy sauce that runs into the corn and potatoes. The same base can do both.
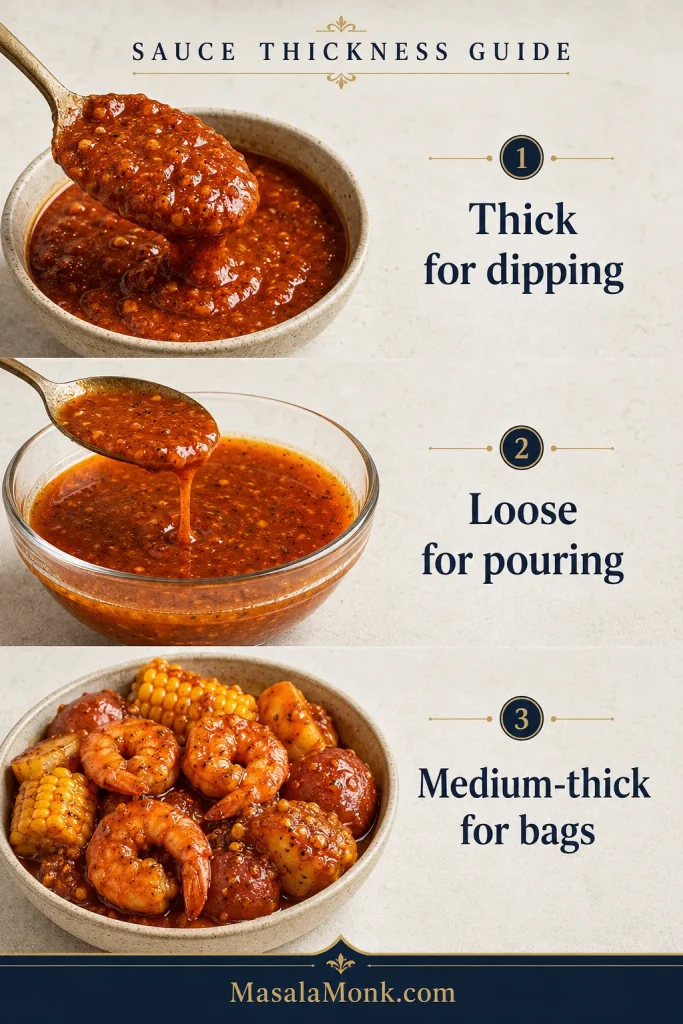
Seafood boil sauce thickness guide showing thick dipping sauce, loose pour-over sauce, and medium-thick bag sauce.
Thickness decides the job, so keep it thicker for dipping, looser for pouring, and medium-thick for bags.
UseTextureHow to Adjust
Dipping sauceThick, buttery, clingyUse ¼ cup / 60 ml liquid and simmer slightly longer.
Pour-over sauceGlossy, loose, spoonableUse ½ cup / 120 ml liquid.
Seafood boil bag sauceMedium-thick, coating sauceUse ½–¾ cup / 120–180 ml liquid.
Big tray sauceLooser and more spreadableUse ¾–1 cup / 180–240 ml liquid.
Crab leg dipping sauceRich and butteryKeep it thicker and serve lemon wedges on the side.

Crab people usually want the thick bowl. Shrimp, corn, and potatoes usually want the loose spoon-over version. If your table is divided, make the base sauce medium-thick, then loosen half for pouring and keep half rich for dipping.

Think of the broth or boil liquid like a volume knob. Add a little for a thick dip. Add more for a sauce that covers a whole tray.

How Much Seafood Boil Sauce Do You Need?

The only sad seafood boil sauce is the one that runs out too early. If the tray has corn and potatoes, make extra. They absorb sauce faster than the seafood does.
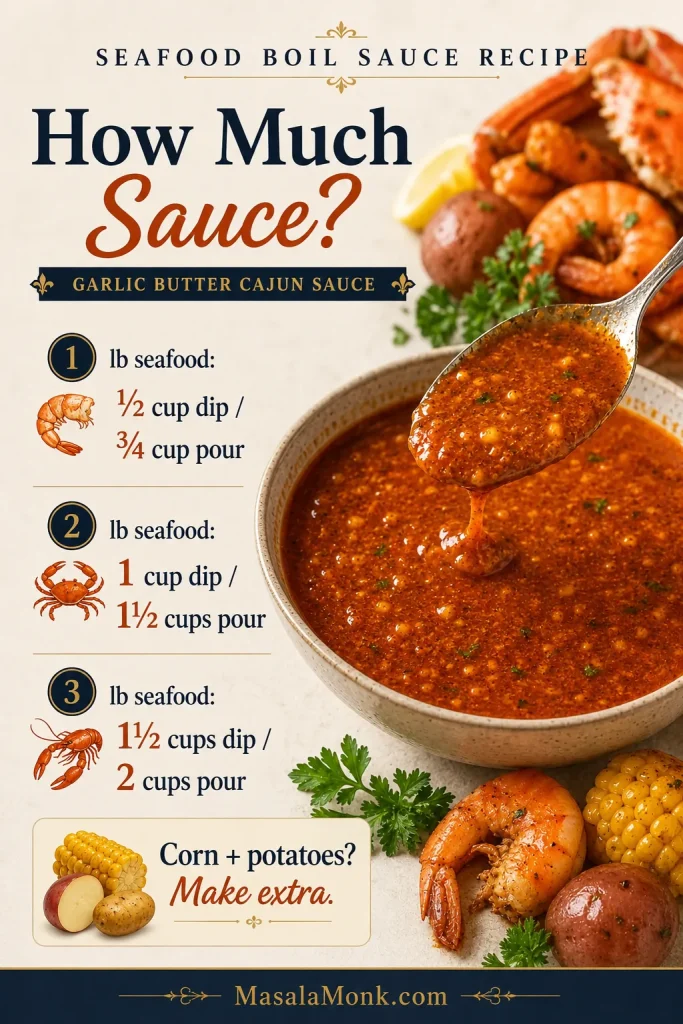
Guide showing how much seafood boil sauce to make by pounds of seafood.
Corn and potatoes always change the math, so make extra when the tray has more than just shrimp or crab.

By Seafood Weight

Seafood AmountDipping SaucePour-Over Sauce
1 lb / 450 g seafood½ cup / 120 ml¾ cup / 180 ml
2 lb / 900 g seafood1 cup / 240 ml1½ cups / 360 ml
3 lb / 1.35 kg seafood1½ cups / 360 ml2–2¼ cups / 480–540 ml
5 lb / 2.25 kg seafood2½ cups / 600 ml3–4 cups / 720–960 ml
Party trayMake extraServe extra on the side

By Number of People

PeopleSauce for DippingSauce for Pouring/Tossing
2 people½–¾ cup / 120–180 ml1 cup / 240 ml
4 people1–1½ cups / 240–360 ml2 cups / 480 ml
6 people1½–2 cups / 360–480 ml3 cups / 720 ml
8 people2–3 cups / 480–720 ml4 cups / 960 ml

This recipe makes about 2 cups / 480 ml sauce. That is enough for about 2½–3 lb / 1.1–1.35 kg seafood as a pour-over sauce, or more if you are mainly serving it for dipping.

Extra sauce never feels like a mistake at a seafood boil. Running out does.

Once you know how thick the sauce should be and how much to make, the next step is understanding why the balance works.

Why This Seafood Boil Sauce Works

The flavor works because it balances richness, garlic, heat, salt, sweetness, and acidity.

Butter gives the sauce body. Garlic makes it bold and fragrant. Cajun seasoning brings peppery heat and Southern-style depth. Old Bay adds the classic seafood-boil flavor many people expect with crab, shrimp, and crawfish. Smoked paprika gives the butter sauce its warm red-orange color. Lemon keeps it from feeling heavy.

The small amount of brown sugar is not there to make the sauce sweet. It rounds out salt and spice, especially if your seasoning blend is intense. A little broth or reserved boil liquid turns plain melted butter into something glossy, spoonable, and better connected to the seafood.

When it is right, the sauce should taste buttery first, then garlicky, smoky, salty-spicy, and finally bright from lemon.

The method matters too. Garlic needs gentle heat, spices taste better when they bloom briefly in butter, and lemon tastes brighter when added near the end.

That balance is why the sauce can be bold enough for sausage and potatoes but still bright enough for shrimp, crab, and lobster.

Ingredients You Need

The recipe card gives you the amounts. This section explains what each ingredient does and how to adjust if your seasoning blend is stronger, smokier, hotter, or saltier than expected.
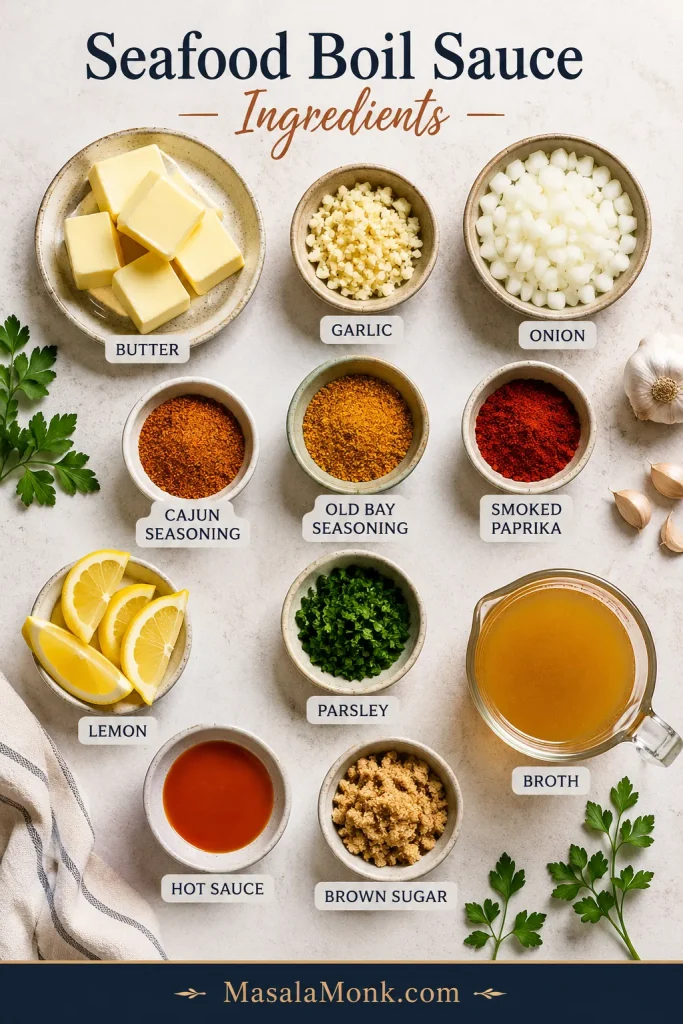
Ingredients for seafood boil sauce including butter, garlic, Cajun seasoning, Old Bay, lemon, parsley, and broth.
Every ingredient earns its place here, because Cajun seasoning, Old Bay, garlic, lemon, and broth all help the sauce stay bold without getting heavy.

Butter

Unsalted butter gives you the best control because seafood boil seasonings can be salty. If you only have salted butter, make the sauce first, then taste before adding anything salty at the end.

For a richer party-style version, whisk in 2–4 extra tablespoons of butter after the sauce simmers.

Garlic

Fresh garlic gives this Cajun butter sauce its best flavor. Minced garlic gives a rustic texture; grated garlic or garlic paste makes the sauce smoother and more restaurant-style.

Keep the garlic pale and fragrant. Dark brown garlic can taste bitter.

Onion

Onion is optional, but it gives the sauce body and natural sweetness. Mince it very finely so it melts into the butter, or grate it for a smoother finish.

Cajun Seasoning

Cajun seasoning gives the sauce its bold, peppery, spicy base. Different brands vary a lot, so taste yours before you add extra heat or salt.

Old Bay Seasoning

Old Bay gives the sauce that classic seafood flavor. It works especially well with shrimp, crab legs, crawfish, potatoes, and corn.

No Old Bay in the pantry? You can still make a good boil sauce with Cajun seasoning, smoked paprika, garlic powder, onion powder, and a small pinch of celery salt or celery seed.

Smoked Paprika

Smoked paprika adds color, warmth, and a gentle smoky note. It helps create the deep red-orange look people associate with Cajun seafood butter.

Brown Sugar

Brown sugar is optional but useful. It rounds out salt, spice, and heat without making the sauce taste sweet, and it helps create a slightly glossy finish.

Broth, Seafood Stock, or Reserved Boil Liquid

This is what changes the sauce from a thick buttery dip into something you can spoon over a whole tray. Reserved boil liquid, stock, or broth loosens the sauce so it pours instead of sitting like straight melted butter.

Reserved boil liquid gives the strongest seafood-boil flavor because it already carries seasoning from the pot. If it tastes very salty, use half boil liquid and half low-sodium broth or water.

Lemon Juice and Lemon Zest

Lemon cuts through the butter and brightens the whole sauce. Add lemon juice near the end so it tastes fresh. Lemon zest is optional, but it makes the sauce smell brighter.

Hot Sauce, Cayenne, or Red Pepper Flakes

Hot sauce gives smoother heat. Cayenne adds stronger fire. Red pepper flakes bring visible spicy texture. Add heat slowly because it is much easier to make the sauce spicier than it is to calm it down.

Equipment

  • Large skillet or medium saucepan
  • Whisk
  • Measuring cups and spoons
  • Microplane, garlic press, or sharp knife
  • Heatproof spatula or spoon
  • Optional immersion blender for a smoother sauce

A skillet gives the spices room to bloom and lets the sauce reduce slightly; a medium saucepan works well for smaller batches or easier pouring.

How to Make It Glossy, Not Greasy

The recipe card above has the short version. These details help if you want a smoother, glossier, more controlled sauce.

Spoonable Sauce Texture

Before you pour the sauce over seafood, check the spoon. A glossy sauce should coat it lightly, then drip back slowly instead of running like water or sitting like straight melted butter.
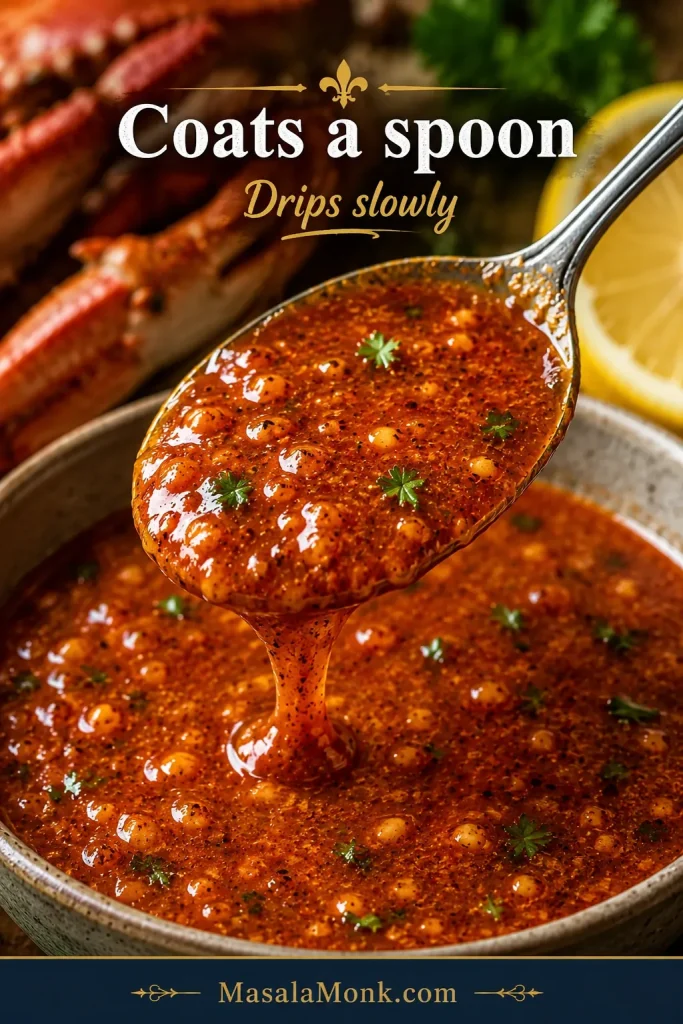
Seafood boil sauce coating a spoon and dripping slowly back into the bowl.
If it coats the spoon and drips slowly, the sauce is in the right place: clingy enough for seafood, but not oily or thin.

1. Melt the Butter Gently

Melt the butter over low to medium-low heat. Starting gently keeps the butter from separating and gives the garlic time to flavor the sauce without burning.
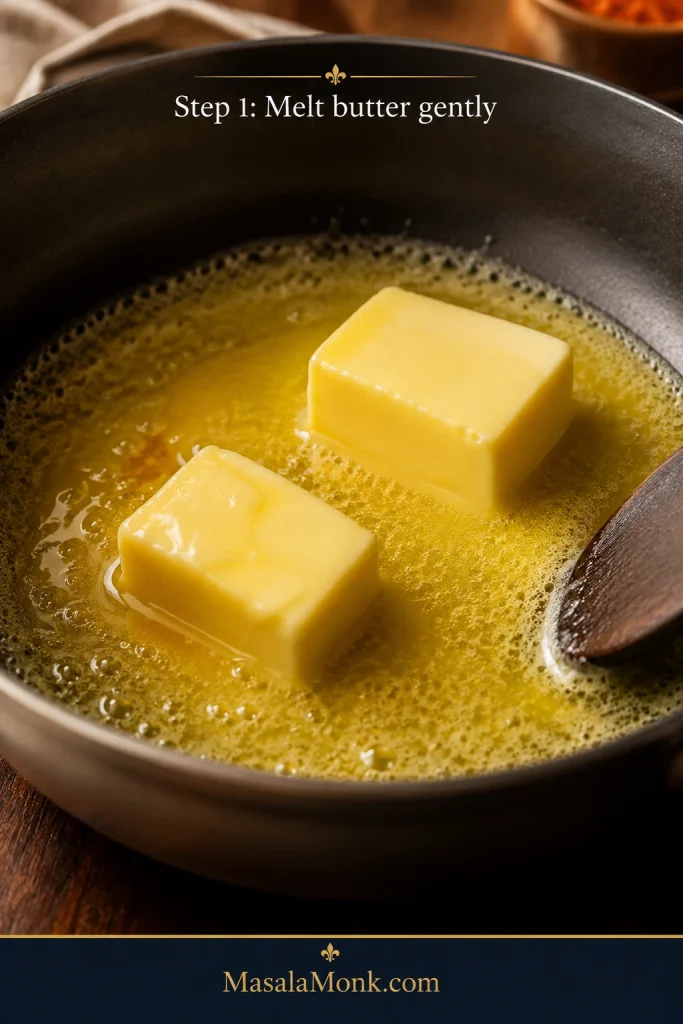
Butter melting in a skillet for seafood boil sauce.
Start low and gentle, because butter should melt slowly before the garlic and spices go in.

2. Soften the Onion and Garlic

Cook the onion until soft and glossy, then add the garlic for 60–90 seconds. The garlic should smell fragrant but stay pale.
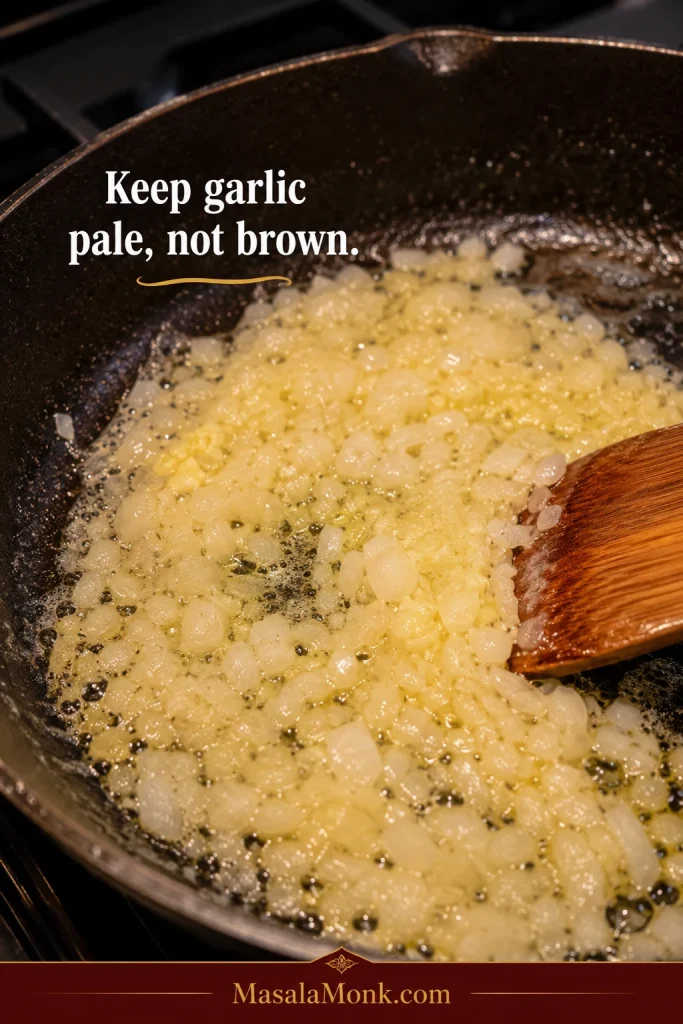
Garlic and onion cooking gently in melted butter for seafood boil sauce.
Once the onion softens and the garlic stays pale, the base turns sweeter and the sauce stays out of bitter territory.

3. Bloom the Seasonings

Stir the Cajun seasoning, Old Bay, smoked paprika, onion powder, brown sugar, and optional heat into the butter. Cook briefly until the butter turns red-orange and the spices look absorbed, not dry or dusty.
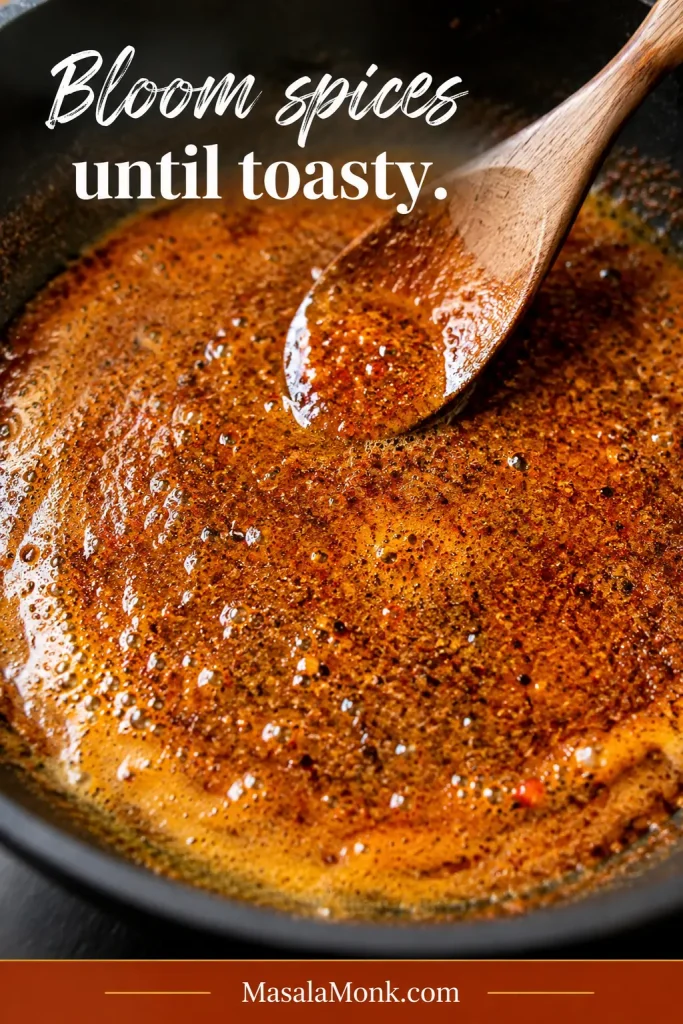
Cajun seasoning, Old Bay, and smoked paprika blooming in melted butter.
Blooming the spices in butter is what gives seafood boil sauce its deep red-orange color and that toasty Cajun flavor.

4. Loosen and Finish

Whisk in the broth or reserved boil liquid slowly, then simmer gently until glossy. Turn off the heat before adding lemon juice, lemon zest, hot sauce, and parsley.
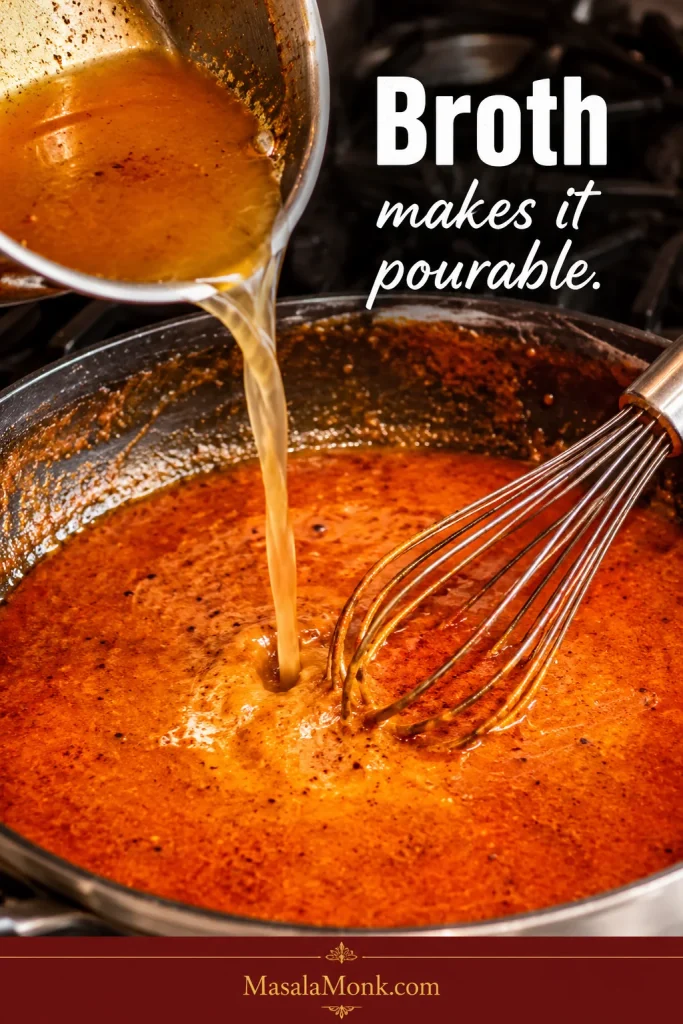
Broth being whisked into Cajun garlic butter seafood boil sauce.
As soon as the broth goes in, the sauce loosens into a glossy pour-over texture that works better for shrimp, crab, and vegetables.

Finish With Lemon and Parsley

After the sauce is glossy, take it off the heat before adding lemon and parsley. That small timing choice keeps the seafood boil sauce brighter and fresher.
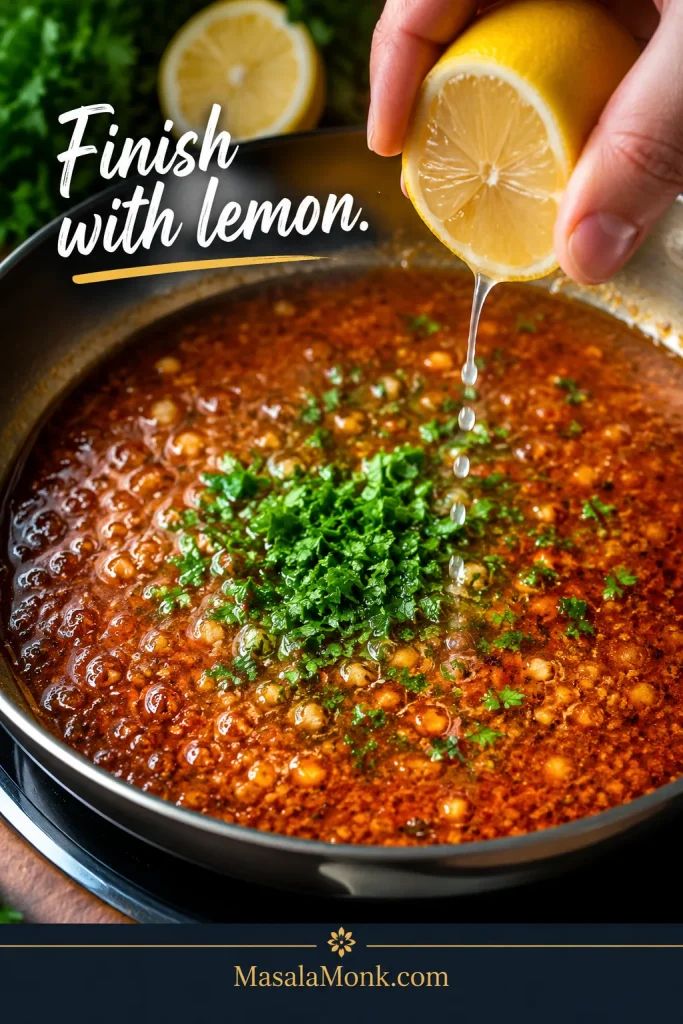
Lemon juice and parsley being added to seafood boil sauce.
Lemon and parsley go in at the end, because that final bright note keeps the sauce fresh instead of flat.

5. Test Before You Pour

Dip one shrimp, one potato, or one piece of corn into the sauce before coating the full tray. Fix the sauce in the pan, not after it has already coated three pounds of seafood.

Do You Add Seafood Boil Sauce Before or After Cooking?

This is a finishing sauce, not the cooking liquid. Let the boil season and cook the seafood, then let the garlic butter sauce coat it.

Add this garlic butter Cajun sauce after the seafood is cooked and drained. The sauce is for pouring, tossing, bagging, or dipping after cooking.

If you are unsure whether the seafood itself is fully cooked, FoodSafety.gov’s safe minimum internal temperatures chart is a useful reference for fish and shellfish.

The best method is simple: cook the seafood, drain it well, taste the sauce, then spoon or toss the warm sauce over the hot seafood. Keep extra sauce on the side for dipping crab, shrimp, corn, and potatoes.

Best Sauce for Shrimp, Crab, Crawfish and More

The same base works across the tray, but each seafood and side likes a slightly different sauce texture.
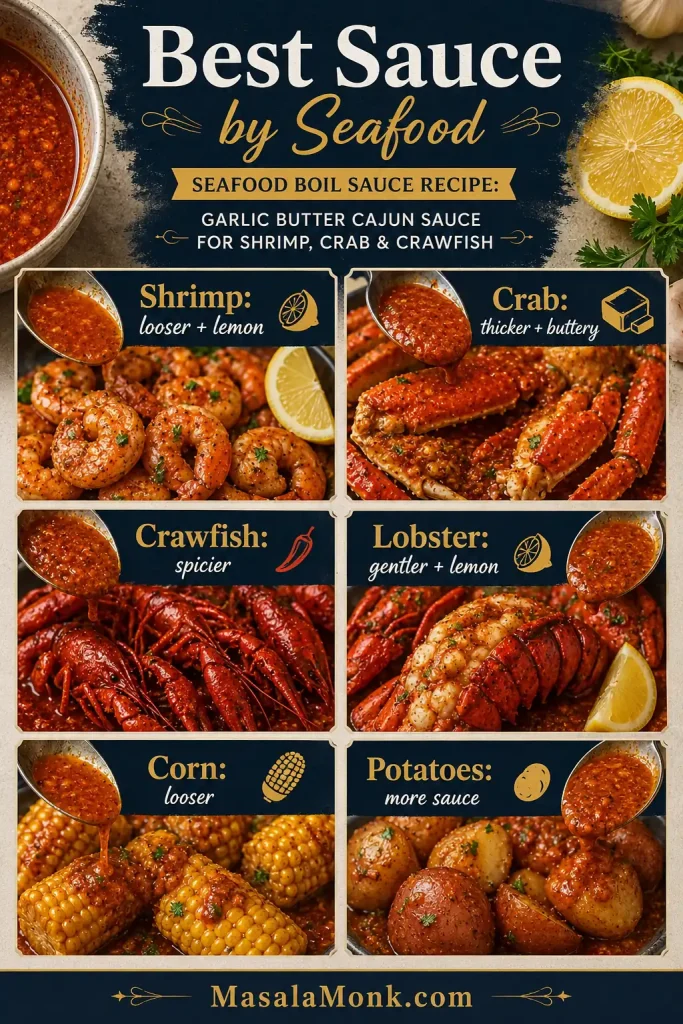
Guide showing the best seafood boil sauce texture for shrimp, crab, crawfish, lobster, corn, and potatoes.
Shrimp usually wants a looser, lemon-bright sauce, while crab does better with a thicker, buttery finish that stays on the meat.
FoodBest Sauce StyleAdjustment
ShrimpPour-over or tossAdd slightly more lemon and keep the sauce looser.
Crab legsDipping sauceKeep it thicker, buttery, and rich.
CrawfishSpicy Cajun sauceAdd extra Cajun seasoning, paprika, or hot sauce.
Lobster tailsGarlic lemon butterUse less Cajun, more lemon and parsley.
Mussels and clamsLoose pour-over sauceAdd more broth so it reaches the shells.
CornPour-over sauceMake it looser so it soaks into the kernels.
PotatoesPour-over sauceAdd enough broth so the sauce coats well.
SausageSmoky spicy sauceSmoked paprika and Cajun seasoning work well.
Boiled eggsMedium-thick sauceSpoon sauce over just before serving.

For Shrimp

Shrimp tastes best with a sauce that is garlicky, lemony, and not too heavy. Keep the texture slightly loose so the shrimp stays juicy.

For another shrimp dinner built around garlic, butter, and lemon, this shrimp scampi recipe keeps the same bright butter-sauce idea in a pasta-friendly direction.

For Crab Legs

Crab legs are perfect for a thicker dipping sauce. Keep it buttery and clingy, then serve extra lemon on the side so each bite can be brightened at the table.

For Crawfish

Crawfish can handle stronger heat. Add extra Cajun seasoning, hot sauce, cayenne, or red pepper flakes if you want a spicy crawfish boil sauce.

For Lobster

Lobster is sweeter and more delicate than crawfish or sausage, so go easier on the Cajun seasoning. More garlic, lemon, parsley, and butter usually works better than extra heat.

For a lobster meal that stays buttery but much simpler, this lobster roll recipe covers both the warm buttered Connecticut style and the cool Maine-style version.

For Corn and Potatoes

Corn and potatoes need a looser sauce. Add more broth or reserved boil liquid so the sauce can soak in instead of sitting on top.

Cajun vs Old Bay Seafood Boil Sauce

Cajun seasoning and Old Bay are both common in seafood boil sauce, but they do different jobs. Think of Cajun seasoning as the heat and depth, and Old Bay as the classic seafood-boil note. Together they make the sauce taste fuller, but together they can also make it salty fast.

Do not increase Cajun seasoning and Old Bay heavily at the same time unless you know both blends are low-salt.
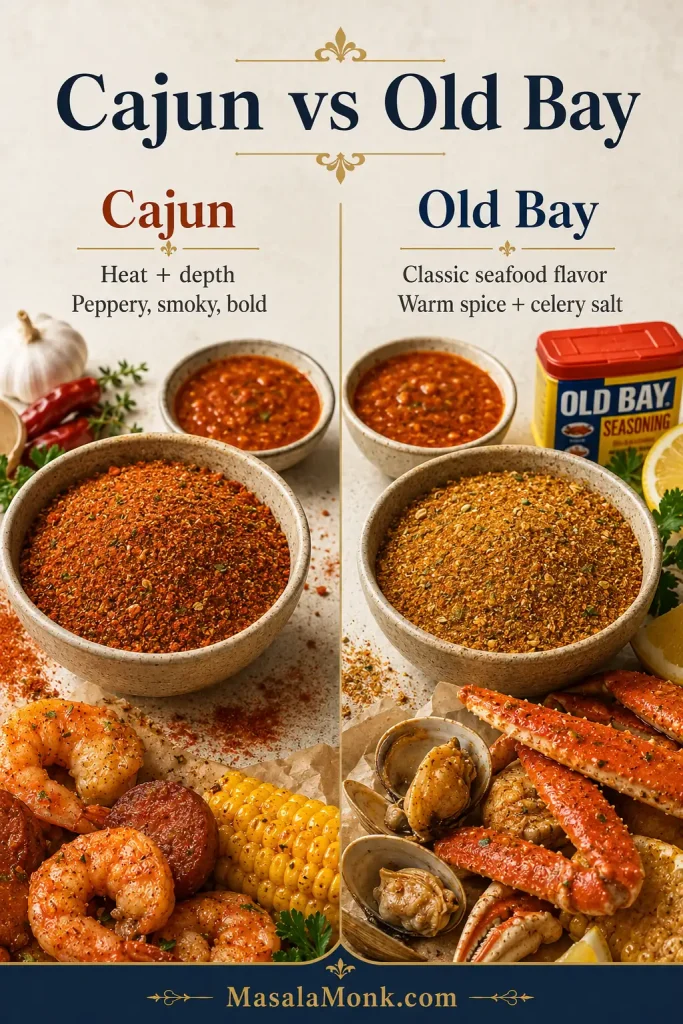
Cajun versus Old Bay seafood boil sauce guide.
Cajun seasoning brings heat and depth, while Old Bay brings that classic seafood flavor, so the two work best when the salt stays under control.
  • For more Cajun flavor: Increase Cajun seasoning slightly, add smoked paprika, and finish with hot sauce.
  • For more Old Bay flavor: Increase Old Bay, reduce Cajun, and keep the lemon bright.
  • For a less salty sauce: Use unsalted butter, low-sodium broth, less Old Bay, and more lemon.
  • If you have no Old Bay: Use Cajun seasoning, smoked paprika, garlic powder, onion powder, and a tiny pinch of celery salt or celery seed.
  • If you have no Cajun seasoning: Use Old Bay, smoked paprika, garlic powder, onion powder, black pepper, and cayenne.

Seafood Boil Sauce Variations

Think of the recipe as one base sauce with two kinds of choices: texture choices for how you serve it, and flavor choices for how spicy, garlicky, or Old Bay-forward you want it.

Want the Sauce…Do This
More garlickyUse 10–12 cloves garlic or grated garlic.
More CajunAdd extra Cajun seasoning and smoked paprika.
More Old BayIncrease Old Bay and reduce Cajun seasoning.
MildSkip cayenne, use mild Cajun seasoning, add more broth and lemon.
SpicyAdd cayenne, hot sauce, red pepper flakes, or spicy Cajun seasoning.
Thicker for dippingUse ¼ cup / 60 ml liquid.
Looser for a trayUse ¾–1 cup / 180–240 ml liquid.
Restaurant-style sauceUse grated onion, extra paprika, brown sugar, less liquid, and optional blending.

Garlic Butter Seafood Boil Sauce

A stronger garlic butter version starts with 10 cloves of garlic and slightly less Cajun seasoning. Keep the lemon juice strong and add parsley at the end. This version is excellent for crab legs, lobster tails, and shrimp.

Spicy Seafood Boil Sauce

For a spicier sauce, add cayenne, red pepper flakes, hot sauce, spicy Cajun seasoning, or hot paprika. Add heat slowly and taste after simmering before adding more.

Mild Seafood Boil Sauce

The mild version uses mild Cajun seasoning, slightly less Old Bay, no cayenne, and extra broth and lemon. It is better for kids, mild eaters, lobster, and anyone who wants buttery garlic flavor without too much heat.

Old Bay Seafood Boil Sauce

An Old Bay-forward sauce works best when Old Bay increases to 1 tablespoon and Cajun seasoning drops to 1 teaspoon. Keep the butter, garlic, lemon, and parsley the same.

Lemon Pepper Seafood Boil Sauce

Add 1–2 teaspoons lemon pepper seasoning and increase the lemon zest. Reduce extra salt because lemon pepper blends can be salty. This version works beautifully with shrimp, lobster, and crab.

Creamy Seafood Boil Sauce

A creamy version needs only 2–4 tablespoons of cream at the end over low heat. This makes the sauce richer and softer, but it is less traditional than garlic butter Cajun sauce.

Restaurant-Style Sauce Adjustments

This is the part that makes the tray look like something people want to gather around. Restaurant-style seafood boils feel different because the sauce arrives hot, glossy, and clingy. It coats the shells, runs into the potatoes, stains the corn, and still leaves enough at the bottom for dipping.

  • For redder color, add a little more smoked paprika.
  • For deeper flavor, bloom the spices a little longer over low heat.
  • For a clingier sauce, use less broth.
  • For smoother texture, use grated garlic and grated onion.
  • For a glossy finish, add 1–2 teaspoons brown sugar.
  • For a smooth restaurant-style sauce, blend briefly with an immersion blender.

Taste Adjustment Ladder

This is the part where the sauce stops being a formula and starts tasting like yours. Most fixes come back to the butter-broth-lemon rule: butter softens, broth loosens, and lemon brightens.

If the Sauce Tastes…Add This
Too saltyUnsalted butter first, then warm broth, then lemon.
Too buttery or heavyLemon juice first, then a splash of broth.
Too thinSimmer a few minutes longer.
Too thickWarm broth, seafood stock, or reserved boil liquid.
Too spicyButter and broth, then a tiny pinch of brown sugar if needed.
Too flatLemon first, then Cajun seasoning or Old Bay.
Too sharpA small knob of butter or a tiny pinch of brown sugar.
Not garlicky enoughA small amount of garlic powder, or gently cooked grated garlic.
Not smoky enoughA little more smoked paprika.

Make one adjustment at a time, then taste again. This keeps the sauce from swinging too far in the other direction.

Quick 2-Minute Seafood Boil Sauce

When the seafood is already cooked and you just need something buttery fast, this shortcut version gets you there.

IngredientAmount
Melted butter½ cup / 113 g
Old Bay or Cajun seasoning1–2 teaspoons
Garlic powder or 1 minced garlic clove½ teaspoon garlic powder or 1 clove
Lemon juice1 tablespoon / 15 ml
Hot sauceOptional, to taste

This quick version is not as deep or layered as the full sauce, but it works well as a fast seafood dipping sauce when the seafood is already cooked. For better flavor, warm everything together gently for 1–2 minutes instead of just stirring it cold.

When you want a cold, creamy seafood dip instead of warm butter, this homemade tartar sauce recipe fits that lane better.

Substitutions and Swaps

The base is forgiving. Missing one ingredient does not ruin the sauce; it just changes which direction you lean.

Missing IngredientUse Instead
No Old BayCajun seasoning + smoked paprika + pinch of celery salt or celery seed
No Cajun seasoningOld Bay + smoked paprika + garlic powder + onion powder + cayenne
No seafood boil liquidSeafood stock, low-sodium chicken broth, vegetable broth, beer, or water with lemon
No fresh garlicGarlic paste or garlic powder
No onionSkip it, or use ½ teaspoon onion powder
Not enough butterUse part butter and part olive oil. If using no butter, use vegan butter or olive oil, but expect a lighter sauce.
No lemonLime juice or a small splash of vinegar
No brown sugarHoney, maple syrup, or skip it
No parsleyChives, green onion, or skip it

If you are using store-bought seafood boil seasoning packets, start with less seasoning than you think you need. Packets can be very salty. Use unsalted butter, taste before adding salt, and loosen the sauce with broth or lemon juice if it tastes too intense.

How to Toss and Serve It Restaurant-Style

This is the point where the sauce becomes the meal. The crab legs get glossy, the shrimp pick up the garlic butter, the corn turns red-orange in the grooves, and the potatoes catch everything the seafood leaves behind.

A restaurant-style finish is not about making the sauce complicated. It is about timing, texture, and serving it while everything is still hot and glossy.

Restaurant-Style Seafood Boil Sauce Finish

Use the sauce while it is warm and glossy, then coat the seafood in layers so the tray looks generous without turning watery.
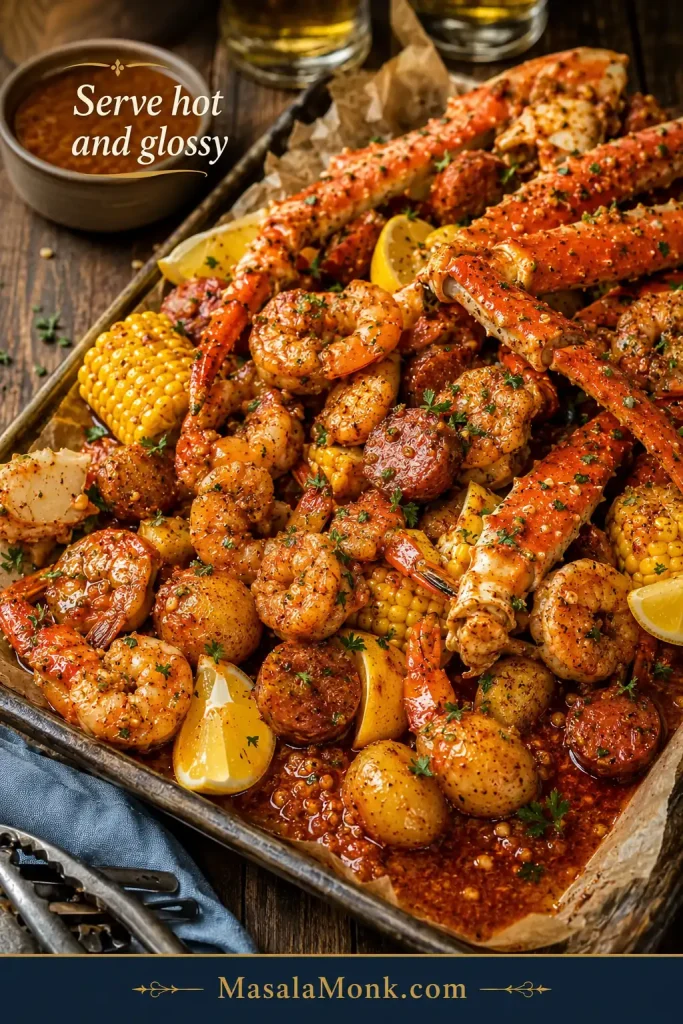
Restaurant-style seafood boil tray with shrimp, crab, corn, potatoes, sausage, and glossy garlic butter sauce.
A great seafood boil tray looks glossy and generous, with enough sauce to coat the seafood and leave some behind for dipping.
  • Warm the seafood before saucing. Cold seafood makes butter firm up quickly.
  • Drain the seafood well so water does not dilute the sauce.
  • Toss or spoon in layers instead of dumping all the sauce at once.
  • Keep extra sauce warm on the side for dipping.
  • Add parsley and lemon at the end so the tray looks and tastes fresh.
  • Serve immediately. Garlic butter sauce is at its best while warm and glossy.

Seafood Boil Bag Sauce

For seafood boil bag sauce: use the medium-thick texture. Add cooked seafood and warm sauce to the bag, seal carefully, and toss until everything is coated. The sauce should move when tossed, coat the shells red-orange, and leave a little buttery pool at the bottom for dipping. If it is too watery, it will pool instead of clinging to shrimp, crab, corn, and potatoes.
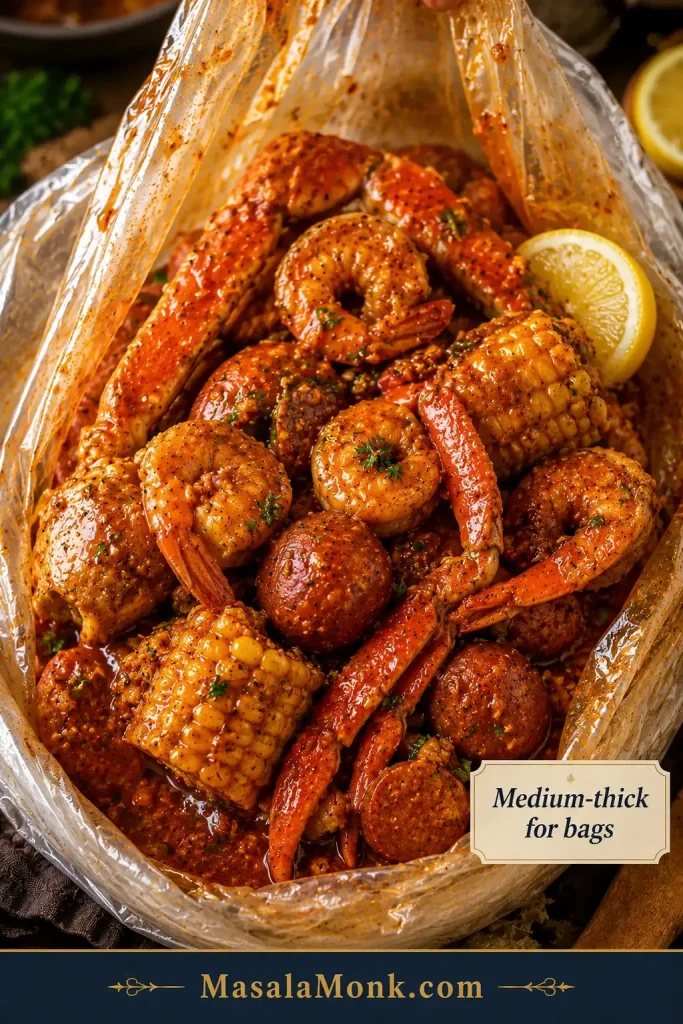
Seafood boil bag with shrimp, crab, corn, and potatoes coated in red-orange garlic butter sauce.
Medium-thick is the sweet spot for seafood boil bags, because the sauce needs to move when tossed and still coat every shell.

Common Mistakes to Avoid

Most sauce problems are easier to fix in the pan than on the tray. Use this as a quick check before the sauce goes over the seafood.

  • Starting too salty: Use unsalted butter when you can, and taste before adding any extra salt.
  • Using heat that is too high: Low to medium-low heat keeps the garlic pale and the butter glossy.
  • Skipping the taste test: Try the sauce with one shrimp, potato, or piece of corn before coating the full tray.
  • Pouring sauce over watery seafood: Drain the seafood well so the sauce stays bold instead of diluted.
  • Using one texture for every purpose: Dipping, pouring, and seafood boil bags all need slightly different thickness.

Troubleshooting Seafood Boil Sauce

Butter sauces can go sideways quickly, but you usually do not need to start over. Catch the problem while the sauce is still in the pan, and the fix is usually simple.
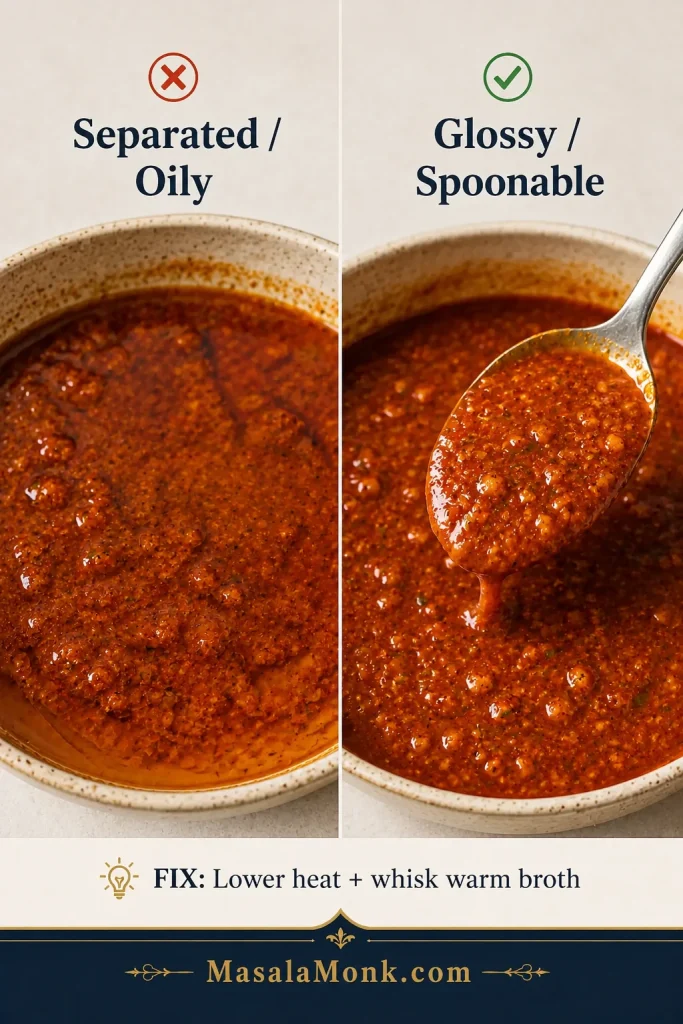
Comparison of separated oily seafood boil sauce and glossy spoonable seafood boil sauce.
When the sauce looks oily or split, lower the heat and whisk in warm broth, because glossy always wins over greasy.
ProblemLikely CauseFix
Too saltySalted butter, salty Cajun seasoning, too much Old BayAdd unsalted butter, broth, lemon juice, or a little brown sugar.
Too spicyToo much cayenne, hot sauce, or spicy Cajun seasoningAdd butter, broth, lemon, or a little sweetness.
Too oilyToo much butter, not enough liquidWhisk in warm broth slowly.
Too thinToo much broth or boil liquidSimmer uncovered for a few minutes.
Sauce separatedHeat too high or liquid added too fastLower the heat and whisk in warm liquid gradually.
Bitter garlicGarlic browned or burnedCook garlic gently for only 60–90 seconds.
Grainy spicesSpices were not bloomed or too much dry seasoning was addedBloom spices in butter and loosen with broth.
Not flavorful enoughToo much liquid or weak seasoningAdd Cajun seasoning, Old Bay, lemon, garlic, or hot sauce slowly.

How to Fix Salty Seafood Boil Sauce

Do not add water first. Water can make the sauce thinner without fixing the flavor. Instead, add unsalted butter, warm broth, lemon juice, or a small pinch of brown sugar. If you are serving the sauce with a full seafood boil, extra potatoes and corn can also help absorb some of the salty flavor on the tray.

How to Fix Separated Seafood Boil Sauce

Lower the heat. Whisk in 1–2 tablespoons of warm broth at a time until the sauce looks glossy again. If it still looks broken, use an immersion blender for a few seconds.

How to Make It Thicker

Simmer it uncovered for a few minutes. You can also use less broth next time or add a little more butter. For a thicker dipping sauce, start with only ¼ cup / 60 ml liquid.

How to Make It Thinner

Whisk in warm broth, seafood stock, reserved boil liquid, or water with lemon juice. Add a little at a time until the sauce pours the way you want.

How to Store and Reheat the Sauce

Do not worry if the sauce turns solid in the fridge. That is just the butter doing what butter does. The texture comes back when the sauce is reheated and whisked.

Refrigerating

Store unused sauce in an airtight container in the refrigerator for 4–5 days.

If the sauce has touched seafood, shells, fingers, or a shared dipping bowl, treat it like a seafood leftover. Cool it quickly, refrigerate it promptly, and use it within 1–2 days for best quality.

For broader leftover safety, the USDA’s leftovers and food safety guide is a useful reference.

Reheating

For clean, unused sauce, reheat gently in a saucepan over low heat, stirring often. Add a splash of broth, water, or reserved boil liquid if the sauce is too thick.

For sauce that has touched seafood or leftovers, reheat until steaming hot, ideally to 165°F / 74°C, then whisk to bring the texture back. A food thermometer is the safest way to check.

You can also microwave clean unused sauce in short bursts, stirring every 15–20 seconds. If reheating sauce with seafood leftovers, stir well and make sure the food is steaming hot throughout before serving.

Freezing

Freeze unused seafood boil sauce for up to 2–3 months. Thaw overnight in the refrigerator, then reheat gently over low heat. If the sauce separates slightly, whisk in warm broth or blend briefly with an immersion blender.

What to Serve With Seafood Boil Sauce

The best use is still the simplest: hot seafood, warm sauce, extra napkins, and something starchy to catch the butter.

Classic Seafood Boil Uses

  • Shrimp
  • Crab legs
  • Crawfish
  • Lobster tails
  • Mussels
  • Clams
  • Corn on the cob
  • Baby potatoes
  • Smoked sausage
  • Boiled eggs

Other Good Uses

  • Garlic bread
  • Rice
  • Roasted potatoes
  • Grilled corn
  • Roasted vegetables
  • Grilled fish
  • Pan-seared scallops
  • Salmon
  • Lemon wedges on the side

For other seafood dinners, this baked haddock recipe keeps the butter-and-lemon idea gentler, while this honey garlic salmon recipe goes sticky, sweet, and skillet-style.

For a full crispy seafood comfort plate instead of a boil, this fish and chips recipe pairs fried fish with tartar sauce, curry sauce, vinegar, and lemon.

For a full seafood boil tray, serve some sauce poured over the seafood and extra sauce on the side for dipping. For a cleaner dinner, serve the sauce in small bowls and let everyone dip shrimp, crab, corn, potatoes, and bread as they eat.

Frequently Asked Questions

What is seafood boil sauce made of?

It is usually made with butter, garlic, Cajun seasoning, Old Bay seasoning, lemon juice, paprika, hot sauce, and broth or reserved seafood boil liquid. Some versions also include onion, brown sugar, parsley, cayenne, or lemon pepper.

Is seafood boil sauce the same as garlic butter sauce?

It is a type of garlic butter sauce, but it is usually more seasoned. Basic garlic butter may only have butter, garlic, lemon, and herbs. Seafood boil sauce usually adds Cajun seasoning, Old Bay, paprika, heat, and sometimes broth or boil liquid.

Is this a Blove’s-style seafood boil sauce?

This is not a Blove’s copycat sauce. Blove’s-style seafood boil sauces are usually heavier, sweeter, and more spice-loaded, often with extra butter, garlic, hot sauce, Worcestershire, ginger, lemon pepper, and a larger seasoning mix. This version is a balanced Cajun garlic butter seafood boil sauce made for dipping, pouring, and tossing without hiding the flavor of the seafood.

Do you put seafood boil sauce in the pot?

No. It is better to add the sauce after the seafood is cooked and drained. This is a finishing sauce, not the cooking liquid.

What sauce goes with shrimp boil?

Garlic butter Cajun sauce is one of the best sauces for shrimp boil. Use a slightly looser sauce with lemon juice so the shrimp stays bright and juicy instead of feeling too heavy.

What sauce is best for crab boil?

A thick garlic butter seafood sauce is best for crab boil because it clings well to crab meat. Keep it buttery, garlicky, and slightly lemony, with Old Bay or Cajun seasoning for classic seafood flavor.

Is this good as a dipping sauce?

It is excellent as a dipping sauce. Reduce the liquid to about ¼ cup / 60 ml and simmer the sauce a little longer. This keeps it thick, buttery, and clingy.

Does it work as a pour-over sauce?

It works well as a pour-over sauce. Use about ½ cup / 120 ml broth or reserved boil liquid, then add more if you want it loose enough to cover a big tray of shrimp, crab, crawfish, corn, potatoes, and sausage.

How do I make it thicker?

Use less liquid or simmer the sauce uncovered for a few minutes. For a thick dipping sauce, start with ¼ cup / 60 ml liquid instead of ½ cup / 120 ml.

How do I make it less salty?

Add unsalted butter, warm broth, lemon juice, or a small pinch of brown sugar. If serving with a full seafood boil, potatoes and corn can also help absorb some of the salty flavor.

Can I make seafood boil sauce without Old Bay?

You can. Use Cajun seasoning, smoked paprika, garlic powder, onion powder, black pepper, and a tiny pinch of celery salt or celery seed if you have it. The flavor will be slightly different, but still good.

Can I make seafood boil sauce without Cajun seasoning?

You can. Use Old Bay, smoked paprika, garlic powder, onion powder, black pepper, and a little cayenne or hot sauce for heat.

Why did it separate?

The heat may have been too high, or the liquid may have been added too quickly. Keep the sauce at a gentle simmer and whisk in broth gradually. If it separates, lower the heat and whisk in a little warm liquid.

How much sauce do I need for a seafood boil?

For dipping, plan on about ½ cup / 120 ml sauce per 1 lb / 450 g seafood. For pouring over a seafood boil tray, plan on about ¾ cup / 180 ml per 1 lb / 450 g seafood. Make extra if you are serving corn, potatoes, sausage, and eggs because they absorb sauce.

Did You Make This Seafood Boil Sauce?

Once you make this sauce once, it stops feeling like an add-on. It becomes the thing that pulls the whole seafood boil together: the shrimp, the crab, the corn, the potatoes, the sausage, the bread at the end, and everyone reaching back for one more dip.
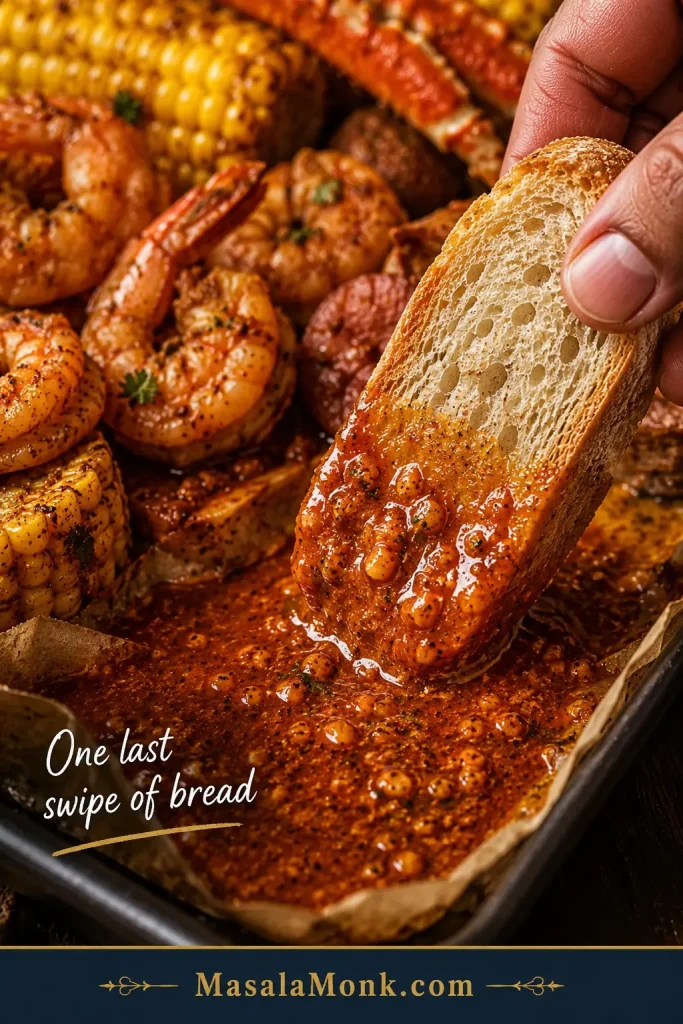
A piece of bread dipped into leftover garlic butter seafood boil sauce.
The final swipe of bread is the payoff, because the best seafood boil sauce always leaves one more bite at the bottom of the tray.

Taste it while it is warm, adjust it until it feels balanced, then pour it over the tray and serve extra on the side. That is the moment the meal comes together.

Did you make it thick for dipping, loose for pouring, or extra spicy for crawfish? Leave a rating and a comment with your seafood mix, sauce thickness, and heat level so other readers can adjust their own seafood boil sauce with confidence.
Posted on Leave a comment

Honey Mustard Dressing Recipe

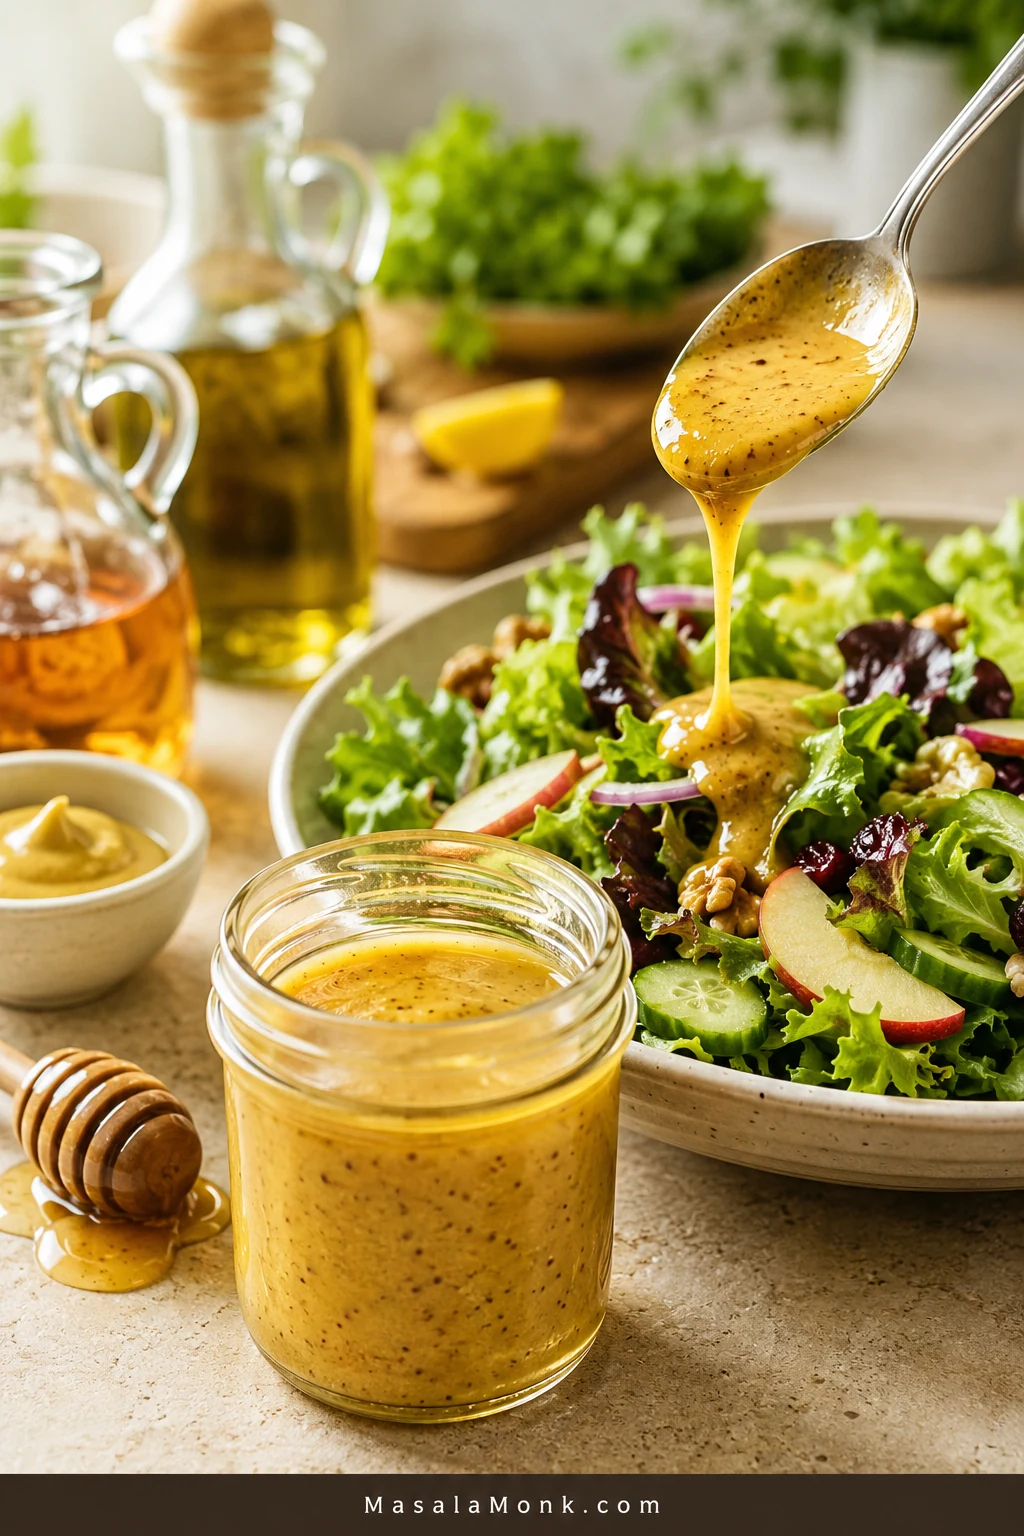
Golden honey mustard dressing in a glass jar with a spoon drizzling it over a salad made with greens, cucumber, tomatoes, onions, apples, and nuts.

A good honey mustard dressing should taste bright before it tastes sweet. It should cling lightly to salad leaves, drizzle smoothly over grain bowls, and still have enough punch for chicken, roasted vegetables, salmon, ham, wraps, or sandwiches. Too much honey makes it taste like bottled yellow sugar; too much vinegar leaves it sharp and thin. The best batch tastes lively, not sugary.

This honey mustard dressing recipe starts with a simple no-mayo Dijon base: mustard, honey, apple cider vinegar, olive oil, salt, and pepper. It takes about five minutes, uses pantry ingredients, and gives you a clean dressing you can turn into a creamy sauce, a thicker dip, or a lighter vinaigrette.

The little trick is knowing what your plate actually needs, because the dressing you want for greens is not always the one you want for fries. For salads, start with the no-mayo dressing. When chicken tenders, fries, nuggets, burgers, or sandwiches are involved, make the creamy mayo sauce.

It is the kind of quick jar that rescues plain greens, leftover chicken, roasted vegetables, and rushed lunches without making anything feel heavy.

Quick Answer: How Do You Make Honey Mustard Dressing?

To make honey mustard dressing, whisk Dijon mustard, honey, apple cider vinegar or lemon juice, olive oil, salt, and black pepper until smooth. For the main 1-cup batch, use ¼ cup Dijon mustard, 3 tablespoons honey, 3 tablespoons vinegar or lemon juice, and ¼ cup olive oil. Add 1–2 tablespoons water at the end only if the dressing needs loosening.

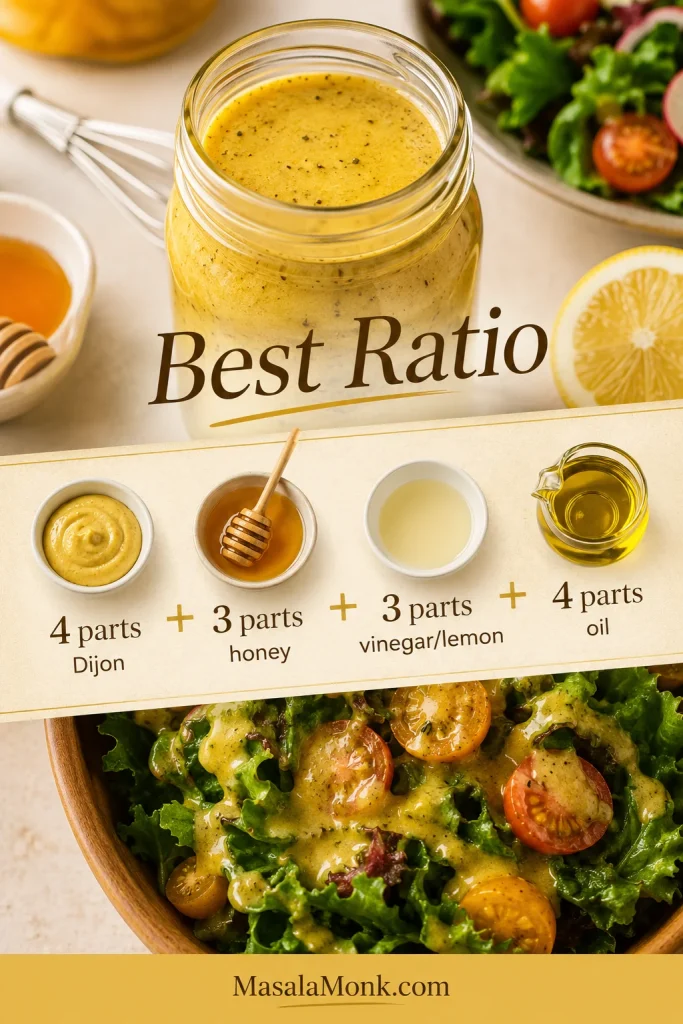
Best honey mustard dressing ratio: 4 parts Dijon mustard, 3 parts honey, 3 parts vinegar or lemon juice, and 4 parts oil. For a sweeter, bolder dressing, use equal parts mustard, honey, vinegar, and oil.

Honey mustard dressing ratio graphic showing four parts Dijon mustard, three parts honey, three parts vinegar or lemon juice, and four parts oil.
Start with the 4:3:3:4 honey mustard dressing ratio, then adjust the jar with more vinegar for brightness, more honey for sweetness, or a pinch of salt when the flavor tastes flat.

The flavor should be tangy first, lightly sweet second, with a clean Dijon bite and enough body to coat greens without feeling heavy. Taste before serving; a tiny splash or pinch is usually enough.

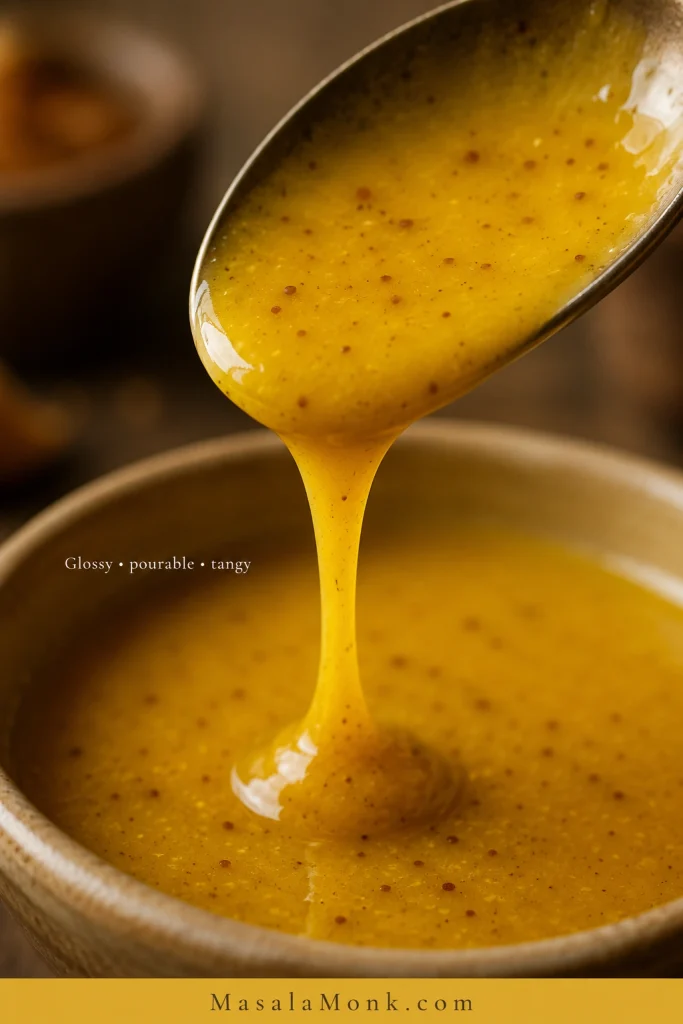
Texture cue: The finished dressing should fall in a glossy ribbon, not sit like a thick dip.

Close-up of glossy golden honey mustard dressing dripping from a spoon into a bowl, with small mustard and pepper specks visible.
Look for a glossy ribbon when the dressing falls from the spoon; if it holds thick peaks instead, you have moved from salad dressing toward honey mustard dip.

5-Minute Honey Mustard Dressing Recipe

This is the main no-mayo dressing: glossy, zippy, lightly sweet, and loose enough to drizzle. Use it on salads, roasted vegetables, grain bowls, chicken, salmon, ham, wraps, or any meal-prep bowl that needs a quick sweet-tangy finish.

Prep Time
5 minutes

Cook Time
0 minutes

Total Time
5 minutes

Yield
About 1 cup / 240 ml

Servings
7–8 servings

Serving Size
About 2 tbsp / 30 ml

Equipment

  • Small bowl or clean jar with lid
  • Small whisk or fork
  • Measuring spoons and cups
  • Optional: small blender or immersion blender for a more blended dressing

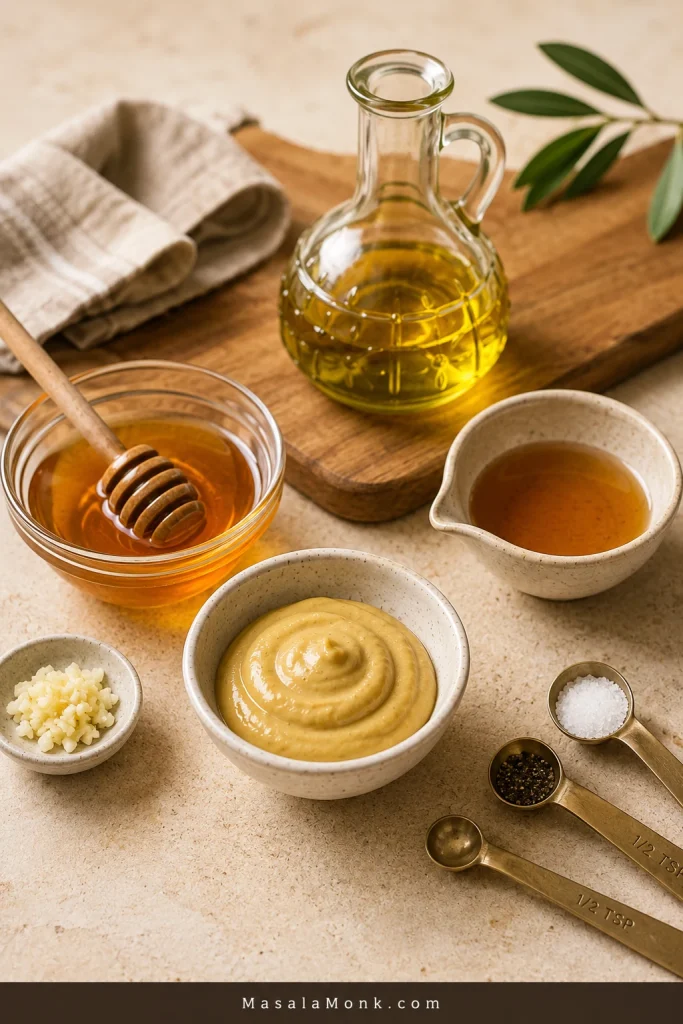
Ingredients

Honey mustard dressing ingredients arranged on a counter, including Dijon mustard in a bowl, honey, olive oil, vinegar, garlic, salt, pepper, and measuring spoons.
Because homemade honey mustard dressing uses only a few pantry ingredients, each one shows up clearly: Dijon adds bite, honey rounds it out, acid brightens it, and oil gives it body.
  • ¼ cup Dijon mustard, about 60 ml / 60–65 g
  • 3 tablespoons honey, about 45 ml / 60–65 g
  • 3 tablespoons apple cider vinegar, or 2 tablespoons apple cider vinegar plus 1 tablespoon fresh lemon juice, about 45 ml total
  • ¼ cup extra-virgin olive oil, about 60 ml
  • 1–2 tablespoons cool water, only as needed to loosen
  • ¼ teaspoon fine salt, plus more to taste
  • ¼ teaspoon black pepper
  • Optional: 1 small grated garlic clove or ¼ teaspoon garlic powder

Instructions

  1. Add the Dijon mustard, honey, vinegar or vinegar-lemon mix, salt, pepper, and garlic to a small bowl or jar.
  2. Whisk until the mustard and honey look smooth and evenly mixed.
  3. Slowly whisk in the olive oil until the dressing turns glossy and pourable. For the jar method, add the oil with everything else, close the lid tightly, and shake hard for 15–20 seconds.
  4. Taste the dressing. Add more honey for sweetness, more vinegar or lemon juice for zip, or a small pinch of salt when the flavor tastes flat.
  5. If the dressing feels too thick, loosen it with 1–2 tablespoons water.
  6. Use right away or refrigerate in an airtight jar. Shake or whisk again before serving.

Recipe Notes

  • Use 2 tablespoons honey for a sharper salad dressing.
  • Use up to 4 tablespoons honey for a sweeter sauce-style dressing.
  • Strong olive oil can dominate the dressing. Light olive oil, avocado oil, or a neutral oil gives a milder result.
  • For meal prep, garlic powder keeps the flavor smoother and more predictable than fresh garlic.
  • Separation after chilling is normal. Shake the jar hard before using.

Need a thicker sauce or dip? Go to the style guide, jump to the creamy version, or return to the top ↑

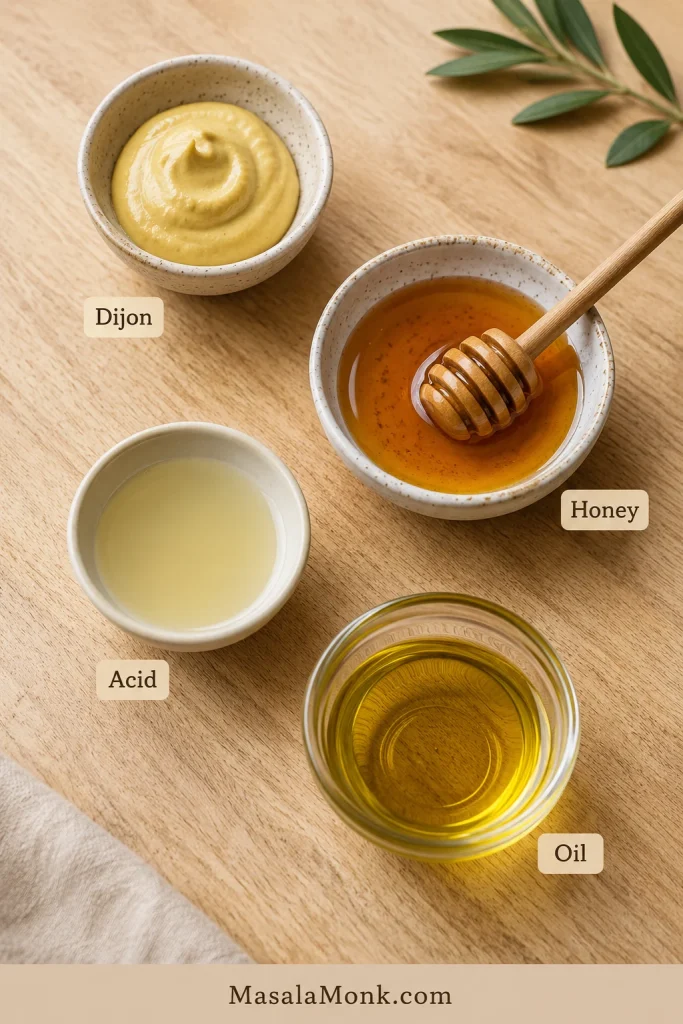
4-Ingredient Honey Mustard Dressing

Strip it down and honey mustard dressing is just four things: mustard for bite, honey for roundness, acid for brightness, and oil for body. Salt and pepper are the difference between “fine” and “finished,” but the core flavor comes from those four ingredients.

  • Dijon mustard: use it for the cleanest salad-style flavor.
  • Honey: use more for dipping sauce and less for sharper greens.
  • Apple cider vinegar or lemon juice: use it to keep the dressing bright.
  • Olive oil: use enough to help the dressing cling instead of running off.
Four core ingredients for honey mustard dressing shown in bowls: Dijon mustard, honey, vinegar or lemon juice, and olive oil.
At its simplest, 4-ingredient honey mustard dressing is mustard for bite, honey for roundness, acid for brightness, and oil for a smooth drizzle.

For a quick small batch, whisk 2 tablespoons Dijon mustard, 1 tablespoon honey, 2 tablespoons apple cider vinegar or lemon juice, and 2 tablespoons olive oil. Add salt and pepper to taste. This makes enough for one large salad or two smaller side salads.

Honey Mustard Dressing Ratio

Once you know the ratio, the recipe becomes less of a rule and more of a dial. You can make the same jar sweeter, sharper, thicker, thinner, creamier, or lighter without starting over.

StyleEasy RatioUse It For
Everyday dressing4 parts mustard : 3 parts honey : 3 parts vinegar : 4 parts oilEveryday salads and bowls
Equal-parts dressing1 part mustard : 1 part honey : 1 part vinegar : 1 part oilSweeter, bolder dressing
Sharper salad dressingMore vinegar or lemon, less honeyGreens, slaws, roasted vegetables
Creamy sauceMayo or yogurt base + mustard + honey + acidChicken, fries, sandwiches
VinaigretteMore oil and vinegar, no creamy baseSpinach, kale, cabbage, grain bowls

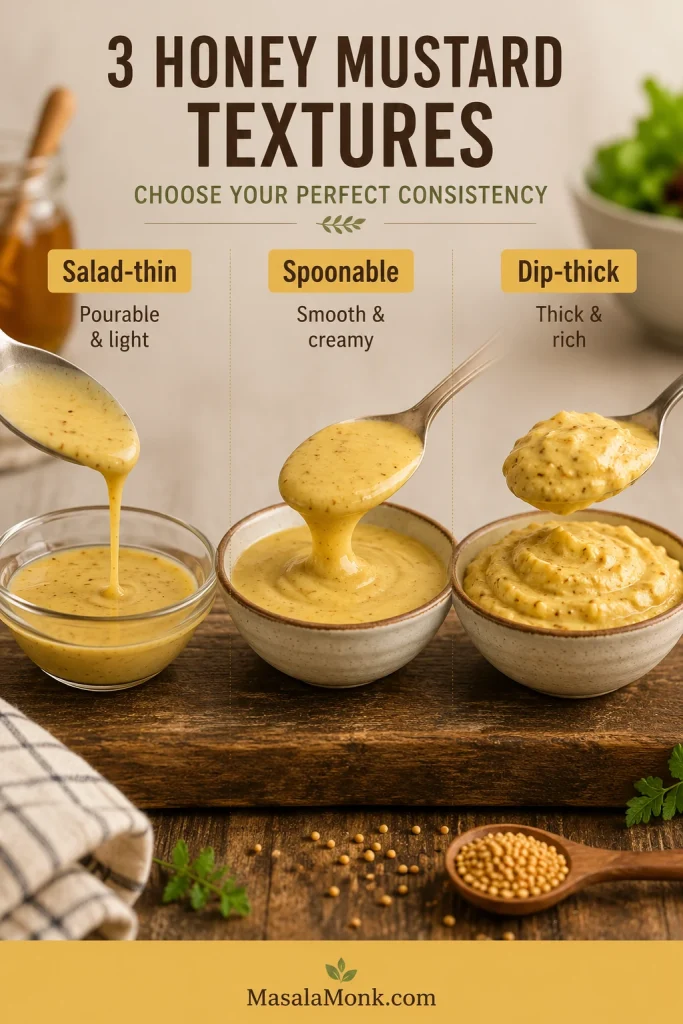
Texture cue: Salad dressing should drizzle, sauce should spoon, and dip should hold onto crispy food.

Three honey mustard textures shown side by side: a thin salad dressing, a spoonable sauce, and a thick dip.
Texture changes the job of the recipe: salad-thin dressing coats greens, spoonable sauce works for bowls and sandwiches, and dip-thick honey mustard belongs with crispy food.

Easy memory trick: too sweet needs acid, too punchy needs honey, and flat almost always needs salt before anything else.

Not sure whether the batch should be thin, spoonable, or dip-thick? Go to the style guide.

Should You Make Dressing, Sauce, Dip, or Vinaigrette?

This is where honey mustard changes personality. Thin it and it belongs on greens. Make it creamy and suddenly it is the sauce everyone reaches for beside fries or chicken.

Do not force a salad dressing to behave like a dip. If fries, nuggets, or chicken tenders are involved, give the bowl a creamy base.

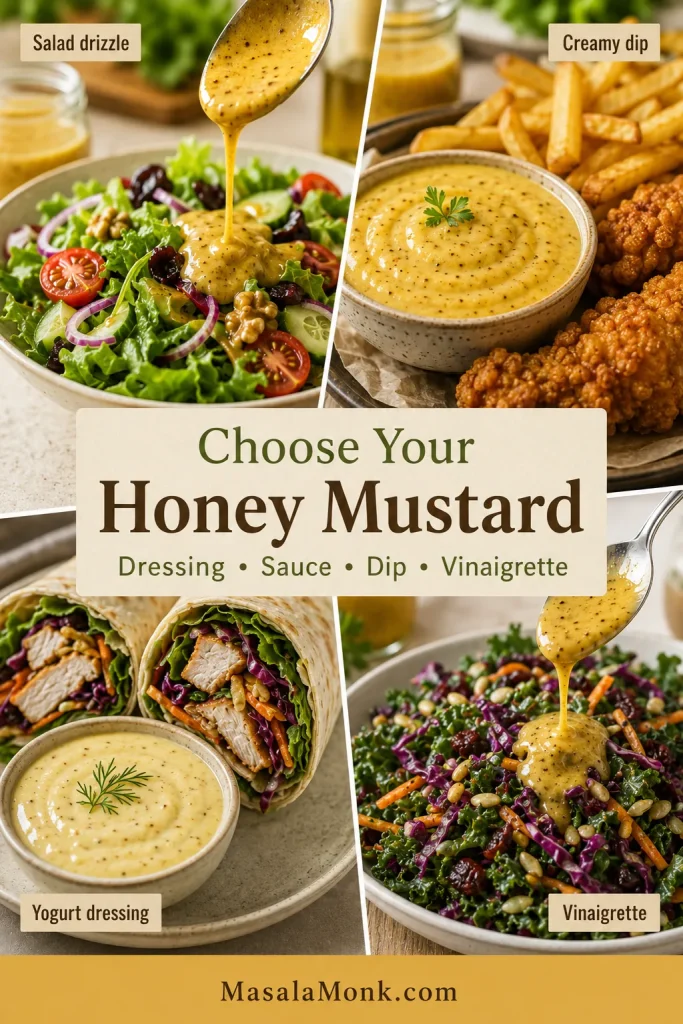
A honey mustard guide showing salad drizzle, creamy dip with fries and chicken, yogurt dressing with wraps, and vinaigrette over a hearty salad.
Match the honey mustard style to the food: keep it pourable for salads, make it creamy for dipping, use yogurt for a lighter sauce, or thin it into vinaigrette for sturdy greens.
The Plate Needs…Make ThisTextureBest For
A clean salad dressingNo-mayo Dijon dressingPourableGreen salads, bowls, roasted vegetables
A classic dipCreamy mayo sauceThick and smoothChicken tenders, fries, nuggets, pretzels
A lighter creamy dressingGreek yogurt dressingCreamy and tangyWraps, lunch bowls, chicken salads
A sharper vinaigretteOil-vinegar dressingLight and glossySlaws, spinach, kale, grain bowls
A sandwich sauceDijon + yellow mustard + mayoMedium-thickHam, turkey, burgers, wraps

Good rule: salads need a dressing that drizzles; fries and chicken need a sauce that stays put.

Make the no-mayo dressing first when you are unsure. Once you taste that base, it is easy to make the next batch richer, sharper, sweeter, or thick enough for dipping without guesswork.

Ingredients and Substitutions

Because the ingredient list is short, the jar changes fast. A bold mustard can make it bite, a floral honey can push it sweeter, and a strong olive oil can take over if you are not expecting it. Taste the base before adding more salt, honey, or vinegar.

Dijon mustard is the safest starting point because it blends easily and gives the dressing a clean mustard bite without turning harsh. Yellow mustard works too, but it tastes brighter and sweeter, so it is better in creamy dips and sandwich-style sauces.

Honey softens the mustard and vinegar so the dressing tastes rounded instead of biting. Use 2 tablespoons for a sharper salad dressing, 3 for the balanced batch, and 4 when you want it sweeter and more sauce-like.

Apple cider vinegar gives the dressing a rounder tang. Lemon juice makes it brighter and more awake. Use either one, or mix them when you want both depth and freshness.

Olive oil gives the dressing enough body to cling to leaves instead of running straight to the bottom of the bowl. Extra-virgin olive oil adds flavor; light olive oil, avocado oil, or a neutral oil keeps the dressing milder.

Salt, pepper, and garlic finish the jar. When the dressing tastes dull, salt is usually the quiet fix. Garlic is optional, but garlic powder is easier for meal prep because it stays smoother and gentler after a day or two in the fridge.

Bowl Method vs Jar Method

The order matters more than the effort. Mix the mustard, honey, vinegar, salt, and pepper first, then add the oil. This gives the dressing a smoother texture and makes it easier to adjust before serving.

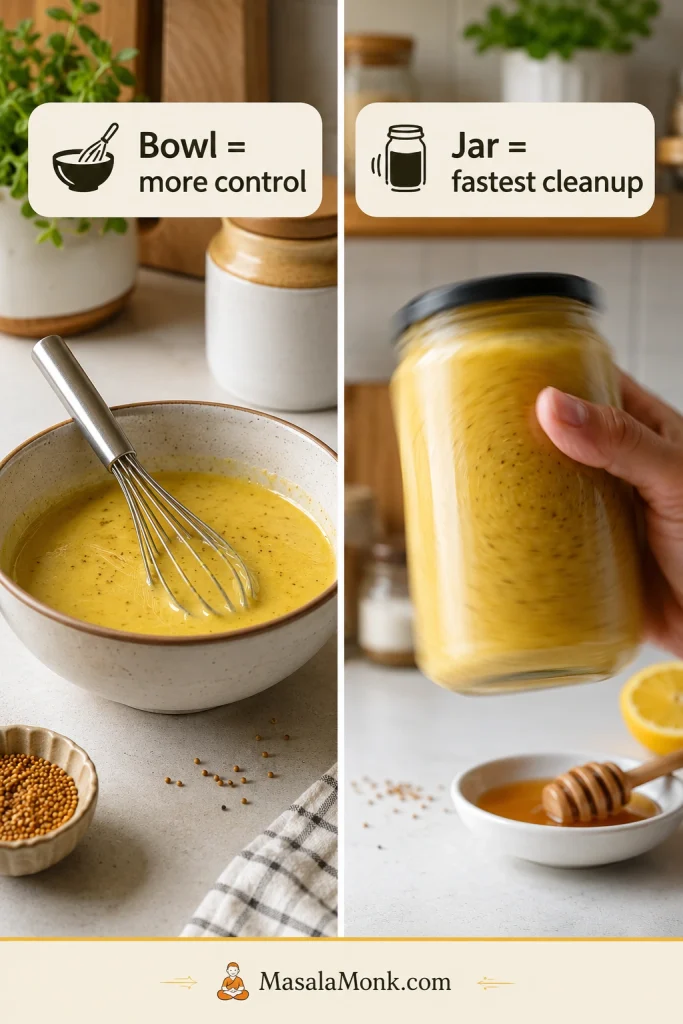
Side-by-side comparison of honey mustard dressing mixed in a bowl with a whisk and shaken in a glass jar by hand.
The bowl method is best when you want to fine-tune flavor and thickness; the jar method wins when you need a quick dressing that stores neatly.

Bowl Method

  1. Whisk the Dijon mustard, honey, vinegar or vinegar-lemon mix, salt, pepper, and garlic together first.
  2. Drizzle in the olive oil slowly while whisking.
  3. Keep whisking until the dressing looks smooth and lightly thickened.
  4. Taste before serving and adjust one thing at a time.

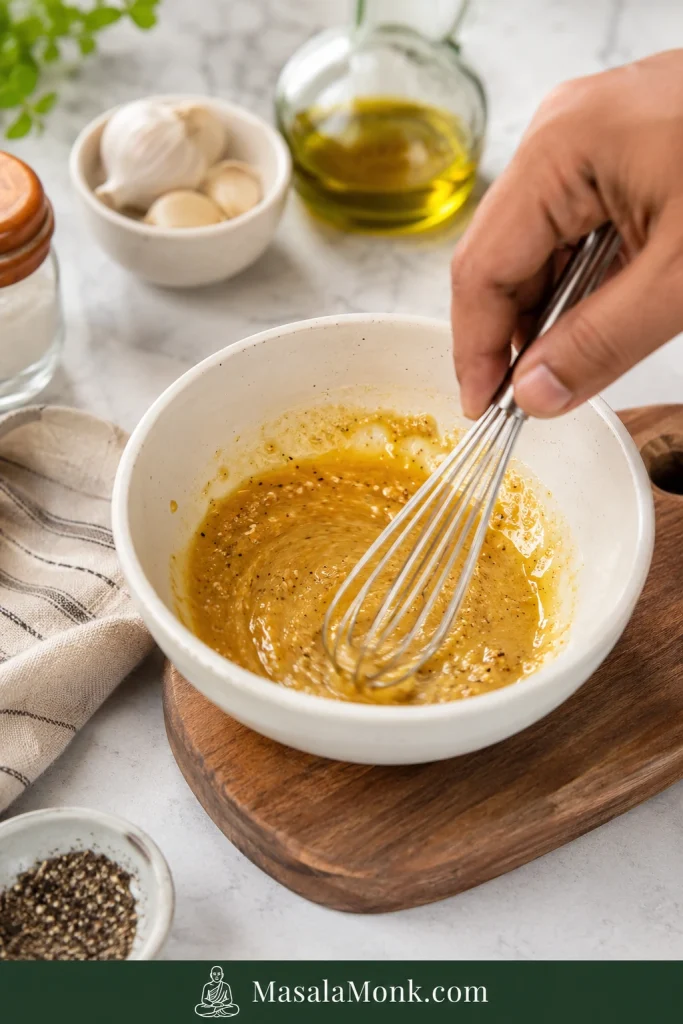
Method cue: Mix the flavor base before adding oil.

A hand whisking Dijon mustard, honey, vinegar, salt, pepper, and garlic in a white bowl before olive oil is added.
First, build flavor before texture: whisking mustard, honey, vinegar, salt, and pepper together makes the dressing easier to balance before the oil goes in.

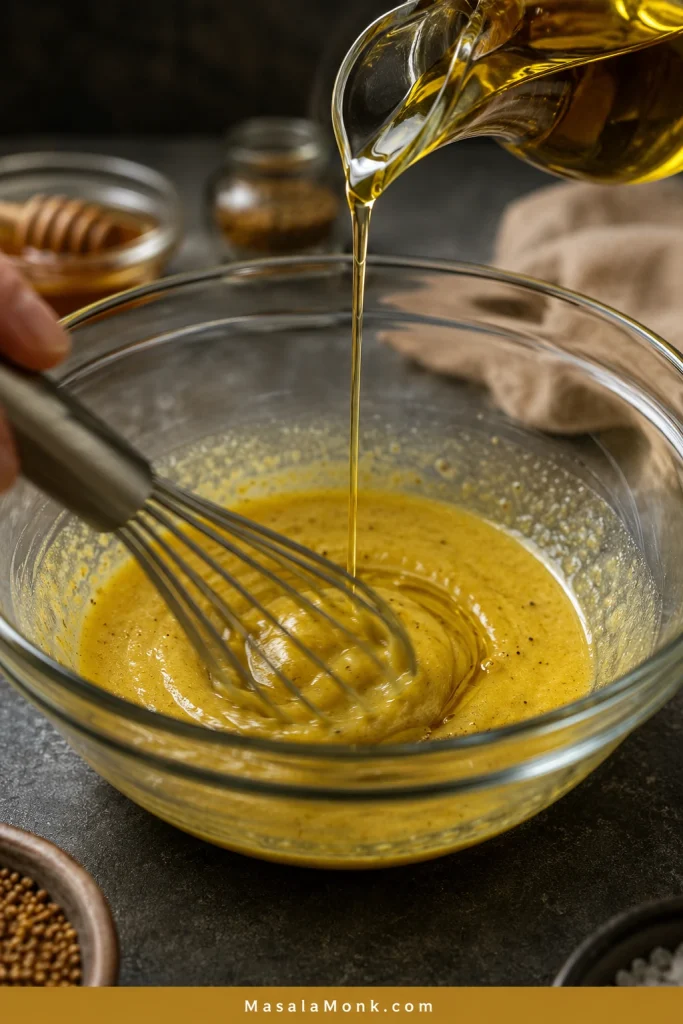
Emulsion cue: Add oil slowly for a smoother dressing.

Olive oil being poured in a thin stream into a bowl of honey mustard dressing while the mixture is whisked.
Next, the slow oil pour is what turns the mixture glossy, helping homemade honey mustard dressing cling to leaves instead of separating right away.

Jar Method

  1. Add all ingredients to a clean jar.
  2. Close the lid tightly.
  3. Shake hard for 15–20 seconds, until the dressing looks glossy and combined.
  4. Refrigerate in the same jar and shake again before using.

Why mustard helps: Dijon helps the oil and vinegar hold together long enough to coat greens evenly. If the dressing separates later, nothing is wrong; just shake it again.

If the dressing tastes too sweet, too sharp, too thick, or separated, jump to the quick fix table.

Honey Mustard Dressing Without Mayo

You do not need mayo for a good honey mustard dressing. The oil-vinegar base is usually better for salads because it stays lighter, brighter, and easier to drizzle.

Use the small-batch formula below when you want just enough for one salad, one wrap night, or a quick bowl.

Small-Batch No-Mayo Formula

  • 2 tablespoons Dijon mustard / 30 ml
  • 1 tablespoon honey / 15 ml / about 20 g
  • 2 tablespoons apple cider vinegar or lemon juice / 30 ml
  • 2 tablespoons olive oil / 30 ml
  • Salt and black pepper, to taste

This makes enough for one large salad or two smaller side salads. Taste it with a lettuce leaf, cucumber slice, or piece of chicken before adjusting; a spoonful can taste stronger than it will taste on food.

Creamy Honey Mustard Dressing

Use the creamy version when honey mustard needs to sit beside crispy food, not disappear into greens. Mayo gives it the thicker, smoother body you want for chicken tenders, fries, nuggets, burgers, wraps, and sandwiches. Thin it slightly when you want a spoonable salad dressing.

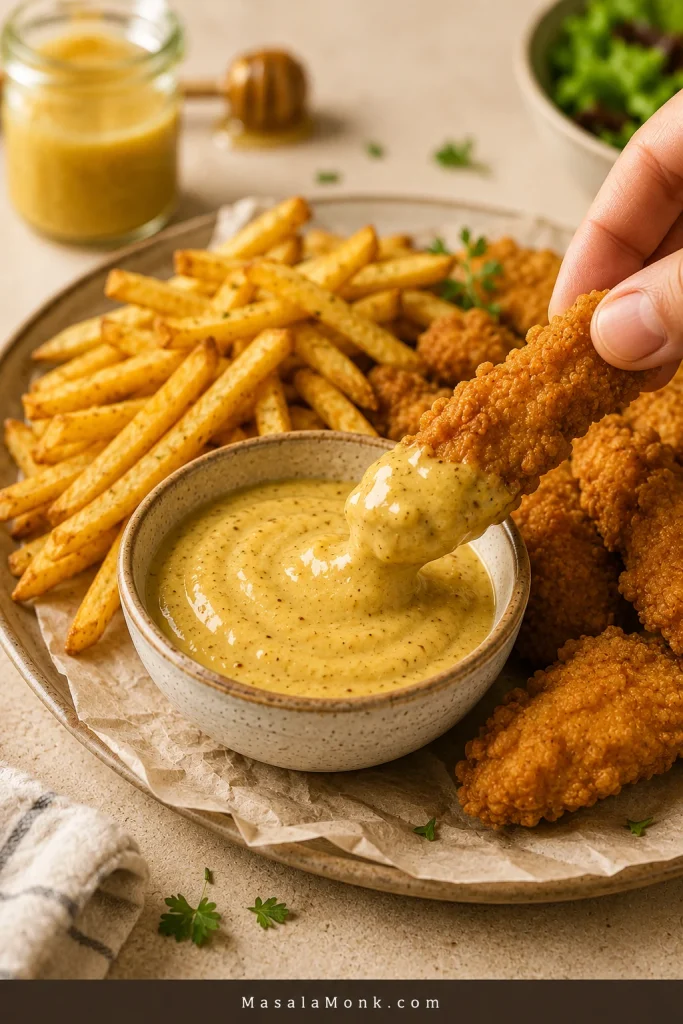
A cooked crispy chicken tender being dipped into thick creamy honey mustard sauce beside fries and more chicken tenders.
For fries, nuggets, and chicken tenders, make creamy honey mustard sauce thick enough to stay on the food instead of sliding off like salad dressing.

Creamy Mayo Honey Mustard

  • ½ cup mayonnaise / 120 ml / about 110–115 g
  • 2 tablespoons Dijon mustard / 30 ml
  • 1 tablespoon yellow mustard / 15 ml
  • 2–3 tablespoons honey / 30–45 ml / about 40–60 g
  • 1–2 teaspoons lemon juice or apple cider vinegar / 5–10 ml
  • Salt and pepper, to taste

Whisk everything together until silky. Two tablespoons honey keeps it tangier; three makes it sweeter and more dip-like. Add a teaspoon or two of water only when you want it loose enough to drizzle instead of scoop.

Already making homemade mayo? This is one of the easiest ways to turn it into a quick dipping sauce.

Keep it thick for crispy homemade French fries, chicken tenders, nuggets, or pretzels. For the same mustardy idea with a fruitier edge, try this mango mustard sauce.

Greek Yogurt Honey Mustard Dressing

Use Greek yogurt when you want the creamy feel of a dip but still want something fresh enough for lunch bowls, wraps, and chicken salads. It is the one to make when mayo feels too heavy but the no-mayo dressing feels too thin.

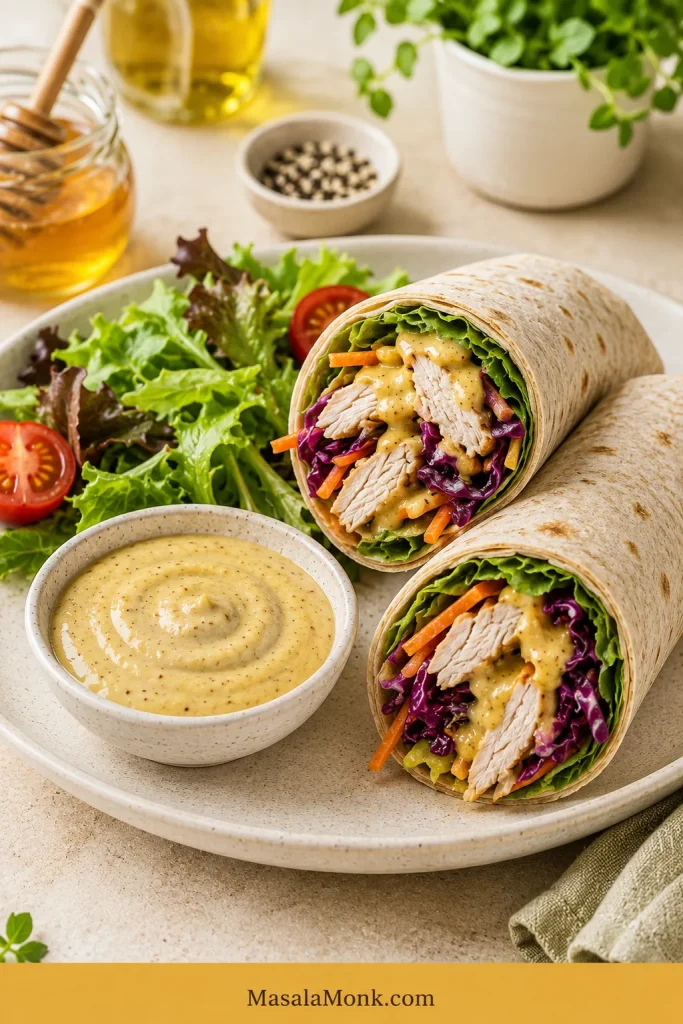
Greek yogurt honey mustard dressing served beside chicken wraps filled with lettuce, cabbage, carrots, and golden dressing.
Greek yogurt honey mustard dressing gives wraps and lunch bowls a creamy feel while keeping the flavor brighter and lighter than a mayo-based dip.
  • ½ cup Greek yogurt / 120 ml / about 125 g
  • 2 tablespoons Dijon mustard / 30 ml
  • 2–3 tablespoons honey / 30–45 ml / about 40–60 g
  • 1 tablespoon lemon juice or apple cider vinegar / 15 ml
  • 1 tablespoon olive oil / 15 ml, optional for a smoother texture
  • Salt and pepper, to taste

Yogurt dressing is naturally tangier than mayo-based sauce, so taste before adding extra vinegar. Thin a thick batch with water, lemon juice, or a little olive oil.

This tangy, creamy dressing also works well in a chicken salad sandwich, especially when the filling needs creaminess without feeling too heavy.

Honey Mustard Vinaigrette

Make the vinaigrette when the salad needs brightness more than richness. It is especially good with sturdy greens, cabbage, apples, nuts, roasted vegetables, and grain bowls because it cuts through heavier ingredients instead of coating them like a dip.

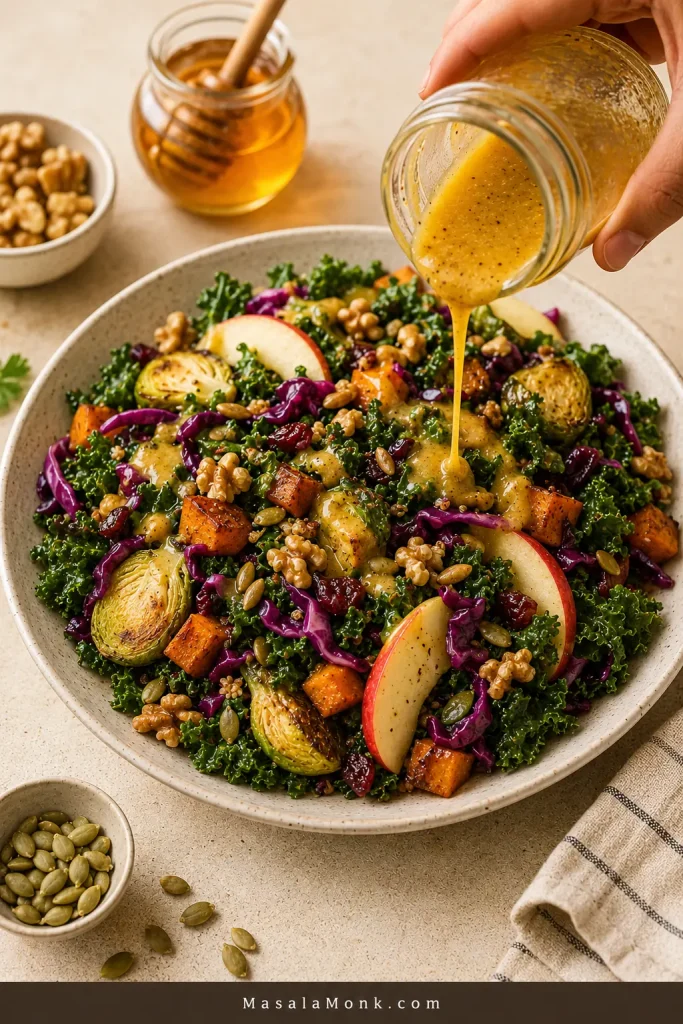
Honey mustard vinaigrette being poured from a jar over a kale and cabbage salad with apples, walnuts, seeds, roasted vegetables, and dried cranberries.
For kale, cabbage, apples, nuts, and roasted vegetables, honey mustard vinaigrette works better than a thick sauce because the extra acid keeps hearty ingredients lively.
  • ⅓ cup to ½ cup olive oil / 80–120 ml
  • 3 tablespoons apple cider vinegar, white wine vinegar, or white balsamic vinegar / 45 ml
  • 2 tablespoons Dijon mustard / 30 ml
  • 2–3 tablespoons honey / 30–45 ml / about 40–60 g
  • Salt and black pepper, to taste

Shake everything in a jar until combined. Vinaigrettes naturally separate as they sit, so give the jar another hard shake before pouring. If the olive oil firms up in the fridge, let the jar sit at room temperature for 10–15 minutes, then shake again.

This lighter dressing is especially good when the salad has cabbage, apples, nuts, roasted vegetables, or anything that needs a sweet-tangy spark. Use it on a crunchy chickpea salad, cabbage slaw, kale salad, or roasted vegetable bowl. It can also replace the creamier dressing in a coleslaw recipe when the bowl needs more tang and less richness.

Want the base batch again? Back to the 5-minute recipe card.

What Mustard Is Best for Honey Mustard Dressing?

For the main dressing, Dijon is the best all-purpose choice because it blends smoothly, tastes clean, and has enough bite to stand up to honey without turning harsh.

  • Dijon mustard: best for the main dressing and vinaigrette.
  • Yellow mustard: brighter, sweeter, and more classic for creamy dip or sandwich sauce.
  • Whole grain mustard: rustic and textured, especially good with roasted vegetables or grain bowls.
  • Spicy brown mustard: bolder and better for pork, ham, and sandwiches.
  • Half Dijon + half yellow: a good middle path for creamy honey mustard sauce.

Only yellow mustard in the fridge? Start with less honey and taste as you go, because yellow mustard already has a sweeter, brighter flavor than Dijon.

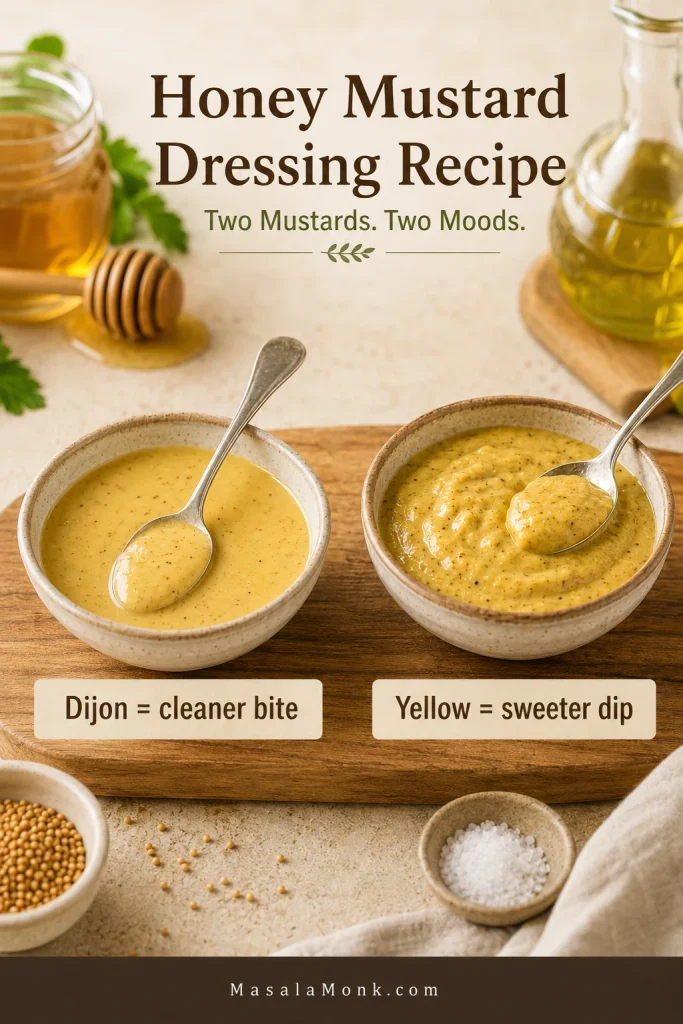
Two bowls comparing Dijon-based honey mustard dressing and yellow mustard honey mustard sauce, with labels for cleaner bite and sweeter dip.
Dijon mustard gives honey mustard dressing a cleaner bite, while yellow mustard tastes sweeter and works especially well in creamy dipping sauces.

Healthy and Dietary Options

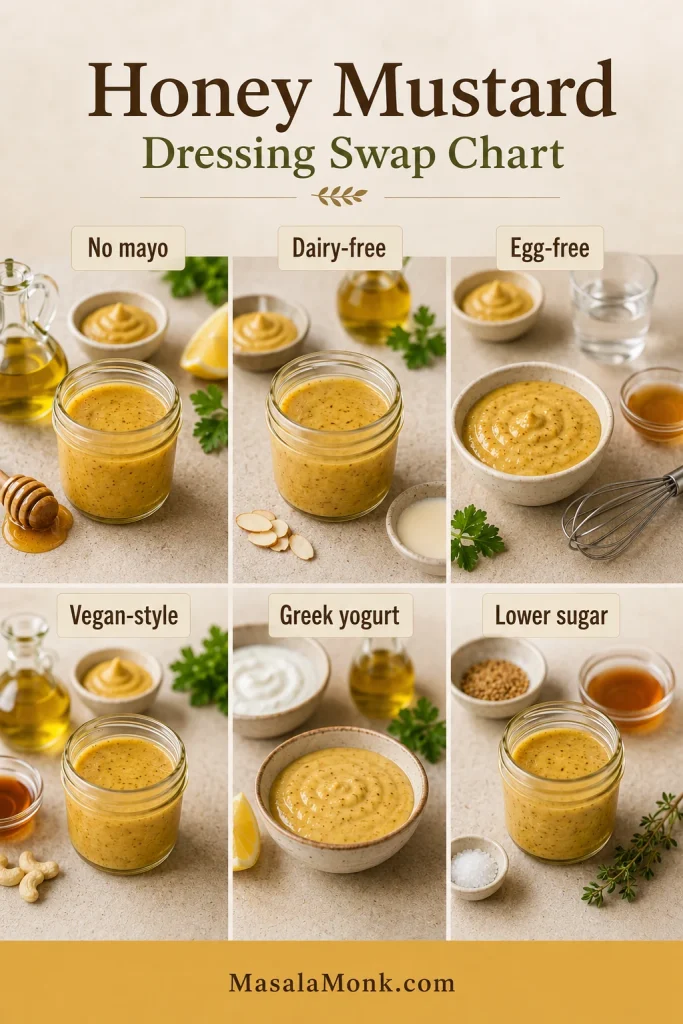
Begin with the no-mayo dressing when you want something lighter, then adjust from there. The same basic jar can become dairy-free, egg-free, lower-sugar, lower-oil, or creamy with Greek yogurt.

Honey mustard dressing swap chart showing no mayo, dairy-free, egg-free, vegan-style, Greek yogurt, and lower sugar options.
Once the no-mayo honey mustard base is balanced, it becomes easy to steer the recipe toward dairy-free, egg-free, vegan-style, Greek yogurt, or lower-sugar versions.
  • No mayo: use the Dijon, honey, vinegar, and oil base.
  • Dairy-free: the main no-mayo dressing is dairy-free as written.
  • Lighter creamy dressing: use Greek yogurt instead of mayo.
  • Egg-free: avoid regular mayo or use eggless mayonnaise.
  • Vegan-style: honey is not vegan, so use maple syrup or agave instead.
  • Lightened-up: reduce some oil and honey, then loosen the dressing with vinegar, lemon juice, or water so it still drizzles well.
  • Lower sugar: use less honey, then add a little extra mustard and acid so the dressing still tastes complete.

Do not remove all the sweetness unless you are replacing it with something else. Mustard and vinegar need a little sweetness to taste rounded instead of harsh.

How to Fix Honey Mustard Dressing

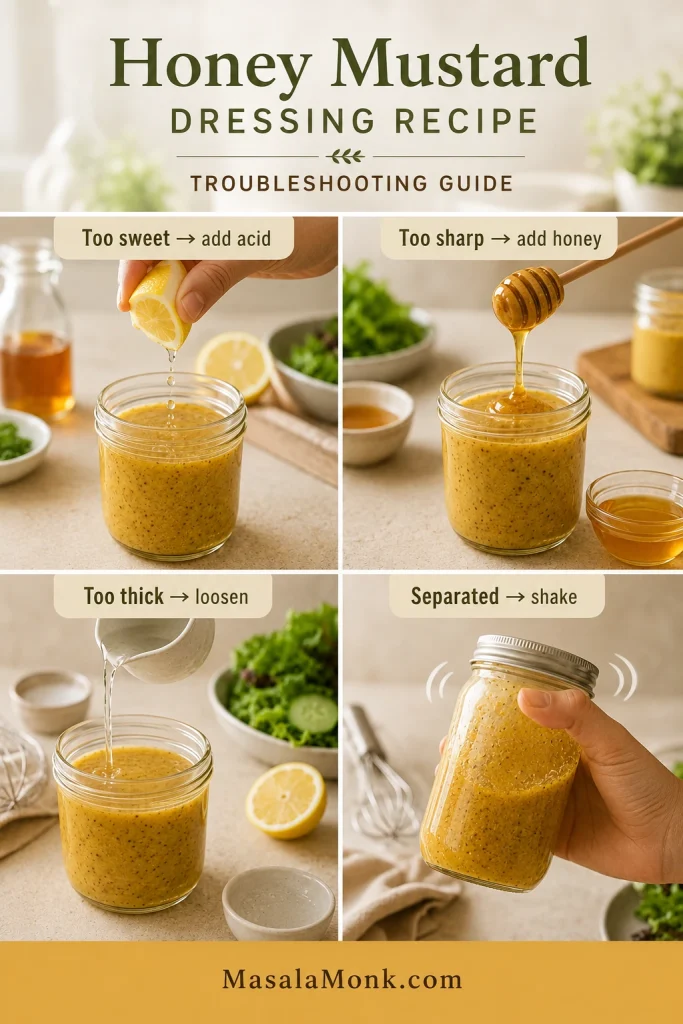
This dressing is easy to fix because nothing is cooked. Taste it, change one thing, then taste again. Most batches need one small adjustment, not a fresh start.

Troubleshooting guide showing lemon added to too-sweet dressing, honey added to too-sharp dressing, liquid added to too-thick dressing, and a jar shaken for separated dressing.
Most honey mustard dressing problems need one small fix: add acid if it is too sweet, honey if it is too sharp, liquid if it is too thick, or shake if it separates.
ProblemWhat to Do
Overly sweetAdd vinegar or lemon juice, 1 teaspoon at a time.
Sharp or sourAdd honey, mayo, or Greek yogurt.
Too thickAdd water, vinegar, lemon juice, or oil, 1 teaspoon at a time.
Runny or thinAdd Dijon mustard, mayo, Greek yogurt, or a little more honey.
Mustard-heavyAdd honey or a creamy base.
Oily-tastingAdd more Dijon and a splash of vinegar or lemon juice.
Flat flavorAdd a pinch of salt first, then adjust acid if needed.
Separated dressingShake hard in a jar or whisk again.
Firm olive oilLet the jar sit for 10–15 minutes, then shake.

Unsure what is missing? Add salt first. A tiny pinch often makes the honey, mustard, and vinegar taste like one dressing instead of three separate ingredients.

Once the flavor is balanced, see what to serve it with or how to store it.

What to Serve with Honey Mustard Dressing

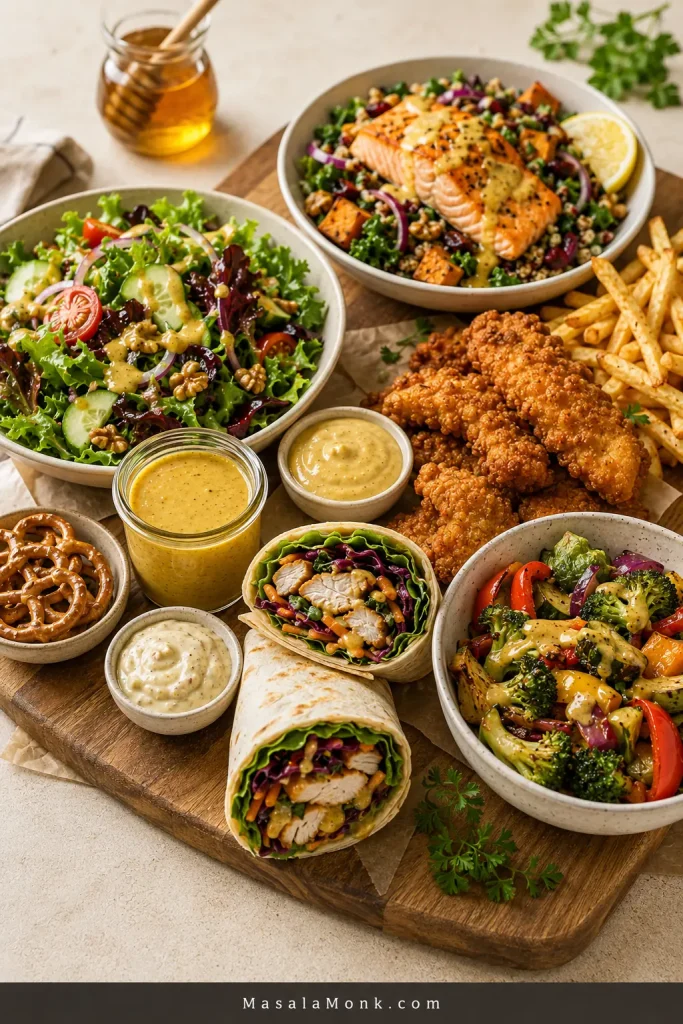
Think of this as the jar you pull out when dinner is already cooked but the plate still needs a little lift. The salad-style dressing is bright and pourable, while the creamy sauce works better as a dip.

Serving board with honey mustard dressing, green salad, salmon bowl, fries, cooked crispy chicken tenders, roasted vegetables, wraps, pretzels, and dipping sauces.
One batch can work across the whole meal: drizzle no-mayo honey mustard dressing over salads and bowls, then use the creamy version for fries, chicken, wraps, and pretzels.
  • Green salads with lettuce, spinach, arugula, kale, or cabbage
  • Grain bowls with rice, quinoa, roasted vegetables, or grilled chicken
  • Chicken tenders, nuggets, grilled chicken, or chicken wraps
  • Salmon, shrimp, or simple seafood bowls
  • Ham, turkey sandwiches, burgers, and wraps
  • Roasted potatoes, carrots, broccoli, Brussels sprouts, or sweet potatoes
  • Fries, pretzels, and snack plates when you make the creamy dip
  • Slaws and pasta salads when you want something sweet and tangy

At dinner, spoon it over sliced baked chicken breast when the plate needs a quick lift. The creamy sauce belongs in wraps, burgers, and chicken sandwich recipes, where a loose vinaigrette would disappear.

In bowls, drizzle it over rice, greens, cucumbers, roasted vegetables, or a simple salmon bowl. Delicate greens work best with the no-mayo dressing. Hearty salads with cabbage, kale, apples, nuts, or roasted vegetables are especially good with the vinaigrette.

How to Store Homemade Honey Mustard Dressing

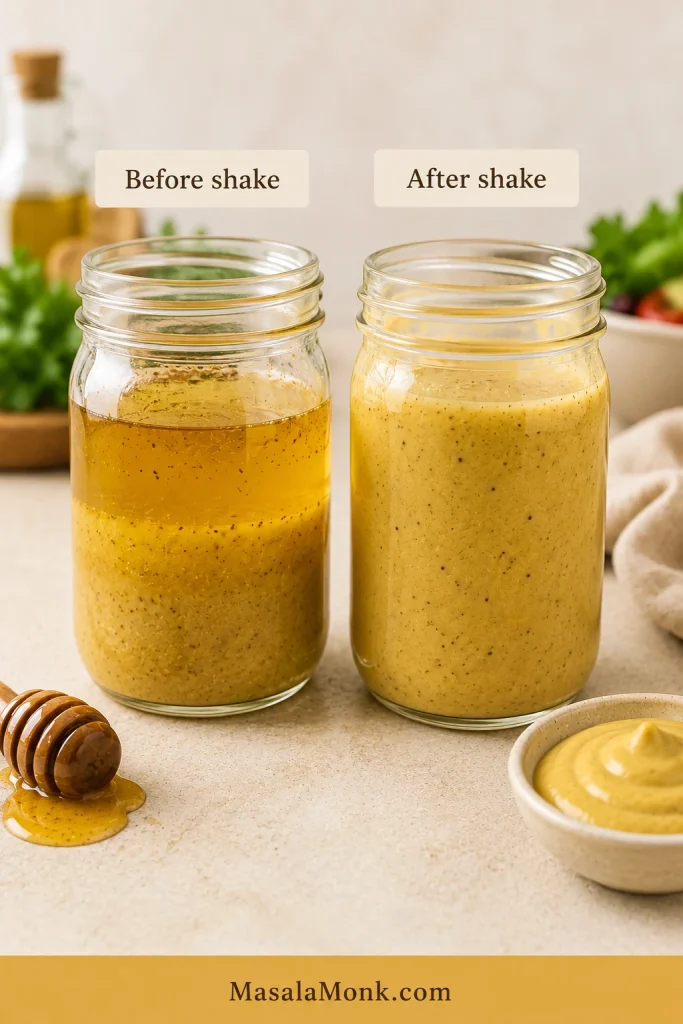
Keep the dressing in a clean airtight jar in the fridge. It may look a little separated the next day. That is normal; it just needs a shake.

Storage cue: If the dressing separates after chilling, it is usually normal oil-and-vinegar separation, not a failed batch.

Two jars of honey mustard dressing labeled before shake and after shake, with separated dressing on the left and smooth dressing on the right.
Finally, separated dressing is not ruined; once the chilled oil and mustard base loosen slightly, a firm shake brings the jar back to a smooth, glossy texture.
StyleBest Storage TimeNotes
No-mayo dressing7–10 daysShake before using.
Creamy mayo sauce5–7 daysKeep refrigerated and use a clean spoon.
Greek yogurt dressing5–7 days or by yogurt expiryMay thicken as it sits.
VinaigretteAbout 1 weekOlive oil may firm up in the fridge.

Do not freeze creamy honey mustard dressing. Mayo and yogurt can split after thawing. The no-mayo dressing is so quick that it is better to make a fresh batch when you need it.

Back to the top ↑

FAQs About Honey Mustard Dressing

Does honey mustard dressing have mayo?

Not always. Salad-style honey mustard dressing is often made without mayo using mustard, honey, vinegar or lemon juice, and oil. Creamy honey mustard sauce usually adds mayo or Greek yogurt.

How do I make honey mustard dressing without mayo?

Use Dijon mustard, honey, vinegar or lemon juice, olive oil, salt, and pepper. It will be lighter and more pourable than a mayo-based sauce, which makes it better for salads, slaws, roasted vegetables, and grain bowls.

What is honey mustard dressing made of?

Honey mustard dressing is usually made with mustard, honey, vinegar or lemon juice, oil, salt, and pepper. Creamy sauces add mayonnaise or Greek yogurt. A simple 4-ingredient batch uses Dijon mustard, honey, vinegar or lemon juice, and olive oil.

Is honey mustard dressing dairy-free?

The main no-mayo dressing is dairy-free as written because it uses mustard, honey, vinegar or lemon juice, and oil. Greek yogurt dressing is not dairy-free unless you use a dairy-free yogurt.

Can I use maple syrup instead of honey?

Yes. Maple syrup or agave can replace honey if you want a vegan-style mustard dressing. Start with the same amount, then taste and adjust because maple syrup tastes different from honey.

Is honey mustard dressing the same as honey mustard sauce?

They overlap, but texture is the difference. Dressing is usually thinner and pourable for salads. Sauce is thicker and often contains mayo or yogurt, so it works better as a dip or sandwich spread.
Dijon or yellow mustard: which one works better?

Dijon gives a cleaner, more balanced dressing. Yellow mustard tastes brighter and sweeter, which is why it works well in creamy dipping sauces. A mix of Dijon and yellow mustard is a good choice for sandwich-style honey mustard.

What can I use instead of vinegar?

Lemon juice is the easiest substitute. It gives the dressing a fresh, lifted flavor. Apple cider vinegar gives it a deeper tang, and a mix of both works well.

How long does homemade honey mustard dressing last?

The no-mayo dressing is best within 7–10 days in the fridge. Mayo and Greek yogurt sauces are best within 5–7 days. Store everything in a clean airtight jar and shake before using.

Why did my dressing separate?

Oil and vinegar naturally separate over time. Shake the dressing hard in a jar or whisk it again before serving. For a smoother texture, whisk the oil in slowly or blend the dressing briefly.

How do I make it creamy?

Whisk in mayonnaise for a classic dipping sauce, or Greek yogurt for a tangier, lighter version. Thin with lemon juice, vinegar, or water when you want it pourable.

Can honey mustard dressing be used as a marinade?

Yes, the no-mayo dressing can work as a quick marinade for chicken, salmon, pork, or vegetables. Avoid mayo or yogurt sauces for marinating. Do not reuse marinade that has touched raw meat unless it has been boiled thoroughly. Cook poultry to a safe minimum internal temperature of 165°F / 74°C. For dipping, make a separate fresh batch.

A Five-Minute Dressing You Can Use All Week

Once you make this once, you stop needing the bottle. The base is simple enough for a weekday salad, but flexible enough to become a dip, sauce, or vinaigrette depending on what is on the plate.

Keep it pourable for greens, make it creamy for dipping, or add a little extra acid when a bowl needs lift. After a batch or two, you will know when it needs more honey, more vinegar, a pinch of salt, or just a good shake.

Back to the top ↑

Posted on Leave a comment

Hibachi Ginger Sauce Recipe — Japanese Steakhouse Brown Sauce

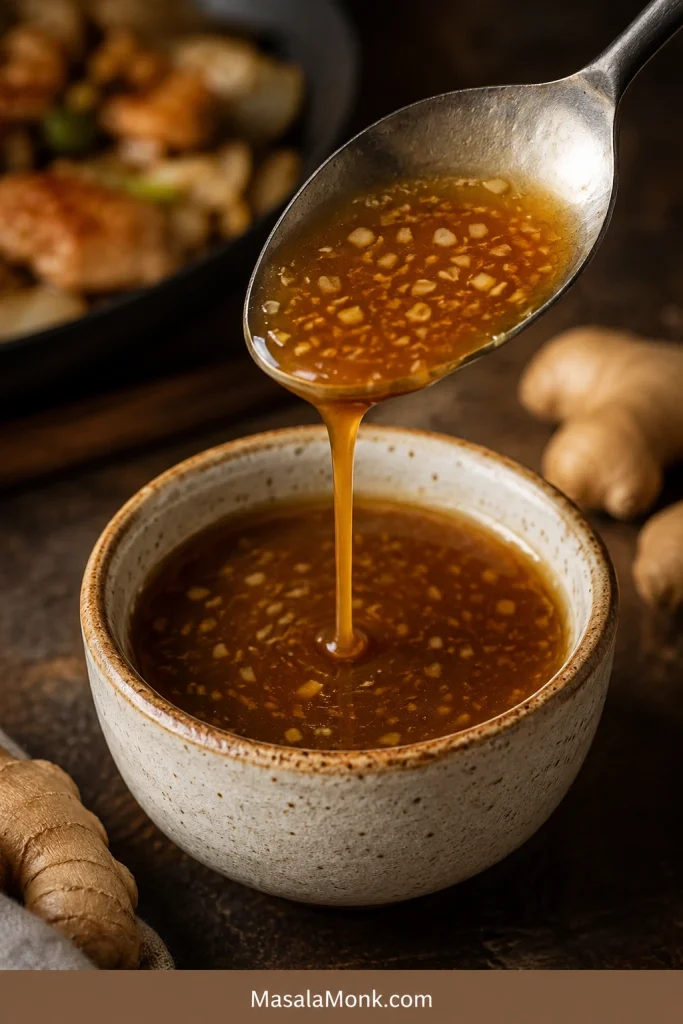
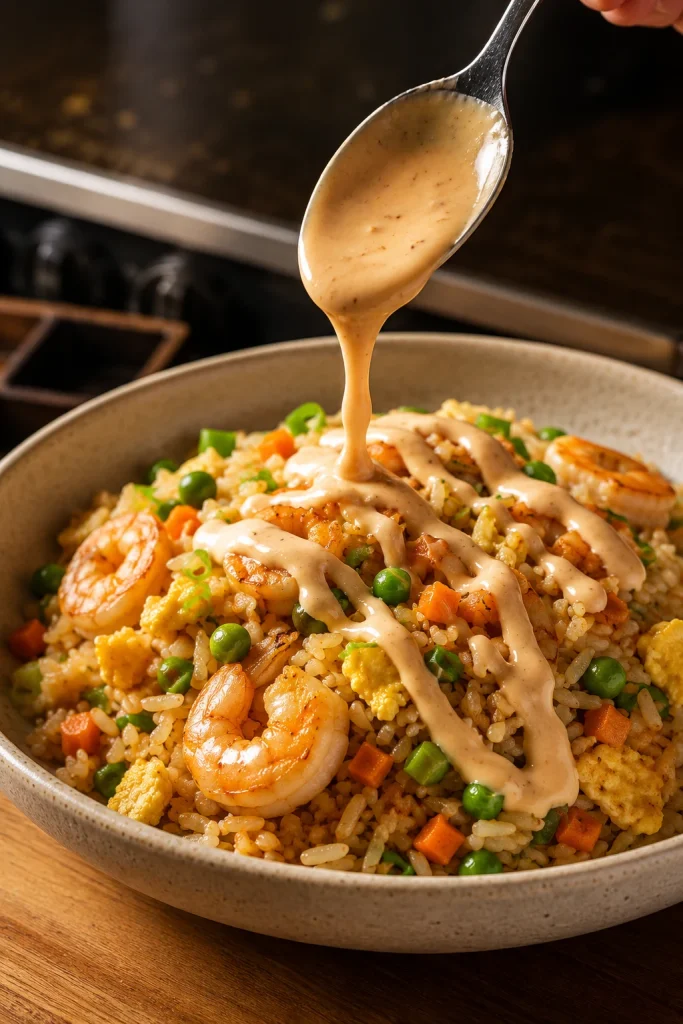
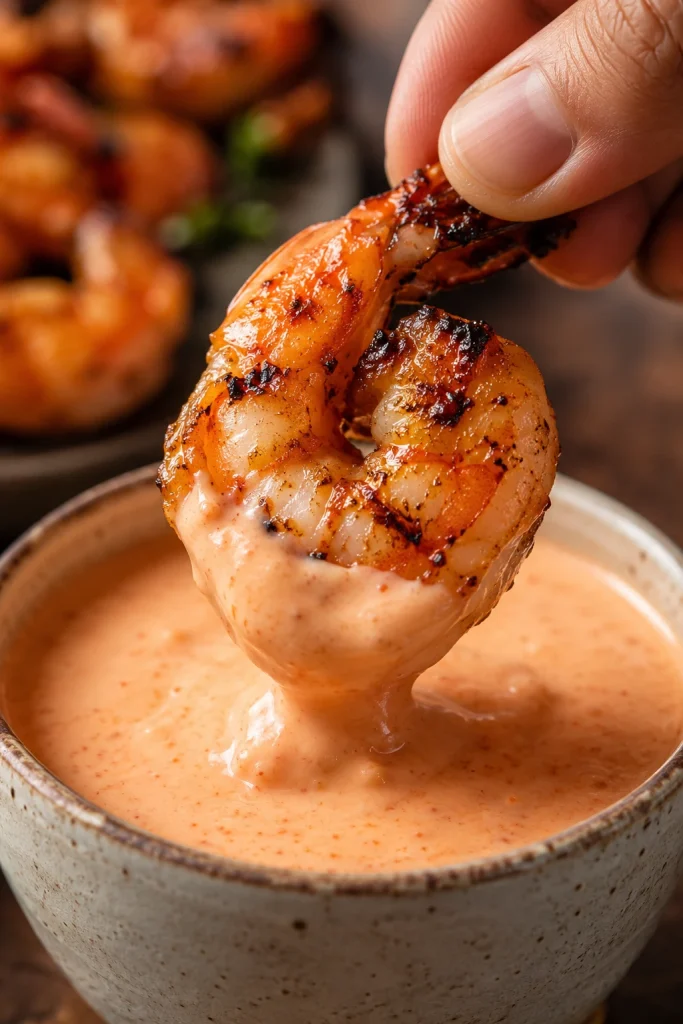
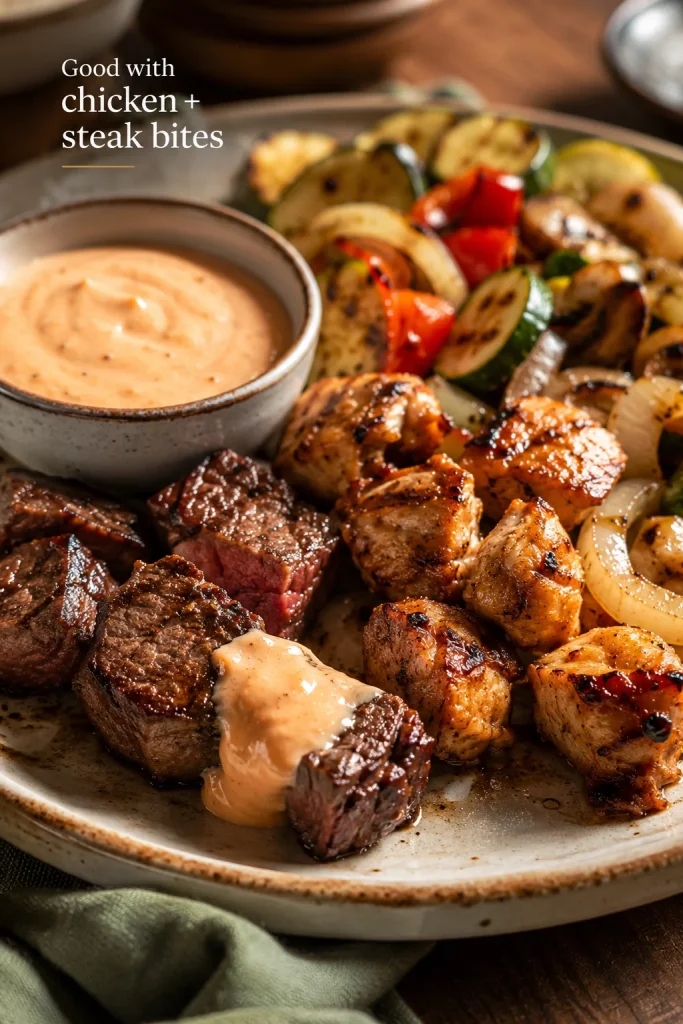
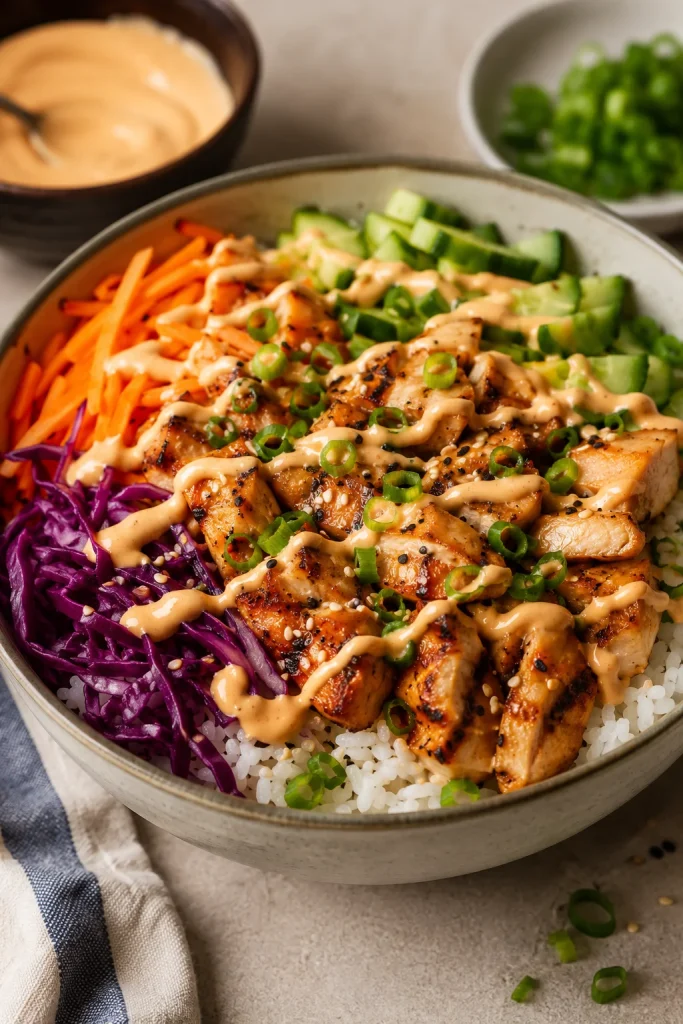
A small ceramic bowl of brown hibachi ginger sauce with visible ginger and onion flecks, served with shrimp, steak bites, fried rice, zucchini, mushrooms, and onion.

If you have ever dipped hibachi shrimp, steak, or fried rice into that sharp brown ginger sauce and wished you had a jar at home, this is the one to make.

This hibachi ginger sauce is pourable, tangy, salty, lightly sweet, and full of fresh ginger-onion bite. It is the brown dipping sauce from the little Japanese steakhouse cup — not creamy yum yum sauce and not the orange ginger dressing from the salad.

The first spoonful should taste like the dip you remember: salty at the start, bright in the middle from lemon and rice vinegar, and warm with ginger at the end. Blend it in 5 minutes, chill it if you can, and serve it with shrimp, steak, chicken, fried rice, noodles, vegetables, dumplings, tofu, or rice bowls.

Before You Blend

  • Use fresh ginger if possible. Ginger paste works in a pinch, but fresh ginger gives the cleanest bite.
  • Choose low-sodium soy sauce. Regular soy sauce can make this dip too salty after it rests.
  • Pulse, don’t fully puree. Tiny ginger and onion flecks are part of the steakhouse-style texture.
  • Let it chill when you can. One hour in the fridge softens the raw onion and makes the sauce taste more rounded.

Quick Answer: What Is Hibachi Ginger Sauce?

Hibachi ginger sauce is a Japanese steakhouse-style dipping sauce made with fresh ginger, onion, soy sauce, rice vinegar, lemon juice, and a little sugar. It is usually served with grilled meats, seafood, vegetables, noodles, and fried rice.

When people ask for the brown sauce from hibachi restaurants, they usually mean this ginger-soy dipping sauce. Yum yum sauce is the creamy pink-orange one. On salad, the orange or tan sauce is usually Japanese ginger dressing.

It is especially good with shrimp fried rice, steak bites, grilled chicken, sautéed mushrooms, zucchini, dumplings, spring rolls, tofu, salmon, and rice bowls.

Hibachi Ginger Sauce Recipe

A 5-minute no-cook Japanese steakhouse-style ginger sauce made with fresh ginger, onion, soy sauce, rice vinegar, and lemon juice. The flavor is salty-tangy first, then bright and gingery, with a little onion bite that mellows after chilling.

Prep Time5 minutes
Cook Time0 minutes
Optional Chill Time1 hour
Total Time5 minutes, or 1 hour 5 minutes with chilling
YieldAbout 1 cup / 240 ml
Servings8
Serving Size2 tablespoons / 30 ml
TexturePourable, lightly textured

Ingredients

  • 2 tablespoons fresh ginger, peeled and grated or finely chopped, about 15 g
  • ½ cup chopped yellow onion, about 70–80 g
  • ⅓ cup low-sodium soy sauce or tamari, 80 ml
  • 3 tablespoons rice vinegar, 45 ml
  • 2 tablespoons fresh lemon juice, 30 ml
  • 1 teaspoon sugar or brown sugar, 4 g
  • ½ teaspoon lemon zest, optional
  • 1 small garlic clove, optional

Equipment

  • Blender, food processor, or mini chopper
  • Microplane, grater, or sharp knife
  • Cutting board
  • Measuring cups and spoons
  • Small jar or airtight container

No blender? Grate the ginger, mince the onion as finely as possible, then shake everything hard in a jar. The dip will be chunkier and more intense, but it still works for dipping.

Instructions

  1. Peel the ginger and grate it, or chop it finely so it blends easily.
  2. Chop the onion into small pieces. Smaller pieces help the mixture blend faster without turning foamy.
  3. Add the ginger, onion, soy sauce, rice vinegar, lemon juice, sugar, and optional lemon zest or garlic to a blender or food processor.
  4. Pulse until the sauce is loose and spoonable. Stop while tiny pieces of ginger and onion are still visible.
  5. Taste before you change anything. Add more lemon juice if it tastes flat, a tiny pinch of sugar if it tastes too strong, or 1–2 tablespoons water if it tastes too salty.
  6. Serve right away, or cover and chill for 1 hour so the flavor tastes smoother and more rounded.

Recipe Notes

  • Do not judge the sauce in the first minute after blending. Raw onion and ginger taste loud at first; chilling is part of the recipe if you want a smoother restaurant-style flavor.
  • Start with 2 tablespoons fresh ginger. Very mild ginger can take another ½ tablespoon after blending. Older, woody, or very hot ginger should rest in the sauce before you add more.
  • Low-sodium soy sauce keeps the sauce from becoming too salty.
  • Use a food processor for a slightly textured sauce and a blender for a smoother one.
  • The dip may separate in the fridge. Stir or shake before serving.
  • Yield may vary slightly depending on how finely the onion is chopped and blended.
  • Store in an airtight jar in the refrigerator and use within 5 days.

Choose Your Version

The main recipe is balanced for home cooking: bold enough for hibachi-style plates, but not so salty that it overwhelms rice, vegetables, or dumplings. Use this quick guide before you add more soy sauce, sugar, or lemon.

A tabletop guide showing hibachi ginger sauce served with steak bites, dumplings, fried rice, a rice bowl, and a jar method.
Start with the base sauce, then adjust it for the meal in front of you. Keep it loose for fried rice, make it bolder for steakhouse plates, or add garlic and sesame oil when serving it with dumplings.
Want This Result?Do This
Closest steakhouse biteAdd extra soy sauce, rice vinegar, lemon, and ginger from the stronger restaurant-style adjustment below.
Less salty everyday sauceStay with the main recipe and use low-sodium soy sauce.
Best for dumplingsAdd the optional garlic and a few drops of toasted sesame oil.
Best for fried riceKeep it loose and bright. Do not thicken it.
Best texturePulse until tiny ginger and onion flecks remain.
No blender versionGrate the ginger, mince the onion finely, and shake everything in a jar.

Already made the sauce? Jump to adjustments after blending or troubleshooting. Still deciding how you want it to taste? Start with why the balance works.

Why This Ginger Sauce Recipe Works

Some restaurant-style ginger sauces lean hard on soy sauce and vinegar. They taste bold with grilled steak or shrimp, but they can become too salty for home dinners. This version keeps the familiar ginger-onion base and balances it with lemon, rice vinegar, and a small amount of sugar.

The finished sauce should hit salty first, then tangy, then gingery. It should not taste creamy, oily, syrupy, or thick. If the onion tastes raw right away, chill the sauce before changing the recipe.

Quick Taste Check

The dip should taste balanced, not sweet or heavy. Flat sauce needs lemon, a too-strong batch needs chill time, and salty sauce needs water 1 tablespoon at a time. When one bite of rice makes you want another, the balance is right.

Chopsticks holding white rice dipped in brown hibachi ginger sauce above a small bowl of sauce, with grilled vegetables and fresh ginger nearby.
Plain rice is the quickest way to test the flavor because it does not hide the sauce. When the bite tastes lightly salty, bright, and gingery, the hibachi ginger sauce is ready.

That balance is why the dip works with a whole plate, not just one bite. It cuts through butter, soy, and seared edges without covering up the shrimp, steak, rice, or vegetables. Use it as a dip, a spoon-over sauce for fried rice, or a brighter alternative when a thicker stir fry sauce would feel too heavy.

What Is Hibachi Ginger Sauce?

The easiest way to understand hibachi ginger sauce is by where it sits on the plate: beside grilled food, not on salad. It cuts through richness, wakes up rice, and adds a fresh ginger bite to shrimp, steak, chicken, vegetables, and noodles.

You may see it called Japanese steakhouse ginger sauce, Benihana-style ginger sauce, hibachi brown sauce, or simply ginger sauce. Most of those names point to the same ginger-soy dipping cup sauce.

Ingredients You’ll Need

The goal is not to make the strongest sauce possible. Aim for that familiar first dip: bright, salty, gingery, and balanced enough that you keep going back for one more bite of rice.

Fresh ginger root, grated ginger, chopped yellow onion, soy sauce, rice vinegar, lemon halves, sugar, and garlic arranged on a wooden board.
Fresh ginger and onion create the bite, while soy sauce, rice vinegar, lemon, and a small amount of sugar bring balance. Together, they keep the sauce savory and bright instead of flat, sour, or overly salty.
Fresh Ginger

Fresh ginger is the main flavor. It gives the sauce its clean bite, gentle heat, and bright fragrance. Peel it first, then grate or finely chop it so it blends evenly.
Two tablespoons gives the sauce a clear ginger flavor without overwhelming everything else. Use 1½ tablespoons for a milder dip or 2½ tablespoons for a stronger one.
Yellow Onion

Onion is what keeps the dip from tasting like soy sauce with ginger stirred in. Yellow onion gives the best balance; white onion tastes sharper, and red onion changes the color and flavor too much for this style.

Soy Sauce or Tamari

Soy sauce brings salt, color, and savory depth. Low-sodium soy sauce is the safest choice because this is a dipping sauce, and salt builds quickly.

Tamari works well for a deeper flavor or a gluten-free version. Coconut aminos can work for a soy-free version, but it is sweeter and less salty, so reduce or skip the sugar and brighten the sauce with extra vinegar or lemon if needed.

For a sweeter cooked soy-ginger glaze instead of a fresh dipping sauce, this teriyaki sauce recipe is the better direction.

Rice Vinegar

Rice vinegar gives the sauce a clean tang without making it harsh. Unseasoned rice vinegar gives you the most control. If using seasoned rice vinegar, blend first, then add sugar only if the sauce still needs rounding.

Lemon Juice

Fresh lemon juice lifts the ginger, keeps the soy sauce from tasting heavy, and gives the dip a clean finish. Lemon zest is optional; use only a little because too much can make the sauce bitter.

Sugar

The sugar is not there to make the sauce sweet. It just rounds off the raw onion, vinegar, lemon, and ginger so the dip tastes balanced instead of harsh. Brown sugar tastes rounder; white sugar keeps the flavor cleaner.

Garlic, Optional

Garlic pushes the dip away from the clean steakhouse flavor and toward a stronger dumpling or noodle sauce. Add one small clove for that version, or leave it out for a cleaner ginger-onion base.

Fresh Ginger vs Ginger Paste vs Ground Ginger

Fresh ginger is best here because the sauce is supposed to taste lively. Dried ginger cannot give the same clean bite.

Ginger OptionDoes It Work?How to Use It
Fresh gingerBest choiceUse 2 tablespoons / about 15 g for the main recipe.
Ginger pasteWorks in a pinchStart with 1½ tablespoons, blend, then add more after tasting.
Ground gingerEmergency onlyStart with ¼ teaspoon. The flavor will be warmer and duller.

Check the label on ginger paste. Some brands include salt, vinegar, oil, or preservatives, and those can change the balance.

How to Make Ginger Sauce

No cooking needed here — just chop, blend, taste, and rest. A blender or food processor gives the cleanest texture, but a hand-chopped jar version still works when you want the sauce quickly.

1. Prep the ginger and onion

Peel the ginger and grate it, or chop it finely. Cut the onion into small pieces so it breaks down quickly.

Fresh ginger being grated on a metal grater beside chopped yellow onion on a wooden cutting board.
Grating the ginger before blending helps its flavor spread evenly through the sauce. Likewise, chopping the onion small gives body without leaving big raw pieces in the finished dip.

2. Add the sauce ingredients

Add the ginger, onion, soy sauce, rice vinegar, lemon juice, sugar, and optional lemon zest or garlic to a blender or food processor.

Chopped onion, fresh ginger, soy sauce, rice vinegar, lemon juice, and sugar inside a food processor before blending.
This no-cook ginger sauce comes together in the food processor. Add the aromatics and liquids together, then pulse in short bursts so the sauce stays loose and lightly textured.

3. Pulse until spoonable

Pulse until the sauce is loose and easy to pour. Stop before it becomes a creamy puree. Tiny visible bits of ginger and onion are a good sign.

Pulsed brown hibachi ginger sauce inside a food processor with small visible pieces of ginger and onion.
Stop pulsing while tiny ginger and onion flecks are still visible. That light texture is what gives Japanese steakhouse ginger sauce its fresh bite instead of a dull, over-blended finish.

4. Taste and adjust

Taste before you change anything, and do not panic if it feels loud at first. This sauce can swing from perfect to too salty quickly, so small adjustments are better than big ones. Add lemon if it tastes flat, a tiny pinch of sugar if it tastes too strong, or 1–2 tablespoons water if it tastes too salty.

5. Chill for smoother flavor

You can serve the sauce right away, but it tastes better after resting. After about an hour in the fridge, the onion relaxes, the ginger settles, and the sauce starts tasting more like the restaurant cup.

Blender vs Food Processor: What Texture Should Ginger Sauce Have?

Both tools work, but they give slightly different results.

Two bowls of brown ginger sauce on a tray, one labeled blender with a smoother texture and one labeled food processor with more visible flecks.
Use a blender for a smoother ginger sauce and a food processor for a more flecked steakhouse-style dip. Either works, but the tool changes the final texture.
ToolBest ForTexture
BlenderSmoother sauceMore even, less textured, easy to pour.
Food processorSteakhouse-style textureLightly textured, with tiny ginger and onion flecks.
Mini chopperSmall batchesWorks well, but scrape the sides once or twice.
No blenderQuick hand-chopped versionChunkier and stronger, but still useful for dipping.

The ideal texture is pourable and lightly flecked. It should not look like mayonnaise, salad dressing, or a thick glaze.

If the sauce turns pale or foamy after blending, let it sit for a few minutes and stir. Air can lighten the color temporarily; after resting, the sauce usually settles into a deeper brown.

Taste and Texture Target

You’ll know the sauce is right when it smells gingery, pours easily from a spoon, tastes bright but not biting, and leaves tiny flecks behind in the cup. It should be brighter than salad dressing and lighter than teriyaki sauce.

A spoon pouring brown hibachi ginger sauce with small flecks back into a ceramic bowl.
The finished sauce should fall easily from a spoon. That pourable texture lets it brighten rice, shrimp, steak, chicken, and vegetables without feeling heavy like a glaze.

How to Adjust the Sauce After Blending

Once the dip is blended, change it slowly. A spoonful of water, lemon, sugar, or soy sauce can move the whole batch.

GoalWhat to Do
More restaurant-styleAdd 1–2 tablespoons soy sauce, 1 tablespoon rice vinegar, and a little extra grated ginger.
Less saltyAdd 1–2 tablespoons water after blending, or use a little less soy sauce next time.
Less intenseChill for 1 hour and add ½ teaspoon sugar if needed.
More gingeryAdd ½ tablespoon more fresh grated ginger.
More texturedUse a food processor and stop while tiny pieces are visible.
SmootherUse a blender and blend a little longer, but stop before it turns foamy.
Gluten-freeUse tamari or certified gluten-free soy sauce.
Soy-freeUse coconut aminos, reduce or skip the sugar, and add extra vinegar or lemon to balance the sweetness.
Better for dumplingsAdd the optional garlic and a few drops of toasted sesame oil.

Benihana-Style Notes

Think of this as Benihana-style, not a claim that it is the restaurant’s exact formula. Benihana’s own ginger sauce notes emphasize fresh ginger, onion, rice vinegar, lemon juice, and low-sodium soy sauce, which lines up with the flavor profile people expect from the brown dipping sauce.

This version keeps that profile but adjusts the balance for a home kitchen. Use the stronger adjustment below when the sauce in your memory was sharper, saltier, and more intense. For a dip you can spoon over rice and use all week, stay with the main recipe.

A small bowl of dark brown Benihana-style ginger sauce with visible flecks, served near shrimp, steak bites, fresh ginger, lemon, and chopsticks.
For a stronger Benihana-style direction, add soy sauce, rice vinegar, lemon, and extra ginger a little at a time. Small changes matter because this dipping sauce can turn too salty quickly.

For a Stronger Restaurant-Style Sauce

After blending the main recipe, make it sharper and more soy-forward by adding:

  • 1–2 extra tablespoons soy sauce
  • 1 extra tablespoon rice vinegar
  • ½ tablespoon extra lemon juice
  • ½ tablespoon extra grated ginger

Add these slowly and taste as you go. It is easier to make the sauce stronger than to rescue a sauce that has become too salty or too sour.

Ginger Sauce vs Ginger Dressing vs Yum Yum Sauce

These sauces often get mixed up because they all show up around hibachi and Japanese steakhouse meals. The easiest way to tell them apart is to look at where they show up on the table: ginger sauce is for the dipping cup, ginger dressing is for salad, and yum yum sauce is the creamy one people spoon over shrimp and fried rice.

Three small cups labeled ginger sauce, yum yum sauce, and ginger dressing, showing a brown sauce, a creamy pink-orange sauce, and an orange-tan dressing.
This side-by-side view clears up the common hibachi sauce mix-up. Brown ginger sauce is for dipping, yum yum sauce is creamy, and Japanese ginger dressing usually belongs on salad.
SauceTextureMain FlavorBest Use
Hibachi ginger sauceBrown, pourable, lightly texturedGinger, onion, soy, vinegar, lemonShrimp, steak, chicken, vegetables, fried rice
Japanese ginger dressingOrange or tan, dressing-likeCarrot, onion, ginger, oil, vinegarGreen salad
Yum yum sauceCreamy, pale pink or orangeMayo, tomato or ketchup, sugar, spicesShrimp, chicken, fried rice, vegetables
Hibachi mustard sauceSmooth, mustard-forwardMustard, soy, sesame, or cream depending styleSteak and chicken
Ginger scallion sauceOil-based and spoonableGinger, scallions, hot oilRice, noodles, poached chicken, tofu

For salad, ginger dressing is usually the better match. Beside hibachi shrimp, steak, chicken, vegetables, or fried rice, this brown ginger sauce is the right one.

What to Eat With Ginger Sauce

Use this sauce beside something rich: buttery mushrooms, seared shrimp, fried rice, grilled steak, or chicken thighs. It makes rice taste brighter, shrimp taste sweeter, and steak feel less heavy after a few bites.

Hibachi-style favorites

  • Hibachi shrimp
  • Steak bites or grilled steak
  • Chicken thighs or chicken breast
  • Salmon or tuna
  • Grilled zucchini, onion, mushrooms, and broccoli
  • Fried rice
  • Hibachi noodles

Takeout-style snacks

  • Dumplings
  • Potstickers
  • Egg rolls
  • Spring rolls
  • Lettuce wraps

For a creamier dip beside spring rolls or noodles, keep this ginger sauce as the bright option and add a bowl of peanut sauce for contrast.

A wooden appetizer board with dumplings, spring rolls, lettuce wraps, brown ginger sauce, and a separate creamy dipping sauce.
This brown ginger dipping sauce also works beyond hibachi dinners. Try it with dumplings, potstickers, spring rolls, and lettuce wraps when you want a bright soy-ginger dip instead of a creamy sauce.

Everyday bowls and meals

  • Rice bowls
  • Noodle bowls
  • Tofu
  • Roasted vegetables
  • Leftover grilled chicken
  • A flexible salmon bowl when you want the sauce with fish

Complete Your Hibachi Night

For a full hibachi-style plate, serve this ginger sauce with fried rice or steamed rice, sautéed zucchini and mushrooms, shrimp or chicken, and one creamy sauce on the side. The ginger sauce brings the bright tang; the creamy sauce brings richness.

A hibachi-style dinner plate with fried rice, shrimp, steak, chicken, zucchini, mushrooms, onion, and a small bowl of brown ginger sauce.
Serve this ginger sauce beside rich hibachi foods. Its ginger, lemon, vinegar, and soy cut through fried rice, seared shrimp, steak, chicken, mushrooms, and buttery vegetables.

Cold leftover rice works especially well because the sauce cuts through the salty, savory flavor. For a fresh base, use this how to cook rice guide before adding shrimp, steak, chicken, tofu, or vegetables.

Optional Warm Drizzle for Bowls and Noodles

Classic hibachi ginger sauce is served cold or at room temperature. But if you want a warmer drizzle for noodles, bowls, or stir-fried vegetables, you can thicken a small portion.

Quick thickened version

  1. Mix ½ teaspoon cornstarch with 1 tablespoon water.
  2. Add ½ cup ginger sauce to a small pan.
  3. Warm over medium-low heat.
  4. Stir in the cornstarch slurry.
  5. Cook for 1–2 minutes, stirring, until lightly thickened.

Heating changes the personality of the sauce. It becomes more of a warm bowl drizzle, and the fresh ginger-onion bite softens. Thicken only what you plan to use right away and keep the rest cold for dipping.

Troubleshooting Ginger Sauce

Fresh ginger and onion can taste strong before they rest. Most problems are easy to fix with a small adjustment.

A troubleshooting board for hibachi ginger sauce with a bowl of brown sauce, lemon wedges, sugar, soy sauce, water, onion, and text explaining flavor fixes.
Fix the sauce in small steps after blending: lemon wakes up a flat batch, chilling softens onion bite, water reduces saltiness, and sugar rounds out too much acid.
ProblemWhy It HappenedHow to Fix It
Too onionyToo much raw onion or not enough resting timeChill for 1 hour. Add a small splash of soy sauce or lemon juice. Use less onion next time.
Overly saltyRegular soy sauce or too much soy sauceAdd 1–2 tablespoons water, a little more onion, or a squeeze of lemon.
Sharp or sourToo much vinegar or lemon juiceAdd ½–1 teaspoon sugar and a small splash of soy sauce.
Flavor feels intenseGinger, onion, vinegar, and lemon are all strongChill the sauce. Add a tiny bit more sugar. Dilute with 1 tablespoon water if needed.
BitterToo much lemon zest or old gingerSkip zest next time. Add a little sugar to round out the bitterness.
Runny textureClassic ginger sauce is naturally looseServe as-is, or use the warm drizzle variation for bowls and noodles.
Chunky textureNot blended enoughPulse 10–20 seconds more, or strain only if you prefer a cleaner pour.
Smooth or foamyOver-blendedLet it settle and stir. Next time, pulse instead of blending continuously.
Separated in the fridgeNormal for a fresh blended sauceShake or stir before serving.

Storage and Make-Ahead

Store the sauce in an airtight jar in the refrigerator and use it within 5 days for the freshest flavor.

Homemade hibachi ginger sauce stored in a glass jar labeled Hibachi Ginger Sauce, with a spoonful of sauce, fresh ginger, garlic, and kitchen ingredients nearby.
Store homemade hibachi ginger sauce in an airtight jar and shake before serving. As it rests, the fresh ginger, onion, and soy-vinegar base can naturally settle.

The flavor is loudest right after blending. After 1 hour in the fridge, the onion and ginger settle down and the soy, vinegar, and lemon taste more balanced. By the next day, the sauce feels rounder, and it is the kind of small jar you end up spooning over leftover rice, cold chicken, or roasted vegetables without planning to.

Shake or stir before serving because the sauce can separate as it sits.

Can you freeze ginger sauce?

You can freeze it in small portions, but the texture will not be as fresh after thawing. The onion and ginger can become slightly watery. For the best dipping texture, make it fresh and refrigerate it instead.

Can you use ginger sauce as a marinade?

Yes, but it is best as a dipping sauce first and a quick marinade second. Use it for shrimp, chicken, tofu, or vegetables when you want a fast ginger-soy flavor.

Because it contains vinegar and lemon juice, do not marinate delicate seafood for too long. Shrimp or fish only needs 10–15 minutes; chicken or tofu can sit for 15–30 minutes.

FAQ

What is the brown sauce at hibachi restaurants?

It is usually ginger sauce: a soy-based dipping sauce made with fresh ginger, onion, vinegar, and lemon. Restaurants commonly serve it with shrimp, steak, chicken, vegetables, noodles, and fried rice.

Is this the same as Benihana ginger sauce?

It is Benihana-style, not the restaurant’s exact formula. The recipe keeps the fresh ginger, onion, soy, vinegar, and lemon profile while using a balanced home-kitchen ratio. Benihana says its signature ginger sauce is prepared fresh and is not sold in stores or bottles. Read Benihana’s note here.

Is ginger sauce the same as yum yum sauce?

No. Ginger sauce is brown, tangy, and soy-based. Yum yum sauce is creamy, usually mayo-based, and pale pink or orange.

Is hibachi ginger sauce the same as ginger salad dressing?

No. Hibachi ginger sauce is a dipping sauce for grilled food and rice. Japanese ginger dressing is usually smoother, often made with carrot, onion, ginger, oil, vinegar, and soy sauce, and served on salad.

Do you serve ginger sauce hot or cold?

Serve it cold, chilled, or at room temperature. It can sit beside hot steak, shrimp, chicken, vegetables, or fried rice, but the sauce itself does not need to be heated.

How long does homemade ginger sauce last?

Use it within 5 days for the freshest flavor. Keep it in an airtight jar in the refrigerator and stir or shake before serving.

Fresh ginger, paste, or powder — which is best?

Fresh ginger is best. Ginger paste can work as a shortcut, but it may contain salt or vinegar. Ground ginger is not recommended because it does not give the same lively flavor.

Can I make ginger sauce without a blender?

Yes. Grate the ginger, mince the onion very finely, add the remaining ingredients to a jar, and shake hard. The sauce will be chunkier and stronger, but it still works for dipping.

Why does my ginger sauce taste too oniony?

Raw onion can taste strong right after blending. Chill the sauce for 1 hour before judging it. If it still tastes too oniony, add a little soy sauce, lemon juice, or sugar to balance it. Next time, use slightly less onion.

What can I serve with ginger sauce?

Serve it with hibachi shrimp, steak, chicken, fried rice, noodles, grilled vegetables, dumplings, spring rolls, tofu, salmon, rice bowls, or roasted vegetables.

Final Tip

The sauce should taste like the first bright bite at the hibachi table: salty, tangy, gingery, and fresh enough to make you want another spoonful of rice or another piece of shrimp. Blend it, chill it if you can, and keep the texture lightly flecked. That little bit of ginger and onion is the whole point.

Posted on Leave a comment

Yum Yum Sauce Recipe

A small white cup of pale pink-orange yum yum sauce served with shrimp fried rice, grilled shrimp, broccoli, zucchini, and hibachi-style vegetables.

This yum yum sauce is the cool, creamy, pale pink-orange sauce people remember from the hibachi plate before anything else. It is a little sweet, a little tangy, rich enough for dipping, and somehow good on almost everything at the table.

Yum yum sauce is a mayo-based hibachi-style sauce made with ketchup or tomato paste, rice vinegar, sugar, garlic powder, onion powder, paprika, and water. It takes about 5 minutes to whisk together, then the fridge does the final work.

Make the simple ketchup version first. Once it chills, you can tune it sweeter, tangier, richer, thinner, or spicier without guessing. Ketchup gives you the friendly first batch; tomato paste gives you the deeper, less sweet version you try once you know what you like.

The goal is not just copying one restaurant bottle. It is to give you the sauce people keep reaching for: creamy but not heavy, sweet but not sugary, thin enough to drizzle, and bold enough to make rice, shrimp, chicken, and vegetables taste finished.

Keep it nearby when dinner is moving toward shrimp, vegetables, or a quick shrimp fried rice plate.

Quick Answer: How to Make Yum Yum Sauce

To make yum yum sauce, whisk mayonnaise with ketchup, rice vinegar, sugar, garlic powder, onion powder, paprika, a pinch of salt, and enough water to make it smooth. Ketchup gives the easiest sweet, pale pink-orange version. Tomato paste can replace ketchup when you want a deeper, less sweet sauce.

You can use it immediately if dinner is ready, but it tastes more like steakhouse-style yum yum sauce after chilling. Thirty minutes helps, 2 hours is better, and overnight gives the smoothest flavor. Stir before serving and thin with a little water if you want it pourable enough for fried rice, shrimp, chicken, vegetables, or bowls.

This sauce is often called hibachi white sauce, Japanese white sauce, shrimp sauce, pink sauce, or Japanese steakhouse sauce. It is best understood as an American hibachi-style restaurant sauce, not a traditional Japanese condiment.

Already cooking? Go straight to the recipe card, or use the texture guide if you need dip, drizzle, or dressing consistency.

Best first batch: Use 1 cup mayo, 2 tablespoons ketchup, 2 teaspoons rice vinegar, 1 teaspoon sugar, 1 teaspoon garlic powder, ½ teaspoon onion powder, ½ teaspoon paprika, a pinch of salt, and 1 to 2 tablespoons water. Chill for 30 minutes. This gives you the classic sweet, creamy hibachi-style version before you start adjusting.

Ingredients for yum yum sauce arranged on a kitchen counter, including mayonnaise, ketchup, rice vinegar, sugar, garlic powder, onion powder, paprika, salt, water, a whisk, and a mixing bowl.
Start with the ketchup version when making your first batch because it gives the easiest sweet baseline before you adjust tang, heat, or richness.

Yum Yum Sauce at a Glance

Best default versionRegular mayo, ketchup, rice vinegar, sugar, garlic powder, onion powder, paprika, salt, and water
Active time5 minutes
Minimum total time35 minutes, including a 30-minute chill
Best flavorAfter 2 hours or overnight
YieldAbout 1¼ to 1½ cups / 300 to 360 ml, depending on thinning
Texture goalThick enough to dip, smooth enough to drizzle after thinning
Best withShrimp, fried rice, chicken, steak bites, vegetables, fries, spring rolls, rice bowls, wraps, and burgers
StorageUp to 1 week in an airtight container in the refrigerator

Yum Yum Sauce Recipe

This easy yum yum sauce starts thick and creamy, then thins into the pale pink-orange drizzle people love with fried rice, shrimp, chicken, vegetables, steak bites, fries, spring rolls, and hibachi-style bowls. The main recipe uses ketchup for the easiest first batch. Tomato paste, Kewpie mayo, butter, and heat are included as optional upgrades when you want a richer steakhouse-style sauce.

Active Time5 minutes
Cook Time0 minutes
Chill Time30 minutes minimum, 2 hours recommended
Minimum Total Time35 minutes
Best FlavorAfter 2 hours or overnight
YieldAbout 1¼ to 1½ cups / 300 to 360 ml
Serving Size2 tablespoons / 30 ml
Servings10 to 12
EquipmentMixing bowl, whisk, measuring spoons, airtight jar, optional squeeze bottle

Ingredients

  • 1 cup mayonnaise / about 230 g
  • 2 tablespoons ketchup / about 30 g
  • 2 teaspoons rice vinegar / 10 ml
  • 1 teaspoon sugar / 4 g
  • 1 teaspoon garlic powder / about 3 g
  • ½ teaspoon onion powder / about 1 g
  • ½ teaspoon paprika or smoked paprika / about 1 g
  • 1 to 2 tablespoons water / 15 to 30 ml, plus more as needed
  • Pinch of salt, to taste

Optional Restaurant-Style Add-Ins

  • Use 1 tablespoon tomato paste / 15 to 16 g instead of ketchup for a deeper, less sweet sauce.
  • Add 1 tablespoon melted cooled butter / 14 g for a silkier, richer finish.
  • Use Kewpie mayo instead of regular mayo for a fuller, more savory base.
  • Add a pinch of cayenne or ½ teaspoon sriracha for gentle heat.
  • If using tomato paste instead of ketchup, increase sugar to 2 teaspoons / 8 g.

Instructions

  1. Add the mayonnaise, ketchup, rice vinegar, sugar, garlic powder, onion powder, paprika, and a pinch of salt to a mixing bowl.
  2. Whisk until the sauce is smooth and evenly colored, with no streaks of tomato or spice.
  3. Add water 1 tablespoon at a time until the sauce reaches your preferred thickness.
  4. If using butter, let the melted butter cool slightly, then whisk it into the sauce. Do not add hot butter directly to the mayo.
  5. Taste lightly, but do not over-adjust yet. The flavor becomes smoother after chilling.
  6. Cover and refrigerate for at least 30 minutes. For better flavor, chill for 2 hours or overnight.
  7. Stir again before serving. Thin with another teaspoon or two of water if needed.

Recipe Notes

  • The ketchup version is sweeter, easier, and the best place to start.
  • The tomato paste version is deeper, less sweet, and better when you want the richer steakhouse-style finish.
  • Thick dip texture needs about 1 tablespoon water. Drizzle texture usually needs 2 to 3 tablespoons water. A looser dressing-style sauce can take up to 4 tablespoons.
  • To double the recipe, double everything except the water. Add water slowly at the end until the texture looks right.
  • Store in an airtight jar in the refrigerator for up to 1 week.
  • Freezing is not recommended because mayo-based sauces can separate after thawing.

Closest restaurant-style version: Use Kewpie mayo, 1 tablespoon tomato paste instead of ketchup, 2 teaspoons sugar, 1 tablespoon cooled melted butter, 2 tablespoons water, and a tiny pinch of cayenne. Chill for at least 2 hours before serving.

Rich pale pink-orange yum yum sauce with a squeeze bottle, tomato paste, melted butter, cayenne, and fried rice with shrimp in the background.
For a richer steakhouse-style sauce, tomato paste, cooled melted butter, and a tiny pinch of heat make the flavor rounder.

Before You Start

Start with the ketchup version if this is your first batch. It tastes familiar right away: sweet, creamy, lightly tangy, and close to the sauce-cup flavor people remember from hibachi dinners. Try tomato paste next time if you want deeper color, stronger tomato flavor, and less sweetness.

If it tastes like plain mayo after the first whisk, do not panic. That is normal before the sauce rests. A freshly mixed batch can taste sharper than expected, so give it 30 minutes before you start fixing things that may not be broken.

Yum yum sauce is a finishing sauce, not a pan sauce. Add it after cooking, not while the food is simmering or frying. For a sauce that cooks with the food, use this stir fry sauce recipe instead.

Choose Your Version: Classic, Richer, Spicy, or Lighter

The best version depends on what you want from the sauce tonight. Ketchup gives you the familiar sweet hibachi-night flavor. Tomato paste makes it deeper and less sweet. Kewpie and butter push it richer. Yogurt makes it lighter for bowls, even though it moves away from the classic copycat feel.

VersionUse ThisWhat It Tastes Like
Classic easy sauceMayo + ketchup + rice vinegar + sugar + garlic powder + paprikaFamiliar, gently sweet, family-friendly
Deeper sauceMayo + tomato paste + a little extra sugarLess sweet, deeper in color, more concentrated
Richer steakhouse-style sauceKewpie mayo + tomato paste + cooled melted butterSmoother, fuller, more savory
Spicy versionAdd cayenne, sriracha, sambal, or chili garlic sauceCreamy with gentle to medium heat
Keto or lower-sugar sauceTomato paste instead of ketchup + keto sweetenerTangier, less sweet, still creamy
Lighter bowl sauceHalf mayo + half Greek yogurtBrighter, lighter, better for bowls than copycat flavor

For a completely different quick dip in the same weeknight-sauce family, this peanut sauce recipe is better when you want something nutty, salty-sweet, and built for noodles or spring rolls.

Ketchup vs Tomato Paste

Stuck between ketchup and tomato paste? Use this as the simple rule: use ketchup for the easy sweet version and tomato paste for the deeper, less-sweet version.

Two bowls of yum yum sauce comparing a lighter ketchup version with a deeper tomato paste version, with ketchup and tomato paste nearby.
Choose ketchup for a sweeter yum yum sauce, or tomato paste for a deeper, less-sweet restaurant-style flavor.
Use Ketchup WhenUse Tomato Paste When
You want the easiest versionYou want a deeper flavor
You prefer a sweeter sauceYou want less sweetness
You want a brighter pale pink-orange colorYou want a more concentrated tomato taste
You are making it for kids or family mealsYou are making a keto or lower-sugar version
You want a softer, familiar flavorYou want a richer steakhouse-style base

Ketchup usually needs less sugar. Tomato paste usually needs a little more. Taste after chilling.

Ingredients You Need

The core yum yum sauce ingredients are mayonnaise, ketchup or tomato paste, rice vinegar, sugar, garlic powder, onion powder, paprika, water, and salt. Butter and heat are optional.

Mayonnaise

Mayonnaise is the body of the sauce. Use one you already like, because its flavor comes through. Regular mayo works well. Kewpie tastes richer and slightly more savory. Light mayo or avocado oil mayo can work if you like the flavor, but the sauce may taste sharper or thinner. If using Miracle Whip, reduce the sugar and vinegar because it is already sweeter and tangier.

Ketchup or Tomato Paste

Ketchup gives the sauce that familiar hibachi-night sweetness. Tomato paste is the version you try when you want it to taste a little less sweet and a little more grown-up.

Rice Vinegar

Rice vinegar cuts through the richness of the mayo and keeps the sauce from tasting flat. It is mild enough to brighten the sauce without making it harsh.

Sugar

A little sugar gives the sauce its familiar sweet finish. Ketchup already contains sweetness, so the ketchup version needs less. Tomato paste is less sweet, so it usually needs a little more.

Garlic Powder, Onion Powder, and Paprika

Garlic powder and onion powder give savory depth without raw garlic bite. Paprika gives the sauce its warm color and keeps the flavor from feeling plain. Smoked paprika adds a deeper note that works well with grilled chicken, fried rice, shrimp, or steak bites.

Butter and Water

Butter is optional. Add it when you want the sauce to feel fuller and more like the little cup from a steakhouse; skip it when you want a brighter drizzle for rice or vegetables. Water decides whether the sauce behaves like a dip, drizzle, or dressing. Add it slowly because a small amount changes the consistency quickly.

Why This Recipe Works

This sauce works because every small ingredient fixes one common problem. Vinegar keeps the mayo from tasting heavy. Tomato gives color and tang. Sugar rounds the edges. Garlic powder, onion powder, and paprika make it taste like more than seasoned mayo. Water turns it from a thick dip into the soft ribbon people want over fried rice, shrimp, chicken, and vegetables.

The rest time matters too. After chilling, the garlic powder softens, the paprika settles into the mayo, and the vinegar stops tasting sharp. After 30 minutes it tastes more blended; after 2 hours it tastes closer to the steakhouse-style sauce people remember.

No Rice Vinegar? Use These Instead

Rice vinegar is mild and slightly sweet, which is why it works well here. Rice vinegar is usually milder than sharp white vinegar; for example, Kikkoman lists its rice vinegar at 4.2% acidity. If you need a swap, use another gentle acid and adjust slowly.

A bowl of yum yum sauce surrounded by rice vinegar, apple cider vinegar, white vinegar, lemon juice, seasoned rice vinegar, lemon wedges, and small labeled cards.
When replacing rice vinegar, start small; apple cider vinegar, white vinegar, lemon juice, and seasoned rice vinegar all sharpen the sauce differently.
SubstituteHow to Use It
Apple cider vinegarUse the same amount. It is slightly fruitier and a little sharper.
White vinegarUse a little less at first because it can taste sharper.
Lemon juiceUse the same amount for a fresher, brighter sauce.
Seasoned rice vinegarUse the same amount, but reduce the sugar slightly because it may already be sweetened.
MirinUse a small splash for sweetness and depth, but do not rely on it as the only acid.

Avoid strong vinegars like balsamic or malt vinegar. They can overpower the mayo and tomato. Whichever swap you use, start small, let the sauce rest, and adjust after the flavor settles.

Butter or No Butter?

No, yum yum sauce does not need butter. A good sauce can be made with mayo, ketchup or tomato paste, vinegar, sugar, seasonings, and water. Butter is optional; it makes the sauce richer and silkier, but the sauce still works without it.

Add butter if you want a fuller, sauce-cup style finish. Skip it if you want a brighter sauce for fried rice, spring rolls, or vegetables. If you use butter, melt it gently and let it cool until warm, not hot, before whisking it into the mayo.

How to Make Yum Yum Sauce

Add the mayo, ketchup, vinegar, sugar, garlic powder, onion powder, paprika, and salt to a bowl. Whisk until the sauce is completely smooth and there are no streaks of tomato or spice left in the mayo.

A hand whisking mayonnaise, ketchup, vinegar, sugar, garlic powder, onion powder, paprika, and salt in a ceramic bowl to make yum yum sauce.
Once the mayo, ketchup, vinegar, sugar, and spices turn evenly colored, the sauce is ready to chill and settle.

Thin the sauce with water. Start with 1 tablespoon for a thick dip. Add more water 1 teaspoon to 1 tablespoon at a time until it reaches the texture you want. If you are adding butter, make sure it is warm, not hot, before whisking it in.

Finished Sauce Texture

Once the sauce is fully whisked, check the spoon trail before you start changing the flavor. The texture should look glossy and smooth, not stiff or grainy.

A close-up of smooth pale pink-orange yum yum sauce in a bowl, with a spoon dragging through the glossy surface.
A good finished sauce should leave a glossy spoon trail; if it looks stiff or heavy, loosen it slowly with water.

Taste the sauce, but do not make aggressive adjustments right away. Freshly mixed sauce often tastes more mayo-forward than the finished version. Cover and refrigerate it for at least 30 minutes, then stir and taste again.

A Few Things Not to Rush

  • Do not add all the water at once. The sauce can go from thick dip to thin dressing quickly.
  • Do not add hot butter directly to mayo. Let it cool first so the sauce stays smooth.
  • Do not cook the finished sauce in fried rice or stir-fry. Add it after cooking.
  • Do not use strong vinegars like balsamic or malt vinegar. They take the sauce in a completely different direction.

Best Texture: Dip, Drizzle, or Dressing

The right texture depends on the plate. Fries need a thick dip. Fried rice needs a loose ribbon. Shrimp can go either way.

A three-part texture guide showing yum yum sauce as a thick dip with shrimp, a drizzle over fried rice, and a dressing over a slaw-style bowl.
Instead of using one texture for everything, keep it thick for dipping, looser for rice, and lightest for bowls or slaw.
TextureWater AmountBest For
Thick dip1 tablespoon / 15 mlShrimp, fries, nuggets, spring rolls, dumplings, roasted potatoes
Drizzle sauce2 to 3 tablespoons / 30 to 45 mlFried rice, chicken bowls, hibachi shrimp, steak bites, vegetables
Dressing-style sauce3 to 4 tablespoons / 45 to 60 ml, plus a little extra vinegarSalads, slaws, grain bowls, cold noodle bowls

The sauce should fall softly from a spoon for rice, but cling after one dip for shrimp, fries, and spring rolls. If you are serving it with hot fried rice, make it slightly thinner than you think; the rice will make a thick sauce feel heavier. If the sauce is for fries or spring rolls, stop thinning early so it clings to crispy edges.

Serving ideas: jump to fried rice, shrimp, bowls, or crispy snacks.

Why Yum Yum Sauce Tastes Better After Chilling

You can use the sauce immediately, but it tastes better after chilling. Right after mixing, the mayo, vinegar, tomato, sugar, and spices can taste separate. The sauce may also taste more mayo-forward than expected.

After 30 minutes in the fridge, the garlic powder and onion powder soften into the sauce. The paprika and tomato blend into the fat. The vinegar becomes less sharp, and the sweetness tastes less raw. After 2 hours, the flavor usually lands much closer to the hibachi-style sauce people remember from restaurants.

If you have time, make it the night before. Overnight chilling gives the smoothest flavor. If the sauce has been in the fridge overnight, let it sit for 5 to 10 minutes and stir before serving. It should be cool, not icy-thick.

Jump to recipe · Texture guide · Back to top

Hibachi White Sauce, Japanese White Sauce, and Shrimp Sauce

If you have ever searched for “that white sauce from hibachi,” this is probably the sauce you meant. In many American hibachi and Japanese steakhouse-style restaurants, this creamy sauce is called yum yum sauce, hibachi white sauce, Japanese white sauce, shrimp sauce, pink sauce, or Japanese steakhouse sauce.

The names come from how people use it. Some remember it with shrimp, some with fried rice, and some from the little sauce cups at a steakhouse. Even though it is often called white sauce, most homemade versions are pale peach or pink-orange because of ketchup, tomato paste, and paprika.

There is no single official formula. The goal is the familiar balance: cool mayo base, gentle sweetness, mild tang, pale tomato color, and enough water to make it dip-friendly or drizzle-friendly.

Homemade vs Store-Bought Yum Yum Sauce

Store-bought yum yum sauce is useful when you just want a squeeze bottle in the fridge. The problem is that bottled versions can swing too sweet, too salty, too thin, or too much like a generic mayo dressing.

Homemade is better when you want the sauce to match the plate: thicker for fries, looser for fried rice, sweeter for kids, tangier for shrimp, richer for steakhouse-style bowls. You can also make gluten-free, vegan, keto, or lighter versions more easily when you control the ingredients.

What to Eat with Yum Yum Sauce

Think of this as a cool finishing sauce. It works anywhere you want something creamy enough to soften heat, bright enough to wake up rice, and rich enough to cling to crispy snacks. This is the drizzle that makes plain rice, shrimp, and vegetables feel like hibachi night at home.

UseBest Texture
Fried riceLoose drizzle
ShrimpThick dip or light drizzle
Chicken bowlsDrizzle
Fries and nuggetsThick dip
Spring rolls and dumplingsThick dip
Burgers, wraps, and tacosSpread texture
Salads and slawsDressing-style

Fried Rice and Hibachi Plates

On fried rice and hibachi-style plates, keep it loose enough to fall from a spoon. You want pale, creamy streaks across hot rice, not a heavy scoop sitting on top. Add the sauce after cooking so the rice stays fluffy and the sauce stays smooth.

Yum yum sauce being spooned in ribbons over shrimp fried rice with egg, peas, carrots, scallions, and visible rice grains.
Drizzle the sauce after cooking fried rice so the grains stay fluffy and the cool sauce does not turn oily.

Shrimp, Seafood, and Chicken

Shrimp can go either way: thick as a dip or slightly loosened as a drizzle. For shrimp, the sauce should be thick enough to cling after one dip. If the protein is already rich or fried, add a little extra vinegar to the sauce for balance.

A grilled shrimp held by fingers and dipped into thick pale pink-orange yum yum sauce in a ceramic bowl.
Hibachi shrimp sauce works best as a thicker dip that clings after one swipe instead of sliding off the shrimp.

For another quick shrimp dinner with a brighter lemon-garlic direction, keep this shrimp scampi recipe nearby. If the meal is more fried fish than hibachi shrimp, this homemade tartar sauce is the better match.

Chicken, Steak Bites, and Hibachi Vegetables

Chicken and steak bites are best with a cool, smooth sauce that softens charred edges without hiding the grilled flavor.

A plate of grilled chicken pieces, steak bites, hibachi-style vegetables, and a bowl of pale pink-orange yum yum sauce, with sauce on one piece of steak.
Beyond shrimp, a cool hibachi-style sauce helps balance grilled chicken, steak bites, onions, zucchini, and peppers.

Bowls, Wraps, and Rice Meals

Bowls need a smoother drizzle. A spoonful can make a simple bowl feel finished, especially when there is warm rice, crunchy cucumber, cabbage, lettuce, carrots, grilled chicken, shrimp, beef, tofu, or crispy vegetables.

A rice bowl with grilled chicken, white rice, cucumber, purple cabbage, carrots, scallions, sesame seeds, and yum yum sauce drizzled across the top.
In rice bowls, a light drizzle adds flavor without covering the crunch of cucumber, cabbage, and carrots.

A seafood rice bowl can borrow the build from this salmon bowl recipe. With beef and rice, use it as a cool creamy contrast beside a saucy Korean beef bowl.

Fries, Spring Rolls, Dumplings, and Snacks

Crispy snacks are where the thicker version wins. Start with only 1 tablespoon water so the sauce clings to fries, nuggets, spring rolls, dumplings, potstickers, onion rings, roasted potatoes, and other crunchy bites instead of sliding back into the bowl.

A snack board with a bowl of thick yum yum sauce surrounded by fries, spring rolls, dumplings, nuggets, roasted potatoes, and onion rings.
Crispy snacks need a thicker sauce, so fries, spring rolls, dumplings, nuggets, and onion rings can catch it on their edges.

With spring rolls and fries, keep it spoonable and thick so every crispy edge catches some sauce. A crisp snack plate works well beside crispy veg spring rolls, fries, dumplings, or roasted potatoes.

Sandwiches, Burgers, and Tacos

As a burger, taco, or sandwich spread, keep it thicker than drizzle texture so it stays where you put it. It pairs especially well with crunchy lettuce, cucumber, cabbage, grilled chicken, shrimp, or crispy tofu.

Yum Yum Sauce Variations

Make the main version first if you can. Once you know the baseline, these variations help you make it spicier, richer, lighter, vegan, gluten-free, or lower in sugar.

Spicy Yum Yum Sauce

Add cayenne, sriracha, sambal, chili garlic sauce, or your favorite hot sauce. A pinch of cayenne gives gentle heat. About ½ to 1 teaspoon sriracha makes the sauce noticeably spicy. If it becomes too hot, add more mayo and a small pinch of sugar.

For a hotter fruit-and-chili direction that goes further than yum yum sauce, save this mango habanero sauce recipe for tacos, wings, shrimp, grilled chicken, paneer, tofu, or vegetables.

Kewpie Mayo Version

Kewpie mayo makes the sauce richer, smoother, and slightly more savory. It is a good choice if you want a fuller steakhouse-style flavor. Regular mayo still works well, especially when balanced with vinegar, tomato, garlic powder, paprika, and rest time.

Gluten-Free Version

This sauce can be made gluten-free if every packaged ingredient you use is labeled gluten-free. Check the mayo, ketchup, tomato paste, vinegar, hot sauce, and spice blends. If you add soy sauce, chili garlic sauce, or another condiment, choose a gluten-free version.

Vegan Version

Use vegan mayo in place of regular mayo. Skip the butter or use vegan butter. Sugar, maple syrup, or another sweetener can round out the flavor. Vegan mayo gives a more classic result than yogurt-style bases because it keeps the sauce creamy and rich.

Keto or Lower-Sugar Version

Tomato paste is usually the cleaner low-sugar base because ketchup brings sweetness before you even add a sweetener. Replace the sugar with a keto-friendly sweetener, then taste after chilling because some sweeteners can feel sharper before the sauce rests.

Low-Calorie or Greek Yogurt Version

The half-mayo, half-yogurt version is the sweet spot. It still tastes like a creamy sauce, while a full-yogurt version tastes more like a tangy bowl dressing. Use it for bowls, salads, slaws, or lighter chicken-and-rice plates rather than a strict hibachi copycat.

No-Mayo Version

You can make a no-mayo version with Greek yogurt, sour cream, vegan sour cream, or blended cashew cream, but it becomes a different sauce. To keep it balanced, add tomato, vinegar, sweetener, and seasoning in small amounts, then let it rest before adjusting again.

Troubleshooting Yum Yum Sauce

Most “failed” yum yum sauce is not actually failed. It usually just needs a short rest, a tiny splash of acid, or a spoonful of mayo to bring it back. If the flavor still feels off after chilling, the fix is usually small.

Yum yum sauce texture comparison showing a too-thick mound-like sauce beside a smoother drizzle texture, with water and a spoon nearby.
If the sauce is too thick, add water one teaspoon at a time until it changes from a mound to a smooth drizzle.
ProblemHow to Fix It
It tastes too much like mayoChill first. Then add a little more vinegar, paprika, garlic powder, ketchup or tomato paste, and a small pinch of sugar.
Too sweetAdd rice vinegar, lemon juice, or a pinch of salt.
Sharp or tangyAdd more mayo and a tiny pinch of sugar.
Thick and heavyAdd water 1 teaspoon at a time until it loosens.
Thin or runnyAdd mayo 1 tablespoon at a time until it thickens.
Looks too paleAdd a little more tomato paste, ketchup, or paprika.
Looks too orangeAdd more mayo.
Not steakhouse-style enoughUse Kewpie mayo, add the optional cooled butter, and chill the sauce longer.
Too spicyAdd mayo and a small pinch of sugar.
Tastes flatAdd salt, onion powder, garlic powder, or a tiny splash of rice vinegar.

When It Tastes Too Much Like Mayo

A mayo-heavy sauce usually needs rest and small balancing moves, not a full restart.

A bowl of yum yum sauce with rice vinegar, paprika, garlic powder, ketchup, sugar, and two spoons comparing a mayo-forward sauce with a more balanced sauce.
When the sauce tastes mayo-heavy, rest it first; then balance it with rice vinegar, ketchup or tomato paste, paprika, garlic, and sweetness.

Storage and Make-Ahead

Store yum yum sauce in an airtight jar or covered container in the refrigerator for up to 1 week. Stir it before serving because the sauce may thicken slightly as it chills.

A glass jar and squeeze bottle filled with pale pink-orange yum yum sauce on a kitchen counter beside an open refrigerator, with date labels.
Refrigerate homemade yum yum sauce in a jar or squeeze bottle, then stir before serving because it thickens as it chills.

This is a good make-ahead sauce. The flavor is better after at least 30 minutes and usually best after 2 hours or overnight. If you are serving it for a hibachi-style dinner, make the sauce first and let it chill while you prepare the rice, shrimp, chicken, or vegetables.

A squeeze bottle is helpful when you want the restaurant-style drizzle over rice and shrimp. For storage, a jar is easier to clean.

Keep the sauce refrigerated and do not leave it sitting out for long periods. This is not a shelf-stable sauce and it is not meant for canning. For general food safety, FoodSafety.gov recommends refrigerating perishable foods within 2 hours and keeping the refrigerator at 40°F / 4°C or below.

If you use Greek yogurt, vegan mayo, homemade mayo, or any ingredient with a shorter use-by date, follow the shortest storage time. Freezing is not recommended because mayo-based sauces can separate and turn grainy after thawing.

Make-ahead tip: Make the sauce first when you start dinner. By the time the rice, shrimp, chicken, or vegetables are ready, the flavor will already be smoother. It is one of those small prep steps that makes tomorrow’s rice bowl easier before tomorrow even starts.

Jump to recipe · Troubleshooting · Back to top

FAQs

What is yum yum sauce made of?

Yum yum sauce is usually made with mayonnaise, ketchup or tomato paste, vinegar, sugar, garlic powder, paprika, and water. Some versions also include butter, onion powder, cayenne, sriracha, mirin, or hot sauce.

Is yum yum sauce actually Japanese?

Not traditionally. It is best known as an American hibachi-style sauce served at many Japanese steakhouse-style restaurants.

Is yum yum sauce the same as hibachi white sauce?

Usually, yes. Many restaurants and home cooks use those names for the same creamy mayo-based sauce.

Is yum yum sauce the same as spicy mayo?

No. Spicy mayo is usually mayo mixed with sriracha or another hot sauce. Yum yum sauce has more rounded flavor from tomato, vinegar, sugar, garlic powder, paprika, and water.

Can I make yum yum sauce without tomato paste?

Yes. Use ketchup instead. For this recipe, 2 tablespoons ketchup gives the easiest sweet, pale pink-orange sauce. Because ketchup is already sweet, start with only 1 teaspoon sugar and adjust after chilling.

Is this Benihana-style yum yum sauce?

It is a homemade hibachi-style sauce in the same creamy, sweet-tangy family, but restaurant formulas vary. For the closest restaurant-style version, use Kewpie mayo, tomato paste, cooled melted butter, a tiny pinch of heat, and a 2-hour chill.

What can I use instead of rice vinegar?

Use apple cider vinegar, white vinegar, lemon juice, or seasoned rice vinegar. White vinegar is sharper, so start with a little less. Seasoned rice vinegar may already contain sugar, so reduce the sugar slightly.

Does yum yum sauce need butter?

No. Butter is optional. It adds richness and a silkier texture, but the sauce still works without it. If using butter, cool it before whisking it into the mayo.

Why does my yum yum sauce taste like mayo?

Freshly mixed sauce often tastes mayo-forward before it rests. Chill it for at least 30 minutes, then add a little more vinegar, paprika, garlic powder, tomato, and sugar if needed.

Is yum yum sauce good on fried rice?

Yes. Thin it to drizzle texture and add it after cooking, not in the pan. It gives hot fried rice a creamy, tangy finish without making the rice soggy.

What does yum yum sauce go with?

It goes well with shrimp, fried rice, chicken, steak, vegetables, rice bowls, fries, spring rolls, dumplings, nuggets, burgers, wraps, and roasted potatoes.

Is yum yum sauce gluten-free?

It can be gluten-free if every packaged ingredient you use is labeled gluten-free. Check mayo, ketchup, vinegar, hot sauce, spice blends, and any add-ins.

How long does homemade yum yum sauce last?

It keeps for up to 1 week in an airtight container in the refrigerator. Stir before serving and discard it if it smells off, changes texture, or has been left out too long.

Can you freeze yum yum sauce?

Freezing is not recommended. Mayo-based sauces can separate, turn watery, or become grainy after thawing. Make a fresh batch and store it in the refrigerator instead.

How do I make yum yum sauce spicy?

Add cayenne, sriracha, sambal, chili garlic sauce, or hot sauce. Start small, chill the sauce, and taste again before adding more.

Jump to recipe · Storage · Back to top

Posted on Leave a comment

Stir Fry Sauce Recipe: One Sauce for Chicken, Beef, Tofu, Vegetables & Noodles

Finished chicken stir-fry with broccoli, bell peppers, carrots, mushrooms, rice, and a small jar of brown stir fry sauce in the background.

A stir-fry can look perfect in the pan and still taste disappointing if the sauce is off. Use too little, and dinner feels dry. Pour too much, and the vegetables turn watery. Go too salty, and you lose the freshness. Let it get too sweet, and everything starts tasting bottled.

The short version: mix one jar, add it near the end, and use about 1 cup for a family-size stir-fry so dinner turns glossy, not watery.

This homemade stir fry sauce is built around a simple MasalaMonk rule: salt, loosen, brighten, round, aroma, cling. Soy sauce gives the savory base, water or broth keeps it balanced, vinegar brightens it, honey or brown sugar rounds it, garlic-ginger-sesame bring aroma, and cornstarch helps it cling to the food instead of pooling at the bottom of the pan.

It takes about five minutes to mix and works with chicken, beef, tofu, shrimp, vegetables, noodles, rice bowls, and those tired weeknight dinners where the fridge has a few vegetables, a protein, and no clear plan.

This is the sauce to keep in your back pocket: flexible enough for whatever is in the pan, reliable enough to make a random skillet taste like a real dinner, and easy enough to adjust lighter, deeper, sweeter, spicier, lower-sodium, vegan, keto-friendly, gluten-free, or soy-free.

Quick Answer: What Is Stir Fry Sauce Made Of?

A basic stir fry sauce is made with soy sauce, water or broth, rice vinegar, honey or brown sugar, toasted sesame oil, garlic, ginger, and cornstarch. Whisk everything together, add it near the end of cooking, and let it bubble for 30 to 60 seconds until it turns glossy and coats the food.

For most stir-fries, use about ¾ to 1 cup sauce for 1 lb / 450 g protein plus vegetables. Use less for fried rice, more for noodles, and slightly less if your vegetables release a lot of water.

If you have ever poured sauce into a stir-fry and watched it turn thin, salty, or soupy, the problem was probably not you. It was usually timing, pan moisture, or too much sauce for the amount of food in the pan.

Need a specific fix? Jump to how much sauce to use, when to add it, or how to fix watery stir-fry sauce.

What the sauce texture should look like

Before the sauce ever hits the pan, check the texture. It should be thin enough to pour, but balanced enough to turn shiny and cling once heated.

Close-up of glossy brown stir fry sauce coating a spoon, with visible bits of garlic, chili, sesame, and scallion.
Use the spoon as a quick texture check: the sauce should pour easily, but still leave a shiny coating behind. That is the texture that helps it cling in the pan.

Recipe at a Glance

Prep time:
5 minutes
Cook time:
No cooking until added to the pan
Yield:
About 1 cup / 250 ml
Servings:
1 family-size stir-fry / about 4 portions
Best for:
Chicken, beef, tofu, vegetables, noodles, rice bowls
Flavor:
Savory, lightly sweet, garlicky, gingery
Make-ahead:
5–7 days in the fridge
Main cue:
Add near the end; stop when shiny and coating

Easy Homemade Stir-Fry Sauce

This is the all-purpose version to start with. It is balanced enough for chicken, beef, tofu, vegetables, noodles, and rice bowls, but simple enough to mix before the pan is even hot.

All-Purpose Stir Fry Sauce

Prep: 5 minutes
Cook: no-cook sauce; 1–3 minutes in pan
Yield: about 1 cup / 250 ml
Serves: 1 family-size stir-fry / about 4 portions

Equipment

No special equipment is needed. A small bowl or jar, a whisk or fork, measuring spoons, and a hot wok or large skillet are enough.

Best For

Chicken, beef, tofu, shrimp, vegetables, noodles, rice bowls, and quick weeknight stir-fries.

Not Best For

It is not meant for deep-frying or as a thick dip straight from the jar. This sauce shines when it hits hot food in the pan and has a minute to thicken.

Ingredients

  • ½ cup / 120 ml water or low-sodium broth
  • ⅓ cup / 80 ml low-sodium soy sauce
  • 1 tablespoon / 15 ml rice vinegar
  • 1 tablespoon honey or brown sugar, about 20 g honey or 12–13 g sugar
  • 2 teaspoons / 10 ml toasted sesame oil
  • 2 garlic cloves, grated or very finely minced
  • 2 teaspoons fresh ginger, grated
  • 1 tablespoon cornstarch / cornflour (the white thickening starch), about 8 g
  • ¼ to ½ teaspoon red pepper flakes, chili garlic sauce, or sriracha, optional

Instructions

  1. Add the water or broth, soy sauce, rice vinegar, honey or brown sugar, sesame oil, garlic, ginger, cornstarch, and chili if using to a bowl or jar.
  2. Whisk well, or close the jar and shake until the cornstarch is fully dissolved.
  3. Use immediately, or refrigerate in an airtight jar.
  4. Shake or whisk again before using because the cornstarch settles as the sauce sits.
  5. Add near the end of stir-frying, after the protein and vegetables are mostly cooked.
  6. Let it bubble for 30 to 60 seconds, tossing until it turns shiny and coats the food.

Recipe Notes

  • Use low-sodium soy sauce for the best balance. Regular soy sauce can become too salty once reduced.
  • Use broth instead of water when you want a deeper sauce for chicken or beef.
  • For a brighter sauce, add 1 extra teaspoon rice vinegar at the end.
  • For a saucier rice bowl, add 2 to 4 tablespoons extra water or broth when the sauce hits the pan.
  • Do not pour it into a pan full of watery vegetables. Cook off extra moisture first.
  • If using this as a marinade, leave out the cornstarch. Cornstarch is for thickening in the hot pan; in a marinade, it can settle, clump, or make the surface pasty.
  • Yes, you can double the recipe. Double all ingredients, store in a larger jar, and shake well before each use.
  • It is also a good meal-prep sauce. Keep a jar in the fridge, and you are halfway to a stir-fry before the pan is even hot.

Why a jar of sauce makes stir-fry easier

A mixed sauce jar turns stir-fry into assembly cooking. With the flavor base ready, you can focus on heat, sequence, and not overcrowding the pan.

Clear glass jar of brown homemade stir fry sauce on a counter with garlic, ginger, scallions, soy sauce, and sesame oil nearby.
Because the sauce is mixed before cooking, weeknight stir-fries move faster. Keep it in a jar, then shake before using so the cornstarch blends back into the sauce.

Stir fry sauce ingredients before you mix

Keep the ingredients measured before cooking starts. Stir-fries move quickly, so the sauce should be ready before the wok or skillet gets hot.

Overhead flat-lay of stir fry sauce ingredients including soy sauce, broth, rice vinegar, honey, sesame oil, garlic, ginger, cornstarch, chili, and scallions.
The ingredient list is short, but each part matters: soy sauce brings salt, vinegar brightens, sweetener rounds, aromatics wake it up, and cornstarch helps it finish properly.

Mix the sauce before the pan gets hot

Whisk or shake until the cornstarch disappears into the liquid. That prevents last-minute measuring and gives the thickener time to disperse evenly.

Hand whisking brown homemade stir fry sauce in a ceramic bowl, with a wok of vegetables in the background and garlic, ginger, chili, scallions, and sesame nearby.
Mix the sauce before the pan gets hot. Then, once the protein and vegetables are ready, you can add it quickly instead of overcooking dinner while you measure.

Before you pour it into the pan: check how much sauce to use and when to add it so the stir-fry turns glossy instead of soupy.

The first time this sauce really clicks is when you stop treating it like a separate recipe and start treating it like a dinner shortcut. A jar in the fridge means chicken, tofu, broccoli, mushrooms, noodles, or leftover rice can turn into something that feels planned — as long as you use the right amount.

Timing cue: Mix the sauce before the pan gets hot. The protein should be cooked, the vegetables should be crisp-tender, and the pan should be hot but not swimming in liquid before the sauce goes in.

The MasalaMonk Stir-Fry Sauce Rule

A good stir-fry sauce is not just soy sauce plus thickener. It needs balance. Once you understand what each part is doing, you can adjust the sauce without guessing.

The six-part sauce rule

Use this as the control panel for the recipe. If dinner tastes off, fix the missing role instead of adding random ingredients.

Educational graphic showing a bowl of stir fry sauce and the MasalaMonk stir-fry sauce rule: salt, loosen, brighten, round, aroma, and cling, with ingredient examples around the bowl.
This is the control system for the whole recipe: salt, loosen, brighten, round, aroma, and cling. Once you understand those six jobs, you can fix the sauce without guessing.
Balance Part Ingredient Job in the Sauce
Salt Soy sauce, tamari, coconut aminos Creates the savory base.
Loosen Water or broth Keeps the sauce from becoming too salty or heavy.
Brighten Rice vinegar, lime juice Cuts through richness and keeps the flavor awake.
Round Honey, brown sugar, maple syrup Softens salt, acid, and heat.
Aroma Garlic, ginger, toasted sesame oil Makes the sauce smell fresh instead of flat.
Cling Cornstarch, arrowroot, xanthan gum Helps the sauce coat the food instead of pooling.

That is the real trick. The recipe gives you the base, but this rule tells you how to fix it. Too salty? Loosen. Too flat? Brighten. Too sharp? Round. Too thin? Help it cling. Too bottled? Add aroma.

Using the rule to fix dinner? If the sauce tastes too salty, too flat, too thin, or too sweet, jump to the troubleshooting table.

How Much Stir Fry Sauce to Use

This is the part most recipes skip, and it is also the part that saves dinner. The same sauce can taste perfect or overwhelming depending on how much food is in the pan.

If your stir-fries usually taste either dry or soupy, use the table first, then check the image cue that matches what you are cooking.

What You Are Cooking How Much Sauce to Use What to Watch
1 lb / 450 g chicken + vegetables ¾ to 1 cup Use the full cup if serving over rice and you want extra sauce.
1 lb / 450 g beef + vegetables ⅔ to 1 cup Beef can handle a deeper, slightly stronger sauce.
14 oz / 400 g tofu + vegetables About ⅔ cup Use a slightly thicker sauce so it clings to crisp tofu.
4 cups vegetables only About ½ cup Use less if the vegetables release water.
6 cups vegetables + 1 lb protein About 1 cup This is the classic family-size stir-fry amount.
200 g fresh noodles or 100 g dried noodles + add-ins ⅔ to 1 cup Noodles absorb sauce quickly; add water or broth if needed.
Fried rice-style stir fry 3 to 5 tablespoons Too much sauce makes rice wet and soft.
Very saucy takeout-style stir fry 1 cup plus 2 to 4 tablespoons water or broth Best when serving over plain rice.

How much sauce to use for chicken stir-fry

For chicken and vegetables, start with ¾ cup if the pan is modest and go up to 1 cup when you want extra sauce for plain rice.

Cooked chicken pieces, mixed vegetables, and a measuring cup of brown stir fry sauce with text reading “Chicken + vegetables” and “Use ¾–1 cup sauce.”
Chicken and vegetables usually need ¾ to 1 cup sauce for a family-size pan. Use the higher end when serving over plain rice, where a little extra sauce is useful.

How much sauce to use for tofu stir-fry

Tofu works better with restraint. Too much sauce softens the crisp edges before they can hold flavor.

Crisp golden tofu cubes with broccoli, peppers, snap peas, carrots, and a measuring cup of sauce, with text reading “Tofu + vegetables” and “Use about ⅔ cup sauce.”
Tofu needs enough sauce to cling to its crisp edges, but not so much that the pan floods. About ⅔ cup is a good starting point for tofu and vegetables.

How much sauce to use for vegetables

Vegetables release moisture as they cook, so a smaller amount of sauce often looks light at first but finishes better after bubbling.

Colorful vegetable stir-fry with broccoli, peppers, carrots, mushrooms, snap peas, zucchini, and a measuring cup of sauce, with text reading “Vegetables only” and “Use about ½ cup sauce.”
Vegetable-only stir-fries need restraint because the vegetables release water as they cook. Start with about ½ cup, then add more only after the sauce thickens.

How much sauce to use for noodles

Noodles absorb sauce quickly. Keep water or broth nearby so you can loosen the pan without adding more salt or sweetness.

Glossy noodle stir-fry being lifted with tongs, with chicken, broccoli, peppers, and a measuring cup of sauce labeled “Noodles” and “Use ⅔–1 cup sauce.”
Noodles absorb sauce as they sit, so keep the finish flexible. Start with ⅔ to 1 cup sauce, then loosen with a splash of water if the noodles tighten up.

How much sauce to use for fried rice

Fried rice needs seasoning, not a full stir-fry sauce pour. Start with a few tablespoons, toss, taste, and stop before the grains clump.

Pan of fried rice with vegetables, egg, scallions, and a tablespoon of sauce, with text reading “Fried rice,” “Use only 3–5 tbsp,” and “Seasoned, not wet.”
Fried rice is seasoned, not sauced. Use only 3 to 5 tablespoons so the grains stay separate instead of turning wet and clumpy.

Amount rule: Start lower if your pan is crowded, your vegetables are watery, or your noodles are already soft. You can always add more sauce after it thickens; you cannot easily remove extra once the pan turns soupy.

When to Add the Sauce

Add it near the end of cooking, not at the beginning. The sauce is there to coat and finish the food, not to boil the vegetables or stew the protein.

The stir-fry order before sauce goes in

The pan should be hot, the protein mostly cooked, and excess vegetable moisture reduced before the sauce goes in.

  1. Heat the wok or large skillet first. A hot pan helps food sear instead of steam.
  2. Cook the protein. Chicken, beef, shrimp, pork, or tofu need direct heat before sauce.
  3. Remove the protein if needed. This prevents overcooking while vegetables finish.
  4. Cook firm vegetables first. Broccoli and carrots need more time than bok choy leaves or peppers.
  5. Cook off extra moisture. A watery pan dilutes the sauce.
  6. Return the protein and shake the sauce. Cornstarch settles, so mix it again.
  7. Add the sauce and toss for 30 to 60 seconds. Stop when it thickens and finishes the pan.
Brown stir fry sauce being poured from a jar into a wok of mostly cooked chicken, broccoli, carrots, peppers, snap peas, and scallions.
Add the sauce near the end, not at the beginning. The food should already be mostly cooked, so the sauce only needs a short bubble to thicken and coat.

Cloudy to glossy: what the sauce should do in the pan

In the pan, the sauce often starts cloudy because the cornstarch is just beginning to hydrate. Once it bubbles around the edges, it should turn clearer, darker, and shinier.

Wok of chicken and vegetables with cloudy brown sauce bubbling around the food and text reading “Cloudy at first is normal.”
At first, cornstarch sauce can look cloudy in the pan. Give it 30 to 60 seconds of bubbling, and it should turn clearer, shinier, and more clingy.

Stop when the sauce turns glossy

The stop point is short and visual: the sauce tightens, the food looks coated, and the vegetables still look bright. Keep cooking after that and the flavor can turn too salty.

Close-up of glossy chicken stir-fry with broccoli, carrots, red peppers, mushrooms, scallions, and sauce clinging to the food, with small text reading “Stop when glossy.”
This is the stop point: the sauce has tightened, the food looks coated, and the vegetables still look bright. Keep cooking much longer and the sauce can turn too salty.

Glossy, not soupy: the final texture cue

The goal is glossy, not soupy — coated, not drowned. If sauce sits under the food instead of clinging to it, the pan probably has too much liquid.

Comparison image with one side showing a stir-fry in too much liquid and the other side showing a coated stir-fry, with text reading “Glossy, not soupy,” “Coated, not drowned,” “Too much liquid,” and “Just enough sauce.”
The difference is liquid control. Too much stir-fry sauce drowns the pan; just enough coats the food and keeps the vegetables crisp-looking.

Good stir-frying is mostly prep, heat, and sequence. Serious Eats explains those stir-frying basics in depth, but for this sauce the main thing is simple: mix it first and add it near the end.

If you need rice underneath your stir-fry, MasalaMonk’s how to cook rice guide is useful when you want fluffy rice that can hold sauce without turning mushy.

Why This Recipe Works

Why each ingredient has a job

This recipe works because each ingredient solves a specific sauce problem. Use the roles below when you need to adjust taste, thickness, or balance.

Ingredient-role graphic with labeled bowls showing soy sauce as savory base, water or broth as balance, vinegar as brightness, honey as roundness, garlic and ginger as aroma, and cornstarch as cling.
When a sauce tastes off, fix the role that is missing. Add broth to loosen, vinegar to brighten, honey or sugar to round, garlic and ginger for aroma, or cornstarch for cling.

This sauce is simple, but it is not random. Soy sauce brings salt and savory depth, while water or broth keeps it from becoming too intense. Rice vinegar adds brightness, and honey or brown sugar rounds the sharp edges so the sauce tastes balanced instead of harsh.

Garlic and ginger give the sauce its classic stir-fry aroma. Toasted sesame oil adds a warm nutty finish. Cornstarch is what changes the sauce from thin liquid into a shiny coating in the hot pan.

The goal is not a heavy glaze. The goal is a thin mixture that thickens in the hot pan, grabs onto the food, and leaves everything tasting seasoned but still fresh.

When it is right, you should smell the garlic and ginger first, see the sauce turn from cloudy to shiny, and still taste the freshness of the vegetables underneath. The sauce should make the food feel finished, not hidden.

Ingredients and Substitutions

Think of this section as permission to adjust. The sauce does not fall apart if you swap broth for water, honey for maple syrup, or tamari for soy sauce. You just need to keep the balance: salt, loosen, brighten, round, aroma, and cling.

Cooking for a specific need? Jump to gluten-free, soy-free, vegan, lower-sodium, and keto variations.

Soy Sauce

Low-sodium soy sauce is the best default. Regular soy sauce can work, but it becomes stronger as it reduces. If you only have regular soy sauce, use ¼ cup instead of ⅓ cup, then add 1 to 2 extra tablespoons water or broth.

For gluten-free sauce, use certified gluten-free tamari, certified gluten-free soy sauce, or coconut aminos. For a soy-free style version, coconut aminos are usually the easiest starting point, but they are sweeter and less salty than soy sauce, so reduce the sweetener and taste at the end.

Water or Broth

Water keeps the flavor clean and light. Broth gives more depth. Chicken broth works well with chicken, beef broth gives beef stir-fries a deeper base, and vegetable broth keeps tofu or vegetable stir-fries flexible. Low-sodium broth is best because the soy sauce already brings salt.

Honey or Brown Sugar

A little sweetness balances the saltiness of soy sauce and the sharpness of vinegar. Honey gives a smooth feel. Brown sugar gives deeper flavor. Maple syrup works well for a vegan version.

For the base sauce, keep the sweetener modest. This is a balanced weeknight sauce, not a sticky glaze. If you want something sweeter, use the honey soy variation below.

Rice Vinegar

Rice vinegar keeps the sauce bright. Apple cider vinegar can work in a pinch. Lime juice also works, especially for a Thai-inspired version, but it changes the flavor and makes the sauce sharper.

Garlic and Ginger

Fresh garlic and ginger make the sauce taste more alive. Grating them helps them disappear into the mixture and spread evenly through the pan.

Close-up of fresh ginger being grated beside minced garlic on a wooden cutting board, with garlic cloves and a small bowl in the background.
Fresh garlic and ginger do more than add flavor; they make the sauce smell freshly cooked instead of bottled. Grating them helps that aroma spread quickly through the stir-fry.

If you need to use powders, replace 2 garlic cloves with about ½ teaspoon garlic powder, and replace 2 teaspoons fresh ginger with about ½ to ¾ teaspoon ground ginger. The sauce will still work, but fresh gives better aroma.

Toasted Sesame Oil

Use toasted sesame oil for flavor, not as the main cooking oil. Two teaspoons are enough to make the sauce taste warm and nutty without overpowering the garlic and ginger.

Cornstarch / Cornflour

Cornstarch thickens the sauce and gives it that takeout-style finish. It must be mixed into cold or room-temperature liquid before heating. If dry cornstarch hits hot liquid directly, it can clump.

Bowl of brown stir fry sauce being whisked with visible text reading “Whisk cornstarch cold first” and “No clumps in the pan.”
Cornstarch works best when it is whisked into cool liquid first. That small step prevents clumps and helps the sauce turn smooth when it bubbles.

It also settles when the sauce sits, so always shake or whisk before adding it to the pan.

Can you make it without cornstarch? Yes, but it will be thinner. You can simmer it slightly longer, use arrowroot for some gluten-free or grain-free versions, or use a tiny amount of xanthan gum for keto sauce. Cornstarch is still the easiest everyday thickener.

How to Use This Sauce for Different Stir-Fries

Once the base is mixed, the rest is about matching the sauce to the food. Chicken wants balance. Beef can take depth. Tofu needs cling. Vegetables need restraint. Noodles need room to move.

For Chicken

Chicken is mild, so the sauce should stay balanced rather than too salty or too sweet. The base recipe works as written, especially if you use broth instead of water.

For 1 lb / 450 g chicken plus vegetables, ¾ to 1 cup is usually right. Go closer to the full cup if you are serving it over rice and want a little extra sauce to catch underneath.

The main danger with chicken is not the sauce; it is overcooking the chicken while waiting for the sauce to thicken. Keep the final simmer short.

Good vegetables for chicken include broccoli, bell peppers, carrots, snap peas, green beans, mushrooms, cabbage, bok choy, zucchini, and onions.

Chicken stir-fry being served from a wok onto rice, with broccoli, carrots, peppers, mushrooms, peas, and glossy brown sauce.
This is the chicken use-case: tender pieces, crisp vegetables, and enough sauce to catch on the rice without turning the bowl soupy.

For Beef

Beef likes a darker, more savory sauce. Start by swapping water for broth. Oyster sauce gives the quickest savory boost, Shaoxing wine or dry sherry adds restaurant-style depth, white pepper brings quiet warmth, and a small splash of dark soy sauce gives color if you have it.

You do not need every add-in at once. Even one or two — broth, oyster sauce, or white pepper — can make the sauce taste deeper.

For 1 lb / 450 g beef plus vegetables, ⅔ to 1 cup works well. Beef can carry a stronger sauce, especially with broccoli, mushrooms, green beans, or rice underneath.

Slice beef thinly across the grain and cook it quickly over high heat. Add the sauce only after the beef and vegetables are mostly cooked, then toss just long enough for everything to thicken and coat.

Beef stir-fry with thin beef slices, broccoli, mushrooms, red peppers, green beans, scallions, sesame seeds, and glossy dark brown sauce.
For beef, lean deeper and more savory. A darker brown sauce works well with mushrooms, broccoli, peppers, and thin slices of tender beef.

For Tofu

Tofu needs the sauce to cling, not slide off. If the tofu is not browned first, it can taste bland even when the sauce itself tastes good.

A 14 oz / 400 g block of tofu plus vegetables usually needs about ⅔ cup. More than that can flood the pan before the tofu has a chance to hold the flavor.

Press firm or extra-firm tofu, cut it into cubes or slabs, and pat it dry before it hits the pan. A dry surface browns better, and browned tofu holds sauce better.

Golden tofu cubes in a wok with broccoli, bell peppers, snap peas, mushrooms, scallions, sesame seeds, and glossy brown sauce.
Brown the tofu first so the sauce has something to hold onto. Crisp edges make tofu taste more seasoned and keep the sauce from sliding off.

For a lower-carb tofu dinner idea, MasalaMonk’s tofu and broccoli stir-fry with cauliflower rice is a natural fit, especially when you want a high-protein meal without noodles or regular rice.

For a vegan tofu stir-fry, use vegetable broth and maple syrup or sugar instead of honey. If you want deeper savory flavor, add mushroom powder or a little dried-shiitake soaking liquid.

For Vegetables

Vegetables are sneaky. They look dry when they first hit the pan, then suddenly release enough water to thin the whole sauce. That is why vegetable stir-fries need less sauce and a hotter pan.

Four cups of vegetables usually need only about ½ cup sauce. That may look modest, but vegetables release their own moisture as they cook.

Mushrooms and zucchini are the biggest water releasers here. Give them space, use higher heat, and wait until their moisture cooks off before adding the sauce.

Cook firm vegetables first: broccoli, carrots, cauliflower, green beans, cabbage stems. Add softer vegetables later: bell peppers, mushrooms, zucchini, bok choy leaves, snap peas, and scallions.

Colorful vegetable-only stir-fry with broccoli, red and yellow peppers, carrots, mushrooms, snap peas, zucchini, scallions, and a light glossy sauce.
A vegetable stir-fry should still look fresh after saucing. Keep the coating light so the broccoli, peppers, carrots, mushrooms, and snap peas stay colorful.

For Noodles and Rice

Noodles drink sauce quickly, so they need a looser finish. For noodles, use ⅔ to 1 cup sauce for about 200 g fresh noodles or 100 g dried noodles, plus your protein and vegetables. Start lower if the noodles are already soft or oily; add a splash of water or broth if they drink up the sauce too quickly.

If cooked noodles are clumped before they go into the pan, loosen them first with a splash of water or oil. Sauce cannot coat noodles evenly if they enter the pan as one sticky block.

Chopsticks lifting glossy stir-fried noodles from a wok with vegetables, tofu or chicken pieces, scallions, and brown sauce.
Noodle stir-fry is ready when the strands separate and shine instead of clumping together. If the pan feels tight, add a splash of water and toss briefly.

For fried rice-style cooking, use much less. Start with 3 to 5 tablespoons. Too much liquid makes rice wet and heavy. Cold cooked rice works better than freshly cooked hot rice because it is drier and separates more easily in the pan.

If you like saucy rice-bowl dinners, use the full cup in the stir-fry and serve it over plain rice. For fried rice, season gradually.

For a takeout-style egg dish with a glossy sauce, MasalaMonk’s egg foo young recipe is a useful companion because it also leans on a savory sauce that thickens and coats.

Back to top ↑

Easy Sauce Variations

You do not need every variation today. Make the base sauce first. Come back to this section when you want it sweeter, spicier, darker, lower-sodium, vegan, gluten-free, keto-friendly, or soy-free.

Choose the sauce direction that fits dinner

Use the base recipe as your starting point, then nudge it sweeter, hotter, darker, or looser depending on what is in the pan.

Three labeled bowls of stir fry sauce showing Honey Soy, Spicy, and Dark Takeout-Style variations with honey, chilies, mushrooms, ginger, and scallions nearby.
Once the base sauce works, choose the direction that fits dinner: honey soy for shine, spicy for heat, or dark takeout-style for a deeper brown sauce.
If You Want Change This Best For
Balanced everyday sauce Use the base recipe as written. Chicken, tofu, vegetables, rice bowls
Sweeter honey soy Increase honey to 2 tablespoons. Chicken, shrimp, tofu, noodles
Darker takeout-style sauce Use broth, oyster sauce, Shaoxing wine, and white pepper. Beef, broccoli, mushrooms, cabbage
Spicy sauce Add chili garlic sauce, sriracha, chili crisp, or fresh chilies. Chicken, shrimp, tofu, noodles
Noodle-friendly sauce Keep it looser with extra water or broth. Fresh noodles, dried noodles, rice noodles
Soy-free style Use coconut aminos and reduce the sweetener. Tofu, vegetables, chicken, rice bowls

Pick the version closest to tonight’s dinner, then adjust from there. Chicken and noodles may want sweeter or looser; beef may want darker; vegetables usually want restraint.

If you find a version that works especially well — extra ginger, chili crisp, coconut aminos, mushroom broth, less sweetener, or something completely your own — leave it in the comments so another reader can borrow the idea.

3 Ingredient Stir Fry Sauce

A 3 ingredient version is useful when you need something fast and do not have the full list of ingredients. Mix soy sauce, honey or brown sugar, and a cornstarch slurry. It works in a pinch, but the full sauce tastes more balanced because it includes acid, aromatics, sesame oil, and a proper loosened base.

Chinese Takeout-Style Brown Sauce Variation

For a deeper, darker, more takeout-style sauce, start by swapping water for broth. Oyster sauce brings the quickest savory boost, Shaoxing wine or dry sherry adds restaurant-style depth, white pepper brings quiet warmth, and a small splash of dark soy sauce gives color if you have it. Reduce the honey or brown sugar slightly so the sauce stays savory.

Vegetarian cooks can use mushroom sauce instead of oyster sauce. For a vegan version, skip oyster sauce and use mushroom powder, shiitake soaking liquid, or a vegan mushroom stir-fry sauce.

Honey Soy Stir Fry Sauce

The honey soy version is sweeter and shinier: increase the honey to 2 tablespoons. It works especially well with chicken, shrimp, salmon, tofu, broccoli, carrots, bell peppers, and noodles. If it tastes too sweet, balance it with rice vinegar, lime juice, chili flakes, or a little more soy sauce.

Spicy Stir Fry Sauce

To make it spicy, add red pepper flakes, chili garlic sauce, sriracha, gochujang, chili crisp, or fresh chopped chilies to the base recipe. Start small. Spicy sauce tastes better when it still has balance: salt, sweetness, acid, garlic, ginger, and heat.

Thai-Inspired Quick Stir-Fry Sauce

This is not a replacement for a specific Thai dish sauce. It is a quick direction for weeknight stir-fries when you want the flavor to lean brighter, sharper, and more chili-forward. Replace some rice vinegar with lime juice, add a little fish sauce if you are not vegetarian, reduce the soy sauce slightly, and keep the garlic and chili strong.

If you want a full Thai basil stir-fry, MasalaMonk’s Pad Kra Pao recipe goes deeper into that sharper, basil-heavy sauce style.

Teriyaki-Style Stir Fry Sauce

For a teriyaki-style version, make the sauce sweeter and shinier. Increase the sweetener, use a little more ginger, and let it reduce until it looks lightly glazed. Use this when you want a sweeter rice-bowl style dinner rather than a lighter vegetable stir-fry. For a dedicated sweeter glaze, see MasalaMonk’s teriyaki sauce recipe.

Diet and Substitution Variations

These versions are not here to make the sauce feel restricted. They are here so the same jar can still work when someone at the table needs less sodium, no gluten, no soy, no animal products, or no sugar.

Use this section like a shortcut: lower-sodium if salt is the problem, gluten-free if wheat is the problem, soy-free if soy itself is the problem, and keto if sugar or starch is the problem.

Easy stir fry sauce swaps that are not interchangeable

The labels matter here. Gluten-free, soy-free, vegan, and lower-sodium changes solve different problems, so choose the swap that matches the actual need.

Ingredient-swap guide for stir fry sauce with visible labels for gluten-free tamari or coconut aminos, soy-free coconut aminos, vegan maple syrup and vegetable broth, and lower-sodium dilute and taste.
Substitution labels matter. Tamari can help with gluten-free stir fry sauce, but it is usually soy-based; coconut aminos are the better soy-free starting point.

Lower-Sodium Version

A lower-sodium version needs more than just low-sodium soy sauce. Low-sodium soy sauce still contains sodium, and the sauce can become saltier as it reduces. Reduce the soy sauce first, increase water or unsalted broth, and build flavor with garlic, ginger, vinegar, chili, scallions, mushrooms, and sesame aroma.

Do not add salt until the stir-fry is finished and tasted. If you are cooking for a strict sodium limit, use label numbers rather than taste alone.

Keto / Sugar-Free Version

For a keto or sugar-free version, skip the honey or brown sugar and use a keto-friendly sweetener only if needed. Cornstarch is not ideal for strict keto. Use up to ⅛ teaspoon xanthan gum for 1 cup sauce, starting with a smaller pinch if your brand thickens aggressively.

Xanthan gum does not behave like cornstarch: cornstarch thickens as it cooks, while xanthan gum thickens as it hydrates. Whisk well, wait a minute, and add more only if you really need it. A sauce can go from glossy to gummy quickly.

Vegan Version

To make it vegan, use vegetable broth and maple syrup or sugar instead of honey. Avoid oyster sauce, fish sauce, chicken broth, chicken bouillon, and non-vegan bottled sauces. For deeper savory flavor, add mushroom powder, finely minced mushrooms, or a little dried-shiitake soaking liquid.

If you are building more plant-forward meals around tofu, tempeh, edamame, lentils, or beans, MasalaMonk’s plant-based protein sources guide can help you choose what to pair with the sauce.

Gluten-Free Version

Regular soy sauce often contains wheat, so it is not always gluten-free. Use certified gluten-free tamari, certified gluten-free soy sauce, or coconut aminos. Also check the labels on broth, oyster sauce, hoisin sauce, chili garlic sauce, and bottled sauces because gluten can appear in places you may not expect.

No Soy Sauce vs Soy-Free vs Gluten-Free

These terms sound similar, but they are not interchangeable. That matters when you are cooking for allergies, gluten-free needs, or someone who is avoiding soy completely. For a broader look at tamari, coconut aminos, and liquid aminos, EatingWell’s guide to soy sauce substitutes is a helpful reference.

Phrase What It Actually Means What to Watch
Without soy sauce The recipe does not use soy sauce. It may still contain soy from hoisin, oyster-style sauces, or other condiments.
Soy-free No soy ingredients at all. Check every label carefully.
Gluten-free No wheat/gluten ingredients. Tamari may be gluten-free but still contains soy.
Coconut aminos A common soy-free and gluten-free substitute for soy sauce. Usually sweeter and less salty, so reduce sweetener.
Liquid aminos A savory soy-sauce-like seasoning. Many versions are soy-based and can still be high in sodium; check the label.

Without Soy Sauce

A sauce without soy sauce is not always the same as a soy-free sauce. Some recipes skip soy sauce but use hoisin sauce, oyster sauce, or other bottled condiments that may still contain soy. That may be fine if you only want to avoid soy sauce specifically, but it is not appropriate for someone who needs a truly soy-free version.

Coconut aminos are the easiest starting point for a soy-sauce-style substitute. From there, garlic, ginger, vinegar, chili, and a little mushroom depth help bring back the savory edge that soy sauce usually provides.

Truly Soy-Free Version

For a truly soy-free version, check every ingredient label carefully. Do not use soy sauce, tamari, hoisin sauce, or oyster-style sauces unless they are clearly labeled soy-free. Use coconut aminos as the main savory base, then add garlic, ginger, rice vinegar, sesame oil if tolerated, chili, and mushroom flavor for depth.

Back to top ↑

Homemade vs Store-Bought Stir Fry Sauce

Store-bought sauce is convenient, but it often leans too sweet, too salty, or too thick. Homemade sauce lets you adjust the balance in the moment: more vinegar for brightness, more broth for looseness, more garlic or ginger for freshness, and a little sweetener only when the sauce tastes harsh.

If you are using bottled sauce, start with ⅓ to ½ cup for a small two-serving stir-fry, or ½ to ¾ cup for a larger pan. Bottled sauces are often saltier and sweeter than homemade, so add less first and stretch with water or broth if needed.

  • Too salty? Dilute with water or broth and add more vegetables.
  • Too sweet? Add rice vinegar, lime juice, chili, or a little soy sauce.
  • Too thick? Loosen with water or broth.
  • Too flat? Add fresh garlic, ginger, scallions, chili, or toasted sesame oil.
  • Tastes bottled? Add fresh aromatics and a splash of acid.

Use bottled sauce near the end of cooking, just like homemade. If it is already thick and sweet, do not simmer it for too long or it can become sticky and overpowering.

How to Fix Sauce Problems

A stir-fry can go sideways fast, but most sauce problems are fixable while the pan is still hot. Usually the pan needs one small correction, not a restart.

Most sauce problems start earlier: check the amount guide and the timing cue if your stir-fries often turn watery, salty, or too thick.

Quick fixes for common stir-fry sauce problems

Problem Why It Happened Fix
Sauce is too salty Too much regular soy sauce, salty broth, or bottled sauce. Add water or broth, vinegar or lime, more vegetables, or a little sweetener.
Sauce is too thin Not enough cornstarch, not simmered long enough, or pan is watery. Simmer 30–60 seconds more or add a small slurry.
Sauce is too thick Too much cornstarch or sauce reduced too much. Add water or broth 1 tablespoon at a time.
Sauce tastes flat Not enough acid, garlic, ginger, or heat. Add vinegar, lime, garlic, ginger, chili, or sesame oil.
Sauce is too sweet Too much honey, sugar, or bottled sauce. Add vinegar, chili, soy sauce, or broth.
Sauce clumps Cornstarch was added directly to hot liquid. Mix cornstarch with cold liquid first.
Stir-fry turns watery Vegetables released moisture into the pan. Cook off liquid before adding sauce.
Sauce burns Sugary sauce cooked too long over high heat. Add sauce at the end, lower the heat slightly if needed, and stop once glossy.
Noodles absorb everything Noodles are thirsty or sauce is too thick. Add water or broth and toss briefly.
Tofu tastes bland Tofu was not crisped or sauce was too thin. Crisp tofu first and use a slightly thicker sauce.
Sauce tastes bottled It is sweet, salty, and thick but missing freshness. Add fresh garlic, ginger, vinegar or lime, scallions, chili, or sesame oil.

Why your stir-fry turns watery

The most common mistake is adding sauce to a crowded, watery pan. Cook the vegetables until extra moisture reduces, then add the sauce and let it bubble briefly.

Wok of chicken and vegetables sitting in thin watery sauce with text reading “Watery pan? Cook off moisture first.”
If the pan turns watery, pause before adding more sauce. Cook off vegetable moisture first, especially with mushrooms, zucchini, or a crowded skillet.

Small fixes before you restart dinner

Small save: If the pan tastes almost right but not quite, add a splash of water if it is too strong, a little vinegar if it feels flat, or a pinch of sugar if it tastes harsh. Tiny changes fix most stir-fry sauce problems.

How to Store It

Store the sauce in an airtight jar in the refrigerator for 5 to 7 days. Shake or whisk before using because the cornstarch settles at the bottom.

You can also freeze it for up to 3 months. Thaw in the refrigerator, then whisk or shake well before adding it to the pan. If freezing, use a freezer-safe container and leave a little room for expansion.

Do not worry if it looks cloudy or separated when cold. Cornstarch can settle and make the sauce look uneven. Once heated and stirred, it should smooth out again.

If the sauce has already been cooked into a stir-fry, store leftovers in an airtight container. For best texture, store noodles or rice separately from saucy stir-fry when possible.

What to Serve With It

It fits easy dinners like chicken and broccoli, beef and green beans, tofu and bok choy, shrimp and vegetables, cabbage and mushrooms, or zucchini and peppers.

Serve those over steamed jasmine rice, brown rice, cauliflower rice, stir-fried noodles, lettuce wraps, or fried rice. For choosing between rice, quinoa, cauliflower rice, or lighter base options, MasalaMonk’s quinoa vs rice guide is helpful, especially if you are balancing fullness, carbs, and texture.

If you want a cool, crisp side beside a salty-sweet stir-fry, MasalaMonk’s cucumber salad is a simple contrast: fresh, tangy, and fast enough to make while the sauce is resting in the jar.

If you want a rice-based takeout-style meal with a different flavor direction, MasalaMonk’s Spam fried rice recipe shows how little sauce fried rice actually needs compared with a saucy stir-fry.

At its best, the sauce leaves you with crisp vegetables, tender protein, and just enough savory-sweet shine for the rice or noodles to catch.

Frequently Asked Questions

What is stir fry sauce made of?

It is usually made with soy sauce, water or broth, rice vinegar, a little sweetener, garlic, ginger, sesame oil, and cornstarch. Together, they make a sauce that is savory, lightly sweet, aromatic, and able to thicken in the pan.

How much sauce should I use for a stir-fry?

Use about ¾ to 1 cup for 1 lb / 450 g protein plus vegetables. Use about ½ cup for vegetables only, ⅔ to 1 cup for noodles, and only 3 to 5 tablespoons for fried rice.

When should I add sauce to a stir-fry?

Add it near the end of cooking, after the protein and vegetables are mostly cooked. Let it bubble for 30 to 60 seconds until it turns glossy and coats the food.

Can I make this without soy sauce?

Yes. Coconut aminos are the easiest soy-sauce-style substitute. They are usually sweeter and less salty than soy sauce, so reduce the sweetener and adjust the flavor at the end. Be careful with hoisin, oyster sauce, and bottled sauces because they may still contain soy even if they are not soy sauce.

Is this sauce gluten-free?

Only if you use the right soy sauce substitute. Regular soy sauce often contains wheat, so choose certified gluten-free tamari, certified gluten-free soy sauce, or coconut aminos, and check all bottled add-ins.

How do I make a lower-sodium version?

Use low-sodium soy sauce or a lower-sodium alternative, water or unsalted broth, and extra garlic, ginger, vinegar, chili, scallions, or mushroom flavor. Avoid high-sodium bottled sauces unless the label works for your needs.

How do I make a keto version?

Skip honey or sugar and use a keto sweetener only if needed. Replace cornstarch with up to ⅛ teaspoon xanthan gum for 1 cup sauce, starting with a small pinch. Soy sauce, tamari, or coconut aminos can all work depending on your carb and sodium needs.

Can I use this for noodles?

Yes. Use ⅔ to 1 cup for a noodle stir-fry, and keep a little water or broth nearby. Noodles absorb sauce quickly, so you may need a splash to loosen everything in the pan.

Can I use this as a marinade?

Yes, but leave out the cornstarch if using it as a marinade. Cornstarch is for thickening in the pan, not for soaking raw protein. Add the cornstarch later when you are ready to cook.

Why is my sauce too salty?

The most common reason is regular soy sauce, salty broth, or too much bottled sauce. Dilute with water or broth, add more vegetables, brighten with vinegar or lime, or balance with a small amount of sweetener.

Why did it not thicken?

It may not have simmered long enough, the pan may have too much vegetable liquid, or there may not be enough cornstarch. Let it bubble briefly, or add a small slurry made from cornstarch and cold water.

How long does homemade stir fry sauce last?

It lasts 5 to 7 days in an airtight jar in the refrigerator. Shake or whisk before using because the cornstarch settles.

Final Notes

Do not let the length of the guide make the sauce feel complicated. The base recipe is simple; the extra notes are just here to help you adjust it without guessing.

Once you know the rule — salt, loosen, brighten, round, aroma, cling — stir-fry sauce stops feeling like a fixed recipe and starts feeling like something you can control.

Keep a jar ready, and a random mix of protein, vegetables, and rice or noodles starts to feel like dinner instead of leftovers. If you make it your own — sweeter, spicier, soy-free, or extra garlicky — share what worked so others can borrow the idea too.

Back to top ↑