Posted on — Leave a comment

Crockpot Chili Recipe: Easy Slow Cooker Chili With Ground Beef and Beans

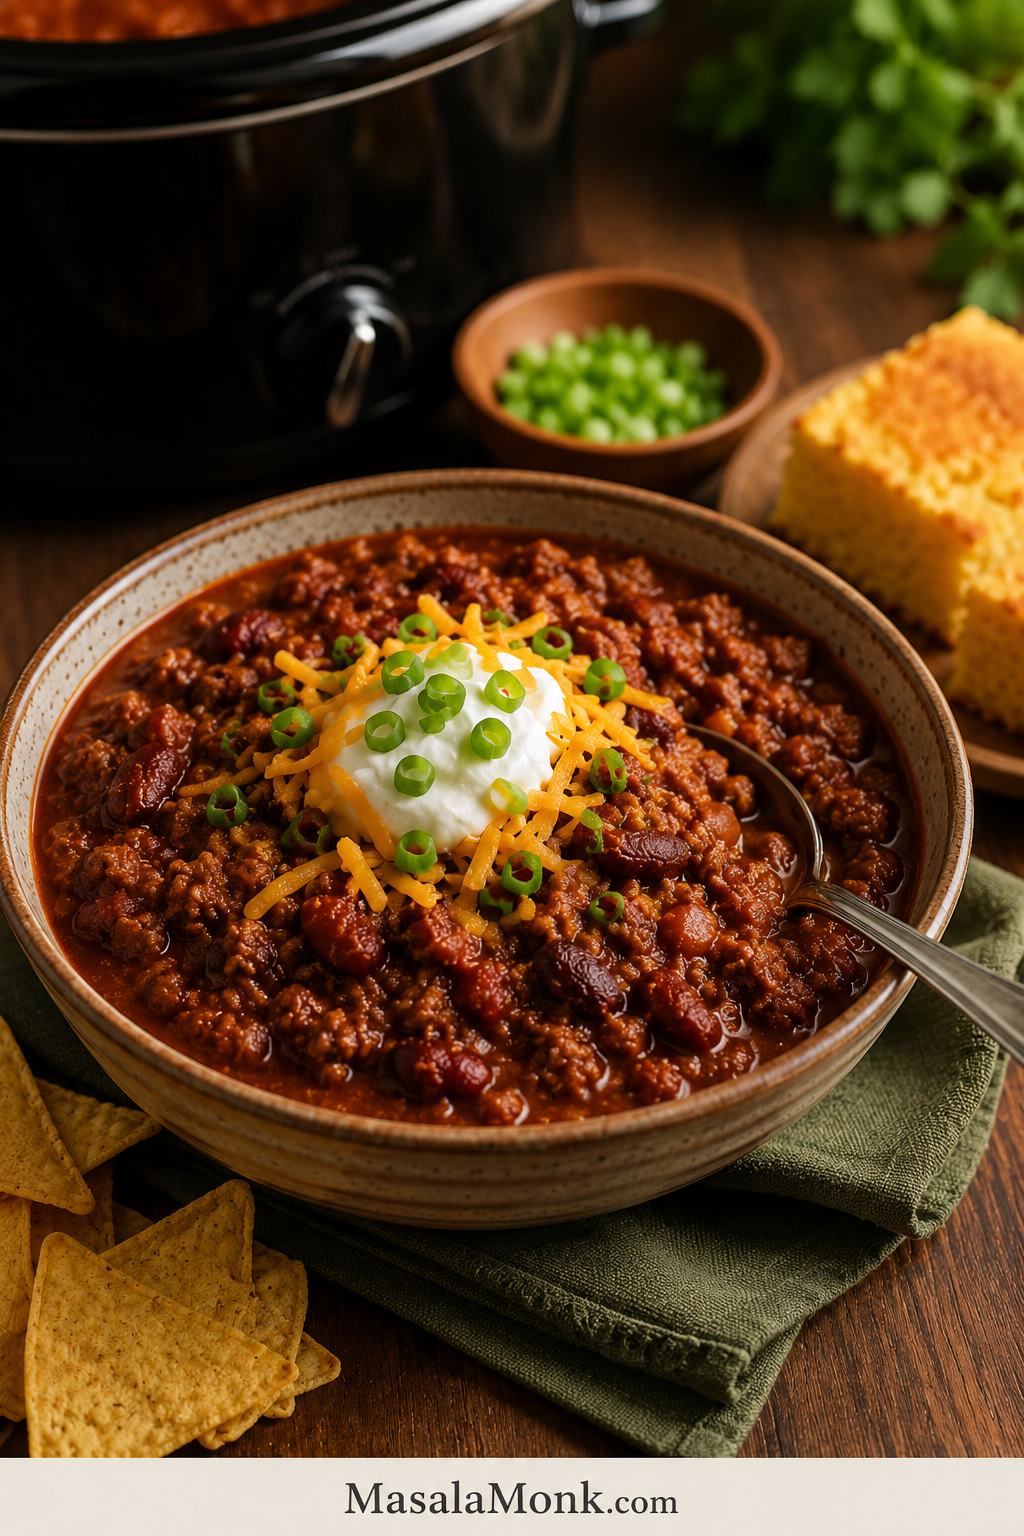
Bowl of crockpot chili topped with cheddar cheese, sour cream, green onions, tortilla chips, and cornbread, with a slow cooker in the background

This crockpot chili recipe is for the night you want dinner to smell like it has been simmering all day, without standing over the stove all afternoon. It is thick, beefy, tomato-rich, and built to avoid the usual slow-cooker chili problems: watery sauce, greasy beef, bland seasoning, and beans that go too soft.

You brown and drain the beef first, build a quick tomato-spice base, add beans and tomatoes, then cook everything on Low for 6 to 8 hours or High for 3 to 4 hours. The result is cozy, spoonable chili that can hold cheese, sour cream, onions, and chips without turning into soup.

This is the kind of chili that tastes right with a spoon, a handful of chips, or a pile of toppings. It is not fancy. Instead, it is dependable: rich enough for adults, familiar enough for kids, and sturdy enough for leftovers.

The secret to thick crockpot chili is starting with a pot that looks almost too thick, because the slow cooker gives moisture back. Slow cookers trap steam instead of reducing liquid like a stovetop pot, so this recipe uses less added liquid, tomato paste for body, browned beef for flavor, and a short uncovered rest at the end.

This version stays with the familiar tomato-based beef-and-bean style. White chicken chili, turkey chili, vegetarian chili, and no-bean chili all need their own balance of ingredients, so they are treated here as simple variations rather than the main recipe.

Quick Answer: How to Make Crockpot Chili

To make crockpot chili, brown ground beef in a skillet, drain the grease, then cook onion, bell pepper, garlic, tomato paste, and chili spices for a minute to build flavor. Transfer everything to a slow cooker with beans, diced tomatoes, tomato sauce, a small amount of broth or beer, and Worcestershire sauce.

Cook on Low for 6 to 8 hours for the best flavor, or on High for 3 to 4 hours when you need chili sooner. Let the chili rest uncovered for 10 to 15 minutes before serving so it thickens just enough to hold a spoonful of cheese, sour cream, onions, and chips without turning soupy.

The mistake-proof chili rule: the pot should look thick and saucy before cooking, not loose. As the tomatoes release moisture, this recipe starts with only 1/2 cup added liquid and lets tomato paste, drained beans, and resting time do the thickening work.

Once the beef is browned, the recipe becomes very hands-off. The slow cooker handles the long simmer while the base stays sturdy enough for toppings, chili dogs, baked potatoes, nachos, or tomorrow’s lunch.

Crockpot Chili Recipe Card

Easy Crockpot Chili With Ground Beef and Beans

A hearty, family-style slow cooker chili made with browned ground beef, beans, tomatoes, tomato paste, chili spices, and a 6-quart crockpot. It is easy enough for a weeknight, sturdy enough for game day, and perfect for leftovers.

Prep time20 minutes
Cook time6 to 8 hours on Low, or 3 to 4 hours on High
Total timeAbout 3 hours 20 minutes to 8 hours 20 minutes, depending on setting
Servings8 to 10 servings
YieldAbout 10 to 12 cups chili
Recommended slow cooker size6-quart slow cooker

Equipment

  • 6-quart slow cooker
  • Large skillet or frying pan
  • Wooden spoon or spatula for breaking up the beef
  • Colander or strainer for draining and rinsing beans
  • Ladle for serving
  • Airtight containers or freezer bags for leftovers
  • Optional instant-read thermometer, especially if using a dump-and-go raw beef method

Ingredients

  • 2 lb / 900 g ground beef, preferably 85/15 for richer chili or 90/10 for leaner chili
  • 1 large yellow onion, diced, about 150 to 180 g
  • 1 medium green bell pepper, diced, about 120 to 150 g
  • 4 garlic cloves, minced, about 12 to 16 g
  • 2 to 3 tablespoons / 30 to 45 g tomato paste
  • 2 1/2 to 3 tablespoons chili powder blend
  • 2 teaspoons ground cumin
  • 1 teaspoon smoked paprika
  • 1 teaspoon dried oregano
  • 1 1/2 teaspoons salt, plus more to taste
  • 1/2 teaspoon black pepper
  • 1 can kidney beans, 15 oz / 425 g, drained and rinsed
  • 1 can black beans or pinto beans, 15 oz / 425 g, drained and rinsed
  • 1 can diced tomatoes, 28 oz / 794 g, undrained
  • 1 can plain canned tomato sauce, 15 oz / 425 g
  • 1/2 cup / 120 ml beef broth or beer
  • 1 tablespoon / 15 ml Worcestershire sauce

Instructions

  1. Heat a large skillet over medium-high heat. Add the ground beef and cook for 6 to 8 minutes, breaking it into small pieces, until browned.
  2. Drain the excess grease. A little fat is fine, but too much will make the finished chili oily.
  3. Add the onion and bell pepper to the skillet. Cook for 4 to 5 minutes, until they begin to soften.
  4. Stir in the garlic, tomato paste, chili powder blend, cumin, smoked paprika, oregano, salt, and black pepper. Cook for 30 to 60 seconds, until the tomato paste darkens slightly and the spices smell warm.
  5. Transfer the beef mixture to a 6-quart slow cooker.
  6. Add the drained beans, undrained diced tomatoes, plain canned tomato sauce, Worcestershire sauce, and about half the broth or beer. Stir well.
  7. Check the texture before the lid goes on. It should look saucy and sturdy, not loose. If it looks tight and dense, add the remaining broth or beer; if it already looks loose, hold it back.
  8. Cover and cook on Low for 6 to 8 hours or High for 3 to 4 hours. At the end, the chili should bubble gently around the edges and look thicker than it did when you started.
  9. Taste near the end. Add more salt, chili powder, Worcestershire sauce, or a small splash of apple cider vinegar if the chili tastes flat.
  10. Let the chili rest uncovered for 10 to 15 minutes before serving so the sauce tightens slightly.
  11. Serve with shredded cheese, sour cream, green onions, jalapeños, tortilla chips, cornbread, or your favorite chili toppings.

Success Notes

  • Need more body? Use the full 3 tablespoons tomato paste, keep broth to 1/2 cup, and rest the chili uncovered before serving.
  • To round out the flavor: add 1 teaspoon cocoa powder for depth, 1 teaspoon brown sugar to soften acidity, or 1 teaspoon apple cider vinegar to brighten a flat pot.
  • For more smoke: try smoked paprika, chipotle powder, cooked bacon, or a tiny splash of liquid smoke.
  • To raise the heat: add jalapeño, cayenne, hot sauce, or diced tomatoes with green chiles.
  • Keeping it mild? Use mild chili powder and plain diced tomatoes.
  • Using a packet? Replace most dried spices with one chili seasoning packet, then taste before adding extra salt.

Serve when the chili looks thick, smells savory, and holds softly on a spoon after resting.

Before the deeper notes, here is the finished texture you are aiming for.

What Thick Crockpot Chili Should Look Like

Close-up of crockpot chili in a bowl with ground beef, beans, tomato sauce, melted cheddar cheese, sour cream, and green onions
Look for sauce that clings to the beef and beans instead of pooling underneath; that is the difference between cozy crockpot chili and a watery bowl.

Timing and Make-Ahead Notes

Timing at a Glance

Low is the setting to choose when the day allows it. The chili has time to settle, the tomato base tastes rounder, and the beef and beans feel like one pot instead of separate ingredients. High works for a faster batch in 3 to 4 hours. Use Warm only after the chili is fully cooked, when you are holding it for serving.

This is the chili for the day when dinner needs to take care of itself after the first 20 minutes. The pot does not need much attention, but the early browning step is what makes it taste like someone paid attention.

Can You Prep Crockpot Chili the Night Before?

Yes. Brown the beef, cook the onion, bell pepper, garlic, tomato paste, and spices, then cool the mixture and refrigerate it in an airtight container. The next day, add it to the slow cooker with the beans, tomatoes, tomato sauce, Worcestershire sauce, and broth or beer.

If you refrigerate ingredients in a removable slow cooker insert, check your manufacturer’s guidance before placing a very cold insert into the heating base. When in doubt, refrigerate the cooked beef mixture separately and load the slow cooker fresh the next day.

Make This Crockpot Chili When

  • Dinner needs to be started before the busy part of the day hits.
  • A short skillet step is fine, but the rest of the meal needs to be hands-off.
  • Classic beef-and-bean chili sounds better than white chicken chili or vegetarian chili.
  • The pot needs to hold cheese, sour cream, onions, and chips without turning soupy.
  • Game day needs something easy that still tastes homemade.
  • Leftovers should become chili dogs, nachos, baked potatoes, rice bowls, or chili mac.
  • A bigger spread is planned with other slow-cooker snacks like grape jelly meatballs.

The flavor also settles well overnight, which makes this a good make-ahead chili for parties, meal prep, and second-day leftovers.

Texture Notes for Crockpot Chili

This is a thick beef-and-bean chili, not a loose tomato soup. The balance is simple: 2 lb beef, 2 cans beans, 28 oz undrained diced tomatoes, 15 oz plain canned tomato sauce, 2 to 3 tablespoons tomato paste, and only 1/2 cup added liquid.

Texture note: the best balance for this style of crockpot chili is 2 lb beef, 2 cans beans, 28 oz diced tomatoes, 15 oz tomato sauce, 2 to 3 tablespoons tomato paste, and only 1/2 cup added liquid. More liquid can make the chili looser after several hours because the slow cooker holds onto steam instead of reducing like a stovetop pot.

The pot may look denser than you expect before cooking. That is a good sign. If your slow cooker runs hot or the mixture looks too tight, add the remaining broth or beer a splash at a time.

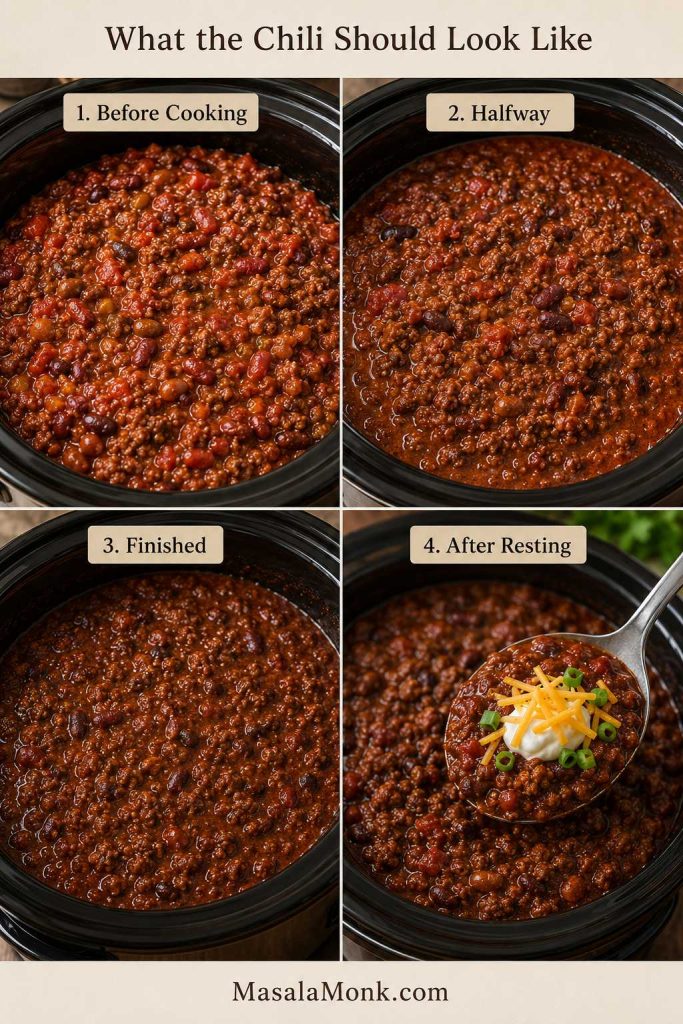
What the Chili Should Look Like

StageTexture cue
Before cookingThick and saucy, with visible beef and beans, not swimming in liquid
Halfway throughJuicier around the edges as the tomatoes release moisture
FinishedDarker chili bubbling gently around the sides
After restingSpoonable chili that holds toppings on top instead of swallowing them
Four-panel guide showing crockpot chili before cooking, halfway cooked, finished, and after resting
Use the texture shift as your guide: sturdy at the start, looser midway, darker when done, and spoonable again after a short uncovered rest.

What It Tastes Like: Flavor and Heat Level

This is a classic tomato-based beef chili with a mild-to-medium heat level, depending on your chili powder. Use mild chili powder and skip jalapeños or cayenne for a kid-friendly pot. Beer adds a subtle malty depth, not a boozy flavor, and broth works perfectly if you want the chili classic and alcohol-free.

The finished chili tastes savory, gently smoky, and beefy, with enough tomato to feel rich but not so much that it tastes like plain canned tomatoes. It is sturdy enough for bowls, nachos, chili dogs, baked potatoes, and leftovers.

Why This Slow Cooker Chili Works

This slow cooker chili works because it does not rely on time alone. Time helps, but the real flavor comes from building the base correctly before the lid goes on.

Browning the beef gives the chili better flavor and better texture. It also lets you drain off excess grease so the finished bowl tastes rich instead of oily. This is the step that keeps the chili from tasting like ground beef floating in tomatoes.

Tomato paste gives the chili body. It deepens the tomato flavor and helps the sauce cling to the beef and beans instead of sitting loose in the bottom of the bowl.

Two kinds of beans make the chili feel hearty without becoming heavy. Kidney beans give the familiar chili bite. Pinto or black beans add softness, body, and a slightly different texture.

A small amount of broth or beer helps everything cook evenly without thinning the chili too much. Extra liquid feels safe at the beginning, but it is usually what makes slow cooker chili soupy at the end. Start small; you can always loosen a tight pot later.

The final rest matters. Chili thickens as it sits. Ten minutes uncovered can make the difference between a loose pot and a bowl that holds nicely under cheese, sour cream, onions, and chips.

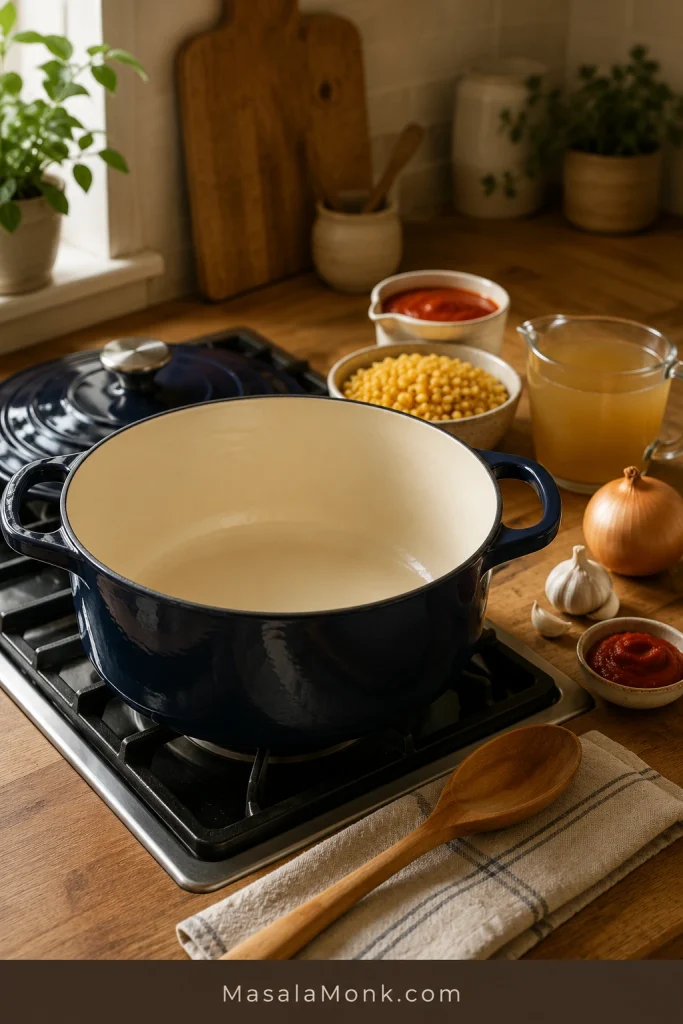
Ingredients for Crockpot Chili

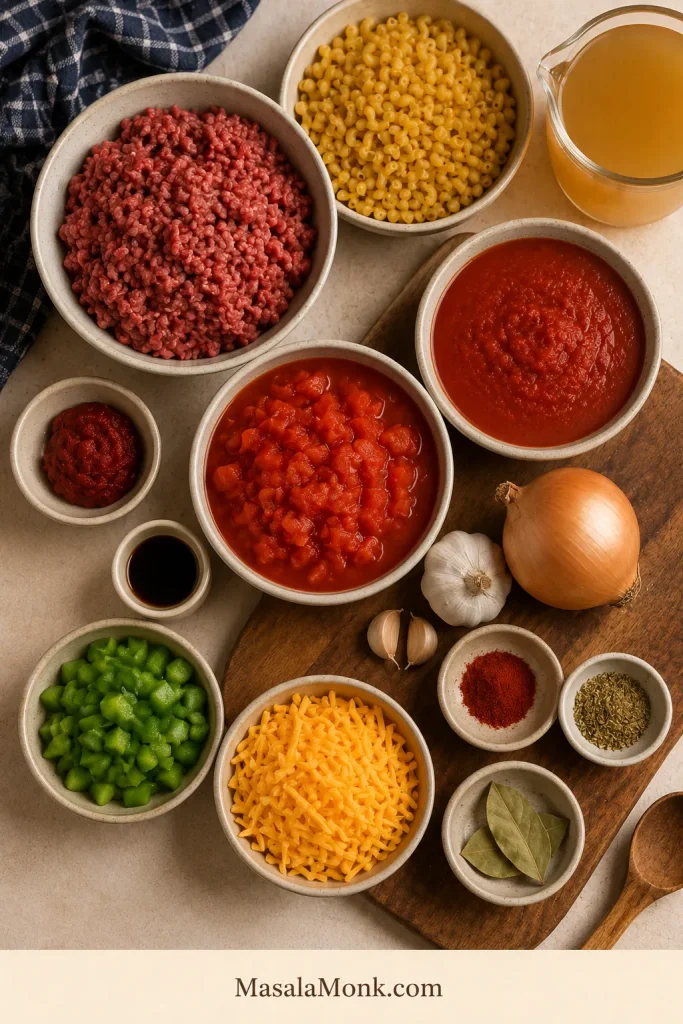
The ingredient list is simple, but nothing is just filler. Each piece helps the chili taste fuller, thicker, warmer, or more balanced.
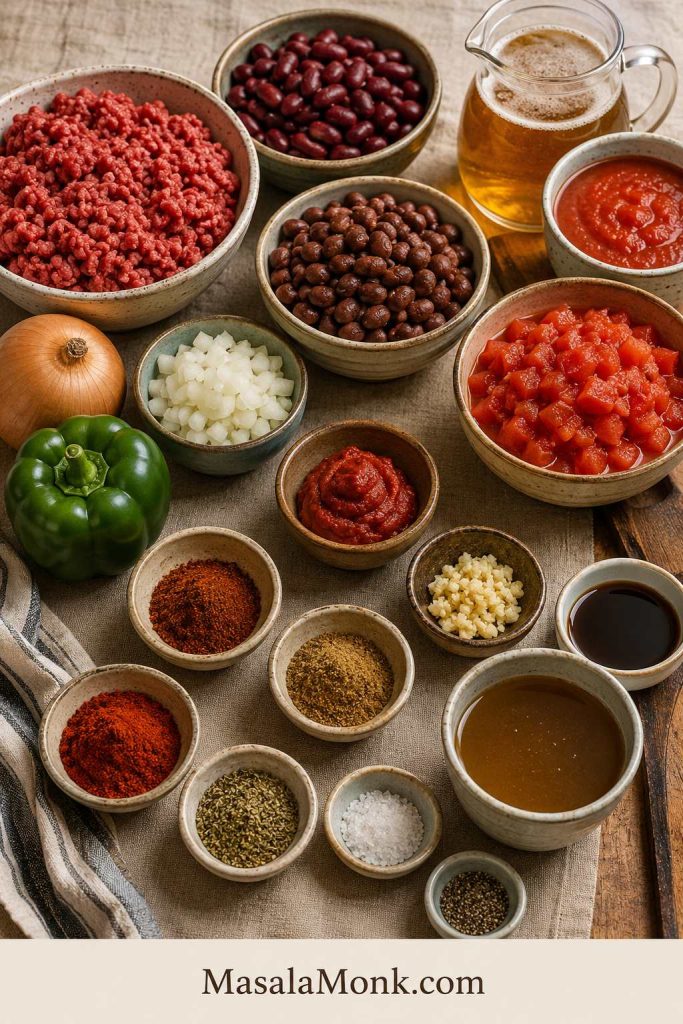
Ingredients for crockpot chili arranged on a table, including ground beef, beans, tomatoes, tomato sauce, tomato paste, onion, bell pepper, garlic, spices, Worcestershire sauce, and broth
These simple ingredients build different layers: beef gives body, beans add bite, tomatoes make the base, and spices turn the slow cooker into something deeper.

Ground Beef

Choose 2 lb / 900 g ground beef. An 85/15 blend gives a richer chili, while 90/10 makes a leaner pot. Both work well as long as you brown and drain the beef before adding it to the crockpot.

If you use very lean beef, taste the chili near the end. Lean meat can taste milder, so it may need a little more salt, Worcestershire sauce, chili powder, or tomato paste to feel full and savory.

Onion, Bell Pepper, and Garlic

Onion, bell pepper, and garlic are what make the chili smell like dinner before the tomatoes even go in. Green bell pepper tastes familiar and old-school. Red bell pepper makes the pot slightly sweeter. Jalapeño can be added here if you want more heat.

Cooking the vegetables briefly with the beef helps them lose their raw edge and melt into the base instead of tasting like separate pieces floating in tomato sauce.

Beans

This version uses one can of kidney beans and one can of black or pinto beans. Kidney gives the classic chili bite, while the second can brings a softer texture and more body. Drain and rinse both for better control over salt and texture.

If you use chili beans in sauce, you can add the sauce too, but remember that they are already seasoned. Taste before adding extra salt or chili powder.

Tomatoes

Diced tomatoes bring the chunks, tomato sauce fills in the base, and tomato paste gives the chili that deeper, thicker body you want from a slow-cooked pot. Use plain canned tomato sauce here, not ketchup or sweet table sauce.

To make the chili spicier, replace some of the diced tomatoes with diced tomatoes and green chiles. For a smoother pot, use crushed tomatoes instead of diced tomatoes.

Broth or Beer

Keep the broth or beer to 1/2 cup / 120 ml. A broth version tastes familiar and straightforward. Beer leans the pot a little deeper, with a malty background that works especially well for game day. Choose broth if you want to keep everything alcohol-free.

Extra liquid feels helpful at the start, but the slow cooker gives moisture back as the tomatoes, beef, and beans cook together. Begin with less; a thick pot is easier to loosen than a watery pot is to fix.

Chili Seasoning

Chili powder blend, cumin, smoked paprika, oregano, salt, and black pepper give this recipe its main flavor. Use a chili powder blend, not pure hot red chile powder. When your chili powder is mostly ground hot chiles, use much less and build the heat slowly.

With salted broth, chili beans, or a seasoning packet, start with a little less salt and adjust near the end. When the first spoonful tastes almost right but a little dull, it probably needs brightness, not more cooking time. A little salt, Worcestershire sauce, tomato paste, chili powder, or apple cider vinegar can wake the whole pot up.

What Size Slow Cooker to Use for Chili

A 6-quart slow cooker is the best size for this full batch of crockpot chili. It gives the beef, beans, tomatoes, and sauce enough room to heat evenly without bubbling over.

  • Half batch: use a 4-quart slow cooker.
  • Full recipe: choose a 6-quart slow cooker.
  • Larger batch or chili bar: move up to a 7- to 8-quart slow cooker.

For a half batch, use half the ingredients and keep the same cooking cues. A smaller pot can run hotter or finish a little sooner, so check the texture near the early end of the time range.

Keep the slow cooker no more than about three-quarters full so the chili has room to bubble gently and heat evenly. For a double batch, a very large cooker or two separate batches is safer than one overloaded pot.

How to Make Crockpot Chili

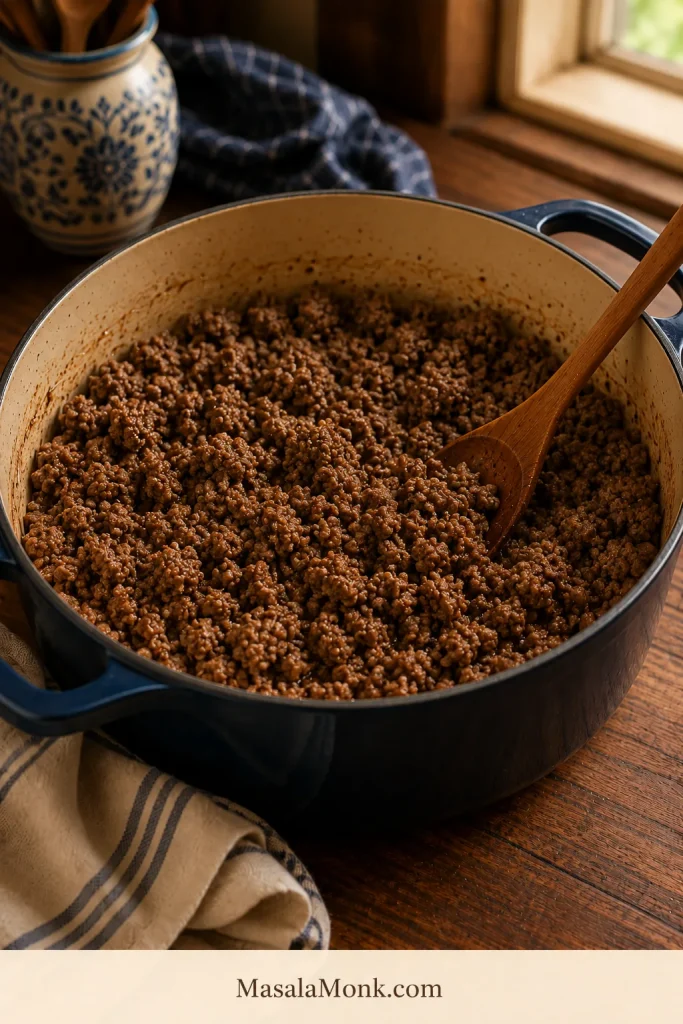
1. Brown the Beef

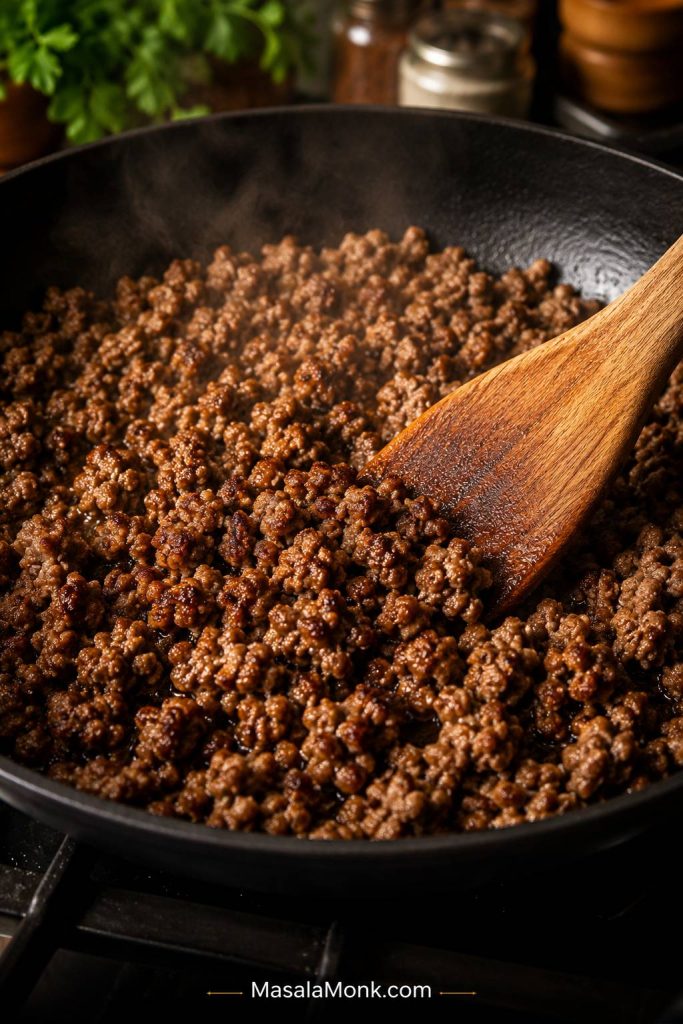
Brown the ground beef in a large skillet over medium-high heat, breaking it into small pieces as it cooks. You want browned, crumbly beef, not large soft clumps.

Drain the excess grease before adding the beef to the slow cooker. That one small step keeps the bowl cozy instead of greasy.
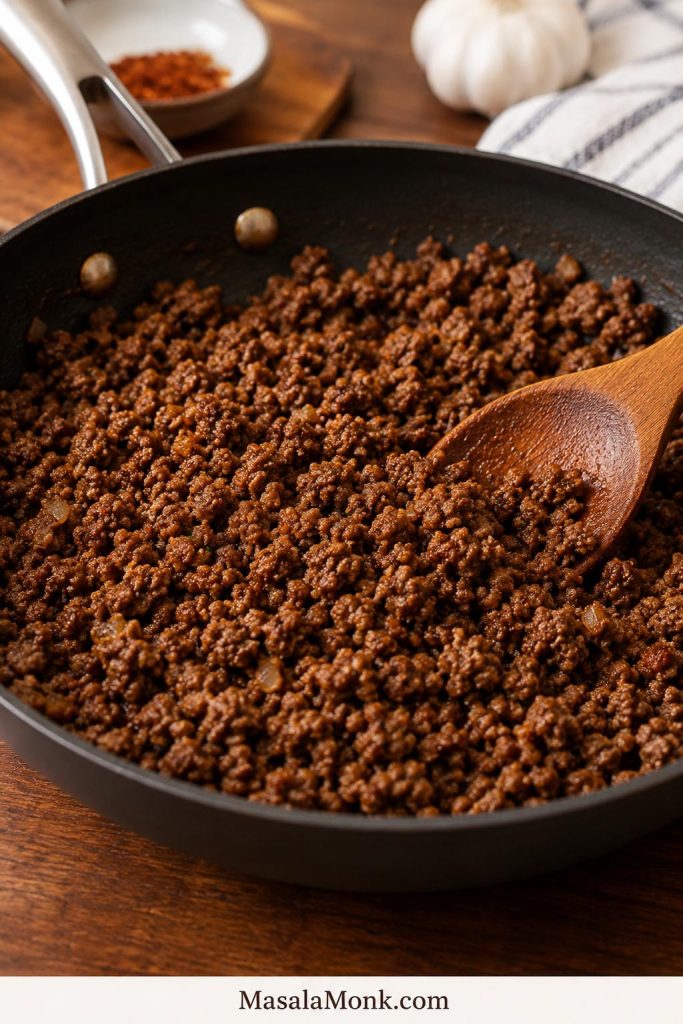
Browned ground beef crumbles cooking in a skillet with a wooden spoon
Well-browned beef should look crumbly and deeply colored, not gray; that early skillet color is what keeps slow cooker chili from tasting flat.

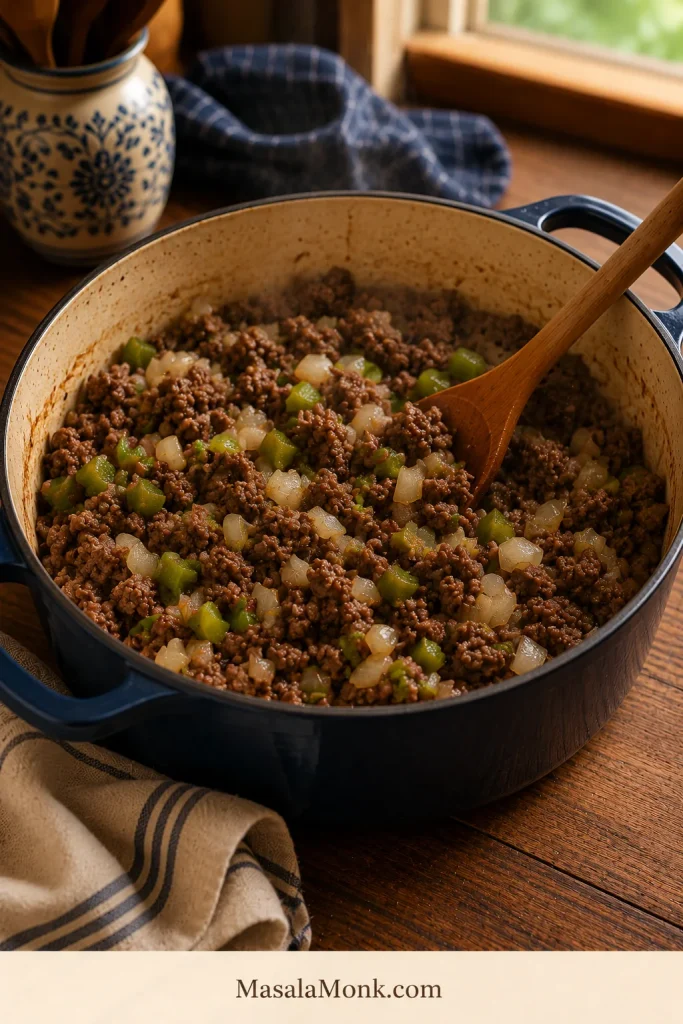
2. Soften the Vegetables

Add the onion and bell pepper to the skillet. Cook for a few minutes until they begin to soften, then add the garlic. From there, the base already starts smelling like chili before the slow cooker even takes over.
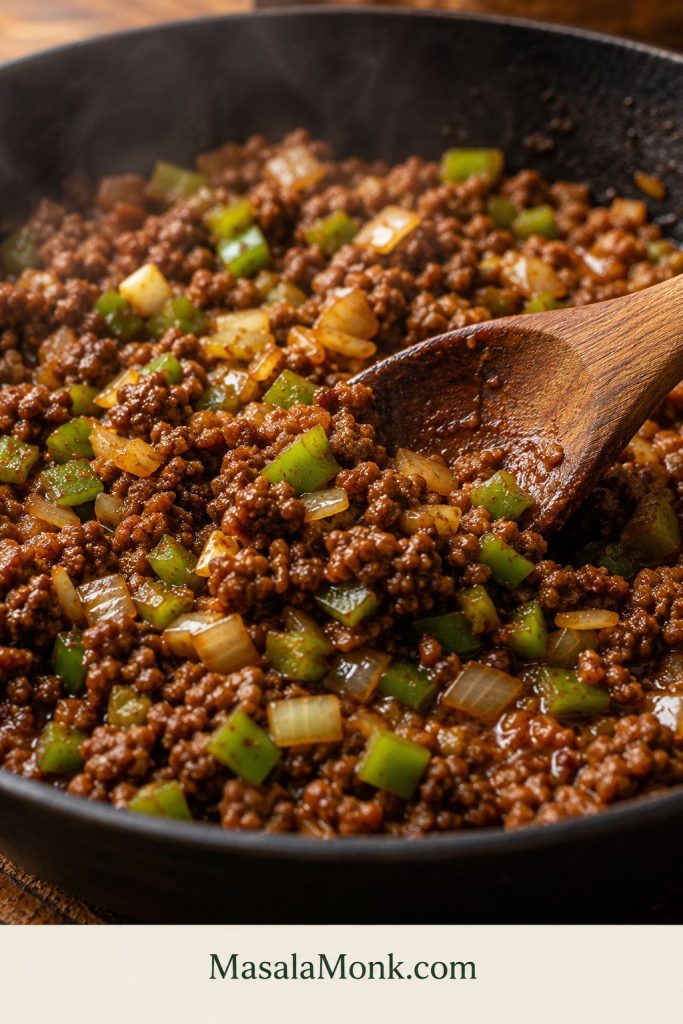
Browned ground beef cooking with diced onion, green bell pepper, and garlic in a skillet
Once the onion, bell pepper, and garlic soften around the beef, the chili base starts tasting cooked and savory instead of simply dumped together.

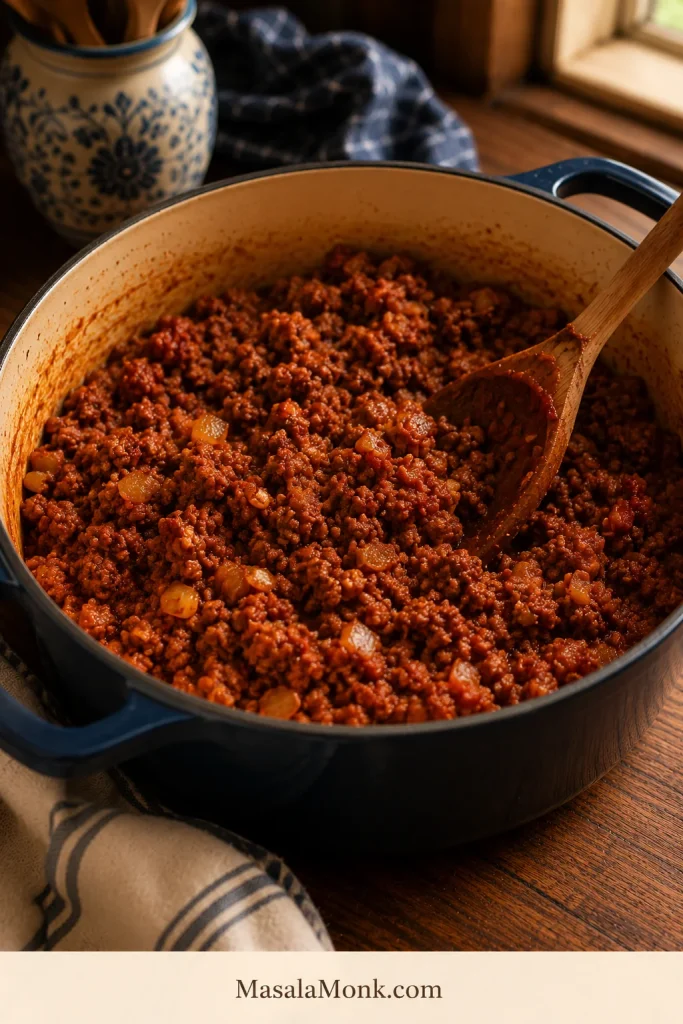
3. Bloom the Tomato Paste and Spices

Stir in tomato paste, chili powder blend, cumin, smoked paprika, oregano, salt, and pepper. Cook for 30 to 60 seconds. The mixture should smell warm and savory, not raw or dusty.

This small step makes the chili taste more developed. It also helps the tomato paste blend into the sauce instead of sitting in sharp little pockets.
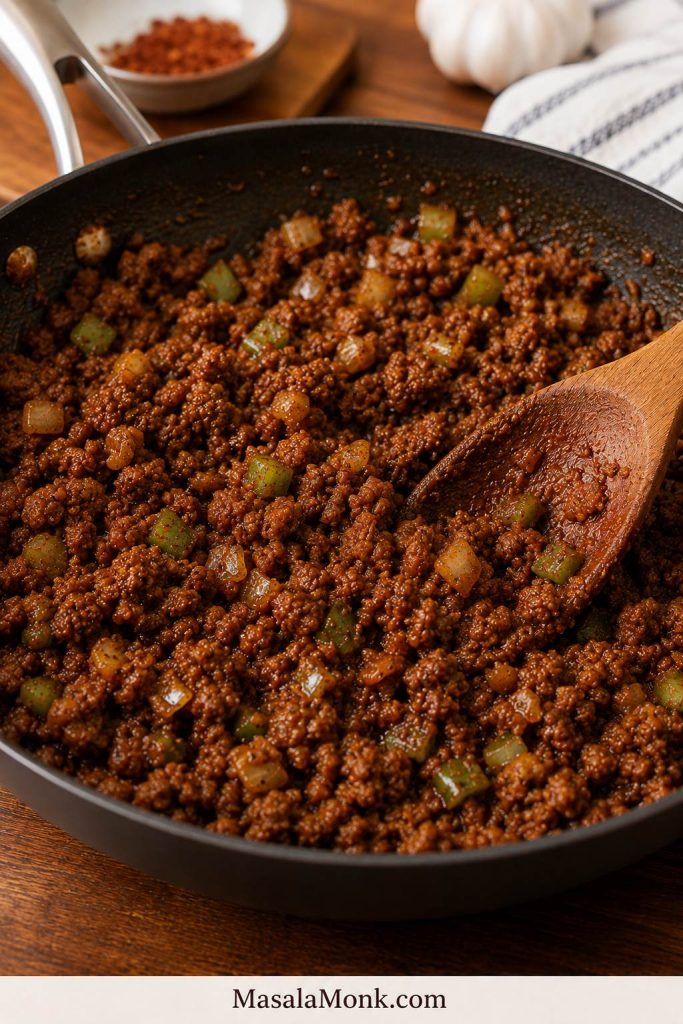
Ground beef, onion, bell pepper, tomato paste, and chili spices cooking together in a skillet
Tomato paste should darken slightly as it hits the hot skillet, while the chili spices coat the beef instead of sitting dry on top.

4. Load the Slow Cooker

Transfer the beef mixture to the slow cooker. Add the beans, undrained diced tomatoes, plain canned tomato sauce, Worcestershire sauce, and about half the broth or beer. Stir until everything is evenly combined.

The mixture should look saucy but not loose before the lid goes on. Add the remaining broth or beer only if it looks thick and tight. Hold the rest back when the pot already looks loose.
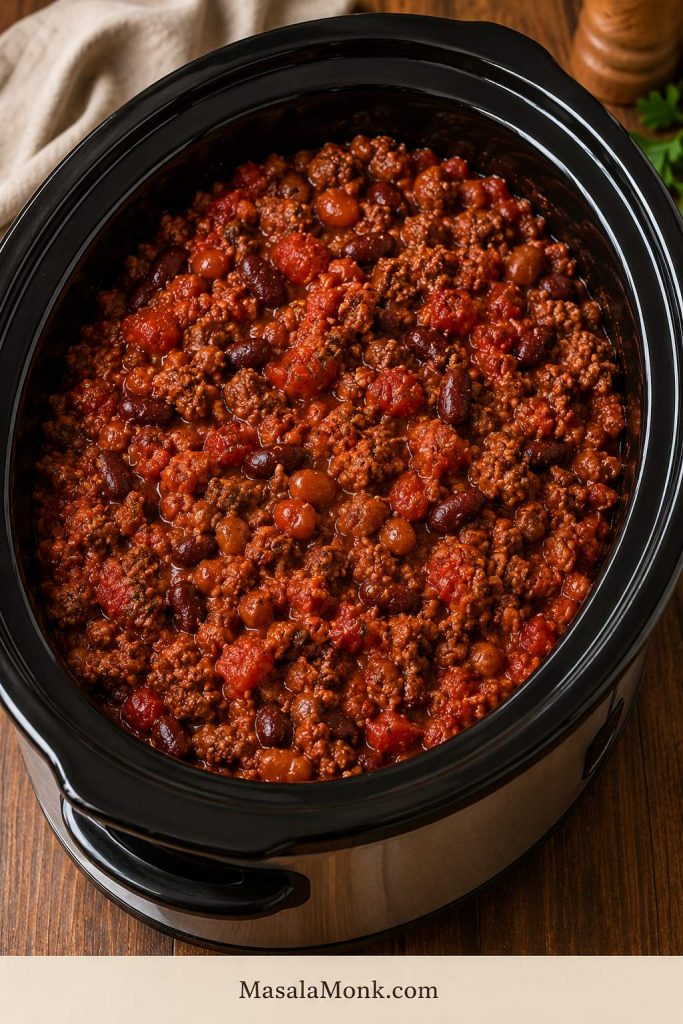
Uncooked crockpot chili mixture in a slow cooker with ground beef, beans, tomatoes, and thick red sauce
Before cooking, the pot can look almost too dense; that is a good sign because tomatoes, beans, and beef release moisture under the lid.

5. Cook Low or High

Cook on Low for 6 to 8 hours or High for 3 to 4 hours. Low gives the best flavor, but High works when you need chili ready sooner.

Try not to keep lifting the lid. Each time the lid opens, heat escapes and the cooking time stretches. At the end, the chili should bubble gently around the edges and look darker and thicker than it did when you started.
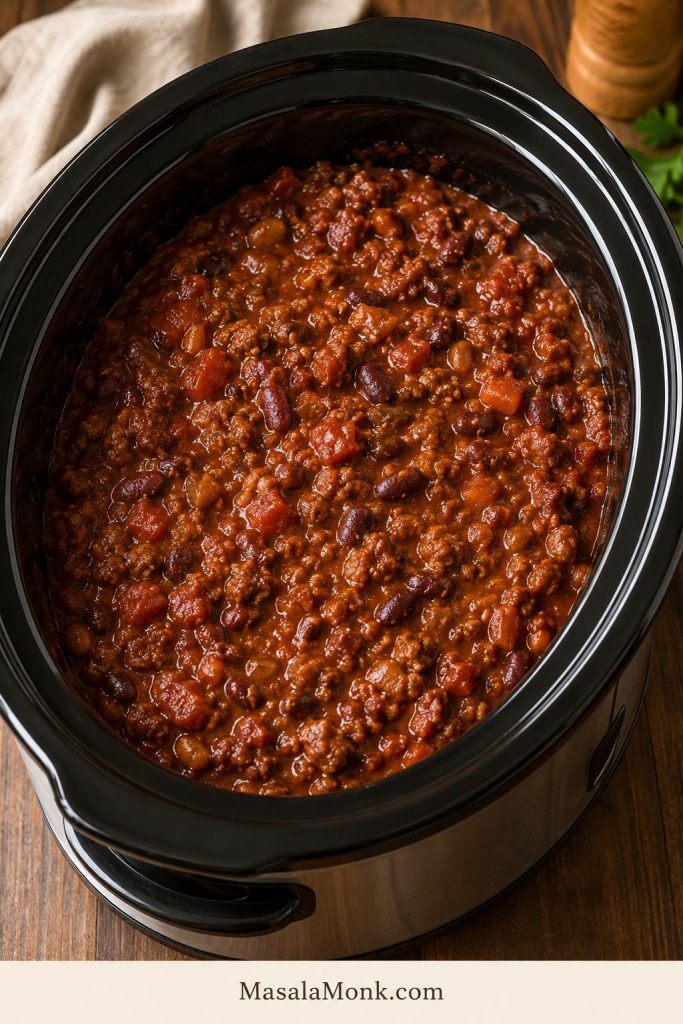
Finished crockpot chili in an open slow cooker with ground beef, beans, tomatoes, and thick red sauce
Finished crockpot chili should look settled and darker, with beef and beans still visible instead of disappearing into thin tomato liquid.

6. Taste and Finish

Taste the chili near the end. When it tastes flat, add more salt, a small splash of Worcestershire sauce, or 1 teaspoon apple cider vinegar. If it tastes too acidic, add a tiny pinch of sugar or a little extra tomato sauce.

Let the chili rest uncovered for 10 to 15 minutes before serving. As it sits, the sauce thickens slightly and the flavors taste more complete.

The finished chili should taste savory, gently smoky, and tomato-rich, with beans that still hold their shape and a sauce thick enough to cling to the spoon. If it tastes sharp, flat, or thin, the fix is usually seasoning, acid, or a short uncovered rest.
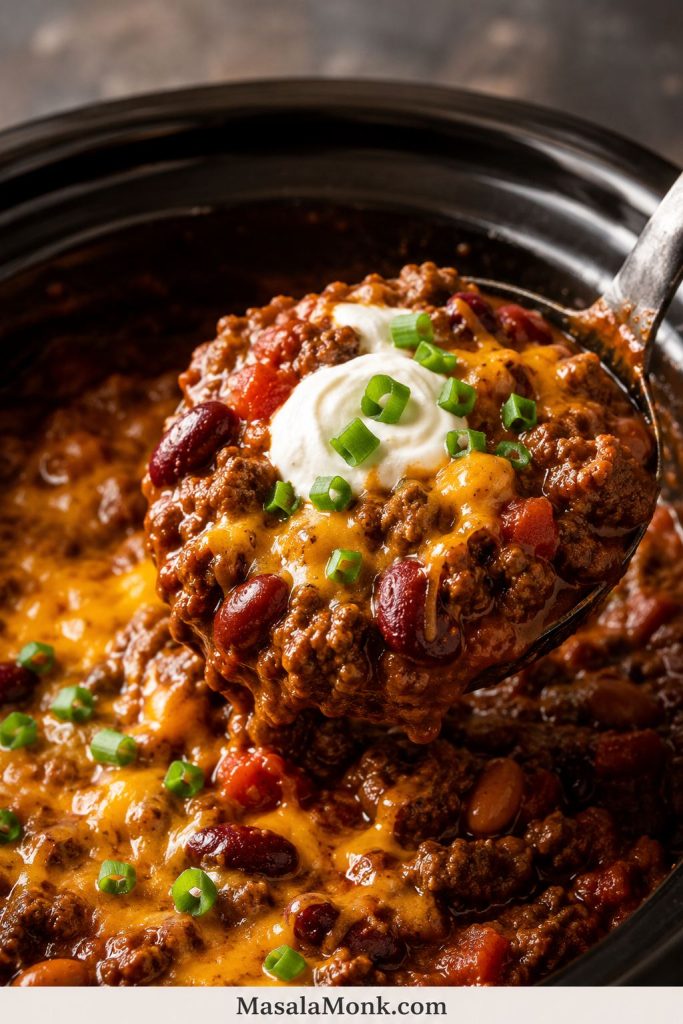
Spoon lifting slow cooker chili with ground beef, beans, and red tomato sauce
When a spoonful holds together for a moment, the chili is sturdy enough for toppings, tortilla chips, baked potatoes, or chili mac.

Once the basic method is clear, the details below help you adjust the chili for thickness, timing, beans, toppings, leftovers, and a crowd.

Choose Your Chili Path

Once the base is right, you do not need a new recipe every time. Change the heat, toppings, beans, or shortcut ingredients around the same thick tomato-beef base.

If you want…Do this
Family-style chiliUse the recipe as written with kidney and pinto or black beans.
More spoonable chiliUse 3 tablespoons tomato paste, mash some beans, and rest uncovered.
Game-day chiliKeep it warm in the slow cooker and set toppings out separately.
Spicy chiliAdd jalapeño, chipotle, cayenne, hot sauce, or diced tomatoes with green chiles.
Mild chiliUse mild chili powder, plain diced tomatoes, and no cayenne.
No-bean chiliReplace beans with extra beef, peppers, mushrooms, or tomatoes and reduce liquid.
Leaner chiliUse 90/10 beef or ground turkey, then season a little more boldly.
Shortcut chiliUse a chili seasoning packet and keep the tomato, bean, and liquid balance the same.

Do You Have to Brown Ground Beef Before Crockpot Chili?

You do not absolutely have to brown ground beef before crockpot chili, but for the best chili, you should. Browning gives the beef better flavor, improves the texture, and lets you drain grease before it goes into the slow cooker.

If raw ground beef goes straight into the crockpot, it can cook through, but the finished chili is usually softer, greasier, and less flavorful. The beef may also clump together instead of staying in small, even pieces.

Can You Make Dump-and-Go Crockpot Chili?

You can make a dump-and-go version, but it is a compromise. Use thawed lean ground beef, break it up very well, and make sure it cooks through fully. The chili will usually be softer and a little greasier than the browned-beef version.

For the best balance of easy and flavorful, brown the beef first. It adds a few minutes, but it makes the whole pot taste better.

A Quick Safety Note

Before you change the beef, beans, or prep method, these few safety details are worth keeping in mind.

For the best texture and flavor, this recipe browns the ground beef before slow cooking. If you use a dump-and-go raw beef method, use thawed beef, break it up well, and make sure it cooks through fully. Ground beef should reach 160°F / 71°C.

Do not start with frozen ground beef in the slow cooker; it may heat unevenly. Canned beans are the easiest, most reliable choice here. Dried kidney beans need proper soaking and boiling before they go into the slow cooker.

For broader slow-cooker handling, the USDA slow cooker safety guide is a useful reference. To handle leftovers safely, cool the chili in shallow containers and refrigerate it within 2 hours rather than leaving the pot out for hours.

Crockpot Chili Cook Time: Low vs High

Crockpot chili is forgiving, but the setting changes the final texture and flavor. Low is best when you have time. High is useful when the beef is already browned and you need dinner sooner.

Cooking methodTimeResult
Low6 to 8 hoursBest flavor, thicker texture, more developed chili
High3 to 4 hoursGood for same-day cooking
Longer than 8 to 10 hoursNot idealBeans can soften too much and flavor can turn dull
Warm setting1 to 2 hours after cookingGood for serving, not endless holding

Can Chili Cook Too Long in a Crockpot?

Yes. Chili can handle slow cooking, but it is not impossible to overcook. After too many hours, canned beans can get mushy, the beef can lose texture, and the flavor can become muddy instead of bright and hearty.

Can You Leave Chili on Warm?

You can leave chili on Warm for serving, especially for a party or game day, but it should stay hot, be stirred occasionally, and not drift into lukewarm territory. If the chili is sitting out for a crowd, a food thermometer is useful. Keep it around 140°F / 60°C or above so it stays safely hot, not just warm to the touch.

For the best texture, do not treat the Warm setting as an all-day extension of cooking time. It is for serving, not for endlessly stretching the batch.

How to Thicken Crockpot Chili

If you have ever lifted the slow cooker lid and found chili that looks more like soup, this is the section that saves the pot.

The slow cooker is good at simmering; it is not good at evaporating. That is why thick chili starts with less liquid, not with a rescue mission at the end.

Do not judge the texture straight from under the lid. Slow cookers trap steam, so let the chili rest uncovered for 10 to 15 minutes before adding thickeners. If it still looks loose after resting, use one of the fixes below.

Once the chili coats the spoon and leaves a soft trail when you stir, it is thick enough.

Best Ways to Give a Loose Pot More Body

Thickening methodHow to use it
Tomato pasteAdd 2 to 3 tablespoons at the start
Cook uncoveredRemove the lid for the last 20 to 30 minutes
Mash beansMash 1/2 to 1 cup beans into the chili before serving
Refried beansStir in 1/2 cup for a creamier, fuller base
Masa harina or cornmealAdd 1 tablespoon at a time and let it cook in
Rest before servingLet chili sit uncovered for 10 to 15 minutes

Easy thick chili trick: mash some of the beans directly into the pot before serving. It gives the sauce body naturally without making the chili taste starchy. Refried beans work the same way if you want an even creamier base.
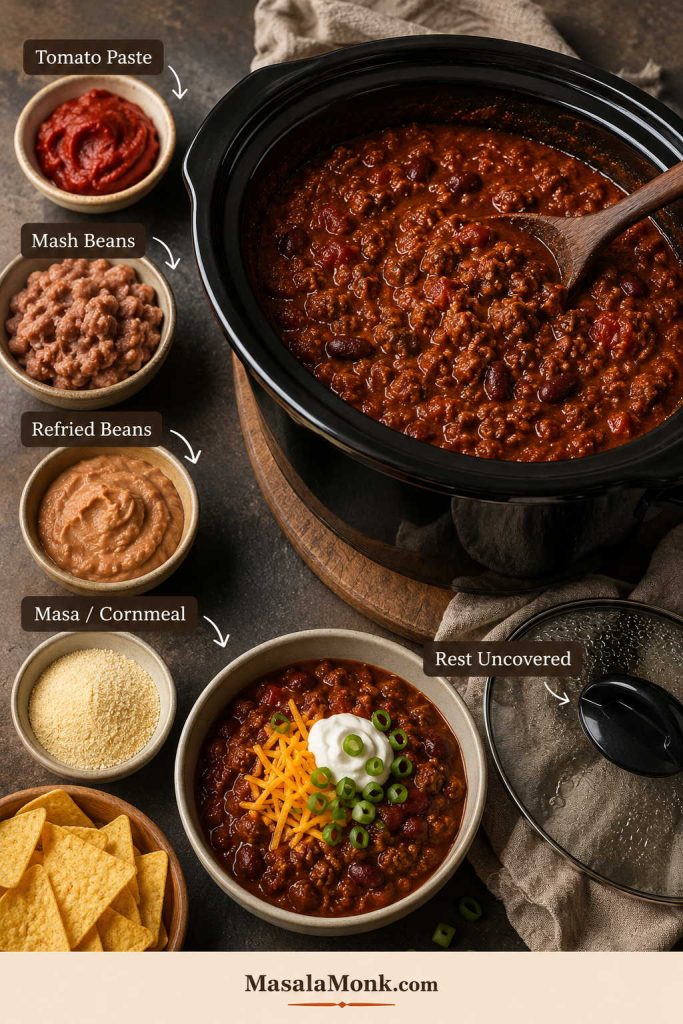
Guide showing ways to thicken crockpot chili with tomato paste, mashed beans, refried beans, masa or cornmeal, and resting uncovered
If your crockpot chili turns loose, fix the body before serving: rest it uncovered, mash beans, add tomato paste, or stir in refried beans.

For the next batch, start with less broth, drain the beans, and keep tomato paste in the recipe. The chili should look almost too dense before cooking, because the slow cooker will give moisture back.

Best Beans for Crockpot Chili

Beans make chili hearty, but the mix decides whether the bowl feels firm, creamy, or too soft. The easiest rule is to use one firm bean and one softer bean so the chili has both bite and body.

  • Kidney beans: classic chili bite, sturdy texture, and a familiar look.
  • Pinto beans: softer and creamier, especially if you like a slightly thicker-feeling bowl.
  • Black beans: darker, earthier, and a little firmer than pinto beans.
  • Chili beans: useful as a shortcut because they are already seasoned, but taste before adding more salt.
  • Refried beans: not a main bean here, but useful if you want to thicken the sauce naturally.

Kidney plus pinto gives the most classic texture. Pairing kidney with black beans makes the chili a little darker and heartier. If your family does not love kidney beans, use pinto and black beans instead.
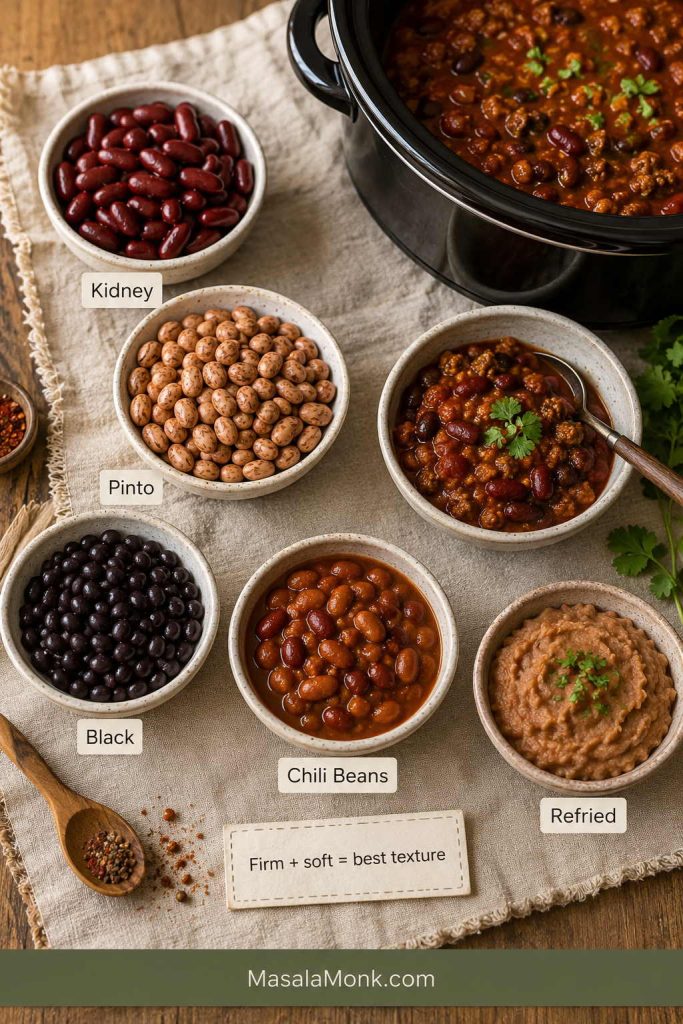
Bowls of kidney beans, pinto beans, black beans, chili beans, and refried beans beside a slow cooker of chili
For better bean texture, mix one firm bean with one softer bean; kidney beans give bite, while pinto, black, or refried beans add body.

Should You Drain Canned Beans for Chili?

For this recipe, yes. Draining and rinsing gives you better control over salt and keeps the chili base cleaner. If you use chili beans in sauce, you can include the sauce, but reduce other seasoning until you taste the finished pot.

Can You Use Dried Beans in Crockpot Chili?

Canned beans are the easiest, most reliable choice for this slow cooker chili. They are already cooked and ready for the crockpot.

Dried kidney beans need proper soaking and boiling before they go into a slow cooker recipe. If you want to use dried beans, cook them safely first, then add them to the chili.

Flavor Upgrades for Better Crockpot Chili

Once the base tastes right, upgrades should make the chili deeper, not busier. Choose one or two, not the whole table.

UpgradeWhat it doesHow much to use
BaconAdds smoky richness4 to 6 cooked slices, chopped
Italian sausageAdds savory depthReplace 1/2 to 1 lb beef
BeerAdds a deeper, malty baseUse 1/2 cup instead of broth
Worcestershire sauceAdds umami1 tablespoon
Cocoa powderAdds dark depth, not sweetness1 teaspoon
Brown sugarBalances tomato acidity1 to 2 teaspoons
Apple cider vinegarBrightens flat chili1 teaspoon at the end
Chipotle or smoked paprikaAdds smoky heatStart with 1/2 to 1 teaspoon
Jalapeño or cayenneMakes chili spicierAdd to taste
Beef bouillonBoosts beefy flavor1 cube or 1 teaspoon paste

For a familiar family-style chili, tomato paste and Worcestershire sauce are enough. A richer game-day pot can take bacon, beer, cocoa powder, or a little chipotle. To brighten chili that tastes dull, add a small splash of vinegar at the end instead of adding more spice.

If bacon is your upgrade, making a tray of oven-cooked bacon first is easier than frying strips while the chili is coming together.

Crockpot Chili Variations

The base method is built for beef-and-bean chili, but it can still flex without turning into a completely different dinner.

No-Bean Crockpot Chili

Skip the two cans of beans and add extra ground beef, diced bell peppers, mushrooms, or more tomatoes. Reduce the broth slightly so the chili does not turn soupy. A true no-bean chili needs a meatier balance, so build the pot around beef, peppers, tomatoes, and seasoning instead of simply removing the beans.

Turkey Chili

Use ground turkey in place of the beef. Because turkey is leaner and milder, add a little extra tomato paste, Worcestershire sauce, chili powder, or smoked paprika.

Spicy Crockpot Chili

Add jalapeño, cayenne, chipotle powder, hot sauce, or diced tomatoes with green chiles. Start small because the heat spreads through the whole pot as the chili cooks.

Mild Crockpot Chili

Use mild chili powder, plain diced tomatoes, no cayenne, and only a small amount of smoked paprika. If everyone at the table likes a different heat level, keep the base mild and let toppings do the arguing with jalapeños, hot sauce, chipotle, or mango habanero sauce.

5-Ingredient Shortcut Chili

For the fastest version, use ground beef, beans, diced tomatoes, tomato sauce, and a chili seasoning packet. It will not have the same depth as the full recipe, but it works when dinner needs to be simple.

Chili Seasoning Packet Version

Use one chili seasoning packet in place of the chili powder blend, cumin, smoked paprika, oregano, salt, and pepper. Taste near the end before adding more salt because packets vary.

Vegetarian Chili

For vegetarian crockpot chili, skip the beef and add extra beans, lentils, bell peppers, corn, zucchini, mushrooms, or sweet potato. Because the beef is no longer carrying the base, vegetarian chili needs extra body from beans, lentils, mushrooms, or vegetables.

White Chicken Chili

White chicken chili follows a different path. It usually uses chicken, white beans, green chiles, broth, and often cream cheese or cream. This recipe is the tomato-based beef chili version.

Toppings for Crockpot Chili

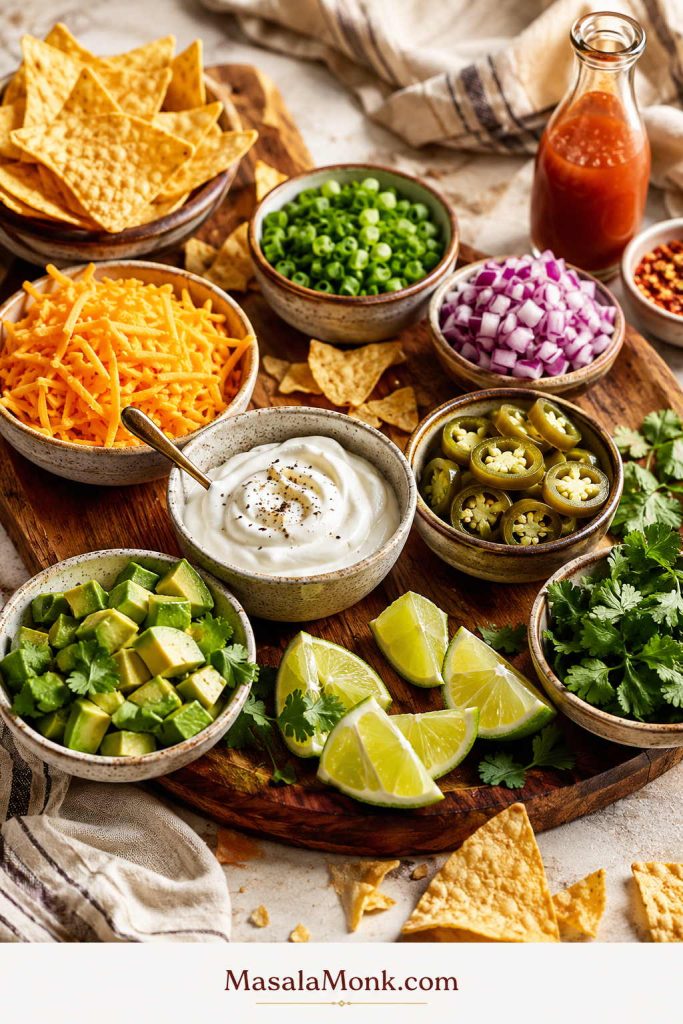
Toppings are where the bowl gets fun: cold sour cream against hot chili, sharp cheddar melting into the top, onions for crunch, and chips for scooping.

  • Shredded cheddar cheese
  • Sour cream or Greek yogurt
  • Green onions
  • Diced red onion
  • Pickled jalapeños
  • Fresh jalapeños
  • Cilantro
  • Avocado
  • Tortilla chips
  • Corn chips
  • Lime wedges
  • Hot sauce
Chili toppings arranged on a board, including shredded cheddar, sour cream, green onions, red onion, jalapenos, avocado, cilantro, lime wedges, tortilla chips, and hot sauce
Toppings change the same pot in different ways: cheese adds richness, sour cream cools heat, onions add crunch, and lime keeps the bowl bright.

On game day, the easiest move is to keep the chili warm and let the toppings do the work. A rich, balanced pot makes every topping taste better.

If you are turning chili into nachos or chili cheese fries, a spoonable cheese sauce gives a smoother finish than shredded cheese alone.

What to Serve With Crockpot Chili

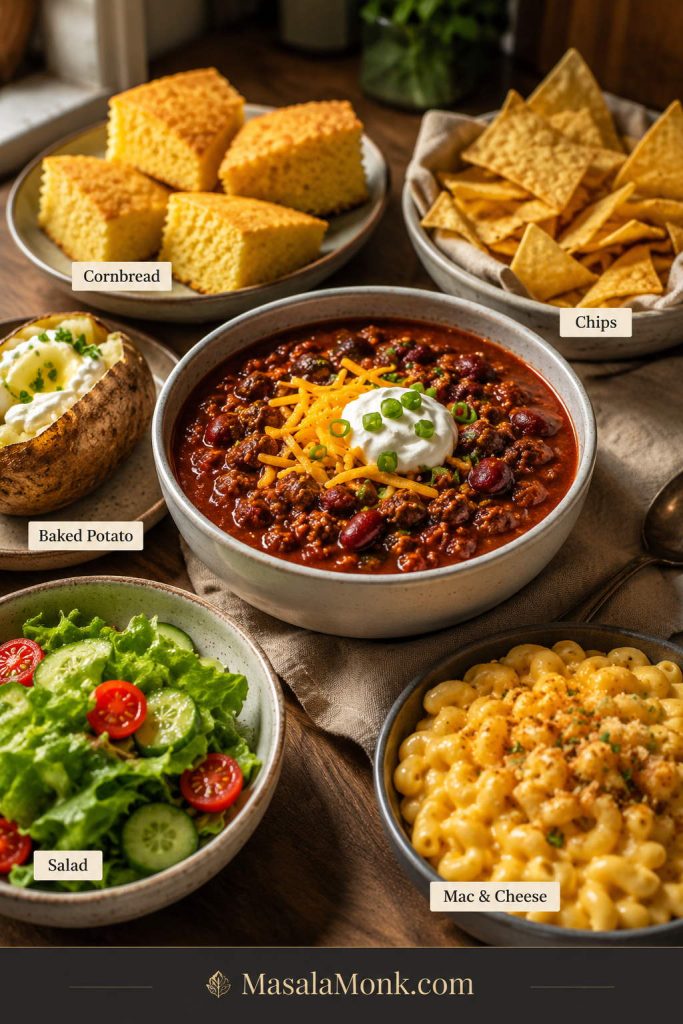
A bowl of chili can stand on its own, but the right side makes it feel like a full table instead of just a full bowl.

  • Cornbread
  • Rice
  • Baked potatoes
  • Tortilla chips
  • Nachos
  • Hot dogs
  • French fries
  • Garlic bread
  • Simple green salad
Bowl of crockpot chili served with cornbread, tortilla chips, baked potato, green salad, and macaroni and cheese
To make chili feel like a full meal, pair it with something scoopable, something soft, and something fresh: chips, cornbread, potatoes, mac and cheese, or salad.

For a bigger comfort-food table, chili pairs well with creamy sides like macaroni and cheese. Keep the chili bold and the side creamy, and the plate feels balanced instead of heavy in one note.

If the chili spread is already rich, a cold wedge salad gives the table something crisp, creamy, and fresh without competing with the chili.

Leftover Chili Ideas

Leftovers are not a compromise here. They are part of the plan. Spoon chili over baked potatoes, use it for chili dogs, turn it into chili nachos, serve it over rice, or stir it into cooked macaroni for chili mac. For another ground-beef pasta night, homemade cheeseburger macaroni keeps the same cozy skillet-dinner feeling without repeating chili.

How Much Chili Per Person?

This recipe makes about 10 to 12 cups of chili, which is enough for 8 to 10 servings. The exact amount depends on whether chili is the main meal, part of a chili bar, or a topping for potatoes, hot dogs, nachos, or fries.

Serving stylePlan for
Main meal1 to 1 1/2 cups per person
Chili bar with toppingsAbout 1 cup per person
Side dish1/2 to 3/4 cup per person
Topping for potatoes, nachos, or hot dogs1/2 cup per person

How to Set Up a Crockpot Chili Bar

For a chili bar, keep the pot hot, set toppings out separately, and plan for people to come back for a little more. Chili has a way of turning one bowl into “just one more spoonful.”
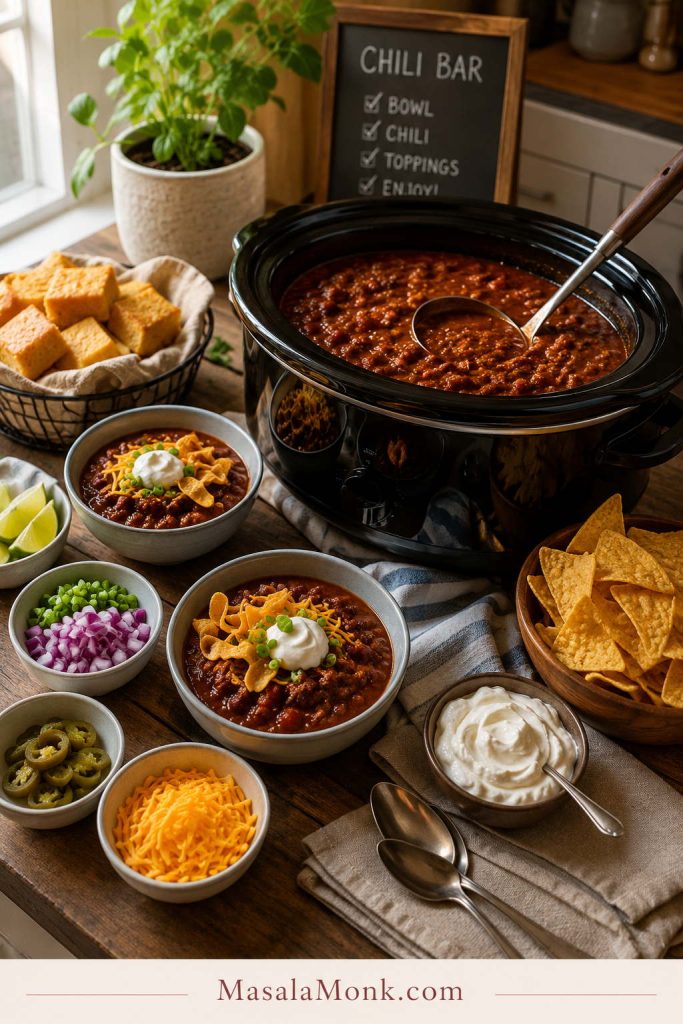
Crockpot chili bar with a slow cooker of chili, ladle, bowls, tortilla chips, cornbread, sour cream, cheese, onions, jalapenos, and serving spoons
A crockpot chili bar works best when the hot chili, bowls, toppings, chips, and cornbread are close enough for people to build their own bowls easily.

If you are feeding a crowd, keep the slow cooker no more than about three-quarters full. Make two batches if needed, or use a larger 7- to 8-quart slow cooker so the chili has room to heat evenly.

Storage, Freezing, and Reheating

How Long Does Crockpot Chili Last in the Fridge?

Store leftover chili in shallow airtight containers in the refrigerator for 3 to 4 days. Let the steam settle briefly, then refrigerate it within 2 hours rather than leaving the pot out for hours.
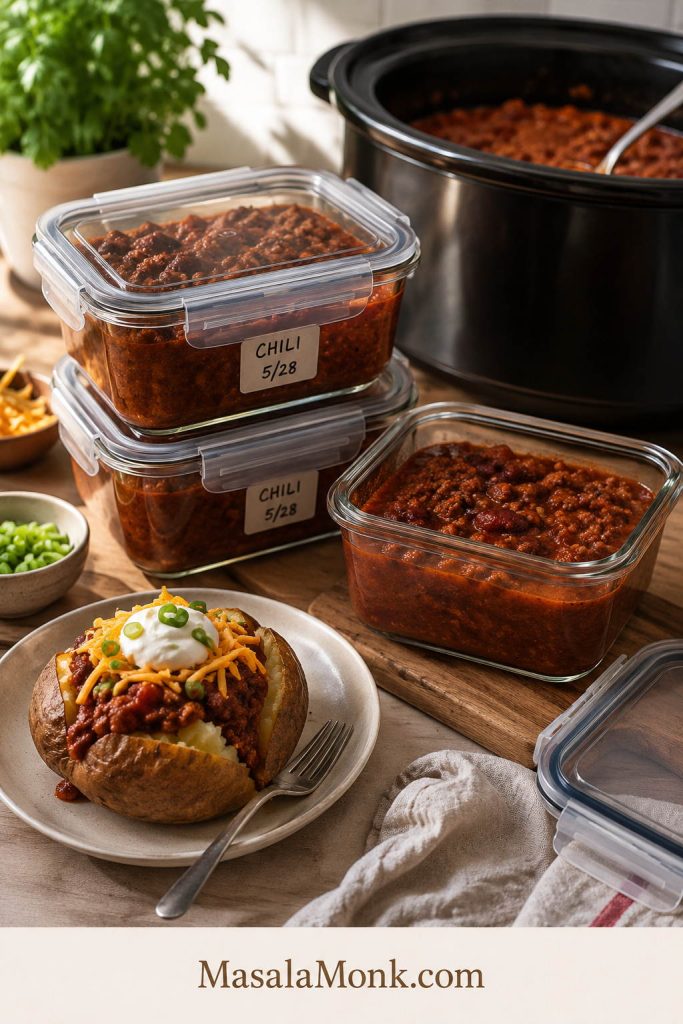
Leftover crockpot chili stored in glass containers with a serving of chili on a baked potato nearby
Leftover chili should feel like a second dinner, not a backup plan; store it well, then use it over baked potatoes, rice, nachos, chili mac, or hot dogs.

Can You Freeze Crockpot Chili?

Yes. Crockpot chili freezes well for up to 3 months for best quality. Freeze it in meal-size containers or freezer bags, leaving a little space at the top because chili expands as it freezes.

How to Reheat Chili

Reheat chili on the stovetop over medium-low heat or in the microwave, stirring occasionally. Add a splash of broth or water when it is too thick after chilling or freezing. When it is too thin, simmer uncovered until it tightens back up.

Is Chili Better the Next Day?

Yes, chili often tastes better the next day. The spices settle, the tomato base mellows, and the beef and beans absorb more flavor. Tomorrow’s bowl tastes like a plan, not a leftover.

Common Crockpot Chili Mistakes and Fixes

If the chili does not taste right at the end, do not panic. Most problems need a small adjustment, not a new pot. The final 15 minutes should be for toppings, not rescue work, but this table will still save a pot that needs help.

ProblemFix
Chili is wateryRest uncovered first, then cook uncovered, add tomato paste, or mash beans
Chili is greasyBrown and drain the beef before slow cooking
Chili tastes blandAdd salt, Worcestershire sauce, chili powder, or a splash of vinegar
Chili is too spicyAdd beans, tomato sauce, sour cream, or a tiny pinch of sugar
Beans are mushyAdd canned beans later next time if you prefer firmer beans
Chili is too firmAdd broth or water in small splashes
Beef is clumpyBreak it up well while browning before adding it to the slow cooker
Chili tastes acidicAdd a small pinch of sugar, more beans, or a little extra tomato sauce

The easiest way to avoid most of these problems is to brown and drain the beef, use tomato paste, avoid too much liquid, and taste the chili near the end instead of assuming it is finished. If the pot tastes flat, it usually needs salt or brightness, not more hours.

FAQ

How long does chili cook in a crockpot?

Cook crockpot chili for 6 to 8 hours on Low or 3 to 4 hours on High. Low gives deeper flavor and a more settled, spoonable texture.

Best setting for crockpot chili: Low or High?

Choose Low when you have time. High works when the beef is already browned and you need the chili ready sooner.

Do you have to brown ground beef before crockpot chili?

Yes, for the best result. Browning gives the beef better texture, adds deeper flavor, and lets you drain grease before it goes into the slow cooker.

Can raw ground beef go in the slow cooker?

Technically yes, if it is thawed, broken up well, and cooked through fully to 160°F / 71°C. Browning first gives better texture, deeper flavor, and less grease.

Night-before prep: can you start crockpot chili ahead?

Yes. Brown the beef and cook the aromatics and spices, then cool and refrigerate that mixture. Add it to the slow cooker with the canned ingredients the next day.

Is this chili spicy?

It is mild to medium, depending on your chili powder. For kid-friendly chili, use mild chili powder and skip cayenne, jalapeños, and hot sauce.

How do you thicken crockpot chili?

Rest it uncovered for 10 to 15 minutes first. If it still looks loose, add tomato paste, mash some beans, stir in refried beans, or cook uncovered briefly.

What beans are best for crockpot chili?

Kidney beans give classic bite, pinto beans make the bowl softer and creamier, and black beans add a darker, earthier flavor. A mix of one firm bean and one softer bean works well.

Should canned beans be drained for chili?

Yes. Draining and rinsing canned beans gives you better control over salt and texture. If you use chili beans in sauce, add the sauce but season carefully.

Dried beans in crockpot chili: are they safe?

No, especially not dried kidney beans. Use canned beans here, or soak and boil dried beans properly before slow cooking.

How do you make crockpot chili without beans?

Replace the beans with extra ground beef, peppers, mushrooms, or more tomatoes, and reduce the added liquid. No-bean chili needs a meatier balance.

Does beer work in crockpot chili?

Yes. Beer adds a subtle malty depth, but broth works just as well if you want a classic or alcohol-free chili.

What size slow cooker do I need for chili?

A 6-quart slow cooker is best for this full recipe. Use a 4-quart slow cooker for a half batch, or a 7- to 8-quart slow cooker for a larger batch.

Doubling crockpot chili: what should change?

You can double it only if your slow cooker is large enough. Keep it no more than about three-quarters full, or make two separate batches.

Using a chili seasoning packet: does it work?

One chili seasoning packet can replace the dried spices. Taste near the end before adding more salt because packets vary.

Why does my chili taste bland?

Bland chili usually needs salt, acidity, or deeper savory flavor. Add salt, Worcestershire sauce, tomato paste, chili powder, or a small splash of apple cider vinegar near the end.

Freezing crockpot chili: does it work?

Crockpot chili freezes well. Cool it, portion it into freezer-safe containers or bags, and freeze for up to 3 months for best quality. Thaw overnight in the fridge and reheat gently.

Is chili better the next day?

Chili often tastes better the next day because the spices, beef, beans, and tomatoes have more time to settle. That makes it ideal for parties, meal prep, and leftovers.

Final Notes for Thick Crockpot Chili

Save this one for the days when you want dinner handled early and a pot of chili waiting when everyone is hungry. Make it once as written, then adjust the heat, beans, and toppings the way your table likes it.

The base is the part that matters: browned beef, tomato paste, low liquid, and enough time for the slow cooker to turn everything thick, savory, and scoopable. When that base is right, the chili smells good before anyone asks what is for dinner and lands on the table ready for cheese, sour cream, onions, chips, or a second bowl.
Back to top

Posted on — Leave a comment

American Goulash Recipe: Easy One-Pot Ground Beef and Macaroni Goulash

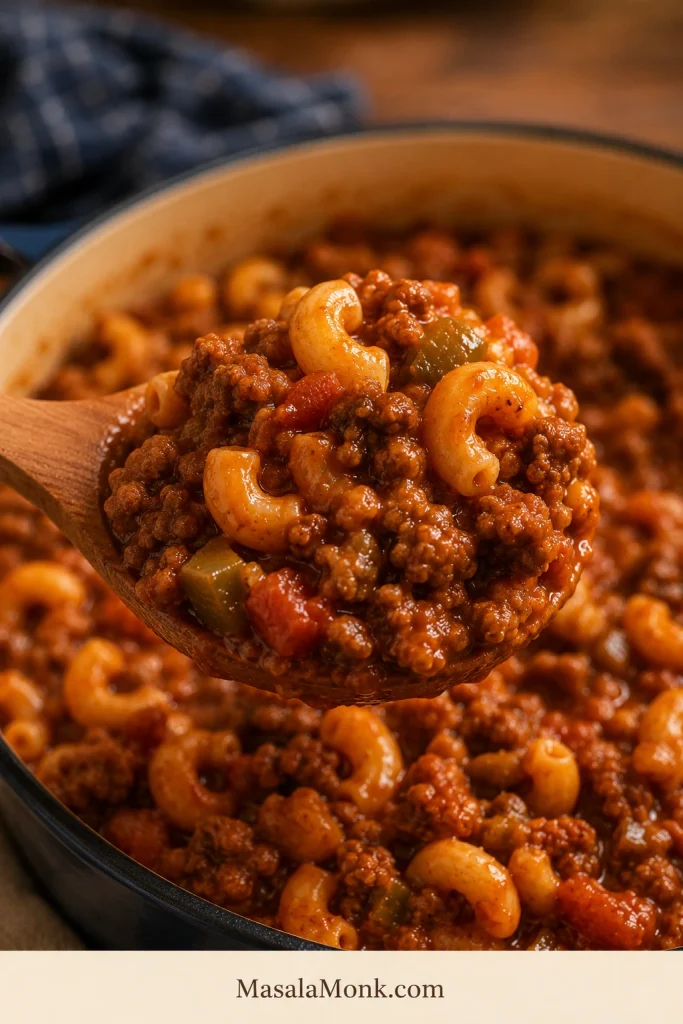
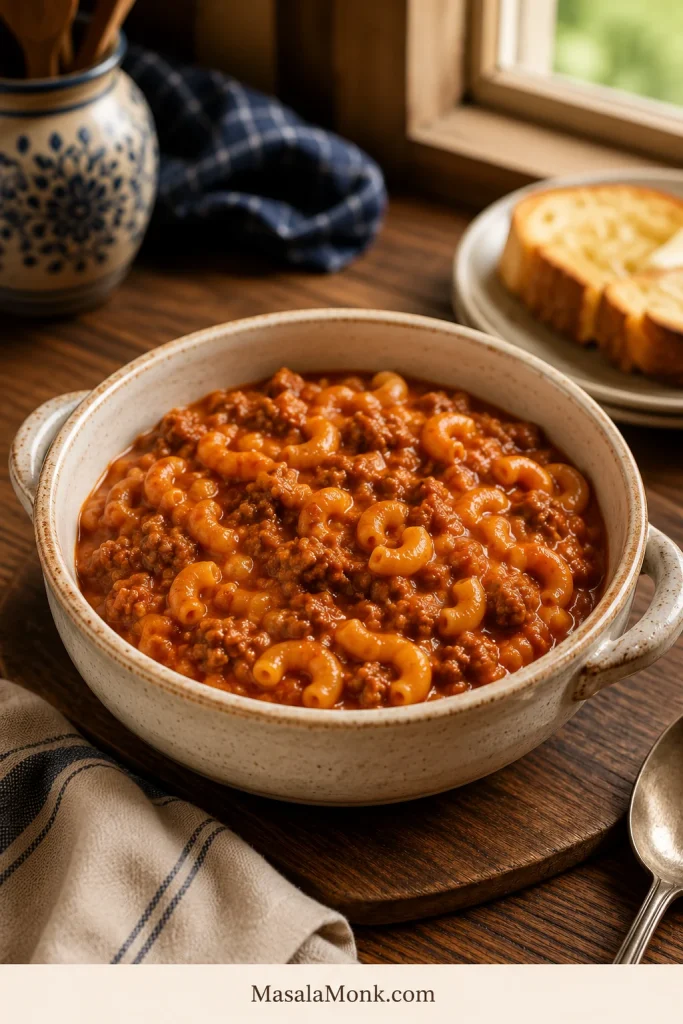
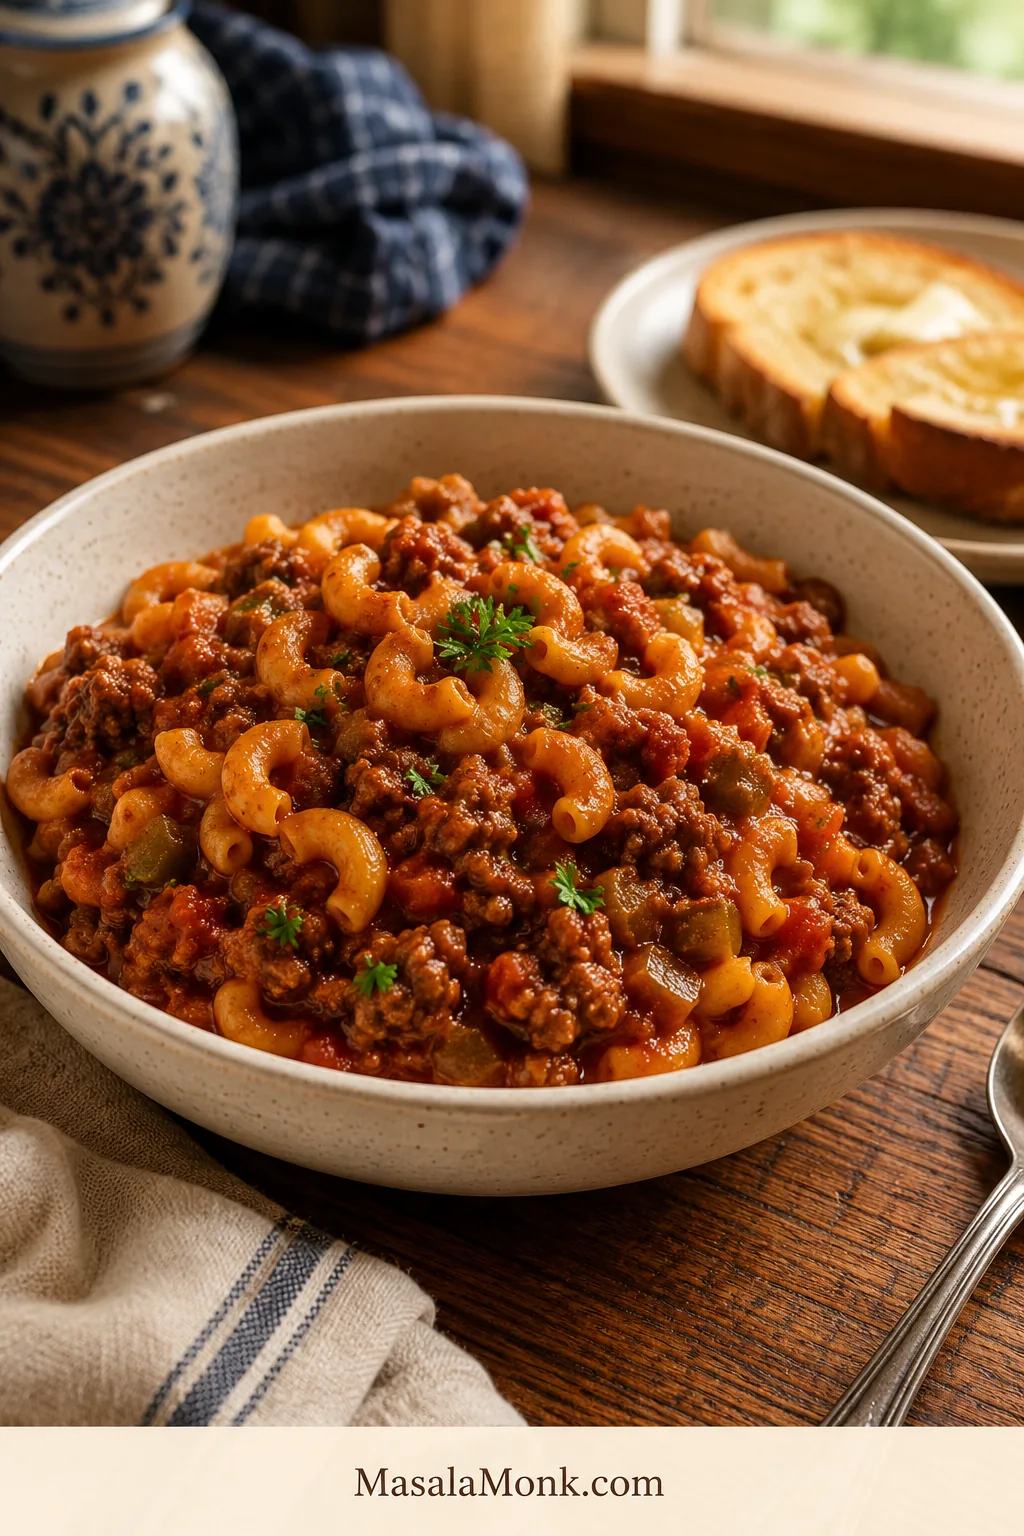
Bowl of American goulash with elbow macaroni, ground beef, tomato sauce, parsley, and buttered toast in the background.

This American goulash recipe is the kind of one-pot dinner you make when there is ground beef in the fridge, elbow macaroni in the pantry, and everyone needs something warm, saucy and familiar. It is the cozy tomato-beef macaroni version many people in the United States mean when they say goulash, and it stretches one pound of ground beef into a full pot of dinner.

The sauce is rich but simple, the macaroni cooks right in the pot, and a short rest at the end helps everything settle into that thick, spoonable texture. It tastes old-fashioned in the best way, but the method is controlled so the pasta does not turn mushy and the sauce does not end up watery.

If the version you remember used tomato soup, tomato juice, green bell pepper, cheddar, or no tomato chunks at all, there is room for that version here too. Start with the main stovetop recipe, then use the notes to make it more like grandma’s goulash, American Chop Suey, cheesy goulash, Crockpot goulash, Instant Pot goulash, or a soupier bowl.

It is also the kind of pot that can sit for five minutes while everyone finds plates, forks and hot sauce, which is exactly the kind of flexibility a weeknight dinner needs.

Quick Answer: What Is American Goulash?

American goulash is a one-pot pasta dinner made with ground beef, elbow macaroni, tomatoes, onion, garlic, and a savory tomato-based sauce. The dry macaroni usually cooks directly in the sauce, so it absorbs flavor instead of tasting like plain pasta stirred in at the end.

It is not the same as Hungarian goulash. Hungarian goulash leans on paprika, beef chunks and broth; this American version leans on ground beef, tomato sauce and macaroni. Both can be comforting, but they are very different dinners.

This recipe is built as a flexible base, not one rigid family version. Keep it thick and tomato-saucy, make it sweeter with tomato soup, loosen it with tomato juice, smooth it with crushed tomatoes, or finish it with cheddar while keeping the macaroni tender instead of swollen and mushy.

This version gives you old-fashioned tomato-beef macaroni flavor, but with enough liquid control to make it your family’s style instead of a watery or mushy pot.

One-Pot American Goulash With Tender Macaroni and Thick Tomato Sauce

This recipe gives you saucy goulash with tender elbow macaroni, browned ground beef, mellow onion and garlic, and a tomato base that clings to the pasta after a 5-minute rest.

Starting with less liquid gives you better control. Elbow macaroni varies by brand, pot width and simmer strength, so this recipe begins with 1 1/2 cups broth and holds back the final 1/2 cup until the pasta actually needs it.

The extra few minutes are doing real work here: the sauce gets a short simmer before the macaroni goes in, and the finished pot rests so it thickens without overcooking the pasta.

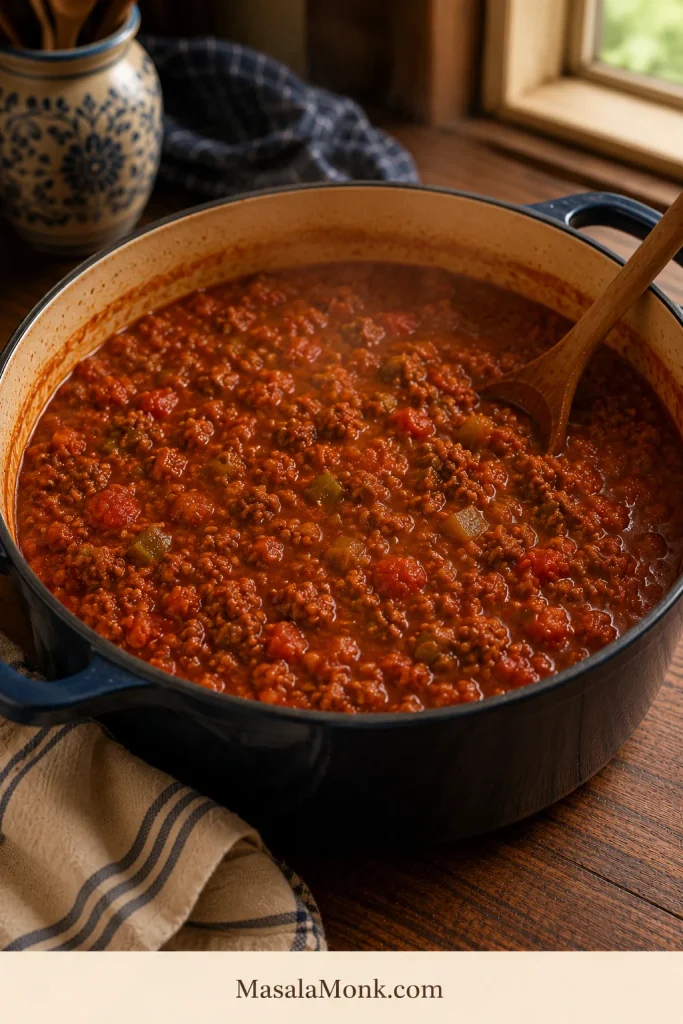
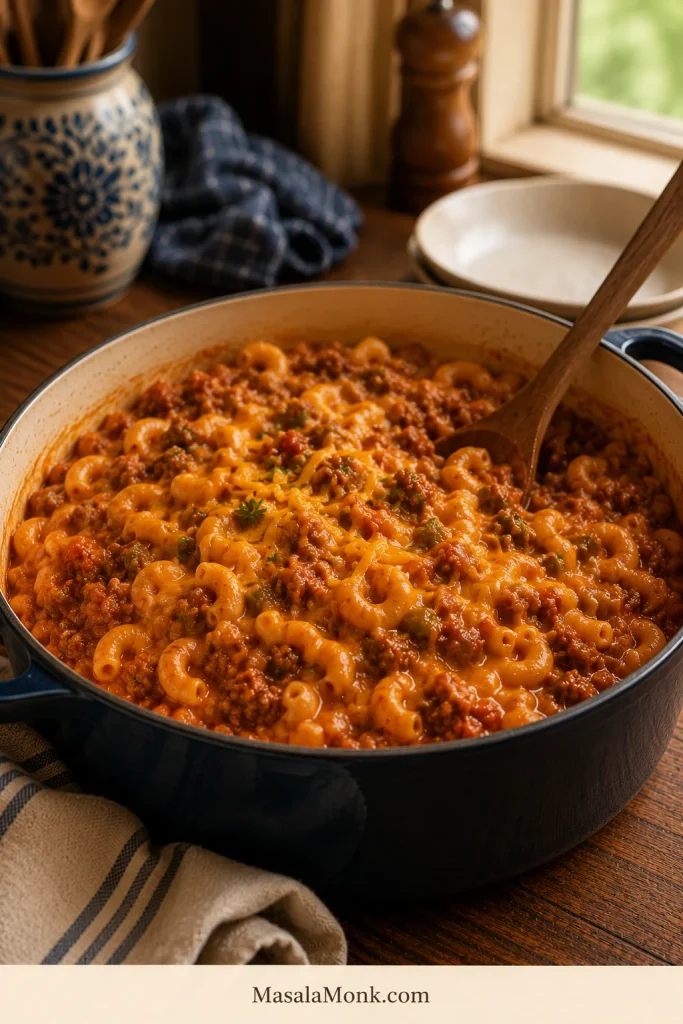
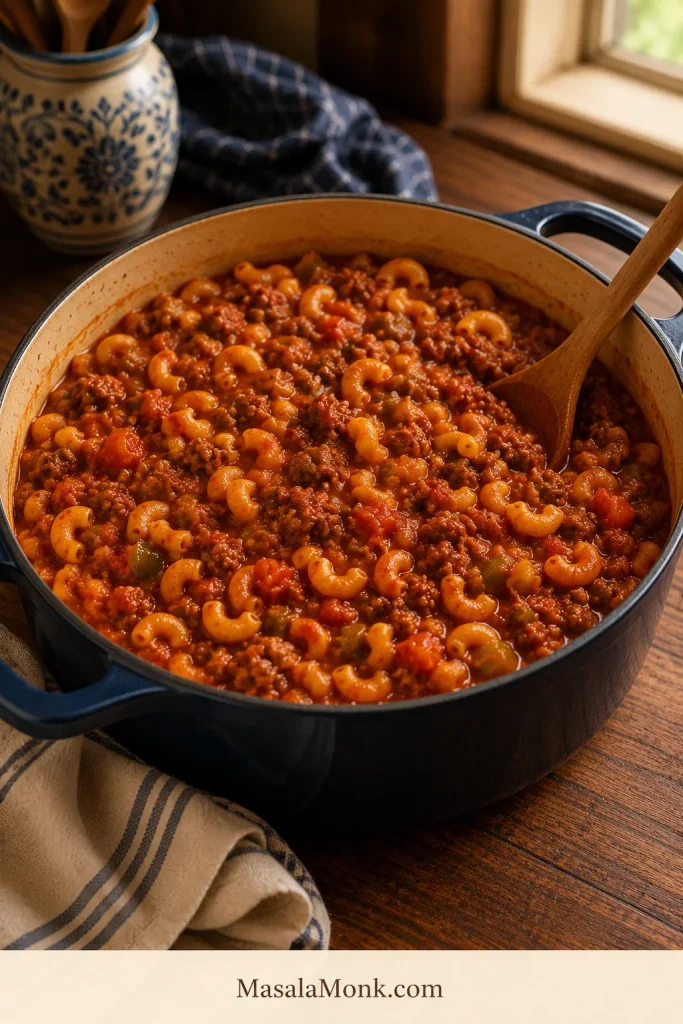
Dutch oven filled with one-pot American goulash made with elbow macaroni, ground beef, and tomato sauce.
Since this is one-pot American goulash, the sauce needs enough moisture to soften the macaroni while still finishing hearty and scoopable.
RecipeAmerican Goulash Recipe
Servings6 generous servings
Prep time10 minutes
Cook time30 minutes
Rest time5 minutes
Total time45 minutes
MethodStovetop, one pot
Equipment5 to 6 quart Dutch oven or heavy-bottomed pot with lid
CourseDinner, Main Course
CuisineAmerican

Ingredients

Ingredients for American goulash including ground beef, elbow macaroni, tomato sauce, diced tomatoes, onion, garlic, broth, spices, and cheddar.
The ingredients are simple, but tomato choice, broth amount, and optional cheddar decide whether your American goulash turns classic, smooth, cheesy, or looser.
  • 1 tablespoon olive oil, 15 ml
  • 1 lb ground beef, 450 g
  • 1 medium yellow onion, chopped, about 150 g
  • 1 green bell pepper, chopped, optional, about 120 to 150 g
  • 3 garlic cloves, minced, about 10 to 15 g
  • 2 tablespoons tomato paste, 30 g
  • 2 cups tomato sauce, passata or simple marinara, 480 ml
  • 1 can diced tomatoes with juices, 14 to 15 oz, 400 to 425 g
  • 1 1/2 to 2 cups beef broth or water, 360 to 480 ml
  • 1 tablespoon Worcestershire sauce, 15 ml
  • 1 1/2 teaspoons Italian seasoning
  • 1 teaspoon sweet paprika
  • 1 bay leaf
  • 1/2 to 1 teaspoon salt, then adjust to taste
  • 1/2 teaspoon black pepper
  • 8 oz uncooked elbow macaroni, about 2 cups or 225 g
  • 1 cup shredded cheddar cheese, optional, 100 to 115 g
  • Chopped parsley, optional, for serving

Instructions

  1. Heat the olive oil in a 5 to 6 quart Dutch oven or heavy-bottomed pot over medium-high heat.
  2. Add the ground beef and cook for 5 to 7 minutes, breaking it up with a spoon, until browned. Drain excess grease if needed.
  3. Stir in the onion and optional green bell pepper. Cook for 3 to 4 minutes, until the onion begins to soften and the pepper loses its raw bite.
  4. Add the garlic and tomato paste. Cook for 1 minute, stirring often, until the tomato paste darkens slightly and stains the beef a deeper red.
  5. Pour in the tomato sauce, diced tomatoes with juices, 1 1/2 cups broth, Worcestershire sauce, Italian seasoning, paprika, bay leaf, 1/2 to 3/4 teaspoon salt and black pepper. Stir well and bring to a simmer.
  6. Simmer the sauce for 5 to 10 minutes before adding the pasta. It should smell savory and tomato-rich before the macaroni goes in. Taste it here; it should be lightly salty because the pasta will absorb some seasoning as it cooks.
  7. Stir in the dry elbow macaroni. Keep the pot at a gentle simmer, not an angry boil.
  8. Cover and cook for 8 minutes, stirring every 2 to 3 minutes so the macaroni does not stick to the bottom.
  9. Uncover and cook for another 3 to 6 minutes, until the macaroni is just tender. Add the remaining 1/2 cup broth only if the pot looks dry before the pasta is done.
  10. Turn off the heat. Remove the bay leaf. Taste and adjust salt. If using cheese, stir in the cheddar until melted.
  11. Let the goulash rest for 5 minutes before serving. The sauce will thicken and cling better to the macaroni.

Recipe Notes

  • Hold back the final 1/2 cup broth until the macaroni needs it, especially if using a narrow pot or a pasta brand that softens quickly.
  • If using jarred marinara, salted broth, condensed tomato soup or cheddar, start with 1/2 to 3/4 teaspoon salt. Add more only after the pasta cooks.
  • Choose a simple marinara if using jarred sauce. Sweet or strongly herbed marinara will make the goulash taste less old-fashioned.
  • To make it thicker, simmer uncovered for a few minutes and let it rest before serving.
  • A looser or soupier bowl needs extra broth, tomato sauce or tomato juice.
  • The best make-ahead texture comes from cooking the beef tomato sauce ahead and adding macaroni when reheating.
  • If you plan to freeze the full dish, slightly undercook the macaroni or freeze the sauce separately and add fresh pasta later.

Trying to Match the Goulash You Grew Up With?

Why This Recipe Works

This is not about making goulash fancy. The goal is to make it taste familiar while keeping the macaroni tender, the sauce rich, and the pot easy to adjust.

  • Start the sauce before the pasta. A short simmer gives the tomato paste, garlic, beef and seasonings time to taste like one sauce instead of separate canned ingredients.
  • Cook the macaroni right in the pot. The pasta absorbs beefy tomato flavor as it softens, which makes the dish taste more complete.
  • Hold back some liquid. The extra splash of broth is there only if the macaroni needs help finishing.
  • Keep the simmer gentle. A hard boil can make the macaroni rough, swollen and uneven before the sauce has settled.
  • Let it rest. A few quiet minutes off heat help the sauce cling to the macaroni instead of sliding to the bottom of the bowl.

Ingredients and Why They Matter

This recipe is simple, so each ingredient has a clear job. You do not need anything fancy, but the balance of beef, tomato, pasta and liquid matters.

Ground Beef

Ground beef is what makes this taste like the version many people grew up with: hearty, simple and easy to stretch into a full pot of dinner. If your beef releases a lot of fat, drain some of it before adding the tomato paste and liquids.

Elbow Macaroni

Elbow macaroni is the classic pasta shape here. It cooks quickly, holds sauce well, and gives the dish that old-fashioned macaroni-and-beef texture. Other short pasta shapes can work, but the cooking time and liquid absorption may change.

If you like a creamier cheese-first version of elbow pasta instead, this macaroni and cheese recipe is the better direction.

Tomato Sauce and Diced Tomatoes

Tomato sauce gives the pot a smooth base, while diced tomatoes add texture and a more homemade feel. For a no-chunk version, use crushed tomatoes or extra sauce instead.

When making the tomato base from scratch another day, this tomato sauce from fresh tomatoes is useful for understanding how tomatoes thicken, sweeten and turn into a smoother sauce.

Tomato Paste

Tomato paste is the little shortcut that keeps the sauce from tasting thin or freshly opened from a can. Cook it with the beef, onion and garlic before adding the liquids so it has time to deepen.

Beef Broth or Water

The broth gives the macaroni enough room to soften right in the tomato-beef sauce instead of tasting like plain pasta added at the end. For a deeper savory flavor, use beef broth; water works if that is what you have.

Worcestershire Sauce

Worcestershire sauce adds a little savory depth, the kind that makes a quick tomato sauce taste like it has been cooking longer than it has.

Paprika and Italian Seasoning

Sweet paprika gives a gentle nod to the goulash family, while Italian seasoning keeps the flavor familiar for American-style tomato pasta. Use a light hand with paprika here unless you intentionally want the dish to lean closer to a Hungarian-inspired flavor.

Cheddar Cheese

Cheese is optional, and it is one of the big family debates. Some old-fashioned versions do not use it at all, while many modern versions finish with cheddar. Stir it in after turning off the heat so it melts smoothly without making the pot greasy.

Easy Swaps

Use lean ground beef or ground turkey if you want a lighter pot. Skip the cheddar for a dairy-free version. Use gluten-free elbows if needed, but check them early because they can soften faster. For more salt control, choose low-sodium broth and unsalted tomato sauce.

Best Pot for This Recipe

A 5 to 6 quart Dutch oven or heavy-bottomed pot gives this saucy one-pot pasta enough room for the macaroni to move and enough weight to keep the tomato sauce from scorching.

With a narrow pot, the macaroni can stack too deeply and cook less evenly. In a very wide skillet, the sauce may reduce faster than expected. A wide, deep pot with a lid gives you the best control.

Wide Dutch oven with elbow macaroni, tomato sauce, broth, tomato paste, onion, garlic, and a wooden spoon arranged nearby.
Using a wide Dutch oven gives the macaroni room to cook evenly while the sauce reduces gently without scorching.

How to Make American Goulash in One Pot

The recipe card gives you the exact steps. This walkthrough is here for the cues: what the beef should look like, how the sauce should smell, when the macaroni is ready, and when to stop before the pot goes too far.

Step 1: Brown the Beef

Cook the beef until it is browned and broken into small crumbles. You want little browned bits and no pink patches, because those browned pieces carry flavor through the whole pot.

Ground beef browning in a Dutch oven with a wooden spoon for American goulash.
Brown the ground beef first to build a savory base before the tomatoes go in; otherwise, the sauce can taste flat.

Step 2: Soften the Onion and Pepper

The onion should look glossy and softened before you move on. If using green bell pepper, it should lose its sharp raw smell but still give the pot that old-fashioned flavor.

Browned ground beef cooking with chopped onion and green bell pepper in a Dutch oven.
Onion softens into the sauce, while green bell pepper adds the old-fashioned flavor many family-style goulash recipes are known for.

Step 3: Add Garlic and Tomato Paste

The tomato paste should darken slightly and coat the beef in a brick-red layer. Do not let it burn on the bottom; one minute is usually enough to take away the raw canned taste.

Tomato paste stirred into browned ground beef and onion in a Dutch oven before sauce or broth is added.
This brick-red tomato paste stage builds deeper flavor before broth and tomatoes loosen the sauce.

Step 4: Build the Tomato Sauce

Once the tomato sauce, diced tomatoes, broth and seasonings go in, let the pot simmer before adding macaroni. The sauce should smell savory and tomato-rich, not like plain canned tomatoes.

Tomato beef sauce simmering in a Dutch oven before dry elbow macaroni is added.
Before the macaroni goes in, let the tomato-beef sauce simmer briefly so the pasta has a more flavorful liquid to absorb.

Step 5: Add Dry Macaroni

Stir the dry macaroni into the simmering sauce and keep the heat gentle. The elbows should be surrounded by sauce, but the pot should not be boiling so hard that it spits and sticks.

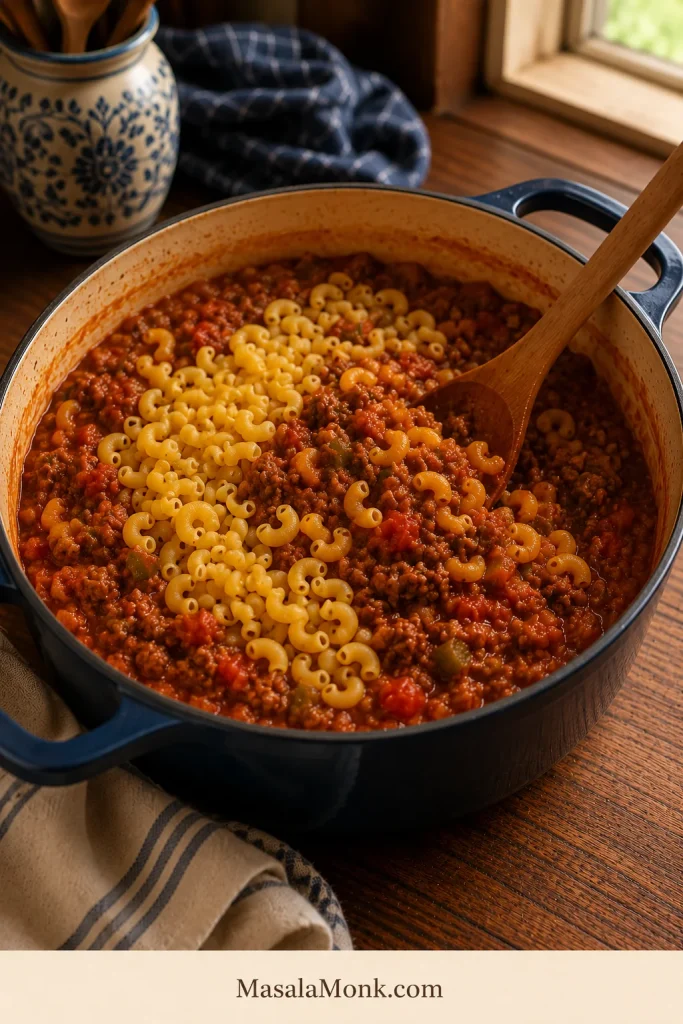
Dry elbow macaroni being stirred into tomato beef sauce in a Dutch oven for one-pot American goulash.
Dry elbow macaroni goes straight into the simmering sauce, so holding back some broth helps prevent watery American goulash.

Step 6: Simmer Until Just Tender

Start checking near the end of the cook time. The macaroni should be tender with no chalky center, but it should not look swollen. If the spoon drags through a dry pot before the pasta is done, add a small splash of broth.

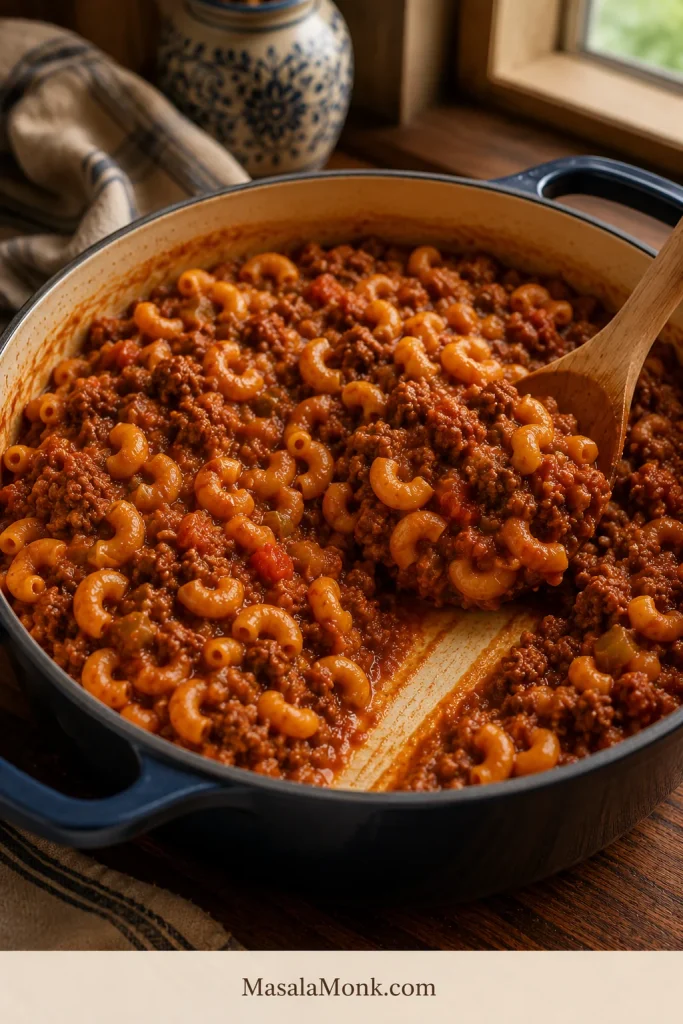
Spoon dragging through American goulash in a Dutch oven, showing just-tender macaroni in tomato beef sauce.
Stop when the macaroni is just tender; it will keep softening as the sauce tightens during the rest.

Step 7: Rest Before Serving

Turn off the heat before the pot looks perfect. During the 5-minute rest, the sauce tightens, the pasta settles, and the goulash becomes easier to scoop without drying out.

Rested American goulash in a Dutch oven with elbow macaroni, ground beef, tomato sauce, and a wooden spoon.
After resting, the goulash should look cohesive and spoonable, with sauce clinging to the macaroni instead of pooling underneath.

If you like this direct-in-the-sauce pasta method, this one-pot chicken bacon ranch pasta uses the same basic idea in a creamier chicken dinner.

How to Know It Is Done

A good bowl should look glossy and spoonable, with sauce clinging to the elbows instead of sitting underneath them. Turn off the heat when the macaroni is just tender and the pot still looks slightly looser than the final bowl you want.

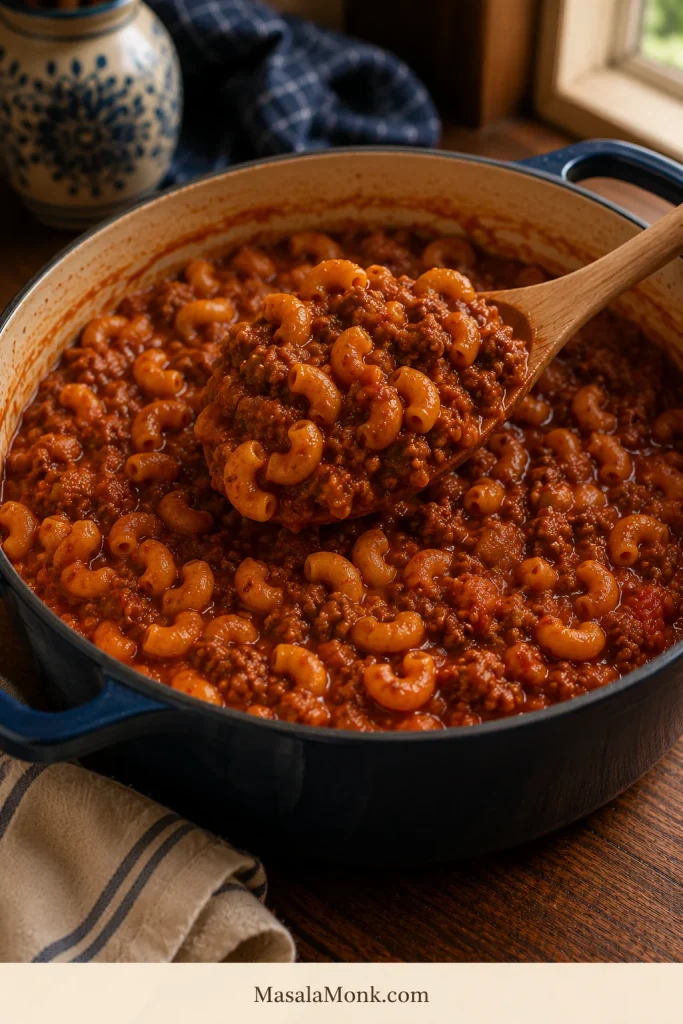
Spoon lifting American goulash with elbow macaroni, ground beef, and thick tomato sauce clinging to the pasta.
Use the spoon-lift test for texture: the sauce should cling to the elbows and beef instead of sliding back into the pot.

After resting, it should be thick enough to scoop with a spoon, but not dry like a casserole. If it tightens too much, stir in a splash of broth, tomato sauce or tomato juice before serving.

How to Keep the Macaroni from Getting Mushy

The only real trick with one-pot goulash is knowing when to add the macaroni and when to stop cooking it. Once those two moments are right, the rest is easy.

  • Add the pasta after the sauce is simmering. Do not add macaroni before the liquid is hot.
  • Use a gentle simmer. A hard boil can break down the pasta and make the sauce reduce too fast.
  • Stir often. Every 2 to 3 minutes, stir so the macaroni cooks evenly and does not stick.
  • Stop at just tender. The pasta keeps softening after the heat is turned off.
  • Be careful with leftovers. Macaroni absorbs sauce in the fridge, so reheated goulash will be softer than freshly cooked goulash.
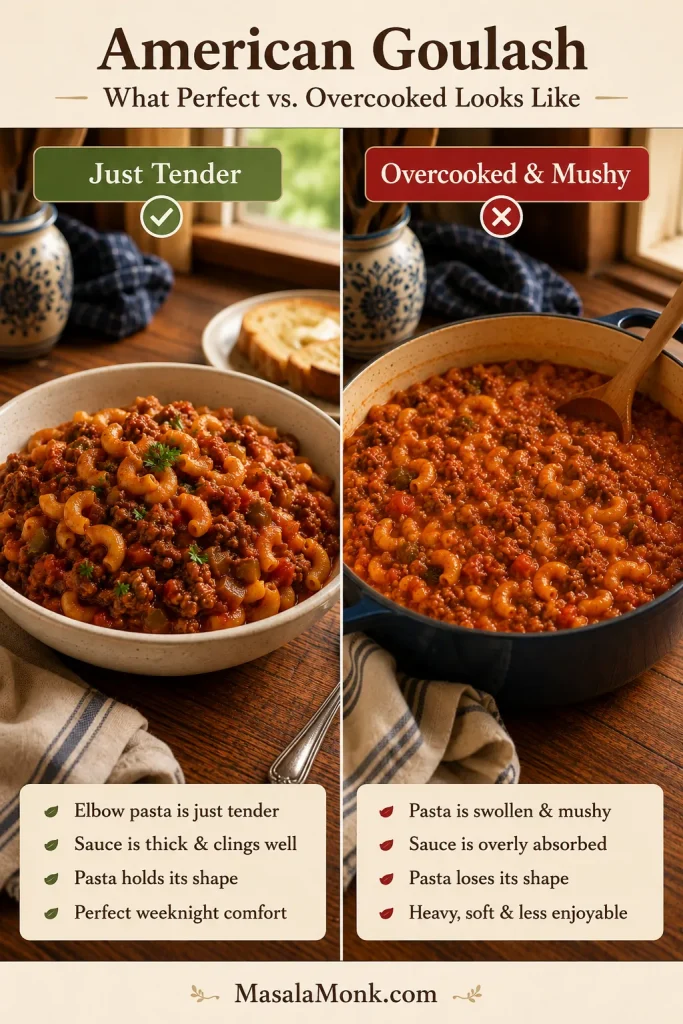
Split comparison of American goulash showing just-tender macaroni on one side and overcooked mushy macaroni on the other.
Aim for just-tender, defined elbows; by contrast, overcooked macaroni swells, absorbs too much sauce, and turns soft.

The best make-ahead texture comes from cooking the beef tomato sauce ahead and adding macaroni when reheating. If you cook the full one-pot version ahead, the pasta will keep absorbing sauce as it sits.

Tomato Sauce, Diced Tomatoes, Tomato Soup or Tomato Juice?

Ask five families about American goulash and you may hear five different tomato opinions. One family’s goulash is smooth and saucy, another’s is chunky with diced tomatoes, and another’s tastes sweeter because it started with condensed tomato soup.

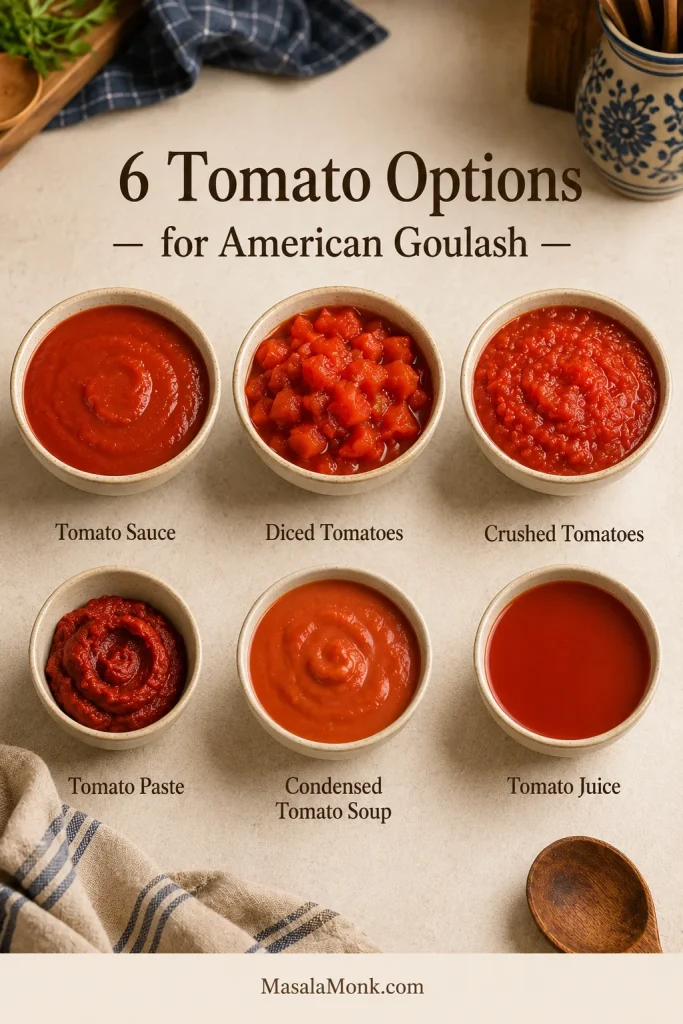
Six tomato options for American goulash labeled tomato sauce, diced tomatoes, crushed tomatoes, tomato paste, condensed tomato soup, and tomato juice.
Each tomato option — sauce, diced tomatoes, crushed tomatoes, paste, soup, or juice — steers American goulash toward a different family-style finish.
Tomato optionBest useAdjustment
Tomato sauceClassic smooth baseUse as the main base
Diced tomatoesChunkier old-fashioned textureUse with the juices
Crushed tomatoesSmoother but still thickUse instead of diced tomatoes
Tomato pasteDeeper tomato flavorCook briefly before adding liquids
Condensed tomato soupSweeter old-school versionThin with broth; already sweet
Tomato juiceLooser grandma-style bowlUse in place of some broth
No diced tomatoesSmooth, no chunksUse crushed tomatoes or sauce

Can You Make Goulash with Tomato Soup?

Yes. Tomato soup gives American goulash a sweeter, old-school flavor. It can taste more like cafeteria goulash or the version many people remember from childhood. Because condensed tomato soup is thicker and sweeter than tomato sauce, thin it with broth or water and taste before adding anything sweet.

To use condensed tomato soup in the main recipe, replace 1 cup of the tomato sauce with one 10.5 oz / about 300 g can condensed tomato soup. Start with 1 cup broth or water instead of 1 1/2 cups, then add more only if the macaroni needs it.

Can You Make Goulash with Tomato Juice?

Yes. Tomato juice makes the pot looser and more old-fashioned. Use it in place of part of the broth if you like a saucier finish. It is especially useful when reheating leftovers because the macaroni absorbs sauce as it sits.

For a grandma-style tomato juice version, replace 1/2 to 1 cup of the broth with tomato juice. The finished goulash will be softer, looser and more spoonable than a thick modern tomato-sauce version.

How to Make American Goulash with No Tomato Chunks

To make a smoother pot, replace diced tomatoes with tomato sauce, crushed tomatoes, passata or condensed tomato soup. This keeps the same beefy tomato flavor without the tomato chunks.

Smooth American goulash without diced tomato chunks, served in a bowl with elbow macaroni and ground beef in tomato sauce.
To make a smoother no-chunk American goulash, use crushed tomatoes, passata, or extra tomato sauce instead of diced tomatoes.

If replacing one 14 to 15 oz can of diced tomatoes, use about 1 3/4 cups crushed tomatoes or tomato sauce instead. When the sauce becomes too thick, loosen it with a splash of broth or tomato juice while the macaroni cooks.

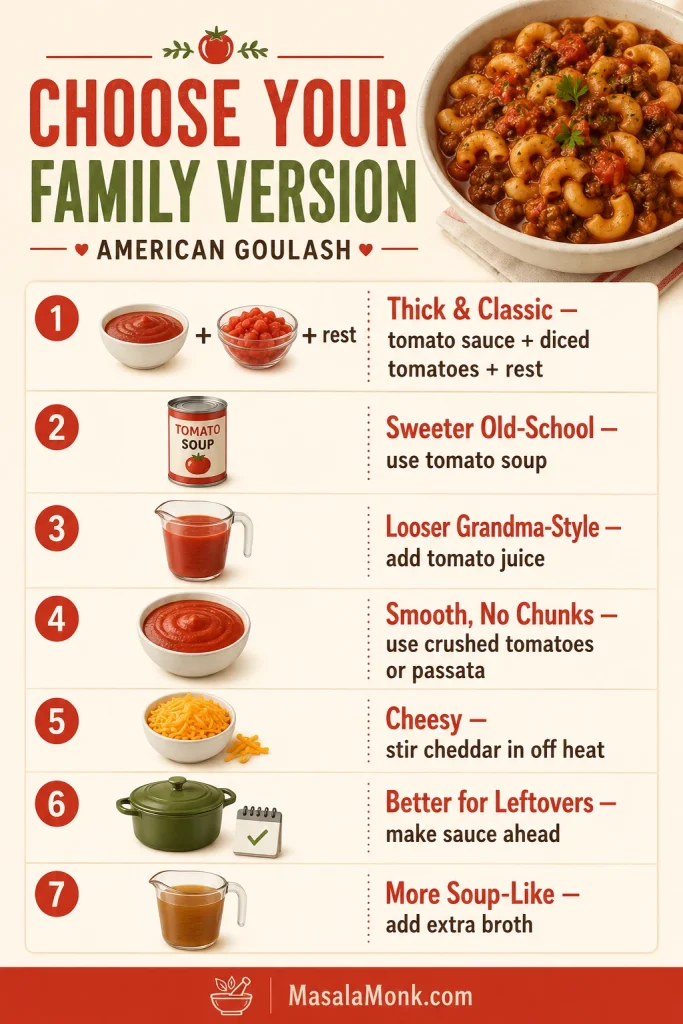
Still deciding? Use the family version guide to make it thicker, sweeter, smoother, cheesier, or soupier.

Choose Your Family Version

This is one of those recipes where the “right” version usually means the one you grew up with. The base method keeps the pot from going watery or mushy; the small changes below help it taste more like the version you remember.

For some people, the remembered version came with buttered bread on the side. Other families remember it sweeter from tomato soup, looser from tomato juice, or orange-edged from cheddar stirred in at the end.

Infographic titled Choose Your Family Version with options for thick, tomato soup, tomato juice, no chunks, cheesy, leftover-friendly, and soup-like American goulash.
Start with the same one-pot base, then choose the tomato, cheese, broth, or make-ahead adjustment that matches the goulash you remember.
If you want it…Do this
Thick and classicUse tomato sauce, diced tomatoes, 1 1/2 cups broth, and rest before serving
Sweeter and old-schoolReplace 1 cup tomato sauce with condensed tomato soup
Looser grandma-styleReplace 1/2 to 1 cup broth with tomato juice
Smooth with no chunksUse crushed tomatoes, passata or extra tomato sauce
CheesyStir cheddar in off heat after the macaroni is tender
Better for leftoversMake the sauce ahead and add macaroni when reheating
More soup-likeAdd 1 to 2 cups extra broth and serve soon

What did your family use — tomato soup, tomato juice, cheddar, green pepper, celery, no chunks? Tell us your version in the comments, because those little details are what make American goulash personal.

Old-Fashioned, Cheesy and Soupier Variations

Once the basic method is clear, this dish is easy to adjust. Keep the beef, macaroni and tomato base, then change the final texture or flavor depending on the version you grew up with.

Old-Fashioned Grandma-Style Goulash

To make it more old-fashioned, keep the ingredients simple and familiar: elbow macaroni, ground beef, onion, garlic, tomato sauce, diced tomatoes and mild seasoning. Green bell pepper is classic but optional, and cheese can be skipped if the version you remember was more tomato-forward than cheesy.

If the goulash you grew up with was sweeter, softer and a little more cafeteria-style, use condensed tomato soup. A looser, saucier version can use tomato juice in place of some broth. These small changes are often what make the recipe taste like someone’s family version.

Cheesy American Goulash

To make it cheesy, turn off the heat once the macaroni is tender, then stir in 1 cup shredded cheddar. Cover the pot for 2 to 3 minutes so the cheese melts into the sauce.

Do not boil the goulash after adding cheese. High heat can make the cheese separate and turn oily. Sprinkle more cheddar on top just before serving if you like it extra cheesy.

Cheesy American goulash in a Dutch oven with melted cheddar, elbow macaroni, ground beef, and tomato sauce.
Add cheddar off heat for cheesy American goulash, so the cheese melts into the sauce without separating or turning oily.

For the creamier skillet-dinner cousin, this homemade Hamburger Helper keeps the same ground beef and pasta comfort, but turns it into a cheesy sauce instead of a tomato-forward goulash.

How to Make It Thicker

If your goulash is too loose, simmer it uncovered for 2 to 4 minutes and then let it rest for 5 minutes. The macaroni will continue to absorb some sauce as it sits.

A spoonful of tomato paste can also help deepen and thicken the sauce, but add it earlier in the cooking process if possible so it has time to cook into the beef and tomatoes.

How to Make It Looser or Soupier

This recipe is written as thick American goulash, not soup. A soupier bowl needs extra broth, tomato sauce or tomato juice. For American goulash soup, add 1 to 2 extra cups of broth and use slightly less macaroni so the pasta does not absorb all the liquid.

Serve soupier goulash soon after cooking. The macaroni will keep drinking up the broth as it sits, especially in the fridge.

For a true tomato-broth pasta soup rather than a thick goulash, this minestrone soup recipe is built as a soup from the start, with beans, vegetables, small pasta and a tomato broth.

Can You Make American Goulash in the Crockpot or Instant Pot?

Yes, but the stovetop is still the best method for the main recipe because you can watch the pasta and sauce closely. Both Crockpot and Instant Pot versions can work, but pasta timing matters even more.

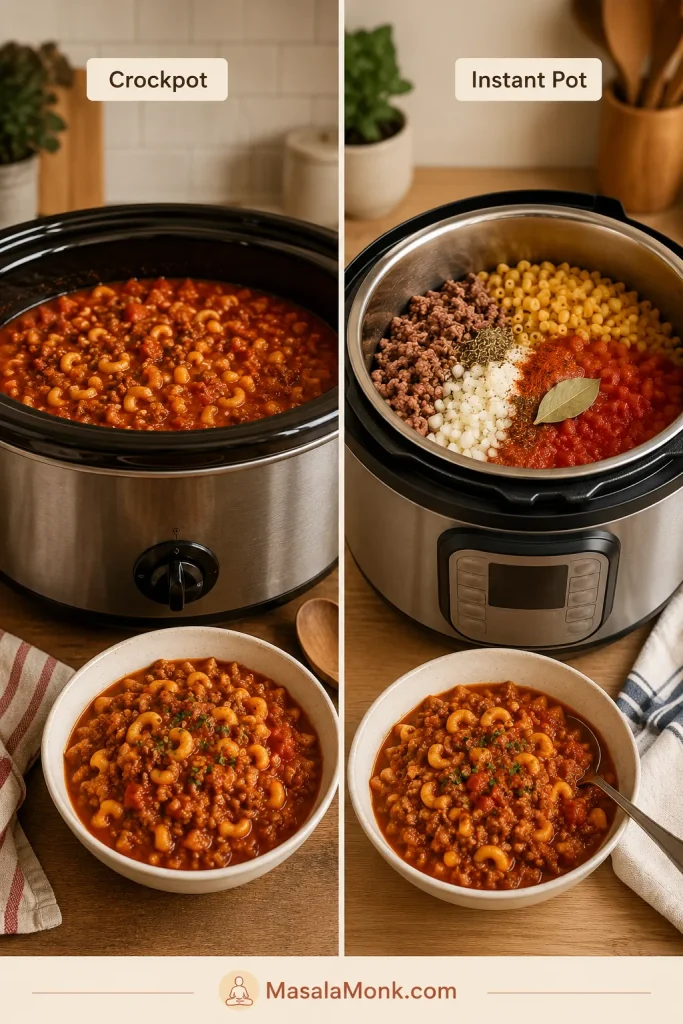
Split image comparing Crockpot American goulash and Instant Pot American goulash with tomato beef macaroni.
These Crockpot and Instant Pot methods can work, but pasta timing matters most because macaroni turns soft when it cooks too long.

Crockpot American Goulash

The Crockpot is best for the sauce, not for all-day pasta. Brown the beef, onion and garlic first, then add the beef mixture and sauce ingredients to the slow cooker. Cook on low for 4 to 6 hours or high for 2 to 3 hours.

Do not add macaroni at the beginning of a long slow-cooker cook. It can become swollen and mushy. Add dry macaroni during the last 30 to 45 minutes, or stir in cooked macaroni during the last 10 to 15 minutes. Finish with cheese at the end.

If pasta texture matters most to you, cook the sauce in the Crockpot and boil the macaroni separately just before serving.

That same late-pasta rule matters in slow-cooker pasta soups too; this crock pot lasagna soup uses the same idea of adding noodles near the end so they stay tender instead of swollen.

Instant Pot American Goulash

In the Instant Pot, sauté the beef, onion and garlic first. Deglaze the pot very well with broth or water so no browned bits are stuck to the bottom.

After deglazing, add broth and macaroni first, then spoon the tomato sauce and diced tomatoes over the top without stirring them deeply into the bottom. That layering helps reduce burn-warning risk. Pressure cook for 4 to 5 minutes, quick release, stir, and rest for 3 to 5 minutes before adding cheese.

Smaller macaroni, or a firmer texture, usually does better with the shorter cook time.

American Goulash vs Hungarian Goulash

The two dishes share a name, but they are built very differently. This recipe is the American macaroni version, not the paprika-heavy Hungarian stew or soup.

  • American goulash is usually made with ground beef, elbow macaroni and a tomato-based sauce.
  • Hungarian goulash is usually a paprika-rich beef soup or stew made with beef chunks, onions, broth and sometimes potatoes or vegetables.
  • The American version is one-pot comfort food; the Hungarian version is a separate traditional dish with a different flavor base.

If you are here for the macaroni, ground beef and tomato sauce version, this is the right recipe. The paprika-heavy beef soup or stew should be treated as a different dish, not a variation of this one.

Is American Goulash the Same as American Chop Suey?

Mostly, yes. In New England, a similar dish made with ground beef, elbow macaroni and tomato sauce is often called American Chop Suey. Across the Midwest and many other places, the same general comfort-food idea is called American goulash.

The details change from kitchen to kitchen. Some versions use green bell pepper or celery, some use stewed tomatoes, and some finish with cheddar.

Depending on where you grew up, similar beef-and-macaroni dinners may also connect to names like Slumgullion, Johnny Marzetti, beefaroni or homemade Hamburger Helper. The same comfort-food idea stays at the center: ground beef, macaroni and a tomato-based sauce cooked into a simple, filling dinner.

What to Serve with American Goulash

This goulash is already a full meal, so sides can stay simple. Something crisp, green or buttery is usually enough to balance the rich tomato-beef pasta.

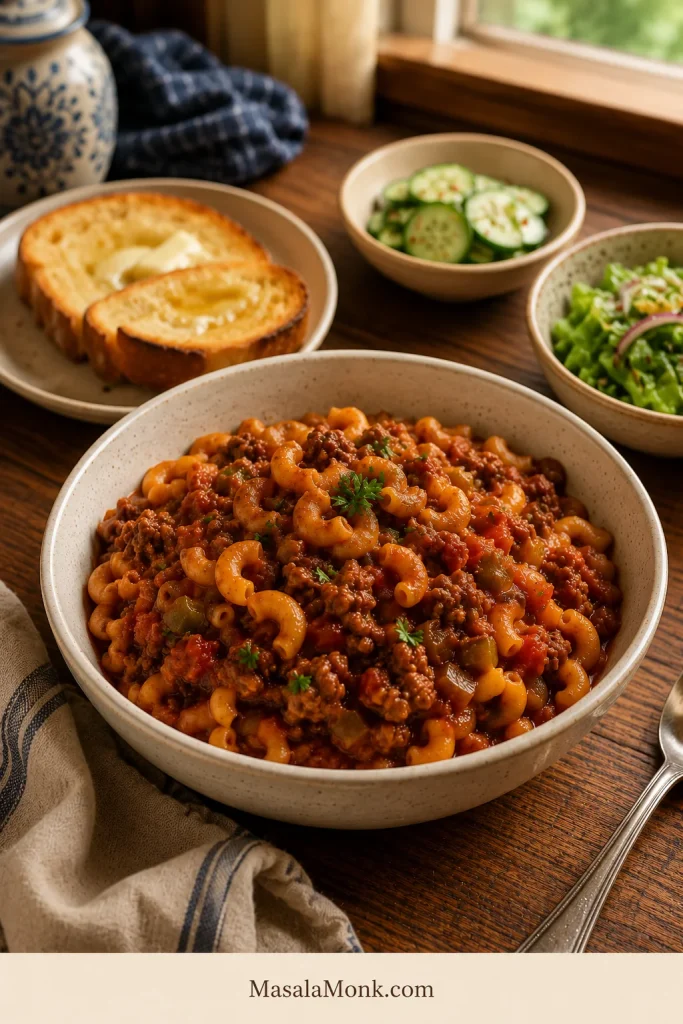
Bowl of American goulash served with buttered toast, cucumber salad, green salad, and a spoon on a wooden table.
Buttered toast, cucumber salad, pickles, or a simple green salad balance the rich tomato-beef macaroni without making dinner complicated.
  • Fresh sides: green salad, cucumber salad, coleslaw or pickles. A cucumber salad keeps the plate especially fresh.
  • Cozy sides: garlic bread, buttered toast, dinner rolls or ranch roasted potatoes.
  • Vegetable sides: roasted broccoli, green beans or peas.
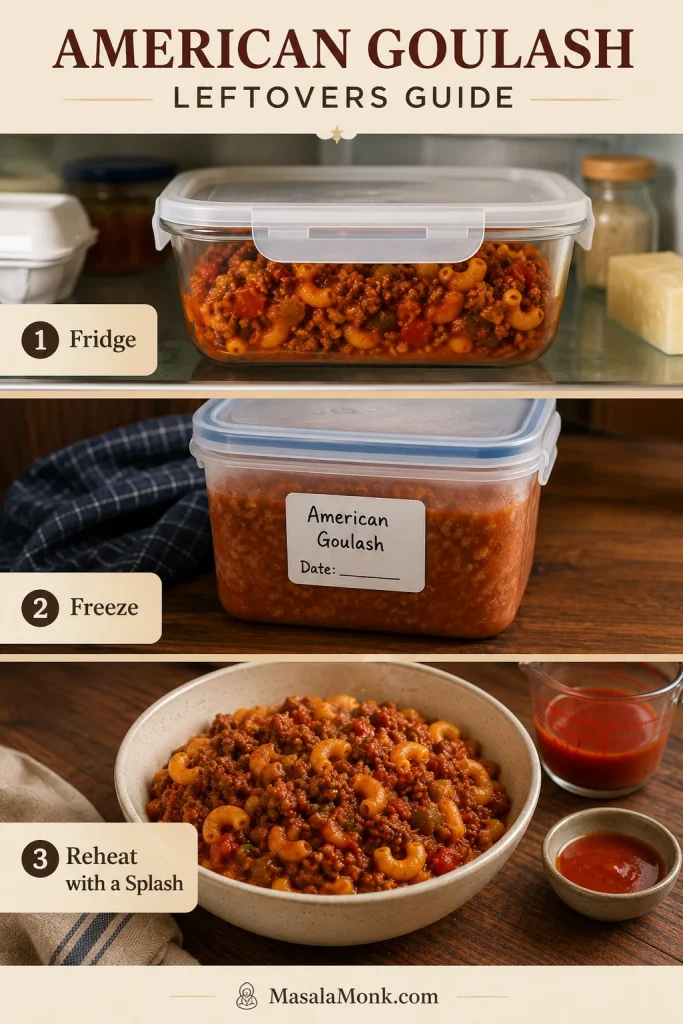
  • Sharp extras: hot sauce, black pepper or pickles if the bowl tastes very tomato-heavy or cheesy.

Storage, Freezing and Reheating

This goulash stores well, but the macaroni changes texture as it sits. It keeps absorbing sauce in the fridge, so leftovers will usually be thicker and softer than the freshly cooked pot.

Three-panel guide showing American goulash stored in the fridge, frozen in a container, and reheated with extra sauce or liquid.
Leftover goulash thickens as the macaroni absorbs sauce, so reheat it gently with broth, tomato sauce, or tomato juice.

Best Make-Ahead Method

For the best texture, make the beef tomato sauce ahead and keep the macaroni out until serving day. Reheat the sauce, add the dry macaroni with enough broth to cook it, and simmer until just tender.

Refrigerating

Store leftover goulash in an airtight container in the refrigerator for 3 to 4 days. The USDA FSIS leftovers guidance gives the same 3 to 4 day refrigerator window and recommends freezing leftovers for longer storage.

Freezing

You can freeze American goulash, but the pasta will be softer after thawing. For best texture, freeze the beef tomato sauce without the macaroni and cook fresh pasta when you reheat it. If freezing the full dish, slightly undercook the macaroni and use within about 3 months for best quality.

Reheating

Reheat gently on the stovetop or in the microwave. Add a splash of broth, water, tomato sauce or tomato juice to loosen the sauce. Stir halfway through reheating so the pasta warms evenly.

Leftovers can also become a second meal. Spoon them into a small baking dish, loosen with a little sauce or broth, top with cheddar, and bake until hot for a casserole-style dinner.

Back to recipe card · Back to quick answer

Fixes for Watery, Mushy or Dry Goulash

ProblemLikely causeFix
Goulash is wateryToo much broth or not enough resting timeSimmer uncovered for a few minutes, then rest 5 minutes
Macaroni is mushyPasta cooked too long or sat too long in sauceStop cooking when just tender and serve sooner
Pot looks dry before pasta is donePasta absorbed liquid faster than expectedAdd 1/4 to 1/2 cup broth or water
Sauce tastes flatTomato base did not cook long enough or needs saltCook tomato paste briefly, add Worcestershire and adjust salt
Goulash is too sweetTomato soup or sweet marinara was usedAdd more broth, a little tomato paste, black pepper or extra Worcestershire
Leftovers are too thickMacaroni absorbed sauce in the fridgeReheat with broth, water, tomato sauce or tomato juice

Review mushy pasta tips · Review tomato options · Back to recipe card

American Goulash FAQ

What is American goulash made of?

It is usually made with ground beef, elbow macaroni, tomatoes, onion, garlic and a tomato-based sauce. Bell pepper, Worcestershire sauce, paprika and cheddar show up in many family versions.

What is the difference between American goulash and Hungarian goulash?

The American version is tomato-beef macaroni. Hungarian goulash is usually a paprika-rich beef soup or stew made with beef chunks, onions, broth and sometimes potatoes or vegetables.

Is American goulash the same as American Chop Suey?

Mostly, yes. In New England, this style of ground beef, macaroni and tomato-sauce dinner is often called American Chop Suey. Across many other places, it is called American goulash.

Is American goulash the same as chili mac?

Not exactly. American goulash is usually tomato-beef macaroni, while chili mac leans more heavily on chili seasoning, beans or a chili-style base.

Do you cook macaroni before adding it to goulash?

For this stovetop version, no. The macaroni goes in dry and cooks directly in the sauce so it absorbs the beefy tomato flavor.

How do you keep macaroni from getting mushy in goulash?

Add the macaroni only after the sauce is simmering, keep the heat gentle, stir often, and stop when the pasta is just tender. It will keep softening as it rests.

Why is my American goulash watery?

Watery goulash usually has too much liquid, has not simmered uncovered long enough, or has not rested after cooking. Simmer uncovered briefly, then rest before serving.

Is tomato soup good in goulash?

Yes. Tomato soup works well if you like a sweeter, old-fashioned or cafeteria-style version. Replace part of the tomato sauce with it, then thin with broth or water as needed.

What can I use instead of diced tomatoes?

Choose crushed tomatoes, tomato sauce, passata or condensed tomato soup if you do not want diced tomatoes. Crushed tomatoes are the best choice for a smoother sauce that still tastes rich.

Can I make American goulash without bell pepper?

Yes. Bell pepper gives a more old-fashioned flavor, but the recipe works without it. Skip it for a smoother, milder pot, or replace it with a little celery if that is closer to the version you remember.

Should American goulash have cheese?

Cheese is optional, and it is one of the big family debates. Older versions are often more tomato-forward, while many modern versions stir in cheddar at the end. Add cheese off heat so it melts smoothly.

Can I double this American goulash recipe?

Yes, but use a larger heavy pot and stir more often once the macaroni goes in. A crowded pot can cook unevenly, so add liquid gradually instead of all at once.

Does American goulash freeze well?

It freezes, but the macaroni softens after thawing. For best texture, freeze the beef tomato sauce without pasta, then add freshly cooked macaroni when reheating.

What goes well with American goulash?

Garlic bread, buttered toast, green salad, roasted vegetables, green beans, peas, coleslaw, dinner rolls, pickles and cucumber salad all work well. Fresh or crisp sides balance the rich tomato-beef pasta best.

Final Tips for the Best American Goulash

  • Use a heavy pot so the tomato sauce and macaroni do not stick or scorch.
  • Cook the tomato paste briefly before adding liquids for deeper flavor.
  • Taste the sauce before adding macaroni; it should be savory enough to season the pasta as it cooks.
  • Start with less broth and add more only if needed.
  • Keep the macaroni at a gentle simmer, not a hard boil.
  • Turn off the heat before the pot looks perfect because the rest finishes the texture.
  • Use tomato soup for a sweeter old-school version, tomato juice for a looser version, and add cheese off heat if you want it cheesy.

The best American goulash is not the fanciest one. It is the one that lands in the bowl tasting familiar, feeds everyone from one pot, and still gives you tender macaroni instead of tomato-beef mush.

Posted on — Leave a comment

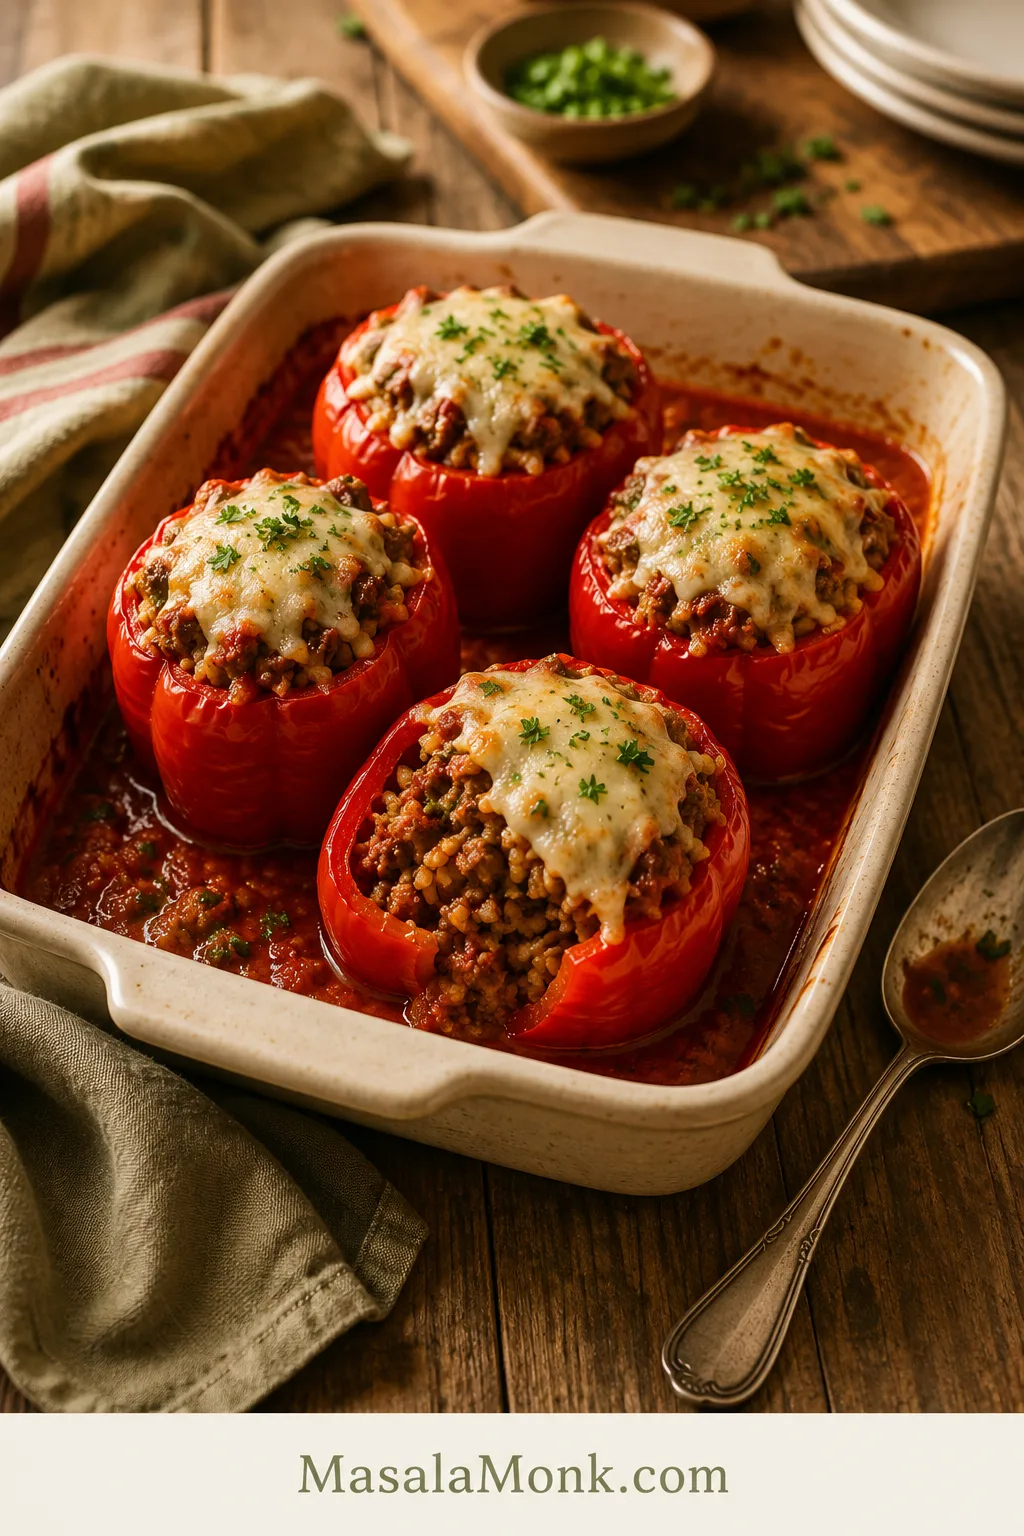
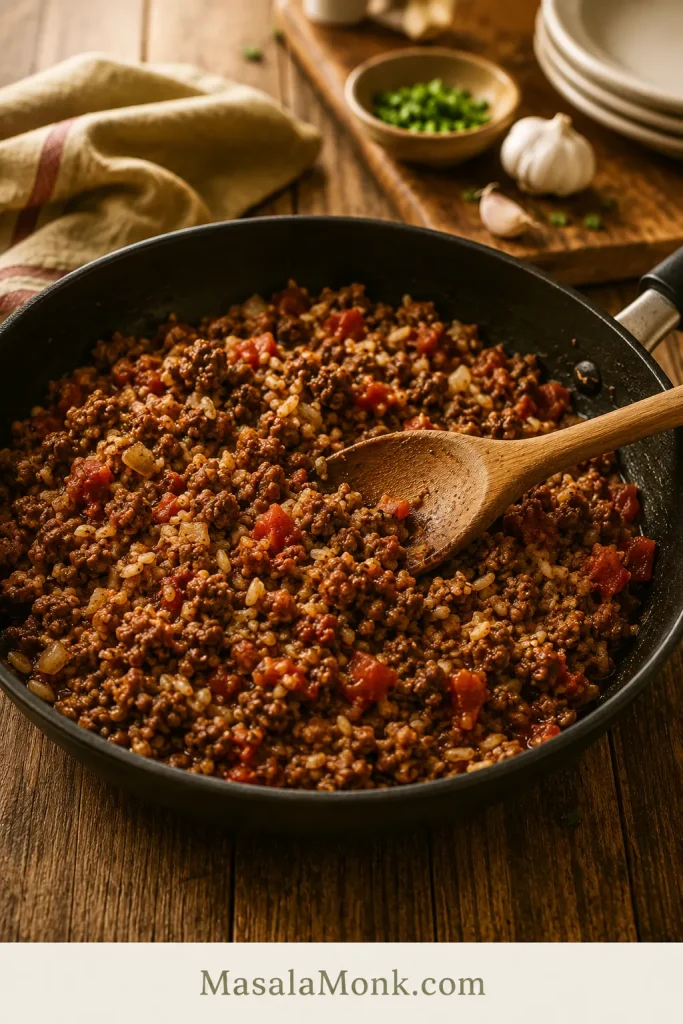
Stuffed Red Pepper Recipe

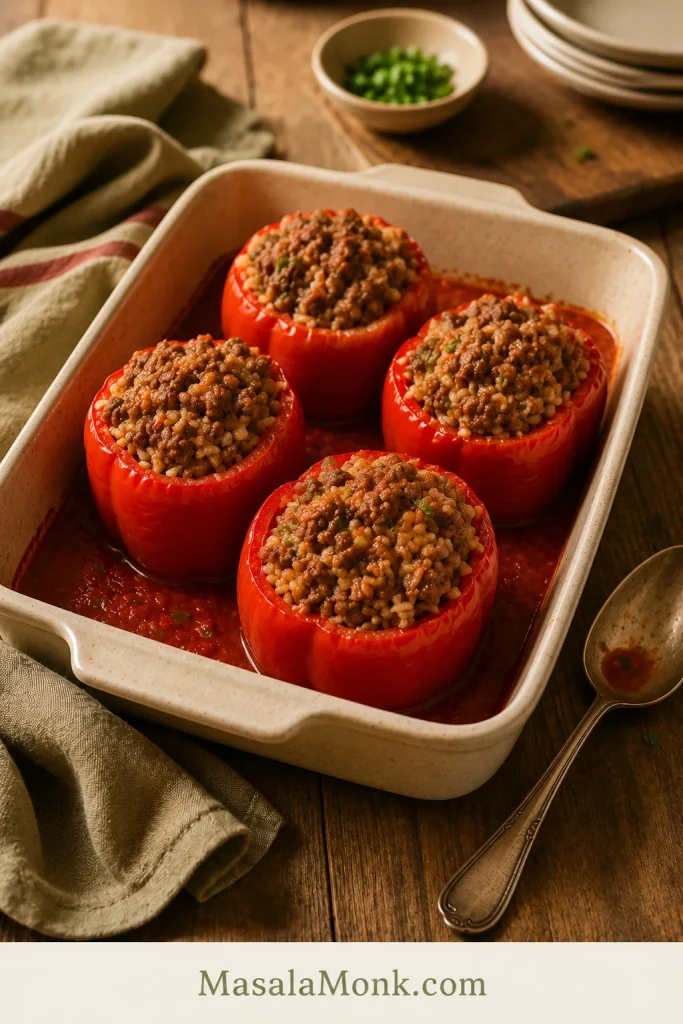
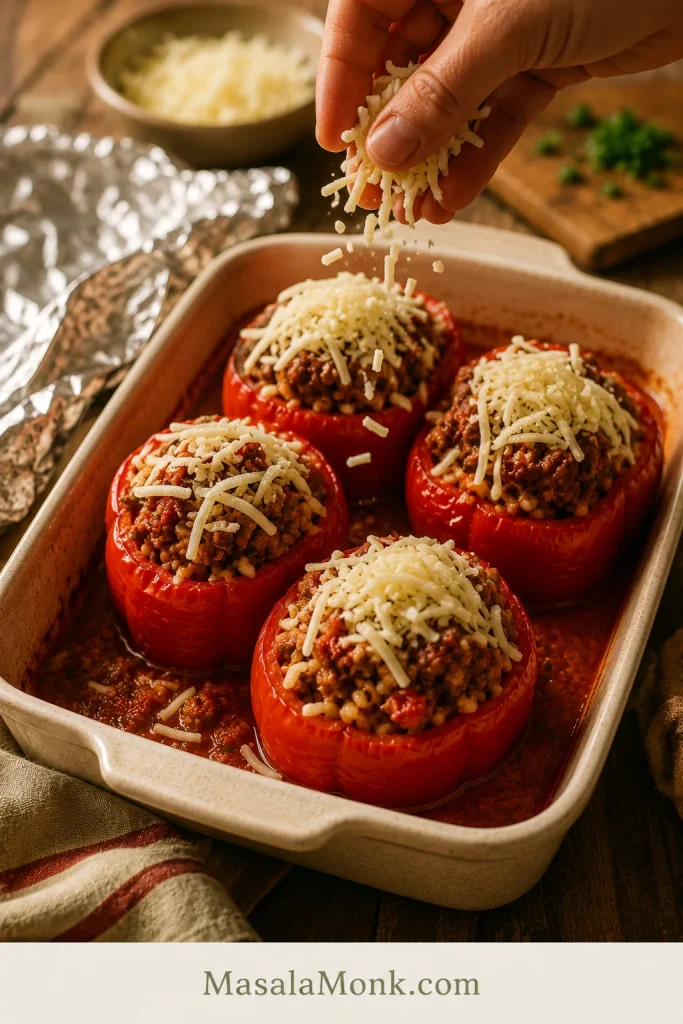
Baked red bell peppers stuffed with ground beef, rice, tomato sauce, and melted cheese in a cream ceramic baking dish

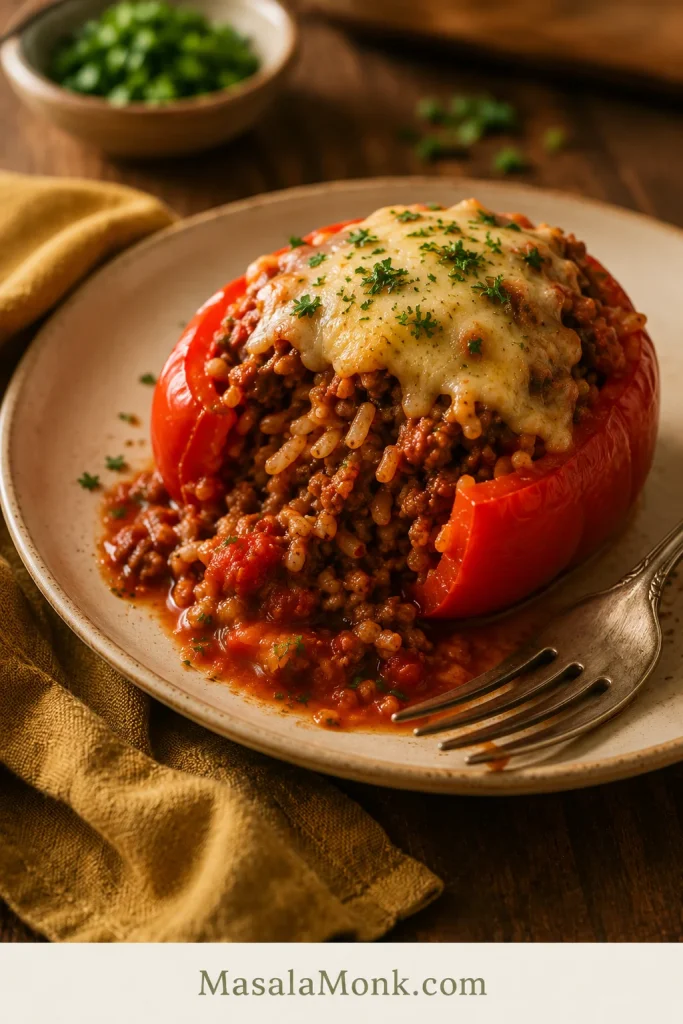
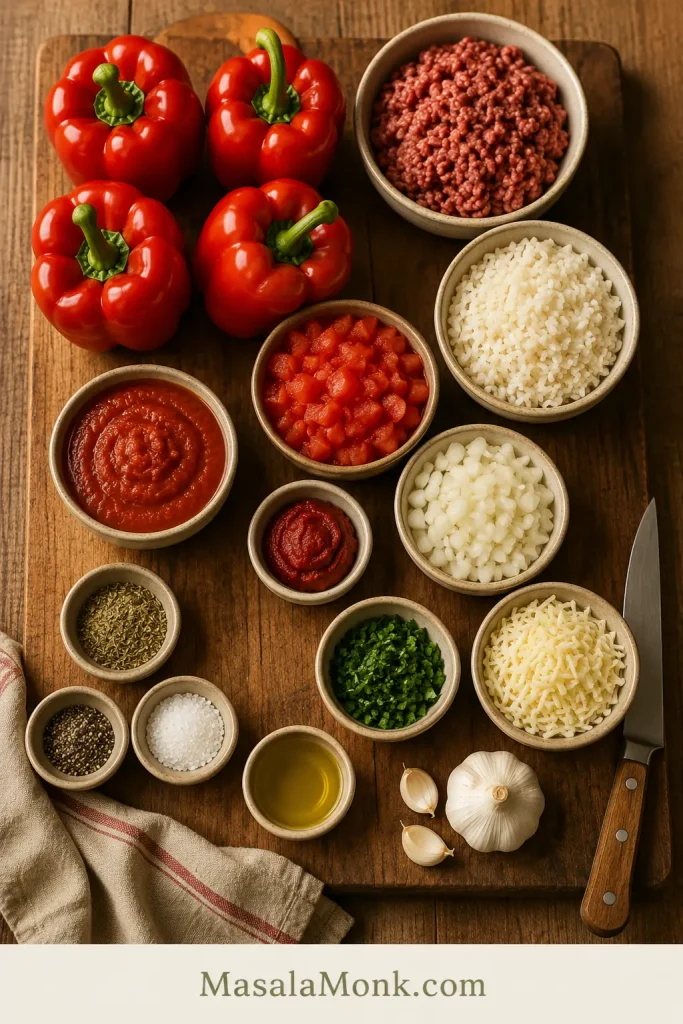
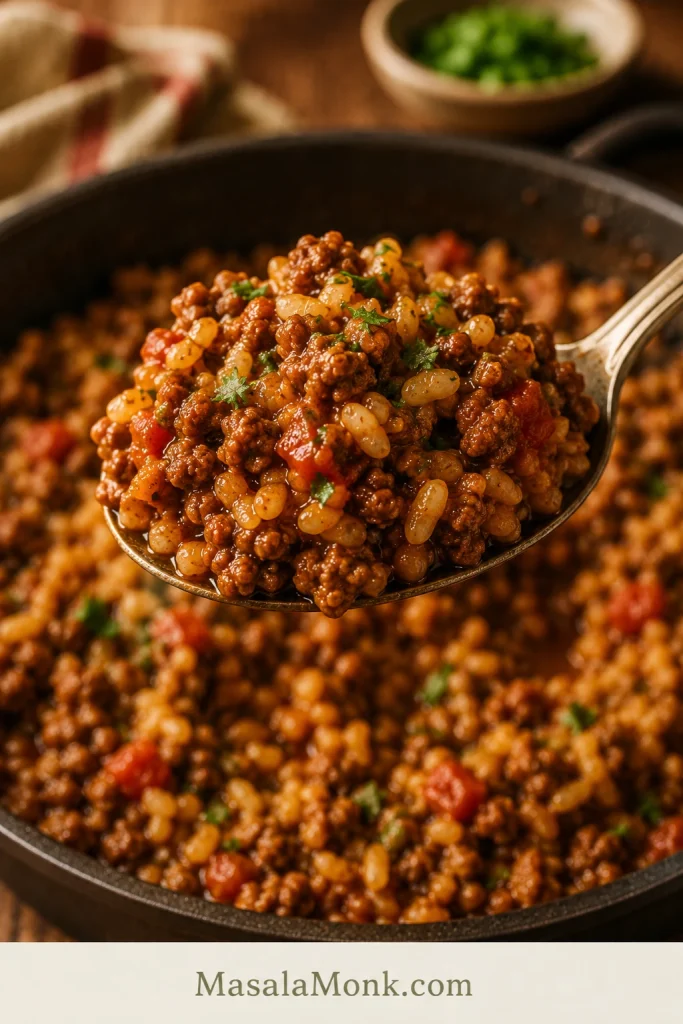
Stuffed red peppers should feel like dinner is handled: sweet pepper walls, savory beef-and-rice filling, tomato sauce, and melted cheese all baked together in one cozy dish. The only catch is that small details matter. If the peppers stay too firm, the rice tastes bland, the filling turns watery, or the cheese browns too early, the whole dish feels less comforting than it should.

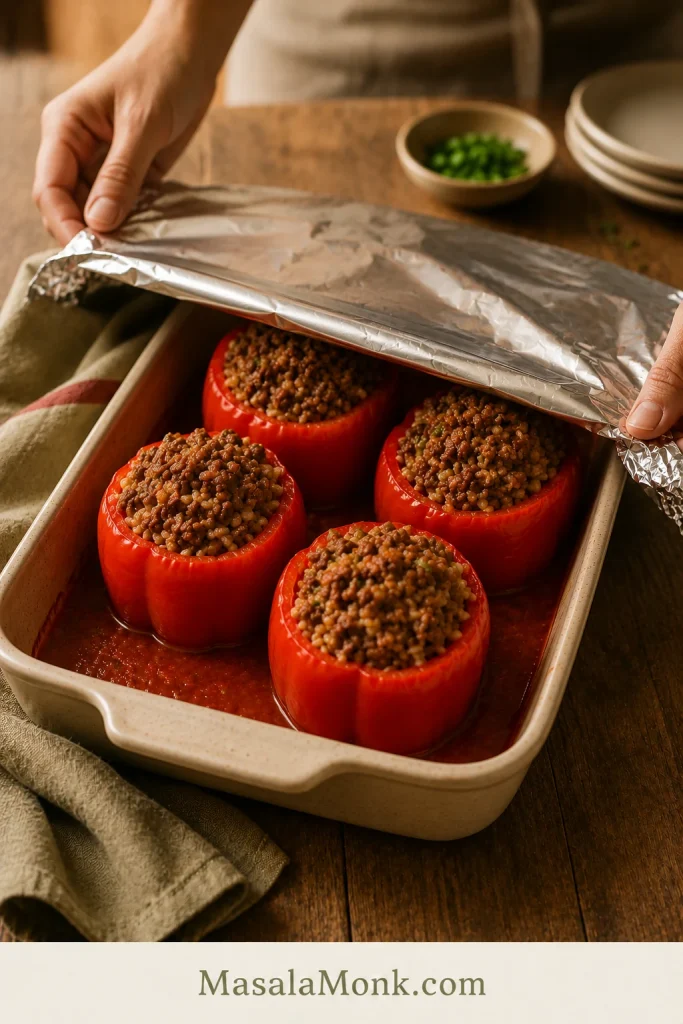
This is the no-guesswork version built to avoid those problems. The filling is cooked and seasoned before it ever goes into the peppers, the sauce stays underneath instead of drowning the dish, and the peppers bake covered first so they soften before the cheese goes on. By the time the foil comes off, the dish should smell like tomato sauce, garlic, roasted peppers, and melting cheese.

Think of this as classic baked stuffed bell peppers tuned specifically for red peppers: sweeter, softer in flavor, and especially good with tomato sauce, ground beef, cooked rice, and cheese. You get the old-fashioned dinner feeling, but with clear cues for what the filling, sauce, peppers, and cheese should look like at every step.

The promise

These stuffed red peppers bake up tender, saucy, and full of flavor, with a seasoned beef-and-rice center that holds together instead of turning loose and watery.

Quick Answer: How to Make Stuffed Red Peppers

To make stuffed red peppers, cut the tops off large red bell peppers and remove the seeds. Brown ground beef with onion, garlic, tomato paste, salt, pepper, and herbs, then stir in cooked rice and diced tomatoes. Spread tomato sauce or marinara in a baking dish, fill the peppers, cover with foil, and bake at 375°F / 190°C for 30 to 35 minutes. Uncover, add cheese, and bake for another 10 to 15 minutes, until the peppers are fork-tender, the sauce is bubbling, and the cheese is melted.

Remember the order: filling first, sauce underneath, foil first, cheese last. The key is not to rush the cheese; let the peppers soften under foil before finishing them uncovered.

Make This Version When

Make this version when you want classic stuffed bell peppers, but you do not want to gamble on the texture. The red peppers soften without collapsing, the beef-and-rice filling tastes seasoned before it goes into the oven, and the cheese goes on late enough to melt instead of drying out. It is hearty enough to count as dinner without needing much else, but still flexible enough for turkey, sausage, vegetarian, vegan, no-rice, or halved-pepper versions.

What the Finished Stuffed Red Pepper Should Look Like

Use this as the visual target before you start: the pepper should soften around the edges, while the rice, beef, sauce, and cheese still read as one generous filling.

Cut-open stuffed red pepper on a plate with visible beef, rice, tomato sauce, and melted cheese inside
A cut-open stuffed red pepper shows what matters inside: tender rice, seasoned beef, enough sauce to keep the filling juicy, and melted cheese in every forkful.

Stuffed Red Pepper Recipe Card

Easy Baked Stuffed Red Peppers

Whole red bell peppers filled with seasoned ground beef, cooked rice, tomato sauce, and melted cheese. A reliable baked stuffed peppers recipe that turns tender, saucy, and comforting without becoming watery.

Prep Time20 minutes
Cook Time50 minutes
Total Time1 hour 10 minutes
Servings6 stuffed red peppers
Oven Temperature375°F / 190°C
Baking Dish13×9-inch / 33×23 cm dish
Main MethodBake covered first, then finish uncovered with cheese

Ingredients

IngredientAmount
Large red bell peppers6
Olive oil2 tablespoons / 30 ml
Yellow onion, finely chopped1 medium / about 150 g
Garlic, minced3 cloves
Tomato paste2 tablespoons / about 30 g
Ground beef1 lb / 450 g
Cooked white or brown rice1½ cups / about 240 to 260 g
Diced tomatoes, with juices1 can, 14.5 oz / 411 g
Tomato sauce or marinara1½ cups / 360 ml
Italian seasoning or dried oregano1½ teaspoons
Salt1 teaspoon, plus more to taste
Black pepper½ teaspoon
Shredded mozzarella, Monterey Jack, cheddar, or a blend1 cup / about 110 g, or up to 1½ cups / 170 g for a cheesier top
Fresh parsleyOptional, for serving

Instructions

Build the Filling

  1. Preheat the oven. Heat the oven to 375°F / 190°C.
  2. Prepare the peppers. Slice the tops off the red bell peppers. Remove the seeds and membranes. If needed, trim a very thin slice from the bottom so the peppers stand upright, but do not cut through into the hollow center.
  3. Soften the onion. Warm the olive oil in a large skillet over medium heat. Add the onion and cook for 3 to 4 minutes, until softened.
  4. Build the flavor base. Add the garlic and tomato paste. Stir for about 1 minute, until the tomato paste darkens slightly and the garlic smells fragrant.
  5. Brown the beef. Add the ground beef, salt, black pepper, and Italian seasoning. Cook until the beef is browned and no longer pink, breaking it up as it cooks. Drain excess fat if the skillet looks greasy.
  6. Add rice and tomatoes. Stir in the cooked rice and diced tomatoes with their juices. Simmer for 3 to 5 minutes, until the mixture is moist but not soupy. Taste and adjust salt if needed.

Fill, Bake, and Finish

  1. Add sauce to the dish. Spread the tomato sauce or marinara in a shallow layer in the bottom of a 13×9-inch / 33×23 cm baking dish.
  2. Stuff the peppers. Spoon the beef and rice mixture into the peppers. Fill generously, but do not press it down hard.
  3. Bake covered. Place the peppers upright in the baking dish. Cover tightly with foil and bake for 30 to 35 minutes, until the pepper walls are starting to soften.
  4. Add cheese and finish uncovered. Remove the foil. Spoon a little sauce over the peppers if they look dry, then top with shredded cheese. Bake uncovered for 10 to 15 minutes, until the cheese is melted and the peppers are tender.
  5. Check doneness. The peppers are done when they are fork-tender but still holding their shape, the sauce is bubbling around the edges, the center is hot, and the cheese is melted.
  6. Rest before serving. Let them rest for 5 minutes. Spoon extra sauce from the dish over the top and finish with parsley if using.

Recipe Notes

  • Cooked rice gives the most reliable texture. Leftover rice works well.
  • Taste the filling before stuffing the peppers. It should taste slightly bold in the skillet because the pepper and rice will soften the flavor once baked.
  • If your marinara, canned tomatoes, or cheese are salty, start with ¾ teaspoon salt and adjust after the rice goes in.
  • For ground turkey or very lean beef, add an extra spoonful or two of sauce to keep the filling moist.
  • Very large peppers may need 5 to 10 extra minutes of covered baking time.
  • Let the peppers rest before serving so the filling settles instead of spilling out immediately.

Before You Start: The Stuffed Red Pepper Rules

Use these as your quick mistake-prevention cues, and your stuffed peppers with ground beef and rice are much less likely to turn watery, bland, undercooked, or dry on top.

RuleWhy It Matters
Use cooked riceIt prevents crunchy grains and makes the filling easier to season.
Cook the beef firstBrowning builds flavor and lets you drain excess fat.
Keep the filling thickThe mixture should mound slightly, not run across the skillet.
Use a shallow sauce layerSauce should cushion the peppers, not boil them.
Bake covered firstSteam softens the pepper walls before the top dries out.
Add cheese lateThe cheese melts cleanly instead of drying out while the peppers finish.
Rest before servingThe filling settles, and the peppers are easier to lift from the dish.

Table of Contents

What This Recipe Is Built Around

This is the classic baked stuffed bell pepper dinner, but tuned for red peppers: sweeter pepper walls, a thicker beef-and-rice filling, sauce underneath instead of too much liquid inside, and cheese added only once the peppers are nearly tender.

It is practical comfort food, not a fancy project. The dish works because the filling is seasoned well, the sauce is in the right place, and the covered bake gives the peppers enough time to soften before the top is finished.

If you like this kind of saucy, cheesy covered-bake dinner, these baked stuffed shells follow the same comfort-food logic with pasta, filling, sauce, and cheese.

Choose Your Stuffed Red Pepper Path

The main recipe is the classic stuffed bell peppers with ground beef and rice version. Use this table if you already know what style you want.

If You WantUse This Approach
Classic stuffed red peppersUse ground beef, cooked rice, tomato sauce, and melty cheese.
Softer peppersBake covered 5 to 10 minutes longer before adding cheese.
No boil stuffed peppersSkip boiling and let the covered bake soften the peppers.
Saucier peppersAdd a little extra marinara to the dish and spoon sauce over before serving.
Less watery peppersSimmer the filling until thick and finish the bake uncovered.
Ground turkey versionReplace beef with turkey and add a little extra oil or sauce.
Vegetarian versionUse beans, lentils, mushrooms, quinoa, vegetables, and cheese.
Vegan versionUse beans or lentils, rice or quinoa, tomato sauce, herbs, and vegan cheese or no cheese.
No-rice versionUse cauliflower rice, mushrooms, eggplant, extra meat, lentils, or beans.
Faster weeknight bakeUse halved peppers instead of whole peppers.

Why This Stuffed Red Pepper Recipe Works

The trick is not a special ingredient. It is timing and moisture. These stuffed red bell peppers work because the rice is already cooked, the beef is browned first, the sauce stays shallow, and the cheese goes on only after the peppers have started to soften.

  • Cooked rice prevents crunchy grains. The filling bakes evenly instead of waiting for dry rice to soften inside the pepper.
  • Browned beef gives better flavor. It also lets you drain extra fat before the rice and tomatoes go in.
  • Tomato paste deepens the skillet mixture. One minute in the pan makes the filling taste more rounded.
  • A shallow sauce layer prevents boiling. The sauce keeps the peppers moist without turning the dish soupy.
  • Foil softens the peppers first. The covered bake gives the pepper walls time to relax before the cheese is added.
  • A short rest helps the filling settle. The peppers lift from the dish more neatly after a few minutes.

Ingredients You’ll Need

The ingredients are familiar, which is exactly why the balance matters. A little tomato paste makes the beef taste deeper, cooked rice keeps the texture steady, and tomato sauce in the dish makes the peppers feel finished instead of dry.

Stuffed red pepper ingredients arranged on a board, including red bell peppers, ground beef, cooked rice, tomato sauce, cheese, onion, garlic, and herbs
The ingredients are simple, but each one has a job: peppers hold the filling, cooked rice gives structure, tomato sauce adds moisture, and cheese finishes the baked top.

Red Bell Peppers

Use large red bell peppers for this recipe. Red peppers are sweet, colorful, and mild, which makes them especially good with beef, rice, tomato sauce, and cheese. In some countries, red bell peppers are sold as red capsicum. Choose the large sweet kind, not small hot red peppers.

Ground Beef

Ground beef gives the filling its classic flavor. Beef that is around 85% to 90% lean works well because it has enough richness without making the dish greasy. The beef should taste a little bold in the skillet because the rice, pepper, and sauce will mellow it once everything bakes together.

Cooked Rice

Cooked rice is the most reliable choice for baked stuffed peppers. White rice, brown rice, basmati, jasmine rice, or leftover rice can all work. The important part is that the rice should already be cooked before it goes into the filling.

Tomato Paste, Diced Tomatoes, and Sauce

Tomato paste adds depth, diced tomatoes bring moisture and texture, and tomato sauce or marinara keeps the baking dish saucy. Together, they stop the filling from tasting flat or dry.

Cheese

Mozzarella gives a mild, stretchy melt. Monterey Jack melts smoothly and tastes creamy. Cheddar adds sharper flavor. Add the cheese near the end, when the peppers are almost tender, so it melts into the top instead of drying out while the peppers catch up.

Seasoning

Italian seasoning or oregano keeps the flavor classic. Paprika, chili flakes, basil, parsley, or a little cumin can also work depending on the version you want. Season the beef before adding the rice, because rice softens the flavor once it goes in.

Best Red Peppers to Use

Choose large, firm, glossy red bell peppers that are close to the same size. Similar-sized peppers bake more evenly, and flat-bottomed peppers are easier to stand upright in the dish.

  • Use: large red bell peppers.
  • Good backup: yellow or orange bell peppers.
  • For a sharper flavor: green bell peppers can work, but they taste less sweet.
  • Not ideal for this main recipe: mini peppers, cherry peppers, pimento peppers, long hot red peppers, or red jalapeños.

Mini peppers and pimento peppers are delicious, but they behave differently. They need different filling amounts and shorter cooking times, so save them for appetizer-style stuffed pepper recipes.

No Boil Stuffed Peppers: Do You Need to Boil or Pre-Bake?

You do not need to boil red peppers before stuffing them for this recipe. This no-boil method uses the covered bake to create enough steam to soften the peppers while the filling stays moist.

For very soft peppers, blanch the empty peppers in boiling water for about 5 minutes, then drain and dry them before stuffing. When you prefer peppers that hold their shape and keep a little bite, skip boiling and let the oven do the work.

With halved peppers, pre-baking is more useful than boiling. Bake the empty halves for 10 minutes, tip out any liquid, then add the filling. This helps prevent watery halves and shortens the final bake.

MethodUse It WhenWhat to Know
No boilingYou want classic whole stuffed red peppersGood balance of tenderness and shape
Blanch 5 minutesYou like very soft peppersDrain and dry well before stuffing
Pre-bake 10 minutesYou are using halved peppersTip out liquid before adding filling

Equipment

You need a large skillet for the filling and a snug 13×9-inch / 33×23 cm baking dish for the peppers. A snug dish helps the peppers support each other instead of tipping into the sauce.

  • 13×9-inch / 33×23 cm baking dish
  • Large skillet
  • Cutting board and sharp knife
  • Spoon for stuffing
  • Foil
  • Optional baking sheet under the dish to catch bubbling sauce

Cooked Rice or Uncooked Rice?

Use cooked rice for this stuffed red pepper recipe. Cooked rice lets you control the texture before the dish goes into the oven, so you are not guessing whether the grains will soften in time.

Side-by-side bowls of fluffy cooked rice and dry uncooked rice used to compare rice texture for stuffed peppers
For stuffed red peppers, cooked rice gives a more reliable texture because the grains are tender before baking. In contrast, uncooked rice needs extra liquid and can stay firm inside the peppers.

If rice texture is the part that usually trips you up, this guide on how to cook rice is useful before you make the filling.

Uncooked rice can work in some stuffed peppers with tomato sauce, but it needs more liquid, more time, and closer control. Without enough liquid, the rice can stay hard. With too much liquid, the peppers can become watery.

Cooked rice also makes the filling easier to taste and adjust. Rice absorbs seasoning, so the mixture may need a final pinch of salt after the grains go in.

Leftover rice tip: leftover rice is excellent here. Break up any clumps before stirring it into the beef and tomato mixture.

Leftover rice can do double duty: use some here, then save the rest for this shrimp fried rice recipe later in the week.

For uncooked rice, do not add it dry straight into the peppers. Simmer the grains with the meat, tomatoes, and extra liquid until they are mostly tender, then stuff the peppers and bake.

Do You Cook the Meat First?

Yes. Cook the beef first. It is one of the simplest ways to make stuffed peppers with ground beef and rice taste deeper and bake more evenly.

Browning the meat first helps the onion and garlic cook properly, gives you a chance to season the filling, and lets you drain off excess fat. It also makes the final bake more predictable because the oven’s job is to soften the peppers, heat the filling through, and melt the cheese — not cook raw meat hidden inside a pepper.

For a thermometer check, USDA guidance lists ground beef at 160°F / 71°C. Since the beef is browned before stuffing, the oven is mainly heating the filling through and finishing the peppers.

Red Sauce for Stuffed Peppers

The best red sauce for stuffed peppers is tomato sauce or marinara. Use about 1½ cups / 360 ml for six peppers, spread in a shallow layer under the peppers, then spoon the sauce over the top after baking.

How Much Sauce to Add First

Start with a thin layer across the bottom of the dish. That gives the peppers moisture from below without turning the baking dish into a pot of sauce.

Shallow tomato sauce layer spread across the bottom of a cream baking dish for stuffed red peppers
Next, spread tomato sauce or marinara in a thin, even layer. You need enough sauce to keep the peppers juicy, but not so much that they sit in a deep pool.

Think of the sauce as the cushion under the peppers, not a soup for them to sit in. You want enough to keep the dish moist and give every serving extra tomato flavor, but not so much that the peppers boil in liquid.

Sauce Cushion, Not Soup

This is the main sauce mistake to avoid. A shallow layer supports the peppers; a deep pool can make them taste more boiled than baked.

Comparison image showing stuffed peppers in a shallow tomato sauce layer beside peppers sitting in too much sauce
Too much sauce can turn stuffed peppers watery. Instead, use a shallow tomato sauce layer that keeps the peppers moist without making them taste boiled.

A good sauce layer should show up when you cut into the pepper, without making the pepper taste boiled.

The sauce in the dish is also your finishing sauce. Spoon it over the peppers at the table so the rice and beef taste juicy all the way through.

Jarred sauce is fine, but if you want the dish to feel more homemade, use this marinara sauce recipe as the base.

Sauce StyleUse It For
Plain tomato sauceClassic stuffed red peppers with a clean tomato flavor
MarinaraAn easy shortcut when you want more flavor
Slightly sweet red sauceOld-fashioned stuffed pepper flavor
Spicy red sauceAdd chili flakes, cayenne, or chopped jalapeño

When tomatoes are in season, this tomato sauce from fresh tomatoes can also become the base sauce for the baking dish.

For very thick sauce, loosen it with a splash of broth or water before adding it to the dish. With thin sauce, use a little less and let the peppers finish uncovered so excess moisture can reduce.

How to Make Stuffed Red Peppers

The recipe card gives the exact steps. This section is the visual walkthrough: what you should see, smell, and check as the peppers move from raw ingredients to a finished baked dinner.

1. Prep the Red Peppers

After trimming, the peppers should look like little cups and stand upright on their own. Keep the walls intact and avoid cutting through the bottom, because any hole in the base lets filling and sauce escape into the dish.

Hollowed red bell peppers standing upright on a wooden cutting board with pepper tops, seeds, and a knife nearby
First, trim the red bell peppers into sturdy cups. Keeping the bottoms intact helps the beef-and-rice filling and tomato sauce stay inside instead of leaking into the dish.

2. Cook the Tomato Paste and Beef

The tomato paste should darken slightly before the beef goes in. That quick minute makes the filling taste deeper and less raw-tomato sharp. Once the beef is browned, the skillet should smell savory, garlicky, and tomato-rich, not flat or boiled.

Ground beef, rice, tomatoes, onion, and garlic cooking together in a skillet for stuffed red pepper filling
Browning the ground beef before stuffing builds deeper flavor, cooks off extra moisture, and lets you season the filling before it gets tucked into the peppers.

3. Bring the Filling Together

After the cooked rice and diced tomatoes go in, look for a skillet mixture that is moist, glossy, and thick enough to mound slightly. If it looks wet enough to pour, keep simmering. It should sit on the spoon, not run off it.

Thick beef and rice filling holding its shape on a spoon above a skillet with no visible liquid pooling
Before stuffing, check the filling texture. It should mound on the spoon instead of running across the skillet, which is one of the easiest ways to prevent watery stuffed peppers.

4. Fill Without Packing Too Hard

Fill each pepper generously, but keep the beef-and-rice mixture loose enough that a spoon can still move it. Pressing too hard makes the center heat less evenly and can cause the filling to spill out when served.

Red bell peppers filled with beef and rice in a baking dish before baking and before cheese is added
Once the filling is ready, spoon it into the peppers generously but gently. A looser beef-and-rice filling heats more evenly than one packed down too tightly.

5. Bake Covered Before Adding Cheese

Before the cheese goes on, the pepper walls should already be starting to soften. If they still feel stiff when pierced with a fork, cover the dish again and give them a few more minutes. The cheese should finish the dish, not wait in the oven while the peppers catch up.

Hands placing foil over a baking dish of stuffed red peppers before baking
Cover the stuffed red peppers for the first part of baking so steam can soften the pepper walls before the cheese is added.

6. Add Cheese Near the End

Once the peppers have softened under foil, add the cheese and return the dish to the oven uncovered. The cheese should finish the top, not sit in the oven while firm pepper walls catch up.

Hand sprinkling shredded cheese over stuffed red peppers after the covered baking stage
After the peppers begin to soften, add the cheese. This timing gives you a melted, creamy top without leaving the cheese in the oven long enough to dry out.

7. Rest and Spoon Sauce Over the Top

When the stuffed peppers come out of the oven, the sauce should be bubbling around the base and the cheese should be melted into the top. Let them rest for 5 minutes, then spoon sauce from the dish over each pepper before serving.

Bake Time and Temperature

For whole stuffed red peppers, 375°F / 190°C is the sweet spot. It is hot enough to soften the peppers in a reasonable time, but gentle enough that the filling stays moist and the sauce does not burn.

StepTimeWhat Happens
Bake covered30 to 35 minutesPeppers soften and filling heats through
Bake uncovered with cheese10 to 15 minutesCheese melts and the top finishes
Rest5 minutesFilling settles and serving gets easier

Bubbling Sauce and Melted Cheese Cues

At the end of baking, look at the sauce and the pepper walls before you rely on the clock. The dish should look hot and settled, not dry or collapsed.

Finished baked stuffed red peppers with melted cheese and bubbling tomato sauce in a cream ceramic dish
Look for the real doneness signs: bubbling tomato sauce, melted cheese, hot filling, and red peppers that are tender but still standing. These cues matter more than the timer alone.

Total baking time is usually 40 to 50 minutes. Start checking around 40 minutes if your peppers are small, and closer to 50 minutes if they are large and thick-walled. The fork test matters more than the clock.

When the foil comes off, the peppers should look relaxed around the edges, not collapsed.

The peppers are ready when they are tender enough to pierce with a fork but still hold their shape. If they are still too firm, cover the dish again and bake a little longer before adding more uncovered time.

The Fork-Tender Test

For the final check, pierce the side of a pepper instead of judging only by the cheese. Tender but upright is the goal.

Fork piercing the side of a baked stuffed red pepper with melted cheese, beef filling, and tomato sauce
Use the fork test near the end of baking. The pepper wall should feel tender when pierced, but the stuffed pepper should still hold its shape in the sauce.

Should Stuffed Peppers Be Baked Covered or Uncovered?

Stuffed peppers should be baked covered first, then uncovered at the end. The covered bake softens the peppers; the uncovered finish melts the cheese and reduces extra moisture.

If you bake whole stuffed peppers uncovered from the beginning, the cheese and top of the filling can dry before the pepper walls become tender. Covering first and uncovering late makes the difference between peppers that taste baked and peppers that taste boiled.

How to Keep Stuffed Red Peppers From Getting Watery

Watery stuffed peppers usually happen for one of three reasons: the filling was too loose, the peppers released a lot of liquid, or the dish had too much sauce. The fix is not complicated, but you need to control moisture before and during baking.

Infographic showing four causes and fixes for watery stuffed peppers, including loose filling, too much sauce, soft peppers, and no uncovered finish
For better texture, check the four usual trouble spots: loose filling, too much sauce, soft peppers, and skipping the uncovered finish.
  • Use cooked rice. It absorbs flavor without needing extra liquid inside the pepper.
  • Brown and drain the beef. Excess fat can make the filling feel greasy and loose.
  • Cook the filling until it is thick enough to mound. Let extra tomato liquid simmer off before stuffing.
  • Do not flood the baking dish. Use a shallow layer of sauce, not a deep pool.
  • Bake covered first, then uncovered. Covered baking softens; uncovered baking lets extra moisture reduce.
  • Use firm peppers. Older, softer peppers collapse and release more liquid.
  • Rest before serving. Five minutes helps the filling settle.
  • For halved peppers, pre-bake and tip out liquid. Halved peppers can release moisture quickly.

Texture cue: the filling should look glossy before stuffing, but not loose enough to run across the skillet. If it looks soupy, simmer it a few minutes longer.

Freezer note: for the best texture, freeze cooked stuffed peppers rather than raw stuffed peppers. Raw peppers can release more water after thawing.

Whole vs Halved Stuffed Red Peppers

This recipe uses whole upright peppers because they give the classic stuffed pepper presentation and hold a generous amount of filling. They need a longer bake and a snug dish, but they look beautiful on the plate.

Halved peppers are better when you want a faster weeknight bake. They cook faster, are easier to portion, and give you more surface area for cheese. Because the cut sides release moisture quickly, a short pre-bake helps.

Side-by-side comparison of whole stuffed red peppers and halved stuffed red peppers topped with cheese
Whole stuffed red peppers give you the classic upright presentation and hold more filling. Meanwhile, halved peppers cook faster and create more surface area for melted cheese.

How to Make Halved Stuffed Red Peppers

To use halved peppers, slice them from stem to base, remove the seeds, and place them cut-side up in the dish. Pre-bake the empty halves at 375°F / 190°C for 10 minutes, then tip out any pooled liquid.

Add the filling, cover the dish, and bake for 15 to 20 minutes. Finish uncovered with cheese for another 5 to 10 minutes, until the cheese melts and the peppers are tender. Halved peppers cook faster than whole peppers, so start checking early.

Easy Variations

Once you know the base method, the filling can change without the whole recipe falling apart. Keep the mixture thick, keep the sauce shallow, bake covered first, and add cheese near the end.

Guide board with stuffed red pepper variations labeled turkey, sausage, vegetarian, vegan, no rice, feta, cream cheese, and grilled
Once the base method works, you can change the filling without losing the texture logic. Turkey, sausage, vegetarian, vegan, no-rice, feta, cream cheese, and grilled versions all follow the same core cues.

Ground Turkey Stuffed Red Peppers

Ground turkey works well when you want a lighter filling. Since turkey is leaner than beef, add a little extra olive oil or a few extra spoonfuls of tomato sauce so the center does not turn dry. Season well, because turkey needs more help than beef.

Sausage Stuffed Red Peppers

For a richer, more seasoned filling, use half ground beef and half Italian sausage. Because sausage brings salt and flavor, reduce the added salt at first and adjust after tasting.

Vegetarian Stuffed Red Peppers

For a vegetarian version, replace the beef with black beans, pinto beans, lentils, mushrooms, quinoa, or extra vegetables. Beans and lentils make the peppers hearty; mushrooms add savory depth if you cook off their moisture first.

Vegan Stuffed Red Peppers

For a vegan version, use beans, lentils, mushrooms, rice, quinoa, or vegetables cooked down with tomato sauce and herbs. Skip the cheese or use vegan cheese. Keep the mixture moist and well-seasoned so it does not taste like plain rice and vegetables.

Stuffed Red Peppers Without Rice

For no-rice stuffed red peppers, use cauliflower rice, chopped mushrooms, cooked eggplant, extra ground beef, ground turkey, lentils, or beans. If you use watery vegetables like zucchini, mushrooms, or eggplant, cook them first so they release moisture before going into the peppers.

Feta Stuffed Red Peppers

For a Mediterranean-style version, use feta, herbs, lemon, olives, chickpeas, couscous, or rice. Because feta is salty, taste the filling before adding extra salt. This version works especially well with halved peppers.

Cream Cheese Stuffed Red Peppers

Cream cheese stuffed red peppers are usually more of an appetizer than a full dinner. For that style, mini red peppers or small sweet peppers work better than large whole bell peppers. Mix cream cheese with herbs, garlic, cheddar, chives, smoked paprika, or crispy breadcrumbs, then bake or air fry until warm.

Grilled Stuffed Red Peppers

Grilled stuffed red peppers work best with a fully cooked filling. Place the stuffed peppers over medium heat, close the grill, and cook until the pepper walls soften and the center is hot. Add cheese near the end so it melts without burning.

What to Serve With Stuffed Red Peppers

This dish can be a full meal on its own because it already has vegetables, protein, rice, sauce, and cheese. On a busy night, choose one simple side based on the kind of plate you want.

  • Fresh and crisp: a cucumber salad for something cold and tangy
  • Starchy and cozy: roasted potatoes or warm bread
  • Sauce-friendly: homemade garlic bread for catching extra tomato sauce
  • Light and vegetable-heavy: steamed broccoli, green beans, or a simple green salad
  • For spicy versions: plain yogurt or sour cream

If you want a soup-and-peppers dinner, a bowl of minestrone soup keeps the meal vegetable-heavy without making it feel too rich.

Make Ahead, Storage, Freezing, and Reheating

Make Ahead

You can make the filling 1 to 2 days ahead and store it in the fridge. You can also stuff the peppers several hours ahead, cover the dish, and refrigerate until ready to bake. If baking straight from the fridge, add about 5 to 10 extra minutes to the covered baking time.

For the cleanest make-ahead stuffed peppers, keep a little extra sauce ready. Cold filling can feel drier when it goes into the oven, so spooning sauce into the dish before baking helps everything heat more evenly.

Storage

Store leftovers in an airtight container in the fridge for 3 to 4 days. Keep extra sauce with the peppers if possible, because it helps them reheat without drying out.

That timing also matches USDA leftover guidance, which recommends keeping cooked leftovers in the refrigerator for 3 to 4 days.

Freezing

These peppers freeze best after they are cooked. Let them cool completely, then wrap them well or store them in freezer-safe containers. Freeze for up to 2 to 3 months.

Raw stuffed peppers can be frozen, but the texture is usually softer and wetter after thawing. For the best result, bake first, cool, then freeze.

Reheating

To reheat in the oven, place the peppers in a baking dish with a spoonful of sauce, cover, and warm at 350°F / 175°C until the center is hot. The microwave is faster, but the peppers will be softer. Add a little sauce before reheating if the filling looks dry.

Troubleshooting

Most stuffed red pepper problems come down to moisture, timing, or seasoning. Use this table if something feels off.

ProblemLikely CauseFix
Peppers are wateryLoose filling, too much sauce, or peppers released liquidSimmer filling longer, use less sauce, bake uncovered at the end, and rest before serving
Peppers are still firmNot enough covered baking timeCover again and bake 5 to 10 minutes longer
Rice is undercookedUncooked or partly cooked rice was addedUse fully cooked rice for this recipe
Filling tastes blandNot enough seasoning before rice was addedSeason the beef well and use tomato paste, garlic, herbs, and enough salt
Filling is dryVery lean meat or not enough sauceAdd extra tomato sauce or a splash of broth
Peppers collapsedOverbaking or very soft peppersUse firm peppers and bake only until tender
Cheese browned too fastCheese was added too earlyAdd cheese during the last 10 to 15 minutes only
Filling spills out when servedPeppers were overfilled or served immediatelyPack gently and rest 5 minutes before lifting from the dish
Peppers will not stand uprightUneven bottoms or dish is too largeTrim a tiny slice from the bottom or use a snugger dish

FAQ

Do you cook rice before adding it to stuffed red peppers?

Yes. Cooked rice gives the most reliable texture and keeps you from finding hard grains inside an otherwise tender pepper. Leftover rice works well.

Can I use uncooked rice in stuffed red peppers?

You can, but cooked rice is easier. If using uncooked rice, simmer it with the filling and extra liquid until mostly tender before stuffing the peppers.

Should the ground beef be cooked before stuffing peppers?

Yes. Brown the beef first so the filling tastes deeper, releases excess fat in the skillet, and heats more predictably in the oven.

Do you have to boil red peppers before stuffing them?

No. This recipe uses a no-boil method. Baking the peppers covered gives enough steam to soften them.

How long do stuffed red peppers take in the oven?

Whole peppers usually take 40 to 50 minutes at 375°F / 190°C: 30 to 35 minutes covered, then 10 to 15 minutes uncovered with cheese.

What temperature is best for baking stuffed red peppers?

375°F / 190°C works well because it gives whole peppers time to soften while keeping the filling moist.

How do I know when stuffed red peppers are done?

The peppers should be fork-tender but still holding their shape. Around the edges, the sauce should bubble, the filling should be hot, and the cheese should be melted.

Why are my stuffed peppers watery?

They can turn watery if the filling is loose, the meat was not drained, the dish had too much sauce, or the peppers released liquid. Simmer the filling until thick and finish the bake uncovered.

Do stuffed peppers need to be covered while baking?

Yes, for the first part of baking. Covering traps steam and helps the peppers soften; uncover near the end for melted cheese and reduced moisture.

Is it better to make stuffed peppers whole or halved?

Whole peppers look classic and hold more filling. Halved peppers cook faster, are easier to eat, and give more surface area for cheese.

What sauce goes with stuffed red peppers?

Tomato sauce or marinara is the easiest choice because it keeps the peppers moist and gives you sauce to spoon over the finished dish.

Which cheese melts best on stuffed peppers?

Mozzarella, Monterey Jack, cheddar, or a blend all work. For the final texture, mozzarella is mild and stretchy, Monterey Jack is creamy, and cheddar tastes sharper.

How do you make stuffed red peppers without rice?

Replace the rice with cauliflower rice, mushrooms, eggplant, extra meat, lentils, beans, or quinoa. Cook watery vegetables first so they do not loosen the filling.

What is a good vegetarian filling for red peppers?

Beans, lentils, mushrooms, quinoa, rice, corn, tomatoes, onions, garlic, herbs, and cheese all work well. Keep the filling hearty and well-seasoned.

Can I make stuffed red peppers ahead of time?

Yes. Make the filling 1 to 2 days ahead or stuff the peppers several hours ahead. If baking from cold, add 5 to 10 extra minutes to the covered bake.

Do stuffed red peppers freeze well?

Yes. They freeze best after baking. Cool completely, wrap or store airtight, and freeze for up to 2 to 3 months.

How do you reheat stuffed red peppers without drying them out?

Reheat them covered with a spoonful of sauce in the dish. Use a 350°F / 175°C oven until the center is hot, or microwave gently for a softer result.

Can I use red capsicum for this recipe?

Yes. Red capsicum is another name for red bell pepper in many countries. Use large sweet red capsicum, not small hot red peppers.

Are red peppers better than green peppers for stuffed peppers?

Red peppers are sweeter and milder, which works especially well with tomato, beef, rice, and cheese. Green peppers still work if you prefer a sharper flavor.

Final Bite

The best part is cutting into the pepper while the sauce is still warm enough to slip into the rice and beef. That is when the dish stops feeling like separate parts and becomes the comfort food it is supposed to be: soft red pepper, savory filling, tomato sauce, and melted cheese in one forkful.

Tomato sauce being spooned over a cut-open stuffed red pepper with beef, rice, and melted cheese
Finally, spoon extra tomato sauce over the stuffed red peppers before serving. That last spoonful brings the rice, beef, pepper, and cheese together in the first bite.

Let the peppers rest just long enough for the first forkful to hold together, then serve while the sauce is still warm and glossy.

Posted on — Leave a comment

Rotel Dip Recipe: Easy Velveeta Cheese Dip with Sausage, Beef & Crock Pot Tips

A tortilla chip lifting warm Rotel dip with melted Velveeta, sausage crumbles, diced tomatoes, and green chilies from a dark serving bowl.

This Rotel dip recipe is for the moment when the chips are open, people are hovering, and the cheese needs to stay creamy long after the first scoop. It is not fancy food. Think warm, glossy, salty, tomato-chile cheese dip that does exactly what party food should do: disappear from the table.

The best bowl should be soft enough to drag through with a chip, thick enough to cling, but not so stiff that the chip snaps. That texture comes from a few simple choices: use the Rotel undrained, melt the cheese gently, drain the meat well, and keep the finished dip warm instead of hot.

Keep it classic with Velveeta and Rotel when you need something fast. Add ground beef when you want it hearty and mild. Choose sausage when you want a bolder game-day bowl. Stir in cream cheese when you want it thicker and richer. Use the slow cooker when people are going to keep coming back for one more scoop.

Quick Answer: How to Make Rotel Dip

To make classic Rotel dip, combine 16 oz Velveeta with one 10 oz can of Rotel, undrained. Melt gently on the stovetop, in the microwave, or in a slow cooker until smooth. For a heartier dip, add 1 lb cooked and drained sausage or ground beef.

For the best all-around party dip, use sausage. A milder, family-friendly bowl works better with ground beef. Need the fastest version? Skip the meat. Want the thickest scoop? Add cream cheese.

There is no fancy sauce technique here. The Rotel liquid loosens the cheese, Velveeta keeps it steady, and cooked meat makes it hearty. Once everything is melted, your only job is to keep it soft and stir it now and then.

  • Classic ratio: 16 oz Velveeta + one 10 oz can Rotel, undrained
  • Cream cheese version: add 4 to 8 oz cream cheese for a thicker scoop
  • Crock pot version: cook on low for 2 to 3 hours, then switch to warm
  • Main rule: melt gently; do not boil the cheese mixture

The Easy Rotel Dip Ratio

This simple ratio gives the dip enough cheese to stay creamy, enough Rotel to loosen it, and enough meat to feel like a real party bowl.

Velveeta, an open can of Rotel, cooked ground meat, and tortilla chips arranged on a dark wooden table.
For the easiest Rotel dip ratio, use 16 oz Velveeta, one 10 oz can of Rotel, and 1 lb cooked meat for a heartier batch.

Rotel Dip Recipe Card

Rotel Dip Recipe

A creamy, scoopable cheese dip made with Velveeta, Rotel tomatoes with green chilies, and optional ground beef or sausage. Make it on the stovetop for a quick appetizer, or move it to a crock pot to keep it warm for a crowd.

  • Prep time: 5 minutes
  • Cook time: 10 to 15 minutes
  • Total time: 15 to 20 minutes
  • Servings: 10 to 12 appetizer servings
  • Best for: game day, potlucks, parties, movie nights, nachos, and snack boards

Ingredients

  • 1 lb ground beef or breakfast sausage / 454 g, optional but recommended for a heartier dip
  • 16 oz Velveeta, cubed / 454 g
  • 1 can Rotel diced tomatoes and green chilies, undrained / 10 oz / about 283 g
  • 1/2 tsp chili powder or 1 to 2 tbsp taco seasoning, optional
  • 1 to 3 tbsp milk / 15 to 45 ml, optional, only if the cheese needs thinning
  • 4 to 8 oz cream cheese / 113 to 227 g, optional, for a thicker and richer dip
Cubed Velveeta, an open can of Rotel, cooked meat, cream cheese, milk, seasoning, and a spoon arranged on a wooden board.
Before cooking, set up each ingredient by job: Velveeta melts smoothly, Rotel adds tomato-chile flavor, meat adds body, and cream cheese makes the dip richer.

Instructions

  1. Brown the ground beef or sausage in a large skillet over medium-high heat, breaking it into small crumbles as it cooks.
  2. Drain the meat very well. Keep the crumbles, not the grease.
  3. Reduce the heat to medium-low.
  4. Add the cubed Velveeta, undrained Rotel, and chili powder or taco seasoning if using.
  5. If using cream cheese, add it now in small cubes so it melts evenly.
  6. Stir until the cheese melts and the mixture looks smooth, glossy, and creamy.
  7. If it is too thick, add milk 1 tablespoon at a time until it is easy to scoop.
  8. Taste before serving. Add a pinch of chili powder, taco seasoning, or hot sauce only if it needs more flavor.
  9. Serve warm with tortilla chips, or transfer to a slow cooker on warm for parties.

Recipe Notes

  • For 2-ingredient Rotel dip, skip the meat and use only Velveeta and Rotel.
  • Mild breakfast sausage keeps the batch crowd-friendly, while hot sausage adds more heat.
  • Lean ground beef works well because it keeps the bowl hearty without adding too much grease.
  • Use 4 oz cream cheese for a slightly richer dip or 8 oz for a thick sausage-style batch.
  • If using sausage or taco seasoning, taste before adding extra salt.
  • Cook ground beef or sausage fully before adding the cheese. Ground meat and sausage should reach 160°F / 71°C; FoodSafety.gov has a safe minimum temperature chart if you want a reference.
  • Do not boil the cheese after it melts. Low, steady heat keeps the texture smoother.

What the Dip Should Look Like

Finished Rotel dip should look glossy, melted through, and thick enough to coat a chip. You should see small tomato and green chile pieces suspended in the cheese, not watery liquid around the edges.

When the dip falls from a spoon in slow ribbons, it is ready. A stiff clump needs gentle heat and a little milk. Grease pooling on top usually means the meat needed more draining. The final test is simple: a sturdy chip should scoop through without snapping.

Look for Slow Ribbons

The spoon tells you more than the clock. Smooth ribbons mean the cheese has melted evenly and the dip is ready to serve.

A spoon lifting glossy Rotel dip with diced tomatoes and green chilies so the dip falls back into the bowl in thick ribbons.
Once the cheese falls from the spoon in slow ribbons, the texture is right: melted through, easy to dip, and still strong enough for chips.

Which Version Should You Make?

Keep this ratio handy: 16 oz Velveeta, one 10 oz can Rotel, and 1 lb meat if you want the bowl hearty. From there, choose the version that fits the table.

SituationMake This
Need dip in 10 minutes2-ingredient Velveeta + Rotel
Want the best all-around party bowlSausage + Velveeta + Rotel
Serving kids or spice-sensitive guestsGround beef + mild Rotel
Want thicker scoopsAdd 4 to 8 oz cream cheese
Want the richest versionSausage + cream cheese + Velveeta + Rotel
Keeping it warm for a partyUse the crock pot on warm after melting
Dip got too thickRewarm gently and add milk slowly
Making a bigger party batch32 oz Velveeta + two cans Rotel + 1 to 2 lb meat

Match the Version to the Table

Use the version guide when you are choosing between fast, mild, bold, thick, or slow-cooker friendly.

Four bowls of Rotel dip on a dark table labeled meatless, ground beef, sausage, and cream cheese, with tortilla chips nearby.
Next, match the version to the table: meatless for speed, ground beef for mild flavor, sausage for game day, and cream cheese for thicker scoops.

For most parties, sausage with original Rotel is the safest bold version. A milder family bowl is easier to love with ground beef and mild Rotel.

Need more detail before choosing? Compare the ground beef version, sausage version, cream cheese version, or crock pot method.

Why This Cheese Dip Works

This dip works because every ingredient has a job, and none of them ask much from you.

  • Velveeta melts smoothly. It gives the bowl that classic creamy texture without needing a roux or careful cheese sauce technique.
  • Rotel adds flavor and moisture. The tomatoes and green chilies bring tang, gentle heat, and enough liquid to loosen the cheese.
  • Well-drained meat keeps it clean. Ground beef or sausage makes the bowl more filling, but extra grease can float on top if the meat is not drained.
  • Low heat protects the texture. Cheese dip does not need to boil. It needs to melt gently until loose, glossy, and dippable.
  • A slow cooker solves the party problem. Once melted, the warm setting keeps the cheese soft enough for chips without constant reheating.

If you like understanding why cheese turns smooth instead of grainy, this easy cheese sauce recipe goes deeper into gentle heat and creamy texture.

What Is Rotel Dip?

Rotel dip is the quick American-style cheese dip people make when they want melted cheese, tomato-chile flavor, and almost no prep. The classic version uses Velveeta because it melts smoothly and stays creamy, while Rotel adds tomatoes, green chilies, and just enough liquid to loosen the cheese.

The familiar 10 oz can plus 16 oz cheese ratio is also the brand-style queso formula. Ro-Tel’s Famous Queso Dip uses a 10 oz can of Ro-Tel, undrained, with a 16 oz package of Velveeta.

Searchers may call this Rotel cheese dip, Velveeta Rotel dip, Rotel queso dip, sausage Rotel dip, or hamburger cheese dip, but the idea is usually the same: melted cheese, Rotel, and sometimes meat.

Once you know the basic idea, the ingredient choices are simple: cheese controls the texture, Rotel brings the tomato-chile flavor, and meat decides how filling the bowl feels.

Ingredients You’ll Need

Velveeta

Velveeta gives this recipe its familiar party texture: creamy, steady, and almost impossible to mess up if you keep the heat low. A 16 oz block gives one standard batch the texture people expect from Velveeta Rotel dip.

Regular Velveeta gives the classic flavor. Queso blanco Velveeta also works for a lighter-colored dip. Shredded cheddar alone can turn grainy, so it works better with cream cheese in the no-Velveeta option.

Rotel Tomatoes and Green Chilies

One 10 oz can is the right amount for one 16 oz block of Velveeta. Pour in the tomatoes, chilies, and liquid together; that liquid keeps the cheese from turning stiff. The tomato and green chile pieces also keep the bowl from tasting flat.

Original Rotel is the default for that familiar tomato-chile bite. Mild Rotel is better for a gentle, crowd-friendly bowl. Hot Rotel works when you want more heat.

Ground Beef or Sausage

Meat is optional, but it makes the cheese dip more filling. Ground beef brings a milder, heartier flavor. Sausage makes it bolder, saltier, and more game-day friendly.

For one standard batch, cook 1 lb of ground beef, breakfast sausage, pork sausage, or hot sausage. Break it into small crumbles, spoon off excess fat, and then add the cheese and Rotel.

Cream Cheese

A little cream cheese gives the dip more body; a full 8 oz block turns it into a thicker, richer party scoop. It works especially well with sausage and in no-Velveeta versions.

Cut it into small cubes before adding it so it melts evenly. Use 4 oz when you still want classic queso energy; go up to 8 oz when you want the chip to come up loaded.

Seasoning and Heat

You do not need much seasoning because Velveeta, Rotel, and sausage already bring flavor. For more depth, add a little chili powder, taco seasoning, garlic powder, hot sauce, or chopped jalapeños. Start light, especially with sausage or taco seasoning.

How to Make Rotel Dip

The method is simple: cook the meat if you are using it, turn the heat down, melt the cheese with Rotel, and thin only if the dip needs it.

Stovetop Method

  1. Brown the ground beef or sausage in a large skillet over medium-high heat.
  2. Drain the meat well and return it to the pan.
  3. Lower the heat to medium-low.
  4. Add cubed Velveeta and undrained Rotel.
  5. Add cream cheese now if using it.
  6. Stir until the cheese melts into a smooth dip.
  7. Add a splash of milk only if the dip is too thick.

Drain the Meat Well

Draining the meat is the small step that keeps the finished dip rich instead of oily.

Cooked sausage crumbles in a skillet with a spoon removing excess grease before the meat is added to cheese dip.
After browning sausage or ground beef, drain it well so the cheese dip stays savory and rich without a greasy layer on top.

Once the meat is drained, add the Rotel with its liquid. That can liquid is part of the sauce, helping the cheese loosen while carrying tomato-chile flavor through the whole pan.

Use the Rotel Liquid

Pour in the tomatoes, green chilies, and liquid together before the cheese fully melts, so the mixture has enough moisture from the start.

Undrained Rotel tomatoes, green chilies, and liquid being poured from a can over cubed Velveeta in a dark pan.
When adding Rotel, pour in the tomatoes, green chilies, and liquid together; that juice loosens the Velveeta and keeps the dip scoopable.

Stop when the cheese looks glossy and the dip moves slowly from the spoon, not when it starts bubbling. High heat can make the edges oily, the texture heavy, or real cheese grainy.

Melt the Velveeta Gently

Low heat gives the cheese time to melt into the Rotel liquid, so the dip stays glossy and smooth.

Cubed Velveeta melting with Rotel tomatoes and green chilies in a skillet while a spoon stirs the mixture.
As the Velveeta melts, keep the heat gentle. The goal is glossy, dippable cheese, not a bubbling pot that turns heavy or oily.

Making this ahead for a crowd? Use the crock pot method. If the texture changes while it sits, the troubleshooting guide will help you bring it back.

Microwave Method

The microwave is best when you are making the fast meatless version and just need cheese dip on the table now. Add cubed Velveeta and undrained Rotel to a microwave-safe bowl. Microwave on high for 2 to 3 minutes, stir well, then continue in 30 to 60 second bursts until the cheese is melted through.

If adding ground beef or sausage, cook and drain the meat separately first, then stir it into the melted cheese mixture.

Slow Cooker Method

For parties, the slow cooker is the easiest method. Brown and drain the meat first, then add the meat, cubed Velveeta, and undrained Rotel to the slow cooker. Cook on low for 2 to 3 hours or high for 1 to 2 hours, stirring occasionally. Once smooth, switch to warm for serving.

2-Ingredient / Meatless Rotel Dip

When speed matters more than making it hearty, skip the meat and keep the bowl simple: Velveeta and Rotel. This is the fastest version and the easiest one to make at the last minute.

  • 16 oz Velveeta, cubed / 454 g
  • 1 can Rotel, undrained / 10 oz / about 283 g

Melt them together on the stovetop or in the microwave, stirring until smooth. It is lighter than the ground beef or sausage batch, but it still gives you that classic warm cheese-and-chile flavor. Corn or beans can make it more filling, but they move the recipe into a different style.

Ground Beef Version

Start here when you want the dip to feel like food, not just a snack, but still keep the flavor mild enough for everyone. Ground beef makes the bowl feel more like a filling snack than plain melted cheese, while still letting the tomato-chile flavor come through.

For one batch, use 1 lb ground beef, 16 oz Velveeta, and one 10 oz can Rotel. Brown the beef, break it into small crumbles, and drain it well before adding the cheese and Rotel. You may know this as hamburger Rotel dip, hamburger cheese dip, or Velveeta cheese dip with hamburger meat.

A dark bowl of Rotel dip with fine ground beef crumbles, melted Velveeta, diced tomatoes, green chilies, and tortilla chips.
For a milder bowl, ground beef gives this dip taco-night flavor that works with chips, nachos, baked potatoes, or a mixed crowd.

Sausage Version

Sausage is the game-day version: bolder, saltier, and a little more “people keep coming back” than ground beef. The sausage version smells richer and more savory as it melts, which is why it feels especially right for game day.

A standard sausage batch needs 1 lb breakfast sausage, 16 oz Velveeta, and one 10 oz can Rotel. Mild sausage keeps the dip crowd-friendly. Hot sausage makes it spicier and pairs well with original or hot Rotel. Cook the sausage fully, drain it well, and leave the grease behind before the cheese goes in.

Close-up of sausage Rotel dip with melted cheese, browned sausage crumbles, diced tomatoes, and green chili pieces.
For a bolder party dip, sausage brings deeper savory flavor, more texture, and a stronger game-day feel than ground beef.

This is also the option that works especially well with cream cheese. Add 4 to 8 oz when you want a thicker, richer scoop.

Cream Cheese Version

Cream cheese is for the thick-scoop people. It turns the dip into a heavier, richer scoop — the kind that sits on a sturdy chip instead of sliding right off.

Add 4 oz cream cheese for extra creaminess or 8 oz cream cheese for a thick sausage-style dip. Cut it into small cubes and let it soften slightly so it melts evenly.

A hand holding a tortilla chip topped with thick cream cheese Rotel dip, diced tomatoes, green chilies, and small meat pieces.
Add cream cheese when you want a heavier scoop; it makes the cheese dip richer, sturdier, and easier to load onto thick chips.

Because cream cheese makes the dip thicker, it pairs especially well with the chip test and the sturdy serving ideas below.

Slow Cooker / Crock Pot Rotel Dip

The slow cooker is the best choice when the cheese needs to stay soft for a party. It melts everything gently and keeps the finished bowl ready for repeat scoops.

BatchUse ThisSlow Cooker Size
Standard batch1 lb cooked meat + 16 oz Velveeta + 1 can Rotel3 to 5 quart
Small meatless batch16 oz Velveeta + 1 can Rotel2 to 3 quart
Big party batch1 to 2 lb cooked meat + 32 oz Velveeta + 2 cans Rotel4 to 6 quart
A slow cooker filled with Rotel dip on a party table with tortilla chips, diced tomatoes, jalapeños, green onions, and serving utensils.
For parties, the crock pot is about holding as much as cooking. Once melted, the warm setting keeps each scoop soft and ready.

Cook on low for 2 to 3 hours or high for 1 to 2 hours. Once the cheese is smooth, switch to warm. A large slow cooker batch may need up to 1/4 to 1/2 cup milk as it sits, but add it slowly so the cheese does not become thin.

Do not add raw ground beef or sausage directly into the cheese dip. Cook and drain the meat first. If using 2 lb sausage, taste before adding seasoning because sausage can make the dip salty.

Serving this for a longer party? Keep the dip on warm, then use the troubleshooting section if it thickens, turns oily, or needs loosening later.

For another slow-cooker bite that can stay warm for a crowd, grape jelly meatballs fit the same potluck and game-day table.

Do You Drain the Rotel?

No, do not drain Rotel for regular cheese dip. The liquid in the can helps the cheese melt into a smooth, creamy, dippable texture. The Rotel pour visual above shows how the tomatoes, green chilies, and liquid go in together.

Drain part of the liquid only for a very thick bowl, a doubled recipe that needs more control, or a different recipe where extra moisture causes problems. For the classic dip, use the whole can.

No-Velveeta Version

Real cheese can work, but it will not behave exactly like Velveeta. The no-Velveeta version tastes more like homemade queso, with stronger cheese flavor but less foolproof texture. Keep the heat low and give it help from cream cheese so it stays smoother.

  • 8 oz cream cheese / 227 g
  • 1 to 1 1/2 cups freshly shredded cheddar or pepper jack
  • 1 can Rotel, partly drained if you want a thicker dip
  • A splash of milk if the cheese needs loosening

Freshly shredded cheese melts better than pre-shredded cheese because bagged shredded cheese often has anti-caking ingredients. Add shredded cheese off the heat or over very low heat, and stir gently.

How to Make It Spicier

The easiest way to add heat is to use hot Rotel instead of original. For a stronger kick, add spicy sausage, chopped jalapeños, cayenne, hot sauce, pepper jack, or a little extra chili powder.

Add heat slowly. Cheese dip can become too spicy faster than expected, especially if you use hot sausage and hot Rotel together. For a brighter bowl beside all that cheese, salsa verde adds a tangy green contrast for chips, tacos, bowls, and nachos.

How to Keep It Creamy and Warm

Rotel dip is best when it stays soft enough to scoop. As it cools, the cheese naturally tightens; that is normal, and it is easy to fix.

  • Serve it from a slow cooker on warm.
  • Stir every 20 to 30 minutes during a party.
  • Keep the lid on when people are not serving.
  • Add milk slowly if it gets too thick.
  • Keep the heat low after the cheese melts.
  • Drain meat well so grease does not collect on top.

If the bowl has been sitting for a while, stir it before adding more liquid. Sometimes the top looks thick, but the inside is still creamy once stirred. The same rule applies to other dairy-heavy dips, like spinach artichoke dip: once it is hot and melted, warm is safer than high.

Troubleshooting

When the cheese changes while it sits, do not panic. Warm dips thicken, cool, and sometimes look oily before a quick stir brings them back. Most problems are easy to fix if you control heat, thickness, and grease.

ProblemWhy It HappensHow to Fix It
Too thickThe cheese cooled, or too much liquid evaporatedWarm gently and add milk 1 tablespoon at a time
Too thinToo much liquid or not enough cheeseAdd more cubed Velveeta, or warm uncovered on low for a few minutes while stirring often
GreasyThe meat was not drained wellSpoon off excess grease or blot the surface lightly
Oily edgesThe heat is too high, or the meat was greasyLower the heat, stir gently, and spoon off excess oil
GrainyHeat was too high, or real cheese did not melt smoothlyLower the heat and use Velveeta or cream cheese for a smoother base
Skin on topIt sat uncovered or unstirred for too longKeep covered and stir every 20 to 30 minutes
Too spicyHot Rotel, spicy sausage, or too much hot sauceAdd more Velveeta or cream cheese to mellow it
BlandMild meat and mild Rotel need more seasoningAdd taco seasoning, chili powder, garlic powder, or hot sauce
Too saltySausage, Velveeta, or seasoning added more salt than expectedAdd cream cheese, a splash of milk, or more unsalted meat if you have it

Quick Fix Guide

Most dip problems come down to heat, liquid, or grease. Fix one at a time and the bowl usually comes back quickly.

A Rotel dip troubleshooting board with bowls labeled too thick, too thin, greasy, grainy, too spicy, and too salty, plus small fix ingredients.
If the dip gets too thick, thin, greasy, grainy, spicy, or salty, small fixes like milk, gentle heat, cream cheese, or extra cheese can bring it back.

What to Serve with Rotel Dip

Once the cheese is warm and glossy, the only real question is what gets dipped first. Set out the sturdy chips first. The thin ones can wait for salsa.

Use the Chip Test Before Serving

A sturdy tortilla chip should scoop through the dip without snapping. That tells you the dip is thick enough to cling but still soft enough to serve.

A hand pushing a sturdy tortilla chip into Rotel dip with melted cheese, meat crumbles, diced tomatoes, and green chilies.
Before serving, try the chip test: a sturdy tortilla chip should scoop through cleanly and bring up cheese, meat, tomato, and chile.
  • Best dippers: thick tortilla chips, scoop-style corn chips, Fritos Scoops, pretzels, or sturdy crackers.
  • Fresh contrast: celery sticks, bell pepper strips, cucumber rounds, jalapeño slices, green onion, cilantro, pico de gallo, or a little sour cream drizzle.
  • Load it onto: nachos, fries, tater tots, baked potatoes, tacos, rice bowls, burgers, or hot dogs.
  • Game-day spread: pair it with something crisp and savory like air fryer chicken wings.

The best scoop should bring up cheese, tomato, chile, and little bits of meat in one bite. That is why thick chips matter, especially with sausage or cream cheese versions.

Make Ahead, Storage, Reheating, and Freezing

Yes, you can make Rotel dip ahead. Let it cool, store it in the fridge, and reheat it gently on the stovetop, in the microwave, or in a slow cooker. Add a splash of milk if it has thickened.

Store leftovers in an airtight container in the fridge for 3 to 4 days. Refrigerate leftovers within 2 hours; during serving, keep the dip warm rather than letting it sit at room temperature for long stretches.

Reheating is easy; the only trick is not rushing it. Use low heat on the stovetop or short microwave intervals, stirring often so the edges do not overheat before the center is warm.

Freezing is not ideal. Cheese dips can separate, turn grainy, or lose their smooth texture after thawing. For the best texture, refrigerate leftovers and reheat them within a few days instead.

Make It a Snack Table

A good snack table needs contrast. Keep this cheese dip warm, add a cold 7 layer dip, set out something crunchy, and bring in one savory bite like wings, meatballs, or sliders. That way the Rotel dip stays the warm centerpiece without having to carry the whole table.

Build the Serving Board

Put sturdy chips closest to the warm dip, then use vegetables, jalapeños, green onion, pico, and toppings to add freshness around the rich cheese.

A serving board with Rotel dip, tortilla chips, scoop chips, celery sticks, red bell pepper strips, jalapeños, green onion, diced tomatoes, shredded cheese, and cilantro.
Finally, serve the dip with sturdy chips first, then add scoop chips, vegetables, jalapeños, green onion, pico, and toppings for contrast.

For a second warm dip, buffalo chicken dip brings a spicy, creamy option beside this cheesy one. If you are turning the snack table into dinner, slow cooker pulled pork works for sliders, nachos, rice bowls, and loaded baked potatoes.

FAQ

What is Rotel dip made of?

The classic version is Velveeta plus Rotel diced tomatoes with green chilies. Many versions also add ground beef, sausage, cream cheese, taco seasoning, or chili powder.

Do you drain Rotel before adding it?

No. Use Rotel undrained for regular cheese dip. The liquid helps the cheese melt smoothly and keeps the texture scoopable.

How much Velveeta do I need for one can of Rotel?

Use 16 oz Velveeta for one 10 oz can of Rotel. That is the classic ratio for smooth, scoopable Rotel dip.

Is Rotel dip better with sausage or ground beef?

Sausage gives the dip a bolder, saltier, more party-style flavor. Ground beef is milder and better for a crowd that does not want much spice.

How do you make Rotel dip in a crock pot?

Cook and drain the meat first, then add it to the slow cooker with cubed Velveeta and undrained Rotel. Heat on low for 2 to 3 hours or high for 1 to 2 hours, then switch to warm.

What does cream cheese do in Rotel dip?

Cream cheese makes the dip thicker, richer, tangier, and sturdier on chips. Use 4 oz for a small creamy boost or 8 oz for a thick sausage-style batch.

How do I thin Rotel dip without making it watery?

Warm it gently and add milk 1 tablespoon at a time. Stir before adding more because the center may be creamier than the top looks.

What can I use instead of Velveeta?

Use cream cheese with freshly shredded cheddar or pepper jack. It will taste more like homemade queso, but it will not be as foolproof as classic Velveeta dip.

How long does Rotel dip last in the fridge?

Leftover Rotel dip keeps well in an airtight container in the fridge for 3 to 4 days. Reheat gently and stir in a little milk if it has thickened.

Does Rotel dip freeze well?

Freezing is not the best choice because the cheese can separate or turn grainy after thawing. Refrigerate leftovers and reheat them within a few days for the best texture.

Rotel dip should make the table easier, not more complicated. Start with Velveeta and Rotel, add sausage or ground beef if the bowl needs to feel hearty, stir in cream cheese for a thicker scoop, and let the slow cooker do the quiet work while people come back for more.

Made it with sausage, ground beef, cream cheese, or just Velveeta and Rotel? Tell us which version disappeared first.

Posted on — Leave a comment

Korean Beef Bowl Recipe: 20-Minute Ground Beef Rice Bowls

Ceramic bowl of white rice topped with glossy ground beef, sliced cucumber, scallions, sesame seeds, kimchi, and chopsticks lifting a bite.

This Korean beef bowl recipe is for the nights when you have ground beef in the fridge, rice ready or almost ready, and no patience for a complicated dinner. In about 20 minutes, the beef turns saucy, garlicky, a little sweet, and deeply savory, with browned edges and a pan sauce that clings to every crumble.

With rice, beef, and one fresh topping, this is already dinner. Everything else — kimchi, carrot, sesame seeds, a fried egg, or a creamy gochujang drizzle — just makes it feel more complete.

You do not need a perfect topping spread. One crunchy or bright thing is enough to make the bowl work.

The idea is simple: one sauce ratio, three flavor paths, and a bowl you can build around whatever you have. Keep it mild, add gochujang for heat, or make it rounder and more bulgogi-style with grated apple or pear.

Small effort, big dinner: saucy beef, warm rice, one fresh crunch, and a sauce you can keep mild or make spicy. This is a 20-minute recipe when cooked rice is ready. If you are starting rice from scratch, this guide to cooking perfect rice helps with stovetop, rice cooker, and Instant Pot timing.

Make This Tonight

If you want the fastest path to dinner, start here. This gives you the full sweet-savory Korean-inspired beef bowl feeling with the fewest moving parts.

Beef1 lb / 450–500 g ground beef or beef mince
Sauce¼ cup soy, 2–3 tbsp sweetener, 1 tbsp vinegar, 2 tsp sesame oil, garlic, ginger
Rice3–4 cups cooked rice, warm before the beef is done
Best toppingsCucumber, scallions, sesame seeds, fried egg if you have time

Bowl formula: warm base + saucy beef + one fresh crunch + one finish. That can be as simple as rice, beef, cucumber, and sesame seeds.

The key move is to brown the beef first, then add the sauce. If the sauce goes in too early, the beef simmers and tastes flatter. Brown it first, and the sauce clings to deeper, better-tasting crumbles.

Dark skillet of saucy ground beef beside white rice, sliced cucumber, scallions, and sesame seeds on a warm kitchen counter.
For a 20-minute dinner, keep rice and cucumber ready while the beef simmers; once the sauce thickens, the skillet can go straight into bowls.

What You’ll Need

You do not need much to make this taste good. The beef brings richness, the sauce brings that salty-sweet garlic-soy flavor, and the toppings keep everything fresh enough to go back for another bite.

Ground beef, cooked rice, soy sauce, sesame oil, garlic, ginger, scallions, cucumber, carrot, cabbage, and sesame seeds arranged for cooking.
The ingredient list stays weeknight-friendly: ground beef for speed, rice for comfort, sauce for flavor, and fresh toppings for balance.

Ground Beef or Beef Mince

Use 1 lb / 450–500 g ground beef or beef mince for 4 bowls. The method is the same either way, so use the pack size and wording common where you live.

If you only remember one thing, use 90/10. It browns nicely, stays juicy, and does not leave the bowl greasy. 85/15 tastes richer but often needs draining, while 93/7 is leaner and needs a little more care so it does not dry out.

Beef type Best for Cooking note
85/15 Juicier bowls, better browning, richer flavor. Drain excess fat if the pan looks greasy before adding sauce.
90/10 Best all-purpose choice. Enough flavor, but not too greasy.
93/7 Leaner meal prep bowls. Add a little oil if needed and avoid overcooking.

Aromatics

Fresh garlic and ginger make the pan smell like dinner almost immediately. Use 3–4 garlic cloves and about 1 teaspoon grated ginger. Scallion whites or a little grated onion can also go into the pan for extra depth.

Rice and Toppings

Warm cooked rice is the easiest base. For toppings, use cucumber, carrot, cabbage, scallions, sesame seeds, kimchi, or egg. Even a simple bowl with rice, beef, scallions, and sesame seeds can still feel complete.

US and Metric Measurements

Measurements are forgiving here. The sauce does not need laboratory precision, but these amounts give you a reliable starting point before you adjust sweetness, heat, or salt at the end.

Ingredient US measure Metric measure
Ground beef / beef mince 1 lb 450–500 g
Low-sodium soy sauce ¼ cup 60 ml
Brown sugar 2–3 tbsp about 25–38 g
Honey, if using instead 2–3 tbsp about 42–63 g
Rice vinegar 1 tbsp 15 ml
Toasted sesame oil 2 tsp 10 ml
Gochujang, optional 1–2 tbsp 18–36 g
Cooked rice 3–4 cups about 500–750 g, depending on rice type
Grated apple or pear, optional 2–3 tbsp 30–45 g
Grated onion, optional 1–2 tbsp 15–30 g

Korean Beef Bowl Sauce

The sauce is what makes the beef taste deeper than a 20-minute dinner usually does. It works because every bite has balance: salty soy, sweetness from brown sugar or honey, acidity from rice vinegar or kimchi, fat from beef and sesame oil, heat if you add gochujang, and crunch from cucumber or cabbage.

That is why the bowl tastes complete even when the topping list is short.

Small ceramic bowl of dark soy-garlic-sesame sauce being whisked, with garlic, ginger, brown sugar, sesame seeds, and sauce ingredients nearby.
The base sauce sets the flavor before heat: soy sauce, sweetener, rice vinegar, sesame oil, garlic, and ginger create the salty-sweet backbone.

Save This Sauce Ratio

For 1 lb / 450–500 g beef, remember this base formula:

  • ¼ cup / 60 ml low-sodium soy sauce for salt and savoriness
  • 2–3 tablespoons brown sugar or honey for sweetness and gloss
  • 1 tablespoon rice vinegar for balance
  • 2 teaspoons toasted sesame oil for aroma
  • Garlic + ginger for the flavor base
  • Optional: 1–2 tablespoons gochujang for heat, or grated apple/pear for bulgogi-style sweetness

Make It Mild, Medium, Spicy, or Bulgogi-Style

  • Mild: skip the gochujang and use the soy-garlic-sesame sauce as written.
  • Medium: add 1 tablespoon gochujang for color, depth, and gentle heat.
  • Spicy: add 2 tablespoons gochujang, then balance the bowl with cucumber, cabbage, rice, or egg.
  • Bulgogi-style: add 2–3 tablespoons grated apple or pear and 1–2 tablespoons grated onion.

Not sure which one to make? Start with the mild version. For the best all-around bowl, add 1 tablespoon gochujang and 2 tablespoons grated apple or pear; it stays balanced, slightly spicy, and deeper without becoming difficult.

Central bowl of dark soy-garlic sauce with red gochujang on a spoon, grated apple or pear, grated onion, garlic, ginger, sesame oil, and scallions nearby.
From that same sauce base, gochujang adds heat, while grated apple or pear and onion create a sweeter, rounder bulgogi-style beef bowl.
Sesame oil note: toasted sesame oil tastes strongest when it is not cooked hard for too long. Whisk it into the sauce for ease, or save half to drizzle in at the end if you want a stronger sesame aroma.

Quick Sauce Adjustments

  • Less sweet: use 2 tablespoons brown sugar or honey instead of 3.
  • More saucy: add 1–2 tablespoons water while simmering.
  • Spicier: add more gochujang, gochugaru, chili flakes, or sriracha-style sauce.
  • Brighter: finish with a small splash of rice vinegar.
  • More sesame-rich: finish with sesame seeds or a tiny drizzle of toasted sesame oil.

Ingredient Swaps

Dinner can still happen even if you are missing one ingredient. The flavor will change slightly, but these swaps keep the bowl moving in the same sweet-savory direction.

If you do not have… Use instead
Rice vinegar Apple cider vinegar, white vinegar, or a squeeze of lime juice.
Gochujang Chili flakes, gochugaru, sriracha-style sauce, or simply skip it.
Fresh ginger ¼–½ teaspoon ground ginger, or leave it out if needed.
Brown sugar Honey, maple syrup, white sugar, or coconut sugar.
Soy sauce Tamari for gluten-free, or coconut aminos for a milder option.
Sesame oil Skip it if needed, then finish with sesame seeds for some nuttiness.
Apple or pear Leave it out, or use a little grated onion for body.

Back to top ↑

Simple Equipment

No special equipment is needed, but a wide skillet makes a real difference. A crowded pan traps moisture, which makes the beef steam instead of brown. You only need a wide skillet, a small bowl for the sauce, and a spatula or wooden spoon.

Before you start: have cooked rice and toppings ready. The beef cooks quickly, and the bowl tastes best when the hot, saucy beef goes straight over warm rice.

How to Make the Bowls

Once the sauce is mixed, the skillet part moves fast: brown the beef, simmer until the sauce coats the crumbles, then build the bowls while everything is still hot.

Step 1: Make the Sauce

In a small bowl, whisk together soy sauce, brown sugar or honey, rice vinegar, garlic, ginger, and optional gochujang. Whisk in the sesame oil too, or save half to drizzle in at the end for a stronger sesame aroma. For the bulgogi-style version, add grated apple or pear, grated onion, and optional mirin.

Whisk until the sugar dissolves and the gochujang, if using, is fully mixed in.

Step 2: Brown the Beef

Heat a wide skillet over medium-high heat. Add the beef. If it is very lean, add 1 tablespoon neutral oil first.

Press the beef into an even layer and let it cook undisturbed for 1–2 minutes before breaking it apart. That short pause helps the bottom brown instead of turning gray and watery.

Browned ground beef crumbles cooking in a dark skillet with a wooden spatula and steam rising.
Before the sauce goes in, brown the ground beef well; those caramelized edges keep the finished bowl from tasting flat.

Step 3: Break It Into Crumbles

Use a wooden spoon or spatula to break the beef into small crumbles. Cook until browned and fully cooked. If the pan looks watery before the sauce goes in, drain it; sauce clings to browned beef, not liquid.

Food safety note: ground beef should be cooked to 160°F / 71°C. A thermometer is the most reliable check; color alone can be misleading. If you do not have one, cook until the beef is steaming hot throughout and fully cooked through.

Step 4: Add the Sauce

Pour the sauce into the skillet and stir well. When the garlic and ginger hit the hot beef, it should smell savory and warm almost immediately. If anything smells sharp or scorched, lower the heat before the sauce reduces too far.

Hand pouring dark soy-garlic sauce from a small bowl into browned ground beef in a skillet.
After browning, let the sauce bubble briefly so the soy-garlic flavor coats the beef instead of staying loose in the pan.

What Glossy Korean Ground Beef Should Look Like

Let the sauce bubble gently for 2–4 minutes, until it looks glossy, reduced, and clings to the beef instead of running across the pan. It should coat the crumbles, not pool like soup.

Saucy Korean-style ground beef in a dark skillet with a spoon dragged through the thickened sauce.
Once the sauce clings to the crumbles, the beef is ready; that texture helps it season the rice without making the bowl watery.

Taste the beef before you build the bowls. Too salty? Add more rice or cucumber. Flat? Splash in rice vinegar. Want more heat? Stir in a little gochujang at the end.

Step 5: Build the Bowls

Divide warm rice between bowls. Spoon the saucy beef over the rice. Add cucumber, carrot, cabbage or lettuce, scallions, sesame seeds, kimchi, and egg if using.

Spoon adding saucy ground beef over white rice in a ceramic bowl, with cucumber slices and chopped scallions nearby.
Next, spoon the beef over hot rice, then keep the bowl simple with one fresh crunch and one finish instead of overloading the toppings.

Step 6: Finish and Serve

Finish with extra sesame seeds, sliced scallions, a drizzle of sesame oil, or a spoonful of gochujang sauce. For a creamy drizzle, mix 2 tablespoons mayo with 1–2 teaspoons gochujang and a few drops of rice vinegar. Add a tiny splash of water only if you want it thinner. For a homemade version, this mayo guide includes a gochujang mayo variation.

Serve while the beef is hot, the rice is warm, and the vegetables are still crisp.

Korean Beef Bowl Recipe

Easy ground beef or beef mince rice bowls with sticky soy-garlic beef, warm rice, crunchy toppings, optional gochujang heat, and a bulgogi-style apple or pear upgrade.

Prep Time5 minutes
Cook Time15 minutes
Total Time20 minutes
Servings4 bowls

Total time assumes cooked rice is ready and toppings are simple. Add about 5 minutes for several toppings, fried eggs, or the bulgogi-style upgrade.

Equipment

  • 12-inch skillet or large nonstick skillet
  • Small mixing bowl
  • Whisk or fork
  • Spatula or wooden spoon
  • Rice cooker or pot, if cooking rice fresh
  • Optional microplane or box grater

Ingredients

For the Beef and Bowls

  • 1 lb / 450–500 g ground beef or beef mince, preferably 90/10
  • 3–4 cups cooked rice, warm and ready before the beef starts cooking
  • 1 tablespoon neutral oil, only if using very lean beef
  • 2–3 scallions, sliced, whites and greens separated if possible
  • 1 small cucumber, sliced
  • 1 medium carrot, shredded or julienned
  • 1 cup shredded cabbage or lettuce
  • 1–2 teaspoons sesame seeds
  • Kimchi, optional
  • 4 fried eggs or soft-boiled eggs, optional

For the Sauce

  • ¼ cup / 60 ml low-sodium soy sauce
  • 2–3 tablespoons brown sugar or honey
  • 1 tablespoon rice vinegar
  • 2 teaspoons toasted sesame oil
  • 3–4 garlic cloves, minced
  • 1 teaspoon fresh ginger, grated
  • 1–2 tablespoons gochujang, optional
  • 1–2 tablespoons water, if needed

Optional Bulgogi-Style Upgrade

  • 2–3 tablespoons grated apple or Asian pear
  • 1–2 tablespoons grated onion
  • 1 tablespoon mirin or rice wine, optional

Instructions

  1. Have the rice ready. This recipe moves quickly once the beef starts cooking, so use warm cooked rice, leftover rice, microwave rice, or rice already prepared in a cooker.
  2. Make the sauce. In a small bowl, whisk together soy sauce, brown sugar or honey, rice vinegar, garlic, ginger, and optional gochujang. Whisk in the sesame oil too, or save half to drizzle in at the end for a stronger sesame aroma. If using the bulgogi-style upgrade, whisk in grated apple or pear, grated onion, and mirin.
  3. Brown the beef. Heat a large skillet over medium-high heat. Add the beef. Press it into an even layer and let it brown for 1–2 minutes before breaking it apart.
  4. Cook through. Break the beef into small crumbles and cook until browned, steaming hot, and cooked through. Drain excess liquid if the pan looks watery.
  5. Add the sauce. Pour the sauce over the beef and stir well. Simmer for 2–4 minutes, until it looks glossy, reduces slightly, and coats the crumbles. Add a splash of water if it becomes too thick.
  6. Build the bowls. Divide warm rice between bowls. Spoon the saucy beef over the rice.
  7. Add toppings. Top with cucumber, carrot, cabbage or lettuce, scallions, sesame seeds, kimchi, and egg if using.
  8. Serve. Finish with extra sesame seeds, a drizzle of sesame oil, extra gochujang sauce, or a little gochujang mayo if you want a creamy finish.

Recipe Notes

  • Cook ground beef to 160°F / 71°C for food safety.
  • Use low-sodium soy sauce because the sauce reduces in the skillet.
  • Total time assumes cooked rice is ready and toppings are simple.
  • If you only have beef, sauce, rice, scallions, and sesame seeds, the bowl still works.
  • Mild bowl: skip the gochujang or serve it on the side.
  • Medium heat: use 1 tablespoon gochujang.
  • Spicier version: use 2 tablespoons gochujang.
  • Bulgogi-style flavor: add grated apple or pear and grated onion.
  • Store beef, rice, and fresh toppings separately for the best meal prep texture.

What Makes This a Korean-Inspired Beef Bowl?

Think of this as a weeknight shortcut built from the flavors people love in Korean BBQ-style beef: soy, garlic, ginger, sesame, sweetness, and optional gochujang. Ground beef or beef mince makes it fast. Rice makes it filling. Cucumber, cabbage, kimchi, scallions, or egg make it feel like a complete bowl instead of just beef over rice.

Korean Beef Bowl vs Bulgogi vs Bibimbap

This bowl borrows the sweet-savory garlic-soy comfort people love in bulgogi-style beef, but it keeps the method simple. Here is the quick difference, so expectations are clear.

Dish What it usually means How this recipe relates
Korean beef bowl A beef and rice bowl with Korean-inspired sauce and toppings. This recipe fits that style directly.
Bulgogi Traditional Korean marinated beef, usually thinly sliced and cooked quickly. This version uses ground beef, so it is faster but not traditional bulgogi.
Bulgogi bowl A rice bowl built around bulgogi or bulgogi-style beef. Add apple or pear and onion to the sauce for a closer bulgogi-style flavor.
Bibimbap Korean mixed rice bowl with vegetables, gochujang, egg, and often beef. Add egg and vegetables for a similar feel, while keeping this recipe simpler.

For traditional bulgogi, use thinly sliced beef and marinate it before cooking. The Smithsonian Center for Folklife and Cultural Heritage describes bulgogi as thinly sliced beef marinated with soy sauce, sugar or honey, sesame oil, garlic, onion, and often Asian pear. That is why the apple-or-pear upgrade works so well in this shortcut version. Read more about bulgogi.

For tonight, ground beef gives you the shortcut: the same garlic-soy-sesame comfort, but in a pan that can be done while the rice is still steaming.

Back to top ↑

How to Brown Ground Beef Without Steaming It

If your beef turns gray or watery, the pan is usually crowded or stirred too soon. Use this checklist before adding sauce so the finished bowl tastes browned, not boiled.

  • Use a wide pan. A crowded skillet traps moisture.
  • Start with medium-high heat. The beef should sizzle when it hits the pan.
  • Do not stir immediately. Let the beef sit for 1–2 minutes so it can form browned edges.
  • Drain excess liquid. Sauce sticks better to browned beef than to watery beef.
  • Add sauce after browning. If sauce goes in too early, the beef simmers before it browns.

Best Rice to Use

Warm white rice gives this bowl its soft, comforting base, especially when the beef is glossy and salty-sweet. Jasmine rice, short-grain rice, or medium-grain rice all work well because they catch the sauce and let the beef stay the main event.

Close-up of fluffy white rice in a ceramic bowl with a small amount of saucy ground beef being added to one side.
Warm rice works as the soft base because it catches the sauce; even a small spoonful of beef can season the grains.
Base Best for
White rice Classic, soft, comforting bowl base.
Jasmine rice Fragrant weeknight rice bowls.
Short-grain rice Stickier bowl texture.
Brown rice Meal prep and nuttier flavor.
Cauliflower rice Low-carb bowls.
Noodles Turning the beef into a noodle bowl.
Lettuce cups A lighter, hand-held version.

If using leftover rice, cool it quickly, refrigerate it in a covered container, and reheat it until steaming hot.

Best Toppings, Sides, and Finishes

The toppings are not decoration here; they are what make a fast bowl feel fresh instead of tired. A little cold crunch, a little acid, and maybe an egg can make ground beef and rice feel like dinner you planned.

Hands slicing cucumber on a wooden board with shredded cabbage, carrot, scallions, sesame seeds, and kimchi nearby.
Meanwhile, fresh toppings do the work the beef cannot: cucumber cools, kimchi sharpens, cabbage crunches, and scallions wake up each bite.

If you only have rice, beef, scallions, and sesame seeds, you still have a good bowl. Add cucumber, kimchi, cabbage, or pickled onions when you want freshness. Add egg, avocado, noodles, or extra rice when you want it heartier.
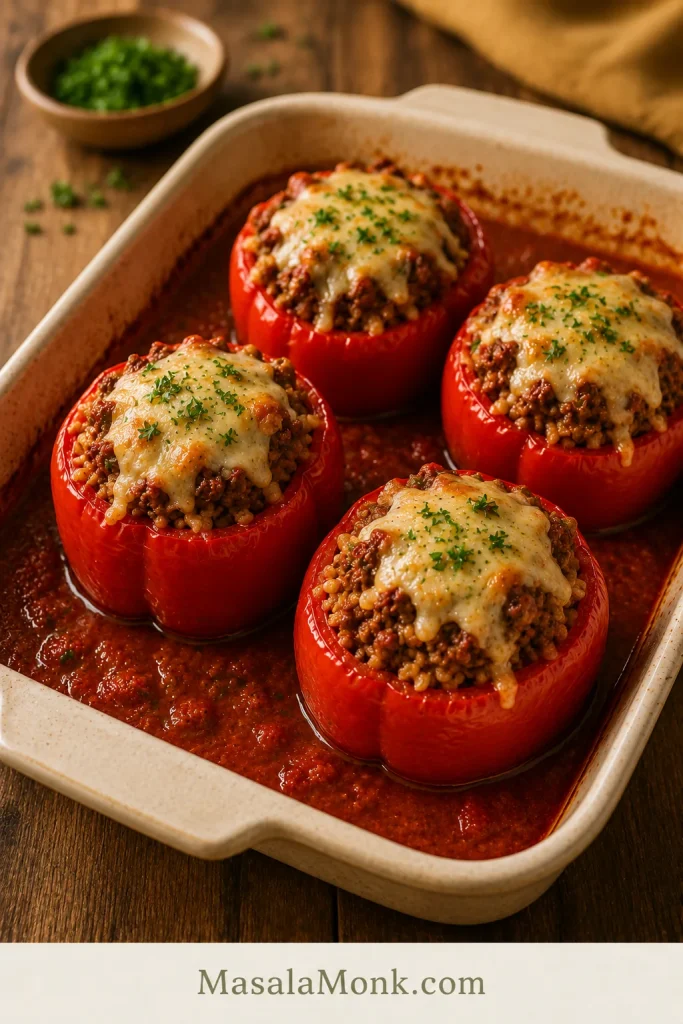
Type Options Why it helps
Fresh and crunchy Cucumber, carrot, cabbage, lettuce, scallions Balances the rich beef and keeps the bowl from feeling heavy.
Acidic or fermented Kimchi, quick cucumber topping, pickled onions Adds brightness and cuts through the sweet-savory sauce.
Rich Fried egg, soft-boiled egg, avocado, gochujang mayo Makes the bowl more filling and satisfying.
Simple sides Cucumber salad, cabbage slaw, steamed broccoli, mushrooms, spinach Adds freshness or vegetables without changing the beef.
Flavor finish Sesame seeds, sesame oil, gochugaru, chili flakes Adds aroma, heat, and texture at the end.

The same bowl logic works beyond beef: warm base, protein, sauce, crunch, and a fresh finish. Once that structure is clear, you can turn the beef into rice bowls, lettuce cups, noodle bowls, or meal prep boxes without starting over.

Add an Egg

A fried egg makes the bowl richer and gives it a bibimbap-style feel. The yolk mixes into the rice and beef like a quick sauce. For meal prep, soft-boiled or jammy eggs are easier to make ahead; this air fryer hard-boiled eggs guide is useful if you want soft, jammy, or fully set eggs without boiling water.

Korean beef rice bowl topped with a fried egg, ground beef, sliced cucumber, scallions, sesame seeds, and white rice.
Add a fried egg when you want the bowl to feel richer; the yolk softens the rice and gives the beef a bibimbap-style finish.

Quick Cucumber Topping

For a fast cucumber topping, mix thinly sliced cucumber with rice vinegar, a pinch of sugar or honey, a pinch of salt, sesame seeds, and optional chili flakes. Let it sit while the beef cooks.

Ceramic bowl of sliced cucumber tossed with sesame seeds, chili flakes, and a glossy vinegar-style dressing.
A quick cucumber sesame topping is the easiest way to add crunch and acid when the beef sauce is sweet, salty, and rich.

It is not a full cucumber salad, but it gives the bowl a fresh, tangy contrast in just a few minutes. For a colder, crunchier side, this cucumber salad recipe works especially well with sweet-savory beef bowls.

Easy Bowl Builds

Use these when you want a quick decision instead of a long topping list. The beef is the same; the bowl changes depending on what you need that night.

Pantry Korean Beef Bowl

Use this build when you need dinner with the fewest toppings: rice, saucy beef, scallions, sesame seeds, and optional chili flakes.

Simple ceramic bowl of white rice topped with ground beef, chopped scallions, sesame seeds, and chili flakes.
The pantry bowl proves the formula works with almost nothing extra: rice, beef, scallions, sesame, and chili flakes are enough for dinner.

Fresh Korean Beef Bowl

Choose this version when the beef tastes rich and you want more crunch: rice, beef, cucumber, carrot or cabbage, kimchi, and scallions.

Bright rice bowl with ground beef, sliced cucumber, shredded carrot, purple cabbage, kimchi, scallions, and sesame seeds.
In the fresh bowl build, let cucumber, carrot, cabbage, kimchi, scallions, and sesame take up more space so the saucy beef feels lighter.

Loaded Gochujang Beef Bowl

Make this one when you want heat and fullness: gochujang beef, rice, fried egg, kimchi, cucumber, sesame, scallions, and a light creamy drizzle.

Loaded gochujang beef rice bowl with fried egg, kimchi, cucumber slices, scallions, sesame seeds, creamy drizzle, and white rice.
The loaded version uses gochujang beef, kimchi, cucumber, egg, sesame, scallions, and a light drizzle for a spicier bowl.
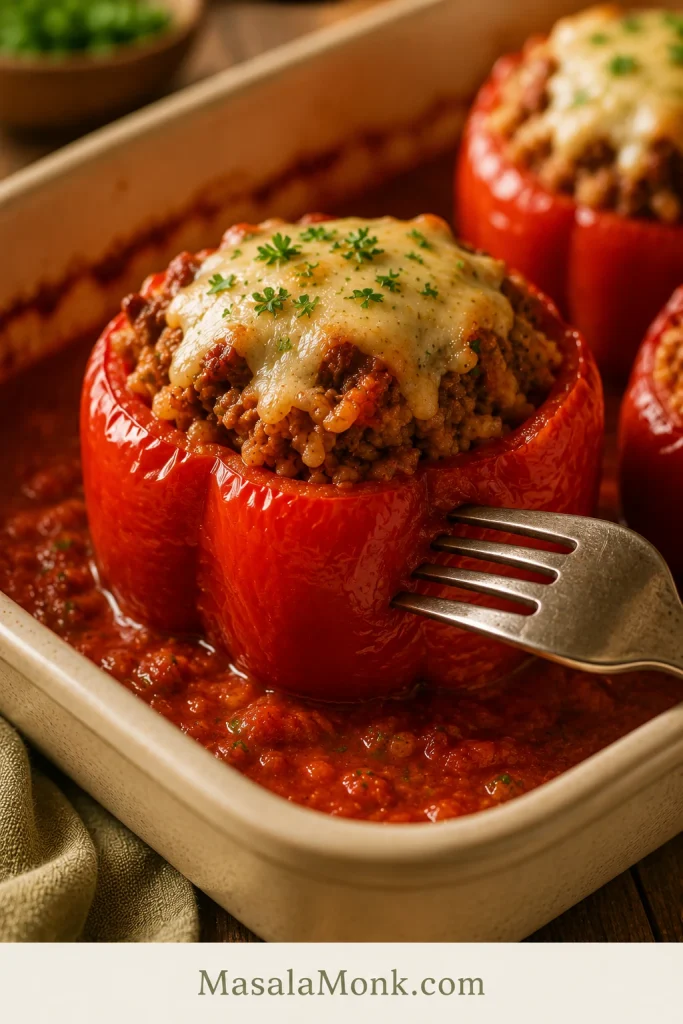
Choose your night: In a rush? Use rice, beef, scallions, and sesame. Need freshness? Add cucumber, cabbage, or kimchi. Need more protein? Add egg or extra beef. Need lower carb? Use cabbage, lettuce cups, cucumber, or cauliflower rice.

Other Ways to Use the Beef

Once you have the beef, it can go a lot of places: lettuce wraps, tacos, noodle bowls, fried rice, salad bowls, and meal prep boxes.

Low-Carb Korean Beef Bowl

For a lower-carb version, use cauliflower rice, shredded cabbage, lettuce cups, cucumber, or sautéed greens instead of rice. Keep the same sauce and add enough fresh crunch so the bowl still feels full and satisfying.

Lettuce cups filled with saucy ground beef, cucumber slices, scallions, sesame seeds, shredded cabbage, and a small red sauce drizzle.
Instead of rice, use lettuce cups or cabbage to keep the same saucy Korean beef flavor with more crunch and fewer carbs.

You can also use ground pork, turkey, or chicken with the same sauce. Pork tastes richer, while turkey and chicken are leaner and may need a little oil. Brown them well, cook them through, then let the sauce reduce until it coats the meat.
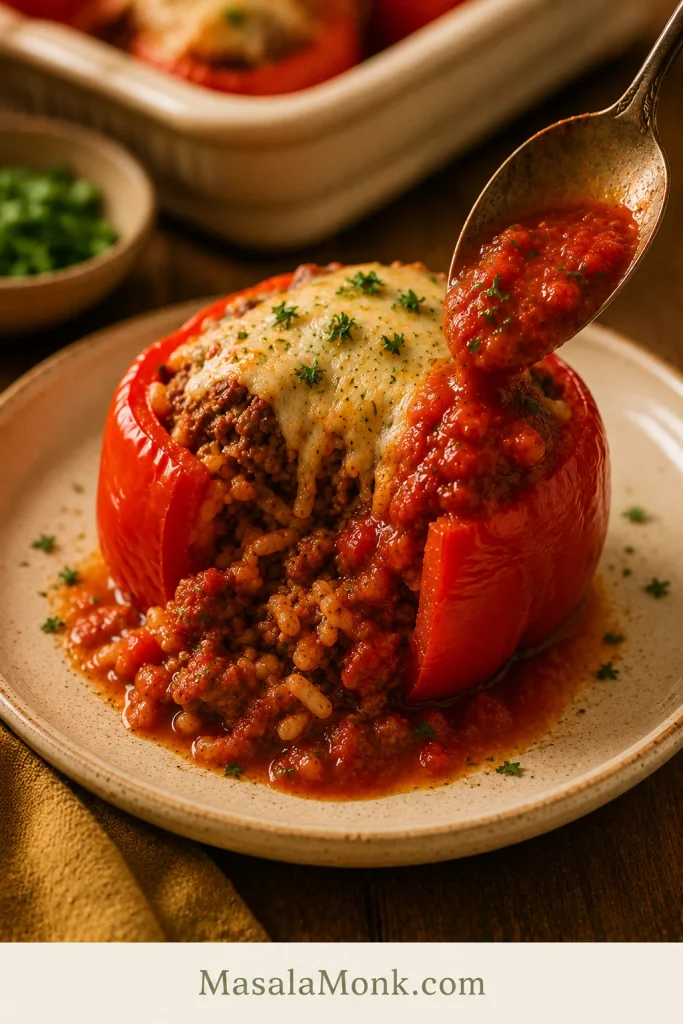
For a gluten-free bowl, use tamari or gluten-free soy sauce. Check your gochujang label too, because some brands contain wheat.

Back to top ↑

Meal Prep, Storage, and Reheating

These bowls work well for meal prep, but the best texture comes from storing the hot and fresh parts separately. The beef and rice can reheat together; the cold toppings should stay cold.

The only thing that really suffers in the fridge is the crunch, so keep cucumber, cabbage, kimchi, scallions, and creamy drizzles in separate containers. Add them after reheating so the bowl still tastes fresh.

Glass meal prep containers with ground beef, white rice, sliced cucumber, kimchi, scallions, and sesame on a wooden table.
Meal prep works best when beef and rice stay separate from cucumber and kimchi, so reheated bowls still finish crisp.

Best Meal Prep Order

  1. Cook or reheat the rice.
  2. Cook the beef and sauce.
  3. Slice cucumber, carrots, cabbage, and scallions.
  4. Store beef and rice separately from fresh toppings if possible.
  5. Add egg, kimchi, cucumber, and drizzles just before serving.
Part How to store Best note
Cooked beef 3–4 days in an airtight container in the fridge. Reheat with a splash of water to loosen the sauce.
Rice Store separately from fresh toppings. Cool quickly, refrigerate covered, and reheat until steaming hot.
Cucumber and lettuce Keep cold and separate. Add after reheating so they stay crisp.
Egg Cook fresh if fried; soft-boiled eggs can be made ahead. Best added just before serving.
Freezer Freeze cooked beef for 2–3 months. Freeze beef only, not assembled bowls.

Troubleshooting: If Something Feels Off

Most problems come from pan size, beef fat, sauce balance, or simmering time. The good news is that this bowl is easy to fix before it reaches the table.

Problem Why it happened How to fix it
Beef tastes greasy The meat was fatty or the pan had too much rendered fat. Drain excess fat before adding sauce. Use 85/15, 90/10, or leaner beef next time.
Beef is dry The beef was very lean or overcooked. Add a splash of water while reheating, or use 85/15 or 90/10 beef.
Beef steamed instead of browned The pan was crowded or stirred too often. Use a wider skillet, medium-high heat, and let the beef sit before breaking it up.
Sauce is too salty Regular soy sauce was used or the sauce reduced too much. Add more rice, vegetables, water, or a little honey. Use low-sodium soy next time.
Sauce is too sweet Too much sugar or honey. Add rice vinegar, gochujang, or a small splash of soy sauce.
Sauce is watery Too much liquid in the pan. Simmer uncovered until reduced. Drain beef better next time.
Sauce is too thick It reduced too long or gochujang made it dense. Add 1–2 tablespoons water and stir.
Too spicy Too much gochujang or chili. Add more rice, cucumber, honey, or a creamy drizzle.
Bowl tastes flat It needs acid, freshness, or heat. Add cucumber, kimchi, scallions, rice vinegar, or chili flakes.

Nutrition Estimate

Nutrition will change depending on beef fat percentage, rice amount, egg, mayo drizzle, and toppings. As a rough estimate, one bowl made with 90/10 beef, about ¾ cup cooked white rice, sauce, cucumber, scallions, and sesame seeds is around 480–560 calories with about 26–32 g protein.

  • Higher protein: use a generous beef portion or add an egg.
  • Lower calorie: use leaner beef, less rice, more cucumber or cabbage, and skip mayo drizzle.
  • Lower carb: use cauliflower rice, shredded cabbage, lettuce cups, or cucumber as the base.
  • More filling: add egg, avocado, extra vegetables, or brown rice.

Frequently Asked Questions

Can I make Korean beef bowls with ground beef?

Yes. Ground beef is one of the easiest ways to make this bowl fast because it browns quickly and soaks up the soy-garlic-sesame sauce.

Can I use beef mince instead of ground beef?

Yes. Beef mince works just like ground beef here. Use 450–500 g and brown it well before adding the sauce.

Is Korean beef bowl the same as bulgogi?

Not exactly. Traditional bulgogi usually uses thinly sliced marinated beef. This recipe uses ground beef or beef mince with a bulgogi-style sauce, so it is faster and easier for weeknights.

Is this the same as bibimbap?

No. Bibimbap is a Korean mixed rice bowl with vegetables, gochujang, egg, and often beef. This bowl is simpler and centered around saucy ground beef over rice, though egg and vegetables can give it a similar feel.

What sauce goes in a Korean beef bowl?

A simple sauce usually includes soy sauce, brown sugar or honey, garlic, ginger, sesame oil, and rice vinegar. Add gochujang for heat or grated apple and onion for a deeper bulgogi-style sauce.

Do I need gochujang?

No. The bowl still tastes complete with just the mild soy-garlic-sesame sauce. Gochujang adds heat, color, and deeper flavor, but it is not required. For a family-friendly pan, skip it and let people add gochujang or chili at the table.

What can I use instead of gochujang?

Use chili flakes, gochugaru, sriracha-style sauce, or another chili paste you like. The flavor will not be exactly the same, but it will still add heat.

What rice is best for Korean beef rice bowls?

White rice is the easiest, jasmine rice is fragrant, short-grain rice feels stickier, and brown rice works well for meal prep. For a lower-carb bowl, use cauliflower rice, cabbage, or lettuce cups.

What vegetables go with it?

Fresh cucumber, cabbage, carrot, lettuce, and scallions are best when you want crunch. Broccoli, mushrooms, spinach, zucchini, bell pepper, and snap peas work well if you want cooked vegetables. Add tender greens at the end so they do not overcook.

Can I add an egg?

Yes. A fried egg is best when serving right away; soft-boiled or jammy eggs are easier for meal prep. Add the egg after reheating so it stays tender.

How do I make it more like bulgogi?

Add grated apple or Asian pear, grated onion, and optional mirin to the sauce. This gives the ground beef a sweeter, rounder, more bulgogi-style flavor.

Can I make this gluten-free?

Yes. Use tamari or gluten-free soy sauce. Check your gochujang label too, because some brands contain wheat.

Can I make this low-carb?

Yes. Serve the beef over cauliflower rice, shredded cabbage, lettuce, or cucumber instead of rice. Keep the same sauce and add plenty of crunchy toppings.

Can I meal prep it?

Yes. The beef reheats well, so it is a good meal-prep protein. Store beef and rice separately from cucumber, cabbage, scallions, kimchi, egg, and creamy drizzles. Reheat the beef and rice first, then add the cold toppings.

How long does the cooked beef last in the fridge?

Cooked beef keeps for 3–4 days in an airtight container in the fridge.

Can I freeze the beef?

Yes. Freeze the cooked beef for up to 2–3 months. Freeze the beef by itself, not the assembled bowls. Thaw overnight in the fridge and reheat with a splash of water to loosen the sauce.

Final Thoughts

Once you know the sauce ratio, this stops being one recipe and becomes a dinner you can rebuild all week: rice bowl tonight, lettuce wraps tomorrow, noodles for lunch, or meal prep boxes with cucumber and egg.

Try it mild first, then make the next pan yours: more gochujang, more cucumber, extra sesame, a creamy drizzle, or a fried egg on top. Once you make it once, it stops being a recipe you follow and becomes a bowl you know how to build.

Back to top ↑