Posted on 5 Comments

Cottage Cheese Lasagna Recipe | Chicken, Spinach, & Ricotta

Cottage cheese lasagna slice lifted from a pan, gooey cheese stretch, basil on top—portrait cover with chicken, spinach, and ricotta options.

There are nights when you want a pan of lasagna that slices cleanly, tastes like a hug, and doesn’t swallow your evening. This cottage cheese lasagna is built for exactly those nights. It leans on a silky cottage-cheese layer that bakes up luscious without feeling heavy, embraces a handful of sensible upgrades for jarred marinara, and leaves space for you to pivot into chicken and spinach variations—or fold in a little ricotta—depending on the crowd. As you’ll see, small choices (how you treat the noodles, how you season the cheese, how you nudge the sauce) compound into big results. And yes, everything is weeknight-manageable, even if you’re aiming for company-worthy.


Why cottage cheese lasagna belongs in your rotation

Cottage cheese brings two superpowers to lasagna: protein and flexibility. Where ricotta can read sweet and sometimes grainy, cottage cheese—especially when briefly blended—turns plush and savory, delivering a custardy bite that holds a slice. If you like a touch more texture, you can skip the blender and just whisk; the curds soften in the oven and dot the layers with a pleasant creaminess.

From a nutrition standpoint, cottage cheese is a pragmatic choice many dietitians recommend when you want substantive, satisfying protein without turning to meat in every layer. If you like to skim a bit of background before you cook, you’ll find plain-language context in Cottage Cheese for Breakfast: Fueling Your Day with Protein and Flavor, and for label comparisons, USDA FoodData Central is a reliable place to look up specific brands before you shop.

Just as important: cottage cheese behaves beautifully when you season with intent. A whisper of garlic powder, a pinch of Italian seasoning, and a few twists of black pepper round its edges. If you like nutty depth, grated Parmesan in the filling adds savor and helps the center set like a dream.

Also Read: Lentil Pasta for Weight Loss: Nutrition, Best Brands & 5 Healthy Recipes


Pantry-first lasagna, with smart marinara moves

Great lasagna is as much about approach as it is about ingredients. We’ll build this with pantry-friendly items and a couple of quick upgrades that turn convenience into something that tastes deliberately made.

Creamy cottage cheese, mozzarella, parmesan, eggs, lasagna sheets and a jar of marinara arranged for cottage cheese lasagna.
These are the pantry staples for cottage cheese lasagna—clean-label marinara, a three-cheese combo, and either oven-ready or regular sheets.
  • Noodles: Regular or oven-ready both work; your technique shifts slightly (more below).
  • Sauce: A jar of marinara (24–32 oz) is not a compromise if you season it like you mean it and give it 60 seconds of love on the stove. Editors and chefs consistently point toward clean-label picks—short ingredient lists, tomatoes first, olive oil rather than seed oils, and no added sugar. For a sense of what to scan on the label, peek at EatingWell’s roundup of chef-approved marinara.
  • One-minute upgrade: While the sauce warms, finish it with one to two tablespoons of unsalted butter; this simple technique adds body and balances acidity without turning the sauce into cream. The approach is explained neatly in Simply Recipes’ 1-ingredient upgrade for jarred sauce.
  • Cheese trio: Cottage cheese (the star), shredded mozzarella for stretch, and Parmesan for salinity and nutty bite.

If you’re the kind of cook who enjoys understanding why textures behave the way they do, a quick skim of Classic vs. Authentic Alfredo: 5 Essential Recipes lays out emulsion logic—how fat, water, and hard cheese play together—which is directly relevant to how your lasagna layers bake into a cohesive slice.

Also Read: How to Make Churros (Authentic + Easy Recipe)


The baseline method: cottage cheese lasagna that slices clean and tastes rich

This is your foundation. Once you’ve made it once, you can riff freely.

Prep and noodle strategy

Preheat the oven to 375°F (190°C). If you’re using oven-ready (no-boil) noodles, give them a short soak in warm water while you mix the filling; this partial hydration prevents brittle edges and helps them finish tender in the oven. The idea—so simple it feels like cheating—has been tested repeatedly; Serious Eats even uses a 15-minute soak to streamline assembly. If you’re using regular noodles, boil them to very al dente (about 2 minutes shy of package time) so they finish in the oven with a pleasant bite.

Hand soaking oven-ready lasagna sheets in warm water to hydrate before assembly for tender edges.
A short warm-water soak softens no-boil sheets so they finish evenly in the oven—no brittle corners, no mush.

The cottage-cheese layer

In a large bowl, whisk cottage cheese with a teaspoon of garlic powder, two teaspoons of Italian seasoning, a half-teaspoon of black pepper, and salt to taste. For a plush texture, blend the mixture for 10–20 seconds—just enough to smooth the curds, not so much that it becomes liquid. If you prefer a firmer set, whisk in one or two eggs; if you prefer a softer, spoonable middle, skip them. (Texture tweaks like these show up in other comfort dishes, too; see how curd size changes the bite in Indian Cottage Cheese Jaffles and apply the same idea here.)

Sauce tuning

Warm your marinara in a small pot; add a tablespoon of unsalted butter to round the sauce and a pinch of dried basil or Italian seasoning if your jar reads plain. If you bought a cleaner, tomato-forward jar, that may be all you need. Prefer a touch more umami? You can also swirl in a teaspoon of Worcestershire for depth—this trick plays especially well if your sauce tastes sweet or flat.

Layer and bake

Spoon a cup of sauce into a 9×13-inch (23×33 cm) baking pan. Layer noodles, a third of the cottage mixture, a generous shower of mozzarella, a little Parmesan, then more sauce. Repeat two more times, finishing with noodles, plenty of sauce, the remaining mozzarella, and a final snowfall of Parmesan. Cover the pan (tent the foil so it doesn’t touch the cheese) and bake for 30 minutes. Uncover and continue baking 15–20 minutes until the edges bubble and the top turns spotty-golden.

Finally, rest the lasagna 10–15 minutes before slicing. That pause is not optional if you want tidy squares; moisture redistributes, cheese sets, and your patience is rewarded. If you’re a process nerd, there’s more texture wisdom in The Best Spinach Lasagna—pay particular attention to how moisture management and noodle hydration affect structure.

Also Read: How to Cook Bacon in the Oven (Crispy, No-Mess, Crowd-Ready Recipe)


Lasagna pan showing layer order: tomato sauce base, noodles, cottage cheese layer, then mozzarella on top.
Build tall, tidy slices by repeating this stack: sauce base → noodles → cottage layer → modest mozzarella; finish with extra cheese on top.

Cottage cheese lasagna with chicken: a protein-forward pivot

Now for the first variation: chicken. Rather than building a separate meat sauce, you’ll toss 2 cups of shredded rotisserie or poached chicken with a ladle of warm marinara and tuck it between layers one through three. The goal is gentle coating, not drowning; you want every bite to register chicken without turning the pan into a casserole of sauce and shreds.

When in doubt about balance, remember the pasta-sauce logic that keeps creamy dishes light: coat, don’t smother. If you want a quick refresher on that equilibrium (and a handful of fast variations you can crib when you’re low on time), browse Chicken Alfredo Pasta, 5 Ways. The same principles—salt early, finish with a touch of fat for sheen, and stop before it gets stodgy—apply directly to chicken in lasagna.

For seasoning, chicken appreciates pepper and a little heat. A pinch of red pepper flakes in the cottage layer wakes things up, especially if you’re using a milder jar of marinara. If your crowd skews comfort-first, keep the spice gentle and let the browned top provide the excitement.

Also Read: French Toast Sticks (Air Fryer + Oven Recipe) — Crispy Outside, Custardy Inside


Two bowls of cottage cheese filling: one blended silky with an immersion blender, one whisked with visible curds.
Blend 10–20 seconds for velvety layers or whisk for gentle curds—both bake creamy; pick the texture your crowd prefers.

Cottage cheese lasagna with spinach: green, vibrant, and not watery

Spinach in lasagna is gorgeous when you treat it properly. The core rule is simple: cook and squeeze. Blanch or sauté spinach until just wilted, then wring it dry in a clean towel. Fold the greens into your cottage mixture and taste for salt; spinach can be bland if unseasoned. Because you’ve removed excess water, the lasagna stays cohesive and the slices remain neat.

No-boil sheets pair beautifully with spinach, provided you respect hydration. That brief soak (or a very generous sauce hand) matters because dry corners steal moisture from the filling and punish your layers. If you like to see how pros phrase it, the method notes in this Serious Eats spinach-and-mushroom lasagna explain why soaking sheets for 15 minutes lets you skip boiling while keeping moisture levels consistent from edge to center.

Finally, consider texture play: spinach folded into a lightly blended cottage base gives you a marbled look and a delicate mouthfeel. If you fully puree the cheese, those green ribbons pop even more against the creamy backdrop.

Also Read: 10 Best Chicken Sandwich Recipes (BBQ, Parm, Buffalo & More)


Cottage cheese and ricotta lasagna: the hybrid that pleases both camps

Plenty of readers adore the gentle sweetness of ricotta. If that’s you—or your table is split—try a one-cup swap: replace 1 cup of cottage cheese with 1 cup of ricotta and proceed exactly as written. The blend tilts the filling toward custard while staying sturdy enough to slice. It’s also the right move when you’re pairing the lasagna with something robust (say, garlicky sausage on the side) and want a creamier center to contrast.

If you like to sanity-check macros or sodium when you experiment with blends, USDA FoodData Central lets you compare cottage cheese and ricotta entries by brand and fat percentage. The rough pattern: whole-milk cottage cheese usually brings more protein per gram, ricotta trends slightly sweeter and, depending on brand, a touch saltier. Season your blend like you mean it and let the parmesan sprinkle on top carry the savory note.

Also Read: 10 Best Espresso Martini Recipe Variations (Bar-Tested)


Three neat lasagna slices labeled cottage cheese, spinach, and ricotta, each topped with golden cheese and basil.
One pan, three directions: classic cottage only, spinach folded into the filling, or a one-cup ricotta swap for a custardy center.

Cottage cheese lasagna, step by step (refined for flow)

While the baseline method above gets dinner on the table, you can squeeze even more consistency from the process with a few gentle refinements:

  1. Stage your pans and bowls so assembly is rhythmic: sauce pot (still warm), cottage bowl, mozz/parm bowl, noodles within reach. Smooth rhythm means even layers and less overworking.
  2. Taste the cottage mixture before it ever hits the pan. It should taste a touch saltier than you think ideal; pasta and sauce will absorb the edge.
  3. Use a light hand with mozzarella inside the lasagna and save your big finish for the top. Too much inside gives you slippage; a generous top gives you picture-perfect pull.
  4. Run sauce to every corner. Dry edges are the enemy. Even with soaked no-boil sheets, you want a glaze of sauce kissing the perimeter so nothing leeches moisture from the middle.
  5. Rest on a rack. Elevate the pan for 10–15 minutes and let steam dissipate so the bottom doesn’t over-steam itself into sogginess.

If you’re curious about how professionals layer like engineers—especially with many thin layers—take a look at All-Day Meat Lasagna for perspective. Even if you’re not making a Bolognese today, the notes on moisture balance and noodle handling are worth borrowing.

Also Read: Macaroni & Cheese Recipe: Creamy Stovetop, Baked & Southern


Sauce sense: choose well, then finish like a cook

Jarred marinara isn’t a shortcut; it’s a platform. Choose well, then treat it with the respect you’d give a sauce you simmered yourself.

  • Scan for tomatoes first. You want tomatoes, olive oil, onion, garlic, basil—recognizable items. Editors frequently land on clean-label jars for the most “homemade” flavor; EatingWell’s chef survey is a helpful reference point.
  • Finish with fat, not sugar. The butter swirl method adds body and mellows acidity without sweetening the sauce. If you need more depth, a teaspoon of Worcestershire gives you umami without heavy-handedness.
  • Reseason after warming. Heat changes flavor perception; wait until the sauce is hot, then adjust salt and pepper.

Prefer creamier sauces in general? A few techniques from Alfredo Pasta Reinvented: 5 Indian-Inspired Twists—like blooming spices in fat and balancing dairy with a touch of heat—translate surprisingly well when you want a rosé-style marinara that flatters cottage cheese.

Also Read: Vegan French Toast: 6 Easy Recipes (Pan, Air Fryer, GF & High-Protein)


Clean, layered slice of cottage cheese lasagna on a plate with basil after resting, steam faintly rising.
Rest 10–15 minutes before cutting—moisture settles, cheese sets, and you get photogenic, dinner-party slices.

Texture choices that make your cottage cheese lasagna memorable

What separates a “good enough” lasagna from one people remember? Texture you can see and feel:

  • Silky middle, structured slice: One egg in the cottage mixture gives you a neat slice; two eggs make it firmer and more picnic-friendly. No eggs yields a softer, spoonier center that still settles if you let it rest.
  • Cheese pull that doesn’t slide: Keep most mozzarella on top; inside, a lighter hand reduces slippage and helps the cottage mixture cling to noodles.
  • Edge crisp vs. tender top: Uncovering for the final 15–20 minutes gives you beautiful browning. If your oven runs hot, move the pan down one rack halfway through to avoid scorching.
  • Noodle tenderness without mush: Soaked no-boil sheets or very al dente boiled noodles are your guardrails. For more why-it-works geekery, see Serious Eats’ spinach lasagna, which explains hydration and stacking in plain terms.

Also Read: Pumpkin Spice, Your Way: Master Blend, Variations & Real-World Recipes


Cottage cheese lasagna with chicken, spinach, & ricotta—three paths, one pan

Because your table might want different things on different nights, here’s how to navigate the trio of popular pivots without rewriting the recipe:

Cottage cheese lasagna with chicken (rotisserie-friendly)

  • How much: 2 cups shredded chicken.
  • Where it goes: Scatter a thin layer between each cheese layer so it integrates, not dominates.
  • How to keep it juicy: Toss with warm marinara first; moisture on the outside of the meat keeps it from drying in the oven.
  • How to season: Pepper and a pinch of red pepper flakes bring the chicken to life without demanding a heavier sauce. If you love creamy profiles, the “coat, don’t drown” approach in Chicken Alfredo Pasta, 5 Ways is the north star.

Spinach version of Cottage cheese lasagna (green ribbons, zero puddles)

  • Cook, squeeze, season. Spinach must be dry before it hits the pan. Fold it into the cottage mixture and taste; greens swallow salt.
  • Hydration check: Use the warm-water soak for no-boil sheets, or be generous with sauce at the edges. The moisture discussion in this Serious Eats method is worth a read.
  • Texture cue: Lightly blended cottage base + chopped spinach = green marbling and a custardy bite.

Cottage cheese and ricotta lasagna (the best of both)

  • The swap: Replace 1 cup of cottage cheese with 1 cup of ricotta.
  • What changes: Slightly sweeter, more custardlike center; still sliceable.
  • Label check: Use USDA FoodData Central to compare sodium and fat across brands if you’re cooking for specific dietary needs.

Also Read: Homemade & DIY Coffee Creamer: 16 Flavor Recipes (French Vanilla, Pumpkin Spice & More)


Make-ahead rhythm, reheating, and freezing (reader-tested flow)

You can assemble the lasagna, cover it tightly, and refrigerate for 24–36 hours. Add roughly 10 minutes to the covered bake time to account for the colder start, then uncover and finish as usual. Resting remains crucial; slices clean best after the center relaxes.

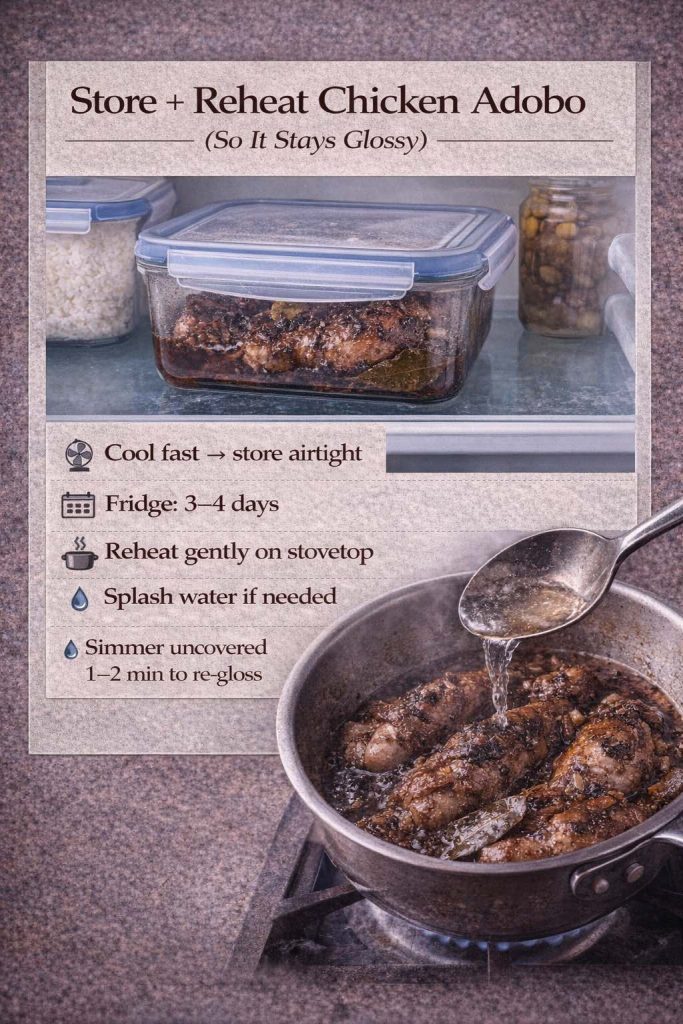
Freezing works, too. Assemble but don’t bake; double-wrap in plastic and foil. Thaw in the refrigerator overnight, bake covered until the center is hot, then uncover to brown. Leftover slices reheat gently at 325°F (165°C), covered, for 10–15 minutes; a splash of water along the pan edge preserves moisture.

If gluten-free eaters are at the table, you can replace part of a layer with zucchini planks or serve the lasagna alongside a gluten-free pasta side. For broader ideas, Finding Pasta Alternatives for the Keto Diet outlines swaps (including almond-flour “pasta”) that give you options without forfeiting comfort.

Also Read: Lemon Drop Martini Recipe (Classic, 3-Ingredient, & More)


Serving ideas that flatter cottage cheese lasagna

Because this dish is rich without being dense, pair it with a crunchy salad and something bright in the dressing—lemon, red wine vinegar, a touch of mustard. If you added chicken, lean into peppery greens or shaved fennel to lift the plate. If you folded in spinach and kept the center custardy, think toasted walnuts and thinly sliced apples on the side for crunch and sweetness. Garlic bread is never wrong, but consider brushing the slices with olive oil whisked with a bit of the warm marinara (before the butter finish) so the flavors echo rather than compete.

Wine-wise, medium-bodied reds with decent acidity (Sangiovese blends, Montepulciano) cut through cheese and amplify tomato. If you prefer white, a Verdicchio or a mineral-driven Pinot Grigio won’t get steamrolled. Non-alcoholic options? A splash of balsamic in sparkling water with ice and lemon peels makes a sharp, palate-resetting spritz that stands up to dairy.

Also Read: Daiquiri Recipe (Classic, Strawberry & Frozen Cocktails)


Troubleshooting your cottage cheese lasagna (when something goes sideways)

The top browned before the center set. Your oven likely runs hot or your rack was too high. Next time, start one level down and keep the initial foil tent looser so cheese doesn’t touch. If you need more browning at the end, switch to broil for 60 seconds and watch like a hawk.

The noodles felt stiff at the edges. That’s a hydration or coverage issue. Soak no-boil sheets in warm water while you mix the filling, and make sure sauce touches every corner. The soak-and-stack approach from Serious Eats is your friend here.

The middle slumped when sliced. You either cut too early or skipped eggs in the filling. Rest at least 10 minutes, preferably 15. If you like ultra-clean slices (picnic vibes), use two eggs in the cottage mixture; if you prefer a softer middle, skip them but accept that you must rest the pan longer.

It tasted flat. Season in the bowl, then re-season the warm sauce. A small butter finish helps—here’s the why—and a pinch of red pepper flakes in the cottage layer brightens flavor without heat shock.

Also Read: Piña Colada: Classic Recipe + 10 Variations (Virgin & On the Rocks)


If you want to push flavor further (without extra effort)

  • Herbs: Finely chop basil and parsley, but don’t stir fresh herbs into the cottage mixture; their moisture can make the center watery. Instead, scatter herbs between layers or over the top after baking so they stay vivid.
  • Citrus: A microplane’s worth of lemon zest into the cottage mixture, especially on spinach nights, brings lift without obvious “lemon flavor.”
  • Heat: Aleppo pepper plays beautifully with tomato and dairy—fruity warmth, not aggressive spice.
  • Cheese blend: A little pecorino with Parmesan on top sharpens the finish; keep it to a tablespoon or two so it doesn’t dominate.

If the idea of creamier, spicier profiles intrigues you, you’ll find technique you can borrow in Alfredo Pasta Reinvented: 5 Indian-Inspired Twists. Bloomed spices in fat, then folded into dairy, can turn part of your marinara rosy and aromatic without a second pot.

Also Read: Punch with Pineapple Juice: Guide & 9 Party-Perfect Recipes


Cook once, eat twice: repurpose with intent

Leftover cottage cheese lasagna turns into effortless lunches and low-effort dinners if you treat it like an ingredient rather than a reheat. Cube cold slices and warm them in a small skillet with a splash of water, then toss with fresh basil and a drizzle of good olive oil—the edges caramelize a bit and the center returns to creamy. You can also tuck warm cubes into a toasted ciabatta with arugula and a smear of marinara (yes, effectively a lasagna panini). If you went heavy on spinach, slip those cubes over a garlicky bean salad; the contrast of warm, creamy squares and cool, lemony beans is wildly satisfying.

And because cottage cheese is such an adaptable protein, you’ll find it pulling double duty in breakfast and snack contexts as well—if you enjoy that versatility, Cottage Cheese for Breakfast offers ideas you can fold into the week while you finish off the pan.

Also Read: Savoiardi Chocolate Vanilla Pudding- Easy Dessert Recipe


The last word (before you preheat)

Make the baseline pan once, exactly as written. Notice how the butter-finished jar tastes more considered, how a 10-second blend changes mouthfeel, how a short rest protects your slice. Next time, add chicken and watch how those shreds meld into the structure. The time after that, fold in spinach and see how the greens play against a silkier base. When your table splits between cheese camps, do the one-cup ricotta swap and keep everyone happy.

In the end, the promise is simple: cottage cheese lasagna that respects your time, rewards your attention, and adapts to whatever you have on hand. Choose a clean, tomato-forward jar (scan for cues like the ones in this chef survey), finish it like a cook (a little butter goes a long way), handle noodles thoughtfully (a quick soak for no-boil sheets changes everything), and season your cottage layer with confidence. When those choices stack up—literally—you get the kind of lasagna that makes people ask for seconds and the recipe.

FAQs

1) What is cottage cheese lasagna, and why choose it?

Cottage cheese lasagna layers noodles, a seasoned cottage-cheese mixture, mozzarella, and sauce. Moreover, it delivers a creamy, sliceable center with higher protein and a cleaner flavor than many heavy versions.

2) Can I make cottage cheese lasagna with ricotta as well?

Absolutely. Additionally, swap in 1 cup ricotta for 1 cup cottage cheese for a slightly sweeter, custardlike filling while keeping structure.

3) Do I need eggs in cottage cheese lasagna?

Often, yes. Furthermore, one egg helps the middle set for tidy slices; two eggs make it extra firm; zero eggs yield a softer, spoonable center—just let it rest longer.

4) Should I blend cottage cheese for a smoother texture?

Yes, briefly. Meanwhile, a 10–20 second blitz turns curds silky; a whisk-only mix keeps gentle texture. Either way, season boldly.

5) What’s the best jarred sauce style for cottage cheese lasagna?

Tomato-forward marinara. Notably, choose one with recognizable ingredients and adjust at the stove (salt, pepper, a pat of butter) before layering.

6) How do I use oven-ready (no-boil) noodles in cottage cheese lasagna?

Soak sheets in warm water while mixing the filling. Consequently, they hydrate evenly, avoid brittle edges, and finish tender in the oven.

7) Can I use regular noodles instead of no-boil?

Of course. Similarly, boil to very al dente (about 2 minutes shy of package time) so they finish perfectly during baking.

8) What temperature and time work best?

Bake at 375°F (190°C). Thereafter, go 30 minutes covered, then 15–20 minutes uncovered until bubbling and golden; rest 10–15 minutes before slicing.

9) How do I prevent watery cottage cheese lasagna?

Drain or squeeze wet add-ins (like spinach), hydrate noodles properly, and ensure sauce lightly coats every edge. Consequently, layers hold together beautifully.

10) Can I add chicken to cottage cheese lasagna?

Definitely. Moreover, toss 2 cups shredded chicken with warm sauce, then layer lightly so the lasagna stays balanced rather than heavy.

11) What about spinach in cottage cheese lasagna?

Great idea. Likewise, cook and squeeze it dry, fold into the cheese mixture, and season generously for bright green ribbons without puddling.

12) Is beef or sausage good with cottage cheese lasagna?

Yes. Conversely, use a light hand: scatter cooked, drained meat thinly between layers so the cottage filling still shines.

13) Can I make cottage cheese lasagna vegetarian?

Certainly. Instead, skip meat and lean on spinach, zucchini planks, or mushrooms; just keep vegetables dry so texture stays neat.

14) How do I adapt cottage cheese lasagna to an 8×8 pan?

Halve ingredients. Then, shave about 10 minutes off the uncovered bake, watching for bubbling edges and a lightly browned top.

15) What’s the ideal cheese ratio inside vs. on top?

Inside, go modest with mozzarella to reduce slippage. Conversely, finish boldly on top with mozzarella plus a sprinkle of Parmesan for savory lift.

16) Which cottage cheese works best?

Whole-milk versions melt creamier. Nevertheless, low-fat works if you add a touch more seasoning or a teaspoon of olive oil for richness.

17) Can I assemble cottage cheese lasagna ahead?

Yes. Subsequently, refrigerate 24–36 hours, add ~10 minutes to the covered bake, then uncover to finish; rest before cutting.

18) Does cottage cheese lasagna freeze well?

It does. Preferably, assemble unbaked, double-wrap, and freeze up to 3 months. Later, thaw overnight, bake covered until hot, then brown.

19) How should I reheat leftovers?

Gently. Accordingly, cover slices and warm at 325°F (165°C) for 10–15 minutes; add a splash of water around the edges to keep moisture.

20) How can I make cottage cheese lasagna healthier?

Focus on clean sauce, whole-milk cottage cheese in moderate portions, and smart add-ins like spinach or zucchini. Subsequently, keep portions steady and sides fresh.

21) Can I make gluten-free cottage cheese lasagna?

Yes. Alternatively, use gluten-free noodles or substitute some layers with thin zucchini planks while maintaining generous sauce coverage at the edges.

22) What’s the secret to clean slices?

Patience. Consequently, let the pan rest 10–15 minutes so steam settles and the cottage-cheese layer firms into photo-worthy squares.

23) Why does my cottage cheese lasagna taste flat?

Season twice. First, the cheese mixture; then, the warmed sauce. Finally, finish with Parmesan on top for salty, nutty definition.

24) Can I make cottage cheese lasagna in a skillet?

Yes, for a smaller batch. Thereafter, par-cook noodles or use broken oven-ready sheets, layer in a high-sided oven-safe skillet, and bake as directed.

25) Is cottage cheese lasagna suitable without ricotta?

Absolutely. Indeed, the base recipe was designed to shine with cottage cheese alone—creamy, stable, and undeniably comforting.

Posted on 7 Comments

Macaroni & Cheese Recipe: Creamy Stovetop, Baked & Southern

Hand lifting a gooey spoonful from a golden baked macaroni and cheese, with two creamy variations in the background—portrait cover for a macaroni and cheese recipe by MasalaMonk.

When you crave a macaroni and cheese recipe, chances are you’re picturing a bowl of silky noodles wrapped in a molten, savory blanket—nostalgic yet refined, familiar yet endlessly adaptable. In that spirit, what follows is a single, dependable blueprint that branches gracefully into three proven versions: a quick, creamy stovetop you can finish on a weeknight without breaking a sweat; a creamy baked casserole crowned with a bronzed, crunchy top; and a Southern baked, custard-style classic that slices neatly and holds beautifully for gatherings. As we go, you’ll also find natural places to layer in chicken, to lighten or enrich, and to experiment with cheeses—plus a few carefully chosen references for technique, safety, and smart flavor moves.


Creamy Stovetop Macaroni & Cheese Recipe (Ready Fast, Stays Silky)

First, let’s anchor the base. This stovetop method leans on a softly cooked roux, warmed milk, and patient whisking before the cheese ever touches heat. Then, crucially, the melt happens off the burner, which prevents the proteins from tightening and turning grainy. Not only does this approach deliver a glossy sauce, but it also makes the whole process calmer and more forgiving.

Ingredients (serves 4):

  • 225 g (8 oz) elbow macaroni (or cavatappi), cooked very al dente in generously salted water
  • 30 g (2 Tbsp) unsalted butter
  • 20 g (about 2½ Tbsp) all-purpose flour
  • 480 ml (2 cups) whole milk, gently warmed
  • 60 ml (¼ cup) evaporated milk (optional, for sheen and stability)
  • 170 g sharp cheddar, finely grated
  • 70 g Gruyère or Monterey Jack, finely grated
  • 1 thin slice American cheese (optional, for ultra-smooth emulsion)
  • ¾ tsp kosher salt, or to taste
  • ¼ tsp mustard powder
  • Pinch of white pepper and a light dusting of sweet paprika
Hand lifting a spoonful of silky stovetop macaroni and cheese from a cast-iron skillet; cheese strands and warm milk in background.
Creamy stovetop macaroni and cheese—melted off the heat for a glossy sauce in about 15 minutes.

Method:

  1. Boil and time it right. Cook the pasta in well-salted water until one minute shy of al dente; drain but reserve about ½ cup of starchy cooking water. Meanwhile, warm the milk in a small pot or microwave—it shouldn’t be hot, just comfortably warm.
  2. Roux, but gently. In a wide saucepan over medium heat, melt the butter. Sprinkle in the flour and whisk for 60–90 seconds; you’re cooking out the raw edge, not browning.
  3. Build the béchamel. Whisk in the warm milk gradually, stirring constantly to avoid lumps. Bring to a lazy simmer and cook for 3–4 minutes, until the sauce lightly coats the back of a spoon. If using, stir in the evaporated milk.
  4. Take it off the heat. Slide the pan off the burner. Stir in the cheddar and Gruyère in two or three small additions, letting each handful melt before adding the next. If you want a super-glossy, café-style finish, slip in the optional slice of American at the end. Season with salt, mustard powder, white pepper, and paprika.
  5. Finish to gloss. Fold in the pasta. If the sauce tightens, loosen with a tablespoon or two of the reserved pasta water. You’re aiming for a sauce that clings without clumping, shining lightly on every elbow.

Because technique matters, it helps to remember why this works: cheese melts best away from direct heat, and gradual additions prevent seizing. If you’d like a deeper dive into emulsified cheese sauces—including an approachable explanation of why evaporated milk and a touch of starch make them more stable—the step-by-step breakdown by Serious Eats is a clear, practical companion you can consult for extra confidence (ultra-gooey stovetop method and a concise explainer on stabilizers here).


Baked Macaroni & Cheese Recipe (Creamy Center, Crunchy Top)

Sometimes, what you want is a bubbling, cozy casserole that starts with the same silky base and then bakes just long enough to marry flavors and crisp the lid. Rather than reinvent the wheel, we’ll take that stovetop sauce and invite it into the oven for a short visit.

Ingredients & Setup:
Prepare the stovetop version as written. Butter a 9×9-inch (or similar) baking dish. Combine 1 cup panko with 1 Tbsp melted butter and a pinch of salt; set aside 1 cup of grated cheddar.

Hand sprinkling buttery breadcrumbs over a golden baked macaroni and cheese in a black casserole; cheese wedge and grater softly blurred.
Baked mac and cheese with a bronzed breadcrumb lid and a creamy center for the perfect bite.

Bake:

  1. Stir the drained pasta into the finished sauce, then transfer the mixture to the buttered dish.
  2. Scatter the extra cheddar over the top, followed by the buttered panko.
  3. Bake at 190 °C / 375 °F for 15–20 minutes, until the edges barely bubble and the crumb turns golden. For a final flourish, broil for 1–2 minutes, just until the top is audibly crisp when tapped.

For extra insurance against splitting, a splash of evaporated milk in the sauce and finely grated cheese (not thick shreds) make a noticeable difference. If you enjoy exploring why evaporated milk and cornstarch prevent breakage, the technique notes from Serious Eats are well worth a quick read (stable cheese sauce method).


Southern Baked Macaroni & Cheese Recipe (Custard-Style, Sliceable)

On holidays and church tables across the South, you’ll find a different—but equally beloved—style: a custard set with eggs and enriched by evaporated milk. The texture is tender, sliceable, and deeply comforting; moreover, it holds exceptionally well on buffets and travels neatly to potlucks.

Ingredients (serves 6):

  • 225 g elbows, cooked to firm al dente
  • 2 large eggs, beaten
  • 360 ml (1½ cups) evaporated milk
  • 120 ml (½ cup) whole milk
  • 280 g cheese blend (for example, 200 g sharp cheddar + 80 g Colby or Jack), divided
  • 30 g butter, melted
  • ½ tsp kosher salt; ¼ tsp black pepper; pinch paprika
Hand cutting a neat square of Southern baked macaroni and cheese from an oval casserole; custard-like interior visible with vintage spoon and milk props.
Southern baked mac and cheese—egg-set custard texture that slices cleanly and holds beautifully for gatherings.

Method:

  1. Toss the hot pasta with half the cheese and the melted butter; spread it evenly in a buttered 8×8-inch dish.
  2. Whisk together the eggs, evaporated milk, whole milk, salt, and pepper. Pour the custard over the pasta. Top with the remaining cheese and dust lightly with paprika.
  3. Bake at 175 °C / 350 °F for about 30–35 minutes, until the center is just set and the top is gently browned. Let it rest 10 minutes before cutting.

Because this version contains eggs, it’s wise to check that the center reaches 160 °F / 71 °C. A quick-read thermometer makes this easy; for a straightforward reference, the USDA/FSIS safe temperature chart is the standard many pros keep bookmarked (official chart and an egg-dish note for clarity here).


Cheese Choices That Actually Melt (and How to Blend for Balance)

Now, let’s talk flavor and function in one breath. Sharp cheddar brings that quintessential mac-and-cheese profile; however, when used alone, it can turn a little pasty. To counter this, combine it with a young, elastic melter—Monterey Jack, young Gouda, or even a restrained portion of mozzarella—so the sauce stays fluid and supple. Then, to lift the aroma, a small share of Gruyère or Emmentaler adds nuttiness without dominating.

As a practical baseline for 240–250 g total cheese, try 60% sharp cheddar, 25% alpine (Gruyère/Emmentaler), 15% easy-melter (Jack/Gouda). For an elegant salty finish, shave in a spoonful of finely grated Parmesan right at the end—handled thoughtfully, it boosts savoriness without tightening the sauce. If you’d like a refresher on Parmesan varieties and how to use them wisely, the MasalaMonk overview offers a handy primer on style, storage, and serving ideas: browse the concise guide to Parmesan and its varieties for context and quick comparisons (MasalaMonk primer) and, for a side-by-side, this deeper Parmesan vs. Parmigiano Reggiano piece breaks down labeling, flavor, and age cues in plain language (comparison guide).

If you ever want showroom-smooth sauce while using stronger, older cheeses, you can also explore sodium citrate—a simple, safe emulsifying salt that keeps melted cheese from separating. It’s not required, yet it’s fascinating to learn; for an approachable, kitchen-tested walkthrough, the Serious Eats breakdown shows how a pinch turns almost any cheese blend into a glossy, pourable dream (sodium-citrate baked method and the broader mac & cheese overview with variations here).


Variation Pathways (Layer More Flavor Without Losing the Plot)

Because the base is flexible, you can extend this macaroni and cheese recipe in several directions without compromising texture. Rather than sprawl into fully separate recipes, think of these as compact pathways you can fold in as needed.

Chicken Macaroni & Cheese Recipe (Comforting and Hearty)

Warm, gently seasoned chicken plays especially well with creamy sauces. After saucing the pasta, fold in 2 cups of diced roast chicken; the residual heat is enough to warm it through without drying. If you’re hunting for subtle flavor ideas that won’t clash with dairy—think a whisper of garlic, a hint of herbs—our MasalaMonk Chicken Alfredo collection explores creamy, chicken-forward combinations that transfer beautifully into mac and cheese without overshadowing the cheese base (find inspir­ing pairings).

Macaroni & Cheese Recipe with Cream Cheese (Even Silkier)

If you love an extra-lux mouthfeel, whisk in 60–90 g cream cheese off the heat, then reduce the cheddar by about 15% to keep salt in balance. This trick mimics the stability you’d get from processed slices while remaining firmly in “from-scratch” territory. If you’d like the science behind why a little stabilized dairy keeps the emulsion glossy, the practical testing notes by Serious Eats illustrate how evaporated milk and a touch of starch prevent separation without adding gumminess (technique explainer).

Three-Ingredient Macaroni & Cheese Recipe (Minimalist, Weeknight)

For nights when you want dinner with vanishing effort, use pasta, milk, and cheese alone. Simmer the pasta directly in milk with frequent stirring until barely tender, remove from heat, and add finely grated cheese in small handfuls. The result tastes nostalgic and takes scarcely more time than a boxed dinner; if you’d like a tested baseline, Serious Eats has a straightforward version that gets the job done without fuss (three-ingredient approach).

White Cheddar Macaroni & Cheese Recipe

Swap the blend for 100% white cheddar, ideally medium sharp rather than extra-aged. To keep the texture lively, add a whisper of mustard powder and finish with a spoonful of pasta water; this simple tweak maintains flow and prevents the sauce from turning claggy.

Gouda or Jack Accents (Nutty or Mildly Sweet)

When you want mellow sweetness or a nudge of nuttiness, fold young Gouda or Monterey Jack into your cheddar base at a 40:60 ratio. Meanwhile, if you’re tempted by smoked Gouda, keep it to 20–25% of the blend; otherwise, it can dominate.

Holiday & Potluck Strategy (Make-Ahead Without Stress)

Before a gathering, assemble either baked version up to 24 hours in advance. Cover and refrigerate, then bake covered until heated through; uncover toward the end so the top browns. For a whisper of depth that reads “festive” rather than “smoky,” finish with a dusting of sweet paprika. For more gentle paprika routes that respect dairy’s sweetness, the MasalaMonk paprika-in-classics guide offers clever, balanced ideas you can borrow without overpowering the dish (practical paprika tips).

Gluten-Free, Lactose-Conscious, and Low-Carb Considerations

If you’re cooking for gluten-free guests, switch to GF elbows and build the roux with rice flour; the method is identical, though you may find the sauce sets a hair faster. If you’re reducing lactose, opt for lactose-free milk and focus on aged cheeses, which typically contain far less residual lactose than young, fresh styles. And if you’re steering low-carb, try roasted cauliflower florets as the base, then finish with slightly more sauce for coverage. For a helpful sweep of practical swaps and carb-conscious alternatives, our MasalaMonk keto pasta guides lay out approachable options—from zucchini ribbons to spaghetti squash—while explaining how to season them so the dish still tastes indulgent (low-carb pasta options and a broader keto-friendly overview here).


Texture Troubleshooting (Quick Fixes That Respect the Sauce)

Even with a steady hand, sauce can misbehave; fortunately, a few calm adjustments bring it back in line.

If it’s grainy or greasy: You likely melted the cheese over too much heat or added it too fast. Pull the pot off the burner, whisk vigorously, and trickle in a tablespoon or two of warm milk to re-emulsify. Next time, keep the pan off heat during the melt and add cheese in handfuls. If you’re curious about the “why,” the emulsification explanation in the Serious Eats mac series translates kitchen chemistry into everyday steps you can actually use (overview with technique notes).

If it’s too thin: Simmer the béchamel a touch longer before adding cheese; or, whisk 1 tsp cornstarch into 1 Tbsp cold milk, then stir that into the gently simmering sauce for 30–60 seconds. This minor adjustment thickens without chalkiness and, importantly, won’t dull the cheese flavor.

If it’s too thick: Ease in warm milk or a spoon of pasta water until the sauce flows freely again. Because starch can tighten as it cools, it’s normal to need a splash more liquid at the table.

If reheating: Stir low and slow with a splash of milk; avoid high heat. For baked leftovers, cover with foil and warm gently. Softness returns as the sauce relaxes and regains moisture.

Also Read: Lentil Pasta for Weight Loss: Nutrition, Best Brands & 5 Healthy Recipes


Flavor Lifts That Don’t Overpower

Cheese loves restraint. Accordingly, keep boosts small and purposeful so the dairy still sings.

  • Mustard powder: A tiny pinch (⅛–¼ tsp) brightens cheddar and lifts aroma without shouting.
  • White pepper: A whisper adds warmth without speckling the sauce.
  • Onion powder or garlic powder: Go light—⅛ tsp at a time—so you add a hum rather than a headline.
  • Paprika: Sweet for color and softness; smoked only in the smallest quantities, ideally on top rather than in the sauce.
  • Nutmeg: One or two gentle gratings in the béchamel, especially if you’re leaning alpine with Gruyère.

If you’d like to practice restraint with creamy sauces while still layering interest, the balanced approach in our Classic vs. Authentic Alfredo walkthrough shows how to use starchy pasta water, butter, and cheese to create dimension without clutter—ideas that port gracefully into mac and cheese as well (learn the gentle emulsion approach). And for more creative yet dairy-friendly directions, the Indian-inspired Alfredo riffs offer nuanced spice paths that flatter, not fight, a cream-and-cheese base (five subtle twists).


The “Why” Behind Small Habits That Matter

A few small behaviors do the heavy lifting:

  • Warm the milk. Cold milk can seize the roux and create tiny lumps that never fully smooth out.
  • Grate finely. Thin shreds melt evenly and quickly; thick batons resist and clump.
  • Melt off heat. Cheese proteins are delicate; gentle residual heat delivers silk instead of chalk.
  • Season late. Salt levels vary wildly among cheeses. Taste after melting, not before.
  • Hold back pasta water. A tablespoon or two can rescue a sauce that tightened while you grabbed bowls.
  • Rest custards. The Southern baked version continues to set after leaving the oven; give it 10 minutes before cutting.

If your curiosity runs deeper, the modern mac-and-cheese canon collected by Serious Eats stitches together precisely these habits with testing notes you can use immediately, from stovetop to baked—and from classic cheddar blends to sodium-citrate adventures (explore the collection). Meanwhile, when you’re preparing the egg-set Southern style, it never hurts to keep the USDA temperature reference close at hand for that easy 71 °C target (official guidance).


Ingredient Swaps That Preserve Structure

Because life happens, let’s outline safe substitutions that won’t disrupt the balance:

  • Milk: 2% works with a touch of extra butter; half-and-half works if you loosen with pasta water to avoid over-thickening.
  • Flour: Rice flour performs well in the roux for gluten-free guests; whisk diligently and give it an extra 30 seconds on the heat to tame any raw note.
  • Cheddar: Medium sharp melts more kindly than extra-aged; if using very old cheddar, fold in 10–15% Monterey Jack for elasticity.
  • Butter: Neutral oils can stand in for the roux, yet butter’s milk solids add flavor; if substituting, consider finishing with a small pat of butter at the end for aroma.

And if you’re pursuing low-carb or simply variety, moving from pasta to roasted cauliflower florets changes the dish’s feel while keeping the spirit intact. To make that detour more satisfying, skim the MasalaMonk low-carb pasta alternatives; the strategies there translate directly to mac and cheese and help you keep richness without wobbling structure (practical low-carb swaps).


Bringing It All Together

At its heart, a macaroni & cheese recipe should be dependable, comforting, and easy to tailor. The creamy stovetop builds confidence because it behaves; the baked variation adds celebration with texture and aroma; the Southern custard provides nostalgia and crowd-pleasing structure. From there, you can nudge flavor—toward chicken for heartiness, toward white cheddar for clarity, toward alpine notes for depth—while the technique remains steady beneath your hands.

As you cook, let small, careful moves do the work: warm the milk before whisking, melt the cheese off heat, grate finely, season at the end, and keep a little pasta water on standby. If you’re feeding a crowd, assemble ahead and bake gently; if you’re feeding yourself, the stovetop pan will be ready before you’re done setting the table. And should you want to explore richer emulsions, silkier textures, or kitchen-tested tweaks, the thoughtfully written technique pieces from Serious Eats give you both confidence and clarity, while the USDA benchmarks keep holiday casseroles safely on target. Meanwhile, when you’re hungry for friendly flavor expansions—cheese primers, paprika tips, creamy chicken pairings—the linked MasalaMonk guides open the door to variations that respect the dish’s soul rather than drown it out.

In the end, whether you spoon it steaming from the pot, crack through a breadcrumb crust, or slice a custard-set square beside collards and cornbread, you’re returning to the same promise: warm noodles, a gentled emulsion, and the kind of cheesy comfort that meets you exactly where you are tonight.

FAQs

1) What is the best macaroni and cheese recipe for beginners?

For a first timer, a classic stovetop macaroni and cheese recipe is ideal: make a light roux (equal parts butter and flour), whisk in warm milk to form a béchamel, then melt in finely grated cheddar with a secondary melter like Monterey Jack off the heat. This path is quick, forgiving, and produces a glossy sauce without special equipment.

2) Which cheeses melt best for mac and cheese?

Aim for a blend: primarily sharp cheddar for flavor, supported by a young melter (Monterey Jack, young Gouda, or low-moisture mozzarella). Optionally, include a little Gruyère or Emmentaler for nutty depth. This combination delivers flavor, stretch, and smoothness without becoming oily.

3) How can I keep my cheese sauce from turning grainy or greasy?

Remove the pan from direct heat before adding cheese; stir in small handfuls until each addition melts. Furthermore, grate cheese finely, warm the milk beforehand, and avoid pre-shredded bags with anti-caking starch if possible. Gentle handling prevents the proteins from tightening.

4) What pasta shape works best—and why?

Elbows are traditional, yet cavatappi and small shells catch sauce superbly. Because ridges and curves hold more béchamel, these shapes create a creamier bite. Cook them 1–2 minutes shy of al dente so they finish perfectly in the sauce or in the oven.

5) How do I thicken a mac and cheese sauce that’s too loose?

Let the béchamel simmer briefly to reduce; otherwise, whisk 1 teaspoon cornstarch into 1 tablespoon cold milk and stir that into the gently bubbling sauce for 30–60 seconds. Subsequently, add cheese off heat and reassess; the melt will thicken it further.

6) How do I fix a sauce that set up too thick?

Stir in warm milk or a spoon of reserved pasta water a bit at a time until it flows. Additionally, toss the hot pasta in sooner; the starch on its surface will naturally thin the sauce to a glossy consistency.

7) What’s the difference between creamy baked and Southern baked mac and cheese?

Creamy baked begins as stovetop mac and cheese, then bakes briefly under a breadcrumb or extra-cheese topping for a golden crust. By contrast, Southern baked uses a custard base (eggs + evaporated milk), setting into neat slices with a nostalgic, Sunday-table texture.

8) Can I use only cheddar, or should I mix cheeses?

Only cheddar works, but moderate the age: medium sharp melts more kindly than extra-aged. Conversely, a blend (cheddar + Jack/Gouda + a little Gruyère) offers superior silkiness and layered flavor. Balance wins here.

9) Is heavy cream better than milk for a macaroni and cheese recipe?

Heavy cream makes a richer sauce but can turn cloying or overly thick. Whole milk (sometimes with a splash of evaporated milk) keeps things velvety without dulling flavor. If you choose cream, loosen with pasta water so the sauce still drapes rather than sits.

10) How do I make mac and cheese extra creamy without processed cheese?

Melt cheese off heat, use a finely grated blend, and add a few tablespoons of evaporated milk for stability. Moreover, a small spoon of cream cheese can add silkiness while keeping a from-scratch feel. Finish with pasta water for sheen.

11) What are the best breadcrumbs for a crunchy baked topping?

Butter-toasted panko creates an audible crunch. Alternatively, mix half panko and half grated cheddar for flavor plus texture. Spread in an even layer and bake just to golden; then, broil briefly for a shattering crust.

12) How do I make a gluten-free mac and cheese that still tastes great?

Swap in gluten-free elbows and make the roux with rice flour. Whisk attentively and give the sauce an extra 30 seconds of simmer to cook out any raw note. Otherwise, follow the same method; the result remains creamy and familiar.

13) Can I make a lactose-friendly version without losing flavor?

Use lactose-free milk and favor aged cheeses (they naturally contain less residual lactose). In addition, rely on mustard powder, paprika, and a little Parmesan for savory lift so you don’t need to overload dairy to taste rich.

14) What’s the simplest 3-ingredient approach for busy nights?

Cook pasta in milk with frequent stirring until just tender, then take the pot off heat and stir in finely grated cheese. Consequently, you get a nostalgic, minimal macaroni and cheese recipe in minutes—no roux required.

15) How do I add chicken without drying it out?

Fold in bite-size pieces of warm, cooked chicken at the very end so residual heat brings them to temperature. Light seasoning—think a pinch of garlic powder or thyme—enhances the dish without muting the cheese.

16) How do I reheat mac and cheese so it stays creamy?

For stovetop leftovers, add a splash of milk and rewarm on low while stirring. For baked casseroles, cover with foil and heat gently until steamy, then uncover for a few minutes to refresh the top. Avoid high heat, which can split the sauce.

17) Does rinsing pasta help?

Skip rinsing for this dish. The light starch coating on drained pasta helps the sauce cling. Instead, just shake off excess water and move straight to the pot of sauce.

18) How far ahead can I assemble mac and cheese?

Assemble baked versions up to 24 hours in advance. Cover and refrigerate, then bake covered until hot through; uncover to brown at the end. For parties, this make-ahead approach keeps the texture creamy while simplifying timing.

19) Can I freeze mac and cheese?

Yes, although texture softens slightly after thawing. Cool completely, portion tightly, and freeze. Later, reheat covered with a little milk to restore creaminess. Even so, fresh or refrigerated-then-baked versions keep the best bite.

20) What seasonings complement cheese without overpowering it?

Use restraint: a pinch of mustard powder brightens cheddar; white pepper adds warmth without visible specks; sweet paprika lends color and gentle sweetness. Likewise, a whisper of nutmeg in the béchamel harmonizes with alpine cheeses.

21) Why does melting cheese off the heat matter so much?

Direct heat can make proteins contract and separate fat from moisture, causing graininess. Instead, let residual warmth do the melting. In short, slow additions off heat maintain a smooth emulsion and a naturally glossy sauce.

22) How do I scale a macaroni and cheese recipe for a crowd?

Multiply ingredients linearly, then divide into multiple shallow pans so the interior heats evenly and the top browns properly. Additionally, stagger pans on different oven racks and rotate midway for consistent results.

23) What’s the smartest way to lighten the dish without losing comfort?

Opt for 2% milk, keep the roux the same, and finish with a touch more pasta water to maintain flow. Beyond that, consider a sharper cheese for stronger flavor so you can use slightly less overall while the dish still tastes indulgent.

24) Can I make mac and cheese without baking at all?

Absolutely. The stovetop version is designed to be served right away. Meanwhile, if you want a “baked” feel without the oven, sprinkle extra cheese and buttered crumbs over hot mac and cheese and cover for a minute to soften the topping slightly.

25) What’s the ideal salt strategy with multiple cheeses?

Season late and in stages. Since cheeses vary in salinity, taste after the melt, then adjust. Ultimately, a small pinch of salt at the end is often enough once Parmesan or aged cheddar enters the mix.

Posted on 9 Comments

Classic vs. Authentic Alfredo: 5 Essential Recipes

Classic vs authentic Alfredo: glossy fettuccine lifted from a black plate, showing the silky emulsion of butter, Parmigiano, and pasta water.

When classic fettuccine alfredo is done well, the sauce doesn’t merely coat the noodles; it becomes them. The ribbons look lacquered, not drowned. The cheese tastes like satin, not grit. And as you twirl, a glossy ribbon trails off the fork and back into the bowl. That’s the bowl we’re chasing—one that balances richness with clarity, and comfort with control.

There are two equally valid roads to that shine. First, the Roman original: pasta, cold butter, and finely grated Parmigiano, brought together with starchy water into a supple emulsion. Second, the American route: a little cream, a whisper of garlic, and a steadier, plush result that holds on the plate (and in the fridge) a touch longer. Once you can move easily between them, you can steer classic fettuccine alfredo toward your life—weeknight-swift, restaurant-creamy, or bright and “better-for-you” without losing the soul of the dish.

Along the way, you’ll find a few quiet helpers. For instance, when you want aromatic detours that still respect the sauce, see our Indian-inspired Alfredo twists. When you need a lighter night, lean on low-carb pasta alternatives for timings and textures that won’t compromise that signature gloss.


The Small Choices That Make Classic Fettuccine Alfredo Shine

Before we cook, a few principles elevate both authentic alfredo and the creamy style.

  • Grate Parmigiano ultra-fine. A microplane turns it snow-soft so it melts into a seamless sauce instead of speckling it. (If you care about buying the real thing, the official rind markings are explained by the consortium here: Parmigiano Reggiano – seals & marks.)
  • Work warm-to-warm. A warmed bowl keeps the Roman emulsion supple; a wide, preheated skillet steadies the cream-based version; warm plates prevent the sauce from tightening prematurely.
  • Save and use pasta water deliberately. Add it like a seasoning—first to form the emulsion, then to tune the texture. For a crisp explanation of why this matters, see how pasta water helps sauce emulsify and cling.
  • Keep heat gentle. Cheese wants warmth, not aggression. Cream wants a soft simmer, not a boil. This is how classic fettuccine alfredo stays glossy rather than greasy.

1) Authentic Roman Fettuccine Alfredo (No Cream)

This is the minimalist master class; it’s also your fastest route to dinner.

Serves: 4 Time: 20 minutes

Authentic Roman Alfredo without cream—fettuccine tossed with butter, Parmigiano and hot pasta water, top-down on travertine.
Roman minimalism: warm the bowl, whisk butter with very hot pasta water, then add ultra-fine Parm in waves. The sauce should become the pasta—glossy, elastic, and light.

Ingredients

  • 12 oz (340 g) fresh fettuccine (or excellent dry)
  • 6 Tbsp (85 g) cold unsalted butter, cut into small cubes
  • 1¼ cups (300 ml) very hot pasta water (reserved)
  • 1¼ cups (100–120 g) very finely grated Parmigiano Reggiano
  • Fine sea salt
  • Black pepper (optional, not traditional)

Method

  1. Bring a large pot of well-salted water to a rolling boil. Add fettuccine and cook until just shy of al dente. Meanwhile, warm a wide mixing bowl with hot water; dry it thoroughly.
  2. Slip the butter into the warmed bowl and add about ½ cup of the hottest pasta water. Whisk until the mixture looks pale and slightly creamy—this is your emulsion base.
  3. Lift the pasta directly from the pot into the bowl so a little water clings to the noodles. Toss steadily with tongs so the heat stays in the bowl and the butter doesn’t firm up.
  4. Sprinkle in the Parmigiano in three or four delicate additions, tossing after each until it melts. If the mixture tightens, spoon in more hot pasta water; if it feels slack, pause and keep tossing as the cheese hydrates and thickens.
  5. Taste and season with salt; add pepper only if you like.

Texture Cues (for quick fixes)

  • Too thick? Add 1 Tbsp hot pasta water and toss vigorously for 10 seconds.
  • Too thin? Toss off heat for 20–30 seconds; the sauce will tighten as the cheese absorbs moisture.
  • Grainy? The cheese may be too coarse or the bowl too cool; add a splash of hot water and toss briskly to smooth it.

Benchmark for pace and feel: the Roman no-cream method captures the texture you’re aiming for.


2) Classic Creamy Fettuccine Alfredo (With Cream)

This is the dependable crowd-pleaser—still elegant, just a touch more plush.

Serves: 4 Time: 25 minutes

Classic fettuccine alfredo on white marble—pale-gold creamy sauce with parsley, bright brasserie light.
For dependable classic fettuccine alfredo, simmer cream and butter gently, whisk in Parm off a low flame, then tune with pasta water until each ribbon shines. Reheat slowly with a splash of water, not more cream.

Ingredients

  • 12 oz (340 g) fettuccine
  • 2 Tbsp unsalted butter
  • 1 cup heavy cream
  • 1 small garlic clove, finely grated (or ½ tsp garlic powder)
  • 1 cup (85–100 g) finely grated Parmigiano Reggiano
  • ¼ tsp kosher salt, plus more to taste
  • A pinch of black or white pepper
  • 2 Tbsp chopped parsley (optional)

Method

  1. Cook the pasta in generously salted water until al dente; reserve ¾ cup pasta water.
  2. In a wide skillet over medium-low heat, melt the butter. Stir in the cream and garlic; bring to a gentle simmer for 2–3 minutes so the flavors meet without boiling.
  3. Lower the heat and whisk in the Parmigiano until the sauce turns smooth and satiny.
  4. Add the pasta and toss, loosening with spoonfuls of pasta water until every ribbon shines and the sauce clings lightly.
  5. Taste for salt; finish with pepper. Add parsley if you like a little green.

Make-It-Yours Notes

  • Lighter night? Swap in some vegetables for part of the pasta—the timings in low-carb pasta alternatives are dependable.
  • Why pasta water still matters: serious but approachable science here—saucing pasta the right way—which explains why even creamy sauces benefit from pasta water’s starch.

3) Creamy Garlic Alfredo (Restaurant-Style, with Bright Finish)

This version is about aroma and lift; it’s the one that impresses without shouting.

Serves: 4 Time: 25 minutes

Creamy garlic Alfredo in moody trattoria light—chives and a hint of chili on a warm stoneware plate.
Bloom garlic just to blond, add cream, and keep the simmer soft. Finish with Parm for velvet; a touch of lemon zest or chives lifts the richness without stealing the spotlight.

Ingredients

  • 12 oz (340 g) fettuccine (or spaghetti for a silkier twirl)
  • 2 Tbsp unsalted butter
  • 3–4 garlic cloves, minced
  • 1 cup heavy cream
  • ¾ cup (60–70 g) finely grated Parmigiano
  • ½ tsp kosher salt
  • ¼ tsp black pepper
  • Optional finishes: pinch red pepper flakes, zest of ½ lemon, or 1 Tbsp chopped chives

Method

  1. Boil the pasta; reserve 1 cup pasta water.
  2. In a skillet over medium heat, melt the butter until foamy. Stir in the garlic and cook to just-blonde—about 45 seconds—so it smells sweet, not sharp.
  3. Pour in the cream and let it simmer softly for 2 minutes.
  4. Drop the heat, add the Parmigiano, and stir until perfectly smooth.
  5. Fold in the pasta with a modest splash of pasta water; toss until the sauce clings with a gentle sheen.
  6. Taste; then decide whether your bowl wants warmth (pepper flakes), lift (lemon zest), or a cool green edge (chives).

For aromatic detours that still respect the sauce, explore our Indian-inspired Alfredo twists—they’re playful yet weeknight-friendly.


4) Lighter Alfredo (Lower Butter/Cream, Still Silky)

Here the trick is body without weight; starch does the quiet heavy lifting.

Serves: 4 Time: 25 minutes

Lighter Alfredo overhead in a sun-washed kitchen—half-and-half, tiny slurry cup, lemon micro-zest on blond wood.
Body without weight: half-and-half plus a teaspoon of slurry, then fine Parm for sheen. Use pasta water as your texture dial; chickpea or lentil pasta adds protein without heaviness.

Ingredients

  • 12 oz (340 g) fettuccine
  • 1 Tbsp unsalted butter
  • 1 tsp olive oil
  • 1 garlic clove, minced (optional)
  • 1¼ cups half-and-half (or ¾ cup milk + ½ cup cream)
  • 1 tsp cornstarch mixed with 1 Tbsp cold water
  • ¾ cup (60–70 g) finely grated Parmigiano
  • ½ tsp kosher salt
  • Black pepper
  • A bare pinch of nutmeg (optional)

Method

  1. Cook the pasta; reserve 1 cup pasta water.
  2. Warm the butter and oil in a skillet; soften the garlic for 30 seconds without browning.
  3. Add the half-and-half and bring it to the quiet edge of a simmer. Whisk in the slurry; let it thicken lightly—about a minute.
  4. Lower the heat, then stir in the Parmigiano until smooth.
  5. Add the pasta and loosen with small spoonfuls of pasta water until the sauce slides silkily over the noodles. Season; nutmeg if it suits.

Smart Swaps (that still look great in snippets)


5) Better-for-You Alfredo (Choose Greek Yogurt or Cauliflower)

Different evenings call for different comforts; both paths feel bright and modern while staying recognizably Alfredo.

Greek Yogurt Alfredo

Serves: 4 Time: 25 minutes

Greek-yogurt Alfredo on cool terrazzo—lemon and herbs in soft focus, bright daylight.
Temper yogurt with hot broth off heat to prevent curdling, then fold in Parm. Toss with pasta, loosen lightly, and finish with a fragrant hint of lemon for a lively, lighter bowl.

Ingredients

  • 12 oz (340 g) pasta (fettuccine or penne)
  • 1 Tbsp olive oil
  • 1 small shallot, minced (optional)
  • ¾ cup hot low-sodium broth
  • ¾ cup plain Greek yogurt (whole-milk for best texture)
  • ½ cup (40–45 g) finely grated Parmigiano
  • ½ tsp kosher salt
  • Black pepper
  • A small squeeze of lemon (optional)

Method

  1. Cook the pasta; reserve ¾ cup pasta water.
  2. Soften the shallot in the oil for 2–3 minutes.
  3. Take the pan off the heat; whisk in the hot broth, then the yogurt—tempering prevents curdling.
  4. Return to low heat; whisk in the Parmigiano until smooth.
  5. Add the pasta; relax with pasta water to a satin finish, and season. A dot of lemon brightens without turning it into “lemon Alfredo.”

Cauliflower Alfredo

Serves: 4 Time: 30 minutes

Cauliflower Alfredo on matte black plate—blender jar and steamed florets, overhead on charcoal slate.
Blend cauliflower longer than you think for a restaurant-smooth puree; warm with garlic, add Parm, then gloss with pasta water. Season assertively—salt and pepper wake the sweetness.

Ingredients

  • 12 oz (340 g) pasta
  • 2 cups cauliflower florets
  • 1 Tbsp butter or olive oil
  • 1 garlic clove, minced
  • ¾ cup milk (dairy or unsweetened plant milk)
  • ½ cup (40–45 g) finely grated Parmigiano (or nutritional yeast for a dairy-lighter profile)
  • ½ tsp salt
  • Black pepper

Method

  1. Steam the cauliflower until very tender.
  2. Blend with the milk and butter until completely smooth—really let the blender run; the silk is in the blending.
  3. Warm the garlic for 30 seconds; pour in the puree and stir in the Parmigiano. Let it barely simmer for a minute.
  4. Toss with the pasta, loosen with pasta water, and season.

Plant-leaning tonight? There’s a clever tofu-based idea tucked into our tofu meal-prep guide. And if shellfish is off the table, vegan substitutes for shrimp keep texture and satisfaction in play.


What to Serve Alongside Your Classic Fettuccine Alfredo

  • Greens that cut through: lemony arugula, roasted asparagus, or shaved fennel.
  • Proteins that tuck in neatly: sautéed shrimp, grilled chicken, or seared mushrooms; when seafood’s a no-go, those vegan shrimp alternatives above are convincing.
  • Bread, judiciously: warm focaccia fingers or slender garlic toasts—enough to swipe the plate, not enough to steal the show.

Quick Answers (the kind readers actually need)

  • How do I keep classic fettuccine alfredo from clumping? Work warm-to-warm; add finely grated cheese gradually over low heat; and loosen with small spoonfuls of hot pasta water while tossing.
  • How can I reheat Alfredo without breaking it? Warm gently over low heat with a splash of hot water or milk, stirring until glossy again; reheat only what you’ll eat. For safety, follow USDA leftover guidance via Leftovers & Food Safety.
  • Is authentic alfredo really made without cream? Yes—Roman style is pasta, butter, Parmigiano, and pasta water; the cream-based version is the American adaptation.
  • Which cheese should I buy? Look for Parmigiano Reggiano with PDO markings; the consortium’s page on seals & marks helps you spot the real thing.

A Graceful Ending: Choosing the Right Alfredo Tonight

For weeknights that still feel like an occasion, authentic alfredo offers speed and purity; for company dinners, classic fettuccine alfredo brings plush comfort and a steady hold. Meanwhile, the garlic version provides aroma and lift, the lighter one slides into the week without effort, and the Greek yogurt or cauliflower paths keep the spirit of Alfredo while trimming weight. Then, as always, twirl. If the ribbons shine and the fork draws a clean line through the bowl, you’ve done exactly enough—and not a bit more.

More from MasalaMonk (to explore after you plate up)

If you’re in the mood to wander a little, these pieces extend the same spirit as your classic fettuccine alfredo—just in different directions.

  • Indian-inspired Alfredo riffs: curious about warmth and perfume? This guide layers gentle spice and aromatics into Alfredo so the sauce stays silky while the flavor blooms.
  • Low-carb pasta alternatives: when dinner needs to feel lighter, this walkthrough shows how to time zoodles, squash noodles, and other swaps so the sauce still clings.
  • High-protein pasta ideas: if you’d rather finish satisfied than stuffed, these pairings help you build more staying power into an Alfredo night.
  • Lentil pasta guide: meanwhile, if you want extra fiber without losing that glossy finish, this primer explains how lentil shapes behave in creamy sauces.
  • Vegan shrimp substitutes: no shellfish? No worries—this list offers convincing stand-ins that play beautifully with Alfredo’s texture.
  • Tofu Zoodle Alfredo idea: finally, if you prefer a lighter, plant-leaning bowl, this tidy idea folds tofu and zoodles into a sauce that still feels luxurious.

Quiet, trustworthy sources (for the cooks who like to know why)

Because technique is half the pleasure, these references offer calm, useful context—nothing fussy, just the right details at the right moment.

  • Roman no-cream method: for pace, heat, and the feel of the toss, this is a clear baseline when you’re aiming for authentic Alfredo.
  • Why pasta water matters: moreover, if you’ve ever wondered how a ladle of starchy water can transform a sauce, this explainer shows the chemistry in plain language.
  • Parmigiano markings — how to spot the real thing: before you shop, look here; the PDO seals and dotted rind tell you you’re buying cheese that will melt cleanly and taste bright.
  • USDA leftovers & reheating: finally, when you save a portion, reheat gently and, for safety, follow this straightforward guidance.

FAQs

1) What exactly is “authentic Alfredo,” and how is it different from classic fettuccine alfredo?

Authentic Alfredo (the Roman style) is simply hot pasta tossed with cold butter and finely grated Parmigiano, brought together with starchy pasta water—no cream, no garlic. By contrast, classic fettuccine alfredo uses a little cream (and sometimes garlic) for extra plushness and stability. For a clear technique template, see this Roman no-cream method from Serious Eats.

2) How do I keep classic fettuccine alfredo from clumping or turning grainy?

First, grate Parmigiano ultra-fine so it melts instantly; then, work warm-to-warm and add cheese gradually over gentle heat. If it tightens, loosen with a spoonful of hot pasta water and toss until glossy. If you want the “why,” this primer on how pasta water helps sauce emulsify and cling is excellent.

3) What pasta shape works best—and can I swap in others without ruining the texture?

Although fettuccine is the namesake, spaghetti, tonnarelli, penne, and even farfalle all work. However, you may need a touch more pasta water with ridged or tubular shapes to keep that silk. If you’re reducing carbs, consider the timings and textures in low-carb pasta alternatives.

4) Which cheese should I buy for the smoothest Alfredo?

Use real Parmigiano Reggiano and grate it very fine. Moreover, look for PDO seals and dotted rind marks so you know it’s authentic; the Parmigiano consortium’s guide to seals & marks shows exactly what to spot.

5) Can I make a lighter Alfredo that still feels luxurious?

Yes—absolutely. You can use half-and-half plus a tiny slurry, or go brighter with our Greek-yogurt or cauliflower approaches in the post. If you’d like even more staying power (without heaviness), skim our high-protein pasta ideas and the lentil pasta guide for easy pairings.

6) Is there a plant-forward or dairy-lighter way to enjoy Alfredo?

Certainly. Try the Greek-yogurt version, a cauliflower-based sauce, or (when you want a playful detour) the Tofu Zoodle Alfredo idea tucked inside our tofu meal-prep guide. And if shellfish is off the table, these vegan shrimp substitutes keep texture and satisfaction in play.

7) Do I salt the pasta water heavily for authentic alfredo—and how much should I save?

Yes—season the water so the noodles taste good on their own (think “well-seasoned soup”). Then, before draining, reserve at least 1 cup of very hot pasta water. Add it gradually: first to jump-start the emulsion, then to fine-tune the gloss. Here’s the science-backed explanation of why pasta water matters.

8) How do I reheat leftovers without breaking the sauce?

Gently does it. Warm the pasta over low heat with a splash of hot water or milk, stirring until glossy again. Reheat only what you’ll eat; for safety, follow the USDA’s leftovers & reheating guidance (aim for 165°F).

9) When should I choose authentic Alfredo over the creamy version?

Choose authentic Alfredo when you want weeknight elegance with minimal ingredients and maximum cheese clarity. Alternatively, choose the creamy route when you need a steadier sauce that travels well to the table and reheats more predictably. If you’re feeling adventurous, drift toward Indian-inspired Alfredo riffs for aromatic warmth.

10) What’s the single most common mistake home cooks make?

Too much heat, too little patience. Instead, keep the flame gentle, add cheese gradually, and use pasta water as your texture dial. With that rhythm, classic fettuccine alfredo stays glossy rather than greasy.

11) Can I add chicken, shrimp, or vegetables without losing that silky finish?

Yes—add quickly cooked proteins (grilled chicken or sautéed shrimp) and blanched vegetables (broccoli, asparagus) at the toss stage, then adjust with pasta water until the sauce re-coats everything. When shrimp isn’t an option, lean on vegan shrimp alternatives that mimic the bite without the shellfish.

12) I love Alfredo but prefer a fresher, spiced profile—any ideas that still respect the sauce?

Try a garlic-forward base finished with lemon zest and chives, or (for something playful yet balanced) explore our Indian-inspired Alfredo twists. They keep the silky core intact while the aromatics bloom around it—perfect for dinner guests who want familiar comfort with a graceful nudge.

Posted on 1 Comment

Creamy Cauliflower Soup—Keto-Friendly, Ultra-Comforting (Vegan Option)

Portrait cover of creamy cauliflower soup in a charcoal Dutch oven, a ladle lifting a silky spoonful; topped with herb oil, toasted almonds, and chives—keto-friendly with a vegan option.

Some soups do their job and move along. However, this one lingers—in the best way. Creamy Cauliflower Soup has a quiet kind of confidence: a short ingredient list, a steady method, and that velvety finish that makes a bowl feel like a small kindness. Moreover, it’s an easy weeknight recipe you can cook on a Tuesday and still be proud to serve on a Sunday. The base method is simple and reliable; then, with just a few tweaks, you can nudge it cheesy, roast-forward, leek-fragrant, broccoli-green, slow-cooker mellow, minimalist, or gently spicy.

Meanwhile, we’ll keep the tone warm and the directions practical. You’ll see clear steps, small tips that make a big difference, and smooth transitions so the post reads like a conversation in your kitchen. Most importantly, you’ll get a flexible, delicious Creamy Cauliflower Soup blueprint that adapts to keto, vegetarian, and vegan tables without losing its creamy heart.

If you are curious to know more about Cauliflower in Keto, and what other ways you can use it, do read our post : Incorporating Cauliflower into Your Keto Diet: A Guide to Low-Carb Deliciousness. For a quick nutrition snapshot, see cauliflower nutrition facts (USDA).


Why Creamy Cauliflower Soup Works (and When)

First, cauliflower is a naturally mild vegetable that welcomes flavor—from onions and leeks to herbs, spices, and good stock. Second, blending transforms humble florets into something silky and soothing. Third, the method is forgiving: even if you skip the cream, Creamy Cauliflower Soup still tastes luxurious if you blend thoroughly and season with intention. Consequently, it’s a recipe that fits early fall cozy nights, deep winter meal prep, and even quick spring dinners when you want comfort without heaviness. For the technique behind that silkiness, here’s how to make creamy soups without flour.

Additionally, this soup scales beautifully. You can double it for gatherings, halve it for a solo supper, or batch it for lunch all week. Finally, it holds up to different eating styles with minimal changes—so the whole table can eat happily together.


Ingredients for Cauliflower Soup

Here are the ingredients for cauliflower soup most home kitchens already have:

  • 2 tablespoons olive oil or butter
  • 1 medium onion, diced (or 2 leeks, white and light green parts only)
  • 3 garlic cloves, minced
  • 1 medium head cauliflower (about 700–800 g), cut into florets
  • 3 cups unsalted vegetable or chicken stock (plus a splash to thin)
  • ½ to ¾ cup heavy cream or coconut milk (optional, for extra silk)
  • ½ teaspoon freshly ground black pepper, and salt to taste
  • 1 lemon wedge, to finish

In addition, if you prefer a vegetarian bowl, choose vegetable stock. Alternatively, if you’re making a fully plant-based version, use olive oil and coconut milk (or cashew cream) instead of dairy for a vegan Creamy Cauliflower Soup. For low-carb readers, this naturally leans toward a keto approach—if you’re curious to learn more about keto, so browse our post Keto Diet: Most Frequently Asked Questions.


The Base: Easy, Creamy Cauliflower Soup

Serves: 4 bowls
Active Time: 15–20 minutes
Total Time: 20–30 minutes

  1. Soften the Aromatics. Warm olive oil or butter over medium heat. Next, add the onion with a pinch of salt and cook, stirring now and then, until translucent and sweet, 3–4 minutes. Add the garlic and cook just 30 seconds—enough to wake it up.
  2. Simmer the Cauliflower. Add the florets and stock. Bring to a boil, then lower to a lively simmer. Cook until a knife slides through the stems easily, about 10–12 minutes.
  3. Blend to Silk. Turn off the heat. Use an immersion blender to puree until completely smooth. (If using a stand blender, vent the lid and blend in batches.)
  4. Enrich and Balance. Stir in cream or coconut milk if you’re using it. Afterward, taste and season with salt and plenty of black pepper. Finish with a squeeze of lemon to brighten. Thin with a splash of stock to your perfect consistency.
Four-step 20-minute creamy cauliflower soup—soften aromatics, add florets and stock, simmer 10–12 minutes, blend smooth.
Weeknight blueprint: four quick steps to a silky base you can spin into roasted, cheesy, spicy, or vegan versions.

Texture Tip: For that restaurant-smooth Creamy Cauliflower Soup, blend a full minute longer than you think, then pass the soup through a fine mesh sieve. Admittedly, it’s optional; nevertheless, the result is luxurious.

Basic Cauliflower Soup Shortcut: If you’re in a minimalist mood, skip the cream and keep the texture slightly rustic. Even so, once blended, it still reads as a simple cream of cauliflower soup—light yet satisfying.


Flavor Fundamentals (So Small Moves Taste Big)

To begin with, sweat aromatics gently; browned onions or leeks can turn bitter in a delicate puree. Furthermore, season in layers: a pinch early to draw out sweetness, another check after blending, and a final brightening with lemon. Similarly, blend longer than you think you need—texture carries aroma to your palate. Finally, garnish for contrast: something crisp (nuts or seeds), something green (herbs), and a little shine (olive oil or chili oil). Altogether, these moves make every bowl of Creamy Cauliflower Soup feel complete.


Roasted Cauliflower Soup

When you want deeper, toastier notes, roast the florets first. Toss with olive oil, salt, and pepper; spread on a sheet pan and roast at 220°C / 425°F for 25–30 minutes, until the edges are well browned. Meanwhile, make the base as written. Then, blend the roasted florets into the stock, onion, and garlic. The color leans golden-beige, the flavor turns nutty, and the whole bowl feels weekend-special. For a primer on browning and tray spacing, see how to roast vegetables well.

Roasted cauliflower soup guide showing roast-first cues—220°C/425°F for 25–30 minutes, well-browned edges, spaced florets.
Roast florets hot and spaced for nutty depth; then blend into the base for a golden, weekend-special bowl.

Finishing Move: Drizzle each serving with a teaspoon of rosemary-infused olive oil (warm oil with a sprig, cool, then strain) and add a pinch of flaky salt. Additionally, hold back a few roasted florets as garnish so every spoonful gets silky base plus a little texture.


Cauliflower & Cheese Soup

Cheese brings nostalgic comfort. Therefore, once your base is blended and back over low heat, stir in 1 to 1½ cups grated sharp cheddar until fully melted and smooth. For depth, add 2 tablespoons finely grated Parmesan. Importantly, keep the heat gentle and avoid a simmer so the cheese stays glossy.

Creamy cauliflower and cheese soup card—blend first, melt in 1–1½ cups cheddar with 2 tbsp Parmesan over gentle heat.
Add grated cheese after blending and keep heat low for a glossy, restaurant-smooth finish.

Make It Extra: A handful of chives, a twist of pepper, and a few shards of crisped Parmesan on top. For a lower-carb crunch, toasted almonds or seed crackers work beautifully. If you’re tracking carbs in dairy, this quick guide can help you choose wisely: Carbs in Cheese (Keto Perspective).


Cauliflower & Leek Soup

Leeks have a soft perfume that suits creamy soups. Accordingly, swap onion for 2 leeks, sliced thin and rinsed well. Cook them slowly in olive oil with a pinch of salt until tender but pale; browning makes leeks a bit assertive for this style. After that, proceed with the base method. The result is a pale, elegant Cauliflower & Leek Soup—or, as some home cooks say, a comforting cauli and leek soup.

Optional Finish: A spoon of crème fraîche (or coconut cream) right before serving, plus dill or chives. Alternatively, a little lemon zest brightens beautifully.


Broccoli & Cauliflower Soup

For a heartier green bowl, use about half broccoli, half cauliflower. To keep the color bright, add the broccoli a couple of minutes after the cauliflower. Then, blend smooth for a familiar Broccoli & Cauliflower Soup that eats like a sweater-weather staple. If you’d like extra body, add a small peeled potato to the simmer (skip if you’re keeping it very low-carb).

Bright-green broccoli and cauliflower soup with pesto swirl; card notes to add broccoli 2–3 minutes after cauliflower and blend promptly.
For vivid color, add broccoli late and blend right away; finish with lemon zest for lift.

Serving Idea: Lemon zest and shaved Parmesan lift the green notes without getting in the way. Alternatively, swirl in a spoon of pesto for a leafy accent.

Read more about: <strong>The Broccoli – Nutrition, Benefits, and 5 Practical Ways for Weight Loss.


Slow Cooker Cauliflower Soup (Crockpot)

Some days, dinner needs to take care of itself. In that case, add everything except the cream to the slow cooker and cook on LOW for 4–6 hours or HIGH for 2–3 hours, until the florets are soft. Blend right in the crock if your stick blender fits; otherwise, carefully transfer to a blender and puree in batches. Afterward, stir in cream or coconut milk, season, and finish with lemon. This slow cooker cauliflower soup—also known as cauliflower soup crockpot in some kitchens—tastes like you worked all afternoon, even if you didn’t. If you are looking to amp up your plant based protein game while meal prepping, have a look at 10 Delicious Plant-Based Protein Sources for High-Protein Meal Prep.

Slow cooker cauliflower soup instructions—LOW 4–6 hours or HIGH 2–3 hours; blend, then stir in cream or coconut milk; season with lemon.
Hands-off meal prep: load the crock, cook, blend silky, and finish with dairy and lemon at the end.

20-Minute, 3-Ingredient, and 5-Ingredient Options

20-Minute Cauliflower Soup: Cut florets small, keep the simmer lively, and blend hot with an immersion blender. Additionally, warm your bowls with hot water beforehand; that small step makes weeknight Creamy Cauliflower Soup feel special.

3-Ingredient Cauliflower Soup: Cauliflower + good stock + olive oil. That’s it. Even with so little, blend very smooth, season assertively, and finish with lemon. This minimalist path yields a lovely healthy cauliflower soup that still tastes complete.

5-Ingredient Cauliflower Soup: The minimalist version plus onion for sweetness and cream (or coconut milk) for silk. Consequently, it reads simple, but the mouthfeel feels restaurant-worthy.


Spicy Cauliflower Soup

For gentle heat, bloom ½ to 1 teaspoon chili flakes and ½ teaspoon smoked paprika in the oil before you add the onion. Then, proceed with the base. After blending, taste and add a tiny splash of apple cider vinegar to bring the flavors forward. Finally, finish each bowl with a light swirl of chili oil. If the spice edges sharper than you planned, simply round it out with a tablespoon of cream or coconut milk. Either way, the result is a lively interpretation of Creamy Cauliflower Soup that still comforts.

Spicy cauliflower soup card—bloom chili flakes and smoked paprika, blend smooth, garnish with chili oil, pine nuts, and parsley.
Gentle heat, big flavor: bloom spices first, then balance with a swirl of chili oil and a pinch of acid.

Carrot & Cauliflower Soup (Optional)

Add 2 cups chopped carrots with the florets and proceed with the base. As a result, you’ll get a sunny, orange-gold bowl with quiet sweetness. A spoon of crème fraîche or coconut milk ties it together; a little cumin warms it without turning the soup into something entirely different.


Cauliflower Bisque (Optional)

If you like a classic cauliflower bisque, enrich the blended soup with a splash of cream and the gentlest whisper of dry sherry. Keep it subtle; the bisque should still taste like cauliflower first. To finish, try chives and a touch of white pepper. Altogether, it feels like a dinner-party first course that’s secretly easy.


Eating Styles: Keto, Vegetarian, and Vegan

Keto Cauliflower Soup: Start with butter or olive oil, then enrich with heavy cream. Keep stock unsweetened, skip flour or starch, and finish with a little cheddar or Parmesan if cheese fits your plan. Additionally, if cheese is your topping of choice, this helpful reference on dairy macros can guide your picks: Carbs in Cheese (Keto Perspective).

Ingredient swap chart for cauliflower soup—keto (butter, cream, chicken stock, cheese, bacon) vs vegan (olive oil, coconut milk, veg stock, nutritional yeast, crisp nuts, cashew cream).
Choose your lane in seconds—simple swaps keep the method the same while matching keto or vegan goals.

Vegetarian Cauliflower Soup: Use vegetable stock and finish with cream, milk, or a swirl of olive oil. That way, it stays silky and satisfying without chicken stock.

Vegan Cauliflower Soup: Use olive oil. Replace cream with coconut milk or cashew cream (blend soaked cashews with hot water until perfectly smooth). Notably, nutritional yeast can add a gentle “cheesy” note; lemon and herbs brighten beautifully. And if you’re in a plant-based groove, these soup ideas are a great next stop: Vegan Lentil Soup Recipes.


Serving Ideas and Toppings

Little finishes make a puree feel complete. Therefore, mix and match:

  • Herb Oils: Rosemary or thyme gently infused into olive oil, then drizzled over each bowl.
  • Crisp and Crunchy: Toasted almonds, hazelnuts, pine nuts, or seed crackers.
  • Cheese Shower: Parmesan or Pecorino for savoriness; cheddar shards for comfort.
  • Green Notes: Snipped chives, parsley, dill, or a handful of baby spinach blended in for color.
  • Hold-Back Roasted Florets: If you made the roasted version, save a few for garnish—soft base, crisp top.
  • Bright Finishes: Lemon juice and zest lift every version, especially vegan bowls.

Side Ideas: For low-carb nights, consider a cucumber–dill salad or roasted mushrooms with thyme. Alternatively, if your table isn’t strictly low-carb, a warm loaf or garlic croutons makes dunking irresistible. Moreover, if celery comes up as a crunchy add-in or side, this friendly overview answers the usual questions: Celery on Keto.

Ingredient Swaps and Pantry Notes

  • Onion vs. Leek: Onion gives sturdy sweetness; leek brings delicate perfume. Either way, both are right—choose your mood.
  • Stock Choices: Vegetable stock keeps things vegetarian/vegan; chicken stock tilts toward Sunday-supper richness. For control, low-sodium helps you stay in charge of seasoning.
  • Creamy Elements: Heavy cream is plush, coconut milk adds gentle sweetness, and cashew cream is a vegan power move.
  • Cheese Options: Cheddar melts smoothly; Parmesan adds umami; Gruyère feels a little fancy.
  • Aromatics: A stick of celery, a bay leaf, or a sprig of thyme can join the simmer and hop out before blending.
  • Add-Ins: A spoon of pesto, a dusting of smoked paprika, or a few sweet peas (skip peas if you’re very low-carb). For thickness on the fly, adding riced cauliflower to soup works beautifully. Plus, if you’re bulking soups while keeping carbs in check, see these smart ideas: Keto Beans: 5 Varieties That Won’t Ruin Your Diet.

Make-Ahead, Storage, and Freezing

  • Chill: Cool, then refrigerate in a sealed container for up to 4 days.
  • Freeze: For the smoothest thaw, freeze without dairy, then stir in cream or coconut milk after reheating. Additionally, freeze up to 2 months in flat, labeled bags—they stack neatly and thaw faster. Here’s how to freeze soup flat for easy storage.
  • Reheat: Warm gently on the stovetop. If the soup thickens, loosen with a splash of stock or water and re-season with salt and pepper.

For authoritative guidance, see USDA: Freezing and Food Safety and the Cold Food Storage Chart.

Meanwhile, if you’re batch-cooking for variety, pair this with something hearty and plant-based from our Red Lentil Soup Collection. That way, the week feels diverse without complicating your shopping list.


Troubleshooting and Tiny Adjustments

  • Too Thin? Simmer 3–5 minutes to reduce, or add a small handful of grated cheddar if you’re steering cheesy.
  • Too Thick? Add hot stock a splash at a time and blend back to silky.
  • Needs “Something”? It’s usually acid and salt. Therefore, try lemon, then a pinch of salt, then a grind of pepper.
  • Cheese Split? Take the pot off heat and whisk in a spoon of cream or coconut milk. Generally, gentle heat keeps cheese emulsified.
  • Want Extra Body Without Cream? Blend in a few cauliflower florets reserved from the pot or a spoon of cashew cream; both boost creaminess while keeping flavors clean.

A Gentle Cooking Plan That Actually Happens

Monday: Pick up a cauliflower, an onion or leeks, garlic, and stock.
Tuesday: Make the base—20 minutes, tops—and portion half for lunch.
Wednesday: Rewarm part of the base and whisk in cheddar for Cauliflower & Cheese Soup.
Weekend: Roast a fresh batch of florets and turn the rest into Roasted Cauliflower Soup with an herby oil drizzle. In short, one pot, two moods, very little effort.


More Cauliflower You’ll Love

When people fall for Creamy Cauliflower Soup, they often want another classic. Accordingly, you can browse these:


Printable Core Recipe (Reader-Friendly Summary)

Creamy Cauliflower Soup (Keto, Vegetarian, and Vegan Options)

  • 2 tbsp olive oil or butter
  • 1 onion (or 2 leeks), 3 garlic cloves
  • 1 medium cauliflower (700–800 g), florets
  • 3 cups unsalted vegetable or chicken stock
  • ½–¾ cup cream or coconut milk (optional)
  • Salt & black pepper, lemon to finish

Method:

  1. Soften onion in oil, 3–4 min; add garlic 30 sec.
  2. Add cauliflower + stock; simmer 10–12 min until very tender.
  3. Blend completely smooth.
  4. Stir in cream or coconut milk (if using). Season and finish with lemon.

Variations:

  • Roasted Cauliflower Soup: Roast florets 25–30 min at 220°C/425°F, then proceed.
  • Cauliflower & Cheese Soup: Stir in 1–1½ cups grated cheddar + 2 tbsp Parmesan off heat.
  • Cauliflower & Leek Soup: Swap onion for 2 leeks; sweat gently without browning.
  • Broccoli & Cauliflower Soup: Use half broccoli; add a couple of minutes after cauliflower.
  • Slow Cooker Cauliflower Soup: Everything except dairy, LOW 4–6 h or HIGH 2–3 h; blend; add dairy.
  • Spicy Cauliflower Soup: Bloom chili flakes + smoked paprika; finish with chili oil.
  • 3-Ingredient: Cauliflower + stock + olive oil; blend and season.
  • 5-Ingredient: Add onion + cream (or coconut milk).

Closing Notes (and a Gentle Nudge)

Ultimately, the secret to Creamy Cauliflower Soup isn’t a long ingredient list; instead, it’s attention in the right places: softly sweated aromatics, patient blending, layered seasoning, and a bright finish. Because of that, even a minimalist bowl feels generous. So, keep riced cauliflower in the freezer, stash a carton of good stock in the pantry, and give yourself permission to cook simply. Before long, you’ll have a dependable, cozy staple that adapts to every season and every table.


FAQs

1) What makes Creamy Cauliflower Soup so silky without flour?

Because cauliflower blends beautifully, the puree turns naturally velvety. Moreover, when you sweat the onions or leeks gently, blend a bit longer than you think, and finish with a splash of cream or coconut milk, the result is a luxurious Creamy Cauliflower Soup—no flour or starch required.

2) Can I make Creamy Cauliflower Soup dairy-free or vegan?

Absolutely. Simply use olive oil instead of butter and, additionally, swap cream for coconut milk or cashew cream. As a result, you’ll keep the same cozy texture while the soup stays fully plant-based.

3) How do I keep it keto-friendly without losing the creamy vibe?

It’s already low in carbs, so you’re close. Then, for extra richness, finish with heavy cream and a sprinkle of cheese if you like. Meanwhile, avoid flour or potatoes, and taste for salt and lemon so the flavors stay bright.

4) What are the essential ingredients for cauliflower soup?

You’ll need olive oil or butter, onion or leeks, garlic, cauliflower, stock, pepper, salt, and a lemon wedge. Additionally, cream or coconut milk is optional; however, it does add that signature silk to Creamy Cauliflower Soup.

5) How can I make it in 20 minutes on a busy weeknight?

First, cut florets small. Next, bring the pot to a lively simmer and cook until the stems are easily pierced. Finally, blend right in the pot with an immersion blender. Consequently, you’ll have Creamy Cauliflower Soup on the table fast.

6) What’s the difference between the basic soup and a true “cream of cauliflower” version?

The basic version is blended and naturally creamy; however, the cream of cauliflower soup includes an enriching step with cream or coconut milk. In short, both are silky—one is simply richer.

7) How do I make Roasted Cauliflower Soup for deeper flavor?

Toss florets with oil, salt, and pepper; then roast at 220°C / 425°F until golden at the edges. Meanwhile, build the base with onion and garlic, and finally blend in the roasted florets. As a result, you’ll get a nutty, weekend-special bowl.

8) What’s the best way to make Cauliflower & Cheese Soup without it splitting?

Keep the pot over low heat and add grated cheese after blending. Additionally, avoid boiling once the cheese goes in. This gentle approach keeps the soup glossy, smooth, and wonderfully cheesy.

9) Can I use leeks instead of onions?

Yes, and they’re lovely. Leeks bring a softer aroma; therefore, sweat them slowly without browning. After that, proceed as usual and you’ll get an elegant Cauliflower & Leek Soup with a calm, café-style vibe.

10) How do I make Broccoli & Cauliflower Soup that stays bright green?

Add broccoli two to three minutes after the cauliflower so it doesn’t overcook. Then, blend promptly and finish with lemon zest. Consequently, the color stays vivid and the flavor remains fresh.

11) Is there a slow-cooker (crockpot) method that still tastes rich?

Definitely. Place everything except dairy in the slow cooker and cook on LOW 4–6 hours or HIGH 2–3 hours. Then blend, stir in cream or coconut milk, and, finally, brighten with lemon. Meanwhile, the hands-off approach makes meal prep effortless.

12) What are easy minimalist options—3-ingredient or 5-ingredient?

For 3-ingredient, use cauliflower, good stock, and olive oil; blend and season assertively. For 5-ingredient, simply add onion and cream (or coconut milk). Even so, both taste pleasantly complete.

13) How can I adjust the spice without overpowering the soup?

Bloom chili flakes and smoked paprika in the oil at the start. After blending, taste and, if needed, balance with a tiny splash of apple cider vinegar. Alternatively, soften heat with a tablespoon of cream or coconut milk.

14) What’s the easiest way to fix texture—too thick or too thin?

If it’s too thick, add hot stock a splash at a time and blend again. Conversely, if it’s too thin, simmer briefly to reduce or melt in a small handful of cheese (for a cheesy path). Either way, season again at the end.

15) Can I freeze Creamy Cauliflower Soup?

Yes. For best results, freeze it without dairy, and then stir in cream or coconut milk after reheating. Additionally, cool completely first and freeze flat in labeled bags; this method stacks neatly and thaws quickly.

16) How long does it keep in the fridge, and how should I reheat it?

It keeps up to 4 days chilled. When reheating, warm gently over medium-low heat. Moreover, if the soup has thickened, loosen it with a splash of stock or water; then taste and adjust salt and lemon.

17) Which garnishes make Creamy Cauliflower Soup feel restaurant-worthy?

Think contrast. For instance, add herb oil, toasted nuts or seeds, a cheese shower, and fresh herbs. Additionally, holding back a few roasted florets for the top gives every spoonful a little texture.

18) How do I boost protein without changing the flavor too much?

Stir in shredded rotisserie chicken after blending, or, alternatively, top each bowl with a soft-boiled egg. Meanwhile, keep the seasoning balanced so the soup still tastes like cauliflower first.

19) Can I make a lighter bisque-style version?

Certainly. Enrich the blended soup with a modest splash of cream and, optionally, a whisper of dry sherry. Consequently, you’ll get a classic cauliflower bisque that feels dinner-party elegant yet remains simple.

20) What’s the single most important step for the best flavor?

Blend thoroughly and finish bright. In other words, pureeing until silky and adding lemon at the end—plus a pinch of salt—turns a good Creamy Cauliflower Soup into a truly memorable one.