Posted on Leave a comment

Peanut Noodles Recipe: Creamy Peanut Sauce Noodles in 20 Minutes

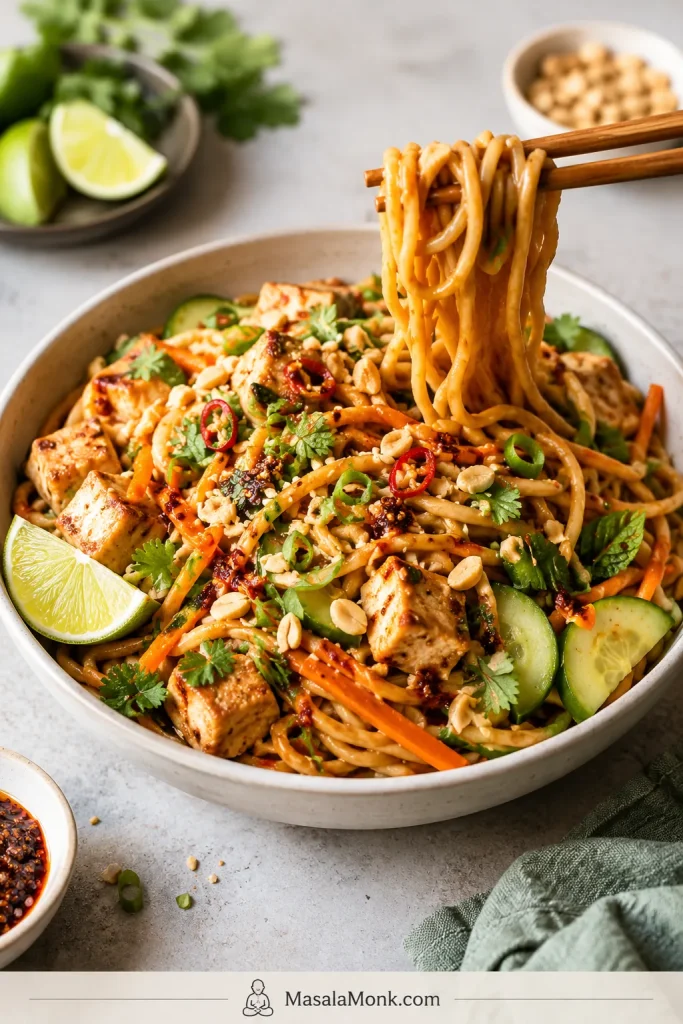
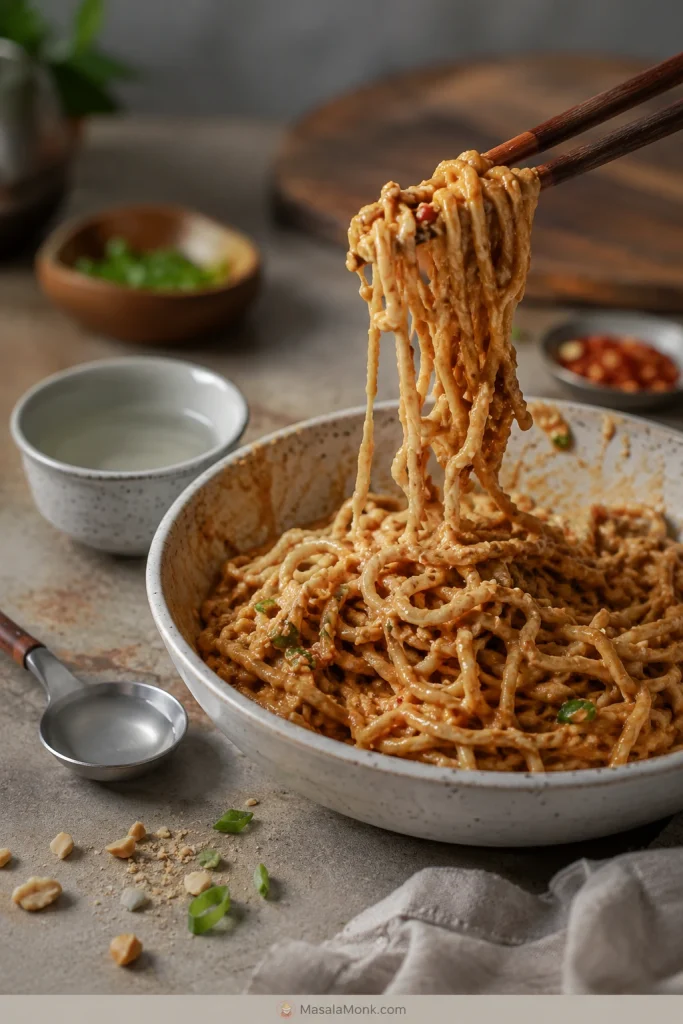
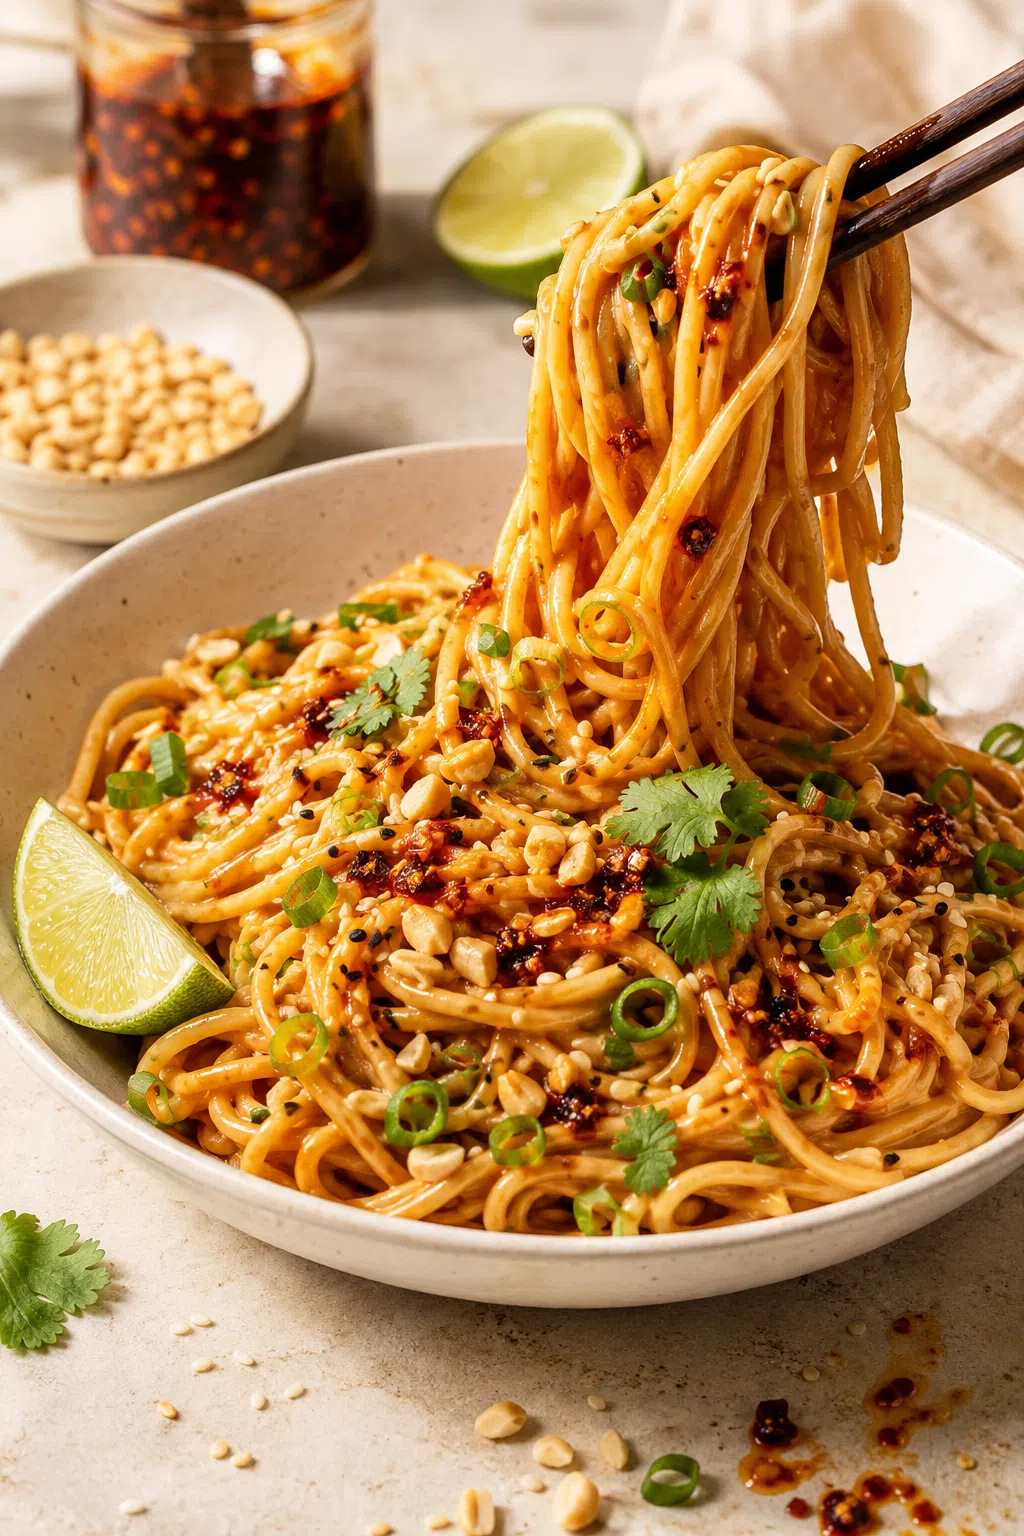
Bowl of creamy peanut noodles with chili crisp, scallions, chopped peanuts, sesame seeds, herbs, lime, and lifted noodles

Peanut noodles are the dinner you make when you have noodles, peanut butter, and very little patience. This version is built around the one thing that makes or breaks the bowl: a peanut sauce loose enough to cling to every strand without turning thick, dry, or clumpy.

These creamy peanut noodles are ready in about 20 minutes. They turn a packet of noodles and a jar of peanut butter into something that feels like dinner: rich but not heavy, peanutty but not pasty, and bright enough that you want another bite.

Keep them plain and pantry-friendly, make them spicy with chili crisp, serve them cold with cucumber and herbs, or turn them into a full meal with tofu, chicken, shrimp, egg, or edamame. However you build them, the goal is the same: glossy strands, salty-tangy peanut flavor, and enough crunch or lime to keep you going back for another bite.

Make This Tonight If You Have

  • 8 oz / 225 g dried noodles, spaghetti, ramen, rice noodles, udon, soba, or another noodle you already have
  • ½ cup / about 128 g peanut butter
  • Soy sauce or tamari
  • Rice vinegar, lime, lemon, or a small splash of regular vinegar
  • Warm water to turn the peanut butter into sauce
  • Garlic, ginger, chili, scallions, herbs, peanuts, or crunchy vegetables if available

The easiest version is spaghetti, peanut butter, soy sauce, vinegar or lemon, chili flakes, and warm water. No lime, no rice noodles, no chili crisp? Use what you have. This bowl forgives imperfect noodles, half a lime, and whatever crunchy vegetables are left in the fridge.

Pantry check: this is the simplest version of the recipe promise — noodles, peanut butter, salty seasoning, acid, chili, and enough liquid to make dinner happen.
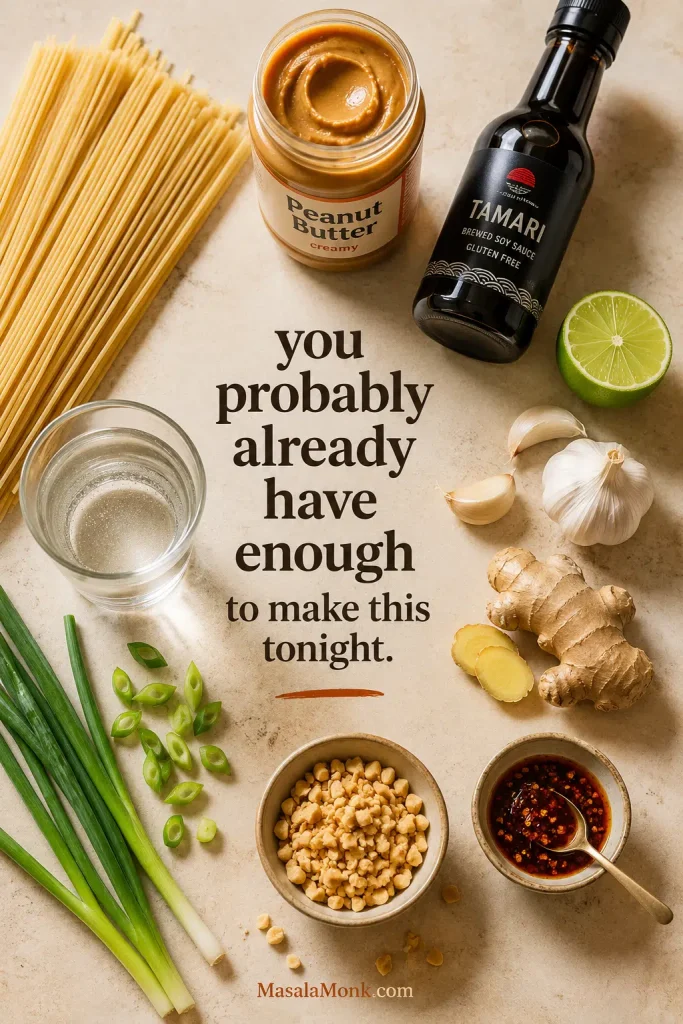
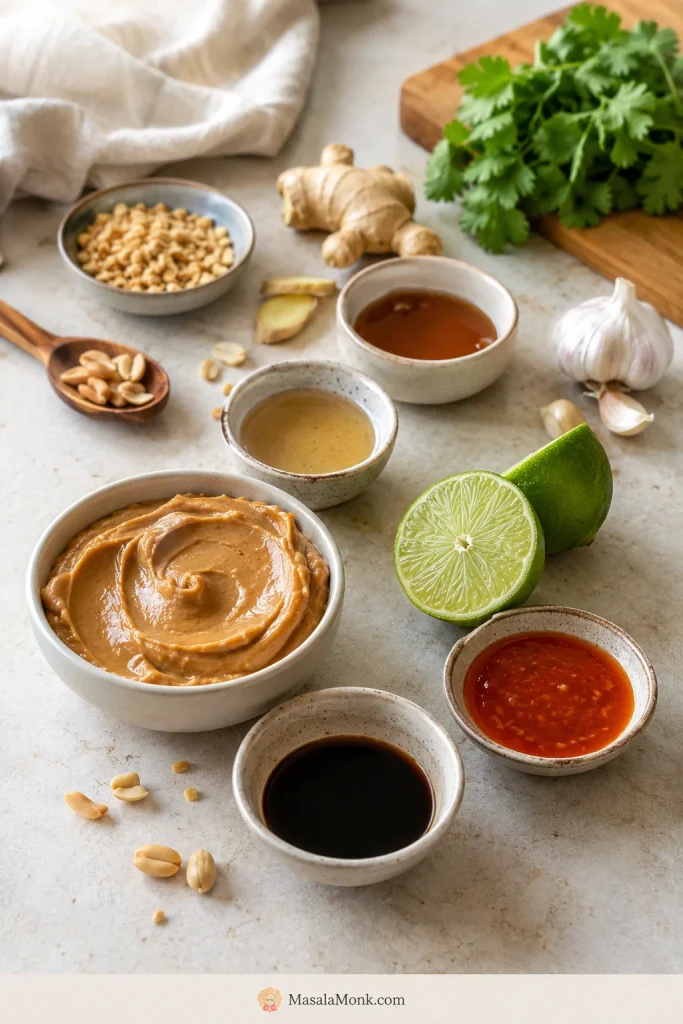
Dried noodles, peanut butter, soy sauce, lime, garlic, ginger, chili, scallions, peanuts, and water arranged on a countertop
Before you cook, check what you already have. Peanut butter, noodles, soy sauce, acid, chili, and warm water can turn into dinner quickly.

Quick Answer

To make peanut noodles, cook 8 oz / 225 g dried noodles, reserve ½ cup / 120 ml noodle water, then whisk ½ cup / about 128 g peanut butter with soy sauce or tamari, rice vinegar, lime juice, a little sweetener, garlic, ginger, chili, and ¼ cup / 60 ml warm water. Toss with the noodles, then loosen with reserved noodle water until the noodles look shiny, saucy, and easy to lift.

The basic peanut noodle sauce formula is simple: peanut butter for body, soy sauce for salt, vinegar or lime for brightness, a little sweetener for balance, chili for heat, and warm water to make it pourable. That is the difference between peanut butter on noodles and peanut sauce noodles.

For 4 servingsUse
Noodles8 oz / 225 g dried noodles
Peanut butter½ cup / about 128 g
First thinning liquid¼ cup / 60 ml warm water
Final adjustmentReserved noodle water or warm water, in small splashes
Best texture cuePourable sauce before tossing, glossy noodles after tossing

Sauce shortcut: use this formula when the bowl tastes flat, too thick, too salty, or too peanut-heavy.
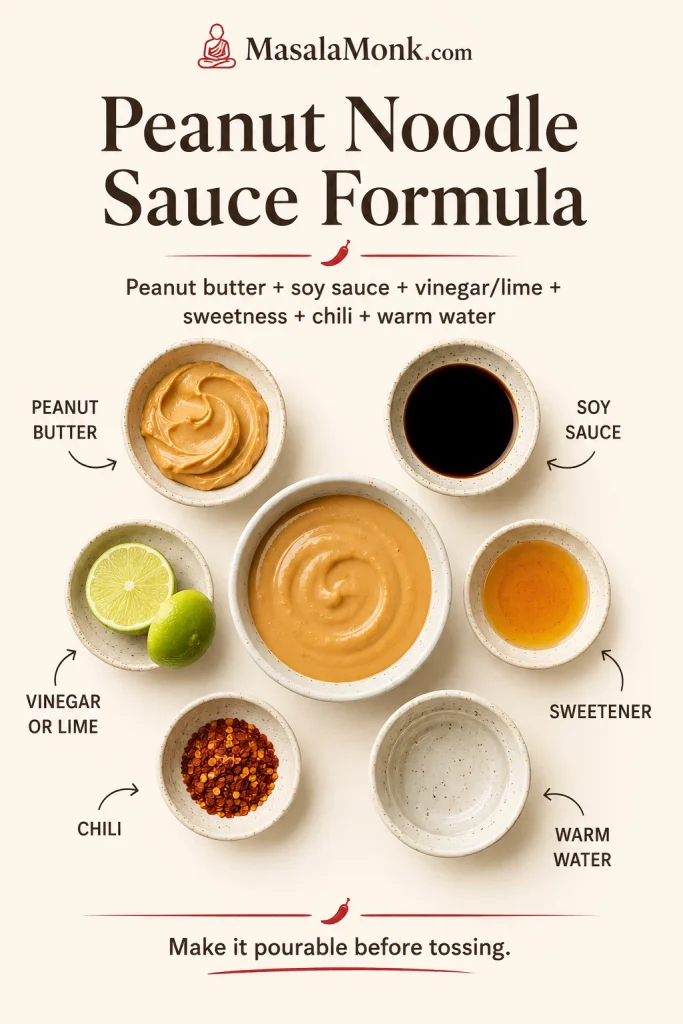
Peanut noodle sauce formula graphic showing peanut butter, soy sauce, vinegar or lime, sweetener, chili, warm water, and sauce
A good peanut noodle sauce is about balance: creamy body, salty depth, tangy lift, gentle sweetness, optional heat, and enough liquid to move.

Choose Your Bowl

Start with the same sauce, then steer the bowl toward the kind of dinner you need: pantry-simple, spicy, cold, protein-heavy, or extra saucy.

What you wantUseFinish with
Pantry dinnerSpaghetti, peanut butter, soy sauce, vinegar or lemonChili flakes, peanuts, scallions
Spicy takeout-ish bowlRamen, udon, wheat noodles, or spaghettiChili crisp, chili oil, lime
Cold lunch bowlRice noodles or sobaCucumber, cabbage, herbs, sesame
Full dinner bowlUdon, wheat noodles, spaghetti, or rice noodlesTofu, chicken, shrimp, egg, or edamame
Extra-saucy noodles6–7 oz / 170–200 g dried noodlesMore peanut sauce and noodle water

For the first time, start with spaghetti or udon, creamy peanut butter, low-sodium soy sauce, lime or vinegar, and chili crisp if you like heat. After that, the same sauce can go pantry-simple, spicy, cold, protein-heavy, or extra saucy.

Use the bowl guide below when you know the kind of meal you want but need help choosing the noodle, topping, or finish.
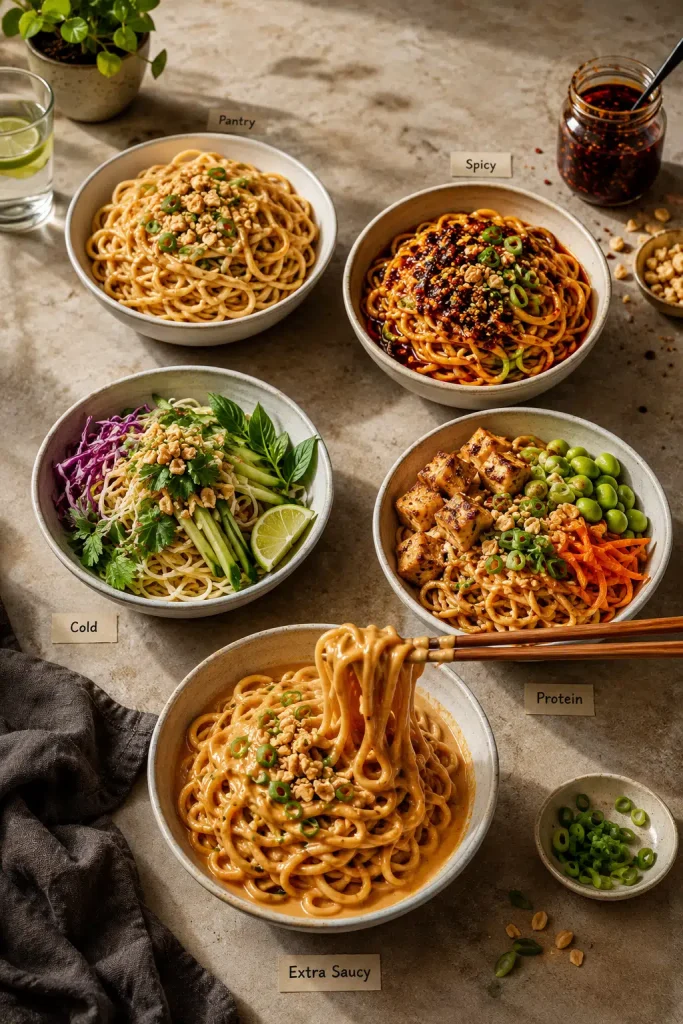
Five peanut noodle bowls showing pantry, spicy, cold, protein, and extra-saucy variations
Once the sauce tastes right, choose the mood: pantry-simple, spicy, cold and crisp, protein-rich, or extra saucy for comfort.

Creamy Peanut Noodles Recipe

This is the main recipe: 8 oz / 225 g noodles, a ½-cup peanut butter sauce, and just enough warm water and noodle water to make the sauce silky instead of stiff. You only need a pot, a colander, a bowl or jar for the sauce, a whisk or fork, and tongs for lifting and tossing.

Prep time10 minutes
Cook time10 minutes
Total time20 minutes
Servings4
Best servedWarm, room temperature, or cold

Ingredients

For the noodles

  • 8 oz / 225 g dried noodles, or 16–20 oz / 450–570 g fresh noodles
  • Salt for the cooking water, if using wheat noodles, spaghetti, or pasta-style noodles

For the peanut sauce

  • ½ cup / about 128 g creamy peanut butter
  • 2 tablespoons / 30 ml low-sodium soy sauce or tamari
  • 1 tablespoon / 15 ml rice vinegar
  • 1 tablespoon / 15 ml lime juice or lemon juice
  • 1 tablespoon honey, maple syrup, brown sugar, or jaggery
  • 1 small garlic clove, finely grated
  • 1 teaspoon grated fresh ginger
  • 1–2 teaspoons sriracha, chili garlic sauce, chili oil, or chili crisp
  • ¼ cup / 60 ml warm water, plus more as needed
  • ½ cup / 120 ml reserved noodle water, for adjusting while tossing

For finishing

  • 2 scallions, thinly sliced
  • 2–3 tablespoons chopped peanuts
  • Fresh cilantro, basil, or mint
  • Sesame seeds
  • Lime wedges
  • Optional vegetables or protein, such as cucumber, cabbage, carrots, tofu, chicken, egg, shrimp, or edamame

Method

1. Cook the Noodles

Bring a large pot of water to a boil for wheat noodles, spaghetti, udon, soba, or ramen. For rice noodles, cook or soak according to the package directions. Keep the noodles slightly firm rather than soft, because overcooked noodles can turn sticky once tossed with peanut sauce.

2. Reserve Noodle Water

Before draining, scoop out at least ½ cup / 120 ml of the cooking water. This gives you an easy way to loosen the sauce while mixing.
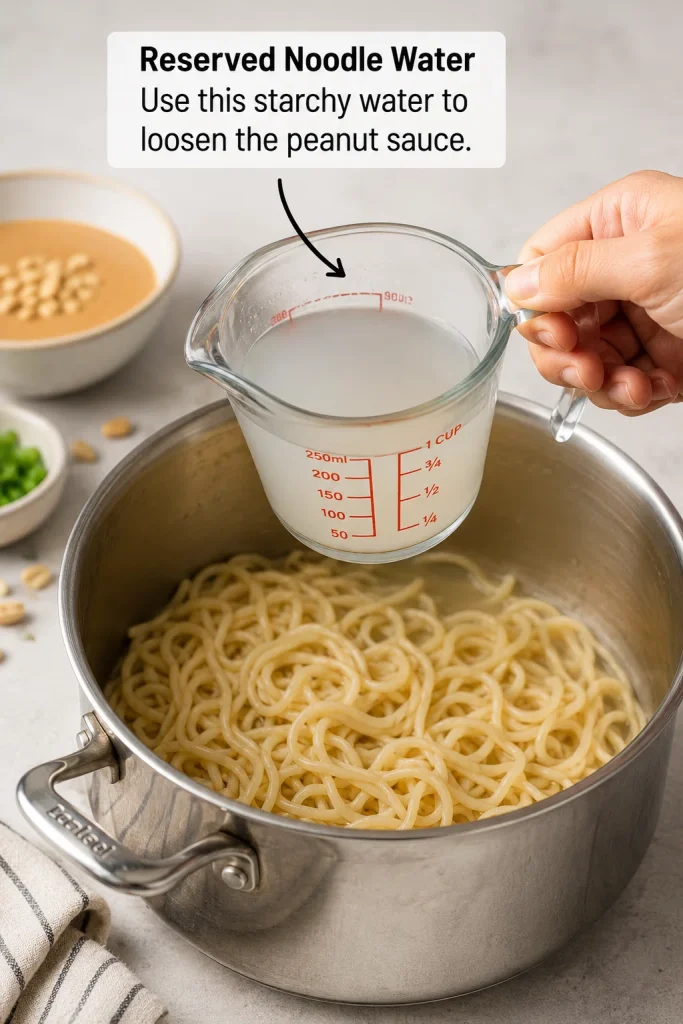
Cloudy noodle cooking water being scooped from a pot of noodles before draining
Before draining, save some cloudy cooking water. A small splash can loosen thick peanut sauce while helping it cling better.

3. Drain the Noodles

For warm wheat noodles, spaghetti, udon, or ramen, drain and keep the noodles warm. For rice noodles, soba, or cold noodles, rinse briefly under cool water to remove extra starch and stop the cooking. If cooked noodles must sit before saucing, toss them with only 1 teaspoon neutral oil; skip the oil if you are saucing right away.
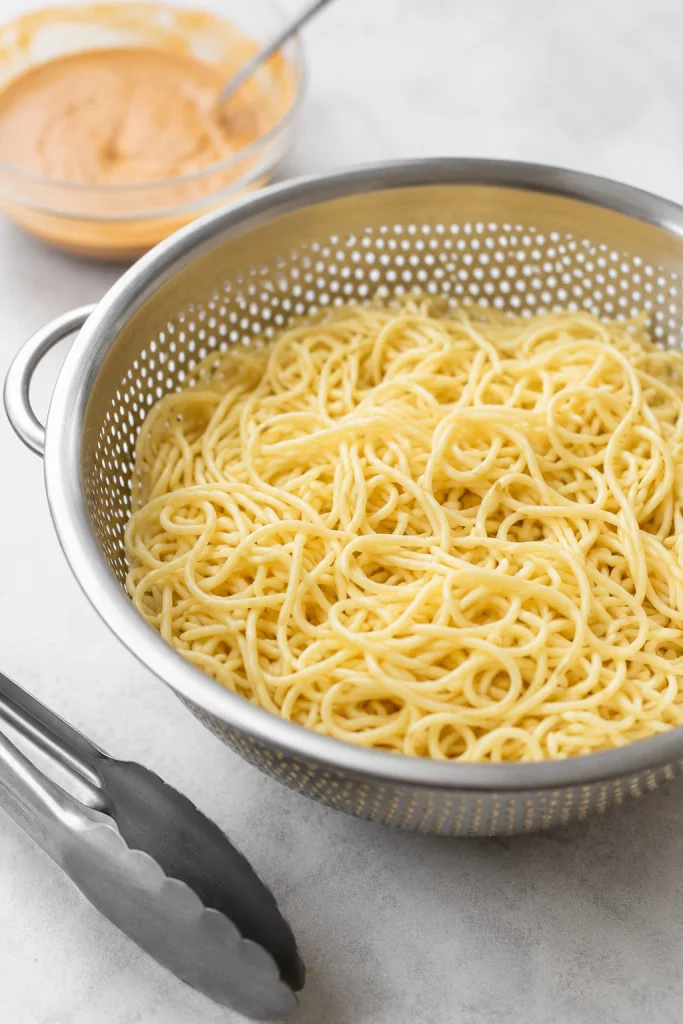
Cooked noodles with separate strands in a metal colander beside tongs and a bowl of peanut sauce
Meanwhile, stop the noodles while they still have a little bite. Firm, separate strands make better peanut sauce noodles.

4. Whisk the Peanut Sauce

In a medium bowl or jar, combine peanut butter, soy sauce or tamari, rice vinegar, lime juice, sweetener, garlic, ginger, chili, and ¼ cup / 60 ml warm water. Whisk until smooth and pourable. If the sauce resists the whisk or looks like peanut butter spread, add another small splash of warm water.

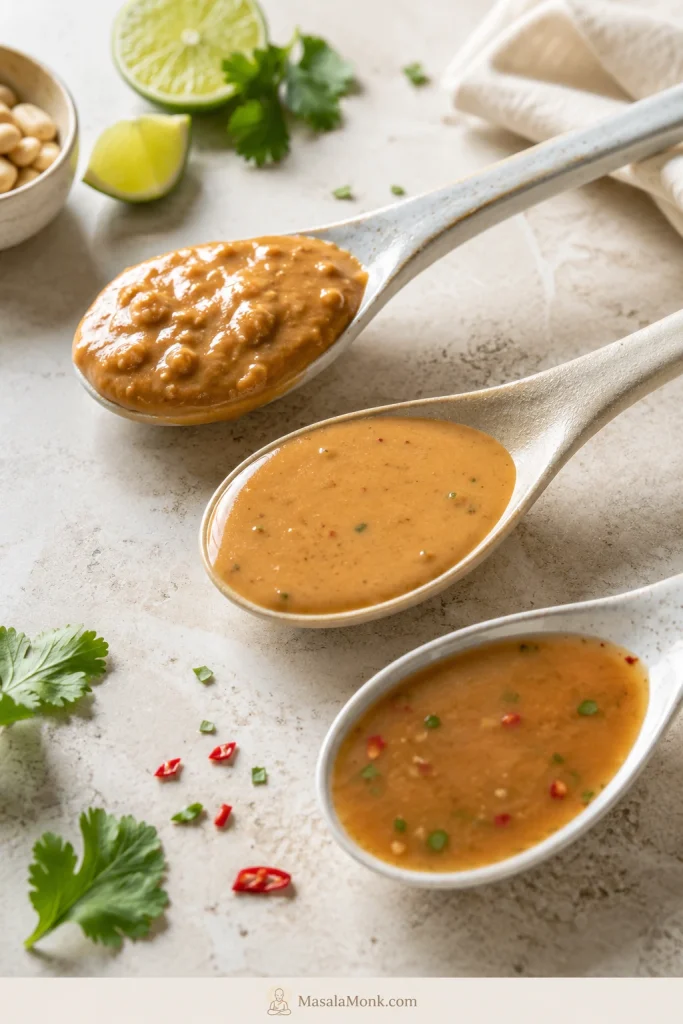
Texture check: the sauce should move before it meets the noodles, so fix thickness here rather than fighting clumps later.
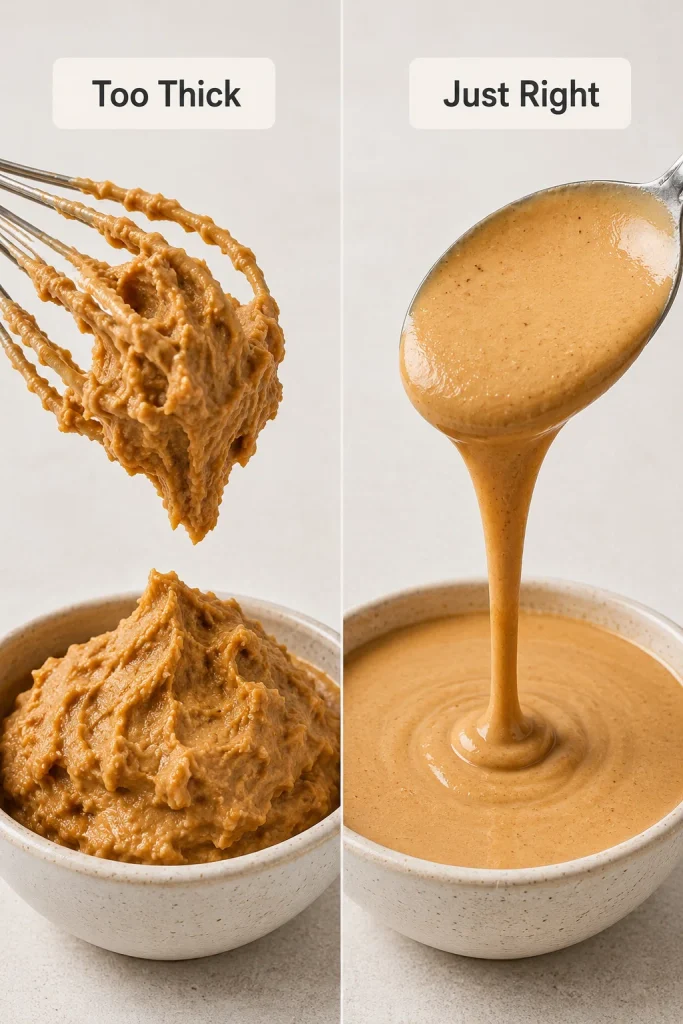
Side-by-side peanut sauce comparison showing thick peanut paste and smooth pourable sauce
Look for drizzle, not paste. If the peanut sauce moves from a spoon, it will coat the noodles more evenly.

5. Toss the Noodles

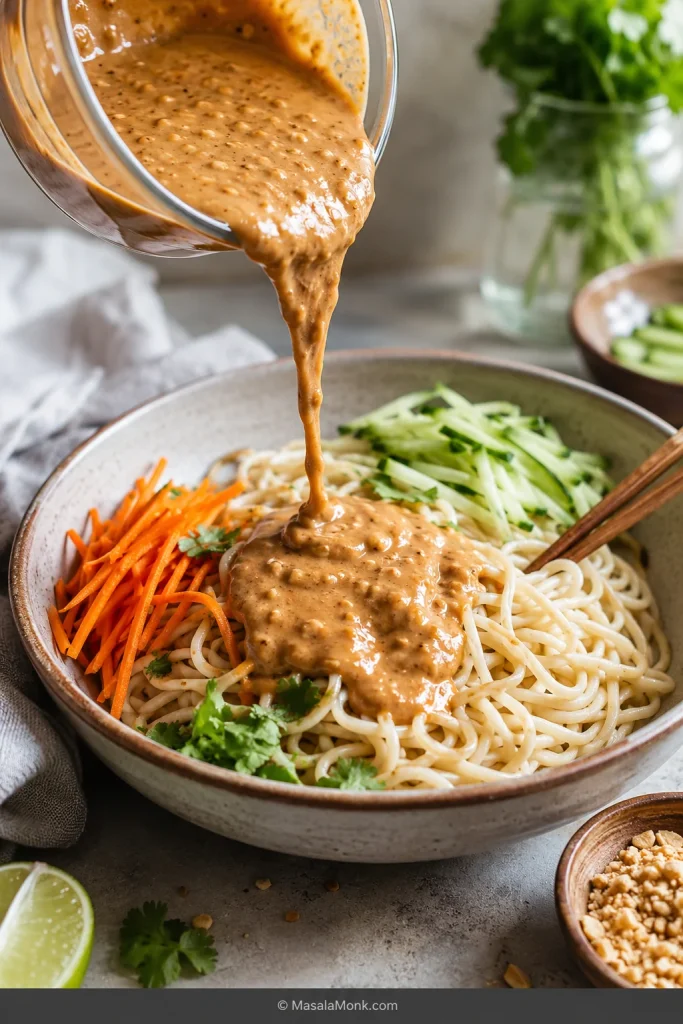
Add the noodles to a large bowl. Pour over most of the peanut sauce and lift with tongs until the strands look glossy. Add reserved noodle water in small splashes until the sauce falls around the noodles instead of dragging through them.
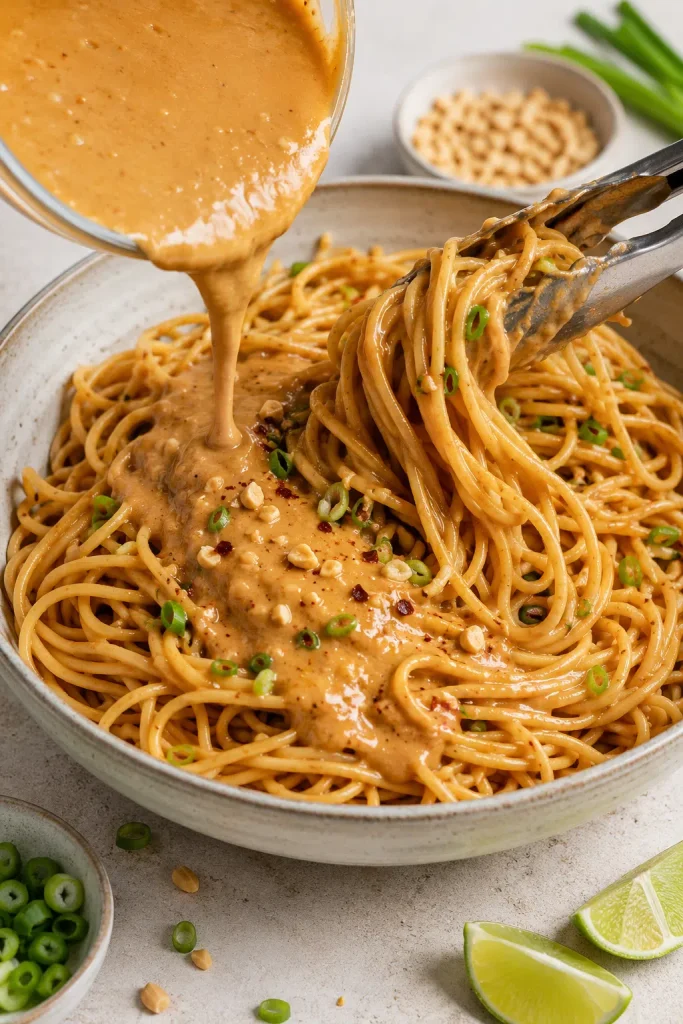
Peanut sauce being poured over noodles while tongs lift and turn the strands in a bowl
Then add sauce in stages and lift as you toss. That keeps the noodles coated instead of crushed into one thick mound.

6. Adjust the Flavor

Taste after mixing. Use soy sauce for more salt, lime for brightness, chili for heat, or a little water if the sauce is too intense. When the bowl tastes rich but sleepy, it probably needs lime.

7. Finish and Serve

Add scallions, chopped peanuts, herbs, sesame seeds, and lime wedges. If the bowl sits for a few minutes before serving, lift and turn the noodles once more with a small splash of water.

Final cue: the bowl is ready when the noodles are twirlable and the toppings add crunch, freshness, heat, and brightness.
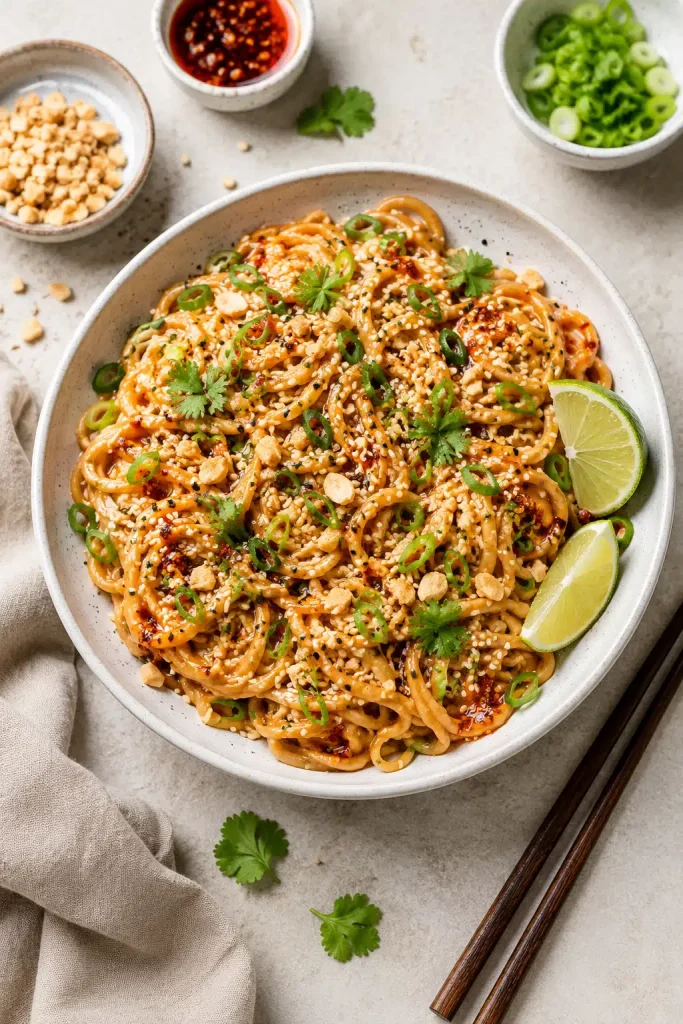
Finished peanut noodles topped with scallions, peanuts, sesame seeds, herbs, chili crisp, and lime
After tossing, finish with contrast. Scallions freshen the bowl, peanuts add crunch, chili brings heat, and lime cuts through the richness.

The finished bowl should be glossy, saucy enough to twirl, and bright at the edges from lime or vinegar. Add peanuts, scallions, herbs, or crunchy vegetables and it stops feeling like pantry noodles and starts feeling like dinner.

Recipe Notes

  • Natural peanut butter works, but every jar behaves differently. Stir it fully before measuring and expect to use a little more warm water.
  • If using regular soy sauce instead of low-sodium soy sauce, start with 1½ tablespoons and adjust after tossing.
  • For extra-saucy noodles, use 6–7 oz / 170–200 g dried noodles, or add another 1–2 tablespoons peanut butter and enough warm water to loosen the sauce.
  • Leftovers revive with 1–2 tablespoons hot water, broth, or cool water per serving.
  • This recipe contains peanuts. For a peanut-free kitchen, use a separate seed-butter noodle sauce recipe; seed butters thicken differently.
  • For a sauce-first version you can use for dipping, satay, salads, bowls, and noodles, see this MasalaMonk peanut sauce recipe.

Before you keep scrolling: if the sauce feels too thick, go to the peanut sauce texture guide. If you are choosing noodles, jump to best noodles for peanut noodles.

More Tips for Better Peanut Noodles

The Three Cues That Make Peanut Noodles Better

Peanut noodles are simple, but three small choices decide whether they feel silky or sticky.

  1. Do not overcook the noodles. Slightly firm noodles hold the sauce better than soft noodles.
  2. Make the sauce pourable. It should look like a thick dressing, not a dip.
  3. Taste at the end. Noodles dull the sauce, so the final salt, lime, chili, and sweetness should be adjusted after tossing.

The goal is not a thicker sauce. It is a sauce that moves. Once the noodles look shiny and twirlable, stop fixing them.

Ingredients and Smart Swaps

The sauce is simple, but each ingredient has a job: salty, tangy, sweet, spicy, aromatic, or creamy. Once you understand that, the swaps become easy.

Peanut Butter

Creamy peanut butter gives the most predictable sauce. Natural peanut butter works too, but every jar behaves a little differently; some are runny, some are dry, and some need extra warm water. Crunchy peanut butter adds texture, though the sauce will not be completely smooth. If you make pantry staples from scratch, homemade peanut butter works as long as it is loose enough to whisk smoothly.

Soy Sauce or Tamari

Soy sauce is the salty backbone, so low-sodium gives you room to fix the bowl at the end. Tamari is the closest gluten-free swap, as long as the label says gluten-free. Check the labels on your noodles and chili sauce too.

Rice Vinegar, Lime, or Lemon

Rice vinegar keeps the sauce from feeling heavy; lime makes the finished bowl taste awake. Lemon juice works too. Skipping the acid completely can leave the noodles tasting rich but flat.

Sweetener

Use honey, maple syrup, brown sugar, or jaggery. One tablespoon is enough to round the salty and tangy edges; the noodles should not taste sugary.

Chili

Sriracha gives smooth heat, chili garlic sauce adds punch, chili oil makes the bowl richer, and chili crisp adds heat plus crunch. Start small if you are cooking for a mixed table. Chili crisp takes the bowl into takeout-ish territory: spicy, crunchy, salty, and a little messy in the best way.

Garlic and Ginger

Fresh garlic and ginger keep the sauce from tasting like plain peanut butter and soy sauce. Grate them finely so they disappear into the sauce. In an emergency, use a small pinch of garlic powder and ginger powder.

Warm Water and Noodle Water

Warm water turns peanut butter from something that sticks to the spoon into something the noodles can actually wear. Noodle water helps it cling once the noodles are in the bowl. The same idea — salty, bright, slightly sweet, aromatic, and loose enough to coat — also matters in a good stir-fry sauce, especially with tofu, vegetables, or noodles.

Best Noodles for Peanut Noodles

The easiest default choices are spaghetti, wheat noodles, medium rice noodles, ramen, or udon. They hold sauce well, are easy to find, and do not need much fuss.

There is no single correct noodle here. The best choice is the one you can cook without overthinking it. That is why spaghetti belongs in the conversation.

Use this noodle guide to match the recipe to what you already have, whether you want a pantry bowl, a bouncy ramen version, or a cold lunch.
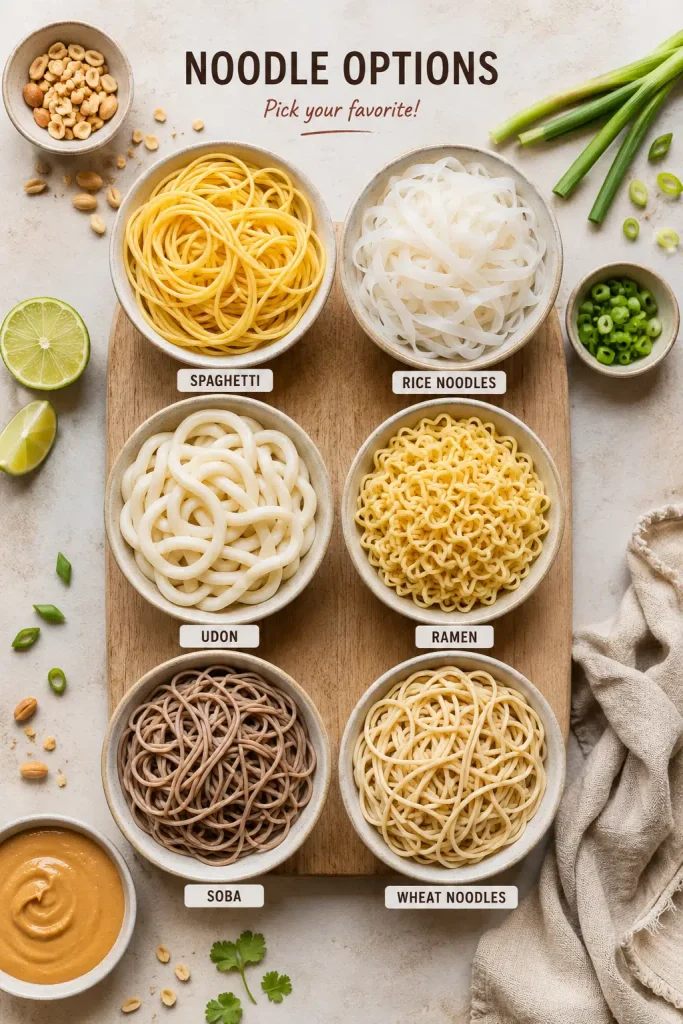
Bowls of spaghetti, rice noodles, udon, ramen, soba, and wheat noodles arranged on a board
The noodle changes the experience: spaghetti is easy, ramen is springy, udon is chewy, soba is nutty, and rice noodles work beautifully cold.
NoodleBest useRinse?Texture note
SpaghettiPantry hot bowlNo, unless gummyReliable and twirlable
Rice noodlesCold bowls, lighter bowls, gluten-free meals*Usually yesDelicate and fast-absorbing
UdonSaucy comfort bowlUsually noThick, chewy, satisfying
SobaCold nutty bowlYesEarthy and best cooled
RamenFast spicy bowlUsually noBouncy and quick to absorb
Wheat noodlesClassic warm bowlNo, unless gummyChewy and sauce-friendly
VermicelliLight cold bowlUsually yesSoft, delicate, easy to break

*For gluten-free bowls, use certified gluten-free noodles and gluten-free tamari.

A warm bowl is easiest with wheat noodles, spaghetti, udon, or ramen. Cold bowls work better with rice noodles or soba because they rinse and chill well.

Spaghetti is not a compromise here. It is easy to find, holds the sauce nicely, and makes this a real weeknight recipe.

Spaghetti Peanut Noodles

Choose spaghetti when you want the fastest pantry version and do not want to buy specialty noodles. The main trick is keeping the sauce loose enough for long strands.
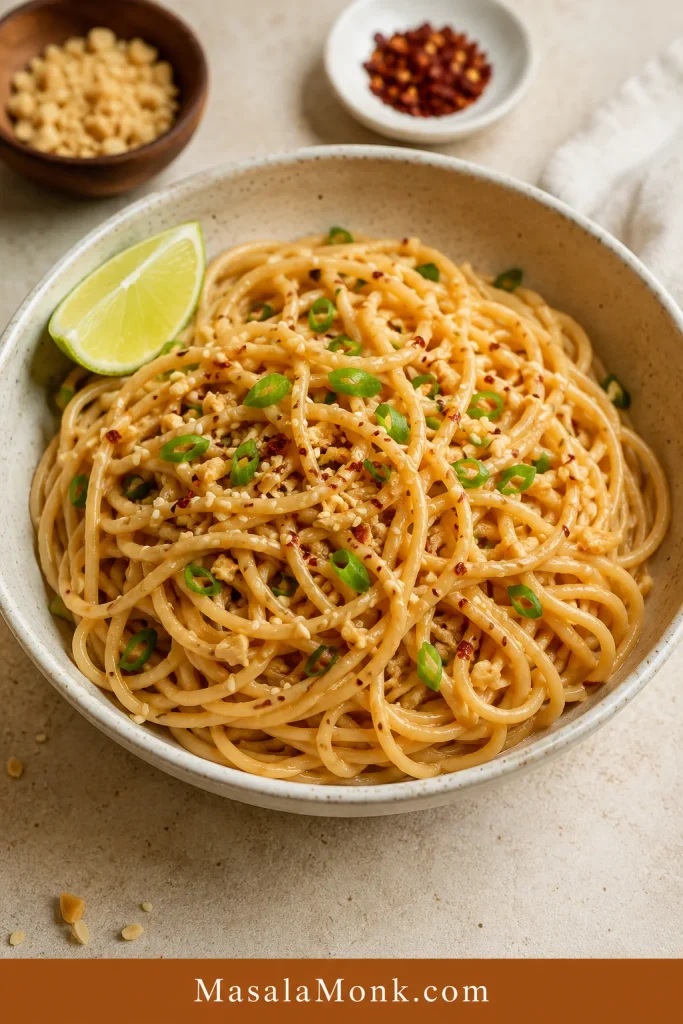
Spaghetti peanut noodles with creamy peanut sauce, scallions, chopped peanuts, chili flakes, sesame seeds, and lime
Spaghetti is the no-special-shopping shortcut. Those long strands need enough loose peanut sauce to stay silky.

Ramen Peanut Noodles

Ramen works when you want a bouncy bowl with chili oil, scallions, and a little takeout-style drama. Toss it right before serving because it absorbs sauce quickly.
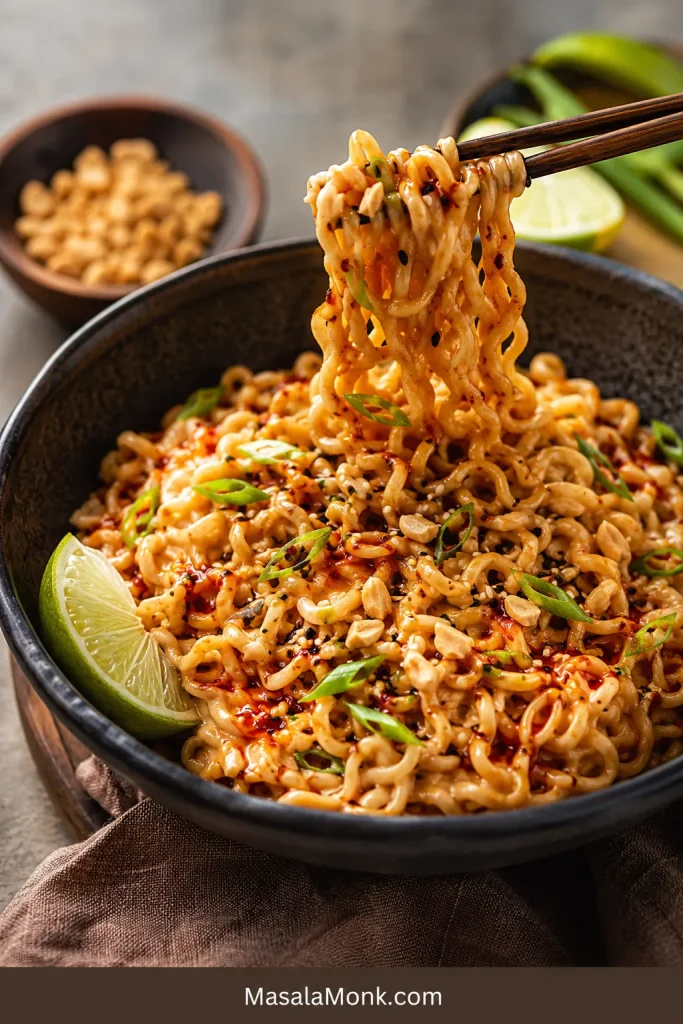
Ramen peanut noodles in a dark bowl with chili oil, scallions, peanuts, sesame seeds, lime, and noodles lifted with chopsticks
Ramen gives peanut noodles a bouncy, takeout-style feel. Since it absorbs sauce fast, start looser than you think.

How to Make Them Look and Taste Right

The recipe card gives you the steps. This section gives you the cues to watch while you cook, so you know when the noodles, sauce, and final bowl look right.

1. The Noodles Should Be Firm, Not Soft

Cook or soak the noodles according to the package directions, but stop before they go soft. Slightly firm noodles stay separate and hold sauce. Overcooked noodles can turn gummy, especially after sitting.

Rinse rice noodles or soba if they feel starchy, or if you are serving them cold. For warm spaghetti, udon, ramen, or wheat noodles, drain and toss while warm.

2. The Sauce Should Look Like Thick Dressing

When you first whisk peanut butter with soy sauce, vinegar, lime, and warm water, it may look stiff, split, or grainy. Keep going. Peanut butter often looks worse before it turns smooth.

Stop when the sauce falls from the spoon in thick ribbons. It should not sit on the spoon like peanut butter spread.

3. Lift the Noodles Instead of Mashing Them

Use tongs or two forks to lift and turn the noodles through the sauce. Heavy stirring can break delicate noodles and make soft noodles feel gummy.

If the sauce drags through the noodles, it needs a splash of liquid. If it puddles underneath, keep lifting for a few seconds before adding anything else.

4. The Final Bowl Should Be Shiny, Not Matte

Matte noodles usually mean the sauce is too thick or the noodles have absorbed it while sitting. Shiny noodles mean the sauce is still moving. That is the texture you want.

A final squeeze of lime is not decorative. It wakes up the sauce and keeps the noodles from tasting heavy.

Peanut Sauce Texture Guide

Start here when the problem is texture: sauce that turns too thick, too thin, clumpy, oily, dry, or stiff. Flavor fixes come later in troubleshooting.

Before tossing, the peanut mixture should be spoonable and pourable. After tossing, the noodles should look glossy and lightly covered. Most texture problems are fixed slowly, not by starting over.

Texture problemFix
Sauce is too thick before tossingWhisk in warm water in small splashes.
Sauce turns clumpy on noodlesAdd noodle water and lift gently until smooth.
Noodles look dry or matteUse hot water, noodle water, or broth to bring back shine.
Sauce puddles at the bottomStop adding liquid and keep lifting the noodles.
Sauce looks oilyWhisk in warm water and a little lime or vinegar.
Leftovers are stiffAdd 1–2 tablespoons water or broth per serving.

Use the visual cue: matte noodles need liquid; shiny noodles are ready to serve.
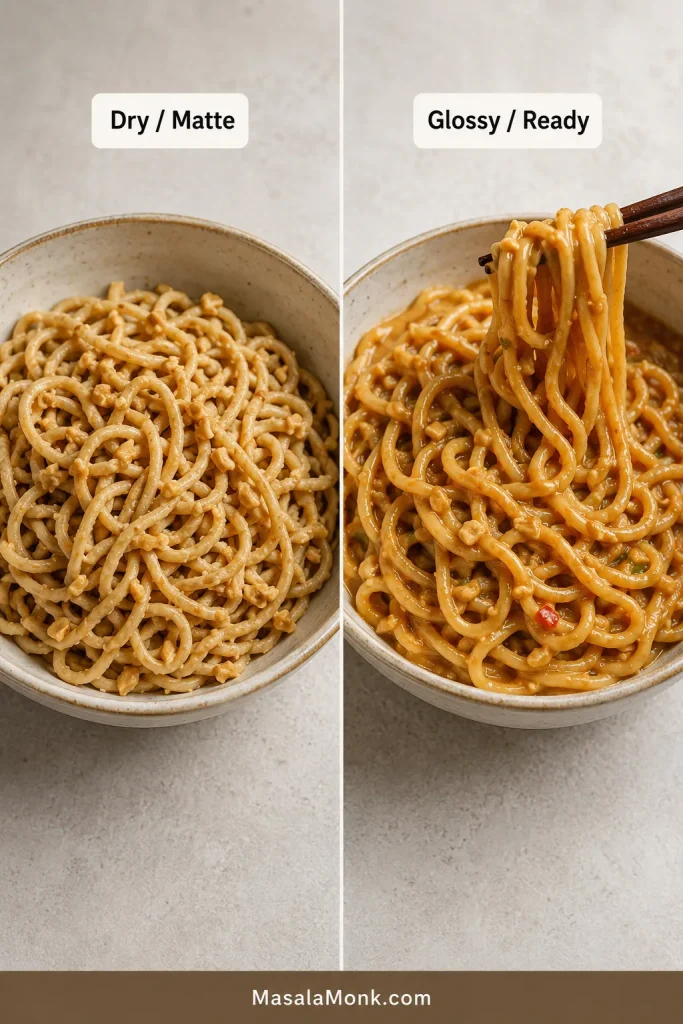
Comparison of dry matte peanut noodles and glossy saucy peanut noodles, with the glossy noodles lifted by chopsticks
If the noodles look matte, pause before serving. Add a splash of liquid until the strands loosen and shine.

Do not panic when the sauce thickens. Peanut butter wants to thicken. Add liquid slowly, lift the noodles gently, and it will loosen again.

Still not right? Go to troubleshooting for bland flavor, salty sauce, sticky noodles, and natural peanut butter problems.

Serve Them Hot or Cold

You can serve this bowl hot, room temperature, or cold. Warm, it leans cozy and saucy. Cold, it becomes brighter, crunchier, and more lunch-box friendly.

Pick the serving style first. Hot bowls need loosened sauce, while cold bowls need freshness, crunch, and enough lime to stay awake.
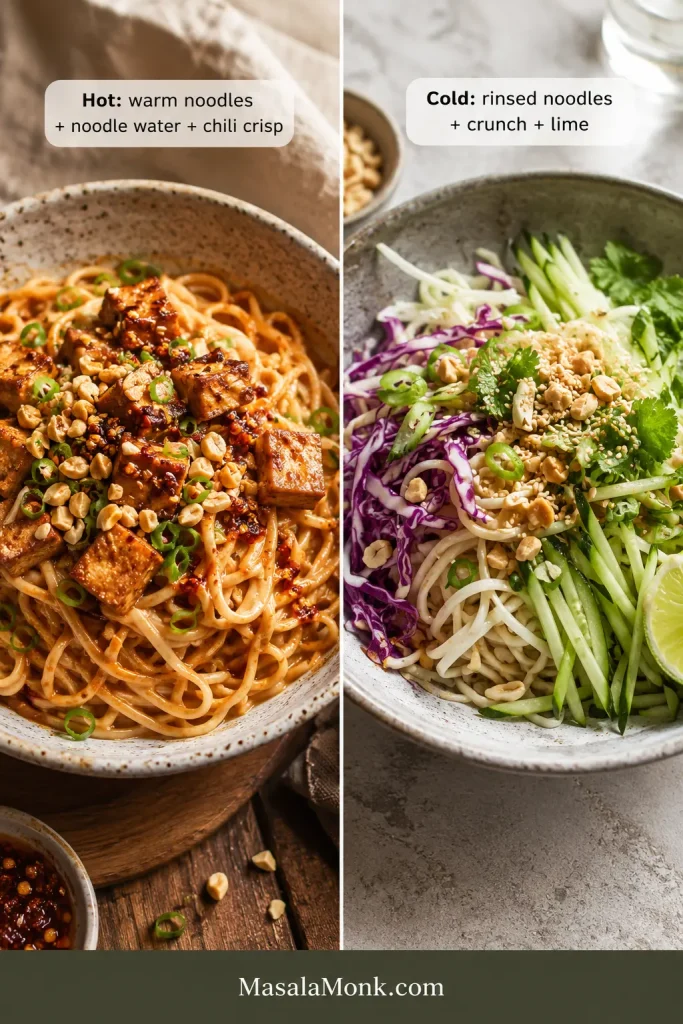
Hot peanut noodles with chili crisp beside cold peanut noodles with cucumber, cabbage, herbs, peanuts, sesame seeds, and lime
Hot peanut noodles want warmth and sauciness. Cold peanut noodles need crunch, herbs, and lime so they taste fresh rather than flat.
  • Hot bowl: Usually do not rinse, unless the noodles are gummy. Loosen with warm noodle water. Add tofu, chicken, shrimp, egg, broccoli, scallions, or chili crisp.
  • Cold bowl: Rinse and cool the noodles first. Use cool water and lime to loosen the sauce. Add crunch and herbs right before serving.

Cold peanut noodles are best when they feel crisp, not leftover-ish: cool noodles, cucumber snap, cabbage crunch, fresh herbs, sesame, peanuts, and enough lime to wake everything back up.

If you want the cold version to feel extra fresh, add cucumber inside the bowl or serve it with a crisp cucumber salad on the side.

Add-Ins and Variations

This bowl can stay simple or become a full meal. Think of the noodles as the base, then add one crunchy thing, one fresh thing, and one protein if you want it to feel complete.

Spicy Peanut Noodles

The spicy version should feel bold and a little messy: creamy peanut sauce, chili heat, scallions, peanuts, and crunchy chili crisp hitting at the end. Add 2 teaspoons sriracha or chili garlic sauce to the peanut sauce, then finish with chili crisp or chili oil. Keep chili crisp mostly on top if you want the crunchy bits to stay bold.
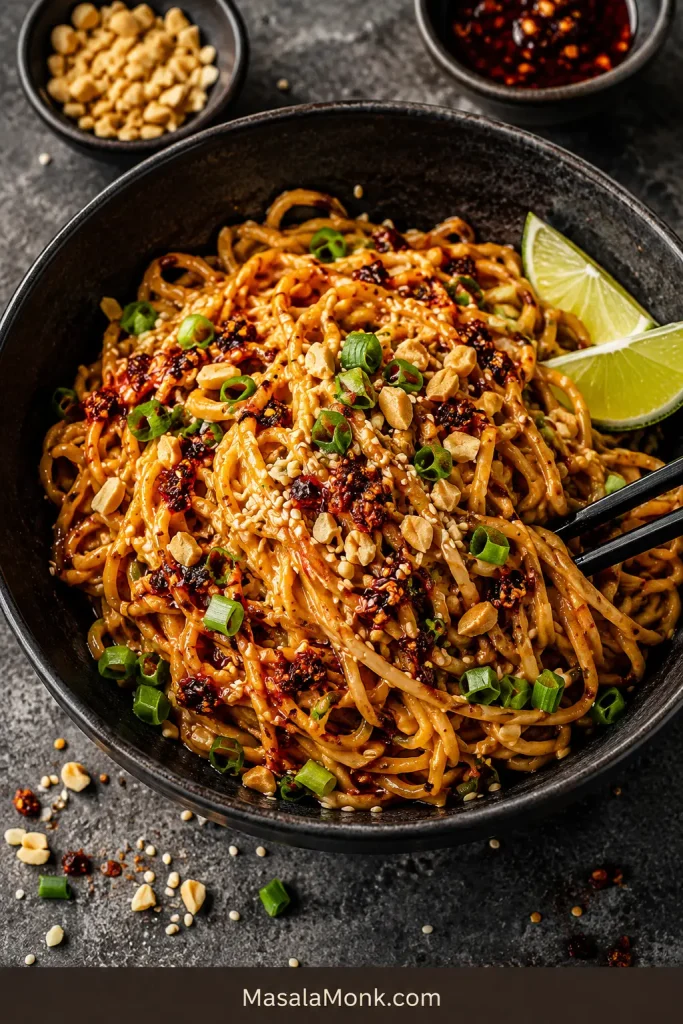
Spicy peanut noodles in a dark bowl with chili crisp, chili oil, scallions, peanuts, sesame seeds, and lime
For spicy peanut noodles, add chili crisp at the end. That keeps the heat bold and the crunchy bits noticeable.

Cold Peanut Noodles

Rice noodles and soba are the easiest choices because they rinse clean and stay light. Keep the sauce a little thinner so the noodles stay silky after chilling, then add cucumber, cabbage, herbs, sesame, peanuts, and lime. This is the version that makes tomorrow’s lunch feel intentional.
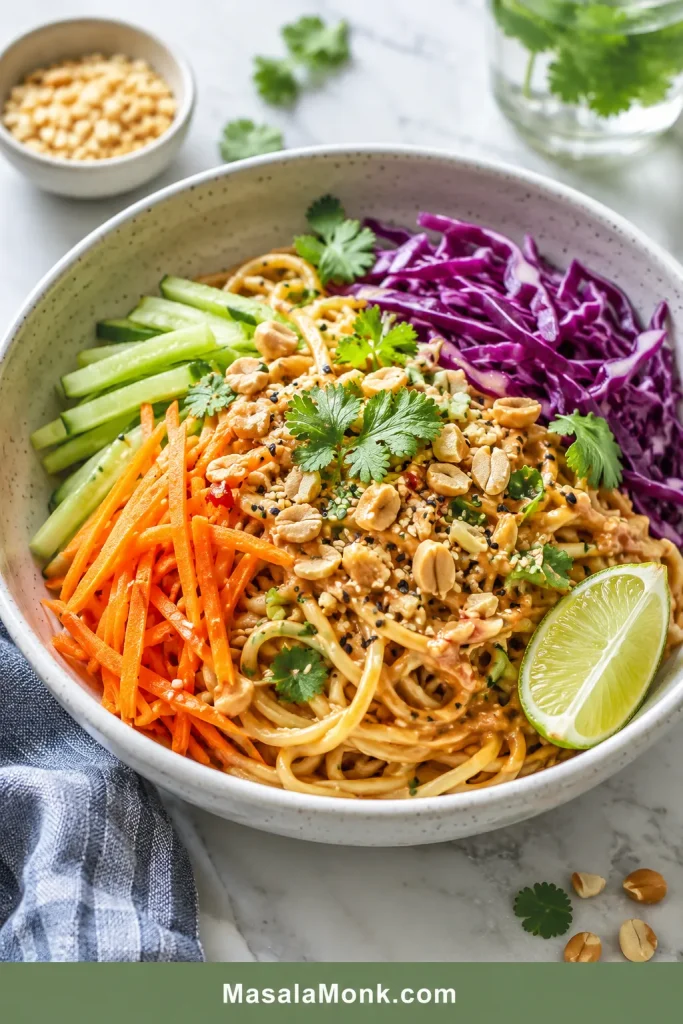
Cold peanut noodles with cucumber, purple cabbage, carrots, herbs, peanuts, sesame seeds, lime, and light peanut sauce
For cold peanut noodles, freshness matters most. Cucumber, cabbage, herbs, sesame, peanuts, and lime keep the creamy sauce from feeling heavy.

Protein Peanut Noodles

Crispy tofu, cooked chicken, sautéed shrimp, jammy egg, fried egg, tempeh, and edamame all work. Cook the protein separately so the noodles stay silky and the sauce does not dry out in the pan. For a plant-protein version, add crispy tofu or use one of these tofu meal prep ideas when you want bowls that hold up for weekday lunches.
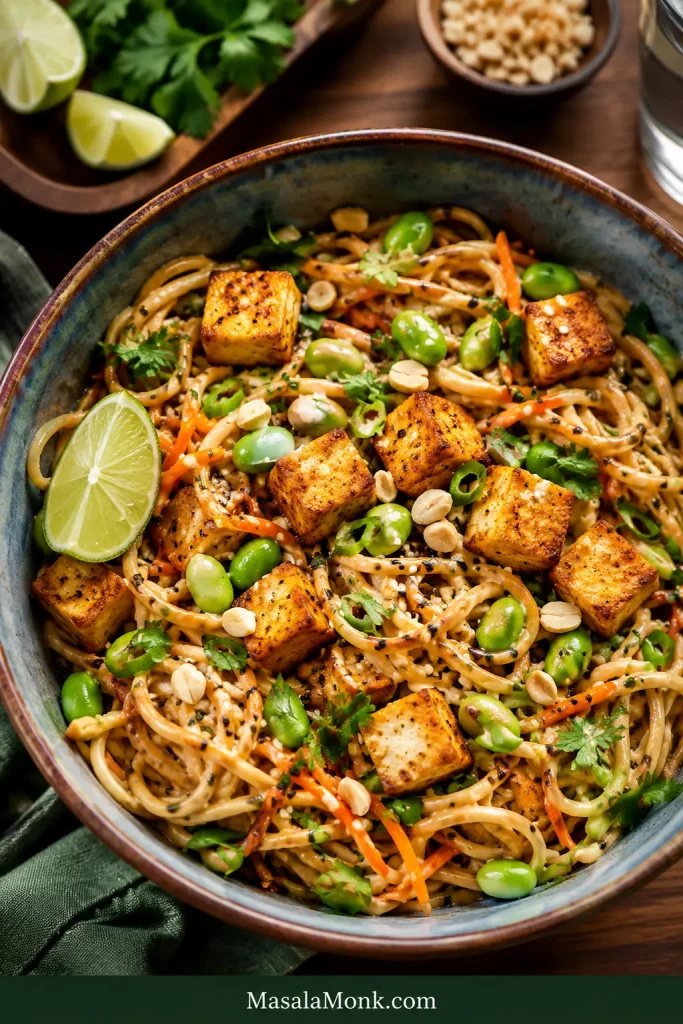
Peanut noodles topped with crispy tofu, edamame, carrots, herbs, peanuts, scallions, sesame seeds, and lime
To make peanut noodles feel like dinner, add protein with texture. Crispy tofu and edamame work well without hiding the noodles.

Sesame Peanut Noodles

A little toasted sesame oil makes the sauce deeper and rounder. Start with 1 teaspoon, taste, then add a second teaspoon only if you want more sesame aroma. It should support the peanut flavor, not cover it.

Thai-Style Peanut Noodles

Rice noodles, lime juice, cilantro, basil, chili, and crunchy vegetables move the bowl in a fresher, herbier direction. This Thai-style vegan bowl with peanut butter dressing has more ideas for pairing peanut sauce with vegetables and plant protein without making the noodles do all the work.

Pantry Peanut Noodles

Spaghetti, peanut butter, soy sauce, vinegar or lemon juice, chili flakes, and warm water are enough. It is not fancy, but it saves a busy night when takeout sounds tempting and the noodles are already in the pantry.

What to Serve with This Bowl

The easiest way to serve peanut noodles is to match the add-ins to the meal. Keep the sides fresh or simple because the noodles already bring the richness.

  • Light lunch: cucumber, cabbage, herbs, lime, and sesame seeds.
  • Protein dinner: crispy tofu, chicken, shrimp, egg, edamame, or tempeh.
  • Cold meal prep: rice noodles, carrots, cabbage, cucumber, herbs, and extra lime.
  • Spicy bowl: chili crisp, scallions, peanuts, and lime.
  • Kid-friendlier bowl: less chili, cucumber, carrots, mild vegetables, and extra peanuts if safe.

As a side dish, serve the noodles with fresh spring rolls, steamed broccoli, stir-fried greens, crispy tofu, grilled chicken, sautéed shrimp, a fried egg, or a light broth-based soup.

Storage, Leftovers, and Meal Prep

These noodles are best when freshly tossed, but leftovers are still useful if you know how to revive them.

Store leftovers in an airtight container in the fridge for 3–4 days. This matches the USDA’s general leftovers and food safety guidance. The noodles will absorb sauce as they sit, so they may look dry or stiff when cold.

Peanut Noodles Meal Prep

Meal prep works best when the noodles, sauce, and crunchy toppings are stored separately. Toss just before eating so tomorrow’s bowl still has contrast: silky strands, crisp vegetables, fresh herbs, and peanuts that still crunch.
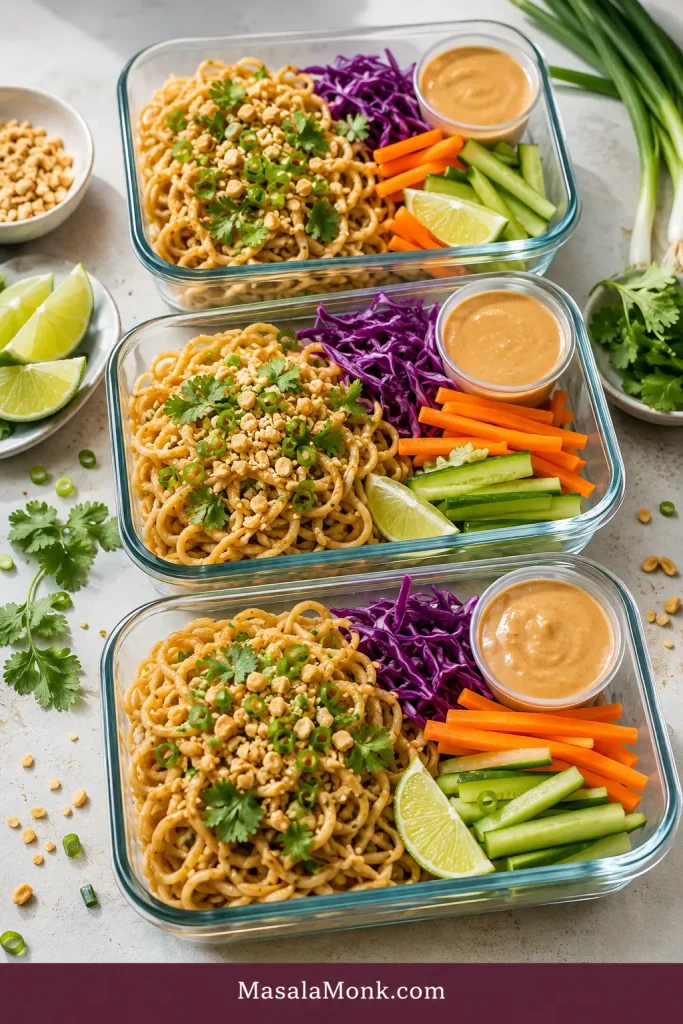
Glass meal prep containers with peanut noodles, vegetables, herbs, peanuts, lime wedges, and separate cups of peanut sauce
For peanut noodles meal prep, pack the sauce separately when possible. Then the vegetables stay crisp and lunch tastes brighter.

Revive Leftover Peanut Noodles

To reheat, add 1–2 tablespoons hot water or broth per serving, then warm gently and lift until saucy again. Avoid overheating for too long, because the sauce can tighten.

Cold leftovers come back with a splash of cool water and a squeeze of lime. Toss until the noodles loosen, then add herbs, cucumber, or peanuts if you want the serving to feel fresh again.
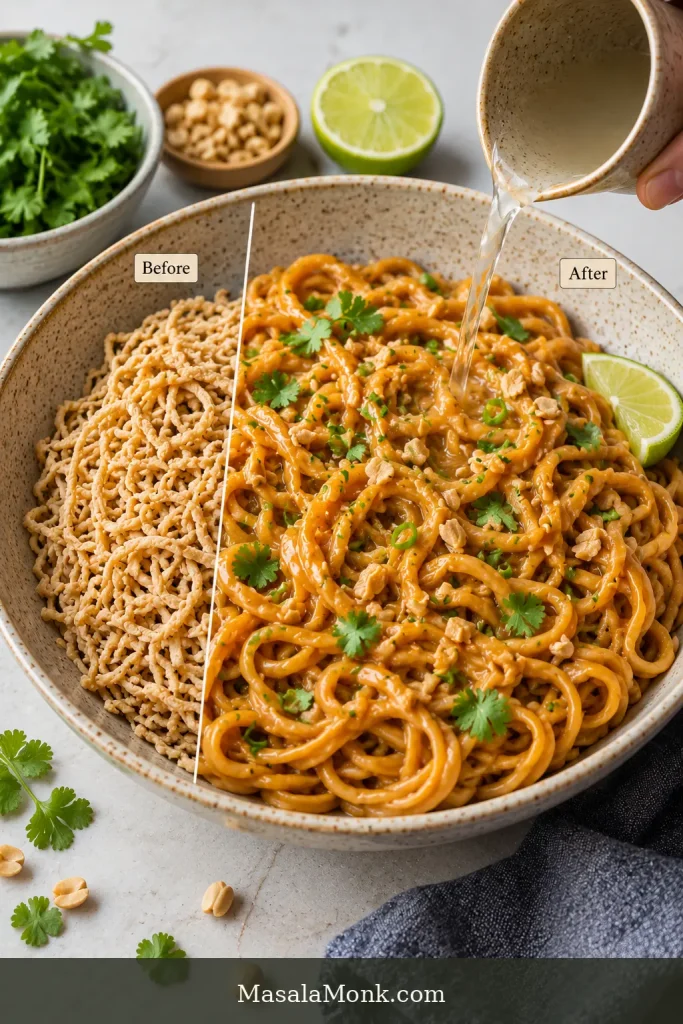
Before-and-after peanut noodles showing dry leftover noodles beside revived glossy noodles while liquid is poured in
Leftover peanut noodles are easy to rescue. Add water, broth, or lime, then toss until the strands relax and look ready again.

Troubleshooting: Sticky Noodles, Bland Flavor, Strong Sauce

Most peanut noodle problems are fixable, and very few require starting over. Usually the noodles need a splash of liquid, a little lime, more salt, or a gentler toss.

Sticky Noodles

Use plenty of water when boiling, avoid overcooking, and toss soon after draining. Rice noodles and soba can be rinsed if they feel gummy. Warm wheat noodles usually hold sauce better when they are not rinsed.

Grainy Peanut Sauce

Keep whisking and splash in warm water slowly. Peanut butter can look stiff or split before it turns smooth. A whisk is easiest, but a jar with a tight lid also works.
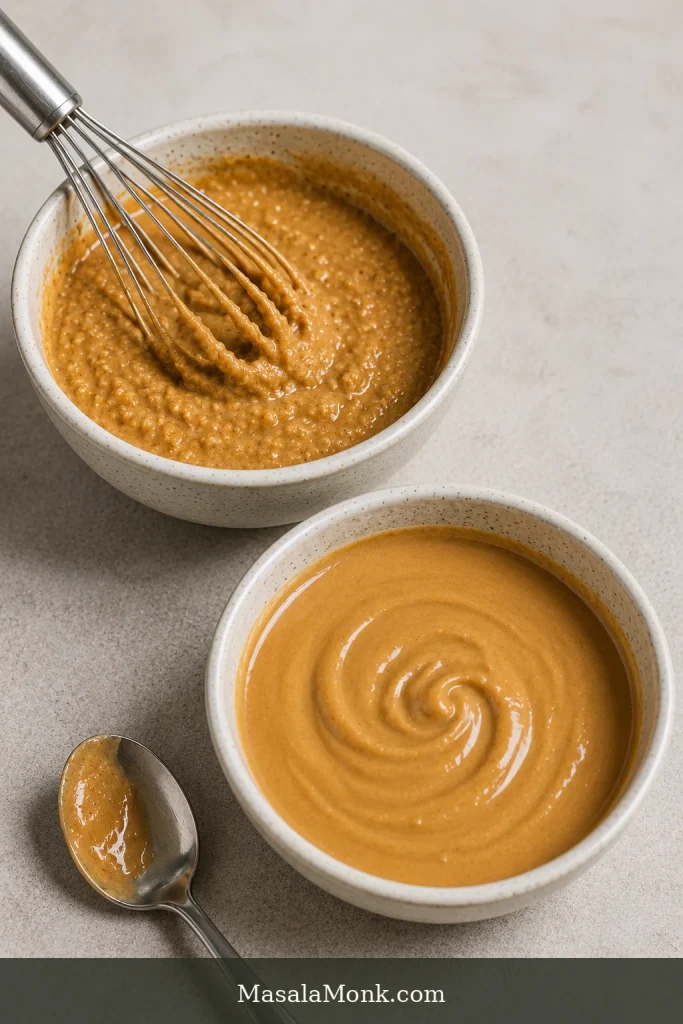
Two bowls of peanut sauce showing a grainy mixture with a whisk and a smooth sauce after mixing
Peanut sauce often looks rough before it turns creamy. Keep whisking and add warm water slowly until the texture smooths out.

Bland Peanut Noodles

They probably need balance, not more peanut butter. Use soy sauce or tamari for salt, lime or vinegar for brightness, chili for heat, and ginger or garlic for depth.

Too Salty

Soften the bowl with more noodles, cucumber, cabbage, carrots, lime, or water. Do not add more peanut butter first; that can make the sauce heavier without fixing the salt.

Too Spicy

Bring the heat back down with more noodles, peanut butter, a small touch of sweetener, or extra lime. Crunchy cucumber also helps calm the bowl.

Natural Peanut Butter Problems

Stir the jar well first, then whisk the measured peanut butter with warm water before adding the rest of the sauce ingredients.

Back to the recipe card or jump to more tips.

Frequently Asked Questions

What noodles are best for peanut noodles?

Spaghetti, wheat noodles, medium rice noodles, ramen, udon, and soba all work. If you are making this for the first time, spaghetti, wheat noodles, medium rice noodles, or udon are the easiest because they are predictable and easy to find.

Do you rinse noodles for peanut noodles?

Rinse rice noodles, soba, or noodles you plan to serve cold. For warm wheat noodles, spaghetti, udon, or ramen, it is usually better not to rinse because the surface starch helps the peanut sauce cling.

How do you keep peanut sauce from getting too thick?

Start with a pourable sauce, then loosen slowly with reserved noodle water or warm water. Peanut sauce thickens as it sits, so stop when it clings instead of clumps.

Are peanut noodles served hot or cold?

Both work. Hot noodles feel softer and saucier right away. Cold noodles are best when rinsed, cooled, and paired with crunchy vegetables, herbs, and a slightly thinner sauce.

Can you make peanut noodles ahead of time?

Yes, but they are best if the sauce, noodles, and crunchy toppings are stored separately. If the noodles are already dressed, make the sauce slightly thinner and loosen with water, broth, or lime before eating.

Can you use ramen noodles for peanut noodles?

Yes. Ramen works well because it is quick and bouncy, but it absorbs sauce fast. Keep the peanut sauce slightly thinner and toss right before serving.

Does natural peanut butter work for peanut sauce noodles?

Yes. Natural peanut butter works, but every jar behaves differently. Stir it fully before measuring, then loosen the sauce with warm water until it pours.

What protein goes well with peanut noodles?

Tofu, chicken, shrimp, egg, edamame, and tempeh all work well. Cook the protein separately, then add it on top or fold it in gently after the noodles are sauced.

How long do peanut noodles last in the fridge?

Peanut noodles keep for about 3–4 days in an airtight container, but they will need a splash of liquid to come back. Use water, broth, or lime juice before reheating or serving cold.

Why did my peanut noodles taste bland?

They probably need balance, not more peanut butter. Use soy sauce or tamari for salt, lime or vinegar for brightness, chili for heat, and ginger or garlic for more depth.

Is this recipe vegan?

It can be vegan if you use maple syrup, brown sugar, or jaggery instead of honey. Also check that your noodles, chili sauce, and other add-ins are vegan.

Are peanut noodles Thai or Chinese?

Peanut noodles can lean in different directions depending on the ingredients. Rice noodles, lime, herbs, and chili make the bowl feel Thai-style. Wheat noodles, soy sauce, sesame oil, and chili oil can make it feel closer to Chinese-style cold or warm noodles. This recipe is a practical peanut sauce noodle bowl, not a claim to one traditional regional dish.

Final Tips for Creamy Peanut Noodles

The best peanut noodles are not perfect because you followed every step exactly. They are good because you know what to look for: noodles that lift easily, sauce that clings without clumping, and enough lime, herbs, or crunch to keep the bowl bright.

Once the noodles look shiny and twirlable, stop adjusting and eat. Use the noodles you have, keep it mild, make it spicy, serve it hot, or pack it cold for lunch.

Posted on Leave a comment

Lemon Pepper Chicken Recipe: Juicy, Easy, Skillet & Oven Friendly

Golden lemon pepper chicken cutlets in a dark skillet with lemon butter sauce, parsley, cracked black pepper, and lemon wedges.

Lemon pepper chicken should feel easy before you even start cooking: golden chicken, fresh lemon, cracked pepper, and a buttery pan sauce you can spoon over rice, potatoes, pasta, or vegetables. It should taste lively without being sour, peppery without being harsh, and tender enough that chicken breast does not feel like the boring part of dinner.

The usual problems are familiar: thick chicken dries out, bottled lemon pepper can be salty, and too much juice can make the sauce sharp. This version keeps the chicken thin, the seasoning flexible, and the lemon butter balanced.

It is especially useful when you have two chicken breasts, a bottle of lemon pepper seasoning, and no patience for another dry weeknight chicken dinner. When the skillet is right, the chicken picks up a light golden crust, the lemon zest smells fresh before the juice ever hits the pan, and the butter pulls the browned bits into a sauce that tastes bigger than the short ingredient list.

Quick Answer

Lemon pepper chicken is made by seasoning thin chicken breast cutlets with lemon pepper seasoning, searing them until golden, and finishing them in a lemon butter pan sauce. The key is to use lemon zest for flavor, lemon juice for brightness, and cook chicken breast to 165°F / 74°C in the thickest part.

For the skillet version, slice 2 large chicken breasts into 4 thin cutlets, season them with lemon pepper seasoning, garlic powder, salt only as needed, and a light flour coating, then sear for about 3–5 minutes per side. The pan sauce comes together in the same skillet with butter, broth, lemon zest, and fresh lemon juice.

This recipe is built around the three fixes that matter most: thin chicken so it stays juicy, flexible salt because lemon pepper blends vary, and fresh zest so the lemon flavor tastes bright instead of sour. The point is not to make chicken fancy; it is to make it reliable: juicy, bright, buttery, and easy to serve with whatever is already in the kitchen.

Before You Start: 5 Details That Matter

A few small choices decide whether this tastes bright and tender or just like seasoned chicken.

Chicken2 large breasts, sliced into 4 thin cutlets
ThicknessAbout 1.25 cm / 1/2 inch
SaltDepends on your lemon pepper blend
LemonZest for flavor, juice near the end
Doneness165°F / 74°C in the thickest part
Overhead guide showing thin chicken, lemon pepper seasoning, lemon zest, lemon juice, and a thermometer marked 165°F / 74°C.
Before cooking, check the details that prevent most mistakes: thin cutlets, restrained salt, zest for aroma, juice near the end, and a final 165°F / 74°C temperature.

If you only remember one thing before cooking, remember this: thin chicken gives you room to get color without drying out the center.

Use the seasoning you already have; just taste or check the label before adding extra salt. Some bottled blends are mostly pepper and lemon. Others are salty enough that the chicken barely needs any added salt at all.

Lemon Pepper Chicken Recipe Card

Start here when dinner needs to happen now. This is the skillet version to make first: thin chicken cutlets, lemon pepper seasoning, a light flour coating, and a quick lemon butter finish made in the same pan.

Recipe nameLemon Pepper Chicken
Prep time10 minutes
Cook time15 minutes
Total time25 minutes
Servings4
Yield4 thin chicken cutlets
Main methodSkillet
Internal temperature165°F / 74°C for chicken breast

Equipment

You need a large 10–12 inch skillet, tongs, a shallow plate for coating, a fine grater for zest, and ideally an instant-read thermometer. A meat mallet or rolling pin helps even out thick spots.

Ingredients

IngredientAmount
Boneless skinless chicken breasts2 large, about 550–650 g / 1.2–1.4 lb total
All-purpose flour3 tablespoons / 24 g
Lemon pepper seasoning2 teaspoons / about 5–6 g, depending on brand
Garlic powder1/2 teaspoon
Fine salt1/4 to 1/2 teaspoon, depending on seasoning
Olive oil or neutral oil1 1/2 tablespoons / about 22 ml
Unsalted butter3 tablespoons / 42 g
Chicken broth or stock1/2 cup / 120 ml
Fresh lemon juice1 to 2 tablespoons / 15–30 ml
Lemon zest1 to 2 teaspoons
Fresh parsley, chopped1 to 2 tablespoons
Fresh garlic, optional1 clove, minced

Before adding salt: Taste or check your lemon pepper seasoning. If it already tastes salty, start with 1/4 teaspoon extra salt or skip the added salt until the pan sauce is finished. Let the skillet juices do the balancing before you reach for more salt.

Instructions

  1. Slice the chicken. Place each breast flat on a board and slice horizontally into 2 thinner cutlets. Pound uneven spots to about 1.25 cm / 1/2 inch thick.
  2. Pat it dry. Use paper towels to remove surface moisture so the chicken browns better and holds seasoning evenly.
  3. Season the flour. In a shallow bowl or plate, mix the flour, lemon pepper seasoning, garlic powder, and salt.
  4. Coat lightly. Dredge each cutlet and shake off the excess. The coating should look thin and dusty, not thick or caked on.
  5. Sear until golden. Heat oil in a large skillet over medium to medium-high heat. Cook the cutlets in one layer for 3–5 minutes per side, until golden. Lower the heat if the coating colors too fast.
  6. Check the temperature. Test the thickest part before removing the chicken, or right after transferring it to a plate. It should read 165°F / 74°C.
  7. Start the pan finish. Lower the heat to medium, add butter, and stir in garlic, when using, for 20–30 seconds.
  8. Add broth and lemon. Pour in the broth, scrape up the browned bits, then stir in 1 tablespoon lemon juice and the zest. Simmer for 2–4 minutes, until glossy.
  9. Return the chicken. Add the cutlets back and spoon the lemon butter over the top. Warm gently instead of boiling hard.
  10. Finish and serve. Taste, then add more lemon juice, pepper, or salt only as needed. Sprinkle with parsley and serve warm.

Recipe Notes

  • Large chicken breasts cook better when sliced into cutlets instead of cooked whole.
  • Fresh lemon zest gives stronger lemon flavor than lemon juice alone.
  • Use 1 tablespoon lemon juice for a softer sauce and 2 tablespoons for a sharper lemon finish.
  • Broth and butter are the best way to bring a strong-tasting sauce back into balance.
  • For a gluten-free version, use a light gluten-free flour blend.
  • For a thinner coating, use 1 1/2 tablespoons cornstarch instead of flour, or skip the coating and reduce the sauce slightly longer.

Choosing another method? Jump to the oven, air fryer, thighs, and meal-prep options.

What Good Lemon Pepper Chicken Should Taste Like

Good lemon pepper chicken should taste lemony before it tastes sour, peppery before it tastes hot, and buttery without feeling heavy. Ideally, the cutlets are golden outside, tender in the center, and lightly coated rather than buried under sauce.

A little lemon butter should remain in the pan for rice, potatoes, pasta, or vegetables. The best bite makes the side dish better too, as if it caught the same bright, buttery finish.

Sliced lemon pepper chicken served with mashed potatoes, green vegetables, lemon butter sauce, parsley, and a lemon wedge.
A good side should catch the lemon-butter juices, not compete with them. That is why mashed potatoes, rice, pasta, and simple vegetables all work well here.

When the first bite tastes mostly salty, the bottled blend was probably too aggressive. A flat bite usually needs zest or a final squeeze of lemon. Sharpness, though, is better fixed with butter and broth than with more juice.

4 Small Details That Make or Break It

The recipe is simple, but these four choices decide whether it tastes bright and juicy or flat, salty, and dry.

Educational board showing thin cutlets, salt control, lemon zest and juice, and pan sauce for lemon pepper chicken.
Four details decide the final result: thin cutlets for even cooking, salt control for balance, zest and juice for lemon flavor, and a skillet finish for depth.
DetailWhat Can HappenHow This Recipe Handles It
Chicken thicknessThick pieces cook unevenly.Slice into thin cutlets and check the internal temperature.
Seasoning strengthBottled lemon pepper seasoning may already contain salt.Add salt carefully and adjust after the sauce is made.
Lemon balanceToo much lemon juice can taste sharp.Use zest for flavor and juice near the end.
Pan finishSeasoned chicken can still feel plain.Make a quick lemon butter pan sauce with broth and butter.

Why This Recipe Works

This recipe treats the dish as a balance problem, not just a seasoning problem.

Cutting the chicken into thin cutlets gives you more surface area for browning and shortens the cooking time. The outside can turn golden before the inside dries out. A thin coating of seasoned flour helps the breast meat brown and gives the skillet juices just enough body to cling lightly.

Zest brings the lemon aroma, juice brings the bright finish, butter rounds out the pepper, and broth lifts the browned bits from the skillet. When the finish is right, it tastes peppery first, buttery in the middle, and fresh at the end.

By the time it turns glossy and the chicken goes back in, dinner should smell like lemon, browned butter, and pepper — not like a complicated project.

Choose Your Version

If this is your first time making it, stay with the skillet. It gives you the golden crust, the full lemon-butter finish, and the best pan flavor. Once you know that version, you can bend the same flavor toward the oven, air fryer, grill, or slow cooker depending on the night.

Method guide showing lemon pepper chicken options for skillet, oven, air fryer, thighs, meal prep, and wings.
Choose the method based on what you need. Skillet lemon pepper chicken gives the strongest pan flavor, while oven, air fryer, thighs, meal prep, and wings offer easier variations.
VersionBest ForKey Tip
Skillet lemon pepper chickenFastest saucy dinnerUse thin cutlets and finish with lemon butter sauce.
Oven lemon pepper chickenHands-off cookingUse evenly thick pieces and spoon sauce over after baking.
Air fryer lemon pepper chickenQuick, low-mess cookingOil lightly so the coating does not stay floury.
Lemon pepper chicken breastLean weeknight dinnerSlice or pound evenly so the breast stays tender.
Lemon pepper chicken thighsJuicier, more forgiving chickenCook a little longer for softer texture.
Grilled lemon pepper chickenSmoky summer flavorUse zest and oil in the marinade, then add lemon after cooking.
Slow cooker lemon pepper chickenMeal prep, bowls, wraps, or shreddingUse less liquid than expected and brighten at the end.
Lemon pepper wingsCrispy party-style wingsUse a separate wings method for crisp skin.

Looking for crispy lemon pepper wings instead of skillet chicken? Wings need a different method for crisp skin and a dry or wet wing sauce. Use this lemon pepper chicken wings recipe when wings are the plan.

Ingredients You Need

The ingredient list is short, and each item has a job, which makes substitutions easier.

Chicken

Boneless skinless chicken breasts are quick, lean, and familiar. The key is to turn 2 large breasts into 4 thinner cutlets so they cook quickly and stay tender in the center.

Boneless thighs, bone-in thighs, or tenders also work. Thighs are juicier and more forgiving, while tenders are good for bowls, wraps, or kid-friendly dinners.

Lemon Pepper Seasoning

Lemon pepper seasoning gives the recipe its familiar flavor. Some blends are lemony and peppery with very little salt. Others are salty enough that you barely need any extra salt at all.

The bottle gives you the shortcut; the fresh zest makes it taste alive.

Fresh Lemon

Fresh lemon makes bottled seasoning taste brighter. The zest gives the strongest lemon aroma, while the juice adds tang to the pan finish. Avoid adding too much juice too early; it can turn sharp when it cooks down hard.

Butter, Broth, and Flour

Butter softens the pepper and acidity. Broth keeps the sauce spoonable and pulls flavor from the skillet. Flour gives the chicken a light coating, helps with browning, and gently thickens the pan sauce. Shake off the excess before cooking.

Salt-Control Guide

This is where many lemon pepper recipes go wrong. The label matters more than the measuring spoon because lemon pepper seasoning is not standardized. One brand may taste mostly like lemon peel and black pepper, while another may taste salty before it ever touches the chicken.

Salt-control guide with lemon pepper seasoning, salt, lemon zest, broth, butter, and labels about tasting the blend first.
Lemon pepper seasoning can be mild, salty, or sharp depending on the blend. Taste it first, then add salt only after you know what the chicken needs.
Your Seasoning Tastes…What to Do
Very saltySkip the added salt in the coating. Adjust only after the sauce is finished.
Mild but saltedUse 1/4 teaspoon salt for 550–650 g chicken.
Salt-freeUse 1/2 teaspoon salt in the coating, then taste the sauce.
Sour or citricUse less lemon juice and more lemon zest.
Weak or flatAdd fresh lemon zest and a little extra black pepper.
Very pepperyUse the lower amount of seasoning and soften the sauce with butter.

Start with less salt when unsure. It is much easier to add a little salt to the finished sauce than to rescue chicken that is already too salty. Avoid adding more lemon as the first fix because acidity can make salt taste sharper.

Once the salt is under control, the lemon tastes brighter, the butter tastes rounder, and the chicken finally tastes like dinner instead of seasoning.

Seasoning already tastes too strong? Go to troubleshooting or check zest vs juice.

Bottled Seasoning or Homemade?

Bottled lemon pepper seasoning is completely fine for a weeknight. This recipe is written to work with bottled seasoning, not to shame it. The only catch is that every brand behaves a little differently, especially around salt and citric sharpness.

  • Bottled lemon pepper seasoning: Fastest and easiest, but check the salt level.
  • Salt-free lemon pepper: Gives more control, but you need to add salt separately.
  • Homemade lemon pepper: Freshest lemon flavor, especially with fresh zest and cracked pepper.
  • Lemon pepper marinade: Better for grilled or baked chicken than for the skillet cutlet method.
  • Lemon butter pan sauce: The best finish for this skillet version.

Quick Homemade Lemon Pepper Blend

No bottled seasoning on hand? Mix a quick fresh blend for this recipe. It is not a shelf-stable pantry mix.

  • 1 tablespoon fresh lemon zest
  • 1 1/2 teaspoons cracked black pepper
  • 1 teaspoon garlic powder
  • 1/2 teaspoon fine salt
  • 1/4 teaspoon onion powder, optional
  • A tiny pinch of sugar, optional, to soften the lemon edge

This blend tastes fresher than many bottled seasonings, but the salt level depends on how much salt you add. Taste the sauce at the end and adjust from there.

Lemon Zest vs Lemon Juice

The simplest way to understand this recipe is this: use zest for lemon flavor and juice for brightness.

Lemon zest carries the fragrant oils from the outside of the lemon. It gives the chicken a strong lemon aroma without adding much acidity. Lemon juice gives the sauce its tang, but too much can make the dish sharp.

Hands zesting a lemon and squeezing lemon juice with labels for zest as flavor, juice as brightness, and yellow zest only.
Lemon zest and lemon juice do different jobs. Zest brings aroma without extra sourness, while juice adds brightness near the end of cooking.
  • Zest: Gives strong lemon aroma without extra sourness.
  • Juice: Adds a fresh, tangy finish to the pan sauce.
  • Lemon slices: Look good as garnish, but can turn mildly bitter if cooked too long.
  • Bottled lemon juice: Works in a pinch, although fresh lemon tastes cleaner.

When zesting a lemon, remove only the yellow part. The white pith underneath can taste bitter. A microplane or fine grater makes this easier.

How to Keep Chicken Breast Juicy

Once the lemon flavor is balanced, the next job is texture. Chicken breast only tastes good here if it stays tender.

  • Slice large breasts into cutlets. Thinner pieces cook faster.
  • Pound uneven spots. Even thickness helps the whole piece finish at the same time.
  • Pat the chicken dry. Dry chicken browns better than wet chicken.
  • Use enough heat. A properly heated skillet gives color before the chicken overcooks.
  • Do not crowd the pan. Crowding traps steam and makes the chicken pale.
  • Use a thermometer. Pull chicken breast when it reaches 165°F / 74°C.
  • Rest before slicing. Even a short rest helps the juices settle.
  • Spoon lemon butter over the chicken. The glossy finish protects the meat and makes every bite feel moist.

What Juicy Lemon Pepper Chicken Looks Like

The best visual cue is in the sliced center. Look for meat that is still moist, with a golden outside and just enough gloss to carry flavor.

Close-up of sliced lemon pepper chicken with a moist interior, golden crust, lemon butter sauce, black pepper, and parsley.
Use the sliced center as your doneness cue. The sliced center should look moist, the crust should look golden, and the surface should be lightly glossed rather than soaked.

The goal is chicken that slices cleanly and still looks moist, not chicken you have to hide under sauce.

That is the difference between chicken you eat because it is there and chicken people drag through the last spoonful of sauce.

Chicken breast giving you trouble in general? This baked chicken breast recipe goes deeper into thickness, timing, resting, and doneness so the meat stays juicy instead of chalky.

Ready for the pan? Jump to the cooking cues or check the time and temperature guide.

Step-by-Step Cooking Cues

The recipe card gives the steps. These are the little pan cues that tell you things are going right.

1. Cut the Chicken Into Thin Pieces

Place each chicken breast flat on a cutting board and slice it horizontally into two thinner cutlets. Pound thicker spots gently until the piece is even. The chicken does not need to be paper-thin; it just needs to cook evenly.

Raw chicken breast being sliced horizontally into thin cutlets on a wooden board with lemon and seasoning nearby.
Thin cutlets cook evenly, so the edges can brown before the center dries out.

2. Season and Coat Lightly

Mix the flour, lemon pepper seasoning, garlic powder, and salt in a shallow bowl. Coat the chicken lightly and shake off the extra flour. The coating should look like a light dusting, not a batter.

Chicken cutlet lightly coated in seasoned flour with lemon pepper seasoning and garlic powder on a shallow plate.
The flour coating should look light, not packed on. That thin layer helps the cutlet brown while keeping the finished bite tender instead of bready.

3. Sear Until Golden

A steady sizzle is the goal. If the pan is too quiet, the chicken may steam; if it smokes hard, the coating can brown before the center finishes. Let the underside release easily before flipping, and lower the heat if the cutlets color too quickly.

Lemon pepper chicken cutlets searing in a skillet with space between the pieces, golden edges, pepper flecks, and light pan juices.
Give the cutlets enough space to sear. Otherwise, trapped moisture turns the pan steamy and leaves the chicken pale instead of golden.

When to Flip Lemon Pepper Chicken

The first side is done when it lifts cleanly with tongs and shows a golden underside. If it still sticks, give the crust another minute before turning.

Tongs lifting the edge of a lemon pepper chicken cutlet to show the golden underside before flipping.
The first side is ready when the cutlet releases without tearing. If it still sticks, wait briefly so the crust can finish forming.

4. Make the Lemon Butter Pan Sauce

After the chicken comes out, let the pan calm down for a few seconds, then add butter. Stir in garlic when using, then add broth, lemon juice, and lemon zest. Scrape the bottom so the browned bits melt into the sauce.

Spoon dragging through glossy lemon butter pan sauce with browned bits, lemon zest, black pepper, and herbs in a skillet.
Aim for a loose, glossy lemon butter sauce rather than a thick gravy. That texture lets it spoon easily over chicken and flow into rice, potatoes, pasta, or vegetables.

5. Return the Chicken Gently

Add the chicken back to the skillet and spoon the sauce over the top. Taste before adding more lemon or salt. Boiling the cooked chicken hard can tighten the breast and take away tenderness.

Lemon butter sauce being spooned over sliced golden lemon pepper chicken with parsley, cracked pepper, and lemon zest.
Spoon the lemon butter over cooked chicken, not boiling-hard chicken, so the breast meat stays tender and glossy.

Need exact timing? Use the time and temperature guide before switching methods.

Time and Temperature Guide

Use this table as a starting point, not a promise. Chicken thickness always wins over the clock. The clock helps, but the thermometer is what saves dinner. For the simplest food-safety rule, cook chicken to 165°F / 74°C in the thickest part.

Instant-read thermometer inserted into cooked lemon pepper chicken in a skillet, showing 165°F.
Check the thickest part of the chicken, not the pan juices. For chicken breast, 165°F / 74°C is the safe internal temperature that still protects tenderness.
MethodBest CutTemperatureApprox TimeInternal Temp
Skillet cutletsBreast cutlets, about 1.25 cm thickMedium to medium-high3–5 min per side165°F / 74°C
Skillet thicker breastThicker breast piecesMedium5–6 min per side, then check165°F / 74°C
Oven thin cutletsThin breast cutlets400°F / 204°C15–18 min165°F / 74°C
Oven medium breasts6–8 oz / 170–225 g breasts425°F / 218°C18–22 min165°F / 74°C
Oven large breasts9–10 oz / 255–285 g breasts425°F / 218°C22–26 min165°F / 74°C
Boneless thighsChicken thighsSkillet or 400°F / 204°C oven22–28 min in oven165°F / 74°C safe, 175°F / 79°C for softer texture
Air fryer cutletsThin breast pieces375°F / 190°C10–14 min165°F / 74°C
Grilled breastChicken breastMedium-high grill6–8 min per side165°F / 74°C

Once you understand the skillet version, the rest is just choosing the method that fits your night. The next sections are quick adaptations, not separate full recipes.

Cooking another way? Jump to oven, air fryer, or chicken thighs.

Oven-Baked Lemon Pepper Chicken

Use the oven when you want the same flavor with less stove time. This is the oven version of the same recipe, not a separate full ingredient list. Thin cutlets usually take 15–18 minutes at 400°F / 204°C, while larger breasts usually take 18–26 minutes at 425°F / 218°C.

The oven cooks the chicken; a small pan makes the sauce. Bake the seasoned chicken until the thickest part reaches 165°F / 74°C, then spoon lemon butter sauce over the top after baking.

Oven-baked lemon pepper chicken cutlets in a metal baking dish with lemon wedges, parsley, black pepper, and pan juices.
Bake the cutlets until just done, then add the lemon-butter finish so the flavor stays bright instead of harsh.
Chicken PieceOven TempApprox Time
Thin breast cutlets400°F / 204°C15–18 minutes
Medium breasts, 6–8 oz / 170–225 g425°F / 218°C18–22 minutes
Large breasts, 9–10 oz / 255–285 g425°F / 218°C22–26 minutes
Boneless thighs400°F / 204°C22–28 minutes
Bone-in skin-on thighs400°F / 204°C35–45 minutes

Air Fryer Lemon Pepper Chicken

Use the air fryer when you want quick cutlets with less cleanup. Thin chicken breast pieces usually take 10–14 minutes at 375°F / 190°C. Tenders may cook faster, while thighs need a little more time.

Lightly oil the chicken, season it, and arrange it in a single layer. If using the flour coating, mist or brush the surface lightly with oil so no dry flour patches remain. Cook the chicken first, then spoon the sauce over it after it comes out.

Air fryer basket with browned lemon pepper chicken cutlets, parsley, black pepper, and a lemon wedge.
For air fryer lemon pepper chicken, coat the surface lightly with oil before cooking. Otherwise, the seasoned flour can stay pale, dry, and dusty.
CutAir Fryer TempApprox Time
Thin chicken breast cutlets375°F / 190°C10–14 minutes
Chicken tenders375°F / 190°C8–12 minutes
Boneless thighs380°F / 193°C14–18 minutes
Bone-in thighs380°F / 193°C20–24 minutes

Using Chicken Thighs

Chicken thighs are the more forgiving choice. They have more fat than chicken breasts, so they stay moist even when they cook a little longer.

Boneless thighs work well in a skillet or oven. Bone-in, skin-on thighs are better when you want crisp skin and deeper flavor. Chicken thighs are safe at 165°F / 74°C, but many cooks prefer the texture closer to 175°F / 79°C.

Lemon pepper chicken thighs with golden browned skin, lemon butter pan juices, black pepper, parsley, and lemon slices.
Lemon pepper chicken thighs are more forgiving than breast meat. Let them cook a little longer for richer texture, then finish with lemon so the flavor stays fresh.

Using Tenders, Drumsticks, and Other Cuts

The seasoning can travel; the cooking method just has to fit the cut. This is useful when the chicken in your fridge is not the exact cut in the recipe.

Chicken CutBest ApproachQuick Tip
Chicken tendersSkillet or air fryerCook like small breast pieces and check early.
Chicken stripsSkillet or air fryerSeason lightly and add sauce after cooking.
DrumsticksOven or air fryerTurn during cooking so the skin browns evenly.
Bone-in legsOvenCheck temperature near the bone, not just the surface.
WingsAir fryer, oven, or fried wing methodUse a separate wings recipe for crisp skin.

Grilled Lemon Pepper Chicken

Grilling takes this in a lighter, smokier direction. Skip the flour coating and use a marinade instead: oil, lemon zest, lemon pepper seasoning, garlic, and a small amount of lemon juice.

Grill chicken breast over medium-high heat for about 6–8 minutes per side, depending on thickness, until it reaches 165°F / 74°C. Finish with a little butter, lemon zest, or fresh lemon juice so the flavor tastes lifted rather than flat.

Slow Cooker Lemon Pepper Chicken

The slow cooker is for meal prep days, not for the golden skillet finish. Use thighs when possible because they stay softer and shred more easily.

Add lemon pepper seasoning, a small amount of broth, garlic, and butter. Start checking around 3–4 hours on low for breasts and 4–5 hours for thighs. Add fresh lemon juice and zest near the end, and reduce watery sauce in a pan before serving. For more slow-cooker chicken ideas, use these crock pot chicken breast recipes as a meal-prep starting point.

Lemon Pepper Chicken Marinade

You do not need a marinade for the skillet recipe. Use this only when the chicken is going on the grill, into the oven, or into the air fryer.

For 550–650 g / 1.2–1.4 lb chicken, start with 3 tablespoons / 45 ml olive oil, 1–2 teaspoons lemon zest, 1–2 tablespoons / 15–30 ml lemon juice, and 2 teaspoons lemon pepper seasoning. Add 1–2 minced garlic cloves, then add salt only when your seasoning needs it. One teaspoon honey is optional for better browning and a rounder finish.

Chicken CutMarinating Time
Boneless chicken breast30 minutes to 2 hours
Boneless thighs1 to 4 hours
Bone-in pieces2 to 8 hours
Very lemon-heavy marinadeAvoid overnight marinating

Longer marinating works better with more zest, oil, garlic, and seasoning, and less lemon juice. Marinate chicken in the refrigerator, never on the counter. For safety, USDA FSIS notes poultry can be refrigerated in marinade for up to 2 days, but this lemon-heavy version tastes better with the shorter times above. See the USDA poultry marinating guidance for the safety side.

Lemon Butter Sauce for Chicken

The pan sauce is what turns this from seasoned chicken into dinner. Without it, the chicken can taste dry, salty, or one-dimensional. With it, the chicken becomes glossy, fresh, and easy to serve with almost anything.

  • Butter: 3 tablespoons / 42 g, to round out the lemon and pepper.
  • Chicken broth: 1/2 cup / 120 ml, to lift the browned bits and keep the sauce spoonable.
  • Lemon juice: 1–2 tablespoons / 15–30 ml, for brightness.
  • Lemon zest: 1–2 teaspoons, for clean lemon aroma.
  • Parsley: 1–2 tablespoons, for freshness and color.

The sauce should taste peppery first, buttery in the middle, and fresh at the end. Add an extra tablespoon of butter for a richer finish. For a creamy version, stir in 2–3 tablespoons cream after the broth reduces, then keep the heat gentle.

What to Serve on the Side

Because the sauce is bright and buttery, it plays well with almost anything that can catch a spoonful.

  • Easy dinner: rice, roasted potatoes, or a simple salad.
  • Comfort plate: mashed potatoes, pasta, buttered noodles, or garlic bread.
  • Lighter side: green beans, asparagus, zucchini, broccoli, or cauliflower rice.
  • Meal prep: rice bowls, couscous, roasted vegetables, or wraps.

For a fresh, sharp side, a crisp cucumber salad recipe works especially well because the vinegar, dill, and onion cut through the buttery lemon sauce.

Serving potatoes? Creamy garlic mashed potatoes are one of the best ways to catch the lemon butter without making the plate feel too heavy.

Make It a Rice Bowl, Pasta, Salad, or Wrap

This is the kind of chicken that makes plain rice, pasta, or bowls feel intentional. Use the pan sauce as the bridge between the chicken and the rest of the plate.

Lemon pepper chicken rice bowl with sliced chicken, rice, broccoli, carrots, lemon wedge, sauce, and a leftover container behind it.
Leftovers work better with extra pan juices. Spoon them over rice bowls, wraps, pasta, or meal-prep containers so the chicken stays moist the next day.
  • Rice bowl: Spoon extra sauce over rice, then top with sliced chicken and parsley.
  • Pasta: Toss noodles with extra sauce, a splash of broth, and a little pasta water.
  • Chicken bowl: Add rice, roasted vegetables, sliced chicken, and a little extra lemon butter.
  • Salad: Serve sliced chicken over crisp greens with a lemony dressing.
  • Wrap: Use sliced chicken, lettuce, cucumber, and a little creamy sauce or yogurt dressing.

Making pasta often? The same loose-sauce habit matters in this chicken pesto pasta recipe too, where pasta water keeps the dish glossy instead of dry.

For a colder, crunchier salad plate, a wedge salad recipe works better as a full dinner side than a small garnish.

Storage and Reheating

Leftovers are best when the extra pan juices stay with the chicken.

  • Refrigerator: Store leftovers in an airtight container for 3–4 days.
  • Freezer: Freeze cooked chicken for up to 2 months. The sauce may look slightly different after thawing, but the flavor will still be good.
  • Skillet reheating: Reheat gently with a splash of broth or water until warmed through.
  • Microwave reheating: Cover and reheat at lower power in short bursts so the chicken does not dry out.
  • Best tip: Store the pan juices in the same container so the chicken stays moist.

Avoid overheating chicken breast when reheating. It is already cooked, so the goal is to warm it gently, not cook it again.

Leftover sliced chicken also works well in wraps and sandwiches. For more ways to turn cooked chicken into lunch, these chicken sandwich recipes give you BBQ, buffalo, Caesar, pesto, and quick café-style ideas.

Troubleshooting Dry, Salty, or Sharp Chicken

Most problems here have simple fixes once you know what went wrong.

Troubleshooting board showing dry chicken fixed with thin cutlets and temperature, salty seasoning balanced with broth and butter, and sharp lemon corrected with zest and less juice.
Most dry, salty, or sharp results come from thickness, salt, or lemon balance. Fix the cause directly with thinner cutlets, gentler seasoning, broth and butter, or more zest with less juice.
ProblemWhy It HappenedFix
Chicken is dryThe breast was too thick or overcookedSlice into cutlets, pound evenly, and use a thermometer.
Chicken tastes too saltyThe lemon pepper seasoning already had saltReduce added salt and balance with broth or butter.
Lemon tastes harshToo much lemon juice was added too earlyUse zest for flavor and add juice near the end.
Sauce is wateryToo much broth or not enough reducing timeSimmer for 2–4 minutes longer.
Sauce is too sharpToo much lemon juiceAdd butter or a splash of broth.
Coating falls offThe chicken was wet or the pan was not hotPat chicken dry and preheat the skillet.
Chicken is paleThe pan was crowdedCook in batches so the chicken sears instead of steams.
Air fryer chicken is dryThe pieces were small or cooked too longCheck early and add sauce after cooking.
Thighs are chewyThey were pulled too early for best textureCook thighs a little longer, closer to 175°F / 79°C.

A salty sauce usually needs dilution and fat, not more acid. Add broth and butter first, then taste again before reaching for more lemon.

If the sauce tastes a little too sharp, butter and broth fix that faster than more lemon.

This is not fussy chicken. It is the better kind of weeknight chicken: fast, bright, buttery, and useful with whatever side is already in your kitchen.

FAQs

What is lemon pepper chicken made of?

It is usually made with chicken breast or thighs, lemon pepper seasoning, garlic, fresh lemon, and butter or oil. This skillet version uses thin chicken cutlets and finishes them in a lemon-butter pan sauce.

How do you keep lemon pepper chicken from drying out?

Slice large chicken breasts into thin cutlets, pound uneven spots, cook only until the thickest part reaches 165°F / 74°C, and spoon sauce over the chicken before serving. Thick chicken breast and overcooking are the most common reasons it turns dry.

What temperature should lemon pepper chicken reach?

Chicken breast should reach 165°F / 74°C in the thickest part. Thighs are also safe at 165°F / 74°C, but they often taste more tender when cooked closer to 175°F / 79°C.

How long does lemon pepper chicken take?

This skillet dinner takes about 25 minutes total: 10 minutes to prep and about 15 minutes to cook. Thin chicken breast cutlets usually need 3–5 minutes per side. Oven versions usually take 15–26 minutes depending on thickness.

Do you use fresh lemon or lemon pepper seasoning?

Use both when possible. Lemon pepper seasoning gives the familiar peppery flavor, while fresh lemon zest and juice make it taste livelier. Bottled seasoning alone can taste flat or too salty depending on the brand.

Why does it taste too salty?

The seasoning blend probably already contained salt. Taste the seasoning before adding extra salt, and soften a salty sauce with broth and butter before adding more lemon.

Is it better with breasts or thighs?

Chicken breasts are lean, quick, and classic. Thighs are juicier and more forgiving. If breast meat often turns dry for you, thighs are the easier option.

Does lemon pepper chicken need to marinate?

No, the skillet version does not need to marinate. The seasoned coating and lemon butter sauce give plenty of flavor. Marinade is more useful for grilled, baked, or air fryer chicken.

How do you reheat it without drying it out?

Reheat it gently with a splash of broth or water. A skillet over low heat works well. In the microwave, cover the chicken and heat it in short bursts at lower power. Avoid cooking it a second time.

Why is my lemon pepper chicken bitter?

Bitterness usually comes from too much white pith in the lemon zest, lemon slices cooked too long, or a seasoning blend with a harsh citric taste. Zest only the yellow part of the lemon, use juice near the end, and balance sharpness with butter or broth.

Final Thoughts

This skillet dinner works best when it stays simple: thin chicken, smart seasoning, fresh lemon, and enough butter sauce to make the plate feel finished. That is what turns two plain chicken breasts into dinner you actually want to eat.

Keep this version for the nights when chicken needs to be fast but not boring, bright but not sour, buttery but not heavy. A little zest, a steady skillet, and one spoonful of pan sauce can do more than a long ingredient list.

That is the real win: chicken that tastes fresh, peppery, buttery, and complete without turning a simple dinner into a project.

Posted on Leave a comment

Sausage Rolls Recipe: Easy Homemade Puff Pastry Sausage Rolls

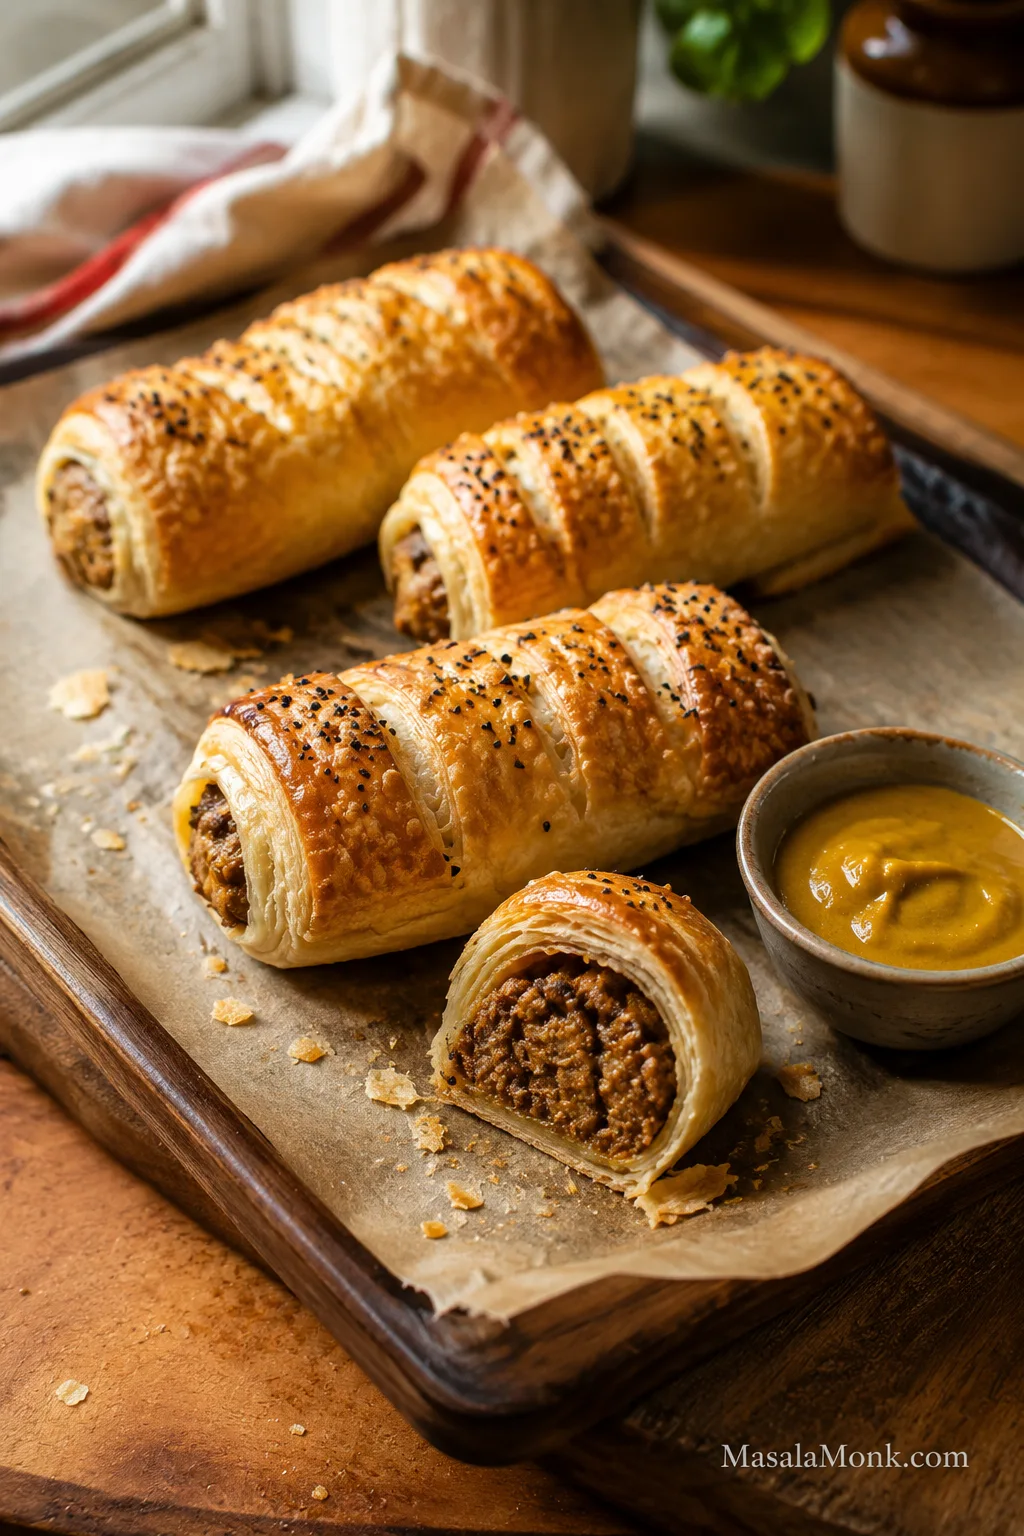
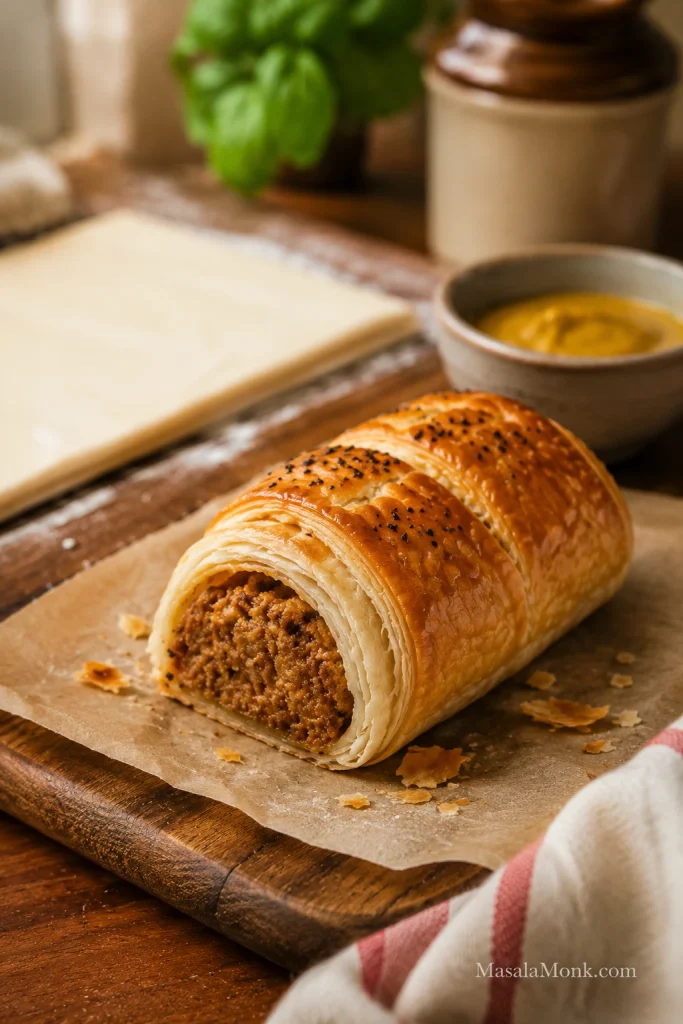
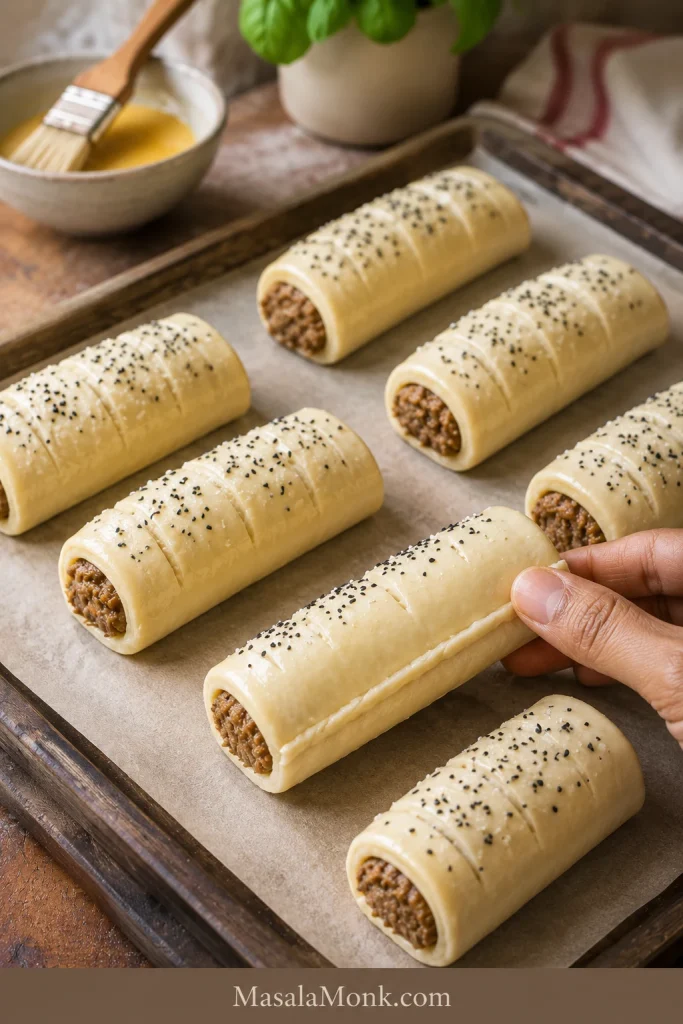
Homemade puff pastry sausage rolls on parchment with one roll cut open beside a small bowl of mustard.

If you have puff pastry and sausages, you are already close to a tray of homemade sausage rolls: buttery layers, savory filling, crisp bottoms, and the kind of warm snack people reach for before you have even moved the tray to the table.

Sausage rolls are savory pastry rolls filled with seasoned sausage meat and baked until flaky, golden, and hot in the center. This version keeps the classic idea but makes it practical for real kitchens: store-bought puff pastry, everyday sausages if that is what you have, clear cutting sizes, and enough small technique to avoid greasy, soft pastry.

The method itself is simple: fill, roll, seal, cut, glaze, and bake. You do not need special sausage meat, you do not need to guess the bake time, and you do not have to settle for soggy bottoms.

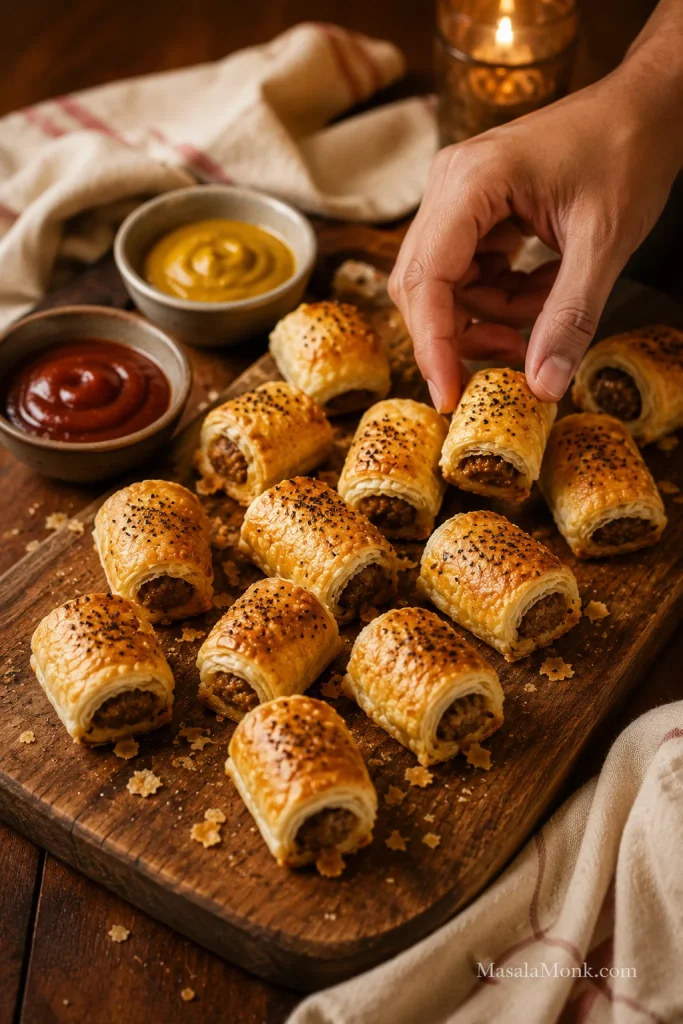
Make them large for dinner, small for parties, or freeze them unbaked for later. Once you know the basic shape, the same method works for lunchboxes, snack trays, and the kind of warm batch that disappears faster than expected.

Quick Answer: How to Make Sausage Rolls

To make sausage rolls, fill cool puff pastry with seasoned sausage meat or regular sausages with the skins removed, roll and seal the pastry, brush with egg wash, then bake at 200°C / 400°F, or 180°C fan / convection, until the pastry is puffed and well browned.

Large sausage rolls usually take 25–30 minutes, 16 medium rolls usually take 22–25 minutes, and mini sausage rolls usually take 18–22 minutes.

The easiest version uses puff pastry, sausages, and egg wash. The better version adds softened onion, breadcrumbs, herbs, and a little mustard, so the filling tastes rounder, stays juicy, and does not soak the pastry as it bakes.

For pork or beef sausage rolls, the filling should reach 160°F / 71°C in the center. For chicken or turkey sausage rolls, use 165°F / 74°C. If the pastry browns before the center is done, lower the oven slightly and bake a few minutes longer.

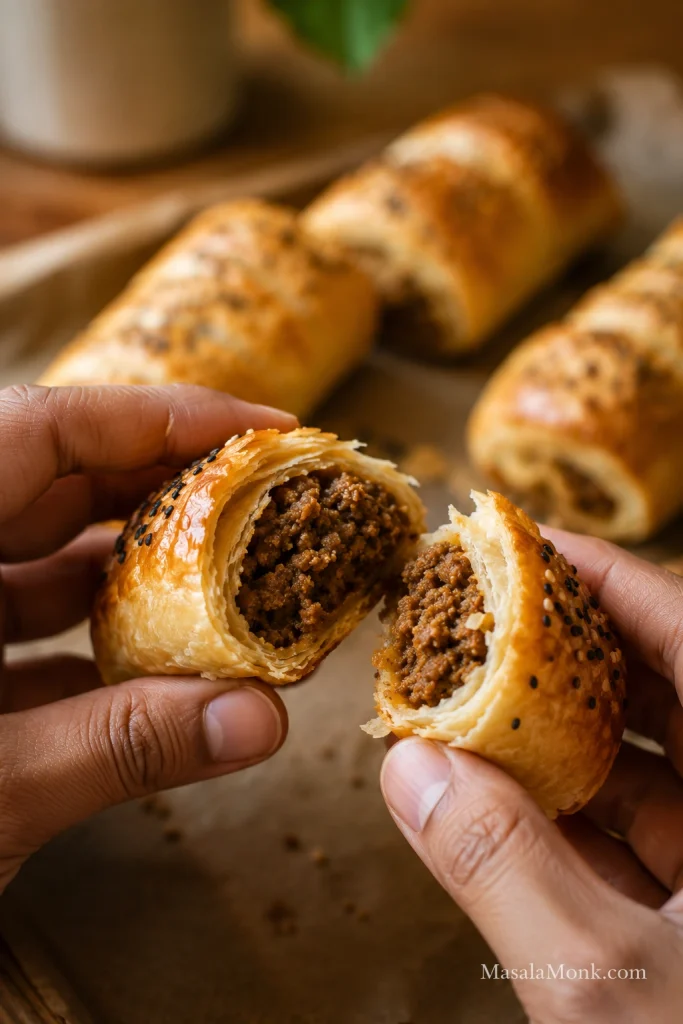
When they come out right, you get the best kind of contrast: flaky pastry on top, a clean, crisp base, and a savory filling that stays juicy without soaking through.

Hands holding a sausage roll broken open to show flaky puff pastry layers and cooked sausage filling.
When the roll breaks open, the pastry should flake instead of collapse, and the filling should look moist, cooked, and evenly packed.

Sausage Rolls Recipe Card

Easy Homemade Puff Pastry Sausage Rolls

This recipe makes flaky homemade sausage rolls with ready-rolled puff pastry and sausage meat, or regular sausages with the skins removed. Make them big enough for lunchboxes, small enough for party trays, or somewhere in the middle for the kind of snack that disappears while it is still warm.

Prep time20 minutes
Optional chill time10–20 minutes
Cook time18–30 minutes, depending on size
Total time40–60 minutes
Yield8 large, 16 medium, or 24–32 mini sausage rolls
Oven200°C / 400°F, or 180°C fan / convection

Equipment: You need a baking sheet, parchment paper, mixing bowl, small pan, sharp knife, pastry brush, and wire rack. An instant-read thermometer is helpful for large rolls or chicken and turkey fillings.

Sausage Roll Ingredients

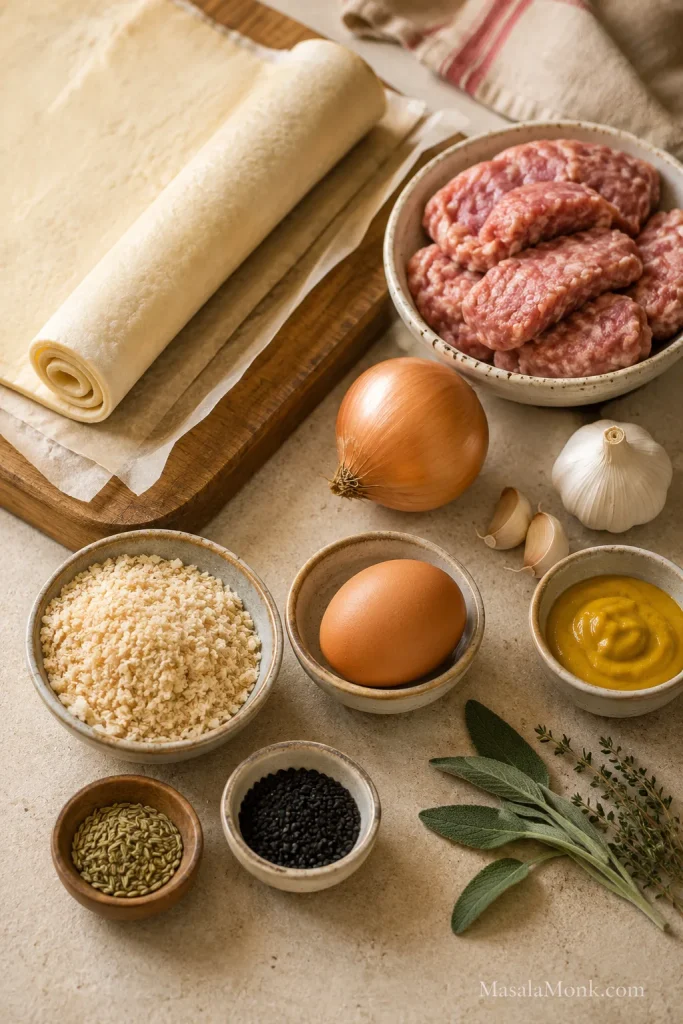
Puff pastry, sausage meat, onion, garlic, breadcrumbs, egg, mustard, herbs, and seeds arranged on a kitchen work surface.
This ingredient mix shows why the full version tastes rounder: breadcrumbs hold moisture, onion adds sweetness, and mustard sharpens the sausage filling.
  • 320–375g / 11–13 oz ready-rolled puff pastry, thawed if frozen but still cool
  • 450–500g / about 1 lb sausage meat, or 6–8 medium sausages with skins removed
  • 1 teaspoon oil or butter, for softening the onion
  • 1 small onion, about 70–90g / ½ cup very finely chopped
  • 1–2 garlic cloves, minced
  • 35–40g / about ½ cup panko breadcrumbs or fresh breadcrumbs, plus more if the filling feels loose
  • 1 egg for the filling
  • 1 egg for egg wash
  • 1 tablespoon / 15ml Dijon mustard or English mustard, optional
  • 1 teaspoon dried sage or thyme, or 1 tablespoon finely chopped fresh herbs
  • ½–1 teaspoon fennel seeds, lightly crushed, optional
  • Black pepper, to taste
  • Salt, only if using plain ground meat instead of seasoned sausage meat or sausages
  • Sesame seeds or nigella seeds, optional topping

If using plain ground pork or beef: start with about ¾ teaspoon fine salt per 500g / 1 lb meat. To check the seasoning safely, cook a tiny pinch of the filling in a pan before shaping the rolls.

Make the Filling and Shape the Rolls

  1. Preheat and line the tray. Preheat the oven to 200°C / 400°F, or 180°C fan / convection. Line a large baking sheet with parchment paper.
  2. Prepare the pastry. If frozen, thaw the puff pastry until flexible but still cool. It should unroll without cracking.
  3. Cook the onion. Warm the oil or butter in a small pan. Soften the onion for a few minutes, then add garlic for 30 seconds. Cool completely.
  4. Prepare the sausage meat. If using regular sausages, slit the skins lengthwise and squeeze the meat into a mixing bowl.
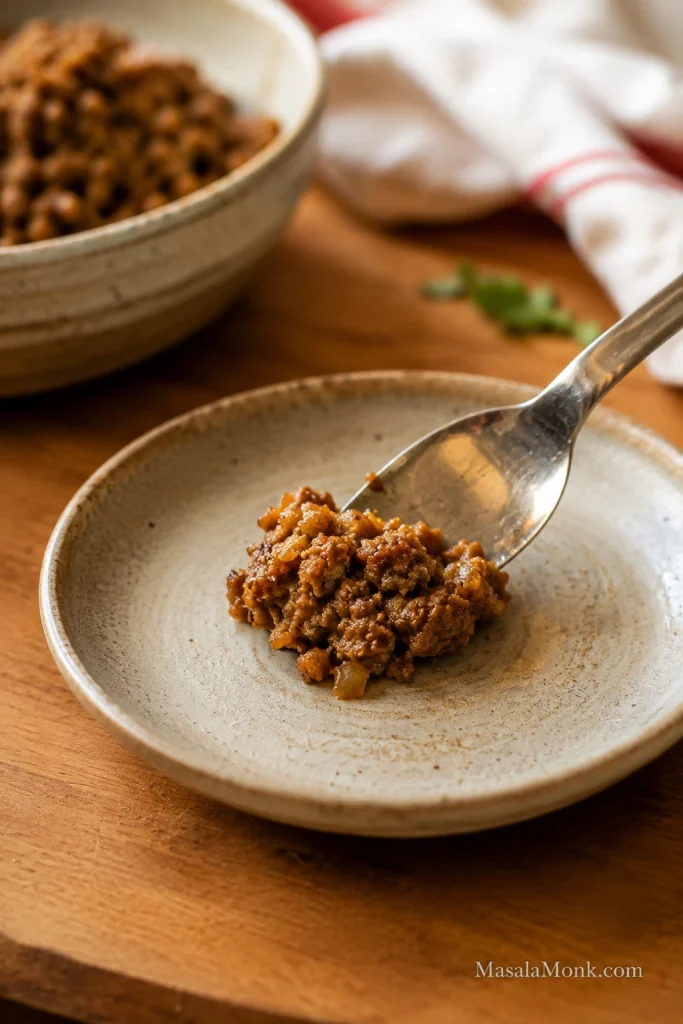
  5. Mix the filling. Combine sausage meat, cooled onion and garlic, breadcrumbs, 1 egg, mustard, herbs, optional fennel, and black pepper. Mix gently.
  6. Check the texture. You want a soft log that holds together without spreading like paste or crumbling apart. Add 1–2 tablespoons more panko if it feels loose, or 1–2 teaspoons cold water or milk if it feels dry.
  7. Cut the pastry. For one 320–375g sheet, cut the pastry in half lengthwise to make 2 long strips. If your pastry sheet is a different size, aim for strips wide enough to wrap around the filling without stretching.
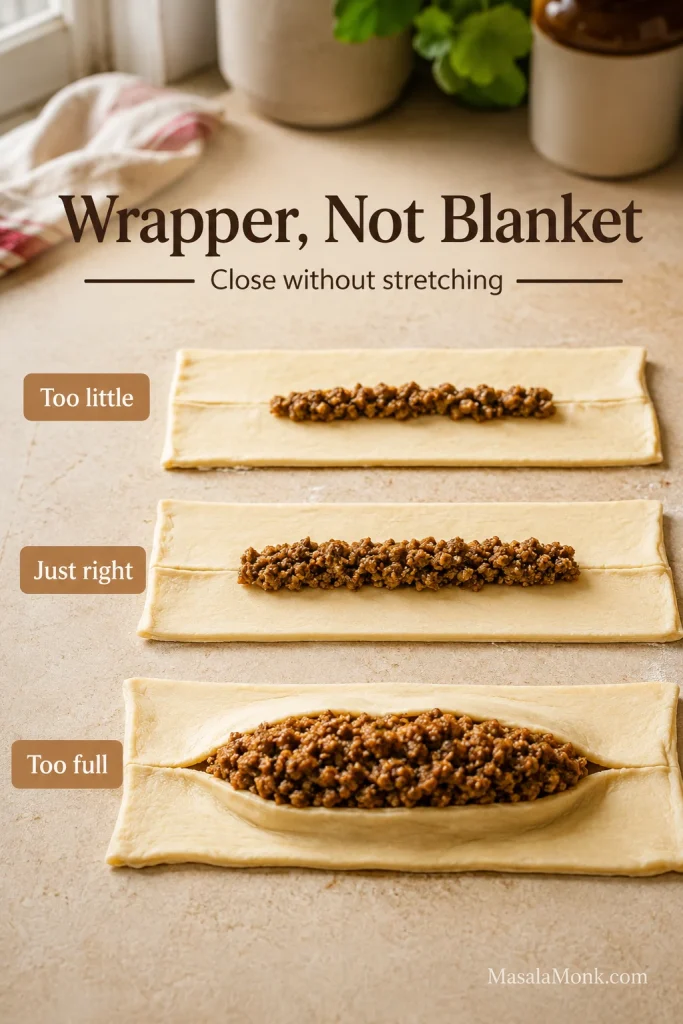
  8. Add the filling. Divide the sausage filling into 2 even logs and place one log down the center of each pastry strip. For mini sausage rolls, shape thinner logs rather than simply cutting overfilled rolls smaller.
  9. Seal. Leave a small border beside the filling. Brush the edge lightly with beaten egg, fold the pastry over, and press just enough to close. Place seam-side down. Too much egg wash can make the edge slippery, and too much pressure can flatten the layers.
  10. Chill if soft. Chill the shaped rolls for 10–20 minutes if the pastry feels sticky, warm, or loose.

Cut, Bake, and Cool

  1. Cut and glaze. Cut each long roll into 4 pieces for 8 large rolls, 8 pieces for 16 medium rolls, or 12–16 pieces for 24–32 mini rolls. Brush tops with egg wash, add seeds if using, and slash lightly.
  2. Bake. Space the rolls at least 2.5cm / 1 inch apart on the baking sheet. Bake large rolls for 25–30 minutes, 16 medium rolls for 22–25 minutes, or mini rolls for 18–22 minutes.
  3. Cool. Rest for a few minutes on the tray, then move to a wire rack so the bottoms stay crisp.

Doneness: Look for well-browned pastry and cooked-through filling. Pork or beef sausage filling should reach 160°F / 71°C. Chicken or turkey filling should reach 165°F / 74°C.

What good looks like: the rolls should feel firm before baking, sit seam-side down, and come out browned on top with crisp bottoms and hot filling.

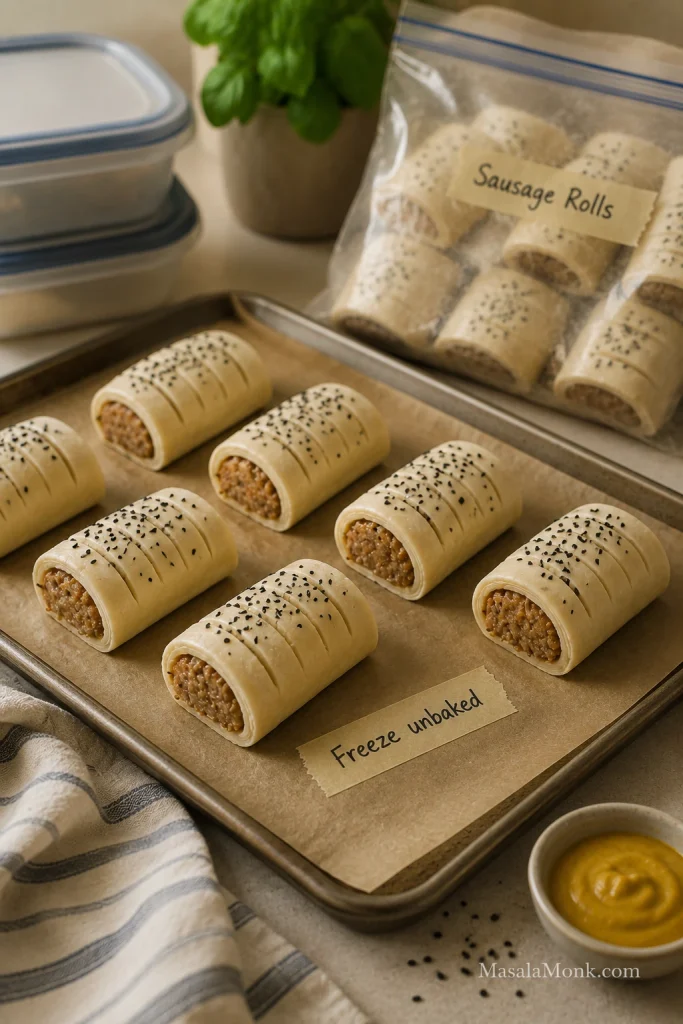
Freezer note: For best texture, freeze sausage rolls unbaked after shaping and cutting. Bake from frozen at 200°C / 400°F, or 180°C fan / convection, and add extra time. Do not thaw first unless your pastry packet specifically recommends it.

First batch recommendation: make the full version with onion, breadcrumbs, mustard, and herbs. It gives you the best balance of juicy filling and crisp pastry. Once you know how your pastry and sausages behave, use the 3-ingredient shortcut for faster batches.

The 3 Rules for Better Sausage Rolls

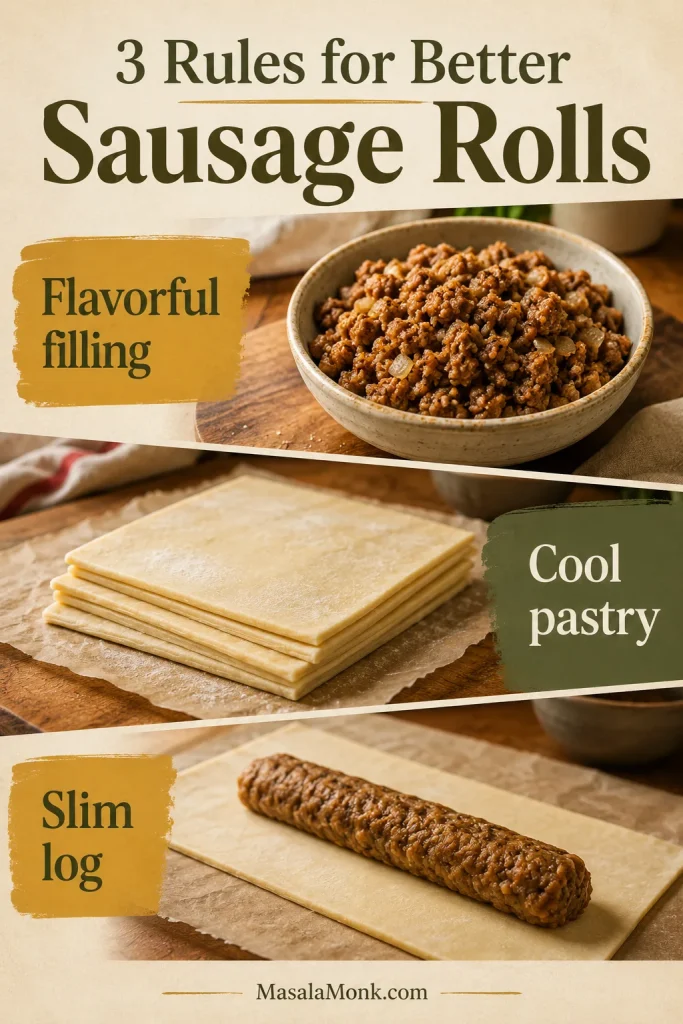
Good sausage rolls do not need fancy pastry or special sausage meat. They need three small things done well: filling that tastes good before it goes in, pastry that stays cool enough to puff, and a filling log slim enough for the pastry to close without a fight.

Visual guide showing flavorful filling, cool pastry, and a slim filling log for making sausage rolls.
Think of this as the sausage roll safety net: seasoned filling for flavor, cold pastry for lift, and a slim log for a clean seal.
  • Use filling that tastes good before it goes in. Sausage rolls are simple, so bland sausage has nowhere to hide.
  • Keep the pastry cool. Sticky, greasy, or slack pastry is a sign to pause and chill the tray.
  • Shape thinner than you think. The pastry should close like a wrapper, not stretch like a blanket.

Get those right and the rolls bake neater, crisper, and juicier, with fewer split seams, fewer soggy bottoms, and a center that cooks through before the pastry over-browns. Next, choose the filling, pastry, and size that fit the batch you actually want to make.

Need the exact amounts now? Jump back to the recipe card, or compare options in Choose the Sausage Roll Version You Want.

Choose the Sausage Roll Version You Want

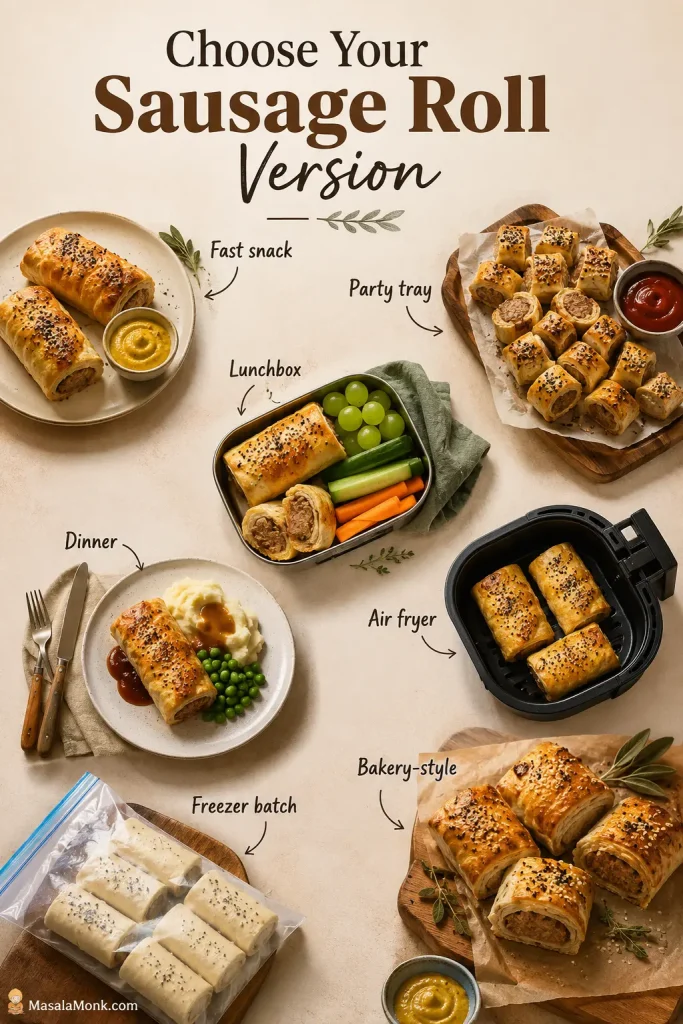
A party tray, lunchbox roll, freezer batch, and fast snack all use the same base method, but the size and filling choices change slightly. Start with the version that fits the moment, then use the rest of the guide to fine-tune it.

Decision board showing sausage rolls for a fast snack, party tray, lunchbox, dinner, air fryer batch, freezer batch, and bakery-style serving.
Once the base method is clear, the same sausage roll recipe can become a snack, party tray, lunchbox option, air fryer batch, or freezer prep.
SituationBest sausage roll version
Fast snack3-ingredient sausage rolls with puff pastry, sausages, and egg wash
Best flavorMain recipe with onion, breadcrumbs, mustard, herbs, and optional fennel
Party trayMini sausage rolls, shaped thinner and frozen unbaked if making ahead
LunchboxesMedium rolls, cooled completely before packing
DinnerLarger rolls with salad, beans, soup, or potatoes
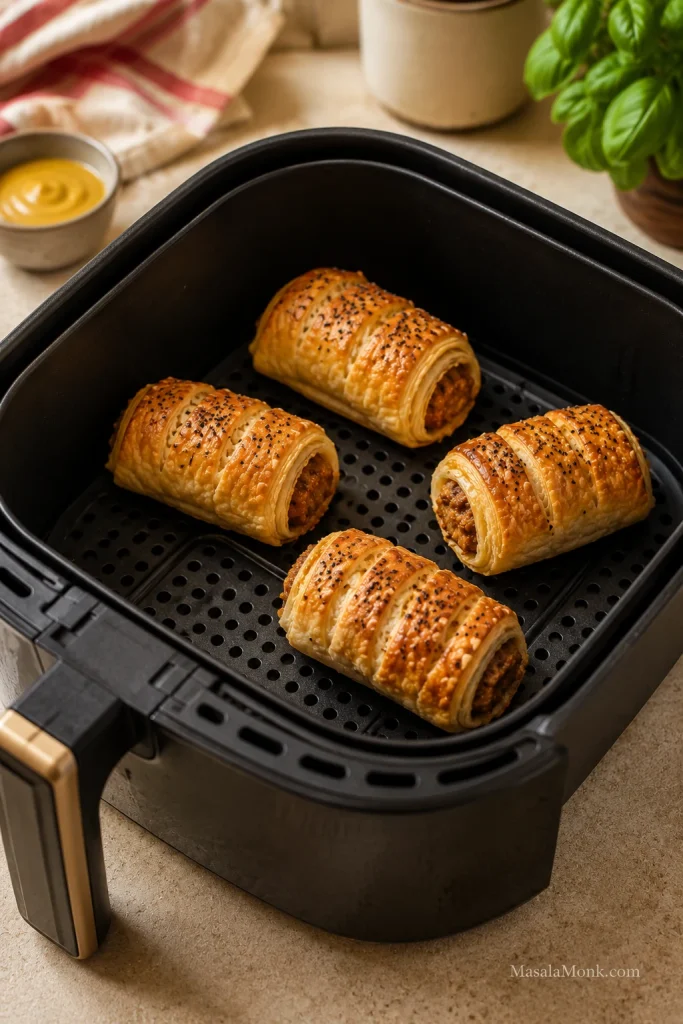
Air fryer batchMini or medium rolls cooked in one layer
Rich bakery-stylePork sausage, all-butter puff pastry, generous egg wash, and a short chill before baking

Can I Use Regular Sausages?

Yes. Most people do not buy “sausage meat” every week. Regular sausages are usually easier to find, and they work beautifully when the flavor is already good. Slit the skins, squeeze out the meat, and loosen it with a fork so it shapes evenly inside the pastry.

Hands opening regular sausages and shaping the sausage meat into a log on a kitchen counter.
Regular sausages can become sausage roll filling once the skins are removed; after that, shape the meat evenly so the pastry wraps cleanly.

Choose sausages you already like because the filling is the main flavor of the roll. If the sausage tastes bland before it goes in, the pastry cannot fix it.

Ingredient note: In the UK and Australia, “sausage meat” usually means seasoned loose sausage filling. In the US, look for bulk sausage, breakfast sausage meat, or simply remove the meat from sausages. Plain ground pork works too, but it needs proper seasoning.

  • Sausage meat: fastest and most classic, but check salt before adding more.
  • Regular sausages: easiest supermarket shortcut; slit the skins and use the filling.
  • Plain ground pork or beef: works if you season it properly and keep enough fat or moisture for juiciness.
  • Chicken, turkey, or vegetarian sausage: useful alternatives, but watch dryness or excess moisture.

Check the Seasoning Safely

Salt note: most sausages are already seasoned, so cook a tiny test piece before adding more salt. If you are using plain ground pork or beef instead, season it properly and test a small cooked piece before shaping.

Small cooked spoonful of sausage roll filling on a plate with a bowl of filling in the background.
A tiny cooked test piece lets you adjust seasoning before the pastry is involved, so the final sausage rolls taste balanced from the center out.

Which Sausages Make the Best Filling?

The best sausage rolls start with sausages you would happily eat on their own: savory, well-seasoned, and juicy without flooding the pan. Pork sausages are the classic choice because they usually have enough fat to stay tender. Breakfast sausage, Cumberland-style sausage, mild Italian sausage, chicken, turkey, and vegetarian sausage can all work too, as long as they are not too lean or watery.

For your first batch, avoid sausages that release a lot of liquid in the pan. Extra moisture can soften the pastry before it has time to crisp.

Simple rule: use sausage meat when you want speed, sausages when that is what you already have, and plain ground meat only when you are ready to season the filling properly.

What Pastry Is Best for Sausage Rolls?

Puff pastry is best for classic sausage rolls because it gives them lift, flakes, and crisp edges. Store-bought puff pastry is the right choice here because the point is a reliable homemade roll, not a pastry project.

All-butter puff pastry gives the richest flavor and the cleanest flaky bite: the kind that shatters a little when you bite in. Standard ready-rolled puff pastry still works well, especially if it stays cold and is not stretched around too much filling.

Close-up of a baked sausage roll with flaky puff pastry layers and cooked sausage filling on parchment.
Puff pastry gives sausage rolls their classic lift and crisp edges; keeping it cool helps those layers rise instead of melting flat.

Shortcrust pastry gives a firmer, more crumbly shell. Crescent roll dough makes a softer, breadier shortcut. Both can work, but neither gives the same flaky puff pastry bite.

How Much Filling Fits the Pastry?

Puff pastry sheets vary by country and brand. Use this table to avoid overfilling the pastry.

Pastry-to-filling ratio guide showing too little, just right, and too much sausage filling on puff pastry strips.
The best sausage roll ratio leaves a visible pastry border, so the roll seals better, puffs cleaner, and leaks less.
Pastry amountFilling amountBest use
280g / 10 oz puff pastry350–400g / 12–14 oz fillingSmaller batch or mini rolls
320g / 11 oz puff pastry400–450g / 14–16 oz fillingOne ready-rolled sheet
375g / 13 oz puff pastry450–500g / about 1 lb fillingStandard full batch
1 smaller US puff pastry sheet, about 225–250g / 8–9 oz275–350g / 10–12 oz fillingSmall batch
2 US puff pastry sheets, about 450–500g / 16–18 oz450–500g / about 1 lb fillingFull batch

When in doubt, use the visual cue: the filling log should let the pastry wrap around it without stretching. Think slim log, not stuffed tube. A sausage roll that looks slightly modest before baking often comes out neater, flakier, and better balanced after the pastry puffs.

The pastry is a wrapper, not a stretchable blanket. If you have to pull it hard to close, the roll is overfilled.

What Makes the Filling Better?

Cooked onion gives the filling deeper flavor without raw sharpness. Breadcrumbs are not just filler; they catch juices from the sausage so the filling stays tender without soaking the base. Mustard adds lift, sage and thyme bring classic savory flavor, and fennel seeds give pork sausage rolls a more aromatic, bakery-style finish.

Egg wash note: A whole beaten egg gives good shine and color. Egg yolk gives a deeper golden finish. Milk gives a softer, lighter color. For vegan sausage rolls, use plant milk, aquafaba, or a little oil depending on the finish you want.

The 3-Ingredient Sausage Roll Shortcut

Yes, you can make 3-ingredient sausage rolls with puff pastry, sausages, and egg wash. They will be simpler than the full recipe, but still good if the sausages are well seasoned and the pastry stays cool.

Use the full recipe when you want a juicier filling with onion, breadcrumbs, mustard, and herbs.

  • Unroll the pastry and cut it into strips.
  • Remove the sausage skins and shape the meat into logs.
  • Roll, seal, brush with beaten egg, and bake until golden and cooked through.

Step-by-Step Visual Cues for Better Sausage Rolls

The recipe card tells you what to do. This section shows you what to look for, because sausage rolls are much easier when you know how the pastry and filling should feel before they go into the oven.

1. Look for Pastry That Bends Without Grease

The puff pastry needs to unroll without cracking while still feeling cool to the touch. Sticky pastry is a sign to pause, not push through. A few minutes in the fridge gives the butter a cleaner start in the oven.

2. Cook the Onion Until Soft, Not Wet

The onion should be soft and fragrant before it goes into the sausage mixture, but not watery. Cooking it first gives sweetness and keeps raw onion moisture from softening the pastry.

Finely chopped onion softened in a pan with a wooden spoon for sausage roll filling.
Softened onion should look glossy and dry around the edges; that gives the filling sweetness without adding steam inside the pastry.

3. Shape a Filling Log That Holds Together

A good filling log holds its shape without slumping across the pastry. Loose filling needs a little more panko before it reaches the pastry. Dry, crumbly filling can take a teaspoon or two of cold water or milk.

Mixed sausage roll filling in a bowl with a shaped sausage filling log on parchment.
A filling that holds as a soft log is easier to roll, seal, and bake evenly; loose filling is more likely to soften the pastry.

4. Place the Filling on the Pastry

The pastry needs to wrap easily around the filling. If you have to pull hard to close it, the log is too thick. Shape thinner than you think, especially for mini sausage rolls.

A slim sausage filling log placed down the center of a puff pastry strip with clear pastry borders.
Center the filling like a narrow ridge, not a mound; then the pastry can wrap around it without stretching thin at the seam.

5. Seal with a Light Line of Egg Wash

Brush the edge lightly with egg wash, fold the pastry over, and press just enough to close. The seam needs to hold, but the layers should not be flattened.

A pastry brush applying egg wash along the edge of puff pastry beside sausage filling.
Egg wash works best as a thin glue line; a heavy brush of liquid can make the pastry edge slide open.

6. Bake Seam-Side Down

The sealed edge should sit against the tray, not face up. That way, the baking sheet supports the roll while the filling heats and the pastry expands.

Unbaked sausage rolls brushed with egg wash and arranged seam-side down on a parchment-lined tray.
Seam-side down placement turns the tray into support, so the pastry stays closed while the sausage filling heats and expands.

7. Cut Large, Medium, or Mini Sausage Rolls

Cut larger rolls for dinner or lunchboxes, medium rolls for snacks, and mini rolls for parties. Small rolls need thinner filling logs, not just shorter pieces of an overfilled roll.

Guide showing large, medium, and mini sausage rolls cut into different sizes.
Size changes the eating moment: large rolls suit dinner, medium rolls suit snacks, and mini sausage rolls suit parties or lunchboxes.

8. What the Tray Should Look Like Before Baking

The final tray should look tidy but not crowded: glossy tops, clear gaps between rolls, and pastry that still holds its shape when moved.

Unbaked sausage rolls brushed with egg wash, topped with seeds, and spaced on a parchment-lined tray.
Before baking, the best tray looks tidy but not crowded: glazed tops, visible gaps, and pastry firm enough to hold its shape.

9. Look for Bronzed Tops and Clean Bottoms

Look for deeply browned tops, set seams, and bottoms that lift cleanly from the paper. If the pastry bends or feels damp underneath, it likely needs more time or better air circulation after baking.

10. Cool on a Rack, Not a Plate

Let the rolls sit briefly on the tray, then move them to a wire rack. A plate traps steam underneath; a rack keeps the base crisp while the filling settles.

Before baking check: the rolls should be easy to lift, not stretched tight, with the seam tucked underneath and small gaps between each piece. If the pastry feels greasy or the filling is bulging through the seam, chill the tray before baking.

Changing the size? Check sausage roll cooking times before baking. If the pastry feels soft or crowded, go to How to Stop Soggy Sausage Rolls.

How Long to Cook Sausage Rolls

Once the rolls pass that before-baking check, size matters more than anything else. A mini party roll and a thick lunchbox roll should not bake for the same amount of time.

Most homemade sausage rolls bake best at 200°C / 400°F, or 180°C fan / convection. That temperature is hot enough to puff and brown the pastry while giving the sausage filling time to cook through.

The goal is not pale pastry with cooked meat, or dark pastry with a doubtful center. The sweet spot is a bronzed top, a clean base, and filling that is hot all the way through.

Cooking time guide for mini, medium, large, and frozen unbaked sausage rolls.
Size is the reason one timing never fits all; mini rolls, large rolls, and frozen unbaked rolls each need their own bake cue.
TypeTemperatureApprox. timeDoneness cue
Large fresh sausage rolls, 8 pieces200°C / 400°F, or 180°C fan25–30 minWell browned pastry, hot center
Medium sausage rolls, 16 pieces200°C / 400°F, or 180°C fan22–25 minGolden, crisp, cooked through
Mini sausage rolls, 24–32 pieces200°C / 400°F, or 180°C fan18–22 minPuffed, browned, and crisp
Frozen unbaked sausage rolls200°C / 400°F, or 180°C fanAdd 6–10 min to the fresh time for that sizeGolden pastry with bubbling edges
Reheating baked rolls180°C / 350°F, or 160°C fan8–12 minHot center and crisp pastry

When they are ready, look for bronzed, firm tops, set seams, and bottoms that lift cleanly from the paper instead of bending or feeling damp.

Check the Internal Temperature

Instant-read thermometer inserted into the cooked filling of a baked sausage roll.
A thermometer checks what pastry color cannot show: whether the center of a thicker sausage roll is cooked through.

Use color as a clue, not the only test. Puff pastry should look well browned, but thick rolls can brown before the center is fully cooked. For a safe check, use an instant-read thermometer in the thickest part of the filling. For the official temperature chart, FoodSafety.gov has a simple safe minimum internal temperatures guide.

Making a batch for later? Go to Freezing, Reheating, and Making Ahead, or jump back to the recipe card.

How to Stop Soggy Sausage Rolls

Soggy sausage rolls are disappointing, but they are rarely mysterious. If the base is soft, the seam opens, or fat leaks around the edges, the problem usually started before the tray went into the oven: wet filling, warm pastry, overfilling, or trapped steam after baking.

The oven can brown pastry, but it cannot fully rescue a filling that went in too wet.

Troubleshooting guide showing wet filling, warm pastry, crowded tray, and trapped steam as causes of soggy sausage rolls.
Soggy sausage rolls usually start before serving, with wet filling, warm pastry, crowding, or trapped steam weakening the crisp base.
ProblemLikely causeFix
Soggy bottomWet filling or pastry sitting in steamUse breadcrumbs, cool cooked onion, avoid watery vegetables, and move baked rolls to a wire rack.
Pastry leaking fatVery fatty filling, warm pastry, or oven too lowChill the shaped rolls if needed, bake at the right heat, and space rolls apart.
Pastry split openOverfilled rolls or weak sealUse egg wash on the edge, press firmly, and bake seam-side down.
Pale pastryWeak egg wash or underbakingBrush well with beaten egg and bake until golden and firm.
Dry fillingMeat too lean or filling overmixedUse sausage with enough fat, mix gently, and do not overbake.
Soft after bakingRolls cooled on a plate or covered too tightlyCool on a wire rack and avoid trapping steam.

A sturdy metal baking sheet also helps. Very thin trays can brown unevenly, and crowded trays trap steam. For extra-crisp bottoms, place the rolls on parchment on a hot tray only if you can transfer them safely.

What a Crisp Bottom Looks Like

A baked sausage roll lifted with a spatula to show an evenly browned crisp bottom.
A golden underside shows the pastry baked instead of steamed, which is why rack cooling matters as much as oven heat.

Cold pastry, confident bake: if the puff pastry feels greasy, sticky, or slack, pause and chill the tray before it goes into the oven.

Most batches do not need every fix here. If the pastry is cool, the rolls are not overfilled, and the tops are deeply browned, you are already most of the way there.

That is the sweet spot: hot filling, crisp base, and pastry that flakes instead of bending.

Mini Sausage Rolls for Parties, Lunchboxes, and Snacks

Mini sausage rolls are the party version for a reason: they bake faster, serve neatly, and disappear from a platter while people are still deciding what to drink. They are the thing people pick up while talking, then return for before they realize they have already had three.

Mini sausage rolls on a wooden party platter with dips and a hand reaching for one roll.
Mini sausage rolls stay easy to grab, dip, and share, which makes them especially useful for appetizers, party boards, and casual snack trays.
  • Cut each long roll into 12–16 small pieces for party-size sausage rolls.
  • Bake mini sausage rolls at 200°C / 400°F, or 180°C fan, for 18–22 minutes.
  • Shape thinner filling logs so each mini roll is balanced, not overstuffed.
  • Leave space between pieces so the pastry can puff.
  • Use sesame or nigella seeds if you want a more finished party-platter look.
  • Cool fully before packing into lunchboxes so steam does not soften the pastry.

Party math is simple: plan on 3–4 mini sausage rolls per person if they are one of several snacks, and more if these are the main warm bite on the table. Think two-bite snacks, not tiny overstuffed parcels.

How to Keep Sausage Rolls Warm for a Party

Keep baked sausage rolls in a low oven, loosely covered, so steam can escape. Wrapping them tightly in foil while hot softens the pastry. Softened rolls come back quickly in the oven or air fryer for a few minutes before serving.

For another easy party appetizer in the same make-ahead lane, these grape jelly meatballs are a useful option beside mini sausage rolls.

If you are baking a full party tray, the oven is still easier. For a handful of mini rolls, leftovers, or a small frozen batch, the air fryer is the faster tool.

Baking only a few? The air fryer section covers small batches. Planning ahead? Go to freezing and reheating.

Air Fryer Sausage Rolls

The air fryer is not the best tool for a full tray, but it is excellent for small batches, leftovers, and frozen mini sausage rolls when you want hot pastry without heating the oven.

It is especially useful for the last few frozen rolls in the bag: enough for a snack, not enough to justify a full oven.

Golden sausage rolls arranged in one layer inside a clean air fryer basket.
Air fryer sausage rolls need breathing room; with one open layer, hot air can reach the pastry instead of steaming it.
Air fryer useTemperatureApprox. time
Fresh mini sausage rolls180–190°C / 350–375°F10–14 min
Fresh medium sausage rolls190°C / 375°F13–16 min
Frozen unbaked sausage rolls180°C / 350°F18–22 min
Reheating cooked sausage rolls180°C / 350°F4–6 min

These air fryer times are for homemade sausage rolls. Store-bought frozen mini sausage rolls can vary by brand, so start checking early and use the package instructions as the first guide.

Air fryer timing is most reliable for mini and medium rolls. Cook in one layer with space for the pastry to expand, and start checking early the first time because machines vary. Large rolls can brown outside before the middle is hot, so lower the heat and cook a little longer if needed.

Freezing, Reheating, and Making Ahead

This is the kind of tray that earns its keep: hot enough for dinner, small enough for a party, and easy enough to freeze before you need it.

Freeze sausage rolls unbaked for the best texture. Shape, cut, freeze on a tray, then bake from frozen with extra time whenever you want a hot batch later.

When the rolls bake for the first time from frozen, the pastry stays fresher than it does after being baked, frozen, and reheated. It is the quiet freezer win: a tray you shaped when you had time, ready to bake when you do not.

That is the freezer version at its best: no flour on the counter, no filling bowl to wash, just a cold tray becoming hot, flaky sausage rolls when you need them.

Freezing Unbaked Sausage Rolls

Unbaked sausage rolls on a parchment-lined tray beside a freezer bag labeled for sausage rolls.
Freezing unbaked keeps the pastry from drying out twice; when baking from frozen, use the size of the roll to judge the extra time.
  1. Shape and cut the sausage rolls.
  2. Place them on a parchment-lined tray.
  3. Freeze until firm.
  4. Transfer to a freezer-safe bag or container.
  5. Bake from frozen at 200°C / 400°F, or 180°C fan, adding extra time.

Frozen unbaked sausage rolls usually need 6–10 minutes longer than fresh rolls, depending on size; very large rolls may need a few minutes more. Brush with egg wash before baking if possible. If the egg wash does not stick well to frozen pastry, bake the rolls plain or brush lightly after the first few minutes. Bake unbaked frozen rolls straight from the freezer unless the pastry packet says otherwise.

Simple Party-Day Plan

  • A few hours ahead: shape and cut the sausage rolls, then refrigerate until baking.
  • The day before or earlier: freeze them unbaked for the best texture.
  • Before guests arrive: brush with egg wash and bake until golden and cooked through.
  • To hold briefly: keep warm in a low oven, loosely covered, so steam can escape.
  • To refresh: return softened rolls to the oven or air fryer for a few minutes instead of wrapping them tightly.
  • For the table: serve with mustard or chutney, one creamy dip, and one fresh side so the pastry does not feel too heavy.

Can You Freeze Baked Sausage Rolls?

Yes, baked sausage rolls can be frozen, but the pastry is usually better when the rolls are frozen unbaked. If you freeze baked rolls, cool them completely first, pack airtight, and reheat in the oven or air fryer until hot and crisp again.

Storing Leftovers

Sausage rolls are best the day they are baked, especially while the pastry is crisp. Once cooled, store leftovers in an airtight container in the fridge for up to 3 days. Try to refrigerate them within 2 hours of baking.

Reheating Without Soft Pastry

Reheat baked sausage rolls in the oven at 180°C / 350°F, or 160°C fan, for 8–12 minutes. You can also use the air fryer at 180°C / 350°F for 4–6 minutes. Avoid the microwave when you want crisp pastry. It heats quickly, but it makes puff pastry soft.

Making Them Ahead

You can assemble sausage rolls a few hours ahead and keep them covered in the fridge until baking. For longer storage, freeze them unbaked. If the pastry softens while sitting, give the tray a short fridge rest before baking.

Serving a tray now? See what to serve with sausage rolls, or go back to top.

Sausage Roll Variations

Once the base recipe works, sausage rolls become easy to riff on. Keep the filling savory and not too wet, then change the mood: fennel for bakery-style rolls, apple for sweetness, cheddar for comfort, chili for heat, or cranberry and sage for a holiday tray.

  • Pork and fennel sausage rolls: add ½–1 teaspoon lightly crushed fennel seeds for an aromatic, bakery-style finish.
  • Pork and apple sausage rolls: add a small amount of grated apple, squeezed dry, for gentle sweetness.
  • Beef sausage rolls: use beef sausage meat and stronger seasoning such as mustard, pepper, or Worcestershire-style flavor.
  • Chicken sausage rolls: use chicken sausage or ground chicken and cook to 165°F / 74°C.
  • Cheese and onion sausage rolls: add grated cheddar and softened onion for a richer, more savory filling, but avoid overfilling.
  • Spicy sausage rolls: add chili flakes, smoked paprika, black pepper, or mustard.
  • Christmas sausage rolls: use sage, onion, apple, cranberry, chutney, or a little stuffing-style seasoning.
  • Bakery-style sausage rolls: keep the filling simple, use well-seasoned sausages, chill before baking, and egg wash generously.

When adding vegetables, be careful with moisture. Carrot, zucchini, mushrooms, spinach, and apple can all work, but watery ingredients should be cooked, squeezed, or used sparingly so the pastry does not turn soggy. For a completely different sausage dinner, this smoky kielbasa pasta is better when you want a full meal instead of a pastry snack.

Vegetarian, Vegan, Gluten-Free, and Lighter Sausage Rolls

Vegetarian, vegan, gluten-free, and lighter sausage rolls can all work, but they need the same care as the classic version. The filling needs body, the pastry needs to stay cool, and anything watery needs to be cooked, squeezed, or used sparingly before it is wrapped.

Vegetarian Sausage Rolls

For vegetarian sausage rolls, build savoriness first. Mushrooms, lentils, cheese, paneer, onions, herbs, and plant-based sausage can all work, but the mixture should be thick enough to shape into a log. If it slumps before baking, it will likely soften the pastry.

Vegan Sausage Rolls

For vegan sausage rolls, use vegan puff pastry and a plant-based filling. Replace egg wash with plant milk, aquafaba, or a little oil depending on the finish you want. Check both the pastry and the filling: many puff pastries are accidentally vegan, but not all are.

Gluten-Free Sausage Rolls

For gluten-free sausage rolls, check the pastry, sausage, breadcrumbs, mustard, and sauces. Gluten-free pastry can crack more easily, so let it soften just enough to fold, then chill again before baking if it turns sticky or fragile.

Healthy or Lighter Sausage Rolls

For a lighter version, make smaller rolls, use leaner sausage or chicken/turkey filling, add cooked vegetables, and serve with salad instead of heavier sides. Keep the promise honest: these are lighter sausage rolls, not diet food. Puff pastry and sausage are still rich ingredients.

What to Serve with Sausage Rolls

The best sausage rolls do not need much around them; they just need contrast. Add one sharp thing, one fresh thing, or one dip that cuts through the buttery pastry and makes people reach for another. A crisp wedge salad works especially well because the cold lettuce and creamy dressing balance the hot, flaky pastry.

Warm sausage rolls served on a wooden board with mustard, chutney, pickles, and green salad.
Sharp mustard, chutney, pickles, or fresh salad cut through the buttery pastry and make sausage rolls feel complete on the plate.
  • Sharp: English mustard, Dijon mustard, brown sauce, steak sauce, onion chutney, apple chutney, or pickles.
  • Fresh: green salad, wedge salad, slaw, cucumber salad, or a simple tomato salad.
  • Cozy: baked beans, soup, mashed potatoes, potato wedges, or chips.
  • Party-style: ketchup, creamy dips, chutney, mustard, pickles, or a cheese ball.

For a party platter, serve mini sausage rolls with two or three dips rather than too many sides. In lunchboxes, cool the rolls completely before packing so the pastry does not steam itself soft. On another sausage dinner night, this slow cooker sausage casserole gives you the opposite comfort-food mood: soft sausages, beans, vegetables, and a spoonable sauce.

FAQs About Sausage Rolls

Do you need sausage meat for sausage rolls?

No. Sausage meat is convenient, but regular sausages work well. Slit the skins, squeeze out the meat, and loosen the filling before shaping.

Do you cook sausage meat before making sausage rolls?

No. The sausage meat usually goes into the pastry raw and cooks as the pastry bakes. Cook only the onion, garlic, or watery vegetables first, then cool them before mixing. The filling is done at 160°F / 71°C for pork or beef, and 165°F / 74°C for chicken or turkey.

How do you make sausage rolls with regular sausages?

Remove the skins, loosen the meat with a fork, shape it into logs, and roll it inside cool puff pastry. Season only if needed because most sausages are already salted.

What pastry is best for sausage rolls?

Puff pastry is best for classic sausage rolls because it bakes flaky, crisp, and golden. All-butter puff pastry gives the richest flavor, but standard ready-rolled puff pastry works well if you keep it cool.

Can you use crescent dough instead of puff pastry?

Yes, but the result will be softer and breadier. Puff pastry gives the classic flaky sausage roll texture. Crescent dough is better for a quick shortcut than for a bakery-style sausage roll.

How long do sausage rolls take to cook?

Large sausage rolls usually take 25–30 minutes at 200°C / 400°F, or 180°C fan. Medium rolls usually take 22–25 minutes, while mini sausage rolls usually take 18–22 minutes. Frozen unbaked rolls need extra time.

What temperature should sausage rolls be cooked at?

Cook sausage rolls at 200°C / 400°F, or 180°C fan, for the best balance of puffed pastry and cooked filling. For reheating, use a slightly lower temperature such as 180°C / 350°F, or 160°C fan.

How do you know sausage rolls are cooked inside?

Use three checks: browned pastry, a base that lifts cleanly from the paper, and hot filling in the center. For thick rolls, use a thermometer rather than color alone.

Why is my sausage roll filling still pink?

Some sausage fillings stay slightly pink because of seasoning, curing ingredients, or the type of meat used. Use temperature, not color alone, as the final check. Pork or beef filling should reach 160°F / 71°C, and chicken or turkey filling should reach 165°F / 74°C.

Why are my sausage rolls soggy underneath?

Usually, moisture got trapped somewhere: wet filling, warm pastry, underbaking, or cooling on a tray. Breadcrumbs, a hot bake, and a wire rack solve most of it.

Why did my sausage rolls burst open?

Sausage rolls usually burst open when they are overfilled, sealed weakly, or baked seam-side up. Leave a pastry border, seal with a little egg wash, press gently, and bake seam-side down.

Should sausage rolls be frozen before or after baking?

Before baking is best. Shape and cut the rolls, freeze them on a tray, then store them in a freezer-safe bag or container. They bake up fresher because the pastry gets its first full bake from frozen.

Can sausage rolls be served cold?

Yes, sausage rolls can be served cold once they are fully cooked and properly cooled. They are best warm if you want crisp pastry, but cold rolls work well for lunchboxes, picnics, and party platters. Keep leftovers refrigerated.

How do you keep sausage rolls warm for a party?

Keep sausage rolls in a low oven, loosely covered, so steam can escape. Avoid wrapping them tightly while hot. If the pastry softens, refresh the rolls in the oven or air fryer for a few minutes before serving.

How do you reheat sausage rolls without making them soft?

Reheat sausage rolls in the oven at 180°C / 350°F for 8–12 minutes or in the air fryer for 4–6 minutes. Avoid the microwave if you want crisp pastry.

What is the best way to make mini sausage rolls?

Use thinner filling logs, then cut each long roll into small pieces before baking. Mini sausage rolls usually bake in 18–22 minutes at 200°C / 400°F, or 180°C fan.

Final Tip for Better Sausage Rolls

Good sausage rolls come down to three things: filling that tastes good before it goes in, pastry that stays cool and relaxed, and a bake that goes far enough for real color. Once those are right, the same base method works for regular sausages, mini party rolls, freezer batches, and air fryer snacks.

Make the first batch plain and classic. After that, sausage rolls become the kind of recipe you can adapt without overthinking: a warm tray for dinner, a freezer stash for later, lunchbox rolls for the next day, or the party snack people keep circling back to while pretending they are only having one more.

Back to top

Posted on Leave a comment

Peanut Sauce Recipe for Spring Rolls, Satay, Noodles & Chicken

Bowl of creamy peanut sauce with spring rolls, noodles, lime wedges, herbs and crushed peanuts on a dinner table.

This is the peanut sauce you make when dinner is almost there but needs one creamy, salty-sweet thing to pull it together. It is rich from peanut butter, bright with lime and rice vinegar, warm with ginger and garlic, and easy to adjust depending on what is on the plate.

The promise is simple: one 5-minute peanut sauce, adjusted by texture. Make it easy to dip with spring rolls, warmer and richer for satay-style chicken or tofu skewers, looser for noodles, and brighter for salads or slaw.

Once you understand how the sauce should behave, the recipe becomes more than a dip. It becomes the jar that helps fresh rolls, plain noodles, grilled chicken, crispy tofu, rice bowls, vegetables, and leftovers feel like dinner. This is the kind of sauce that makes you feel like you planned dinner, even when you mostly assembled it.

Quick Answer: How to Make Peanut Sauce

To make peanut sauce, whisk the soy sauce or tamari, rice vinegar, lime juice, sweetener, chili sauce, ginger, garlic, and sesame oil first, then whisk in peanut butter and water until the sauce comes together. Start with less liquid, then add more until the sauce matches the food you are serving.

Rule one: fix texture before flavor. A thick peanut sauce can taste saltier, sweeter, and heavier than it really is, so get it close to the right consistency first. Then adjust with lime, soy sauce, sweetener, or chili.

Once the base comes together, the question is not only “is it smooth?” but “will it behave on the food?” If you are unsure, use the texture guide before adding all the liquid.

Jump to

5-Minute Peanut Sauce Recipe

Recipe name: Peanut Sauce Recipe

Prep time: 5 minutes
Cook time: 0 minutes
Total time: 5 minutes
Yield: About 1 to 1¼ cups / 240 to 300 ml, depending on how much water you add
Servings: 8 to 10
Serving size: About 2 tablespoons / 30 ml

Best as a dip: spring rolls, satay, lettuce wraps, dumplings, rice paper rolls
Best as a sauce: noodles, chicken, tofu, salads, rice bowls, roasted vegetables, slaw

Equipment: bowl and whisk or fork. Optional: jar for storage, grater for fresh ginger and garlic, small saucepan for the satay-style variation.

Ingredients

Line up the peanut sauce ingredients before you start so the balance is clear: nutty body, salty depth, tang, heat and just enough sweetness.

Peanut sauce ingredients including peanut butter, soy sauce, lime, rice vinegar, ginger, garlic, chili sauce, sweetener and sesame oil.
Peanut butter gives the sauce body, while soy sauce, lime, vinegar, ginger, garlic and chili give it balance. Together, they keep the peanut sauce savory enough for dinner instead of sweet and flat.
IngredientAmount
Creamy natural peanut butter½ cup / about 128 g
Low-sodium soy sauce or tamari2 tablespoons / 30 ml
Rice vinegar1 tablespoon / 15 ml
Fresh lime juice1 tablespoon / 15 ml
Maple syrup or honey1 to 2 tablespoons / 15 to 30 ml
Brown sugar, if using instead1 to 2 tablespoons / about 12 to 25 g
Sriracha or chili garlic sauce1 to 2 teaspoons / 5 to 10 ml
Fresh grated ginger1 teaspoon / about 2 g
Garlic1 small clove, finely grated, about 3 g
Toasted sesame oil, optional1 teaspoon / 5 ml
Warm water3 to 6 tablespoons / 45 to 90 ml, plus more as needed

Instructions

Start the peanut sauce by mixing the salty, tangy and spicy ingredients before the peanut butter goes in.

Soy sauce, lime juice, rice vinegar, chili sauce, ginger, garlic and sesame oil being whisked in a bowl before peanut butter is added.
First, whisk the salty, tangy and spicy ingredients together. Then the peanut butter blends into a balanced base instead of forcing you to fix the flavor later.
  1. Add the soy sauce or tamari, rice vinegar, lime juice, sweetener, chili sauce, ginger, garlic, and sesame oil to a medium bowl. Whisk briefly so the salty, tangy, spicy ingredients come together first.
  2. Add the peanut butter and whisk until the mixture looks thick, dark, and mostly combined. It may look stubborn before it turns silky.
  3. Add warm water or another thinning liquid 1 tablespoon at a time, whisking well after each addition.
  4. Stop when the texture matches the food you are serving. Satay can stay thicker, spring roll dip should glide, and noodles or salad dressing need more flow.
  5. Taste and adjust. More lime or vinegar helps if it tastes heavy, soy sauce or tamari helps if it tastes flat, sweetener softens sharpness, and chili adds heat.
  6. Serve right away, or store in an airtight jar in the fridge and re-whisk with a splash of water before using.

Recipe Notes

  • The 3 to 6 tablespoons water gives you a standard dip or drizzle. Noodles and salad dressing usually need more.
  • Warm liquid helps peanut butter loosen faster than cold liquid.
  • Natural peanut butter often needs more patience because it can start thicker, stiffer, or more separated than regular creamy peanut butter.
  • Regular sweetened peanut butter works, but start with less sweetener. The sauce should taste like peanut butter went to dinner, not dessert.
  • The sauce thickens as it sits, especially after refrigeration. If it has already thickened, jump to storage and make-ahead before changing the flavor.
  • For chicken, use this as a dip, drizzle, or finishing sauce. Keep any sauce that touches raw chicken separate from the serving sauce, and cook chicken to 165°F / 74°C.
  • Since this is peanut-based, check for peanut allergies before serving it to guests and read labels on bottled sauces if allergies are a concern.

Texture Guide for Spring Rolls, Satay, Noodles and More

If your sauce looks clumpy, tastes too heavy, or turns noodles sticky, you probably have not ruined anything. Peanut sauce is usually a texture problem before it is a flavor problem.

Clumps usually mean the sauce needs liquid and whisking, not a full restart.

Thick clumpy peanut sauce in a bowl with whisk marks before enough liquid has been added.
At first, peanut sauce can look clumpy and stubborn. Instead of starting over, add liquid slowly and keep whisking until the mixture turns smooth and cohesive.

The mistake most people make is stopping when the sauce looks smooth. Peanut sauce is not done until it behaves right on the food. A spring roll dip should glide, satay sauce should cling, noodle sauce should fall from the spoon in a loose stream, and dressing should pour easily.

How to Read the Sauce Texture

Thin the sauce gradually so you can stop at dip, drizzle, noodle sauce or dressing instead of overshooting the texture.

Water being added by spoon to thick peanut sauce while a whisk rests in the bowl.
Add liquid one spoonful at a time and watch how the sauce changes. Stop when it loosens for the job you need: thick dip, noodle sauce or pourable peanut dressing.
UseSauce Should Look LikeAdd This Much LiquidServe It
Spring rollsSoft sheen, easy to dip, clings lightly to rice paperAbout 4 to 6 tablespoons water totalRoom temperature or slightly chilled
SatayThicker, warm, spoonable, not mounded like pasteAbout 2 to 4 tablespoons water, or use the coconut milk variationWarm
NoodlesLoose stream from the spoon, easy to tossAbout 6 to 8 tablespoons hot water or noodle waterWarm or opened up with hot water
Salad dressingPourable, bright, thinner than dipping sauceExtra water plus more lime juice or rice vinegarChilled or room temperature
ChickenMedium-thick dip or drizzleKeep it savory and not too sweetRoom temperature or warm
TofuThicker for coating, thinner for bowlsAdd extra chili and lime for punchRoom temperature or warm
Rice bowlsSlow drizzle, not wateryThin slightly and re-whisk before servingRoom temperature

Use this visual guide when you are deciding whether the sauce should cling, glide, coat or pour.

Three spoons holding different peanut sauce textures for satay, spring rolls and noodles.
This is the texture rule worth saving: thicker peanut sauce clings to satay, softer sauce works for spring rolls, and looser sauce coats noodles without grabbing them.

Before you taste, fix the texture: peanut butter can look clumpy or slightly broken before it turns silky. Keep whisking, add liquid slowly, and taste only after the sauce is close to the consistency you want. A sauce that is too thick will taste saltier, sweeter, and heavier than it really is.

When in doubt, keep it a little thicker at first. You can always add a splash more liquid, but it takes extra peanut butter to fix a sauce that has gone too thin.

Why This Peanut Sauce Works

The finished sauce should not taste like sweet peanut butter. It should taste nutty first, then salty, tangy, lightly sweet, and gently spicy at the end.

Peanut butter gives body and nutty richness. Soy sauce or tamari gives dinner-level savoriness. Lime juice and rice vinegar cut the heaviness. Sweetener rounds the sharp edges. Ginger, garlic, and chili keep the sauce lively instead of flat.

Water is not filler here. It is the texture tool. A little gives the sauce enough body for dipping; more turns it into a noodle sauce or dressing. That is why the same bowl can taste right with cool rolls, hot noodles, grilled chicken, tofu, or a pile of vegetables. If the sauce already tastes off, check the troubleshooting table before adding more soy sauce, sugar or lime.

If the sauce tastes like peanut butter first and dinner second, it usually needs salt, acid, or chili before it needs more sweetness.

Ingredients and Smart Swaps

Peanut Butter

Creamy natural peanut butter gives the cleanest peanut flavor. If your jar has separated, stir it well before measuring. Homemade peanut butter also works well if you want more control over roast, salt, and texture.

Regular creamy peanut butter works too, but it is usually sweeter, so start with less sweetener. Crunchy peanut butter is fine if you like texture, especially for satay-style sauce or rice bowls.

Soy Sauce or Tamari

Low-sodium soy sauce keeps the sauce savory without pushing it too salty. Tamari is the best swap for gluten-free peanut sauce, as long as the label says gluten-free. Coconut aminos can work for a soy-free version, but it is sweeter and less salty, so adjust with salt and lime at the end.

Rice Vinegar and Lime Juice

Rice vinegar gives a clean tang; lime makes the sauce taste fresher. Together, they keep peanut butter from feeling heavy. Apple cider vinegar or white vinegar can work in a pinch, especially for a satay-style version.

Sweetener

Maple syrup keeps the sauce vegan and blends easily. Honey gives rounder sweetness. Brown sugar adds deeper flavor, especially in satay-style peanut sauce. When your peanut butter is already sweet, let the lime and soy sauce lead before adding more sugar.

Chili Sauce

Sriracha, chili garlic sauce, sambal, or chili crisp can all work. One teaspoon keeps the heat mild; two or more pushes it into spicy peanut sauce territory. For the satay-style variation, red curry paste adds better depth than sriracha alone.

Garlic and Ginger

Fresh grated garlic and ginger make the sauce taste alive. Grating them finely helps them disappear into the sauce instead of leaving sharp pieces. If raw garlic is too strong for you, use half a clove or a small pinch of garlic powder.

Sesame Oil

Toasted sesame oil is optional, but a small amount gives the sauce a deeper, nuttier flavor. Use it lightly because peanut butter is already rich.

Coconut Milk

Coconut milk is not required for the 5-minute sauce. Water keeps it quick, bright, and flexible.

Coconut milk is what makes the satay-style version feel rounder and warmer. Use it for skewers, grilled chicken, tofu satay, or roasted vegetables. Coconut cream makes the sauce thicker and more luxurious, while regular coconut milk keeps it smoother and more pourable. Making skewers? Jump to the satay-style peanut sauce variation. If you like that coconut-curry direction, the same balance shows up in Chicken Panang Curry, where peanut stays in the background instead of taking over like satay sauce.

Hoisin Sauce

Hoisin is not part of the main sauce, but it is very useful for a Vietnamese-style spring roll dip. It adds sweetness, body, and a deeper savory flavor that works beautifully with rice paper rolls, shrimp rolls, and fresh vegetable rolls.

Peanut Sauce for Spring Rolls

For spring rolls, fresh rolls, summer rolls, and rice paper rolls, the dip should be smooth enough for dipping but thick enough to cling. When it sits on the roll like paste, it needs more liquid. When it runs off immediately, it needs more peanut butter.

Start with the sauce as written and add liquid until it becomes easy to dip. A little extra lime juice or rice vinegar also helps because fresh rolls are usually full of cool vegetables, herbs, shrimp, tofu, or noodles. A good spring roll dip should catch on the rice paper, slide over the herbs and vegetables, and leave a little peanut richness behind.

Use fresh spring rolls as a texture check: the dip should feel light around herbs and vegetables while still leaving a creamy coat.

Fresh rice paper spring rolls cut open and served with peanut sauce, herbs and lime.
The dip should coat rice paper lightly, then get out of the way so the herbs, vegetables and filling still taste fresh.

How to Adjust the Sauce for Spring Rolls

  • Vegetable-heavy rolls taste better with a little extra lime juice or rice vinegar.
  • Shrimp rolls can handle a slightly sweeter dip, which is where the hoisin variation works especially well.
  • Tofu rolls benefit from chili crisp, extra ginger, or crushed peanuts for more punch.

  • A dip that drags across rice paper needs a small splash of water until it glides.
  • A dip that slides off the roll needs a small spoon of peanut butter to bring back body.

Before moving to the hoisin variation, check the basic spring roll texture: the dip should coat rice paper without dragging.

Fresh spring roll dipped into peanut sauce that clings lightly to the rice paper wrapper.
For spring rolls, the dip should leave a light coat on the rice paper. Too much drag means it needs liquid; too much slide means it needs more body.

Vietnamese-Style Hoisin Peanut Sauce for Rice Paper Rolls

Use this version when spring rolls are the main event. Hoisin gives the dip the darker, sweeter body people often expect with rice paper rolls, while peanut butter keeps it creamy and rich.

The hoisin version should look darker and glossier than the everyday peanut sauce, especially for rice paper rolls.

Dark Vietnamese-style hoisin peanut sauce served with rice paper rolls and crushed peanuts.
When rice paper rolls are the main event, hoisin gives peanut sauce a darker, sweeter body. After mixing, add lime or vinegar if the dip starts tasting too sweet.

Use this quick formula:

  • ½ cup peanut sauce
  • 1 tablespoon hoisin for lighter sweetness, or 2 tablespoons for a deeper dip
  • 1 to 3 tablespoons water, milk, or coconut milk, as needed
  • ½ teaspoon chili garlic sauce, optional
  • Crushed peanuts, optional, for finishing

Whisk until the dip has a soft sheen. It should be looser than satay sauce but thicker than salad dressing. Too sweet? Add lime juice or rice vinegar. Too thick? Add liquid a spoonful at a time.

This is the variation to reach for when the meal is built around fresh rolls, shrimp rolls, or rice paper rolls and you want a dip that feels complete on its own.

Satay-Style Peanut Sauce

Satay sauce is usually richer, warmer, and thicker than a quick peanut dipping sauce. Depending on the region and recipe, more traditional versions may use roasted peanuts, coconut milk, curry paste, tamarind, palm sugar, fish sauce, or other aromatics.

Think of this as the weeknight bridge between a quick peanut dip and a fuller satay sauce. Start with the 5-minute base, then add coconut milk and curry paste for depth. Warmth changes everything here: the sauce softens, the curry paste blooms, and the peanut flavor feels rounder before it ever reaches the skewers.

Use this as a satay-style shortcut, not as a claim that all satay sauces are the same. It works well with chicken satay, tofu satay, grilled paneer, roasted vegetables, and rice bowls because it clings well and tastes more complete with grilled food.

Satay-Style Peanut Sauce Variation

Coconut milk and curry paste turn the quick peanut sauce into a warmer satay-style sauce for skewers and grilled food.

Coconut milk and red curry paste being stirred into peanut sauce in a saucepan.
For satay-style peanut sauce, coconut milk and curry paste add warmth and depth. Warm it gently so the curry paste blooms without reducing the sauce into paste.
  • ½ cup peanut sauce
  • ¼ cup coconut milk or coconut cream
  • 1 to 2 teaspoons red curry paste
  • 1 teaspoon brown sugar, optional
  • ½ teaspoon fish sauce, optional
  • 1 to 2 tablespoons crushed roasted peanuts, optional

Warm everything in a small saucepan over medium-low heat for 3 to 5 minutes, stirring often. Do not hard-boil the sauce. The goal is to warm it, not reduce it into paste. It should be thick, warm, and spoonable, but still loose enough to drizzle over skewers.

If it tightens too much, add water or coconut milk, a spoonful at a time. A squeeze of lime or splash of rice vinegar helps when the sauce tastes too rich.

For chicken satay, the sauce should be warm, spoonable and thick enough to cling to grilled edges.

Grilled chicken satay skewers with peanut sauce, lime wedges, herbs and crushed peanuts.
Chicken satay needs a peanut sauce that clings to grilled edges without stiffening. If the sauce tightens as it warms, loosen it with a spoonful of water or coconut milk.

Because tofu starts mild, give the satay-style sauce more contrast with lime, chili and crunch.

Grilled tofu satay skewers drizzled with peanut sauce, herbs, chili and crushed peanuts.
Keep the sauce thick enough to cling to grilled tofu, then use lime, ginger, chili and crushed peanuts for contrast.

Is Peanut Sauce the Same as Satay Sauce?

Not always. Peanut sauce is a broad term for sauces made with peanuts or peanut butter. Satay sauce usually refers to the peanut-based sauce served with satay skewers, and it is often warmer, richer, and more deeply seasoned.

For everyday cooking, this sauce can move in a satay-style direction with coconut milk, curry paste, and gentle heat. A very specific Thai, Indonesian, Malaysian, or Singaporean satay sauce may need a more traditional recipe built around that cuisine.

Peanut Sauce for Noodles

This is where the sauce becomes dinner, not just a dip. Noodles need a looser peanut sauce than spring rolls or satay. Peanut butter thickens quickly when it hits warm noodles, and a mixture that looks pourable in the bowl can turn sticky once tossed.

For 2 servings, start with about ½ cup peanut sauce and add 2 to 4 tablespoons hot water or noodle cooking water before tossing. For 8 ounces / 225 g noodles, use ½ to ¾ cup sauce, depending on how saucy you like your noodles.

Before sauce meets noodles, it should already move in a loose stream from the spoon.

Loose peanut sauce falling from a spoon to show the texture needed for noodles.
For noodles, the sauce should fall from the spoon in a loose stream before tossing. Otherwise, peanut butter can tighten around warm noodles and make the bowl sticky fast.

The idea is similar to glossy pasta sauces: loosen first, then toss. The same idea shows up in pesto pasta, where pasta water keeps the sauce glossy instead of oily or dry.

Pour the peanut sauce over noodles only after it has enough movement to coat the strands evenly.

Peanut sauce being poured over noodles before tossing, with vegetables and herbs nearby.
Before tossing noodles, loosen the peanut sauce until it moves easily. As a result, it coats the strands evenly instead of grabbing them into sticky clumps.

Sometimes the bowl looks perfect, then tightens while you are setting the table. Do not panic. Add hot water or noodle water, a spoonful at a time, and toss again until the sauce relaxes around the noodles instead of grabbing them. If it keeps clumping, jump to how to fix peanut sauce.

Tips for Peanut Noodles

  • Hot water or noodle water helps the sauce loosen cleanly; cold water can make it tighten.
  • Make the sauce looser before adding it to the noodles.
  • Toss gradually instead of dumping everything in at once.
  • Lime juice or rice vinegar helps when the noodles taste heavy.
  • Soy sauce or tamari helps when the noodles taste flat.
  • Cold peanut noodles need a looser sauce because it thickens as it chills.

Toss it with rice noodles, spaghetti, ramen, soba, udon, or egg noodles. Add cucumber, carrots, cabbage, scallions, cilantro, mint, edamame, tofu, chicken, shrimp, or a fried egg to turn it into a full meal.

Once the sauce is coating properly, fresh toppings finish the noodle bowl and keep it from tasting heavy.

Peanut sauce noodle bowl with vegetables, herbs, lime, chili and crushed peanuts.
Once the noodles are coated, add crunch, herbs, lime and protein to turn peanut sauce noodles into dinner. The finish should taste fresh, not just creamy.

Peanut Sauce for Chicken, Tofu and Bowls

This is where peanut sauce earns its place in the fridge: plain chicken, tofu, rice, and vegetables suddenly taste like a planned meal. The trick is matching the texture to the job, not pouring the same thickness over everything.

UseBest TextureBest Adjustment
Grilled chickenMedium-thick drizzleAdd lime after cooking so the sauce tastes bright, not heavy
Chicken rice bowlsSlow drizzleKeep it savory enough to season the rice
Peanut chicken noodlesLoose, tossable sauceUse hot water or noodle water before tossing
Crispy tofuThicker coating sauceAdd chili crisp, extra ginger, or crushed peanuts
Tofu bowlsDrizzle-able but not wateryAdd lime and tamari so the tofu does not taste flat
Lettuce wrapsEasy dip with bodyAdd lime and herbs for freshness

Chicken

Spoon it over cooked chicken, serve it as a dip for grilled chicken, or use the warm satay-style version with skewers. Plain baked chicken works well here because the sauce brings most of the flavor. Once the chicken is cooked, you can slice it into bowls, tuck it into lettuce wraps, or serve it beside spring rolls and cucumber salad.

Everyday chicken needs a peanut sauce that drizzles cleanly and seasons the plate without turning sweet.

Sliced grilled chicken with peanut sauce, white rice, cucumber, lime and herbs.
For everyday chicken, keep the sauce savory and medium-thick. It should drizzle over the slices, season the rice and stay balanced without tasting dessert-sweet.

Tofu

Tofu can take this sauce in two directions. Keep it thicker if you want to coat crispy tofu, or make it slightly looser if you want to drizzle it over a tofu bowl. Tofu loves a bolder sauce because it gives the peanut, lime, chili, and ginger room to show up.

For crispy tofu, keep the sauce thick enough to coat without covering every crunchy edge.

Crispy golden tofu cubes with peanut sauce, chili, herbs, lime and crushed peanuts.
Crispy tofu can take a thicker peanut sauce because the edges stay sturdy. Then chili, lime, ginger and crushed peanuts help the tofu taste bold instead of bland.

For a vegan version, maple syrup or brown sugar keeps the sweetness simple. Gluten-free bowls work best with tamari for the same savory depth. When you need a soy-free version, use coconut aminos and adjust with salt and lime at the end.

Rice Bowls and Meal Prep

In rice bowls, aim for a slow drizzle, not a watery pour. It should settle into the rice, vegetables, and protein without disappearing. Fluffy rice matters because it can hold the sauce without turning gummy.

Rice bowls need a slow drizzle that settles into the grains and makes leftovers feel intentional.

Rice bowl with tofu, vegetables, herbs, lime and peanut sauce being drizzled from a spoon.
In rice bowls, aim for a slow peanut sauce drizzle that settles into the grains without disappearing. This is where leftover rice and vegetables start to feel planned.

When meal prepping, store the sauce separately. It will thicken in the fridge, so re-whisk it with a splash before adding it to bowls, noodles, or salads. A jar of peanut sauce can make leftover rice, roasted vegetables, cooked chicken, tofu, or even plain cucumber feel intentional.

For a full bowl meal, the same creamy-salty idea works beautifully in a Thai-style vegan bowl with peanut butter dressing.

Peanut Dressing for Salads, Slaw and Bowls

To make peanut dressing for salad, slaw, or cold noodle salad, use more liquid than you would for dipping. It should pour easily from a spoon and taste brighter than satay sauce.

Start with ½ cup peanut sauce, then whisk in 2 to 4 tablespoons water. Add 1 to 2 teaspoons extra lime juice or rice vinegar if the dressing tastes heavy. A good peanut dressing should taste a little brighter than you think, because raw vegetables soften its sharpness once everything is tossed.

For salad and slaw, the sauce has to pour easily and taste brighter than it would as a dip.

Pourable peanut dressing being drizzled over cabbage, cucumber and carrot slaw.
For slaw and salads, make the peanut dressing brighter and thinner than a dip. Once it hits cabbage, cucumber and carrots, the extra tang keeps everything fresh instead of heavy.

Once it hits cabbage, cucumber, herbs, or shredded carrots, that extra brightness settles into balance. Use it on cabbage slaw, Thai peanut salad, cold noodle salad, lettuce wraps, grilled vegetables, or shredded chicken salad. It also works beautifully beside a crisp cucumber salad, especially when the meal has satay-style chicken, tofu, noodles, or grilled vegetables.

Rich toppings like avocado, fried tofu, or chicken need more lime. Mostly raw vegetables can handle a dressing that is a little sweeter and saltier.

Everyday Peanut Sauce, Vietnamese-Style Hoisin Dip and Satay-Style Sauce

Peanut sauce can mean different things depending on the dish. This recipe is an everyday peanut-butter sauce for home cooking, not a claim that all peanut sauces are the same. Traditional and regional versions may use roasted peanuts, tamarind, palm sugar, fish sauce, coconut milk, hoisin, curry paste, or other aromatics depending on the cuisine and dish.

Use the color and thickness of the sauce to understand which direction it has moved: everyday dip, hoisin dip or satay-style sauce.

Three bowls showing light peanut sauce, darker hoisin peanut dip and golden satay-style peanut sauce.
One peanut sauce base can move in three directions: everyday dip, Vietnamese-style hoisin peanut sauce or warmer satay-style sauce. The color and thickness show where it belongs.
  • Thai-inspired home-cooking peanut sauce: often a flexible peanut butter sauce with soy or tamari, lime, rice vinegar, chili, ginger, garlic, and water. Use it for dipping, noodles, chicken, tofu, bowls, and salads.
  • Vietnamese-style spring roll sauce: often brings in hoisin with peanut butter, garlic, and water, milk, or coconut milk. Use it for fresh spring rolls, rice paper rolls, shrimp rolls, and summer rolls.
  • Satay-style peanut sauce: usually richer, thicker, and often warm, sometimes with coconut milk, curry paste, fish sauce, or crushed peanuts. Use it for chicken satay, tofu satay, skewers, and grilled vegetables.

The main sauce here is flexible and quick. Add hoisin, and it moves toward a Vietnamese-style spring roll dip. Stir in coconut milk and curry paste, and it becomes warmer, richer and closer to a satay-style sauce.

Substitutions and Variations

This is where peanut sauce is forgiving, but not automatic: every swap changes the balance a little. Use the table as a starting point, then taste again once the texture is right.

NeedUseWatch Out For
Gluten-free peanut sauceTamari or certified gluten-free soy sauceCheck labels on hoisin, chili sauce, and curry paste
Soy-free peanut sauceCoconut aminosAdd salt and lime because coconut aminos are sweeter and less salty
Vegan peanut sauceMaple syrup or brown sugar instead of honeySkip fish sauce in the satay-style variation
Richer satay-style sauceCoconut milk or coconut creamAdd lime or vinegar if it tastes too heavy
Vietnamese-style dipHoisin added to the base sauceAdd lime or vinegar if it tastes too sweet
Spicy peanut sauceSriracha, chili garlic sauce, sambal, chili crisp, or red pepper flakesAdd heat slowly; peanut butter can hide spice at first
Mild peanut sauceSkip chili sauce or use a tiny pinch of chili flakesAdd extra ginger or lime so it does not taste flat
More textureCrushed roasted peanuts or blended roasted peanutsAdd extra liquid if the sauce thickens

Emergency 3-Ingredient Peanut Sauce

If you do not have all the ingredients, you can still make a quick peanut sauce. It will not taste as layered as the full version, but it works for noodles, dipping, wraps, or a fast bowl sauce.

Simple Version

  • 3 tablespoons peanut butter
  • 1 tablespoon soy sauce or tamari
  • 1 to 3 tablespoons warm water

Whisk everything together until smooth. Add lime juice, rice vinegar, chili sauce, garlic, or sweetener if you have them.

Better 3-Ingredient Version

  • 3 tablespoons peanut butter
  • 1 tablespoon soy sauce or tamari
  • 1 tablespoon lime juice or rice vinegar

Whisk with enough liquid until the sauce reaches the texture you need. This version tastes more balanced because the acid cuts through the peanut butter.

How to Fix Peanut Sauce

Most peanut sauce problems are not recipe failures; they are texture problems. Too thick, too salty, too heavy, grainy, separated, or sticky on noodles usually means the sauce needs one small adjustment, not a full restart.

Rule one still applies: fix texture first, then salt, then acid, then sweetness, then heat. If the problem happened after chilling, the storage and make-ahead fix may be all you need.

Fix Texture First, Then Flavor

If the noodles clump, treat it as a sauce-texture problem before you change the flavor.

Chopsticks lifting peanut noodles that have clumped because the sauce is too thick.
If peanut noodles turn sticky, the sauce usually needs hot water or noodle water, not a remake. Add a spoonful, toss again and let the sauce relax around the noodles.
ProblemWhy It HappenedFix
Too thickPeanut butter seized, not enough water, or sauce chilledWhisk in warm water 1 tablespoon at a time
Too thinToo much liquid was addedAdd peanut butter 1 tablespoon at a time
Too saltyToo much soy sauce, tamari, or fish sauceAdd peanut butter, lime juice, sweetener, or water
Too sweetToo much sugar, honey, maple syrup, or hoisinAdd lime juice, rice vinegar, chili, or soy sauce
Too spicyToo much chili sauce or curry pasteAdd peanut butter, coconut milk, sweetener, or water
GrainyNatural peanut butter, cold liquid, or poor mixingUse warm water and whisk hard, or blend briefly
Oily or separatedPeanut butter separated, sauce chilled, or sauce overheatedRewarm gently and whisk in warm water
BlandNeeds salt, acid, heat, or aromaticsAdd soy sauce or tamari, lime, vinegar, ginger, garlic, or chili
Too heavyToo much peanut butter or not enough acidAdd lime juice, rice vinegar, water, and fresh herbs
Noodles turned stickyThe sauce thickened after tossingAdd hot water or noodle water and toss again

Noodles need the loosest sauce. Satay can stay thicker and warmer. Spring rolls need a dip that coats the rice paper but still feels easy to bite through.

Storage and Make-Ahead

Store peanut sauce in an airtight jar or container in the fridge for up to 1 week. It will thicken as it chills, so do not judge the texture straight from the fridge.

Straight from the fridge, peanut sauce can look hopeless, but it is not broken; it is just waiting for a splash of water and a firm whisk. Let it sit for a few minutes before adding too much liquid, because the sauce often softens as it warms slightly.

A short rest and a firm whisk are usually enough to bring refrigerated peanut sauce back.

Glass jar of thick refrigerated peanut sauce beside a bowl of re-whisked pourable peanut sauce.
After chilling, peanut sauce often looks thicker than expected. Let it sit briefly, then re-whisk with a splash of water until it flows again.

Noodles usually need more liquid than you expect. Spring roll dip only needs enough water to flow again. Satay-style sauce is best rewarmed gently, then loosened with water or coconut milk.

You can freeze peanut sauce if needed, but the texture may change after thawing. Thaw it in the fridge, then whisk or blend it with a splash of warm water until smooth.

What to Serve with Peanut Sauce

Once the sauce is in the fridge, the question becomes less “what recipe am I making?” and more “what needs help tonight?” Use it where you want something fresh and cool, warm and grilled, dinner-like, or snacky and dippable.

MoodServe It With
Fresh and coolFresh spring rolls, rice paper rolls, summer rolls, shrimp rolls, cabbage slaw, cucumber salad, Vegan Som Tam / Thai raw papaya salad
Warm and grilledChicken satay, tofu satay, grilled chicken, grilled paneer or tofu skewers, roasted shrimp, roasted vegetables
Full dinnerPeanut noodles, rice noodles, cold noodle salad, rice bowls, chicken bowls, tofu bowls, roasted vegetable bowls
Snacky and dippableLettuce wraps, dumplings, potstickers, fresh vegetables, crispy tofu bites

If the sauce is going over something rich, add more lime or vinegar. If it is going over plain rice, noodles, or vegetables, keep it a little saltier and spicier so it can carry the whole bowl. For a thicker Indian peanut condiment rather than a pourable sauce, try peanut chutney.

FAQ

What is peanut sauce made of?

Peanut sauce is usually made with peanut butter or ground peanuts, soy sauce or tamari, vinegar or lime juice, sweetener, chili, garlic, ginger, and water. Some satay-style versions also use coconut milk, curry paste, fish sauce, tamarind, or crushed roasted peanuts.

Is peanut sauce the same as satay sauce?

Not exactly. Peanut sauce is broad; satay sauce usually means the richer peanut-based sauce served with satay skewers.

Do you serve peanut sauce warm or cold?

Serve it room temperature or slightly chilled for spring rolls, warm for satay, and loosened with hot water for noodles. For salad dressing, chilled or room temperature both work.

How do you thin peanut sauce for spring rolls?

Add water 1 tablespoon at a time until the sauce is easy to dip. It should cling lightly to the spring roll without feeling pasty or running off immediately.

Why did my peanut sauce get so thick?

It thickens because peanut butter absorbs liquid and firms up as it sits, especially in the fridge. Whisk in a splash of water at a time until it relaxes again.

What peanut butter works best for peanut sauce?

Creamy natural peanut butter gives the cleanest peanut flavor. Regular creamy peanut butter also works, but it is usually sweeter, so start with less sweetener. Crunchy peanut butter works if you do not mind a textured sauce.

How long does peanut sauce last in the fridge?

It keeps well in an airtight jar in the fridge for up to 1 week. It will thicken as it chills, so whisk in a splash of water before serving.

Is peanut sauce gluten-free?

It can be gluten-free if you use tamari or certified gluten-free soy sauce. Check labels on hoisin, chili sauce, curry paste, and any bottled ingredients because they can vary.

How do you make peanut sauce vegan?

Use maple syrup or brown sugar instead of honey, and skip fish sauce in the satay-style variation. The 5-minute sauce is easy to keep vegan with peanut butter, tamari or soy sauce, lime, vinegar, chili, garlic, ginger, and water.

Can you make peanut sauce without peanut butter?

Yes, but it becomes a different sauce. For a similar creamy dip, use tahini, almond butter, cashew butter, or sunflower seed butter, then adjust salt, acid, sweetness, and liquid to taste. For peanut allergies, do not call it peanut sauce when serving guests; label it clearly.

How much peanut sauce do you need for noodles?

For 2 servings of noodles, start with about ½ cup peanut sauce and thin it with 2 to 4 tablespoons hot water or noodle water before tossing. For 8 ounces / 225 g noodles, use about ½ to ¾ cup sauce depending on how saucy you want them.

Make It Your House Sauce

Make it once, then keep adjusting it by feel. One night, it is a dip for fresh rolls. Another night, it saves plain noodles. Later in the week, it can turn leftover rice, tofu, chicken, or vegetables into a meal you actually meant to make. That is when peanut sauce becomes the jar you are glad to have waiting in the fridge.

If you try it, I would love to know where it landed first: spring rolls, noodles, satay, tofu, or a fridge-cleanout bowl. That is usually the version worth saving and making again.

Posted on Leave a comment

Minestrone Soup Recipe

Bowl of minestrone soup with tomato broth, white beans, kidney beans, small pasta, carrots, zucchini, greens, herbs, and bread on the side.

A good minestrone soup should look generous before you even take the first spoonful: tender vegetables, creamy beans, small pasta, herbs, and a tomato broth that tastes rich instead of watery. The first spoonful should catch a little of everything — a soft bean, a piece of pasta, sweet carrot, zucchini, greens, and enough tomato broth to pull it all together.

This pot works because it protects the three things that matter most in minestrone: rich tomato broth, vegetables with texture, and pasta that does not turn the leftovers into mush. Even a half-used zucchini, a tired carrot, two cans of beans, and the last handful of pasta can become a proper dinner.

Homemade minestrone also gives you something canned soup rarely does: better texture. The vegetables do not have to be overcooked, the pasta can stay tender, and you control the salt, broth, and finish.

Cooking now? Jump to the recipe card. The notes below help keep the broth rich, the vegetables tender, and the leftovers useful.

What a Good Minestrone Spoonful Should Show

Before you start, notice the target balance: beans, vegetables, pasta, greens, and tomato broth should all show up in the same spoonful.

Spoon lifting minestrone soup with small pasta, white bean, kidney bean, carrot, zucchini, greens, and tomato broth dripping back into the bowl.
This spoonful shows the balance you want: beans for body, vegetables for freshness, small pasta for comfort, and tomato broth tying everything together.

Recipe at a Glance

Prep time20 minutes
Cook time45 minutes
Total time1 hour 5 minutes
Faster versionAbout 40 to 45 minutes with smaller diced vegetables, the full 6 cups broth, and a shorter 15 to 20 minute base simmer
Servings6 generous bowls
YieldAbout 11 to 13 cups soup
MethodStovetop
Best pot5 to 6 quart / 5 to 6 liter Dutch oven or heavy soup pot
Best forWeeknight dinner, meal prep, and freezer-friendly soup base
DietMeatless when made with vegetable broth; vegan option

The Minestrone Rule of 5: soften the aromatics, build the tomato base, add beans for body, keep the pasta small, and save tender greens for the end. Vegetables can change; the rhythm is what keeps the pot balanced.

Why this works: tomato paste gives the soup depth, beans make it feel full, late-added vegetables keep their shape, and pasta goes in only when the broth already tastes good. That is what keeps the soup hearty without letting it turn heavy or dull.

The Minestrone Rule of 5

This visual is the memory hook for the whole recipe: keep the rhythm steady, even when the vegetables change.

Rustic board showing minestrone ingredients arranged as aromatics, tomato base, beans, small pasta, and leafy greens.
Use the Minestrone Rule of 5 when you want the recipe to feel flexible: aromatics, tomato base, beans, small pasta, and greens are the core building blocks.

Easy minestrone ratio: for 6 bowls, use about 5 to 6 cups broth, 2 cans beans, 4 to 5 cups chopped vegetables, and 3/4 cup small pasta.

Short on time? Dice the vegetables smaller, use the full 6 cups broth, and simmer the soup base for 15 to 20 minutes before adding pasta and greens. The full cook gives deeper flavor, but the faster version still makes a good weeknight bowl.


Minestrone Soup Recipe Card

Description: A hearty minestrone soup with vegetables, beans, small pasta, and a rich tomato broth. It is meatless when made with vegetable broth, cozy without cream, and easy to adjust for leftovers or a thicker dinner-style bowl.

Prep: 20 minutes | Cook: 45 minutes | Total: 1 hour 5 minutes | Serves: 6 generous bowls | Yield: about 11 to 13 cups

Equipment: 5 to 6 quart / 5 to 6 liter Dutch oven or heavy soup pot, knife, cutting board, can opener, colander, wooden spoon, and ladle.

Ingredients

Base

  • 2 tablespoons olive oil, plus more for finishing, about 30 ml
  • 1 medium yellow onion, diced, about 150 to 180 g
  • 2 medium carrots, diced, about 130 to 160 g
  • 2 celery ribs, diced, about 90 to 120 g
  • 4 garlic cloves, minced
  • 3 tablespoons tomato paste, about 45 g

Broth and Seasoning

  • 1 can crushed or diced tomatoes, 28 oz / 794 g
  • 5 to 6 cups vegetable broth, 1.2 to 1.4 liters
  • 1 bay leaf
  • 1 1/2 teaspoons Italian seasoning
  • 1/2 teaspoon dried oregano, optional
  • 1/4 teaspoon red pepper flakes, optional
  • 1 teaspoon kosher salt or 3/4 teaspoon fine salt, plus more to taste; start with less if your broth is salted
  • 1/2 teaspoon black pepper, plus more to taste
  • 1 parmesan rind, optional; skip for vegan minestrone

Beans, Vegetables, and Pasta

  • 1 can cannellini beans or white beans, 15 oz / 425 g, drained and rinsed
  • 1 can kidney beans, 15 oz / 425 g, drained and rinsed
  • 1 cup chopped green beans, about 100 to 125 g
  • 1 medium zucchini, diced, about 180 to 220 g
  • 3/4 cup small pasta such as ditalini, small shells, elbows, or macaroni, about 75 to 90 g
  • 2 cups packed spinach or chopped kale, about 60 to 80 g

Finish

  • 1 to 2 teaspoons lemon juice or red wine vinegar, 5 to 10 ml
  • 1/4 cup chopped parsley or basil, about 10 to 15 g
  • Extra olive oil, for finishing
  • Grated parmesan, optional, for serving

Instructions

  1. Heat olive oil in a 5 to 6 quart / 5 to 6 liter Dutch oven or heavy soup pot over medium heat.
  2. Add onion, carrot, celery, and salt. Cook for 7 to 10 minutes, stirring often, until softened and fragrant.
  3. Add garlic and tomato paste. Cook for 1 to 2 minutes, stirring often, until the tomato paste darkens slightly.
  4. Add crushed or diced tomatoes, vegetable broth, bay leaf, Italian seasoning, oregano if using, red pepper flakes if using, black pepper, and parmesan rind if using. Stir well and scrape the bottom of the pot.
  5. Add the cannellini beans and kidney beans. Bring to a boil, then reduce to a gentle simmer.
  6. Simmer partly covered for 20 to 25 minutes, until the broth tastes developed. Add firm vegetables such as cabbage, potato, or squash during this simmer if using them.
  7. Add green beans, zucchini, and pasta. Cook for 8 to 10 minutes, or until the pasta is just tender.
  8. Stir in spinach or kale and cook for 1 to 3 minutes, just until wilted.
  9. Remove the bay leaf and parmesan rind. Stir in lemon juice or red wine vinegar, parsley or basil, and a drizzle of olive oil.
  10. Taste and adjust salt, pepper, and acidity. Let the soup rest for 5 minutes before serving.
  11. Serve hot with parmesan, extra herbs, crusty bread, garlic bread, or a simple salad.

Recipe Notes

  • Brothier soup: use 3/4 cup pasta and the full 6 cups broth.
  • Thicker soup: use 1 cup pasta or mash 1/2 cup beans into the broth.
  • Firmer zucchini: add zucchini during the final 5 minutes instead of with the pasta.
  • Better leftovers: cook pasta separately and add it to bowls.
  • Vegan version: use vegetable broth and skip parmesan rind and parmesan cheese.
  • Meal prep: toss separately cooked pasta with a tiny drizzle of olive oil after draining so it does not clump.
  • Gluten-free version: use gluten-free pasta or rice, preferably cooked separately.
  • Rice version: cooked rice is easiest. Add it near the end or directly to bowls because rice absorbs broth quickly.
  • Extra richness: simmer with a parmesan rind or finish with olive oil and herbs.

The recipe works on its own, but the notes below help you adjust the beans, pasta, vegetables, storage, and appliance methods without losing the minestrone feel. If leftovers matter, the storage and freezing notes are especially useful.

Before the deeper notes, this quick visual ratio gives you a flexible way to adjust the pot without losing the minestrone balance.

Easy Minestrone Ratio

Use this ratio when you want to adjust the recipe without losing the soup’s balance.

Broth, beans, chopped vegetables, and small pasta arranged on a rustic counter as an easy minestrone ratio guide.
Instead of measuring every vegetable perfectly, follow the ratio: broth keeps it loose, beans make it filling, vegetables add bulk, and pasta should stay modest.

What Is Minestrone Soup?

Minestrone is an Italian vegetable soup made with vegetables, beans, tomatoes, broth, herbs, olive oil, and usually pasta or rice. Classic minestrone is not about one fixed vegetable list; it is about building a generous, seasonal soup with enough beans and starch to feel like a meal.

That is why one pot might have zucchini and green beans while another has cabbage, kale, potato, or squash. A good bowl should be crowded, not dry: enough vegetables and beans to make it feel like dinner, but enough tomato broth to keep it unmistakably soup.

Why You’ll Like This Recipe

  • The broth tastes built, not diluted. Tomato paste, sautéed aromatics, herbs, beans, and olive oil give it a rounded tomato flavor.
  • The vegetables keep their texture. Firm vegetables simmer first, while zucchini and greens go in later.
  • The pasta will not hijack the leftovers. Cook it in the soup when serving right away, or separately when you want better storage.
  • It starts meatless. Use vegetable broth, and the whole pot stays hearty without meat.
  • It gives you room to use what you have. Small shells, elbows, ditalini, zucchini, green beans, cabbage, kale, spinach, white beans, kidney beans, or chickpeas can all work.
  • It can be lighter or heartier. Use more greens and less pasta for a lighter bowl, or extra beans and a little more pasta for a thicker dinner-style soup.

Minestrone feels hearty without cream because beans, vegetables, pasta, and olive oil do the work. If you like cozy tomato-and-pasta dinners, this sits near the same comfort zone as baked ziti, but it is lighter, brothier, and packed with vegetables.

Minestrone Soup Ingredients

These ingredients follow the same Rule of 5: aromatics, tomato broth, beans, small pasta or rice, and tender greens at the end. Do not worry if you are missing one vegetable. Minestrone is forgiving as long as the base stays balanced.

If you are missing one vegetable or bean, check the easy minestrone swaps before changing the broth or pasta ratio.

Ingredients for minestrone soup on a counter, including tomatoes, broth, beans, pasta, carrots, celery, onion, garlic, zucchini, green beans, greens, herbs, olive oil, and parmesan rind.
Each minestrone ingredient has a role: aromatics create sweetness, tomatoes shape the broth, beans add substance, pasta brings comfort, and greens freshen the finish.

If you remember one thing: taste the broth before adding pasta. When it tastes thin or flat at that point, fix the broth first; pasta will not rescue a weak soup.

Build the Aromatic Base

Onion, carrot, celery, garlic, and olive oil create the base. Cook the onion, carrot, and celery until the sharp onion smell softens and the pot starts smelling sweet. The onion should look translucent and the carrot edges should soften. This is the first moment the soup starts smelling like dinner instead of chopped vegetables.

Onion, carrot, and celery sautéing in olive oil inside a Dutch oven with a wooden spoon.
First, cook the onion, carrot, and celery until they soften and smell sweet. This step gives homemade minestrone a deeper base before the tomatoes arrive.

Cook the Tomato Paste Before Broth


Tomato paste and a large can of crushed or diced tomatoes give the broth its color and flavor. Cook the tomato paste until it darkens slightly; it should leave orange-red streaks on the bottom of the pot, not black bits. Crushed tomatoes make a fuller, smoother broth, while diced tomatoes give a chunkier texture.

Tomato paste cooked with onion, carrot, and celery in a pot, with a wooden spoon dragging through the red paste.

Next, let the tomato paste cook briefly with the aromatics. It deepens the soup base and helps the broth taste rich instead of thin.

Broth


Vegetable broth keeps the soup meatless and easy to make vegan. Chicken broth also works if you are not keeping the soup vegetarian. Low-sodium broth gives you more control because canned beans, tomatoes, pasta, and cheese can all add salt.

Beans


White beans and kidney beans are a strong everyday combination. The white beans soften into the tomato broth and make the soup feel fuller, almost as if it simmered longer than it did. Kidney beans add color, bite, and the familiar minestrone look. Rinse canned beans before adding them so the broth stays clean and balanced.

Pasta or Rice


Small pasta is what keeps minestrone easy to eat by the spoonful. Ditalini is classic, but small shells, elbows, macaroni, or orzo all work. Use 3/4 cup for a brothier soup and up to 1 cup for a thicker bowl. Cooked rice also works when you want a pasta-free version. If you are cooking for leftovers, see how to keep minestrone pasta from getting mushy before adding pasta directly to the pot.

Vegetables


Zucchini, green beans, spinach, kale, cabbage, potato, peas, squash, carrots, and celery can all work. Dense vegetables such as potato, squash, cabbage, and carrots need more time. Zucchini, peas, spinach, and tender greens should go in later so they keep some color and shape.

Minestrone is not a test of whether you bought the exact vegetables; it is a way to turn the vegetables you have into a balanced soup.

Herbs and Finishers


Italian seasoning, oregano, basil, thyme, bay leaf, black pepper, parsley, and fresh basil all fit well. A parmesan rind is optional for extra depth, but use vegetarian-style parmesan if that matters to you, or skip cheese completely for a vegan version.

A small splash of lemon juice or red wine vinegar wakes up the whole pot at the end, especially after the beans and pasta have softened the broth. A spoonful of pesto can make the finish taste brighter; these basil pesto variations are useful if you like that herby direction.

How to Make Minestrone Soup

The steps follow the same rhythm as the Rule of 5: sauté, deepen, simmer, add quick-cooking ingredients late, finish fresh.

1. Sauté the Onion, Carrot, and Celery


Heat olive oil in a large Dutch oven or heavy soup pot over medium heat. Add onion, carrot, celery, and salt. Cook for 7 to 10 minutes, stirring often, until the vegetables soften and the onion turns translucent. The pot should smell sweet and savory before you move on.

2. Add Garlic and Tomato Paste


Stir in the garlic and tomato paste. Cook for 1 to 2 minutes, stirring often. The tomato paste should darken slightly and smell richer, but it should not scorch. A watery minestrone usually means the base was rushed, so give this step its minute.

3. Build the Broth


Add crushed or diced tomatoes, broth, Italian seasoning, bay leaf, black pepper, and parmesan rind if using. Scrape the bottom of the pot so all the tomato paste and aromatics dissolve into the broth.
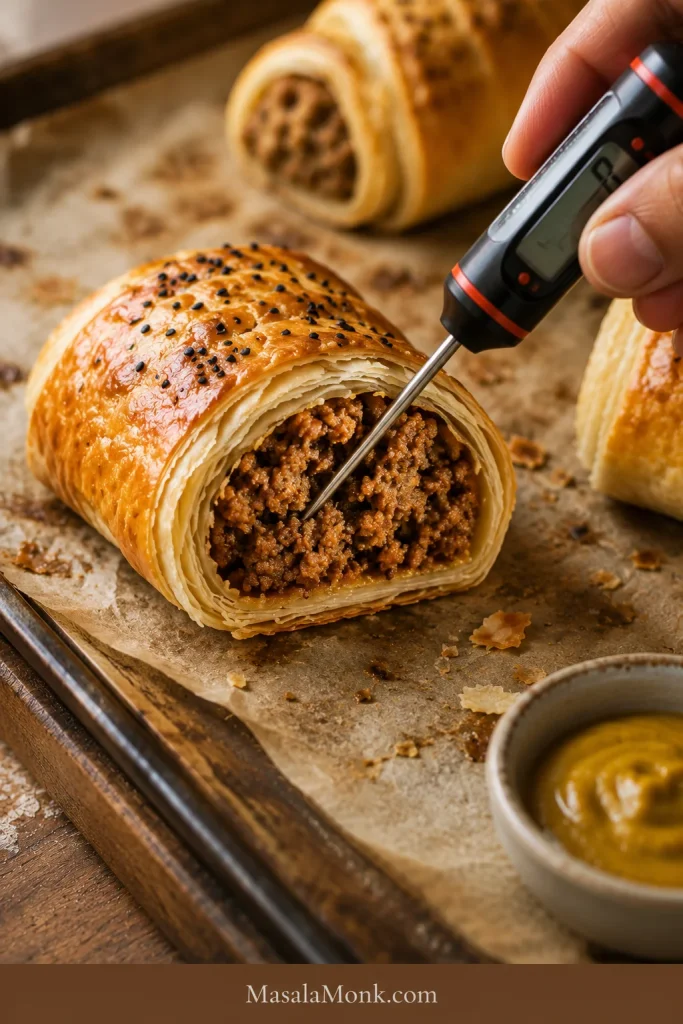
Minestrone soup base in a Dutch oven with tomato broth, beans, carrots, celery, and firm vegetables before pasta and greens are added.
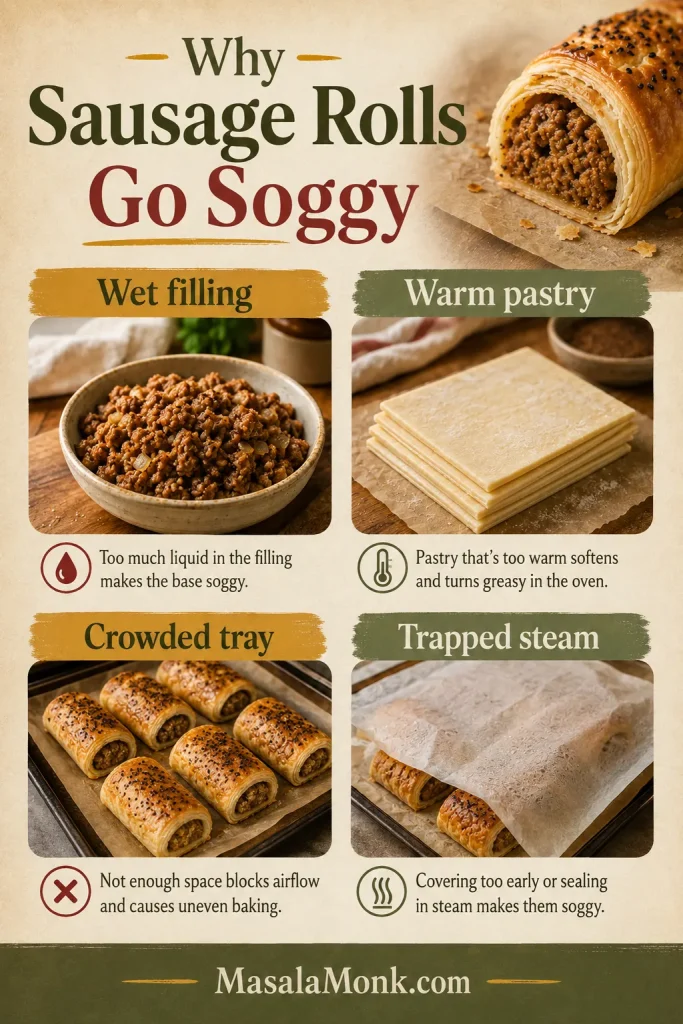
Let the tomato broth, beans, and firm vegetables simmer before adding pasta. As a result, the base tastes rounded instead of rushed.

4. Add Beans and Simmer Gently


Add the rinsed beans and any firm vegetables such as cabbage, potato, or squash. Bring the soup to a boil, then reduce it to a gentle simmer. You want small bubbles, not a rolling boil. Cook partly covered for 20 to 25 minutes, until the broth tastes fuller and the vegetables are tender.

Taste the broth before adding pasta. If it tastes thin or flat now, give it more simmering time, adjust the salt, or brighten it with a little lemon juice or vinegar. The broth should already taste good before the pasta goes in; if it still tastes weak, use the troubleshooting section before adding pasta.

Minestrone soup gently simmering in a Dutch oven with tomato broth, beans, carrots, celery, pasta, and vegetables.

Keep minestrone at a gentle simmer, not a hard boil. Small bubbles build flavor while helping the vegetables stay tender and intact.

5. Add Quick-Cooking Vegetables and Pasta


Add green beans, zucchini, and small pasta near the end. Cook for 8 to 10 minutes, or until the pasta is just tender. Stop while it still has a little structure, because it will keep softening in the hot broth.

Small pasta being poured into a pot of minestrone soup with spinach added near the end of cooking.

Add pasta and greens near the end. This keeps the soup brighter, protects the greens, and helps prevent pasta from swelling in the pot.

6. Finish with Greens, Herbs, and Brightness


Stir in spinach or kale for the final 1 to 3 minutes. The greens only need to wilt; they do not need to cook down into the broth. Remove the bay leaf and parmesan rind. Finish with parsley or basil, a drizzle of olive oil, and lemon juice or red wine vinegar. Rest the soup for 5 minutes before serving so the broth settles and the flavors come together.

Finished pot of homemade minestrone soup with tomato broth, beans, pasta, carrots, zucchini, green beans, greens, herbs, and olive oil.

When the pot is ready, it should look colorful and ladle easily. If it feels crowded, loosen it with a splash of broth before serving.

Easy Minestrone Swaps

Once the base makes sense, the soup becomes forgiving. You do not need the exact same vegetables every time; you just need the right balance of broth, beans, pasta or rice, and timing.

Use What You Have

Use this section when the pot needs to adapt to the vegetables, beans, and pasta you already have.

Rustic board with minestrone swaps including zucchini, carrot, cabbage, kale, potato, white beans, green beans, herbs, and small pasta.

Minestrone is made for flexible cooking. Therefore, zucchini, cabbage, kale, potato, beans, herbs, and small pasta can all work when you add them at the right time.

If you do not have Use this instead
Cannellini beans Navy beans, great northern beans, white beans, or chickpeas
Kidney beans More white beans, borlotti beans, chickpeas, or lentils
Zucchini Cabbage, green beans, peas, spinach, kale, or squash
Ditalini Small shells, elbows, macaroni, or orzo
Vegetable broth Water with extra tomato paste, herbs, olive oil, and careful seasoning
Fresh greens Frozen spinach, frozen kale, or chopped cabbage added earlier
Parmesan rind Skip it, or finish with olive oil, herbs, and a little lemon juice or vinegar

This is also where minestrone becomes personal. One cook adds cabbage, another adds potato, another uses chickpeas, and another keeps it brothy. The base stays the same, but the pot can still feel like yours. For more timing help, see the firm-early, tender-late vegetable guide.

What the Soup Should Look and Taste Like

You are looking for a soup that is chunky but still brothy. The tomato broth should taste rounded rather than sharp or thin. Vegetables should be tender without collapsing, beans should stay creamy but mostly intact, and the pasta should be just tender, not swollen.

Finished Bowl Texture Check

Use the finished bowl as a quick check before serving: the soup should look full, but it should still move like soup.

Close-up bowl of finished minestrone soup with tomato broth, white beans, kidney beans, pasta, carrots, zucchini, greens, and herbs.

Use the finished bowl as a texture check. The vegetables and beans should stand out clearly, while the tomato broth still fills the gaps around them.

Chunky but Still Soup

If the pot looks crowded but still has enough broth to move around the vegetables, you are in the right place. You should be able to drag the spoon through the bowl and see vegetables and beans settle back into the tomato broth, not sit in a dry pile. The final olive oil, herbs, and lemon juice or vinegar should make the bowl taste brighter, not sour.

Close bowl of chunky but brothy minestrone soup with visible tomato broth, beans, pasta, carrots, zucchini, greens, and herbs.

Aim for chunky but not dry. The spoon should catch vegetables and beans, while the broth still makes the bowl feel like soup.

Best Beans, Pasta, and Vegetables for Minestrone

Beans, pasta, and vegetables are where minestrone becomes dinner. The choices do not need to be fancy; they just need to make sense together in the spoon.

Best Beans and Pasta for Minestrone

Start with spoon-friendly beans and small pasta shapes, then choose vegetables that match the season and cooking time.

Bowls and spoons of cannellini beans, kidney beans, ditalini pasta, small shells, elbows, and orzo for minestrone soup.

Choose beans and pasta that fit easily on a spoon. Cannellini beans, kidney beans, ditalini, elbows, or small shells keep minestrone hearty without making it clumsy.

Best Beans


  • Cannellini or white beans: creamy, mild, and classic.

  • Kidney beans: firmer, colorful, and familiar in restaurant-style minestrone.

  • Borlotti beans: rustic and soft with a fuller bean flavor.

  • Chickpeas: nutty and firmer, good when you want more bite.

  • Lentils: useful for a thicker, higher-protein variation.

Best Pasta


  • Ditalini: classic and spoon-friendly.

  • Small shells: good for catching tomato broth.

  • Elbows or macaroni: easy pantry choice.

  • Orzo: soft and pleasant, but it thickens leftovers quickly.

  • Rice: useful if you do not want pasta. Cooked rice is easiest.

Once the beans and pasta are chosen, the vegetables are mostly about timing: firm ones early, tender ones late. That is what keeps the bowl generous without making it taste tired.

Firm Vegetables Early, Tender Vegetables Late


A good minestrone should never feel trapped by one vegetable list. Keep the tomato broth, aromatics, beans, herbs, and small pasta structure, then choose vegetables that fit the pot.

  • Summer: zucchini, green beans, fresh tomatoes, basil, spinach.

  • Winter: cabbage, kale, potato, squash, carrots, celery.

  • Spring: peas, asparagus, spinach, leeks, fresh herbs.

  • Pantry version: canned tomatoes, canned beans, frozen vegetables, cabbage, carrots, small pasta.

Add dense vegetables like potato, squash, cabbage, and carrots earlier. Add zucchini, peas, spinach, and tender greens near the end. Try not to overload the pot; minestrone should be hearty, but it should still have enough broth to feel like soup.

Rustic vegetable timing board showing firm vegetables like potato, cabbage, carrot, and squash beside tender vegetables like zucchini, peas, spinach, kale, and herbs.

Vegetable timing matters more than a perfect shopping list. Add firm vegetables early, then save tender greens, zucchini, peas, and herbs for the final minutes.

How to Fix Minestrone Soup Problems

If your minestrone tastes bland, watery, too thick, too acidic, or overcooked, it can usually be fixed. Most problems come down to seasoning, simmering, pasta timing, vegetable timing, or broth balance.

Fix Bland Minestrone Soup

Before rebuilding the whole pot, taste for salt, acid, herbs, pepper, and olive oil; those small finishes often fix a flat bowl.

Bowl of minestrone soup beside salt, lemon wedge, red wine vinegar, olive oil, parsley or basil, and black pepper.

Bland minestrone often needs a finish, not a rebuild. Salt, lemon or vinegar, herbs, black pepper, and olive oil can wake up the whole pot.

Problem Fix
Soup tastes flat Add salt first, then a small splash of lemon juice or red wine vinegar.
Broth is too thin Simmer uncovered for a few minutes or mash 1/2 cup of beans into the broth.

Soup is too thick Add broth or water until it becomes spoonable again.

Pasta is too soft Add more broth, fresh herbs, and a little acidity. Next time, cook pasta separately.
Vegetables are overcooked Freshen the bowl with herbs, olive oil, and extra broth. Next time, add zucchini and greens later.
Soup tastes too acidic Add a drizzle of olive oil or a tiny pinch of sugar to round the tomato flavor.
Soup is too salty Add unsalted broth, water, extra beans, or more vegetables.

Most of the time, the fix is smaller than you think. A little salt, a little acid, a splash of broth, or a few mashed beans can bring the pot back.

Fix Watery Minestrone Soup

When the broth looks thin, mashed white beans are the quickest natural thickener because they add body without changing the soup into cream sauce.

Two bowls of minestrone comparing thin watery broth with richer tomato broth, with mashed white beans shown as the thickening fix.

If the broth tastes watery, mash a few white beans into the soup and simmer briefly. This thickens minestrone naturally without cream or flour.

How to Make Minestrone Richer

  • Cook the onion, carrot, and celery until they soften and smell sweet.

  • Cook the tomato paste before adding broth.

  • Use crushed tomatoes for a fuller broth.

  • Add a parmesan rind if you are using cheese.

  • Mash some of the beans into the soup for natural body.

  • Simmer partly uncovered when the soup looks too thin.

  • Finish with olive oil, herbs, and a small splash of lemon juice or vinegar.

How to Keep Pasta from Getting Mushy


Minestrone pasta gets mushy when it sits in hot broth for too long or stays in the soup through storage. The safest method depends on how you plan to serve it.

  • Serving immediately: add dry pasta during the final 8 to 10 minutes.

  • Meal prep: cook pasta separately and add it to each bowl.

  • Freezing: freeze the soup without pasta and add fresh pasta later.

  • Thick leftovers: reheat with extra broth or water.

Glass containers showing minestrone soup base stored separately from cooked small pasta, with pasta being added to a serving bowl.

For better leftovers, store the soup base and pasta separately. Then add pasta to each serving so the next bowl stays fresh instead of soggy.

Slow Cooker and Instant Pot Minestrone

Slow Cooker vs Instant Pot Minestrone

For both appliance methods, the texture rule is the same: cook the base first and keep pasta and greens late. The pasta texture notes are especially useful for meal prep.

Slow cooker and Instant Pot filled with minestrone soup, with small bowls of pasta and greens nearby for adding near the end.

Whether you use a slow cooker or Instant Pot, cook the soup base first. Meanwhile, keep pasta and greens for the end so the texture stays better.

Slow Cooker Minestrone

Slow cooker minestrone is best for a hands-off soup base. Cook the broth, beans, aromatics, and firm vegetables first, then add zucchini, pasta, and greens near the end so they do not overcook.

  1. Add onion, carrot, celery, garlic, tomato paste, tomatoes, broth, herbs, bay leaf, beans, and firm vegetables to the slow cooker.

  2. Cook on low for 6 to 8 hours or high for 3 to 4 hours.

  3. Add zucchini and green beans during the final 30 minutes.

  4. Add pasta only during the final 20 to 30 minutes, or cook pasta separately.

  5. Stir in spinach or kale at the end, then finish with herbs, olive oil, and lemon juice or vinegar.

Instant Pot Minestrone


Instant Pot minestrone is best for a fast soup base. Pressure cook the broth, beans, and firm vegetables, then add cooked pasta and greens at the end so the pasta does not turn soft under pressure.

  1. Use sauté mode to cook onion, carrot, celery, and olive oil for 4 to 5 minutes.

  2. Add garlic and tomato paste. Cook for 1 minute.

  3. Add tomatoes, broth, herbs, bay leaf, beans, and firm vegetables.

  4. Pressure cook on high for 4 to 5 minutes.

  5. Let pressure release naturally for 5 to 10 minutes, then quick release carefully.

  6. Stir in greens and cooked pasta, then finish with herbs, olive oil, and lemon juice or vinegar.

Olive Garden-Style Minestrone Soup

If you like Olive Garden’s lighter tomato-broth style, use these adjustments while keeping the main recipe homemade. Olive Garden describes its minestrone as vegetables, beans, and pasta in a light tomato broth, so this is a home version in that familiar direction, not the official recipe. You can see Olive Garden’s menu description for the style reference.

Light tomato-broth minestrone soup in a cream bowl with kidney beans, white beans, pasta, carrots, zucchini, green beans, celery, spinach, and herbs.

For Olive Garden-style minestrone at home, keep the broth lighter, the beans whole, the vegetables small, and the pasta modest.

  • Use diced tomatoes instead of crushed for a lighter restaurant-style texture.

  • Do not mash the beans into the broth.

  • Keep the pasta modest so the soup stays brothy.

  • Use kidney beans, white beans, zucchini, green beans, carrots, celery, and spinach.

  • Finish with herbs and acidity so the bowl tastes bright, not heavy.

Minestrone Soup Variations

After the base tastes good, you can take the soup in a few different directions without losing the minestrone feel. Keep the tomato base, beans, vegetable timing, and small pasta structure in place, then adjust the bowl you want. For gluten-free, rice-based, or pasta-free versions, the storage section is useful if you plan to cook the starch separately.

Three bowls of minestrone variations showing a vegan version, a gluten-free or rice version, and a thicker bean-rich version on a rustic table.

Once the tomato-bean base tastes good, you can take minestrone in several directions: vegan, gluten-free, rice-based, or thicker and extra hearty.

  • Vegan minestrone: use vegetable broth and skip parmesan rind, parmesan cheese, meat, and egg pasta. Finish with olive oil, herbs, nutritional yeast, or vegan pesto.

  • Gluten-free minestrone: use gluten-free pasta or rice. Cook gluten-free pasta separately for the best texture. Do not use barley or farro.

  • Minestrone without pasta: skip the pasta and add extra beans, cabbage, zucchini, potato, kale, spinach, or cooked rice.

  • Thick and hearty minestrone: use crushed tomatoes, 1 cup pasta, extra white beans, and a small potato. Mash some beans into the broth.

  • Brothy minestrone: use 3/4 cup pasta, unmashed beans, and an extra cup of broth for a lighter, restaurant-style bowl.

  • Low-sodium minestrone: start with low-sodium broth, rinse canned beans well, and choose no-salt-added tomatoes if available. Use garlic, herbs, lemon juice, vinegar, and olive oil to build flavor.

  • Add meat: brown Italian sausage or ground beef before adding the aromatics, or stir in shredded cooked chicken near the end.

Think of these as directions, not separate recipes. The same pot can become lighter, heartier, vegan, gluten-free, or meatier without losing its minestrone backbone.

What to Serve with Minestrone Soup

Minestrone can stand alone as dinner, especially with beans and pasta, but a simple side makes the meal feel complete.

  • A lighter meal: serve minestrone with a crisp salad, roasted vegetables, or something bright like beet salad.

  • For a heartier dinner: add garlic bread, focaccia, grilled cheese, parmesan toast, or pesto toast.

Bowl of minestrone soup served with garlic bread, a green salad with tomatoes, herbs, and a spoon on a wooden table.

Minestrone can stand alone, but the sides change the meal. Garlic bread makes it heartier, while a fresh salad keeps dinner lighter.

The best side is something that balances the tomato broth without making the meal feel heavy.

Make-Ahead, Storage, Freezing, and Reheating

Make-Ahead Plan


Yes, you can make minestrone ahead of time. For the best texture, make the soup base without pasta, refrigerate it, and add freshly cooked pasta when serving.

  • Chop the onion, carrot, celery, zucchini, and green beans up to 1 day ahead.

  • Drain and rinse the beans ahead of time.

  • Make the soup base without pasta up to 3 days ahead.

  • Add greens when reheating so they stay brighter.

  • Cook pasta fresh, or store cooked pasta separately with a tiny drizzle of olive oil.

Store and Freeze Minestrone with Pasta Separately

This storage setup keeps the soup base useful and protects the pasta from swelling before the next serving.

Glass containers of minestrone soup base and a separate bowl of cooked small pasta for storing and freezing.

For freezing, leave pasta out of the soup base. This way, the broth, beans, and vegetables reheat well, and fresh pasta can be added later.

Fridge

Store minestrone soup in an airtight container in the fridge for 3 to 4 days, which matches the USDA’s general guidance for refrigerated leftovers. The next-day soup is often thicker and more flavorful. Loosen it with broth before reheating.

Freezer


Minestrone freezes best without pasta. Freeze the soup base for up to 3 months, then add freshly cooked pasta when reheating. If you freeze it with pasta, the flavor will still be good, but the pasta will become softer.

Reheating


Reheat gently on the stovetop over low to medium-low heat. Add broth or water to loosen the soup. After reheating, freshen the bowl with olive oil, herbs, lemon juice, vinegar, or parmesan. For the fastest fix when leftovers get thick, see the troubleshooting table.

Serve Minestrone Family-Style

Family-style Dutch oven of minestrone soup on a wooden table with a ladle, bowls of soup, bread, herbs, cheese, and a hand serving soup.

Serve minestrone family-style when you want the meal to feel relaxed and generous, with herbs, cheese, bread, or extra broth added at the table.

Once you have the rhythm down, minestrone becomes one of those soups you can make again and again without overthinking it. Keep the tomato broth, beans, small pasta, and vegetable timing in place, then let the pot change with the season.

The best minestrone is not the one with the longest ingredient list; it is the one where the broth, beans, vegetables, and pasta all still feel like they belong in the same spoonful.

Minestrone changes from kitchen to kitchen. If your pot had cabbage, potato, chickpeas, kale, extra zucchini, or a pasta shape that worked beautifully, tell us. Those small choices are often what help the next person make a better pot from what they already have.


Frequently Asked Questions

What is minestrone soup made of?


Minestrone soup is an Italian vegetable soup made with vegetables, beans, tomatoes, broth, herbs, olive oil, and usually pasta or rice. Common vegetables include onion, carrot, celery, zucchini, green beans, cabbage, spinach, kale, potato, and peas.

Is minestrone soup vegetarian?


Minestrone soup is vegetarian when it is made with vegetable broth and no meat. If you add parmesan, choose vegetarian-style parmesan if that matters to you.

Is minestrone soup vegan?


Minestrone soup is vegan when it is made with vegetable broth and no parmesan, parmesan rind, meat, or egg pasta. For a vegan finish, use olive oil, herbs, nutritional yeast, or vegan pesto.

What is the best pasta for minestrone?


Ditalini is one of the best pasta shapes for minestrone because it is small and spoon-friendly. Small shells, elbows, macaroni, and orzo also work.

What beans are best for minestrone?


Cannellini beans, white beans, and kidney beans are the best everyday beans for minestrone. Borlotti beans, navy beans, chickpeas, and lentils also work.

Why does my minestrone taste bland?


Bland minestrone usually needs salt, acidity, or more simmering time. Cook the aromatics well, cook the tomato paste until it darkens slightly, taste the broth before adding pasta, then finish with lemon juice or vinegar if the tomato flavor tastes flat.

How do you make minestrone less watery?


To make minestrone less watery, simmer it uncovered, mash some beans into the broth, use crushed tomatoes, or add a parmesan rind if you are using cheese. A watery soup often means the aromatics or tomato paste needed more time at the beginning.

How do you keep pasta from getting mushy in minestrone?


To keep pasta from getting mushy in minestrone, add it only near the end and stop when it is just tender. For leftovers, meal prep, or freezing, cook pasta separately and add it to each bowl.

Can you make minestrone soup ahead of time?


Yes, minestrone is a good make-ahead soup, especially if you make the soup base without pasta. Refrigerate the base for 3 to 4 days, then add freshly cooked pasta when serving.

Can you freeze minestrone soup?


Yes, minestrone soup freezes well, but it freezes best without pasta. Freeze the soup base for up to 3 months, then add freshly cooked pasta when serving.

What is the difference between minestrone and vegetable soup?


Minestrone is usually heartier than plain vegetable soup because it often includes beans, pasta or rice, tomatoes, Italian herbs, and olive oil. Vegetable soup can be any broth-based soup made with vegetables.

What is the difference between minestrone and pasta e fagioli?


Minestrone is a vegetable-heavy soup that often includes beans plus pasta or rice. Pasta e fagioli means pasta and beans, so it is more focused on those two ingredients and is often thicker and more bean-forward.

Can I make minestrone without pasta?


Yes, you can make minestrone without pasta. Add extra beans, cabbage, zucchini, potato, kale, spinach, or cooked rice instead.

Can I use frozen vegetables in minestrone?


Yes, frozen peas, green beans, spinach, kale, and mixed vegetables can work well in minestrone. Add quick-cooking frozen vegetables near the end unless they are dense vegetables. If frozen spinach releases too much water, squeeze it before adding.

Can I make minestrone with canned vegetables?


Yes, canned vegetables can work in minestrone when you need a pantry version. Drain them well and add them near the end because they are already cooked and can become too soft if simmered for a long time.