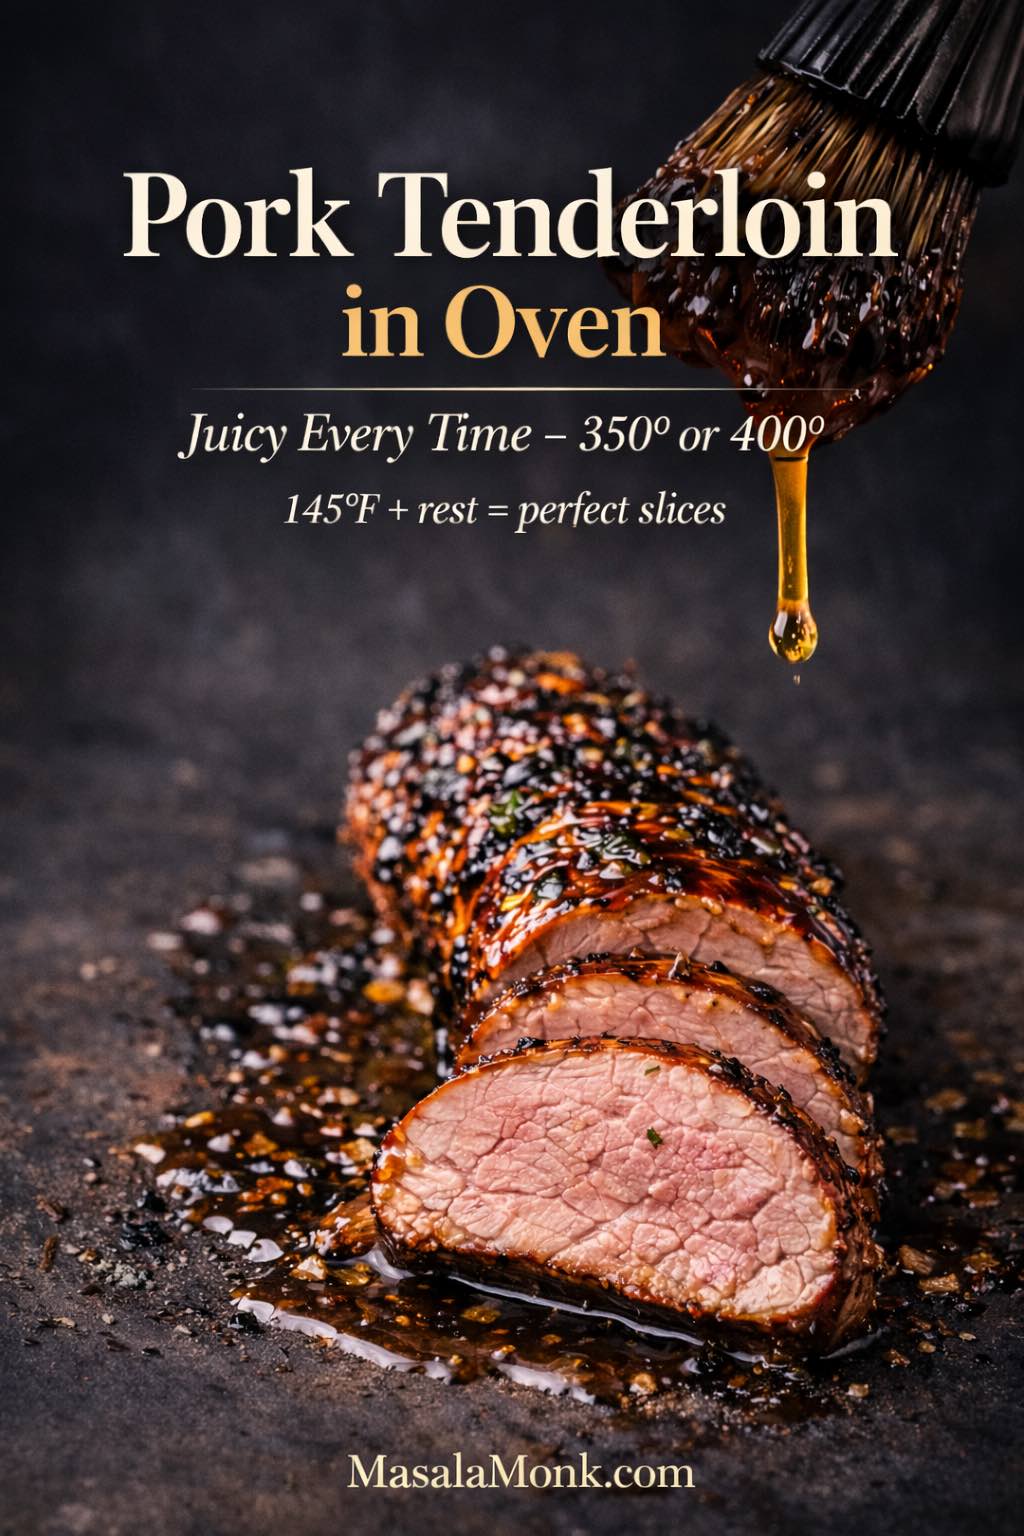
Pork tenderloin in oven is one of the most satisfying “simple” dinners you can make—when it’s treated with a little respect. The cut is lean, which means it cooks quickly, slices beautifully, and takes on flavor fast. At the same time, that leanness is exactly why it can dry out if it’s pushed too far. The difference between tender, juicy medallions and a roast that feels chewy is usually just a handful of degrees and a few minutes of patience.
So this is a full, proper recipe-style guide: you’ll get a dependable oven method first, then upgrades that truly change the meal—honey garlic, creamy mushroom, brown sugar balsamic, lemon herb, mustard glaze, apples, maple-apricot, a BBQ finish, and a few bold, spicy table options. You’ll also get a cast-iron sear-and-finish method for deeper browning, a sheet-pan dinner with potatoes and carrots, and realistic versions for the slow cooker, Instant Pot, grill, and smoker. Finally, you’ll see how to use leftovers in a way that keeps them moist instead of sad.
Take what you need tonight, then come back later when you want a different flavor without learning a new technique.
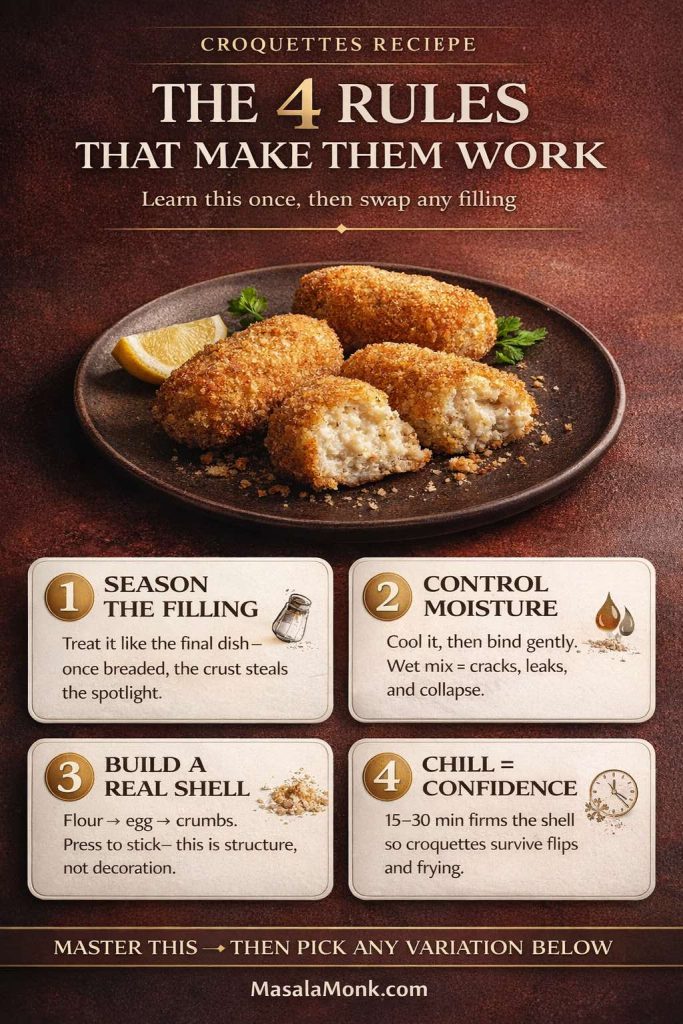
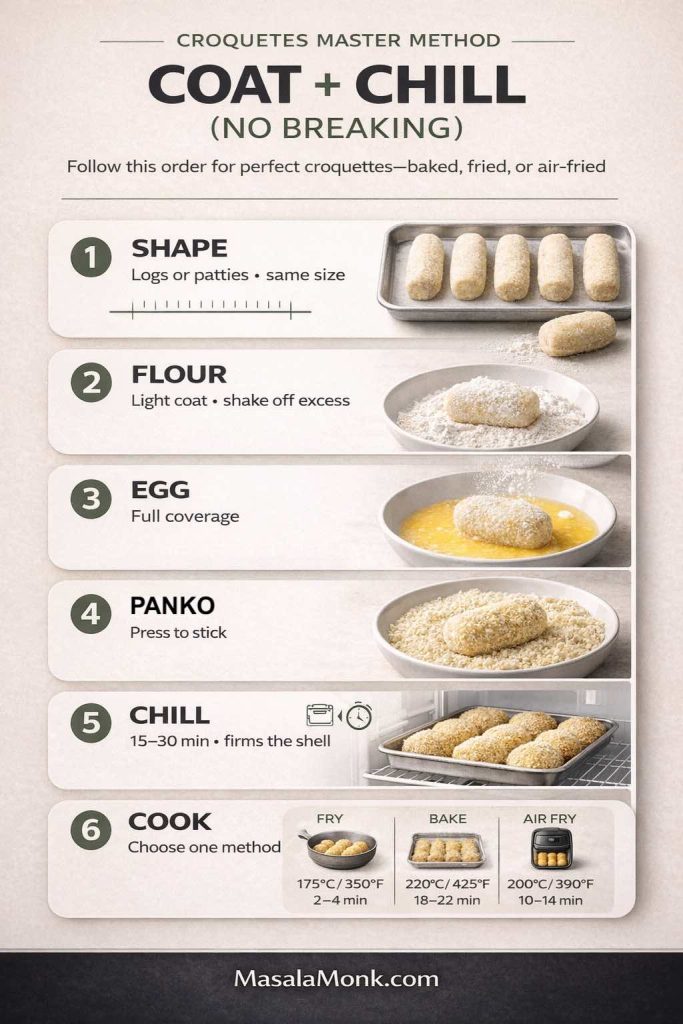
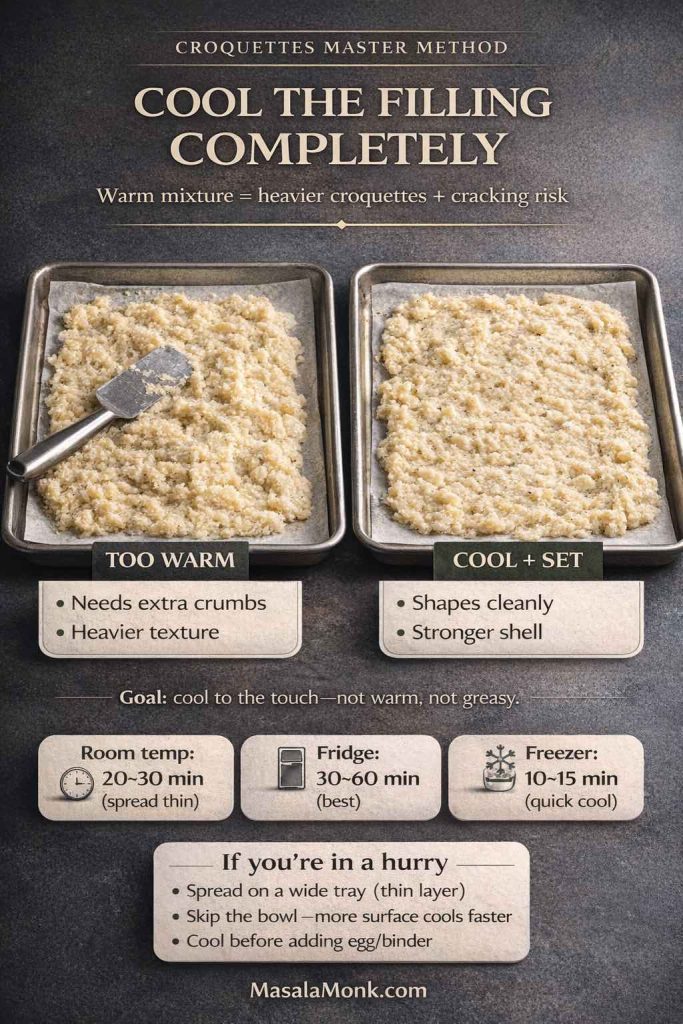
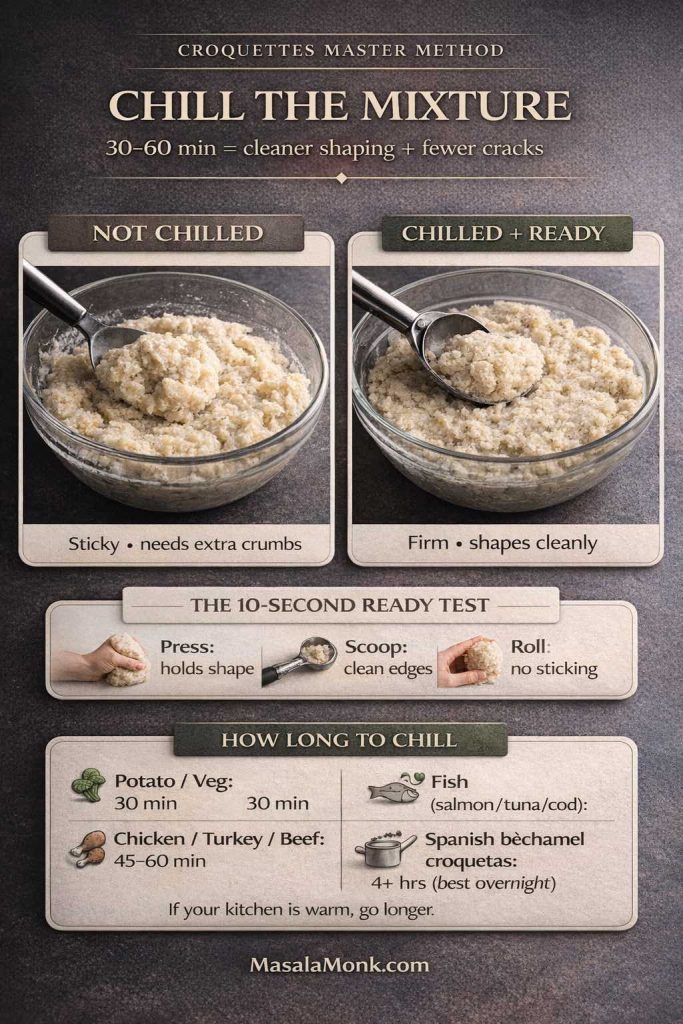
Also Read: Croquettes Recipe: One Master Method + 10 Popular Variations
Pork tenderloin vs pork loin vs pork fillet (so timing finally clicks)
Before the oven even warms up, it helps to know what you’re cooking. Pork tenderloin and pork loin are not the same thing, and swapping them without adjusting time is one of the fastest ways to end up disappointed.
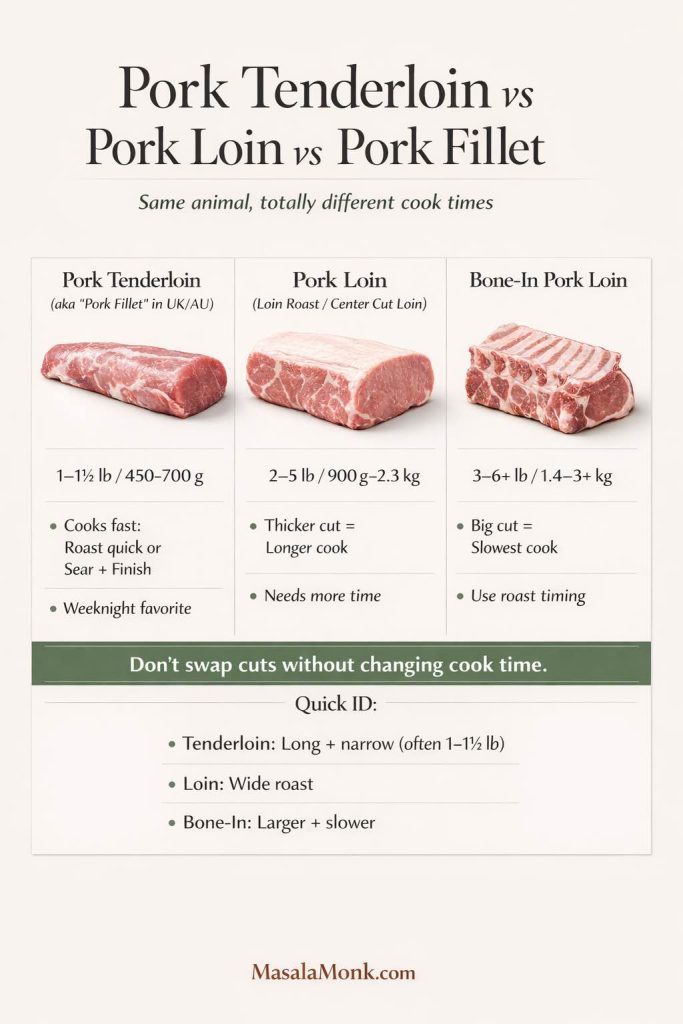
Pork tenderloin is long, narrow, and usually weighs around 1 to 1½ pounds (about 450–700 g). It’s sometimes labeled as pork fillet, especially in the UK and Australia, which is why you’ll see phrases like “pork fillet oven time” or “roasting pork fillet UK.” In most cases, those are still talking about tenderloin.
Pork loin, on the other hand, is thicker and wider. It can show up as a whole boneless pork loin, a center cut pork loin filet, or a loin end pork roast, and it commonly weighs 2 to 5 pounds. A bone in pork loin roast will be even bigger and needs more time. When someone mentions “pork loin on the bone” or “bone in pork loin roast,” that’s a different cook altogether.
Tenderloin cooks quickly; loin cooks more slowly. That difference influences everything—temperature, timing, and how much rest you need.
If your package says pork tenderloin (sometimes labeled pork fillet), you’re in the right place. If it says pork loin roast, you can still use many flavor ideas below, but you must increase cook time and treat it like a larger roast. The flavors can transfer; the timing cannot.
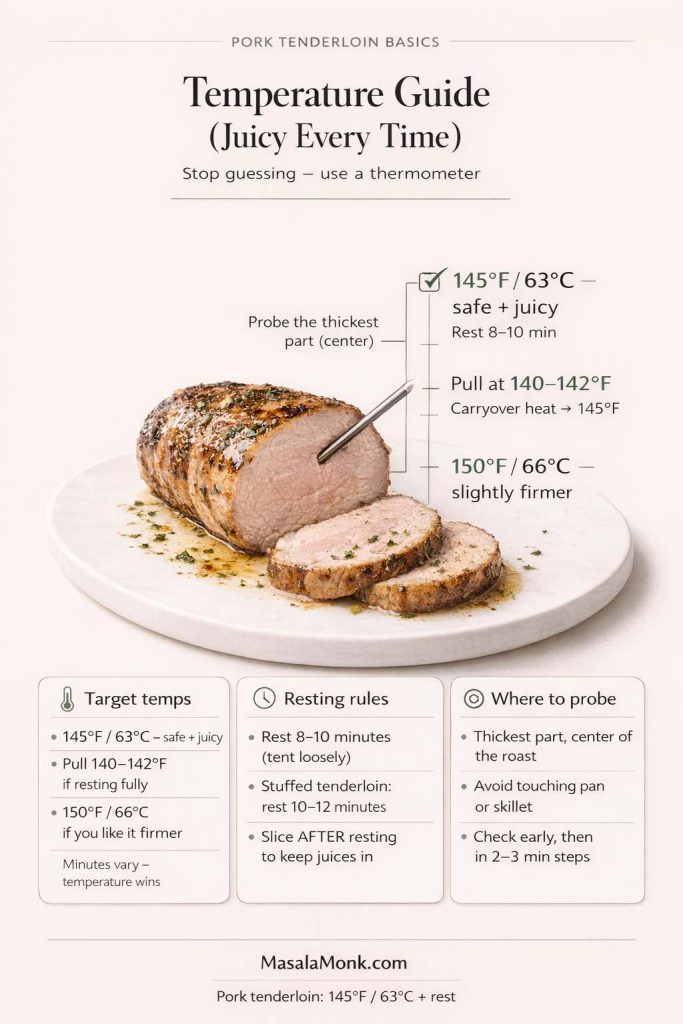
The one rule that keeps pork tenderloin juicy
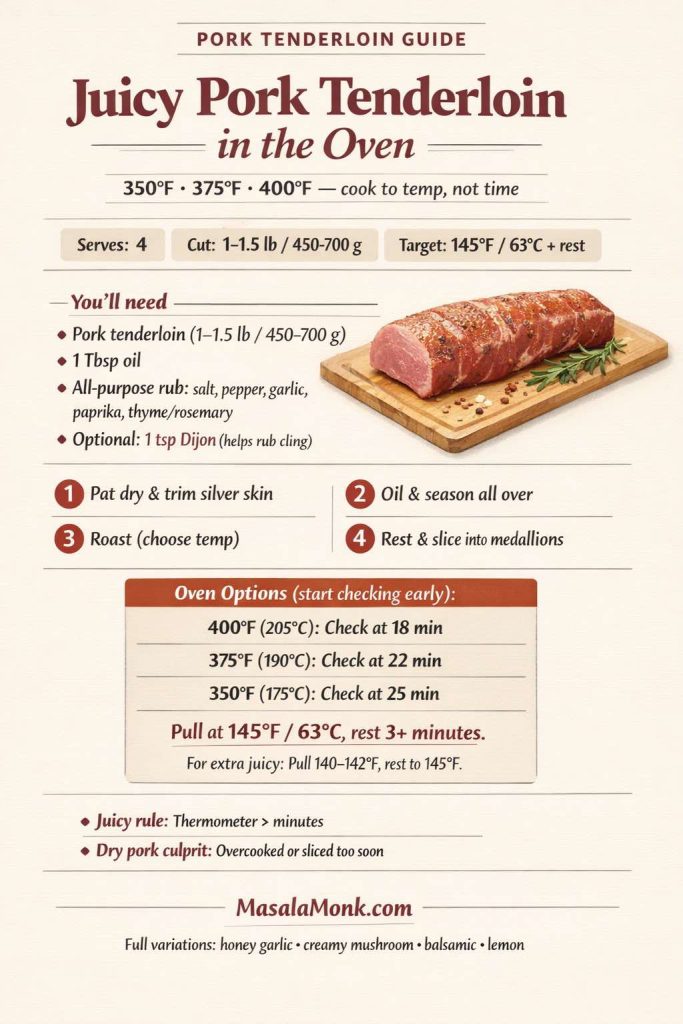
If there’s a single habit that transforms pork tenderloin, it’s cooking by internal temperature instead of guessing. Whole cuts of pork are considered safe at 145°F / 63°C followed by a short rest, as shown in the official guidance on the USDA safe temperature chart and the FoodSafety.gov temperature chart.
That standard is also where tenderloin tends to be at its best: juicy, tender, and sliceable. Practically speaking, many home cooks pull the tenderloin a few degrees early (around 140°F) only if they’re going to rest it fully and let carryover heat bring it up to 145°F; otherwise, pull it at 145°F, then rest.
If you’re looking for “pork fillet oven time,” use this chart first — “pork fillet” is another name for pork tenderloin in many regions. Times vary by thickness, so start checking a little early and cook to temperature.
Pork Fillet (Tenderloin) Oven Time Chart
| Oven Temp | Approx. Cook Time* | Best For | Pull At (Internal Temp) |
|---|---|---|---|
| 350°F (175°C) | 25–35 min | Most even cooking, biggest “juicy” safety margin | 145°F / 63°C |
| 375°F (190°C) | 22–30 min | Balanced: quicker, still tender | 145°F / 63°C |
| 400°F (205°C) | 18–25 min | Fastest; great when finishing with a glaze | 145°F / 63°C |
Times assume a 1.25–2 lb (600–900 g) pork fillet/tenderloin. Thicker pieces take longer. If you’re cooking two smaller fillets, begin checking earlier.
Three small details make the biggest difference:
- Carryover heat is real. The temperature rises slightly after you remove the roast from the oven.
- Resting matters. It’s not a polite suggestion; it’s how juices settle back into the meat.
- Slicing too early costs you moisture. Even a perfectly cooked tenderloin can look dry if you cut it the moment it comes out.
If you like a firmer, more cooked texture, you can pull closer to 150°F / 66°C. Even then, resting is still the secret to tenderness.
Also Read: Ravioli Recipe Reinvented: 5 Indian-Inspired Twists on the Italian Classic
Pork tenderloin in oven: 350°F vs 400°F vs 375°F
There’s more than one “right” oven temperature. What matters is how the heat fits your evening.
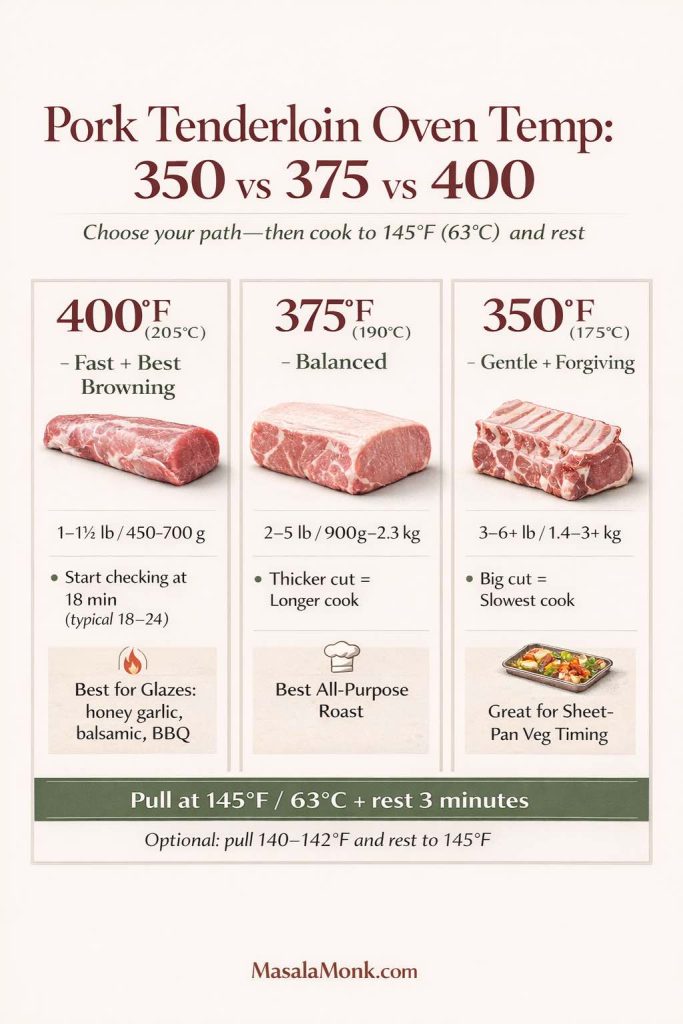
400°F (fast, great browning)
This is the weeknight favorite. It cooks quickly, encourages color on the outside, and works especially well with glazes—honey garlic, balsamic, maple-apricot, teriyaki-style finishes, or a BBQ brush-on at the end.
350°F (gentle, forgiving)
This is the calm, steady approach. It’s ideal when you’re also roasting vegetables and want everything to land together. It also gives you a slightly wider window before the meat goes past its sweet spot.
375°F (middle path)
This is the comfortable compromise: enough heat for browning, plus a gentler roast than 400°F.
No matter which temperature you pick, the finish remains the same: cook to temperature, rest, slice.
Also Read: Fish and Chips Reimagined: 5 Indian Twists (Recipe + Method)
The seasoning that makes pork taste like dinner, not “protein”
Because tenderloin is mild, seasoning is the difference between “fine” and genuinely craveable. Salt helps the meat hold onto moisture, while aromatics and spices build a crust that tastes roasted and savory.
You’ll get two approaches here:
- a reliable all-purpose rub
- targeted flavor profiles that turn the same roast into different meals
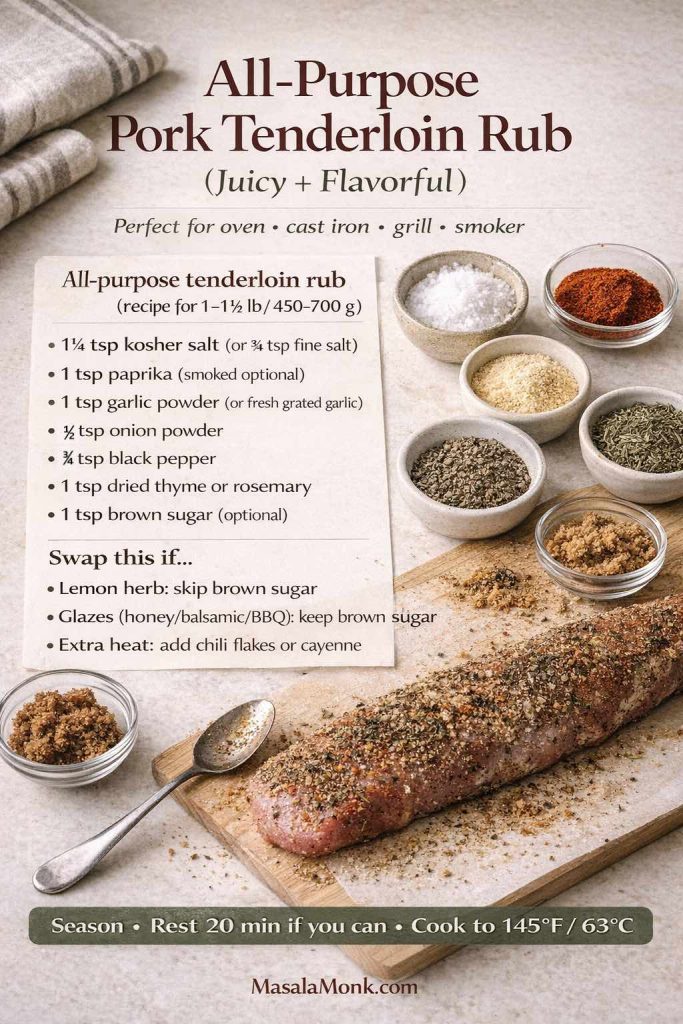
All-purpose tenderloin rub (recipe for 1–1½ lb / 450–700 g)
- 1¼ tsp kosher salt (or ¾ tsp fine salt)
- 1 tsp paprika (smoked paprika adds depth)
- 1 tsp garlic powder (or 2–3 cloves fresh garlic, finely grated)
- ½ tsp onion powder
- ¾ tsp black pepper
- 1 tsp dried thyme or dried rosemary (or 1½ tsp fresh, chopped)
- 1 tsp brown sugar (optional, helps browning and pairs well with glazes)
This rub is flexible: it works for oven roasting, cast iron, grilling, and smoking. If you know you’re going lemon herb, you can skip the brown sugar. If you’re going honey garlic or balsamic, keep it.
A quick note on resting after seasoning
If you have time, season and let the tenderloin sit while the oven heats. Even 20 minutes helps. If you can do 45–60 minutes, the flavor tends to taste more “inside” the meat rather than just on the surface.
Also Read: Dirty Martini Recipe (Classic, Extra Dirty, No Vermouth, Spicy, Blue Cheese, Tequila + Batched)
Pork tenderloin in oven: the core recipe
This is the dependable method that anchors everything else. Once it’s familiar, variations become simple choices rather than brand-new recipes.

Ingredients (serves 4)
- 1 pork tenderloin (1–1½ lb / 450–700 g), trimmed
- 1 tbsp olive oil or neutral oil
- All-purpose tenderloin rub (above)
- Optional: 1 tsp Dijon mustard (subtle tang; helps seasoning cling)
- Optional: 1 tbsp butter (useful for finishing or pan sauce)
If your package says pork fillet (UK/AU), it’s usually pork tenderloin—use the same 350/375/400 method below and pull at 145°F.
Step 1: Trim and dry
Pat the tenderloin dry very thoroughly. That dryness helps the seasoning stick and improves browning. If you see silver skin (a thin, shiny membrane), trim it away; it doesn’t soften with cooking.
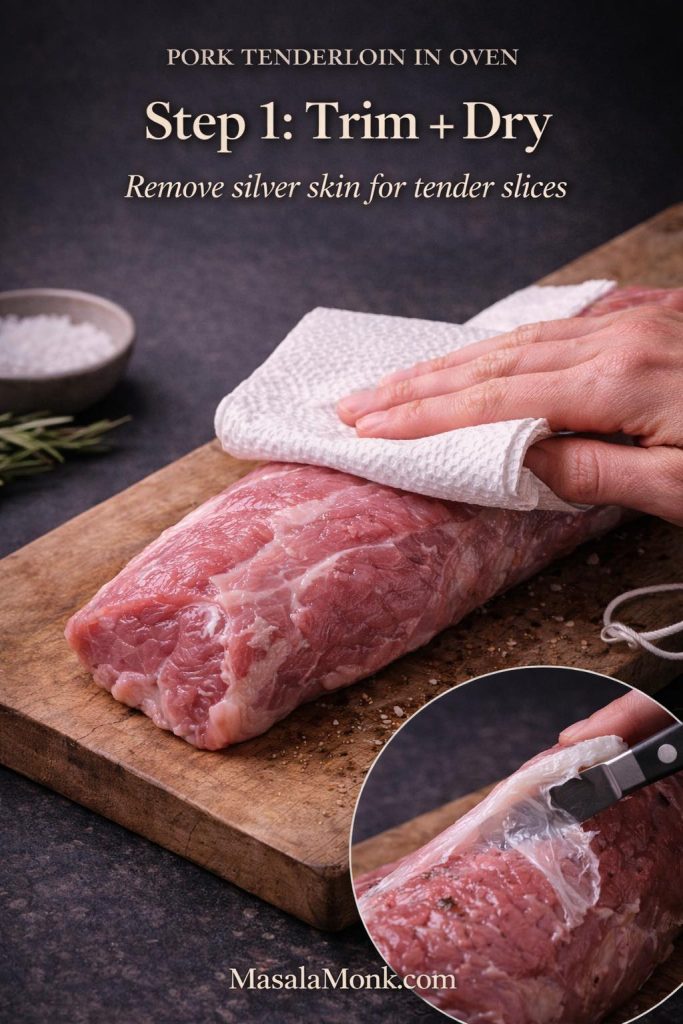
If one end is thinner, tuck that end under itself and tie lightly with kitchen twine. That small adjustment helps the roast cook more evenly so you don’t end up with overdone tail slices.
Step 2: Season properly
Rub the tenderloin with oil. If using Dijon, rub it on next. Then coat all sides with the seasoning rub, pressing gently so it adheres.
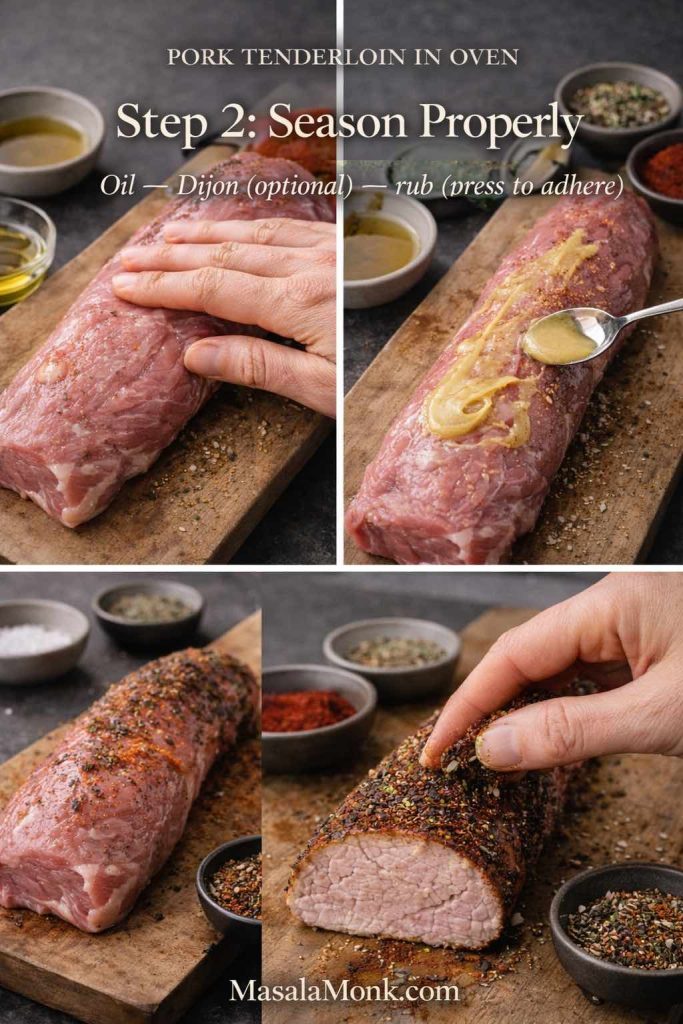
At this point, the surface should look evenly coated, not patchy. The aroma should be savory and warm from paprika and garlic.
Step 3: Roast (choose one temperature)
Pork tenderloin in oven at 400°F (205°C)
- Preheat oven to 400°F.
- Roast 18–24 minutes, depending on thickness.
- Start checking temperature at 18 minutes.
- Pull when the thickest part reaches 140–145°F.
- Rest 8–10 minutes, then slice.
What you’ll notice: the outside develops a deeper color, and the kitchen smells roasted and garlicky. The surface should look set and lightly browned rather than pale. This is the classic “pork tenderloin 400” approach that works beautifully for a quick dinner and crisp edges.
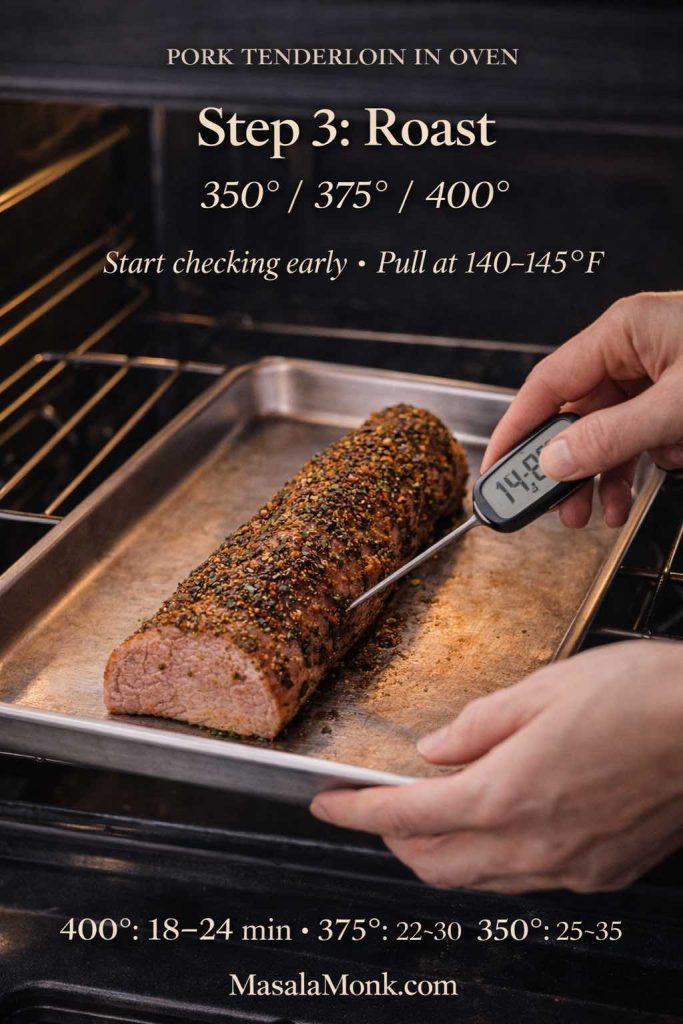
Pork tenderloin in oven at 350°F (175°C)
- Preheat oven to 350°F.
- Roast 25–35 minutes.
- Start checking temperature at 25 minutes.
- Pull at 140–145°F.
- Rest 8–10 minutes, then slice.
What you’ll notice: slightly gentler browning, an even roast, and a more gradual finish. This is a comfortable option when you’re coordinating sides, or when you want the tenderloin to finish more evenly across the center.
Pork tenderloin in oven at 375°F (190°C)
- Preheat oven to 375°F.
- Roast 22–30 minutes.
- Start checking at 22 minutes.
- Pull at 140–145°F.
- Rest 8–10 minutes, then slice.
What you’ll notice: a balance—good color, but still forgiving.
Step 4: Rest, then slice into medallions
Move the tenderloin to a cutting board and tent loosely with foil. While it rests, you can make a pan sauce, warm a glaze, or finish sides.
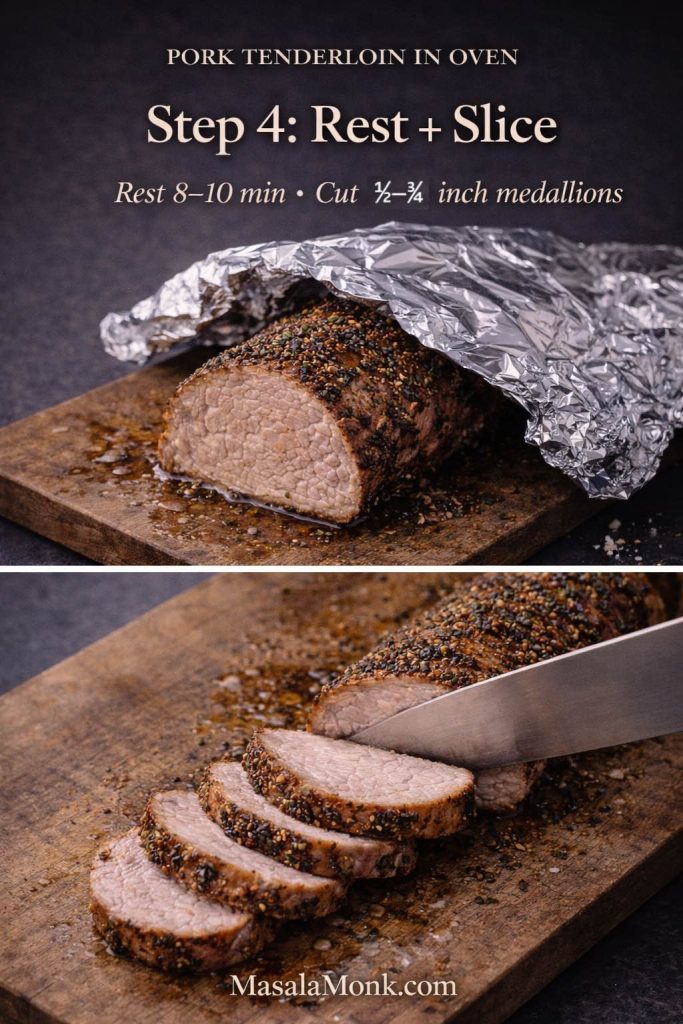
After resting, slice across the grain into medallions. If the knife meets resistance, your slices may be too thick or you may be cutting in the wrong direction. Aim for slices about ½ to ¾ inch thick for a tender bite.
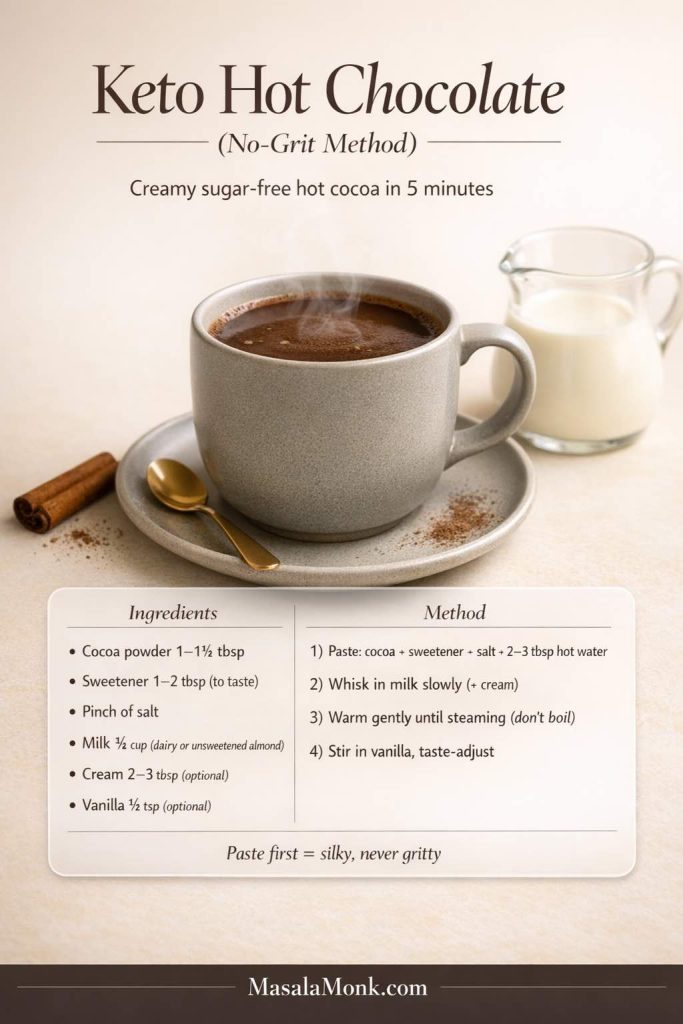
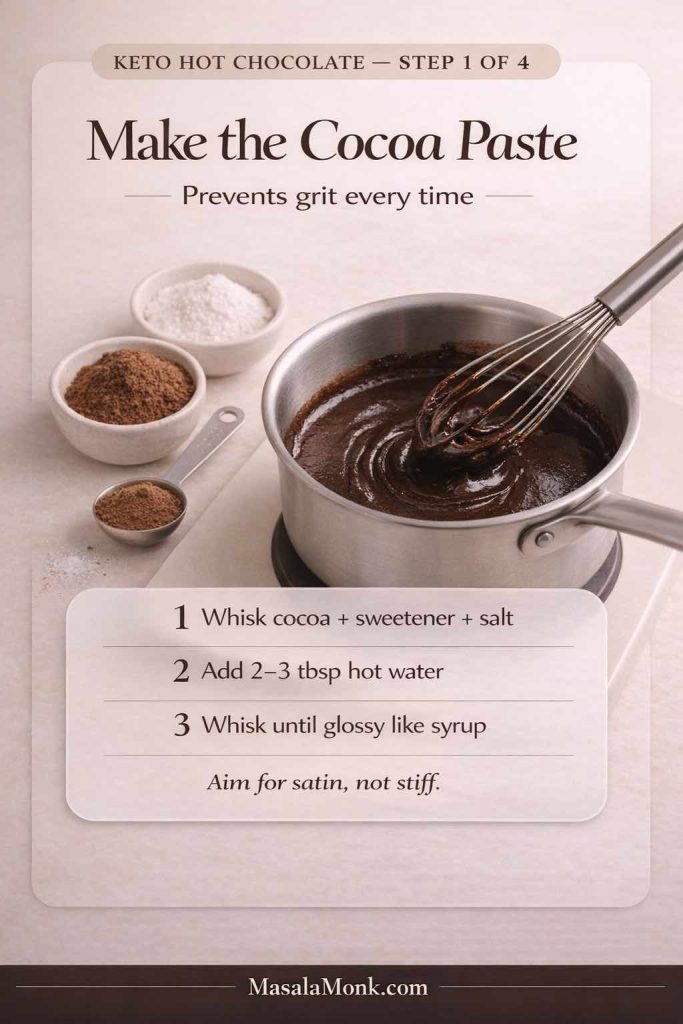
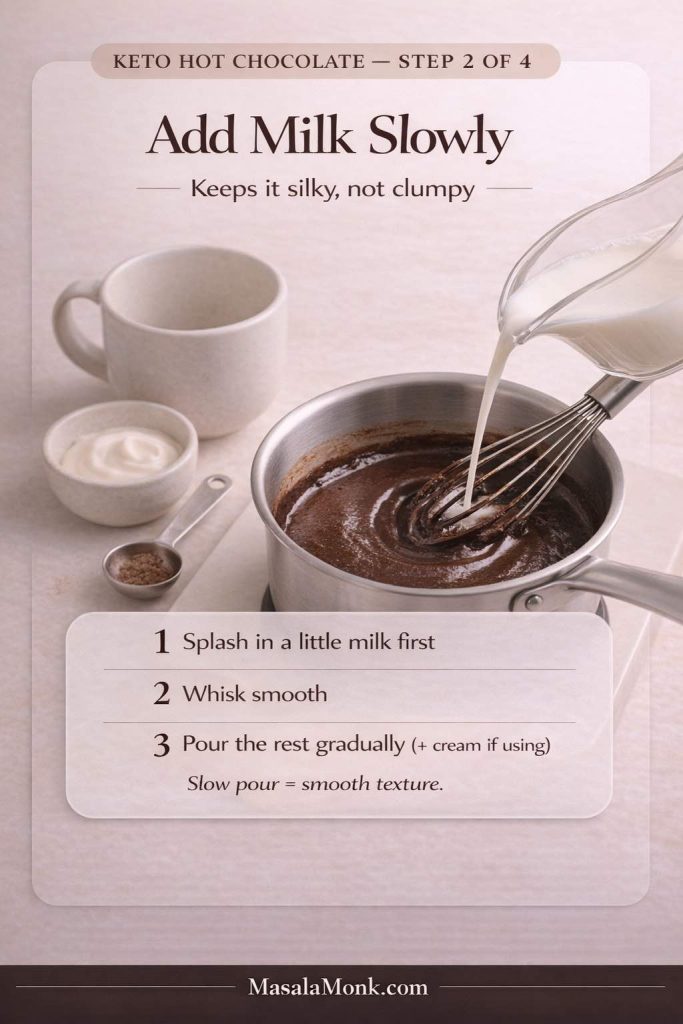
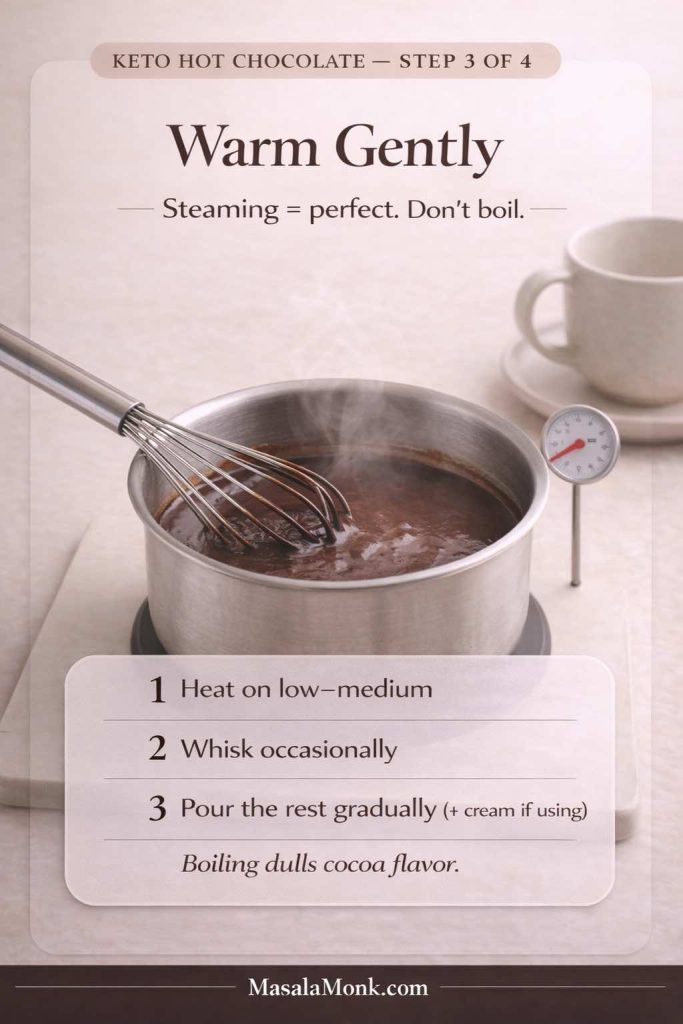
Also Read: Keto Hot Chocolate Recipe (Sugar-Free Hot Cocoa) + Best Homemade Mix
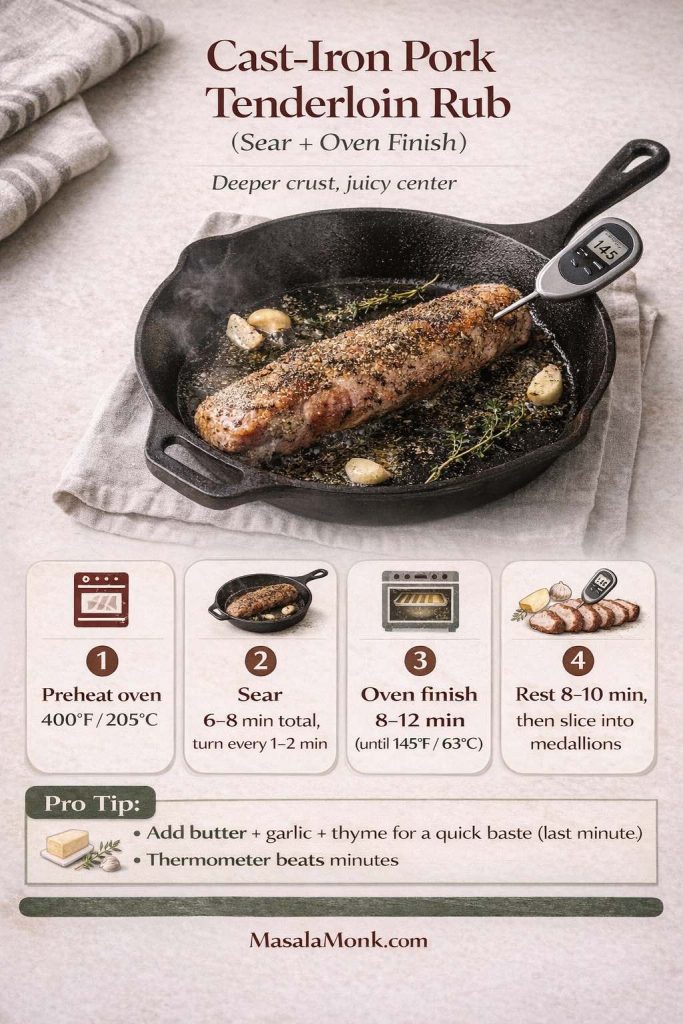
Cast iron pork tenderloin (sear + oven finish)
If you want deeper browning and a more savory “pan-roasted” flavor, start the tenderloin in a hot cast-iron skillet and finish it in the oven. The sear builds crust quickly; the oven brings the center to temperature gently.
This method is especially satisfying when serving the tenderloin plain with vegetables, because the crust brings flavor without needing a heavy sauce.
Ingredients
- 1 seasoned pork tenderloin
- 1 tbsp neutral oil (avocado, canola, grapeseed)
- Optional: 1 tbsp butter + 1 smashed garlic clove + a sprig of thyme or rosemary
Method
- Preheat oven to 400°F.
- Heat a cast-iron skillet over medium-high until hot. Add oil.
- Lay the tenderloin in the pan. You should hear an immediate sizzle.
- Sear on all sides, turning every 1–2 minutes, until browned all around (about 6–8 minutes total).
- Slide the skillet into the oven. Roast until the center reaches 140–145°F (often 8–12 minutes depending on thickness).
- Rest 8–10 minutes, then slice.
If you’re adding butter, drop it in during the last minute on the stovetop. As it foams, baste the tenderloin with a spoon for 20–30 seconds. The aroma becomes richer and more “roast-like,” even before it goes into the oven.
This sear-then-finish approach mirrors classic pan-roasting logic, similar to what’s used in this pan-roasted pork tenderloin technique.
Serve-it-with ideas:
- Creamy mushroom sauce (below) + mashed potatoes or roasted potatoes
- Chimichurri on the side + grilled vegetables
- Mustard glaze + carrots and onions roasted until sweet
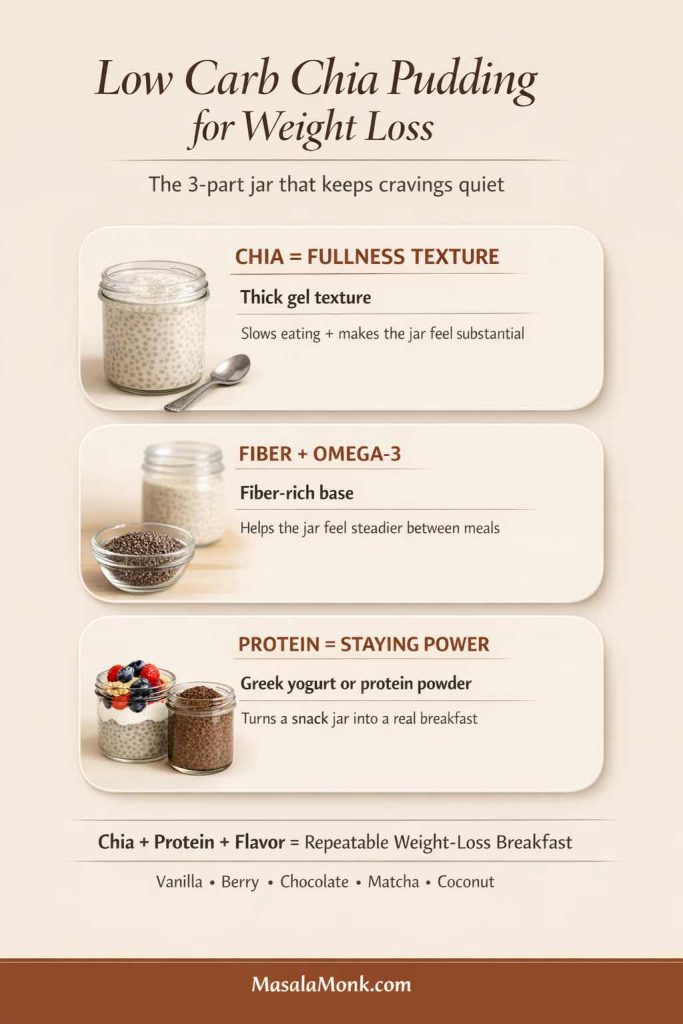
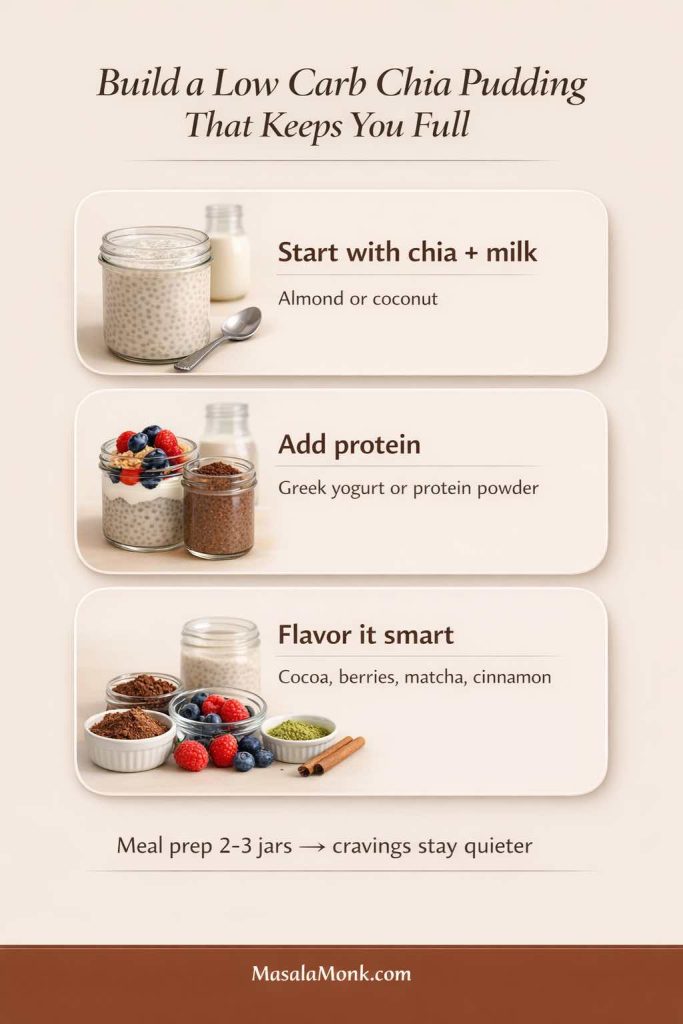
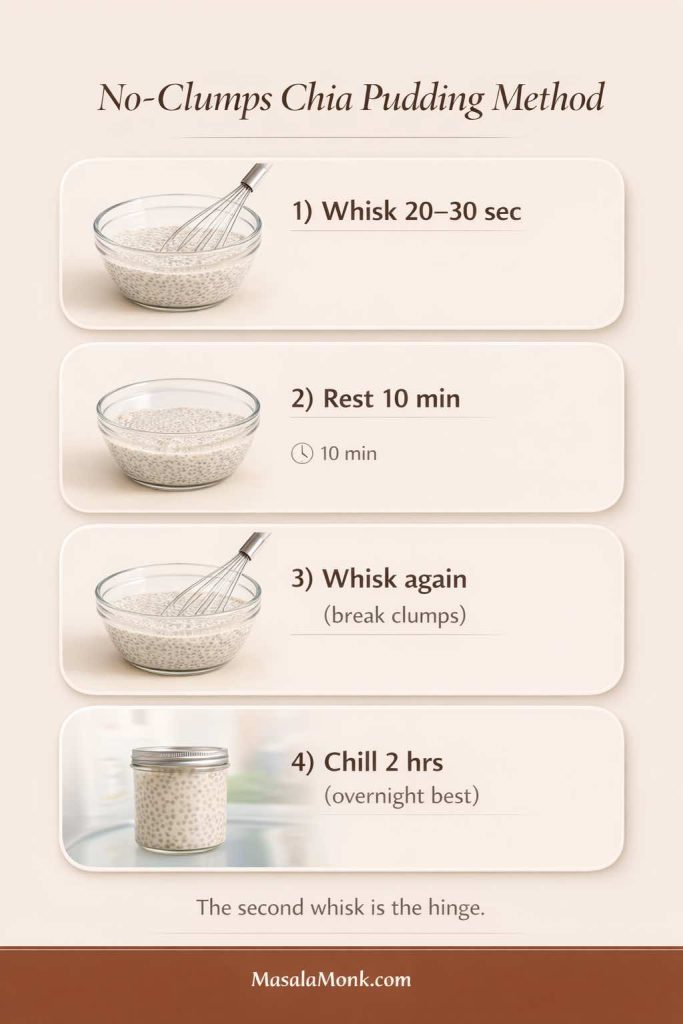
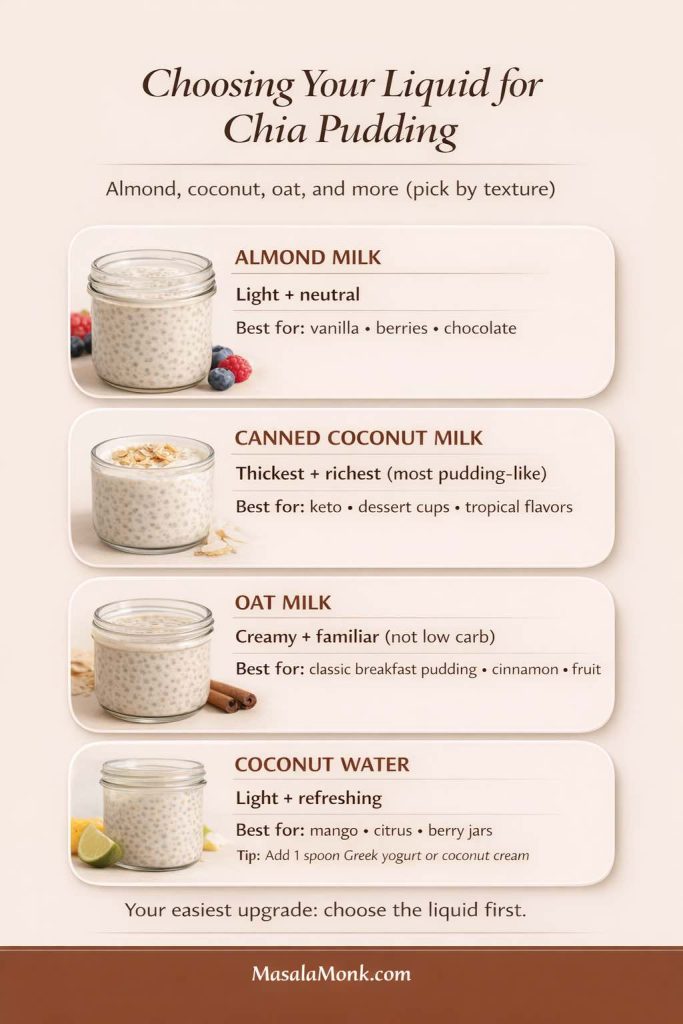
Also Read: 10 Low Carb Chia Pudding Recipes for Weight Loss (Keto, High-Protein, Dairy-Free)
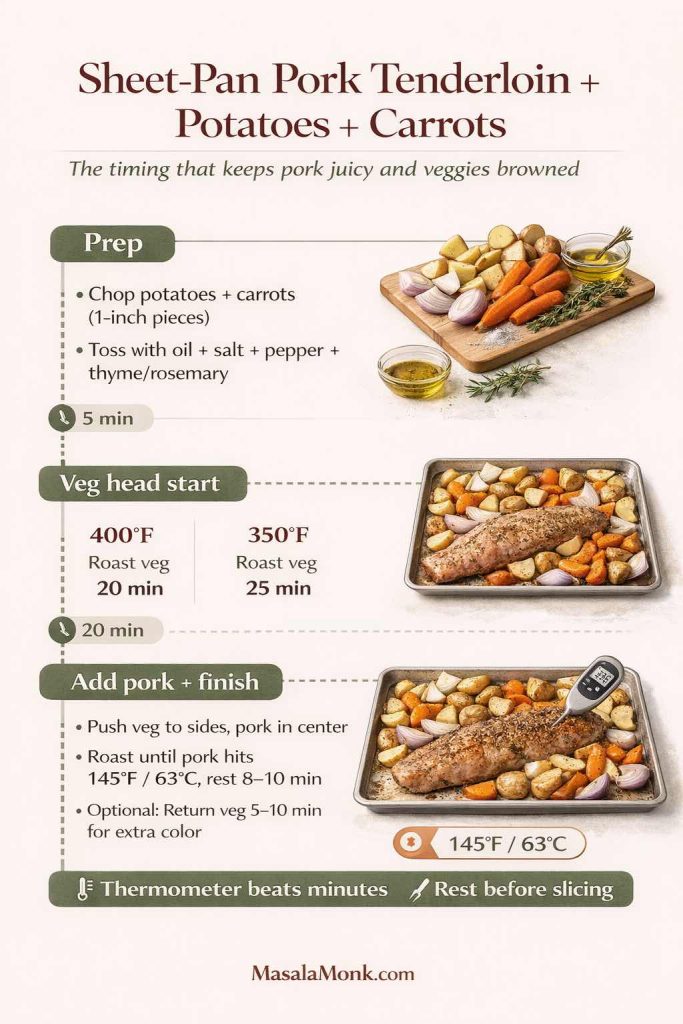
Pork tenderloin with potatoes and carrots (sheet-pan dinner)
A sheet-pan dinner turns tenderloin into a complete meal with minimal effort. The only trick is timing: potatoes and carrots need a head start; the pork goes in later so it stays juicy.
Ingredients (serves 4)
- 1 pork tenderloin, seasoned (use the rub or any glaze variation)
- 500 g potatoes, cut into 1-inch chunks
- 3–4 carrots, cut into thick coins or batons
- 1 medium onion, cut into wedges (optional but excellent)
- 2–3 tbsp olive oil
- 1 tsp kosher salt
- ½ tsp black pepper
- 1 tsp dried thyme or rosemary
- Optional: 1 tsp smoked paprika for the vegetables
Method
- Preheat oven to 400°F for crisp edges, or 350°F for a gentler roast.
- Toss potatoes, carrots, and onion with oil, salt, pepper, and herbs.
- Roast vegetables first:
- At 400°F: 20 minutes
- At 350°F: 25 minutes
- Push vegetables to the sides, then place the seasoned tenderloin in the center.
- Roast until the pork reaches 140–145°F.
- Move pork to a board to rest. Toss vegetables in the drippings and return them to the oven for 5–10 minutes if they need more color.
- Slice tenderloin into medallions and serve with the vegetables.
What you’ll notice: the carrots turn sweet, the onions soften and caramelize at the edges, and the potatoes soak up the meat juices like a built-in sauce.
If you like swapping potatoes, this quick read on white vs sweet potatoes can help decide what fits your flavor direction.
Serve-it-with ideas:
- Honey garlic glaze + sweet potatoes + broccoli
- Balsamic glaze + carrots + onions (they’re made for each other)
- Lemon herb finish + white potatoes + green beans
Also Read: Garlic & Paprika Cabbage Rolls (Keto-Friendly Recipes) – 5 Bold Savory Twists
Sauce and glaze variations that are actually worth making
A good sauce changes everything. Even if your tenderloin is perfectly cooked, a finishing glaze or pan sauce makes the meal feel intentional—like you planned it rather than stumbled into it. Each variation below is complete, flavorful, and written so you can cook it without improvising.

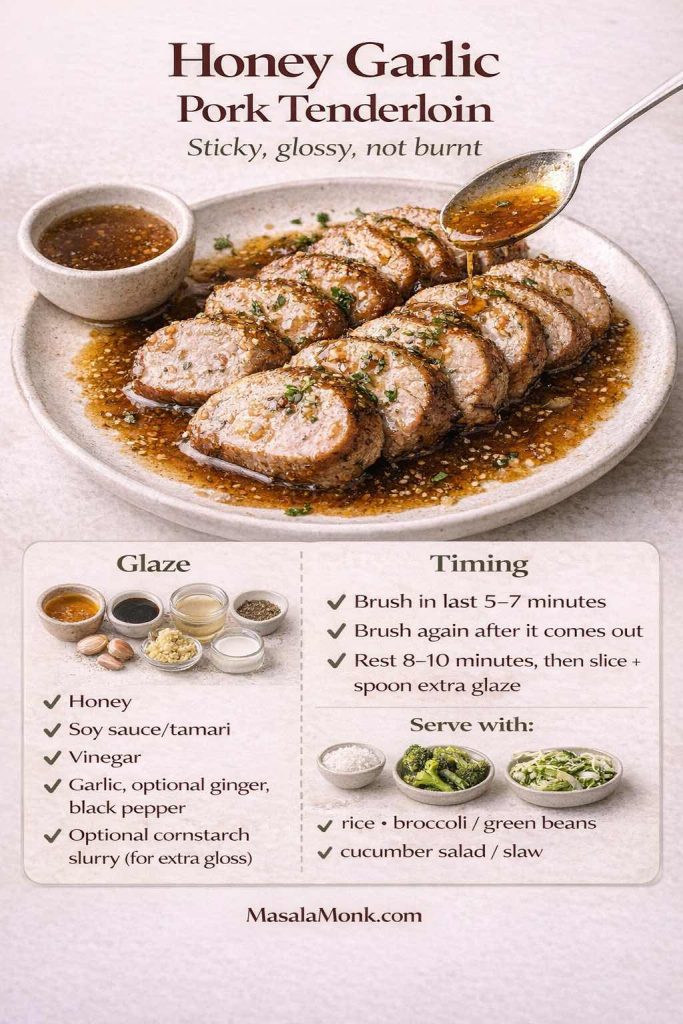
Honey garlic pork tenderloin (sticky, glossy, crowd-pleasing)
Honey garlic is the “everyone at the table is happy” flavor. It’s sweet, savory, and especially good when the tenderloin is sliced into medallions and coated in glaze.
Honey garlic glaze (recipe for 1 tenderloin)
- 3 tbsp honey
- 2 tbsp soy sauce (or tamari)
- 1 tbsp apple cider vinegar or rice vinegar
- 4 cloves garlic, finely minced or grated
- 1 tsp grated ginger (optional, but adds warmth)
- ½ tsp black pepper
- Pinch of chili flakes (optional)
- Optional thickener: 1 tsp cornstarch + 1 tbsp water
Method
- Cook the tenderloin using the core oven method (400°F for speed, 350°F for gentleness).
- While it roasts, combine honey, soy sauce, vinegar, garlic, ginger, and pepper in a small saucepan.
- Warm gently for 2–3 minutes, stirring. The glaze should smell sweet and garlicky, not harsh.
- If you want it thicker, whisk in the cornstarch slurry and simmer 30–60 seconds until glossy.
- During the last 5–7 minutes of roasting, brush glaze over the tenderloin.
- Brush again as soon as it comes out, then rest.
- Slice into medallions and spoon remaining glaze over the top.
If you enjoy a teriyaki direction, a thicker homemade sauce like homemade teriyaki sauce works beautifully the same way—brushed on near the end so it turns lacquered rather than burnt.
Serve-it-with ideas:
- Roasted broccoli or green beans + rice
- Sweet potatoes + a bright cucumber salad
- A simple slaw tucked into sandwiches the next day
Also Read: Eggless Yorkshire Pudding (No Milk) Recipe
Creamy mushroom pork tenderloin recipe (deep, savory comfort)
This is comfort food that still feels like a proper dinner. The flavor comes from browning mushrooms until they’re deeply savory—so the sauce tastes rich even before the cream goes in.
Creamy mushroom sauce (serves 4)
- 250–300 g mushrooms, sliced
- 1 tbsp butter
- 1 tbsp olive oil
- 1 small onion or 2 shallots, finely chopped
- 3 cloves garlic, minced
- ½ cup chicken stock (or water + a pinch of salt)
- ½ cup cream (or coconut cream for dairy-free)
- 1 tsp Dijon mustard
- Optional: 1 tsp Worcestershire sauce
- ½ tsp dried thyme or 1 tsp fresh thyme leaves
- Salt and pepper

Method
- Roast or cast-iron sear the tenderloin to 140–145°F, then rest it.
- In the same skillet, heat butter and oil.
- Add mushrooms and spread them out. Let them sit undisturbed for 2 minutes so they brown instead of steaming.
- Stir, then keep cooking until moisture evaporates and the mushrooms deepen in color.
- Add onion/shallot and cook until softened.
- Add garlic and cook 30 seconds, just until fragrant.
- Pour in stock and scrape up browned bits. Simmer 2–3 minutes.
- Stir in cream, Dijon, thyme, and Worcestershire if using. Simmer until slightly thick.
- Slice tenderloin into medallions, then warm the slices in the sauce for 1–2 minutes.
- Taste, adjust salt and pepper, then serve.
If you want a lighter vegetable side that still feels hearty, a quick mushroom and zucchini skillet fits beautifully here—especially because it keeps the plate balanced.
Serve-it-with ideas:
- Mashed potatoes (this sauce was made for them)
- Buttered noodles or rice
- Roasted asparagus or green beans for contrast
Also Read: Crock Pot Chicken Breast Recipes: 10 Easy Slow Cooker Dinners (Juicy Every Time)
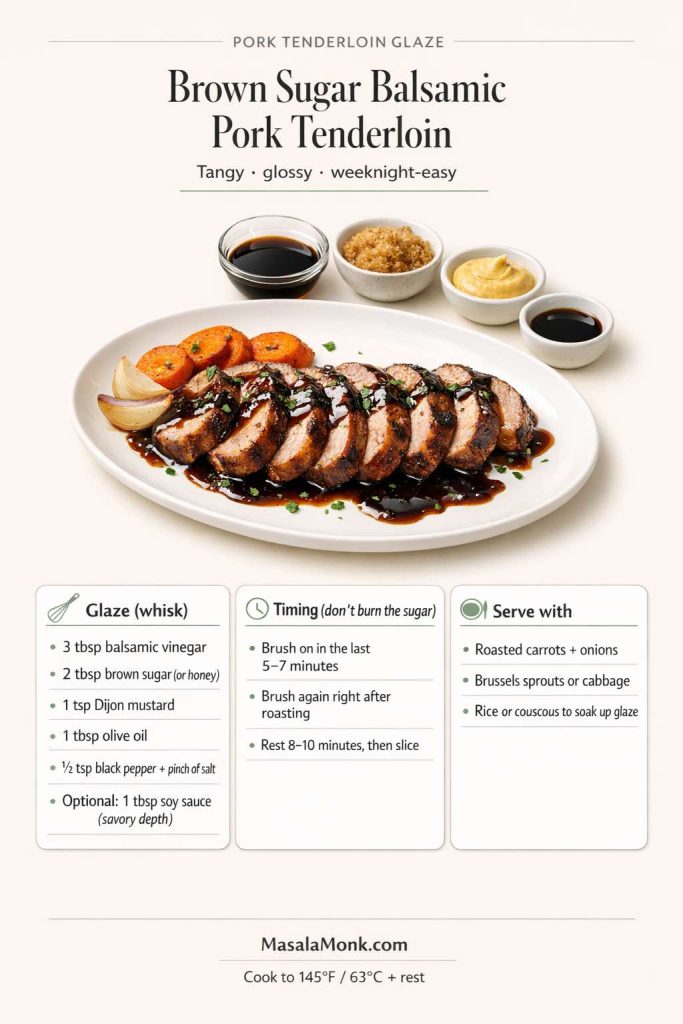
Brown sugar balsamic pork tenderloin (tangy, glossy, slightly sweet)
This glaze tastes bold without requiring much effort. It’s especially good when you’re roasting vegetables on the side, because balsamic and brown sugar make carrots and onions taste even sweeter.
Balsamic glaze (recipe for 1 tenderloin)
- 3 tbsp balsamic vinegar
- 2 tbsp brown sugar (or honey)
- 1 tsp Dijon mustard
- 1 tbsp olive oil
- ½ tsp black pepper
- Pinch of salt
- Optional: 1 tbsp soy sauce for extra savory depth
Method
- Whisk all glaze ingredients together.
- Roast the tenderloin using the core method.
- Brush glaze on during the last 5–7 minutes of roasting.
- Brush again right after it comes out.
- Rest, slice, and drizzle pan juices over the medallions.
Because this glaze contains sugar, it behaves best when applied late. That timing gives you caramelization instead of bitterness.
Serve-it-with ideas:
- Roasted carrots + onions
- Brussels sprouts or cabbage roasted until crisp
- A simple grain like couscous or rice to soak up the glaze
Lemon pork tenderloin (bright, clean, weeknight-perfect recipe)
When you want something lighter than honey or cream, lemon brings freshness instantly. It’s also a beautiful match for potatoes and green vegetables.
Lemon herb finish
- Zest of 1 lemon
- 2 tbsp lemon juice
- 1 tbsp olive oil
- 1 small garlic clove, grated
- ½ tsp salt
- ½ tsp black pepper
- 1 tbsp chopped parsley (optional)
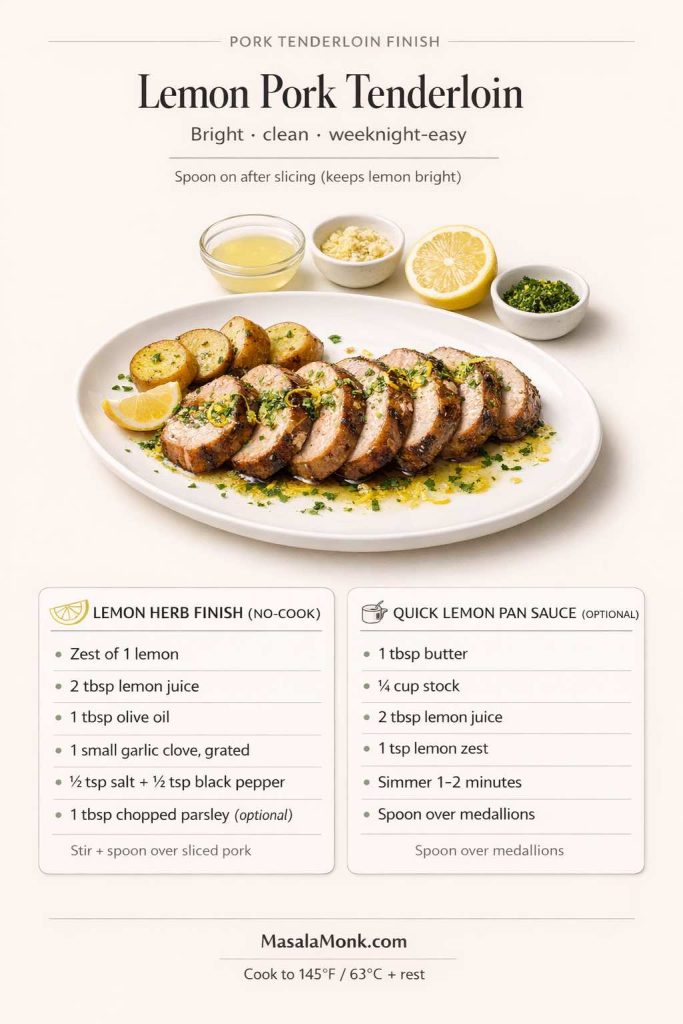
Quick lemon pan sauce (optional)
- 1 tbsp butter
- ¼ cup stock
- 2 tbsp lemon juice
- 1 tsp lemon zest
- Pinch of salt
Method
- Roast the tenderloin and let it rest.
- Stir lemon herb finish ingredients together. Spoon over sliced medallions.
- If you want a warm sauce, simmer butter + stock + lemon juice/zest for 1–2 minutes, then spoon over.
The scent here is bright and clean—lemon zest, garlic, and warm pork together. It’s simple, yet it tastes intentional.
Serve-it-with ideas:
- Roasted potatoes + sautéed greens
- Steamed rice + cucumber salad
- Grilled vegetables for a lighter plate
Also Read: Sourdough Starter Recipe: Make, Feed, Store & Fix Your Starter (Beginner Guide)
Mustard glazed pork tenderloin (savory, tangy, elegant)
Mustard adds a gentle bite that makes tenderloin taste more like a classic roast dinner. It’s also a fantastic choice when you’re serving potatoes and carrots.
Mustard glaze
- 2 tbsp Dijon mustard
- 1 tbsp honey
- 1 tbsp olive oil
- 1 tsp minced garlic
- ½ tsp dried thyme or rosemary
- ½ tsp black pepper
- Pinch of salt
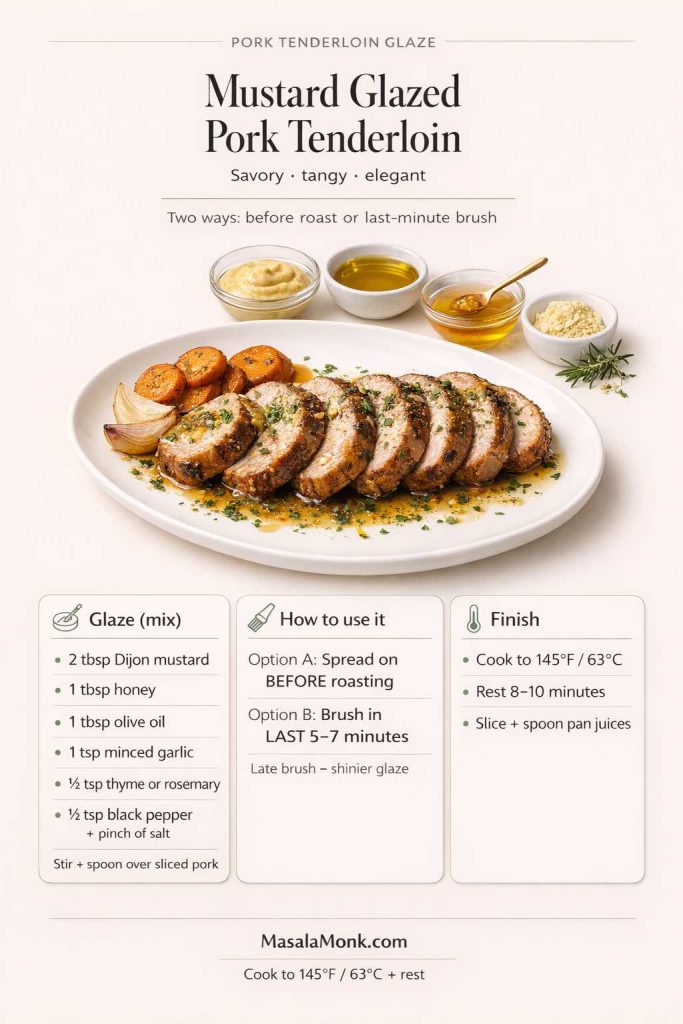
Method
- Mix glaze ingredients and spread evenly over the tenderloin before roasting.
- Roast until the center reaches 140–145°F.
- Rest, slice, then spoon pan juices over the medallions.
The glaze becomes slightly darker at the edges and smells warmly herbal, especially with rosemary.
Serve-it-with ideas:
- Sheet-pan potatoes and carrots
- Green beans with a squeeze of lemon
- A simple salad with crisp apples or pears
Also Read: How to make No-Bake Banana Pudding: No Oven Required Recipe
Pork tenderloin and apples (sweet-savory, cozy, balanced)
Apples and pork are a classic pairing because they bring sweetness and acidity that flatter savory meat. It feels cozy without needing cream.
Apple pan sauce (recipe serves 4)
- 1 tbsp butter
- 1 tbsp olive oil
- 1 apple, thinly sliced (sweet-tart varieties work best)
- 1 small onion or shallot, thinly sliced
- ½ cup stock
- 1 tsp Dijon mustard
- 1 tbsp apple cider vinegar (optional)
- Pinch of cinnamon (optional, use lightly)
- Salt and pepper
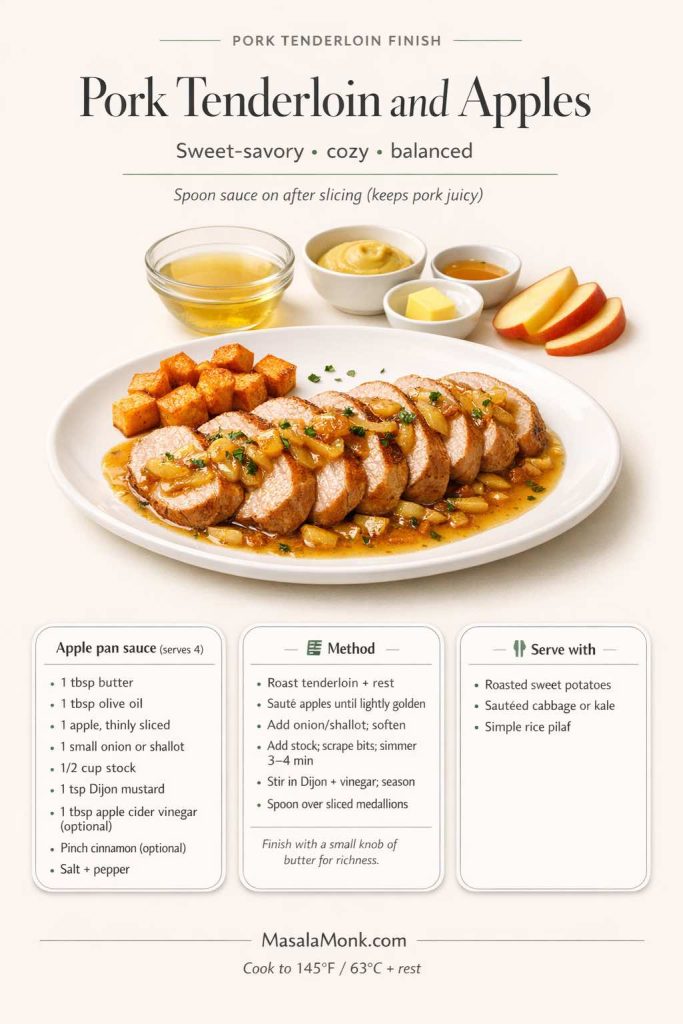
Method
- Roast the tenderloin and rest it.
- Heat butter and oil in a skillet. Sauté apples until lightly golden.
- Add onion/shallot and cook until softened.
- Pour in stock, scrape up browned bits, and simmer 3–4 minutes.
- Stir in Dijon and vinegar if using. Season well.
- Slice tenderloin and spoon apple sauce over the medallions.
For extra richness, add a small knob of butter at the end. For extra brightness, add a touch more vinegar.
Serve-it-with ideas:
- Roasted sweet potatoes
- Sautéed cabbage or kale
- A simple rice pilaf
Also Read: Chicken Adobo — Step-by-Step Recipe — Classic Filipino Adobong Manok
Maple pork tenderloin (plus a quick apricot twist)
Maple gives you a glaze that feels different from honey—more caramel, less floral. Add apricot jam and it turns into a dinner-party finish with almost no extra work.
Maple glaze
- 3 tbsp maple syrup
- 1 tbsp Dijon mustard
- 1 tbsp soy sauce
- 1 tsp apple cider vinegar
- 1 clove garlic, grated
- Black pepper
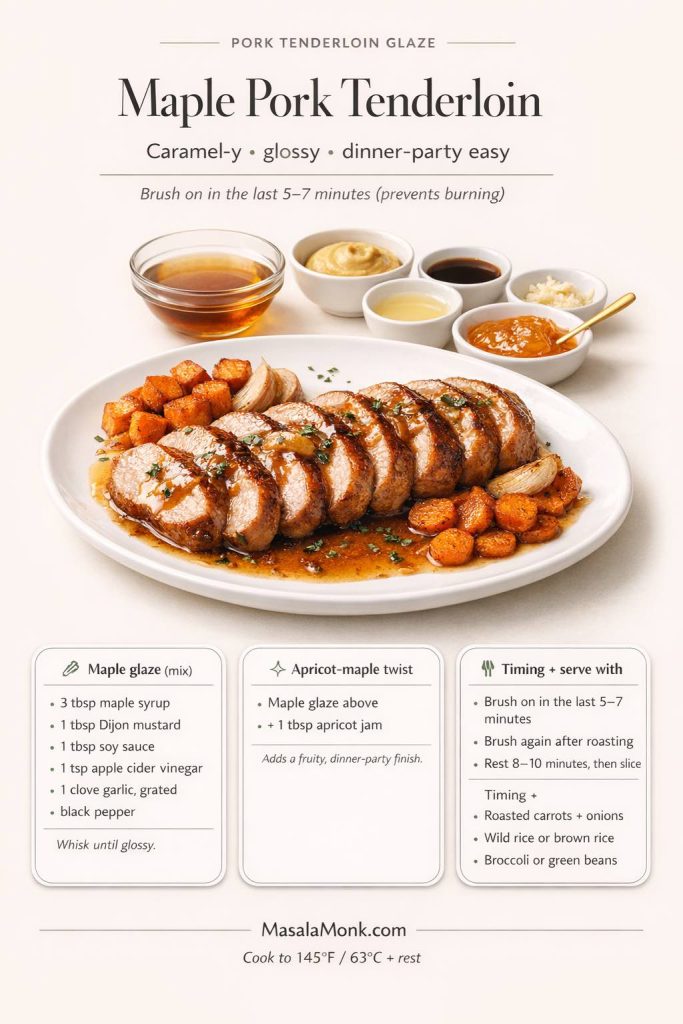
Apricot-maple glaze
- Maple glaze above
- 1 tbsp apricot jam
Brush on during the last 5–7 minutes of roasting, then brush again after it comes out. Rest, slice, and spoon any extra glaze over the top.
Serve-it-with ideas:
- Roasted carrots and onions
- Wild rice or brown rice
- Broccoli or green beans for freshness
Also Read: Sweetened Condensed Milk Fudge: 10 Easy Recipes
Spicy finishing options (when you want bold flavor at the table)
Some nights you want the tenderloin to stay simple, yet you still want punch. A finishing sauce on the side does that beautifully—each person can adjust heat and tang to taste.
If you love variety, pepper sauce ideas gives you multiple directions—from sharp and vinegary to smoky and deep.
For a bright, herby, garlic-forward option, a spoon of chimichurri sauce next to sliced tenderloin is especially good when the meat is simply roasted or grilled.
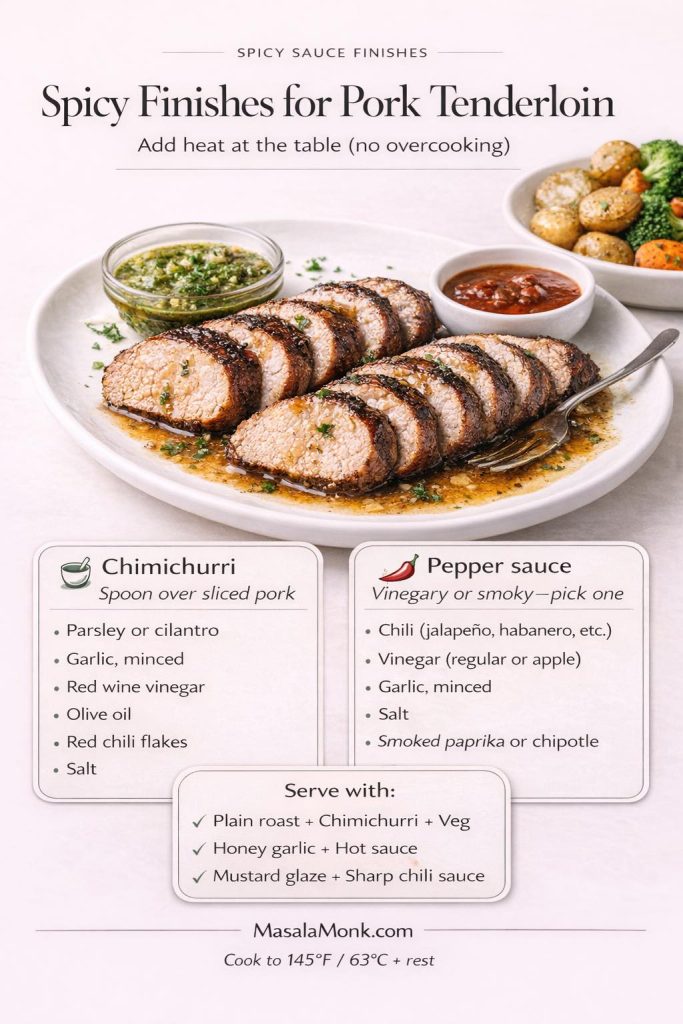
Serve-it-with ideas:
- Plain roasted tenderloin + chimichurri + roasted vegetables
- Honey garlic tenderloin + a hot sauce on the side for contrast
- Mustard-glazed tenderloin + a sharp chili sauce for bite
Also Read: Sourdough Recipe: 10 Easy Bread Bakes (Loaves, Rolls & Bagels)
BBQ pork tenderloin (oven or grill)
BBQ flavor works beautifully on tenderloin as long as the sauce is applied late. Many BBQ-style sauces contain sugar, which can burn if brushed on too early.
BBQ pork tenderloin in oven
- Roast the seasoned tenderloin using the core method.
- During the last 5–7 minutes, brush with BBQ-style sauce.
- Finish roasting, then brush again after it comes out.
- Rest and slice.
If you enjoy playing with sauce styles—tangy, creamy, spiced, or sweet—collections like pizza sauce variations can inspire flavor directions while you keep the same “brush late” approach.
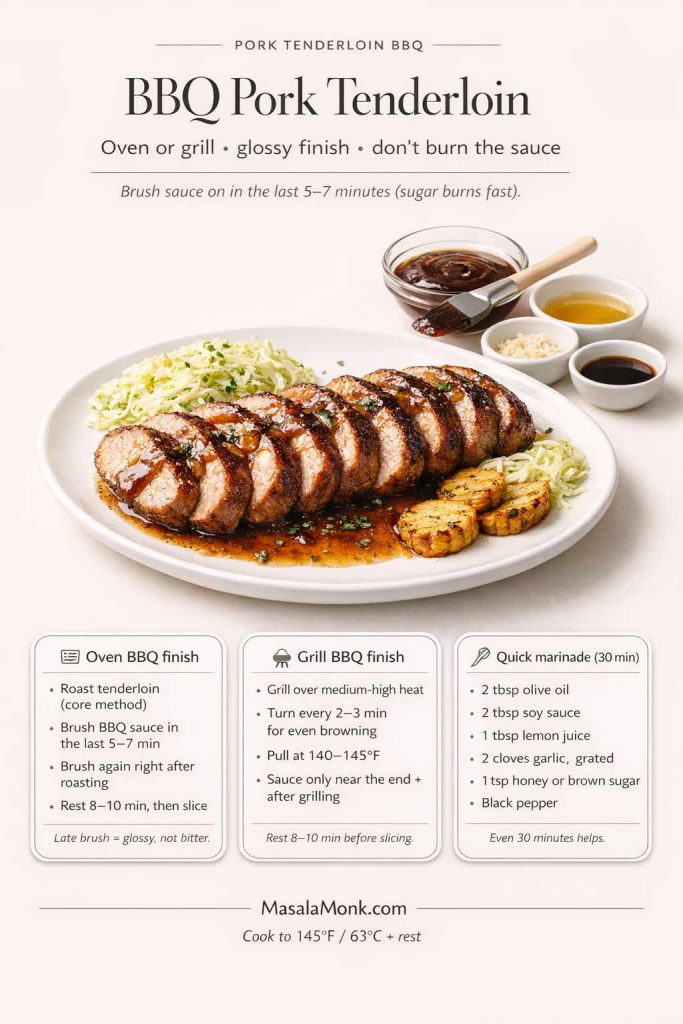
Best grilled pork tenderloin
- Season with the base rub, or use a quick marinade.
- Grill over medium-high heat, turning every few minutes for even browning.
- Pull at 140–145°F.
- Rest, slice, serve.
A quick marinade for grilled marinated pork tenderloin:
- 2 tbsp olive oil
- 2 tbsp soy sauce
- 1 tbsp lemon juice
- 2 cloves garlic, grated
- 1 tsp honey or brown sugar
- Black pepper
Even 30 minutes helps.
Also Read: Peanut Butter Fudge: Recipes & Guide (8 Methods + Easy Variations)
Smoked pork tenderloin (Traeger-style approach, without drying it out)
Smoked tenderloin tastes fantastic, although tenderloin isn’t built for hours and hours of low-and-slow cooking. Because it’s lean, it benefits from a shorter smoke and a careful finish.
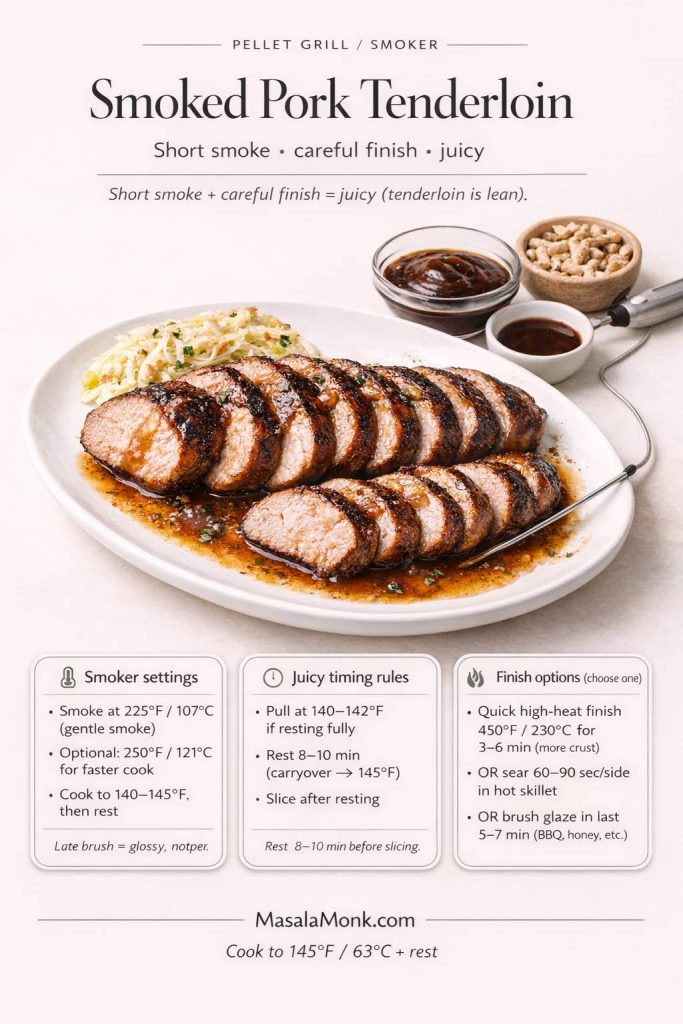
Smoke at a lower temperature until the tenderloin reaches 140–145°F internally, then rest. If you want more crust, finish briefly over higher heat.
No matter the smoker, the goal stays consistent: stop at temperature, then rest.
Also Read: 10 Vegan Chocolate Cake Recipes (Easy, Moist, & Dairy-Free)
Slow cooker pork tenderloin (sliceable, not overcooked)
A slow cooker can be a lifesaver. With tenderloin, the main priority is avoiding overcooking. Because it’s lean, it can go from tender to dry if it stays in too long.
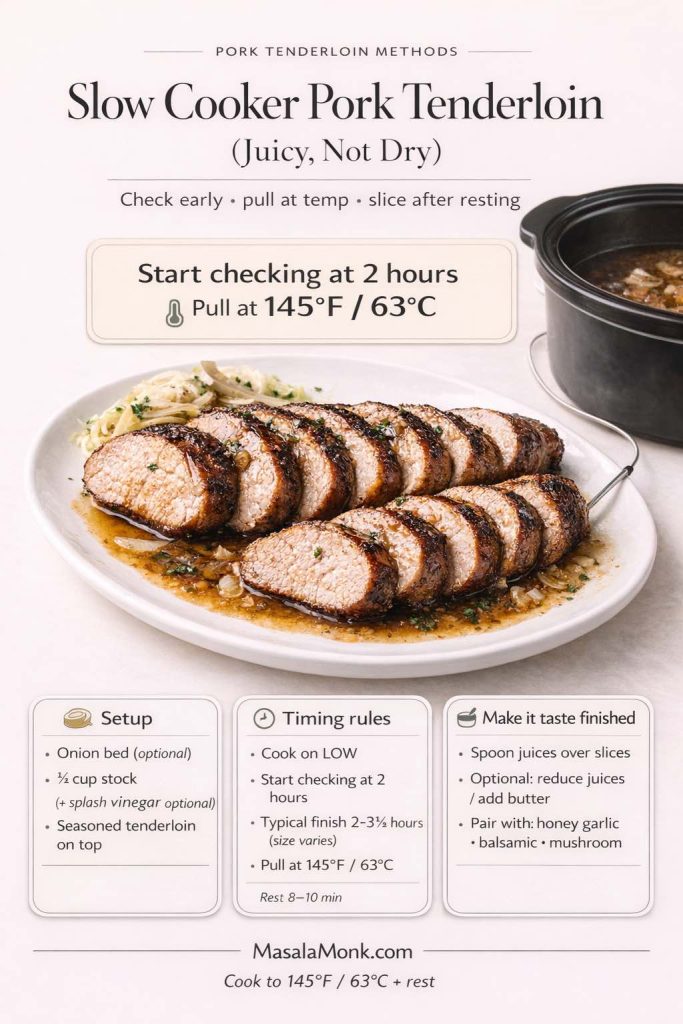
Simple slow cooker tenderloin recipe
- Place sliced onions in the bottom if you like.
- Add ½ cup stock (or stock plus a splash of vinegar for brightness).
- Add the seasoned tenderloin.
- Cook on LOW and start checking at 2 hours; most 1–1½ lb tenderloins finish around 2–3½ hours—remove at 145°F, rest 8–10 minutes, then slice..
- Remove once it reaches 145°F, rest, then slice.
- Spoon cooking juices over the slices.
Finishing with sauce makes this feel more complete. Honey garlic, teriyaki-style, balsamic, or creamy mushroom all work well.
If you like slow cooker structure for lean meats, crock pot chicken breast recipes offers ideas that translate nicely because chicken breast shares the same “lean meat needs careful timing” reality.
Also Read: Kahlua Drinks: 10 Easy Cocktail Recipes (Milk, Vodka, Coffee)
Instant Pot pork tenderloin (fast, useful, best with sauce)
Pressure cooking can be fast and convenient, though it benefits from a good sauce afterward.
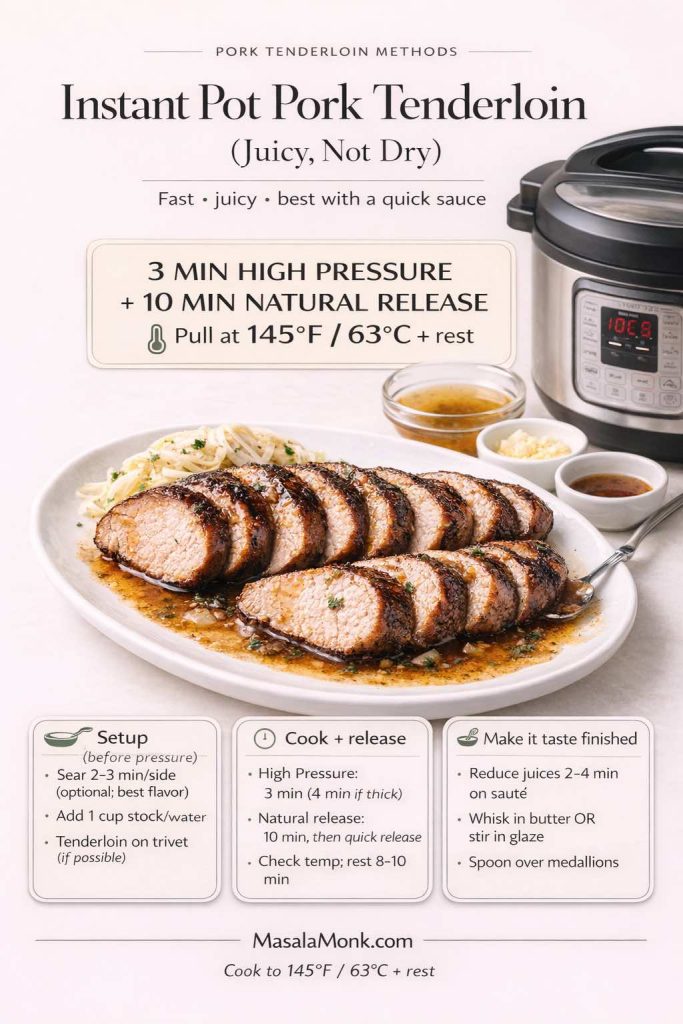
- Sear first (optional but best): sauté 2–3 minutes per side.
- Add liquid: 1 cup stock or water (plus onions/garlic if you want).
- Pressure cook (High): 3 minutes for a typical 1–1½ lb tenderloin (use 4 minutes if it’s notably thick).
- Release: 10 minutes natural release, then quick release.
- Finish: check internal temp; rest 8–10 minutes, then slice.
- Make it taste finished: simmer the pot juices on sauté for 2–4 minutes to reduce, then whisk in a knob of butter or stir in one of your glazes.
Because every model differs slightly, checking internal temperature remains the most reliable finish.
Also Read: Hot Chocolate Coffee: 3 Easy Recipes (Cocoa, Mix, or Espresso)
Pulled-style tenderloin (when you want shreddable pork)
Tenderloin is not the first choice for classic pulled pork because it’s lean. Still, if tenderloin is what you have and you want something shreddable, it can work—provided it’s protected with liquid and you stop as soon as it becomes tender.
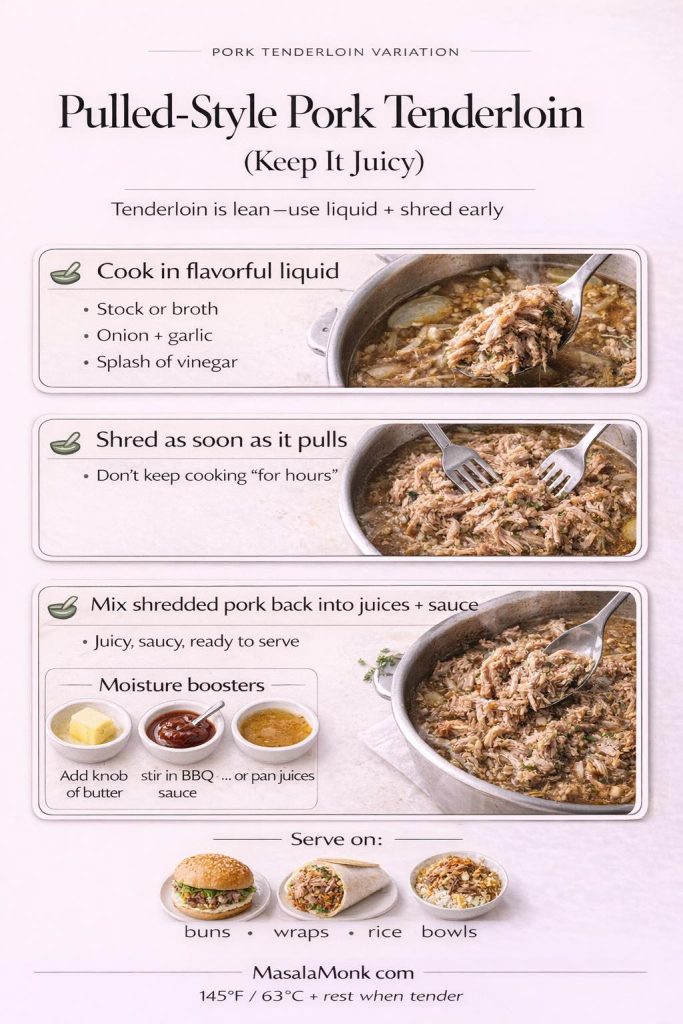
Cook it in flavorful liquid (stock, onions, garlic, a touch of vinegar), then check for tenderness. As soon as it shreds easily, shred it and immediately mix it back into the cooking juices and sauce so it stays moist. Serve it in buns, wraps, or rice bowls.
- Cook it in flavorful liquid.
- Stop once it shreds easily.
- Mix the shredded meat back into the cooking liquid and sauce immediately.
If your goal is the traditional barbecue pulled texture, pork shoulder is the best option. Pork loin can also handle longer cooking better than tenderloin. Even so, pulled-style tenderloin can be a satisfying “use what you have” dinner when it’s treated gently.
Also Read: Cappuccino Recipe: How to Make a Perfect Cappuccino at Home
Breaded pork tenderloin and pork fillet sandwich style (crispy, hearty, different meal)
Roasted tenderloin is one personality. Crispy cutlets are another. When you slice tenderloin into medallions, pound thin, bread, and pan-fry, you get a completely different meal—crisp edges, juicy center, and the kind of sandwich that feels like comfort food.
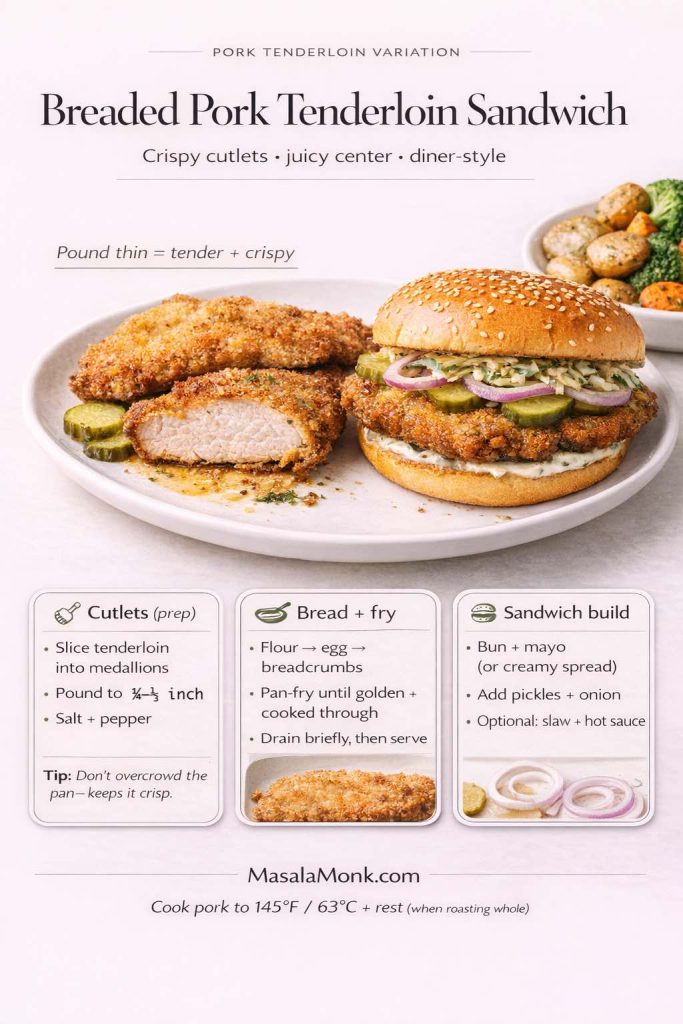
Basic recipe for crispy cutlets
- Slice tenderloin into medallions, then pound each slice thin.
- Season with salt and pepper.
- Dredge in flour, dip in beaten egg, then coat in breadcrumbs.
- Pan-fry until crisp and cooked through.
Serve in a bun with pickles, onion, and a creamy spread. A homemade spread like eggless mayonnaise makes it feel more intentional.
For extra flavor, add a spoon of spicy sauce or a tangy slaw. Meanwhile, the leftover cutlets are incredible sliced into wraps.
Also Read: 19 Essential Kitchen Tools That Make Cooking Easier
Stuffed pork tenderloin in oven (weekend-special, still approachable)
Stuffed tenderloin looks impressive and feels festive, especially for holiday pork tenderloin dinners. It does take a bit more prep, although the technique is approachable.
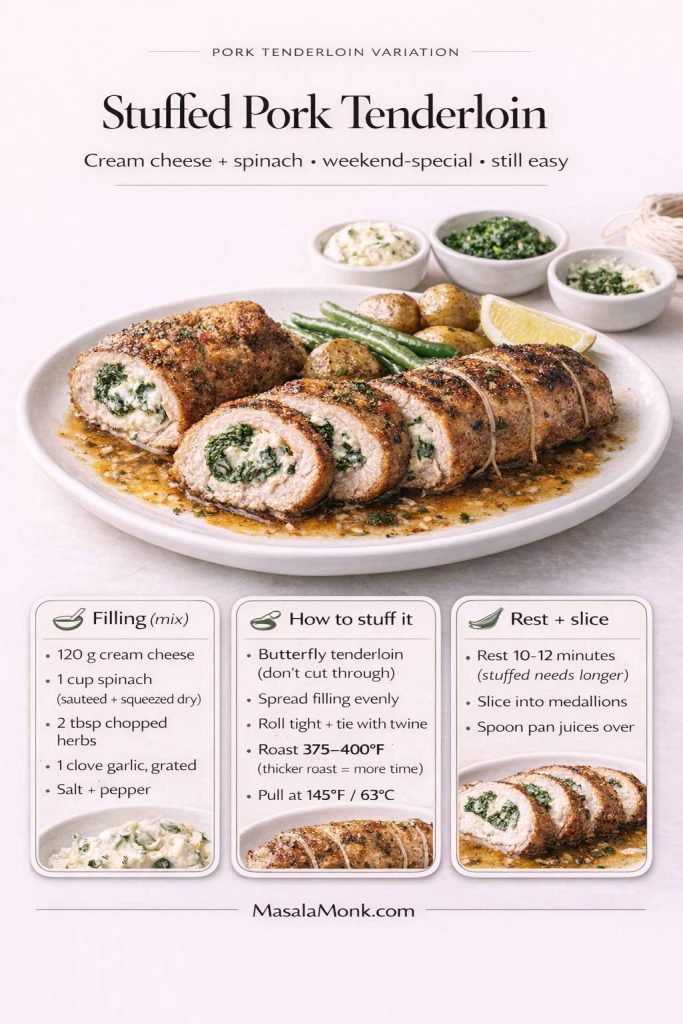
Cream cheese stuffed pork tenderloin (savory, rich)
Filling:
- 120 g cream cheese
- 1 cup spinach, sautéed and squeezed dry
- 2 tbsp chopped herbs
- 1 clove garlic, grated
- Salt and pepper
Butterfly the tenderloin (slice lengthwise, not all the way through), open it like a book, and flatten gently. Spread filling, then roll tightly and tie with twine at intervals. Roast at 375–400°F, checking temperature carefully because the stuffed roll is thicker and needs extra time.
A stuffed tenderloin benefits from resting a bit longer—closer to 10–12 minutes—before slicing.
Also Read: How to Cook Tortellini (Fresh, Frozen, Dried) + Easy Dinner Ideas
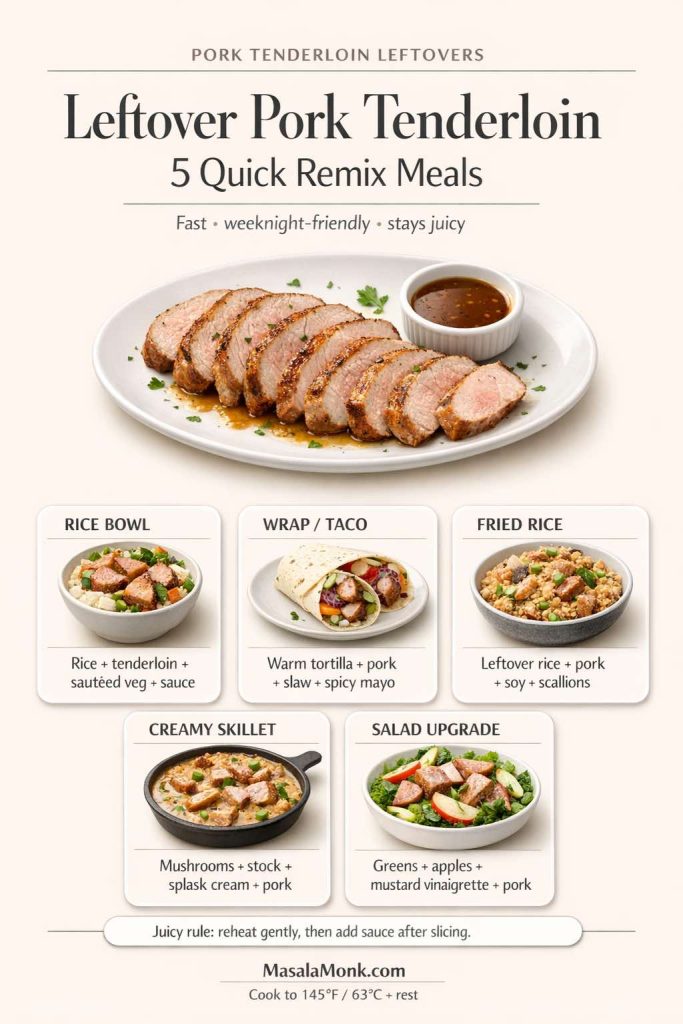
Leftover pork tenderloin (how to keep it juicy)
Leftovers are often where tenderloin truly shines, because the slices work in sandwiches, bowls, and quick skillets.
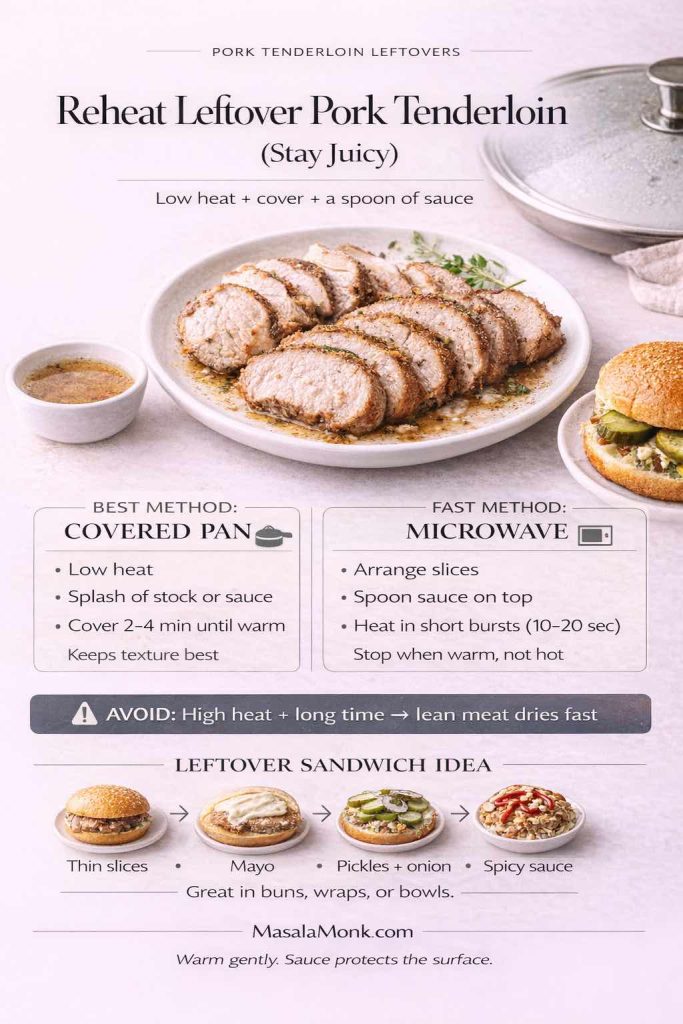
Best ways to reheat
- Warm slices gently in a covered pan with a splash of stock or sauce.
- Alternatively, microwave briefly with a spoon of sauce on top to protect the surface.
- Avoid high heat for a long time, since lean meat dries quickly.
Leftover sandwich idea
Slice the tenderloin thinly, spread mayo, add crunchy pickles and onions, then finish with a spicy sauce if you like. For inspiration on sandwich structure and flavors, a roundup of easy sandwich ideas can spark new combinations even when the protein changes.
Also Read: Double Chocolate Chip Cookies – Easy Recipe with 7 Variations
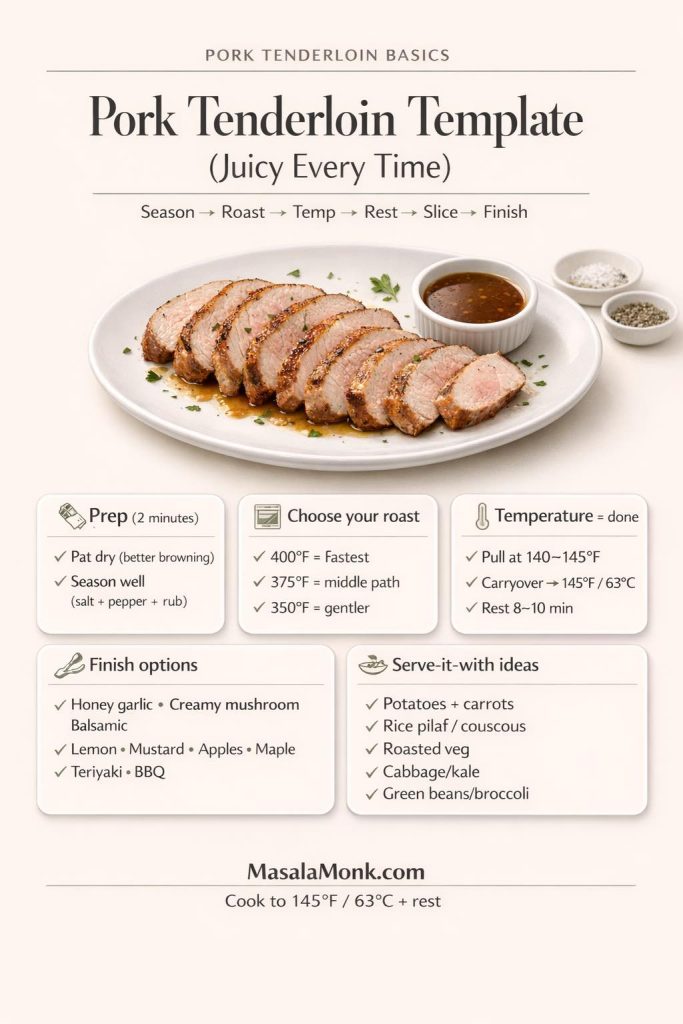
Putting it all together: a repeatable tenderloin template
Once you’ve cooked pork tenderloin in oven a few times, the process becomes simple:
- Pat dry, season well.
- Roast at 400°F for speed, 350°F for gentleness, or 375°F for the middle path.
- Pull at 140–145°F and rest.
- Slice into medallions.
- Finish with a sauce that matches the moment: honey garlic, creamy mushroom, balsamic, lemon, mustard, apples, maple, teriyaki, or BBQ.
From there, dinner becomes flexible. One night it’s pork tenderloin with potatoes and carrots. The next time it’s pork fillet in creamy mushroom sauce. Another evening, it becomes a pork fillet sandwich with crisp edges and a bright, punchy topping. Even smoked tenderloin has a place when you want that barbecue feel without committing to an all-day cook.
Most importantly, the tender result isn’t guesswork. Safe, juicy doneness comes from cooking to temperature and resting—exactly as laid out in the USDA temperature chart and the FoodSafety.gov internal temperature guide. Once that foundation is in place, everything else—glazes, sauces, sides, sandwiches—becomes a pleasure rather than a puzzle.
Also Read: How to Cook Bacon in the Oven (Crispy, No-Mess, Crowd-Ready Recipe)
FAQs
1) What’s the difference between pork tenderloin and pork loin?
Pork tenderloin is a smaller, long, narrow cut that cooks quickly and stays best when it’s pulled at the right internal temperature and rested. Pork loin is thicker and often much larger, so it needs more time in the oven. Because the cuts cook so differently, the same cook time rarely works for both.
2) What temperature should pork tenderloin be cooked to?
For a juicy result, cook pork tenderloin until the thickest part reaches 145°F (63°C), then let it rest before slicing. In practice, many cooks remove it a few degrees earlier and rely on resting to finish gently, which helps prevent dryness.
3) How long does pork tenderloin take in the oven at 400°F?
Pork tenderloin in oven at 400°F often takes about 18–24 minutes, depending on thickness. Even so, the most reliable finish comes from checking internal temperature rather than relying on a fixed minute count.
4) How long does pork tenderloin take in the oven at 350°F?
At 350°F, pork tenderloin typically roasts for about 25–35 minutes. Since tenderloins vary in thickness, start checking early and pull it as soon as it reaches the target temperature.
5) Is pork tenderloin better at 350 or 400?
Both work well, although they suit different goals. At 400°F you get a quicker cook and more browning, while 350°F gives a gentler roast and a slightly wider timing window. If you’re roasting vegetables on the same pan, 350°F can feel easier to manage.
6) What’s the best way to season pork tenderloin?
A simple seasoning for pork tenderloin usually includes salt, pepper, garlic, and herbs like rosemary or thyme. From there, you can build flavor with paprika for warmth, mustard for tang, or a sweet element like honey or brown sugar for a glaze-friendly crust.
7) Why is my pork tenderloin dry even when I follow the time?
Most often, it’s overcooked by a small margin or sliced too soon. Because tenderloin is lean, it can go past juicy quickly. Using a thermometer and resting the meat before cutting are the two most effective fixes.
8) Should I sear pork tenderloin before baking?
Searing isn’t required, yet it adds a deeper crust and a richer roasted flavor. A cast iron pork tenderloin method—sear first, then oven finish—gives great browning without drying out the center when you stop at the right temperature.
9) Can I cook pork tenderloin in a cast iron skillet?
Yes. Pan sear the tenderloin to build color, then transfer the skillet to the oven to finish. This approach keeps the outside flavorful while letting the inside cook gently and evenly.
10) Can I make pork tenderloin with potatoes and carrots on one pan?
Absolutely. For pork tenderloin with potatoes and carrots, roast the vegetables first so they can soften and brown, then add the tenderloin later so it stays juicy. That staggered timing prevents the pork from overcooking while the vegetables catch up.
11) How do I make honey garlic pork tenderloin without burning the glaze?
Brush the honey garlic glaze on near the end of roasting, not at the beginning. Since honey and sugar can darken quickly, adding the glaze late gives you shine and flavor without a scorched surface.
12) What sauce goes best with pork tenderloin?
It depends on the mood. Creamy mushroom sauce makes it comforting, balsamic glaze makes it bold and glossy, lemon sauce keeps it bright, and mustard glaze gives it a classic roast feel. Even a simple pan sauce made from the drippings can be enough.
13) Can I make creamy mushroom pork tenderloin ahead of time?
You can prep the sauce components ahead by slicing mushrooms and chopping aromatics, then cook the sauce while the pork rests. For best texture, warm the sliced tenderloin briefly in the sauce right before serving rather than simmering it for long.
14) Can pork tenderloin be cooked in a slow cooker?
Yes, although it’s important not to overcook it. Because tenderloin is lean, it should be cooked just until done, then rested and sliced. Pairing it with a sauce afterward helps keep it moist.
15) Can I make Instant Pot pork tenderloin?
Yes. Searing first improves flavor, then pressure cook briefly and check temperature before slicing. Since timing varies by model and thickness, confirming doneness with a thermometer helps avoid a dry result.
16) Can you make pulled pork from pork tenderloin?
You can make a pulled-style version, yet it won’t be as rich as classic pulled pork because tenderloin is lean. To keep it juicy, cook it in flavorful liquid and stop as soon as it shreds easily, then mix the meat back into the juices.
17) What’s the best way to reheat leftover pork tenderloin?
Reheat gently to avoid drying it out. Warm slices in a covered pan with a splash of broth or sauce, or microwave briefly with moisture on top. High heat for too long is what makes leftovers tough.
18) Can I slice pork tenderloin into medallions before cooking?
You can, especially if you want pan fried pork medallions or quick sautéed pork tenderloin. For oven roasting, however, cooking it whole usually keeps it juicier and makes timing easier.
19) How do I cook pork tenderloin on the grill?
Grill over medium-high heat and turn it every few minutes for even browning. Pull it when it reaches the target internal temperature, then rest before slicing. This method works particularly well with marinated pork tenderloin.
20) Can I smoke pork tenderloin on a pellet grill?
Yes, smoked pork tenderloin can be excellent when it’s cooked to temperature and not left in the smoker too long. Because it’s lean, a shorter smoke followed by resting helps preserve tenderness and moisture.