Posted on — 8 Comments

Mozzarella Sticks Recipe (Air Fryer, Oven, or Fried): String Cheese, Shredded Cheese, and Every Crunchy Variation

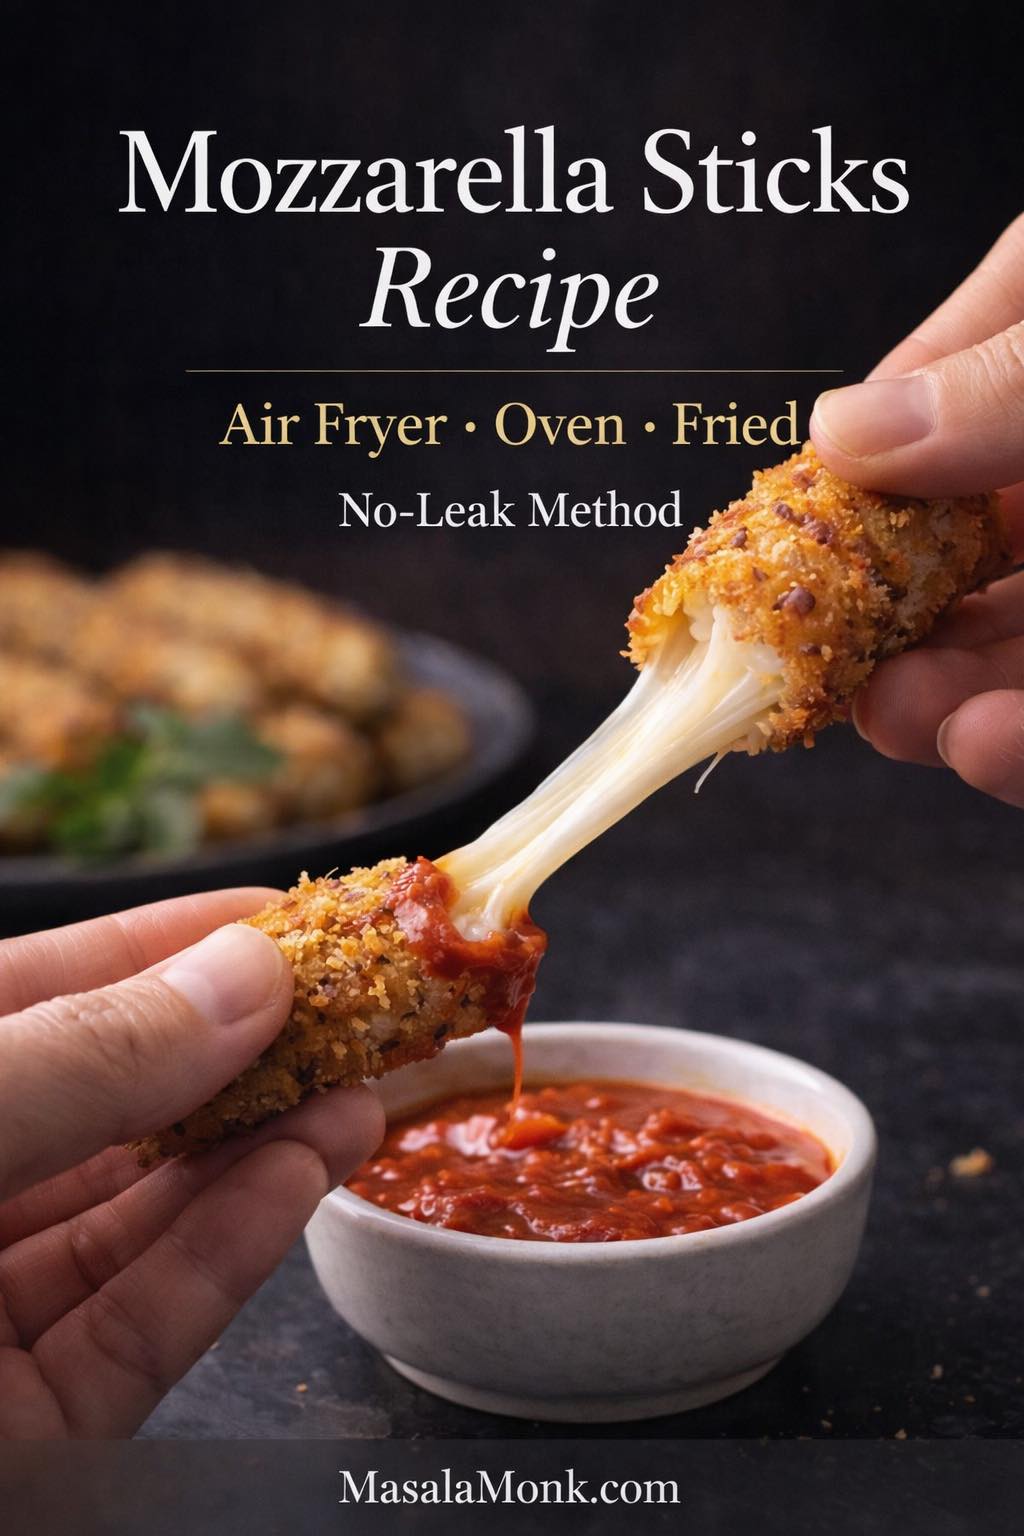
Close-up of a crispy mozzarella stick being pulled apart over a bowl of marinara, showing a stretchy, gooey cheese pull. Text overlay reads “Mozzarella Sticks Recipe,” “Air Fryer • Oven • Fried,” and “No-Leak Method,” with MasalaMonk.com at the bottom.

This post was last updated on:

Mozzarella sticks are comfort food with a little drama built in. You bite through a crisp shell, the cheese stretches, steam escapes, and suddenly the plate needs “just one more.” Even better, once you learn a reliable base recipe, you can pivot in any direction—classic fried mozzarella sticks, air fryer mozzarella sticks, oven baked cheese sticks, beer battered mozzarella sticks, keto cheese sticks, prosciutto wrapped mozzarella sticks, puff pastry mozzarella sticks, Hot Cheetos mozzarella sticks with a spicy crumb crust, and even mozzarella sticks with shredded cheese when that’s what your fridge gives you.

This is that base method—plus multiple detailed recipes—so you can make the version that fits your night, your pantry, and your patience level.

If you want to turn it into a full snack spread instead of a single plate, it’s easy to build a “pizza night” board around them: pick a dip from MasalaMonk’s pizza sauce recipes, add something warm and bready like a homemade garlic bread loaf, and suddenly mozzarella sticks feel like a party, even on an ordinary evening.

Quick Answer: How to Make Mozzarella Sticks That Don’t Leak

For the most reliable homemade mozzarella sticks, use low-moisture mozzarella or string cheese, pat it dry, then coat flour → egg → crumbs → egg → crumbs. Press the second coating over the ends so there are no thin spots, freeze the breaded sticks until very firm, and cook them straight from frozen. The crust needs to set before the cheese becomes fully molten.

MethodTemperatureTypical time from frozen
Air fryer200°C / 390–400°F5–7 minutes
Oven220°C / 425°F10–12 minutes
Deep fry175–180°C / 350–360°F45–75 seconds
These are starting points for homemade, fully frozen breaded sticks. If your air fryer runs particularly hot, reduce it to 190°C / 375°F and begin checking early; thickness and appliance intensity can shift the timing.

Homemade Mozzarella Sticks Recipe Card

This is the simplest complete version of the master recipe to follow from start to finish: low-moisture string cheese, a double breadcrumb coating, a thorough freeze, then a hot air-fryer finish. The oven and deep-fry routes are covered in detail later in the guide.

YieldAbout 12 mozzarella sticks
Active prep time20 minutes
Freeze time2 hours minimum; 4 hours or overnight is more forgiving
Cook time5–7 minutes in the air fryer
Total timeAbout 2 hours 30 minutes using the minimum freeze
Cooking methodAir fryer
CategoryAppetizer / snack

Ingredients

  • 12 low-moisture mozzarella string cheese sticks
  • 70 g / 2.5 oz all-purpose flour
  • 2 large eggs
  • 1 tbsp / 15 ml water or milk
  • 120 g / 4.2 oz panko breadcrumbs
  • 40 g / 1.4 oz fine breadcrumbs
  • 1 tsp garlic powder
  • 1 tsp onion powder
  • 1 tsp dried oregano or Italian seasoning
  • ½ tsp paprika
  • ¾ tsp salt
  • Black pepper, to taste
  • Neutral oil spray, for air frying

Method

  1. Dry the cheese. Pat the mozzarella sticks dry with paper towel so the first coating can grip.
  2. Set up the breading station. Put flour in one shallow bowl. In a second bowl, whisk the eggs with the water or milk. In a third bowl, combine panko, fine breadcrumbs, garlic powder, onion powder, oregano, paprika, salt, and black pepper.
  3. Build the first coat. Roll each cheese stick in flour and tap off the excess. Dip it completely in egg wash, then press it into the breadcrumb mixture.
  4. Double-coat and seal the ends. Dip each breaded stick back into the egg wash, then into the crumbs again. Press crumbs over both ends so no cheese is visibly exposed.
  5. Freeze until very firm. Arrange the coated sticks on a tray and freeze for at least 2 hours. Four hours or overnight gives the coating more time to set.
  6. Air fry from frozen. Preheat the air fryer to 200°C / 390–400°F for 3–5 minutes. Arrange the sticks in one layer with space around them, spray lightly with oil, and air fry for 5–7 minutes, turning around minute 3–4. Start checking early if your air fryer runs hot.
  7. Rest before serving. Let the mozzarella sticks sit for 2 minutes so the crust firms and the cheese settles, then serve hot with marinara sauce or a creamy dip.

For oven or deep frying: keep the breading and freezing steps exactly the same, then use the dedicated oven method or deep-fry method below.


Mozzarella sticks recipe: the master method that prevents leaks

Mozzarella sticks are simple, but they’re not forgiving. Cheese melts quickly; breading sets on its own schedule. The gap between those two timelines is where most “burst open” disasters happen.

So rather than chasing perfection with complicated ingredients, focus on three non-negotiables:

  1. A dry cheese surface
  2. A coating that’s thick enough to seal
  3. A frozen center so the crust can set first
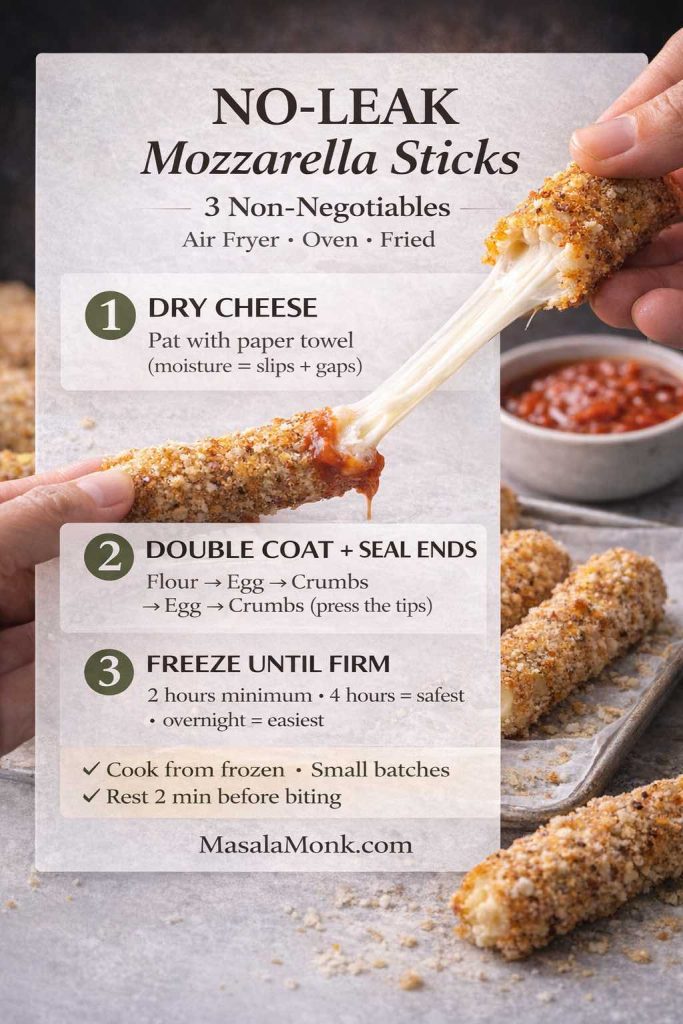
No-leak mozzarella sticks method showing three key steps: dry the cheese, double-coat and seal the ends, then freeze until firm before air frying, baking, or frying.
Stop mozzarella sticks from bursting open with this No-Leak Master Method. The whole trick is timing: dry the cheese, double-coat + seal the ends, then freeze until firm so the crust sets before the center turns molten. Works for air fryer mozzarella sticks, oven baked mozzarella sticks, and fried mozzarella sticks—especially with string cheese. Save this card for your next batch, and grab the full Mozzarella Sticks Recipe on MasalaMonk.com for exact temps/times, shredded-cheese “log” method, and sauce ideas.

Serious Eats emphasizes the value of a thicker coating for fried cheese and specifically notes coating the ends to prevent leaking in their mozzarella sticks method (Gluten-Free Tuesday: Mozzarella Sticks). It’s not about being fussy; it’s about giving melted cheese fewer escape routes.

Ingredients for mozzarella cheese sticks (base setup)

This makes about 12 sticks (more if you cut them shorter).

Cheese (choose one)

  • 12 mozzarella string cheese sticks (the most reliable starting point)
  • or 450–500 g low-moisture mozzarella block, cut into sticks (about 10–12 cm long, 2 cm thick)
  • or shredded mozzarella (there’s a dedicated method below, because it needs structure)

Breading station

  • 70 g all-purpose flour
  • 2 large eggs
  • 1 tbsp water or milk (loosens eggs so they coat evenly)
  • 120 g panko breadcrumbs (for crunch)
  • 40 g fine breadcrumbs (optional, but it helps seal gaps)
  • 1 tsp garlic powder
  • 1 tsp onion powder
  • 1 tsp dried oregano or Italian seasoning
  • ½ tsp paprika (or chili flakes if you want heat)
  • ¾ tsp salt
  • black pepper

For cooking

  • Air fryer or oven: neutral oil spray
  • Frying: neutral oil (enough for 5–7 cm depth in your pot)

How to bread mozzarella sticks (the order matters)

Set up three shallow bowls: flour, egg wash, breadcrumb mix.

  1. Dry the cheese. Pat each stick with paper towel. Moisture is the enemy of adhesion.
  2. Flour first. Coat in flour; tap off excess. Flour is the “primer coat.”
  3. Egg wash. Dip fully and let extra drip off.
  4. Breadcrumb coat. Roll and press gently so crumbs cling, especially at the ends.
  5. Second dip, second coat. Back into egg, then crumbs again. This double coating is what turns “okay” into “crispy and sealed.”
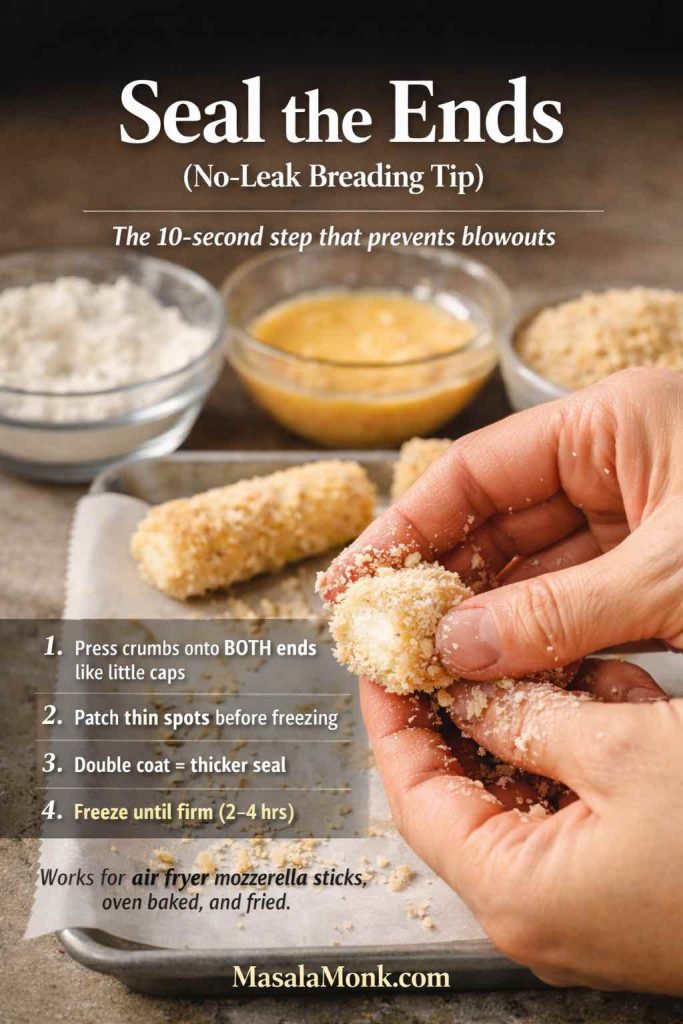
Instructional recipe-card image titled “Seal the Ends (No-Leak Breading Tip)” showing hands pressing breadcrumbs onto the end of a breaded mozzarella stick over a tray. Three bowls in the background show flour, egg wash, and breadcrumbs. On-image tips say to press crumbs onto both ends like little caps, patch thin spots before freezing, double coat for a thicker seal, and freeze until firm (2–4 hours). Note says it works for air fryer mozzarella sticks, oven baked, and fried. MasalaMonk.com branding.
If your mozzarella sticks burst open, it’s usually not the recipe—it’s the ends. After the second coat, press breadcrumbs onto both ends like little caps, patch thin spots, then freeze until firm. This quick “seal the ends” step makes air fryer mozzarella sticks, oven baked cheese sticks, and fried mozzarella sticks far less likely to leak.

Now the most important step:

  1. Freeze until firm. Arrange on a tray and freeze at least 2 hours. For stress-free results, freeze 4 hours or overnight.

Why freezing works: the crust sets before the cheese reaches full melt, so the cheese stays inside long enough to warm and stretch instead of instantly escaping.

Quick reality check: if you want truly no-stress mozzarella sticks

Use string cheese, double coat, freeze longer than you think you need, and cook in small batches. It sounds boring, yet it’s the route to “they all stayed sealed.”


Best cheese for mozzarella sticks: string cheese vs block vs shredded

Mozzarella sticks are not picky about flavor; they’re picky about water content and structure.
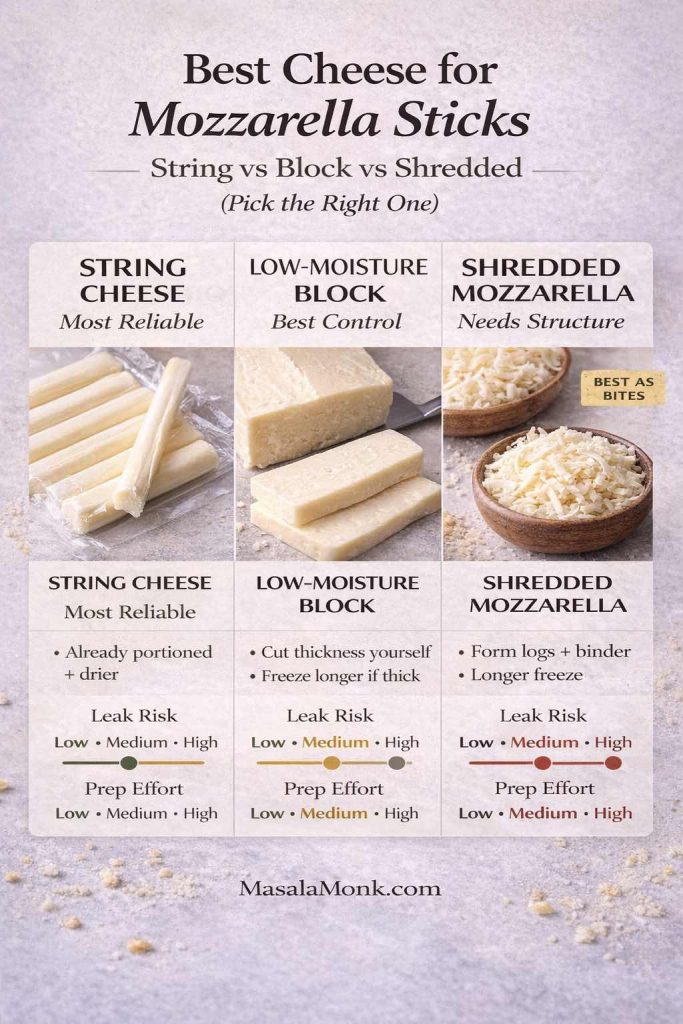
Infographic titled “Best Cheese for Mozzarella Sticks: String vs Block vs Shredded.” Three side-by-side panels compare string cheese (most reliable, low leak risk, low prep), low-moisture mozzarella block (best control, medium leak risk depending on thickness, medium prep), and shredded mozzarella (needs structure, best as formed logs/bites, higher leak risk, longer freeze and more prep). MasalaMonk.com branding.
Not all mozzarella behaves the same—and this is why sticks “leak.” String cheese is the most reliable (already portioned + drier), low-moisture block mozzarella gives you the most control (thickness matters, so freeze longer if you cut thick), and shredded mozzarella needs structure (form logs/bites with a binder, then freeze longer). Use this chart to pick the right cheese for air fryer mozzarella sticks, oven baked cheese sticks, or fried mozzarella sticks—then follow the master no-leak method (dry surface, thick coating, frozen center). Save this for your next snack night.

String cheese mozzarella sticks (easiest and most consistent)

String cheese is already portioned, relatively dry, and firm enough to handle breading. It’s also the best option if you’re making mozzarella sticks in an air fryer, because air fryers cook aggressively from the outside in.

Mozzarella sticks with shredded cheese (it can work, but shape is everything)

Shredded cheese is loose. It melts quickly. It needs help. The solution is to turn shredded mozzarella into a cohesive “log” before breading.

Below, you’ll get a method that uses a binder and a longer freeze so the exterior can set without the center instantly collapsing.

Smoked mozzarella sticks (big flavor, different behavior)

Smoked mozzarella brings a deeper flavor, but it often softens faster once heated. That means the same rule applies—freeze longer, and don’t cook too long “just to be safe,” because extra time usually causes leakage.


Mozzarella sticks with shredded mozzarella (formed logs recipe)

If you’re here because you want mozzarella sticks shredded cheese style, this is the most dependable approach.

Shredded mozzarella “sticks” recipe (best as short logs or bites)

Ingredients

  • 200 g / 7 oz shredded low-moisture mozzarella
  • 20 g / 0.7 oz cornstarch (about 2 tbsp)
  • 30 g / 1.1 oz cream cheese (about 2 tbsp), softened
  • 1 egg white (optional, use it if the mix feels loose)
  • breading station from the master method
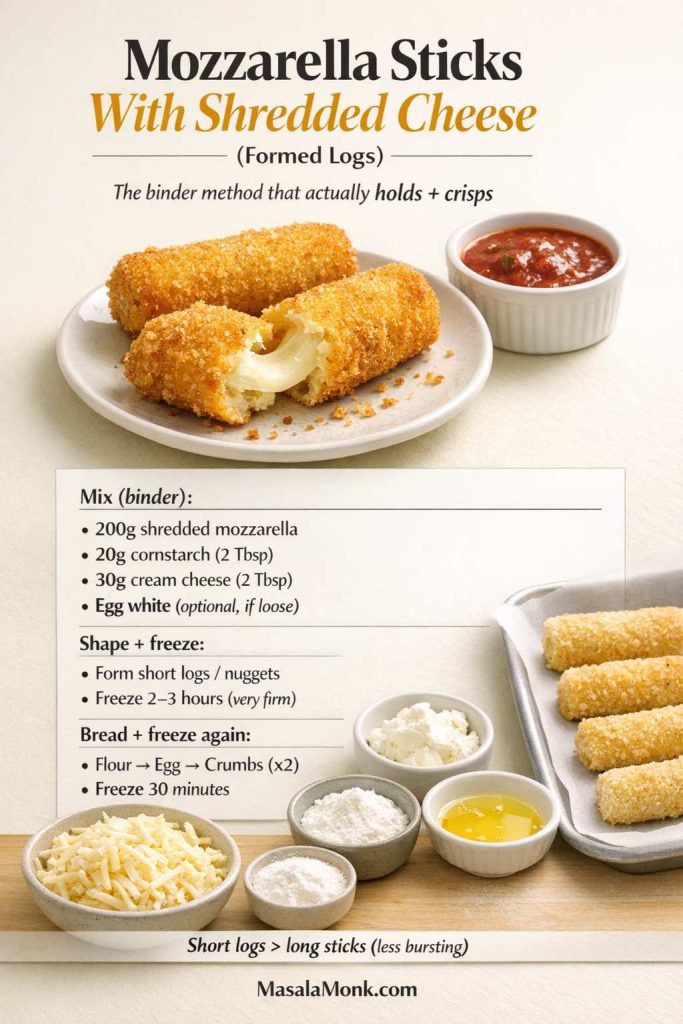
Recipe-card image titled “Mozzarella Sticks With Shredded Cheese (Formed Logs)” showing breaded mozzarella logs with a cheese pull and marinara dip. Text explains the binder method: 200g shredded low-moisture mozzarella, 20g cornstarch, 30g cream cheese, optional egg white; shape short logs, freeze 2–3 hours, double-coat (flour/egg/crumbs), freeze again 30 minutes; tip says short logs burst less. MasalaMonk.com branding.
Making mozzarella sticks with shredded cheese? Use the formed-log binder method so they hold their shape and don’t collapse in the fryer. Mix shredded low-moisture mozzarella + cornstarch + cream cheese, shape short logs, freeze until very firm, then double-coat and freeze again for the crispiest, least-leaky results.

Method

  1. Mix shredded mozzarella and cornstarch until the shreds look lightly dusted.
  2. Add cream cheese and mix until the mixture clumps and holds together.
  3. If it still feels crumbly, add the egg white and mix again.
  4. Shape into short logs (about finger length) or nuggets.
  5. Freeze 2–3 hours until very firm.
  6. Bread using the master method (double coat), then freeze 30 minutes again.
  7. Cook using any method below; start checking early because formed logs can go from perfect to bursting quickly.

These are closer to mozzarella cheese bites than classic long sticks, although the flavor and crunch payoff is exactly what you want.


Mozzarella sticks sauce: build dips that make the plate disappear

Mozzarella sticks and marinara are classic for a reason. Still, a second sauce makes the whole thing feel intentional rather than routine.
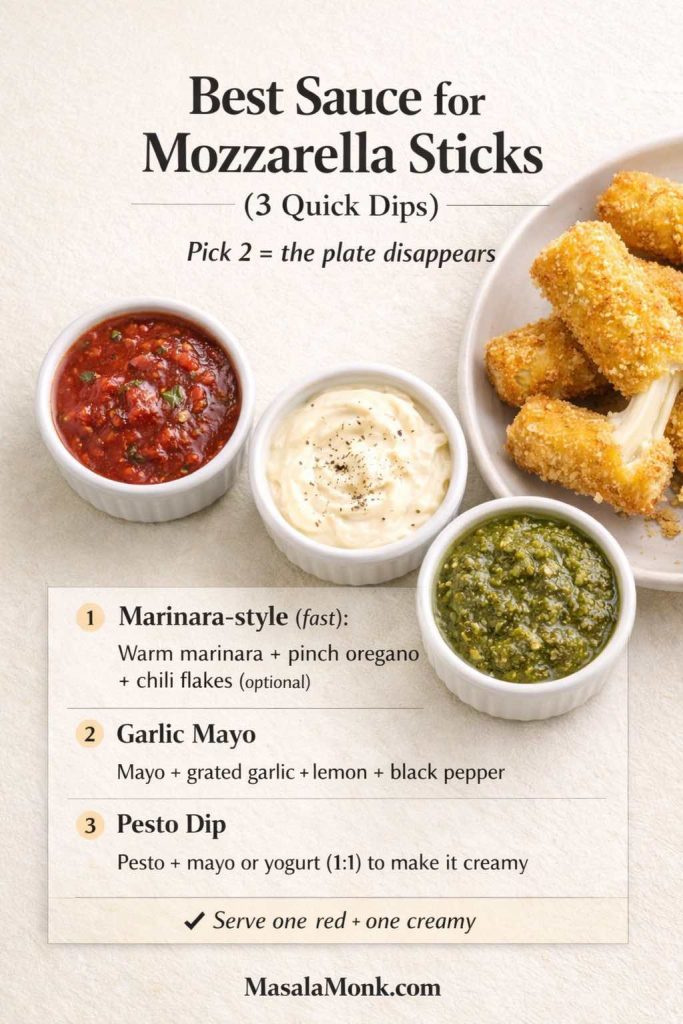
Recipe-card image titled “Best Sauce for Mozzarella Sticks (3 Quick Dips)” showing breaded mozzarella sticks with a cheese pull and three ramekins of dipping sauce: marinara-style sauce, garlic mayo, and pesto dip. On-image text lists quick dip formulas: warm marinara with oregano and optional chili flakes; mayo with grated garlic, lemon, and black pepper; pesto mixed 1:1 with mayo or yogurt to make it creamy. Tip says “Serve one red + one creamy.” MasalaMonk.com branding.
The fastest way to upgrade mozzarella sticks sauce beyond “just marinara” is a dip duo: one red + one creamy. Use warm marinara-style sauce, a punchy garlic mayo, or a bright pesto dip (pesto + mayo/yogurt). Pick two and suddenly mozzarella sticks feel restaurant-level—perfect for cheese sticks and marinara sauce nights.

Marinara-style dip

For the classic red dip, start with MasalaMonk’s marinara sauce recipe and reduce it until it is thick enough to cling to a hot cheese stick. If you want to branch out from classic marinara, the pizza sauce recipes guide gives you several other tomato-based and creamy directions for the same snack plate.

Creamy dip base (spicy mayo, garlic mayo, herby mayo)

If you want a dip that clings, mayo is the base. The easiest way to make it feel restaurant-level is to start with a strong foundation like MasalaMonk’s homemade mayonnaise guide, then flavor it:

  • spicy mayo: chili sauce + lime + pinch of sugar
  • garlic mayo: grated garlic + lemon + black pepper
  • herby mayo: dried oregano + parsley + a splash of pickle brine

If you want an egg-free base, use MasalaMonk’s eggless mayonnaise recipe and build the same variations.

Pesto dip (fresh, bright, unexpectedly perfect)

Pesto is underrated with fried cheese. A spoonful beside hot mozzarella sticks feels “fancier” instantly. Start with MasalaMonk’s pesto recipe guide if you want a classic or a creative variation.


Air fryer mozzarella sticks recipe (crispy, fast, minimal oil)

Air fryer mozzarella sticks are the weeknight hero version. They also demand discipline: the air fryer’s heat is intense, and overcrowding makes breading soften instead of crisp.

Food Network’s air fryer mozzarella sticks method preheats to 400°F and cooks around 6 minutes, turning halfway (Air Fryer Mozzarella Sticks). Use that as a baseline, then adjust for your model.
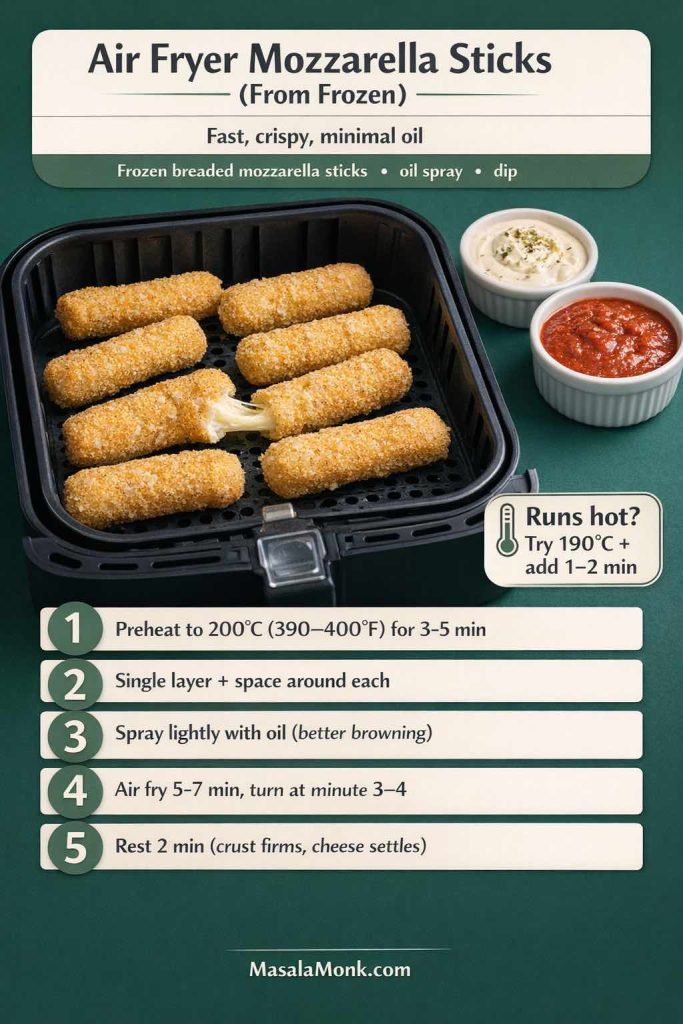
Recipe-card infographic titled “Air Fryer Mozzarella Sticks (From Frozen)” showing breaded mozzarella sticks in an air fryer basket with marinara and a creamy dip, plus one stick pulled for a cheese stretch. Text lists: preheat air fryer to 200°C (390–400°F) for 3–5 minutes; cook in a single layer with space; spray lightly with oil for better browning; air fry 5–7 minutes, turning at minute 3–4; rest 2 minutes so the crust firms and cheese settles. Tip says “Runs hot? Try 190°C + add 1–2 min.” MasalaMonk.com branding.
Making frozen mozzarella sticks in the air fryer is all about spacing + timing. Preheat to 200°C (390–400°F), keep them in a single layer, spray lightly for browning, and cook 5–7 minutes (turn at minute 3–4), then rest 2 minutes for a cleaner cheese pull. Save this for “how long to cook mozzarella sticks in air fryer” nights—if your air fryer runs hot, drop to 190°C and add 1–2 minutes to prevent blowouts.

Air fryer mozzarella sticks (from frozen, breaded)

Ingredients

  • frozen breaded mozzarella sticks (string cheese or block)
  • oil spray
  • marinara-style sauce or creamy dip

Steps

  1. Preheat air fryer to 200°C (390–400°F) for 3–5 minutes.
  2. Arrange sticks in a single layer with space around each. If they touch, crisping suffers.
  3. Spray lightly with oil to help browning.
  4. Air fry 5–7 minutes, turning at minute 3–4.
  5. Rest 2 minutes before biting; the cheese settles and the crust firms.

If your air fryer runs hot, drop to 190°C and add 1–2 minutes instead. That small change often prevents blowouts.

When you’re already in air fryer mode, it’s easy to keep the basket moving with something like MasalaMonk’s air fryer chicken wings as a companion platter—crispy, shareable, and in the same “dunkable snack” lane.


Oven baked mozzarella sticks recipe (big batch, hands-off)

When you’re feeding more people—or simply want the whole batch finished at once instead of cycling through air-fryer rounds—oven baked mozzarella sticks are the practical route.
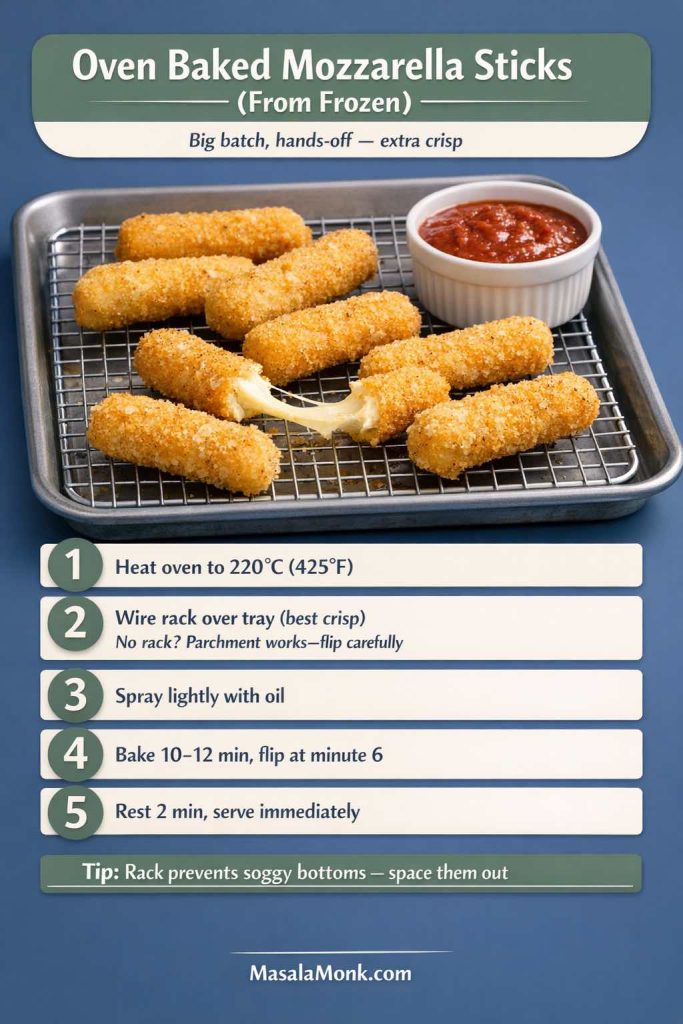
Recipe-card infographic titled “Oven Baked Mozzarella Sticks (From Frozen)” showing breaded mozzarella sticks on a wire rack over a sheet tray with a marinara dip. Text reads “Big batch, hands-off — extra crisp” and lists steps: heat oven to 220°C (425°F); place sticks on a wire rack over a tray (best crisp) or use parchment and flip carefully; spray lightly with oil; bake 10–12 minutes and flip at minute 6; rest 2 minutes and serve immediately. Tip says rack prevents soggy bottoms and to space them out. MasalaMonk.com branding.
For oven baked mozzarella sticks from frozen, the rack is the cheat code. Bake at 220°C (425°F) for 10–12 minutes, flip at minute 6, then rest 2 minutes so the crust stays crisp and the cheese pull is clean. Save this card for “cheese sticks in oven” nights—spacing + a wire rack prevents soggy bottoms.

Oven baked mozzarella sticks (from frozen, breaded)

Steps

  1. Heat oven to 220°C (425°F).
  2. Place sticks on a wire rack over a tray if you have one. If not, parchment works—just flip carefully.
  3. Spray lightly with oil.
  4. Bake 10–12 minutes, flipping at minute 6.
  5. Rest 2 minutes, then serve immediately.

If you’re building a tray of snacks, oven timing pairs beautifully with MasalaMonk’s baked jalapeño poppers—cheese plus heat, crisp edges, and the same “dip and repeat” rhythm.


Fried mozzarella sticks recipe (restaurant-style crunch)

Deep fried mozzarella sticks are the most dramatic and the most satisfying. They’re also the most sensitive to oil temperature. Too cool, and the cheese melts before the crust sets. Too hot, and the breading browns before the cheese warms.

USDA’s food safety guidance for deep frying is worth a quick read before you start (Deep Fat Frying and Food Safety), especially if you’re new to frying. Meanwhile, if you want a temperature target you can trust, USDA notes deep frying oil is usually maintained around 350°F to 375°F with a deep fry thermometer.

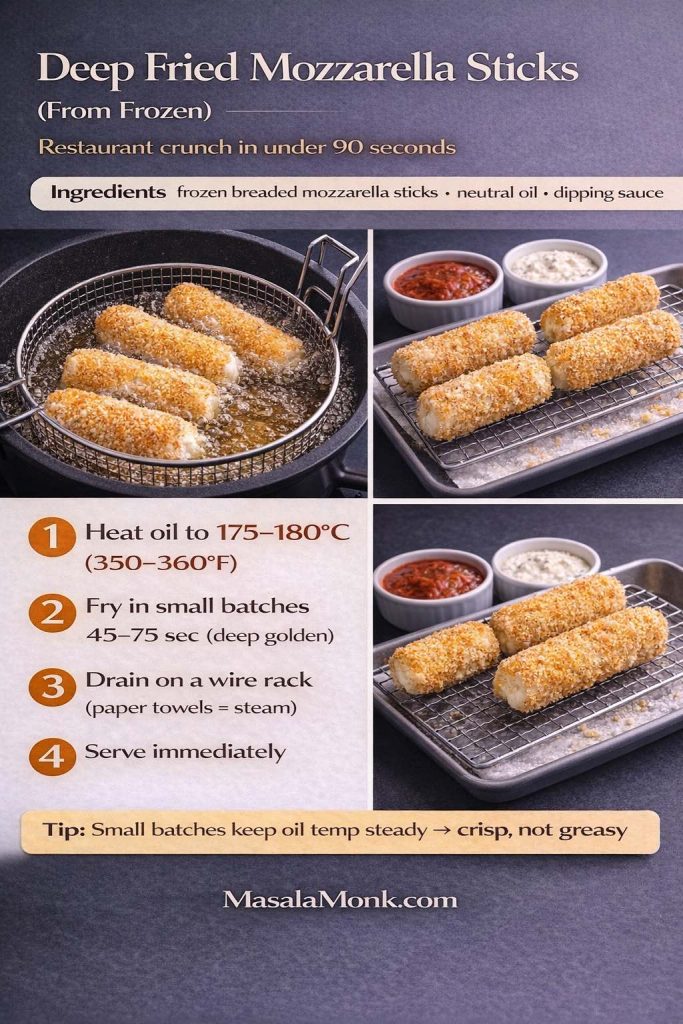
Deep fried mozzarella sticks (from frozen, breaded)

Ingredients

  • frozen breaded mozzarella sticks
  • neutral oil (canola/vegetable/sunflower)
  • sauce for dipping
Recipe-card infographic titled “Deep Fried Mozzarella Sticks (From Frozen)” showing breaded mozzarella sticks frying in hot oil in a basket and then draining on a wire rack, with marinara dipping sauce. Text lists ingredients (frozen breaded mozzarella sticks, neutral oil, dipping sauce) and steps: heat oil to 175–180°C (350–360°F); fry in small batches for 45–75 seconds until deep golden; drain on a wire rack (paper towels cause steam); serve immediately. MasalaMonk.com branding.
Deep fried mozzarella sticks from frozen are all about speed + oil temperature. Keep oil at 175–180°C, fry 45–75 seconds in small batches, then drain on a wire rack so the crust stays crisp (paper towels trap steam). Save this for “how long to fry mozzarella sticks” nights—and serve immediately with marinara for the best crunch.

Steps

  1. Heat oil to 175–180°C (350–360°F).
  2. Fry in small batches for 45–75 seconds until deep golden.
  3. Drain on a wire rack. Paper towels can trap steam and soften crust.
  4. Serve immediately.

If you want the crunch to stay loud: don’t stack them. Put them on a rack, spread out, and dip one at a time.

The same oil-temperature discipline matters with other fried snacks too. If you want to practice that skill on a less leak-prone ingredient, the homemade French fries guide walks through staged frying and crispness cues in more detail.

Bon Appétit’s homemade mozzarella sticks recipe leans into that ideal balance—crispy coating, gooey center, not greasy—while emphasizing a proper crust and good oil temperature control (Homemade Mozzarella Sticks).


Pan fried mozzarella sticks (when you don’t want deep frying)

Pan frying is a compromise: less oil, less mess, still crisp. However, it only works well if you keep the oil hot enough and you don’t flip endlessly.
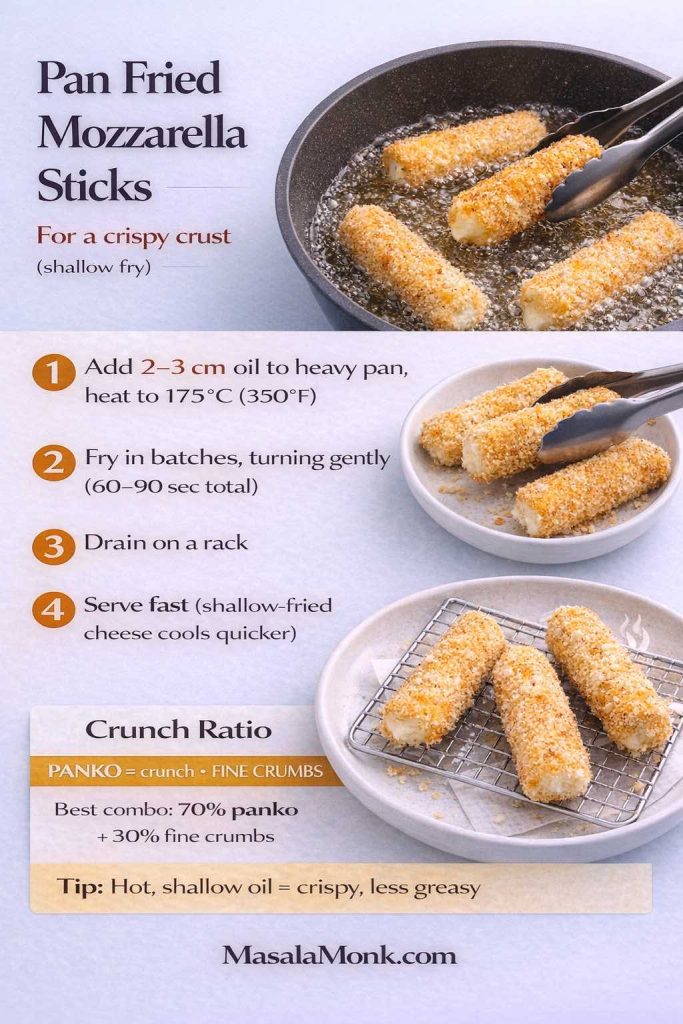
Step-by-step recipe-card titled “Pan Fried Mozzarella Sticks (Shallow Fry)” showing breaded mozzarella sticks frying in a heavy pan with shallow oil, then draining on a rack. Text lists steps: add 2–3 cm oil to a heavy pan and heat to 175°C (350°F); fry in batches, turning gently, for 60–90 seconds total; drain on a rack; serve fast because shallow-fried cheese cools quicker. A tip notes hot shallow oil helps keep them crispy with less grease. MasalaMonk.com branding.
Pan fried mozzarella sticks are the “less oil, less mess” middle ground—still crisp, just faster and more delicate than deep frying. Keep the oil hot (about 175°C), turn gently once or twice, and drain on a rack so the crust stays loud. Save this shallow-fry card for nights when you want fried cheese sticks without filling a pot.

Pan fried mozzarella sticks (shallow fry)

Steps

  1. Add 2–3 cm of oil to a heavy pan and heat to 175°C (350°F).
  2. Fry in batches, turning gently, about 60–90 seconds total.
  3. Drain on a rack.
  4. Serve fast—shallow-fried cheese cools quicker than deep fried.

This method is best for shorter sticks (cut string cheese in half) because they heat through before the cheese has time to escape.


Beer battered mozzarella sticks (pub-style, craggy and bold)

Breadcrumbs give a clean crunch. Beer batter gives a thicker, more rugged coating—almost like a tempura cousin with pub energy.
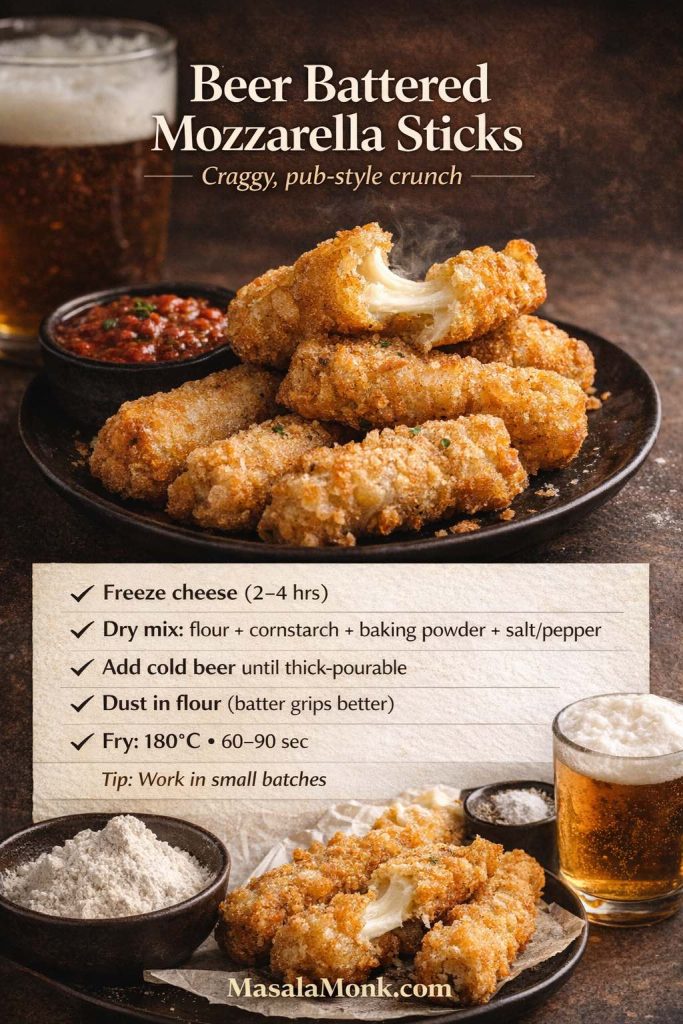
Recipe-card image titled “Beer Battered Mozzarella Sticks” showing craggy, golden battered mozzarella sticks on a dark plate with marinara sauce and a beer glass in the background. On-image steps say: freeze cheese 2–4 hours; whisk dry mix of flour, cornstarch, baking powder, salt and pepper; add cold beer until thick-pourable; dust sticks in flour so batter grips; fry at 180°C for 60–90 seconds; tip says work in small batches. MasalaMonk.com branding.
Want beer battered mozzarella sticks with that bold, craggy pub crunch? The secret is extra-freezing plus a cold, thick-pourable batter so it sets fast in hot oil. Dust the sticks in flour first (better grip), then fry at 180°C for 60–90 seconds in small batches for crispy battered mozzarella sticks without greasy coating.

Beer battered mozzarella sticks recipe

Ingredients

  • 12 cheese sticks (preferably block-cut or firm string cheese)
  • 125 g flour
  • 1 tbsp cornstarch
  • 1 tsp baking powder
  • ½ tsp salt + pepper
  • 180–240 ml cold beer (add gradually)
  • oil for frying

Steps

  1. Freeze cheese sticks 2–4 hours.
  2. Whisk dry ingredients, then add cold beer until the batter is thick yet pourable.
  3. Dust cheese lightly in flour first (batter sticks better).
  4. Dip in batter and fry at 180°C for 60–90 seconds.
  5. Drain and serve.

Beer battered mozzarella sticks are one of those snacks that feel like they came from a menu, even though they’re made in your kitchen.

If you like that rough, craggy shell, MasalaMonk’s battered fries recipe uses the same useful batter logic—starch for crispness, leavening for lightness, and very cold liquid so the coating fries up rather than turning heavy.


Breaded Mozzarella Sticks: Quick Cooking Reference

If you have already used the master double-coating method and frozen the sticks until firm, this is the fastest cooking reference for that same homemade breaded base. It is not a second recipe—just the three finishing routes side by side.
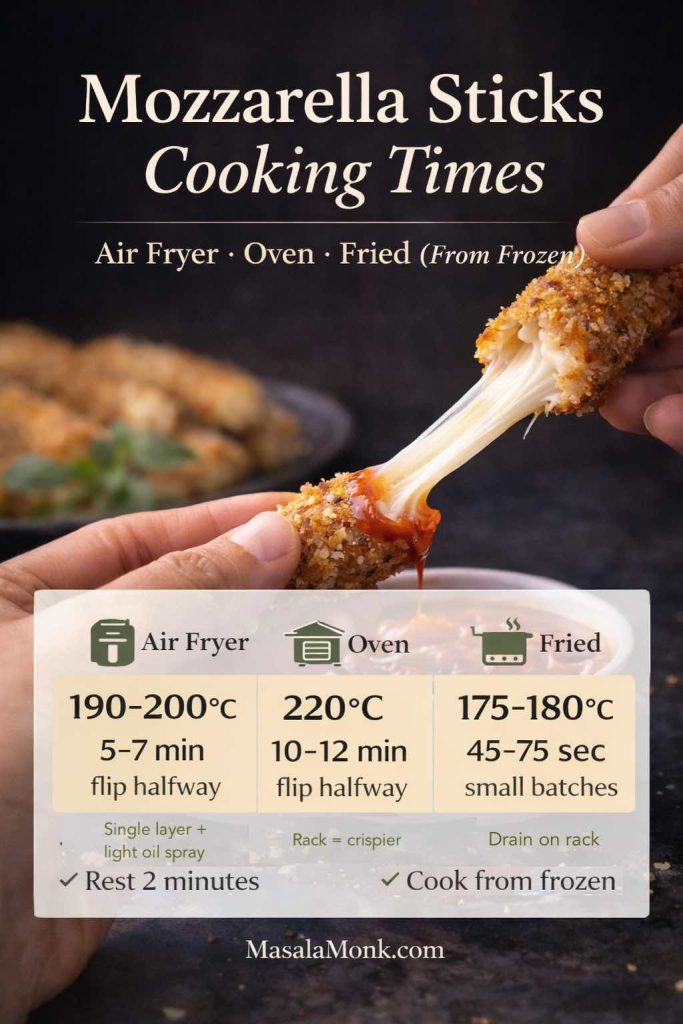
Infographic showing mozzarella sticks cooking times from frozen: air fryer 190–200°C for 5–7 minutes (flip halfway), oven 220°C for 10–12 minutes (flip halfway), and deep fried at 175–180°C for 45–75 seconds in small batches. Background photo shows a crispy mozzarella stick being pulled with gooey cheese stretch and marinara dip.
Mozzarella sticks cooking times, solved—so you get a gooey pull without blowouts. This quick guide covers mozzarella sticks in the air fryer (190–200°C, 5–7 min), oven baked cheese sticks (220°C, 10–12 min), and fried mozzarella sticks (175–180°C, 45–75 sec). Biggest rule for crispy, no-leak results: cook from frozen, don’t crowd, flip halfway (air fryer/oven), then rest 2 minutes so the cheese settles. Save this for “what temp + how long?” nights, and share it with anyone who always overcooks them. Which method are you making—air fryer, oven, or fried?

Use the master breading method above, then choose your cooking path:

  • Air fryer: 200°C for 5–7 minutes, flip halfway
  • Oven: 220°C for 10–12 minutes, flip halfway
  • Frying: 175–180°C for 45–75 seconds

It’s the same breaded base, three different personalities.


3 ingredient mozzarella sticks (simple recipe, fast prep)

When you want a quick easy mozzarella sticks recipe without extra seasoning bowls, keep it minimal.
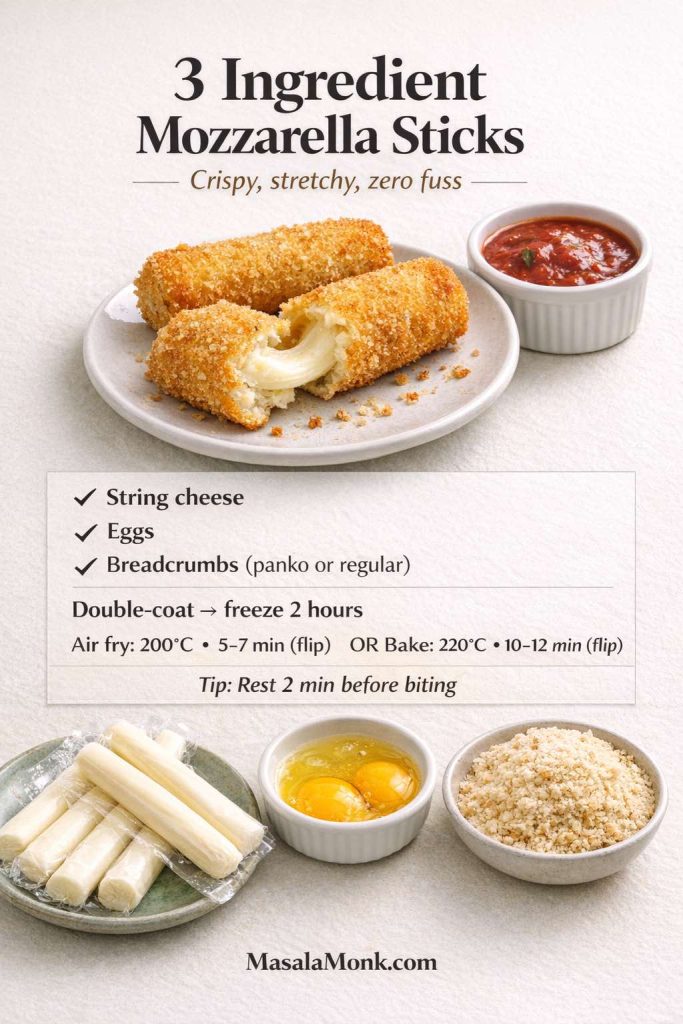
Recipe-card image titled “3 Ingredient Mozzarella Sticks” showing golden breaded mozzarella sticks with a cheese pull and a marinara dip, plus the three ingredients below: string cheese, eggs, and breadcrumbs (panko or regular). On-image instructions say to double-coat and freeze for 2 hours, then cook either in the air fryer at 200°C for 5–7 minutes (flip) or bake at 220°C for 10–12 minutes (flip). Tip says to rest 2 minutes before biting. MasalaMonk.com branding.
Need a quick easy mozzarella sticks recipe? This 3 ingredient mozzarella sticks method is the simplest path to crispy, stretchy cheese sticks at home: string cheese + eggs + breadcrumbs, double-coat, freeze, then cook in the air fryer or oven. Save this card for busy snack nights—and don’t skip the 2-minute rest for the best cheese pull.

How to make three-ingredient mozzarella sticks

  • string cheese
  • eggs
  • breadcrumbs (panko or regular)

Bread the sticks (egg → crumbs), repeat once more for a double coat, freeze for 2 hours, then air fry or bake using the timings above. Rest for 2 minutes before serving so the crust firms and the cheese pull stays cleaner.

Even without extra spices, these still work because the dip carries flavor.


Puff pastry mozzarella sticks (flaky, golden, party-perfect recipe)

Puff pastry mozzarella sticks are the “wrapped cheese sticks” upgrade. They don’t need breading; they need good sealing and enough bake time to crisp.
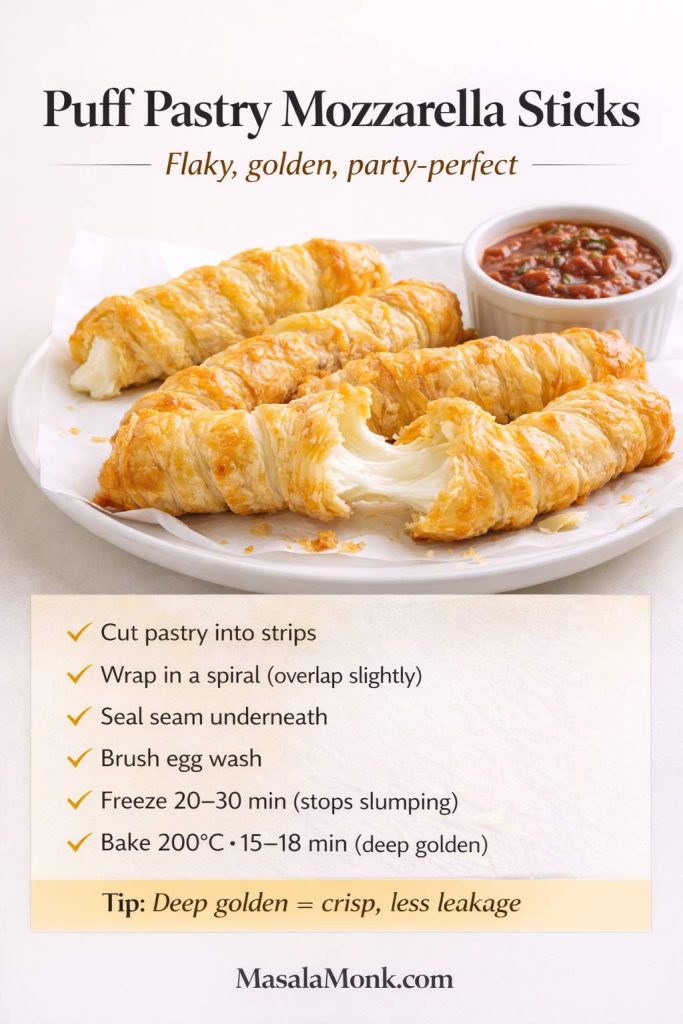
Recipe-card image titled “Puff Pastry Mozzarella Sticks” showing golden, flaky puff pastry-wrapped mozzarella sticks on a white plate with a cheese pull and a ramekin of marinara sauce. On-image instructions say: cut pastry into strips, wrap in a spiral (overlap slightly), seal seam underneath, brush egg wash, freeze 20–30 minutes to stop slumping, then bake at 200°C for 15–18 minutes until deep golden. Tip notes deep golden equals crisp with less leakage. MasalaMonk.com branding.
These puff pastry mozzarella sticks are the flakiest “wrapped cheese sticks” upgrade—no breading station needed. Wrap in a spiral, freeze briefly so the pastry holds shape, then bake until deep golden for the crispiest finish and the cleanest cheese pull. Perfect party snack when you want oven-baked cheese sticks that look fancy but feel easy.

Puff pastry mozzarella sticks recipe

Ingredients

  • puff pastry sheet, thawed
  • mozzarella sticks (or cut block sticks)
  • egg wash (1 egg + splash water)
  • optional: chili flakes, oregano, sesame seeds

Steps

  1. Cut pastry into strips.
  2. Wrap each cheese stick in a spiral, overlapping slightly.
  3. Seal the seam underneath.
  4. Brush with egg wash.
  5. Freeze 20–30 minutes so the pastry sets and doesn’t slump.
  6. Bake at 200°C (400°F) for 15–18 minutes until deeply golden.

These are especially good with pesto, because flaky pastry plus herb sauce feels like a snack you’d order twice.


Crescent roll mozzarella sticks (easy wrapped cheese sticks)

This dough is forgiving and fast, which makes it perfect for quick cheese sticks at home.
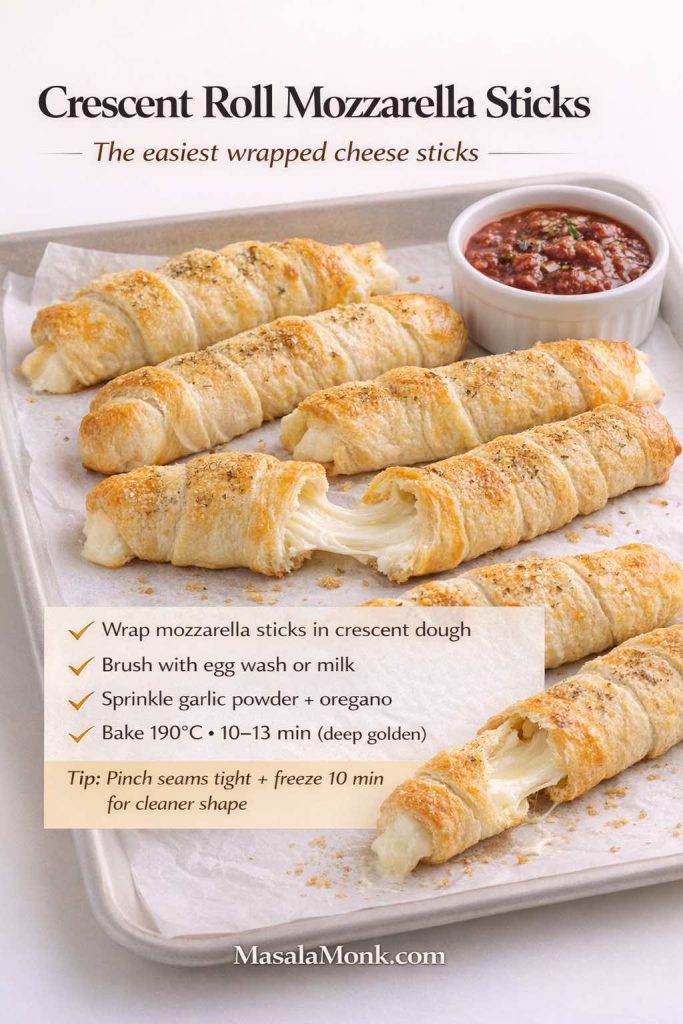
Recipe-card image titled “Crescent Roll Mozzarella Sticks” showing mozzarella sticks wrapped in crescent dough on a parchment-lined baking tray with a cheese pull and a ramekin of marinara sauce. On-image instructions say: wrap mozzarella sticks in crescent dough, brush with egg wash or milk, sprinkle garlic powder and oregano, and bake at 190°C for 10–13 minutes until deep golden. Tip says to pinch seams tight and freeze 10 minutes for a cleaner shape. MasalaMonk.com branding.
These crescent roll mozzarella sticks are the easiest wrapped cheese sticks for busy nights: wrap, brush, season, bake—and you still get that gooey cheese pull. Pinch the seams and freeze for 10 minutes so they hold their shape, then bake until deep golden for the crispiest edges. Perfect if you’re searching mozzarella sticks with crescent rolls or an easy oven-baked version.

Crescent roll mozzarella sticks

Steps

  1. Wrap and seal. Wrap each mozzarella stick in crescent dough and pinch every seam tightly closed.
  2. Brush. Brush with egg wash or milk.
  3. Season. Sprinkle with garlic powder and oregano.
  4. Briefly freeze. Freeze the wrapped sticks for 10 minutes so the seams firm and the shape stays cleaner in the oven.
  5. Bake. Bake at 190°C (375°F) for 10–13 minutes until deeply golden.

They’re softer than breaded sticks, yet they deliver a satisfying “pull” and hold up well with marinara.


Prosciutto wrapped mozzarella sticks (and pepperoni wrapped mozzarella sticks)

Wrapped mozzarella sticks are a different kind of crunchy: the crisp comes from rendered cured meat rather than breadcrumbs. They’re also naturally lower carb, although they’re not exactly “low calorie mozzarella sticks.”
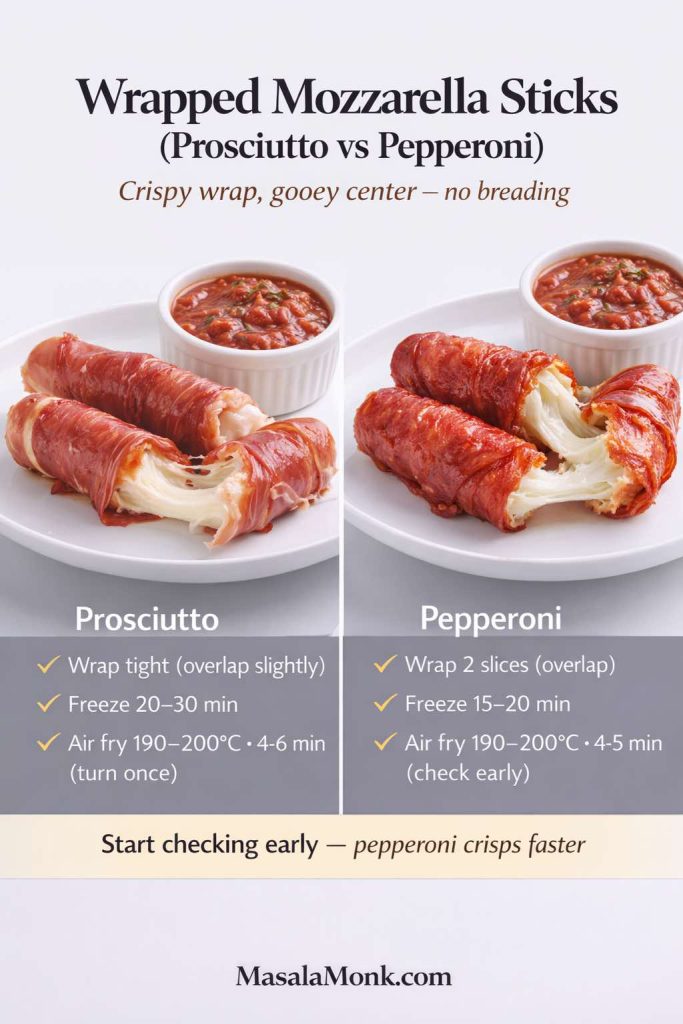
Split recipe-card image titled “Wrapped Mozzarella Sticks (Prosciutto vs Pepperoni)” showing two plates of mozzarella sticks wrapped in prosciutto on the left and pepperoni on the right, each with marinara sauce. Text says “Crispy wrap, gooey center — no breading.” Prosciutto instructions: wrap tight (overlap slightly), freeze 20–30 minutes, air fry 190–200°C for 4–6 minutes (turn once). Pepperoni instructions: wrap 2 slices (overlap), freeze 15–20 minutes, air fry 190–200°C for 4–5 minutes (check early). Tip says pepperoni crisps faster. MasalaMonk.com branding.
These wrapped cheese sticks skip breadcrumbs but still deliver crunch: prosciutto wrapped mozzarella sticks turn crisp and salty, while pepperoni wrapped mozzarella sticks crisp even faster. Freeze briefly so the wrap firms up, then air fry hot and fast for a gooey center—perfect when you want low-carb-ish mozzarella sticks without the breading station.

Prosciutto wrapped mozzarella sticks recipe

Steps

  1. Wrap each mozzarella stick with a thin slice of prosciutto, overlapping slightly.
  2. Freeze 20–30 minutes so the wrap firms.
  3. Air fry at 190–200°C for 4–6 minutes, turning once.
  4. Serve immediately.

Pepperoni wrapped mozzarella sticks

  1. Overlap 2 pepperoni slices around each mozzarella stick so the cheese is mostly covered.
  2. Freeze for 15–20 minutes so the wrap firms.
  3. Air fry at 190–200°C / 375–400°F for 4–5 minutes, checking at 4 minutes because pepperoni crisps quickly.
  4. Serve immediately while the wrap is crisp and the cheese is stretchy.

If you want to build a full tray of savory bites alongside these, it’s easy to add something like MasalaMonk’s how to cook bacon in the oven method for crisp bacon strips that can top dips, salads, or even a snack board.


Keto mozzarella sticks (low carb cheese sticks recipe that still crunch)

Making keto mozzarella sticks is mostly about swapping the breadcrumb shell for a low-carb coating that browns and crisps while still protecting the cheese.
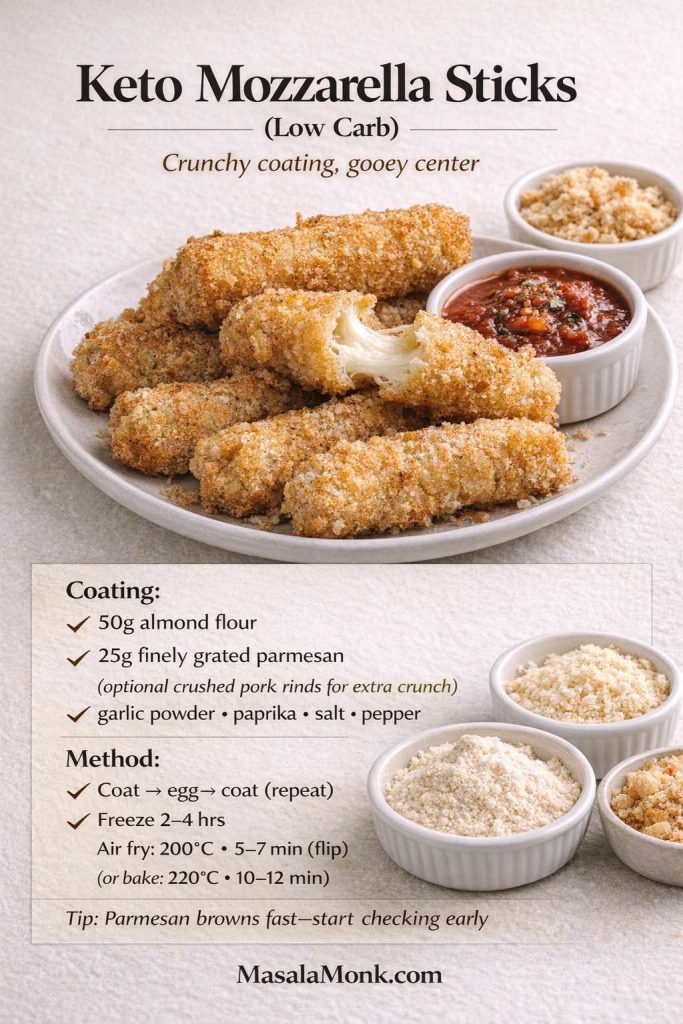
Recipe-card image titled “Keto Mozzarella Sticks (Low Carb)” showing crispy coated mozzarella sticks with a cheese pull and marinara, plus bowls of almond flour and finely grated parmesan. Text lists keto coating ingredients (50g almond flour, 25g parmesan, optional crushed pork rinds, garlic powder, paprika, salt, pepper) and method: coat → egg → coat (repeat), freeze 2–4 hours, air fry 200°C for 5–7 minutes (flip) or bake 220°C for 10–12 minutes; tip notes parmesan browns fast so start checking early. MasalaMonk.com branding.
These keto mozzarella sticks are the easiest way to get a real crunch without breadcrumbs: almond flour + parmesan (optional pork rind crunch), double-coat, freeze, then cook hot and fast. Perfect for anyone searching low carb cheese sticks or keto cheese sticks—and the “check early” parmesan tip prevents blowouts.

Keto mozzarella sticks recipe

Coating

  • 50 g almond flour
  • 25 g parmesan, finely grated
  • optional: ½ cup crushed pork rinds for extra crunch
  • garlic powder, paprika, pepper, salt

Steps

  1. Bread as usual: almond flour mix → egg → almond flour mix again.
  2. Freeze 2–4 hours.
  3. Air fry at 200°C for 5–7 minutes or bake at 220°C for 10–12 minutes. Start checking early because parmesan browns quickly.

If you want a deeper mozzarella-and-low-carb angle for readers who like that lane, MasalaMonk’s mozzarella keto-friendly guide fits naturally as a supporting read.


Cheddar cheese stick recipe (a sharper, richer twist)

Cheddar sticks are delicious, but cheddar behaves differently from mozzarella. It melts more aggressively and can separate if pushed too far. That means the safest way is thicker sticks, longer freezing, and quick cooking.
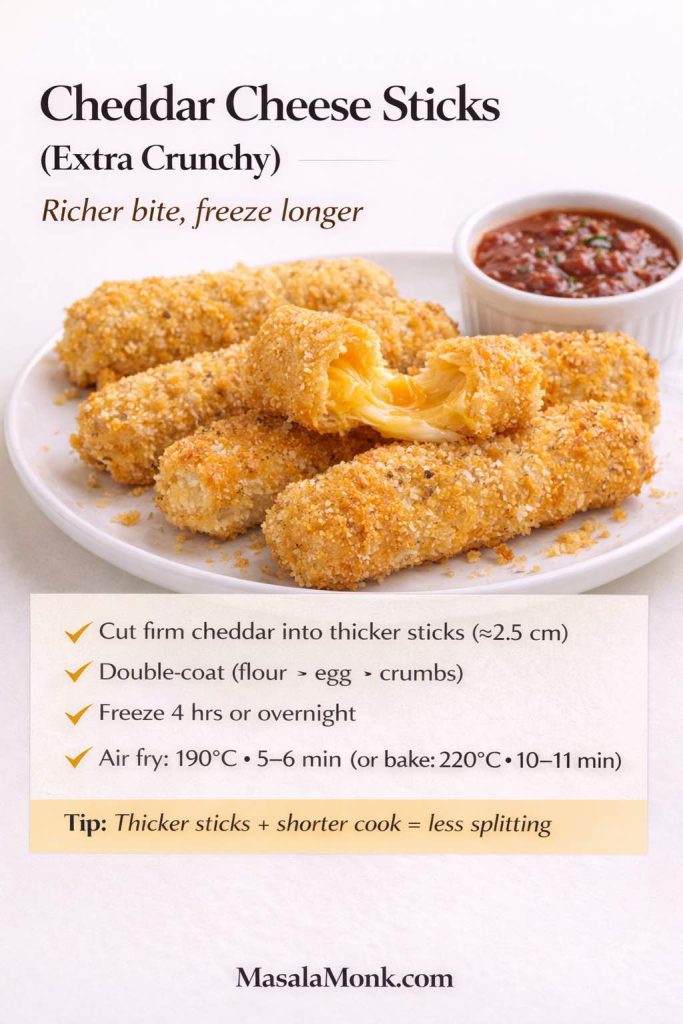
Recipe-card image titled “Cheddar Cheese Sticks (Extra Crunchy)” showing crispy breaded cheddar cheese sticks on a white plate with a melted cheddar center and a ramekin of marinara sauce. On-image instructions say to cut firm cheddar into thicker sticks (about 2.5 cm), double-coat (flour, egg, crumbs), freeze 4 hours or overnight, then air fry at 190°C for 5–6 minutes or bake at 220°C for 10–11 minutes. Tip says thicker sticks plus shorter cook means less splitting. MasalaMonk.com branding.
A cheddar cheese stick recipe needs a slightly different strategy than mozzarella: thicker sticks + longer freezing + faster cooking so the coating sets before the cheddar melts too aggressively. This “extra crunchy” method is perfect for anyone searching cheddar sticks recipe or wanting a sharper, richer twist on classic cheese sticks.

Cheddar cheese sticks (breaded)

Steps

  1. Cut firm cheddar into thicker sticks than mozzarella (about 2.5 cm thick).
  2. Double coat using the master breading method.
  3. Freeze 4 hours or overnight.
  4. Air fry 190°C for 5–6 minutes or bake 220°C for 10–11 minutes.
  5. Serve fast; cheddar cools and firms quickly.

These don’t stretch like mozzarella, yet they deliver a richer bite that’s excellent with a tangy sauce.


Smoked mozzarella sticks (bolder flavor, same recipe)

Mozzarella sticks with smoked cheese are pure snack joy—especially with marinara or spicy mayo.
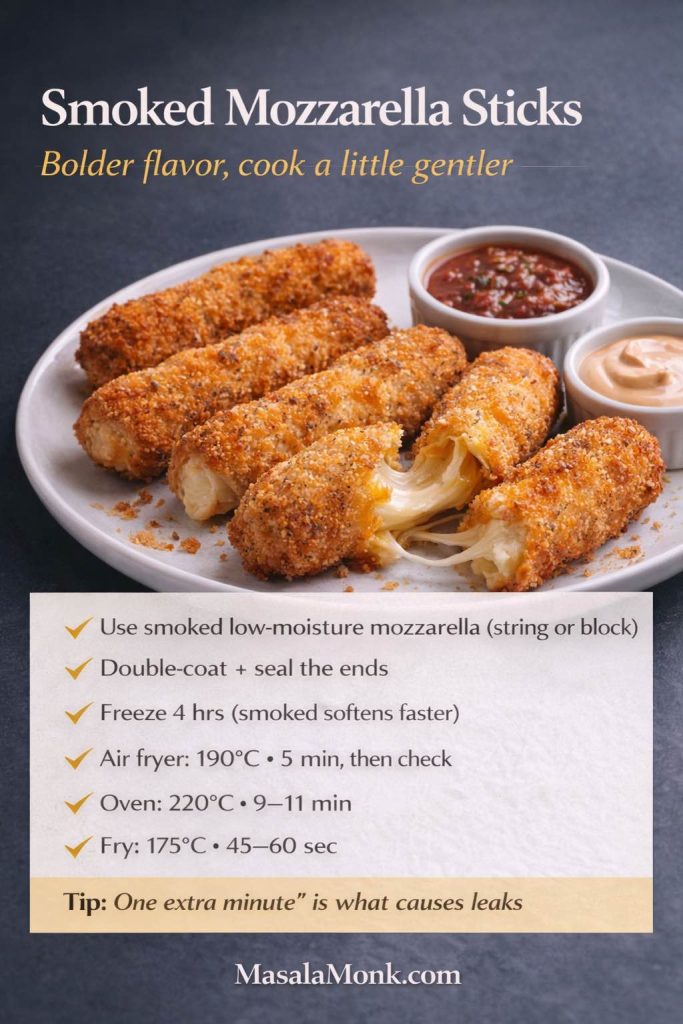
Recipe-card image titled “Smoked Mozzarella Sticks” showing crispy breaded smoked mozzarella sticks on a plate with a cheese pull and two dips (marinara and spicy mayo). Text says “Bolder flavor, cook a little gentler” and lists tips: use smoked low-moisture mozzarella (string or block), double-coat and seal the ends, freeze 4 hours, then cook with one of three methods—air fryer 190°C for 5 minutes then check, oven 220°C for 9–11 minutes, or fry 175°C for 45–60 seconds. Tip notes “one extra minute” is what causes leaks. MasalaMonk.com branding.
Smoked mozzarella sticks bring bigger flavor, but smoked cheese softens faster—so the win is cooking a little gentler and checking early. Double-coat, seal the ends, freeze longer, then air fry, bake, or fry just until golden. Use marinara or spicy mayo and serve immediately for the best pull without leaks.

Use smoked low-moisture mozzarella, follow the same double-coating method, seal the ends and freeze for 4 hours, then cook slightly more cautiously:

  • Air fryer: start at 190°C for 5 minutes, then check
  • Oven: 220°C for 9–11 minutes
  • Frying: 175°C for 45–60 seconds

Because smoked mozzarella can soften fast, “just one extra minute” is often what causes leaks.


Mozzarella rounds and mozzarella cheese bites (bite-size versions)

Sometimes sticks feel too long, especially for a party tray. In that case, cut string cheese into thirds or use a low-moisture block and cut small rectangles. Bread them the same way, freeze thoroughly, then cook a little faster:
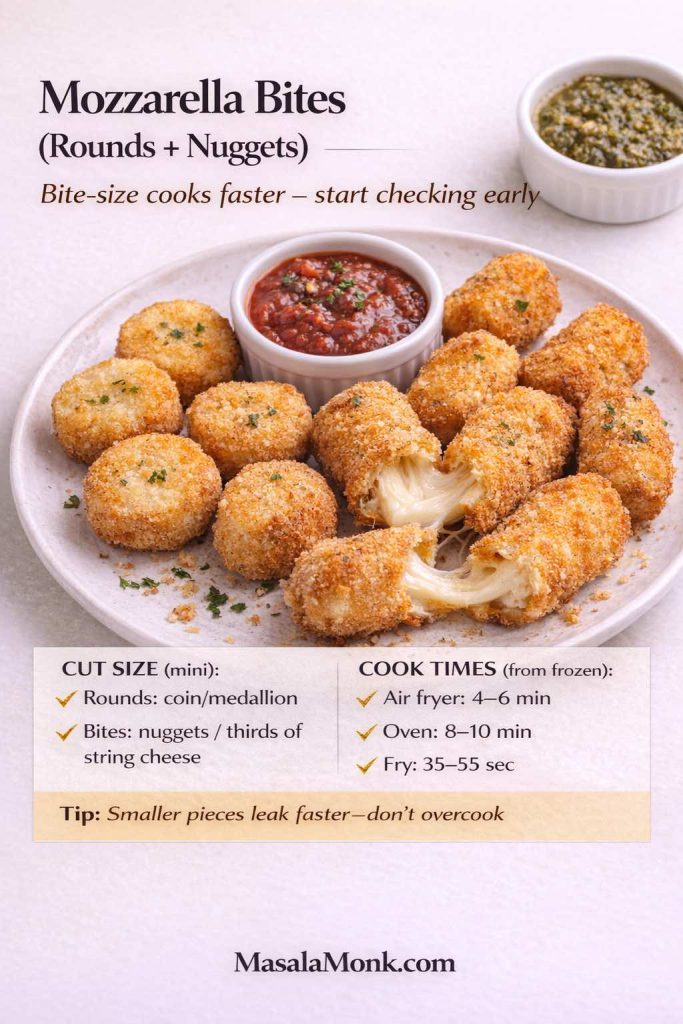
Recipe-card image titled “Mozzarella Bites (Rounds + Nuggets)” showing golden breaded mozzarella rounds and nugget bites on a plate with marinara and pesto dips, including one piece broken open with a cheese pull. Text explains cut size (rounds as coin/medallion, bites as nuggets or thirds of string cheese) and cook times from frozen: air fryer 4–6 minutes, oven 8–10 minutes, fry 35–55 seconds. Tip says smaller pieces leak faster, so don’t overcook. MasalaMonk.com branding.
For party trays, mozzarella rounds and mozzarella cheese bites are easier to dip and cook faster than full sticks—just start checking early. Use this quick from-frozen time guide for air fryer mozzarella bites, oven baking, or frying, and remember the key rule: smaller pieces leak faster if you overcook them.
  • Air fryer: 4–6 minutes
  • Oven: 8–10 minutes
  • Frying: 35–55 seconds

Bite-size pieces are also the easiest way to use shredded cheese logs because they hold shape better.


Hot Cheetos Mozzarella Sticks (Spicy Crunch, Air Fryer or Oven)

For a vivid spicy crust that stays crisp while the mozzarella turns stretchy inside, Hot Cheetos—or another finely crushed spicy cheese-flavored corn snack—can replace the standard breadcrumbs. The same no-leak rules still matter: fine crumbs, a complete double coat, sealed ends, and a thoroughly frozen center.
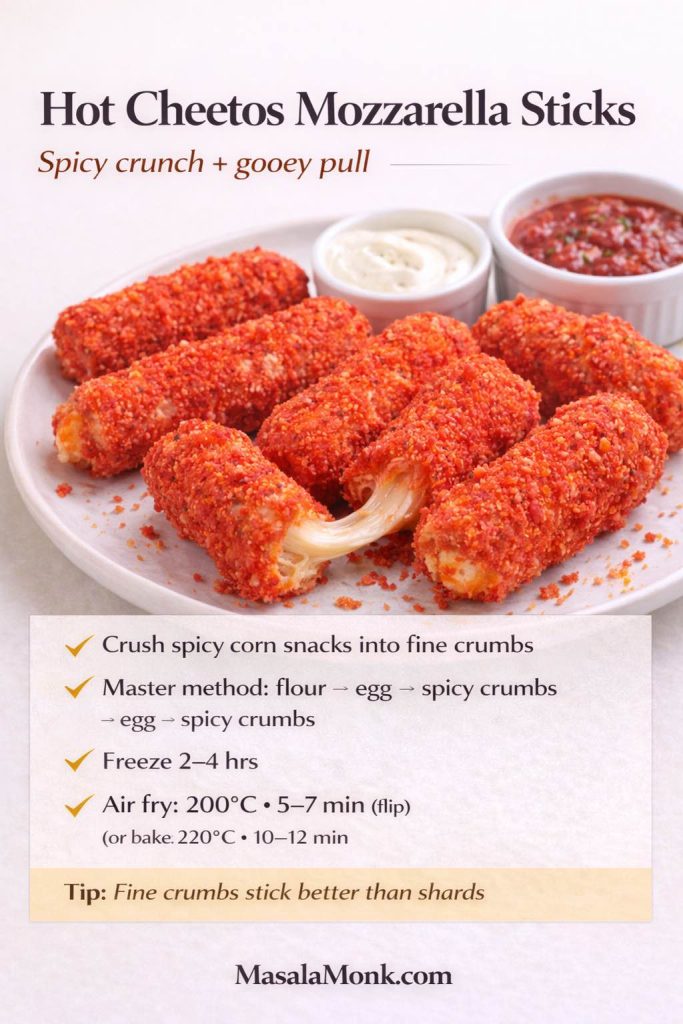
Recipe-card image titled “Hot Cheetos Mozzarella Sticks” showing bright red-orange, spicy-crumb coated mozzarella sticks on a plate with one stick pulled open for a gooey cheese stretch. Two dips sit behind the plate (ranch-style/creamy dip and marinara). Text instructions say: crush spicy corn snacks into fine crumbs; use master method flour → egg → spicy crumbs → egg → spicy crumbs; freeze 2–4 hours; air fry at 200°C for 5–7 minutes (flip) or bake at 220°C for 10–12 minutes. Tip says fine crumbs stick better than shards. MasalaMonk.com branding.
If you want hot cheetos mozzarella sticks with real crunch, the key is fine crumbs + double coating so the spicy crust seals before the cheese goes molten. Freeze well, then cook hot and fast in the air fryer (or bake). This is the most fun way to do hot mozzarella sticks and it’s a guaranteed save for “spicy snack energy” nights.

Hot Cheetos mozzarella sticks ingredients

  • 12 low-moisture mozzarella string cheese sticks
  • 70 g / 2.5 oz all-purpose flour
  • 2 large eggs
  • 1 tbsp / 15 ml water or milk
  • 150 g / 5.3 oz Hot Cheetos or similar spicy cheese-flavored corn snacks, crushed into fine crumbs
  • neutral oil spray for air frying or baking

How to make Hot Cheetos mozzarella sticks without cheese blowouts

  1. Crush the coating very finely. Large shards leave gaps; fine crumbs build a more complete shell.
  2. Dry and flour the cheese. Pat each mozzarella stick dry, coat lightly in flour, and tap off the excess.
  3. Double-coat. Dip in egg wash, press into the spicy crumbs, then repeat egg wash and crumbs. Press extra crumbs over both ends like little caps.
  4. Freeze until very firm. Freeze for at least 2 hours; 4 hours or overnight is more forgiving.
  5. Air fryer: cook straight from frozen at 200°C / 390–400°F for 5–7 minutes, turning once if needed. If your air fryer runs particularly hot, reduce it to 190°C / 375°F and begin checking early.
  6. Oven: bake straight from frozen at 220°C / 425°F for about 10–12 minutes, flipping halfway. A rack over the tray gives the best airflow.
  7. Rest for 2 minutes. That short pause lets the crust firm and makes the first cheese pull less likely to spill out.

No-leak checkpoint: if you can still see cheese through a thin patch before freezing, patch it with egg wash and more crumbs. The coating should look continuous all the way around, especially at the ends.

The spicy crust is best with something cool beside it. Use MasalaMonk’s eggless mayonnaise as a creamy dip base, or head in the opposite direction with a little sauce from the pepper sauce guide if you want the heat turned up again.

If these are going onto a game-day or movie-night table, MasalaMonk’s buffalo chicken dip makes a natural companion: one hot, crisp finger food beside one creamy, scoopable dip, without repeating the same texture twice.


How to Cook Store-Bought Frozen Mozzarella Sticks (Air Fryer and Oven)

This section is for packaged, store-bought frozen mozzarella sticks, not the homemade breaded sticks earlier in the guide. Commercial sticks vary in size and coating thickness, so they often need a slightly wider timing window. Whatever the brand, the biggest mistake is crowding the basket or stacking on a tray, because trapped steam softens the coating.
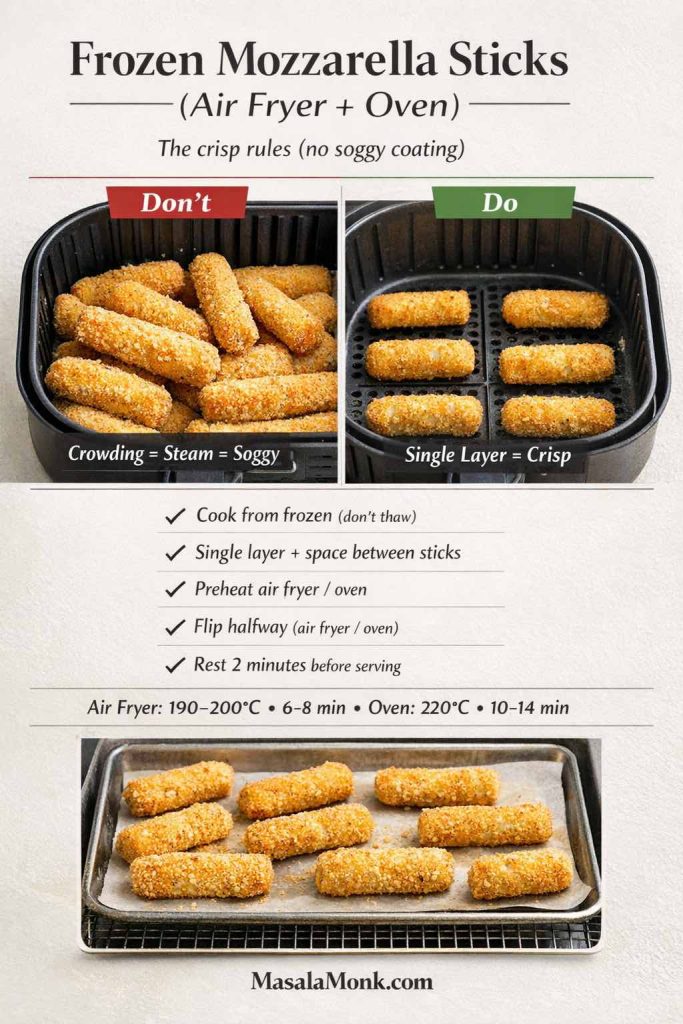
Infographic titled “Frozen Mozzarella Sticks (Air Fryer + Oven): The crisp rules (no soggy coating).” Side-by-side air fryer basket photos show “Don’t” overcrowd sticks (crowding causes steam and sogginess) versus “Do” cook in a single layer with space for crisp results. Checklist says: cook from frozen (don’t thaw), single layer with space, preheat air fryer/oven, flip halfway, rest 2 minutes. Bottom line lists times: air fryer 190–200°C for 6–8 minutes; oven 220°C for 10–14 minutes. MasalaMonk.com branding.
For frozen mozzarella sticks in the air fryer (or oven), the biggest “why are they soggy?” fix is simple: single layer + space so hot air circulates instead of steaming the coating. Cook straight from frozen, preheat, flip halfway, and rest 2 minutes—this is the easiest way to get crispy air fryer mozzarella sticks frozen or oven baked cheese sticks without blowouts.

Instant Pot’s from-frozen mozzarella sticks method stresses single-layer spacing, with room around each piece, so hot air can circulate (From-Frozen Mozzarella Sticks).

Store-bought frozen mozzarella sticks in the air fryer

  1. Preheat to 190–200°C (375–400°F).
  2. Arrange in one layer with space around each.
  3. Air fry 6–8 minutes, turning once if your model benefits from it.

Store-bought frozen mozzarella sticks in the oven

  1. Heat oven to 220°C (425°F).
  2. Place sticks on a rack or spaced out on parchment.
  3. Bake 10–14 minutes, flipping halfway.

For packaged frozen sticks, use the manufacturer’s directions as the first reference when they differ from these ranges. The universal crispness rules are still the same: cook from frozen, leave space, preheat, check before the cheese bursts, and rest briefly before serving.


Mozzarella stick breading: how to make it taste like more than crumbs

Breading can taste bland if it’s treated like an afterthought. Luckily, the fix is simple: give it fragrance and contrast.

Try one of these breadcrumb blends:

  • Italian-style: oregano + garlic + parmesan
  • smoky: smoked paprika + black pepper + pinch of sugar
  • spicy: chili flakes + paprika + garlic
  • herby: dried parsley + oregano + lemon zest (tiny amount)

Also, panko gives a louder crunch, while fine breadcrumbs help seal. Combining both is the easiest way to get “crispy cheese stick” texture without extra steps. If you want to see the same flour → egg → crumbs → chill logic applied to filled snacks, MasalaMonk’s croquettes recipe is a useful companion technique.


Low calorie mozzarella sticks (the realistic approach)

Mozzarella sticks are not diet food; still, you can make them lighter without turning them sad.
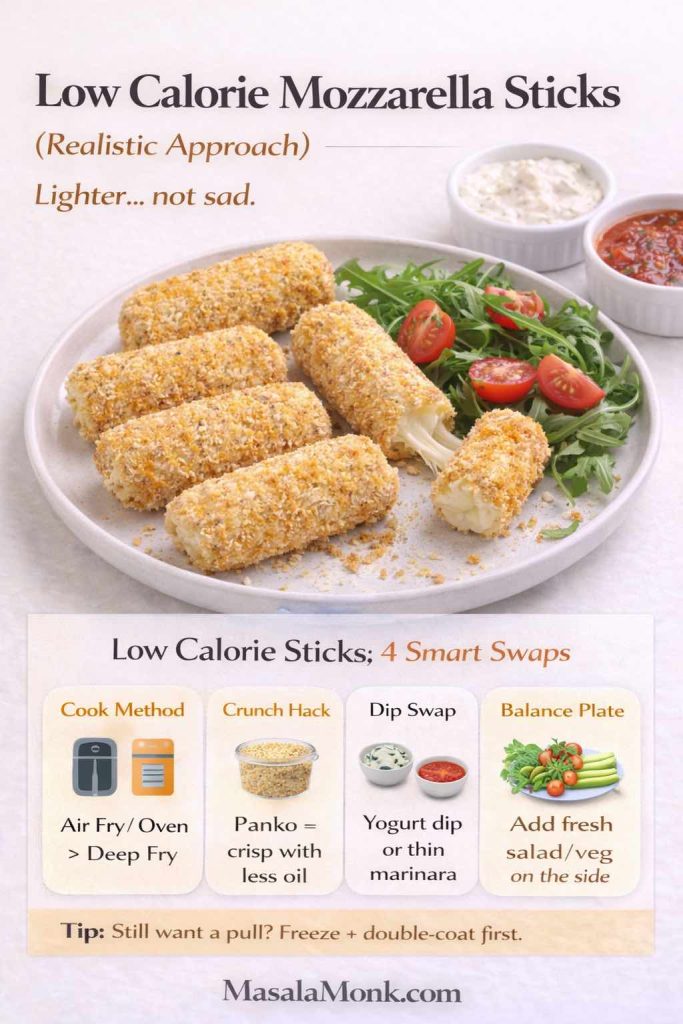
Recipe-card infographic titled “Low Calorie Mozzarella Sticks (Realistic Approach)” showing crispy breaded mozzarella sticks on a plate with a small arugula and cherry tomato salad, plus two dips (yogurt dip and marinara). Text reads “Lighter… not sad.” and “Low Calorie Sticks: 4 Smart Swaps,” listing: cook method air fry/oven over deep fry, panko for crisp with less oil, dip swap to yogurt dip or thin marinara, and balance plate with fresh salad/veg. Tip says “Still want a pull? Freeze + double-coat first.” MasalaMonk.com branding.
Want low calorie mozzarella sticks that still feel like a treat? Use the “realistic” upgrades: air fryer or oven, panko for crunch, and a lighter dip like yogurt-herb sauce or thin marinara—then add something fresh so the plate feels balanced. Save this card for your next snack night and use the master freeze + double-coat method from the post for the cleanest, no-leak cheese pull.

Here’s what helps:

  • Choose air fryer or oven instead of deep frying.
  • Use panko for crunch so you don’t need as much oil.
  • Serve with a lighter dip (yogurt-based or a thinner marinara-style sauce).
  • Pair with something fresh so the plate feels balanced.

If you want another crisp side that’s baked rather than fried, MasalaMonk’s garlic cheese potatoes (no frying) fits the same comfort lane while staying oven-friendly.


A snack board built around mozzarella sticks (so the night feels like a plan)

Mozzarella sticks shine brightest when they’re part of a spread. That doesn’t mean you need ten dishes; it means you need contrast.

Here’s a simple board idea:

If you want one “effort snack” that’s still in the same family, MasalaMonk’s arancini balls guide is basically mozzarella sticks’ cousin—crispy outside, gooey and cheesy inside, and impossible to ignore.


How to make mozzarella sticks at home without stress (common issues and fixes)

Even with a good recipe, mozzarella sticks can misbehave. When that happens, the fix is usually one of these, not a full restart.

“They burst open in the air fryer.”

  • Freeze longer. Two hours is the minimum; four is calmer.
  • Lower the temperature slightly and extend the time.
  • Make sure the ends are sealed with crumbs.

“Breading falls off.”

  • Don’t skip flour. Flour gives the egg something to grip.
  • Pat the cheese dry first.
  • Press crumbs gently; don’t just roll and hope.

“They’re golden but the cheese isn’t melty.”

  • Your cheese pieces are too thick for your cook time.
  • Cut sticks slightly slimmer next time, or cook 30–60 seconds longer—carefully.

“They’re greasy.”

  • Oil was too cool (frying), or you drained on paper towels and steam softened the crust.
  • If frying, keep oil temperature steady. USDA’s deep frying guidance is useful here (Deep Fat Frying and Food Safety).

Make-ahead mozzarella sticks (and why they’re perfect for it)

Mozzarella sticks are at their best right after cooking, yet the prep can be done long before anyone shows up.

Make ahead

Bread the sticks, freeze until solid, then transfer to a freezer bag.

How long they keep

They keep well frozen for several weeks. The key is keeping them sealed so they don’t pick up freezer odors.

Reheating leftovers

Microwaves soften breading. Instead, reheat in:

  • air fryer at 190°C for 3–4 minutes
  • oven at 220°C for 6–8 minutes

Bon Appétit highlights the advantage of prepping ahead with homemade mozzarella sticks since cooking is quick once you’re ready (Homemade Mozzarella Sticks).


Turn mozzarella sticks into dinner (not just snacks)

Mozzarella sticks can be the opening act. If you want a full meal, keep the rest simple and comforting.

It’s warm, shareable, and it makes the night feel like it had a plan—without turning cooking into a project.


One last note before you cook

Mozzarella sticks are a snack, but they’re also a small technique: seal, freeze, cook hot and fast, and serve immediately. Once you nail that rhythm, you can make them any way you want—string cheese mozzarella sticks, mozzarella sticks with shredded cheese, beer battered cheese sticks, baked cheese sticks, keto cheesesticks, or frozen mozzarella sticks in the air fryer when time is tight.

↑ Back to the top

FAQs

1) What’s the best cheese for mozzarella sticks?

For the most reliable mozzarella sticks recipe, low-moisture mozzarella is the sweet spot because it melts smoothly without releasing as much water. String cheese is the easiest option since it’s already shaped and fairly firm. Meanwhile, block mozzarella (cut into sticks) gives you control over thickness and texture. If you’re using fresh mozzarella, expect more leaking unless you dry it very well and freeze longer.

2) Can I make mozzarella sticks using string cheese?

Yes—mozzarella sticks made with string cheese are often the simplest way to get consistent results. Since the pieces are uniform, they cook evenly whether you choose air fryer mozzarella sticks, oven baked mozzarella sticks, or fried mozzarella sticks. Just make sure they’re double-breaded and thoroughly frozen first.

3) How do I make mozzarella sticks with shredded cheese without them falling apart?

Mozzarella sticks with shredded cheese work best when you treat them like shaped logs or bites rather than long sticks. First, mix shredded mozzarella with a small amount of starch (cornstarch works well) and a soft binder like cream cheese so it holds together. After that, freeze the shaped pieces until very firm, then double-coat and freeze again. As a result, the coating has time to set before the cheese collapses.

4) Why do my cheese sticks burst open while cooking?

Usually, the center isn’t frozen enough or the breading has thin spots—especially at the ends. Sometimes, cooking temperature also plays a role: if the oil is too cool, the cheese melts before the crust sets; if the air fryer runs very hot, the outside browns quickly while the middle erupts. Therefore, longer freezing, better sealing, and steady heat fix most blowouts.

5) How long should I freeze mozzarella sticks before cooking?

Freeze breaded mozzarella sticks for at least 2 hours; however, 4 hours (or overnight) makes the process calmer and more forgiving. If you’re making mozzarella sticks from shredded mozzarella, freeze even longer because the shaped mixture warms and softens faster.

6) What’s the best breading for mozzarella sticks?

A mix of panko and fine breadcrumbs creates the best balance: panko gives louder crunch, while finer crumbs help seal gaps. Additionally, seasoning the breading—garlic powder, oregano, onion powder, paprika—makes the crust taste like more than “just crumbs.”

7) How do I bread mozzarella sticks so the coating stays on?

Start with flour, then egg, then breadcrumbs—because flour helps the egg grip and prevents slipping. After that, repeat egg and breadcrumbs for a second coat. Finally, press the crumbs gently, especially around the ends, since that’s where leaking usually starts.

8) How to cook mozzarella sticks in an air fryer?

For mozzarella sticks in air fryer, preheat to around 190–200°C, arrange in a single layer, lightly spray with oil, and cook for about 5–7 minutes, flipping halfway. Then let them rest for a minute or two so the cheese settles rather than spilling immediately.

9) How long to cook cheese sticks in air fryer (time guide)?

For homemade breaded mozzarella sticks cooked from frozen, 5–7 minutes at about 200°C / 390–400°F is the main starting range. If your air fryer runs hot, start checking at 5 minutes or lower the temperature to 190°C / 375°F. Packaged frozen sticks often use a slightly wider 6–8 minute range.

10) How do I cook store-bought frozen mozzarella sticks in the air fryer?

For packaged store-bought frozen mozzarella sticks, air fry straight from the freezer at 190–200°C / 375–400°F for about 6–8 minutes, turning once if needed. Don’t thaw first, and check the package directions because commercial sticks vary in size and coating.

11) How do I cook store-bought frozen mozzarella sticks in the oven?

For packaged store-bought frozen mozzarella sticks, bake at about 220°C / 425°F for roughly 10–14 minutes, flipping halfway. A rack improves airflow and crispness; follow the package directions when they specify a different time or temperature.

12) Can I bake mozzarella sticks instead of frying?

Absolutely—baked mozzarella sticks can get very crisp, particularly with panko breading and a light oil spray. Use a hot oven and avoid crowding. Even so, freezing first still matters, because the cheese needs time to warm without escaping.

13) What’s the best way to make mozzarella sticks extra crispy?

Double breading is step one. After that, freeze thoroughly, then cook hot and fast. Additionally, panko breadcrumbs and a light oil spray help browning, while cooking on a rack (in the oven) prevents soggy bottoms.

14) Can I pan fry mozzarella sticks?

Yes, pan fried mozzarella sticks can work with a shallow layer of hot oil. Still, you’ll want to fry in small batches and avoid constant flipping. In other words, treat it like quick shallow frying: set the crust, turn once, and remove promptly.

15) How long to fry mozzarella sticks?

Most deep fried mozzarella sticks cook quickly—often under 90 seconds—because the goal is to brown the crust while warming the center. If you fry too long, the cheese melts completely and pushes out. So, once they’re golden, pull them.

16) What oil is best for fried cheese sticks?

Choose a neutral, high-heat oil such as sunflower, canola, or vegetable oil. In addition, keep the temperature steady so the breading crisps quickly without absorbing excess oil.

17) What are beer battered mozzarella sticks, and how are they different?

Beer battered mozzarella sticks use a thick batter instead of breadcrumbs, creating a craggy, pub-style shell. Because batter needs time to set, freezing the cheese extra well is even more important. Also, a quick flour dust before dipping helps the batter cling.

18) Can I make low carb mozzarella sticks or keto cheese sticks?

Yes—keto mozzarella sticks skip breadcrumbs and use coatings like almond flour, parmesan, and sometimes crushed pork rinds for crunch. Even so, the same rules apply: double coat, freeze thoroughly, then cook quickly to prevent blowouts.

19) Are “low calorie mozzarella sticks” actually possible?

They can be lighter, although they won’t be “diet food.” Air fryer mozzarella sticks or oven baked cheese sticks reduce oil compared to deep frying. Moreover, pairing them with a tomato-based dip instead of a heavy creamy sauce can keep the plate feeling balanced.

20) What sauce goes with mozzarella sticks besides marinara?

Marinara sauce for mozzarella sticks is classic, yet plenty of other options work: garlic mayo, spicy mayo, ranch-style dip, pesto, honey-mustard, or even a simple chili sauce. As a result, the same cheese sticks can feel totally different from one night to the next.

21) Can I reheat mozzarella sticks and keep them crispy?

Yes—reheat in an air fryer or hot oven so the crust re-crispens. Meanwhile, microwaving tends to soften the coating. For best texture, reheat briefly, then rest for a minute before serving.

22) Can I make mozzarella sticks ahead of time?

Definitely. Bread the sticks, freeze until solid, and store in a freezer bag. Then cook straight from frozen whenever you want. Consequently, mozzarella sticks become a quick snack instead of a last-minute project.

23) Why are my mozzarella sticks soggy?

Crowding is the usual culprit, especially in the air fryer. Also, baking on a flat tray can trap steam underneath. Therefore, space them out, flip midway, and consider using a rack in the oven.

24) Can I use cheddar for cheese sticks?

Yes—cheddar cheese stick recipe versions exist, but cheddar melts differently and can separate. For that reason, cut thicker pieces, freeze longer, and cook slightly faster. Alternatively, blend cheddar with mozzarella for a sharper flavor with better melt behavior.

25) What are mozzarella rounds, and can I cook them like cheese sticks?

Mozzarella rounds are simply thicker coin-shaped pieces (or small medallions). You can bread and cook them like mozzarella cheese bites, although they often need slightly shorter cooking times. In addition, they’re great for snack platters because they’re bite-sized and easy to dip.
Posted on — 6 Comments

Chicken Adobo Recipe

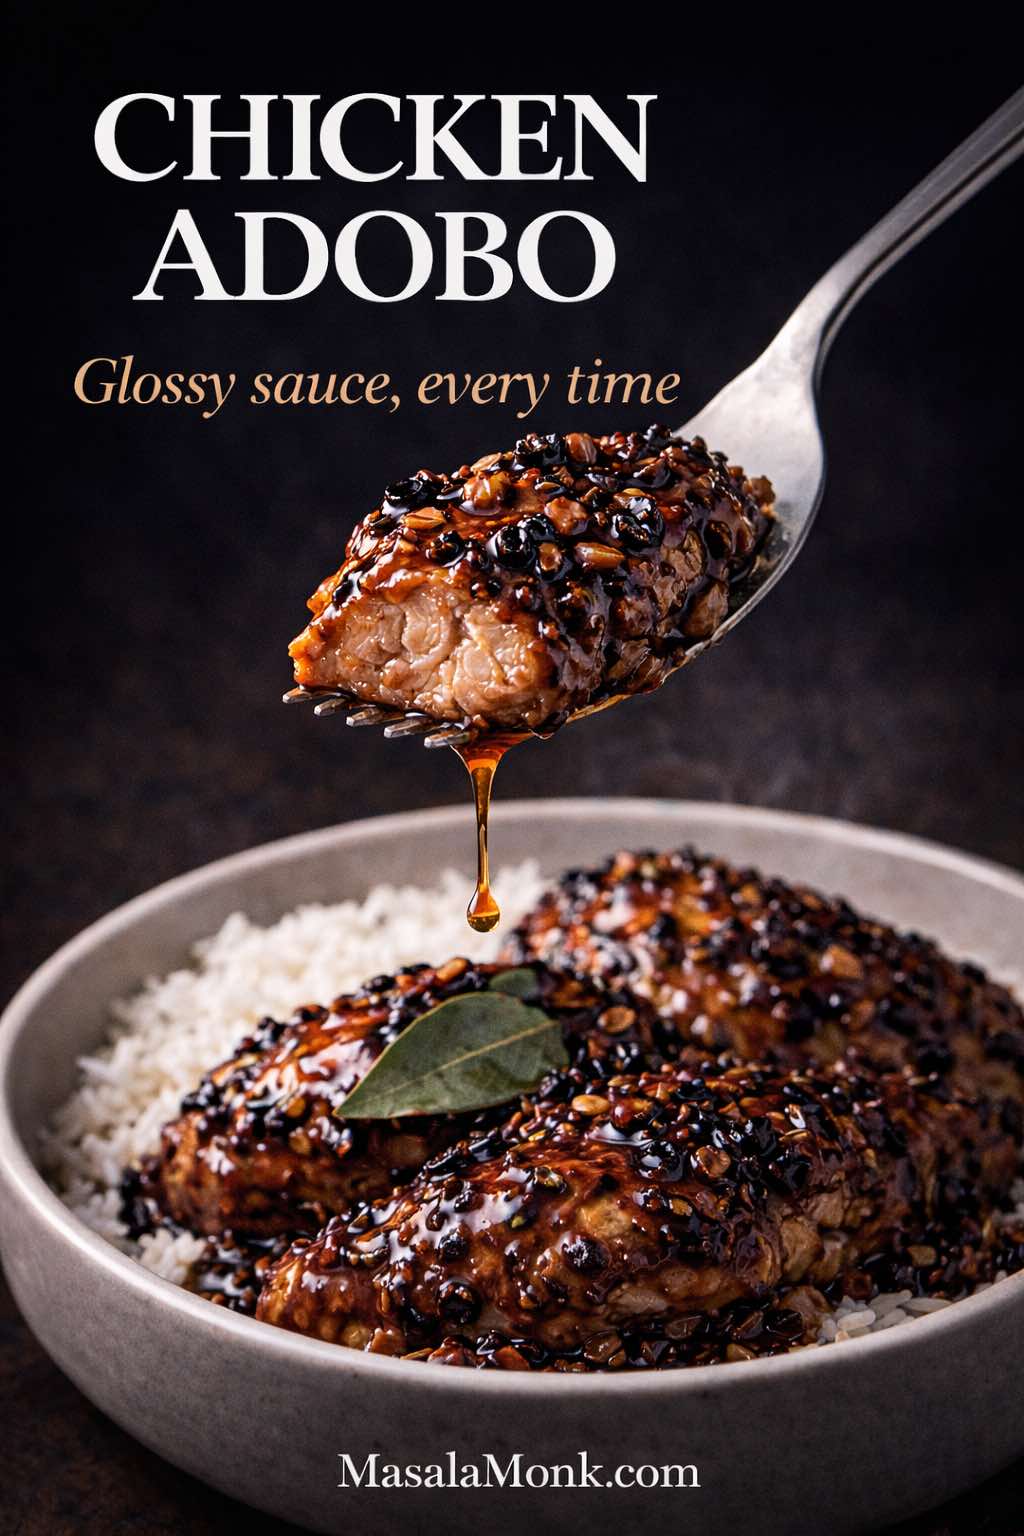
A close-up fork lifts a juicy bite of chicken adobo over a bowl of rice, with a thick glossy soy-vinegar sauce dripping from the bite. The chicken is coated in dark caramelized sauce with visible garlic bits and peppercorns against a moody black background, with the text “Chicken Adobo” and “Glossy sauce, every time” plus MasalaMonk.com at the bottom.

Last updated on

This chicken adobo recipe gives you the version most people are hoping for when they search for adobong manok: tender chicken, plenty of garlic, a savory-tangy soy-and-vinegar sauce, and a final reduction that turns the braising liquid glossy enough to cling to the meat and rice.

The ingredients are simple, but the order matters. Brown the chicken without trying to cook it through, keep the garlic fragrant rather than dark, simmer gently until the meat is tender, and only then decide how far to reduce the sauce. Stop while there is still enough to spoon over rice for classic adobo, or keep going for a drier, lacquered adobong manok na tuyo.

Filipino adobo changes from household to household, so there is no useful reason to pretend one ratio is the only legitimate one. This version keeps a clear starting point—½ cup / 120 ml soy sauce, ⅓ cup / 80 ml vinegar, and ¾ to 1 cup / 180–240 ml water for 1.2–1.5 kg chicken—then shows you how to adjust the finished pot without losing the character of the dish.

Chicken adobo at a glance: Serves 4–5 · best with bone-in thighs or drumsticks · simmer 25–35 minutes for those cuts · cook chicken to at least 165°F / 74°C · reduce 8–12 minutes for a saucy finish or longer for tuyo.

Chicken Adobo Recipe

Classic Filipino chicken adobo with bone-in chicken braised in soy sauce, vinegar, garlic, bay leaves and peppercorns, then reduced until the sauce is glossy and deeply savory.

Prep15 minutes
Cook55 minutes
Total1 hour 10 minutes
Yield4–5 servings
CuisineFilipino
MethodStovetop braise

Ingredients

  • 1.2–1.5 kg bone-in chicken thighs and drumsticks, skin-on optional
  • 1 tablespoon neutral oil
  • 10–12 garlic cloves, smashed
  • 3 bay leaves
  • 1–1½ teaspoons whole black peppercorns, or ¾ teaspoon coarsely cracked pepper
  • ½ cup / 120 ml soy sauce
  • ⅓ cup / 80 ml cane vinegar, coconut vinegar, or distilled white vinegar
  • ¾–1 cup / 180–240 ml water
Optional short marinade: Take 2 tablespoons soy sauce, 1 tablespoon vinegar and 3–4 garlic cloves from the measured ingredients above. Toss with the chicken for 15–30 minutes. This is optional and is not included in the total time.

Instructions

  1. Prep the chicken. Pat the pieces thoroughly dry. If using large leg quarters, separate them into thighs and drumsticks so they cook more evenly. Do not add extra salt at this stage.
  2. Brown in batches. Heat the oil in a wide heavy pan over medium-high heat. Brown the chicken in a single layer for about 2–4 minutes per side, aiming for golden patches rather than a dark crust. Transfer to a plate.
  3. Cook the aromatics. Lower the heat to medium. Add the smashed garlic and cook for 30–60 seconds, just until fragrant. Add the bay leaves and peppercorns.
  4. Build the braise. Add the water first and scrape up the browned bits. Pour in the soy sauce and vinegar. Let the mixture come to a lively simmer; giving the vinegar a minute or two before vigorous stirring can help its raw aroma settle.
  5. Simmer until tender. Return the chicken and any juices to the pan. Cover and simmer gently: 25–35 minutes for bone-in thighs or drumsticks, 18–25 minutes for wings, or 12–18 minutes for breast pieces. Chicken should reach at least 165°F / 74°C.
  6. Reduce the sauce. Remove the lid and simmer over medium heat until the sauce is glossy. For a classic saucy finish, this usually takes 8–12 minutes. Turn the chicken once or twice as the sauce thickens. If the meat is already tender and the sauce needs more reduction, lift the chicken out and reduce the liquid separately.
  7. Rest and serve. Turn off the heat and let the chicken sit in the sauce for about 5 minutes. Serve hot with rice, spooning the sauce over the top.

Optional Tuyo Finish

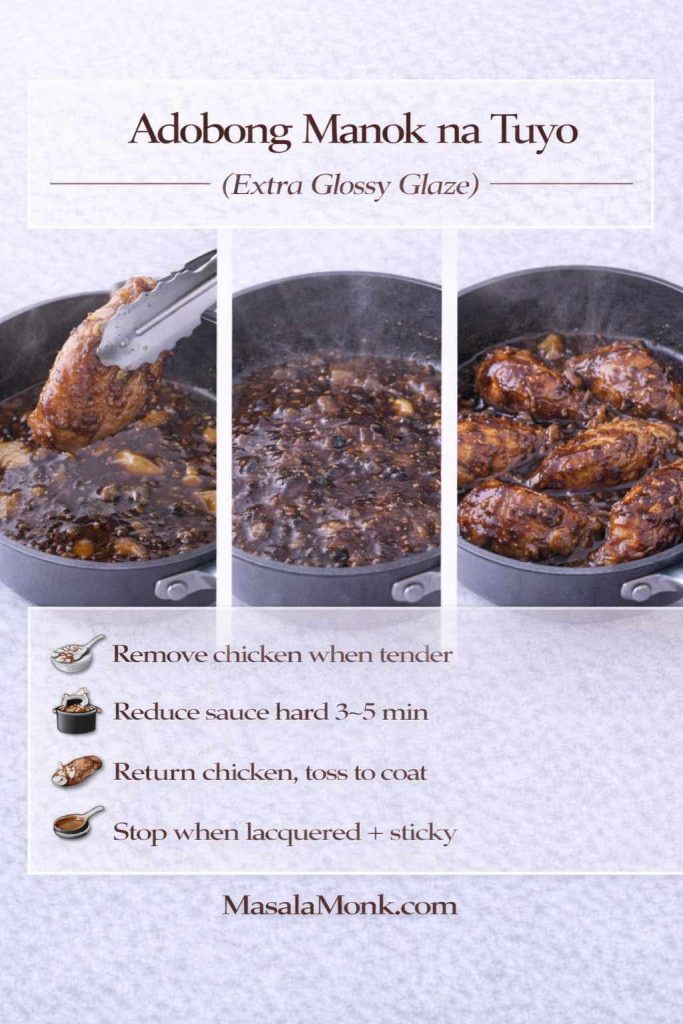
For adobong manok na tuyo: Reduce longer, usually 12–18 minutes in total. For an extra-sticky glaze, remove the tender chicken, reduce the sauce hard for 3–5 minutes, then return the chicken and toss to coat.

In This Chicken Adobo Guide

Chicken Adobo Ingredients

Chicken, vinegar, soy sauce, garlic, bay leaves and peppercorns do most of the work. The ingredient list is short enough that changing the vinegar or soy sauce can noticeably shift the finished pot, so it helps to know what each choice is doing before you start adjusting quantities.

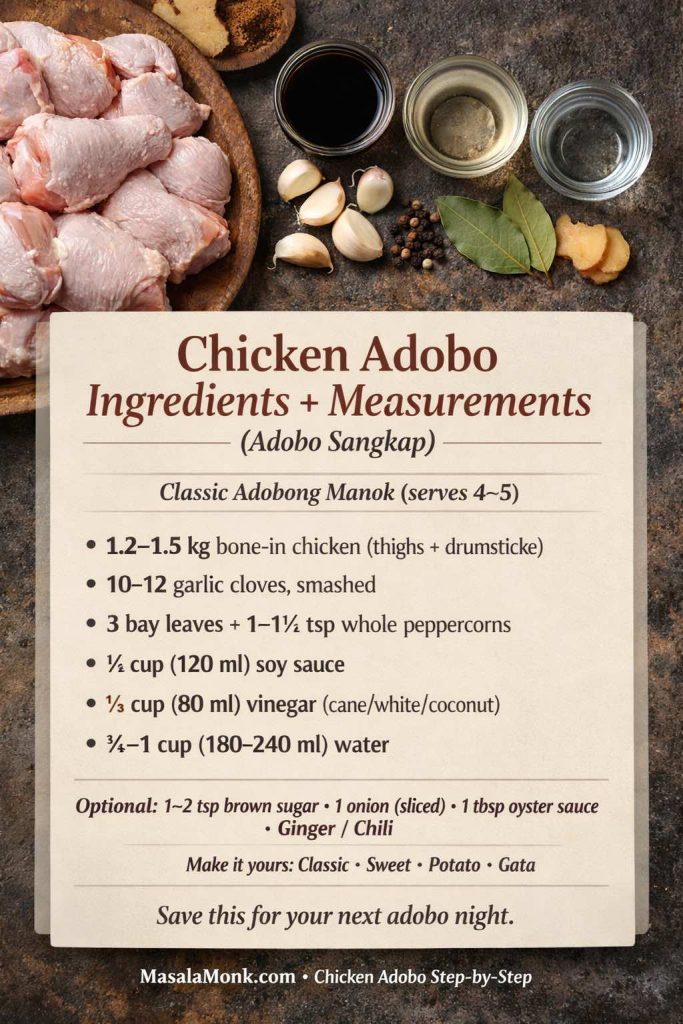
Overhead flatlay of chicken adobo ingredients on a dark surface: raw bone-in chicken, soy sauce, vinegar, water, smashed garlic, bay leaves, peppercorns, and ginger. Text overlay reads “Chicken Adobo Ingredients + Measurements (Adobo Sangkap)” with quantities for classic adobong manok (serves 4–5), including soy sauce, vinegar, water, garlic, bay leaves, and peppercorns, plus optional sugar, onion, oyster sauce, and chili.
The base formula for 4–5 servings: 1.2–1.5 kg chicken with 120 ml soy sauce, 80 ml vinegar and 180–240 ml water, plus garlic, bay and peppercorns.

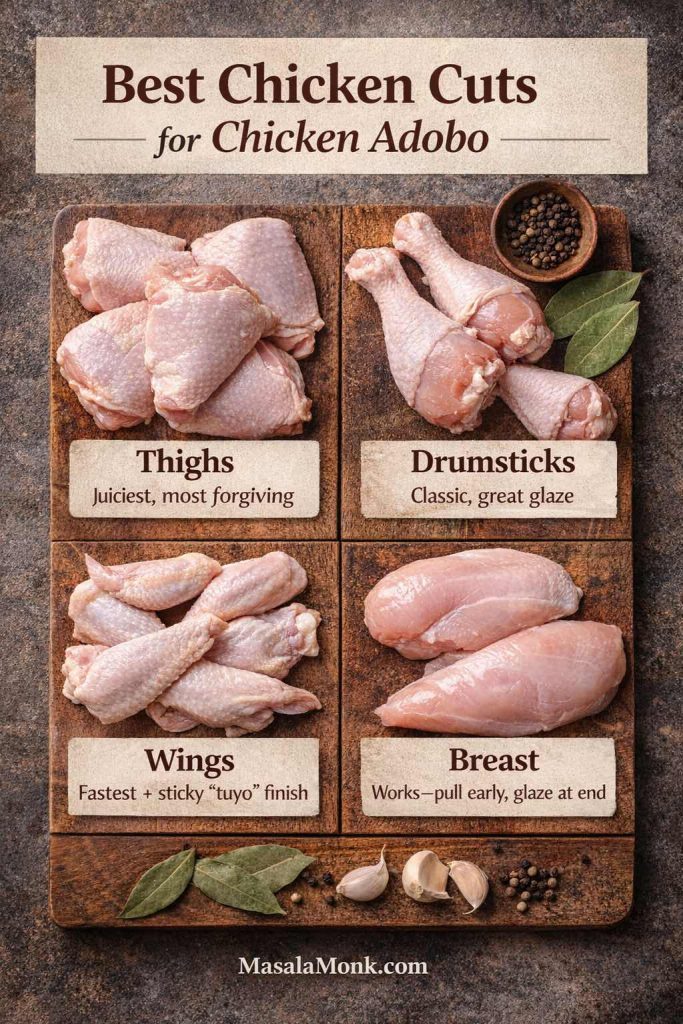
Best Chicken Cuts for Adobo

Bone-in thighs and drumsticks are the easiest default for this chicken adobo recipe. They have enough fat and connective tissue to stay juicy through the covered simmer and the uncovered reduction. Wings cook faster and take especially well to a sticky tuyo finish.

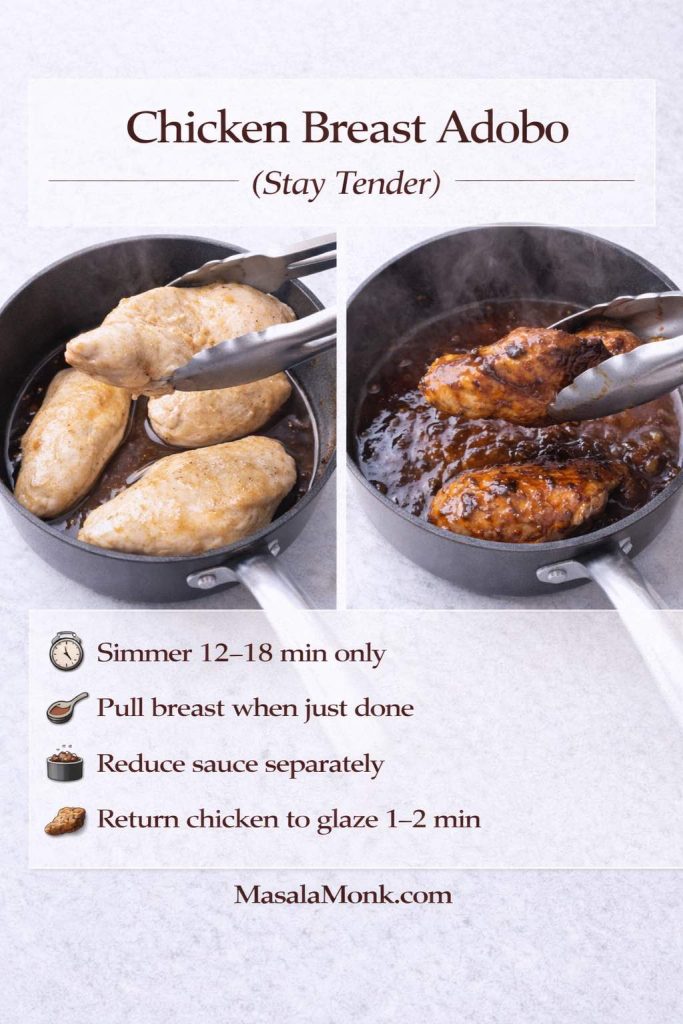
Chicken breast works, but it has less room for error. Simmer it only until done, pull it from the pan, reduce the sauce separately, then return the breast for a 1–2 minute glaze. If breast is the cut you cook most often, the MasalaMonk guide to keeping chicken breast juicy goes deeper into thickness, temperature and carryover cooking.

Infographic showing the best chicken cuts for chicken adobo on a wooden board: thighs, drumsticks, wings, and chicken breast, each labeled with a short tip. Thighs are noted as juiciest and most forgiving, drumsticks as classic with great glaze, wings as fastest for a sticky “tuyo” finish, and breast as workable if pulled early and glazed at the end. Bay leaves, peppercorns, and garlic appear as adobo aromatics, with MasalaMonk.com in the footer.
Thighs and drumsticks are the most forgiving; wings cook faster, while breast should be pulled early and returned only for the final glaze.

Which Soy Sauce and Vinegar Work Best?

Use the soy sauce you know, but remember that brands and styles can differ sharply in saltiness and color. If the bottle in your kitchen is unfamiliar, the MasalaMonk soy sauce guide explains the practical differences between common types.

Cane vinegar is a natural fit for Filipino adobo. Coconut vinegar is usually rounder, while distilled white vinegar gives a cleaner, sharper edge. With a stronger vinegar, do not reduce the water just because the vinegar tastes sharp; water is the part that dilutes both acidity and salt. Start within the 180–240 ml range, then judge the sauce near the end rather than trying to correct it while it is still thin and raw-tasting.

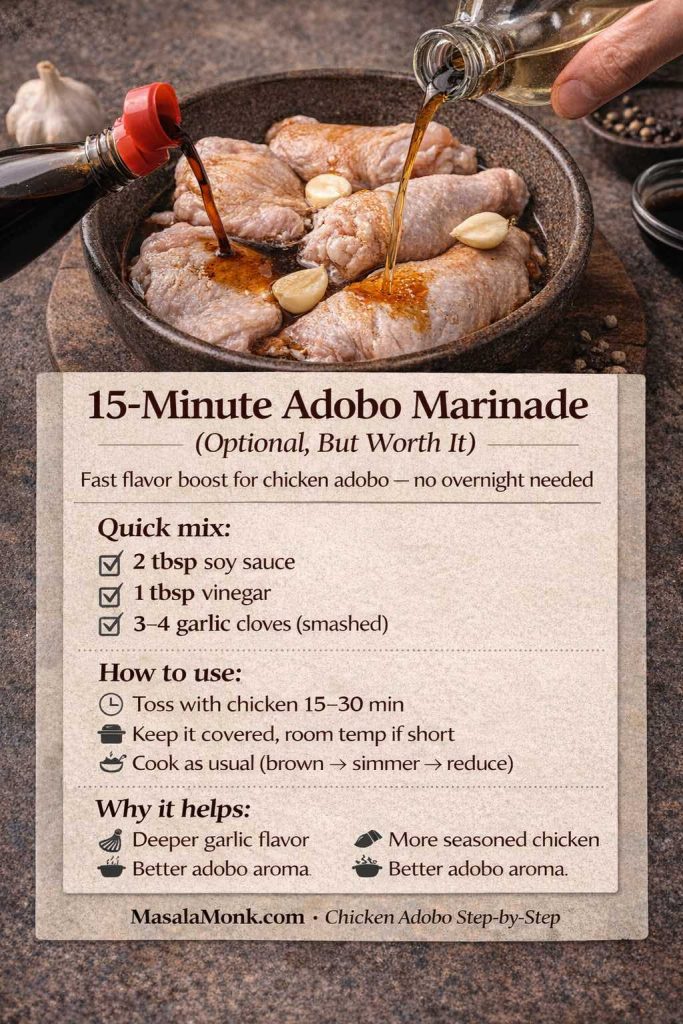
Optional 15–30 Minute Marinade

A long marinade is not required. If you have 15–30 minutes, take 2 tablespoons soy sauce, 1 tablespoon vinegar and 3–4 smashed garlic cloves from the measured recipe ingredients and toss them with the chicken while you prepare the pan and aromatics. If dinner needs to move immediately, skip it.

Recipe-card infographic for a 15-minute adobo marinade for chicken adobo. Photo shows chicken pieces in a bowl with soy sauce and vinegar being poured over smashed garlic. Text overlay lists the quick mix: 2 tbsp soy sauce, 1 tbsp vinegar, 3–4 smashed garlic cloves. Instructions say to toss with chicken for 15–30 minutes, keep covered, then cook as usual (brown, simmer, reduce). MasalaMonk.com appears in the footer.
The short marinade is optional: use measured soy sauce, vinegar and garlic from the main recipe, then continue with the same browning and braising method.

Garlic, Peppercorns, Bay Leaves and Optional Onion

Garlic is not a background ingredient here: 10–12 smashed cloves give this chicken adobo recipe much of its savory aroma. Smashing rather than finely mincing the cloves also makes them less likely to scorch during the brief sauté. Three bay leaves add a dry, herbal note, while whole peppercorns give little bursts of warmth as the sauce reduces.

One small sliced onion is optional. Add it after the chicken comes out of the pan and give it a minute or two to soften before the garlic goes in. It makes the sauce a little rounder and sweeter without turning the dish into a different style. Fresh chili is better treated according to the table: add one or two to the braise if everyone wants heat, or serve sliced chili on the side when different diners want different levels.

These aromatics are easy to increase casually, but restraint helps. More garlic is usually forgiving; too many bay leaves can become medicinal, and heavily crushed pepper can make the final reduction harsher than expected. For this adobo recipe, chicken and sauce should still lead, with the aromatics supporting rather than dominating them.

How to Make Chicken Adobo, Step by Step

The recipe card above gives you the short route. This section is for the points where texture and timing matter: getting real browning instead of steam, keeping garlic from scorching, knowing when the chicken is tender, and reducing the sauce without overcooking the meat.

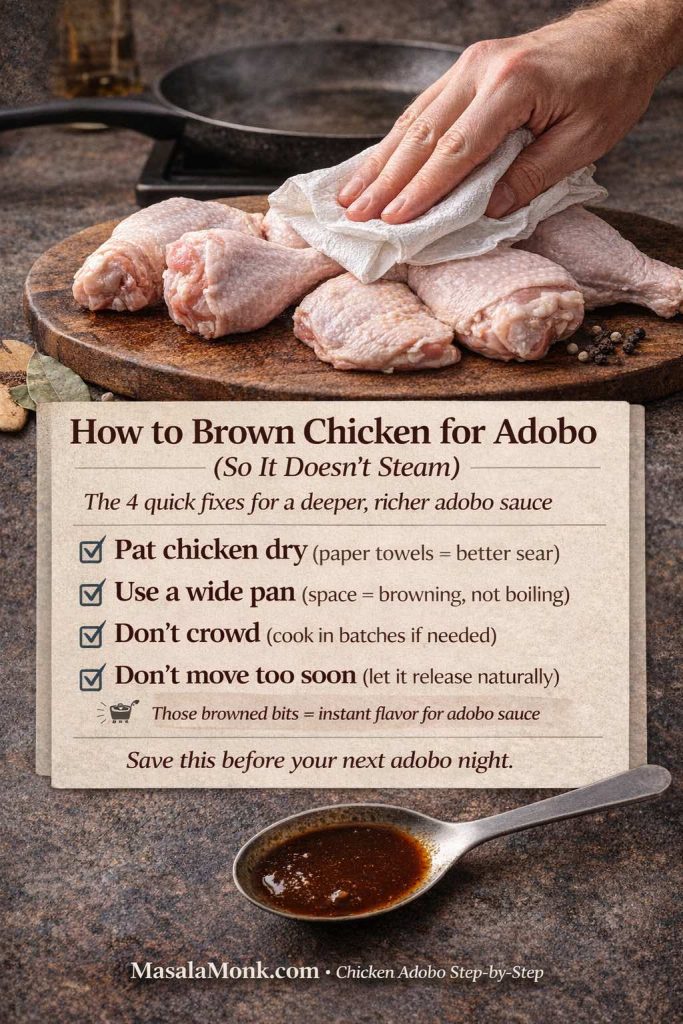
1. Dry the Chicken Before It Hits the Pan

Pat the pieces thoroughly dry with paper towels. Surface moisture has to boil away before browning can begin, so wet chicken spends its first minutes steaming. A wide pan also matters; if the pieces are packed tightly, brown them in batches.

Infographic showing how to brown chicken for adobo so it doesn’t steam. Photo shows hands patting raw chicken pieces dry with a paper towel on a wooden board, with a wide pan heating in the background. Text overlay lists four tips: pat chicken dry, use a wide pan, don’t crowd (cook in batches), and don’t move too soon (let it release naturally). Note says browned bits add instant flavor for adobo sauce, with MasalaMonk.com in the footer.
Dry chicken, a wide pan and enough space between pieces are the three biggest safeguards against steaming instead of browning.

2. Brown for Golden Patches, Not a Dark Crust

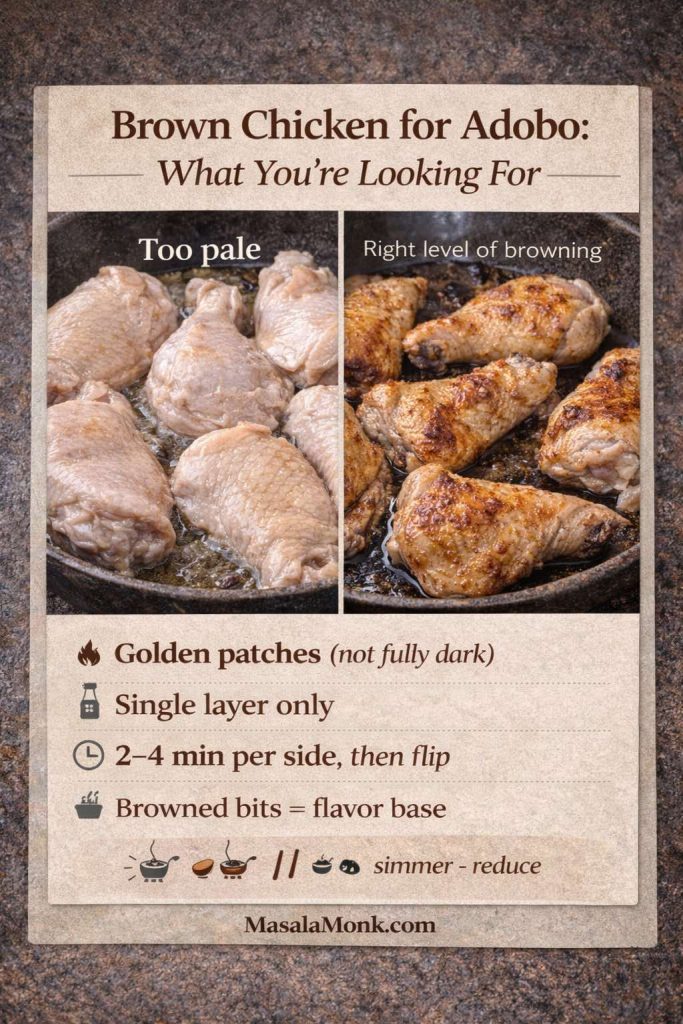
Heat 1 tablespoon oil over medium-high heat. Once the chicken goes in, leave it alone long enough to release naturally. The visual target is golden patches, not a uniformly dark crust: about 2–4 minutes per side is a useful starting range, depending on the pan, cut and batch size.

Side-by-side infographic showing browning levels for chicken adobo. Left panel labeled “Too pale” shows chicken pieces that look steamed with little color. Right panel labeled “Right level of browning” shows chicken with golden-brown patches in the pan. Text below lists tips: golden patches (not fully dark), single layer only, brown 2–4 minutes per side then flip, and browned bits create the flavor base for adobo sauce. MasalaMonk.com appears at the bottom.
Aim for scattered golden-brown patches. You are building fond for the sauce, not trying to finish the chicken during searing.

3. Keep the Garlic Fragrant

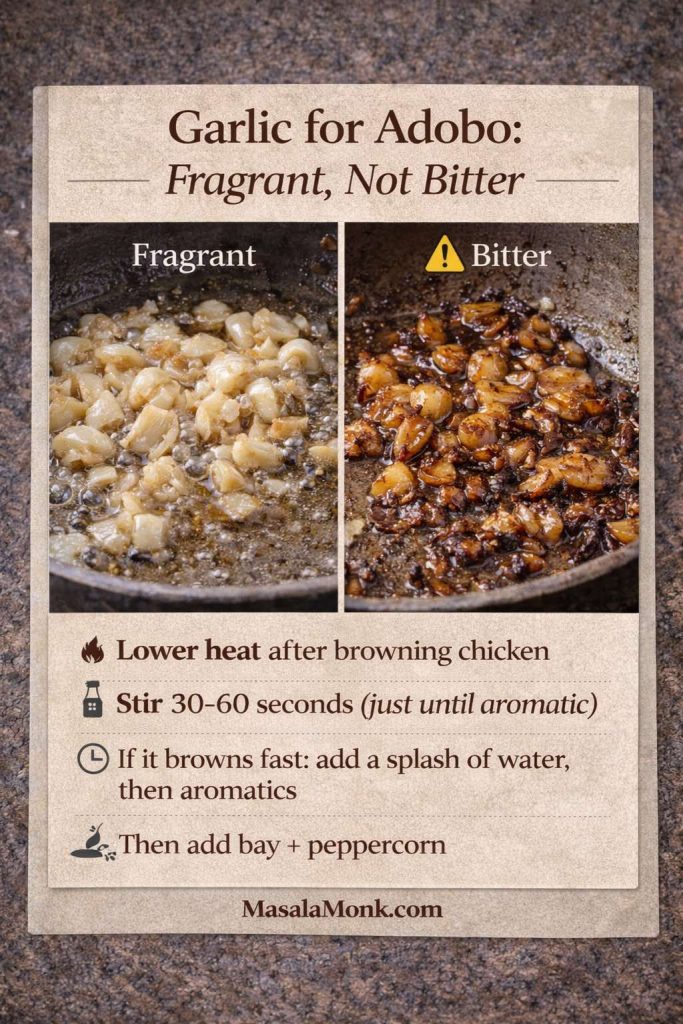
After the chicken comes out, lower the heat before adding the smashed garlic. Thirty to sixty seconds is usually enough. Add the bay leaves and peppercorns once the garlic smells sweet and aromatic. If the garlic races toward brown, add a splash of the measured water and move on to the braising liquid.

Split-panel infographic about garlic for chicken adobo. Left panel labeled “Fragrant” shows lightly cooked chopped garlic in oil, pale-golden and aromatic. Right panel labeled “Bitter” shows garlic browned too dark and scorched. Text overlay reads “Garlic for Adobo: Fragrant, Not Bitter” and lists tips: lower heat after browning chicken, stir 30–60 seconds until aromatic, if it browns fast add a splash of water then aromatics, then add bay leaves and peppercorns. MasalaMonk.com is in the footer.
The garlic should smell aromatic and look pale to lightly golden. Dark, scorched garlic can make the finished sauce bitter.

4. Deglaze, Then Add Soy Sauce and Vinegar

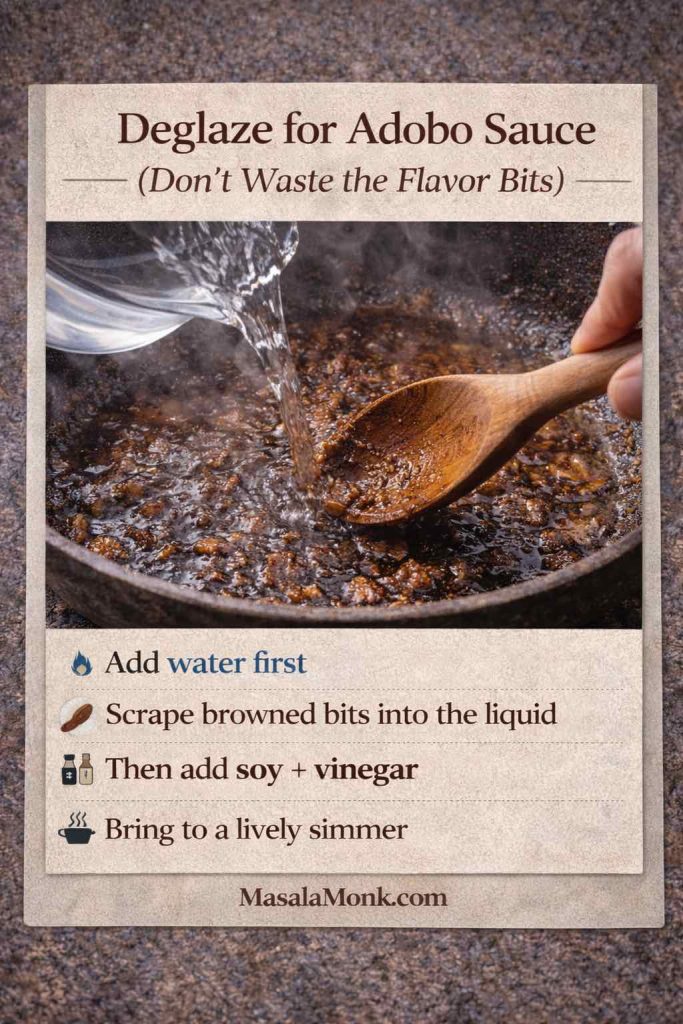
Add the water first and scrape the bottom of the pan. Those browned bits are part of the sauce. Add the soy sauce and vinegar, bring the liquid to a lively simmer, and let the vinegar cook for a minute or two before stirring vigorously. The point is not to “cook out” the acid; it is simply to let the harshest raw vinegar aroma settle.

Infographic titled “Deglaze for Adobo Sauce (Don’t Waste the Flavor Bits).” Photo shows water being poured into a hot pan while a wooden spoon scrapes up browned bits (fond) from the bottom. Text overlay lists steps: add water first, scrape browned bits into the liquid, then add soy sauce and vinegar, and bring to a lively simmer. MasalaMonk.com appears in the footer.
Water loosens the browned fond from the pan; soy sauce and vinegar then turn those concentrated bits into the base of the braise.

5. Simmer Gently Until the Chicken Is Tender

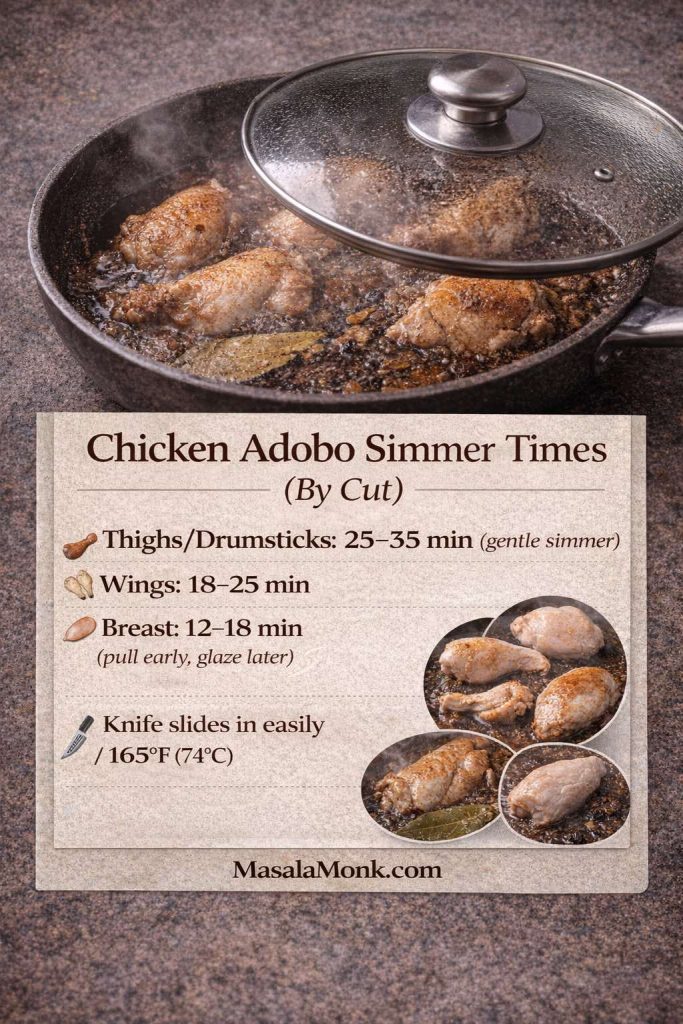
Return the chicken and any juices to the pan, cover and keep the heat low enough for a gentle simmer rather than a hard boil. Bone-in thighs and drumsticks usually need 25–35 minutes; wings about 18–25 minutes. Breast pieces need only 12–18 minutes and should be removed as soon as they are done.

Infographic titled “Chicken Adobo Simmer Times (By Cut).” Photo shows chicken pieces gently simmering in adobo sauce in a pan with a glass lid and a bay leaf visible. Text lists cook times: thighs/drumsticks 25–35 minutes (gentle simmer), wings 18–25 minutes, and chicken breast 12–18 minutes (pull early, glaze later). A doneness cue says “Knife slides in easily / 165°F (74°C).” MasalaMonk.com appears in the footer.
Use cut-specific timing, then confirm doneness by tenderness and a safe internal temperature of at least 165°F / 74°C.

For food safety, poultry should reach at least 165°F / 74°C at the thickest part. The USDA chicken safety guidance also covers storage and reheating, which we use again later in this guide.

Chicken Breast Adobo: Pull It Early, Glaze It Later

Infographic titled “Chicken Breast Adobo (Stay Tender)” with two pan photos: on the left, chicken breast pieces simmering in adobo liquid while tongs lift one out; on the right, chicken breast glazed in a thicker, glossy adobo sauce. Text tips say: simmer 12–18 minutes only, pull breast when just done, reduce sauce separately, and return chicken to glaze for 1–2 minutes. MasalaMonk.com appears in the footer.
With breast, pull it as soon as it is done, reduce the sauce separately, then return the meat for a 1–2 minute glaze.

6. Reduce Only After the Chicken Is Tender

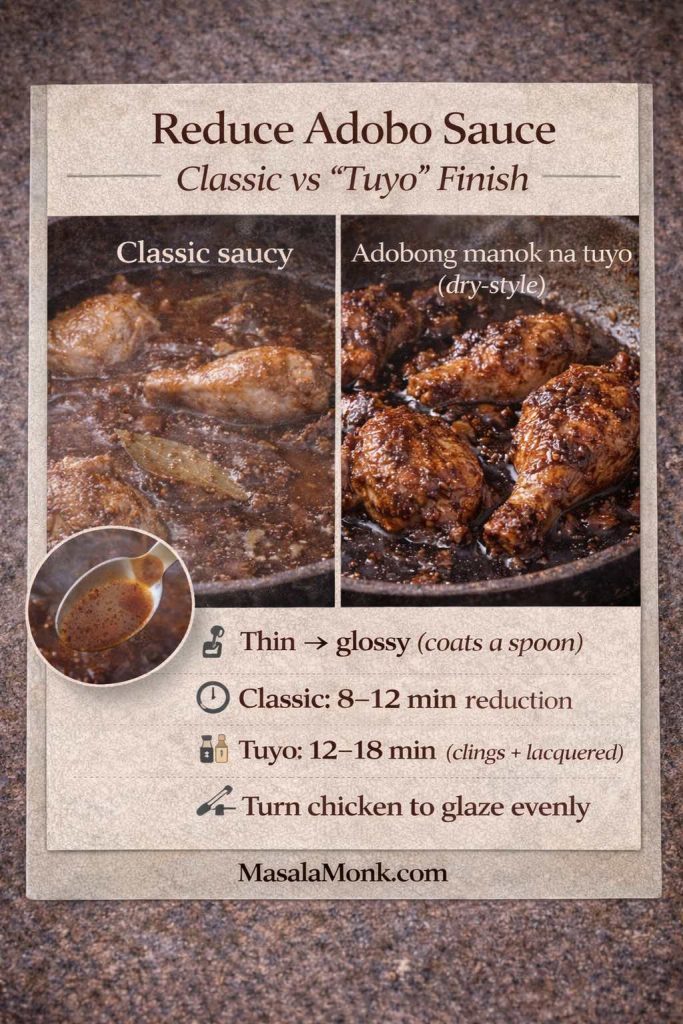
Take off the lid and raise the heat to medium. The sauce will move from thin and broth-like to darker, shinier and more concentrated. For a classic finish, stop when it coats the back of a spoon and there is still enough to spoon over rice—usually after about 8–12 minutes of uncovered reduction.

Split comparison infographic titled “Reduce Adobo Sauce: Classic vs ‘Tuyo’ Finish.” Left panel shows chicken simmering in a thinner, saucy adobo with bay leaves, labeled “Classic saucy.” Right panel shows adobong manok na tuyo (dry-style) with chicken coated in thick, lacquered sauce. A spoon inset shows sauce coating. Text notes: thin to glossy (coats a spoon), classic reduction 8–12 minutes, tuyo 12–18 minutes (clings and lacquered), and to turn chicken to glaze evenly. MasalaMonk.com appears in the footer.
Stop at the glossy spoon-coating stage for classic saucy adobo; keep reducing for a drier, lacquered tuyo finish.

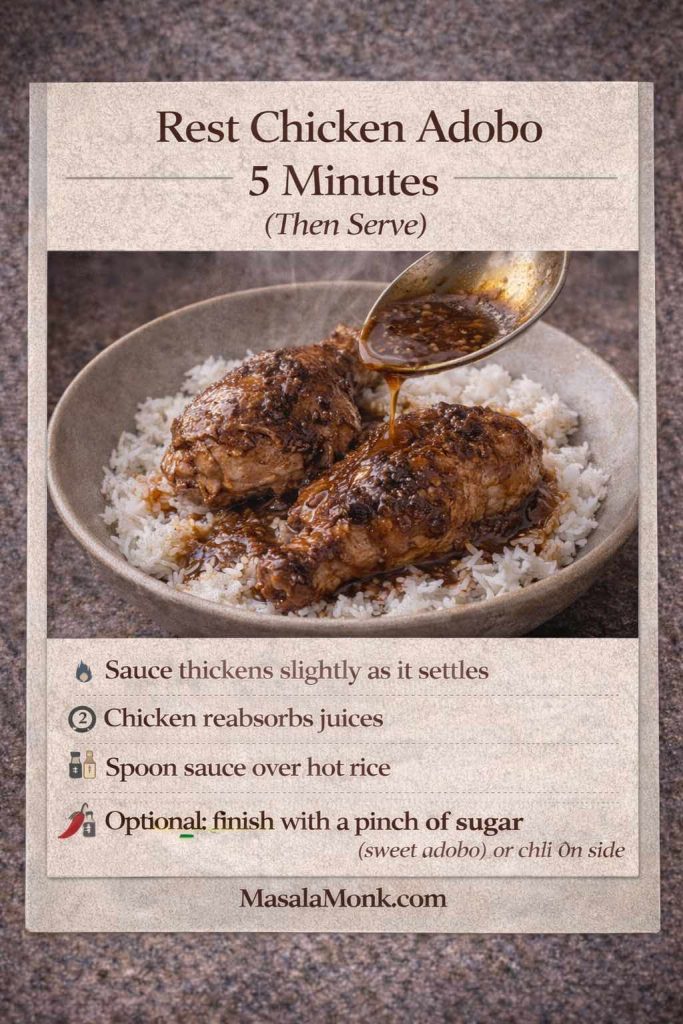
7. Rest for 5 Minutes Before Serving

Turn off the heat and leave the chicken in the sauce for about five minutes. The reduction settles slightly and the meat gets a final coating before it reaches the plate.

Instructional card titled “Rest Chicken Adobo 5 Minutes (Then Serve).” Photo shows two pieces of chicken adobo on a bowl of white rice while a spoon pours glossy adobo sauce over the chicken. Text notes: sauce thickens slightly as it settles, chicken reabsorbs juices, spoon sauce over hot rice, and an optional finish with a pinch of sugar for sweet adobo or chili on the side. MasalaMonk.com appears in the footer.
A short rest lets the sauce settle and cling before you spoon the chicken and adobo sauce over hot rice.

Getting the Adobo Sauce Right

The starting ratio is only half the story. Soy sauce and vinegar vary, chicken releases juices, and a wide pan can reduce faster than a narrow pot. The finished sauce should therefore be judged by both taste and concentration, not by the clock alone.

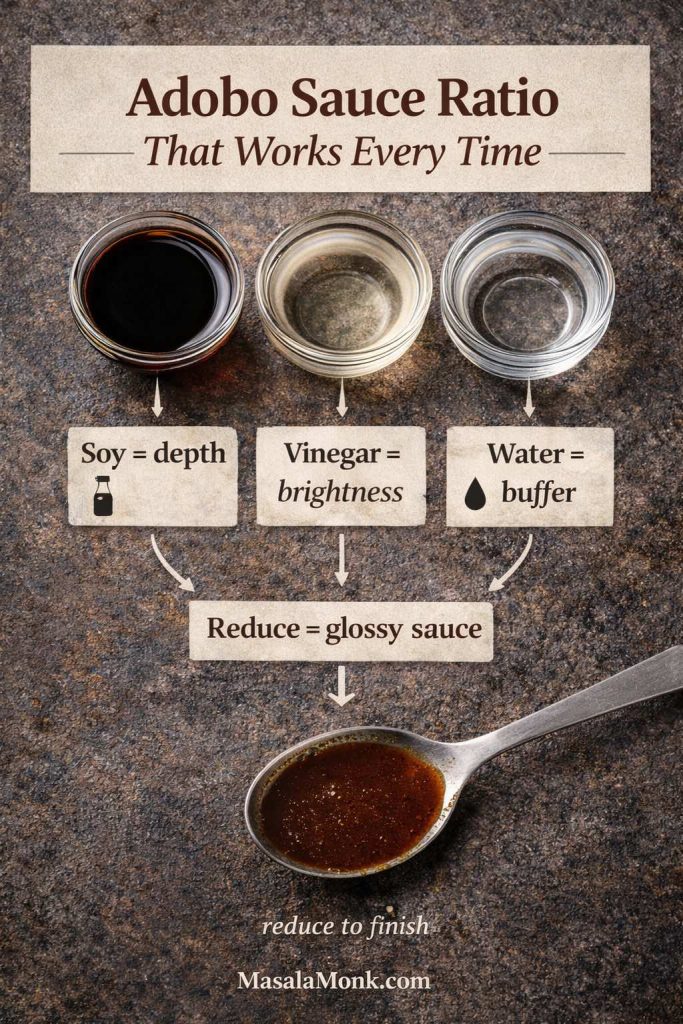
Infographic explaining Filipino adobo sauce balance on a dark stone surface: three small bowls show soy sauce, vinegar, and water labeled “Soy = depth,” “Vinegar = brightness,” and “Water = buffer.” Arrows point to “Reduce = glossy sauce,” with a spoon holding shiny reduced adobo sauce at the bottom. Text reads “Adobo Sauce Ratio That Works Every Time” and includes MasalaMonk.com.
Soy sauce brings savory depth, vinegar brings acidity, water controls concentration, and reduction determines the final body of the sauce.
How soy sauce, vinegar, water and reduction affect chicken adobo sauce
ComponentWhat it doesWhat to watch
Soy sauceSalt, color and savory depthSome brands are much saltier than others
VinegarAcidity and characteristic adobo tangDistilled white vinegar can taste sharper than cane or coconut vinegar
WaterDilutes salt and acidity while the chicken braisesUse more when the starting mixture is too concentrated, not less
ReductionConcentrates flavor and thickens the sauceIt also concentrates salt and acid, so taste as the sauce tightens

What if the Vinegar Smells Harsh?

Early in the simmer, vinegar can smell much sharper than the finished dish tastes. Give it a few minutes before correcting anything. If the sauce is still thin, continued cooking may mellow that raw aroma while the liquid reduces. Once the sauce is already thick and concentrated, however, further reduction is not the right fix for excessive sourness because it concentrates the acid as well.

Saucy Adobo vs Adobong Manok na Tuyo

For classic saucy adobo, stop after roughly 8–12 minutes of reduction, when the sauce coats a spoon but still pools lightly in the pan. For tuyo, reduce longer—often 12–18 minutes total—until the liquid clings tightly to the chicken.

Three-panel instructional infographic titled “Adobong Manok na Tuyo (Extra Glossy Glaze).” Panel 1 shows chicken being lifted from the pan with tongs while the sauce simmers. Panel 2 shows the adobo sauce reducing vigorously in the pan. Panel 3 shows chicken returned to the pan and coated in a thick, lacquered, sticky glaze. Text steps read: remove chicken when tender, reduce sauce hard 3–5 minutes, return chicken and toss to coat, stop when lacquered + sticky. MasalaMonk.com is in the footer.
For an extra-glossy tuyo finish, remove the tender chicken, reduce the sauce hard for 3–5 minutes, then return the chicken and toss until lacquered.

Doubling Chicken Adobo Without a Watery Pot

This chicken adobo recipe scales well, but a double batch does not behave exactly like two single batches in the same pot. More chicken releases more liquid, and crowding reduces the exposed surface area that lets moisture escape. The usual result is not under-seasoning; it is a sauce that takes much longer to concentrate.

Use the widest heavy pot or sauté pan that comfortably holds the chicken. Brown in batches rather than stacking pieces, then combine them for the covered simmer. Double the chicken, soy sauce, vinegar, garlic, bay and peppercorns, but treat the water as an adjustable braising liquid rather than a number that must be doubled blindly. Start with enough for a comfortable simmer, remembering that the chicken itself will contribute juices.

Once the meat is tender, judge the pot before reducing. If there is a large volume of liquid, lift the chicken out and reduce the sauce on its own so the meat does not overcook while you wait for evaporation. A wider pan may finish quickly; a deep narrow pot can need considerably longer. The endpoint remains the same: glossy enough to coat a spoon, with enough sauce left for the style you want.

Chicken Adobo Troubleshooting

Start by looking at the sauce itself. A thin sharp sauce needs a different fix from a thick sharp sauce; “too sour” is not enough information on its own.

Chicken adobo troubleshooting infographic with fixes for sauce that is too sour and thin, too sour and already thick, too salty, too thin, or too thick.
Start with the sauce’s thickness before fixing the flavor: a thin, sharp sauce may need more simmering, while an already-thick sour sauce needs dilution rather than further reduction.
Chicken adobo troubleshooting by problem, likely cause and fix
ProblemLikely reasonWhat to do now
Too sour, sauce still thinVinegar still tastes raw and the sauce has not settledSimmer a little longer, then taste again before adding anything
Too sour, sauce already thickAcid is too concentrated for your vinegarAdd a small splash of water, simmer briefly, then use a tiny pinch of sugar only if needed
Too saltySoy sauce or reduction has concentrated too farAdd water a little at a time, simmer gently and re-taste
Sauce too thinNot enough evaporationRemove tender chicken and reduce uncovered until glossy
Sauce too thickReduced too farLoosen with a splash of hot water
Garlic tastes bitterGarlic browned too hard before liquid was addedDilute slightly if needed; next time lower the heat before adding garlic
Chicken feels toughLean cut, hard boil, or not enough gentle cookingLower to a gentle simmer and continue until tender; do not compensate with higher heat

What to Serve With Chicken Adobo

Hot steamed rice is the obvious partner because it catches both the sauce and the garlic. If you want a dependable method for separate, fluffy grains, use the MasalaMonk guide to cooking rice alongside the adobo.

Infographic titled “What to Eat With Chicken Adobo (Best Sides).” Photo shows a bowl of chicken adobo on steamed white rice, with small bowls of crisp cucumber/quick pickles and chili sauce on the side, plus an optional creamy side resembling potato salad. Text suggests pairings: steamed rice (classic), crisp cucumber or quick pickles (fresh contrast), chili on the side (heat control), and an optional creamy side (potato salad/coconut adobo night). MasalaMonk.com appears in the footer.
The richest plate usually needs contrast: hot rice for the sauce, something crisp and tangy, and chili served separately.

If you prefer a mellow counterpoint, a small scoop of creamy potato salad can work too, especially beside a sharper vinegar-forward adobo. Keep the portion modest so the rice and chicken remain the center of the plate.

Add Something Cold and Crisp

A vinegar-dressed cucumber salad works particularly well because it gives the plate crunch without competing with the adobo sauce. Quick-pickled cucumber or radish does the same job.

Build a Bigger Filipino-Style Table

If adobo is one part of a larger meal, Pinakbet Tagalog brings squash, eggplant, okra and long beans to the table, giving the rich chicken a vegetable-heavy counterpoint.

Keep the Heat on the Side

Instead of making the whole pot spicy, serve sliced chilies or a bright vinegar-forward pepper sauce at the table. Everyone can change the heat without changing the sauce balance for everyone else.

Chicken Adobo Variations

Once the classic method is clear, most variations are small changes in one ingredient or in how far the sauce is reduced. Keep the main braise recognizable and change one variable at a time.

Infographic titled “Chicken Adobo Variations (Same Method, Different Mood)” showing a 2x3 grid of six Filipino chicken adobo styles. The tiles are labeled: adobong manok na tuyo (dry-style), adobo with potato (one-pot comfort), sweet chicken adobo (1–2 tsp brown sugar), adobo with pineapple (bright sweet-sour), adobo with oyster sauce (deeper umami), and adobo with luya (ginger warmth). MasalaMonk.com appears in the footer.
The same braise can move toward tuyo, potato, subtle sweetness, pineapple, oyster sauce or ginger without changing the entire cooking method.

Chicken Adobo With Potato

Add 2 medium potatoes, peeled and cut into chunks, when the chicken returns to the braising liquid. Simmer until both the chicken and potatoes are tender, then reduce uncovered. The potatoes absorb sauce and make the pot feel more substantial without changing its basic flavor.

Sweet Chicken Adobo

Reduce the sauce first, then add 1–2 teaspoons brown sugar near the end. The aim is to round the acidity, not make the sauce obviously sugary.

Two-panel infographic titled “Sweet Chicken Adobo (Subtle, Not Sugary).” Left panel shows a spoon adding brown sugar into simmering adobo sauce; right panel shows chicken pieces coated in glossy adobo glaze. Text tips say: reduce sauce first until glossy, stir in 1–2 tsp brown sugar near the end, simmer 1–2 minutes to melt in, and taste—stop when the tang feels “rounded.” MasalaMonk.com appears in the footer.
Add only 1–2 teaspoons brown sugar after the sauce has reduced, then simmer briefly and taste before adding more.

Chicken Adobo With Pineapple

Add ½–1 cup pineapple chunks during the last 10 minutes of simmering. If using canned fruit, add only a small splash of juice if the sauce needs it; too much can make the finish syrupy.

Two-panel infographic titled “Chicken Adobo with Pineapple (Bright Sweet-Sour).” Left panel shows pineapple chunks being added to simmering chicken adobo sauce in a pan. Right panel shows finished chicken adobo pieces coated in glossy sauce with pineapple chunks. Text tips say: add ½–1 cup pineapple near the end, simmer 10 minutes so it stays juicy, use a splash of juice only if needed, and reduce briefly to glaze. MasalaMonk.com appears in the footer.
Add pineapple during the last 10 minutes so the pieces stay juicy, then reduce only long enough to glaze the chicken.

Chicken Adobo With Oyster Sauce

Stir in 1 tablespoon oyster sauce with the braising liquids. Because it adds salt as well as savory depth, use a little less soy sauce at the start and adjust only after reduction.

Two-panel infographic titled “Adobo with Oyster Sauce (Deeper Umami).” Left panel shows oyster sauce being poured into simmering chicken adobo after the liquids are added; right panel shows finished chicken coated in glossy dark adobo sauce. Text tips say: stir in 1 tbsp oyster sauce after adding liquids, start with slightly less soy, simmer as usual, then reduce, taste, and adjust at the end. MasalaMonk.com appears in the footer.
Oyster sauce adds savory depth but also salt; start with slightly less soy and make the final adjustment only after reduction.

Adobo With Luya (Ginger)

Add a 1-inch piece of sliced ginger with the garlic. It gives the sauce a warm, clean aroma without taking over. If that ginger-led Filipino chicken profile is what you enjoy most, Chicken Tinola takes it in a lighter, brothier direction.

Two-panel infographic titled “Adobo with Luya (Ginger) — Clean Warmth.” Left panel shows sliced ginger being added to a pan with garlic after browning chicken. Right panel shows chicken adobo simmering in glossy sauce with visible ginger slices, peppercorns, and bay. Text tips say: add 1-inch ginger sliced, sauté with garlic after browning chicken, simmer as usual, then reduce and taste-adjust at the end. MasalaMonk.com appears in the footer.
Add a 1-inch piece of sliced ginger with the garlic, then simmer and reduce the adobo as usual.

Adobong Puti (White Adobo)

Adobong puti omits soy sauce and relies on vinegar, garlic, bay leaves, peppercorns and salt. Keep the water toward the higher end at first, season gradually, then reduce once the chicken is tender. Without soy sauce, the result is paler, brighter and more vinegar-forward.

Recipe-card infographic titled “Adobong Puti (White Adobo) — No Soy Sauce.” Photo shows chicken pieces simmering in a light vinegar-based broth with whole garlic cloves, bay leaves, and peppercorns. Text tips say: vinegar + garlic + bay + peppercorn, season with salt gradually, keep water a bit higher at first, and reduce at the end for body. MasalaMonk.com appears in the footer.
White adobo skips soy sauce; season with salt gradually, keep enough water for the braise, then reduce near the end for body.

Chicken Adobo sa Gata

Cook the chicken until tender using the classic method. As the sauce begins its final reduction, stir in ¾ cup coconut milk and simmer gently for 5–8 minutes. Avoid a hard boil; the goal is a smooth, creamy sauce rather than separated coconut fat.

Instructional infographic titled “Adobo sa Gata (Creamy Coconut Adobo).” Two photos show chicken adobo in a pan: left image shows coconut milk being poured into cooked adobo near the end, and right image shows the finished creamy coconut adobo sauce coating the chicken. Text tips say: cook adobo until chicken is tender, stir in ¾ cup coconut milk near the end, simmer gently 5–8 minutes (don’t hard-boil), and reduce slightly for a creamy, glossy sauce. MasalaMonk.com is in the footer.
Add ¾ cup coconut milk only after the chicken is tender, then simmer gently for 5–8 minutes instead of boiling hard.

If you want to start from fresh coconut, the MasalaMonk guide to making coconut milk at home covers the extraction step separately.

Storage, Reheating and Make-Ahead

This chicken adobo recipe is unusually friendly to leftovers because the meat stays protected by sauce and the garlic, vinegar and soy taste more integrated after a night in the refrigerator. The trick is reheating gently enough that the meat stays tender while the sauce regains its gloss.

Infographic titled “Store + Reheat Chicken Adobo (So It Stays Glossy).” Top photo shows leftover chicken adobo stored in an airtight container inside a refrigerator. Bottom photo shows chicken adobo reheating in a saucepan while water is poured in from a spoon. Text tips include: cool fast and store airtight, fridge 3–4 days, reheat gently on stovetop, add a splash of water if needed, and simmer uncovered 1–2 minutes to restore a glossy adobo sauce. MasalaMonk.com appears in the footer.
Cool promptly, refrigerate in a covered container for 3–4 days, then reheat gently with a splash of water if the sauce has tightened.

Refrigerating and Freezing

Cool leftovers promptly and refrigerate in a shallow covered container. USDA guidance recommends using cooked chicken within 3–4 days. For longer storage, freeze portions with enough sauce to protect the meat from drying out.

Reheat Without Losing the Sauce

Warm the chicken over medium-low heat. If the sauce is very thick from the refrigerator, add a small splash of water. Once everything is hot, simmer uncovered for 1–2 minutes to bring the sauce back to a glossy consistency. Reheated leftovers should reach 165°F / 74°C.

Making Chicken Adobo a Day Ahead

You can cook the adobo completely a day before serving, including the final reduction. Cool it promptly, refrigerate it with the chicken sitting in the sauce, then reheat gently the next day. If the chilled sauce has tightened into a gel, add only a small splash of water at first; it will loosen as it warms. Once the chicken is hot, uncover for the final minute or two and let the sauce return to the consistency you want. Making the dish ahead is especially convenient for a larger batch because all the browning and long simmering are already finished before guests arrive.

Crispy-Skin Leftover Adobo

Step-by-step infographic titled “Crispy Skin Adobo (Without Changing the Sauce).” Three photos show leftover chicken adobo lifted from the sauce onto a rack, then crisped in a hot pan, and finally served over rice while reduced adobo sauce is spooned on top. Text instructions say: lift chicken from sauce, pat dry lightly, crisp in hot pan or broiler 1–2 minutes, and spoon reduced adobo sauce over the crispy skin. MasalaMonk.com appears in the footer.
For crisp edges, lift cooked chicken from the sauce, pat lightly dry, crisp for 1–2 minutes in a hot pan or under the broiler, then spoon the hot sauce over it.

If you used skin-on chicken, separate texture from reheating: warm the sauce first, crisp the chicken briefly in a hot pan or under the broiler, then spoon the sauce over the top. That gives you crisp edges without having to cook the chicken hard in the sauce.

Leftover Chicken Adobo Rice Bowl

Instructional graphic titled “Leftover Chicken Adobo Rice Bowl (Fast Remix).” A bowl of white rice is topped with chopped or shredded chicken adobo and a glossy adobo sauce, with sliced cucumber and fresh herbs on the side and a red chili pepper. Text steps say: chop or shred leftover adobo chicken, warm with a spoon of sauce, pile over hot rice, add fresh cucumber/herbs for contrast, and optional chili on the side. MasalaMonk.com appears in the footer.
Warm chopped or shredded adobo chicken with a spoon of sauce, then build a rice bowl with something fresh and crisp on the side.

Chopped adobo chicken makes an easy rice bowl. If you also have cold rice to use up, the MasalaMonk chicken fried rice method is another route—use the adobo meat as cooked chicken and add it near the end rather than searing it again.

Shredded Chicken Adobo for Wraps and Sandwiches

Instructional graphic titled “Shredded Chicken Adobo (Easy Filling Idea).” A white bowl holds shredded chicken adobo coated in glossy adobo sauce. Beside it, a wrap is being filled with the shredded adobo chicken, shredded cabbage, sliced cucumber, carrots, and green onions, with a red chili nearby. Text tips say: pull meat from the bone, toss with warm adobo sauce, use in wraps/sandwiches/bao/lettuce cups, and add crunchy vegetables and chili on the side. MasalaMonk.com appears in the footer.
Shredded adobo chicken works as a filling for wraps, sandwiches or lettuce cups; add crisp vegetables to keep the leftover meal from feeling heavy.

And if the chicken disappears before the rice does, leftover rice can go in a completely different direction with these crispy arancini-style rice balls.

A Short Note on Filipino Adobo

Adobo is not a single fixed formula. The name is Spanish in origin, but the Filipino practice of preserving and cooking food with vinegar predates the colonial label; over time, household and regional versions developed with different balances of vinegar, salt or soy, garlic and other aromatics. The Philippine Information Agency gives useful cultural context for how Filipino food traditions—including adobo—reflect that layered history.

Frequently Asked Questions

1. Do I need to marinate chicken adobo?

No. The covered braise seasons the chicken well on its own. A 15–30 minute marinade with measured soy sauce, vinegar and garlic is optional if you have the time.

2. Which vinegar is best for chicken adobo?

Cane vinegar is a strong first choice. Coconut vinegar is usually a little rounder, while distilled white vinegar gives a sharper, cleaner acidity. Start with the recipe amount and use water to control concentration rather than cutting the water because a vinegar tastes strong.

3. What soy sauce-to-vinegar ratio should I use?

This recipe uses ½ cup / 120 ml soy sauce to ⅓ cup / 80 ml vinegar, plus ¾–1 cup / 180–240 ml water. Treat that as a starting formula; your soy sauce saltiness, vinegar acidity and final reduction all affect the finished balance.

4. Why is my chicken adobo too sour?

If the sauce is still thin and smells raw, simmer a little longer before judging it. If it is already thick and still too sour, add a small splash of water and re-simmer briefly. A tiny pinch of sugar can round the acidity after that, but do not keep reducing an already concentrated sauce just to chase away sourness.

5. Should chicken adobo be saucy or dry?

Both styles are common. Stop the reduction while there is still sauce to spoon over rice for a classic saucy finish, or reduce longer for adobong manok na tuyo, where the sauce clings tightly to the chicken.

6. Can I use chicken breast instead of thighs?

Yes. Simmer breast pieces for about 12–18 minutes, remove them as soon as they are done, reduce the sauce separately, then return the chicken for a 1–2 minute glaze.

7. Can chicken adobo be made ahead?

Yes. This chicken adobo recipe can be cooked fully the day before, cooled promptly and refrigerated in its sauce. Reheat gently with a splash of water if needed, then simmer uncovered for a minute or two to restore the gloss.

8. What does adobo mean in Filipino cooking?

In Filipino cooking, adobo refers broadly to a family of dishes cooked with vinegar and salt or soy sauce, commonly with garlic and pepper. Chicken adobo and pork adobo are among the best-known versions, but household formulas vary widely.

Once you have made the classic version, the useful thing to remember is not a slogan but the sequence: tenderize the chicken first, concentrate the sauce second, and make final taste adjustments only when you can see how concentrated the pot has become.

Posted on — 10 Comments

Green Chutney Recipe (Coriander–Mint / Cilantro Chutney)

Green chutney recipe in a bowl with coriander and mint, shown with a spoonful lifted—coriander–mint (cilantro) chutney with 5 variations.

This green chutney recipe is the kind you start making “just for snacks,” and then—almost without noticing—you’re spreading it on toast, swirling it into yogurt, packing it for lunch, and finding excuses to dip everything into it. It’s fresh coriander (cilantro) and mint blended with green chilli, ginger, roasted cumin, salt, and citrus, so it tastes bright, punchy, and alive. Better still, the same base can become restaurant style green chutney for chaat nights, a thick green chutney for sandwich spreads, or a mellow coconut green chutney that belongs beside dosa and idli.

Depending on where you learned your kitchen language, you might call it coriander mint chutney, cilantro mint chutney, coriander chutney, cilantro chutney, dhania chutney, or dhaniya chutney. The name changes; the craving doesn’t. What matters is that you end up with a jar of green goodness that fixes the whole plate.


The green chutney that fixes everything

Some condiments behave like optional extras. Green chutney isn’t one of them. It’s a small, cold spoonful that can make hot food feel lighter, spicy food feel brighter, and plain food feel like you actually meant it to taste that good.

Think about the foods we naturally reach for it with: samosas, pakoras, kebabs, cutlets, chaat. Those are all rich or fried or boldly spiced, which means they love a contrast—something tangy and herbal to cut through the heaviness. Yet the real power of green chutney shows up outside snack plates. Spread it inside a sandwich and it instantly tastes more “street,” more layered, more addictive. Add it to a bowl of yogurt and it becomes a quick dip that tastes like you planned ahead. Stir a spoon into leftover rice and suddenly you’re not eating leftovers; you’re eating a clever lunch.

In other words, green chutney isn’t just a recipe. It’s a kitchen habit.

Also Read: Pesto Recipe: Classic Basil Pesto Sauce & 10 Variations


Names you’ll hear at home (and what they usually mean)

Before we blend anything, it helps to make peace with the names. The same chutney can wear different labels depending on region, language, and what your family grew up saying.

Cilantro and coriander

If you grew up calling the leafy herb “coriander,” then “coriander chutney” will sound natural. Meanwhile, if you’re used to the word “cilantro,” then “cilantro chutney” will feel like the obvious name. Both can point to the same chutney built on coriander leaves.

Cilantro vs coriander guide showing cilantro (coriander leaves), coriander seeds, and a bowl of green chutney to explain the difference.
If you’re searching for a cilantro chutney recipe, you’re in the right place—cilantro is the same as coriander leaves. Coriander seeds are a different ingredient, so green chutney is made with the leaves (often with mint), not the seeds.

To keep it simple, treat “cilantro” and “coriander leaves” as interchangeable in your kitchen unless you’re specifically talking about coriander seeds.

Dhania and dhaniya

Dhania (and dhaniya) are common Hindi words for coriander. So a dhania chutney recipe or dhaniya chutney recipe is usually pointing you to this same green chutney family—sometimes with mint, sometimes without, but almost always brightened with lemon.

Mint chutney and green chutney

A mint chutney recipe often overlaps with green chutney, but the balance shifts. Mint becomes the main note, coriander supports, and the chutney feels cooler and more mint-forward. You’ll get that variation in this post too, because it’s genuinely useful.

Also Read: Vodka Pasta (Penne alla Vodka) + Spicy Rigatoni, Chicken, and Gigi Recipes


What a good green chutney should taste like

A great green chutney doesn’t taste like “blended leaves.” It tastes like freshness with intention.

First comes tang—lemony brightness that makes your mouth water. Next comes the herb hit, clean and green without tasting raw or grassy. Then the chilli warmth arrives, not as a punch, but as a steady glow. Finally, roasted cumin shows up quietly in the background, giving the chutney that “snack-ready” depth that keeps it from feeling like a salad.

When green chutney is off, the flavor problems are usually predictable:

  • When it tastes flat, it often needs roasted cumin or salt.
  • When it tastes grassy, it usually needs lemon and better seasoning.
  • When it tastes harsh, chilli or ginger may be dominating and needs buffering.
  • When it tastes bitter, the herbs may have heated up during blending or too many thick stems made it into the jar.

The reassuring part is that most batches can be corrected. You don’t have to start over. You just have to nudge the chutney back into balance.

Also Read: Healthy Oat Protein Bars – 5 Easy No Sugar Recipes for Snacks


Before you blend: the small choices that change everything

Choose herbs that smell bright

This sounds almost too obvious, yet it’s the easiest quality check. Coriander should smell citrusy and fresh, not damp. Mint should smell cool, not muddy. If your herbs already smell tired, your chutney will taste tired too—no amount of lemon will fully fix it.

Use tender coriander stems, skip the thick ones

Tender stems carry aroma, so using them makes the chutney taste fuller. Thick, fibrous stems near the base, on the other hand, can blunt the flavor and sometimes add bitterness. So, trim the rough ends, keep the tender parts, and you’ll get the best of both worlds.

Dry your herbs more than you think you need to

Water is the most common reason green chutney becomes thin and bland. Since this chutney is meant to taste concentrated, shake off excess water and pat the herbs dry if you can. Even a quick towel pat changes the final texture.

This step matters even more if you want green chutney for sandwich spreads, because sandwich chutney has to be thick enough to stay put.

Blend in short bursts

Long blending runs heat up herbs. Short bursts keep things cooler, help preserve a brighter green, and give you more control over texture. In practice, this also makes it easier to keep the chutney thick without dumping in water too early.

Also Read: Strawberry Smoothie Recipes (12 Easy Blends + Bowls & Protein Shakes)


Recipe Card: Classic Green Chutney Recipe (Coriander–Mint / Cilantro Chutney)

This is the everyday base—the one you’ll use as a dip, spoon beside meals, or turn into variations. It also naturally covers what most people mean by coriander chutney recipe and cilantro chutney recipe in daily kitchen language.

Yield: about 1 to 1¼ cups
Prep time: 10 minutes
Blend time: 2 to 4 minutes
Best for: snacks, chaat, wraps, everyday meals

Green chutney ingredients flatlay with coriander (cilantro), mint, green chilies, ginger, lemon, roasted cumin powder, and salt.
Everything you need for a classic green chutney recipe—fresh coriander (cilantro), mint, green chilli, ginger, lemon, and roasted cumin—styled here so you can prep fast and blend in minutes.

Ingredients

Coriander (cilantro), 1 large bunch (leaves with tender stems)
Mint leaves, ½ to 1 cup (adjust to taste)
Green chillies, 2 to 4 (adjust to heat)
Ginger, 1 to 1½-inch piece
Roasted cumin powder, ½ to ¾ teaspoon
Salt, to taste (black salt optional)
Lemon or lime juice, 1 to 2 tablespoons
Water, only as needed (start with none)

Green chutney recipe quick steps card showing coriander–mint (cilantro) chutney in 5 steps with a bowl of green chutney and bread.
Short on time? This green chutney recipe (coriander–mint / cilantro chutney) comes together fast—follow these five steps and you’ll have a bright, fresh chutney ready for snacks or sandwiches.

Method

  1. Rinse coriander and mint thoroughly. Then shake off as much water as possible and pat dry if you have time.
  2. Add green chillies and ginger to the blender jar first. Pulse once or twice until roughly broken down.
  3. Add coriander, mint, roasted cumin, and salt. Blend in short bursts, scraping down the jar once or twice.
  4. Add water only in tiny splashes if the blades struggle.
  5. Add lemon juice last. Blend briefly, taste, and adjust slowly until the chutney feels bright and balanced.
Green chutney blend order guide showing the step-by-step sequence: chilli and ginger first, add herbs dry, cumin and salt, lemon last.
For a brighter, smoother green chutney recipe, follow this blend order: start with chilli and ginger, add dry herbs next, season with cumin and salt, then finish with lemon last for the freshest coriander–mint (cilantro) chutney flavor.

The texture of green chutney you’re aiming for

Texture depends on where the chutney is headed. A smooth, spoonable blend is perfect for dipping, especially with fried snacks. If you’re serving it as a side with everyday meals, a slightly coarse grind can taste wonderfully fresh and rustic. Sandwiches are different, though: a thicker spread works better inside bread and won’t turn the layers soggy.

If you enjoy seeing how widely this base is used, the overall structure lines up with classic versions like Veg Recipes of India’s mint coriander chutney and Indian Healthy Recipes’ cilantro chutney. No need to copy either one exactly—think of them as familiar signposts rather than strict rules.

Also Read: Classic Rum Punch + 9 Recipes (Pitcher & Party-Friendly)

Green chutney recipe card with coriander–mint (cilantro chutney) showing ingredients, quick method, prep time, and yield.
Save this classic green chutney recipe card: a bright coriander–mint (cilantro) chutney with a quick 4-step method—use it as a dip now, then explore the five variations in the post for restaurant-style, sandwich spread, coconut, and mint-forward versions.

Getting the texture right (because flavor isn’t the only job)

A lot of green chutney disappointment is really texture disappointment. The flavor might be good, but if the chutney is watery or uneven, it won’t behave the way you want.

Green chutney consistency guide showing three textures: dip consistency, thick sandwich spread, and restaurant-smooth green chutney.
Not sure if your green chutney is “right”? Use this quick guide: keep it spoonable for dipping, thicker for green chutney for sandwich spreads, and extra-smooth for restaurant-style green chutney.

When it’s too thin

Thin chutney happens when too much water enters the blender early, or when the herbs were very wet. Instead of adding more spices to “fix” it, solve the texture first. Later in this post, you’ll see the most reliable thickener for sandwich chutney; for now, remember this: you can always thin chutney later, but thickening watery chutney is harder than starting thick.

When it’s too coarse

Coarse chutney can taste wonderful, especially when served beside home-style meals. Still, if you want that restaurant style green chutney feel, smoothness matters. A smoother blend coats snacks better and tastes more “finished.” Instead of adding lots of water, blend in short bursts and scrape down more often. Usually, patience improves smoothness more than water does.

When it’s foamy or “air-y”

This happens when the blender runs too long, too fast, and pulls in air. The chutney can look lighter and feel less dense. Short bursts help. So does using a smaller jar where the blades catch the herbs properly.

Also Read: 7 Pizza Sauce Recipes | Marinara, White Garlic, Alfredo, Buffalo, BBQ, Vodka & Ranch


Cilantro chutney, coriander chutney, and the green base you already made

With the base green chutney recipe ready, you’re already holding two common variations in your hands. You don’t need separate recipes as much as you need direction.

Coriander–mint ratios for green chutney showing classic 2:1, coriander-forward 4:1, and mint-forward 1:1 with fresh herbs and a bowl of chutney.
Dial in your flavor fast: use a 2:1 coriander–mint ratio for a classic green chutney recipe, go 4:1 for a coriander-forward cilantro chutney, or choose 1:1 when you want a cooler mint chutney vibe.

Cilantro chutney recipe style (coriander-forward Green Dip)

If you want coriander to lead, reduce mint to a small handful or skip it completely. Then keep ginger, chilli, cumin, salt, and lemon as usual. This coriander-forward chutney tastes cleaner and sharper, which makes it excellent in wraps, toasties, and quick lunches.

To make that version taste “complete,” be confident with lemon at the end and keep roasted cumin steady. That combination gives coriander chutney a satisfying finish rather than a raw edge.

Cilantro chutney (no mint) recipe card showing coriander-forward green chutney with ingredients list, quick method, prep time, and yield.
Save this cilantro chutney recipe card for a coriander-forward green chutney without mint—bright, everyday, and easy to blend when you want a simpler chutney that still tastes fresh.

Coriander mint chutney style (mint-friendly & Green)

If you prefer the snack-stall feeling, use more mint. Keep coriander as the backbone, but let mint join more confidently. Blend a bit smoother. Add black salt if you love that chaat tang. This version tends to feel cooler and more “dip-ready,” especially beside fried snacks.

Dhania chutney and dhaniya chutney (both green) at home

If you call it dhania chutney or dhaniya chutney, you’re usually making one of the two styles above—either coriander-forward or coriander-and-mint. The name doesn’t force the method; your taste does.

Also Read: Marinara Sauce Recipe: Classic Homemade Marinara


The “restaurant” taste without overcomplicating your life

Restaurant style green chutney has a particular personality: it’s smoother, brighter, and slightly more intense. It also tastes like it was designed specifically for snacks, which is why it’s so satisfying on a chaat plate.

The simplest way to get that feel is to focus on three things: smoothness, tang, and finish.

Restaurant-style green chutney guide showing 4 simple tweaks—blend smoother, add more lemon, roasted cumin, and optional black salt.
Want restaurant-style green chutney at home? These four quick tweaks—smoother blend, extra lemon, roasted cumin, and a pinch of black salt—deliver that bright chaat-style punch and a deeper finish.

Smoothness comes from blending a little longer than your home version, but doing it in short bursts so the herbs stay cool. Tang comes from pushing lemon slightly further than you normally would. Finish comes from roasted cumin and, if you like it, a pinch of black salt. Used carefully, those two seasonings create the snack-stall memory without overpowering the herbs.

Also Read: Oat Pancakes Recipe (Healthy Oatmeal Pancakes)


Recipe Card: Restaurant Style Green Chutney (Smooth and Chaat-Ready)

This is the version that feels like it belongs beside samosas, pakoras, and chaat. It also matches what many people mean when they say “green chutney restaurant style.”

Yield: about 1 cup
Prep time: 10 minutes
Blend time: 3 to 5 minutes
Best for: chaat, samosas, pakoras, snack platters

Ingredients

Coriander (cilantro), 1 large bunch
Mint leaves, ¾ cup (adjust to taste)
Green chillies, 2 to 4
Ginger, 1-inch piece
Roasted cumin powder, ¾ teaspoon
Salt, to taste
Black salt, a small pinch (optional)
Lemon juice, 1½ to 2 tablespoons (taste as you go)
Water, minimal and added only if needed

Save this restaurant-style green chutney recipe card for a smoother, tangier coriander–mint chutney—perfect as a chaat chutney for samosas, pakoras, and street-style snacks when you want that bright, punchy finish.

Method

  1. Pulse ginger and chillies first.
  2. Add coriander, mint, cumin, salt, and black salt (if using).
  3. Blend smoother than your home version, using short bursts and scraping down.
  4. Add lemon at the end, blend briefly, then taste.
  5. Adjust until the chutney tastes bright and “snack-ready.”

If you enjoy contrasting chutney personalities, it’s fun to pair this with a bold red chutney like MasalaMonk’s Kara Chutney for idli and dosa on the same table. The flavors are entirely different, yet both do the same job: they make the plate exciting.

Also Read: Mayo Recipe: 15+ Homemade Mayonnaise Variations


The sandwich factor (where green chutney becomes a daily habit)

If you’ve ever eaten a proper Bombay sandwich, you already know why green chutney matters. The potatoes and spices create comfort, while the chutney creates contrast. Together, they taste like street food even when you’re eating at home.

Still, green chutney for sandwich needs one special quality: it has to be thick enough to spread without soaking bread. Thin chutney migrates. It makes the bread soggy, the filling slippery, and the flavor uneven. Thick chutney, on the other hand, stays where you put it, so every bite tastes deliberate.

To build that thickness, you mainly need to control water and choose a helpful thickener.

Why roasted chana dal works so well

Roasted chana dal (bhuna chana/dalia) thickens chutney without making it heavy. It also gives the spread a satisfying body that feels very “sandwich shop.” Meanwhile, it keeps the herb flavor intact, which is exactly what you want.

Also Read: Daiquiri Recipe (Classic, Strawberry & Frozen Cocktails)


Recipe Card: Green Chutney for Sandwich (Thick Spread)

This is designed to perform inside bread. It’s spreadable, stable, and concentrated enough to hold its own under fillings.

Yield: about 1 cup
Prep time: 10 minutes
Blend time: 4 to 6 minutes
Best for: Bombay sandwich, toasties, wraps, lunchbox sandwiches

Save this green chutney for sandwich recipe card—thick, spreadable, and made with roasted chana dal so it stays put in a Bombay-style sandwich without turning the bread soggy.

Ingredients

Coriander (cilantro), 1 large bunch
Mint leaves, ½ cup
Green chillies, 2 to 3
Ginger, 1-inch piece
Roasted cumin powder, ½ to ¾ teaspoon
Salt, to taste
Lemon juice, 1 to 1½ tablespoons
Roasted chana dal (bhuna chana/dalia), 1 to 2 tablespoons
Water, only by teaspoons if absolutely needed

Method

  1. Pulse ginger and chillies first.
  2. Add coriander, mint, cumin, and salt. Blend in bursts with almost no water.
  3. Add roasted chana dal and blend again until thick and spreadable.
  4. Add lemon at the end, blend briefly, and taste.
  5. If it becomes too thick, loosen with a teaspoon of water. If it’s still thin, add a little more roasted chana dal.
Sandwich green chutney thickness shown on a spoon and spread on bread, demonstrating a spreadable, not watery green chutney for sandwich.
This is the thickness you want for green chutney for sandwich—spreadable and sturdy, so it stays put on bread instead of soaking in and turning the sandwich soggy.

Where to use it immediately

This is the signature layer in MasalaMonk’s Authentic Grilled Bombay Sandwich Recipe, where green coriander chutney helps create that unmistakable street-style bite. It also works beautifully when you’re using leftovers creatively, like in this Paneer Sabji Sandwich. For mornings, it fits naturally into MasalaMonk’s Sandwich for breakfast ideas, especially when you want a toastie that tastes fresh and bold rather than merely filling.


Coconut green chutney: a softer, breakfast-friendly direction

Sometimes you don’t want sharp. You want calm. Coconut green chutney is that mood: creamy, mellow, and especially good with dosa, idli, or any breakfast plate that needs a comforting dip.
Coconut green chutney in a bowl with lemon and coconut pieces, a breakfast-friendly variation to serve with dosa and idli.
Coconut green chutney is the mellow, breakfast-friendly variation—creamier than classic green chutney, and especially good with dosa and idli when you want a softer, less sharp bite.

The beauty of coconut is that it rounds off harshness and softens chilli heat. Consequently, coconut green chutney feels soothing without becoming bland—especially if you remember to bring brightness back with lemon at the end.


Recipe Card: Coconut Green Chutney (Herb + Coconut)

This version keeps the green freshness, then adds coconut for a creamier finish.

Yield: about 1 to 1¼ cups
Prep time: 10 minutes
Blend time: 4 to 6 minutes
Best for: dosa, idli, savory breakfasts, snack platters

Ingredients

Fresh grated coconut, ½ to ¾ cup (or desiccated coconut soaked briefly)
Coriander (cilantro), 1 bunch
Mint leaves, a small handful (optional)
Green chillies, 1 to 3
Ginger, a small piece
Roasted cumin powder, ¼ to ½ teaspoon
Salt, to taste
Lemon juice, about 1 tablespoon (adjust to taste)
Water, minimal

Save this coconut green chutney recipe card for a mellow, creamy variation of green chutney—perfect with dosa and idli when you want a softer, breakfast-friendly chutney.

Method

  1. Pulse ginger and chillies first.
  2. Add coconut, coriander, cumin, and salt. Blend smooth with very little water.
  3. Add lemon at the end and blend briefly.
  4. Taste and adjust. If it feels too mellow, add a touch more lemon or an extra chilli.

If you want a more traditional coconut chutney profile for South Indian breakfasts, MasalaMonk’s South Indian Coconut Chutney is a great companion. It’s not the same chutney, yet it sits beautifully alongside a sharper green chutney on the same plate.

Also Read: Coconut Water Cocktails: 10 Easy, Refreshing Drinks


Mint chutney recipe: when mint leads the green melody

There are days when mint deserves the spotlight. A mint chutney recipe is cooler, more mint-forward, and often feels especially good with spicy foods because mint softens the heat without dulling flavor.

Mint chutney (pudina chutney) in a bowl with fresh mint and lemon, a cooling green chutney best served with kebabs and pakoras.
Mint chutney (pudina chutney) is the cooling, herb-forward cousin of classic green chutney—perfect when you want a fresher finish with kebabs, pakoras, and spicy snacks.

Although mint chutney and green chutney live in the same family, the balance changes. Mint becomes the main note, coriander supports, and lemon becomes especially important so the chutney feels bright rather than heavy.


Recipe Card: Mint Chutney (Pudina-Forward)

This is a mint-led chutney that still keeps enough coriander to taste rounded.

Yield: about 1 cup
Prep time: 10 minutes
Blend time: 3 to 5 minutes
Best for: kebabs, pakoras, sandwiches, snack platters

Ingredients

Mint leaves, 1 to 1¼ cups
Coriander (cilantro), ½ bunch
Green chillies, 1 to 3
Ginger, ½ to 1-inch piece
Roasted cumin powder, ½ teaspoon
Salt, to taste
Lemon juice, 1 to 1½ tablespoons
Water, minimal

Save this mint chutney (pudina chutney) recipe card for a cooler, herb-forward green chutney—especially good alongside pakoras, kebabs, and spicy snacks when you want a fresh, clean finish.

Method

  1. Pulse ginger and chillies first.
  2. Add mint, coriander, cumin, and salt. Blend in short bursts, scraping down as needed.
  3. Add lemon at the end and blend briefly.
  4. Taste and adjust until it feels bright and complete.

If you like seeing a classic mint-led approach, Veg Recipes of India’s pudina chutney recipe is a helpful reference for how naturally mint can carry a chutney.

Also Read: Double Chocolate Chip Cookies – Easy Recipe with 7 Variations


A spicier cousin to keep in mind

Green chutney is fresh and herby, yet sometimes you want something louder—more chilli, more punch, less silky smoothness. That’s where thecha comes in. It’s not the same chutney, but it scratches the same “one spoon changes the meal” itch in a fierier way. When you’re in that mood, MasalaMonk’s thecha recipe is a great one to explore.


How to use green chutney all week (without forcing it)

The jar empties fastest when you match the chutney style to the meal. Instead of treating it as “a snack condiment,” let it behave like a sauce you reach for whenever food needs contrast.

Ways to use green chutney guide showing green chutney served with samosas and pakoras, Bombay sandwich spread, dosa and idli, and wraps and bowls.
Green chutney isn’t just a dip—use it as a chaat chutney with samosas and pakoras, spread it into a Bombay sandwich, serve it with dosa and idli, or spoon it into wraps and bowls for an instant hit of freshness.

Breakfast: warm + crisp + cold chutney

A savory breakfast becomes instantly more complete when there’s something tangy on the side. For example, MasalaMonk’s Semolina Veggie Pancakes are perfect with a fresh green chutney beside them. The warm, lightly spiced pancake meets the cool, tangy chutney, and suddenly breakfast feels cheerful rather than routine.

Coconut green chutney also fits beautifully on breakfast plates, especially when you’re serving dosa or idli. Meanwhile, a sharper green chutney can sit beside it as contrast, so the plate doesn’t taste one-note.

Lunch: spread it, don’t dip it

For lunchbox sandwiches and wraps, thickness matters. That’s why the sandwich spread version earns its own recipe card. Once you use a thick green chutney for sandwich builds, you’ll notice how much cleaner the sandwich feels—less soggy, more evenly flavored.

If you’re using leftover sabji, chutney acts like a bridge between bread and filling. The Paneer Sabji Sandwich is a perfect example of how chutney makes leftovers taste intentional instead of accidental.

Snacks: the moment for restaurant-style punch

When snacks appear—pakoras, samosas, cutlets—restaurant style green chutney shines. It’s smoother, brighter, and designed to feel “ready” immediately. Even a simple plate of fried potatoes tastes more exciting when the chutney has that chaat-like pop.
Dinner: a small spoon as a fresh counterpoint

For heavier comfort meals, a fresh green chutney side can lift the whole plate. MasalaMonk’s Litti Chokha guide mentions serving it with green chutney, and the pairing makes perfect sense: smoky, hearty flavors love a tangy herbal contrast.
When the plate isn’t “Indian,” the chutney still works

Green chutney behaves like a universal herb sauce. It can sit beside roasted vegetables, grilled paneer, or even as a dip for snacks that aren’t traditionally Indian. MasalaMonk’s Falafel with Indian twists points toward mint-coriander chutney as a dip option, which is a gentle reminder that chutney doesn’t need a passport.

Condiment spreads: pair wet and dry

If you love building a snack spread, pair green chutney with something dry and bold for texture contrast. MasalaMonk’s Vada Pav Dry Chutney recipe is a great counterpart—sprinkleable, garlicky, and intense in a completely different way.

Also Read: Peanut Butter Cookies (Classic Recipe & 3 Variations)


Keeping it vibrant: why green chutney darkens and what helps

Herb chutneys dull over time. That’s normal. When herbs are crushed, they’re exposed to oxygen, and natural enzyme activity can change color. You don’t need to treat this like a crisis; you simply need a few habits that make the chutney stay brighter for longer.

Keep green chutney green guide showing 3 tips: blend in short bursts, add lemon at the end, and store in a small jar to reduce air exposure.
To keep green chutney bright and fresh, blend in short bursts, add lemon at the end, and store it in a smaller jar so there’s less air sitting on top.

To understand the “why” in plain language, IFST’s explainer on enzymic browning is a helpful read. If you enjoy practical kitchen experiments, Serious Eats has a deep dive into why pesto browns and what actually helps. Green chutney isn’t pesto, of course, but the herb-and-oxygen problem behaves similarly.

In daily cooking terms, these habits help the most:

  • Blend in short bursts so the herbs don’t warm up.
  • Add lemon at the end so the bright top notes stay bright.
  • Store in a smaller jar so there’s less headspace.
  • Smooth the top of the chutney so there’s less surface area exposed to air.

Those steps aren’t fussy. They’re simply the small things that keep your chutney looking and tasting fresher.

Also Read: How to Cook Perfect Rice Every Time (Recipe)


Storage and food safety (without turning it into a lecture)

Green chutney is typically uncooked, which means you should treat it like any prepared, ready-to-eat condiment. Keep it refrigerated, use clean spoons, and make batches sized for real life.

If you want an official reference point for general safe handling of prepared foods, the USDA page on leftovers and food safety is worth a quick skim. Even though chutney isn’t exactly “leftovers,” the mindset carries over: fresh prepared foods are best used within a reasonable window, and cleanliness matters.

Freeze green chutney guide showing green chutney cubes in an ice tray with steps to spoon into trays, freeze, and refresh with lemon.
Freeze green chutney in small cubes so you can thaw only what you need—spoon into trays, freeze, then refresh the thawed coriander–mint (cilantro) chutney with a squeeze of lemon.

For longer storage, freezing in small portions works well. The color may dull a bit after thawing, yet the flavor often stays surprisingly strong, especially if you refresh it with a squeeze of lemon before serving.

Also Read: How to Cook Perfect Rice Every Time (Recipe)


When a batch goes sideways (and how to rescue green chutney)

Even experienced cooks get a batch that’s almost right. Fortunately, green chutney is forgiving, so you can correct most problems without frustration.

Fix your green chutney troubleshooting guide with quick fixes for watery, bitter, too spicy, and flat green chutney.
If your green chutney goes off-track, don’t toss it—use these quick fixes for watery chutney, bitterness, too much heat, or a flat taste, and bring it back to a fresh, balanced green chutney recipe.

Too thin

If the chutney is watery, thicken it rather than adding more spices. Roasted chana dal is the most reliable thickener. If you don’t have it, reduce water next time and pat the herbs dry more thoroughly.

Too flat

When it tastes muted, it often needs roasted cumin and salt. Add a pinch of each, blend briefly, then taste again. Usually the chutney isn’t missing “more herbs”; it’s missing grounding.

Too grassy

Grassy chutney typically needs lemon and salt. Add lemon in small squeezes, then taste until the chutney feels “awake.”

Green chutney heat levels guide showing mild, medium, and hot options based on how many green chillies to use.
Adjust your green chutney recipe to your comfort level: use 1 deseeded chilli for mild, 2 chillies for medium heat, or 3–4 chillies for a hotter, punchier coriander–mint (cilantro) chutney.

Too spicy

Instead of diluting with water, blend in more coriander. Water reduces flavor, while more herbs keep it tasting like chutney.

Slightly bitter

Bitterness can happen when herbs heat up during long blending runs, or when thick stems dominate. To soften bitterness in the moment, add lemon and a pinch more salt, then blend in a handful of fresh coriander if you have it. Next time, use short bursts and trim thick stems more carefully.

Also Read: Whole Chicken in Crock Pot Recipe (Slow Cooker “Roast” Chicken with Veggies)


A green chutney ritual worth keeping

After making this green chutney a few times, a simple pattern shows up: the jar empties fastest when the chutney is thick enough to use without thinking. A watery batch, on the other hand, tends to linger—not because the flavor is bad, but because spreading and dipping start feeling messy.

Here’s the easiest rule to live by: begin with less water than you think you’ll need. You can always loosen the chutney later; thickening it after the fact is far more annoying. As a bonus, the flavor stays bolder, sandwiches hold up better, and the chutney feels like a daily staple rather than an occasional side.

That’s why green chutney becomes a habit. It brightens the plate, sharpens each bite, and makes even simple food feel intentional.

When you’re ready to use it right away, MasalaMonk already has plenty of natural landing spots: spread a generous layer in the Authentic Grilled Bombay Sandwich, tuck it into the Paneer Sabji Sandwich, serve it alongside Semolina Veggie Pancakes, or pair it with something bold like Vada Pav Dry Chutney. After that, the jar tends to take care of itself.

Green chutney recipe variations chart showing five types: classic coriander–mint, restaurant-style smooth, thick sandwich spread, coconut green chutney, and mint-forward chutney.
One base green chutney recipe, five directions—keep it classic coriander–mint, blend it extra-smooth for restaurant-style green chutney, thicken it for green chutney for sandwich spreads, mellow it with coconut, or go mint-forward for a cooler finish.

FAQs

1) What is green chutney made of?

Green chutney is usually made by blending coriander (cilantro) with mint, green chillies, ginger, salt, roasted cumin, and lemon or lime juice. Depending on the style, you may also add ingredients like black salt, roasted chana dal for thickness, or coconut for a milder, creamier version.

2) Is cilantro chutney the same as coriander chutney?

Often, yes. In many kitchens, “cilantro” and “coriander leaves” refer to the same herb, so cilantro chutney and coriander chutney commonly point to the same kind of green chutney. That said, some people use “coriander chutney” to mean a coriander-forward version with little or no mint.

3) What is dhania chutney and how is it different from dhaniya chutney?

Dhania chutney and dhaniya chutney are generally the same thing—both names commonly refer to coriander-based green chutney. The difference is usually spelling preference or regional language habits, not a different recipe.

4) How do I make restaurant style green chutney at home?

For restaurant style green chutney, blend the herbs smoother than usual, push the lemon a little further for extra brightness, and season confidently with roasted cumin. Additionally, a small pinch of black salt can give that familiar chaat-style tang, although it’s optional.

5) Why does my green chutney turn dark or brown?

Green chutney can darken because the herbs react with air after blending. To slow it down, blend in short bursts so the chutney doesn’t heat up, store it in a tightly sealed jar, and reduce the empty space at the top. Also, adding lemon at the end can help keep the flavor fresher.

6) How can I keep green chutney green for longer?

To keep green chutney greener, start with cold, dry herbs, blend quickly, and avoid adding too much water. Then, store it in a small jar so there’s less air exposure. In some cases, blanching herbs briefly and cooling them before blending can help, but many cooks prefer keeping it fully raw for the freshest taste.

7) What’s the best green chutney for sandwich spread?

The best green chutney for sandwich is thick and spreadable, not watery. For that reason, use very little water while blending and add roasted chana dal (bhuna chana/dalia) to thicken it. As a result, the chutney stays in place and the bread doesn’t turn soggy.

8) Why is my green chutney watery?

Green chutney becomes watery when herbs aren’t dried well or too much water is added during blending. Instead, blend in bursts and add water only by teaspoons if needed. If it’s already thin, roasted chana dal can thicken it quickly.

9) How do I fix green chutney that is too spicy?

To reduce heat, blend in more coriander (and a little mint, if you use it), rather than adding water. Alternatively, adding a spoon of yogurt can mellow the spice, although it will change the flavor slightly and make the chutney creamier.

10) How do I fix green chutney that tastes bitter?

Bitterness can come from too many thick coriander stems or from over-blending, which warms the herbs. To improve it, add more lemon and a pinch more salt, then blend in extra fresh coriander to rebalance. Next time, use tender stems only and blend in short bursts.

11) How much mint should I add to coriander mint chutney?

Mint quantity depends on how minty you want the chutney and how strong your mint is. Generally, a moderate handful gives a balanced coriander mint chutney, whereas a larger amount creates a more cooling, mint-forward chutney.

12) Can I make coconut green chutney without tempering?

Yes. Coconut green chutney can be made by simply blending coconut with coriander, green chilli, ginger, salt, and lemon. If you want it more traditional, you can add tempering, but it isn’t required for a tasty everyday version.

13) How long does green chutney last in the fridge?

Typically, green chutney is best used within 3 to 4 days when stored in a clean, airtight container in the refrigerator. After that, the flavor and color may degrade, even if it still looks fine.

14) Can I freeze green chutney?

Yes, green chutney can be frozen in small portions. For example, freezing in ice cube trays makes it easy to thaw only what you need. After thawing, the chutney may look slightly duller, so adding a little fresh lemon juice can brighten the flavor.

15) What can I serve with green chutney?

Green chutney pairs well with samosas, pakoras, cutlets, kebabs, chaat, sandwiches, wraps, and savory pancakes. Moreover, it works as a dip for snacks beyond Indian food when you want a fresh, herby sauce with a spicy kick.

Posted on — 15 Comments

Sandwich for Breakfast: Breakfast Sandwich Recipe + 10 Variations

Breakfast sandwich recipe cover image showing an English muffin egg and cheese sandwich with sausage, melted cheddar, and a fried egg.

A really good breakfast sandwich does two things at once. First, it tastes like you treated yourself—melty cheese, a warm egg, something crisp, something creamy. Then, almost secretly, it makes your morning easier because you can build it with whatever bread you already have: an English muffin, a croissant, a bagel, even waffles.

That’s the heart of this breakfast sandwich recipe. Instead of giving you one rigid version, we’ll start with a simple master build you can repeat, and then we’ll branch into the most-loved styles people actually search for and crave: egg and cheese, English muffin breakfast sandwich, breakfast croissant, croissant sandwiches, bagel with egg and cheese, scrambled egg sandwich, fried egg sandwich, high protein breakfast sandwich, vegetarian breakfast sandwich, gluten free breakfast sandwich, plus make-ahead frozen breakfast sandwiches for meal prep.

Along the way, we’ll lean on sauces and spreads that make a sandwich feel “finished” without being fussy—like a quick homemade mayo, a punchy pepper sauce, a bright pesto, or a thick tzatziki-style yogurt sauce—so every bite stays balanced instead of flat.


Breakfast sandwich: the master formula that works every time

Before we get into variations, it helps to have a dependable “base.” Think of it as a choose-your-own-adventure breakfast sandwich where each layer has a job.

Infographic showing the breakfast sandwich formula—bread, egg, cheese, sauce, and crunch—with a croissant egg and cheese sandwich on a plate.
Use this breakfast sandwich formula to mix and match your favorites—choose a bread base, add eggs and cheese, finish with a sauce, then layer on crunch for the perfect bite every time.

The five layers

  1. Bread (or bread substitute)
    English muffin, croissant, bagel, biscuit, sliced bread, waffles, or an egg-based “eggwich.”
  2. Eggs for sandwiches (the engine)
    Fried egg, scrambled egg, folded omelet, baked egg patty, or boiled eggs turned into a spread.
  3. Cheese (the glue)
    Cheddar, mozzarella, gouda, pepper jack, or whatever melts well.
  4. Sauce or spread (the comfort layer)
    Mayo, eggless mayo, vegan mayo, pesto, tzatziki, or a quick chili-mayo.
  5. Texture + freshness (the wake-up layer)
    Crisp veggies, pickles, herbs, peppery greens, onions, tomatoes, even a little crunchy spice mix.

Once you understand those roles, breakfast sandwich ideas become effortless: swap the bread, switch the egg style, keep the sauce, change the crunch—suddenly you have a new breakfast without starting over.

Also Read: 10 Best Chicken Sandwich Recipes (BBQ, Parm, Buffalo & More)


Breakfast sandwich recipe: the base method (one sandwich)

Ingredients (flexible, not fussy)

  • Bread of choice (English muffin / croissant / bagel / waffles / 2 slices bread)
  • 1–2 eggs
  • 1 slice cheese (or a small handful grated)
  • 1–2 tablespoons spread or sauce
  • Salt and pepper
  • Optional add-ons: tomato, onion, spinach, cucumber, avocado, herbs, hot sauce, pickles

Method

First, toast or warm your bread. You’re not just adding crunch—you’re building a barrier so the sandwich doesn’t go soggy.

Next, cook your eggs in the style you want (fried or scrambled sections are coming up). While they’re still hot, add cheese and let it melt.

Then, spread sauce on the bread while it’s warm. That small detail matters: warm bread helps spreads cling instead of sliding.

After that, stack egg + cheese, add your texture layer, close the sandwich, and press gently for a few seconds so everything holds together.

Breakfast sandwich fixes infographic showing quick solutions for soggy bread, rubbery eggs, cheese not melting, fillings sliding, and adding crunch, with an English muffin egg and cheese sandwich on a cutting board.
Save this breakfast sandwich fixes guide: toast bread well to prevent sogginess, cook eggs low and pull early for softness, cover briefly to melt cheese fast, spread sauce on both sides to stop slipping, and add pickles/greens/onion for crunch.

If you like checking food safety temps (especially when you’re batch-cooking), egg dishes are commonly cooked to 160°F / 71°C, and leftovers reheated to 165°F / 74°C—guidance you can see on the USDA safe temperature chart and on FoodSafety.gov’s chart.

Also Read: Food for Constipation Relief & Gut Health : 6 High-Fiber Sandwiches


Egg and cheese: the classic egg & cheese breakfast sandwich

Sometimes you don’t want a “creative” breakfast. You want the one that always works: egg and cheese, warm bread, a little seasoning, done.

Fried egg sandwich recipe (crispy edges, runny or set yolk)

Heat a pan, add butter or oil, crack in an egg, season it. Let the edges crisp; cover briefly if you want the top to set faster. Once it’s nearly where you want it, lay cheese on top and cover for 20–30 seconds so it melts smoothly.

Fried egg sandwich recipe card showing a toasted sandwich cut in half with crispy-edged fried egg, melted cheese, and optional runny or set yolk, with MasalaMonk.com branding.
For the best fried egg sandwich, aim for crispy edges and melted cheese—choose a runny yolk for richness or cover the pan briefly for a set yolk that travels better.

This version is ideal when you want a clean, structured bite—especially on an English muffin or bagel.

Scrambled egg sandwich (soft, fluffy, and forgiving)

Whisk 2 eggs with salt and pepper. Cook on low heat, stirring slowly. Pull the eggs off the heat while they’re still slightly glossy; the residual heat finishes them.

A scrambled egg sandwich is the best make-ahead egg sandwich—cook low and slow for soft, fluffy eggs that reheat well, then melt the cheese onto the eggs so every bite stays creamy instead of dry.

Scrambled egg sandwiches are particularly good when you’re packing breakfast for later, because the eggs stay tender instead of turning rubbery.

Also Read: Cottage Cheese Lasagna Recipe | Chicken, Spinach, & Ricotta


Choose Your Bread Base for the Perfect Breakfast Sandwich

Before you cook a single egg, pick the bread. It decides almost everything: how tidy the sandwich feels, how rich the bite is, and whether it holds up for meal prep or needs to be eaten right away. Once the base is locked in, the “best” egg and sauce choices become obvious—so you’re not building a great filling on the wrong foundation.

Best breakfast sandwich breads infographic showing an English muffin, croissant, bagel, and waffle with notes on what each bread is best for.
Pick your base first: English muffin for tidy stacking, croissant for a flaky breakfast croissant, bagel for a hearty breakfast bagel sandwich, or waffle for sweet-savory brunch sandwiches.

English muffin: the neat, classic breakfast sandwich

If you want a café-style breakfast sandwich that’s easy to hold and doesn’t slide around, the English muffin is the safest bet. It toasts beautifully, stays sturdy under egg and cheese, and naturally supports the “stacked” look most people want in an English muffin breakfast sandwich.

Croissant: the premium, flaky breakfast croissant

A croissant makes breakfast feel like a treat. It’s buttery and delicate, so it works best when your fillings are bold but not watery. Choose it when you want croissant sandwiches with a “bakery morning” vibe—just keep sauces and fresh veggies controlled so it doesn’t turn soft.

Bagel: the hearty breakfast bagel sandwich

Bagels are dense and satisfying, which is why a bagel with egg and cheese can feel like a full meal. They shine when you want contrast—soft egg, melty cheese, plus something bright and crunchy like onion, cucumber, or pickles. If you’re hungry-hungry, this is the base that delivers.

Waffles: sweet-savory waffle breakfast sandwich energy

Waffles turn the same ingredients into brunch. Because waffles carry a gentle sweetness, they pair especially well with salty cheese, peppery sauces, and savory fillings. Pick this base when you want a waffle breakfast sandwich that feels fun, dramatic, and very shareable.

Quick rule to decide in 5 seconds

For a tidy, classic bite, choose an English muffin. For luxury and flaky layers, reach for a croissant. When you want something big and seriously filling, go with a bagel. And if you’re craving brunch-style sweet-savory energy, waffles are the move.


English muffin breakfast sandwich (café-style, sturdy, and easy to hold)

The English muffin breakfast sandwich is popular for a reason: it’s compact, it toasts beautifully, and it doesn’t fall apart mid-commute.

How to make round eggs for breakfast sandwiches (without special gear)

If you want that neat “egg patty” look, you don’t need a fancy ring. A wide mason jar lid ring, a cleaned metal cookie cutter, or even a DIY foil ring works.

Step-by-step guide showing how to make round eggs for breakfast sandwiches using a mason jar lid ring, covering the pan, and stacking the egg patty on an English muffin with cheese.
Want café-style egg patties? This quick method shows how to make round eggs for breakfast sandwiches using a simple jar-lid ring—perfect for an English muffin breakfast sandwich that stacks neatly and stays easy to hold.

Warm the ring in the pan, grease it lightly, crack in the egg, and cover. As the egg sets, it becomes the perfect shape for English muffins.

Build: egg and cheese on English muffin

  • Toast muffin halves until crisp
  • Spread sauce on both sides
  • Add egg + cheese
  • Add one crisp layer (thin onion, tomato slice, spinach, or pickles)
  • Close, press gently, eat
English muffin egg and cheese breakfast sandwich recipe card, cut in half to show a round egg patty, melted cheese, spinach, and red onion, with café-style text overlay and MasalaMonk.com footer.
This English muffin egg and cheese breakfast sandwich stacks neatly with a round egg patty and melty cheese—add a thin layer of spinach and onion for crunch and freshness without making the muffin soggy.

For a creamy base that can swing classic or spicy, a simple homemade mayo is hard to beat. If you want a versatile one with a lot of variations you can reuse for other sandwiches too, this guide is handy: homemade mayonnaise with 15+ easy variations.

If you’re feeding a mixed crowd—some people avoiding eggs in spreads or preferring egg-free condiments—you can also keep a jar of eggless mayonnaise or a fully dairy-free vegan mayo in rotation.


Breakfast croissant: when you want croissant sandwiches that feel like a treat

A breakfast croissant sandwich is the “I went out for breakfast” vibe—without leaving home. Because croissants are rich and flaky, the best versions keep fillings bold but not watery.

Croissant egg and cheese (the simple starter)

  • Warm the croissant (don’t over-toast—just warm and lightly crisp)
  • Add a soft scrambled egg layer
  • Add cheese while eggs are hot
  • Finish with pepper or chili flakes

Bacon egg and cheese croissant

Crisp bacon, melt cheese onto the egg, then add something fresh so it doesn’t feel heavy: a thin tomato slice, peppery greens, or even quick-pickled onions.

Bacon egg and cheese croissant breakfast sandwich recipe card showing a flaky croissant filled with egg, melted cheese, and crispy bacon, with “Bakery-style breakfast” text overlay and MasalaMonk.com footer.
This bacon egg and cheese croissant delivers the classic breakfast croissant vibe at home—keep the croissant lightly warmed (not over-toasted), melt the cheese onto the eggs, then add crisp bacon and one fresh layer so it stays rich but balanced.

Sausage egg and cheese croissant

Sausage + egg + cheese is a classic breakfast sandwich trio for a reason. The croissant turns it into a weekend-level meal. If your sausage is strongly seasoned, keep the sauce simple—mayo or a yogurt-based spread—so it doesn’t clash.

Ham egg and cheese croissant

Ham loves mustard-mayo or herby mayo. Even a thin swipe makes the whole sandwich taste “designed,” not accidental.

If you want a sandwich spread that’s creamy yet tangy, Greek yogurt-style sauces are perfect on croissants too. This Greek tzatziki sauce recipe with variations gives you a thick, garlicky option that stays put instead of leaking out the sides.

Also Read: Strawberry Smoothie Recipes (12 Easy Blends + Bowls & Protein Shakes)


Bagel with egg and cheese: the breakfast bagel sandwich that actually feels balanced

A bagel with egg and cheese is dense and satisfying, so it helps to build contrast—soft + crisp, rich + fresh, salty + bright.

This bagel with egg and cheese gets an easy avocado upgrade—add creamy avocado plus a sharp, crunchy layer like pickled onions to balance the richness and make a more satisfying breakfast bagel sandwich.

Bagel with egg and cheese (the core build)

Toast the bagel cut sides well. Spread sauce on both halves. Add egg + cheese, then add one “fresh” element: tomato, cucumber, avocado, or herbs.

Avocado egg sandwich on a bagel

Avocado and egg are a natural pair. Add black pepper, a squeeze of lemon, and something crunchy (onion or cucumber). The result feels like a healthy breakfast sandwich, even though it’s still comforting.

For a flavor blueprint you can borrow directly, this one is built for mornings: avocado, basil, and grilled tomato sandwich. You can adapt the same idea onto a bagel and add egg + cheese to turn it into a bigger breakfast.

Egg sandwich spread for bagels (when you want it creamy)

Instead of a whole egg, use a spreadable egg layer (egg mayo / egg salad style). It’s easier to eat, especially if you’re walking out the door.

We’ll do that properly in the egg mayo sandwich recipe section below.

Also Read: Classic Deviled Eggs (Easy) + 8 Flavorful Variations


Breakfast muffin sandwich: egg, cheese, and a sturdy base

“Breakfast muffin sandwich” can mean an English muffin sandwich, or it can mean a muffin-shaped bread base you toast and fill. Either way, the goal is the same: structure.

Egg and cheese muffin-style sandwich

Toast the base, add a folded omelet or egg patty, add cheese, then add a little sauce. Because this style is compact, it’s great for meal prep breakfast sandwiches as well.

If you’re making eggs in bulk for this, an easy workflow is to cook and peel a batch of eggs quickly. An air fryer is surprisingly effective for that—here’s a reliable method: air fryer hard boiled eggs.

Also Read: How to Make Pineapple Chia Pudding: A Refreshing Low-Carb Breakfast Option


Waffle breakfast sandwich: sweet-savory brunch energy

A waffle breakfast sandwich is where brunch gets playful. The key is using waffles that are crisp enough to hold fillings.

If you want to make waffles that stay golden and crisp even without dairy, this is a solid base: waffle recipe without milk. For more adventurous directions (including Indian twists that still feel natural), this is fun inspiration: Belgian waffle recipe + Indian twists.

Waffle breakfast sandwich recipe card showing a stacked waffle sandwich with egg, melted cheese, and spicy mayo, plus text overlay for a sweet-savory brunch build.
This waffle breakfast sandwich turns a simple egg and cheese into a sweet-savory brunch—keep the waffles crisp, add melty cheese, then finish with spicy mayo for a bold contrast that still feels breakfast-friendly.

Waffle sandwich build ideas

  • Egg + cheese + spicy mayo
  • Scrambled egg + herbs + pepper sauce
  • Egg + cheese + avocado for a more “healthy breakfast sandwich” feel

Because waffles lean slightly sweet, a bright sauce works especially well. If you like heat, a pepper sauce can turn waffles and eggs into something unforgettable. This is a deep rabbit hole if you want options: pepper sauce recipe guide.


Egg sandwiches recipes: choosing the egg style that matches your morning

It’s easy to treat eggs like “one ingredient,” yet the cooking method changes the entire sandwich. So, instead of guessing, pick based on the kind of morning you’re having.

Best eggs for sandwiches infographic comparing fried, scrambled, folded omelet, and boiled egg spread with suggested bread pairings and a bagel egg and cheese sandwich.
Not all egg sandwiches eat the same—use this guide to pick the best eggs for sandwiches (fried, scrambled, folded omelet, or boiled spread) and match them to the right bread for a better breakfast sandwich every time.

Fried egg sandwich (best for immediate eating)

Fried eggs are at their peak right out of the pan. That’s when the edges stay crisp and the yolk is still luscious. Consequently, this version shines for weekends or slow mornings.

Scrambled egg sandwich (best for reheating)

Scrambled eggs hold better than fried eggs in the fridge and reheat more evenly. Therefore, if you’re thinking meal prep, scrambled is your friend.

Folded omelet-style egg (best for neat layers)

Beat eggs, cook into a thin sheet, fold into a rectangle. This makes a tidy “egg patty” without tools. It’s also ideal for breakfast slider sandwiches because the pieces cut cleanly.

Boiled eggs for sandwiches (best for cold breakfast)

Boiled eggs can become a spread, which means you can eat your breakfast sandwich cold and still enjoy it. This is where egg mayo sandwich recipes, egg salad sandwiches, and even tuna egg sandwich variations come in.

If you want a broader set of ideas for using small egg counts creatively, this list can spark options: egg dishes with 2 eggs.

Also Read: Top 10 Foods for Gut Health (+ Pre/Probiotics, Best Drinks, Gut-Reset Plan)


Egg mayo sandwich recipe: creamy, fast, and surprisingly breakfast-friendly

Egg mayo often gets treated as “lunch food,” yet it’s one of the best solutions for busy mornings. It’s fast, it’s filling, and it turns into a portable sandwich without needing to reheat anything.

Ingredients (2 sandwiches)

  • 2 hard-boiled eggs, chopped
  • 2–3 tablespoons mayo
    (or use eggless mayo or vegan mayo if that fits your needs)
  • Salt and pepper
  • Optional: chopped onion, dill, cucumber, chili flakes, a squeeze of lemon
This egg mayo sandwich filling doubles as a simple egg salad sandwich recipe—mix chopped boiled eggs with mayo (or Greek yogurt), then add dill and pickles for crunch and a fresher, lighter bite.

Method

Mash the eggs lightly, stir in mayo, season, then adjust texture. If you want it looser, add a tiny splash of milk or lemon. If you want it thicker, add more egg or a little grated cheese.

Turn egg mayo into egg salad sandwich recipe territory

If you want the “egg salad” vibe, fold in crunch: finely chopped celery (if you like), onion, pickles, or cucumber. Add a pinch of curry powder for a curried egg sandwich direction, or add paprika for a classic style.

Curried egg salad upgrade recipe card showing a bowl of curried egg salad with pickles, onion, and lemon, plus a seeded bread egg salad sandwich; text overlay lists curry powder, pickles, onion, and lemon.
Turn a basic egg mayo sandwich into a curried egg sandwich by stirring in curry powder, chopped pickles, onion, and a squeeze of lemon—an easy upgrade that adds brightness, crunch, and bold flavor.

Egg salad with greek yogurt (lighter, tangier)

Instead of all mayo, use thick yogurt or hung curd for part of the spread. It stays creamy, tastes fresher, and feels closer to a healthy breakfast sandwich.

If you like the flavor logic of yogurt-based fillings, this is a great reference point: healthy hung curd spinach cheese sandwich.

Also Read: Vodka Pasta (Penne alla Vodka) + Spicy Rigatoni, Chicken, and Gigi Recipes


Breakfast sandwich ideas that borrow from “real sandwich culture”

A breakfast sandwich doesn’t have to be only egg + cheese + meat. It can borrow from classic sandwich styles and still feel totally breakfast-appropriate.

The Bombay-inspired breakfast sandwich

If you’ve ever loved a spicy, chutney-forward sandwich, you can bring that energy to breakfast: toast bread, add green chutney or herby mayo, add egg + cheese, then add thin-sliced onion and tomato.

For a full flavor blueprint, this is the classic: authentic grilled Bombay sandwich recipe. Use the same “layering logic,” then make the egg the star.

The mushroom-and-cheese breakfast upgrade

Sauté mushrooms, add pepper, add cheese, then add egg. It turns basic egg sandwiches into something deeper and more savory.

If you want the mushroom direction fully mapped out, this is a great base: mushroom cheese sandwich recipe.

The hummus-and-veg morning sandwich (egg optional)

Some mornings you want breakfast without eggs. A hummus-based sandwich gives you protein and staying power while keeping things fresh.

Here’s a straightforward build to borrow: hummus veggie sandwich. Add a fried egg if you want it heartier, or keep it egg-free for a vegetarian breakfast sandwich that still satisfies.

Also Read: Protein Oatmeal: Turn Plain Oats into a High-Protein Meal


Healthy breakfast sandwich and high protein breakfast sandwich variations

“Healthy” can mean a lot of things. For some people it means higher protein; for others it means lighter sauces; for many it means fewer ultra-processed ingredients. Thankfully, breakfast sandwiches can adapt without losing their comfort-food soul.

Healthy high-protein breakfast sandwich swaps infographic showing mayo swapped for tzatziki, one egg swapped for a folded omelet with two eggs, plain cheese swapped for higher-protein cheese, and crunch added with pickles, greens, and onions.
Build a healthy high-protein breakfast sandwich with simple swaps—use tzatziki or Greek yogurt sauce instead of mayo, double the eggs with a folded omelet layer, choose a more filling cheese, and add crunch with pickles, greens, or onions.

High protein breakfast sandwich (simple ways to level up)

  • Use 2 eggs instead of 1
  • Add an extra slice of cheese or use a higher-protein cheese
  • Add thick yogurt-based sauce (like tzatziki)
  • Add paneer or tofu as an additional filling

If you’re curious about egg protein numbers, this breakdown is a useful reference: how much protein in two boiled eggs.

Healthy breakfast sandwich (lighter sauces that still taste rich)

Instead of drowning the sandwich in mayo, try:

  • A thin layer of pesto
  • Thick yogurt sauce
  • A small swipe of mayo plus lemon juice for brightness

For pesto options you can tweak to your taste, this is a strong starting point: pesto recipe guide with variations. If you want a specific dairy-free pesto, this one is fast and flavorful: fresh basil pesto vegan recipe.


Vegetarian breakfast sandwich: options that don’t feel like “second place”

A vegetarian breakfast sandwich can be just as craveable as any meat-based version—provided you build for texture and seasoning.

Save these vegetarian breakfast sandwich ideas for easy morning variety—mushroom and cheese with egg, spinach pesto with egg, paneer with chutney, or hummus with crunchy veggies (egg optional) for a satisfying vegetarian breakfast sandwich.

Vegetarian breakfast sandwich (easy templates)

  • Egg + cheese + mushrooms + pepper sauce
  • Egg + cheese + spinach + pesto
  • Hummus + veggies + cheese (egg optional)
  • Paneer + egg + chutney (if you like a bigger, spiced bite)

If you want a leftover-friendly option that turns dinner into breakfast, this is a smart template: paneer sabji sandwich recipe. Add a fried egg and it becomes a powerful breakfast sandwich meal prep option.

Also Read: Classic Rum Punch + 9 Recipes (Pitcher & Party-Friendly)


Gluten free breakfast sandwich: easy swaps that still feel satisfying

Going gluten free doesn’t mean giving up the breakfast sandwich experience. It simply means switching the base while keeping the same layers.

Gluten-free breakfast sandwich bases guide showing GF muffin or bagel, hash brown buns, waffles, and an eggwich, with a simple build formula and MasalaMonk.com footer.
For a gluten free breakfast sandwich, swap the base—not the whole idea: use a gluten-free muffin or bagel, crispy hash brown “buns,” gluten-free waffles, or an eggwich, then build with egg, cheese, sauce, and crunch.

Gluten free breakfast sandwich bases

  • Gluten-free English muffins or bagels
  • Hash brown “buns” (crispy potato rounds)
  • Waffles made with a gluten-free mix
  • Egg “buns” (eggwich style)

Once you pick the base, the rest is identical: egg + cheese + sauce + crunch. In other words, you’re not learning a new recipe—you’re just changing the vehicle.

Also Read: Moscow Mule Recipe (Vodka Mule): The Master Formula + 9 Variations


Eggwich: a breakfast sandwich without bread

An eggwich is essentially an egg sandwich where eggs replace bread. If you want a lower-carb or gluten-free breakfast sandwich that still feels indulgent, this is a strong move.

Eggwich no-bread breakfast sandwich guide showing egg “buns” with melted cheese, veggies, and sauce on a dark slate background, labeled as a gluten-free breakfast sandwich.
An eggwich is the easiest no-bread breakfast sandwich—use two thin egg “buns,” add melty cheese and a crunchy veggie layer, then finish with a sauce so it eats like a real breakfast sandwich while staying gluten-free.

How to build it

Cook two thin omelet “rounds,” let them cool slightly so they firm up, then use them as top and bottom. Add cheese, add filling, add sauce, press gently, and eat with a napkin because it’s joyfully messy.

Also Read: 7 Pizza Sauce Recipes | Marinara, White Garlic, Alfredo, Buffalo, BBQ, Vodka & Ranch


Breakfast sandwich homemade sauces that make everything taste intentional

A sandwich can have perfect eggs and still taste “unfinished” without a good spread. Sauce isn’t extra; it’s the layer that ties everything together.

Breakfast sandwich sauce pairings infographic with bowls of mayo, pesto, tzatziki, and pepper sauce and quick notes on which breakfast sandwiches each spread suits.
Use these breakfast sandwich sauce pairings to change the flavor fast—mayo for classic egg and cheese, pesto for a herby café-style sandwich, tzatziki for a fresh high-protein feel, and pepper sauce for a spicy, craveable bite.

Mayo: classic, versatile, and endlessly adaptable

If you want one foundational sauce that can become spicy mayo, garlic mayo, herby mayo, and more, start here: homemade mayonnaise with 15+ variations.

Eggless mayo and vegan mayo: inclusive options without compromise

If you’d rather avoid raw eggs in homemade spreads, or you’re serving someone who prefers egg-free condiments, these are useful:

If you’re cooking for pregnancy or generally avoiding raw-egg preparations, the FDA’s guidance for higher-risk groups is worth reading: Food Safety for Moms-to-Be.

Pepper sauce: the fastest way to make breakfast taste exciting

A little heat transforms egg and cheese into something you crave instead of something you tolerate. If you want options ranging from tangy vinegar hot sauces to creamy peppercorn-style sauces, this is a complete guide: pepper sauce recipe guide.

Tzatziki: cooling, thick, and perfect for breakfast sandwiches

Yogurt-based sauces are especially good when you’re building a healthy breakfast sandwich. They add creaminess without feeling heavy, and they pair beautifully with herbs and cucumbers: Greek tzatziki sauce recipe with variations.

Also Read: Pesto Recipe: Classic Basil Pesto Sauce & 10 Variations


Frozen breakfast sandwiches: make-ahead meal prep you’ll actually use

Frozen breakfast sandwiches have one job: save your morning when you have no time. The secret is building them in a way that reheats well. That means slightly drier eggs, sturdy bread, and sauces added after reheating.

Frozen breakfast sandwiches meal prep infographic showing wrapped make-ahead egg and cheese sandwiches with freezer-friendly ingredients, what to add later, and a reheat method for crisp bread.
Make-ahead frozen breakfast sandwiches work best when you freeze sturdy bread with a folded omelet or scrambled patty and melty cheese, then add fresh veggies and creamy sauces after reheating for the best texture.

What freezes well

  • English muffin breakfast sandwich builds
  • Bagel breakfast sandwich builds (slice thin so it reheats faster)
  • Biscuit-style builds (best reheated in oven/air fryer)
  • Folded omelet egg layers (they hold shape beautifully)

What to add later

Fresh tomato, cucumber, lettuce, delicate herbs, and most creamy sauces are better after reheating. Otherwise, you risk soggy bread or watery textures.

How to assemble frozen breakfast sandwiches

Cook eggs (scrambled patties or folded omelets work best). Melt cheese onto the eggs. Assemble on toasted bread. Wrap tightly. Freeze.

How to reheat

  • Microwave for speed, then finish in a pan or toaster oven for texture
  • Oven/toaster oven for the best overall result
  • Air fryer for crisp edges (especially on biscuits and croissants)
Reheat breakfast sandwiches without rubbery bread infographic showing a three-step method: microwave to warm, pan/oven/air fryer to crisp, then add fresh crunch.
Reheat frozen breakfast sandwiches the café way: warm the center first in the microwave, crisp the outside in a pan or oven/air fryer, then finish with fresh toppings like pickled onions or greens for the best texture.

If you ever want a quick reference on storage timelines beyond “it seems fine,” the FoodKeeper app is a practical tool developed with USDA FSIS partners to help with fridge/freezer guidance.

For egg-specific safety basics, USFDA’s guidelines are clear and straightforward, including: methods for cooking eggs safely.

Also Read: Oat Pancakes Recipe (Healthy Oatmeal Pancakes)


Meal prep breakfast sandwiches: a one-hour batch that changes your week

If you’re doing sandwich meal prep, it helps to commit to a single batch session. The goal isn’t perfection—it’s making weekday mornings almost automatic.

A simple batch plan

  • Toast a stack of English muffins or bagels
  • Cook eggs as folded omelets (fast, neat, scalable)
  • Melt cheese on top of eggs in the pan
  • Assemble and wrap
  • Freeze what you won’t eat within a day or two

If you like a broader framework for planning and portioning without stress, this guide is a solid foundation: Mastering Meal Prep: a beginner’s guide.


Breakfast sandwiches for a crowd: the easiest way to feed everyone without chaos

Sometimes you’re not making one breakfast sandwich. You’re making breakfast sandwiches—plural—because family is hungry, guests are over, or you want leftovers that actually feel useful.

Breakfast sandwiches for a crowd infographic showing sheet-pan eggs cut into squares and slider rolls assembled with egg and cheese using a bake-slice-stack method.
Feeding a group? Use sheet-pan eggs for sandwiches: bake one large egg slab, slice into squares, then stack into slider rolls with cheese and warm—fast, tidy, and perfect for breakfast slider sandwiches.

Breakfast slider sandwiches (the party-friendly move)

Use a sheet of rolls, slice horizontally, layer eggs and cheese across the whole surface, add fillings, close, and bake until warm.

Sheet-pan eggs for sandwiches guide showing a baked egg slab cut into squares in a tray with a knife slicing portions, plus a whisk-bake-slice-stack timeline and MasalaMonk.com footer.
Sheet-pan eggs for sandwiches are the fastest way to prep a crowd—bake one tray, slice into tidy squares, then stack into breakfast sliders or meal prep breakfast sandwiches without the mess of cooking eggs one-by-one.

Sheet pan eggs for sandwiches (the cleanest bulk method)

Whisk eggs, season, pour into a sheet pan, bake until set, then cut into squares. This gives you uniform pieces that stack easily into every sandwich format: croissants, bagels, English muffins, and even waffles.

Also Read: Mimosa Recipe: 10 Easy Versions from Classic to Caramel Apple


Bringing it all together

The reason breakfast sandwiches stay popular isn’t just convenience. It’s the way they adapt. On a slow day, you can make a fried egg sandwich with crisp edges and melty cheese. On a packed morning, you can grab a frozen breakfast sandwich, reheat it, and still feel like you ate something real. When you’re trying to eat lighter, you can pivot to yogurt sauces and veggie layers. When you’re craving comfort, you can go full breakfast croissant mode and lean into it.

If you take only one thing from this: build your breakfast sandwich recipe around layers with purpose—bread for structure, eggs for richness, cheese for glue, sauce for harmony, and crunch for contrast. Once that clicks, the rest becomes a rotation you can enjoy all year.

Also Read: 10 Best Espresso Martini Recipe Variations (Bar-Tested)

FAQs about Sandwich for Breakfast

1) What is the best breakfast sandwich recipe for beginners?

The best breakfast sandwich recipe for beginners is a simple egg and cheese sandwich on toasted bread. Start with one fried or scrambled egg, add a slice of cheese while the egg is still hot, and finish with a light spread so the sandwich stays moist without turning soggy.

2) How do I make egg sandwiches that don’t fall apart?

To keep egg sandwiches from falling apart, toast the bread well, use cheese as a “glue” layer, and avoid overfilling with watery ingredients. If you’re adding tomato or cucumber, blot them first and keep the slices thin so the sandwich holds its shape.

3) What’s the easiest way to make round eggs for an English muffin breakfast sandwich?

For an English muffin breakfast sandwich, crack an egg into a lightly greased ring (a mason jar ring or cookie cutter works) and cover the pan so the top sets quickly. In this way, the egg cooks into a neat patty that matches the muffin size.

4) Which egg style works best for a breakfast sandwich: fried egg or scrambled egg?

A fried egg sandwich is ideal when you’re eating right away and want crisp edges or a runny yolk. By contrast, a scrambled egg sandwich is better for reheating and meal prep because the texture stays softer after warming.

5) Can I use boiled eggs for sandwiches?

Yes—boiled eggs for sandwiches are great when you want a no-reheat option. Simply chop or mash the eggs and mix with a spread to make an egg sandwich filling that’s easy to pack and quick to assemble.

6) What is an eggwich, and how is it different from an egg sandwich?

An eggwich is a breakfast sandwich made without bread, where eggs act as the “bun.” In other words, it’s a gluten free breakfast sandwich option that still includes classic fillings like cheese, veggies, and a sauce layer.

7) How do I make a high protein breakfast sandwich without changing the flavor too much?

A high protein breakfast sandwich can be made by using two eggs instead of one, adding an extra slice of cheese, or including a protein-forward filling like paneer or a thick yogurt-based spread. As a result, you get more staying power while keeping the taste familiar.

8) What’s the best bread for a breakfast sandwich?

The best bread depends on the texture you want. English muffins create a tidy breakfast muffin sandwich feel, croissants make a rich breakfast croissant, bagels give a chewy bite for a breakfast bagel sandwich, and waffles create a crisp-sweet waffle breakfast sandwich.

9) How do I keep croissant sandwiches from getting soggy?

Because croissants are delicate, warm them lightly, avoid watery fillings, and keep spreads thin. Additionally, add fresh items like tomato only right before eating so the layers stay flaky instead of soft.

10) What’s the simplest bagel with egg and cheese build?

Toast the bagel cut sides, spread a small amount of sauce, add egg and cheese, then finish with one fresh layer like tomato, cucumber, or avocado. Consequently, you get a bagel breakfast sandwich that feels balanced rather than heavy.

11) How can I make a healthy breakfast sandwich that still tastes satisfying?

A healthy breakfast sandwich can stay satisfying by focusing on texture and seasoning rather than extra fat. For example, use toasted bread, a well-seasoned egg, plenty of crunchy veggies, and a tangy spread such as yogurt-style sauce or a lighter mayo blend.

12) What are easy vegetarian breakfast sandwich options?

Vegetarian breakfast sandwich options include egg and cheese with sautéed mushrooms, egg with spinach and herbs, hummus with veggies (with or without egg), or paneer with onions and spices. Likewise, adding a crisp layer keeps it lively.

13) How do I make a gluten free breakfast sandwich at home?

For a gluten free breakfast sandwich, use gluten-free bread, a gluten-free bagel, or swap bread entirely by making an eggwich. Alternatively, you can use waffles made with a gluten-free mix for a sturdier base.

14) What are the best breakfast sandwich ideas when I’m bored of egg and cheese?

If you’re bored of egg and cheese, switch just one layer: try pesto instead of mayo, add mushrooms instead of bacon, use a croissant instead of an English muffin, or add avocado for a creamy contrast. Similarly, a peppery sauce can change the flavor without changing the structure.

15) Can I make frozen breakfast sandwiches for busy mornings?

Yes—frozen breakfast sandwiches are one of the easiest meal prep wins. Assemble sandwiches with egg and cheese, skip watery vegetables, wrap tightly, and freeze. Then reheat and add fresh toppings afterward for better texture.

16) What’s the best method for meal prep breakfast sandwiches that reheat well?

For meal prep breakfast sandwiches, use scrambled eggs or a folded omelet layer because they reheat evenly. Furthermore, toast the bread first, keep sauce minimal before freezing, and wrap each sandwich tightly to reduce freezer burn.

17) How long do frozen breakfast sandwiches last in the freezer?

Frozen breakfast sandwiches typically keep their best quality for about 1–2 months, although they can remain safe longer if stored properly. Even so, using airtight wrapping helps prevent dry edges and off flavors.

18) How do I reheat frozen breakfast sandwiches without making the bread rubbery?

To avoid rubbery bread, thaw slightly, microwave briefly to warm the center, then finish in a pan, toaster oven, or air fryer to crisp the outside. In short, heat for speed first, then crisp for texture.

19) What’s the difference between breakfast sandwich ideas and breakfast sandwich recipes?

Breakfast sandwich ideas are quick combinations or swaps you can try, whereas breakfast sandwich recipes include clear steps, timings, and a method you can repeat. Consequently, recipes are better when you want consistent results.

20) How do I make breakfast sandwiches for a crowd?

To make breakfast sandwiches for a crowd, cook eggs in a larger batch (scrambled or sheet-pan style), lay out bread bases, and assemble an assembly line. Afterwards, keep sandwiches warm in a low oven so everyone can eat together.

Posted on — 3 Comments

Waffle Recipe Without Milk: Fluffy, Golden, and Crisp

Dark green luxe magazine cover showing a tall stack of golden waffles without milk on a black plate with maple syrup pouring from above, topped with strawberries and blueberries, with text overlay “Waffle Recipe Without Milk” and “Crispy Method • Vegan Option • Best Substitutes,” plus MasalaMonk.com in the footer.

A waffle recipe without milk has a very specific kind of charm when it’s done right: the sound of batter meeting a hot iron, the steam that smells like toasted vanilla, and that first bite where the outside snaps lightly before giving way to a soft, warm center. It’s also the rare kind of breakfast that feels equally perfect on a quiet Tuesday and at a full-on weekend brunch.

Then you open the fridge and realize there’s no milk.

If you’re here because you are looking for a waffle recipe without milk, you’re not alone—and you’re not doomed to second-best waffles. With the right approach, waffles without milk can be indistinguishable from the classic version: crisp edges, airy interior, and that gentle sweetness that makes you reach for another bite even when you promised yourself you wouldn’t.

This post gives you one dependable no milk waffle recipe, and then shows you how to stretch it into multiple directions without losing the waffle magic. You’ll learn how to make waffles without milk using common substitutes (including water), how to keep a crunchy waffle texture even when you’re cooking in batches, how to handle waffle mix without milk if you’re starting with a box, and how to adapt your waffle batter without milk into a vegan waffle batter for days when you want waffles without eggs as well. You’ll also find a hearty oat flour waffles variation (which also covers oatmeal flour waffles), plus topping and serving ideas—from peanut butter waffles to fruit sauces—so the same recipe can feel different every time.

Set your waffle iron out, choose your milk substitute, and let’s make waffles.


Waffle batter without milk: what matters most

Milk is common in waffle recipes because it contributes moisture, a little sweetness, and some proteins and fats. Those can help with browning and flavor. Still, milk isn’t the reason waffles rise, and it isn’t the only pathway to crispness.

To consistently make great waffles without milk, focus on four pillars:

1) Moisture
Flour needs liquid to hydrate. Baking powder needs moisture to activate. As long as you provide enough liquid, you can build a batter that cooks up properly.

2) Leavening
Baking powder is the main lift in most quick waffle recipes. Eggs can help too, but the batter can work without them when you use a good replacement.

3) Fat
Fat is what helps waffles feel tender instead of bready, and it supports browning and crisp edges. When people complain that dairy free waffles taste “dry,” it’s often because the batter is too lean.

4) Heat + airflow
A waffle iron is basically a high-heat press. When it’s hot enough, it creates a crisp shell quickly. When finished waffles are allowed to breathe, they stay crisp. And then when they’re stacked, they steam and soften.

Once those pieces are in place, a waffle recipe no milk can be as reliable as any other recipe you make on repeat.

Also Read: Belgian Waffle Recipe + 5 Indian Twists on a Breakfast Classic


Choosing the best substitute for a waffle recipe without milk

When you’re making waffle batter without milk, the swap you choose affects two things: flavor and structure. There isn’t one “right” choice, so think about what you want your waffles to taste like, and what you have available today.

Dark green portrait guide showing four milk substitutes for waffles without milk—oat, soy, almond, and water—beside a bowl of waffle batter and whisk, with text overlay explaining which swap gives the best texture, plus MasalaMonk.com in the footer.
Quick way to choose the right liquid for waffle batter without milk—oat for cozy flavor, soy for a classic structure, almond for a lighter bite, and water when you need a neutral backup.

Plant milk for a waffle recipe without milk (dairy free waffle recipe option)

If your goal is a dairy free waffle recipe (and not just “I ran out of milk”), an unsweetened, unflavored plant milk is the easiest place to start. A practical overview of how non-dairy milk swaps work in baking can be found in King Arthur Baking’s guide on how to bake dairy-free. That same site also discusses how different plant milks behave in batters in their post on the best non-dairy milk for baking.

If you want a dependable, classic waffle texture, soy milk is usually the safest bet. It tends to create a batter with good body and a cooked waffle with a satisfying structure. Oat milk is another excellent option—mild, cozy, and often good for browning. Almond milk works too; it tends to produce a slightly lighter, more delicate waffle.

If you enjoy homemade versions, you can use them in this recipe as well. Homemade plant milks can vary in thickness, so you’ll adjust batter consistency by eye (you’ll learn how in a bit). If you want a good method, MasalaMonk has a helpful guide to easy homemade oat milk and a step-by-step for how to make almond milk at home.

Water in a without milk waffle recipe: when it works best

If you’re making a no milk waffle recipe because there’s simply nothing in the fridge, water is absolutely workable. The trade-off is flavor and browning: water doesn’t add sweetness or proteins, so waffles can taste a bit more neutral unless you balance with fat and a touch of sugar.

Portrait guide showing water pouring into waffle batter in a mixing bowl with a whisk, vanilla extract bottle and a small bowl of salt nearby, with text overlay “Only Water? Still Works…Keep the oil…Add vanilla + pinch of salt…Cook deeper golden for crisp edges,” and MasalaMonk.com in the footer.
Making waffles without milk using water is doable—keep the oil for texture, add vanilla and a pinch of salt for flavor, then cook until deeper golden for crisp edges.

The upside is that water-based waffles pair beautifully with bold toppings. If you love peanut butter waffles, chocolate drizzle, or fruit sauces, water makes a surprisingly good “blank canvas.”

Sweetened or flavored plant milk

Vanilla almond milk or sweetened oat milk can be convenient, though it can push waffles toward dessert fast. If you’re planning toppings like syrup, fruit compote, or chocolate sauce, using unsweetened milk keeps you in control of sweetness.

Also Read: Almond Flour Pancakes (Easy Recipes) Fluffy, High-Protein, Keto & More


Waffle recipe without milk: the base you can memorize

This is the core waffle recipe without milk. It’s intentionally simple, yet it produces waffles that feel like a proper weekend breakfast: crisp outside, fluffy inside, and sturdy enough to hold toppings without turning soggy.

Ingredients (makes about 6–8 waffles, depending on your iron)

  • 2 cups (250 g) all-purpose flour
  • 2 tablespoons sugar (use 1 tablespoon for less sweet waffles)
  • 1 tablespoon baking powder
  • 1/2 teaspoon fine salt
  • 2 large eggs
  • 1 3/4 cups (420 ml) unsweetened plant milk (soy/oat/almond) or water
  • 1/3 cup (80 ml) neutral oil (or melted dairy-free butter)
  • 1 teaspoon vanilla extract (optional)

Method

  1. Preheat the waffle iron fully. Give it a few minutes beyond the “ready” indicator if your waffles tend to come out pale.
  2. Mix the dry ingredients. In a large bowl, whisk flour, sugar, baking powder, and salt until evenly combined.
  3. Mix the wet ingredients. In a second bowl or large measuring jug, whisk eggs, your chosen milk substitute (or water), oil, and vanilla.
  4. Combine gently. Pour wet into dry and stir just until the flour disappears. Small lumps are fine; overmixing makes waffles tough.
  5. Rest the batter. Let it sit 5–10 minutes. During this pause, flour hydrates and the batter becomes more consistent.
  6. Cook. Add batter to the hot waffle iron and cook according to the manufacturer’s directions. Avoid opening too early; it’s still steaming and setting.
  7. Serve or hold properly. Eat immediately, or keep waffles crisp using the oven-rack method described below.

That’s your waffle batter without milk. From here, you can keep it classic or branch out.

Also Read: Mayo Recipe: 15+ Homemade Mayonnaise Variations


How to keep a waffle recipe without milk crisp & crunchy

A common complaint with dairy free waffles (and waffles in general) is that they start crisp and then soften quickly. The reason is almost always steam. Fresh waffles release moisture. If you stack them on a plate, that moisture condenses and softens the crust.

The simplest fix is airflow. Epicurious explains crisp waffle technique—especially holding waffles on a rack in a warm oven—in their guide on how to make crispy waffles.

Portrait guide showing freshly cooked waffles cooling in a single layer on a wire rack over a sheet pan with a warm oven in the background, plus text overlay “Crispy-Not-Soggy Method” and tips “Single layer on rack • Warm oven 250–300°F • Never stack hot waffles,” with MasalaMonk.com in the footer.
For crispy waffles without milk, let steam escape: keep waffles in one layer on a rack in a warm oven while you finish the batch—stacking traps moisture and softens the crust.

The crisp-holding method (works for every batch)

  1. Heat your oven to 250–300°F (120–150°C).
  2. Place a wire rack on a sheet pan.
  3. As each waffle finishes, place it on the rack in a single layer.

This method lets steam escape. As a result, your crunchy waffle stays crunchy while you cook the rest.

A few small moves that make a big difference

Cook a shade darker.
If your waffles are pale, they’re almost always soft. Let them go until deep golden.

Don’t skimp on fat.
Oil isn’t only richness—it helps crispness. Reducing oil too much can make waffles bready.

Let the iron preheat properly.
If the iron isn’t hot enough, waffles cook slowly and steam rather than crisp.

Avoid the “peek.”
Opening the iron early releases steam at the wrong moment. Waiting helps the waffle set and release cleanly.

Once you start doing these consistently, you’ll be able to make waffles without milk that stay crisp long enough to actually enjoy them.

Also Read: Negroni Recipe: Classic Cocktail & Its Variation Drinks


Waffle batter without milk: how to judge the consistency

Even a consistent recipe can feel different depending on flour brand, humidity, and the thickness of your plant milk. Instead of relying on a fixed look, aim for a familiar texture:

Close-up portrait guide showing waffle batter without milk dripping in a smooth ribbon from a spoon into a bowl, with text overlay “Batter Check: Thick, Not Stiff” and tips for adjusting batter that’s too thick or too thin, plus MasalaMonk.com in the footer.
Use the ribbon test to dial in waffle batter without milk—aim for a thick pour that settles slowly, then tweak with 1 tablespoon at a time for consistently crisp, fluffy waffles.
  • The batter should be thick but pourable.
  • It should flow off a spoon in a steady ribbon and settle slowly.
  • It should not be watery, and it should not sit in a stiff mound.

If the batter is too thick

This can happen with oat milk that’s very thick, homemade plant milk, or oat flour variations. Add liquid one tablespoon at a time until it loosens slightly.

If the batter is too thin

If your plant milk is very watery, add 1–2 tablespoons flour, stir gently, then rest another few minutes.

This small adjustment prevents thin batter from spreading too much and producing flat waffles.

Also Read: 10 Best Espresso Martini Recipe Variations (Bar-Tested)


Dairy free waffle recipe: keeping it simple and still delicious

If your goal is truly dairy free waffles, the base recipe already gets you there as long as you choose:

  • a plant milk (or water)
  • oil or dairy-free butter

From there, toppings are where you can make breakfast feel special. For a quick option that stays dairy-free and pairs beautifully with crisp waffles, MasalaMonk’s 3-minute homemade chocolate syrup is an easy win.

If you prefer fruit over chocolate, you’ll love having a tart sauce ready to spoon over waffles.


Vegan waffle batter: waffles without milk and without eggs

Sometimes you want more than a dairy free waffle recipe—you want a vegan waffle recipe. That means building a vegan waffle batter: no milk, no eggs, still crisp, still fluffy.

Eggs do a few things in waffle batter: they add structure, bind ingredients, and support browning. When you remove them, you’ll want a replacement that adds some binding without weighing the waffles down.

A common, accessible approach is the flax egg. Cookie and Kate lays out the classic method in their guide on how to make a flax egg. For a broader look at egg substitutes, Bob’s Red Mill also discusses options in their article on egg substitutes for baking.

Portrait recipe-card image showing a flax egg formula for vegan waffle batter without milk: a small bowl of gelled flax mixture beside a mixing bowl of batter and whisk on a dark green background, with text overlay “Flax Egg Formula…1 tbsp ground flax + 3 tbsp water…Rest 10 min (gel)…Use 2 flax eggs for this batch…Cook a shade darker,” plus MasalaMonk.com in the footer.
For vegan waffles without milk and eggs, flax eggs add structure: mix, let it gel, then cook the waffles a shade darker for a crisp edge and a tender center.

Vegan waffle recipe variation (flax egg method)

To convert the base batter into vegan waffles:

  • Replace the 2 eggs with 2 flax eggs:
    • 2 tablespoons ground flaxseed + 6 tablespoons water
    • Stir and rest 5–10 minutes until gel-like
  • Use plant milk (soy or oat tends to give better body than very thin milks).
  • Keep the oil amount the same.

After mixing, let vegan waffle batter rest a little longer—around 10 minutes—so the flax has time to hydrate properly. When cooking, expect slightly longer cook times than the egg version. Rather than turning up the heat, let the waffle cook until it releases easily and looks richly golden.

If you’re making a plant-based brunch spread, it’s fun to offer more than one main. MasalaMonk’s vegan French toast recipes fit beautifully alongside vegan waffles, especially if you’re feeding a group with different preferences.

Portrait guide for eggless waffles without milk showing an egg beside bowls of ground flaxseed and chia seeds with measuring spoons and a bowl of waffle batter, with text overlay “No Eggs? Quick Fixes” plus flax egg and chia egg ratios, and MasalaMonk.com in the footer.
For eggless waffles without milk, flax or chia eggs work as reliable binders—mix 1 tablespoon seeds with 3 tablespoons water, rest 10 minutes, then cook a little longer for better crispness.

Eggless waffles and “no egg waffles” without going fully vegan

A lot of people search eggless waffles or no egg waffles because they ran out of eggs, not because they want a fully vegan breakfast. The flax egg method still works in that situation, and it’s often the simplest fix because it uses pantry ingredients.

If you want another eggless breakfast idea that still feels comforting and classic, MasalaMonk’s eggless French toast is worth bookmarking for those “no eggs in the fridge” mornings.


Vegetarian waffles: what people usually mean

“Vegetarian waffles” can mean a few different things depending on who’s searching. Many waffles are already vegetarian by default. Often, the person asking for vegetarian waffles is actually asking for eggless waffles, or for dairy free waffles. The easiest way to keep everyone happy is to start with the base waffle recipe without milk, then choose the variation that matches what you need:

  • plant milk + eggs = dairy free waffle recipe (not vegan)
  • plant milk + flax eggs = vegan waffle recipe
  • water + eggs = no milk waffle recipe in a pinch
  • water + flax eggs = vegan waffles when the pantry is bare

Once you see it that way, the labels stop being confusing and the waffles become predictable.

Also Read: 10 Creative Chia Pudding Recipes for Every Taste


Oat flour waffles and oatmeal flour waffles: a hearty, cozy variation

If you like waffles that feel a bit more filling—warm, slightly nutty, and perfect with fruit—oat flour waffles are the move. You’ll also see the phrase oatmeal flour waffles used often, usually to describe oat flour made by blending rolled oats into flour.

Portrait guide showing a spoonful of oat flour over a bowl with oats scattered on a dark green surface, plus text overlay “Oat Flour Swap (Works)” with instructions for making oat flour waffles without milk, and MasalaMonk.com in the footer.
For oat flour waffles without milk, swap in 1¾ cups oat flour, let the batter rest, then loosen with a splash of liquid only if it thickens after resting.

How to convert the base into oat flour waffles

Use the same recipe, with this swap:

  • Replace the all-purpose flour with 1 3/4 cups oat flour.

After you mix and rest the batter, check the consistency. Oat flour absorbs liquid differently, and batter can thicken while it sits. If it becomes too thick, add 1–2 tablespoons plant milk or water and stir gently.

Oat flour waffles can be wonderfully crisp if the iron is hot and the batter includes enough fat. The oven-rack method is especially helpful here because oat flour waffles can soften faster if stacked.

For topping ideas that match oat flour especially well, fruit compote is a great choice. MasalaMonk’s spiced plum and dragon fruit compote adds color, fragrance, and a sweet-tart finish that feels special without being heavy.


Waffle mix without milk: how to make boxed waffles work

There are mornings when you want waffles but you don’t want to measure flour. Waffle mix exists for a reason. The only catch is that many boxes assume you’ll use dairy milk.

Portrait step guide for waffle mix without milk showing a boxed waffle mix, a measuring cup of plant milk, a small dish of oil, and a bowl of batter with a whisk on a dark green background, with text overlay “Box Mix Hack (No Milk) — Plant milk 1:1 swap — Using water? Add 1 tbsp oil — Cook deeper golden for crispness,” plus MasalaMonk.com in the footer.
Turn waffle mix into crisp, dairy-free waffles: swap in plant milk 1:1, or use water with a tablespoon of oil—then cook until deeply golden for the best texture.

You can still make waffle mix without milk easily:

  • Replace the milk with an equal amount of unsweetened plant milk.
  • If you must use water, consider adding a tablespoon of oil (especially if the mix is lean) to support browning and crispness.

If you’re curious about how milk swaps behave in baked goods, King Arthur’s post on how to bake dairy-free is a helpful general reference.

Making waffle mix without milk taste more “homemade”

Instead of rewriting the mix, focus on a few small upgrades:

  • Add vanilla extract for warmth.
  • Rest the batter for 5–8 minutes so it hydrates evenly.
  • Cook thoroughly and hold finished waffles on a rack so steam doesn’t soften the crust (again, the technique from Epicurious’ crispy waffle guide matters here).

If you like the idea of “mix upgrades” for breakfast batters, you might also enjoy MasalaMonk’s approach to pancakes, especially the mix-friendly ideas in blueberry pancakes and homemade pancake mix.


Peanut butter waffles and waffles and peanut butter: two easy ways to go nutty

Peanut butter is one of the easiest ways to make dairy free waffles feel richer and more satisfying. You can bake it into the waffle or treat it as the star topping.

Portrait how-to image showing peanut butter being stirred into waffle batter in a bowl on a dark green surface, with text overlay “Peanut Butter Mix-In” and instructions to stir 2–3 tablespoons into the wet mix and adjust batter if it thickens, plus MasalaMonk.com in the footer.
For peanut butter waffles without milk, mix 2–3 tablespoons into the wet ingredients for a richer batter—then loosen with a splash of liquid only if the batter thickens.

Peanut butter waffles (peanut butter in the batter)

For peanut butter waffles, whisk 2–3 tablespoons peanut butter into the wet ingredients before combining wet and dry. This adds richness and a gentle roasted-nut aroma. It’s particularly helpful if you’re using water in your waffle batter without milk, because peanut butter adds flavor and body that water doesn’t provide.

If the batter becomes slightly thicker, don’t panic. Let it rest, then loosen with a tablespoon of liquid if needed.

Waffles and peanut butter (topping-style)

For waffles and peanut butter, keep the base recipe unchanged. Spread peanut butter over a hot waffle so it melts into the pockets, then add banana slices, berries, or a drizzle of syrup. This method is faster and lets everyone choose their own amount.

To make it feel like a dessert without turning breakfast into a project, add a drizzle of MasalaMonk’s dairy-free chocolate syrup. Peanut butter plus chocolate on a crisp waffle is hard to beat.


Fruit toppings that make waffles without milk feel festive

Waffles without milk taste especially good with bright fruit because the base flavor stays clean and neutral. You don’t need whipped cream or butter to make waffles feel special—fruit does a lot of work on its own.

A standout option is cranberry-orange sauce: tart, fragrant, glossy, and perfect for spooning. MasalaMonk’s cranberry sauce with orange juice works beautifully on classic waffles, vegan waffles, and oat flour waffles alike.

If you prefer a softer, spiced fruit profile, the plum and dragon fruit compote mentioned earlier is another great direction—especially if you like the idea of waffles feeling a little more “brunchy” and a little less “dessert.”


Turning dairy free waffles savory

Sweet waffles are iconic. Even so, waffles can be a fantastic savory base—especially if you reduce the sugar in the batter to 1 teaspoon or skip it altogether. Suddenly the waffle becomes more like a crisp bread: a platform for herbs, sauces, and savory spreads.

Two sauces that work surprisingly well with savory waffles are pesto and chimichurri:

  • MasalaMonk’s pesto recipes include variations that can keep things dairy-free while still tasting bold and fresh.
  • MasalaMonk’s chimichurri recipe adds tang and brightness that contrasts beautifully with crisp waffles.

Savory waffles are also a great way to use waffles for lunch rather than breakfast, especially when you want something quick that still feels intentional.


Syrup choices and sweetener curiosity

Most people reach for syrup automatically. Others like to think more carefully about sweeteners and how they compare. If you enjoy that kind of exploration, MasalaMonk’s article on maple syrup vs sugar is an interesting read and can help you choose toppings that match your taste and goals.

Even if you never change what you pour on top, it’s nice to understand why some sweeteners taste richer, why some feel “sharper,” and how those flavors play with fruit or peanut butter.


Make-ahead waffles without milk: storing and reheating without losing crispness

Waffles are one of the best make-ahead breakfasts because they reheat well—if you store them properly.

Portrait guide showing waffles cooling on a wire rack with a tray and freezer bag nearby, with text overlay “Freeze & Reheat for Crispness” and steps “Cool on rack (no stacking) • Freeze flat, then bag • Reheat: toaster/oven,” plus MasalaMonk.com in the footer.
Make-ahead waffles without milk stay crisp when you cool them on a rack first, freeze them flat, and reheat with dry heat (toaster or oven) instead of the microwave.

Cooling first (so they don’t steam themselves soft)

Let waffles cool on a rack before refrigerating or freezing. If you store them hot, steam gets trapped, moisture condenses, and the crust softens.

Fridge vs freezer

For short-term plans, the fridge works. For longer storage, the freezer is better.

If you want general cold storage guidance, FoodSafety.gov provides useful references in their cold food storage charts. For a broader food safety overview on refrigeration, the USDA FSIS page on refrigeration and food safety is a straightforward resource. If you like seeing a clear chart for storage timing, the FDA’s refrigerator and freezer storage chart is another widely used reference.

Reheating for a crunchy waffle finish

To bring waffles back to life:

  • Toaster: fast and crisp, especially for standard-sized waffles
  • Oven: best for batches; place waffles on a rack so air circulates
  • Air fryer: great for quick crisping with even heat

No matter which method you choose, airflow and heat restore crispness. Stacking and microwaving, by contrast, tend to soften waffles.

Also Read: Double Chocolate Chip Cookies – Easy Recipe with 7 Variations


Troubleshooting: when waffles without milk don’t behave

Even a dependable waffle recipe without milk can occasionally surprise you. Instead of guessing, use these practical fixes.

Portrait troubleshooting guide showing a bowl of waffle batter with a whisk, a small dish of baking powder, and a batter-smeared spatula on a dark green surface, with text overlay “Dense Waffles? 3 Fixes” listing don’t overmix, check fresh baking powder, and rest batter 10 minutes, plus MasalaMonk.com in the footer.
If waffles without milk feel dense, keep mixing gentle (small lumps are fine), use fresh baking powder, and let the batter rest so it hydrates and lifts properly.

Problem: waffles are dense

  • Your baking powder may be old.
  • The batter may be overmixed.
  • The iron might not be hot enough.

Try mixing more gently, resting the batter, and cooking fully until deep golden.

Problem: waffles are pale

  • Preheat longer.
  • Cook longer.
  • If using water, consider adding a touch more sugar (even a teaspoon) to help browning.
Portrait comparison guide showing two waffles side by side on a dark green background—one pale and one deep golden—with text overlay “Color = Crispness” explaining pale waffles stay soft while deep golden waffles get crisp edges, plus MasalaMonk.com in the footer.
If waffles without milk keep turning soft, cook them deeper golden—color is the quickest signal that the crust has actually crisped up.

Problem: waffles soften quickly

This is almost always steam. Use the rack-in-the-oven method from the Epicurious crispy waffle guide. Avoid stacking until waffles have cooled.

Problem: vegan waffles feel gummy

Make sure your flax mixture has time to gel (the process described in Cookie and Kate’s flax egg method helps here). Also, cook vegan waffles a bit longer and let them crisp on a rack rather than stacking.


Serving ideas that keep breakfast interesting

A waffle recipe without milk is a base. The fun comes from how you serve it. Here are a few directions that keep things fresh:

  • Classic and simple: syrup, fruit, and a pinch of salt to sharpen sweetness
  • Peanut butter waffles: peanut butter mixed into batter + banana slices
  • Waffles and peanut butter: peanut butter on top + berries + chocolate drizzle
  • Fruit-forward: cranberry-orange sauce or spiced fruit compote
  • Brunch spread: waffles + pancakes + coffee-style drink

If you want to build an easy “choose-your-own” breakfast table, it helps to offer one more main besides waffles. MasalaMonk’s almond flour pancakes are a good contrast if you want something different from classic flour-based batters. For a more playful weekend option, blueberry pancakes add variety and feel festive without much extra work.

And if you like a warm, cozy drink with your waffles—especially when you’re leaning into cinnamon, vanilla, or fruit—MasalaMonk’s healthy pumpkin spice latte fits the mood nicely.


The big picture: one base batter, many waffle styles

After you’ve made this a few times, the recipe stops feeling like a workaround and starts feeling like your go-to. The same waffle recipe without milk can lean classic with soy milk, softer and sweet with oat milk, or wonderfully straightforward with water when that’s all you have.

From there, the variations almost build themselves. Swap in plant milk and a dairy-free fat, and it becomes dairy free waffles that still taste familiar. Trade the eggs for a flax-based option, and vegan waffle batter turns into waffles without milk and without eggs—still golden, still satisfying.

Even the flour can shift without changing the whole method. Oat flour waffles (and oatmeal flour waffles) fit right into the same rhythm with a simple swap and a quick consistency check. Meanwhile, crispness becomes predictable once airflow is part of the routine—no stacking, no steam, just a crunchy waffle that holds its texture while the next batch cooks.

Boxed batter fits too. Waffle mix without milk works with the same logic, and it’s easy to keep a few topping directions ready—peanut butter waffles, waffles and peanut butter with fruit, chocolate drizzle, or bright sauces—so breakfast never feels repetitive.

Most importantly, milk stops being a gatekeeper. Waffles happen whenever you want them.

Also Read: Peanut Butter Cookies (Classic Recipe & 3 Variations)

FAQs about Waffle Recipe Without Milk

1) Can I make a waffle recipe without milk and still get crispy waffles?

Yes. A waffle recipe without milk can turn out crisp on the outside and fluffy in the middle as long as your waffle iron is fully preheated, the batter has enough fat, and the waffles are cooked until deeply golden rather than pale.

2) What’s the easiest no milk waffle recipe substitution if I’m out of everything?

If you have no milk substitutes, you can use water in a no milk waffle recipe. Even so, expect a slightly more neutral flavor, so toppings like fruit, syrup, or nut butter can make the waffles taste more rounded.

3) How do I make waffle batter without milk taste less “plain”?

To add more flavor to waffle batter without milk, use vanilla, a pinch of salt, and a bit of sugar for balance. Additionally, using plant milk instead of water usually brings a softer sweetness and better browning.

4) Which milk substitute works best for waffles without milk?

Generally, unsweetened soy milk gives the most “classic” structure for waffles without milk. Meanwhile, oat milk often browns nicely and tastes mild, while almond milk can make a lighter, more delicate waffle.

5) Can I use waffle mix without milk?

Absolutely. Waffle mix without milk works well with plant milk substitutes or water. However, if you use water, adding a little oil often helps the waffles brown better and stay crisp longer.

6) How do I fix thick waffle batter without milk?

If waffle batter without milk is too thick, stir in extra liquid one tablespoon at a time until it becomes thick-but-pourable. Afterward, let the batter rest briefly again so it hydrates evenly.

7) How do I fix thin waffle batter without milk?

If the batter seems too thin, mix in a small amount of flour, then rest the batter for a few minutes. As it sits, the flour absorbs moisture, which helps waffles cook up thicker and less fragile.

8) Why are my waffles without milk turning soft after cooking?

Most often, it’s trapped steam. Instead of stacking waffles, place them in a single layer so air can circulate. Otherwise, the crust softens quickly even if the waffle was crisp at first.

9) Can I make vegan waffle batter without milk and without eggs?

Yes. Vegan waffle batter without milk typically uses a plant milk plus an egg replacement like flax or chia. As a result, you can still make vegan waffles that are tender inside and crisp outside.

10) Are eggless waffles the same as vegan waffles?

Not always. Eggless waffles remove eggs but may still include dairy ingredients. In contrast, a vegan waffle recipe removes both eggs and dairy, meaning it’s waffles without milk and without eggs.

11) How do I stop vegan waffles without milk from feeling gummy?

First, let the egg replacer mixture thicken properly before mixing the batter. Next, cook the waffles a little longer until they release easily. Finally, let them cool briefly in a single layer so steam doesn’t soften the crust.

12) Can I make oat flour waffles without milk?

Yes. Oat flour waffles without milk work well with plant milk or water. Still, oat flour absorbs more liquid, so you may need a small splash of extra liquid after the batter rests.

13) Is “oatmeal flour waffles without milk” different from oat flour waffles?

Usually, no. “Oatmeal flour” often refers to oat flour made by blending oats. Therefore, oatmeal flour waffles without milk can be made using the same method as oat flour waffles without milk.

14) Can I make peanut butter waffles with a waffle recipe without milk?

Definitely. Peanut butter waffles can be made by mixing peanut butter into the wet ingredients, then cooking as usual. Alternatively, you can keep the batter plain and top the waffles with peanut butter for a similar flavor.

15) What’s the best way to do waffles and peanut butter so it doesn’t feel heavy?

Try spreading a thin layer of peanut butter on a hot waffle so it melts, then add fruit like banana or berries. That combination keeps waffles and peanut butter balanced rather than overly rich.

16) Why are my waffles without milk coming out pale?

Typically, the iron isn’t hot enough or the waffles aren’t cooked long enough. Also, if you used water instead of plant milk, browning can be lighter, so cooking a bit longer helps.

17) Can I make dairy free waffles with the same waffle recipe without milk?

Yes. A waffle recipe without milk becomes dairy free waffles when you use plant milk (or water) and choose a dairy-free fat. Consequently, the same base recipe can work for many dietary needs.

18) How far ahead can I make waffles without milk?

You can make waffles without milk ahead of time and store them for later. For best texture, cool them fully before storing so they don’t trap steam and soften.

19) What’s the best way to reheat a waffle recipe without milk?

To bring back crispness, reheat waffles in a toaster or oven rather than the microwave. In particular, dry heat restores the crust better than steaming.

20) Do waffles without milk taste different from regular waffles?

Sometimes slightly, depending on the substitute. Plant milk versions usually taste very close to classic waffles, while water-based waffles can taste lighter and more neutral—making toppings even more important for flavor.