Posted on Leave a comment

Lobster Bisque Recipe: Easy Creamy Homemade Lobster Bisque With Lobster Tails

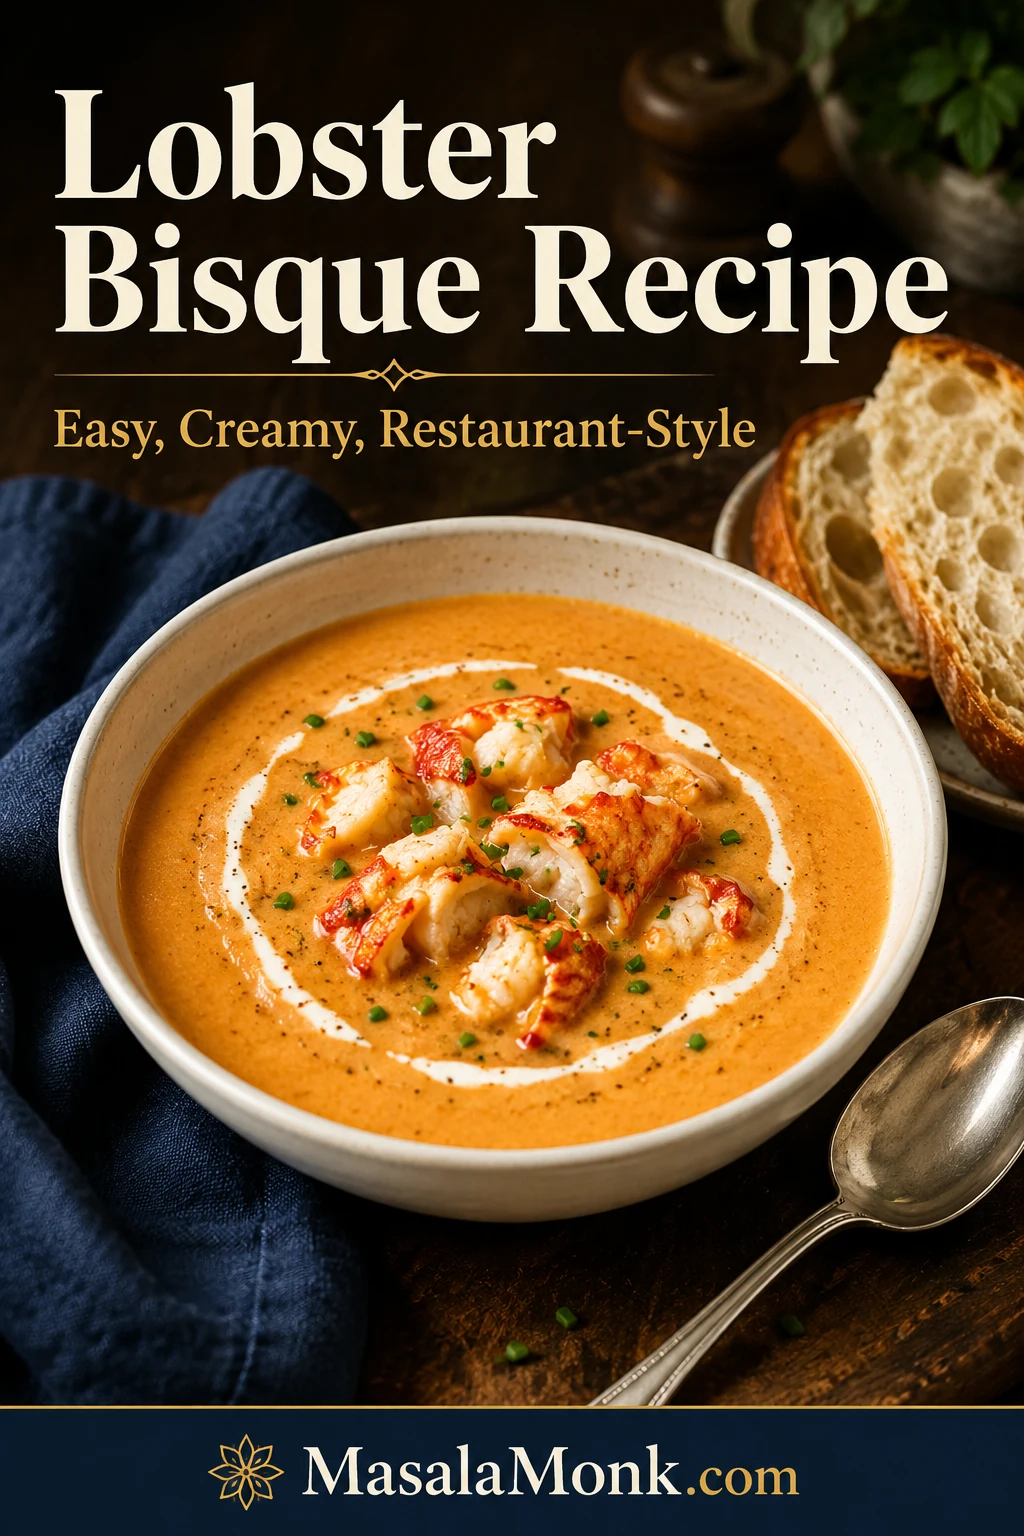
Creamy lobster bisque in a white bowl with lobster pieces, chives, cream swirl, crusty bread, spoon, and navy linen.

Lobster bisque feels intimidating for one honest reason: lobster is expensive, and the soup shows every shortcut. Weak stock tastes flat. Boiled cream can turn grainy. Lobster meat that sits in the pot too long becomes rubbery instead of sweet and tender.

This version is built to avoid those problems. It gives you a creamy, silky, restaurant-style bowl using lobster tails, seafood stock, aromatics, tomato paste, dry sherry or white wine, and cream. You can keep it simple with clean-tasting seafood stock, or take the fuller route and simmer the lobster shells into that same stock for a sweeter, more layered base.

It is still an easy lobster bisque built around lobster tails, but when you have an extra 25 minutes, the shells give the stock that deeper restaurant-style flavor.

The goal is simple: make the bowl taste like you used the expensive, old-school method, while giving you a calmer lobster-tail path that is much harder to ruin.

You do not need live lobster. There is no chef-only technique hiding in the fine print. You just need to treat the lobster with care, let the shells do some of the flavor work, and keep the cream stage low and steady instead of boiling hard.

It is the kind of soup that makes dinner feel planned and generous, whether you serve it as a holiday starter, a date-night bowl, or a quiet weekend dinner with bread on the side.

Quick Answer: How to Make Lobster Bisque

To make lobster bisque, briefly poach lobster tails in seafood stock just until the meat turns opaque. Remove the meat, save the shells, and use that same stock as the flavor base. For deeper flavor, simmer the shells with aromatics, tomato paste, herbs, and wine if using, then strain and measure the stock.

In a heavy pot, cook onion, celery, carrot, garlic, and tomato paste in butter, add flour, deglaze with dry sherry or white wine, pour in the prepared stock, and simmer until the vegetables are tender. Blend, strain if you want a polished finish, stir in cream over low heat, adjust the base, and add the lobster meat right before serving.

The whole method is about restraint: build flavor from the shells, then protect the cream and lobster at the finish.

For most home cooks, the best balance is the middle path: lobster tails poached in seafood stock, shells simmered back into that same stock, then cream and lobster added only once the base is ready.

Ready to cook? Go straight to the recipe card, or compare the easy, better, and best lobster bisque methods before you start.

This visual keeps the lobster bisque order simple: cook the tails briefly, use the shells for flavor, smooth the base, and protect the cream and lobster at the finish.
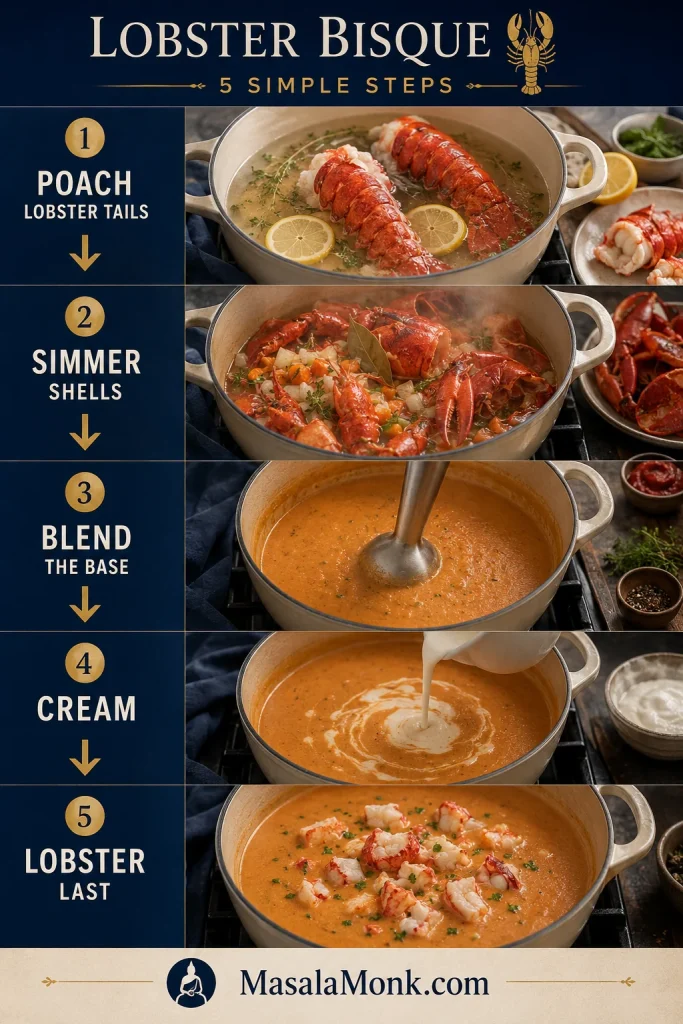
Vertical step-by-step guide showing lobster tails poaching, shells simmering, bisque blending, cream being added, and lobster added last.
First poach the tails, then simmer the shells, blend the base, add cream, and warm the lobster last; that order protects both flavor and texture.

Lobster Bisque at a Glance

Main lobster choiceLobster tails
Servings4 generous bowls or 6 appetizer servings
Finished amountAbout 5½ to 6 cups / 1.3 to 1.4 liters
Total timeAbout 1 hour 20 minutes to 1 hour 30 minutes
Texture goalSmooth, creamy, silky, lightly spoon-coating
Recommended pathPoach tails, simmer shells into the same stock, then finish with cream and lobster
Fullest stock optionSeafood stock simmered with lobster shells
Shortcut stock optionClean-tasting seafood or lobster stock
Main thickenerFlour roux, with gluten-free options below
Classic alcohol optionDry sherry, dry white wine, or a little brandy
No-alcohol optionExtra seafood stock plus lemon juice or sherry vinegar
Make-ahead tipMake the base ahead; add cream and lobster before serving
Freezer tipFreeze the base before adding cream and lobster

As a serving guide, a generous bowl is about 1⅓ to 1½ cups. An appetizer serving is closer to 1 cup.

Lobster Bisque Recipe Card

Creamy Lobster Bisque With Lobster Tails

This creamy lobster bisque is made with lobster tails, seafood stock, aromatics, tomato paste, dry sherry or white wine, and cream. The recommended path is simple: poach the lobster tails in stock, simmer the shells into that same stock for deeper flavor, build the bisque base, blend, strain, add cream, adjust the base, and warm the lobster only right before serving.

Prep Time20 minutes
Cook Time1 hour to 1 hour 10 minutes
Total Time1 hour 20 minutes to 1 hour 30 minutes
Servings4 generous bowls or 6 appetizer servings
YieldAbout 5½ to 6 cups / 1.3 to 1.4 liters

Main path: this card uses the shell-enhanced method because it gives the richest flavor without requiring whole live lobsters. For shortcuts, cooked lobster, no-alcohol swaps, and gluten-free thickening, see the quick notes after the card.

Read this before starting: the same 4 cups of stock are used first to poach the lobster, then simmered with the shells, then measured again for the bisque. You are not starting with 8 cups of stock.
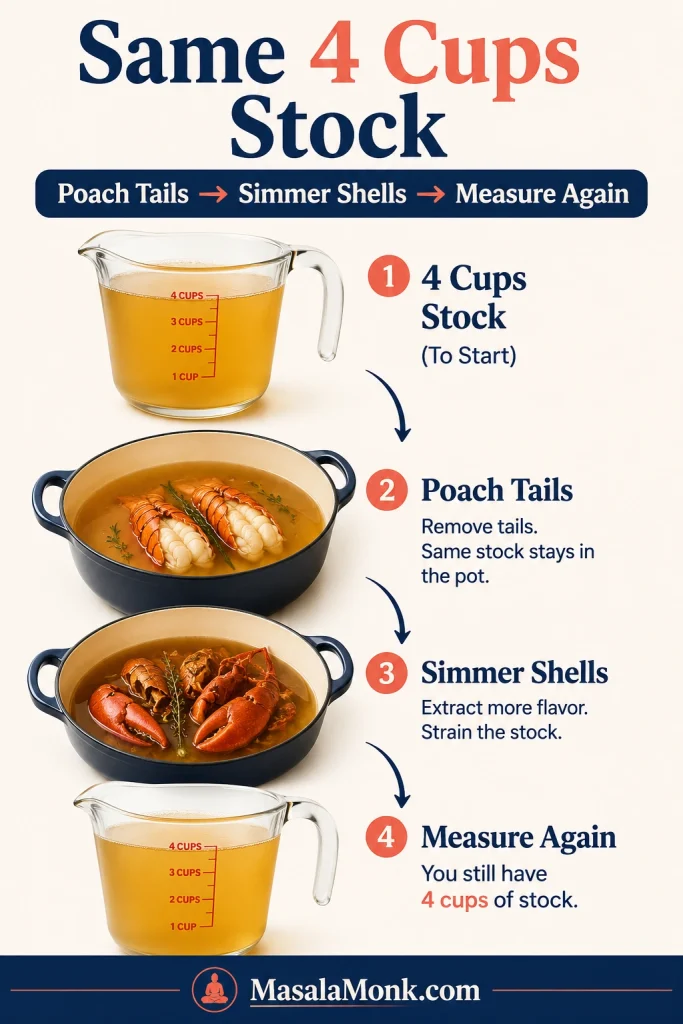
Infographic showing one measuring jug of lobster stock used to poach tails, simmer shells, and measure again for lobster bisque.
The same 4 cups of stock do three jobs: poach the lobster, pull flavor from the shells, and become the measured base for the bisque.

Ingredients

For the lobster and shell-enhanced stock
  • 4 lobster tails, 4 to 5 oz each / 115 to 140 g each
  • 4 cups clean-tasting seafood stock or lobster stock / 960 ml, preferably low-sodium
  • 1 tablespoon olive oil or butter
  • ½ small onion, roughly chopped
  • 1 celery rib, roughly chopped
  • 1 small carrot, roughly chopped
  • 2 garlic cloves, smashed
  • 1 tablespoon tomato paste
  • ½ cup dry white wine / 120 ml, optional for the shell stock
  • Up to 1 cup water or extra seafood stock / 240 ml, only if needed to top up after simmering
  • 1 bay leaf
  • 2 sprigs thyme, or ½ teaspoon dried thyme
For the bisque base
  • 4 tablespoons unsalted butter / 56 g
  • 1 medium onion, finely chopped / about 150 g
  • 2 celery ribs, finely chopped / about 100 g
  • 1 medium carrot, finely chopped / about 75 g
  • 3 garlic cloves, minced
  • 2 tablespoons tomato paste / about 32 g, or 3 tablespoons for deeper color
  • 3 tablespoons all-purpose flour / about 24 g
  • ½ cup dry white wine / 120 ml
  • ¼ cup dry sherry / 60 ml
  • 4 cups prepared lobster-shell stock from above / 960 ml
  • ½ teaspoon sweet paprika
  • Pinch of cayenne pepper, optional
  • ½ teaspoon dried thyme, or 1 teaspoon fresh thyme leaves
  • ¾ to 1 cup heavy cream / 180 to 240 ml
  • 1 teaspoon lemon juice or sherry vinegar, plus more to taste
  • Salt and black pepper, to taste
  • 1 tablespoon chopped chives, parsley, or tarragon, for finishing

Stock note: after simmering and straining, measure the liquid again. You need 4 cups / 960 ml for the bisque. If you are short, top it up with water or more seafood stock.

Instructions

Lobster and shell stock
  1. Prepare the lobster tails. Use kitchen shears to cut along the top of each shell. Leave the meat inside for the brief poach; you will remove it after cooking.
  2. Poach the lobster in the stock. Bring the 4 cups seafood or lobster stock to a low simmer. Add the lobster tails and cook for 3 to 5 minutes, depending on size, just until the meat turns opaque. Remove the tails from the stock. When cool enough to handle, pull out the meat, chop it into bite-size pieces, and set it aside. Save the shells and keep the stock.
  3. Build the shell stock. In a pot, heat 1 tablespoon olive oil or butter. Add the lobster shells, rough-chopped onion, celery, carrot, garlic, and tomato paste. Cook for 5 to 7 minutes, stirring often, until the shells smell fragrant and the tomato paste darkens slightly. Add wine if using, then pour in the lobster-poaching stock. Then add bay leaf and thyme. Simmer for 25 to 35 minutes.
  4. Strain and measure the stock. Pass the shell stock through a fine mesh strainer. Measure the liquid. You need 4 cups / 960 ml for the bisque. If you have less, top it up with water or seafood stock. Extra stock can be saved for thinning the soup or reheating leftovers.
Build and smooth the bisque base
  1. Start the bisque base. In a heavy Dutch oven or soup pot, melt the butter over medium heat. Add finely chopped onion, celery, and carrot. Cook for 6 to 8 minutes, until softened and sweet-smelling but not browned.
  2. Build the garlic and tomato paste base. Stir in the garlic and cook for 30 seconds. Add tomato paste and cook for 2 to 3 minutes, stirring often, until it deepens from bright red to brick-red and smells savory.
  3. Make the roux. Sprinkle in the flour and stir for 1 to 2 minutes. The mixture should look thick and pasty, like the vegetables are coated in a soft roux. If it looks dry, lower the heat and keep stirring.
  4. Deglaze. Slowly pour in the white wine and sherry, scraping the bottom of the pot. Let it bubble for 2 to 3 minutes so the sharp alcohol smell softens.
  5. Pour in stock and simmer. Add 4 cups prepared stock, paprika, cayenne if using, thyme, and a small pinch of salt and pepper. Bring to a steady simmer and cook for 18 to 22 minutes, until the vegetables are very tender and the broth tastes full. Salt gradually because seafood stock, clam juice, and lobster base can be salty.
  6. Blend. Carefully blend the soup until smooth using an immersion blender or countertop blender. If using a countertop blender, work in batches and vent the lid slightly so steam can escape.
  7. Strain for a silkier texture. For the most polished finish, pass the blended soup through a fine mesh strainer into a clean pot. Press with a ladle for liquid, then leave the gritty bits behind.
Finish with cream and lobster
  1. Add cream over low heat. Set the pot over low heat. Stir in ¾ cup cream. Add more cream if you want a richer bowl. The soup should look smooth and shiny, with steam rising but no hard bubbling.
  2. Finish the bisque base. Taste and adjust salt, pepper, lemon juice, or sherry vinegar. The finished base should lightly coat a spoon, smell sweet and buttery, and taste balanced. If it tastes heavy, add lemon juice or sherry vinegar. A thin base needs a little more simmering before the lobster goes in. Flat flavor usually means salt should be checked first.
  3. Add the lobster and serve. Stir in the chopped lobster meat and warm it for 1 to 2 minutes. For the safest texture, divide the lobster among bowls and ladle the hot bisque over it. Garnish with chives, parsley, or tarragon and serve hot, not boiling.

Shortcuts, Swaps, and Special Cases

Use these notes when real life does not match the main path exactly: no shells, cooked lobster, no wine, gluten-free needs, or making the base ahead. The recipe is forgiving as long as you protect the stock, cream, and lobster texture.

  • Easy version: poach the lobster in seafood stock, skip the shell-simmering step, and use that stock directly in the bisque.
  • Flavor upgrade: poach the lobster in stock, then simmer the shells in that same stock before making the soup.
  • Cooked lobster meat: skip poaching, use 4 cups seafood stock, and add the cooked lobster only right before serving.
  • Without lobster shells: use lobster stock if possible, or strengthen seafood stock with ¼ to ½ cup clam juice or a small spoonful of lobster base. Add salty bases carefully and taste before adding more salt.
  • No alcohol: replace the ½ cup wine and ¼ cup sherry in the bisque base with ¾ cup extra seafood stock. If you are also skipping the optional wine in the shell stock, use another ½ cup stock there too. Finish with lemon juice or sherry vinegar for brightness.
  • Gluten-free: skip the flour. After blending, whisk 1½ tablespoons cornstarch with 2 tablespoons cold water, stir it into the warm soup, and simmer for 1 to 2 minutes. You can also simmer 2 tablespoons uncooked white rice in the stock until tender, then blend it into the base.
  • Dairy-free: use cashew cream for the most neutral finish. Add it near the end over low heat, just as you would heavy cream.
  • Freezing: freeze the base before adding cream and lobster for the smoothest texture.

Back to top

Why This Lobster Bisque Works

The whole recipe is built around one idea: poach the lobster carefully, use the shells to deepen the stock if you can, blend the base smooth, add cream over low heat, and warm the lobster only right before serving. That path gives you a rich, polished bowl without buying whole live lobsters or guessing through the most expensive part of the process.

Method board with lobster tails, saved shells, golden stock, cream, and a finished bowl of lobster bisque.
Lobster tails keep the method approachable, while the saved shells add the deeper stock flavor that makes the bisque taste more restaurant-style.

The tails give you tender meat for the finished bowl, while the shells turn ordinary seafood stock into something sweeter and more seafood-rich. The aromatics soften in butter until sweet. Tomato paste cooks until it turns brick-red, which gives the soup color and savory depth. Wine and sherry brighten the base so the cream does not make everything taste heavy.

The shell step is the one shortcut I would not skip when I have the shells in front of me. It adds more flavor than extra cream ever will.

The final texture comes from three small choices: simmering the vegetables until tender, blending the base thoroughly, and straining if you want a smoother finish. Cream goes in after blending, and the lobster goes in right before serving. That is the quiet trick: the lobster is the prize, so do not make it do extra work in the pot.

What Is Lobster Bisque?

Lobster bisque is the smooth, creamy side of seafood soup: less chunky than chowder, more polished than stew, and built around shellfish stock, aromatics, tomato paste, wine or sherry, and cream. When it is done well, it tastes rich but not heavy, sweet with lobster but not fishy, and smooth enough to feel special.

Thickness is not the real goal. Balance is: a full seafood base, a little sweetness from the aromatics and tomato paste, enough acidity to wake everything up, and cream that makes the soup plush without muting the lobster.

Equipment You Need

You do not need a restaurant kitchen here. A heavy pot builds flavor, a blender smooths the base, and a fine mesh strainer gives the soup its polished finish.

  • Heavy Dutch oven or soup pot: for sautéing, simmering, and finishing the soup.
  • Kitchen shears: for cutting open lobster shells cleanly.
  • Cutting board and sharp knife: for chopping aromatics and lobster meat.
  • Blender or immersion blender: for smoothing the base.
  • Fine mesh strainer: for a silkier, more polished texture.
  • Whisk: for working flour into the base without clumps.
  • Ladle and measuring cup: for straining, measuring, and adjusting stock.

The fine mesh strainer is not mandatory, but it is the difference between a rustic homemade soup and a smooth bisque. Use it if you have one. If you use a countertop blender, blend hot soup in batches and vent the lid slightly so steam can escape.

Ingredients for Lobster Bisque

Once the method makes sense, the ingredient list feels much less fancy. Each item is there to build sweetness, body, brightness, or shellfish depth.
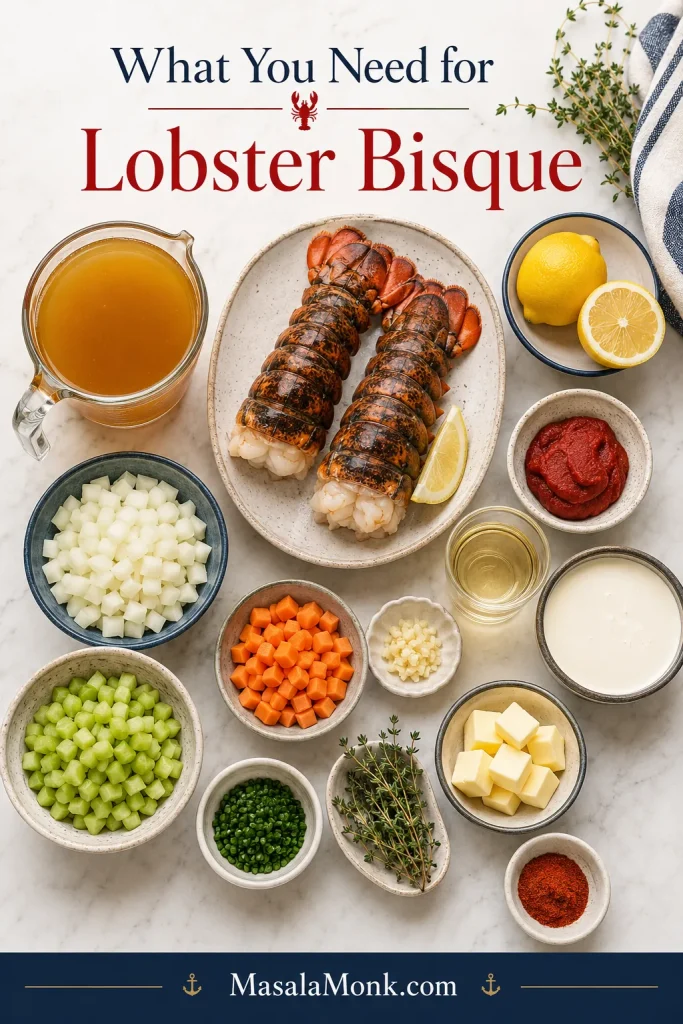
Overhead ingredient board with lobster tails, seafood stock, onion, celery, carrot, garlic, tomato paste, cream, wine, herbs, lemon, and butter.
Once the lobster tails, seafood stock, aromatics, tomato paste, cream, herbs, and lemon are laid out, the recipe feels organized instead of intimidating.

Lobster Tails

For homemade bisque, lobster tails are the most practical choice. They are easier to find than whole live lobsters, simpler to cook, and still give you shells for stock. Four tails, about 4 to 5 oz each, give enough lobster for 4 generous bowls or 6 appetizer portions.

Frozen lobster tails work well. Thaw them overnight in the refrigerator, or place them in a sealed bag in cold water if you need a faster thaw. Pat them dry before cooking so they do not water down the base.

If you bought extra lobster meat and want a colder, buttery seafood-shack style meal later, save some for these lobster rolls with extra lobster meat.

Lobster Shells or Seafood Stock

The shells are where much of the deep lobster flavor lives. You can make a solid soup with store-bought seafood stock, but simmering the tail shells in that stock makes the base taste fuller and more special.

Taste the stock before using it. If it tastes harsh, stale, metallic, or aggressively salty, it will show up in the finished soup. Lobster bisque does not hide bad stock well.

Without shells, use the cleanest seafood or lobster stock you can find. Clam juice can help in a pinch, but it can be salty, so use it carefully. Chicken stock is an emergency backup, not the ideal choice, because it does not give the same seafood depth.

Onion, Celery, Carrot, and Garlic

These aromatics create the savory foundation. Chop them finely for the bisque itself so they soften quickly and blend smoothly. For the shell stock, rough chopping is fine because everything gets strained.

Tomato Paste

This paste is not there to make the bisque taste like tomato soup. Once it cooks to a brick-red color, it gives the soup warmth, sweetness, color, and a savory base note.

Flour or Thickener

You only need a small amount of flour. It gives the soup body without turning it into gravy. For a gluten-free version, cornstarch slurry is the quickest fix, while rice gives a softer, old-school texture once blended.

Sherry, Wine, or Brandy

Dry sherry is classic here. A dry white wine is easier to find and works beautifully. Brandy or cognac can add a deeper special-occasion note. Use dry alcohol, not sweet dessert-style wine.

Heavy Cream

Cream should make the bisque feel plush, not dull. Add it after blending so the lobster and stock still stay in front.

Herbs and Seasoning

Thyme, tarragon, chives, parsley, paprika, and a tiny pinch of cayenne all work well with lobster. Keep the seasoning warm and supportive. The lobster should still be the main flavor.

Best Lobster to Use

You have more options than you might think. The right choice depends on how much work you want to do, how much shellfish depth you want in the stock, and whether you are starting with raw or cooked meat.

Lobster optionWorks?Use it for
Raw lobster tailsYesMost practical default for homemade bisque
Frozen lobster tailsYesThaw first, then cook briefly
Cooked lobster meatYesAdd near serving so it does not overcook
Whole lobsterYesDeepest flavor, but more work
Lobster shells onlyYesUse for stock; add separate cooked lobster if serving
LangostinoYesBudget-friendly variation or pasta add-in
Shrimp or crabYesUseful variation, but not classic lobster bisque

If you are buying lobster tails specifically for this recipe, look for tails that smell clean and mild, not fishy. Avoid tails with gray patches, strong odor, or freezer burn. For more buying context before shopping, NOAA’s American lobster guide is a helpful reference on flavor, texture, and seafood basics. Read NOAA’s American lobster seafood guide.

Choose Your Lobster Bisque Method

Use this table when you are deciding how much time, lobster flavor, and shortcut help you want. The middle path is the sweet spot for most kitchens: easy enough to manage, but deep enough to taste special.

MethodWhat you doFlavor levelUse it for
EasyPoach lobster tails in seafood stock and use that stock directlyClean and simpleWeekends, first-time bisque, simpler cooking
BetterPoach the tails, then simmer the shells in that same stockFuller and sweeterMost home cooks who want deeper flavor
BestMake a fuller lobster stock from shells, bodies, aromatics, and wineDeepest and most layeredSpecial occasions, dinner parties, holiday starters
ShortcutUse lobster base or clam juice with seafood stockStrong but salt-sensitiveWhen you need flavor fast

Most balanced path: poach the lobster tails in seafood stock, then simmer the shells in that same stock for 25 to 35 minutes. It is not much harder than the easy version, but the broth tastes much fuller.
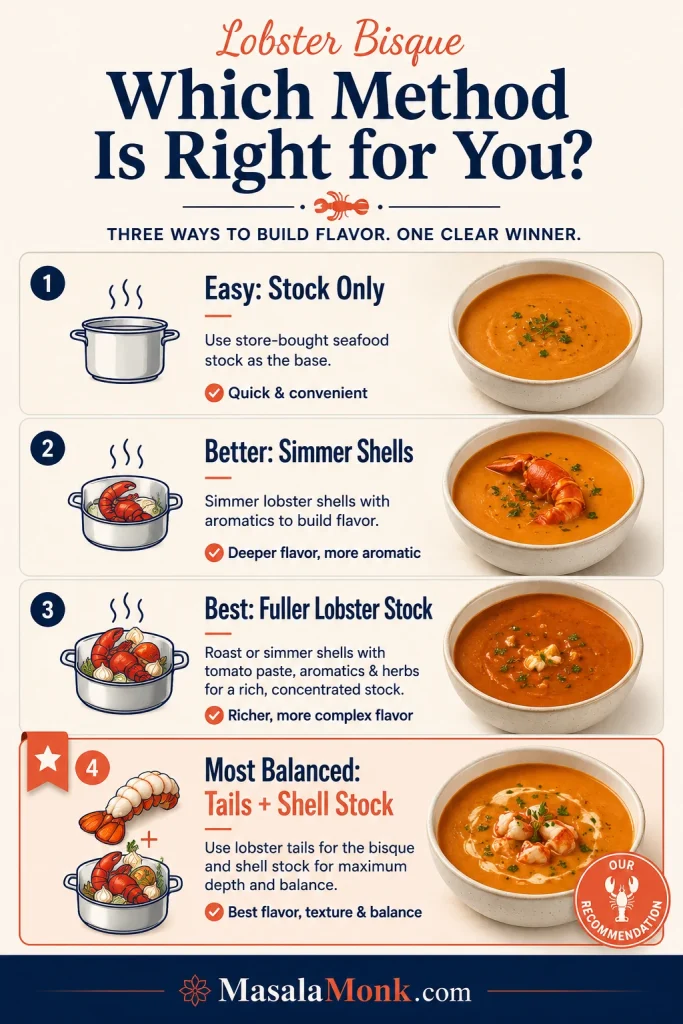
Infographic comparing easy, better, and best lobster bisque methods with stock-only, simmered shells, and fuller lobster stock options.
The middle path is the sweet spot: poach lobster tails in stock, then simmer the shells back into that stock before building the bisque.

How to Make Quick Lobster Stock From Shells

If you have lobster shells, do not throw them away. A quick shell stock turns a simple base into a much better one. This is the step where the soup starts to smell expensive.
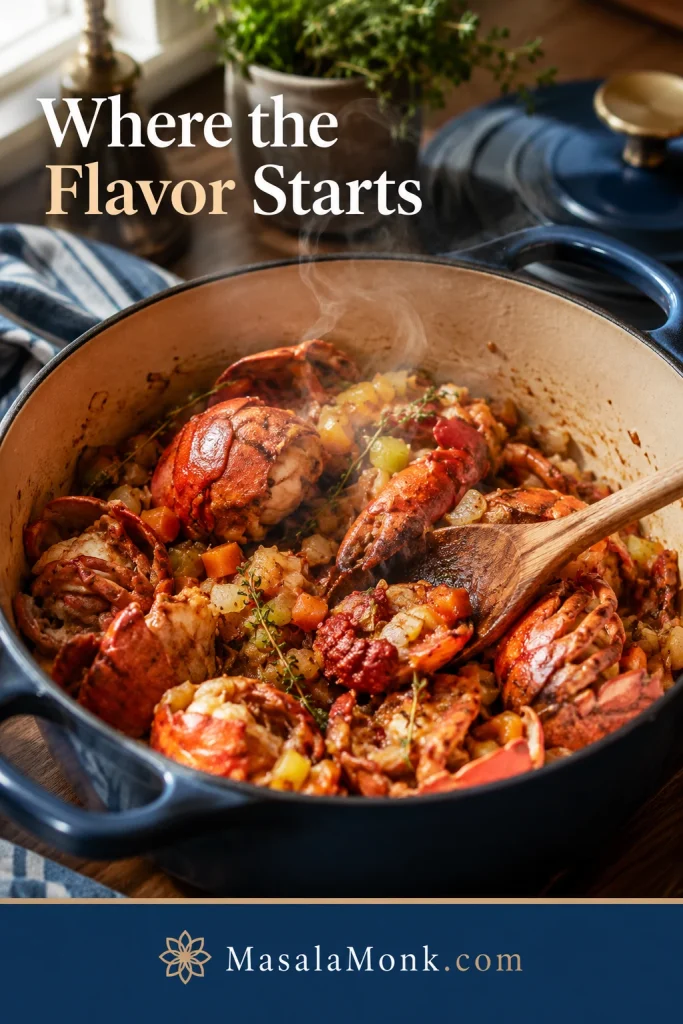
Lobster shells cooking in a pot with onion, celery, carrot, garlic, thyme, and tomato paste.
Sautéing lobster shells with aromatics and tomato paste gives the stock a sweeter, deeper base than seafood stock alone.

After poaching the lobster tails in seafood stock, save that stock. Heat a tablespoon of butter or olive oil in a pot. Add the shells and cook them for a few minutes until they smell fragrant. Then add onion, celery, carrot, garlic, and a spoonful of tomato paste. Once the paste darkens slightly, deglaze with dry white wine if using. Add the lobster-poaching stock, a bay leaf, and thyme. Simmer for 25 to 35 minutes, then strain well.
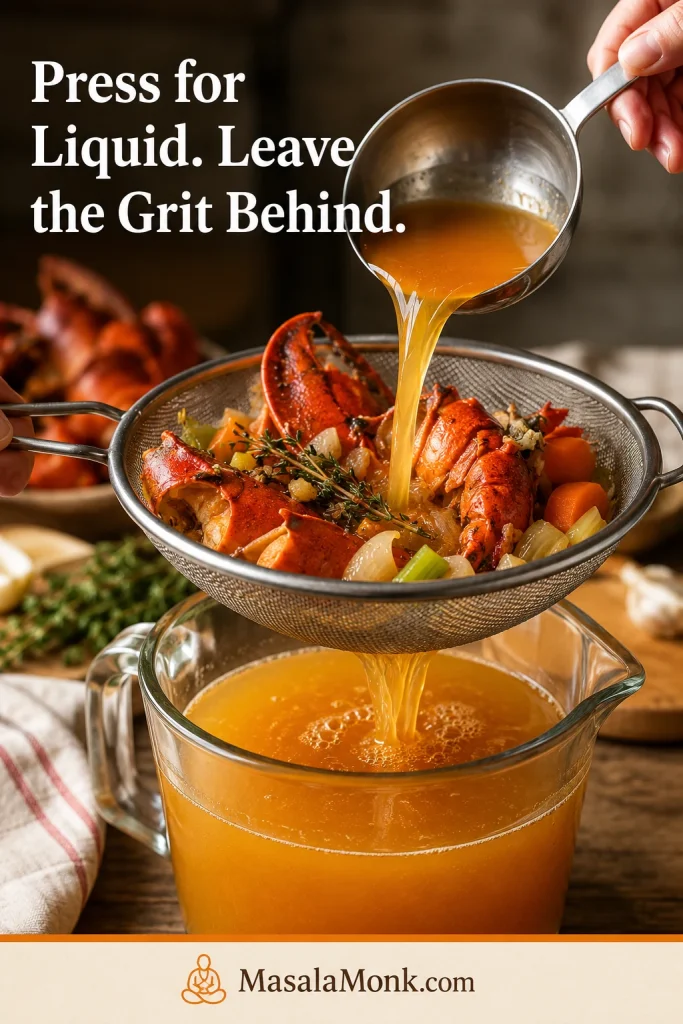
Golden lobster shell stock being strained through a fine mesh strainer with shells and vegetables left behind.
After simmering, strain for liquid rather than solids: press gently for flavor, then leave the gritty shell bits behind.

Next, measure the liquid. Use 4 cups / 960 ml for the bisque. Short on stock? Top it up with water or seafood stock. Extra stock is a bonus — save it for thinning the soup, reheating leftovers, or making a small seafood sauce.

Glass measuring jug filled with golden lobster stock exactly at the 4-cup mark, with herbs and lobster shells in the background.
Measure the strained stock before moving on, because the bisque base needs the right amount of liquid to cook and blend properly.

The simmer should be steady but not rough. A lazy bubble is enough. Press on the shells and vegetables while straining to extract the liquid, then leave the gritty bits behind.

If your stock smells sweet, buttery, and seafood-rich here, you have already done the most important flavor work. That is when the recipe starts to feel less like a gamble and more like a plan.

Success Checkpoints for Lobster Bisque

Use these checkpoints as you cook. They turn the recipe from a list of steps into something you can read with your eyes, nose, and spoon.
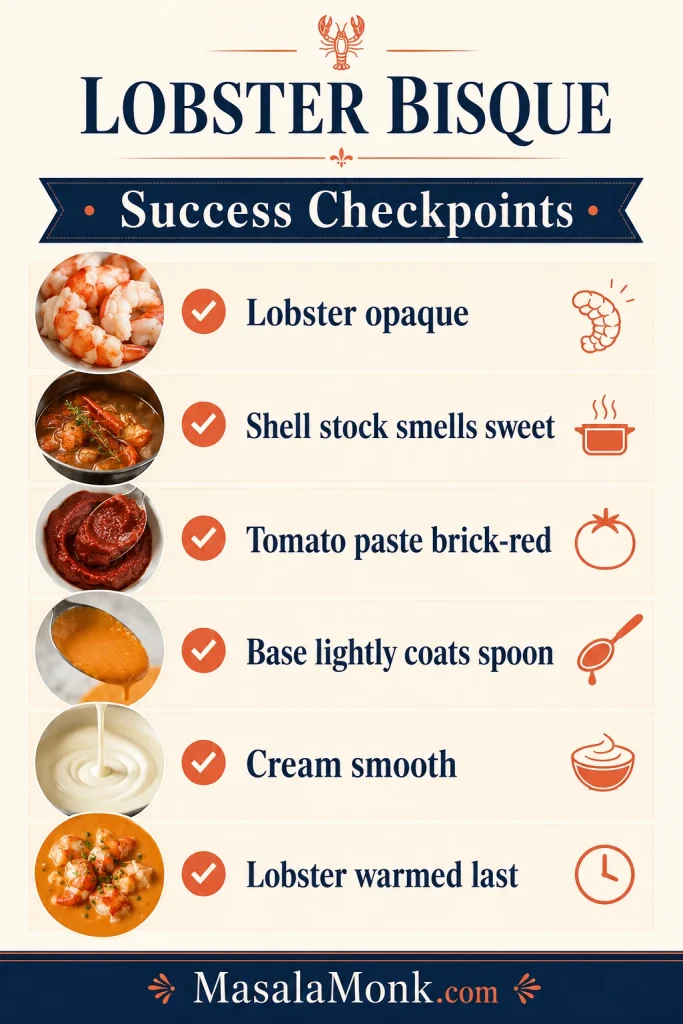
Infographic listing lobster bisque success checkpoints with small visuals for lobster, shell stock, tomato paste, spoon texture, cream, and final lobster.
Use the visual checkpoints as you cook, because color, aroma, texture, and timing matter more than the clock alone.
StageCorrect signProblem sign
Lobster poachMeat turns opaque but still looks tenderTight curl, rubbery texture, or long simmering
Shell stockSweet, buttery, seafood-rich aromaHarsh, stale, or aggressively salty smell
Tomato pasteBrick-red and savory-smellingBright red and raw-smelling
Simmered baseVegetables are very softCarrot or celery still feels firm
Blended soupSmooth and lightly spoon-coatingPasty, gritty, watery, or fibrous
Cream stageSmooth, shiny, and not boiling hardGrainy, split, or aggressively bubbling
Final lobsterWarmed through for 1 to 2 minutesLeft to simmer in the finished soup

If the soup lightly coats a spoon before the lobster goes in, the texture is already close. The lobster only needs to warm through at the finish; that restraint is what keeps it tender.

Once those signs are there, the hard part is behind you. From here, the bisque is less about effort and more about finishing it with restraint.

Before you start the detailed method, use the cook-time table below with the success checkpoints. The lobster should turn opaque and tender before it ever reaches the final bisque.

How Long to Cook Lobster Tails for Bisque

Lobster tails for bisque should be cooked briefly. The meat should turn opaque and firm up slightly, but it should not become tight or chewy.

Lobster tail sizeApproximate cook timeWhat to look for
4 oz / 115 g3 to 4 minutesOpaque meat, still tender
5 oz / 140 g4 to 5 minutesOpaque and just firm
6 oz / 170 g5 to 6 minutesCooked through but not tight
Cooked lobster meatWarm only 1 to 2 minutesDo not simmer for long

When in doubt, slightly undercook the lobster during the first step. It will warm again in the finished soup. Overcooked lobster is the main reason homemade bisque feels disappointing.
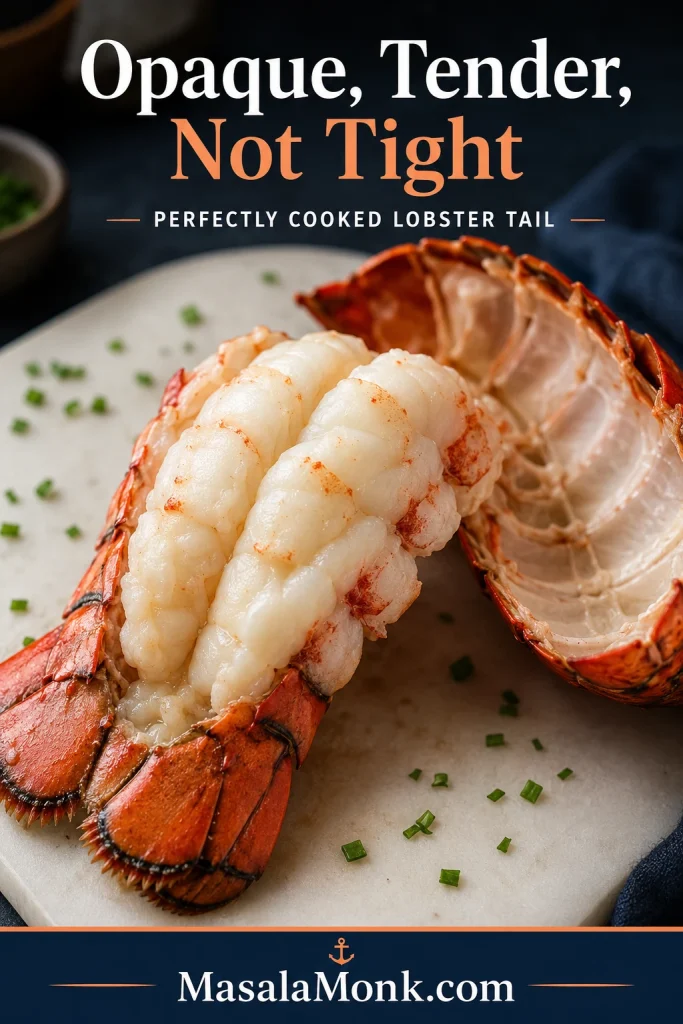
Cooked lobster tail meat beside its shell, looking pearly white, opaque, and tender on a clean plate.
Stop when the lobster meat is opaque and tender-looking; meanwhile, a tight curl usually warns that it has gone too far.

For food safety, the FDA says shrimp, lobster, and crab should be cooked until the flesh is pearly and opaque. In this recipe, that means cooking the tails briefly, then warming the chopped meat near serving instead of letting it simmer in the pot. See the FDA safe food handling guidance.

Now that the timing and doneness cues are clear, follow the step-by-step method and keep the lobster out of long simmering.

Step-by-Step Instructions

1. Prep the Lobster Tails

Cut along the top of each shell with kitchen shears. Leave the meat inside for the brief poach. The cut helps heat reach the meat and makes the meat easier to remove after cooking.
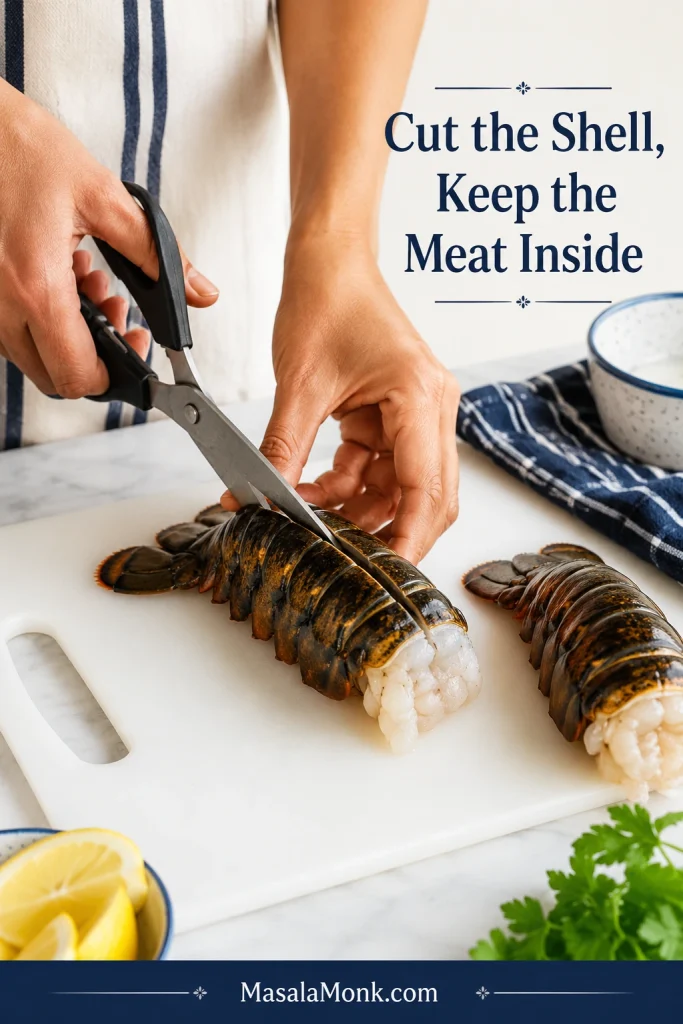
Hands using kitchen shears to cut along the top shell of raw lobster tails on a white cutting board.
Cutting along the top shell helps the lobster tail cook evenly and, later, makes the meat easier to remove without tearing.

2. Poach the Lobster Briefly

Bring the seafood stock to a low simmer, then add the tails. For most 4 to 5 oz tails, 3 to 5 minutes is enough. The meat should turn opaque, but it should not tighten into a rubbery curl. Remove the tails right away, cool them slightly, then pull out and chop the meat.

This is the moment to be conservative. The lobster does not need to be fully pampered yet; it only needs to be protected.
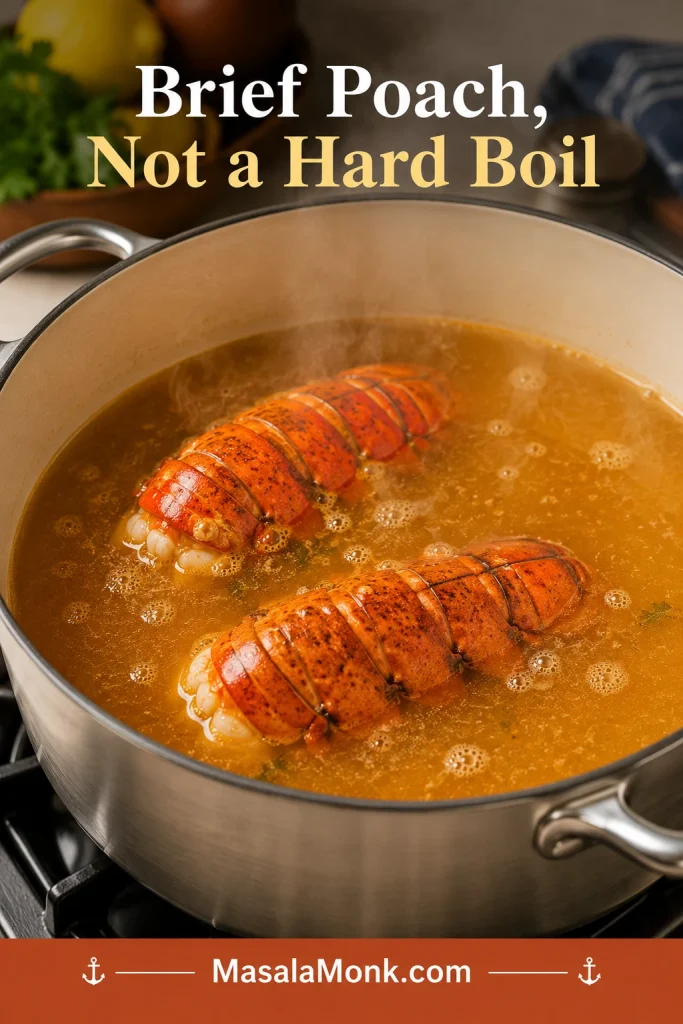
Lobster tails poaching gently in golden seafood stock inside a pot with steam and a low simmer.
Keep the poach brief and gentle; the lobster only needs to turn opaque because it warms once more in the finished bisque.

3. Separate Meat, Shells, and Stock

Save both the shells and the poaching stock. The stock already has a little lobster flavor now, and the shells can make it taste even more layered.
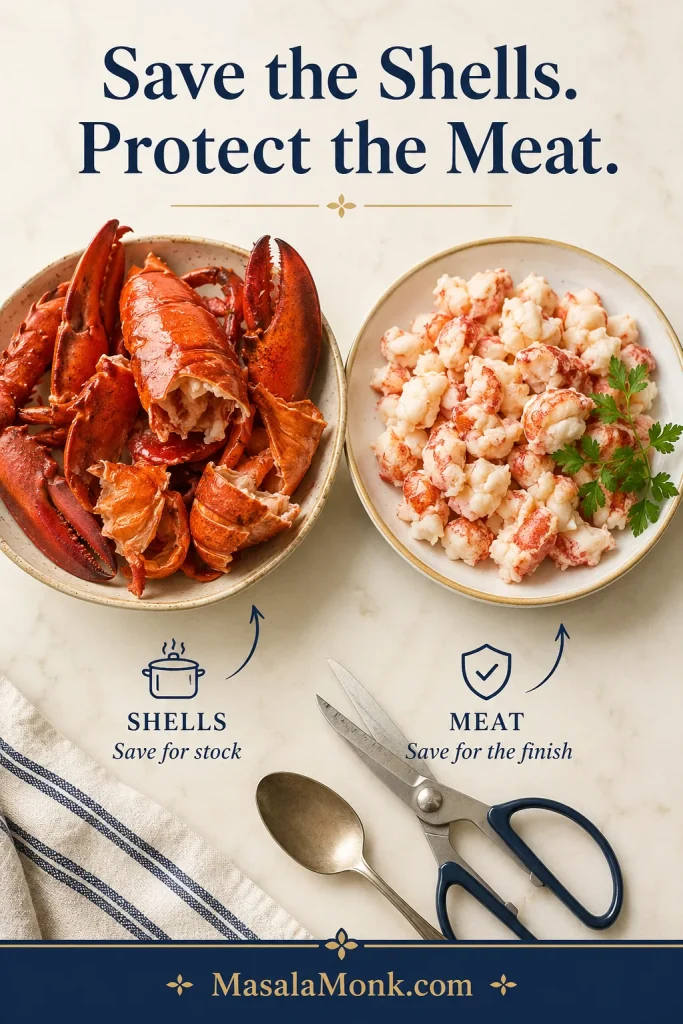
Saved lobster shells and chopped lobster meat separated into bowls with kitchen tools nearby.
Once the tails are poached, the shells go back into the stock, while the meat waits safely for the final warm-through.

4. Make the Shell-Enhanced Stock

Cook the shells with rough-chopped aromatics and tomato paste until the pot smells sweet, buttery, and seafood-rich. Add wine if using, then pour in the lobster-poaching stock. Simmer, strain, measure, and use 4 cups for the bisque.

5. Sauté the Aromatics

Melt butter in a heavy pot and add onion, celery, and carrot. Cook until the vegetables soften and smell sweet, about 6 to 8 minutes. Soft vegetables blend more smoothly and create a better base.
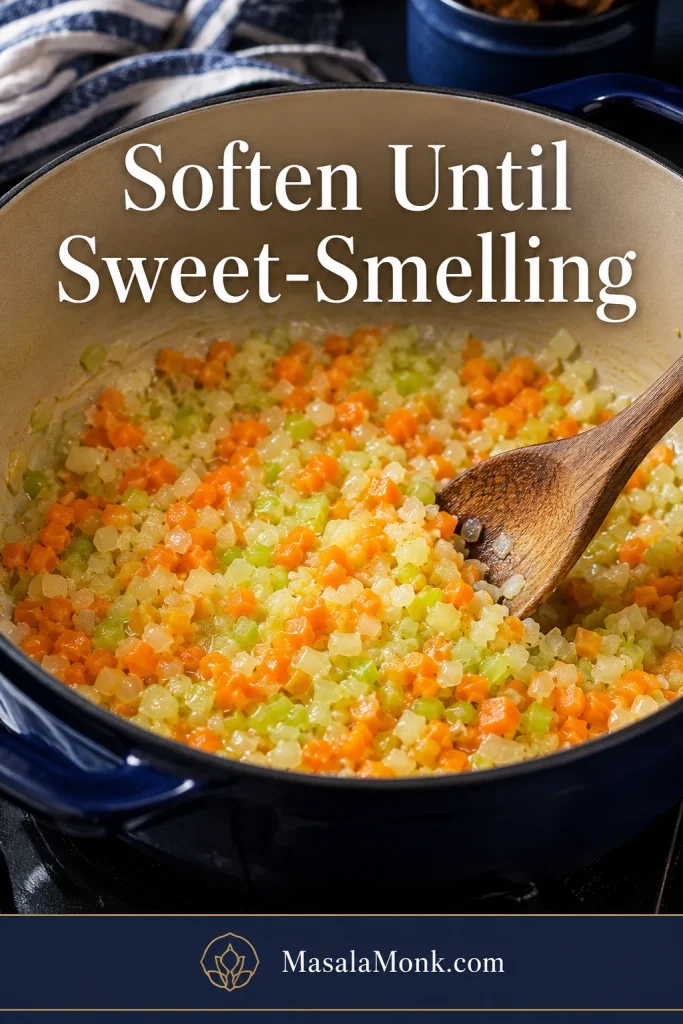
Chopped onion, celery, and carrot softening in butter inside a heavy pot.
Softened onion, celery, and carrot give the bisque a sweeter foundation and help the blended base turn smoother later.

6. Build Brick-Red Tomato Paste Flavor

Add garlic and tomato paste. Stir until the paste darkens from bright red to a deeper brick-red color. That little bit of cooking improves the color and removes raw tomato sharpness.
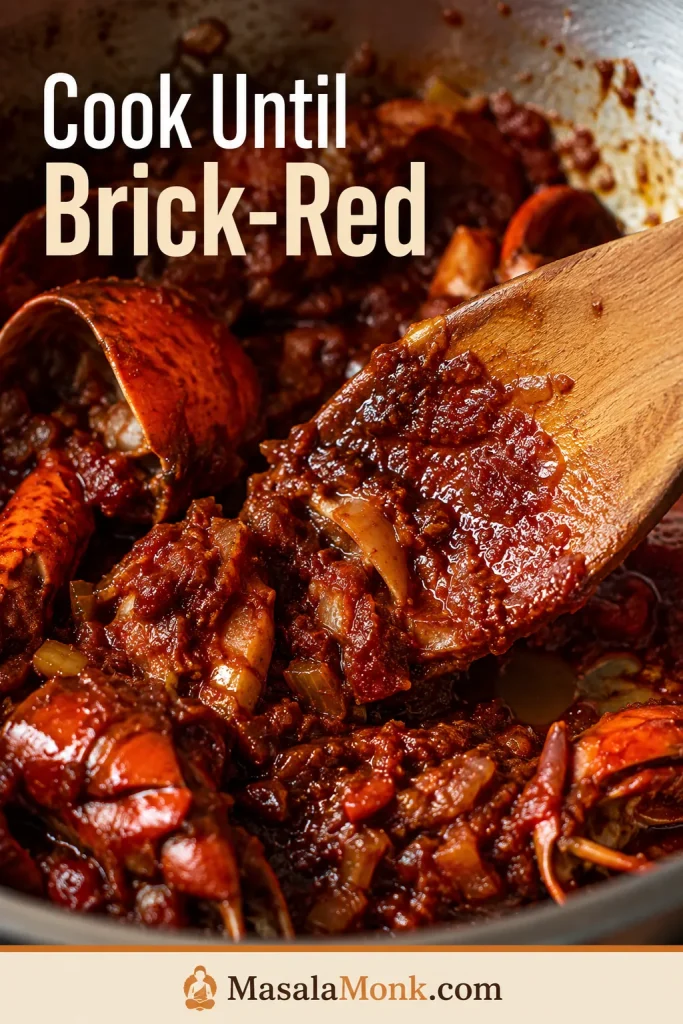
Close-up of brick-red tomato paste cooked with lobster shells, vegetables, and a wooden spoon.
Cook the tomato paste until it turns brick-red; that small color change adds warmth, depth, and a less raw tomato taste.

7. Add Flour

Sprinkle flour over the vegetables and stir until everything looks thick and coated. It should look like a soft paste, not a dry clump. This gives the soup body without making it heavy.
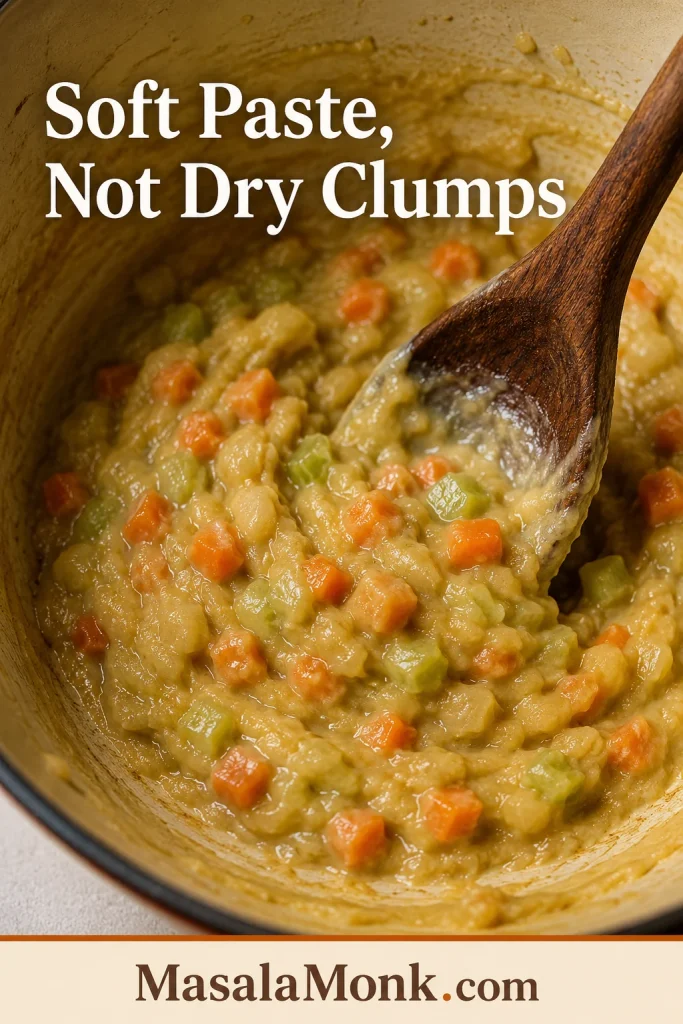
Flour stirred into softened vegetables in a pot, forming a thick roux-like paste.
Before adding liquid, the flour should coat the vegetables like a soft paste; this gives the lobster bisque body without heaviness.

8. Deglaze With Wine and Sherry

Pour in the wine and sherry slowly, scraping up the bottom of the pot. Let it bubble briefly so the sharp alcohol smell softens. This is where the base starts to smell like classic bisque instead of simple vegetable soup.

9. Build the Simmering Base

Pour in the prepared stock, then season with paprika, thyme, cayenne if using, and a little salt and pepper. Simmer until the vegetables are very soft and the broth tastes full. Add salt gradually; stock and seafood bases can sneak up on you.

Golden lobster stock being poured into a brick-red bisque base in a pot.
When the shell stock meets the tomato-aromatic base, the pot shifts from simple vegetables into a true lobster bisque foundation.

10. Smooth the Bisque Base

Use an immersion blender or countertop blender to smooth the base. An immersion blender is convenient, but a countertop blender usually gives the smoothest result. Work in batches if needed and be careful with steam.
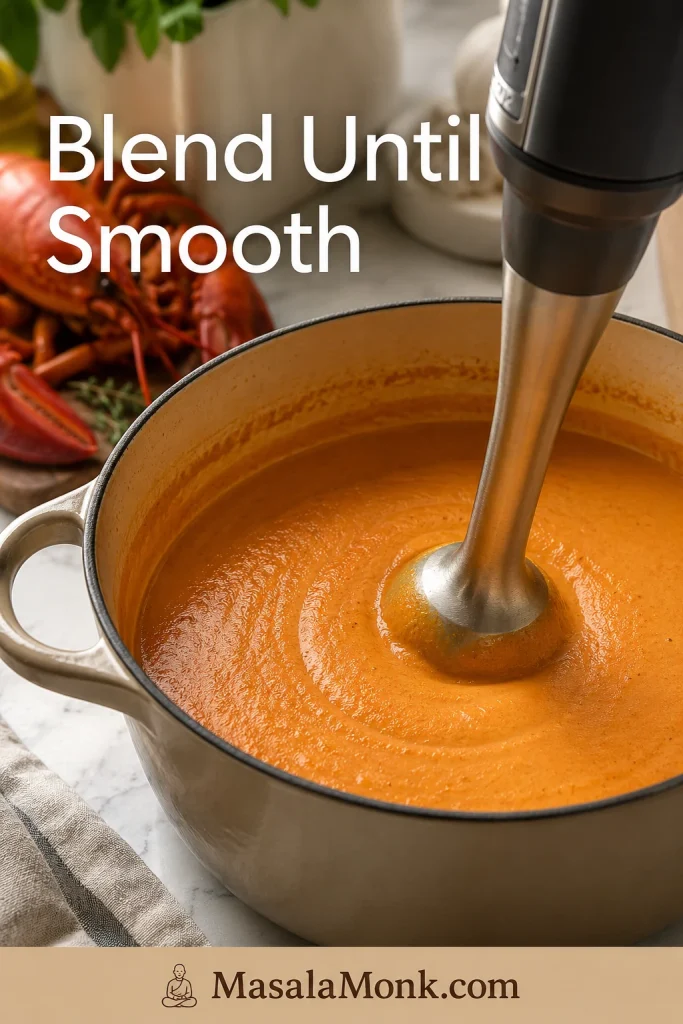
Immersion blender blending coral-orange lobster bisque base in a pot.
Blend only after the vegetables are tender; otherwise, the base can stay fibrous instead of turning silky.

11. Strain for a Polished Finish

For the silkiest finish, strain the blended soup through a fine mesh strainer. If you want the bowl to feel like restaurant bisque, this is the extra minute that pays you back.
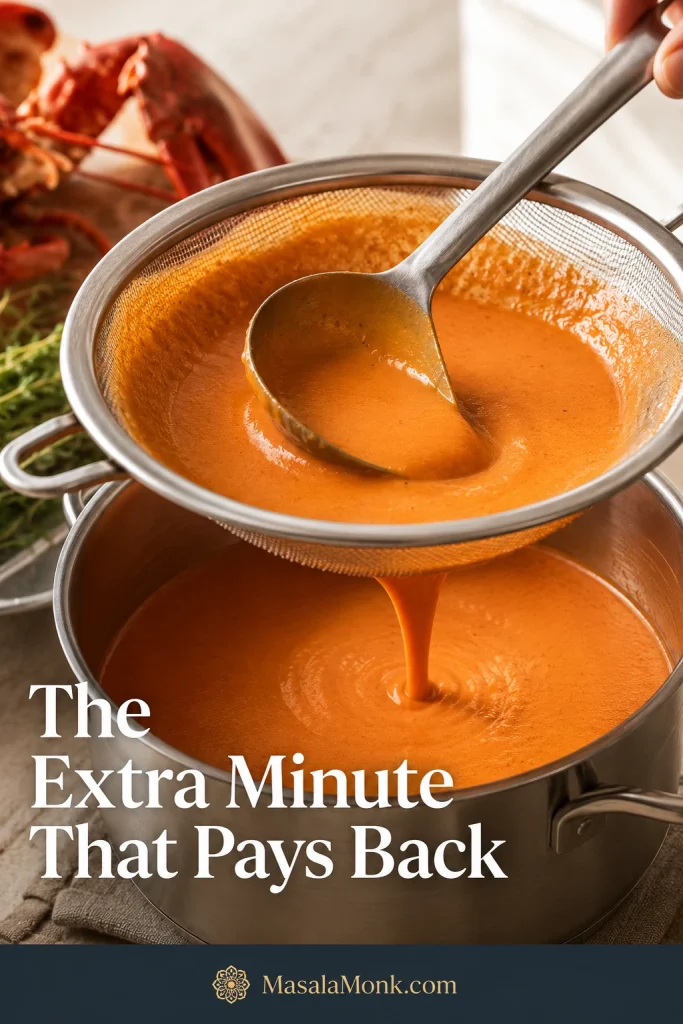
Smooth coral-orange lobster bisque being pressed through a fine mesh strainer into a clean pot.
Straining after blending is optional, but it is the step that makes homemade lobster bisque feel polished and restaurant-smooth.

12. Add Cream Over Low Heat

Return the strained soup to the pot and lower the heat. Stir in the cream slowly. The soup should look smooth and shiny, not bubbling like it is still cooking hard.

Heavy cream being poured into smooth coral-orange lobster bisque in a pot.
Add cream over low heat, then keep the soup steaming rather than boiling so the texture stays smooth and silky.

13. Finish the Bisque Base

Taste the base before the lobster goes in. It should lightly coat a spoon, smell sweet and buttery, and taste balanced. If it tastes heavy, add lemon juice or sherry vinegar. A thin base needs a little more simmering. Flat flavor usually means salt should be checked first.

Spoon lifted from creamy coral-orange lobster bisque showing a light coating on the back of the spoon.
The base should lightly coat a spoon before the lobster goes in; thick enough to feel silky, but not heavy like gravy.

14. Warm Lobster Right Before Serving

Stir in the chopped lobster meat during the final minute or two, just long enough to warm it. You can also place it directly in bowls and ladle the hot bisque over it. The soup should arrive at the table hot, smooth, and composed — not bubbling like it is still cooking.
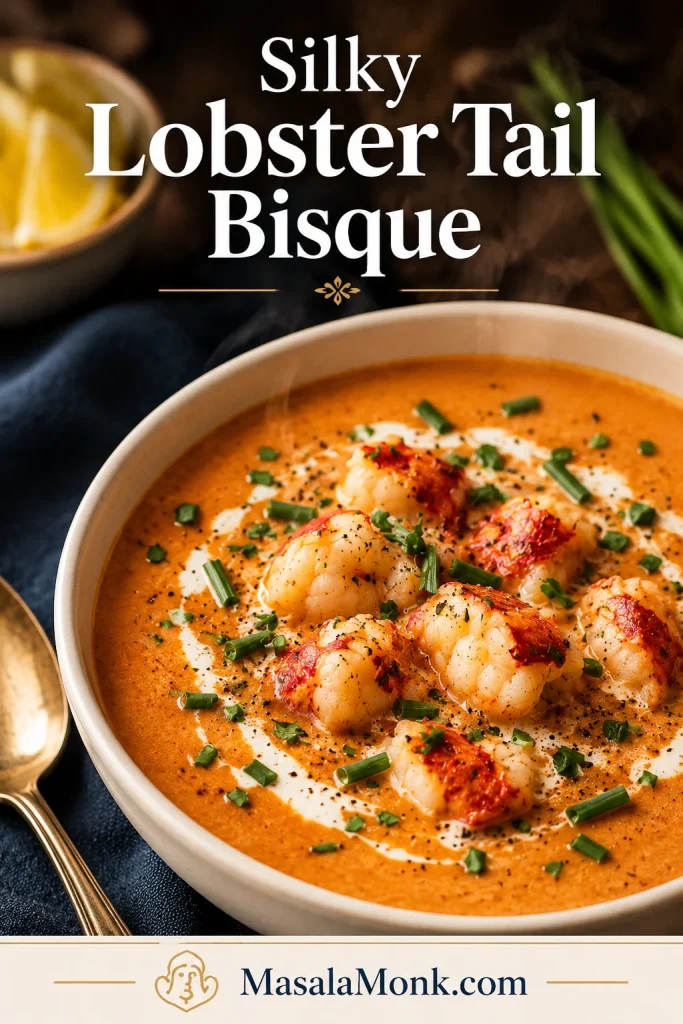
Close-up bowl of silky lobster bisque with lobster tail pieces, chives, cream swirl, and a spoon nearby.
Add the lobster only at the end so the bisque stays creamy and the tail meat remains tender in the finished bowl.

The three texture rules: save the lobster-poaching stock, keep the cream below a hard boil, and keep the lobster out of the long simmer so it stays tender.

If the bisque tastes flat, looks thin, feels too thick, or the cream seems grainy, go to troubleshooting lobster bisque before adding more cream.

Back to top

How to Make Lobster Bisque Smooth and Silky

A well-made bisque should feel creamy and smooth, not grainy or chunky. The easiest way to get that texture is to cook the vegetables until fully tender, blend thoroughly, and strain the soup after blending.

  • Cook the vegetables long enough. Hard carrot or celery pieces will not blend smoothly.
  • Use enough liquid. A very thick base can turn pasty in the blender.
  • Blend in batches if needed. Do not overfill a countertop blender with hot soup.
  • Strain for a smoother finish. This is optional, but it makes the bowl feel more polished.
  • Add cream after blending. Cream finishes the texture instead of getting cooked hard from the beginning.

If the soup looks a little plain before the cream, do not worry; the final richness comes later. When it is thicker than you like after blending, loosen it with warm stock before adding more cream. More cream makes it richer, but stock keeps the lobster flavor cleaner.

How to Thicken Lobster Bisque

The soup should have body, but it should not feel like gravy. The goal is a light spoon-coating texture, not a heavy sauce.

ThickenerUse it forHow it affects texture
Flour rouxClassic creamy bisqueSmooth, reliable, familiar
Cornstarch slurryGluten-free quick fixGlossy and fast-thickening
Cooked riceOld-school silky textureVelvety once blended
ReductionStronger flavorDeepens taste but takes longer
Blended vegetablesLighter bodyNatural thickness, less rich

If the bisque is too thin, simmer it uncovered for a few minutes, or whisk 1 teaspoon cornstarch with 1 tablespoon cold water and stir it into the warm soup. For a fully gluten-free version from the start, skip the flour and use 1½ tablespoons cornstarch mixed with 2 tablespoons cold water after blending. Simmer for 1 to 2 minutes so it thickens.

If it is too thick, loosen it with warm seafood stock. Adding dry flour directly to finished soup can clump and leave a raw flour taste, so use a slurry or reduction instead.

Sherry, Wine, Brandy, and No-Alcohol Options

Lobster bisque often uses alcohol because it adds aroma and balances the richness of cream and shellfish. You have several reliable options.

OptionFlavorUse it for
Dry sherryClassic, nutty, mellowTraditional lobster bisque flavor
Dry white wineBright and cleanEveryday version
Brandy or cognacDeep and special-occasionA more luxurious bowl
No alcoholMilder, still balancedUse extra stock plus lemon or sherry vinegar

For the most balanced version, use white wine and a little dry sherry. To make it without alcohol, replace the ½ cup wine and ¼ cup sherry in the bisque base with ¾ cup extra seafood stock. If you are also skipping the optional wine in the shell stock, use another ½ cup stock there too. Finish with lemon juice or sherry vinegar so the soup still tastes bright.

No-alcohol does not mean flat. The stock gives body, while lemon juice or sherry vinegar gives the lift that wine would normally bring.

The same no-wine idea works beautifully in seafood pasta too. This shrimp scampi without wine uses garlic, lemon, butter, and stock when you want a brighter seafood dinner without opening wine.

Skip sweet sherry unless you intentionally want a sweeter soup. Dry sherry is the safer choice for classic flavor.

Troubleshooting Lobster Bisque

If the soup is not where you want it yet, do not assume it is ruined. Bisque usually needs one clear adjustment: salt, acid, stock, cream, or lower heat.

Before you fix the soup, taste it in this order: salt first, then acid, then stock depth, then cream. Most bland bisque is not missing more cream; it is missing balance.
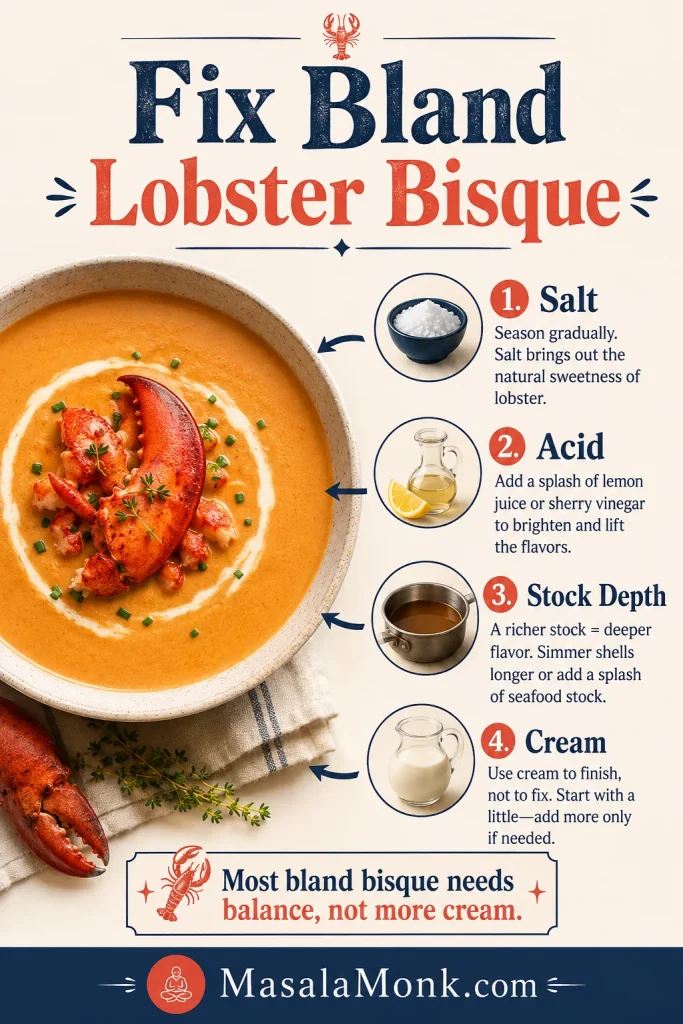
Troubleshooting infographic for bland lobster bisque with numbered steps for salt, acid, stock depth, and cream.
Before adding more cream, fix bland lobster bisque in order: salt first, then acid, then stock depth, and only then richness.

Bland Lobster Bisque

If the bisque tastes bland, do not panic. Check salt first, then add a little lemon juice or sherry vinegar. If it still tastes thin or hollow, the stock may need more shell flavor, reduction, or a small amount of lobster base. Add more cream only after the soup already tastes balanced.

Fishy-Tasting Bisque

A fishy taste usually comes from old seafood, poor-quality stock, or over-reduced briny liquid. Use fresh-smelling lobster, simmer the shells steadily but not aggressively, and balance the finished soup with lemon, herbs, cream, and enough aromatics.

Rubbery Lobster

Chewy lobster almost always means the meat spent too much time in heat. The soup can still taste good, but next time, treat lobster like the finishing touch, not an ingredient that needs to cook in the pot. If you already have cooked lobster, put it in the bowls and ladle hot bisque over it.

Bisque That Is Too Thin

Simmer it uncovered for a few minutes to reduce, or add a small cornstarch slurry. You can also blend in more of the cooked vegetables if you have not strained the soup yet.

Bisque That Is Too Thick

Add warm seafood stock a little at a time until the texture feels right. Use more cream only if you also want it richer.

Split or Grainy Cream

The heat was probably too high after the cream was added. Keep the soup low enough that it steams rather than bubbles hard. If it looks slightly separated, blending can help, but prevention is better.

How to Make Lobster Bisque Pasta or Use Bisque as Pasta Sauce

Lobster bisque pasta is a smart way to use leftover homemade bisque or upgrade a container of store-bought bisque. Think of the soup as a creamy seafood sauce first: reduce it slightly, loosen it with pasta water, and add seafood only near the finish.

Quick lobster bisque pasta formula for 2 servings: use 1½ to 2 cups lobster bisque, 6 to 8 oz pasta / 170 to 225 g, ¼ cup reserved pasta water / 60 ml, and 4 to 6 oz cooked lobster, shrimp, crab, scallops, or langostino.
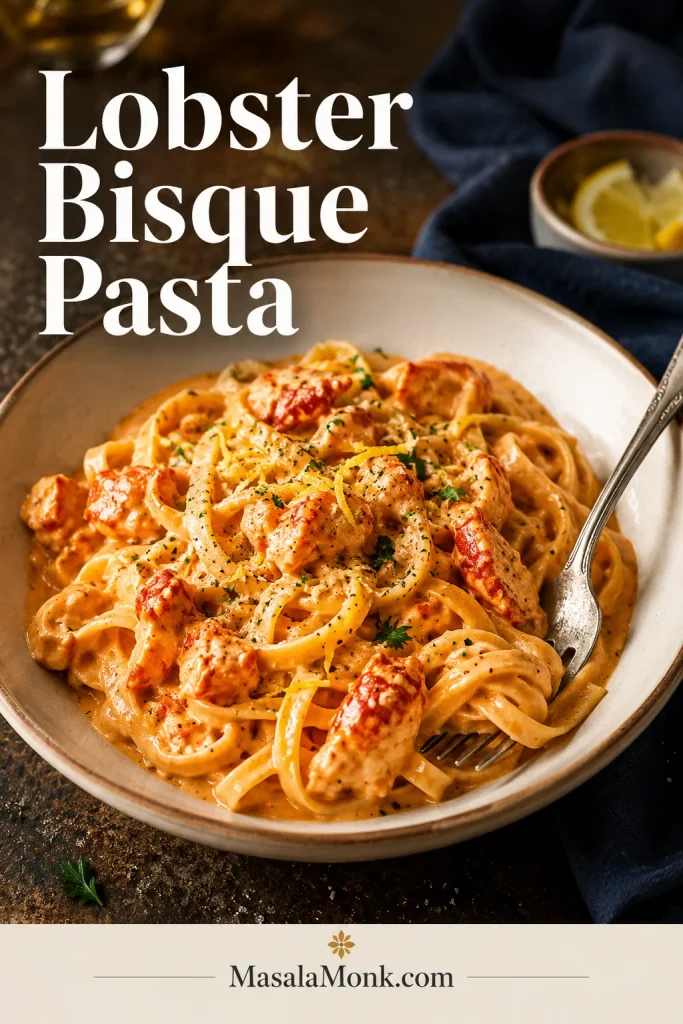
Creamy lobster bisque pasta with noodles, lobster pieces, herbs, lemon zest, black pepper, and a fork.
Leftover lobster bisque becomes a creamy seafood pasta sauce when you reduce it slightly, toss with noodles, and loosen with pasta water.

To make it, simmer the bisque for 3 to 5 minutes so it thickens slightly. Add cooked pasta and toss with a splash of pasta water until the sauce coats the noodles. Then fold in lobster, shrimp, crab, scallops, or langostino near the end, and finish with lemon juice, black pepper, and herbs.

Pasta shapes that work well include linguine, fettuccine, rigatoni, fusilli, farfalle, and lobster ravioli. Use Parmesan lightly if you like, but do not overdo it. The sauce is already rich, and too much cheese can hide the seafood flavor.

For another creamy seafood pasta that uses pasta water to keep the sauce silky instead of heavy, this creamy salmon pasta with lemon and garlic follows the same gentle-sauce logic with tender fish.

  • Thick sauce: add pasta water.
  • Thin sauce: reduce it before adding pasta.
  • Overly rich: add lemon juice or a little chili.
  • Flat flavor: add herbs, black pepper, or a splash of sherry vinegar.

How to Upgrade Store-Bought Lobster Bisque

Homemade gives you the cleanest lobster flavor, but store-bought bisque can still be useful as a shortcut for soup, lobster bisque pasta, seafood sauce, or a quick starter. Most store-bought lobster bisque needs one of two things: more body or more brightness.

Store-bought problemQuick rescue
WaterySimmer to reduce before serving or tossing with pasta
BlandAdd lemon juice, sherry vinegar, herbs, or a small splash of dry sherry
Lacks lobsterAdd cooked lobster, shrimp, crab, scallops, or langostino
Too saltyLoosen with unsalted stock or cream, not more seafood base
Heavy and flatAdd lemon, herbs, black pepper, or a small splash of acid

If it tastes salty and heavy at the same time, do not add more seafood base. Loosen it with unsalted stock or a little cream, then add lemon or herbs to make it taste cleaner.
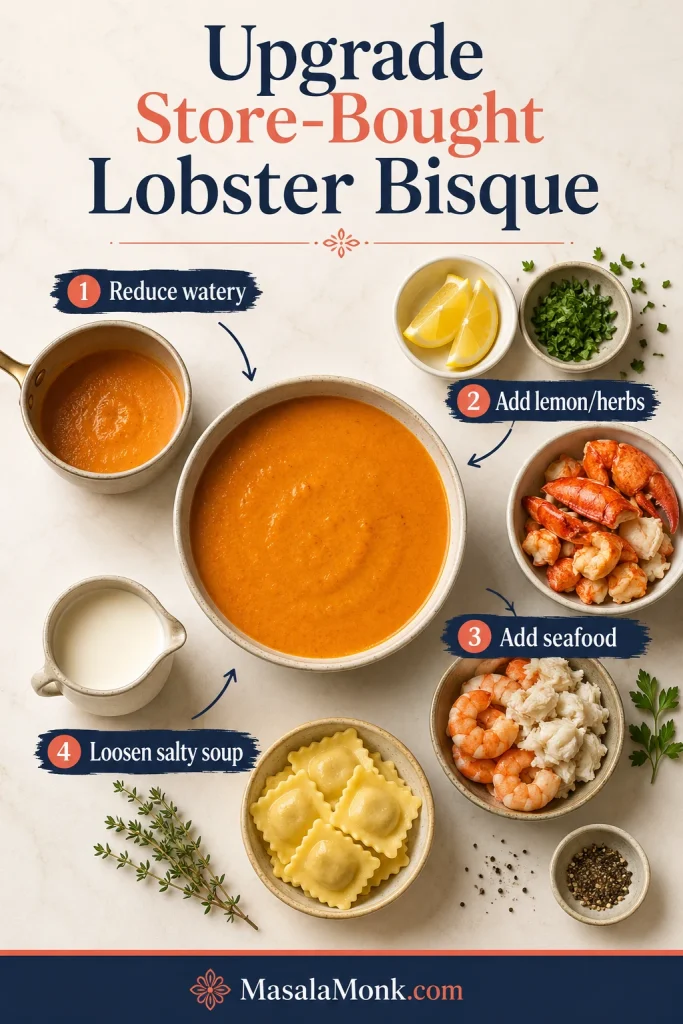
Overhead board showing lobster bisque with lemon, herbs, seafood, cream, pasta, and upgrade notes for store-bought bisque.
Store-bought lobster bisque usually needs one clear fix: reduce watery soup, brighten with lemon and herbs, add seafood, or loosen saltiness.

For ravioli, reduce the bisque until it lightly coats a spoon, then use it as a sauce instead of a full bowl of soup. If the store-bought bisque already contains cream, warm it over low heat so the texture stays smooth.

Back to top

Lobster Bisque Variations

These variations all work best when the core bisque base is balanced first. After that, shrimp, crab, spice, gluten-free thickeners, or dairy-free cream can change the bowl without changing the method.
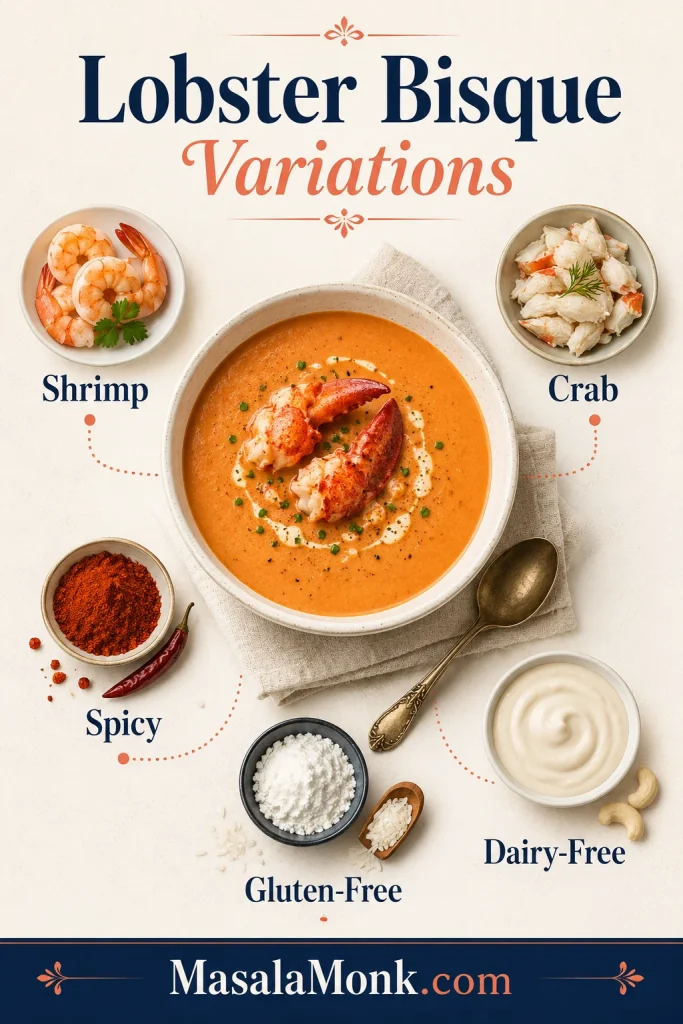
Lobster bisque variations board with a central soup bowl and surrounding shrimp, crab, chili, gluten-free thickener, and dairy-free cream cues.
Use the same bisque base for shrimp, crab, spicy, gluten-free, or dairy-free variations without changing the core method.

Shrimp and Lobster Bisque

When you want the bowl to feel fuller without buying extra lobster, shrimp is the easiest helper. Add shrimp shells to the stock for extra seafood flavor, then add peeled shrimp during the final few minutes of cooking.

Crab and Lobster Bisque

For a softer, sweeter bowl, crab works especially well when you want delicate pieces of seafood in each spoonful. Stir lump crab meat into the finished soup after the cream and fold carefully so the crab stays in pieces.

Langostino Lobster Bisque

Use langostino when the bisque is heading toward pasta, ravioli, or a budget-friendly seafood dinner. Add it near serving, just long enough to warm through.

Spicy Lobster Bisque

A little heat can make the bisque feel even cozier, especially when you are serving it with bread, rice, or pasta. Add cayenne, smoked paprika, chili flakes, or a small amount of Cajun seasoning, but keep the spice supportive rather than overpowering.

Gluten-Free Lobster Bisque

Skip the flour and thicken after blending with cornstarch slurry, rice, or gluten-free flour. Cornstarch is the quickest route, while rice gives a softer, more old-school texture and a classic blended body.

Dairy-Free Lobster Bisque

Use cashew cream for the most neutral dairy-free option. Coconut milk can work, but it will change the flavor and make the soup taste sweeter. Add dairy-free cream near the end over low heat, just as you would heavy cream.

Lighter Lobster Bisque

Use less cream, rely more on blended vegetables, and finish with lemon juice for brightness. The soup will be lighter, though less rich than the classic version.

Lobster Bisque vs Lobster Soup vs Lobster Chowder

These names are often used loosely, but they are not exactly the same.

DishTextureTypical style
Lobster bisqueSmooth, blended, creamySilky soup made with shellfish stock and cream
Lobster soupVariesBroad term for any lobster-based soup
Lobster chowderChunkyOften includes potatoes, cream, and larger pieces
Lobster stewRusticUsually lobster-forward and less blended

If you want a classic bisque, keep it smooth and strain it if possible. For a chowder-style lobster soup, add potatoes and skip the final fine straining.

Another creamy seafood soup that stays chunkier and simpler than bisque is this salmon soup recipe: potatoes, dill, lemon, cream, and tender salmon added near the end.

What to Serve With Lobster Bisque

This is the kind of soup that does not need a crowded plate around it. A small bowl, good bread, and something crisp on the side are enough to make it feel like a planned meal, whether you serve it as a starter, a light dinner, or part of a special seafood spread.

Lobster bisque served with garlic bread, green salad, lemon wedges, spoon, navy linen, and a warm table setting.
Because lobster bisque is rich, pair it with crusty bread or garlic bread plus something crisp, fresh, and lemony.

Crusty bread is the easiest pairing, but a warm garlic bread loaf from scratch makes the bowl feel more like a full dinner.

  • Good crusty bread or garlic bread
  • Simple green salad with lemony dressing
  • Roasted asparagus or green beans
  • Baked potatoes or twice-baked potatoes
  • Steak for a surf-and-turf dinner
  • Lobster rolls if you have extra lobster meat
  • Shrimp scampi for a seafood dinner spread
  • Light pasta or lobster ravioli

For another cozy starter with a restaurant-style feel, this French onion soup for a cozy starter gives you the same slow, savory comfort in a non-seafood direction.

Make-Ahead, Storage, Freezing, and Reheating

Plan Ahead

The strongest make-ahead method is to prepare the base through the blending and straining step, then refrigerate it before adding cream and lobster. When ready to serve, warm the base, add cream, and finish with lobster.

For dinner-party timing, make the base up to 1 day ahead. Reheat it over low heat, add cream shortly before serving, and warm the lobster in the bowls or in the soup for only the final minute. That approach keeps the soup smooth and lets you serve it like it was finished fresh, even if most of the work happened yesterday.

Refrigerate

Store leftovers in an airtight container in the refrigerator for up to 2 to 3 days. Reheat over low heat.

Freeze

For the smoothest texture, freeze the base before adding cream and lobster. Cream-based soups can separate after freezing, and lobster meat can become less tender after repeated heating. Freeze the base for up to 2 to 3 months, thaw overnight in the refrigerator, then reheat and add cream and lobster just before serving.

Reheat

Warm the soup over low heat, stirring often. Keep the heat low enough that the soup steams rather than bubbles hard. If it thickens in the refrigerator, loosen it with a splash of seafood stock or cream.

Use Leftovers

Leftover bisque is excellent as a pasta sauce, seafood sauce, or base for lobster ravioli. Reduce it, add pasta water if needed, and finish with lemon or herbs.

Have extra bisque? Turn it into lobster bisque pasta, use it as a seafood sauce, or see how to upgrade store-bought lobster bisque with the same balancing tricks.

That is the quiet bonus of a good bisque base: even a small amount can turn pasta, ravioli, or seafood into another special meal.

FAQ

These are the quick answers for the questions that usually come up once you start adapting the recipe.

Can I make lobster bisque with lobster tails?

Yes. Lobster tails are the most practical choice for homemade lobster bisque because they give you tender meat and shells for stock. You get the ease of tails while still building deeper flavor from the shells.

Are lobster shells required?

No, but lobster shells are the easiest way to make homemade bisque taste fuller and sweeter. If you do not have shells, use the cleanest lobster or seafood stock you can find, then balance the finished soup with lemon juice or sherry vinegar.

What if I already have cooked lobster meat?

Add cooked lobster only right before serving, just long enough to warm it. Since cooked meat gives you no shells for stock, use lobster stock if possible or strengthen seafood stock carefully with clam juice or lobster base.

Which stock works best?

Lobster stock or shell-enhanced seafood stock gives the fullest flavor. Clean seafood stock is the next best option, clam juice can help in small amounts, and chicken stock should be treated as an emergency backup because it lacks seafood depth.

How do I make it without wine or sherry?

Replace the ½ cup wine and ¼ cup sherry in the base with ¾ cup seafood stock. Finish with lemon juice or sherry vinegar so the soup still has brightness and does not taste flat.

What thickens lobster bisque best?

A flour roux is the classic choice. For gluten-free bisque, use cornstarch slurry or blended rice. To make a thinner finished soup, reduce it instead of adding more cream.

Why does my lobster bisque taste bland?

Start with salt, then add acid, then check stock depth. A little lemon juice or sherry vinegar often wakes up the soup, but if the stock itself is weak, shells, reduction, or a small amount of lobster base may be needed.

Why does lobster turn rubbery in bisque?

Lobster turns rubbery when it spends too long in heat. Treat it like the finishing touch, not an ingredient that needs to simmer: cook it briefly, remove it, and warm it only right before serving.

Is lobster bisque gluten-free?

It can be. Skip the flour and thicken after blending with cornstarch slurry, rice, or gluten-free flour. Cornstarch is fastest, while rice gives a softer blended texture and a more classic old-school body.

Can lobster bisque be dairy-free?

Yes, but it will taste less classic. Cashew cream is the most neutral option; coconut milk works, but it can make the soup sweeter. Add dairy-free cream near the end over low heat, just as you would heavy cream.

Does lobster bisque freeze well?

The base freezes better than the finished soup. Freeze before adding cream and lobster, then use within 2 to 3 months. Add cream and lobster only after reheating so the texture stays smoother and the seafood stays tender.

Can lobster bisque be used as pasta sauce?

Yes. Lobster bisque pasta works best when the bisque is reduced slightly, tossed with pasta, loosened with pasta water, and finished with seafood, lemon, and herbs.

What is the difference between lobster bisque and lobster chowder?

Lobster bisque is smooth, blended, and creamy. By contrast, lobster chowder is chunkier and often includes potatoes, cream, and larger pieces of seafood or vegetables.

What should I serve with lobster bisque?

Serve lobster bisque with crusty bread, garlic bread, a lemony salad, roasted vegetables, baked potatoes, or steak for a surf-and-turf meal. The best pairings are simple, crisp, or bread-like because the soup is already rich.

Lobster bisque should feel special, but it does not need to feel stressful. Start with lobster tails, use a stock you would happily taste on its own, save the shells if you can, and keep the lobster meat out of the long simmer. The best lobster bisque is not the one with the most complicated method. It is the one where the stock tastes clean, the cream stays silky, and the lobster is still tender when the spoon reaches the bowl.
Back to top

Posted on Leave a comment

Smoked Haddock Chowder Recipe: Creamy, Smoky, Easy Fish Soup

Bowl of smoked haddock chowder with fish flakes, potato chunks, herbs, black pepper, crackers, and a lemon wedge on a wooden table.

A good smoked haddock chowder should feel like a full meal in a bowl: soft potatoes, tender flakes of fish, and a creamy broth that carries the smoke without turning salty or heavy. This version is smoke-kissed enough to feel special, rounded enough to be comforting, and sturdy enough to serve with nothing more than bread on the side.

This version keeps the base simple: smoked haddock, milk, potatoes, leek, onion, celery, and herbs. From there, you can make the bowl sweeter with sweetcorn, richer with cream, deeper with bacon, or more seafood-forward with prawns. The heart of the recipe stays the same: gently poached smoked fish, smoky milk, and potatoes mashed just enough to thicken the soup naturally.

The method is built to avoid the usual smoked haddock chowder problems: over-salted broth, split milk, rubbery flakes, and a thin base. It feels like weekend comfort, but the cooking is simple enough for a weeknight.

Those small details matter most at the end, when the milk, seasoning, and flaked haddock come together. For another cozy fish-and-potato bowl, this creamy salmon soup follows the same comforting, gentle-cooked idea.

Quick Answer: What Is Smoked Haddock Chowder?

Smoked haddock chowder is a creamy fish soup made with smoked haddock, potatoes, leek or onion, and milk. The best method is to poach the haddock gently in milk first, use that smoky milk in the soup base, mash some potatoes for body, then fold the fish back in at the end so it stays tender.

It is closely related to Cullen skink, the traditional Scottish smoked haddock soup, but chowder is broader and more flexible. Cullen skink usually stays close to smoked haddock, potatoes, onion or leek, milk, and sometimes cream. Chowder can include sweetcorn, bacon, celery, prawns, stock, herbs, or a richer creamy finish.

The key: Treat the haddock gently. Once it has been poached, the chowder is mostly about building a soft potato base and folding the fish back in without breaking it up.

Jump to the recipe card · See the 3 rules first

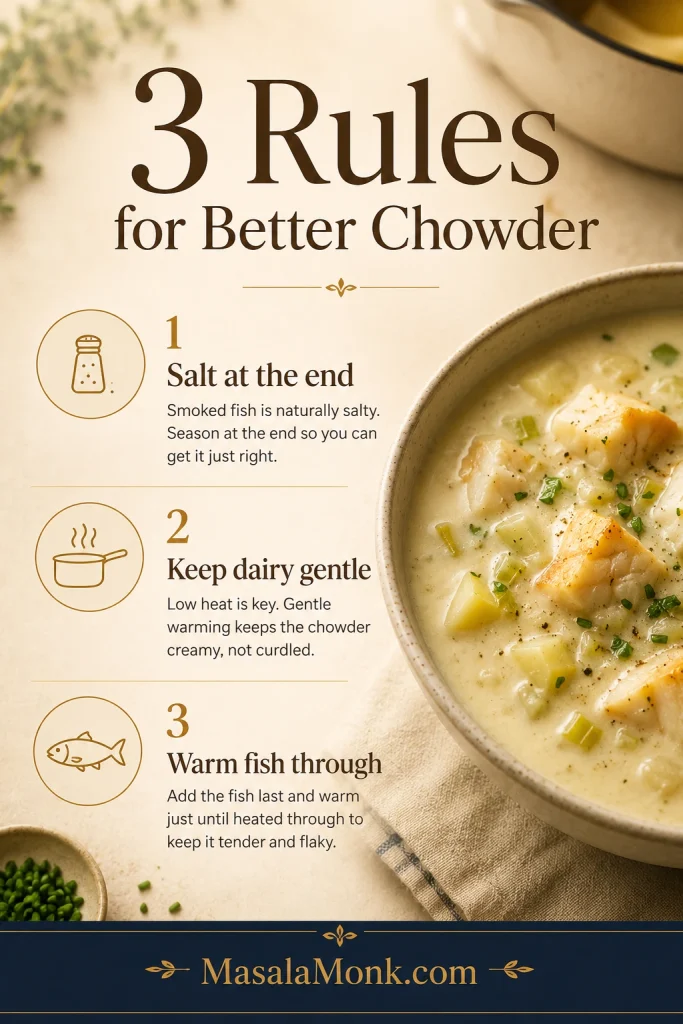
Before You Cook: 3 Things That Make the Chowder Better

Smoked haddock is easy to cook, but it has a strong personality. A little care with heat and seasoning keeps the chowder mellow, creamy, and balanced.

  1. Save salt for the end. Smoked haddock, bacon, pancetta, and stock can all bring salt. Taste the finished chowder before seasoning.
  2. Keep the dairy gentle. Milk and cream stay smoother when they are warmed quietly instead of pushed into a rolling boil.
  3. Warm the fish through instead of re-cooking it. Once the haddock is poached and flaked, it only needs a few minutes in the finished chowder.
Guide graphic showing three smoked haddock chowder rules: salt at the end, keep dairy gentle, and warm fish through.
These three rules protect the chowder before trouble starts: season late, keep the dairy gentle, and warm the fish through instead of boiling it.

Best for: smoky comfort without an over-salted soup, a creamy chowder without a heavy roux, and one base recipe you can turn sweeter with sweetcorn, deeper with bacon, or more seafood-forward with prawns.

Jump to the recipe card

Smoked Haddock Chowder Recipe

Easy Creamy Smoked Haddock Chowder

This is a cozy stovetop chowder with milk-poached smoked haddock, soft potatoes, leek, onion, celery, and herbs. Sweetcorn is optional but lovely for a sweeter family-style bowl; cream and bacon are optional richer finishes. The potatoes thicken the base naturally, the poaching milk carries the smoked-fish flavour, and the haddock goes back in at the end so the flakes stay tender.

Prep time15 minutes
Cook time35 to 40 minutes
Total time50 to 55 minutes
Servings4 generous bowls
MethodStovetop
DifficultyEasy
TextureCreamy, chunky, smoky, spoon-coating

Ingredients

  • 400 to 450 g / 14 to 16 oz smoked haddock fillets
  • 600 ml / 2½ cups whole milk
  • 250 to 300 ml / 1 to 1¼ cups unsalted fish stock, unsalted vegetable stock, or water
  • 500 to 600 g / 1 lb 2 oz to 1 lb 5 oz potatoes, peeled and diced into 1 to 1.5 cm pieces
  • 1 large leek, cleaned and sliced
  • 1 small onion, finely chopped
  • 1 celery stick, finely sliced
  • 30 to 40 g / 2 to 3 tablespoons unsalted butter
  • 1 bay leaf
  • 1 teaspoon thyme leaves, or 2 thyme sprigs
  • 100 to 150 g / about ⅔ to 1 cup sweetcorn, optional, recommended for a sweeter family-style bowl
  • 75 to 100 ml / ⅓ cup to scant ½ cup cream, optional
  • 75 to 100 g / about 2½ to 3½ oz bacon or pancetta, optional
  • Black pepper, to taste
  • Chopped parsley or chives, to finish
  • Lemon wedges, optional

Salt note: Taste after the smoked haddock is back in the pot, then add salt only if the chowder needs it.

Instructions

Poach the fish and start the base

  1. Poach the smoked haddock. Place the smoked haddock in a wide pan. Add the milk and bay leaf. Warm over low to medium-low heat until the milk is steaming and barely simmering.
  2. Cook the fish gently. Poach for 5 to 7 minutes, depending on thickness, until the fish is opaque and flakes easily.
  3. Reserve the smoky milk. Lift the fish out with a slotted spoon. Strain and reserve the poaching milk. Remove skin or bones if needed, then flake the haddock into large pieces.
  4. Start the base. Melt the butter in a large soup pot over medium-low heat. If using bacon or pancetta, cook it first until golden, then remove some crispy pieces for topping if you like.
  5. Soften the vegetables. Add the leek, onion, and celery. Cook for 8 to 10 minutes, stirring often, until soft and glossy but not browned. The leeks should smell sweet before the potatoes go in.

Thicken, finish, and serve

  1. Simmer the potatoes. Add the diced potatoes, thyme, and unsalted stock or water. Simmer for 10 to 15 minutes, or until the potatoes are tender.
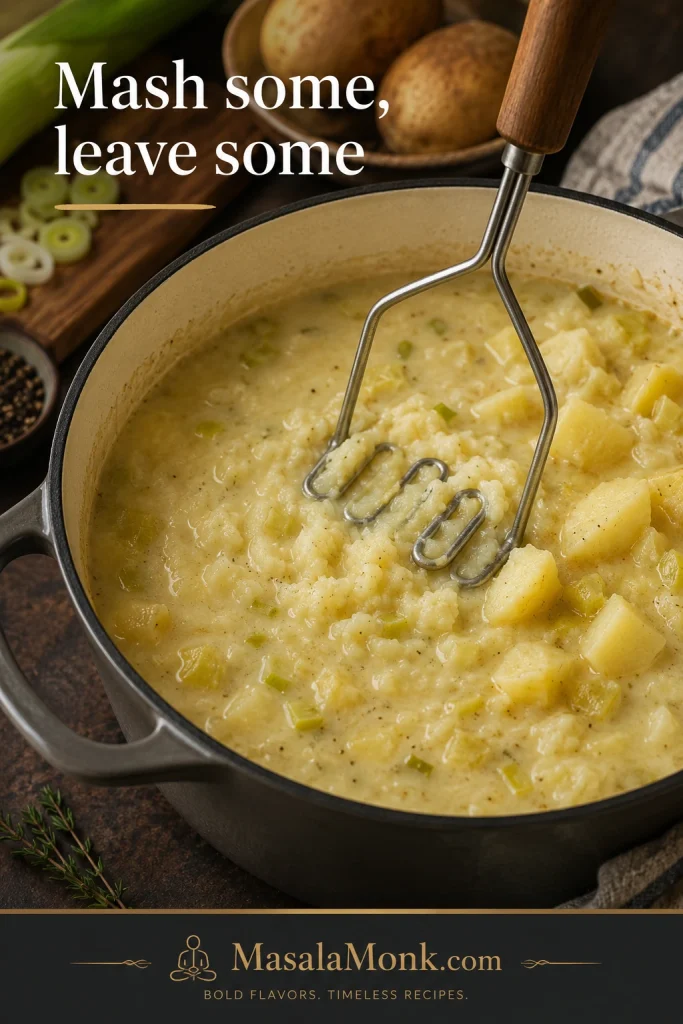
  2. Thicken naturally. Mash some of the potatoes directly in the pot. Leave some chunks whole so the bowl stays hearty.
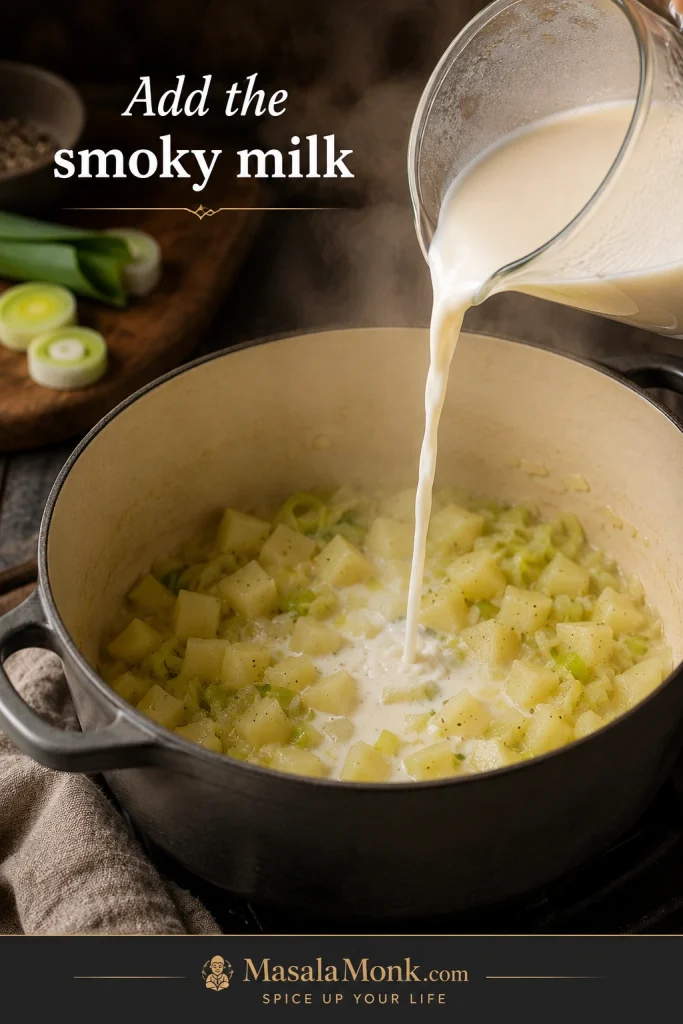
  3. Add the milk and sweetcorn. Pour in the reserved poaching milk. Add the sweetcorn, if using. Warm gently for 3 to 5 minutes.
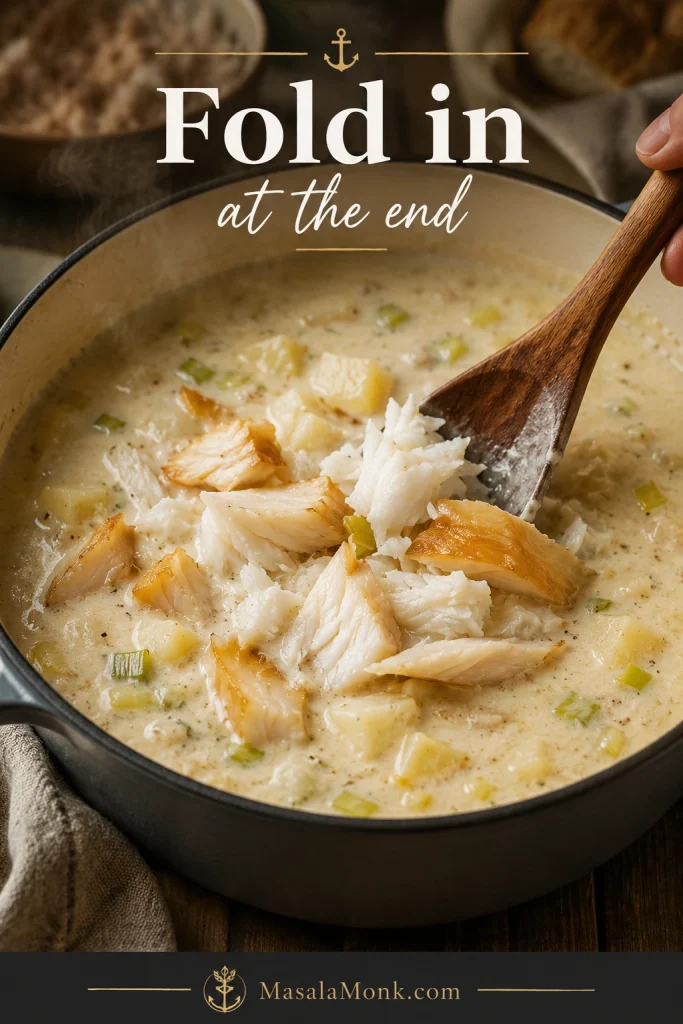
  4. Finish with cream and fish. Stir in the cream, if using, then add the flaked smoked haddock. Keep the heat low and warm through for 2 to 3 minutes. The pot should be hot, not bubbling hard.
  5. Rest, taste, and serve. Let the chowder sit off the heat for 5 minutes if you have time; the potatoes settle and the smoky flavour rounds out. Finish with black pepper, herbs, lemon, and a little salt only if needed. Serve hot with crusty bread, toast, oatcakes, crackers, or a simple green salad.

Best texture cue: The chowder should be spoon-coating, with tender potato pieces and large flakes of fish. It should feel generous, creamy, and smoky without becoming heavy.

Once you understand the base, this chowder becomes easy to bend. Keep the fish tender, keep the seasoning balanced, then choose the version that fits the meal you want.

See the variations · Need a fix?

Smoked Haddock Chowder Variations: Sweetcorn, Bacon, Prawn, Creamy, or Lighter

Choose the bowl you want, but keep the spine of the recipe steady: smoked fish, milk, potatoes, leek or onion, and gentle heat. The variations below let you make the same pot lighter, richer, sweeter, or more generous without relearning the recipe.

Six-panel guide showing classic, sweetcorn, bacon, prawn, lighter, and Cullen skink-style smoked haddock chowder variations.
After the base is right, choose the mood of the bowl: sweeter with sweetcorn, richer with bacon, lighter without cream, or more seafood-forward with prawns.
If you want…Do thisResult
Classic cozy bowlUse milk, potatoes, leek, onion, celery, thyme, and a little cream.Rounded, creamy, balanced
Lighter weeknight bowlSkip bacon and cream, mash extra potatoes, and finish with herbs and lemon.Creamy without feeling heavy
Sweetcorn chowderAdd 100 to 150 g / about ⅔ to 1 cup sweetcorn near the end.Softer smoke, little sweet pops
Bacon chowderCook bacon or pancetta first, then soften the vegetables in the fat.Deeper, savoury, bacon-smoky
Prawn or shrimp chowderAdd raw prawns or large shrimp near the end and cook just until pink.More seafood-forward and generous
Cullen skink-style bowlSkip sweetcorn, bacon, celery, and prawns. Keep smoked haddock, potatoes, onion or leek, milk, and herbs.Simpler, cleaner, more traditional
Dairy-free coconut bowlUse light coconut milk and water instead of dairy milk and cream.Smoke-kissed, lighter, less traditional

Why This Recipe Works

Milk-poaching makes the biggest difference. The fish cooks quietly, the milk takes on a gentle smoke, and the kitchen starts to smell smoky and savoury before the soup base is even built.

Potatoes give the soup body without needing a heavy flour base. Once they are tender, mash some directly into the pot. The starch thickens the broth naturally, leaves the flavour cleaner than a roux, and still gives you enough potato chunks to make the bowl feel hearty.

Adding the fish back at the end keeps the flakes large and tender instead of dry, rubbery, or broken into tiny pieces. The same gentle-finish idea also matters in creamy fish dishes like this creamy salmon pasta.

Late seasoning keeps the bowl balanced. Smoked haddock varies from mild to very salty, and richer add-ins like bacon or pancetta can change the salt level quickly. Waiting until the end gives you control.

The Texture We’re Going For

The finished chowder should sit in the comfortable middle: thicker than a thin fish soup, lighter than a heavy seafood stew, and creamy without becoming heavy or stodgy. The broth should coat a spoon lightly, the potatoes should be soft, and the fish should stay tender instead of breaking down into the base.

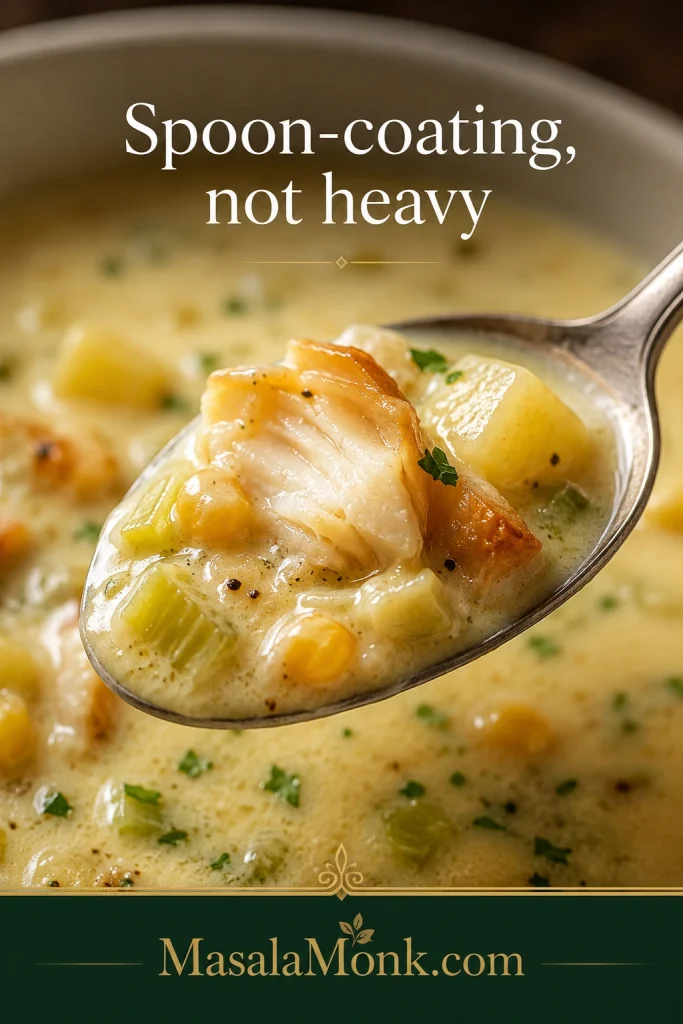
Spoon lifting smoked haddock chowder with creamy broth, fish flakes, potato, leek, herbs, and a few sweetcorn kernels.
Look for this texture at the end: spoon-coating broth with tender haddock flakes and potato pieces still clearly visible.

The finished bowl should feel settled and comforting: soft potatoes, mellow smoke, and clear pieces of haddock, not tiny fragments lost in the soup. If the pot looks a little loose before the haddock goes back in, give the potatoes a gentle mash and a few minutes to settle. If it looks too thick, a splash of warm milk or unsalted stock will bring it back.

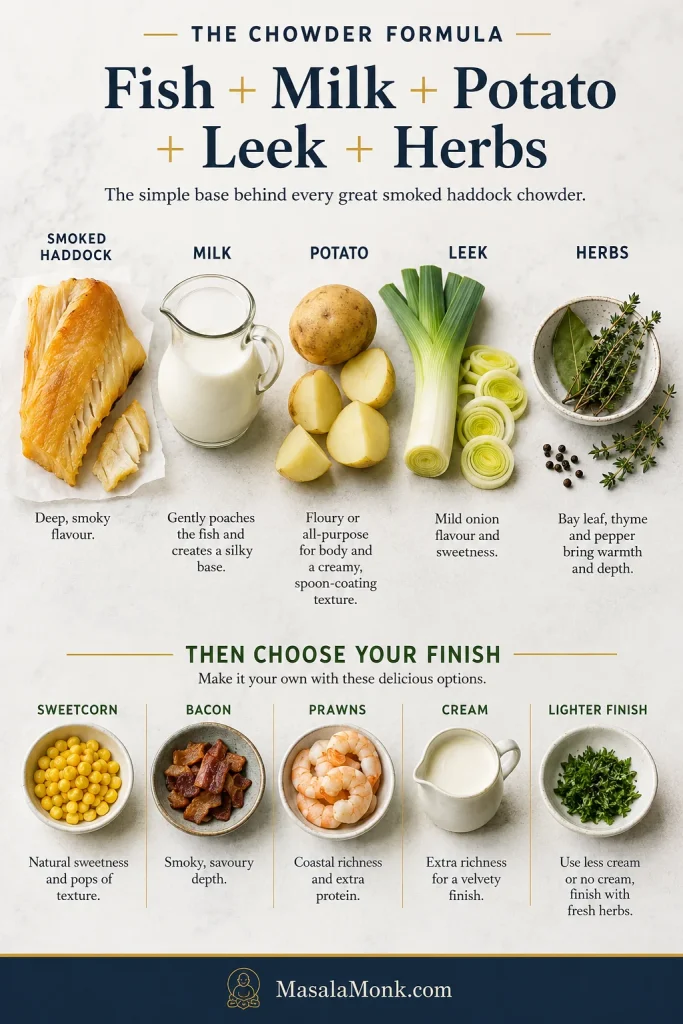
The Chowder Formula

Once the fish is handled gently, the rest of the chowder is built from simple, comforting things: potatoes for body, leek for sweetness, milk for softness, and herbs for a fresh finish.

Ingredient guide showing a smoked haddock chowder formula with fish, milk, potatoes, leek, herbs, and optional finishes.
The formula is easy to remember: smoked fish for depth, milk for softness, potatoes for body, leek for sweetness, and herbs for lift.
FishSmoked haddock, ideally undyed if available
BaseWhole milk for poaching, plus unsalted stock or water for the potatoes
BodyDiced potatoes, partly mashed into the soup
SweetnessLeek, onion, and optional sweetcorn
RichnessCream or bacon, both optional
FreshnessParsley, chives, black pepper, and lemon at the end
Main cueQuiet heat after the dairy and fish go in

Ingredients and Smart Swaps

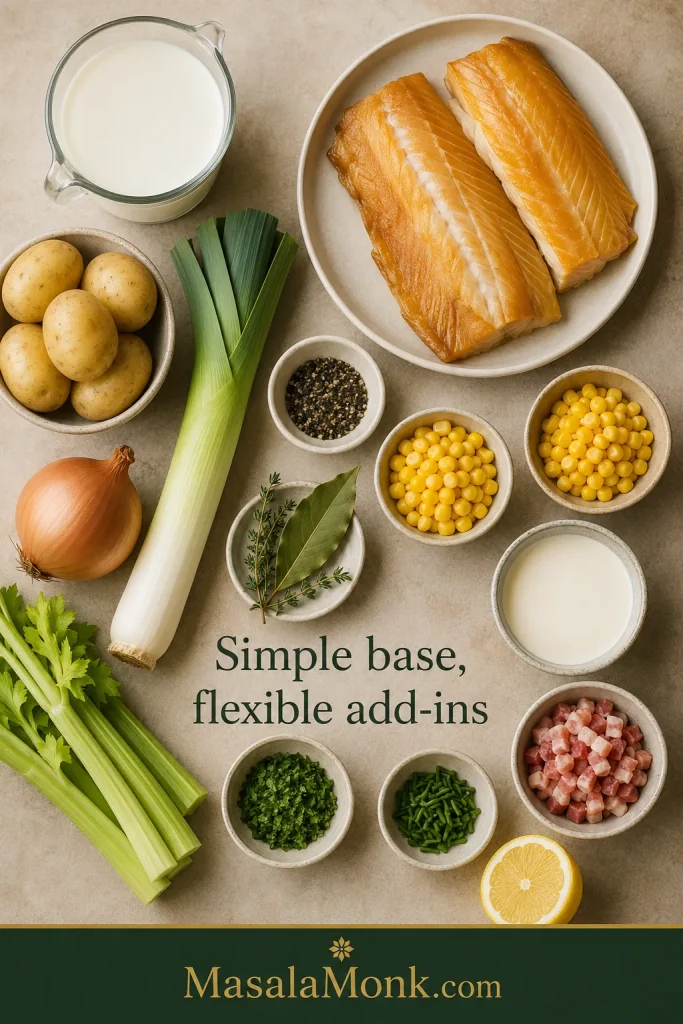
The ingredient list is simple, but each choice shapes the bowl: smoke from the fish, sweetness from the leek, body from the potatoes, softness from the milk, and freshness from herbs and lemon.

Overhead flatlay of smoked haddock, milk, potatoes, leek, onion, celery, herbs, sweetcorn, cream, bacon, lemon, and seasonings.
Because smoked haddock brings plenty of flavour, the best base stays simple: milk, potatoes, leek, onion, celery, herbs, and only the extras you need.

Smoked Haddock

Choosing the Fish

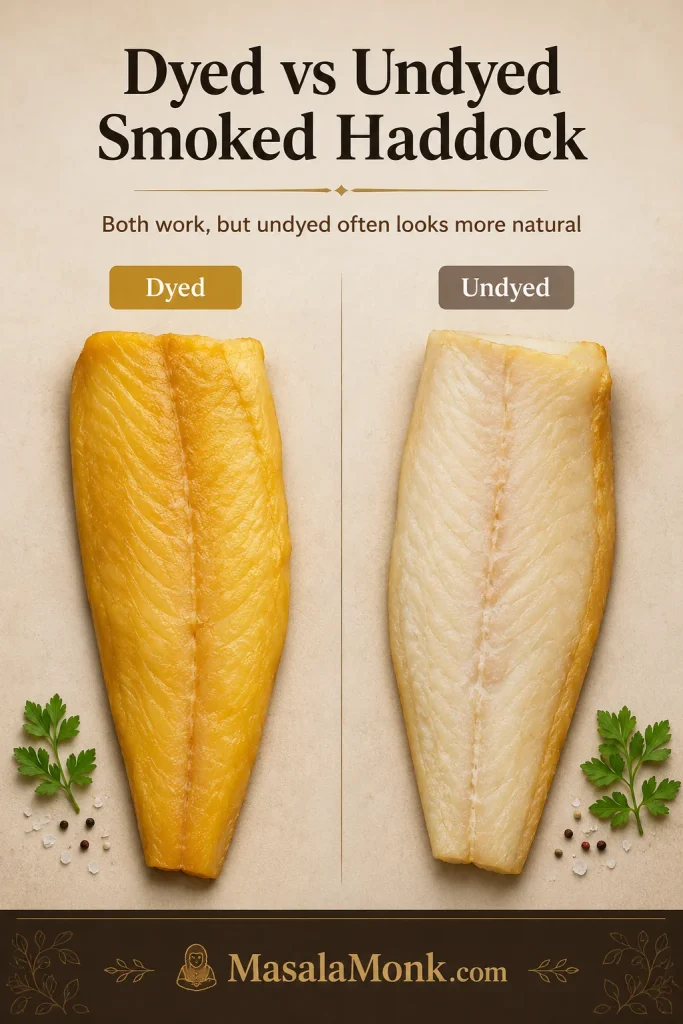
Use 400 to 450 g / 14 to 16 oz smoked haddock for four generous bowls. Undyed smoked haddock is ideal if you can find it because the colour is natural and the flavour is usually cleaner. Dyed smoked haddock also works, but it will give the soup a stronger yellow colour.

Side-by-side comparison of yellow dyed smoked haddock and paler undyed smoked haddock on a light surface.
Dyed haddock works, but undyed smoked haddock usually gives the chowder a cleaner colour and a more natural-looking finished bowl.

When the fish has skin, poach it with the skin on, then remove the skin before flaking. Pull out any bones as you break the fish into large pieces.

Frozen Fish, Substitutes, and Salt Balance

Frozen smoked haddock works well when it is thawed overnight in the fridge before poaching. Pat it dry, then cook gently as usual. When poaching from frozen, use lower heat and allow extra time, though thawed fish gives better texture and more even cooking.

When smoked haddock is unavailable, use smoked cod, smoked pollock, smoked whiting, or another smoked white fish. For very strong smoked fish, use part smoked fish and part plain white fish.

Very strong or salty haddock can overpower the pot, so use a little less of the poaching milk and balance the chowder with fresh milk, unsalted stock, or extra potato. You still get the smoked-fish flavour without letting it take over the bowl.
Extra cooked smoked haddock is worth keeping in large flakes for potato-based leftovers. This crispy fish cakes recipe is a useful next idea when you have fish and potato to use up.

Milk

Whole milk gives the best texture and flavour because it does two jobs at once: it poaches the fish and becomes part of the base. Semi-skimmed or 2% milk can work too, but it needs lower heat because leaner milk is less forgiving.

Potatoes

Floury potatoes make the thickest, creamiest chowder because they break down slightly. Maris Piper, King Edward, Russet, or Yukon Gold are all good choices. Waxy potatoes hold their shape and give a chunkier bowl, which is also fine if that is what you like.

Dice the potatoes into roughly 1 to 1.5 cm pieces so they cook in 10 to 15 minutes. Mash some of the cooked potatoes into the soup before adding the fish back, and leave the rest whole for texture. The best bowls have both: a rounded base from the mashed edges and a few soft pieces left for the spoon.

You can replace 150 to 200 g of the potato with sweet potato for a slightly sweeter chowder, especially if you are using prawns, sweetcorn, or a lighter no-cream version.

Leek, Onion, and Celery

Leek gives a soft sweetness that suits smoked fish. Slice it, then rinse well in a bowl or colander to remove grit between the layers. Onion adds depth, and celery gives the pot a classic savoury base.

If you only have onion, use one large onion and skip the leek. If you love leeks, use two leeks and skip the onion. For a more leek-forward smoked haddock and leek chowder, use two leeks and skip the celery.

Sweetcorn

Sweetcorn is optional, but it works beautifully here. It gives little pops of sweetness against the creamy potato base and softens the salty-smoky edge of the fish. Frozen sweetcorn can go straight into the hot chowder. Canned sweetcorn should be drained first. Fresh corn can be cut from the cob and simmered for a few minutes until tender.

Stock or Water

Unsalted fish stock, unsalted vegetable stock, or water gives you the most control. If your stock is already salted, start with less and adjust the finished bowl instead of seasoning early.

Bacon or Pancetta

Bacon or pancetta makes the bowl deeper, richer, and more pub-style. Cook it first, then soften the leek and onion in the rendered fat. If the bacon releases plenty of fat, use less butter before adding the vegetables. Taste the finished chowder before seasoning because bacon can push the salt up quickly.

Cream

Cream is a finishing touch, not the thing that holds the chowder together. Single cream, heavy cream, or cooking cream all work. If using double cream, use the smaller amount because it is richer. Add cream near the end over low heat.

For another rich finish, stir in a small handful of mature cheddar off the heat. Keep it modest and taste before adding salt, because smoked haddock and cheese can make the bowl salty quickly.

Herbs, Pepper, Mustard, and Lemon

Parsley and chives bring freshness to the finished bowl. Black pepper works better than early salt. Lemon is optional, but a small squeeze at the end can wake up a rich chowder, especially if you used cream or bacon.

A small teaspoon of Dijon or English mustard can also sharpen the soup without making it taste obviously mustardy. It is especially useful if the base tastes creamy but a little flat.

Jump to the step-by-step method · Back to recipe card

Useful Equipment

You only need a wide pan for poaching, a soup pot for the base, a sieve for the smoky milk, and a potato masher or sturdy spoon for thickening. An immersion blender is optional, but blend only part of the potato mixture so the chowder keeps some texture.

How to Poach Smoked Haddock in Milk

Milk-poaching is the step that makes the chowder taste rounded instead of sharp. The fish cooks quietly, the milk absorbs the smoke, and you get a base that already tastes like smoked haddock before the soup is built.

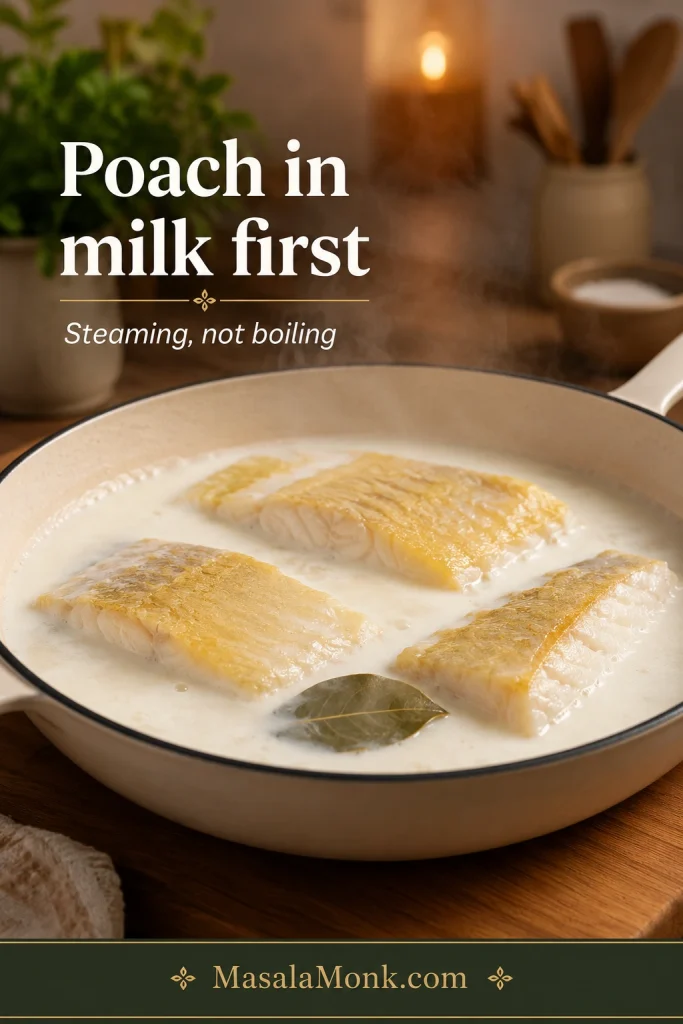
Smoked haddock fillets gently poaching in milk in a shallow pan with a bay leaf and light steam.
Poaching the haddock in milk first does two jobs at once: it keeps the fish tender and turns the milk into the smoky chowder base.

Milk-Poaching Steps

  1. Place the smoked haddock in a wide pan in a single layer.
  2. Add the milk and bay leaf. The fish does not need to be submerged perfectly, but it should be mostly covered.
  3. Warm slowly over low to medium-low heat until the milk is steaming and just beginning to tremble at the edges.
  4. Poach for 5 to 7 minutes, depending on the thickness of the fillets.
  5. Lift the fish out as soon as it turns opaque and flakes easily. If checking with a thermometer, look for 63°C / 145°F.
  6. Strain the milk and keep it for the chowder. The reserved milk should smell gently smoky, not harsh; that is the flavour that will carry through the whole pot.
  7. Remove skin and bones if needed, then flake the haddock into large pieces.

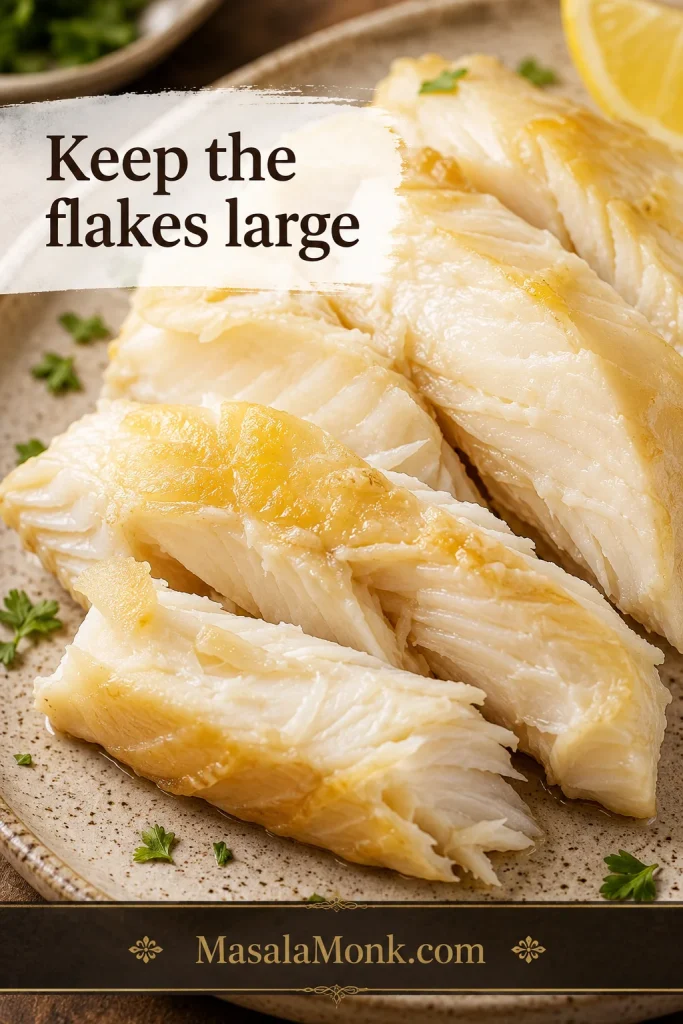
Visual cue: Keep the cooked haddock in large flakes before it goes back into the chowder.

Large flakes of cooked smoked haddock on a plate with the text “Keep the flakes large.”
Once the fish is cooked, flake it generously rather than finely so the haddock still feels like the main ingredient in each spoonful.

Give this step gentle heat and a few calm minutes. The fish may not look dramatic at this stage, and that is fine. You are only cooking it until it flakes, not trying to brown or crisp it.

Continue to the step-by-step method · Back to recipe card

How to Make Smoked Haddock Chowder

Once the haddock is poached and the smoky milk is reserved, the chowder comes together like a simple potato soup. Build flavour before the dairy goes back in, then finish with low, patient heat.

1. Soften the Leek, Onion, and Celery

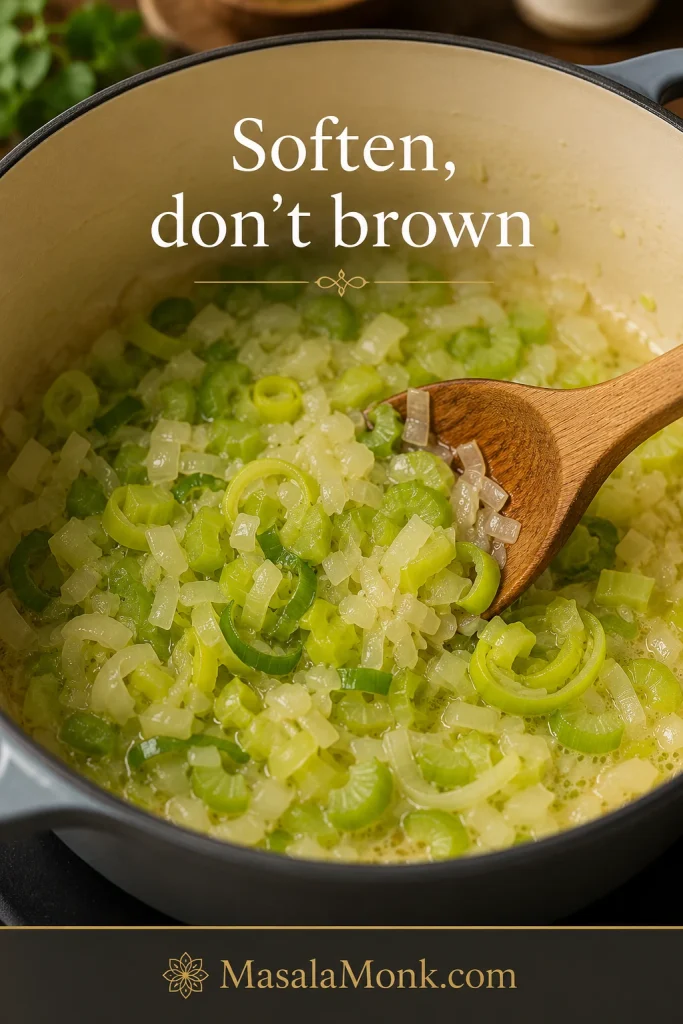
Melt the butter in a large soup pot over medium-low heat. Add the leek, onion, and celery, then cook for 8 to 10 minutes until soft and glossy. The vegetables should smell sweet and savoury, not browned.

Leek, onion, and celery softening in butter in a pan with a wooden spoon and the text “Soften, don’t brown.”
Soften the leek, onion, and celery until glossy and mellow; browning them pushes the chowder away from its soft, creamy flavour.

2. Simmer the Potatoes

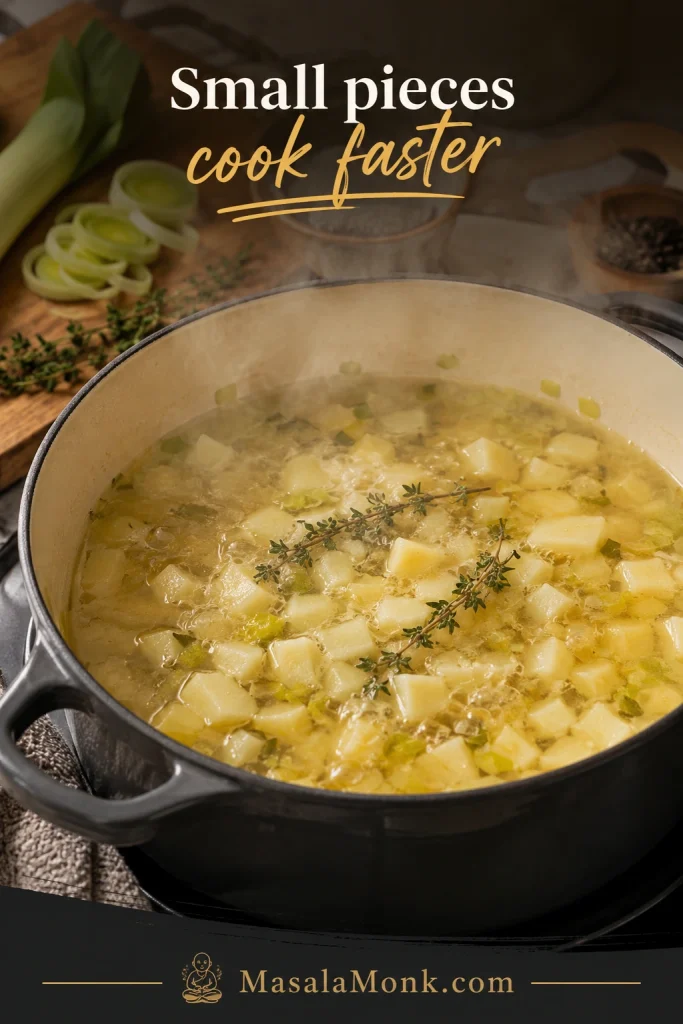
Add the diced potatoes, thyme, and unsalted stock or water. Simmer until the potatoes are tender, usually 10 to 15 minutes. Smaller potato pieces cook faster and make the chowder easier to thicken.

Diced potatoes simmering with leek and thyme in a pot, with the text “Small pieces cook faster.”
Next, simmer small potato pieces until tender so they cook evenly and can later thicken the chowder without a floury roux.

3. Mash Some Potatoes for Body

Mash some of the potatoes directly in the pot. This is the easiest way to thicken the soup without making it heavy. Leave enough potato chunks whole so each bowl still has texture.

Potato masher pressing cooked potatoes in a pot with leeks, leaving some potato chunks whole.
Mash only part of the potatoes into the pot; that gives the chowder body while leaving enough chunks for a hearty bowl.

4. Add the Reserved Smoky Milk

Pour in the strained poaching milk and stir gently. The pot should start to smell smoky and mellow, not sharp or fishy. This is the moment it starts to taste like chowder instead of potato soup. If the chowder looks a little loose, mash a few more potatoes and let the base settle for a minute.

Milk being poured from a jug into a pot of potatoes and leeks with steam rising.
Then pour in the reserved smoky milk slowly, letting the potato base loosen into a creamy chowder instead of a thin soup.

5. Finish With Fish, Sweetcorn, and Cream

Stir in the sweetcorn and warm it through. Add the cream if using, then fold in the flaked smoked haddock. A few broken flakes are fine; just avoid stirring so hard that the fish disappears into the soup.

Large flakes of smoked haddock being folded into creamy chowder in a pot with a wooden spoon.
Add the haddock near the end and fold gently, because the flakes only need to warm through, not simmer for ages.

6. Taste at the End

Finish with black pepper, parsley or chives, and a squeeze of lemon if the chowder needs brightness. Add mustard if the base tastes creamy but flat. The final herbs and lemon lift the bowl and make it feel rich without becoming heavy.

Check final texture cues · Troubleshoot the chowder

Final Texture and Taste Cues

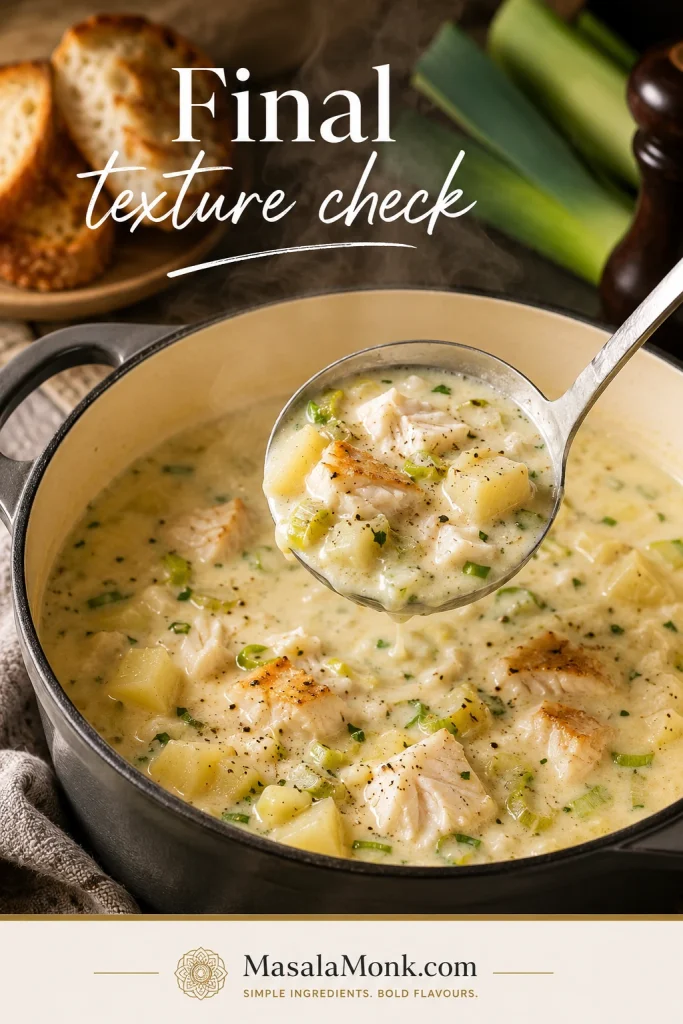
A good smoked haddock chowder should look smooth and spoon-coating, not gluey. The broth should coat a spoon lightly, the potatoes should be tender, and the haddock should sit in large flakes rather than tiny broken pieces. The bowl should feel generous, not heavy.

Ladle lifting finished smoked haddock chowder with fish flakes, potatoes, leeks, herbs, and creamy broth.
Before serving, check the ladle: you want creamy broth, tender fish, soft potatoes, and enough movement that the chowder still feels silky.
  • Fish: opaque, tender, and easy to flake.
  • Potatoes: soft enough to mash at the edges, with some chunks left whole.
  • Liquid: smooth and rounded, not separated or grainy.
  • Seasoning: smoke first, gentle sweetness from leek and corn, and only enough salt to feel balanced.

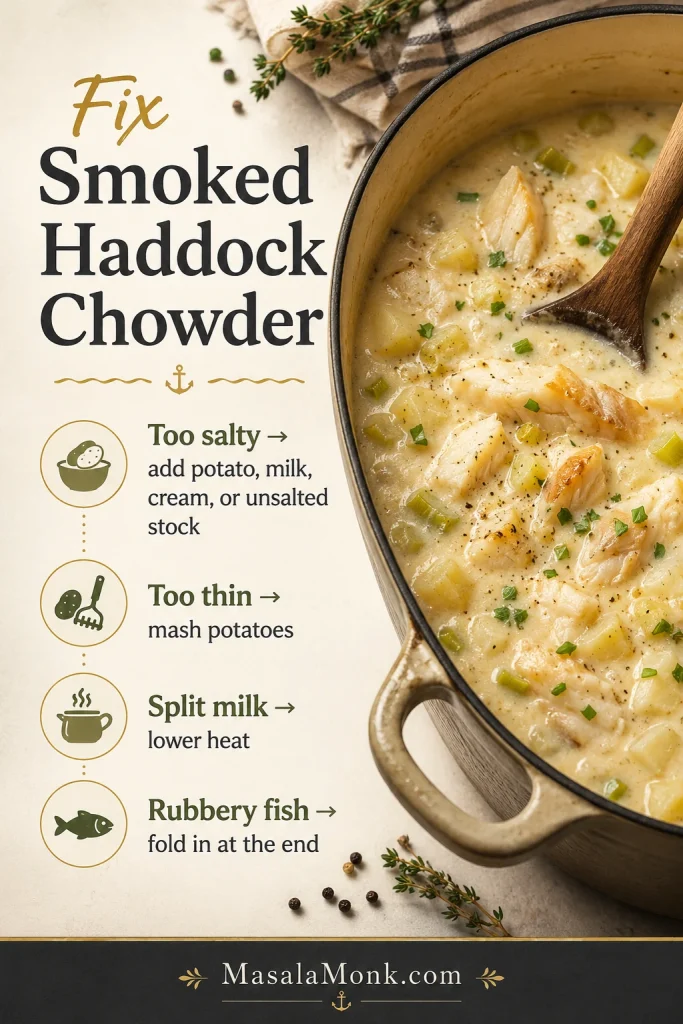
If the chowder tastes flat, it usually needs pepper, herbs, lemon, mustard, or a little extra smoked-fish flavour. If it tastes too salty, the fix is usually more potato, milk, cream, or unsalted stock.

More Ways to Adjust the Chowder

The base recipe gives you a classic spoon-coating chowder. These notes help you steer the same pot lighter, richer, sweeter, or more seafood-heavy without changing the method.

Creamy Version

A splash of cream makes the bowl fuller and softer. Stir in 75 to 100 ml / ⅓ cup to scant ½ cup near the end so it rounds out the broth without drowning the smoked fish.

Lighter or No-Cream Version

Skip the bacon and cream, use milk as the main liquid, mash extra potatoes for body, and finish with herbs and lemon instead of extra fat. The bowl still feels rich and rounded, but the body comes from potatoes rather than cream.

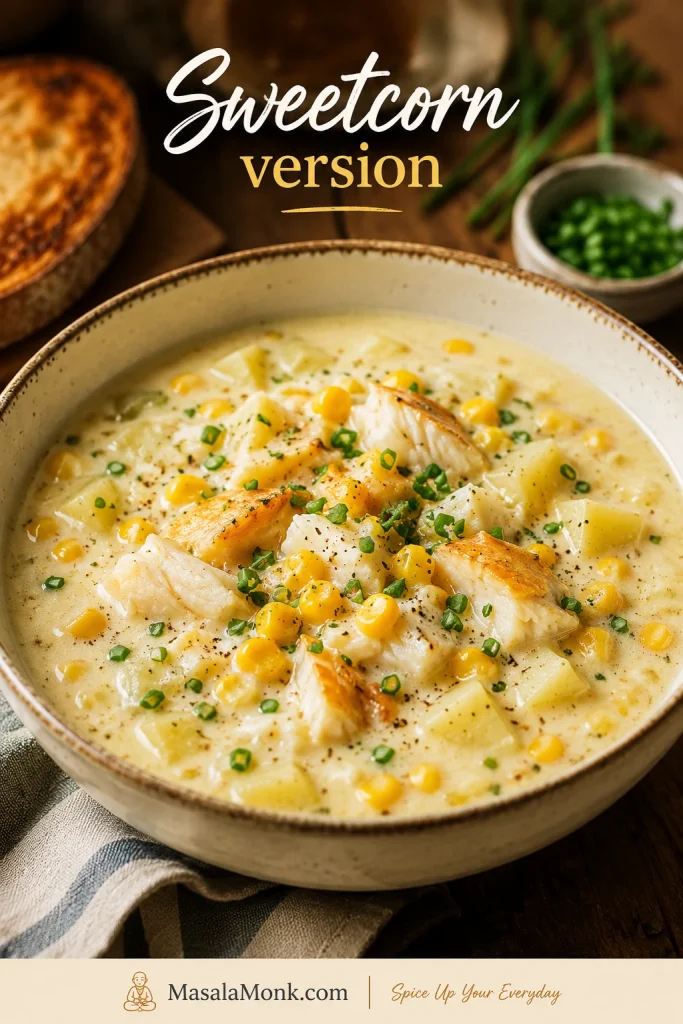
Smoked Haddock and Sweetcorn Chowder

Sweetcorn is the easiest way to soften the smoke. Add 100 to 150 g / about ⅔ to 1 cup near the end for little sweet pops against the salty fish and creamy potato base. Frozen, canned, or fresh corn all work.

Bowl of smoked haddock and sweetcorn chowder with fish flakes, potato chunks, herbs, black pepper, and visible sweetcorn.
For a sweeter family-style version, sweetcorn softens the smoky edge and adds bright pops of texture against the potato base.

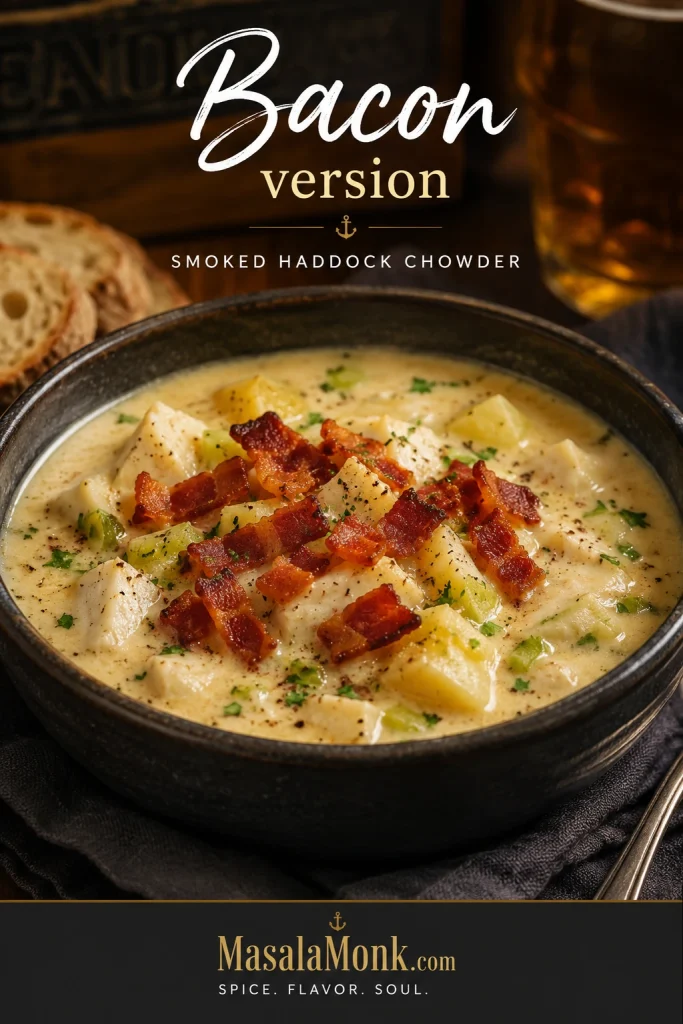
Smoked Haddock and Bacon Chowder

Bacon pushes this into pub-style territory. Cook 75 to 100 g / about 2½ to 3½ oz chopped bacon or pancetta first, then let the leek and onion soften in the rendered fat. Taste the finished chowder before seasoning.

Bowl of smoked haddock chowder topped with crispy bacon, herbs, potatoes, leeks, and creamy broth in a dark bowl.
For a deeper pub-style bowl, bacon adds savoury crunch and smoke, but taste before salting because it seasons the chowder too.

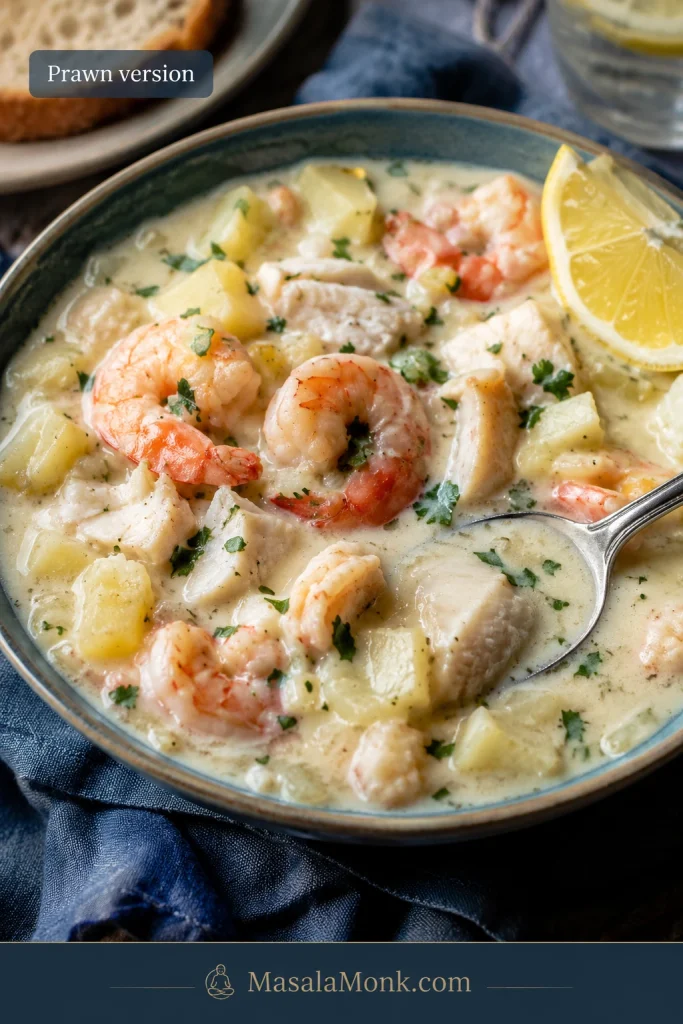
Smoked Haddock and Prawn Chowder

Prawns make the bowl feel more generous and seafood-forward. Add raw prawns, or large shrimp, near the end and cook gently for 2 to 3 minutes, just until pink and opaque. If using cooked prawns, add them only long enough to warm through. For a separate quick seafood dinner where prawns are the main event, try this shrimp scampi recipe.

Bowl of smoked haddock and prawn chowder with pink prawns, fish pieces, potatoes, herbs, lemon, and creamy broth.
For the prawn version, add prawns near the end so they stay pink, tender, and sweet instead of shrinking into the broth.

Dairy-Free Coconut Version

This will not taste like a classic British chowder, but it can still be lovely: smoky, light, and gently spiced. Use light coconut milk and water instead of dairy milk and cream, then add ginger, turmeric, chilli, or smoked paprika if you want more warmth.

Small Batch for 2 People

For two bowls, use about 200 to 225 g / 7 to 8 oz smoked haddock, 300 ml / 1¼ cups milk, 250 to 300 g potatoes, and one small leek or half an onion. A smaller pan helps keep the fish mostly covered while it poaches.

Budget-Friendly Version

To stretch the pot, use 250 to 300 g smoked haddock instead of the full amount, then add more potato, sweetcorn, and leek. The flavour will be milder, but the smoky poaching milk still carries through the soup.

Smoked Haddock Chowder vs Cullen Skink

Cullen skink is the more traditional Scottish smoked haddock soup; smoked haddock chowder is the broader, more flexible version. Cullen skink usually stays close to smoked haddock, potatoes, onion or leek, milk, and sometimes cream, while chowder may include celery, sweetcorn, bacon, prawns, stock, herbs, or extra cream.

Make the Cullen skink-style version when you want something simpler and more traditional. Make this chowder when you want a flexible bowl with sweetcorn, bacon, prawns, or a richer finish.

Split comparison showing a simpler Cullen skink-style bowl beside a fuller smoked haddock chowder with optional add-ins.
Cullen skink-style keeps things simpler and more traditional, while chowder gives you more room for cream, herbs, sweetcorn, bacon, or prawns.

For a more traditional direction, this Cullen skink recipe keeps the focus on smoked fish, potatoes, onion, and a simple milk-rich base.

For a stricter Cullen skink-style bowl, skip the sweetcorn, bacon, celery, prawns, and heavy add-ins. Use smoked haddock, potatoes, leek or onion, milk, a little cream if you like, black pepper, and herbs.

DishUsually includesBest for
Smoked haddock chowderSmoked haddock, potatoes, milk, leek or onion, celery, sweetcorn, bacon, cream, herbs, or seafood add-insA flexible creamy fish soup
Cullen skinkSmoked haddock, potatoes, onion or leek, milk, cream, herbsA more traditional Scottish smoked haddock soup

Back to top

Troubleshooting

Most chowder problems happen near the end, when the milk gets too hot, the fish is stirred too hard, or the smoked haddock brings more salt than expected. The fixes below will usually save the pot.

Troubleshooting guide for smoked haddock chowder with fixes for too salty, too thin, split milk, and rubbery fish.
If the chowder needs rescuing, fix the cause: potatoes add body, milk or stock softens saltiness, and lower heat protects the dairy and fish.

Texture and heat fixes

ProblemWhat happenedHow to fix it
Chowder is too thinThe potatoes did not break down enough.Mash some potatoes into the soup or simmer the base uncovered briefly before adding the fish.
Chowder is too thickThe potatoes thickened the base more than expected.Loosen with warm milk, stock, or water until the texture feels right.
Milk split or turned grainyThe heat was too high after the milk or cream went in.Lower the heat and avoid a hard boil. A split chowder is usually edible, but the texture may look grainy.
Fish is rubberyThe haddock was boiled or cooked too long.Poach gently and add the flaked fish back near the end only to warm through.
Fish broke into tiny piecesThe haddock was stirred too much after flaking.Fold the fish in gently at the end and avoid aggressive stirring.

Flavour and seasoning fixes

ProblemWhat happenedHow to fix it
Chowder is too saltyThe smoked haddock, bacon, pancetta, or stock added more salt than expected.Add potato, milk, cream, or unsalted stock to soften the salt. Next time, season at the end.
Chowder tastes too smokyThe smoked haddock was very strongly smoked.Add potato, sweetcorn, milk, or cream to soften the smoke. Next time, use part smoked fish and part plain white fish.
Chowder tastes blandThe base needs more lift or seasoning.Add pepper, herbs, lemon, mustard, or a little extra smoked-fish flavour.
Chowder is too richToo much cream, bacon, or butter made it heavy.Loosen with milk or stock and finish with lemon and herbs. Next time, skip cream and thicken with potato.
Chowder tastes fishyThe fish may not be fresh enough, may have been overcooked, or may be too strong for your taste.Use fresh-smelling smoked haddock, avoid boiling, and finish with lemon and herbs.

Back to recipe card · Storage and reheating

Storage, Freezing, and Reheating

This chowder is best freshly made, but leftovers can still be lovely if you warm them slowly. Fish and dairy prefer patience, not high heat.

Smoked haddock chowder in a bowl and glass storage container with a small jug of milk, herbs, spoon, and lemon.
For leftovers, cool the chowder promptly, store it gently, and reheat it slowly with a splash of milk or stock if it thickens.

To Refrigerate

Let the chowder cool briefly, then store it in an airtight container in the fridge for up to 2 to 3 days. Because it contains fish and dairy, get it into the fridge promptly.

To Reheat

Reheat on low heat, stirring gently, until hot all the way through. Add a splash of milk or stock if the chowder has thickened in the fridge.

To Freeze

You can freeze it, but the texture may change because milk, cream, and potatoes can become slightly grainy after freezing. For the best make-ahead result, freeze the potato and milk base before adding cream and fish, then add freshly poached smoked haddock when reheating.

Best Make-Ahead Method

Make the leek, potato, and milk base ahead of time, then add the flaked smoked haddock when you reheat the chowder. This keeps the fish from breaking apart or turning tough.

What to serve with it · Back to recipe card

What to Serve With Smoked Haddock Chowder

The chowder is filling enough to be a meal on its own, especially when it has potatoes and sweetcorn in the bowl. A simple side makes it feel complete.
Anything toasted, crunchy, or slightly sharp works well here because the chowder itself is soft, smoky, and spoon-coating. Toast, oatcakes, crackers, or crusty bread give you contrast against the creamy bowl.

Bowl of smoked haddock chowder served with toasted bread, salad, lemon wedges, oatcakes, butter, herbs, and black pepper.
To make the chowder feel like a full meal, add contrast with toasted bread, oatcakes, crackers, lemon, herbs, or a crisp green salad.
  • Crusty bread
  • Buttered toast
  • Soda bread
  • Oatcakes or crackers
  • Simple green salad
  • Roasted carrots or other roasted vegetables
  • Lemon wedges
  • Extra chives, parsley, or black pepper

For something homemade to dip into the bowl, this homemade garlic bread loaf is a strong fit.

For a fresher plate, pair the chowder with a crisp salad. This cucumber salad recipe gives you the cool, sharp contrast that creamy soups often need.

Final tips · Back to top

FAQ

Should I poach smoked haddock in milk first?

Yes. It keeps the fish tender and gives you smoky milk for the base.

What should I do with the poaching milk?

Strain it and use it in the chowder. It carries smoked-fish flavour into the whole soup.

Does frozen smoked haddock work for chowder?

Yes. Thaw it overnight in the fridge for the best texture, then poach it in milk. Cooking from frozen works, but it takes longer and cooks less evenly.

Can I use dyed smoked haddock?

Yes. Dyed smoked haddock works, but it gives the soup a stronger yellow colour. Undyed smoked haddock usually looks more natural and often tastes cleaner.

How do I make it without cream?

Skip the cream and mash more potatoes into the soup. Whole milk and potatoes are enough to make the bowl feel full-bodied.

How do I make a lighter version?

Skip bacon and cream, use a little more stock if you want a looser base, and finish with lemon, herbs, and black pepper.

Is sweetcorn good in smoked haddock chowder?

Yes. Sweetcorn softens the salty-smoky edge of the fish and adds little pops of sweetness. Frozen, canned, or fresh corn all work.

Should I add bacon?

Add bacon for a richer, pub-style bowl. Cook it first, then soften the leek and onion in the fat. Taste before adding salt.
How is this different from Cullen skink?

Cullen skink is usually simpler: smoked haddock, potatoes, onion or leek, milk, and sometimes cream. This chowder is broader and can include sweetcorn, bacon, celery, prawns, herbs, or extra cream.

Why did my chowder turn out too salty?

Smoked haddock, bacon, pancetta, and stock can all add salt. Add more potato, milk, cream, or unsalted stock to soften the saltiness.

Does smoked haddock chowder freeze well?

It can be frozen, but dairy and potatoes may turn slightly grainy. For the best result, freeze the potato and milk base, then add freshly poached haddock when reheating.

What can I use instead of smoked haddock?

Use smoked cod, smoked pollock, smoked whiting, or another smoked white fish. If the flavour is too strong, use part smoked fish and part plain white fish.

How do I make the chowder thicker?

Mash more cooked potatoes into the soup. If it still feels loose, simmer the potato base briefly before adding the milk, cream, and fish.

What is the best make-ahead method?

Make the potato and milk base ahead, then add the smoked haddock when reheating. This keeps the fish tender and prevents it from breaking apart.

Final Tips for the Best Smoked Haddock Chowder

The best smoked haddock chowder is gentle from start to finish. Warm the milk slowly, let the leeks soften properly, use the potatoes for body, and add the fish back only when the base is ready. That is how you get smoke, creaminess, and tender haddock in the same spoonful.
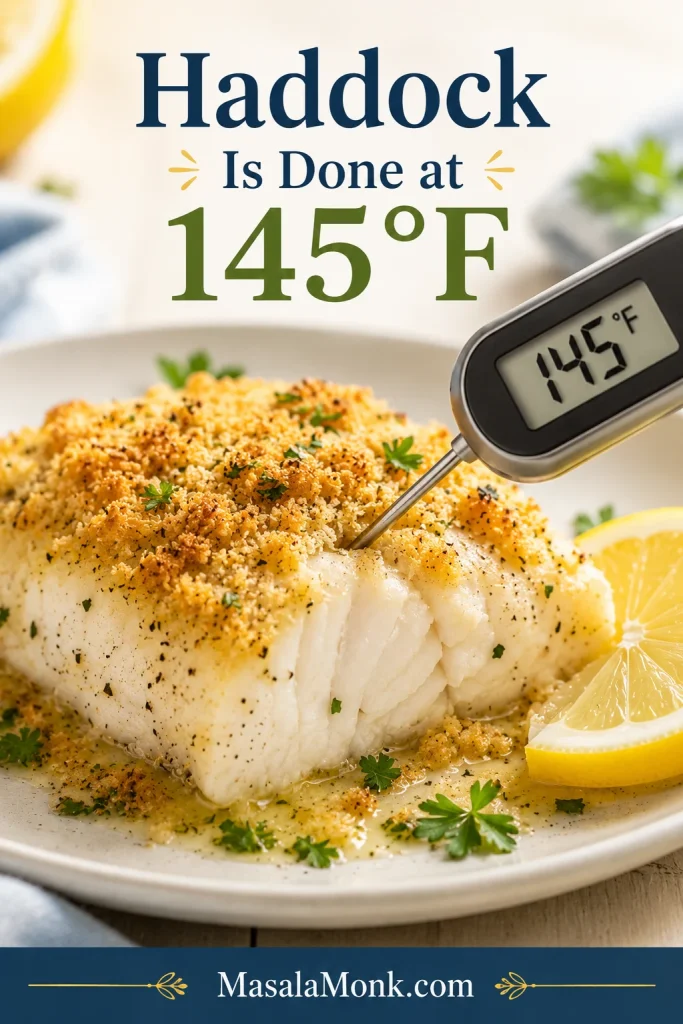
If the first spoonful tastes smoky, mellow, and a little sweet from the leek or corn, you have done it right. Make it richer with cream, lighter with extra mashed potato, sweeter with sweetcorn, or deeper with bacon. Serve it hot, keep the bread close, and do not be surprised if the last bit in the bowl gets wiped clean.
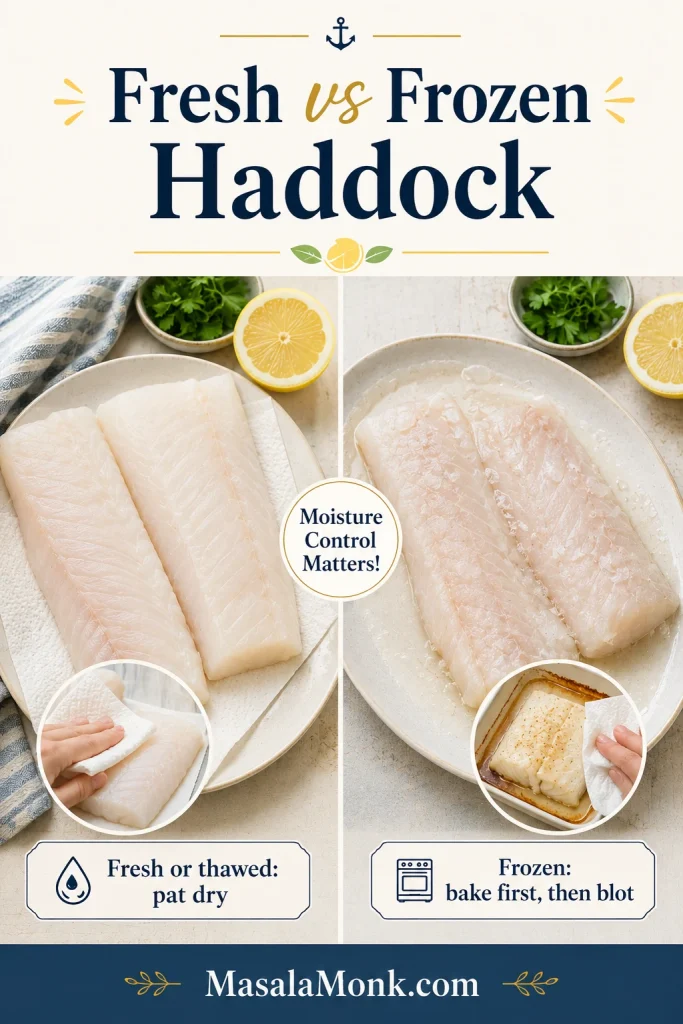
Hand dipping a piece of crusty bread into smoked haddock chowder with fish flakes, potatoes, herbs, and black pepper.
Finally, keep bread close by; the creamy broth, smoky fish, and soft potatoes are exactly the kind of bowl made for dipping.

Back to top

Posted on Leave a comment

Baked Haddock Recipe: Easy Oven Haddock with Buttery Ritz or Panko Topping

Baked haddock fillet with golden crumb topping served with lemon wedges, roasted potatoes, green beans, and tartar sauce.

This baked haddock recipe gives you tender, flaky white fish with a golden buttery topping in about 25 minutes. It is simple oven fish, but with the small details that keep haddock from turning dry, watery, bland, or hidden under soggy crumbs.

Haddock cooks quickly, which can feel a little unforgiving at first. The rhythm is simple: dry the fish, season it directly, add a buttery topping, and stop baking when the fish is done. After that, it becomes one of the easiest weeknight seafood dinners.

Quick Answer: Bake Time, Temperature, and Doneness

Bake haddock fillets at 400°F / 200°C for 12 to 16 minutes, depending on thickness. The fish is done when it turns opaque, flakes easily with a fork, and reaches 145°F / 63°C in the thickest part.

  • 400°F / 200°C is the easiest everyday temperature for quick, flaky baked haddock.
  • 350°F / 175°C is gentler for thick haddock loins, a heavier Ritz cracker topping, or a more traditional New England-style bake.
  • Bake uncovered when using panko, breadcrumbs, or Ritz crackers.
  • The fish comes first. The crumbs come second. Pull the haddock when it is done; the broiler can finish a pale surface in a minute.

A pale topping can be fixed. Overcooked fish cannot. That one idea makes this recipe much easier.

Recipe guide card showing baked haddock timing of 400°F for 12 to 16 minutes and doneness at 145°F.
For most haddock fillets, 400°F gives a fast oven bake; then 145°F confirms the center is cooked without drying out.

Easy Baked Haddock Recipe

Easy Baked Haddock with Buttery Ritz or Panko Topping

Mild haddock fillets baked with lemon, butter, herbs, and your choice of panko, breadcrumbs, or crushed Ritz crackers. The fish turns soft and flaky while the surface becomes golden and savory.

Prep Time10 minutes
Cook Time12 to 16 minutes
Total TimeAbout 25 minutes
Servings4
Yield4 baked haddock fillets
Oven Temperature400°F / 200°C
Doneness145°F / 63°C, opaque, and flaky

Ingredients

  • 4 skinless boneless haddock fillets, about 6 oz / 170 g each, or about 1 1/2 lb / 680 g total
  • 1 tablespoon olive oil or melted butter, for the baking dish and fish
  • Fine salt, to taste: about 3/4 teaspoon for plain crumbs, or 1/4 to 1/2 teaspoon for Ritz crackers, salted butter, or Parmesan
  • 1/4 teaspoon black pepper
  • 1 tablespoon lemon juice / 15 ml, plus lemon wedges for serving
  • 1 teaspoon lemon zest, optional but excellent in the topping
  • 1/2 teaspoon garlic powder
  • 1/2 teaspoon paprika
  • 2 tablespoons chopped parsley, plus more for serving

For a Breadcrumb or Panko Topping

  • 3/4 to 1 cup panko or breadcrumbs
  • 4 tablespoons melted butter / 56 g
  • 1/4 cup grated Parmesan / about 22 g, optional

For a Ritz Cracker Topping

  • 1 sleeve Ritz crackers, about 34 crackers / roughly 90 to 100 g, crushed
  • 3 to 4 tablespoons melted butter / 42 to 56 g
  • 1/4 to 1/2 teaspoon fine salt total, added only after tasting the cracker mixture

Instructions

  1. Preheat the oven. Heat the oven to 400°F / 200°C. Lightly grease a 9×13-inch / 23×33 cm baking dish.
  2. Dry the haddock. Pat the fillets very dry with paper towels. Dry fish before the oven means better texture after the oven.
  3. Season the fish. Arrange the fillets in one layer. Brush lightly with olive oil or melted butter, then season with salt, pepper, lemon juice, garlic powder, and paprika.
  4. Make the topping. Mix panko, breadcrumbs, or crushed Ritz crackers with melted butter, lemon zest, parsley, and Parmesan if using. The mixture should look like damp sand, not wet paste.
  5. Top the fillets. Spoon the mixture over the fish and press gently so it sticks. Keep the layer loose rather than packed down.
  6. Bake uncovered. Bake for 12 to 16 minutes, depending on thickness, until the fish is opaque and flakes easily.
  7. Check doneness. For the most reliable result, check the thickest part with an instant-read thermometer. Haddock is done at 145°F / 63°C.
  8. Brown only if needed. If the fish is done but the topping is pale, broil, or use the oven grill, for 1 to 2 minutes. Watch closely.
  9. Rest and serve. Let the fish rest for 2 minutes, then serve with lemon wedges and more parsley.

When it is right, the fish should lift in soft flakes, the center should look opaque and moist, and the buttery layer should be golden without feeling greasy.

Recipe Notes

  • For thicker haddock loins or a heavier Ritz layer, bake at 350°F / 175°C for 18 to 25 minutes instead.
  • Thin fillets may be done in less than 12 minutes, so start checking early.
  • If using a fan or convection oven, begin checking 2 to 3 minutes early.
  • Mixed-size fillets need mixed timing: lift out thinner pieces first and let thicker ones finish.
  • Serve soon after baking. The fish stays moist, but the golden layer is best while warm and fresh.
Four baked haddock fillets in a white baking dish with golden topping, parsley, and lemon wedges.
Baking the fillets uncovered helps the topping toast while the haddock underneath stays tender, moist, and easy to lift from the dish.

Choose Your Baked Haddock Version

Start with the dinner you want, then choose the topping. Ritz gives you buttery New England comfort, panko gives you crunch, breadcrumbs keep it classic, and lemon butter keeps the plate lighter.

Four-panel guide showing baked haddock versions with Ritz, panko, no breadcrumbs, and a from-frozen method.
Once you know the style you want, this guide helps you choose between Ritz, panko, no breadcrumbs, or a from-frozen method.

Best Topping by Dinner Style

What You WantUseBest TemperatureWhy It Works
New England baked haddockCrushed Ritz crackers350°F or 400°FButtery, cozy, and classic with lemon and parsley.
Crispy baked haddock without fryingPanko and Parmesan400°FLight crunch without a pot of oil.
Soft classic baked fishPlain breadcrumbs375°F or 400°FGentler texture and familiar flavor.
Baked haddock without breadcrumbsLemon, butter or olive oil, herbs400°FClean, bright, and lighter.
Thick center-cut haddockHaddock loins350°F or longer 400°F timingThicker fish needs gentler timing.
Baked haddock from frozenEmergency frozen method400°FBake briefly first, blot moisture, then season.

Use this topping comparison to choose the texture you want before you bake: buttery Ritz, crisp panko, or softer breadcrumbs.

Comparison board showing Ritz crackers, panko, and breadcrumbs as three topping options for baked haddock.
Choose Ritz for buttery New England baked haddock, panko for a crisp finish, or breadcrumbs for a softer classic crust.

For a first try, choose Ritz if you want the coziest fish dinner and panko if you want the crispest finish. Both make mild haddock feel more complete than plain baked fish.

Craving fried fish instead of baked fish? This fish batter recipe is the better path.

More Baked Haddock Tips

Why This Baked Haddock Works

Haddock needs three things: a dry surface, seasoning on the fish itself, and the confidence to stop baking before the fillets turn firm. The buttery layer adds flavor and comfort, but the fish is still the main event.

If baked fish has disappointed you before, it was probably not because you did anything dramatic wrong. Delicate white fish simply rewards early checking. Once you learn that, this recipe feels relaxed instead of risky.

The buttered surface protects the fish, the lemon keeps the flavor bright, and the broiler gives you a backup plan when the fish is done before the surface looks perfect.

Ingredients You’ll Need

The ingredient list is short, so balance matters. Haddock is mild; it needs direct seasoning and enough butter in the topping to brown without turning greasy.

Ingredients for baked haddock arranged overhead, including haddock fillets, lemon, butter, parsley, Ritz crackers, panko, breadcrumbs, Parmesan, and spices.
Before choosing your topping, gather the essentials: mild haddock, lemon, butter, herbs, and either Ritz crackers, panko, or breadcrumbs.

Haddock Fillets

Skinless boneless haddock fillets are easiest. Four fillets, about 6 oz / 170 g each, fit well in a 9×13-inch baking dish. Thinner pieces cook quickly; thick haddock loins need more time. Skin-on haddock can still be baked skin-side down.

Butter or Olive Oil

Butter gives the most classic flavor and helps the surface turn golden and savory. Olive oil works when you want a lighter plate, especially with plenty of lemon and herbs.

Panko, Breadcrumbs, or Ritz Crackers

Panko gives the lightest crunch. Fine breadcrumbs make a softer classic crust. Ritz crackers bring buttery New England comfort and need a lighter hand with salt.

Crush Ritz crackers into coarse pieces, not powder. You want little buttery bits that toast on top of the fish.

Lemon, Garlic, Paprika, and Herbs

Lemon brightens the fish, garlic powder seasons evenly, paprika adds color, and parsley keeps the plate fresh. For a seafood-seasoning flavor, replace the paprika with a small pinch of seafood seasoning and reduce the salt.

Parmesan

Parmesan is optional, but it works beautifully with panko. It adds savory depth and helps the panko crust taste more finished.

Step-by-Step Tips for Better Baked Haddock

The recipe card gives you the fast version. These cues help with thin fillets, thick loins, frozen fish, and heavier toppings.

1. Start with dry fillets

Pat both sides of the fish with paper towels. This one step helps seasoning stick and keeps the dish from turning watery.

Raw haddock fillets being patted dry with paper towels on a light surface before baking.
First, pat the haddock dry; otherwise, extra surface moisture can make the fish steam and soften the topping.

2. Season the fish, not just the topping

Add salt, pepper, lemon juice, garlic powder, and paprika before the topping goes on. The golden layer should support the fish, not carry all the flavor by itself.

Haddock fillets in a white baking dish being seasoned with lemon, paprika, garlic powder, salt, and pepper before topping.
Next, season the haddock itself with lemon, salt, pepper, garlic, and paprika so the fish tastes good beneath the topping.

3. Keep the topping loose

Mix the panko, breadcrumbs, or crushed crackers with melted butter until the texture looks like damp sand. Spoon it over the fish, press gently, and stop there. A loose layer browns better than a packed one.

Bowl of buttered panko breadcrumb topping with herbs and lemon zest, lifted with a spoon to show a damp sand texture.
The topping should feel like damp sand because that texture browns better than dry crumbs or a greasy butter paste.

After mixing the crumbs, keep the layer loose on top of the fillets so the heat can move through the fish.

Loose breadcrumb topping being spooned over seasoned haddock fillets in a white ceramic baking dish.
Spoon the topping on lightly instead of pressing it down, because a loose layer leaves room for heat to cook the fish evenly.

4. Bake uncovered

An uncovered dish gives the surface a chance to toast. Covering traps steam, which is useful for some foods but not for buttery topping on delicate fish.

5. Let the fish win

Pull the haddock when it flakes, even if the top is not quite as golden as you hoped. A minute under the broiler can fix the color.

Before and after comparison of baked haddock topping before broiling and after becoming golden brown.
If the haddock is done but the surface looks pale, broil the topping briefly instead of extending the bake time.

Once the topping choice is clear, the only real timing question is temperature.

350°F vs 400°F: Which Is Better?

Both temperatures can work. Choose based on thickness and topping.

Oven TemperatureBest ForTypical Timing
350°F / 175°CThicker fillets, haddock loins, heavier Ritz layer, gentler New England-style bake18 to 25 minutes
375°F / 190°CA middle path when the topping browns quickly but the fish is thick14 to 20 minutes
400°F / 200°CMost everyday baked haddock fillets12 to 16 minutes
425°F / 220°CVery thin fillets or quick browning at the end8 to 12 minutes

For most weeknight dinners, 400°F / 200°C is the easiest default. For a thicker loin or a heavy Ritz layer, 350°F / 175°C gives the fish more time to cook gently.

Infographic comparing 350°F and 400°F oven temperatures for baked haddock with notes for thick loins and most fillets.
Use 400°F for most weeknight haddock fillets; however, thicker loins or a heavier Ritz layer often bake better at 350°F.

How Long to Bake Haddock by Thickness

Thickness matters more than weight. A thin 6 oz fillet can cook faster than a smaller but thicker haddock loin.

Fillets vs Loins

Haddock fillets are usually thinner and cook quickly, while haddock loins are thicker center-cut pieces that need more time and often do better with gentler heat.

If your dish has mixed sizes, remove the thinner fillets as soon as they are done and let the thicker pieces finish. This simple move prevents dry edges and underdone centers.

Haddock ThicknessAt 400°F / 200°CAt 350°F / 175°C
Thin fillet, about 1/2 inch8 to 10 minutes12 to 15 minutes
Medium fillet, about 3/4 inch10 to 14 minutes15 to 18 minutes
Thick fillet, about 1 inch14 to 17 minutes18 to 22 minutes
Very thick haddock loin17 to 20 minutes22 to 25 minutes

Start checking at the early end of the range. Haddock rewards early checking more than extra oven time.

Bake time chart for haddock by thickness, showing 1/2 inch, 3/4 inch, 1 inch, and thick loin timing at 400°F.
Because thickness changes bake time more than weight, thin fillets need early checking while thick haddock loins need extra minutes.

How to Know When Haddock Is Done

Haddock is done when the center is opaque, moist-looking, and flakes with gentle pressure. The most reliable check is an instant-read thermometer in the thickest part.

  • Temperature: 145°F / 63°C in the thickest part
  • Fork test: soft flakes separate without force
  • Visual cue: opaque center, not translucent or glossy

The first time, a thermometer is helpful. After that, you will start recognizing the soft flakes and opaque center by sight.

Close-up of baked haddock flaking apart with a fork, showing a moist opaque center and golden topping.
When the center turns opaque and separates into soft flakes, pull the haddock from the oven before the delicate fish overcooks.
Instant-read thermometer inserted into baked haddock, showing doneness at 145°F with lemon and parsley nearby.
A thermometer gives the clearest first-time answer: haddock is done when the thickest part reaches 145°F.

The safe minimum internal temperature for fish is 145°F / 63°C. Once haddock looks firm, dry, or heavily shrunken, it has probably gone too far.

Fresh vs Frozen Haddock

Fresh haddock is easiest, but frozen haddock works well when it is thawed and dried properly. Crumb-topped fish needs a dry surface more than extra liquid in the dish.

Side-by-side comparison of fresh or thawed haddock patted dry and frozen haddock needing moisture control before baking.
Fresh or thawed haddock needs a dry surface; for frozen haddock, a short first bake and a quick blot help control moisture.

Best Method: Thaw First

Thaw frozen haddock overnight in the refrigerator. For a faster method, keep the fish sealed and thaw it in cold water, changing the water every 30 minutes. The USDA describes refrigerator thawing, cold-water thawing, and microwave thawing as safe defrosting methods. Fish thawed by cold water or microwave should be cooked right away.

After thawing, unwrap the fillets and pat them dry before seasoning. That is the difference between a golden top and a wet crust.

Emergency Method: Baking Haddock from Frozen

Thawed fish gives the best texture, but frozen fillets can still become dinner. Keep the topping off at first.

  1. Heat the oven to 400°F / 200°C.
  2. Place frozen fillets in a lightly greased baking dish.
  3. Bake plain for 5 to 8 minutes, just until surface ice melts and moisture starts to release.
  4. Blot or drain the dish carefully.
  5. Season the fish, add the topping, and continue baking until the center reaches 145°F / 63°C.

This will get dinner on the table, but thawed fish gives you a drier surface and a better topping.

Three-step guide showing how to bake haddock from frozen by baking plain, blotting moisture, then seasoning and adding topping.
When baking haddock from frozen, bake it plain first, blot the released moisture, and only then add seasoning and topping.

Flavor Variations

Choose one flavor direction and keep it simple. Haddock is mild, so it does not need a crowded topping.

New England Baked Haddock with Ritz Crackers

This is the buttery comfort version: crushed Ritz crackers, melted butter, lemon, and parsley over mild white fish. Bake at 350°F for a gentler old-school feel, or 400°F when you want dinner faster. Keep the salt light and let the crackers do their job.

New England baked haddock with buttery Ritz cracker topping served on a plate with lemon and parsley.
Crushed Ritz crackers give this New England baked haddock its buttery comfort, while lemon and parsley keep each bite balanced.

Panko Parmesan Baked Haddock

Panko and Parmesan give you the crunch of fried fish without pulling out a pot of oil. This version is best at 400°F so the panko crust can toast while the fish stays tender.

Panko Parmesan baked haddock with a crisp golden crust, lemon wedge, and parsley garnish on a plate.
Panko and Parmesan add crispness without frying, so this baked haddock version works well when you want crunch with less mess.

Lemon Butter Haddock

Skip the crumbs and let lemon butter lead. This is the lightest path, especially when the fish is fresh and you want a clean, bright dinner.

Lemon butter baked haddock without breadcrumbs served with herbs, lemon, and a light side.
For a lighter baked haddock variation, skip the crumbs and let lemon butter, herbs, and gentle oven heat carry the flavor.

Garlic Butter Haddock

Add garlic powder or a little finely grated garlic to the melted butter, then finish with parsley and lemon. Fresh garlic can burn under the broiler, so use a light hand.

Warm Paprika or Chili Crumb Haddock

Add a small pinch of smoked paprika, mild chili powder, or Kashmiri chili powder to the buttered crumbs. Keep the warmth gentle; haddock tastes best when the spice supports the fish instead of taking over.

Healthy Baked Haddock

Use olive oil instead of some of the butter, keep the topping thin, and add lemon, herbs, and quick-cooking vegetables around the fish. The plate stays lighter, but the golden finish still makes it feel like dinner.

Cod or Another White Fish

This method also works with cod, pollock, hake, or another mild white fish. Cod is often thicker and meatier than haddock, so use the thickness chart instead of only the clock.

For a crisp battered dinner instead, save this fish and chips recipe for another night.

What to Serve with Baked Haddock

For the easiest comfort plate, serve the haddock with roasted potatoes, green beans, lemon wedges, and a spoonful of tartar sauce. It feels classic, but still light enough for a weeknight.

Baked haddock served with roasted potatoes, green beans, lemon wedges, parsley, and tartar sauce on a dinner plate.
To make baked haddock feel like a full dinner, pair the flaky fish with roasted potatoes, green beans, lemon, and tartar sauce.

Cozy Sides

Fresh Sides

  • Green beans
  • Peas
  • Cucumber salad or simple green salad
  • Coleslaw
  • Roasted carrots

Sauces and Extras

  • Lemon wedges
  • Tartar sauce
  • Lemon butter sauce
  • Herb yogurt sauce
  • Crusty bread

Keep the sides simple so the fish still feels like the center of the plate. For something brighter than tartar sauce, spoon a little mango salsa over the lemon-butter version, especially with rice or salad.

Troubleshooting

Most baked haddock problems come down to moisture, timing, or seasoning. The fix is usually simple.

Three things to remember: Start with dry fillets, bake uncovered when using a topping, and pull the fish when it is done. The surface can always be browned for one more minute.

Troubleshooting guide for baked haddock with fixes for dry fish, watery fish, and soggy topping.
If baked haddock turns dry, watery, or soggy, adjust the timing, dry the fillets better, and bake uncovered next time.
ProblemLikely CauseHow to Fix It
Haddock is dryIt baked too long or the fillets were thin.Check early and pull the fish when it reaches 145°F / 63°C.
Fish is wateryThe fish was frozen, not fully thawed, or crowded in the dish.Thaw fully, pat dry, and leave space between fillets.
Topping is soggyToo much moisture or a covered dish.Bake uncovered and avoid adding extra liquid under the topping.
Topping is paleThe fish cooked before the surface browned.Broil for 1 to 2 minutes after the fish is done.
Fish tastes blandOnly the topping was seasoned.Season the fish directly before adding the top layer.
Fish fell apartIt was overcooked or lifted too roughly.Rest for 2 minutes and use a thin fish spatula.
Topping is greasyToo much butter, especially with crackers.Use less butter with Ritz and keep the layer loose.
Fish smells too strongThe fish may not be fresh or was stored too long after thawing.Use fresh-smelling fish and cook soon after thawing.

Make Ahead, Storage, and Reheating

Can You Make It Ahead?

Assemble this recipe right before baking. You can thaw the fish ahead and mix the dry topping ahead, but add butter, seasoning, and the final layer close to oven time.

How to Store Leftovers

Store leftovers in an airtight container in the refrigerator for up to 2 days. Keep extra lemon wedges separate and add fresh lemon after reheating.

Flaked leftovers are useful, not wasted. Fold them into potato and herbs for simple fish cakes, or tuck them into fish tacos with slaw, lime, and a creamy sauce.

Three-panel guide showing leftover baked haddock as flaked fish, golden fish cakes, and fish tacos with slaw and lime.
Leftover baked haddock still has options: flake it into bowls, shape it into fish cakes, or tuck it into tacos with slaw and lime.

How to Reheat It

Reheat gently in a low oven or air fryer until warmed through. The microwave works in a pinch, but it softens the topping and can make fish smell stronger.

Can You Freeze Cooked Haddock?

Cooked crumb-topped haddock does not freeze beautifully. The fish can turn watery and the topping usually softens. For best texture, freeze raw haddock, thaw it safely, and bake it fresh.

FAQ

What temperature is best for baked haddock?

For most fillets, 400°F / 200°C is the easiest everyday temperature. It cooks the fish quickly while giving the topping time to turn golden. For thicker loins or a heavier Ritz cracker topping, 350°F / 175°C gives a gentler bake.

How long does haddock take in the oven?

Most medium fillets take 12 to 16 minutes at 400°F / 200°C. Thin pieces may be ready in 8 to 10 minutes, while thick loins may need 17 to 20 minutes or more.

Should baked haddock be covered or uncovered?

Bake it uncovered when using a crumb topping. Covering traps steam, which helps some dishes but makes buttery crumbs soft instead of golden.

Can I bake frozen haddock?

Yes, but thawing first gives a drier surface and a better topping. For a frozen emergency, bake the plain fish briefly, blot the released moisture, season, add the topping, and continue baking until done.

Can I use cod instead of haddock?

Yes — cod works well here, but it is often thicker and meatier than haddock. Use the thickness chart and doneness cues instead of relying only on the clock.

Is haddock done at 145°F?

Yes. For safety, fish should reach 145°F / 63°C in the thickest part. It should also look opaque and flake easily with a fork.

Why did my baked haddock turn watery?

Watery haddock usually means the fish carried too much moisture into the oven. Fully thaw frozen fillets, pat them dry, and leave space in the dish so the fish bakes instead of steaming.

Can I make baked haddock without breadcrumbs?

Yes. Use melted butter or olive oil, lemon juice, lemon zest, parsley, salt, and pepper. Bake just until the fish is opaque and flaky. It will be lighter and softer, more lemon-butter fish than crisp-topped fish.

What is the best topping for baked haddock?

Ritz crackers give the buttery New England-style finish. Panko gives the crispest bite. Plain breadcrumbs give a softer, classic baked-fish texture.

Can I use smoked haddock for this recipe?

You can, but reduce the salt because smoked haddock is already salty and stronger in flavor. Smoked haddock is also excellent in chowder, Cullen skink, fish pie, and kedgeree.

A Few Last Tips Before You Bake

Baked haddock should feel simple, not stressful. Dry the fish, season the fish, bake it uncovered, and stop when the center is flaky and moist. The surface can always get one more minute under the broiler; the fish cannot be uncooked.

Baked haddock rules card listing dry the fish, season the fish, bake uncovered, stop when flaky, and broil only if needed.
Finally, remember the core baked haddock rules: dry the fish, season it directly, bake uncovered, stop when flaky, and broil only if needed.

Whether you choose buttery Ritz crackers, crisp panko, plain breadcrumbs, or lemon butter, the goal is the same. You want tender haddock with enough golden flavor on top to make it feel like a proper dinner.

If you make this baked haddock, leave a comment and tell us which version you chose: Ritz, panko, breadcrumbs, or lemon butter. Also mention whether you used thin fillets, thick loins, or frozen haddock. Your notes help other readers choose their own path.

Posted on Leave a comment

Frozen Shrimp in Air Fryer: No-Thaw Time & Temp Guide

Cooked shrimp on a white plate with lemon wedges, garlic butter, parsley, and a blurred air fryer in the background.

This is the kind of recipe for the night when dinner was not really planned, the shrimp are still frozen, and you need the air fryer to save the meal. A bag of frozen shrimp can turn into shrimp tacos, rice bowls, pasta, salads, wraps, or garlic-butter shrimp in minutes — but only if you use the right timing for the shrimp you actually have.

Do not start with the timer. Start with the bag: raw or precooked, small or jumbo, peeled or shell-on, plain or breaded/coated. The rule is simple: cook raw shrimp, reheat precooked shrimp, and crisp coated shrimp. No thawing bowl, no guessing, no rubbery shrimp if you start with that bag check.

Quick Answer

Most plain frozen raw shrimp takes 8 to 10 minutes at 400°F / 205°C in the air fryer, with a shake or flip halfway. Frozen cooked or precooked shrimp takes 4 to 6 minutes at 375°F to 400°F / 190°C to 205°C because it only needs reheating.

Icy, glazed, or stuck-together pieces need a short head start. Air fry them plain for 2 to 3 minutes first, then separate them, drain off extra moisture if needed, add oil and seasoning, and finish cooking. Some frozen shrimp has a thin ice glaze, and that is normal. The short head start helps the flavor stick to the seafood, not the ice.

That tiny pause is the difference between seasoning the shrimp and seasoning the basket.

Timing graphic showing raw frozen shrimp at 400°F for 8 to 10 minutes, cooked frozen shrimp for 4 to 6 minutes, and icy shrimp loosened before seasoning.
Start with the timing split: raw frozen shrimp needs full cooking time, while precooked shrimp only needs a quick reheat.

Jump to What You Need

Bag Check: What Do You Have?

Use this quick check before you set the timer. It is the fastest way to avoid rubbery precooked shrimp, bland icy shrimp, or coated shrimp that browns outside before it heats through.

What the bag says or looks likeWhat to do
Grey or translucent shrimpCook as raw shrimp
Pink, orange, or white shrimpReheat only; do not use raw-shrimp timing
Icy, glazed, or clumped piecesAir fry briefly, separate, then season
Jumbo shrimp, prawns, or shell-on shrimpUse size-based timing and check doneness
Breaded, popcorn, coconut, or scampi shrimpFollow package timing and crisping cues
Bag check guide showing raw, cooked, icy, jumbo, shell-on, prawn, breaded, and coated frozen shrimp categories for air fryer timing.
Before the shrimp goes into the air fryer, check the bag. Raw, cooked, icy, jumbo, shell-on, and coated shrimp need different timing.

Air Fryer Frozen Shrimp Recipe

The recipe below is the simple cook-now path for plain frozen raw shrimp — the bag most people grab when dinner needs to happen fast. If yours is cooked, jumbo, shell-on, thawed, prawn-style, or coated, use the chart right after the card to adjust.

Recipe at a Glance

Cooking methodAir fryer
Shrimp typePlain frozen raw shrimp
ThawingNo thawing needed
Prep time3 minutes
Cook time8 to 10 minutes
Total time11 to 13 minutes
Serves3 to 4
Temperature400°F / 205°C
Using precooked shrimp?Reduce time to 4 to 6 minutes

Ingredients

  • 1 lb / 454 g frozen raw shrimp, peeled and deveined
  • 1 tbsp / 15 ml olive oil or avocado oil
  • ½ tsp garlic powder
  • ½ to 1 tsp paprika, Cajun seasoning, or Old Bay-style seafood seasoning
  • Salt: ¼ to ½ tsp, depending on how salty your seasoning blend is
  • ¼ tsp black pepper
  • Lemon wedges, to serve
  • Optional: 1 tbsp / 14 g melted butter, for finishing
  • Fresh herbs, optional: 1 to 2 tbsp chopped parsley or cilantro

For a smaller 8 oz / 225 g batch, use half the shrimp and roughly half the seasoning. Smaller batches are especially useful in 3 to 4 quart air fryers.

Frozen shrimp, oil, garlic powder, paprika, salt, pepper, lemon, melted butter, herbs, and an unbranded freezer bag arranged on a light counter.
Keep the base simple: oil helps seasoning cling, dry spices add quick flavor, and lemon or butter finishes the shrimp cleanly.

Method

  1. Preheat the air fryer to 400°F / 205°C for 3 to 5 minutes.
  2. Add the frozen shrimp in a mostly single layer.
  3. If the pieces are icy, glazed, or clumped, air fry them plain for 2 to 3 minutes first.
  4. Shake, separate, and drain excess liquid if needed.
  5. Toss with oil, garlic powder, seasoning, salt, and pepper.
  6. Air fry for 8 to 10 minutes total, shaking or flipping halfway, until opaque and tender.
  7. Finish with lemon, melted butter, herbs, or your favorite sauce. For a full garlic-butter pasta route, use the shrimp in a shrimp scampi-style dinner.

The batch is ready when the center is opaque, not grey or glassy. For jumbo, precooked, shell-on, thawed, or prawn-style bags, use the timing chart below.

Frozen Shrimp Air Fryer Time and Temperature Chart

Use this chart when your bag is not plain frozen raw shrimp. Size, raw or cooked status, surface ice, and crowding can all change the timing.

ShrimpTempTimeCue
Frozen raw small or medium400°F / 205°C6 to 8 minOpaque, gently curled
Frozen raw large400°F / 205°C8 to 10 minOpaque through center
Frozen raw jumbo400°F / 205°C9 to 12 minCheck thickest piece
Frozen cooked or precooked shrimp375°F to 400°F / 190°C to 205°C4 to 6 minHot through, not tight
Thawed raw shrimp350°F to 375°F / 175°C to 190°C5 to 7 minPat dry first
Thawed cooked shrimp350°F / 175°C2 to 4 minWarm gently
Shell-on frozen shrimp400°F / 205°C8 to 12 minShells pink, flesh opaque
Frozen prawns400°F / 205°C8 to 12 minTime by size

Treat the chart as a starting point, then let doneness get the final vote. In most baskets, large raw shrimp land in the 8 to 10 minute range, but crowding or a heavy glaze can push the batch toward the longer end. If the basket looks watery, it usually means surface ice is melting, so drain if needed instead of cooking the shrimp longer.

Got your timing? Go to the step-by-step method.

How to Air Fry Frozen Shrimp

The method below gives you tender shrimp without thawing first. That small head start for icy pieces is worth it because it keeps the seasoning from washing away. Frozen shrimp is fast, but it asks for one favor: stop early and check.

1. Preheat the air fryer

Preheat to 400°F / 205°C for raw frozen shrimp. A hot basket helps the pieces start cooking quickly instead of slowly thawing and releasing too much liquid.

2. Add the shrimp in one layer

Place the frozen shrimp in the basket in a mostly single layer. A little overlap is fine, but avoid a thick pile. You are not trying to fill the basket; you are trying to give the hot air room to work.

Grey frozen raw shrimp with visible frost spread in a mostly single layer inside a black air fryer basket.
A mostly single layer gives frozen raw shrimp space to cook evenly instead of trapping steam in a crowded basket.

3. Loosen icy or clumped shrimp first

When the pieces are stuck together or covered in a thin ice glaze, air fry them plain for 2 to 3 minutes. Then shake the basket and separate them with tongs. After that short head start, the icy glaze should look wet instead of frosty, and the pieces should separate easily. That is the moment to season.

Side-by-side comparison of icy clumped frozen shrimp before cooking and loosened shrimp after a short air fryer head start.
When shrimp is clumped or heavily glazed, loosen it first; then seasoning sticks to the shrimp instead of melting away.

4. Add oil and seasoning

Move the shrimp to a bowl if needed, then toss with oil, garlic powder, seasoning, salt, and pepper. Drain any liquid in the basket before adding the shrimp back.

Shrimp being tossed in a bowl with oil, garlic powder, paprika, salt, and pepper after the frost has loosened.
Season once the surface frost softens. At that point, oil and spices can coat the shrimp instead of pooling below.

5. Finish cooking

Air fry until the pieces are opaque and tender, shaking or flipping halfway. Use the timing chart for small, jumbo, precooked, shell-on, thawed, or prawn-style bags.

Partly cooked shrimp in an air fryer basket with tongs turning the pieces halfway through cooking.
Halfway through cooking, shake or flip the shrimp so pale centers, pink edges, and released moisture even out.

6. Finish with lemon or butter

Squeeze lemon over the hot shrimp. For a richer finish, toss with melted butter, chopped herbs, garlic butter, or a quick sauce after cooking. When it works, the shrimp tastes bright and clean, with lemon, butter, and seasoning clinging to the surface instead of sliding into the basket.

Close-up of finished air fryer shrimp with lemon butter, herbs, and light seasoning on the surface.
Finished shrimp should look moist, pearly, and lightly curled, with the seasoning clinging to the surface instead of the basket.

How Shrimp Type Changes the Timing

This is where the label on the bag matters most. The same air fryer can give you tender shrimp or rubbery shrimp depending on whether the pieces started raw, cooked, icy, jumbo, or shell-on.

Raw vs cooked frozen shrimp

Raw shrimp usually looks grey or translucent and needs to cook through. Cooked or precooked shrimp usually already looks pink, orange, or white and only needs to get hot. For precooked shrimp, look for heat, not a deeper curl.

Split comparison showing grey frozen raw shrimp on one side and pink cooked frozen shrimp on the other side.
This is the biggest timing mistake to avoid: grey raw shrimp must cook through, while pink cooked shrimp only needs heat.

Shrimp size guide: what 16/20, 21/25, and 31/40 mean

Many frozen shrimp bags use a count-per-pound number instead of words like medium or jumbo. A lower number means larger shrimp because there are fewer pieces in a pound. Higher numbers mean smaller shrimp, which cook faster.

Shrimp size guide showing 16/20 jumbo, 21/25 large, 31/40 medium, and 41/50 small shrimp arranged from largest to smallest.
Shrimp count tells you size. Lower numbers mean larger pieces, so jumbo shrimp usually needs more air fryer time than small shrimp.
Package countCommon sizeAir fryer note
16/20JumboUse the longer range, often 9 to 12 minutes from frozen
21/25Extra large or largeMain 8 to 10 minute timing usually works
26/30LargeMain 8 to 10 minute timing usually works
31/40MediumStart checking around 6 to 8 minutes
41/50 and smallerSmallCheck early; small shrimp can overcook fast

Once you know the count, the timing starts making much more sense. When the bag gives both a size word and a count, trust the count more. “Large” can vary by brand, but 16/20 will almost always need more time than 31/40.

Thin ice glaze or freezer burn?

A thin ice glaze is normal on many frozen shrimp bags. Heavy frost, dry white patches, freezer-burned edges, or a stale smell are different. If the seafood smells off after opening, do not use it.

Comparison of frozen shrimp with a normal thin ice glaze beside shrimp with heavy frost, dry white patches, and freezer burn signs.
A light ice glaze is normal. However, heavy frost, dry patches, rough edges, or an off smell are signs to pause and check quality.

Shell-on shrimp, prawns, and thawed shrimp

These need small adjustments, not a new recipe. Shell-on frozen shrimp usually needs 8 to 12 minutes at 400°F / 205°C, depending on size. Frozen prawns cook like shrimp; let size decide. Thawed raw shrimp cooks faster, usually about 5 to 7 minutes at 350°F to 375°F / 175°C to 190°C.

Shell-on shrimp or prawns cooked in a black air fryer basket with pink-orange shells and a lemon wedge.
Shell-on shrimp and prawns can air fry from frozen, but larger pieces need a center check instead of timer-only cooking.

Tail-on and tail-off shrimp cook almost the same way. Leaving the tail on looks a little more dramatic for serving, while tail-off is easier for bowls, tacos, fried rice, and pasta.

Ready to cook now? Return to the recipe card or follow the full method.

Why This Method Works

Frozen shrimp needs quick heat, enough space, and a moment for surface ice to loosen. Once the frost turns wet and the pieces separate, the seasoning can land on the shrimp instead of sliding into the basket. That is why the short head start matters more than adding extra seasoning at the beginning.

Ingredient Notes

Oil helps the spices cling. Garlic powder adds quick flavor without burning. Paprika, Cajun seasoning, or Old Bay-style seafood seasoning adds color and depth. If your bag is already seasoned, marinated, or salty, start with less salt and adjust after cooking.

Equipment and Batch Size

You do not need special equipment beyond an air fryer, but basket size matters. A hot basket helps. Crowding does not. In a smaller air fryer, a smaller batch works better than a longer struggle.

  • For a 3 to 4 quart air fryer, cook smaller 8 oz / 225 g batches.
  • A 5 to 6 quart air fryer can handle 12 to 16 oz / 340 to 454 g if the shrimp are mostly in one layer.
  • Keep tongs nearby to separate clumped pieces and a slotted spoon or quick drain ready if liquid collects.
  • Pat thawed shrimp dry with a paper towel before cooking.
  • Ninja Foodi, Cosori, Instant Vortex, basket-style, and oven-style air fryers can all work, but timing may vary slightly.

If your air fryer is small, cook less shrimp rather than forcing the whole bag in. That one choice fixes more problems than extra minutes ever will.

Season Before or After Air Frying?

Separate, lightly frosty shrimp can be seasoned before air frying. Icy, glazed, or clumped pieces do better with a short head start in the basket first, then seasoning.

  • Lightly frosty shrimp: toss with oil and seasoning before cooking.
  • Icy or clumped shrimp: loosen first, then season.
  • Thawed shrimp: pat dry, then season before air frying.
  • Precooked frozen shrimp: season lightly and reheat briefly.
  • Coated shrimp: skip wet seasoning before air frying; use dips or sauces after cooking.

For slightly crisp edges on plain shrimp, add 1 teaspoon cornstarch or cornflour after the surface frost has loosened. This is optional. Do not use this trick for shrimp that are already breaded, battered, popcorn-style, or coconut-coated.

Once the seasoning actually lands on the shrimp, even a simple garlic-lemon finish tastes cleaner and brighter.

How to Know Shrimp Is Done

The goal is not hard browning. You want tender shrimp with no grey center. For plain shrimp, the flesh should be pearly, opaque, and no longer grey or glassy in the middle. The pieces should feel springy, not tight.

Check the center

For a thermometer check, seafood is generally cooked to 145°F / 63°C. Visually, shrimp should be firm, pearly, and opaque. When you cut into the thickest piece, the center should look opaque and moist, not grey, glassy, or dry. For more detail, see the FDA seafood safety guide.

Cut shrimp comparison showing a grey glassy center labelled needs more time and an opaque white center labelled done.
When you are unsure, cut the thickest shrimp. The center should be opaque and moist, not grey, glassy, or translucent.

Use the curl as a texture clue

Shrimp moves from perfect to rubbery quickly, so checking early is not fussy. It is the shortcut.

  • Undercooked shrimp: grey, glassy, or translucent in the center
  • Done shrimp: opaque, pearly, springy, and loosely curled
  • Overcooked shrimp: tight, dry, rubbery, or curled into a very tight O
Cooked shrimp comparison showing a loose C-shaped tender shrimp and a tightly curled overcooked shrimp.
Shrimp shape gives a fast texture clue: a loose curl usually means tender, while a tight O-shape often means overcooked.

For coated or sauced frozen shrimp, follow the package directions because the outside can brown before the inside is fully heated.

Avoid These Mistakes

Most mistakes come from treating every frozen shrimp bag the same. A few small changes make the difference between tender shrimp and a tough batch.

  • Precooked shrimp should not cook like raw shrimp. It only needs reheating.
  • Do not season a block of icy shrimp. Loosen it first so the flavor can stick.
  • Give the pieces room instead of piling them high. Shrimp cook faster and more evenly with space.
  • If the basket gets watery, drain it instead of trying to cook the water away.
  • Do not use plain-shrimp timing for coated frozen shrimp. Breaded, popcorn, and coconut shrimp need package and crisping cues.

Already dealing with a watery, bland, or rubbery batch? Jump to troubleshooting or rescue it for dinner.

Troubleshooting Air Fryer Frozen Shrimp

A first batch that goes sideways is usually easy to fix. Watery baskets, bland seasoning, or a slightly rubbery bite do not mean the recipe failed. Usually, the shrimp just needed a different timing path.

If your first batch looks watery, do not panic. That is usually ice, not failure. The next batch is easier once you know what happened.

Why did my shrimp turn rubbery?

Rubbery shrimp usually means overcooking. This is common with frozen cooked or precooked shrimp because it only needs reheating. Use the shorter timing range, and check even earlier if the pieces are already thawed.

A batch that is already a little rubbery should not keep air frying. Toss it with garlic butter, lemon, sauce, pasta, fried rice, or a rice bowl where moisture can help soften the bite.

Why is there water in the air fryer basket?

That water in the basket is usually just surface ice melting. The goal is not to panic-cook the water away; drain it, season the shrimp itself, and finish gently.

Air fryer basket tilted over a bowl while liquid drains from cooked shrimp inside the basket.
If the basket turns watery, drain the moisture instead of adding more minutes. Extra time can make shrimp tough.
  • Loosen icy pieces before seasoning.
  • Shake halfway through cooking.
  • Separate clumped pieces as soon as they loosen.
  • Drain excess liquid instead of cooking it away.

Why is the shrimp bland?

Seasoning ice is frustrating because the flavor ends up in the basket. Let frosty pieces loosen first, then add oil and seasoning so the flavor sticks.

To rescue a bland batch, toss it immediately with melted butter, lemon juice, garlic powder, black pepper, and a pinch of seasoning while it is still hot. For rice bowls or noodles, a spoonful of stir-fry sauce can turn plain shrimp into dinner quickly.

Why did some pieces cook faster than others?

The pieces were probably clumped, crowded, or mixed in size. Separate stuck pieces early and shake the basket halfway. A mixed bag of small and jumbo shrimp will not finish all at once; the small ones will cook first.

ProblemLikely causeFix nowNext time
Rubbery shrimpPrecooked shrimp got too much timeStop cooking; toss with sauce, butter, pasta, or riceReheat only 4 to 6 minutes
Dry shrimpToo much heat or too much timeFinish with lemon, butter, or sauceCheck earlier and stop at opaque
Bland shrimpSeasoning slid off iceToss hot shrimp with butter, lemon, and seasoningSeason after frost loosens
Watery basketSurface ice meltedDrain the basket and finish gentlyUse one layer and shake halfway
Uneven cookingClumped, crowded, or mixed-size shrimpSeparate pieces and add 1 minute if neededSpread into a mostly single layer
Slightly underdoneJumbo pieces or cold centerAdd 1 minute and check the thickest pieceUse the longer range for jumbo shrimp

Best Uses for an Imperfect Batch

Not every batch has to become a perfect shrimp plate. If the texture or seasoning is not exactly where you wanted it, turn the shrimp into the kind of meal that helps it shine anyway.

Four-panel collage showing air fryer shrimp used in fried rice, garlic butter shrimp, wraps, and tacos.
An imperfect batch still has uses: watery shrimp suits fried rice, bland shrimp likes garlic butter, and firm shrimp works better chopped.
If the shrimp turned out…Use it for…
Tender and juicyTacos, bowls, salads, pasta, or peel-and-eat plates
A little wateryFried rice, noodles, saucy bowls, or garlic butter pasta
Slightly rubberyChopped wraps, rice bowls, pasta, or saucy stir-fries
Mild or blandStir-fry sauce, peanut sauce, Cajun butter, lemon butter, or chutney
Shell-onPeel-and-eat plates, seafood bowls, or simple lemon-and-salt platters

This is one of those freezer shortcuts that gets easier every time you make it. The first batch teaches you the bag; the next one feels simple.

Batch fixed? Turn it into tacos, rice bowls, pasta, or fried rice.

Flavor Variations

This is where the plain batch becomes dinner. Once you know the timing, keep the base method the same and change the seasoning or finish.

  • Garlic butter shrimp: finish with melted butter, garlic, lemon, and parsley so the hot shrimp turns glossy and bright. Best with pasta, rice bowls, bread, or vegetables.
  • Old Bay-style shrimp: use seafood seasoning, lemon, and black pepper for a simple peel-and-eat feel. Good for salads, tacos, and quick plates.
  • Cajun shrimp: use Cajun seasoning, paprika, and a little cayenne for smoky heat. Serve in tacos, wraps, or grain bowls.
  • Lemon pepper shrimp: use lemon zest, black pepper, and garlic powder for a bright, sharp finish. Good for salads, pasta, and quick lunches.
  • Taco shrimp: use chili powder, cumin, and lime. Serve in tacos, burrito bowls, lettuce cups, or with mango habanero sauce.
  • Light masala shrimp: use garlic, chili, black pepper, and a tiny pinch of turmeric or garam masala. Finish with green chutney.

Add fresh garlic or butter near the end or after cooking. Garlic can burn if it sits in the hot basket too long, and butter can brown quickly if it drips under the shrimp.

What to Serve With Air Fryer Frozen Shrimp

Think of this as a fast protein you can drop into whatever meal is already halfway planned. The shrimp cook quickly, so they work especially well with rice, pasta, noodles, salads, and wraps.

Three-panel collage showing cooked shrimp served as tacos, a garlic butter rice bowl, and shrimp fried rice.
Use cooked shrimp as a flexible protein: pile it into tacos, spoon it over rice, or fold it into fried rice when dinner needs to move fast.
  • Shrimp tacos with slaw, lime, and mango salsa
  • Rice bowls with vegetables, garlic butter, lemon, and herbs
  • Pasta with lemon butter, garlic, tomato sauce, or a quick scampi-style finish
  • Salads with avocado, cucumber, corn, herbs, or greens
  • Wraps with lettuce, onion, spicy mayo, and a squeeze of lime
  • Noodle bowls with chili oil, peanut sauce, or soy-lime dressing
  • Quick shrimp fried rice
  • Shrimp cocktail-style plates with lemon and dipping sauce

For pasta, fried rice, or saucy dishes, stop cooking as soon as the shrimp are just done. They will keep warming when tossed with the rest of the meal.

Storage and Reheating

Air fryer shrimp is best right after cooking, but leftovers can still be useful. Cool the shrimp, store it in an airtight container, and refrigerate for up to 3 days. Reheat gently at 300°F to 350°F / 150°C to 175°C for 1 to 3 minutes, just until warm.

Shrimp is not very patient the second time around, so reheat gently and avoid warming it again and again. Cold leftover shrimp is often kinder than reheated shrimp, especially in salads, wraps, shrimp cocktail-style plates, or quick lunch bowls.

Breaded, Popcorn, Coconut, or Scampi Shrimp

These are not plain uncoated shrimp, so let the bag’s directions lead. Coated shrimp plays by slightly different rules: the outside needs to crisp while the inside heats through.

  • Frozen breaded shrimp: use a single layer, shake or flip, and follow package timing so the coating crisps.
  • Popcorn shrimp: shake often because the pieces are small and can brown quickly.
  • Frozen coconut shrimp: watch the coating closely because coconut can brown faster than the inside heats.
  • Scampi-style frozen shrimp: use scampi-specific package directions because butter, sauce, and coating can change the method.

As a loose starting point, many frozen breaded, popcorn, and coconut shrimp products cook around 390°F to 400°F / 200°C to 205°C for 7 to 12 minutes, but the package should lead. Product size, coating, brand, and raw or precooked status can change the timing quickly.

Plain shrimp is about tenderness; coated shrimp is about crispness.

FAQs

Do you need to thaw shrimp before air frying?

No. Plain frozen shrimp can go straight into the air fryer. If the pieces are icy or clumped, loosen them briefly first, then season and finish cooking.

How long does frozen shrimp take in the air fryer?

Most frozen raw shrimp takes 8 to 10 minutes at 400°F / 205°C. Small shrimp can finish closer to 6 minutes, while jumbo shrimp may need 9 to 12.

What temperature works best for frozen shrimp?

For raw frozen shrimp, 400°F / 205°C is the best starting point. With precooked shrimp, use 375°F to 400°F / 190°C to 205°C and stop once hot.

Raw or cooked frozen shrimp: what changes?

Raw shrimp needs to cook through. Precooked shrimp only needs to get hot. That one difference changes the timing completely.

How do you air fry precooked frozen shrimp?

Air fry precooked frozen shrimp at 375°F to 400°F / 190°C to 205°C for 4 to 6 minutes, shaking halfway. Stop once the pieces are hot.

Can you air fry frozen shrimp with vegetables?

Yes, but vegetables often need more time and frozen vegetables can release water. Start firmer vegetables first, then add shrimp near the end.

Can you air fry frozen shrimp without oil?

Yes, but a little oil helps seasoning stick and improves texture. For oil-free shrimp, cook in one layer and finish with lemon or sauce.

What do shrimp size numbers like 16/20 or 31/40 mean?

The number tells you roughly how many shrimp are in one pound. Lower numbers mean larger shrimp, so 16/20 needs more time than 31/40 or 41/50.

Are frozen prawns cooked the same way as shrimp?

Yes. Frozen prawns can be air fried like frozen shrimp. Let size guide the timing.

Should shell-on frozen shrimp be peeled before cooking?

No. You can air fry shell-on frozen shrimp, then peel after cooking. Cook until the shells turn pink and the flesh is opaque.

Why did my air fryer shrimp turn rubbery?

Rubbery shrimp almost always means it went too long, especially if it was precooked. Use a shorter time and stop once hot.

Why is there water in the air fryer basket?

Frozen shrimp releases moisture as surface ice melts. Use one layer, shake halfway, separate clumps early, and drain excess liquid if needed.

What about frozen breaded shrimp or popcorn shrimp?

Treat breaded, popcorn, and coconut shrimp as coated products. Start with package directions, then watch for a crisp outside and a fully heated center.

Back to Quick Answer · Back to Recipe Card

Final Tender Shrimp Check

Before you serve, the shrimp should be opaque through the center, loosely curled, and hot without feeling tight or dry. Raw shrimp should have no grey or glassy center. Precooked shrimp should be hot, not curled tighter and tighter.

Once you learn to read the bag, frozen shrimp becomes one of the easiest freezer proteins to trust. Loosen icy pieces if needed, season the shrimp instead of the frost, and stop as soon as the center is opaque. That is how a forgotten bag of shrimp turns into dinner instead of a guessing game.

Posted on Leave a comment

Shrimp Fried Rice Recipe: Easy, Fluffy & Better Than Takeout

Bowl of shrimp fried rice with plump shrimp, scrambled egg, peas, carrots, scallions, and chopsticks lifting a bite of rice.

This shrimp fried rice recipe is for the night you open the fridge, see cooked rice, and realize dinner is almost already halfway done. A hot skillet turns yesterday’s rice into glossy, savory grains with juicy shrimp, soft egg, garlic, scallions, and vegetables — faster than takeout and fresher from the pan.

The goal is fluffy rice, tender shrimp, and a dinner that tastes planned, even when it started with leftovers. No restaurant burner needed. Just remember the four things that matter most: cold rice, dry shrimp, hot pan, light sauce.

What makes it better than takeout is control: more shrimp, less grease, tender egg, bright scallions, and rice that tastes soy-sesame savory without turning heavy.

Quick Answer: How to Make Shrimp Fried Rice

To make shrimp fried rice, start with cold cooked rice and break up the clumps. Pat raw shrimp dry, season lightly, then cook it quickly in a hot wok or large skillet until just opaque. Remove the shrimp, scramble the eggs, and cook the vegetables until the skillet looks dry again.

Stir-fry garlic, scallions, and rice, then add a small amount of soy-sesame sauce. Fold the shrimp and egg back in and serve while the rice is hot, loose, and glossy.

What is shrimp fried rice? It is a quick stir-fried rice dish made with cooked rice, shrimp, egg, vegetables, aromatics, and a savory soy-sesame sauce. In the best versions, cold rice and a hot pan keep the grains separate instead of soft or sticky.

Order matters because each ingredient behaves differently. Shrimp cooks fast, frozen vegetables can release water, and rice needs direct contact with heat before it gets sauced. When those pieces happen in the right order, the dish tastes fresh instead of heavy.

Already have cold rice and thawed shrimp? Jump straight to the recipe card. Need rice help first? See the best rice guide.

The 4 Rules for Fluffy Shrimp Fried Rice

Use this quick visual guide as the recipe’s safety net before you start cooking. Each rule protects the final texture in a different way.

Four-part guide showing cold rice, dry shrimp, a hot wok, and light sauce as the key rules for shrimp fried rice.
Use this four-rule system as your fried rice safety net: cold rice protects texture, dry shrimp sears cleanly, high heat adds flavor, and light sauce keeps the grains separate.

Shrimp Fried Rice Recipe

This version is built for real weeknights: cooked rice from yesterday, shrimp from the fridge or freezer, a few vegetables, and a hot pan that makes it all feel deliberate. Leftover rice makes it easiest, but the fresh-rice workaround below gives you a path when you are starting from scratch.

Prep Time10 minutes
Cook Time15 minutes
Total Time25 minutes
Yield4 servings
CourseMain dish, quick dinner
StyleTakeout-style shrimp fried rice

Timing note: The 25-minute total assumes you already have cooked and chilled rice. Cooking rice from scratch adds cooling time before frying. Starting with fresh rice today? Use the fresh-rice workaround before heating the pan.

Before you turn on the stove: Have the rice loosened, shrimp dried, eggs beaten, vegetables ready, and sauce mixed. Fried rice is easy, but it does not wait once the pan is hot.

Equipment

  • Wok or large 12-inch non-stick/heavy skillet
  • Wide spatula
  • Mixing bowl for shrimp
  • Small bowl for sauce
  • Sheet pan or wide plate if cooling fresh rice

Ingredients

Overhead view of cooked rice, raw shrimp, three eggs, peas, carrots, garlic, scallions, soy sauce, oyster sauce, sesame oil, cornstarch, white pepper, and salt.
Fried rice moves quickly once the pan gets hot, so prep the shrimp, eggs, vegetables, aromatics, rice, and sauce before you start cooking.
IngredientUS MeasureMetric
Cold cooked rice4 cupsabout 600–650 g
Raw peeled and deveined shrimp1 lb450 g
Large eggs, beaten33
Frozen peas and carrots1 to 1 1/2 cups140–200 g
Garlic, minced3 cloves10–12 g
Scallions / green onions, sliced3–425–35 g
Neutral oil2 tbsp30 ml
Light soy sauce2 tbsp30 ml
Oyster sauce, optional1 tbsp15 ml
Toasted sesame oil1 tsp5 ml
White pepper1/4 tspabout 0.5 g
Sugar1/4 tspabout 1 g
Cornstarch1 tspabout 3 g
Salt1/4 tsp for shrimp, then only more after tastingabout 1.5 g, then only more after tasting

Ingredient note: This main method is written for raw shrimp. If you are using cooked shrimp, skip the searing step and add it at the very end just to warm through.

Frozen shrimp note: Frozen shrimp works well once fully thawed and patted dry. To quick-thaw, keep the shrimp sealed in a bag and place it in cold water until thawed, then drain and pat very dry before cooking. The skillet should sear the shrimp, not hiss with extra water. If you are unsure when to pull it from the pan, use the shrimp doneness cues.

Instructions

Prep the Rice and Sauce

  1. Break up the rice. Use your fingers or a fork to loosen cold cooked rice before it goes into the skillet. Clumps are easier to fix now than once the heat is on.
  2. Mix the sauce. In a small bowl, stir together soy sauce, oyster sauce if using, sesame oil, white pepper, and sugar. Keep it beside the stove so you are not measuring while the rice is cooking.

Season the Shrimp and Heat the Pan

  1. Season the shrimp. Pat shrimp very dry. Toss with salt, cornstarch, and a small pinch of white pepper. A dry surface helps the shrimp cook quickly instead of steaming.
  2. Heat the pan. Place a wok or large skillet over medium-high to high heat. Add 1 tablespoon oil and let the pan get properly hot.

Cook Shrimp Separately So It Stays Tender

  1. Cook the shrimp. Add shrimp in a single layer. Cook for about 60–90 seconds per side, just until pearly, opaque, and lightly curled. Move it to a plate before it turns tight and firm.
  2. Scramble the eggs. Add 1 teaspoon oil if the pan is dry. Pour in the beaten eggs and scramble until just set. Move them to the plate with the shrimp; they will finish warming when they return to the rice.
Shrimp searing in a black wok with a spatula and an empty plate nearby for removing the shrimp.
Shrimp needs less time than rice, so cook it separately. Pull it while it is still plump, then return it near the end for tender shrimp in every bite.

Cook the Vegetables Until the Pan Looks Dry

  1. Cook the vegetables. If needed, add the remaining oil, then stir in the peas and carrots. Cook until the skillet looks dry again so their sweetness and color stay bright without softening the rice.
Peas and diced carrots cooking in a black wok with a wooden spatula while a bowl of cooked rice waits nearby.
Once peas and carrots stop releasing moisture, the pan should look dry again. That is when the rice can fry instead of steam.

Garlic and Scallions Build the First Flavor Layer

  1. Add aromatics. Stir in garlic and the white/light parts of the scallions. Cook for 15–30 seconds, just until the pan smells garlicky and sharp. You want the garlic lively, not browned.
Minced garlic and sliced scallions sizzling in oil inside a black wok with a wooden spatula.
Garlic and scallion whites flavor the oil almost instantly. Stir just until fragrant, because browned garlic can make the whole pan taste bitter.

Fry the Rice Before Adding Sauce

  1. Fry the rice. Add the cold rice, spread it out, and let it sizzle before stirring. The rice should look separate before it looks glossy; sauce comes after the grains are hot, not before.
Cooked rice frying in a wok with a spatula while a small bowl of dark sauce waits beside the pan.
Let the rice spend a little time in the pan before the sauce joins in. That early contact with heat keeps the grains loose instead of heavy.

Add Sauce, Return Shrimp and Egg, Then Finish

  1. Add the sauce. Drizzle in the sauce and toss quickly. The rice should look glossy, separate, and evenly seasoned. Puddles mean keep tossing over heat until the grains absorb the seasoning.
  2. Return shrimp and egg. Add the seared shrimp and scrambled egg back to the pan. Toss for 30–60 seconds, just until everything is hot, the shrimp stays springy, and the egg is tucked through the rice.
  3. Finish and serve. Add the green parts of the scallions so the final pan tastes fresh, sharp, and a little sweet. Taste before adding more soy sauce. If it needs lift, try white pepper, scallion greens, or a tiny pinch of salt before adding more liquid.

Cook’s cue: The pan should sound lively. Quiet, steamy rice usually means the skillet is crowded or something brought in too much moisture. If the rice steamed, clumped, or turned salty, jump to troubleshooting before trying again.

This is the kind of dinner that feels bigger than the effort it asks from you: one hot pan, a bowl of leftover rice, a handful of shrimp, and a few minutes where garlic, scallions, soy, and sesame make the kitchen smell like you planned ahead.

Shrimp Fried Rice Success Formula

Once you know the basic order, the recipe becomes easy to adapt. This quick table helps you adjust for the rice, shrimp, vegetables, or pan you actually have, while still landing in the same place: loose rice, tender shrimp, soft egg, bright scallions, and sauce that clings instead of pools.

If you have…Do this
Day-old riceBreak it up and fry it cold.
Fresh riceSpread, cool, and chill it until the surface feels dry.
Frozen shrimpThaw fully, pat dry, and cook briefly.
Cooked shrimpAdd it at the end just to warm through.
Frozen vegetablesCook them until the skillet looks dry before adding rice.
A small skilletCook in batches instead of crowding the pan.
Flat flavorAdd white pepper, scallions, heat, or a tiny pinch of salt before adding more soy sauce.

Why This Recipe Works

This recipe treats leftovers like an advantage. Cold rice is already drier and firmer, so the hot pan only has to wake it up.

The rest is order: shrimp cooks briefly and comes out, vegetables lose moisture before rice goes in, rice fries before sauce, and egg returns at the end for softness. That is how you get fried rice that tastes fresh instead of heavy.

If you like this leftover-rice style of cooking, MasalaMonk’s Spam fried rice recipe uses the same cold-rice logic with crispy Spam, egg, vegetables, and a quick savory sauce.

Ingredient Notes That Matter

The ingredient list is simple, which is part of the charm. A few ordinary things — cold rice, shrimp, egg, vegetables, garlic, scallions, and soy sauce — turn into a full dinner when the pan is hot and the moisture is under control.

Eggs

Egg makes the rice feel fuller and softer. Scramble it separately for the easiest method. Once you are comfortable, you can drizzle beaten egg over hot rice and stir quickly for a more golden restaurant-style effect. Try that only when the rice is already hot and loose; otherwise the egg can disappear into wet rice.

Soft egg gives the rice richness without needing extra sauce, which helps the whole pan stay savory instead of wet.

Vegetables

Frozen peas and carrots are classic because they are easy, colorful, and already cut small. Loose frozen vegetables can go straight into the hot skillet; just cook them until the pan looks dry again before adding rice. If they are icy or clumped together, thaw briefly and pat dry first.

No peas and carrots? Use corn, cabbage, bell pepper, mushrooms, green beans, or skip vegetables and add extra egg or shrimp. Small, quick-cooking add-ins give you color and texture without stealing heat from the rice.

Aromatics

Garlic and scallions are enough for a clean takeout-style flavor. For a deeper base, add 1/4 cup finely diced onion or 1 teaspoon minced ginger with the garlic. Keep the pieces small so they cook quickly and do not weigh down the rice.

Sauce and Seasoning

Light soy sauce gives salt and color. Oyster sauce adds a deeper takeout-style flavor, but it is optional. Low-sodium soy sauce gives you more control when your oyster sauce is already salty. Toasted sesame oil is strong, so use it sparingly. White pepper gives the rice a familiar restaurant-style warmth.

The goal is not dark, salty rice. Instead, aim for grains that taste seasoned all the way through — soy at the edges, sesame in the background, white pepper for warmth, and scallions keeping each bite fresh.

Want a warmer restaurant-style color? A tiny pinch of turmeric can add a light golden tint without needing food coloring. Use very little so it supports the rice instead of making it taste like turmeric.

For a broader sauce base you can use across vegetables, noodles, chicken, shrimp, tofu, and rice bowls, see this stir fry sauce recipe.

Best Rice for Shrimp Fried Rice

The rice matters, but the texture matters more. Choose a grain that can cool, separate, and move cleanly through a hot pan.

How Cold Rice Should Look Before Frying

Cold rice should feel firm enough to break apart easily. If the grains loosen before cooking, they have a better chance of frying evenly in the pan.

Hand using a fork to break up cold cooked rice in a metal bowl before adding it to the pan.
Break up chilled rice before cooking, not inside a crowded pan, so every grain can touch the heat instead of clumping together.

For the easiest fluffy texture, start with cold cooked rice that separates easily. Freshly cooked rice is usually too soft and steamy for direct frying, while chilled rice has enough structure to move cleanly through the skillet.

Choose jasmine rice for a takeout-style aroma, long-grain white rice for reliability, basmati rice if that is what you already cook, and brown rice if you want a firmer, nuttier version.

Not every rice behaves the same once it hits high heat, so use this as a quick guide.

Best Rice Types for Shrimp Fried Rice

Rice TypeGood for Shrimp Fried Rice?Notes
Jasmine riceYesAromatic and excellent for takeout-style fried rice.
Long-grain white riceYesReliable, fluffy, and easy to separate.
Basmati riceYes, if dryWorks well when cooked firm, cooled fully, and broken up before frying.
Brown riceYesFirmer and nuttier; taste and adjust seasoning carefully.
Short-grain or sticky riceNot idealCan clump and turn heavy unless you are making a different style intentionally.
Comparison board with bowls labeled jasmine rice, long-grain rice, basmati rice, brown rice, and sticky rice for fried rice.
Jasmine and long-grain rice are the easiest choices for fluffy shrimp fried rice, while basmati and brown rice can also work when cooked firm and cooled well.

Best make-ahead move: Cook the rice the day before, spread it out so steam escapes, then refrigerate it once cool. The next day, break up the grains before frying. This gives you the easiest fluffy texture.

Do not rinse cooked rice before frying. If the grains are clumped, loosen them with your fingers or a fork; adding water brings back the moisture you are trying to avoid.

No Day-Old Rice? Fresh Rice Workaround

You can make shrimp fried rice with fresh rice, but not while it is hot and steamy. Cook it slightly firm, spread it on a sheet pan so steam escapes, then chill it until the surface feels cool and dry. Once the grains separate easily, it can fry like day-old rice.

  1. Cook the rice with slightly less water than usual so it finishes a little firmer.
  2. Spread the hot rice on a sheet pan or large plate.
  3. Let the steam escape for 10 minutes.
  4. Refrigerate the rice for 30–60 minutes, or freeze it for about 15 minutes if you are rushing.
  5. Break up the cooled rice before frying.
Three-step guide showing fresh rice spread on a sheet pan, cooled, and chilled before being used for fried rice.
No day-old rice? Spread fresh rice thinly, let the steam escape, and chill it until the surface dries so it behaves more like leftover rice.

Fresh rice will not be quite as effortless as day-old rice, but it can still make good fried rice when you cool it properly. You are just trying to give it the same dry surface that leftovers already have.

Shrimp, Prawns, Frozen Shrimp, and Cooked Shrimp

Whether your market sells them as shrimp or prawns, cook them the same way here. Start with seafood that is dry on the surface, cook it briefly, and bring it back only after the rice has had time in the pan.

Size changes the way the fried rice eats, not just how it looks. Choose 26–30 count shrimp for a juicy home-style pan. For smaller restaurant-style pieces through every bite, use 51–60 count shrimp. Very large shrimp are best chopped into bite-size pieces so the rice eats evenly.

Shrimp SizeBest Use
51–60 count / small shrimpBest for restaurant-style fried rice because shrimp pieces mix through every bite.
26–30 count / medium shrimpBest balance for home cooks; juicy but still easy to mix into rice.
16–20 count / large shrimpLooks generous, but may need chopping so the rice eats evenly.
Cooked shrimpUse only in a pinch. Add at the end just to warm through.

How to Thaw and Dry Frozen Shrimp

Frozen shrimp can work as well as fresh shrimp when it is thawed safely and dried thoroughly. The goal is to remove surface moisture before the shrimp hits the hot pan.

Frozen shrimp sealed in a bag thawing in cold water, with drained shrimp and paper towel-dried shrimp beside it.
After a cold-water thaw, dry shrimp well before it hits the pan. A dry surface sears better and keeps the rice from steaming later.

Shrimp Doneness: Loose C, Not Tight Curl

The best doneness cue is visual: shrimp should turn opaque and curl gently. When it tightens into a firm ring, it has usually cooked too long.

Shrimp doneness guide showing raw grey shrimp, just-cooked coral shrimp in a loose C shape, and overcooked tightly curled shrimp.
Watch the shape, not only the color. A loose C-shape usually means tender shrimp, while a tight curl means it has stayed on the heat too long.

If you are using pre-cooked shrimp, do not sear it again. Add it near the end and toss only until warm. For shrimp that starts raw, a loose C-shape is usually a good cue; tight, firm curls usually mean it stayed on the heat too long.

When the shrimp is right, it should feel juicy and springy against the rice, not tight or chewy. That contrast is what makes the bowl feel generous.

The Sauce Ratio That Keeps Fried Rice Glossy, Not Wet

If your fried rice tastes salty but still flat, more soy sauce is usually not the answer. Try aroma, pepper, scallions, chili, or a tiny bit of sweetness before adding more liquid.

A balanced pan should taste savory all the way through, not sit in a puddle of sauce. For 4 cups cooked rice, this is enough to coat the grains without making them heavy:

  • 2 tbsp / 30 ml light soy sauce
  • 1 tbsp / 15 ml oyster sauce, optional
  • 1 tsp / 5 ml toasted sesame oil
  • 1/4 tsp white pepper
  • 1/4 tsp sugar
Sauce ratio board showing four cups of rice with soy sauce, oyster sauce, sesame oil, white pepper, and sugar.
A good sauce ratio should season the rice, not drown it. Measure first, then add just enough soy, oyster sauce, sesame oil, and white pepper for balance.

Mix the sauce before you start cooking. Fried rice moves quickly, and stopping to measure sauces while the pan is hot can lead to overcooked shrimp or wet rice.

A small splash of dark soy sauce can add color, while light soy sauce stays the main seasoning. Too much dark soy can make the rice look heavy and taste overly salty.

Sauce Ratio by Rice Amount

Sauce is where fried rice can go from balanced to salty fast. Start with these amounts, then taste at the end.

Cooked RiceSoy SauceOyster SauceSesame Oil
2 cups1 tbsp / 15 ml1 1/2 tsp / 7 ml1/2 tsp / 2.5 ml
3 cups1 1/2 tbsp / 22 ml2 tsp / 10 ml3/4 tsp / 4 ml
4 cups2 tbsp / 30 ml1 tbsp / 15 ml1 tsp / 5 ml

If you skip oyster sauce, keep the soy sauce measured and build flavor with white pepper, scallions, heat, or a tiny pinch of sugar after tasting. If the rice tastes flat or salty, check the pan cues before adding more soy sauce.

Sauce Swaps

  • No oyster sauce: Skip it, then taste for white pepper, scallions, heat, or a tiny pinch of sugar.
  • Gluten-free: Use tamari instead of soy sauce and check the oyster sauce label.
  • No soy sauce: Use coconut aminos, or season lightly with salt and a tiny splash of broth.
  • No sesame oil: Skip it and finish with extra scallions for freshness.
  • Spicy: Add chili crisp, sriracha, sambal, chopped green chili, or red pepper flakes.

Wok vs Skillet: Best Pan for Home Stoves

If you have ever made fried rice in a small pan and wondered why it steamed instead of fried, the pan size is probably the reason — not your cooking skill.

A wok is excellent for fried rice because it gives you room to toss and move ingredients quickly. But a large skillet is often better for home cooks than a small wok on a weak burner.

You do not need restaurant heat; you need restaurant order. A wide hot skillet, dry rice, and a little patience between stirs will get you much closer than a crowded wok on weak heat.

Comparison image showing shrimp fried rice being tossed in a wok and spread across a wide skillet.
On a home stove, a wide skillet often beats a small wok. More surface area lets more rice touch direct heat at once.

With less crowding, the rice has room to sizzle, which is where the better texture comes from. When the pan is too full, the vegetables leak water, the rice steams, and the sauce sits underneath instead of clinging to the grains.

  • Use a wok if your stove gives strong heat and you can toss quickly.
  • Choose a large non-stick skillet for the easiest beginner-friendly option.
  • Try a heavy stainless or cast-iron skillet if it holds heat well and you are comfortable managing sticking.
  • Cook in batches if your pan is small. A small pan can still make good fried rice — it just needs batches.

The Pan Cues That Matter Most

Use this while the rice is still in the pan. The troubleshooting table later is for fixing or understanding what went wrong; this section helps you catch problems before they become permanent.

Good fried rice gives you clear signs while it cooks. The pan tells you when to move forward and when to pause: steam, puddles, tight shrimp, or rice that sits in clumps instead of moving freely.

Think of it as the fried rice pan test: sizzle means go, steam means pause, puddles mean keep tossing, and tight shrimp means it cooked too long.

Fried rice pan test infographic showing four cues: sizzle means go, steam means pause, puddles mean toss, and tight shrimp means too long.
Let the pan guide you: sizzle means keep frying, steam means slow down, puddles need tossing, and tight shrimp should come off sooner.
CueWhat It MeansWhat to Do
Rice sizzlesThe pan is hot enough and the grains are frying.Let the rice get contact with the pan before adding sauce.
Rice steams heavilyThe pan is crowded or there is too much moisture.Spread the rice out or cook in batches.
Sauce pools underneathToo much liquid was added or the rice was not hot enough.Keep tossing over heat until the sauce clings to the grains.
Shrimp is tight and firmIt stayed on the heat too long.Cook shrimp briefly next time and return it only at the end.
Flavor tastes flatThe rice may need lift, not more liquid.Add white pepper, scallions, chili, or a tiny pinch of salt before more soy sauce.

When it is ready, you should see loose grains, springy shrimp, soft egg, fresh scallions, and no sauce puddles.

Shrimp Fried Rice Variations

Once the base method works, you can take the same pan in a few different directions: brighter with pineapple and lime, hotter with chili crisp, fuller with chicken, lighter with cauliflower rice, or simpler without egg. Keep the rice dry and the sauce measured, and the texture stays in your control.

Looking for a specific version? Jump to restaurant-style, pineapple, or chicken and shrimp fried rice.

Prawn Fried Rice

Use prawns exactly the same way as shrimp. Medium prawns stay juicy and still mix well with the rice. Very large prawns are easier to eat when cut into bite-size pieces before cooking or after searing.

Restaurant-Style Shrimp Fried Rice

Use jasmine rice, white pepper, scallions, a little oyster sauce, and small shrimp pieces that mix through the rice. Drizzle the sauce around the edge of the hot skillet so it sizzles before coating the grains. Keep the sauce light so the rice tastes restaurant-style without turning dark, salty, or heavy.

Restaurant-style shrimp fried rice in a bowl with small shrimp, egg, peas, carrots, scallions, and lightly glossy rice.
Restaurant-style shrimp fried rice should taste savory, not heavy. Keep the sauce light, finish with scallions and white pepper, and let the rice stay golden.

Pineapple Shrimp Fried Rice

Add 1/2 to 3/4 cup pineapple chunks, diced bell pepper, and a squeeze of lime at the end. Use less sugar in the sauce because pineapple brings sweetness. For a Thai-style direction, add a small splash of fish sauce, chopped chili, and extra scallions. Drain the pineapple well so the rice stays glossy instead of wet.

Pineapple shrimp fried rice with shrimp, pineapple chunks, egg, peas, carrots, red pepper, scallions, and a lime wedge.
Pineapple shrimp fried rice works best when the fruit is bright but not juicy. Drain it well and add it near the end so the rice stays fluffy.

Chicken and Shrimp Fried Rice

Use small pieces of boneless chicken along with the shrimp. Cook the chicken first until done, remove it, then cook the shrimp briefly. Return both proteins near the end so neither overcooks.

Chicken and shrimp fried rice with plump shrimp, browned chicken pieces, egg, peas, carrots, scallions, and glossy rice.
Chicken and shrimp need different timing. Cook the chicken first for browning, then add shrimp briefly so both proteins stay juicy.

Shrimp Fried Rice Without Egg

Skip the eggs and add more vegetables, tofu, or extra shrimp. Since egg adds richness, finish with scallions, white pepper, and a small amount of sesame oil to keep the rice flavorful.

Shrimp Fried Rice Without Soy Sauce

Use coconut aminos for a sweeter soy-free version, or season with salt, white pepper, sesame oil, and a tiny splash of broth. Add less liquid than you think you need, then taste after tossing.

Spicy Shrimp Fried Rice

Add chili crisp, sambal, sriracha, chopped green chili, or red pepper flakes. For the best texture, add chili oil or chili crisp near the end instead of flooding the rice early.

Cauliflower Shrimp Fried Rice

Use cauliflower rice instead of cooked rice for a lighter version. Frozen cauliflower rice should be thawed and squeezed dry first. Fry it in a wide skillet and leave it uncovered so it does not turn watery.

Why Fried Rice Turns Mushy — and How to Fix It

A difficult pan of fried rice is usually not a disaster. It is feedback: too much moisture, not enough heat, too much sauce, or shrimp that stayed in the pan too long.

Most fried rice problems are easy to diagnose once you know what to look for. Steam means moisture, puddles mean liquid, clumps mean the rice needed breaking up earlier, and tight shrimp means it stayed in the heat too long.

Troubleshooting board with fixes for mushy rice, rubbery shrimp, watery pan, salty rice, and rice clumps.
Mushy shrimp fried rice usually starts with excess moisture. Dry rice, dry add-ins, measured sauce, and enough pan space fix most texture issues.
ProblemWhy It HappenedFix
Rice is mushyRice was warm or wet, sauce was too heavy, or the pan was crowded.Use cold rice, reduce sauce, use a wider pan, and cook in batches.
Shrimp is rubberyShrimp cooked too long or stayed in the pan while the rice finished.Cook shrimp briefly, remove it, and return it at the end.
Rice tastes blandSauce was uneven or the rice was not seasoned enough.Mix sauce before cooking and taste for salt, white pepper, scallions, and heat before adding more sauce.
Rice is too saltyToo much soy sauce, oyster sauce, or dark soy sauce was added.Add plain rice, egg, or extra vegetables to balance it.
Rice is clumpyCold rice was added in large chunks.Break rice apart before it goes into the pan.
Fried rice is wateryFrozen shrimp, frozen vegetables, or pineapple added too much moisture.Dry shrimp well, cook off vegetable moisture, and drain pineapple before adding.
Egg disappeared into the riceEgg was mixed into wet rice or over-stirred.Scramble egg separately, then return it near the end.

What to Serve with Shrimp Fried Rice

This can be dinner on its own, especially with egg and vegetables. Because the rice is savory and glossy, the best sides bring crunch, acidity, freshness, or heat.

Shrimp fried rice served with cucumber salad, broccolini, chili crisp, scallions, and small side dishes.
Because shrimp fried rice is savory and rich, pair it with something crisp, green, acidic, or spicy. That contrast makes the meal feel fresher.
  • Cucumber salad or quick pickled cucumbers
  • Steamed or stir-fried greens
  • Spring rolls or lettuce wraps
  • Clear soup or hot and sour soup
  • Chili oil, chili crisp, or extra scallions on top

For a cold, crisp contrast, MasalaMonk’s cucumber salad recipe works especially well beside salty, glossy rice. For another quick shrimp dinner in a different direction, the shrimp scampi recipe gives you garlic butter, lemon, and tender shrimp instead of soy-sesame rice.

Storage and Reheating

This dish tastes best fresh from the pan, but leftovers can still be good when they are cooled, stored, and reheated properly.

  • Refrigerate: Store cooled shrimp fried rice in an airtight container for up to 3 days.
  • Reheat in a skillet: Warm over medium heat with a few drops of oil or water. Stir gently until hot.
  • Microwave carefully: Use short bursts and stop as soon as the rice is hot. Shrimp can get rubbery if overheated.
  • Freezing: Freezing is possible, but the shrimp and egg texture may not be as good after reheating.

Leftover rice note: Because this recipe often starts with leftover rice, cooling and reheating matter. If you cook rice ahead for fried rice, cool it quickly in a shallow container and refrigerate it within 2 hours. Do not leave cooked rice sitting out for hours before chilling. Reheat shrimp fried rice until hot all the way through, and reheat only the portion you plan to eat. For more detail, see the USDA leftover food safety guidance.

FAQs About Shrimp Fried Rice

What is the best rice for shrimp fried rice?

Cold cooked jasmine or long-grain white rice is the easiest choice because the grains stay separate in a hot skillet. Dry basmati can also work well when it has been cooked firm and cooled fully.

Do you need cold rice for shrimp fried rice?

Cold rice is easiest because the grains are firmer and drier on the surface. Fresh rice can work too, but it needs cooling time first so it stops steaming.

Can you use freshly cooked rice for shrimp fried rice?

Yes, but not straight from the cooker. Cook it slightly firm, spread it out so steam escapes, then chill it until the surface feels dry. Break up the grains before adding them to the pan.

How do you make shrimp fried rice not mushy?

Use cold rice, a hot wide pan, and a measured amount of sauce. Pat shrimp dry, cook off moisture from frozen vegetables, and avoid crowding the pan.

What shrimp works best for fried rice?

Raw peeled and deveined medium shrimp is the easiest choice. Smaller shrimp give a more restaurant-style bite, while very large shrimp are better chopped.

Should shrimp be cooked before adding rice?

Yes. Cook shrimp briefly first, remove it from the pan, then return it after the rice is fried. This keeps the shrimp tender while the rice gets enough time on the heat.

How much sauce should you add to shrimp fried rice?

For 4 cups cooked rice, start with 2 tablespoons soy sauce, 1 tablespoon oyster sauce, 1 teaspoon sesame oil, white pepper, and a small pinch of sugar. Add more only after tasting.

Is oyster sauce necessary?

No. Oyster sauce gives a deeper takeout-style flavor, but the rice still works without it. Keep the soy sauce measured, then use white pepper and scallions for extra flavor.

How do you make shrimp fried rice with frozen shrimp?

Thaw frozen shrimp fully and pat it dry. Season it, cook it briefly in a hot pan, then remove it before frying the rice so it stays juicy and the skillet stays dry.

Do prawns work instead of shrimp?

Yes. Prawns work the same way in this recipe. Use raw peeled and deveined prawns, dry them well, cook them briefly, and return them at the end.

How do you make shrimp fried rice without egg?

Skip the egg and add more shrimp, vegetables, or tofu. Since egg adds richness, finish with scallions, white pepper, and a small amount of sesame oil.

How long does shrimp fried rice keep?

Shrimp fried rice keeps for up to 3 days in the refrigerator when stored in an airtight container. Cool it before storing and reheat only the portion you plan to eat.

What is the best way to reheat shrimp fried rice?

A skillet over medium heat gives the best texture. Add a few drops of oil or water and stir gently until hot. Use short microwave bursts if reheating quickly.

Back to recipe card · Back to quick answer

The Takeaway

Good shrimp fried rice is not about a long ingredient list. It is about giving the rice enough heat, keeping the shrimp tender, and using just enough sauce to season every grain.

Once you hear the rice sizzling instead of steaming, you are on the right track. Keep the shrimp brief, the sauce measured, and the pan wide, and this becomes the kind of fried rice you can repeat with whatever is already in the fridge.

The best version does not taste like leftovers. It tastes like a hot pan gave yesterday’s rice a second life.