Posted on Leave a comment

Chicken and Chorizo Paella Recipe

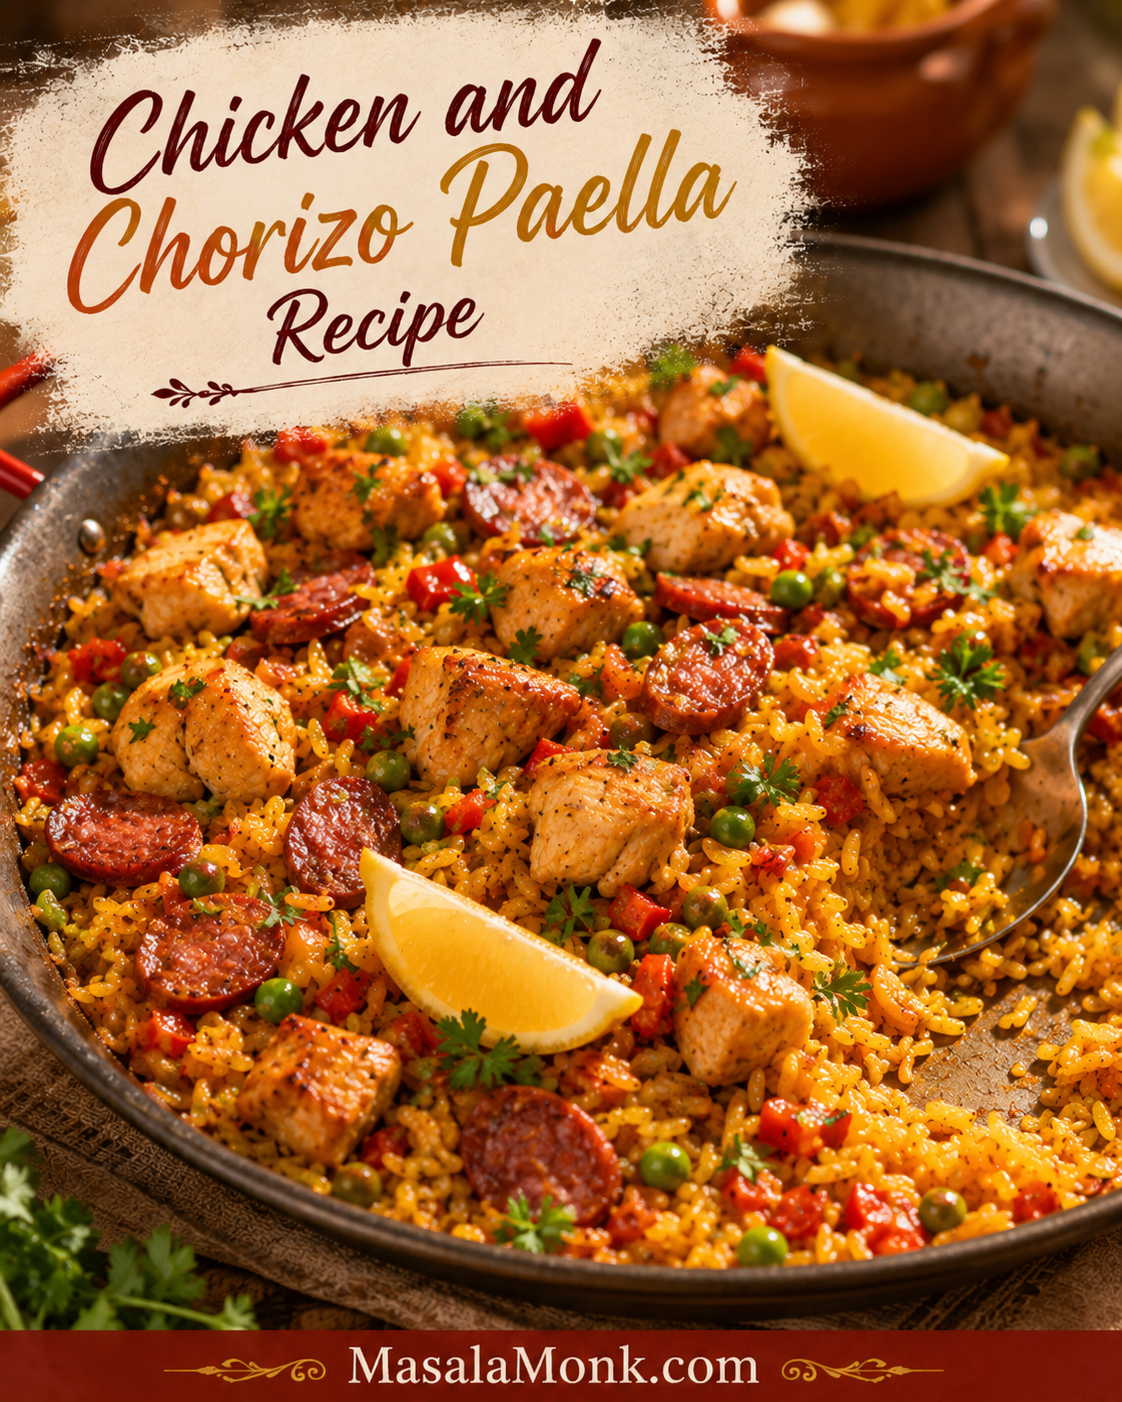
Finished chicken and chorizo paella in a wide shallow pan with golden saffron rice, browned chicken thigh pieces, sliced Spanish chorizo, peas, lemon wedges, parsley and title text.

One-pan dinner · smoky chorizo · saffron rice

Golden rice, juicy chicken thighs, smoky Spanish-style chorizo, peas, lemon, and saffron stock all come together in one generous stovetop pan. This chicken and chorizo paella recipe gives you the drama of paella without needing an outdoor burner or restaurant setup.

The promise is simple: rice that stays the hero, chorizo that seasons without taking over, chicken that stays juicy, and a lemon-bright finish that makes the whole dish wake up at the table.

It looks like a weekend dish, but the method is straightforward: brown the chicken, let the chorizo turn the oil paprika-red, build a glossy base, add rice and hot stock, then leave the pan alone.

This is the kind of dinner that makes people go back for the rice: smoky at the edges, golden through the middle, dotted with peas, finished with lemon, and generous enough for a relaxed table.

If you want the broader classic version first, start with our full paella recipe. This page focuses on the home-stovetop chicken-and-chorizo version: which rice to use, how much stock to add, what pan works best, when to add prawns, and how to avoid the common texture problems.

Quick Answer

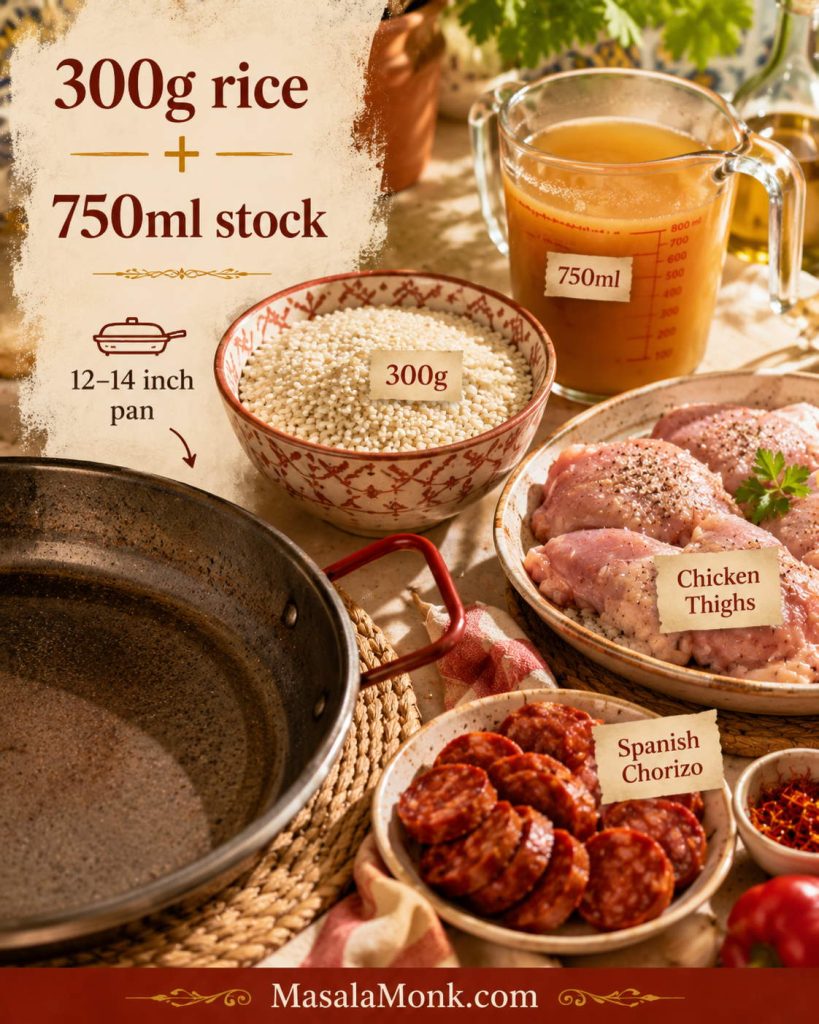
The best home-stovetop chicken and chorizo paella ratio is 300g paella rice to 750ml hot stock in a roomy 12–14 inch pan, with 350–450g chicken thighs and 100–140g Spanish-style chorizo.

Most important rule: stir before the stock goes in, then stop. Level the rice, let it simmer, and give the grains a covered rest before serving.

The dish takes about 50–55 minutes, including rest. Brown the chicken, render the chorizo, build the base, coat the rice, add hot saffron stock, then let the rice cook until tender, distinct, and settled. If you are scaling the recipe, use the rice-to-stock ratio guide before choosing your pan.

Chicken and chorizo paella ratio setup with 300g paella rice, 750ml hot stock, chicken thighs, Spanish chorizo and a 12–14 inch pan.
Use this ratio as your starting guardrail; it keeps the rice layer shallow enough to absorb stock without turning heavy.

Chicken and Chorizo Paella at a Glance

Serves
4 generous portions
Prep
15 minutes
Cook
35 minutes
Rest
5 minutes

Best with Bomba, Calasparra, Valencia rice, or supermarket paella rice. Use Spanish cooking chorizo or thinly sliced dry-cured Spanish chorizo. For a chicken, chorizo and prawn paella, add the prawns near the end so they stay tender.

What This Recipe Solves

This version is for the home cook who wants smoky chorizo flavor without losing the rice. The chicken stays juicy, the chorizo seasons the oil, and the rice gets enough room to cook through without turning creamy.

It is built around the things that matter most in a normal kitchen: a roomy pan, hot saffron stock, controlled chorizo, and clear visual cues. Look for glossy sofrito, shiny coated rice, liquid dropping below the surface, and a soft crackle at the end.

The rice should be the reason people go back for seconds, while the chicken and chorizo make the first spoonful feel generous.

What the Finished Paella Rice Should Look Like

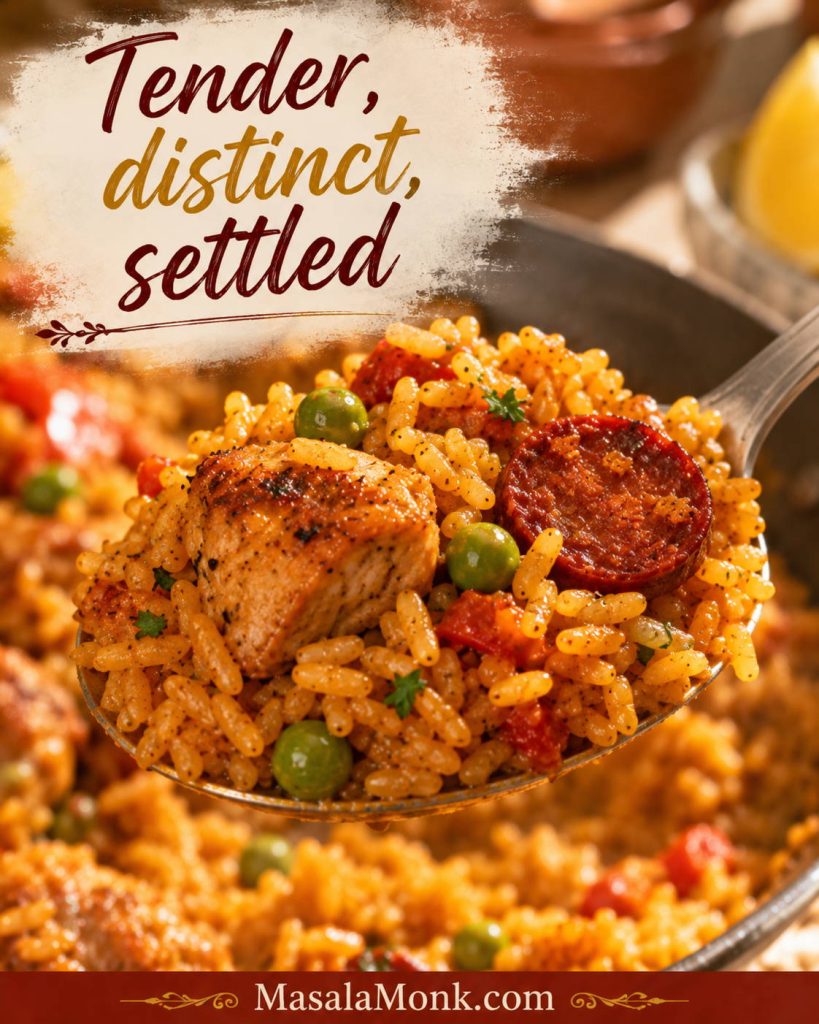
The most useful texture check happens after the rest. The rice should look settled and glossy, with grains that separate on the spoon instead of collapsing into a creamy mound.

Close-up spoonful of rested chicken and chorizo paella rice with golden distinct grains, peas, chorizo oil and a small piece of chicken.
After the rice rests, the grains should look tender, separate and settled; that final texture matters more than chasing a perfect-looking pan.

Chicken and Chorizo Paella Ingredients

Ingredient Overview Before You Cook

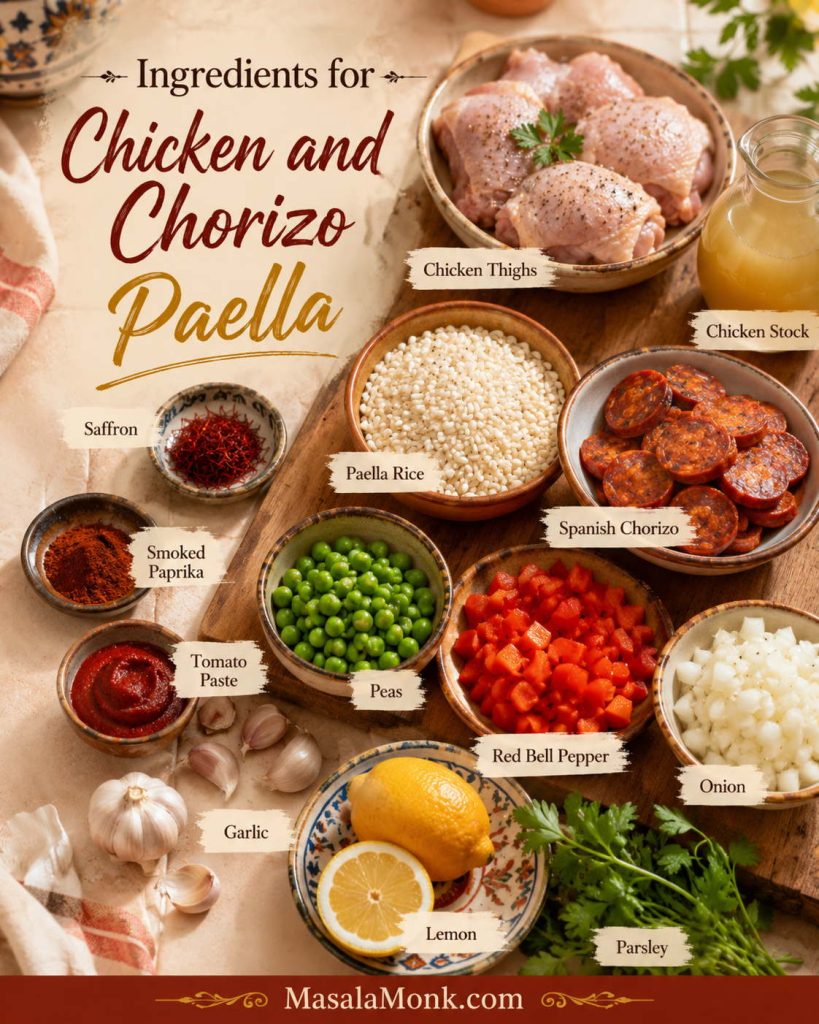
The ingredient list is short enough for a weeknight, but each piece has a job: chicken gives the dish comfort, chorizo turns the oil smoky and red, the sofrito sweetens the base, saffron stock carries aroma into the rice, and lemon gives the final lift.

If you are choosing ingredients at the store, the most important decisions are the chorizo, the rice, and the pan size that gives the grains enough room.

Ingredients for chicken and chorizo paella arranged on a board, including chicken thighs, Spanish chorizo, paella rice, saffron, stock, red pepper, onion, garlic, smoked paprika, peas, lemon and parsley.
This ingredient setup shows the whole flavor path: smoky oil first, aromatic stock next, then lemon and herbs to finish cleanly.

Protein, Chorizo and Sofrito Base

Start with the ingredients that build the base flavor before the rice goes in.

IngredientAmountWhy it matters
Olive oil2 tbsp / 30mlStarts the browning and gives the sofrito a richer base.
Boneless skinless chicken thighs350–450g / 12–16 ozStays juicier than breast through browning and simmering.
Spanish-style chorizo100–140g / 3.5–5 ozCreates paprika-red oil and smoky depth without overpowering the rice.
Onion1 mediumSoftens into the base and brings gentle sweetness.
Red bell pepper1 mediumAdds color, sweetness, and a familiar home-paella feel.
Garlic3 clovesRounds out the paprika and chorizo.
Smoked paprika1 tspDeepens the smoky warmth already coming from the chorizo.
Tomato paste1 tbspAdds color and body without making the base watery.
Optional grated tomato150–200g / 5–7 ozAdds a softer tomato richness if you like a deeper sofrito.

Rice, Stock and Finishers

Once the base is ready, these ingredients decide the rice texture, aroma and final brightness.

IngredientAmountWhy it matters
SaffronBig pinch, about 15–20 threadsGives the rice aroma and golden color.
Paella rice300g / about 1½ cupsShort-grain rice absorbs stock while keeping structure.
Hot chicken stock750ml / about 3 cups plus 3 tbspCooks and seasons the rice from the inside out.
Frozen peas75–100g / ½–¾ cupAdds sweetness and color near the end.
Lemon1Cuts through the chorizo richness.
ParsleySmall handfulAdds a clean green finish.

Once the chorizo stains the oil red and the saffron stock hits the rice, the ingredients stop feeling separate. That is when the dish starts to smell like a full pan of dinner, not a list of parts.

Best Chorizo for Paella

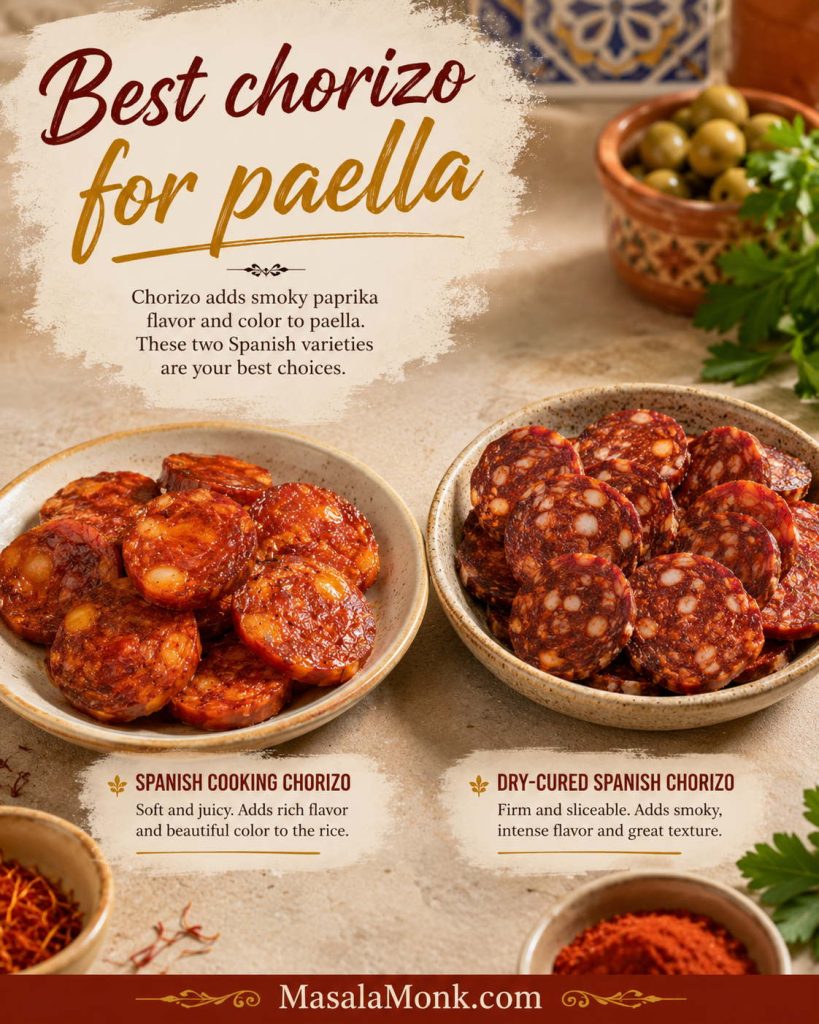
The best choice is Spanish-style chorizo. Use 100g if you want the rice to stay cleaner and more saffron-forward; use 140g if you want a richer, smokier pan. Above that, the dish can start tasting more like sausage rice than paella.

Spanish cooking chorizo and dry-cured Spanish chorizo sliced on a board for choosing chorizo for paella.
Choose Spanish-style chorizo for smoky paprika depth; however, keep the amount controlled so the rice still feels like the main event.
Chorizo typeUse it?How to handle it
Spanish cooking chorizoBest first choiceSlice into half-moons or small chunks so it browns and seasons the oil.
Dry-cured Spanish chorizoGood backupSlice thinly so it softens and does not become chewy.
Fresh Mexican-style chorizoOnly if changing the dishIt is wetter, crumbly, and more strongly seasoned, so the result will be different.

How Much Chorizo to Use in Paella

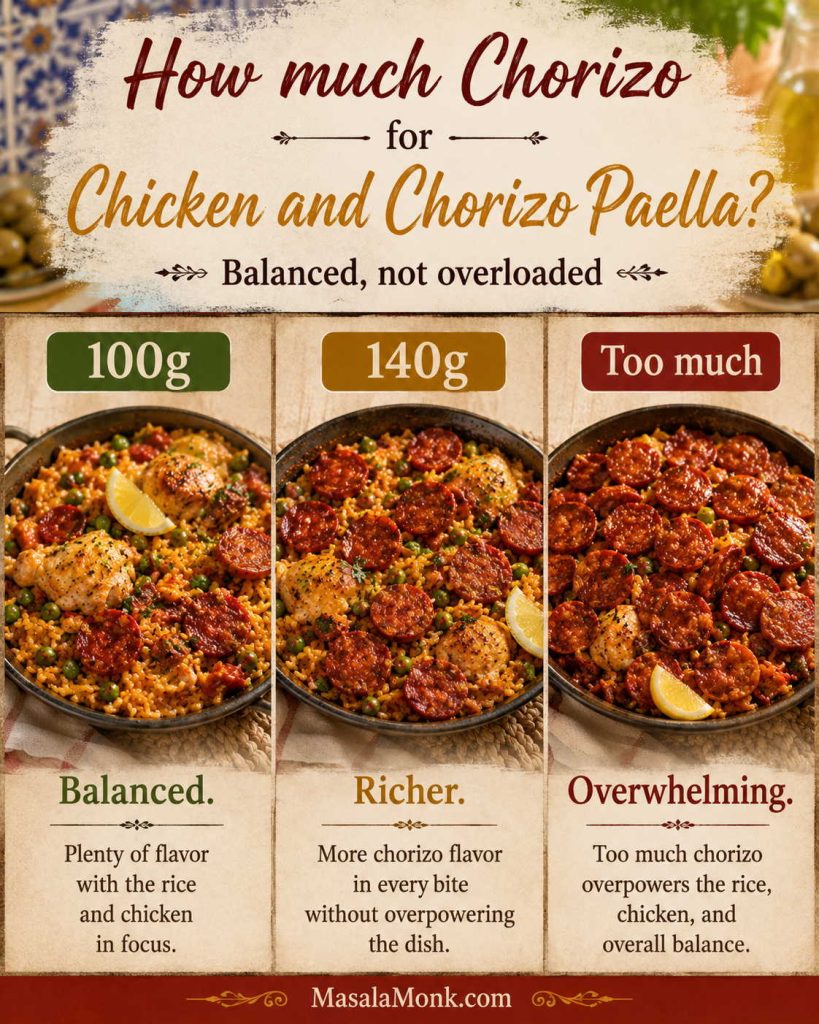
Chorizo should season the rice, not crowd it. Use the lower end if your sausage is salty or very fatty, and save the richer end for a deeper, smokier pan.

Chorizo amount comparison for paella with balanced 100g chorizo, richer 140g chorizo and an overloaded greasy version.
The sweet spot is enough chorizo to stain the oil red, but not so much that the pan turns greasy or crowded.

If your chorizo is very salty, use the lower end of the amount and choose a low-salt stock. If you are choosing between Spanish and Mexican chorizo at the store, this Food & Wine guide to Spanish vs Mexican chorizo is a useful quick check.

Best Rice for Chicken and Chorizo Paella

The best bite is tender but not creamy: rice that has soaked up the saffron stock and chorizo flavor while still holding its shape.

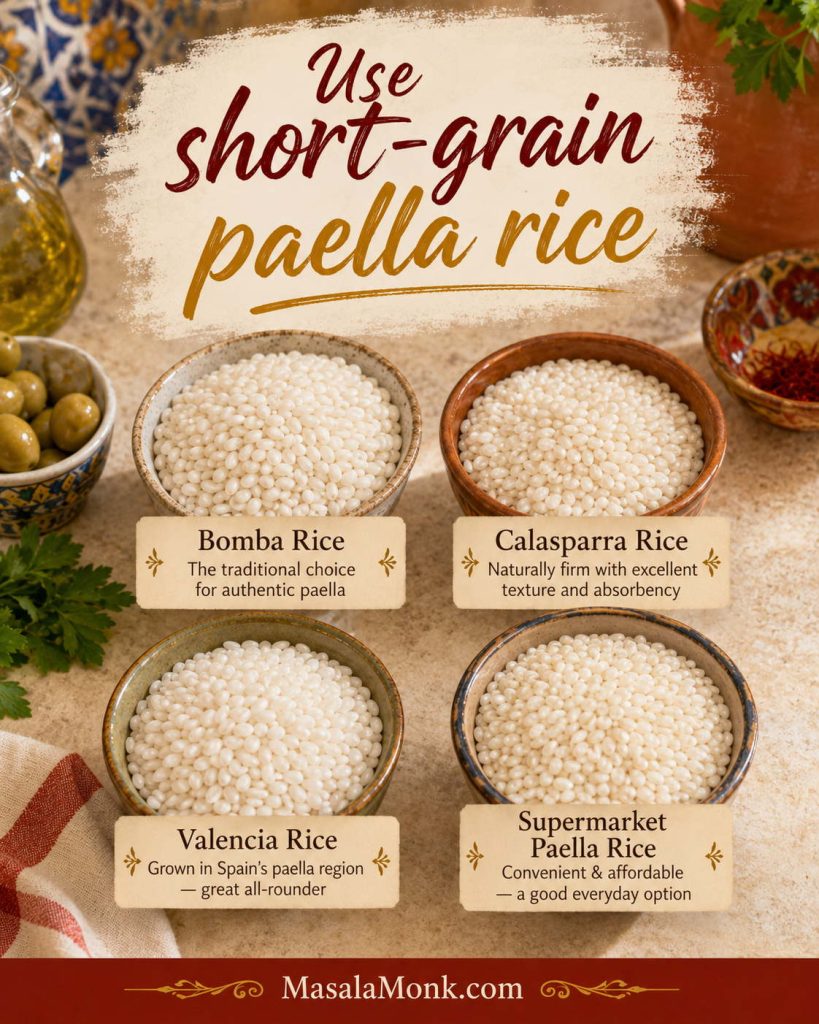
Bowls of short-grain paella rice options labeled Bomba, Calasparra, Valencia and supermarket paella rice.
Short-grain paella rice absorbs saffron stock while holding its shape, which is why it gives a better bite than long-grain rice.
RiceUse it?What to expect
Bomba riceBest choiceAbsorbs stock well and stays distinct when cooked properly.
Calasparra riceBest choiceExcellent texture, especially in a broad pan.
Valencia riceGood choiceA proper short-grain option for this kind of cooking.
Supermarket paella riceGood practical choiceUsually the easiest option for home cooks; follow the texture cues.
Arborio riceBackup onlyWorks in a pinch, but it is starchier and can turn creamy if stirred.
Long-grain riceNot idealMakes a good chicken chorizo rice dish, but the texture moves away from paella.
Brown riceAvoid for this methodNeeds different timing and liquid.
Basmati or jasmine riceAvoid for this methodThe aroma and texture pull the dish in a different direction.

Paella Rice vs Long-Grain Rice

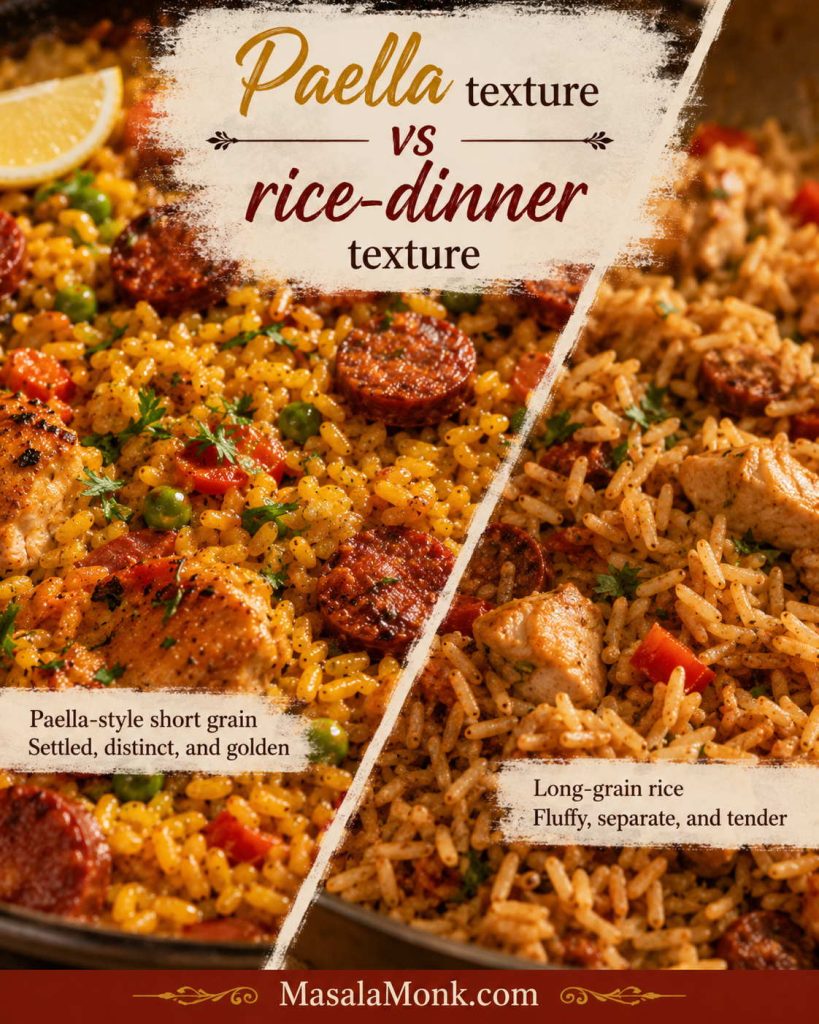
Long-grain rice can still make a good chicken chorizo rice dinner, but it changes the bite. For paella-style texture, short-grain rice gives the stock somewhere to go without losing shape. Already cooking? The no-stir simmer cues below will help you judge the pan.

Cooked rice texture comparison with short-grain paella rice beside softer long-grain chicken chorizo rice.
Long-grain rice can still make a good chicken chorizo rice dinner; for paella texture, though, short-grain rice gives a more settled, distinct finish.

Use dry, unrinsed rice here. Add it straight to the pan and stir it briefly through the sofrito before adding stock.

For everyday rice cooking, rinsing, soaking, and stovetop timing, MasalaMonk’s how to cook rice guide is useful. For this paella, stay with short-grain rice and the ratio below.

Chicken Thighs vs Chicken Breast

Chicken thighs are the better default. They stay juicier during browning and simmering, and they reheat better if you have leftovers.

Chicken breast can work, but it dries out faster. Cut it into slightly larger pieces, brown it briefly, and avoid cooking it hard at the beginning. If you often struggle with dry white meat, MasalaMonk’s baked chicken breast recipe goes deeper into timing and doneness cues.

Boneless skinless chicken thigh chunks browning in a skillet with tongs before being cooked with paella rice.
Brown the thigh pieces for flavor first, then let them finish gently with the rice so they stay juicy instead of drying out.

Best Pan and Rice-to-Stock Ratio

This is the section that saves the rice. Not because paella is difficult, but because pan size changes everything.

The pan is not about equipment snobbery. It is about giving the rice enough room to become the best part of the meal.

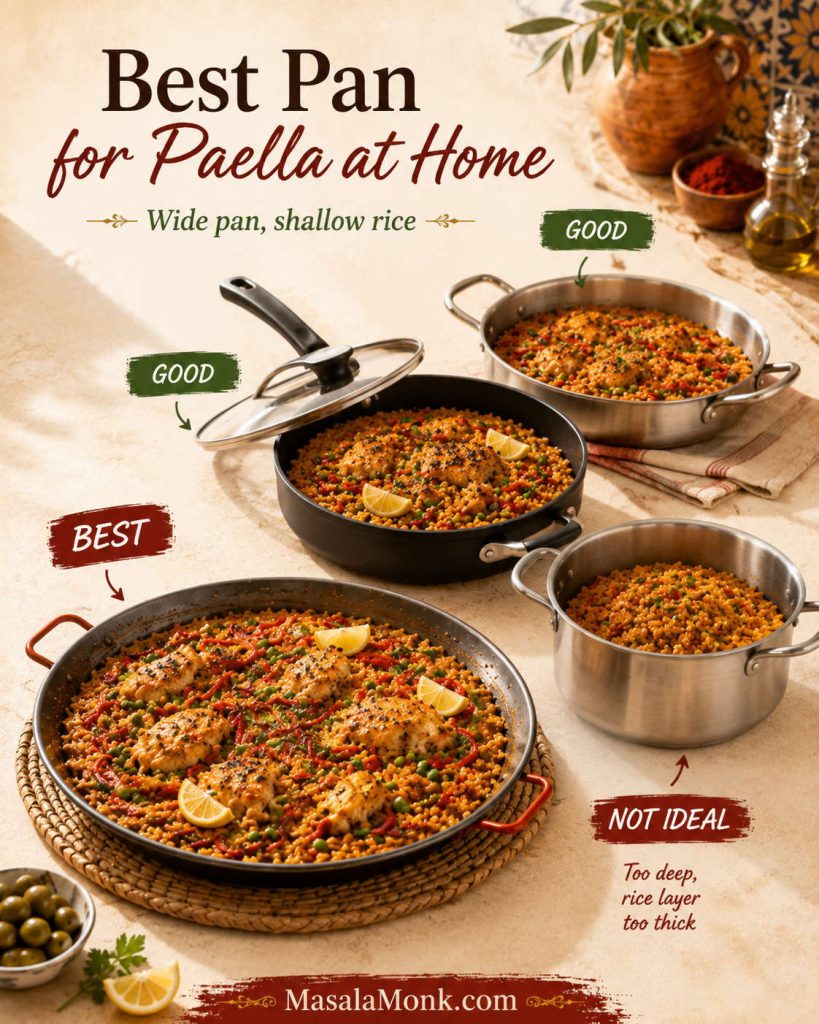
Best pan for paella at home guide with a paella pan, wide skillet, wide sauté pan and deep saucepan showing shallow and deep rice layers.
A paella pan is useful, but the real lesson is shape: wide, shallow cookware helps the rice cook more evenly than a deep pot.

Choose a Wide Pan, Not a Deep Pot

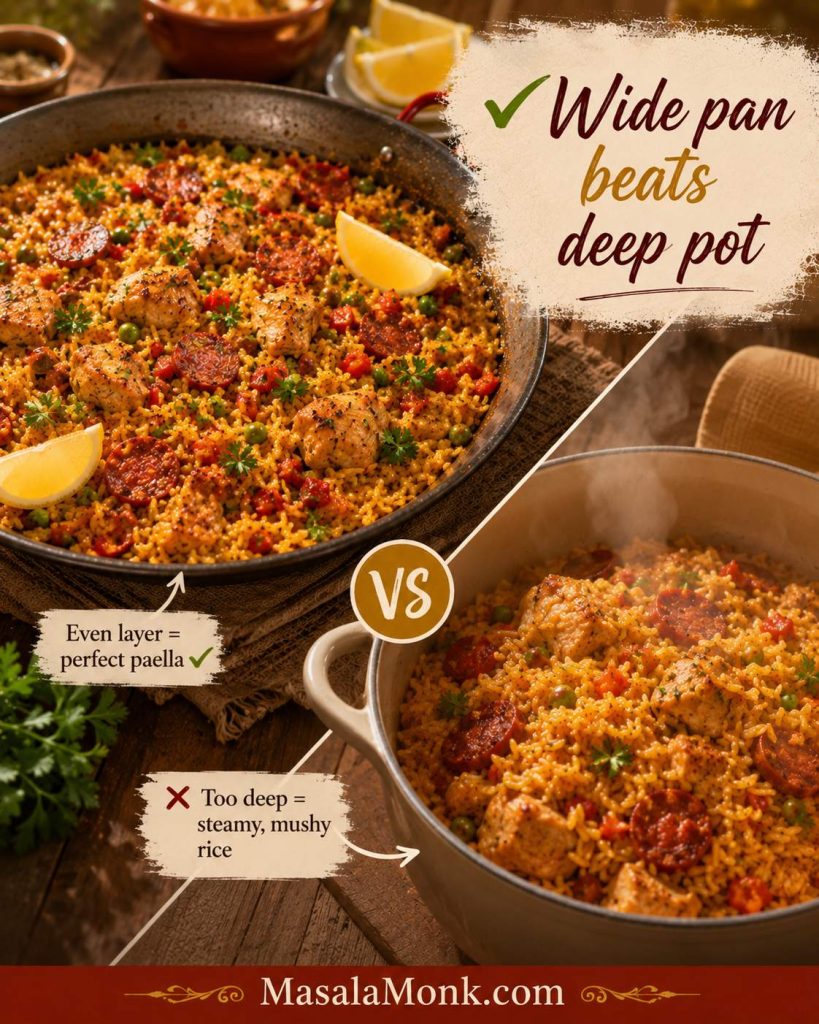
You do not need a perfect paella pan. You need enough surface area for the rice to sit shallow, not piled. A deep saucepan can still make a tasty chicken chorizo rice dinner, but it traps steam and gives a softer finish.

Wide pan and deep pot comparison for paella with a shallow rice layer in the wide pan and a thick rice layer in the saucepan.
When the rice sits too deep, it steams instead of settling; therefore, a wide pan gives better evaporation and a more paella-like texture.
PanWorks?Best use
12–14 inch / 30–35cm paella panBestGives the rice the most even spread and evaporation.
12 inch / 30cm skillet with lidExcellentBest everyday home option.
Wide sauté panGoodWorks well if the base is broad and not too deep.
Cast iron skilletGood, but watch heatGreat crust potential, but it can go from toasted to scorched quickly.
Deep saucepanNot idealBetter for chicken chorizo rice than paella-style texture.

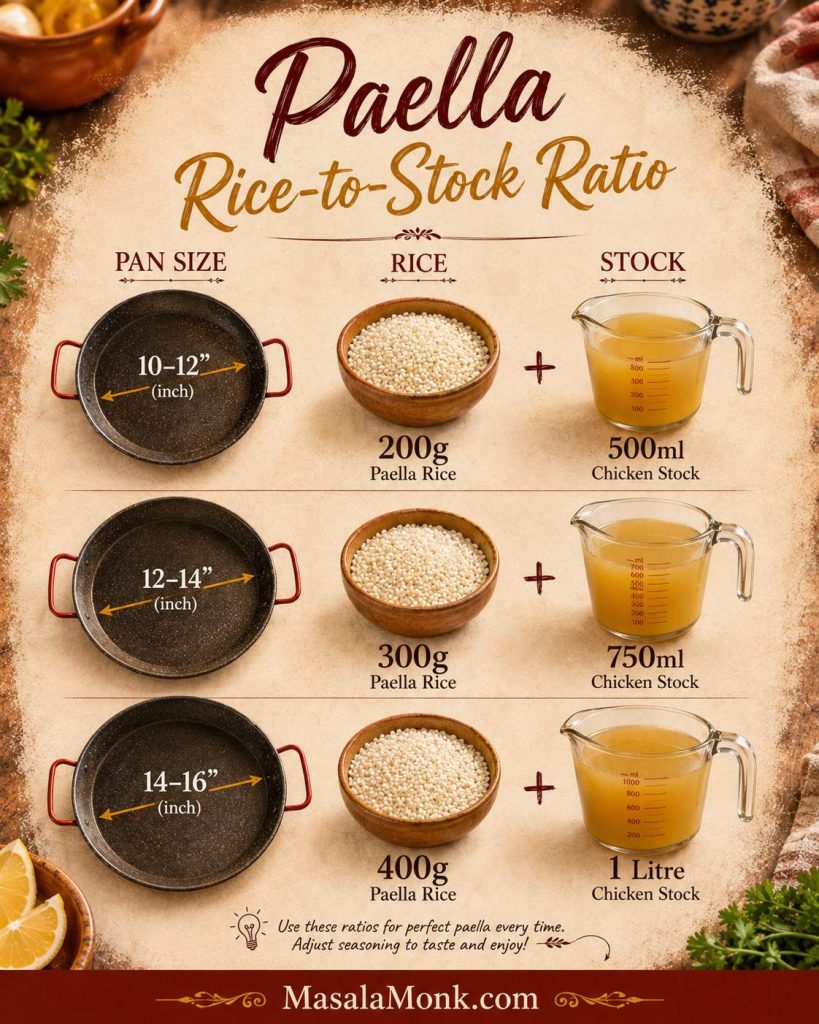
Paella Rice-to-Stock Ratio

Best default: 300g paella rice + 750ml / about 3 cups plus 3 tbsp hot stock in a roomy 12–14 inch pan.

RiceHot stockBest panServes
200g500ml / about 2 cups plus 2 tbsp10–12 inch pan2–3
300g750ml / about 3 cups plus 3 tbsp12–14 inch pan4
400g1 litre / about 4¼ cups14–16 inch pan5–6
Paella rice-to-stock ratio guide with 200g rice and 500ml stock, 300g rice and 750ml stock, and 400g rice and 1 litre stock.
The amount of stock matters, but pan width matters too; a bigger batch needs more surface area, not just more liquid.

Warm the stock first, then bloom the saffron in that hot liquid. Cold stock slows the pan down; hot stock keeps the simmer steady and helps the rice cook predictably.

Once your pan and ratio are set, the next big texture move is to level the rice before simmering.

  • Rice nearly tender but dry? Add 2–4 tbsp hot stock around the edge and cover loosely for a few minutes.
  • Working with a smaller pan? Reduce the batch instead of piling the rice deep.
  • No lid? Use foil for the resting stage.

If you are using cast iron, watch the final heat push closely. MasalaMonk’s cast iron skillet guide is useful if you cook often with heavy pans.

How to Make Chicken and Chorizo Paella

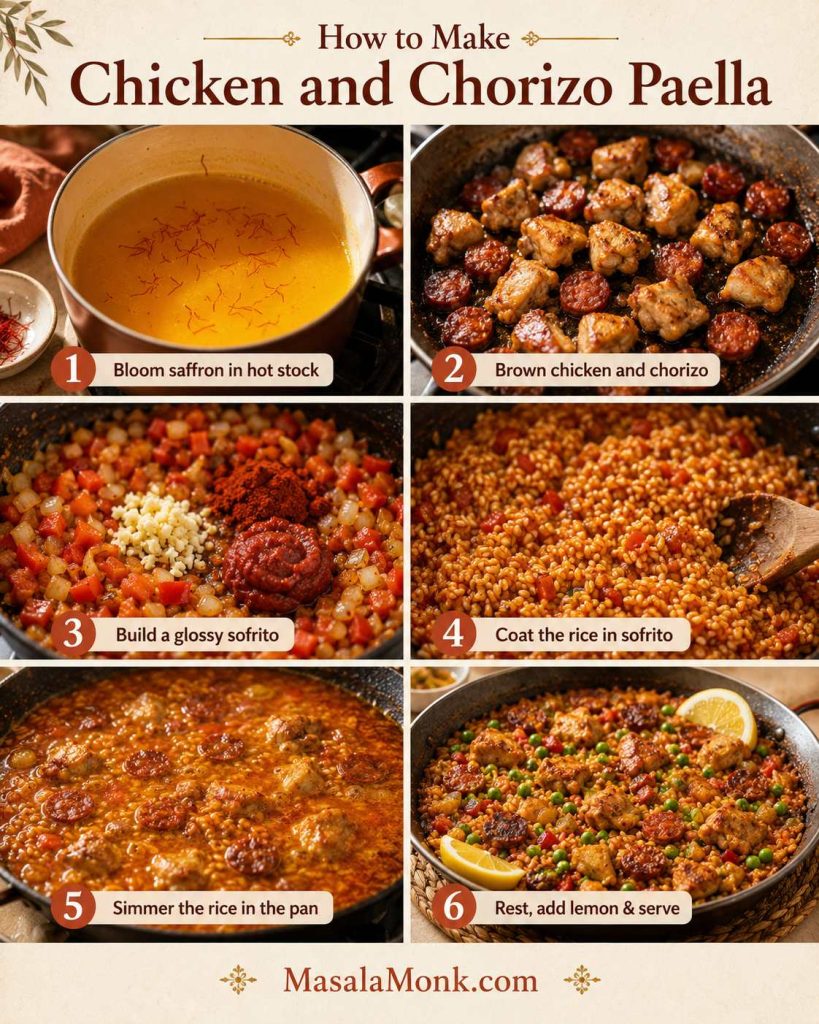
The cooking is straightforward, but each stage has a cue. Watch what is happening rather than only the clock: paprika-red oil, glossy sofrito, shiny rice, steady bubbling, the liquid dropping below the surface, and a soft crackle at the end.

Once the chorizo and paprika hit the warm oil, the kitchen starts to smell like dinner is already halfway there.

Six-step process board for chicken and chorizo paella showing saffron stock, browned chicken and chorizo, sofrito, coated rice, simmering rice and rested paella.
Think of the method in stages: season the oil, strengthen the base, coat the grains, then let heat and time finish the rice.

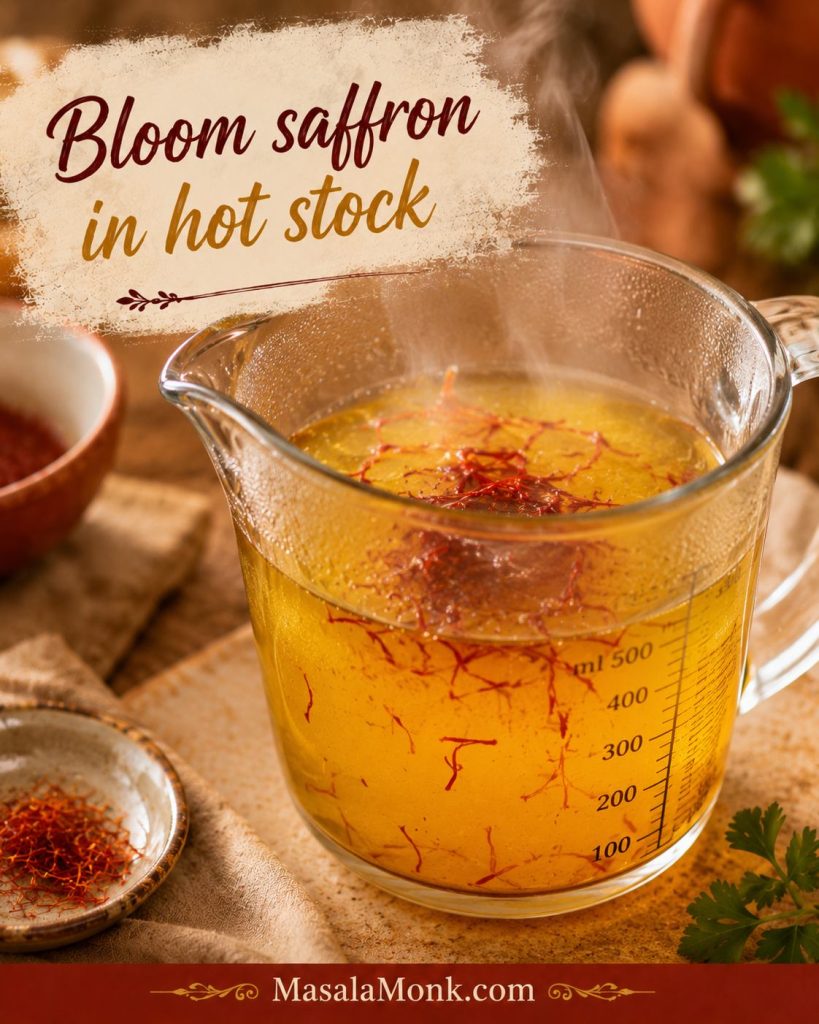
1. Bloom the saffron

Warm the chicken stock and add the saffron. Let it steep while you start the pan. The stock should be hot when it goes into the rice, but it does not need to boil aggressively.

Saffron threads blooming in hot chicken stock inside a clear measuring jug for chicken and chorizo paella.
Bloom saffron in hot stock before adding it to the pan, because the color and aroma spread more evenly through the rice.

2. Brown the chicken and chorizo

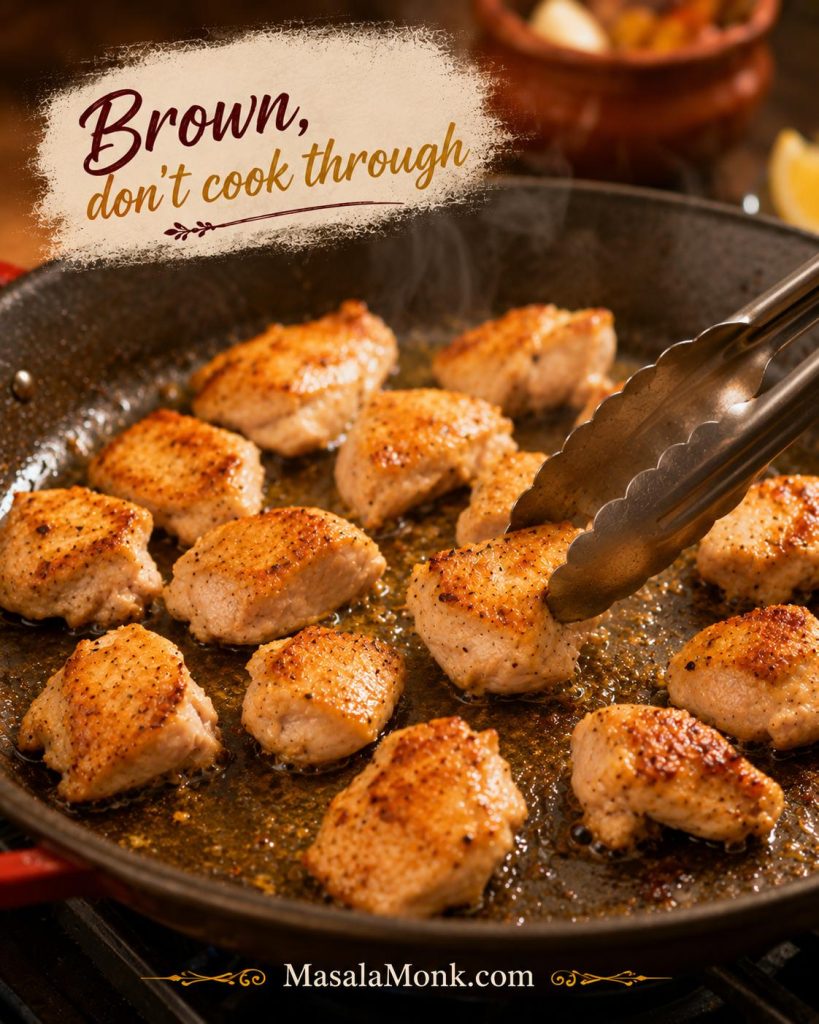
Cut the chicken thighs into large bite-size pieces and season them lightly. Heat olive oil in a wide pan over medium-high heat, then brown the chicken for 4–6 minutes. You want color on the outside, not fully cooked chicken. Move it to a plate.

Boneless skinless chicken thigh pieces browning in olive oil with tongs in a wide skillet for paella.
At this stage, color matters more than doneness; the chicken should brown on the outside and finish later with the rice.

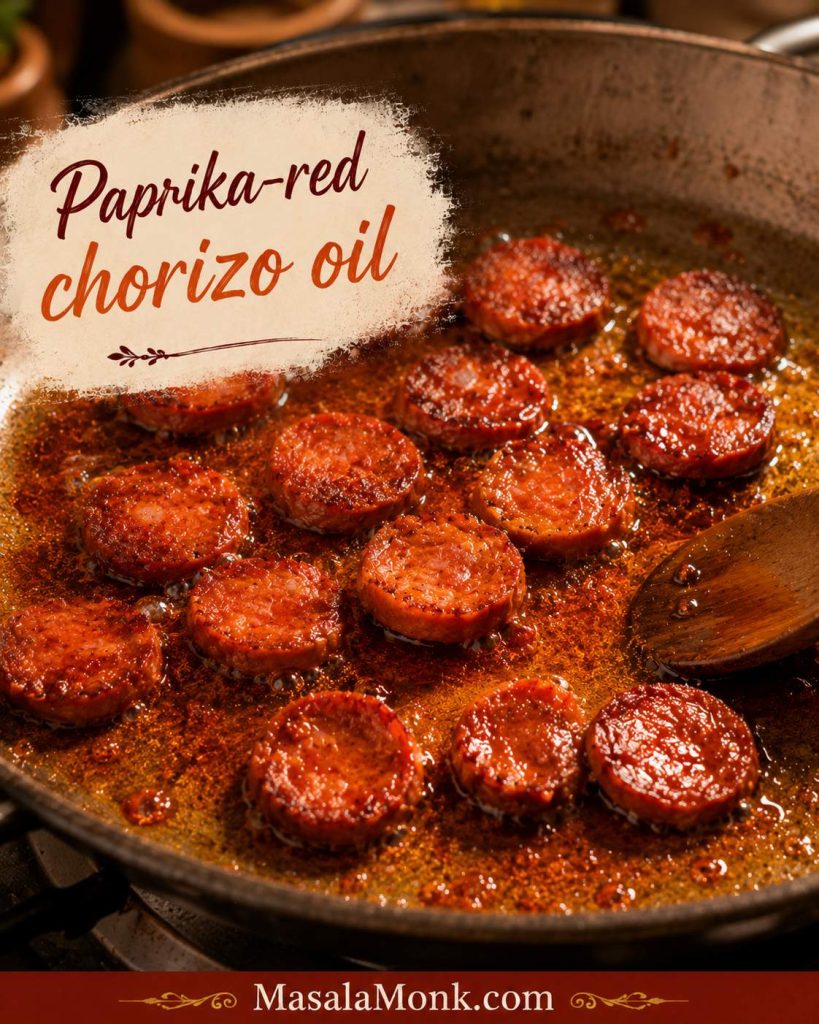
Add the chorizo to the same pan. Let it sizzle for 2–3 minutes, just until the edges brown and the oil turns paprika-red. If the chorizo releases a lot of fat, spoon off a little before moving on.

When the pan turns red-orange, pay attention: that oil will carry the chorizo flavor through the rice.

Spanish chorizo slices sizzling in a pan and turning the oil paprika red for chicken and chorizo paella.
Once the chorizo oil turns paprika-red, it becomes seasoning for the rice, not just flavor sitting on top.

3. Build the sofrito

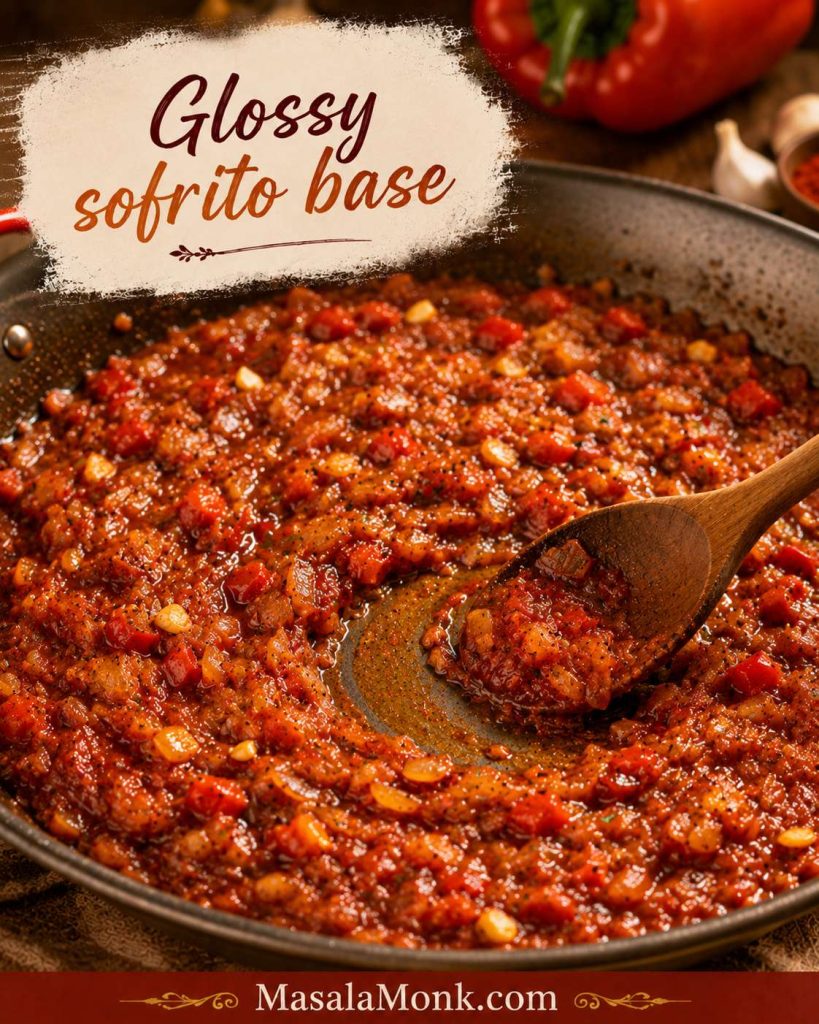
Add the onion and red bell pepper. Cook over medium heat for 5–7 minutes, until the vegetables soften and smell sweet and smoky. Add garlic, smoked paprika, and tomato paste, then cook for 1 minute.

If using grated tomato, add it now and let it reduce until the mixture looks glossy rather than watery. The rice should meet a concentrated base, not a loose sauce.

Glossy sofrito base in a pan made with onion, red bell pepper, garlic, smoked paprika and tomato paste.
Cook the sofrito until it looks glossy and concentrated, because watery vegetables can make the rice taste flatter later.

4. Add the rice and stock

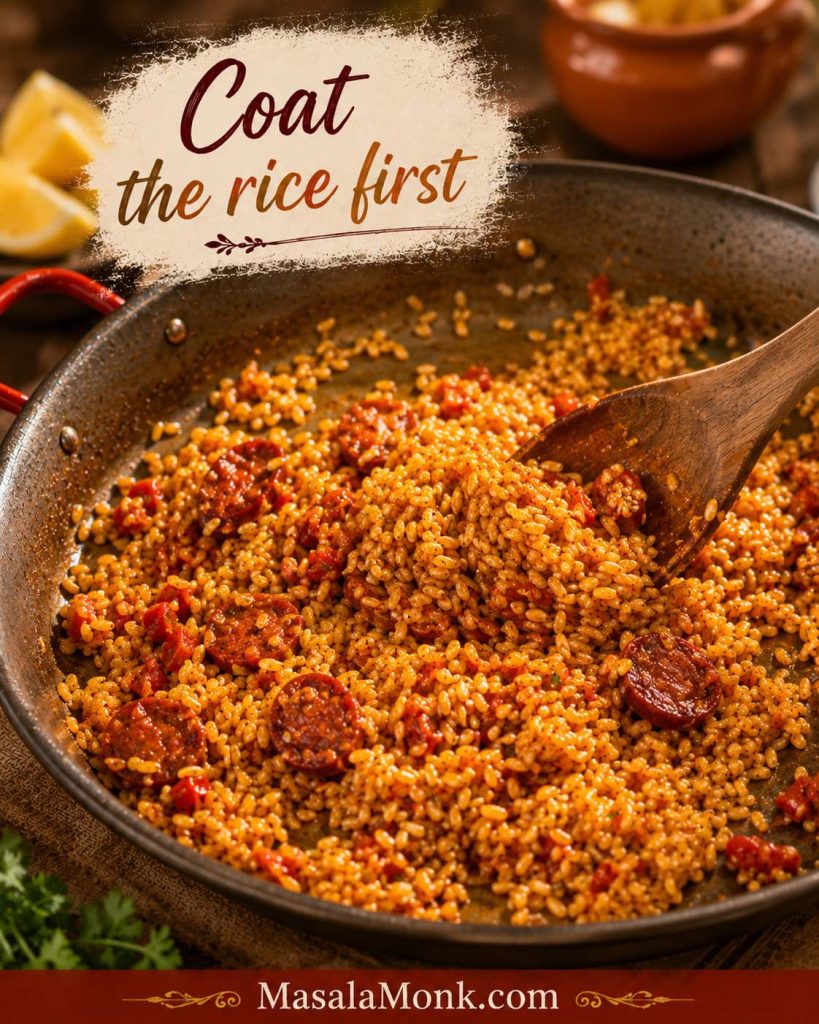
Add the dry paella rice and stir for 1–2 minutes, just until the grains look shiny and coated. Pour in the hot saffron stock, scrape the bottom gently, return the chicken, and spread everything into an even layer.

Before the stock goes in, the rice should look coated and glossy rather than wet. This short stir builds flavor without turning the dish into risotto.

Dry paella rice being stirred through red sofrito and chorizo oil before hot stock is added.
This is the last full stir: coating the dry rice first helps the grains pick up the smoky sofrito before the stock goes in.
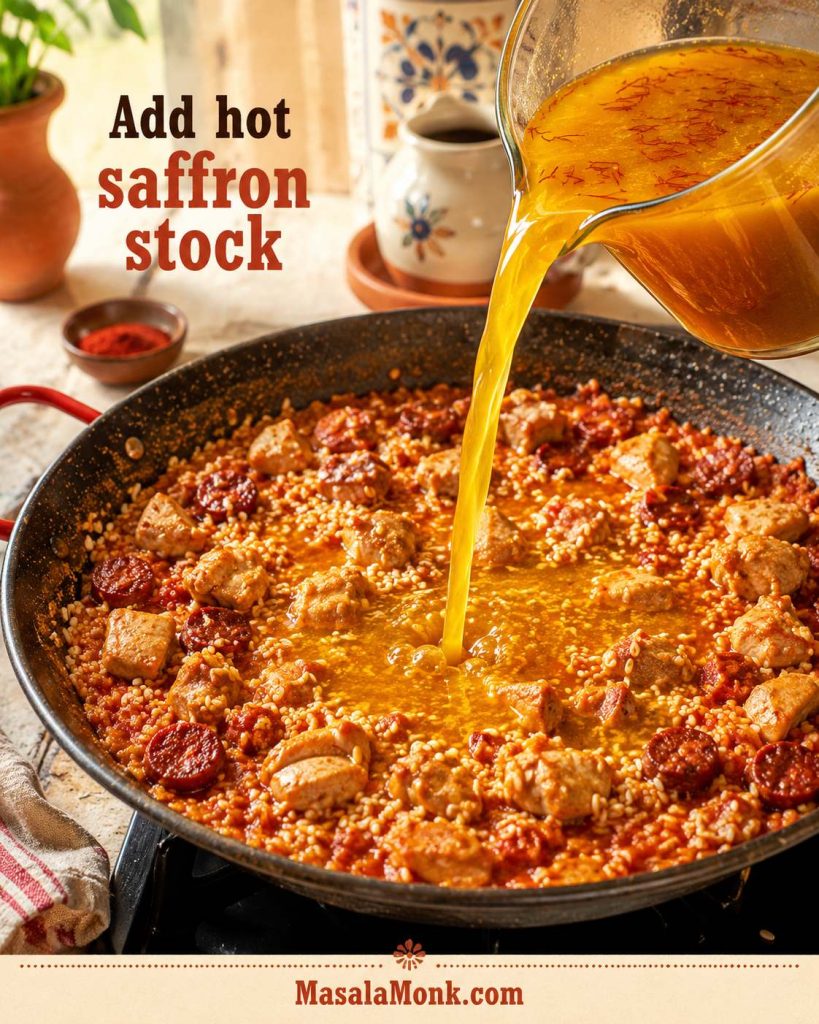
Golden saffron stock being poured into a wide pan with paella rice, browned chicken thigh pieces and chorizo.
Add the saffron stock while it is hot so the pan keeps simmering and the rice starts cooking evenly right away.

Once the rice is level, stop moving it around. This is the moment the dish changes from “stirring dinner” to paella-style cooking.

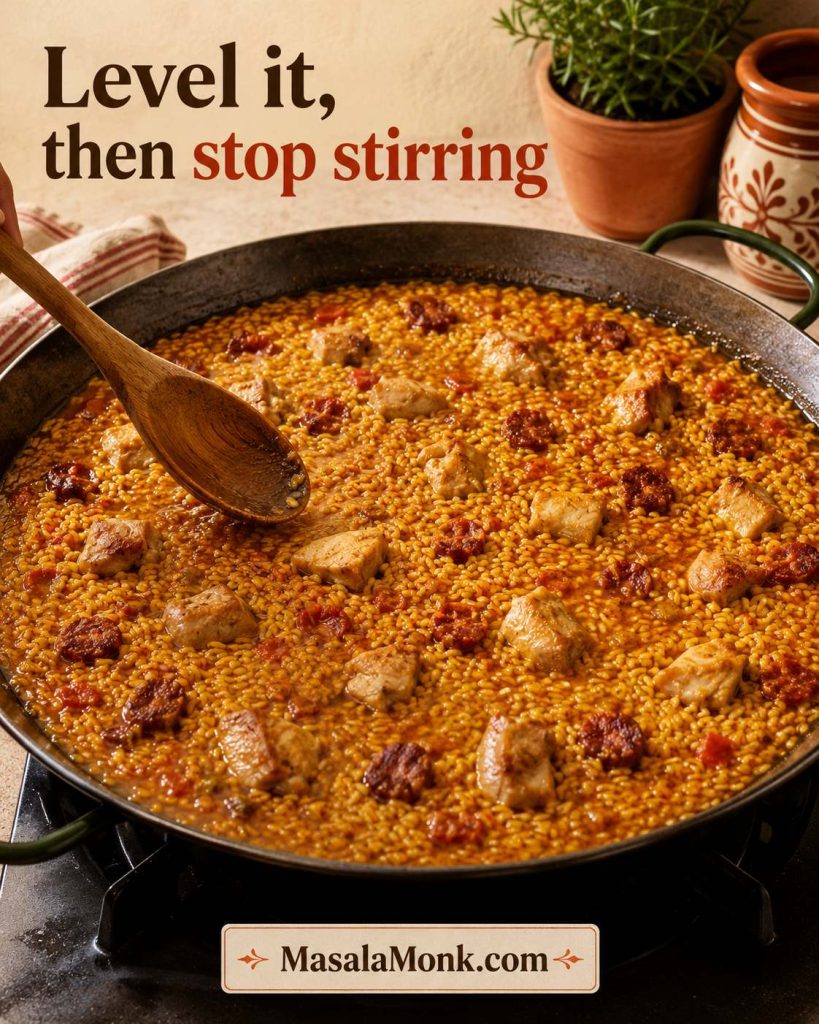
Level the Rice, Then Stop Stirring

Spread the rice into one even shallow layer, then let the simmer take over. Next, watch for the steady simmer and liquid-level cues.

Paella rice leveled into an even shallow layer in a wide pan with chicken and chorizo before simmering without stirring.
Once the stock is added, level the rice and stop stirring; from here, steady heat does more for texture than movement.

5. Simmer without stirring

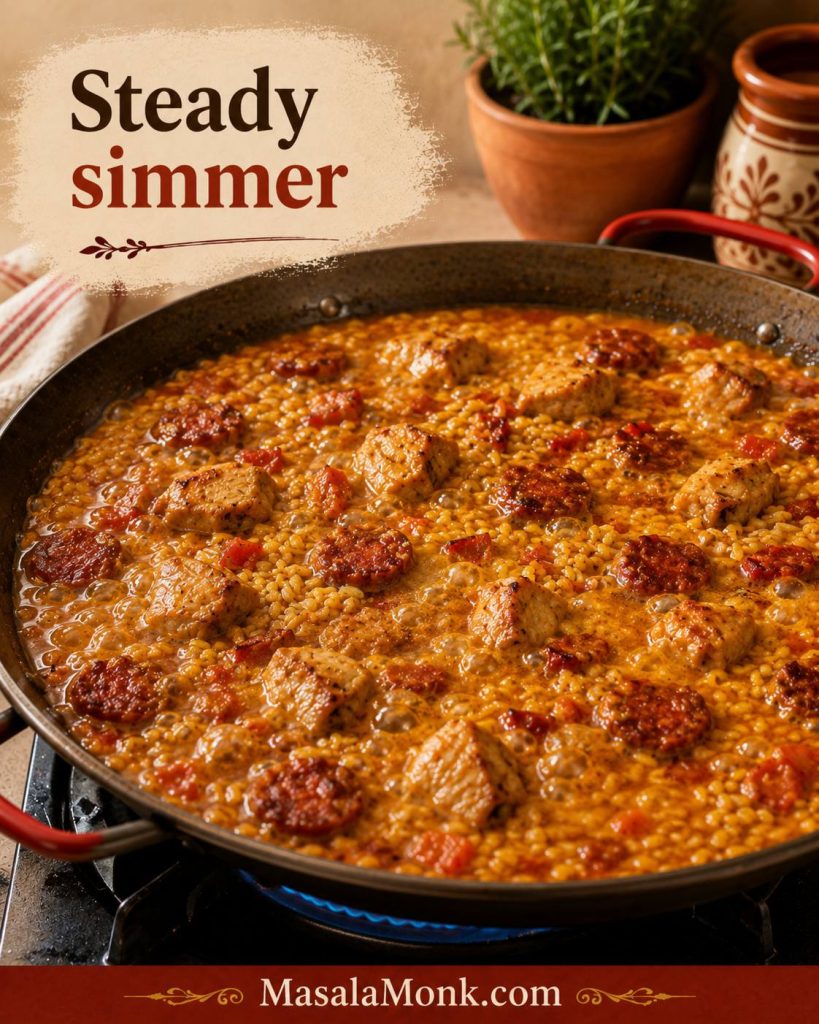
Bring the pan to a lively simmer, then reduce the heat to low or medium-low so it bubbles steadily. Early on, the surface should look active. Later, the rice will swell, the liquid will sit lower, and small gaps may open between the grains.

Chicken and chorizo paella at an early active simmer with saffron stock bubbling around rice, chicken chunks and chorizo slices.
Early in the simmer, liquid should still be visible around the grains, so let the rice swell without rushing or stirring it.

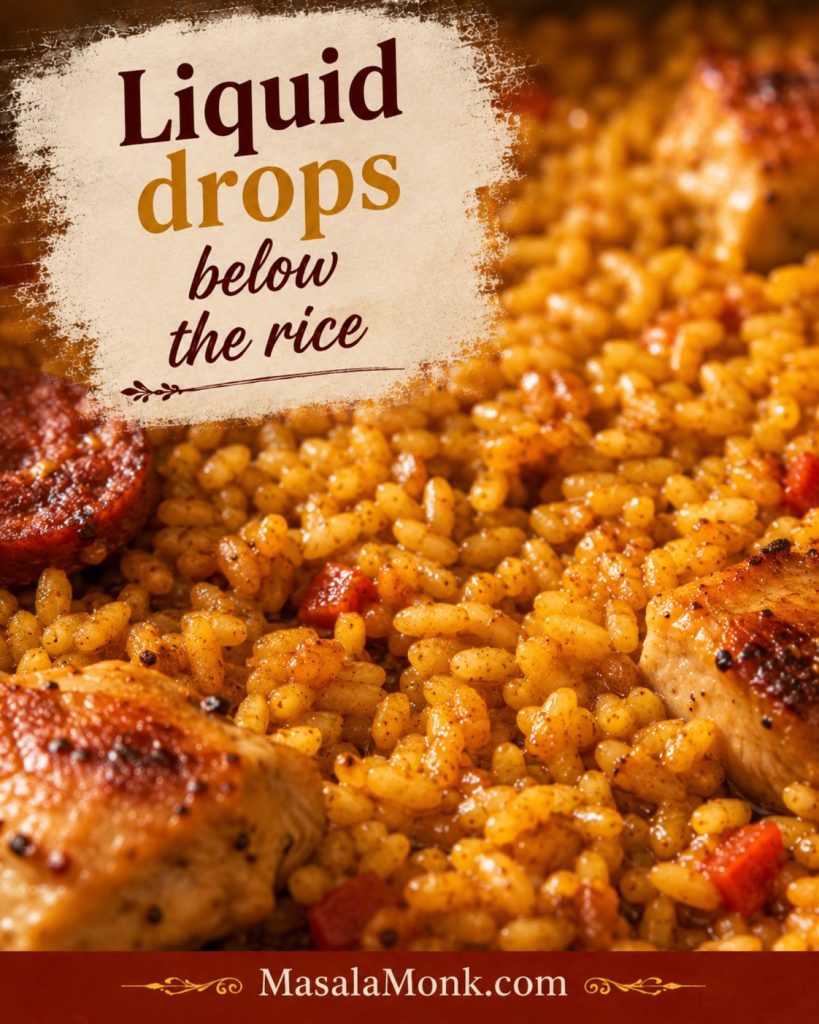
When the Liquid Drops Below the Rice

Later in the simmer, the rice will swell and the liquid will sit below the surface. If the texture starts looking wrong, use the troubleshooting guide before guessing.

Close-up of nearly cooked paella rice with small gaps between swollen golden grains and liquid below the surface.
As the stock drops below the rice, start watching closely; this is when tender grains can turn dry if the heat runs too hard.

Rotate the pan if one side cooks faster. If the rice is still firm and the pan looks dry, add a little hot stock around the edge. The grain should be cooked through with a slight bite, not chalky in the center.

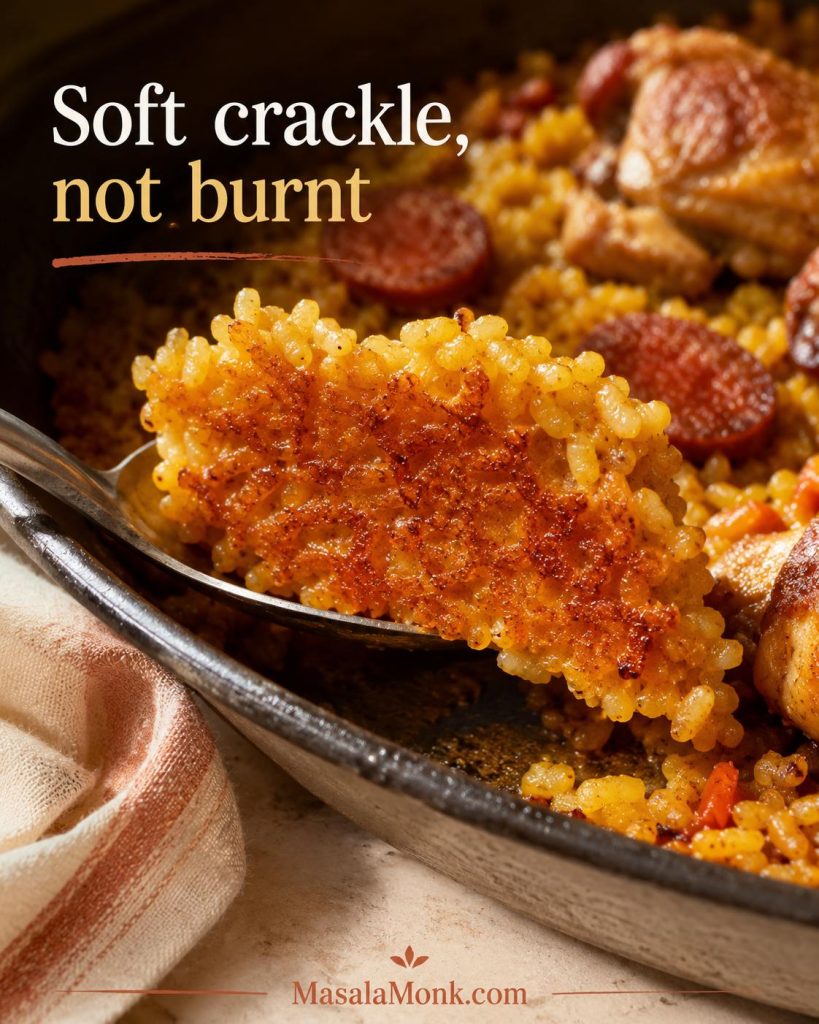
6. Finish the bottom and rest

Scatter the peas over the rice during the final 5 minutes. Once the rice is just tender and the liquid is absorbed, raise the heat for 30–60 seconds. Listen for a soft crackle and smell for toasted rice.

Stop as soon as it smells nutty and warm. If you smell bitterness, stop immediately. A lighter toasted bottom is still a win if the rice tastes good.

Spoon lifting golden paella rice from the edge of the pan to show a lightly toasted brown underside that is crisp but not burnt.
A light toasted bottom is a bonus, but bitterness is not; stop when the rice smells nutty, warm and crisp.

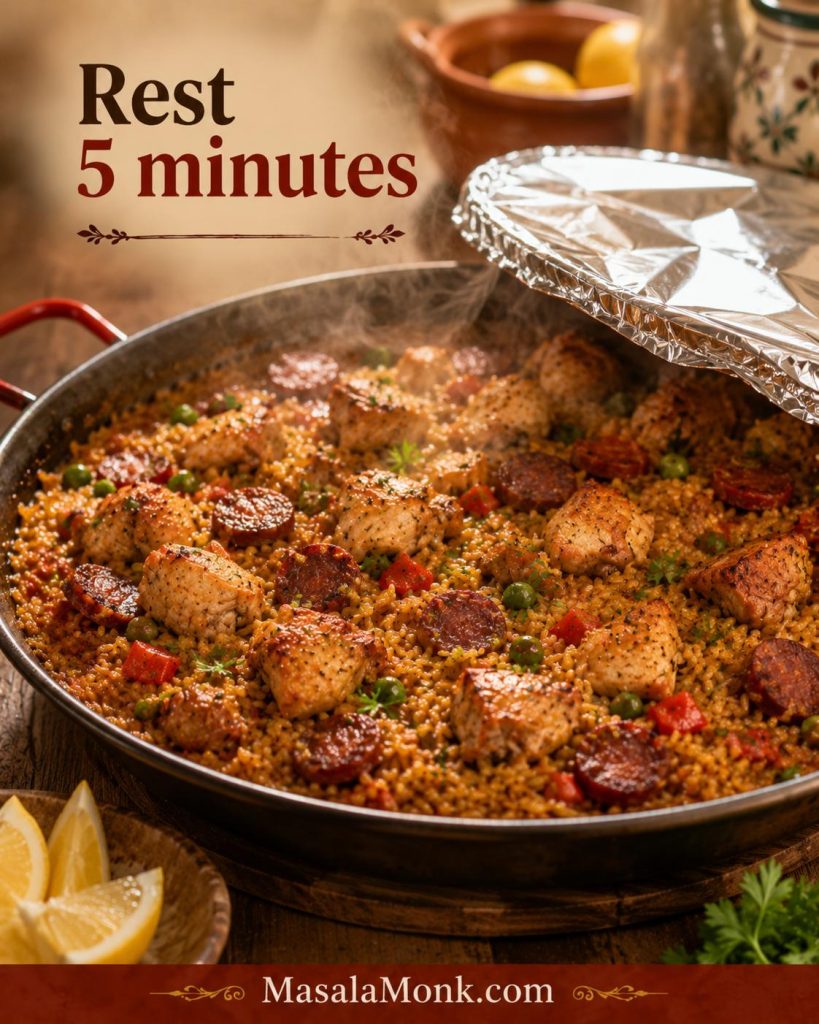
Remove from the heat, cover with a lid or foil, and rest for 5 minutes. The chicken should be cooked through by now; if checking with a thermometer, aim for 74°C / 165°F in the thickest pieces. Finish with lemon and parsley just before serving.

Rest the Paella Before Serving

This short pause is part of the cooking, not a delay. It helps the rice settle before the first serving spoon goes in.

Finished chicken and chorizo paella resting under lifted foil with steam, golden rice, chicken, chorizo, peas and lemon nearby.
Resting gives the rice a few quiet minutes to settle, so the paella serves cleaner and tastes more balanced.

Resist the urge to keep adding extras. Steady heat, a short rest, and a bright finish do more for the dish than a crowded surface.

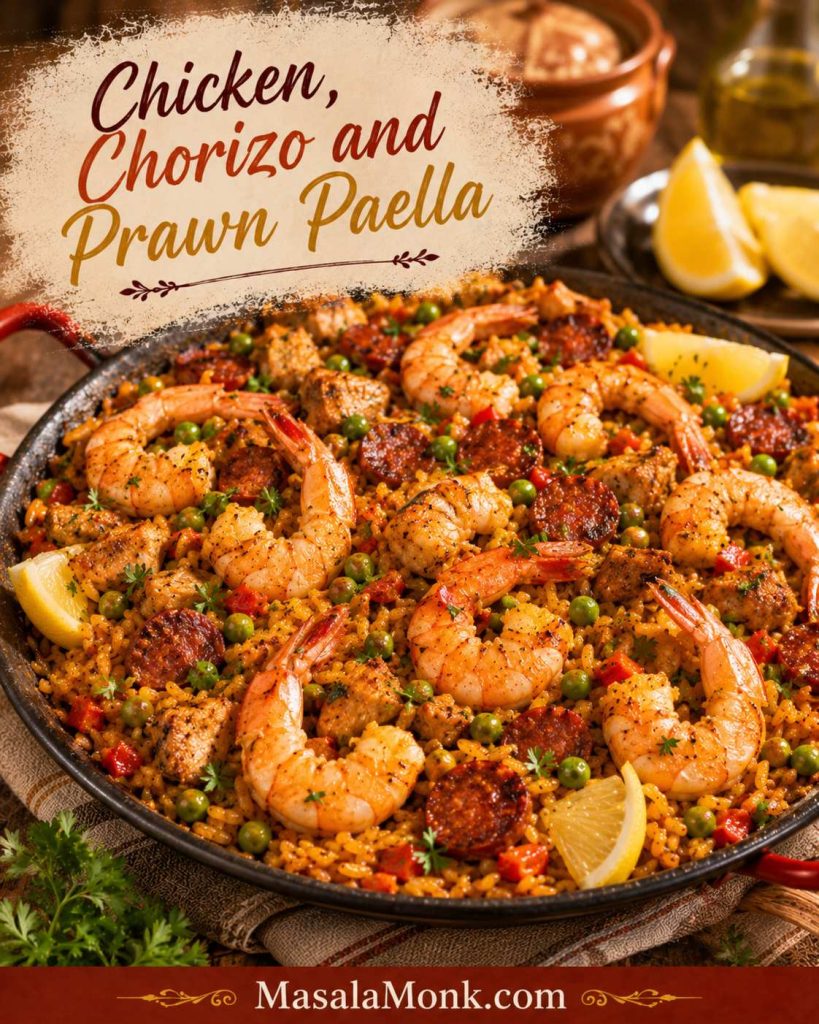
Chicken, Chorizo and Prawn Paella Variation

Prawns make the dish feel more festive, especially when they sit on top during the final minutes. Add 150–200g prawns or shrimp to the base recipe without changing the stock ratio.

Finished chicken, chorizo and prawn paella with prawns on top of golden rice, chicken pieces, chorizo, peas, lemon and parsley.
For the prawn version, place the prawns on top near the end; this keeps them tender while the rice finishes underneath.

When to Add Prawns to Paella

The timing changes depending on whether the prawns are raw or already cooked. Use the quick guide below before adding them to the pan.

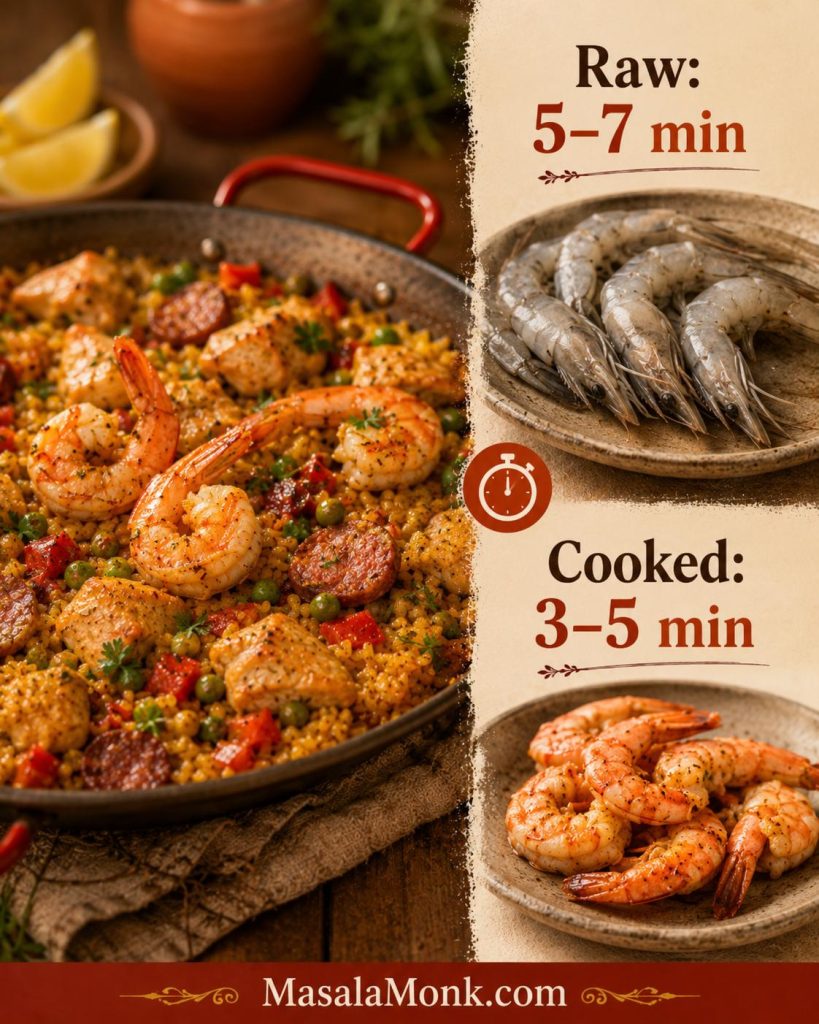
Timing guide for adding prawns to paella, showing raw prawns for 5–7 minutes and cooked prawns for 3–5 minutes.
Raw prawns need only the final 5–7 minutes, while cooked prawns just need 3–5 minutes to warm through without tightening.
  • Raw prawns: add for the final 5–7 minutes, until pink and opaque.
  • Cooked prawns: add for the final 3–5 minutes, just to heat through.
  • Crowded pan? reduce chicken slightly to 300–350g so the rice still has room.

Keep the prawns on top where you can see them. They should turn opaque and gently curled, not tight and rubbery. Peeled prawns are easiest for weeknights; shells or tails look more dramatic for guests.

Chicken and Chorizo Paella Recipe

A home-stovetop chicken and chorizo paella with juicy thighs, Spanish-style chorizo, saffron stock, short-grain rice, peas, lemon, and a method that keeps the rice smoky, tender, and distinct, with grains that hold their shape.

Yield
4 servings
Prep Time
15 minutes
Cook Time
35 minutes
Total Time
50–55 minutes

Equipment: 12–14 inch paella pan, 12 inch skillet with lid, or wide sauté pan

Ingredients

Protein

  • 350–450g / 12–16 oz boneless skinless chicken thighs, cut into large bite-size pieces
  • 100–140g / 3.5–5 oz Spanish-style chorizo, sliced or diced
  • Salt and black pepper, to taste

Sofrito Base

  • 2 tbsp / 30ml olive oil
  • 1 medium onion, finely chopped
  • 1 red bell pepper, chopped
  • 3 garlic cloves, minced
  • 1 tsp smoked paprika
  • 1 tbsp tomato paste
  • Optional: 150–200g / 5–7 oz grated or finely chopped tomato

Rice and Liquid

  • Big pinch saffron, about 15–20 threads
  • 750ml / about 3 cups plus 3 tbsp hot chicken stock
  • 300g / about 1½ cups paella rice, such as Bomba, Calasparra, or Valencia rice

Finish

  • 75–100g / ½–¾ cup frozen peas
  • 1 lemon, cut into wedges
  • Small handful parsley, chopped

Optional Prawn Variation

  • 150–200g prawns or shrimp
  • Raw prawns: add during final 5–7 minutes
  • Cooked prawns: add during final 3–5 minutes

Instructions

Build the Base

  1. Bloom the saffron. Add saffron to the hot chicken stock and let it steep while you begin the recipe.
  2. Brown the chicken. Heat olive oil in a wide pan over medium-high heat. Season the chicken lightly, then brown for 4–6 minutes. It should be golden outside but not fully cooked. Remove to a plate.
  3. Cook the chorizo. Add chorizo to the same pan and cook for 2–3 minutes, until lightly browned and the oil turns paprika-red. Spoon off excess fat if the pan looks greasy.
  4. Build the sofrito. Add onion and red bell pepper. Cook for 5–7 minutes until softened. Add garlic, smoked paprika, and tomato paste. Cook for 1 minute. If using grated tomato, add it now and cook until reduced and glossy.
  5. Coat the rice. Add the dry paella rice and stir for 1–2 minutes so the grains look shiny. This is the last proper stir.

Cook, Rest and Serve

  1. Add stock and chicken. Pour in the hot saffron stock. Scrape the pan gently, return the chicken, and spread everything into an even layer.
  2. Simmer without stirring. Bring to a lively simmer, then reduce heat to low or medium-low. Cook for 16–20 minutes without stirring, until the rice is nearly tender and the liquid sits below the surface.
  3. Add peas and prawns. Scatter peas over the rice during the final 5 minutes. If using prawns, place raw prawns on top for the final 5–7 minutes, or cooked prawns for the final 3–5 minutes.
  4. Finish the bottom. When the rice is cooked and liquid absorbed, increase the heat for 30–60 seconds. Listen for a soft crackle and stop if it smells burnt.
  5. Rest and serve. Remove from heat, cover with a lid or foil, and rest for 5 minutes. Chicken should be cooked through; use 74°C / 165°F as the thermometer cue. Finish with parsley and lemon wedges.

Notes

  • Use dry, unrinsed paella rice.
  • After the stock is added, leave the rice level and mostly undisturbed.
  • If the rice is firm but the pan is dry, add a few tablespoons of hot stock around the edge.
  • A lighter toasted bottom is fine; stop before the rice smells bitter or burnt.
  • For 2–3 servings, use 200g rice and 500ml / about 2 cups plus 2 tbsp stock in a 10–12 inch pan.
  • For larger batches, use a larger pan or two pans so the rice stays spread out.
  • If the rice looks hard, wet, greasy or burnt, check the troubleshooting section before making a big adjustment.

By the time the pan rests, the rice should look settled and golden, with chicken tucked through the grains, chorizo at the edges, and lemon ready to cut through the smoky oil. If something looks off, use the fixes below.

Chicken and Chorizo Paella Troubleshooting

Quick Paella Fixes Before You Guess

If the rice is not behaving, do not panic. Paella usually tells you what it needs: more heat, less stirring, a splash of hot stock, or a shorter final toast.

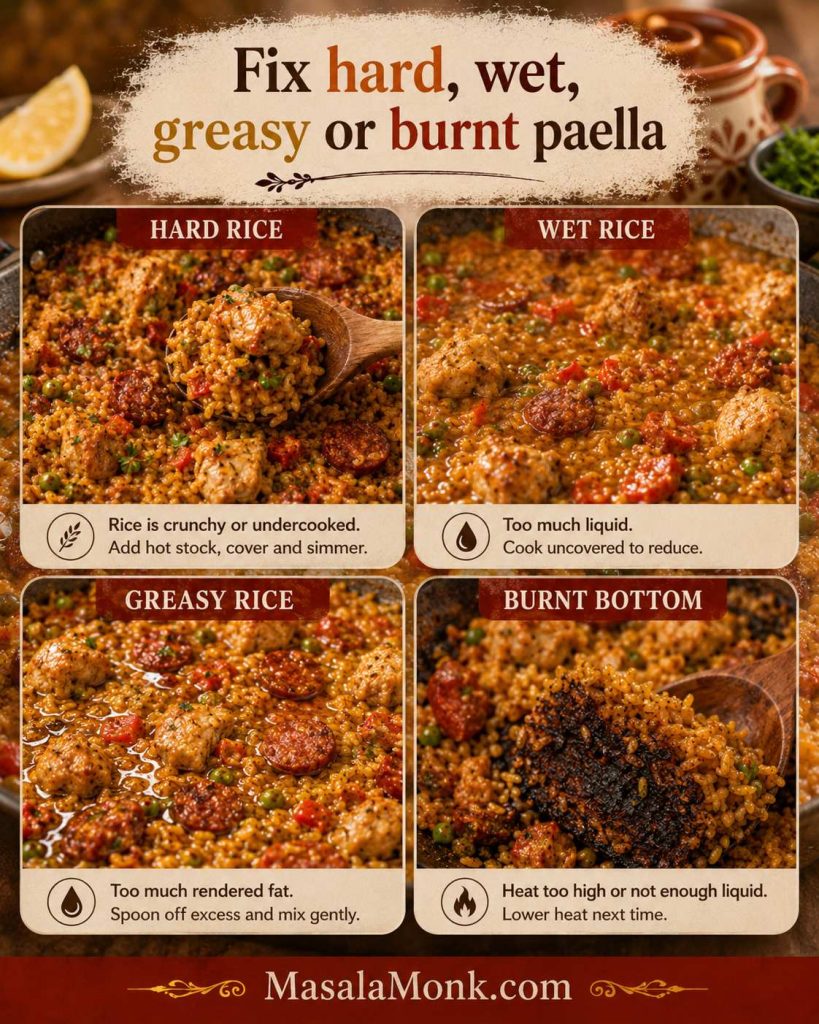
Four-panel chicken and chorizo paella troubleshooting guide showing hard rice, wet rice, greasy rice and burnt bottom with brief fixes.
If the paella goes wrong, check heat, liquid, pan depth and chorizo fat first; most fixes start with one of those four clues.

Rice Texture Fixes

ProblemLikely causeFix
Rice is still hardHeat too high or liquid evaporated too quickly.Add 2–4 tbsp hot stock around the edge, cover loosely, and cook a few more minutes.
Rice is wet or soupyToo much liquid, heat too low, or pan too deep.Uncover and simmer gently until excess liquid evaporates. Avoid stirring hard.
Rice is mushyOver-stirring, too much liquid, or wrong rice.Use paella rice next time and leave the pan alone once the stock is added.
Rice is blandWeak stock, under-seasoned chicken, or rushed sofrito.Season chicken lightly at first, use better stock, and adjust final salt after the rice rests.

Heat, Chorizo and Prawn Fixes

ProblemLikely causeFix
Paella is too saltySalty chorizo plus salty stock.Use low-salt stock next time. Serve this batch with extra lemon and a fresh salad.
Paella is greasyToo much chorizo fat left in the pan.Spoon off excess fat after browning the chorizo, while leaving some paprika-rich oil for flavor.
Chicken is dryBreast cooked too long or chicken pieces cut too small.Use thighs, cut larger pieces, and brown only until golden before simmering.
Bottom burnedFinal heat push was too long or pan has hot spots.Stop the toasted-bottom finish sooner and rotate the pan during cooking.
No toasted bottomHeat too low at the end or too much liquid left.Once the rice is cooked and liquid absorbed, increase heat briefly for 30–60 seconds.
Prawns are rubberyAdded too early.Add raw prawns only for the final 5–7 minutes, cooked prawns for 3–5 minutes.

Wet, Just-Right and Dry Paella Rice

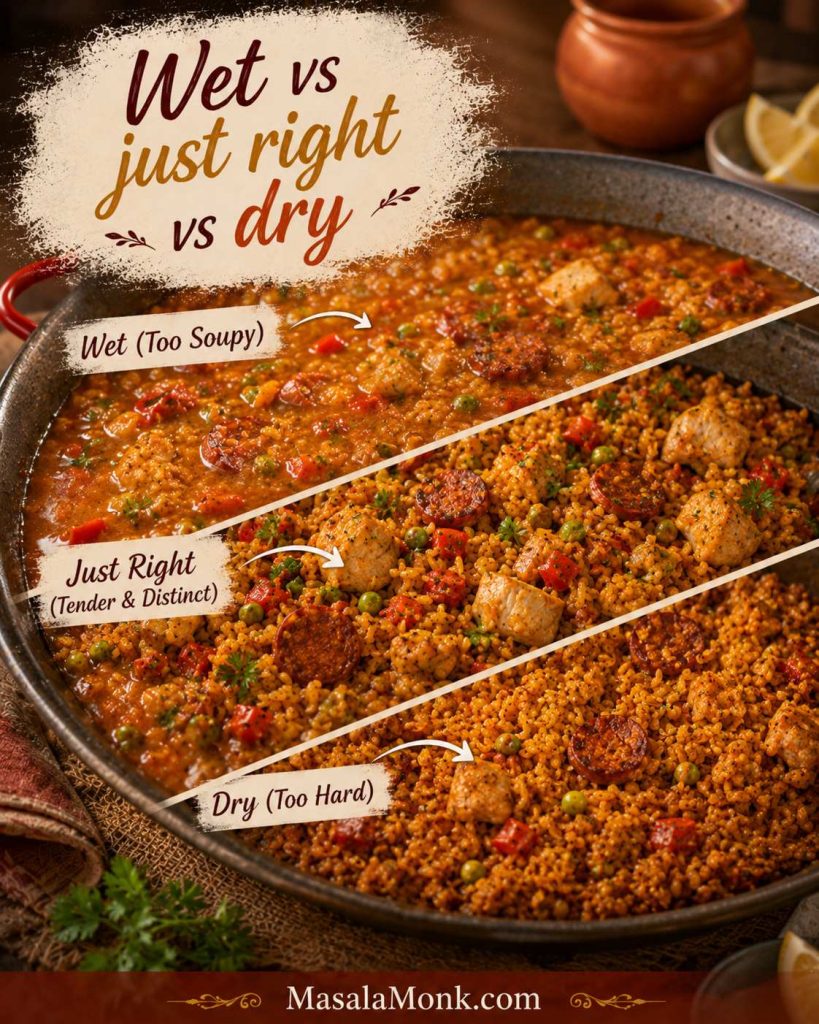
For a visual texture check, compare wet, just-right and dry rice before deciding whether to simmer uncovered, add a splash of hot stock or stop cooking.

Paella rice texture comparison showing wet soupy rice, just-right tender distinct rice and dry hard rice in a pan.
Use texture as your guide, not only the timer: the best paella rice is tender and distinct, with no soupy liquid or chalky center.

Uneven Burner? Use a Short Oven Finish

If your burner heats unevenly, cover the pan and transfer it to a 175°C / 350°F oven for 5–8 minutes once most of the liquid is absorbed. This helps the rice finish more evenly without stirring.

For a full oven-style version, use a hotter oven, around 220°C / 200°C fan / about 425°F, and bake with hot stock before adding prawns and peas near the end. That is a different approach from the stovetop method here, but it can be useful if your stove has strong hot spots.

Authenticity and Home-Cook Notes

Is Chicken and Chorizo Paella Authentic?

This is the chicken-and-chorizo paella many home cooks search for: smoky, generous, and made for an ordinary stovetop. Traditional Valencian paella is different, and this recipe does not need to pretend otherwise.

For comparison, Spain’s official tourism site describes Valencian paella with rice, chicken, rabbit, beans, tomato, olive oil, saffron, paprika, water and salt. That is why this chorizo version is better described as Spanish-inspired: Spain.info’s paella reference.

What it keeps from paella is the home-cook logic that matters here: short-grain rice, a broad cooking surface, saffron stock, a concentrated flavor base, minimal stirring after the stock goes in, and a rested finish.

Chicken Chorizo Rice vs Paella

If your only option is a deep pot, make the dish anyway and enjoy it honestly as chicken chorizo rice. It will be softer, but still delicious. For a result closer to paella, use the roomiest pan you have and keep the rice layer shallow.

Slow Cooker Chicken Chorizo Paella

A slow cooker can make a convenient chicken chorizo rice dish, but it will not create the same texture as paella. Paella depends on shallow evaporation, direct pan heat, and the chance of a lightly toasted bottom. Use the slow cooker only if convenience matters more than texture, and add peas or prawns near the end.

What to Serve with Chicken and Chorizo Paella

Because the rice is smoky and rich, the best sides are the ones that make the next spoonful feel lighter. Keep the plate bright, sharp, or fresh rather than heavy.

Chicken and chorizo paella served on a dinner table with lemon wedges, tomato salad, olives, crusty bread and drinks.
Serve this smoky rice with sharp, fresh sides so the meal feels generous without becoming too heavy.
  • Bright: lemon wedges, tomato salad, or a sharp green salad.
  • Snacky: marinated olives, roasted peppers, or crusty bread.
  • Simple: garlic bread or a light cucumber salad.
  • Drinks: dry rosé, Rioja-style red, sparkling water with lemon, or a crisp white wine.

A squeeze of lemon matters more than a heavy side. The paella is rich and savory, so the bright finish wakes it up. For another low-stress chicken dinner with minimal cleanup, MasalaMonk’s sheet pan chicken fajitas keeps the same easy-dinner spirit in a completely different flavor direction.

Storage, Reheating and Make-Ahead Tips

  • Best make-ahead move: chop the ingredients and cook the chicken-chorizo sofrito base ahead, but add rice and stock only when you are ready to cook.
  • Storage: cool leftovers quickly and refrigerate them in an airtight container.
  • Reheating: reheat until piping hot all the way through; if checking with a thermometer, aim for 74°C / 165°F.
  • Seafood note: if your paella includes prawns, refrigerate promptly and reheat only once.

A covered skillet with a small splash of water or stock gives the best leftover texture. The rice will soften after storage, so leftovers will taste more like chicken chorizo rice than freshly made paella.

FAQs

Best saffron substitute for chicken and chorizo paella

A tiny pinch of turmeric can help with color, but it will not give the same floral aroma. Use it lightly, or the dish starts to taste like curry rice instead of saffron rice.

Arborio rice in paella: what changes?

Arborio will get dinner on the table, but it is not ideal here. Because it releases more starch, it can turn creamy if you treat it like risotto. Stir before the stock goes in, then leave it alone.

Why long-grain rice makes it more like chicken chorizo rice

Long-grain rice can still make a good dinner, but it moves the dish away from paella texture. Use it when you want a softer, more flexible chicken chorizo rice rather than distinct paella-style grains.

Using brown rice in chicken and chorizo paella

Brown rice needs its own method. It takes longer to cook and needs a different liquid ratio, so it is better saved for a separate brown-rice version rather than swapped into this one.

Chicken breast instead of thighs

Chicken breast can work, but it needs a gentler hand than thighs. Cut it into slightly larger pieces, brown it briefly, and avoid cooking it hard at the beginning so it does not dry out before the rice is ready.

Should chorizo go in paella?

Chorizo is not part of strict Paella Valenciana, but it is common in the Spanish-inspired chicken-and-chorizo paella many home cooks are looking for. This recipe uses it honestly as a flavor base rather than claiming to be the traditional Valencian dish.

When to add prawns without making them rubbery

Add raw prawns for the final 5–7 minutes, or cooked prawns for the final 3–5 minutes. They should be opaque and gently curled, not tight and rubbery.

White wine in chicken and chorizo paella

White wine can add a little brightness to the base. Add 50–75ml dry white wine after the tomato paste and let it reduce before adding the rice. Keep the amount small, or reduce the stock slightly if you add more.

How to double paella without mushy rice

Use a larger pan or two pans. Piling double the rice into the same skillet makes the layer too thick, so the bottom can overcook while the top stays firm.

Freezing chicken and chorizo paella

You can freeze leftovers, but the rice softens after thawing. If texture matters, refrigerated leftovers usually taste better than frozen-and-reheated paella.

Is this gluten-free?

It can be gluten-free if your chorizo and stock are certified gluten-free. Check both labels carefully, because sausages and packaged stocks can include additives or thickeners.

Final Thought

A good chicken and chorizo paella is built on restraint: enough chorizo to turn the oil smoky and red, enough stock to cook the rice, and enough patience to let the grains settle.

Give the rice room, let the pan do its work, and finish with lemon while everything is still warm. That is when this becomes the kind of one-pan dinner that looks generous, smells incredible, and makes people go back for the rice.

Plated serving of chicken and chorizo paella with golden rice, chicken, chorizo, peas and lemon being squeezed over the top.
That final squeeze of lemon is small, but it lifts the chorizo, chicken and saffron rice into a brighter finished plate.

Start with the classic chicken-and-chorizo version once, then try prawns, extra lemon, or a deeper toasted bottom the next time you want the pan to feel a little more festive.

Posted on Leave a comment

Panang Curry Recipe: Chicken Panang with Store-Bought Paste

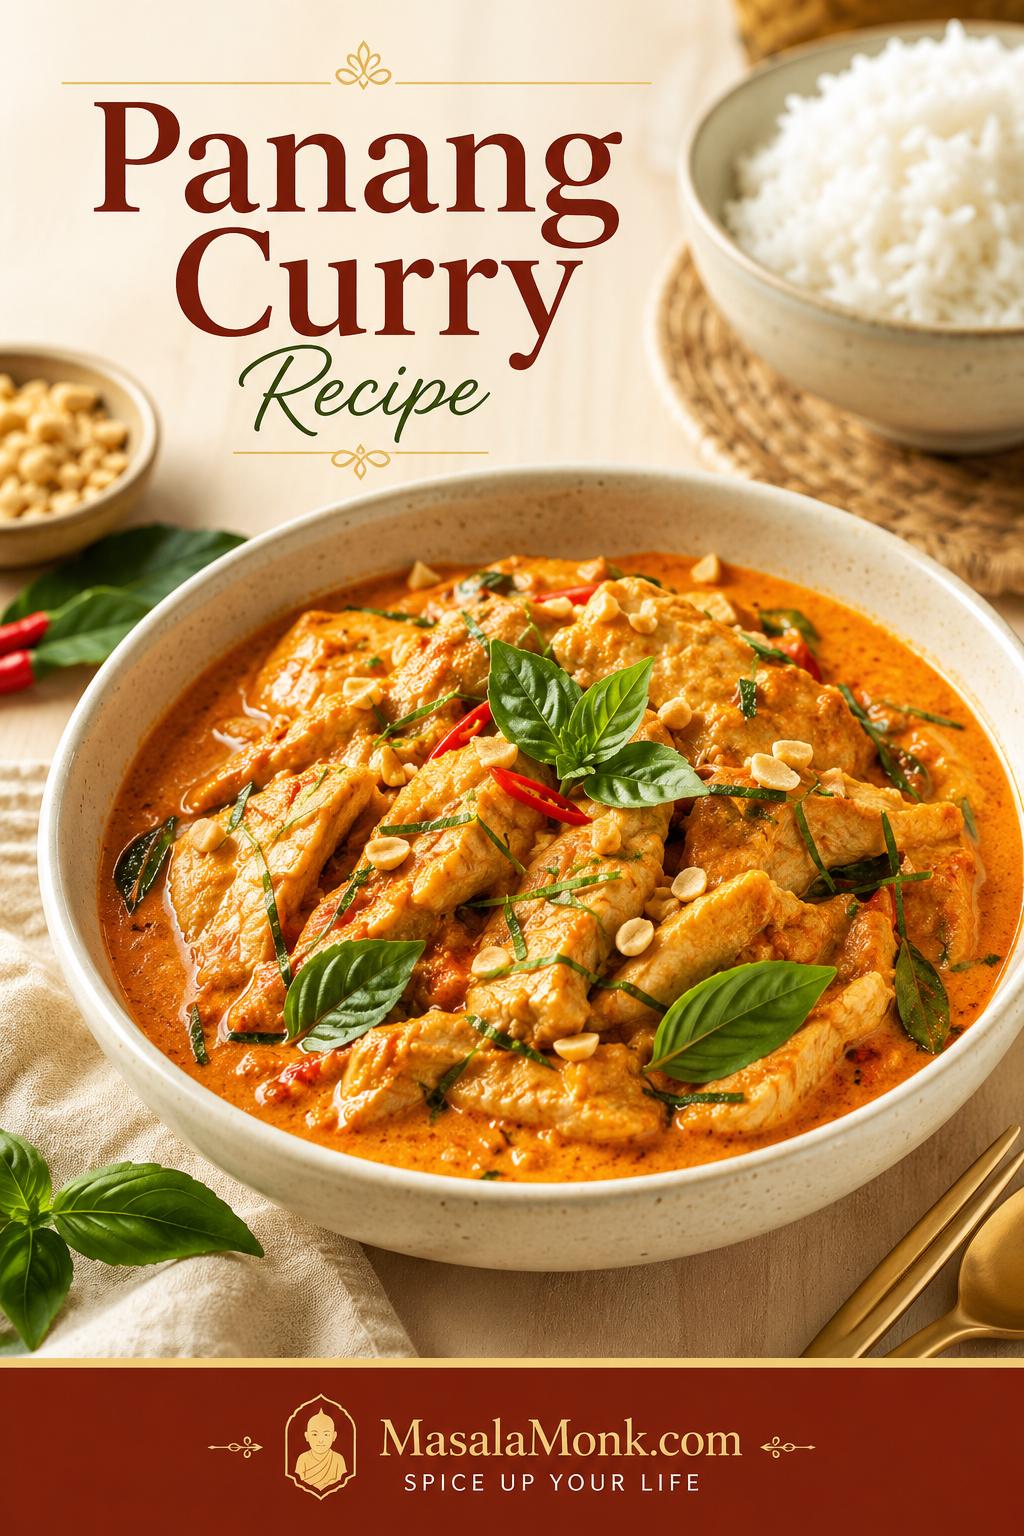
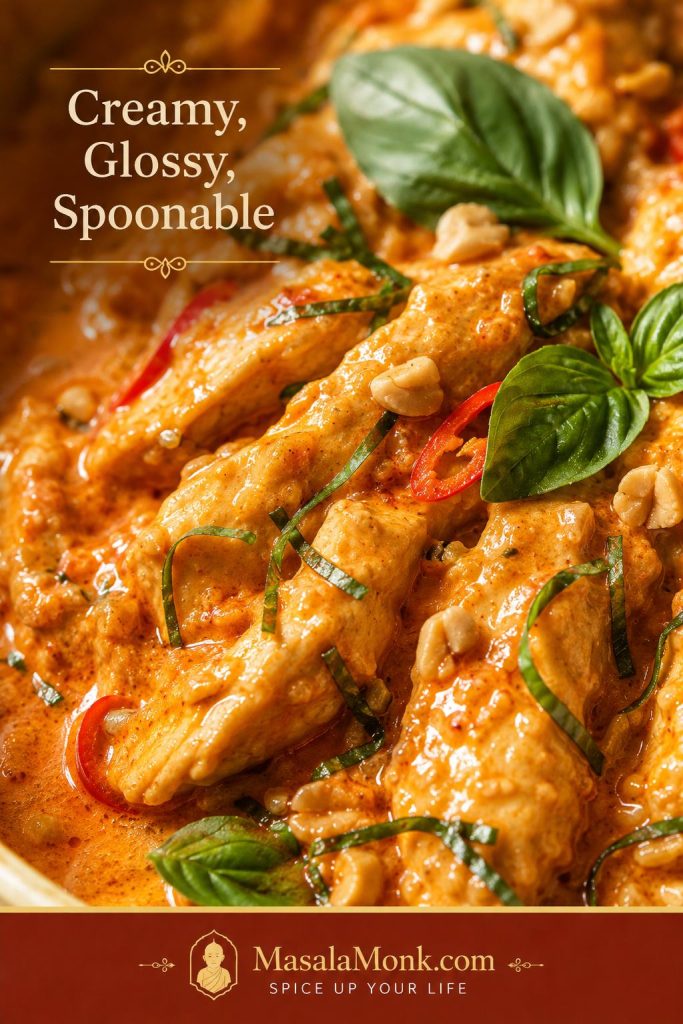
Bowl of chicken Panang curry with orange-red coconut sauce, sliced chicken, Thai basil, crushed peanuts, makrut lime leaves, and jasmine rice.

A good Panang curry starts changing the moment the paste hits hot fat: the raw edge softens, the chile smell deepens, and the pan begins to smell warmer almost immediately. When the coconut goes in, it turns orange-red around the paste. By the time the chicken is done, the curry should look glossy and generous, not thin or tired.

This Panang curry recipe is built for the home-cook problem most recipes do not talk about enough: store-bought paste can taste flat, watery, harsh, or too much like ordinary red curry when it is rushed. The fix is not a longer shopping list. It is better paste frying, full-fat coconut, and a few clear texture cues.

The result is a 40-minute curry that still feels special: tender chicken, glossy coconut sauce, fresh basil, jasmine rice, and enough depth that the store-bought paste never feels like a compromise. The base version is chicken Panang curry, also called Panang gai, but the same method works for beef, tofu, shrimp, or vegetables once you understand the texture.

It is generous weeknight food: fragrant, creamy, a little sweet, a little spicy, and made to spoon over rice. If you like fast Thai basil-heavy dinners, this Pad Kra Pao recipe is another bold option to keep nearby.

Table of Contents

Use this guide to make Panang curry that tastes creamy, balanced, aromatic, and clearly different from ordinary red curry.

Panang Curry Recipe: Quick Answer

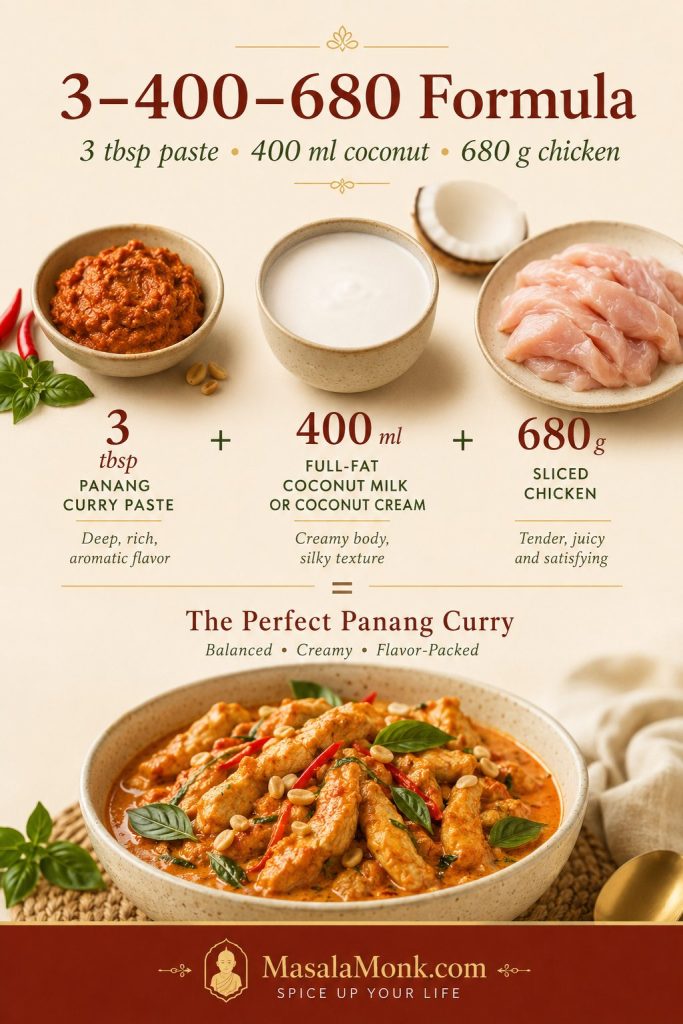
Remember it as 3–400–680: 3 tablespoons / about 45g Panang curry paste, 13.5–14 oz / 400ml full-fat coconut milk or coconut cream, and 1½ lb / 680g thinly sliced chicken for a generous 4-serving curry.

Fry the paste first in oil or thick coconut cream until it smells deeper and less raw. Stir in the coconut gradually, then add fish sauce, palm sugar or brown sugar, torn makrut lime leaves, and peanuts or peanut butter. Simmer gently until the chicken is cooked through, finish with Thai basil, and serve with jasmine rice.

Think of this as your safe starting bowl: enough paste to taste full, enough coconut to feel creamy, and enough body for the curry to settle over rice instead of running through it. Add 1–1½ cups vegetables if you want a fuller chicken curry; keep the amount modest so the flavor stays focused.

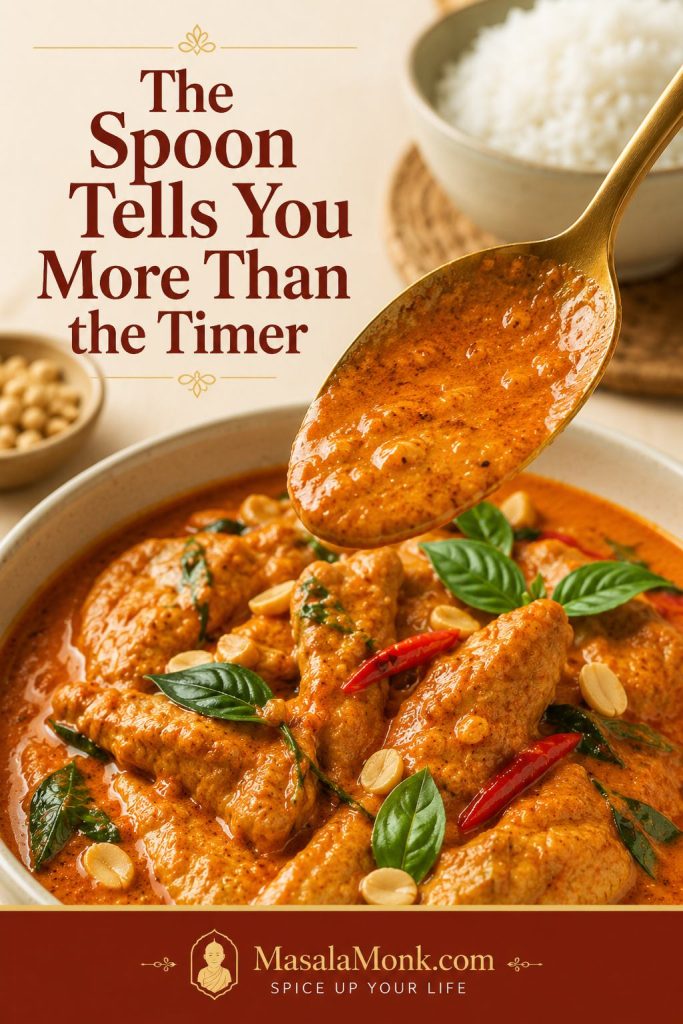
Most important cue: the spoon tells you more than the timer. The curry should coat the back of a spoon in a glossy layer while still being loose enough to serve over rice. Need the exact visual cue? Jump to the spoon-coating test. Ready to cook? Go straight to the recipe card.

Close-up of chicken Panang curry with creamy sauce coating sliced chicken, red chile, Thai basil, peanuts, and makrut lime leaf garnish.
Look for sauce that clings to the chicken but still moves when spooned; that balance keeps Panang curry rich without making it heavy.

The Easy Panang Curry Formula

The 3–400–680 formula is not a test; it is a starting point. From there, you can adjust for paste strength, vegetable volume, protein choice, and how rich you want the final curry. More vegetables usually need a little more paste and a little more time in the pan. Saltier paste needs less fish sauce. Sweeter coconut needs less sugar.

Panang curry formula guide showing 3 tablespoons curry paste, 400 milliliters coconut milk, and 680 grams chicken.
The 3–400–680 formula gives you a reliable starting point before you adjust for paste strength, vegetable volume, or spice preference.
For 4 ServingsAmountWhy It Matters
Panang curry paste3 tbsp / about 45gThe flavor base. Start lower if your paste is very spicy or salty.
Coconut milk or coconut cream13.5–14 oz / 400mlThe body of the curry. Coconut cream gives the lushest result.
Chicken or other protein1½ lb / 680g chicken, or equivalentEnough protein for a full dinner without overcrowding the pan.
Fish sauce1–1½ tbsp / 15–22mlAdds salt and savory depth. Use less at first if your paste is salty.
Palm sugar or brown sugar2 tsp–1 tbsp / 8–15gRounds heat and salt. Start low if your paste or coconut tastes sweet.
Makrut lime leaves4–6 leavesTorn leaves perfume the simmering sauce; finely sliced tender leaves can finish the curry.
Peanuts or peanut butter2 tbsp / about 15g crushed peanuts, or 1 tbsp / about 16g peanut butterBrings Panang’s quiet nutty note without turning the sauce into satay.

Taste after the curry has simmered for a few minutes, not when the paste first hits the pan. Early tasting can trick you because the coconut is still loose, the paste has not settled, and the salt has not concentrated yet. If your paste tastes too mild or too harsh, use the store-bought paste guide before changing the whole recipe.

Why This Recipe Works

The difference between a forgettable Panang curry and a good one is usually not the ingredient list. It is the order. Curry paste needs fat and heat before the coconut goes in. The pan sauce needs enough time to come together. Basil needs to go in at the end, when its aroma will stay bright instead of disappearing into a long simmer.

If your first few homemade Thai curries have tasted thinner than takeout, this is usually where things change. You are not adding fancy ingredients; you are simply giving the paste and coconut enough time to become a sauce.

Frying the paste prevents flat flavor
Let it sizzle in fat first, and the smell changes from sharp to warm, deep, and curry-like.

Full-fat coconut gives the curry body
Light coconut milk makes the flavor feel spread out. Coconut cream gives the richest result.

The final balance happens at the end
Fish sauce, sugar, lime leaves, peanuts, and basil let you tune salt, sweetness, aroma, and nuttiness before serving.

The finished curry lands rich without feeling greasy, spicy without tasting harsh, and gently sweet without becoming sugary. It tastes like Panang curry, not red curry with peanut butter stirred in.

What Is Panang Curry?

Panang curry, also written as Phanaeng, Phanang, or Panaeng, is a Thai coconut curry with a richer, more concentrated character than a loose red curry. The easiest way to recognize a good Panang is this: if red curry pours, Panang clings.

In the bowl, Panang feels creamy, rounded, aromatic, and concentrated enough to coat the protein. Coconut gives body, curry paste gives heat and depth, makrut lime leaves give a citrusy lift, basil adds freshness, and peanuts add a quiet roasted note in the background.

Peanut belongs in the background here; it rounds the curry without turning it into satay. Chicken Panang curry is often called Panang gai or gaeng Panang gai. “Gai” means chicken, so Panang gai simply means the chicken version.

Panang Curry vs Red Curry

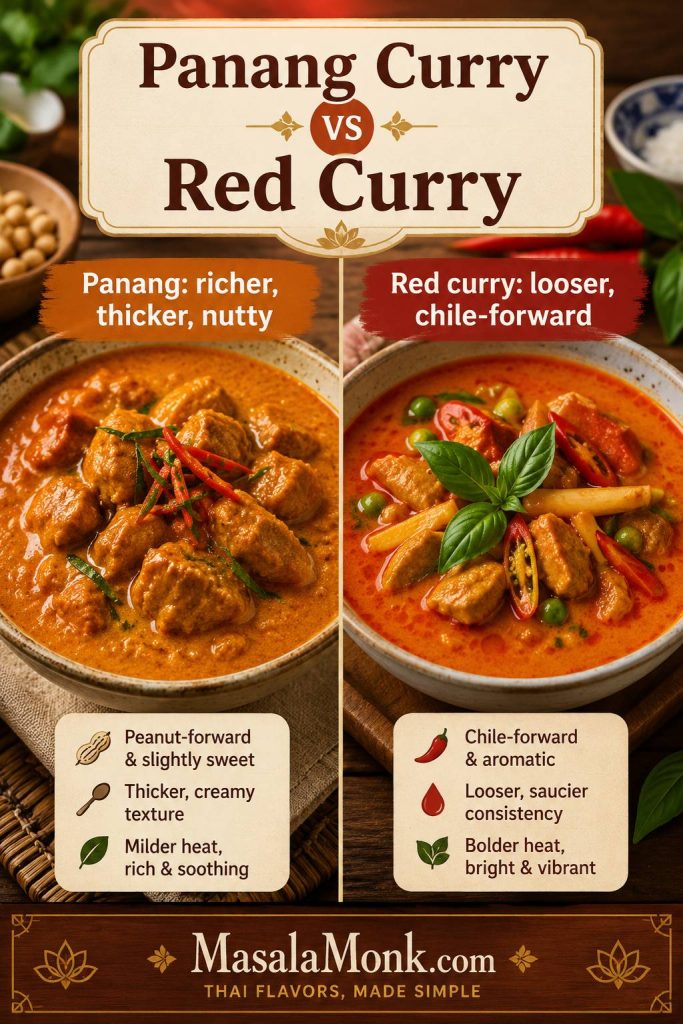
Panang curry and Thai red curry are related, but they should not taste identical. Red curry is usually looser and more chile-forward. Panang is creamier, richer, lightly sweet, and gently nutty. When homemade Panang tastes too much like red curry, the first fix is usually texture, then peanut and aromatic finish.

FeaturePanang CurryThai Red Curry
TextureThicker, creamier, more clingyLooser, saucier, more broth-like
FlavorRich, lightly sweet, savory, nuttyBrighter, chile-forward, more flexible
Paste profileRed-curry-style base with peanut and spice depthRed chile and aromatic base
Best cueCoats the protein clearlyPours more freely around the ingredients
Split-panel comparison of thicker Panang curry and looser Thai red curry with labels explaining texture and flavor differences.
Panang curry and red curry are related, but Panang is usually richer, thicker, and gently nutty, while red curry is looser and more chile-forward.

Quick fix: bring the curry back toward Panang by simmering the coconut base until it looks glossy, then finishing with peanut richness, Thai basil, and finely sliced tender makrut lime leaves if you have them.

If you are using red curry paste as a shortcut, add peanuts and a tiny pinch of warm spice so the sauce does not taste like ordinary red curry with coconut milk.

Panang Curry Ingredients

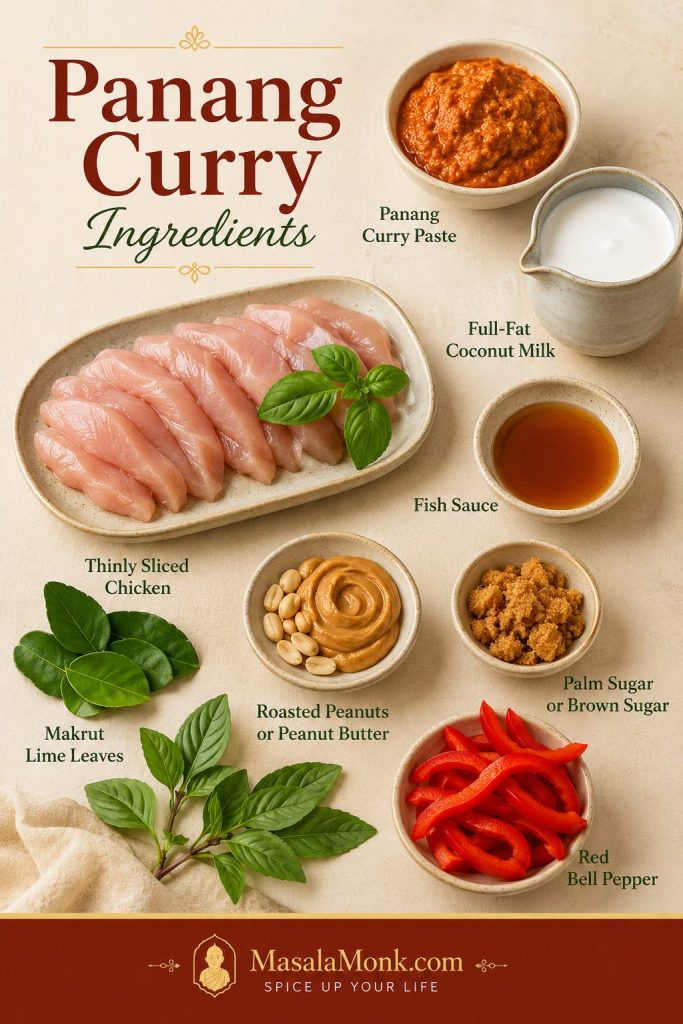
These ingredients are not equal. The paste, coconut, fish sauce, and lime leaves decide whether the curry tastes complete. Peanuts and basil finish the personality. Sugar is there to round the edges, not make the curry sweet.

The most important thing is timing. Paste goes first, coconut goes in gradually, protein cooks once the base has formed, and basil waits until the heat is low or off.

Panang curry ingredients including curry paste, coconut milk, chicken, fish sauce, sugar, makrut lime leaves, peanuts, Thai basil, and red bell pepper.
The ingredients work as a team: paste brings depth, coconut gives body, lime leaves add aroma, and peanuts round the curry without turning it into satay.

Panang curry paste

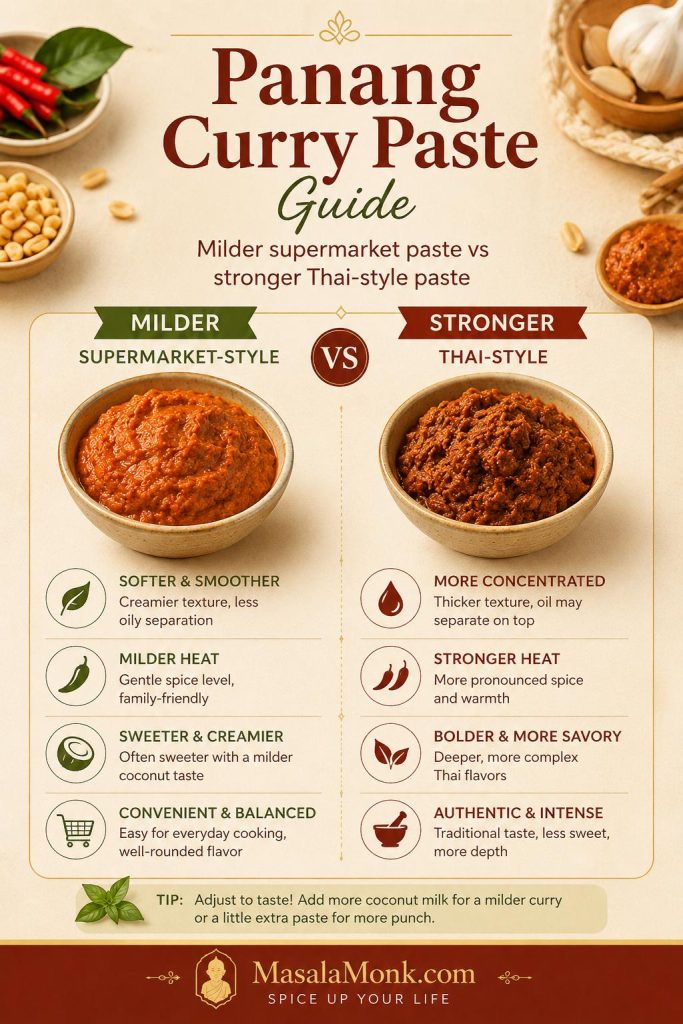
Use Thai Panang curry paste if you can find it. Some brands are stronger, saltier, and spicier than others, so start with a balanced amount and adjust. Thai Kitchen-style supermarket pastes are often milder, while Mae Ploy and Maesri-style Thai pastes are usually stronger, saltier, and more concentrated. Start lower if the brand is new to you.

Guide comparing milder supermarket-style Panang curry paste with stronger Thai-style paste for homemade Panang curry.
Because Panang curry paste brands vary in salt, heat, and intensity, taste after simmering before adding more fish sauce, sugar, or paste.

If your paste is very salty, begin with 1 tablespoon fish sauce, simmer, then add the remaining ½ tablespoon only if the curry needs it. When homemade Panang tastes flat, the paste often needed a better start: fat, heat, and enough time to smell cooked before the coconut went in. For the deeper technique, see how to bloom the paste in fat first.

Coconut milk or coconut cream

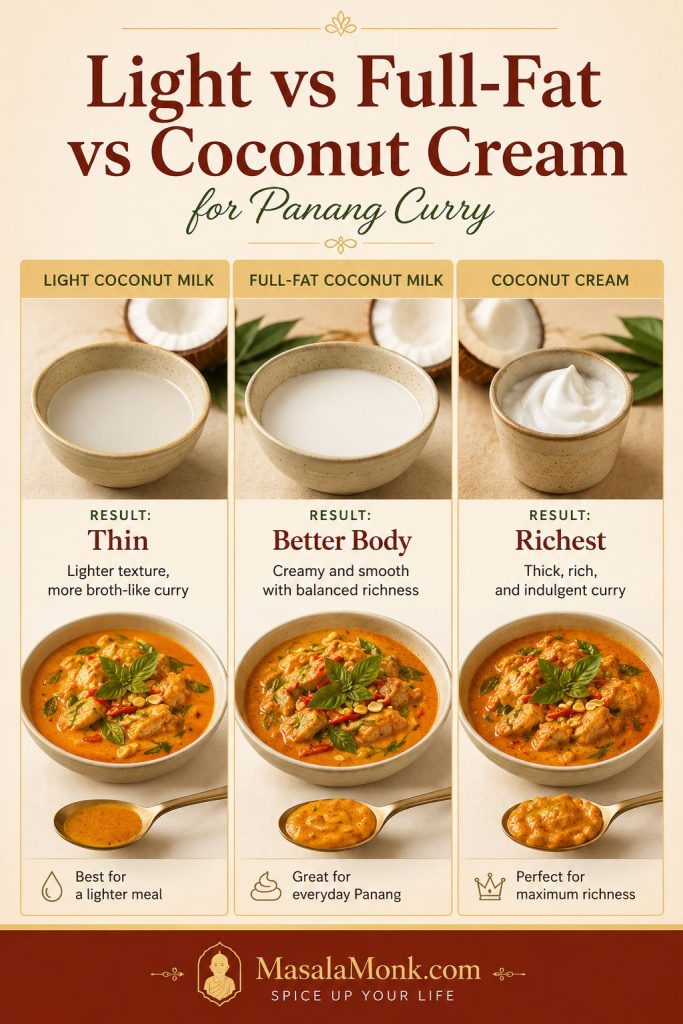
Coconut cream gives the lushest result. Full-fat coconut milk also works well; it just needs a few extra minutes in the pan. Light coconut milk makes the curry harder to concentrate and easier to dilute.

Comparison board showing light coconut milk, full-fat coconut milk, and coconut cream for Panang curry sauce texture.
For the richest Panang curry texture, full-fat coconut milk or coconut cream works better than light coconut milk, which can make the sauce feel thin.

How to use thick coconut cream first

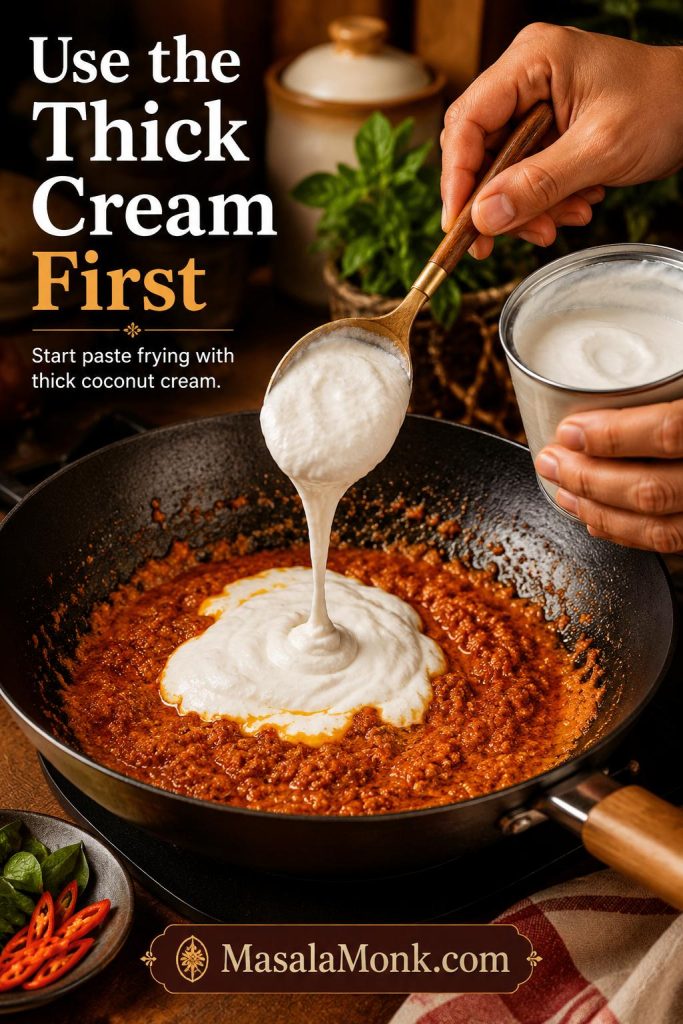
If the can has a thick layer of coconut cream at the top, scoop that into the pan first and use it to fry the curry paste. Then add the thinner coconut milk gradually. This gives the pan a richer start and helps the paste bloom in fat.

Thick coconut cream being added to fried Panang curry paste in a skillet to begin the curry sauce.
When a can has thick cream on top, use it first so the curry paste gets the fat it needs to bloom properly.

Fish sauce

Fish sauce keeps the coconut from tasting flat. You should not notice it as “fishy”; you should notice that the curry tastes deeper, saltier, and more complete. Add it gradually because the paste may already be salty.

For a vegan version, use soy sauce, tamari, or a vegetarian fish-sauce alternative. The flavor will be different, but the curry still needs savory depth.

Palm sugar or brown sugar

The sweetness should round the chile and salt; it should not announce itself first. Palm sugar gives a softer sweetness, while brown sugar works well in a home kitchen. Start with 2 teaspoons if your paste or coconut milk already tastes sweet.

Makrut lime leaves

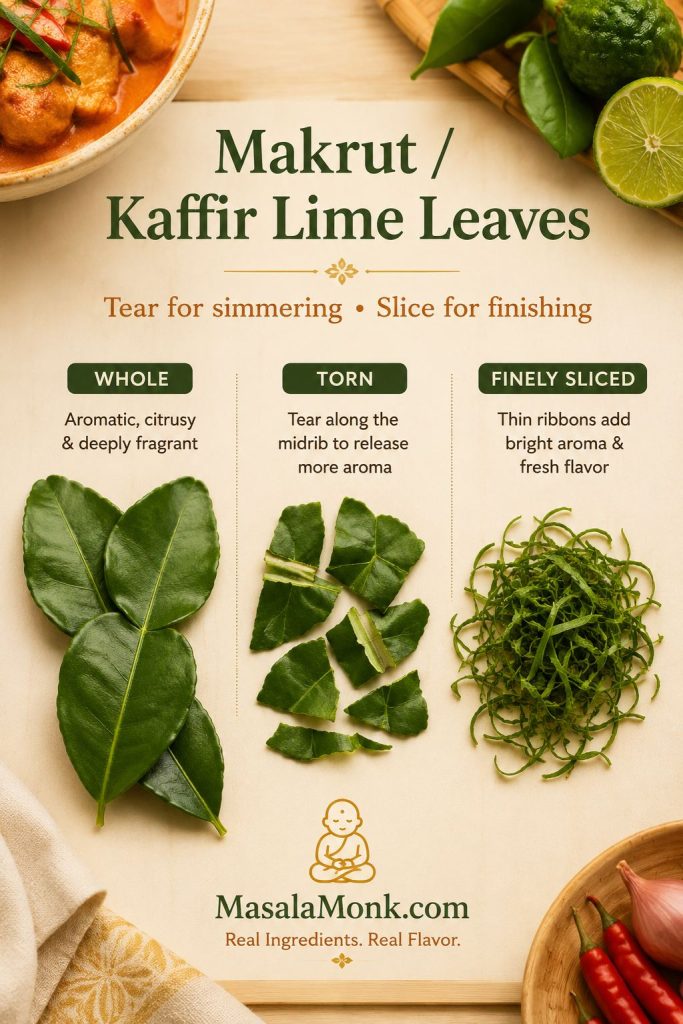
Makrut lime leaves, often sold as kaffir lime leaves, are the ingredient that makes the curry smell alive. Tear whole leaves before adding them to the simmering coconut sauce so their oils release into the pan. If you have tender leaves, slice a small amount very finely and use it at the end for a sharper aromatic finish.

Fresh or frozen leaves are best. Torn whole leaves can be left in the curry for aroma and picked out while eating. Lime juice is not a true replacement; if you need a backup, a little lime zest is closer than bottled lime juice, but use it gently. The goal is aroma, not sourness.

Makrut lime leaves shown whole, torn, and finely sliced, with guidance for simmering and finishing Panang curry.
Makrut lime leaves, often sold as kaffir lime leaves, give Panang curry its fresh citrus aroma without making the sauce sour.

Peanuts or peanut butter

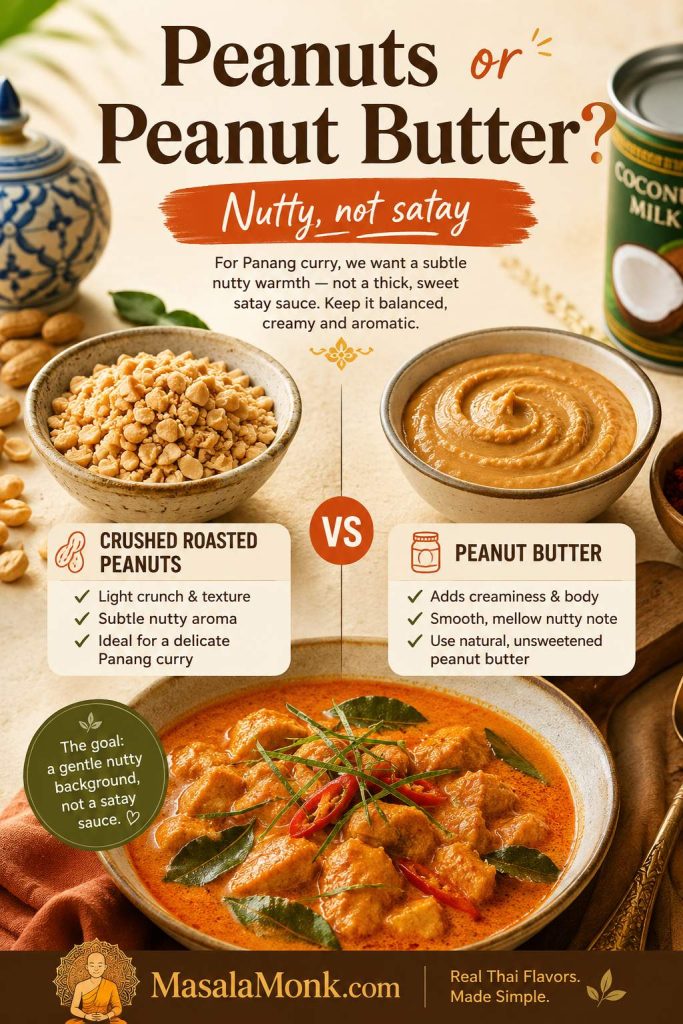
Crushed roasted peanuts give texture and a more traditional feel. Peanut butter is a practical shortcut that blends smoothly into the sauce. Either works, but keep the amount modest. The peanut note should sit in the background, not make the curry taste like peanut sauce.

Split image comparing crushed roasted peanuts and peanut butter for adding a nutty note to Panang curry.
Crushed peanuts add texture, while peanut butter blends in smoothly; either way, the peanut flavor should stay gentle and balanced.

Thai basil

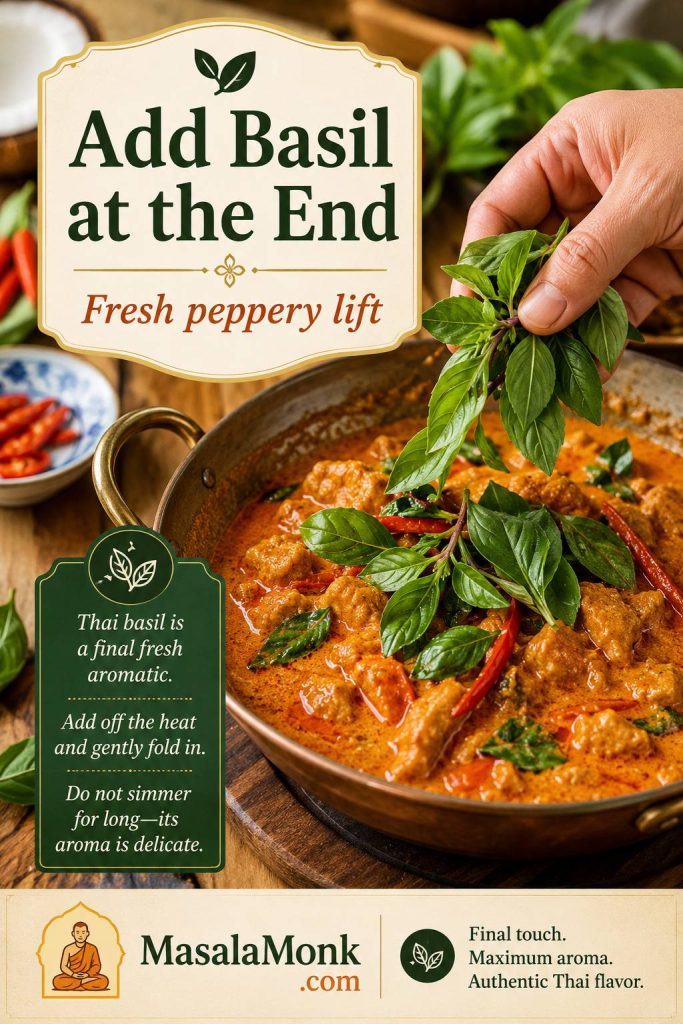
Thai basil gives the finished dish a fresh, peppery lift. Add it after the sauce thickens and the heat is low or off. If it simmers for several minutes, that fragrance fades quickly.

Thai basil being added to finished Panang curry as a final aromatic, with text about fresh peppery lift.
Add Thai basil near the end, because its peppery fragrance is strongest when it meets the hot curry right before serving.

How to Make Store-Bought Panang Curry Paste Taste Better

This is a home-kitchen Panang curry built around store-bought paste, but the technique is the point: fry the paste properly, use full-fat coconut, simmer until glossy, and finish with basil and lime leaf.

Fry it first
Cook the paste in oil or coconut cream until it smells warmer, deeper, and less raw.

Use full-fat coconut
Thin coconut milk makes the curry taste weaker. Full-fat coconut milk or cream gives body.

Finish the flavor
Fish sauce, sugar, lime leaves, peanuts, and basil make the sauce taste complete.

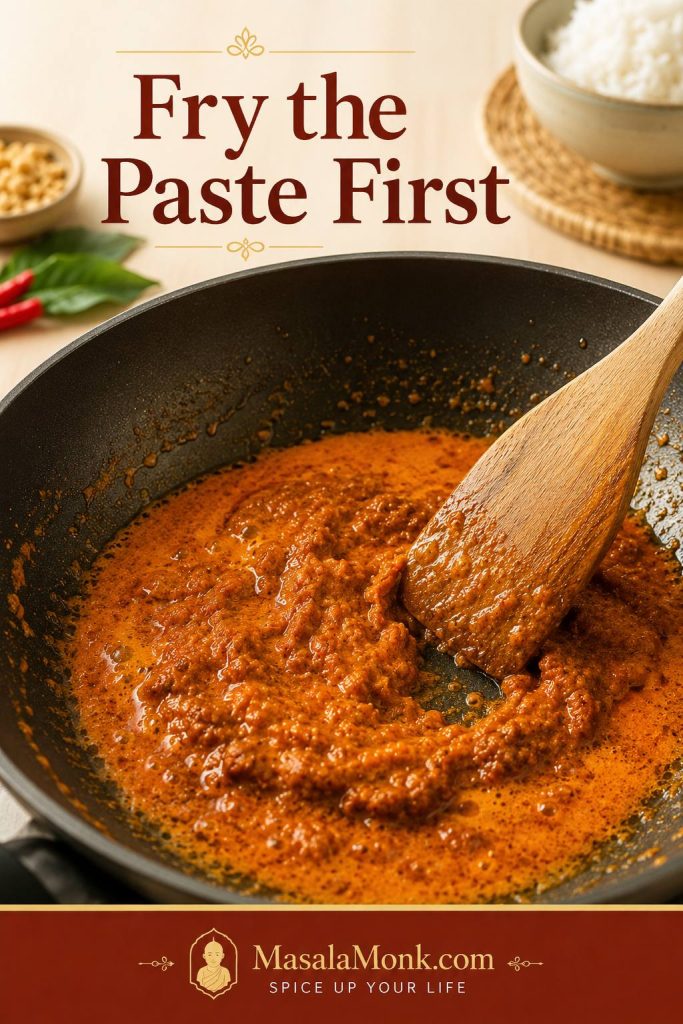
Bloom the paste in fat first

Traditional Panang methods often fry the paste in coconut cream until the oil separates. At home, canned coconut milk does not always separate well, so oil or the thick cream from the top of the can is more reliable.

Panang curry paste frying in a skillet with oil or coconut cream while a wooden spatula stirs it.
Frying the paste first is the flavor-building step that makes store-bought Panang curry paste taste fuller and less raw.

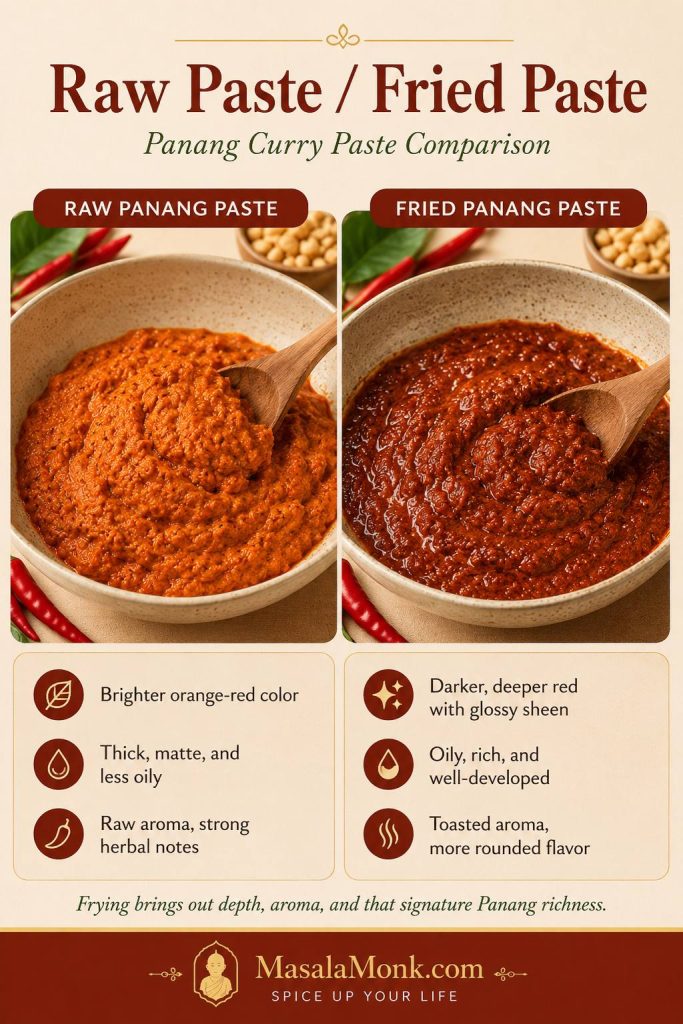
What fried Panang curry paste should look like

The color change is subtle but useful: the paste turns a little darker, smells rounder, and loses the raw edge before the coconut is stirred in.

Side-by-side comparison of raw Panang curry paste and darker fried Panang curry paste in a pan.
The paste does not need to burn or dry out; it just needs to darken slightly and smell warmer before the coconut goes in.

Choose the right paste amount

For one 13.5–14 oz / 400ml can of coconut milk or cream, use this as your starting point:

StylePaste AmountBest For
Mild2 tbsp / about 30gKids, spice-sensitive eaters, or very strong paste brands
Balanced3 tbsp / about 45gMost homemade Panang curry
Stronger4 tbsp / about 60gRestaurant-style intensity or a pan with more protein and vegetables

Adjust after simmering

If the curry tastes weak after simmering, check the texture first. A thin coconut base can make even a strong paste taste dull because the flavor is spread across too much liquid. Let the pan settle into a glossy consistency, then decide if you need more paste.

When you do add more paste, avoid stirring it in raw. Fry another teaspoon or two in a small pan with a spoon of coconut cream, then stir that back into the curry. This keeps the added flavor cooked and rounded. For a deeper look at the paste itself, Serious Eats has a helpful Panang curry paste guide that explains the peanut and warm-spice notes that separate it from a basic red curry paste.

Using red curry paste instead? For every 2–3 tablespoons red curry paste, add 1 tablespoon crushed roasted peanuts or peanut butter, a tiny pinch of nutmeg, and a small pinch of ground coriander or cumin if the sauce tastes plain. Add torn makrut lime leaves if you have them. This shortcut is best for a weeknight curry, not for a strict traditional version.

Check labels for vegan or vegetarian versions

If you are cooking for vegan or vegetarian eaters, check the paste label carefully. Many Thai curry pastes contain shrimp paste, fish sauce, or other seafood ingredients. Use a vegan Panang curry paste, or use vegan red curry paste and adjust it with peanuts and warm spices.

How to Make Panang Curry

Once the paste and coconut are ready, the cooking moves quickly. A wide skillet, wok, or 12-inch saucepan gives the paste room to fry and helps the coconut base come together faster. Have the chicken sliced, vegetables cut, herbs ready, and rice started before the paste hits the pan.

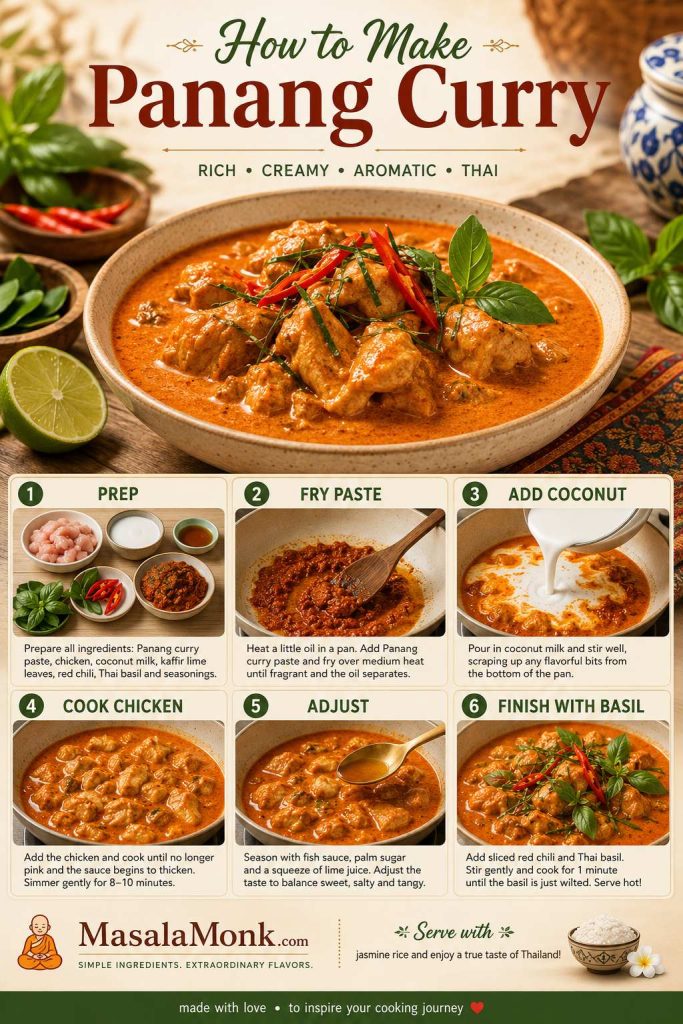
Visual overview: how to make Panang curry

Step-by-step Panang curry board showing prep, frying paste, adding coconut, cooking chicken, adjusting, and finishing with basil.
Follow the visual order before you start cooking: prep first, fry the paste, build the coconut base, cook gently, adjust, then finish fresh.

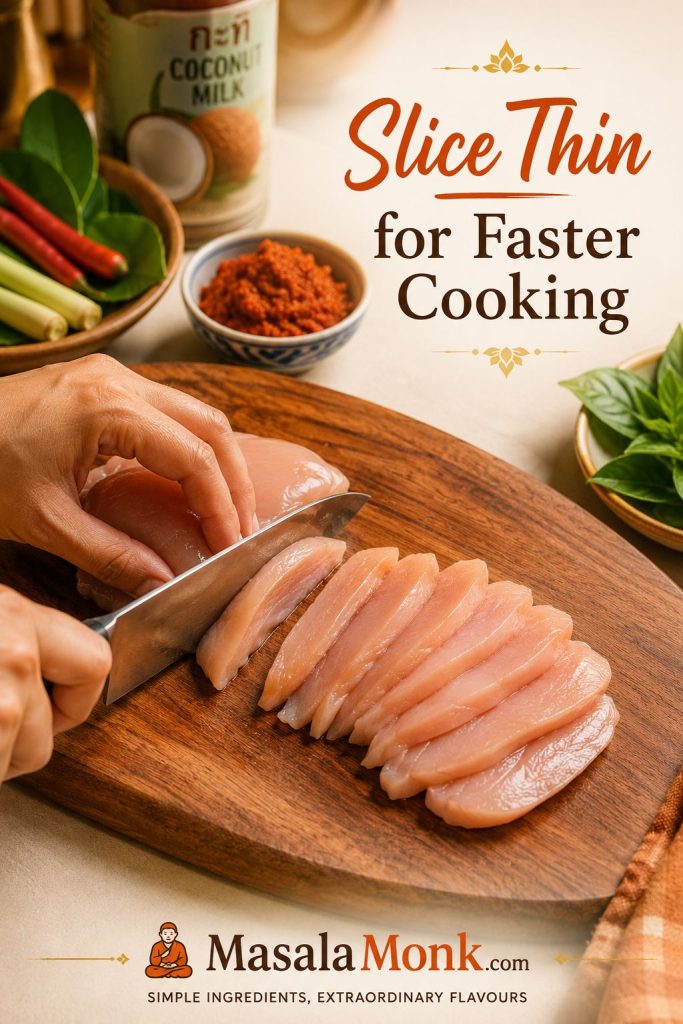
1. Slice the protein thinly

Thin slices cook quickly and pick up the curry better. Cut chicken across the grain into bite-size strips. Slice beef very thinly against the grain. For tofu, cut into cubes or slabs and pat dry before cooking.

Avoid large chunks of chicken here. Thick pieces take longer to cook, which can push the pan past its best texture before the center is done.

Hand slicing raw chicken into thin strips on a cutting board for Panang curry, with herbs and curry ingredients nearby.
Thin chicken slices cook quickly and absorb the curry better, so the meat stays tender while the sauce settles into the right texture.

2. Fry the curry paste

Heat neutral oil, or the thick cream from the top of the coconut milk can, in a wide skillet, wok, or 12-inch saucepan over medium heat. Add the paste and fry for 1–2 minutes for softer supermarket paste, or 3–5 minutes for a thicker Thai paste, stirring often, until it smells deeper and turns slightly darker.

When the paste starts sticking, lower the heat and loosen it with a spoonful of coconut cream or coconut milk. Water cools the pan, so use it only when you have no other choice.

This is the moment the curry starts smelling less like paste from a tub and more like dinner: chile, coconut fat, warm spice, and lime leaf waiting to open up.

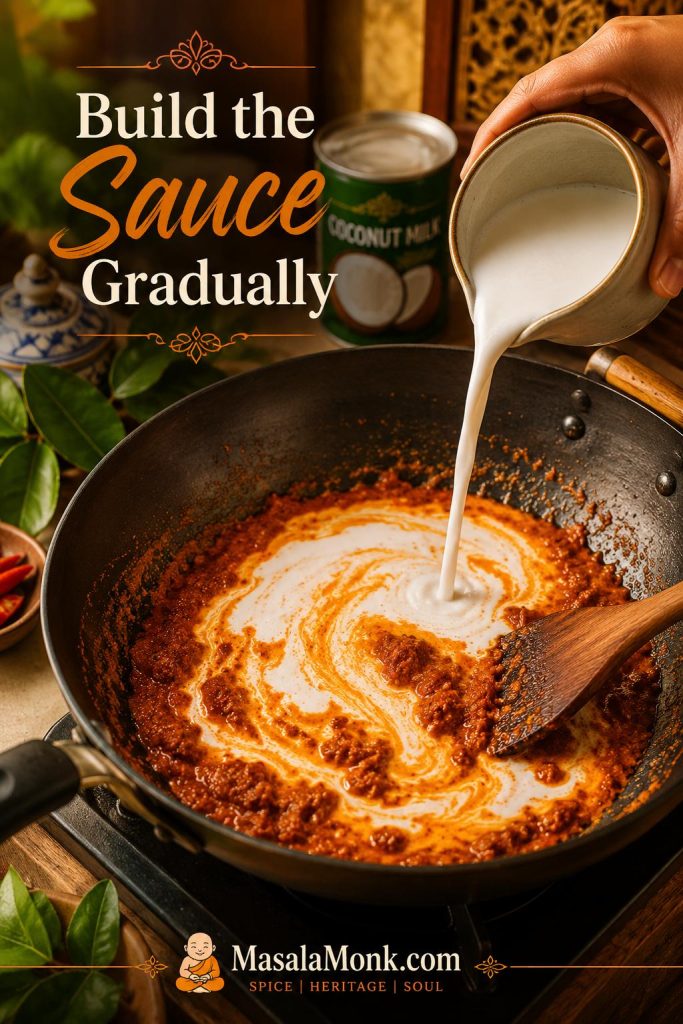
3. Build the coconut sauce

Stir in the coconut milk or coconut cream gradually until the paste dissolves into a smooth sauce. Add fish sauce, palm sugar or brown sugar, torn makrut lime leaves, and peanuts or peanut butter. Keep the curry at a gentle bubble, not a hard boil.

At this point, the pan should look creamy and red-orange. Let it bubble for a few minutes before adding delicate vegetables or herbs. A good Panang base looks slightly more intense than you think it needs to be; rice will soften everything later. When you are unsure, use the spoon-coating test before serving.

Coconut milk being poured into fried Panang curry paste in a wok, creating orange-red swirls as the sauce forms.
Add coconut gradually so the fried paste dissolves evenly; as it blends, the curry changes from separate ingredients into one smooth base.

4. Cook the protein and vegetables

Add chicken and firm vegetables such as carrots, green beans, baby corn, or broccoli stems first. Simmer gently until the chicken is cooked through; the thickest piece should reach 165°F / 74°C.

Add bell pepper, snap peas or snow peas, zucchini, or spinach later so they stay brighter and release less water. Save finely sliced makrut lime leaves for the end if you are using them as garnish.

Beef and shrimp go in later. Browned tofu can go in near the end so it keeps its shape.

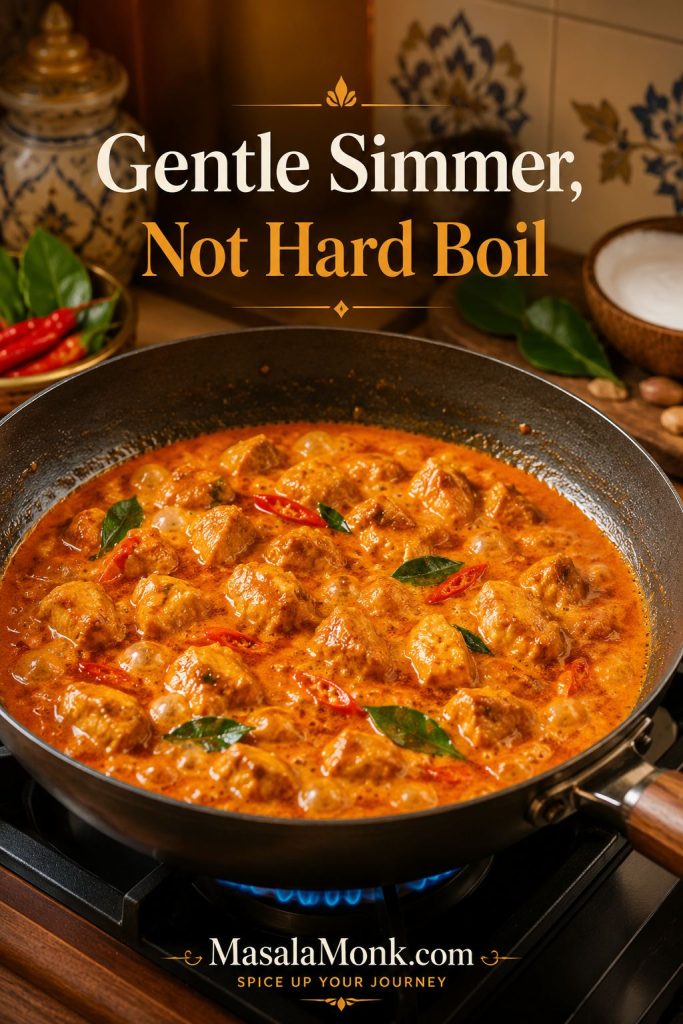
Chicken Panang curry gently simmering in a wide pan with small bubbles, orange-red sauce, chicken pieces, and herbs.
A gentle simmer gives the chicken time to cook while the coconut base thickens softly, without the rough look that comes from hard boiling.

5. Taste and finish

Give the curry a few uncovered minutes before final tasting. The flavor changes as the coconut settles: salt becomes clearer, sweetness rounds out, and the paste tastes less scattered.

Turn off the heat and stir in Thai basil right before serving. Add extra finely sliced makrut lime leaves, crushed peanuts, or sliced red chile for a stronger finish. The basil should smell fresh as soon as it hits the hot curry.

Hand adding Thai basil to finished chicken Panang curry in a pan with red chile and creamy orange-red sauce.
Stir basil in right at the end, then stop cooking; as a result, the curry keeps its fresh Thai basil aroma.

Chicken safety note: chicken should reach 165°F / 74°C in the thickest piece. FoodSafety.gov lists this as the safe minimum internal temperature for poultry in its safe minimum internal temperatures chart.

The Spoon-Coating Test for Panang Curry Sauce

When you are not sure whether the curry is ready, trust the spoon more than the clock. Dip a spoon into the pan and lift it out. The sauce should coat the back in a visible layer instead of sliding off immediately.

Spoon lifted from Panang curry showing orange-red coconut sauce coating the back of the spoon above the pan.
Once the curry coats the spoon in a smooth layer, it is concentrated enough for rice but still loose enough to serve generously.

When it is right, the sauce leaves a glossy trail on the spoon and settles over rice instead of disappearing into it. If it becomes too heavy, loosen it with a spoonful of coconut milk, water, or stock. Cornstarch can rescue a rushed sauce, but it should not be the first fix. If the texture is already off, go to the sauce fixes before serving.

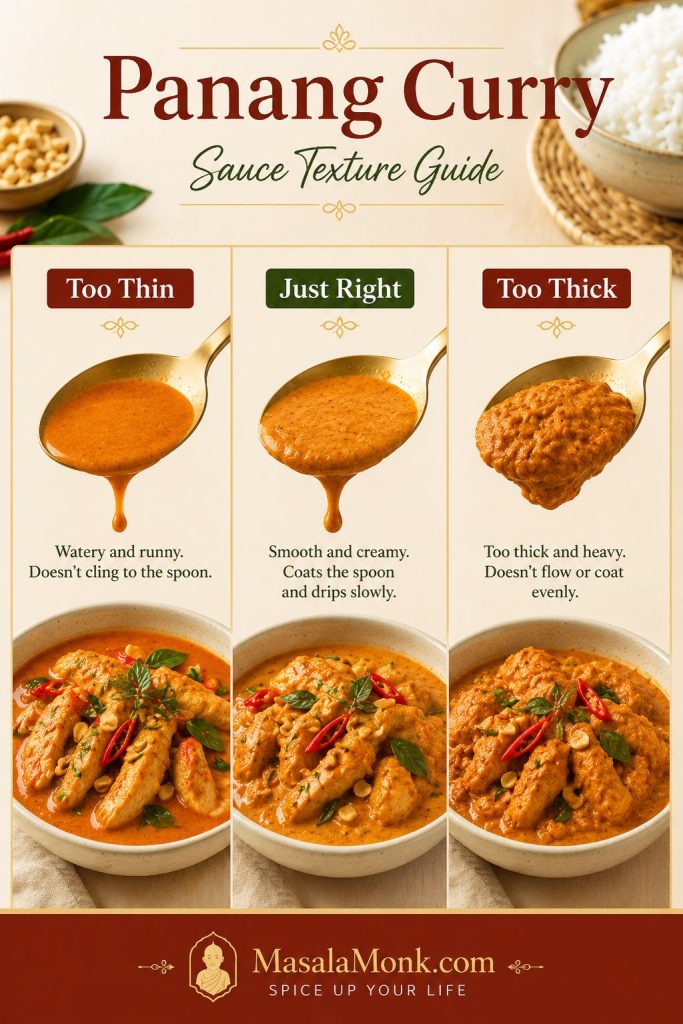
How thick should Panang curry sauce be?

The best texture sits between runny and pasty: it coats the spoon, moves slowly in the pan, and still spoons easily over rice.

Three-panel guide comparing Panang curry sauce that is too thin, just right, and too thick.
Use this texture guide before serving: thin curry needs more simmering, while overly thick curry needs a small splash of coconut milk or water.

Texture goal: glossy and spoonable, rich enough to coat the protein, but still loose enough for rice.

Best Vegetables for Panang Curry

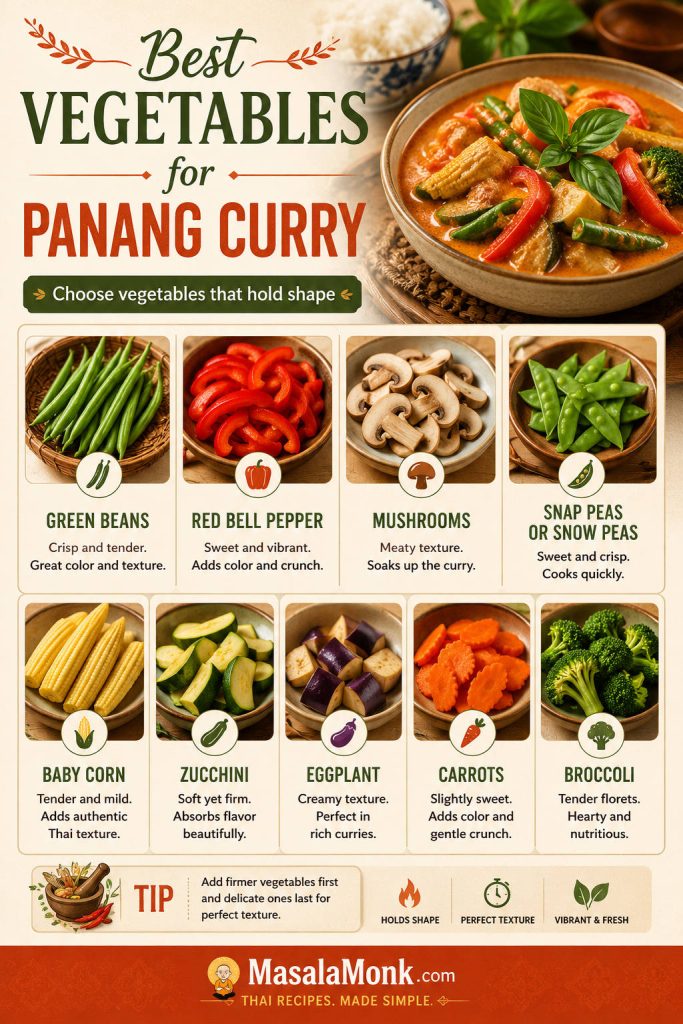
Vegetables can make Panang curry feel fuller and fresher, but they need good timing. Add firm vegetables first, tender vegetables later, and basil at the very end.

Vegetable guide for Panang curry showing green beans, red bell pepper, mushrooms, snap peas, baby corn, zucchini, eggplant, carrots, and broccoli.
Choose vegetables that hold their shape so the curry stays colorful, balanced, and concentrated instead of turning watery.

Keep watery vegetables modest, especially mushrooms, zucchini, and spinach. They are delicious here, but a crowded pan can turn a glossy Panang into a thinner curry.

When to add vegetables to Panang curry

Vegetable timing guide for Panang curry with early, midway, and late groups for vegetables and Thai basil.
Add firmer vegetables first and delicate ones later; this way, the curry keeps both texture and fresh color.
Add EarlyAdd MidwayAdd Late
CarrotsMushroomsBell pepper
Green beansSmall eggplant piecesSnap peas or snow peas
Small cauliflower floretsBroccoli floretsZucchini
Broccoli stemsBamboo shootsSpinach
Baby cornThai basil

For a vegetable-heavy curry, use a little more paste and give the coconut base extra time to settle into the right texture. If you are skipping meat completely, jump to the vegetable Panang curry variation.

Chicken, Beef, Tofu, Shrimp and Vegetable Panang Curry

The curry base stays mostly the same, but each version has one thing to protect: juicy chicken, tender beef, intact tofu, just-cooked shrimp, or vegetables that do not water down the pan.

VersionHow Much to UseBest Method
Chicken Panang curry1½ lb / 680g chicken thighs or breastSlice thin and simmer until just cooked through. Thighs are juicier; breast cooks faster.
Beef Panang curry1–1¼ lb / 450–570g tender beefSlice thinly against the grain and add near the end so it stays tender.
Tofu Panang curry14–16 oz / 400–450g firm tofuPress if watery, brown if desired, then add after the sauce has reduced.
Shrimp Panang curry1 lb / 450g peeled shrimpAdd during the final few minutes and cook only until opaque.
Vegetable Panang curry3–4 cups mixed vegetablesAdd firm vegetables first and quick-cooking vegetables later.

Chicken Panang Curry

Chicken is the best first version because it is easy to cook and lets the curry shine. Thighs are the most forgiving choice because they stay juicy. Breast also works, but it needs thin slicing and close timing.

For the most reliable chicken version, use 1½ lb / 680g chicken, 3 tablespoons curry paste, one 400ml can of coconut milk or coconut cream, and 1–1½ cups vegetables. Red bell pepper, green beans, baby corn, mushrooms, and snap peas or snow peas all work well.

Beef Panang Curry

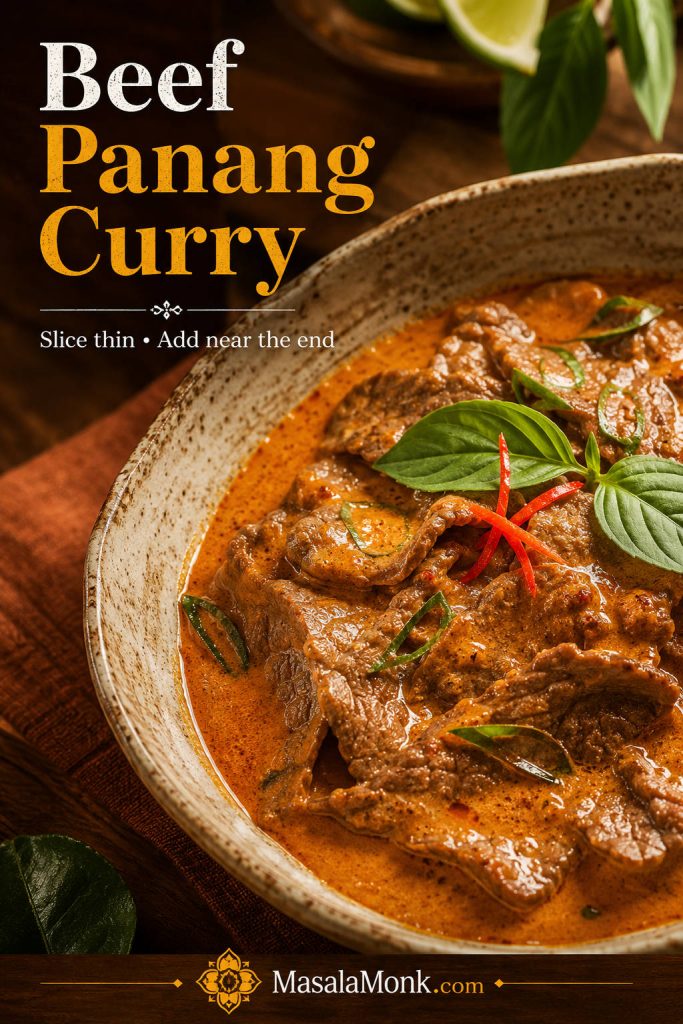
Use sirloin, ribeye, flank steak, flat iron, or another tender cut. Slice it thinly against the grain, then add it after the sauce is mostly finished. Simmer just until cooked through.

Beef Panang curry with thin slices of beef in orange-red coconut curry sauce, basil, makrut lime leaf garnish, and red chile.
Beef Panang curry works best with thin slices added near the end, so the beef stays tender instead of becoming chewy.

Do not simmer thin steak-style beef for 15 minutes the way you might simmer chicken. It can turn chewy, especially if it is very lean. For a slow-cooked beef Panang, use a tougher cut such as chuck or short rib and treat it as a separate slow-braised version.

Tofu or Vegan Panang Curry

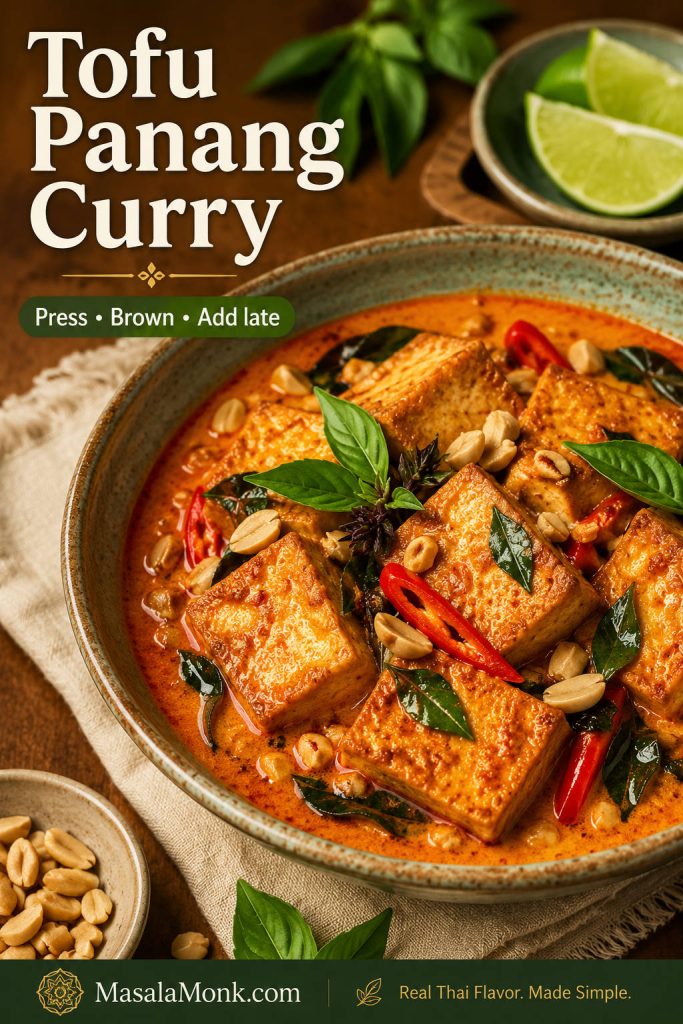
Tofu Panang curry can be excellent, but the tofu needs texture and the curry paste needs a label check if you are cooking vegan. Use firm or extra-firm tofu. Press it for 15–20 minutes if it is watery, then cut it into cubes or slabs. For better texture, brown the tofu before adding it to the sauce.

Tofu Panang curry with tofu pieces in coconut curry sauce, Thai basil, peanuts, red chile, and makrut lime leaf garnish.
Press and brown tofu before adding it to the curry; then it holds its shape and gives the sauce something firm to coat.

Vegan paste warning: many Thai curry pastes contain shrimp paste, fish sauce, or other seafood ingredients. Use a vegan Panang curry paste, or use vegan red curry paste and adjust it with peanuts, a tiny pinch of nutmeg, and a little coriander or cumin.

Replace fish sauce with soy sauce or tamari. Add tofu after the sauce has reduced so it does not break apart while the curry thickens. Finish with basil and crushed peanuts.

Shrimp Panang Curry

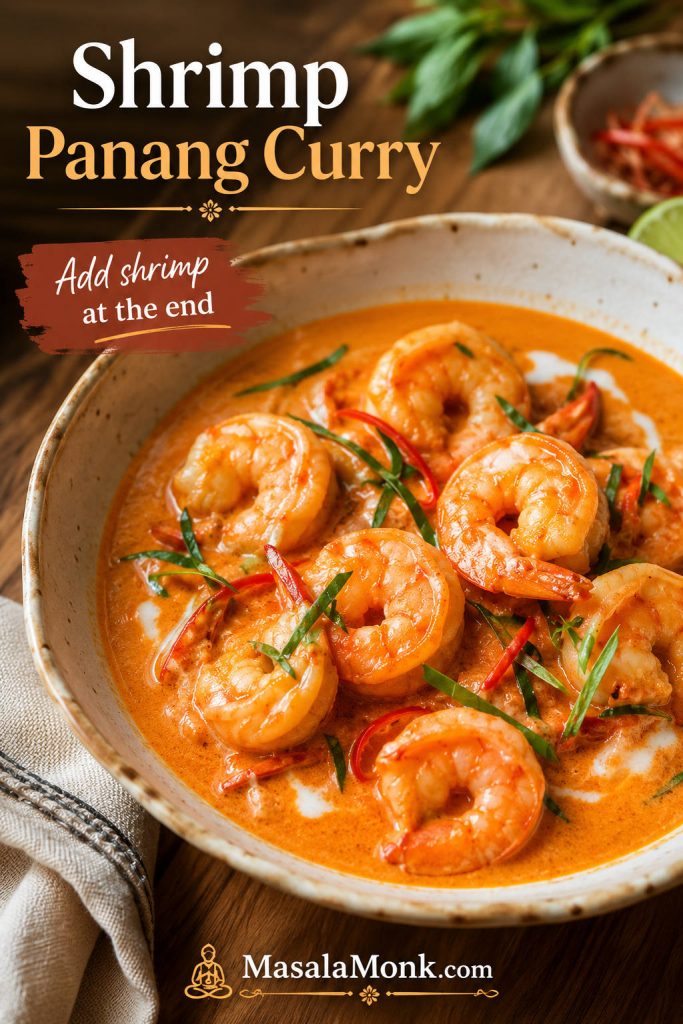
Shrimp Panang is the fastest version, but it asks for restraint. The sauce should be ready before the shrimp goes in, because shrimp only needs a few minutes to turn sweet, opaque, and tender.

Shrimp Panang curry with curled shrimp in creamy orange-red coconut curry sauce, Thai basil, red chile, and lime leaf garnish.
Shrimp needs only a short finish in Panang curry, so build and balance the sauce before the shrimp goes into the pan.

Once the shrimp is in the pan, simmer only until it curls gently and loses its translucency. Serve right away.

Vegetable Panang Curry

Vegetable Panang curry works best when you choose vegetables that hold their shape. Green beans, bell peppers, mushrooms, broccoli, snap peas or snow peas, baby corn, carrots, zucchini, and eggplant can all work, but they should not all go in at once.

Vegetable Panang curry with green beans, bell pepper, mushrooms, baby corn, zucchini, eggplant, snap peas, and basil in coconut curry sauce.
Vegetable Panang curry works best when the vegetables stay distinct, bright, and lightly tender instead of collapsing into the coconut sauce.

Add firm vegetables first, quick-cooking vegetables later, and basil at the very end. For a vegetable-heavy curry, start with 1 extra teaspoon of paste. A very full pan may need up to 1 extra tablespoon. Once you have chosen the version, return to the recipe card for the base method.

How to Fix Panang Curry Sauce

This is the section to use when the curry looks wrong five minutes before dinner. Most Panang problems are not disasters; they are small balance problems. A watery vegetable, a salty paste, thinner coconut milk, or too much heat can throw the pan off, but most of it is fixable.

You are looking for sauce that visibly coats the protein, but still has enough movement to spoon over rice. When the protein is already cooked, remove it with a slotted spoon and fix the sauce on its own.

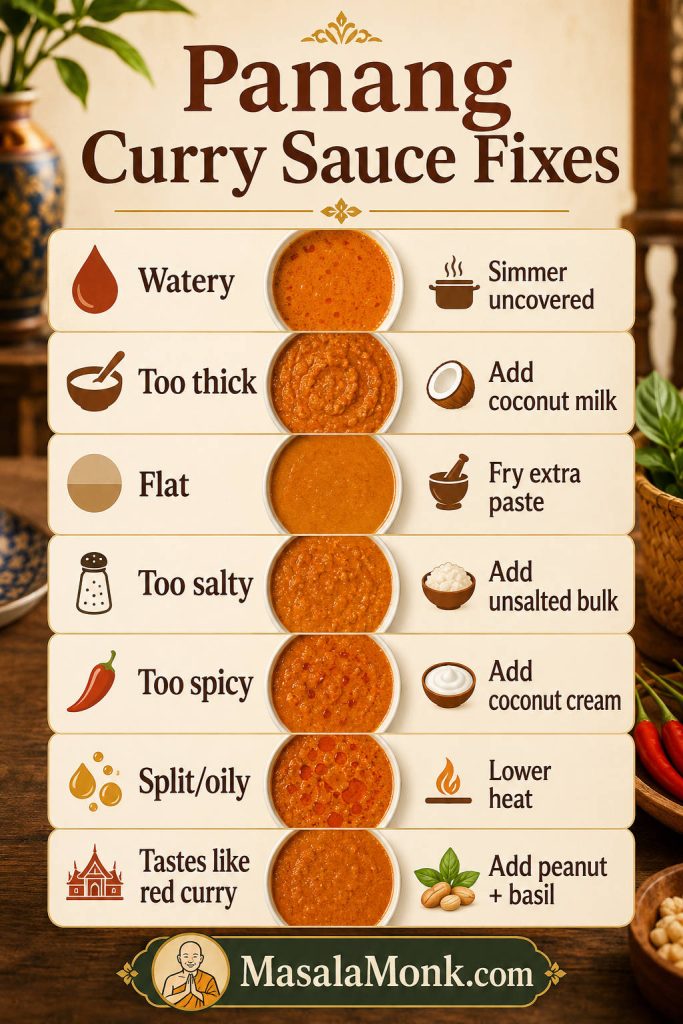
Quick fixes for Panang curry sauce

Panang curry sauce troubleshooting board with fixes for watery, thick, flat, salty, spicy, split, oily, or red-curry-like sauce.
Use this rescue guide before serving: most Panang curry sauce problems can be fixed with better simmering, coconut, paste, seasoning, or heat control.
Sauce ProblemWhat It Feels LikeHow to Fix It
Too wateryThe chicken looks like it is floating instead of coated.Simmer uncovered. If the protein is cooked, remove it and reduce the sauce alone. Use coconut cream next time.
Too thickThe curry looks heavy, pasty, or dry instead of glossy.Add coconut milk, water, or stock one spoonful at a time, then stop as soon as it turns spoonable.
Tastes flatThe curry smells fine but tastes dull or unfinished.Fry extra paste separately and stir it in. Add fish sauce, sugar, lime leaves, or basil.
Too saltyThe salt hits first and the coconut sweetness disappears.Add unsalted bulk such as coconut milk, vegetables, tofu, or chicken. Balance with a tiny amount of sugar.
Too spicyThe heat overwhelms the coconut and aromatics.Add coconut cream or coconut milk and serve with extra rice.
Oily or splitThe curry looks greasy around the edges.Lower the heat, stir gently, and add a splash of coconut milk.
Tastes like red curryThe curry is loose, chile-forward, and missing the rounded Panang note.Add peanuts or peanut butter, simmer briefly, and finish with Thai basil and finely sliced tender makrut lime leaves.

Panang Curry Recipe Card

A creamy chicken Panang curry with store-bought paste, full-fat coconut, makrut lime leaves, peanuts, and Thai basil. Rich, spoonable, and easy to adapt for beef, tofu, shrimp, or vegetables.

Yield
4 servings
Prep Time
15 minutes
Cook Time
25 minutes
Total Time
40 minutes

Ingredients

  • 1½ lb / 680g boneless chicken thighs or chicken breast, thinly sliced
  • 3 tbsp / about 45g Panang curry paste
  • 1 tbsp / 15ml neutral oil, or thick coconut cream from the top of the can
  • 13.5–14 oz / 400ml full-fat coconut milk or coconut cream
  • 1–1½ tbsp / 15–22ml fish sauce, plus more to taste, depending on paste saltiness
  • 2 tsp–1 tbsp / 8–15g palm sugar or brown sugar
  • 4–6 makrut lime leaves, torn, plus optional finely sliced tender leaves for finishing
  • 2 tbsp / about 15g crushed roasted peanuts, or 1 tbsp / about 16g peanut butter
  • 1 red bell pepper, thinly sliced, or 1–1½ cups mixed vegetables for the chicken version
  • ½ cup loosely packed Thai basil leaves
  • Optional garnish: sliced red chile, extra basil, crushed peanuts, finely sliced makrut lime leaves
  • Steamed jasmine rice, for serving

Instructions

  1. Prep. Slice the chicken thinly and prepare the vegetables, herbs, and garnishes before cooking.
  2. Fry the paste. Heat oil or thick coconut cream in a wide skillet, wok, or 12-inch saucepan over medium heat. Add the Panang curry paste and cook, stirring often, until fragrant and slightly darker — about 1–2 minutes for softer paste or 3–5 minutes for thicker Thai paste.
  3. Build the sauce. Stir in coconut milk or coconut cream gradually until smooth. Add fish sauce, sugar, torn makrut lime leaves, and peanuts or peanut butter.
  4. Simmer. Add chicken and firm vegetables such as carrots, green beans, or baby corn. Simmer gently until the chicken is cooked through: about 6–8 minutes for thin chicken breast or 8–12 minutes for thin chicken thighs. The thickest piece should reach 165°F / 74°C. Add bell pepper, snap peas or snow peas, zucchini, or spinach near the end.
  5. Adjust. If the sauce looks loose, simmer uncovered until glossy and spoonable. Taste after thickening, then adjust with fish sauce, sugar, coconut milk, or extra fried paste if needed.
  6. Finish. Turn off the heat and stir in Thai basil. Garnish with extra basil, crushed peanuts, sliced chile, or finely sliced makrut lime leaves.
  7. Serve. Serve hot with steamed jasmine rice.

Recipe Notes

  • Beef: use 1–1¼ lb / 450–570g thinly sliced sirloin, ribeye, flank steak, or another tender cut. Add near the end and simmer briefly.
  • Tofu: use firm or extra-firm tofu. Press if watery, brown first if desired, and add after the sauce has reduced.
  • Vegan Panang: use vegan curry paste and replace fish sauce with soy sauce or tamari.
  • Shrimp: build and thicken the sauce first, then add shrimp near the end and cook only until opaque.
  • Vegetable Panang: use 3–4 cups mixed vegetables and add 1 teaspoon to 1 tablespoon extra paste depending on volume.
  • Richer sauce: use coconut cream. For a milder curry, start with 2 tbsp paste and add more after tasting.

Once the paste smells cooked, the coconut turns glossy, and the basil hits the pan, the curry feels much easier to trust. Spoon it beside jasmine rice, add the final herbs, and you have the kind of weeknight Panang that tastes deliberate instead of rushed.

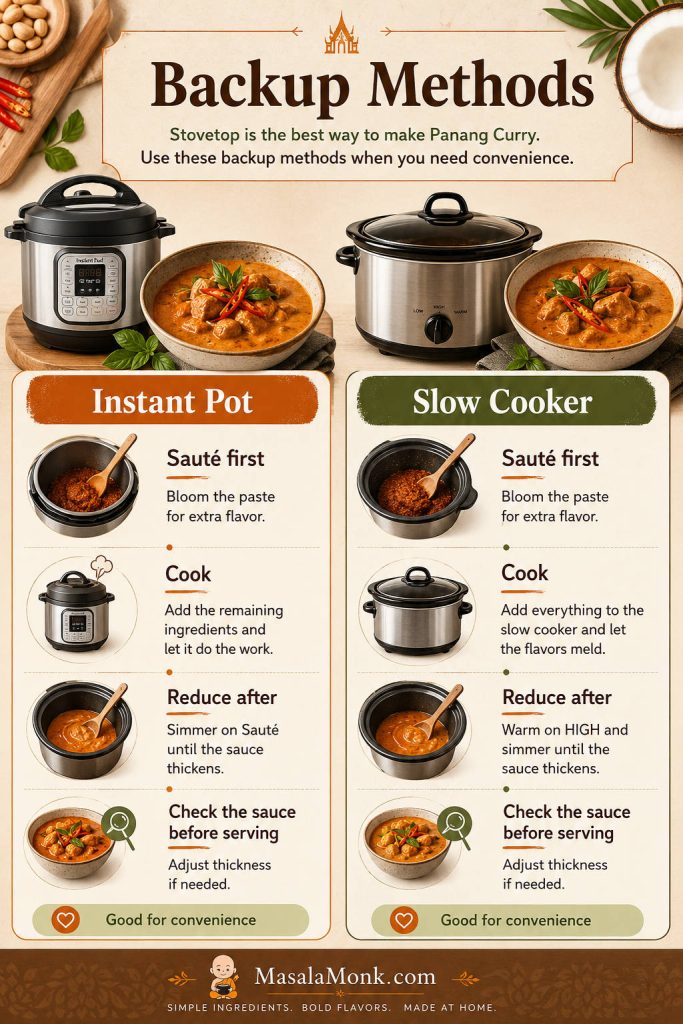
Instant Pot or Slow Cooker Panang Curry

Panang rewards stovetop control, so treat Instant Pot and slow cooker versions as backup methods. They are useful for convenience, but both need a final look at the sauce before serving.

Backup-method guide for Panang curry showing Instant Pot and slow cooker options with sauté first, cook, reduce after, and check sauce cues.
Instant Pot and slow cooker Panang curry can be convenient, but the final sauce check still matters before the curry reaches the table.

Instant Pot Panang curry

Use sauté first. Fry the paste in oil or thick coconut cream for 1–2 minutes, then stir in coconut milk or cream, fish sauce, sugar, torn lime leaves, and thin chicken pieces. Pressure cook on high for 3–4 minutes, then quick release. Use sauté again to bring the sauce back to a spoonable texture, then finish with basil.

Slow cooker Panang curry

Slow cooker Panang works best with chicken thighs or beef, not thin chicken breast. Fry the paste separately first, then add it to the slow cooker with coconut milk, seasoning, and protein. Cook on low until the meat is tender, usually about 2–3 hours for boneless chicken thighs. If the sauce is thin at the end, reduce it uncovered in a saucepan before adding basil.

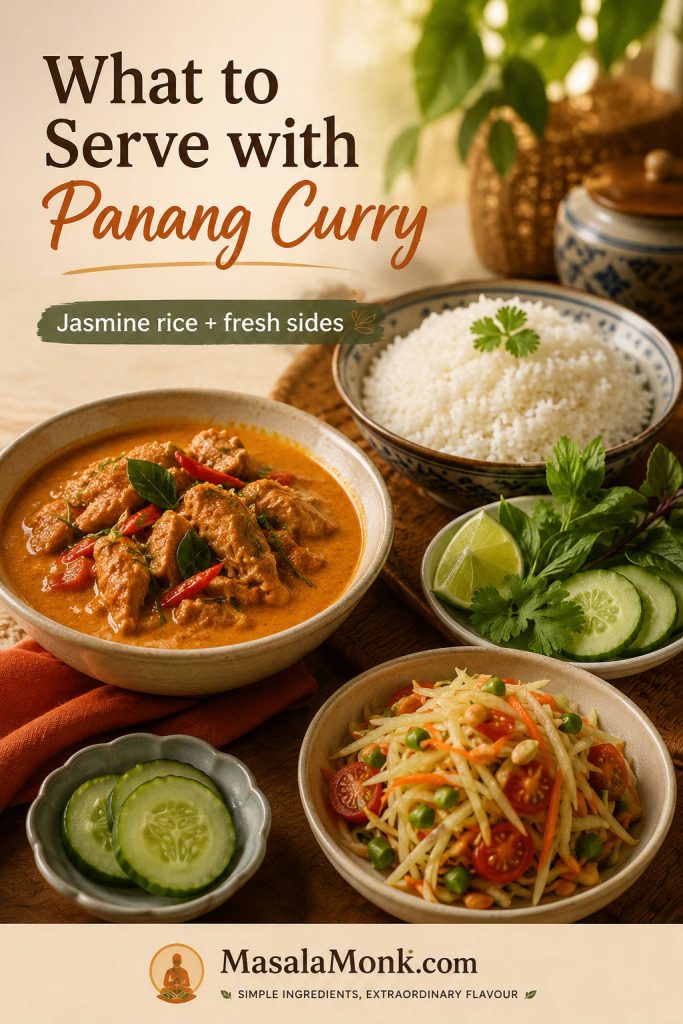
What to Serve with Panang Curry

Panang is rich, so the best sides either catch the sauce or cut through it. Jasmine rice catches the glossy curry; cucumber, herbs, lime, green beans, or Som Tam keep the bowl from feeling heavy. Planning leftovers too? Jump to storage and reheating.

What goes well with Panang curry?

Panang curry served with jasmine rice, cucumber, herbs, lime, and a fresh Som Tam-style side dish on a warm table.
Pair Panang curry with jasmine rice and a crisp side so the meal has both coconut richness and fresh contrast.

Spoon the curry beside the rice rather than burying it. That way the first few bites stay glossy and concentrated, and the rice catches the sauce slowly instead of muting it all at once. If rice is the part that usually goes wrong, this guide to cooking perfect rice can help.

Serve WithWhy It Works
Steamed jasmine riceBest default; it absorbs the sauce without competing with the curry.
Cucumber salad, herbs, lime, or lightly steamed green beansFresh sides balance the coconut richness.
Roti, flatbread, rice noodles, or coconut riceComfort options for a fuller, more restaurant-style meal.

For a crisp Thai-style side, this Vegan Som Tam Salad gives the fresh, sharp contrast that works well beside a creamy coconut curry.

Storage, Freezing and Reheating

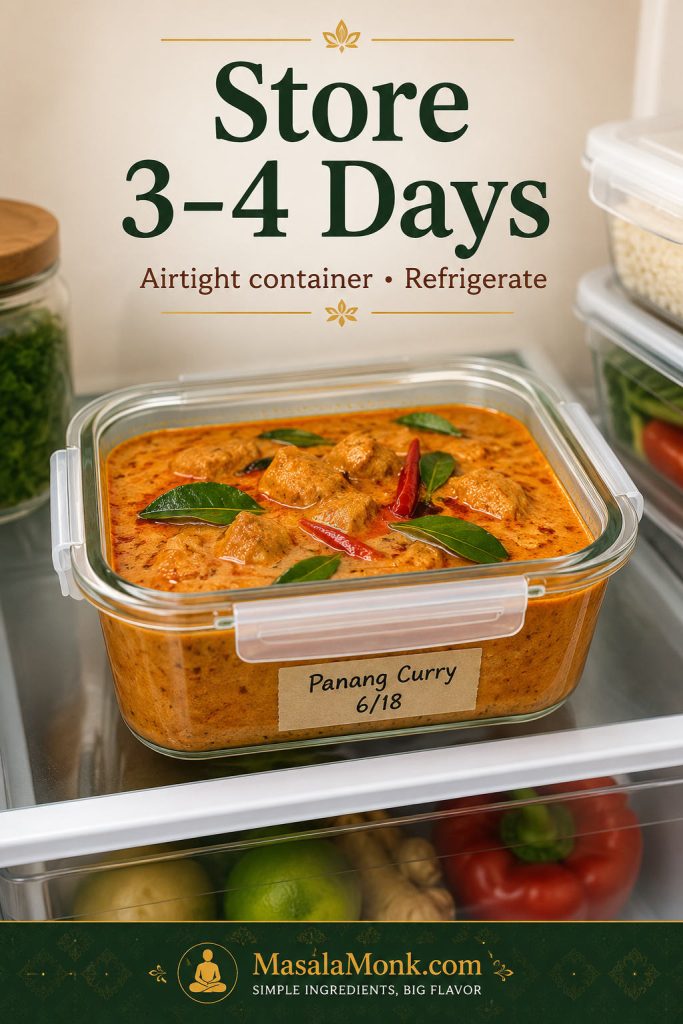
How to store Panang curry leftovers

Store leftover Panang curry in an airtight container in the refrigerator for 3–4 days. The sauce will thicken as it chills, so add a splash of coconut milk, water, or stock when reheating.

Panang curry leftovers stored in an airtight glass container on a refrigerator shelf with text saying store three to four days.
Leftover Panang curry keeps well for 3–4 days in an airtight container; for the brightest flavor, add fresh basil after reheating.

How to reheat Panang curry

Reheat gently on the stovetop over low to medium-low heat. Avoid hard boiling because coconut-based sauces can split. If the curry looks oily after reheating, lower the heat and stir in a small splash of coconut milk.

Panang curry reheating gently in a saucepan while coconut milk is poured in and the sauce is stirred with a wooden spoon.
Reheat Panang curry gently, adding a splash of coconut milk if needed, so the sauce turns smooth again instead of splitting.

The curry reheats well, but fresh basil does not. For make-ahead cooking, stop before adding the basil if you can, then add it after reheating so the curry tastes fresh again.

You can freeze Panang curry for up to 2 months, but the sauce may look slightly separated or grainy after thawing. Reheat gently and stir in a little coconut milk to smooth it out. Shrimp Panang curry is less ideal for freezing because shrimp can become rubbery after thawing and reheating. Tofu may soften slightly after storage, but it still tastes good.

Panang Curry FAQs

Is Panang curry supposed to be thick?

Panang curry is usually thicker and more concentrated than Thai red curry. It should coat the chicken, tofu, shrimp, beef, or vegetables instead of running like soup.

Is Panang curry very spicy?

Most bowls land in the medium-spicy range, but the paste controls the heat. Start with 2 tablespoons for a gentler curry and add more after tasting.

What does Panang curry taste like?

It tastes creamy, savory, lightly sweet, and aromatic, with a quiet peanut note. Peanut belongs in the background; it rounds the curry without turning it into satay sauce.

Why does my Panang curry taste like red curry?

The curry may be too loose or missing the rounded peanut and lime-leaf finish. Simmer the coconut base until glossy, then add peanut richness, basil, and finely sliced tender makrut lime leaves if you have them.

Can I use red curry paste instead of Panang curry paste?

Yes, as a shortcut. Add peanuts or peanut butter, a tiny pinch of nutmeg, and a little coriander or cumin to move it closer to Panang flavor.

What is the best coconut milk for Panang curry?

Full-fat coconut milk works well, while coconut cream gives the richest result. Light coconut milk makes the curry thinner and less satisfying.

Is Panang curry the same as Panang gai?

Panang gai means chicken Panang curry. “Gai” means chicken, so the method is the same here: thin chicken, coconut sauce, and a fresh basil finish.

Can I make Panang curry without fish sauce?

Use soy sauce, tamari, or a vegetarian fish-sauce alternative. Taste after simmering because substitutes vary in saltiness and depth.

Why is my Panang curry watery?

The coconut may need more time, the milk may be too thin, or the vegetables may have released water. Simmer uncovered before reaching for cornstarch.

Can I make Panang curry ahead?

Chicken, beef, tofu, and vegetable versions reheat well. For the freshest flavor, hold back the basil and add it after reheating.

What vegetables go well in Panang curry?

Green beans, bell peppers, mushrooms, broccoli, snap peas, baby corn, carrots, zucchini, and eggplant all work. Add watery vegetables late.

Can I make this with shrimp?

Build and thicken the sauce first, then add shrimp near the end and cook just until opaque. Do not reduce the curry after shrimp goes in.

Back to top

Posted on Leave a comment

Pinakbet Tagalog Recipe

Bowl of Pinakbet Tagalog with pork, squash, okra, eggplant, ampalaya, long beans, and tomato-bagoong sauce, served with rice nearby.

Pinakbet Tagalog is the kind of vegetable dish that makes rice feel necessary. The best spoonful has salty bagoong-rich juices, sweet squash, silky eggplant, tender okra, a little bitter ampalaya, and enough porky depth to make the vegetables feel like the meal.

It is generous, home-style Filipino cooking: vegetables cooked until they soften into each other, but not so far that everything turns muddy. The squash should become creamy at the edges, the eggplant should turn soft and shiny, and the bitter melon should balance the sweetness instead of taking over.

If your pinakbet has ever turned watery, too salty, too bitter, or too soft, the problem usually is not the ingredient list. It is the order. Squash needs a head start, okra needs restraint, and bagoong needs to be cooked with the tomatoes instead of dumped in heavily at the end.

This is a Pinakbet Tagalog-style home recipe: squash-forward, shrimp-paste seasoned, saucy enough for rice, and built to keep the vegetables tender but distinct. It also includes notes for a sharper Ilocano direction, no-bagoong substitutions, and the small timing cues that keep pakbet from becoming mushy.

Quick Answer: What Is Pinakbet?

Pinakbet is a Filipino vegetable stew made with bagoong, tomatoes, and vegetables such as squash, okra, eggplant, bitter melon, and long beans. This version is Pinakbet Tagalog, made with bagoong alamang, pork, squash, and mixed vegetables in a salty, savory sauce that is meant for rice.

For the easiest balanced version, cook pork with onion, garlic, tomatoes, and shrimp paste. Add squash first, long beans next, and eggplant, ampalaya, and okra near the end. That order keeps the vegetables tender without turning everything into one soft mixed stew; the full vegetable cooking order is below.

  • Main seasoning: bagoong alamang, or shrimp paste
  • Protein: pork belly or pork shoulder, cut into 1-inch pieces
  • Vegetables: squash, long beans, okra, eggplant, and ampalaya
  • Liquid: 1 cup / 240 ml water or light stock, plus more only if needed
  • Texture goal: glossy and saucy, not soupy or mushy

Start here: Use 1 tablespoon bagoong first, then adjust with 1–3 teaspoons more near the end. Bagoong brands vary a lot, and starting low gives you room to correct the seasoning.

Pinakbet at a Glance

Yield4 generous servings with rice, or 5–6 smaller side servings
Prep time20 minutes
Cook timeAbout 40 minutes
Total timeAbout 1 hour
Best pan12-inch wide pan, wok, deep skillet, or wide Dutch oven
Main flavorSalty, savory, lightly sweet, earthy, and a little bitter
Main fixGive squash a head start and add delicate vegetables near the end
Pinakbet at a glance guide showing yield, prep time, cook time, best pan, flavor profile, and texture goal.
Use this Pinakbet Tagalog snapshot to set the cooking target early: tender vegetables, modest sauce, and a spoonable finish that stays clear of watery or mushy.

Why these amounts work: This recipe starts with 1 tablespoon bagoong and 1 cup / 240 ml water because both salt and liquid build as the vegetables cook. Bagoong tastes sharper before it softens into the tomatoes and squash, and the vegetables release liquid as they simmer. If you are unsure how saucy the finished dish should look, use the texture guide below before adding more water.

Pinakbet Tagalog vs Ilocano: What This Recipe Is

This is a Pinakbet Tagalog-style recipe: squash-forward, seasoned with bagoong alamang, and saucy enough to spoon over rice. It is the style many home cooks expect when they want pakbet with pork, shrimp paste, kalabasa, eggplant, okra, ampalaya, and long beans.

A stricter Ilocano-style pinakbet is often more closely tied to bagoong isda or fermented fish seasoning, and the finish can be drier and more vegetable-forward. To move this recipe in that direction, use bagoong isda, reduce the liquid slightly, stir less, and let the vegetables cook down more quietly.

Side-by-side comparison of Pinakbet Tagalog and Ilocano-style pinakbet with notes about bagoong and texture differences.
Pinakbet Tagalog usually leans rounder, saucier, and squash-forward. By contrast, Ilocano-style pinakbet often tastes sharper and drier, so the bagoong choice changes the whole direction of the dish.

Cook’s clarity: Follow the recipe as written for a rounder, shrimp-paste Tagalog-style pakbet. Use the Ilocano notes if you want a sharper, drier, more fermented-fish direction. The bagoong guide below explains when to use bagoong alamang, bagoong isda, or a lighter substitute.

Why This Pinakbet Recipe Works

Good pinakbet is not about throwing every vegetable into the pan and hoping for the best. Squash, okra, eggplant, long beans, and bitter melon do not cook at the same speed, and shrimp paste is strong enough that small choices matter.

The goal is a pan of vegetables that has softened into itself without losing every shape and texture. Squash should yield but still stay visible. Eggplant should look silky and soft. Okra should be tender, not slippery across the whole dish. Ampalaya should bring enough bitterness to balance the squash and tomato, not dominate every bite.

Brown the pork first

Pork belly or pork shoulder gives the tomato and seasoning mixture more depth. Let a little fat render before the aromatics go in.

Bloom the bagoong with tomatoes

Cooking the shrimp paste with softened tomatoes rounds out the sharp saltiness and helps the flavor spread through the pan.

Stage the vegetables

Squash needs a head start. Eggplant, okra, and ampalaya go in later so they soften without collapsing.

Tested texture target: In a wide pan, 1 cup / 240 ml water is usually enough to soften the pork and start the vegetables. Add up to 1/2 cup / 120 ml more only if the pork or squash needs extra time. The finished dish should have shallow glossy juices that cling lightly to the vegetables, not a soup-like broth.

Pinakbet Ingredients

The amounts below make 4 generous servings with rice, or 5–6 smaller servings as part of a larger meal. You get enough pork for richness, enough fermented seasoning for depth, enough tomato for body, and enough vegetable contrast to make the dish feel generous.

If you are cooking outside the Philippines, check Filipino or broader Asian groceries for long beans, bitter melon, Filipino eggplant, kalabasa, and bagoong alamang. Green beans, kabocha, butternut squash, and slender eggplant can still make a good home version if you keep the same balance of sweet, bitter, tender, and firm. If your market does not carry every Filipino vegetable, the substitution guide shows which swaps keep the dish closest to the original balance.

If you cannot find every traditional ingredient, do not let that stop you. The dish still works when the pan has the same basic shape: something sweet, something bitter if possible, something tender, something green, and enough savory depth to make it feel complete.

Ingredient board for Pinakbet Tagalog with pork, bagoong alamang, tomatoes, onion, garlic, squash, long beans, okra, eggplant, and ampalaya.
These ingredients show why Pinakbet Tagalog works before the pan even heats up: pork adds richness, bagoong brings depth, tomatoes give body, and the vegetables create the sweet, bitter, tender, and crisp-tender contrast that defines the dish.

Ingredient Amounts and Why They Matter

IngredientUS measureMetricWhy it matters
Pork belly or pork shoulder1/2 lb225 gPork belly gives richness; shoulder is leaner and may need a little more time.
Cooking oil1 tbsp15 mlUse less if the pork is very fatty.
Onion1 medium110–150 gBuilds sweetness in the savory foundation.
Garlic3–4 cloves12–16 gAdd after the onion so it does not burn.
Tomatoes2 mediumAbout 225 gCook down into the savory juices.
Bagoong alamang1 tbsp to start, plus 1–3 tsp more to taste15 g to start, plus more to tasteStarting low helps prevent the dish from becoming too salty.
Water or light stock1 cup, plus up to 1/2 cup more as needed240 ml, plus up to 120 ml more as neededLoosens the tomato-bagoong mixture without making the dish soupy.
Kalabasa / squash2 cups cubed250–300 gAdds sweetness and body.
Sitaw / long beans1–1 1/2 cups cut100–150 gAdds green bite and structure.
Okra6–8 pieces100–150 gAdd late so it keeps its shape.
Ampalaya / bitter melon1/2 medium, or up to 1 medium if you enjoy bitternessAbout 100–225 gGives the signature bitter edge.
Eggplant1 large or 2 small170–250 gAdd late so it softens without dissolving.
Black pepper1/4 tspAbout 0.5 gOptional, but rounds the flavor.

Best Vegetables for Pinakbet

The best bites have contrast: sweet squash, bitter ampalaya, silky eggplant, tender okra, and salty tomato-bagoong juices that pull everything together.

Guide showing squash, okra, eggplant, ampalaya, long beans, and tomatoes used in pinakbet, with short role labels.
Each vegetable does something different in pakbet, so the mix matters as much as the seasoning. Kalabasa brings sweetness, long beans keep the dish structured, eggplant turns silky, okra adds body, and ampalaya brings the bitter edge that keeps the dish from tasting flat.

Kalabasa / Squash

This sweet squash makes the salty seasoning feel round. Cut it into sturdy chunks so the edges turn creamy without the pieces disappearing.

Okra

Okra is there for softness and body, but it needs a light hand. Trim only the ends, add it late, and let it turn tender without stirring it into the whole pan.

Eggplant

Eggplant is at its best when it turns silky and soaks up the tomato-bagoong juices. Keep the pieces thick so they soften without vanishing.

Ampalaya

Ampalaya is the edge of the dish. Use less if you want a milder pan, but do not erase all the bitterness; that little bite is what keeps the squash and tomato from tasting too sweet.

Sitaw / Long Beans

Long beans keep the dish from feeling too soft, especially beside squash and eggplant. Cut them into 2- to 3-inch pieces so they cook evenly and keep a little bite.

Tomatoes

Once tomatoes soften into the pan, they make the fermented seasoning taste fuller and less sharp. Give them time to collapse before adding water.

Best Cut Sizes for Pinakbet

Pinakbet is forgiving, but the knife work quietly decides a lot. Small squash collapses too early, thin eggplant disappears, and overcut okra can make the texture slippery.

Cut size guide showing pork pieces, squash chunks, long beans, eggplant pieces, ampalaya half-moons, okra pods, and chopped tomatoes for pinakbet.
Good knife work quietly improves Pinakbet Tagalog. Larger squash chunks hold shape better, thick eggplant pieces soften without disappearing, and lightly trimmed okra stays cleaner in texture, so the finished dish feels tender rather than collapsed.
IngredientBest cut sizeWhat to watch
Pork belly or shoulderAbout 1-inch piecesSmall enough to tenderize, large enough to stay juicy.
Squash / kalabasa1 to 1 1/2-inch chunksHolds shape while becoming tender.
Long beans / sitaw2 to 3-inch piecesCooks evenly and stays easy to serve.
EggplantThick diagonal pieces or large chunksSoftens without dissolving into the dish.
AmpalayaThin half-moonsDistributes bitterness without taking over every bite.
OkraWhole small pods or halved large podsLess cutting means a cleaner texture.
TomatoesRough choppedBreaks down into the tomato-bagoong mixture without needing perfect dice.

How to Reduce Ampalaya Bitterness

Optional ampalaya tip: For milder bitter melon, soak the sliced ampalaya in water with a big pinch of salt for 20–30 minutes, then drain before cooking. Skip this if you enjoy the stronger bitter edge.

Ampalaya bitterness guide showing sliced bitter melon, soaking in salted water for 20 to 30 minutes, draining, and keeping some bitterness.
Ampalaya should soften its bitterness, not lose it completely. A short salted-water soak helps mellow the sharpness; however, keeping a little bitterness in the final dish is exactly what makes Pinakbet Tagalog taste balanced instead of one-note.

Ingredient Substitutes If You Cannot Find Everything

Pinakbet is best with traditional vegetables, but a home pot can still work when the market does not give you everything. Think about what each ingredient brings to the pan: sweetness from squash, bitterness from ampalaya, body from okra, and salty depth from the fermented seasoning.

Ingredient substitutes guide for pinakbet showing alternatives for long beans, squash, bitter melon, eggplant, and pork.
Traditional ingredients are ideal, yet pinakbet can still work when the pot keeps the same shape: something sweet, something green, something tender, a little bitterness if possible, and enough savory depth to make the vegetables feel complete.
Traditional ingredientGood substituteWhat to watch
Sitaw / long beansGreen beansGreen beans cook faster, so add them a little later.
KalabasaKabocha, pumpkin, or butternut squashSweetness and cooking time vary by squash type.
AmpalayaUse less, or skip if unavailableThe dish becomes less bitter and milder.
Filipino eggplantAny slender eggplantSimilar texture; avoid tiny pieces because they collapse.
Pork bellyPork shoulder, shrimp, chicken thighs, or tofuChanges richness and cooking time.

From here, the seasoning does the heavy lifting. This is where pinakbet can become deep and rounded, or too salty too quickly, so taste slowly and let the tomatoes do their work.

Bagoong Alamang vs Bagoong Isda

Bagoong is the ingredient that makes pinakbet taste like pinakbet. In this Tagalog-style version, bagoong alamang gives a round shrimp-paste flavor. To move the dish in a sharper Ilocano direction, use bagoong isda or bagoong monamon instead. For more background on Filipino pantry staples like bagoong and patis, this Filipino pantry guide is helpful.

Comparison guide showing bagoong alamang and bagoong isda for Pinakbet Tagalog and Ilocano-style pinakbet.
Bagoong does more than add salt; it gives pinakbet its fermented depth and unmistakable savory backbone. For a rounder Tagalog-style flavor, bagoong alamang fits naturally, while bagoong isda pushes the dish toward a sharper Ilocano direction.

Raw vs Ginisang Bagoong

Raw bagoong alamang tends to taste sharper and saltier, so it benefits from being cooked briefly with tomatoes before the water goes in. Ginisang bagoong is already sautéed and often tastes rounder, but many jars are also sweeter. Taste before adding more, especially if the jar is meant to be eaten as a condiment.

If your ginisang bagoong tastes sweet straight from the jar, be slower with extra squash and do not add more seasoning until the vegetables are cooked. Sweet jarred shrimp paste can taste pleasantly round at first, then too sweet once the squash softens.

Taste Before Adding More

Bagoong is powerful, so use it with patience. Let it bloom with the tomatoes, then taste again later when the vegetables have softened around it. A spoonful of cooking liquid may taste strong by itself; taste with squash or rice before deciding whether the dish needs more. If you cannot use shrimp paste at all, skip ahead to the without-bagoong options.

Bagoong typeStart withAdd more when
Very salty bagoong alamang1 tbspThe vegetables are cooked but the dish tastes flat.
Sweeter ginisang bagoong1 tbsp, then adjustThe dish needs more savory depth, not more sweetness.
Bagoong isda1 tbspYou want a sharper Ilocano-style flavor.
Fish sauce substitute1 tbspOnly after tasting near the end.

Bloom the bagoong: Cook it briefly with the tomatoes before adding water. Raw-stirred bagoong can taste sharp; cooked shrimp paste tastes rounder and spreads better through the dish.

Equipment You Need

A 12-inch wide pan, wok, deep skillet, or wide Dutch oven works best. Pinakbet has bulky vegetables, so a narrow pot forces you to stir more aggressively, which can break the squash and eggplant. Use a lid for gentle steaming and a wooden spoon or silicone spatula for turning.

How to Cook Pinakbet

Once everything is cut, the cooking is mostly patience. Brown the pork, soften the aromatics, let the tomatoes collapse, then cook the bagoong long enough for the smell to turn round and savory instead of sharply salty.

Do not rush the beginning. The tomato and shrimp paste mixture is what makes the vegetables taste complete, not like plain vegetables wearing salt. Once the squash and beans are in, give the pan enough time before you decide it needs more water. If your past batches turned watery, salty, bitter, or mushy, the troubleshooting table after the method will help you fix the problem.

A wide cooking surface helps everything cook in a shallow layer instead of being crushed. Do not stir just because the pan is quiet. You are looking for pieces that have softened into each other without losing themselves.

Best Vegetable Cooking Order

Slow-cooking vegetables and fast-cooking vegetables should not be treated the same way. This is the order that keeps pinakbet tender without making it mushy.

Three-stage guide showing the cooking order for pinakbet: base ingredients, squash and long beans, then eggplant, ampalaya, and okra.
The cooking order keeps Pinakbet Tagalog from turning into one soft pile. Build the savory base first, let the sturdier vegetables get started, then finish with the delicate ones so every bite still has contrast.
Add firstAdd in the middleAdd last
Pork, onion, garlic, tomatoes, bagoongSquash, kamote if using, long beansEggplant, ampalaya, okra
Builds the savory foundationNeeds time but should hold shapeOvercooks faster and can turn too soft

Step-by-Step Method

Build the Pork, Tomato, and Bagoong Base

  1. Brown the pork. Heat oil in a wide pan over medium heat. Add pork in one layer and cook for 5–8 minutes, until lightly browned and some fat has rendered. Spread the pork out so it browns instead of steaming.

Visual Cue: Brown the Pork

Pork pieces browning in a wide pan at the beginning of making Pinakbet Tagalog.
Browning the pork first builds flavor before the vegetables ever hit the pan. As the fat renders and the edges deepen in color, the base becomes richer, which means the later tomato-bagoong mixture tastes fuller without needing extra seasoning.
  1. Cook the aromatics. Add onion and cook for about 2 minutes, until softened. Add garlic and cook for 30 seconds to 1 minute, just until fragrant.
  2. Soften the tomatoes. Add tomatoes and cook for 3–5 minutes, pressing them gently with the spoon. They should lose their raw shape and look juicy around the edges.
  3. Bloom the bagoong. Stir in 1 tablespoon bagoong and cook for 1–2 minutes. The smell should become rounder and more savory.

Visual Cue: Build the Tomato-Bagoong Base

Pork, onion, garlic, softened tomatoes, and bagoong being stirred together in a wide pan for Pinakbet Tagalog.
This step is where Pinakbet Tagalog starts tasting like itself. Once the tomatoes soften and the bagoong cooks into them, the flavor turns rounder and less harsh, so the vegetables later absorb something savory rather than just salty.
  1. Simmer the pork. Add 1 cup water or light stock. Cover and simmer for 15–20 minutes, or until the pork starts to become tender. If using pork shoulder and it still feels firm, simmer 5–10 minutes longer before adding squash. If the liquid already looks high before the squash goes in, do not add more yet; the vegetables will release more as they cook.

Visual Cue: Simmer the Pork

Pork simmering in shallow tomato-bagoong liquid in a wide pan with steam rising.
Simmer the pork before adding the vegetables, especially if you are using pork shoulder instead of belly. That little bit of patience lets the meat start tenderizing early, while the squash and softer vegetables can still cook on their own schedule later.

Add the Vegetables and Finish the Dish

  1. Add the squash. Add kalabasa and cook for 5–7 minutes. It should begin to soften, but it should not be falling apart. Add up to 1/2 cup / 120 ml more water only if the pan looks dry or the squash needs more time.

Visual Cue: Add Squash First

Orange squash chunks being added to pork and tomato-bagoong sauce in a wide pan for pinakbet.
Squash goes in first because it is the vegetable that changes the dish’s body. As the edges soften, it thickens the pan slightly and rounds out the stronger bagoong flavor without making the pakbet taste sweet.
  1. Add the long beans. Add sitaw and cook for 2–3 minutes. The beans should brighten and begin to soften while still keeping some bite.

Visual Cue: Add Long Beans Next

Long beans being added to partially cooked squash and pork in a wide pan of Pinakbet Tagalog.
Long beans belong in the middle of the cooking process rather than at the beginning or the very end. This timing helps them stay green and tender, so the final pakbet still has a little structure instead of turning uniformly soft.
  1. Finish with eggplant, ampalaya, and okra. Cover and cook for 4–6 minutes, turning gently once or twice. The eggplant should look silky, the okra should still hold shape, and the ampalaya should soften without taking over the whole pan.

Visual Cue: Finish with Eggplant, Ampalaya, and Okra

Eggplant, ampalaya, and okra being added last to a pan of Pinakbet Tagalog with squash and long beans already cooking.
Eggplant, ampalaya, and okra cook quickly, so they should finish the dish instead of starting it. Added late, they keep their character: the eggplant turns silky, the okra stays tender, and the ampalaya gives bitterness without taking over the whole pot.
  1. Taste and adjust. Add 1–3 teaspoons more bagoong, pepper, or a small splash of water only if needed. The cooking liquid should cling lightly to the vegetables, with no large pool of broth at the bottom. Serve hot with rice.

Visual Cue: Taste, Adjust, and Finish

Finished Pinakbet Tagalog in a wide pan with a spoon lifting vegetables and glossy sauce.
The final texture should look moist and glossy, not brothy. Before adding more bagoong, taste with squash or rice, because the seasoning settles once the vegetables soften into the sauce.

How Long to Cook Pinakbet

Pinakbet is a stovetop dish, so the “temperature” is really about heat control. Medium heat is enough for most of the recipe. If the pan gets too hot, the juices can stick and the vegetables can break before they cook through.

StageHeatTimeVisual cue
Brown porkMedium to medium-high5–8 minutesEdges lightly browned, fat beginning to render
AromaticsMedium2–3 minutesOnion softened, garlic fragrant
Tomato and bagoongMedium3–5 minutesTomatoes juicy, bagoong darker and aromatic
Pork simmerMedium-low15–20 minutes, longer if needed for pork shoulderPork starting to tenderize
SquashMedium5–7 minutesFork enters but squash holds shape
Long beansMedium2–3 minutesBrighter, tender-crisp
Eggplant, ampalaya, okraMedium4–6 minutesTender, silky, and not collapsed

How Pinakbet Should Look When It Is Done

The best pinakbet does not look perfect. It looks generous, saucy, and ready for rice. The squash should be creamy at the edges but still in chunks. The long beans should keep a little bite. The eggplant should turn silky, not disappear. The okra should be tender without making the whole dish slippery.

If there is a lot of loose liquid, simmer uncovered for a few minutes. If the pan is dry before everything is tender, add a small splash of water, cover again, and continue gently. The final texture should feel saucy and spoonable, with shallow coated juices rather than loose broth. For a quick visual check, compare your pan with the watery vs right vs mushy guide.

You are done when the squash is fork-tender, the eggplant is silky, the long beans still have bite, and the cooking liquid lightly clings to the vegetables.

Finished Pinakbet Tagalog with notes showing tender squash, silky eggplant, long beans with slight bite, and glossy sauce that is not soupy.
Good pinakbet should look soft, but not sloppy. The vegetables ought to be tender and comfortable in the sauce, yet still easy to recognize, while the liquid should lightly coat them instead of drifting around like a separate broth.

Too Watery, Just Right, or Too Mushy

Three-panel comparison showing pinakbet that is too watery, just right, and too mushy.
This is one of the easiest ways to judge your Pinakbet Tagalog at a glance. If it looks watery, simmer uncovered; if it looks mushy, the vegetables likely stayed in too long, while the ideal version holds shape and still looks glossy.

Pinakbet Recipe Card

Pinakbet Tagalog Recipe

This Filipino Pinakbet Tagalog recipe builds a savory pork, tomato, and bagoong mixture first, then adds the vegetables in stages. The squash softens, the eggplant turns silky, and the okra and long beans keep their shape.

Yield
4 generous servings

Prep Time
20 minutes

Cook Time
40 minutes

Total Time
1 hour

Ingredients

  • 1/2 lb / 225 g pork belly or pork shoulder, cut into 1-inch pieces
  • 1 tbsp / 15 ml cooking oil
  • 1 medium onion, chopped
  • 3–4 garlic cloves, minced
  • 2 medium tomatoes, chopped
  • 1 tbsp / 15 g bagoong alamang, plus 1–3 tsp more to taste
  • 1 cup / 240 ml water or light stock, plus up to 1/2 cup / 120 ml more as needed
  • 2 cups / 250–300 g kalabasa or squash, cut into 1 to 1 1/2-inch chunks
  • 1 to 1 1/2 cups / 100–150 g sitaw or long beans, cut into 2- to 3-inch pieces
  • 6–8 okra, trimmed
  • 1/2 medium ampalaya, or up to 1 medium if you enjoy bitterness, seeded and sliced into thin half-moons
  • 1 large eggplant or 2 small eggplants, cut into thick pieces
  • 1/4 tsp black pepper, optional

Instructions

  1. Heat oil in a wide pan over medium heat. Add pork in one layer and cook for 5–8 minutes, until lightly browned and some fat has rendered.
  2. Add onion and cook for about 2 minutes, until softened. Add garlic and cook for 30 seconds to 1 minute, just until fragrant.
  3. Add tomatoes and cook for 3–5 minutes, pressing them gently, until softened and juicy around the edges.
  4. Stir in 1 tablespoon bagoong and cook for 1–2 minutes, until the smell becomes rounder and more savory.
  5. Add 1 cup water or light stock. Cover and simmer for 15–20 minutes, until the pork starts to become tender. If using pork shoulder and it still feels firm, simmer 5–10 minutes longer before adding the squash. Add up to 1/2 cup more water only if needed.
  6. Add squash and cook for 5–7 minutes, until a fork starts to enter but the pieces still hold shape.
  7. Add long beans and cook for 2–3 minutes, until brighter and beginning to soften.
  8. Finish with eggplant, ampalaya, and okra. Cover and cook for 4–6 minutes, turning gently once or twice, until the vegetables are tender but still distinct.
  9. Taste and adjust with 1–3 teaspoons more bagoong or pepper if needed. The finished dish should be moist and spoonable, with no large pool of broth at the bottom of the pan. Serve hot with rice.

Notes

  • Use a wide 12-inch pan so the vegetables cook evenly without being crushed.
  • Start with 1 tablespoon bagoong, especially if your brand is very salty.
  • For milder ampalaya, soak the slices in salted water for 20–30 minutes, then drain.
  • Add extra water only if the pork or squash needs more time.
  • Add crispy pork, bagnet, or lechon kawali just before serving so it does not become soggy.

A good batch should make rice feel like part of the recipe, not just a side. The juices should be salty enough to carry the vegetables, but not so strong that the squash, eggplant, okra, and ampalaya disappear.

Cook’s confidence: Flexible: exact vegetable mix, protein, and bitterness level. Not flexible: cooking the seasoning with the tomatoes, keeping the liquid modest, and giving slower vegetables more time than delicate ones.

What Pinakbet Should Feel Like

Pinakbet is not meant to eat like a smooth stew. It is a dish of contrast: squash softening at the edges, bitter melon cutting through sweetness, eggplant soaking up salty juices, and rice pulling everything together.

Some homes make it drier and sharper; others prefer it saucier and sweeter from squash. This version stays in the Pinakbet Tagalog lane while giving you room to adjust the bitterness, protein, and finish toward your own table.

Pakbet is simply the everyday shorter name many people use for pinakbet. The more useful difference is style: Pinakbet Tagalog is often shrimp-paste and squash-forward, while Ilocano pinakbet often leans more toward fermented fish seasoning and a drier finish.

Can You Make Pinakbet Without Bagoong?

You can make pinakbet without bagoong, but it becomes a pinakbet-inspired vegetable stew. Bagoong does three jobs at once: it adds salt, fermentation, and deep umami. Replacing it means rebuilding all three, not just adding something salty.

If seafood is fine, fish sauce is the closest simple substitute. For seafood-free versions, use soy sauce or tamari for salt, mushroom powder for umami, and a little miso or extra cooked tomato for depth. Add these slowly and taste with a piece of squash or rice, because substitutes can become too salty fast.

  • No bagoong available: start with 1 tablespoon fish sauce, then adjust once the vegetables are tender.
  • Seafood-free version: use soy sauce or tamari plus mushroom powder and extra tomato.
  • Vegetarian or vegan direction: use miso, tamari, mushroom powder, and tomato to rebuild depth.
  • Lower-sodium attempt: use less bagoong rather than removing it completely, if possible.
Guide to making pinakbet without bagoong using fish sauce, soy sauce or tamari, mushroom powder, miso, and extra tomato.
Without bagoong, the dish changes, but it does not have to become bland. Instead of replacing only the salt, rebuild the missing layers with umami, depth, and a little extra tomato so the vegetables still taste grounded and complete.

Pinakbet Variations

You can change the protein, but do not rush the vegetables; they are still the heart of the dish.

Pinakbet with Pork Belly

This is the richest everyday version. Brown the pork first so the rendered fat flavors the tomatoes and shrimp paste.

Pinakbet with Bagnet

Stir some bagnet or lechon kawali in near the end, then reserve a few crisp pieces for topping. If all of it simmers too long, it will soften.

Pinakbet with crispy bagnet pieces on top, mixed vegetables, glossy sauce, and rice nearby.
Bagnet gives pinakbet a completely different texture, especially when the crisp pieces are added close to serving time. That way, you get crunchy pork against soft vegetables and savory sauce instead of letting everything turn uniformly tender.

Pinakbet with Shrimp

Add shrimp in the final 2–3 minutes, after the vegetables are almost tender. Shrimp cooks quickly and turns rubbery if simmered too long.

Pinakbet with shrimp, squash, long beans, okra, eggplant, ampalaya, tomatoes, and glossy sauce served with rice.
Shrimp pinakbet needs a lighter hand than the pork version because shrimp cooks quickly and can toughen fast. Add it when the vegetables are almost done, and the dish stays sweet, seafood-forward, and still recognizably pakbet.

Chicken Pinakbet

Use boneless chicken thighs rather than chicken breast. Brown them first, then simmer until nearly tender before adding the squash.

Ginataang Pinakbet

Add coconut milk after the pork has softened and the squash has started cooking. Simmer gently; hard boiling can make coconut milk split.

Ginataang pinakbet with creamy coconut milk sauce, squash, long beans, eggplant, okra, and ampalaya in a shallow serving pan.
Ginataang pinakbet is richer, although it should still feel like a vegetable dish rather than a coconut stew. Simmer gently once the coconut milk goes in, because that softer cooking keeps the sauce smooth and the vegetables clear and distinct.

Meatless Pinakbet

Skip the pork but build depth with extra tomato, mushroom powder, and careful seasoning. If using tofu, add it near the end so it does not break apart.

Meatless pinakbet with squash, long beans, okra, eggplant, ampalaya, tomatoes, and glossy savory sauce in a bowl.
A meatless pinakbet can still taste full when the vegetables are cooked carefully and the seasoning is layered thoughtfully. Mushrooms, miso, soy, or extra tomato can help, yet the real success still comes from keeping the vegetables varied in texture and flavor.

Timing is what keeps each vegetable from disappearing into the next. Pork and chicken need time early, shrimp goes in late, crispy pork is best partly reserved for the top, and coconut milk needs gentle heat.

How to Fix Common Pinakbet Problems

Pinakbet is forgiving, but it tells on you quickly. Too much water pools under the vegetables, too much bagoong shows up in the first bite, and too much stirring shows up in the squash.

Start With the Problem You See

Troubleshooting guide for pinakbet showing fixes for watery texture, too much salt, too much bitterness, mushy vegetables, slimy okra, and flat flavor.
Most pinakbet problems come from the same few places: too much liquid, too much bagoong, bitter melon used too heavily, or vegetables added all at once. Fix what you can in the pan, then use the next batch to correct the timing.

Problem-by-Problem Fixes

ProblemFix nowNext time
Too waterySimmer uncovered for 3–5 minutes.Use less water and add extra only if pork or squash needs more time. Remember that the vegetables release liquid too.
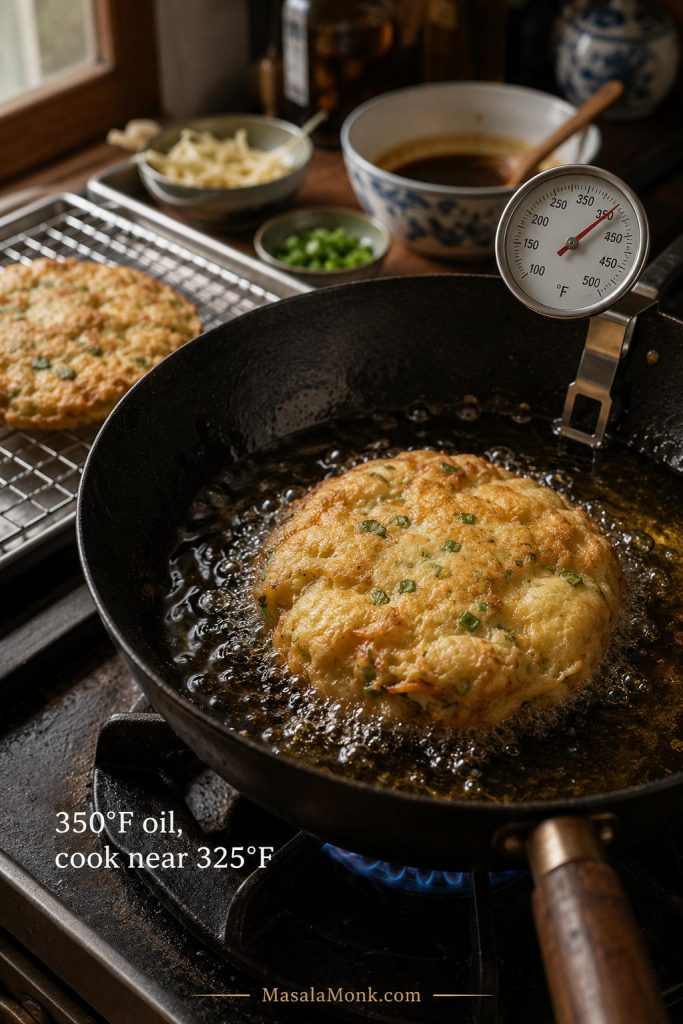
Too saltyAdd more squash, eggplant, or tomato. Serve with plain rice.Start with less bagoong and adjust after vegetables cook.
Too bitterAdd a little more squash or tomato.Use less ampalaya, slice it thinner, or soak it briefly.
Vegetables are mushyYou cannot fully reverse this, but you can simmer uncovered if watery.Add vegetables in stages and turn gently.
Squash collapsedLet it thicken the dish and avoid more stirring.Use larger chunks and do not add squash too early.
Okra made it slimySimmer uncovered briefly and avoid stirring hard.Trim only the ends and add okra near the end.
Tastes flatAdd a little more bagoong, fish sauce, or tomato, then simmer briefly.Bloom the seasoning with the tomatoes before adding water.
Bagoong tastes too strongAdd tomato or squash, simmer gently, and serve with plain rice.Use less at the start and adjust later.
Dish tastes too sweetAdd a little fish sauce or bagoong.Watch sweet ginisang bagoong and very sweet squash.
Too oilySpoon off excess fat before serving.Render pork first and remove extra fat before adding vegetables.
Pork is toughSimmer the pork pieces longer before serving if vegetables can handle it.Give pork more time before adding squash and delicate vegetables.

What to Serve With Pinakbet

Filipino meal spread with Pinakbet Tagalog, steamed rice, adobo, fried fish, grilled pork, dipping sauce, and calamansi.
Pinakbet shines beside plain steamed rice because the sauce is bold enough to carry the plate. For a fuller Filipino-style meal, add adobo, fried fish, or grilled pork while keeping pinakbet at the center.

Pinakbet is best with hot steamed rice. Because the tomato-bagoong mixture is bold, plain rice is not an afterthought here; it is part of how the dish works. If you want a dependable pot of rice, MasalaMonk’s guide on how to cook rice covers stovetop, cooker, and Instant Pot methods.

For a fuller Filipino-style meal, pinakbet sits naturally beside a savory protein dish like chicken adobo. Fried fish, grilled pork, simple chicken, or crispy pork also work well. If the pinakbet itself already has pork belly or bagnet, keep the rest of the meal simple.

Pinakbet is at its best when it tastes like more than the sum of its vegetables: salty enough for rice, sweet from squash, bitter enough to stay interesting, and saucy without becoming soup.

How to Store, Reheat, and Freeze Pinakbet

Cool leftovers quickly and store them in a shallow airtight container in the refrigerator. Pinakbet is best eaten within 3–4 days because it contains cooked vegetables and often pork or seafood-based seasoning. Store rice separately so the vegetables do not continue softening in the rice.

To reheat, warm it gently in a pan over low to medium-low heat. Add a splash of water only if the vegetables look dry. Avoid aggressive stirring because the squash and eggplant can break apart.

Microwaving is fine for a quick lunch, but the vegetables will soften more than they do in a pan. Freezing is possible, but not ideal; squash, eggplant, and okra soften further after thawing.

For general leftover safety, follow the USDA FSIS guidance on leftovers and food safety.

Some families prefer pinakbet drier and sharper; others like it saucier and sweeter from squash. Once you understand the timing, you can move the dish toward your table without losing its shape.

Back to top

FAQs About Pinakbet

What is pinakbet made of?

Most pinakbet starts with bagoong, tomatoes, and mixed vegetables such as squash, okra, eggplant, ampalaya, and long beans. Pork, shrimp, fish, bagnet, or crispy pork may be added depending on the household version.

Is pinakbet the same as pakbet?

Yes. Pakbet is the everyday shorter name many people use for pinakbet, though the exact style can change by region and household.

What does pinakbet taste like?

Pinakbet is savory, salty, earthy, lightly sweet, and a little bitter. The squash and tomatoes bring sweetness, while bagoong gives deep umami. A good version should taste balanced, not simply salty.

What is the difference between Pinakbet Tagalog and Ilocano pinakbet?

Pinakbet Tagalog usually uses bagoong alamang and squash, while Ilocano pinakbet is more closely tied to bagoong isda and a drier, more vegetable-forward finish. This recipe is Tagalog-style, with notes for adjusting it in a sharper Ilocano direction.

What is the best bagoong for pinakbet?

For Pinakbet Tagalog, bagoong alamang is the easiest fit because it gives a rounded shrimp-paste flavor. For a sharper Ilocano-style direction, use bagoong isda or bagoong monamon.

How do you keep pinakbet from getting mushy?

Add vegetables in stages and stir gently. Squash needs a head start, long beans need only a few minutes, and eggplant, ampalaya, and okra should go in near the end. A wide pan also helps because the vegetables steam and simmer instead of being crushed together.

Is pinakbet supposed to be soupy?

No. Pinakbet should be moist and saucy, not soupy. The vegetables should soften and shrink slightly, with cooking liquid clinging to them rather than floating in broth. If there is too much liquid, simmer uncovered for a few minutes.

Why is my pinakbet watery?

Pinakbet can turn watery if too much water was added or if the vegetables released more liquid than expected. Simmer uncovered until the liquid reduces and clings lightly to the vegetables. Next time, start with less water and add extra only if the pork or squash needs more time.

How do you reduce ampalaya bitterness in pinakbet?

Use less ampalaya, slice it evenly, and avoid overcooking it. For a milder flavor, soak the sliced bitter melon in lightly salted water for 20–30 minutes, then drain before cooking. A little bitterness should remain because it keeps the dish balanced.

What can I use instead of bagoong alamang?

Fish sauce is the easiest substitute if seafood is not a problem. For seafood-free versions, use soy sauce or tamari with mushroom powder and extra tomato. The flavor will not be the same, but it will have more depth than plain salt.

What is the difference between pinakbet and dinengdeng?

Both are Filipino vegetable dishes, but they eat differently. Pinakbet is usually a sautéed or simmered vegetable stew with bagoong, tomatoes, and often pork or seafood, while dinengdeng is generally lighter and more broth-like.

How long does pinakbet last in the fridge?

Pinakbet is best eaten within 3–4 days when stored in a shallow airtight container in the refrigerator. Reheat gently so the squash, eggplant, and okra do not break apart.

Posted on 1 Comment

Pad Kra Pao Recipe: Thai Basil Chicken, Pork, or Beef: Thai Basil Chicken, Pork, or Beef

Finished Pad Kra Pao rice plate with glossy basil minced meat, red chilies, fluffy white rice, lime, and a crispy fried egg on a dark plate.

Pad Kra Pao is the Thai rice plate you want when dinner needs to be fast but still loud: garlic in hot oil, chilies, glossy minced meat, fresh basil, steamed rice, and a crispy fried egg that breaks into the sauce.

It is bold without being complicated. Once the rice is ready and the sauce is mixed, the stir-fry itself takes only a few minutes, which is why this dish works so well for weeknights, leftovers, and those “I want takeout, but I can cook” nights.

You may know this dish as Thai basil chicken, pad krapow, pad ka pow, kra pao, or holy basil chicken. The names and spellings vary, but the craving is usually the same: a spicy basil stir-fry that tastes fresh, savory, chili-hot, and glossy.

Here, you can make it with chicken, pork, or beef, then use the same base for tofu or eggplant. You will also see what to do if you only have Thai basil instead of holy basil, how to adjust the sauce, and how to fix the common problems that make homemade Pad Kra Pao taste flat, salty, or dry.

Quick Answer: What Is Pad Kra Pao?

Pad Kra Pao is a Thai basil stir-fry made with garlic, chilies, meat or tofu, a salty-savory sauce, and basil. It is usually served over rice, often with a crispy fried egg on top.

If you came here looking for Thai basil chicken, this is the same dish family. Thai basil chicken is the version many people know from Thai restaurants: minced or chopped chicken stir-fried with garlic, chilies, basil, and sauce, then spooned over rice.

The most traditional version is made with holy basil, which has a sharper, peppery, clove-like aroma. Thai basil gives a different but still excellent home version: sweeter, more anise-like, and closer to many restaurant-style Thai basil chicken plates outside Thailand.

Best quick version: Use 450g / 1 lb ground chicken, pork, or beef; 5–8 garlic cloves; 3–6 chilies; 1½–2 cups basil leaves; and a sauce made with oyster sauce, fish sauce, soy sauce, dark soy, sugar, and a little water or stock. Stir-fry hot and fast, add basil at the end, and serve over rice with a crispy fried egg.

Need exact measurements? See the sauce ratio or jump to the recipe card.
Labeled Pad Kra Pao plate with basil stir-fry, white rice, and crispy fried egg callouts.
If you know this dish as Thai basil chicken, the idea is the same: a fast garlic-chili basil stir-fry made to land on rice, usually with a crispy fried egg on top.

Why This Pad Kra Pao Works

The flavor does not come from marinating or simmering. It comes from a hot pan, crushed garlic and chilies, meat that sizzles instead of steams, sauce that reduces until glossy, and basil added right at the end.

Keep those five things in place and the dish tastes bold even with practical substitutions. When it works, the pan smells sharp with garlic and chilies, the meat looks shiny instead of wet, and the basil hits at the end with a fresh, peppery lift.

That rhythm is the whole dish: hot, sharp, glossy, fresh.

Pad Kra Pao, Pad Krapow, Pad Ka Pow: Why So Many Spellings?

You may see this dish written as pad kra pao, pad krapow, pad ka pow, pad ka prao, pad gaprao, phat kaphrao, kra pao, or gai pad krapow. These spellings come from different ways of transliterating Thai into English.

For a home cook, the idea is simpler than the name: a hot, fast basil stir-fry with garlic, chilies, sauce, rice, and usually a fried egg. Here, we’ll call it Pad Kra Pao for consistency, but if a menu uses another spelling, you are still in the right place.

Editorial spelling guide for Pad Kra Pao with terms pad krapow, pad ka pow, pad gaprao, and a small plated basil stir-fry.
Because Thai names are transliterated several ways, pad kra pao, pad krapow, pad ka pow, and pad gaprao usually lead readers to the same basil-heavy stir-fry family.

Holy Basil vs Thai Basil

The basil question matters because it changes the flavor of the dish. It should not stop you from cooking, though.

Strictly speaking, holy basil is what gives Pad Kra Pao its name and sharper, peppery character. Thai basil is the easiest excellent home-cook route: not identical, but fresh, aromatic, easy to find, and deeply satisfying in this garlic-chili rice plate. For a deeper Thai cooking perspective on the dish, see this explanation from Hot Thai Kitchen.

Comparison board showing holy basil and Thai basil leaves with flavor notes beside a small Pad Kra Pao dish.
Holy basil gives Pad Kra Pao its sharper traditional bite; however, Thai basil is often the easiest excellent route for a home-style Thai basil chicken plate.

Holy Basil

Holy basil is the most traditional choice for Pad Kra Pao. It has a sharper, peppery, slightly clove-like flavor. If you can find Thai holy basil at an Asian grocery store, use it.

The leaves wilt quickly, so add them at the very end. Do not simmer them for several minutes or the aroma will fade.

Thai Basil

For most home cooks, Thai basil is the easiest reliable substitute. Its aroma is sweeter and more anise-like than holy basil, and it is easier to find in many places.

Many restaurant-style Thai basil chicken recipes use Thai basil, so the flavor will still feel familiar and satisfying. If you are cooking this on a normal weeknight, do not let the basil question stop dinner.

Sweet Basil

Sweet basil, also called Italian basil, will not taste the same as holy basil or Thai basil. Still, it can work when that is all you have.

The result will taste softer, sweeter, and less peppery. It may lean slightly toward a regular basil stir-fry rather than classic Pad Kra Pao, but it is better to make a good basil rice plate than to skip the dish completely.

Can You Use Tulsi?

Tulsi is related to holy basil, but it is not always a simple one-for-one replacement in cooking. Depending on the variety, it can taste medicinal, bitter, or very strong when used in large amounts.

If you want to try tulsi, use a smaller amount first and mix it with Thai basil or sweet basil if possible. Fresh basil in a hot pan is still better than waiting for the perfect herb and never cooking the dish.

Whatever basil you use, wash the leaves ahead of time and dry them well. Wet basil can splutter in the pan and add extra moisture right when you want the sauce to stay glossy.

Sweet basil and tulsi fallback herb board with notes about softer flavor and careful tulsi use.
When holy basil and Thai basil are not available, fresh herbs still help; sweet basil makes the dish softer, while tulsi should be used lightly because its flavor can turn strong.
Simple basil rule: use holy basil if you can get it, Thai basil when you want the easiest excellent home version, sweet basil only if that is what you have, and tulsi carefully.

Already know your basil choice? Go to the ingredients.
Decision board comparing holy basil, Thai basil, sweet basil, and tulsi for Pad Kra Pao.
Use the best basil you can find, but do not pause dinner over the herb question; the bigger win is keeping the garlic-chili-basil structure intact.

Ingredients You Need

Pad Kra Pao is short on ingredients, but every ingredient has a job. Think of them in two groups: the loud things that wake up the pan — garlic, chilies, basil — and the salty-sweet sauce that makes the rice worth eating.

Overhead Pad Kra Pao ingredient map with protein, garlic, chilies, basil, sauce ingredients, rice, egg, and shallot.
The ingredients work in groups: protein catches the sauce, garlic and chilies wake up the pan, basil finishes fresh, and rice plus egg turn it into dinner.

Chicken, Pork, Beef, Tofu, or Eggplant

Ground meat is easiest because it cooks quickly and catches the sauce well. Use ground chicken, ground pork, ground beef, or finely chopped boneless meat. Hand-chopped chicken thigh gives a slightly chunkier, more restaurant-style bite.

For the main recipe, use 450g / 1 lb meat. If your pack is 500g, that is fine. You may need a small extra handful of basil or a splash more water, but do not automatically increase every sauce ingredient.

You do not need to marinate the meat. The flavor comes from the hot garlic-chili base, the sauce reducing onto the meat, and the basil added at the end.

Pork gives the juiciest, most classic-feeling version. Chicken is the version many people recognize from Thai restaurant menus. Beef gives a deeper, richer stir-fry.

Garlic and Chilies

Do not be shy with garlic. Pad Kra Pao should taste bold.

Use 5–8 garlic cloves for 450g / 1 lb meat. For heat, use 3–6 Thai bird chilies, or use 2–4 Indian green chilies if that is what you have. For a mild family version, start with 1 Thai chili or 1 small green chili, then add extra chopped chilies at the table.

Shallots are optional. They add a little sweetness and body, but the dish still works without them.

A mortar and pestle gives the strongest aroma because it crushes the garlic and chilies instead of only cutting them. Finely chopping with a knife also works. The goal is rough, fragrant pieces, not a watery paste.

Garlic and chili guide with crushed garlic, Thai bird chilies, Indian green chilies, optional shallots, and a heat spectrum.
Garlic and chilies are not background flavor here; instead, they create the sharp first hit that keeps Pad Kra Pao from tasting like a regular soy-sauce stir-fry.

Sauce Ingredients

The sauce usually includes oyster sauce, fish sauce, light soy sauce, optional dark soy sauce, sugar, and a little water or stock.

Oyster sauce gives body and savory sweetness. Fish sauce gives salty depth. Light soy adds more salt and umami. Dark soy adds color, but the dish can still work without it. Sugar rounds the heat and salt.

For a vegetarian version, use vegetarian oyster sauce or mushroom sauce, replace fish sauce with light soy sauce, and keep the sugar modest because many mushroom sauces are already slightly sweet.

Pad Kra Pao sauce ingredients board with oyster sauce, fish sauce, light soy, dark soy, sugar, and water or stock role labels.
Oyster sauce gives body, fish sauce adds depth, soy brings umami, and a splash of water or stock helps the sauce coat instead of clump.

Rice and Crispy Fried Egg

Serve it over hot rice so the sauce has somewhere to land. Jasmine rice gives the most classic feel, but plain steamed rice, basmati, or even leftover rice will still do the job.

The crispy fried egg is optional only in the technical sense. In practice, it makes the plate feel complete. The runny yolk mixes with the salty basil stir-fry and rice, while the crisp edges add texture. If the egg yolk runs into the rice, that is not a problem. That is the point.

Pad Kra Pao rice plate with glossy basil meat, fluffy rice, a lacy crispy fried egg, and a close-up egg texture inset.
The crispy fried egg is more than garnish; once the yolk runs into hot rice, it softens the salty chili-basil stir-fry into a satisfying plate.

Easy Substitutions for Indian and Everyday Kitchens

Missing one bottle should not kill the dish. Losing the garlic-chili-basil structure will.

The goal is not to fake perfection. It is to keep the core of the dish intact with what you can actually buy.

Pad Kra Pao substitutions board for Indian kitchens with basil, green chilies, sauces, chicken keema, garlic, and a skillet or kadai cue.
Even with everyday swaps, keep the structure intact: fresh basil, sharp chilies, a salty-savory sauce, and a hot wide pan.
If You Do Not Have… Use This What Changes
Holy basil Thai basil Sweeter and more anise-like, but still excellent
Thai basil Sweet basil Softer and less peppery; still fresh and usable
Thai bird chilies Indian green chilies or serrano chilies Heat is less sharp, but the recipe still works
Dark soy sauce Skip it, or use a tiny extra splash of light soy Less dark color, but the flavor is still good
Fish sauce Light soy sauce plus a pinch of mushroom seasoning Less funky depth, but still savory
Oyster sauce Vegetarian oyster sauce or mushroom sauce Best vegetarian replacement for body and umami
Jasmine rice Plain steamed rice Less fragrant, but perfectly usable
Ground chicken Chicken keema or finely chopped boneless thigh Similar texture; chopped thigh stays juicier
Wok Wide skillet or wide kadai Works well if the pan is hot and not crowded

If your regular soy sauce is very dark and salty, use it like light soy sauce and skip the dark soy. Some supermarket soy sauces do not map neatly to “light soy” and “dark soy,” so taste and adjust gently.

The biggest substitution mistake is not using the “wrong” basil. It is crowding the pan and boiling the meat instead of stir-frying it. A hot, wide pan matters more than having every bottle exactly right.

Once your swaps are sorted, check the sauce ratio before you start cooking.

Best Pan and Equipment for Pad Kra Pao

A wok gives you quick heat and fast evaporation, but a wide skillet works very well for home cooking.

Use a 12-inch / 30cm skillet if you do not have a wok. A wide kadai can also work if it gives the meat enough surface area. Avoid using a small deep pan for a full batch because the meat will steam and release liquid.

For nonstick pans, use medium-high heat instead of the highest possible heat. For a wok or stainless-steel skillet, high heat is fine as long as you keep the food moving.

You will also need a small bowl for the sauce, a knife or mortar and pestle for the garlic and chilies, and a small frying pan if you are making crispy eggs.

Pan rule: the meat should sizzle, not steam. If the pan sounds quiet and wet, it is not stir-frying yet.
Best pan guide showing wok, wide skillet, and wide kadai with a sizzle versus steam cue for Pad Kra Pao.
A wide hot pan is the difference between stir-fried and steamed meat; therefore, listen for a real sizzle before adding the sauce.

If your pan setup is ready, go straight to the method.

Pad Kra Pao Sauce Ratio

The sauce should cling to the meat first and season the rice second. It should look glossy, not soupy.

When the sauce hits the pan, it should bubble hard almost immediately. When it looks like the rice underneath will want a spoonful of it, but the pan is not swimming, you are in the right zone.

Texture comparison board showing too wet Pad Kra Pao versus just-right glossy meat with basil and chilies.
The best texture is glossy and spoonable, not soupy; once the sauce clings to the meat, it flavors the rice without flooding the plate.

Balanced Sauce for 450g / 1 lb Meat

Ingredient Amount What It Does
Oyster sauce 1 tbsp / 15 ml Adds savory body and slight sweetness
Fish sauce 1 tbsp / 15 ml Gives salty, Thai-style depth
Light soy sauce 1 tbsp / 15 ml Adds salt and umami
Dark soy sauce 1–2 tsp / 5–10 ml, optional Adds color and deeper flavor
Sugar 1 tsp / about 4g Rounds the salt and chili heat
Water, chicken stock, or vegetable stock 2–3 tbsp / 30–45 ml Helps the sauce coat the meat
Saveable Pad Kra Pao sauce ratio card with measured oyster sauce, fish sauce, light soy, dark soy, sugar, and water or stock.
This Pad Kra Pao sauce ratio is built for 450g or 1 lb of meat, so the sauce should cling to the mince and lightly season the rice below.

Lower-Salt Sauce Ratio

If your fish sauce, soy sauce, or oyster sauce tastes especially salty, use this version first.

Ingredient Amount
Oyster sauce 1 tbsp / 15 ml
Fish sauce 2 tsp / 10 ml
Light soy sauce 2 tsp / 10 ml
Dark soy sauce 1 tsp / 5 ml, optional
Sugar 1 tsp / about 4g
Water, chicken stock, or vegetable stock 2 tbsp / 30 ml
Lower-salt Pad Kra Pao sauce ratio card with smaller fish sauce and soy sauce amounts for salty sauce brands.
If your fish sauce or soy sauce tastes very salty, start lower; then, after cooking, balance the plate with rice, lime, or a small extra splash of sauce.

Sauce brands vary, especially oyster sauce and soy sauce. If yours tastes very salty or very sweet straight from the bottle, start with the lower-salt ratio and adjust after cooking.

Taste after cooking. If the stir-fry is too salty, serve it with more rice and reduce fish sauce next time. If it tastes flat, it may need more garlic, chili, basil, or a better salt-sugar balance.

Once the sauce is mixed, move to the cooking method.

How to Make Pad Kra Pao

Pad Kra Pao cooks quickly, so the method is more about timing than difficulty. Once everything is lined up, the cooking feels fast rather than stressful.

Before turning on the stove, have the sauce mixed, basil picked and dried, garlic and chilies chopped, rice cooked, and eggs ready to fry. Once the pan is hot, there is not much time to stop and measure.

Pad Kra Pao prep setup with mixed sauce, basil, chopped garlic and chilies, cooked rice, and eggs on a dark surface.
Because Pad Kra Pao moves fast, prep the sauce, basil, aromatics, rice, and eggs first; then the cooking feels quick instead of chaotic.

Cook the Rice First

Start the rice before you cook the stir-fry. Once the garlic and chilies hit the pan, the dish moves fast.

Jasmine rice is the classic choice, but any plain steamed rice will work. If rice timing or water ratios are the part that usually slows you down, MasalaMonk’s guide to cooking perfect rice can help you get the base ready before the stir-fry starts. Avoid heavily seasoned rice because the stir-fry already has plenty of salt, chili, garlic, and basil.

Mix the Sauce Before You Start

Stir the oyster sauce, fish sauce, soy sauces, sugar, and water or stock in a small bowl.

Measure the sauce first, because garlic can burn while you are still looking for bottles.

Pound or Chop Garlic and Chilies

For the strongest aroma, pound garlic and chilies together in a mortar and pestle until roughly crushed. You do not need a smooth paste.

If you do not have a mortar and pestle, finely chop everything with a knife. A mini chopper also works, but stop before the mixture turns wet and pasty.

Fry the Crispy Egg

For each serving, use one egg. Heat 2–3 tablespoons of oil in a small pan, then fry the eggs one at a time or in batches. Add a little more oil between eggs only if the pan gets dry.

Crack in the egg and spoon hot oil over the whites until the edges are crisp and lacy. Keep the yolk runny if you like the classic rice-plate effect.

You can fry the eggs before the stir-fry and set them aside, or fry them right after the stir-fry if you prefer the egg hot from the pan.

Crispy fried egg technique board with hot oil, lacy golden edges, runny yolk, and spooning oil over the whites.
For a Thai-style crispy egg, hot oil matters; spoon it over the whites so the edges turn lacy while the yolk stays rich.

Stir-Fry the Meat Hot and Fast

Heat a wok over high heat, or use medium-high heat if you are cooking in a nonstick skillet. Add oil, then the garlic, chilies, and optional shallots.

The garlic and chilies should become fragrant within seconds. Do not let the garlic turn dark brown. This is the point where the kitchen should smell sharp, garlicky, and a little wild.

Garlic and sliced red and green chilies sizzling in oil in a wok with a spatula.
This is the aroma stage, so move quickly: the garlic should smell sharp and toasty before it gets dark.

Add the meat and break it up as it cooks. It should sizzle, not sit in liquid. If it releases moisture, spread it across the pan and keep cooking until most of that moisture evaporates.

If you add the sauce while the pan is still watery, the finished dish can taste boiled instead of stir-fried.

Before-and-after pan comparison showing wet minced meat versus moisture-cooked-off meat ready for sauce.
Add sauce only after the released moisture cooks off; otherwise, Pad Kra Pao turns boiled and watery instead of glossy.

If your pan is already looking wet, jump to the troubleshooting guide before adding basil.

Add Sauce and Reduce Until Glossy

Pour in the sauce and toss well. It should bubble quickly, coat the meat, and tighten around the pieces instead of pooling underneath.

If the pan looks dry, add 1–2 tablespoons of water or stock. If the pan looks soupy, keep cooking over high heat for another minute before adding basil.

The finished meat should look shiny and loose, not wet or clumpy.

Add Basil at the End

Turn the heat down or off, then add the basil leaves. Toss just until wilted.

Once the basil hits the hot meat, the whole pan should wake up. Long cooking dulls that aroma, so let the leaves collapse into the stir-fry and stop there.

Sequential board showing sauce bubbling into minced meat, coating the meat, and fresh basil added last.
Sauce goes in before basil because it needs heat to reduce; meanwhile, basil should only wilt at the end so the aroma stays fresh.

Serve Immediately

Spoon the basil stir-fry over hot rice. Add a crispy fried egg, cucumber slices, and lime if you like.

The first bite should be hot, salty, fresh, and softened by rice and yolk. This is not a dish that improves by sitting around, so serve it while the basil still smells alive.

Step-by-step Pad Kra Pao board with sauce, basil, garlic and chilies, stir-fried meat, sauce, basil, and a finished rice plate.
The method is simple when the order is clear: prep first, cook aromatics, brown the meat, reduce the sauce, then add basil right at the end.

Chicken, Pork, or Beef: Which Version Should You Make?

The same sauce and method work for chicken, pork, or beef, but each one gives the plate a different mood.

Choose chicken for the cleanest restaurant-style Thai basil chicken, pork for the juiciest street-food-style version, and beef for the darkest, most savory bowl.

Three-way Pad Kra Pao chooser board comparing chicken, pork, and beef rice plates with text labels.
The same sauce can lead to three moods: chicken is clean and fast, pork is juicy and classic, and beef is darker and more savory.

Once you choose the protein, use the recipe card for exact quantities and timing.

Thai Basil Chicken Version

For Thai basil chicken, use ground chicken, chicken keema, or finely chopped boneless chicken thigh.

Hand-chopped thigh gives little juicy pieces that catch the sauce, while ground chicken keeps the dish quick and familiar. Chicken breast works too, but it dries out faster, so chop it small and cook it quickly.

This is the lightest, fastest version and lets the basil come through clearly.

Thai basil chicken plate with glossy chicken pieces, red chilies, basil, rice, cucumber, lime, and crispy fried egg.
Thai basil chicken is the cleanest, fastest version; however, it still needs enough garlic, chilies, and basil to taste bold.

Pork Pad Kra Pao Version

Ground pork gives the richest, juiciest Pad Kra Pao. It is the version to make when you want the dish to feel more street-food-style and deeply satisfying.

Use 450g / 1 lb ground pork. If the pork is fatty, use slightly less oil and let some edges brown before adding the sauce. If it is very lean, keep the full 2 tablespoons of oil and avoid overcooking.

The fat carries the garlic and chili beautifully, especially if you can find holy basil.

Pork Pad Kra Pao plate with glossy browned pork mince, basil, red chilies, rice, and a crispy egg with runny yolk.
Pork gives the juiciest Pad Kra Pao because the fat carries garlic and chili especially well, while the egg makes the rice plate feel complete.

Thai Basil Beef Version

Thai basil beef gives the deepest, most savory bowl. Use ground beef, minced beef, or very thinly chopped steak.

Beef needs a hot, wide pan. If it steams instead of browns, the flavor turns flat. Cook in batches if needed, and use the higher end of the dark soy sauce range if you want a deeper color.

This is the version for a darker, richer rice plate with a strong garlic-chili base.

Thai basil beef rice plate with dark glossy beef, basil, red chilies, white rice, and crispy fried egg.
Thai basil beef should taste deeper and more savory than chicken, so keep the pan hot enough to brown without turning the basil dark.

Vegetarian, Tofu, and Eggplant Options

You can make a vegetarian Pad Kra Pao-style stir-fry with tofu, eggplant, mushrooms, or a mix of vegetables. These versions are not exactly the same as the classic meat rice plate, but the same garlic-chili-sauce-basil structure works well if you control moisture.

The best vegetarian version still needs the same attitude as the meat version: high heat, strong aromatics, and enough basil that the pan smells alive at the end.

For tofu, use firm or extra-firm tofu. Press it if it is very wet, then crumble it into small pieces. Cook it in a hot pan until the edges look lightly browned. The goal is the same as with meat: drive off moisture first, then let the sauce cling instead of slide off.

Tofu Pad Kra Pao plate with crisp glossy tofu, basil, red chilies, rice, and fried egg on a dark plate.
Tofu works best when it gets crisp edges first; after that, the sauce can cling instead of sliding off a wet surface.

If tofu is your main protein more often than a one-time swap, MasalaMonk’s tofu meal prep ideas go deeper into pressing, browning, saucing, and building rice-box style meals that still taste good later.

For eggplant, cut it into small pieces and cook it until tender before adding the sauce. Eggplant absorbs oil, so use a wide pan and avoid stirring too aggressively once it softens.

For mushrooms, cook them until their liquid evaporates. Then add the garlic-chili base, sauce, and basil.

Vegetarian Pad Kra Pao options board with glossy eggplant bowl and browned mushroom bowl with basil and red chilies.
Eggplant should turn tender and glossy, while mushrooms need their moisture cooked off first; otherwise, the vegetarian version can taste watery.

Use vegetarian oyster sauce or mushroom sauce. Replace fish sauce with soy sauce and, if you have it, a small pinch of mushroom seasoning.

For vegetarian sauce swaps, use the substitution guide before cooking.

What to Serve With Pad Kra Pao

Pad Kra Pao is usually served as a rice plate, not as a saucy curry. Keep the sides simple so the basil, garlic, chilies, and fried egg stay in focus.

  • Steamed jasmine rice
  • Crispy fried egg
  • Cucumber slices
  • Lime wedges
  • Extra chopped chilies
  • Prik nam pla — chopped chilies in fish sauce and lime — or soy sauce and lime for a vegetarian plate
Serving spread for Pad Kra Pao with rice, crispy fried egg, cucumber, lime, extra chilies, and prik nam pla labels.
The best sides are simple on purpose: cucumber cools the heat, lime brightens the sauce, extra chilies add control, and prik nam pla sharpens the rice.

Cucumber is especially useful because it cools the heat and gives the plate a fresh crunch. If you want that cooling side to feel a little more complete, a simple cucumber salad works well beside the hot basil stir-fry.

For a brighter Thai-style side, you can also serve it with a small portion of vegan Som Tam raw papaya salad. The crunch, lime, chili, and freshness make sense next to the rich fried egg and savory basil meat.

For the table-side chili condiment, keep the spoonful small and bright rather than drowning the rice.

Prik nam pla condiment bowl with sliced red and green chilies in fish sauce and lime, plus a soy-lime vegetarian note.
Prik nam pla adds salty heat in tiny spoonfuls; for vegetarian plates, soy sauce with lime gives a similar bright table-side lift.

If you bought a large bunch of basil, use the extra leaves quickly in another fresh herb recipe rather than letting them wilt. This dish is best when the basil tastes alive, not tired.

How to Fix Pad Kra Pao

Most Pad Kra Pao problems come from heat, timing, or sauce balance. Fortunately, the fixes are usually simple once you know what happened.

Fast diagnosis: watery usually means crowding or low heat, bland usually means weak garlic-chili-basil energy, salty usually means the sauce needs more rice or a lower-salt ratio, and dull basil flavor usually means the basil cooked too long.
Seasoning troubleshooting board for Pad Kra Pao with rice, lime, chilies, garlic, basil, fish sauce, and a glossy stir-fry bowl.
Fix the plate before you panic: rice and lime soften salt, fresh chilies restore heat, and garlic, basil, or fish sauce can wake up flat flavor.

Too Watery

Watery Pad Kra Pao almost always means the meat steamed before it fried.

Keep cooking until the liquid evaporates before adding basil. Next time, use a wider pan, higher heat, and do not double the recipe in one skillet. For larger batches, cook the meat in rounds.

Troubleshooting board showing watery Pad Kra Pao from a crowded pan and low heat beside glossy fixed stir-fry.
Watery Pad Kra Pao usually starts before the sauce goes in, so use a wider pan and cook off moisture before adding basil.

Sauce Is Pooling Under the Meat

Pooling sauce usually means the sauce went in before the pan was ready.

Keep the pan on high heat and toss until the sauce clings to the meat. Next time, start with 2 tablespoons water or stock, then add more only if the pan looks dry.

Too Salty

Salty Pad Kra Pao is usually easiest to fix on the plate, not in the pan.

Serve it with more plain rice and add a squeeze of lime. Next time, use the lower-salt sauce ratio and reduce fish sauce and light soy before reducing oyster sauce, because oyster sauce also gives body.

Too Sweet

Too much sweetness usually comes from sweet oyster sauce, dark sweet soy, or too much sugar.

To balance the current batch, add a small splash of fish sauce or light soy and serve it with plain rice. Next time, keep the added sugar modest.

Too Dry

If the meat tastes plain and dry instead of glossy, the pan probably needed a small splash of liquid near the end.

Add 1–2 tablespoons of water or stock and toss briefly over heat. The meat should be glossy enough to season the rice, not dry like plain mince.

Not Spicy Enough

If the dish tastes warm but not lively, the chilies are probably too mild or too few.

Add more chopped fresh chili next time, or serve extra chilies on the side. Fresh chilies give sharper flavor and better aroma than chili flakes alone.

Tastes Like Generic Stir-Fry

If it tastes like a regular soy-sauce stir-fry, the sharp things have been muted: garlic, chili, fish sauce, basil, or heat.

Use enough fresh basil, add it at the end, and make sure the sauce reduces onto the meat instead of staying loose in the pan.

Not Enough Basil Flavor

Weak basil flavor usually means one of two things: too little basil, or basil added while the pan was still boiling.

Use 1½–2 cups basil leaves for 450g / 1 lb meat. Add them only at the end and toss just until wilted.

Basil Turned Dark or Lost Its Aroma

Basil turns dull when it cooks too long.

Add it after the sauce has reduced and the heat is low or off. The leaves should wilt into the meat, not simmer.

Garlic Tastes Burnt

Burnt garlic means the aromatics waited too long before the meat went in.

Next time, stir the garlic and chilies only until fragrant, then add the meat as soon as the garlic smells sharp and toasty.

Meat Turned Rubbery

Rubbery meat is usually an overcooking problem, especially with chicken breast or lean beef.

Stir-fry until just cooked, reduce the sauce quickly, then finish with basil.

For texture and basil problems, focus on timing: keep the meat glossy, keep the garlic golden, and add basil only at the end.

Texture and basil troubleshooting board with dry meat, rubbery meat, weak basil, burnt garlic, glossy meat, basil leaves, and spooned stock.
Texture problems have small fixes: a splash of stock rescues dry meat, shorter cooking prevents rubbery meat, and basil belongs at the end.

Need to cook another batch instead? Return to the recipe card with the fixes in mind.

Storage and Reheating

Pad Kra Pao tastes best immediately, when the basil is fresh and the egg is crisp, but leftovers are still useful.

Store the cooked stir-fry in an airtight container in the fridge for up to 3 days. That sits within the USDA’s general 3–4 day guidance for refrigerated leftovers. Store rice separately if possible. Fried eggs are best cooked fresh, but you can skip the egg when reheating and fry a new one before serving.

To reheat, warm the stir-fry in a skillet with a splash of water. Heat just until hot. Do not cook it for too long or the basil flavor will fade further.

Leftovers will not have the same just-wilted basil aroma, but they still make a very good rice bowl the next day.

If you want to prep ahead, mix the sauce, chop the garlic and chilies, wash and dry the basil leaves, and cook the rice. Leave the actual stir-fry for right before eating.

Storage, reheating, and make-ahead board with cooked Pad Kra Pao in a glass container, reheating skillet, rice, eggs, sauce, basil, garlic, and chilies.
Pad Kra Pao is best fresh, but leftovers still work; reheat with a splash of water and fry a fresh egg if possible.

If you like salty-garlicky rice-plate dinners, MasalaMonk’s chicken adobo recipe is another strong one to cook next.

Pad Kra Pao Recipe Card

If this is your first time making it, start with the balanced sauce, use Thai basil if holy basil is hard to find, and keep the pan wide and hot. The first batch will quickly teach you your preferred salt, chili, and basil level.

Pad Kra Pao Recipe: Thai Basil Chicken, Pork, or Beef

This Pad Kra Pao recipe gives you a fast, garlicky Thai basil rice plate with chicken, pork, or beef, glossy sauce, and a crispy fried egg. Use holy basil if you can find it, or Thai basil for the easiest restaurant-style home version.

Prep Time 10 minutes
Cook Time 10–12 minutes
Total Time 20–22 minutes
Servings 4

Equipment

  • Wok or 12-inch / 30cm skillet
  • Small bowl for mixing the sauce
  • Mortar and pestle, knife, or mini chopper
  • Small frying pan for eggs
  • Spatula

Ingredients

For the Stir-Fry

  • 450g / 1 lb ground chicken, pork, or beef
  • 2 tbsp neutral oil, for the stir-fry
  • 5–8 garlic cloves, finely chopped or pounded
  • 3–6 Thai bird chilies, chopped, or 2–4 Indian green chilies
  • 1–2 shallots, thinly sliced, optional
  • 1½–2 cups holy basil or Thai basil leaves, about 30–60g depending on how tightly packed the leaves are
  • Steamed jasmine rice, for serving
  • 4 eggs
  • 2–3 tbsp neutral oil to start, plus more as needed for frying the eggs
  • Cucumber slices, optional
  • Lime wedges, optional

For the Sauce

  • 1 tbsp oyster sauce, 15 ml
  • 1 tbsp fish sauce, 15 ml
  • 1 tbsp light soy sauce, 15 ml
  • 1–2 tsp dark soy sauce, 5–10 ml, optional for deeper color
  • 1 tsp sugar, about 4g
  • 2–3 tbsp water, chicken stock, or vegetable stock, 30–45 ml

Instructions

  1. Cook the rice first. Pad Kra Pao cooks quickly, so have rice ready before you start the stir-fry.
  2. Mix the sauce. In a small bowl, stir together oyster sauce, fish sauce, light soy sauce, optional dark soy sauce, sugar, and water or stock.
  3. Prepare the aromatics. Pound or finely chop the garlic and chilies. Pick the basil leaves from the stems, wash them if needed, and dry them well.
  4. Fry the eggs. Heat 2–3 tablespoons oil in a small pan. Fry the eggs one at a time or in batches, spooning hot oil over the whites until the edges are crisp. Add more oil only if the pan gets dry. Set aside.
  5. Heat the pan. Heat a wok over high heat, or a wide nonstick skillet over medium-high heat.
  6. Cook the garlic and chilies. Add oil, then garlic, chilies, and optional shallots. Stir briefly until fragrant, without letting the garlic burn.
  7. Add the meat. Add ground chicken, pork, or beef. Break it up and stir-fry until cooked through and most moisture has evaporated.
  8. Add the sauce. Pour in the sauce and toss until the meat is glossy and coated. It should not be soupy.
  9. Add basil last. Turn the heat down or off, add basil, and toss just until wilted.
  10. Serve immediately. Spoon over rice and top each serving with a crispy fried egg. Add cucumber and lime if you like.

Notes

  • Holy basil gives the most traditional flavor; Thai basil is the easiest excellent home version.
  • Use neutral oil because olive oil or strongly flavored oils can fight the basil, garlic, and fish sauce.
  • You do not need to marinate the meat. The sauce and aromatics flavor it during the fast stir-fry.
  • If using 500g meat instead of 450g, keep the same sauce ratio first, then adjust only if needed.
  • For a less salty or milder version, reduce fish sauce and soy slightly, and start with 1 Thai chili or 1 small green chili.
  • If doubling the recipe, cook the meat in batches and add the basil only at the end.
Pad Kra Pao recipe card with serving time, ingredients, sauce amounts, method bullets, and a plated basil stir-fry with rice and egg.
Keep this card for the core formula: 1 lb meat, bold aromatics, balanced sauce, basil at the end, and rice plus egg to serve.

By the time the rice, basil stir-fry, and egg come together, the plate should feel hot, glossy, and immediate.

Close-up final Pad Kra Pao serving with glossy basil meat, white rice, crispy fried egg, runny yolk, red chilies, basil leaves, and spoon.
A good final plate should feel immediate: glossy meat, fresh basil, hot rice, and a yolk that runs into everything.

FAQs

Is Pad Kra Pao the same as Thai basil chicken?

Thai basil chicken is usually the chicken version of Pad Kra Pao. Traditionally, the dish is made with holy basil, but many restaurant and home versions use Thai basil because it is easier to find.

What does Pad Kra Pao taste like?

Pad Kra Pao tastes garlicky, salty-savory, spicy, and fresh from the basil. It should feel bold and punchy, with just enough glossy sauce to season the rice without turning the plate into curry.

What basil is best for Pad Kra Pao?

Holy basil gives the most traditional sharp, peppery flavor. Thai basil is the best practical substitute for most home kitchens. Sweet basil works only in a pinch; it makes the dish softer and less like classic Pad Kra Pao.

Can I use dried basil?

Dried basil is not a good replacement because Pad Kra Pao depends on the fresh aroma of basil added at the end. If dried basil is all you have, you can still make a garlic-chili stir-fry, but it will not taste like Pad Kra Pao or a fresh Thai basil chicken-style stir-fry.

Is Pad Kra Pao supposed to be saucy?

No, it should be glossy rather than soupy. You want enough sauce to season the rice, but not so much that the meat swims. Think juicy rice plate, not curry.

Does Pad Kra Pao need a fried egg?

The fried egg is technically optional, but it is part of the pleasure of the plate. The crisp edges add texture, and the yolk softens the salty, spicy meat into the rice.

Chicken breast, sliced chicken, or ground chicken: which works best?

Ground chicken or chopped chicken thigh is easiest and juiciest. Sliced chicken works too if you cut it small and cook it quickly. Chicken breast is usable, but it dries out faster than thigh.

What can replace fish sauce?

Use light soy sauce with a small pinch of mushroom seasoning if you have it. The flavor will be less funky and less Thai-style, but still savory.

What can replace oyster sauce?

Vegetarian oyster sauce or mushroom sauce is the best replacement. If you do not have either, use soy sauce with a little sugar, but the sauce will be thinner and less rounded.

Why did my Pad Kra Pao turn watery?

Watery Pad Kra Pao usually means the meat steamed before it fried. Use a wider pan, higher heat, and cook off moisture before adding the sauce.

Can I make Pad Kra Pao ahead?

You can prep the sauce, garlic, chilies, basil, and rice ahead of time. For the best flavor, cook the stir-fry right before eating because basil tastes freshest when added at the end.

How long does Pad Kra Pao keep in the fridge?

The cooked stir-fry keeps for up to 3 days in an airtight container. Reheat it in a skillet with a splash of water. Fry a fresh egg when serving if possible.

Once this rhythm clicks, Pad Kra Pao becomes less like a strict recipe and more like a rice-plate formula you can repeat with chicken, pork, beef, tofu, or whatever needs cooking.

Back to top ↑

Posted on 1 Comment

Cream of Mushroom Chicken Recipe

Cream of mushroom chicken served over mashed potatoes with sliced mushrooms, creamy sauce, black pepper, and fresh herbs.

This cream of mushroom chicken recipe is for the night when you have chicken in the fridge, a can of cream of mushroom soup in the pantry, and no patience for a complicated sauce. The goal is simple: tender chicken, creamy mushroom gravy, and a dinner that works with rice, egg noodles, mashed potatoes, biscuits, or whatever vegetable you already have.

This is the kind of dinner that feels like a shortcut while it cooks, but like comfort food once it hits the plate. It is not fancy food; it is the creamy, spoon-over-something meal you make when the day has been long and everyone still needs to eat.

Bake it when you want the easiest family dinner. Use the skillet when dinner needs to happen faster, the slow cooker when the meal should take care of itself, and the rice bake when chicken and rice should land in one dish.

The dish works best with condensed cream of mushroom soup, thin or evenly pounded chicken, and just enough milk or broth to turn the soup into a spoonable sauce. A thermometer keeps the chicken from drying out while still getting it safely to 165°F / 74°C.

Quick Answer: How to Make Cream of Mushroom Chicken

To make cream of mushroom chicken, season chicken breasts or thighs, place them in a baking dish, whisk condensed cream of mushroom soup with milk or low-sodium chicken broth, pour the sauce over the chicken, cover, and bake until the chicken reaches 165°F / 74°C. Uncover near the end if the sauce needs to thicken or cheese is going on top.

The result should be chicken that slices easily with creamy mushroom gravy you can spoon over rice, noodles, mashed potatoes, biscuits, or vegetables. This is still a low-effort dinner: about 10 minutes of prep, then the oven does most of the work.

The skillet version is faster, the slow cooker version is more hands-off, and the rice bake turns it into a one-dish meal. The trick is changing the liquid slightly for each method, so use the version guide or the soup and liquid ratios before switching methods.

Best first version: Bake thin chicken breasts or thighs with 1 can condensed cream of mushroom soup and ½ cup milk or broth at 375°F / 190°C. Cover first for moisture, then uncover near the end so the sauce thickens.
Quick answer board showing cream of mushroom chicken, chicken pieces, condensed soup, milk or broth, and covered baking instructions.
For the simplest version, build the dish in four parts: chicken, condensed cream of mushroom soup, a little milk or broth, and a covered bake.

For food safety, chicken should reach 165°F / 74°C in the thickest part; FoodSafety.gov lists poultry and casseroles at this internal temperature.

Which Version Should You Make?

Before you open the soup can, decide how dinner needs to work tonight. The same basic ingredients can become an easy oven dinner, a quick skillet meal, a slow cooker comfort dish, or a chicken-and-rice bake.

The one thing that changes most between versions is the soup-to-liquid ratio. The oven, skillet, slow cooker, and rice bake each need slightly different treatment, which is what keeps the chicken juicy and the sauce creamy instead of watery.

Choose This Version Best When Key Ratio
Baked cream of mushroom chicken You want the easiest family dinner with minimal prep. 1 can soup + ½ cup milk or broth
Skillet cream of mushroom chicken You want dinner faster and more control over the sauce. 1 can soup + ½–1 cup broth or milk
Slow cooker cream of mushroom chicken You want hands-off creamy chicken for rice, noodles, or potatoes. 2 cans soup + ½ cup liquid
Cream of mushroom chicken and rice You want a full one-dish meal. 1 can soup + 1 cup liquid + ¾ cup rice
Creamy chicken over egg noodles You want mushroom-sauce chicken without baking rice. Cook noodles separately and spoon sauce over them
Guide comparing baked, skillet, slow cooker, and chicken and rice versions of cream of mushroom chicken.
Instead of using one formula for every method, adjust the liquid for baked, skillet, slow cooker, and chicken-and-rice versions.

How Much Liquid to Add to Cream of Mushroom Soup

Use these ratios as starting points, then adjust until the sauce looks spoonable, not stiff and not soupy.

Version Condensed Soup Added Liquid Why It Works
Baked chicken 1 can / 10.5 oz / 298 g ½ cup / 120 ml milk or broth Creates a creamy, spoonable sauce without making the dish watery.
Skillet chicken 1 can / 10.5 oz / 298 g ½–1 cup / 120–240 ml broth or milk The sauce reduces as it simmers, so you can loosen or thicken it as needed.
Slow cooker chicken 2 cans / about 596 g total ½ cup / 120 ml broth or water The slow cooker traps moisture, so too much liquid makes the sauce thin.
Small chicken and rice bake 1 can / 10.5 oz / 298 g 1 cup / 240 ml liquid + ¾ cup rice Rice needs measured liquid and trapped steam to cook properly.
Large 9×13 rice bake 2 cans / about 596 g total 2 cups / 480 ml broth + 1¼ cups rice Better for a family-size casserole with more rice and chicken.
Liquid ratio guide for baked, skillet, slow cooker, and chicken and rice cream of mushroom chicken recipes.
Condensed soup gives the sauce body; however, each cooking method needs a different amount of liquid to stay creamy.

Once the ratio is right, everything gets easier: the chicken cooks gently, the sauce stays spoonable, and the sides do half the work. When you are ready to cook the oven version, go straight to the cream of mushroom chicken recipe card.

Water works in a pinch, but broth gives the dish more savory flavor and milk makes the sauce softer and creamier. Regular condensed soup, regular broth, cheese, and onion soup mix can all add salt, so taste before adding more.

Basic Oven Method at a Glance

Use this as the quick map before the full recipe card.

  1. Thin and season the chicken. Slice large breasts in half lengthwise or pound them evenly, then season lightly.
  2. Whisk the soup mixture. Mix condensed cream of mushroom soup with milk or broth until smooth.
  3. Cover and bake. Pour the mixture over the chicken, cover with foil, and bake so the meat stays moist.
  4. Uncover, check, and rest. Finish uncovered, cook to 165°F / 74°C, and rest before serving.
Four-step oven method for cream of mushroom chicken showing thin chicken, soup mixture, covered baking, and temperature check.
Once the chicken is even in thickness and the soup mixture is loosened, the oven version becomes simple and predictable.

Cream of Mushroom Chicken Recipe Card

This baked cream of mushroom chicken is the oven version to make first: tender chicken, condensed cream of mushroom soup, a little milk or broth, simple seasonings, and enough creamy mushroom sauce to spoon over rice, egg noodles, mashed potatoes, or vegetables.

Prep Time10 minutes
Cook Time30–35 minutes
Total Time40–45 minutes
Yield4 servings

Course: Dinner
Cuisine: American
Method: Baked
Equipment: 9×13-inch baking dish, foil, mixing bowl, instant-read thermometer

Ingredients

  • 1½ lb / 680 g boneless skinless chicken breasts or thighs
  • 1 can condensed cream of mushroom soup, 10.5 oz / 298 g
  • ½ cup / 120 ml milk or low-sodium chicken broth
  • ½ tsp garlic powder, divided
  • ½ tsp onion powder, divided
  • ½ tsp paprika, divided
  • ¼ tsp black pepper, divided, plus more to taste
  • 8 oz / 225 g sliced mushrooms, optional
  • ¼–½ cup / 60–120 g sour cream, optional
  • ¾–1 cup / 85–115 g shredded mozzarella, Monterey Jack, or cheddar, optional
  • Salt only after tasting, if needed

Instructions

  1. Heat oven to 375°F / 190°C. Lightly grease a 9×13-inch baking dish.
  2. Slice large chicken breasts in half lengthwise or pound them to an even thickness.
  3. Place the chicken in the baking dish. Sprinkle with about half of the garlic powder, onion powder, paprika, and black pepper.
  4. Scatter raw mushrooms around the chicken for convenience, or brown them first for deeper flavor and less extra moisture.
  5. In a bowl, whisk the condensed cream of mushroom soup with milk or broth and the remaining garlic powder, onion powder, paprika, and pepper until smooth. Whisk in sour cream now if using it for the baked version.
  6. Taste the sauce. Add salt only if it needs it. A flat-tasting sauce can take a little more pepper, paprika, thyme, garlic powder, or Dijon.
  7. Pour the sauce over the chicken and spread it so the chicken is mostly covered.
  8. Cover the dish tightly with foil.
  9. Bake for 25 minutes.
  10. Uncover and bake 5–10 minutes more, or until the chicken reaches 165°F / 74°C in the thickest part.
  11. Sprinkle cheese over the chicken during the uncovered finish if using it, then bake until melted.
  12. When the chicken is done but the sauce is still thin, move the chicken to a plate and thicken the sauce separately in a small pan, or in the baking dish only if your dish is stovetop-safe.
  13. Rest for 5 minutes before serving.
  14. Serve over rice, egg noodles, mashed potatoes, biscuits, broccoli, green beans, or roasted vegetables.

Notes

  • Use condensed cream of mushroom soup, not ready-to-eat mushroom soup.
  • Browned mushrooms give the sauce a deeper, less canned flavor.
  • Water works if that is all you have, but broth gives better flavor and milk makes the sauce creamier.
  • A cream of chicken swap works too: replace half or all of the cream of mushroom soup with condensed cream of chicken soup.
  • For skillet or slow cooker versions, add sour cream or cheese near the end over gentle heat for the smoothest finish.
Recipe card for cream of mushroom chicken with prep time, cook time, oven temperature, chicken, condensed soup, milk or broth, and method notes.
Save this basic baked cream of mushroom chicken formula first, then use the other sections when you want skillet, slow cooker, or rice variations.

Making a different version? Use the skillet method, slow cooker method, or chicken and rice bake so the liquid and timing stay right.

Why This Recipe Works

The baked version works because it solves two problems at once: thick chicken and loose sauce. Thin pieces cook before they dry out, while condensed soup gives the sauce enough body to stay creamy. A small splash of milk or broth loosens the canned base, covered baking protects the chicken, and the uncovered finish lets the sauce settle.

The real win is not making it fancy. It is keeping the chicken juicy and turning the canned soup into a sauce that tastes like it belongs on the plate.

Ingredient Notes That Keep It Creamy, Not Watery

Nothing here is precious. The point is knowing which shortcuts help and which ones make the dish watery, salty, or dry.

Ingredients for cream of mushroom chicken including chicken, condensed mushroom soup, milk or broth, mushrooms, seasonings, sour cream, and cheese.
A pantry base can still taste rounded when you add smart upgrades like broth, browned mushrooms, thyme, pepper, sour cream, or cheese.
  • Chicken: Boneless skinless breasts or thighs both work. Breasts give you a classic sliced dinner; thighs give you more forgiveness.
  • Condensed cream of mushroom soup: The word condensed matters because the soup starts thick and becomes sauce when you add liquid.
  • Milk, broth, or water: Broth gives savory depth, milk gives a softer creamy finish, and water works when that is all you have.
  • Fresh mushrooms: Raw mushrooms are convenient, but browned mushrooms add deeper flavor and release less water into the dish.
  • Sour cream: Use it for tang. Whisk it into the oven version before baking, or stir it into skillet and slow cooker versions near the end over gentle heat.
  • Cheese: Mozzarella, Monterey Jack, cheddar, Swiss, or Muenster can turn this into a richer family bake.
Taste before baking: Once the soup, liquid, and seasonings are mixed, taste the sauce before pouring it over the chicken. A bland sauce can take black pepper, garlic powder, paprika, thyme, or a small spoon of Dijon; a salty sauce does not need extra salt.

For the oven version, a 9×13-inch baking dish, foil, a mixing bowl, and an instant-read thermometer are enough. The stovetop route needs a lidded skillet, while the crockpot option works best in a 4–6 quart slow cooker.

Using Campbell’s or Any Condensed Mushroom Soup

Campbell’s condensed cream of mushroom soup works well here, and so do other condensed brands. The label matters less than the word condensed.

Condensed vs Ready-to-Eat Soup

Condensed soup is thick enough to become sauce when mixed with a small amount of milk, broth, or water. Ready-to-eat mushroom soup is already diluted, so it can make the dish watery unless you reduce or skip the added liquid.

Comparison of thick condensed cream of mushroom soup and thinner ready-to-eat mushroom soup.
Condensed cream of mushroom soup starts thick, while ready-to-eat soup is already diluted; that difference matters when you want a creamy sauce.

Low-sodium condensed soup gives you more control if you are also using broth, cheese, onion soup mix, or another salty ingredient.

The same cream-soup comfort logic shows up in MasalaMonk’s tuna noodle casserole recipe, where condensed soup turns into a creamy noodle bake.

Best Chicken to Use: Breasts, Thighs, or Cubed Chicken

That is really the whole chicken decision: breasts for a classic sliced dinner, thighs when you want more forgiveness, and cubed chicken when you want a faster skillet or casserole-style meal.

Chicken guide showing breasts, thighs, cubed chicken, and thinner cutlets for cream of mushroom chicken.
Your cut changes the result: breasts slice neatly, thighs stay juicy, and cubed chicken cooks quickly for skillet-style dinners.

Chicken Breasts

Chicken breasts work well when they are not too thick. Large breasts should be sliced in half lengthwise to make thinner cutlets, or pounded to an even thickness. This helps the chicken cook through before the sauce dries out.

For more detail on baking chicken breast without drying it out, see MasalaMonk’s baked chicken breast recipe.

Chicken Thighs

Boneless skinless thighs stay juicy even when the dish needs a few extra minutes. They are especially good for the slow cooker or chicken-and-rice versions because they can handle longer cooking better than thin breasts.

Cubed Chicken

Cubed chicken is useful for a quick skillet dinner or a casserole-style variation. It cooks faster and mixes easily with noodles or rice, though it does not give you the same sliced-chicken presentation as baked breasts or thighs.

Baked Cream of Mushroom Chicken

This is the version to make first. It gives you the classic creamy mushroom chicken experience without needing a skillet, a roux, or a separate sauce.

The best pan comes out bubbling around the edges, with mushroom gravy tucked around the chicken and enough creamy sauce to drag through rice, noodles, or mashed potatoes.

Before Baking

The dish should look assembled but not finished: chicken tucked into the mushroom mixture, mushrooms visible, and just enough sauce to coat the pan before it is covered.

Raw chicken breasts in a baking dish with cream of mushroom sauce, sliced mushrooms, foil, and a spoon nearby.
Before baking, the chicken should be coated and nestled into the mushroom mixture, not buried under too much liquid.

Baked Version at a Glance

Detail Best Answer
Oven temperature 375°F / 190°C
Baking dish 9×13-inch dish
Chicken 1½ lb / 680 g boneless skinless breasts or thighs
Soup 1 can condensed cream of mushroom soup, 10.5 oz / 298 g
Liquid ½ cup / 120 ml milk or low-sodium chicken broth
Covered bake 25 minutes
Uncovered finish 5–10 minutes
Safe internal temperature 165°F / 74°C
Resting time 5 minutes
Baked cream of mushroom chicken guide showing 375°F oven, covered baking, uncovered finish, 165°F temperature, and resting time.
Baked cream of mushroom chicken works best with a covered start, a short uncovered finish, and a thermometer check at 165°F.

Once this version is in the oven, there is not much left to do except make something for the sauce to land on.

Covered or Uncovered?

Cover the chicken for the first part of baking. The foil traps steam, keeps the meat moist, and prevents the sauce from drying out too quickly. The final uncovered minutes help looseness cook off and let cheese melt if you are using it.

Very thin pieces should be checked early. Thicker pieces need a thermometer more than they need a guessed time.

Comparison of covered and uncovered baked cream of mushroom chicken in a casserole dish.
Covering helps the chicken stay moist; afterward, uncovering lets the creamy mushroom sauce reduce just enough.
If the chicken is done but the sauce is thin: Do not keep baking the chicken just to thicken the sauce. Move the chicken to a plate, cover it loosely, and thicken the sauce in a small pan, or in the baking dish only if your dish is stovetop-safe.

What the Sauce Should Look Like

The finished sauce should be creamy and spoonable, thick enough to coat the chicken but loose enough to run into rice, noodles, or mashed potatoes. It should not be stiff like paste, and it should not run like soup.

A sauce that looks too thick before baking needs another splash of milk or broth. When the sauce looks watery but the chicken still needs time, uncover the dish for the last few minutes. Once the chicken is already at 165°F / 74°C, remove it and thicken the sauce separately instead of overbaking dinner.

Sauce texture guide for cream of mushroom chicken showing too thick, just right, and too thin sauces.
Look for sauce that coats a spoon without running like soup, since that texture will sit better on rice, noodles, or mashed potatoes.

In the oven version, ½ cup / 120 ml milk or broth per 10.5 oz / 298 g can of condensed soup is the safest starting point. The skillet version can handle more liquid because the pan sauce reduces as it simmers. The slow cooker needs less because the lid traps moisture as everything cooks. When the texture looks off, use the troubleshooting guide instead of guessing.

Skillet Cream of Mushroom Chicken

The skillet version is best when dinner needs to be faster and the sauce needs more hands-on control. It tastes a little more cooked, not just assembled, because the chicken and mushrooms get direct heat before the sauce comes together.

This is the version with the most dinner-pan flavor: a little browning, a little butter, and creamy mushroom sauce pulled together in the same skillet.

Skillet cream of mushroom chicken with seared chicken, browned mushrooms, creamy sauce, black pepper, and herbs.
The skillet version adds extra savory depth because the chicken and mushrooms brown before the cream sauce is finished.

Skillet Formula

  • 1½–2 lb / 680–900 g chicken
  • 1 tbsp oil or butter, for searing
  • 1 can condensed cream of mushroom soup, 10.5 oz / 298 g
  • ½–1 cup / 120–240 ml milk, water, or low-sodium chicken broth
  • 8 oz / 225 g sliced mushrooms, optional
  • Garlic powder, onion powder, paprika, black pepper, and herbs to taste

Oil helps the chicken sear without burning. A small knob of butter added with the mushrooms gives the pan a richer, rounder flavor.

Skillet Timing

Chicken Type Timing What to Watch
Thin chicken cutlets Sear 3–4 minutes per side, then simmer 5–8 minutes in sauce Check early so they do not dry out.
Boneless thighs Sear 4–5 minutes per side, then simmer 8–12 minutes in sauce They stay juicier and can handle a little longer cooking.
Cubed chicken Cook 8–12 minutes total, depending on cube size Stir often so the sauce coats the pieces evenly.
Skillet formula and timing guide for cream of mushroom chicken with cutlets, thighs, and cubed chicken.
Skillet cream of mushroom chicken cooks quickly, so cut size matters: thin cutlets, thighs, and cubed chicken all need different timing.

How to Make It in a Skillet

Season the chicken, then sear it in a large skillet until lightly browned on both sides. Add fresh mushrooms after removing the chicken briefly, then cook them until they release moisture and start to brown. Whisk in the condensed soup with enough broth or milk to make a sauce, then return the chicken to the pan.

Step-by-step skillet method showing seared chicken, browned mushrooms, sauce mixture, returned chicken, and gentle simmering.
Sear first, then simmer gently; that sequence builds flavor while keeping the chicken from drying out.

Cover and simmer gently until the chicken reaches 165°F / 74°C. A pan sauce that tightens too much only needs a tablespoon or two of milk or broth. A loose sauce needs the opposite: a few uncovered minutes so extra moisture can cook off. Use the sauce texture guide if you are unsure whether to loosen or reduce it. For a quick slurry, mix 1 tsp cornstarch with 1 tbsp cold water, then stir it into the simmering sauce. Sour cream should go in near the end over low heat so everything stays smooth.

Slow Cooker Cream of Mushroom Chicken

The slow cooker is best when you want tender, saucy chicken waiting for you later. It is less about speed and more about having creamy chicken ready when the rice, noodles, or potatoes are done.

Because the lid traps moisture, start with less liquid than you would use in the oven or skillet. Thawed chicken gives the most predictable timing and texture; frozen chicken releases more moisture and can make the sauce thin.

Slow cooker cream of mushroom chicken before and after cooking, with chicken, mushrooms, condensed soup, and creamy finished sauce.
Slow cooker cream of mushroom chicken needs a thicker starting mixture because the covered cooker creates its own moisture.

If you like this kind of hands-off chicken dinner, MasalaMonk’s crock pot chicken breast recipes has more ways to keep slow-cooked chicken juicy instead of dry.

Slow Cooker Formula

  • 1½–2 lb / 680–900 g chicken breasts or thighs
  • 2 cans condensed cream of mushroom soup, 10.5 oz / 298 g each
  • ½ cup / 120 ml low-sodium chicken broth or water
  • 8 oz / 225 g sliced mushrooms, optional
  • ½ packet onion soup mix, optional, only if you like a saltier old-school flavor
  • Sour cream or cheese near the end, optional
Slow cooker formula board for cream of mushroom chicken with chicken, condensed soup, broth or water, timing, and temperature.
Start the slow cooker with less liquid than the oven version, then adjust near the end if the sauce needs loosening or enrichment.

Cook on High for 3–4 hours or Low for 6–7 hours, until the chicken reaches 165°F / 74°C. Thighs handle the longer cook better than thin breasts. By the end, the chicken should be fork-tender and the sauce should taste like it has had time to settle into the meat.

Serve the pieces whole, or shred the chicken into the sauce if you want it to spoon over rice, noodles, or potatoes. Add sour cream or cheese near the end, not at the beginning, for the smoothest finish.

How to Thicken Slow Cooker Cream of Mushroom Chicken

A thin slow cooker sauce can be fixed by removing the lid for a short time, shredding the chicken into the sauce, or thickening it with a small slurry made from 1 tsp cornstarch and 1 tbsp cold water. Use this fix before the chicken overcooks.

Guide showing how to thicken slow cooker cream of mushroom chicken sauce by removing the lid, shredding chicken, or adding slurry.
If slow cooker sauce turns thin, you can fix it calmly with uncovered time, shredded chicken, or a small cornstarch slurry.

For another saucy crockpot chicken dinner, MasalaMonk’s slow cooker French onion chicken follows a similar comfort-food idea with onion gravy, cheese, and a base of noodles, potatoes, rice, or toast.

Cream of Mushroom Chicken and Rice

Rice can absolutely work here, but it needs its own formula. Dry rice needs extra liquid, trapped steam, and more time than the basic baked chicken version. Before you bake, scan the rice mistakes to avoid if you are using brown rice, instant rice, or thick chicken pieces.

Rice version rule: Use extra liquid, a tight foil cover, and longer baking time. The soup base alone is too thick to cook raw rice evenly.
Cream of mushroom chicken and rice casserole in a baking dish with tender rice, mushrooms, creamy sauce, and a serving spoon.
Cream of mushroom chicken and rice needs its own method, since dry rice requires extra liquid, trapped steam, and resting time.

Campbell’s classic one-dish chicken and rice bake follows this same condensed-soup pattern: condensed soup, measured liquid, uncooked long-grain white rice, and chicken baked together under a tight cover. You can see that reference here: Campbell’s One-Dish Chicken & Rice Bake.

Small Classic Chicken and Rice Bake

This smaller rice bake makes about 4 servings.

  • 1 can condensed cream of mushroom soup, 10.5 oz / 298 g
  • 1 cup / 240 ml water or low-sodium chicken broth
  • ¾ cup / about 140 g uncooked long-grain white rice
  • 1¼ lb / 565 g boneless skinless chicken breast or thighs
  • ¼ tsp paprika, plus pepper and garlic powder if desired

Mix the soup, liquid, rice, and seasoning in a greased baking dish. Place the chicken on top, cover tightly, and bake at 375°F / 190°C for about 45 minutes, or until the rice is tender and the chicken reaches 165°F / 74°C. Let it stand for 10 minutes before serving so the rice can finish absorbing the sauce.

Chicken and rice timing tip: Thicker chicken pieces or thighs work better for rice bakes because the rice needs longer to cook. Thin chicken breasts may finish before the rice is tender. When that happens, remove the chicken, keep the rice covered, and continue baking the rice until soft.

Larger 9×13 Family Rice Bake

A larger family-style casserole needs more soup, more rice, and more liquid.

  • 2 cans condensed cream of mushroom soup, 10.5 oz / 298 g each
  • 2 cups / 480 ml low-sodium chicken broth
  • 1¼ cups / about 230 g long-grain white rice
  • 1½–2 lb / 680–900 g chicken
  • Optional onion, thyme, Dijon, black pepper, or Parmesan

Cover tightly and bake at 350°F / 175°C for about 60 minutes. Check the rice, stir gently around the chicken if needed, add a splash of hot broth if the rice is still firm, then cover again and bake 10–15 minutes more. Rest 10 minutes before serving.

Chicken and Rice Formula Guide

Use the small bake when you want a compact dinner, and use the 9×13 formula when the casserole needs to feed more people without leaving the rice undercooked.

Formula guide for small and family-size cream of mushroom chicken and rice bakes with soup, liquid, rice, chicken, oven temperature, and time.
Use the right chicken-and-rice formula from the start, and you avoid the common problem of tender chicken with undercooked rice.

Rice Mistakes to Avoid

The rice version is forgiving once the steam is right, but it is less forgiving when the cover is loose or the liquid is guessed.

  • A loose cover will not trap enough steam. Rice needs a tight cover to soften properly.
  • Brown rice needs a different plan. It takes more time and usually more liquid than white rice.
  • Instant rice cooks too fast for this long bake. It can turn mushy unless you change the method.
  • Ready-to-eat soup can make the bake watery. It is already diluted, unlike condensed soup.
  • The chicken can finish before the rice. Check both before calling the dish done.
  • Resting matters. The rice absorbs the final sauce as it stands.
Chicken and rice mistakes guide showing loose cover, wrong rice, too little liquid, chicken done before rice, skipped resting time, and rice choices.
Long-grain white rice is the easiest choice; brown rice and instant rice need different liquid and timing to work well.

Serving the chicken over plain rice instead of baking rice in the dish? MasalaMonk’s how to cook rice guide is useful for getting fluffy grains that do not turn gummy under the sauce.

Cream of Chicken + Cream of Mushroom Variation

You can mix cream of chicken and cream of mushroom soup. Cream of chicken makes the sauce milder and more savory, while cream of mushroom adds deeper mushroom flavor. A 50/50 mix works especially well for larger bakes, chicken and rice, and slow cooker meals.

For a bigger casserole or crockpot dinner, try 1 can cream of mushroom soup and 1 can cream of chicken soup. Low-sodium versions are the safest choice because two condensed soups can make the dish salty fast.

Comparison of cream of mushroom soup, cream of chicken soup, and a 50 50 blend spooned over chicken.
Cream of mushroom brings deeper flavor, cream of chicken tastes milder, and a 50/50 blend gives a softer creamy sauce.

This same cream-soup swap logic also shows up in comfort casseroles like MasalaMonk’s green bean casserole recipe ideas, where condensed cream soup is part of the classic creamy base.

How to Make Cream of Mushroom Chicken Taste Better

The shortcut works as-is, but one or two small upgrades can make it taste more like a creamy mushroom dinner than plain canned soup.

The easiest upgrades are browned mushrooms for depth, broth for savoriness, and a small spoon of Dijon or thyme for balance.

Flavor upgrade board for cream of mushroom chicken with browned mushrooms, broth, thyme, Dijon, sour cream, cheese, pepper, and parsley.
Small upgrades like browned mushrooms, broth, Dijon, thyme, sour cream, cheese, pepper, and parsley make the shortcut taste more complete.

Browned vs Raw Mushrooms

Raw mushrooms can go straight into the dish, but browning them first gives the sauce more flavor and reduces the extra moisture that can loosen the pan.

Comparison of raw sliced mushrooms and browned mushrooms for cream of mushroom chicken.
Raw mushrooms keep prep easy; meanwhile, browned mushrooms add deeper flavor and reduce extra moisture in the sauce.
  • Brown fresh mushrooms first: This adds real mushroom flavor, cooks off extra moisture, and gives the sauce a deeper base.
  • Choose broth instead of water: Low-sodium chicken broth gives the dish more savory depth.
  • Add garlic and onion powder: These make the pantry version taste fuller.
  • Add thyme: Thyme works naturally with mushrooms and chicken.
  • Stir in a small spoon of Dijon: It cuts through the richness without making the dish taste mustardy.
  • Finish with sour cream: It gives the sauce a tangier, creamier finish. In skillet and slow cooker versions, add it near the end over gentle heat.
  • Melt cheese on top: Mozzarella, Monterey Jack, cheddar, Swiss, or Muenster can turn this into a cheesy baked chicken dinner.
  • Add black pepper and parsley at the end: This keeps the final plate from tasting too heavy.

What to Serve with Cream of Mushroom Chicken

The sauce is the point, so serve it with something that catches every spoonful: fluffy rice, buttered egg noodles, mashed potatoes, biscuits, broccoli, or green beans.

Side dish guide for cream of mushroom chicken with rice, egg noodles, mashed potatoes, biscuits, broccoli, and green beans.
The best sides give the sauce somewhere to go, whether you choose rice, egg noodles, mashed potatoes, biscuits, broccoli, or green beans.

Over Rice

Plain white rice is the easiest pairing. Brown rice, leftover rice, or seasoned rice also work, but keep them separate unless you are following a true chicken-and-rice bake formula.

Cream of mushroom chicken served over fluffy white rice with sliced mushrooms, creamy sauce, black pepper, and herbs.
Rice keeps this creamy chicken dinner simple, filling, and easy to serve on a busy weeknight.

Over Egg Noodles

Egg noodles make this feel like old-school chicken and gravy. Cook the noodles separately, then spoon the chicken and mushroom sauce over the top. Dry egg noodles should not go into the baking dish unless you are using a tested noodle-casserole formula.

Cream of mushroom chicken served over broad egg noodles with creamy mushroom sauce, chicken pieces, herbs, and a fork lifting a bite.
Broad egg noodles hold the mushroom sauce in their folds, so this version feels cozy without needing extra prep.

Over Mashed Potatoes

Mashed potatoes make the plate even cozier. If you want a creamy potato side that will hold the sauce without turning gluey, try MasalaMonk’s garlic mashed potatoes recipe.

Sliced cream of mushroom chicken served over mashed potatoes with mushrooms, creamy sauce, black pepper, and herbs.
Mashed potatoes make the richest plate because the soft potatoes hold the creamy mushroom sauce instead of letting it run.

With Vegetables

Green beans, broccoli, peas, carrots, roasted mushrooms, or a simple salad balance the richness. For a holiday-style comfort plate, serve it with green bean casserole, roasted vegetables, or a crisp side salad.

For a bigger comfort-food spread, MasalaMonk’s hashbrown casserole recipe also works as a creamy potato side, especially when the chicken is served with green beans or salad. Planning leftovers? The storage and reheating tips explain how to loosen the sauce again without drying out the chicken.

How to Fix Cream of Mushroom Chicken

Even when this dish goes a little sideways, it is usually fixable. Most problems are texture problems: the sauce is too thick, too watery, or too salty, while the chicken dries out because the pieces were too thick or cooked too long.

The usual culprits are ready-to-eat soup instead of condensed soup, too much liquid, a loose cover on rice, or thick chicken breasts that needed more time than the sauce did.

Common Sauce, Chicken, and Rice Fixes

Problem What Happened How to Fix It
Sauce is too thick or gluey Not enough liquid was added to the condensed soup. Add milk or broth 1–2 tbsp at a time until it is spoonable.
Sauce is watery Too much liquid was added, ready-to-eat soup was used, or raw mushrooms released extra moisture. When the chicken still needs time, bake uncovered 5–10 minutes. When the chicken is already done, remove it and thicken the sauce separately with a small slurry: 1 tsp cornstarch mixed with 1 tbsp cold water.
Sauce is too salty Condensed soup, broth, cheese, or onion soup mix added too much salt. Serve with rice, noodles, or potatoes to soften the saltiness. A spoonful of sour cream can also mellow the sauce. Next time, use low-sodium soup and broth.
Chicken is dry The pieces were too thick, uncovered too long, or cooked past 165°F / 74°C. Slice breasts thinner, cover while baking, check early, or use thighs.
Chicken is done but sauce is thin The sauce needs more time, but the chicken does not. Remove the chicken, cover it loosely, and thicken the sauce separately in a small pan.
Rice is undercooked The dish needed more steam, liquid, or time. Add ¼–½ cup hot broth, cover tightly again, and bake longer.
Rice is mushy Too much liquid or too much bake time. Use long-grain white rice, measure carefully, and rest the dish instead of overbaking.
Dish tastes bland The sauce was not boosted with enough seasoning or fresh ingredients. Add black pepper, garlic powder, onion powder, thyme, paprika, Dijon, or browned mushrooms.
Sauce splits when reheated It was reheated too aggressively. Reheat gently with a splash of milk or broth and stir slowly.
Troubleshooting guide for cream of mushroom chicken showing fixes for watery sauce, thick sauce, salty sauce, dry chicken, undercooked rice, and bland flavor.
Most cream of mushroom chicken problems are fixable once you know whether the issue is texture, salt, timing, or seasoning.

Storage, Freezing and Reheating

Store leftovers in an airtight container in the refrigerator for 3–4 days. Rice or noodles are best stored separately when possible so they do not soak up all the sauce.

To reheat, warm the chicken gently on the stovetop or in the microwave with a splash of milk or broth. The sauce thickens as it chills, so that splash of liquid helps bring it back to a spoonable texture.

You can freeze the cooked chicken and sauce, but the sauce may loosen or look slightly grainy after thawing. It is still usable; reheat gently and whisk in a splash of milk or broth to bring it back together.

Chicken-and-rice leftovers thicken more in the fridge because the rice keeps absorbing the sauce. Reheat them with a splash of broth or milk so the rice loosens instead of turning dry.

Storage guide for cream of mushroom chicken showing a fridge container, freezer bag, and reheating in a skillet with milk or broth.
Creamy leftovers thicken in the fridge, so reheat gently and add a splash of milk or broth to bring the sauce back.

Cream of Mushroom Chicken FAQs

How long should cream of mushroom chicken bake?

Thin boneless chicken breasts or thighs usually need about 25 minutes covered at 375°F / 190°C, then 5–10 minutes uncovered. Thickness matters more than the clock, so check that the chicken reaches 165°F / 74°C.

Covered or uncovered?

Cover the dish first so the chicken stays moist and the sauce does not dry out. Uncover near the end when the sauce needs to thicken or cheese is going on top.

Campbell’s soup vs other condensed brands

A standard 10.5 oz / 298 g can of Campbell’s condensed cream of mushroom soup works well, but other condensed brands work too. The important detail is that the soup is condensed, not ready-to-eat.
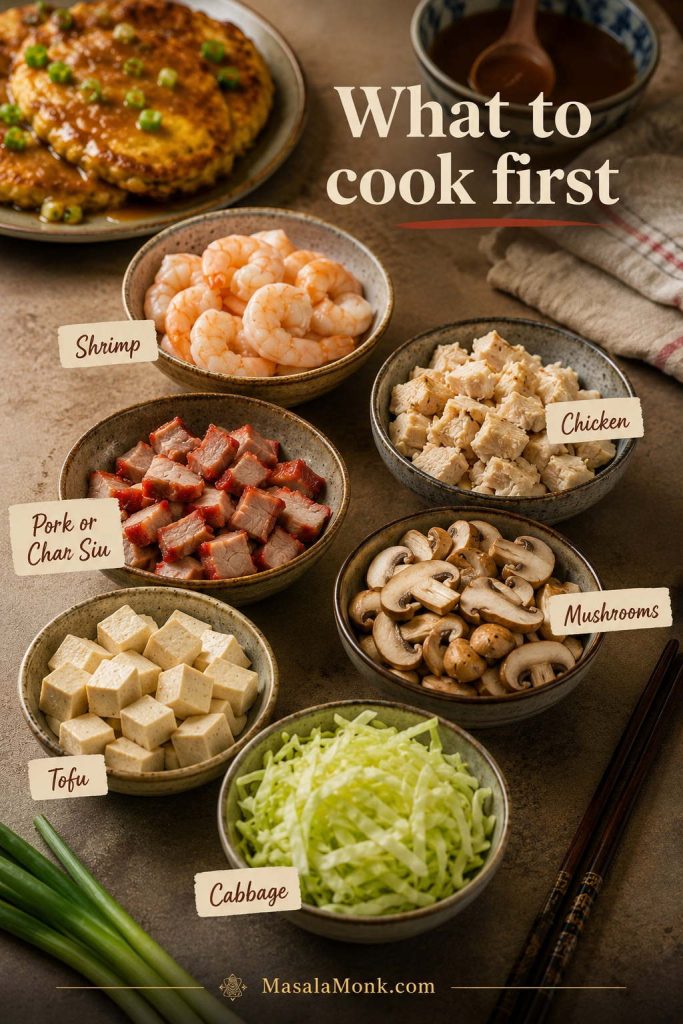
Chicken breasts vs thighs

Boneless skinless thighs are the more forgiving choice because they stay juicy even when the dish needs a few extra minutes. Breasts work well too, but they should be thin and even before baking.
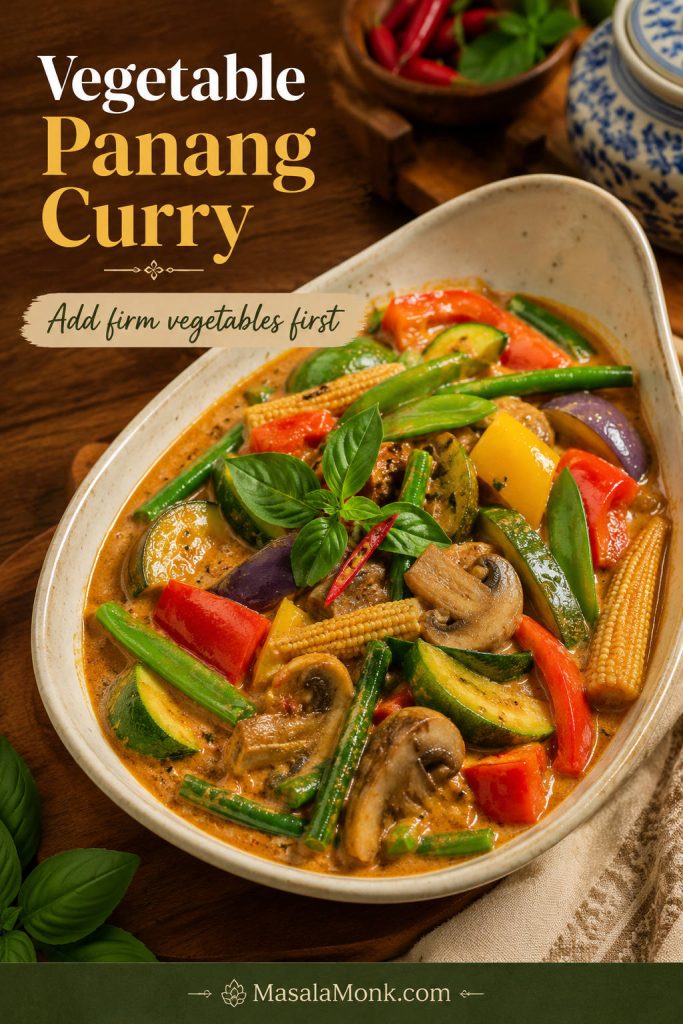
How much liquid should I add to condensed soup?

For baked chicken, ½ cup / 120 ml milk or low-sodium broth per 10.5 oz / 298 g can makes a creamy sauce. Skillet chicken can take ½–1 cup / 120–240 ml because the pan sauce reduces as it simmers.

How to make it on the stove

The stovetop version works best with thin pieces because they cook quickly and stay tender. Sear them first, then simmer gently in the mushroom sauce until they reach 165°F / 74°C. A few uncovered minutes will tighten a loose pan sauce.

Homemade mushroom sauce instead of canned soup

This becomes a different style of recipe, but it can work. For a quick homemade mushroom cream sauce, start with 2 tbsp butter, 8 oz mushrooms, 1 minced garlic clove, 2 tbsp flour, 1 cup broth, and ½ cup milk or cream, then cook the chicken in that sauce. For the classic shortcut flavor, use condensed soup.

Adding rice safely

Rice can work beautifully, but treat it like its own bake, not a last-minute add-in. It needs extra liquid, trapped steam, and more time than the basic chicken version. Start with 1 can condensed soup, 1 cup / 240 ml water or broth, ¾ cup / about 140 g long-grain white rice, and about 1¼ lb / 565 g chicken.

Should you use frozen chicken?

Thawed chicken is the safer bet here because it cooks more evenly and keeps the sauce from turning watery. Frozen chicken can release a lot of moisture, especially in the oven or skillet, so thaw it first when you can.

Why the sauce turns watery

Watery sauce usually comes from too much liquid, ready-to-eat soup instead of condensed soup, raw mushrooms releasing moisture, or keeping the dish covered for the whole bake. Once the chicken is done, remove it and thicken the sauce separately with a small slurry made from 1 tsp cornstarch and 1 tbsp cold water.

Fixing a salty sauce

Condensed soup is already salty, and broth, cheese, or onion soup mix can add even more. Rice, noodles, or potatoes help soften the saltiness on the plate. A spoonful of sour cream can also mellow the sauce.

Best sides for creamy mushroom chicken

Rice, egg noodles, mashed potatoes, biscuits, broccoli, green beans, peas, carrots, and roasted mushrooms all work. The best side is something that catches the creamy mushroom sauce.

Slow cooker ratio

In the slow cooker, use less liquid than you might expect because the lid traps moisture. For 1½–2 lb / 680–900 g chicken, use 2 cans condensed cream of mushroom soup and about ½ cup / 120 ml broth or water. Cook on High for 3–4 hours or Low for 6–7 hours, until the chicken reaches 165°F / 74°C.

Final Thoughts

Start with the oven version first. Once you understand the soup-to-liquid ratio, the recipe bends to the night: faster in a skillet, easier in the slow cooker, or heartier with rice.

However you make it, the goal stays the same: juicy chicken, creamy mushroom gravy, and a dinner that asks very little from you but still feels like someone cared.

Back to top