Posted on Leave a comment

Easy Chicken Enchilada Recipe: Saucy, Cheesy, and Weeknight-Friendly

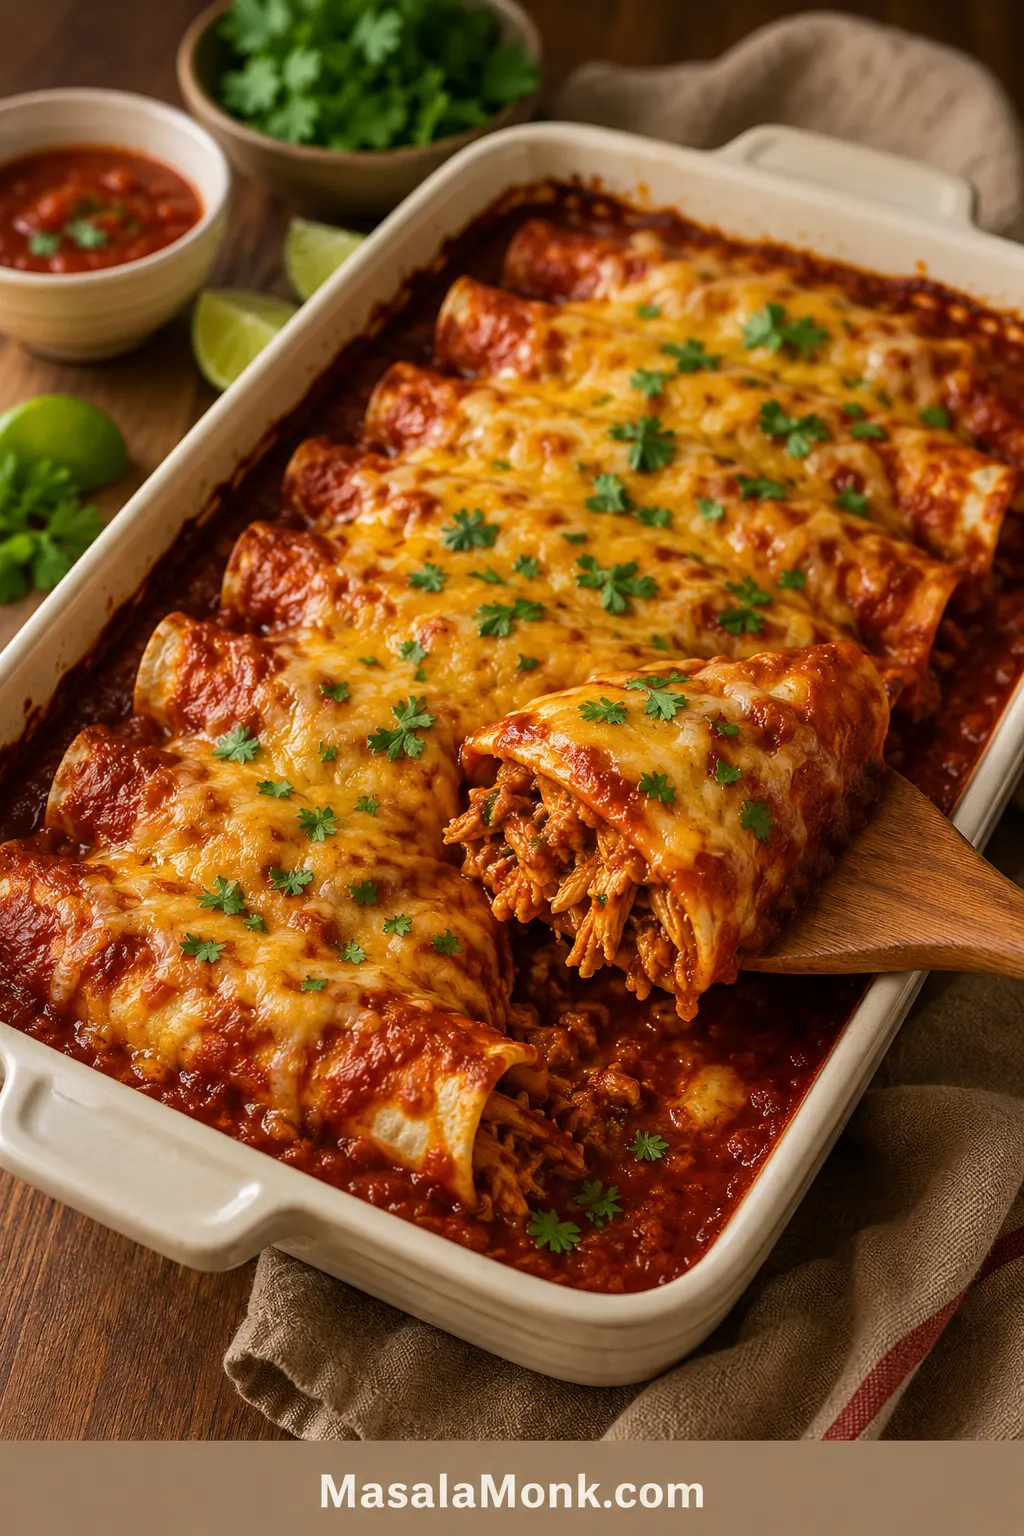
Baked red chicken enchiladas in a cream ceramic dish with melted cheese, cilantro, saucy edges, and one enchilada lifted to show shredded chicken filling.

You want chicken enchiladas that taste like a real dinner, not dry chicken wrapped in tortillas and hidden under cheese. This easy chicken enchilada recipe keeps the filling juicy, the sauce generous but controlled, and the tortillas soft enough to roll without turning the whole pan soggy.

It is the pan for nights when cooked chicken is already handled and you just need it to become dinner. Store-bought sauce, rotisserie chicken, and flour tortillas are not shortcuts to apologize for here. They are what make this a dinner you can actually cook tonight.

The best version gives you soft tortillas, juicy chicken, melted cheese, and saucy edges without a wet bottom. A simple trick makes that possible: the ½-½-1½ no-soggy sauce split, with a thin layer under the enchiladas, a little sauce in the chicken, and most of the sauce on top.

Quick Answer: Easy Chicken Enchiladas

Easy chicken enchiladas are made by filling warm tortillas with shredded chicken, cheese, spices, and enchilada sauce, then rolling them into a 9×13-inch baking dish. Top with more sauce and cheese, then bake at 350°F / 175°C for 22–25 minutes, until the cheese is melted and the sauce bubbles around the edges.

For one family-size pan, use 3 cups / 375–425 g cooked shredded chicken, 2½ cups / 600 ml enchilada sauce, 8 medium tortillas or 10 small corn tortillas, and 2½ cups / about 285 g shredded cheese. Let the pan rest for 5–10 minutes before serving.

The shortcut version uses rotisserie chicken and store-bought sauce, so most of the work is filling, rolling, topping, and baking. To keep the pan saucy but not soggy, use ½ cup sauce underneath, ½ cup in the chicken, and 1½ cups on top.

  • Fastest chicken: rotisserie chicken.
  • Main sauce: red enchilada sauce.
  • Beginner-friendly tortilla: flour tortillas.
  • More classic texture: warmed corn tortillas.
  • Best texture clue: saucy edges, melted cheese, and tortillas that lift instead of collapse.

Serving Chicken Enchiladas

This plate shows the finished texture you are aiming for: saucy edges, melted cheese, and enough structure to serve with toppings instead of collapsing into the dish.
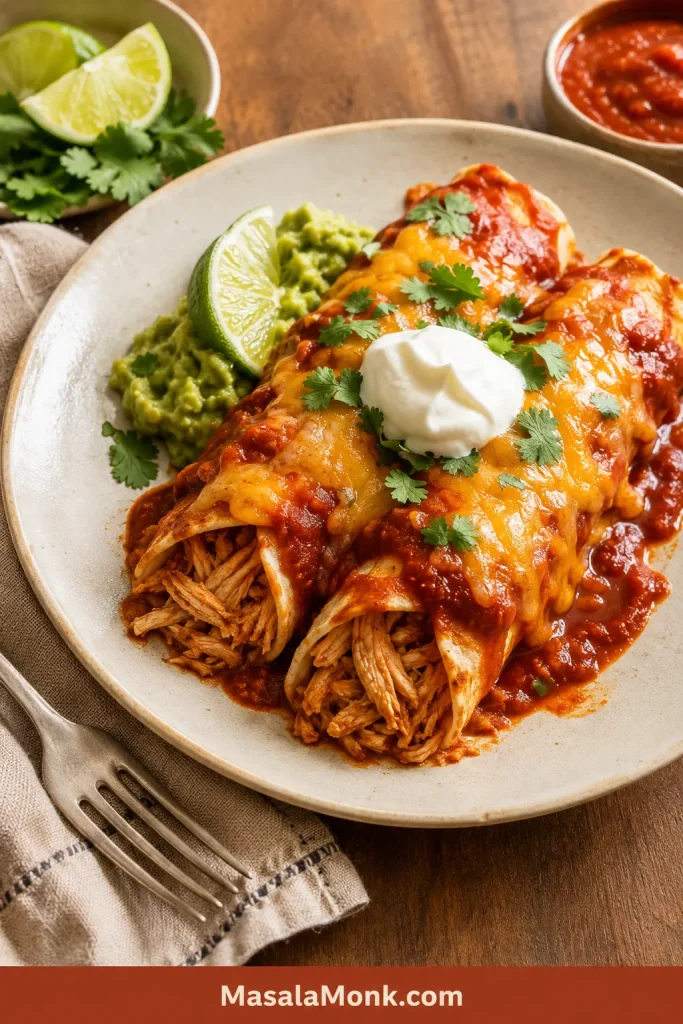
Two chicken enchiladas on an off-white plate with red sauce, melted cheese, sour cream, cilantro, lime, and guacamole.
After baking, add cooling toppings like sour cream, lime, cilantro, or guacamole so each serving tastes rich, fresh, and balanced.

Make This Now If You Have

  • Rotisserie chicken, leftover chicken, or any cooked shredded chicken
  • Red enchilada sauce or green enchilada sauce
  • Flour or corn tortillas
  • A cheese that melts well
  • A 9×13-inch baking dish
  • About 45 minutes

You do not need homemade sauce, freshly cooked chicken, or perfect tortillas to make this work. The recipe is built around cooked chicken, ready sauce, and a few small choices that keep the pan from turning heavy or soggy.

This is the kind of pan that still works even if one tortilla tears, the sauce came from a can, and the chicken came from last night’s dinner. Choose flour tortillas if you are worried about cracking. Pick corn tortillas if you want a more classic enchilada bite.

Make the card version first. The sections after it are there for the moments that usually cause trouble: dry chicken, cracked tortillas, too much sauce underneath, and messy first servings.

Easy Chicken Enchilada Recipe Card

Start here for the classic version: red chicken enchiladas with shredded chicken, warm tortillas, enchilada sauce, and melty cheese.

Recipe Details

Prep time15 minutes
Cook time22–25 minutes
Rest time5–10 minutes
Total time45–50 minutes
Servings4–6
Yield8 medium enchiladas or 10 smaller corn-tortilla enchiladas
Oven temperature350°F / 175°C
Baking dish9×13-inch / 23×33 cm

Equipment

  • 9×13-inch / 23×33 cm baking dish
  • Large mixing bowl
  • Measuring cups and spoons
  • Spoon or spatula
  • Skillet, microwave-safe plate, or clean towel for warming tortillas
  • Foil, optional

Ingredients

  • 3 cups cooked shredded chicken / about 375–425 g
  • 2½ cups red enchilada sauce / about 600 ml, divided
  • 8 medium flour or corn tortillas, or 10 small 6-inch corn tortillas
  • 2½ cups shredded cheese / about 285 g, divided
  • 1 can diced green chiles / 4 oz / 113 g, optional but recommended
  • ½ teaspoon ground cumin
  • ½ teaspoon garlic powder
  • ¼ teaspoon onion powder, or ¼ cup finely chopped onion
  • ½ teaspoon salt, adjust depending on the sauce
  • ¼ teaspoon black pepper
  • Oil or cooking spray, for the baking dish

For topping: chopped cilantro, sour cream, diced onion, avocado, guacamole, jalapeños, lime wedges, pico de gallo, or crumbled cotija.

The ½-½-1½ Sauce Split

  • ½ cup / 120 ml sauce for the bottom of the baking dish
  • ½ cup / 120 ml sauce mixed into the chicken filling
  • 1½ cups / 360 ml sauce poured over the top

This is the no-soggy rhythm: a little underneath so nothing sticks, a little inside so the chicken stays moist, and most on top where it can bubble into the cheese.

Instructions

  1. Preheat the oven. Heat the oven to 350°F / 175°C. Lightly grease a 9×13-inch / 23×33 cm baking dish.
  2. Add the bottom sauce. Spread ½ cup / 120 ml enchilada sauce across the bottom. The dish should be coated, not flooded.
  3. Make the filling. Mix the shredded chicken with ½ cup / 120 ml sauce, green chiles, cumin, garlic powder, onion powder, salt, pepper, and 1 cup / about 115 g shredded cheese.
  4. Warm the tortillas. Heat them until flexible. Use a skillet, microwave them wrapped in a damp towel for 20–30 seconds, or briefly warm corn tortillas with a little oil.
  5. Fill each tortilla. Spoon about ⅓ cup filling down the center of each medium tortilla. Use 2–3 tablespoons for small corn tortillas.
  6. Roll and arrange. Work snugly, then place each enchilada seam-side down in the baking dish.
  7. Add the top sauce and cheese. Pour the remaining 1½ cups / 360 ml sauce over the enchiladas. Sprinkle with the remaining 1½ cups / about 170 g cheese.
  8. Bake. Leave the pan uncovered for 22–25 minutes, until the cheese melts, the sauce bubbles at the edges, and the center is hot.
  9. Rest. Let the pan rest for 5–10 minutes before serving.
  10. Finish. Add cilantro, sour cream, avocado, lime, jalapeños, or your favorite toppings.

Recipe Notes

  • Use 2½ cups chicken for lighter enchiladas or up to 4 cups for very full enchiladas.
  • If using small corn tortillas, use about 2–3 tablespoons filling per tortilla and expect about 10 smaller enchiladas.
  • When the chicken filling is steaming hot, let it cool for 3–5 minutes before rolling so the tortillas do not soften too quickly.
  • Bake uncovered for the best texture. Cover loosely for the first 15 minutes only if you prefer very soft enchiladas.
  • If your enchilada sauce is already salty, reduce the added salt in the filling.
  • Dry filling needs 1–2 extra tablespoons of sauce. Loose filling needs a little more chicken or cheese.
  • For an 8×8-inch / 20×20 cm pan, halve the recipe and bake until the sauce bubbles and the center is hot.

Need help before rolling? Jump to the no-soggy sauce split, corn vs flour tortillas, or troubleshooting.

At a Glance

What mattersBest choice for this recipe
Oven temperature350°F / 175°C
Pan size9×13-inch / 23×33 cm baking dish
Chicken3 cups / 375–425 g cooked shredded chicken
Sauce split½ cup bottom, ½ cup filling, 1½ cups top
Tortillas8 medium tortillas or 10 small corn tortillas
Cheese2½ cups / about 285 g shredded cheese
Yield8 medium enchiladas or 10 smaller corn-tortilla enchiladas
Bake time22–25 minutes, uncovered, until bubbling
Rest time5–10 minutes
Total time45–50 minutes

In This Recipe

Back to top

Why This Recipe Works

This recipe works because it fixes the three places chicken enchiladas usually go wrong: dry filling, cracked tortillas, and a soggy bottom.

Sauce, spices, green chiles, and cheese go into the chicken before rolling, so the filling tastes seasoned instead of plain. Warm tortillas bend instead of splitting, and the thin bottom sauce layer keeps the underside coated without turning mushy.

Most of the comfort lands on top, where the sauce and cheese bubble together. Give the pan a few minutes to rest, and the first serving has a much better chance of lifting cleanly.

The ½-½-1½ No-Soggy Sauce Split

Soggy enchiladas usually come from too much sauce underneath, watery filling, cold tortillas, very hot filling, or steam trapped in the pan for too long. Instead, aim for better placement, not less sauce.

The split is easy to remember: ½ cup underneath, ½ cup inside, 1½ cups on top.
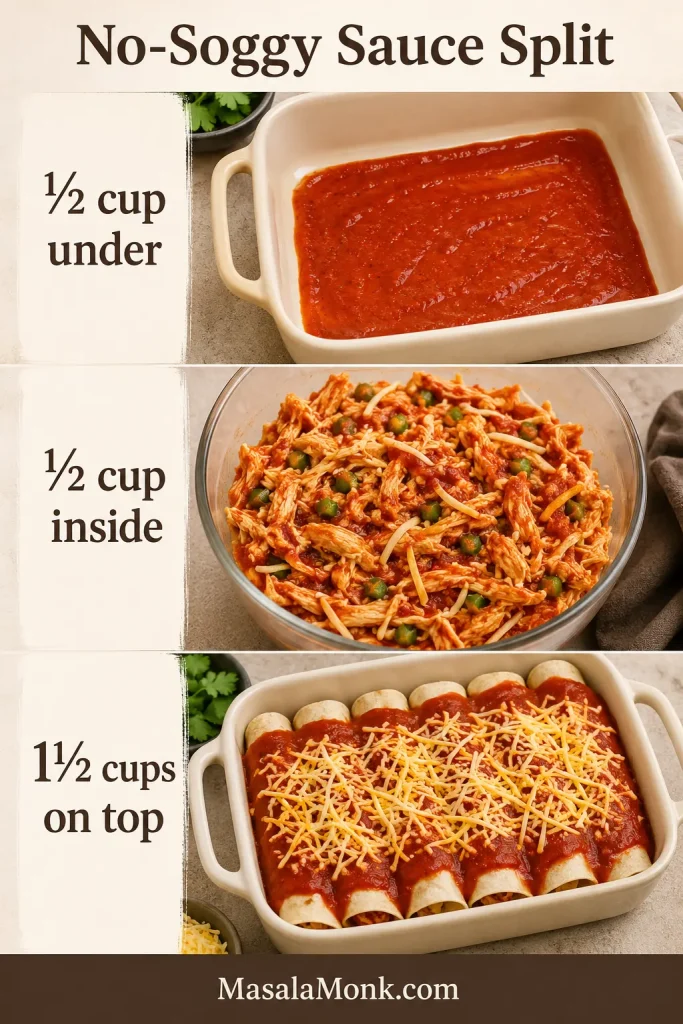
Three-part no-soggy sauce split guide showing sauce under the enchiladas, sauce mixed into chicken filling, and sauce poured over rolled enchiladas.
In practice, the ½-½-1½ split means a little sauce underneath, a little in the filling, and most on top where it can bubble into the cheese.

Rule of thumb: light sauce underneath, moist chicken inside, generous sauce on top, warm tortillas, uncovered bake, and a short rest before serving.

  • Underneath: a thin sauce layer keeps the enchiladas from sticking without soaking the bottom.
  • Inside: a little sauce in the chicken keeps the filling juicy.
  • On top: most of the sauce bubbles into the cheese where it belongs.
  • Very hot filling: let it cool for a few minutes before rolling so trapped steam does not soften the tortillas too quickly.
  • Extra sauce: serve it warm at the table instead of drowning the baking dish.

Use a Thin Sauce Layer Underneath

A light base layer protects the rolls from sticking, but the bottom of the dish should still look shallow and controlled.
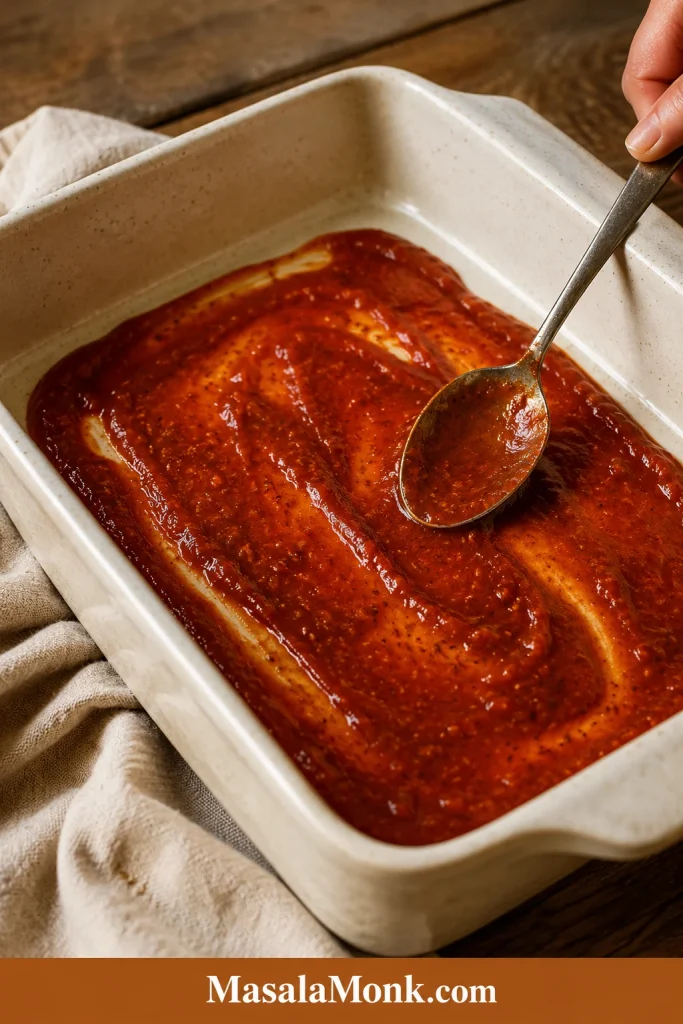
A spoon spreading a thin layer of red enchilada sauce across the bottom of a cream ceramic baking dish.
First, spread only a thin layer of enchilada sauce in the baking dish; this prevents sticking without turning the bottom soggy.

Do not chase perfect rolls here. Warm tortillas, seam-side down, sauce and cheese on top — that is enough. The first enchilada out of the pan is always the most likely to look a little rough, so let the dish sit while everyone grabs plates, sour cream, lime, and whatever toppings are already in the fridge.

Next decision: choose corn or flour tortillas, or go back to the recipe card.

Pan Notes That Matter

These small choices make the difference between a pan that tastes good and a pan that serves cleanly.

  • A 10-minute rest gives cleaner servings than cutting into the pan immediately.
  • Flour tortillas are easiest for beginners, but corn tortillas give a more classic enchilada bite.
  • Extra sauce works better at the table than poured into the bottom of the dish.
  • Monterey Jack melts smoother than sharp cheddar alone.
  • A torn tortilla is not a failure; place it seam-side down and cover it with sauce and cheese.
  • The corner pieces usually get the best saucy edges.
  • If the first enchilada comes out messy, serve that one to the cook and let the rest settle another minute.

Choose Your Chicken Enchilada Path

Keep the red-sauce version as the base. From there, you can make the dish brighter, creamier, lighter, or skip the rolling entirely.

What you wantBest move
Classic easy chicken enchiladasUse red enchilada sauce, shredded chicken, tortillas, and Monterey Jack or Mexican-blend cheese.
Fastest weeknight versionUse rotisserie chicken and store-bought enchilada sauce.
Green chicken enchiladasSwap red sauce for green enchilada sauce or salsa verde.
Creamier enchiladasAdd sour cream, cream cheese, or a small amount of creamy sauce.
Milder family panUse mild sauce, Monterey Jack, and keep jalapeños or hot sauce for the table.
No rollingLayer the same chicken, sauce, tortillas, and cheese as a casserole.
Less heavy versionUse chicken breast, corn tortillas, less cheese, and beans or vegetables.

Ingredients You Need

Because the ingredient list is short, the few choices you make matter: use chicken that is not watery, sauce you actually like, tortillas that bend, and cheese that melts.
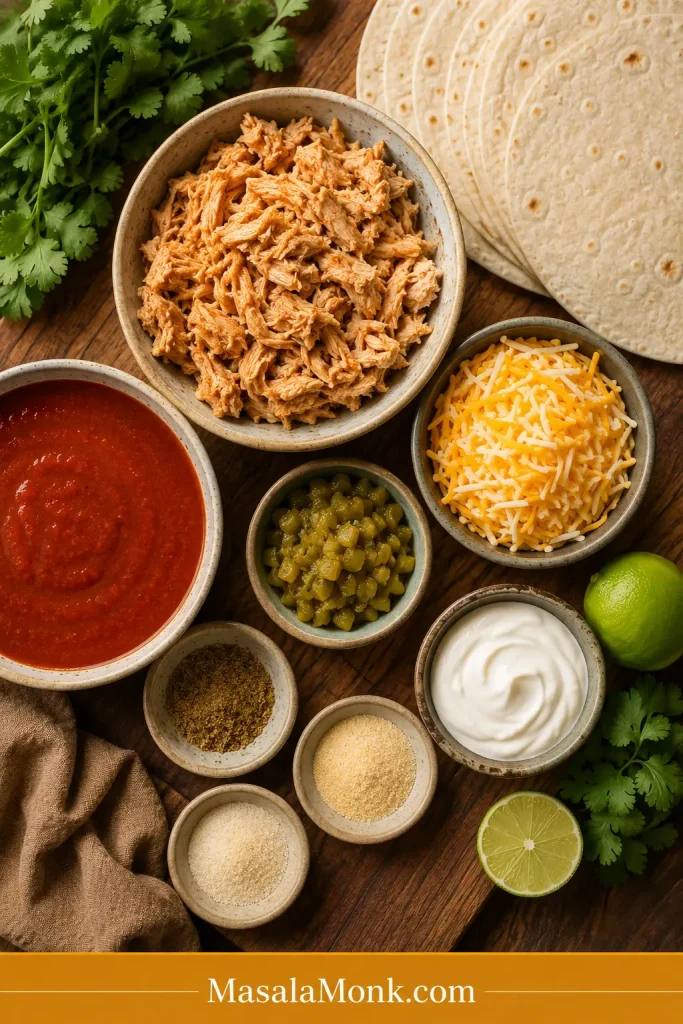
Overhead ingredient board with shredded chicken, red enchilada sauce, tortillas, shredded cheese, green chiles, spices, sour cream, cilantro, and lime.
Simple ingredients do the work here: cooked chicken, red enchilada sauce, tortillas, cheese, green chiles, and seasonings for a complete filling.

Chicken

Use cooked shredded chicken that is moist but not watery. Rotisserie chicken is the easiest choice, but leftover chicken, poached chicken breast, cooked thighs, or slow cooker shredded chicken all work.

If the chicken tastes good before rolling, the enchiladas will taste good after baking. Mix it with sauce, spices, green chiles, and cheese so every bite has flavor.

Enchilada Sauce

Pick a red enchilada sauce you would happily spoon over the finished pan, because it carries a lot of the flavor here. Store-bought sauce works well for a weeknight version; homemade sauce gives more depth if you already have it.

You will use 2½ cups / 600 ml sauce total. For extra-saucy servings, warm more sauce separately and add it at the table.

Using store-bought sauce? Warm it first and taste it before adding salt to the filling. When it tastes flat, add a pinch of cumin or garlic powder. If it tastes too sharp, stir in a small spoon of sour cream after warming. Want more heat? Add hot sauce, chipotle, or jalapeños at the table instead of making the whole pan spicy.

Tortillas

Corn tortillas taste more classic. Flour tortillas are softer and easier to roll. Both work, but cold tortillas crack and over-sauced tortillas get heavy.

Cheese

Cheese is not just topping here. It helps the filling hold together and gives the pan that melted, bubbling finish.

  • Monterey Jack: smoothest melt.
  • Mexican blend: easiest everyday option.
  • Cheddar-Jack: more flavor with good melt.
  • Oaxaca: mild, stretchy, excellent if available.
  • Cotija or queso fresco: better as a finishing topping than the main melting cheese.

Green Chiles

Diced green chiles are optional, but they make the filling taste more complete without adding much heat. They bring mild chile flavor, moisture, and a little brightness to the chicken.

Best Chicken for Chicken Enchiladas

Start with whatever cooked chicken you already have. The only real rule is that it should be cooked, shredded, and not watery.
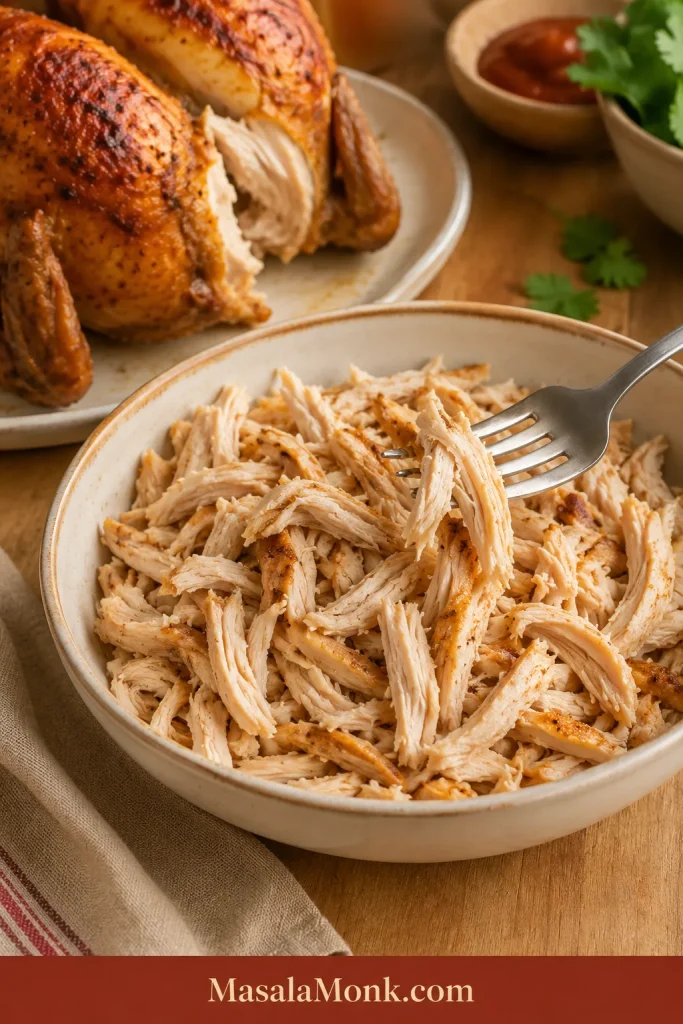
Shredded rotisserie chicken in a cream bowl with a fork pulling strands, with part of a roasted chicken in the background.
For the fastest pan, rotisserie chicken gives you cooked, tender meat that shreds easily and soaks up sauce and spices.
Best forChicken choice
Fastest dinnerRotisserie chicken
Juiciest fillingCooked chicken thighs
Leanest versionPoached or cooked chicken breast
Meal prepSlow cooker shredded chicken
Pantry emergencyCanned chicken, drained well

If you need a simple batch of shredded chicken before making enchiladas, the same basic method from Crock Pot Chicken Breast Recipes can be used here. Keep the chicken simply seasoned so the enchilada sauce still leads the flavor.

One medium rotisserie chicken usually gives about enough shredded meat for this recipe, depending on size. If you only have 2½ cups chicken, the enchiladas will still work. With closer to 4 cups, use large tortillas or make the filling a little fuller.

Only have canned chicken? Drain it very well, break it up gently, and season it with sauce, cumin, garlic powder, green chiles, and cheese before rolling. It will not taste as rich as rotisserie chicken, but it can still save dinner when the pantry is what you have.

Corn Tortillas vs Flour Tortillas

Tortillas are where many enchiladas go wrong. The filling can be perfect, the sauce can be good, and one cold tortilla can still split open before it reaches the pan.

Mini rule: do not use cold tortillas. Warm tortillas bend. Cold tortillas crack.

Warm Tortillas Before Rolling

Whether you choose corn or flour, warmth matters because a flexible tortilla rolls cleanly and is less likely to split at the center.
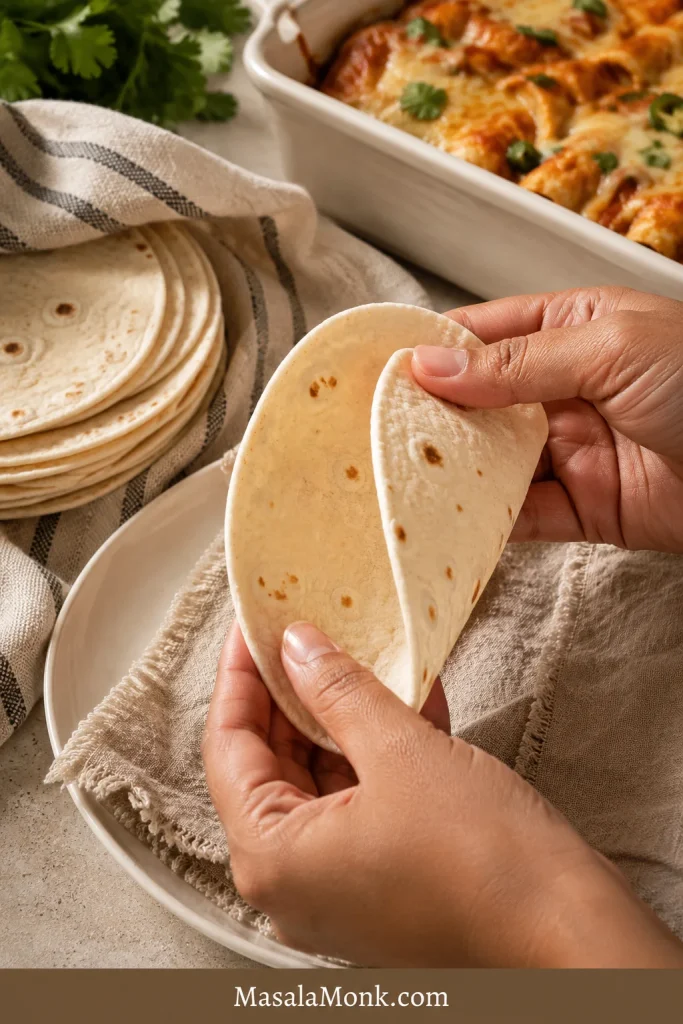
Hands gently bending a warm flour tortilla without cracking, with a stack of tortillas and enchiladas in the background.
A quick warm-up makes tortillas flexible enough to roll cleanly, while cold tortillas are more likely to crack or tear.
TortillaBest forWatch out for
Corn tortillasClassic flavor and better enchilada textureThey can crack if cold or dry
Flour tortillasEasy rolling and softer textureThey can become too soft if over-sauced
Small corn tortillasTraditional-style smaller enchiladasUse less filling so they do not tear
Large flour tortillasBigger, fuller enchiladasDo not overstuff or the pan becomes heavy
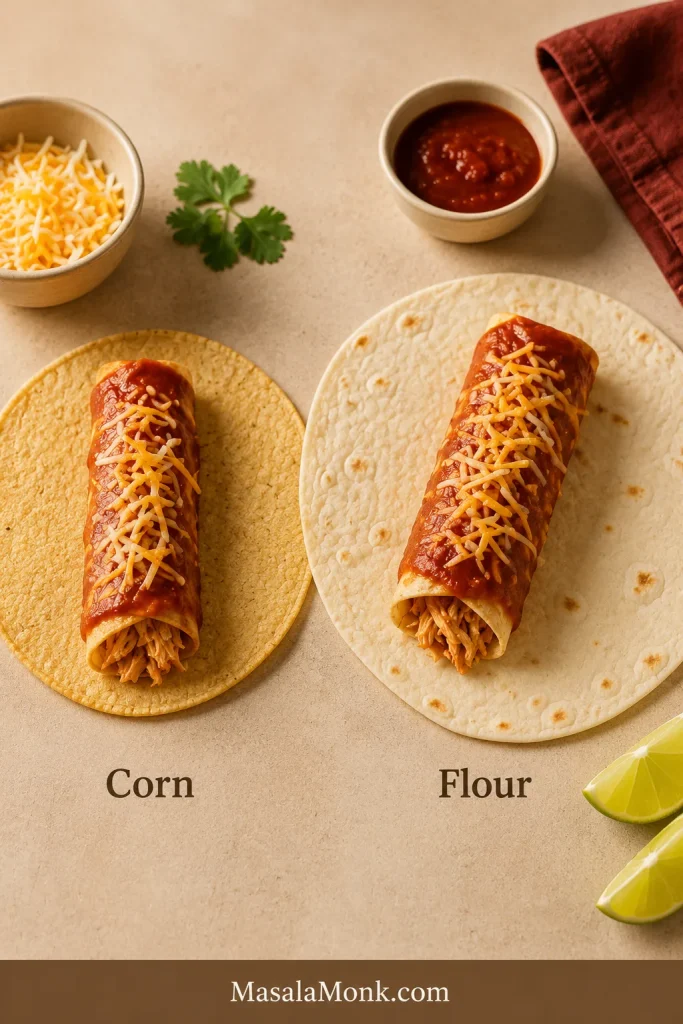
Corn and flour tortillas compared side by side, each topped with a small rolled chicken enchilada, red sauce, and shredded cheese.
For texture, corn tortillas give enchiladas a more classic bite, while flour tortillas are softer, larger, and easier for beginners to roll.

Once you pick the tortilla, check how much filling to use so the rolls close without tearing.

For corn tortillas, wrap them in a damp towel and microwave for 20–30 seconds, adding a few seconds more if they are still stiff. You can also heat them one by one in a skillet, or warm them quickly with a little oil.

Flour tortillas are more forgiving, but they still need sauce control. Keep the bottom layer thin and let most of the sauce sit on top, where it can bubble into the cheese instead of soaking the underside.

How Much Filling Goes in Each Tortilla?

  • Small corn tortilla: 2–3 tablespoons filling
  • Medium tortilla: about ⅓ cup filling
  • Large flour tortilla: ⅓–½ cup filling, depending on size

A good roll should close without strain. If you have to force it shut, use less filling.
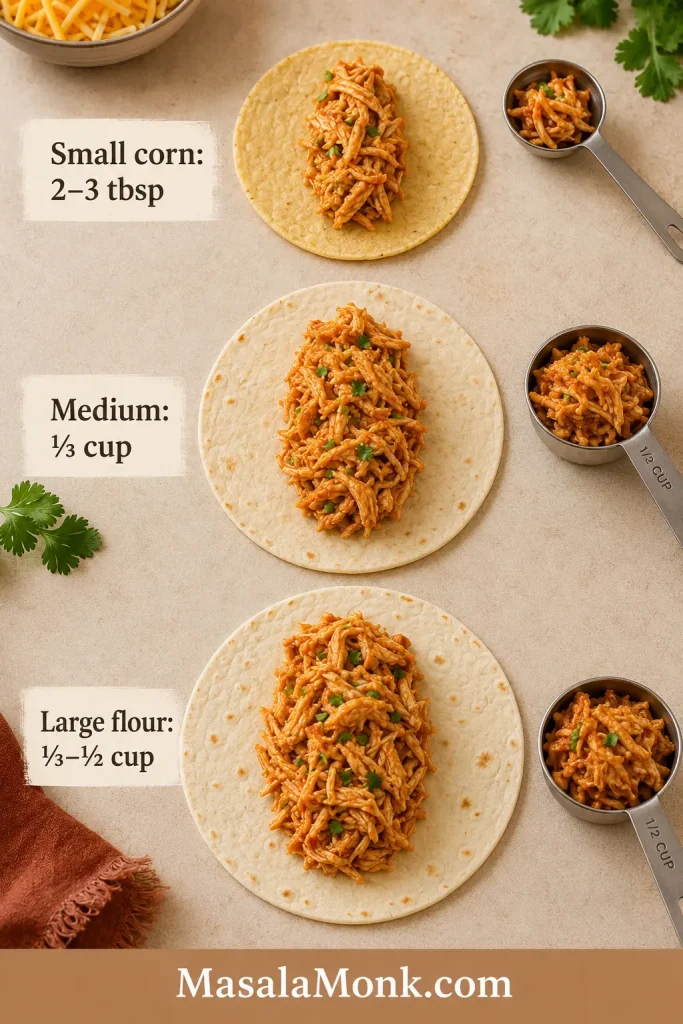
Filling amount guide showing small corn, medium, and large flour tortillas with different portions of shredded chicken enchilada filling.
Smaller tortillas need less filling and large flour tortillas can hold more; either way, each roll should close without strain.

Sauce Options and Easy Variations

Keep the same rolling and baking approach, then change the sauce, filling, or toppings to match the dinner you want. Pick the sauce based on what sounds good, not because one version is more correct.

VersionHow to make it
Classic red chicken enchiladasUse red enchilada sauce, shredded chicken, green chiles, and Monterey Jack or Mexican-blend cheese.
Green chicken enchiladasSwap red sauce for green enchilada sauce or Salsa Verde. Finish with cilantro, lime, and sour cream.
White chicken enchiladasUse a creamy white sauce with chicken broth, sour cream, green chiles, and cheese.
Sour cream chicken enchiladasStir ½ cup / 120 g sour cream into the filling, or spoon sour cream over the baked enchiladas.
Cream cheese chicken enchiladasAdd 4 oz / 113 g softened cream cheese for a gentle creamy version, or up to 8 oz / 226 g for a heavier pan.
Pantry creamy enchiladasStir ½–1 can condensed cream of chicken soup into the filling or sauce.
Mild chicken enchiladasUse mild sauce, Monterey Jack, and keep spicy toppings at the table.
Spicy chicken enchiladasAdd pepper Jack, jalapeños, chipotle, cayenne, hot sauce, or spicy enchilada sauce.
Lighter chicken enchiladasUse chicken breast, corn tortillas, a lighter cheese layer, and beans or vegetables to make the filling feel generous.

Red feels cozy, green feels brighter, and creamy versions feel softer and richer. The same basic recipe gives you a very different dinner depending on the sauce.

How to Make Chicken Enchiladas

The recipe card gives you the measurements. Think of this as your texture checklist while the pan comes together.

Mix a Moist, Not Soupy, Filling

The filling should look seasoned and cohesive before you roll it. If it looks dry, add a little sauce; if it drips, add more chicken or cheese.
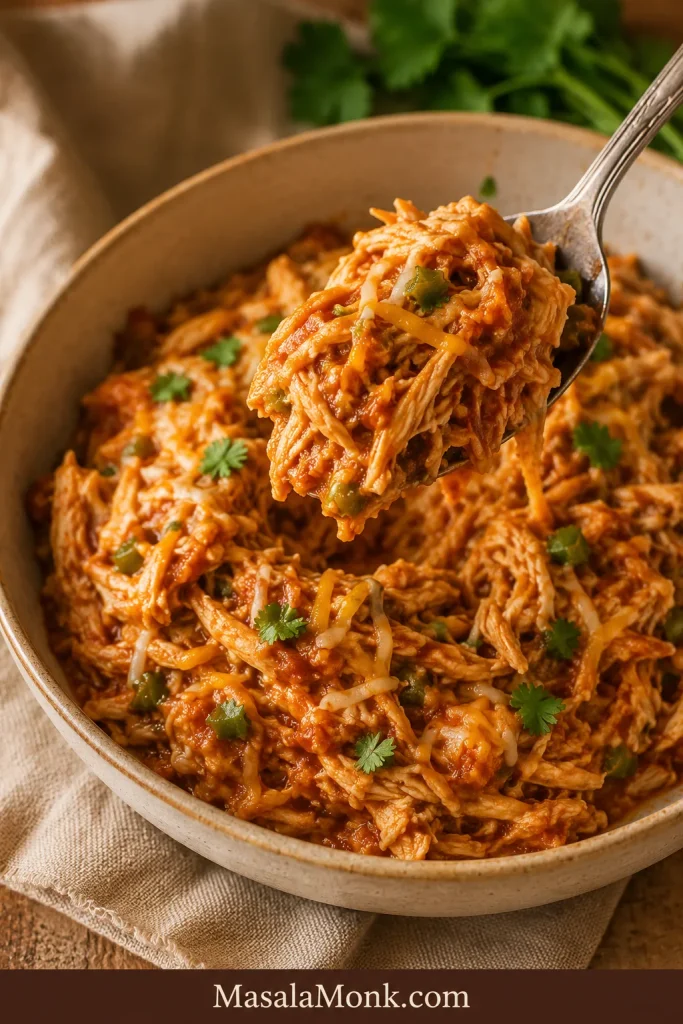
Shredded chicken filling mixed with red enchilada sauce, cheese, green chiles, and spices in a bowl, with a spoon lifting the mixture.
Next, mix the shredded chicken with enough sauce, cheese, green chiles, and seasoning to make the filling juicy, but not loose or dripping.
  1. Coat the dish lightly. The bottom should look sauced, not flooded.
  2. Mix a filling that holds together. It should look moist and seasoned, not loose or dripping.
  3. Warm the tortillas until bendable. A flexible tortilla rolls more cleanly.
  4. Fill without forcing. If the tortilla strains to close, use less filling.
  5. Place seam-side down. This hides rough edges and keeps the rolls in place.
  6. Top generously, not deeply. The tortillas should be covered, but not swimming.
  7. Bake until bubbling. The cheese should melt into the seams, and the sauce should thicken slightly at the edges.
  8. Rest before serving. The sauce settles, and the first serving has a better chance of lifting cleanly.

Roll Enchiladas Seam-Side Down

A snug roll helps, but the real insurance is placing the rough edge underneath so the filling stays tucked in while the sauce heats.
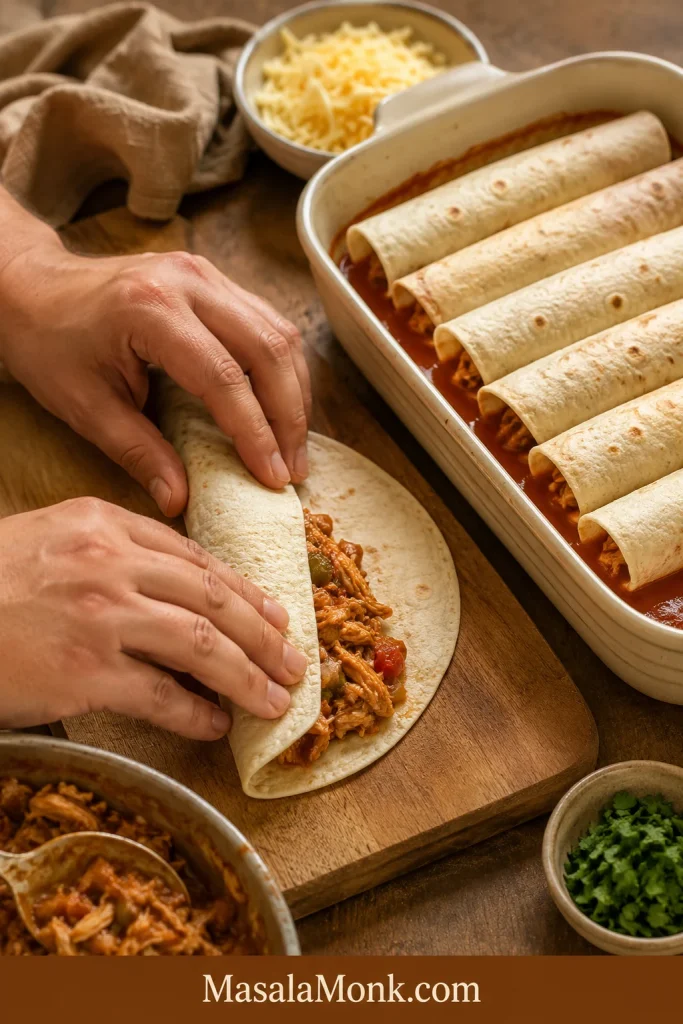
Hands rolling a tortilla around chicken enchilada filling beside a cream baking dish with rolled enchiladas arranged seam-side down.
Seam-side down keeps the filling tucked in place as the sauce and cheese bake around the rolls.

Add Sauce and Cheese on Top

Keep most of the sauce above the rolls, where it can thicken around the cheese instead of soaking the bottom of the pan.
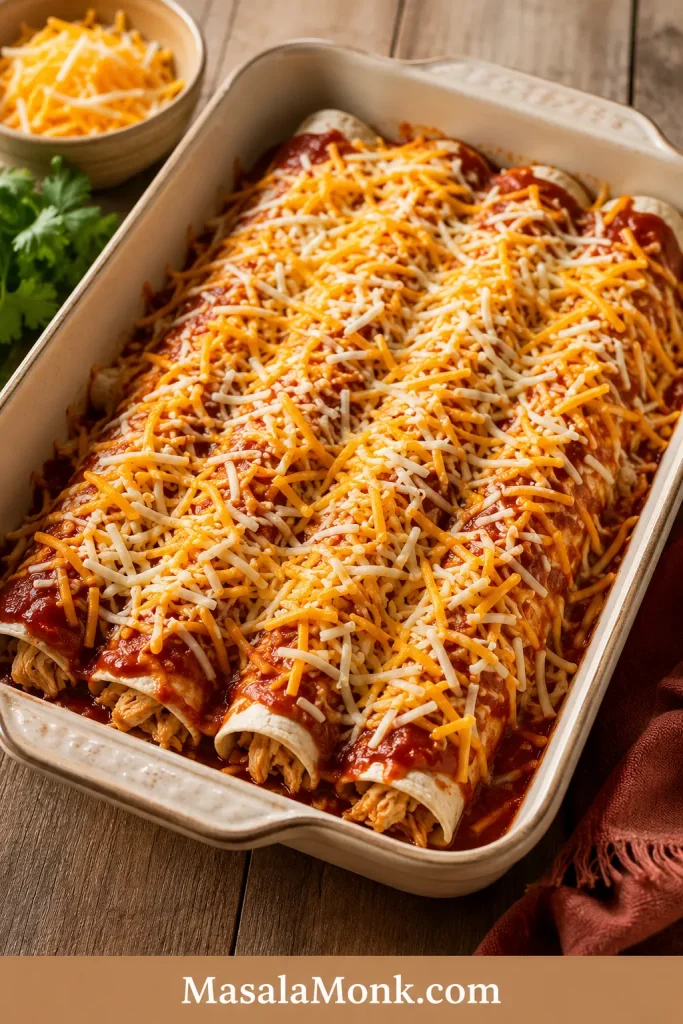
Rolled chicken enchiladas in a cream baking dish topped with red enchilada sauce and shredded cheese before baking.
Once the rolls are in the dish, cover them with red sauce and cheese while keeping the pan coated, not flooded.

Before serving, check the doneness cues and why the pan needs to rest.

How to Know the Enchiladas Are Done

Chicken enchiladas use cooked chicken, so you are not waiting for raw meat to cook through. You are looking for heat, bubbling sauce, melted cheese, and a pan that has had a few minutes to settle.
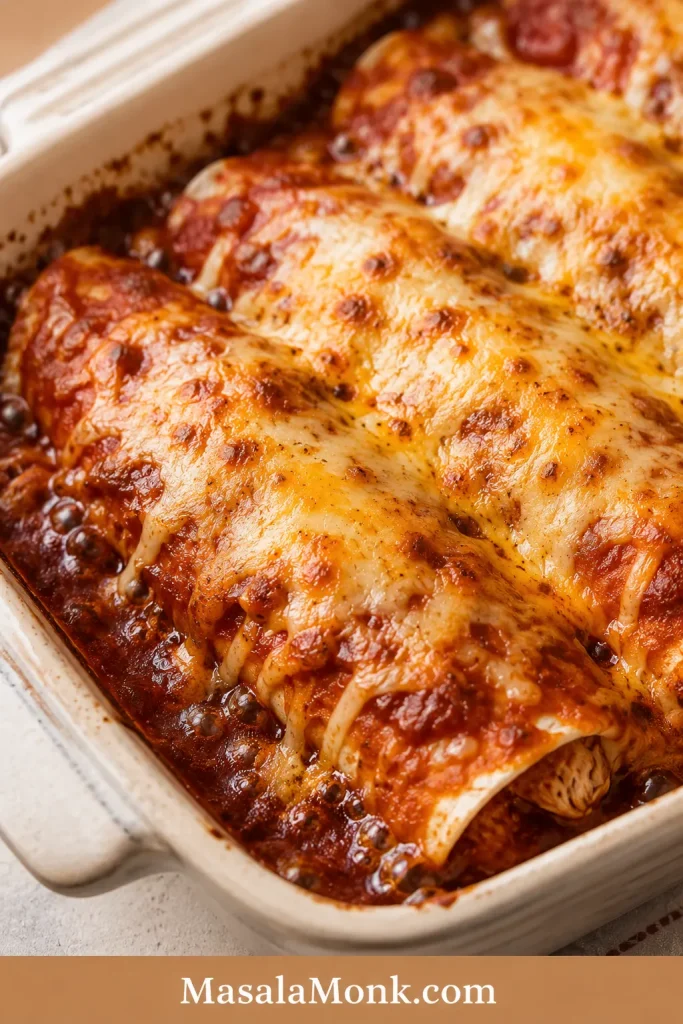
Close-up of baked chicken enchiladas in a cream dish with bubbling red sauce and melted golden cheese on top.
Look for bubbling red sauce around the edges and cheese melted into the seams with a few golden spots.
  • Sauce bubbles around the edges of the dish.
  • Cheese is fully melted on top and settling into the seams.
  • A knife inserted into the center comes out hot to the touch.
  • The tortillas look soft but not drowned.
  • You can hear a little bubbling at the edges when the dish comes out of the oven.
  • After resting, the first enchilada lifts out without falling apart completely.

The best bite is usually from the edge of the pan, where the sauce has thickened into the cheese. Spoon any saucy edges over the top of each serving.

Rest Before Serving for Cleaner Pieces

Resting is not just a waiting step. It gives the sauce and cheese time to settle so the first piece comes out cleaner.
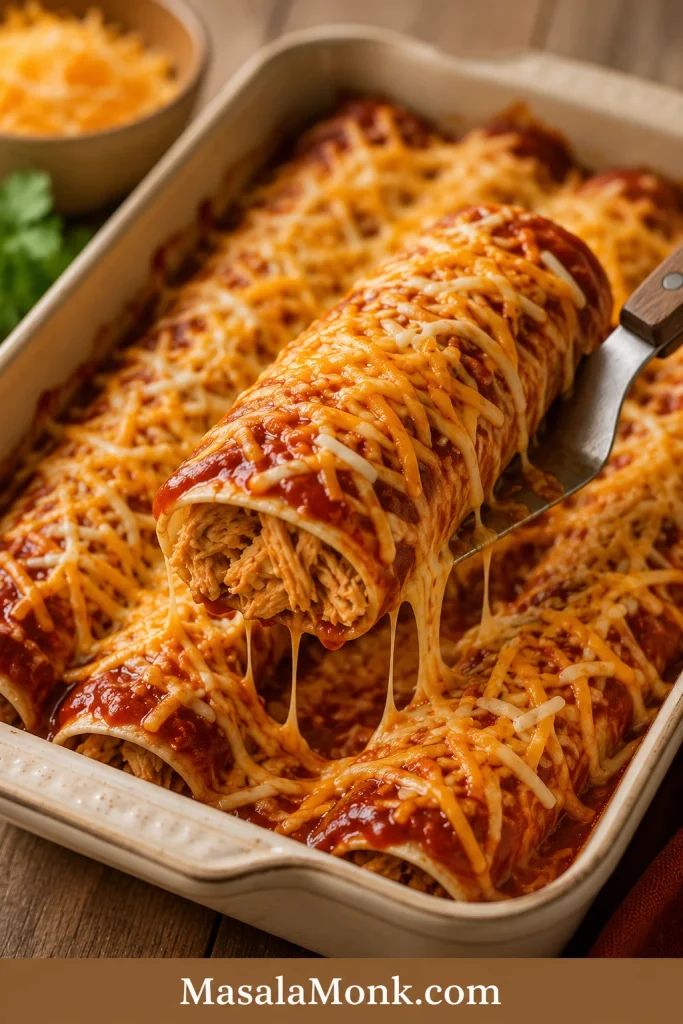
A spatula lifting one saucy chicken enchilada from a baking dish, with melted cheese stretching and shredded chicken visible inside.
A short rest helps the sauce settle, the cheese grip, and the first piece lift more cleanly from the pan.

What If I Only Have…

This is where the recipe gets flexible, because dinner rarely starts with a perfect fridge.

You only haveWhat to do
Flour tortillasThey are fine here. Keep the sauce layer underneath thin so they stay soft without turning heavy.
Corn tortillasWarm them well before rolling. Use less filling if they are small.
Store-bought sauceUse it. Taste before adding salt to the filling.
2 cups chickenMake slightly lighter enchiladas, or add black beans, corn, sautéed peppers, or extra cheese.
No green chilesSkip them, or add a little extra cumin, garlic, onion, or jalapeño.
Only cheddarUse it, but mix with Monterey Jack next time for a smoother melt.
Taco seasoningUse a small amount in place of the cumin, garlic powder, and onion powder. Taste before adding extra salt.

Dry filling needs sauce. Loose filling needs chicken or cheese. Cracking tortillas need warmth. Enchiladas are forgiving once the sauce and cheese settle in.

Want the Same Flavor Without Rolling?

If rolling tortillas feels like too much on a busy night, make the same chicken-sauce-cheese idea as a layered bake. This Chicken Enchilada Casserole Recipe gives you the flavor of chicken enchiladas without filling and rolling each tortilla.

The casserole version is also useful when your tortillas are tearing, when you need a scoopable dinner, or when you want enchilada flavor with less assembly.

What to Serve with Chicken Enchiladas

This is a rich, saucy, cheesy dish, so the best sides and toppings bring freshness, creaminess, crunch, or acidity.

  • Fresh: cilantro, lime wedges, pico de gallo, diced onion, simple green salad
  • Creamy: sour cream, Greek yogurt, avocado, Guacamole
  • Hearty: Mexican rice, cilantro lime rice, black beans, refried beans
  • Crunchy: tortilla chips, pickled onions, shredded lettuce
  • Sweet-fresh: Mango Salsa
  • Snack-table side: 7 Layer Dip

For a spicy pan, cool the plate down with sour cream, avocado, or salad. With a milder pan, bring heat at the table with jalapeños, hot sauce, pickled onions, or lime.

Make Ahead, Storage, Freezing, and Reheating

Make Ahead

You can assemble chicken enchiladas up to 24 hours ahead. Cover the dish and refrigerate until ready to bake. For the best texture, keep a little sauce and cheese aside and add them just before baking.

If baking straight from the fridge, add 5–10 extra minutes to the bake time. The center should be hot, the cheese should be melted, and the sauce should bubble around the edges.

Storage

Store leftover chicken enchiladas in an airtight container in the fridge for 3–4 days. The tortillas will soften as they sit, but the flavor usually gets even better by the next day. For general leftover timing and safe reheating guidance, see the USDA leftovers guidance.

Freezing

Chicken enchiladas freeze well. You can freeze them unbaked or freeze baked leftovers. Wrap the dish tightly, or freeze individual portions in airtight containers for easier reheating. For best texture, use frozen portions within 2–3 months.

Thaw overnight in the fridge before baking or reheating for the cleanest texture. If baking from frozen, keep the dish covered at first so the center heats through, then uncover near the end so the top does not stay wet.

For another freezer-friendly tortilla meal, these Meal Prep Breakfast Burritos use similar moisture-control logic: keep wet toppings out, cool the filling, and reheat with texture in mind.

Reheating

Reheat a larger portion covered in a 350°F / 175°C oven until hot. Reheat individual portions in the microwave. If the enchiladas look dry, spoon a little extra sauce over the top before reheating.

Troubleshooting Chicken Enchiladas

A cracked tortilla or messy first serving does not ruin the pan. Enchiladas are forgiving once the sauce and cheese settle in.
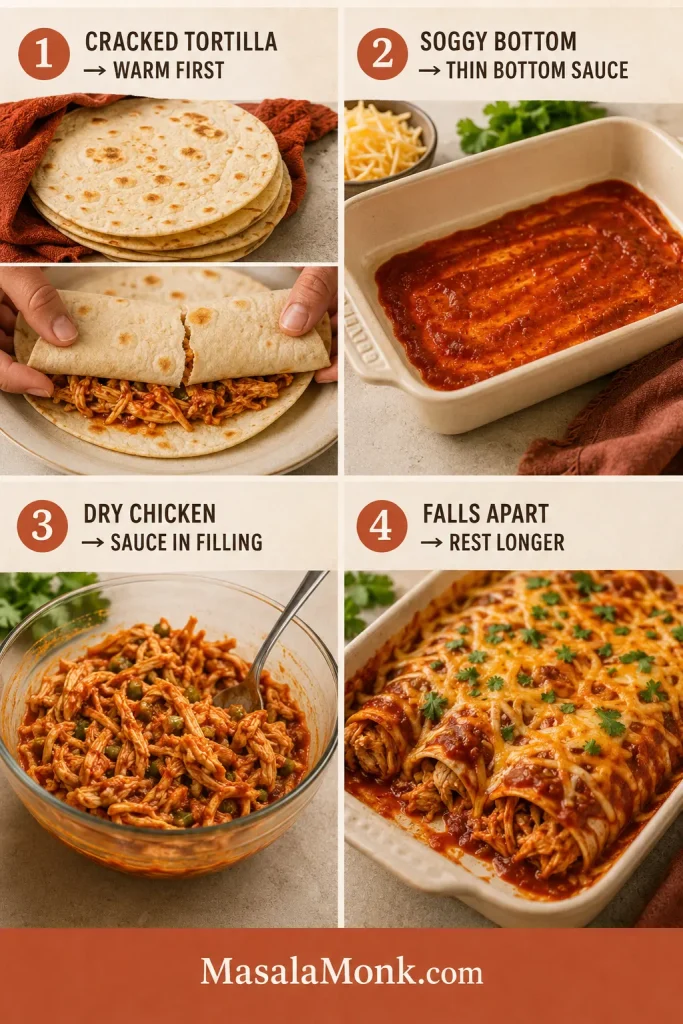
Four-panel chicken enchilada troubleshooting guide showing fixes for cracked tortillas, soggy bottoms, dry chicken filling, and enchiladas falling apart.
When enchiladas crack, turn soggy, taste dry, or fall apart, the fix usually comes down to warmer tortillas, controlled sauce, moist filling, and rest time.

Why did my tortillas crack?

The tortillas were probably cold, dry, or overfilled. Warm them before rolling, and use less filling if you are working with small corn tortillas. If one tortilla tears, tuck it seam-side down and let the sauce and cheese cover the rough edges.

What makes chicken enchiladas soggy?

Usually too much sauce on the bottom, watery filling, cold tortillas, very hot filling, or a pan that was covered too long. Use the ½-½-1½ sauce split, let steaming filling settle briefly, bake uncovered, and rest before serving.

Why is the chicken dry?

The chicken may have been dry before it went into the filling, or it may not have been mixed with enough sauce. Stir sauce, green chiles, spices, and cheese into the chicken before rolling.

Why did the enchiladas fall apart?

They may have been overfilled, over-sauced, or served too soon after baking. If the first enchilada comes out messy, the pan probably needed a few more minutes to rest.

What if my filling tastes bland?

Add a little more salt, cumin, garlic powder, green chiles, or enchilada sauce before rolling. The filling should taste good on its own before it goes into the tortillas.

What if my enchiladas look dry after baking?

Spoon warm enchilada sauce over the top before serving. Next time, mix a little more sauce into the chicken filling and check that the top is fully covered before baking.

Why did the cheese get oily?

Some cheese blends release more oil when baked. Use Monterey Jack, a good Mexican blend, or a cheddar-Jack mix, and avoid overbaking once the cheese has melted.

Fixed the issue? Go back to the recipe card, review the sauce split, or return to the top.

FAQ

Rotisserie chicken or cooked chicken breast — which is better?

Rotisserie chicken is fastest because it is already tender and seasoned. Cooked chicken breast works too; mix it well with sauce and spices so the filling does not taste plain.

Are corn or flour tortillas better for chicken enchiladas?

Corn tortillas are more classic and slightly firmer. Flour tortillas are softer and easier to roll. Both work if they are warm and not over-sauced.

How do you keep chicken enchiladas from getting soggy?

Use the ½-½-1½ sauce split: ½ cup under the enchiladas, ½ cup in the chicken, and 1½ cups on top. Warm the tortillas, avoid overfilling, bake uncovered, and rest before serving.

Should enchiladas be covered while baking?

Bake this pan uncovered unless you specifically want very soft enchiladas. For softer enchiladas, cover for the first 15 minutes, then uncover to finish.

Do tortillas have to be fried for enchiladas?

No, but corn tortillas benefit from a quick warm in a lightly oiled skillet. It makes them more flexible and helps them hold up better in sauce.

How much filling should go in each tortilla?

Use about ⅓ cup filling for medium tortillas, 2–3 tablespoons for small corn tortillas, and up to ½ cup for large flour tortillas.

What cheese melts best for chicken enchiladas?

Monterey Jack, Mexican blend, cheddar-Jack, and Oaxaca all melt well. Cotija and queso fresco are better as finishing toppings.

Is red or green enchilada sauce better with chicken?

Both are good. Red sauce tastes cozy and classic. Green sauce is brighter and tangier, especially with lime, cilantro, sour cream, and Monterey Jack.

How far ahead can chicken enchiladas be assembled?

Assemble them up to 24 hours ahead and keep them covered in the fridge. For the best texture, hold back some top sauce and cheese until just before baking.

Do chicken enchiladas freeze well?

Yes. Freeze them unbaked or freeze baked leftovers. Wrap tightly and reheat with a little extra sauce if they seem dry.

What is the difference between chicken enchiladas and chicken enchilada casserole?

Rolled enchiladas are filled and tucked seam-side down. Chicken enchilada casserole uses similar ingredients but layers them in a dish instead of rolling each tortilla.

Next Time You Want an Easy Tortilla Dinner

Once you have the tortillas out, it is easy to stay in that dinner lane. These Sheet Pan Chicken Fajitas keep the same weeknight rhythm: seasoned chicken, warm tortillas, and simple toppings.

For another tortilla meal, try this Breakfast Burrito Recipe. Need something quicker and lighter? The Shrimp Tacos Recipe keeps the same fresh-topping energy in a faster format.

Final Thought

Good chicken enchiladas do not need perfect tortillas, homemade sauce, or freshly cooked chicken. They need moist filling, warm tortillas, controlled sauce, and a few minutes of patience after baking.

Let the pan sit while the toppings hit the table, then spoon the saucy edges over each serving.

Do that, and the pan gives you what you came for: soft tortillas, juicy chicken, bubbling cheese, and saucy edges worth scooping from the dish.

Back to top

Posted on Leave a comment

Honey Mustard Chicken Tenders Recipe

Golden panko-coated honey mustard chicken tenders on a plate with dip, pickles, crumbs, and a cut-open cooked tender.

These honey mustard chicken tenders are for the night you want crispy chicken strips, a creamy sweet-tangy dip, and zero deep-frying drama. The chicken stays juicy, the panko turns golden, and every piece is made for dragging through honey mustard sauce.

They are the kind of tenders people pick from the tray before dinner is even on the table: crisp edges, juicy centers, and just enough honey mustard to keep everyone reaching for one more.

Here, the goal is simple: no pale panko, no soggy bottoms, no dry chicken, and no wasted dipping sauce because it touched raw chicken. Everything runs on one simple system: creamy honey mustard as the binder, panko as the crunch, clean dip reserved first, then an oven or air fryer finish.

Remember the signature rule: mix once, divide first — one clean bowl for dipping, one bowl for coating raw chicken. For the best all-around tray, use chicken strips about 3/4 inch thick, press them into panko, and bake at 425°F / 220°C until golden and cooked through. It is the kind of dinner that feels fun without asking you to set up a frying station or babysit a pan of oil.

Quick Answer: How to Make Honey Mustard Chicken Tenders

To make crispy honey mustard chicken tenders, pat chicken tenderloins or chicken breast strips dry, coat them in a creamy mustard-honey mixture, reserve clean sauce before raw chicken touches the rest, press the coated chicken into panko breadcrumbs, then bake at 425°F / 220°C for 16–20 minutes or air fry at 390°F / 200°C for 10–12 minutes.

The chicken is done when the thickest piece reaches 165°F / 74°C. For the best texture, keep the strips evenly sized, spray the crumb layer lightly with oil, leave space between pieces, and dip at the table instead of pouring sauce over the crust too early.

Jump to recipe card · Oven method · Air fryer method · Fix a problem

Honey Mustard Chicken Tenders Recipe Card

Recipe: Crispy Honey Mustard Chicken Tenders

Main method: Oven baked
Alternate method: Air fryer
Servings: 4
Yield: About 10–12 chicken tenders

Prep Time15 minutes
Optional Rest15–30 minutes
Cook Time16–20 minutes oven / 10–12 minutes air fryer
Total Time35–45 minutes, plus optional 15–30 minute rest
Chicken Doneness165°F / 74°C internal temperature

Ingredients

For the Chicken and Coating

  • 1 1/2 lb / 680 g / 24 oz chicken tenderloins, or boneless chicken breast sliced into strips about 3/4 inch thick
  • 1 1/2 cups / 75–90 g panko breadcrumbs
  • Fine salt, 1 teaspoon / 5–6 g, divided
  • Black pepper, 1/2 teaspoon
  • Garlic powder, 1 teaspoon
  • Onion powder, 1/2 teaspoon
  • Smoked paprika or sweet paprika, 1 teaspoon
  • Oil spray, or 1 tablespoon / 15 ml olive oil for drizzling

For the Honey Mustard Coating and Dipping Sauce

  • 1/4 cup / 60 ml / about 60 g Dijon mustard, yellow mustard, or a mix of both
  • 3 tablespoons honey / 45 ml / about 60 g
  • 3 tablespoons mayonnaise or Greek yogurt / 45 ml / about 45 g
  • 1 tablespoon / 15 ml lemon juice or apple cider vinegar
  • 1/4 teaspoon garlic powder
  • Pinch of salt and black pepper, to taste

Sauce note: This amount gives enough sauce to coat the chicken and reserve a small dipping bowl. For sauce-heavy serving, make a second half-batch of honey mustard or reserve more before raw chicken touches it.

Instructions

Prepare the Sauce

  1. In a bowl, mix the mustard, honey, mayonnaise or Greek yogurt, lemon juice or vinegar, garlic powder, salt and pepper.
  2. Taste and adjust. Make it sweeter with more honey, sharper with extra Dijon, or brighter with a little more lemon juice.
  3. Mix once, divide first: reserve about one-third to one-half of the sauce in a clean bowl for dipping. Keep this portion away from raw chicken.

Coat the Chicken

  1. Pat the chicken tenders dry with paper towels. The surface should look dry, not shiny-wet.
  2. Season the chicken lightly with some of the salt, pepper, garlic powder, onion powder and paprika.
  3. Add the chicken to the remaining honey mustard mixture and turn until each piece is coated.
  4. Let the chicken sit for 15–30 minutes if you have time. Avoid a long acidic marinade for very thin strips because the surface can soften and the coating may not grip as well.
  5. Place the panko breadcrumbs in a shallow bowl. Season with the remaining salt and spices.
  6. Press each honey mustard-coated chicken tender firmly into the panko, turning to coat all sides.

Bake the Chicken Tenders

  1. Preheat the oven to 425°F / 220°C. Line a baking sheet with parchment paper. For crispier bottoms, place a wire rack over the baking sheet.
  2. Arrange the coated tenders in a single layer with space between them.
  3. Spray the tops lightly with oil, or drizzle with a small amount of olive oil.
  4. Bake for 16–20 minutes, flipping once if needed, until the edges are golden and the chicken is cooked through.
  5. Check the thickest tender for doneness.
  6. Rest for 3–5 minutes on a rack or plate, then serve with the reserved clean honey mustard dipping sauce.

Air Fryer Method

  1. Preheat the air fryer to 390°F / 200°C.
  2. Arrange the chicken tenders in a single layer. Do not overcrowd the basket.
  3. Spray lightly with oil.
  4. Air fry for 10–12 minutes, flipping halfway, until crisp and cooked through. Check around 9–10 minutes the first time because air fryers brown at different speeds.
  5. Cook in batches if needed. Two lighter batches will beat one crowded batch every time.

Recipe Notes

  • No egg is needed here because the honey mustard mixture acts as the binder.
  • Very thin strips cook quickly, so start checking early.
  • Thicker tenders may need the full 20 minutes, or a gentler 400°F / 200°C bake for a few extra minutes.
  • For the crunchiest crust, use a wire rack and oil spray.
  • To get a familiar fast-food-style honey mustard, use more yellow mustard and mayonnaise.
  • Prefer a sharper Dijon-style sauce? Use more Dijon and a little extra lemon juice.

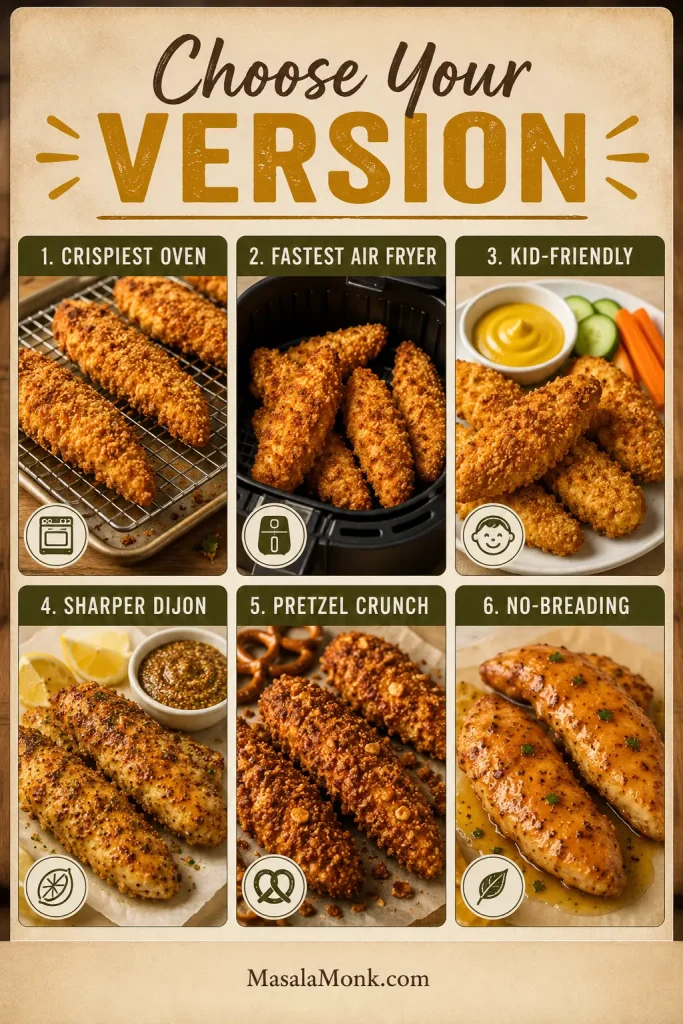
Choose Your Version

Already know what kind of tray you want? Use this table to steer the recipe. The base method stays the same; the small changes below make the tenders crunchier, faster, milder, sharper, party-style, or gluten-free.

Six-panel board comparing honey mustard chicken tender versions: oven, air fryer, kid-friendly, Dijon, pretzel crunch, and no-breading.
Choose the version that fits your night: oven-baked for maximum crunch, air fryer for speed, Dijon for a sharper bite, pretzel crumbs for texture, or no-breading for a lighter option.
Want This Result?Do This
Crispiest oven tendersUse panko, toast it first if you can, spray with oil, and bake on a wire rack.
Fastest versionUse the air fryer at 390°F / 200°C in a single layer.
Kid-friendly flavorUse yellow mustard, mayonnaise, and a little extra honey.
Sharper Dijon versionUse more Dijon, Greek yogurt, and extra lemon juice.
Party-style crunchReplace panko with crushed pretzels and reduce added salt.
Gluten-free versionUse gluten-free panko or crushed gluten-free rice cereal.
No-breading versionSkip the panko and bake lightly coated honey mustard tenderloins.

Time and Temperature Guide

Chicken tenders cook quickly, so timing matters. Use the table below as a guide, then check the thickest piece before serving.

MethodTemperatureTimeBest For
Oven, standard tenders425°F / 220°C16–20 minutesFull batch, golden crumb crust
Oven, thick tenders400°F / 200°C20–25 minutesLarger chicken strips
Air fryer390°F / 200°C10–12 minutesFast crisping, smaller batches
Reheat375–390°F / 190–200°C5–8 minutes, or until hot and crispLeftovers

Chicken should reach 165°F / 74°C in the thickest part. The tenders should also look golden at the edges and feel firm when lifted with tongs, but the thermometer is the safest check.

Once the timing is clear, the next thing is texture. These tenders work because the coating is built to cling, brown, and stay crisp long enough to dip.

Why This Recipe Works

The best honey mustard chicken tenders are not just sweet chicken in breadcrumbs. They need a coating that stays put, a crust that browns before the chicken dries out, and a dipping sauce that does not soften the crunch too early.

The magic is not complicated, but it does depend on a few small choices that keep baked tenders from tasting like soft breaded chicken.

  • Dry chicken helps the coating grip. You want the mustard-honey layer to cling, not slide around.
  • Honey mustard replaces egg. It gives the crumbs something to hold onto and adds flavor at the same time.
  • Panko gives the oven-fried bite. It is lighter and flakier than regular breadcrumbs.
  • Oil spray brings the color. Dry crumbs stay pale; a little oil helps them turn golden.
  • Space and a rack fight steam. Give the tenders a little breathing room so they brown instead of softening together.
  • Reserved sauce stays clean. Moving the dip to a separate bowl before coating the chicken keeps serving simple and safe.

When those pieces work together, you get the comfort of chicken fingers, the brightness of honey mustard, and a crisp bite that still tastes juicy underneath.

The best part is the contrast: the craggy panko shell, the tender strip of chicken inside, and that cool-sweet honey mustard dip catching in all the little crispy edges.

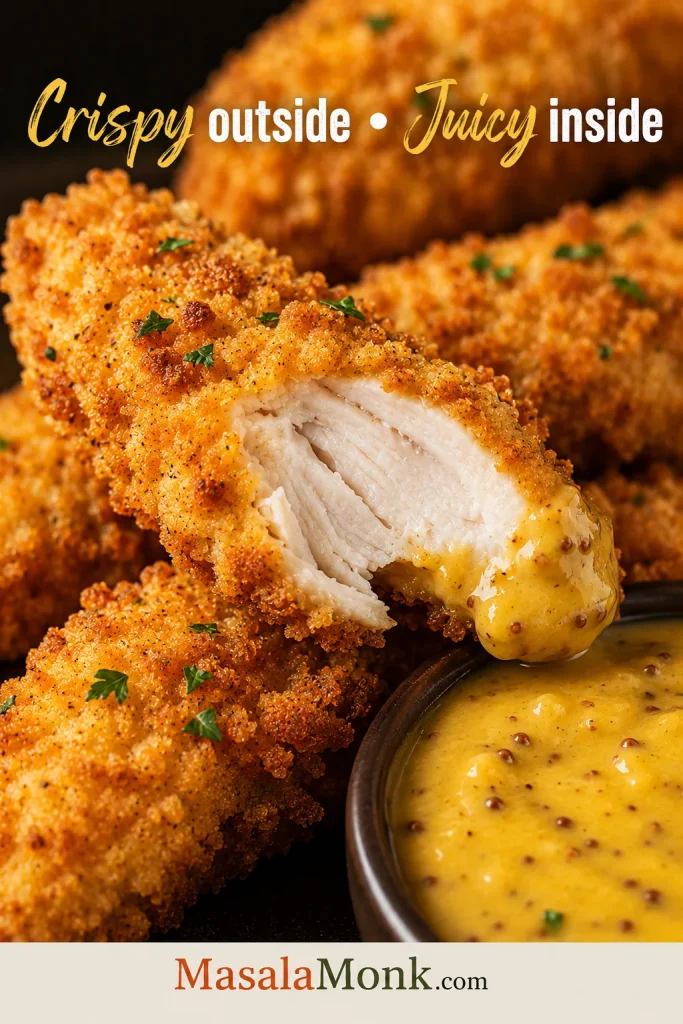
Crispy Outside, Juicy Inside

This is the texture target to keep in mind before you start coating: crisp crumbs on the outside, tender chicken in the middle, and sauce served on the side so the crust stays lively.

Close-up of a cut-open crispy chicken tender with golden panko coating, white cooked chicken inside, and honey mustard dip nearby.
Aim for contrast in every bite: a crunchy panko shell outside and moist white chicken inside. Pull the tenders once they are cooked through so the center stays juicy.

Ingredients You Need

Most of the flavor comes from the ingredients. Simple tools and small technique choices handle the texture.

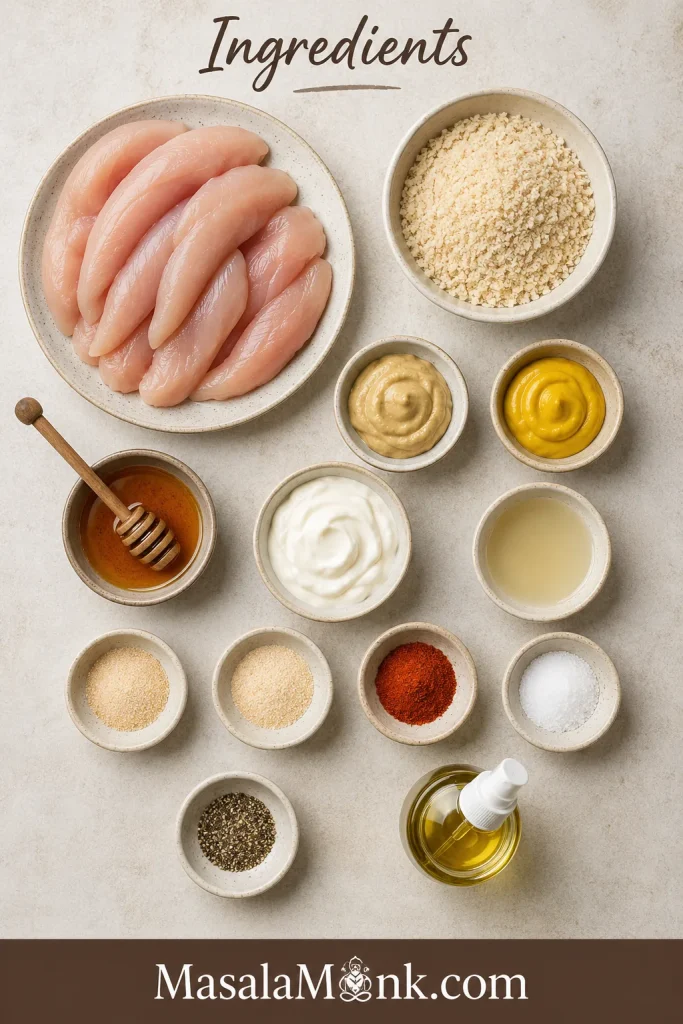
Overhead layout of ingredients for honey mustard chicken tenders, including raw chicken, panko, mustard, honey, yogurt or mayo, spices, and oil.
Set out the chicken, panko, sauce ingredients, seasonings, and oil spray before you start. It keeps the coating step smooth and makes it easier to reserve a clean dipping bowl.

Chicken Tenderloins or Chicken Breast

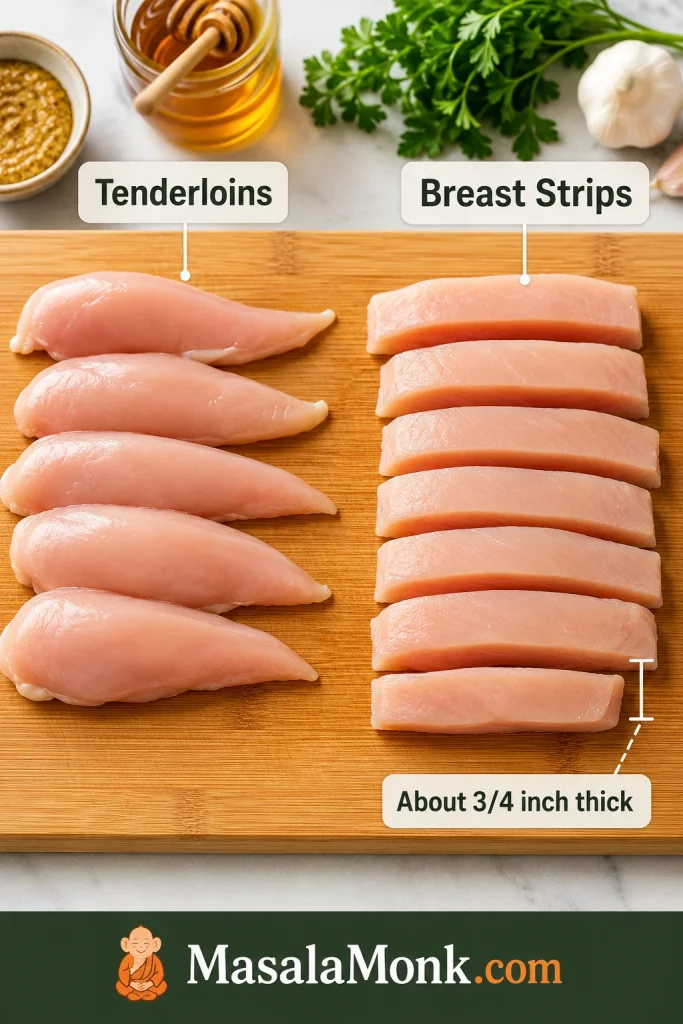
Chicken tenderloins are easiest because they are already shaped like strips. Boneless chicken breast works too; just slice it lengthwise into even pieces about 3/4 inch thick at the widest part. Very thin strips cook before the crumbs brown, while very thick strips need more time and can darken the honey before the center is done.

Raw chicken tenderloins and sliced chicken breast strips arranged side by side on a cutting board with a 3/4 inch thickness label.
Even thickness matters more than perfect shape. Keep chicken tenderloins or breast strips close to 3/4 inch thick so the coating can brown before the center dries out.

If you are starting with full chicken breasts and want more detail on keeping them juicy, this baked chicken breast recipe goes deeper into timing, thickness, and avoiding dry chicken.

Mustard

Dijon brings bite; yellow mustard brings nostalgia. Use Dijon for a sharper sauce, yellow mustard for a milder dipping-sauce flavor, or a mix of both for the best middle ground.

Honey

Honey gives the sauce its classic sweetness, but this is not a sticky glaze recipe. The honey mustard flavors the chicken while the panko does the crisping, so the tenders stay crunchy instead of turning syrupy.

Mayonnaise or Greek Yogurt

Mayonnaise makes the sauce creamy and familiar. Greek yogurt gives you a lighter, tangier version. Both help the mustard-honey coating cling to the chicken and hold the crumbs in place.

If you like making creamy sauces from scratch, this homemade mayonnaise guide gives you a richer base for dips.

Panko Breadcrumbs

Panko is what keeps baked tenders from feeling like soft breaded chicken. The flakes are light and uneven, so they create a craggy shell that feels much closer to fried chicken fingers.

This recipe skips the classic flour-and-egg dredge to keep the coating simple. The mustard-honey layer works as the glue. For a firmer, more restaurant-style crust, lightly dust the chicken with flour before dipping it into the sauce, then press it into the panko.

Seasonings

Garlic powder, onion powder, paprika, salt and pepper are enough. They make the coating savory without hiding the honey mustard flavor.

Equipment That Helps

You can make these with a baking sheet and a bowl, but a few simple tools make the difference between “good enough” tenders and crisp, golden ones.

  • Rimmed baking sheet: Keeps crumbs and oil contained.
  • Parchment paper: Helps prevent sticking and makes cleanup easier.
  • Wire rack: Gives the bottoms a better chance to crisp.
  • Shallow bowl: Makes pressing the panko onto the chicken easier.
  • Oil spray: Helps the crumbs turn golden without deep frying.
  • Air fryer: Optional, but excellent for smaller batches.
  • Instant-read thermometer: Helpful for avoiding dry or undercooked chicken.

Honey Mustard Sauce: Dip, Binder or Marinade?

Honey mustard does three jobs here: it helps the crumbs stick, flavors the chicken, and gives you that creamy dipping bowl at the end. The only rule is that the dip must be reserved before raw chicken touches the rest.

Sauce safety rule: mix once, divide first. Make one batch of honey mustard, then immediately move the dipping portion to a clean bowl before raw chicken touches the rest.

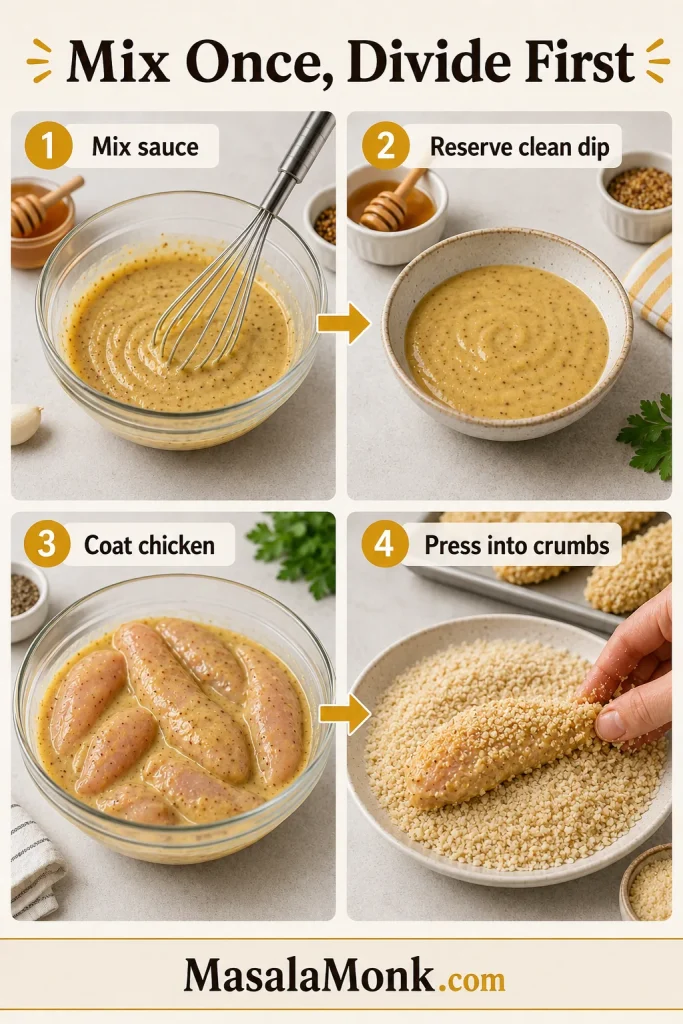
Mix Once, Divide First

This visible split is what keeps dinner simple: one bowl becomes the clean dip, while the rest of the sauce seasons and coats the raw chicken before breading.

Four-panel guide showing honey mustard sauce mixed, clean dip reserved, raw chicken coated, and chicken pressed into panko crumbs.
Mix once, then divide before raw chicken touches the sauce. This keeps one bowl safe and clean for dipping while the remaining honey mustard becomes the flavorful coating binder.

The sauce has three jobs. First, it helps the crumb layer stick. At the table, it gives the cooked tenders that creamy sweet-tangy finish. If the chicken rests for 15–30 minutes before breading, the same sauce also works as a short flavor boost.

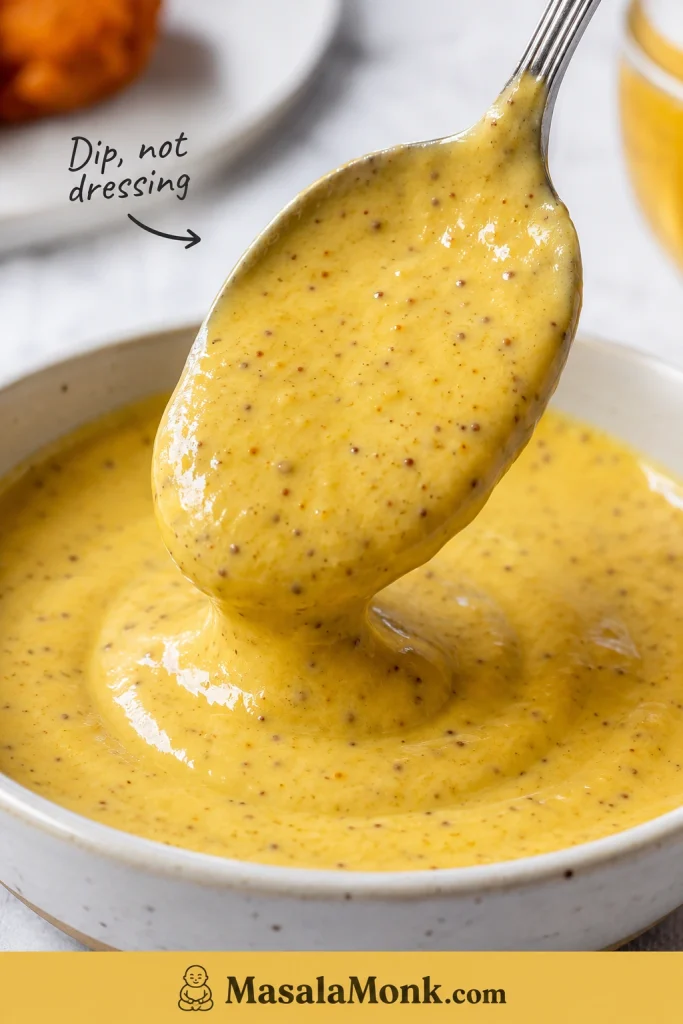
Honey Mustard Sauce Spoon Test

Before the chicken goes in, lift a spoon through the sauce and check the texture. It should coat the spoon in a creamy layer, not run off immediately.

Thick creamy honey mustard sauce clinging to the back of a spoon above a bowl with visible mustard specks.
Look for a spoon-coating texture: thick enough to cling, creamy enough to dip. If the honey mustard looks runny, thicken it slightly before coating the chicken.

For a loose sauce, whisk in another spoonful of mayo or Greek yogurt before breading. A thicker sauce grips the chicken better and protects the panko from turning wet.

Very thin strips do not need an overnight marinade, especially if your sauce is tangy with lemon juice or vinegar. Too much time in an acidic sauce can soften the surface and make the coating less secure.

Simple Honey Mustard Dipping Sauce Ratio

  • 1/4 cup / 60 ml mayonnaise or Greek yogurt
  • 2 tablespoons / 30 ml Dijon or yellow mustard
  • 2 tablespoons honey / 30 ml / about 40 g
  • 1–2 teaspoons lemon juice or apple cider vinegar
  • Pinch of garlic powder
  • Salt and pepper to taste

Make it sweeter with more honey, sharper with extra Dijon, or more familiar and restaurant-style with yellow mustard and mayo. Greek yogurt plus a little extra lemon juice gives you the lighter, tangier version.

If you enjoy this sweet-tangy lane, mango mustard sauce is a fun next dip for fries, wraps and sandwiches.

Next: press into panko · Bake the tenders · Air fry the tenders · Back to recipe card

How to Make Honey Mustard Chicken Tenders

Once the recipe card is open, these are the small visual cues that make the tray come out right: dry surface, spoon-coating sauce, firmly pressed crumbs, enough space, and golden edges.

1. Dry and Season the Chicken

The chicken should look dry before the sauce goes on. You want the mustard-honey coating to cling, not slide around.

2. Mix, Taste and Divide the Sauce

The sauce should taste sweet first, tangy next, and creamy enough to dip. Once it tastes right, reserve the clean dipping portion before you coat the raw chicken.

3. Coat Lightly, Not Heavily

You want a thin layer of honey mustard clinging to the chicken, not a heavy blanket of sauce. Too much sauce can make the crumbs wet and slow down browning.

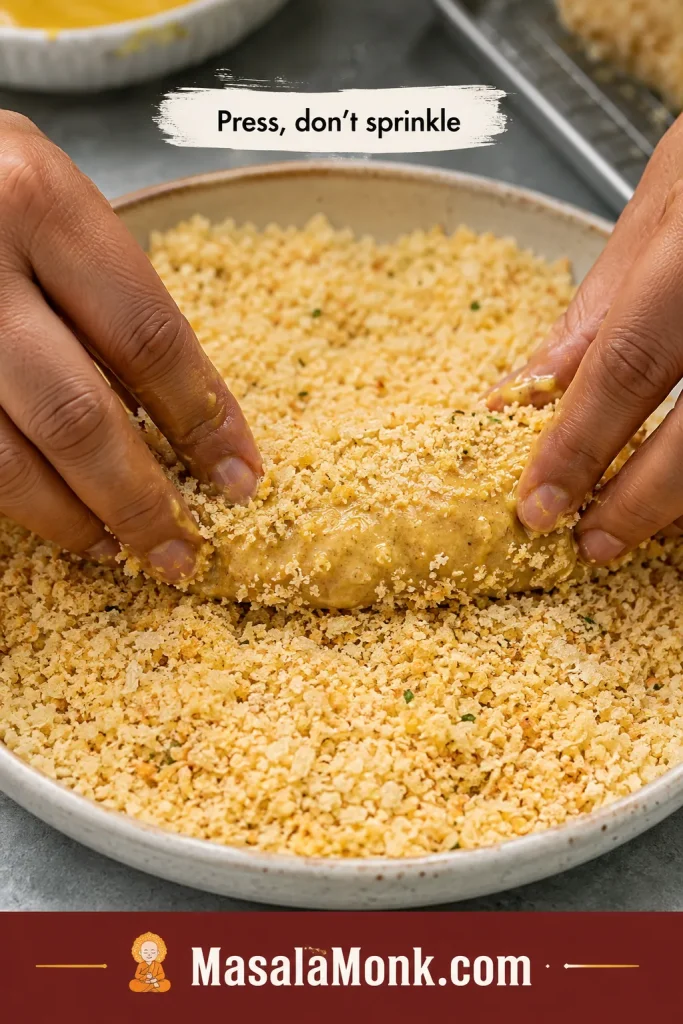
4. Press the Panko

Press the crumbs onto the chicken instead of sprinkling them over the top. The coating should look attached before it goes into the oven or air fryer.

Hands pressing a honey-mustard-coated chicken tender into coarse panko breadcrumbs in a shallow bowl.
After coating the chicken, press it firmly into the panko instead of sprinkling crumbs over the top. This helps the breadcrumb crust grip better during baking or air frying.

5. Space, Spray and Cook

Leave gaps between the tenders and give the crumb layer a light spray of oil. This is the step that makes the tray look like dinner instead of pale baked chicken: the crumbs need both heat and a little fat to turn golden.

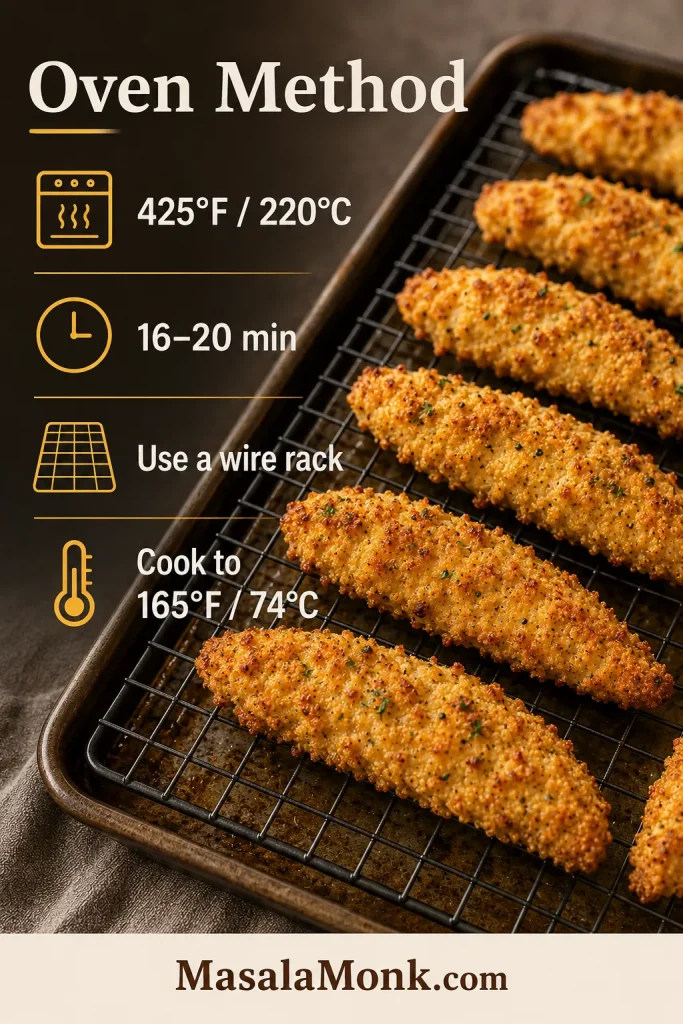
Oven Method

Use the oven when you want the whole tray ready together, with enough tenders for dinner plates and a few “just one more” pieces.

  • Temperature: 425°F / 220°C
  • Time: 16–20 minutes
  • Best setup: parchment-lined baking sheet or a wire rack over a baking sheet
  • Texture goal: golden crumbs, juicy chicken, crisp edges
Oven method guide for panko honey mustard chicken tenders showing baking temperature, time, wire rack use, and safe doneness.
For the oven method, high heat and rack spacing do most of the work. The rack helps the panko crisp underneath while the quick bake keeps the chicken tender.

Why Use a Wire Rack?

A wire rack helps hot air reach the bottom of the tenders, which keeps them from steaming against the pan. When baking directly on parchment, flip the tenders once for better bottom color. With a rack, flipping is optional.

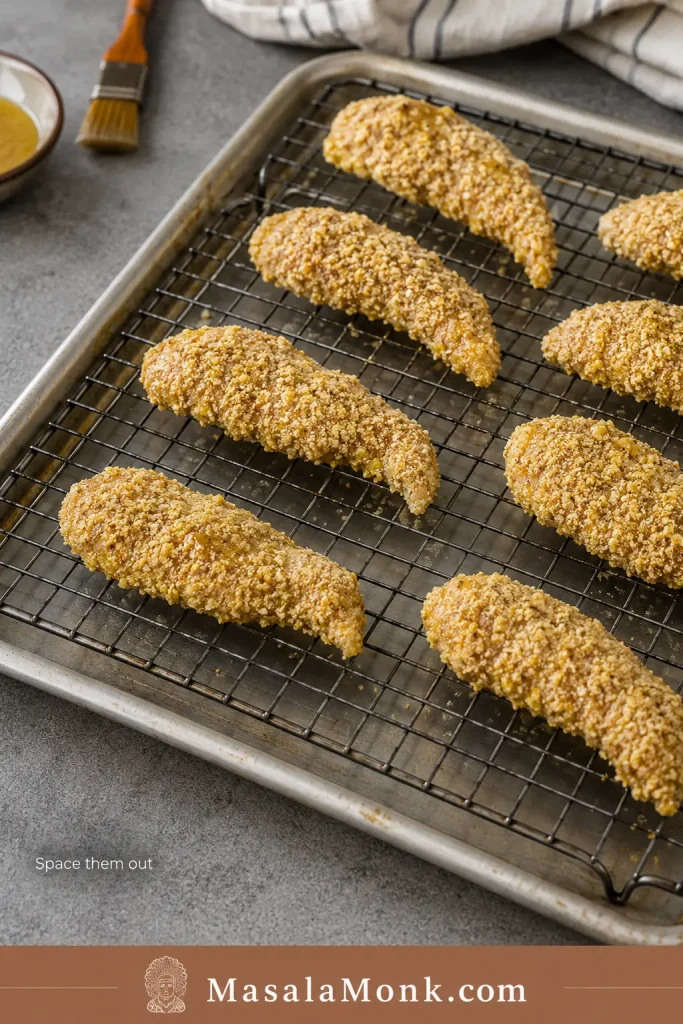
Breaded chicken tenders spaced apart on a wire rack over a rimmed baking sheet before baking.
A wire rack gives baked chicken tenders an instant crispness boost. Because heat can move underneath the pieces, the bottoms stay drier and the panko browns more evenly.

Thick tenders can bake at 400°F / 200°C for about 20–25 minutes. Thin strips may be ready closer to 14–16 minutes, so start checking early.

Compare the air fryer method · Make them extra crispy · See serving ideas · Back to recipe card

Air Fryer Method

Use the air fryer when speed matters more than cooking the whole batch at once. It crisps the crumb layer quickly, but only if the basket has enough space.

Air Fryer Single Layer Setup

Before starting the timer, check the basket. The pieces should sit in one layer with visible gaps, even if that means cooking two smaller batches.

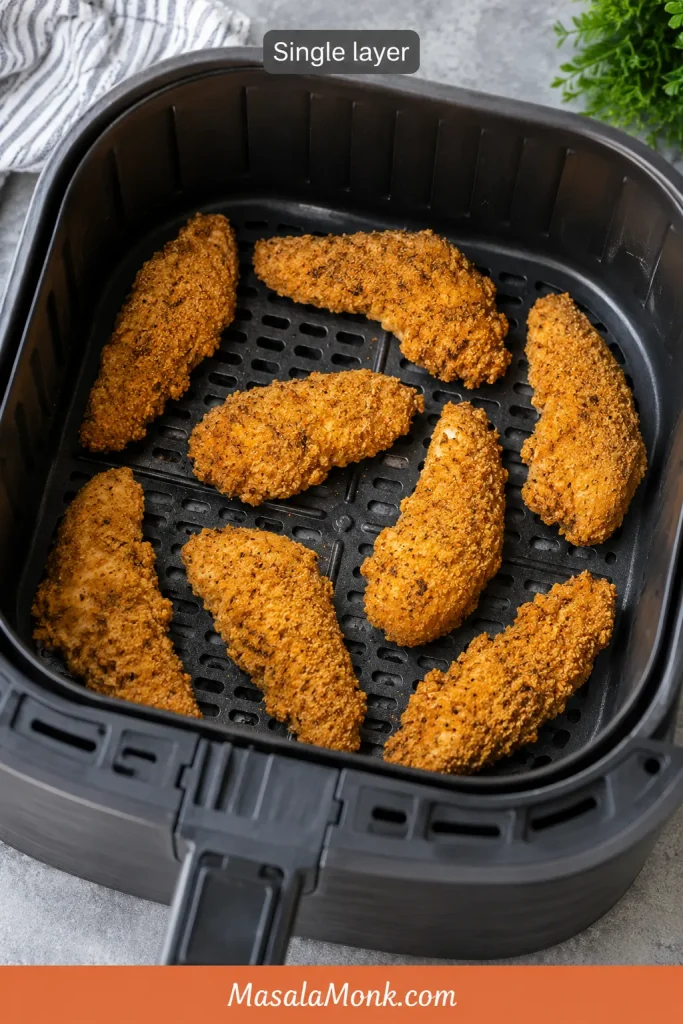
Breaded chicken tenders arranged in a single layer inside a black air fryer basket with space between each piece.
In the air fryer, crowding turns crisping into steaming. Therefore, leave small gaps between the tenders so the hot air can brown the panko coating properly.
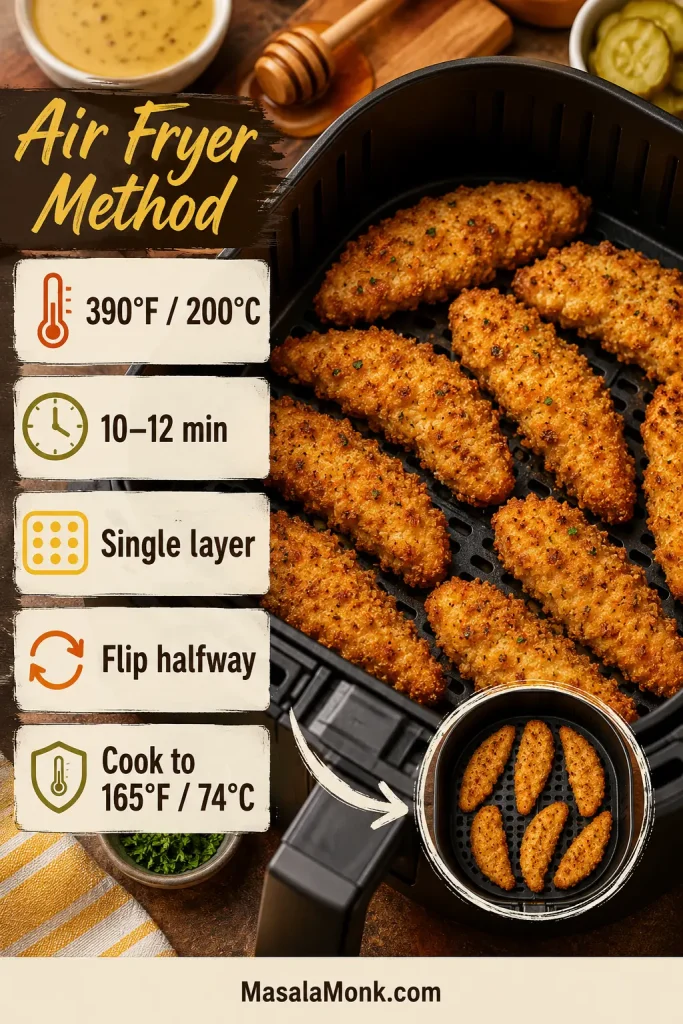
  • Temperature: 390°F / 200°C
  • Time: 10–12 minutes
  • Flip: halfway through
  • Oil: light spray on both sides
  • Best rule: cook in batches if the basket is small

Air Fryer Time and Temperature Guide

Use this quick visual check when you want the air fryer version: moderate-high heat, a halfway flip, and enough space for the crumbs to crisp.

Air fryer method guide with breaded chicken tenders in a basket and text for temperature, time, flipping, single-layer spacing, and doneness.
Give every tender room in the air fryer basket. Meanwhile, flipping halfway helps both sides get direct heat so the coating crisps instead of softening.

Different air fryers brown at different speeds, so check around 9–10 minutes the first time. Keep the first batch warm on a rack in a low oven while the rest cook, and avoid stacking hot tenders in a bowl because steam will soften the crust.

The same air-flow rule shows up in crispy recipes like air fryer chicken wings: dry surfaces, space between pieces, and late saucing protect the crunch.

Make them extra crispy · Try another coating · See serving ideas · Back to recipe card

Extra Crispy Upgrades

Once the basic method is in place, these upgrades take baked chicken tenders from good to properly crisp. They are especially helpful if your baked tenders usually come out pale or soft.

  • Toast the panko first. This is the best color upgrade. Toasting gives baked tenders a golden head start before the chicken has a chance to overcook.
  • Use a wire rack. It lets heat move around the tenders instead of trapping steam underneath.
  • Spray both sides lightly. A little oil helps the crumbs brown and gives the crust a more oven-fried texture.
  • Rest cooked tenders on a rack. If you have a rack, use it even after baking. It keeps the bottoms from softening while everyone is getting plates ready.
  • Avoid stacking. Hot tenders piled together will soften quickly.
  • Dip, do not drown. Let the crust stay in charge until the moment you eat.

Best Coatings for Honey Mustard Chicken Tenders

Panko is the easiest default, but honey mustard chicken tenders are flexible. Use this quick guide to choose the coating that fits the meal.

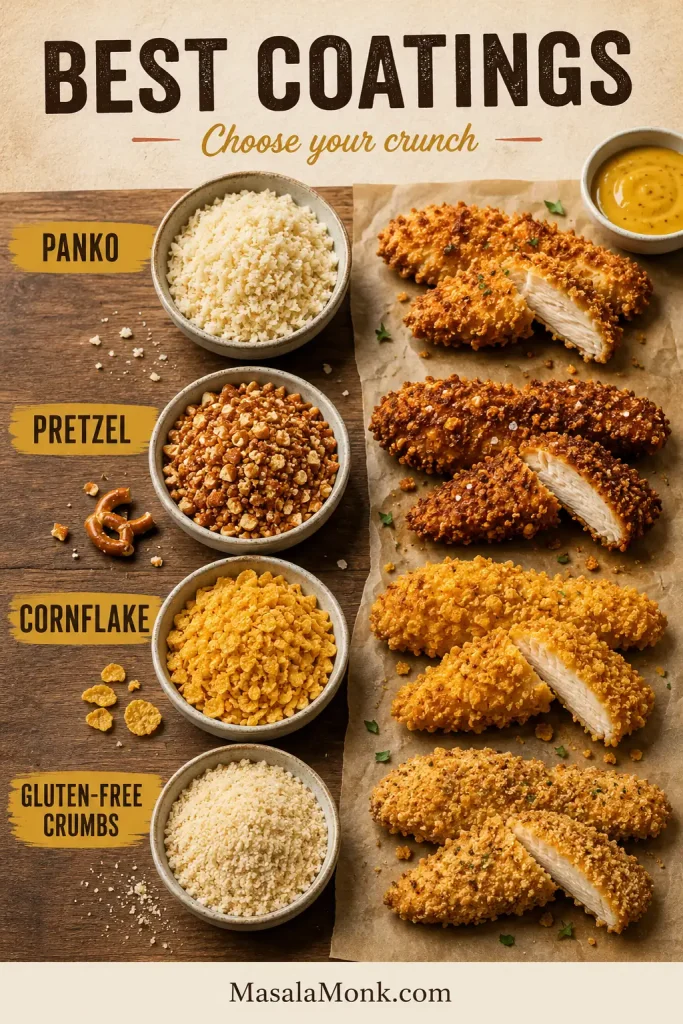
Coating comparison board showing panko, pretzel, cornflake, and gluten-free crumbs with chicken tender samples.
Each coating changes the crunch. Panko stays light and flaky, pretzel crumbs add salty depth, cornflakes create a bigger golden crust, and gluten-free crumbs keep the recipe flexible.
CoatingBest ForNotes
Panko breadcrumbsClassic crispy baked tendersBest default choice
Crushed pretzelsSalty, crunchy party-style tendersUse less added salt
Crushed cornflakesExtra crisp kid-friendly tendersCrush finely but not into powder
Regular breadcrumbsSofter chicken stripsWorks, but less crisp than panko
Gluten-free pankoGluten-free versionCheck labels on mustard and seasonings too
Crushed rice cerealEmergency gluten-free crunchBest with a little extra seasoning

If you use pretzels or cornflakes, crush them into small uneven crumbs. A little texture is good, but a fine powder will not give the same crunch.

Variations

Once the basic tray works, this recipe is easy to bend toward the people eating it — sweeter for kids, sharper for Dijon lovers, spicier for game day, crunchier with pretzels, or lighter without mayo.

Spicy Hot Honey Mustard Chicken Tenders

This is the game-day version: still sweet and creamy, but with enough heat to keep people dipping. Add a pinch of cayenne, chili powder or hot sauce to the honey mustard mixture. You can also finish the cooked tenders with a tiny drizzle of hot honey, but add it at the table so the coating stays crisp.

For a fruitier heat, borrow the sweet-spicy direction from this mango habanero sauce and add only a small amount to the honey mustard dip.

Pretzel-Crusted Honey Mustard Tenders

Replace the panko with crushed pretzels for a salty snack-style crust that feels made for a party tray. Reduce the salt in the crumb mixture because pretzels are already salty.

Buttermilk Honey Mustard Chicken Tenders

For a more tender, classic chicken-finger texture, soak the chicken in buttermilk for 30 minutes before coating. Pat off the excess before adding the honey mustard mixture so the panko does not slide off.

No-Mayo Honey Mustard Sauce

Use Greek yogurt when you want the dip tangier and lighter without losing the creamy coating. Add a little extra honey if you want it sweeter. For an egg-free creamy base, eggless mayonnaise also works well.

Kid-Friendly Yellow Mustard Version

Use yellow mustard instead of Dijon, skip the cayenne or spicy seasonings, and keep the sauce a little sweeter. This version tastes closer to familiar fast-food honey mustard.

Gluten-Free Honey Mustard Chicken Tenders

Use gluten-free panko or crushed gluten-free rice cereal. Also check the mustard, mayonnaise and seasonings to make sure they fit your needs.

No-Breading Honey Mustard Tenderloins

This version is not trying to be crispy. It is for the night you want juicy honey mustard tenderloins over rice, salad, or roasted vegetables. Skip the panko, coat the chicken lightly in honey mustard, and bake on parchment until cooked through, starting to check around 14–16 minutes depending on thickness.

Green Chutney Mayo Dip

For an Indian-style dipping sauce, stir a spoonful of green chutney into mayo or Greek yogurt. It gives the tenders a fresh coriander-mint bite without changing the main recipe.

Shallow-fried note: If you want a more classic chicken-finger texture, shallow fry the coated tenders in a thin layer of neutral oil until golden and cooked through. Keep the heat moderate so the honey in the coating does not brown too fast.

What to Serve with Honey Mustard Chicken Tenders

Once the tray is done, the only real question is whether this is a cozy dinner, a game-day snack, or a wrap-and-leftovers situation. Keep the dip close and build the meal around something crisp, creamy, tangy or fresh.

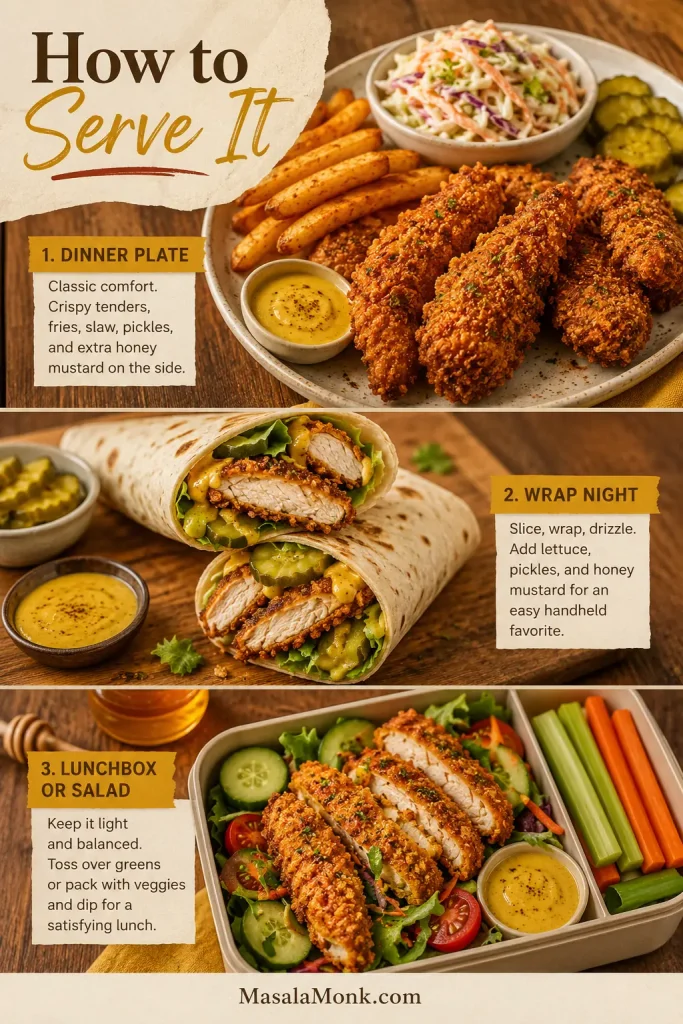
Three serving ideas for honey mustard chicken tenders: dinner plate with fries and slaw, chicken wrap, and lunchbox salad.
These tenders can move from snack to full meal with the right sides. Try them with fries and slaw, tuck them into wraps, or slice them over salad with extra honey mustard.
  • Weeknight dinner: roasted broccoli, green beans, mashed potatoes, or macaroni and cheese.
  • Diner-style plate: crispy homemade French fries, creamy coleslaw, pickles, and extra honey mustard.
  • Game-day tray: buffalo chicken dip, potato wedges, celery sticks, and a pile of napkins.
  • Lunchbox or salad bowl: cucumber salad, green salad, crunchy vegetables, and sliced cold tenders.
  • Wrap or sandwich night: lettuce, pickles, soft buns or tortillas, and enough sauce to swipe through every bite.

Leftover tenders are great sliced over salad, tucked into wraps, or layered into sandwiches with lettuce, pickles and extra honey mustard. For more lunch ideas, these chicken sandwich recipes are a useful next stop.

Storage, Freezing and Reheating

The main rule for leftovers is simple: keep the sauce separate and bring the crunch back with dry heat.

Storing Leftovers

Store cooked chicken tenders in an airtight container in the fridge for 3–4 days. Keep the honey mustard sauce in a separate container so the coating does not soften. That 3–4 day window matches the FoodSafety.gov cold storage chart for cooked meat and poultry leftovers.

Reheating

For the best texture, reheat the tenders in an oven or air fryer at 375–390°F / 190–200°C for about 5–8 minutes, or until hot and crisp. The microwave works if you are in a hurry, but it will soften the coating.

Freezing

For easiest freezing, freeze cooked tenders. Raw breaded tenders can also be frozen if the chicken was handled cold and clean, but cooked leftovers are simpler and safer for most home kitchens. Freeze in a single layer first, then move to a freezer-safe bag or container.

Do not freeze the dipping sauce with the chicken. Make fresh sauce or store it separately in the fridge.

Troubleshooting

Most honey mustard chicken tender problems come down to moisture, crowding, or too much sauce. If baked tenders have ever come out pale, soft, or half-naked on the pan, this is the section that saves the next batch.

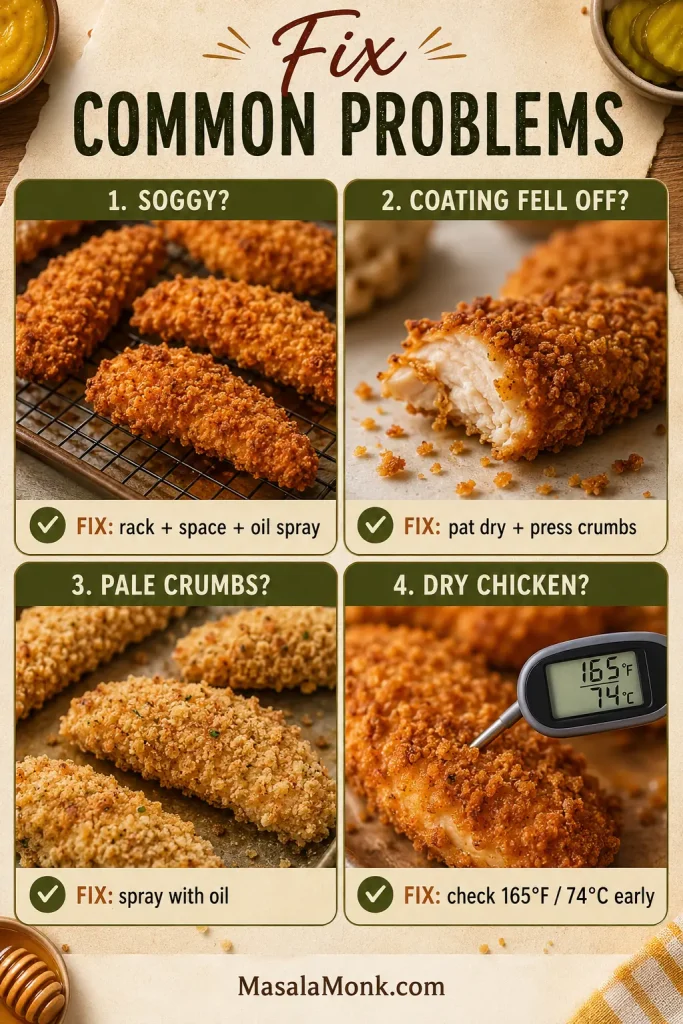
Troubleshooting board showing fixes for soggy chicken tenders, coating falling off, pale crumbs, and dry chicken with temperature guidance.
For soggy coating, fix the airflow first with a rack, spacing, and oil spray. When crumbs fall off, start earlier by patting the chicken dry and pressing the panko firmly.

Why Are My Chicken Tenders Soggy?

Likely causes: crowding, too much sauce, not enough oil on the crumbs, or stacking hot tenders after cooking.

Fix: leave space between pieces, use a rack if possible, spray lightly with oil, rest cooked tenders without stacking, and dip at the table instead of saucing early.

Why Did My Coating Fall Off?

Likely causes: wet chicken, thin sauce, loose crumbs, or not enough pressing.

Fix: pat the chicken dry, use a creamy coating that clings, and press each tender into the panko until the crumbs look attached.

Why Is My Panko Pale?

Likely causes: dry breadcrumbs, low browning, or not enough time for color before the chicken is done.

Fix: spray or drizzle the panko lightly with oil. For deeper color, toast the panko before coating the chicken.

Why Did the Honey Burn?

Likely causes: a sauce layer that is too heavy, very small chicken pieces, or cooking too long.

Fix: use a thin coating, rely on panko for crunch, and start checking thin strips early.

Why Is the Chicken Dry?

Likely causes: thin strips, uneven sizes, or cooking past the safe internal temperature.

Fix: cut even pieces, start checking early, and use a thermometer in the thickest tender.

Why Is the Sauce Too Sweet or Too Sharp?

Likely causes: too much honey for your taste, too much Dijon, or not enough creamy base.

Fix: add mustard or lemon juice if it is too sweet. Add honey, mayo, or Greek yogurt if it is too sharp. Honey mustard should taste sweet first, tangy next, and creamy enough to dip.

Back to recipe card · Review oven method · Review air fryer method · Back to top

FAQs

Are Chicken Tenders and Chicken Strips the Same Thing?

They are often used the same way in recipes. Tenderloins are the small natural strips attached to the chicken breast. Strips are usually sliced from boneless chicken breast. Both work as long as the pieces are similar in size.

Can I Use Chicken Breast Instead of Tenderloins?

Yes. Slice boneless chicken breast into even strips about 3/4 inch thick at the widest part. Try not to make them too thin, because thin strips can dry out before the coating gets crisp.

Do I Need Flour or Egg for These Chicken Tenders?

No. The honey mustard mixture works as the binder in this recipe. For a firmer restaurant-style crust, lightly dust the chicken with flour before adding the sauce and panko.

Can I Make Honey Mustard Chicken Tenders in the Air Fryer?

Yes. Air fry at 390°F / 200°C for 10–12 minutes, flipping halfway, until the chicken is crisp and cooked through. Cook in batches so the basket is not crowded.

How Do I Keep Baked Chicken Tenders Crispy?

Use panko breadcrumbs, spray or drizzle the coating lightly with oil, leave space between the tenders, and bake at high heat. A wire rack helps too. Keep the sauce on the side until serving.

Can I Make These Gluten-Free?

Yes. Use gluten-free panko or crushed gluten-free rice cereal. Check your mustard, mayonnaise, and seasonings as well if gluten-free cooking is important for your household.

Can I Make the Sauce Without Mayo?

Yes. Use Greek yogurt for a tangier, lighter sauce. Add a little extra honey if you want it sweeter, or use eggless mayonnaise if you want a mayo-style sauce without egg.

Can I Use the Same Honey Mustard as Marinade and Dip?

Only if you divide it first. Reserve the dipping portion in a clean bowl before raw chicken touches the rest. The sauce used on raw chicken should not be served as a dip unless it is cooked safely.

How Do I Reheat or Freeze Honey Mustard Chicken Tenders?

Reheat cooked tenders in an oven or air fryer at 375–390°F / 190–200°C for 5–8 minutes, or until hot and crisp. For freezing, cooked tenders are the easiest option. Freeze in a single layer first, then store in a freezer-safe bag or container.

Final Bite

The win here is simple: no frying pot, no soggy tray, no dry chicken, and no wasted dipping sauce because it touched raw chicken.

Just golden panko, juicy strips, and a clean bowl of sweet-tangy honey mustard that somehow disappears faster than expected. Keep the sauce creamy, the crumbs well-pressed, and the dip on the side until the moment everyone starts reaching.

Posted on Leave a comment

Honey Garlic Salmon Recipe

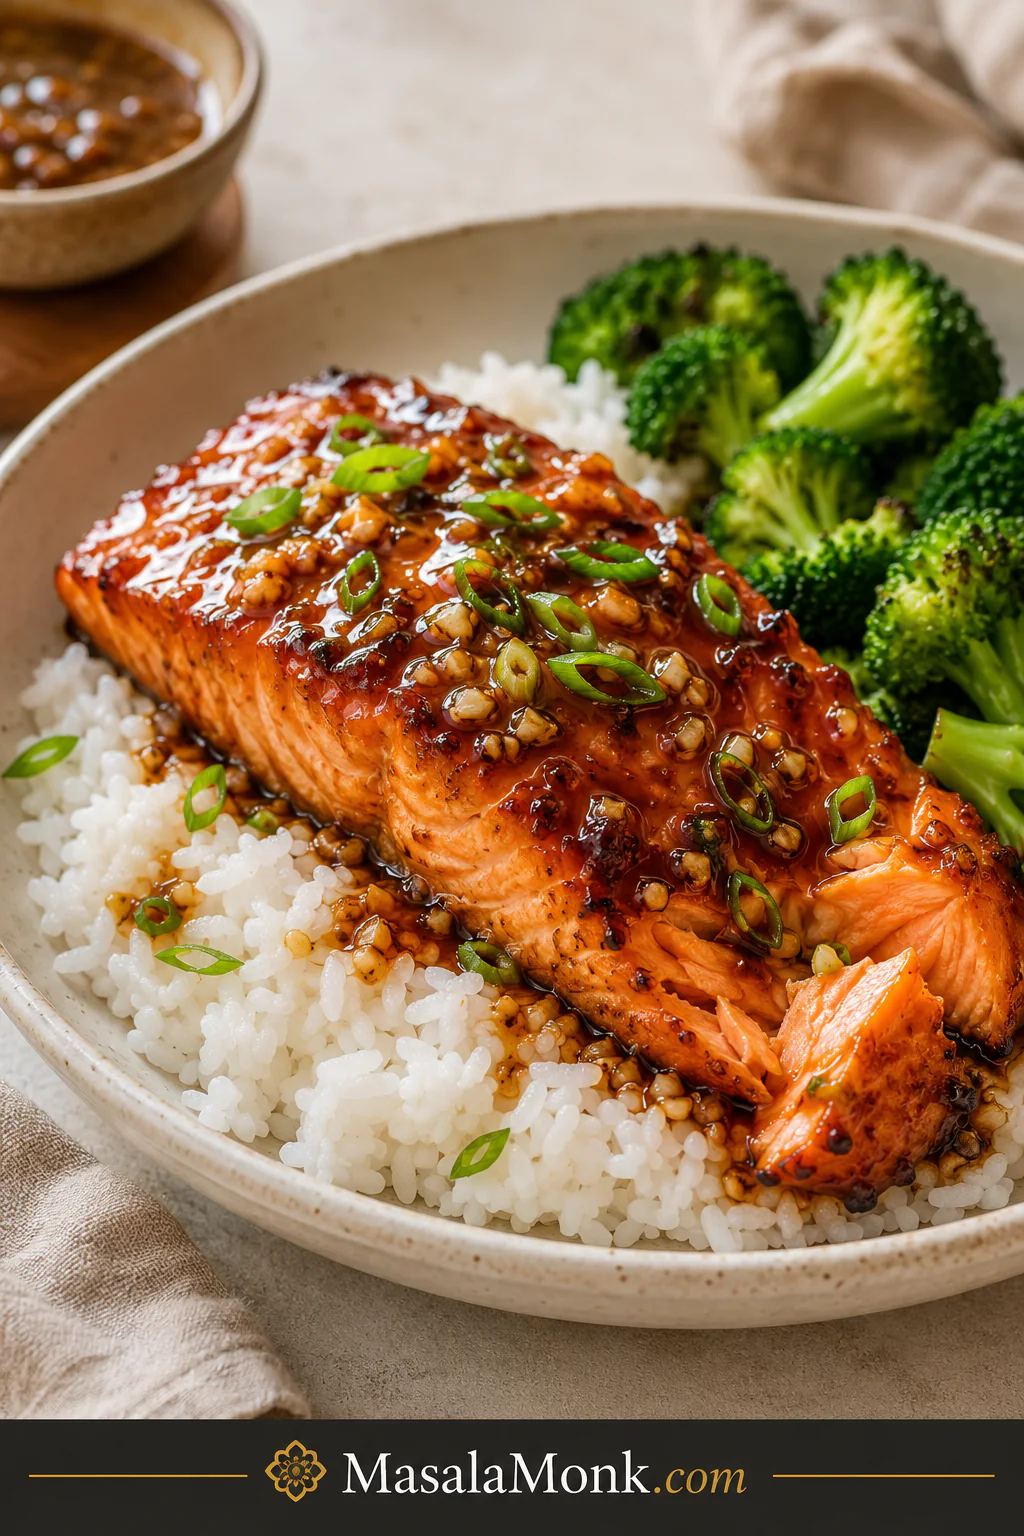
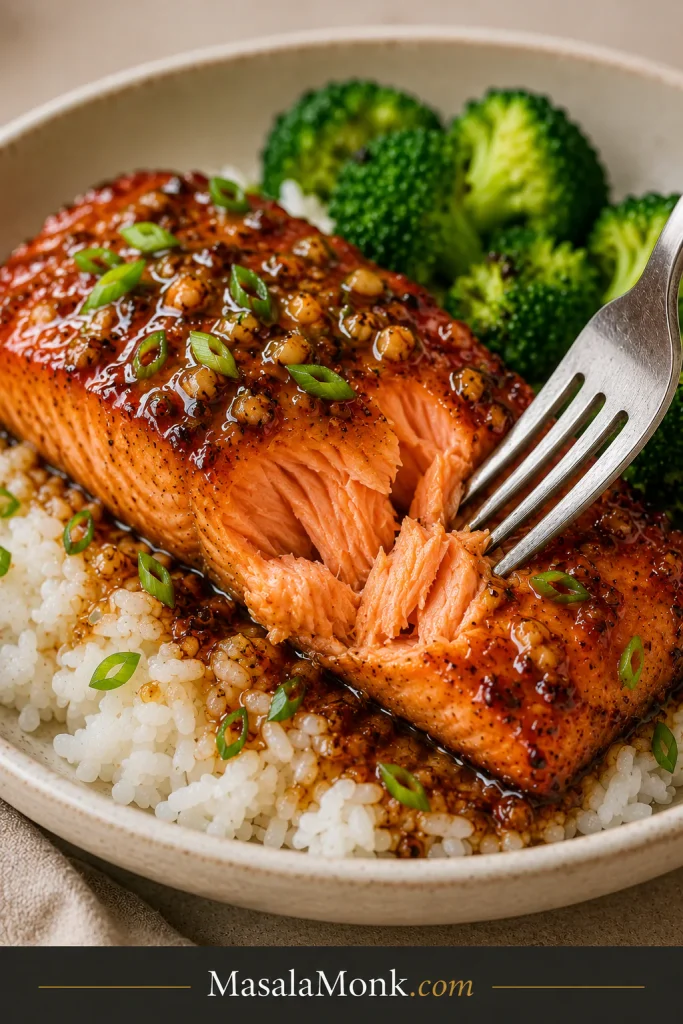
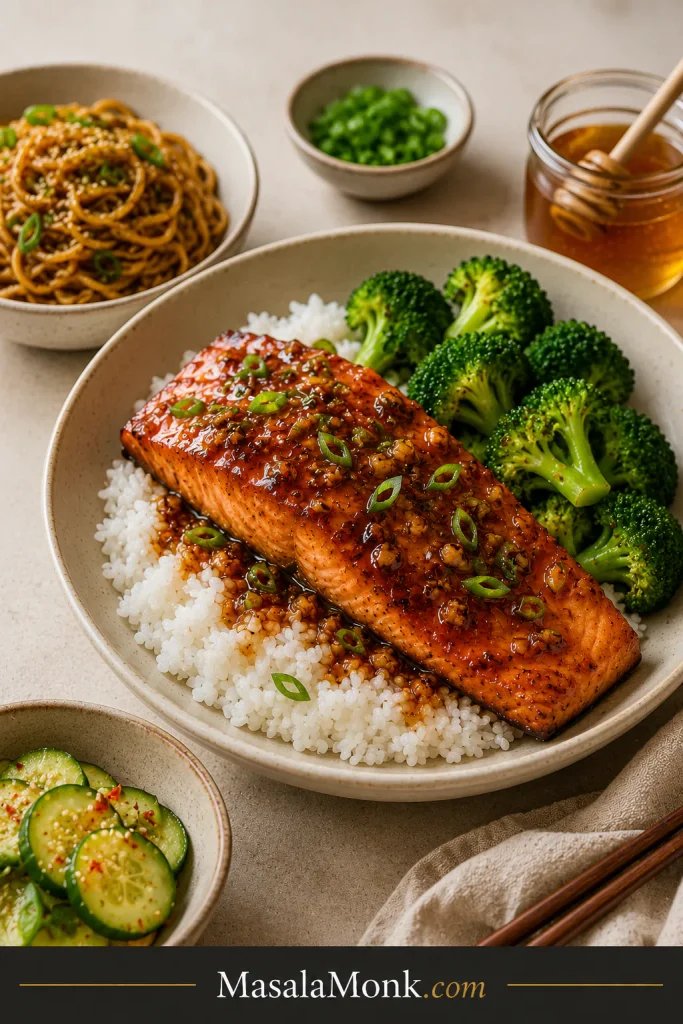
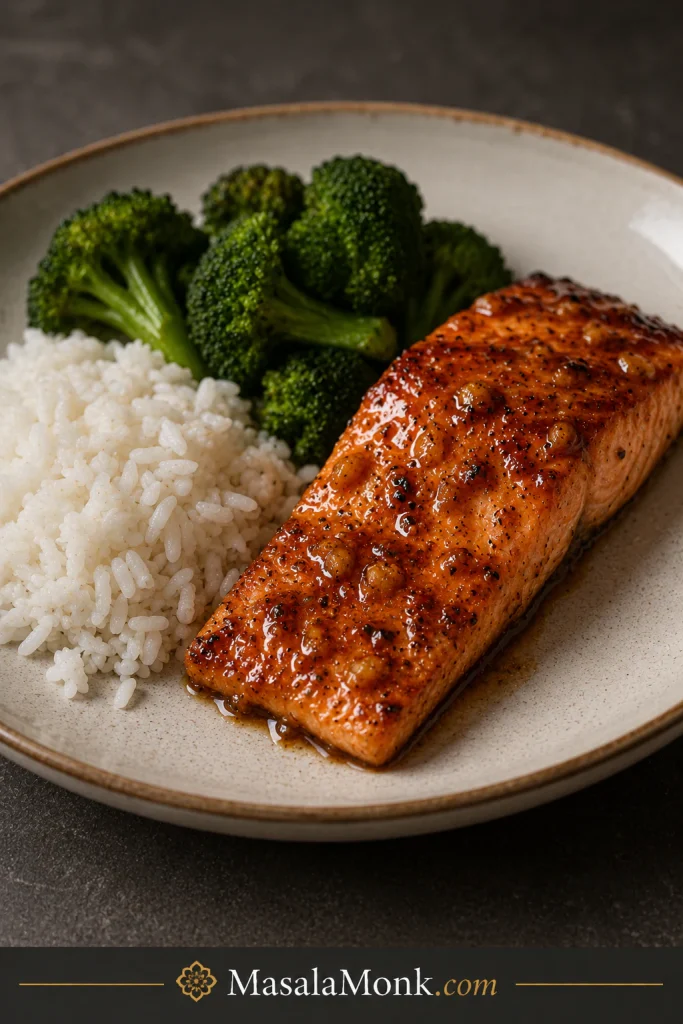
Honey garlic salmon served over white rice with broccoli in a shallow beige bowl.

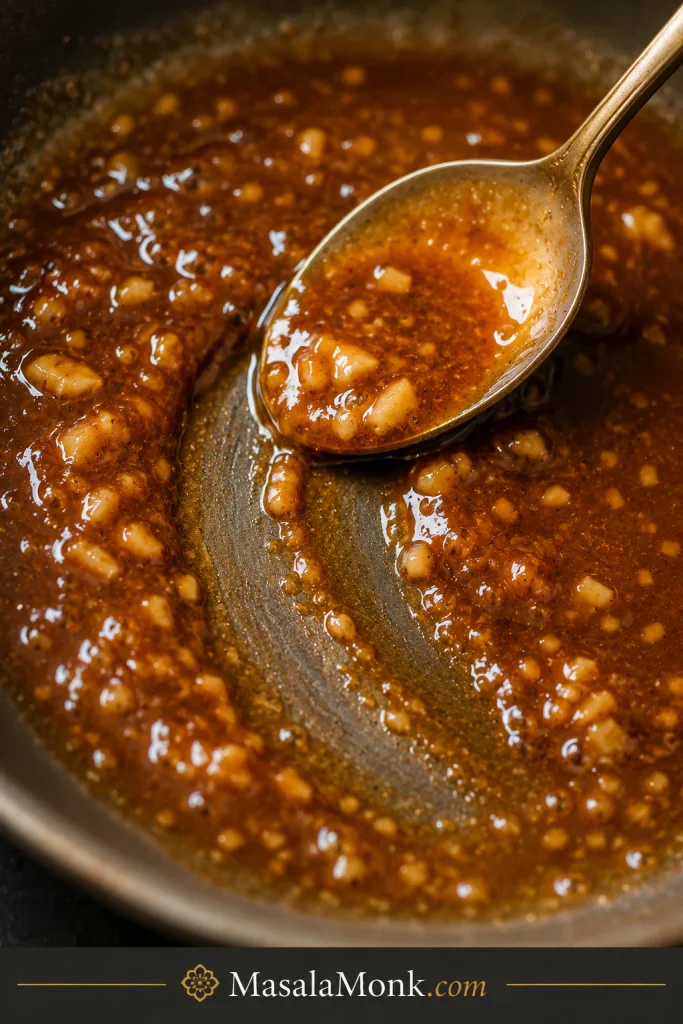
This honey garlic salmon is the kind of dinner that makes plain rice feel exciting. The salmon stays tender and flaky, the sauce turns shiny and spoonable, and every bite has that sweet-savory mix of honey, garlic, soy sauce, and a little brightness from lemon or rice vinegar.

Here is the main rule: sear first, sauce later. Salmon needs enough heat to brown; honey needs gentler heat so it can thicken without burning. Once you understand that, this recipe becomes much easier to trust.

That matters because salmon cooks quickly, and nobody wants to lose a good piece of fish to burnt honey or a dry center. This method gives you control: brown the fish first, then let the honey garlic mixture finish gently around it.

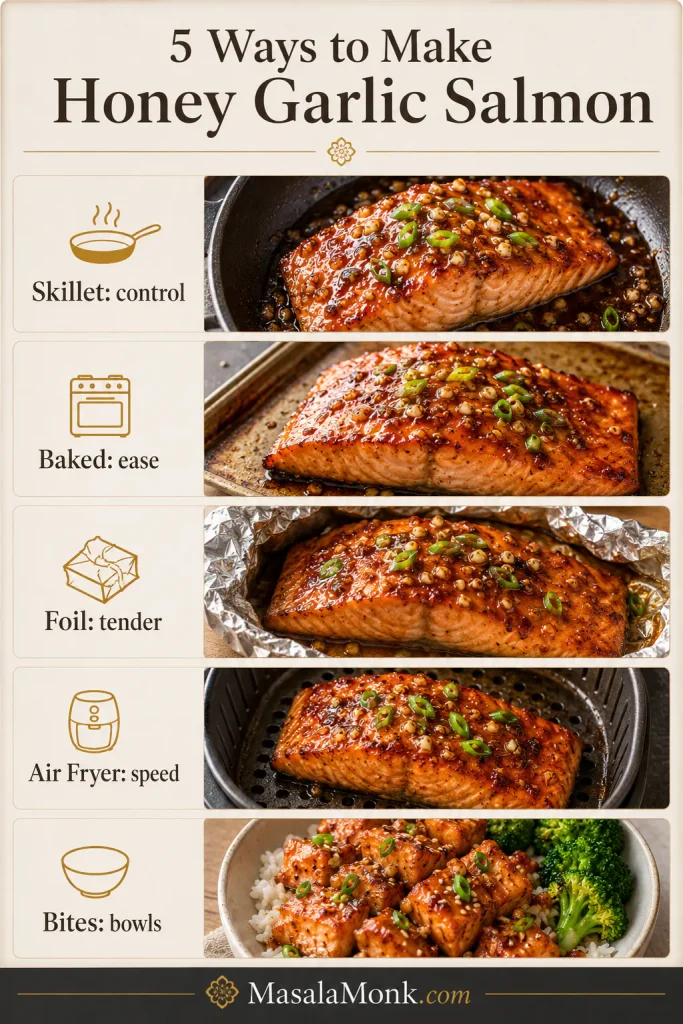
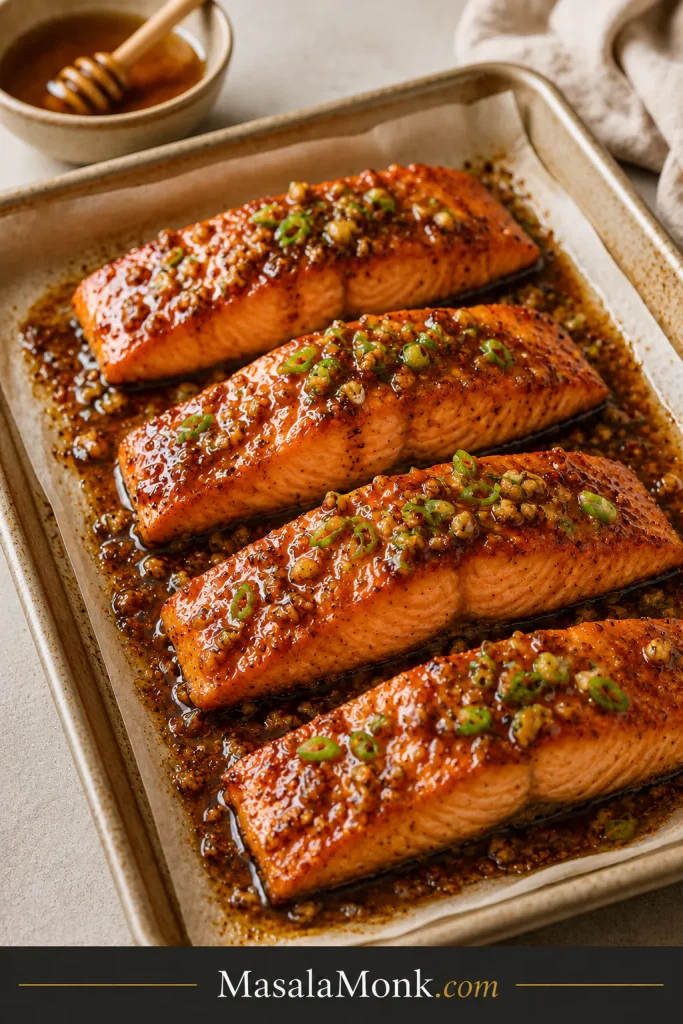
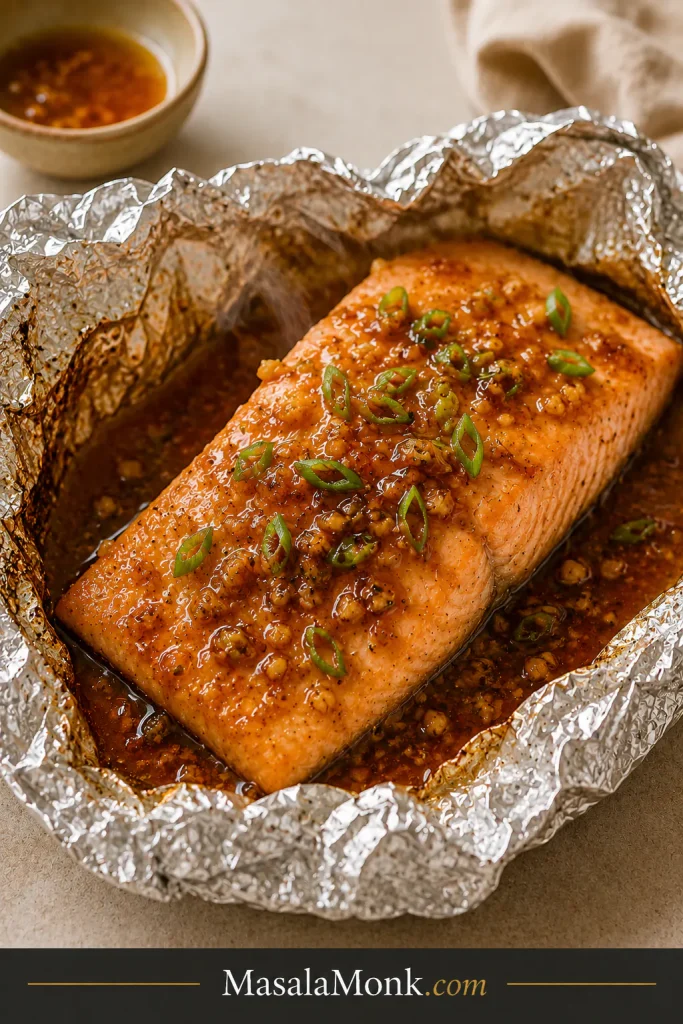
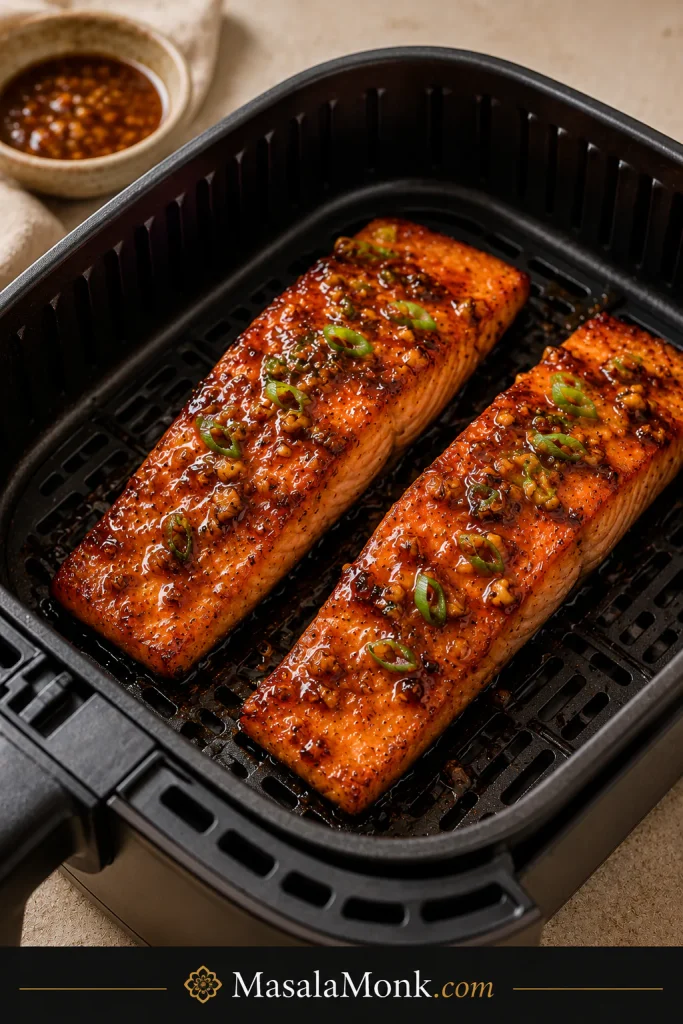
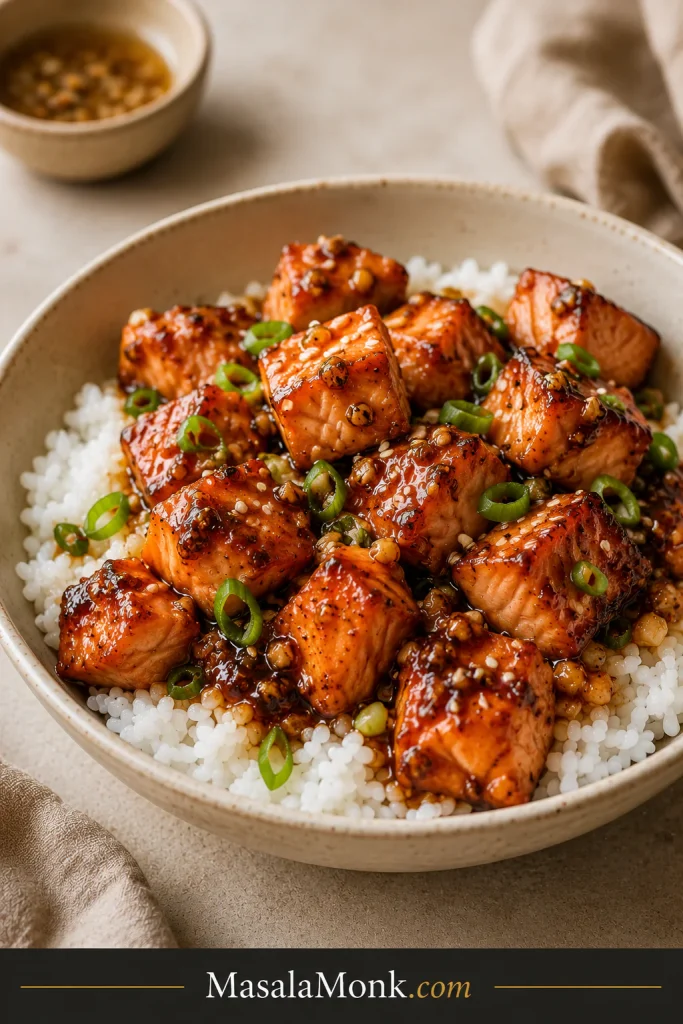
The skillet method gives you the stickiest, glossiest result, but the same honey garlic sauce also works for baked salmon, foil packets, air fryer salmon, and salmon bites. Start with the main recipe when you want the best skillet glaze, then use the oven or air fryer notes when dinner needs to be more hands-off.

Quick Answer: The Best Way to Make Honey Garlic Salmon

For the stickiest glaze, use a skillet. Pat the salmon dry, sear it first, then add a honey garlic sauce made with honey, low-sodium soy sauce, garlic, and lemon juice or rice vinegar. Once the sauce enters the pan, lower the heat and baste for 2–4 minutes, just until the bubbles slow and the sauce lightly coats the fish.

  • Total time: about 20 minutes.
  • Best salmon size: 4 fillets, about 6 oz / 170 g each.
  • Preferred method: skillet for the most controlled glaze.
  • Oven option: bake at 400°F / 200°C for 12–15 minutes.
  • Foil option: bake at 400°F / 200°C for 12–15 minutes.
  • Air fryer option: air fry at 390°F / 199°C for 7–8 minutes.
  • Biggest mistake: adding honey sauce too early over high heat.

Honey Garlic Salmon Recipe Card

Prep time: 8 minutes
Cook time: 12 minutes
Total time: 20 minutes
Servings: 4
Yield: 4 salmon fillets
Main method: Skillet
Other methods included below: Baked, foil, air fryer, and salmon bites

Ingredients

IngredientUS amountMetric amount
Salmon fillets4 fillets, about 6 oz eachAbout 680 g total
Honey1/3 cupAbout 113 g
Low-sodium soy sauce1/4 cup60 ml
Lemon juice or rice vinegar2 tbsp30 ml
Garlic, minced4 clovesAbout 12–16 g
Olive oil or butter1 tbsp15 ml oil or 14 g butter
Black pepper1/2 tspTo taste
Red pepper flakes, sriracha, or hot honeyOptionalTo taste
SaltSmall pinch, optionalUse lightly

Instructions

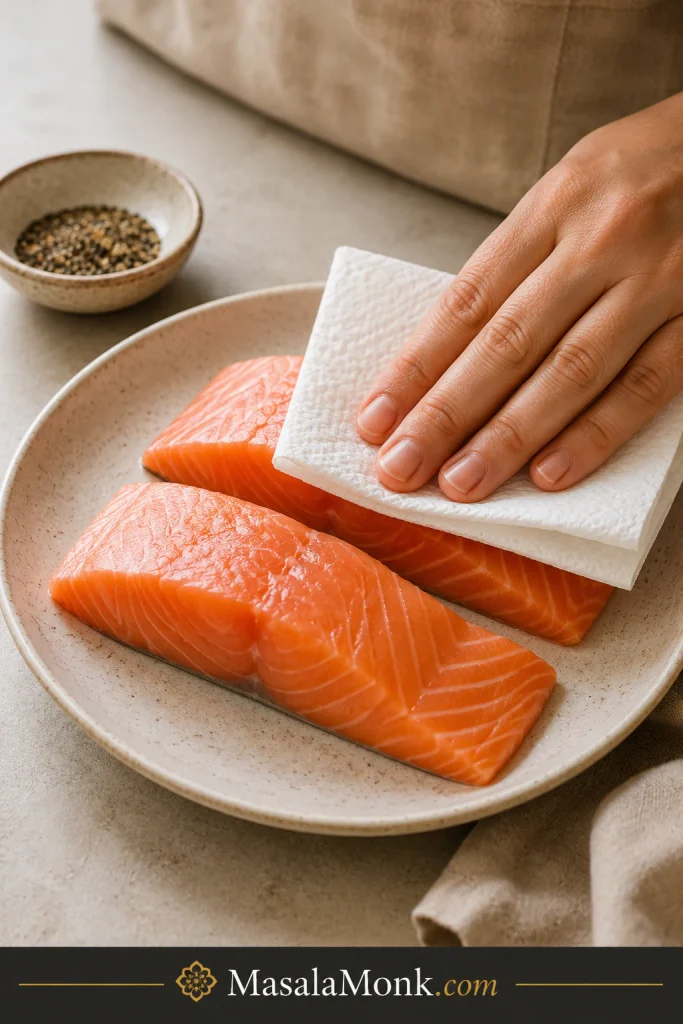
  1. Pat the salmon fillets very dry with paper towels. Season lightly with black pepper and a small pinch of salt only if needed.
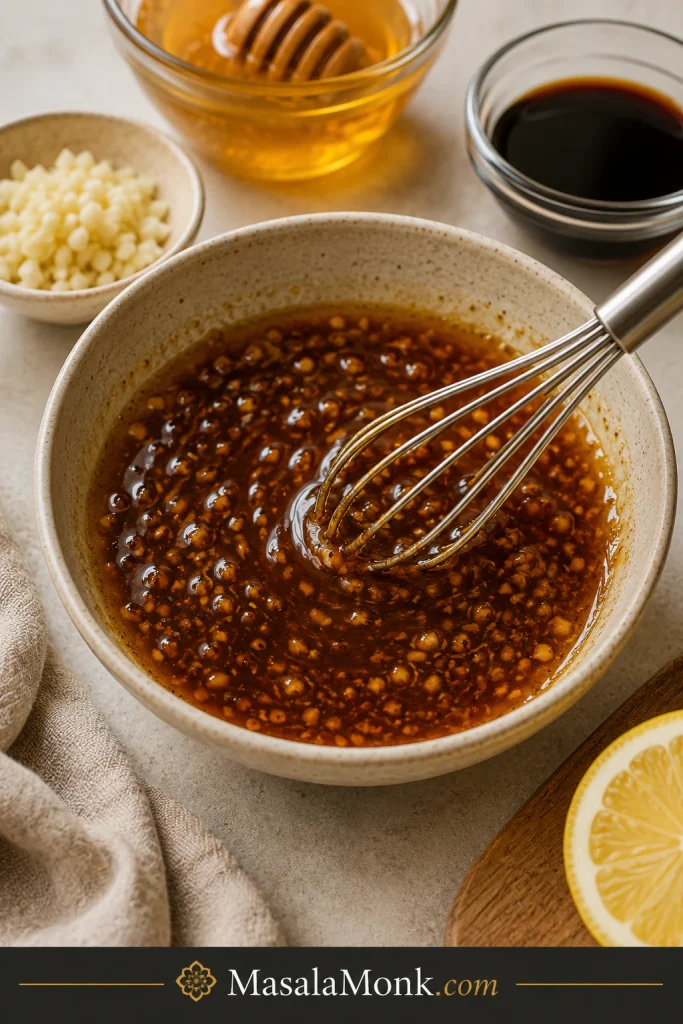
  2. In a small bowl, whisk together the honey, low-sodium soy sauce, lemon juice or rice vinegar, minced garlic, and optional red pepper flakes, sriracha, or hot honey.
  3. Heat olive oil or butter in a large nonstick or cast-iron skillet over medium to medium-high heat.
  4. Add the salmon best-looking side down first. Sear for 3–5 minutes, depending on thickness, until the surface is lightly golden.
  5. Flip carefully and cook the second side for about 2 minutes.
  6. Lower the heat to medium. Pour the honey garlic sauce into the pan around the salmon.
  7. Let the sauce bubble gently for 2–4 minutes. As the bubbles get smaller and slower, spoon the basting liquid over the salmon until it leaves a light coating on the fish.
  8. If the sauce tightens too quickly, add 1–2 tbsp water. When the salmon is cooked but the sauce is thin, remove the fish and simmer the sauce for another minute.
  9. Serve hot with extra pan glaze spooned over the salmon.

Recipe note: Sear first, sauce later. Honey darkens quickly over high heat, so get the salmon mostly cooked first, then lower the heat and let the sauce turn glossy instead of burnt.

Start with the skillet recipe for the best glaze. The baked, foil, and air fryer methods are there for the nights when dinner needs to be softer, easier, or faster.

Honey Garlic Salmon at a Glance

Best forFast weeknight dinner, rice bowls, meal-prep lunches, and a sweet-savory salmon glaze
Main flavorHoney, savory soy sauce, fresh garlic, light acidity, optional heat
Best methodSkillet, because you can watch the sauce reduce and control the heat
Salmon amount4 fillets, about 6 oz / 170 g each
Main sauce ratio1/3 cup honey, 1/4 cup low-sodium soy sauce, 2 tbsp lemon juice or rice vinegar, 4 garlic cloves
Skillet timing3–5 minutes first side, 2 minutes second side, 2–4 minutes with sauce
Baked timing400°F / 200°C for 12–15 minutes
Foil timing400°F / 200°C for 12–15 minutes
Air fryer timing390°F / 199°C for 7–8 minutes
Best serving ideaRice, broccoli, cucumber salad, noodles, or a salmon bowl with extra pan sauce

The sauce does most of the work: it gives rice something to soak up, makes the salmon look finished, and turns a simple vegetable on the side into part of the meal.

Why This Recipe Works

This recipe works because the fish and the sauce are treated differently. Salmon wants quick, confident heat. Honey wants gentler heat. If the sauce goes in too early, the honey can scorch before the salmon is cooked. When you sear first and sauce later, the fish gets color and the glaze only needs a few minutes to thicken.

The same late-sauce logic is useful in quick dinners like a stir fry sauce: let the main ingredient cook first, then add the sauce just long enough to coat everything.

  • Dry salmon sears better. Patting the fillets dry helps the surface brown instead of steam.
  • Low-sodium soy sauce keeps the sauce balanced. As it reduces, regular soy sauce can become too salty.
  • Lemon juice or rice vinegar cuts the sweetness. Honey alone tastes flat; acid makes the final bite brighter.
  • Garlic gives the sauce its savory backbone. It should cook gently, not burn in an empty pan.
  • Basting builds the glaze. Spoon the sauce over the salmon as it thickens so every bite gets coated.

The rule to remember: sear first, sauce later. Once honey enters the pan, lower the heat and let it bubble gently.

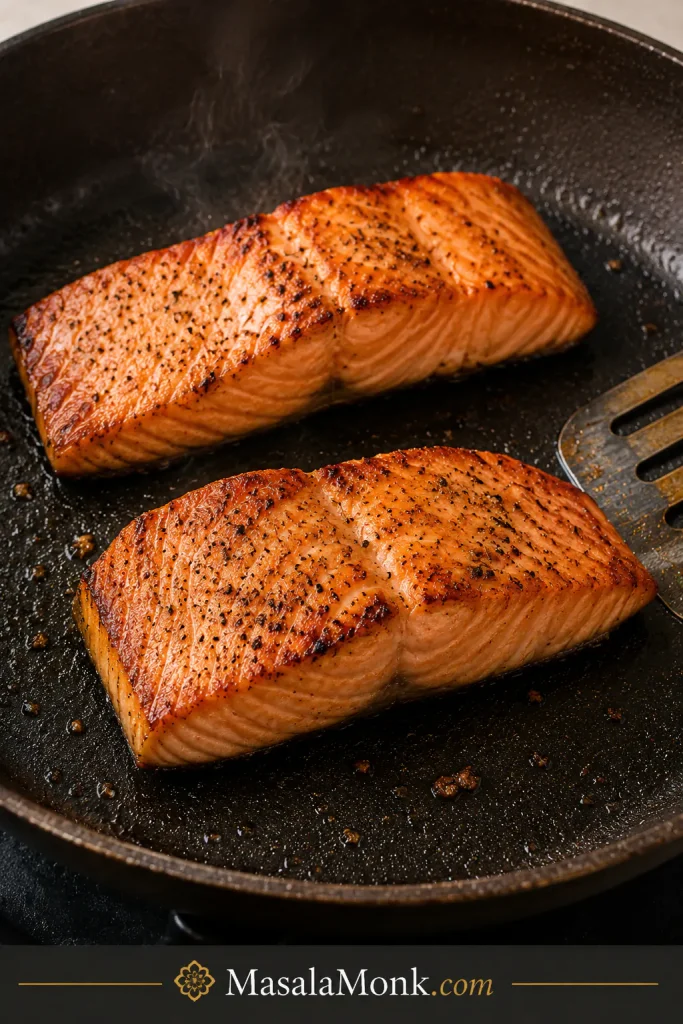
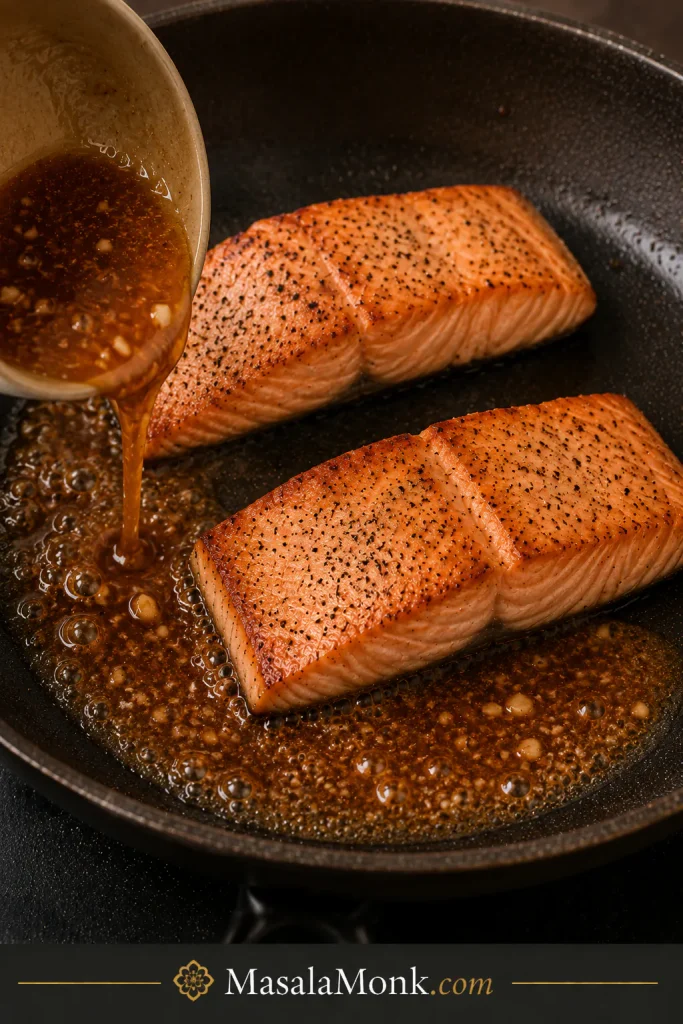
Skillet cue: sear before the sauce goes in: The salmon should get color first, because honey garlic sauce needs gentler heat once it enters the pan.

Salmon fillets searing in a dark skillet before sauce is added, with a metal spatula nearby.
For skillet honey garlic salmon, sear first and sauce second; this gives the fish color before the honey has a chance to scorch.

If you are here because there is salmon in the fridge and no plan for dinner, start with the skillet version. It is fast, glossy, and forgiving as long as you add the sauce after the first sear.

Helpful Equipment

You can make this with a skillet, a bowl, and a spoon, but a few tools make the process calmer — especially if salmon usually makes you nervous.

  • Large nonstick skillet or cast-iron skillet
  • Small mixing bowl
  • Whisk or fork
  • Fish spatula
  • Instant-read thermometer
  • Baking sheet or baking dish for the oven method
  • Small saucepan if you want to reduce extra sauce separately

Ingredients You Need

The ingredient list is short, so each item matters. The sauce should taste sweet, salty, garlicky, and slightly sharp before it goes into the pan. Salmon and rice will soften those flavors, so do not be afraid if the sauce tastes a little bold in the bowl.

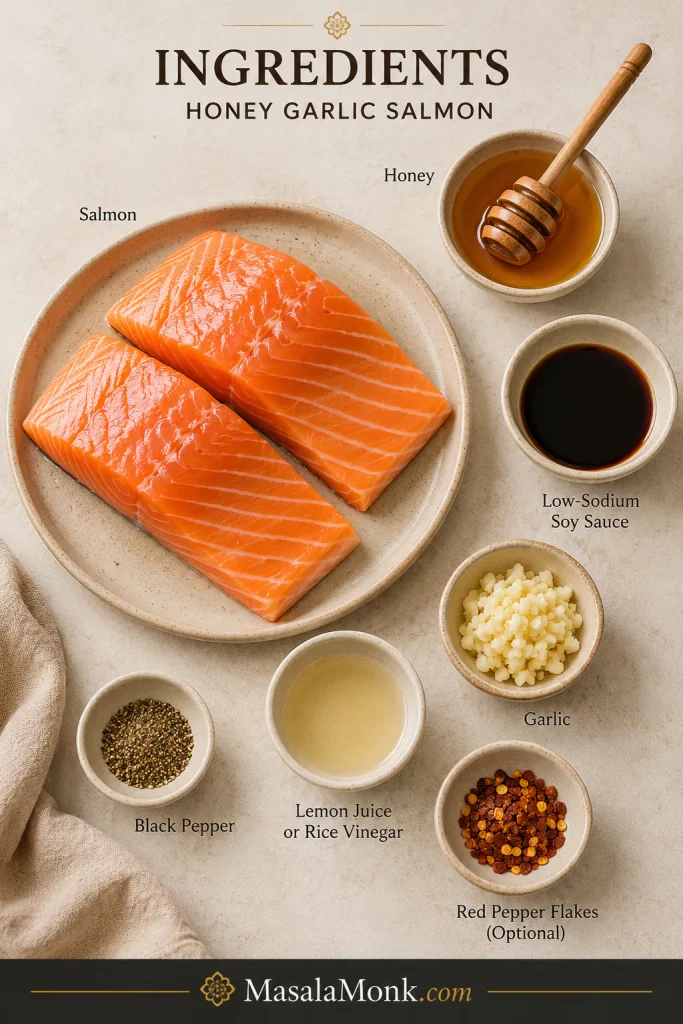
Ingredient visual: what goes into the sauce: Use this visual to check the short ingredient list before the sauce hits the pan.

Ingredient layout with raw salmon, honey, soy sauce, garlic, lemon or rice vinegar, black pepper, and red pepper flakes.
Before the pan gets hot, gather the core honey garlic salmon ingredients so the sauce can come together quickly once the fish is seared.

Salmon

Use 4 salmon fillets that are about 6 oz / 170 g each. This size cooks quickly but is still thick enough to stay moist. If one fillet is much thinner than the others, pull it from the pan early and let the thicker pieces finish.

Skin-on fillets are a little more forgiving in a skillet because the skin protects the bottom of the fish. Skinless fillets are easier to coat on all sides and work well for baked salmon, air fryer salmon, and salmon bites.

Honey

Honey gives the sauce its shine, sweetness, and body. It also browns quickly, which is why the sauce is added after the fish has already started cooking.

Maple syrup can work in a pinch, but the finish will be thinner and less sticky. Brown sugar also works if you dissolve it fully into the sauce before it goes into the pan.

Low-Sodium Soy Sauce

Low-sodium soy sauce is the safest choice because the sauce reduces in the pan. It gives salt, umami, and color without overpowering the honey and garlic.

For a gluten-free version, use gluten-free tamari. To make it soy-free, coconut aminos are the easiest swap. The flavor will be a little sweeter and lighter, but it still works well with garlic and lemon.

Garlic

Fresh minced garlic gives the best flavor. Mince it finely so it spreads through the sauce and cooks quickly. If your pan runs hot, mix the garlic into the sauce instead of frying it alone; burnt garlic can turn bitter.

In a pinch, use 1/2 tsp garlic powder instead of fresh garlic. Mix it into the sauce rather than adding it directly to the hot pan.

Lemon Juice or Rice Vinegar

A little acid keeps the sauce from tasting too sweet. Fresh lemon juice gives a brighter finish. Rice vinegar makes the sauce taste softer and slightly more takeout-style. Either one works well.

Butter or Oil

Use olive oil for a cleaner, dairy-free version. Use butter if you want a richer honey garlic butter salmon. Butter adds a deeper, restaurant-style flavor, but it can brown quickly, so keep the heat controlled.

Optional Heat

Red pepper flakes, sriracha, chili crisp, or hot honey can make the sauce spicy. Start small. You can always add more heat at the end, but it is harder to fix a sauce that has become too sharp or fiery.

The sauce is forgiving, but the shape of the salmon matters. A thick center-cut fillet gives you more room to sear and baste; a thin tail piece needs a shorter ride in the pan.

Best Salmon to Use

Choose salmon that is thick enough to stay juicy while the sauce reduces. Center-cut fillets are easiest because they cook more evenly from end to end. Thin tail pieces still work, but they cook faster and need a gentler hand.

Salmon typeHow it behavesBest tip
Atlantic salmonUsually fattier and more forgivingGood for skillet and air fryer methods
Sockeye salmonLeaner, deeper in color, and quicker to dry outCook gently and pull it earlier
Skin-on filletsMore protection in the panGood for skillet cooking
Skinless filletsEasier to coat all overGood for baked, air fryer, and bites
Frozen salmonWorks well if fully thawedDrain and pat very dry before cooking

If you are using sockeye, keep a closer eye on the timing because it is leaner than many Atlantic salmon fillets. For more detail on that style of fish, see this sockeye salmon recipe, which focuses on keeping lean salmon moist.

When using frozen salmon, thaw it fully first, drain off extra liquid, and pat it very dry. Wet fish steams instead of searing, and that makes the pan sauce feel thinner.

Honey Garlic Salmon Sauce Ratio

A good honey garlic sauce is not just sweet. It needs salt, acid, and garlic to stay balanced. This main ratio gives you enough sauce to coat 4 fillets and still spoon a little extra over rice.

Think of the sauce as a balance, not a pour: honey brings shine, soy sauce brings depth, acid keeps it awake, and garlic makes it taste like dinner.

If you are serving this with rice, err on the side of a little extra sauce. The rice is not just a side here; it is where the glaze lands.

Sauce visual: balance the honey garlic glaze: Use this sauce cue to see how the sweet, salty, garlicky, and bright ingredients come together before they reduce in the pan.

Honey garlic sauce being mixed in a bowl with honey, soy sauce, garlic, and lemon nearby.
The honey garlic salmon sauce should taste sweet, savory, garlicky, and bright before cooking, because the glaze only gets stronger as it reduces.

Main Sauce Ratio

IngredientUS amountMetric amountRole
Honey1/3 cupAbout 113 gSweetness, shine, body
Low-sodium soy sauce1/4 cup60 mlSalt, umami, color
Lemon juice or rice vinegar2 tbsp30 mlBalance and brightness
Garlic, minced4 clovesAbout 12–16 gSavory flavor
Butter or olive oil1 tbsp14–15 g/mlRichness and pan coating

How to Adjust the Sauce

From there, adjust the sauce to match the plate: sweeter for kids, saltier for noodles, spicier for bowls, or thicker when rice is waiting underneath.

Sauce styleWhat to changeBest for
Balanced sauceUse the main ratioEveryday honey garlic salmon
Sweeter sauceUse 1/3 cup honey and reduce soy to 3 tbspMilder family dinners
Saltier soy sauceUse equal honey and soy sauceRice bowls and noodles
Thicker glazeReduce the sauce 1–2 minutes longerSpooning over rice
Gluten-free versionUse gluten-free tamariGluten-free cooking, not soy-free cooking
Soy-free versionUse coconut aminos instead of soy sauceSoy-free cooking
Spicy versionAdd sriracha, chili flakes, chili crisp, or hot honeyHot honey garlic salmon

If this sweet-salty sauce is the part you love most, a homemade teriyaki sauce is a good next sauce to try.

Best practical tip: Rice deserves extra sauce. For a saucier plate, make 1.5 times the recipe: 1/2 cup honey, 1/4 cup plus 2 tbsp low-sodium soy sauce, 3 tbsp lemon juice or rice vinegar, and 6 garlic cloves. Reduce the extra sauce separately so the salmon does not overcook.

Coconut aminos are the best soy-free choice. In a pinch, water, a small pinch of salt, extra lemon juice, and a little more garlic will work, but the flavor will be lighter and less savory.

Use this sauce in the skillet method · See what to serve with it

Skillet vs Baked vs Foil vs Air Fryer

Choose the method by the kind of dinner you want: skillet for control, oven for ease, foil for tenderness, and air fryer for speed.

Method visual: choose the right cooking style: This guide helps readers choose skillet, baked, foil, air fryer, or salmon bites based on the result they want.

Five honey garlic salmon methods shown side by side: skillet, baked, foil, air fryer, and salmon bites.
Use this honey garlic salmon method guide to choose the right version: skillet for control, baked for ease, foil for tenderness, air fryer for speed, or bites for bowls.
MethodTime and tempTextureBest for
SkilletAbout 10–12 minutes total cookingGlossy pan glazeMost control
Baked400°F / 200°C for 12–15 minutesTender, easy, less hands-onWeeknight tray dinner
Foil400°F / 200°C for 12–15 minutesSoft and juicy, less brownedEasy cleanup
Air fryer390°F / 199°C for 7–8 minutesFast, lightly caramelizedOne or two fillets
Salmon bites390°F / 199°C for 6–8 minutesSticky edges, bowl-friendlyRice bowls and meal prep

Your first skillet batch also teaches you the visual cues: loose at first, bubbling in the middle, then slower and clingier as the glaze tightens.

Skillet method · Baked method · Foil method · Air fryer method · Salmon bites

How to Make Honey Garlic Salmon in a Skillet

Use a skillet when you want the most control. You can see the sauce loosen, bubble, darken slightly, and finally leave a light coating on the salmon instead of guessing what is happening inside the oven.

Visual cue: dry the salmon before searing: This step matters because surface moisture makes salmon steam, while a dry fillet browns faster in the skillet.

Hand pressing a paper towel onto raw salmon fillets on a beige plate.
First, blot the salmon well; a dry surface helps create better browning and keeps the fillets from steaming in the skillet.

Skillet Step-by-Step

  1. Pat the salmon dry. Use paper towels and dry the top, sides, and bottom. This helps the salmon sear instead of steam.
  2. Season lightly. Add black pepper and only a small pinch of salt if needed. The soy sauce already brings salt to the glaze.
  3. Mix the sauce first. Whisk honey, low-sodium soy sauce, lemon juice or rice vinegar, garlic, and optional chili in a small bowl.
  4. Sear the salmon. Heat oil or butter in a large skillet over medium to medium-high heat. Add the salmon best-looking side down first and cook for 3–5 minutes, depending on thickness.
  5. Flip gently. Cook the second side for about 2 minutes. A fish spatula helps keep the fillets intact.
  6. Lower the heat and add the sauce. Pour the honey garlic sauce around the salmon, not directly over one spot.
  7. Baste as the bubbles slow. Let the sauce bubble gently for 2–4 minutes. When the bubbles get smaller and slower, spoon it over the fish until the surface is lightly coated.
  8. Finish smart. If the salmon is done before the sauce is thick, move the fish to a plate and reduce the sauce by itself for another minute.

How the Glaze Should Look

The sauce is ready when it coats the back of a spoon and does not run straight off the salmon. It should look glossy, not dry or grainy. If it tightens too much, add 1–2 tbsp water and swirl the pan.

Skillet cue: add sauce around the salmon: Pouring the sauce around the fillets helps it bubble evenly and keeps one spot from getting too dark too fast.

Honey garlic sauce being poured around two seared salmon fillets in a dark skillet.
Next, pour the sauce around the salmon so it bubbles evenly across the pan instead of overwhelming one fillet.

Glaze cue: watch the bubbles slow down: Smaller, slower bubbles tell you the honey garlic sauce is thickening into a glaze instead of staying thin.

Close-up of amber honey garlic sauce gently bubbling beside a salmon fillet in a dark skillet.
As the bubbles slow down, the honey garlic sauce starts turning into a clingy glaze instead of staying thin and runny.

If the garlic or honey starts darkening too quickly, lift the pan off the heat for a few seconds, then return it once the bubbling calms down. That small pause can save the sauce without stopping dinner.

Skillet cue: baste for the glossy finish: Basting pulls the warm glaze over the top of the salmon while the center stays moist.

Spoon pouring glossy honey garlic sauce over a salmon fillet in a skillet.
Basting coats the top of the fish with warm glaze, giving skillet honey garlic salmon that shiny finish without cooking it too long.

Finished skillet cue: glossy, reduced, and spoonable: At the end, the salmon should look coated and shiny, with enough pan glaze left to spoon over rice.

Finished honey garlic salmon in a skillet with reduced glossy sauce and scallion garnish.
When the sauce looks glossy and lightly reduced, the finished skillet honey garlic salmon should have enough glaze left for spooning over rice.

Back to recipe card · Fix the glaze · Check doneness

When you do not want to stand at the stove, the oven gives you a softer, easier path.

Baked Honey Garlic Salmon

Bake it when you want dinner to feel easier. Line the tray, brush on the honey garlic mixture, bake, and finish with a little extra reduced sauce while the rice or vegetables come together.

Oven visual: easy tray salmon: Use this tray version when you want a hands-off honey garlic salmon dinner.

Baked honey garlic salmon fillets on a parchment-lined tray with glaze and scallions.
Baked honey garlic salmon is the low-effort oven method: the fillets cook gently while the glaze caramelizes on top.
Oven styleTemperatureTimeBest for
Everyday baked salmon400°F / 200°C12–15 minutesMost weeknight fillets
Gentler baked salmon375°F / 190°C15–20 minutesThicker fillets or softer texture
Caramelized topBroil after baking1–2 minutesMore color, only if watched closely
Separate sauce finishSmall saucepan2–4 minutesShiny sauce without burnt honey on the tray
  1. Preheat the oven to 400°F / 200°C.
  2. Line a baking sheet or baking dish with parchment or foil.
  3. Place the salmon on the tray and brush with part of the honey garlic sauce.
  4. Bake for 12–15 minutes, depending on thickness.
  5. For better color, broil for 1–2 minutes at the end, watching closely.
  6. Spoon extra reduced sauce over the salmon before serving.

Oven sauce tip: For the shiniest baked salmon, reduce some sauce in a small saucepan for 2–4 minutes and spoon it over the salmon after baking. This gives you better shine without risking burnt honey on the tray.

Try the foil method · Try the air fryer method · Back to recipe card

Honey Garlic Salmon in Foil

Use foil when you want tender salmon and almost no cleanup. It is the gentlest method here: less browning, more steam, and a softer piece of fish that still tastes good with a little extra pan glaze at the end.

Foil method visual: tender salmon with easy cleanup: Foil keeps sauce and steam close to the fish, which gives a softer result and a simpler cleanup.

Honey garlic salmon cooked in an open foil packet with sauce pooled around the fish.
Honey garlic salmon in foil keeps the sauce close to the fish, which helps the fillet stay tender and makes cleanup easier afterward.
  1. Preheat the oven to 400°F / 200°C.
  2. Place the salmon on a large sheet of foil.
  3. Spoon honey garlic sauce over the salmon.
  4. Seal the foil loosely so there is a little space above the fish.
  5. Bake for 12–15 minutes, depending on thickness.
  6. Open the foil and broil for 1–2 minutes if you want a more caramelized finish.

For the best foil result, keep some sauce separate and spoon it over the fish after baking. That gives you the easy cleanup of foil with the sweet-savory glaze people expect from honey garlic salmon.

Air Fryer Honey Garlic Salmon

Use the air fryer when you want one or two fillets fast without heating the oven. Brush the salmon lightly before cooking, then add warm reduced sauce at the end. That gives you caramelized edges without burning honey in the basket.

Air fryer method visual: fast caramelized edges: A lighter glaze before cooking helps the salmon caramelize without making the air fryer basket too messy.

Two honey garlic salmon fillets in a black air fryer basket with caramelized edges and scallions.
For air fryer honey garlic salmon, start with a lighter coating and add more glaze after cooking so the basket stays cleaner.
  1. Preheat the air fryer to 390°F / 199°C.
  2. Pat the salmon dry and brush lightly with honey garlic sauce.
  3. Place the fillets in the basket with space between them.
  4. Air fry for 7–8 minutes, adding 1–2 minutes for thicker pieces.
  5. Brush or spoon extra warm sauce over the salmon before serving.

Air fryer sauce tip: Do not pour a lot of honey sauce into the basket. Brush lightly before cooking, then spoon warm reduced sauce over the salmon after cooking for the stickiest finish.

Honey Garlic Salmon Bites

For salmon bites, cut the salmon into 1-inch / 2.5 cm cubes. Air fry at 390°F / 199°C for 6–8 minutes, or use 370°F / 188°C if your air fryer runs hot. Toss the cooked bites with warm sauce after cooking so they stay sticky without burning.

Salmon bites visual: better for bowls: Smaller pieces cook quickly and give the honey garlic glaze more surface area to cling to.

Bite-sized glazed salmon pieces served over white rice with scallions and sesame seeds.
Honey garlic salmon bites cook quickly and glaze on more sides, making them especially useful for rice bowls and fast lunches.

Salmon bites are especially good over rice bowls with cucumber, avocado, edamame, scallions, sesame seeds, or a drizzle of spicy mayo. If bowl-style dinners are your thing, this salmon bowl recipe has more ideas for rice, toppings, sauces, and fresh crunchy add-ons.

Back to recipe card · Build a salmon bowl · Store leftovers

The method can change, but the honey rule does not: keep the heat gentle once the sauce is involved.

How to Make the Glaze Sticky Without Burning

The biggest mistake is treating honey like oil. Oil can take high heat. Honey cannot. It is supposed to bubble and thicken, but it can go from shiny to burnt quickly if the pan is too hot.

  • Pat the salmon dry. A dry surface sears faster, so the fish spends less time in the pan.
  • Sear first, sauce later. Let the salmon get color before the honey enters the pan.
  • Lower the heat before adding sauce. Medium heat is usually enough once honey is involved.
  • Baste instead of boiling hard. Spoon the sauce over the fish while it thickens.
  • Add water if the sauce tightens too fast. One or two tablespoons can loosen it and save dinner.
  • Remove the salmon if the sauce needs more time. Reduce the sauce by itself instead of overcooking the fish.

Do not worry if the sauce looks loose at first. It thickens fast once the bubbles get smaller and slower. You are not chasing a hard candy coating; you want a soft glaze that leaves a trail on the spoon and lightly hugs the fish.

Glaze cue: look for a spoon trail: A clear spoon trail shows that the sauce is thick enough to coat the salmon instead of running straight off.

Spoon dragged through amber honey garlic glaze, leaving a clear trail in the sauce.
A visible spoon trail means the honey garlic glaze has thickened enough to coat the salmon instead of sliding straight off.

If the sauce starts darkening, it is not always a disaster. Move the fish to a plate, loosen the pan with a splash of water, and bring it back gently once the bubbling calms down.

Check salmon doneness · Fix sauce problems · Back to recipe card

How to Tell When Salmon Is Done

The sauce gets the attention, but doneness is what makes the salmon worth eating. The fish should flake easily and still look moist in the center. If it becomes firm all the way through, it is usually overcooked.

Pulling salmon at the right moment matters more than forcing a perfect glaze. You can always reduce sauce for another minute, but you cannot undo dry fish.

Doneness visual: flake the thickest part: This cue helps readers check that the salmon separates easily while still looking moist inside.

Fork flaking a cooked honey garlic salmon fillet over rice with broccoli in the background.
To check salmon doneness, flake the thickest part gently; it should separate easily while still looking moist inside.
DonenessInternal temperatureTexture
Moist / medium-rare120–130°F / 49–54°CSoft, tender, slightly translucent center
Medium130–135°F / 54–57°CFlaky but still juicy
More done135–145°F / 57–63°CFully opaque and firmer

For fully cooked salmon, 145°F / 63°C is the standard safety endpoint. The FDA also notes that fish should look opaque and separate easily with a fork when a thermometer is not available. You can read its seafood safety guidance here: FDA seafood safety guidance.

Many people prefer to pull salmon earlier for a softer, restaurant-style texture, then let carryover heat finish the center. Choose the doneness level you are comfortable with, especially if cooking for children, older adults, or anyone who prefers fully cooked fish.

If you do not have a thermometer, press the thickest part gently with a fork. The salmon should separate into flakes but still look glossy inside. A little white albumin on the surface is normal, but a lot of it usually means the fish is cooking too hot or too long.

See serving ideas · Store leftovers · Back to recipe card

Sauce vs Glaze vs Marinade

Honey garlic sauce, glaze, and marinade use similar ingredients, but they are not exactly the same thing. Knowing the difference helps you avoid watery sauce, over-marinated salmon, and unsafe reuse of marinade.

TermWhat it meansHow to use it here
SauceLoose and spoonableMix before cooking and pour into the pan
GlazeReduced until sticky and shinyBaste over the salmon as it thickens
MarinadeUsed before cooking to flavor the fishUse briefly, then cook fresh or reserved sauce for serving

You can use honey garlic sauce as a marinade, but keep it short. Salmon only needs 15–30 minutes. If the sauce contains lemon juice or vinegar, avoid marinating for hours because acid can soften the texture of the fish.

Marinate salmon in the refrigerator, not on the counter. The cleanest method is to divide the sauce before it touches raw salmon: use one part as a short marinade and keep the rest clean for glazing. If a marinade has touched raw fish, boil it thoroughly before using it as a sauce.

Honey Garlic Salmon Variations

Once the base sauce works, the variations are low-risk. Keep the same honey-soy-garlic backbone, then change the mood with butter, ginger, chili, lemon, or Dijon.

Choose the butter version when you want it richer, the ginger version when you want it brighter, and the hot honey version when the plate needs a little spark.

VersionWhat to changeBest method
Classic honey garlic salmonUse the main sauce exactly as writtenSkillet
Honey garlic butter salmonUse butter instead of oil, or add 2 tbsp / 28 g butter to the panSkillet
Honey soy ginger salmonAdd 1 tsp grated ginger and 1 tsp sesame oilSkillet or air fryer
Hot honey garlic salmonAdd sriracha, chili flakes, chili crisp, or hot honeySkillet or baked
Lemon honey garlic salmonUse extra lemon juice and slightly less soy sauceBaked
Gluten-free honey garlic salmonUse gluten-free tamariSkillet or baked
Soy-free honey garlic salmonUse coconut aminos instead of soy sauceSkillet
Honey mustard garlic salmonAdd Dijon mustard to the sauceBaked or foil

For the most restaurant-style version, make honey garlic butter salmon. Sear the fish, add butter and garlic, then pour in the honey-soy-lemon mixture and baste until glossy. For a sharper version, add Dijon mustard. Add sriracha or chili flakes and finish with lime when you want heat.

Keep the plate simple. This glaze already brings sweetness, salt, garlic, and brightness, so the sides only need to catch it and balance it.

What to Serve With Honey Garlic Salmon

The easiest plate is rice, salmon, and something green. The rice catches the sauce, the vegetable keeps the sweetness in check, and the salmon stays the star without needing much else. If you want the rice to come out fluffy instead of sticky or wet, this guide on how to cook rice covers stovetop, rice cooker, and Instant Pot timing.

Think of the plate in three parts: something to catch the sauce, something green or crisp, and something fresh to keep the sweetness balanced.

Serving visual: build a balanced plate: Rice, greens, cucumber salad, noodles, and bowl toppings all balance the sweet-savory glaze.

Honey garlic salmon served with rice, broccoli, cucumber salad, noodles, and bowl toppings.
Wondering what to serve with honey garlic salmon? Rice, greens, cucumber salad, noodles, and simple bowl toppings all balance the sweet-savory glaze.

Best Sides for the Glaze

  • Simple rice: jasmine rice, basmati rice, brown rice, coconut rice, or fried rice.
  • Noodles: sesame noodles, garlic noodles, stir-fried noodles, or these creamy peanut noodles when you want the meal to feel fuller.
  • Vegetables: broccoli, asparagus, green beans, bok choy, snap peas, or roasted carrots.
  • Fresh sides: avocado, shredded cabbage, scallions, pickled onions, or a crisp cucumber salad to cut through the sweet-savory sauce.
  • Bowls: rice, salmon, cucumber, edamame, avocado, sesame seeds, and extra sauce.

For a brighter plate, add something fresh and fruity on the side. A spoonful of mango salsa works especially well with glazed fish because it brings acidity, freshness, and juicy contrast.

Lowest-Effort Plate

On the lowest-effort nights, rice and frozen broccoli are enough because the glaze carries the plate. The extra sauce is part of the meal, not just decoration, so let it run into the rice, noodles, or vegetables.

Weeknight plate visual: rice and broccoli are enough: This simple plate shows that the glaze can carry dinner even when the sides stay minimal.

Simple plate with honey garlic salmon, white rice, and broccoli on a dark tabletop.
On busy nights, salmon with rice and broccoli is enough because the honey garlic glaze carries flavor across the whole plate.

Back to recipe card · Storage and reheating · Read FAQs

Storage and Reheating

Serve the first round hot if you can. That is when the sauce looks best and the fish flakes most softly. They will not have quite the same shine, but leftovers still have plenty of good uses.

Leftovers taste best when you treat them like a new meal instead of trying to recreate the first plate. Flake the salmon into rice bowls, noodles, wraps, or a quick lunch salad.

  • Fridge: Store cooled salmon in an airtight container for up to 3 days.
  • Freezer: You can freeze cooked salmon, but the texture is better fresh. Freeze only if needed.
  • Skillet reheating: Reheat gently in a covered skillet with a splash of water.
  • Oven reheating: Warm at a low temperature until just heated through.
  • Microwave reheating: Use short bursts and avoid overheating, or the salmon can turn dry.

For general leftover safety, USDA guidance recommends using refrigerated leftovers within 3 to 4 days: USDA leftovers and food safety.

If the sauce thickens in the fridge, add a teaspoon or two of water when reheating. That loosens it and helps it coat the salmon again. Leftover flakes are especially good tucked into a rice bowl with cucumber, scallions, sesame seeds, and a little extra sauce.

With a larger piece of leftover salmon, flake it gently and use it in a softer dinner the next day. This creamy salmon pasta is the right direction when you want lemon, garlic, pasta, and a richer sauce instead of another sticky glaze.

Troubleshooting Honey Garlic Salmon

When something goes wrong, it is usually not the recipe falling apart. Most honey garlic salmon problems look dramatic in the pan, but they usually come down to heat, moisture, or timing.

A watery sauce needs more reduction. Burnt glaze usually needed lower heat. Dry salmon simply stayed in the pan too long. Most mistakes are fixable if you catch them early, and slightly overcooked salmon can still be saved with extra sauce over rice.

Troubleshooting visual: too hot vs gentle heat: This comparison helps readers see why honey garlic glaze needs controlled heat to stay amber and spoonable.

Side-by-side comparison showing dark burnt glaze labeled Too hot and glossy amber glaze labeled Gentle heat.
If the heat is too high, honey can darken fast; gentle heat keeps the glaze amber, glossy, and easy to spoon over the salmon.

Why did my honey garlic glaze burn?

The heat was probably too high, or the sauce went into the pan too early. Sear the salmon first, lower the heat, then add the honey garlic sauce and let it bubble gently.

Why is my sauce watery?

Moisture from the fish may have loosened the sauce, or the sauce may not have reduced long enough. Remove the fillets from the pan and simmer the sauce by itself for a minute or two.

Why is my salmon dry?

It cooked too long or the heat was too high. Pull salmon from the pan while it still looks moist inside. Carryover heat will continue cooking it for a short time.

Why does my garlic taste bitter?

The garlic burned before the sauce had a chance to cool the pan down. Add garlic briefly, or mix it into the sauce and cook it gently with the glaze.

Can I use frozen salmon?

Yes. Thaw it fully, drain off extra liquid, and pat it very dry before cooking. Frozen salmon that is still wet will steam instead of sear.

Can I make this without soy sauce?

Yes. Coconut aminos are the easiest soy-free version. Choose gluten-free tamari only if you need a gluten-free option and soy is still okay for you.

Glaze tips · Doneness guide · Back to recipe card

Those are the big pan problems. Here are the quick questions people usually ask before they start.

FAQs

Is honey garlic salmon better baked or pan-seared?

Pan-seared is best if you want the stickiest glaze and the most control over the sauce. Baked salmon is easier and more hands-off, especially when cooking several fillets at once. Both work well.

What temperature keeps salmon moist?

For fully cooked salmon, use 145°F / 63°C. Many cooks pull salmon around 125–135°F / 52–57°C for a softer texture, then let carryover heat finish the center. Choose the doneness level you are comfortable with, especially if cooking for children, older adults, or anyone who prefers fully cooked fish.

How long does honey garlic salmon take in the air fryer?

Air fry at 390°F / 199°C for 7–8 minutes for standard fillets. Keep the first layer of sauce light, because honey can darken quickly in the air fryer, then spoon on more warm sauce after cooking.

Should I marinate salmon in honey garlic sauce?

You can, but keep the marinating time short. Salmon only needs 15–30 minutes. If the sauce has lemon juice or vinegar, do not marinate too long or the texture can become soft. Always marinate in the refrigerator.

Why is my honey garlic sauce not thickening?

It may need another minute or two of simmering, or the salmon may have released moisture into the pan. If the fish is already cooked, remove it and reduce the sauce by itself so the salmon does not overcook.

Should I use skin-on or skinless salmon?

Both work. Skin-on salmon is a little more forgiving in a skillet because the skin protects the bottom of the fish. Skinless salmon is easier to coat on all sides and works well for baked or air fryer versions.

What can I use instead of soy sauce?

Use coconut aminos for the easiest soy-free swap. If you only need the recipe to be gluten-free, use gluten-free tamari. Tamari is usually soy-based, so it is not the same as soy-free.

What is the white stuff on cooked salmon?

The white stuff is albumin, a protein that comes to the surface as salmon cooks. A little is normal. Heavy albumin usually means the fish cooked too hot or too long.

Can I use maple syrup instead of honey?

Yes, but the sauce will be thinner and less sticky. Honey gives a thicker glaze. Maple syrup still tastes good, especially with soy sauce, garlic, and a little lemon, but it will not cling quite the same way.

What sides go best with honey garlic salmon?

Rice is the easiest choice because it catches the sauce. Add a green vegetable for balance, cucumber salad for crunch, or noodles if you want a fuller meal. Keep the sides simple so the sweet-savory sauce stays the main flavor.

Final Thought

Honey garlic salmon feels fancy because the glaze does the showing off. Dry the fish, sear it well, lower the heat, and let the honey, garlic, soy sauce, and lemon do the rest. Add rice and something green, spoon the pan sauce over the plate, and dinner feels finished without asking much from you.

Posted on Leave a comment

Air Fryer Chicken Thighs Recipe: Crispy Skin, Juicy Meat & Time Chart

Crispy air fryer chicken thighs served on a plate with lemon wedges, rice, salad, and a creamy dipping sauce.

The air fryer is especially good for chicken thighs because the heat moves fast around the skin while the dark meat stays forgiving and juicy. When the timing is right, you get golden crisp edges, tender meat near the bone, and a dinner that feels much more satisfying than the effort it takes.

The easiest mistake is treating every chicken thigh the same. Bone-in, skin-on thighs need time for the skin to render. Boneless skinless thighs cook much faster. Frozen thighs need a slower start. BBQ sauce and sweet marinades need to go in late so they turn sticky instead of burnt.

Start with the best all-purpose version: bone-in, skin-on thighs with crisp skin and juicy meat. Bought boneless, frozen, sauced, skinless, tiny, or extra-large thighs? You are still covered. Use the recipe card for the classic crispy-skin version, then jump to the section that matches the chicken you actually have.

The goal is simple: no rubbery skin, no dry boneless pieces, and no guessing whether the thickest part is done. You should be able to open the basket and know what you are looking at: crisp skin where there is skin, juicy meat in the center, and no awkward cutting into every piece to check.

Jump to: Recipe Card · Time Chart · Boneless Skinless · Crispy Skin · Frozen Thighs · BBQ & Marinated · Troubleshooting · FAQs

Quick Answer: How Long to Cook Air Fryer Chicken Thighs

For bone-in, skin-on chicken thighs, air fry at 400°F / 200°C for 20 to 24 minutes, flipping once, until the center of the largest thigh reaches at least 165°F / 74°C. Many people prefer dark meat closer to 175°F / 79°C for a softer texture, while still using 165°F as the food-safety minimum.

Boneless skinless thighs need a shorter window. Thin pieces may take 11–13 minutes, average pieces usually take 14–17 minutes, and thick or folded pieces may need 18–20 minutes.

Skin-side up or down? Start skin-side down, then finish skin-side up. Starting skin-side down gives the fat under the skin time to render; finishing skin-side up gives the skin direct heat so it turns golden instead of rubbery.

Air fryers vary. A compact basket model may finish faster than a large oven-style model, so use the time range as a starting point and let the thermometer decide the final few minutes.

Choose Your Thighs

The cut decides the clock: bone-in needs time, boneless needs attention, frozen needs patience, and sauced chicken needs a late glaze. Match your pack of chicken to the right path before you cook.

Think of air fryer chicken thighs in four decisions: cut, size, surface, and finish. Cut gives you the basic timing, size tells you when to start checking, surface decides whether you get crisp skin, a browned coating, or a sticky glaze, and the thermometer confirms when dinner is actually done.

What you haveBest forWatch out forWhere to go
Bone-in, skin-on thighsCrisp skin and juicy dinner platesNeeds enough time for the skin to renderRecipe Card
Boneless skinless thighsBowls, wraps, salads, tacos, noodles, meal prepCooks fast and can dry if ignoredBoneless Skinless
Skinless bone-in thighsJuicy meat without skinLess browning, no crispy skinTime Chart
Frozen thighsRescue dinners when you forgot to thawLess predictable; must check temperatureFrozen Thighs
BBQ or sauced thighsSticky, glossy finishSugar can burn if added too earlyBBQ & Marinated
Marinated thighsDeeper flavorToo much wet marinade prevents browningBBQ & Marinated
Very small or very large thighsStill usable with adjusted timingSmall pieces finish early; large pieces need more timeTime Chart
Guide to choosing air fryer chicken thigh timing for bone-in skin-on, boneless skinless, frozen, and BBQ sauced thighs.
Before you choose a time, choose your chicken. Bone-in, boneless, frozen, and sauced thighs all need a slightly different air fryer game plan.

Next step: Making the classic bone-in version? Jump to the recipe card. Need exact timing? Use the time chart. Bought a different pack? Go to boneless skinless, frozen thighs, or BBQ and marinated thighs.

Before You Start: The 3 Rules That Change the Result

1. Dry skin browns; wet skin steams

Pat the chicken dry before seasoning, especially on the skin side. If the skin still looks shiny-wet, it will steam before it crisps.

2. Airflow is what makes the edges crisp

The thighs can touch lightly at the edges, but they should not overlap or cover each other. If air cannot move around the chicken, the skin softens and the pieces cook unevenly. The same airflow issue is behind many common air fryer mistakes.

Four seasoned chicken thighs arranged in a single layer with space between them inside a black air fryer basket.
A little space does real work here. When the thighs sit in one layer, hot air can reach more surface area and brown the chicken more evenly.

3. The biggest thigh decides when the batch is done

Chicken thighs vary in size, shape, and thickness. Use the time range to start, then check the center of the largest piece with a thermometer. That is the difference between guessing and knowing.

Avoid These 5 Mistakes

  • Keep the thighs in one layer instead of stacking them.
  • Brush BBQ sauce on near the end, not at the beginning.
  • Use browned skin as a clue, not the final doneness test.
  • Insert the thermometer into the meat without touching the bone.
  • Give boneless thighs their own shorter timing instead of using the bone-in timing.
Infographic listing common air fryer chicken thigh mistakes including crowding, wet skin, early sauce, wrong thermometer placement, and overcooked boneless thighs.
When air fryer chicken thighs disappoint, the fix is usually simple: more space, drier skin, later sauce, better thermometer placement, or less time for boneless pieces.

Ready to cook? Follow the recipe card for the classic version, or check the time chart first if your thighs are boneless, frozen, sauced, skinless, unusually small, or unusually large.

Air Fryer Chicken Thighs Recipe Card

This is the everyday version: bone-in, skin-on thighs rubbed with smoked paprika, garlic, herbs, and a little oil, then air fried until the skin is golden and the dark meat stays juicy. The skin should smell like paprika and garlic as it browns, and the first cut should stay juicy instead of spilling everything onto the plate.

This is the kind of chicken that works on a tired weeknight: crisp enough to feel special, simple enough that you are not babysitting a pan.

Serve it straight from the basket with lemon wedges, rice, salad, or a cool dip, and it feels like a proper dinner without much planning.

Prep time5 minutes
Cook time20–24 minutes
Rest time5 minutes
Total time30–34 minutes
Servings4
Main cut4 medium bone-in, skin-on chicken thighs
Temperature400°F / 200°C
Basket setupSingle layer, no overlapping

Equipment

  • 5–6 quart air fryer
  • Instant-read thermometer
  • Tongs
  • Paper towels
  • Small bowl for the seasoning

Ingredients

  • 4 medium bone-in, skin-on chicken thighs, about 2–2.5 lb / 900–1130 g total
  • 1 tablespoon / 15 ml olive oil or avocado oil
  • 1 teaspoon smoked paprika
  • 1 teaspoon garlic powder
  • 1/2 teaspoon onion powder
  • 1/2 teaspoon dried oregano or thyme
  • 3/4 teaspoon fine salt, or about 1 teaspoon coarse kosher salt, plus more to taste
  • 1/4 teaspoon black pepper
  • Optional for extra-crisp skin: 1/4 teaspoon aluminum-free baking powder
  • Lemon wedges, for serving

Instructions

  1. Dry the chicken well. Pat the thighs very dry with paper towels, especially on the skin side.
  2. Trim loose pieces. Remove large hanging pieces of skin or fat, but leave the skin attached. If the skin folds under itself, gently spread it back over the top.
  3. Mix the seasoning. In a small bowl, combine smoked paprika, garlic powder, onion powder, oregano or thyme, salt, and pepper. For extra-crisp skin, add the baking powder.
  4. Season the thighs. Rub the chicken with oil, then coat both sides with the seasoning. Season the edges too.
  5. Preheat the air fryer. Set it to 400°F / 200°C for 3–5 minutes if your model recommends preheating.
  6. Start skin-side down. Place the thighs in a single layer, skin-side down. Air fry for 10–12 minutes.
  7. Flip and finish skin-side up. Turn the thighs over and air fry for another 8–12 minutes, until the skin is golden and the chicken is cooked through.
  8. Check the temperature. Insert an instant-read thermometer into the center of the largest thigh without touching the bone. The safe minimum is 165°F / 74°C; for softer dark meat, cook closer to 175°F / 79°C.
  9. Rest before serving. Let the thighs rest for 5 minutes so the juices settle instead of running out as soon as you cut into the meat.

Recipe Notes

  • The baking powder is optional, but it helps skin-on thighs crisp more deeply. Use only a tiny amount.
  • With table salt, start slightly lighter. Coarse kosher salt may need a little more by volume.
  • Small thighs may finish closer to 18–20 minutes. Large thighs may need 2–5 extra minutes.
  • If the chicken is cooked but the skin is not crisp, air fry skin-side up for 2–4 more minutes.
  • For boneless skinless thighs, use the boneless timing section instead of the main bone-in timing.

Using a different kind of thigh? See boneless skinless thighs, frozen thighs, or BBQ and marinated thighs before you cook.

Ingredients You Need

The recipe card gives you the amounts. These notes help you choose the right cut, seasoning, and crisping option before you cook.

Raw chicken thighs with paprika, garlic powder, herbs, salt, pepper, oil, and lemon arranged on a prep board.
The seasoning stays flexible on purpose. Paprika brings color, garlic and herbs bring depth, and oil helps the air fryer build better browning.

Chicken thighs

Bone-in, skin-on thighs are best for the main recipe because they give you crisp skin and juicy meat. Boneless skinless thighs cook faster and are better for bowls, wraps, salads, tacos, noodles, and meal prep.

Oil

One tablespoon / 15 ml of oil is enough for 4 thighs. It helps the seasoning cling and encourages browning. Too much oil can make the basket smoky and the skin heavy.

Smoked paprika

Smoked paprika gives the chicken a warm color and a lightly smoky flavor, which helps the thighs taste roasted even though they cook quickly.

Garlic powder and onion powder

Powdered garlic and onion coat the chicken evenly and are less likely to burn than fresh garlic in the air fryer.

Dried herbs

Oregano or thyme adds a simple savory note. Crush dried herbs between your fingers before adding them to wake up the aroma. You can also use Italian seasoning, Cajun seasoning, ranch seasoning, lemon pepper, or a pinch of garam masala.

Salt

Fine salt seasons quickly and evenly. Table salt is stronger by volume, so start a little lighter. Coarse kosher salt may need a little more.

How to Make It

Here is what each stage should look and feel like, so you can adjust confidently even if your thighs are bigger, smaller, or shaped differently from mine.

1. Dry the chicken until the skin is no longer shiny

Blot both sides, then give the skin side a second pass. If the surface still looks wet, it will steam first and brown later.

Hands patting raw chicken thighs dry with a white paper towel before seasoning.
Remove surface moisture before seasoning. Dry skin has a much better chance of crisping instead of steaming in the basket.

2. Trim loose fat, but keep the skin attached

Trim large hanging pieces of skin or fat, but do not remove the skin completely. Spread folded skin back over the top instead of leaving it tucked underneath.

3. Coat the edges, not just the top

Rub the thighs with oil, then season both sides and around the edges. If the skin is loose, you can season lightly underneath it without pulling it off.

Raw chicken thighs being coated with a paprika garlic seasoning rub in a shallow bowl.
Season the edges as well as the top. As the thighs cook and tighten, those seasoned edges become some of the most flavorful bites.

4. Start hot so the surface begins browning quickly

Preheating helps the chicken start cooking as soon as it hits the basket. If your air fryer does not require preheating, you can still run it empty for 3 minutes while you finish seasoning the chicken.

5. Give the skin time to render before the flip

Arrange the thighs in a single layer, skin-side down. Cook for 10–12 minutes. The pieces can touch lightly at the edges, but they should not overlap.

Seasoned chicken thighs placed skin-side down in an air fryer basket with metal tongs.
Starting skin-side down gives the fat under the skin time to warm and render. That quiet first step helps set up the crispier finish.

6. Finish skin-side up for color and texture

Turn the thighs over and finish cooking skin-side up for another 8–12 minutes. This final stage is where the skin gets its best color. If one thigh is much smaller than the others, check it early and pull it out if it is already done.

Chicken thighs flipped skin-side up in an air fryer basket with metal tongs.
The final direct heat is what turns the skin crisp. During this stage, the color deepens and the surface changes from soft to browned.

7. Check the thickest thigh, not the prettiest one

Insert the thermometer into the deepest part of the meat without touching the bone. The safe minimum for poultry is 165°F / 74°C; FoodSafety.gov lists that same minimum for chicken thighs and other poultry cuts.

Instant-read thermometer inserted into the thickest part of a cooked chicken thigh.
A thermometer removes the guesswork. Check the thickest thigh first because the largest piece decides when the whole batch is ready.

Think of 165°F / 74°C as the safety line. Going closer to 175°F / 79°C is a texture choice, not a safety rule; many people like dark meat better there because it turns softer instead of dry.

8. Rest before cutting so the juices stay in the meat

Rest the chicken for 5 minutes before serving. Resting keeps the first cut from sending all those juices onto the plate.

How to Tell When Chicken Thighs Are Done

Look for golden skin, browned seasoning around the edges, and juices that do not look pink when the thigh rests. Boneless thighs should feel springy but not tight. Bone-in thighs can still look slightly pink near the bone, so color alone is not enough.

Temperature is still the real check: 165°F / 74°C in the thickest part for safety, or closer to 175°F / 79°C if you prefer softer dark meat.

Cut-open air fryer chicken thigh showing crisp browned skin and fully cooked juicy meat inside.
Aim for contrast: browned skin outside, moist cooked meat inside. Resting briefly helps keep those juices in the chicken.

A compact, thick thigh usually needs more time than a flatter thigh of the same weight. Large pieces can look browned outside before the center is ready, so check the largest thigh in the basket before serving.

Why This Method Works

This method works because it gives the skin time to render before the final crisping stage. Starting skin-side down warms the fat under the skin; finishing skin-side up gives the surface direct heat. The thermometer check keeps the timing flexible, because a small boneless thigh and a large bone-in thigh can look similar outside but cook very differently inside.

Time and Temperature Chart

If you remember one thing, remember this: the cut decides the clock. Use the chart to get close, then use the thermometer to land the chicken exactly where you want it: safe, juicy, and not overcooked.

Chicken thigh typeTemperatureApprox. timeFlip?Doneness cue
Bone-in, skin-on400°F / 200°C20–24 minYesSkin crisp, 165°F minimum inside
Small bone-in, skin-on400°F / 200°C18–20 minYesCheck early so they do not dry
Large bone-in, skin-on390–400°F / 199–200°C24–28 minYesContinue in 3-minute bursts if needed
Boneless skinless, thin375–400°F / 190–200°C11–13 minOptionalEdges browned, center 165°F
Boneless skinless, average380–390°F / 193–199°C14–17 minYesJuicy center, browned surface
Boneless skinless, thick380–390°F / 193–199°C18–20 minYesCheck the thickest folded part
Bone-in, skinless390–400°F / 199–200°C18–22 minYesJuicy but less browned
Frozen bone-in360°F then 380°F / 180°C then 190°C25–40 minYesSeparate once softened, check near bone
BBQ thighs380–400°F / 193–200°CNormal time + 3–5 min glazeYesSauce sticky, not burned
Marinated thighs380–400°F / 193–200°CDepends on cutYesPat dry if you want browning
Air fryer chicken thighs time and temperature chart for bone-in, boneless, frozen, and BBQ sauced thighs.
Treat the air fryer chicken thighs time chart as your starting point, then let size and thickness guide the final few minutes. Smaller thighs often finish faster than the chart suggests.

Need the full method? Return to the recipe card. For special cases, jump to boneless skinless thighs, frozen thighs, or BBQ and marinated thighs.

Boneless Skinless Air Fryer Chicken Thighs

Boneless skinless chicken thighs in the air fryer are the fast version: less dramatic than crisp skin, maybe, but incredibly useful for rice bowls, wraps, salads, tacos, noodles, and lunch boxes.

Sliced boneless skinless air fryer chicken thighs served with rice, salad, cucumbers, herbs, and lemon wedges.
This sliced version is built for bowls, wraps, salads, noodles, and meal prep. Start checking early so the pieces stay juicy.

The texture is different from skin-on thighs. Boneless pieces can get browned edges and a roasted surface, but they will not have crispy chicken skin. For a better surface, pat them dry, use a little oil, and toss the seasoned thighs with 1 tablespoon / about 8 g cornstarch if you want a light crisp coating.

This is the version to make when you want cooked chicken you can actually use all week: slice it hot for dinner, then tuck leftovers into wraps, bowls, salads, noodles, or a filling chickpea salad with lemon, herbs, or a spoonful of yogurt dip.

Best method for boneless skinless thighs

  1. Pat the thighs dry.
  2. Open any folded pieces so the thickness is more even.
  3. Rub with oil and seasoning.
  4. Use cornstarch if you want a light browned coating.
  5. Air fry average pieces at 380–390°F / 193–199°C.
  6. Flip halfway for better browning.
  7. Check the center for 165°F / 74°C.

Thin boneless thighs may be ready in 11–13 minutes. Average pieces usually need 14–17 minutes. Thick pieces, folded pieces, or a crowded basket may need closer to 18–20 minutes. Start checking at the low end of the range if your air fryer runs hot.

How to Get Crispy Skin

Crisp skin is not luck. It is mostly dryness, space, and the final few minutes.

  • Blot the skin very dry. Keep blotting until it no longer looks shiny.
  • Give the thighs space. Light edge-touching is fine; overlapping traps steam.
  • Start skin-side down, finish skin-side up. The first stage helps render fat; the second gives the skin direct heat.
  • Use very little oil. Too much oil makes the surface heavy instead of crisp.
  • Add wet or sweet things late. BBQ sauce, honey, and sugary marinades brown fast and can burn before the chicken is done.
Infographic showing five rules for crispy air fryer chicken thigh skin, including drying, spacing, flipping, and saucing late.
Crispy skin works best as a sequence: dry surface, good airflow, a purposeful flip, and sauce only at the end.

For the crispiest version, season the thighs and refrigerate them uncovered for 1–8 hours before cooking. This dries the surface even more, but it is optional for a regular weeknight batch.

If the chicken is cooked through but the skin is still soft, air fry skin-side up for another 2–4 minutes. Watch closely near the end because spices can darken quickly. For another crisp chicken guide, see these air fryer chicken wings.

Frozen Chicken Thighs in the Air Fryer

You can cook frozen thighs in the air fryer, but treat them like a rescue dinner, not the crispiest version of the recipe. Begin gently, separate the pieces as soon as they loosen, and let the thermometer make the final call.

For frozen bone-in thighs, start at 360°F / 180°C for 20–30 minutes, flipping halfway, then finish hotter only after the pieces have separated and the centers are mostly cooked. When pieces are frozen into a solid block, do not force them apart with a knife; warm them until they loosen.

Frozen-together thighs cook unevenly because the center of the stack lags behind the outside pieces. Separate them as soon as they loosen, season any exposed surfaces, then continue cooking in a single layer.

Frozen chicken thighs in an air fryer basket shown before and after separating into a single layer.
When cooking frozen chicken thighs, separation is the turning point. After the pieces loosen, spread them out so the middle cooks as evenly as the edges.

Once the chicken is mostly cooked through, increase to 380°F / 190°C for 3–5 minutes to improve browning and crisp the skin. Medium frozen thighs may take about 25–35 minutes total. Large frozen thighs can take 30–40 minutes. Check near the bone before serving.

The same staged approach works for other frozen chicken pieces too, including frozen chicken wings in the air fryer. Fresh or fully thawed thighs usually brown better and cook more predictably, but frozen thighs are useful when dinner needs to happen without a thawing plan.

Thawed thighs? Return to the classic recipe card or compare cuts in the time chart.

BBQ, Sauced, and Marinated Chicken Thighs

BBQ sauce and marinades can make the chicken taste deeper and more flavorful, but they also change how the surface cooks. Think dry rub early, sweet sauce late. That is the simple rule.

The best sauced thighs should look glossy and sticky at the edges, not blackened before the center is done.

BBQ sauce brushed onto cooked chicken thighs inside an air fryer basket.
Timing matters more than extra sauce here. Brush near the end so the BBQ glaze turns sticky and glossy instead of burnt.

For BBQ thighs

Air fry the thighs mostly plain or with a dry rub first. Sauce belongs near the end: brush it on during the final 3–5 minutes, then cook until it looks glossy at the edges, not blackened. Add a second light brush after cooking if you want a saucier finish. For very sugary sauces, use a thin layer first and add more after cooking.

Marinated thighs

Lift the chicken out of the marinade and wipe off excess liquid before air frying. Let the flavor stay, but leave the liquid behind. This is especially useful for soy-based marinades, honey garlic marinades, yogurt marinades, and tandoori-style marinades.

With sweet marinades, cook closer to 380°F / 193°C and watch the last few minutes carefully. Honey, sugar, and bottled sauces can darken quickly. For a glossy sweet-savory finish, brush on homemade teriyaki sauce near the end rather than at the start.

Flavor Variations

Once the cooking method is clear, flavor becomes the easy part. Keep the timing steady and adjust the seasoning around it.

  • Lemon pepper: Use lemon pepper seasoning and finish with fresh lemon juice after cooking. For a saucier version, see this lemon pepper chicken.
  • Garlic herb: Use garlic powder, onion powder, thyme, oregano, and black pepper.
  • Cajun: Use Cajun seasoning and reduce added salt if the blend is already salty.
  • Ranch: Use dry ranch seasoning lightly, then taste before adding extra salt.
  • Teriyaki: Cook with a dry base seasoning, then glaze near the end.
  • Honey garlic: Add honey garlic glaze during the final few minutes so it does not burn.
  • Tandoori-style: Use a thick yogurt-spice marinade, wipe off excess, then air fry until cooked through.
  • Garam masala: Add a small pinch of garam masala to the paprika-garlic rub for a warmer spice note.
  • Green chutney: Serve with green chutney, or stir the chutney into yogurt for a quick herby dip.
  • Spicy: Add cayenne, chili powder, crushed red pepper, or hot sauce after cooking. Serve sweet-hot versions with mango habanero sauce.

Bright, spicy serving idea

For a brighter plate, keep the thighs dry-rubbed and crisp, then serve them with sliced onions, lemon wedges, green chutney, and a quick yogurt-garlic dip. You get the crisp skin from the air fryer and the fresh, spicy contrast on the side.

Air Fryer Size, Basket Space, and Equipment

A 5–6 quart basket-style air fryer is ideal for 4 medium bone-in thighs. Smaller air fryers may only fit 2 or 3 at a time. Light edge-touching is fine; overlapping or stacking means you should cook in batches.

Basket-style air fryers often brown faster than oven-style air fryers. Larger oven-style models may need a few extra minutes because the food sits farther from the heating element. Ninja Foodi, Cosori, Instant, Philips, and similar models can all work, but basket shape and heating strength change the final few minutes more than the brand name does.

The most useful tool is an instant-read thermometer. It removes the guesswork, especially when the thighs are different sizes or when you are cooking frozen pieces.

Troubleshooting

Most air fryer chicken thigh problems are not recipe failures. They are usually surface problems, spacing problems, timing problems, or sauce problems. Once you know which one happened, the fix is usually simple.

Quick fixes by problem

ProblemLikely reasonFix
Skin is rubberyThe skin was wet, the basket was crowded, or the thighs did not finish skin-side up long enoughPat dry, cook in a single layer, and add 2–4 minutes skin-side up
Chicken is dryThe thighs were small or cooked too longStart checking earlier and rest for 5 minutes before serving
Outside is browned but inside is undercookedThe thighs are large, very cold, frozen, or crowdedLower the temperature slightly and continue cooking in 3-minute bursts
Seasoning burnedToo much sugar, fresh garlic, or sauce went in too earlyUse dry spices first and add sweet sauces near the end
Air fryer smokedToo much oil, excess fat, old grease, or a dirty basketTrim loose fat, use less oil, and check the drawer for old grease before starting
Chicken tastes blandThe surface was under-seasonedSeason both sides, including edges, and add a squeeze of lemon after cooking if the chicken tastes flat
Thighs cooked unevenlyPieces were different sizes or folded under themselvesUse similar-sized thighs and open folded boneless pieces before cooking
Skin stuck to the basketThe basket was not clean, the skin was too wet, or the chicken was moved too earlyClean the basket, dry the skin well, and let the first side cook before flipping
Frozen thighs cooked unevenlyThe pieces were stuck together or too thickSeparate once softened and check near the bone before serving

When the skin is still soft

When the chicken is already cooked but the skin is disappointing, do not start over. Put it back skin-side up for a few minutes, then serve with lemon, chutney, sauce, or a cool dip.

Storage and Reheating

Store leftover chicken thighs in an airtight container in the refrigerator for 3–4 days. That matches USDA guidance for cooked leftovers, which gives a 3–4 day refrigerator window.

To reheat, air fry at 350°F / 175°C until hot in the center. The exact time depends on whether the thigh is bone-in or boneless. Reheating in the air fryer keeps the surface much better than microwaving.

For the best leftover texture, reheat only what you plan to eat and keep the rest chilled until needed.

The microwave works when speed matters, but the skin will soften. If you want the skin crisp again, microwave briefly to warm the center, then air fry for a few minutes to revive the outside.

Cooked thighs can also be frozen, though the skin will not be as crisp after thawing. For best results, remove the meat from the bone and use it later in rice bowls, wraps, soups, noodles, or salads.

What to Serve with Them

These thighs are flexible enough for a simple dinner, a meal prep box, or a more flavorful weekend plate. The best plate is usually hot chicken, something cool, something bright, and something that catches the juices.

Crispy air fryer chicken thighs served with green chutney, yogurt dip, sliced onions, lemon wedges, and naan.
To serve, build contrast around the crispy chicken. Lemon brightens it, onions add bite, chutney brings heat, and yogurt dip cools everything down.
  • Plain rice, jeera rice, fried rice, or a bowl with sliced thighs and crunchy vegetables
  • Mashed potatoes, roasted potatoes, or air fryer hash browns
  • Steamed vegetables, roasted broccoli, green beans, carrots, or corn
  • A cold cucumber salad for smoky, spicy, or BBQ-style thighs
  • Garlic bread, dinner rolls, or naan
  • Noodles with garlic, chili, or teriyaki-style sauce
  • Cool yogurt-garlic dip, green chutney, ranch, aioli, hot sauce, or lemon wedges for squeezing over the hot skin

Creamy garlic mayo works well here, or you can build one from this homemade mayonnaise guide. For a tandoori-style version, serve the chicken with naan, rice, sliced onions, lemon wedges, and a cooling yogurt dip.

A lighter meal works well with sliced boneless thighs over salad. Tuck extras into wraps with crunchy vegetables.

FAQs

How long do chicken thighs take in the air fryer?

Bone-in, skin-on thighs usually take 20–24 minutes at 400°F / 200°C. Boneless skinless thighs cook faster, usually 11–20 minutes depending on thickness. Start checking at the low end of the range if your thighs are small or your air fryer runs hot.

What temperature works best?

For bone-in, skin-on thighs, 400°F / 200°C gives the best balance of golden skin and juicy meat. Boneless skinless thighs do better around 380–390°F / 193–199°C because the center can cook before the edges dry.

Do you need to preheat the air fryer?

Preheating helps the chicken start browning quickly, especially for skin-on thighs. If your air fryer does not require preheating, you can still run it empty for 3 minutes while you finish seasoning the chicken.

Should chicken thighs start skin-side up or down?

Start skin-side down, then flip skin-side up to finish. The first stage helps the fat begin to render, and the final stage gives the skin direct heat so it can crisp.

Are boneless skinless thighs faster?

Yes. Boneless skinless thighs cook much faster than bone-in thighs, especially when they are thin or opened flat. Start checking early so they stay juicy instead of tightening up.

How do you make the skin crispy?

Use skin-on thighs, blot the skin dry, preheat the air fryer, avoid overcrowding, and finish cooking skin-side up. A tiny amount of baking powder can also help the skin crisp more deeply.

Why is the skin not crispy?

The skin may have been too damp, the basket may have been crowded, or the chicken may have needed a few extra minutes skin-side up. Wet marinades and too much oil can also soften the surface.

Is 165°F enough for chicken thighs?

Yes. Chicken thighs are safe to eat once they reach 165°F / 74°C in the deepest part of the meat. Check the thickest thigh and keep the thermometer in the meat, not against the bone.

Why cook thighs closer to 175°F?

They do not have to reach 175°F for safety, but many people prefer dark meat around that temperature because it can taste softer and more tender. Thighs are more forgiving than chicken breast, so they can handle a slightly higher finish.

Can frozen thighs go straight in?

Yes, but give them a slower start and check the center carefully. Begin around 360°F / 180°C to cook through, then finish hotter around 380°F / 190°C to brown and crisp the outside. Separate pieces as soon as they loosen so the centers cook evenly.

How many thighs fit in an air fryer?

A 5–6 quart basket usually fits 4 medium bone-in thighs in a single layer. Smaller air fryers may fit only 2 or 3. The thighs can touch lightly, but they should not overlap.

Can you use BBQ sauce?

Yes. Brush BBQ sauce on during the final 3–5 minutes so it turns sticky without burning. If the sauce is very sugary, use a thin layer first and add more after cooking.

Can you air fry marinated thighs?

Yes, just do not move them straight from a dripping marinade into the basket. Let the flavor stay, but wipe away excess liquid so the surface can brown.

Need the short version again? Return to the Quick Answer or the Recipe Card.

Final Tip

Once you know what kind of thigh is in the basket, the recipe becomes simple. Give skin-on thighs time to render, check boneless pieces early, be patient with frozen pieces, and finish with something bright: lemon, chutney, yogurt dip, or a sticky glaze. The result is a low-effort dinner that still feels like you meant to make something good.

Posted on Leave a comment

Peanut Noodles Recipe: Creamy Peanut Sauce Noodles in 20 Minutes

Bowl of creamy peanut noodles with chili crisp, scallions, chopped peanuts, sesame seeds, herbs, lime, and lifted noodles

Peanut noodles are the dinner you make when you have noodles, peanut butter, and very little patience. This version is built around the one thing that makes or breaks the bowl: a peanut sauce loose enough to cling to every strand without turning thick, dry, or clumpy.

These creamy peanut noodles are ready in about 20 minutes. They turn a packet of noodles and a jar of peanut butter into something that feels like dinner: rich but not heavy, peanutty but not pasty, and bright enough that you want another bite.

Keep them plain and pantry-friendly, make them spicy with chili crisp, serve them cold with cucumber and herbs, or turn them into a full meal with tofu, chicken, shrimp, egg, or edamame. However you build them, the goal is the same: glossy strands, salty-tangy peanut flavor, and enough crunch or lime to keep you going back for another bite.

Make This Tonight If You Have

  • 8 oz / 225 g dried noodles, spaghetti, ramen, rice noodles, udon, soba, or another noodle you already have
  • ½ cup / about 128 g peanut butter
  • Soy sauce or tamari
  • Rice vinegar, lime, lemon, or a small splash of regular vinegar
  • Warm water to turn the peanut butter into sauce
  • Garlic, ginger, chili, scallions, herbs, peanuts, or crunchy vegetables if available

The easiest version is spaghetti, peanut butter, soy sauce, vinegar or lemon, chili flakes, and warm water. No lime, no rice noodles, no chili crisp? Use what you have. This bowl forgives imperfect noodles, half a lime, and whatever crunchy vegetables are left in the fridge.

Pantry check: this is the simplest version of the recipe promise — noodles, peanut butter, salty seasoning, acid, chili, and enough liquid to make dinner happen.

Dried noodles, peanut butter, soy sauce, lime, garlic, ginger, chili, scallions, peanuts, and water arranged on a countertop
Before you cook, check what you already have. Peanut butter, noodles, soy sauce, acid, chili, and warm water can turn into dinner quickly.

Quick Answer

To make peanut noodles, cook 8 oz / 225 g dried noodles, reserve ½ cup / 120 ml noodle water, then whisk ½ cup / about 128 g peanut butter with soy sauce or tamari, rice vinegar, lime juice, a little sweetener, garlic, ginger, chili, and ¼ cup / 60 ml warm water. Toss with the noodles, then loosen with reserved noodle water until the noodles look shiny, saucy, and easy to lift.

The basic peanut noodle sauce formula is simple: peanut butter for body, soy sauce for salt, vinegar or lime for brightness, a little sweetener for balance, chili for heat, and warm water to make it pourable. That is the difference between peanut butter on noodles and peanut sauce noodles.

For 4 servingsUse
Noodles8 oz / 225 g dried noodles
Peanut butter½ cup / about 128 g
First thinning liquid¼ cup / 60 ml warm water
Final adjustmentReserved noodle water or warm water, in small splashes
Best texture cuePourable sauce before tossing, glossy noodles after tossing

Sauce shortcut: use this formula when the bowl tastes flat, too thick, too salty, or too peanut-heavy.

Peanut noodle sauce formula graphic showing peanut butter, soy sauce, vinegar or lime, sweetener, chili, warm water, and sauce
A good peanut noodle sauce is about balance: creamy body, salty depth, tangy lift, gentle sweetness, optional heat, and enough liquid to move.

Choose Your Bowl

Start with the same sauce, then steer the bowl toward the kind of dinner you need: pantry-simple, spicy, cold, protein-heavy, or extra saucy.

What you wantUseFinish with
Pantry dinnerSpaghetti, peanut butter, soy sauce, vinegar or lemonChili flakes, peanuts, scallions
Spicy takeout-ish bowlRamen, udon, wheat noodles, or spaghettiChili crisp, chili oil, lime
Cold lunch bowlRice noodles or sobaCucumber, cabbage, herbs, sesame
Full dinner bowlUdon, wheat noodles, spaghetti, or rice noodlesTofu, chicken, shrimp, egg, or edamame
Extra-saucy noodles6–7 oz / 170–200 g dried noodlesMore peanut sauce and noodle water

For the first time, start with spaghetti or udon, creamy peanut butter, low-sodium soy sauce, lime or vinegar, and chili crisp if you like heat. After that, the same sauce can go pantry-simple, spicy, cold, protein-heavy, or extra saucy.

Use the bowl guide below when you know the kind of meal you want but need help choosing the noodle, topping, or finish.

Five peanut noodle bowls showing pantry, spicy, cold, protein, and extra-saucy variations
Once the sauce tastes right, choose the mood: pantry-simple, spicy, cold and crisp, protein-rich, or extra saucy for comfort.

Creamy Peanut Noodles Recipe

This is the main recipe: 8 oz / 225 g noodles, a ½-cup peanut butter sauce, and just enough warm water and noodle water to make the sauce silky instead of stiff. You only need a pot, a colander, a bowl or jar for the sauce, a whisk or fork, and tongs for lifting and tossing.

Prep time10 minutes
Cook time10 minutes
Total time20 minutes
Servings4
Best servedWarm, room temperature, or cold

Ingredients

For the noodles

  • 8 oz / 225 g dried noodles, or 16–20 oz / 450–570 g fresh noodles
  • Salt for the cooking water, if using wheat noodles, spaghetti, or pasta-style noodles

For the peanut sauce

  • ½ cup / about 128 g creamy peanut butter
  • 2 tablespoons / 30 ml low-sodium soy sauce or tamari
  • 1 tablespoon / 15 ml rice vinegar
  • 1 tablespoon / 15 ml lime juice or lemon juice
  • 1 tablespoon honey, maple syrup, brown sugar, or jaggery
  • 1 small garlic clove, finely grated
  • 1 teaspoon grated fresh ginger
  • 1–2 teaspoons sriracha, chili garlic sauce, chili oil, or chili crisp
  • ¼ cup / 60 ml warm water, plus more as needed
  • ½ cup / 120 ml reserved noodle water, for adjusting while tossing

For finishing

  • 2 scallions, thinly sliced
  • 2–3 tablespoons chopped peanuts
  • Fresh cilantro, basil, or mint
  • Sesame seeds
  • Lime wedges
  • Optional vegetables or protein, such as cucumber, cabbage, carrots, tofu, chicken, egg, shrimp, or edamame

Method

1. Cook the Noodles

Bring a large pot of water to a boil for wheat noodles, spaghetti, udon, soba, or ramen. For rice noodles, cook or soak according to the package directions. Keep the noodles slightly firm rather than soft, because overcooked noodles can turn sticky once tossed with peanut sauce.

2. Reserve Noodle Water

Before draining, scoop out at least ½ cup / 120 ml of the cooking water. This gives you an easy way to loosen the sauce while mixing.

Cloudy noodle cooking water being scooped from a pot of noodles before draining
Before draining, save some cloudy cooking water. A small splash can loosen thick peanut sauce while helping it cling better.

3. Drain the Noodles

For warm wheat noodles, spaghetti, udon, or ramen, drain and keep the noodles warm. For rice noodles, soba, or cold noodles, rinse briefly under cool water to remove extra starch and stop the cooking. If cooked noodles must sit before saucing, toss them with only 1 teaspoon neutral oil; skip the oil if you are saucing right away.

Cooked noodles with separate strands in a metal colander beside tongs and a bowl of peanut sauce
Meanwhile, stop the noodles while they still have a little bite. Firm, separate strands make better peanut sauce noodles.

4. Whisk the Peanut Sauce

In a medium bowl or jar, combine peanut butter, soy sauce or tamari, rice vinegar, lime juice, sweetener, garlic, ginger, chili, and ¼ cup / 60 ml warm water. Whisk until smooth and pourable. If the sauce resists the whisk or looks like peanut butter spread, add another small splash of warm water.

Texture check: the sauce should move before it meets the noodles, so fix thickness here rather than fighting clumps later.

Side-by-side peanut sauce comparison showing thick peanut paste and smooth pourable sauce
Look for drizzle, not paste. If the peanut sauce moves from a spoon, it will coat the noodles more evenly.

5. Toss the Noodles

Add the noodles to a large bowl. Pour over most of the peanut sauce and lift with tongs until the strands look glossy. Add reserved noodle water in small splashes until the sauce falls around the noodles instead of dragging through them.

Peanut sauce being poured over noodles while tongs lift and turn the strands in a bowl
Then add sauce in stages and lift as you toss. That keeps the noodles coated instead of crushed into one thick mound.

6. Adjust the Flavor

Taste after mixing. Use soy sauce for more salt, lime for brightness, chili for heat, or a little water if the sauce is too intense. When the bowl tastes rich but sleepy, it probably needs lime.

7. Finish and Serve

Add scallions, chopped peanuts, herbs, sesame seeds, and lime wedges. If the bowl sits for a few minutes before serving, lift and turn the noodles once more with a small splash of water.

Final cue: the bowl is ready when the noodles are twirlable and the toppings add crunch, freshness, heat, and brightness.

Finished peanut noodles topped with scallions, peanuts, sesame seeds, herbs, chili crisp, and lime
After tossing, finish with contrast. Scallions freshen the bowl, peanuts add crunch, chili brings heat, and lime cuts through the richness.

The finished bowl should be glossy, saucy enough to twirl, and bright at the edges from lime or vinegar. Add peanuts, scallions, herbs, or crunchy vegetables and it stops feeling like pantry noodles and starts feeling like dinner.

Recipe Notes

  • Natural peanut butter works, but every jar behaves differently. Stir it fully before measuring and expect to use a little more warm water.
  • If using regular soy sauce instead of low-sodium soy sauce, start with 1½ tablespoons and adjust after tossing.
  • For extra-saucy noodles, use 6–7 oz / 170–200 g dried noodles, or add another 1–2 tablespoons peanut butter and enough warm water to loosen the sauce.
  • Leftovers revive with 1–2 tablespoons hot water, broth, or cool water per serving.
  • This recipe contains peanuts. For a peanut-free kitchen, use a separate seed-butter noodle sauce recipe; seed butters thicken differently.
  • For a sauce-first version you can use for dipping, satay, salads, bowls, and noodles, see this MasalaMonk peanut sauce recipe.

Before you keep scrolling: if the sauce feels too thick, go to the peanut sauce texture guide. If you are choosing noodles, jump to best noodles for peanut noodles.

More Tips for Better Peanut Noodles

The Three Cues That Make Peanut Noodles Better

Peanut noodles are simple, but three small choices decide whether they feel silky or sticky.

  1. Do not overcook the noodles. Slightly firm noodles hold the sauce better than soft noodles.
  2. Make the sauce pourable. It should look like a thick dressing, not a dip.
  3. Taste at the end. Noodles dull the sauce, so the final salt, lime, chili, and sweetness should be adjusted after tossing.

The goal is not a thicker sauce. It is a sauce that moves. Once the noodles look shiny and twirlable, stop fixing them.

Ingredients and Smart Swaps

The sauce is simple, but each ingredient has a job: salty, tangy, sweet, spicy, aromatic, or creamy. Once you understand that, the swaps become easy.

Peanut Butter

Creamy peanut butter gives the most predictable sauce. Natural peanut butter works too, but every jar behaves a little differently; some are runny, some are dry, and some need extra warm water. Crunchy peanut butter adds texture, though the sauce will not be completely smooth. If you make pantry staples from scratch, homemade peanut butter works as long as it is loose enough to whisk smoothly.

Soy Sauce or Tamari

Soy sauce is the salty backbone, so low-sodium gives you room to fix the bowl at the end. Tamari is the closest gluten-free swap, as long as the label says gluten-free. Check the labels on your noodles and chili sauce too.

Rice Vinegar, Lime, or Lemon

Rice vinegar keeps the sauce from feeling heavy; lime makes the finished bowl taste awake. Lemon juice works too. Skipping the acid completely can leave the noodles tasting rich but flat.

Sweetener

Use honey, maple syrup, brown sugar, or jaggery. One tablespoon is enough to round the salty and tangy edges; the noodles should not taste sugary.

Chili

Sriracha gives smooth heat, chili garlic sauce adds punch, chili oil makes the bowl richer, and chili crisp adds heat plus crunch. Start small if you are cooking for a mixed table. Chili crisp takes the bowl into takeout-ish territory: spicy, crunchy, salty, and a little messy in the best way.

Garlic and Ginger

Fresh garlic and ginger keep the sauce from tasting like plain peanut butter and soy sauce. Grate them finely so they disappear into the sauce. In an emergency, use a small pinch of garlic powder and ginger powder.

Warm Water and Noodle Water

Warm water turns peanut butter from something that sticks to the spoon into something the noodles can actually wear. Noodle water helps it cling once the noodles are in the bowl. The same idea — salty, bright, slightly sweet, aromatic, and loose enough to coat — also matters in a good stir-fry sauce, especially with tofu, vegetables, or noodles.

Best Noodles for Peanut Noodles

The easiest default choices are spaghetti, wheat noodles, medium rice noodles, ramen, or udon. They hold sauce well, are easy to find, and do not need much fuss.

There is no single correct noodle here. The best choice is the one you can cook without overthinking it. That is why spaghetti belongs in the conversation.

Use this noodle guide to match the recipe to what you already have, whether you want a pantry bowl, a bouncy ramen version, or a cold lunch.

Bowls of spaghetti, rice noodles, udon, ramen, soba, and wheat noodles arranged on a board
The noodle changes the experience: spaghetti is easy, ramen is springy, udon is chewy, soba is nutty, and rice noodles work beautifully cold.
NoodleBest useRinse?Texture note
SpaghettiPantry hot bowlNo, unless gummyReliable and twirlable
Rice noodlesCold bowls, lighter bowls, gluten-free meals*Usually yesDelicate and fast-absorbing
UdonSaucy comfort bowlUsually noThick, chewy, satisfying
SobaCold nutty bowlYesEarthy and best cooled
RamenFast spicy bowlUsually noBouncy and quick to absorb
Wheat noodlesClassic warm bowlNo, unless gummyChewy and sauce-friendly
VermicelliLight cold bowlUsually yesSoft, delicate, easy to break

*For gluten-free bowls, use certified gluten-free noodles and gluten-free tamari.

A warm bowl is easiest with wheat noodles, spaghetti, udon, or ramen. Cold bowls work better with rice noodles or soba because they rinse and chill well.

Spaghetti is not a compromise here. It is easy to find, holds the sauce nicely, and makes this a real weeknight recipe.

Spaghetti Peanut Noodles

Choose spaghetti when you want the fastest pantry version and do not want to buy specialty noodles. The main trick is keeping the sauce loose enough for long strands.

Spaghetti peanut noodles with creamy peanut sauce, scallions, chopped peanuts, chili flakes, sesame seeds, and lime
Spaghetti is the no-special-shopping shortcut. Those long strands need enough loose peanut sauce to stay silky.

Ramen Peanut Noodles

Ramen works when you want a bouncy bowl with chili oil, scallions, and a little takeout-style drama. Toss it right before serving because it absorbs sauce quickly.

Ramen peanut noodles in a dark bowl with chili oil, scallions, peanuts, sesame seeds, lime, and noodles lifted with chopsticks
Ramen gives peanut noodles a bouncy, takeout-style feel. Since it absorbs sauce fast, start looser than you think.

How to Make Them Look and Taste Right

The recipe card gives you the steps. This section gives you the cues to watch while you cook, so you know when the noodles, sauce, and final bowl look right.

1. The Noodles Should Be Firm, Not Soft

Cook or soak the noodles according to the package directions, but stop before they go soft. Slightly firm noodles stay separate and hold sauce. Overcooked noodles can turn gummy, especially after sitting.

Rinse rice noodles or soba if they feel starchy, or if you are serving them cold. For warm spaghetti, udon, ramen, or wheat noodles, drain and toss while warm.

2. The Sauce Should Look Like Thick Dressing

When you first whisk peanut butter with soy sauce, vinegar, lime, and warm water, it may look stiff, split, or grainy. Keep going. Peanut butter often looks worse before it turns smooth.

Stop when the sauce falls from the spoon in thick ribbons. It should not sit on the spoon like peanut butter spread.

3. Lift the Noodles Instead of Mashing Them

Use tongs or two forks to lift and turn the noodles through the sauce. Heavy stirring can break delicate noodles and make soft noodles feel gummy.

If the sauce drags through the noodles, it needs a splash of liquid. If it puddles underneath, keep lifting for a few seconds before adding anything else.

4. The Final Bowl Should Be Shiny, Not Matte

Matte noodles usually mean the sauce is too thick or the noodles have absorbed it while sitting. Shiny noodles mean the sauce is still moving. That is the texture you want.

A final squeeze of lime is not decorative. It wakes up the sauce and keeps the noodles from tasting heavy.

Peanut Sauce Texture Guide

Start here when the problem is texture: sauce that turns too thick, too thin, clumpy, oily, dry, or stiff. Flavor fixes come later in troubleshooting.

Before tossing, the peanut mixture should be spoonable and pourable. After tossing, the noodles should look glossy and lightly covered. Most texture problems are fixed slowly, not by starting over.

Texture problemFix
Sauce is too thick before tossingWhisk in warm water in small splashes.
Sauce turns clumpy on noodlesAdd noodle water and lift gently until smooth.
Noodles look dry or matteUse hot water, noodle water, or broth to bring back shine.
Sauce puddles at the bottomStop adding liquid and keep lifting the noodles.
Sauce looks oilyWhisk in warm water and a little lime or vinegar.
Leftovers are stiffAdd 1–2 tablespoons water or broth per serving.

Use the visual cue: matte noodles need liquid; shiny noodles are ready to serve.

Comparison of dry matte peanut noodles and glossy saucy peanut noodles, with the glossy noodles lifted by chopsticks
If the noodles look matte, pause before serving. Add a splash of liquid until the strands loosen and shine.

Do not panic when the sauce thickens. Peanut butter wants to thicken. Add liquid slowly, lift the noodles gently, and it will loosen again.

Still not right? Go to troubleshooting for bland flavor, salty sauce, sticky noodles, and natural peanut butter problems.

Serve Them Hot or Cold

You can serve this bowl hot, room temperature, or cold. Warm, it leans cozy and saucy. Cold, it becomes brighter, crunchier, and more lunch-box friendly.

Pick the serving style first. Hot bowls need loosened sauce, while cold bowls need freshness, crunch, and enough lime to stay awake.

Hot peanut noodles with chili crisp beside cold peanut noodles with cucumber, cabbage, herbs, peanuts, sesame seeds, and lime
Hot peanut noodles want warmth and sauciness. Cold peanut noodles need crunch, herbs, and lime so they taste fresh rather than flat.
  • Hot bowl: Usually do not rinse, unless the noodles are gummy. Loosen with warm noodle water. Add tofu, chicken, shrimp, egg, broccoli, scallions, or chili crisp.
  • Cold bowl: Rinse and cool the noodles first. Use cool water and lime to loosen the sauce. Add crunch and herbs right before serving.

Cold peanut noodles are best when they feel crisp, not leftover-ish: cool noodles, cucumber snap, cabbage crunch, fresh herbs, sesame, peanuts, and enough lime to wake everything back up.

If you want the cold version to feel extra fresh, add cucumber inside the bowl or serve it with a crisp cucumber salad on the side.

Add-Ins and Variations

This bowl can stay simple or become a full meal. Think of the noodles as the base, then add one crunchy thing, one fresh thing, and one protein if you want it to feel complete.

Spicy Peanut Noodles

The spicy version should feel bold and a little messy: creamy peanut sauce, chili heat, scallions, peanuts, and crunchy chili crisp hitting at the end. Add 2 teaspoons sriracha or chili garlic sauce to the peanut sauce, then finish with chili crisp or chili oil. Keep chili crisp mostly on top if you want the crunchy bits to stay bold.

Spicy peanut noodles in a dark bowl with chili crisp, chili oil, scallions, peanuts, sesame seeds, and lime
For spicy peanut noodles, add chili crisp at the end. That keeps the heat bold and the crunchy bits noticeable.

Cold Peanut Noodles

Rice noodles and soba are the easiest choices because they rinse clean and stay light. Keep the sauce a little thinner so the noodles stay silky after chilling, then add cucumber, cabbage, herbs, sesame, peanuts, and lime. This is the version that makes tomorrow’s lunch feel intentional.

Cold peanut noodles with cucumber, purple cabbage, carrots, herbs, peanuts, sesame seeds, lime, and light peanut sauce
For cold peanut noodles, freshness matters most. Cucumber, cabbage, herbs, sesame, peanuts, and lime keep the creamy sauce from feeling heavy.

Protein Peanut Noodles

Crispy tofu, cooked chicken, sautéed shrimp, jammy egg, fried egg, tempeh, and edamame all work. Cook the protein separately so the noodles stay silky and the sauce does not dry out in the pan. For a plant-protein version, add crispy tofu or use one of these tofu meal prep ideas when you want bowls that hold up for weekday lunches.

Peanut noodles topped with crispy tofu, edamame, carrots, herbs, peanuts, scallions, sesame seeds, and lime
To make peanut noodles feel like dinner, add protein with texture. Crispy tofu and edamame work well without hiding the noodles.

Sesame Peanut Noodles

A little toasted sesame oil makes the sauce deeper and rounder. Start with 1 teaspoon, taste, then add a second teaspoon only if you want more sesame aroma. It should support the peanut flavor, not cover it.

Thai-Style Peanut Noodles

Rice noodles, lime juice, cilantro, basil, chili, and crunchy vegetables move the bowl in a fresher, herbier direction. This Thai-style vegan bowl with peanut butter dressing has more ideas for pairing peanut sauce with vegetables and plant protein without making the noodles do all the work.

Pantry Peanut Noodles

Spaghetti, peanut butter, soy sauce, vinegar or lemon juice, chili flakes, and warm water are enough. It is not fancy, but it saves a busy night when takeout sounds tempting and the noodles are already in the pantry.

What to Serve with This Bowl

The easiest way to serve peanut noodles is to match the add-ins to the meal. Keep the sides fresh or simple because the noodles already bring the richness.

  • Light lunch: cucumber, cabbage, herbs, lime, and sesame seeds.
  • Protein dinner: crispy tofu, chicken, shrimp, egg, edamame, or tempeh.
  • Cold meal prep: rice noodles, carrots, cabbage, cucumber, herbs, and extra lime.
  • Spicy bowl: chili crisp, scallions, peanuts, and lime.
  • Kid-friendlier bowl: less chili, cucumber, carrots, mild vegetables, and extra peanuts if safe.

As a side dish, serve the noodles with fresh spring rolls, steamed broccoli, stir-fried greens, crispy tofu, grilled chicken, sautéed shrimp, a fried egg, or a light broth-based soup.

Storage, Leftovers, and Meal Prep

These noodles are best when freshly tossed, but leftovers are still useful if you know how to revive them.

Store leftovers in an airtight container in the fridge for 3–4 days. This matches the USDA’s general leftovers and food safety guidance. The noodles will absorb sauce as they sit, so they may look dry or stiff when cold.

Peanut Noodles Meal Prep

Meal prep works best when the noodles, sauce, and crunchy toppings are stored separately. Toss just before eating so tomorrow’s bowl still has contrast: silky strands, crisp vegetables, fresh herbs, and peanuts that still crunch.

Glass meal prep containers with peanut noodles, vegetables, herbs, peanuts, lime wedges, and separate cups of peanut sauce
For peanut noodles meal prep, pack the sauce separately when possible. Then the vegetables stay crisp and lunch tastes brighter.

Revive Leftover Peanut Noodles

To reheat, add 1–2 tablespoons hot water or broth per serving, then warm gently and lift until saucy again. Avoid overheating for too long, because the sauce can tighten.

Cold leftovers come back with a splash of cool water and a squeeze of lime. Toss until the noodles loosen, then add herbs, cucumber, or peanuts if you want the serving to feel fresh again.

Before-and-after peanut noodles showing dry leftover noodles beside revived glossy noodles while liquid is poured in
Leftover peanut noodles are easy to rescue. Add water, broth, or lime, then toss until the strands relax and look ready again.

Troubleshooting: Sticky Noodles, Bland Flavor, Strong Sauce

Most peanut noodle problems are fixable, and very few require starting over. Usually the noodles need a splash of liquid, a little lime, more salt, or a gentler toss.

Sticky Noodles

Use plenty of water when boiling, avoid overcooking, and toss soon after draining. Rice noodles and soba can be rinsed if they feel gummy. Warm wheat noodles usually hold sauce better when they are not rinsed.

Grainy Peanut Sauce

Keep whisking and splash in warm water slowly. Peanut butter can look stiff or split before it turns smooth. A whisk is easiest, but a jar with a tight lid also works.

Two bowls of peanut sauce showing a grainy mixture with a whisk and a smooth sauce after mixing
Peanut sauce often looks rough before it turns creamy. Keep whisking and add warm water slowly until the texture smooths out.

Bland Peanut Noodles

They probably need balance, not more peanut butter. Use soy sauce or tamari for salt, lime or vinegar for brightness, chili for heat, and ginger or garlic for depth.

Too Salty

Soften the bowl with more noodles, cucumber, cabbage, carrots, lime, or water. Do not add more peanut butter first; that can make the sauce heavier without fixing the salt.

Too Spicy

Bring the heat back down with more noodles, peanut butter, a small touch of sweetener, or extra lime. Crunchy cucumber also helps calm the bowl.

Natural Peanut Butter Problems

Stir the jar well first, then whisk the measured peanut butter with warm water before adding the rest of the sauce ingredients.

Back to the recipe card or jump to more tips.

Frequently Asked Questions

What noodles are best for peanut noodles?

Spaghetti, wheat noodles, medium rice noodles, ramen, udon, and soba all work. If you are making this for the first time, spaghetti, wheat noodles, medium rice noodles, or udon are the easiest because they are predictable and easy to find.

Do you rinse noodles for peanut noodles?

Rinse rice noodles, soba, or noodles you plan to serve cold. For warm wheat noodles, spaghetti, udon, or ramen, it is usually better not to rinse because the surface starch helps the peanut sauce cling.

How do you keep peanut sauce from getting too thick?

Start with a pourable sauce, then loosen slowly with reserved noodle water or warm water. Peanut sauce thickens as it sits, so stop when it clings instead of clumps.

Are peanut noodles served hot or cold?

Both work. Hot noodles feel softer and saucier right away. Cold noodles are best when rinsed, cooled, and paired with crunchy vegetables, herbs, and a slightly thinner sauce.

Can you make peanut noodles ahead of time?

Yes, but they are best if the sauce, noodles, and crunchy toppings are stored separately. If the noodles are already dressed, make the sauce slightly thinner and loosen with water, broth, or lime before eating.

Can you use ramen noodles for peanut noodles?

Yes. Ramen works well because it is quick and bouncy, but it absorbs sauce fast. Keep the peanut sauce slightly thinner and toss right before serving.

Does natural peanut butter work for peanut sauce noodles?

Yes. Natural peanut butter works, but every jar behaves differently. Stir it fully before measuring, then loosen the sauce with warm water until it pours.

What protein goes well with peanut noodles?

Tofu, chicken, shrimp, egg, edamame, and tempeh all work well. Cook the protein separately, then add it on top or fold it in gently after the noodles are sauced.

How long do peanut noodles last in the fridge?

Peanut noodles keep for about 3–4 days in an airtight container, but they will need a splash of liquid to come back. Use water, broth, or lime juice before reheating or serving cold.

Why did my peanut noodles taste bland?

They probably need balance, not more peanut butter. Use soy sauce or tamari for salt, lime or vinegar for brightness, chili for heat, and ginger or garlic for more depth.

Is this recipe vegan?

It can be vegan if you use maple syrup, brown sugar, or jaggery instead of honey. Also check that your noodles, chili sauce, and other add-ins are vegan.

Are peanut noodles Thai or Chinese?

Peanut noodles can lean in different directions depending on the ingredients. Rice noodles, lime, herbs, and chili make the bowl feel Thai-style. Wheat noodles, soy sauce, sesame oil, and chili oil can make it feel closer to Chinese-style cold or warm noodles. This recipe is a practical peanut sauce noodle bowl, not a claim to one traditional regional dish.
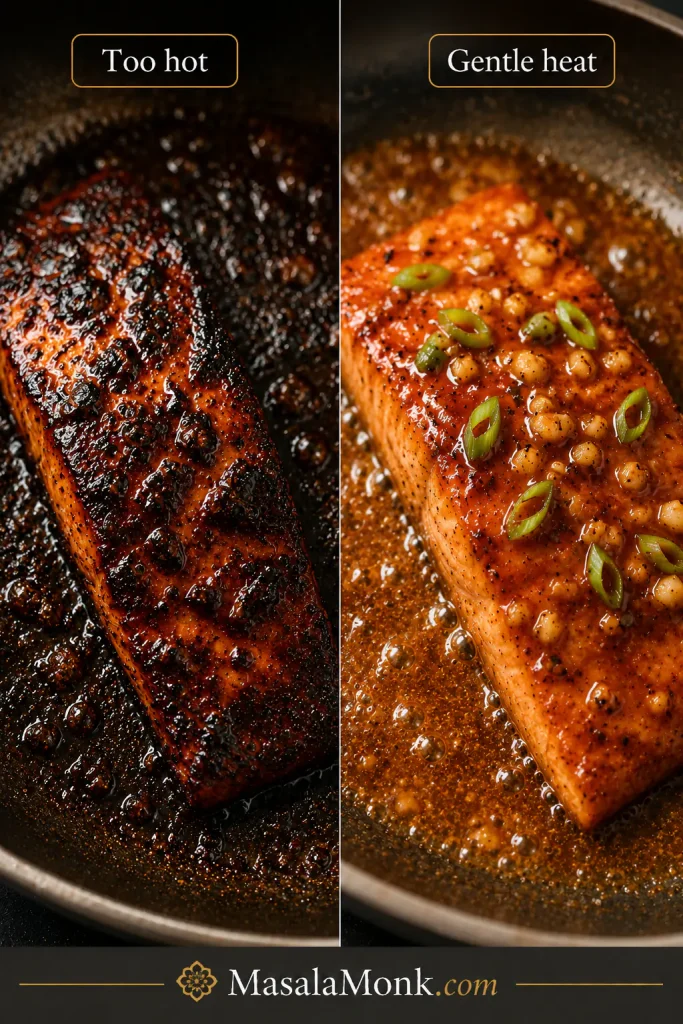
Final Tips for Creamy Peanut Noodles

The best peanut noodles are not perfect because you followed every step exactly. They are good because you know what to look for: noodles that lift easily, sauce that clings without clumping, and enough lime, herbs, or crunch to keep the bowl bright.
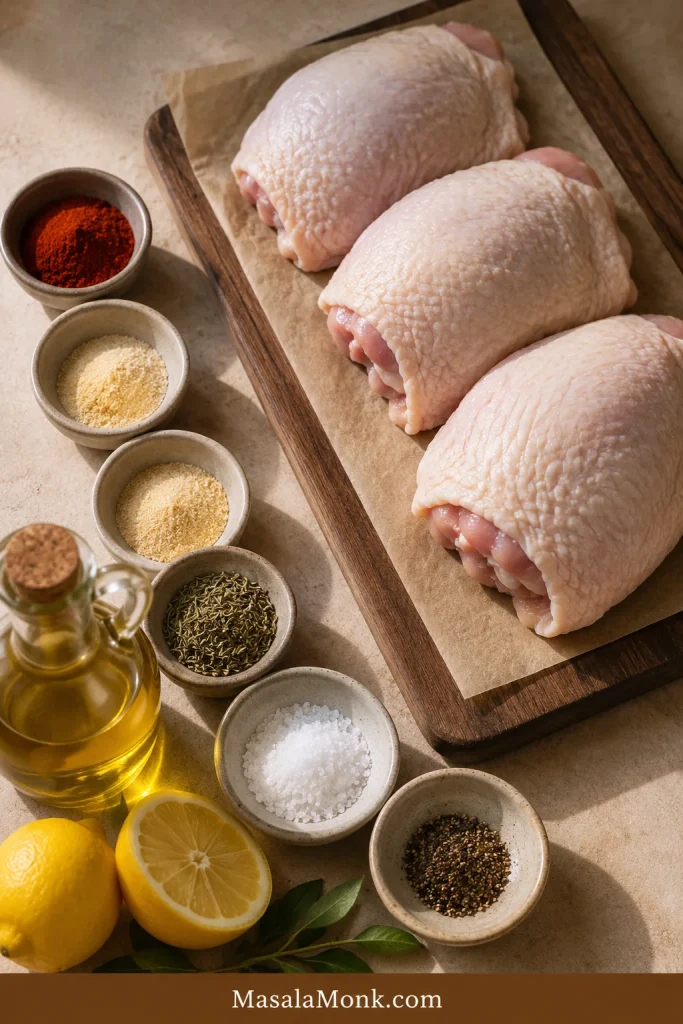
Once the noodles look shiny and twirlable, stop adjusting and eat. Use the noodles you have, keep it mild, make it spicy, serve it hot, or pack it cold for lunch.