Posted on — Leave a comment

Beef Barley Soup Recipe: Hearty, Tender Beef and Pearl Barley Soup

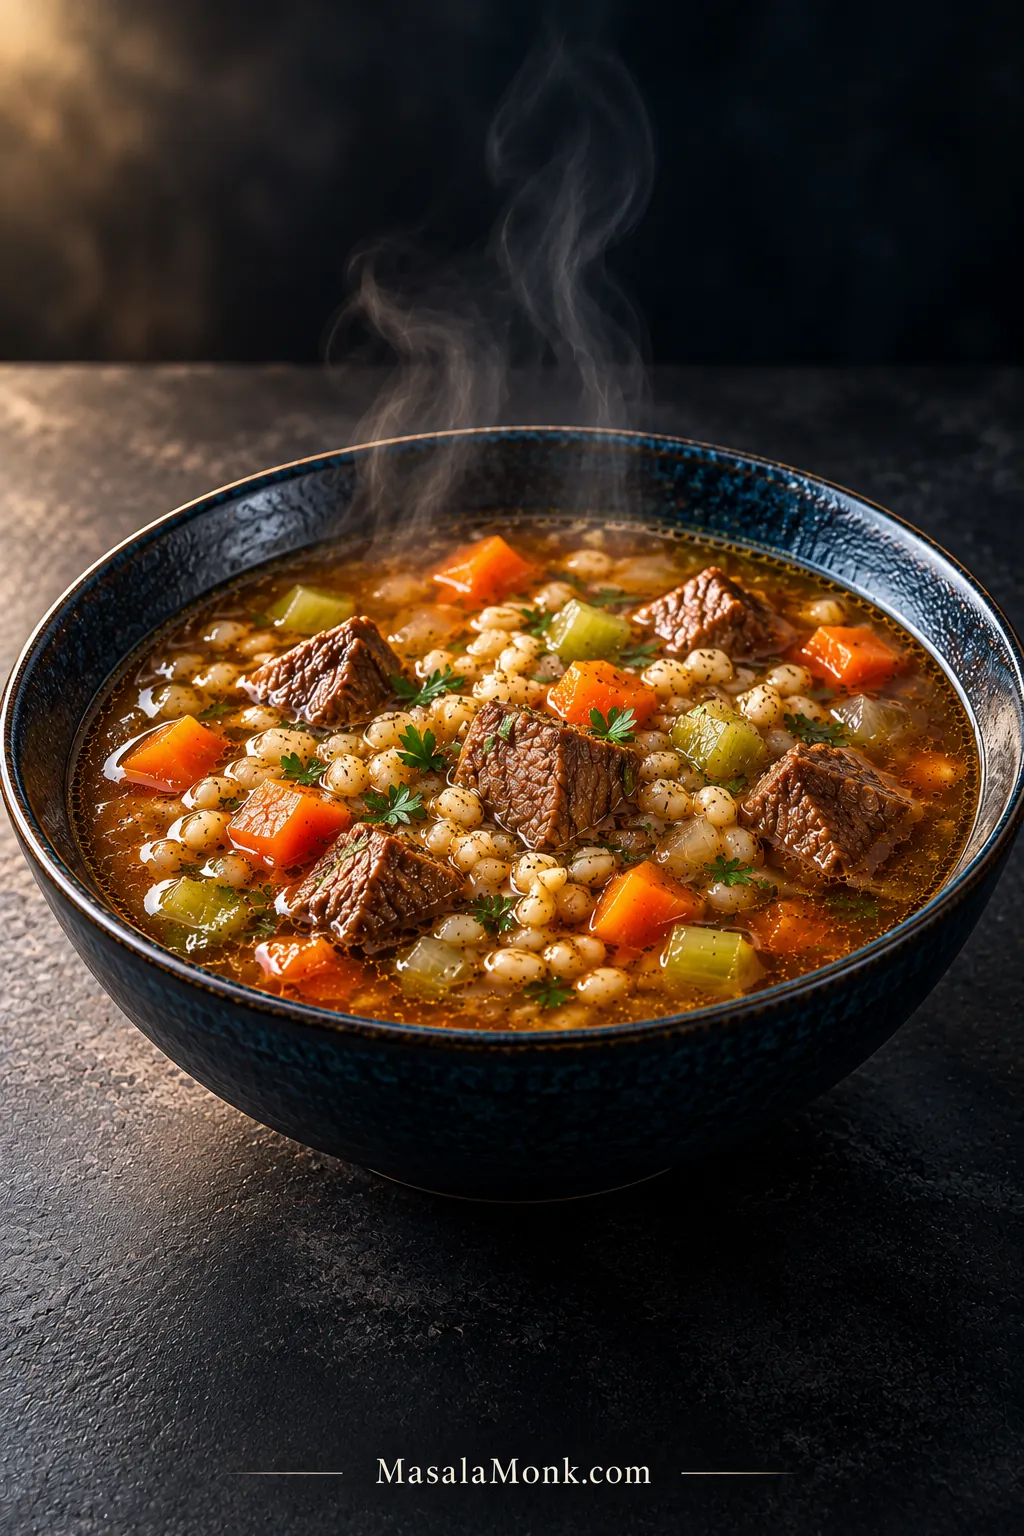
Steaming black bowl of beef barley soup with browned beef chunks, pearl barley, diced carrots, celery and parsley in deep brown broth.

A good beef barley soup recipe should give you tender pieces of beef, plump pearl barley with a little chew, carrots and celery that keep their shape, and enough deeply savory broth for the bowl to remain unmistakably soup. The best spoonful catches a little of everything, with dark broth settling back around the beef and grain instead of disappearing into them.

The tricky part is that those ingredients do not finish on the same schedule. This version browns the chuck in batches, gives the beef a head start, then brings in the barley and vegetables according to how long they actually need. The flavors stay classic—beef, barley, onion, carrots, celery and herbs—but the timing is more deliberate, which helps prevent rubbery beef, overdone vegetables and a pot that quietly turns into barley stew.

Quick Answer: Give the Beef a Head Start

Brown the chuck and simmer until it has clearly begun softening. Add the pearl barley, then add the carrots and celery when the barley has about 20-25 minutes left to cook. Use 3/4 cup (about 160 g) barley for a substantial soup that remains brothy, and adjust the final consistency with reserved broth.
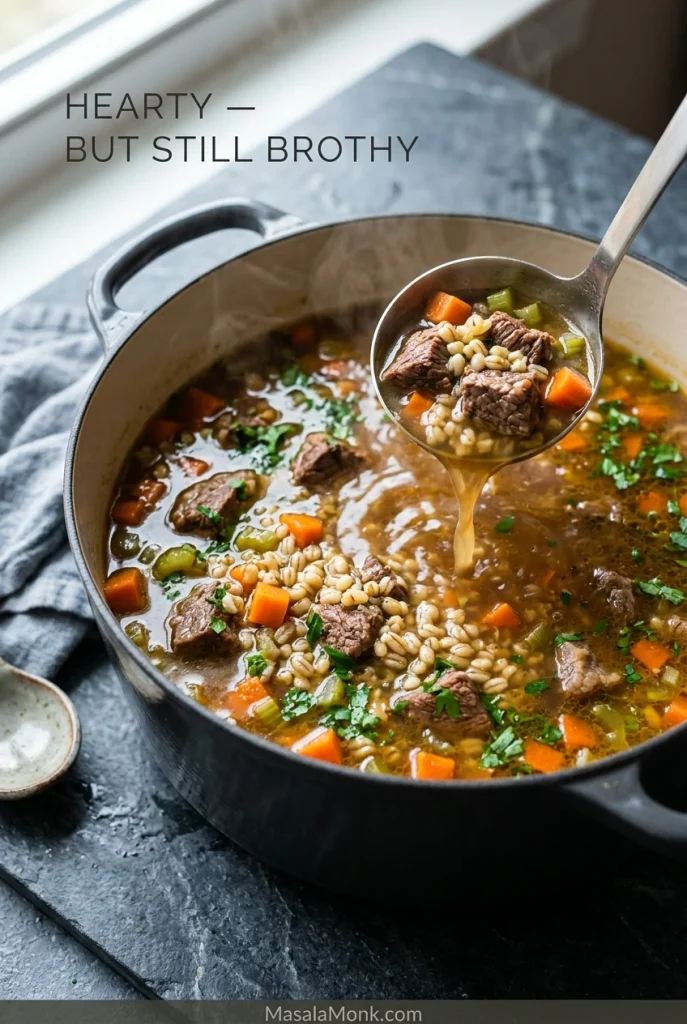
Dutch oven filled with beef barley soup as a ladle lifts beef, pearl barley, carrots and celery with brown broth visible around the ingredients.
A hearty bowl can still be brothy: look for liquid moving freely between the beef, barley and vegetables.

Before the Pot Goes On

  • Beef: boneless chuck roast, cut into 3/4-inch (2 cm) pieces.
  • Barley: regular pearl barley, sometimes sold as medium pearled barley; not quick-cooking barley.
  • Pot: 5 1/2- to 6-quart (about 5.2-5.7 L) Dutch oven or heavy soup pot.

Make the Soup: Tender Beef Barley Soup

Yield6 generous servings
PrepAbout 25 minutes
CookAbout 1 1/2-2 hours, depending on the beef and barley
TotalAbout 2-2 1/2 hours
Final textureTender beef, plump barley, intact vegetables and a full-bodied broth that still flows

Ingredients

  • 2 lb (900 g) boneless beef chuck roast, trimmed of thick hard exterior fat and cut into 3/4-inch (2 cm) pieces
  • 1 1/4 teaspoons fine sea salt, divided, plus more to taste; this is a starting point for low-sodium broth
  • 1 teaspoon freshly ground black pepper, divided
  • 2 tablespoons (30 ml) neutral cooking oil, plus a little more if needed between batches
  • 1 large yellow onion, about 8-9 oz (225-255 g), chopped
  • 4 garlic cloves, minced
  • 1 tablespoon (about 16 g) tomato paste
  • 1/2 cup (120 ml) dry red wine, such as Cabernet Sauvignon, Merlot or Pinot Noir, optional; if omitted, use an additional 1/2 cup (120 ml) beef broth in addition to the 7 cups below
  • 7 cups (1.65 L) low-sodium beef broth
  • 1-2 cups (240-480 ml) additional low-sodium beef broth, kept in reserve
  • 1 tablespoon (15 ml) Worcestershire sauce
  • 1 teaspoon dried thyme or 4 fresh thyme sprigs
  • 1 bay leaf
  • 3 medium carrots, about 8-9 oz (225-255 g), cut into 1/2-inch (1.25 cm) pieces
  • 3 celery ribs, about 5 oz (140 g), cut into 1/2-inch (1.25 cm) pieces
  • 3/4 cup (about 160 g) regular pearl barley, rinsed and drained if directed on the package
  • 1/4 cup chopped flat-leaf parsley
  • Up to 1 teaspoon (5 ml) red wine vinegar or apple cider vinegar, optional, for final adjustment

Brown the Beef

  1. Dry and season the beef. Pat the chuck very dry. Season with about 3/4 teaspoon of the salt and 1/2 teaspoon of the black pepper.
  2. Brown in batches. Heat 1 tablespoon oil over medium-high heat. Add enough beef for one uncrowded layer. Leave it undisturbed until the underside develops a dark brown crust and releases reasonably cleanly, then turn and brown additional sides. Transfer to a bowl and repeat with the remaining beef, adding the remaining oil as needed.

The beef does not need to cook through here. Look for dark brown patches on the meat and a brown film on the bottom of the pot. Pale, wet-looking beef needs more space. By the end of this step, the pot should smell roasted and beefy rather than steamed.
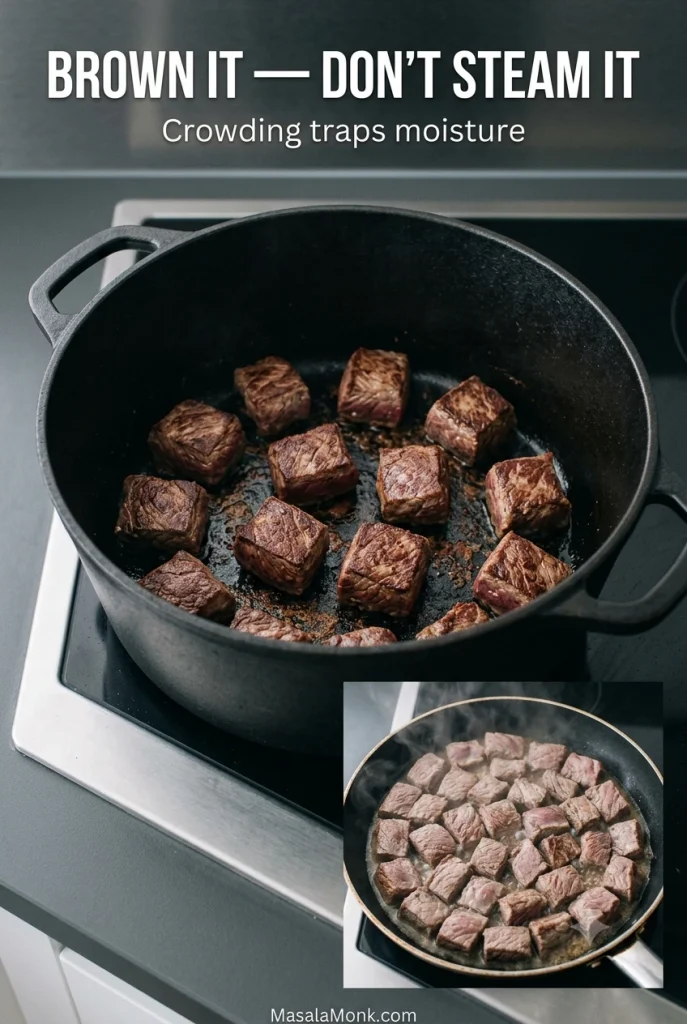
Instructional graphic showing well-spaced beef cubes browning in a dark pot beside an inset of crowded, pale beef releasing moisture. Text reads “Brown it — don’t steam it.”
Pale, wet-looking beef needs more room before it can brown properly.

Build the Broth

  1. Cook the onion. Reduce the heat to medium. Add the onion and cook for 5-6 minutes, until softened and lightly golden, scraping loose browned bits from the pot.
  2. Build the savory base. Stir in the garlic and tomato paste and cook for about 1 minute, until fragrant and the paste has darkened slightly. If using wine, add it now, scrape the bottom of the pot well, and let it bubble for 2-3 minutes. Without wine, add 1/2 cup (120 ml) extra beef broth here; this is in addition to the 7 cups used in the next step.
  3. Start the beef simmer. Return the beef and accumulated juices to the pot. Add 7 cups broth, Worcestershire, thyme, bay leaf, the remaining black pepper and the remaining 1/2 teaspoon salt. Bring just to the edge of a boil, then reduce to a gentle simmer. Partially cover and cook for about 40-45 minutes.

Before You Add the Barley, Check One Piece of Beef

Test one beef cube after about 40-45 minutes. A fork should enter more easily than it did at the start, but the meat does not need to be fully tender yet. If the beef seems stubborn at this point, that is not unusual. Give it another 10-15 minutes, check again, and repeat as needed. Do not add the barley merely because another 15 minutes passed. Wait until the chuck has clearly begun to soften.

Do not rush the chuck.
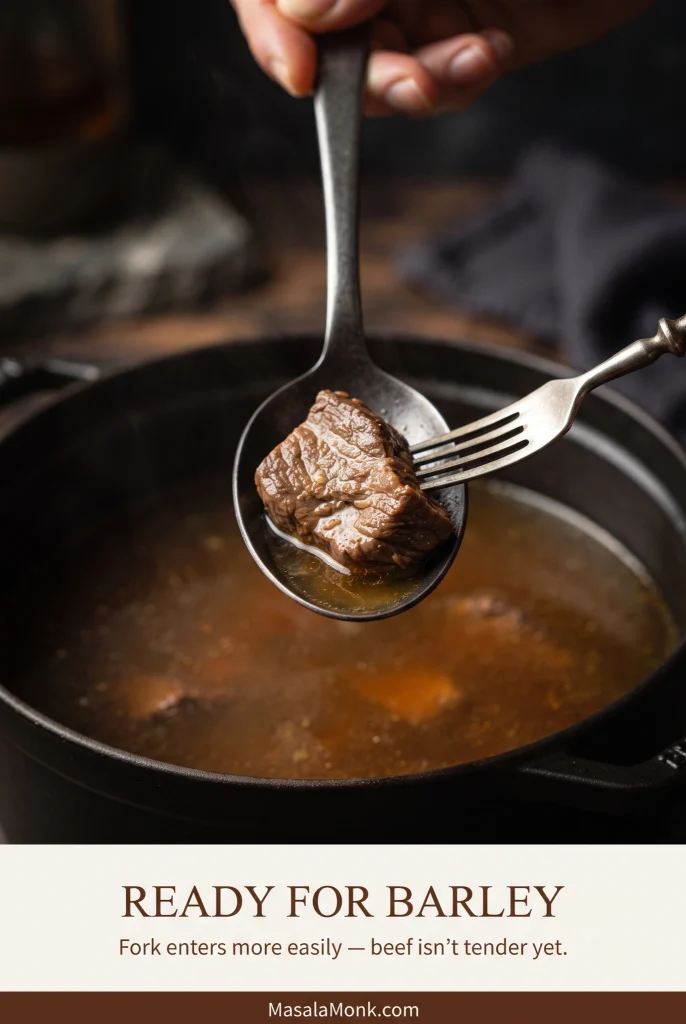
Fork testing a cube of simmered beef above a spoon and pot of broth. The graphic says the beef should begin softening before pearl barley is added.
The chuck only needs to begin softening here; full tenderness comes later.

Add the Barley, Then the Vegetables

  1. Add the barley. Stir in the pearl barley. The dry amount may look small. Do not add more by eye.
  2. Add the vegetables when the barley has about 20-25 minutes left to cook. Check the cooking time on your barley. For a 30-35 minute pearl barley, that usually means adding the carrots and celery about 8-10 minutes after the barley goes in. A slower barley simply gets a longer head start.
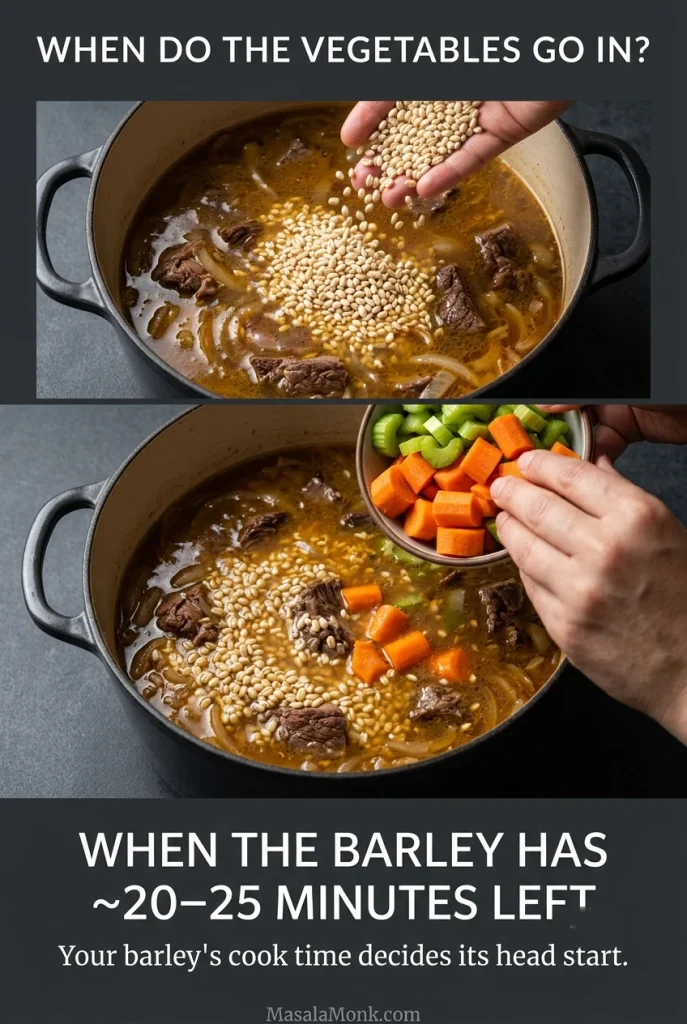
Two-stage cooking graphic showing pearl barley added to beef broth first and chopped carrots and celery added later, when the barley has about 20–25 minutes left.
This 20-25 minute window assumes roughly 1/2-inch carrot and celery pieces; larger cuts need more time.
  1. Cook until the barley is ready. Keep the soup partially uncovered and stir across the bottom every 8-10 minutes so settled grain does not catch. Bite one grain as you approach its expected cooking time. It is ready when the center is tender with a little pleasant resistance left.

Finish the Soup

  1. Check the beef. Bite into a piece. It should give easily, without a rubbery center. If it needs only a few more minutes, leave the whole pot at the gentlest simmer. When the barley is already ready but the beef remains substantially tough, lift out the beef and finish it gently in a little hot broth before returning it to the pot.
  2. Set the consistency. Remove the bay leaf and fresh thyme stems. Add hot reserved broth 1/4-1/2 cup (60-120 ml) at a time until liquid moves freely around the beef, vegetables and grain. Drag a ladle through the pot: the broth should close back in behind it instead of leaving a trench. If the soup is too thin, simmer uncovered for a few minutes.
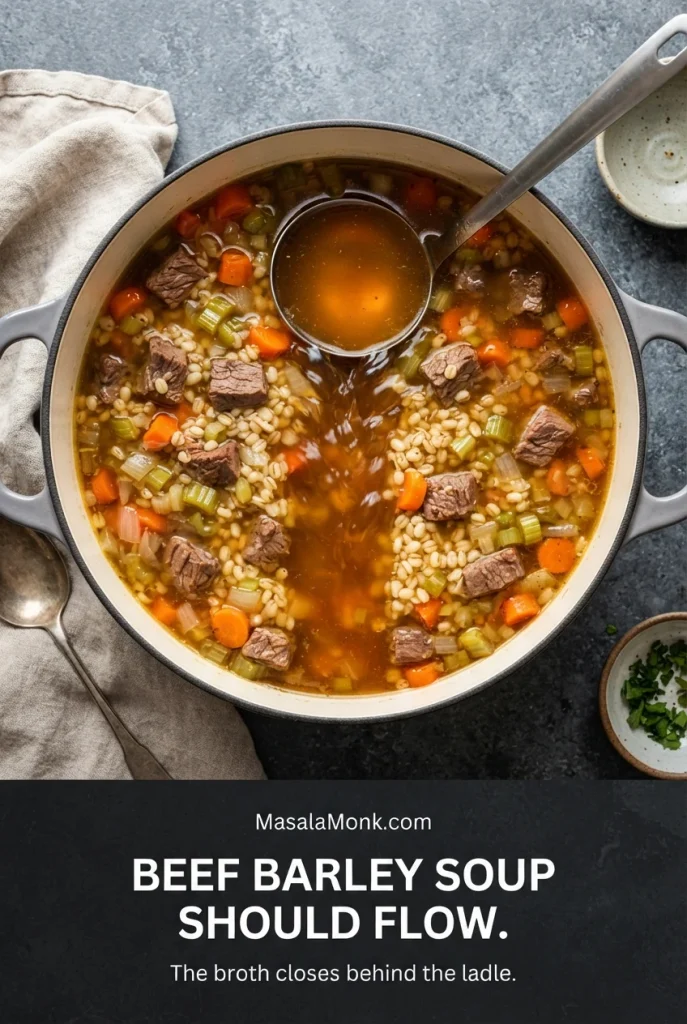
Overhead pot of beef barley soup with a ladle raised above the surface, showing flowing brown broth between beef, barley and vegetables.
Set the soup’s flow before the final seasoning adjustment; added broth can change how salty the pot tastes.
  1. Season and rest. Taste before adding more salt. Adjust salt and black pepper and stir in the parsley. If the broth is properly salted but tastes rich and dull, add 1/2 teaspoon vinegar, taste, and add more only if needed, up to 1 teaspoon total. Rest for about 5 minutes before serving.

Recipe Notes

  • Use regular pearl barley. Different brands can cook at noticeably different speeds, so use the grain’s texture as the final judge.
  • Keep broth in reserve. The exact amount needed depends on the barley, simmer and how long the soup stands.
  • For multi-day leftovers, cook the barley separately. The make-ahead method below keeps the soup brothier for longer.

A finished spoonful is one last check on the whole pot: beef, barley and vegetables should all feel present, with broth still visible around them.
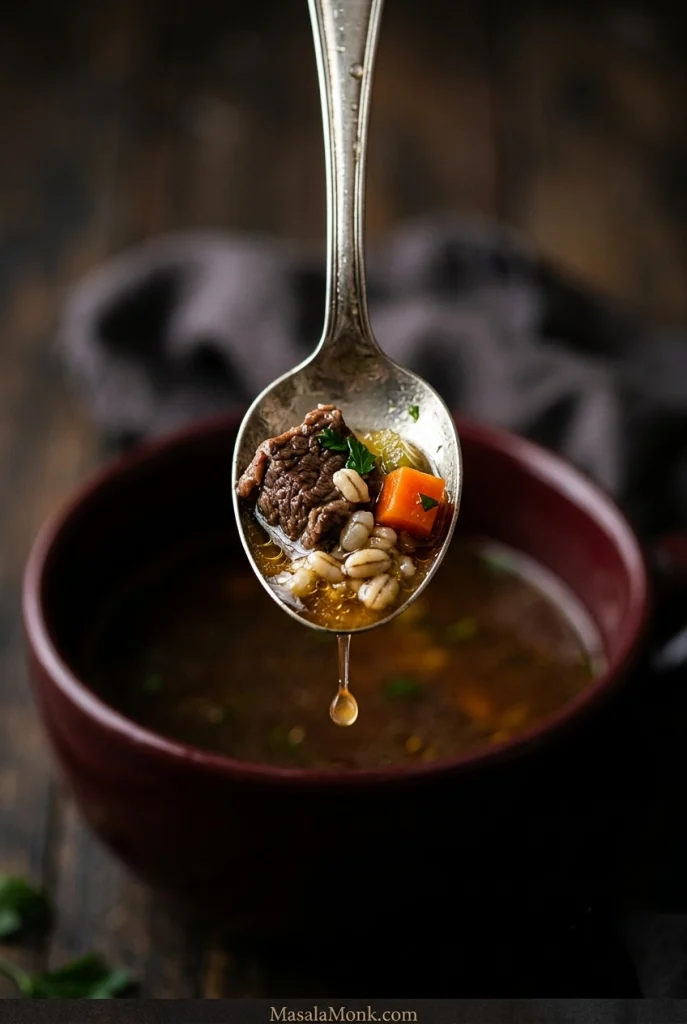
Close-up spoonful of beef barley soup containing a beef chunk, pearl barley, carrot and celery above a dark bowl of broth.

If you are cooking now, the recipe above is all you need. The guide below is for choosing beef and barley, adjusting the final texture, rescuing a pot that behaves differently from the ideal one, or adapting it for another kind of beef.

What Beef Makes the Best Beef Barley Soup?

Boneless chuck roast is the best all-around choice because its marbling and connective tissue soften during a long, gentle simmer. Buying a whole roast also lets you cut pieces to a consistent size, which helps them reach tenderness more evenly.

Aim for pieces around 3/4 inch (2 cm). Smaller cubes can lose their presence in the finished bowl; much larger ones may still be firm when the barley is ready. Trim thick hard exterior fat and obvious silverskin, but leave the useful internal marbling.
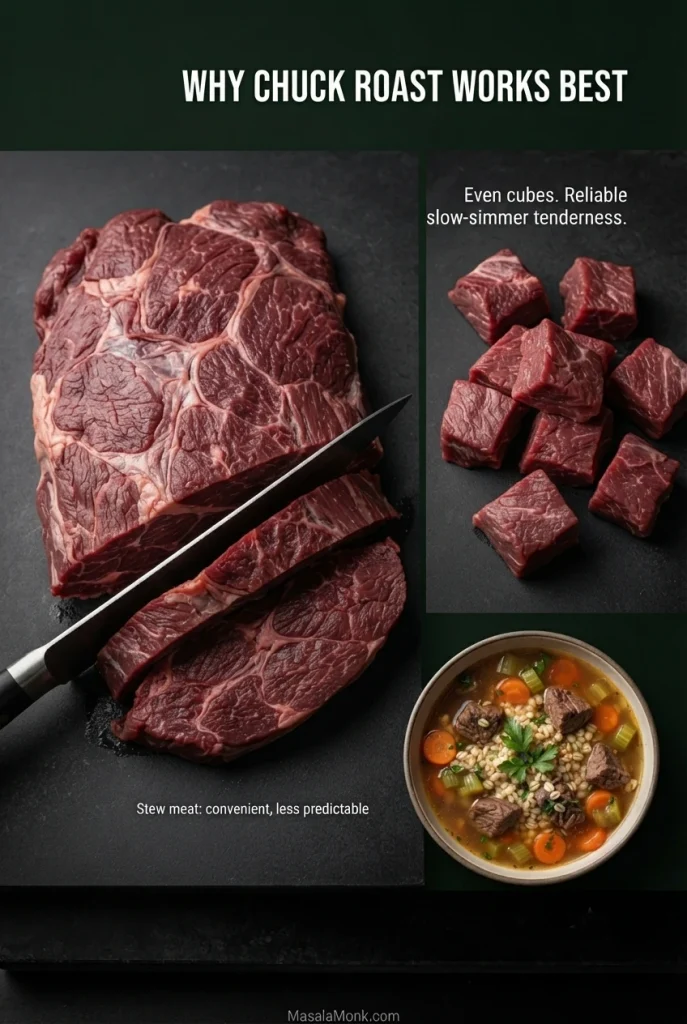
Food guide showing a raw chuck roast, evenly cut beef cubes and a finished bowl of beef barley soup, with text explaining why chuck is preferred for a long simmer.
Even 3/4-inch chuck cubes are more likely to soften on the same schedule.
BeefHow it behaves here
Chuck roastPreferred. Rich, predictable and suited to a long gentle simmer.
Packaged stew meatConvenient, but less predictable than cutting a chuck roast yourself.
Boneless short ribRich and tender, but more expensive and often fattier.
Beef shankExcellent beef flavor, but usually needs a longer cooking window.
Ground beefA different, faster soup with browned beef crumbles instead of tender chuck pieces.
Cooked roast or brisketAdd near the end so already-tender beef does not dry out.
Cooked steak or prime ribWarm only briefly at the end, especially if you want to preserve a pink center.

Stew meat works too, but a package can contain several cuts. One cube may turn tender while the next still fights the fork, so check the meat itself instead of expecting every piece to finish together.

Pearl Barley: How Much to Use and When to Add It

Use regular pearl barley for this recipe. It needs no overnight soaking, but cooking time varies considerably with the grain and degree of pearling. Some pearl barley may be tender around the half-hour mark, while other medium pearled barley needs considerably longer. Check the package once, then let texture make the final decision. The Whole Grains Council’s barley guide explains the differences between hulled, pearl and quick barley.

  • Regular pearl barley: the recipe default; add it after the beef has clearly begun softening.
  • Quick-cooking barley: add it near the end and follow its shorter cooking time.
  • Hulled barley: cook it separately according to its package directions, then add it near the end. Its longer cook makes it awkward to synchronize with this soup’s beef and vegetables.

Pearl barley contains gluten, so this soup is not gluten-free.

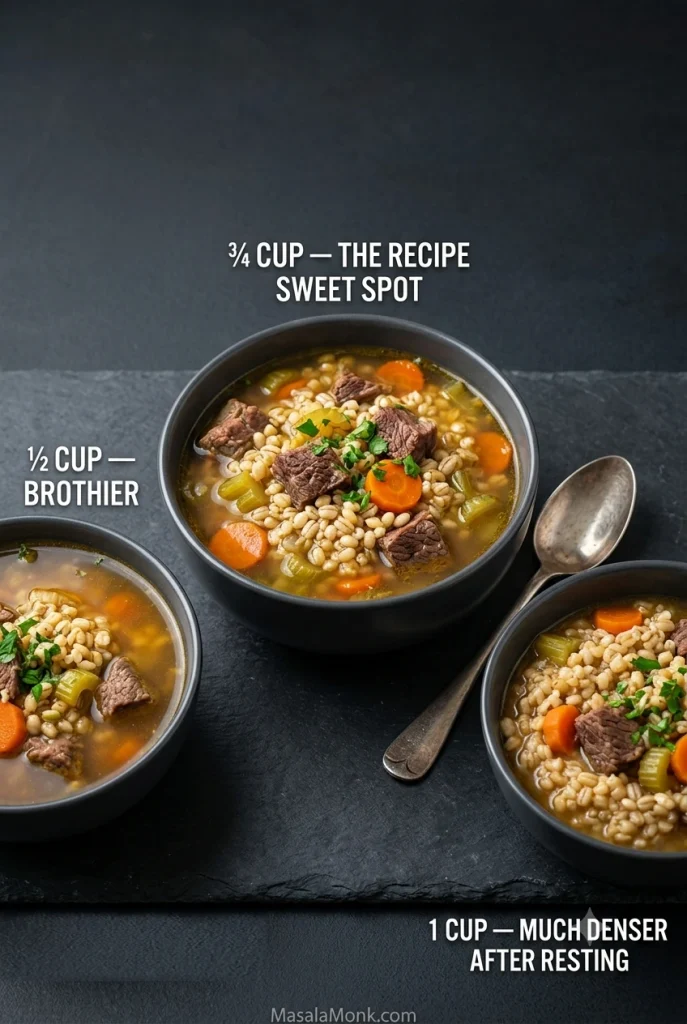
How Much Barley Changes the Whole Pot

Dry pearl barleyWhat the soup becomes
1/2 cup (about 105 g)Brothier, with beef and vegetables dominating each spoonful.
3/4 cup (about 160 g)The balance used here: plenty of barley, with broth still moving freely around it.
1 cup (about 210-215 g)Much more grain-heavy and likely to become stew-like after resting.
Three bowls compare beef barley soup made with one-half cup, three-quarters cup and one cup of dry pearl barley, with three-quarters cup marked as the preferred balance.
Three-quarters cup gives the best balance here; a full cup makes the soup noticeably denser after resting.

Three-quarters of a cup looks stingy when the barley is dry. It will not look stingy half an hour later. Leave it alone and let it expand before deciding the pot needs more grain.

How Thick Should Beef Barley Soup Be?

Beef barley soup should be hearty enough to satisfy, with broth moving freely between the solids. Tilt a full ladle and you should see liquid run around the beef, vegetables and barley rather than clinging like gravy.

  • Too thick now: add hot broth 1/4-1/2 cup (60-120 ml) at a time and stir before deciding whether it needs more.
  • Too thin now: simmer uncovered for a few minutes before changing the seasoning.
  • Much thicker tomorrow: nothing went wrong. Loosen the soup with broth or water while reheating.

Troubleshooting

The Beef Is Still Tough

Tough does not mean ruined. Keep the soup at a gentle simmer and check another piece in 10-15 minutes. Repeat until the fork enters reasonably easily. A hard boil is not the fix; give the chuck time.

The Barley Is Ready but the Beef Is Still Tough

If the beef needs only a few more minutes, leave the whole pot at the gentlest simmer. Substantially tough beef needs its own finish: lift out the pieces, put them in a small saucepan with enough hot soup broth to come partway up the meat, simmer gently until tender, then return everything to the pot. The grain and vegetables can stop cooking while the chuck catches up.
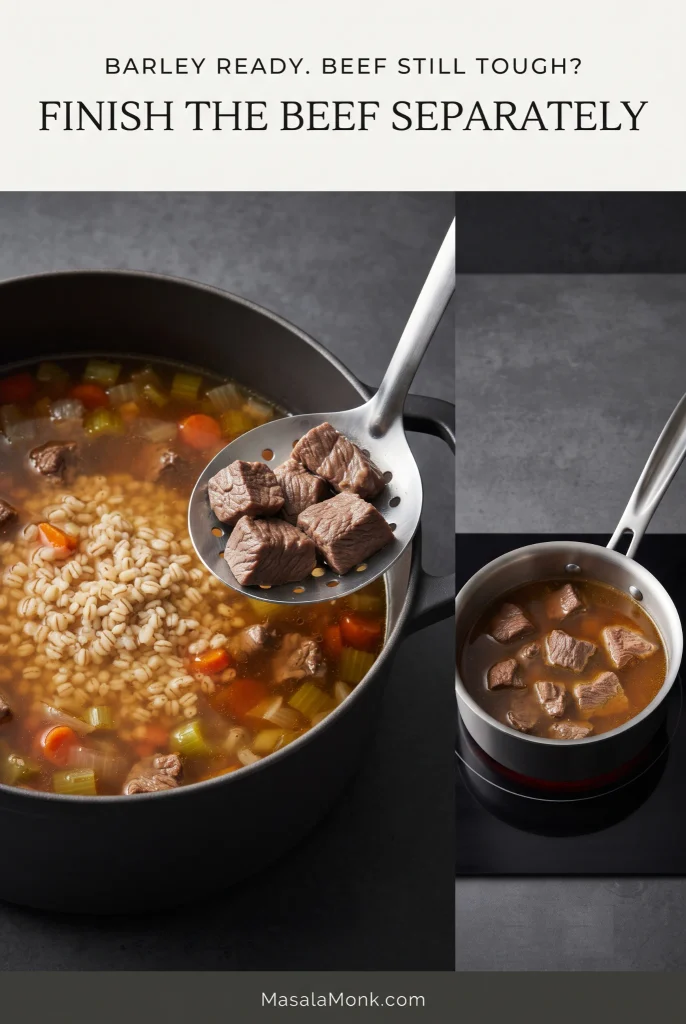
Split instructional graphic showing beef cubes lifted from beef barley soup and transferred to a small saucepan of broth to finish cooking separately.
Separate the jobs: let the barley stop cooking while the beef gets the extra time it needs.

The barley swallowed all the broth.

Add hot broth 1/4-1/2 cup (60-120 ml) at a time until the soup looks properly brothy again, then taste for salt.

The vegetables are falling apart.

There is no way to restore their shape once they are soft. Next time, add them when the barley has 20-25 minutes left to cook.

The broth tastes flat.

Check salt first. Properly salted but lacking savory depth? Add 1/2 teaspoon Worcestershire, taste, then add more only if needed. If the broth tastes rich and heavy, try 1/2 teaspoon red wine vinegar or apple cider vinegar instead. The vinegar should brighten the broth without announcing itself.

Smaller problemLikely fix
Barley is still hardKeep simmering gently and add broth if needed. Give the grain the time it needs.
Barley is mushyIt cooked too long or quick barley was used. Loosen the soup with broth; the grain’s bite cannot be restored.
Soup is greasySkim surface fat. Next time trim thick hard exterior fat and avoid unnecessary extra oil.
Soup is too saltyDilute with unsalted broth or water, then taste again.
Barley is stickingLower the heat and scrape across the bottom regularly after the grain goes in.
Broth looks cloudy or foamyThis is usually harmless coagulated protein from the beef. Skim it if you prefer a clearer-looking broth.

Variations That Need Different Timing

Beef Mushroom Barley Soup

For noticeable mushroom flavor without overwhelming the beef, use about 8 oz (225 g) sliced cremini or button mushrooms. Brown the beef first and remove it. If the pot looks dry, add 1-2 teaspoons oil, then cook the mushrooms until their released moisture has evaporated and real browning begins. Remove the mushrooms and cook the onion as written.

Continue with the broth and beef as written, then return the mushrooms for the final 10-15 minutes. Want mushrooms to play a bigger role? Increase them to 12-16 oz (340-450 g).
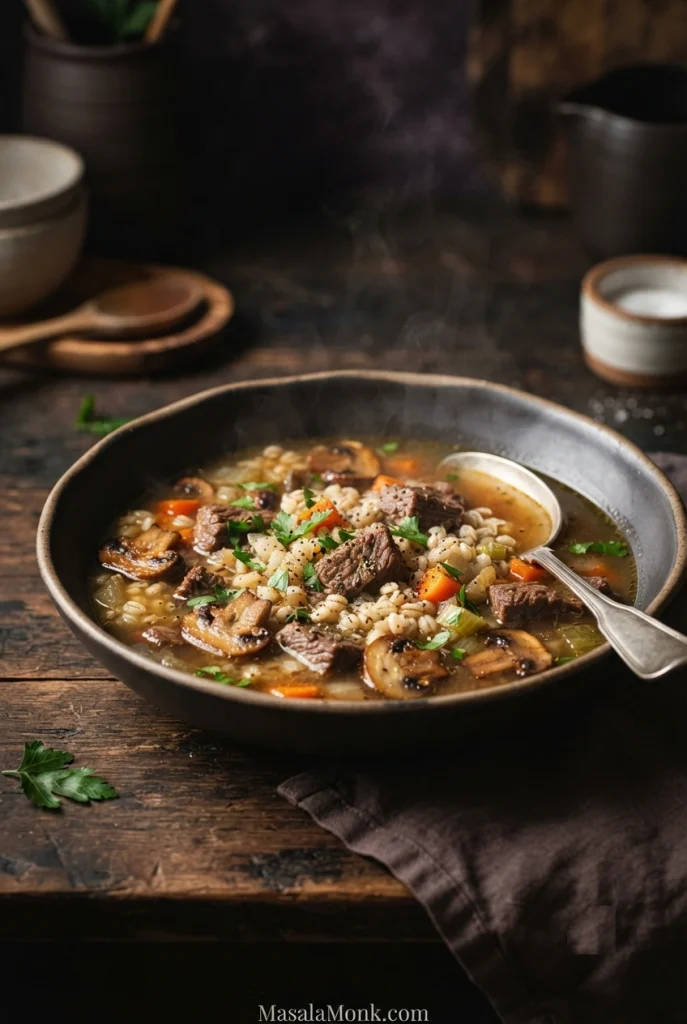
Bowl of beef mushroom barley soup with browned beef pieces, sliced mushrooms, pearl barley, carrots, celery and parsley in brown broth.

Using Leftover Roast Beef or Brisket

Use about 1 1/2 lb (680 g) chopped or cubed cooked roast beef or brisket. Build the broth without the long chuck-tenderizing phase, then cook the barley as directed.

Add the carrots and celery when the grain has about 20-25 minutes left. Stir in the cooked roast or brisket for only the final 5 minutes or so, just long enough to heat through.

Using Leftover Steak or Prime Rib

Already-pink steak or prime rib needs much less heat. Slice or cube it and add it only at the very end, just long enough to warm through. To protect a medium-rare center, put the meat directly into individual bowls and ladle the steaming soup over it.
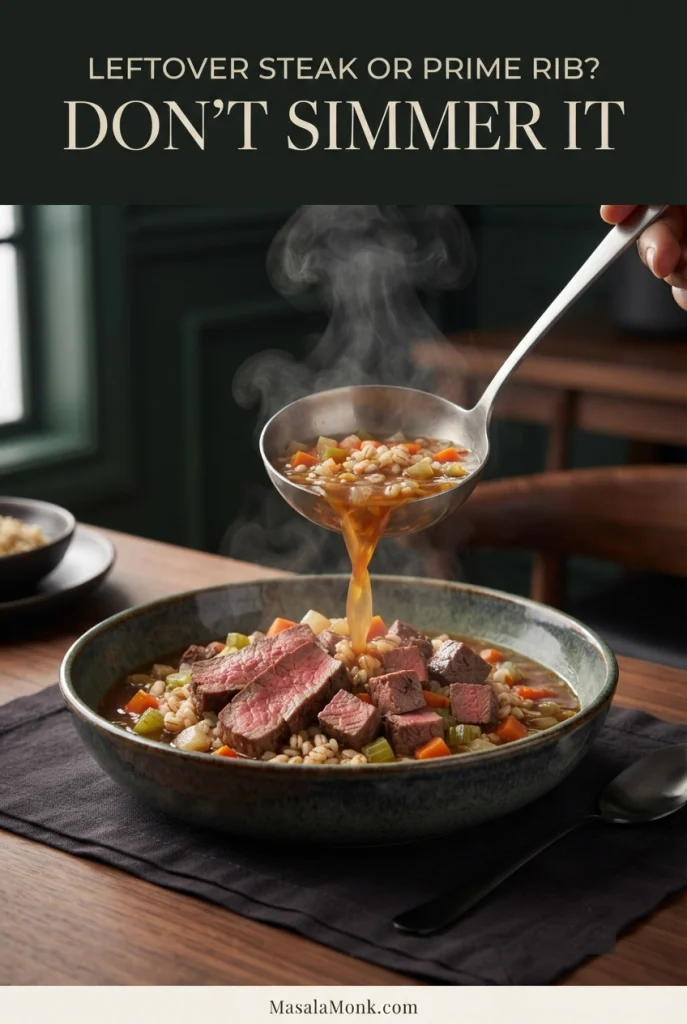
Slices of pink cooked steak in a bowl as hot beef barley soup with pearl barley and vegetables is ladled over the meat.

Ground Beef Barley Soup

Use about 1 1/2 lb (680 g) ground beef for a faster soup with browned beef crumbles instead of tender chuck pieces. Brown the meat thoroughly, drain excess fat if needed, and transfer it to a bowl. Cook the onion, garlic and tomato paste as written, then return the beef when you add the broth.

Add the barley, followed by the carrots and celery when the grain has about 20-25 minutes left to cook. There is no long tenderizing phase.

Easy Swaps

SwapAdjustment
No wineReplace the 1/2 cup (120 ml) wine with the same amount of beef broth.
No tomato pasteOmit it if you want beef barley soup without tomato. The broth will be lighter in color and slightly less concentrated.
Quick-cooking barleyAdd it near the end and follow its shorter cooking time.
Hulled barleyCook separately according to package directions, then stir it into the soup near the end.

Make-Ahead Beef Barley Soup

For several days of leftovers, cook and store the barley separately. For a pot you expect to finish within a day or so, cooking the grain directly in the soup is the better default because it takes on beef flavor and gives the broth natural body.

How to Cook the Barley Separately

  1. Bring 3 cups (710 ml) water or low-sodium broth to a boil.
  2. Add the recipe’s 3/4 cup (about 160 g) pearl barley and a small pinch of salt.
  3. Reduce to a steady simmer and cook until the grain is tender through the center with a little chew. Start checking around the time listed on the package rather than forcing one universal minute mark.
  4. Drain well, cool promptly and refrigerate separately from the soup.
  5. Add barley to individual bowls as the soup reheats.
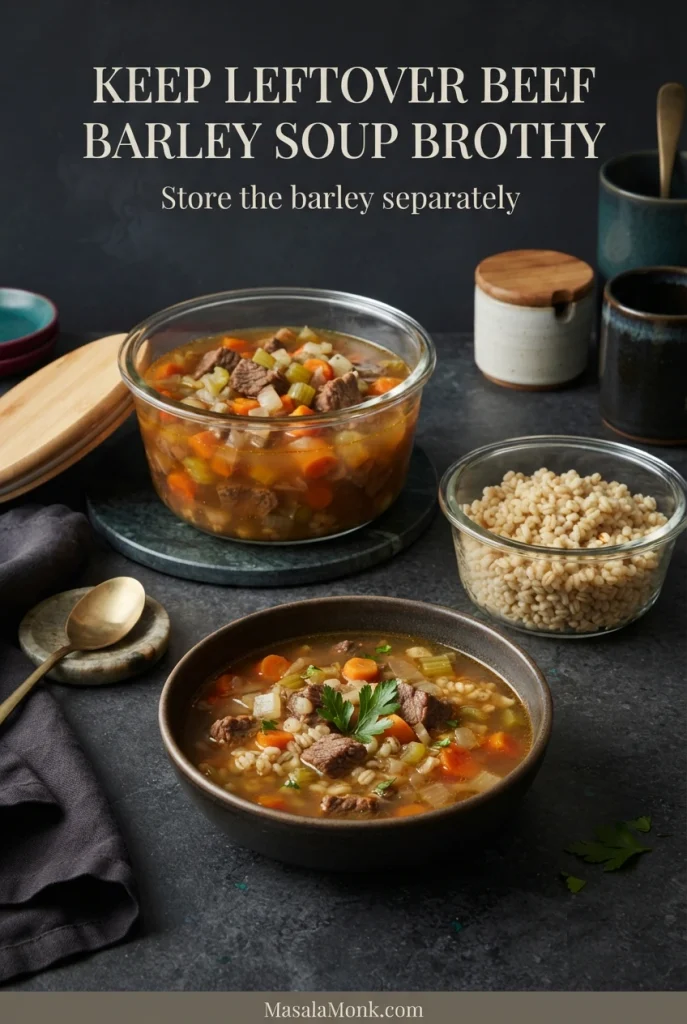
Container of beef and vegetable soup beside a separate bowl of cooked pearl barley, with a finished serving of beef barley soup in front.
Separate storage sacrifices a little shared beef flavor, but gives you far more control over leftover brothiness.

When the barley is staying out of the soup pot, continue simmering the beef until it is nearly tender—a fork goes in fairly easily, but there is still a little resistance. Add the carrots and celery at that point and cook for another 20-25 minutes, until the vegetables are tender and the beef is ready. Spoon barley into each bowl and ladle the hot soup over it.

If you like your beef barley soup especially brothy, portioning the barley bowl by bowl also lets each person control how grain-heavy their serving becomes. Our Minestrone Soup keeps its starch separate for the same practical reason: leftovers stay brothier.

Storage and Reheating

The flavors often settle and deepen overnight, while the soup itself becomes thicker. Add broth or water during reheating until it returns to the consistency you like.

Refrigerating. Divide the soup into shallow covered containers and refrigerate promptly. Use refrigerated leftovers within 3-4 days. If the barley was cooked separately, keep it in its own container and combine portions only as you reheat them. This follows USDA food-safety guidance on rapid cooling and leftover storage.

Freezing. Freeze chilled portions in airtight freezer-safe containers for best quality within about 2-3 months. Barley can be frozen in the soup, although keeping it separate gives you more control over the broth when freezing a batch for later.

Reheating. For about 2 cups of cold soup, start with 1/4 cup (60 ml) beef broth or water and add more as needed. Reheat leftovers to 165°F (74°C), stirring so the soup heats evenly.

Whenever you serve it, ladle the soup into warm bowls and scatter over a little parsley.
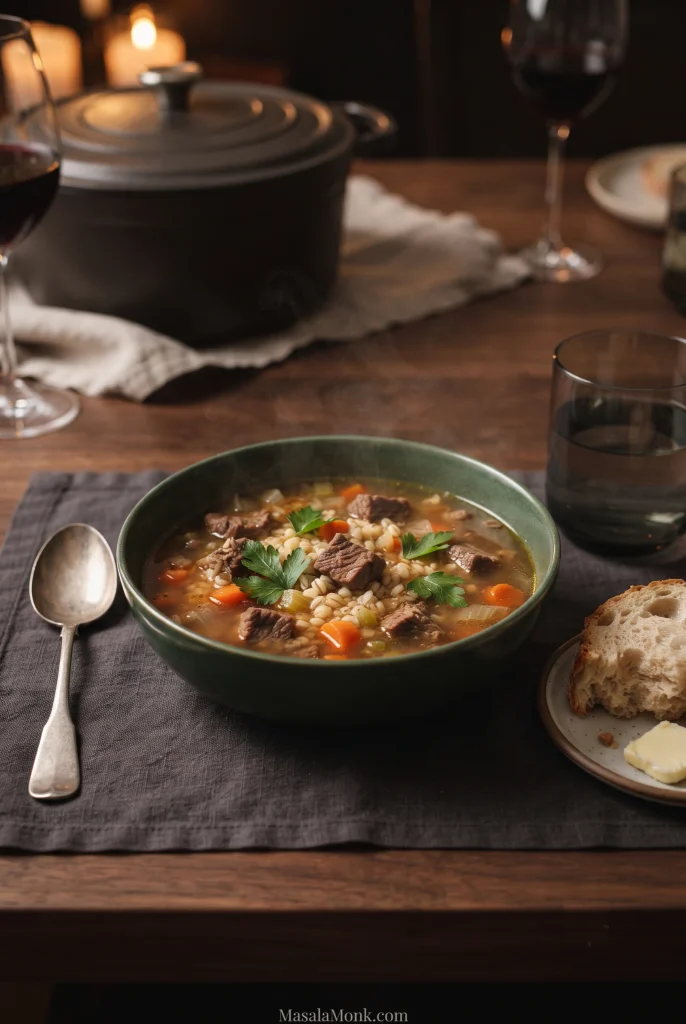
Green bowl of beef barley soup with beef, pearl barley, carrots, celery and parsley on a dining table beside bread and a spoon.

Bring it to the table while the broth is steaming and the beef is tender enough to meet the spoon without a fight. Crusty bread or soft dinner rolls are welcome alongside, but this is already dinner in the bowl.
Posted on — Leave a comment

Orange Chicken Recipe: Crispy Homemade Chicken with Easy Orange Sauce

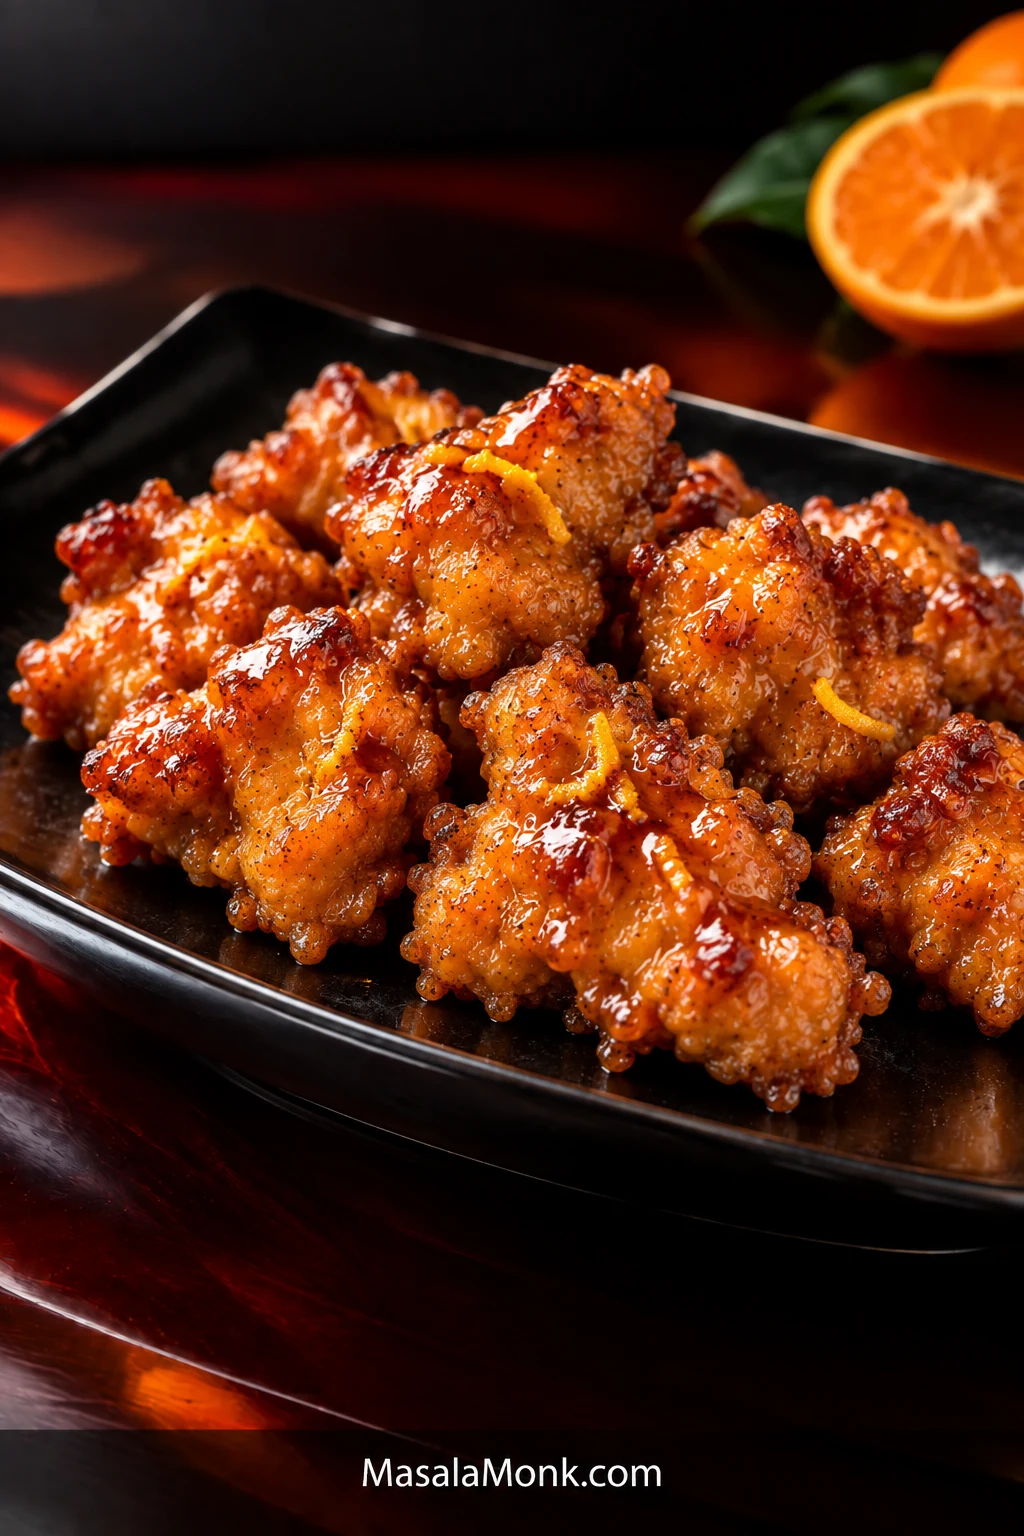
Glossy orange chicken piled on a black rectangular plate, topped with thin orange-peel strips, with a halved orange behind the plate.

Orange chicken has a built-in problem: the sauce needs to reach every crisp ridge, but the moment that wet glaze touches the crust, the crust starts to soften.

When it lands properly, though, the first bite still has a crisp edge under the glaze, the chicken stays juicy inside, and the orange arrives before the sweetness does. That bright citrus smell matters just as much as the sticky finish.

This is Chinese-American takeout-style orange chicken, but it isn’t built as a restaurant copycat. The goal is fresh orange, a manageable shallow fry and just enough glossy sauce to coat the crust.

Coat
Tacky chicken, pressed starch, shaggy surface.

Fry
Hot oil, roomy batches, rack between batches.

Glaze
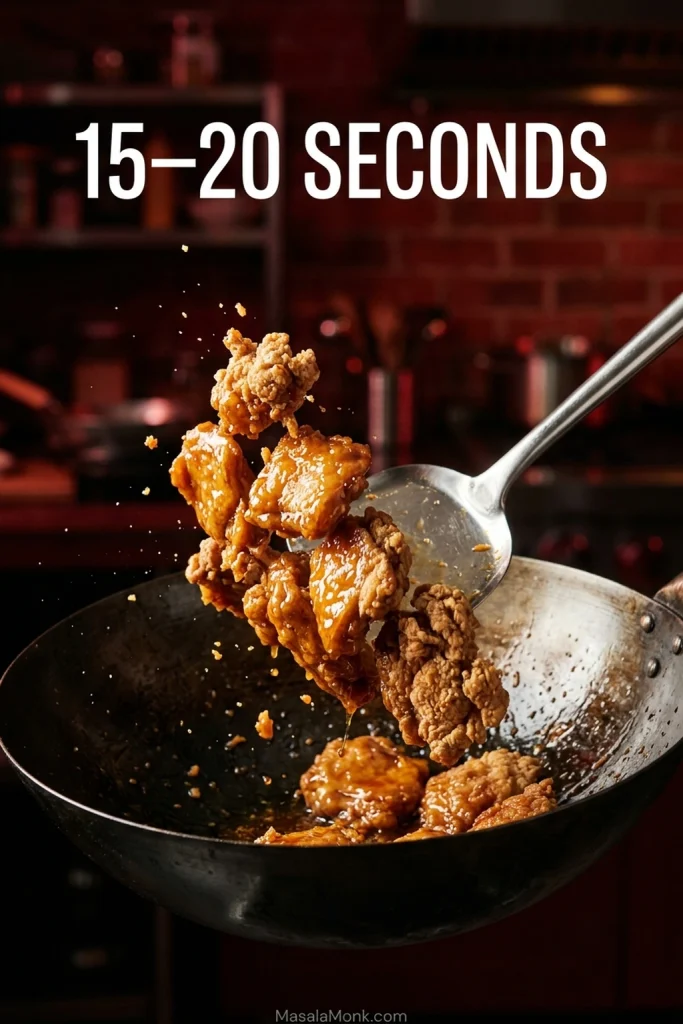
Thicken first, coat lightly, toss 15–20 seconds.

Crispy Homemade Orange Chicken Recipe

Crisp first. Glaze last. Keep the fried chicken and finished orange sauce apart until serving.

Yield
4 generous servings

Prep
About 25 minutes

Cook
About 25 minutes

Total
About 50 minutes

Equipment: 12-inch / 30 cm heavy skillet, wok or similar wide pan; wire rack set over a tray; fine grater or zester; instant-read thermometer if available; heatproof container for used oil if reusing the frying pan.

Chicken

  • 1½ lb / 680 g boneless skinless chicken thighs
  • 1 tbsp / 15 ml regular or light soy sauce, not dark or sweet soy
  • 1 tbsp / 15 ml Shaoxing wine or dry sherry
  • ¼ tsp ground white pepper

Crisp Coating

  • ¾ cup plus 2 tbsp cornstarch / about 105 g total, divided
  • Neutral high-heat frying oil, enough for about ¼ inch / 5–6 mm depth in the pan

Fresh Orange Sauce

  • About 3 medium oranges, or enough to yield ¾ cup / 180 ml fresh orange juice
  • 2 tbsp / 30 ml water
  • ⅓ cup / about 65 g granulated sugar
  • 2 tbsp / 30 ml regular or light soy sauce
  • 2 tbsp / 30 ml unseasoned rice vinegar
  • ¼–½ tsp red pepper flakes, or omit for mild
  • 2 tsp neutral oil, if using a clean pan for the sauce
  • 3 garlic cloves / about 9 g, finely minced
  • 2 tsp / about 4–5 g finely grated fresh ginger
  • 2 tsp packed / about 4–5 g finely grated orange zest, colored skin only
  • ½ tsp / 2.5 ml toasted sesame oil, optional

Cornstarch Slurry

  • 1½ tbsp / about 12 g cornstarch
  • 2 tbsp / 30 ml cold water

Optional Finish

  • Thinly sliced scallions
  • Sesame seeds

1. Season the chicken

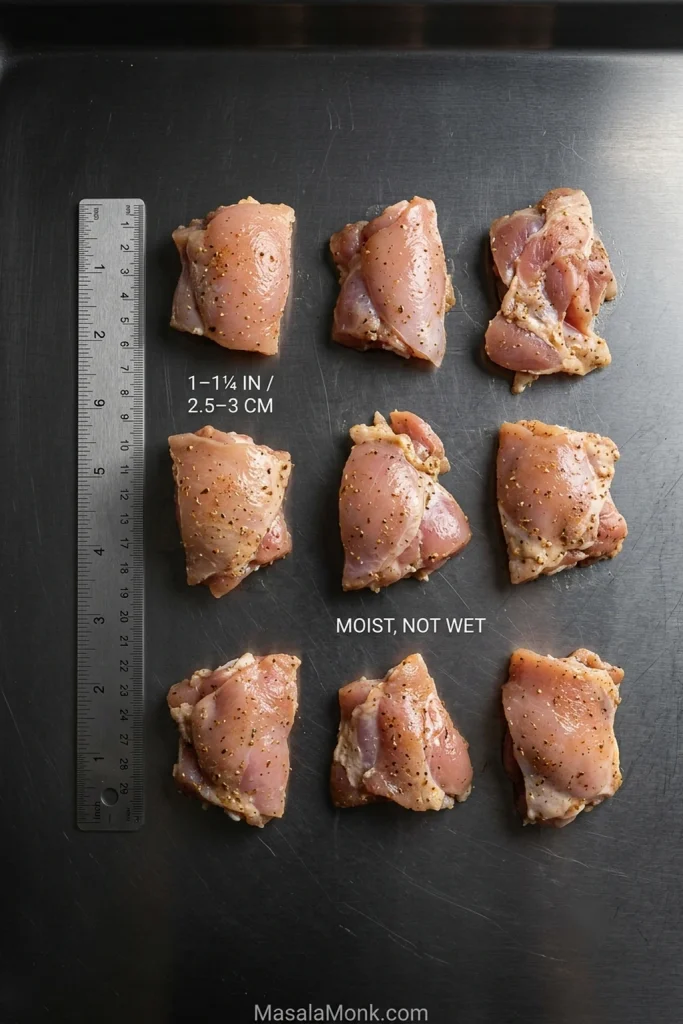
Cut the thighs into fairly even 1 to 1¼-inch / 2.5–3 cm pieces. Toss with 1 tablespoon soy sauce, the Shaoxing wine and white pepper. Leave for 15 minutes while you prepare the sauce ingredients.

You’re looking for moist chicken with no puddle at the bottom of the bowl. Drain off any obvious excess before coating.
2. Mix the sauce and slurry

Zest the oranges before juicing them. Then squeeze enough juice to measure ¾ cup / 180 ml.

Whisk the orange juice with the water, sugar, 2 tablespoons soy sauce, rice vinegar and red pepper flakes. Keep the measured zest and optional sesame oil aside.

In a second bowl, stir the cornstarch into the cold water. Mix the sauce now, but wait until the chicken is fried before cooking and thickening it.

Before you start frying, have the sauce mixture, slurry, zest, wire rack and serving plate ready. Once the chicken is done, the rest moves quickly.

3. Coat the chicken

Add 2 tablespoons cornstarch directly to the seasoned chicken and toss until the surface feels lightly tacky.

Put the remaining ¾ cup / about 90 g cornstarch in a wide bowl or shallow dish. Press each piece firmly into the starch, then shake away whatever does not stick.

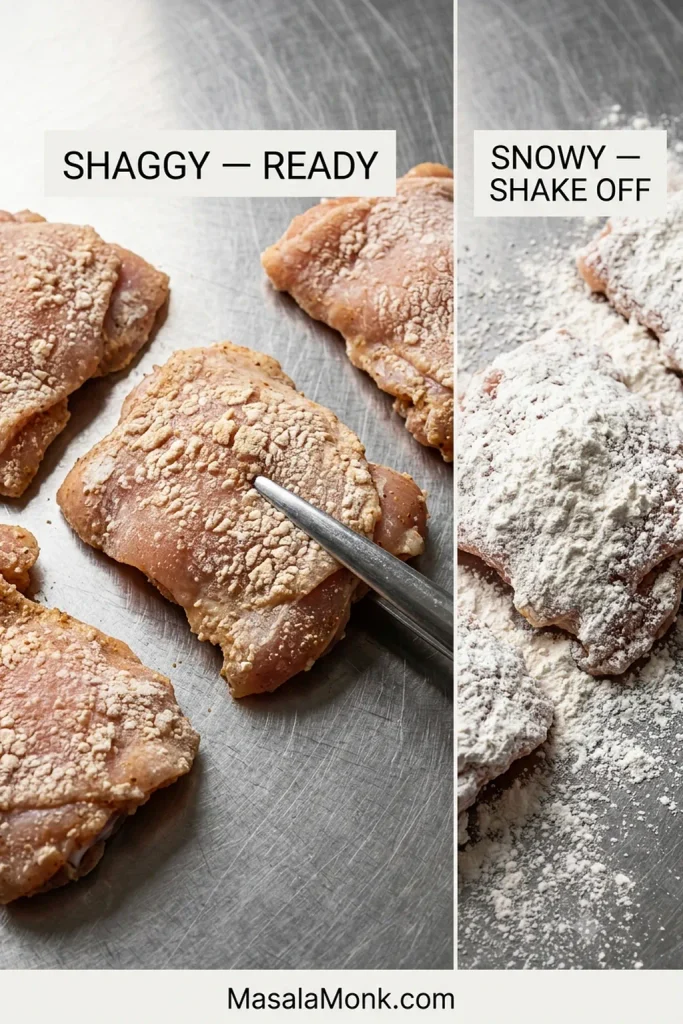
A good coating looks rough, dry and a little shaggy. Fry it once the oil is ready.

4. Shallow-fry in batches

Pour about ¼ inch / 5–6 mm neutral oil into a 12-inch / 30 cm heavy skillet, wok or similar wide pan. Heat to roughly 350–360°F / about 175–180°C.

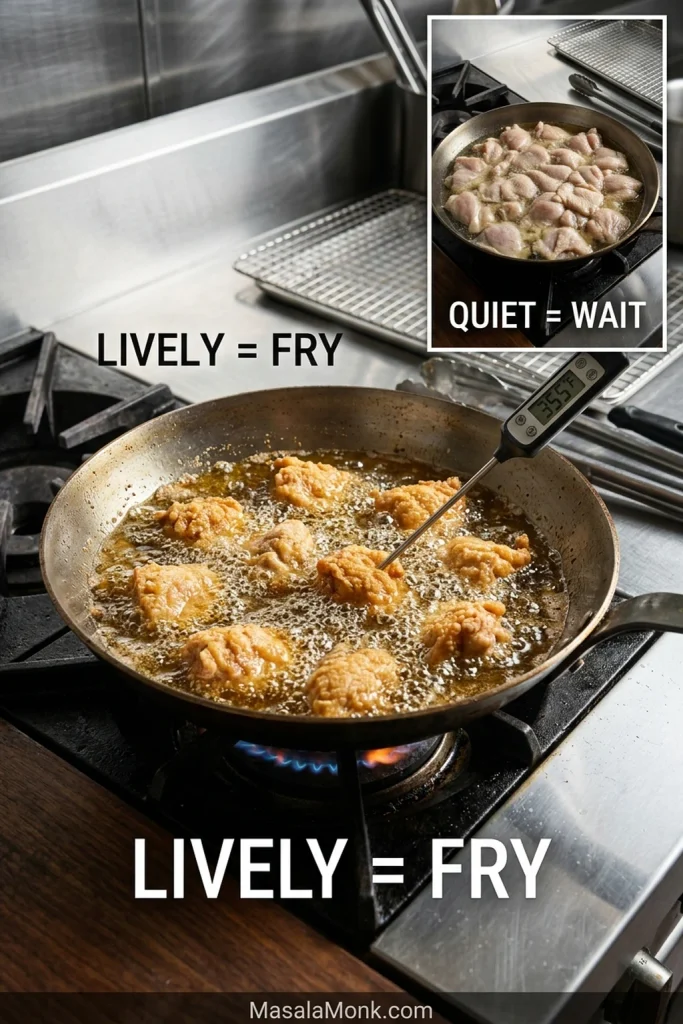
Lower each piece into the oil away from you and leave visible space between the pieces. A high-sided pan helps contain splatter; a splatter screen is useful if you have one. Listen for a steady, lively sizzle. A suddenly quiet pan means it is time to stop adding chicken and let the oil recover.

Let the first side cook undisturbed until the crust has set before turning. If it still feels soft or wants to cling to the pan, give it a few more seconds. Fry in 2–3 batches; each batch will usually need about 3½–5 minutes total, until crisp and cooked through.

Check one of the larger pieces: poultry should reach 165°F / 74°C in the center. Move each batch to a wire rack rather than piling it into a bowl.
Finish all the frying before you cook the sauce. The chicken can wait on the rack for those few minutes.

The crust should now feel dry, set and crisp under the tongs instead of dusty or soft. At this point, it should already be crisp enough to make you want to steal a piece. That’s a good sign.

For extra crunch: Once every piece has completed the first fry, raise the oil to about 375°F / 190°C and fry the chicken again for 45–90 seconds. Stop once the crust looks drier and feels more brittle. Allow about 5 extra minutes for this optional step.

5. Cook the orange sauce

Using a clean pan? Heat 2 teaspoons neutral oil over medium. Reusing the frying pan? Carefully transfer the excess frying oil to a heatproof container, leaving about 2 teaspoons in the pan, and remove any loose dark starch bits. Never pour frying oil down the sink.

Add the garlic and ginger and cook for 20–30 seconds, until fragrant. A little color is fine; burnt garlic is not.

Stir the orange-juice mixture, pour it in and bring it to a lively simmer for 1–2 minutes. Taste it now. Orange should lead, sweetness should sit behind it, and enough acidity and soy should remain to keep the sauce from tasting like candy.

Stir the slurry again and start with about two-thirds. Let it bubble for a few seconds and look at the sauce before adding more. Still thin? Add a little more. You may not need the rest.

The glaze should coat the back of a spoon or spatula in a thin shiny film. Drag the spatula through the pan as a second check: the trail should stay visible for about one second before closing.

Turn off the heat and stir in the orange zest. Almost immediately, the sauce should smell fresher and unmistakably more orange. Add the optional sesame oil if you want a faint toasted note.

If the glaze tightens before you’re ready to toss the chicken, loosen it over low heat with 1 tablespoon water. Nothing is ruined.

6. Glaze and serve

If there is visibly more sauce in the pan than you need for a thin coating, spoon a little out now and save it for rice. The chicken needs a lacquer, not a bath.

Add the fried chicken and toss for only 15–20 seconds, just until glossy. Plate immediately and finish with scallions and sesame seeds, if using.

Recipe Notes

  • Chicken breast: works, but it dries faster than thigh, so start checking it earlier.
  • Soy sauce: use regular/light soy rather than dark or sweet soy, which can overpower the citrus and darken the glaze.

Cooking now? You can stop here. The rest of the guide is for the moments when the coating falls off, the oil cools down, or the sauce somehow still does not taste orange enough.

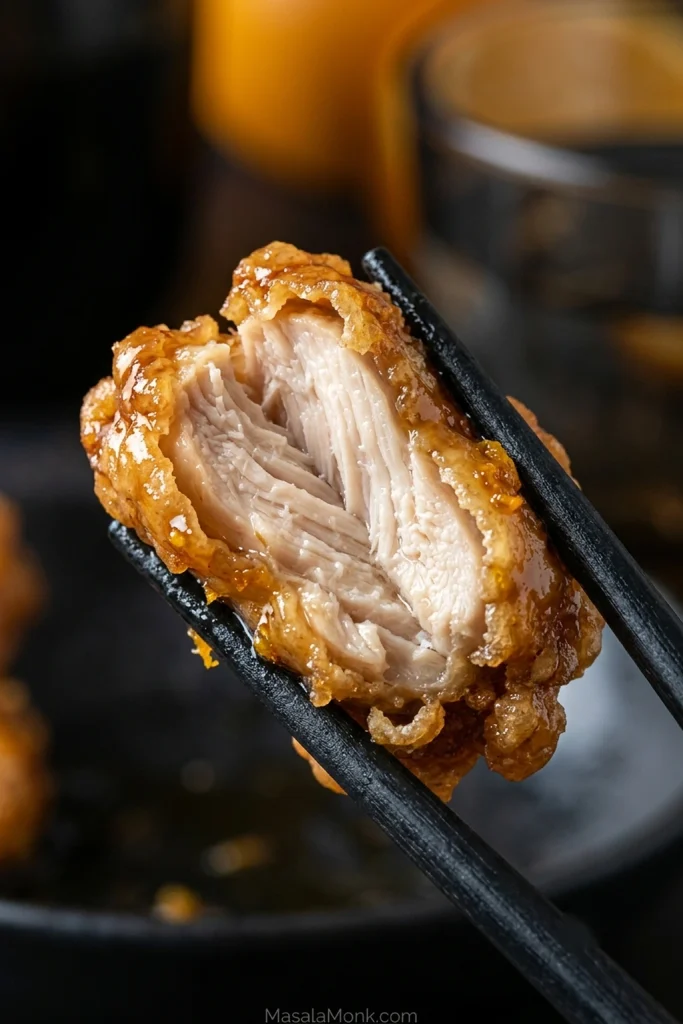
The finished bite is the test for everything above: a thin crisp shell should still give way to juicy chicken underneath, even after the glaze has reached the crust.

Close-up of a glazed piece of orange chicken held in black chopsticks and cut open to reveal juicy chicken inside a thin golden crust.
The best bite keeps both textures in play: crisp coating around the edges and juicy chicken at the center, with neither one overwhelming the other.

Before the Oil: Make the Coating Stay Put

Your coating can start failing before the chicken ever reaches the oil. Too much surface liquid weakens the starch layer and gives it less to hold onto.

Keep the pieces around 1 to 1¼ inches / 2.5–3 cm. That gives you plenty of crisp surface without shrinking the chicken into tiny nuggets that dry out too quickly.

Raw seasoned chicken thigh pieces arranged beside a ruler, with a size guide of 1–1¼ inches / 2.5–3 cm and a note that the surface should be moist, not wet.
Uniform pieces are easier to fry well than a mix of large and small ones; similar sizing helps the centers finish together while the outside turns crisp.

Season first, but don’t soak the surface

The short soy, Shaoxing and white-pepper rest gives the meat some flavor of its own. Liquid collecting at the bottom of the bowl is your cue to drain it before the starch goes on.

Why cornstarch?

A pressed-on starch coating fries into a thin, crisp crust. The first small addition of cornstarch makes the seasoned chicken tacky; the remaining starch then has something to hold onto.

A heavier flour-and-starch dredge, like our hot honey chicken tenders use, creates a much craggier crust. For this shallow-fry method, keep the starch shell lighter.

Look before you fry. The starch should sit in little rough patches that stay put when you lift a piece. Shake away any powder that showers off. Once the coating looks shaggy rather than snowy, you’re there. Those rough ridges are exactly where the glaze will catch later.

Side-by-side chicken pieces comparing a rough, attached cornstarch coating labeled “shaggy — ready” with a heavily powdered coating labeled “snowy — shake off.”
More loose cornstarch does not mean more crunch. What matters is the starch that actually clings, because attached rough patches become the crust instead of falling away in the oil.

In the Oil: Control the Heat

How do you keep orange chicken crispy? Fry in small batches, let the crust set before turning, drain the chicken on a rack, and finish the sauce before the final toss.

A wide high-sided skillet gives you room for batches and some protection from splatter. A wok or Dutch oven works too.

The sound gives you an early warning before a thermometer does. When the steady sizzle fades sharply, check the oil; once it drops much below about 325°F / 165°C, pause before adding more chicken and let the heat recover.

Chicken frying vigorously in a skillet beside an oil thermometer, with a comparison showing a lively frying pan and a quieter pan that needs time to recover.
A fading sizzle is also a batch-size warning: give the pan room and time to regain heat before adding more chicken.

Move each batch straight to a wire rack. Hot chicken keeps giving off steam, and a bowl traps that moisture against the crust.

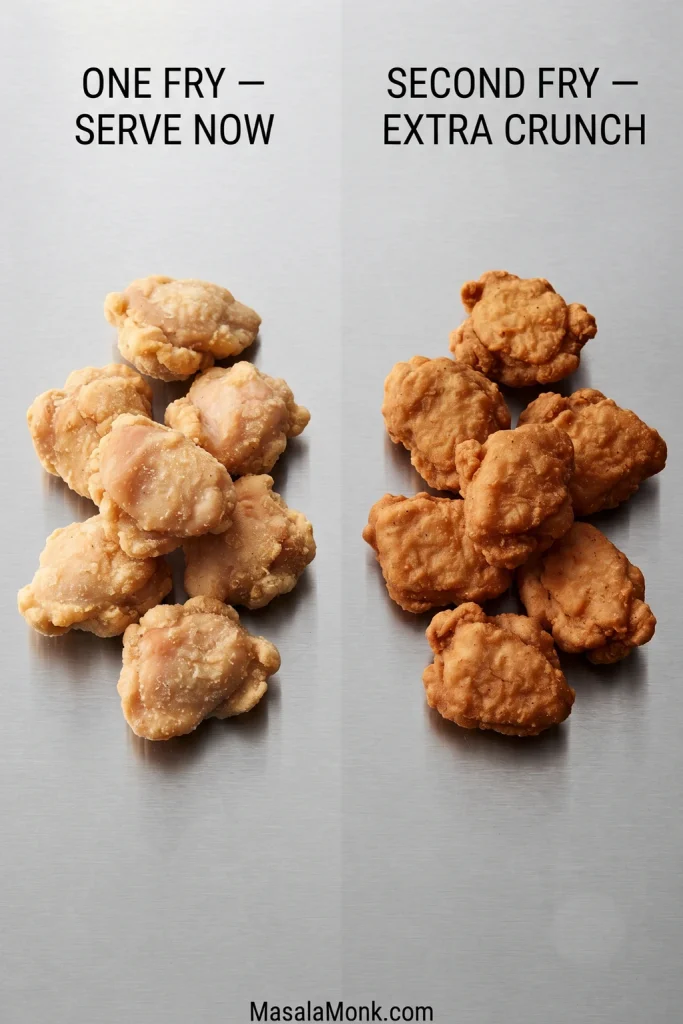
When is a second fry worth it?

For orange chicken that is going straight from pan to plate, one good fry is usually enough. Use the optional second fry for maximum crunch or when the fried chicken needs to sit longer than the few minutes it takes to finish the sauce.

The second fry drives off a little more surface moisture, leaving the coating harder, drier and noticeably more brittle.

Two groups of fried chicken compared side by side, with one labeled “one fry — serve now” and the crisper second group labeled “second fry — extra crunch.”
The second fry earns its keep when the chicken must wait—the drier crust buys you a little more resistance to steam and sauce.

Check the Crust Before You Move On

Break open one larger piece if you want a final pre-sauce check. The coating should be thin and crisp, while the chicken inside stays juicy. Once that contrast is there, the slow part is behind you. Now build the sauce.

Build an Orange Sauce, Not an Orange-Juice Sauce

More juice does not always make a sauce taste more orange. Once the sauce is already loose enough, another splash can dilute it faster than it improves the aroma.

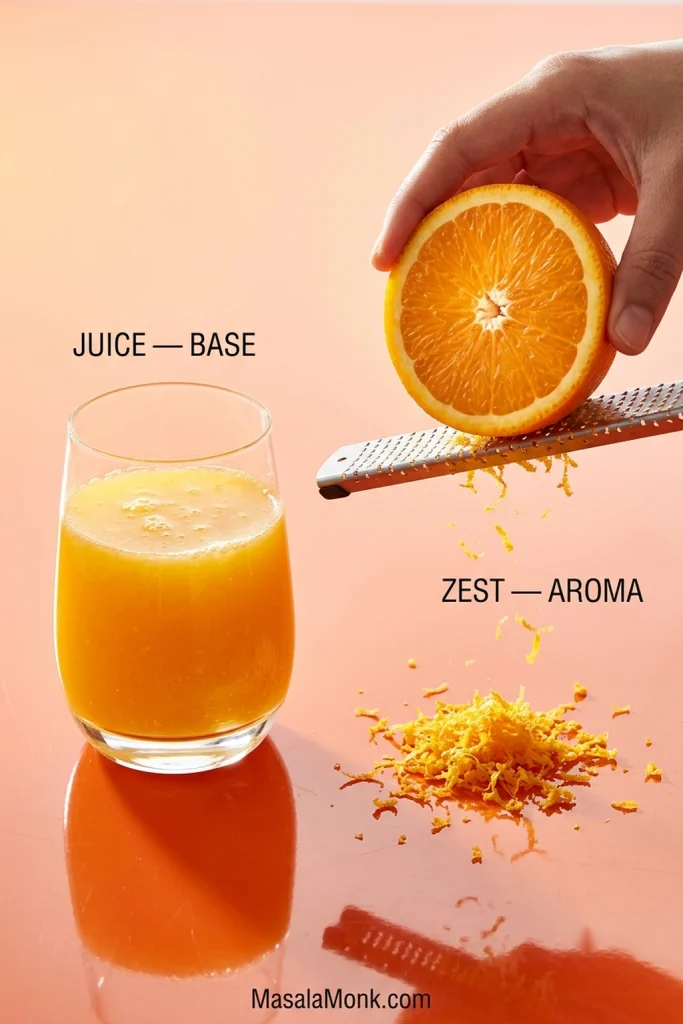
Orange juice brings sweetness, acidity and the base citrus flavor. Fresh zest supplies the concentrated aromatic oils that make the finished glaze smell unmistakably orange.

A glass of fresh orange juice beside a halved orange being grated, with loose orange zest and labels identifying juice as the sauce base and zest as the aroma.
If the sauce already has enough sweetness and liquid but still smells muted, add zest before reaching for more juice—the missing piece may be aroma, not orange volume.

Taste before you thicken

Balance the sauce while it is still fluid. Once it is thickened, adding water, vinegar or soy also changes its texture, so settle the sweet-sour-savory balance first. If something still tastes off, fix the flavor before thickening.

Fix the Flavor Before the Chicken Goes In

Small corrections are enough.

If the sauce tastes…Try this
Too sweetAdd unseasoned rice vinegar, 1 tsp at a time, then taste again.
Too sharpAdd 1 tsp sugar, dissolve it, then taste again.
Too saltyAdd warm water, 1 tbsp at a time, then taste again. Thicken only after the balance is right.
Flat or one-noteTry ½ tsp soy plus ½ tsp rice vinegar, then taste again.
Sweet but not orange enoughFinish thickening first. Once the heat is off, add extra zest ¼ tsp at a time until the aroma lifts.

Once the balance tastes right, check the glaze thickness before the chicken goes in.

How Thick Should Orange Chicken Sauce Be?

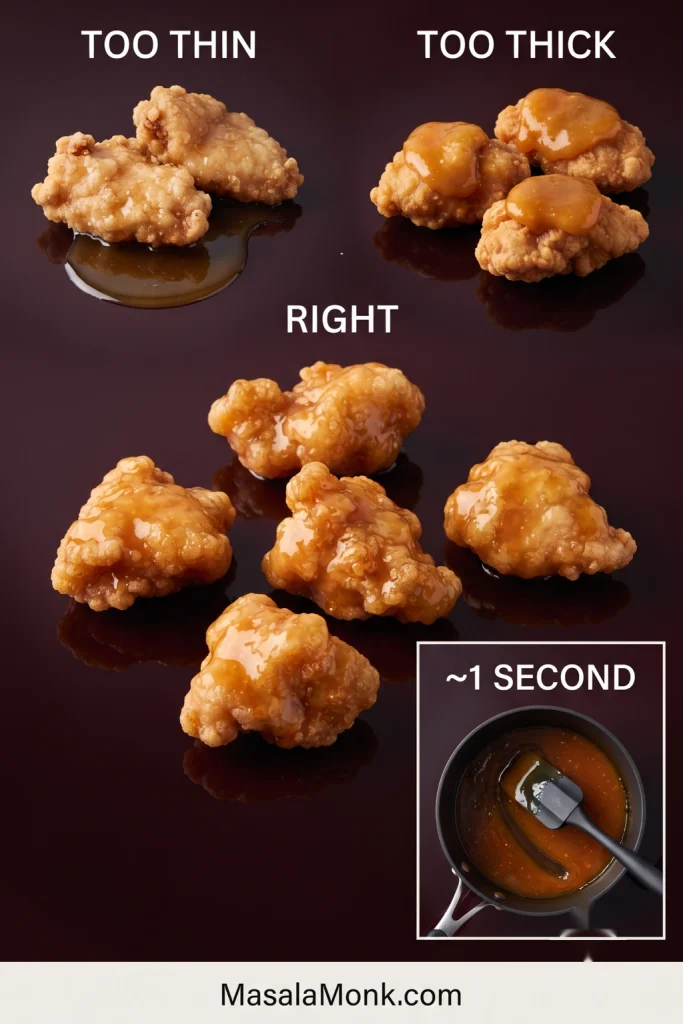
Thickness matters most once the sauce reaches the crust.

Too thin: it runs straight off the crust and gathers underneath, carrying more water into the coating.

Right: it still moves easily in the pan but leaves a translucent, glossy layer across the rough surface of the chicken.

Too thick: it begins sitting on the chicken in sticky blobs instead of flowing over the ridges, and the glaze can turn gummy as it cools.

Three-way comparison of orange chicken coated with sauce labeled too thin, too thick and right, with an inset showing a short trail through properly thickened sauce.
Judge the glaze by how it moves: too thin brings extra moisture to the crust, while too thick sits heavily on it. The sweet spot is glossy, fluid and clingy.

The exact amount of slurry can vary because pan width, simmer intensity and reduction time change how much liquid cooks off. Start with most of it, then let the texture in the pan decide whether the rest is needed.

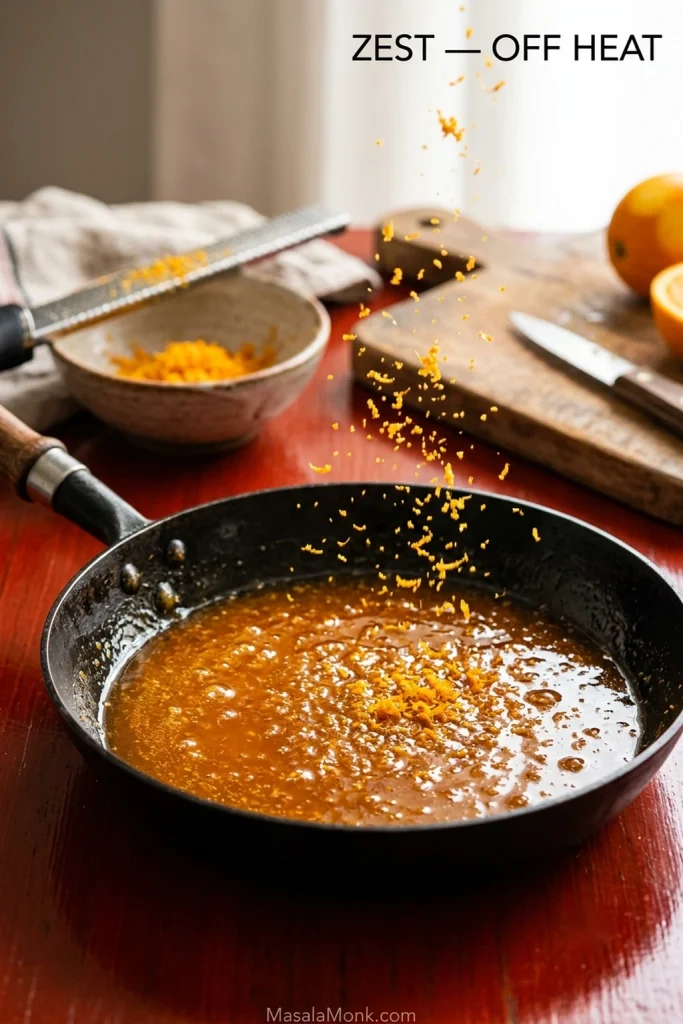
Once the glaze is where you want it, turn off the heat and stir in the orange zest. The aroma should brighten almost immediately. Add the optional sesame oil now if you want a faint toasted note.

Fresh orange zest falling into a pan of glossy orange sauce, with a grater and a small bowl of zest beside the pan.
Late zest is less about making the sauce more sour and more about restoring the fresh orange aroma lost during simmering.

Glaze ready? Go to the final toss.

The 15–20 Second Window

By now the chicken is crisp and the sauce is finished. Nothing needs more cooking.

Add only enough glaze to coat the chicken thinly and toss for about 15–20 seconds. Then get it onto the plate.

A spoon lifting glossy orange chicken from a wok during the final sauce toss, with “15–20 seconds” displayed above the pan.
The final toss is for coverage, not cooking. Once the glossy sauce has reached the rough surfaces, get the chicken out of the pan before the crust absorbs more moisture.

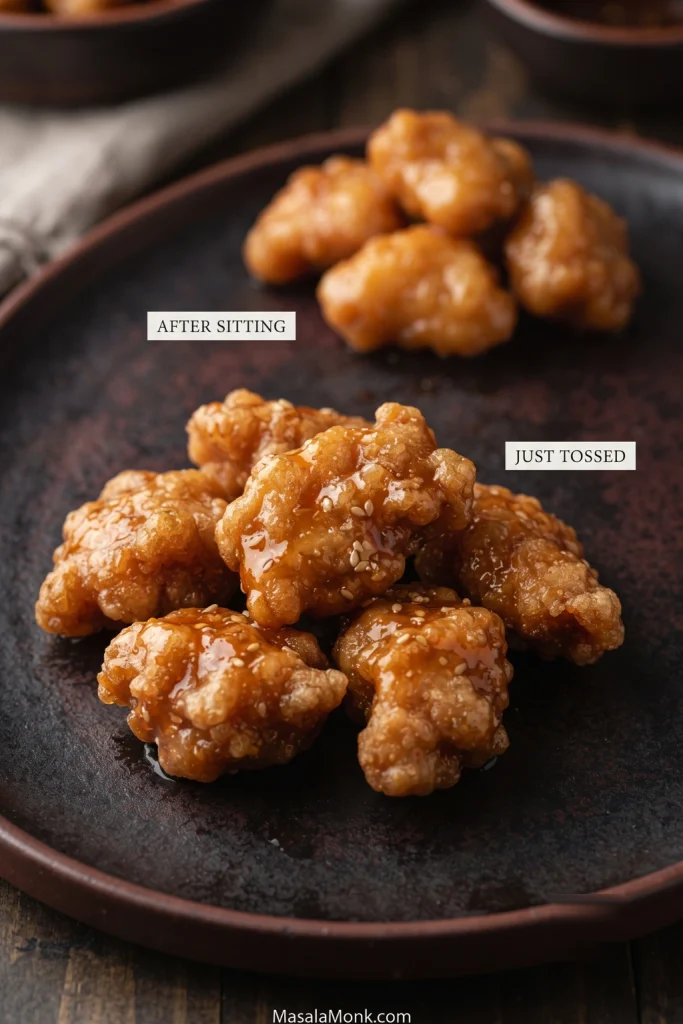
A wet glaze will eventually soften any starch crust, so those first few minutes are the reward: crisp edges beneath a thin sticky coating, juicy chicken inside, and fresh orange aroma still sitting above the sweetness.

Two portions of glazed orange chicken compared on a dark plate, with crisp pieces labeled “just tossed” and softer-looking pieces labeled “after sitting.”
Crispness starts changing as soon as sauce meets starch. The freshly tossed batch has the strongest contrast between sticky glaze and brittle edges.

Need the quantities or numbered method again? Back to the recipe card.

Orange Chicken Troubleshooting

If a batch goes sideways, don’t change everything at once. Think back to the first moment it looked wrong. That usually tells you what to fix.

Chicken and Coating Problems

ProblemLikely causeWhat to do
Coating looks wet and pastyToo much surface liquidDrain obvious liquid before coating. If the starch is already pasty, press on more dry starch until the surface looks rough rather than wet.
Loose starch keeps falling offCoating is not firmly attachedPress it on, then shake away the excess.
Coating falls off in the oilMoisture, weak adhesion or turning too earlyLet the crust set before turning, handle the pieces gently, and revisit the coating cues if the starch never attached well.
Chicken is pale or greasyOil stayed too coolReduce the batch size and let the oil recover before adding more chicken; see the frying-oil cues.
Outside darkens too fastOil too hot or pieces too largeLower the heat slightly and keep the pieces close to the recipe size.

Sauce, Glaze and Serving Problems

ProblemLikely causeWhat to do
Sauce stays wateryNot enough simmering or slurryBring it back to a simmer and add a little more freshly stirred slurry, using the sauce-thickness cues as your target.
Sauce turns gummyToo much starch or too much reductionWhisk in warm water, 1 tbsp at a time, until it flows again; compare it with the correct glaze consistency.
Sauce tastes bitterToo much white pith or scorched aromaticsMild pith bitterness may soften with a little water and sugar. If the garlic or ginger is genuinely burnt and acrid, remake the sauce.
Chicken loses its crispness too quicklyToo much sauce, sauce too thin or toss too longUse less glaze, finish thickening it first and keep the final toss brief.
Chicken is dry insideIt cooked too longCheck the larger pieces earlier and stop once they reach 165°F / 74°C. Breast has less margin than thigh.

Once you’ve fixed the problem, return to the recipe card and pick up from the step you need.

Swaps That Work Here

Chicken and coating

Chicken breast can replace thigh; start checking it earlier. Potato starch is also a good coating alternative if you already have it, with a slightly more brittle finished crust.

Sauce ingredients

Dry sherry is the easiest substitute for Shaoxing wine; if you have neither, leave it out. Unsweetened bottled orange juice can work, although fresh zest still matters. Orange marmalade brings sugar, peel and pectin together, so it needs its own balanced sauce rather than a straight swap for fresh juice. For more heat, add extra red pepper flakes or a little chile paste.

Air Fryer and Unbreaded Options

For an unbreaded version, brown seasoned bite-size chicken in a lightly oiled skillet and finish it with the orange sauce. Our hibachi chicken recipe goes deeper into pan-browning chicken without a coating.

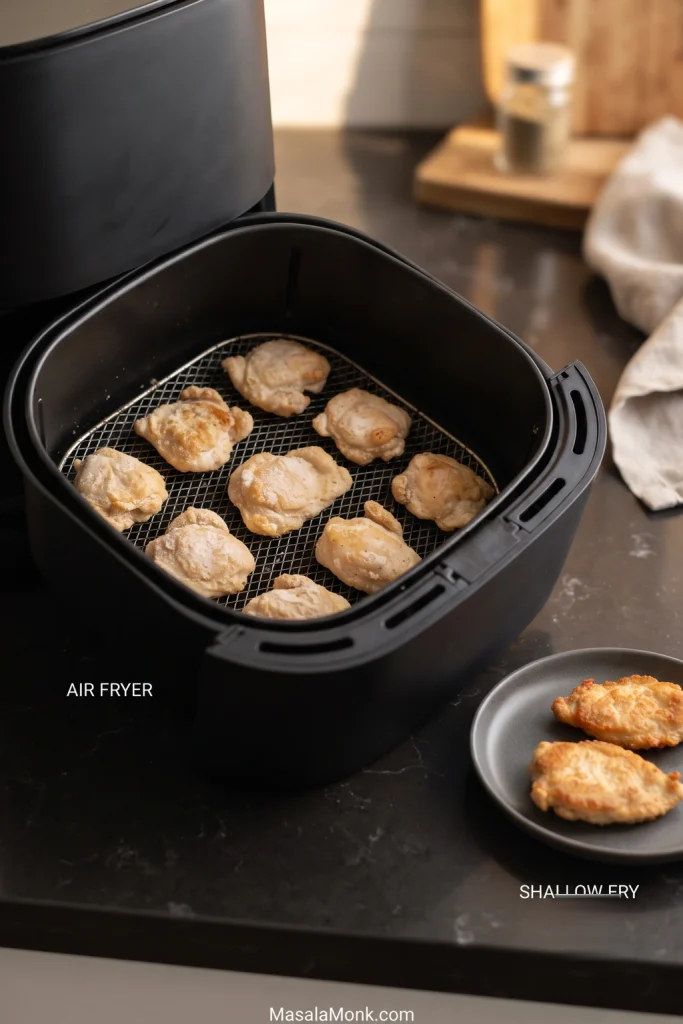
For an air-fryer adaptation, use the same cornstarch-coated chicken and coat the surface thoroughly but lightly with oil so dry starch does not remain chalky. Arrange the pieces in a single layer and air fry at 400°F / 205°C, turning halfway.

Start checking around 10 minutes; exact timing varies with the air fryer and piece size. Cook until the edges look crisp and the largest pieces reach 165°F / 74°C. Finish the sauce separately and toss only at the end. Expect the crust to be lighter and a little less evenly craggy than the shallow-fried version.

Cornstarch-coated chicken in an open air-fryer basket beside a plate of shallow-fried chicken, with labels identifying the two cooking methods.
With air-fried orange chicken, watch for chalky white starch rather than chasing the darker color of shallow frying; exposed dry patches need a light coating of oil.

What to Serve with Orange Chicken

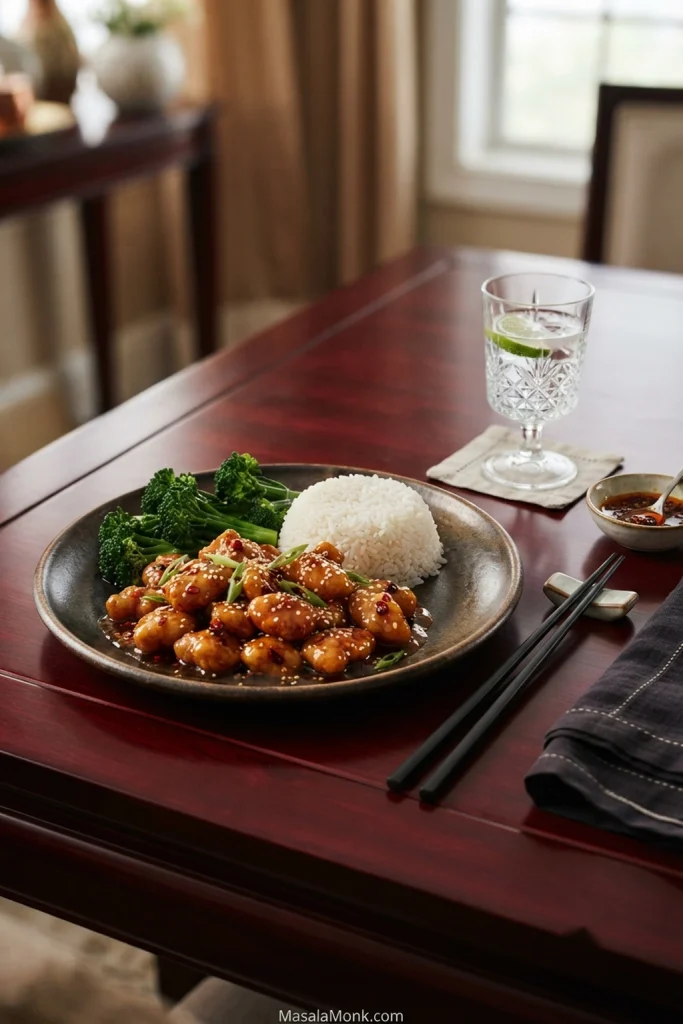
Because the chicken is sticky, sweet and rich, plain rice and something green are usually all it needs.

Glazed orange chicken served with white rice and green vegetables on a plate set on a wooden dining table.
Plain rice gives stray glaze somewhere to go, while broccoli or another green vegetable brings freshness against the sweet, rich orange chicken.
  • Steamed jasmine rice: simple and excellent for catching the little bit of glaze left on the plate. Our guide to cooking jasmine and other white rice has stovetop ratios and texture cues if rice is the part you tend to second-guess.
  • Broccoli, bok choy or stir-fried greens: something fresh and slightly bitter works well against the sweet citrus glaze.
  • Fried rice: good when you want a fuller takeout-style meal; keep its seasoning relatively restrained so the orange chicken remains the main event.

If you want the same contrast of crisp chicken and glossy sauce with a toasted-sesame profile, our sesame chicken takes it in that direction.

Store, Freeze and Reheat Orange Chicken

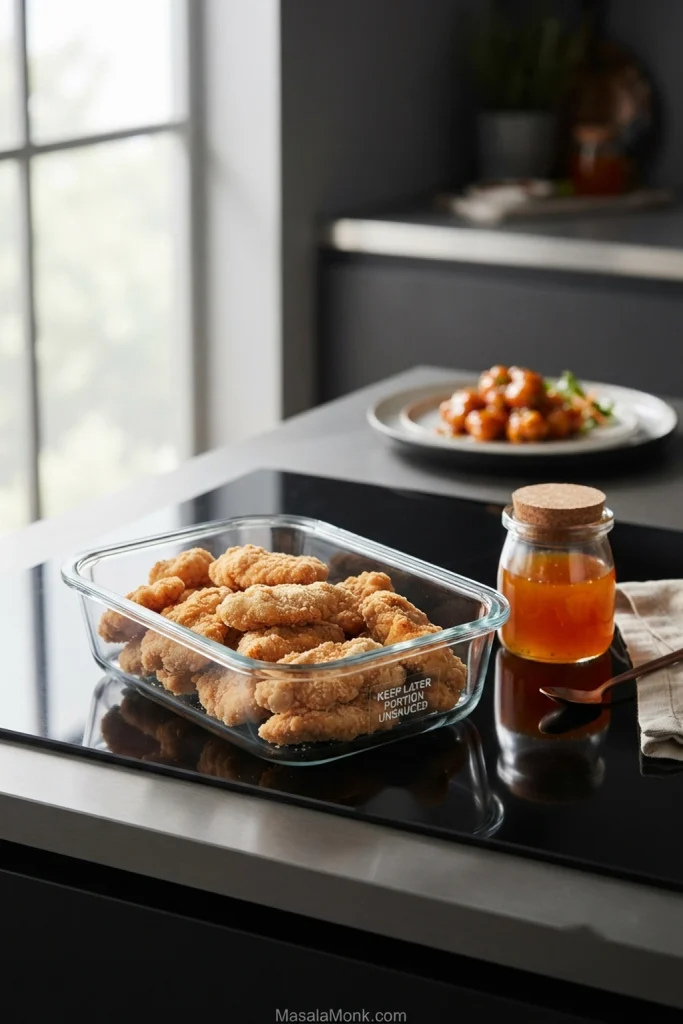
If you expect leftovers, leave the portion you will not serve immediately unsauced and keep the chicken and sauce separate. That gives the crust a much better chance of coming back later.

Glass container filled with unsauced fried chicken beside a separate jar of orange sauce, with a plated serving of orange chicken in the background.
Set aside tomorrow’s portion before glazing the whole batch. An unsauced crust responds far better to dry reheating than chicken that has already spent hours absorbing sauce.

For make-ahead cooking, mix the sauce ingredients in advance but keep the zest and slurry separate. Cut the chicken ahead if needed, then coat it close to frying time.

Refrigerate leftovers promptly, within 2 hours of cooking. Store them in shallow covered containers and use refrigerated leftovers within 3–4 days.

For longer storage, keep the chicken and sauce in separate shallow containers and chill them promptly. For best quality, freeze for up to 3 months. Reheat the chicken until hot and crisp again, warm the sauce separately, and toss only when you’re ready to eat.

An oven or air fryer gives the crust the best chance to dry out again. A skillet works for smaller portions. The microwave is fastest, and sometimes that’s what works tonight—just expect a softer coating. Reheat leftovers thoroughly to 165°F / 74°C.

Back to the recipe card · Back to top

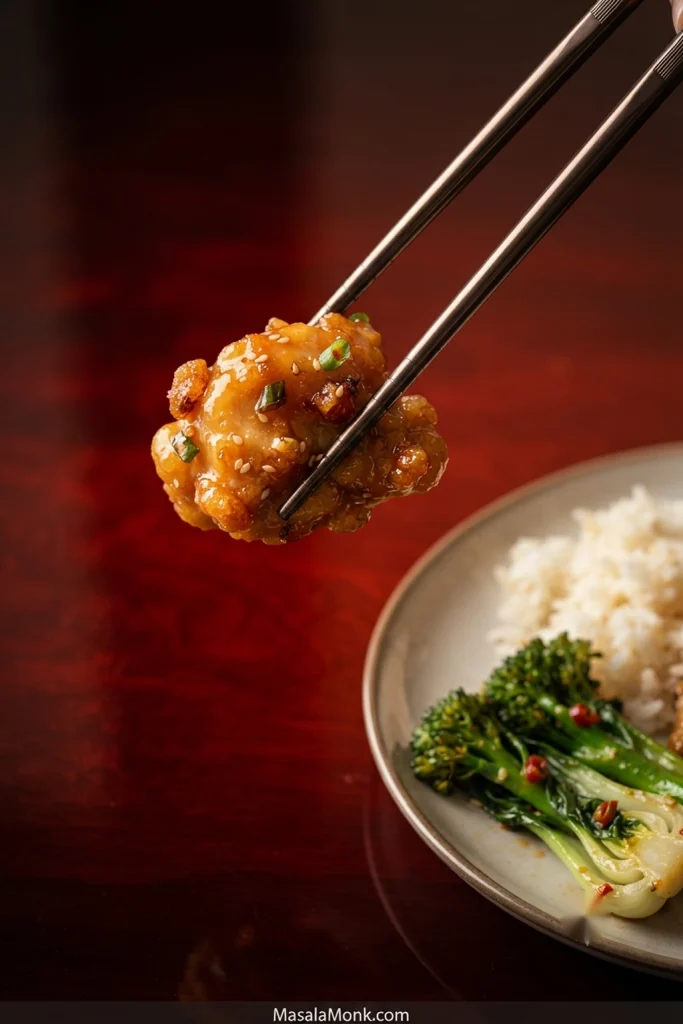
When it is time to eat, the finished plate should still look like fried chicken underneath the sauce: glossy enough to catch the light, but textured enough that the crust has not disappeared.

Black chopsticks holding a glossy piece of orange chicken above a plate containing white rice, orange chicken and green vegetables.
A thin sheen is enough. If the fried ridges are still visible beneath the glaze, the sauce is coating the chicken rather than burying it.

The sauce should taste unmistakably orange, cling in a thin glossy layer and leave very little liquid behind in the pan. Once the chicken is crisp and the glaze is there, don’t linger. Toss, plate and eat.

Posted on — Leave a comment

Sheet Pan Sausage and Peppers Recipe: Easy Oven-Baked Italian Sausage, Peppers & Onions

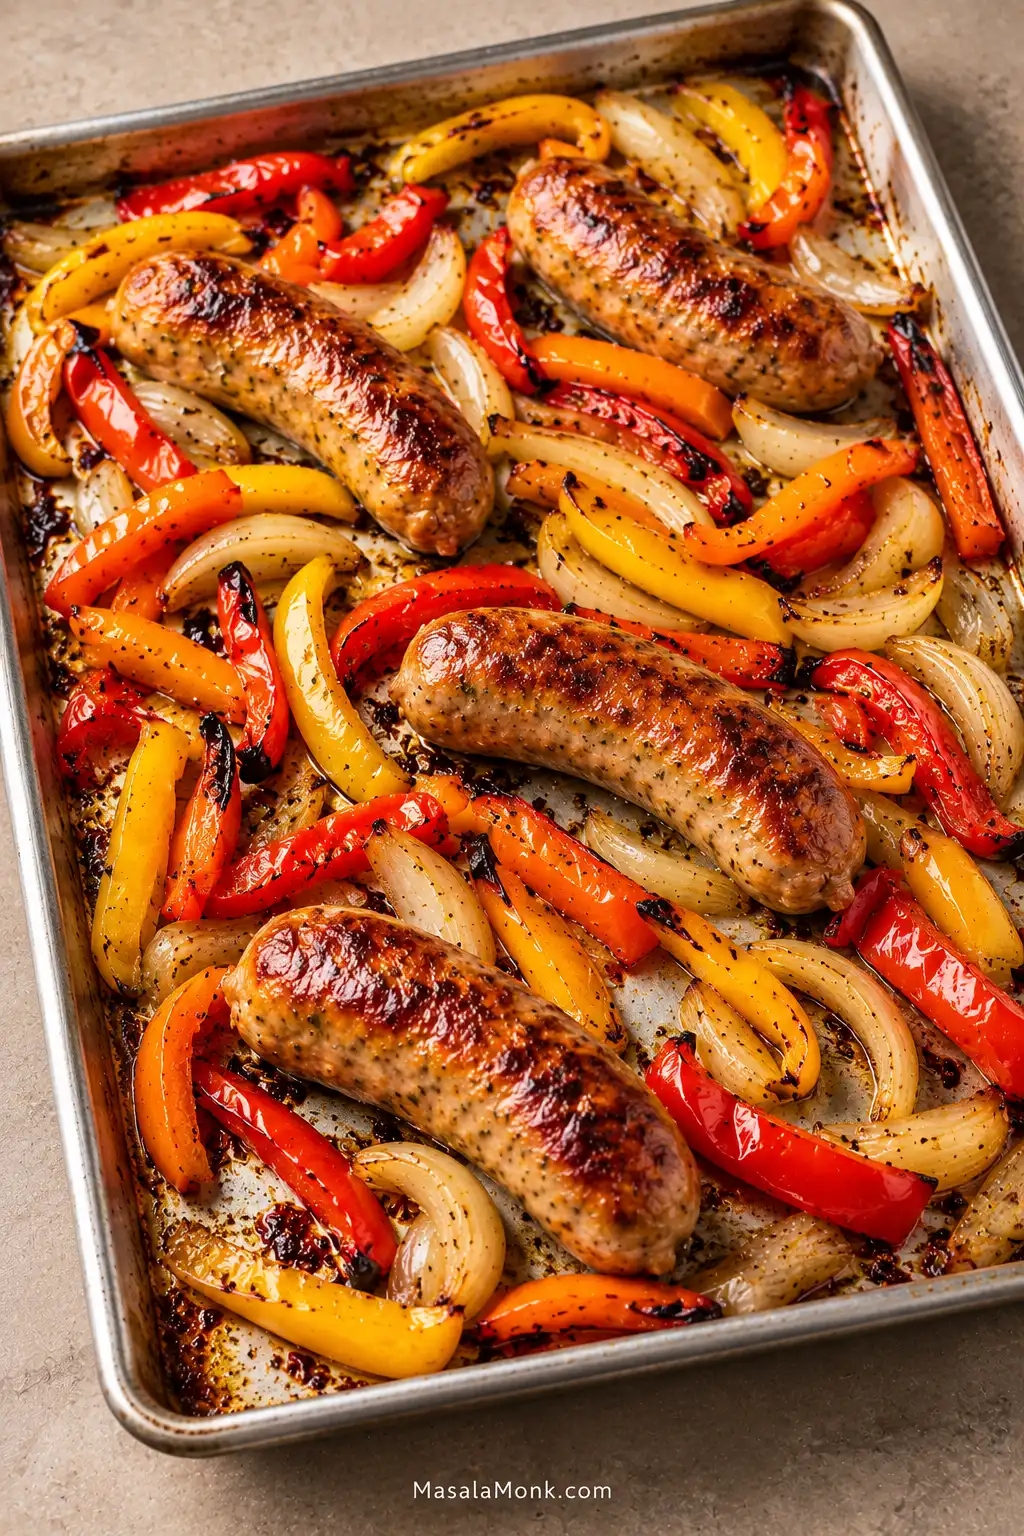
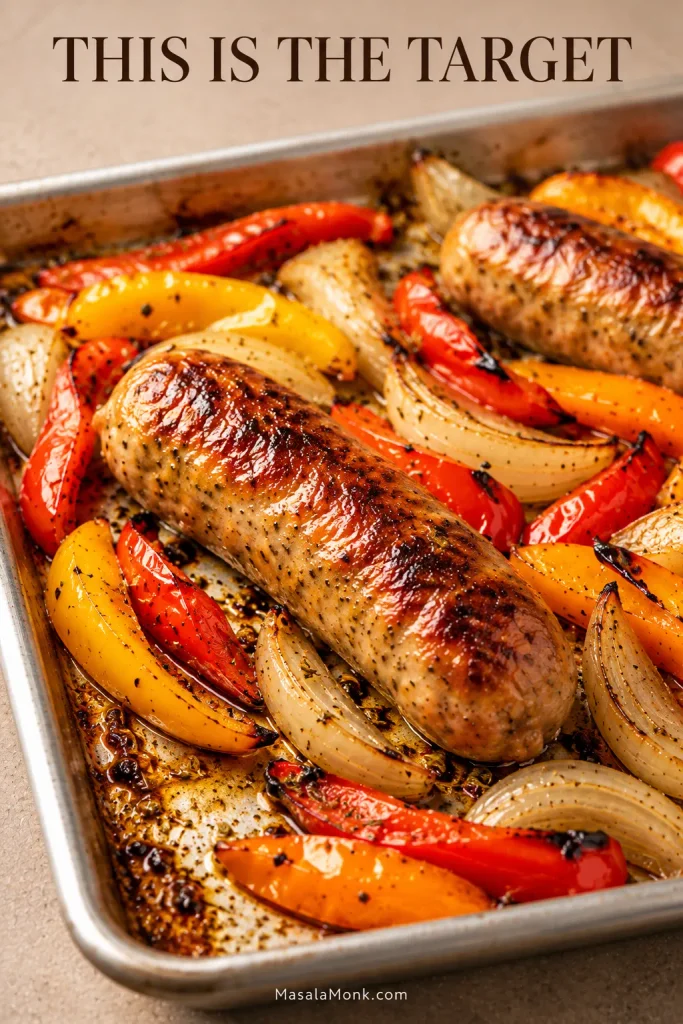
Roasted Italian sausage links with red, orange and yellow bell pepper strips and golden onion spread across a rimmed aluminum sheet pan with visible areas of bare metal.

A good tray of sausage and peppers gives you browned sausage, sweet onion, blistered pepper edges and enough savory juices to make a piece of bread worthwhile. It is also the kind of dinner that asks very little of you once the pan goes into the oven—especially on a night when you want a proper dinner without turning cooking into another project.

The trick is getting the sausage and vegetables done together without steaming the peppers along the way. Keep the vegetables substantial, give everything room on the pan, and let the oven handle the rest.

This sheet pan sausage and peppers recipe uses fresh Italian sausage, three bell peppers and a large onion for an easy oven dinner with very little hands-on work. Eat it straight from the pan, spoon it over something that will catch the juices, or pile everything into toasted hoagie rolls.

Sheet Pan Sausage and Peppers at a Glance

Roast fresh Italian sausage, peppers and onion at 425°F / 220°C on an 18 × 13-inch / 46 × 33-cm rimmed sheet pan. Turn the links and stir the vegetables after 15 minutes, then start checking the sausage around 25 minutes. Fresh pork or beef sausage should reach 160°F / 71°C in the center; fresh chicken or turkey sausage should reach 165°F / 74°C. The thermometer, not the clock, makes the final call.

Sheet Pan Sausage and Peppers Recipe

Fresh Italian sausage, bell peppers and onion roast together at 425°F / 220°C until the sausage is browned in patches, the peppers are tender and the onion is sweet at the edges. This method is written for fresh/raw Italian sausage links.

Yield
4 generous servings
Prep Time
15 minutes
Cook Time
25–30 minutes
Total Time
40–45 minutes

Equipment

  • 18 × 13 in / 46 × 33 cm rimmed half-sheet pan
  • Cutting board and sharp knife
  • Tongs or sturdy spatula
  • Instant-read food thermometer

Ingredients

  • 1¼ lb / 20 oz / about 570 g fresh Italian sausage links, usually 5–6 depending on size, sweet/mild or hot
  • 3 large bell peppers, about 1 lb / 450–500 g, preferably a mix of colors
  • 1 very large yellow or sweet onion, about 9–10 oz / 250–285 g
  • 2 tbsp / 30 mL olive oil
  • 1 tsp dried oregano or Italian seasoning
  • 1 tsp garlic powder
  • ½ tsp freshly ground black pepper
  • ¼ tsp red pepper flakes, optional
  • ¼ tsp fine salt to start, plus more after roasting as needed
  • 1–2 tsp / 5–10 mL red wine vinegar or fresh lemon juice, optional
  • 2 tbsp / about 8 g chopped flat-leaf parsley, optional

Instructions

  1. Heat the oven. Set a rack in the middle of the oven and heat to 425°F / 220°C. Have a rimmed half-sheet pan ready. Use bare metal for the strongest contact browning; parchment is the easier-cleanup alternative.
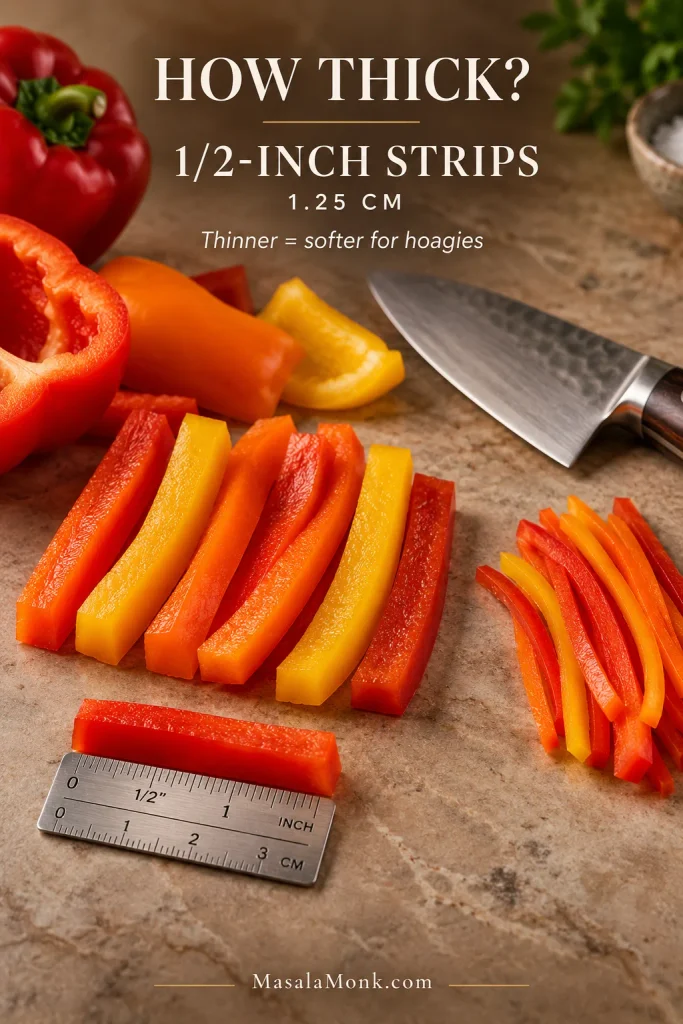
  2. Cut the vegetables. Slice the bell peppers into strips about ½ inch / 1.25 cm wide. Cut the onion into thick half-moons or wedges of roughly similar size.
  3. Season. Toss the peppers and onion with the olive oil, oregano or Italian seasoning, garlic powder, black pepper, optional red pepper flakes and ¼ tsp salt. Italian sausage varies considerably in saltiness, so start here and adjust after roasting.
  4. Arrange the pan. Spread the vegetables into one loose layer and nestle the whole raw sausage links among them. Keep the links whole while they roast; slice them after resting.

Roast, Turn and Finish

  1. Roast for 15 minutes. The vegetables will shrink noticeably as they roast.
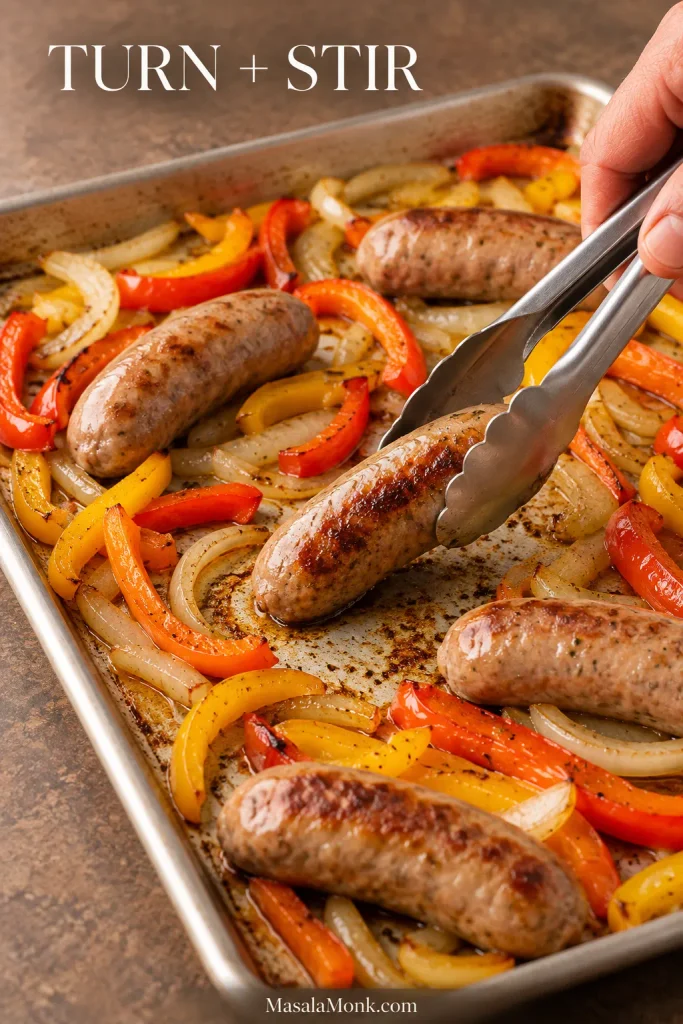
  2. Turn and stir. Flip the sausage links and stir the vegetables. The peppers and onions should now look smaller and softer, with darkening edges here and there and more bare pan visible between them. Spread them back out and roast for another 10–15 minutes.
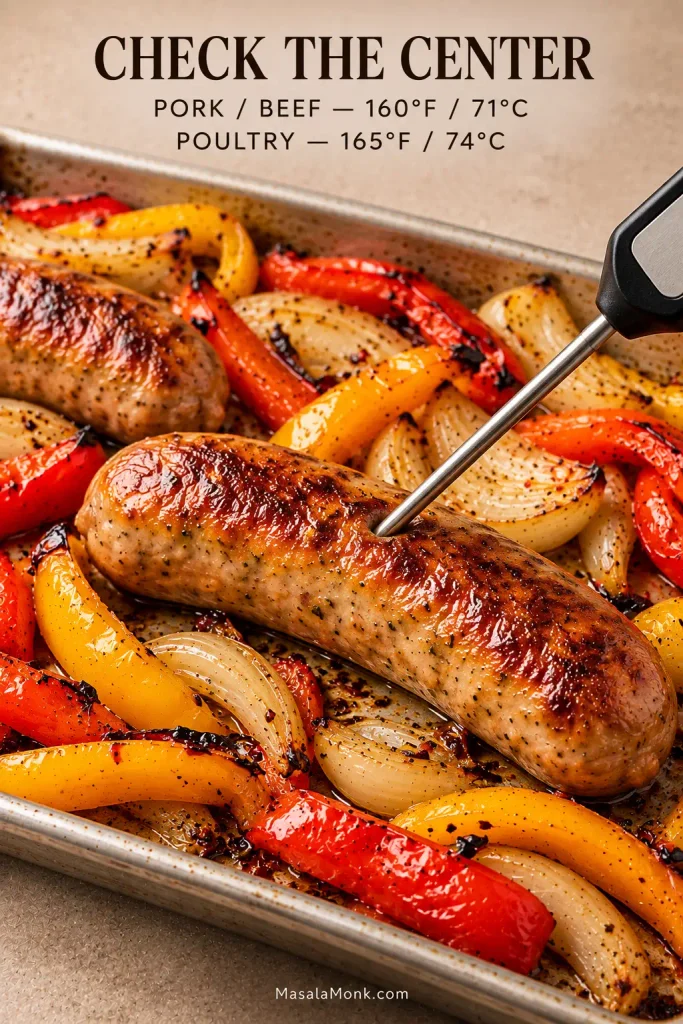
  3. Check the sausage. Begin checking around 25 minutes. Fresh pork or beef sausage should reach 160°F / 71°C in the center; fresh chicken or turkey sausage should reach 165°F / 74°C.
  4. Add more color. If the sausage has reached its safe temperature but still looks pale, broil for 1–3 minutes. Watch continuously and remove ordinary parchment before broiling.
  5. Rest and finish. Give the sausages 3–5 minutes to rest. Taste the vegetables and adjust the salt. For a brighter finish, start with 1 tsp / 5 mL red wine vinegar or lemon juice, toss, taste, and add more if needed. Scatter over the parsley, if using.

The recipe above is enough to get dinner on the table. Below, the details cover the choices and problems that can change the result—from the sausage you start with and how you cut the vegetables to a watery pan, dark onion edges or links that need a little more color.

Check the Sausage Before You Start

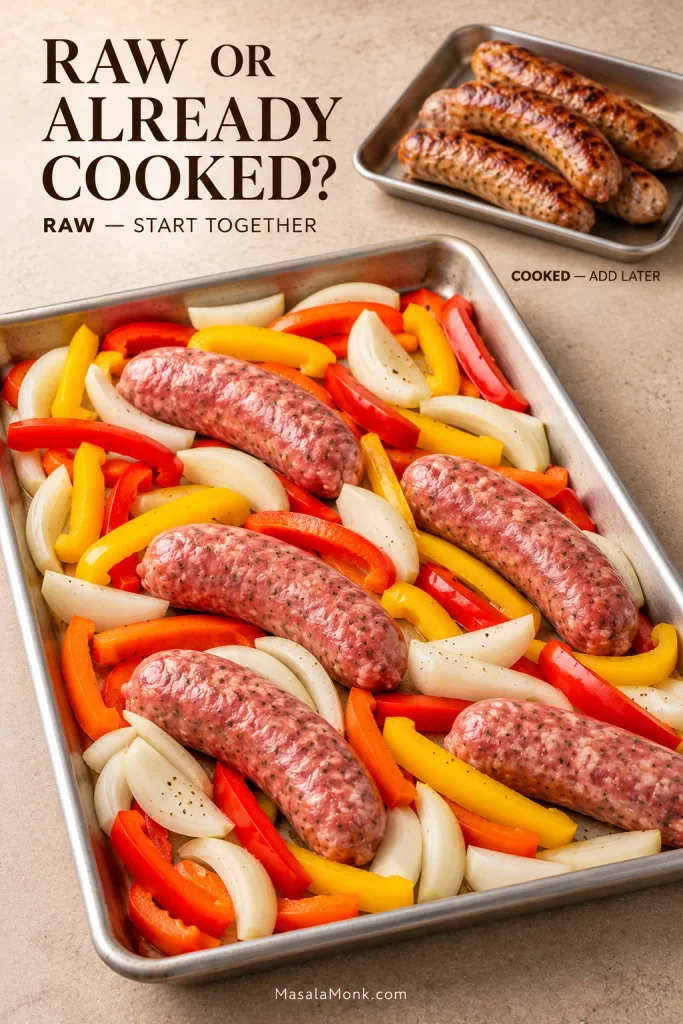
Check the package before anything goes onto the pan. Fresh sausage and fully cooked sausage can look similar in the refrigerator, but their oven timing is very different.

Raw Italian sausage links arranged with uncooked bell peppers and yellow onion on a sheet pan, with browned fully cooked sausage links shown separately above the pan.
Two packages can look nearly identical in the refrigerator yet need different treatment in the oven. Therefore, check whether the links are fresh or fully cooked before arranging the pan; that distinction determines whether the sausage starts with the vegetables or joins them later.
What You Have How to Handle It
Fresh pork or beef Italian linksUse the main method and cook to 160°F / 71°C.
Fresh chicken or turkey linksUse the main method and cook to 165°F / 74°C.
Fully cooked sausageRoast the vegetables for 15 minutes first, then add the sausage for roughly the final 10–15 minutes.
Very thick fresh linksAllow extra time and check the center with a thermometer.
Thin fresh linksBegin checking before the full cooking window is up.

Sweet or mild Italian sausage lets the peppers and onion come through clearly. Hot Italian sausage follows the same method, and mixing sweet and hot links works too. Fennel flavor varies by sausage, so check the label if you’re not a fan.

Using kielbasa instead? It is already cooked, so the timing changes. Our kielbasa and potatoes recipe handles that combination separately.

Cut the Peppers and Onion to Match the Sausage

For this version, cut the peppers about ½ inch / 1.25 cm wide. They will soften considerably in the oven but should still have enough body to pick up easily with a fork when the sausage is done.

For softer hoagie-style vegetables, go a little thinner—about ¼–⅜ inch / 6–10 mm—and watch them at the halfway turn. Small onion tips often darken first. Pull off anything actually scorched and leave the browned pieces alone.

Red, orange and yellow bell peppers cut into thick and thin strips beside a chef’s knife and a small metal ruler showing about a half-inch width.
About ½-inch pepper strips are the sweet spot for the standard sheet-pan roast: they soften while keeping enough structure to stay distinct. For softer sausage-and-pepper hoagies, cut them thinner; meanwhile, slightly sturdier strips give you more timing tolerance when unusually large sausage links need longer to cook.

Red, orange and yellow peppers bring more sweetness; green keeps a slightly more savory edge. Use whatever mix sounds good.

Leave the sausage links whole; they’re easier to turn and temperature-check, then you can slice them after resting.

Get the Pan Right

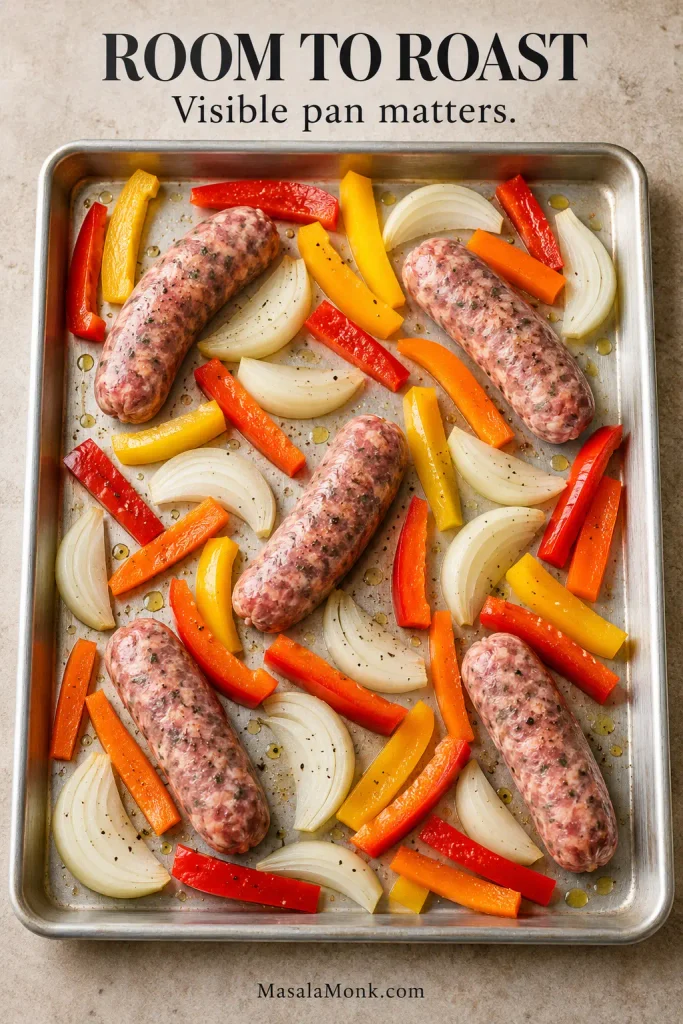
Peppers and onions release water as they cook, while sausage adds fat and juices. Give that moisture room to sizzle away around the food instead of collecting underneath it. A standard half-sheet pan is a good fit for this batch.

Raw Italian sausage links, bell pepper strips and yellow onion wedges arranged in a loose single layer on an aluminum sheet pan with visible metal between the ingredients.
Treat visible pan as an early capacity test. If sausage, peppers and onions already cover almost every inch before roasting, moving part of the batch to a second pan is easier than trying to recover lost browning after the vegetables begin releasing water.
  • Dry visibly wet peppers after washing.
  • Spread everything into one layer.
  • Keep broth, water and marinara off the roasting pan.
  • For a larger batch, use another pan.

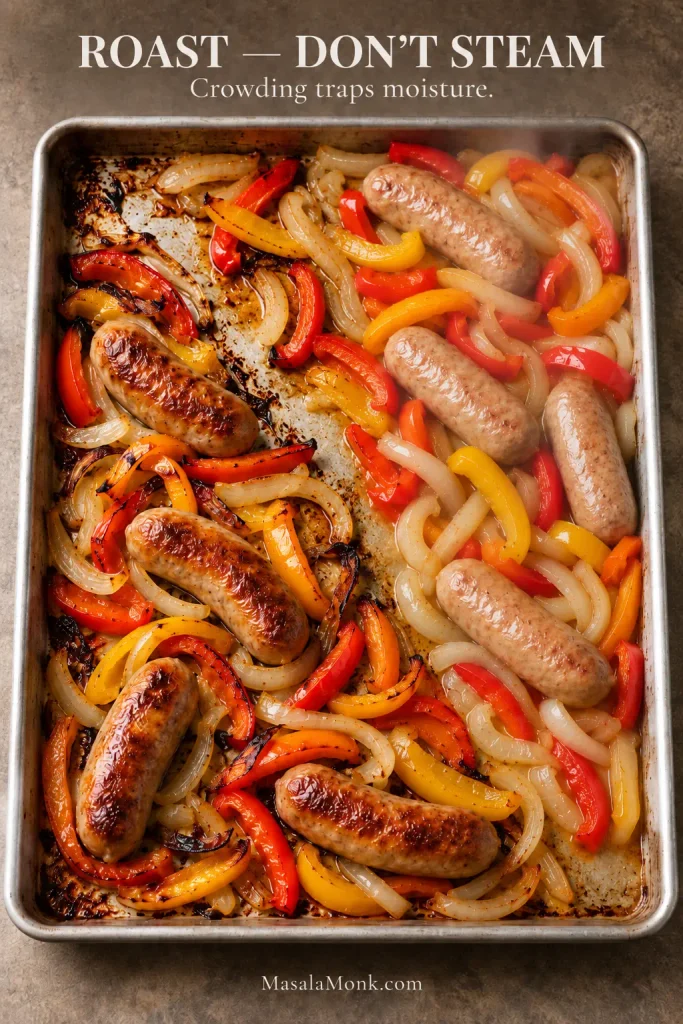
If the vegetables are turning tender but the pan still looks pale and wet, check the spacing before changing the seasoning or oven temperature. Crowding is often the reason roasting has started to behave more like steaming.

A sheet pan showing browned sausage and roasted peppers with exposed metal on one side and more crowded, pale, moist sausage and vegetables on the other.
A pale, wet pan is usually a surface-area problem before it is a seasoning problem. In other words, more oregano or garlic cannot replace the browning you lose when released vegetable moisture has too little exposed metal from which to evaporate.

Use bare metal for the best browning. Parchment makes cleanup easier, but you give up some direct pan contact. Ordinary parchment also needs to come off before the pan goes under the broiler.

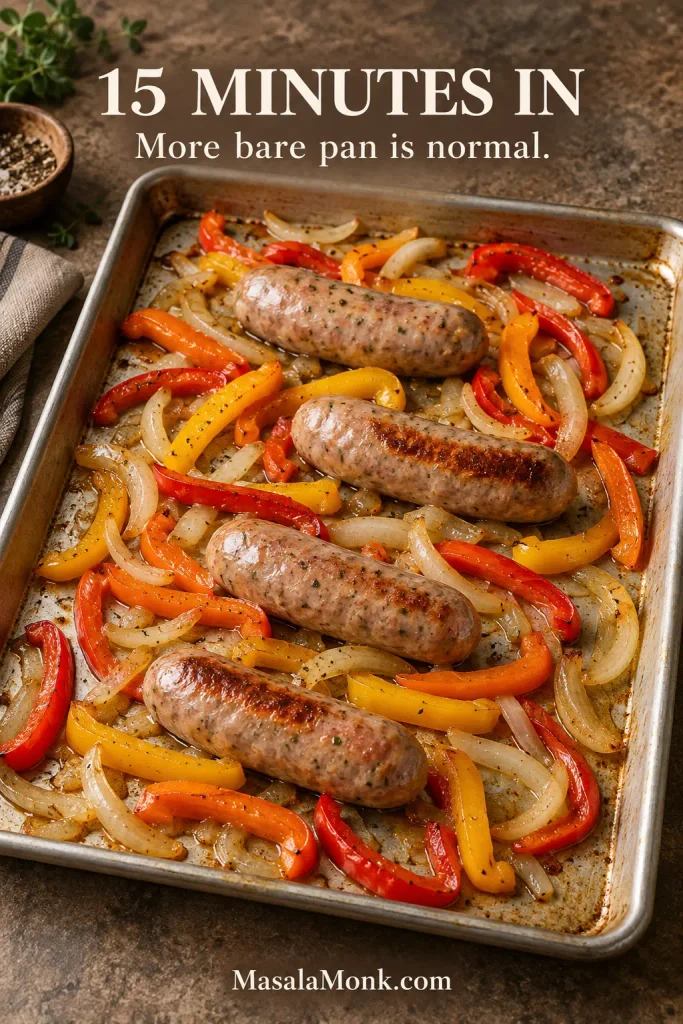
What the Pan Should Look Like After 15 Minutes

At the halfway turn, judge the pan by its progress rather than by final color: the vegetables should be smaller and softer, with more metal beginning to show between them.

Partially roasted Italian sausage with softened red, orange and yellow peppers and onions after about 15 minutes, with more exposed aluminum visible between the food.
Halfway through, the pan should look unfinished rather than dramatically browned. Because the vegetables have already shrunk and released some moisture, this is the point to redistribute them—not the point to keep cooking until the food resembles the final tray.

The sausages do not need to color evenly on every side. Contact points against the hot metal will usually go darkest. Turn them once halfway through and leave the rest to the oven.

Metal tongs turning an Italian sausage link on a sheet pan and exposing its browned contact side, with partially roasted peppers and onions around it.
One well-browned contact side is enough to tell you the hot pan is doing its job. Turn the links once, stir the vegetables into new positions, and let the second half of roasting create fresh contact instead of repeatedly chasing color on every surface.

Know When It Is Done

Start looking closely around the 25-minute mark. Some links will be ready; unusually thick ones may need longer.

  • Sausage: browned in patches and safely cooked through. It does not need to be dark all over.
  • Peppers: soft and flexible with blistered edges, but not collapsed into the pan juices.
  • Onion: tender and sweet, with darker corners here and there.
  • Pan: rendered fat and concentrated juices, not a puddle of thin vegetable liquid.
Close view of a browned Italian sausage link surrounded by blistered red, orange and yellow peppers, golden onion and concentrated roasting juices on an aluminum sheet pan.
Do not force the vegetables to wait for the sausage if they reach this stage first. Once the peppers are soft and blistered and the onions are tender, move them off the pan if necessary and let unusually thick links finish safely on their own.

Brown tells you what the pan looks like; temperature tells you whether the sausage is done. Fresh pork or beef sausage should reach 160°F / 71°C; fresh chicken or turkey sausage should reach 165°F / 74°C. Those are the separate safe-temperature targets given by the USDA Food Safety and Inspection Service.

Instant-read thermometer probe inserted into the thickest central part of a browned Italian sausage link with roasted peppers and onions on the sheet pan.
Link thickness can move the cooking time more than the clock suggests, so temperature gets the final decision. Check the thickest part: pork or beef sausage should reach 160°F / 71°C, while chicken or turkey sausage should reach 165°F / 74°C.

Vegetables ready first? Take them off. Sausage safely cooked but still pale? Give it a minute or two under the broiler.

Taste and Finish the Pan

Italian sausage already brings plenty of salt, spice and fat to the pan, so taste the vegetables before adding more salt. Oregano, garlic and black pepper support those flavors without burying the sweetness of the peppers and onion.

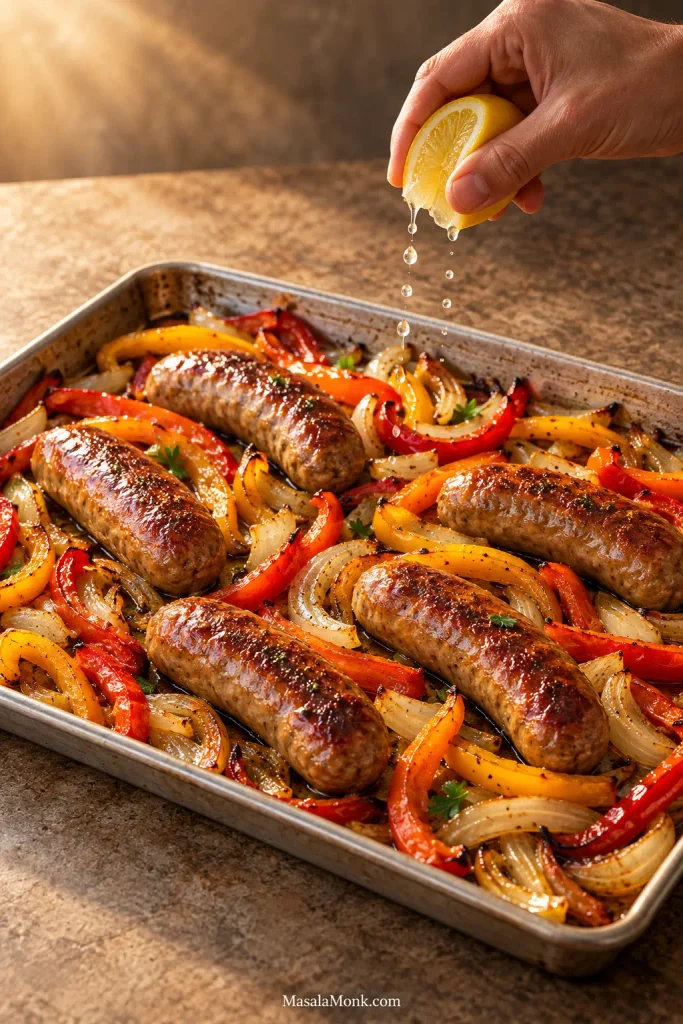
A squeeze of lemon or a splash of red wine vinegar wakes up the rich sausage and sweet roasted vegetables, especially after a few bites. Parsley brings a fresh edge and a little color.

A hand squeezing a lemon wedge over browned Italian sausage, roasted red, orange and yellow peppers and golden onions on a sheet pan.
Rich Italian sausage and sweet roasted peppers often benefit from a small hit of acidity at the end. Start with a little lemon juice or red wine vinegar, then taste—the goal is to lift the roasted flavors and make the whole pan feel brighter, not noticeably sour.

Or keep everything rich and savory and put the contrast alongside it. A cold cucumber salad with vinegar, dill and onion gives you something crisp between bites.

Ways to Serve It

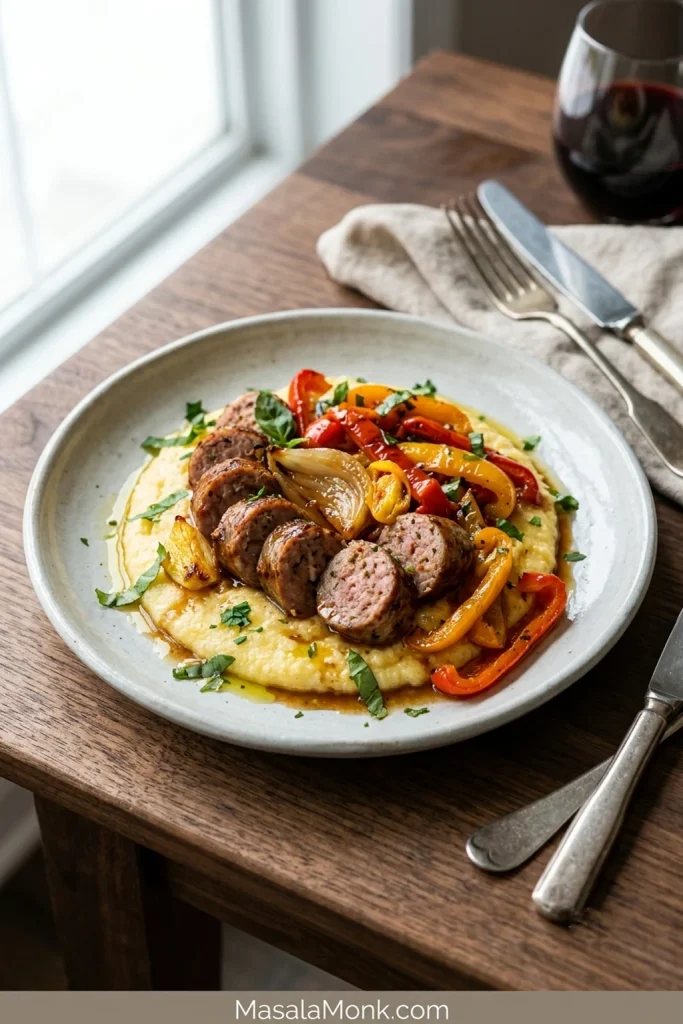
After the sausages have rested, leave them whole or slice them thickly and spoon the peppers and onion over the top. Rice and soft polenta soak up the pan juices beautifully. For a richer plate, put everything over creamy mashed potatoes.

Thick slices of browned Italian sausage with roasted bell peppers and onions served over a creamy pale side on a warm-toned ceramic dinner plate.
Resting the sausage before slicing is especially useful once the meal leaves the sheet pan. The cut surfaces stay juicier, while mashed potatoes or soft polenta can catch the concentrated roasting juices without diluting the peppers and onions.

For sausage-and-pepper hoagies

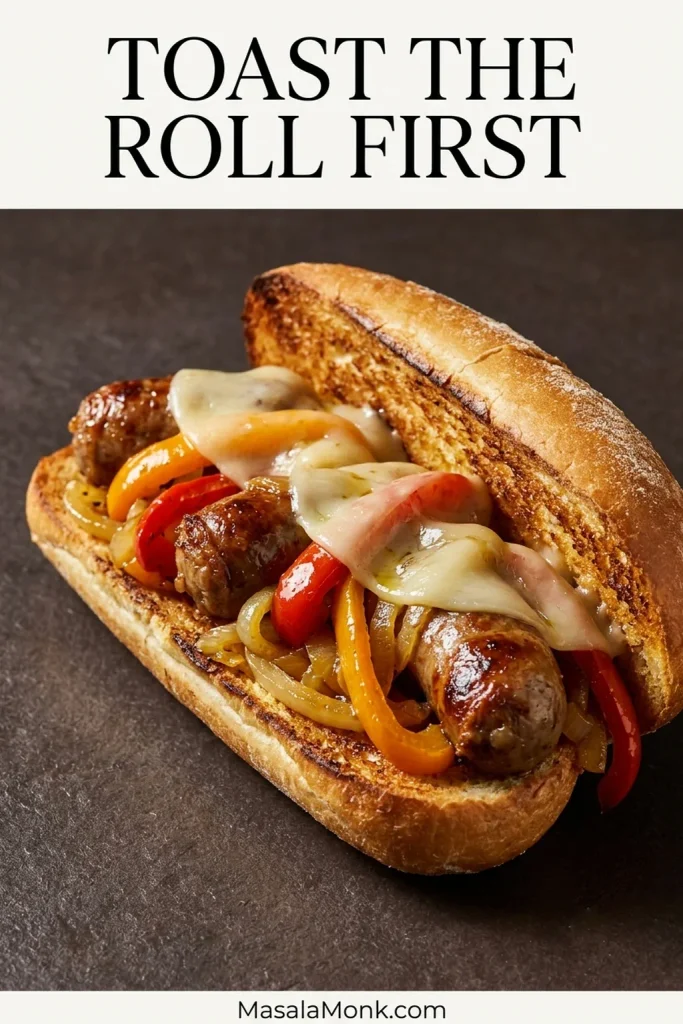
Toast the cut side of the roll well. The peppers are juicy, and a soft untoasted roll can turn soggy quickly. Slice the rested sausage into bite-size pieces, pile on the peppers and onion, and tuck in the provolone while everything is hot enough to soften it around the sausage and peppers.

Toasted hoagie roll filled with sliced Italian sausage, roasted red, orange and yellow peppers, golden onion and softened provolone, with the browned bread interior visible.
The part of the roll worth toasting most thoroughly is the cut face, because that is where the juicy sausage and peppers make contact. Once filled, that crisp inner surface gives the bread more resistance while the hot filling gently softens the provolone.

Marinara is optional; the sausage juices are already doing plenty of work. For homemade rolls, our sourdough bread guide includes homemade hoagie and sub rolls sturdy enough for a generous filling.

When you want tomato sauce

Don’t put the marinara on the roasting pan. Roast first, then spoon the sauce over or underneath the finished sausage and peppers. Our marinara sauce recipe works well here.

Adding potatoes

Potatoes need a head start unless they are cut very small. The simpler option is a second pan: these ranch roasted potatoes cook at the same 425°F / 220°C.

Cooking for a Crowd

For a main course, figure on roughly 4–5 oz / 115–140 g sausage per person—often about one substantial link—with extra for big appetites or loaded hoagies.

Servings Fresh Sausage Bell Peppers Large Onion Half-Sheet Pans
41¼ lb / 20 oz / about 570 g311
82½ lb / 40 oz / about 1.13 kg622
123¾ lb / 60 oz / about 1.7 kg933, usually in batches
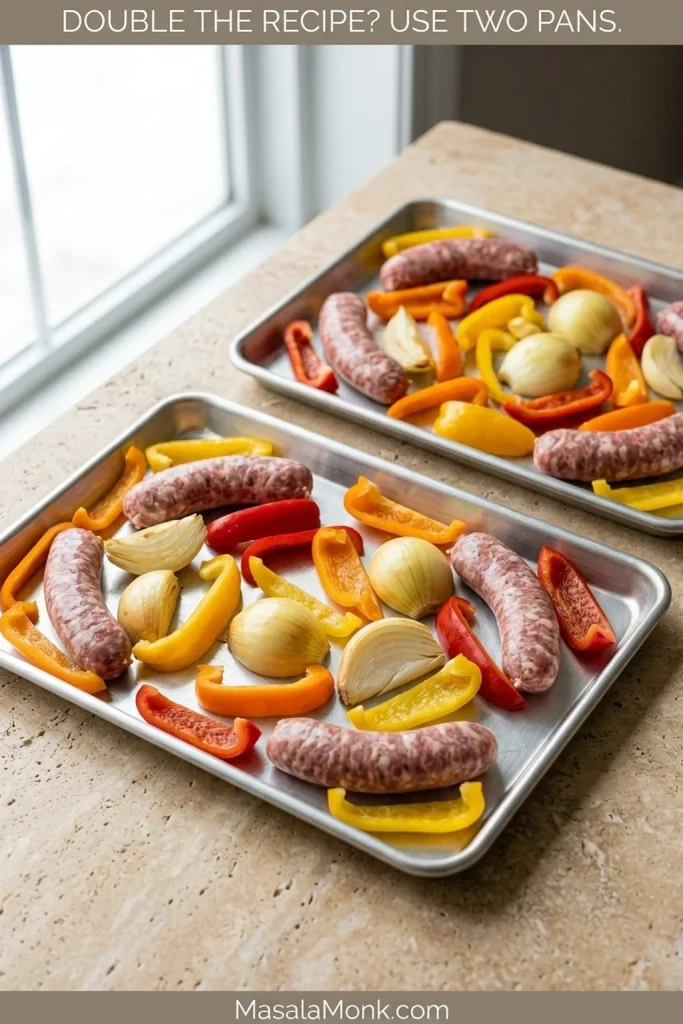
Two aluminum sheet pans arranged together, each holding raw Italian sausage links, bell pepper strips and yellow onion with visible space between the ingredients.
More pans solve crowding only if the oven still has room to circulate heat around them. When cooking on two racks, compare the browning halfway through and swap pan positions if the upper and lower levels of your oven behave differently.

Two pans can cook together if your oven gives them enough room for air to move. Swap their positions halfway when one rack browns faster. For a larger crowd, batches are usually easier than filling every rack at once.

Make Ahead, Store and Reheat

Slice the peppers and onion up to a day ahead and refrigerate them covered, with the raw sausage stored separately. That leaves little more than seasoning and arranging the pan when dinner comes around.

Fresh uncooked sausage generally keeps for 1–2 days in the refrigerator. Once cooked, refrigerate the sausage-and-pepper leftovers for 3–4 days.

Refrigerate cooked leftovers within 2 hours, or within 1 hour when the surrounding temperature is above 90°F / 32°C. Reheat leftovers to 165°F / 74°C. The USDA sausage and food-safety guidance covers safe storage and handling in more detail.

For freezing, cool the sausage and vegetables, pack them airtight, and use them within about 1–2 months for best quality, following USDA freezer guidance for sausage. Thaw overnight in the refrigerator when you can. The peppers will be softer after freezing, which matters much less once the leftovers are headed into a sandwich, skillet or bowl.
Choose the Reheating Method by the Texture You Want

  • Best texture: use a hot skillet and let the sausage and vegetable edges pick up some color again.
  • Hands-off: spread the leftovers in a single layer on a pan and reheat at 375°F / 190°C until hot through, roughly 8–12 minutes for a modest single-layer portion. Check that the food reaches 165°F / 74°C.
  • Fastest: microwave until thoroughly hot; the vegetables will be softer.

The next day, the peppers are softer and the sausage, onion and seasoning have settled together. Tuck them into a toasted roll, spoon them over rice, or go in a saucier direction with our sausage pasta recipe.

Breakfast may be even better. Crisp the chopped leftovers in a skillet, let the bottom pick up some color, then add eggs, potatoes or cheese. Our breakfast burrito recipe gives you a useful framework if everything is headed into a tortilla.

Sliced leftover sausage, roasted peppers and onions reheating in a skillet with a fried egg while a spatula lifts a browned piece of sausage and pepper.
Reheating method changes the texture you get back. A microwave is quicker, whereas a hot skillet lets leftover sausage and peppers sit against metal long enough to rebuild some browned edges before you turn them.

Something Went Wrong? Here’s What to Do

Most problems are visible right on the pan. Save dinner first; adjust the setup next time.

If the Sheet Pan Turns Watery

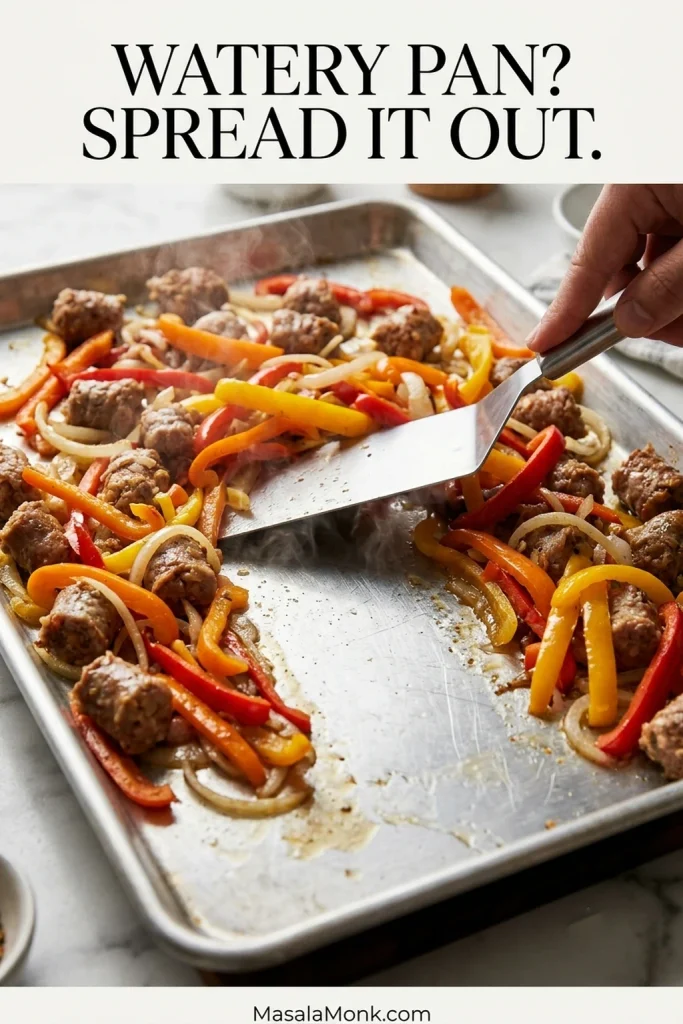
If the peppers and onions have already released enough liquid to make the pan watery, create more exposed metal first. That gives the moisture somewhere to evaporate before you decide whether the finished pan still needs a brief broil.
A stainless spatula pushes wet peppers and onions apart on a crowded sausage sheet pan, opening a wide strip of bare aluminum through the center.
A watery sheet pan is easier to fix in stages than all at once. First create bare-metal space; then, once the sausage is safely cooked, spoon off any remaining thin liquid before using a brief broil for extra color.

Match the Fix to What You See

What You See Do This Now Next Time
Watery peppers and onionsSpread them out. Once the sausage is safely cooked, spoon off excess thin liquid and broil briefly for more color.Dry wet vegetables and use the full-size pan.
Vegetables are tender but paleBroil briefly once the sausage is safely cooked.Use bare metal and leave more exposed pan between the vegetables.
Sausage is cooked but paleBroil for 1–3 minutes on a broiler-safe setup.Let the links make good contact with the pan and turn them halfway.
Vegetables are ready before the sausageMove them to a plate and let the sausage finish to the correct temperature.Cut the vegetables thicker when using very large links.
Onion edges are burningRemove the scorched pieces while the rest finishes.Cut the onion into thicker wedges or half-moons.
Precooked sausage is dryServe it with the juicy peppers and onions or warm marinara.Add fully cooked sausage only for the final 10–15 minutes.
The pan is very greasySpoon off excess rendered fat.Use a little less olive oil with especially fatty sausage.
The dish tastes too saltyServe it with an unsalted starch or extra unsalted vegetables to spread the seasoning across more food. A little lemon or vinegar can balance the richness, but it will not remove the salt.Start with less added salt on the vegetables.
A double batch is soggyDivide it across another pan and finish in a thinner layer.Use two pans from the beginning.

Don’t Leave the Pan Juices Behind

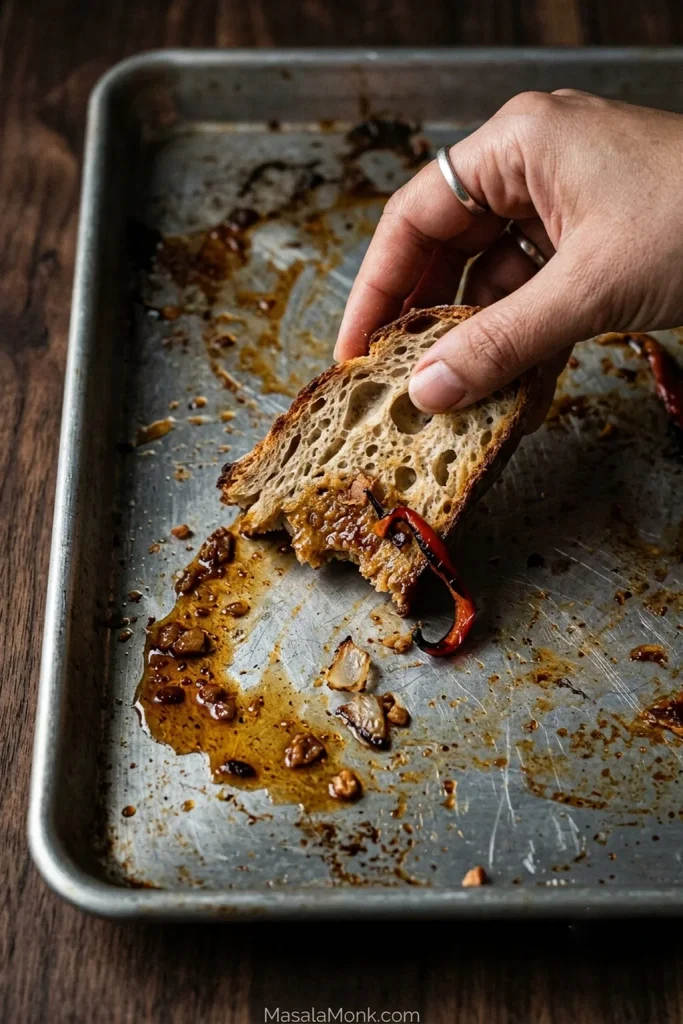
Give the links 3–5 minutes to rest, then slice them if you like. Spoon the hot peppers and onions over the top, scatter on parsley if you have it, add a squeeze of lemon if it tastes right, and bring everything to the table. The browned bits and savory juices left behind are worth a piece of bread.

Torn crusty bread being dragged through browned fond and concentrated juices on a nearly empty aluminum sheet pan with a few roasted pepper and onion pieces remaining.
What remains on the pan is a final clue to how the roast behaved. Concentrated fond and glossy savory juices are worth collecting with crusty bread; a broad puddle of thin liquid would instead suggest that too much moisture survived the cook.
Posted on — Leave a comment

Baked Cod Recipe: Easy, Flaky Oven Cod with Lemon Garlic Butter

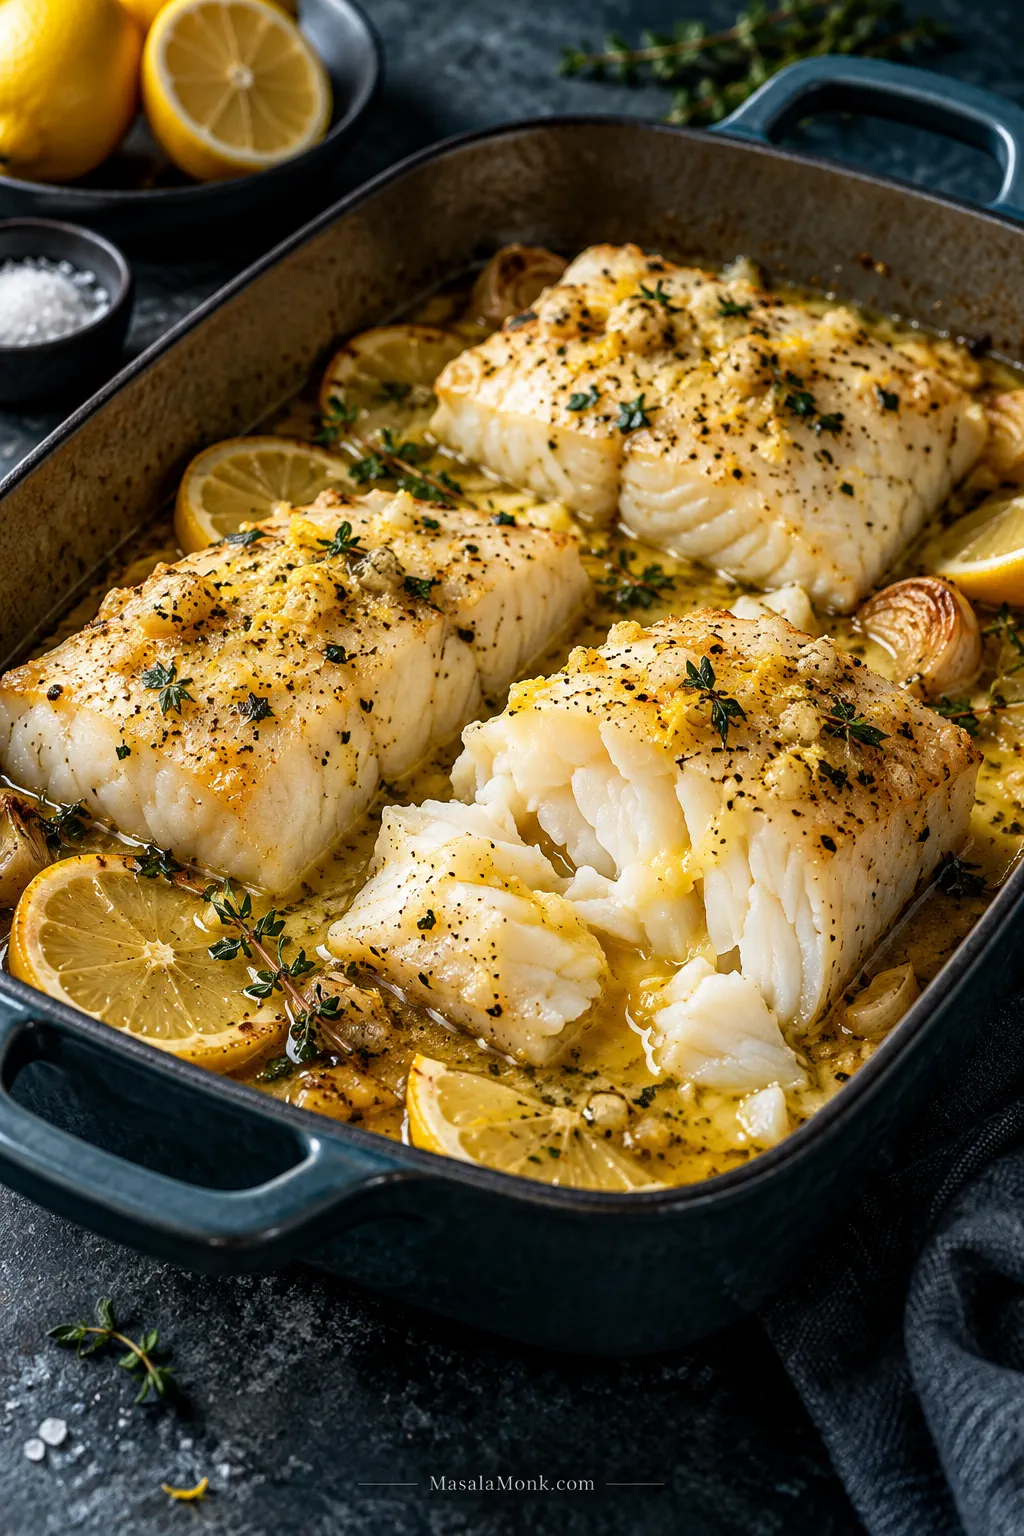
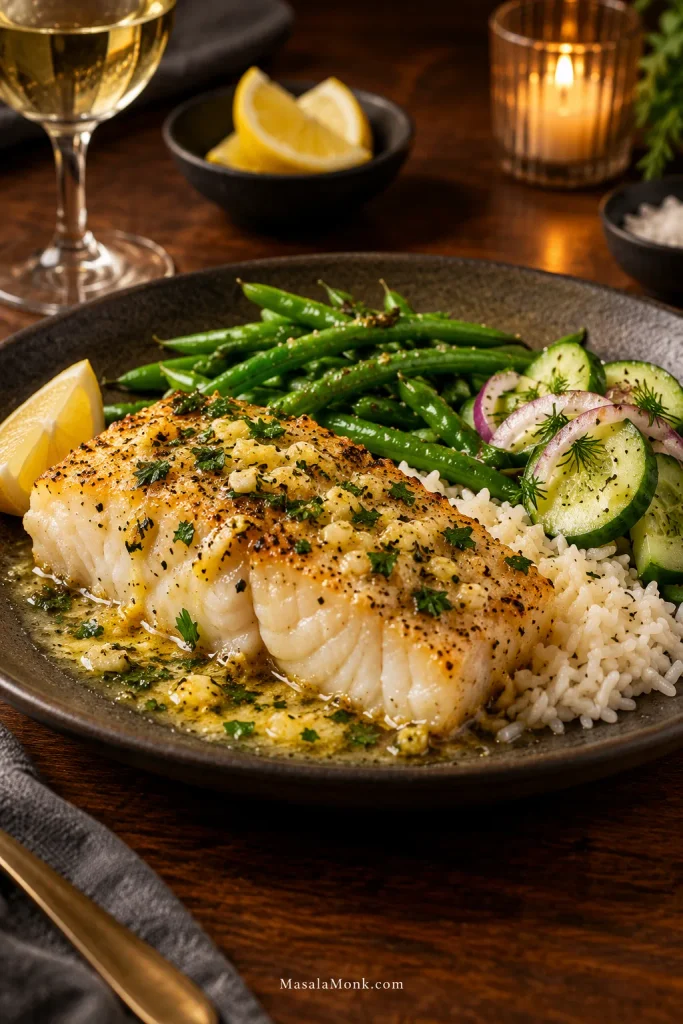
Baked cod portions in a dark roasting dish with moist white flakes, lemon slices, herbs and golden lemon garlic butter pooled around the fish.

Tender white flakes, warm lemon garlic butter and a squeeze of fresh lemon just before you eat. That’s what this baked cod recipe is about. A handful of familiar ingredients, one baking dish and plenty of buttery pan juices to spoon over the fish.

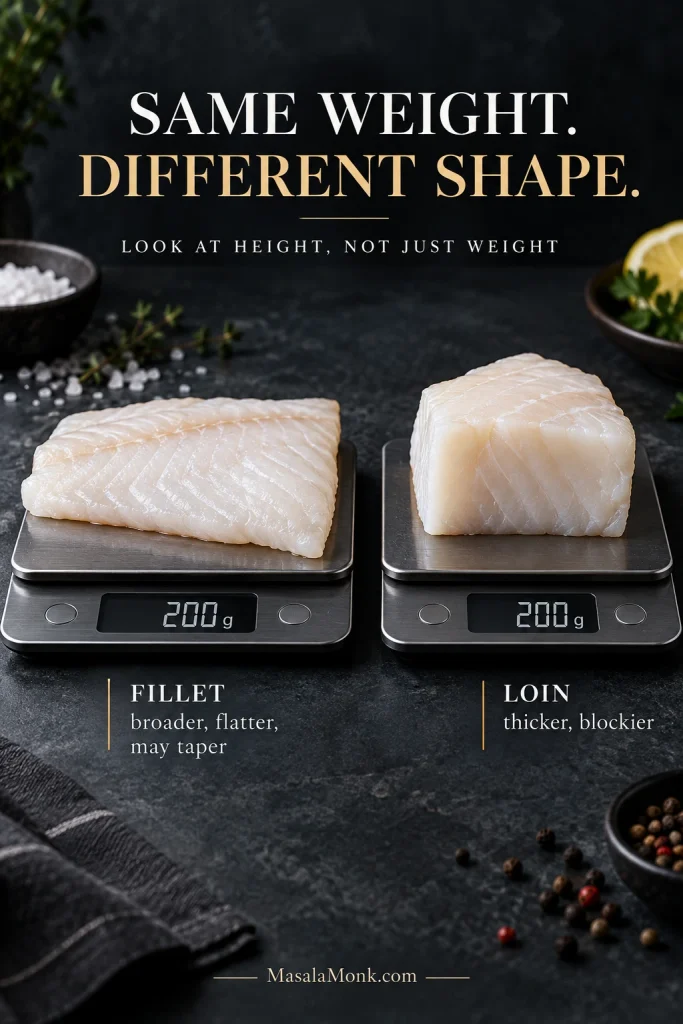
The only tricky part is the cod itself. It doesn’t always come in neat, matching pieces, and two portions of the same weight can cook quite differently when one is broad and thin and the other is a thick loin. This recipe gives you the lemon-garlic butter; the useful bit is knowing how to read the piece of fish you actually bought.

Cod is mild and lean, with large, tender flakes when it’s cooked well. Pat it dry, season it directly and bake it uncovered at 400°F / 205°C. There’s no breading, flipping or skillet sear to manage. The timer tells you when to start paying attention; the thickest part tells you when dinner is ready.

Lemon Garlic Butter Baked Cod

Choose four portions that are reasonably similar in thickness and a shallow baking dish that holds them comfortably in one layer.

Serves
4

Prep
About 10 minutes

Cook
About 10–20 minutes for most portions

Total
About 20–30 minutes

Oven
400°F / 205°C

Typical Thickness
About ¾–1¼ in / 2–3 cm

Doneness
145°F / 63°C

Equipment: shallow 9×13-inch / 23×33-cm baking dish or similarly sized pan, small bowl, paper towels and an instant-read thermometer.

Ingredients

  • 1½ lb / 680 g skinless cod fillets or loins, divided into 4 portions of about 6 oz / 170 g each
  • 3 tbsp / 42 g unsalted butter, melted
  • 1 tbsp / 15 ml olive oil
  • 3 medium garlic cloves, finely minced or grated
  • 1½ tbsp / 22 ml fresh lemon juice, divided, plus lemon wedges for serving
  • 1 tsp finely grated lemon zest
  • ¾ tsp fine sea salt
  • ½ tsp sweet paprika
  • ¼ tsp freshly ground black pepper
  • 2 tbsp chopped fresh parsley
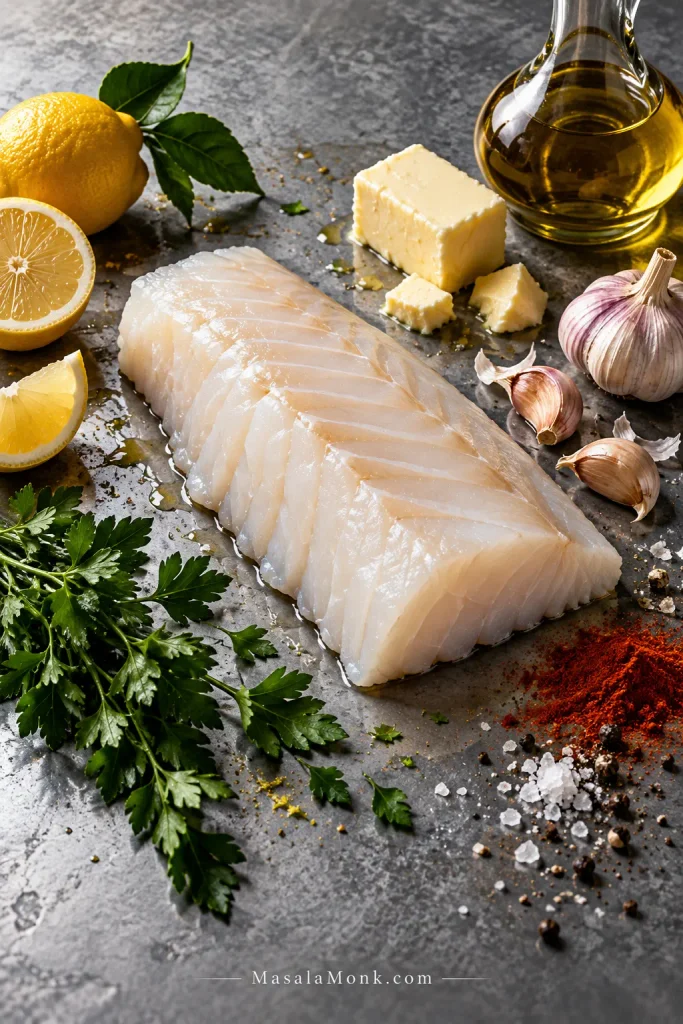
Raw cod fillet arranged with butter, olive oil, lemon, garlic, parsley, paprika, salt and black pepper on a cool grey surface.
Each ingredient has a different job here: zest brings aroma, juice brings acidity, butter carries the garlic, and paprika adds gentle warmth without overwhelming the mild cod.

Check the package before adding salt. Some frozen cod may contain added salt or brine. If yours does, start with less.

How to Make It

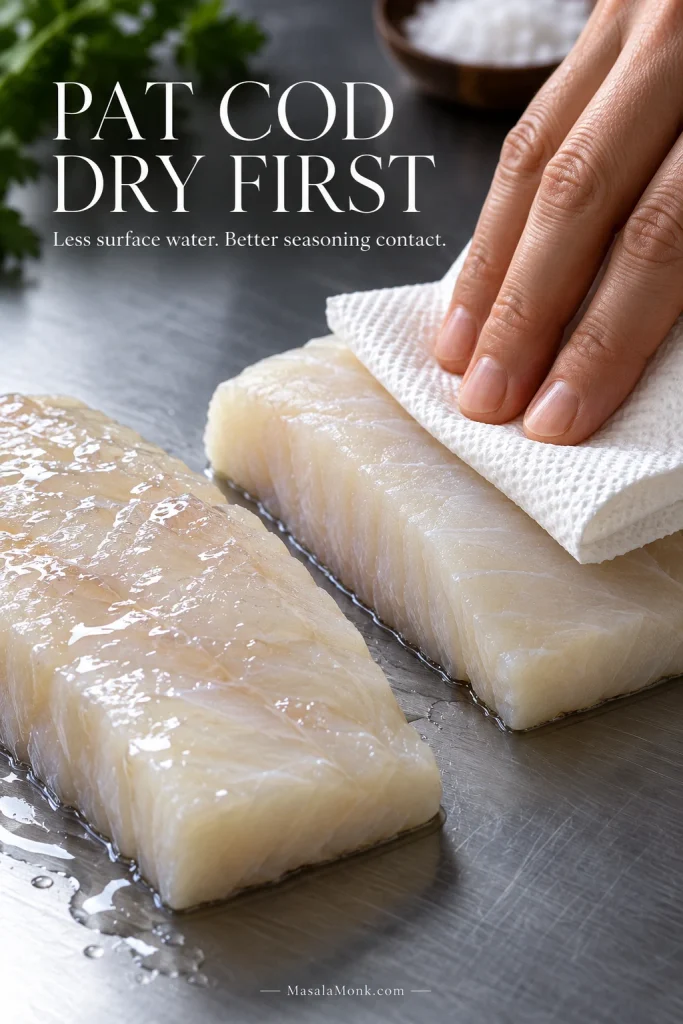
  1. Preheat and dry. Heat the oven to 400°F / 205°C and lightly grease the baking dish. Remove any obvious pin bones, then pat the cod thoroughly dry on every side.
A hand presses paper towel onto a raw cod portion beside a visibly wetter fillet to show how to dry cod before baking.
First, dry until the surface loses its wet shine. That gives the seasoning direct contact with the cod and reduces the amount of stray water entering the baking dish.
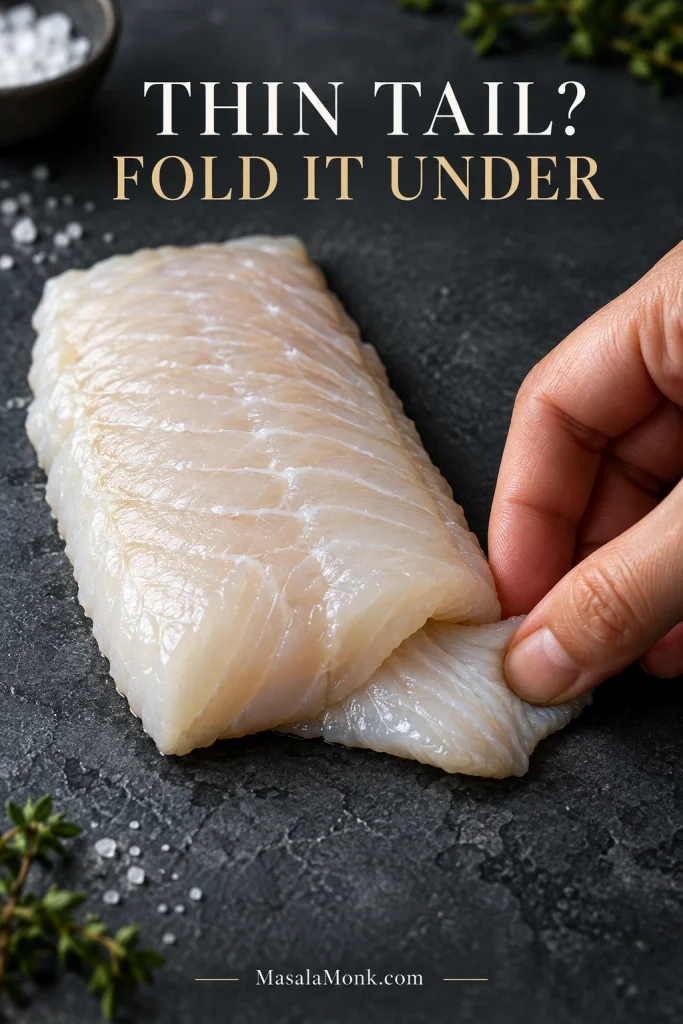
  1. Arrange and season. Set the portions in a single layer with a little room between them. Fold a very thin tail underneath itself so it doesn’t dry out before the thicker part is done. Season the fish directly with salt, paprika and black pepper.
A hand tucks the thin tapered end of a boneless cod fillet underneath to make the piece more even in thickness.
If only the last inch or two becomes dramatically thinner, tuck just that section underneath. The goal is a more even profile, not a doubled-up lump of fish.
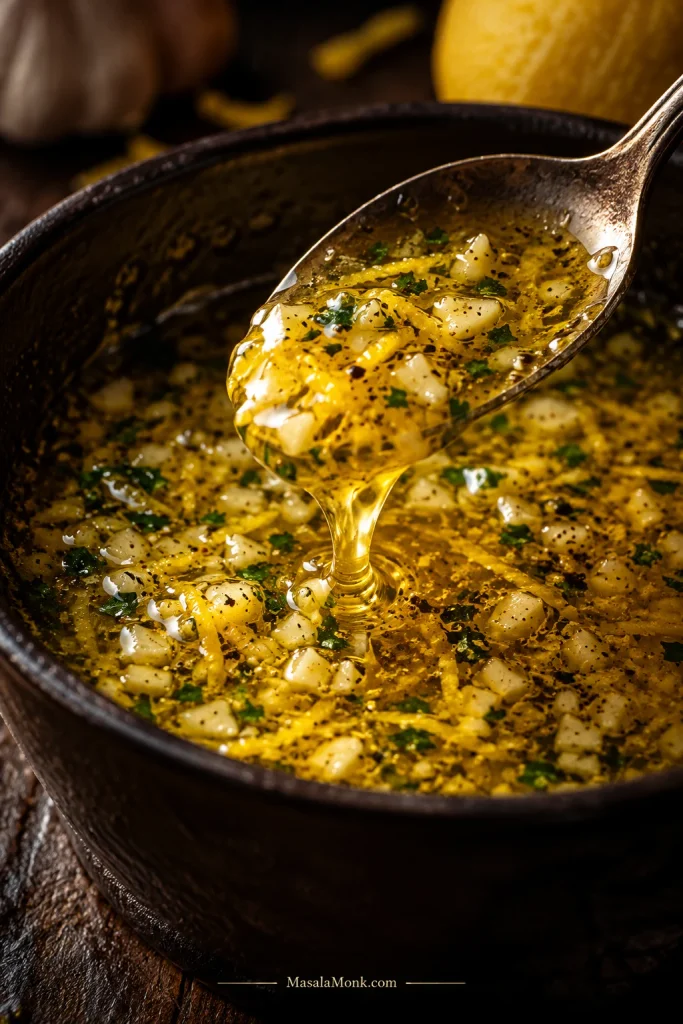
  1. Mix the butter. Stir together the melted butter, olive oil, garlic, lemon zest and 1 tbsp / 15 ml of the lemon juice.
Close-up of melted butter with olive oil, chopped garlic, lemon zest and herbs being lifted with a spoon.
For even flavor, disperse the garlic and lemon zest through the melted butter before spooning it over the fish; otherwise the aromatics tend to collect unevenly between portions.
  1. Spoon it over. Coat each piece with the lemon-garlic butter, letting a little run into the dish. Leave the pan uncovered.

Bake, Check and Finish

  1. Bake and check. Begin checking according to the thickness guide below. Uneven pieces may be ready at different times.
  2. Finish. Take each portion out when the center reaches 145°F / 63°C. Add the remaining ½ tbsp / 7 ml lemon juice and scatter with parsley.

No flipping needed. Cod becomes delicate as it cooks. Leave it alone in the oven, then slide a broad spatula underneath each piece when you’re ready to serve.

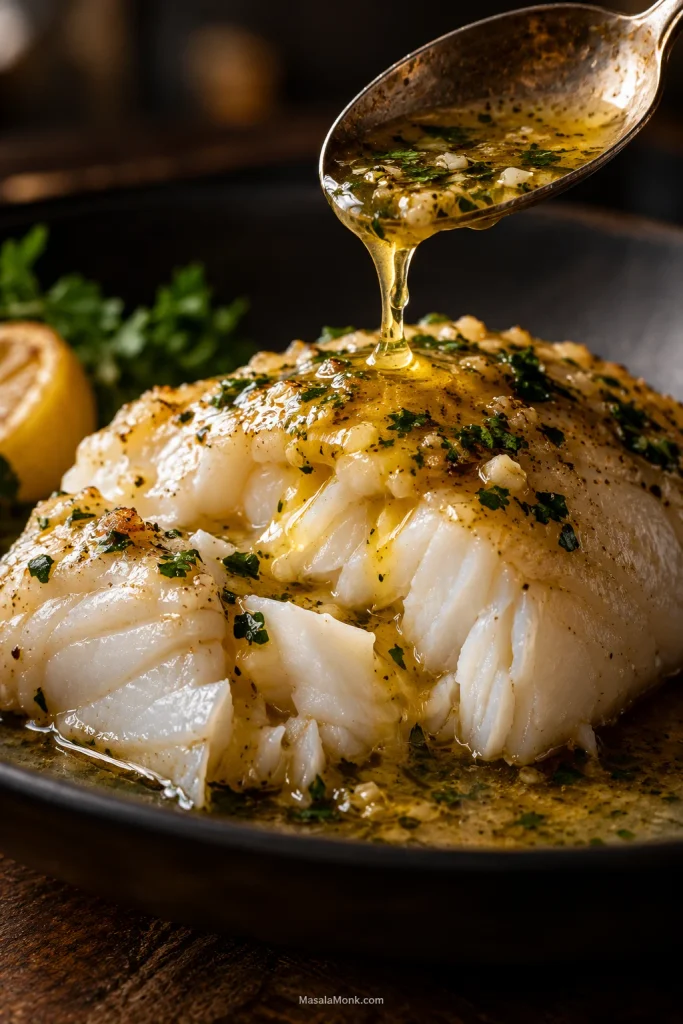
Don’t leave the butter behind. Spoon those warm, garlicky juices over the flakes before the plates reach the table.

A spoon pours golden lemon garlic butter over the open moist flakes of a cooked cod portion.
Warm pan butter slips into the opened flakes instead of sitting only on the surface.

Making dinner now? The recipe above is enough. Keep reading if your cod is unusually thick, still frozen, unevenly shaped or simply isn’t behaving the way you expected.

How Long to Bake Cod at 400°F

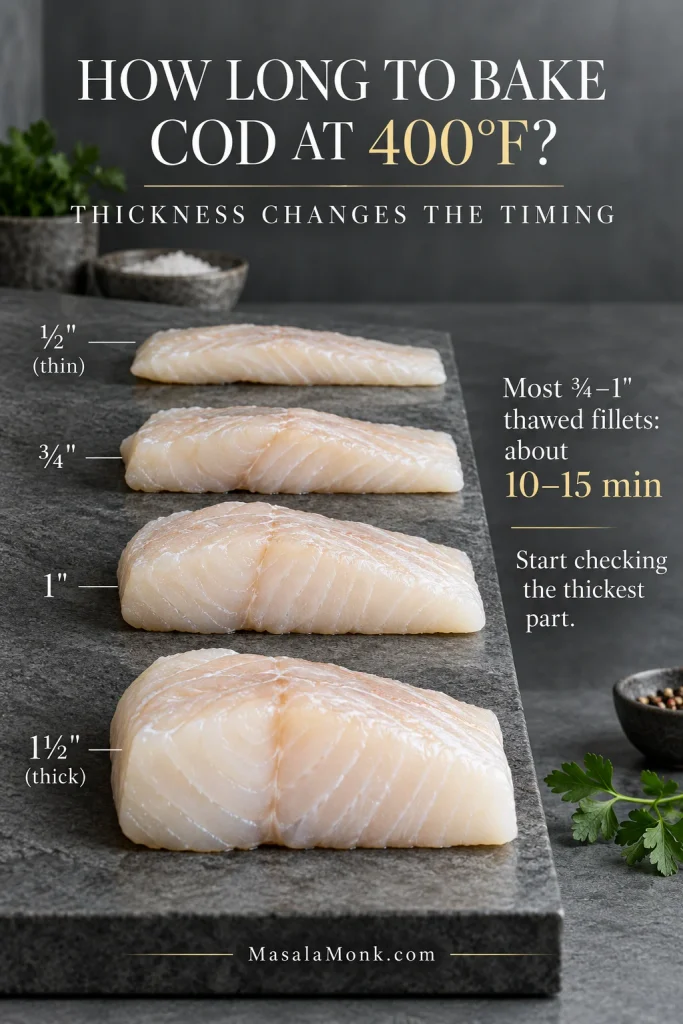
At 400°F / 205°C, most fully thawed cod fillets around ¾–1 inch thick take approximately 10–15 minutes. A thin tail may finish sooner; a substantial loin can need 15–20 minutes or more.

ThicknessTypical pieceStart checkingApproximate bake time
½ in / 1.3 cmThin fillet or tailAbout 7 minAbout 7–10 min
¾ in / 2 cmRegular filletAbout 9 minAbout 9–13 min
1 in / 2.5 cmThick filletAbout 11 minAbout 11–15 min
1¼–1½ in / 3–4 cmThick loinAbout 14 minAbout 15–20+ min

You don’t need to predict the exact finishing minute. Start checking at the first number in the table. If you’re not sure how your piece compares, see how fillet and loin shape change the timing.

Four raw cod portions arranged from thinner to thicker, illustrating how cod thickness affects baking time at 400°F.
At 400°F, the height of the fish is more useful than its weight for deciding when to start checking. Use the thickest part of the fillet as your guide.

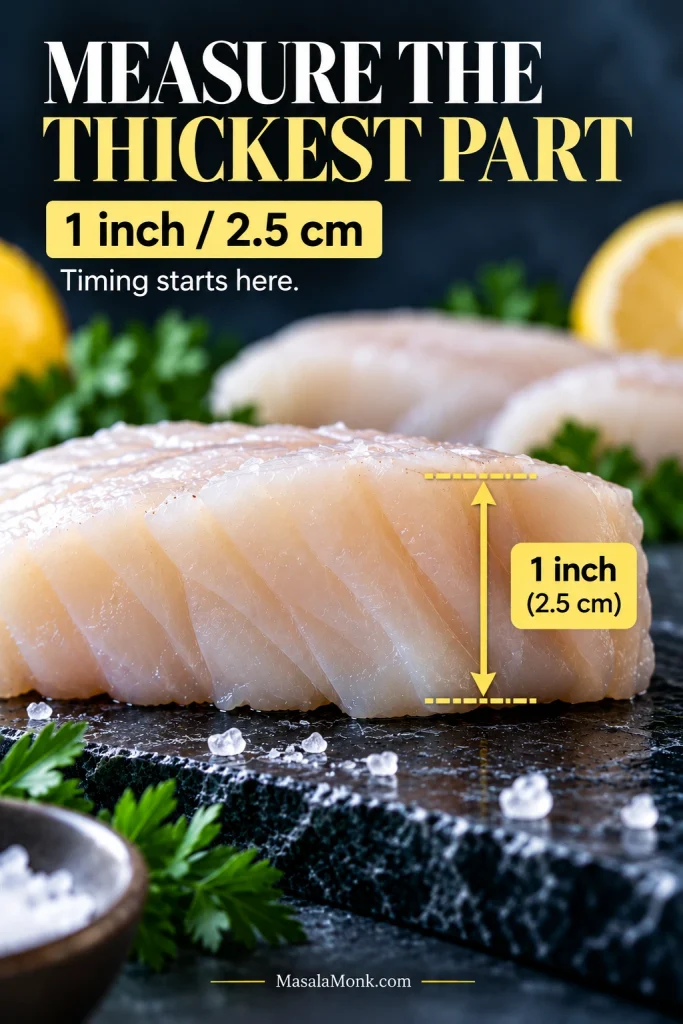
Measure the fish at its thickest point before you compare it with the timing guide.

Side view of a raw cod fillet with a vertical bracket marking its thickest section at about 1 inch or 2.5 centimeters.
Take the thickness vertically through the deepest section of flesh; width, length and the sloping top surface do not tell you how far heat must travel to reach the center.

Cod Fillet vs Loin: Look at the Shape

Two 200-gram raw cod portions on digital scales, comparing a broad flat fillet with a shorter thicker cod loin.
These equal-weight pieces illustrate why cod loin and cod fillet timing can diverge: the blockier loin concentrates the same mass into a deeper center.

That’s why shape matters as much as the label. A loin is usually the thick, blockier center cut. A fillet may be broad and flat or taper sharply toward the tail. At the fish counter, look at height as much as weight. If you’re cooking several pieces together, choosing similar thicknesses makes the timing much easier.

What About 375°F or 425°F?

The timing above assumes 400°F / 205°C, the temperature this version is built around. At 375°F / 190°C the fish cooks more slowly; at 425°F / 220°C, begin checking earlier.

How to Tell When Cod Is Done

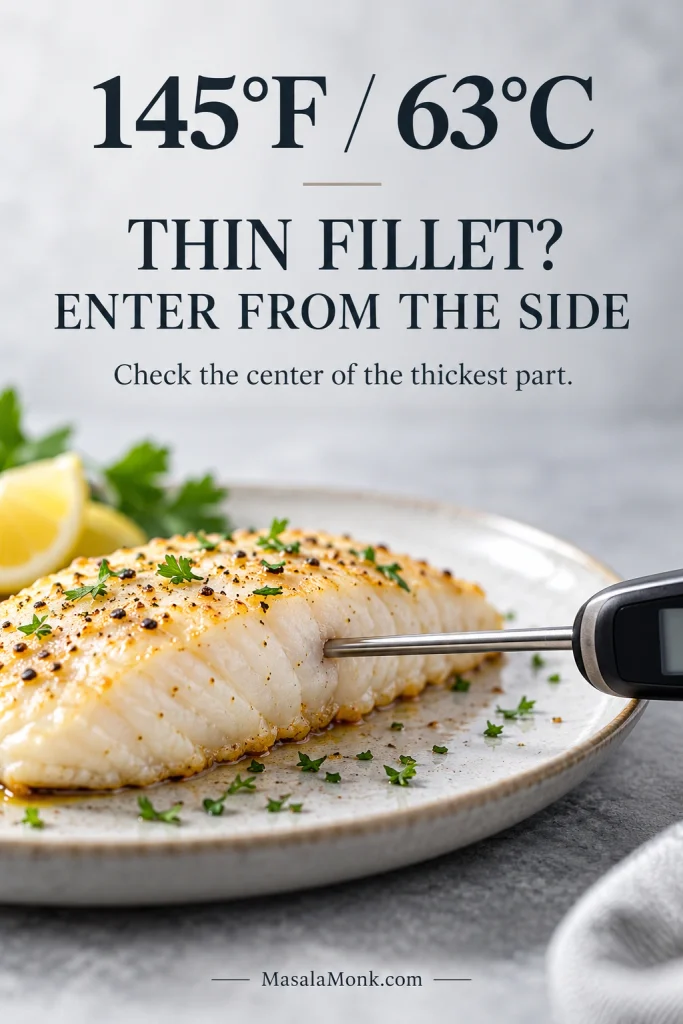
Whatever shape you’re cooking, the center settles the question. For food safety, cook fin fish to 145°F / 63°C in the center, following the USDA safe temperature guidance.

Instant-read thermometer inserted horizontally from the side of baked cod toward the center of its thickest part, showing 145°F.
Keep the thermometer tip inside the center of the thickest flesh and clear of the hot baking dish; touching the pan can give a misleadingly high reading.

For a thin fillet, insert the thermometer from the side. That makes it easier to place the tip in the middle instead of passing straight through.

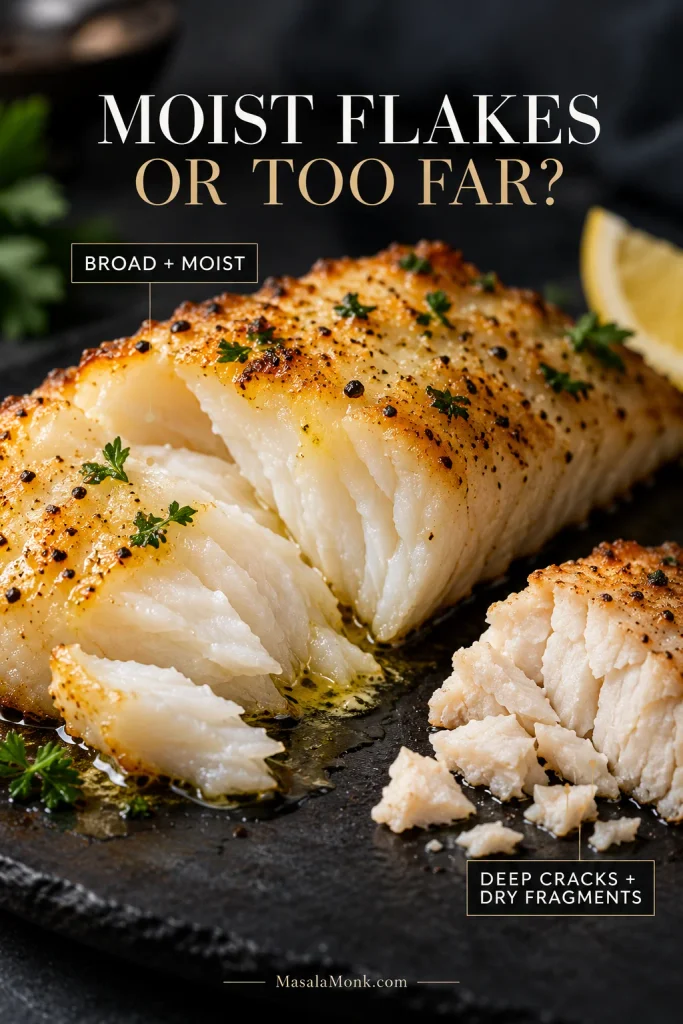
When it’s ready, the flesh should look opaque and open into broad, moist flakes with gentle pressure from a fork. Deep cracks, a chalky surface or lots of small dry fragments mean it has gone too far.

Side-by-side comparison of moist baked cod with broad glossy flakes and overcooked cod with deep cracks and dry broken pieces.
By contrast, doneness should be judged from the center, not the driest edge. Thin areas can look overcooked even while the thickest part still needs another moment.

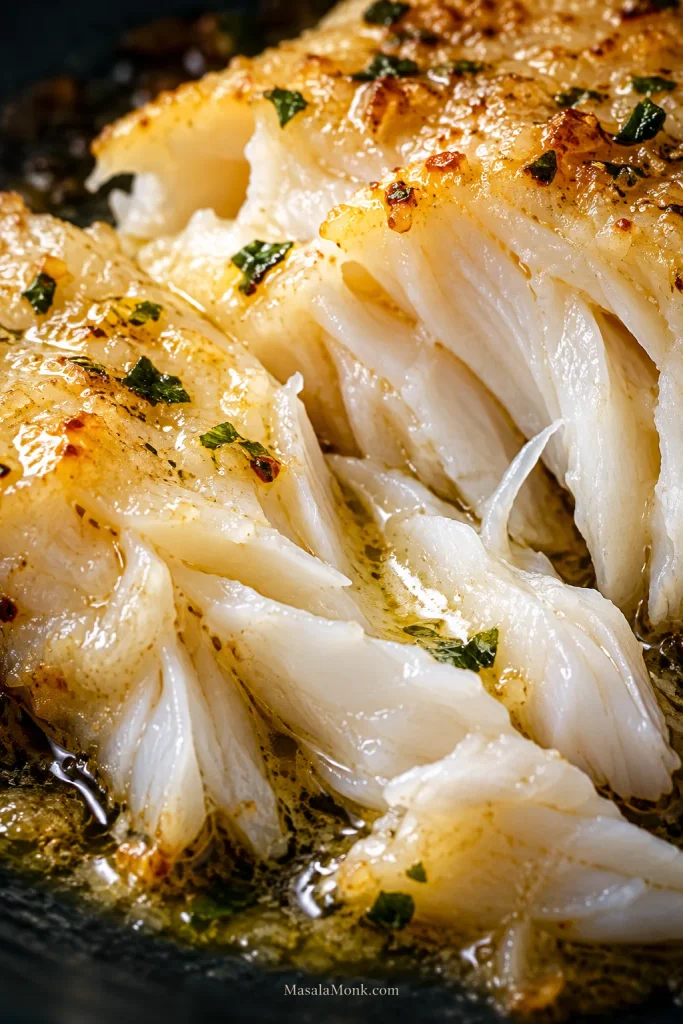
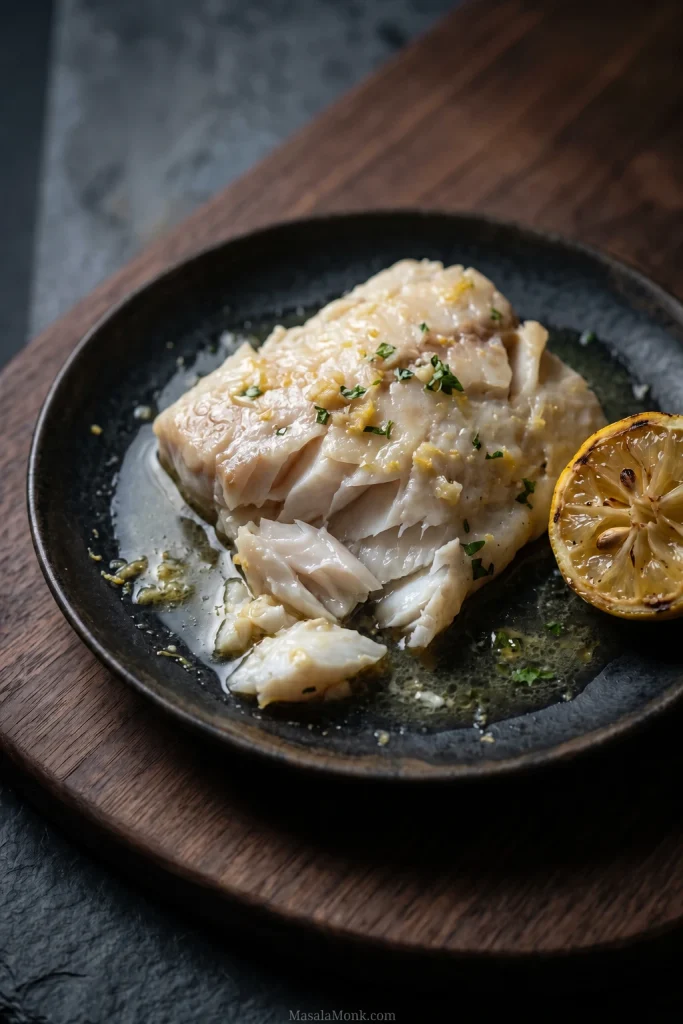
As those flakes separate, spoon a little of the hot garlic butter into the openings. It slips between the layers while the fish is still warm instead of simply sitting on top.

Extreme close-up of large pearly baked cod flakes with golden butter visible between the moist layers.

↑ Back to Recipe  ·  ↑ Back to Top  ·  Troubleshoot Dry or Watery Cod →

If Your Cod Came From the Freezer

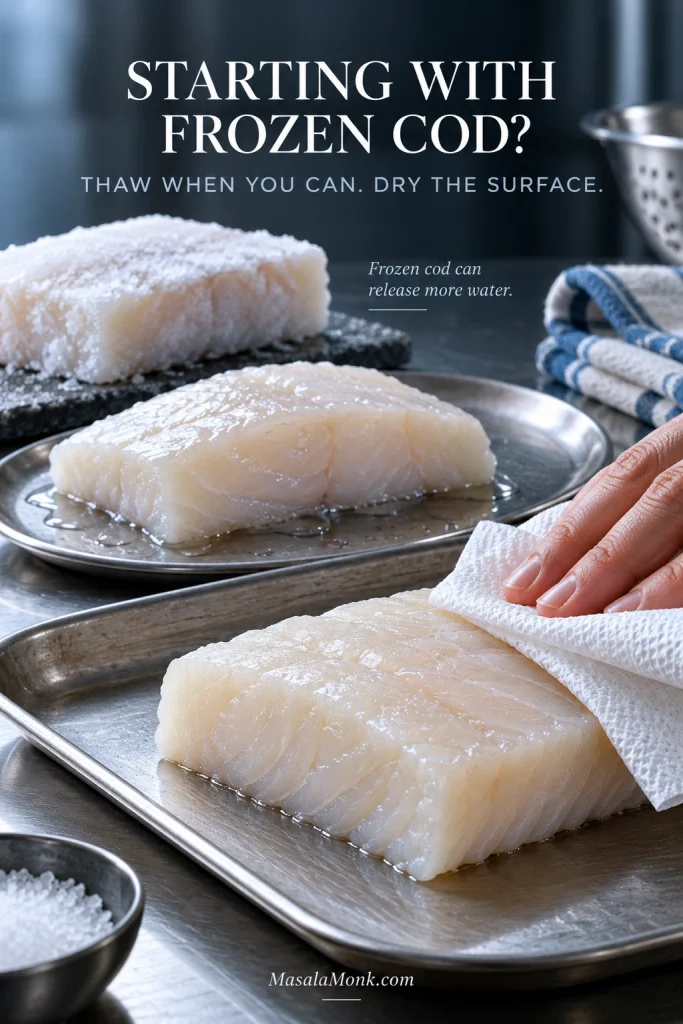
Frozen cod works here too. The complication is water. A puddle in the baking dish doesn’t automatically mean you overcooked the fish; sometimes that water arrived with the cod.

Thaw first when you can. It makes the timing easier to judge and lets you dry the surface properly before the butter goes on. If thawing is not practical tonight, jump to the straight-from-frozen guidance.

Frozen cod with surface frost, thawed cod with visible moisture, and a hand drying a thawed portion with paper towel.
When thawing frozen cod, moisture often collects underneath the fillet and between natural folds. Check those hidden areas before seasoning, not just the exposed top surface.

Thawing Cod Safely

The FDA’s seafood-handling guidance recommends thawing frozen seafood in the refrigerator. When you need it faster, use cold water and a leakproof bag according to the product’s handling directions, then cook the fish promptly. Counter thawing isn’t a safe shortcut.

Vacuum-packed cod needs a label check. Follow the package directions carefully. Some reduced-oxygen packaged fish must be removed from the original packaging before thawing.

Can You Bake Cod Straight From Frozen?

Yes, but frozen cod needs its own timing. Remove loose surface ice, season the fish and follow the package’s cooking directions where provided. The center will take longer to heat and the fish may release more water, so check it with a thermometer rather than adding an arbitrary number of minutes.

Should You Cover Cod When Baking?

Not for this recipe. Leave the dish uncovered so some released moisture can escape. A sealed foil or parchment packet traps steam and gives you softer, steam-cooked fish—a different style of cod with different timing.

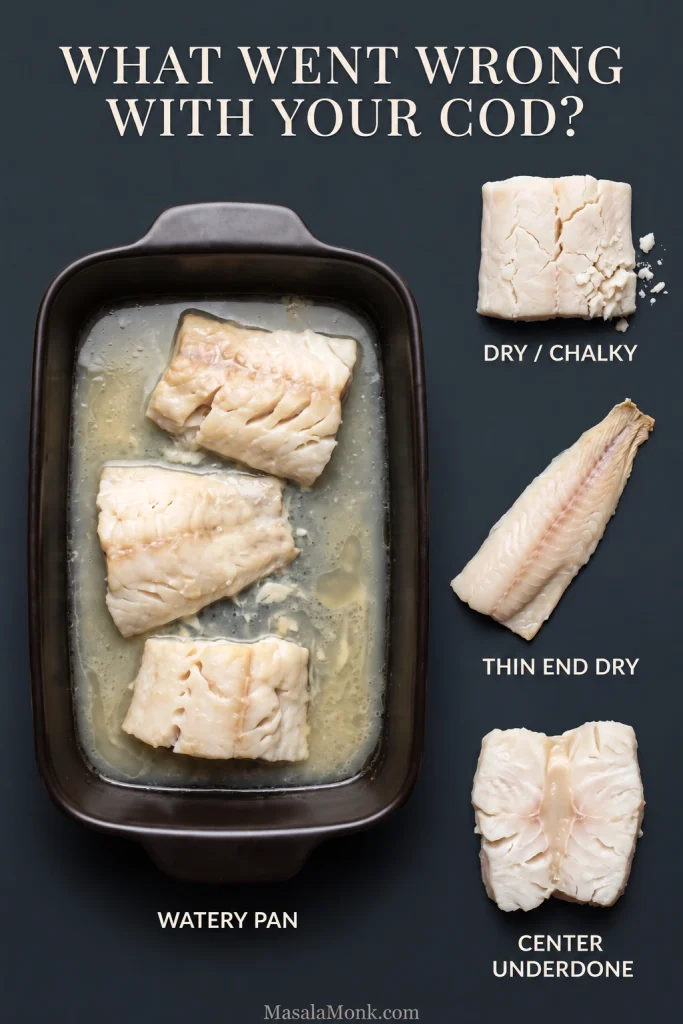
If the Cod Didn’t Come Out Right

Don’t change five things at once. Find the symptom that looks most like yours and start there.

Baked cod troubleshooting graphic showing excessive watery liquid, dry cracked cod, a fillet with an overcooked thin end, and cod with a slightly underdone center.
One clue can prevent the wrong fix: a watery pan does not necessarily mean undercooked cod, and dry fish can still sit in excess liquid if it released a lot of moisture.
What happened?Likely reasonWhat to do
Dry or rubberyIt cooked too long for its thickness.You can’t put moisture back into overcooked cod. Add fresh lemon and begin checking earlier next time.
Watery panThe cod was wet, crowded or released a lot of water.Dry it thoroughly, give the portions some room and bake uncovered.
Mushy or mealyExcess moisture or damage from freezing and thawing.Check how it was thawed. If the same product repeatedly disappoints, try another source.
BlandThe fish wasn’t seasoned directly.Season the cod itself before the lemon-garlic mixture goes on.
Thin end dryThe tail finished before the thicker part.Fold it underneath before baking, or remove smaller pieces as soon as they’re done.
Outside cooked, center translucentA substantial or partly frozen center needs longer.Return it to the oven briefly, then check the center again.
Cooking took much longerA thick loin, cold center or oven variation.Keep cooking in short intervals and judge the center, not the clock.
Fish broke apartCooked cod is delicate and was handled too much.Lift it from underneath with a broad spatula. Already have loose flakes? Turn them into fish tacos.

↑ Back to Recipe  ·  ↑ Back to Top  ·  Got it sorted? Finish the plate →

What to Serve With Baked Cod

Hot rice may be the easiest answer. Start it first; the cod cooks quickly, and the rice gives all that lemon-garlic butter somewhere to go. If you want the timing sorted before the fish goes into the oven, use our guide to cooking rice.

Plated baked cod dinner with rice, green beans, cucumber salad, lemon and golden pan butter on a warm dark table.
For a balanced cod dinner, pair one element that absorbs the lemon butter with another that adds crunch, acidity or coolness; that keeps the plate from becoming uniformly soft and rich.

For something green, green beans almondine add toasted-almond crunch beside the soft fish. A crisp cucumber salad goes the other way: cool and sharp against the warm cod.

Potatoes work beautifully too. Our Greek lemon potatoes need a much longer head start, so get them well underway before the cod goes into the oven.

Small Changes That Work

Want it brighter? Swap the parsley for fresh dill and lean on the lemon wedges at the table. Want something warmer and smokier? Use smoked paprika instead of sweet. Two garlic cloves make the flavor gentler; four bring the garlic forward.

The zest and juice do different jobs. Lemon zest brings citrus aroma without adding much liquid; the final squeeze gives the hot fish its sharper citrus edge.

For a dairy-free version, replace the 3 tbsp butter with 3 tbsp additional olive oil. That version won’t have quite the same richness, but the garlic, paprika, zest and finishing lemon still carry plenty of flavor.

The same seasoning also works with other mild white fish; just reset the timing for the fish you choose. For a crisp, browned topping rather than lemon-garlic butter, our baked haddock recipe is built around that style.

Storing and Using Leftover Cod

Refrigerate leftover cod promptly in a shallow, covered container and use it within 3–4 days. When reheating, bring leftovers to 165°F / 74°C, following USDA food-safety guidance.

Because cod is lean, stop once the leftovers are safely heated through; prolonged reheating dries the flakes quickly.

If the fish is already in pieces, don’t try to reconstruct the fillet. Fold the flakes into fish cakes and let that become tomorrow’s dinner.

For tonight, serve the cod while the butter is still warm and loose in the dish. Spoon it over the fish, squeeze fresh lemon across the top and let the tender flakes do the rest.

Single serving of pale baked cod opened into moist flakes on a dark plate with loose lemon garlic butter, herbs and a halved lemon.

↑ Back to Recipe  ·  ↑ Back to Timing Guide  ·  ↑ Back to Top

Posted on — Leave a comment

Barbacoa Recipe: Tender Mexican Beef in the Slow Cooker

Three corn tortillas filled with glossy shredded beef barbacoa, diced white onion, cilantro and lime on a dark stone table.

Pull properly cooked barbacoa apart and the beef should give way before you really have to tug. The strands stay juicy, smoky chile runs through the meat without covering up its beefiness, and the cooking juices cling instead of collecting as thin broth underneath. Put that into a hot corn tortilla with white onion, cilantro, lime and salsa, and very little else is required.

This Mexican beef barbacoa recipe uses well-marbled chuck, chipotle in adobo, warm spices, vinegar and lime in a standard 6–7 quart slow cooker.

Barbacoa refers to a broad family of slow-cooked meat preparations, with very different regional forms across Mexico and beyond. This is a practical slow-cooker adaptation rather than an attempt to represent every regional form.

There are two finish lines. First, the chuck has to become genuinely pull-apart tender. Then the cooking liquid needs its own attention. Remove excess fat, reduce it if it tastes thin, brighten it with fresh lime, and return only enough finished juice to leave the shredded beef glossy and succulent.

The finished beef should taste beefy first, smoky next, with a clean tang from vinegar and lime and quiet warmth from cumin and clove underneath.

If you are cooking now: for 4 lb / 1.8 kg chuck, cook on LOW for 8–10 hours and start checking at 8. Keep the beef in large 3–4 inch / 7.5–10 cm pieces, and use probe tenderness rather than the clock as the final test. Once the chuck gives way easily, shred it separately, finish the cooking liquid, then add the finished juices back a little at a time.

Slow Cooker Beef Barbacoa Recipe

Chuck keeps the main method straightforward: browned beef, a smoky chipotle sauce, relatively little added stock and a long covered cook. The slow cooker traps steam, so the beef and onion will create considerably more liquid as they cook.

Recipe at a Glance

Beef4 lb / 1.8 kg boneless chuck roast
Slow cooker6–7 qt / 5.7–6.6 L
Prep25–30 minutes
LOWStart checking at 8 hours; expect 8–10 hours
HIGHStart checking at 5 hours; expect 5–7 hours
Finish15–25 minutes, depending on whether the cooking liquid needs reducing
Total on LOW9–11 hours, depending on the beef and cooker
Yield20–24 small tacos; 7–9 hearty servings, or 10–12 with substantial sides
Look forBeef pulls easily; finished juices cling to the strands without pooling underneath

Equipment

  • 6–7 qt / 5.7–6.6 L slow cooker or Crock-Pot
  • 12-inch / 30-cm heavy skillet, if searing
  • Blender or food processor
  • Small saucepan for reducing the cooking liquid, if needed
  • Instant-read thermometer or thin probe, optional

Ingredients

  • 4 lb / 1.8 kg well-marbled boneless chuck roast
  • 12 g fine sea salt, about 2 tsp, plus more at the end only if needed
  • 1 tsp / about 2 g freshly ground black pepper
  • 1½–2 tbsp / 22–30 ml neutral high-heat oil, for searing
  • 1 medium white or yellow onion, roughly chopped, about 5–6 oz / 150–180 g
  • 5–6 large garlic cloves, about 20–25 g
  • 3 individual canned chipotle peppers in adobo
  • 1 tbsp / 15 ml adobo sauce from the can
  • ¾ cup / 180 ml low-sodium beef stock
  • 3 tbsp / 45 ml apple cider vinegar
  • 3 tbsp / 45 ml fresh lime juice, divided, plus lime wedges for serving
  • 1 tbsp / about 6 g ground cumin
  • 2 tsp / about 2 g Mexican oregano
  • ¼ tsp / about 0.5 g ground clove
  • 3 bay leaves

For Serving

Before You Start: Chipotles, Clove and Lime

Chipotles: three individual peppers means three peppers, not the whole can. Measure the tablespoon of adobo sauce separately.

Three canned chipotle peppers coated in dark adobo sauce on a metal spoon against a garnet background.
Count the chipotle peppers and measure the adobo separately. That gives you two different controls: the peppers set most of the smoky heat, while the sauce adjusts chile flavor and seasoning without automatically adding another whole pepper.

Clove: ¼ teaspoon should stay in the background. The beef ought to taste like beef and chile first.

Lime: 2 tbsp / 30 ml cooks with the beef. Keep the remaining 1 tbsp / 15 ml fresh for the finished juices.

Method

1. Keep the Chuck in Large Pieces

Pat the chuck dry. Trim away thick, hard slabs of exterior fat, but leave the marbling running through the meat. Cut the roast into 3–4 inch / 7.5–10 cm pieces.

Small stew-size cubes expose far more surface during a long cook and give you finer shreds at the end. Large pieces are more forgiving and produce broader, juicier strands.

Large palm-width pieces of marbled raw beef chuck being cut with a chef’s knife on a stainless work surface.
Keeping chuck in large pieces also gives you a meaningful thick center to test later. That matters because probe tenderness is far more useful when the beef has not already been divided into small, quickly softening cubes.

Season all over with the salt and black pepper.

2. Brown Without Crowding the Pan

Heat a 12-inch / 30-cm heavy skillet over medium-high heat and add enough oil to leave a thin film across the base.

Add only as many beef pieces as will sit comfortably without touching. The pan should sound lively as the beef goes down. Leave each broad surface against the heat until deep brown patches develop and the smell turns noticeably more roasted, then turn.

Watery liquid gathering around pale-gray meat means the pan is crowded. Pull a piece or two out and let the heat recover, then move the browned beef into the slow cooker.

Two skillets of beef chuck, with spaced deeply browned pieces in front and crowded pale pieces steaming in liquid behind.
Deep browning develops when moisture can escape. Crowd the skillet, however, and released liquid turns that sear into steam, costing the barbacoa some of its roasted beef flavor.

Skipping the sear? Put the seasoned beef straight into the slow cooker. Skip the deglazing step too and add the full ¾ cup / 180 ml stock directly to the blender. You lose some browned flavor, but the beef can still become beautifully tender.

3. Deglaze the Pan

Once the last batch is out, lower the heat slightly and pour roughly half of the stock into the skillet. Scrape until the browned fond loosens into the liquid.

Pour the deglazing liquid into the blender and add the remaining stock. Let it cool for a few minutes first if your blender is not rated for hot liquids.

4. Blend the Chipotle Sauce

Add the onion, garlic, chipotle peppers, measured adobo sauce, apple cider vinegar, 2 tbsp / 30 ml lime juice, cumin, Mexican oregano and clove.

Blend until the onion and chiles are broken down and the chipotle sauce looks reasonably smooth. A perfectly strained puree is unnecessary; the goal is simply to distribute the chile, aromatics and spices evenly around the beef.

5. Load the Slow Cooker

Pour the chipotle sauce over and around the beef, add the bay leaves, and turn the pieces once so the sauce reaches their surfaces.

The meat may look surprisingly exposed at first. Leave it alone. The chuck and onion will release plenty of moisture as they cook, and the liquid level will rise without needing to submerge the beef at the start.

Large browned beef chuck pieces sitting partly above red-brown chipotle sauce in a black slow cooker against teal tile.
Those exposed upper surfaces are useful information, not a problem to correct. As the slow cooker traps steam and the beef releases moisture, the liquid level rises on its own. Therefore, topping up too early can make the final juices harder to concentrate.

6. Cook Until the Beef Stops Fighting the Probe

Cook on LOW and begin checking at 8 hours. Some roasts will be ready then; others will still feel firm at nine. Expect 8–10 hours, with variation from one roast and slow cooker to another.

On HIGH, begin checking at 5 hours and expect 5–7 hours. HIGH can work well, although differences in cooker temperature and piece size matter more when the cook moves faster.

Push a fork, skewer or thin probe into one of the thickest pieces. Ready beef gives very little resistance and begins to separate under gentle pressure.

A metal probe entering the thick center of braised beef chuck as moist fibers begin to separate around it.
The probe is testing softened connective tissue, not simply whether the beef is hot. Once the thickest section yields with very little resistance, the chuck is far more likely to shred cleanly without needing force.

Eight hours can feel like a very long time to lift the lid and find beef that still refuses to shred. Moist, firm chuck usually needs more tenderizing time, not harder pulling. Cover it again, give it another 30–45 minutes, and check once more.

When the beef is getting close, the sharp smell of the raw chile mixture should have mellowed into something deeper and more beef-forward. The probe still decides the finish, but that change in aroma is a good sign that the long cook is doing its work.

Still unsure about doneness? See how to read the beef from tight to pull-apart →

7. Pull the Beef Gently

Transfer the tender chuck to a wide tray or bowl and discard the bay leaves.

Once the meat is cool enough to handle safely, pull it into irregular strands with two forks or clean hands. Leave a few succulent small chunks among the shreds and discard any large pieces of hard fat or connective tissue that stayed firm.

A hand mixer can take very soft meat from chunky to paste surprisingly quickly. Forks or fingers give you far more control.

Two forks pulling tender beef chuck into broad irregular strands and small juicy chunks on a metal tray.
Broader strands survive the final toss with the finished juices better than finely shredded beef. Keeping some structure now helps the barbacoa stay dimensional instead of collapsing into a soft, uniform mass later.

8. Finish the Cooking Liquid

Remove excess fat first, then taste the cooking liquid. If it tastes thin or watery, reduce it; if it is already concentrated, leave the volume alone. Add the reserved lime, check the seasoning, then return only enough finished juice to coat the shredded beef.

When the meat comes out, the cooking liquid may look thinner and much fattier than the chipotle sauce you started with. That does not mean anything has gone wrong. The roast has released water and fat during the long cook. Now you decide what is worth putting back.

Let a noticeable layer of rendered beef fat separate, then skim it with a spoon or use a fat separator. Do this before reducing the liquid; otherwise, you concentrate the grease along with the good flavors.

A spoon skimming a golden layer of rendered beef fat from darker red-brown barbacoa cooking liquid in a stainless pot.
Look for the lighter, translucent amber layer sitting above the darker cooking liquid. That upper layer is the rendered fat to remove; the deeper red-brown liquid carries the concentrated beef, chile and spice flavor worth keeping.
Reduce, Brighten and Return the Juices

Taste what remains. When it already tastes concentrated, leave the volume alone. If it tastes like good but thin broth, transfer it to a saucepan and boil until the flavor deepens and the liquid lightly coats a spoon. You are not trying to make gravy.

Stir in the reserved 1 tbsp / 15 ml fresh lime juice, taste again, and adjust the salt only after the reduction is finished. Salt becomes more concentrated as water evaporates.

Ladle the finished juices over the shredded beef a little at a time, tossing gently between additions. Stop when the strands are glossy and juicy with no puddle underneath.

Close-up of broad shredded beef barbacoa coated with glossy juices on a dark green surface with no liquid pooling underneath.
More liquid is not automatically more succulent. The useful stopping point is when the juices catch the light on the beef itself while the plate or tray underneath remains mostly free of loose broth.

If the strands stay broad, glossy and moist at this point, you are done fussing with them.

Taste a piece before any tortilla, salsa or garnish gets involved. The beef should feel succulent rather than greasy, with smoke up front, warm spice underneath and enough lime to keep the next bite appealing instead of heavy.

Serve once the balance tastes right. If the tortillas or toppings still need a few minutes, leave the beef sitting in those finished juices until you’re ready to eat.

Need a fix? Jump to tough, dry, watery or greasy barbacoa →   Ready to eat? Build the first taco →

Scaling the Batch

Scale the seasonings and aromatics roughly with the amount of beef. Be more cautious with the stock. Slow-cooker liquid does not scale neatly in a straight line because cooker shape, headspace and moisture released by the meat all change the result.

The chipotle sauce should reach around the beef without needing to submerge it. A larger batch also needs room below the lid; if doubling crowds the cooker, split the recipe between two rather than simply doubling everything in the same pot.

Two slow cookers holding different amounts of large beef chuck pieces partly surrounded by red-brown sauce.
For a larger batch, cooker capacity matters as much as ingredient multiplication. Leave enough headroom for circulation and released moisture; if the beef crowds the vessel badly, splitting the batch is often better than adding more liquid to make everything fit.

Feeding more people? See how much cooked barbacoa to plan for →

Need More Help With the Barbacoa?

At this point, the beef is glossy, balanced and ready for tortillas. The sections below cover the questions that tend to come next. Choose another cut, fix a problem, adapt the method, or plan how to serve, store and reheat the beef.

What Meat Is Best for Barbacoa?

For this slow-cooker version, chuck roast is the best all-around choice. Choose beef cheek when you specifically want a softer, stickier and more gelatinous texture.

Well-marbled chuck carries plenty of beef flavor, enough collagen for a long cook and enough internal fat to stay succulent. It is also easy to buy in a predictable quantity.

Beef cheek, or cachete, is different. Tender cheeks can feel stickier, softer and more gelatinous than chuck because they contain so much connective tissue. For someone expecting broad shredded-beef fibers, that texture can be surprising. To someone who knows barbacoa as cachete, it may be exactly the point.

Broad strands of cooked beef chuck beside softer, chunkier beef cheek with a glossy gelatinous surface.
A sticky or gelatinous surface can be completely normal on properly cooked beef cheek. Much of that texture comes from collagen turning to gelatin, so do not mistake it for greasy or failed chuck barbacoa.

Untrimmed cheeks can also lose a surprising amount of package weight to hard fat, glands and tough exterior material. Trim what clearly will not become pleasant to eat, but leave the softer connective seams that can melt during the cook.

Brisket and Other Alternatives

Buying brisket specifically for this? Choose a well-marbled brisket point rather than a lean flat. Boneless short ribs also cook beautifully, although they are an expensive way to fill a taco.

CutTextureHow it fits here
Chuck roastBeefy, juicy, pull-apartBest everyday choice
Beef cheek / cacheteCollagen-rich, sticky, gelatinousExcellent if you want that cachete texture
Brisket pointWell-marbled and shreddableGood alternative
Brisket flatLeanerHigher drying risk
Boneless short ribWell-marbled and tenderExcellent but expensive
Round / very lean rumpLean, less forgivingNot the first choice for this long cook
Tongue / head meatDistinct texture and preparationImportant to some traditions, but not a direct chuck substitution

In the cooker, the package label matters less than what the meat feels like when you test it.

Read the Beef: From Tight to Pull-Apart

The clock gets you into the right part of the cook. Resistance tells you whether dinner is actually ready.

Tight: the probe meets obvious resistance and the beef still wants to slice cleanly. It may look completely cooked through, yet still be far too firm to shred.

Almost there: the outer layers begin to flake while the center still feels firm. This is the point where a long-cooked roast can look frustratingly close. Moist chuck in this state usually needs more time.

Ready: a thin probe glides through with very little pressure and gentle fork movement opens the meat into broad, moist fibers. Pull it from the cooker once it reaches this stage.

Do not chase the thermometer. As a secondary reference, collagen-rich chuck often becomes shreddable somewhere around 195–205°F / 91–96°C. That is a tenderness range, not a minimum safe temperature for beef. The number tells you the meat is in the right neighborhood; the probe tells you whether the connective tissue has softened enough.

Slow Cooker Barbacoa: LOW or HIGH?

LOW: 8–10 hours, checking from 8. HIGH: 5–7 hours, checking from 5. LOW gives large pieces of chuck a more forgiving window; HIGH still works, but differences in cooker temperature and piece size matter more.

The WARM setting is for holding cooked food, not for cooking raw beef.

Control the Chipotle Heat

Three chipotles let the smoke lead without turning the whole pot into a heat challenge. For a gentler batch, use 1–2 peppers. Four or more push the chile itself further forward, although cans can vary more than you might expect.

Once you know how hot your preferred brand runs, the next batch becomes easy to tune. Texture problems take a little more diagnosis.

Fix Tough, Dry, Watery or Greasy Barbacoa

The first question is whether the beef is still moist or has already become dry. Those two textures need very different fixes.

Two portions of cooked beef, with moist firm chunks on the left and dry fine stringy shreds on the right.
Before deciding what to fix, look at both surface moisture and fiber shape. Moist meat that still holds together tightly points in a very different direction from fine, dull strands that have already dried out.
What you seeWhat may be happeningWhat to do
Chuck is still moist but toughIt usually needs more tenderizing timeCover and continue 30–45 minutes, then test again
Beef is dry and stringyLean cut, small pieces, hot cooker or too much time after tendernessMoisten with finished juices; use fattier chuck and larger pieces next time
Cooking liquid is wateryThe covered cooker retained released moistureRemove the meat and reduce the defatted liquid
Cooking liquid is greasyToo much rendered fat remainsSkim or separate the fat before any reduction
Finished beef tastes flatJuices may be dilute, under-salted or short on fresh acidityReduce first, then adjust salt and lime
Barbacoa is too spicyToo many chipotles or a particularly hot canServe with tortillas and fresh toppings; reduce the pepper count next time
Tacos become soggyToo much loose liquid is coming with the meatUse coated beef rather than spoonfuls of broth

Using beef cheek? A sticky, gelatinous texture can be completely normal because its abundant connective tissue converts to gelatin during the long cook. Mushy cheek is different: very soft meat can lose its texture when it cooks too far or is worked too aggressively while shredding.

My Chuck Has Cooked for Hours and Is Still Tough

Still moist and tough after 8–9 hours? Give it another 30–45 minutes and test again. Once the connective tissue has had enough time to soften, the change can happen quickly.

Dry, fine, stringy beef is different. More cooking will not restore moisture already lost. Use some of the finished juices to help the current batch, then choose a fattier cut or larger pieces next time.

Trouble with the cooking liquid instead? Back to finishing the juices ↑

Dutch Oven and Instant Pot Barbacoa

The slow cooker is the main method here. A Dutch oven loses more moisture as it cooks, while a pressure cooker needs substantially more thin liquid to build pressure safely. Those differences matter more than simply converting the clock.

Slow cooker, Dutch oven and electric pressure cooker holding barbacoa at visibly different liquid levels in one kitchen scene.
Keep the same tenderness endpoint even when the cooking vessel changes. What shifts is the liquid strategy: slow cookers conserve moisture, Dutch ovens lose more to evaporation, and pressure cookers need enough thin liquid to operate properly.

Dutch Oven

Cook the barbacoa covered at 325°F / 165°C for 3½–4 hours, beginning the tenderness checks at 3½ hours.

Brown the beef and prepare the chipotle sauce as written, then combine everything in a heavy Dutch oven with a tight-fitting lid. A genuinely dry pot late in the cook only needs a small splash of stock. Use the same probe-tender endpoint as the slow-cooker recipe.

Instant Pot / Electric Pressure Cooker

For a 6-quart Instant Pot, use at least 375 ml of thin cooking liquid—just over 1½ US cups. Cook the large chuck pieces for 60 minutes on HIGH PRESSURE, followed by a 10–15 minute natural release. Follow your own model’s minimum-liquid requirement if it differs.

When browning with the sauté function, scrape the base completely clean during deglazing. Add the thin liquid first, followed by the beef and blended chipotle sauce, so a thick mixture is not sitting directly against browned residue on the bottom.

After the natural release, check one of the thickest pieces. If it still feels firm, give the beef another short pressure cycle. Because this method begins with more liquid than the slow-cooker version, expect to reduce more of the cooking liquid before turning it into finished juices.

Prefer the slow cooker? Back to the main recipe ↑

Build Better Barbacoa Tacos

Warm a corn tortilla until it is soft and pliable, smells toasted and develops a few light brown spots from the hot pan. Add a controlled mound of steaming barbacoa, then finish with finely diced white onion, cilantro, fresh lime and salsa.

A bright roasted salsa verde works especially well because tomatillo acidity and green chile cut through the richness of the beef. Fresh onion, herbs and lime do the same job, especially with gelatin-rich cachete.

The beef should be coated, not dripping. If juice reaches your wrist before the first bite reaches your mouth, use a little less on the next tortilla.

A hand holding a small corn tortilla filled with glossy shredded barbacoa, white onion and cilantro, with no liquid dripping.
The tortilla is part of the moisture test. Properly finished barbacoa should keep it pliable through the first few bites rather than asking the tortilla to absorb loose broth until it weakens and tears.

A Few Browned Edges

For extra contrast, spread a portion of lightly sauced beef over a sheet pan and place it briefly under a hot broiler. Stop once a few exposed edges brown while most of the meat remains juicy. If the surface needs it, return a little finished juice afterward.

Match the Juices to What You Are Making

A rice bowl can carry more of the finished juices, especially with something fresh alongside it; mango salsa gives the smoky beef a sweet, bright counterpoint. Burritos need less loose moisture so the tortilla stays easy to roll. Quesadillas need the driest filling of the three so the tortilla can crisp rather than steam.

Serving a group? Check the taco and per-person portions →

How Much Beef to Plan For

Plan on about 2 oz / 55 g cooked barbacoa per small taco. With substantial sides, allow about 4 oz / 115 g per person. For a beef-forward bowl or main course, plan on 5–6 oz / 140–170 g.

Digital kitchen scale showing 2.0 ounces of shredded barbacoa beside a small corn tortilla taco filled with a similar portion.
Think of 2 oz / 55 g as a taco-building unit, not a per-person rule. Once diners are eating several tacos—or the beef becomes the main course—the total amount you need changes quickly.

A 4 lb / 1.8 kg chuck roast commonly finishes with 2½–3 lb / 1.1–1.35 kg shredded beef. The exact yield depends on the roast and how much exterior fat is trimmed away. At 2 oz / 55 g each, that gives you 20–24 small tacos.

In practice, this batch makes 7–9 hearty servings, or 10–12 when the table also has rice, tortillas, creamy refried beans and other substantial sides.

Cooking for later? See how to make ahead, store and reheat the barbacoa →

Ingredient Swaps That Actually Work

No chipotles in adobo? Start with 1½ tsp chipotle powder + 1 tsp smoked paprika for this batch. This is a workable smoky-heat substitute, not a direct replacement for the flavor or body of canned chipotles in adobo. Ground chipotle varies in strength, so taste cautiously.

Bowls of dark chipotle powder and red smoked paprika beside a small serving of finished beef barbacoa.
Chipotle powder and smoked paprika can replace part of the smoke-and-heat job of canned chipotles, but not the adobo’s moisture or body. That is why the swap works as a flavor workaround rather than a literal one-for-one replacement.

No Mexican oregano? Use the same amount of ordinary dried oregano. For the vinegar, white wine vinegar or distilled white vinegar can stand in for apple cider vinegar. An especially sharp substitute may need a little less, so adjust after the cooking liquid has been reduced.

Beer works in the slow cooker or Dutch oven. Replace the ¾ cup / 180 ml stock with the same amount of a modestly malty lager or darker beer rather than something aggressively bitter. For the pressure-cooker version, keep the total thin cooking liquid at or above the minimum required by your machine.

Make Ahead, Store and Reheat Barbacoa

Barbacoa is a particularly good make-ahead dish. For a taco bar or dinner the next day, cook it ahead, chill it with some of the finished juices, then reheat gently before serving.

Glass container of cooked barbacoa in the background and reheated glossy barbacoa in a serving pan with tortillas nearby.
Saving some of the original finished juices gives you a better reheating tool than adding fresh stock later. Those juices already carry the recipe’s chile, beef and acidity balance, so they restore moisture without diluting the flavor.

Cool cooked barbacoa promptly in shallow containers and refrigerate it within 2 hours. When the surrounding temperature is above 90°F / 32°C, shorten that window to 1 hour.

Keep refrigerated leftovers for 3–4 days and reheat them with some reserved juices until they reach 165°F / 74°C.

For the best texture, use frozen cooked barbacoa within 2–3 months. Freeze meal-size portions with some of the finished juices, thaw them in the refrigerator, and restore moisture gradually during reheating.

Reheated and ready to serve? Back to building the tacos ↑

A Few Barbacoa Questions

1. Can I Put Frozen Beef Directly in the Slow Cooker?

Thaw it first. A slow cooker heats gradually, so raw beef should be thawed before it goes into the cooker. The USDA’s slow-cooker food-safety guidance recommends starting with thawed meat rather than frozen.

2. What Is the Difference Between Barbacoa and Birria?

Barbacoa and birria are related but distinct Mexican cooking traditions. The broader barbacoa family includes regional slow-cooked-meat preparations, while birria is especially associated with Jalisco and commonly uses a chile-rich adobo or braising mixture. Modern beef birria tacos and beef barbacoa tacos can look similar online, but the names are not interchangeable.

3. What Is the Difference Between Barbacoa and Carnitas?

Carnitas is generally a pork preparation cooked until tender in its own fat or added fat, often with crisp browned edges at the finish. Barbacoa can involve several meats and regional cooking traditions; the slow-cooker beef here cooks in a chile-seasoned moist environment. Briefly broiling a portion for browned edges does not make it carnitas.

4. What Should I Do With Leftover Chipotles in Adobo?

Freeze the remaining peppers and sauce in small portions. Tablespoon-size portions are convenient because the next recipe may need only one pepper or a spoonful of adobo.

Barbacoa Changes From Place to Place

The chuck-and-chipotle method above sits inside a much larger family of barbacoa traditions.

In central Mexico, one famous traditional barbacoa de borrego method slowly cooks lamb in an earth pit wrapped with maguey leaves.

Elsewhere, barbacoa may center on other meats and cuts, including beef head and cheek. Dried chiles may matter much more than they do here, while some preparations keep the seasoning comparatively simple and serve flavorful broth alongside the meat.

Someone who grew up with sticky, gelatin-rich beef-cheek barbacoa may barely recognize the loose strands of a chuck version. A diner whose reference point is smoky restaurant-style shredded beef may have the opposite reaction. Both expectations come from somewhere.

Those differences are part of the food’s history, not defects to be corrected into one universal recipe.


Once the chuck pulls apart easily and the finished juices cling to the strands, the hard part is over. Warm the tortillas until they smell toasted, pile on the beef, then add onion, cilantro, lime and salsa. The first taco should be messy enough to need both hands, but not wet enough to fall apart before you get there.

Hands around a shared barbacoa taco meal with shredded beef, corn tortillas, lime, white onion, cilantro and salsa.
Fresh toppings do more than decorate the tacos. Onion adds bite, cilantro brings freshness, and lime supplies acidity that cuts through the richness of the beef, keeping the next mouthful as appealing as the first.

Back to the recipe ↑