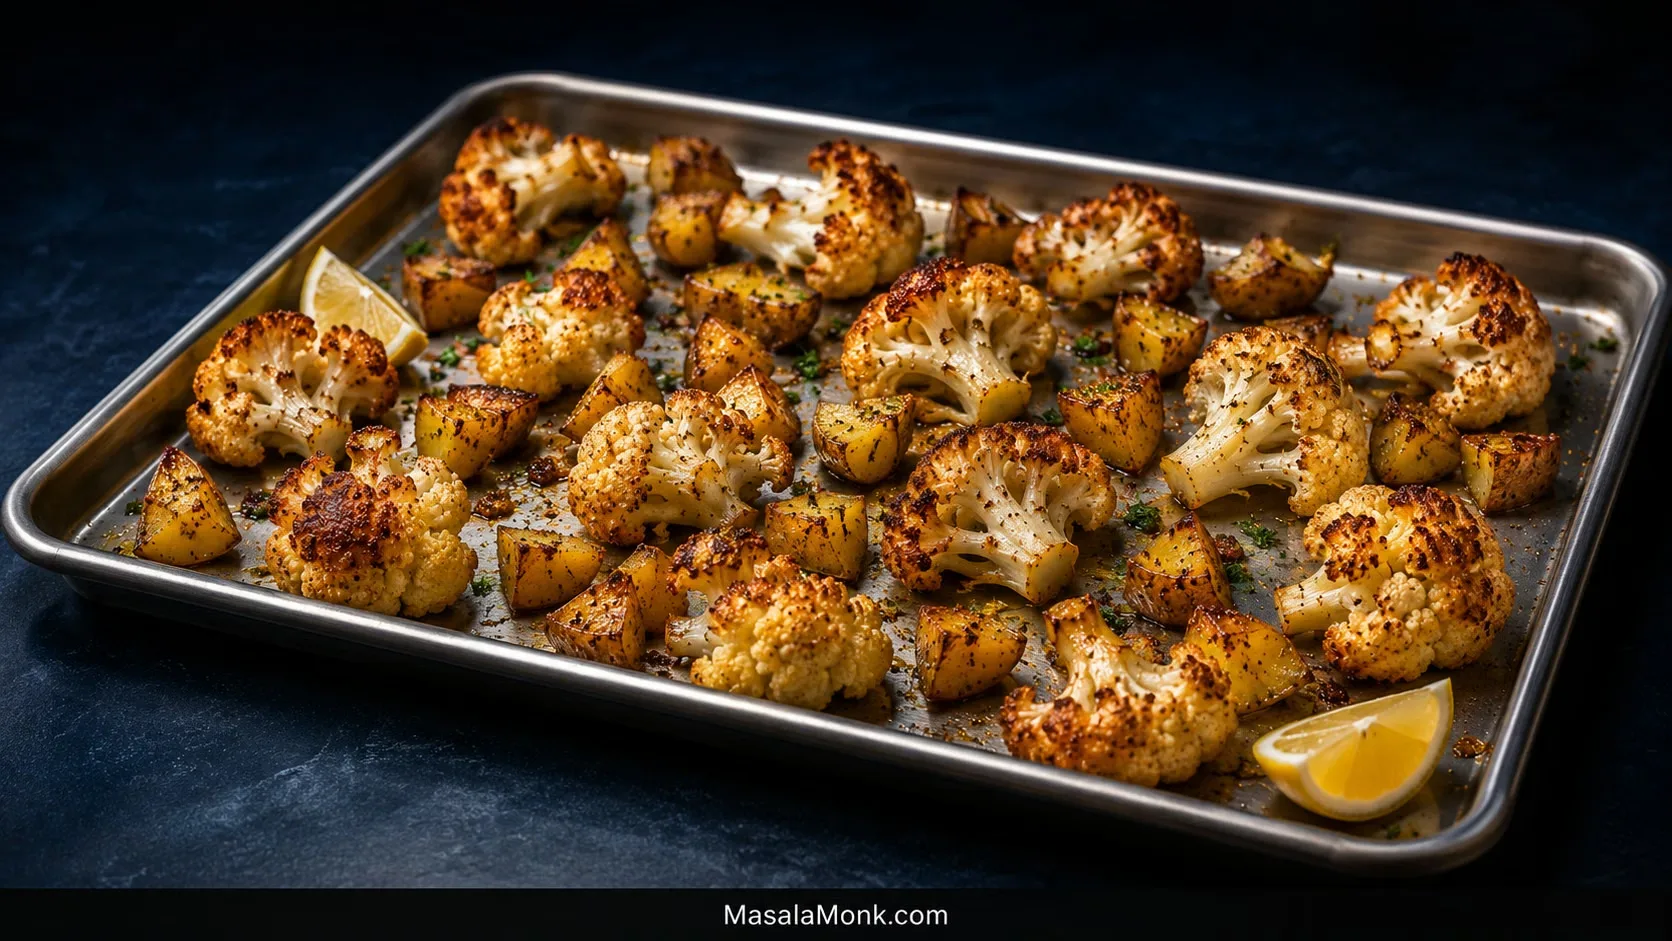
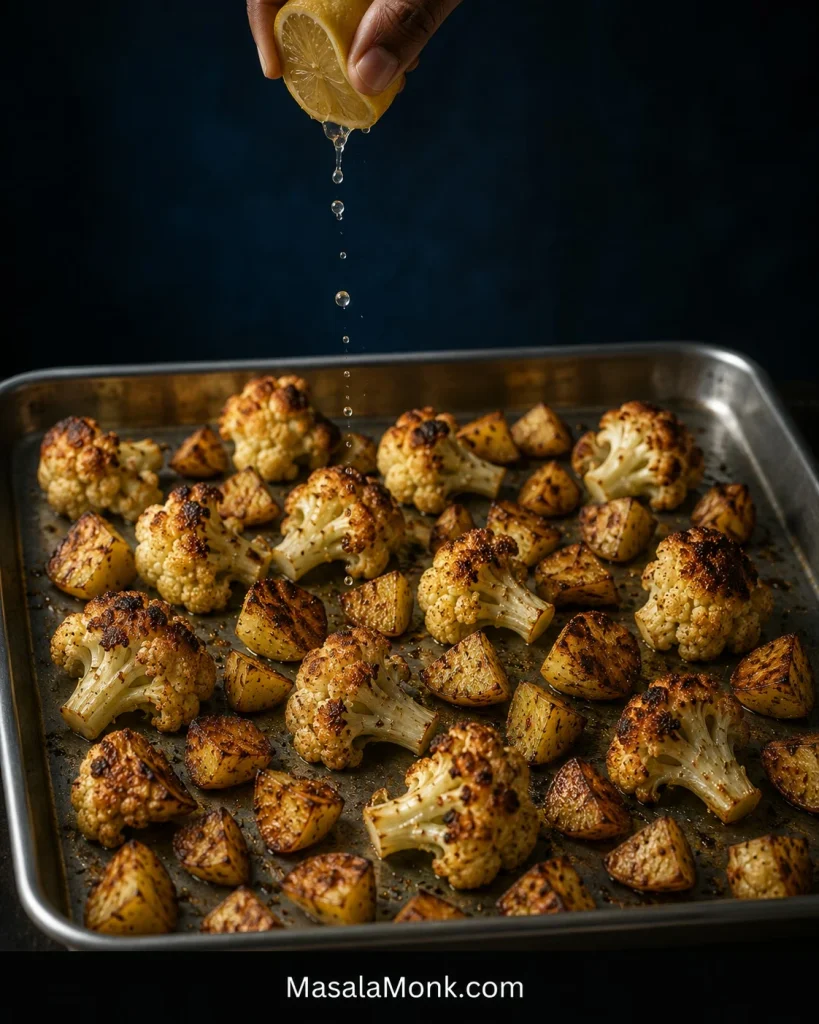
The best pieces on this tray are usually the ones touching the metal: potatoes with properly browned bottoms and cauliflower with deeply golden edges. Inside, the potatoes should be creamy and the cauliflower tender while still holding its shape.
The frustrating version is familiar: the cauliflower looks ready, you test a potato, and the middle is still firm. Cauliflower softens faster than a dense chunk of potato, so the two vegetables do not need to be cut the same size.
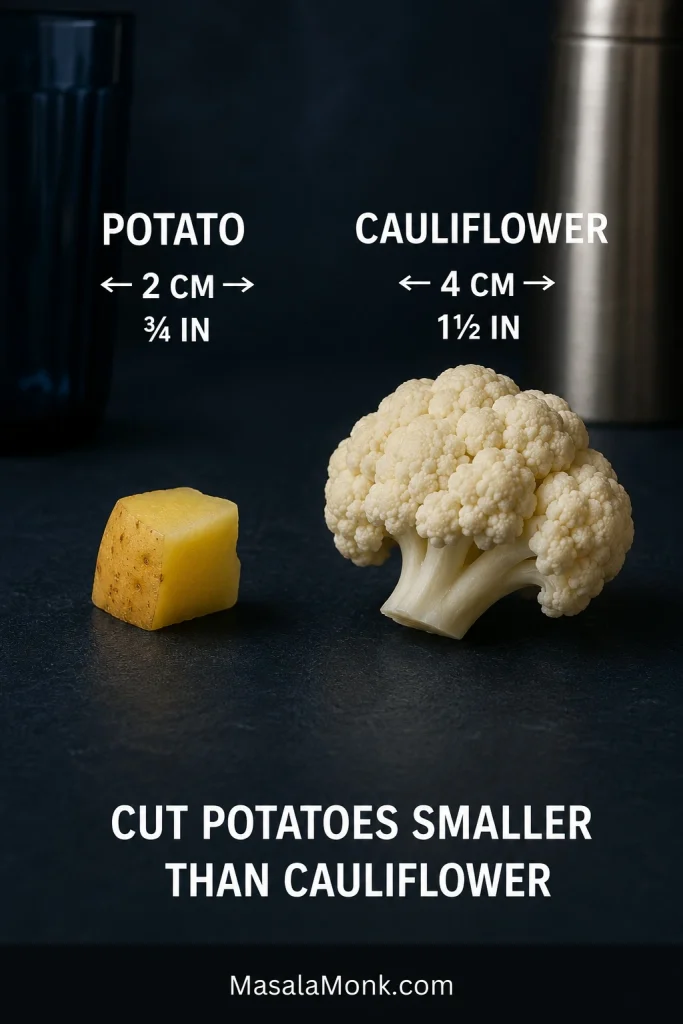
Keep the potato pieces noticeably smaller than the cauliflower florets and they can roast together on the same sheet pan at 425°F (220°C). That one difference lets both vegetables start raw and reach the right texture at about the same time.
Quick Answer: How to Roast Cauliflower and Potatoes Together
Heat the oven to 425°F (220°C). Cut the potatoes into ¾-inch (2 cm) pieces and keep the cauliflower florets larger, about 1½ inches (4 cm) across. At those sizes, both vegetables can start raw together—no boiling, soaking or parboiling is needed.
Toss with olive oil and seasonings, then spread the vegetables in a roomy single layer on a large rimmed sheet pan. Turn once after the undersides begin to brown.
Start checking at 25 minutes; typical total roasting time is 28–35 minutes. Test one of the largest potato pieces before you pull the pan. The center should be completely tender.
The Cut Sizes That Make This Work
That size difference is the timing trick: keep the dense potato chunks smaller than the cauliflower so both can go onto the pan raw and finish together.
Make It Now: Roasted Cauliflower and Potatoes
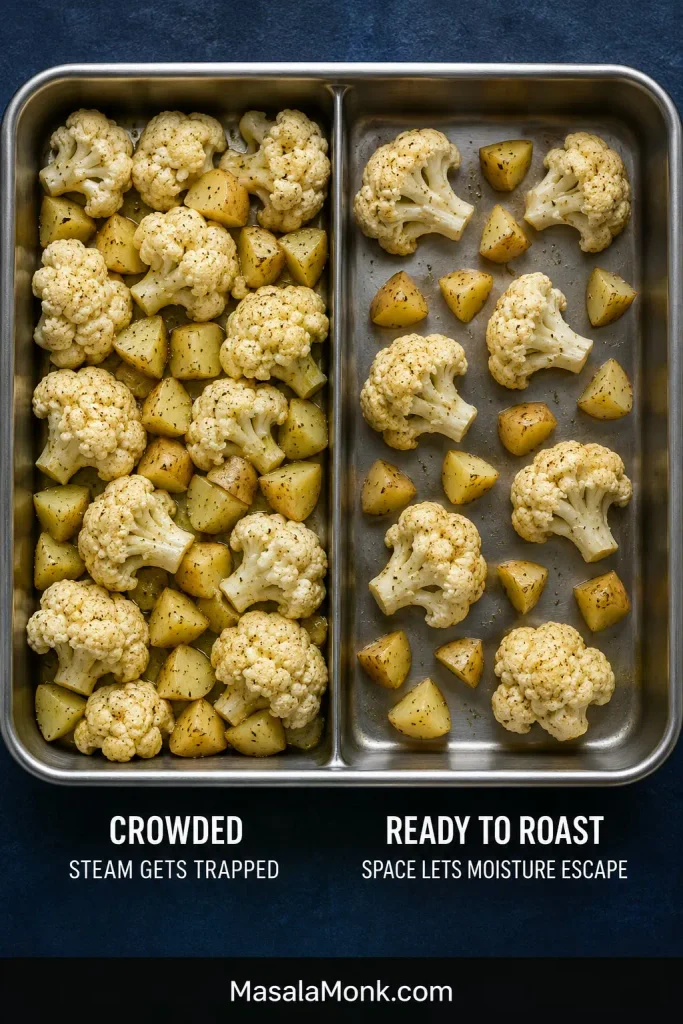
Allow 15–20 minutes for prep. Dry freshly washed cauliflower well. For roasting the whole batch on one pan, a sturdy rimmed metal half-sheet measuring about 13 × 18 inches (33 × 46 cm) is the minimum. Cauliflower varies a lot in bulk, so if the vegetables fill the pan edge to edge with almost no visible gaps, split them between two pans rather than crowding them.
The recipe makes 4 generous side servings and is vegan, dairy-free and naturally gluten-free as written.
Ingredients
700 g (24–25 oz) cauliflower florets, weighed after trimming (about 1 large cauliflower)
450 g (1 lb) Yukon Gold potatoes, scrubbed
3 tablespoons (45 ml) olive oil
7 g fine sea salt (about 1¼ teaspoons; volume varies somewhat by brand), plus more to taste
1½ teaspoons garlic powder
1½ teaspoons sweet paprika
½ teaspoon freshly ground black pepper
1 tablespoon (15 ml) fresh lemon juice, plus more to taste
2 tablespoons chopped fresh parsley, optional
How to Roast Them
1. Heat the oven
Heat the oven to 425°F (220°C) with a rack near the middle. For a fan oven, use 200°C.
2. Cut the vegetables
Cut the potatoes into about ¾-inch (2 cm) pieces. Keep the cauliflower florets about 1½ inches (4 cm) across.
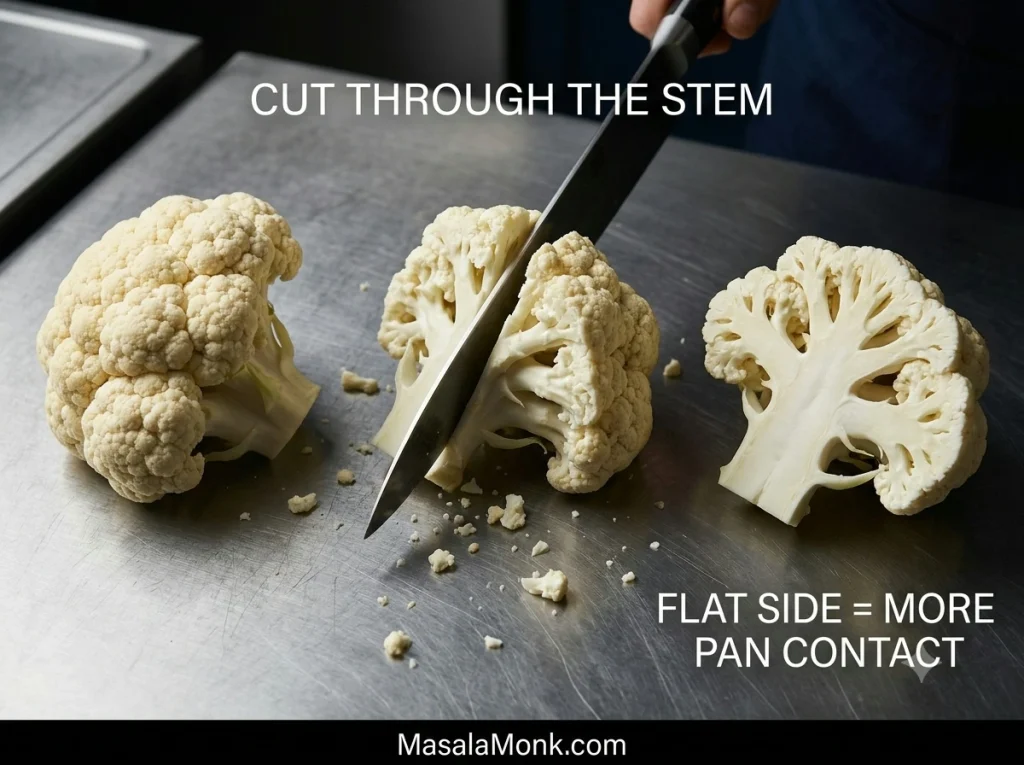
For better browning, make a flat side. Halve some of the larger florets through the stem. The broad cut surface sits flush against the pan and browns much better than a rounded floret.
Keep the stem attached when halving a large floret; it helps the crown hold together while the flat face browns against the pan.
If your potato pieces are closer to 1 inch (2.5 cm), use the head-start method under Potato Size and Variety below.
3. Oil and season
Put the cauliflower and potatoes in a large bowl. Add the olive oil, salt, garlic powder, sweet paprika and black pepper. Toss until the potatoes are lightly glossy and the seasoning has worked its way into the cauliflower’s crags. There should not be a puddle of oil left at the bottom of the bowl.
Prefer fresh garlic? Finely chop 3 medium cloves and scatter them over the tray for the final 5–10 minutes. Skip the garlic powder for this version. Fresh garlic gives a sharper garlic flavor and can turn bitter if roasted for the full time.
4. Give everything room
Spread the vegetables into one open layer. Leave visible metal between many of the pieces and put some flat potato faces and cauliflower cut sides directly against the pan.
If the last handful only fits by closing those gaps and packing the pieces together, grab another tray or save it for later. A little empty metal does more for the roast than squeezing in one more floret.
5. Let the first side brown
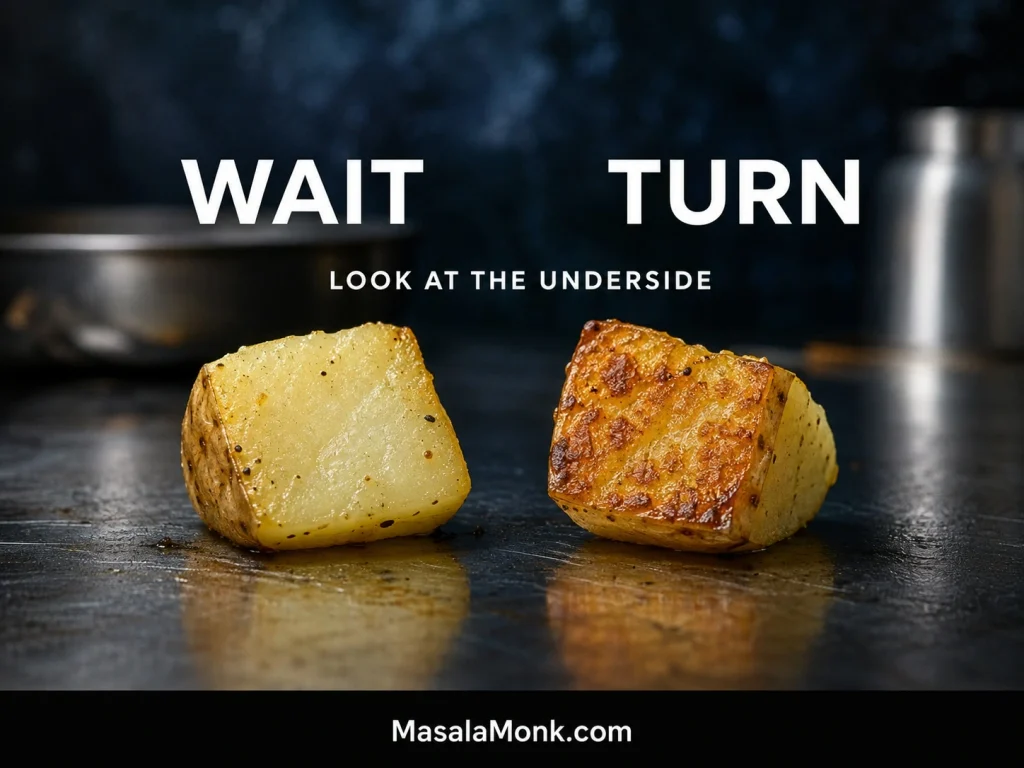
Roast undisturbed for 18–20 minutes. Use a spatula to lift one potato. You should see a proper golden-brown patch underneath. Completely pale bottoms need another couple of minutes before you turn the vegetables.
Use a potato cut face as the browning gauge; its flat underside gives a cleaner read on pan contact than cauliflower.
Turn once and continue roasting. Start checking at 25 minutes. Dark-colored pans and fan/convection ovens can brown the vegetables more quickly, so judge the food rather than waiting for minute 35.
Ready when: a thin knife slides through one of the largest potato pieces with very little resistance. The cauliflower stems should be tender and the florets should still hold together. Deeply browned tips are fine. A potato that looks done outside but remains firm in the middle needs more time.
Add the lemon juice and parsley, if using, as soon as the pan comes out of the oven. You’ll smell the lemon immediately against the warm garlic and paprika. Taste a potato and a piece of cauliflower, then add more salt or another squeeze of lemon if needed.
Serve straight away while the browned sides still have some crispness.
Potato Size and Variety
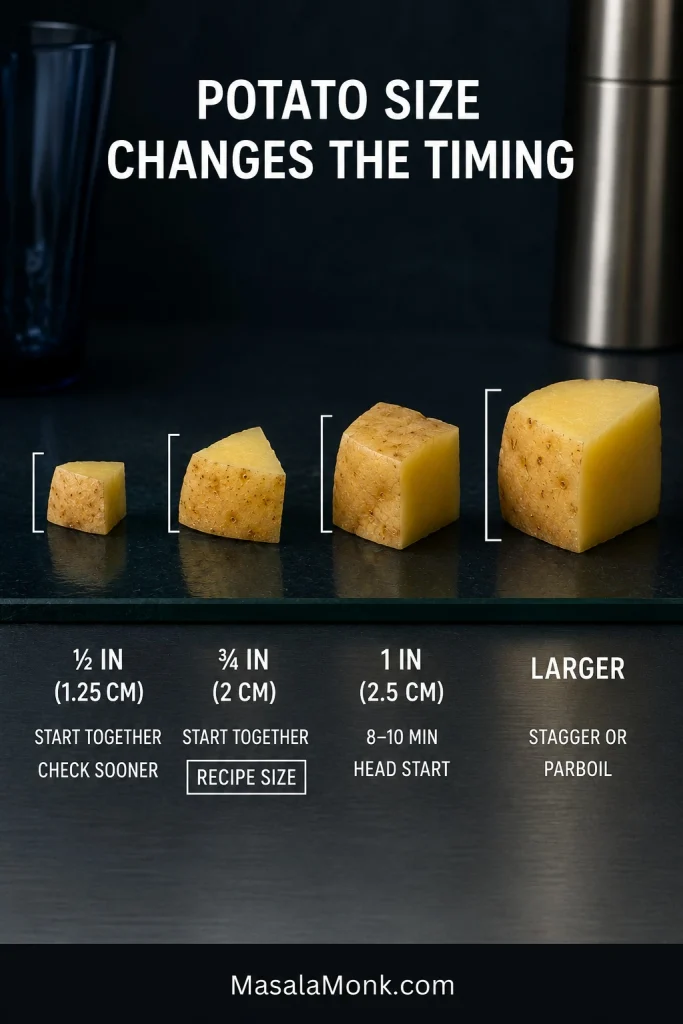
The ¾-inch (2 cm) potatoes in the main recipe are small enough to keep pace with the cauliflower. Bigger pieces need more time; smaller ones reach tenderness sooner.
Potato size
Best approach
½ inch (1.25 cm)
Start both vegetables together and begin checking sooner
¾ inch (2 cm)
Both vegetables can start together
1 inch (2.5 cm)
Give the potatoes an 8–10 minute head start
Larger than 1 inch (2.5 cm)
Use a longer head start, parboil briefly or roast separately
For 1-inch (2.5 cm) potato pieces: toss the potatoes with half the oil and seasonings and roast for 8–10 minutes. Toss the cauliflower with the remaining oil and seasoning, add it to the hot pan, then continue with the main method.
A small increase in width means much more potato to heat through, which is why 1-inch pieces need a head start.
Whatever size you use, check one of the biggest pieces before deciding the potatoes are done. The center should be creamy and tender, never chalky or crunchy.
Yukon Golds are the easiest all-round choice: creamy inside, sturdy enough to hold together and good at picking up color underneath. Red potatoes can be substituted 1:1 by weight at the same ¾-inch (2 cm) size. Russets work too, but their fluffier pieces become more delicate as they cook, so turn them gently. Yukon Gold and red potatoes can stay unpeeled after a good scrub.
Baby potatoes still need to be judged by their actual size; a larger one may need quartering. If potatoes are the main attraction, these ranch roasted potatoes take the browned-cut-side idea further.
How to Get Crisp, Golden Edges
What Good Browning Looks Like
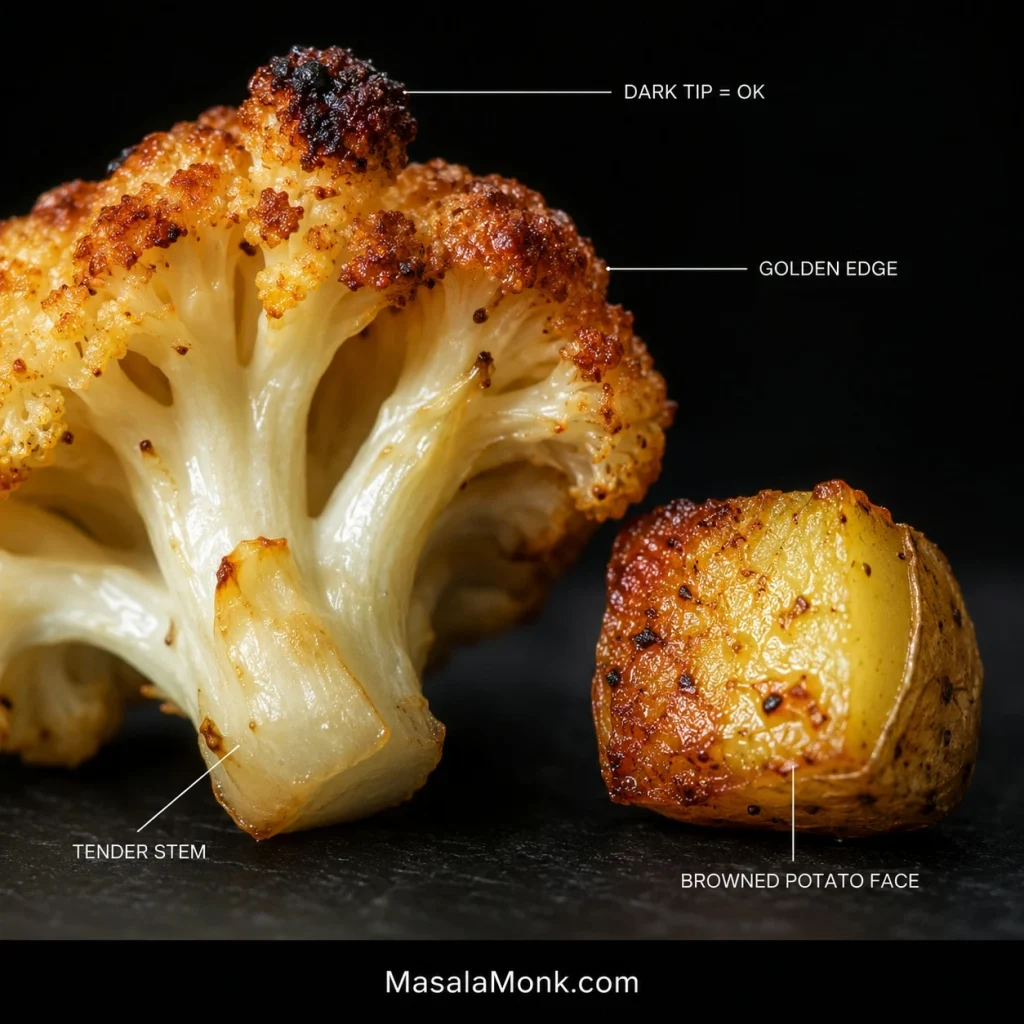
Here, “crispy” means crisp edges and well-browned flat sides around tender centers. Expect good color where the vegetables meet the pan, not a crust over every surface.
Look for the cues together: browned potato contact faces, golden cauliflower edges and tender stems.
Dry cauliflower and open space do most of the early work. Surface water has to evaporate before the florets can brown, while a crowded sheet pan traps steam around them. A thin film of oil helps the cauliflower’s uneven edges and the cut potato faces brown more evenly.
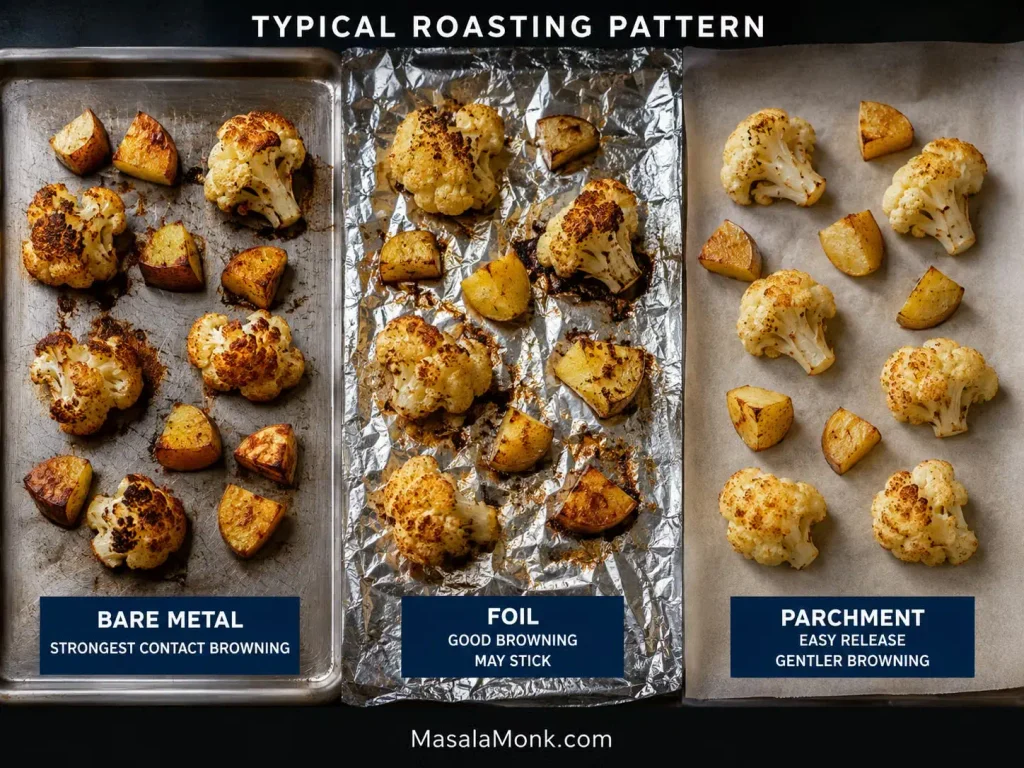
Bare Metal, Foil or Parchment?
Flat sides against the pan supply the strongest color, so give them time before turning. Bare, lightly oiled metal browns best; foil works well too, though the vegetables may stick. Parchment releases more easily and usually gives gentler color underneath. A side-by-side roasting comparison from Serious Eats found the same general pattern.
Bare metal gives the strongest direct contact; parchment softens that contact and usually gives gentler browning underneath.
If you use parchment, choose one rated for at least 425°F. For deeper color, you can also preheat an empty bare sheet pan before adding the vegetables, but the regular method does not depend on that extra step.
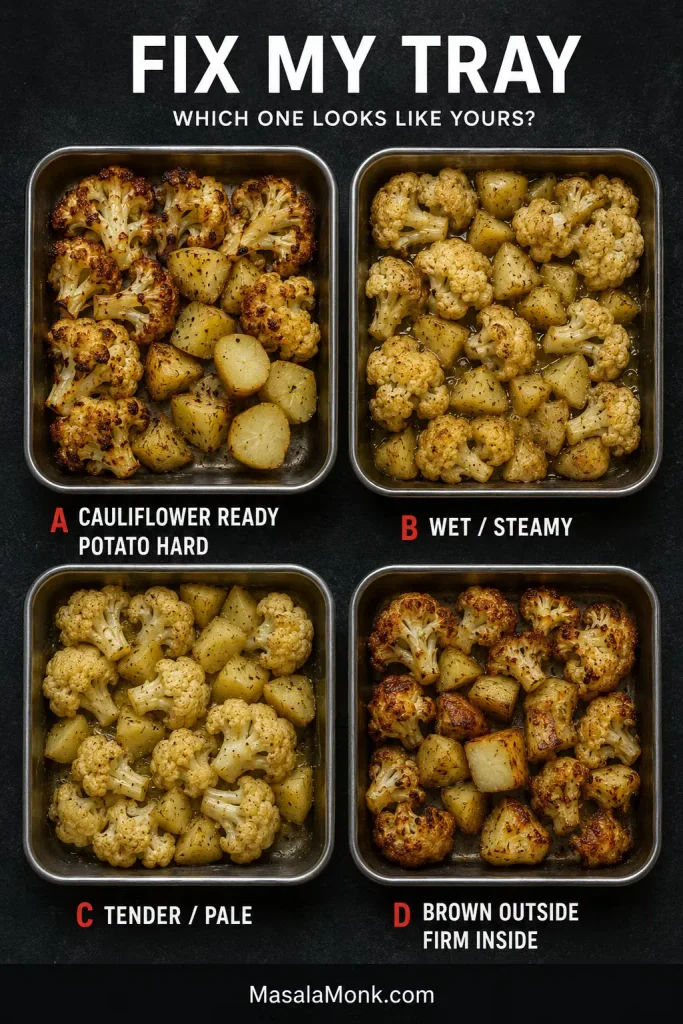
Fix My Tray
Once dinner is already in the oven, the clock is not always the best guide. Look at what the vegetables are doing and fix that problem.
Check tenderness first, moisture second and color third; those clues usually tell you whether to keep cooking, create space or push browning.
Common Roasting Problems and Quick Fixes
What you see
Why it happened
What to do now
Cauliflower is ready but potatoes are hard
The two vegetables are no longer finishing together
Take the cauliflower off the tray and roast the potatoes another 5–10 minutes. Dinner gets no bonus points because everything left the oven together.
Potatoes are deeply brown but still firm inside
The outside browned faster than the middle cooked
Turn the darkest sides upward and keep roasting. If the edges are already close to scorching, lower the oven to about 400°F (200°C conventional; about 180°C fan) and continue until the centers are tender.
Everything is tender but pale
The vegetables cooked through before developing enough color
Keep roasting a little longer. If the vegetables are on a bare broiler-safe pan, 1–2 minutes under the broiler can help. Watch constantly. If you used parchment, stay with the regular oven instead.
Cauliflower is soft or falling apart
The florets were too small, crowded or overcooked
Remove the cauliflower now. More heat will only soften it further.
The tray looks wet or steamy
Crowding is trapping moisture around the vegetables
Split the vegetables between two trays and keep roasting.
Potatoes are tender but the edges are soft
They had poor pan contact or too much surrounding moisture
Put the cut sides against the metal and give them a little longer.
Fresh garlic tastes bitter
It scorched
Remove badly blackened pieces; add fresh garlic later next time.
The vegetables are browned but taste flat
They need more salt or acidity
Season while hot and add another squeeze of lemon.
Deeply Browned or Actually Burned?
A few very dark cauliflower tips are normal. Acrid black garlic, dry scorched florets and smoke are much better signs that something has actually burned.
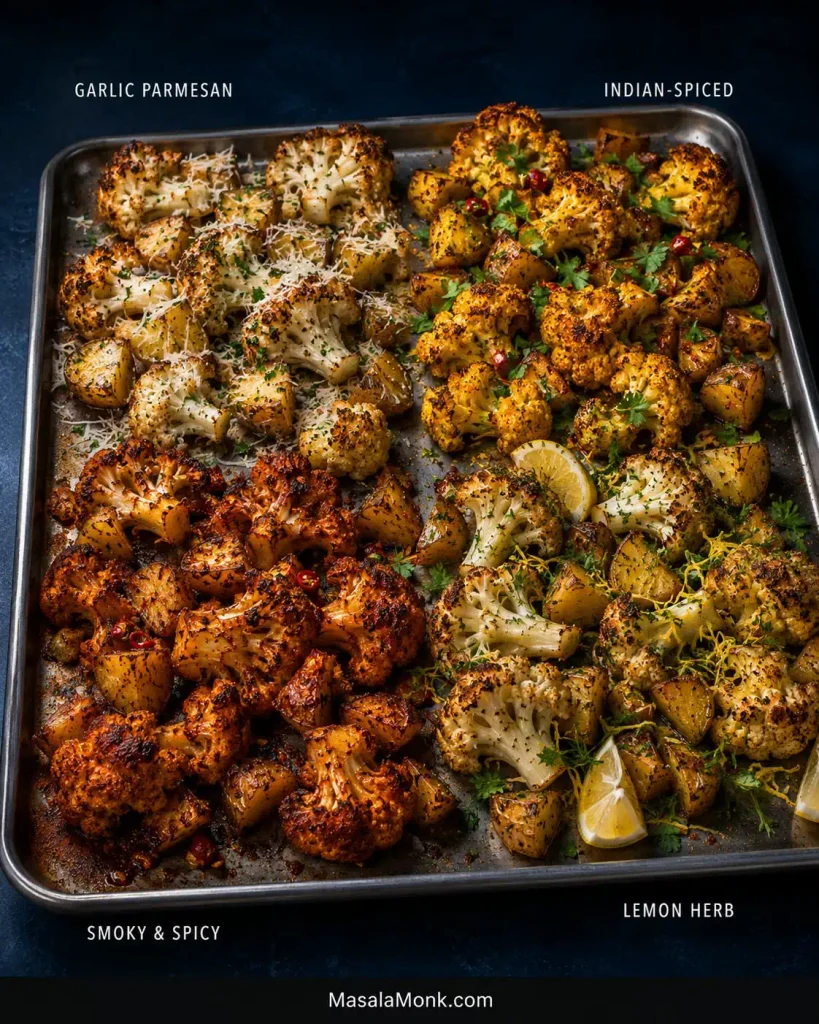
Ways to Change the Flavor
The garlic-paprika base can move in several directions without changing the roasting method.
Garlic Parmesan
Parmesan is especially good where it catches on the rough cauliflower edges and potato corners, melting into little browned patches. Use 5–6 g fine sea salt instead of the full 7 g, then scatter over 35 g (about ⅓ cup) finely grated Parmesan during the final 5–8 minutes. Taste before adding more salt.
Indian-Spiced
Skip the sweet paprika and use 1 teaspoon ground cumin, 1 teaspoon ground coriander and ½ teaspoon turmeric. For color and mild warmth, add ½ teaspoon Kashmiri chilli powder; for more heat, use up to ¼ teaspoon cayenne. Finish the hot vegetables with ½ teaspoon garam masala, cilantro and lemon or lime.
For cauliflower and potatoes cooked as the fuller Indian dish with onion, tomato and masala, use a classic aloo gobi recipe.
Smoky and Spicy
Replace the sweet paprika with 1½ teaspoons smoked paprika and add up to ¼ teaspoon cayenne or red pepper flakes. Finish generously with lemon so the smoky seasoning stays lively rather than heavy.
Lemon Herb
Add 1 teaspoon dried oregano or thyme with the garlic powder. Finish with 1 teaspoon finely grated lemon zest, lemon juice and parsley or dill for a brighter version.
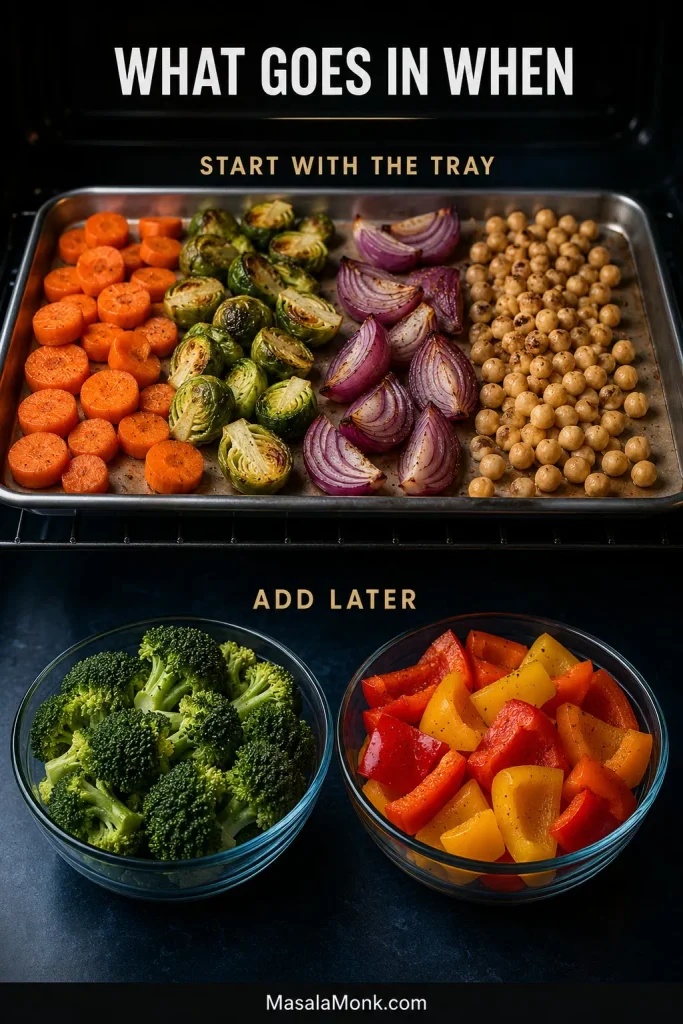
Adding Other Vegetables
A small handful of onion or Brussels sprouts will not change the pan much. Once you’re adding cups of extra vegetables—or a full can of chickpeas—replace some of the cauliflower or potatoes or bring in a second pan. The base recipe already takes up most of one half-sheet while leaving enough room to brown.
Addition
Cut / prep
When it goes in
Carrots
About ⅓ inch (8 mm) slices
From the beginning
Brussels sprouts
Halve small sprouts; quarter large ones
From the beginning
Onion
Thick wedges, with a little root end attached if possible
From the beginning
Broccoli
Medium florets
For the final 15–20 minutes
Chickpeas
1 × 400 g (14–15 oz) can, about 240 g drained; rinse and dry thoroughly
From the beginning; reduce some of the base vegetables or use another pan
Bell peppers
Broad 1-inch (2.5 cm) pieces
For the final 15–20 minutes
Making a Double Batch
To make eight side servings, use two half-sheet pans. Put them on separate racks; when you turn the vegetables, swap the upper and lower pans and rotate them front to back if your oven browns unevenly. Trying to fit a double batch onto one tray turns the central problem from roasting into steaming.
What to Serve With Them
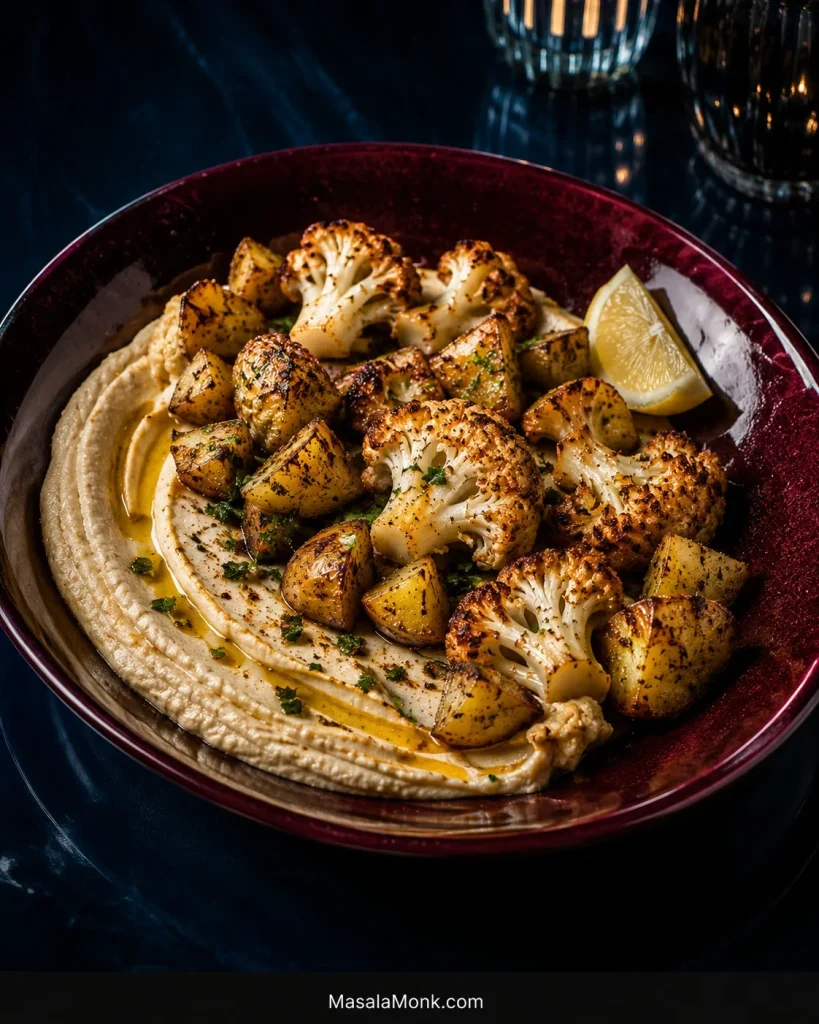
For a vegetarian dinner, spoon the hot vegetables over extra-creamy hummus. The cool, smooth hummus works particularly well against the browned cauliflower and hot potatoes; chickpeas or lentils can make the plate more substantial.
Spread the hummus underneath so the creamy contrast does not cover the crisp, browned surfaces.
As a side, baked chicken breast can share the same oven temperature. If the rest of dinner is rich, go the other way with something cold and acidic: a crisp cucumber salad cuts nicely through the potatoes and roasted edges.
Storage, Reheating and Leftovers
The vegetables keep well; the crisp edges do not. Refrigerate leftovers within 2 hours and use them within 3–4 days, in line with USDA leftovers guidance.
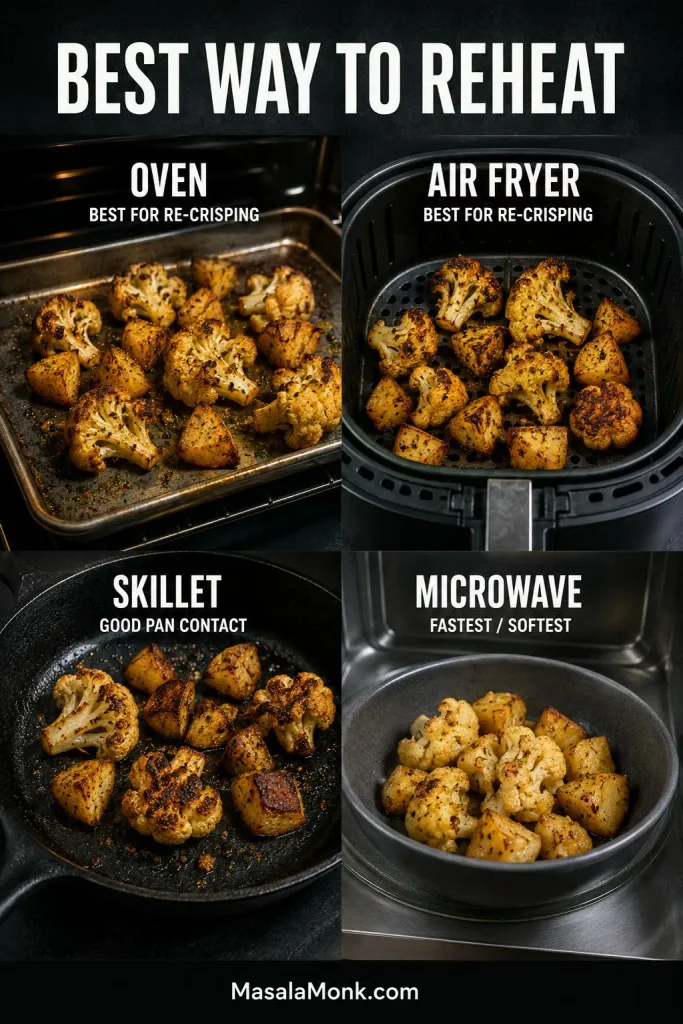
Best Way to Reheat Roasted Cauliflower and Potatoes
For crisp leftovers, keep dry-heat portions uncovered and spread out so they do not steam each other.
Oven or toaster oven: spread the vegetables in one layer and reheat at 375°F (190°C) until hot and the surfaces have dried again. Start checking after about 8 minutes.
Air fryer: reheat a loose single layer at 350°F (175°C). Start checking at about 3 minutes; a potato-heavy portion may need a few minutes more.
Skillet: warm over medium heat, turning occasionally and letting some potato cut sides sit against the pan again. A small portion usually heats through within a few minutes.
Microwave: heat one serving in short bursts until hot. It is the quickest option and gives the softest texture.
Freezing is possible, but it is hard on the texture of both vegetables. Refrigerating and reheating within a few days gives a better result.
Leftovers are good chopped into a breakfast hash, folded into a frittata, tucked into wraps or added to a grain bowl. A pot of fluffy rice turns the remaining vegetables into an easy lunch without asking them to become crisp all over again.
A Few Common Questions
Can I bake cauliflower and potatoes together?
Yes. Cut the potatoes smaller than the cauliflower so the two vegetables cook at similar rates. At the sizes used here, both can go onto the same sheet pan raw and roast together at 425°F (220°C).
Do I need to boil or soak the potatoes first?
No. Yukon Gold potatoes cut to ¾ inch (2 cm) can roast from raw alongside the larger cauliflower florets. Larger pieces are where a head start or brief parboil becomes worthwhile.
Is 400°F, 425°F or 450°F better?
All three can work. 425°F (220°C) works especially well here: it is hot enough for strong browning while still giving the potato centers time to soften. At 400°F (200°C), expect a longer roast and lighter color. Move up to 450°F (230°C), and you should begin checking sooner because cauliflower tips and dry spices can darken quickly.
Can I use frozen cauliflower?
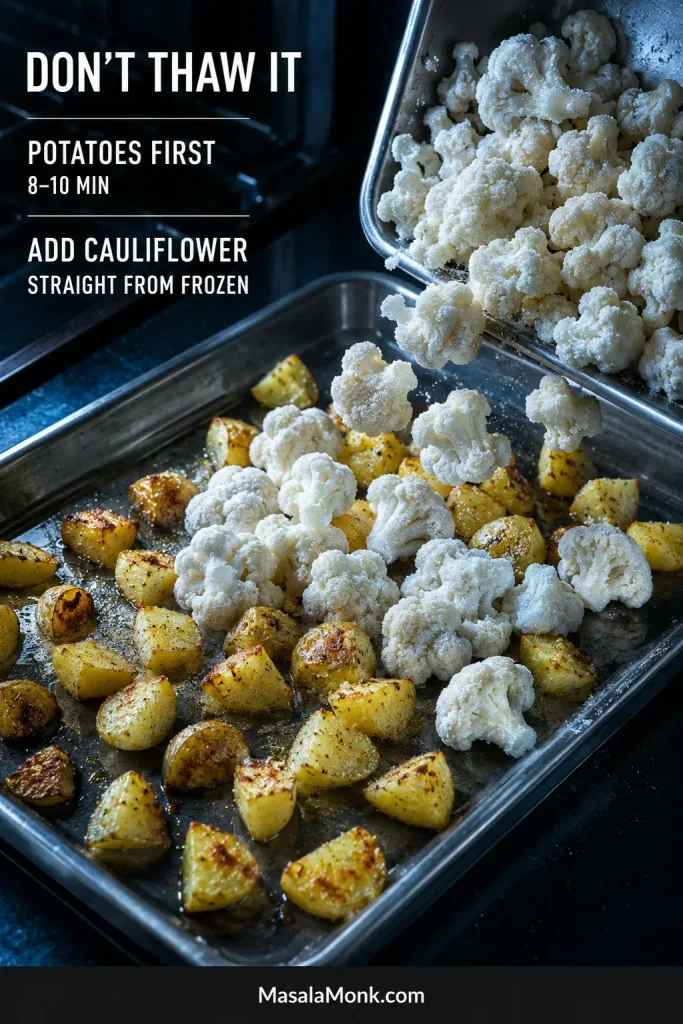
Yes, although fresh cauliflower browns more easily. Do not thaw the frozen cauliflower first. Shake off any obvious loose ice before it goes onto the pan.
Toss the potatoes with half of the oil and seasonings and roast for 8–10 minutes. Meanwhile, toss the still-frozen cauliflower with the remaining oil and seasoning just before it goes onto the hot pan. Continue roasting until the potatoes are tender and the cauliflower has browned.
Scatter frozen cauliflower across the hot tray rather than mounding it, so moisture can escape faster.
Frozen cauliflower releases more water than fresh, so give it generous space. If liquid starts collecting around the vegetables, split them between two pans and keep roasting.
Serve while the potato bottoms still have their crust. One last squeeze of lemon is usually enough.
Sheet pan chicken fajitas are one of those meals that feel like a tiny miracle. You get juicy chicken, caramelised onions, and colourful peppers, all sizzling with smoky fajita spices, but instead of juggling three pans on the stove, everything happens together on one tray in the oven. It’s the kind of recipe that works on frantic weeknights, lazy Sundays, game days, and everything in between. This sheet pan chicken fajitas recipe is all about ease.
You toss strips of chicken and vegetables in a bold spice blend, spread them over a pan, and let the oven transform them into tender, slightly charred perfection. While your oven fajitas roast, you can warm tortillas, mix a simple sauce, or just sit down for a minute and breathe. By the time the timer rings, the kitchen smells like your favourite Tex-Mex spot, and you’ve got a full chicken fajita sheet pan dinner ready to slide onto the table.
Why Sheet Pan Fajitas Chicken Recipe Beats Skillet Fajitas
Traditional skillet fajitas chicken has its charms: a screaming-hot skillet for fajitas, that dramatic sizzle as the pan hits the table, the cloud of steam scented with lime and chili. Yet there’s a reason sheet pan fajitas have become such a staple in modern kitchens.
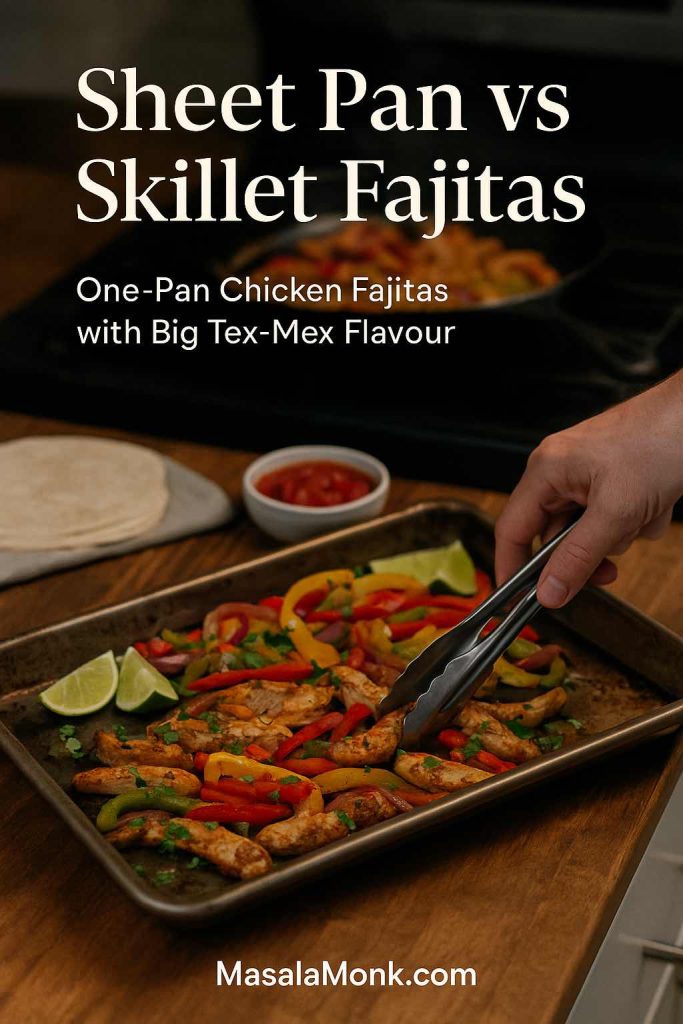
Sheet pan chicken fajitas in the spotlight, skillet fajitas in the background – same Tex-Mex flavour, but the one-pan oven method keeps dinner simpler and cleaner.
First, there’s the simplicity. With this easy sheet pan chicken fajitas method, you’re making a true one pan chicken fajita dinner. Instead of cooking in batches, then keeping everything warm, the meat and vegetables roast together. That means less hovering, fewer dishes, and more time to deal with everything else calling your name.
Second, the texture is fantastic. High oven heat encourages the peppers and onions to soften while still keeping a bit of bite, and the chicken picks up lovely browned edges. When you spread everything out properly on the tray, your baked chicken fajitas end up tasting like you fussed far more than you did.
Finally, this style is incredibly flexible. You can turn it into a chicken fajita tray bake for a crowd, scale down to chicken fajitas for one, make it extra spicy, keep it mild for kids, or adapt the marinade for pork, shrimp, or vegetables. Once you’ve learned the rhythm of cooking chicken fajitas in the oven, you’ll find yourself using the same technique for other dishes too.
Understanding Fajitas (and Why They Love the Oven)
Before diving into the nuts and bolts of this sheet pan chicken fajitas recipe, it helps to know what fajitas actually are. Traditionally, fajitas started as strips of grilled skirt steak served with onions and peppers in tortillas as part of Tex-Mex cooking, and the name itself comes from “faja,” meaning “strip” or “belt.” Over time, the concept expanded to include chicken fajitas, shrimp, and even all-vegetable versions, all built around that core idea of savoury strips tucked into warm tortillas.
Because fajitas are usually cooked hot and fast, transferring that method to the oven makes a lot of sense. When you cook fajitas in oven, you’re essentially recreating the high heat of the grill or stovetop, just with a different heat source. The key difference is that instead of shaking a pan throughout the cooking process, you let the oven do most of the work and just give your sheet pan fajita chicken a stir once or twice.
Stovetop chicken fajitas in a pan are still wonderful when you’re in the mood to stand and cook, but making fajitas in the oven is the move when life is hectic. You end up with the same satisfying flavours in a more forgiving, lower-effort format.
You don’t need anything fancy for baking sheet fajitas—just everyday staples that work incredibly well together.
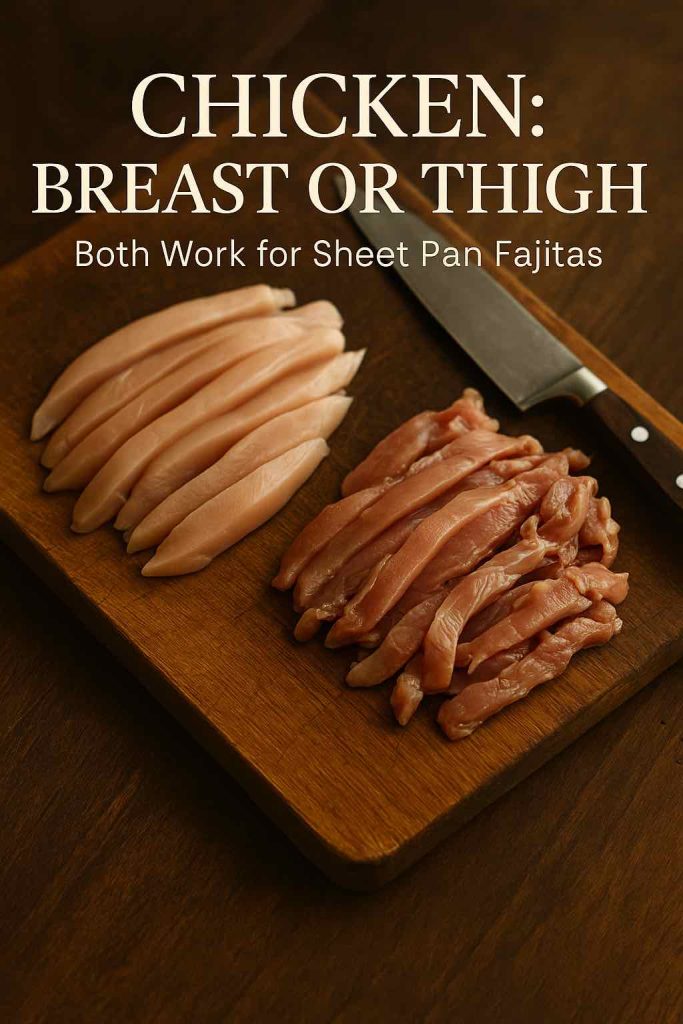
Chicken breasts stay lean and tidy, chicken thighs stay extra juicy—both cuts slice into perfect strips for sheet pan chicken fajitas.
Chicken: breast or thigh
Start with about 700–900 g (1½–2 lb) of boneless, skinless chicken. Both options work:
Chicken breasts give you leaner chicken breast fajitas oven style fajitas. They cook quickly and slice neatly, which is useful if you’re building bowls or meal-prep boxes.
Chicken thighs stay juicy even if they roast a little longer, making them ideal for a slightly more forgiving chicken thigh fajitas oven version.
Slice the chicken into thin strips across the grain. Thin, even strips are crucial for chicken fajitas baked in oven because they cook at roughly the same time as the vegetables.
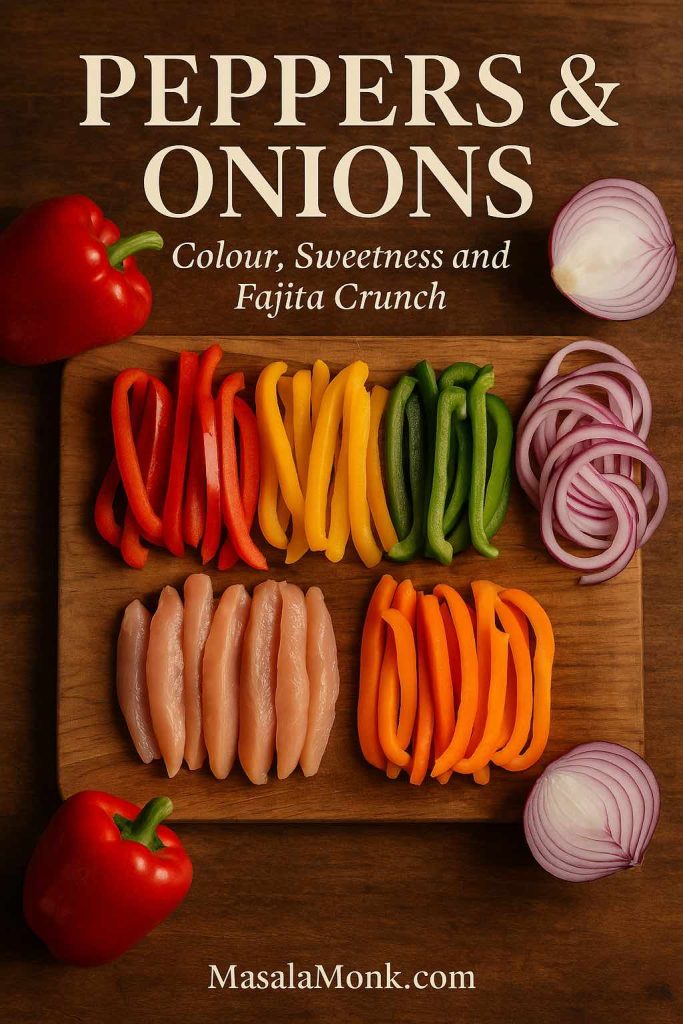
Colourful strips of peppers and onions, cut to match the chicken, give sheet pan chicken fajitas their sweetness, crunch and even roasting.
Peppers and onions
Next, grab your vegetables:
3 bell peppers (red, yellow, orange, or green)
1–2 medium onions
Bell peppers are naturally sweet and full of vitamin C and antioxidants, so they’re one of the reasons these healthy sheet pan chicken fajitas feel as nourishing as they do. Thin slices roast quickly and tuck perfectly into tortillas or bowls. Onions bring savoury depth and a touch of natural sweetness as they caramelise, turning the entire fajita sheet pan dinner into something rich and comforting.
Slice both peppers and onions into strips that mirror the size of your chicken pieces. Matching everything like this makes your one sheet chicken fajitas cook more evenly.
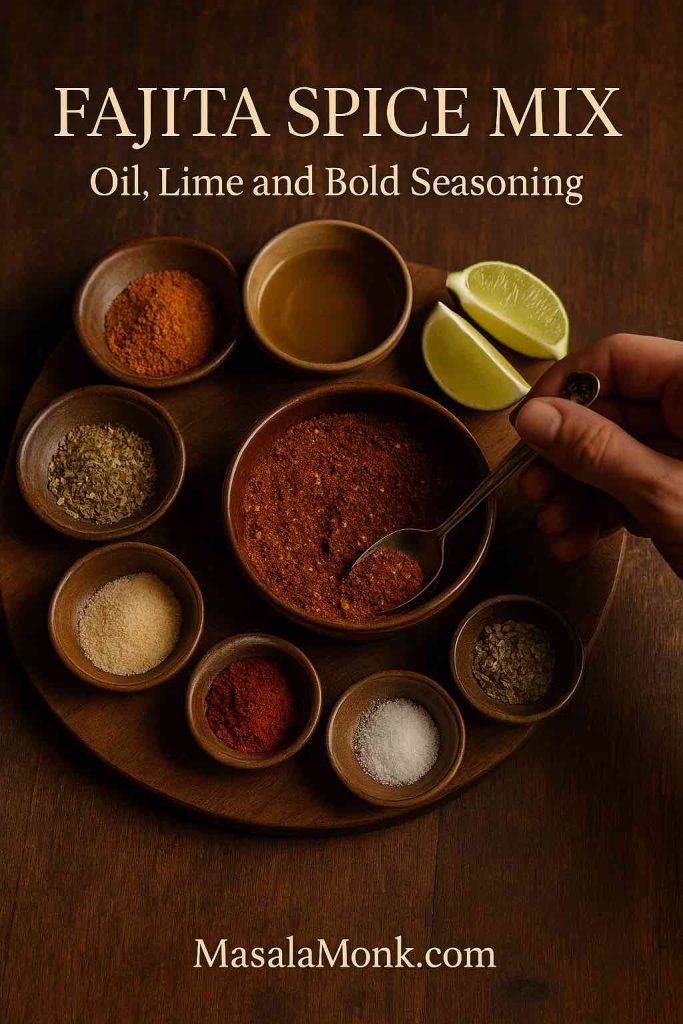
A simple fajita spice mix of chili, cumin, paprika, garlic, oregano, oil and lime is all you need to turn basic chicken and peppers into bold sheet pan chicken fajitas.
Oil, lime, and spice mix
For that signature fajita flavour, you’ll need:
Neutral oil (or mild olive oil)
Fresh lime juice
Chili powder
Ground cumin
Paprika (regular or smoked)
Garlic powder or minced garlic
Dried oregano
Salt and black pepper
Optional cayenne for heat
This blend turns basic chicken and peppers into full-on fajita chicken sheet pan magic. As the tray roasts, the spices toast and cling to every piece, giving your sheet fajitas their unmistakable colour and aroma.
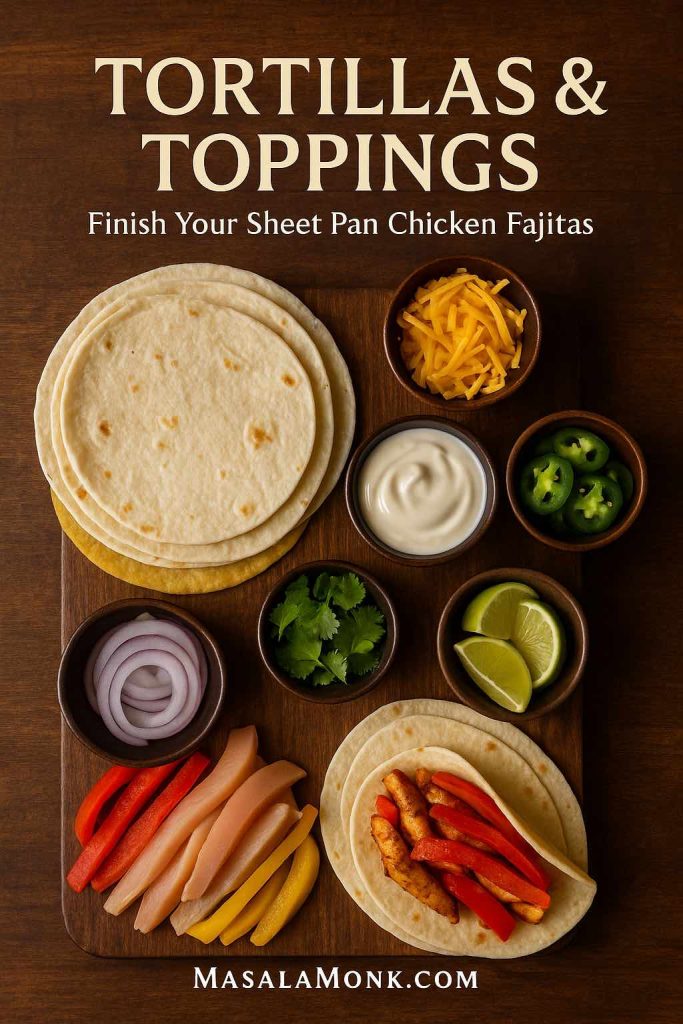
Soft tortillas, fresh jalapeños, lime, cheese and creamy toppings turn simple sheet pan chicken fajitas into a build-your-own fajita bar everyone can customise.
Tortillas and toppings
Once your chicken fajitas in the oven recipe comes out bubbling and browned, you’ll want a few extras to round things out:
Flour or corn tortillas
Grated cheese
Sour cream or thick Greek yogurt
Sliced jalapeños
Fresh coriander
Extra lime wedges
If you’d like a lighter, more refreshing topping, a bowl of cool Greek tzatziki sauce is a beautiful alternative to sour cream. It brings creaminess, garlic, cucumber, and herbs that play wonderfully with spicy chicken fajita oven tray flavours.
Choosing the Best Sheet Pan for Recipe of Chicken Fajitas
Because this recipe hangs on your pan, it’s worth a quick look at equipment. The same mixture of chicken and peppers behaves differently in a cast-iron chicken fajita pan, a light cookie sheet, and a heavy-duty baking tray.
Sheet pan vs skillet
If you’ve always made skillet fajitas chicken, shifting to the oven might feel like a big step. In reality, each method has its niche:
A cast-iron skillet for fajitas is unbeatable when you want dramatic sizzle and dark char. You get those hot spots that bring extra browning, and it’s fun for smaller batches you want to serve right away.
A sturdy sheet pan is better when you need 1 pan chicken fajitas for four people (or more) without hovering. You get more surface area, so your pan sheet chicken fajitas can spread out and roast instead of steaming.
For this recipe, a rimmed, heavy-duty baking sheet is ideal. It’s stable under high heat and holds onto some of that warmth, helping the edges crisp up.
A cast iron skillet, cookie sheet and heavy rimmed sheet pan side by side—showing why the sturdy sheet pan is the best choice for oven-baked chicken fajitas.
Cookie sheet vs baking sheet
You can absolutely use a cookie sheet if that’s what you have; a lot of people make cookie sheet fajitas and cookie sheet chicken fajitas successfully. Just keep these points in mind:
Thin pans may warp at high temperatures, which can cause the oil to pool and parts of your pan sheet fajitas to brown faster.
Darker pans brown more aggressively, which can be great for extra char but requires closer watching at the end.
If you’re shopping with fajitas in mind, look for something marketed as a half-sheet pan or roasting tray. That’s essentially the best pan to cook fajitas in when you’re leaning into the baked fajitas style.
Now that your ingredients and pan are ready, it’s time to make easy oven baked chicken fajitas from start to finish.
Step 1 – Prep the tray: line the pan, scatter peppers and onions, then add the sliced chicken so everything is ready to roast together.
1. Preheat and prep the tray
Begin by preheating your oven to around 220°C (425°F). This high heat is what makes fajitas baked in oven taste similar to grilled versions. While the oven heats, line your pan with parchment or lightly brush it with oil.
Scatter your sliced peppers and onions across the tray. This base layer becomes the foundation of your sheet pan chicken and peppers, catching juices and seasonings as everything cooks.
Arrange the sliced chicken on top. You’re building your chicken sheet pan fajitas right on the tray, so there’s no need for extra bowls once you get the hang of it.
Step 2 – Season and toss: drizzle on oil and lime, sprinkle over the fajita spice mix, then toss everything together until the chicken and veggies are coated.
2. Mix and add the seasoning
Drizzle oil and lime juice over the chicken and vegetables. Sprinkle over your spice mix, making sure every strip has a little colour. Then, use your hands or tongs to toss everything together directly on the pan until the entire chicken fajita sheet pan recipe looks well coated.
At this point, the mixture already resembles a fajita tray bake: vibrant, glossy, and promising. Make sure nothing is piled too high; for the best sheet pan fajitas, you want most pieces in a single layer, or as close as you can get.
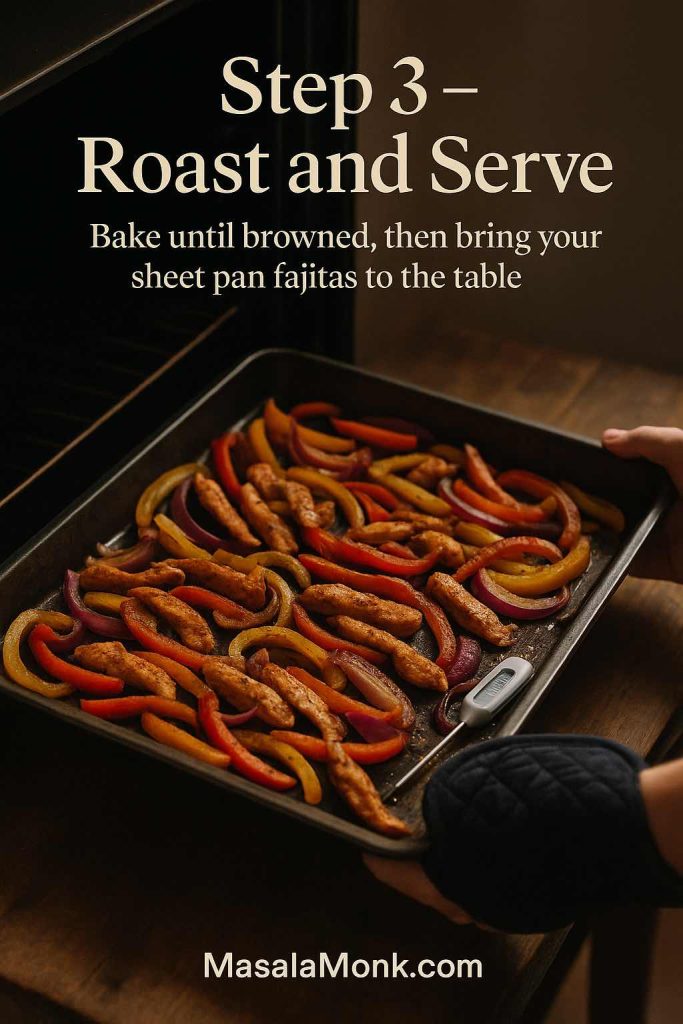
Step 3 – Roast and serve: bake the chicken and peppers until lightly charred, check that the chicken is cooked through, then bring the sizzling sheet pan fajitas straight to the table.
3. Roast until juicy and slightly charred
Slide the pan into the hot oven and roast for about 18–22 minutes:
Stir once halfway through to make sure your pan fajita mix cooks evenly.
Keep an eye on smaller pieces; they might brown a bit faster at the edges.
If you’d like a darker finish, you can increase the heat slightly or use the broiler for the last few minutes for broiled chicken fajitas.
For safety, aim for an internal temperature of 165°F (74°C) in the thickest pieces of chicken. A small instant-read thermometer takes the guesswork out of this part and guarantees fully cooked baked chicken fajitas every time.
When the chicken is opaque and tender and the vegetables have softened and picked up browned spots, your oven baked chicken fajita recipe is ready.
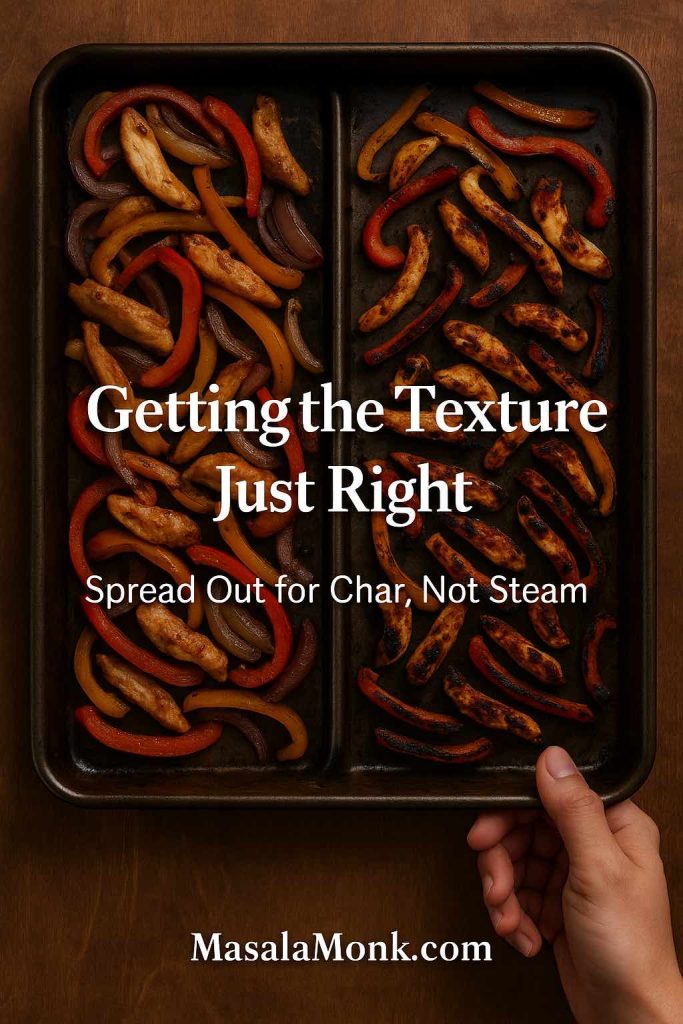
Good chicken fajitas baked in oven are all about balance. You want soft onions, tender peppers, and juicy chicken, but you also want enough colour and char to bring depth.
Crowded fajitas steam, but when you spread the chicken and peppers out in a single layer you get the charred, deeply flavoured sheet pan chicken fajitas everyone loves.
Here are a few small tweaks that make a big difference:
Spread the mixture out. Crowding the tray makes fajitas bake tray style dishes steam. If things are piled high, use two pans.
Rotate the pan halfway through if your oven runs hot in certain spots. This simple step can turn a decent fajita sheet pan recipe into the best sheet pan fajitas your oven can produce.
Stir gently. Flipping everything once in the middle helps both sides brown without shredding the chicken.
If you love the seared edges you get from cooking fajitas in a pan, you can always transfer a portion of the roasted fajita chicken sheet pan mix to a hot cast-iron chicken fajita pan for a minute or two before serving. It’s the best of both worlds: low-effort cooking plus that restaurant-style finish.
Turning One Recipe into Many: Variations on Sheet Pan Chicken Fajitas
A good sheet pan fajita chicken base opens up a lot of possibilities. Once you’ve mastered the classic version, you can start playing with different combinations.
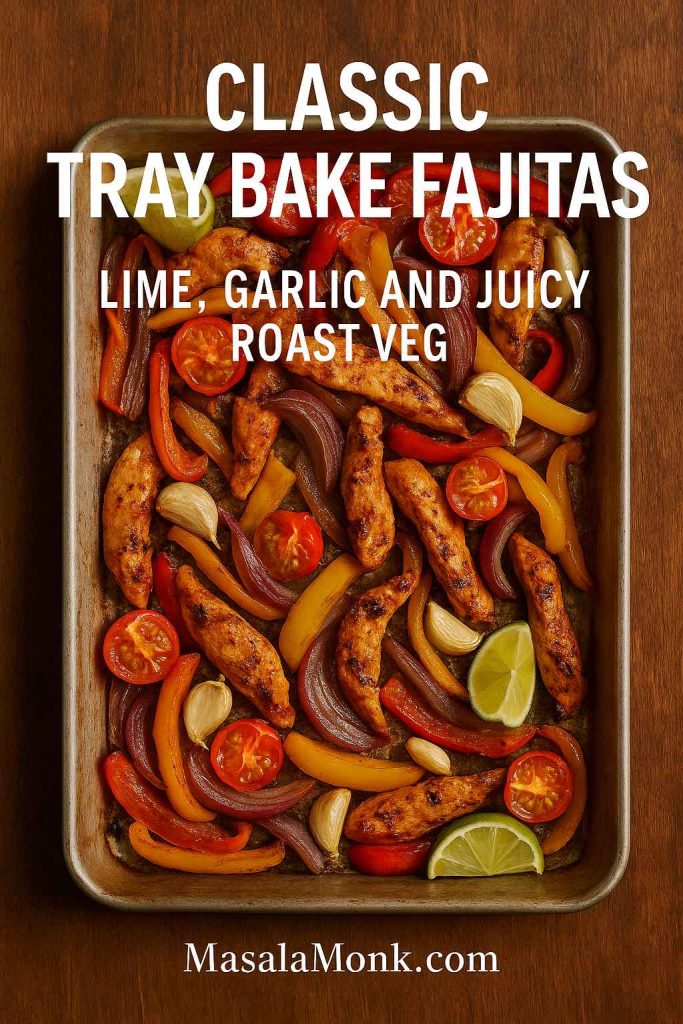
Classic tray bake fajitas with roasted garlic, burst cherry tomatoes and lime wedges turn simple sheet pan chicken fajitas into a full, juicy one-pan dinner.
Classic tray bake fajitas
You can lean harder into the chicken fajita tray bake idea by nestling lime wedges, whole garlic cloves, and even halved cherry tomatoes around the pan before roasting. As the tomatoes burst and the garlic softens, they create pockets of extra flavour that melt into the juices and coat the chicken.
For a slightly heartier fajita chicken tray bake, try adding:
Drained black beans or chickpeas
Frozen corn (no need to thaw)
Diced sweet potato or small potato cubes for a more substantial baked fajitas recipe
These additions make your chicken fajita sheet pan meal feel more like a complete tray dinner that can be served as is, without many extra sides.
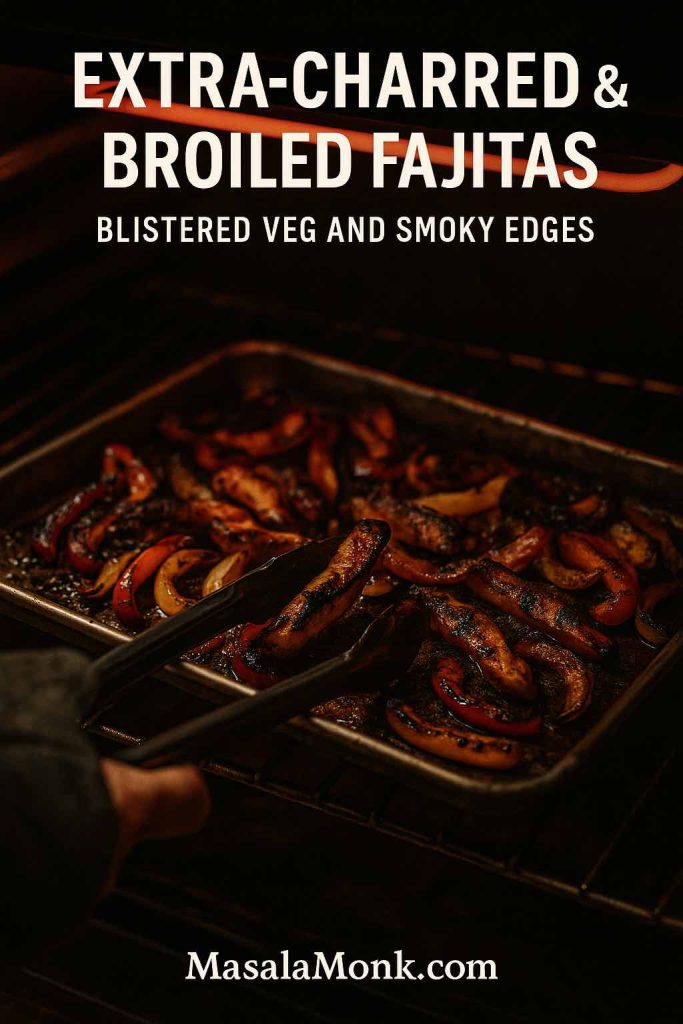
Extra-charred, broiled sheet pan chicken fajitas with blistered peppers and smoky edges for anyone who loves that grilled, restaurant-style flavour at home.
Extra-charred and broiled fajitas
If you lean towards the smoky, charred edges you get from grilling or pan fajita recipe styles, the broiler is your friend. Once the chicken is cooked through, slide the pan under the broiler for two to three minutes, watching closely. The vegetables will blister in places, and you’ll end up with something closer to restaurant-style oven fajitas.
Some cooks like to marinate the chicken first, inspired by recipes like sheet pan chicken fajitas from Serious Eats, then finish under the broiler for a deep, roasty flavour. Others love the simplicity of budget-friendly oven fajitas where you just toss everything and bake. Both approaches fit happily within this chicken fajita recipe sheet pan framework; feel free to adapt.
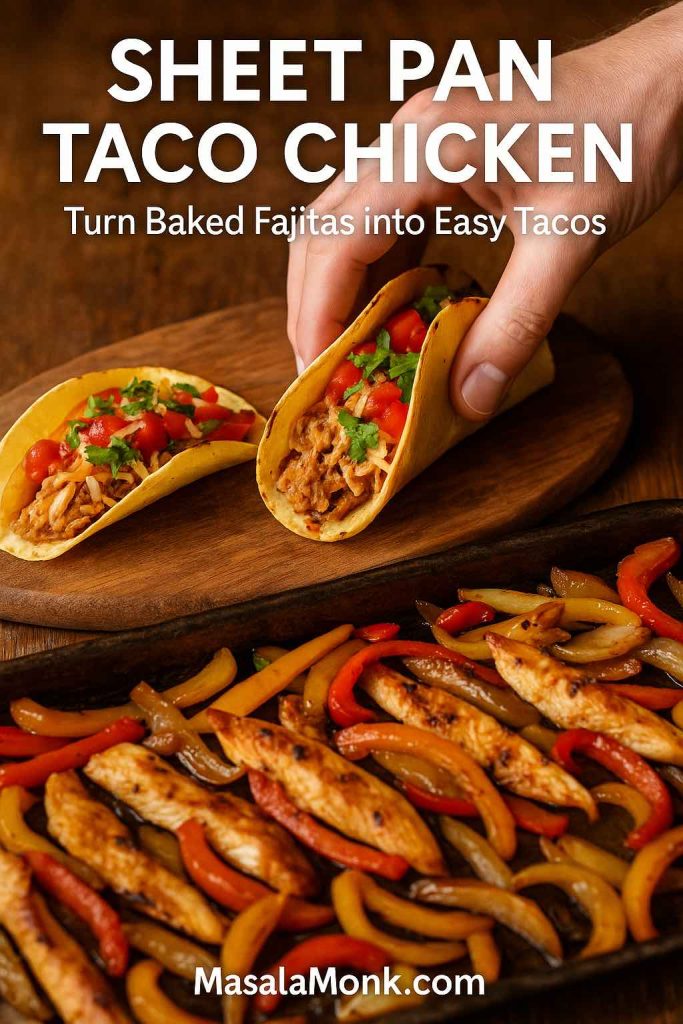
Turn one tray of sheet pan chicken fajitas into easy chicken tacos by shredding the baked chicken, piling it into warm tortillas and topping with cheese, salsa and herbs.
Sheet pan taco chicken and chicken tacos
Sometimes you’re craving tacos rather than classic fajitas. Luckily, the same sheet pan chicken fajitas mixture doubles as sheet pan taco chicken with almost no changes.
Once your easy sheet pan fajitas come out of the oven:
Shred a portion of the chicken with two forks.
Spoon the shredded pieces into small tortillas with extra cheese and salsa.
Keep some of the sliced version for traditional fajitas.
You’ve just transformed easy baked chicken fajitas into both fajitas and tacos, using one tray and one round of cooking.
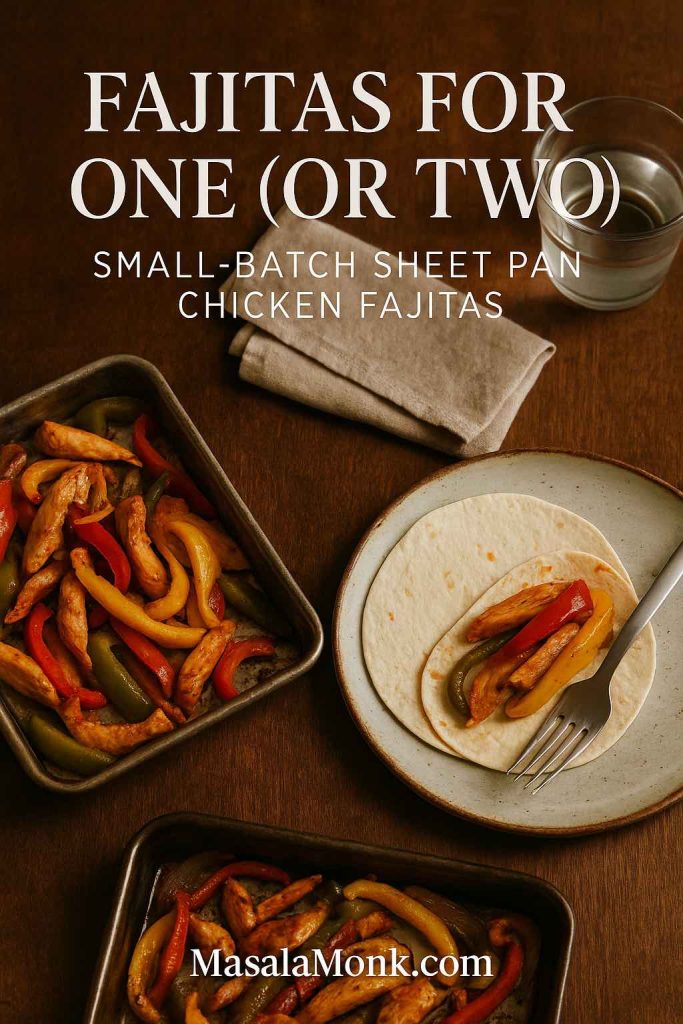
A mini sheet pan of chicken fajitas with a single plate and tortilla shows how easy it is to scale this recipe down for one or two people without losing the one-pan simplicity.
Small-batch fajitas for one or two
The beauty of this method is how easy it is to scale down. For chicken fajitas for one, just cut the amounts to a single chicken breast, one pepper, and half an onion. You’ll still spread everything out so it roasts properly, and you’ll still be rewarded with a personal-sized chicken fajita sheet pan dinner without leftovers, if that’s what you prefer.
On evenings when you want leftovers on purpose, doubling the recipe turns the same base into meal prep gold.
Serving Ideas: Toppings, Sides, and Full Fajita Nights
Once your best sheet pan chicken fajitas are out of the oven, you can serve them simply or turn them into an entire feast.
Classic fajita spread
Lay out warmed tortillas, your sheet pan chicken fajitas, and bowls of toppings:
Grated cheese
Sour cream or Greek yogurt
Salsa or pico de gallo
Avocado slices or guacamole
Fresh coriander and lime wedges
If you’d like something a bit different from sour cream, spoon some Greek tzatziki sauce into a bowl and let people drizzle it over their baked chicken fajitas. The cool yogurt, cucumber, and herbs bring a wonderful contrast to the spicy, smoky chicken.
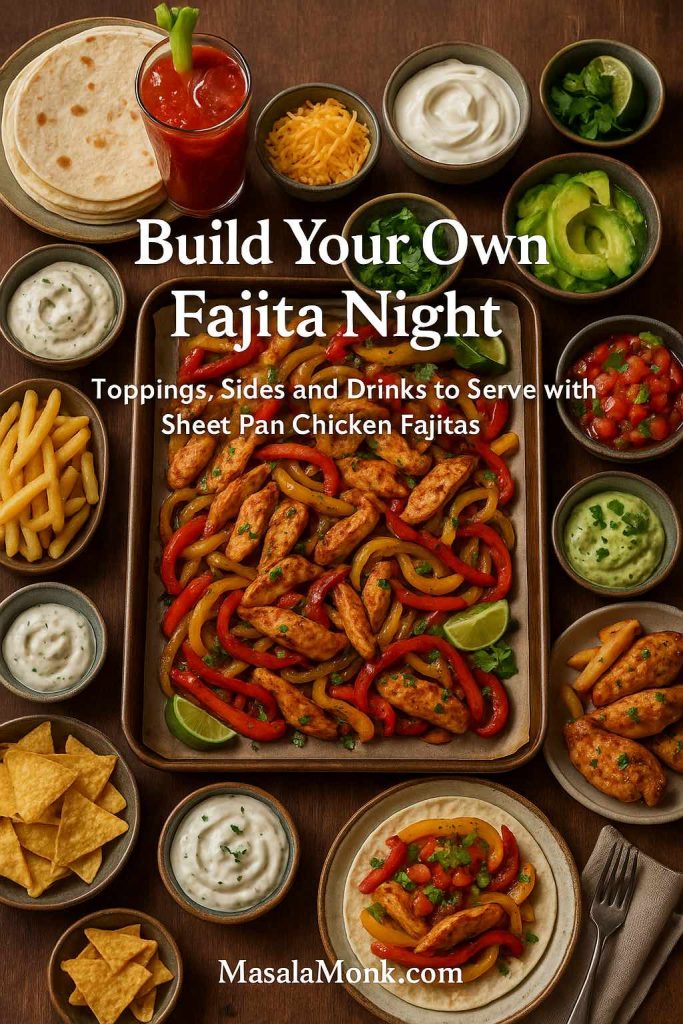
Build your own fajita night with sheet pan chicken fajitas in the centre, surrounded by tortillas, toppings, fries, dips and drinks so everyone can customise their perfect plate.
Party platters and game-day food
For gatherings, you can use your one pan fajita recipe as the centrepiece of a game-day spread. Arrange the tray bake fajitas on a board with bowls of tortilla chips, crunchy vegetables, and a few dips. A bubbling Buffalo chicken dip on the side adds creamy heat, while a selection of spinach dips brings extra richness.
If you want something on the side that everyone loves, a tray of crispy homemade French fries turns fajita night into a full-on comfort feast. You can even add a platter of lemon pepper chicken wings so guests can load their plates with wings, fries, and sheet pan chicken fajitas pioneer woman–style trays of sizzling chicken and peppers.
Bowls, salads, and low-carb options
On nights when you’re craving something lighter, skip the tortillas and build fajita bowls:
Spoon your fajitas in oven chicken over shredded lettuce, rice, quinoa, or cauliflower rice.
Add beans, corn, chopped tomatoes, and avocado.
Finish with lime juice and a spoonful of yogurt or tzatziki.
If you’re exploring lower-carb eating, you might enjoy browsing plant-powered keto Mexican recipes for inspiration. You’ll find ideas there for vegetable-based fillings that pair nicely with this fajita oven recipe, especially when you’re using the same spices in creative ways.
Drinks that pair beautifully with this Recipe of Sheet Pan Chicken Fajitas
Fajitas are festive by nature, so they love good drinks. For brunch-style spreads or weekend dinners with friends, a pitcher of Bloody Marys or colourful mimosas fits right in with fajitas, nachos, and dip.
If you’re more in the mood for something sweet after dinner, a slice of tres leches cake or another dessert brings everything to a gentle close after the warm spice of your fajita sheet pan chicken.
Leftovers, Meal Prep, and Next-Day Ideas
One of the nicest things about easy oven baked sheet pan chicken fajitas is how gracefully they turn into other meals.
Storing and reheating
Let leftovers cool slightly, then pack them in airtight containers. They’ll keep well in the fridge for three days or so. Reheat gently in a skillet, in the oven, or even in the microwave, though a quick blast in a pan or oven helps revive those tasty browned edges.
Because the vegetables hold up, easy baked chicken fajitas make excellent lunches. Tuck them into tortillas, spoon them over rice, or toss them through salads for quick meals that still feel satisfying.
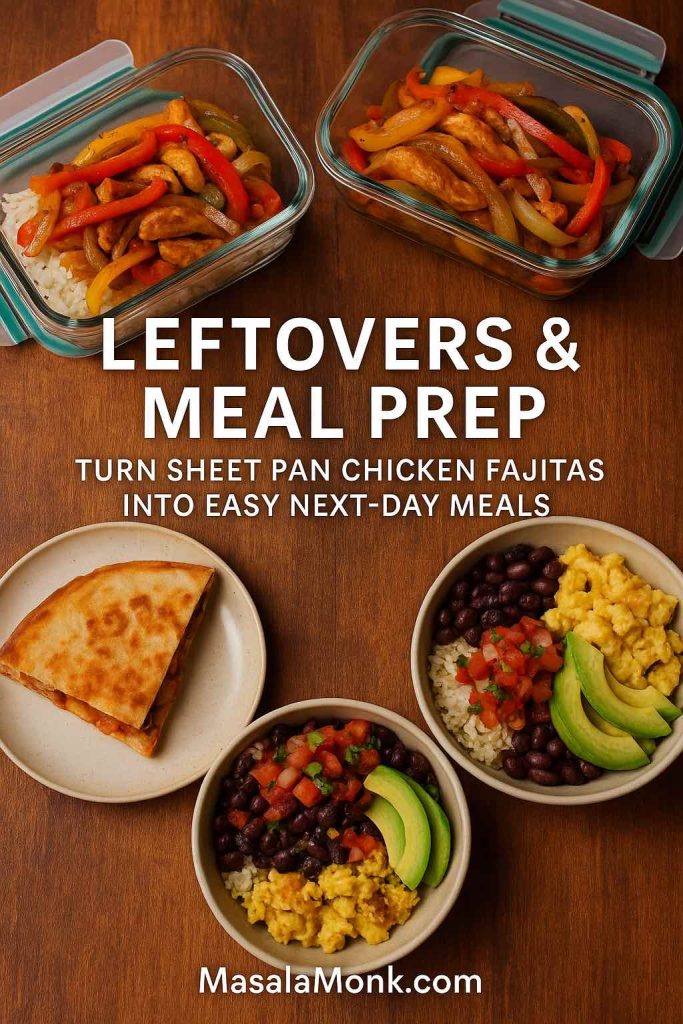
Leftover sheet pan chicken fajitas slip easily into glass containers, then reappear as quesadillas, burrito bowls and even a quick fajita-style breakfast the next day.
Fresh ways to use leftovers from Sheet Pan Chicken Fajitas Recipe
Leftover sheet pan fajita chicken doesn’t have to be eaten in exactly the same format. You can:
Turn it into quesadillas by folding the chicken and peppers into tortillas with cheese and crisping them in a pan.
Build burrito bowls or burritos with rice, beans, and whatever else you have around.
Add it to omelettes or scrambled eggs for a fajita-style breakfast.
Stir it through a simple pasta with a bit of cream or yogurt and extra lime juice for a fajita-inspired pasta night.
If you’re looking for more easy chicken ideas to keep in your weekly rotation, recipes like whole chicken in crock pot or cheesy chicken broccoli rice fit right alongside this easy chicken fajitas sheet pan method. They all deliver that same comforting feeling with minimal fuss.
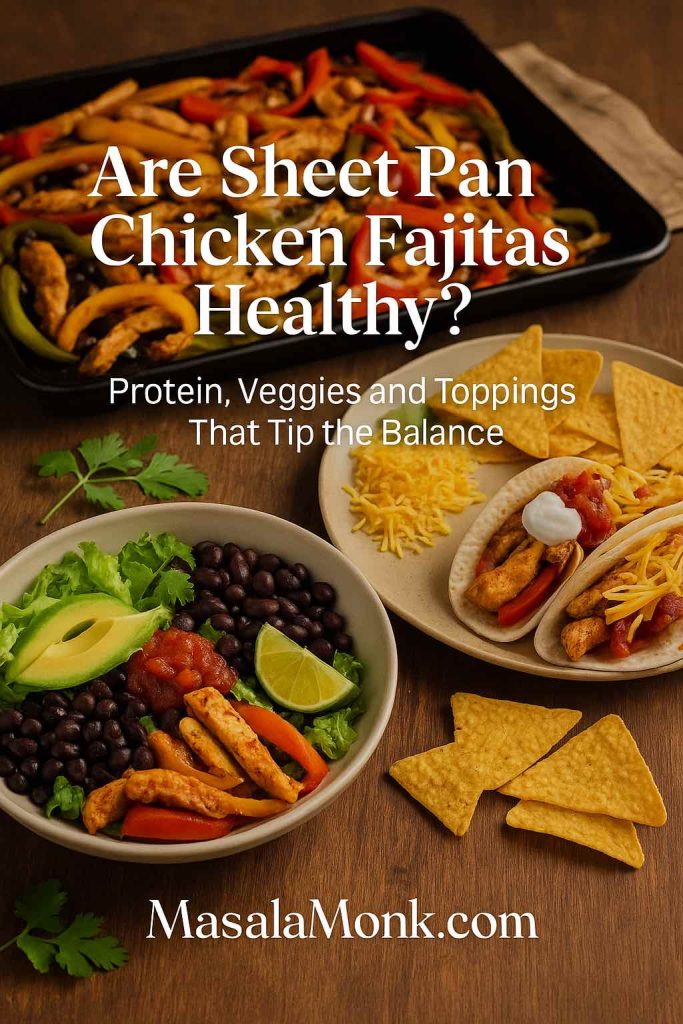
Are Sheet Pan Chicken Fajitas Healthy?
Because this sheet pan fajita recipe leans heavily on chicken and vegetables, it’s simple to tweak it towards your own idea of “healthy.”
Protein and vegetables
You’re getting a good dose of protein from the chicken, plus fibre and vitamins from peppers and onions. Bell peppers are rich in vitamin C and antioxidants, while onions contribute their own unique compounds and prebiotic fibre. When you serve this chicken fajita one pan meal with extra vegetables or a salad, you’re building a plate that’s both satisfying and colourful.
The base of sheet pan chicken fajitas is all about lean protein and colourful vegetables, while your choice of tortillas, beans, salad, cheese or chips is what tips the meal lighter or more indulgent.
Choices that change the balance
The health profile of easy fajitas in the oven depends heavily on what you serve alongside them. Flour tortillas, cheese, sour cream, and chips will make it more indulgent; lettuce, salsa, yogurt, and beans keep it feeling a bit lighter.
You can also swap chicken for vegetables entirely. Jackfruit, mushrooms, and tempeh can all stand in for meat while keeping the spirit of sheet pan fajitas alive. For inspiration, you might enjoy jackfruit-based meal ideas or tempeh “beef” style fillings, both of which adapt beautifully to fajita spices.
If you’re curious about how onions fit into a low-carb or keto approach, you can also explore a gentle breakdown of onions and keto to see how they can still have a place in a mindful diet.
Comparing Sheet Pan Chicken Fajitas Recipe to Stovetop Fajitas
It’s natural to wonder how chicken fajitas in oven recipe versions stack up against the classic pan fajita recipe cooked on the stove.
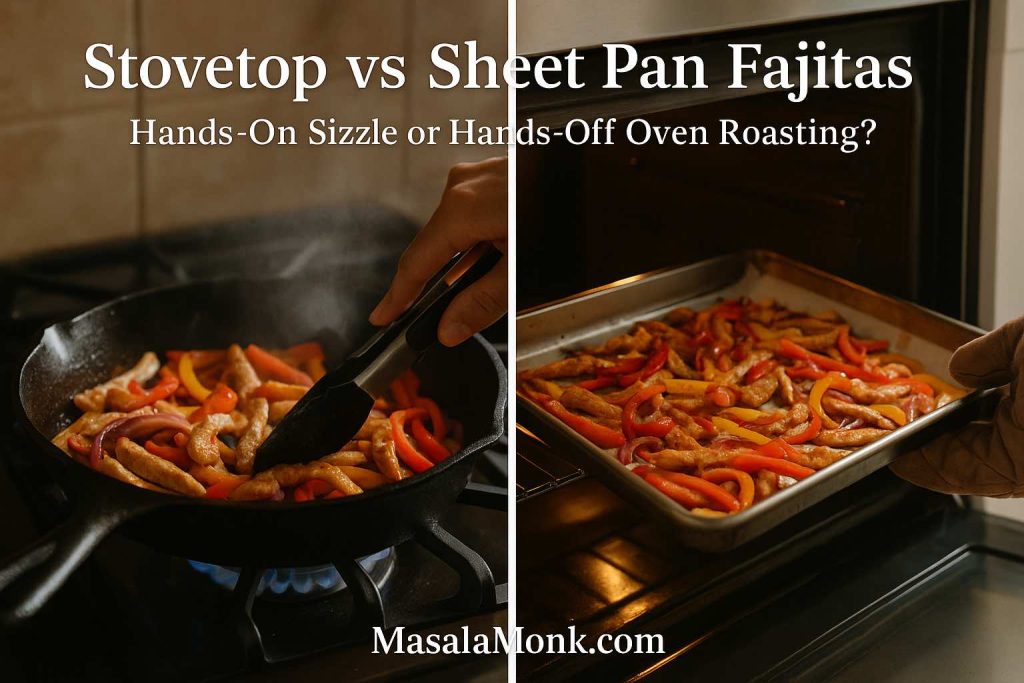
Stovetop fajitas
With cooking fajitas in a pan, you get:
A bit more control over individual pieces as you stir and flip.
Very quick cooking, which is great for small batches.
That sizzle and sear you might associate with restaurant fajitas.
However, you also get more active time at the stove, and if you’re making a large batch of pan fajitas chicken, you may need to cook in rounds.
Stovetop fajitas bring hands-on sizzle in a cast iron skillet, while sheet pan chicken fajitas offer the same flavours with an easier, hands-off oven approach.
Oven fajitas
With fajitas baked in oven, you enjoy:
A mostly hands-off experience: toss, spread, roast.
The ability to cook a lot at once, ideal for families or leftovers.
Easy cleanup, because you’ve truly made 1 pan fajitas.
There’s no wrong answer here. Many people use oven methods during the week for easy sheet pan fajitas and save skillet or grilled versions for weekends when they feel like cooking in a more leisurely way. You can even move between methods in the same meal: roast most of the fajita sheet pan bake in the oven, then finish a portion in a hot skillet if you’re craving that extra sear.
When you bring a tray of sheet pan chicken fajitas to the table, you’re not just serving dinner; you’re offering a tiny piece of culinary history, adapted to modern life. Fajitas may have started as grilled strips of beef cooked over open flames and served to hungry ranch workers, but they’ve travelled a long way from those early days.
Now, they show up as restaurant sizzlers, street food, skillet suppers, and, increasingly, as fajitas in oven chicken dinners pulled from home ovens around the world. Recipes like classic grilled chicken fajitas keep the outdoor tradition alive, while damn delicious sheet pan fajitas and similar recipes prove that you can get big flavour from a humble baking tray.
Your own chicken fajita sheet pan pioneer woman moment might look like a pan pulled from the oven on a Wednesday night, kids spooning sheet pan fajita chicken into tortillas at the counter, someone mixing drinks in the corner, and everyone leaning over the table to build their perfect bite. It doesn’t have to be dramatic; it just has to taste good and feel welcoming.
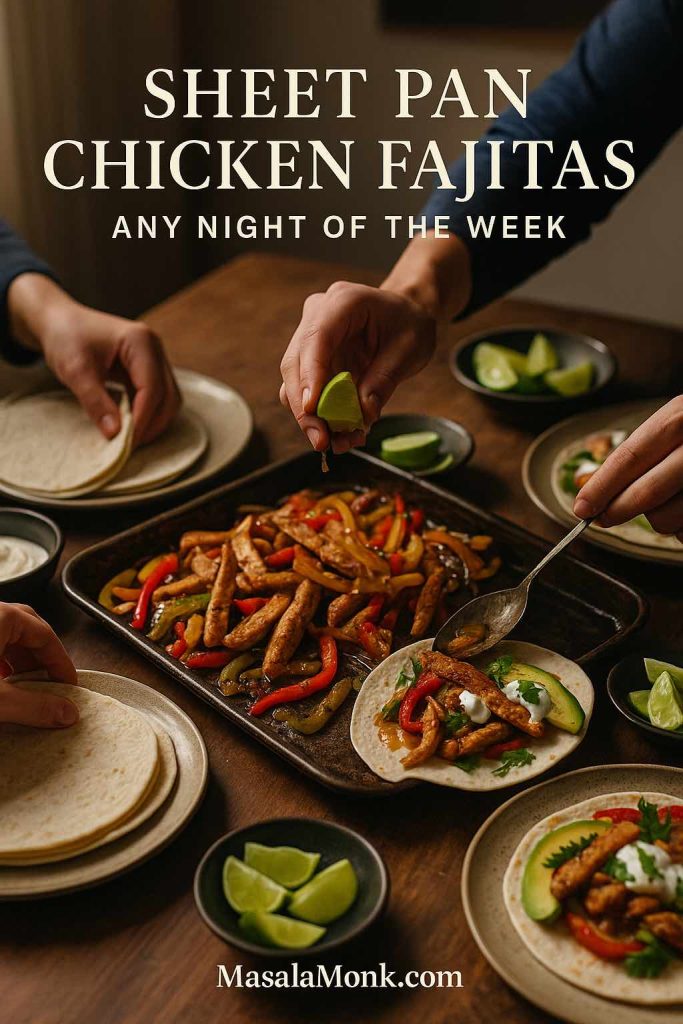
Sheet pan chicken fajitas at the centre of the table, with everyone reaching in to build their own tortillas – an easy any-night-of-the-week dinner straight from one pan.
Bringing It All Together
In the end, this sheet pan chicken fajitas recipe is really an invitation. It invites you to trade a little stovetop juggling for the convenience of easy oven baked fajitas, to let the oven carry more of the load while you use the extra time however you need.
Whether you’re serving classic baked chicken fajitas with warm tortillas, building low-carb bowls from a fajita oven tray, or turning leftovers into quesadillas and tacos, you’re working with a method that’s endlessly adaptable. One night you might pair your pan sheet fajitas with tzatziki and salads; another night you might bring out dips, fries, and wings and turn it into a party.
However you choose to plate them, these best sheet pan chicken fajitas are there to make dinner easier, a little brighter, and a lot more satisfying—one tray at a time.
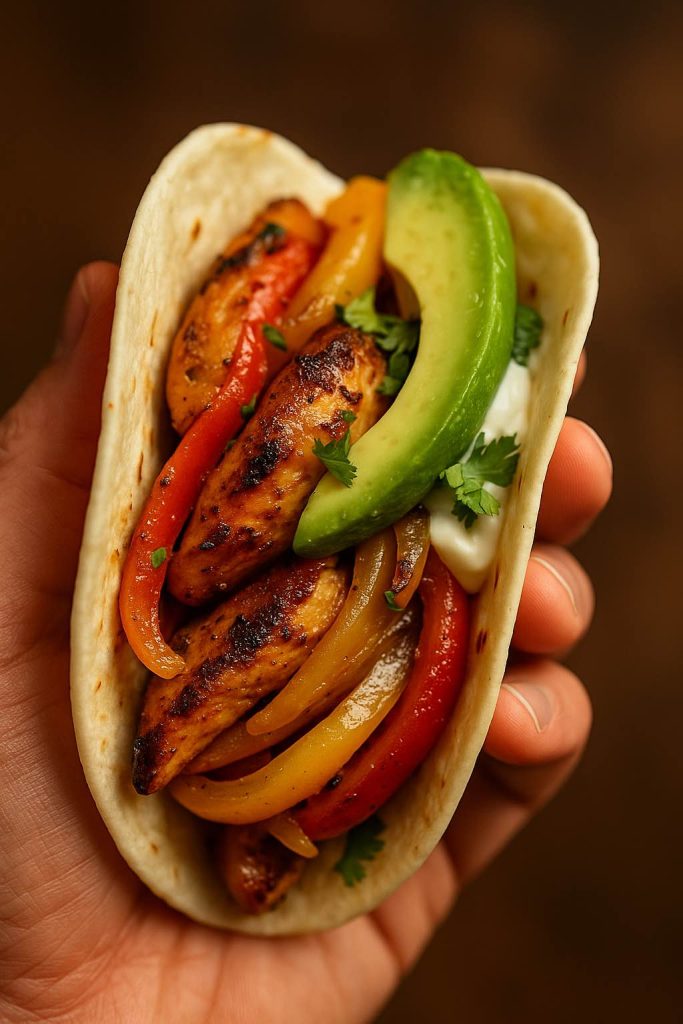
A warm, handheld chicken fajita loaded with charred chicken, sweet peppers, avocado and a touch of creamy sauce—everything you love about sheet pan chicken fajitas in a single perfect bite.
FAQs about Sheet Pan Chicken Fajitas Recipe
1. Can I use chicken breasts or thighs for sheet pan chicken fajitas?
You can use either, and both work beautifully in a sheet pan chicken fajitas recipe. Chicken breasts give leaner baked chicken fajitas, while thighs stay extra juicy and forgiving if they roast a little longer. As long as you slice them into similar strips, your chicken sheet pan fajitas will cook evenly.
2. How thick should I slice the chicken and vegetables?
Aim for strips about 1–1.5 cm thick so everything in your sheet pan fajitas roasts at roughly the same pace. Thin slices of chicken, peppers, and onions give you tender pieces with nicely browned edges. When the sizes match, your one sheet chicken fajitas are much less likely to end up with overcooked chicken and underdone veg.
3. What oven temperature works best for baking sheet fajitas?
A hot oven is ideal; most oven fajitas turn out best around 220°C / 425°F. That higher heat lets the sheet pan fajita chicken caramelise instead of steaming. Once the chicken is cooked through and the vegetables are lightly charred, your chicken fajitas baked in oven are ready to serve.
4. How long do sheet pan chicken fajitas usually take to cook?
For a typical oven baked chicken fajita recipe, the tray needs about 18–22 minutes, depending on your oven and how crowded the pan is. Stir once halfway so the chicken fajita in oven mix colours on all sides. When the chicken is opaque and the vegetables look glossy and tender, your baked fajitas are done.
5. How do I stop my sheet fajitas from going soggy?
Give everything room to breathe on the tray. If your chicken fajita sheet pan is piled too high, the juices collect and you get more steam than roast. Spreading the mixture into a shallow layer—or using two pans for pan sheet chicken fajitas—helps you get those tasty browned edges instead of soft, wet vegetables.
6. What’s the best pan for fajitas in the oven?
A sturdy rimmed baking sheet is usually the best pan for fajitas when you’re using this method. It’s big enough for easy sheet pan chicken fajitas and strong enough not to warp at high heat. You can still make cookie sheet fajitas, but a heavy tray tends to give more even browning.
7. Can I use a non-stick or glass dish for this sheet pan fajita recipe?
You can, although the results change slightly. Non-stick trays make clean-up easier but may brown sheet pan chicken fajitas a little less. Glass dishes hold heat differently, so your chicken fajita one pan dinner might need a few extra minutes; simply watch for colour and doneness rather than relying only on the clock.
8. Can I cook fajitas in the oven if I’m used to making them in a skillet?
Yes, you can easily move from skillet fajitas chicken to a chicken fajitas in the oven recipe. The ingredients stay almost the same; only the technique changes. Instead of tossing everything in a chicken fajita pan on the stove, you toss on a tray, roast, and stir once, letting the heat build flavour while you step away.
9. Are sheet pan chicken fajitas spicy?
They’re usually moderately spiced rather than extremely hot. Most sheet pan fajita recipes rely on chili powder, cumin, and paprika for warmth, then add cayenne or fresh chili for extra kick. If you like mild baked chicken fajitas, simply skip the hotter spices; if you love heat, sprinkle more over your pan fajita before roasting.
10. How can I adjust the heat level in my baked fajitas recipe?
You control the spice level with your seasoning. To keep easy oven baked chicken fajitas gentle, use mild chili powder and no cayenne. On the other hand, if you want fiery sheet pan fajitas, add extra cayenne, fresh jalapeños, or a hotter chili powder to the sheet pan fajita chicken mix before cooking.
11. Can I prepare the chicken fajitas ahead of time?
You can slice the chicken and vegetables and mix them with oil and spices a few hours ahead. Keep the chicken fajita sheet pan mixture covered in the fridge until you’re ready to bake. When it’s time for dinner, spread everything out and roast, turning marinated one pan chicken fajita components into a flavourful tray with very little effort.
12. Is it okay to use frozen vegetables for sheet pan fajitas?
Frozen peppers and onions can work in a pinch, though the texture will be softer. If you scatter them straight onto the tray for baking sheet fajitas, expect less char and more moisture. Fresh vegetables give crisper edges and brighter colour, but frozen still make decent oven fajitas when you’re short on time.
13. How do I keep the chicken from drying out?
Don’t overcook it and avoid very tiny pieces. Cutting even strips, using enough oil, and pulling the chicken fajita in oven tray out as soon as the meat is just done all help keep your chicken fajita pan recipe juicy. Thighs are especially forgiving in a chicken fajita tray bake because they stay tender even if they roast a bit longer.
14. Can I make sheet pan fajitas for one or two people?
Definitely. For chicken fajitas for one or a small household, simply reduce the quantities and use a smaller tray. You’ll still enjoy one sheet fajitas with the same flavour and texture, just in a more manageable size that doesn’t leave you with too many leftovers.
15. Do I need to line the pan when I make sheet pan chicken fajitas?
Lining the pan with parchment makes clean-up easier but isn’t compulsory. If you skip lining, lightly oil the surface so your chicken sheet pan fajitas don’t stick. Either way, the sheet pan chicken and peppers will still roast nicely and pick up plenty of flavour.
16. Can I cook these fajitas under the broiler instead of just baking?
Yes, the broiler can give you extra char. Many people bake the chicken fajita sheet pan dinner until almost done, then move it under the broiler for a couple of minutes for lightly blackened edges. This approach gives broiled chicken fajitas that look close to grilled ones, while still using a single pan.
17. Are baked chicken fajitas healthier than fried versions?
Baked chicken fajitas generally use less oil than deep-fried options, and they’re built around lean protein and vegetables. Because you’re roasting the chicken fajita oven tray rather than frying, the meal often feels lighter. The overall balance still depends on your tortillas, toppings, and portion sizes, but the base of baked chicken fajita recipe is a wholesome starting point.
18. Can I double the recipe for a crowd?
You can absolutely scale this sheet pan chicken fajitas recipe up. For a large group, divide the mixture between two trays so the pan sheet fajitas still roast instead of steaming. Rotate the pans halfway through, and you’ll end up with a big batch of best sheet pan chicken fajitas ready at the same time.
19. What other meats can I use for a sheet pan fajita tray bake?
Chicken is classic, yet the same method works with beef strips, pork, or even shrimp. If you use quicker-cooking proteins like prawns, add them later in the baking time so they don’t overcook. No matter which protein you choose, the basic pan fajita pattern—strips, spices, and high heat—stays the same.
20. Can I make a vegetarian version of sheet pan fajitas?
Yes, it’s simple to adapt this into a vegetable-only fajita sheet pan recipe. Swap the chicken for mushrooms, tofu, paneer, jackfruit, or a mix of hearty vegetables and keep the same seasoning and roasting method. The result still feels like easy sheet pan fajitas, just without the meat.
21. How should I reheat leftover sheet pan chicken fajitas?
Leftover baked chicken fajitas reheat well in a hot skillet or in the oven. Spread the chicken fajita tray bake mixture in a single layer and warm it just until hot, so the chicken doesn’t dry out. A quick reheat brings your pan sheet chicken fajitas back to life for tacos, bowls, or wraps the next day.
22. What’s the difference between sheet pan fajitas and baked chicken tacos?
Sheet pan fajitas focus on strips of chicken and vegetables that you stuff into tortillas right at the table. Baked chicken tacos usually have the filling tucked inside the shells before going into the oven. Nevertheless, the same sheet pan fajita chicken can be used for both; you just decide whether to assemble first or after roasting.
23. Can I make this recipe milder for kids?
Yes, you can easily keep easy sheet pan chicken fajitas gentle enough for younger eaters. Use mild chili powder, skip the cayenne, and maybe add a bit more paprika for colour. Then, if adults want extra heat, they can sprinkle chili or hot sauce over their own chicken fajita sheet pan meal.
24. Do I need special fajita seasoning packets for this recipe?
Packets are convenient, but they’re not required for an easy sheet pan fajita recipe. A simple mix of chili powder, cumin, paprika, garlic, salt, and pepper gives the same character. Once you’ve tasted your homemade seasoning on a chicken fajita in oven tray, you may not feel the need to buy packets again.
25. Can I use this method for a chicken fajita pan on the stovetop?
You can borrow the same spice mix and proportions when you’re cooking chicken fajitas in a pan. Simply sear the chicken and vegetables in a hot skillet for fajitas instead of on a tray. That way, you can enjoy both skillet fajitas chicken and easy oven baked chicken fajitas using one familiar flavour base.