Posted on — 2 Comments

Creamy Cajun Chicken Pasta Recipe

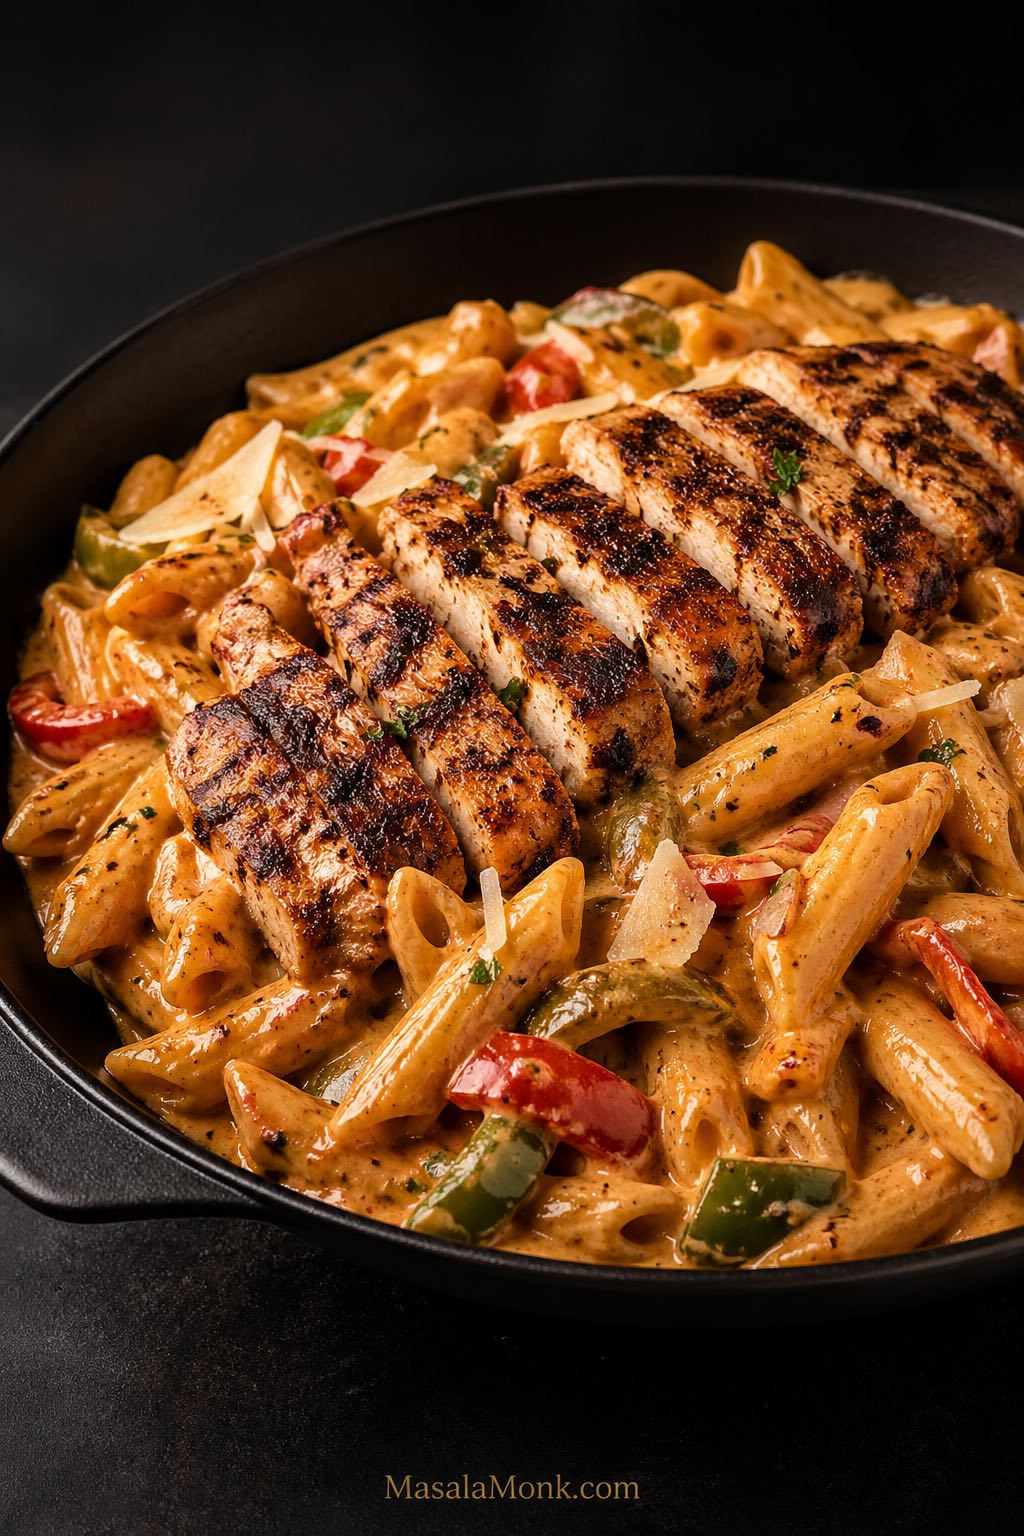
Creamy Cajun chicken pasta with sliced seared chicken, penne, bell peppers, parmesan, and a smoky orange cream sauce in a dark skillet.

A good cajun chicken pasta recipe should give you juicy chicken, tender pasta, and a smoky, spicy cream sauce that clings to every bite. It should taste bold and creamy without turning salty, greasy, watery, or painfully hot.

This version starts with the most reliable skillet method because it gives you better control over the chicken, pasta, sauce, and seasoning. After that, you can use the same base to make it one-pot, Alfredo-style, smoky with sausage, restaurant-style with shrimp, blackened, lighter, no-cream, or slow cooker friendly.

Most importantly, this recipe solves the little problems that usually ruin creamy Cajun pasta: dry chicken, salty seasoning, split sauce, mushy pasta, and leftovers that thicken into a block. Instead of leaving you to guess, the guide gives you exact amounts, pan sizes, timing, temperatures, sauce fixes, and variation rules.

Quick Answer: Cajun Chicken Pasta Recipe

This cajun chicken pasta recipe is made by searing Cajun-spiced chicken, building a garlic-tomato cream sauce in the same skillet, and tossing it with pasta, parmesan, and reserved pasta water. The best version uses a wide skillet, gently simmered cream, freshly grated parmesan, and chicken cooked to 165°F / 74°C.

For four generous servings, use 340 g / 12 oz pasta, 500 g / 1.1 lb chicken, 4–5 tsp Cajun seasoning, 240 ml / 1 cup cream, 180 ml / 3/4 cup chicken stock, 55–65 g parmesan, and 120–240 ml / 1/2–1 cup reserved pasta water.

Although the one-pot method is convenient, the separate-boil skillet method is the better first version because it gives you more control over pasta texture, salt, and sauce thickness. Once you know how the sauce should look, the one-pot version becomes much easier to adjust.

At a Glance

Use this quick guide before you start cooking. It gives you the easiest path to a creamy, balanced bowl before you experiment with sausage, shrimp, Alfredo-style sauce, or lighter swaps.

DetailBest choice
Best pastaPenne or rigatoni for everyday cooking; linguine or fettuccine for a restaurant-style look
Best chickenThin chicken breast cutlets or boneless thighs
Best sauce baseHeavy cream, parmesan, chicken stock, and reserved pasta water
Best pan30 cm / 12-inch wide skillet or shallow braiser
Heat levelMedium, adjustable with cayenne or hot sauce
Main riskSalty Cajun seasoning
Best fixAdd seasoning in stages and loosen the sauce with pasta water at the end
Best variationSausage for smoky, shrimp for restaurant-style, Alfredo for extra rich
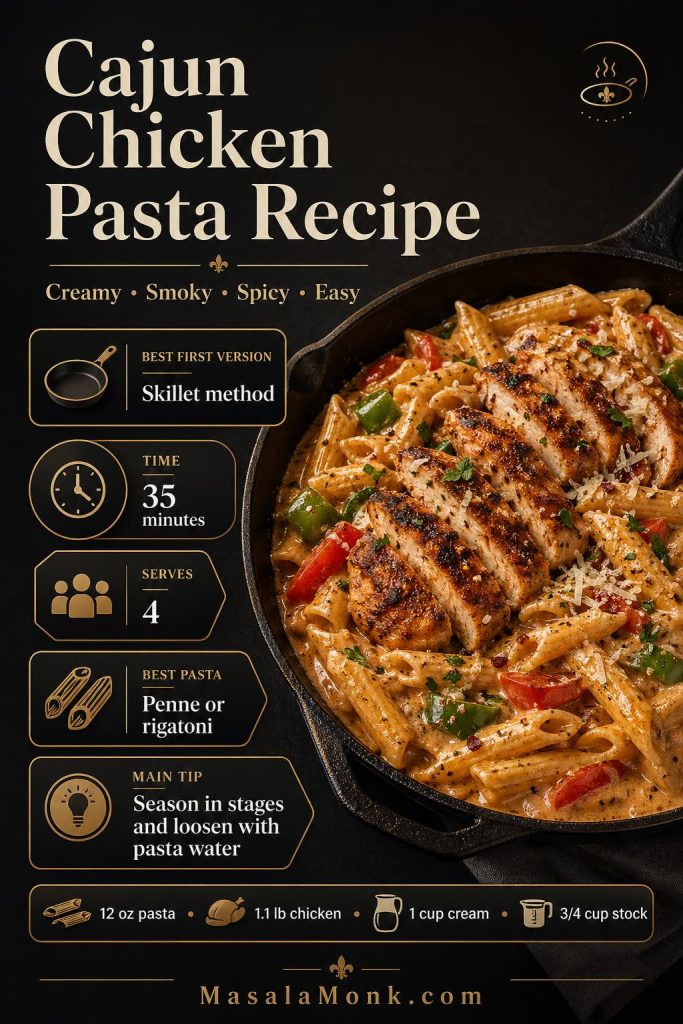
Cajun chicken pasta recipe guide showing skillet method, 35-minute timing, four servings, penne or rigatoni, and the pasta water tip.
Start with the skillet version first: it gives the best control over sauce texture, seasoning, and pasta doneness before you branch into one-pot or variation versions.

What It Tastes Like

This creamy Cajun chicken pasta is smoky, lightly spicy, garlicky, and rich without being heavy. The sauce has warm paprika-cayenne flavor, a little tomato depth, and enough parmesan to make it savory. Meanwhile, the lemon at the end keeps the cream from tasting flat.

The texture should be saucy and glossy, not dry or soupy. When you drag a spoon through the pan, the sauce should coat the pasta and slowly settle back instead of running like broth.

Best First Version to Make

For the first batch, make the skillet version with penne or rigatoni, chicken breast cutlets or boneless thighs, heavy cream, low-sodium chicken stock, and freshly grated parmesan. Also, start with less Cajun seasoning if you are using a store-bought blend, because many blends are saltier than they seem.

This first version gives you the best sense of how the sauce should behave. It should look creamy and loose in the pan, then tighten slightly after a two-minute rest. If it looks dry before serving, add hot pasta water instead of extra cream. Pasta water loosens the sauce without making it heavy.

After you make the base once, the variations become easier. Sausage needs less added salt, shrimp needs shorter cooking, Alfredo needs less tomato paste, and the one-pot version needs more stirring and more careful liquid control.

Why This Recipe Works

This cajun chicken pasta recipe works because the flavor is built in layers rather than added all at once. First, the chicken is seared so the spices toast and the skillet picks up browned bits. Then, onion, bell pepper, garlic, tomato paste, and Cajun seasoning cook in the same pan, which gives the sauce a deeper base.

  • The chicken is cooked separately first, so it stays juicy instead of simmering too long in the sauce.
  • The seasoning is added in stages, which helps prevent the pasta from turning too salty.
  • The tomato paste is cooked briefly, so the sauce tastes rounder and less raw.
  • The cream is added on lower heat, which reduces the risk of splitting.
  • The parmesan goes in gradually, so it melts into the sauce instead of clumping.
  • The reserved pasta water controls the finish, making the sauce glossy, loose, and clingy.

As a result, the pasta tastes creamy and bold without becoming greasy, grainy, dry, or overloaded with salt.

Ingredients and Exact Amounts

For this cajun chicken pasta recipe, the ingredient list is simple, but the amounts matter. Too much seasoning can make the dish salty, too much cream can mute the Cajun flavor, and too little pasta water can make the sauce feel heavy instead of silky.
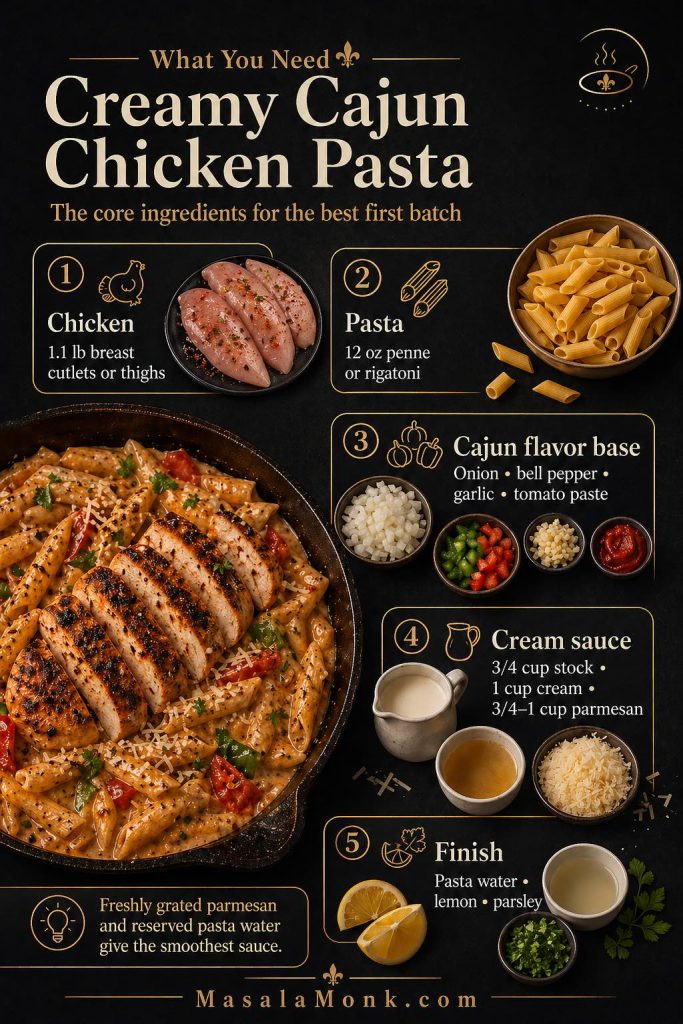
Ingredients for creamy Cajun chicken pasta, including chicken, penne, onion, bell pepper, garlic, tomato paste, stock, cream, parmesan, pasta water, lemon, and parsley.
The easiest first batch uses a simple core: chicken, pasta, Cajun seasoning, cream, parmesan, stock, and pasta water. The aromatics and finishers make the sauce taste fuller and fresher.

Chicken

Use 500 g / 1.1 lb boneless skinless chicken breast or boneless thighs. Chicken breast gives a leaner, cleaner result. However, thighs are juicier and more forgiving, especially if you are cooking for meal prep.

When using chicken breast, slice thick pieces horizontally into cutlets and pound them to about 1.3–1.5 cm / 1/2–5/8 inch thick. This small step matters because evenly thin chicken cooks faster, browns better, and stays juicier.

Pasta

Use 340 g / 12 oz dry pasta for four generous servings. Penne and rigatoni are the most practical choices because they hold the sauce well. Meanwhile, linguine and fettuccine give the dish a more restaurant-style look.

Cream Sauce

The sauce uses 180 ml / 3/4 cup low-sodium chicken stock, 240 ml / 1 cup heavy cream, 55–65 g parmesan, and 120–240 ml / 1/2–1 cup reserved pasta water. Heavy cream is the most reliable choice because it stays smooth more easily than milk or half-and-half.

Also, use freshly grated parmesan whenever possible. Pre-shredded cheese often contains anti-caking ingredients, and those can make creamy pasta sauce grainy.

Vegetables and Aromatics

Use 1/2 medium onion, 1 medium bell pepper, 4 large garlic cloves, and 1 tbsp / 16 g tomato paste. The onion adds sweetness, the bell pepper adds color, the garlic adds sharpness, and the tomato paste gives the sauce body.

Ingredient Table

IngredientMetricUSPurpose
Dry pasta340 g12 ozMain base of the recipe
Boneless chicken breast or thighs500 g1.1 lbPrimary protein
Cajun seasoning16–20 g4–5 tspSmoky heat and seasoning
Oil15 ml1 tbspFor searing chicken
Unsalted butter28 g2 tbspFor sauce flavor and gloss
Yellow onion100 g1/2 mediumSweetness and depth
Bell pepper140–160 g1 mediumColor and Cajun-inspired flavor
Garlic12–16 g4 large clovesSavory sharpness
Tomato paste16 g1 tbspColor and body
Low-sodium chicken stock180 ml3/4 cupDeglazes the skillet
Heavy cream240 ml1 cupCreamy sauce base
Parmesan55–65 g3/4–1 cupThickness and savory flavor
Reserved pasta water120–240 ml1/2–1 cupControls sauce texture
Lemon juice5–10 ml1–2 tspBalances richness
Parsley or scallions5–10 g2–3 tbspFresh finish

The table is there for precision, but the easiest version is simple: chicken, pasta, Cajun seasoning, garlic, cream, parmesan, stock, and pasta water. Everything else helps with flavor, balance, or flexibility.

Cajun Seasoning and Salt Control

The fastest way to ruin a cajun chicken pasta recipe is to use a very salty Cajun seasoning blend at full strength, then also salt the pasta water heavily and add parmesan. Therefore, add the seasoning in stages and taste before making final adjustments.

A full tablespoon of salty Cajun seasoning can overpower the sauce before you realize what happened. For that reason, this recipe seasons the chicken first, blooms a smaller amount in the sauce, and leaves the final adjustment until the pasta, cream, parmesan, and pasta water are all in the pan.
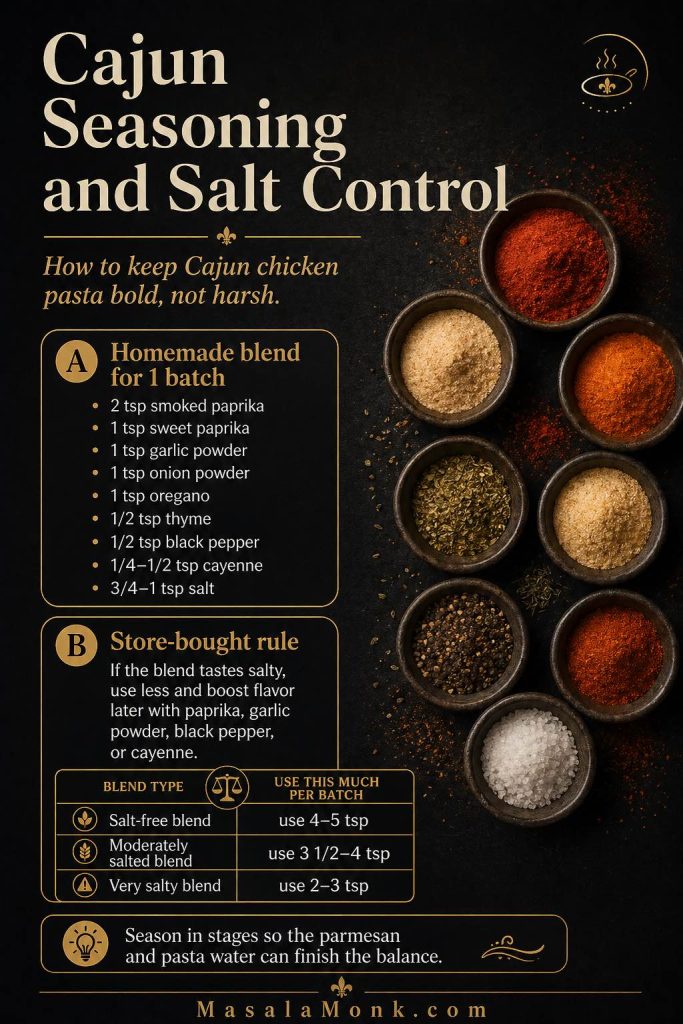
Cajun seasoning and salt control guide with homemade spice blend amounts and store-bought seasoning ranges for Cajun chicken pasta.
Cajun seasoning can bring smoke, heat, garlic, herbs, and salt all at once. Adding it in stages keeps the pasta bold without letting the sauce turn harsh or overly salty.

Homemade Cajun Seasoning for One Batch

This blend makes enough for one four-serving batch. Use the lower cayenne amount for medium heat and the higher amount for a spicier pasta.

SpiceMetricUS
Smoked paprika5 g2 tsp
Sweet paprika2.5 g1 tsp
Garlic powder3 g1 tsp
Onion powder2.5 g1 tsp
Dried oregano1 g1 tsp
Dried thyme0.5 g1/2 tsp
Black pepper1 g1/2 tsp
White pepper, optional0.5 g1/4 tsp
Cayenne pepper0.5–1 g1/4–1/2 tsp
Fine sea salt4–6 g3/4–1 tsp

Store-Bought Cajun Seasoning Rule

If your store-bought blend tastes salty on its own, start with less. Then, if the pasta needs more heat or color later, add smoked paprika, garlic powder, black pepper, and cayenne instead of more salty seasoning.

Seasoning typeHow much to useBest adjustment
Salt-free Cajun seasoning4–5 tspAdd 3/4–1 tsp fine salt separately across the dish.
Moderately salted Cajun seasoning3 1/2–4 tspSalt pasta water lightly and adjust at the end.
Very salty Cajun seasoning2–3 tspAdd paprika, garlic powder, black pepper, or cayenne for extra flavor.
Homemade blend aboveUse the full batchHold back a little salt if your parmesan is very salty.

The goal is not to make the pasta timid. The goal is to separate heat and smoke from salt, so you can make the sauce bolder without making it harsh.

Cajun Cream Sauce for Pasta

The sauce is what makes this cajun chicken pasta recipe work. A good Cajun cream sauce should taste smoky, garlicky, lightly spicy, and savory without becoming salty or heavy. The most reliable base is chicken stock, heavy cream, parmesan, tomato paste, Cajun seasoning, and reserved pasta water.

Although the sauce is creamy, it should not feel thick like dip. It should be loose and glossy in the skillet, coat the pasta evenly, and then tighten slightly after a short rest. If it looks perfect while still bubbling in the pan, it may become too thick by the time it reaches the plate.

You want the sauce…Adjust it this way
Richer and more Alfredo-styleUse less tomato paste, more parmesan, and fettuccine.
Lighter but still creamyUse evaporated milk or half-and-half, then keep the heat gentle.
More tomato-forwardAdd 2–3 tbsp crushed tomatoes or an extra teaspoon of tomato paste.
SpicierAdd cayenne or hot sauce at the end instead of more salty Cajun seasoning.
GlossierAdd hot pasta water 1–2 tbsp at a time while tossing.
Less heavyFinish with lemon juice, parsley, scallions, or extra black pepper.
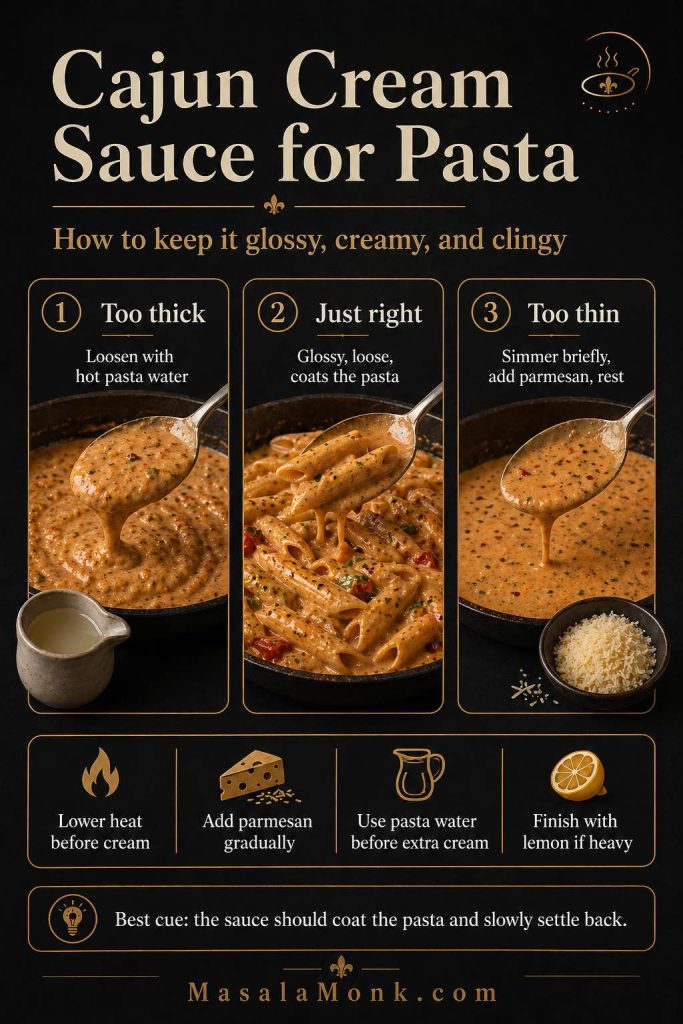
Cajun cream sauce texture guide showing too thick, just right, and too thin sauce, with tips for pasta water, parmesan, gentle heat, and lemon.
A good Cajun cream sauce should look slightly loose in the pan because it tightens as it rests. Pasta water, gentle heat, and gradual parmesan are the key controls.

The most important rule is to add dairy gently. Bring the stock and tomato paste to a simmer first, then lower the heat before adding cream. After that, add parmesan gradually and use pasta water to loosen the sauce instead of adding more cream every time it thickens.

If you are using a salty Cajun seasoning blend, do not keep adding more of it when the sauce tastes flat. Instead, build flavor with smoked paprika, garlic powder, black pepper, lemon juice, parmesan, or cayenne. That keeps the pasta bold without making it too salty.

Best Pasta Shapes for Cajun Chicken Pasta

The best pasta shape depends on the version you want. Short pasta is easier to toss and more practical for one-pot cooking. On the other hand, long pasta gives the dish a more restaurant-style finish.

For most readers, penne or rigatoni is the safest first choice. Both shapes hold the sauce, stand up to sliced chicken, and reheat better than delicate noodles. However, fettuccine is the better choice when you want the dish to feel more like Cajun chicken Alfredo.

Pasta shapeBest forNotes
PenneBest defaultThe tubes catch sauce and work well for skillet or one-pot versions.
RigatoniHearty bowlsExcellent with sausage because the larger shape holds up well.
LinguineRestaurant-style lookGood for a classic creamy Cajun chicken pasta presentation.
FettuccineCajun AlfredoBest when the sauce is richer and more parmesan-forward.
Fusilli or rotiniMaximum sauce clingThe spirals catch cream sauce, spices, and cheese well.
FarfalleVegetable-heavy versionsWorks nicely with peppers, mushrooms, and spinach.
SpaghettiPantry backupIt works, but the sauce may not cling as evenly.
Angel hairNot idealIt overcooks quickly and can clump in creamy sauce.
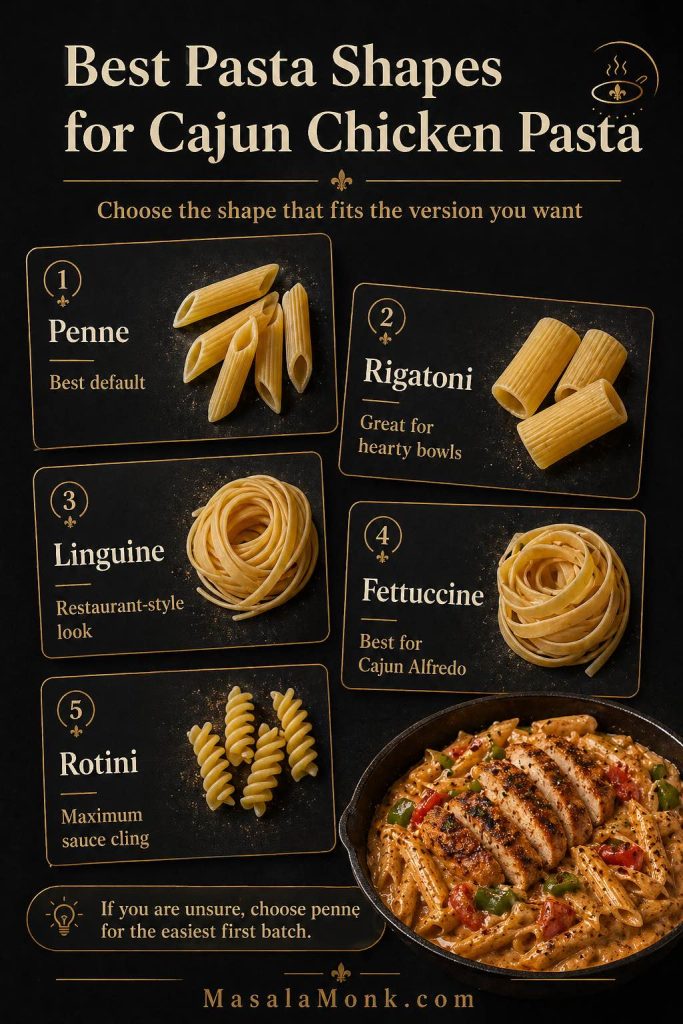
Best pasta shapes for Cajun chicken pasta, comparing penne, rigatoni, linguine, fettuccine, and rotini with their best uses.
Penne is the safest first choice, rigatoni is great for hearty bowls, fettuccine suits Cajun Alfredo, and rotini gives the sauce plenty of ridges to cling to.

Creamy Cajun Chicken Linguine Version

For a creamy Cajun chicken linguine version, use the same chicken, seasoning, and sauce amounts, but swap the short pasta for 340 g / 12 oz linguine. Toss the linguine with the sauce for 60–90 seconds, adding pasta water slowly so the strands stay glossy instead of sticky.

Linguine gives this dish a more restaurant-style finish, especially when the sauce is loose, creamy, and parmesan-forward. However, penne and rigatoni are easier for everyday bowls because they hold sauce well and reheat more forgivingly.

If you are unsure, choose penne. It is easy to cook, easy to toss, and forgiving if the sauce thickens while you finish the chicken.

Best Pan, Pot, and Tools

Good equipment makes this recipe easier because the sauce reduces quickly and the chicken needs enough surface area to sear. A crowded pan steams the chicken. Meanwhile, a tiny saucepan makes the cream sauce reduce unevenly.

The most important tool is a wide skillet. A 30 cm / 12-inch pan gives the chicken room to brown and gives the sauce enough surface area to reduce without scorching. Also, a thermometer helps because chicken breast can go from juicy to dry quickly.

ToolBest sizeWhy it helps
Pasta pot5–6 L / 5–6 qtGives pasta room to cook evenly.
Wide skillet or shallow braiser30 cm / 12 inchLets chicken sear and sauce reduce evenly.
TongsStandardBest for tossing pasta through sauce.
Instant-read thermometerAny reliable modelHelps avoid dry or undercooked chicken.
Fine grater or microplaneFor parmesanFresh fine parmesan melts more smoothly.
Measuring jug500 ml / 2 cupUseful for stock, cream, and pasta water.

You do not need special equipment, but the wide skillet matters more than almost anything else. It gives the chicken room to brown and keeps the cream sauce from reducing too aggressively.

Common Mistakes to Avoid

Most creamy Cajun pasta problems start before the sauce is finished. Avoid these mistakes and the recipe becomes much easier to control.

  • Using salty Cajun seasoning at full strength: Start with less, then adjust at the end.
  • Salting the pasta water too heavily: Salt moderately because Cajun seasoning and parmesan also add salt.
  • Boiling the cream hard: Keep the sauce at a gentle simmer so it stays smooth.
  • Adding parmesan on high heat: Lower the heat first, then add cheese gradually.
  • Overcooking the pasta before the sauce: Stop one minute shy of al dente so the pasta can finish in the skillet.
  • Slicing chicken immediately: Rest it for 5 minutes so the juices stay in the meat.
  • Simmering shrimp in the sauce: Sear shrimp separately and fold it in at the end.
  • Loosening the sauce with extra cream only: Use pasta water first because it makes the sauce glossy without making it heavier.

How to Make Creamy Cajun Chicken Pasta

The best cajun chicken pasta recipe uses the skillet like a flavor builder. First, the chicken seasons the pan. After that, the vegetables, garlic, tomato paste, and spices pick up the browned flavor. Finally, cream, parmesan, and pasta water turn everything into a smooth sauce.
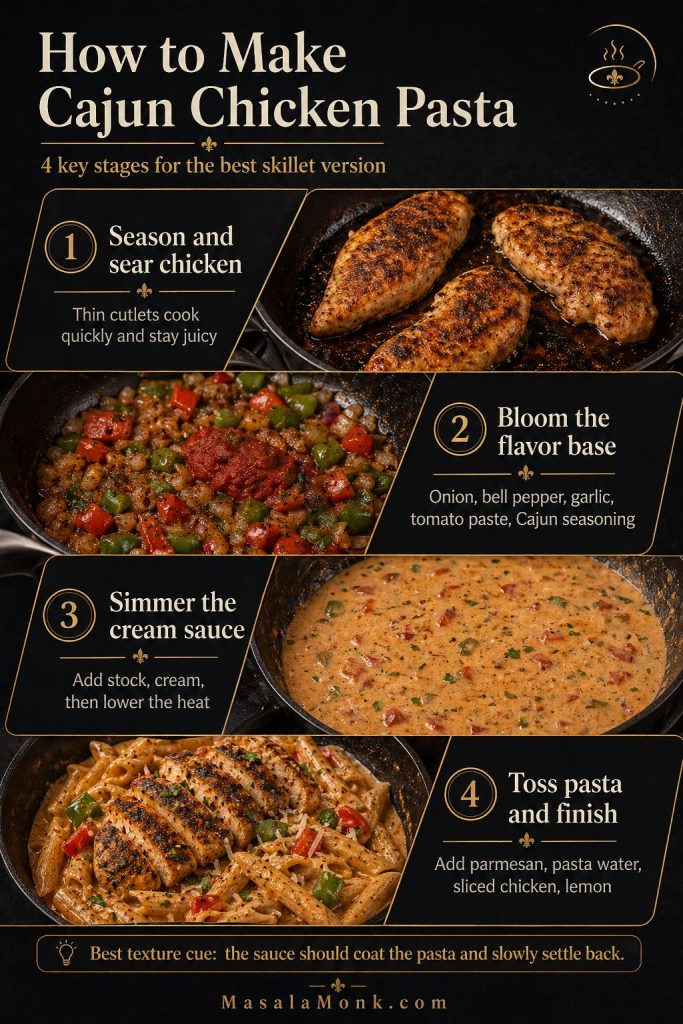
Step-by-step guide for Cajun chicken pasta showing seared chicken, Cajun flavor base, cream sauce, and finished pasta with parmesan and pasta water.
The recipe works best when the flavor is built in stages: sear the chicken, bloom the Cajun base, simmer the cream sauce gently, then finish with parmesan and pasta water.

1. Prep the Chicken

Slice thick chicken breasts horizontally into thinner cutlets. Next, pound them to about 1.3–1.5 cm / 1/2–5/8 inch thick. Pat the chicken dry before seasoning because surface moisture prevents browning.

Season the chicken with about 2 1/2–3 tsp Cajun seasoning. If your seasoning is salt-free, add about 1/2 tsp fine salt to the chicken. However, if your seasoning is already salty, skip extra salt for now.

2. Boil the Pasta

Bring 3.5–4 L / 3.5–4 qt water to a rolling boil in a large pot. Salt the water moderately, not aggressively, because Cajun seasoning and parmesan will also season the dish.

Use about 12–16 g fine sea salt or 18–22 g kosher salt for the pot, depending on how salty your Cajun seasoning is. Then add 340 g / 12 oz pasta and cook it 1 minute shy of al dente. Before draining, reserve at least 360 ml / 1 1/2 cups pasta water.

3. Sear the Chicken

Heat a 30 cm / 12-inch skillet over medium-high heat for about 2 minutes. Once the pan is hot, add 1 tbsp / 15 ml oil. The oil should shimmer, but it should not smoke heavily.

Place the chicken in a single layer. Sear the cutlets for 3–4 minutes on the first side, then flip and cook for 2–3 minutes on the second side. The chicken should be browned outside and reach 74°C / 165°F internally. After cooking, transfer it to a board and rest for 5 minutes before slicing.

4. Build the Cajun Flavor Base

Reduce the heat to medium. Add 1 tbsp / 14 g butter to the same skillet, followed by the onion and bell pepper. Cook for 4–5 minutes, until the vegetables soften and the edges pick up light browning.

After that, stir in the garlic and cook for 30 seconds. Add the tomato paste and another 1–1 1/2 tsp Cajun seasoning. Stir for 30–45 seconds, just until the tomato paste darkens slightly and the spices smell warm.

This step matters because blooming the seasoning in butter gives the sauce deeper flavor than simply stirring dry spice into cream.

5. Make the Cream Sauce

Pour in 180 ml / 3/4 cup low-sodium chicken stock and scrape the browned bits from the pan. Simmer for 1–2 minutes, until the liquid reduces slightly and smells savory.

Then lower the heat to medium-low and stir in 240 ml / 1 cup heavy cream. Keep the sauce at a gentle simmer rather than a hard boil. If you are using a thermometer, aim for roughly 82–90°C / 180–195°F, where the sauce steams and bubbles softly.

6. Toss the Pasta and Finish

Add the drained pasta to the skillet. Toss for 60–90 seconds, then pour in 120 ml / 1/2 cup reserved pasta water. Once the pasta is coated, lower the heat and add the parmesan gradually.

If the sauce looks too thick, add more pasta water 1–2 tbsp at a time. If it looks slightly loose, let it rest for 2 minutes. During that short rest, the pasta will absorb sauce and the texture will tighten.

Finally, add the sliced chicken and any resting juices. Finish with 1–2 tsp lemon juice, parsley or scallions, black pepper, and extra parmesan if needed. The finished sauce should coat the pasta and slowly settle back when stirred.

Creamy Cajun Chicken Pasta Recipe Card

This cajun chicken pasta recipe is smoky, spicy, saucy, and rich without being heavy. Thin chicken cutlets cook quickly, Cajun seasoning blooms in the skillet, and the cream sauce stays glossy because parmesan and pasta water are added gently at the end.

Servings4 generous servings
Prep time15 minutes
Cook time20 minutes
Total time35 minutes
Best pan30 cm / 12-inch skillet

Ingredients

  • 340 g / 12 oz penne, rigatoni, linguine, or fettuccine
  • 500 g / 1.1 lb boneless skinless chicken breast cutlets or boneless thighs
  • 4–5 tsp Cajun seasoning, divided and adjusted for salt level
  • 1 tbsp / 15 ml olive oil or neutral oil
  • 2 tbsp / 28 g unsalted butter, divided
  • 1/2 medium yellow onion, finely sliced or diced, about 100 g
  • 1 medium bell pepper, sliced, about 140–160 g
  • 4 large garlic cloves, minced, about 12–16 g
  • 1 tbsp / 16 g tomato paste
  • 3/4 cup / 180 ml low-sodium chicken stock
  • 1 cup / 240 ml heavy cream
  • 3/4–1 cup / 55–65 g finely grated parmesan
  • 1/2–1 cup / 120–240 ml reserved pasta water, as needed
  • 1–2 tsp / 5–10 ml lemon juice
  • 2–3 tbsp chopped parsley or scallions
  • Black pepper, to taste
  • Fine salt, only if needed

Method

  1. Prepare the chicken. Slice thick chicken breasts into thinner cutlets if needed. Pound to 1.3–1.5 cm / 1/2–5/8 inch thick. Pat dry and season with 2 1/2–3 tsp Cajun seasoning.
  2. Cook the pasta. Bring 3.5–4 L / 3.5–4 qt water to a boil. Salt moderately, then cook pasta 1 minute shy of al dente. Reserve 360 ml / 1 1/2 cups pasta water before draining.
  3. Sear the chicken. Heat a 30 cm / 12-inch skillet over medium-high heat. Add oil, then sear chicken for 3–4 minutes on the first side and 2–3 minutes on the second side, until it reaches 74°C / 165°F internally. Rest for 5 minutes, then slice.
  4. Cook the vegetables. Reduce heat to medium. Add 1 tbsp butter, onion, and bell pepper. Cook for 4–5 minutes, until softened with lightly browned edges.
  5. Bloom the flavor base. Add garlic and cook for 30 seconds. Add tomato paste and 1–1 1/2 tsp Cajun seasoning. Stir for 30–45 seconds, until fragrant.
  6. Deglaze the skillet. Add chicken stock and scrape the bottom of the pan. Simmer for 1–2 minutes.
  7. Add the cream. Lower heat to medium-low. Stir in heavy cream and keep the sauce at a gentle simmer.
  8. Toss the pasta. Add drained pasta and 1/2 cup reserved pasta water. Toss for 60–90 seconds.
  9. Add parmesan. Lower the heat and add parmesan gradually. Toss until glossy, adding more pasta water 1–2 tbsp at a time if needed.
  10. Finish. Add sliced chicken, lemon juice, parsley or scallions, black pepper, and extra parmesan. Rest 2 minutes before serving.

Recipe note: If your Cajun seasoning is salty, use less at the beginning and correct the flavor at the end with smoked paprika, cayenne, black pepper, lemon, and parmesan instead of adding more salty blend.

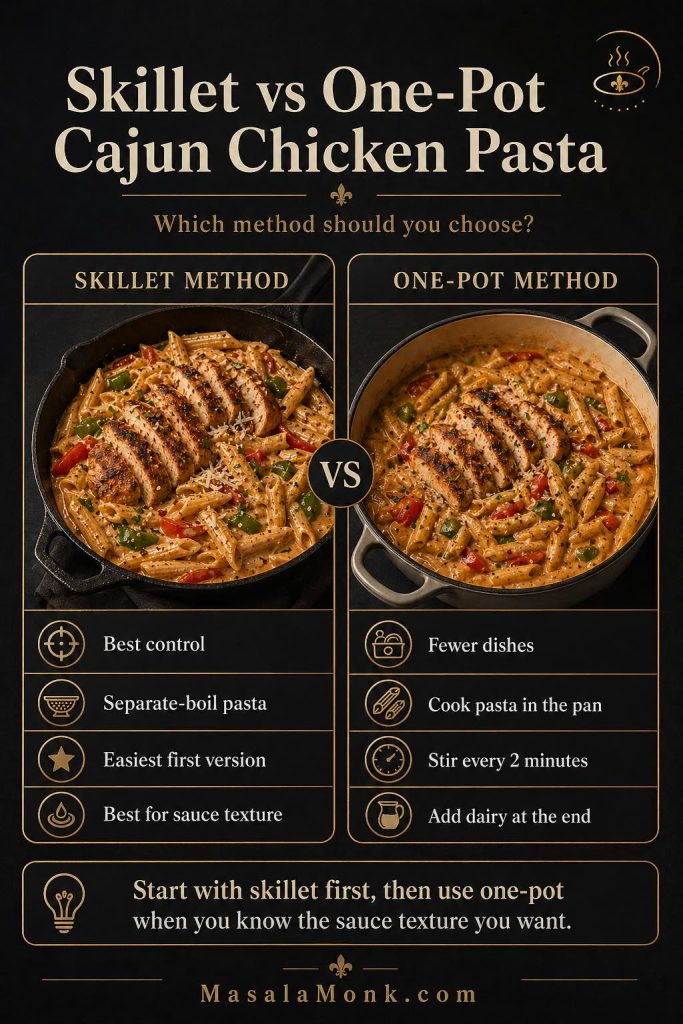
Skillet versus one-pot Cajun chicken pasta comparison showing skillet method for control and one-pot method for fewer dishes.
The skillet method gives the best first result because you control the pasta and sauce separately. The one-pot method is excellent once you know how loose and glossy the sauce should be.

One-Pot Cajun Chicken Pasta Method

To turn this cajun chicken pasta recipe into a one-pot version, use short pasta and cook it directly in stock, water, tomato paste, seasoning, and pan juices. Then add cream and cheese near the end. This method is convenient, but it needs more stirring and closer timing than the separate-boil method.

If you like pasta that cooks directly in the sauce, the same one-pan principle also works in MasalaMonk’s one-pot chicken pasta, where the pasta starch helps thicken the cooking liquid.

One-Pot Formula for 4 Servings

IngredientAmount
Chicken, bite-size pieces450–500 g / 1–1.1 lb
Short pasta300–340 g / 10.5–12 oz
Chicken stock720 ml / 3 cups
Water240 ml / 1 cup
Tomato paste1 tbsp / 16 g
Heavy cream180–240 ml / 3/4–1 cup
Cream cheese, optional55 g / 2 oz
Parmesan50–60 g / about 3/4 cup
Cajun seasoning4–5 tsp total, adjusted for salt

One-Pot Steps

  1. Use a 30 cm / 12-inch deep skillet, Dutch oven, or 3.5–4 L shallow braiser.
  2. Season bite-size chicken pieces, then sear them in oil for 4–5 minutes.
  3. Add onion and bell pepper. Cook for 3–4 minutes.
  4. Stir in garlic, tomato paste, and Cajun seasoning for 30 seconds.
  5. Add dry short pasta, stock, water, and optional diced tomatoes.
  6. Bring to a boil, then reduce to an active simmer.
  7. Cover and cook for 10–13 minutes, stirring every 2 minutes.
  8. Add hot water or stock 60 ml / 1/4 cup at a time if the pan dries before the pasta is tender.
  9. Once the pasta is just al dente, lower the heat.
  10. Stir in cream, optional cream cheese, and parmesan.
  11. Finally, rest for 3–5 minutes before serving so the sauce can settle.

One-pot rule: Add dairy at the end. If cream and cheese boil hard while the pasta is still cooking, the sauce can split or turn grainy.

Slow Cooker or Crockpot Cajun Chicken Pasta

You can make Cajun chicken pasta in a slow cooker, but it works best when the pasta and dairy are added near the end. If pasta cooks for hours in the slow cooker, it can turn soft and heavy. If cream and cheese cook too long, the sauce can split or become grainy.

The best slow cooker version is not a true dump-and-cook pasta. Instead, use the crockpot for the chicken and Cajun sauce base, then add cooked pasta and dairy at the end. That gives you the convenience of slow cooking without ruining the creamy sauce texture.

Best Slow Cooker Method

  1. Add chicken, Cajun seasoning, onion, bell pepper, garlic, tomato paste, and chicken stock to the slow cooker.
  2. Cook on low for 3–4 hours or high for 1 1/2–2 1/2 hours, until the chicken is cooked through.
  3. Remove the chicken, then slice or shred it.
  4. Stir cream or evaporated milk into the sauce base near the end.
  5. Cook the pasta separately until just shy of al dente.
  6. Fold the cooked pasta into the slow cooker sauce.
  7. Add parmesan on the lowest setting or off heat, then loosen with hot pasta water if needed.
  8. Return the chicken to the pasta and let everything sit for 3–5 minutes before serving.
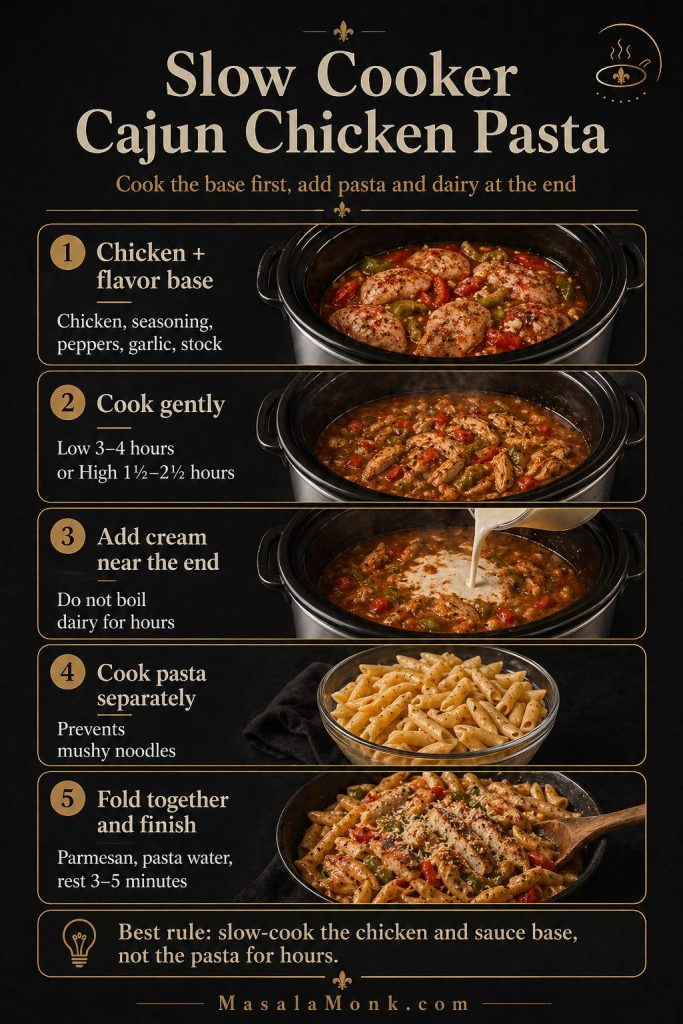
Slow cooker Cajun chicken pasta guide showing chicken and sauce base cooked first, cream added near the end, pasta cooked separately, and parmesan folded in before serving.
For the best crockpot version, use the slow cooker for the chicken and sauce base, then add cooked pasta, cream, and parmesan near the end so the noodles stay tender and the sauce stays smooth.

Best slow cooker rule: Cook the chicken and sauce base in the crockpot, but cook the pasta separately. That gives you creamy Cajun chicken pasta without mushy noodles or broken sauce.

If you want a richer crockpot version, add a small amount of cream cheese near the end. However, keep the heat low and stir gently so the sauce stays smooth.

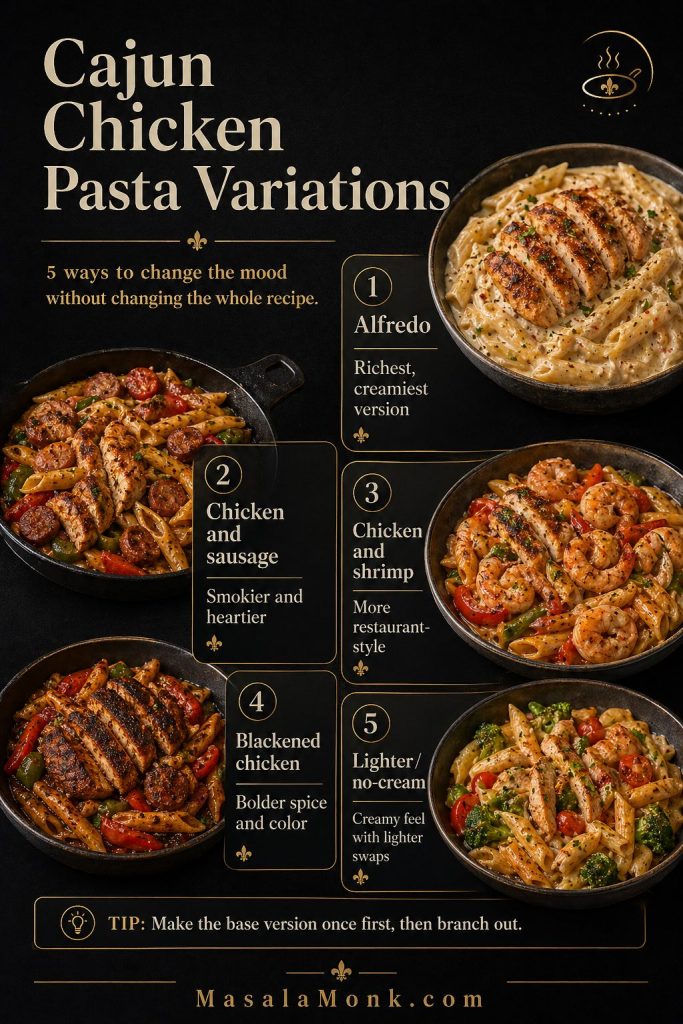
Cajun Chicken Pasta Variations

Once the base is right, this cajun chicken pasta recipe can move in several directions. However, the key is to change the technique, not just throw extra ingredients into the pan.

Which Version Should You Make?

You want…Make this version
Best texture and sauce controlSeparate-boil skillet method
Fewer dishesOne-pot Cajun chicken pasta
Slow cooker convenienceCrockpot chicken and sauce base with pasta added at the end
Richest sauceCajun chicken Alfredo
Smokier flavorCajun chicken and sausage pasta
Restaurant-style proteinCajun chicken and shrimp pasta
Dramatic spice and colorBlackened chicken pasta
Lighter bowlHalf-and-half or evaporated milk version
Dairy-free optionCashew cream or coconut milk version
Cajun chicken pasta variations guide showing Alfredo, chicken and sausage, chicken and shrimp, blackened chicken, and lighter no-cream versions.
Once the base recipe is right, the variations become easy: Alfredo makes it richer, sausage makes it smokier, shrimp makes it more restaurant-style, and lighter swaps keep it weeknight-friendly.
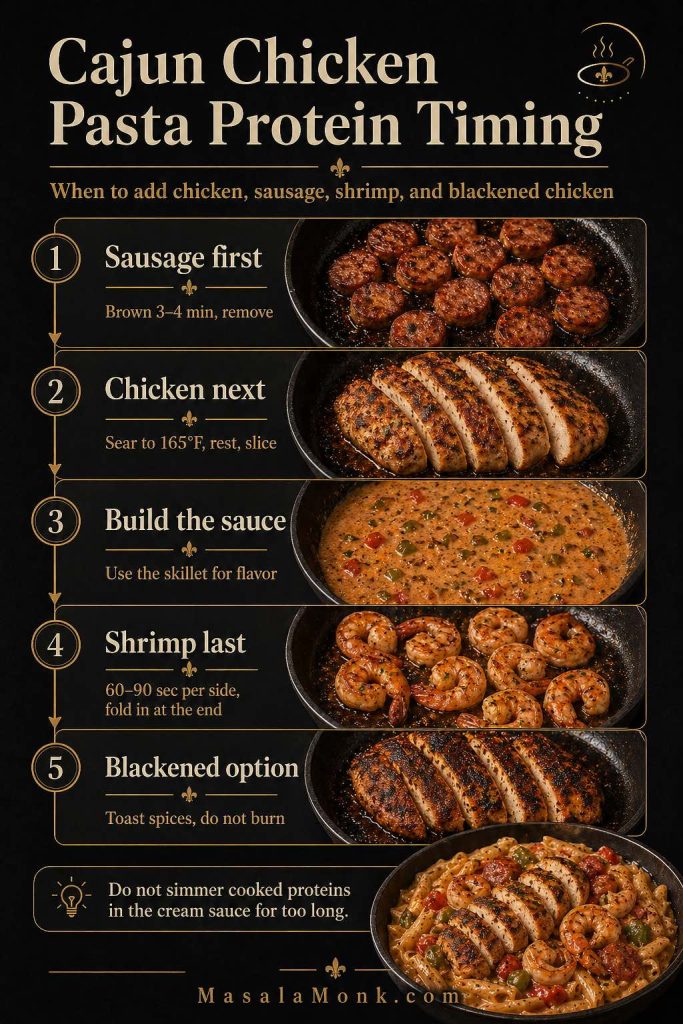
Cajun chicken pasta protein timing guide showing when to brown sausage, sear chicken, cook shrimp separately, and add blackened chicken back to the sauce.
Protein variations work best when each ingredient gets the right timing. Brown sausage first, rest sliced chicken, cook shrimp separately, and fold everything back into the creamy pasta at the end.

Cajun Chicken Alfredo Version

Choose the Alfredo version when you want the richest, most restaurant-style bowl. For this variation, use fettuccine, more parmesan, less tomato paste, and a smoother cream sauce.

Use 340 g / 12 oz fettuccine, 500 g / 1.1 lb chicken, 2 tbsp / 28 g butter, 240 ml / 1 cup heavy cream, 60–75 g parmesan, and 120–180 ml pasta water. Instead of building a tomato-forward sauce, bloom the Cajun seasoning briefly in butter, add the cream gently, toss in fettuccine, and add parmesan off heat.

For a deeper Alfredo-style guide, see MasalaMonk’s Cajun chicken Alfredo pasta section.

Cajun Chicken and Sausage Pasta

Choose the sausage version when you want the pasta to taste smokier, heartier, and more savory. Because sausage brings salt and fat, reduce the Cajun seasoning slightly and taste before adding more.

Use 350 g / 12 oz chicken and 225–300 g / 8–10 oz smoked sausage or andouille. Slice the sausage into 6–8 mm / 1/4-inch coins, brown it first for 3–4 minutes, then remove it. Next, sear the chicken in the same skillet, build the sauce, and add the sausage back near the end.

For a more traditional Louisiana-inspired comfort-food direction, MasalaMonk’s Louisiana red beans and rice guide is a useful companion for smoky sausage, the trinity, and slow-simmered flavor.

Cajun Chicken and Shrimp Pasta

Choose shrimp when you want a more restaurant-style bowl. However, cook it separately because shrimp turns rubbery much faster than chicken.

Use 300–350 g / 10–12 oz chicken and 250–300 g / 9–10 oz peeled and deveined shrimp. Pat the shrimp dry, season with 1/2–3/4 tsp Cajun seasoning, and sear it for 60–90 seconds per side, just until opaque. Then remove it and fold it back into the pasta for only the final 30–60 seconds.

Blackened Chicken Pasta Version

Choose blackened chicken when you want dramatic color, toasted spice, and a bolder chicken topping. However, avoid burning the spices. You want deep color and smoky edges, not bitter black dust.

Blackened chicken rub for 500 g chickenAmount
Smoked paprika2 tsp
Garlic powder1 tsp
Onion powder1 tsp
Dried thyme1/2 tsp
Dried oregano1/2 tsp
Black pepper1/2 tsp
Cayenne1/4–1/2 tsp
Fine salt3/4 tsp

How to Make It Lighter or No-Cream

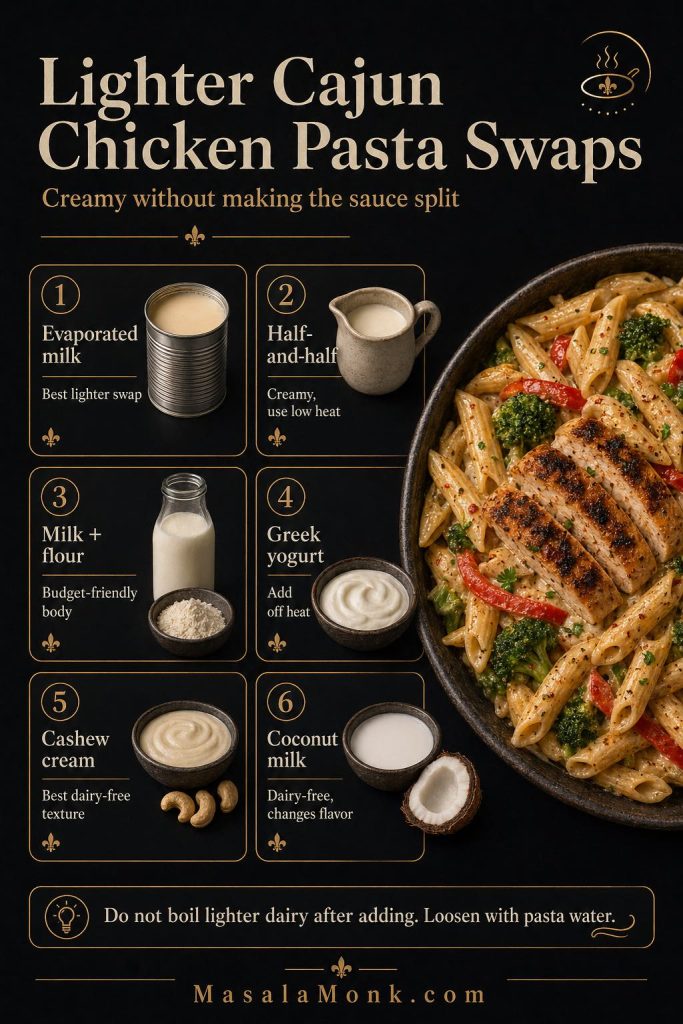
A lighter Cajun chicken pasta can still be creamy, but it needs gentler heat. Instead of boiling the sauce aggressively, use low heat, reserved pasta water, and a little patience.

Evaporated milk is the easiest lighter swap because it is stable and still feels creamy. Half-and-half also works, although it needs lower heat. Greek yogurt, cottage cheese, and cashew cream can work too, but they should be added on low heat or off heat so they do not split.

SwapAmountHow to use it
Half-and-half240 ml / 1 cupUse like cream, but simmer gently.
Evaporated milk240 ml / 1 cupStable and creamy, with less heaviness than cream.
Milk + flour240 ml milk + 1 tbsp flourWhisk into the pan after garlic and tomato paste, then simmer gently.
Greek yogurt120 g / 1/2 cupTemper with warm pasta water and add off heat.
Blended cottage cheese150 g / 2/3 cupBlend smooth with stock, then add on low heat.
Cashew cream180–240 ml / 3/4–1 cupBest dairy-free creamy texture.
Coconut milk240 ml / 1 cupWorks for dairy-free pasta, but it changes the flavor.
Lighter Cajun chicken pasta swaps guide showing evaporated milk, half-and-half, milk with flour, Greek yogurt, cashew cream, and coconut milk with low-heat tips.
Lighter creamy sauces need gentler heat. Evaporated milk is the easiest swap, while yogurt and cashew cream work best when added on low heat or off heat.

If you want a higher-protein pasta bowl, you can also pair the sauce with a firmer protein pasta. MasalaMonk’s lentil pasta for weight loss guide is useful for comparing that kind of swap.

Important: Do not boil yogurt, cottage cheese sauce, or cashew cream after adding. Add them on low heat or off heat, then loosen with pasta water until the sauce clings.

How to Fix Cajun Chicken Pasta

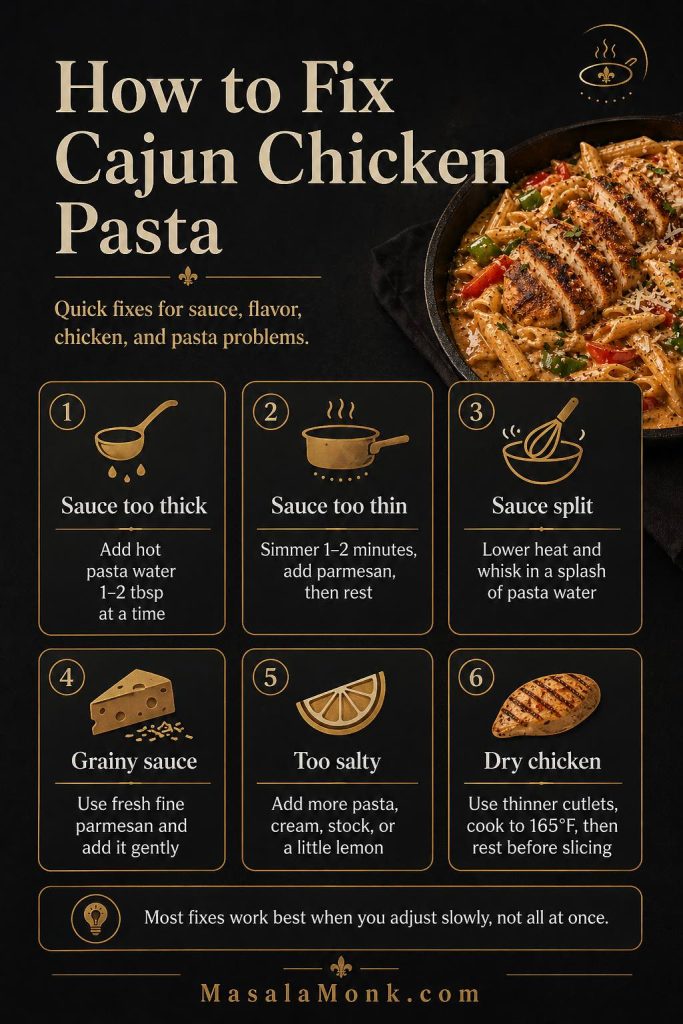
Even a good cajun chicken pasta recipe can go wrong if the heat is too high, the seasoning is salty, or the pasta absorbs more sauce than expected. Fortunately, most problems are easy to fix if you adjust slowly instead of adding a lot of liquid, salt, cream, or spice at once.

Troubleshooting guide for Cajun chicken pasta with fixes for thick sauce, thin sauce, split sauce, grainy sauce, salty pasta, and dry chicken.
Most Cajun chicken pasta problems are fixable if you adjust slowly. Pasta water, gentle heat, fresh parmesan, and a short rest can save the sauce before it goes too far.

Cream Sauce Problems

Start here if the sauce looks too thick, too thin, oily, split, or grainy. In most cases, the solution is gentle heat plus a small amount of hot pasta water.

ProblemWhy it happenedExact fix
Thick, heavy sauceThe pasta absorbed liquid, or the heat reduced the sauce too far.Loosen it with hot pasta water, milk, or stock 1–2 tbsp at a time, then toss until glossy.
Loose, watery sauceThere is too much liquid, not enough parmesan, or the pasta has not rested yet.Simmer for 1–2 minutes, add a little parmesan, then rest off heat for 2 minutes.
Split cream sauceThe dairy boiled too hard, or the cheese was added over high heat.Lower the heat, add a splash of pasta water, and whisk gently until the sauce comes back together.
Grainy textureThe cheese was pre-shredded, added too quickly, or heated too aggressively.Use finely grated parmesan next time. For now, lower the heat and add pasta water gradually while tossing.

Flavor Problems

If the pasta tastes flat, salty, or too spicy, fix the balance before adding more Cajun seasoning. Many Cajun blends already contain salt, so adding more seasoning can make the problem worse.

ProblemWhy it happenedExact fix
Overly salty pastaSalty Cajun seasoning, salted pasta water, parmesan, and sausage may have stacked together.Add cream, unsalted stock, more cooked pasta, or a squeeze of lemon. Do not add more Cajun seasoning.
Too much heatThe Cajun blend had a lot of cayenne, or extra spice was added too early.Soften the heat with cream, butter, parmesan, or more pasta. Add lemon only after the sauce is balanced.
Flat or bland flavorThe sauce needs more salt, spice, garlic, cheese, or acidity.Add Cajun seasoning carefully, then finish with black pepper, parmesan, and a small squeeze of lemon.
Too rich or heavyThe sauce has plenty of cream but not enough brightness.Add lemon juice 1 tsp at a time, then finish with parsley, scallions, or a little extra black pepper.

Chicken, Shrimp, Sausage, and Pasta Problems

These fixes are mostly about timing. Chicken needs to rest, shrimp needs very little heat, sausage should be browned instead of boiled, and pasta should stop just before it turns fully soft.

ProblemWhy it happenedExact fix
Dry chickenThe chicken breast was too thick, cooked too long, or sliced before resting.Pound cutlets thin, sear quickly, rest before slicing, and avoid simmering cooked chicken in the sauce.
Mushy pastaThe pasta cooked too long before being tossed with the sauce.Cook pasta 1 minute shy of al dente. For the one-pot method, start checking earlier than the package time.
Sticky one-pot pastaThere was too little liquid, not enough stirring, or the pan was too hot.Add hot stock or water 60 ml / 1/4 cup at a time, then stir every 2 minutes until the pasta loosens.
Rubbery shrimpThe shrimp simmered too long in the cream sauce.Sear shrimp separately for 60–90 seconds per side, then fold it in at the end for only 30–60 seconds.
Tough sausageThe sausage boiled in the sauce instead of being browned and added back later.Brown sausage first, remove it, then return it near the end so it stays smoky and firm.

Storage, Reheating, and Freezing

Leftovers from this cajun chicken pasta recipe will thicken as they sit because pasta keeps absorbing sauce in the fridge. Therefore, make the sauce slightly looser if you are cooking for meal prep.
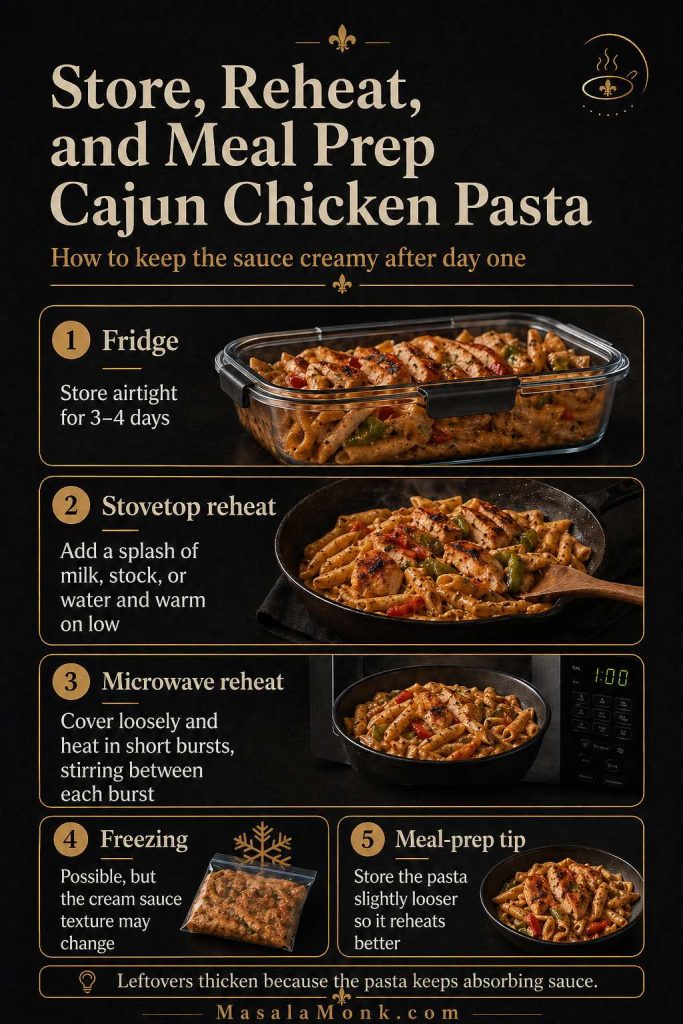
Storage and reheating guide for Cajun chicken pasta with fridge, stovetop, microwave, freezing, and meal prep tips.
Creamy pasta thickens as it sits, so leftovers reheat best with a splash of milk, stock, or water and gentle heat instead of a hard boil.
  • Fridge: Store in an airtight container for 3–4 days, in line with USDA leftover food safety guidance.
  • Stovetop reheating: Add 1–2 tbsp milk, stock, or water per serving. Warm over low heat and stir often.
  • Microwave reheating: Add a splash of liquid, cover loosely, and heat in short bursts, stirring between each burst.
  • Freezing: You can freeze it, but creamy pasta may split and the pasta can soften after thawing.
  • Meal-prep tip: Store extra sauce or a little stock separately, then loosen each portion when reheating.

The best reheated bowl is slightly looser before storage. As the pasta sits, it absorbs sauce, so a creamy pasta that looks perfect on day one can look dry on day two unless you add liquid back gently.

What to Serve with Cajun Chicken Pasta

Because the pasta is rich and creamy, simple sides work best. Serve it with a crisp green salad, roasted broccoli, sautéed green beans, garlic bread, or a lemony cucumber salad. Also, if you are serving a heavier sausage version, keep the side dish lighter and sharper so the meal does not feel too heavy.

For another creamy pasta direction, MasalaMonk’s chicken pesto pasta is useful because it also relies on gentle heat and pasta water to keep the sauce glossy instead of oily.

A Note on Cajun-Inspired Pasta

This is a Cajun-inspired creamy chicken pasta, not a claim of traditional Louisiana Cajun cooking. The flavor comes from Cajun-style seasoning, garlic, peppers, tomato paste, cream, parmesan, and a skillet pasta method. In other words, it is closer to a restaurant-style creamy pasta than a classic Cajun stew, gumbo, jambalaya, or rice dish.

For cultural context, Britannica’s overview of Cajun culture and cuisine explains how Cajun food reflects Louisiana’s blended food traditions. That is why this recipe uses the word Cajun carefully: the seasoning profile is Cajun-inspired, while the creamy pasta format is modern and weeknight-friendly.

FAQs

What is a cajun chicken pasta recipe made of?

A cajun chicken pasta recipe is usually made with chicken, pasta, Cajun seasoning, garlic, cream, parmesan, and vegetables such as bell pepper, onion, tomatoes, or mushrooms. This version also uses chicken stock and reserved pasta water so the sauce stays creamy without becoming too heavy.

Is Cajun chicken pasta very spicy?

It can be mild, medium, or hot depending on your Cajun seasoning. For a medium version, use 1/4 tsp cayenne in the homemade blend. For a hotter version, use 1/2 tsp cayenne or add hot sauce at the end. However, if you are cooking for mixed heat preferences, keep the base milder and let people add more heat at the table.

What pasta is best for Cajun chicken pasta?

Penne and rigatoni are the best default choices because they hold sauce well and are easy to toss. Linguine gives a restaurant-style finish, while fettuccine is best for a Cajun Alfredo version. Meanwhile, rotini and fusilli are great when you want maximum sauce cling.

Can I make Cajun chicken pasta one pot?

Yes. Use short pasta, stock, water, tomato paste, and seasoning, then cook the pasta directly in the pan. However, add cream and parmesan only near the end. Otherwise, the dairy can split before the pasta finishes cooking.

Can I make Cajun chicken pasta in a slow cooker?

Yes, but the best slow cooker method is to cook the chicken and sauce base first, then add cooked pasta, cream, and parmesan near the end. This keeps the pasta from becoming mushy and helps the cream sauce stay smooth.

Can I use chicken thighs instead of chicken breast?

Yes. Boneless skinless chicken thighs work very well because they stay juicy and tolerate a little extra cooking. Cut them into bite-size pieces or sear them whole, then slice before serving.

How do I stop the cream sauce from splitting?

Keep the heat gentle after adding cream. Also, add parmesan gradually on low heat or off heat, and loosen the sauce with reserved pasta water. A hard boil is the biggest reason creamy pasta sauce turns oily or split.

How do I make Cajun chicken pasta less salty?

Add more cooked pasta, cream, unsalted stock, or a squeeze of lemon. Do not add more Cajun seasoning if the blend is salty. Next time, salt the pasta water lightly and use a salt-free or lower-salt Cajun seasoning.

Can I add sausage?

Yes. Brown smoked sausage or andouille first, remove it, then cook the chicken and sauce in the same skillet. After that, add the sausage back near the end so it keeps its browned flavor and does not become rubbery.

Can I add shrimp?

Yes. Sear shrimp separately for 60–90 seconds per side, then fold it into the finished pasta at the end. Do not simmer shrimp in the cream sauce for several minutes because it can overcook quickly.

Can I make Cajun chicken pasta without cream?

Yes. Use evaporated milk, half-and-half, milk with a little flour, blended cottage cheese, Greek yogurt, cashew cream, or coconut milk. However, add lighter dairy options on low heat and loosen with pasta water so the sauce stays smooth.

Can I make Cajun chicken pasta gluten-free?

Yes. Use a sturdy gluten-free pasta shape such as penne, rigatoni, or fusilli, and check that your Cajun seasoning and stock are gluten-free. Cook the pasta just shy of al dente because gluten-free pasta can soften quickly when tossed in hot cream sauce.

Can I make it ahead?

Yes, but creamy pasta is best fresh. If making it ahead, keep the sauce slightly looser, store it airtight, and reheat gently with a splash of milk, stock, or water.

Can I freeze creamy Cajun chicken pasta?

You can freeze it, but the texture may change. Cream sauce can split and pasta can soften after thawing. For best results, freeze the sauce and chicken separately from freshly cooked pasta if possible.

Final Tips for the Best Creamy Cajun Chicken Pasta

The best cajun chicken pasta recipe is not just about adding cream and spice. It is about balance: enough Cajun seasoning for smoky heat, enough cream for richness, enough pasta water for gloss, and enough lemon or parmesan at the end to keep the sauce from tasting flat.

Most importantly, control the salt early, keep the dairy heat gentle, and save more pasta water than you think you need. Once those three things are handled, this becomes the kind of creamy Cajun chicken pasta you can make on a weeknight without worrying about dry chicken, broken sauce, or bland flavor.

Start with the skillet version first. Then use the same base for one-pot, slow cooker, Alfredo, sausage, shrimp, blackened chicken, or a lighter bowl whenever you want to change the mood without learning a whole new recipe.
Back to top

Posted on — 4 Comments

Fish Tacos Recipe: Best Fish, Sauce, Slaw & Easy Methods

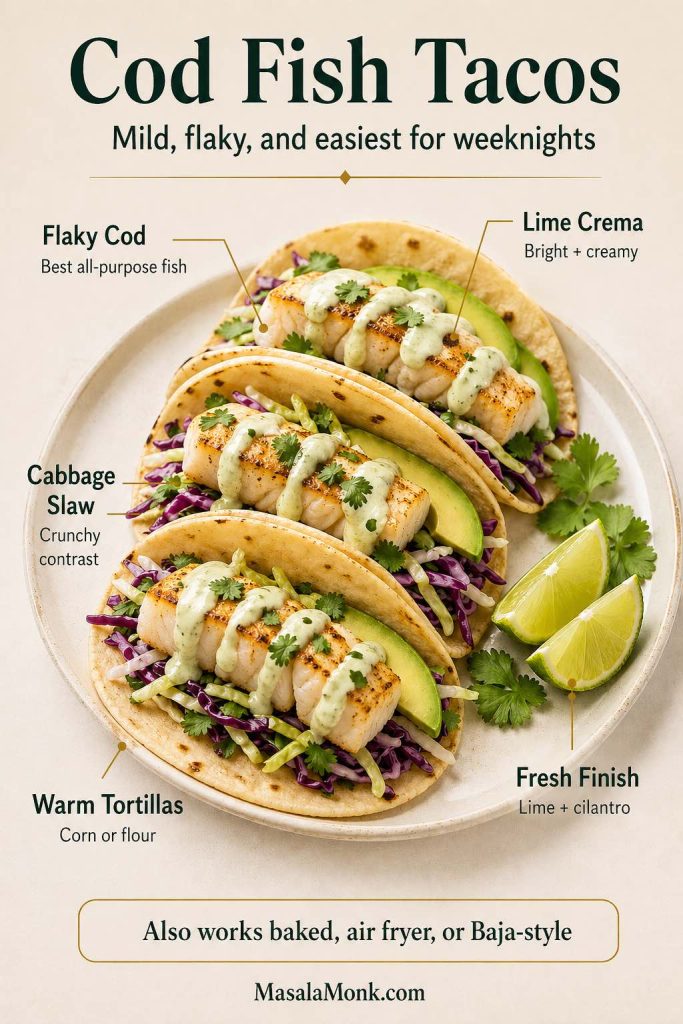
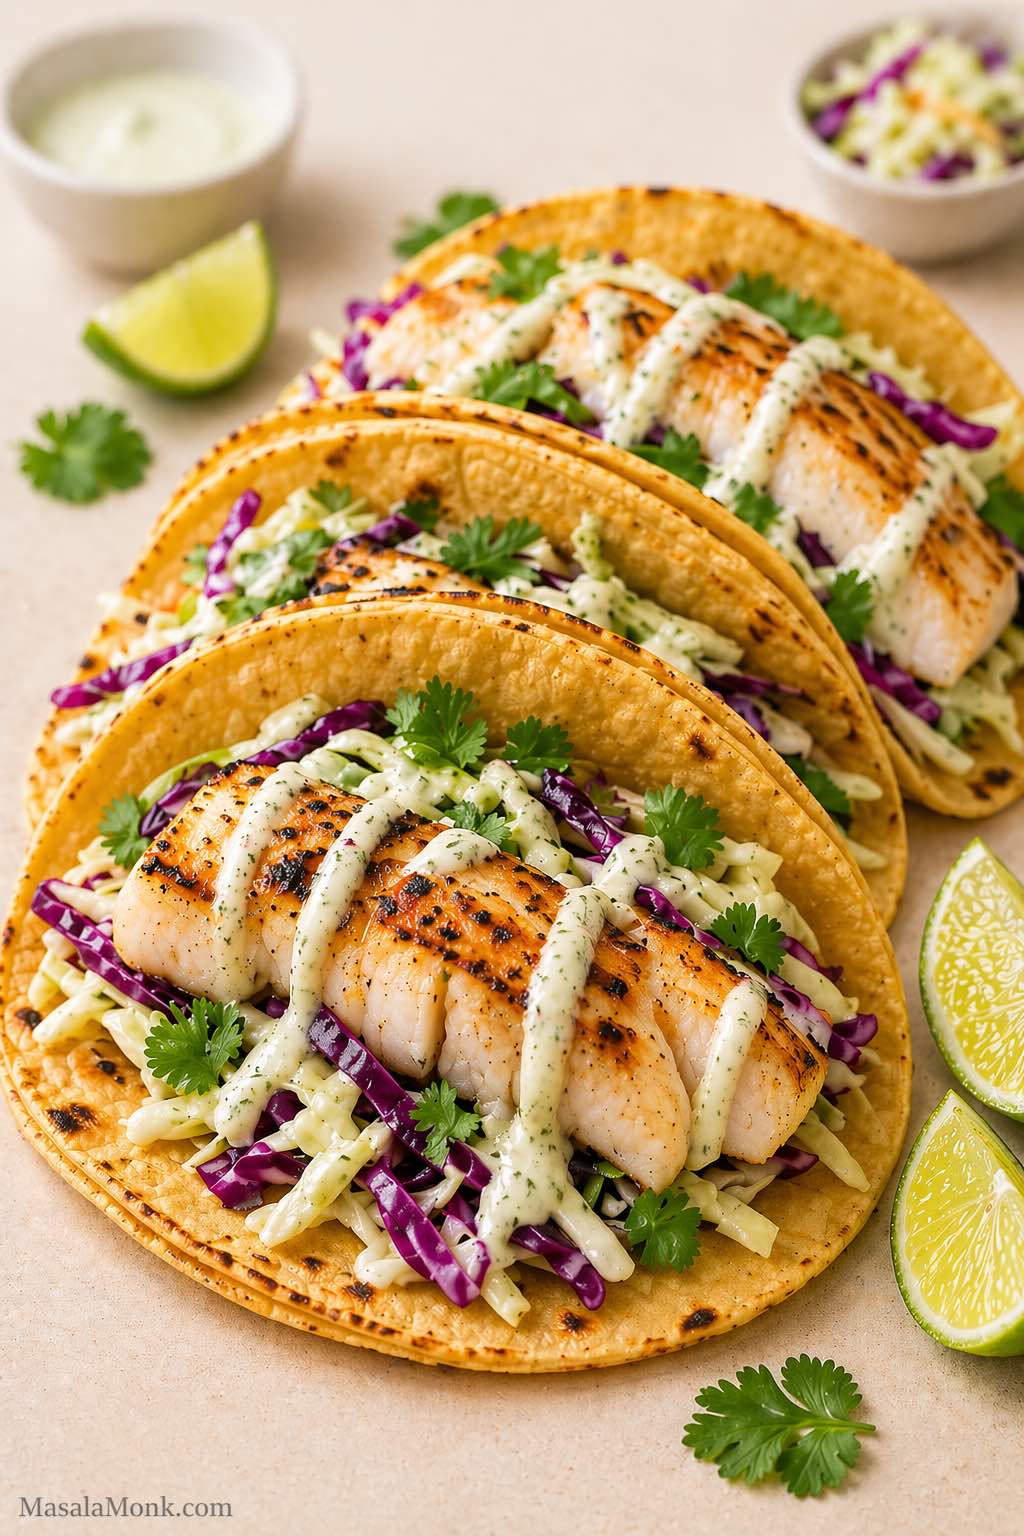
Three cod fish tacos in warm corn tortillas with cabbage slaw, lime crema, cilantro, and lime wedges.

A good fish tacos recipe should answer more than one question. Yes, you need tender fish, warm tortillas, crunchy slaw, and a creamy sauce. However, the real decision usually starts before you cook: what is the best fish for fish tacos, and should you pan-sear, grill, fry, bake, or air fry it?

This recipe for fish tacos starts with the most useful default: pan-seared cod fish tacos with lime crema and cabbage slaw. Cod is mild, flaky, easy to find, and flexible enough for weeknight tacos, Baja-style fried tacos, baked fish tacos, and air fryer fish tacos. When you have mahi mahi, tilapia, halibut, snapper, haddock, salmon, or frozen fish, this guide also shows you how to adjust.

The goal is simple: make fish tacos that taste fresh, bright, and balanced instead of soggy, bland, dry, or overloaded. Use this fish tacos recipe when you need easy fish tacos for dinner, then use the fish guide, sauce options, slaw tips, toppings, and method variations to make the tacos fit what you have.

Quick Answer: Best Fish for This Fish Tacos Recipe

The best fish for fish tacos is a firm, mild white fish such as cod, mahi mahi, halibut, snapper, haddock, or tilapia. Cod is the easiest all-purpose choice because it is mild, flaky, widely available, and works pan-seared, baked, air fried, or beer-battered. Meanwhile, mahi mahi is best for grilled fish tacos, tilapia is the best budget choice, halibut and snapper feel more premium, and salmon works best when blackened or boldly seasoned.

For the easiest fish tacos, season cod or another white fish with chili powder, cumin, smoked paprika, garlic, salt, lime, and a little oil. Then, cook it quickly until just flaky and serve it in warm corn tortillas with cabbage slaw, creamy lime sauce, cilantro, jalapeño, avocado, and fresh lime. For Baja-style fish tacos, use beer-battered cod with chipotle crema and crunchy slaw.

Fish Tacos at a Glance

Best default fishCod
Best other fishMahi mahi, tilapia, halibut, snapper, haddock, salmon
Best methodPan-seared for easiest, Baja-style fried for crispy, grilled for firm fish, baked for hands-off cooking, air fryer for lighter crispy tacos
Best tortillasCorn for classic flavor, flour for softer tacos
Best sauceLime crema or chipotle crema
Best toppingCabbage slaw, cilantro, lime, avocado, mango salsa, jalapeño
Biggest mistakeWet fish, cold tortillas, too much sauce, or assembling too early

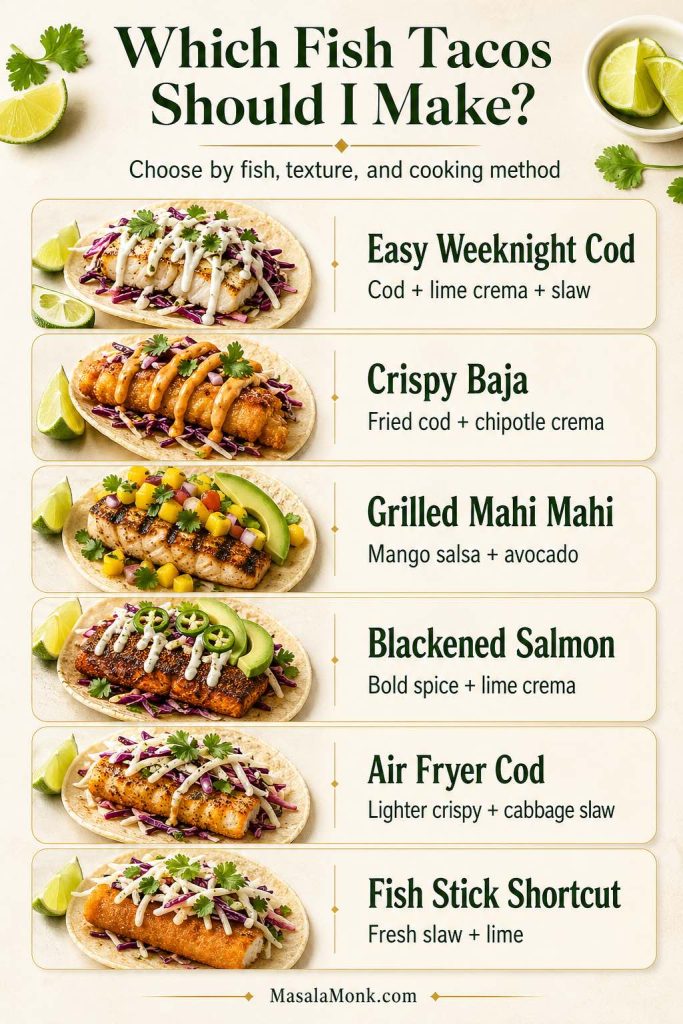
Which Fish Tacos Should I Make?

Choose the fish taco style based on the texture and cooking method you need. The pan-seared cod version is the easiest default, while Baja-style tacos are best when crispy fried fish is the main goal.

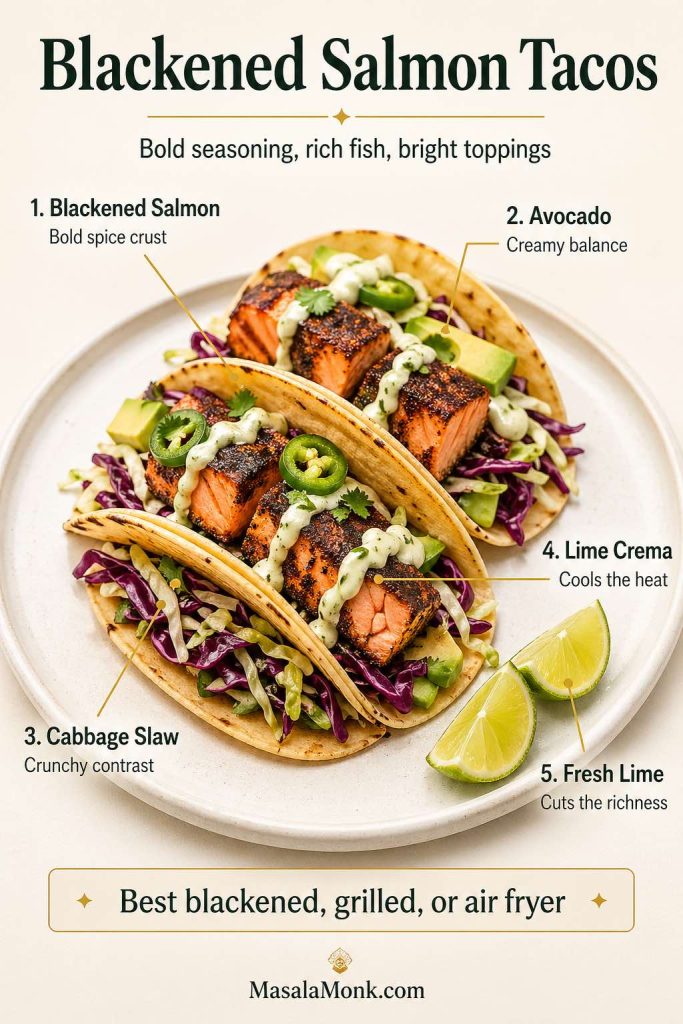
A vertical fish taco chooser guide with six options: easy weeknight cod tacos with lime crema, crispy Baja fish tacos, grilled mahi mahi tacos with mango salsa, blackened salmon tacos, air fryer cod tacos, and fish stick shortcut tacos.
Not sure which version to make first? Start with cod for the easiest weeknight fish tacos, choose Baja when you want crispy fried fish, use mahi mahi for grilled tacos, and go with salmon when you want a bolder blackened version. Air fryer cod and fish stick tacos are the fastest shortcut paths when convenience matters.
When You NeedMake This VersionBest FishBest Topping
Easiest weeknight tacosPan-seared fish tacosCod or tilapiaCabbage slaw + lime crema
Crispy restaurant-style tacosBaja fish tacosCod or haddockChipotle crema + slaw
Grilled tacosGrilled fish tacosMahi mahi or halibutMango salsa + avocado
Bold spicy tacosBlackened fish tacosSalmon, cod, or mahi mahiAvocado + lime crema
Lighter crispy tacosAir fryer fish tacosCod or tilapiaSlaw + lime crema
Shortcut tacosFish stick tacosFrozen breaded fishFresh slaw + lime

The Simple Fish Taco Formula

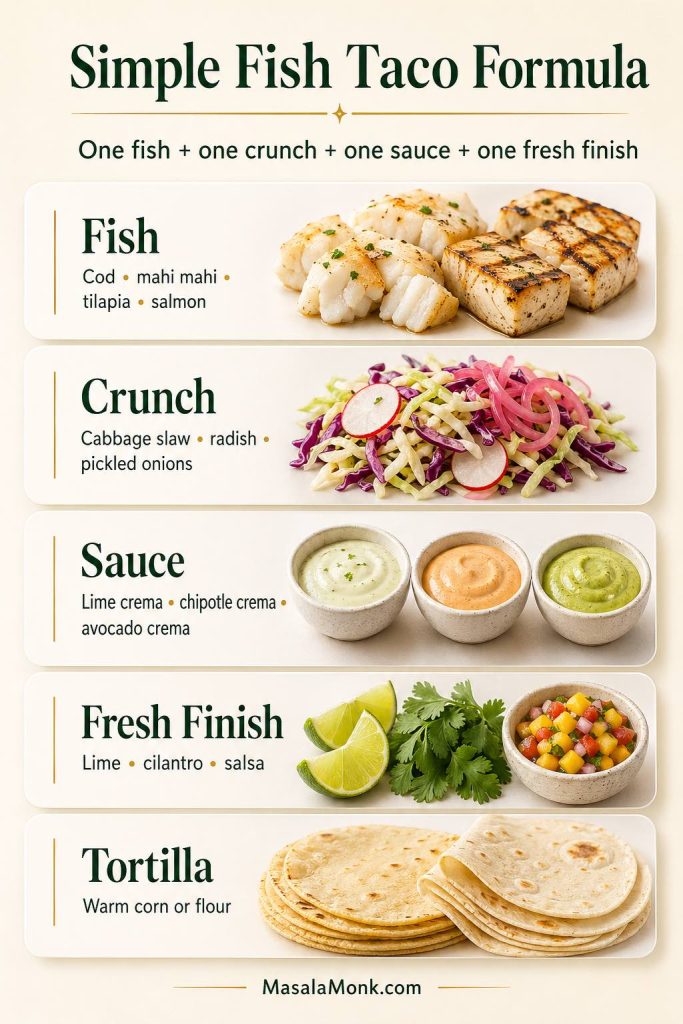
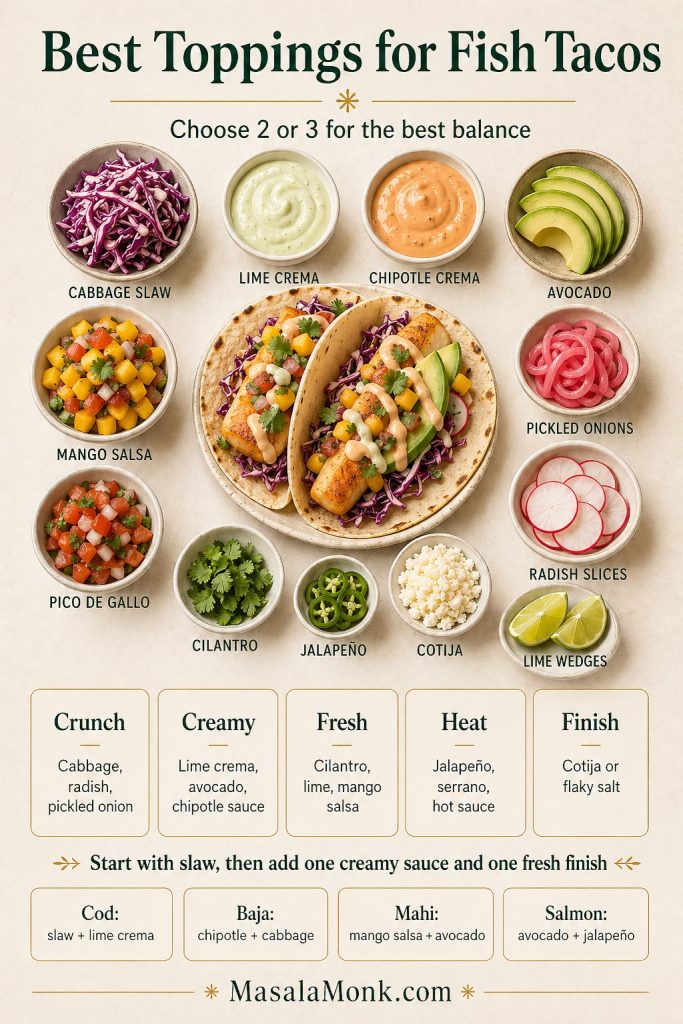
The easiest way to build a good recipe for fish tacos is to use one fish, one crunchy topping, one creamy sauce, one fresh finish, and warm tortillas. This keeps the taco balanced instead of overloaded.

PartBest Choices
FishCod, mahi mahi, tilapia, halibut, snapper, haddock, salmon
Cooking methodPan-seared, grilled, baked, air fried, blackened, or Baja-style fried
CrunchCabbage slaw, radish, pickled onions, shredded lettuce when needed
SauceLime crema, chipotle crema, avocado crema, Greek yogurt sauce
Fresh finishCilantro, lime, mango salsa, pico de gallo, jalapeño
TortillaCorn for classic flavor, flour for softer tacos
A vertical guide titled “Simple Fish Taco Formula” showing the key parts of a balanced fish taco: fish, crunch, sauce, fresh finish, and warm tortillas, with examples like cod, mahi mahi, cabbage slaw, lime crema, cilantro, salsa, and corn or flour tortillas.
Use this formula to keep fish tacos balanced instead of overloaded: start with one fish, add one crunchy element, choose one creamy sauce, finish with something fresh, and serve it all in warm tortillas. It is the easiest way to build tacos that taste bright, layered, and clean without turning soggy or heavy.

Why This Fish Tacos Recipe Works

This fish tacos recipe works because every part has a job. The cod stays mild and flaky, the spice mix gives the fish enough flavor without hiding it, the cabbage slaw adds crunch, the lime crema adds fat and acidity, and the warm tortillas hold everything together.

  • Cod is easy to control: it cooks quickly, flakes cleanly, and works with most toppings.
  • The slaw is lightly dressed: it stays crisp instead of turning wet and heavy.
  • The sauce is tangy, not just creamy: lime keeps the taco bright.
  • The toppings are flexible: you can keep the tacos simple or build toward Baja, grilled, blackened, air fryer, or mango salsa versions.
  • The assembly happens last: warm tortillas, hot fish, crisp slaw, and fresh toppings keep the tacos from getting soggy.

Fish Taco Ingredients

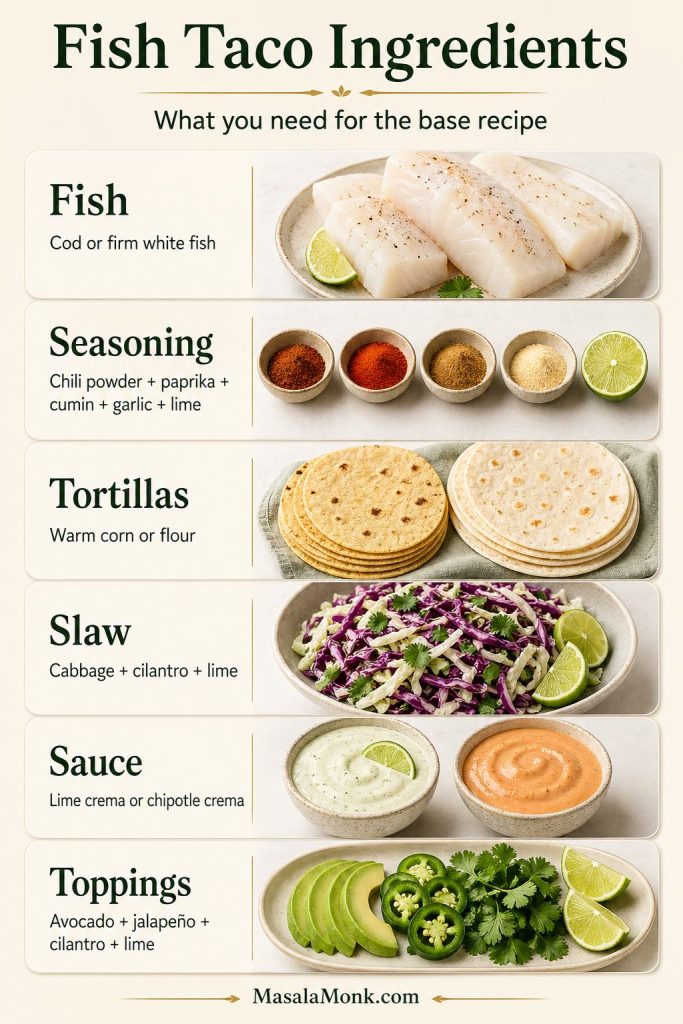
This fish tacos recipe is built in parts: seasoned fish, warm tortillas, crunchy slaw, creamy sauce, and fresh toppings. Because each part has a job, the tacos taste clean instead of heavy when you keep the pieces simple.

A vertical fish taco ingredients guide showing cod or firm white fish, chili powder, paprika, cumin, garlic, lime, corn and flour tortillas, cabbage slaw, lime crema, chipotle crema, avocado, jalapeño, cilantro, and lime.
Great fish tacos are built in parts: mild flaky fish, warm tortillas, crisp slaw, creamy sauce, and fresh toppings. Keep each part simple and balanced so the tacos taste bright and fresh instead of heavy, soggy, or overloaded.

Fish

Use 1 pound of cod for the default recipe. You can also use mahi mahi, tilapia, haddock, halibut, snapper, grouper, bass, or another firm white fish. When using salmon, season it more boldly because it has a richer flavor than mild white fish.
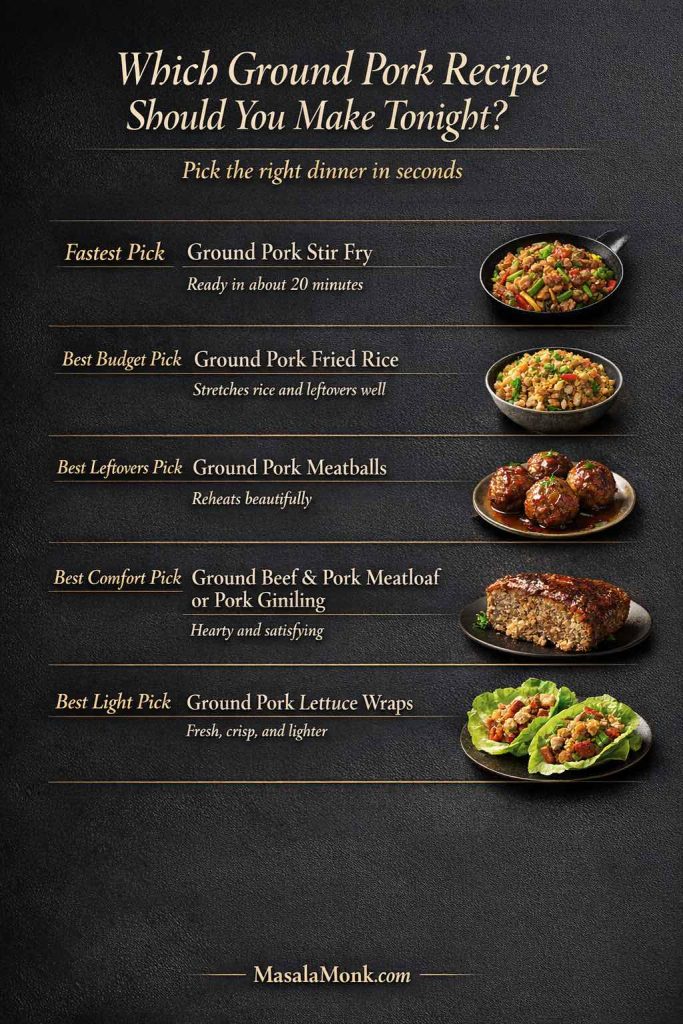
Seasoning

The fish seasoning uses chili powder, smoked paprika, cumin, garlic powder, onion powder, salt, black pepper, lime juice, and oil. As a result, the fish tastes warm, bright, and lightly smoky without becoming aggressively spicy.

Fish Taco Seasoning

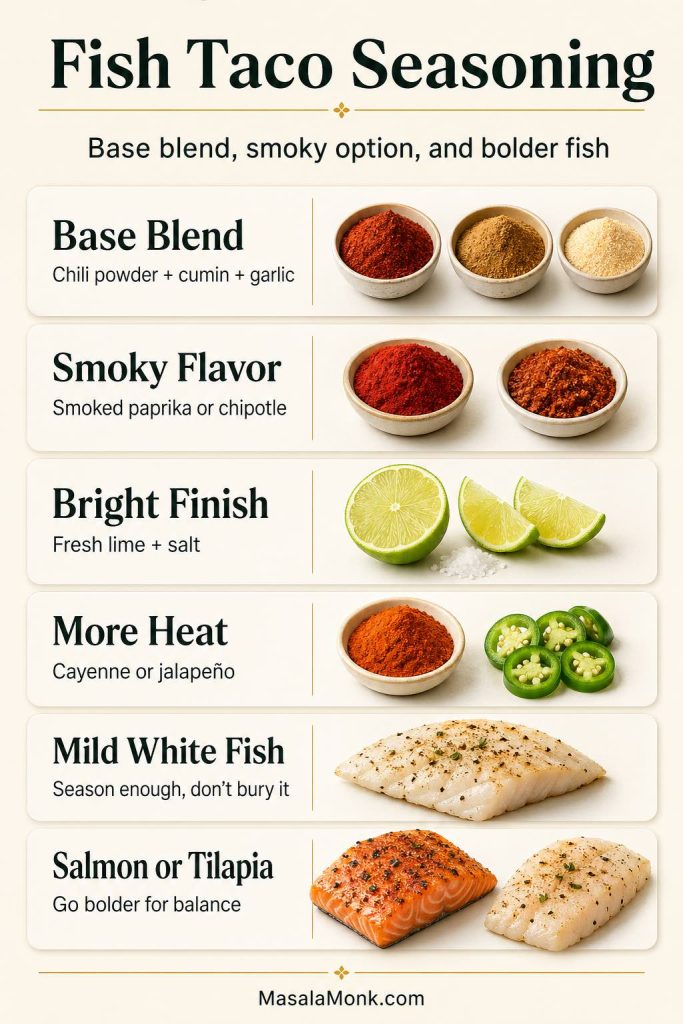
The easiest fish taco seasoning is chili powder, smoked paprika, cumin, garlic powder, onion powder, salt, black pepper, and a little lime. For a smokier flavor, add chipotle powder. For blackened fish tacos, increase the paprika, black pepper, and cayenne.

Flaky white fish needs enough seasoning to avoid tasting flat, but not so much that the fish disappears. Tilapia needs a slightly bolder hand, while salmon works best with a blackened-style spice blend.

A vertical fish taco seasoning guide showing chili powder, cumin, garlic, smoked paprika, chipotle, lime, salt, cayenne, jalapeño, mild white fish, salmon, and tilapia, with tips for base seasoning, smoky flavor, heat, and bolder fish.
Seasoning is what keeps fish tacos from tasting flat. Use chili powder, cumin, garlic, smoked paprika, lime, and salt for the base blend, then adjust the heat with cayenne or jalapeño. Mild white fish needs enough seasoning to taste bright, while salmon and tilapia benefit from a bolder hand.

Tortillas

Corn tortillas give fish tacos the most classic flavor. However, flour tortillas are softer and less likely to crack, so they are useful for bigger tacos. Whichever you use, warm them before filling so they bend instead of breaking.

Corn vs Flour Tortillas for Fish Tacos

Use corn tortillas for the most classic fish taco flavor. They taste more toasty and earthy, which works especially well with Baja fish tacos, cod fish tacos, and chipotle crema. Use flour tortillas for a softer, more flexible taco that is less likely to crack.

When corn tortillas break, warm them longer and keep them covered. For saucier tacos or heavy fillings, double up small corn tortillas.

Slaw

Cabbage is better than lettuce here because it stays crunchy under warm fish and sauce. Use green cabbage, red cabbage, or a bagged slaw mix. Then, add lime, cilantro, salt, and jalapeño to keep it fresh.

Sauce

A good fish taco recipe with cabbage slaw needs a creamy, tangy sauce to tie the fish, tortilla, and toppings together. The default sauce uses sour cream or Greek yogurt, a little mayonnaise, lime juice, garlic powder, salt, and hot sauce or chipotle.

Toppings

Good fish taco toppings add contrast. Use cilantro, jalapeño, avocado, pico de gallo, mango salsa, pickled onions, radish, cotija, hot sauce, or extra lime. However, avoid piling on too many wet toppings at once or the tortillas can turn soggy.

Best Fish for Fish Tacos

The best fish for this fish tacos recipe depends on the style of taco you want. In most cases, mild white fish is the safest choice because it cooks quickly, flakes easily, and lets the sauce, slaw, lime, and toppings shine.

FishBest UseTextureBest Method
CodBest all-purpose fish tacosMild, flaky, cleanPan-seared, baked, air fryer, Baja-style
Mahi mahiGrilled fish tacos and mango salsa tacosFirm, meaty, mildGrilled, blackened, skillet
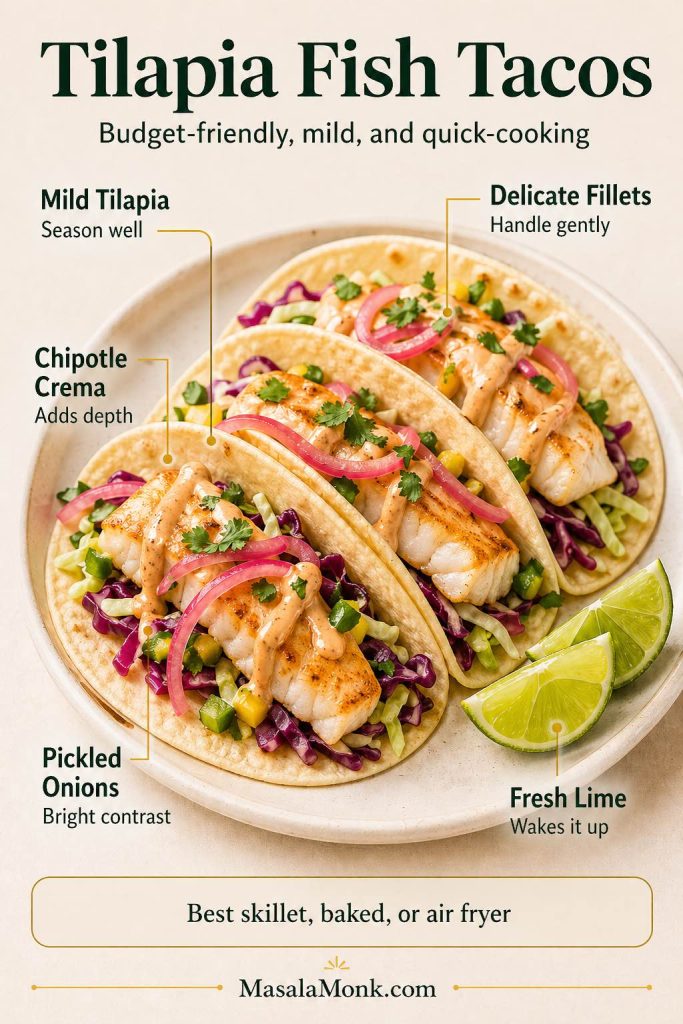
TilapiaBudget-friendly easy fish tacosSoft, mild, thinSkillet, baked, air fryer
HalibutPremium fish tacosFirm, clean, meatyGrilled, pan-seared
SnapperRestaurant-style fish tacosDelicate, sweet, freshGrilled, pan-seared
HaddockCod substituteFlaky, mildBaked, pan-seared, fried
SalmonBold fish tacosRich, stronger flavorBlackened, grilled, air fryer
CatfishFried fish tacosSturdy, earthy, moistFried, cornmeal-crusted, blackened

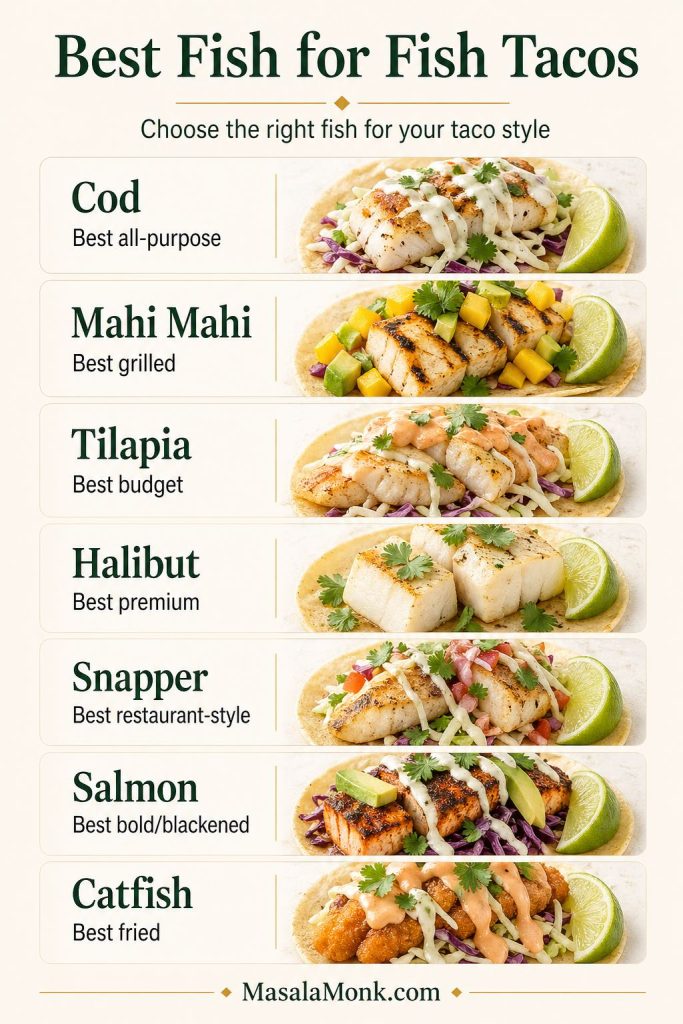
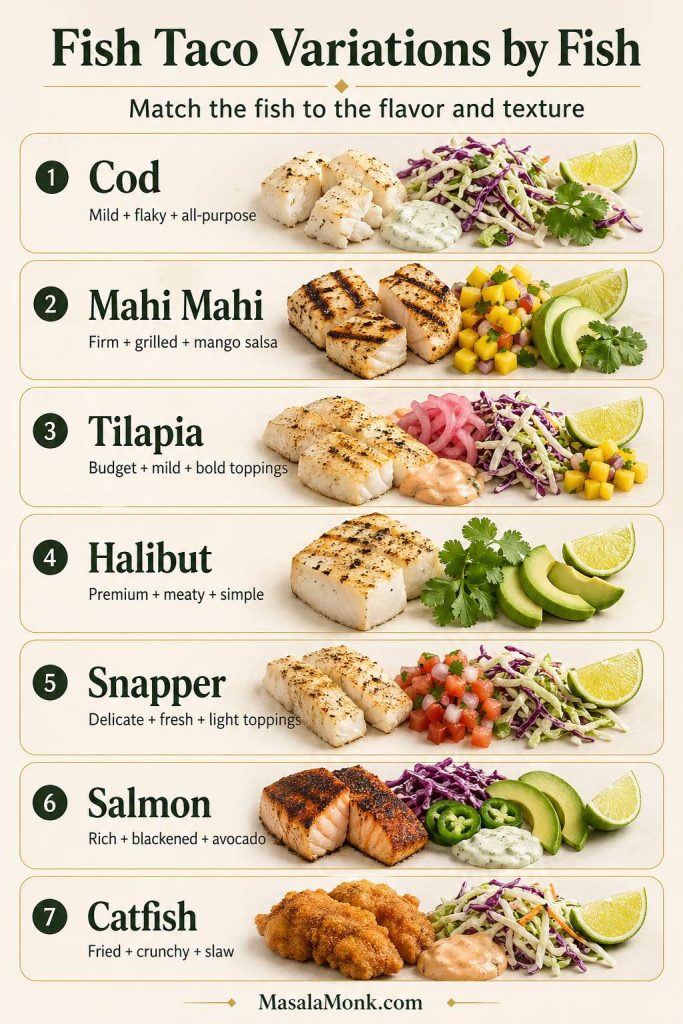
Best overall fish: cod. Best fish for grilling: mahi mahi or halibut. Best budget fish: tilapia. Best fish for Baja tacos: cod. Best premium fish: halibut or snapper. Best bold fish taco: salmon with blackened seasoning.

A vertical guide titled “Best Fish for Fish Tacos” comparing cod, mahi mahi, tilapia, halibut, snapper, salmon, and catfish, with each fish matched to its best taco use such as all-purpose, grilled, budget, premium, restaurant-style, blackened, or fried.
The best fish for fish tacos depends on the style you want. Use cod when you want the easiest all-purpose taco, mahi mahi when you want grilled fish, tilapia when you need a budget-friendly option, salmon when you want bold blackened flavor, and catfish when crispy fried tacos are the goal.

Buying tip: choose fish that looks moist, smells clean rather than strongly fishy, and fits your budget. For the easiest result, choose a firm, mild fish that will hold together when cooked and still taste clean with lime, slaw, and sauce.

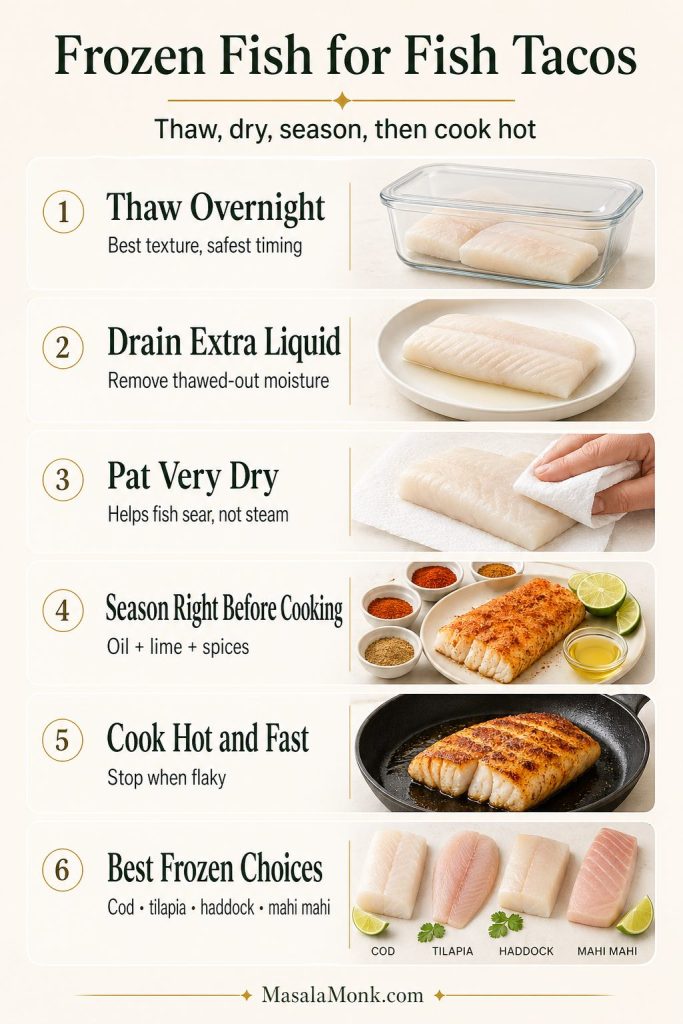
Can You Use Frozen Fish for Fish Tacos?

Yes, frozen fish works well for this fish tacos recipe as long as you thaw it completely and pat it very dry before seasoning. Otherwise, extra surface moisture makes fish steam instead of sear, which can make the tacos taste watery. Frozen cod, tilapia, haddock, mahi mahi, and halibut are all useful choices.

For best texture, thaw frozen fish overnight in the refrigerator. When the fish releases a lot of liquid after thawing, drain it and dry the surface again before adding oil, lime, and spices. The FDA seafood safety guidance also recommends thawing frozen seafood gradually in the refrigerator overnight when possible.

A vertical frozen fish for fish tacos guide showing six steps: thaw frozen fish overnight, drain extra liquid, pat the fish very dry, season right before cooking, cook hot and fast, and choose frozen cod, tilapia, haddock, or mahi mahi.
Frozen fish can make excellent fish tacos, but moisture is the part to control. Thaw it fully, drain any released liquid, pat the fish very dry, and season right before cooking so it sears instead of steaming and keeps the tacos fresh rather than watery.

Fish to Avoid for Fish Tacos

Avoid very delicate fillets that fall apart before they reach the tortilla, such as very thin sole or flounder, unless you are comfortable handling them. Also be careful with very lean, steak-like fish such as tuna or swordfish because they can turn dry in tacos when overcooked. When in doubt, choose cod, mahi mahi, tilapia, haddock, halibut, snapper, or another mild white fish.

Fish Taco Sauce

The sauce for these fish tacos ties everything together. Since the fish is lean, the cabbage is crunchy, and the tortilla is soft, a creamy, tangy sauce gives every bite balance.

Easy Lime Crema

  • 1/3 cup sour cream or Greek yogurt
  • 2 tablespoons mayonnaise
  • 1 tablespoon fresh lime juice
  • 1/2 teaspoon garlic powder
  • 1 teaspoon hot sauce or finely chopped chipotle in adobo
  • Pinch of salt

Stir until smooth. Then, taste and adjust with more lime for brightness, more hot sauce for heat, or a tiny pinch of sugar or honey when the sauce tastes too sharp.

Fish Taco Sauce Variations

  • Chipotle crema: add chopped chipotle in adobo or chipotle powder.
  • Avocado crema: blend the sauce with half a ripe avocado.
  • No-mayo sauce: use all Greek yogurt or sour cream.
  • Spicy sriracha sauce: use sriracha instead of chipotle.
  • Extra-lime crema: add more lime zest and lime juice for a sharper finish.
  • Dairy-free sauce: use thick plant-based mayo and season it with lime, garlic, and chipotle.

For a smokier or richer sauce, use this lime crema as the base and borrow the spicy mayo direction from our homemade mayo recipe.
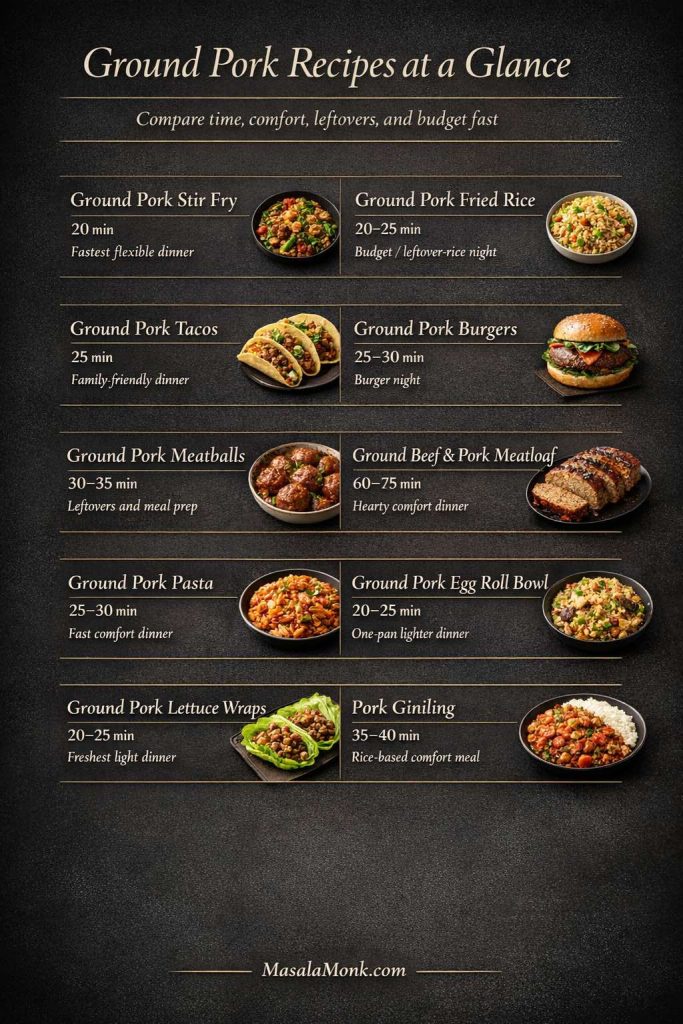
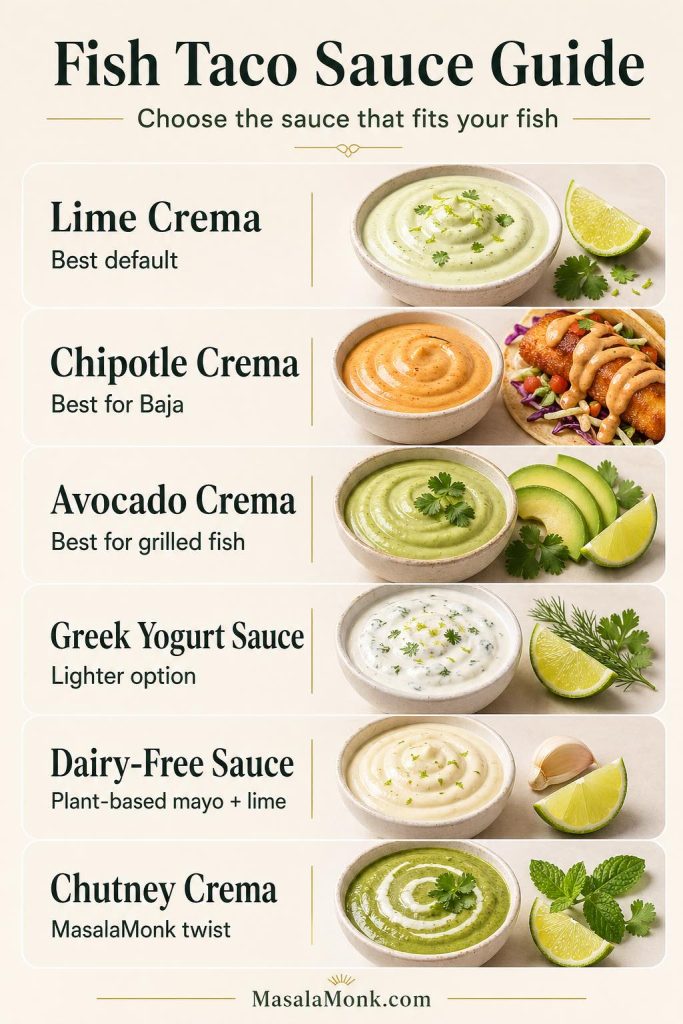
A vertical fish taco sauce guide comparing lime crema, chipotle crema, avocado crema, Greek yogurt sauce, dairy-free sauce, and chutney crema, with notes on which sauces work best for default, Baja, grilled, lighter, plant-based, and MasalaMonk-style fish tacos.
Choose the sauce based on the taco style: lime crema is the easiest default, chipotle crema is best with crispy Baja fish tacos, avocado crema works well with grilled fish, and chutney crema adds a bright MasalaMonk-style twist when you want something fresher and more herb-forward.

MasalaMonk-Style Chutney Crema

For a brighter Indian-inspired fish taco sauce, stir 1 to 2 teaspoons of green chutney into Greek yogurt or sour cream with a squeeze of lime. It works especially well with crispy fish, grilled fish, or a lightly spiced cod filling.

Fish Taco Slaw

The slaw for this fish taco recipe with cabbage slaw should be crisp, bright, and lightly dressed. It should not taste like heavy coleslaw. Instead, the cabbage should add crunch and help protect the tortilla from the warm fish and sauce.

Simple Cabbage Slaw Formula

  • 2 cups shredded cabbage or slaw mix
  • 1 tablespoon fresh lime juice
  • 2 tablespoons chopped cilantro
  • 1 tablespoon thinly sliced jalapeño, optional
  • Pinch of salt

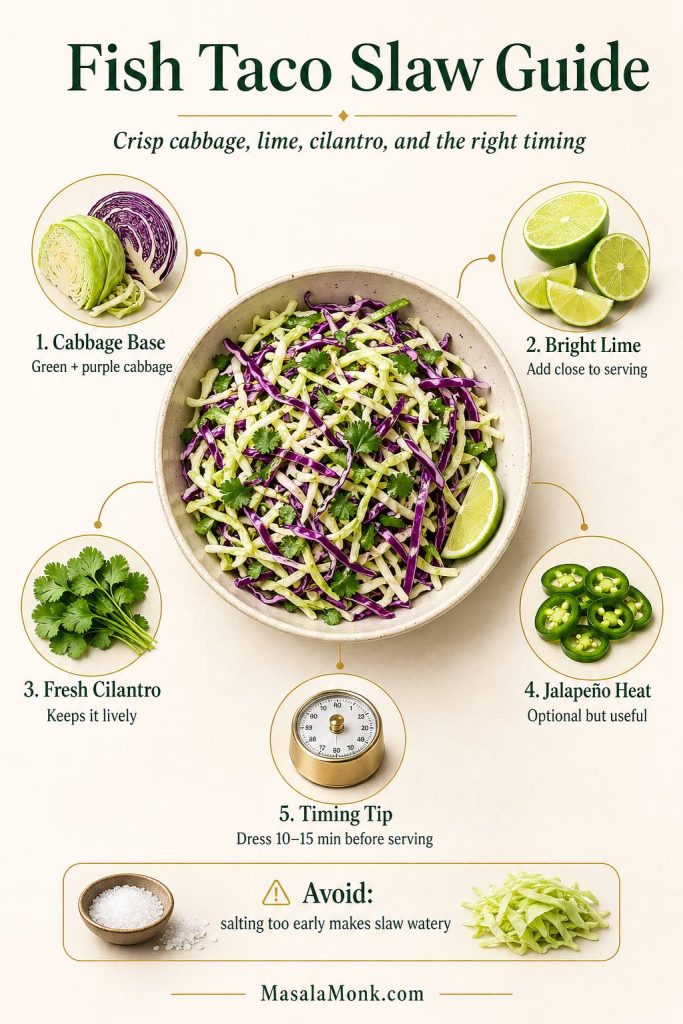
Toss the slaw 10 to 15 minutes before serving. That gives the cabbage enough time to soften slightly without collapsing or turning watery.

When making the tacos ahead, shred the cabbage early but wait to add lime and salt until closer to serving. That way, the slaw stays crisp instead of limp.

A fish taco slaw guide showing a bowl of crisp green and purple cabbage slaw with lime, cilantro, jalapeño, a timing tip to dress 10 to 15 minutes before serving, and a warning not to salt too early.
Cabbage slaw keeps fish tacos crisp, bright, and balanced, but timing matters. Add lime and salt close to serving so the cabbage softens slightly without turning watery, then use cilantro and jalapeño for freshness and gentle heat.

How to Make Fish Tacos

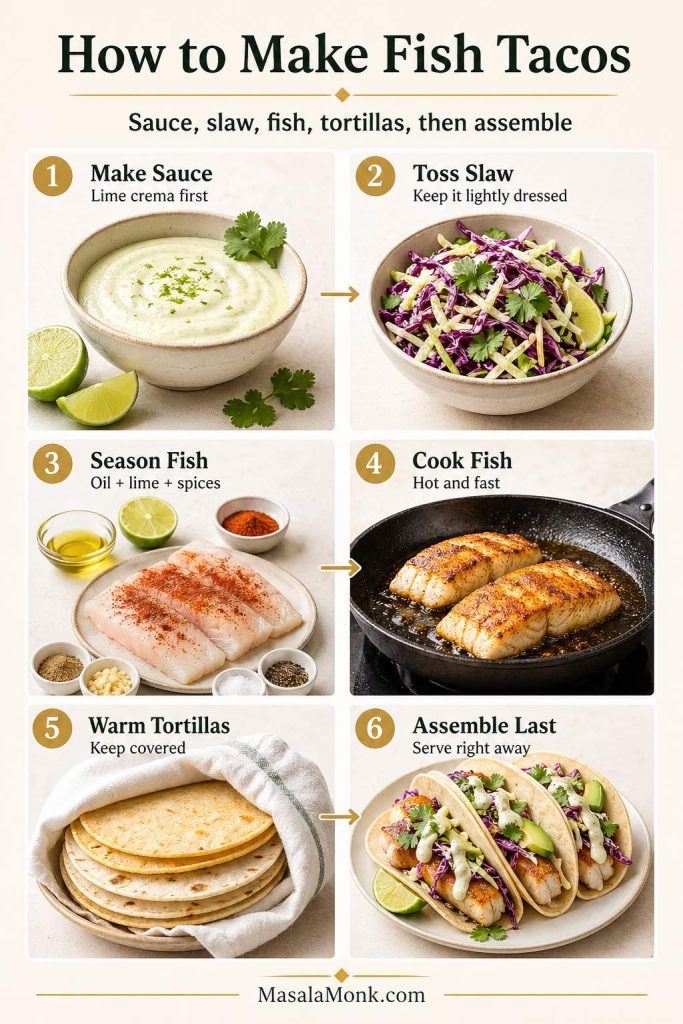
This fish tacos recipe works best when you control the timing. First, make the sauce. Next, toss the slaw. Then, cook the fish quickly, warm the tortillas, and assemble right before eating.

A step-by-step fish tacos guide showing six stages: make lime crema, toss cabbage slaw, season fish with oil, lime and spices, cook fish hot and fast, warm tortillas, and assemble the tacos right before serving.
Fish tacos turn out best when the timing is right: make the sauce and slaw first, season and cook the fish quickly, keep the tortillas warm, and assemble everything at the end. That order keeps the fish tender, the slaw crisp, and the tacos fresh instead of soggy.

1. Make the Sauce

Stir together the sour cream or Greek yogurt, mayonnaise, lime juice, garlic powder, hot sauce or chipotle, and salt. Then, refrigerate the sauce while you prepare the rest of the recipe.
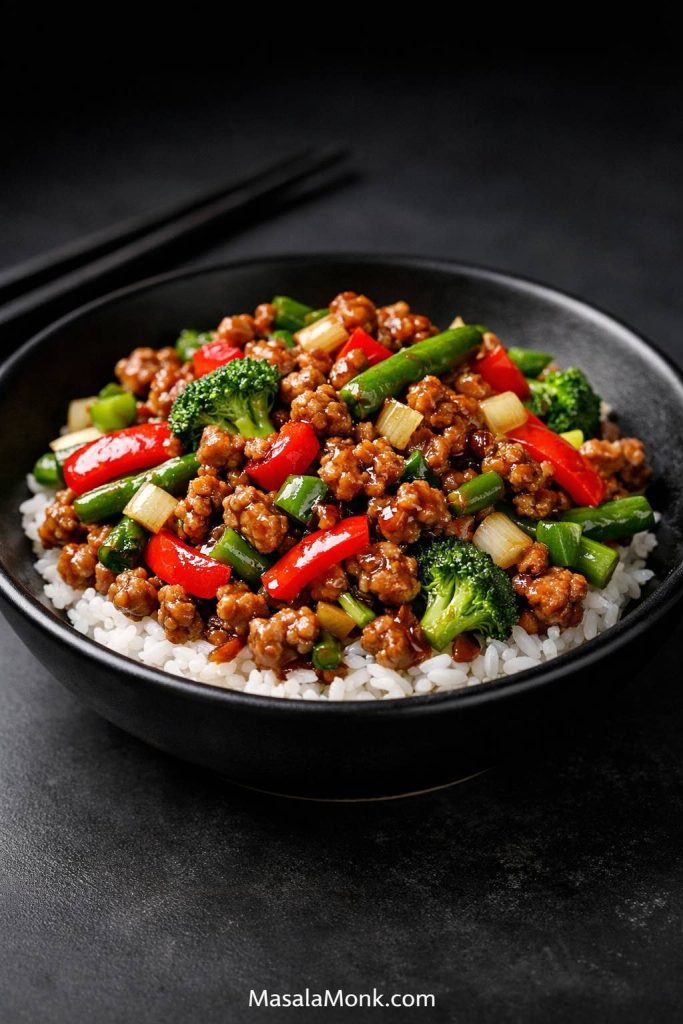
2. Toss the Slaw

Combine the shredded cabbage, lime juice, cilantro, jalapeño, and salt. Keep it lightly dressed. When liquid collects at the bottom of the bowl, leave it behind while assembling the tacos.

3. Season the Fish

Pat the fish dry, then coat it with oil, lime juice, chili powder, smoked paprika, cumin, garlic powder, onion powder, salt, and black pepper. However, do not leave the fish sitting in lime juice for a long time because the acid can change the texture.

4. Cook the Fish

Heat a skillet over medium-high heat. Cook the fish until lightly browned and just flaky, usually 2 to 4 minutes per side depending on thickness. Fish is safely cooked when it reaches 145°F / 63°C, or when the flesh is no longer translucent and separates easily with a fork, according to FoodSafety.gov.

5. Warm the Tortillas

Warm the tortillas in a dry skillet, over a gas flame, or wrapped in a damp towel in the microwave. Then, keep them covered so they stay soft.

6. Assemble the Tacos

Add slaw to each tortilla, then fish, sauce, cilantro, avocado, jalapeño, and lime. Serve immediately. Fish tacos are best when the fish is hot, the tortilla is warm, and the slaw is still crisp.

For the best texture, do not overfill each tortilla. A small layer of slaw, a few pieces of fish, a drizzle of sauce, and one or two fresh toppings usually taste better than a taco packed with everything at once.

How Much Fish Do You Need for Fish Tacos?

Plan on about 4 ounces of raw fish per person, or 1 pound of fish for 4 people. That usually makes about 8 small tacos if each person gets 2 tacos. For bigger appetites, parties, or taco-bar serving, plan closer to 5 to 6 ounces of fish per person.

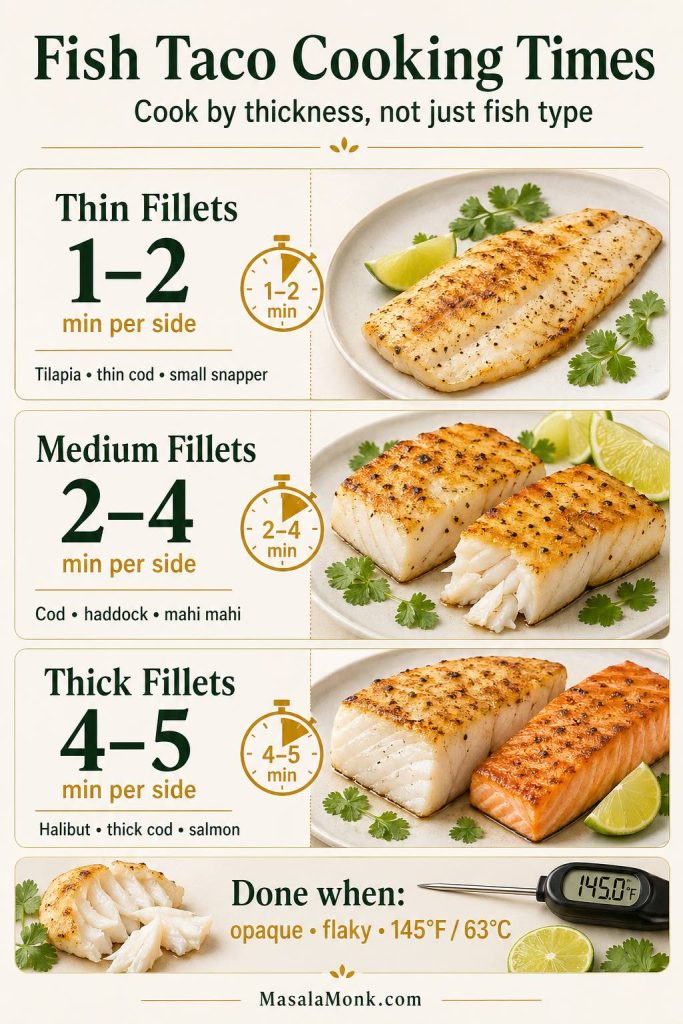
Fish Taco Cooking Times by Thickness

Fish cooks quickly, so thickness matters more than the exact species. Use these times as a guide, then check that the fish is opaque, flakes easily, and reaches 145°F / 63°C.

Fish ThicknessSkillet TimeBest Use
Thin fillets1 to 2 minutes per sideTilapia, thin cod, small snapper fillets
Medium fillets2 to 4 minutes per sideCod, haddock, mahi mahi pieces
Thick fillets4 to 5 minutes per side, or finish covered brieflyHalibut, thick cod, salmon
A fish taco cooking times guide showing thin fillets cooked 1 to 2 minutes per side, medium fillets cooked 2 to 4 minutes per side, thick fillets cooked 4 to 5 minutes per side, and doneness cues of opaque, flaky fish at 145°F or 63°C.
Fish cooks quickly, so thickness matters more than the exact type of fish. Thin fillets like tilapia need only a minute or two per side, while thicker cod, halibut, or salmon may need longer. Stop when the fish is opaque, flakes easily, and reaches 145°F / 63°C.

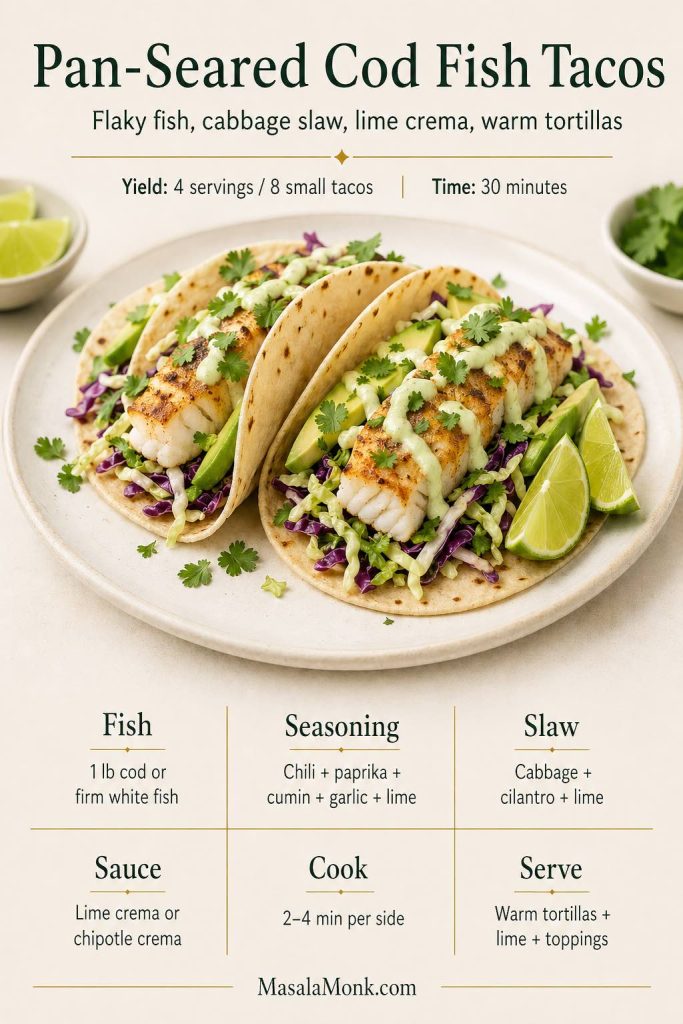
Fish Tacos Recipe Card

Pan-Seared Cod Fish Tacos with Lime Crema and Cabbage Slaw

This easy fish tacos recipe uses mild cod, warm tortillas, crunchy cabbage slaw, and a creamy lime sauce. Use cod as the default, or swap in mahi mahi, tilapia, haddock, halibut, snapper, or another firm white fish.

Yield: 4 servings / 8 small tacos

Prep time: 20 minutes

Cook time: 10 minutes

Total time: 30 minutes

Equipment

  • Large skillet
  • Mixing bowls
  • Tongs or fish spatula
  • Instant-read thermometer, optional

Ingredients

For the fish

  • 1 pound cod or firm white fish, cut into large pieces
  • 1 tablespoon olive oil, plus more for the pan if needed
  • 1 tablespoon fresh lime juice
  • 1 teaspoon chili powder
  • 1 teaspoon smoked paprika
  • 1/2 teaspoon ground cumin
  • 1/2 teaspoon garlic powder
  • 1/4 teaspoon onion powder
  • 3/4 teaspoon kosher salt, or to taste
  • 1/4 teaspoon black pepper
  • Pinch of cayenne, optional

For the lime crema

  • 1/3 cup sour cream or Greek yogurt
  • 2 tablespoons mayonnaise
  • 1 tablespoon fresh lime juice
  • 1/2 teaspoon garlic powder
  • 1 teaspoon hot sauce or finely chopped chipotle in adobo
  • Pinch of salt

For the slaw

  • 2 cups shredded cabbage or slaw mix
  • 1 tablespoon fresh lime juice
  • 2 tablespoons chopped cilantro
  • 1 tablespoon thinly sliced jalapeño, optional
  • Pinch of salt

For serving

  • 8 small corn tortillas or flour tortillas
  • Fresh cilantro
  • Lime wedges
  • Avocado slices, optional
  • Mango salsa or pico de gallo, optional
  • Crumbled cotija, optional
  • Hot sauce, optional

Method

  1. Make the sauce. Stir together the sour cream or Greek yogurt, mayonnaise, lime juice, garlic powder, hot sauce or chipotle, and salt. Refrigerate until needed.
  2. Make the slaw. Toss cabbage with lime juice, cilantro, jalapeño, and salt. Set aside for 10 to 15 minutes while you cook the fish.
  3. Season the fish. Pat the fish dry. Toss with olive oil, lime juice, chili powder, smoked paprika, cumin, garlic powder, onion powder, salt, black pepper, and cayenne if using.
  4. Cook the fish. Heat a large skillet over medium-high heat. Add a little oil if needed. Cook the fish for 2 to 4 minutes per side, depending on thickness, until browned in spots and just flaky.
  5. Warm the tortillas. Warm tortillas in a dry skillet, over a flame, or wrapped in a damp towel in the microwave.
  6. Assemble. Add slaw to each tortilla, then fish, lime crema, cilantro, avocado, lime, and any extra toppings. Serve immediately.

Notes

  • Best fish swap: mahi mahi, tilapia, haddock, halibut, snapper, or another firm white fish.
  • For salmon tacos: use a stronger blackened-style seasoning and cook until just done.
  • For mild tacos: skip cayenne, use plain lime crema, and serve hot sauce on the side.
  • For spicy tacos: add cayenne to the fish, chipotle to the crema, and jalapeño or serrano to the toppings.
  • For crispier fish: dust the seasoned fish lightly with cornstarch or use the air fryer/panko method below.
A saveable recipe card for pan-seared cod fish tacos with cabbage slaw, lime crema, warm tortillas, lime wedges, avocado, and quick notes for fish, seasoning, slaw, sauce, cooking time, and serving.
Save this base version when you want easy fish tacos without overthinking the choices. Cod gives you mild, flaky fish, cabbage slaw keeps the tacos crisp, lime crema adds brightness, and a quick 2–4 minute skillet cook keeps the fish tender instead of dry.

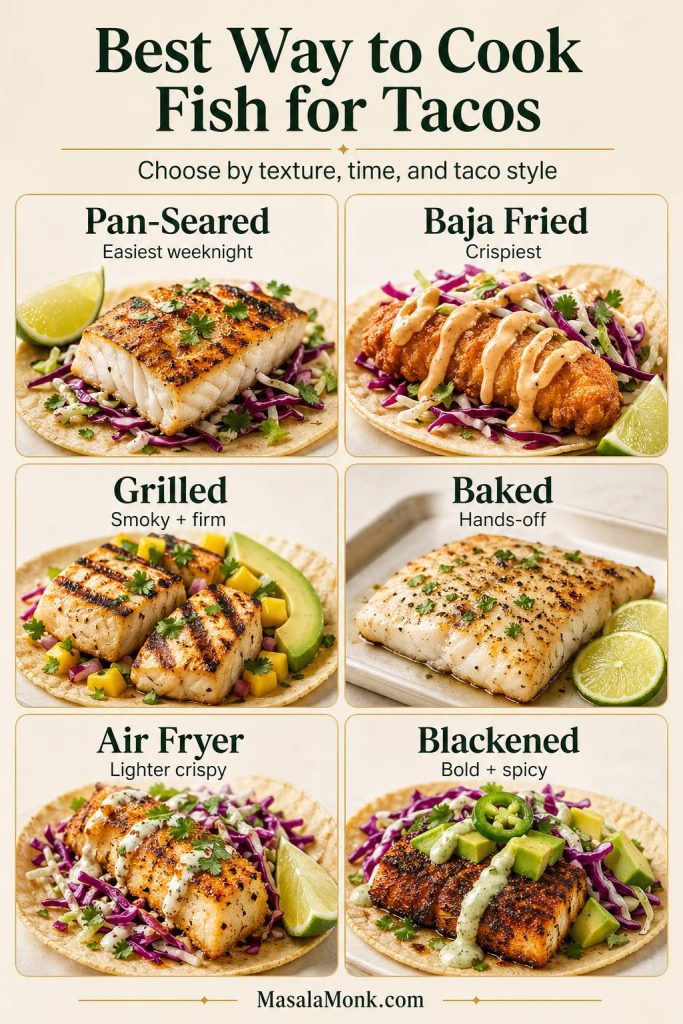
Best Way to Cook Fish for Tacos

The best way to cook fish for tacos depends on the texture you need. Pan-searing is the easiest everyday method, Baja-style frying gives the crispiest fish, grilling adds smoky flavor, baking is hands-off, and the air fryer gives a lighter crispy shortcut.

MethodBest FishBest ForReader Tip
Pan-searedCod, tilapia, haddock, snapperEasy weeknight fish tacosPat fish dry and cook hot and fast.
Baja-style friedCod, haddock, halibutCrispy fish tacosKeep fried fish uncovered briefly so steam does not soften the coating.
GrilledMahi mahi, halibut, salmon, snapperSmoky fish tacosUse firmer fish that can handle flipping.
BakedCod, haddock, tilapia, halibutHands-off cookingAdd crunchy slaw and bright sauce because baked fish is softer.
Air fryerCod, tilapia, haddock, salmonLighter crispy tacosDo not overcrowd the basket.
BlackenedCod, mahi mahi, salmon, snapperBold spicy fish tacosUse high heat, but do not burn the spices.
A cooking method guide for fish tacos comparing pan-seared, Baja fried, grilled, baked, air fryer, and blackened fish tacos with notes for easiest weeknight, crispiest, smoky, hands-off, lighter crispy, and bold spicy methods.
Choose the cooking method based on the texture you want. Pan-seared fish is the easiest weeknight option, Baja fried fish gives the crispiest tacos, grilled fish adds smoky flavor, baked fish is hands-off, air fryer fish is lighter and crisp, and blackened fish brings the boldest spice.

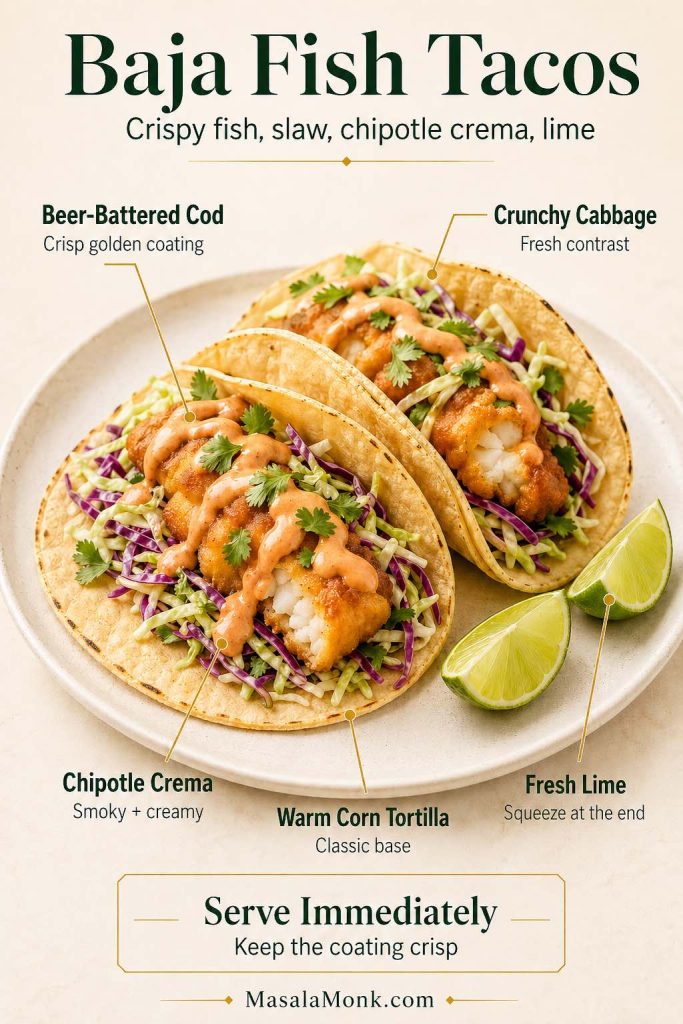
Baja Fish Tacos: Crispy, Fried and Beer-Battered

For a Baja-style recipe for fish tacos, focus on crisp texture: beer-battered white fish, cabbage slaw, chipotle crema, lime, and warm corn tortillas. Cod is the easiest choice because it is mild, flaky, and sturdy enough for batter.

What Makes Fish Tacos Baja Style?

  • Crispy battered fish, usually cod or another white fish
  • Cabbage or slaw for crunch
  • Chipotle crema or a creamy white sauce
  • Warm corn tortillas
  • Fresh lime

Quick Baja-Style Beer Batter Formula

For 1 pound of cod, whisk 1 cup all-purpose flour, 2 tablespoons cornstarch, 1 teaspoon baking powder, 1 teaspoon chili powder, 3/4 teaspoon salt, black pepper, and about 1 cup cold beer until just combined. Dip dry fish strips into the batter, fry until golden and crisp, then serve immediately with cabbage slaw, chipotle crema, lime, and warm corn tortillas.

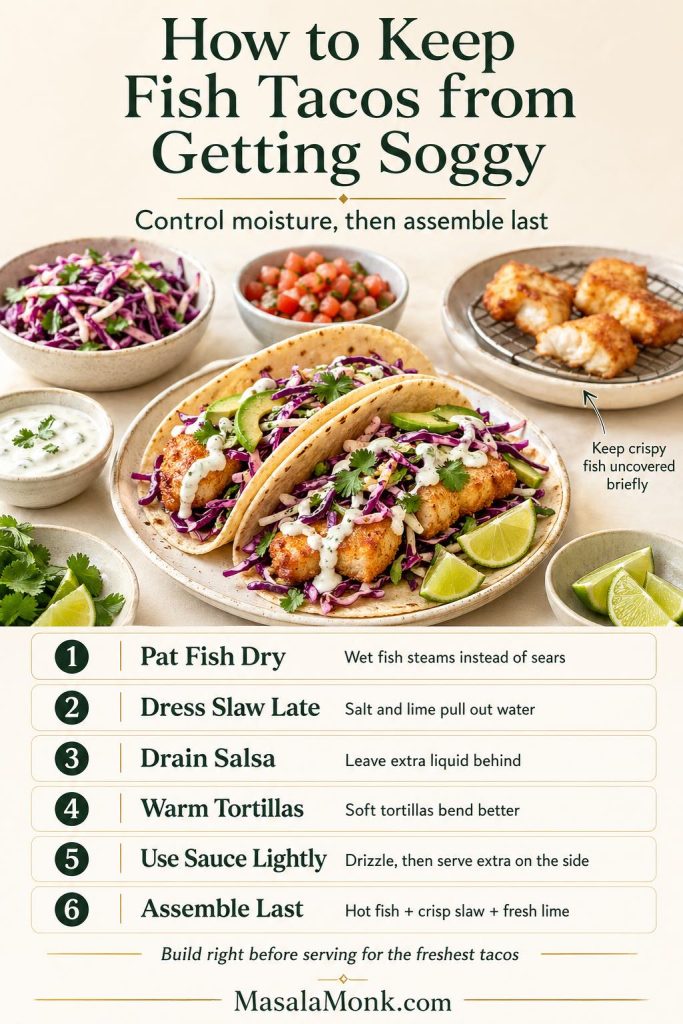
Keep the fried fish uncovered for a few minutes before assembling so steam does not soften the coating. Also, assemble Baja fish tacos right before serving because fried fish loses crunch once it sits under sauce and slaw.

A Baja fish tacos guide showing crispy beer-battered cod in warm corn tortillas with crunchy cabbage, chipotle crema, fresh lime, and a reminder to serve immediately so the coating stays crisp.
Baja fish tacos work because every part adds contrast: crisp beer-battered cod, crunchy cabbage, smoky chipotle crema, warm corn tortillas, and fresh lime. Assemble them right before serving so the coating stays crisp instead of softening under the slaw and sauce.

Fried Fish Tacos

For a fried fish taco recipe that is not fully beer-battered, coat cod, haddock, halibut, or catfish in seasoned flour, egg, and panko or cornmeal. Fry until crisp, drain briefly on a rack, then serve with cabbage slaw, chipotle crema, lime, and warm tortillas. This gives you crunchy fish tacos without making a wet batter.

No-Beer Baja Fish Tacos

When beer is not an option, make a simple batter with flour, cornstarch, baking powder, salt, spices, and cold sparkling water or club soda. The bubbles help keep the coating lighter. For the best texture, fry the fish right after dipping so the batter stays airy instead of heavy.

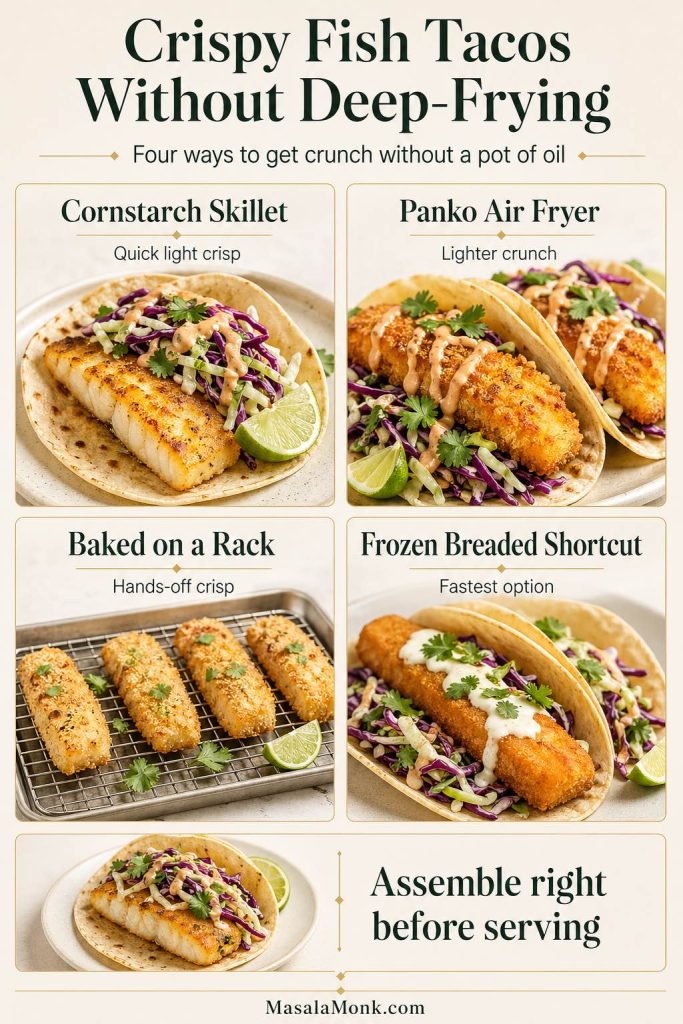
Crispy Fish Tacos Without Deep-Frying

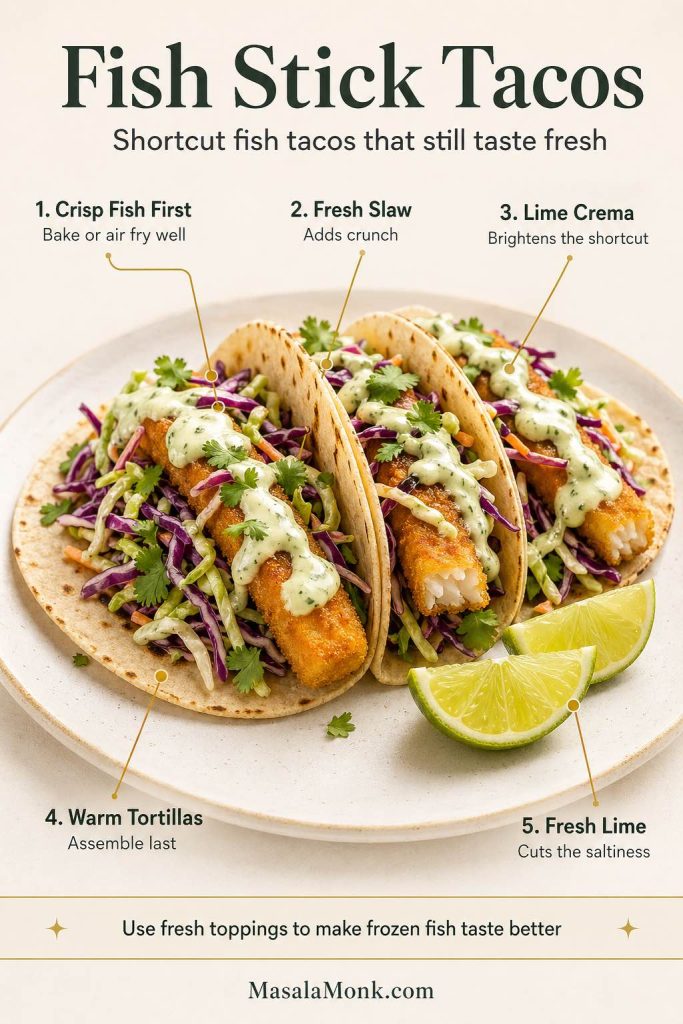
For a crispy fried fish taco recipe without deep-frying, dust the seasoned fish lightly with cornstarch before pan-searing, use the panko air fryer method below, or bake panko-coated fish on a rack so air can circulate around the pieces. Frozen breaded fish or fish sticks can also work as a shortcut when fresh slaw, lime, and sauce keep the tacos bright.

A crispy fish tacos guide comparing four ways to get crunch without deep-frying: cornstarch skillet fish, panko air fryer fish, baked fish on a rack, and a frozen breaded fish shortcut, with a reminder to assemble right before serving.
Crispy fish tacos do not always need deep-frying. A cornstarch skillet method gives quick light crisp, panko works well in the air fryer, a rack helps baked fish stay crunchy, and frozen breaded fish can become a better shortcut when you finish it with fresh slaw, lime, and sauce. Assemble right before serving so the coating stays crisp.

When the crispy battered fish is your favorite part, our fish and chips with Indian twists goes deeper into crisp coating logic, battered fish, spice-forward coatings, and chutney-style dips.

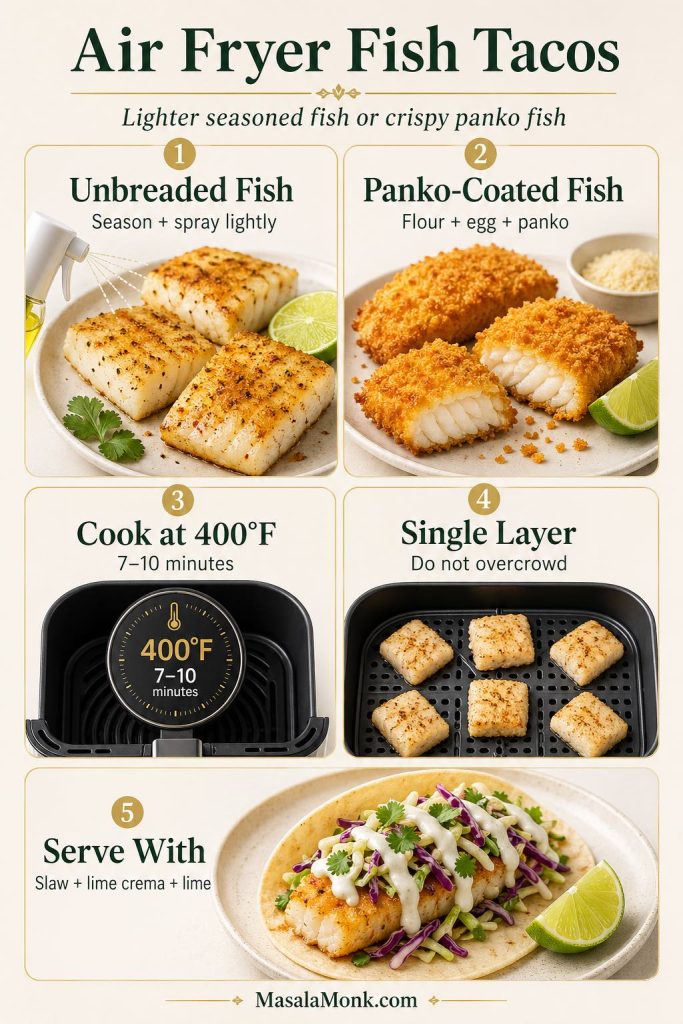
Air Fryer Fish Tacos

An air fryer recipe for fish tacos is useful when you need crispier fish without deep-frying. Cod, tilapia, mahi mahi, haddock, and halibut all work.

Unbreaded Air Fryer Fish Tacos

Season the fish as written in the main recipe. Then, lightly spray the fish and air fryer basket with oil. Cook in a single layer at 400°F for about 7 to 10 minutes for most cod or white fish pieces, checking early for thin fillets. The fish is done when it is opaque and flakes easily.
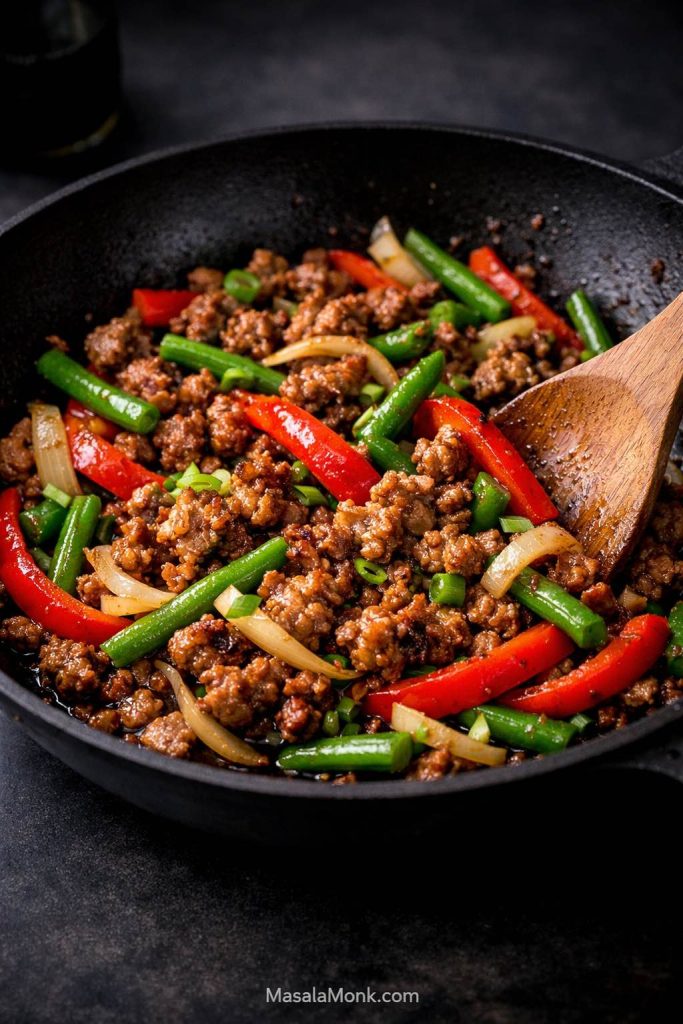
Panko Air Fryer Fish Tacos

For crispy air fryer fish tacos, coat seasoned cod pieces in flour, egg, and panko. Then, spray lightly with oil and air fry in a single layer at 400°F until golden and crisp, usually about 8 to 10 minutes depending on thickness. Serve immediately with slaw and lime crema.

The biggest air fryer mistake is overcrowding. When the pieces touch too much, the coating steams instead of crisping.

An air fryer fish tacos guide showing unbreaded seasoned fish, panko-coated fish, a 400°F cooking temperature for 7 to 10 minutes, fish pieces arranged in a single layer, and an air fryer fish taco served with slaw, lime crema, and lime.
Air fryer fish tacos can go two ways: use seasoned fish for a lighter taco or panko-coated fish when you want more crunch. Either way, cook the pieces in a single layer at 400°F so they crisp instead of steaming, then serve with cabbage slaw, lime crema, and fresh lime.

Baked Fish Tacos

For a baked fish taco recipe with flaky white fish, use cod, haddock, tilapia, halibut, or another mild white fish. Pat the fish dry, season it as written in the main recipe, place it on a lightly oiled baking sheet, and bake at 400°F for about 10 to 14 minutes, depending on thickness, until the fish is opaque, flakes easily, and reaches 145°F / 63°C.

Baked fish will not brown as deeply as skillet fish or turn as crisp as Baja-style fried fish. Therefore, finish the tacos with crunchy slaw, lime crema, fresh lime, cilantro, and a bright topping like mango salsa or pico de gallo.

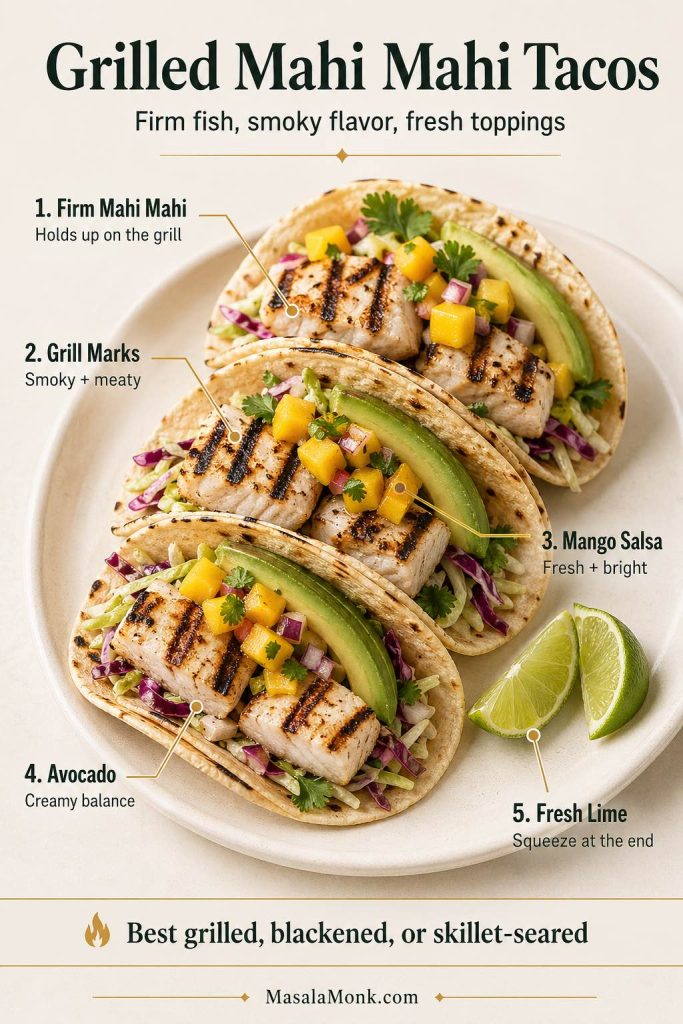
Grilled Fish Tacos

For a grilled fish taco recipe with mahi mahi, halibut, snapper, salmon, or thick cod, choose firm fish that can handle being flipped. Very delicate or thin fillets are easier to cook in a skillet.

  • Pat the fish dry before seasoning.
  • Oil the fish and the grill grates.
  • Use medium-high heat.
  • Wait until the fish releases naturally before flipping.
  • Pair grilled fish with mango salsa, avocado, cabbage slaw, lime, or chipotle crema.

Most firm fish fillets need about 3 to 4 minutes per side on a hot grill, depending on thickness. When the fish sticks, wait a little longer before flipping; properly seared fish usually releases more easily from the grate.

Mahi mahi is especially good for grilled fish tacos because it is firm and meaty without tasting heavy.

Blackened Fish Tacos

For a bold salmon fish taco recipe or blackened taco recipe with cod, mahi mahi, tilapia, halibut, or snapper, use extra smoked paprika, chili powder, garlic, black pepper, and a little cayenne. This is the best option when you need a spicier taco without frying.

Blackened does not mean burnt. Instead, the goal is a dark, spice-coated surface with juicy fish underneath. Balance the heat with cabbage slaw, lime crema, avocado, mango salsa, or extra lime.

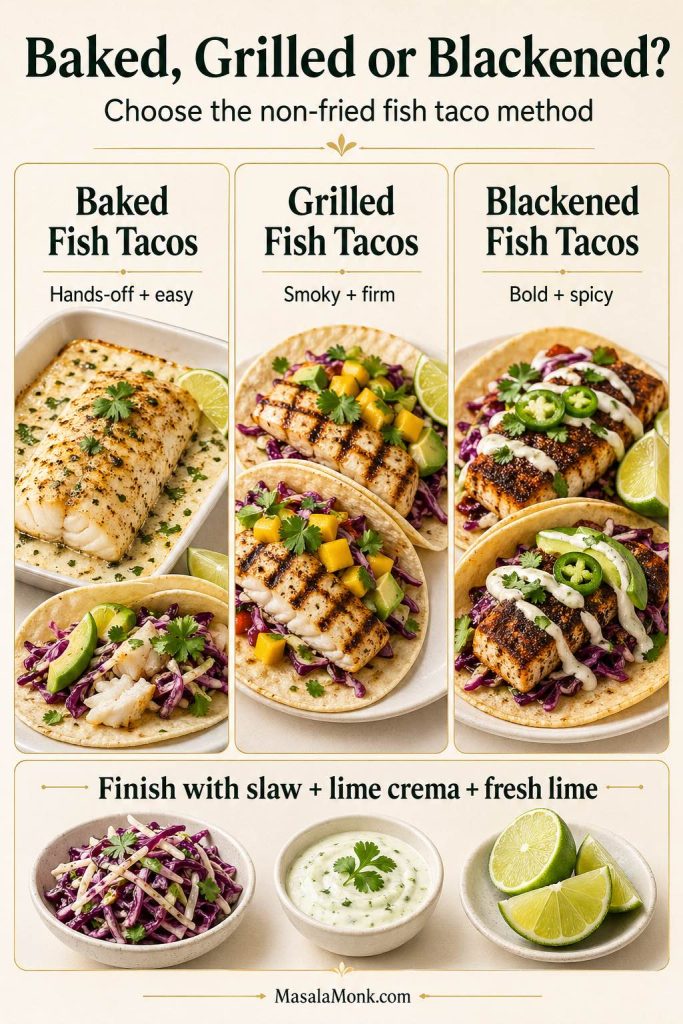
A fish taco method comparison guide showing baked fish tacos, grilled fish tacos, and blackened fish tacos, with notes for hands-off cooking, smoky firm fish, bold spicy fish, and a reminder to finish with slaw, lime crema, and fresh lime.
Use this comparison when you want fish tacos without frying. Baked fish tacos are the easiest hands-off option, grilled fish tacos work best with firmer fish like mahi mahi or halibut, and blackened fish tacos are best when you want bold spice balanced by slaw, lime crema, and fresh lime.

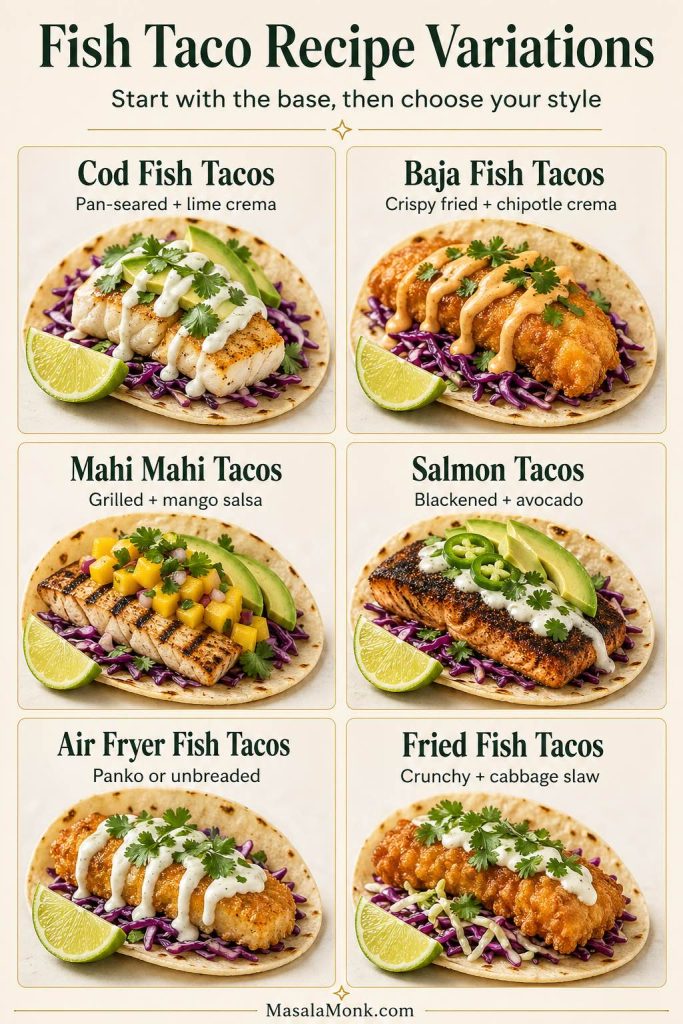
Fish Taco Recipe Variations

Once you know the base recipe, you can change the fish, cooking method, sauce, or topping without rebuilding the whole meal. Use this table when you need a different fish taco recipe from the same basic formula.

A fish taco recipe variations guide showing six options: cod fish tacos with lime crema, Baja fish tacos with chipotle crema, mahi mahi tacos with mango salsa, salmon tacos with avocado, air fryer fish tacos, and fried fish tacos with cabbage slaw.
Use the base recipe as your starting point, then change the fish, cooking method, sauce, and toppings to match the taco style you want. Cod is the easiest default, Baja and fried fish tacos bring the crunch, mahi mahi works well grilled with mango salsa, salmon is best blackened, and air fryer fish tacos give you a lighter crispy option.
VariationUse This FishCooking MethodBest Sauce or Topping
Cod fish taco recipeCodPan-seared, baked, air fryer, or friedLime crema + cabbage slaw
Baja fish taco recipeCod or haddockBeer-battered and friedChipotle crema + slaw
Mahi mahi taco recipeMahi mahiGrilled or blackenedMango salsa + avocado
Salmon fish taco recipeSalmonBlackened, grilled, or air friedAvocado + lime crema
Air fryer fish taco recipeCod, tilapia, or haddockAir fried, plain or panko-coatedCabbage slaw + lime
Fried fish taco recipeCod, haddock, halibut, or catfishBattered, panko-coated, or cornmeal-crustedChipotle sauce + crunchy slaw

Fish Taco Variations by Fish Type

A fish taco variations by fish guide comparing cod, mahi mahi, tilapia, halibut, snapper, salmon, and catfish with suggested flavor and texture pairings such as flaky, grilled, budget-friendly, premium, blackened, and fried.
Different fish change the whole taco. Cod is the easiest mild and flaky choice, mahi mahi works best when grilled, tilapia needs brighter toppings, halibut and snapper are best kept simple, salmon needs bold seasoning, and catfish is strongest when fried and paired with slaw.

Cod Fish Tacos

Cod is the best default for this page because it is mild, flaky, and flexible. Therefore, you can use it for pan-seared fish tacos, baked fish tacos, air fryer fish tacos, or Baja-style beer-battered fish tacos.

For a simple recipe for cod fish tacos, keep the toppings clean: cabbage slaw, lime crema, cilantro, lime, and avocado. For crispy cod tacos, dust the fish lightly with cornstarch before cooking or use the Baja-style beer batter.

A cod fish tacos guide showing flaky cod in warm tortillas with cabbage slaw, lime crema, avocado, cilantro, and lime, with notes that cod is mild, all-purpose, and works baked, air fryer, or Baja-style.
Cod is the safest fish to start with because it is mild, flaky, and easy to pair with almost any fish taco topping. Keep the build simple with cabbage slaw, lime crema, warm tortillas, cilantro, avocado, and fresh lime, then use the same cod filling for pan-seared, baked, air fryer, or Baja-style tacos.

Mahi Mahi Tacos

Mahi mahi is best grilled, blackened, or cooked in a hot skillet. For a grilled fish taco recipe with mahi mahi, season the fish with the same spice blend, grill it for about 3 to 4 minutes per side, and serve it with mango salsa, avocado, cilantro, and lime.

Mahi mahi is firm enough to hold together on the grill, so it is one of the best choices when you need smoky tacos with fish that does not fall apart. Keep the salsa chunky and not too wet when the tacos already have sauce.

A grilled mahi mahi tacos guide showing firm grilled mahi mahi with mango salsa, avocado, cabbage slaw, lime, and cilantro, with callouts for grill marks, fresh toppings, and why mahi mahi works well for grilled fish tacos.
Mahi mahi is one of the best fish for grilled fish tacos because it is firm enough to hold its shape and meaty enough to carry smoky grill marks. Pair it with chunky mango salsa, avocado, cabbage slaw, cilantro, and fresh lime for a taco that tastes bright without becoming watery.

Tilapia Fish Tacos

Tilapia is budget-friendly and mild. For budget-friendly tilapia fish tacos, season the fillets well, cook them gently in a skillet or air fryer, and use bold toppings like chipotle crema, pickled onions, mango salsa, or extra lime.

Because tilapia is delicate, handle it gently and avoid overcooking it. The seasoning and toppings do more of the flavor work, so do not skip the lime and slaw.

A tilapia fish tacos guide showing mild tilapia in warm tortillas with chipotle crema, pickled onions, cabbage slaw, cilantro, jalapeño, and lime, with notes to season tilapia well and handle the delicate fillets gently.
Tilapia is a great budget-friendly fish for tacos, but it needs help from seasoning and bright toppings. Use chipotle crema, pickled onions, cabbage slaw, cilantro, jalapeño, and fresh lime so the mild fish tastes lively instead of flat.

Halibut Fish Tacos

Halibut is a premium choice for fish tacos. Since it is firm, clean, and meaty, keep the toppings simple. Slaw, lime crema, cilantro, avocado, and lime are enough.

For a premium taco recipe with fish that feels restaurant-style, pan-sear or grill halibut until just flaky, then avoid burying it under too many wet toppings.

Snapper Fish Tacos

Snapper tastes fresh and slightly sweet. It works well grilled or pan-seared. Because the flavor is delicate, use light toppings so the fish stays the focus.

Snapper fish tacos are especially good with lime crema, cilantro, avocado, and a small amount of pico de gallo or mango salsa.

Salmon Tacos

Salmon is not the most traditional fish taco fish, but it works when the seasoning is bold. For a salmon fish taco recipe, use blackened seasoning instead of the milder cod seasoning. Salmon has a richer flavor, so it works best with avocado, lime crema, cabbage, jalapeño, and a bright salsa rather than very delicate toppings.

When making air fryer salmon tacos, use the seasoning direction here and follow the timing logic in our air fryer salmon recipe so the salmon stays juicy instead of dry.

A blackened salmon tacos guide showing spice-crusted salmon in warm tortillas with avocado, cabbage slaw, lime crema, jalapeño, cilantro, and fresh lime, with notes that salmon works best blackened, grilled, or air fried.
Salmon works best in fish tacos when the seasoning is bold enough to balance its richness. Use a blackened spice crust, then add cabbage slaw for crunch, avocado for creaminess, lime crema to cool the heat, and fresh lime to keep the tacos bright.

Fish Stick Tacos or Frozen Breaded Fish Tacos

Fish stick tacos are the shortcut version. First, bake or air fry the fish sticks or frozen breaded fish until very crisp. Then, use the same slaw, lime crema, cilantro, and lime. The fresh toppings matter here because they make frozen fish taste more like real fish tacos.

For the best texture, do not assemble the tacos until the fish is fully crisp and the tortillas are warm. When the frozen fish is already salty, keep the sauce bright and the slaw lightly seasoned so the taco does not taste heavy.

A fish stick tacos guide showing crispy frozen breaded fish in warm tortillas with fresh slaw, lime crema, cilantro, and lime, with tips to bake or air fry the fish until crisp and assemble the tacos last.
Fish stick tacos can taste fresh when the frozen breaded fish is cooked until crisp and balanced with bright toppings. Use warm tortillas, crunchy slaw, lime crema, cilantro, and fresh lime, then assemble the tacos right before serving so the coating stays crisp instead of softening under the sauce.

Best Toppings for Fish Tacos

The best toppings for this fish tacos recipe add crunch, creaminess, freshness, heat, or a salty finish. However, you do not need all of them. Choose two or three that balance the fish.

When choosing one essential fish taco topping, start with cabbage slaw. It adds crunch, protects the tortilla, and balances creamy sauce and flaky fish.

A best toppings for fish tacos guide showing cabbage slaw, lime crema, chipotle crema, avocado, mango salsa, pico de gallo, pickled onions, radish, cilantro, jalapeño, cotija, lime wedges, and finished fish tacos.
The best toppings for fish tacos add balance instead of bulk. Start with cabbage slaw for crunch, add one creamy sauce like lime crema or chipotle crema, then finish with something fresh such as cilantro, lime, mango salsa, pico de gallo, jalapeño, pickled onions, avocado, or cotija.
PurposeBest Toppings
CrunchCabbage, radish, red onion, pickled onions
CreamyLime crema, chipotle sauce, avocado, guacamole
FreshCilantro, lime, pico de gallo, mango salsa, pineapple salsa
HeatJalapeño, serrano, hot sauce, chipotle
Salty finishCotija, flaky salt, salted avocado

For an even better match, choose toppings based on the fish and cooking method.

Fish Taco StyleBest ToppingsWhy It Works
Cod fish tacosCabbage slaw, lime crema, cilantro, limeSimple toppings let mild cod stay clean and flaky.
Baja fish tacosChipotle crema, cabbage slaw, pico de gallo, limeCreamy, crunchy, and bright toppings balance fried fish.
Mahi mahi tacosMango salsa, avocado, cilantro, limeFirm grilled fish works well with fruit and creaminess.
Salmon tacosAvocado, jalapeño, cabbage, lime cremaRich salmon needs acid, crunch, and heat.
Tilapia fish tacosChipotle crema, mango salsa, pickled onionsMild tilapia benefits from bolder toppings.
Fish stick tacosFresh slaw, lime crema, cilantro, hot sauceFresh toppings make frozen breaded fish taste brighter.

How to Keep Fish Tacos from Getting Soggy

This fish tacos recipe stays fresh when you control moisture. Soggy fish tacos usually come from wet fish, watery salsa, overdressed slaw, cold tortillas, or too much sauce. Once you fix those parts, the tacos stay much better.

A guide showing how to keep fish tacos from getting soggy with crisp fish, cabbage slaw, lime crema, warm tortillas, drained salsa, lime, and tips to pat fish dry, dress slaw late, drain salsa, use sauce lightly, and assemble last.
Keep fish tacos from getting soggy by controlling moisture before you assemble. Pat the fish dry, dress the slaw close to serving, drain watery salsa, warm the tortillas, use sauce lightly, and build the tacos right before eating so the fish stays crisp, the slaw stays fresh, and the tortillas do not turn wet.
  • Pat the fish dry before seasoning so it sears instead of steaming.
  • Do not over-marinate fish in lime juice.
  • Cook hot and fast so the outside gets flavor before the fish dries out.
  • Drain salsa before adding it to tacos.
  • Use cabbage slaw instead of watery lettuce.
  • Warm tortillas so they bend without cracking.
  • Use sauce lightly and serve extra sauce on the side.
  • Assemble right before serving instead of letting filled tacos sit.
  • Keep fried fish uncovered briefly so steam does not soften the coating.

If the Fish Tastes Bland

Add more salt, lime, chili powder, or hot sauce. Usually, bland fish tacos need either more seasoning on the fish or more acidity at the end.

If the Fish Is Dry

Cook it for less time next round and use a slightly thicker fillet. However, dry fish can still be saved with lime crema, avocado, slaw, and a squeeze of fresh lime.

If the Tortillas Break

Warm them properly and keep them covered. When corn tortillas still crack, double them up or switch to flour tortillas.

If the Slaw Gets Watery

Dress the slaw closer to serving and use less salt at the beginning. When liquid collects in the bowl, lift the cabbage out with tongs instead of pouring the liquid into the tacos.

What to Serve with Fish Tacos

Fish tacos work best with fresh, bright sides rather than heavy ones. Try chips and salsa, mango salsa, guacamole, cilantro lime rice, black beans, corn salad, cabbage slaw, pickled onions, or a simple cucumber salad.

For drinks, a citrusy mango margarita is a natural fit with grilled fish tacos, mahi mahi tacos, or any version topped with mango salsa.

A what to serve with fish tacos guide showing fish tacos with mango salsa, guacamole, cilantro lime rice, black beans, corn salad, tortilla chips, pickled onions, cucumber salad, lime wedges, and a mango margarita.
Serve fish tacos with fresh, bright sides instead of heavy ones. Mango salsa, guacamole, cilantro lime rice, black beans, corn salad, tortilla chips, pickled onions, cucumber salad, lime wedges, and a citrusy mango margarita all help turn fish tacos into a complete taco-night meal.

How to Build a Fish Taco Bar

This fish tacos recipe also works well as a fish taco bar. For the best texture, keep every part separate: cooked fish, warm tortillas, slaw, sauce, lime wedges, cilantro, jalapeño, avocado, mango salsa, and any cheese or hot sauce. As a result, the tortillas stay fresher and everyone can build their own taco.

A fish taco bar guide showing cooked fish, warm tortillas, cabbage slaw, lime crema, chipotle crema, mango salsa, avocado, cilantro, jalapeño, pickled onions, lime wedges, hot sauce, and assembled fish tacos.
Set up a fish taco bar by keeping every part separate until serving. Cook the fish last, keep the tortillas warm, serve slaw in its own bowl, keep sauces on the side, and add wet toppings like salsa, lime, crema, and pickled onions at the table so everyone can build fresh tacos without soggy tortillas.
  • Cook the fish last: fish tastes best hot and freshly cooked.
  • Prep sauce ahead: lime crema and chipotle crema can be made earlier.
  • Prep cabbage ahead: shred it early, but dress it closer to serving.
  • Keep tortillas warm: wrap them in a clean towel after heating.
  • Serve wet toppings separately: salsa, crema, and lime should go on at the table.

For seafood safety at parties, do not leave cooked seafood out for more than 2 hours, or more than 1 hour when temperatures are above 90°F.

Storage and Make-Ahead Tips

Fish tacos are best fresh, but you can prep the parts ahead. That way, dinner comes together quickly without making the tortillas soggy.

A fish tacos make-ahead guide showing lime crema, cabbage slaw, cooked fish, warm tortillas, mango salsa, pickled onions, avocado, lime, and a leftover fish taco bowl, with tips to prep parts ahead and store them separately.
Fish tacos are easiest to prep when you keep every part separate. Make the sauce ahead, shred the cabbage early but dress it later, cook the fish close to serving, warm the tortillas right before eating, and store leftovers separately. For the next day, turn leftover fish into a bowl instead of trying to save assembled tacos.
  • Sauce: make 2 to 3 days ahead and refrigerate.
  • Cabbage: shred ahead, but add lime and salt closer to serving.
  • Fish: season right before cooking for the best texture.
  • Tortillas: warm right before serving.
  • Leftovers: store fish, slaw, sauce, and tortillas separately.

Do not store assembled fish tacos. Otherwise, the tortillas will absorb moisture from the fish, sauce, and slaw.

For raw seafood, the FDA recommends storing seafood in the refrigerator at 40°F or below if you plan to use it within 2 days; otherwise, wrap it tightly and freeze it.

Leftover Fish Taco Bowls

When you have leftover fish, slaw, sauce, or toppings, turn them into a bowl instead of trying to rebuild tacos the next day. Add rice, beans, cabbage, avocado, mango salsa, lime crema, and the leftover fish. Bowls are more forgiving than reheated tortillas and help use the parts without making the meal soggy.

Are Fish Tacos Healthy?

A healthy fish taco recipe usually starts with pan-seared, grilled, baked, or air-fried fish instead of deep-fried fish. Then, cabbage slaw, lime, avocado, and a moderate amount of sauce keep the tacos balanced.

For a lighter version, use grilled or pan-seared cod, Greek yogurt lime crema, cabbage slaw, corn tortillas, and avocado or mango salsa instead of extra cheese.

A healthy fish tacos guide showing grilled or pan-seared fish in corn tortillas with cabbage slaw, Greek yogurt lime crema, avocado, mango salsa, cilantro, lime, and lighter cooking tips.
Healthy fish tacos should still taste fresh and satisfying. Use pan-seared, grilled, baked, or air-fried fish, then build the tacos with cabbage slaw, Greek yogurt lime crema, avocado, mango salsa, cilantro, and fresh lime so they stay lighter without losing flavor.

Final Tips for the Best Fish Tacos

Use this fish tacos recipe as the base, then choose the fish that matches your style. Start with cod for the easiest version. Use mahi mahi for grilled fish tacos, tilapia for a budget-friendly version, halibut or snapper for something more premium, and salmon for a bolder taco. Finally, keep the slaw crisp, the sauce bright, the tortillas warm, and the toppings fresh.

The best fish tacos are not complicated. They just need the right fish, enough seasoning, a crunchy slaw, a creamy sauce, and careful assembly so every bite tastes fresh instead of wet or heavy.

Fish Tacos FAQs

What is the best fish for fish tacos?

Cod is the best all-purpose fish for fish tacos because it is mild, flaky, easy to find, and works with pan-seared, baked, air fryer, or Baja-style methods. However, mahi mahi, tilapia, halibut, snapper, haddock, and salmon also work.

Is cod good for fish tacos?

Yes. Cod is one of the best fish for fish tacos. It has a mild flavor, flakes easily, and works with lime crema, cabbage slaw, chipotle sauce, mango salsa, and Baja-style batter.

Is mahi mahi good for fish tacos?

Yes. Mahi mahi is excellent for grilled fish tacos because it is firm and meaty. It also works well blackened or pan-seared with mango salsa, avocado, cabbage, and lime.

Can you use salmon for fish tacos?

Yes, but salmon needs stronger seasoning than mild white fish. Therefore, use blackened seasoning, grilled salmon, or air fryer salmon with cabbage, avocado, lime, and a fresh salsa.

Are fish tacos better with corn or flour tortillas?

Corn tortillas give fish tacos a more classic flavor. However, flour tortillas are softer and less likely to break. Use corn for a more traditional taco and flour when you need a softer, easier wrap.

What sauce goes on fish tacos?

A creamy lime sauce is the easiest choice. Mix sour cream or Greek yogurt with a little mayonnaise, lime juice, garlic, salt, and hot sauce or chipotle. Chipotle crema, avocado crema, chutney crema, and no-mayo yogurt sauce also work.

What toppings go best with fish tacos?

The best toppings are cabbage slaw, lime crema, cilantro, jalapeño, avocado, pico de gallo, mango salsa, pickled onions, cotija, hot sauce, and fresh lime.

What makes Baja fish tacos different?

Baja fish tacos usually use crispy beer-battered white fish, cabbage slaw, creamy chipotle sauce, lime, and corn tortillas. As a result, they are crunchier and more fried-focused than simple pan-seared fish tacos.

Can I make fish tacos in the air fryer?

Yes. Air fryer fish tacos work well with cod, tilapia, mahi mahi, haddock, or halibut. Use seasoned fish for a lighter version or panko-coated fish for a crispier version.

Can I bake fish for fish tacos?

Yes. Baked fish tacos are useful when you need a hands-off method. Season cod, haddock, tilapia, or another white fish, bake at 400°F until opaque and flaky, then serve with slaw, sauce, and fresh lime.

Can I use frozen fish for fish tacos?

Yes. Thaw frozen fish completely, then pat it very dry before seasoning. Otherwise, the fish can steam instead of sear.

Can I use fish sticks for fish tacos?

Yes. Bake or air fry fish sticks until very crisp, then serve them in warm tortillas with cabbage slaw, lime crema, cilantro, and lime. Fresh toppings help frozen fish stick tacos taste brighter and more balanced.

How much fish do I need per person for fish tacos?

Plan on about 4 ounces of raw fish per person for a normal serving. One pound of fish usually makes about 8 small tacos, enough for 4 people if you serve 2 tacos each.

How do I keep fish tacos from getting soggy?

Pat the fish dry, do not over-marinate it, drain wet salsa, use lightly dressed cabbage slaw, warm the tortillas, go easy on sauce, and assemble the tacos right before serving.

Are fish tacos healthy?

Fish tacos can be healthy, especially when the fish is pan-seared, grilled, baked, or air fried instead of deep-fried. For a lighter version, use cabbage slaw, Greek yogurt sauce, avocado, lime, and corn tortillas.

Back to top

Posted on — Leave a comment

Ground Pork Recipes: 10 Easy Weeknight Dinners to Make Tonight

Ground pork recipes featured image showing stir fry, tacos, fried rice, meatballs, and a burger for easy weeknight dinners.

Ground pork recipes, or pork mince recipes in many regions, are one of the easiest ways to get a flavorful, affordable dinner on the table fast. One pound can become a quick stir fry, juicy tacos, tender meatballs, fried rice, pasta, burgers, or a comforting rice-based skillet. That range is what makes ground pork one of the most useful proteins to keep around for busy nights.

Still, not every ground pork dinner solves the same problem. Some are best when dinner needs to happen in 20 minutes, while others stretch a pound farther, reheat better the next day, or feel more comforting when you want something steadier and heartier. So, the smartest move is to start with the kind of night you are actually having.

These 10 ground pork recipes cover the weeknight dinners people reach for most: fast skillets, tacos, burgers, pasta, meatballs, fried rice, lighter bowls, and a few deeper comfort-food options. Use the quick picks below when you want the answer fast, or scroll straight to the recipe that sounds right for tonight.

If you want the fastest path, jump to the comparison table or go straight to the recipe list.

Fastest pick: Ground Pork Stir Fry. Best budget pick: Ground Pork Fried Rice. Best leftovers pick: Ground Pork Meatballs. And for best comfort pick: Ground Beef and Pork Meatloaf or Pork Giniling.

Decision guide for ground pork recipes showing the fastest, budget, leftovers, comfort, and light dinner picks.
Use this quick chooser to match your night to the right ground pork dinner, whether you need speed, budget value, leftovers, comfort, or something lighter.

Quick Answers: Best Ground Pork Recipes for Weeknights

Need the short version? Start here.

Fastest Dinner

Go with ground pork stir fry. It is the fastest all-around option, works with whatever vegetables you have, and still feels like a complete dinner instead of a backup plan.

Best for Leftovers

Ground pork meatballs and ground beef and pork meatloaf are the strongest leftover picks, with pork giniling close behind when you want a rice-based comfort meal that reheats well.

Best Budget Dinner

Ground pork fried rice is the best budget-first choice, while ground pork egg roll bowl and ground pork tacos also stretch a pound well without making dinner feel skimpy.

Best Light Pick

Ground pork lettuce wraps are the freshest light option, while ground pork egg roll bowl gives you a similar lighter feel in a warmer one-pan format.

Best Comfort Pick

Choose ground beef and pork meatloaf for the most classic comfort-food dinner, ground pork pasta for a fast tomato-led comfort meal, or pork giniling for a steadier rice-based option.

At a Glance: Easy Ground Pork Recipes by Time and Type

Use this quick comparison to find the best fit for tonight.

At-a-glance comparison chart for ground pork recipes showing cooking times and best uses for stir fry, tacos, burgers, meatballs, pasta, fried rice, meatloaf, egg roll bowl, lettuce wraps, and pork giniling.
A fast side-by-side look at cooking time, leftovers value, comfort level, and weeknight usefulness across all 10 ground pork recipes in the post.
RecipeBest forTimeBest if you haveFlavor profileServe with
Ground Pork Stir FryFastest flexible dinner20 minMixed vegetablesSavory, gingery, garlickyRice or noodles
Ground Pork TacosFamily-friendly dinner25 minTortillas and toppingsSpiced, juicy, brightSlaw, salsa, lime
Ground Pork MeatballsMeal prep and leftovers30–35 minBreadcrumbs and an eggTender, savory, versatilePasta, rice, salad
Ground Beef and Pork MeatloafHearty comfort dinner60–75 minA little more timeRich, classic, homeyMash, beans, roasted veg
Ground Pork BurgersBurger night25–30 minBuns and simple toppingsJuicy, savory, classicBuns, slaw, pickles
Ground Pork PastaFast comfort dinner25–30 minPasta and pantry tomatoesSavory, garlicky, saucyParmesan, greens, salad
Ground Pork Fried RiceBudget dinner / leftover-rice night20–25 minCooked rice and odds and endsSavory, flexible, satisfyingAs-is or with egg
Ground Pork Egg Roll BowlOne-pan lighter dinner20–25 minCabbage or slaw mixSoy-ginger, cabbage-forwardAs-is or with rice
Ground Pork Lettuce WrapsFreshest light dinner20–25 minLettuce and a punchy sauceSweet-savory, bright, punchyLettuce cups, herbs, rice
Pork GinilingRice-based comfort meal35–40 minRice and a tomato baseTomatoey, savory, comfortingSteamed rice

Best first pick: choose stir fry for pure speed, tacos for easy family appeal, meatballs for leftovers, burgers for classic comfort, fried rice for budget value, and egg roll bowl for one-pan ease.

10 Easy Ground Pork Recipes for Dinner on Busy Weeknights

Each one is here because it solves a real weeknight dinner problem. Some are built for speed, some for leftovers, some for comfort, and some for stretching a pound of pork into a fuller, more affordable meal.

1. Ground Pork Stir Fry Recipe

Ground pork stir fry with broccoli, green beans, red bell pepper, and rice in a black bowl.
Because stir fry is the fastest pick in this roundup, the real win is contrast: browned pork, bright vegetables, and just enough rice to turn fridge odds and ends into a proper dinner.

Choose this if: dinner needs to happen fast and you want the most flexible recipe on the page.

When the fridge is full of odds and ends, stir fry is usually the smartest move. The pork browns quickly, stays juicy enough to support a lot of vegetables, and carries sauce well. That makes it especially useful on nights when dinner depends on what is already in the fridge.

Time: about 20 minutes
Serves: 4
Best for: speed, flexibility, and using up vegetables

What you need

  • 1 pound ground pork
  • 1 tablespoon neutral oil, only if needed
  • 1 small onion or 3 to 4 scallions, chopped
  • 3 to 4 cloves garlic, minced
  • 1 tablespoon grated ginger
  • 4 to 5 cups mixed vegetables, cut into bite-size pieces
  • 3 tablespoons soy sauce
  • 1 to 2 teaspoons chili paste or chili flakes
  • 1 teaspoon sesame oil
  • 1 to 2 teaspoons rice vinegar or lime juice
  • 1/2 teaspoon black pepper
  • Cooked rice or noodles, for serving
Ground pork stir fry process image showing browned pork with red peppers, green beans, onions, and a wooden spoon in a hot skillet.
Proper browning is what gives this stir fry real flavor, while the vegetables should stay bright and the skillet should look glossy, not watery.

How to make ground pork stir fry

  1. Heat a large skillet or wok over medium-high to high heat. Add the pork and let it sit for 45 to 60 seconds before stirring so it browns instead of steaming.
  2. Break up the meat and cook until no longer pink and browned in spots, about 5 to 6 minutes. Add a little oil only if the pan looks dry.
  3. If the skillet looks very greasy, spoon off some fat, but leave enough behind to carry flavor.
  4. Add the onion, garlic, and ginger. Cook for about 1 minute, stirring often, until fragrant.
  5. Add the vegetables that take longer first, such as broccoli or carrots. Follow with faster-cooking vegetables like mushrooms, peppers, cabbage, or spinach.
  6. Stir in the soy sauce, chili, sesame oil, vinegar or lime juice, and black pepper. Toss until the vegetables are just tender and the skillet looks glossy rather than watery.
  7. Taste and adjust. Add more soy for depth or more acid for brightness.

Best ways to serve it

Serve the stir fry over 3 to 4 cups cooked rice or with about 8 ounces cooked noodles. For a lighter plate, spoon it over shredded cabbage or cauliflower rice and add cucumber on the side for contrast.

Easy variations and leftovers

Add a sweeter savory finish with a quick teriyaki sauce for a glossier version. You can also lean hotter with chili crisp and extra scallions. Leftovers reheat well for lunch, especially when you keep the rice separate so the vegetables stay in better shape overnight.

Best result: do not crowd the pan. The browning is what keeps this from tasting flat.

Related next pick: want a rice-based budget dinner instead? Try Ground Pork Fried Rice.

2. Ground Pork Tacos Recipe

Ground pork tacos on a dark plate with juicy seasoned pork, soft tortillas, cilantro, red onion, lime, and salsa.
Juicy pork, soft tortillas, and just enough fresh topping make these tacos one of the easiest crowd-pleasing dinners in the whole post.

Choose this if: you want a fast, flexible family dinner that still feels generous.

Tacos are one of the easiest ways to turn one pound of pork into a dinner that feels bigger than it is. Pork stays juicy, takes spice well, and works with enough toppings, slaws, and sides that the meal feels generous without getting expensive.

Time: about 25 minutes
Serves: 4
Best for: family dinners, easy customization, and stretching one pound of pork

Ingredients for ground pork tacos

  • 1 pound ground pork
  • 1 small onion, finely chopped
  • 2 to 3 cloves garlic, minced
  • 1 tablespoon chili powder
  • 1 teaspoon cumin
  • 1 teaspoon paprika
  • 1/2 teaspoon oregano
  • 3/4 teaspoon kosher salt, or to taste
  • 1/2 teaspoon black pepper
  • 1 tablespoon tomato paste
  • 2 to 4 tablespoons water
  • 8 to 12 tortillas, flour or corn
  • Toppings such as slaw, salsa, avocado, cilantro, lime, pickled onions, or shredded lettuce

How to cook the filling

Ground pork tacos process image showing browned juicy taco filling with onions in a skillet and a wooden spoon.
A good taco filling should look deeply browned, richly seasoned, and moist enough to spoon easily into tortillas without turning greasy or dry.
  1. Cook the ground pork in a skillet over medium-high heat until browned and broken up well, about 5 to 6 minutes.
  2. Add the onion and cook until softened, about 3 minutes, then stir in the garlic.
  3. Add the chili powder, cumin, paprika, oregano, salt, and pepper. Cook for 30 seconds so the spices bloom instead of tasting dusty.
  4. Stir in the tomato paste and water. The filling should stay juicy enough to spoon into tortillas easily, not dry and crumbly.
  5. Warm the tortillas while the filling finishes.
  6. Squeeze lime over the meat just before serving for a brighter finish.

Toppings and serving ideas

Build the tacos with one crunchy element and one fresh one. Slaw, shredded lettuce, salsa, chopped onion, cilantro, avocado, and lime are enough for a strong version. For a more relaxed family dinner, set everything out taco-bar style so everyone can build their own plate.

Leftover ideas

For a creamier taco, add a quick eggless mayonnaise-based sauce or a spoonful of green chutney for something brighter. Leftover taco meat also works well in rice bowls, quesadillas, stuffed peppers, or a quick breakfast hash with eggs.

Watch out for this: the filling should stay juicy. A dry taco filling makes the whole dinner feel flatter than it needs to.

Related next pick: want the same kind of fast dinner in burger form instead? Try Ground Pork Burgers.

3. Ground Pork Meatballs Recipe

Ground pork meatballs in tomato sauce in a dark bowl, garnished lightly and styled as a comforting leftovers-friendly dinner.
Tender meatballs and a glossy, controlled sauce make this one of the easiest dinners in the post to cook once and enjoy again later.

Choose this if: you want the best all-around meal-prep and leftovers option in the guide.

Meatballs are the easiest make-ahead winner in the lineup. Pork stays tender naturally, the mixture is forgiving, and the finished meatballs can move into pasta, rice bowls, sandwiches, or freezer meals without much extra work.

Time: about 35 minutes
Serves: 4
Makes: about 16 medium meatballs
Best for: leftovers, freezer cooking, and versatile dinners

What you need

  • 1 pound ground pork
  • 1 egg
  • 1/2 cup breadcrumbs, panko or fine dried crumbs
  • 1/4 cup grated Parmesan, optional
  • 2 to 3 cloves garlic, minced
  • 2 tablespoons finely chopped parsley or onion
  • 3/4 teaspoon kosher salt
  • 1/2 teaspoon black pepper
  • 1 tablespoon milk or water if the mixture feels tight
  • Oil for the pan or a parchment-lined baking sheet
  • Sauce for serving

How to make them

  1. Heat the oven to 425°F if baking.
  2. Combine the pork, egg, breadcrumbs, Parmesan, garlic, parsley or onion, salt, pepper, and milk or water.
  3. Mix gently and stop as soon as everything holds together. Overmixing makes meatballs dense.
  4. Form into evenly sized meatballs, about 1 1/2 inches wide, so they cook at the same rate.
  5. Bake for 12 to 15 minutes, or until cooked through and lightly browned. You can also sear them in a skillet and finish in sauce.
  6. The finished meatballs should feel lightly firm and springy, not tight or dry.
  7. Simmer the cooked meatballs in sauce for a few minutes when using one, so they stay moist and pick up more flavor.
Baked ground pork meatballs on a parchment-lined sheet pan with a spatula lifting one meatball.
This is the point where ground pork meatballs prove why they are one of the smartest make-ahead dinners in the post: even sizing and light browning give you a tender batch that can head to sauce, pasta, subs, or the freezer without falling apart.

How to serve them

Serve them with marinara sauce and pasta, over rice with a gingery glaze, in sub rolls, or with roasted vegetables and salad. Because the seasoning starts fairly neutral, the same batch can move in several directions without feeling repetitive.

Make-ahead and freezer notes

Double the batch when possible. You can freeze cooked meatballs for quick dinners later, or freeze them uncooked on a tray first and then transfer them to a container once firm. Either way, they are one of the best meal-prep dinners in the whole guide.

Best result: mix gently and stop early. Tender meatballs come from restraint, not extra mixing.

Related next pick: want another leftovers-first comfort option? Try Ground Beef and Pork Meatloaf.

4. Ground Beef and Pork Meatloaf

Ground beef and pork meatloaf slices with glaze, mashed potatoes, and green beans on a black plate.
Meatloaf is the slow, hearty comfort turn in this roundup, and the beef-and-pork mix earns its place by staying juicier than all-beef while giving you the kind of leftovers that justify the longer cook time.

Choose this if: you want the most classic, hearty comfort dinner on the page with especially good leftovers.

When you want something slower, steadier, and more classic than the skillet dinners, meatloaf makes sense. The beef brings familiar meatloaf depth, while the pork keeps the slices juicy. It takes longer, but the leftovers are strong enough to make that extra time feel worth it.

Time: about 70 minutes including rest time
Serves: 6
Best for: comfort food, planned leftovers, and make-ahead dinners

Ingredients for the loaf

  • 1/2 pound ground beef
  • 1/2 pound ground pork
  • 1 egg
  • 3/4 cup breadcrumbs
  • 1 small onion, finely chopped
  • 2 cloves garlic, minced
  • 2 tablespoons ketchup or tomato paste
  • 1 tablespoon Worcestershire sauce or soy sauce
  • 1 teaspoon kosher salt
  • 1/2 teaspoon black pepper
  • For the top: 3 tablespoons ketchup, 1 teaspoon brown sugar or honey, and 1 teaspoon vinegar

How to bake it

  1. Heat the oven to 375°F.
  2. Mix the beef, pork, egg, breadcrumbs, onion, garlic, ketchup or tomato paste, Worcestershire, salt, and pepper just until combined.
  3. The mixture should feel moist enough to hold together but not wet or loose.
  4. Shape into a loaf in a loaf pan or on a lined sheet tray.
  5. Stir together the glaze ingredients and spread over the top.
  6. Bake for 45 to 55 minutes, or until the loaf is cooked through and firm but still juicy.
  7. Rest for 10 minutes before slicing so it does not crumble and lose its juices.
Ground beef and pork meatloaf process image showing glossy rested slices on a dark board with a knife.
Clean slices and a glossy set glaze are the payoff for letting meatloaf rest before cutting into it too early.

How to serve it

Serve meatloaf with mashed potatoes, roasted carrots, green beans, or a crisp salad to balance the richness. Plain steamed vegetables also work especially well here because the loaf brings enough flavor on its own.

Leftover ideas

Leftover slices make excellent sandwiches, rice bowls, or quick dinner plates. You can also pan-crisp a slice the next day so the leftovers feel more deliberate and less like repetition.

Watch out for this: let the loaf rest before slicing. Cutting too early is the easiest way to lose juices and structure.

Related next pick: want another leftovers-friendly option that cooks faster? Try Ground Pork Meatballs.

5. Ground Pork Burgers Recipe

Ground pork burger with cheese, pickles, red onion, tomato, and lettuce on a toasted bun.
A juicy ground pork burger works best with a well-browned patty, a soft toasted bun, and crisp toppings that keep the dinner rich but still balanced.

Choose this if: you want a classic burger-night dinner with a juicier, slightly richer twist than beef.

Burger night does not need to rely on beef. Ground pork makes especially juicy patties, and the flavor works best when the seasoning stays simple and the toppings bring a little crunch or brightness.

Time: about 25 to 30 minutes
Serves: 4
Best for: burger night, family dinners, and classic comfort

What you need

  • 1 pound ground pork
  • 1 teaspoon kosher salt
  • 1/2 teaspoon black pepper
  • 1/2 teaspoon garlic powder or 1 small clove garlic, finely grated
  • 1 teaspoon Worcestershire sauce or soy sauce, optional
  • 4 burger buns or sturdy lettuce leaves
  • Cheese, pickles, lettuce, onion, tomato, or slaw for serving
  • Oil for the pan, only if needed

How to make the patties

Ground pork burgers process image showing two browned pork patties in a skillet, one with melted cheese and a spatula underneath.
A good pork burger patty should look well browned, gently handled, and juicy enough to rest briefly before it ever goes into the bun.
  1. Combine the pork, salt, pepper, garlic, and Worcestershire if using. Mix just until the seasoning is distributed.
  2. Divide into 4 patties and shape them slightly wider than the buns. Keep them a little thicker in the center than you would with very lean beef.
  3. Chill the patties for 10 minutes if you have time. That helps them hold together more neatly in the pan.
  4. Cook in a hot skillet or grill pan over medium-high heat for about 4 to 5 minutes per side, or until cooked through and browned well on the outside.
  5. Add cheese during the last minute if using, then rest the patties briefly so the juices settle.

Best ways to serve them

Keep the toppings simple so the burger still tastes like pork. Pickles, slaw, onion, lettuce, tomato, and cheese all work well. A swipe of eggless mayonnaise or a spoonful of chimichurri can brighten the burger without making it fussy.

Easy variations and leftovers

Serve them in buns for a classic burger dinner or in lettuce leaves when you want something lighter. Leftover patties also work well sliced into rice bowls or chopped into a breakfast hash the next day.

Watch out for this: do not overwork the meat. The more you mix and press, the less juicy the burgers feel.

Related next pick: want a handheld dinner with more spice and less assembly? Try Ground Pork Tacos.

6. Ground Pork Pasta Recipe

Ground pork pasta with penne, tomato sauce, Parmesan, and basil in a black bowl.
When the lighter skillet dinners do not sound satisfying enough, ground pork pasta is the fast comfort turn in this roundup: tomato sauce, browned pork, and pantry pasta that still feel like a proper dinner.

Choose this if: you want a fast comfort dinner that feels fuller and more familiar than rice or stir fry.

This is the pasta option for nights when you want a quick tomato-pork sauce without spending all evening on it. The pork brings richness, garlic and onion build the base, and a modest amount of tomato turns everything into a weeknight sauce that clings to the pasta instead of pooling underneath it.

Time: about 25 to 30 minutes
Serves: 4
Best for: comfort dinners, pantry cooking, and easy leftovers

Ingredients

  • 1 pound ground pork
  • 8 ounces pasta such as spaghetti, penne, or rigatoni
  • 1 small onion, finely chopped
  • 3 to 4 cloves garlic, minced
  • 2 tablespoons tomato paste
  • 1 cup crushed tomatoes or tomato sauce
  • 1/2 teaspoon chili flakes, optional
  • 1/2 teaspoon black pepper
  • Salt, to taste
  • 1/4 to 1/2 cup pasta water, as needed
  • Parmesan and basil or parsley, optional

How to cook it

Ground pork pasta process image showing penne coated in tomato sauce with browned pork in a skillet and a wooden spoon lifting the pasta.
A good skillet finish leaves the pasta evenly coated and glossy, with the pork worked into the sauce instead of sitting loose underneath it.
  1. Cook the pasta in salted water until just shy of done. Save some pasta water before draining.
  2. Brown the ground pork in a large skillet until cooked through and lightly caramelized.
  3. Add the onion and cook until softened, then stir in the garlic and chili flakes if using.
  4. Stir in the tomato paste and cook for 30 to 60 seconds so it darkens slightly and loses its raw edge.
  5. Add the crushed tomatoes or sauce and a splash of pasta water. Simmer for a few minutes until the sauce looks savory and lightly concentrated.
  6. Add the pasta and toss until the sauce coats it well. Use more pasta water as needed so the pan looks glossy rather than dry.
  7. Finish with Parmesan and herbs if you like.

How to serve it

Serve it with Parmesan, herbs, and a simple salad when you want a fuller plate. Mushrooms, spinach, or zucchini also fit naturally here if you want more volume. For a deeper tomato route, a fuller Bolognese sauce style can pull this dinner in a richer direction.

Leftover notes

Leftovers reheat well with a splash of water so the sauce loosens instead of tightening up. That small step keeps the pasta from feeling dry the next day.

Best result: use the pasta water. It is what helps the sauce cling instead of sitting loose in the bowl.

Related next pick: want another comfort dinner with even better next-day leftovers? Try Ground Beef and Pork Meatloaf.

7. Ground Pork Fried Rice Recipe

Ground pork fried rice with egg, peas, carrots, scallions, and separate rice grains in a black bowl.
Fried rice is the best budget-first pick in the post because leftover rice stretches the pork beautifully, while separate grains, egg, and vegetables keep the bowl from feeling flat or skimpy.

Choose this if: you have leftover rice and want one of the best budget-friendly dinners in the roundup.

Fried rice is the budget-first answer when there is already rice in the fridge. The rice stretches the pork, the eggs and vegetables fill out the bowl, and the whole thing comes together quickly once the prep is done.

Time: about 20 to 25 minutes
Serves: 4
Best for: leftover rice, budget dinners, and quick one-pan meals

What you need

  • 1 pound ground pork
  • 3 to 4 cups cold cooked rice
  • 2 eggs
  • 1 small onion or several scallions
  • 2 to 3 cloves garlic
  • 1 to 2 cups mixed vegetables such as peas, carrots, mushrooms, or cabbage
  • 2 to 3 tablespoons soy sauce
  • 1 teaspoon sesame oil
  • 1/2 teaspoon black pepper
  • Chili crisp or hot sauce, optional

How to make ground pork fried rice

Ground pork fried rice process image showing separate rice grains with browned pork, peas, carrots, egg, and a wooden spoon in a skillet.
Separate grains, browned pork, and just enough gloss are what make fried rice feel properly stir-fried instead of soft, sticky, or clumped together.
  1. Heat a large skillet well and brown the ground pork first. Remove excess fat if needed, but keep enough for flavor.
  2. Push the pork aside or remove it briefly, then scramble the eggs.
  3. Add the onion, garlic, and vegetables. Cook until the vegetables soften but still keep some texture.
  4. Add the cold rice and break up any clumps. Let it sit in the pan for a minute or two so some grains pick up light toasty color.
  5. Return everything together, then season with soy sauce, sesame oil, pepper, and chili if using. Seasoning near the end helps keep the rice from turning mushy.
  6. Finish with scallions for freshness.

How to serve it

Serve fried rice as a complete bowl, or top it with extra chili crisp, sliced cucumber, or a fried egg. If you need a refresher on getting the grains right before they ever hit the pan, this guide on how to cook rice is a useful starting point.

Easy variations and leftovers

Kimchi, leftover roasted vegetables, chopped greens, or mushrooms all fit naturally here. Leftovers also reheat well in a skillet, and the flavor often improves slightly the next day once everything settles together.

Watch out for this: use cold rice and let it toast a little. Fresh hot rice is much more likely to turn soft and clumpy.

Related next pick: want another rice-friendly comfort dinner? Try Pork Giniling.

8. Ground Pork Egg Roll Bowl

Ground pork egg roll bowl with cabbage, carrots, scallions, and sesame in a black bowl.
This ground pork egg roll bowl works best when the pork is well browned, the cabbage stays tender-crisp, and the whole bowl looks glossy and savory rather than wet or heavy.

Choose this if: you want the best one-pan mix of speed, value, and a lighter overall feel.

Ground pork egg roll bowl is one of the easiest one-pan dinners here. It works best when you want something fast, lighter, and practical enough to repeat often, especially if you are using a bag of slaw mix or extra cabbage that needs using.

It lands between the other lighter options: warmer and easier than lettuce wraps, but still cleaner and less heavy than the richer comfort dinners.

Time: about 20 to 25 minutes
Serves: 4
Best for: one-pan dinners, cabbage-heavy meals, and lighter weeknights

Ingredients for the skillet

  • 1 pound ground pork
  • 1 small onion, chopped
  • 3 cloves garlic, minced
  • 1 tablespoon grated ginger
  • 5 to 6 cups shredded cabbage or slaw mix
  • 2 to 3 tablespoons soy sauce
  • 1 teaspoon sesame oil
  • 1 to 2 teaspoons rice vinegar or lime juice
  • Scallions, sesame seeds, peanuts, or chili crisp for topping
  • Optional rice for serving

How to cook it

Ground pork egg roll bowl cooking in a skillet with cabbage, carrots, scallions, and a spoon.
This is the texture you want before serving: the cabbage should be softened and glossy but still distinct, so the bowl stays lighter and fresher than a heavier pork skillet or a soggy cabbage stir-fry.
  1. Brown the pork in a large skillet until cooked through.
  2. Add the onion, garlic, and ginger, then cook until fragrant.
  3. Add the cabbage in batches if needed. It will look like too much at first, but it cooks down quickly.
  4. Season with soy sauce and sesame oil. Taste before topping. The skillet should already taste savory and balanced on its own.
  5. Cook until the cabbage is tender but still slightly crisp, not limp or watery.
  6. Finish with rice vinegar or lime so the dish stays bright.

Toppings and serving

You can serve it straight from the pan, which is part of the appeal. For a fuller dinner, spoon it over rice or add a fried egg. Scallions, sesame seeds, peanuts, or chili crisp make the bowl feel more finished without adding much work.

Leftover notes

Reheat leftovers quickly over medium heat so the cabbage keeps some texture. Otherwise, slow reheating softens the vegetables too much and makes the bowl feel flatter the second time around.

Best result: stop while the cabbage still has a little bite. Once it goes limp, the whole skillet feels heavier.

Related next pick: want a fresher handheld version? Try Ground Pork Lettuce Wraps.

9. Ground Pork Lettuce Wraps

Ground pork lettuce wraps on a dark plate with crisp lettuce, glossy pork filling, peanuts, scallions, herbs, and lime.
Crisp lettuce, glossy pork filling, and a few bright toppings turn this into the freshest dinner in the lineup without making it feel skimpy.

Choose this if: you want the freshest, brightest, most hands-on dinner on the page.

Lettuce wraps work best when the filling is seasoned more assertively than usual, because the lettuce softens the impact and needs a punchier pork mixture to keep the wraps lively.

It is not only lighter. It is fresher, crisper, and more interactive at the table.

Time: about 20 to 25 minutes
Serves: 4
Best for: lighter dinners, interactive meals, and crisp fresh textures

What you need

  • 1 pound ground pork
  • 2 to 3 cloves garlic, minced
  • 1 tablespoon grated ginger, optional but useful
  • 2 to 3 tablespoons soy sauce
  • 1 teaspoon chili paste or chili flakes
  • 1 teaspoon brown sugar or honey, optional
  • 1 to 2 teaspoons lime juice or rice vinegar
  • Butter lettuce, romaine leaves, or another sturdy lettuce
  • Toppings such as herbs, peanuts, scallions, shredded carrots, or cucumber

How to make the filling

  1. Brown the pork in a skillet and cook until lightly caramelized.
  2. Add the garlic and ginger, then stir in the soy sauce, chili, and sugar or honey if using.
  3. Cook until the filling is glossy and well seasoned. It should taste slightly stronger than you think it needs to, because the lettuce will soften the impact.
  4. Brighten with lime juice or vinegar at the end so the richness stays under control.
  5. Wash and dry the lettuce well so the wraps stay crisp instead of slippery.

How to serve it

Ground pork lettuce wraps with two filled lettuce cups, extra leaves, peanuts, scallions, carrots, and lime on a black plate.
The trick with lettuce wraps is not to overfill them: a modest spoonful of pork, a little crunch, and a squeeze of lime keep this dinner feeling fresher and lighter than the warmer bowl-style recipes in the roundup.

Set out the lettuce, warm filling, and toppings separately so everyone can build their own wraps. Butter lettuce makes softer, neater wraps, while romaine gives more crunch. Extra lime, cucumber, herbs, peanuts, and scallions make the whole meal feel brighter and more complete.

Easy swaps and leftovers

When the lettuce is not great or the leftovers feel awkward the next day, turn the filling into rice bowls or noodle bowls instead. That backup plan makes this recipe even more practical on a busy night.

Best result: season the filling a little harder than usual. The lettuce mutes it more than most people expect.

Related next pick: want a warm one-pan cabbage dinner instead? Try Ground Pork Egg Roll Bowl.

10. Pork Giniling (Filipino Ground Pork)

Pork giniling served with white rice in a dark bowl, showing tomato-based ground pork with potatoes, carrots, and peas.
Tomato-based pork, tender vegetables, and white rice make this one of the steadier, more comforting dinners in the whole lineup.

Choose this if: you want a practical, tomato-based rice dinner that feels especially comforting and complete.

Pork giniling brings a different kind of comfort to the lineup. Instead of soy, cabbage, or noodles, it gives you a tomato-based, rice-first dinner that feels warm, homey, and complete in a way the faster skillet meals do not.

Time: about 35 to 40 minutes
Serves: 4
Best for: rice-based comfort food, homey dinners, and tomato-forward ground pork meals

Ingredients

  • 1 pound ground pork
  • 1 small onion, chopped
  • 3 cloves garlic, minced
  • 2 tomatoes, chopped, or 1 cup tomato sauce
  • 1 to 2 tablespoons tomato paste for deeper flavor
  • 1 potato, diced small
  • 1 carrot, diced small
  • 1/2 cup peas, optional but useful
  • 3/4 teaspoon salt, or to taste
  • 1/2 teaspoon black pepper
  • 1 to 2 teaspoons soy sauce or fish sauce, optional
  • Steamed rice, for serving

How to make it

Pork giniling cooking in a skillet with ground pork, tomato sauce, diced potatoes, carrots, peas, and a wooden spoon.
This is the stage that makes pork giniling different from taco meat or pasta sauce: the tomato base should be cooked down and spoonable, with tender potatoes and carrots turning the skillet into a true rice dinner rather than just seasoned mince.
  1. Brown the pork in a skillet or sauté pan until cooked through.
  2. Add the onion and garlic, then cook until softened and fragrant.
  3. Add the tomatoes and tomato paste, then cook until the mixture looks saucy rather than raw.
  4. Add the potato and carrot with 1/2 to 3/4 cup water so they can soften as the sauce simmers.
  5. Season with salt, pepper, and soy sauce or fish sauce if using.
  6. Add peas near the end so they stay bright, then simmer until the vegetables are tender and the sauce lightly coats the pork.

How to serve it

Serve pork giniling over steamed rice first and keep the rest of the plate simple. The rice and saucy pork do most of the work together, which is why the meal feels complete even without many side dishes.

Leftover notes

Leftovers reheat well and often taste even better the next day once the tomato and pork have had more time together. For a looser bowl, keep it slightly saucier. For a thicker finish, reduce it a little more before serving.

Best result: let the tomatoes cook down properly before adding water. That is what gives the dish a deeper, rounder base.

Related next pick: want another rice-based dinner that is faster and cheaper? Try Ground Pork Fried Rice.

How to Choose the Best Ground Pork Recipe Tonight

Use this section when you know the constraint, but not the recipe. Pick the dinner that fits the problem in front of you.
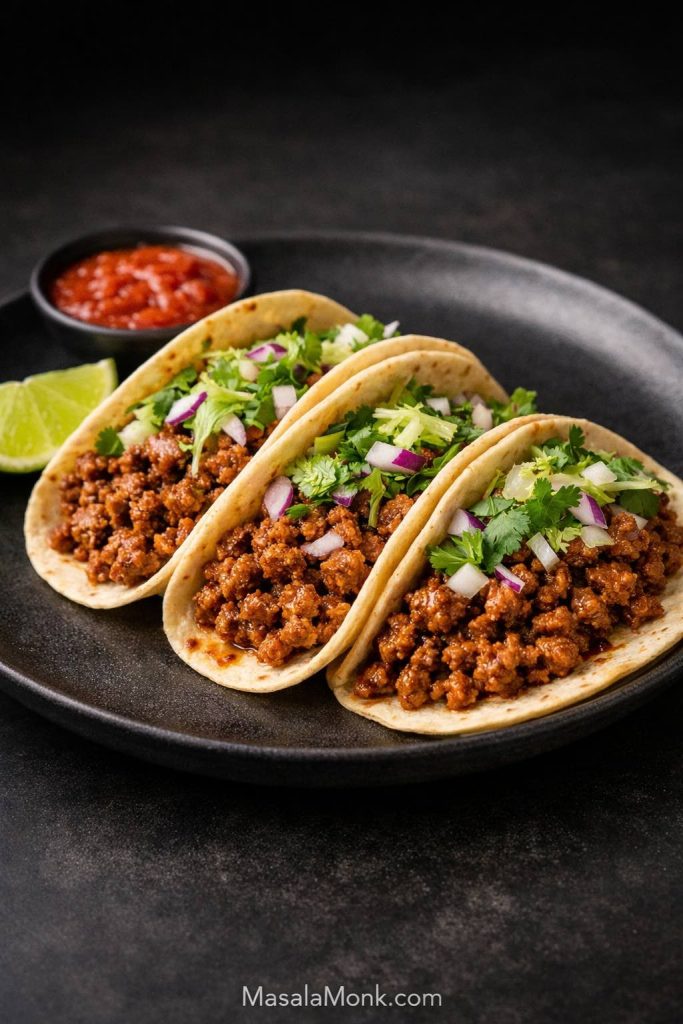
When You Need Dinner in 20 Minutes

Start with ground pork stir fry, ground pork fried rice, ground pork egg roll bowl, or ground pork lettuce wraps. These are the quickest options, they stay on the stovetop, and they do not ask for much downtime. Best first pick: choose stir fry when you need flexibility, or fried rice when the rice is already cooked.

When Tomorrow’s Lunch Matters Too

ground pork meatballs, ground beef and pork meatloaf, ground pork fried rice, and pork giniling all hold up well. None of them depend on delicate textures that disappear overnight. Best first pick: go with meatballs when you want the most flexible leftovers.

When You Want Something Lighter

Choose ground pork lettuce wraps for the freshest option, ground pork egg roll bowl for a warm one-pan dinner, or a vegetable-heavy ground pork stir fry when you still want a fuller plate.

When You Need to Stretch Leftover Rice

Go straight to ground pork fried rice if the rice is already cooked. After that, pork giniling or ground pork egg roll bowl both work well over rice when you want the meal to feel fuller and more affordable.

When You Need a Safe Family-Friendly Pick

ground pork tacos, ground pork burgers, ground pork meatballs, ground pork pasta, and ground pork fried rice are the safest broad-appeal choices. Best first pick: choose tacos when you want the most customization at the table, or burgers when you want something more classic.

How to Cook and Season Ground Pork Better

Ground pork cooks fast, but a few small mistakes can make dinner taste flat. In most cases, bland results come from weak browning, weak seasoning, or no contrast to cut through the richness. A little better browning and seasoning makes a big difference.

Build flavor in the pan, season it clearly, and finish with something bright, fresh, or sharp so the dish does not feel heavy. That balance is what makes dinner taste finished rather than flat.

Instructional guide showing how to cook and season ground pork better with five fixes for browning, fat, seasoning, moisture, and finishing.
Use this card as the fast reset: brown harder, grease less, season with intent, stop before the meat dries out, and finish with something that brings the whole dish back to life.

How to Brown the Meat for Better Flavor

Use enough heat and enough pan space. When the pan is crowded, the meat releases moisture and steams. When you let it sit before stirring too much, you get caramelized bits that deepen the flavor of the whole dish.

How Much Fat to Leave in the Pan

Leave enough fat behind to carry flavor, especially in stir fries, fried rice, and bowl dinners. However, when the pan looks greasy rather than lightly slick, spoon off some excess before adding the aromatics. That keeps the finished dish savory instead of heavy.

Best Seasoning for Tacos

Chili powder, cumin, paprika, garlic, onion, oregano, salt, pepper, lime, and a spoonful of tomato paste make a strong taco base. The tomato paste helps round out the meat so it tastes fuller and less dry.

Best Seasoning for Stir Fries and Bowls

Soy sauce, garlic, ginger, chili, sesame, scallions, and something bright like rice vinegar or lime work especially well. That combination keeps the meat savory and flavorful without letting it feel too rich.

Best Seasoning for Meatballs, Meatloaf, and Patties

Garlic, onion, black pepper, herbs, and either tomato-based or smoky-savory accents usually work best. Meatballs can go more herby, meatloaf benefits from a stronger savory base and glaze, and burgers work best when the seasoning stays fairly simple.

How to Keep It Juicy

Do not overcook it, and use ingredients that support juiciness too. Sauces, tomatoes, cabbage, rice, noodles, and fresh toppings all help keep it satisfying. For food safety, cook it to a safe internal temperature and check the USDA safe temperature chart when you need a quick reference.

How to Keep It From Tasting Bland

Brown it properly, season it with purpose, and balance the richness with something bright. Lime, vinegar, herbs, scallions, chili, pickled toppings, and crisp vegetables all help. The best dinners work because they combine savory depth with a little lift.

Ground Pork Dinner FAQs

What Are the Best Weeknight Picks?

The best weeknight options are usually ground pork stir fry, ground pork tacos, ground pork fried rice, ground pork egg roll bowl, and ground pork pasta. They cook quickly, use practical ingredients, and still feel like proper dinners rather than last-minute compromises.

What Can I Make With 1 Pound?

You can make all ten recipes on this page with about one pound, though some stretch better than others. Tacos, fried rice, egg roll bowl, lettuce wraps, and pork giniling are especially strong when you want that pound to go farther with rice, cabbage, tortillas, vegetables, or toppings.

Is It Good for Meal Prep?

Yes, many of these meals are. Meatballs, beef and pork meatloaf, fried rice, and pork giniling all hold up well and reheat well, which makes them especially useful for meal prep and next-day lunches.

Are Ground Pork and Pork Mince the Same Thing?

In most recipe contexts, yes. Ground pork is the more common label in some regions, while pork mince is the usual wording in others. For this kind of weeknight cooking, they usually refer to the same ingredient.

Can It Replace Ground Beef?

Yes, in many recipes it can. It is often juicier and a little richer, so it works especially well in meatballs, meatloaf, tacos, burgers, bowls, and sauces. The final flavor will still be different, though, so the best results usually come from choosing recipes that genuinely suit it.

What Vegetables Pair Best?

Cabbage, mushrooms, carrots, peppers, broccoli, greens, onions, and scallions all pair especially well with it. For contrast, cucumber, herbs, and crunchy slaws help brighten richer dishes.

What Seasonings Work Best?

Garlic, onion, black pepper, soy, ginger, chili, lime, herbs, paprika, cumin, and tomato all work well. The smartest approach is to match the flavor profile to the dinner you want rather than look for one universal spice blend.

How Long Do Leftovers Keep?

As a general rule, cooked leftovers keep well for a few days in the fridge and longer in the freezer. For current food-safety guidance, see the USDA leftovers and food safety guide.

↑ Back to top

Start with stir fry for speed, tacos for family-friendly flexibility, burgers for classic comfort, meatballs for leftovers, fried rice for budget value, or egg roll bowl for one-pan ease. That is the strength of ground pork, or pork mince if that is the label you usually buy: it can turn into several very different dinners without making weeknights harder. A quick marinara sauce can push meatballs or pasta in a more classic comfort-food direction, while a fresh green chutney or bright chimichurri can change tacos, burgers, bowls, and wraps completely. Pick the dinner that fits tonight, and one pound of pork can take you a long way.

Posted on — Leave a comment

Beyond Chicken: 5 Hemp Seed High Protein Tofu Meal Prep Ideas

Beyond Chicken cover image showing five hemp seed high-protein tofu meal prep ideas, including a smoky chili tofu rice bowl, lemon herb quinoa box, spicy peanut tofu noodle prep, Mediterranean tofu bowl, and buffalo tofu wrap.

Tofu meal prep can be substantial, flavorful, and still worth opening on day four. That is exactly what this guide is built to deliver.

These lunches are designed for real weekday life. They are filling enough to count as proper lunch, varied enough to keep the week from feeling repetitive, and practical enough to prep ahead without sliding into bland tofu, soggy vegetables, or disappointing containers by midweek.

Just as importantly, the hemp seeds are doing real work throughout the lineup. Rather than sitting on top like a token healthy ingredient, they show up as a nutty crust, a creamy dressing base, a richer sauce builder, a fresh herby crunch, and a proper ranch-style finish that makes wraps feel complete instead of merely assembled.

If you want to build a broader plant-based lunch system beyond this page, MasalaMonk’s guide to plant-based protein sources for high-protein meal prep is a natural companion.

Quick answers before you cook

Can tofu be meal prepped? Yes. Tofu is one of the best meal-prep proteins because it roasts well, absorbs flavor, and works naturally in rice bowls, quinoa bowls, noodles, and wraps.

What tofu is best for meal prep? Extra-firm tofu is the easiest and most reliable option because it holds shape well and develops better edges after roasting. Firm tofu also works when you want a slightly softer bite.

How long does tofu meal prep last? Most tofu meal prep keeps well for 3 to 4 days in the fridge when sauces, watery vegetables, and crunchy toppings are packed separately.

What is the biggest mistake? Packing hot tofu with wet vegetables or dressing too early. As a result, a good meal-prep container can turn soggy by day three.

What is the key rule for better tofu meal prep? Press well, roast until it has real color, cool before sealing, and keep wet and dry elements separate whenever texture matters.

Also Read: Easy English Scone Recipe

Tofu Meal Prep at a Glance

Use this as your fast decision guide before choosing a recipe. When you already know you want something warm, cold, craveable, or easy to eat on the go, this section makes the choice quicker. Better yet, it helps you match the right lunch to the right point in the week instead of rereading every recipe section once time is already tight.
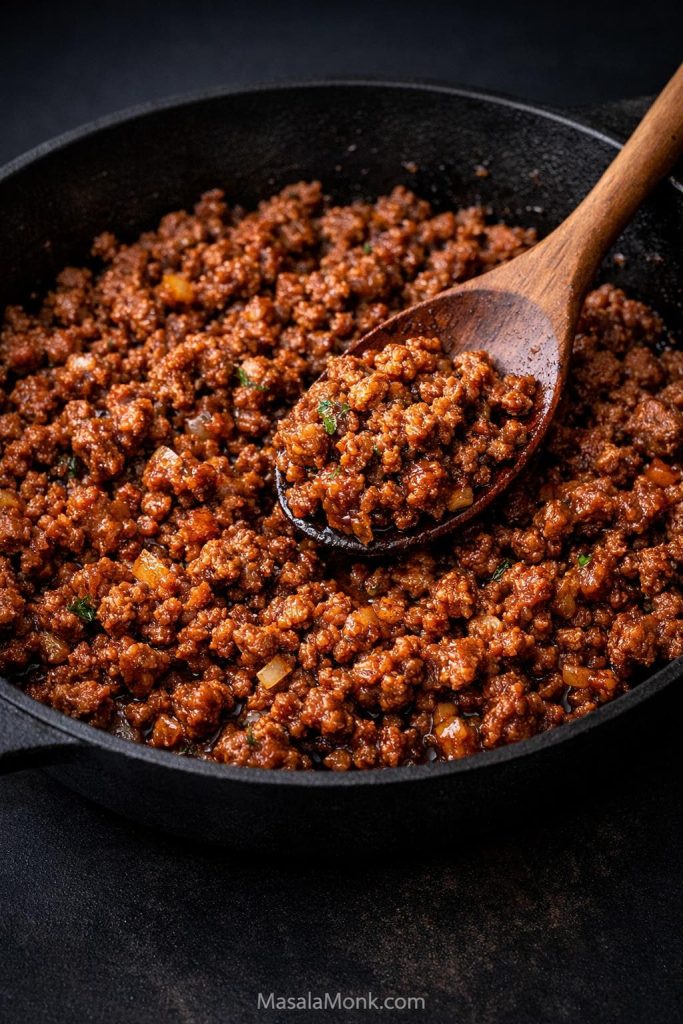
Tofu meal prep comparison graphic showing five lunch ideas: smoky tofu rice bowls, lemon herb tofu quinoa bowls, spicy peanut noodles with crispy tofu, Mediterranean tofu bowls, and buffalo tofu wraps with hemp ranch.
Use this tofu meal prep at-a-glance guide to choose the right lunch for your week: smoky rice bowls for a familiar warm option, lemon herb quinoa bowls for cold lunches, spicy peanut noodles when you want something craveable, Mediterranean bowls for a fresher reset, and buffalo wraps for an easy hand-held meal.
  • Best beginner option: Smoky Tofu Rice Bowls
  • Best cold lunch: Lemon Herb Tofu Quinoa Bowls
  • Best reheated lunch: Smoky Tofu Rice Bowls
  • Best craveable lunch: Spicy Peanut Noodles with Crispy Tofu
  • Best fresh midweek reset: Mediterranean Tofu Bowls
  • Best hand-held option: Buffalo Tofu Wraps with Hemp Ranch
  • Best choice if you are tired of bowls: Buffalo Tofu Wraps with Hemp Ranch
  • Best day-three or day-four option: Lemon Herb Tofu Quinoa Bowls

New to tofu meal prep? Start with the smoky rice bowls. They are the clearest proof that tofu can feel just as satisfying as the classic protein-rice-and-vegetable lunch people usually build around chicken. From there, branching into the colder, fresher, or more sauce-driven options becomes much easier.

Why Tofu Meal Prep Often Disappoints by Day Three — and How This Guide Fixes It

Too often, tofu meal prep falls off by day three because moisture builds, texture softens, and the containers start tasting repetitive. Sometimes the tofu was never pressed or browned enough to begin with. In other cases, the real problem is packing hot ingredients with wet vegetables or dressing too early, which quietly sets everything up to turn soggy in the fridge.
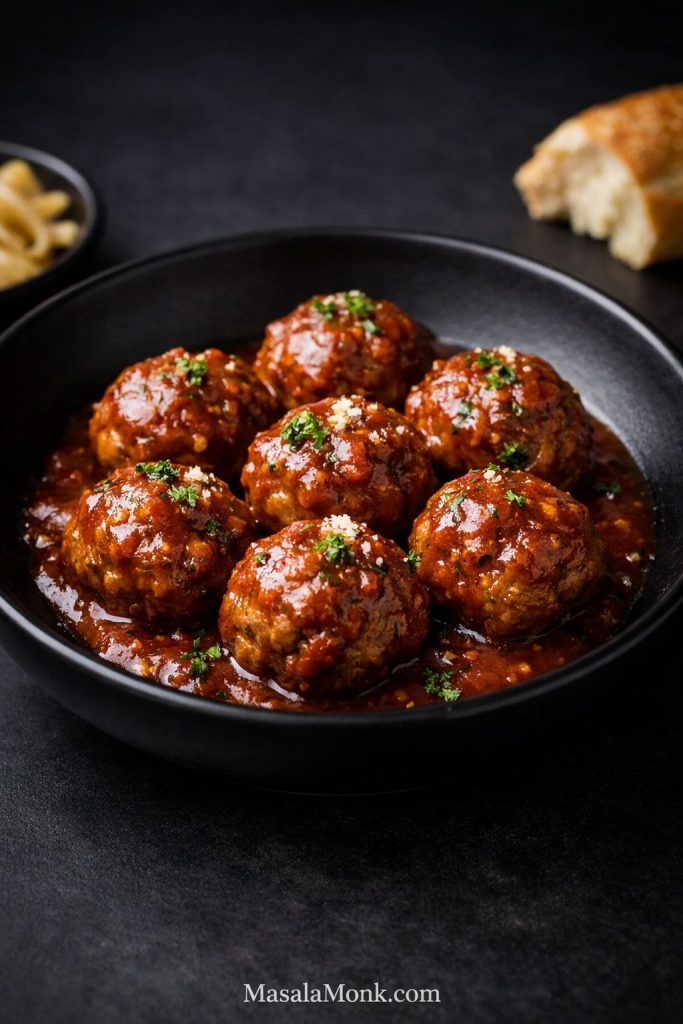
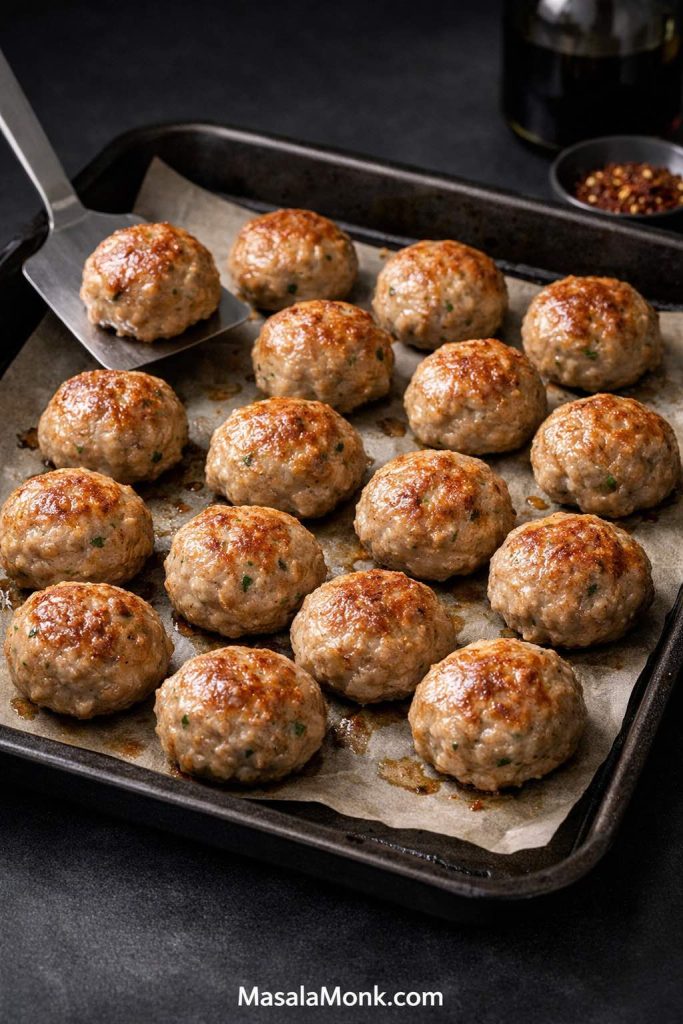
This guide fixes that by treating texture and packing order as part of the recipe, not as an afterthought. Instead of stretching one baked-tofu method across several near-identical boxes, it gives you five genuinely different lunches with different textures, different flavor directions, and different kinds of lunch appeal. Consequently, the week feels less repetitive, while the food itself holds up better.

Hemp seeds make that system stronger. Here, they are not just included for nutrition. They help create a nutty crust, a creamier dressing, a fuller sauce, a brighter finishing crunch, and a better ranch-style spread. In practice, that means the recipes eat better as the week goes on instead of feeling like containers you are forcing yourself to finish.

Also Read: Sourdough English Muffins Recipe

Best Tofu for Meal Prep and How to Prep It

For these recipes, extra-firm tofu is the easiest place to start. It gives you stronger edges, cleaner pieces, and better structure after cooking. Firm tofu also works well, particularly when you want a slightly softer center or a more delicate bite in the finished meal. If you can get super-firm tofu, that is even better because it usually needs less pressing and holds its shape beautifully.

However, silken tofu is not the right fit here. It can be useful in sauces or creamy blends, but it is not built for bowls, noodles, and wraps like these. Even if it sounds convenient, it will not give you the kind of meal-prep texture that keeps well through the week.

Best tofu for meal prep guide comparing extra-firm, firm, and super-firm tofu, plus pressed vs unpressed tofu and pale vs browned tofu for better meal prep texture.
Extra-firm tofu gives the most reliable meal-prep texture, especially when it is pressed well, roasted until properly browned, and cooled before sealing so it stays firmer through the week.

The prep matters just as much as the type you choose. First, press the tofu until it no longer feels waterlogged when you cut it. Twenty to thirty minutes is a good minimum, and longer is even better if time allows. Then season it with more intention than just a splash of soy sauce and hope for the best. Tofu responds well to layered flavor: salt or soy, aromatics, acid, herbs, spices, and a finishing element.

Most importantly, cook for texture rather than mere doneness. Pale tofu rarely improves in the fridge. Instead, what you want is visible browning, firmer edges, and enough structure that the tofu can survive storage and reheating without collapsing into softness. Once cooked, let it cool before sealing it into containers. That pause protects more texture than most people expect.

If you like crisp, prep-friendly plant-based lunches in general, MasalaMonk’s high-protein vegan meal prep ideas using an air fryer are worth a look too.

How to Make Tofu Meal Prep More Filling Without Making It Heavy

One of the easiest ways to improve tofu meal prep is to make it more filling without turning it into a heavy lunch you stop looking forward to by Wednesday. The answer is not to pile in random extras until the meal feels joyless. Rather, build in staying power with a proper base, a good texture contrast, and a sauce or dressing that adds body without flooding the container.

In practice, that usually means tofu plus rice, quinoa, or noodles for structure; vegetables that either roast well or stay crisp; and hemp seeds, yogurt, tahini, or peanut-based sauces that make the lunch feel complete instead of sparse. That is where these recipes work especially well. Tofu carries the main protein role, while hemp seeds add richness, body, and texture in ways that improve the actual eating experience.

Guide to making tofu meal prep more filling without making it heavy, showing protein, structure, freshness, texture, and body with tofu, grains, vegetables, hemp seeds, and sauce.
A satisfying tofu lunch depends less on piling in more ingredients and more on balancing the right five roles: protein for staying power, a base for structure, vegetables for freshness, hemp seeds for texture, and sauce or dressing for body.

This matters because the best tofu meal prep recipes are the ones you actually want to repeat. A filling lunch should still feel bright, balanced, and easy to eat. That is precisely why these bowls, noodles, and wraps are designed to hold well in the fridge while still eating like lunch first and meal prep second.

For a grain-forward prep angle, MasalaMonk’s plant-based meal prep ideas using quinoa as a protein source pair especially well with the quinoa bowls below.

Also Read: White Russian Recipe: 7 Variants to Try, From Classic to Frozen

The 5 Tofu Meal Prep Recipes

The recipes below are built to cover different lunch moods across the week, from a warm rice bowl to a bright quinoa bowl, spicy noodles, a crisp Mediterranean option, and a hand-held buffalo wrap. Protein estimates are approximate and based on generic ingredient values, so they can vary slightly depending on the tofu, noodles, tortillas, and yogurt you use.

If you landed here mainly for the recipes, you can jump straight into the one that fits your week best. On the other hand, if you are still deciding, the short intros and quick snapshots will help you match the right lunch mood to the right container.

1) Smoky Tofu Rice Bowls

Choose this bowl when you want the most familiar lunch format in the post. If your idea of dependable tofu meal prep still looks like some version of protein, rice, and vegetables, this one gives you that same structure with much more character.

The tofu roasts into something smoky, toasty, and lightly nutty from the hemp crust, while roasted broccoli and bell peppers bring sweetness and body. Shredded cabbage keeps the bowl from feeling too soft, and a sharp lime yogurt drizzle wakes everything back up after reheating. For that reason, this is the easiest recipe here to trust on the first try.

Quick recipe snapshot

  • Best served: Warm, with cool toppings added after reheating
  • Fridge life: 4 days
  • Reheats well: Yes
  • Pack separately: Lime yogurt drizzle, avocado, and lime wedges
  • Best texture trait: Smoky, browned tofu with rough hemp-crusted edges
  • Approximate protein per serving: about 29 g

Yield: 4 bowls

Prep time: 25 minutes

Cook time: 30 minutes

Total time: 55 minutes, plus tofu pressing time

Ingredients

Hemp-crusted tofu

  • 2 (14-ounce / 396 g) blocks extra-firm tofu, pressed and cubed
  • 1 tablespoon soy sauce or tamari
  • 1 tablespoon olive oil
  • 1 tablespoon cornstarch
  • 1 teaspoon smoked paprika
  • 1 teaspoon chili powder
  • 1/2 teaspoon garlic powder
  • 1/2 teaspoon onion powder
  • 1/4 teaspoon black pepper
  • 1/3 cup hemp seeds

Rice bowl base

  • 4 cups cooked rice
  • 2 cups broccoli florets
  • 1 red bell pepper, sliced
  • 2 cups shredded cabbage
  • 1 avocado, sliced for serving
  • Lime wedges

Lime yogurt drizzle

  • 1/2 cup plain yogurt
  • 1 tablespoon lime juice
  • 1 teaspoon hot sauce
  • Pinch of salt

Method

  1. Heat the oven to 425°F and line two trays.
  2. Toss the tofu with soy sauce, olive oil, cornstarch, smoked paprika, chili powder, garlic powder, onion powder, and black pepper.
  3. Add the hemp seeds and toss again so they cling to the tofu.
  4. Spread the tofu on one tray in a single layer.
  5. Toss the broccoli and bell pepper with a little oil and salt and spread them on the second tray.
  6. Roast for 25 to 30 minutes, flipping the tofu once, until the tofu is browned at the edges and the hemp seeds smell lightly toasted.
  7. Stir together the yogurt, lime juice, hot sauce, and salt.
  8. Cool the hot ingredients slightly, then divide the rice, tofu, vegetables, and cabbage among containers.
  9. Pack the drizzle, avocado, and lime wedges separately.

What you should notice

The tofu should have darkened corners, a lightly rough hemp crust, and a savory smoky aroma. Meanwhile, the cabbage and lime should keep the bowl from feeling too dense. Once you open the container later in the week, the bowl should still feel balanced rather than heavy.

Best storage tip

Keep the drizzle separate until serving. That one move helps the tofu keep more of its edge and keeps the cabbage crisp longer. In turn, the reheated bowl feels much closer to freshly built lunch rather than day-four leftovers.

Smoky tofu rice bowls recipe card showing browned tofu over rice with broccoli, cabbage, lime, and creamy drizzle for tofu meal prep.
Built for readers who want the most familiar place to start, this smoky tofu rice bowl turns a classic warm lunch format into something more interesting with browned tofu, rice, vegetables, and a limey creamy finish.

Also Read: Mango Sorbet Recipe: Healthy & Plant Based Dessert

2) Lemon Herb Tofu Quinoa Bowls

Reach for this bowl when you want a cold lunch that still feels full, bright, and properly satisfying instead of dry and dutiful. At the same time, it stays calm and clean enough to work especially well later in the week.

The tofu is seasoned simply so the lemon, herbs, and creamy hemp dressing can lead. Quinoa gives the bowl structure and extra staying power, while the fresh herbs keep the flavor from flattening in the fridge. As a result, this becomes one of the smartest later-week lunches in the lineup and one of the easiest to eat straight from the container.

Quick recipe snapshot

  • Best served: Cold
  • Fridge life: 4 days
  • Reheats well: Not necessary
  • Pack separately: Creamy hemp dressing
  • Best texture trait: Bright, herby, fresh-tasting quinoa bowl with creamy finish
  • Approximate protein per serving: about 31 g

Yield: 4 bowls

Prep time: 20 minutes

Cook time: 25 minutes

Total time: 45 minutes, plus tofu pressing time

Ingredients

Lemon-herb tofu

  • 2 (14-ounce / 396 g) blocks firm tofu, pressed and cubed
  • 1 tablespoon olive oil
  • 1 tablespoon lemon juice
  • 1 teaspoon dried oregano
  • 1 teaspoon garlic powder
  • 1/2 teaspoon salt
  • 1/4 teaspoon black pepper

Quinoa bowl base

  • 4 cups cooked quinoa
  • 1 cucumber, chopped
  • 1 1/2 cups cherry tomatoes, halved
  • 1/2 red onion, thinly sliced
  • 1 cup chopped parsley
  • 1/4 cup chopped dill or mint
  • 3 tablespoons hemp seeds, for topping

Creamy hemp dressing

  • 1/3 cup hemp seeds
  • 3 tablespoons plain yogurt
  • 2 tablespoons lemon juice
  • 1 tablespoon olive oil
  • 1 teaspoon Dijon mustard
  • 1 small garlic clove
  • 2 to 4 tablespoons water
  • Salt and pepper to taste

Method

  1. Heat the oven to 425°F.
  2. Toss the tofu with olive oil, lemon juice, oregano, garlic powder, salt, and black pepper.
  3. Roast for about 25 minutes, flipping once, until lightly golden and firm.
  4. Blend or whisk together the dressing ingredients until smooth and lightly creamy.
  5. Divide the quinoa among containers, then add the cucumber, tomatoes, red onion, herbs, and tofu.
  6. Sprinkle with hemp seeds.
  7. Pack the dressing separately and spoon it over just before eating.

What you should notice

When you open this bowl cold, it should smell lemony and herby right away. At the same time, the dressing should coat the quinoa and tofu without making the container loose or watery. Ideally, the whole bowl should feel bright first and creamy second, not the other way around.

Best storage tip

Do not toss everything with the dressing in advance unless you are eating it within a day. Keeping it separate makes the bowl feel fresher for longer. More importantly, it stops the herbs and vegetables from collapsing too early.

Lemon herb tofu quinoa bowls recipe card showing quinoa, golden tofu, cucumber, cherry tomatoes, red onion, herbs, and creamy lemon dressing for cold tofu meal prep.
Cold lunches hold up especially well when they stay bright and composed, and this lemon herb tofu quinoa bowl does exactly that with quinoa, fresh vegetables, herbs, and a creamy dressing packed separately.

Also Read: Protein Ice Cream Recipe: 10 Creamy Homemade Recipes

3) Spicy Peanut Noodles with Crispy Tofu

Pick this one when you want the least “meal prep feeling” lunch in the lineup. Sometimes the smartest way to stay consistent with prep is to make at least one meal that feels saucy, bold, and a little indulgent.

Here, the sauce is the whole point. Peanut butter gives it body, the hemp seeds make it feel fuller and smoother, the tofu brings chew, and the noodles give the whole thing real comfort-food energy without turning it heavy or dull. Since it works cold, at room temperature, or lightly warm, it is also one of the most flexible containers in the entire post.

Quick recipe snapshot

  • Best served: Cold, room temperature, or gently warmed
  • Fridge life: 3 to 4 days
  • Reheats well: Lightly, but also good cold
  • Pack separately: Spicy peanut-hemp sauce
  • Best texture trait: Glossy noodles with crisp-edged tofu and rich clingy sauce
  • Approximate protein per serving: about 34 g

Yield: 4 containers

Prep time: 25 minutes

Cook time: 25 minutes

Total time: 50 minutes, plus tofu pressing time

Ingredients

Crispy tofu

  • 2 (14-ounce / 396 g) blocks extra-firm tofu, pressed and torn into chunks
  • 1 tablespoon soy sauce
  • 1 tablespoon neutral oil
  • 1 tablespoon cornstarch
  • 1 teaspoon garlic powder

Noodle base

  • 12 ounces dry noodles, such as wheat noodles or rice noodles
  • 2 cups shredded cabbage
  • 2 cups shredded carrots
  • 1 red bell pepper, thinly sliced
  • 3 green onions, sliced
  • Cilantro, optional

Spicy peanut-hemp sauce

  • 1/3 cup peanut butter
  • 2 tablespoons soy sauce
  • 1 tablespoon rice vinegar
  • 1 tablespoon maple syrup
  • 1 to 2 teaspoons sriracha
  • 1 teaspoon sesame oil
  • 1/4 cup hemp seeds
  • Warm water, as needed

Method

  1. Heat the oven to 425°F.
  2. Toss the tofu with soy sauce, oil, cornstarch, and garlic powder.
  3. Roast for about 25 minutes, flipping once, until crisp at the edges.
  4. Cook the noodles until just tender, then drain and cool slightly.
  5. Blend or whisk together the sauce ingredients, adding warm water until the sauce is smooth, glossy, and thick enough to cling.
  6. Divide the noodles and vegetables among containers, then add the tofu and green onions.
  7. Pack the sauce separately and toss through just before eating.
How to pack peanut noodles for meal prep guide showing noodles, crispy tofu, vegetables, and peanut sauce packed separately for better texture.
Packing spicy peanut noodles well matters almost as much as making them well, especially when you want the noodles to stay loose, the vegetables to keep some life, and the sauce to coat everything only when you are ready to eat.

What you should notice

The sauce should coat the back of a spoon. The tofu should have crisp edges and a slightly chewy center. Once everything is tossed together, the noodles should look glossy and coated, not soupy. Even so, the whole bowl should still feel lively because of the raw vegetables, not weighed down by the sauce.

Best storage tip

A tiny bit of oil on the noodles after draining helps keep them from clumping in the fridge. After that, keeping the sauce separate gives you much more control over texture when it is time to eat.

Spicy peanut noodles with crispy tofu recipe card showing glossy noodles, browned tofu, cabbage, carrots, bell pepper, green onion, and peanut sauce for tofu meal prep.
When tofu meal prep needs to feel more craveable than dutiful, spicy peanut noodles with crispy tofu bring the right kind of comfort: glossy sauce-coated noodles, browned tofu, and plenty of crunch, with the sauce packed separately so the texture stays under your control.

Also Read: Homemade Mango Ice Cream Recipe

4) Mediterranean Tofu Bowls

Go with this bowl when richer lunches start feeling repetitive. By the middle of the week, something brighter and sharper often sounds much more appealing.

The tofu is warmly spiced and roasted, but the real lift comes from the finish. A lemony herbed hemp crunch gives the bowl a clear texture role instead of hiding quietly in the background, while cucumbers, tomatoes, olives, and romaine keep everything crisp, savory, and bright. By contrast with the noodle prep, this lunch is not trying to comfort you. It is trying to refresh you, which is exactly why it works so well in the same lineup.

Quick recipe snapshot

  • Best served: Cold or cool room temperature
  • Fridge life: 3 to 4 days
  • Reheats well: Not ideal once assembled
  • Pack separately: Romaine, dressing, and herbed hemp crunch for best texture
  • Best texture trait: Crisp, briny, lemony contrast with nutty finishing crunch
  • Approximate protein per serving: about 33 g

Yield: 4 bowls

Prep time: 25 minutes

Cook time: 30 minutes

Total time: 55 minutes, plus tofu pressing time

Ingredients

Spiced tofu

  • 2 (14-ounce / 396 g) blocks firm tofu, pressed and cubed
  • 1 tablespoon olive oil
  • 1 tablespoon lemon juice
  • 1 teaspoon smoked paprika
  • 1 teaspoon ground cumin
  • 1/2 teaspoon garlic powder
  • 1/2 teaspoon salt
  • Black pepper to taste

Mediterranean bowl base

  • 4 cups cooked quinoa
  • 1 cucumber, chopped
  • 1 1/2 cups chopped tomatoes
  • 1/2 cup sliced olives
  • 1 cup shredded romaine
  • 1 cup roasted chickpeas

Creamy lemon dressing

  • 3 tablespoons tahini
  • 2 tablespoons lemon juice
  • 1 small garlic clove
  • 2 to 4 tablespoons water
  • Salt and pepper to taste

Herbed hemp crunch

  • 1/3 cup hemp seeds
  • 2 tablespoons chopped parsley
  • 1 tablespoon chopped dill
  • 1 teaspoon lemon zest
  • Pinch of salt
  • Black pepper

Method

  1. Roast the tofu at 425°F for 25 to 30 minutes until browned and firm.
  2. Whisk together the dressing ingredients.
  3. Stir together the hemp crunch ingredients in a small bowl.
  4. Divide the quinoa among containers and add the cucumber, tomatoes, olives, tofu, and roasted chickpeas.
  5. Pack the romaine, dressing, and hemp crunch separately when possible for the best texture.
  6. Add the fresh elements just before serving.

What you should notice

The hemp topping should smell lemony and fresh and add a real nutty bite. As a result, the finished bowl should feel crisp, bright, and layered rather than soft and one-note. Even on day three, it should still taste awake rather than tired.

Best storage tip

Store the romaine outside the main hot ingredients if you want the best texture on days three and four. In the same way, keeping the crunch and dressing separate protects the part of this bowl that makes it feel fresh in the first place.

Mediterranean tofu bowls recipe card showing quinoa, spiced tofu, roasted chickpeas, romaine, cucumber, tomatoes, olives, and creamy dressing for cold tofu meal prep.
Sharper, brinier lunches can be the difference between finishing your meal prep happily and getting bored by midweek, and this Mediterranean tofu bowl leans into that with spiced tofu, quinoa, crisp vegetables, olives, roasted chickpeas, and a lemony creamy finish.

Also Read: Cookie Pie Recipe: 10 Best Flavors, Fillings and Variations

5) Buffalo Tofu Wraps with Hemp Ranch

This is the lunch that breaks the bowl rhythm. After several container-style meals, that shift alone makes the lineup feel more useful.

Buffalo tofu brings heat and punch, the fresh vegetables add crunch and lift, and the hemp ranch gives the wrap its real identity by cooling the buffalo heat and adding creamy body. Using shredded or finely crumbled tofu also makes the filling feel more natural inside a wrap rather than like bowl tofu folded into a tortilla at the last second. That difference matters, because this lunch is supposed to feel packed on purpose.

Quick recipe snapshot

  • Best served: Cold, assembled fresh
  • Fridge life: 3 to 4 days for components
  • Reheats well: Not as a full wrap
  • Pack separately: Buffalo tofu, wrap vegetables, tortillas, and hemp ranch
  • Best texture trait: Sticky spicy tofu balanced by cool creamy ranch and fresh crunch
  • Approximate protein per serving: about 28 g

Yield: 4 wraps

Prep time: 20 minutes

Cook time: 20 minutes

Total time: 40 minutes, plus tofu pressing time

Ingredients

Buffalo tofu

  • 2 (14-ounce / 396 g) blocks extra-firm tofu, pressed and shredded or finely crumbled
  • 1 tablespoon olive oil
  • 1/2 teaspoon garlic powder
  • 1/2 teaspoon paprika
  • 1/2 teaspoon salt
  • Black pepper to taste
  • 1/3 cup buffalo sauce

Wrap filling

  • 4 large flour tortillas or wraps
  • 2 cups shredded lettuce
  • 1 cup shredded carrots
  • 1 cup finely chopped celery
  • 1/2 red onion, thinly sliced
  • 2 tablespoons hemp seeds, for sprinkling

Hemp ranch

  • 1/4 cup hemp seeds
  • 1/2 cup plain yogurt
  • 1 tablespoon lemon juice
  • 1 teaspoon Dijon mustard
  • 1 tablespoon chopped parsley or dill
  • Pinch of garlic powder
  • Salt and pepper to taste
  • Splash of water, if needed

Method

  1. Heat the oven to 425°F.
  2. Toss the shredded or finely crumbled tofu with olive oil, garlic powder, paprika, salt, and black pepper.
  3. Spread it out on a tray and roast for about 20 minutes, stirring once, until the edges are lightly browned.
  4. Toss the hot tofu with buffalo sauce and let it cool slightly.
  5. Blend or whisk together the hemp ranch ingredients until creamy and spreadable.
  6. For the best texture, store the wrap filling separately and assemble fresh before eating.
  7. To serve, spread hemp ranch on the wrap, then layer the lettuce, carrots, celery, onion, tofu, and a light sprinkle of hemp seeds before rolling tightly.
How to build buffalo tofu wraps guide showing hemp ranch spread on a tortilla, crunchy vegetables, buffalo tofu, and the finished wrap rolled tightly for meal prep.
Building the wrap in the right order makes the difference between a crisp, satisfying lunch and a soft one, which is why the ranch goes down first, the cool vegetables create the crunch, and the buffalo tofu gets added last before rolling everything tightly.

What you should notice

The tofu should look sticky and spicy at the edges, while the ranch should be thick enough to spread without making the wrap soggy. Once assembled, the wrap should feel cool, crisp, creamy, and sharp in the right order, not like a sauce-heavy bundle that falls flat after two bites.

Best storage tip

If you fully assemble these on day one, they soften much faster. Therefore, they are better when the components are prepped ahead and wrapped fresh. That way, you keep the convenience without giving up the texture that makes the wrap worth eating.

Buffalo tofu wraps with hemp ranch recipe card showing cut wraps filled with spicy tofu, lettuce, carrots, celery, red onion, and creamy ranch for tofu meal prep.
A meal-prep wrap only earns its place when it still feels crisp, creamy, and worth eating, and these buffalo tofu wraps do that by pairing punchy tofu with cool hemp ranch, crunchy vegetables, and fresh assembly right before lunch.

Also Read: Punjabi Mutton Bhuna – Amritsari Village-Style Gosht Recipe

Which Tofu Meal Prep Recipes Are Best Hot, Cold, or Build-Fresh?

The Smoky Tofu Rice Bowls reheat best because the rice and roasted vegetables are built for warmth, and the bowl can be refreshed with cool cabbage and lime yogurt drizzle afterward. So if you want the most classic microwave-friendly tofu meal prep option in the post, start there.

Meanwhile, the Spicy Peanut Noodles with Crispy Tofu work both ways. Some people prefer them cold or at room temperature, while others like them gently warmed before tossing with sauce. Because of that flexibility, they are one of the easiest lunches here to fit into different workday setups.

Tofu meal prep comparison guide showing which recipes are best reheated, best cold, best build-fresh, or flexible either way, including smoky tofu rice bowls, lemon herb tofu quinoa bowls, Mediterranean tofu bowls, buffalo tofu wraps, and spicy peanut noodles.
How you want to eat lunch changes which tofu meal prep recipe makes the most sense, and this guide helps you choose fast: smoky rice bowls for reheating, lemon herb and Mediterranean bowls for colder meals, buffalo wraps for fresh assembly, and spicy peanut noodles when you want the most flexibility.

For cold lunches, the Lemon Herb Tofu Quinoa Bowls are excellent. Likewise, the Mediterranean Tofu Bowls are at their best when the romaine, dressing, and herbed hemp crunch stay fresh until serving. In both cases, the freshness is the point, so there is no need to force reheating into the equation.

By contrast, the Buffalo Tofu Wraps with Hemp Ranch are best assembled from cold components just before eating. They can still be fully meal-prepped, of course. Even so, the smartest move is to treat them as a build-fresh lunch rather than a fully wrapped make-ahead one.

Also Read: Peach Cobbler with Canned Peaches (Dessert Recipe)

How to Meal Prep Tofu for the Week in Under 90 Minutes

You do not need to treat this like five separate cooking projects. Instead, the smarter move is to overlap the work so the whole prep session stays manageable.

Start by pressing all the tofu first. While that happens, get your grains cooking. Then preheat the oven and prep your vegetables. Once the tofu goes in, mix the sauces and dressings while everything roasts. Meanwhile, chop herbs and pack the fresh components during that same window. In practice, that overlap is what keeps a big prep session from turning into an all-afternoon chore.

A practical workflow looks like this:

Tofu meal prep workflow guide showing how to prep lunches in under 90 minutes by pressing tofu, cooking grains, chopping vegetables, roasting tofu, mixing sauces, cooling ingredients, packing containers, and labeling what to eat first.
A good tofu meal prep session runs better when the work overlaps, and this under-90-minute workflow shows the smartest order: press tofu first, cook grains while it presses, prep vegetables during that window, roast and cool the hot components, then pack and label everything with texture in mind.
  1. Press all the tofu first.
  2. Cook rice or quinoa while it presses.
  3. Preheat the oven and line your trays.
  4. Chop vegetables, herbs, and crunchy toppings.
  5. Season the tofu and roast it.
  6. Mix the hemp dressing, peanut sauce, tahini dressing, and hemp ranch while the oven is working.
  7. Cool the hot components before closing containers.
  8. Pack wet and dry elements separately wherever texture matters.
  9. Label the containers you want to eat first.

That kind of workflow keeps the prep manageable and makes the whole post more useful in real life. It also makes a big difference in texture, because cooling before packing is one of the easiest ways to avoid condensation and sogginess. Once you start overlapping the work instead of treating every recipe like a separate task, the whole system becomes much more realistic.

Also Read: Masterclass in Chai: How to Make the Perfect Masala Chai (Recipe)

Troubleshooting Tofu Meal Prep

Use this as a quick check before blaming tofu itself. In most cases, the problem is moisture, weak seasoning, or packing order.

Tofu meal prep packing guide showing which ingredients can be packed together and which should be packed separately, including dressings, greens, avocado, lime wedges, crunchy toppings, wraps, and fresh finishing elements.
Texture usually falls apart long before flavor does, so this tofu meal prep packing guide shows what can stay in the main container and what is better held back until serving, from dressings and greens to avocado, wraps, lime wedges, and crunchy toppings.

If tofu turns soggy

The most likely reason is too much moisture or sauce added too early. So press longer, roast longer, and sauce later. In many cases, the fix is not dramatic at all. It is simply a matter of letting the tofu get drier before you ask it to hold texture for several days.

If tofu tastes bland

The issue is usually weak seasoning or under-salted sauce. So use soy, acid, garlic, herbs, chili, and enough salt where needed. More specifically, do not expect one last-minute sauce to rescue tofu that never had enough flavor built into it from the start.

If the container turns watery

Wet vegetables were probably packed too early or against hot ingredients. Therefore, keep cucumbers, tomatoes, lettuce, and dressings separate whenever possible. Once the hot ingredients cool, you can combine more confidently without setting off that slow soggy slide in the fridge.

If reheated tofu turns rubbery

It was probably overcooked twice or reheated too aggressively. Instead, reheat more gently and stop once warm rather than blasting it until very hot. That small change alone usually keeps the texture much more pleasant.

If noodles clump

They were likely packed dry and cooled too tightly. In that case, toss them with a tiny bit of oil after draining and keep the sauce separate. Then, when it is time to eat, the noodles loosen more easily and the sauce coats them more evenly.

If wraps go soft too fast

They were assembled too early or loaded with too much wet sauce. So pack the filling and the wraps separately and build them fresh. That way, you still get the convenience of prep without sacrificing the crisp bite that makes the wrap work.

Also Read: Air Fryer Salmon Recipe (Time, Temp, and Tips for Perfect Fillets)

Tofu meal prep troubleshooting guide showing quick fixes for soggy tofu, bland tofu, watery containers, rubbery reheating, clumpy noodles, and soft wraps.
When tofu meal prep starts going wrong, the fix is usually more about handling than the recipe itself: press and roast tofu longer, season earlier, cool containers before sealing, keep sauce separate, reheat gently, and assemble wraps fresh instead of too far ahead.

How Long Does Tofu Meal Prep Last?

For both quality and practicality, these meals are best treated as a 3-to-4-day refrigerator plan. That way, the textures still feel intentional rather than tired. Meals like the quinoa bowls and Mediterranean bowls tend to hold especially well when the dressing stays separate. Meanwhile, the rice bowl and noodle prep also sit comfortably in that window. For wraps, the components are best prepped ahead and assembled fresh.

Tofu meal prep storage guide showing how long smoky tofu rice bowls, lemon herb tofu quinoa bowls, spicy peanut noodles, Mediterranean tofu bowls, and buffalo tofu wraps last in the fridge and how each is best served.
Planning the week gets easier when you know which lunches hold strongest: smoky rice bowls and lemon herb quinoa bowls can comfortably carry four days, peanut noodles stay flexible, Mediterranean bowls need greens and dressing held back, and buffalo wraps are best kept in components until you assemble them fresh.

Planning for a full five-day workweek? The easiest move is either to prep a smaller second batch midweek or to freeze part of the cooked tofu early and rotate it in later. That approach usually works better than asking one big Sunday prep to stay perfect longer than it really should. For general food-safety guidance on refrigerated leftovers, the USDA’s leftovers and food safety guidance is a useful reference point.

4-day tofu meal prep rotation guide showing a suggested order for smoky tofu rice bowls, spicy peanut noodles with crispy tofu, lemon herb tofu quinoa bowls, Mediterranean tofu bowls, and buffalo tofu wraps with hemp ranch.
A smart tofu meal prep week gets easier when the lunches are eaten in the right order, starting with the warm smoky rice bowls, moving through the more flexible peanut noodles, then into the colder quinoa and Mediterranean bowls, while the buffalo wraps stay best as fresh-built components on any day.

Final thoughts on tofu meal prep

These tofu meal prep ideas work because they treat tofu like a genuinely useful weekday protein instead of a backup option. Once the texture is handled properly, the sauces are built with intention, and the wet elements are packed separately where needed, tofu stops feeling like the compromise lunch and starts feeling like one of the smartest things you can prep for the week.

A practical place to start is the Smoky Tofu Rice Bowls, then follow with the Lemon Herb Tofu Quinoa Bowls or Mediterranean Tofu Bowls later in the week when colder, brighter lunches sound more appealing. Likewise, if you want a different flavor direction for the same weekday problem, these high-protein Indian meal prep ideas are worth bookmarking too. Above all, strong texture, smart packing, and enough variety to keep lunch interesting will take your tofu meal prep much further than novelty alone.

Also Read: Tapas Recipe With a Twist: 5 Indian-Inspired Small Plates

Tofu meal prep recap guide showing five lunch options and their moods: smoky tofu rice bowls, lemon herb tofu quinoa bowls, spicy peanut noodles with crispy tofu, Mediterranean tofu bowls, and buffalo tofu wraps with hemp ranch.
Some tofu lunches feel warm and dependable, others stay brightest cold, and a few are all about craveability or portability, so this quick recap helps you match each recipe to the kind of lunch mood you actually want that week.

Tofu Meal Prep FAQs

1. Is tofu meal prep good for high-protein lunches?

Yes. Tofu meal prep works well for high-protein lunches, especially when you pair tofu with ingredients like hemp seeds, quinoa, chickpeas, yogurt- or tahini-based sauces, or peanut sauce. More importantly, it can still feel like real food rather than a protein project when the texture and seasoning are handled properly.

2. What tofu is best for meal prep?

Extra-firm tofu is usually the best choice because it holds shape well and roasts into stronger edges. However, firm tofu also works well when you want a slightly softer bite. Silken tofu, by contrast, is not the right fit for bowls, noodles, and wraps like these.

3. How do I keep tofu from getting soggy in meal prep?

Press it well, avoid drowning it in marinade, roast it until it has real color, cool it before sealing, and keep sauces separate whenever crispness matters. Taken together, those steps solve most soggy tofu meal prep problems. In other words, the answer is usually better moisture control, not giving up on tofu.

4. Can I eat these tofu meal prep ideas cold?

Yes. Lemon Herb Tofu Quinoa Bowls and Mediterranean Tofu Bowls are especially good cold. Meanwhile, the noodle prep also works well cold or at room temperature. By contrast, rice bowls usually benefit most from reheating.

5. Do hemp seeds really help in meal prep, or are they just for nutrition?

They help with both. Hemp seeds add protein, but they also add creaminess, nuttiness, body, and texture. In this post, they matter most because they improve the actual eating experience, not just the nutrition label. That is precisely why they belong here.

6. Which recipe is best if I am new to tofu meal prep?

Start with the Smoky Tofu Rice Bowls. They feel the most familiar, reheat well, and give you the clearest sense of how satisfying tofu meal prep can be when the texture is right. After that, the other recipes make much more sense because you already trust the base ingredient.

Posted on — 1 Comment

Beyond Chicken: 5 Tofu Meal Prep Ideas for High-Protein Meals

Beyond Chicken cover image showing five tofu meal prep ideas, including crispy sesame tofu bowls, sticky soy garlic tofu, curried tofu salad, taco-style tofu crumbles, and red curry tofu as high-protein chicken-free meals.

If you want tofu meal prep ideas that can genuinely take the place of your usual chicken lunches, the problem usually is not tofu itself. More often, the tofu stays too wet, the seasoning lands too softly, or the finished box never feels as satisfying as the chicken version it is meant to replace.

This post is built to fix that.

Instead of offering another vague tofu roundup, it gives you five practical tofu meal prep ideas based on the chicken lunches people already repeat in real life: sesame bowls, taco bowls, sticky glazed rice boxes, creamy lunch salads, and curry meal prep. The goal is not to make tofu imitate chicken badly. The goal is to use tofu in the meal formats where it can replace chicken confidently, repeatedly, and with far better flavor.

Start with the tofu format that matches the chicken lunch you already rely on most. The sesame bowl is the strongest first move for anyone who wants crisp texture. Smoky tofu crumbles fit best when taco-bowl lunches are already part of the weekly routine. Sticky soy garlic tofu makes the most sense for takeout-style sweet-savory meal prep. Curried tofu salad is the most practical option for cold desk lunches. Coconut red curry tofu is the easiest fit for reheatable comfort food.

Why Most Tofu Meal Prep Fails

When tofu meal prep goes wrong, the pattern is usually predictable. Sometimes the tofu is barely pressed. Just as often, the seasoning is too timid. In other cases, sauce goes on too early, so the tofu steams instead of browning. Meanwhile, some lunch boxes fall flat because they have no crunch, no acid, and no real contrast.

Those same issues show up again and again across successful tofu recipes, whether the format is a sesame bowl, taco crumbles, or a curry box. In other words, the problem is usually not that tofu “cannot replace chicken.” The problem is that tofu needs better handling from the beginning.

Once moisture, seasoning, browning, and box structure improve, tofu meal prep stops feeling like a compromise. It starts feeling like one of the most flexible, economical, and repeatable proteins in a weekly lunch rotation.

Also Read: White Russian Recipe: 7 Variants to Try, From Classic to Frozen

What These Tofu Meal Prep Ideas Do Differently

The five recipes in this post were chosen for a reason. Each one maps onto a chicken meal-prep habit people already have, which makes the switch easier to trust.

  • Sesame chicken bowls → Crispy sesame tofu bowls → best for readers who want texture, roasted vegetables, and a sauce-driven rice bowl
  • Taco bowls or shredded chicken bowls → Smoky tofu crumbles taco bowls → best for bold seasoning, flexible leftovers, and burrito-style lunches
  • Honey garlic or soy-glazed chicken → Sticky soy garlic tofu meal prep → best for takeout-style sweet-savory rice boxes
  • Chicken salad lunches → Curried tofu salad meal prep → best for cold lunches, wraps, crackers, and desk lunches
  • Chicken curry meal prep → Coconut red curry tofu boxes → best for reheatable comfort food and sauce-first meal prep

That structure matters because it lets you begin with a lunch format you already trust instead of changing everything about meal prep at once. You are not asking tofu to win in a random role. You are choosing the lane where it naturally works.

Editorial infographic showing the best tofu meal prep swap for the chicken lunch you already love, including crispy sesame tofu bowls, smoky tofu crumbles, sticky soy garlic tofu, curried tofu salad, and coconut red curry tofu, with quick notes on why each option works and which lunch style each one suits best.
Start with the tofu lunch style that already matches how you like to meal prep. Crispy bowls, taco-style crumbles, sticky glazed rice boxes, cold curried salad lunches, and reheatable curry boxes all solve a different weekday need, so choosing the right format first makes tofu easier to enjoy and repeat. Save this guide for your next meal-prep session, and share it with someone trying to eat less chicken without giving up satisfying lunches.

There is a strong nutritional case for building more lunches this way as well. Harvard’s Nutrition Source notes that soy foods are nutrient-dense protein sources and are especially useful when they replace red and processed meat, which makes tofu a practical protein choice within a broader meal-prep routine. For that bigger-picture context, Harvard’s guide to soy as a nutrient-dense protein source is worth reading. Internally, MasalaMonk’s guide to plant-based protein sources for high-protein meal prep fits naturally alongside this post.

Why Tofu Works as a Chicken Meal Prep Replacement

Chicken usually does three jobs in meal prep: it brings protein, gives the box substance, and carries seasoning well. Tofu can do those same jobs. It simply gets there differently.

Tofu is not at its strongest when the exact meat-like bite is the whole point of the meal. It is strongest where bowls, sauces, spice blends, crunch, vegetables, and repeatable lunch structure do a lot of the work. That is why tofu becomes so convincing in crisp sesame bowls, smoky taco crumbles, sticky glazed rice boxes, creamy curried lunch salads, and reheatable curry meal prep.

The biggest mistake people make is trying to treat tofu exactly like chicken without changing the rest of the meal. If the whole lunch depends on the natural savoriness and bite of chicken, tofu will feel flat unless you compensate with better moisture control, stronger seasoning, and more thoughtful box building. Once that shift happens, tofu stops feeling like a backup plan and starts feeling deliberate.

For a broader vegetarian meal-prep perspective, MasalaMonk’s guide to high-protein Indian meal prep ideas is a strong internal companion.

How to Make Tofu Meal Prep Ideas Taste Good All Week

Choose the best tofu for meal prep

For most of the recipes below, firm or extra-firm tofu is the right choice. These styles hold shape better, brown more easily, and survive refrigeration more gracefully than softer tofu. Soft and silken tofu are far better suited to soups, sauces, smoothies, and desserts.

That distinction matters because beginner frustration often starts with the wrong tofu, not the wrong recipe. EatRight’s guidance on vegetarian protein foods makes the same basic point: firmer tofu works best in roasting, grilling, and sautéing applications, while softer tofu belongs in gentler preparations. Their article on vegetarian protein foods and tofu texture is a useful reader-friendly reference.

Why pressing tofu matters for meal prep texture

Pressing tofu is one of the simplest upgrades you can make. You do not need to remove every trace of moisture. You just need to remove enough excess water that the tofu can brown, crisp, and absorb seasoning without steaming itself into bland softness.

Wrap the tofu in a clean towel or paper towels, place it on a plate or board, and weigh it down for 20 to 30 minutes. In most cases, that is enough. The improvement in texture is immediate, especially in crisp bowls, tofu crumbles, and sticky glazed tofu.

Premium editorial tofu meal prep infographic showing four practical rules for better tofu lunches: press enough to remove excess moisture, coat tofu for crisp edges, brown first and sauce later, and build the whole lunch box with a base, vegetables, crunch, and contrast for better texture and flavor all week.
Better tofu meal prep starts long before the sauce goes on. Pressing properly, creating crisp edges, browning before glazing, and building a lunch box with texture, vegetables, and contrast are the small moves that make tofu taste more satisfying through the week. Save this post for your next prep day, and share it with someone who still thinks tofu meal prep has to be bland, soggy, or boring.

Brown tofu first, then add sauce

This is one of the most important rules in the entire article. Sauce added too early creates steam. Steam ruins browning. So tofu should be roasted, air-fried, or pan-browned before it is glazed or tossed.

That sequence matters most in crispy bowls and sticky tofu meal prep. The Kitchn’s method for making crispy tofu without deep-frying reinforces exactly why pressing, coating, and cooking before saucing works so reliably.

How to season tofu so it does not taste bland

Tofu rewards assertive seasoning. Salt helps, but it is rarely enough on its own. Soy sauce adds umami, vinegar or lime add lift, garlic and ginger add depth, chili brings edge, and a little sweetness often helps bring a glaze together. The best tofu meal prep ideas build flavor from several directions at once rather than relying on one sauce at the end.

Editorial tofu texture guide for meal prep showing four visual stages: too wet and under-pressed tofu, lightly browned tofu, crisp and ready tofu, and over-sauced tofu softening after glazing, with quick cues for when to keep cooking, when to sauce, and when tofu is ready to pack for the week.
Good tofu meal prep gets much easier once you know what to look for in the pan or on the tray. Pale tofu usually needs more time, lightly browned tofu still needs better edges, properly crisp tofu is the right point for glazing or packing, and over-sauced tofu loses the texture that makes lunch satisfying later in the week. Save this post for your next prep day, and share it with someone who keeps ending up with tofu that turns soft before the week is over.

Build the whole meal prep box, not just the protein

The best tofu meal prep ideas are not just tofu plus rice. They are tofu plus a base, vegetables, texture contrast, and a dressing or sauce that makes the meal feel complete.

Rice, quinoa, soba, wraps, chopped salads, and curry-style boxes all work well as foundations. Broccoli, cabbage, peppers, carrots, cucumbers, edamame, onions, herbs, seeds, and pickled elements keep the lunches from going flat. For more base-building inspiration, MasalaMonk’s guide to plant-based meal prep ideas using quinoa as a protein source fits naturally here.

Editorial tofu meal prep packing guide showing how to pack tofu lunches for better texture all week, including what to keep in the main box, which sauces and dressings to store separately, what fresh toppings to add later, and how crispy tofu and saucy tofu should be packed differently for the best meal prep results.
Packing matters just as much as cooking when you want tofu meal prep to hold up through the week. Keep grains, tofu, and sturdy vegetables in the main box, store sauces separately, and add fresh toppings like herbs, lime, avocado, or crunchy elements closer to eating so the lunch keeps more texture and contrast. Save this post for your next prep day, and share it with someone who keeps blaming tofu when the real problem is the packing.

How to pack tofu meal prep so it still tastes good on day three

Packing order matters more than many people expect.

  • Keep sauce separate for crispy meals whenever possible.
  • Let hot tofu, rice, and vegetables cool before sealing the containers.
  • Add wet toppings like salsa, cucumber, and avocado closer to serving time.
  • Refresh older meal prep with acid, herbs, chili, seeds, or crunch rather than assuming the tofu itself is the only issue.

That last point matters. Cold or reheated lunches naturally lose some brightness, so a squeeze of lime, a little vinegar, fresh spring onion, or a spoonful of crunchy topping can make day-three tofu meal prep taste far more alive.

Also Read: Mango Sorbet Recipe: Healthy & Plant Based Dessert

5 Tofu Meal Prep Ideas That Actually Make a Strong Replacement for Chicken

The five recipes below are arranged from the easiest texture-first tofu win to the most comfort-driven sauce-based lunch. Start with the one that matches your usual chicken habit most closely, then branch out once you find the format you actually want to repeat.

Premium editorial tofu meal prep style chooser infographic comparing five lunch formats: crispy sesame tofu bowls, smoky tofu crumbles, sticky soy garlic tofu, curried tofu salad, and coconut red curry tofu, with notes on texture, reheating style, and which type of lunch each option suits best.
The best tofu meal prep is usually the one that fits how you actually like to eat during the week. Crispy sesame bowls work well for texture-first lunches, smoky crumbles are great for taco bowls and wraps, sticky soy garlic tofu suits takeout-style cravings, curried tofu salad covers cold desk lunches, and coconut red curry tofu is the easiest fit for reheatable comfort food. Save this post for your next meal-prep session, and share it with someone who wants more variety without ending up with another week of boring lunches.

Crispy Sesame Tofu Meal Prep Bowls

Best tofu swap for sesame chicken bowls

If you usually prep sesame chicken, crispy stir-fry bowls, or takeout-style rice boxes, this is the strongest place to start. Crisp tofu gives you bite, structure, and sauce-holding power in a way soft cubes never will. Better still, the whole format still feels familiar, which makes the switch easier to trust.

Among all the tofu meal prep ideas in this post, this is one of the most beginner-friendly because it solves several problems at once: texture, strong sauce, roasted vegetables, and a dependable rice-bowl format. If someone thinks tofu always feels soggy or forgettable, this is the recipe most likely to change that opinion early.

Premium editorial guide showing how to build a crispy sesame tofu meal prep bowl with a grain base, crispy tofu, roasted vegetables, sesame ginger sauce, and a fresh finish like spring onion and sesame seeds for better texture, balance, and flavor all week.
A satisfying tofu meal prep bowl works best when every part has a job: a solid base for staying power, crispy tofu for bite, roasted vegetables for bulk and contrast, a bold sesame-style sauce for flavor, and a fresh finish to keep the lunch from tasting heavy by day three. Save this post for your next prep day, and share it with someone who wants high-protein lunches that feel balanced, flavorful, and worth repeating through the week.

Recipe Card: Crispy Sesame Tofu Meal Prep Bowls

Prep time: 25 minutes
Cook time: 30 minutes
Yield: 4 bowls
Approximate protein: about 18 to 22 grams per serving before rice and toppings, depending on tofu brand

Ingredients

For the tofu

  • 2 blocks extra-firm tofu
  • 1 tablespoon neutral oil
  • 1 tablespoon soy sauce
  • 2 tablespoons cornstarch
  • 1 teaspoon garlic powder
  • 1/2 teaspoon black pepper

For the sesame ginger sauce

  • 3 tablespoons soy sauce
  • 1 tablespoon rice vinegar
  • 1 tablespoon maple syrup or honey
  • 1 tablespoon toasted sesame oil
  • 1 tablespoon grated ginger
  • 2 garlic cloves, minced
  • 1 to 2 teaspoons chili crisp or chili flakes
  • 2 tablespoons water

And for the bowls

  • 3 cups cooked rice
  • 1 large head broccoli, cut into florets
  • 2 bell peppers, sliced
  • 2 carrots, sliced thin
  • 1 tablespoon neutral oil
  • 2 tablespoons sesame seeds
  • 3 spring onions, sliced

Method

  1. Press the tofu for 20 to 30 minutes, then cut it into cubes.
  2. Toss the tofu with oil, soy sauce, cornstarch, garlic powder, and pepper. The coating should look light and powdery rather than wet.
  3. Spread on a lined tray and roast at 220°C / 425°F for 25 to 30 minutes, turning once, until the edges look dry, browned, and lightly blistered.
  4. Toss broccoli, peppers, and carrots with a little oil and roast on a second tray until tender with some color.
  5. Whisk together the sauce ingredients and taste before using.
  6. Once the tofu is hot and crisp, toss it lightly in enough sauce to coat.
  7. Divide rice among four containers, then add vegetables and tofu.
  8. Finish with sesame seeds and spring onion.

Best texture checkpoint

The tofu is ready when the cubes release easily from the tray, the corners look browned rather than pale, and the exterior feels lightly firm instead of damp.

Why this recipe works

Crisp texture plus a sesame-ginger sauce gives tofu a role people already trust from chicken bowls. The sauce goes on after roasting, which protects the edges instead of destroying them. Roasted vegetables keep the bowl from tasting one-note, while rice gives the whole meal the same dependable structure that makes sesame chicken lunch prep so popular.

Do not mess this up

Do not pour all the sauce onto the tofu before roasting. It will steam instead of crisp. Also, do not under-roast it. Pale tofu softens too quickly once sauced and feels disappointing by day two.

Storage and reheating

Store for up to 4 days. For the best texture, keep extra sauce separate and add it after reheating. Microwave works fine for the rice and vegetables, but an air fryer or hot skillet is the best way to recover crispness in the tofu. For the best day-three texture, pack sauce in a small container and toss just before eating.

Easy swaps

  • use quinoa instead of rice
  • swap peppers for cabbage or snap peas
  • add edamame for more protein
  • finish with lime for more brightness

For another bowl direction later in the week, MasalaMonk’s Thai-style vegan bowl with peanut butter dressing works well as a follow-on internal read.

Smoky Tofu Crumbles Taco Bowls

Best tofu swap for shredded chicken taco bowls

If your usual lunch prep leans toward taco bowls, burrito bowls, or shredded chicken rice boxes, tofu crumbles are one of the smartest replacements you can make. Because the tofu is broken into small irregular pieces, it catches spice more evenly and feels closer to the structure of seasoned minced or shredded protein.

This is also one of the most believable chicken-to-tofu swaps in the post. Ease, strong seasoning, and leftover flexibility are exactly what make it so repeatable. Once you make a good batch of tofu crumbles, you are not limited to one kind of lunch box.

Editorial infographic showing multiple ways to use smoky tofu crumbles for meal prep, including taco bowls, wraps, burritos, tacos, quesadillas, and baked potatoes or lettuce cups, with notes on why this tofu crumble format works well for flexible high-protein lunches through the week.
One good batch of smoky tofu crumbles can carry much more than a single lunch. Use it for taco bowls early in the week, then turn the leftovers into wraps, burritos, tacos, quesadillas, or even baked potatoes when you want something different without starting from scratch again. Save this post for your next prep day, and share it with someone who wants more variety from one simple, high-protein tofu meal prep base.

Recipe Card: Smoky Tofu Crumbles Taco Bowls

Prep time: 20 minutes
Cook time: 25 minutes
Yield: 4 bowls
Approximate protein: about 20 to 24 grams per serving depending on tofu and beans used

Ingredients

  • 2 blocks firm or extra-firm tofu
  • 2 teaspoons olive oil
  • 1 tablespoon soy sauce
  • 1 tablespoon tomato paste
  • 2 teaspoons chili powder
  • 1 teaspoon smoked paprika
  • 1 teaspoon cumin
  • 1 teaspoon garlic powder
  • 1 teaspoon onion powder
  • 1/2 teaspoon black pepper
  • juice of 1 lime
  • 3 cups cooked rice
  • 1 can black beans, drained and rinsed
  • 1 cup corn
  • 2 cups shredded cabbage or lettuce
  • 1 cup salsa or pico de gallo
  • 1 avocado, sliced or mashed
  • coriander leaves for serving

Method

  1. Press the tofu well, then crumble it by hand into irregular pieces roughly the size of cooked ground meat rather than big chunks.
  2. Mix olive oil, soy sauce, tomato paste, chili powder, smoked paprika, cumin, garlic powder, onion powder, black pepper, and lime juice.
  3. Toss the tofu crumbles in the seasoning mixture until evenly coated.
  4. Spread on a baking tray and roast at 220°C / 425°F for 20 to 25 minutes, stirring once, until the tray looks mostly dry and the edges are browned.
  5. Divide rice among containers.
  6. Add black beans, corn, cabbage, and tofu crumbles.
  7. Pack salsa and avocado separately if possible.
  8. Finish with coriander and extra lime at serving time.

Best texture checkpoint

The crumbles are ready when the tray looks mostly dry, the edges have browned, and the mixture no longer gives off visible steam. They should look concentrated and lightly chewy at the edges rather than soft and damp.

Why this recipe works

Strong seasoning does a lot of the heavy lifting here. Even more importantly, the crumble texture makes tofu feel more integrated into the bowl, which helps a lot if someone is still skeptical about large tofu cubes. Beans, corn, cabbage, salsa, and avocado also create the kind of layered bowl that makes taco meal prep satisfying beyond the protein itself.

Do not mess this up

Do not stop cooking the crumbles too early. If they still look wet, they will taste flat and soften badly in storage. Do not crowd the tray either, or the mixture will steam. Also, do not skip the lime, because the acid helps the whole bowl feel brighter and less heavy.

Storage and serving

These bowls hold well for 3 to 4 days. Add avocado fresh if possible. If you want the crumbles darker and a little chewier, roast them 3 to 5 minutes longer after stirring.

Other ways to use the crumbles

  • spoon into wraps
  • roll into burritos
  • use in tacos
  • add to quesadillas
  • pile onto baked potatoes
  • turn into lettuce cups

Easy swaps

  • use quinoa instead of rice
  • add jalapeños or pickled onions
  • swap black beans for pinto beans
  • stir chipotle into the salsa for more smoke

Also Read: Protein Ice Cream Recipe: 10 Creamy Homemade Recipes

Sticky Soy Garlic Tofu Meal Prep

Best tofu swap for honey garlic or soy-glazed chicken bowls

If you like sticky, glossy, sweet-savory chicken bowls, this is the tofu version to try first. The key is simple: crisp the tofu first, then glaze it. That way you keep contrast instead of ending up with soft, saucy cubes.

This recipe works especially well for readers who love takeout-style lunches but want something they can batch at home without losing all the texture by the next day. The crisp shell gives the glaze something to cling to, while the garlic, ginger, soy, and a little sweetness create the familiar savory payoff many people usually chase in honey garlic chicken or soy-glazed bowls.

Premium editorial infographic showing a sticky soy garlic tofu meal prep box with glossy glazed tofu, rice, and greens, plus tips on crisping tofu first, coating with glaze at the end, pairing it with a balanced lunch box, reheating gently, and finishing with spring onion and sesame for better texture and flavor.
Sticky soy garlic tofu is the lunch to make when you want a meal-prep box that feels closer to takeout than another plain rice bowl. Crisping the tofu first, glazing it at the end, and pairing it with rice, greens, and a fresh finish keeps the box glossy, savory, and satisfying without turning everything soft too early. Save this post for your next prep day, and share it with someone who wants sweet-savory high-protein lunches that still taste good after reheating.

Recipe Card: Sticky Soy Garlic Tofu Meal Prep

Prep time: 20 minutes
Cook time: 30 minutes
Yield: 4 bowls
Approximate protein: about 18 to 22 grams per serving before rice, depending on tofu brand

Ingredients

For the tofu

  • 2 blocks extra-firm tofu
  • 1 tablespoon neutral oil
  • 2 tablespoons cornstarch
  • 1/2 teaspoon black pepper

For the glaze

  • 4 tablespoons soy sauce
  • 1 tablespoon rice vinegar
  • 1 tablespoon maple syrup or brown sugar
  • 1 tablespoon sesame oil
  • 4 garlic cloves, minced
  • 1 teaspoon grated ginger
  • 1 teaspoon chili flakes or chili crisp
  • 4 tablespoons water

And for the bowls

  • 3 cups cooked jasmine rice
  • 2 cups green beans or broccoli
  • 1 bell pepper, sliced
  • 2 spring onions, sliced
  • sesame seeds for garnish
  • shelled edamame, optional, for extra protein

Method

  1. Press the tofu and cut it into cubes.
  2. Toss with oil, cornstarch, and pepper.
  3. Roast or air-fry at 220°C / 425°F until crisp and golden, about 25 minutes.
  4. Roast or sauté the vegetables until just tender.
  5. In a saucepan, combine soy sauce, rice vinegar, maple or brown sugar, sesame oil, garlic, ginger, chili, and water. Simmer until glossy and lightly thickened.
  6. Toss the hot tofu gently in the glaze.
  7. Divide rice and vegetables into containers, then top with glazed tofu.
  8. Finish with spring onion and sesame seeds.

Best texture checkpoint

The tofu should be crisp and well browned before it ever touches the glaze. The glaze should look shiny and lightly syrupy, thick enough to coat the back of a spoon but not so reduced that it turns gummy after chilling.

Why this recipe works

The glaze gives tofu the familiar sticky, savory-sweet finish people often associate with takeout-style chicken bowls. Crisping first prevents the meal from turning heavy and soggy, while the rice and vegetables keep the lunch grounded in a familiar meal-prep structure. That balance between crispness and glaze is what makes the recipe satisfying rather than merely saucy.

Do not mess this up

Do not glaze the tofu before it is properly browned. Otherwise, you lose the contrast that makes the recipe worth making. Also, avoid reducing the glaze too far, or it can become overly sticky after chilling and reheating.

Storage and reheating

Store for up to 4 days. Reheat gently. For the best texture, toss only part of the tofu in glaze before packing and carry extra glaze separately to spoon over after reheating. Fresh spring onion or sesame added at the end helps restore contrast.

Easy swaps

  • use teriyaki instead of soy-garlic
  • swap in mushrooms, cabbage, or snap peas
  • add toasted peanuts for crunch
  • serve with brown rice if you prefer

MasalaMonk’s teriyaki sauce recipe is a natural internal link here if you want to vary the glaze later.

Curried Tofu Salad for High-Protein Lunch Meal Prep

Best tofu swap for curried chicken salad lunches

If you rely on creamy chicken salad for sandwiches, wraps, crackers, or desk lunches, this is the tofu format that replaces it most directly. Because the recipe depends on dressing, crunch, and mix-ins, tofu feels natural here rather than forced.

This is also one of the most practical tofu meal prep ideas for people who do not want to reheat lunch at work. It travels well, tastes good cold, and solves the problem of protein-forward desk lunches without relying on deli meat or another day of chicken.

Premium editorial infographic showing a curried tofu salad no-reheat lunch guide with serving ideas for lettuce cups, sandwich filling, wrap filling, crackers or cucumber slices, and toast or pita pockets, plus notes on easy packing, desk-lunch use, added crunch and acid, and meal-prep storage.
Curried tofu salad is one of the easiest ways to make tofu meal prep work for real weekday lunches because it packs well, tastes good cold, and fits more than one kind of meal. Use it in wraps, sandwiches, lettuce cups, snack-box lunches, or on toast when you want something high in protein without depending on a microwave. Save this post for your next prep day, and share it with someone who needs an easy no-reheat lunch that still feels flavorful, fresh, and worth repeating.

Recipe Card: Curried Tofu Salad Meal Prep

Prep time: 20 minutes
Cook time: optional 10 minutes if you lightly bake the tofu first
Yield: 4 lunches
Approximate protein: about 16 to 20 grams per serving, depending on tofu and dressing choices

Ingredients

  • 2 blocks firm tofu
  • 1/3 cup vegan mayo
  • 1 tablespoon lemon juice
  • 2 teaspoons curry powder
  • 1/4 teaspoon turmeric, optional
  • 1 teaspoon Dijon mustard
  • 2 celery stalks, finely chopped
  • 2 spring onions or 1/4 small red onion, finely chopped
  • 2 tablespoons chopped coriander or parsley
  • 2 tablespoons raisins or finely chopped apple, optional
  • 2 tablespoons toasted sunflower seeds or chopped cashews, optional
  • salt and black pepper to taste
  • greens, wraps, bread, or crackers for serving

Method

  1. Press the tofu lightly so it is not watery, then crumble or finely chop it.
  2. In a bowl, whisk together vegan mayo, lemon juice, curry powder, turmeric if using, Dijon, salt, and pepper.
  3. Fold in the tofu, celery, onion, herbs, and any optional raisins or apple.
  4. Taste and adjust with more lemon, salt, or curry powder.
  5. Chill for at least 20 to 30 minutes before packing.
  6. Portion into containers with greens, wraps, sandwich bread, crackers, or cucumber slices.

Best texture checkpoint

The salad should hold together lightly without looking wet or loose. Finely crumbled tofu gives a more classic chicken-salad feel, while a slightly chunkier chop gives more bite.

Why this recipe works

This recipe replaces the function of chicken salad directly. It is practical, portable, and easy to repeat without reheating. The crunch from celery and seeds, the acid from lemon, and the creaminess from the dressing help tofu feel deliberate rather than plain, which is exactly why this format works so well for cold lunches.

Do not mess this up

Do not leave the tofu too wet before mixing. Excess moisture dilutes the dressing and shortens the storage life. Also, do not overdo the mayo at the start, because the salad loosens slightly as it sits.

Storage

Keeps well for 3 to 4 days. Stir before serving if needed. Keep greens and breads separate until you are ready to eat.

Best ways to serve it

  • spoon into wraps
  • pack with crackers
  • turn into a sandwich filling
  • serve with cucumber slices
  • pile onto toast with tomato
  • use in pita pockets

Easy swaps

  • use a yogurt-style dressing for a lighter version
  • add chopped grapes instead of apple
  • spoon into lettuce cups
  • use as a pita filling
  • add more herbs for a fresher finish

If you keep the mayo-based version, MasalaMonk’s homemade mayo recipe is the cleanest internal fit here.

Coconut Red Curry Tofu Meal Prep Boxes

Best tofu swap for chicken curry meal prep

If your weekly lunches usually include chicken curry, this is the tofu version most likely to satisfy you. Sauce-driven meal prep is one of tofu’s strongest lanes, because the tofu absorbs flavor without needing to imitate the exact texture of chicken.

This is also the best option in the post for readers who care more about reheating performance than crispness. Curry already depends on sauce, aromatics, vegetables, and rice for a large part of its appeal. That means tofu does not have to behave like chicken to feel right. It only has to hold shape, carry flavor, and reheat well.

Premium editorial infographic showing a coconut red curry tofu meal prep box with reheating tips, including browning tofu before simmering, packing curry with rice, finishing with lime and herbs after reheating, and using sturdy vegetables for a sauce-forward tofu lunch that stays satisfying through the week.
Coconut red curry tofu is one of the easiest tofu meal prep ideas to trust when you want a warm lunch that still feels good after reheating. Browning the tofu first, using vegetables that hold up well, and finishing with fresh lime or herbs after heating keeps the box rich, comforting, and balanced instead of heavy. Save this post for your next prep day, and share it with someone who wants a reheatable high-protein lunch that still tastes vibrant later in the week.

Recipe Card: Coconut Red Curry Tofu Meal Prep Boxes

Prep time: 20 minutes
Cook time: 30 minutes
Yield: 4 servings
Approximate protein: about 18 to 22 grams per serving before rice, depending on tofu and any added edamame

Ingredients

  • 2 blocks firm tofu
  • 1 tablespoon neutral oil
  • 1 onion, sliced
  • 3 garlic cloves, minced
  • 1 tablespoon grated ginger
  • 2 to 3 tablespoons red curry paste
  • 1 can full-fat coconut milk
  • 1 tablespoon soy sauce or tamari
  • 1 teaspoon maple syrup or brown sugar, optional
  • 1 bell pepper, sliced
  • 2 carrots, sliced
  • 1 to 2 cups green beans or broccoli
  • juice of 1/2 lime
  • fresh basil or coriander
  • 3 cups cooked rice for serving
  • shelled edamame, optional, for more protein

Method

  1. Press the tofu and cut it into cubes.
  2. Brown the tofu in a skillet with a little oil or roast it until lightly golden, then set aside.
  3. In a large pan, cook the onion until softened.
  4. Add garlic and ginger and cook briefly.
  5. Stir in the red curry paste and cook until fragrant.
  6. Add coconut milk, soy sauce, and the optional maple or brown sugar, then bring to a gentle simmer.
  7. Add bell pepper, carrots, and green beans or broccoli. Simmer until just tender.
  8. Return the tofu to the curry and simmer gently for a few minutes.
  9. Finish with lime juice and herbs.
  10. Portion with cooked rice into containers.

Best texture checkpoint

The tofu should be lightly browned before it enters the sauce, and the vegetables should be tender but not collapsing. The finished curry should look rich and fluid rather than watery or aggressively boiled down.

Why this recipe works

Sauce-driven meal prep is one of tofu’s strongest lanes. In this case, the curry gives you depth, comfort, and leftovers that still taste good several days later. Browning the tofu first helps it hold its structure in the sauce and keeps the final meal from tasting flat.

Do not mess this up

Do not skip browning the tofu first. Even a light browning step makes the final curry taste fuller and less flat. Also, avoid boiling the curry too hard once the tofu goes back in, or the vegetables can over-soften and the sauce can separate.

Storage and reheating

Store for up to 4 days. Reheat gently in the microwave or on the stove. Pack rice separately if you want the curry to reheat more evenly and avoid over-soft rice by day three. Add fresh herbs or extra lime closer to serving time if possible.

Easy swaps

  • use green curry paste
  • add mushrooms, baby corn, or snap peas
  • add edamame for more protein
  • use more lime and herbs for a brighter finish

Also Read: Homemade Mango Ice Cream Recipe

How to Make These Tofu Meal Prep Ideas Even Higher in Protein

Tofu already gives these lunches a solid protein base, but the easiest way to make them more filling is to support the tofu intelligently.

  • add shelled edamame to sesame bowls, sticky bowls, and curry boxes
  • use quinoa instead of rice in some meals
  • pair tofu crumbles with beans or lentils
  • use higher-protein wraps for salad or crumble fillings
  • add roasted chickpeas, hemp hearts, or seeds for extra protein and texture
  • slightly increase the tofu portion in the meals you repeat most often

That kind of adjustment helps the “high-protein” promise feel more real in practice, not just in the title. It also lets you adapt the same tofu meal prep ideas to different hunger levels without reinventing the whole week.

Tofu Meal Prep Troubleshooting: How to Fix the Problems That Ruin the Week

Use this section as a quick check before blaming tofu itself. In most cases, the problem comes down to moisture, weak seasoning, or packing order.

Premium tofu meal prep troubleshooting infographic showing common tofu lunch problems and fixes, including soggy tofu, bland tofu, watery meal prep boxes, rubbery tofu on reheat, flat cold lunches, and tofu sticking to the tray, with clear cause-and-fix notes for better texture and flavor all week.
When tofu meal prep goes wrong, the problem is usually fixable. Too much moisture, weak seasoning, wet add-ins, harsh reheating, or not enough contrast can turn a good lunch into a disappointing one, but small adjustments make a big difference. Save this post for your next prep session, and share it with someone who wants tofu lunches that stay flavorful, balanced, and worth eating all week.
  • Tofu turns soggy: Too much moisture or sauce was added too early. Press longer, roast longer, and sauce later.
  • Tofu tastes bland: The seasoning is too weak or the glaze is under-salted. Use soy, acid, aromatics, chili, and enough salt.
  • Meal prep turns watery: Wet vegetables were packed too early. Store cucumbers, salsa, and similar add-ins separately.
  • Tofu goes rubbery on reheat: It was either overcooked twice or reheated too harshly. Reheat gently and avoid over-reducing sauces.
  • Crispy tofu loses its edge by day three: It was fully dressed too early. Keep extra sauce separate until serving.
  • Salad-style tofu lunch tastes flat: It needs more crunch or acid. Add celery, herbs, lemon, seeds, or pickled elements.
  • Tofu sticks to the tray: There was not enough oil or no lining. Line the tray and let the tofu sit briefly before turning.
  • Tofu tastes watery even when seasoned: It was not pressed enough before cooking or mixing. Press longer and let the exterior dry slightly before seasoning.
  • Tofu falls apart in bowls: The cubes were too soft or handled too much after cooking. Use firm or extra-firm tofu and toss gently after browning.
  • Tofu tastes fine hot but disappointing cold: Cold food dulls flavor. Add more acid, herbs, crunch, or a sharper sauce when serving.

Also Read: Cookie Pie Recipe: 10 Best Flavors, Fillings and Variations

Tofu Meal Prep Ideas for Beginners: Batch-Cook Once and Eat All Week

How to batch-cook tofu meal prep in one session

The best tofu meal prep ideas often share the same foundation. Instead of cooking five unrelated lunches from scratch, cook components once and turn them in different directions.

A practical session looks like this:

  • press and cook 3 to 4 blocks of tofu in two different styles
  • cook a big batch of rice or quinoa
  • roast two trays of vegetables
  • mix one creamy dressing and one glaze
  • prep raw crunchy vegetables for cold lunches

A good order helps. Press the tofu first so it can drain while you start rice or quinoa. Roast one tray of tofu and one tray of vegetables together if your oven space allows. Mix sauces while everything cooks. Then cool components before packing, because steam trapped in containers shortens the life of the meal prep and softens textures faster than people expect.

Premium editorial infographic showing a 90-minute tofu meal prep game plan with six time blocks: press tofu and start grain, chop vegetables and mix sauces, roast tofu and vegetables, make curry or curried tofu salad, cool and portion containers, and pack sauces and add-ons for better lunches all week.
A good tofu meal prep session gets much easier when the work has a clear order. Start by pressing tofu and cooking your grain, move into chopping and sauces, roast tofu and vegetables together, then finish with one saucy option, portioning, and packed toppings so weekday lunches feel organized instead of repetitive. Save this post for your next prep day, and share it with someone who wants a simpler way to batch-cook better tofu lunches all week.

A sample 90-minute batch-cook plan

  • 0 to 10 minutes: press tofu and start rice or quinoa
  • 10 to 20 minutes: chop vegetables and mix sauces
  • 20 to 45 minutes: roast tofu and vegetables
  • 45 to 60 minutes: cook the curry or mix the curried tofu salad
  • 60 to 75 minutes: cool the hot components and portion containers
  • 75 to 90 minutes: label containers, portion sauces, and prep add-ons like herbs, lime, or crunchy toppings

That kind of system is what makes meal prep sustainable. Once the foundation is cooked, you are no longer building every lunch from zero.

How to mix and match these tofu meal prep ideas across the week

One tofu batch can cover more than one meal. Crispy tofu can become sesame bowls on Monday and sticky glazed tofu on Tuesday. Crumbles can go into taco bowls first, then wraps later. Curried tofu salad can cover desk lunches, while curry boxes handle dinners or heavier lunches.

That means the five recipes do not have to live in isolation. They can work as a system. Once you understand that, meal prep gets easier because you are no longer cooking from scratch every time. You are simply building new lunches from the same small set of components.

How long tofu meal prep lasts in the fridge

Most cooked tofu meal prep keeps well for 3 to 4 days. However, the storage method matters just as much as the recipe itself.

  • crispy tofu holds best when sauce is separate
  • salad-style prep holds best when watery vegetables are added later
  • curry and glazed tofu usually reheat well
  • avocado and fresh herbs are best added close to serving time

Even strong tofu meal prep ideas can disappoint if wet ingredients sit on everything for four days straight. Good packing is part of good cooking.

Also Read: Peach Cobbler with Canned Peaches (Dessert Recipe)

Final Thoughts on Using Tofu as a Chicken Replacement

Tofu does not replace chicken by copying it perfectly. It replaces chicken by working especially well in the meal formats where texture, sauce, seasoning, vegetables, and lunch structure matter more than one exact meat-like bite.

That is why these tofu meal prep ideas work. Crispy bowls give you bite. Crumbles give you familiarity. Sticky glazed tofu brings the takeout-style payoff many people want. Curried tofu salad solves cold lunches. Curry boxes bring reheatable comfort and strong leftovers.

If chicken has been your default meal-prep protein simply because it feels easy and dependable, start with the tofu format that matches the chicken lunch you already rely on most. That is usually the simplest way to make the switch actually stick. If you want another plant-based lunch lane after tofu, MasalaMonk’s guide to plant-based meal prep ideas using lentils instead of chicken is the cleanest next internal read.

Premium editorial infographic showing the best tofu meal prep for your workday, comparing crispy sesame tofu bowls, smoky tofu crumbles, sticky soy garlic tofu, curried tofu salad, and coconut red curry tofu by texture, reheating style, and the kind of weekday lunch each option suits best.
The best tofu meal prep is usually the one that fits your workday, not just the one that sounds good in theory. Crispy sesame tofu bowls suit texture-first lunches, smoky tofu crumbles work well for flexible leftovers, sticky soy garlic tofu covers takeout-style cravings, curried tofu salad makes a strong no-reheat desk lunch, and coconut red curry tofu is the easiest fit for warm, comforting meal prep. Save this post for your next prep day, and share it with someone who wants high-protein lunches that actually match the way they like to eat through the week.

FAQs About Tofu Meal Prep Ideas

1. What is the best type of tofu for meal prep?

For most tofu meal prep ideas, firm or extra-firm tofu is the best place to start. These styles hold their shape better, brown more easily, and stay more stable in the fridge than softer tofu. Soft and silken tofu are better suited to soups, sauces, smoothies, and gentler dishes.

2. Do you have to press tofu before meal prep?

Usually, yes. Pressing tofu removes excess surface moisture, which helps it brown better, hold seasoning more effectively, and resist turning soggy too quickly. That matters most for crispy tofu bowls, tofu crumbles, and sticky glazed tofu. Curry and salad-style tofu are a little more forgiving, but even there, lightly pressing the tofu improves the result.

3. How do you keep tofu meal prep from getting soggy?

Press the tofu, brown it properly, and add sauce later rather than earlier. It also helps to store wet ingredients like salsa, cucumbers, and extra dressing separately until serving. For crispy tofu meal prep in particular, packing the sauce on the side is one of the easiest ways to protect texture for several days.

4. How long does tofu meal prep last in the fridge?

Most tofu meal prep keeps well for about 3 to 4 days in the fridge when stored in airtight containers. Crispy tofu usually lasts best when the sauce is kept separate, while curry and salad-style tofu meal prep tend to hold especially well because they are already built around moisture and dressing.

5. Are tofu meal prep ideas actually high in protein?

They can be, especially when the recipes use firm or extra-firm tofu in generous portions and pair it with ingredients like edamame, beans, quinoa, lentils, or higher-protein wraps. The meals also feel more filling when the box includes a solid base, strong seasoning, and enough texture contrast.

6. What are the best tofu meal prep ideas for beginners?

For beginners, the easiest tofu meal prep ideas are usually crispy tofu bowls, sticky glazed tofu bowls, and tofu crumbles. Those formats are forgiving, flavorful, and easy to pair with rice, vegetables, wraps, or tacos. More importantly, they feel familiar if you are coming from sesame chicken bowls, taco bowls, or takeout-style rice boxes.

7. Why does tofu taste bland sometimes?

Tofu usually tastes bland when it is under-seasoned or when the meal around it is weak. Because tofu starts out mild, it needs more help from salt, umami, acid, aromatics, spice, and sauce than many people initially expect. Once the seasoning gets stronger and the meal includes more contrast, tofu becomes much more satisfying.