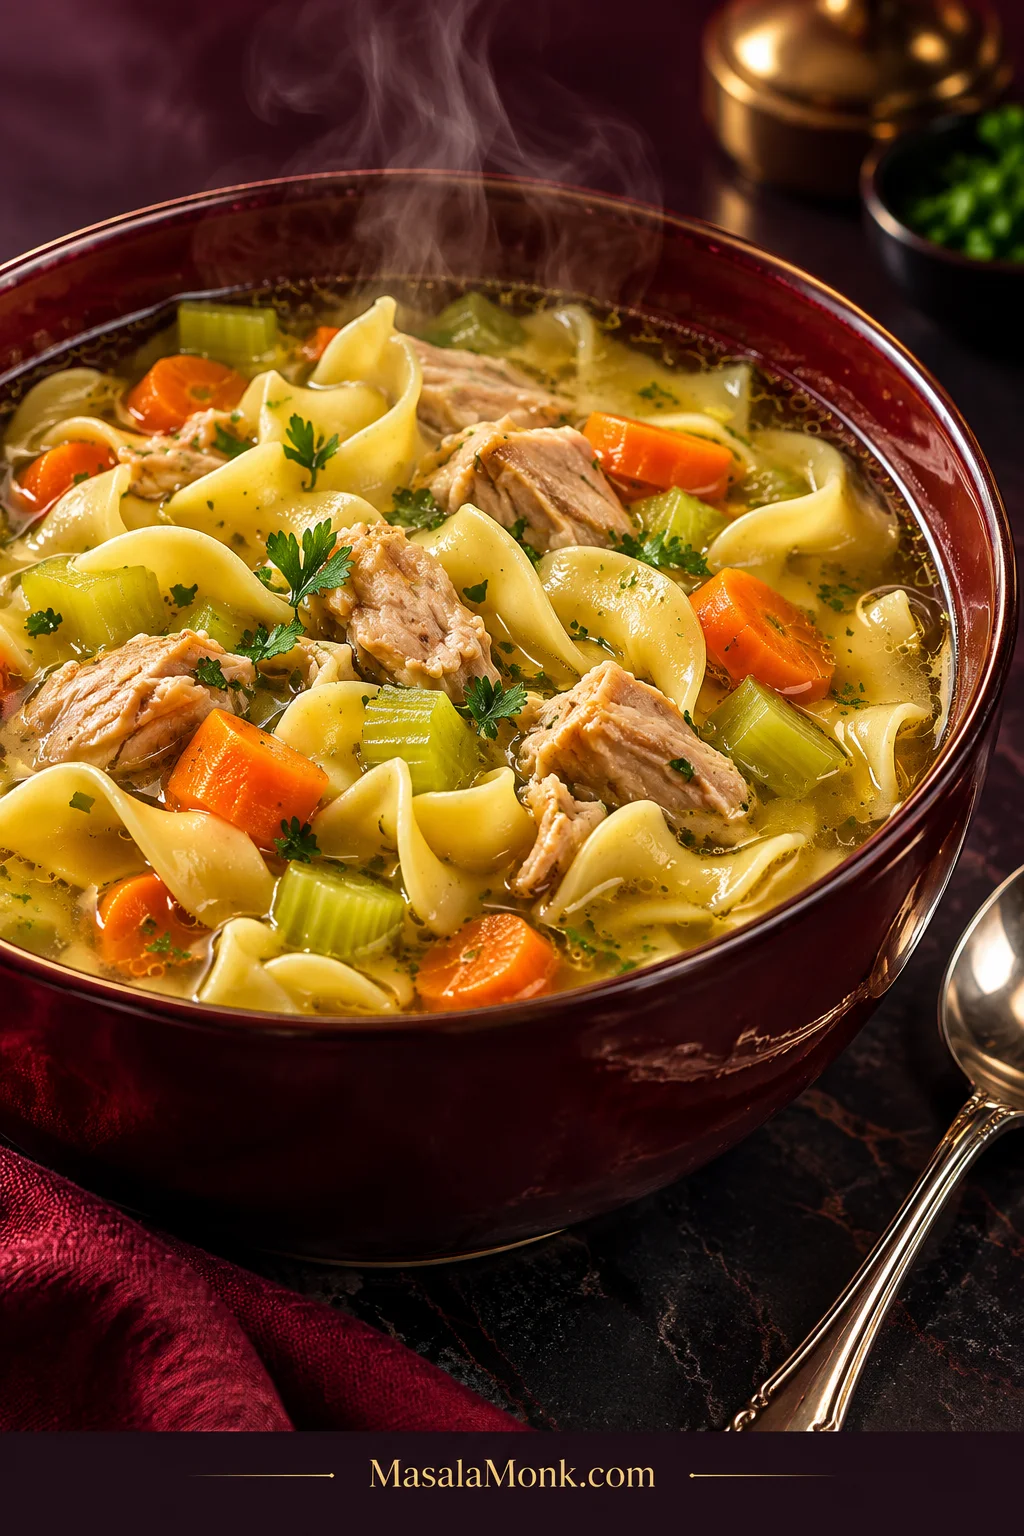
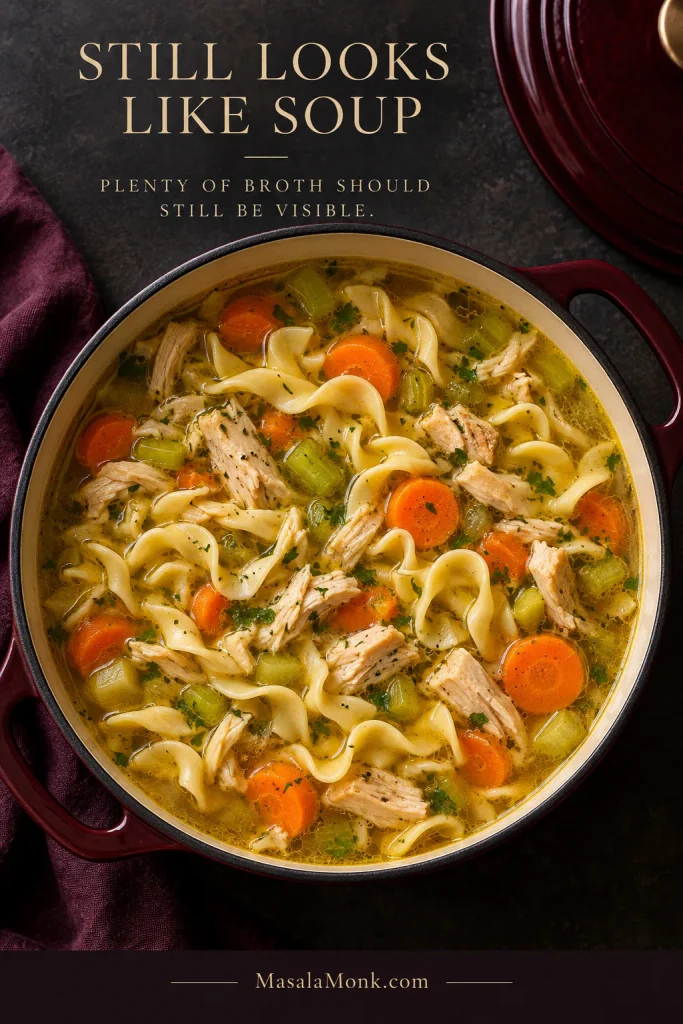
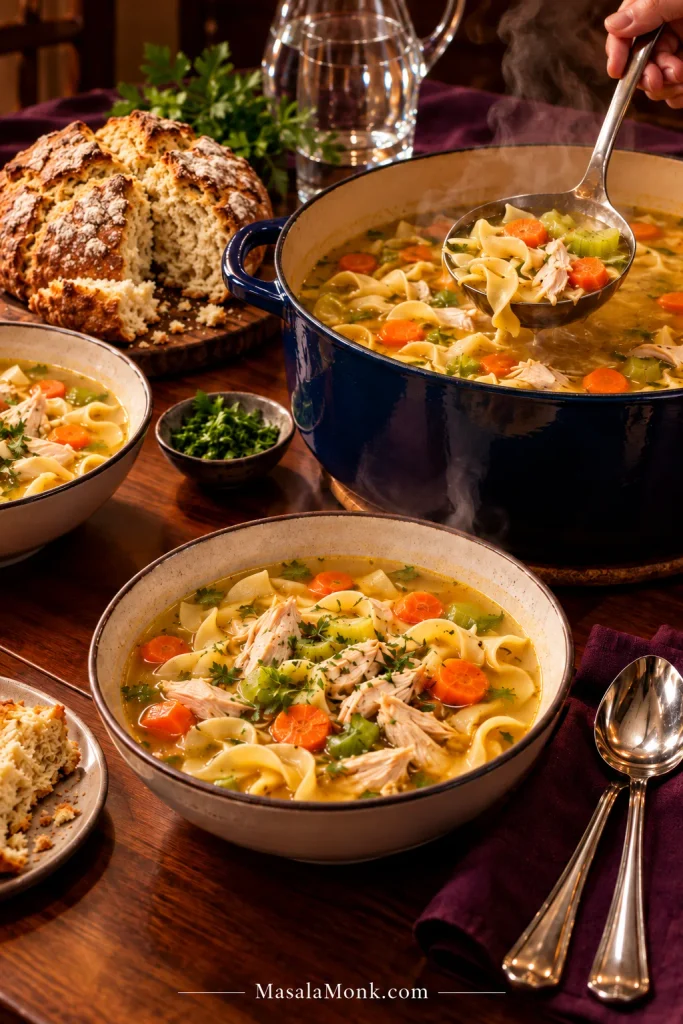
A good chicken noodle soup still looks like soup. There is plenty of golden, savory broth around the noodles, the chicken is tender rather than stringy, and the carrots and celery are soft enough to eat but hold their shape.
It is the kind of dinner that makes sense when the weather turns, the day has run long, or somebody at the table simply wants something warm and familiar.
This easy homemade chicken noodle soup recipe gets there without asking you to simmer a whole chicken all afternoon. Boneless chicken thighs get a light browning first, then onion, carrot and celery pick up the savory fond left behind. Low-sodium chicken broth goes in next, and the thighs finish gently in the pot until tender.
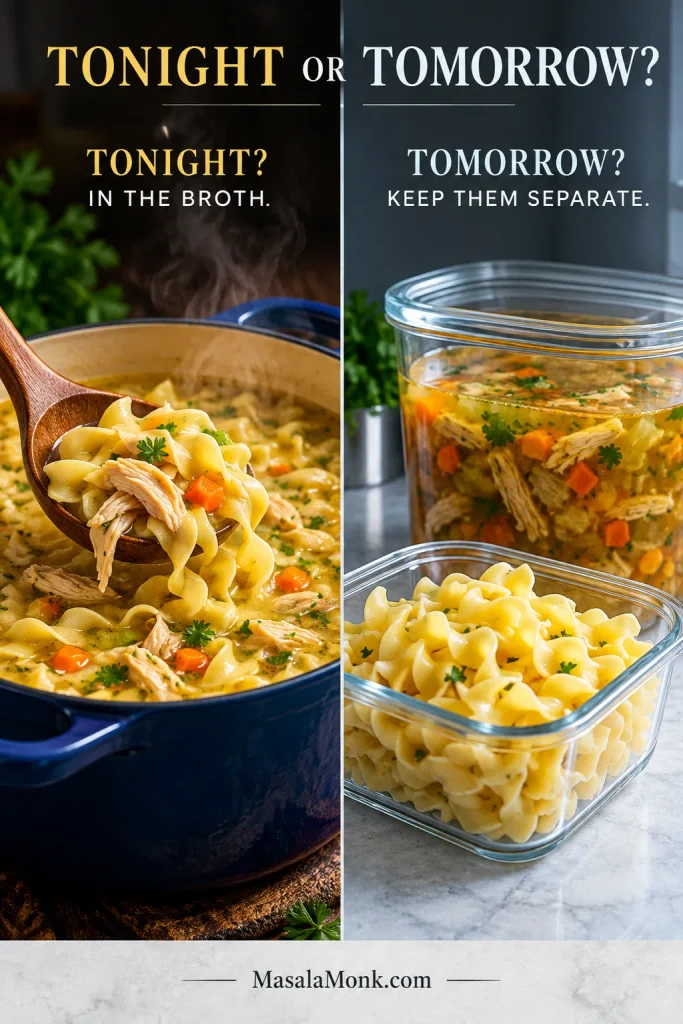
Chicken noodle soup is simple food, but the broth, chicken and noodles do not finish at the same time. Get the broth tasting right before the noodles go in. Take the chicken out when it is ready instead of making it wait for the pasta. Saving most of the pot for tomorrow? Keep those noodles separate.
Chicken Noodle Soup Recipe
A homemade chicken noodle soup with plenty of savory broth, tender chicken thighs, classic vegetables and wide egg noodles. Light browning gives store-bought chicken broth more depth without turning dinner into an all-day stock project.
Prep Time 20 minutes
Cook Time About 50 minutes
Total Time About 1 hour 10 minutes
Yield 6 generous servings
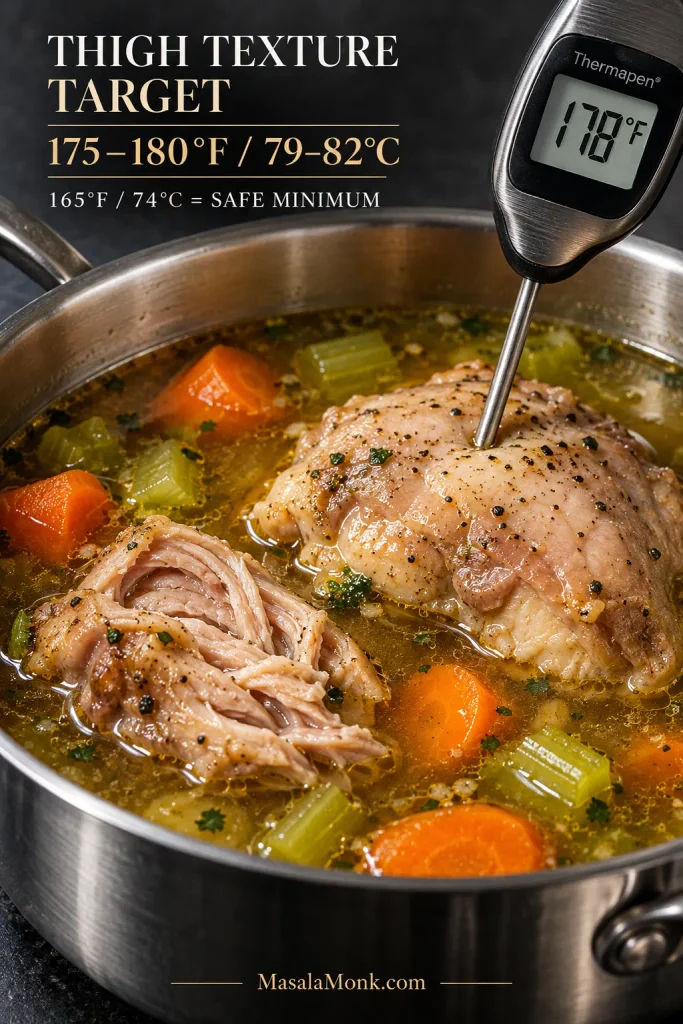
Thigh Texture Target About 175–180°F / 79–82°C
Pot Size 6–7 qt / 5.7–6.6 L
Equipment
6–7 quart / 5.7–6.6 L Dutch oven or heavy soup pot
Instant-read thermometer
Tongs and a wooden spoon
Chef’s knife and cutting board
Optional second saucepan if cooking the noodles separately
Ingredients
1½ lb / 680 g boneless, skinless chicken thighs, trimmed and patted dry
¾ teaspoon fine sea salt, plus more as needed
½ teaspoon freshly ground black pepper, plus more to taste
1 tablespoon / 15 ml neutral cooking oil
1 tablespoon / 14 g unsalted butter
1 medium yellow onion, about 6 oz / 170 g, cut into roughly ½-inch / 1.3 cm pieces, about 1¼–1½ cups
3 medium carrots, about 8 oz / 225 g, sliced about ½ inch / 1.3 cm thick, about 1½ cups
3 celery ribs, about 6 oz / 170 g, cut into ½-inch / 1.3 cm pieces, about 1½ cups
4 garlic cloves, about 12 g, minced
8 cups / 1.9 L low-sodium chicken broth or stock, plus up to 1–2 cups / 240–480 ml extra if needed
1–2 teaspoons chicken base or bouillon paste, optional
2 bay leaves
4 fresh thyme sprigs, or ½ teaspoon dried thyme
6 oz / 170 g wide egg noodles, roughly 3 cups dry depending on the brand and shape
¼ cup / about 15 g fresh parsley, chopped
1 tablespoon finely chopped fresh dill, optional
1–2 teaspoons / 5–10 ml fresh lemon juice, optional
Instructions
Brown the Chicken and Start the Vegetables
Season the chicken. Pat the thighs dry. Season with ¾ teaspoon salt and ½ teaspoon black pepper.
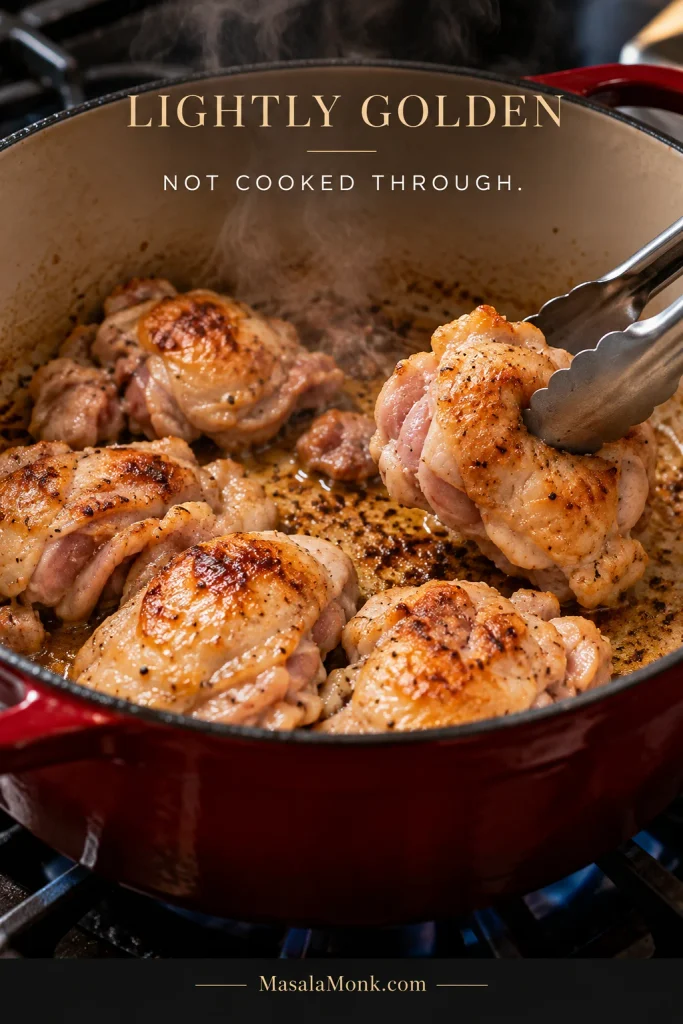
Give the chicken some color. Heat the oil over medium-high heat. Add the thighs in a single layer, working in two batches if necessary rather than crowding the pot. Cook for about 3–4 minutes on the first side and 2–3 minutes on the second, until lightly golden in patches. They should not be cooked through yet. Transfer them to a plate.
The brown residue left behind is the fond; keep it in the pot because it adds depth to the broth.
Crowding chicken thighs traps steam, which weakens browning and leaves less flavorful fond behind. Give the pieces room to make direct contact with the hot pot.
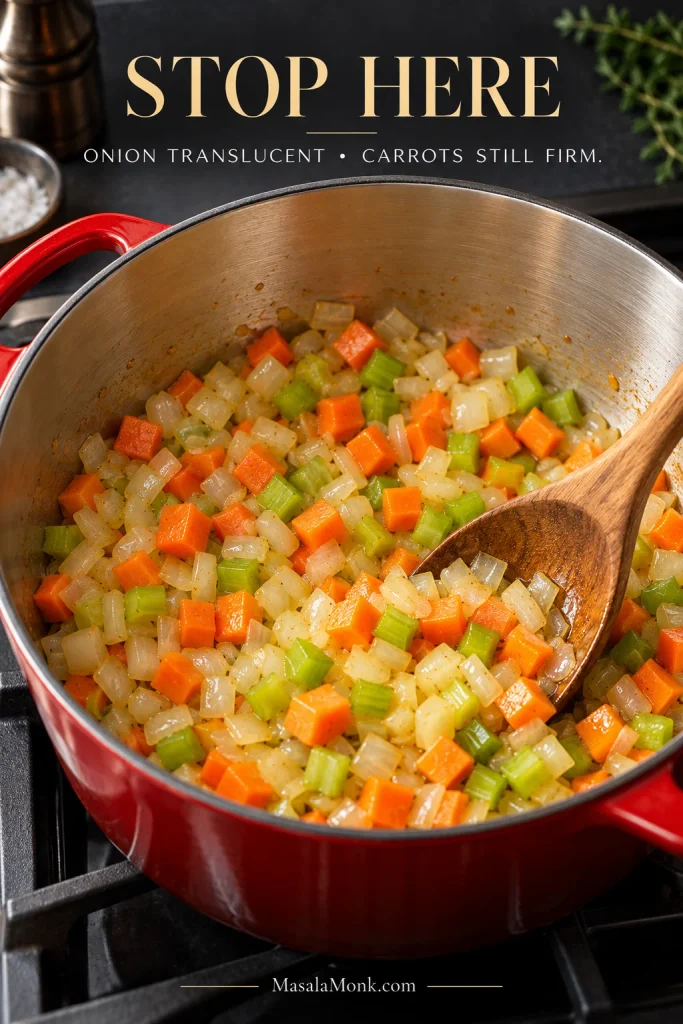
Start the vegetables. Reduce the heat to medium. Spoon off excess chicken fat if there is much more than about a tablespoon in the pot. Add the butter, onion, carrots and celery. Cook for about 4–5 minutes, stirring occasionally. The onion should turn translucent, the celery should just begin to soften, and the carrots should remain quite firm. Add the garlic and cook for about 30 seconds, just until you can smell it clearly. Don’t wait for the garlic to brown.
Cut size matters as much as cooking time here. Keeping the carrots and celery around ½ inch helps them soften at a similar pace; much smaller pieces can lose their shape before the soup is finished.
Build the Broth and Cook the Chicken
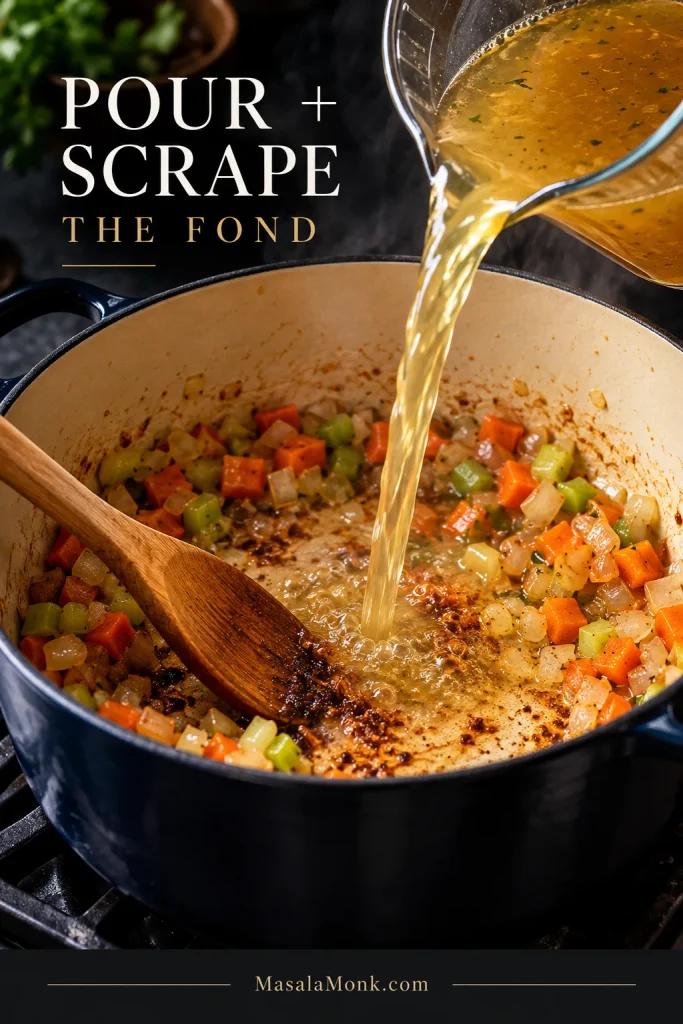
Add the broth. Pour in the 8 cups / 1.9 L chicken broth and scrape the bottom of the pot with a wooden spoon to loosen the browned bits. Add the bay leaves and thyme. Bring the broth just to a boil.
Aim for deep golden-brown fond rather than black scorch. Scrape the browned layer into the broth, but leave genuinely burnt patches behind so bitterness does not spread through the pot.
Move the spoon across the full base of the pot, including the edges where browned bits collect. The released fond carries the flavor into the broth.
Finish the thighs gently. Return the chicken and any juices from the plate. Adjust the heat until the broth settles into a gentle simmer with small, lazy bubbles. Begin checking after about 8 minutes. The safe minimum for poultry is 165°F / 74°C, but thighs become more tender as they cook beyond that point. For this soup, aim for about 175–180°F / 79–82°C. Larger pieces may need around 10–14 minutes. Remove the thighs when they pull apart easily but still form juicy pieces rather than dry threads. Rest for about 5 minutes, then shred or cut into bite-size pieces.
Check the thermometer in the thickest folded part of the thigh, not a thin edge. If the pieces vary noticeably in size, verify more than one before removing them from the broth.
Larger thighs may need several minutes longer than smaller ones. Check the largest piece and verify any noticeably different pieces before removing them all.
Taste the broth now. It should taste clearly of chicken before any noodles go in. Chicken flavor that is present but muted usually needs salt; add about ¼ teaspoon at a time. Weak broth with room for more salt can take 1 teaspoon chicken base. Let it dissolve and taste before deciding whether it needs the second teaspoon.
Cook the Noodles and Finish the Soup
Choose your noodle method. Eating most of the soup tonight? Cook the noodles directly in the broth. Planning several leftover servings? Cook them separately in lightly salted water and add them to each bowl.
Cook the noodles just shy of fully soft. For the one-pot version, add the 6 oz / 170 g egg noodles to the gently simmering broth. Begin checking about 1 minute before the package time; many wide egg noodles take around 6–8 minutes. Stop when they are tender but offer the faintest resistance in the center. For the separate version, cook them in their own saucepan to the same point, then drain.
Return the chicken. Add the shredded chicken for the final 2–3 minutes, just long enough to heat it through. Remove the bay leaves and thyme stems, then stir in the parsley and optional dill.
Take one final taste. A well-seasoned soup that tastes flat may only need 1 teaspoon / 5 ml lemon juice. Stir it in and taste before adding more. A noodle-heavy pot can be loosened with some of the extra low-sodium broth. The finished soup should look brothy, with plenty of liquid visible around the chicken, vegetables and noodles. Serve hot.
Egg noodles continue absorbing liquid from residual heat after the burner is off. If serving is delayed, a little hot low-sodium broth can restore the balance just before ladling.
Browning the chicken gives boxed broth its first real layer of homemade flavor. The golden bits left on the bottom of the pot dissolve into the soup when the broth goes in, carrying savory chicken flavor into the broth.
You do not need to make stock from a whole chicken. A flavorful carton of low-sodium broth is a practical starting point, and the lower salt level leaves room to adjust the pot after the chicken and vegetables have flavored it.
Why Does My Chicken Noodle Soup Taste Bland?
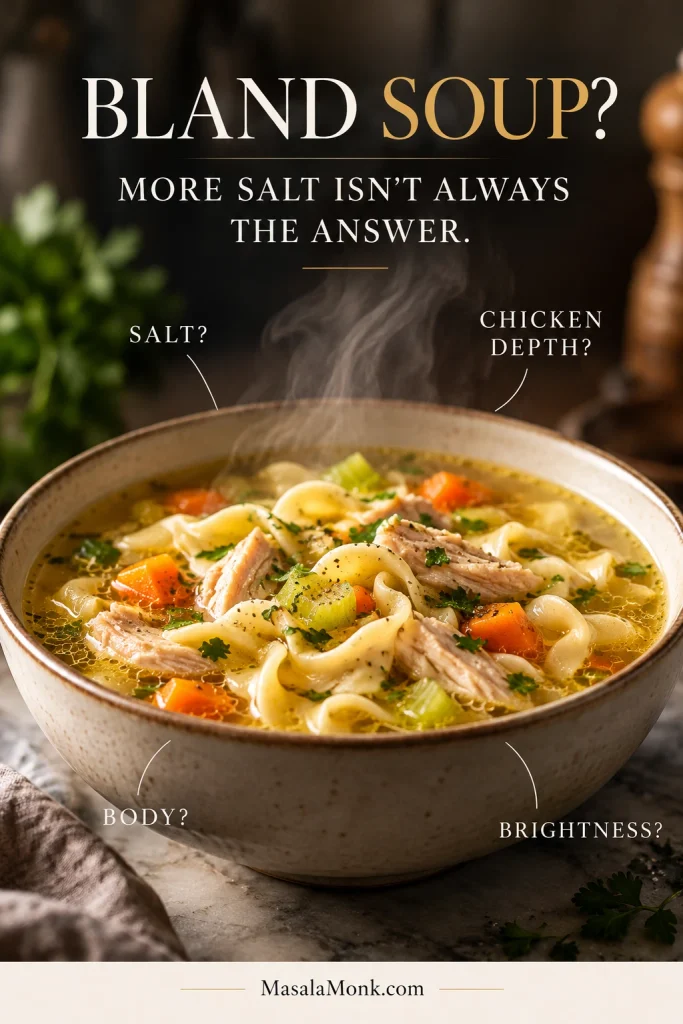
If chicken noodle soup tastes bland, first work out whether it needs more salt, stronger chicken flavor, more body or a brighter finish. More salt is not always the answer.
Salt can make existing flavor more noticeable, but it cannot create chicken depth or give thin broth more body. Taste the broth hot, change one variable, then taste again before reaching for another correction.
What you notice
What usually helps
The chicken flavor is there, but everything seems muted
Add salt about ¼ teaspoon at a time, stir well and taste again.
It barely tastes of chicken and the broth can take more salt
Stir in 1 teaspoon chicken base, let it dissolve, then taste before adding more.
It is already salty enough but the chicken flavor is weak
Add some stronger unsalted or low-sodium chicken stock if you have it. Reducing the broth or adding salty bouillon can make the salt problem worse.
The broth tastes balanced but feels watery
Try the optional gelatin fix below for more body.
It tastes savory and well seasoned but flat
Stir in 1 teaspoon fresh lemon juice, then taste before adding more.
Broth with balanced flavor but a watery mouthfeel can take one optional fix: bloom about 2 teaspoons unflavored powdered gelatin in 2 tablespoons cold water or cool broth until hydrated, then stir it into the hot soup until dissolved. It adds some of the silky body of a long-simmered stock without making the soup thick or gravy-like.
Boneless skinless chicken thighs are the best choice for this easy version because they have more flavor and tolerate the gentle simmer well. Whatever chicken you use, don’t make finished chicken wait in the broth for the noodles.
Chicken thighs: use the recipe as written. Taking them beyond the 165°F / 74°C safety minimum gives their connective tissue more time to soften; around 175–180°F / 79–82°C works well for tender pieces that still hold together.
Chicken breasts: breasts have less margin than thighs. Begin checking sooner and remove them once the thickest part reaches the safe minimum of 165°F / 74°C. Leaving cooked breast meat in the simmer while the noodles finish is an easy way to make it dry and stringy.
Rotisserie chicken: yesterday’s rotisserie chicken works well here. Use about 3 cups / 425–450 g shredded cooked chicken, skip the browning step, and add the meat only during the final few minutes.
Leftover roast chicken: treat it like rotisserie chicken. It only needs enough time in the pot to heat through.
Bone-in chicken: it can give the broth more depth but needs extra time and handling. Chicken Tinola is a good example of a soup built deliberately around bone-in chicken.
Using a rotisserie carcass? Simmer the picked carcass in the boxed broth for 15–20 minutes before making the soup. Strain the enriched broth into a bowl or large measuring jug, discard the bones and cartilage, then use that broth when you continue with the recipe. This keeps small bone fragments out of the vegetables later.
The Noodle Decision: Tonight or Tomorrow?
What Noodles Are Best for Chicken Noodle Soup?
Wide egg noodles fit this version particularly well. They have the familiar soft but substantial bite people expect from a classic bowl, and they sit comfortably beside chunks of chicken and vegetables without needing a huge amount of pasta.
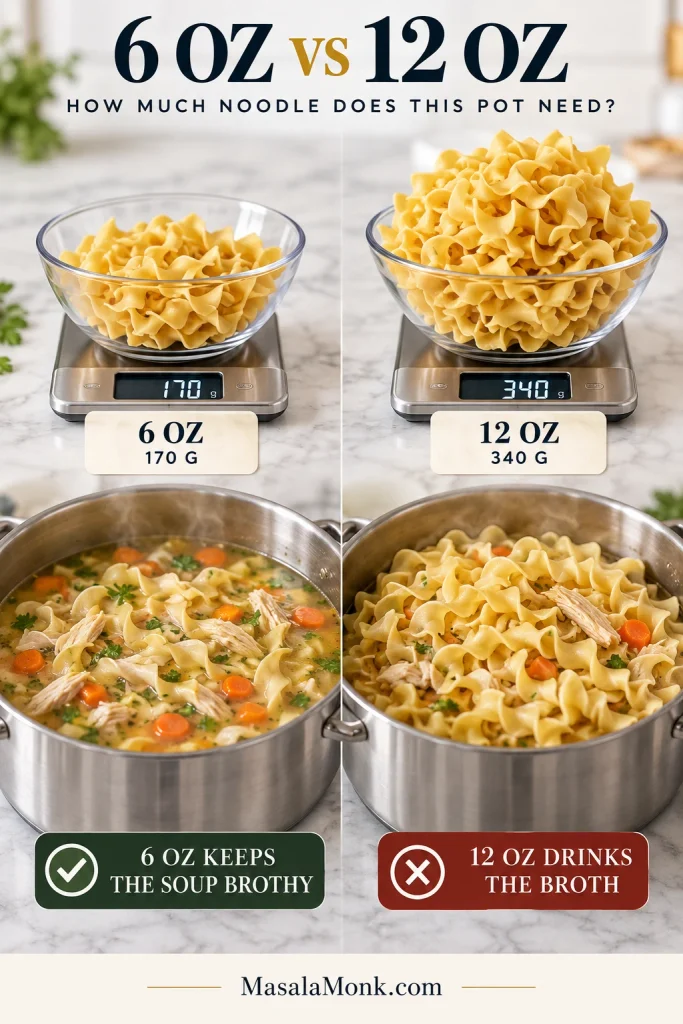
Six ounces / 170 g may not look like much while the noodles are dry. Once cooked, it is plenty for this pot. A full 12-ounce bag is a different story: by the next day, a surprising amount of your broth may be inside the noodles.
Wide egg noodles vary dramatically in width, curl and cup volume, which makes weight more reliable than eyeballing the package. Six ounces / 170 g gives this 8-cup broth base a repeatable noodle-to-broth balance.
Should You Cook Egg Noodles in the Broth?
When you’re eating the soup right away, cooking the noodles directly in the broth keeps things simple and lets them pick up some of the soup’s flavor. Once the pot needs to survive until tomorrow, separation becomes much more useful.
The real variable is holding time. The longer cooked noodles remain in hot broth, the softer they become and the more liquid they absorb; therefore, tomorrow’s servings benefit far more from separation than tonight’s dinner.
If you are…
Do this
Eating most of the soup tonight
Cook the noodles directly in the broth.
Planning several leftover servings
Cook the noodles separately and add them by the bowl.
Taking a pot to a friend or family member
Pack broth and noodles separately so the soup tastes freshly made when they warm it.
Freezing the soup
Leave the noodles out and cook fresh ones later.
Small pasta such as ditalini also works well. Homemade or frozen egg noodles are often thicker and chewier, so use the package or recipe timing rather than assuming they will cook in the same 6–8 minutes as dried wide egg noodles.
This soup can absorb a few substitutions without falling apart. You do not need an emergency grocery run because one celery rib is missing.
No celery: leave it out. You’ll lose some of the familiar chicken-soup aroma, but the recipe works.
No carrots: omit them. The finished broth will have less sweetness.
No onion: you can make the soup without it, although you’ll miss some of the sweetness and savory aroma underneath the broth.
Frozen vegetables: add them during the last few minutes and simmer only until hot and tender. They’re already partly softened, so adding them alongside the fresh carrots and celery can leave them mushy by the time the soup is done.
No fresh thyme: use ½ teaspoon dried thyme.
No dill: skip it. Parsley is enough.
Dairy-free: replace the butter with another tablespoon of olive or neutral oil.
What makes the bowl taste like classic chicken noodle soup is the chicken, flavorful broth, onion-carrot-celery base and noodles. It does not need a cupboard full of “secret” seasonings.
Mushy Noodles, Dry Chicken & Other Fixes
Some mistakes can be fixed in this pot; others are really notes for next time. The useful thing is knowing which is which.
What happened?
What helps now / next time
Noodles are mushy
You cannot make them firm again. Stop cooking and serve the soup now. Next time begin checking sooner and stop while the centers retain the faintest bite.
There is barely any broth left tomorrow
Add low-sodium broth while reheating. Next time store the noodles separately when you know most of the soup will be saved.
Chicken is dry or stringy
Get it out of the hot broth rather than letting it simmer longer. Next time remove the chicken when it reaches the right endpoint for the cut you’re using.
Vegetables are mushy
Their firmness cannot be restored. Stop simmering now; next time shorten the initial sauté or cut the vegetables slightly larger.
Soup looks greasy
Spoon off obvious excess fat. A few shimmering droplets are fine; a heavy oil slick is not needed.
Garlic or herbs dominate the bowl
Dilute genuinely overpowering flavor with a little unsalted or low-sodium broth. Then leave the seasonings alone and let the chicken broth do the work.
Most pots do not need five different corrections. Change one thing, try another spoonful, and stop when the soup tastes good.
A slightly cloudy broth is not a failed broth. Chicken proteins, fat, noodle starch and vigorous simmering can all affect clarity. When the broth tastes balanced, a little cloudiness is not something you need to fix.
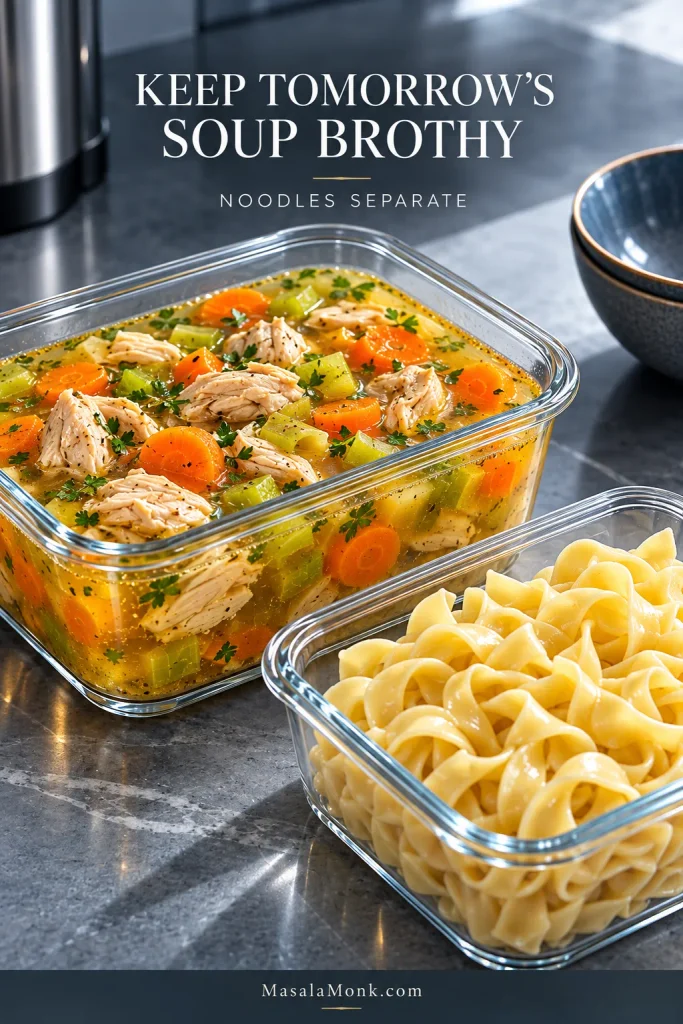
Enough left for tomorrow? You’re in good shape. If you cooked the noodles separately, cool and refrigerate them in their own covered container and store the chicken, vegetables and broth in another. Combine only the amount you’re reheating.
Separate storage also lets you rebuild each bowl instead of reheating the entire batch. Add as many noodles as that serving needs, loosen the broth if necessary, and the remaining components avoid another unnecessary heat cycle.
Making the soup ahead on purpose? Cool and refrigerate the cooked broth and vegetables, and keep the shredded chicken separately. When you’re ready to eat, warm the soup base gently just until hot. Cook fresh noodles in a separate saucepan, return the chicken only long enough to heat through, then add the noodles to each bowl. That keeps the vegetables from going through another full simmer and lets the noodles arrive at the table freshly cooked.
How Long Does Chicken Noodle Soup Last in the Fridge?
Chicken noodle soup keeps for 3–4 days in the refrigerator when it is cooled and stored safely. Divide leftovers into shallow covered containers and refrigerate them within 2 hours.
Noodles stored in the soup will continue taking up liquid overnight. Add low-sodium chicken broth while reheating until the bowl is as brothy as you want it again.
Don’t be surprised if the chilled broth turns a little jiggly. That’s often natural gelatin, along with some chilled fat. It melts back into the soup as it heats.
Can You Freeze Chicken Noodle Soup?
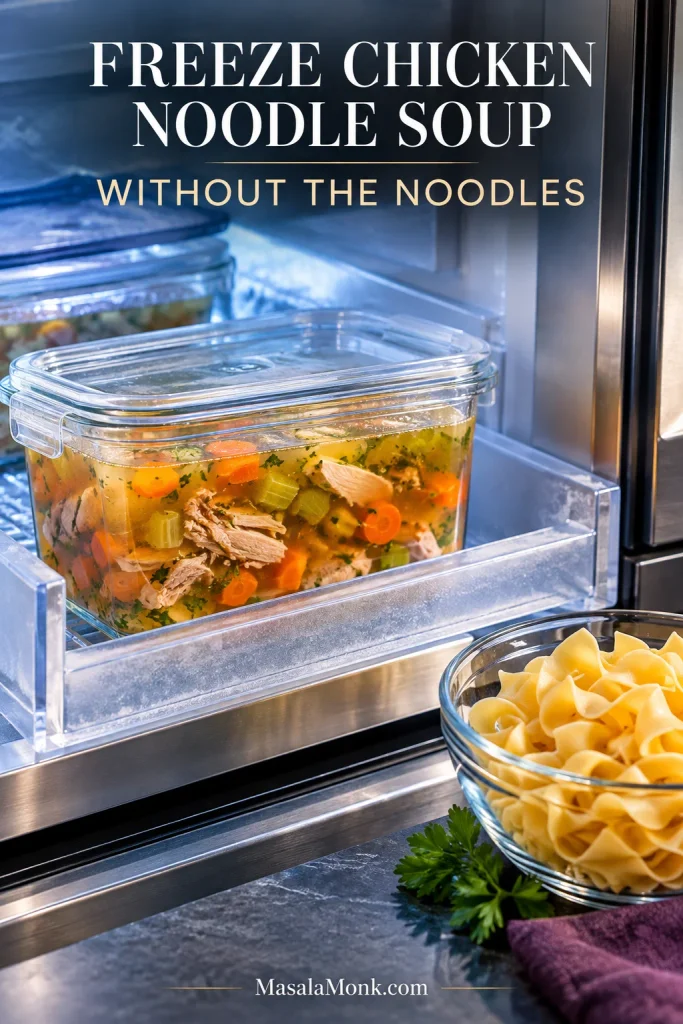
Yes. Freeze the chicken, vegetables and broth without noodles whenever possible. Portion the cooled soup into freezer-safe containers with a little room for expansion. For best quality, use it within about 3 months.
Cooked egg noodles become softer and more fragile through freezing, thawing and reheating. Instead, freeze the chicken-and-vegetable soup base on its own and add freshly cooked noodles when the soup returns to the stove.
Thaw the soup overnight in the refrigerator when convenient, or warm it gently from frozen on the stovetop. Cook fresh egg noodles while the soup reheats.
How to Reheat Chicken Noodle Soup
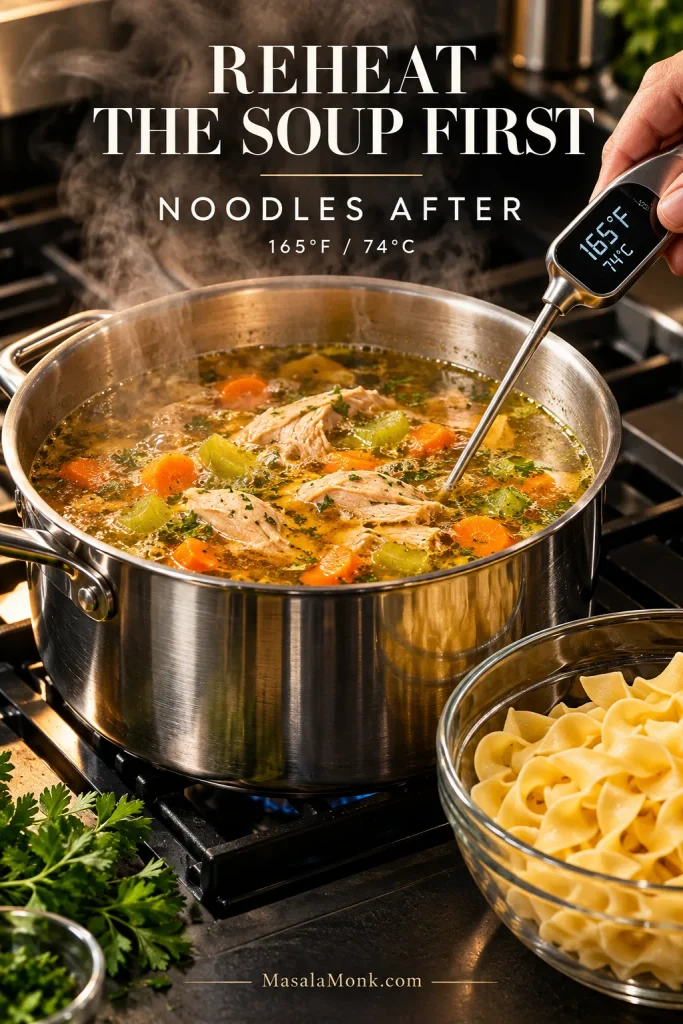
Bring the soup to a brief boil on the stovetop and make sure it reaches at least 165°F / 74°C throughout.
Reheat only the portion you plan to serve when practical. Keeping the rest chilled avoids repeatedly heating the whole batch and lets each bowl take only the noodles it needs.
If the soup has thickened overnight, loosen it with a little low-sodium broth. Add separately stored noodles after the soup is fully reheated and warm them through briefly; if the noodles are already in the soup, keep the boil short to limit further softening.
What to Serve with Chicken Noodle Soup
If you’d like something alongside, warm Irish Soda Bread is an easy partner and doesn’t need yeast or proofing.
Irish soda bread suits homemade chicken noodle soup especially well because its close, sturdy crumb absorbs savory broth without immediately falling apart, giving the meal extra texture without competing with the soup.
Ladle the soup while the broth is steaming, scatter over a little parsley or dill, and put the pot on the table. When the chicken is tender and the noodles are still just right, it really does not need much else.
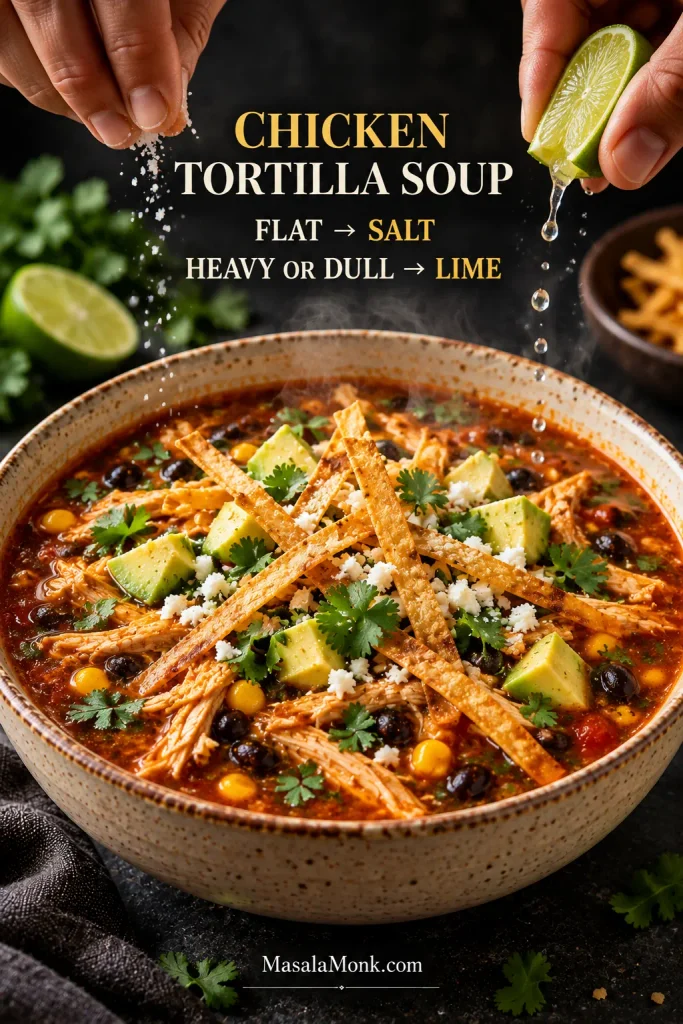
Chicken tortilla soup can go wrong in a surprisingly ordinary way: plenty of chicken, beans and chips, yet a broth that tastes mostly of canned tomato. A good bowl should be different. The first spoonful should taste of chile, chicken broth and fresh lime, with tortilla strips that still crack when they hit the soup.
This chicken tortilla soup recipe starts with the broth. Dried chile, tomato, onion and garlic are blended and cooked down before the rest of the liquid goes in. Two corn tortillas disappear into that base for a little body and toasted-corn flavor; the rest become the crisp topping. Add tender chicken, black beans and sweet corn and you have a generous dinner that still eats like soup rather than bean chili. The broth itself is simpler than the ingredient list suggests: most of it moves between the blender and one soup pot.
Chicken tortilla soup is a tomato-and-chile chicken soup finished with corn tortillas and fresh toppings; this version also blends a small amount of tortilla into the broth for gentle body. It stays broth-forward, without cream or flour thickening. Allow 45–50 minutes with raw chicken thighs, 35–40 minutes with cooked chicken and whole dried chiles, or roughly 25–30 minutes when you also use the ancho-powder and ready-made tortilla chip shortcuts.
Use the spoon as a quick texture check: the broth can cling lightly to the chicken, but it should break naturally into drops as it falls. A heavy, stretchy stream is a sign the soup has moved beyond a broth-forward consistency.
Chicken Tortilla Soup Recipe
Smoky tomato-and-dried-chile broth, tender shredded chicken, black beans and corn, with corn tortilla blended into the soup for gentle body and another batch kept crisp for serving.
Dried chiles, corn tortillas and broth brands all vary a little. The measurements give you a reliable starting point; use the color, texture and doneness cues alongside them.
Prep 15 minutes
Cook 30–35 minutes
Total 45–50 minutes
Yield 6 generous bowls
Pot 5–6 qt / 4.7–5.7 L
Heat Usually mild-medium; chile heat varies
Equipment
5–6 qt / 4.7–5.7 L Dutch oven or heavy soup pot
Blender
Fine-mesh strainer, optional
Instant-read thermometer
Small 8-inch / 20 cm skillet for frying, or a rimmed baking sheet for baked tortilla strips
Chicken Tortilla Soup Ingredients
The dried chiles are the specialty ingredient most worth finding. Mexican oregano is easier to substitute, and the toppings are flexible.
For the blended tomato-chile base
1 medium dried pasilla (negro) chile, stemmed and seeded / 8–10 g after trimming
1 medium dried guajillo chile, stemmed and seeded / 5–7 g after trimming
2 tablespoons neutral oil / 30 ml, divided
1 medium white onion, chopped / 160 g
4 garlic cloves, roughly chopped / 16 g
1 can fire-roasted diced tomatoes with their juices / 28 oz / 794 g
1½ teaspoons finely chopped chipotle in adobo / 8 g
1 teaspoon adobo sauce / 5 ml
2 small corn tortillas, about 6 inches / 15 cm each / 50 g total, torn
1 cup low-sodium chicken broth / 240 ml
1 teaspoon ground cumin / 2 g
½ teaspoon Mexican oregano / 0.5 g, crushed between your fingers
Buying pasilla: look for a long, narrow, very dark dried chile, sometimes labeled pasilla negro. A fresh green poblano is not the same thing, even though some stores use “pasilla” loosely.
No whole dried chiles? Start with 1 tablespoon pure ancho chile powder, not an American-style chili powder seasoning blend. Skip the soaking step and add the ancho powder with the cumin and oregano near the end of the tomato-base reduction.
Mexican oregano is more citrusy and earthy than standard Mediterranean-style oregano. Regular dried oregano can stand in when that is what you have.
To finish the soup
4 cups low-sodium chicken broth / 950 ml
Up to 1 additional cup low-sodium chicken broth / 240 ml, only if needed for consistency
5 g fine sea salt / about 1 teaspoon, plus more to taste
1½ lb boneless skinless chicken thighs / 680 g
1 can black beans / 15 oz / 425 g, rinsed and drained / 255 g drained
1 cup corn kernels / 165 g, frozen or well-drained canned corn
2 tablespoons fresh lime juice / 30 ml, plus more to taste
For the crispy tortilla strips
6 small corn tortillas, about 6 inches / 15 cm each / 150 g total
For frying: ¾ cup neutral high-heat oil / 180 ml, or enough for about ¼ inch / 6 mm depth in an 8-inch / 20 cm skillet
For baking or air frying: 1 tablespoon neutral oil / 15 ml
Fine salt, for seasoning
Canola, sunflower, avocado or another neutral high-heat oil will work.
For serving
1 large avocado, diced
½ cup crumbled cotija or queso fresco / 60 g
⅓ cup Mexican crema or sour cream / 80 ml, optional
Fresh cilantro leaves or roughly chopped cilantro
1–2 limes, cut into wedges
Sliced jalapeño or hot sauce, optional
How to Make Chicken Tortilla Soup
Think of the method in four phases: build the broth base, cook the chicken, crisp the tortillas, then finish the soup.
Build the broth base
Toast and soften the chiles. Set the dry soup pot over medium heat. Press the pasilla and guajillo against the surface for 10–15 seconds per side, just until fragrant and slightly pliable. Do not let them blacken. Transfer them to a heatproof bowl, cover with very hot water and leave for 10–15 minutes. While they soak, move straight on to the onion and garlic. Skip this step when using ancho powder.
Cook the onion and garlic. Add 1 tablespoon / 15 ml oil to the pot. Cook the onion over medium heat for 5–7 minutes, stirring occasionally, until soft with a few golden edges. Add the garlic and cook for 30 seconds.
Blend the base. Drain the softened chiles. Blend them with the cooked onion and garlic, tomatoes and juices, chipotle, adobo sauce, torn tortillas and 1 cup / 240 ml broth. Let the mixture sit for 2 minutes so the tortillas soften, then blend until smooth. If your blender is not rated for hot liquids, let the mixture cool first and follow the manufacturer’s venting instructions. Strain only if coarse chile-skin flecks remain.
Cook the puree down. Add the remaining tablespoon / 15 ml oil to the pot, then carefully pour in the puree. Cook over medium heat for 6–8 minutes, stirring frequently. The color deepens, the raw tomato smell fades and a spatula dragged across the bottom leaves a brief track before the puree flows back. This is where the pot stops smelling like canned tomatoes and starts smelling like dinner. Stir in the cumin and oregano for the final 30 seconds; add ancho powder here when using that shortcut.
Cook the chicken and crisp the tortillas
Add the broth and chicken. Stir in 4 cups / 950 ml broth and the starting salt, then keep the soup at a gentle simmer. Unfold the thighs before adding them. Begin checking at 12–14 minutes. 165°F / 74°C is the safety threshold; thighs often shred more easily nearer 175°F / 79°C. If the meat still fights the forks, give it another couple of minutes.
Make the tortilla strips while the chicken cooks. Cut the tortillas into strips roughly ¼ inch / 6 mm wide and 2–3 inches / 5–7.5 cm long. Very fresh strips can be dried at 250°F / 120°C for 10–12 minutes first. For frying, heat the oil to 350–365°F / 175–185°C and cook in small batches for 45–75 seconds. As moisture leaves, the bubbling calms. Pull the strips when golden and crisp, then drain and salt lightly.
Rest and shred the chicken. Transfer the thighs to a plate for a few minutes, then pull them into substantial bite-size pieces. Keep the juices that collect on the plate.
Finish and serve
Finish the soup. Add the beans and corn to the simmering broth and cook for 3 minutes. Return the shredded chicken and its juices, then warm everything together for another minute.
Check the consistency. Tilt the ladle: the broth should still run easily around the chicken and beans. Give the tortilla starch another minute to thicken the broth before adjusting it. For a thinner soup, add the optional broth ¼ cup / 60 ml at a time.
Add the lime and taste. Turn off the heat and stir in 2 tablespoons / 30 ml lime juice. Broth, beans, cheese and any salty tortilla topping can all shift the final seasoning, so taste before adding more salt. A flat soup may simply need salt; a well-seasoned bowl that still feels heavy often needs another squeeze of lime. Save extra heat for the table.
Serve. Ladle the soup into bowls. Put the tortilla strips, avocado, cheese, cilantro, lime, crema, jalapeño and hot sauce on the table and let everyone finish their own.
Shortcuts and alternate routes
Prefer not to fry? Toss the strips with 1 tablespoon / 15 ml oil and a pinch of salt. Bake at 400°F / 205°C for 8–12 minutes, tossing halfway. For the air fryer, use the same lightly oiled strips and cook at 350°F / 175°C for 4–6 minutes per batch, keeping them in a loose layer.
Cooked chicken: Use 3 loosely packed cups / 14–16 oz / 400–450 g rotisserie or leftover chicken and add it during the final few minutes. Keeping the whole dried chiles puts this route at roughly 35–40 minutes.
Fastest route: Cooked chicken + pure ancho chile powder + ready-made tortilla chips can bring the recipe closer to 25–30 minutes.
Chicken breast: Use the same 1½ lb / 680 g and remove it promptly once the thickest part reaches 165°F / 74°C.
Blend the tomato, chiles, aromatics and tortilla first, then cook that puree down before adding the rest of the broth.
Chicken, beans and corn make the bowl filling. The broth decides whether it tastes like tortilla soup. Putting canned tomatoes straight into several cups of stock can leave the liquid tasting thin even when the bowl is crowded with ingredients. Cooking the blended tomato-chile mixture first drives off water, deepens the color and pushes that raw canned-tomato smell into the background.
Rick Bayless uses the same basic order in his sopa Azteca: the tomato, onion, garlic and pasilla mixture is concentrated before the broth goes in. Here, black beans, corn and plenty of chicken simply make the finished bowl more filling.
The first cup of broth gives the softened chiles and torn corn tortillas enough liquid to circulate smoothly in the blender. As a result, the tortilla starch disperses through the base instead of leaving obvious pieces in the finished chicken tortilla soup.
Pasilla, guajillo and chipotle
Pasilla = earthy and dark. Guajillo = brighter and fruitier. Chipotle = smoky and hotter. Pasilla gives the broth its darker base note, guajillo lifts it, and chipotle supplies the obvious smoke. If you want to work more deeply with dried chiles, the pozole rojo recipe uses guajillo and ancho much more prominently.
Treat chipotle as a smoke control, not the answer to every chile problem. If the broth already has enough smoke but needs more heat, jalapeño or hot sauce can raise the heat without pushing the chicken tortilla soup further toward chipotle.
Tortillas Have Two Jobs
Two go in; the rest stay out. If you are here for the crunchy half, jump to the crispy tortilla strips.
The tortillas blended with the tomato and chiles give the broth gentle body and carry corn flavor into the soup itself. Weight matters more than count here because corn tortillas vary considerably in thickness and hydration—especially homemade ones. The homemade corn tortilla recipe goes deeper into masa harina and hydration.
Moisture treatment needs to be opposite here: the tortillas blended into the broth should soften completely, while the serving strips need to lose moisture and stay dry. That contrast is what lets corn tortillas create both body and crunch.
Chicken Tortilla Soup with Thighs, Breast or Rotisserie Chicken
Boneless skinless thighs are the default because they stay juicy in broth and tolerate the extra cooking needed to become tender enough to shred.
The safe minimum for poultry is 165°F / 74°C. For thighs, that is the safety threshold; a little more gentle cooking can make them much easier to shred. Around 175°F / 79°C is a useful texture target when the meat still resists.
Check the temperature while the thigh is still whole, since the thickest section gives a more reliable reading than shredded pieces. Once 165°F / 74°C is reached, use fork resistance—not temperature alone—to decide whether it needs a little more gentle simmering.
Breast needs less time. Remove it promptly at 165°F / 74°C instead of giving it the extra simmer that helps thighs. The baked chicken breast guide has a fuller breakdown of thickness and temperature.
Rotisserie chicken only needs warming. Add roughly 3 loosely packed cups during the final few minutes; simmering already-cooked chicken through the whole recipe only gives it more opportunity to dry out.
Taste and Adjust the Broth Before Serving
This is often the point where you’ve tasted the pot twice and something still seems slightly off. Reaching for another spoonful of cumin is tempting. It is rarely the first answer.
Broth brands, tomato acidity and tortilla thickness all vary, so identify what the soup is missing before adding more of anything.
What you notice
What to do
Thin like plain stock
Simmer uncovered first. If it still needs body, blend ½ small corn tortilla with ½ cup / 120 ml hot soup and return it to the pot.
Too thick or chili-like
Add warm low-sodium broth ¼ cup / 60 ml at a time.
Flat everywhere
Add a little salt, stir well and taste again.
Seasoned but heavy or dull
Add fresh lime juice 1 teaspoon / 5 ml at a time.
Mostly tastes of tomato
Check the salt first. If that is balanced, stir ½ teaspoon pure ancho or guajillo chile powder into a few spoonfuls of hot broth, return it to the pot and simmer for 2–3 minutes.
Needs more smoke
Add a small amount of adobo sauce.
Smoke is right but you want more heat
Add jalapeño or hot sauce instead of more chipotle.
Change one variable at a time, stir thoroughly, then taste again. Lime can brighten a seasoned broth but cannot replace missing salt; likewise, adding more salt will not supply the acidity a heavy chicken tortilla soup may need.
How thick should chicken tortilla soup be, and how do you thicken it?
Chicken tortilla soup does not need to be thick. This version stays broth-forward, with enough tortilla starch to give the liquid light body without making it pasty. If your soup is thinner than that, simmer first; only then add a little blended tortilla if it still needs help.
Tilt a spoonful and the broth still moves freely around the chicken and beans. Newly added tortilla continues hydrating for a few minutes, so give it time before deciding the pot needs more.
Another useful consistency cue is how quickly the broth closes behind a ladle. It should flow back readily; if a trench lingers or the liquid piles around the solids, the chicken tortilla soup is moving closer to chili than broth.
Crispy Tortilla Strips
The recipe card gives the exact frying, baking and air-fryer routes. What matters most is moisture. Very fresh tortillas sputter longer because they have more water to lose; slightly drier tortillas crisp sooner. Small batches also help the frying oil recover quickly instead of turning the process into a long, greasy soak.
Watch the bubbles as well as the clock. They are lively at first and calm as the strips lose moisture. Golden color plus noticeably quieter bubbling is the cue to get them out.
Once the tortilla strips leave the oil, drain them in a loose layer and season while they are still hot. Piling freshly fried strips too deeply traps steam, which can undo some of the crispness you just worked to create.
The fastest shortcut: tortilla chips
Good tortilla chips are fine on a busy night. Put them on the table instead of stirring them into the pot. An open bag also gives you an easy excuse for some fresh guacamole.
Substitutions
Beans: use pinto instead of black beans, or leave them out for a lighter bowl. Prefer beans on the side? These quick refried beans are an easy option.
Corn: leave it out when you do not want the sweetness or extra bulk. Nothing needs to replace it.
Pasilla: ancho gives a sweeter, rounder result; another guajillo makes the chile profile brighter and fruitier.
Chile de árbol: use it only when you deliberately want extra heat. It is much hotter than pasilla, guajillo or ancho and is not an equal-weight replacement.
Regular canned tomatoes: use them. Fire-roasted tomatoes simply bring another roasted note.
Flour tortillas: skip the blended tortilla if corn tortillas are unavailable. Once hydrated, flour tortillas taste different and behave differently.
Gluten-free: this recipe contains no added flour. For strict gluten avoidance, check that the broth, chipotle in adobo, corn tortillas or packaged chips, and toppings are labelled or otherwise confirmed gluten-free.
Cream or cream cheese: a substantial amount turns this into a different kind of soup. For a creamy chicken-and-bean dinner, the slow cooker white chicken chili is a better fit.
The broth adjustment table above handles seasoning and thickness. These problems usually come from the cooking itself.
The soup is much hotter than expected
Dilute the pot with unsalted broth, then rebalance the salt and lime. Avocado and crema can make each spoonful taste milder, but they can’t take heat back out of the pot.
The chicken is chewy
Breast usually gets chewy because it cooked too long. Thighs can stay firm because their connective tissue has not softened enough yet. Thigh meat that still resists shredding needs a little longer at a gentle simmer.
The broth feels gritty
Dried chile skin is the likely culprit. Blend longer, then strain the puree if coarse flecks remain.
The soup tastes bitter
The chile may have burned during toasting, or the puree may have caught on the bottom while reducing. Brief toasting brings aroma; blackened chile can turn the entire pot bitter.
Do not send a scorched dried chile into the blender hoping the broth will hide it. Because blending distributes that burnt flavor through the entire tomato-chile base, discarding one blackened chile is much easier than rescuing a bitter pot later.
Storage, Make-Ahead and Reheating
The soup can be made a day ahead. Refrigerate the broth, chicken, beans and corn together, then keep the tortilla strips and fresh toppings separate until serving.
Tortilla strips can also be prepared a day ahead. Let them cool completely before sealing them in a dry airtight container.
For food safety, USDA guidance recommends shallow containers for rapid cooling and using cooked leftovers within 3–4 days. If you need longer storage, freeze the soup without the tortilla strips or fresh toppings and use it within roughly 2–3 months for best quality.
Tomorrow’s soup will almost certainly be thicker. Tortilla starch continues taking up liquid as the soup rests, so loosen it with a little broth while reheating and bring leftovers back to 165°F / 74°C. Taste the salt and lime again before the bowls go out.
Judge the consistency after the soup is hot, not straight from the refrigerator. Chilled tortilla starch can make leftovers look unusually thick; therefore, reheat first and add broth gradually only after you can see how freely the soup moves.
Toppings and Serving
Put the toppings on the table and let the bowls diverge. Someone will want extra lime, somebody else more heat, and another person may skip the crema entirely. If you trim the topping list, keep the tortilla strips and lime; the rest can flex around whoever is eating.
Serving the toppings separately does more than offer choice. Cool avocado or crema can soften and cool an individual bowl, while lime, jalapeño and crisp tortilla strips adjust brightness, heat and texture without changing the entire pot.
For a brighter green counterpoint, add a spoonful of roasted salsa verde at the table. It brings tomatillo, green chile and lime without changing the whole pot.
The bowl should land in layers: smoky broth, fresh lime, tender chicken and sweet corn, with cool avocado, salty cheese and crisp tortilla around the edges. Add those strips at the last second.
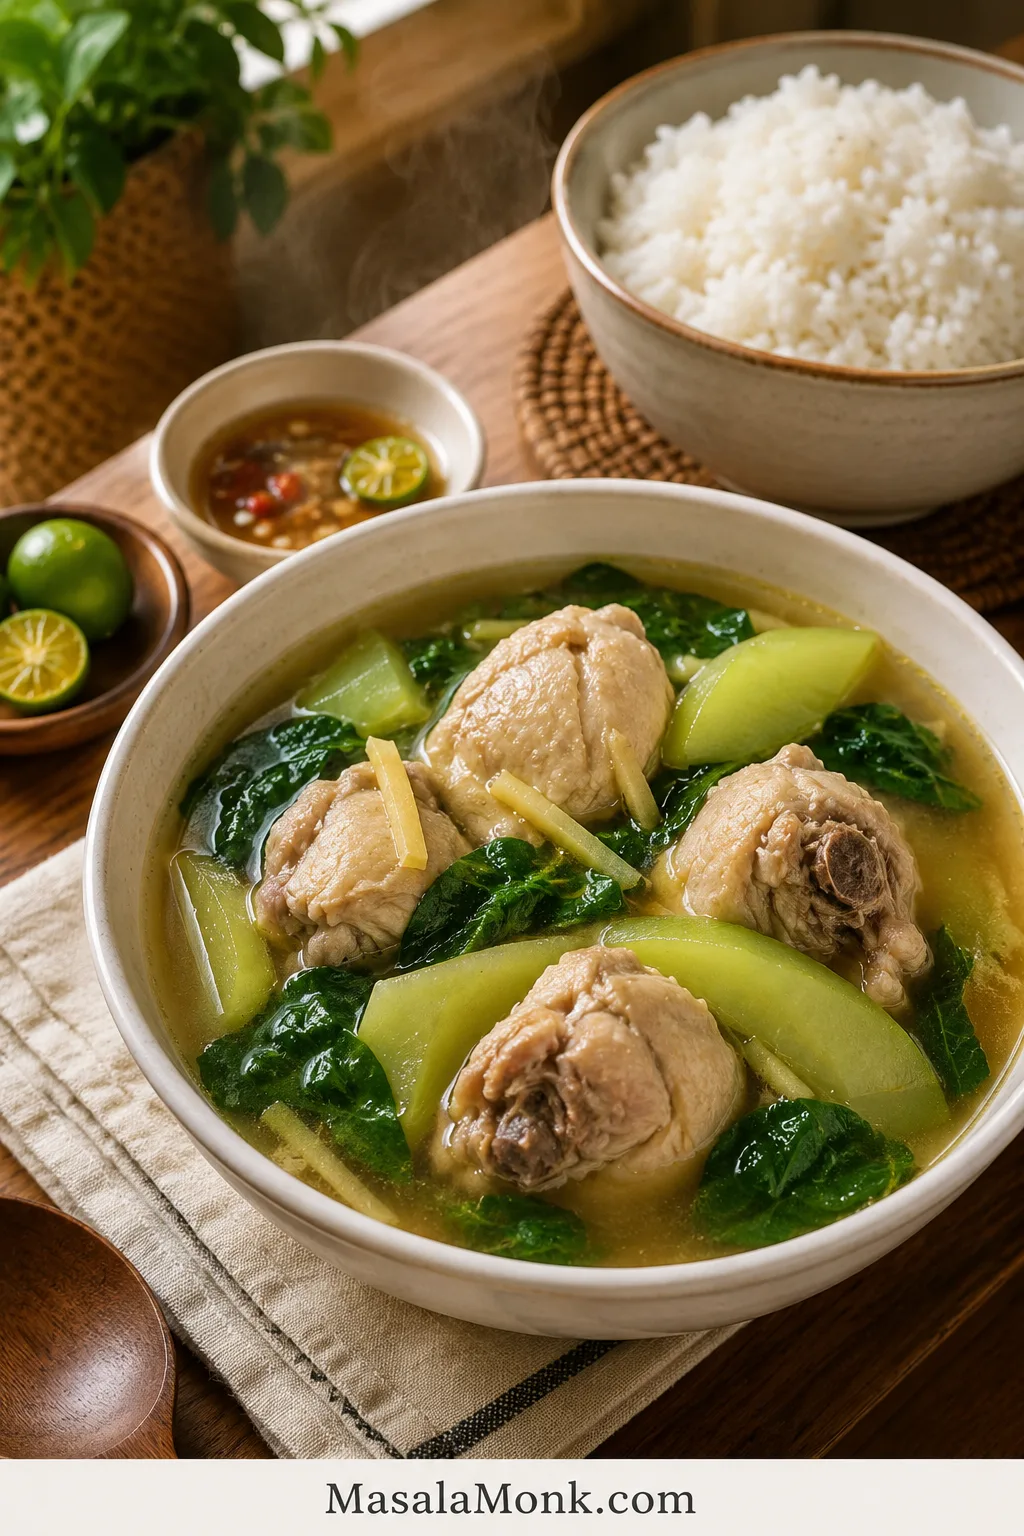
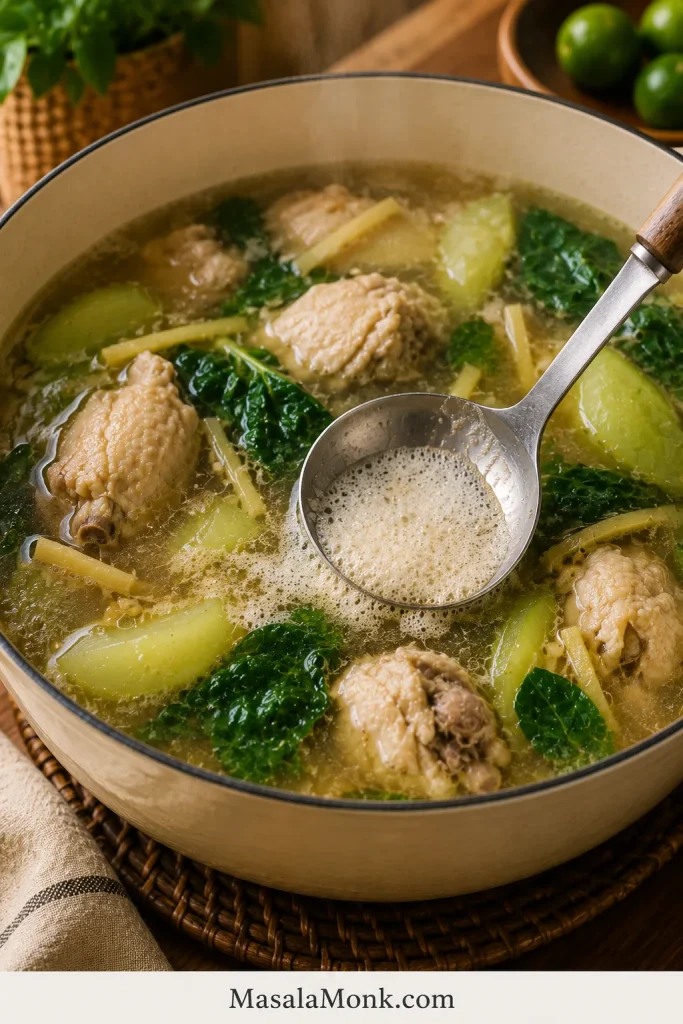
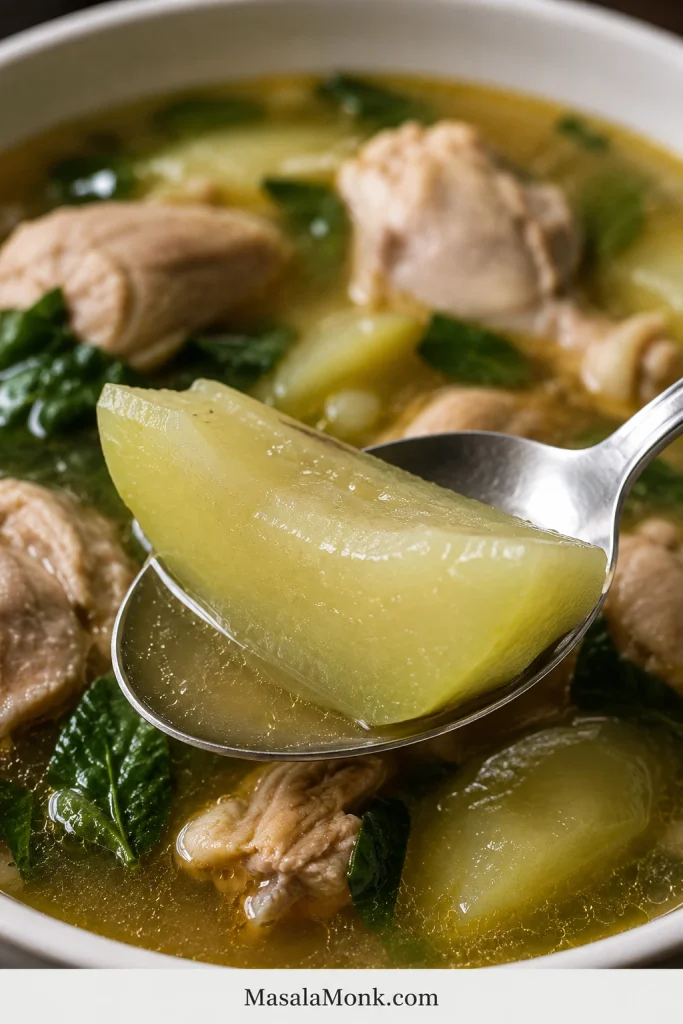
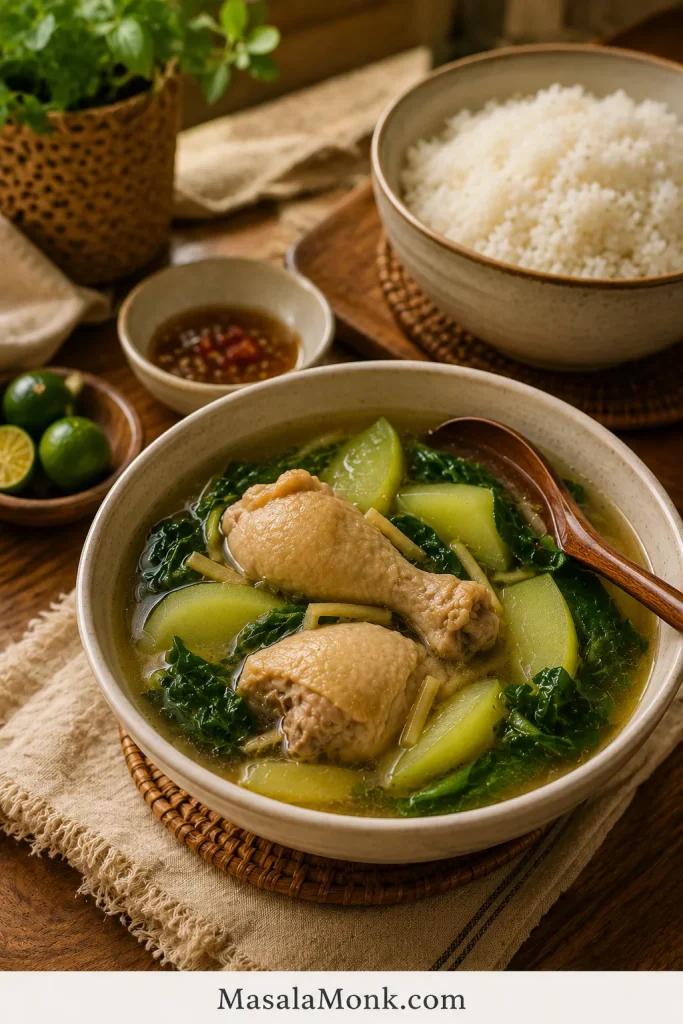
Tinola is the kind of Filipino chicken soup that feels light and restorative, but still filling when poured over rice. In a good pot, the broth is clear, gingery, and savory, the chicken is tender, and the green papaya or sayote softens without falling apart.
It is the kind of soup that feels right when you want something gentle, but not empty — warm broth, tender chicken, fresh greens, and rice that soaks up every spoonful.
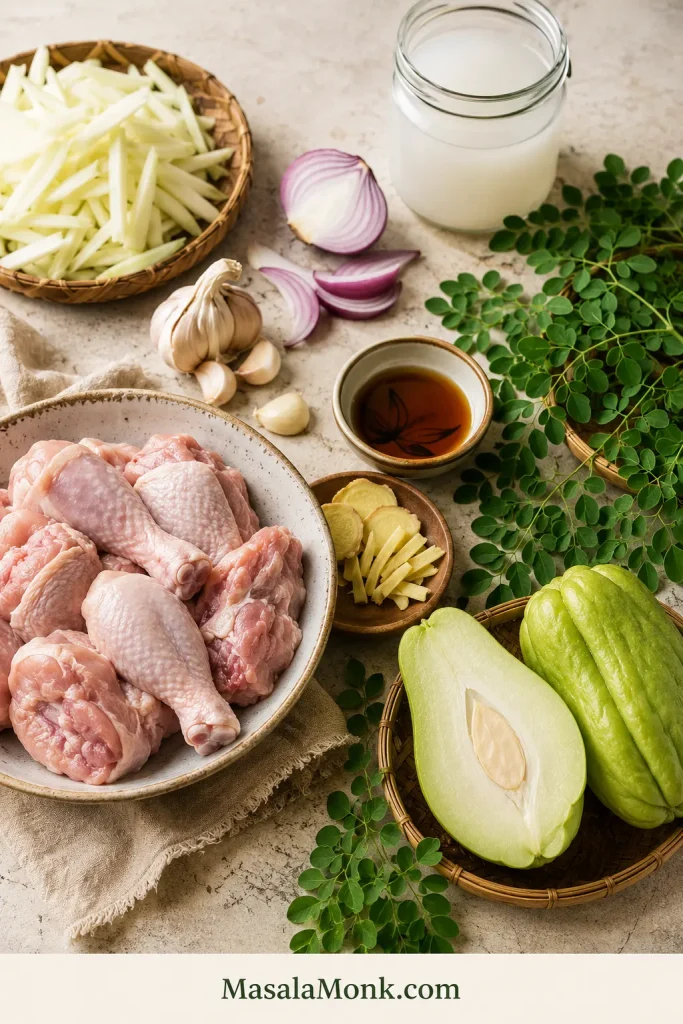
This Tinola recipe, also called Chicken Tinola or Tinolang Manok, is made with bone-in chicken, fresh ginger, garlic, onion, fish sauce, green papaya or sayote, and leafy greens like malunggay, dahon ng sili, spinach, or pechay.
This version keeps the flavor classic, but it also works in real kitchens: sayote if you cannot find green papaya, spinach if malunggay is not available, and clear timing cues so the soup tastes full instead of flat.
Most importantly, it is built around the two things that make or break Tinola: a broth that tastes gingery and full, not watery, and vegetables that turn tender without collapsing.
Tinola is a Filipino broth-based dish. The most common version is Tinolang Manok, which means Chicken Tinola. It is usually made with chicken, ginger, garlic, onion, fish sauce, green papaya or sayote, and leafy greens such as malunggay or dahon ng sili.
In English, Chicken Tinola is best described as a Filipino ginger chicken soup. It is usually eaten as a main dish with rice, not just as a starter soup.
Best chicken: bone-in thighs, drumsticks, wings, or mixed cuts.
Flavor base: fresh ginger, fish sauce, garlic, and onion.
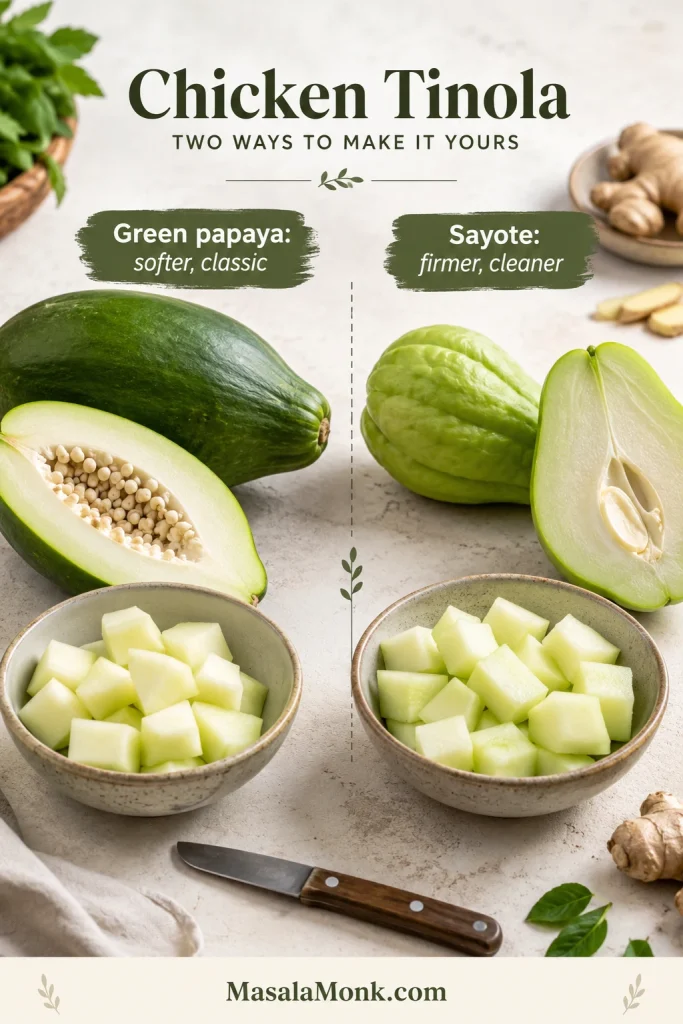
Vegetable choice: green papaya for a softer classic feel, or sayote for a firmer bite.
Best greens: malunggay or dahon ng sili if available; spinach, pechay, or bok choy if not.
Best cooking cue: simmer gently until the chicken is tender and reaches 165°F / 74°C.
Make It Now
Have your chicken, ginger, and vegetables ready? Use this quick path, then follow the recipe card for exact amounts.
Sauté ginger, garlic, and onion until fragrant.
Add chicken and cook until the surface loses its raw color.
Add fish sauce before the liquid so the chicken is seasoned early.
Simmer gently until the chicken is tender.
Add your chosen vegetable near the end, then finish with greens.
Classic but flexible: classic Tinola often means chicken, ginger, patis, green papaya, and malunggay or dahon ng sili. But Tinola is also a home dish, so many cooks use sayote when papaya is hard to find, spinach when malunggay is unavailable, and chicken broth or rice wash when the chicken needs a little help. The point is not to make the pot rigid; it is to keep the soup gingery, savory, clear, and good with rice.
A good pot of Tinola should feel simple, but not thin. The broth should taste like the chicken, ginger, and patis had time to become one thing, not like separate ingredients floating in hot water. That is why this recipe builds the flavor early and waits before adding the vegetables.
Save this Tinola rule: ginger early, patis before broth, chicken until tender, papaya or sayote late, greens last.
Tinola Recipe Card
Filipino Chicken Tinola / Tinolang Manok
This Chicken Tinola recipe keeps the two common problems away: watery broth and vegetables that fall apart before the chicken is tender. The chicken is seasoned early, the simmer stays gentle, and the vegetables go in when the meat is nearly ready.
Prep Time
15 minutes
Cook Time
45 minutes
Total Time
1 hour
Servings
4 to 6
Method
Stovetop
Cuisine
Filipino
Main Equipment
5 to 6 quart / 4.7 to 5.7 L pot or Dutch oven
Ingredients
2 to 2 1/2 lb / 900 g to 1.1 kg bone-in chicken pieces, such as thighs, drumsticks, wings, or mixed cuts
1 1/2 to 2 tablespoons neutral oil / 22 to 30 ml
1 medium onion, sliced
4 garlic cloves, minced or crushed
45 to 60 g / 1 1/2 to 2 oz fresh ginger, sliced, julienned, or lightly smashed
2 to 3 tablespoons fish sauce / patis / 30 to 45 ml, plus more to taste
6 cups water, low-sodium chicken broth, or rice wash / 1.4 L
350 to 500 g / 12 to 18 oz green papaya or sayote/chayote, peeled and cut into wedges. Remove seeds if using papaya.
2 packed cups / 60 to 90 g malunggay, dahon ng sili, spinach, pechay, or bok choy
1/2 teaspoon black pepper, plus more to taste
Salt, only if needed after tasting
Optional Ingredients
1 chicken cube, only if using water and you want a stronger shortcut broth
Calamansi or lime, for serving
Fresh chili, for heat
Extra fish sauce, for serving
1 stalk lemongrass, bruised, for a fragrant variation
Instructions
Prep the chicken and vegetables. Cut the chicken into similar-sized pieces if needed. Peel your chosen vegetable. If using green papaya, remove the seeds. Cut the pieces into 1 1/2 to 2 inch wedges.
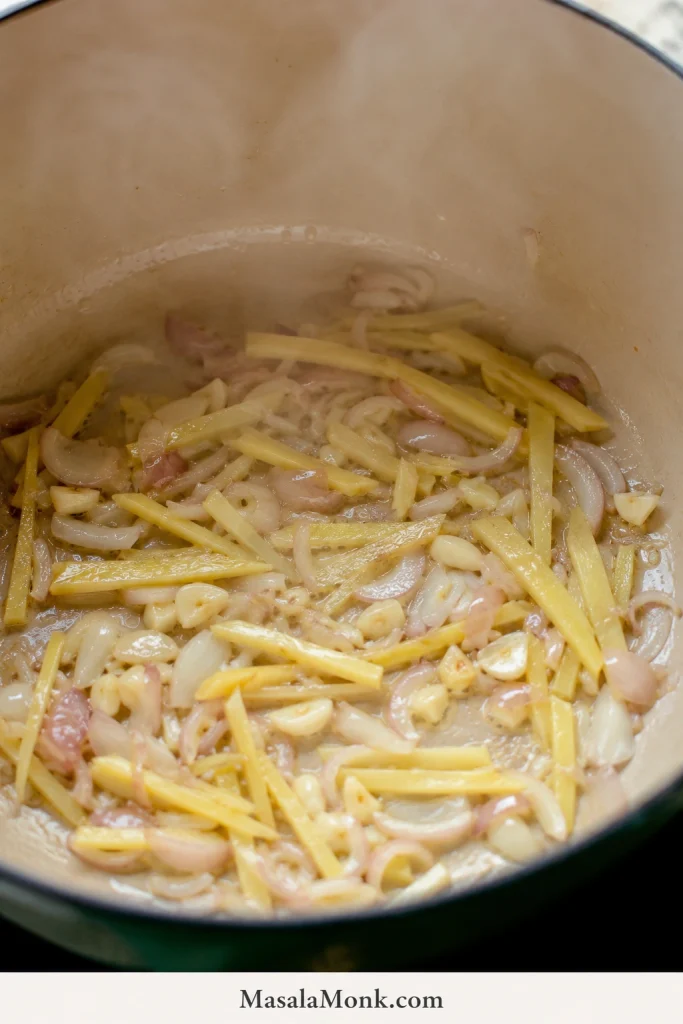
Sauté the aromatics. Heat oil in a large pot over medium heat. Add onion, garlic, and ginger. Cook for 2 to 3 minutes, stirring often, until fragrant and softened. The pot should smell warm and clearly gingery.
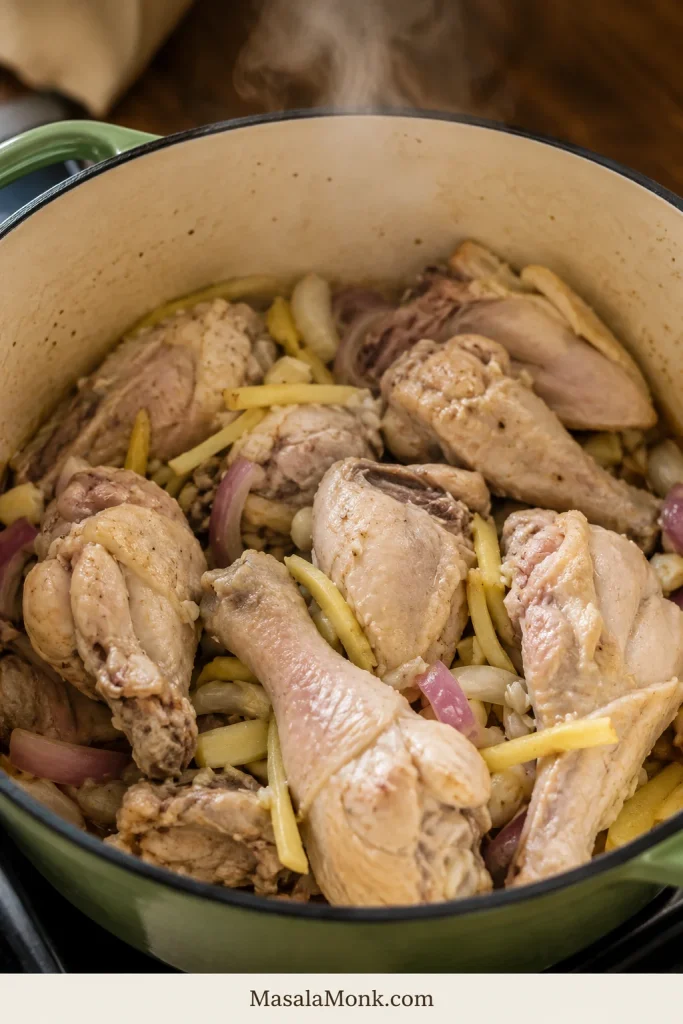
Add the chicken. Cook for 5 to 7 minutes, turning occasionally, until the chicken loses its raw color and begins to lightly brown on the surface.
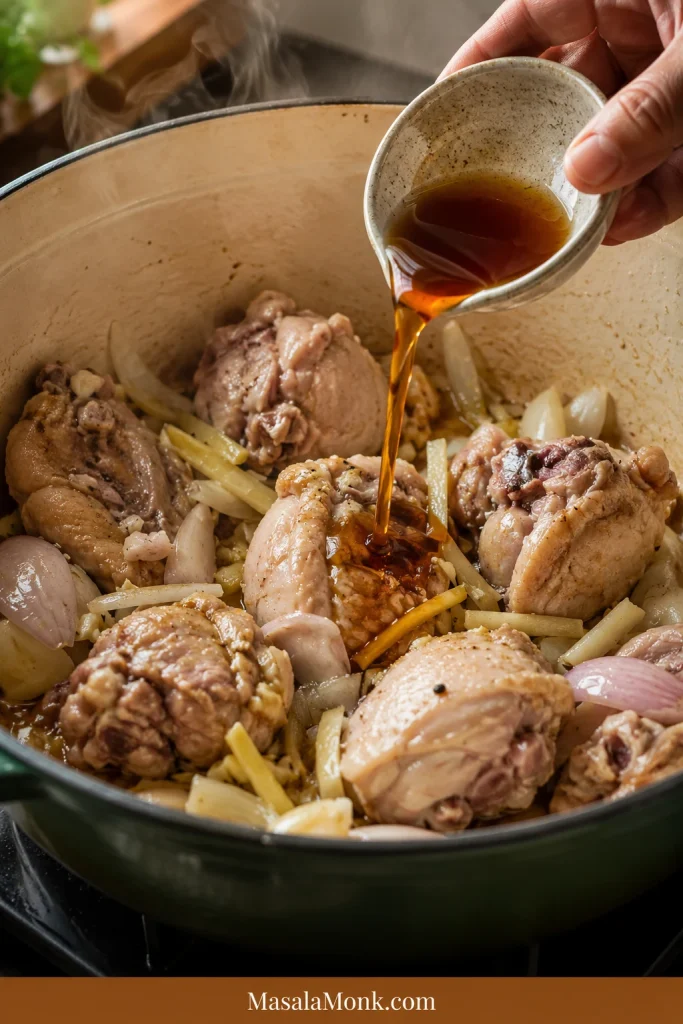
Season early. Add 2 tablespoons fish sauce and stir well. Cook for 1 to 2 minutes so the fish sauce coats the chicken and aromatics.
Add liquid and skim. Pour in water, broth, or rice wash. Bring to a boil, then skim off foam or scum from the surface.
Simmer gently. Lower the heat, cover partially, and simmer for 25 to 35 minutes, or until the chicken is tender and reaches 165°F / 74°C internally.
Add the vegetables. Simmer for 5 to 12 minutes, depending on the size and firmness of the pieces, until fork-tender but not mushy.
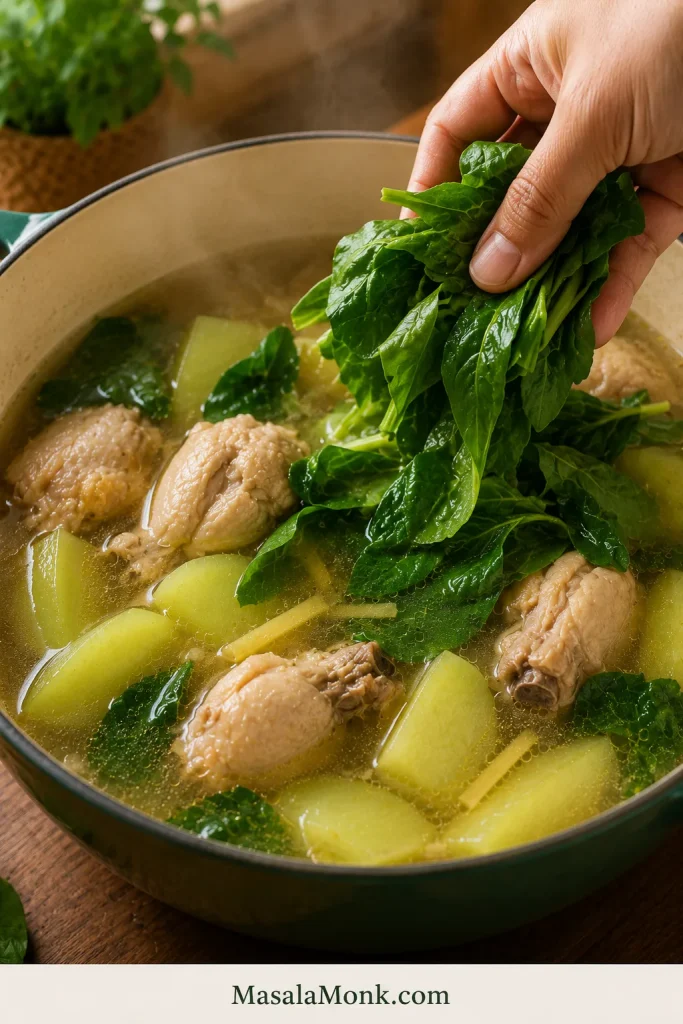
Finish with greens. Add malunggay, dahon ng sili, spinach, pechay, or bok choy. Cook for 1 to 2 minutes, or turn off the heat and cover until the greens wilt.
Taste and serve. Adjust with more fish sauce, salt, black pepper, calamansi, or chili. Serve hot with steamed rice.
Recipe Notes
Bone-in thighs and drumsticks are the easiest choice if you want tender chicken and a fuller broth.
The pot should smell clearly of ginger before the liquid goes in.
Green papaya gives a softer, slightly sweet, more classic feel. Sayote stays firmer and fresher.
Delicate greens need only enough heat to wilt. Fold them in at the end so they stay bright.
A chicken cube can rescue a weak pot, especially if you are using plain water or lean chicken. Start with less fish sauce if you add one, then adjust at the end.
A good bowl of Tinola tastes light, gingery, savory, and balanced. The soup is not heavy, but it has enough seasoning and chicken flavor to make you want to spoon it over rice.
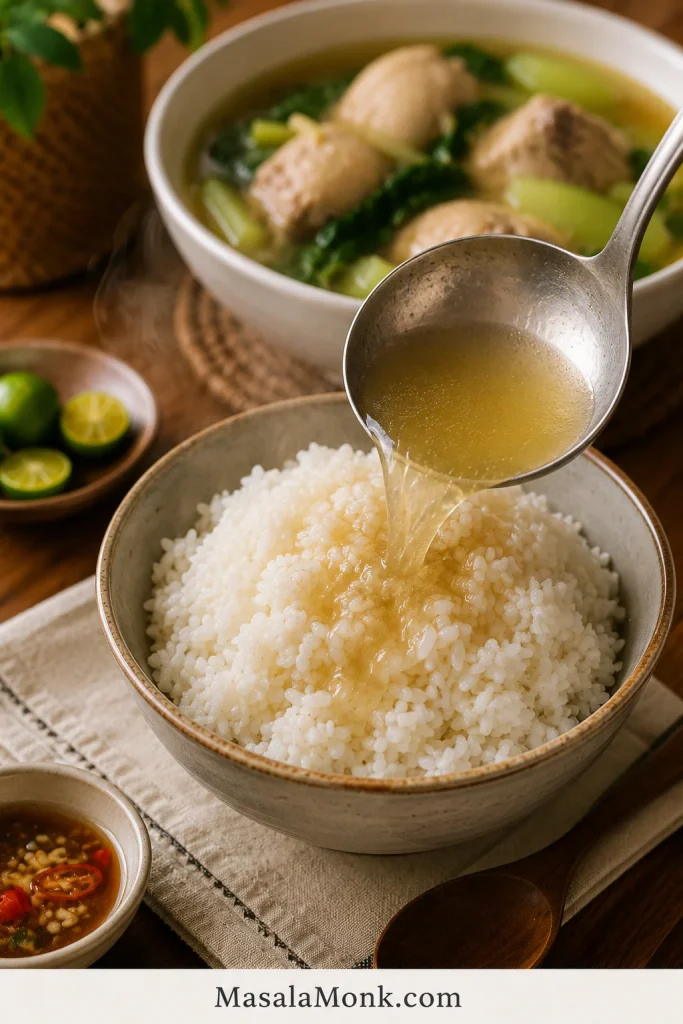
The easiest test is the rice: spoon a little broth over hot rice. If it tastes warm, gingery, and savory without needing rescue, the pot is ready.
Ginger tastes noticeable, warm, and fresh.
Fish sauce gives depth without making the soup taste fishy.
Chicken turns tender, especially near the bone.
Green papaya softens more; sayote keeps a slightly firmer bite.
The greens taste fresh, not dull or overcooked.
Why This Tinola Recipe Works
This recipe is built to solve two common Tinola problems: broth that tastes watery and vegetables that turn mushy. The fix is not complicated. Start the flavor before the liquid goes in, simmer the chicken gently, then add the pieces only when the meat is nearly tender.
The flavor starts before the broth. Ginger, garlic, and onion cook in oil first so the soup has a warm aromatic base.
Fish sauce seasons the chicken early. Salt can season Tinola, but patis gives the broth its rounded, savory depth.
The simmer stays gentle. A steady simmer helps the chicken turn tender without making the liquid rough or cloudy.
The vegetables go in late. Do not add them just because the broth is boiling. Add them when the chicken is already nearly tender.
The greens stay fresh. Finish with them at the end so the soup keeps a bright green finish.
The simple idea: build flavor before the broth, wait for the chicken to turn tender, then add the vegetables and greens in stages. That is the difference between flat Tinola and a bowl you want to spoon over rice.
The rule below is the whole Tinola method in one glance: build ginger and patis early, give the chicken time, then protect the vegetables and greens at the end.
Follow this Tinola order to build flavor and protect texture: ginger early, patis before broth, chicken until tender, vegetables late, and greens last.
Ingredients Explained
Think of the ingredients in layers: ginger for warmth, chicken for body, fish sauce for depth, papaya or sayote for texture, and greens for freshness. Once those layers make sense, the recipe becomes much easier to adjust without losing what makes Tinola taste like Tinola.
These Tinola ingredients each have a job: chicken gives body, ginger brings warmth, patis adds savory depth, and papaya or sayote gives the soup its gentle bite.
Chicken
Bone-in chicken gives Tinola the kind of body that plain water cannot create on its own. Thighs, drumsticks, wings, or a whole chicken cut into serving pieces all work well.
Boneless thighs can work if you want a faster version, but the broth will be lighter. Chicken breast is lean, but it can dry out if boiled hard or cooked too long. Use a gentle simmer and check it earlier if breast meat is what you have.
Ginger
Ginger is the backbone of Tinola. A small token slice is not enough. Use about 45 to 60 g / 1 1/2 to 2 oz fresh ginger for a full pot. Slice it, julienne it, or lightly smash it so it releases flavor into the oil and broth.
When the ginger hits the oil, the pot should smell sharp, warm, and awake. A weak aroma usually means the final broth will taste weak too. If the ginger feels shy, the Tinola will too.
Garlic and Onion
Garlic and onion round out the ginger. Cook them just until fragrant and softened before the chicken goes in; they do not need to brown deeply.
Fish Sauce / Patis
Fish sauce is where the broth starts getting its backbone. Let it hit the hot pot before the water goes in, and it seasons the chicken instead of just floating salty on top later.
Give it a minute in the hot pot so the sharp edge cooks off and the soup starts with depth instead of last-minute saltiness.
Water, Chicken Broth, or Rice Wash
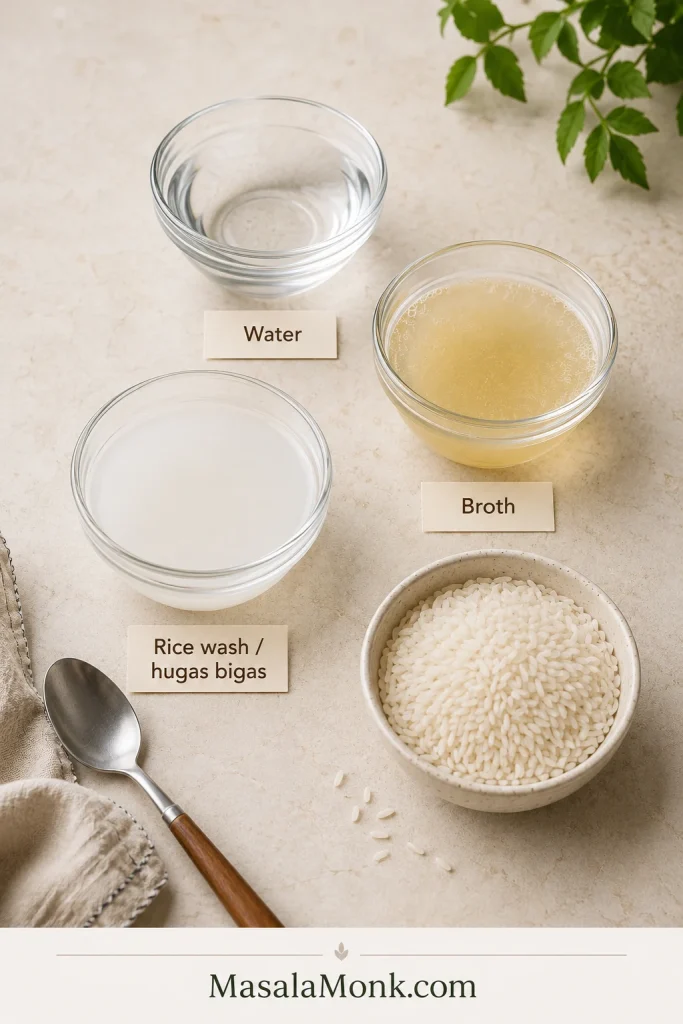
Water works well if you use bone-in chicken, enough ginger, and proper seasoning. Low-sodium chicken broth gives a stronger shortcut flavor. Rice wash, sometimes called hugas bigas, gives the soup a little more body and a softer feel.
If using rice wash, use the second rinse rather than the first. The second rinse is usually cleaner while still giving the soup a little body. Use rice wash when you want a softer, slightly fuller broth; use water or low-sodium broth when you want a cleaner, lighter-tasting pot.
A chicken cube can rescue a weak pot, especially if you are using plain water or lean chicken. Use it if you need it, but let ginger, chicken, and fish sauce do most of the work.
Rice wash, or hugas bigas, gives Tinola a softer body; meanwhile, plain water keeps it light, and broth adds shortcut depth.
Green Papaya or Sayote
Green papaya and sayote are both common in Tinola. Papaya becomes softer and slightly sweet, while sayote, also called chayote, stays firmer with a milder, fresher flavor.
Use the one your market gives you. Tinola is forgiving as long as the broth is gingery and the vegetable goes in at the right time.
Leafy Greens
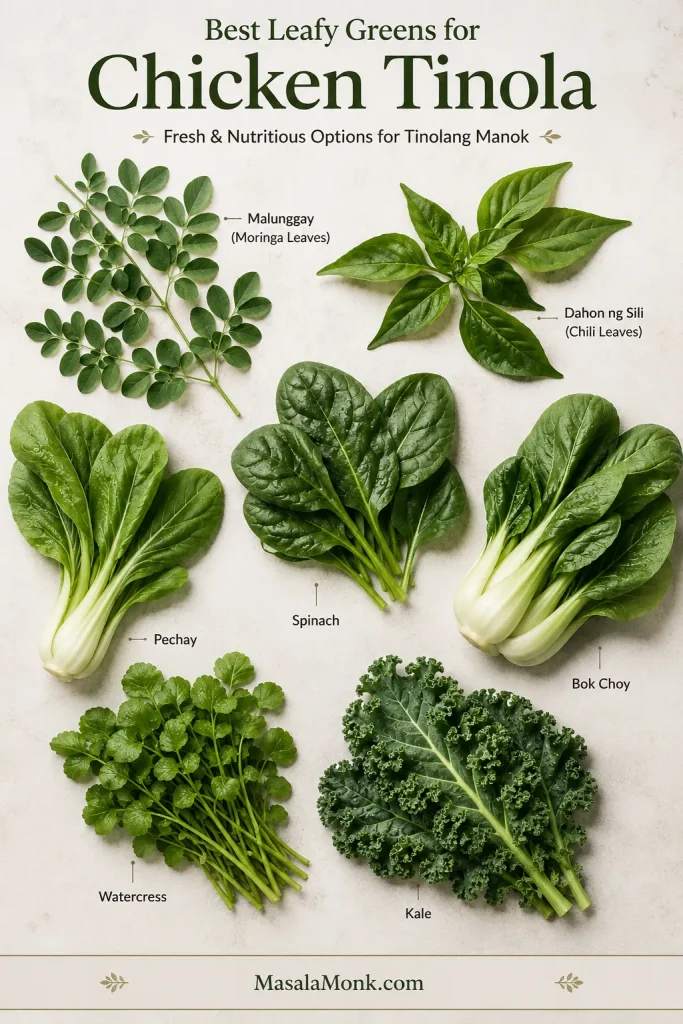
Malunggay and dahon ng sili are classic Tinola greens. Spinach, pechay, and bok choy are practical substitutes. The exact leaf matters less than the timing.
Add something green and fresh at the end, then stop before the leaves lose their brightness.
Shopping Tip
Filipino markets may have the classic leaves and green papaya. At a regular supermarket, sayote/chayote and spinach can still get you a good, comforting pot.
Best Chicken Cuts for Tinola
The chicken cut matters because Tinola is not only about the meat — it is also about what the meat gives back to the pot.
Bone-in thighs, drumsticks, wings, or mixed cuts are the most forgiving choices for this soup because they can simmer without drying out.
Chicken Cut
Best For
Notes
Bone-in thighs
Best flavor and tenderness
The easiest all-round choice.
Drumsticks
Budget-friendly family meals
Easy to serve and good for broth.
Wings
Extra collagen and body
Great mixed with thighs or drumsticks.
Whole chicken, cut up
Traditional family-style pot
Gives different textures in one soup.
Boneless thighs
Faster weeknight version
Less broth depth, but still flavorful.
Chicken breast
Lean version
Can dry out; simmer gently and avoid overcooking.
Chicken should reach 165°F / 74°C internally. FoodSafety.gov lists 165°F / 74°C as the safe minimum internal temperature for chicken, turkey, and other poultry. See the safe minimum internal temperature chart.
Best all-round choice: use bone-in thighs and drumsticks. They give the soup enough flavor, cook evenly, and stay tender even if the pot simmers a little longer.
If you bought a larger pack of thighs and want a dry, crispy dinner another night, this air fryer chicken thighs recipe uses the same reliable cut in a completely different way.
Green Papaya vs Sayote
For many cooks, the first big choice is green papaya or sayote.
Green papaya gives the bowl a softer, more classic feel. Sayote keeps a firmer, cleaner bite. Neither one ruins the dish, so choose based on what you can find and what texture you like.
Green papaya makes Tinola softer and more classic, while sayote stays firmer, cleaner, and easier to find in many markets.
Option
Texture
Flavor
Best For
Green papaya
Soft-tender and absorbs broth
Mild, slightly sweet
A more classic Tinola feel
Sayote / chayote
Firmer and cleaner
Mild, fresh, neutral
Easy supermarket version
Semi-ripe papaya
Softer and sweeter
Noticeably sweet
Use only if you intentionally want a sweeter soup
Upo
Soft and watery
Delicate
Available substitute
Kalabasa
Creamier and sweeter
Richer, less classic
A variation, not the default
Labanos / daikon
Firm and slightly peppery
Sharper
Works in a pinch
If you want a clearer, more ginger-forward bowl, sayote is a very good choice. For the softer texture many people associate with Tinola, use green papaya.
If you buy a whole green papaya and have extra left after Tinola, you can use it in a fresh salad like this raw papaya salad.
Cut whichever one you use into wedges large enough to hold their shape. Add the pieces only after the chicken is nearly tender. If they go in too early, they can turn mushy before the chicken is done.
Tinola Greens: Malunggay, Dahon ng Sili, Spinach, Pechay, or Bok Choy
Traditional Tinola often uses malunggay or dahon ng sili. Outside the Philippines, those can be harder to find. Spinach, pechay, bok choy, or watercress will not make the soup wrong — they simply make it more practical for your kitchen.
Malunggay and dahon ng sili are classic Tinola greens; however, spinach, pechay, bok choy, watercress, or kale can still work when timed well.
Green
Traditional?
Flavor
How to Add
Malunggay / moringa
Yes
Earthy, green, slightly bitter
Last 1 to 2 minutes
Dahon ng sili / chili leaves
Yes
Mildly peppery
Last 1 to 2 minutes
Spinach
Substitute
Soft and mild
Off heat or last 1 minute
Pechay / bok choy
Substitute
Mild with more body
Stems first, leaves last
Kale
Substitute
Stronger and chewier
Simmer 2 to 4 minutes
Watercress
Substitute
Peppery and fresh
Last minute
Do not add delicate greens too early. The leaves should still look alive, not dull. If you are using bok choy or pechay, add the thicker stems first and the leaves later. With spinach, turn off the heat and let the leaves wilt gently.
Equipment and Pot Size
Tinola is a simple one-pot soup, but the pot still matters. Use a pot wide enough that the chicken can sit in the aromatics before the liquid goes in. If the pot is too crowded, the chicken steams instead of picking up flavor from the ginger, garlic, onion, and fish sauce.
5 to 6 quart / 4.7 to 5.7 L pot or Dutch oven: roomy enough for bone-in chicken, broth, papaya or sayote, and greens without boiling over.
Wide spoon or ladle: useful for skimming foam, scum, and extra oil from the surface.
Tongs: helpful for turning chicken pieces while they cook with the aromatics.
Instant-read thermometer: the most reliable way to check that chicken reaches 165°F / 74°C.
A smaller pot can still work, but keep the simmer gentle and watch the liquid level once the vegetables go in.
Cooking Time by Stage
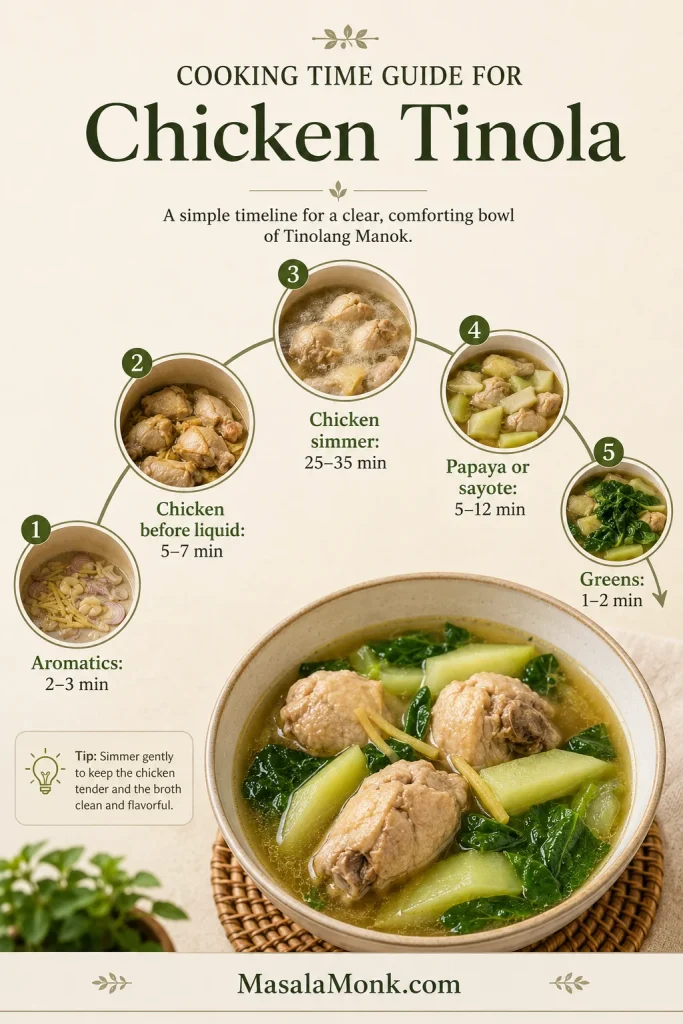
Tinola is simple, but timing decides whether the bowl tastes clean and tender or flat and overcooked.
Good Tinola is mostly timing: aromatics first, chicken long enough to tenderize, vegetables near the end, and greens for the final minute.
Stage
Approximate Time
What to look for
Sauté ginger, garlic, and onion
2 to 3 minutes
Aromatics smell warm, sharp, and fragrant.
Cook chicken before liquid
5 to 7 minutes
Chicken loses raw color and lightly browns on the surface.
Fish sauce with chicken
1 to 2 minutes
Fish sauce coats the chicken and smells savory.
Chicken simmer
25 to 35 minutes
Chicken is tender and reaches 165°F / 74°C.
Papaya or sayote
5 to 12 minutes
Pieces are fork-tender but still hold shape.
Leafy greens
1 to 2 minutes
Leaves are just wilted and still fresh-tasting.
Timing note: in most home pots, bone-in thighs and drumsticks begin turning tender around 30 minutes after the broth starts simmering. Sayote often softens faster than thick green papaya wedges, so start checking the vegetables at 5 minutes. Spinach wilts best off heat, while pechay and bok choy work better when the stems go in before the leaves.
Native chicken or very large bone-in pieces may need more time before the vegetables go in. Wait until the meat is already turning tender, or the pieces may overcook before the chicken is ready.
Once the aromatics are fragrant, the rest of the soup is mostly about patience: simmer the chicken gently, then add the vegetables when the meat is nearly tender.
1. Prep the Chicken and Vegetables
Pat the chicken dry if it is very wet. If the pieces are very uneven, cut larger pieces down so they cook more evenly.
Peel the green papaya or sayote. If using green papaya, remove the seeds. Cut the vegetable into 1 1/2 to 2 inch wedges so the pieces can simmer without falling apart.
2. Sauté Ginger, Garlic, and Onion
Heat oil in a large pot over medium heat. Add the onion, garlic, and ginger. Cook for 2 to 3 minutes, stirring often.
The aromatics should smell warm, sharp, and fragrant. This is where the soup starts becoming Tinola, so do not rush past the ginger.
Start with ginger, garlic, and onion before adding water; as a result, the broth begins with aroma instead of tasting flat later.
3. Add the Chicken and Lightly Brown It
Add the chicken pieces to the pot. Cook for 5 to 7 minutes, turning occasionally. The chicken does not need a deep brown crust, but the surface needs to lose its raw color and pick up some flavor from the aromatics.
This step gives the soup more depth than simply boiling raw chicken in water.
Cooking chicken with ginger and aromatics before the liquid goes in helps the meat season early and gives Tinola a fuller broth.
4. Add Fish Sauce Early
Add 2 tablespoons fish sauce and stir well. Let it cook with the chicken for 1 to 2 minutes before adding the liquid.
This gives the meat and aromatics a savory base. You can always add more fish sauce at the end, but adding some early helps the flavor cook into the soup instead of sitting only on the surface.
Add patis before the broth, not after everything is diluted; this lets the chicken and aromatics absorb savory depth from the start.
5. Add Liquid, Boil, and Skim
Pour in 6 cups water, chicken broth, or rice wash. Bring the pot to a boil. As foam rises, skim it off with a wide spoon or ladle.
Skimming at this stage keeps the liquid clearer. It is much easier to remove foam before the vegetables and greens go in.
Skim the foam after the first boil, then lower the heat; this keeps Tinola broth cleaner without overworking the chicken.
6. Simmer Until the Chicken Is Tender
Lower the heat to a gentle simmer. Cover the pot partially and cook for 25 to 35 minutes, or until the chicken is tender and reaches 165°F / 74°C internally.
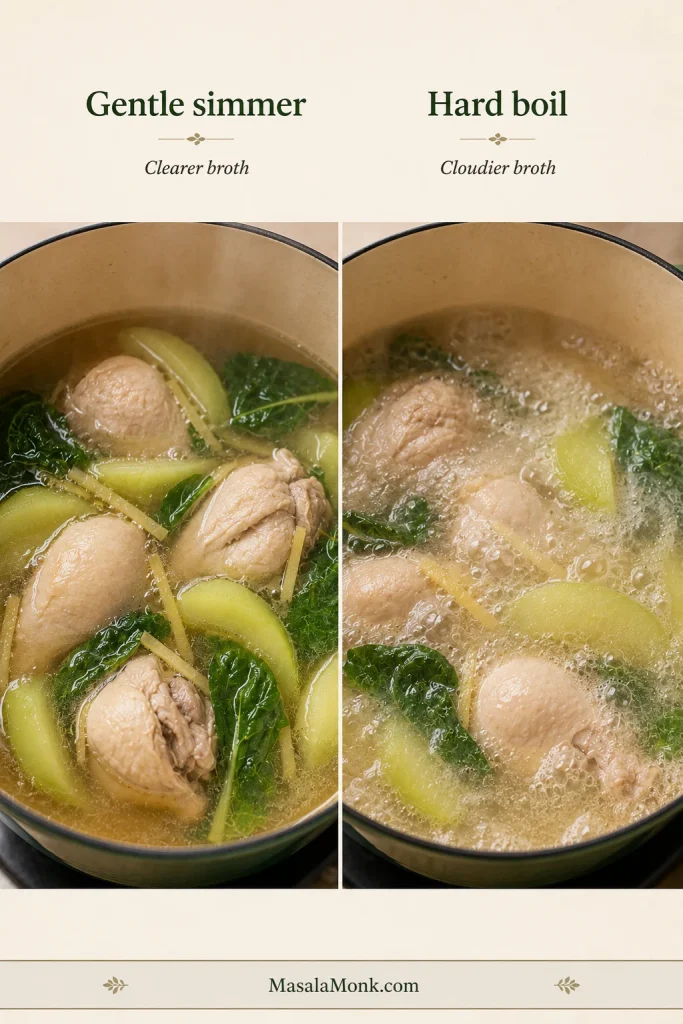
The chicken should feel tender near the bone. Avoid a hard boil. A rough boil can make the broth cloudy and the chicken tougher.
7. Add Green Papaya or Sayote
Add the green papaya or sayote once the chicken is nearly tender. Do not add them just because the broth is boiling; wait until the meat has already started giving flavor back to the pot. Simmer for 5 to 12 minutes, depending on how large and firm the pieces are.
Look for tender edges with enough firmness in the center that the wedges do not collapse in the bowl. If they start breaking apart, they have gone too far.
Add papaya or sayote near the end so the edges soften while the pieces still hold their shape in the bowl.
8. Add the Greens at the End
Add malunggay, dahon ng sili, spinach, pechay, or bok choy near the end. Delicate leaves need only 1 to 2 minutes. Spinach can often be added off heat and covered until wilted.
Pull them off the heat while they are still bright and just wilted. If they look dull and tired, they have cooked too long.
Greens go in last because they only need enough heat to wilt; that way, Chicken Tinola stays fresh, bright, and not overcooked.
9. Taste and Serve
Taste the soup before serving. Adjust with more fish sauce, salt, black pepper, calamansi, or chili.
The test is the rice: spoon a little broth over hot rice. If it tastes warm, gingery, and savory without needing rescue, the pot is ready. The broth can taste a touch stronger from the spoon than it does in the bowl, because rice softens everything.
Timing cue: add the vegetables after the chicken is mostly tender, not at the beginning. That one choice keeps the pieces from collapsing before the chicken is done.
Fix Bland Tinola Broth
Bland Tinola is frustrating because it can look right before it tastes right — clear broth, chicken, greens, rice — but the spoonful feels empty.
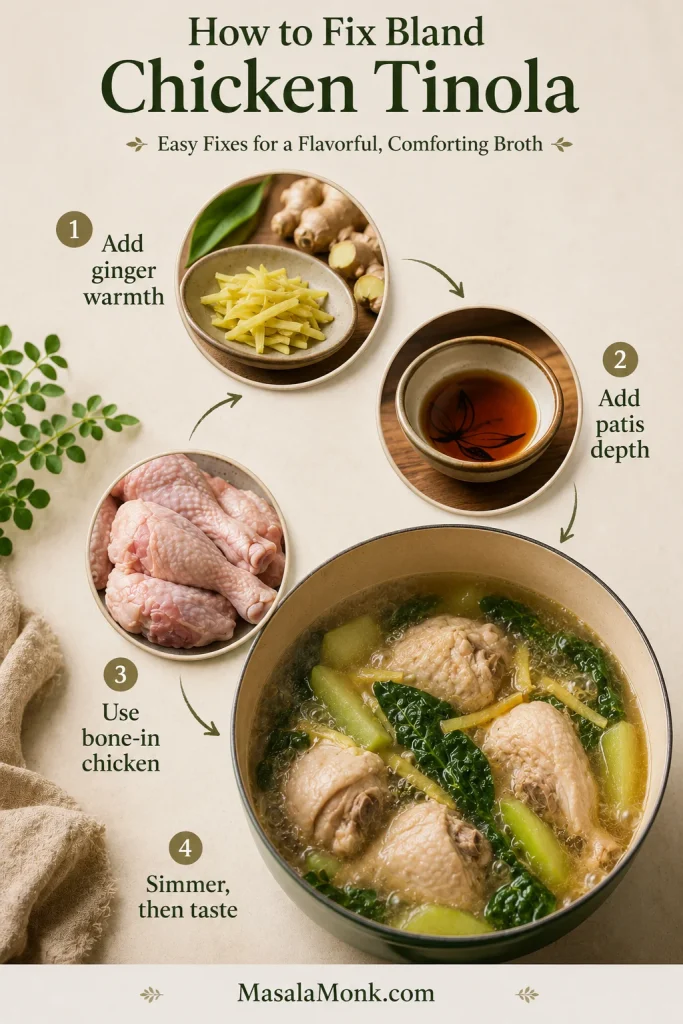
It usually means one of four things: not enough ginger, not enough fish sauce, weak boneless chicken, or too much liquid without final seasoning.
The fix is usually not more salt alone. Tinola needs ginger warmth, chicken flavor, fish sauce depth, and a final taste before serving.
When Chicken Tinola tastes thin, fix the base first: strengthen the ginger, deepen with patis, simmer the chicken properly, then taste again.
Use bone-in chicken. It gives the broth more body than boneless breast.
Use enough fresh ginger. Tinola should smell warm and gingery before the liquid even goes in.
Sauté the aromatics first. Do not just boil everything together from the start.
Add fish sauce before simmering. Let it coat the chicken and aromatics.
Simmer gently. This keeps the chicken tender and the soup balanced.
Skim foam and extra oil. This improves both flavor and appearance.
Taste at the end. The soup may need more patis, salt, pepper, calamansi, or chili.
If your Tinola has ever tasted like hot water with chicken in it, start with ginger and patis before reaching for more salt. A few extra minutes of gentle simmering can also help the chicken give more back to the pot.
Fast fix for bland Tinola: simmer a few fresh ginger slices in the broth for 5 minutes, add a small splash of fish sauce, then taste again. If the soup still feels thin, let it simmer uncovered for a few minutes to concentrate slightly.
Keep Tinola Broth Clear
Clear Tinola broth comes from gentle cooking and good timing. Bring the liquid to a boil first, then skim off the foam or scum that rises to the surface. After that, lower the heat to a gentle simmer.
A gentle simmer keeps Tinola calmer and clearer; by contrast, a hard boil can make the broth cloudy and the chicken tougher.
Boil first, then skim. Remove foam while the surface is still easy to see.
Lower the heat after skimming. A gentle simmer keeps the broth calmer.
Use a wide spoon or ladle. It is easier to lift off scum and extra oil without stirring everything back in.
Finish with greens at the end. Delicate leaves stay brighter when they are not boiled for long.
Avoid hard boiling the chicken. Rough heat can make the liquid cloudy and the meat tougher.
Stop stirring aggressively once foam rises. Let it collect on the surface so you can skim it cleanly.
Pull delicate leaves before they turn dull. Fresh-looking greens make the whole bowl feel cleaner.
A home pot of Tinola does not need restaurant-perfect clarity. Skim what you can, keep the simmer gentle, and focus on a broth that tastes balanced and aromatic.
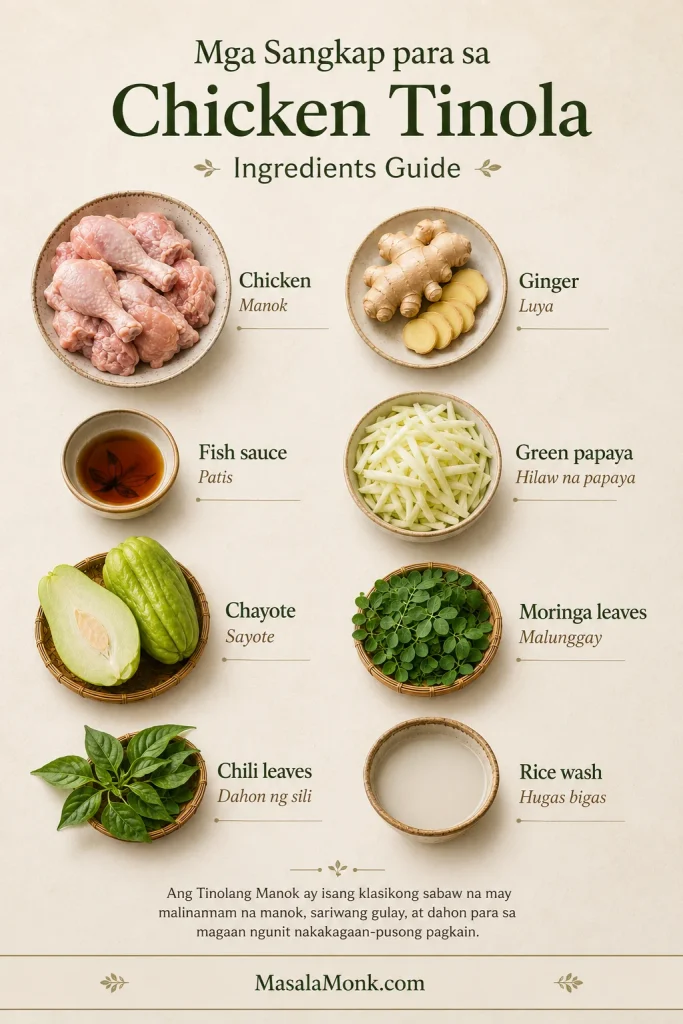
Tinola Ingredients in Tagalog and English
Tinola recipes often move between English, Tagalog, and market names, especially when you are shopping outside the Philippines. If you are shopping at a Filipino market, reading a family recipe, or watching a Tagalog cooking video, these are the ingredient names you are most likely to see.
This Tagalog-English Tinola guide makes shopping and recipe reading easier, especially for manok, luya, patis, sayote, malunggay, and hugas bigas.
English
Filipino / Common Name
Chicken
Manok
Ginger
Luya
Garlic
Bawang
Onion
Sibuyas
Fish sauce
Patis
Green papaya
Hilaw na papaya
Chayote
Sayote
Moringa leaves
Malunggay
Chili leaves
Dahon ng sili
Rice wash
Hugas bigas
Black pepper
Paminta
A short Tagalog-style procedure would be:
Paano lutuin: igisa ang luya, bawang, sibuyas at manok; lagyan ng patis; pakuluan hanggang lumambot; idagdag ang papaya o sayote; tapusin sa malunggay o dahon ng sili.
In English: sauté ginger, garlic, onion, and chicken; season with fish sauce; simmer until tender; add papaya or sayote; finish with malunggay or chili leaves.
Serving Suggestions
Tinola is usually served as a main dish with steamed rice. The broth is often spooned over rice, so it needs enough flavor to carry the meal.
Steamed white rice
Extra fish sauce / patis on the side
Calamansi or lime
Fresh chili
Black pepper
A small dipping sauce of patis and calamansi
The broth does not need to taste salty by itself; it needs to wake up when it hits hot rice. If the soup tastes slightly strong alone but perfect over rice, you are in the right zone.
The rice test is simple: once the broth touches hot rice, it should taste rounded, savory, and alive — not weak or watery.
For another Filipino chicken classic, make Chicken Adobo on a different night. Adobo is darker, tangier, and braised, while Tinola is lighter, gingery, and broth-based.
For a Filipino vegetable dish that also belongs with rice, try Pinakbet Tagalog, a savory mix of tender vegetables and bagoong.
Tinola is especially good when you want something warm, light, and restorative. It is the kind of soup that feels gentle but still satisfying.
Storage, Freezing, and Reheating
Let leftover Tinola cool, then transfer it to an airtight container and refrigerate within 2 hours.
Refrigerator: store for up to 3 days.
Freezer: freeze the chicken and broth if needed, but expect the vegetables and greens to soften after thawing.
Best texture: freeze without the greens, then add fresh spinach, malunggay, pechay, or bok choy when reheating.
Reheating: warm gently on the stovetop until hot throughout. Reheated chicken should reach 165°F / 74°C.
Green papaya and sayote can soften after freezing, so expect a gentler texture if you freeze the finished soup.
Tinola Variations
Once the basic ginger broth method makes sense, you can adjust the vegetable, greens, broth, or protein. Keep the same quiet logic: build the flavor first, cook the main ingredient gently, and finish with the delicate pieces last.
Easy Swaps for This Recipe
Tinola with green papaya: softer, slightly sweet, and more classic in feel. Use firm green papaya, not ripe orange papaya.
Tinola with sayote: firmer, cleaner, and easy to find in many markets.
Tinola with malunggay: earthy, green, and traditional. Add it at the end.
Tinola with spinach or pechay: practical when malunggay or dahon ng sili are not available.
Tinola with rice wash: slightly fuller broth. Use the second rice rinse for a clearer flavor.
Variations That Cook a Little Differently
Native chicken Tinola: deeper flavor, but usually needs a longer simmer before the vegetables go in.
Instant Pot Tinola: pressure cook the chicken first, then add the vegetables separately so they do not overcook.
Fish or seafood Tinola: use the same ginger-broth idea, but cook fish or mussels briefly so they stay tender.
Tinola sa gata or golden Tinola: coconut milk, turmeric, or squash make the soup richer and less like the clear classic version.
Use bone-in pieces, or simmer breast gently and check it early.
Not using enough ginger
Soup tastes flat
Use 45 to 60 g / 1 1/2 to 2 oz fresh ginger.
Adding fish sauce only at the end
Flavor tastes salty but shallow
Add some before simmering, then adjust later.
Using a chicken cube with full fish sauce
Soup becomes too salty
Start with less patis if using a cube, then adjust after simmering.
Adding too much water
Soup tastes thin even after seasoning
Use about 6 cups liquid for 2 to 2 1/2 lb chicken, then simmer uncovered briefly if needed.
Boiling too hard
Cloudy broth and tougher chicken
Skim first, then simmer gently.
Adding the vegetable too early
Pieces turn mushy
Add them after the chicken is nearly tender.
Overcooking greens
Dull, tired leaves
Finish with greens at the end.
Not tasting before serving
Final soup tastes bland
Adjust with patis, salt, pepper, calamansi, or chili.
Using ripe papaya by mistake
Soup becomes too sweet
Use green papaya or switch to sayote.
FAQ
What is Tinola in English?
Tinola is often described in English as Filipino ginger chicken soup. The chicken version is called Tinolang Manok or Chicken Tinola.
What does Tinola mean?
Tinola generally refers to a Filipino broth-based dish. Tinolang Manok is the chicken version most people mean when they say Chicken Tinola.
Is Tinola the same as Tinolang Manok?
Tinola is the general dish. Tinolang Manok is the chicken version. Since chicken is the most common version, many people use Tinola and Tinolang Manok to mean the same thing.
What should Tinola taste like?
Tinola should taste light but not empty: gingery, savory, and good enough that the broth makes plain rice feel like a meal. If the soup tastes flat, it usually needs more patis, more ginger, or a few more minutes for the chicken to flavor the broth.
What are the main ingredients of Chicken Tinola?
The main ingredients are chicken, ginger, garlic, onion, fish sauce, water or broth, green papaya or sayote, and leafy greens such as malunggay, dahon ng sili, spinach, or pechay.
Do you use green papaya or sayote for Tinola?
Both work. Green papaya gives Tinola a softer, slightly sweet, more classic texture. Sayote stays firmer and tastes mild and fresh, which makes it useful when you want cleaner pieces in the bowl.
What can I substitute for green papaya in Tinola?
Sayote or chayote is the best substitute for green papaya. Upo, kalabasa, or labanos can work in some variations, but they change the flavor and texture.
What leaves are used in Tinola?
The classic choices are malunggay and dahon ng sili. When those are hard to find, spinach, pechay, bok choy, watercress, or kale can work. The important part is adding the greens late enough that they stay fresh.
What can I substitute for malunggay?
Spinach is the easiest substitute for malunggay. Pechay, bok choy, watercress, or kale can also work. Add delicate greens at the end so they do not overcook.
Can I use spinach, pechay, or bok choy in Tinola?
Yes. Spinach wilts quickly and can be added off heat. Pechay and bok choy work best when the thicker stems go in before the leaves.
What is dahon ng sili?
Dahon ng sili means chili leaves. They are used in some traditional Tinola recipes and give the soup a mild peppery green flavor.
What is the best chicken part for Tinola?
Bone-in thighs and drumsticks are the easiest all-round choice. They stay tender, add body to the broth, and are harder to overcook than breast meat.
How long should Tinola simmer?
Tinola usually simmers for about 25 to 35 minutes after the liquid is added, depending on the size of the chicken pieces. Add the vegetables near the end and cook for another 5 to 12 minutes.
How do you keep Tinola broth clear?
Bring the broth to a boil, skim off the foam, then lower the heat to a gentle simmer. Avoid hard boiling the soup for a long time.
Why does my Tinola taste bland?
Tinola tastes bland when the broth lacks ginger, patis, bone-in chicken flavor, or enough simmering time. More salt alone will not fix an empty broth; add ginger warmth, fish sauce depth, and enough time for the chicken to give flavor back to the pot.
Can I make Tinola without fish sauce?
You can, but fish sauce gives Tinola much of its savory depth. If avoiding fish sauce, use salt plus low-sodium chicken broth, and consider adding a little soy sauce or coconut aminos. The flavor will not be exactly traditional.
Can I freeze Chicken Tinola?
Chicken Tinola can be frozen, but the greens and vegetables may soften after thawing. For best results, freeze the chicken and broth, then add fresh greens when reheating.
What is the difference between Tinola and Nilagang Manok?
Tinola is a ginger-forward Filipino chicken soup usually made with fish sauce, green papaya or sayote, and leafy greens. Nilagang Manok is a simpler boiled chicken soup that often uses vegetables like cabbage, potatoes, or saba banana and does not have the same strong ginger profile.
Final Note
A finished bowl of Chicken Tinola should feel quiet but complete: warm broth, tender chicken, bright greens, and rice that makes the soup feel like dinner.
Tinola does not need to shout. No watery broth, no collapsed vegetables, no loud tricks — just generous ginger, chicken that has time to flavor the pot, patis added early, and greens folded in last. When those pieces come together, the soup tastes calm but complete: simple food that still feels cared for.
Hello, health enthusiasts! Looking to warm up your dinner table with something that’s both comforting and supportive of your weight loss goals? Look no further! We’re stirring up some delicious and nutrient-rich soup recipes featuring two powerful superfoods: Turmeric and Moringa! 🌟🥣
Why Turmeric and Moringa for Weight Loss?
Turmeric, the golden spice, is known for its anti-inflammatory and antioxidant properties. It may also boost your metabolism and manage inflammatory responses associated with obesity.
Moringa, the “miracle tree,” is a treasure trove of vitamins, minerals, and protein. It’s low in calories but high in nutrients, making it a great addition to weight-loss-friendly recipes. Its high fiber content can help keep you satiated, which may deter overeating.
Ready to simmer? Let’s dive in! 🎉
1. Turmeric Moringa Vegetable Soup: This soup is a garden in a bowl, loaded with your favorite veggies, turmeric, and moringa. The vegetables provide a variety of nutrients and fiber to keep you full, while the turmeric and moringa deliver their superfood benefits. It’s a light, flavorful, and filling choice for any meal. 🥦🥕🌽
2. Turmeric Moringa Chicken Soup: Comforting chicken soup gets a superfood upgrade in this recipe. Lean protein from the chicken, coupled with the nutrition of turmeric and moringa, make this soup a balanced meal that supports weight loss. Plus, it’s a delicious way to use up leftover chicken! 🐔🥣
3. Turmeric Moringa Lentil Soup: Lentils are high in protein and fiber, which can contribute to feelings of fullness and support weight loss. This hearty soup combines lentils with turmeric and moringa for a warming and nourishing meal. A sprinkle of fresh herbs like cilantro or parsley can add a fresh pop of flavor. 🌿🥣
4. Turmeric Moringa Tomato Soup: A classic with a twist, this tomato soup incorporates turmeric and moringa for added health benefits. Tomatoes are low in calories and high in fiber, making them a great choice for weight loss. Enjoy this comforting soup with a side of whole-grain toast for a satisfying meal. 🍅🍞
5. Turmeric Moringa Pumpkin Soup: Ideal for the cooler months, this creamy pumpkin soup is low in calories but high in flavor. Pumpkin is a good source of fiber, while turmeric and moringa bring their signature health benefits. Top with a dollop of Greek yogurt for a creamy contrast and a protein boost. 🎃🥄
These five delightful turmeric and moringa soup recipes can offer a comforting and healthful addition to your weight loss plan. Remember, achieving your wellness goals is not just about shedding pounds, but also about enjoying nutrient-dense and flavorful meals. Savor these soups as part of a balanced diet, and here’s to your health and happiness! 🥂🌿🥣