Posted on 4 Comments

Pineapple Chia Pudding Recipe: Creamy & Spoonable Every Time

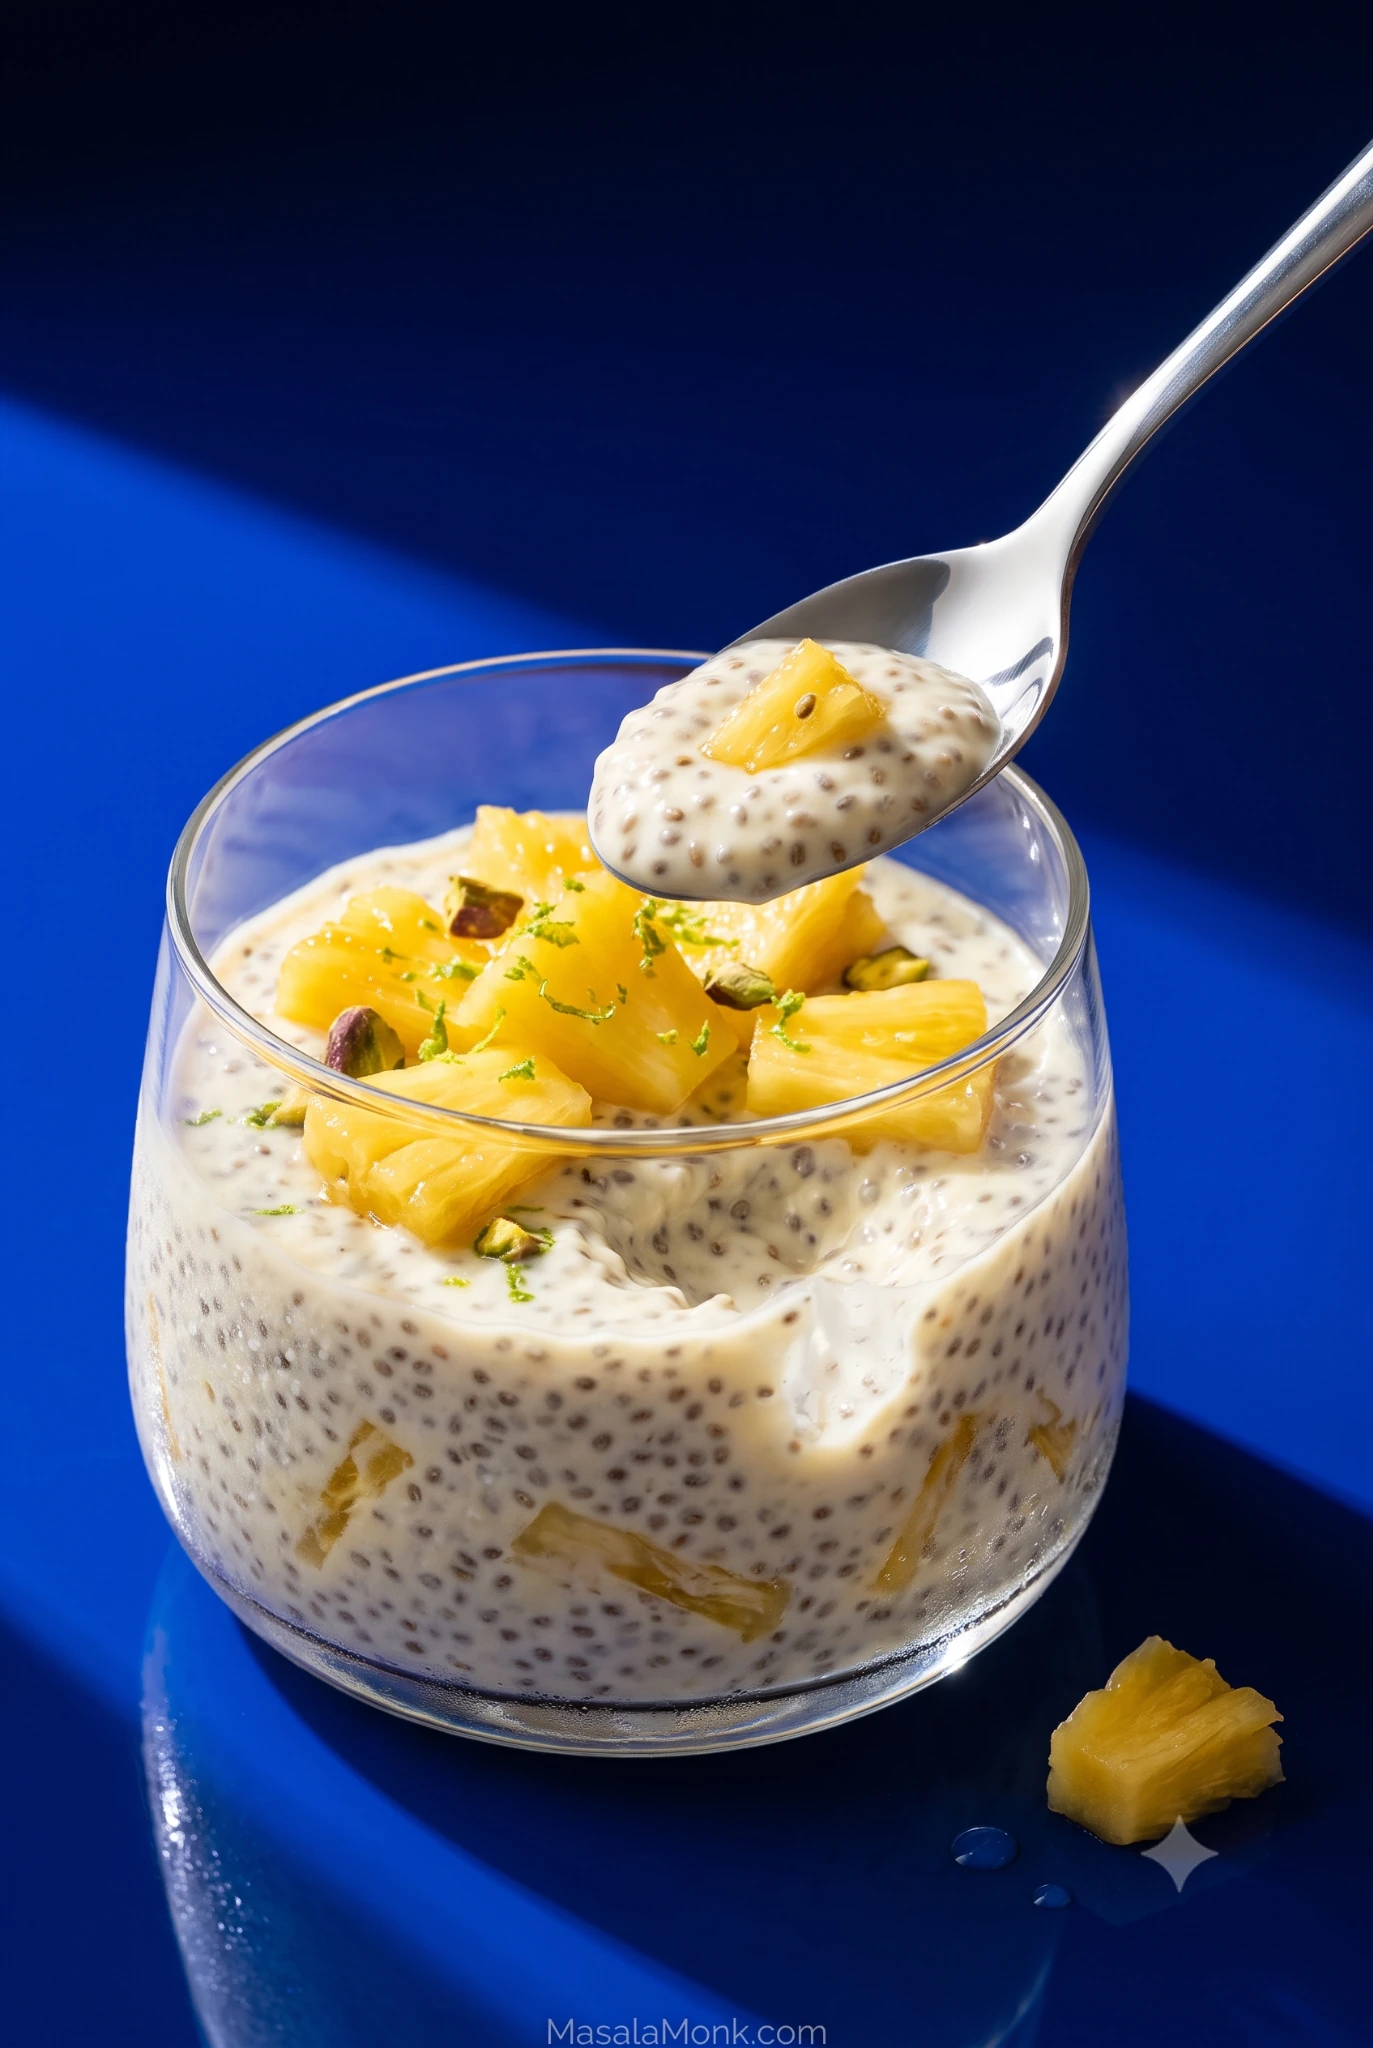
Pineapple chia pudding in a clear glass, topped with juicy pineapple, lime zest and pistachio, with a spoon lifting a soft chia-filled bite.

This post was last updated on:

Pineapple chia pudding should be cold, creamy and bright with fruit. It should not have milk floating above a chia slab or be so thick you can stand a spoon in it.

Juicy pineapple, fresh lime and just enough vanilla make it taste like something you would actually look forward to finding in the fridge. Mixing it takes minutes. Getting that soft, spoonable texture is where most jars go sideways.

This pineapple chia seed pudding uses a slightly firmer base so there is room for the fruit’s moisture. Give it a second stir before it goes into the fridge, and by morning the work is done: stir, add cold pineapple and eat.

Quick Answer

For one breakfast jar, use 3 tablespoons / about 35 g chia seeds + ¾ cup / 180 ml / 6 fl oz milk + ½ cup / about 80 g pineapple, divided. Stir well, wait 5–10 minutes, stir again, fold in about half the fruit, then chill for at least 2 hours. Four hours or overnight gives the most dependable texture; save the remaining pineapple for serving.

It is ready when the chia holds softly on a spoon and there is no loose milk pooling around it.

Pineapple Chia Pudding Recipe

Start with plenty of pineapple, a creamy but not heavy base, and enough lime and vanilla to keep the fruit tasting fresh and lively.

  • Makes: 1 breakfast jar or 2 small snack portions
  • Prep: about 5 minutes
  • Second stir: after the brief initial rest
  • Minimum chill: about 2 hours
  • Best texture: about 4 hours to overnight
  • Cook time: none

A 16 oz / 475 ml jar leaves plenty of room to stir and add toppings. A 12 oz / 350 ml jar works if you mix in a bowl first.

Equipment: a bowl or wide jar, a whisk or spoon, measuring spoons and a lidded container. A small blender is optional for the smooth version.

Ingredients

  • Whole chia seeds: 3 tablespoons, about 35 g / 1.2 oz
  • Unsweetened almond or coconut drinking milk: ¾ cup / 180 ml / 6 fl oz; soy or dairy milk also works
  • Finely diced pineapple: ½ cup / about 80 g / 2.8 oz, divided
  • Vanilla extract: ½ teaspoon
  • Finely grated lime zest: ½ teaspoon
  • Fresh lime juice: ½–1 teaspoon / 2.5–5 ml
  • Fine salt: a small pinch
  • Sweetener: up to 1 teaspoon, if needed

Chia tablespoon weights vary slightly between brands and measuring styles, so the tablespoon measure is the main functional measurement here.

Store-bought unsweetened almond milk keeps things easy, but homemade almond milk works too. Homemade batches vary in richness, so you may need a little more or less milk at the end.

Using dairy milk? The recipe still works. When the jar will sit overnight, keep raw fresh or frozen pineapple separate and add it at serving; the reason is explained below.

Optional toppings: choose one or two so the pineapple still gets to be the point.

  • Toasted unsweetened coconut
  • Chopped pistachios
  • Plain Greek or plant-based yogurt
  • Granola
  • Extra lime zest or fresh mint
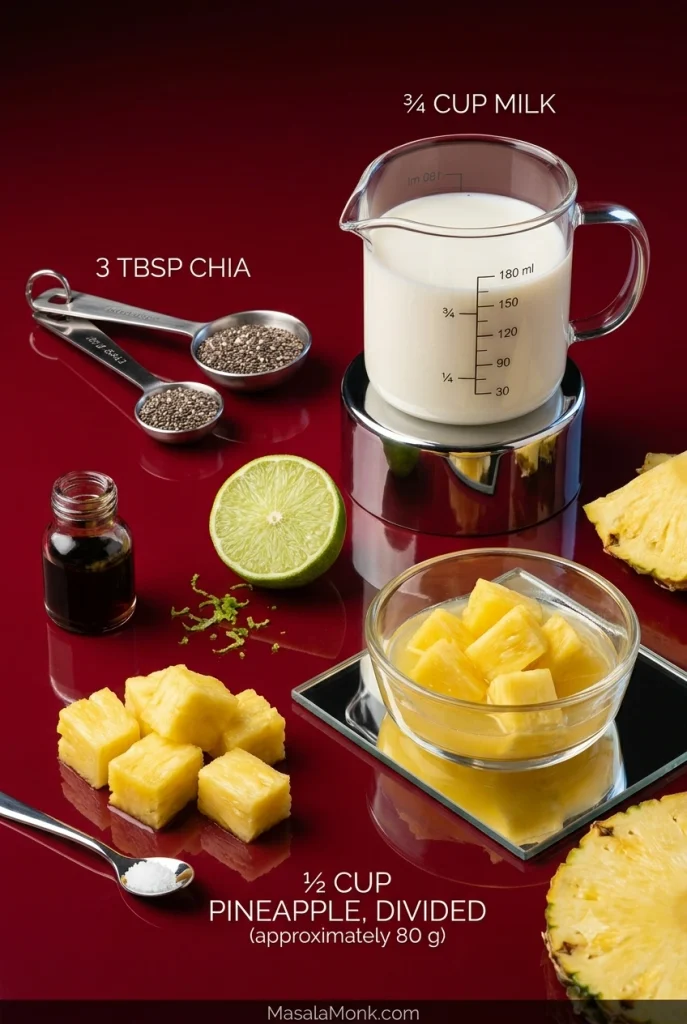
Measured chia seeds, three-quarter cup of milk and half a cup of pineapple divided into two portions, with lime, vanilla and salt.
The firmer base leaves room for pineapple’s juice. The goal is still a soft, spoonable pudding once the fruit is folded in.

Method

  1. Mix the base. Add the milk, vanilla, lime zest, lime juice, salt and any sweetener to a bowl or wide jar. With the whisk moving, sprinkle in the chia gradually and whisk for about 20–30 seconds. Scrape the bottom and corners so no dry pockets remain.
  2. Wait, then stir again. Leave it for 5–10 minutes, then scrape the bottom and sides and break apart any clusters. This is what prevents milk on top and a dense chia layer underneath.
  3. Add half the pineapple. Fold in about ¼ cup / 40 g well-drained diced pineapple. Very juicy fruit—and fruit going into jars for several days—is better kept separate until serving.
  4. Cover and chill. Refrigerate for at least 2 hours. Four hours gives a more dependable set; overnight is easiest. Still seeing the seeds settle—or making a large batch? Give it one more stir 30–60 minutes later. Most single jars will not need it.
  5. Check the texture. Give the pudding a good stir. The seeds should be evenly hydrated and the mixture should hold softly on a spoon without loose milk around it.
  6. Adjust only if needed. Too thick? Add milk 1 tablespoon / 15 ml at a time. Still clearly too thin after several hours? Add 1 teaspoon chia and wait another 15–30 minutes.
  7. Finish and eat. Add the remaining pineapple and any crunchy toppings. Taste it cold: if the pineapple seems muted, add a little extra lime zest; if the fruit is tart, add a touch more sweetener.

Why the Second Stir Matters
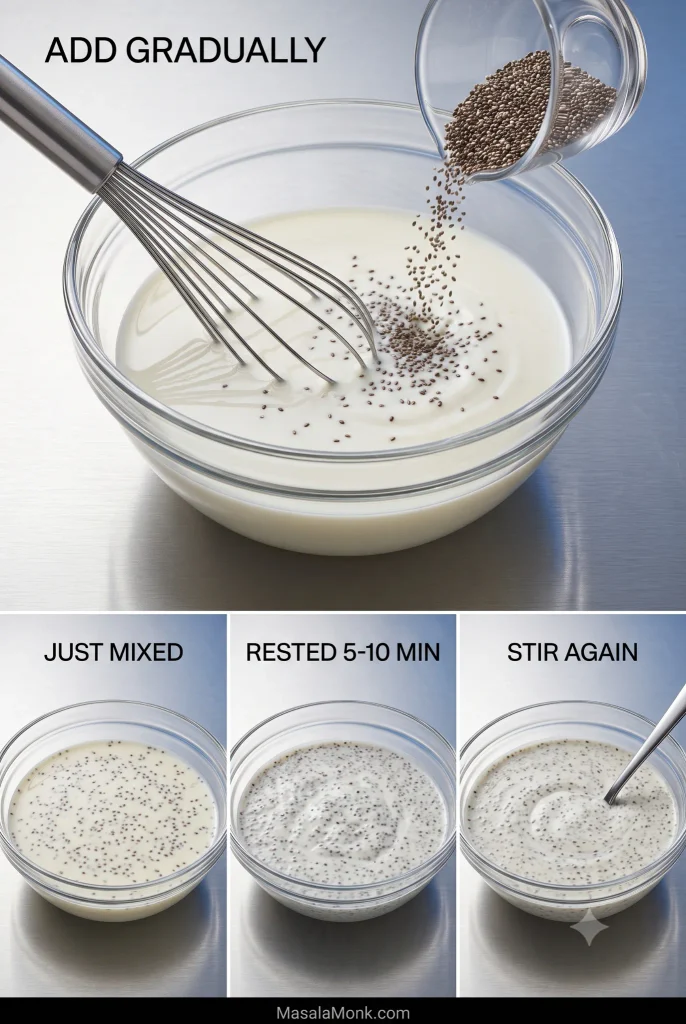
Four-step chia pudding process showing chia sprinkled into milk while whisking, then the mixture just mixed, rested for 5 to 10 minutes, and stirred again until evenly distributed.
The useful moment for the second stir is after hydration has started but before settling has fully taken hold. By then the seeds are tackier, so redistributing them now is more effective than trying to break up a compact layer later.

If your jar is already in the fridge, stop here—you have done everything you need. The rest is for choosing different pineapple or milk, making several breakfasts at once, or rescuing a jar that did not behave as expected.

Choose What You Need

The Chia-to-Liquid Ratio for Pineapple Pudding

Three tablespoons of chia per cup of liquid gives a softer pudding; four gives a noticeably firmer one. Pineapple adds its own moisture, so the main recipe starts toward the thicker end.

Chia seedsLiquidResult
3 tbsp1 cup / 240 mlSofter, looser pudding
4 tbsp1 cup / 240 mlFirmer, spoonable pudding
3 tbsp¾ cup / 180 mlThicker base with room for juicy fruit

A very ripe fresh pineapple can be surprisingly juicy, thawed fruit leaks water, and crushed pineapple carries more liquid than neat chunks. The main recipe’s 3 tablespoons chia to ¾ cup / 180 ml milk leaves room for that extra moisture.

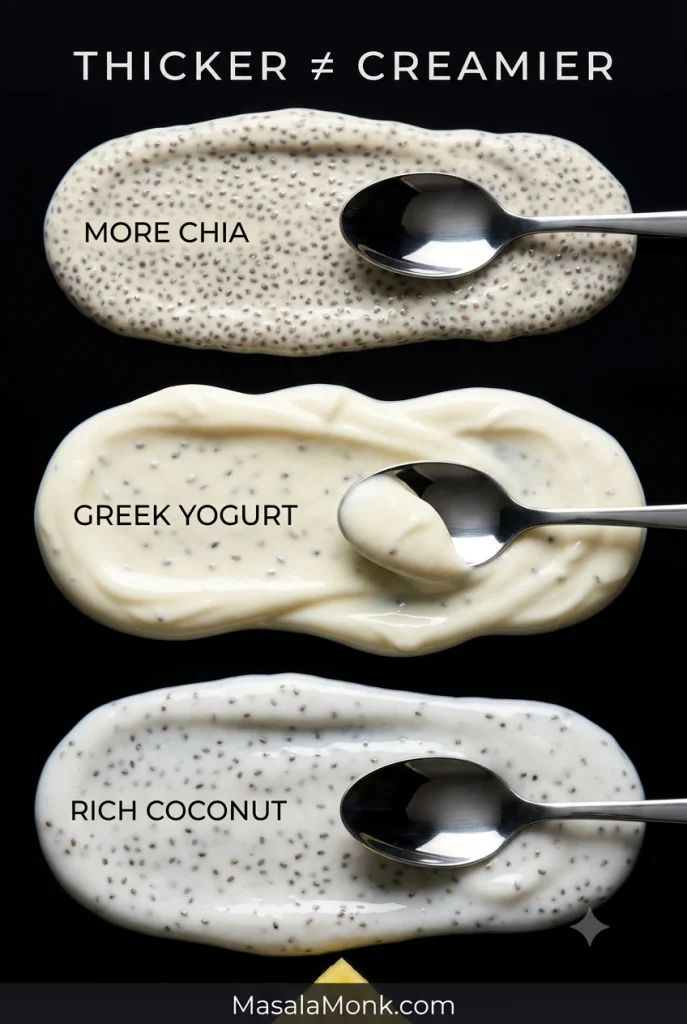
More chia makes the pudding thicker. Yogurt or richer coconut milk makes it feel creamier. That distinction matters when you are chasing a lush café-style spoonful rather than simply trying to make the pudding stand up on the spoon.

The same basic method works with plenty of other flavors in our chia pudding guide.

What Should Properly Set Chia Pudding Look Like?

Whole-seed chia pudding is never quite as smooth as custard. Each seed develops a soft gel coating while the seed remains perceptible. The finished pudding lands somewhere between tiny tapioca and a soft seeded gel.

  • It should hold a soft mound on a spoon.
  • The seeds should look evenly hydrated.
  • There should be no pool of milk floating around it.
  • There should be no dense seed slab stuck underneath.
  • The overall texture should feel creamy rather than rubbery.

A little seed texture is normal. Dry, hard pockets are not.
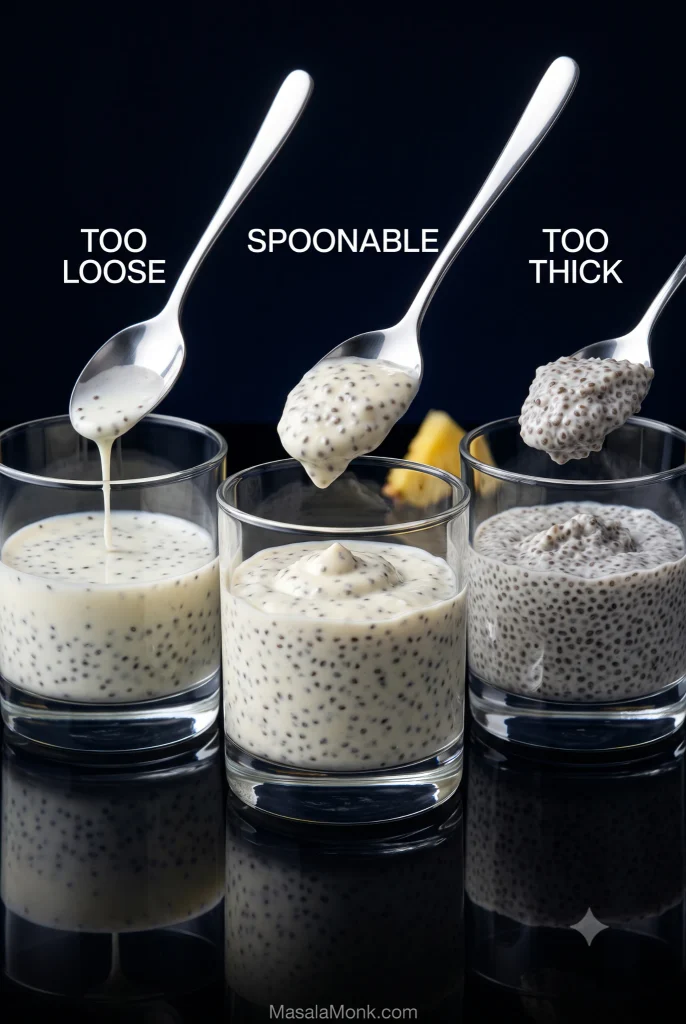
Three glasses compare chia pudding textures: runny pudding dripping from a spoon, properly spoonable pudding holding a soft mound, and very thick pudding forming a dense stiff scoop.
After one good stir, watch what the spoon track does. A loose mixture flows closed, a ready pudding relaxes slowly around a soft scoop, and an over-thick jar leaves ridges that stay sharply defined.

Sometimes the pudding is exactly right and you still dislike the texture. That is allowed. Try the blended version. If that still does not appeal, there are plenty of good breakfasts in the world and no reason to force yourself into a chia habit.

Does your jar look different? Jump to Troubleshooting.

Fresh, Frozen or Canned Pineapple?

PineappleBest forWatch for
FreshBright flavor, topping, juicy piecesVariable juice
FrozenBlending into the baseThaw liquid
Canned in juiceEasy meal prepDrain well
CrushedFruit in every spoonfulExtra liquid
JuiceStronger pineapple flavorCounts as liquid

Fresh pineapple gives the brightest bite. For the sweetest jar, look for a clean sweet aroma at the base and a little give, then dice it fairly small.

Frozen pineapple is best when you want fruit through the base. Blend about ¼ cup / 40 g with the measured milk and keep the rest for serving. Drain thawed fruit before folding it into an already-set pudding.

Canned pineapple is easy for meal prep; choose fruit packed in juice and drain it well. Crushed pineapple spreads fruit through every spoonful but brings more liquid, so drain it or keep it as a separate layer.
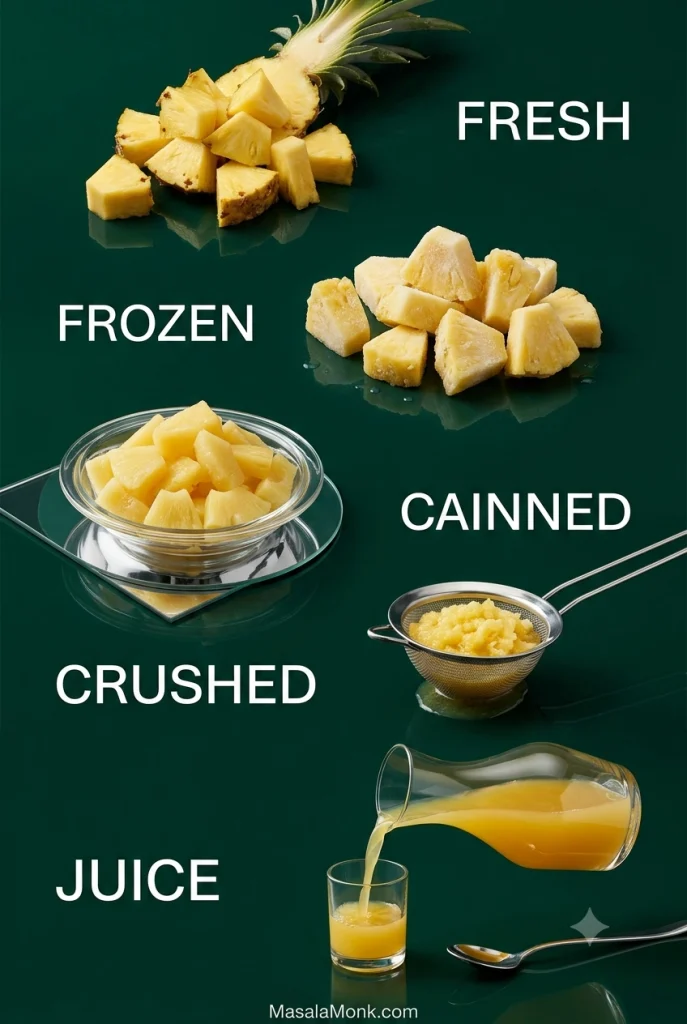
Five pineapple forms labeled fresh, frozen, canned, crushed and juice, showing fresh pieces, frozen chunks, drained canned fruit, crushed pineapple in a strainer and pineapple juice.
A useful rule is to watch what escapes the fruit. If thawed, crushed or canned pineapple leaves noticeable liquid behind, drain it. Once that moisture starts pouring rather than clinging to the fruit, treat it as part of the liquid budget.

Pineapple Juice Changes the Ratio

Chia hydrates perfectly well in pineapple juice, but the juice has to come out of the liquid somewhere else. Add ¼ cup / 60 ml pineapple juice and reduce the milk by about the same amount.

Juice makes the pudding fruitier and sweeter; milk, coconut or yogurt supplies more of the creamy body. Diced fruit gives bite, purée makes a fruit layer, and fully blended pineapple behaves more like liquid. Once the fruit pours like juice, treat it like juice.

Using Yogurt? One Pineapple Quirk Matters

Fresh pineapple contains bromelain, an enzyme that breaks down milk proteins, and freezing raw pineapple does not reliably switch that enzyme off. Pineapple and yogurt are still perfectly normal foods to eat together. Odd bitterness or texture can show up when raw fresh or frozen pineapple sits in yogurt or skyr for hours.

For an overnight dairy-based jar, use canned or cooked pineapple, or add raw fresh or frozen fruit in the morning. With protein-rich soy yogurt, keeping raw pineapple separate until serving is a simple precaution when prepping well ahead.
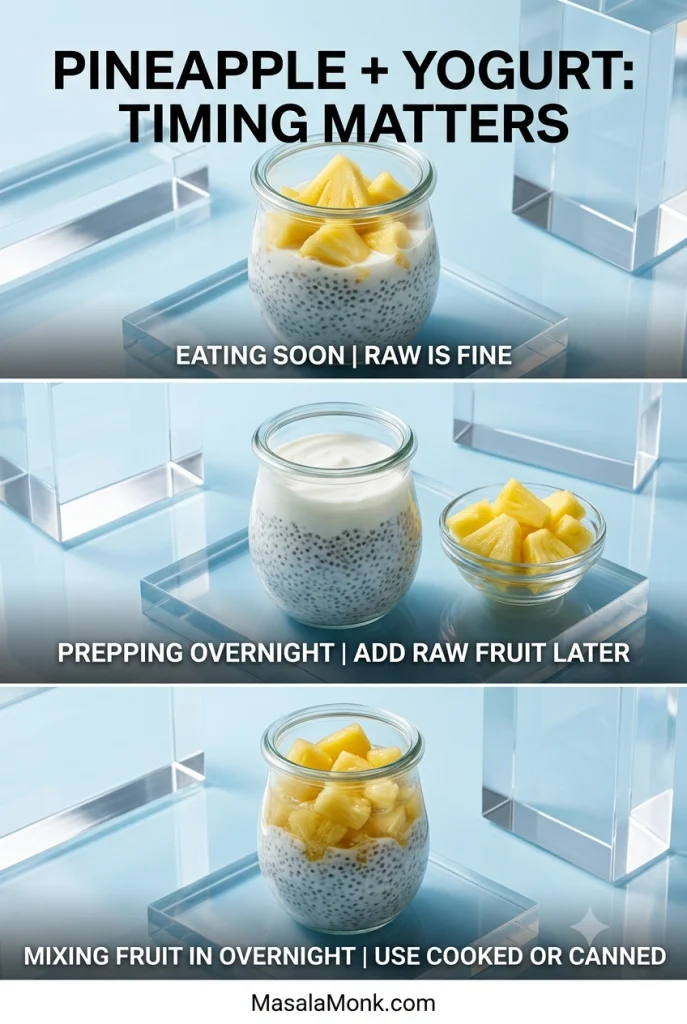
Three pineapple and yogurt chia pudding examples: raw pineapple mixed in for eating soon, raw pineapple kept separate for overnight prep, and cooked or canned pineapple mixed into an overnight jar.
Keeping raw pineapple separate for an overnight yogurt jar has a sensory payoff too. Besides avoiding hours of enzyme contact, you preserve more of the fruit’s fresh aroma, brighter acidity and firmer bite for breakfast.

Using ordinary almond or coconut drinking milk and fresh pineapple? Follow the main recipe and move on.

Using yogurt for the base? Jump to the high-protein Greek yogurt version.

How to Make Pineapple Chia Pudding Creamier

Almond milk keeps the jar light, Greek yogurt makes it silkier, and coconut brings richness.

BaseResultBest move
Almond milkLight, cleanUse main ratio
Soy milkMore body, more proteinUse main ratio
Dairy milkRounder, creamierFresh pineapple at serving for overnight prep
Coconut drinkLight, tropicalUse main ratio
Canned coconut milkRich, denseDilute with lighter milk
Greek yogurt or skyrSilky, tangy, protein-richUse yogurt ratio below
Three close-up chia pudding textures compare a dense mixture with more chia, silky Greek yogurt chia pudding and glossy rich coconut chia pudding.
Look at the spoon tracks rather than the color. Extra chia creates tighter, more rigid grooves; Greek yogurt gives rounded silky folds; richer coconut shows more gloss and a fuller cold-set body.

Carton coconut drink, light canned coconut milk and full-fat canned coconut milk behave very differently once cold. Our guide to coconut milk types and nutrition goes deeper into those differences.

If you are happy with almond or coconut drinking milk and the main recipe, you do not need to change a thing. For a more café-style spoonful, Greek yogurt or skyr gives the base more body and a silkier feel. Let the pineapple do most of the flavor work, then add vanilla, lime and something crisp—perhaps toasted coconut, pistachios or a little granola.

Full-fat canned coconut milk can become surprisingly firm when it gets cold. A mixture that looked creamy at night may feel almost waxy by breakfast. Whisk a separated can smooth before measuring it, and combine rich canned coconut milk with a thinner drink rather than using it alone.

Pineapple Coconut Chia Pudding

Here the coconut softens pineapple’s sharper edges without burying the fruit.

Pineapple coconut chia pudding in a clear coupe with a pineapple layer, fresh pineapple, toasted coconut and lime zest.
The coconut blend is really a cold-texture decision. Lighter coconut drink provides most of the hydration. A smaller amount of canned coconut milk adds richness without letting chilled coconut fat dominate the finished pudding.
  • Chia seeds: 3 tbsp, about 35 g
  • Coconut drinking milk: ⅔ cup / 160 ml
  • Well-mixed canned coconut milk: ¼ cup / 60 ml
  • Pineapple: ½ cup / about 80 g, divided
  • Vanilla: ½ tsp
  • Lime zest: ½ tsp
  • Lime juice: ½–1 tsp
  • Salt: a pinch
  • Sweetener: only if needed

Use the same two-stir method as the main recipe. Fold about half the pineapple through and keep the rest for the top.

For a piña colada-style jar, pulse some of the pineapple into a thick purée. Layer it with the coconut chia so each spoonful gets a clearer hit of fruit.

That same pineapple-coconut-lime combination runs through our piña colada guide.

High-Protein Pineapple Chia Pudding with Greek Yogurt

Greek yogurt or skyr is the simplest way to add substantial protein while making the chia base silkier at the same time.

  • ½ cup plain Greek yogurt or skyr, about 120 g
  • ⅓ cup milk, about 80 ml
  • 2 tbsp chia seeds, about 24 g
  • ½ tsp vanilla
  • Lime zest to taste
  • Pinch of salt
  • Sweetener, if needed
  • ½ cup pineapple, about 80 g
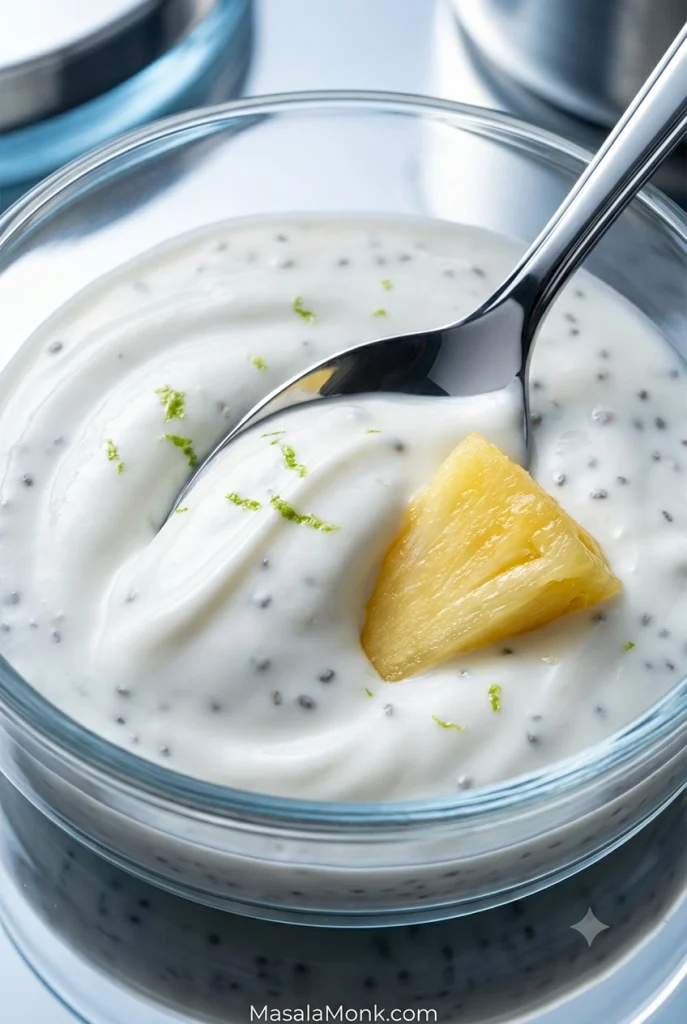
Close-up of thick pineapple chia pudding made with Greek yogurt, with a spoon drawn through the creamy chia mixture and a piece of pineapple in the pudding.
The lower chia amount here is deliberate. Greek yogurt already supplies substantial body. Using 2 tablespoons instead of the master recipe’s 3 helps the high-protein pineapple chia pudding stay silky rather than crowded with seeds.

Whisk the yogurt, milk, vanilla, lime zest and salt first, then add the chia and follow the same two-stir method. Very thick Greek yogurt may need another tablespoon or two of milk so the chilled pudding stays silky rather than pasty.

For an overnight jar, heat-treated or canned pineapple can go straight into the pudding. Raw fruit, whether fresh or frozen, is better added in the morning.

For a plant-based version, use soy milk with a thick soy yogurt. Using protein powder? Start with about 1 tablespoon. Depending on the powder, you may need another 1–3 tablespoons / 15–45 ml milk to keep the pudding creamy rather than pasty.

Prefer It Smooth? Blend It After Chilling

Whole chia always keeps a tiny-seed texture. For something closer to mousse, let the pudding hydrate fully first and then blend it with the pineapple until creamy.

Smooth blended pineapple chia pudding in a glass coupe with fine chia flecks, a pineapple purée swirl and lime zest.
Blend this version to change mouthfeel, not to rescue a runny pudding. Fully hydrated chia becomes smoother and mousse-like after blending, but an under-set ratio still needs time or adjustment before the blender comes out.

Blending after the set usually gives a smoother result than grinding dry chia at the beginning. Ground chia can feel finer, but it can also turn gummy. Hydrating whole seeds first and blending later smooths out most of the seed texture, although chia’s natural gel-like feel will still be there.

Ready to make it? Back to the main recipe.

Lower-Carb Pineapple Chia Pudding

For a lower-carb jar, use a smaller amount of pineapple and let lime zest, vanilla and a pinch of salt make that fruit go further. The easiest way to lower the carb load is simply to use less pineapple.

  • 3 tbsp chia seeds, about 35 g
  • ¾ cup unsweetened almond milk, 180 ml
  • 2–4 tbsp finely diced pineapple, about 20–40 g
  • ½ tsp vanilla
  • Plenty of fresh lime zest
  • Pinch of salt
  • Optional monk fruit, stevia or another preferred non-sugar sweetener

With less pineapple in the jar, lime zest matters more. Start toward the upper end of the fruit range if flavor matters more than shaving off every possible gram of carbohydrate. There is little point making a pineapple pudding with two apologetic cubes of pineapple.

Watching added sugar? Ripe pineapple may be sweet enough on its own. Honey, maple syrup and agave still count as added sugars even when they are described as “natural” sweeteners.

For a stricter base, use our keto chia pudding with almond milk.

Meal Prep & Storage

Making four breakfasts at once? Do not stand there stirring four tiny jars separately. Mix one big batch, give it the second stir, then divide it up.
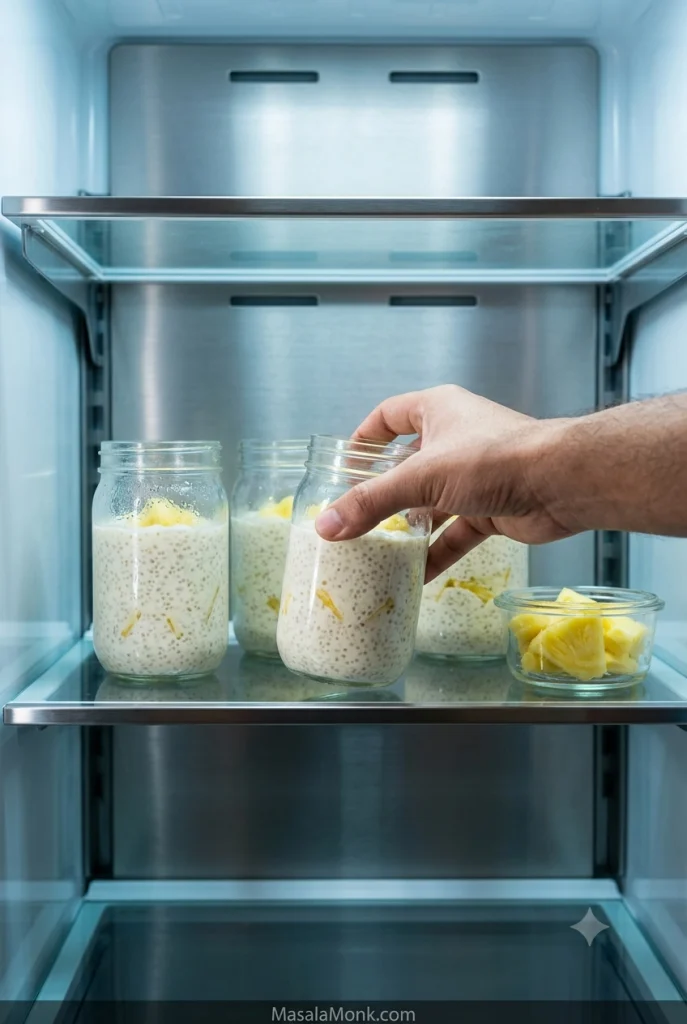
Four jars of pineapple chia pudding on a refrigerator shelf, with a hand reaching for one jar and a small container of pineapple nearby.
Before portioning a batch, give the bowl one last thorough stir so the first and last jars receive the same seed-to-liquid balance. Then divide promptly rather than letting the chia begin settling again while you fill containers.

Scaling the recipe is straightforward:

MakeChiaMilkPineapple
1 jar3 tbsp / ~35 g¾ cup / 180 ml½ cup / ~80 g
2 jars6 tbsp / ~70 g1½ cups / 360 ml1 cup / ~160 g
4 jars¾ cup / ~140 g3 cups / 720 ml2 cups / ~320 g

Mix all of the milk and chia in one large bowl, wait 5–10 minutes, and stir thoroughly again. If a large batch is still settling, keep it in the bowl for one more stir 30–60 minutes later; then divide it between containers. Use roughly half the pineapple in or alongside the jars and save the rest for serving. Keeping all of the fruit separate gives the most consistent texture over several days.

Keeping Meal-Prep Jars at Their Best

Crunchy toppings belong at the last minute. Granola, nuts, seeds and toasted coconut are much more enjoyable crisp than after three nights sitting in chia gel.

A jar that is just right on Monday can be noticeably thicker on Wednesday. Stir in 1–2 tablespoons / 15–30 ml milk and it usually comes straight back.
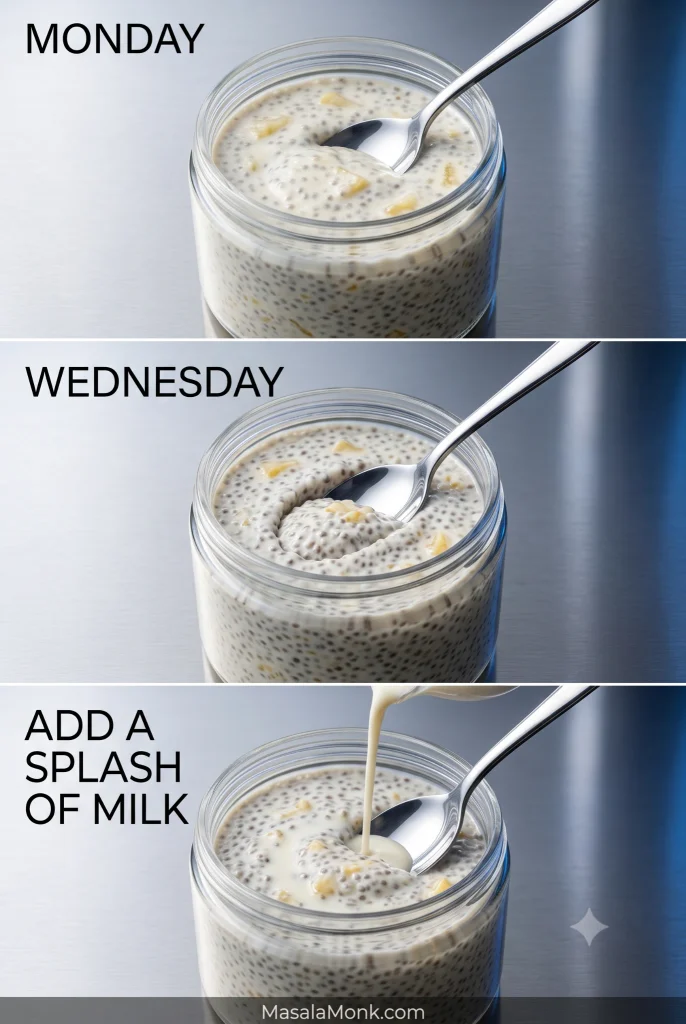
Three stages of stored chia pudding labeled Monday, Wednesday and add a splash of milk, showing a soft pudding, a firmer pudding two days later and milk being poured into the thicker jar.
Loosen the jar you are eating, not the entire batch in advance. Because stored chia keeps changing, adjusting each serving with a little milk preserves more control over tomorrow’s texture.

For the best fruit and texture quality, aim to eat prepared pineapple chia pudding within about 3–4 days. Keep it covered and refrigerated at 40°F / 4°C or below.

If you enjoy opening the fridge to find breakfast already handled, overnight oats work on much the same evening-prep rhythm with a completely different texture.

↑ Back to Recipe · ↑ Back to Top

Pineapple Chia Pudding Troubleshooting

Before fixing anything, check how long the pudding has actually been chilling. A jar that looks loose after 45–60 minutes may simply need more time.
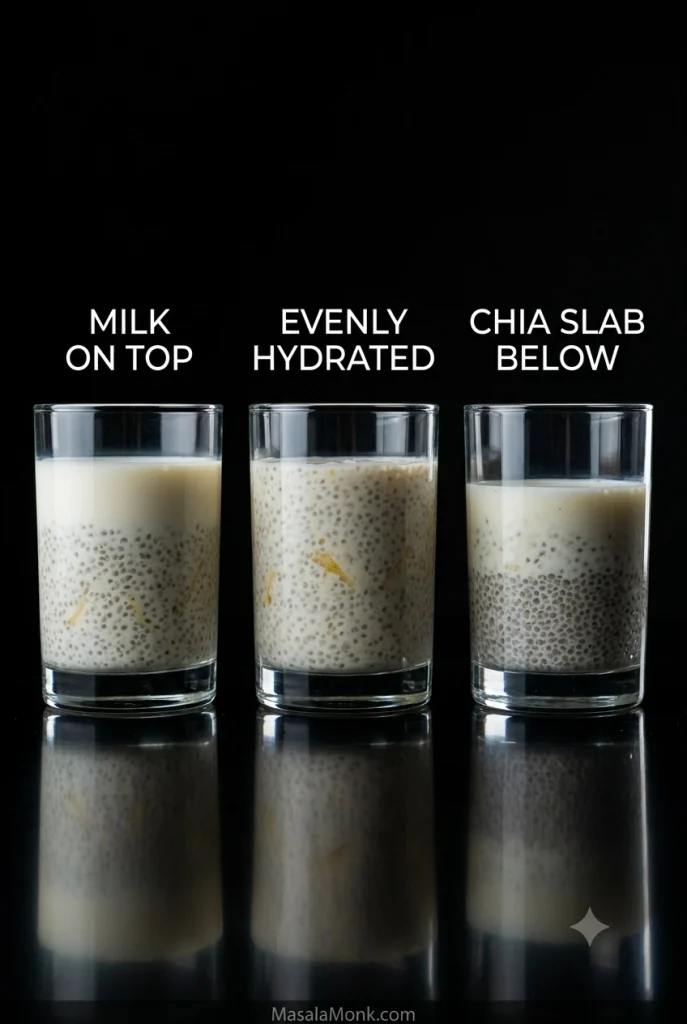
Three clear glasses compare separated chia pudding with milk on top, evenly hydrated chia pudding, and a dense chia layer settled at the bottom beneath thinner liquid.
Treat separation as a distribution problem before treating it as a ratio problem. If milk is sitting above compacted chia, first break up and redistribute the seeds already there. Adding more chia immediately can make the bottom even heavier.

Setting and Texture Problems

My chia pudding is still watery. What now?

After several hours, excess liquid usually means the ratio was too loose or the pineapple brought more juice than expected. Stir first. If it is still clearly too thin, add 1 teaspoon chia, wait 15–30 minutes, then check again. Next time, drain the fruit more thoroughly or keep it as a topping.

Why is there milk on top and a solid chia layer underneath?

The seeds settled before they had hydrated enough to stay suspended. Break the layer apart vigorously if you still can. Next time, stir once when you mix the pudding and again 5–10 minutes later.

My pudding is much too thick.

Stir in milk 1 tablespoon / 15 ml at a time until the spoon moves through it comfortably again. Very thick yogurt, extra chia and rich coconut milk can all push a jar past creamy into dense.

Why are there dry or crunchy chia pockets?

The seeds clumped before enough liquid could reach them. Break up any pockets you can find. Next time, sprinkle the chia in while whisking and do not skip the second stir.

Pineapple, Coconut and Yogurt Problems

The pineapple made my pudding watery.

Very ripe, thawed, crushed or poorly drained pineapple can contribute much more liquid than neat fresh pieces. A teaspoon of extra chia can rescue a clearly loose batch. Draining the fruit or keeping it as a separate layer prevents the problem next time.

Why did the coconut version become firm or waxy?

Coconut fat firms when chilled. Loosen the pudding with a little thinner milk and stir well. Next time, combine rich canned coconut milk with coconut drink or another lighter milk instead of using only full-fat canned coconut.

Why did my pineapple-yogurt pudding turn bitter?

Uncooked pineapple—fresh or frozen—can still contain active bromelain, which breaks down milk proteins during a long rest. For overnight yogurt or skyr pudding, use canned or cooked fruit, or add the raw pineapple in the morning.

It set properly, but I still hate the texture.

You may dislike whole chia pudding. Try blending the fully hydrated pudding. If that still does not help, the texture simply is not for you.

If the Chia Barely Gels at All

Brands and batches can thicken at different speeds, so give a correctly measured pudding several hours—or overnight—before blaming the seeds. If a familiar recipe suddenly stops setting, mix 1 teaspoon chia with 2 tablespoons water. After about 10–15 minutes, you would normally expect a clear gel halo. Very little gel is a good reason to try fresher chia rather than adding more and more seeds.
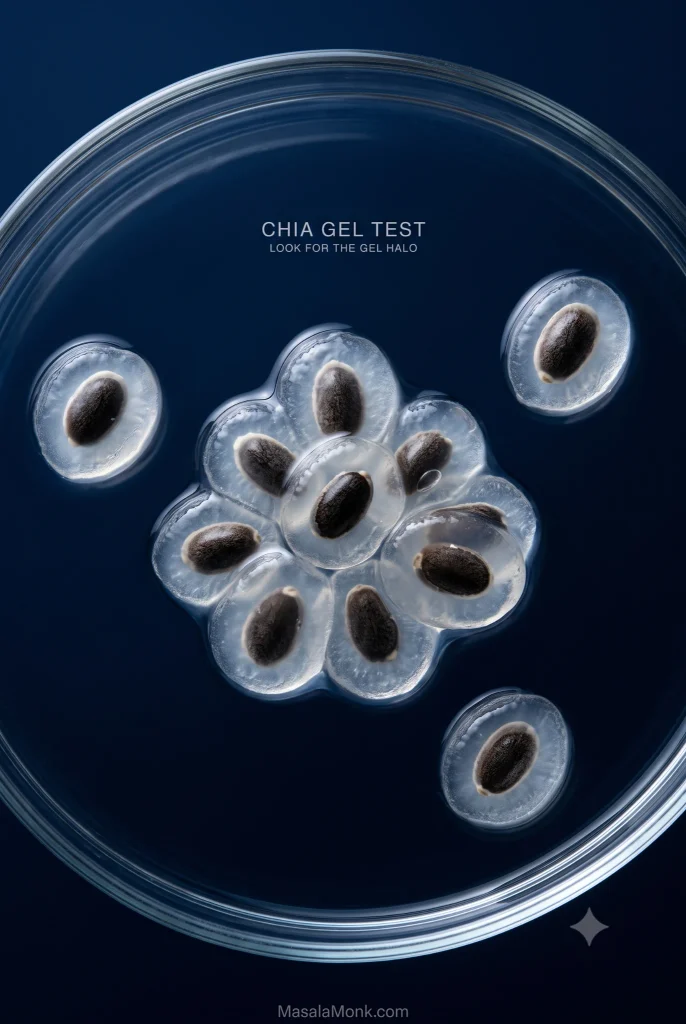
Macro view of hydrated chia seeds in water, each surrounded by a translucent gel halo, with several gelled seeds overlapping in a small cluster.
Judge the gel test across several seeds rather than looking for one perfect specimen. Visible translucent mucilage around multiple chia seeds is the useful sign that hydration is happening, even when individual halos vary in size and shape.

↑ Back to Recipe · ↑ Back to Top

A Few Flavor Ideas

Pineapple, cardamom & pistachio: stir a scant ⅛ teaspoon ground green cardamom into the milk, then finish with pineapple and chopped pistachios.

Pineapple, ginger & lime: add about ¼ teaspoon finely grated fresh ginger to the base and finish with extra lime zest. Start small; ginger gets loud quickly.

For a softer, sweeter fruit direction, try mango chia pudding.

Warm pineapple over cold chia: cook diced pineapple over medium heat for about 5 minutes, until hot, glossy and softened. Add cardamom, ginger or cinnamon, then spoon it over the cold pudding.

Warm glossy pineapple being spooned onto cold chia pudding in a clear glass, with steam rising from the fruit and condensation visible on the chilled glass.
Add the warm pineapple only when you are ready to eat. The fruit stays glossy and aromatic, the chia stays properly cold, and the temperature contrast survives long enough to reach the first spoonful.

A Quick Nutrition Note

Chia contributes dietary fiber, plant protein, unsaturated fats and ALA omega-3 fatty acids. Harvard’s Nutrition Source has a fuller evidence-based overview. The rest of the jar matters too—Greek yogurt, coconut milk, sweeteners, granola and nuts can change the nutritional picture substantially.

Frequently Asked Questions

Can I make pineapple chia pudding overnight?

It works well overnight. Do the second stir, cover and refrigerate; the extra time gives the seeds plenty of time to hydrate.

Can I use pineapple juice instead of milk?

You can. Count pineapple juice as part of the measured liquid: add ¼ cup / 60 ml juice and reduce the milk by about the same amount.

Can I use fresh pineapple with Greek yogurt?

Fresh pineapple is fine for immediate serving. For an overnight yogurt jar, use canned or cooked pineapple, or add uncooked fruit in the morning.

Can I use ground chia seeds?

Yes, but ground chia can turn gummy. For a smoother result, hydrate whole chia first and blend the chilled pudding.

Why didn’t my chia pudding thicken?

Usually it needs more time, extra fruit liquid is involved, or the seeds clumped early. Check the troubleshooting section before adding more chia.

How long does pineapple chia pudding last?

Aim for 3–4 days refrigerated at 40°F / 4°C or below. Keep it covered and add crunchy toppings at serving.

When You’re Ready to Eat

Give the chilled pudding one good stir. Loosen it with a splash of milk if it needs it, then pile on the remaining pineapple, a little lime zest and something crunchy.

The best spoonful has soft, creamy chia, a juicy piece of pineapple and a little lime in the same bite. Cold, bright and ready when you open the fridge—not bad for five minutes the night before.

Did your jar behave differently? Tell us which milk and pineapple you used and how long it chilled; those details usually reveal what happened.
↑ Back to Recipe · ↑ Back to Top

Posted on 1 Comment

Benefits of Chia Seeds: 5 Ideas to Use Chia Seeds with Indian Food

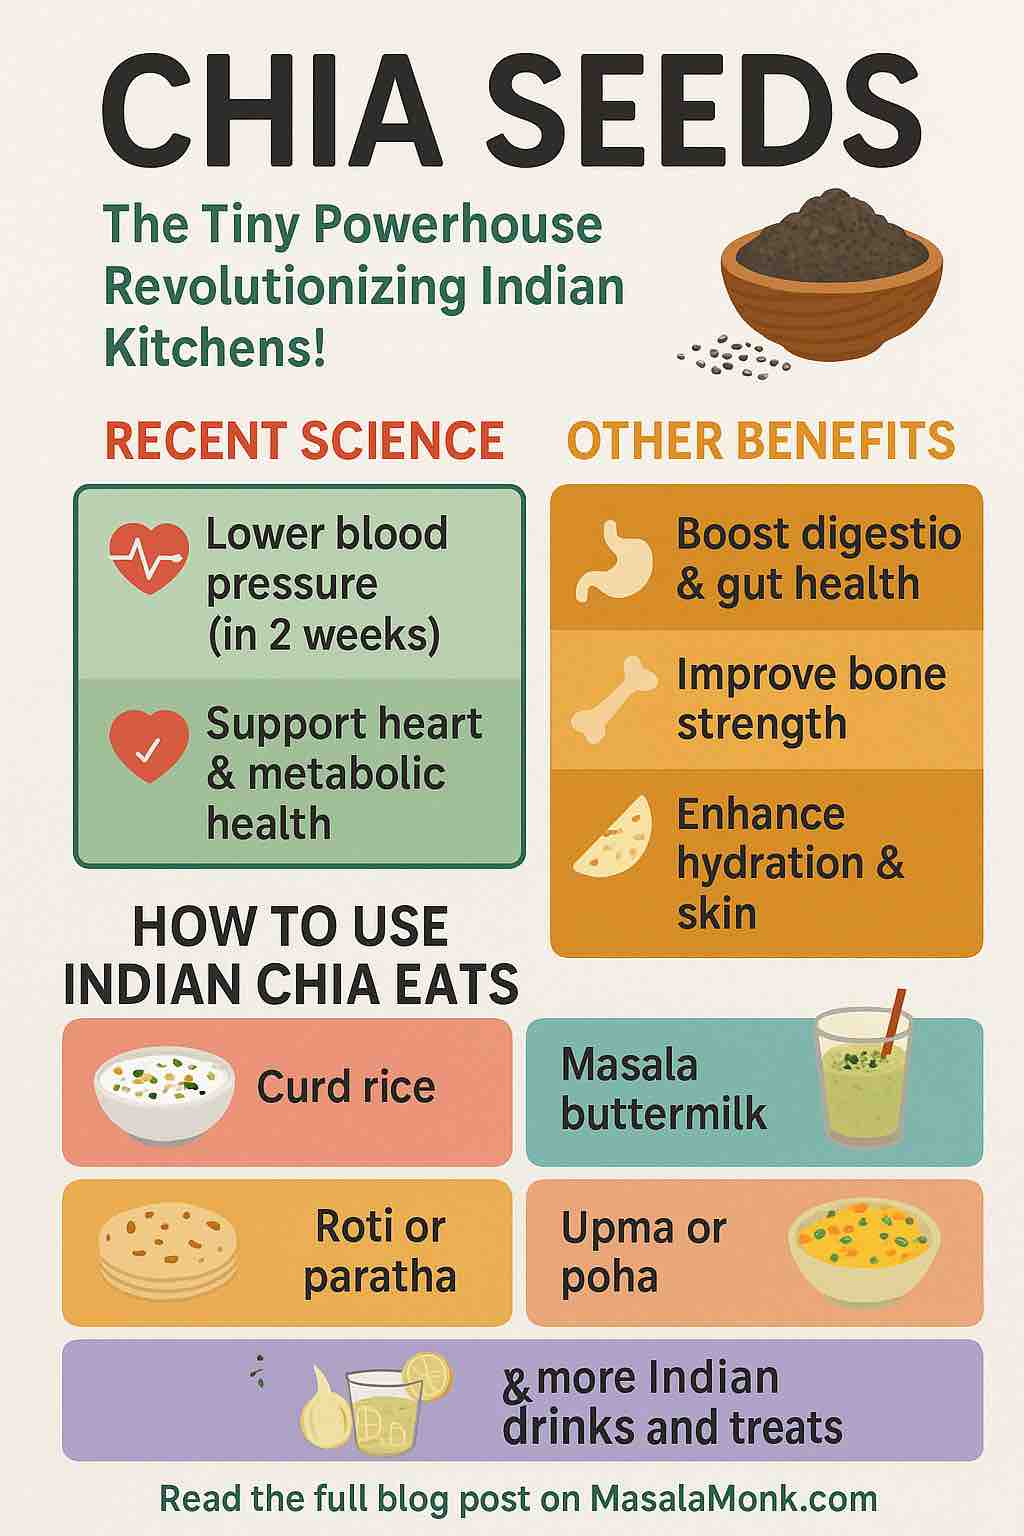
CHIA SEEDS in Indian Kitchen

Chia seeds—once a humble staple of ancient Aztec and Mayan cultures—have rapidly gained superstar status in Indian kitchens. But is this “superfood” just a passing trend, or does modern research truly back its benefits? And most importantly, how can you actually use chia seeds in your daily Indian meals, in ways that are both easy and tasty?

Let’s explore the latest research, break down their real-life advantages, and share 5 fresh, practical Indian ways to enjoy chia seeds every day.


What Makes Chia Seeds Special? (And Why Should Indians Care?)

Chia seeds (Salvia hispanica L.) are tiny black or white seeds loaded with:

  • Omega-3 fatty acids (alpha-linolenic acid)
  • Protein (all essential amino acids)
  • Dietary fiber (both soluble and insoluble)
  • Minerals (calcium, magnesium, phosphorus, iron)
  • Antioxidants (quercetin, chlorogenic acid, kaempferol)

But what does the latest science say about their real health benefits, especially for Indian lifestyles?


Latest Science: What 2025 Research Shows

1. Lowers Blood Pressure (even in 2 weeks)

A meta-analysis of clinical trials published in early 2025 confirmed chia seeds help reduce systolic and diastolic blood pressure—especially in people with mild hypertension. The effect is attributed to their high fiber and plant omega-3 content. (Source: PubMed, 2025)

2. Supports Heart & Metabolic Health

Consuming chia seeds regularly has been shown to reduce triglycerides and LDL (bad) cholesterol, and may even help with modest weight loss. Indian nutritionists are especially interested, given rising rates of heart disease and diabetes in India.

3. Boosts Digestive and Gut Health

Their soluble fiber forms a gel in your gut, which feeds “good” gut bacteria, keeps you regular, and helps prevent blood sugar spikes after Indian carb-rich meals.

4. Improves Bone Strength

A single tablespoon of chia seeds provides about 18% of your daily calcium needs—making them a plant-based boon for vegetarians, vegans, and anyone avoiding dairy.

5. Enhances Hydration and Skin Health

Soaked chia seeds trap water, helping you stay hydrated. Doctors in India now recommend them to patients dealing with hot, dry climates and digestive issues. Early evidence also points to better skin hydration and even mood improvements!


How Much Chia Should You Eat?

  • Safe amount: 1–2 tablespoons (15–30 grams) a day is enough.
  • How to use: Always soak chia seeds for at least 20 minutes before use—dry seeds can expand in your throat and may be a choking risk.
  • Hydrate well: Since they absorb water, drink plenty of fluids.

5 Creative, Practical Ways to Add Chia Seeds to Indian Food

Here’s how you can effortlessly make chia seeds part of your Indian meals—with ideas for every taste and meal of the day!


1. Chia Curd Rice (Dahi-Chia Bowl)

Why: Adds protein, omega-3, and fiber to a classic comfort dish.
How:

  • Mix 1 tablespoon soaked chia seeds into 1 bowl of curd rice (or raita).
  • Add salt, roasted jeera powder, chopped cucumber, and a classic tadka (mustard, curry leaves, ginger, hing).
  • Garnish with pomegranate or coriander.

Pro Tip: Great for lunchboxes—keeps you full, cool, and energized.


2. Masala Chia Buttermilk (Chia-Chaas)

Why: Stay hydrated and support gut health, especially in hot Indian summers.
How:

  • Whisk 1 cup buttermilk/yogurt with roasted cumin, black salt, chopped mint, and green chili.
  • Stir in 1 teaspoon soaked chia seeds.
  • Serve chilled.

Pro Tip: For a tangy twist, add a pinch of chaat masala or grated ginger.


3. Chia Roti/Paratha

Why: Add fiber and healthy fats to everyday Indian breads—without changing the taste!
How:

  • Add 1 tablespoon whole or ground chia seeds to 2 cups atta (wheat flour) while kneading dough.
  • Proceed as usual to make soft rotis or parathas.

Pro Tip: Kids won’t even notice—perfect for picky eaters!


4. Savory Chia Upma or Poha

Why: Upgrade your breakfast or evening snack for better satiety and gut health.
How:

  • Sprinkle 1 tablespoon soaked chia seeds into your upma or poha just before serving.
  • Mix well and let stand 2–3 minutes so the chia gels into the mixture.

Pro Tip: Also works with dhokla or savory oats.


5. Chia-Infused Indian Drinks (Nimbu Pani, Jaljeera, Sattu, Sherbet)

Why: Traditional Indian coolers get a superfood upgrade—great for fasting or weight loss days.
How:

  • Stir 1 teaspoon soaked chia seeds into lemon water, coconut water, sattu, or any traditional Indian drink.
  • Add mint, a touch of black salt, and serve with ice.

Pro Tip: This is a hit during Ramadan, Navratri, or summer wedding season!


Bonus: Sweet Indian Chia Treats

  • Add soaked chia seeds to kheer, phirni, fruit custard, or shrikhand for texture, nutrition, and a touch of crunch.
  • You can even make a healthy “falooda” using chia seeds instead of sabja/tukmaria!

Smart Tips for the Indian Kitchen

  • Always soak first: Chia seeds need 20–30 minutes in water, milk, or curd to form their signature gel.
  • Start slow: If new to chia, begin with 1 teaspoon a day and build up to 1–2 tablespoons.
  • Buy smart: Look for whole seeds from a trusted brand. Black or white is fine—just avoid seeds that look brown (they’re immature).
  • Storage: Keep them in a cool, dry place. They last up to 2 years.
  • For kids and seniors: Ground chia or chia gel is easier to digest and blend into foods.

Final Word: Worth the Hype?

Modern science and centuries-old tradition agree: Chia seeds truly deliver a powerful, plant-based punch. They’re not just a “superfood”—they’re a practical, affordable, and delicious addition to the Indian diet.

Whether you’re aiming for better heart health, stronger bones, weight management, or simply want to boost your family’s nutrition with minimal effort, chia seeds are a tiny investment with huge returns.

Ready to give chia seeds a try? Start with one of the Indian ideas above and share your experiences!


10 FAQs About Chia Seeds in Indian Diets

1. What is the best way to consume chia seeds for maximum health benefits?
Soak chia seeds in water, milk, or yogurt for at least 20–30 minutes before consuming. This helps them form a gel, improving digestibility and nutrient absorption while preventing choking.


2. Can I eat chia seeds raw or dry?
It is not recommended to eat chia seeds dry, as they can expand and cause a choking risk. Always soak or mix them in a moist food or drink.


3. How much chia seed can I safely eat in a day?
Most experts recommend 1–2 tablespoons (15–30 grams) per day for adults. Start with a small amount to allow your digestive system to adjust, and drink plenty of water.


4. Are chia seeds suitable for people with diabetes?
Yes, chia seeds have a low glycemic index and help slow down the absorption of sugar, making them safe and even beneficial for diabetics. They can help control blood sugar spikes after meals.


5. Can children and elderly people eat chia seeds?
Yes, but for children and seniors, ground chia seeds or chia gel is easier to digest and safer. Always introduce slowly and monitor for any digestive discomfort.


6. What’s the difference between chia seeds and sabja (basil) seeds?
Chia and sabja seeds look similar but are from different plants. Chia seeds can be black or white, while sabja seeds are always black, more rounded, and swell faster. Both offer benefits, but chia seeds are richer in omega-3 fatty acids and protein.


7. Can I use chia seeds in hot Indian dishes?
Yes, but it’s best to add soaked chia seeds towards the end of cooking to preserve their nutrients. You can also use ground chia seeds to thicken curries and gravies without altering the flavor.


8. Do chia seeds help with weight loss?
Chia seeds can support weight management due to their high fiber and protein content, which promote fullness and reduce unnecessary snacking. However, they are not a magic solution—combine with balanced diet and exercise.


9. Are chia seeds safe during pregnancy and breastfeeding?
Generally, chia seeds are considered safe and nutritious during pregnancy and lactation, as they provide omega-3s, calcium, and iron. However, consult your doctor before adding any new foods to your diet.


10. How should I store chia seeds and how long do they last?
Store chia seeds in an airtight container in a cool, dry place—preferably away from sunlight. They can last up to 2 years without refrigeration if kept dry and sealed.

Posted on 3 Comments

How Does a High Protein, High Fiber Diet Support Weight Loss?

How Does a High Protein, High Fiber Diet Support Weight Loss?

When it comes to sustainable weight loss, fad diets often promise quick results but leave us frustrated and rebounding. What actually works? Science points us to something beautifully simple: a high-protein, high-fiber diet.

This power duo not only helps shed pounds but also keeps you full, energized, and metabolically balanced. In this post, we dive deep into how these two nutrients work together to support healthy weight loss—backed by the latest research and practical tips to help you get started.


🧬 The Science of Satiety: Why Protein and Fiber Matter

At the heart of any weight loss strategy is one key factor: calories in vs. calories out. But what if you could naturally reduce your calorie intake without feeling starved? That’s where protein and fiber step in.

🥩 Protein: The Hunger-Suppressing Macronutrient

Protein plays multiple roles in weight management:

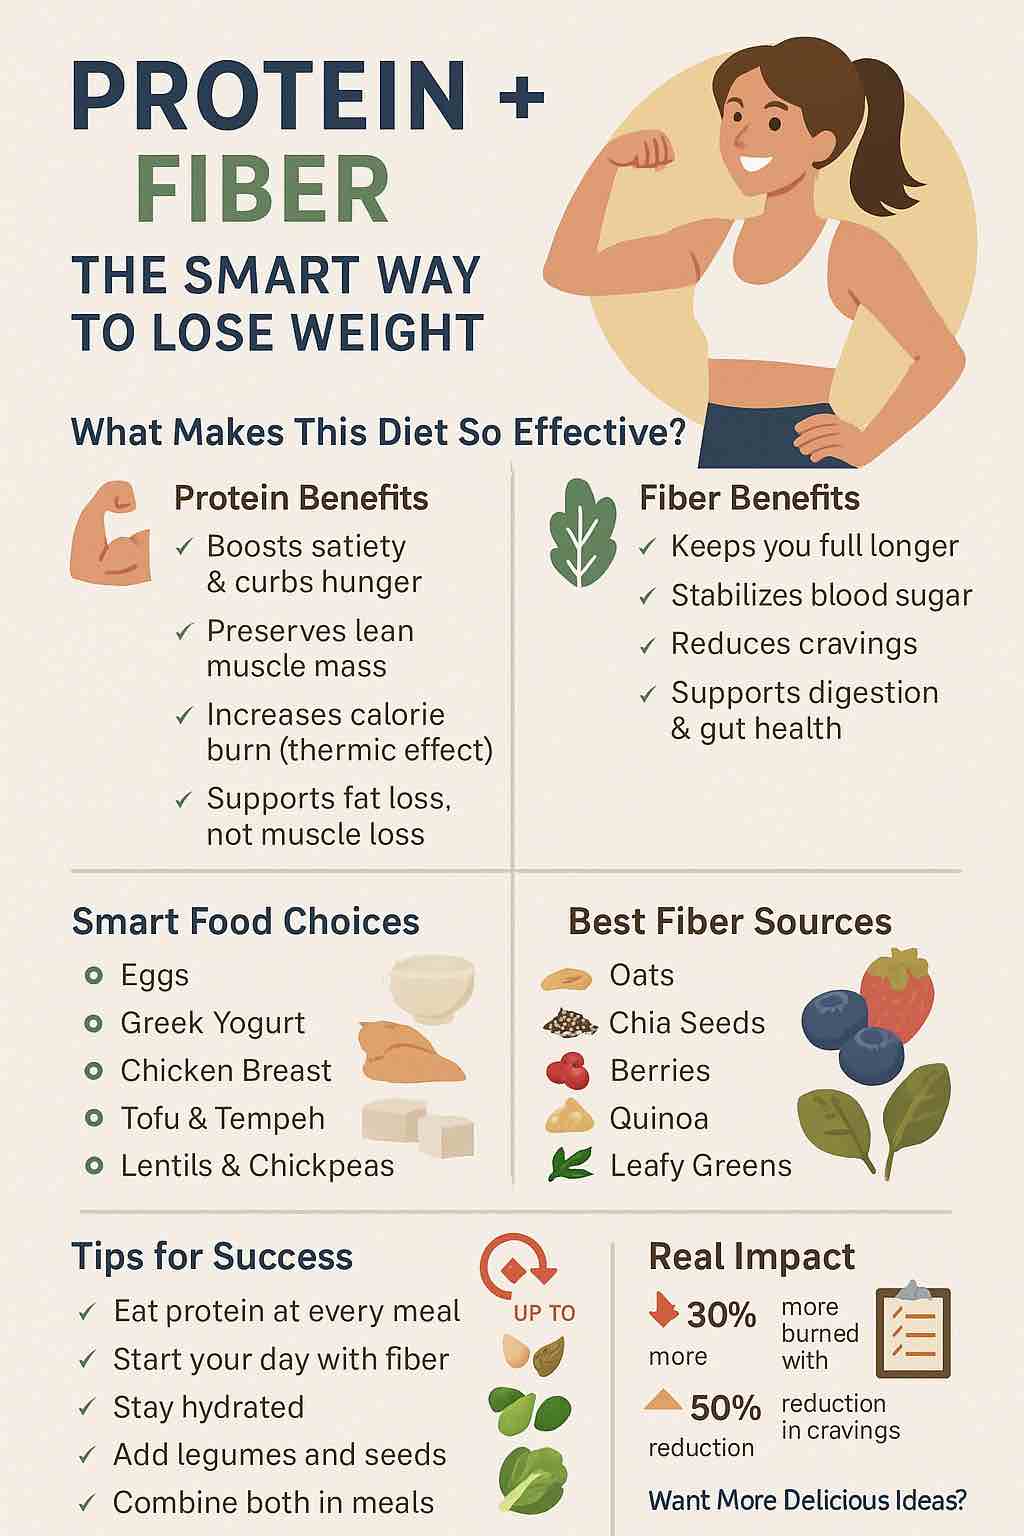
  • Reduces Appetite: It increases the release of satiety hormones (GLP-1, PYY) and decreases the hunger hormone ghrelin. As a result, you’re likely to eat fewer calories throughout the day.
  • Preserves Muscle Mass: During weight loss, we often lose both fat and muscle. Protein ensures your body burns fat rather than precious lean tissue.
  • Boosts Metabolism: Protein digestion has a high thermic effect, meaning it burns more calories during digestion than carbs or fats.

🔍 Clinical Insight: According to a study published by the University of Illinois, higher protein intake was significantly associated with better weight loss outcomes, especially when combined with calorie control.

🌾 Fiber: The Filling, Gut-Friendly Hero

Fiber, especially the soluble type, forms a gel-like substance in the gut. This slows digestion and keeps you fuller longer.

  • Increases Fullness: More fiber = fewer hunger pangs. You feel satisfied for hours without excess calories.
  • Regulates Blood Sugar: A stable blood sugar curve means fewer cravings and energy crashes.
  • Feeds Good Gut Bacteria: A balanced gut microbiome can influence weight management by improving digestion and reducing inflammation.

📚 Fun Fact: A Harvard study found that increasing dietary fiber was one of the simplest and most effective strategies for losing weight without drastically changing eating habits.


🥦 Why the Combo Works: Fiber + Protein = Weight Loss Synergy

You’ve heard of power couples—this is the dietary version.

When consumed together, protein and fiber:

  • Enhance meal satisfaction.
  • Stabilize blood sugar better than either alone.
  • Promote a calorie deficit naturally by reducing the desire to snack.
  • Encourage long-term adherence to healthy eating habits because you’re not battling constant hunger.

🧘‍♀️ Beyond Weight Loss: Additional Benefits

Adopting a high-protein, high-fiber diet doesn’t just help the scale move—it improves overall health:

BenefitHow It Helps
🔄 Balanced HormonesProtein and fiber regulate insulin and appetite hormones.
❤️ Heart HealthFiber helps lower LDL cholesterol levels.
💪 Muscle RetentionProtein protects muscle mass, especially during dieting.
🌿 Gut HealthFiber nourishes good gut bacteria, improving digestion.
⚡ Energy and FocusStable blood sugar = sustained energy and fewer crashes.

🍽️ Sample High-Protein, High-Fiber Foods

To get started, aim for meals that balance both nutrients. Here are some star performers:

🥜 Protein-Rich Choices:

  • Lentils, chickpeas, tofu
  • Eggs, Greek yogurt
  • Chicken, turkey, fish
  • Nuts, seeds (chia, flax, pumpkin)

🌽 Fiber-Packed Options:

  • Oats, quinoa, brown rice
  • Berries, apples (with skin), bananas
  • Broccoli, spinach, sweet potatoes
  • Beans, legumes, avocados

🗓️ A Day on a High-Protein, High-Fiber Diet

Breakfast: Greek yogurt with chia seeds, oats, and berries
Lunch: Grilled chicken salad with avocado, black beans, and quinoa
Snack: Handful of almonds and a pear
Dinner: Stir-fried tofu with broccoli, bell peppers, and brown rice
Hydration: At least 2 liters of water daily (fiber needs fluids!)


⚖️ Weight Loss Tips: Make It Work for You

  • Start Slow: Increase fiber gradually to avoid bloating and cramps.
  • Stay Hydrated: Water is essential when consuming high fiber.
  • Plan Meals: Prepping high-protein, high-fiber meals reduces impulse eating.
  • Mix and Match: Combine animal and plant proteins for variety and complete amino acid profiles.
  • Track Progress: Use a food journal or app to ensure you’re hitting your targets.

❌ Common Pitfalls to Avoid

  • Too Much Too Soon: A sudden fiber increase can backfire.
  • Ignoring Portion Sizes: Even healthy food has calories.
  • Low Water Intake: Can lead to constipation with a high-fiber diet.
  • Protein Overload Without Fiber: May cause sluggish digestion or poor satiety.

💬 Final Thoughts

A high-protein, high-fiber diet is more than a trend—it’s a lifestyle upgrade backed by science. By promoting satiety, stabilizing blood sugar, preserving muscle mass, and improving gut health, this diet helps you lose weight sustainably and feel fantastic while doing it.

You don’t need gimmicks or deprivation—just smart, nutrient-rich choices.


🧠 Want to Learn More?

We’ve only scratched the surface. Dive deeper into expert tips, meal plans, and delicious recipes tailored for weight loss success—only on MasalaMonk.com.

👉 Click here to explore more high-protein, high-fiber diet ideas

❓ 10 FAQs About High-Protein, High-Fiber Diets for Weight Loss

1. How much protein should I eat daily for weight loss?

Most experts recommend 1.2–2.0 grams of protein per kilogram of body weight. For someone weighing 70 kg (154 lbs), that’s about 84–140 grams daily, depending on activity level and goals.


2. How much fiber do I need each day?

Women should aim for at least 25 grams of fiber per day, while men should target 30–38 grams. Most people currently eat far less than this.


3. Can I lose weight just by increasing protein and fiber without counting calories?

Yes—many people naturally eat fewer calories when they feel fuller for longer. That said, tracking intake (even roughly) can enhance results.


4. Are plant-based sources of protein and fiber effective for weight loss?

Absolutely. Beans, lentils, tofu, seeds, and whole grains are excellent plant-based options that support weight loss just as effectively.


5. Will a high-protein, high-fiber diet affect digestion?

In the short term, increasing fiber too quickly can cause gas or bloating. Start slow and drink plenty of water. Long-term, fiber improves digestion and gut health.


6. Can I follow this diet if I’m vegetarian or vegan?

Yes. Lentils, chickpeas, quinoa, chia seeds, tofu, tempeh, and whole grains are great sources of both protein and fiber for plant-based eaters.


7. What’s the best time to eat protein and fiber for weight loss?

Distribute intake evenly throughout the day to maintain satiety, stable energy, and blood sugar. Don’t skip protein or fiber at breakfast!


8. How soon can I see weight loss results?

Results vary, but many people notice reduced cravings, better portion control, and initial fat loss within the first 2–4 weeks of consistent eating.


9. Can this diet help with belly fat?

Yes. Protein helps preserve muscle while burning fat, and fiber helps reduce insulin spikes—both key in targeting visceral (belly) fat.


10. Is this a sustainable, long-term approach?

Definitely. Unlike restrictive diets, a protein- and fiber-rich approach is sustainable, promotes real food, and supports overall wellness.

Posted on Leave a comment

Edamame and the Ketogenic Diet

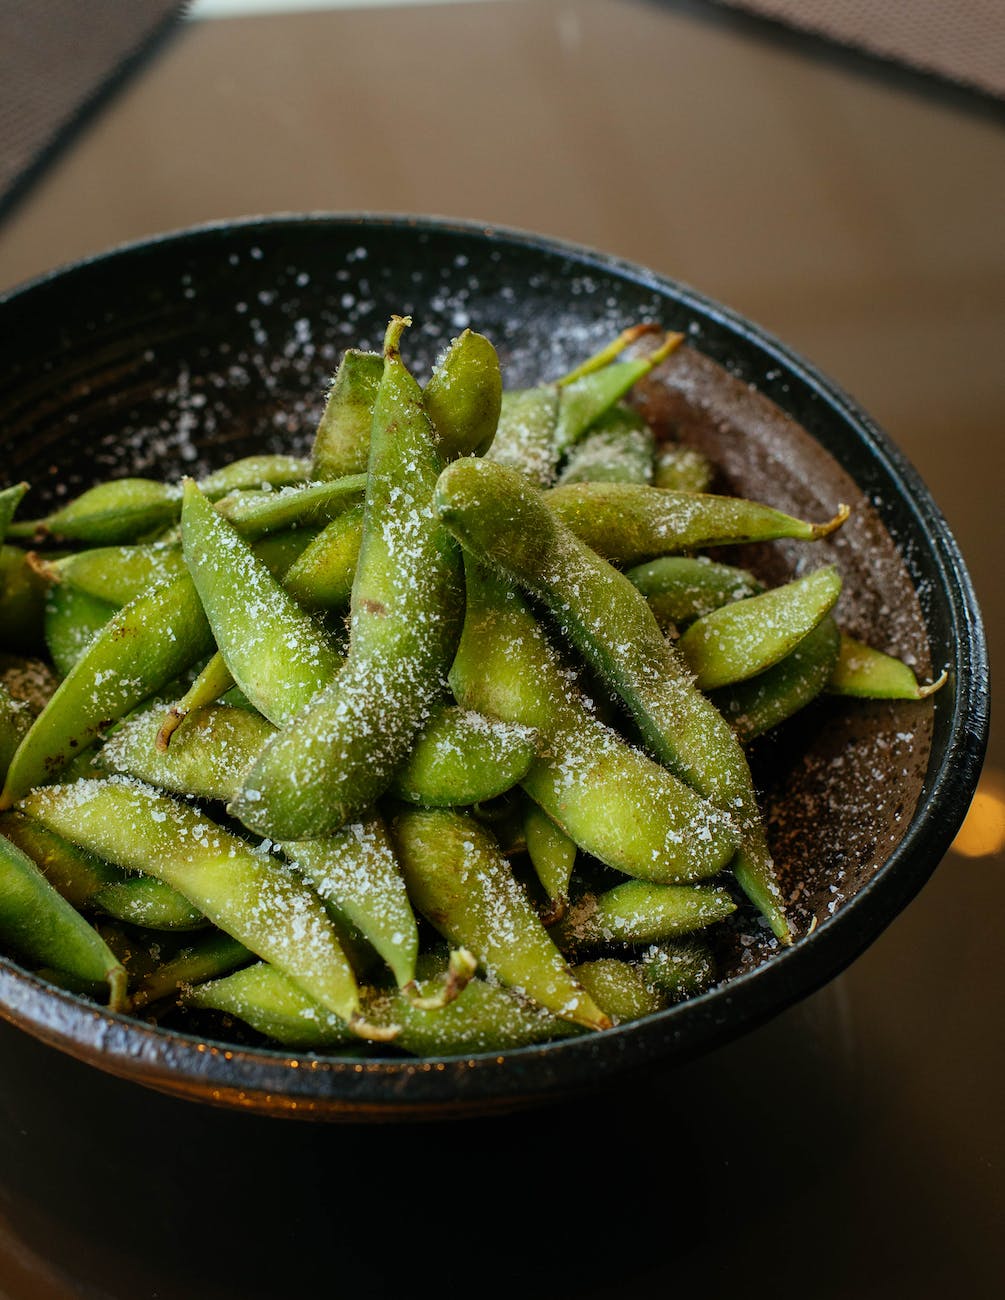
green bean

The ketogenic diet, with its emphasis on high fats and minimal carbohydrates, has become a dietary sensation. As keto enthusiasts continuously seek diverse foods to enrich their meals, edamame has emerged as a subject of intrigue. These tender green soybeans, often relished in salads or as snacks, have sparked discussions about their compatibility with the ketogenic lifestyle. This guide delves deep into the world of edamame, exploring its place within the ketogenic framework.


Benefits and Nutrition of Edamame

Edamame, while delicious, is more than just a tasty treat. Its nutritional profile is both rich and varied:

  • Carbohydrates: Edamame contains carbohydrates, but what sets it apart is the significant amount of dietary fiber it offers. This fiber reduces the net carb content, making it more keto-friendly than one might initially think.
  • Fiber: The fiber in edamame not only aids in digestion but also ensures that blood sugar levels remain stable, preventing those dreaded spikes.
  • Protein: Edamame stands out as a potent source of plant-based protein, a boon especially for vegetarians and vegans navigating the keto landscape.
  • Vitamins and Minerals: This green gem is packed with Vitamin K, folate, magnesium, and iron, among other essential nutrients.

Where Does Edamame Fit In Keto Diet?

The ketogenic diet’s essence lies in achieving and maintaining ketosis. Given this goal, understanding edamame’s role is crucial:

  • Net Carbs and Keto: After accounting for fiber, edamame’s net carb content becomes more palatable for keto enthusiasts. This means that with careful portion control, edamame can be a delightful addition to keto meals.
  • Keto Culinary Adventures with Edamame: From edamame hummus to keto-friendly edamame salads, there’s a plethora of ways to introduce this legume into your ketogenic menu.

Benefits of Edamame in a Keto Diet

  1. Diverse Culinary Experiences: Edamame offers a refreshing break from the monotony of repetitive keto meals. Its versatility ensures that your keto journey remains flavorful.
  2. A Protein Powerhouse: Especially for those who abstain from meat, edamame becomes a critical protein source in a keto regimen.
  3. Micronutrient Boost: A keto diet can sometimes fall short in providing certain vitamins and minerals. Edamame fills this gap, ensuring a balanced nutrient intake.
  4. Blood Sugar Regulation: With its low glycemic index, edamame is a boon for those monitoring their blood sugar levels, making it a safe choice even for diabetics considering keto.

Edamame and Low-Carb Diets

Given its carb content, is edamame suitable for low-carb diets? The answer lies in understanding net carbs. When you subtract the fiber content from the total carbs, edamame’s net carb content is relatively low, making it a viable option for those watching their carb intake.


Is Edamame Keto-Friendly?

The ketogenic diet focuses on high fat, moderate protein, and very low carb intake. While edamame does have carbs, its net carb content, given its high fiber, can fit into a keto diet when consumed in moderation. Plus, there are various edamame-based keto recipes that can be incorporated into the diet.


Edamame’s Glycemic Index

The glycemic index (GI) measures how quickly foods raise blood sugar levels. Foods with a low GI are considered better for blood sugar control. Edamame has a relatively low GI, which means it releases its sugars slowly into the bloodstream, preventing rapid spikes.

Navigating Potential Pitfalls

While edamame is a treasure trove of nutrition, there are considerations to keep in mind:

  • Portion Control: It’s easy to overindulge, but with edamame, it’s crucial to monitor portions to stay within keto carb limits.
  • Sourcing Matters: Always opt for organic, non-GMO variants of edamame. This ensures you’re consuming a product free from harmful pesticides and genetic modifications.

Frequently Asked Questions

  1. What makes edamame a topic of interest for keto enthusiasts?
    • Edamame, being a rich source of plant-based protein and fiber, offers a unique combination of nutrients that can fit into the keto diet when consumed mindfully. Its versatility in recipes also makes it an attractive option for those looking to diversify their keto meals.
  2. How does the carbohydrate content in edamame align with keto guidelines?
    • While edamame does contain carbohydrates, a significant portion is dietary fiber, which is subtracted to calculate net carbs. This makes its net carb content moderate, allowing it to be included in the keto diet in controlled amounts.
  3. Can edamame be a protein substitute for meat on a keto diet?
    • Absolutely! For vegetarians or those looking to reduce meat intake, edamame serves as an excellent protein alternative on keto. However, it’s essential to balance it with other protein sources to meet daily requirements.
  4. Are there any creative ways to include edamame in keto-friendly recipes?
    • Beyond the traditional steamed or boiled preparations, edamame can be transformed into dips, added to keto stir-fries, or even incorporated into low-carb casseroles. Its neutral taste makes it adaptable to various cuisines and flavors.
  5. Is there any concern about the glycemic index of edamame?
    • Edamame boasts a low glycemic index, meaning it releases sugars into the bloodstream gradually. This prevents rapid spikes in blood sugar, making it a safer choice for those monitoring their glucose levels.
  6. How does edamame’s nutritional profile compare to other legumes?
    • Edamame stands out due to its higher protein and fiber content compared to many other legumes. Additionally, its micronutrient richness, including vitamins like folate and minerals like magnesium, sets it apart.
  7. What should I be cautious about when incorporating edamame into my keto diet?
    • Portion control is crucial. While edamame offers many benefits, overconsumption can lead to exceeding your daily carb limit on keto. It’s also advisable to opt for organic, non-GMO variants to ensure the highest quality.
  8. I’ve heard about edamame being beneficial for blood sugar regulation. How does that work?
    • The dietary fiber in edamame slows the release of sugars, ensuring a steady energy supply without causing abrupt blood sugar spikes. This makes it beneficial not just for those on keto, but also for individuals with diabetes or insulin sensitivity.
  9. Are there any other keto-friendly legumes similar to edamame?
    • While most legumes are higher in net carbs, some, like green beans and snap peas, can be consumed in moderation on keto. However, edamame remains one of the more keto-compatible options among legumes.
  10. How can I ensure the best quality when purchasing edamame for my keto diet?
  • Look for labels indicating “organic” and “non-GMO” when buying edamame. This ensures you’re getting a product free from potential pesticides and genetic modifications.

Conclusion

Edamame, with its myriad of nutritional benefits, can indeed find a harmonious place within the ketogenic diet. Its adaptability in recipes and rich nutrient profile make it a commendable choice. However, as with all foods on keto, mindfulness is key. Monitoring portions and being aware of its effects on your body will ensure a successful keto journey with edamame by your side.

Tags: edamame, ketogenic diet, keto-friendly legumes, net carbs, edamame nutrition, keto recipes, plant-based keto, blood sugar regulation.

Posted on 2 Comments

Quick and Healthy Oatmeal Bread for Breakfast

bread on plate beside glas

Hello, Eatlo community! 🍽️👋 We’re back with another exciting video for all the health-conscious foodies out there. This time, we’re bringing you a fantastic recipe from Kochen zu Hause, titled “My Fastest Oatmeal Bread for a Healthy Breakfast! No Flour No Butter”.🍞🌞

About Kochen zu Hause 🎥🍴

Kochen zu Hause is a wonderful platform that features a plethora of healthy, easy-to-make recipes. Their mission is to make cooking accessible and enjoyable, with a focus on health and simplicity. In this video, they take us through the process of making a healthy oatmeal bread using simple ingredients and no refined flour or butter.

The Magic of Oatmeal Bread 🍞✨

Oatmeal bread is a fantastic alternative to traditional wheat bread. It’s packed with fiber and protein, making it a great choice for a healthy breakfast or snack. This recipe is not only healthy but also quick and easy to make, perfect for those busy mornings.

The Recipe 📝🍞

The recipe starts with a cup of long-cooked oatmeal. To this, an egg, salt to taste, a tablespoon of sunflower seeds, and a tablespoon of pumpkin seeds are added.

Next, 200 ml of kefir or yogurt is mixed in, followed by a teaspoon of baking soda. Half a tablespoon of apple cider vinegar is added last to activate the baking soda.

The mixture is quickly stirred and poured into a baking dish. It’s then baked in a preheated oven at 180°C for about 30-35 minutes.

The result is a soft, delicious oatmeal bread that’s perfect for a healthy breakfast.

Nutritional Information 🍞📊

Per 100 grams of this oatmeal bread, you get:

  • Calories: 199 kcal
  • Protein: 8.64 g
  • Fat: 9.76 g
  • Carbohydrates: 18.54 g

Join the Conversation! 🗣️👥

This video is a must-watch for anyone interested in healthy baking and looking for a delicious, easy-to-make oatmeal bread recipe. The recipe is detailed, easy to follow, and results in a delicious, healthy oatmeal bread that’s perfect for breakfast or a snack.

Don’t forget to join our Facebook community for more discussions on food, recipes, and well-being. We’d love to hear your thoughts on this video and any experiences you’ve had with making healthy oatmeal bread. See you there! 😊