Posted on 1 Comment

Tater Tot Casserole Recipe

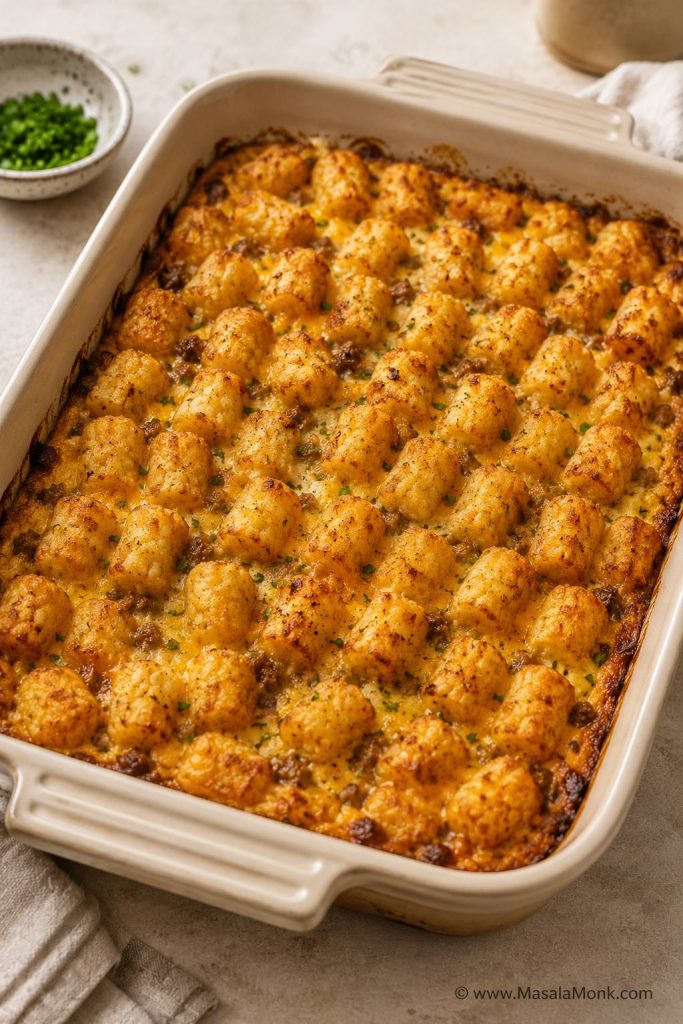
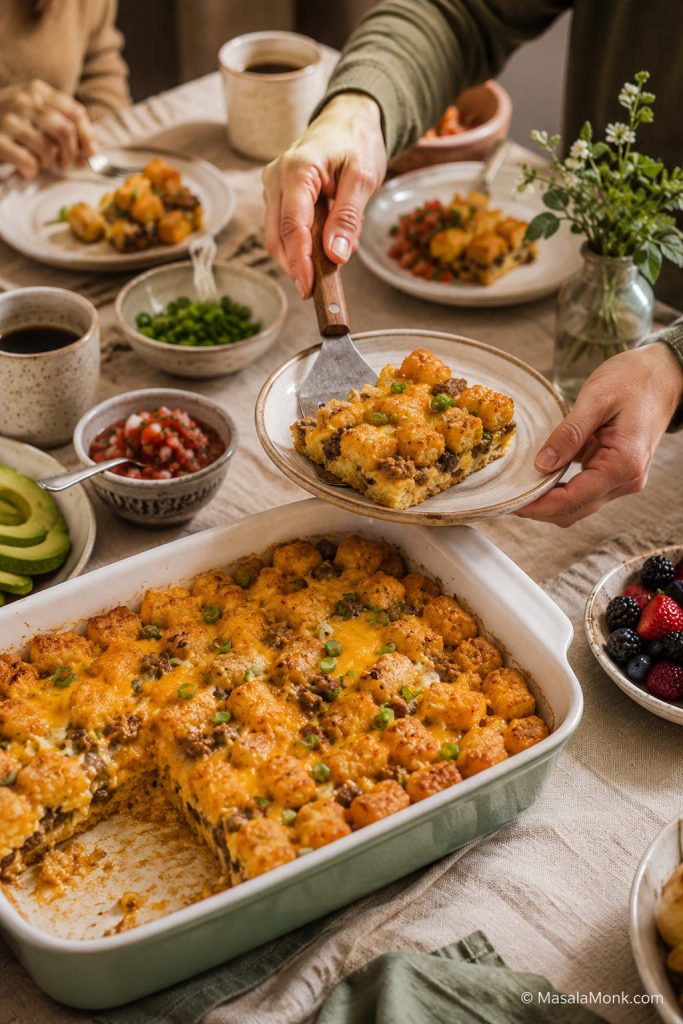
Tater tot casserole with golden crispy tots, creamy ground beef filling, cheddar, and a scoop served from a 9x13 dish

This tater tot casserole recipe is the cozy 9×13 dinner people come back to for seconds: seasoned ground beef, creamy mushroom filling, melted cheddar, and frozen tots that bake golden and crisp on top.

The small upgrade is all in the layering. Most of the cheese goes under the tots, the filling stays creamy but not loose, and the casserole bakes uncovered so the topping browns instead of steaming. That one change helps keep the casserole from turning into a soft, heavy pan of potatoes and sauce.

It does not ask much from you: one skillet for the beef, one baking dish, and a bag of tots straight from the freezer. Make it with cream of mushroom soup, green beans, corn, or mixed vegetables, or use the no-soup version below when you want a homemade sauce.

Best of all, it feels bigger than the effort: a little browning, a little stirring, one layer of tots, and then the oven turns everything into a bubbling, scoopable casserole. It is the kind of dinner that works on a cold night, a busy school night, or any evening when you want something familiar, filling, and easy to scoop straight from the pan.

Quick Answer: Tater Tot Casserole Recipe

To make tater tot casserole, brown 1 pound of ground beef with onion and seasoning, stir in cream of mushroom soup, sour cream, milk, vegetables, and cheese, spread the filling in a 9×13-inch baking dish, top with frozen tater tots, and bake uncovered at 375°F for 40–45 minutes. For the best texture, keep the tots frozen, arrange them in one layer, and add extra cheese only near the end.

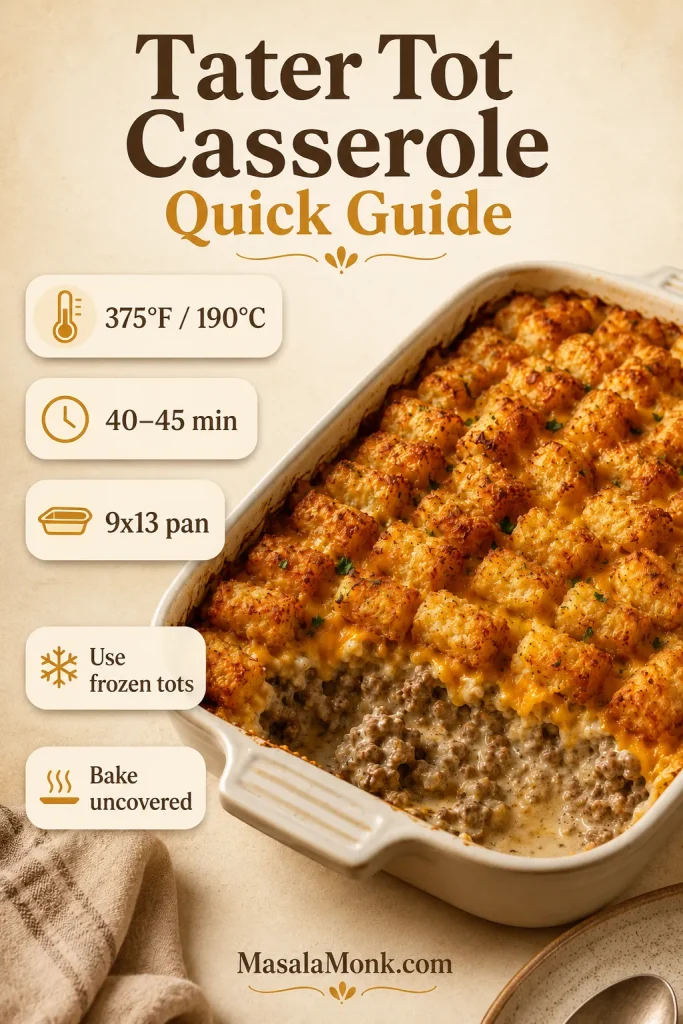
Tater tot casserole quick guide showing 375°F bake temperature, 40 to 45 minute bake time, 9x13 pan, frozen tots, and uncovered baking
Start with the basics: a 9×13 pan, frozen tots, 375°F heat, and an uncovered bake so the topping can brown.

When it comes out of the oven, the edges should be bubbling, the filling should scoop easily, and the tots on top should still have that little crisp bite. That balance comes from using a filling sturdy enough to support the tots, draining excess grease and vegetable liquid, and avoiding a heavy cheese layer over the top too early.

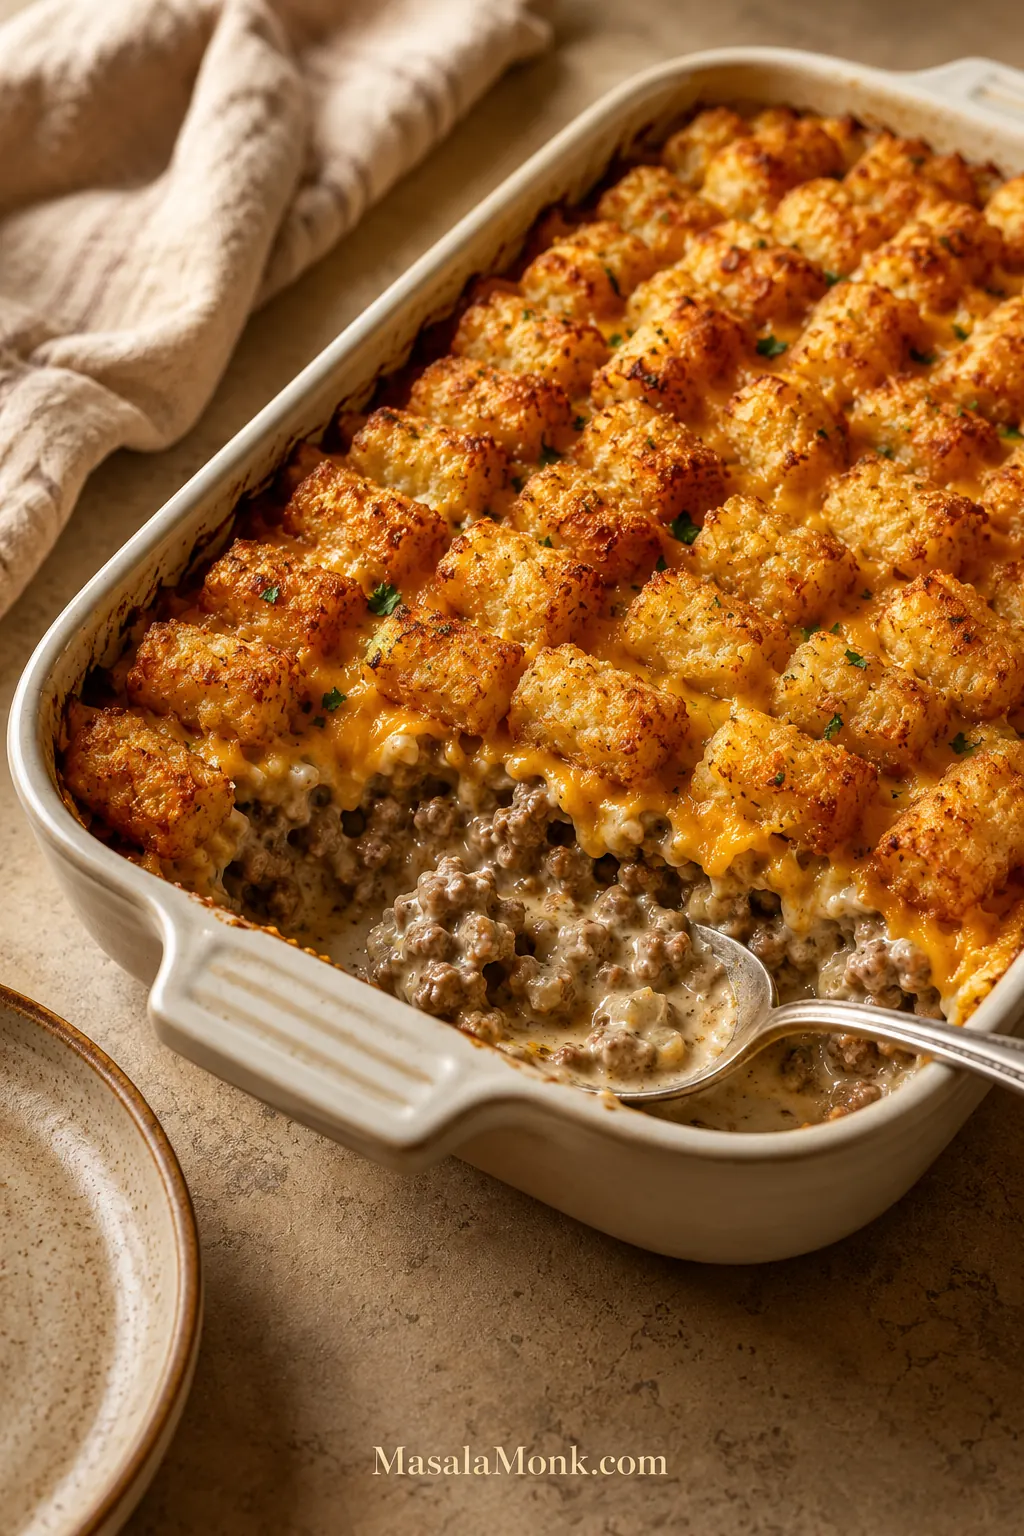
Spoon lifting tater tot casserole with creamy ground beef filling, melted cheese, vegetables, and crispy golden tater tots
A good scoop should hold together without turning soupy, while the tater tots on top still give the casserole a crisp finish.

If your biggest worry is a soft topping, check the crispy tater tot tips before you bake.

What makes this version different: The cheese-under-the-tots rule keeps most of the cheddar in the middle instead of burying the potato layer from the start. You still get a cheesy casserole bite, but the tots stay exposed to the oven so they have a better chance to turn golden instead of soft.
Cheese-under-the-tots rule showing creamy beef filling, cheddar cheese under the tots, and frozen tater tots arranged on top
By moving most of the cheddar under the tots, you keep the casserole cheesy without covering the potato layer too early.

This method is especially helpful when your old version tasted good but came out with soft tots, because it fixes the two biggest texture problems: trapped steam and loose filling.

Tater Tot Casserole at a Glance

Here is the simple version to keep in mind before you start cooking. It uses a full bag of frozen tater tots, a savory ground beef filling, and a 9×13-inch baking dish so the topping has enough room to brown.

Oven temperature 375°F / 190°C
Pan size 9×13-inch / about 3-quart baking dish
Bake time 40–45 minutes, plus 5–10 minutes resting
Best meat Lean ground beef or hamburger
Tater tots Use frozen tots, not thawed
Best vegetables Green beans, corn, peas and carrots, or mixed vegetables
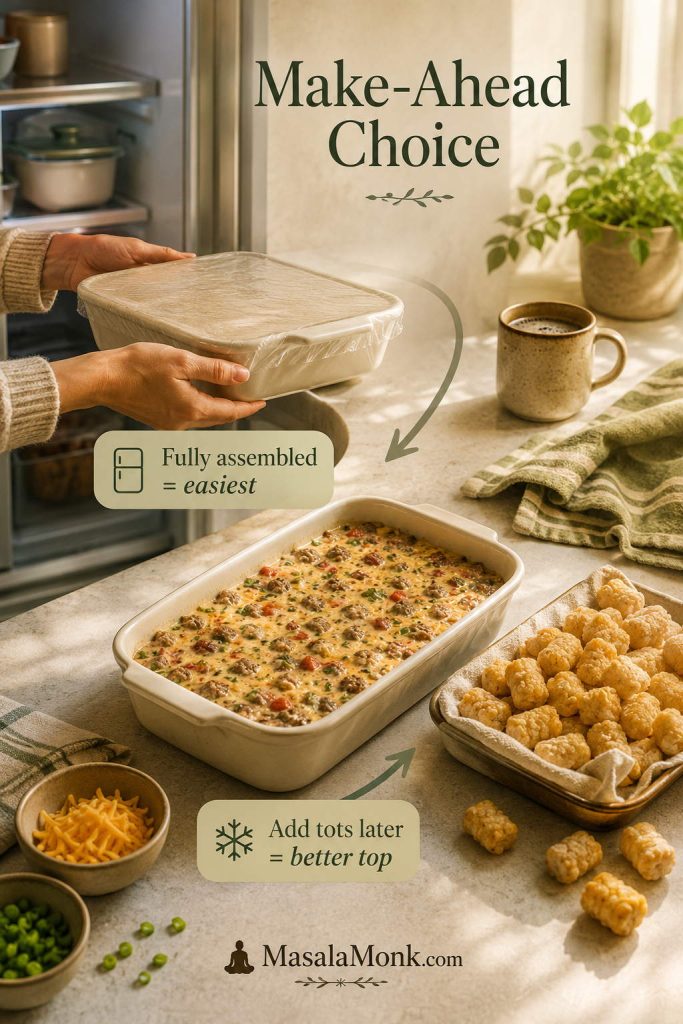
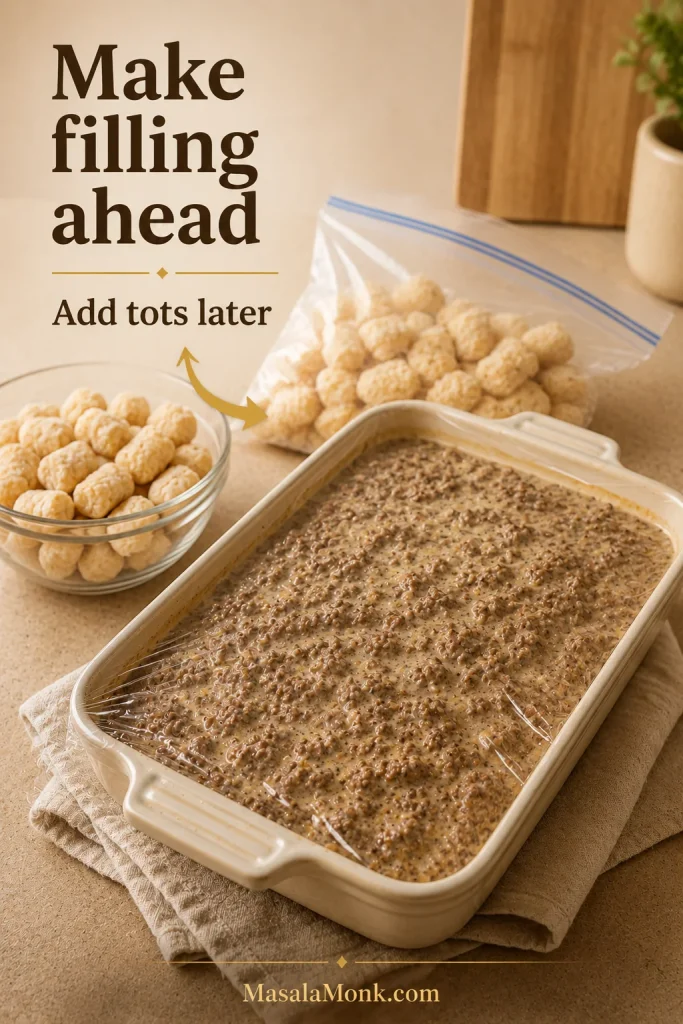
Make ahead? Yes, but add frozen tater tots right before baking for the best topping
Freezer friendly? Yes, especially if you freeze the cooked filling separately and add tots before baking

Why This Recipe Works

A good tater tot casserole should be creamy underneath, cheesy in the middle, and crisp on top. This tater tot casserole recipe keeps the comfort-food flavor people love, but it avoids the usual soggy topping problem by using a sturdy filling, a wide baking dish, frozen tots, and an uncovered bake.

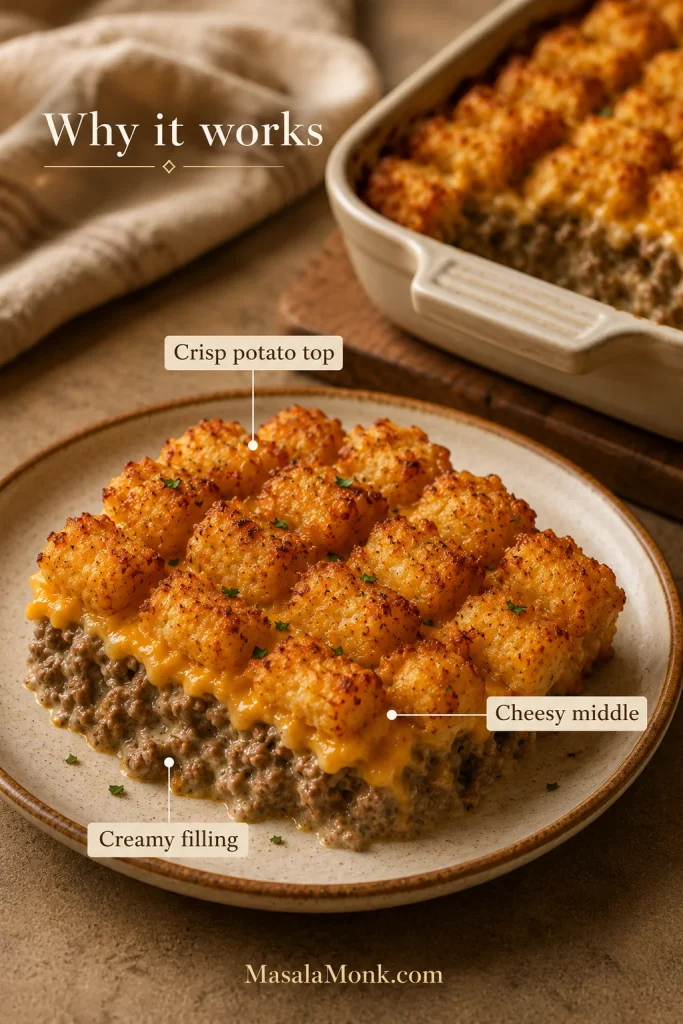
Cutaway serving of tater tot casserole showing creamy beef filling, melted cheddar layer, and crispy tater tot topping
Each layer has a job: beefy filling below, cheddar through the middle, and browned tots on top for contrast.

The cheese placement does a lot of the work. Most of the cheddar melts over the beef filling, so you still get that cheesy casserole bite. Meanwhile, the tots stay exposed to the oven heat. A small final sprinkle of cheese can go on near the end if you want a little extra melt.

That matters because the best bite is not just creamy or cheesy. It is the contrast: hot beefy filling underneath, melted cheddar in the middle, and a potato topping that still has texture when your spoon breaks through.

The filling is creamy without being runny, the beef tastes seasoned rather than flat, and the vegetables add enough balance to keep each scoop from feeling too heavy. Because the filling is sturdy, the tots can sit on top instead of sinking into the sauce.

Ingredients for Tater Tot Casserole

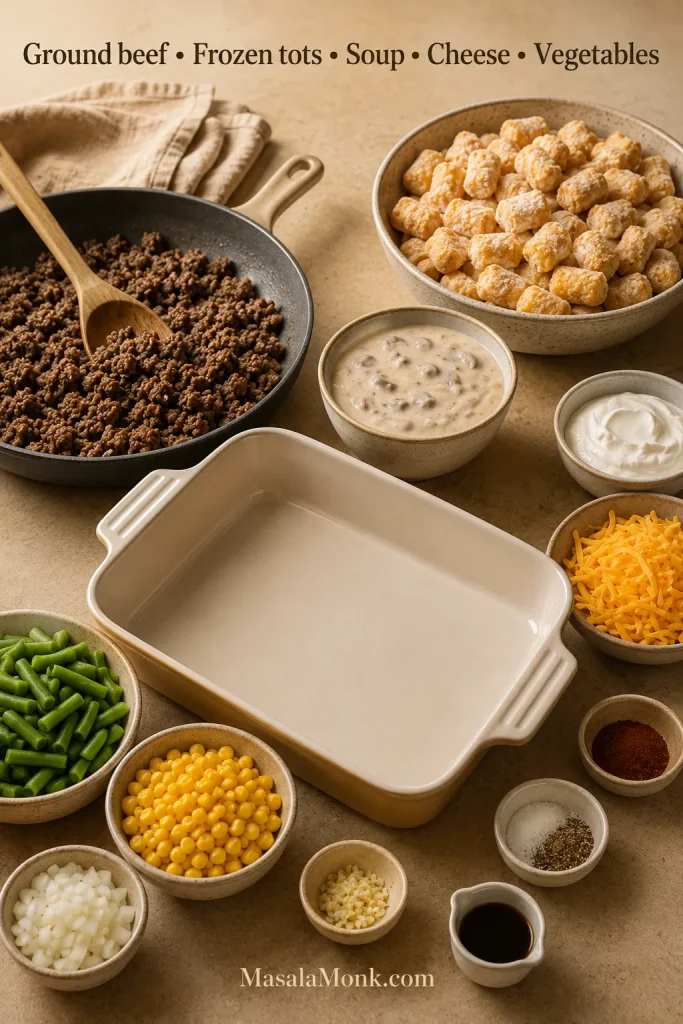
The ingredient list stays simple: ground beef, frozen tater tots, cream of mushroom soup, cheese, and vegetables. However, small upgrades like sour cream, Worcestershire sauce, garlic, paprika, and careful layering give the casserole better flavor without making it fussy.

Ingredients for tater tot casserole including ground beef, frozen tater tots, cream of mushroom soup, sour cream, cheddar, vegetables, onion, garlic, and seasoning
Although the ingredients are familiar, Worcestershire, garlic, and proper layering help the filling taste more balanced than a plain soup-and-beef mix.

Frozen tater tots

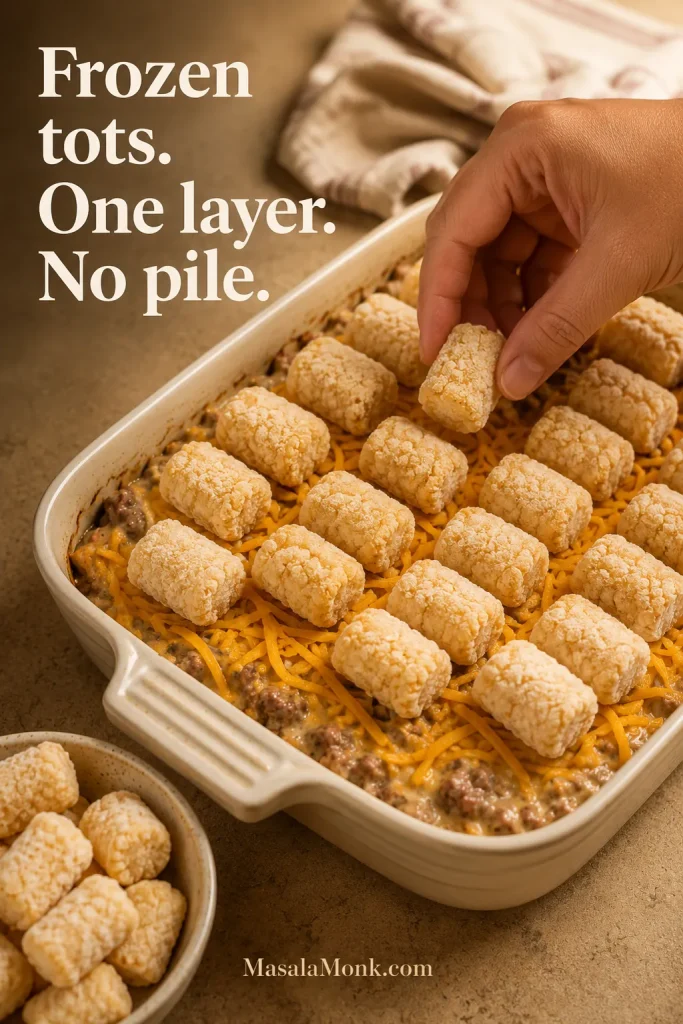
Use 28–32 ounces of frozen tater tots, or enough to cover the casserole in one generous layer. If a few are left in the bag, save them rather than piling them too high. Thawed tots soften quickly and are more likely to turn mushy on top of the filling.

A single layer is ideal. The tots do not need to be arranged perfectly, but they should not be stacked into a thick mound. More exposed edges mean better browning and more crunch.

Frozen tater tots arranged in one layer over tater tot casserole filling with extra tots kept aside
When the tots stay frozen and sit in one layer, they hold their shape better and get more direct heat around the edges.

For more texture help, the crispy tater tot tips explain how pan size, cheese placement, and uncovered baking work together.

Ground beef or hamburger

Lean ground beef gives this casserole its familiar flavor. An 85–90% lean blend works well because it browns nicely without leaving too much grease. Drain excess fat before adding the creamy ingredients so the filling does not turn oily or watery.

Ground turkey can work too, but it tastes milder. If you use turkey, add a little extra Worcestershire sauce, garlic powder, or paprika so the filling still has enough savory depth.

Cream of mushroom soup

Condensed cream of mushroom soup is the traditional base for this kind of casserole. It gives the beef filling a creamy, savory texture and helps everything hold together.

If you do not like mushroom soup, cream of chicken or cream of celery can work too. Also, there is a homemade no-soup sauce later in the post for anyone who wants more control over salt, thickness, and flavor.

There is no need to apologize for the soup version. This is the flavor many people grew up with, and it is the reason the casserole is fast, creamy, and dependable. The homemade sauce is there when you want it, not because the classic version needs fixing.

That same creamy, pantry-friendly style is why dishes like tuna noodle casserole are still so comforting: the sauce, filling, and topping all need to stay balanced.

Sour cream and milk

Sour cream makes the filling richer, while a little milk loosens the condensed soup so it spreads evenly. The sauce should coat the beef and vegetables without pooling in the pan. If it looks loose before baking, simmer it for another minute or two in the skillet.

Green beans, corn, or mixed vegetables

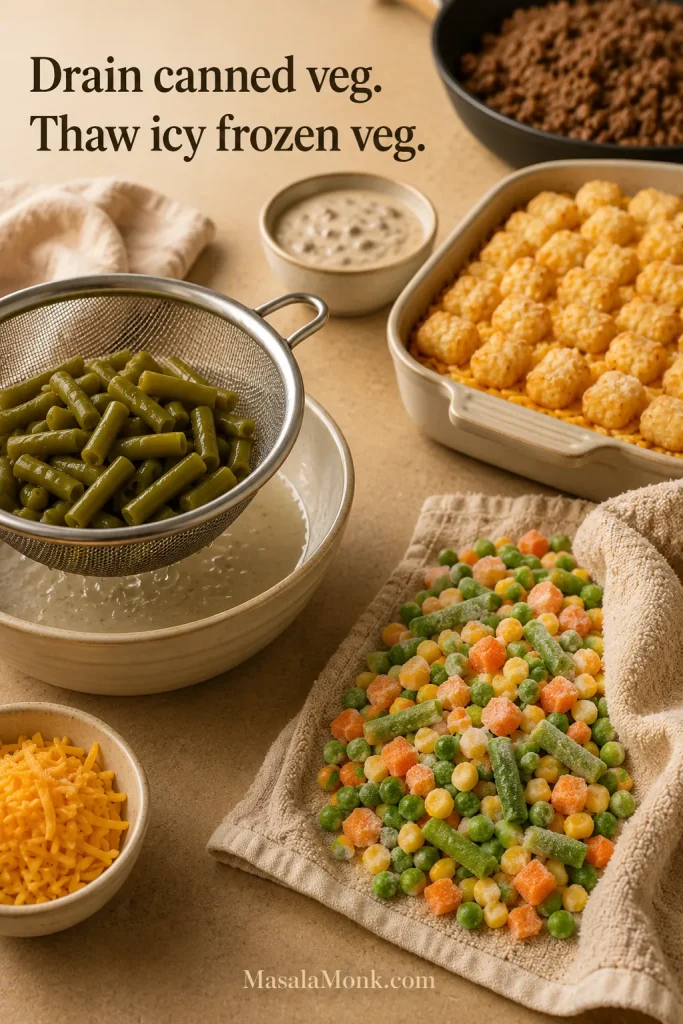
Green beans give the casserole an old-school hotdish feel, corn makes the filling sweeter and more kid-friendly, and mixed vegetables make it feel more like a full dinner in one pan. Drain canned vegetables well and thaw frozen vegetables if they are icy.

That draining step matters. Otherwise, extra liquid from canned green beans, corn, or frosty frozen vegetables can thin the filling and soften the potato topping from below.

Green beans draining in a sieve and frozen mixed vegetables being thawed before adding them to tater tot casserole
Since vegetables can add hidden moisture, drain canned green beans or corn well and thaw icy frozen vegetables before mixing them in.

Cheddar cheese

Sharp or medium cheddar works best. For a better topping, put most of the cheese over the filling and under the tots. Then, save a small handful for the last few minutes of baking.

Pre-shredded cheese is convenient, while freshly shredded cheddar melts more smoothly. Either one works here.

Easy Ingredient Swaps

You can bend this casserole in a lot of directions, but the filling still needs to stay thick enough to hold up the tots. These swaps keep that balance in mind.

Instead of Use What changes
Ground beef Ground turkey, ground chicken, or plant-based crumbles Milder flavor; add extra Worcestershire, garlic, or paprika
Cream of mushroom soup Cream of chicken, cream of celery, cheddar soup, or homemade sauce Changes the flavor and salt level of the filling
Green beans Corn, peas, carrots, or mixed vegetables Adjusts sweetness, color, and texture
Cheddar cheese Colby Jack, Monterey Jack, or a cheddar blend Softer, meltier cheese profile
Sour cream Greek yogurt or a little extra milk Tangier with yogurt; looser with milk

How to Make Tater Tot Casserole

The filling comes together in one skillet, and then the oven does the rest. The only real trick is layering it so the tots stay on top where they can brown.

1. Brown and season the beef

Cook the ground beef and onion in a large skillet until the beef is browned and the onion has softened. Break the meat into small crumbles so the filling spreads evenly through the casserole.

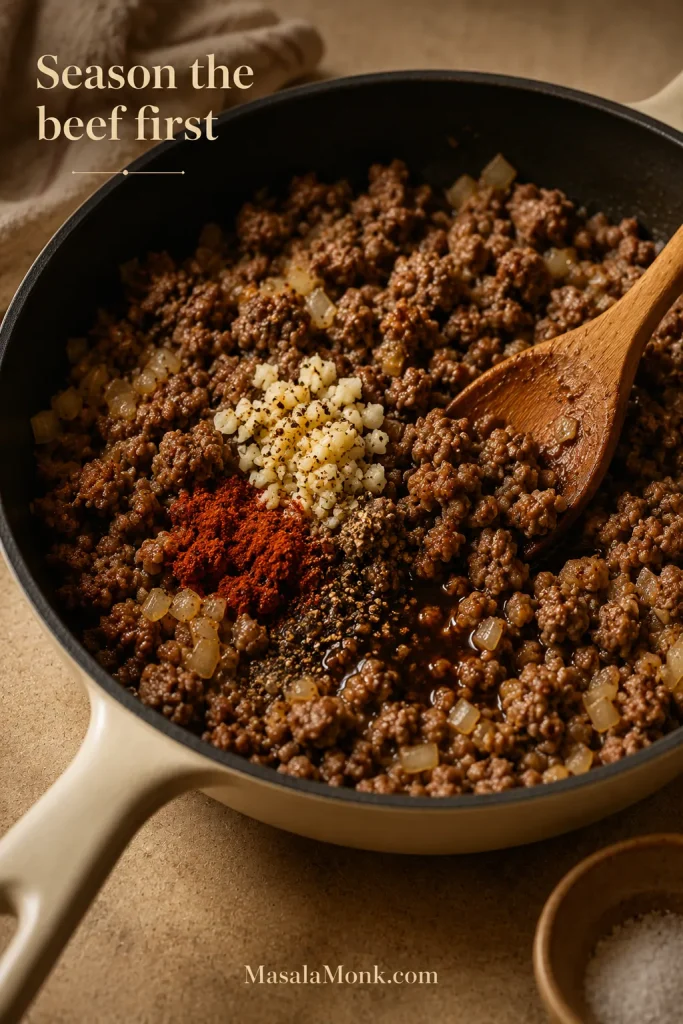
Next, drain excess grease. Then, stir in garlic, Worcestershire sauce, garlic powder, paprika, salt, and pepper. Let the seasonings cook for 30–60 seconds so the beef tastes savory before the creamy ingredients go in.

Browned ground beef with onion, garlic, Worcestershire sauce, paprika, and seasoning being stirred in a skillet
Before the soup and sour cream go in, season the beef well so the whole casserole starts with a savory base.

2. Make the creamy filling

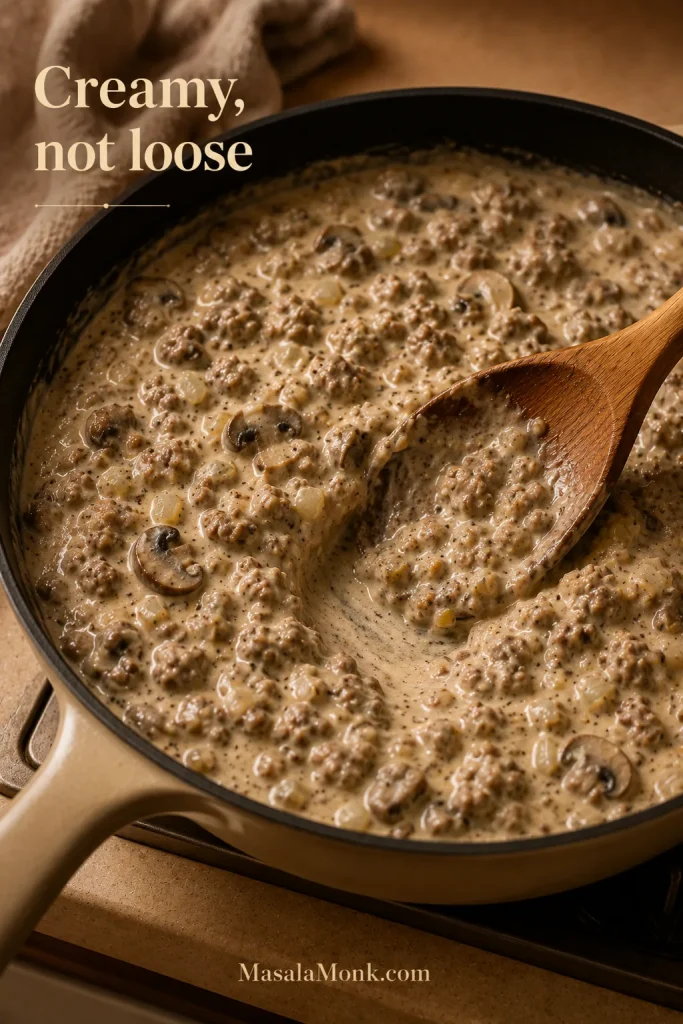
Stir in the cream of mushroom soup, sour cream, milk, and vegetables. The mixture should be creamy but sturdy enough to hold the tots on top. After that, spread it evenly in a greased 9×13-inch baking dish.

Drain canned green beans or corn well before stirring them in. For frozen mixed vegetables, thaw any icy pieces first so the sauce does not thin out in the oven.

Thick creamy tater tot casserole filling in a skillet with a spoon path showing it is not loose or watery
If the filling looks loose in the skillet, simmer it briefly; a thicker base helps keep the tater tot topping from softening underneath.

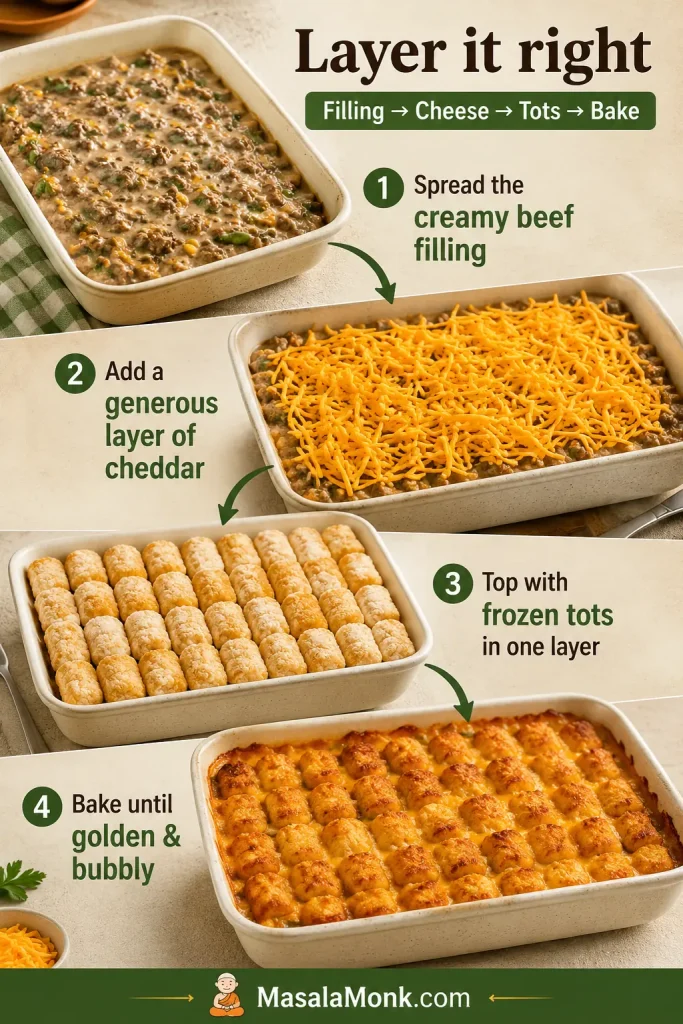
3. Add cheese under the tots

Sprinkle about 1 1/2 cups of cheddar over the filling. This gives the casserole a cheesy middle layer while leaving the top clear for browning.

Shredded cheddar cheese being sprinkled over creamy beef filling before tater tots are added
Sprinkling cheddar at this stage gives you a melted middle layer while leaving the top clear for the frozen tots.

You still get plenty of melted cheese, but the tots are not trapped under a heavy blanket of cheese for the entire bake. Instead, they stay on the surface where the oven heat can reach them.

4. Arrange frozen tots in one layer

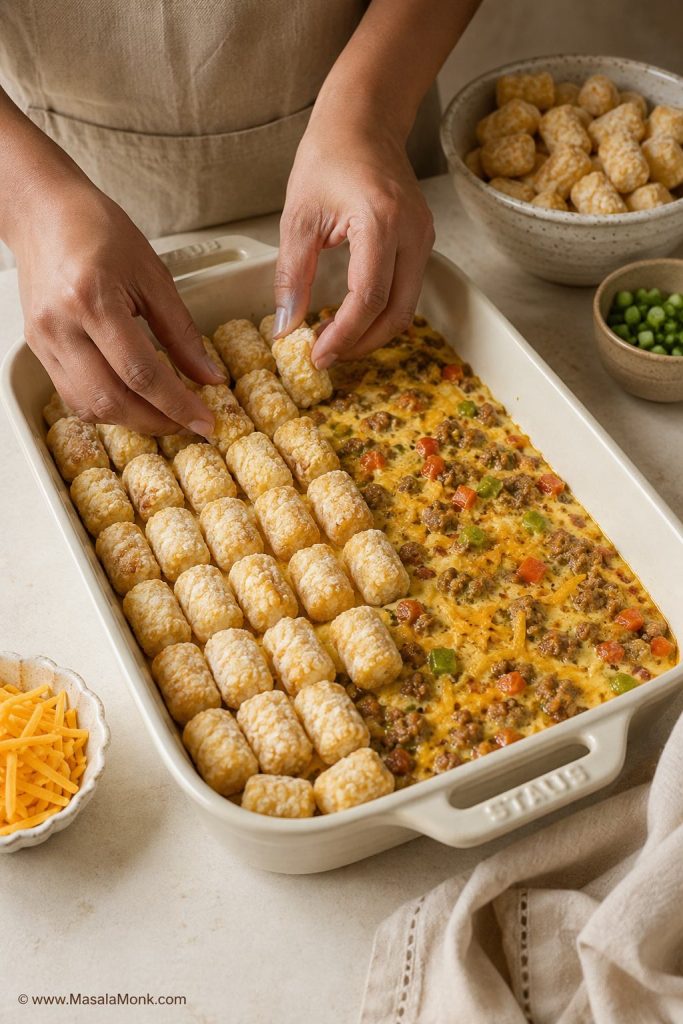
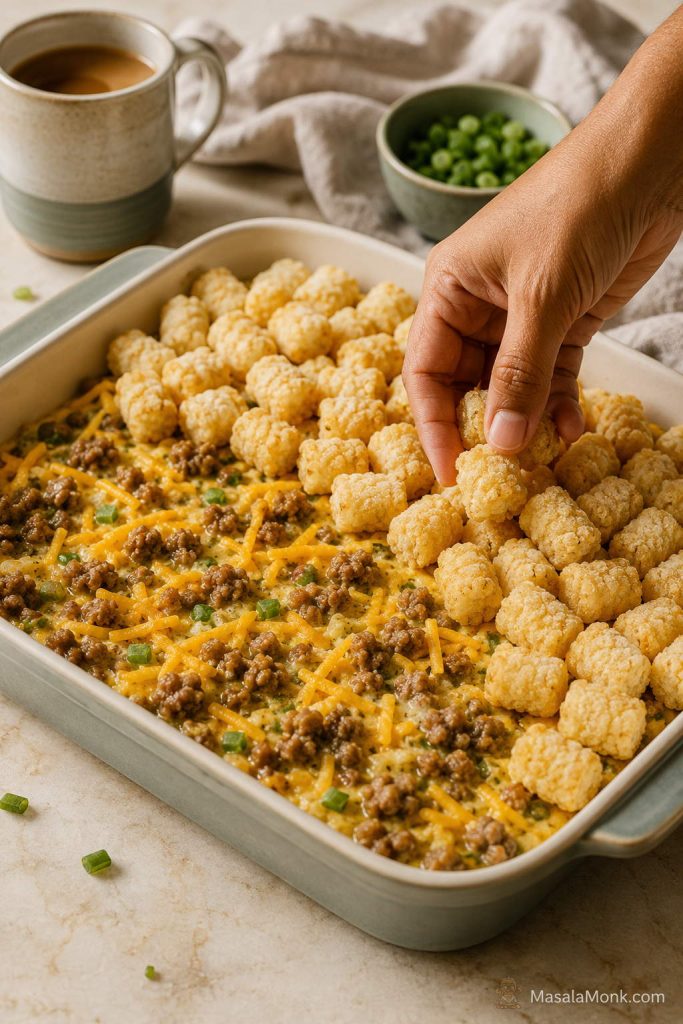
Place the frozen tater tots over the cheese in one generous layer. Try not to pile them too tightly. A little space helps hot air reach more edges.

The tots do not need to be perfectly lined up, but a neat layer does bake more evenly and looks better when served.

Layering guide for tater tot casserole showing creamy beef filling, cheddar cheese, frozen tots, and a baked golden top
Once the filling is spread, the order is simple: cheese next, tots last, and then an uncovered bake for better texture.

5. Bake uncovered until golden and crisp

Bake uncovered at 375°F for about 40 minutes. Then, sprinkle the remaining 1/2 cup of cheddar over the top if you want extra cheese. Finally, bake 5 minutes more, until the filling bubbles at the edges and the tots are golden and crisp.

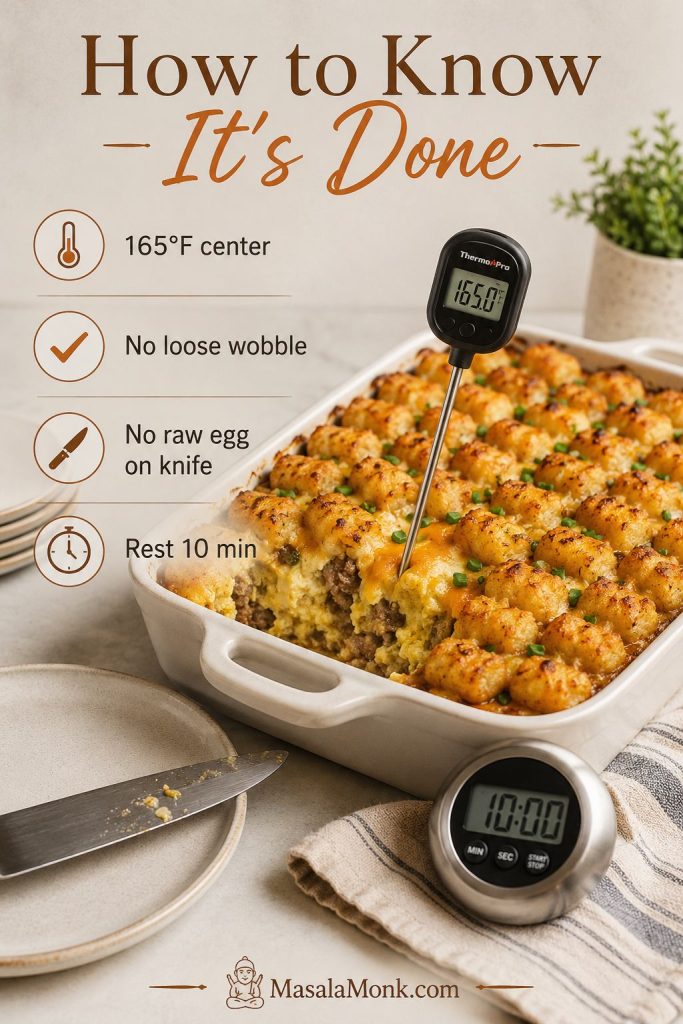
Let the casserole rest for 5–10 minutes before scooping. That short rest helps the filling settle so it serves more neatly. Try not to let it sit too long, though, because the topping will slowly soften from the steam.

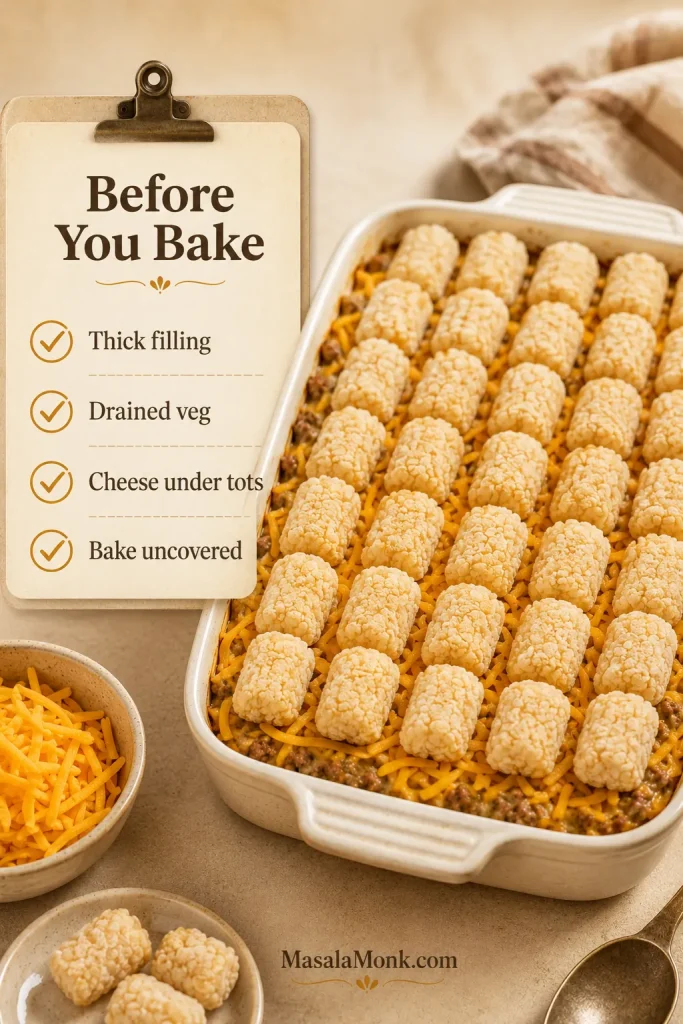
Before You Bake

  • The beef filling should be creamy, not runny.
  • Canned vegetables should be drained well.
  • Frozen vegetables should not be icy.
  • The cheddar should sit mostly under the tots.
  • The tots should cover the dish in one layer, not a pile.
  • The casserole should go into the oven uncovered.
Tater tot casserole ready to bake with checklist for thick filling, drained vegetables, cheese under tots, and uncovered baking
Before the dish goes into the oven, check the texture basics: thick filling, drained vegetables, cheese below, and tots exposed.

After those checks, use the bake-time guide to judge when the center is hot and the topping is browned.

How Long to Bake Tater Tot Casserole

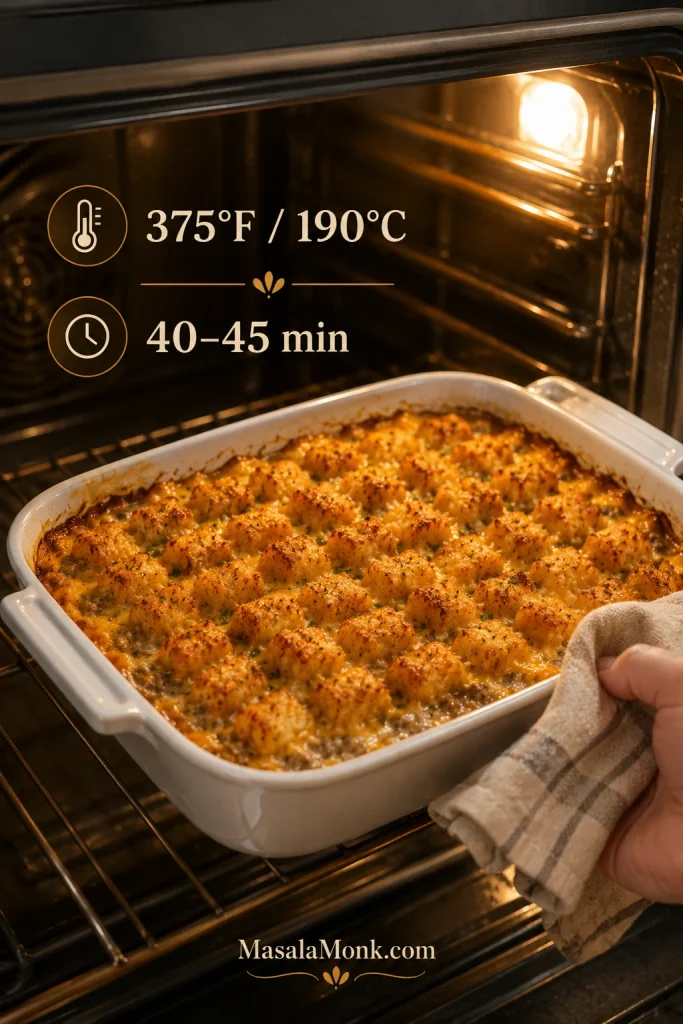
The best balance of bubbling filling and crisp tater tots comes from baking at 375°F / 190°C for 40–45 minutes. It is ready when the edges are bubbling, the center is hot, and the potato topping is browned.

Tater tot casserole baking at 375°F for 40 to 45 minutes until the edges bubble and the top browns
Rather than relying only on the timer, look for bubbling edges, a hot center, and browned tots before pulling the casserole out.

A lower oven temperature gives the filling more time to heat gently, but the topping may not brown as much. A hotter oven can work; however, it can also make the filling bubble too hard, especially if the dish is very full. That is why 375°F is the best default for this version.

If your baking dish is very full, set it on a rimmed baking sheet before it goes into the oven. It catches any bubbling sauce and makes the casserole easier to move in and out of the oven.

Oven temperature Approximate bake time Best use
350°F / 175°C 45–55 minutes Gentler bake, slightly softer topping
375°F / 190°C 40–45 minutes Best default for this recipe
400°F / 200°C 35–45 minutes Can brown well, but watch for aggressive bubbling
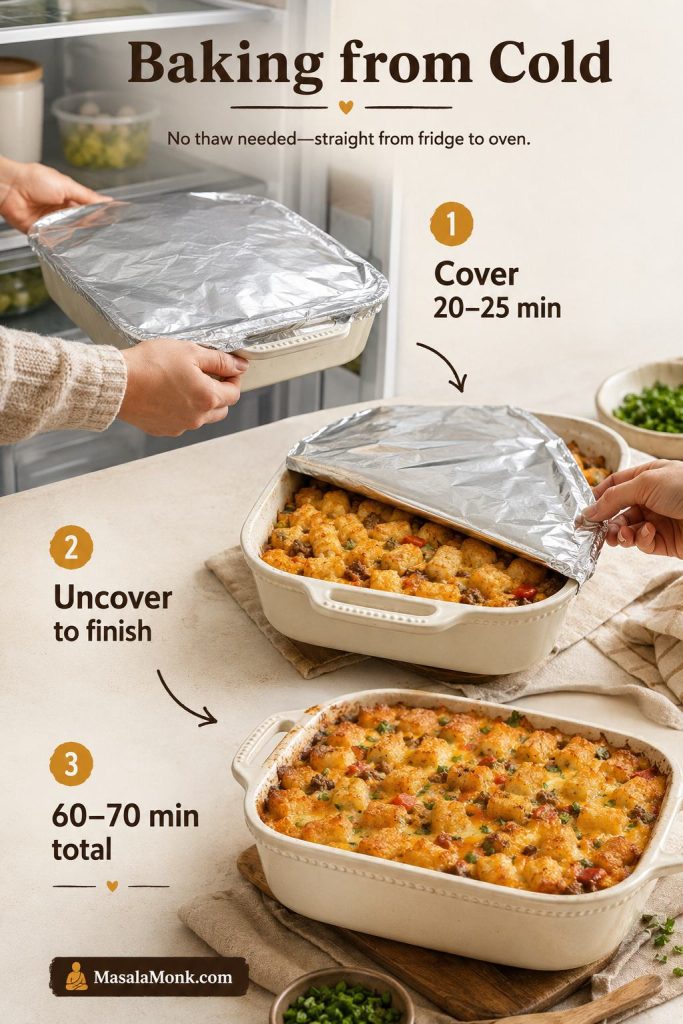
From the fridge Add 10–15 minutes Best if the filling was made ahead
From frozen Covered first, then uncovered Use a thermometer to check the center

If your casserole is coming from the refrigerator, see the make-ahead notes before you add extra time.

If you are baking the casserole from cold or reheating leftovers, check that the center is hot before serving. The USDA recommends reheating leftovers to 165°F / 74°C, and an instant-read thermometer is the easiest way to check a deep casserole. See the USDA safe temperature guidance here.

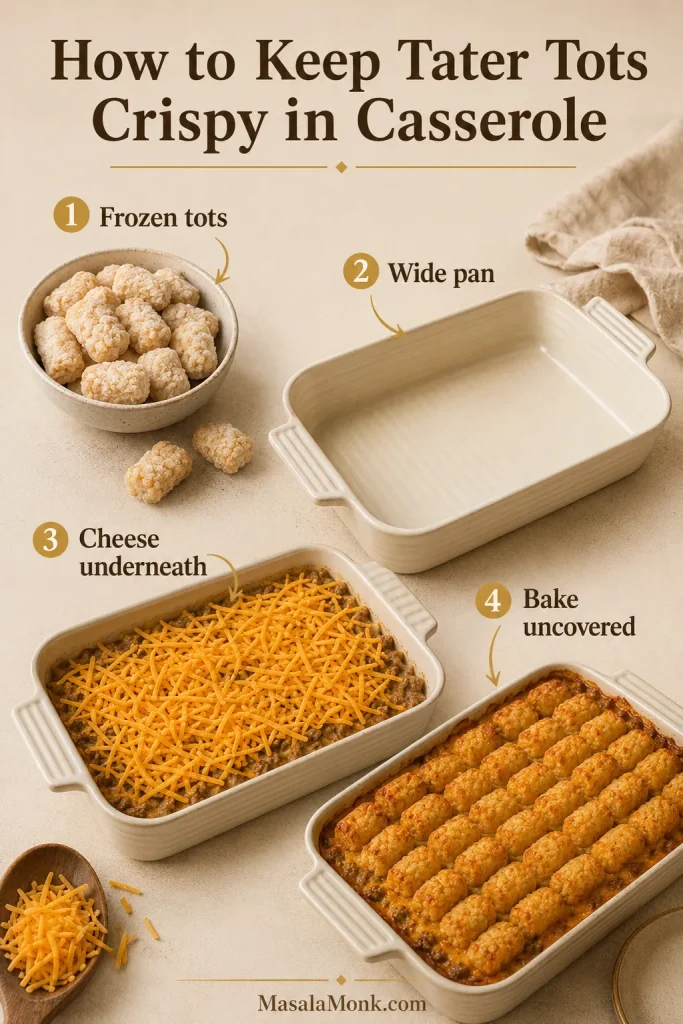
How to Keep Tater Tots Crispy in Casserole

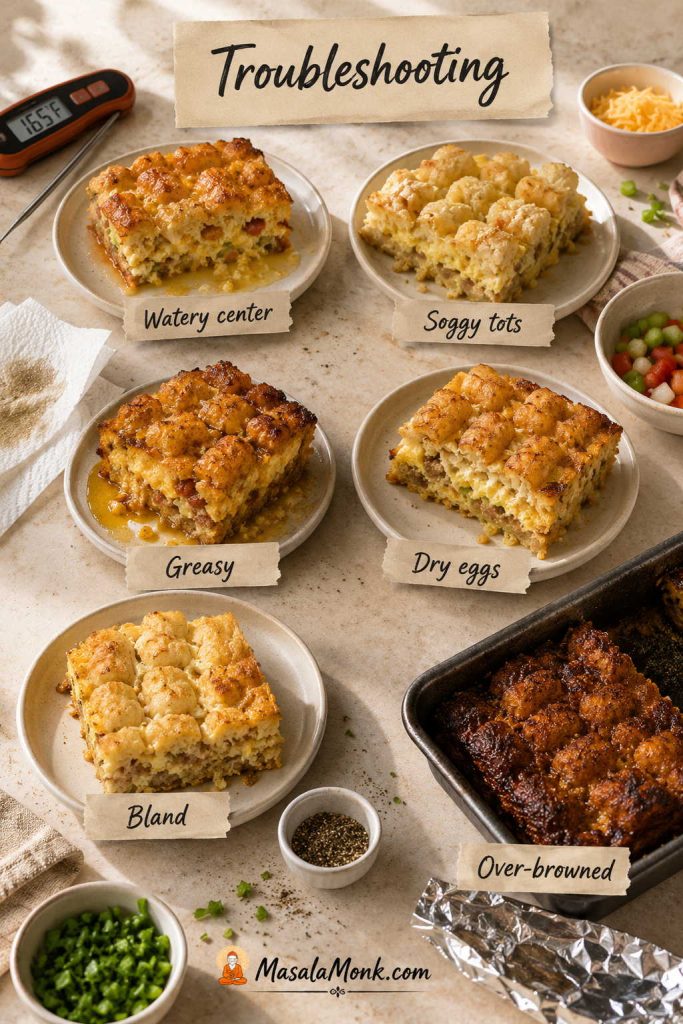
Soggy tots usually come from too much moisture, overcrowding, thawed tots, or a heavy cheese layer trapping steam. Fortunately, a few small choices make a big difference.

Guide to keeping tater tots crispy in casserole with frozen tots, wide pan, cheese underneath, and uncovered baking
For crispier tater tots, control moisture first: use frozen tots, a wide pan, sturdy filling, cheese underneath, and no cover.
  • Use frozen tots. Do not thaw them before adding them to the casserole.
  • Use a 9×13-inch dish. A wide dish helps the top layer spread out instead of steaming in a deep pile.
  • Keep the filling sturdy. Drain beef grease and vegetables well.
  • Arrange tots in one layer. Avoid piling them on top of each other.
  • Bake uncovered. Covering traps steam and softens the top.
  • Use the cheese-under-the-tots rule. Put most of the cheddar under the potato layer and add only a small final sprinkle near the end.
  • Serve after a short rest. Let it settle for 5–10 minutes, but do not let it sit too long before serving.
  • Reheat in the oven or air fryer. The microwave works, but the tots will soften.
Extra-crispy option: Pre-bake the frozen tots on a sheet pan for about 10 minutes while you cook the beef filling. Then arrange them on top of the casserole and bake as directed.

Another useful trick is to avoid overfilling the dish. If the filling comes too close to the top of the pan, it can bubble up through the tots and soften them. A 9×13-inch dish gives the filling room to heat while the potato layer stays exposed to dry oven heat.

If you like this kind of creamy potato bake but want a softer side-dish version, this hashbrown casserole recipe uses frozen potatoes in a different way.

Common Mistakes That Make Tater Tot Casserole Soggy

Common mistakes that make tater tot casserole soggy, including thawed tots, watery filling, too much cheese on top, and covering too long
When the topping turns soft, the usual suspects are thawed tots, watery filling, too much early cheese, or trapped steam.
  • Using thawed tater tots instead of frozen ones.
  • Adding too much milk or soup so the filling turns loose.
  • Not draining ground beef grease or canned vegetables.
  • Using icy frozen vegetables without thawing or draining them first.
  • Covering the casserole for the whole bake.
  • Piling on cheese too early and trapping steam over the tots.
  • Using a deep small dish instead of a wide 9×13 pan.

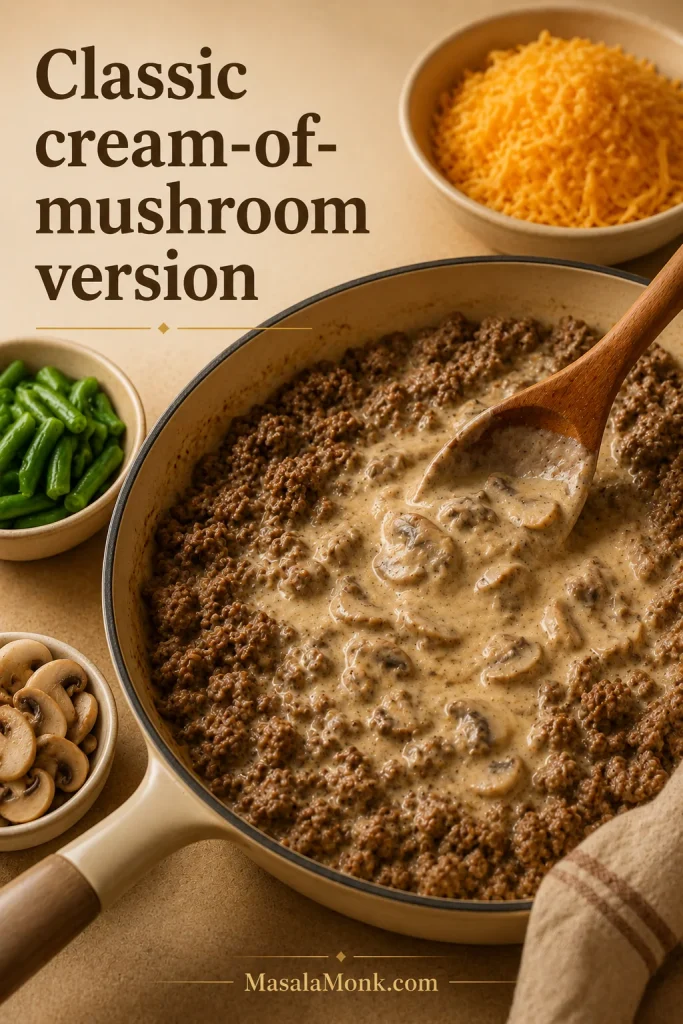
Tater Tot Casserole with Cream of Mushroom Soup

The traditional version uses condensed cream of mushroom soup because it thickens the filling, adds savory flavor, and keeps the recipe fast. One 10.5-ounce can is enough for this 9×13 casserole when mixed with sour cream and a little milk.

Cream of mushroom soup stirred into seasoned ground beef filling for classic tater tot casserole
The cream-of-mushroom version stays popular because it gives the filling body, savory flavor, and comfort-food familiarity without extra sauce work.

Cream of mushroom blends especially well with ground beef, green beans, corn, and cheddar. It also gives the dish the familiar flavor many people expect from tater tot hotdish.

If you want a slightly different flavor, cream of chicken, cream of celery, or cheddar cheese soup can also work. Cream of mushroom gives the most familiar flavor, while cream of chicken tastes milder. Cheddar soup, meanwhile, makes the filling richer and more obviously cheesy.

Prefer not to use canned soup? Use the no-soup version below.

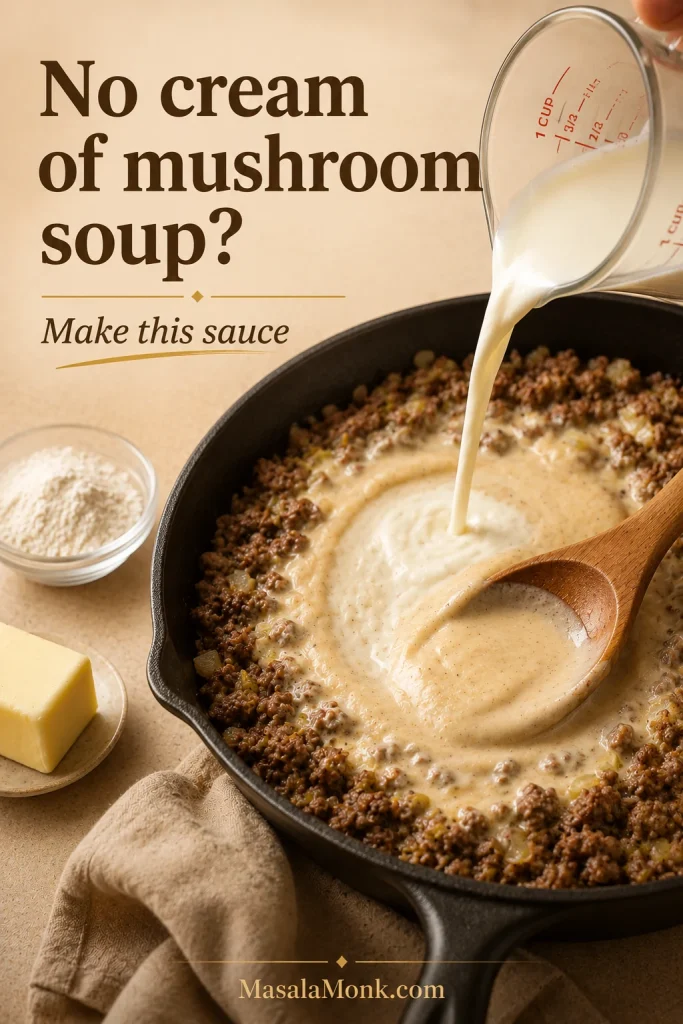
Tater Tot Casserole Without Cream of Mushroom Soup

To make it without cream of mushroom soup, use a quick homemade sauce with butter, flour, beef broth, milk, and Worcestershire sauce. This replaces the canned soup, sour cream, and milk mixture in the main recipe.

Homemade sauce with milk or broth being poured into a skillet for tater tot casserole without cream of mushroom soup
Instead of condensed soup, the no-soup version uses a quick homemade sauce when you want more control over thickness and flavor.

The soup version wins on speed. The homemade sauce wins when you want more control over salt, thickness, and mushroom flavor. Either way, the sauce should coat the beef and vegetables without turning loose in the pan.

No-soup ingredient Amount
Butter 2 tbsp / 28 g
All-purpose flour 2 tbsp / 16–18 g
Beef broth 1 cup / 240 ml
Milk or half-and-half 1/2 cup / 120 ml
Worcestershire sauce 1 tbsp / 15 ml
Sour cream, optional 1/4–1/2 cup / 60–120 g

To make it, melt the butter in the skillet after browning the beef, sprinkle in the flour, and cook for about 1 minute. Slowly stir in the broth and milk, then simmer until thick. Once it thickens, fold the sauce into the beef and vegetables, then continue with the cheese and tater tot topping.

If the homemade sauce looks thin, simmer it a little longer before transferring it to the baking dish. Otherwise, a loose sauce can make the tots soften from underneath.

Once the sauce is ready, use it in the main recipe card in place of the canned soup mixture.

Tater Tot Hotdish vs Tater Tot Casserole

Tater tot hotdish and tater tot casserole are basically the same family of dish. “Hotdish” is the Midwest and Upper Midwest name, especially for a baked dish made with meat, vegetables, creamy sauce, and a starch topping. “Tater tot casserole” is the broader name many people use elsewhere.

Baked tater tot casserole in a dish labeled as hotdish or casserole with golden tots and creamy filling
Whether you call it hotdish or casserole, the same comfort-food formula remains: meat, vegetables, creamy sauce, cheddar, and tots.

Whatever you call it, the comfort-food idea is the same: savory beef, creamy sauce, vegetables, cheddar, and a potato topping that comes out browned instead of soggy.

Some hotdish versions use green beans, corn, or mixed vegetables. Others use two cans of soup for a heavier filling. This version, however, keeps the spirit of the dish but uses a balanced amount of sauce so the casserole stays creamy without drowning the tots.

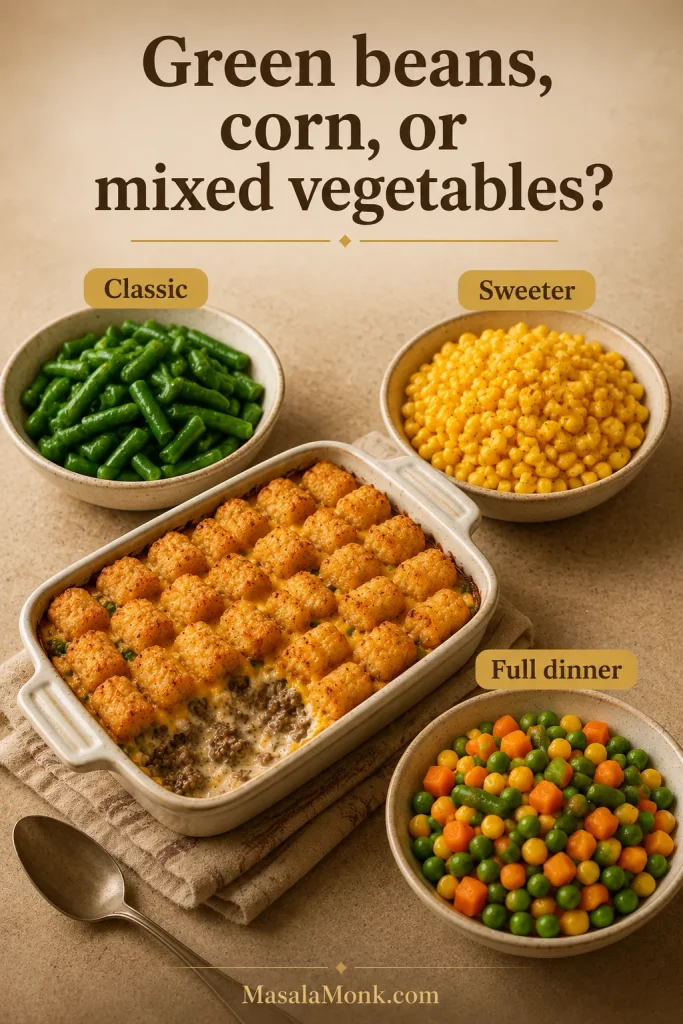
Best Vegetables for Tater Tot Casserole

The vegetable changes the whole feel of the casserole: green beans make it old-school, corn makes it sweeter, and mixed vegetables make it feel more like a full dinner in one pan.

Green beans, corn, and mixed vegetables shown as options for tater tot casserole with a baked casserole dish
Green beans make it classic, corn makes it sweeter, and mixed vegetables make the tater tot casserole feel more like a full meal.
Vegetable Best for Tip
Green beans Classic hotdish flavor Drain canned green beans well
Corn Sweeter, kid-friendly casserole Use drained canned corn or thawed frozen corn
Mixed vegetables Easy family dinner Thaw if icy so the filling does not get watery
Peas and carrots Classic creamy casserole feel Use frozen or canned, but avoid excess liquid
Mushrooms Deeper savory flavor Sauté first to remove moisture

Green beans are the most nostalgic choice for many people, but corn is often the version kids go for first. If your family has a strong opinion about the “right” vegetable in tater tot casserole, this is usually where the debate starts.

Avoid very watery vegetables unless you cook off the moisture first. Zucchini, fresh mushrooms, spinach, and bell peppers can all work, but they should be sautéed before they go into the filling. That way, the casserole stays creamy instead of loose.

Make Ahead, Freezer, Storage, and Reheating

Tater tot casserole is make-ahead friendly, but the best method depends on whether you care more about convenience or texture. For the best result, the filling can wait in the fridge; meanwhile, the tots should wait in the freezer.

Best make-ahead method

Cook the beef filling, spread it in the baking dish, cover, and refrigerate. When you are ready to bake, add the cheese and frozen tater tots, then bake as directed. If the filling is very cold, add 10–15 minutes to the bake time.

Make-ahead tater tot casserole with prepared beef filling covered in a baking dish and frozen tots kept separate
For make-ahead tater tot casserole, prep the filling first; then add frozen tots only when you are ready to bake.

That way, you get the convenience of a make-ahead dinner without letting the tots sit on the wet filling for hours. It is especially helpful if you are assembling dinner during a busy afternoon or prepping for guests.

It is also the best method if you are bringing the casserole to another family, prepping for a weeknight dinner, or trying to get the messy skillet work done before the evening rush.

For a brunch version of the same make-ahead comfort-food idea, this breakfast casserole with hash browns uses eggs, sausage, cheese, and potatoes in a 9×13 pan.

Best freezer method

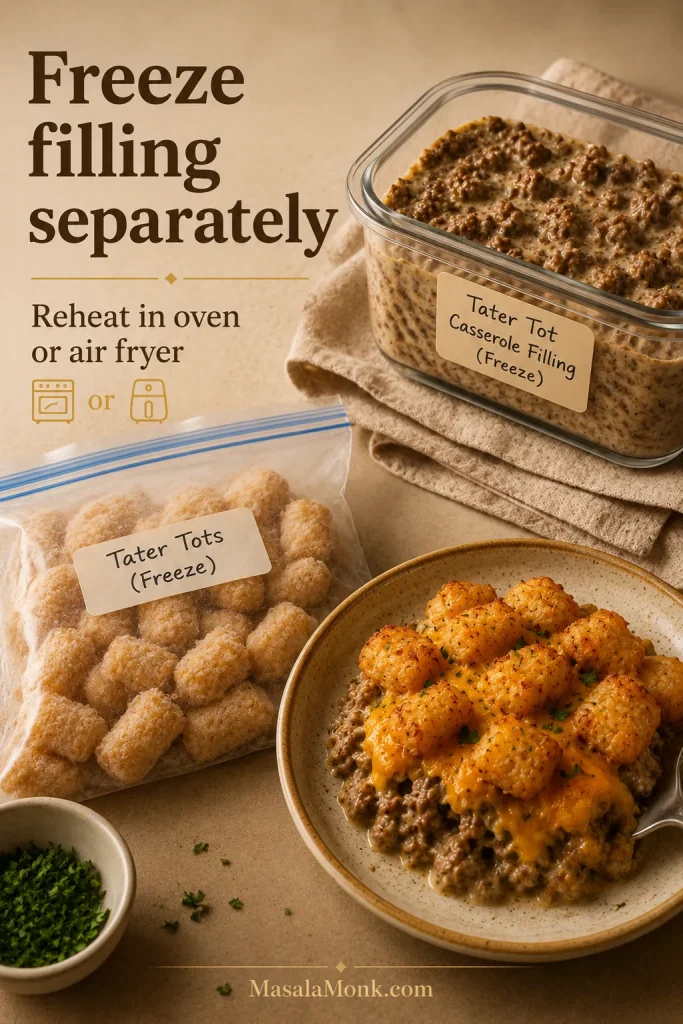
Freeze the cooked beef filling separately in an airtight container. Then, thaw it overnight in the refrigerator, spread it into the baking dish, add cheese and frozen tater tots, and bake uncovered until hot, bubbling, and golden on top.

Freezer-safe container of tater tot casserole filling, separate frozen tots, and reheated serving on a plate
Freezing the filling separately protects texture because the tots can go on fresh from the freezer instead of thawing on the sauce.

The texture is better this way because the tots are added fresh from the freezer instead of freezing and thawing on top of the filling.

Fully assembled freezer method

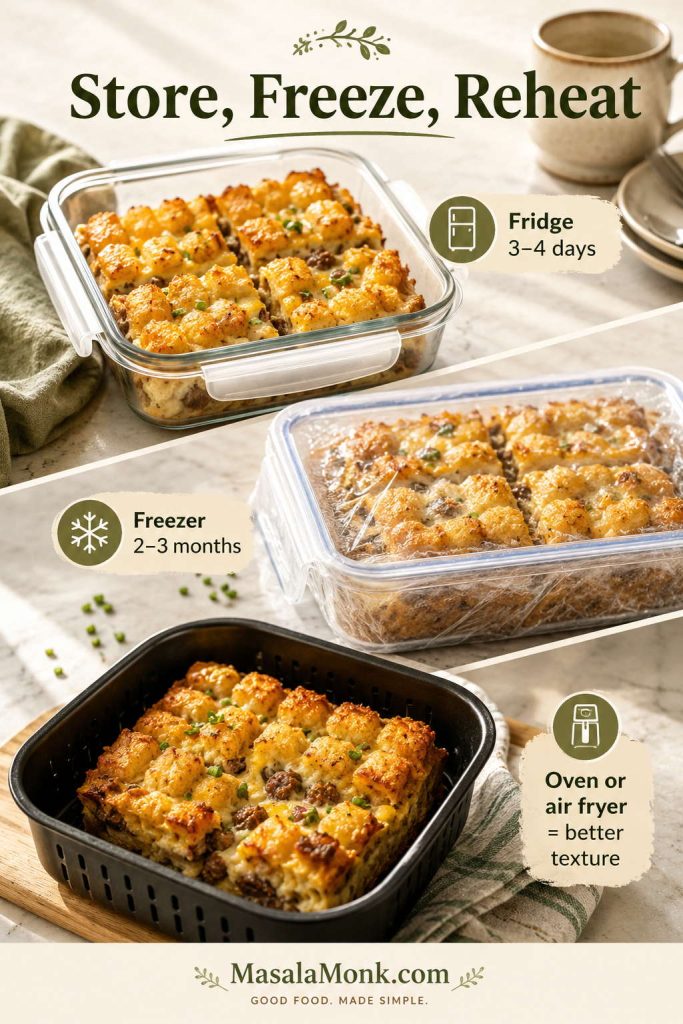
You can freeze the fully assembled casserole, but the tots may not bake quite as well. Wrap tightly and freeze for up to 2–3 months. Bake covered first until the center is hot, then uncover near the end so the top can brown.

How to store leftovers

Store leftovers in an airtight container in the refrigerator for 3–4 days. The topping will soften as it sits, but the flavor stays good.

How to reheat tater tot casserole

For the best texture, reheat leftovers in a 350°F oven or air fryer until hot. The microwave is fastest, but it will soften the tots.

If reheating a larger portion, cover it loosely at first so the center warms through. Then, uncover for the last few minutes to help the topping crisp again.

When you are ready to cook, use the timing in the recipe card and add extra minutes if the filling is cold.

Which Version Should You Make First?

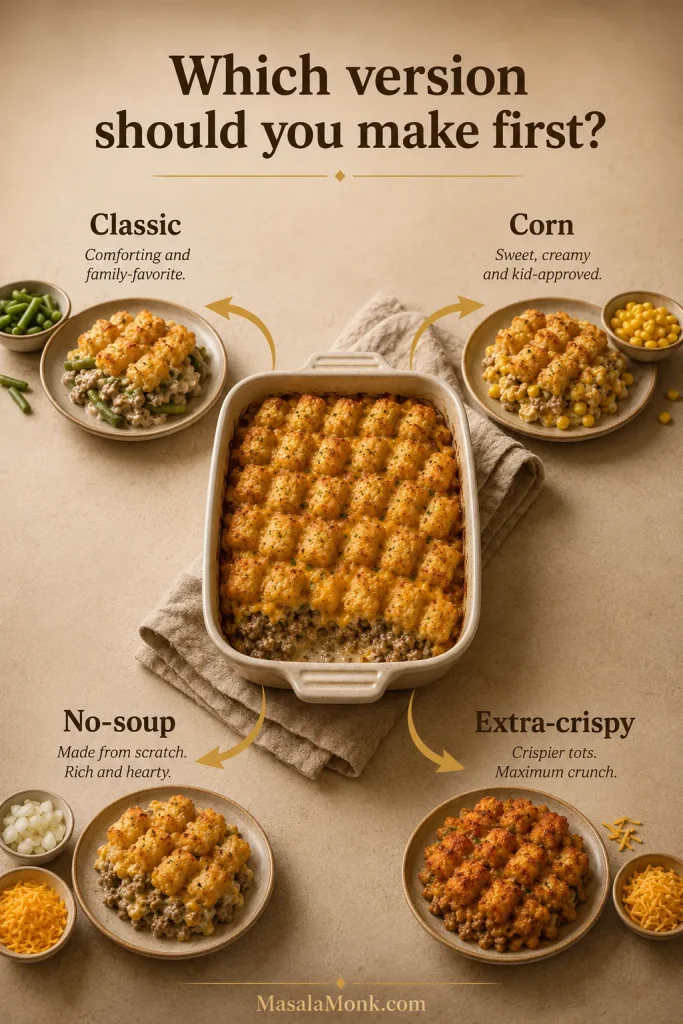
If this is your first time making tater tot casserole, start with the classic cream-of-mushroom version. It gives you the familiar creamy filling, beefy flavor, cheddar middle layer, and golden potato topping most people expect. After that, adjust the vegetable, sauce, or cheese to match your table.

Version chooser for tater tot casserole showing classic, corn, no-soup, and extra-crispy options around a casserole dish
Start with the classic version for familiar flavor, then adjust with corn, a no-soup sauce, or extra-crispy tots based on your table.
Choose this version Best for What to do
Classic green bean version Old-school comfort Use cream of mushroom soup, green beans, cheddar, and frozen tots.
Corn version Kid-friendly sweetness Swap green beans for drained corn and keep the seasoning mild.
No-soup version More control over salt and thickness Use the homemade butter, flour, broth, milk, and Worcestershire sauce base.
Extra-crispy version Best topping texture Keep cheese under the tots and pre-bake the frozen tots for about 10 minutes.

For more ways to change the filling, protein, or seasoning, see the variation ideas next.

Tater Tot Casserole Variations

Keep the main recipe simple the first time. Once the basic method works, you can change the vegetable, protein, seasoning, or sauce without losing the creamy filling and crisp topping.

Tater tot casserole variations showing classic, taco, chicken bacon ranch, and breakfast-style servings
After the basic method works, the same casserole can shift toward taco night, brunch, chicken bacon ranch, or the classic green bean version.

Classic family versions

  • Green bean version: Use 2 cups drained green beans for the most old-school option, especially with cream of mushroom soup and cheddar.
  • Corn version: Use drained corn instead of green beans for a sweeter, softer, and usually more kid-friendly filling.
  • Mixed vegetable version: Use peas, carrots, corn, or a frozen mixed vegetable blend when you want the casserole to feel more like a full dinner in one pan.

Bigger flavor twists

  • Taco tater tot casserole: Add taco seasoning, corn, black beans, and Mexican-style cheese.
  • Chicken bacon ranch: Use cooked chicken, ranch seasoning, bacon, cheddar, and cream of chicken soup.
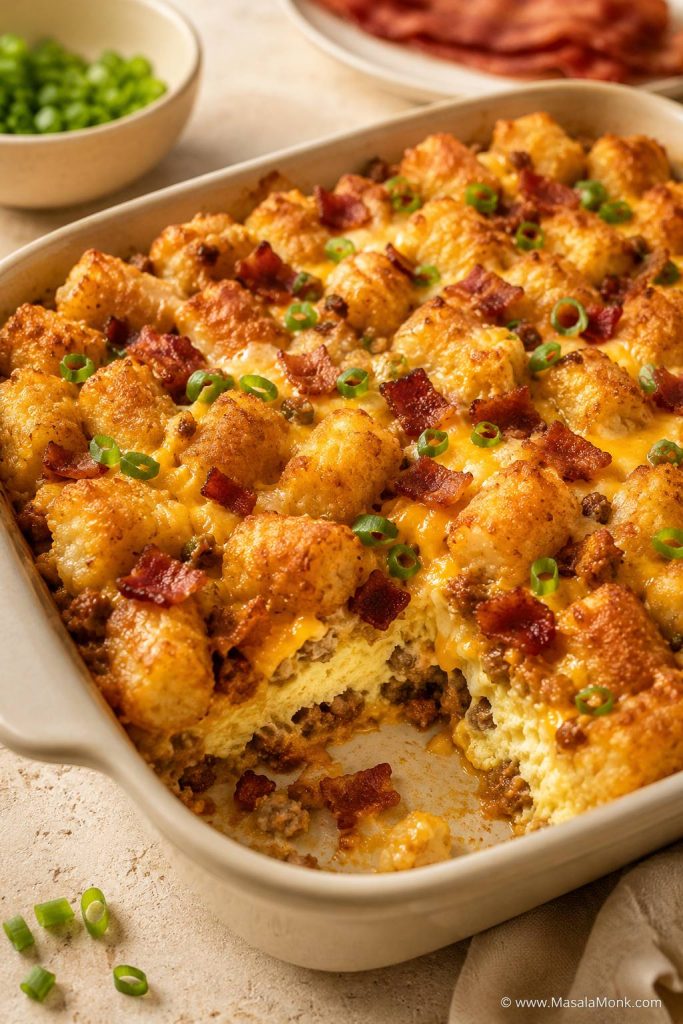
  • Breakfast tater tot casserole: Use eggs, breakfast sausage or bacon, cheese, and tots in a brunch-style bake. For another make-ahead breakfast option with smaller portions, these egg muffins are easier to pack, reheat, and meal prep than a full 9×13 casserole.

Meat, vegetarian, and method swaps

  • Hamburger tater tot casserole: Same as the main recipe; “hamburger” is another common name for ground beef here.
  • Ground turkey version: Use ground turkey instead of beef and add extra Worcestershire, garlic, or paprika so the filling does not taste flat.
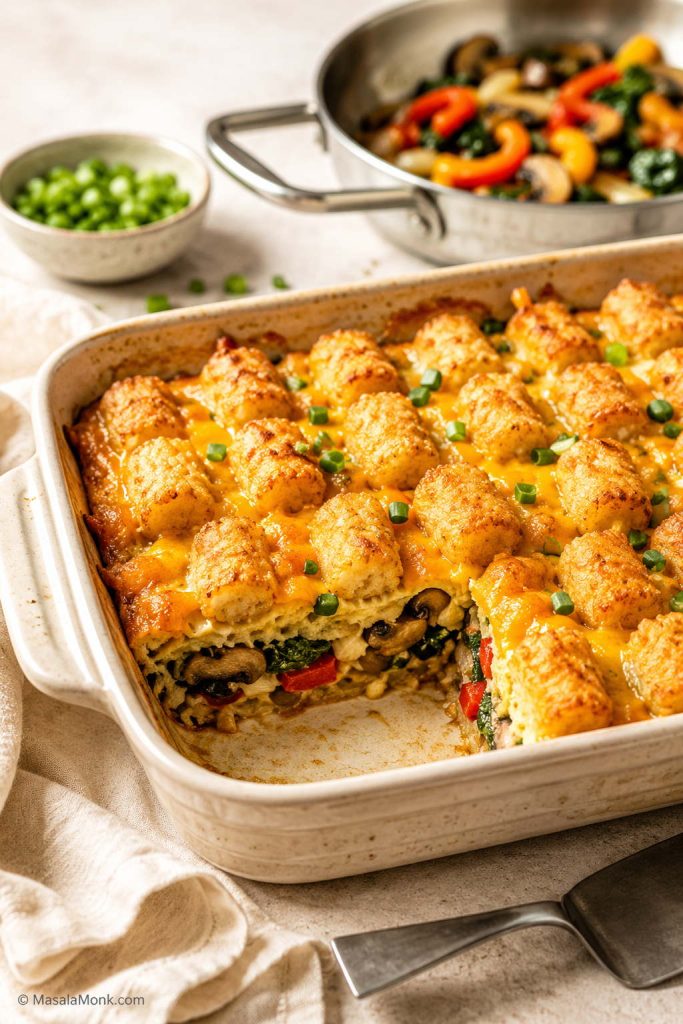
  • Vegetarian version: Skip the beef and use sautéed mushrooms, extra vegetables, or plant-based crumbles.
  • Slow cooker tater tot casserole: Use the same flavor base, but expect a softer topping than the oven version. If you are in more of a crock pot mood, this slow cooker sausage casserole is built for a softer, saucier comfort-food dinner.

The best first variation is usually the vegetable: green beans for old-school comfort, corn for sweetness, or mixed vegetables when you want the casserole to feel more like dinner in one pan.

Once you choose a version, use the recipe card as the base and adjust only the vegetable, protein, or seasoning.

What to Serve with Tater Tot Casserole

Tater tot casserole is rich, creamy, and filling, so simple sides work best. Try it with a crisp green salad, roasted broccoli, steamed green beans, coleslaw, pickles, fruit salad, or soft dinner rolls.

For a lighter plate, choose something fresh and crunchy next to the casserole. A vinegar-based slaw, cucumber salad, or simple green salad helps balance the creamy filling and cheesy potato topping.

Recipe Card: Tater Tot Casserole

This version has enough sauce to stay creamy, but not so much that the tots sink or steam. You still get a cheesy middle layer, while the potato topping stays exposed to the oven heat.

If you ignore everything else, remember the cheese-under-the-tots rule. Keep the tots frozen, and do not bury them under cheese too early. Those two choices make the difference between a soft topping and the crisp golden layer everyone reaches for first.

Tater Tot Casserole Recipe

This easy tater tot casserole recipe is made with seasoned ground beef, creamy mushroom filling, vegetables, cheddar cheese, and a frozen tater tot layer that bakes golden and crisp on top.

Prep Time15 minutes
Cook Time40–45 minutes
Rest Time5–10 minutes
Servings6–8

Equipment: 12-inch skillet, 9×13-inch / 3-quart baking dish, spatula or wooden spoon, measuring cups and spoons.

Ingredients

  • 28–32 oz / 800–900 g frozen tater tots, or enough for one generous layer
  • 1 lb / 454 g lean ground beef
  • 1 medium yellow onion, diced, about 120–150 g
  • 2 garlic cloves, minced
  • 1 tbsp / 15 ml Worcestershire sauce
  • 1 can / 10.5 oz / 298 g condensed cream of mushroom soup
  • 1/2 cup / 120 g sour cream
  • 1/3 cup / 80 ml milk
  • 2 cups / about 250–300 g drained canned green beans, drained corn, or thawed mixed vegetables
  • 2 cups / 225 g shredded cheddar cheese, divided
  • 1/2 tsp garlic powder
  • 1/2 tsp paprika
  • 1/2 tsp black pepper
  • 1/2 tsp salt, plus more to taste
  • Chives or green onions, optional, for serving

Instructions

  1. Preheat the oven to 375°F / 190°C. Grease a 9×13-inch baking dish.
  2. In a large skillet over medium-high heat, cook the ground beef and onion until the beef is browned and the onion is softened. Drain excess grease.
  3. Add garlic, Worcestershire sauce, garlic powder, paprika, salt, and black pepper. Cook for 30–60 seconds.
  4. Stir in the cream of mushroom soup, sour cream, milk, and vegetables. The filling should be creamy but thick enough to support the tots.
  5. Spread the filling evenly in the prepared baking dish.
  6. Sprinkle 1 1/2 cups of cheddar cheese over the filling.
  7. Arrange the frozen tater tots in one generous layer over the cheese. Do not force extra tots on top if the dish is already covered.
  8. Bake uncovered for about 40 minutes, until the edges are bubbling and the tots are golden.
  9. Sprinkle the remaining 1/2 cup cheddar over the top, if using, and bake 5 minutes more.
  10. Rest for 5–10 minutes before serving. Garnish with chives or green onions if desired.

Notes

  • For crispier tots, follow the cheese-under-the-tots rule: bake uncovered, keep most cheddar under the potato layer, and add only a small sprinkle near the end.
  • This casserole is best served after a short 5–10 minute rest while the tots still have texture.
  • For the best make-ahead version, prepare the beef filling ahead and add frozen tots right before baking.
  • For a no-soup version, use the homemade sauce in the section above.
  • If baking from the refrigerator, add 10–15 minutes to the bake time.
  • If using salty soup, canned vegetables, or pre-shredded cheese, start with less salt and adjust after the filling is mixed.
  • Place the baking dish on a rimmed sheet pan if it is very full, because the sauce can bubble at the edges.
  • For best leftover texture, reheat in the oven or air fryer instead of the microwave.

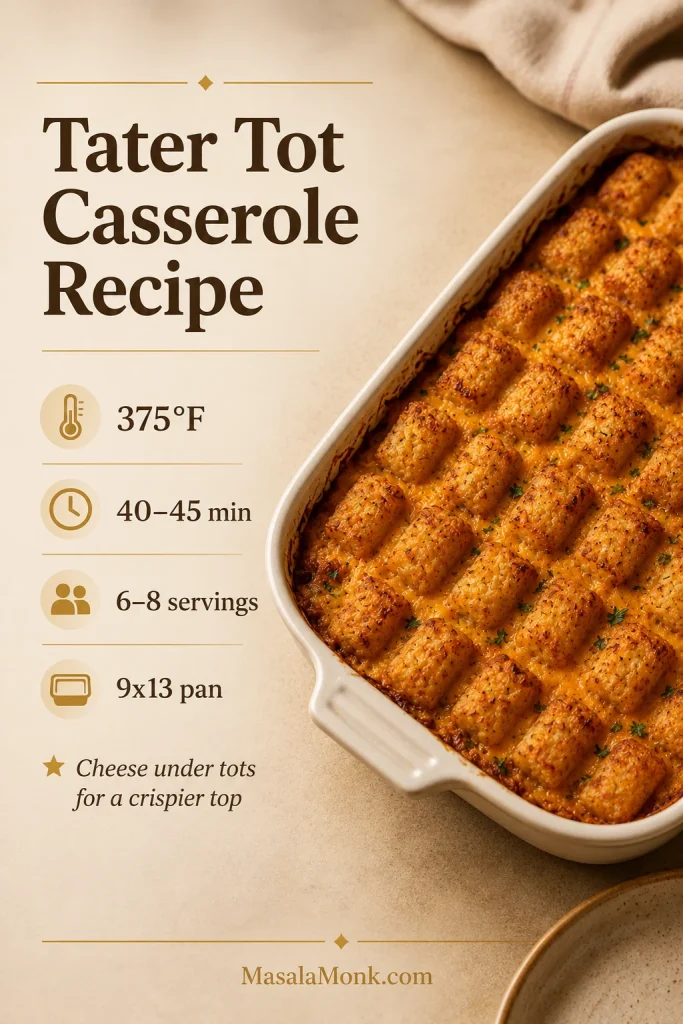
For a quick saveable version, use this visual recipe card as a reminder of the core timing, pan size, and cheese placement.

Saveable tater tot casserole recipe card with 375°F temperature, 40 to 45 minute bake time, 6 to 8 servings, 9x13 pan, and cheese under tots tip
Save the main method: bake in a 9×13 pan at 375°F, keep the tots frozen, and place most of the cheese below the potato layer.

If you grew up with tater tot casserole, I’d love to know what version was on your table: green beans, corn, mixed vegetables, extra cheese, or no vegetables at all? And if soggy tots have ever ruined a pan for you, try the cheese-under-the-tots method once and tell me if it changed the texture.

FAQs

Do you cook tater tots before adding them to casserole?

No, you do not need to cook tater tots before adding them. Put them on the casserole frozen so they bake on top while the filling heats underneath. For extra crunch, you can pre-bake them for about 10 minutes before layering.

Should tater tots be frozen or thawed for casserole?

Use frozen tater tots. Thawed tots soften quickly and can turn mushy during baking.

Do you cover tater tot casserole when baking?

For the best topping, bake tater tot casserole uncovered. Covering traps steam and can soften the tots. However, if baking from frozen or very cold, you can cover it first to heat the center, then uncover near the end to brown the top.

What temperature is best for tater tot casserole?

375°F / 190°C is the best default temperature. It gives the filling enough time to heat through while helping the tater tots turn golden and crisp.

How do you keep tater tot casserole from getting soggy?

Use frozen tots, drain excess grease and vegetable liquid, keep the filling sturdy, bake uncovered, and arrange the tots in one layer. Also, putting most of the cheese under the tots helps the top brown better.

Can I make tater tot casserole ahead of time?

For the best make-ahead texture, prepare the beef filling first, refrigerate it, and add the cheese and frozen tater tots right before baking.

Can I assemble tater tot casserole the night before?

You can make the beef filling the night before and refrigerate it, but wait to add the frozen tater tots until right before baking. If the tots sit on the creamy filling overnight, they are more likely to soften.

Can you freeze tater tot casserole?

Yes. The best method is to freeze the cooked filling separately, then thaw it, top with cheese and frozen tots, and bake. You can also freeze the fully assembled casserole, but the tots may bake softer.

What can I use instead of cream of mushroom soup?

You can use cream of chicken, cream of celery, cheddar cheese soup, or a homemade sauce made with butter, flour, beef broth, milk, and Worcestershire sauce.

Is tater tot hotdish the same as tater tot casserole?

They are basically the same style of dish. “Hotdish” is the Midwest name, while “casserole” is the broader term many people use elsewhere.

What meat works besides ground beef?

Ground turkey, ground chicken, cooked shredded chicken, or plant-based crumbles can work. Ground beef gives the most familiar flavor, but the same creamy filling and tater tot topping can handle many swaps.

Back to top

Posted on 2 Comments

Tuna Noodle Casserole Recipe with Egg Noodles

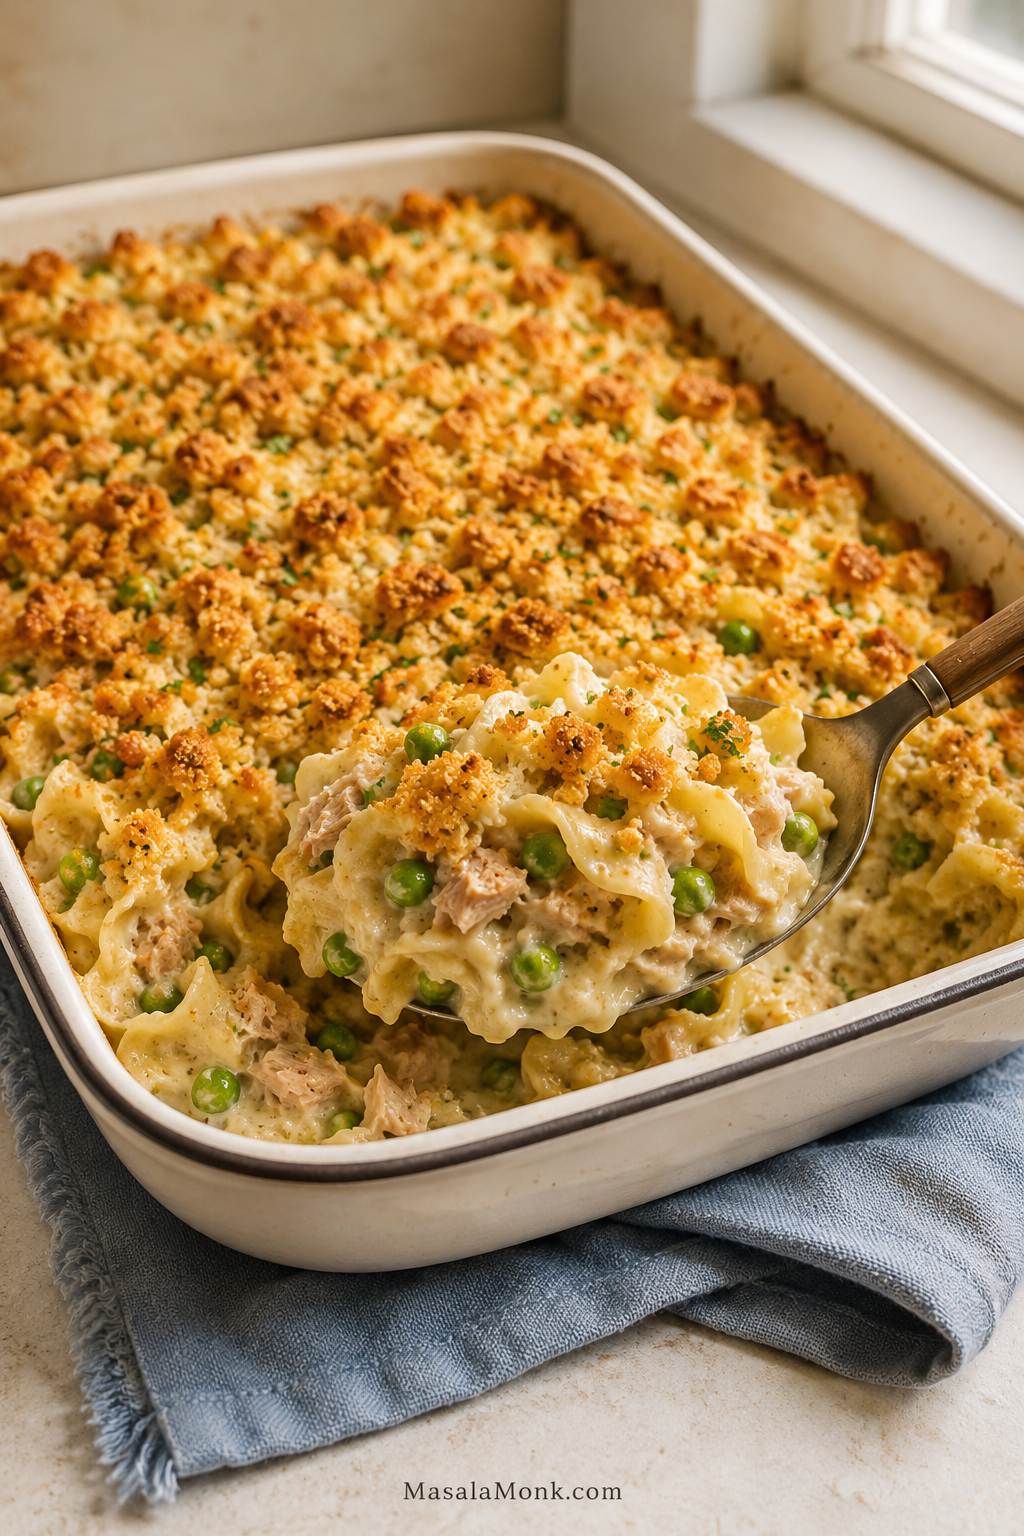
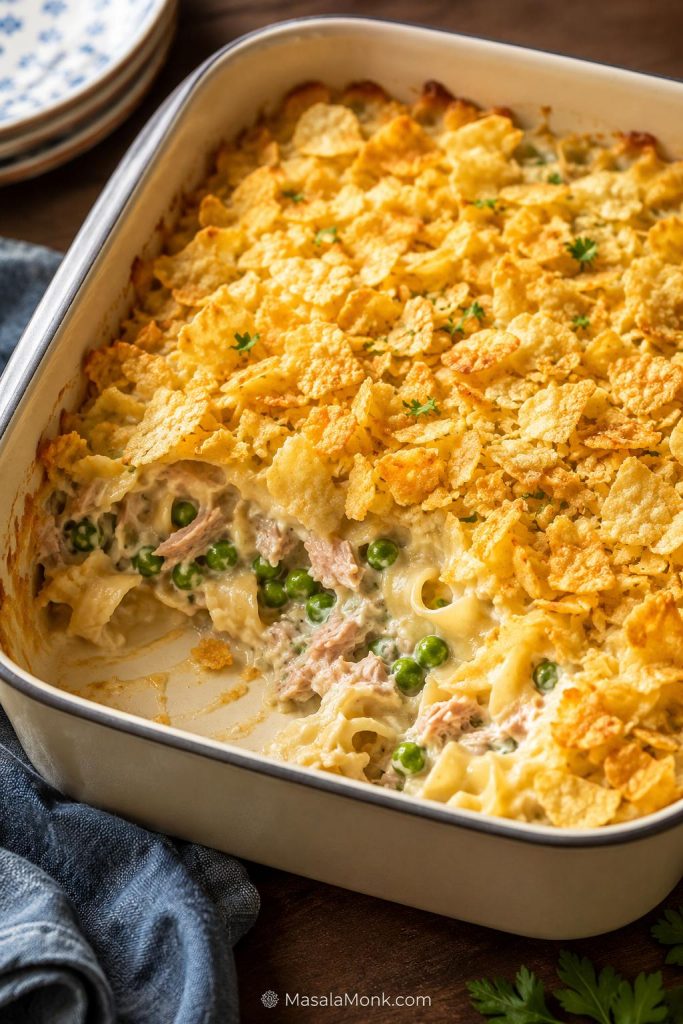
Baked tuna noodle casserole in a cream enamel dish with a spoonful lifted, showing egg noodles, peas, tuna flakes, creamy sauce, and golden topping.

This tuna noodle casserole recipe with egg noodles is the creamy, cozy baked dinner people usually mean when they talk about old-fashioned tuna casserole: wide egg noodles, canned tuna, peas, cream of mushroom soup, milk, optional cheddar, and a crunchy potato chip, cracker, or breadcrumb topping.

It is pantry comfort food, but it should still scoop creamy instead of baking into a dry noodle block. The key is simple: cook the noodles just shy of tender, use enough sauce for the full 9×13-inch dish, and pull the casserole when the edges are bubbling and the center still looks moist.

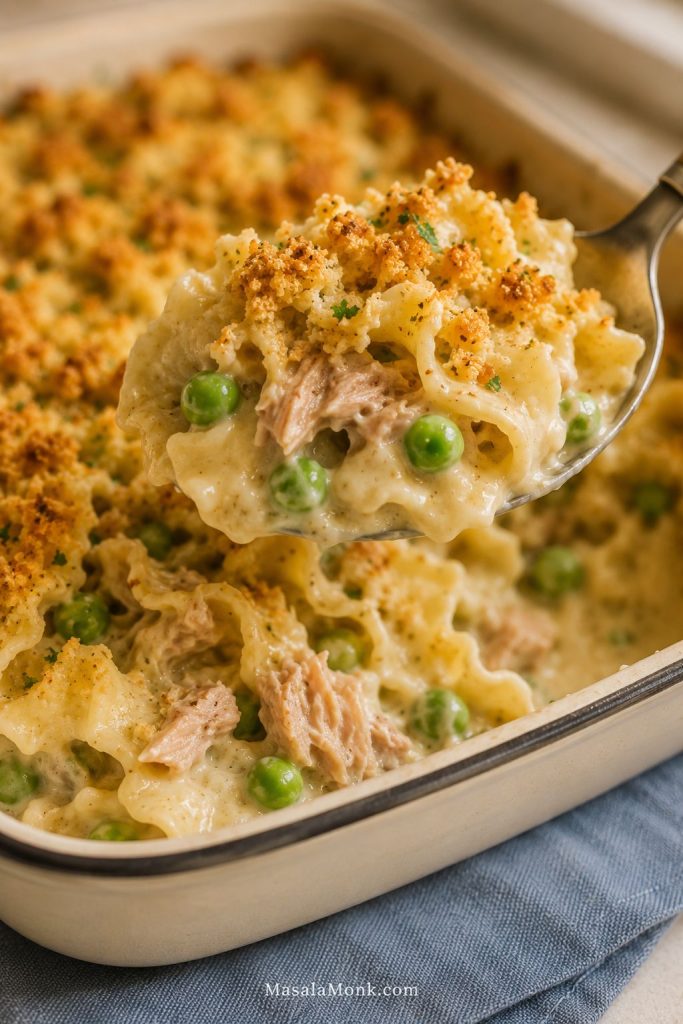
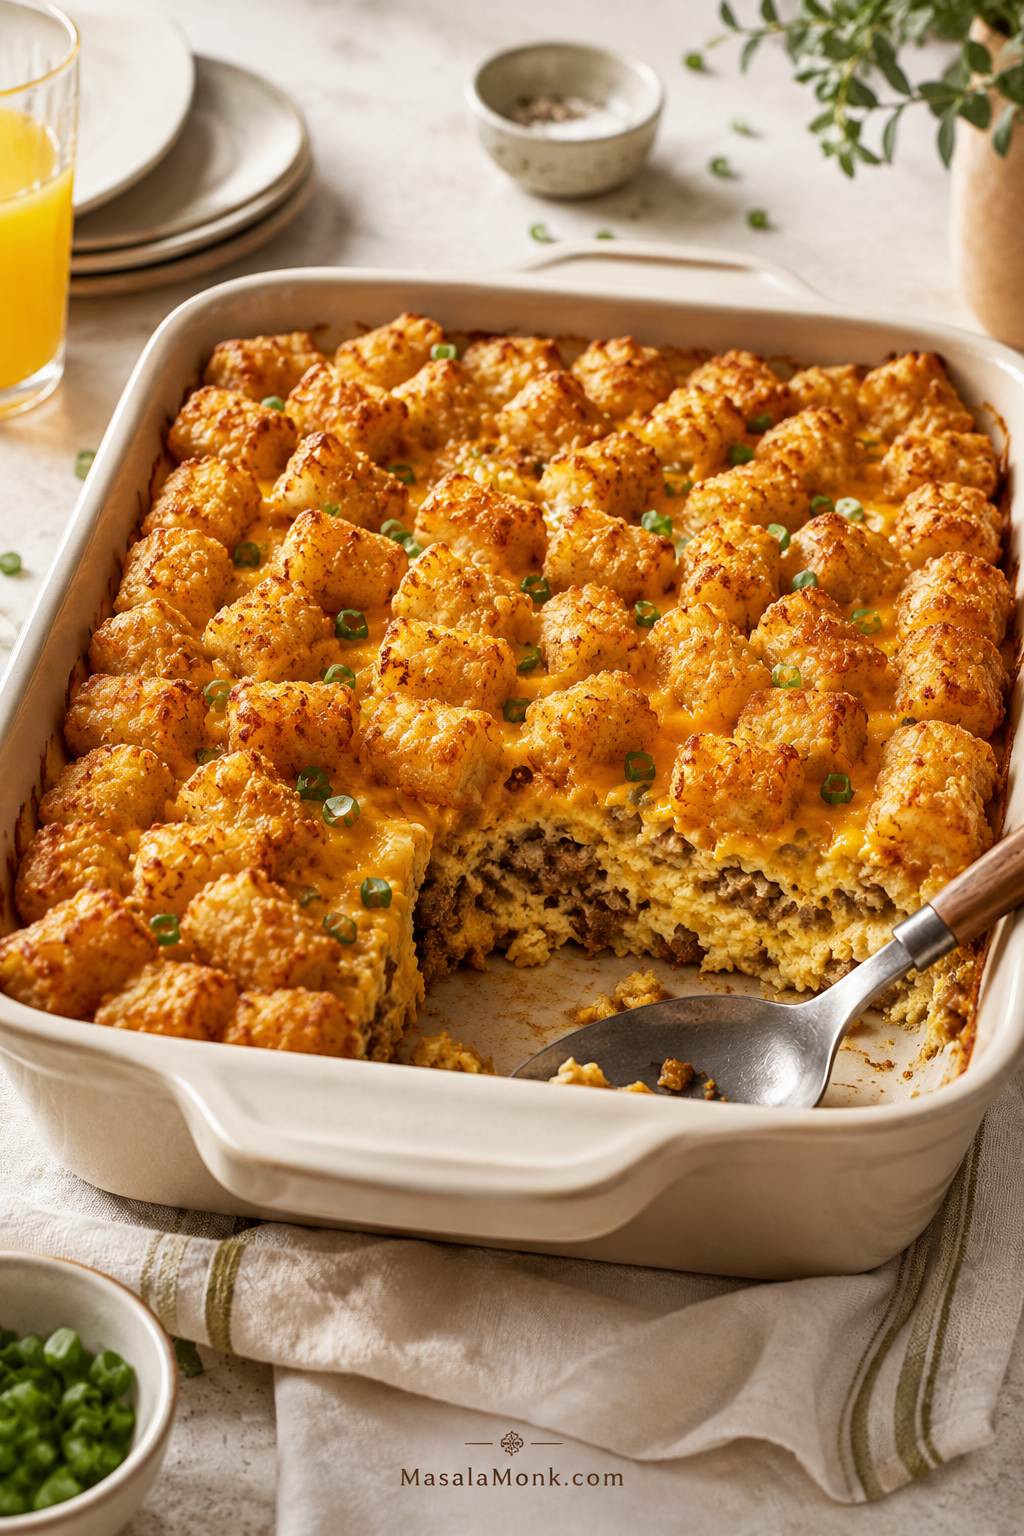
Close spoonful of tuna noodle casserole with saucy egg noodles, peas, tuna flakes, and crisp crumbs lifted from the dish.
This close scoop shows the goal before serving: soft egg noodles that stay moist underneath the crisp topping.

You’ll also find the no-soup version, topping choices, make-ahead and freezer notes, a small-batch option, and fixes for the usual problems: dry, watery, bland, or mushy tuna noodle casserole.

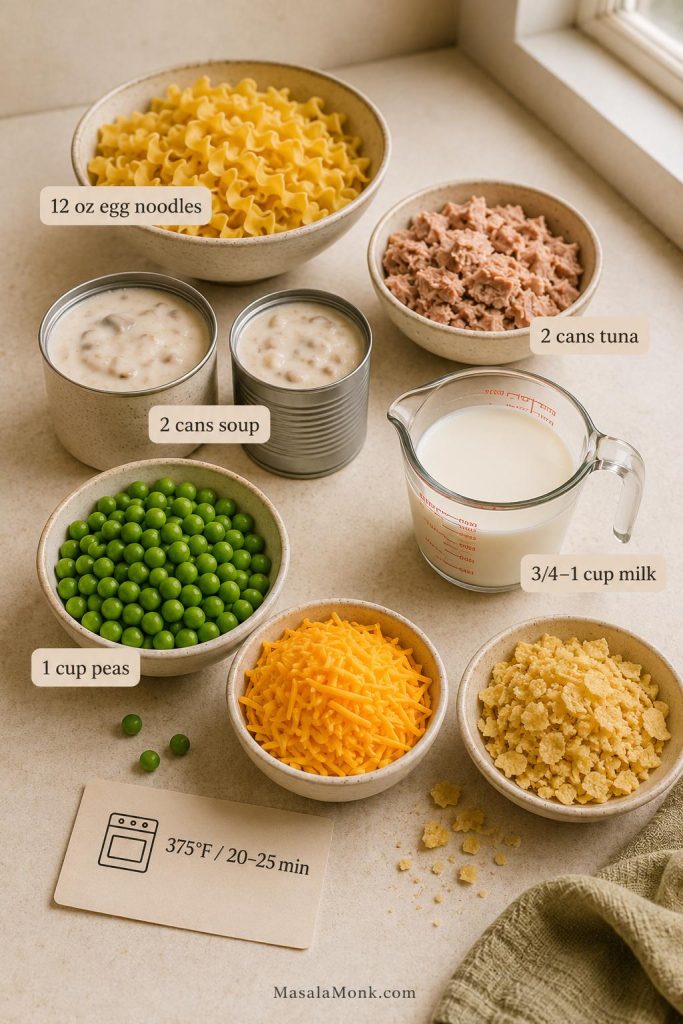
At a glance: This tuna noodle casserole uses 12 oz / 340 g wide egg noodles, 2 cans tuna, 2 cans cream of mushroom soup, 3/4 to 1 cup / 180 to 240 ml milk, 1 cup / 140 g peas, optional cheddar, and a crunchy topping. Bake in a 9×13-inch / 23×33 cm dish at 375°F / 190°C for 20 to 25 minutes, until bubbling at the edges.
Prep board with egg noodles, tuna, cream of mushroom soup, milk, peas, cheddar, crunchy topping, and bake time for tuna noodle casserole.
The classic full-pan formula starts with egg noodles, tuna, cream of mushroom soup, milk, peas, and a crisp topping, then bakes until the edges bubble.

Quick Answer: Tuna Noodle Casserole with Egg Noodles

To make tuna noodle casserole with egg noodles, boil wide egg noodles until just shy of tender. Mix them with well-drained canned tuna, peas, cream of mushroom soup, milk, seasonings, and cheddar if using. Spread into a greased 9×13-inch dish, add a crunchy topping, and bake at 375°F / 190°C for 20 to 25 minutes, until the edges bubble and the top is lightly golden.

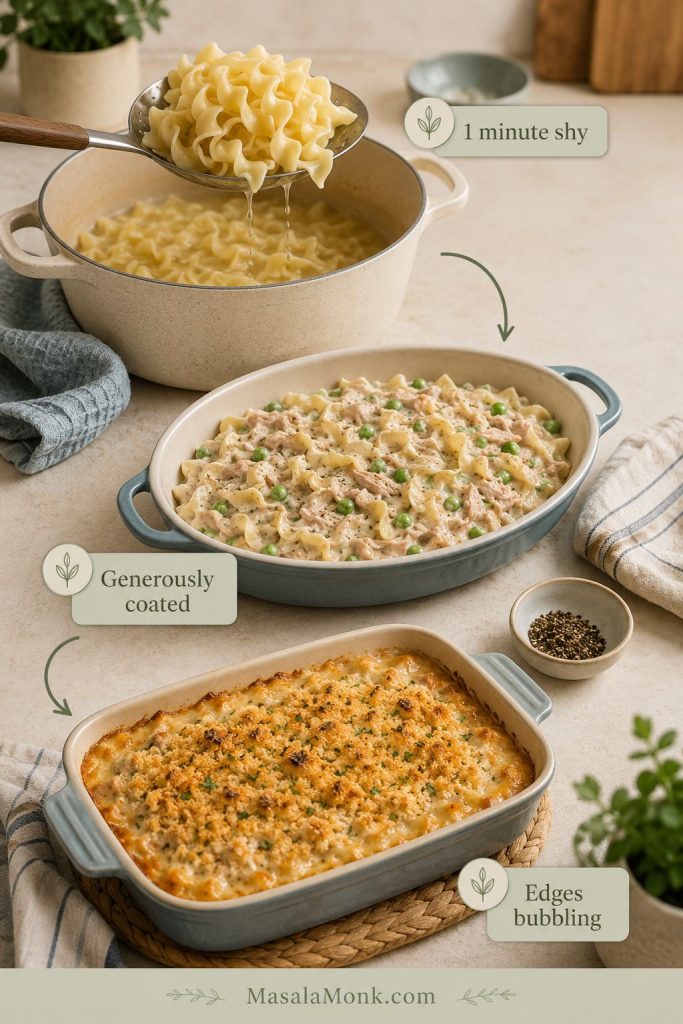
Texture cue: before baking, the noodles should be generously coated and easy to stir. If the mixture already feels stiff in the bowl, it will be dry after baking.

Why This Tuna Noodle Casserole Works

The goal is not a fancy casserole. The goal is the old-school one done properly: creamy noodles, flaky tuna, sweet peas, and a crisp top. This version keeps the familiar cream-of-mushroom flavor while using enough sauce for a full 9×13-inch dish.

  • Wide egg noodles give the casserole its soft-but-sturdy bite.
  • Two cans of soup plus milk make enough sauce for a full pan.
  • Frozen peas add sweetness and color without extra prep.
  • Gently folded tuna stays in flakes instead of disappearing into the sauce.
  • A topping added right before baking stays crisp instead of steaming soft.

Best First Batch

If this is your first time making tuna noodle casserole, start with the classic version: cream of mushroom soup, wide egg noodles, tuna, peas, milk, and either potato chips or buttered panko on top. Once that base is right, the variations are easy.

Prefer homemade sauce instead? Jump to the tuna noodle casserole without soup section.

Version Use This When Key Change
Classic You want old-fashioned flavor Use 2 cans cream of mushroom soup and potato chips or crackers.
Extra creamy You worry about dry casserole Use the full 1 cup / 240 ml milk and optional sour cream.
No-soup You want homemade sauce Use butter, flour, milk, broth, mushrooms, onion, and celery.
Small batch You are cooking for 1–2 people Use 4 oz / 115 g noodles, 1 can tuna, and an 8×8-inch dish.
Lighter You want less richness Use more vegetables, less cheese, and the no-soup sauce option.

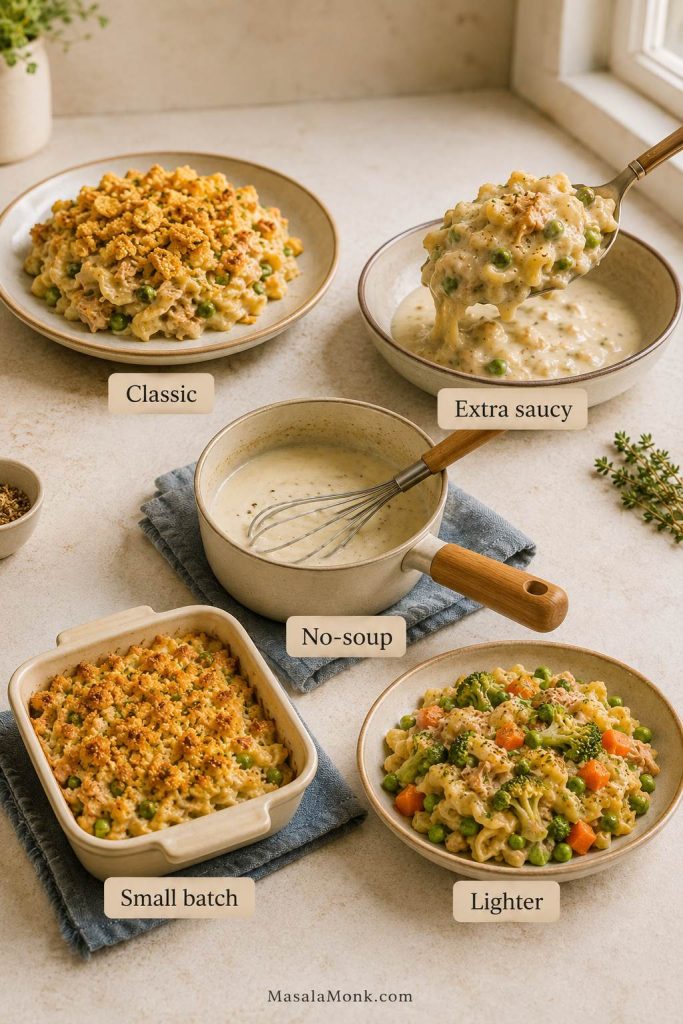
For the safest first batch, keep it classic: cream of mushroom soup, wide egg noodles, peas, optional cheddar, and potato chips or crackers on top. After that, adjust the sauce, topping, or vegetables to match your taste.

Five tuna noodle casserole version cues showing classic, extra saucy, no-soup, small batch, and lighter options.
Start with the classic tuna noodle casserole first, then adjust one part at a time: sauce, topping, batch size, or vegetables.

Ingredients for Tuna Noodle Casserole

The familiar version is built from pantry and freezer staples, but each ingredient still matters. Wide noodles give the casserole its soft structure, tuna adds protein, peas bring sweetness, condensed soup creates the sauce, and the topping adds the crunch that makes the bake feel finished.

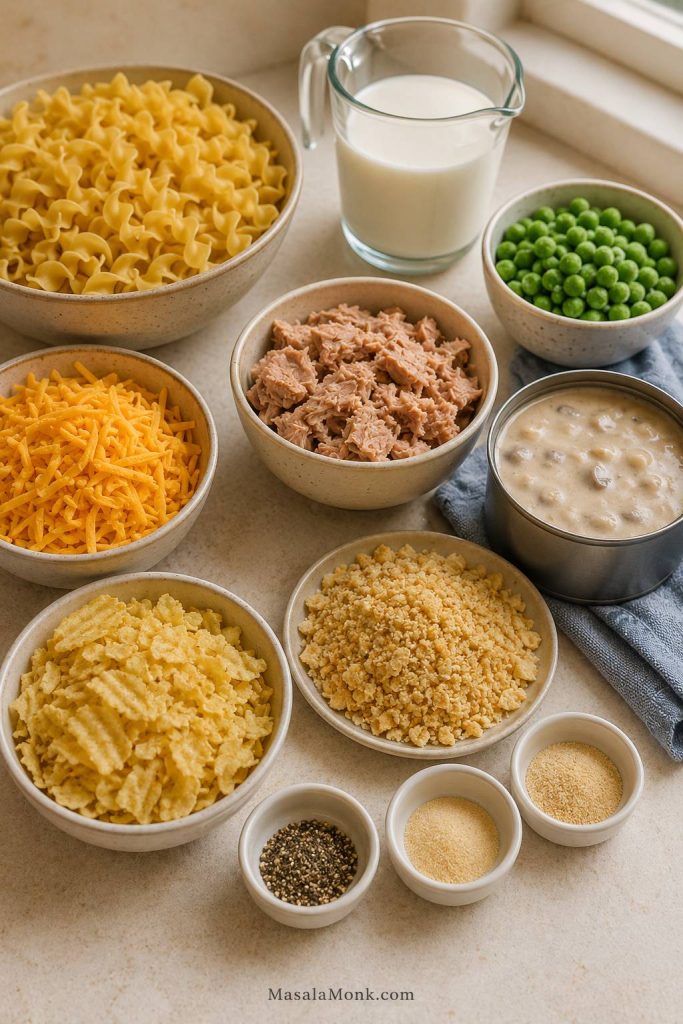
Tuna noodle casserole ingredients arranged on a counter, including egg noodles, tuna, soup, milk, peas, cheddar, seasonings, and topping.
Simple pantry staples work best when each one has a job: noodles for structure, tuna for protein, peas for sweetness, and crumbs or chips for crunch.

For the biggest texture decisions, start with the egg noodle guide and the tuna comparison below.

Egg Noodles

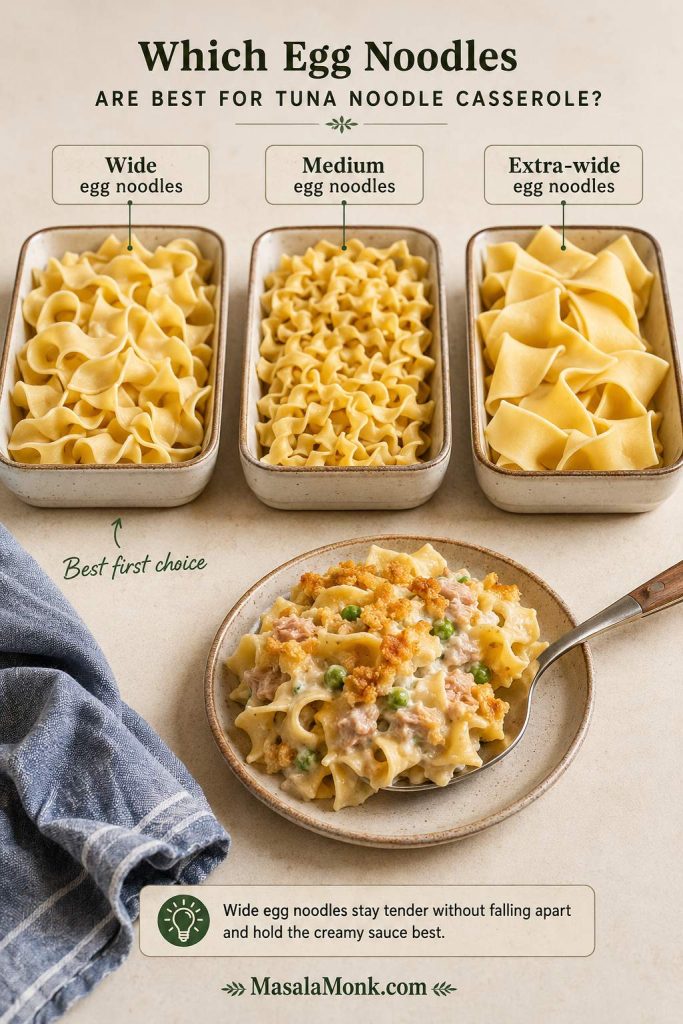
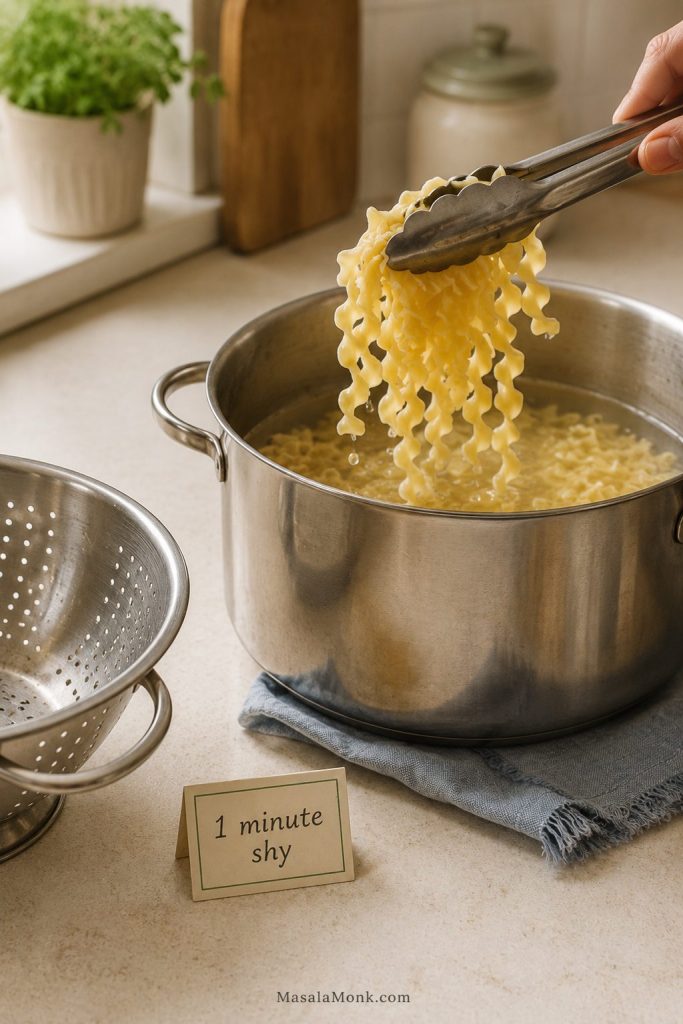
Wide egg noodles are part of what makes this casserole taste like tuna noodle casserole instead of just tuna pasta. They are tender but sturdy, hold sauce well, and give the dish the old-school texture people expect. Cook them 1 minute shy of al dente so they finish softening in the oven without turning mushy.

Wide, medium, and extra-wide egg noodles compared for tuna noodle casserole, with wide egg noodles marked as the best first choice.
Wide egg noodles give the most familiar bite; meanwhile, thinner noodles soften faster and extra-wide noodles need a little more sauce.
Noodle Type Best For What to Know
Wide egg noodles Best old-fashioned tuna noodle casserole texture Soft, saucy, and sturdy enough for baking.
Medium egg noodles Softer casserole texture Cook quickly, so check early and avoid overboiling.
Extra-wide egg noodles More rustic, hearty texture Need enough sauce because the larger noodles absorb more.
Elbow macaroni Tuna mac-style casserole Works well, but feels less like an egg noodle casserole.
Rotini or penne Pasta bake style Better for a tuna pasta bake than this old-school noodle casserole.

Canned Tuna

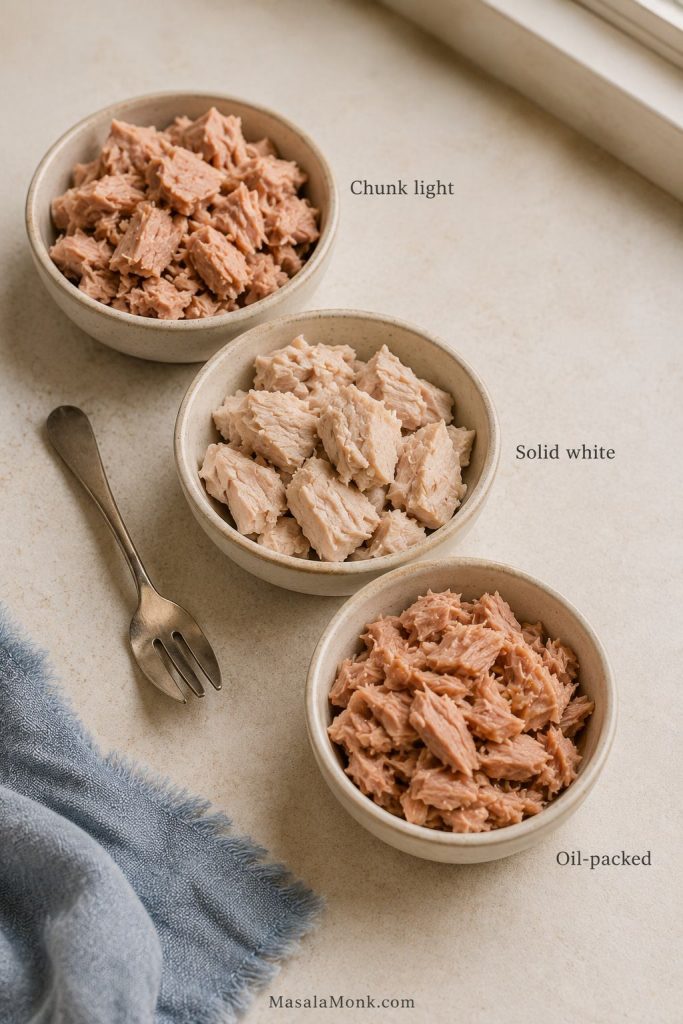
Two standard 5 oz / 142 g cans of tuna are enough for a full 9×13-inch casserole without making the dish taste overwhelmingly fishy. Chunk light tuna gives a milder, softer casserole, while solid white albacore gives larger, firmer flakes. Either works, but fold the tuna in gently so it does not disappear into the sauce.

Chunk light tuna, solid white albacore, and oil-packed tuna compared in small dishes for tuna noodle casserole.
Choose tuna by texture: chunk light blends in gently, while solid white tuna gives the casserole larger, more visible flakes.
Tuna Type Best For What to Know
Chunk light tuna in water Classic mild casserole Soft, affordable, and easy to mix into the sauce.
Solid white albacore Larger tuna flakes Firmer texture and cleaner pieces, but usually stronger tasting.
Tuna packed in oil Richer flavor Drain very well or the casserole can feel heavy.

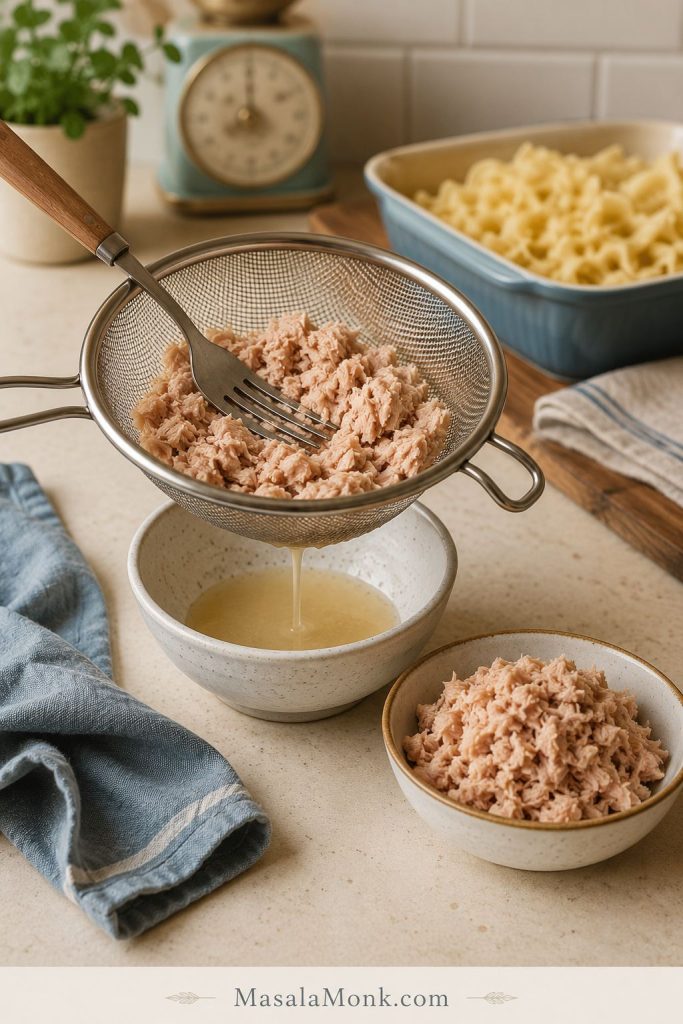
Whatever tuna you use, drain it well. Extra liquid from the can can make the sauce loose in the wrong way, while undrained oil can make the casserole taste heavy. If you want a lighter canned-tuna meal for another day, these healthy tuna salad recipes give you avocado, Greek yogurt, Mediterranean, no-mayo, and high-protein options.

Canned tuna being drained in a fine mesh strainer before adding it to tuna noodle casserole.
Drain the tuna before mixing; extra liquid can make the sauce thin before the casserole even reaches the oven.

Cream of Mushroom Soup

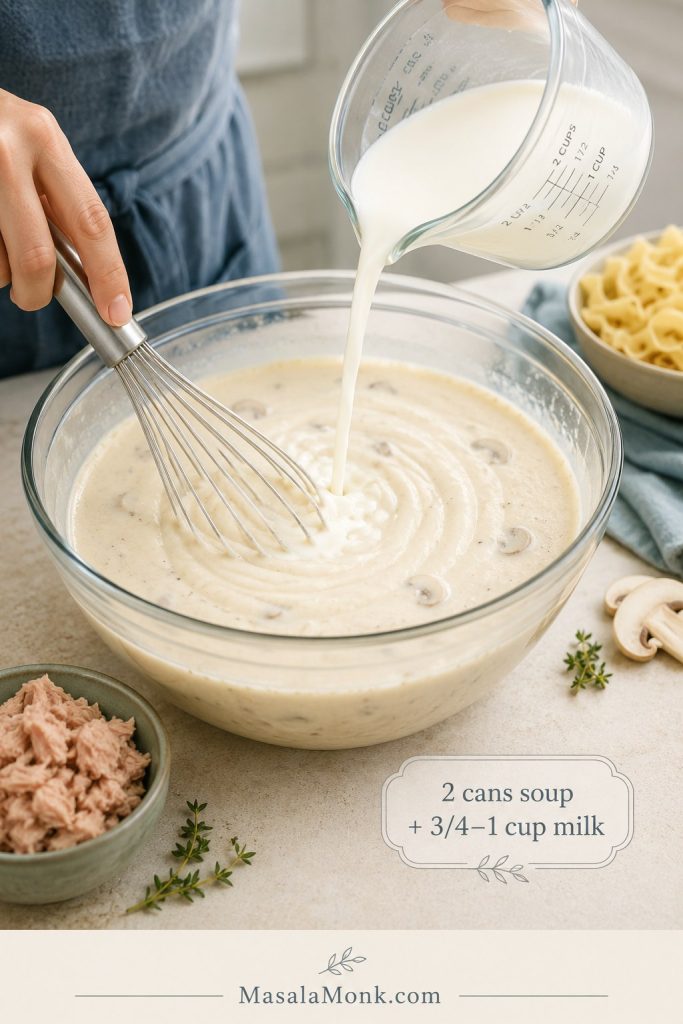
Condensed cream of mushroom soup is the shortcut sauce behind the old-school flavor most people expect here. For a 9×13 casserole, use 2 cans, 10.5 oz / 298 g each, then loosen the condensed soup with 3/4 to 1 cup / 180 to 240 ml milk before adding the noodles.

Milk

Milk turns the condensed soup into a bakeable sauce. Start with 3/4 cup / 180 ml for a thicker casserole, or use a full cup / 240 ml if you want the noodles more generously coated or plan to make the casserole ahead.

Cream of mushroom soup being whisked with milk to make a smooth sauce for tuna noodle casserole.
Whisk cream of mushroom soup with milk before adding noodles so the sauce coats evenly instead of staying thick in pockets.

Peas and Vegetables

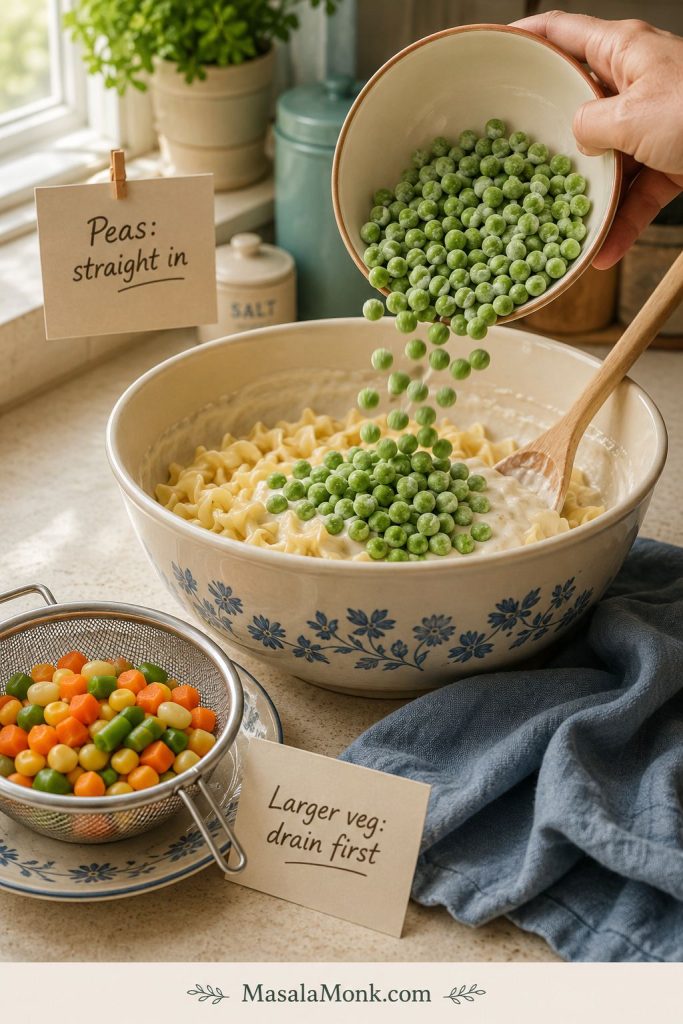
Frozen peas are the easiest vegetable here because they cook quickly and add sweetness. You do not need to thaw frozen peas before mixing them in; they warm through quickly in the oven. If using larger frozen vegetables, thaw and drain them first so they do not water down the sauce.

You can also add sautéed onion, celery, mushrooms, carrots, or a small amount of spinach. Watery vegetables should be cooked or drained first.

Frozen peas being added to tuna noodle casserole mixture with drained vegetables nearby.
Frozen peas can go straight into tuna noodle casserole, while larger vegetables should be thawed and drained so they do not thin the sauce.

Cheddar Cheese

Cheddar is optional, but it makes the casserole richer and more family-dinner friendly. Use 1 cup / 113 g for a balanced version or 1 1/2 cups / 170 g for a cheesier casserole.

Crunchy Topping

Potato chips, buttery crackers, panko, breadcrumbs, and fried onions all work. Add the topping right before baking so it stays crisp instead of turning soft from the sauce.

Because condensed soup, canned tuna, cheddar, crackers, chips, and fried onions can all be salty, taste the sauce before adding extra salt. Black pepper, garlic powder, onion powder, Dijon mustard, or a small squeeze of lemon can add flavor without making the casserole too salty.

Cheddar, pepper, garlic powder, onion powder, Dijon, lemon, and crushed topping arranged for seasoning tuna noodle casserole.
Since soup, tuna, cheese, chips, and crackers can all be salty, build flavor with pepper, garlic, onion, Dijon, or lemon before adding more salt.

Equipment You Need

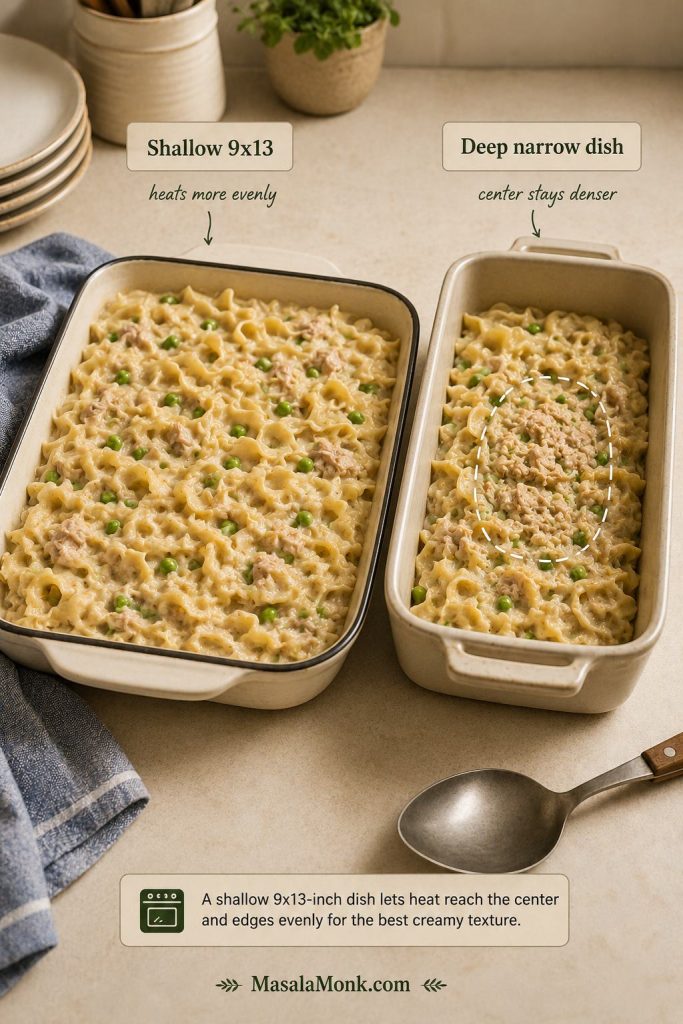
You do not need special equipment, but the pan size matters more than it seems. A shallow 9×13-inch / 23×33 cm baking dish is better than a deep, narrow dish because the casserole heats evenly and does not turn dense in the center before the edges are hot.

Shallow 9x13 baking dish compared with a deep narrow dish for tuna noodle casserole.
A shallow 9×13 dish spreads the tuna noodle casserole evenly, so the center heats through before the edges overbake.
  • Large pot for boiling egg noodles
  • Colander for draining noodles
  • Large mixing bowl or deep skillet
  • 9×13-inch / 23×33 cm baking dish, about 3 quarts
  • Small bowl for mixing the topping
  • Foil for make-ahead, reheating, or chilled casserole baking
  • Optional skillet or saucepan if making the no-soup sauce

How to Make Tuna Noodle Casserole

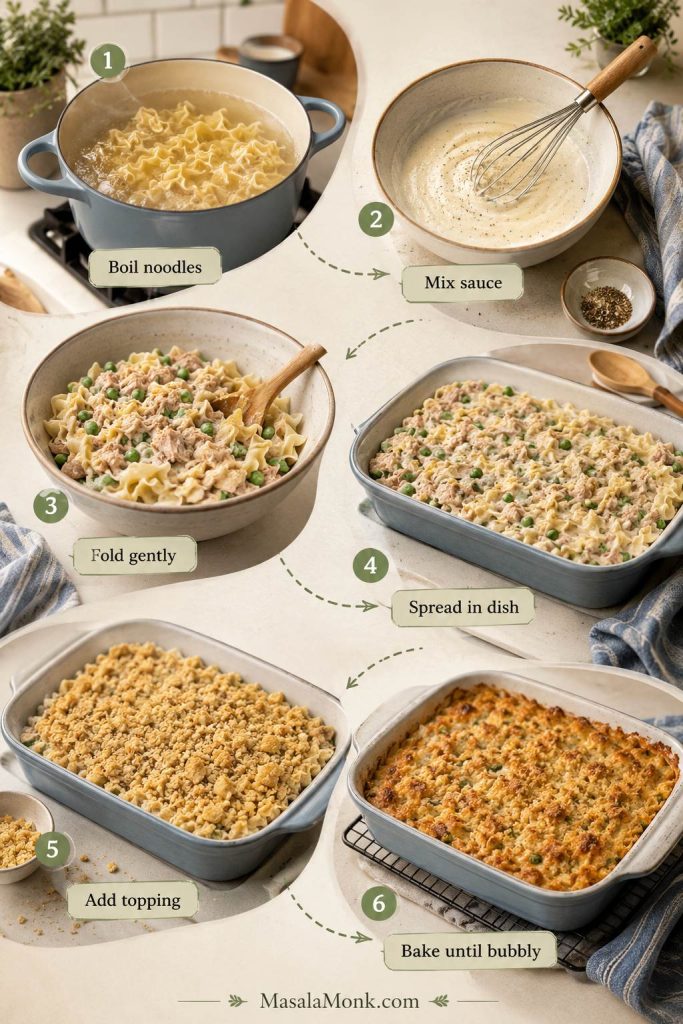
Six-step guide showing noodles, sauce, tuna and peas, casserole dish, topping, and baked tuna noodle casserole.
The order keeps the texture in check: cook the noodles, mix the sauce, fold gently, spread evenly, then add topping just before baking.

1. Boil the Egg Noodles

Bring a large pot of salted water to a boil. Add 12 oz / 340 g wide egg noodles and cook them about 1 minute less than the package’s al dente time. The noodles should bend easily but still have a little firmness in the center.

Egg noodles lifted from a pot with a one-minute-shy cue for tuna noodle casserole.
Pull the egg noodles early because they keep absorbing sauce in the oven, which helps prevent a mushy tuna noodle casserole.

2. Mix the Creamy Sauce

In a large bowl, whisk together the cream of mushroom soup, milk, black pepper, garlic powder, and onion powder. The sauce should be smooth before the noodles go in.

3. Fold in Tuna, Peas, Cheese, and Noodles

Add the well-drained tuna, frozen peas, cheddar, and cooked egg noodles. Fold gently so the tuna stays in small flakes instead of disappearing into the sauce. The noodles should be coated, but not swimming.

Tuna, peas, cheddar, egg noodles, and creamy sauce being folded together in a mixing bowl.
Gentle folding keeps the tuna in flakes and helps the sauce coat the egg noodles without turning the filling pasty.

4. Spread Into a Baking Dish

Grease a 9×13-inch / 23×33 cm baking dish and spread the mixture evenly. Do not pack it down firmly; a lighter layer heats more evenly.

Unbaked tuna noodle casserole mixture spread in a shallow dish with coated noodles, peas, tuna, and no topping yet.
Before the topping goes on, the casserole mixture should spread easily, with sauce clinging to the noodles instead of pooling in the dish.
5. Add the Crunchy Topping

Sprinkle crushed potato chips, crackers, or buttered panko over the top. If using breadcrumbs or panko, mix them with melted butter first so they brown instead of drying out.

6. Bake Until Bubbly

Bake uncovered at 375°F / 190°C for 20 to 25 minutes, until the edges are bubbling and the topping is lightly golden. Rest for 5 minutes before serving.

Tuna Noodle Casserole Recipe Card

Tuna Noodle Casserole Recipe with Egg Noodles

This is the classic pantry-style tuna noodle casserole: wide egg noodles, tuna, peas, cream of mushroom soup, milk, cheddar, and a crisp potato chip, cracker, or breadcrumb topping. It is simple, cozy, and built to stay soft, saucy, and scoopable after baking.

Prep Time15 minutes
Cook Time25 minutes
Total Time40 minutes
Yield6–8 servings

Equipment: large pot, colander, large mixing bowl, 9×13-inch / 23×33 cm baking dish, small topping bowl.

Ingredients

  • 12 oz / 340 g wide egg noodles
  • Salt for the pasta water, plus extra only if the sauce needs it
  • 2 cans tuna, 5 oz / 142 g each, drained well
  • 2 cans condensed cream of mushroom soup, 10.5 oz / 298 g each
  • 3/4 to 1 cup / 180 to 240 ml milk
  • 1 cup / 140 g frozen peas, no need to thaw
  • 1 cup / 113 g shredded cheddar cheese, optional but recommended
  • 1/2 teaspoon black pepper
  • 1/4 teaspoon garlic powder
  • 1/4 teaspoon onion powder
  • 1 cup crushed potato chips or buttery crackers, about 35 to 45 g depending on the topping

Optional Buttered Breadcrumb Topping

  • 1/2 cup / about 30 g panko or breadcrumbs
  • 2 tablespoons / 28 g melted butter
  • 2 tablespoons grated parmesan, optional

Optional Add-Ins

  • 1/2 cup chopped celery, sautéed
  • 1/2 cup chopped onion, sautéed
  • 8 oz / 225 g mushrooms, sautéed
  • 1/2 cup sour cream or 2 to 3 tablespoons mayo for an extra creamy version
  • 1 teaspoon Dijon mustard or a small squeeze of lemon for brightness

Instructions

  1. Preheat the oven. Heat oven to 375°F / 190°C. Grease a 9×13-inch / 23×33 cm baking dish.
  2. Cook the noodles. Bring a large pot of salted water to a boil. Cook the egg noodles 1 minute shy of al dente. Drain well.
  3. Make the sauce mixture. In a large bowl, whisk together cream of mushroom soup, 3/4 cup milk, black pepper, garlic powder, and onion powder. If using sour cream, mayo, Dijon, lemon, sautéed celery, onion, or mushrooms, stir them into the sauce now. Add the remaining 1/4 cup milk if the sauce looks very thick.
  4. Add the filling. Fold in the well-drained tuna, peas, cheddar, and cooked egg noodles. Mix gently so the tuna stays in flakes instead of breaking down completely.
  5. Fill the dish. Spread the mixture evenly into the prepared baking dish. It should look creamy and slightly loose, with the noodles fully coated but not swimming in sauce. If it looks stiff before baking, stir in 2 to 4 tablespoons more milk.

  6. Add topping. Sprinkle crushed potato chips or crackers over the top. If using panko or breadcrumbs, mix them with melted butter first, then sprinkle over the casserole.
  7. Bake. Bake uncovered for 20 to 25 minutes, until the edges are bubbling and the topping is lightly golden.
  8. Rest and serve. Let the casserole rest for 5 minutes before serving.

Notes

  • Taste the sauce before adding extra salt because condensed soup, tuna, cheese, chips, and crackers can all be salty.
  • For a faster bake, use 400°F / 200°C and check after 15 minutes.
  • If baking from chilled, cover loosely for the first half of baking and add 10 to 15 extra minutes.
  • Add crunchy topping right before baking, especially for make-ahead casserole.
  • For leftovers, add a splash of milk before reheating; the reheating section shows the cue.
Saveable tuna noodle casserole recipe card with servings, prep time, bake time, oven temperature, ingredients, and short method.
Keep the core tuna noodle casserole formula handy: egg noodles, tuna, soup, milk, peas, topping, and a 375°F bake until bubbling.

A quick safety note for families: for general fish-consumption guidance, especially for children or people who are pregnant or breastfeeding, see the FDA’s advice about eating fish.

How Long to Bake Tuna Noodle Casserole

The best default is 375°F / 190°C for 20 to 25 minutes. This temperature heats the casserole through without drying the noodles too quickly or burning the topping.

Oven Temperature Best Use Approximate Time
375°F / 190°C Best all-purpose creamy bake 20–25 minutes
400°F / 200°C Faster weeknight bake if the mixture is warm 15–20 minutes
425°F / 220°C Very fast bake 15–20 minutes, but watch for drying or topping browning too quickly
375°F / 190°C from chilled Make-ahead casserole from the refrigerator 30–40 minutes; cover loosely for the first half if needed
Tuna noodle casserole bake time guide with 375°F, 400°F, chilled bake times, and a bubbling-edge cue.
Bake time is a cue, not just a number; when the edges bubble and the center is hot, the casserole is ready.

The casserole is done when the edges bubble, the center is hot, and the topping is golden in spots. If the topping browns before the center is hot, loosely tent the dish with foil and continue baking.

If the casserole is coming from the fridge, check the make-ahead guidance before baking.

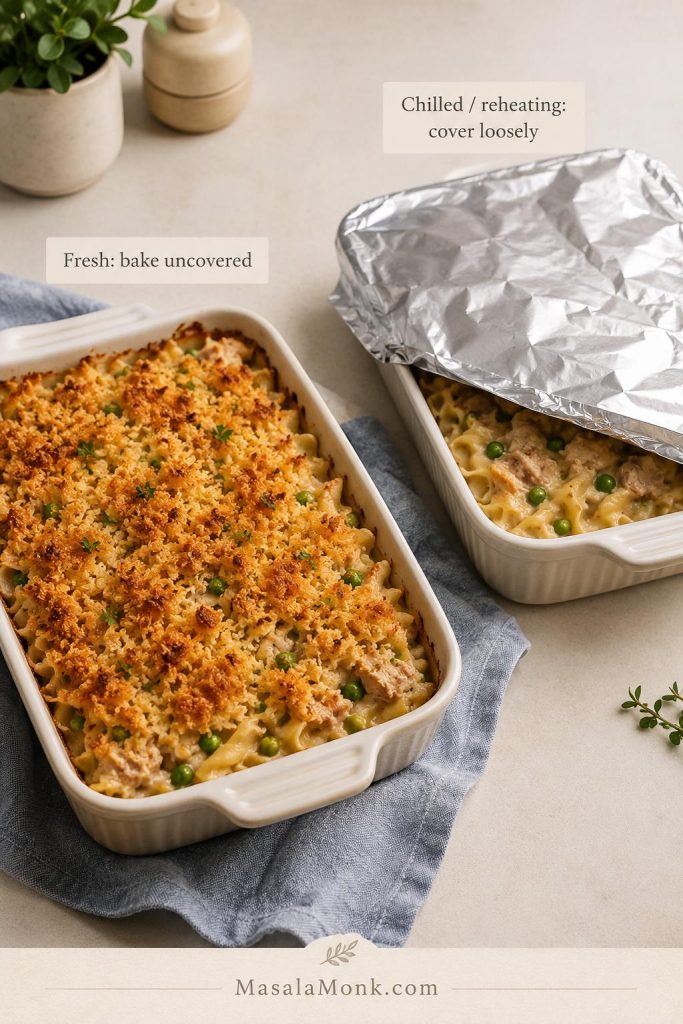
Should Tuna Noodle Casserole Be Covered While Baking?

Bake freshly assembled tuna noodle casserole uncovered so the topping can crisp. Cover it loosely with foil only if the casserole is cold from the refrigerator, the topping is browning too fast, or you are reheating leftovers.

Covered and uncovered tuna noodle casserole dishes showing when to bake uncovered or cover loosely with foil.
Bake fresh tuna noodle casserole uncovered for crunch; cover loosely only when reheating, baking from chilled, or slowing down browning.

Tuna Noodle Casserole with Cream of Mushroom Soup

The cream-of-mushroom version is the main recipe here because it matches the comfort-food casserole most people are looking for: quick, pantry-friendly, creamy, and familiar. For a 9×13-inch tuna noodle casserole, use 2 cans condensed cream of mushroom soup and 3/4 to 1 cup milk.

Prefer a homemade sauce? Skip ahead to the without-soup method.

Stir the soup and milk together before adding noodles so there are no thick pockets of soup. Cream of celery soup gives a lighter vegetable flavor, while one can cream of mushroom plus one can cream of chicken makes the sauce richer and more savory.

If you like understanding sauce texture, this easy cheese sauce recipe shows how milk, cheese, and gentle heat keep sauces smooth instead of grainy or gluey.

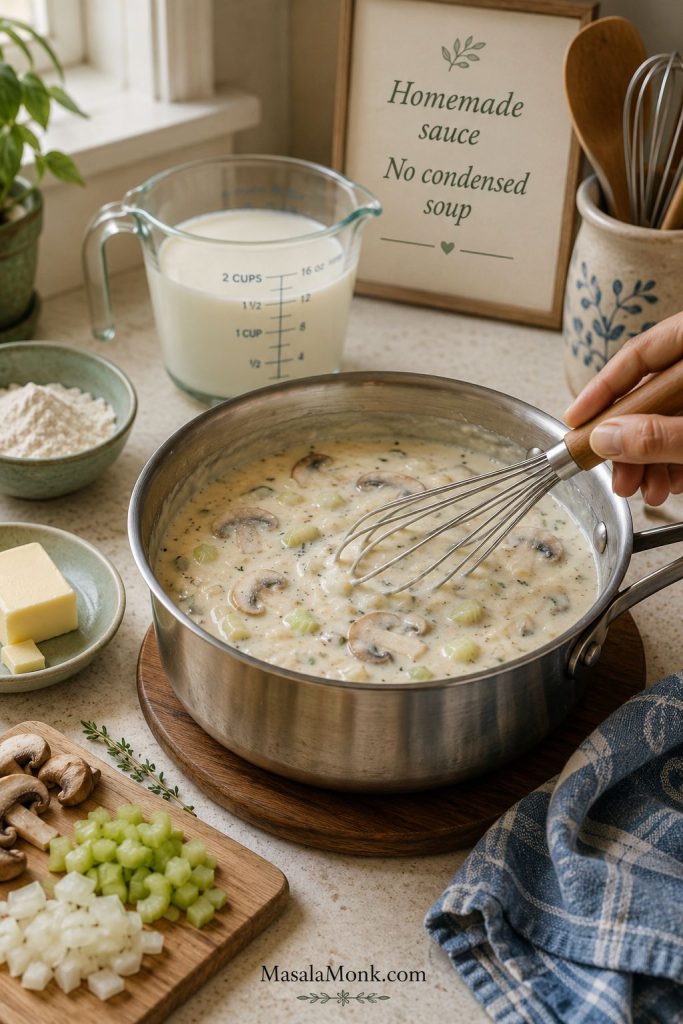
Tuna Noodle Casserole Without Soup

For a homemade version without condensed soup, make a quick white sauce with butter, flour, milk, broth, mushrooms, onion, and celery. Melt 4 tablespoons / 56 g butter in a skillet. Cook 1 small chopped onion, 1 to 2 celery ribs, and 8 oz / 225 g mushrooms until softened. Add 2 minced garlic cloves, then stir in 1/3 cup / 40 g flour.

Slowly whisk in 1 1/2 cups / 360 ml milk and 1 1/2 cups / 360 ml broth. Simmer until creamy, then fold in tuna, peas, noodles, and cheese if using. If the sauce thickens before the noodles are added, loosen it with extra milk or broth 2 tablespoons at a time.

Homemade white sauce for tuna noodle casserole being whisked with mushrooms, onion, celery, milk, and broth.
For tuna noodle casserole without soup, a quick white sauce gives you better control over salt, thickness, and mushroom flavor.

For a deeper white-sauce reference, this béchamel sauce guide explains the butter-flour-milk method that also helps a homemade tuna casserole sauce stay smooth.

Best Tuna Noodle Casserole Toppings

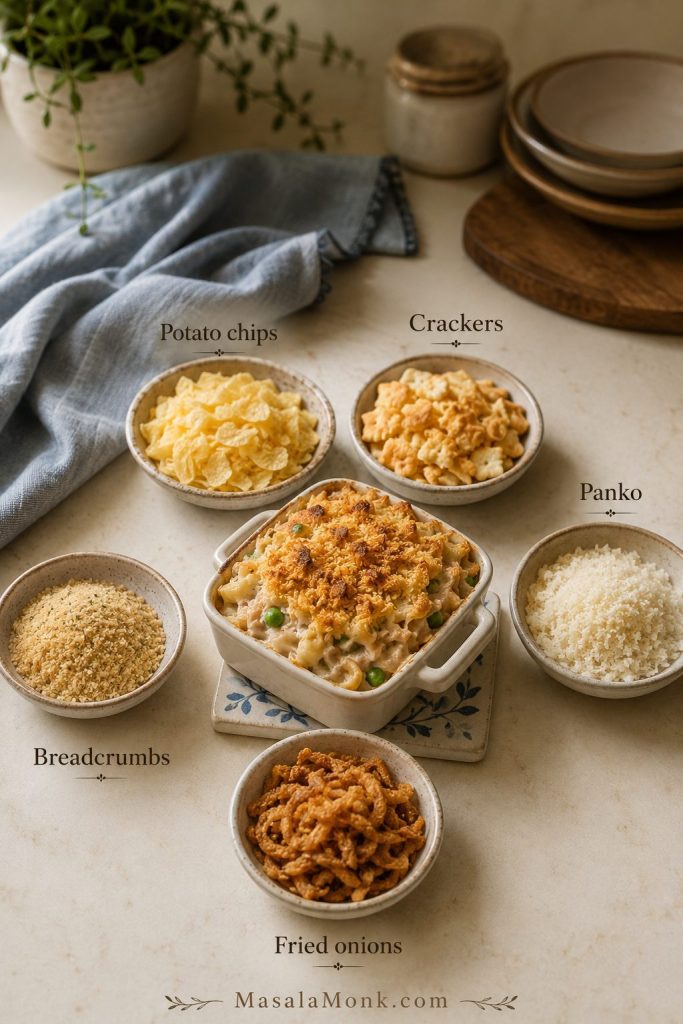
The topping changes the whole personality of the casserole. Potato chips make it salty and old-fashioned, crackers make it buttery, panko makes it crisp, and fried onions make it taste more like a holiday casserole.

Potato chips give you the nostalgic church-supper casserole. Buttered panko gives you a cleaner, crispier top.

Topping Best For How to Use It
Potato chips Old-fashioned salty crunch Crush lightly and add right before baking.
Ritz or buttery crackers Buttery comfort-food topping Crush coarsely; mix with a little melted butter if needed.
Panko Crispest clean topping Mix with melted butter and optional parmesan.
Breadcrumbs Classic balanced topping Use with melted butter so they brown evenly.
Fried onions Green bean casserole-style crunch Use lightly because the flavor is strong.
Potato chips, crackers, panko, breadcrumbs, and fried onions compared as toppings for tuna noodle casserole.
The topping changes the whole casserole: potato chips taste nostalgic, crackers feel buttery, and panko gives a cleaner crunch.
Old-fashioned tuna noodle casserole with crushed potato chip topping and a scooped corner showing noodles, peas, and tuna.
Crushed potato chips are the old-fashioned choice when you want salty crunch and a true retro tuna casserole finish.

Choosing a topping for a make-ahead casserole? See the make-ahead notes so the topping stays crisp.

How to Keep Tuna Noodle Casserole Creamy, Not Dry

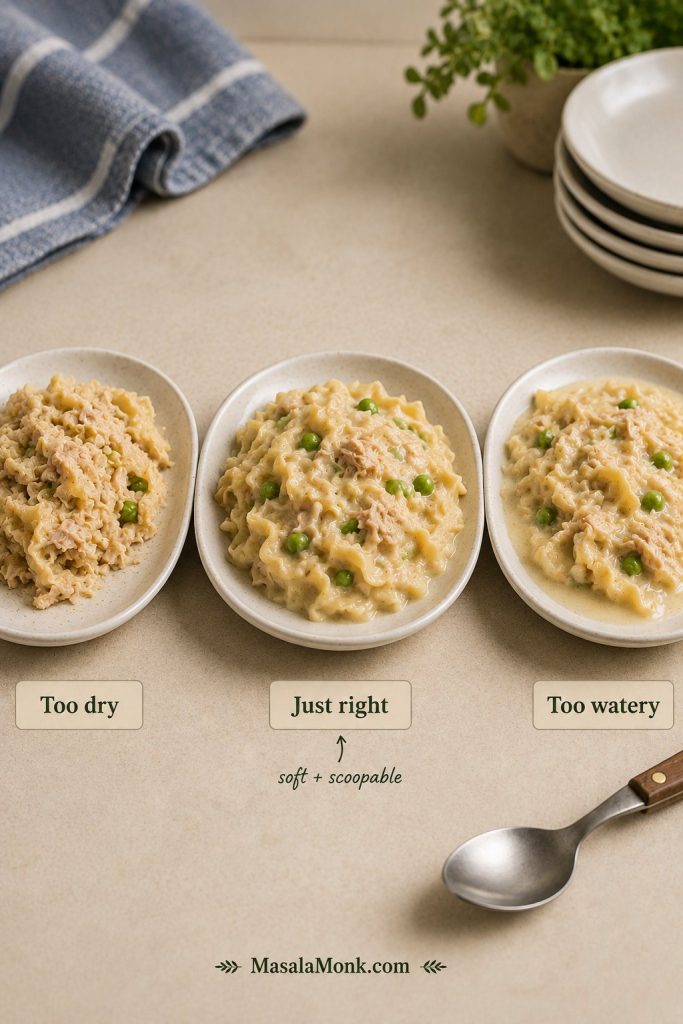
The fix for dry tuna casserole happens before it goes into the oven, not after it comes out. Dryness usually comes from overcooked noodles, sauce that was too thick before baking, too much time in the oven, or leftovers reheated without adding moisture back.

Three-step guide showing one-minute-shy noodles, generously coated casserole mixture, and bubbling edges for creamy tuna noodle casserole.
The best texture starts before baking: slightly firm egg noodles, a generous sauce coating, and a stop point when the edges bubble.

Before Baking

  • Cook the noodles 1 minute shy of al dente.
  • Use the full 1 cup / 240 ml milk if making the casserole ahead.
  • Do not pack the noodles tightly into the baking dish.

After Baking or Reheating

  • Rest the casserole for 5 minutes, not 15 or 20.
  • For leftovers, add a splash of milk before reheating.
  • Cover while reheating, then uncover briefly to crisp the topping.
  • If a serving is already dry, stir in a spoonful of warm milk or cream before serving.
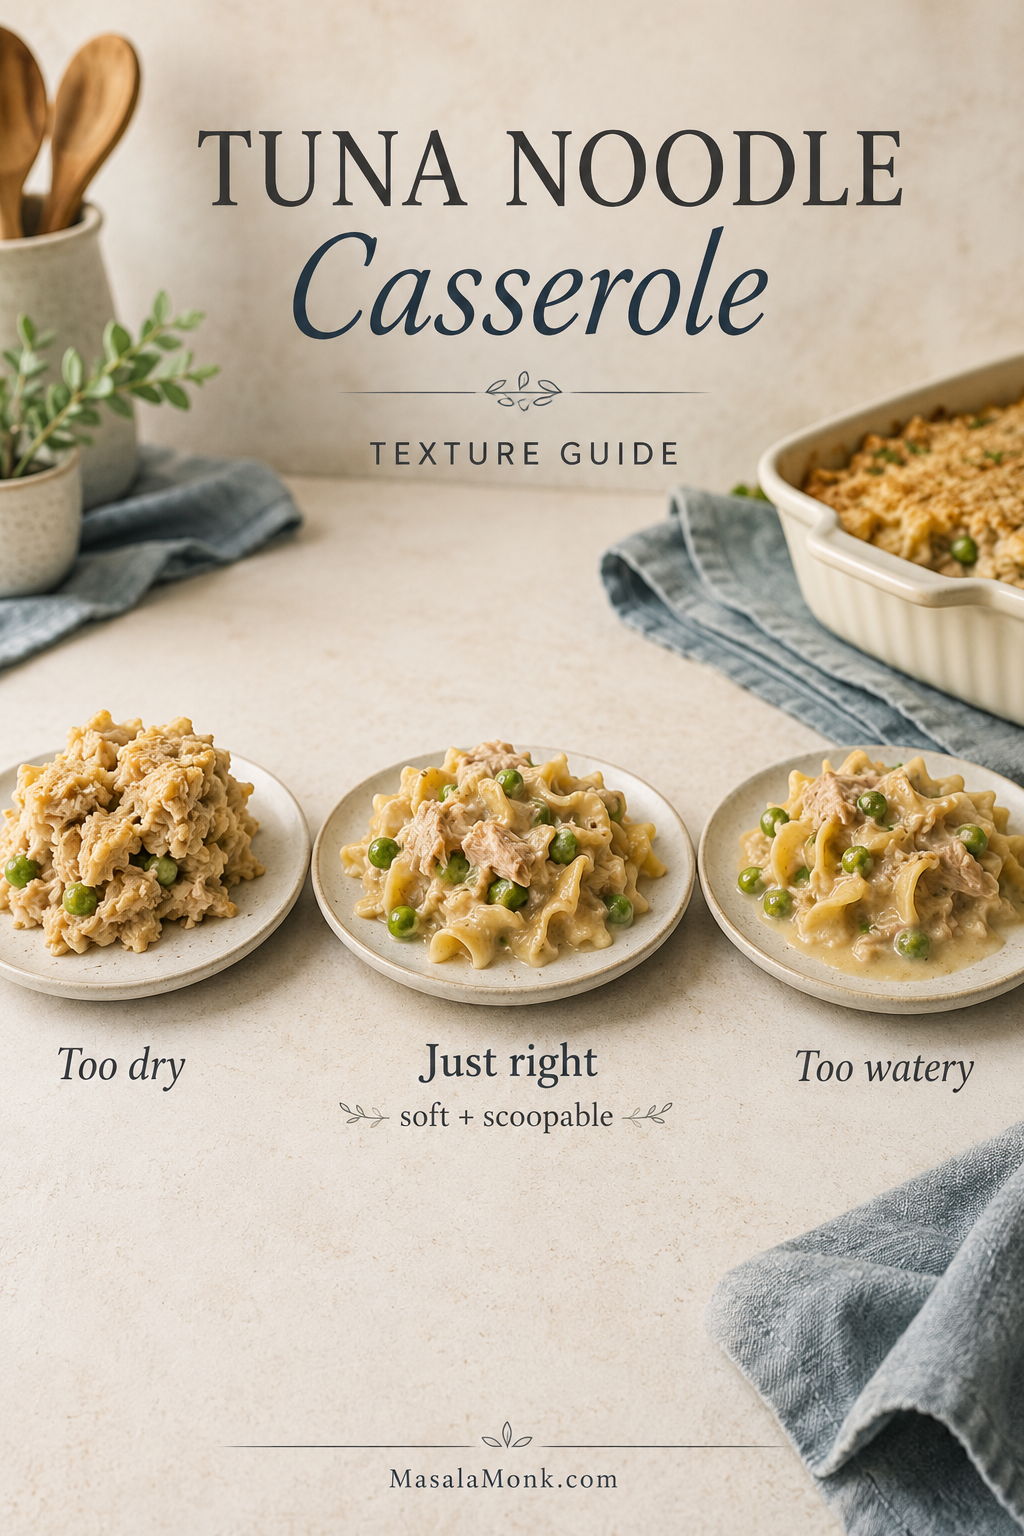
Three plates of tuna noodle casserole showing too dry, just right, and too watery textures.
The best tuna noodle casserole is soft and scoopable; if it slices like a block or leaks sauce, the balance needs adjusting.

If the casserole is already baked and the texture still seems off, use the troubleshooting guide to decide whether the issue is sauce, noodles, topping, or bake time.

No-Boil Tuna Noodle Casserole: Is It Worth It?

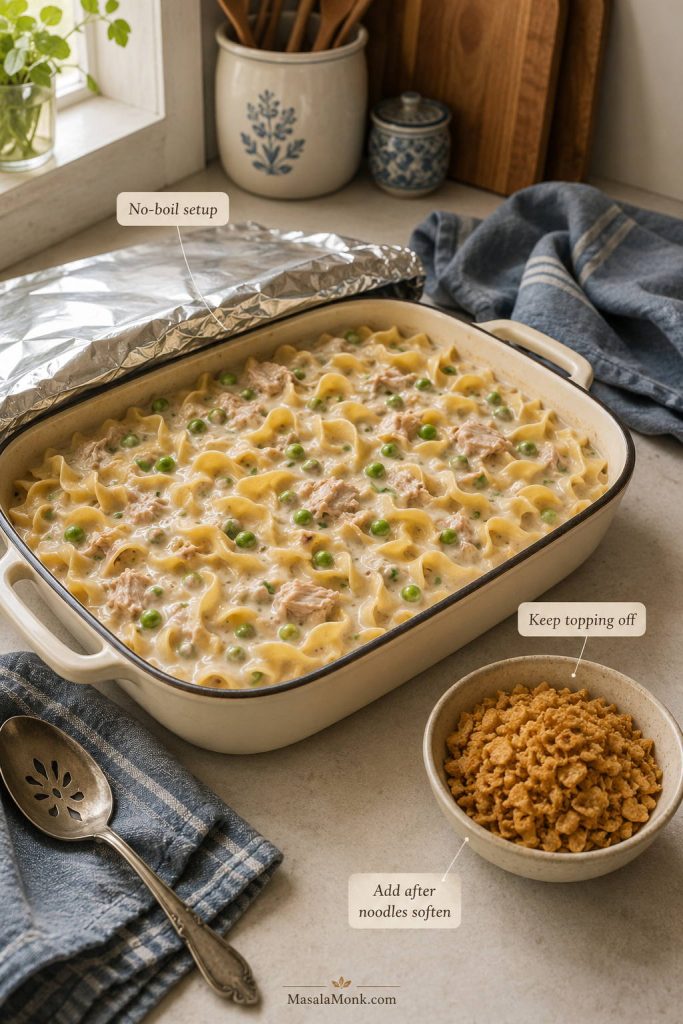
No-boil tuna noodle casserole works when convenience matters more than perfect noodle texture. It saves a pot, but the noodles need more liquid, a tightly covered pan, and a longer bake so they can soften in the sauce.

For the best egg noodle texture, boiling the noodles separately still gives the best result. If you do try a no-boil version, make the sauce much looser, press the noodles under the liquid, and cover the pan tightly with foil.

Add the topping only after the noodles are tender; otherwise the top can brown before the casserole is fully cooked.

No-boil tuna noodle casserole setup with noodles under sauce, foil nearby, and topping kept separate.
No-boil tuna noodle casserole needs extra liquid and patience, so keep the topping off until the noodles have softened.

Stovetop Tuna Noodle Casserole

This is the weeknight version when you want the flavor of tuna noodle casserole without waiting for a baked top. It will be softer and saucier than the oven version, and the topping is sprinkled on at the end instead of browned in the oven.

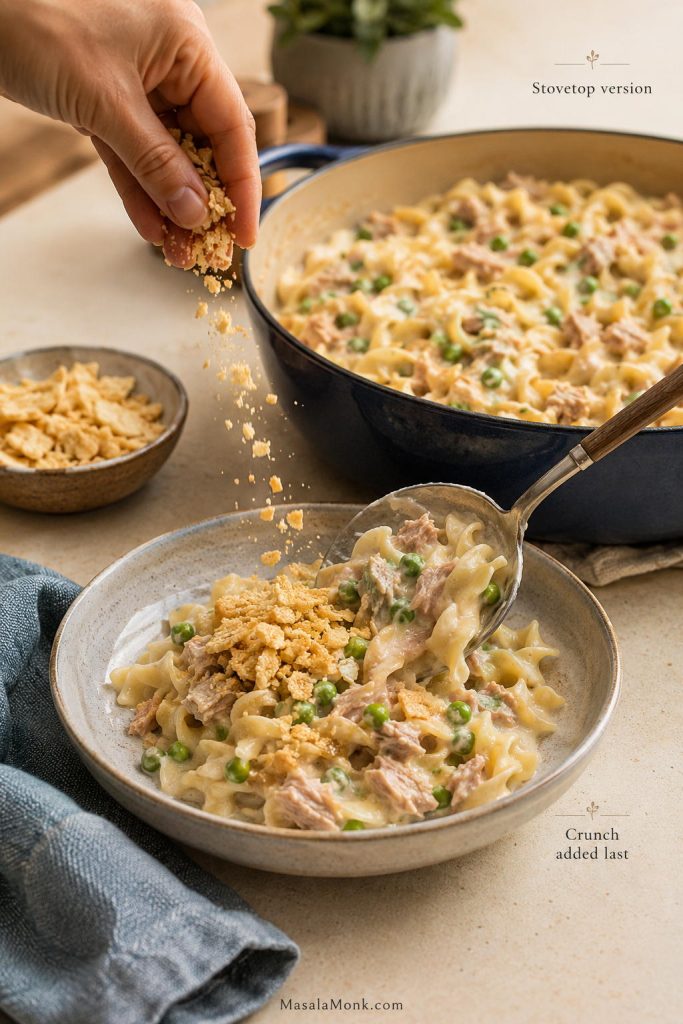
Cook the noodles separately, or simmer them gently in a creamy sauce in a Dutch oven. Stir in the tuna and peas near the end so the tuna stays flaky and the peas do not overcook. Finish each serving with crushed crackers, potato chips, or toasted breadcrumbs for crunch.

Stovetop tuna noodle casserole in a deep skillet with a serving topped with crushed crackers or chips.
The stovetop version stays softer and saucier, while the crunch comes from adding chips, crackers, or crumbs at the end.

Tuna Noodle Casserole for Two

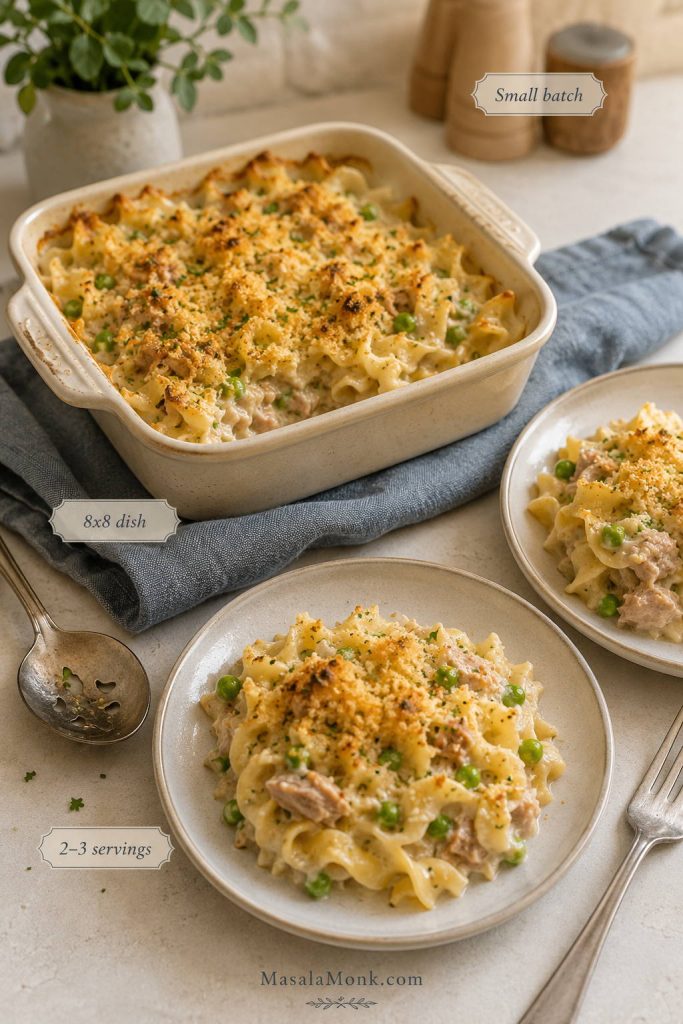
A full 9×13-inch pan is great for family dinner, but an 8×8-inch dish or 1.5-quart baking dish is easier when you only want a few servings. Keep the sauce generous, add the topping right before baking, and check early because a smaller casserole heats faster.

Ingredient Small-Batch Amount
Egg noodles 4 oz / 115 g
Tuna 1 can, 5 oz / 142 g, drained
Peas 1/2 cup / 70 g
Cream of mushroom soup 1/2 to 2/3 can for balanced sauce, or 1 full can for extra creamy
Milk 1/4 to 1/3 cup / 60 to 80 ml
Dish 8×8-inch dish or 1.5-quart baking dish
Bake time 15–20 minutes at 375°F / 190°C
Small batch tuna noodle casserole in an 8x8 dish with two plated servings.
Use an 8×8 dish when you want the same comfort-food flavor without committing to a full 9×13 pan.

Old-Fashioned Tuna Noodle Casserole

For an old-fashioned tuna noodle casserole, keep the ingredients simple: egg noodles, canned tuna, cream of mushroom soup, milk, peas, cheddar, and crushed potato chips. Use light seasoning, add celery or onion only if you like that retro casserole flavor, and taste before salting because the soup, tuna, cheese, and chips already bring plenty.

What to Serve with Tuna Noodle Casserole

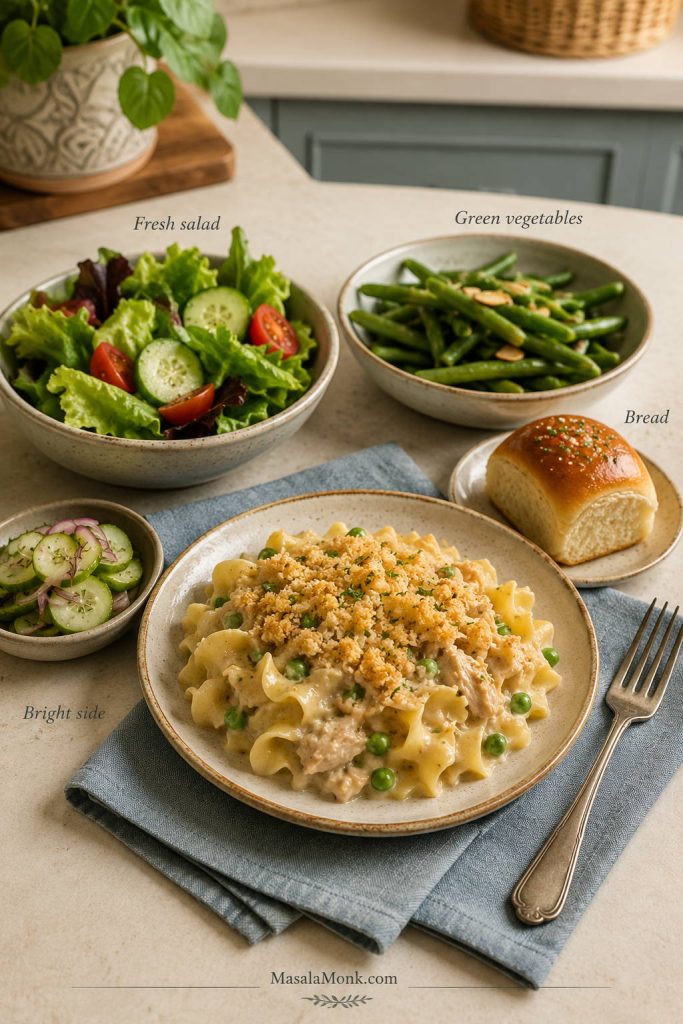
Tuna noodle casserole is rich, creamy, and filling, so the best sides are usually fresh, crisp, or simple. You do not need a heavy side dish unless you are feeding a larger crowd.

  • Fresh sides: green salad, cucumber salad, coleslaw, or tomato cucumber salad.
  • Vegetables: steamed broccoli, green beans, roasted carrots, asparagus, or peas and carrots.
  • Bread: dinner rolls, biscuits, garlic bread, or a simple slice of toasted sourdough.
  • Bright sides: pickles, lemony salad, or vinegar-based slaw to balance the creamy casserole.
Tuna noodle casserole served with green salad, green vegetables, bread, and a bright side.
Because tuna noodle casserole is rich and filling, fresh salad, green vegetables, bread, or a bright pickle-style side keeps the plate balanced.

Serve it soon after the short rest, while the sauce is still creamy and the topping has some crunch.

Make Ahead, Store, and Freeze Tuna Noodle Casserole

Make Ahead

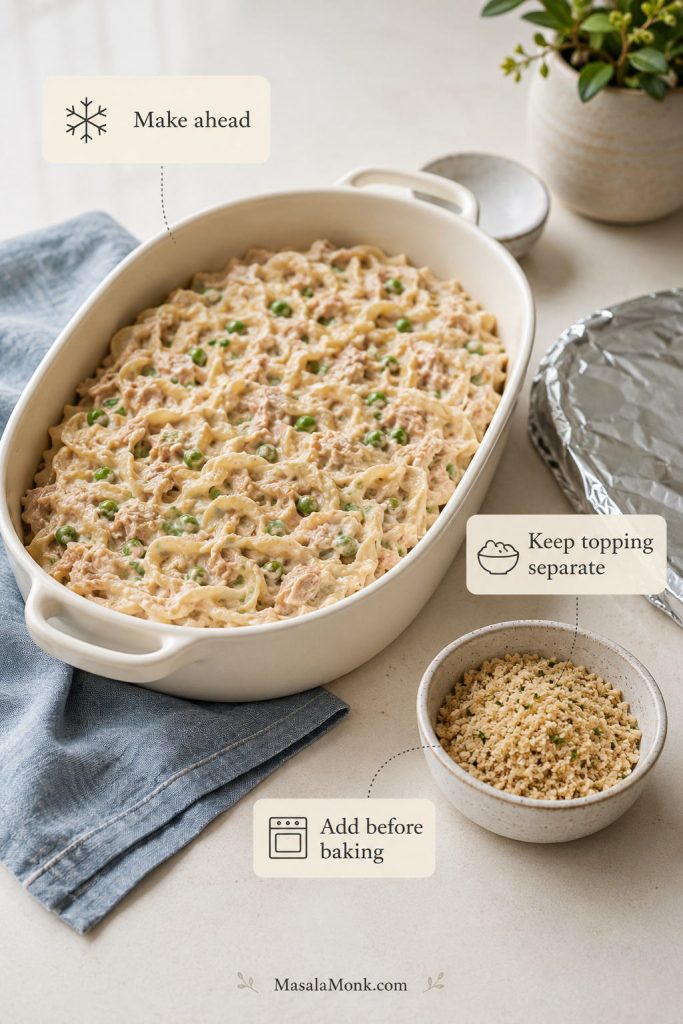
Assemble the casserole without the crunchy topping, cover, and refrigerate for up to 1 day. When ready to bake, let it sit at room temperature while the oven preheats, stir in a small splash of milk if the noodles have absorbed too much sauce, add the topping, and bake. A chilled casserole may need 10 to 15 extra minutes. For topping choices that hold up best, jump back to the topping guide.

Make-ahead tuna noodle casserole filling in a baking dish with crunchy topping stored separately.
For make-ahead tuna noodle casserole, refrigerate the filling without the topping so the crumbs, chips, or crackers stay crisp.

Storage

Store leftovers in an airtight container in the refrigerator for 3 to 4 days. For general leftover safety guidance, see the USDA’s leftovers and food safety guide.

Freezing

You can freeze tuna noodle casserole before or after baking, but the noodles will soften slightly after thawing. For best texture, freeze the casserole without the topping, then add fresh topping before baking or reheating.

Freezer-ready tuna noodle casserole in containers with crunchy topping stored separately for later.
Freeze tuna noodle casserole without the topping; then add fresh chips, crackers, or crumbs before baking or reheating.

Reheating

To reheat, add a splash of milk, cover loosely with foil, and warm in a 325°F / 165°C oven until hot. Remove the foil for the last few minutes if you want to re-crisp the topping. For single servings, microwave gently with a splash of milk and stir halfway through. If leftovers still seem dry, check the creamy, not dry tips for moisture fixes.

Leftover tuna noodle casserole in a small dish with milk being poured in and foil nearby for reheating.
When reheating tuna noodle casserole, a small splash of milk helps loosen the sauce after the noodles absorb moisture in the fridge.

Tuna Noodle Casserole Variations

Extra Cheesy Tuna Noodle Casserole

For a cheesier family-style bake, increase the cheddar to 1 1/2 or 2 cups and sprinkle a little extra cheese under the topping. For a sharper flavor, use sharp cheddar or add parmesan to the crumb topping. If you are in a full cheesy comfort-food mood, this macaroni and cheese recipe covers stovetop, baked, and Southern-style versions with similar creamy-baked pasta logic.

Tuna Noodle Casserole with Celery, Onion, or Mushrooms

Sautéed celery, onion, or mushrooms make the casserole taste a little fresher and more homemade. Cook them in a little butter before adding them to the dish so they add flavor without releasing too much water in the bake.

Healthier Tuna Noodle Casserole

For a lighter but still creamy version, use whole wheat egg noodles or a higher-protein pasta, add more vegetables, reduce the cheese, and use the no-soup sauce option.

Tuna Noodle Casserole Without Peas

Leave the peas out or replace them with corn, broccoli, mushrooms, spinach, or mixed vegetables. If using watery vegetables, cook or drain them first.

Tuna Hotdish

Tuna hotdish is often very similar to tuna noodle casserole, especially in Midwestern-style cooking. It usually means a creamy baked casserole with noodles or another starch, canned tuna, vegetables, and a crunchy topping.

Troubleshooting Tuna Noodle Casserole

Most tuna casserole problems are fixable once you know whether the issue came from the noodles, the sauce, the topping, or the bake time.

Tuna noodle casserole troubleshooting guide with fixes for dry, watery, mushy, and soggy topping problems.
Most tuna casserole problems come from the noodles, sauce, topping, or bake time; once you spot the cause, the fix is usually simple.
Problem Likely Cause Fix
Dry casserole Too little sauce, overcooked noodles, or overbaking Add more milk before baking, cook noodles short, and bake only until bubbly.
Mushy noodles Noodles boiled too long or held too long before baking Cook 1 minute shy of al dente and bake soon after mixing.
Watery sauce Undrained tuna, too much milk, or watery vegetables Drain tuna well, do not overdo the milk, thaw and drain larger frozen vegetables, and bake uncovered.
Bland flavor Not enough seasoning or too much plain pasta Add black pepper, garlic powder, onion powder, mustard, sharp cheddar, or a squeeze of lemon.
Soggy topping Topping added too early, casserole covered while hot, or leftovers stored with topping Add topping right before baking. For leftovers, refresh with a few new crumbs or chips after reheating.
Topping browns too fast Oven too hot or topping too close to broiler Tent loosely with foil and continue baking until the center is hot.

Once baked, the tuna noodle casserole should scoop easily, with creamy noodles underneath and a lightly crisp topping on top. If it looks bubbly at the edges and still moist in the center, it is ready.

FAQs

Do you cook egg noodles before baking tuna casserole?

Cook the egg noodles first, but stop about 1 minute before they are fully al dente. They will continue softening in the oven.

How much milk do you add to tuna noodle casserole?

For a 9×13-inch tuna noodle casserole with 2 cans of condensed soup, use 3/4 to 1 cup / 180 to 240 ml milk. Use the full cup if you want it creamier or are making it ahead.

Do you need one or two cans of cream of mushroom soup?

For a full 9×13-inch casserole with 12 oz / 340 g egg noodles, 2 cans of condensed soup give the best creamy texture. One can is better for a smaller casserole.

What kind of tuna works best?

Chunk light tuna works well for a softer, milder casserole, while solid white albacore gives larger flakes and a firmer bite. Drain either type well.

Should tuna noodle casserole be covered while baking?

Bake it uncovered if the casserole is freshly assembled. Cover loosely with foil only if it is chilled, reheating, or browning too quickly before the center is hot.

Why is my tuna noodle casserole dry?

It probably had too little sauce, overcooked noodles, or baked too long. The casserole should come out when the edges are bubbling, not when the top looks dry.

What can replace cream of mushroom soup?

Cream of celery soup is the closest easy swap. Cream of chicken makes the sauce richer, and a homemade butter-flour-milk sauce gives you the most control over salt and texture.

Can tuna noodle casserole be made ahead?

Make it up to 1 day ahead, but leave off the topping until just before baking. If the noodles absorb too much sauce in the fridge, stir in a small splash of milk before baking.

Can you freeze tuna noodle casserole?

Freezing works, though the noodles soften after thawing. Freeze without the topping for the best texture, then add fresh topping before baking or reheating.

Is tuna hotdish the same as tuna noodle casserole?

They are very similar. “Hotdish” is often the Midwestern term for a creamy baked casserole with a starch, protein, vegetables, and a topping.

What vegetables go well in tuna noodle casserole?

Peas are the classic choice, but celery, onion, mushrooms, carrots, broccoli, spinach, corn, and mixed vegetables all work. Cook or drain watery vegetables first so they do not thin the sauce.

Posted on 3 Comments

Slow Cooker Pork Tenderloin (Crock Pot Recipe) — 3 Easy Ways

Shredded BBQ slow cooker pork tenderloin in a speckled bowl on a cool slate background, topped with sliced tenderloin and glossy barbecue sauce, with a fork resting in the bowl and the title “Slow Cooker Pork Tenderloin” on the cover.

There’s something quietly satisfying about a slow cooker dinner. You season, you layer, you set the lid, and then you go live your life while the kitchen slowly turns itself into the coziest room in the house. Slow cooker pork tenderloin fits that rhythm beautifully—provided you treat it like the lean, quick-cooking cut it is.

That’s the part that surprises people. A tenderloin sounds like it should love long, lazy cooking. However, because it’s so lean, it doesn’t have the same built-in cushion that pork shoulder has. In other words, slow cooking pork tenderloin works best when you’re aiming for a clear endpoint: juicy and sliceable at one temperature, or shreddable at a higher one. Once you cook to that endpoint, the rest becomes wonderfully flexible.

So this is a full guide to slow cooker pork tenderloin with three dependable recipes or “ways”:

  1. a classic sliceable version with glossy juices you can spoon over every slice
  2. a shredded, pulled-style BBQ version that turns into sandwiches, bowls, and sliders
  3. a complete one-pot meal with potatoes and carrots that feels like comfort food without extra pans

Along the way, you’ll also get the cooking time for pork tenderloin in slow cooker on LOW vs HIGH, the temperature targets that keep it juicy, and plenty of flavorful serving variations—because once you nail the method, you’ll want to use it often.


Slow Cooker Pork Tenderloin vs Pork Loin (Don’t Swap Cook Times)

Before you unwrap anything, it helps to confirm what you bought. Pork tenderloin and pork loin get confused constantly, and the slow cooker is where that mix-up can wreck dinner.

Infographic comparing pork tenderloin vs pork loin for slow cooking, showing tenderloin is smaller and leaner with a faster cook, while pork loin is larger and fattier with a slower cook, plus a note not to swap cook times when making slow cooker pork tenderloin.
Not sure if you have pork tenderloin or pork loin? This quick comparison makes it easy: tenderloin is smaller and leaner, so it cooks faster in the slow cooker, while pork loin is bigger and needs more time. Use this before you start so your slow cooker pork tenderloin stays juicy and your cook time makes sense—then follow the post for the full method, temperature targets, and the 3 easy ways (sliceable, shredded BBQ, or potatoes + carrots).

Pork tenderloin is long, narrow, and very lean. It cooks quickly and turns tender without needing hours upon hours. Pork loin is wider, often heavier, and typically needs more time to soften—especially if you’re trying to shred it.

Consequently, pork tenderloin in a slow cooker works best when you treat time as a guideline and temperature as your finish line. That shift—temperature over hours—keeps you out of the “dry but tender” zone.

If you cook tenderloin in other ways too and want a helpful comparison for texture and slicing, this guide on pork tenderloin in the oven is a great companion. It helps anchor your instincts: what tenderloin feels like when it’s juicy, how resting changes everything, and why “just a little longer” can be the wrong move.

Also Read: Chicken Pesto Pasta (Easy Base Recipe + Creamy, One-Pot, Baked & More)


Why Slow Cooker Pork Tenderloin Works (And When It Doesn’t)

Slow cookers excel at gentle, even heat. That’s why they’re great for soups, stews, and braises. At the same time, their superpower—steady heat over time—can become the very thing that dries out tenderloin if you leave it too long.

Infographic explaining why slow cooker pork tenderloin works and when it dries out, showing two finish paths: Juicy Slices pulled at 145°F / 63°C with a 10-minute rest, and Shredded Pulled cooked to 190–200°F / 88–93°C, plus a middle “dry zone” warning for cooking too long at slice temps, with photo tiles for slicing against the grain and saucing after shredding, and MasalaMonk.com in the footer.
Slow cookers do gentle, even heat brilliantly—but pork tenderloin is lean, so the “set it and forget it” mindset can backfire. This visual shows the two finishes that work every time: Juicy Slices (pull at 145°F / 63°C, rest, slice against the grain) or Shredded Pulled (cook to 190–200°F / 88–93°C, then sauce after shredding). Save this “tenderloin window” guide so you always pick the right endpoint—tender, juicy results without drifting into the dry zone.

Here’s the good news: you don’t need fancy tricks. You simply need a structure.

  • For sliceable pork tenderloin crock pot style, you cook to a safe, juicy temperature, then rest and slice.
  • For slow cooker pork tenderloin shredded, you keep cooking until it pulls apart, then you sauce it so the meat stays flavorful and lush.

Once you use that structure, this becomes an “I can do this any week” meal. Moreover, it’s incredibly adaptable—BBQ one night, herb-bright the next, potatoes and carrots on a Sunday when you want a full pot of comfort.

Also Read: How to Make a Flax Egg (Recipe & Ratio for Vegan Baking)


Ingredients for Slow Cooker Pork Tenderloin (Crock Pot Base)

This base is designed to taste complete on its own while still leaving you room to pivot into BBQ or a hearty vegetable version.

Infographic titled “Base Ingredients” for slow cooker pork tenderloin (serves 4) showing pork tenderloin amount, base seasoning list, aromatics (yellow onion and garlic), and a modest liquid amount (1/2 cup / 120 ml) with a note explaining why less liquid prevents washed-out flavor, plus optional finishers (Dijon, butter, apple cider vinegar or lemon) and MasalaMonk.com in the footer.
This is the complete crock pot base one can use for slow cooker pork tenderloin—simple, balanced, and flexible. The seasonings make it taste finished on its own, the onion bed builds depth, and the modest 1/2 cup (120 ml) liquid keeps the juices concentrated instead of watery. Then you can choose a quick finisher at the end—Dijon for savory, butter for richness, or a splash of vinegar/lemon for brightness. Save this ingredients snapshot so you can cook once and pivot into slices, shredded BBQ, or a full one-pot dinner.

Base ingredients for recipe (serves 4)

  • Pork tenderloin: 1.5–2 lb (680–900 g), trimmed
  • Fine salt: 1 tsp (6 g)
  • Black pepper: 1/2 tsp (1–2 g)
  • Garlic powder: 1 tsp (3 g)
  • Onion powder: 1 tsp (3 g), optional but excellent
  • Smoked paprika: 1 tsp (2 g), optional (especially good for BBQ direction)
  • Ground cumin: 1/2 tsp (1 g), optional (adds warmth without taking over)
  • Yellow onion: 1 medium (about 200 g), thinly sliced
  • Garlic cloves: 3–4 (12–16 g), smashed (optional)
  • Liquid: 1/2 cup (120 ml) chicken broth or water

Why the liquid is modest for Slow Cooker Pork Tenderloin

Slow cookers trap steam, so liquid doesn’t reduce the way it would on a stovetop. In addition, pork tenderloin releases its own juices as it cooks. Therefore, a modest amount—about 1/2 cup (120 ml)—creates a flavorful, concentrated pot of juices without washing out the seasoning.

Optional finishers (choose one later)

  • Dijon mustard: 1 tbsp (15 g)
  • Butter: 1 tbsp (14 g)
  • Apple cider vinegar or lemon juice: 1–2 tsp (5–10 ml), to taste

Those “small” finishers add up to a bigger, brighter flavor at the end—especially if you’re serving slices.

Also Read: Croquettes Recipe: One Master Method + 10 Popular Variations


How to Cook Pork Tenderloin in a Slow Cooker (Step-by-Step Recipe)

This method is the foundation for all three ways. It’s also the simplest path to easy pork tenderloin in slow cooker form—juicy, flavorful, and dependable.

1) Season with intention

Pat the tenderloin dry with paper towels, then season evenly with salt, pepper, garlic powder, and any optional spices you’re using. Rub gently so the seasoning adheres.

Drying the surface might seem fussy, yet it helps in two ways: the rub sticks better, and the outer layer doesn’t steam quite as quickly.

Seasoning isn’t just “sprinkle and hope”—it’s a quick setup that pays off later. Pat the tenderloin dry, season evenly, then rub so it actually adheres. That dry surface helps the outer layer avoid steaming too fast and keeps the flavor where you want it: on the meat. If you’re leaning toward BBQ or a warmer profile, paprika + cumin are the easiest optional upgrades without overpowering the base. Save Step 1—you’ll use it every time. MasalaMonk.com

2) Build a flavor bed

Lay the sliced onion (and smashed garlic, if using) in the bottom of the crock pot. The onions soften into the cooking liquid and bring a mellow sweetness that makes the pork taste fuller.

Infographic titled “Step 2: Build a Flavor Bed” showing sliced onions in a slow cooker with optional garlic cloves. Callouts note onions add mellow sweetness, garlic adds optional depth, and an even layer helps even cooking. Includes note that pork sits on top with no direct hot spots and MasalaMonk.com footer.
This is the quiet “chef move” that makes slow cooker pork taste fuller: a simple onion bed. As the onions soften, they melt into the juices and turn into a mellow, savory sweetness that makes the pork taste more complete—without extra effort. Keep the layer even, add garlic if you want depth, then set the pork on top so it cooks gently with no direct hot spots. It’s low effort, high payoff. MasalaMonk.com

3) Add liquid around the edges

Pour 1/2 cup (120 ml) broth or water into the pot. Try to pour around the onions so you don’t rinse all the seasoning off the pork when you set it in.

Infographic titled “Step 3: Add Liquid Around the Edges” showing broth being poured into a slow cooker around onions and pork tenderloin. Callouts say pour around onions, keeps rub from washing off, and modest liquid creates concentrated juices. Includes “½ cup / 120 ml” label and MasalaMonk.com footer.
The #1 reason slow cooker pork tastes bland is too much liquid. Here’s the fix: add only ½ cup (120 ml) and pour it around the edges so you don’t rinse off the rub. Slow cookers trap steam and pork releases juices, so a modest splash gives you rich, concentrated pot juices instead of a watery bath. This step is simple, but it’s what makes the final sauce taste like it belongs on the pork. MasalaMonk.com

4) Place the pork tenderloin on top in a slow cooker

Lay the tenderloin over the onions. Keep it as straight as possible so it cooks evenly.

Infographic titled “Step 4: Pork on Top” showing pork tenderloin placed above onions in a slow cooker with callouts: pork sits above onions, center it for even heat, keep it straight for even thickness, and “Don’t submerge.” MasalaMonk.com footer.
This tiny placement trick makes a big difference. Set the tenderloin on top of the onion bed, keep it centered, and lay it as straight as possible so it cooks evenly from end to end. You’re aiming for gentle heat + steady juices—not a submerged boil—so the pork stays tender and clean-tasting. If your tenderloin ever comes out uneven (one end perfect, one end dry), Step 4 is usually the fix. MasalaMonk.com

5) Cook to the endpoint you want

Now you choose the track:

  • For sliceable slow cooker pork tenderloin, you stop at the juicy temperature and rest.
  • For pulled pork from pork tenderloin in crock pot style, you keep cooking until it shreds easily, then you sauce it.
Infographic titled “Step 5: Cook to the Endpoint You Want” comparing two finish paths for slow cooker pork tenderloin: Juicy Slices at 145°F/63°C with pull and rest 10 minutes and slice against the grain, versus Shredded Pulled at 190–200°F/88–93°C cooked until it pulls apart and sauced after shredding. Includes note “Doneness is by temp, not hours” and MasalaMonk.com footer.
Step 5 is where this recipe becomes foolproof: pick the finish first, then cook to the right endpoint. If you want sliceable pork tenderloin, pull at 145°F / 63°C, rest 10 minutes, then slice against the grain. If you want pulled/shredded, keep going to 190–200°F / 88–93°C until it practically falls apart—then sauce after shredding so it stays bold and glossy, not watery. Save this one because it answers the biggest question instantly: slices or shred? MasalaMonk.com

Should you sear pork tenderloin before putting it in slow cooker?

You can, though you don’t have to.

  • If you have 5–7 minutes and want extra depth, sear in a hot skillet with a little oil: 60–90 seconds per side.
  • If you’re going for “dump and go,” skip it. The seasonings, onions, and finishing steps still deliver.

Either route works. The difference is flavor nuance, not success versus failure.

Infographic titled “The 5-Step Map: Slow Cooker Pork Tenderloin (Foundation Method)” showing a five-step workflow: pat dry and season, onion bed, add 1/2 cup (120 ml) liquid around edges, pork on top kept straight, and cook to endpoint. Bottom shows two finishes: slices at 145°F/63°C plus rest, or shred at 190–200°F/88–93°C plus sauce. MasalaMonk.com footer.
This is the “do-it-once, use-it-forever” method for slow cooker pork tenderloin. Follow the 5 steps, then choose your finish: juicy slices (145°F / 63°C + rest) or shredded pulled (190–200°F / 88–93°C + sauce). It’s the kind of guide you save because it removes the guesswork—especially the part most people get wrong (cooking by hours instead of endpoint). Keep this map handy for weeknights, meal prep, and easy pivots like BBQ or a veggie-packed one-pot dinner. MasalaMonk.com

A quick, trustworthy safety anchor

Slow cookers are safe and practical when used correctly. If you want a clear reference for safe handling and slow cooker practices, the USDA’s guide on slow cookers and food safety is a good citation to keep the method grounded.

Also Read: Ravioli Recipe Reinvented: 5 Indian-Inspired Twists on the Italian Classic


Cooking Time for Pork Tenderloin in Slow Cooker (LOW vs HIGH)

Cook time varies by thickness, slow cooker model, and whether the tenderloin started fridge-cold. Still, these ranges are practical starting points—especially if you pair them with a thermometer.

Cheat-sheet infographic for slow cooker pork tenderloin showing cook time and temperature targets: LOW and HIGH timing guidance, 145°F (63°C) for juicy slices with a 10-minute rest, and 190–200°F (88–93°C) for shreddable pork, on a cool slate background with sliced tenderloin photos.
Bookmark-worthy at-a-glance guide: this slow cooker pork tenderloin cheat sheet shows the timing range and the two temperature targets that change everything—145°F / 63°C for juicy, sliceable pork and 190–200°F / 88–93°C for a shredded, pulled-style finish. Use it while cooking to nail doneness without guesswork, then rest the meat so every slice (or shred) stays tender. Save this image for your next crock pot pork tenderloin night.

Temperature targets that keep it juicy

For sliceable tenderloin, the USDA lists 145°F / 63°C as the safe minimum internal temperature for whole cuts of pork, followed by a rest. You can cite their safe temperature chart right where you explain this.

For shreddable tenderloin (pulled-style), you’re aiming for tenderness more than a single number, yet it usually lands around:

  • 190–200°F / 88–93°C

Typical timing ranges (1.5–2 lb / 680–900 g tenderloin)

  • LOW: 2.5–4 hours
  • HIGH: 1.5–2.5 hours

Because models vary, start checking earlier than you think—particularly on HIGH. That early check is what keeps “juicy” from becoming “a little dry.”

Can you overcook pork tenderloin in a crock pot?

Yes, and it happens quietly. Tenderloin doesn’t have the fat cushion of shoulder. Once it sits past the ideal sliceable endpoint, moisture squeezes out. It may still be tender, yet the slices can taste dry.

Fortunately, there’s an easy rescue: if you overshoot the sliceable window, shift gears and shred it into a saucy version. Sauce won’t recreate lost moisture, but it can make the final dish far more enjoyable.

Also Read: Fish and Chips Reimagined: 5 Indian Twists (Recipe + Method)


Way 1: Classic Slow Cooker Pork Tenderloin (Sliceable + Juicy Recipe)

This is the version you make for neat slices, glossy pan juices, and a dinner plate that looks like you tried harder than you did. It also sets you up for easy leftovers—sandwiches, grain bowls, and quick reheats that still taste like dinner.

Ingredients (Way 1)

Base ingredients, plus one optional finisher:

  • Dijon mustard: 1 tbsp (15 g)
    or
  • Butter: 1 tbsp (14 g)
    optional brightener: apple cider vinegar 1–2 tsp (5–10 ml)

Steps (Way 1)

  1. Layer onions (and garlic if using) in the crock pot.
  2. Add 1/2 cup (120 ml) broth or water.
  3. Place seasoned tenderloin on top.
  4. Cook on LOW or HIGH until the thickest part hits 145°F / 63°C.
  5. Transfer to a plate, tent loosely with foil, and rest 10 minutes.
  6. While it rests, stir the pot juices. Add Dijon or butter for a glossy, flavorful finish.
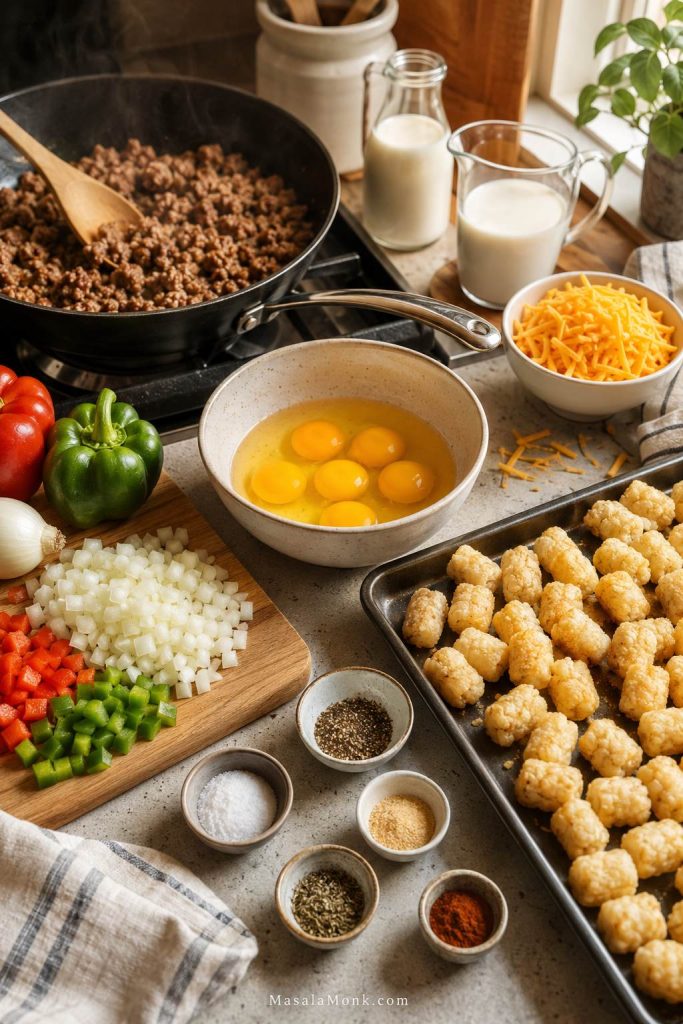
  7. Slice against the grain and spoon juices over each serving.

How to slice pork tenderloin after slow cooking

After resting, slice across the grain into 1/2-inch (1–1.5 cm) pieces. Thin slices cool quickly and can feel drier, while thicker slices can feel less tender. Half-inch slices are a sweet spot for both tenderness and juiciness.

Infographic titled “Juicy Slices” for slow cooker pork tenderloin showing sliced pork on a plate with pan juices and two key tips: rest 10 minutes and slice against the grain, plus a temperature cue to pull at 145°F / 63°C and a WRONG vs RIGHT comparison of slicing direction for tender results.
Juicy slices aren’t luck—this quick guide shows the two moves that make slow cooker pork tenderloin taste tender instead of dry: rest 10 minutes so the juices settle, then slice against the grain for a softer bite. Pull the tenderloin at 145°F / 63°C, let it rest, and use the “wrong vs right” slice direction panel to get clean, tender slices every time. Save this for your next crock pot pork tenderloin night—especially when you want sliceable pork for plates, sandwiches, or easy leftovers.

Serving ideas for sliceable pork tenderloin in the crock pot or slow cooker

This version is quietly versatile. Depending on what you’re craving, it can go in a few directions:

  • Bright and herby: Spoon chimichurri over warm slices for a fresh, restaurant-feeling finish. The acidity and herbs lift the pork beautifully, while the oil adds richness without heaviness.
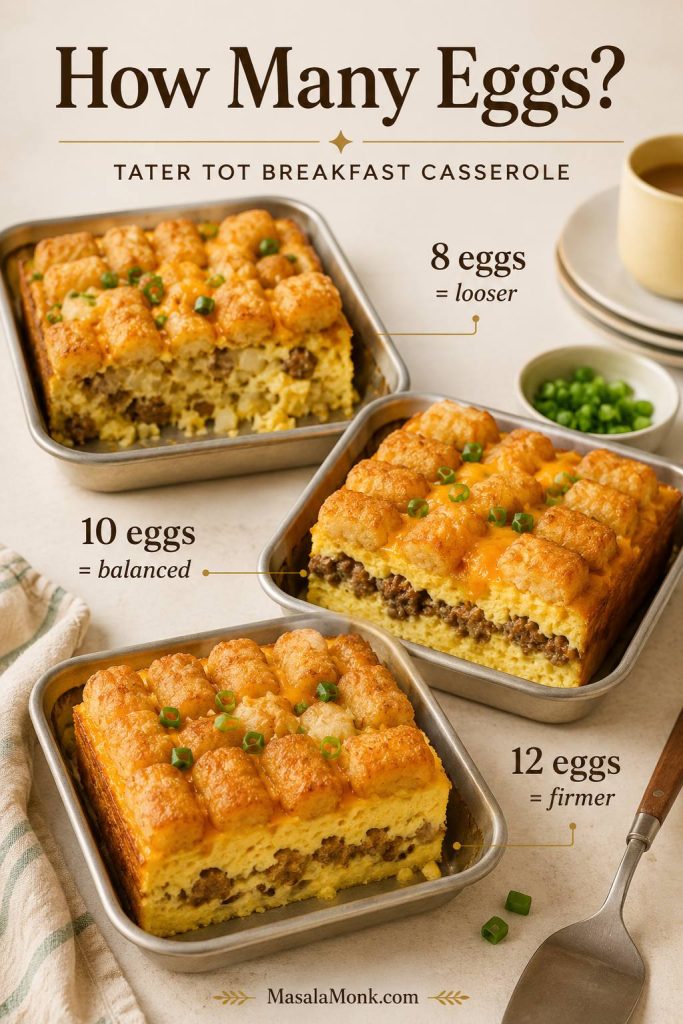
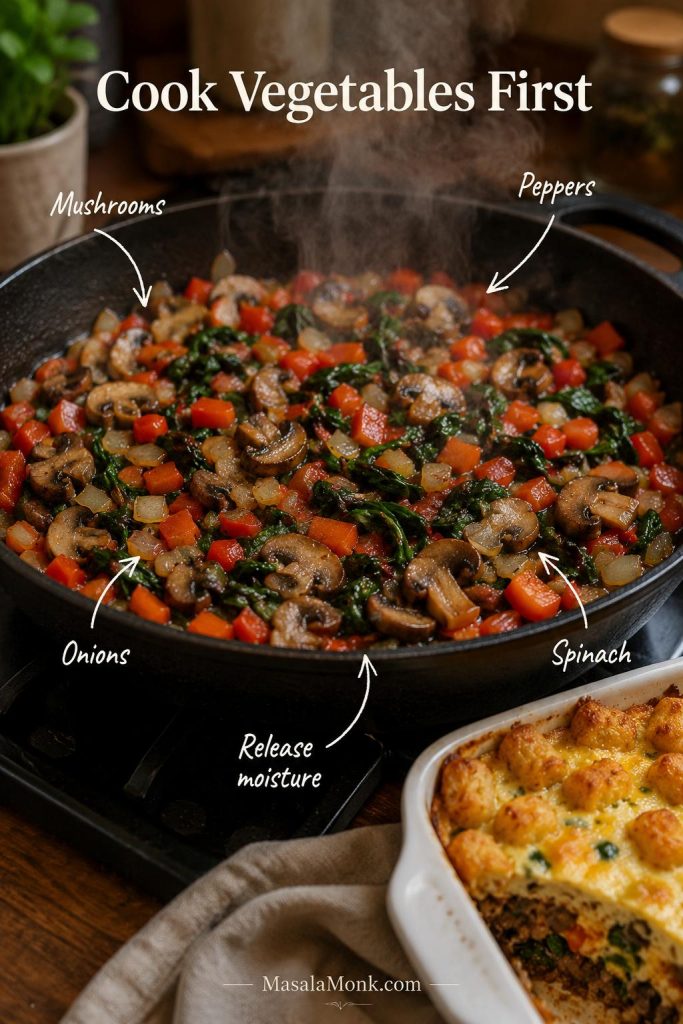
  • Comfort plate: Serve with mashed potatoes, roasted vegetables, or a simple rice pilaf.
  • Salad dinner: Add slices to a salad with crunchy cucumber, onion, and a sharp vinaigrette.
  • Sandwiches: Slice thinly the next day, add a creamy spread, and layer with crisp vegetables.

If you want a creamy base that behaves like a classic sandwich spread, our eggless mayonnaise works well as a simple read here—especially for readers who like a soft, creamy contrast to lean pork.

Make the pot juices taste “finished”

Slow cooker juices can taste good yet slightly muted, especially if you used water instead of broth. To bring them into focus:

  • Add Dijon for sharpness,
  • or butter for richness,
  • or a small splash of vinegar for brightness.

Even better, you can do two—Dijon plus butter is a classic combination that reads like a quick pan sauce without any extra work.

Infographic showing how to finish slow cooker pork tenderloin pot juices in 2 minutes: stir in Dijon mustard (1 tbsp), butter (1 tbsp), and a splash of vinegar (1–2 tsp) to turn thin crock pot juices into a glossy, brighter sauce. Includes “before vs finished” sauce visual, a best-combo strip, and a spooning-over-slices example.
Slow cooker pork tenderloin can be juicy yet the pot juices sometimes taste a little flat. This 2-minute finish fixes that fast: Dijon for sharpness, butter for richness, and a small splash of vinegar for brightness—turning crock pot juices into a glossy, “pan-sauce” style pour-over. Save this for your next sliceable slow cooker pork tenderloin night, then use it right after resting and before serving to make every slice taste bold and finished.

Leftovers for Way 1 (quick, satisfying reuses)

Sliceable tenderloin leftovers are a gift, especially when you store them with a little liquid.

  • Warm bowl: Reheat slices gently with a spoon of juices, then serve over rice with herbs and lemon.
  • Wraps: Add sliced pork, crisp vegetables, and a creamy spread.
  • Protein snack plate: Cold slices with pickles, a little mustard, and crunchy vegetables are surprisingly good.

Also Read: Dirty Martini Recipe (Classic, Extra Dirty, No Vermouth, Spicy, Blue Cheese, Tequila + Batched)


Way 2: Slow Cooker Pork Tenderloin Shredded (Pulled-Style BBQ Recipe)

This version answers a very real craving: the saucy, messy, satisfying joy of pulled pork—without needing pork shoulder. It’s not the same as shoulder, yet it can be wildly delicious when you treat it properly.

Here, you’re using pork tenderloin pulled pork in slow cooker style as a method: cook until it shreds, then sauce it so the flavor stays bold.

Ingredients (Way 2)

Base ingredients, plus:

  • BBQ sauce: 1 cup (240 ml), divided
  • Apple cider vinegar: 1 tbsp (15 ml)
  • Brown sugar or honey: 1 tbsp (12–15 g), optional (adjust to taste)
  • Optional heat: a few drops of pepper sauce

Why sauce timing matters

If you add all the BBQ sauce at the beginning, it tends to thin out and lose its punch. Instead, you want the pork to cook in a lightly seasoned liquid, then get coated in thicker sauce after shredding.

Infographic titled “BBQ Sauce Timing” for shredded slow cooker pork tenderloin, showing three steps: add a little sauce early (¼ cup / 60 ml), shred the tenderloin, then add the remaining sauce plus 1 tbsp vinegar (15 ml), with a before-and-after comparison of watery sauce versus thick, clingy BBQ sauce and MasalaMonk.com in the footer.
Watery BBQ is the fastest way to make shredded pork feel disappointing—this quick visual fixes it. Add just a little sauce early to flavor the cook, shred the slow cooker pork tenderloin once it pulls apart easily, then stir in the remaining BBQ sauce plus a splash of vinegar so it turns thick and clingy instead of diluted. Save this for the next time you’re making bbq pulled pork tenderloin in the crock pot—especially if you want bold flavor that actually coats every strand.

Steps (Way 2)

  1. Add onions and liquid to the crock pot. Stir in 1/4 cup (60 ml) BBQ sauce.
  2. Place the seasoned tenderloin on top.
  3. Cook on LOW until the meat shreds easily. For many slow cookers, that’s around 190–200°F / 88–93°C.
  4. Move tenderloin to a board and shred with two forks.
  5. Return shredded pork to the crock pot. Add remaining BBQ sauce, vinegar, and optional sweetener.
  6. Let it sit on WARM for 10–15 minutes so the sauce clings.
Infographic titled “Shred Test: Ready to Pull?” showing shredded slow cooker pork tenderloin being pulled with two forks, with callouts for the fork-twist test and “no resistance,” plus a target temperature of 190–200°F (88–93°C) and a NOT READY vs READY comparison to help make pulled-style shredded pork tenderloin.
If you’ve ever tried to shred pork and it “fights back,” this is your fix. Use the fork-twist shred test to know when slow cooker pork tenderloin is truly ready for a pulled-style finish: strands should separate easily with no resistance, usually around 190–200°F / 88–93°C. The bottom comparison shows what “not ready” looks like versus perfectly shred-ready pork, so you can cook with confidence and get juicy, saucy shredded pork tenderloin instead of dry strands. Save this for your next crock pot pulled pork night.

How to keep shredded pork tenderloin from drying out

  • Keep some of the cooking juices in the pot when you sauce it—enough to keep it luscious, not so much that it becomes watery.
  • Avoid holding it on WARM for a long time. A short rest for sauce absorption is great; extended holding can dry it out.

BBQ pulled pork tenderloin crock pot serving variations

Now the fun part: once you have saucy shredded pork, dinner becomes flexible. Instead of one meal, you suddenly have options.

1) Pulled pork sandwiches and sliders
Piles of shredded pork love contrast: creamy, crunchy, tangy, or spicy.

  • Creamy drizzle: Mix a spoon of eggless mayonnaise with a splash of vinegar and a pinch of salt for a quick slaw-like drizzle.
  • Crunchy topping: Add shredded cabbage or sliced onions for snap.
  • Build inspiration: If you like the “how to assemble a great sandwich” logic—creamy + crunchy + acidic—this roundup of chicken sandwich recipes is a natural pathway, because the assembly patterns work across proteins.

2) Bowls (fast, filling, meal-prep friendly)
Serve shredded pork tenderloin over:

  • rice,
  • quinoa,
  • mashed potatoes,
  • or roasted sweet potatoes.

Then add something bright (pickles, onions, a squeeze of lime) to keep the bowl from feeling heavy.

If you enjoy batch cooking and turning one protein into multiple meals, our meal prep framework on vegetarian and high-protein meal prep ideas is a natural read here, because the principles—balanced add-ons, smart storage, mix-and-match components—translate perfectly.

3) Potluck plates
BBQ-style shredded pork shines with cold sides. A classic pairing is potato salad, which balances smoky-sweet sauce with tangy creaminess.

4) Spicy BBQ finish
If you want the sauce to taste lively rather than just sweet, a few drops of pepper sauce added at the end can give you clean, controlled heat.

Infographic titled “Pulled Pork Sandwich Formula” for BBQ pork tenderloin, showing a pulled pork sandwich with labeled layers: 1) saucy pork, 2) crunch, 3) creamy, 4) tangy/heat. Includes four boxes with ideas: BBQ-coated pork warmed with a splash of juices; slaw or sliced onion/cabbage for crunch; mayo-yogurt drizzle or ranch-style sauce for creamy; pickles/vinegar squeeze and a few drops of pepper sauce for tangy/heat. Rule: contrast makes it better.
Pulled pork is good—pulled pork with contrast is unforgettable. Use this simple build-anytime formula for BBQ pork tenderloin: Saucy pork + Crunch + Creamy + Tangy/Heat. Start with thick, clingy BBQ-coated pork (warm it with a splash of juices), add slaw or quick-sliced onion for snap, finish with a creamy drizzle (mayo-yogurt or ranch-style), then wake it up with pickles/vinegar and a few drops of pepper sauce. That sweet + acid + crunch balance is what makes “pulled pork sandwiches” taste restaurant-level—even on a busy weeknight. Save this for your next slider night.

A gentle realism check (and why it still works)

Pulled tenderloin won’t have the same fatty silkiness as shoulder. Nevertheless, it can still be extremely satisfying—especially when you choose bold sauce, add acidity, and serve it with crunchy toppings. In a busy week, that combination hits the “comfort food” note without demanding much from you.

Also Read: Keto Hot Chocolate Recipe (Sugar-Free Hot Cocoa) + Best Homemade Mix


Way 3: Pork Tenderloin with Potatoes and Carrots (Crock Pot Meal Recipe)

This is the one-pot dinner that feels like you planned ahead. The pork cooks over vegetables, the juices drip down into the potatoes and carrots, and the whole thing tastes like it belongs on a cold evening.

It also answers a lot of practical cravings: crock pot pork tenderloin with carrots and potatoes, pork tenderloin in crock pot with potatoes and carrots, and slow cooker pork tenderloin with potatoes and carrots—all without feeling repetitive.

Infographic for one-pot slow cooker pork tenderloin with potatoes and carrots on a cool slate background, showing tips to cut vegetables large to prevent mush, place vegetables on the bottom with pork on top, cook LOW 6–7 hours or HIGH 3–4 hours, and a cut-size comparison of “too small” versus “just right” 1.5 in / 4 cm chunks, with MasalaMonk.com in the footer.
Want a full crock pot dinner without mushy vegetables? This one-pot slow cooker pork tenderloin guide shows the simple fixes: cut potatoes and carrots into large chunks (about 1.5 in / 4 cm), layer veg on the bottom and pork on top, and use the timing ranges so everything finishes tender—not falling apart. Save this for busy nights when you want pork tenderloin in the slow cooker with potatoes and carrots that actually hold their shape, then follow the post for the full method and serving variations.

Ingredients (Way 3)

Base ingredients, plus:

  • Baby potatoes: 1.5 lb (680 g), halved (quarter if large)
  • Carrots: 4 medium (about 300–350 g), cut into thick chunks
  • Olive oil: 1 tbsp (15 ml)
  • Salt (for vegetables): 3/4 tsp (4–5 g)
  • Black pepper: 1/2 tsp (1–2 g)
  • Dried thyme or rosemary: 1/2 tsp (1 g), optional
  • Optional finisher: butter 1 tbsp (14 g) or Dijon 1 tbsp (15 g)

Steps (Way 3)

  1. Toss potatoes and carrots with olive oil, salt, pepper, and herbs.
  2. Spread vegetables in the bottom of the crock pot.
  3. Layer sliced onion over the vegetables.
  4. Place the seasoned tenderloin on top.
  5. Pour 1/2 cup (120 ml) broth or water around the edges.
  6. Cook on LOW or HIGH until tenderloin reaches 145°F / 63°C.
  7. Rest pork 10 minutes, then slice.
  8. Taste pot juices and stir in butter or Dijon for a quick, glossy finish.
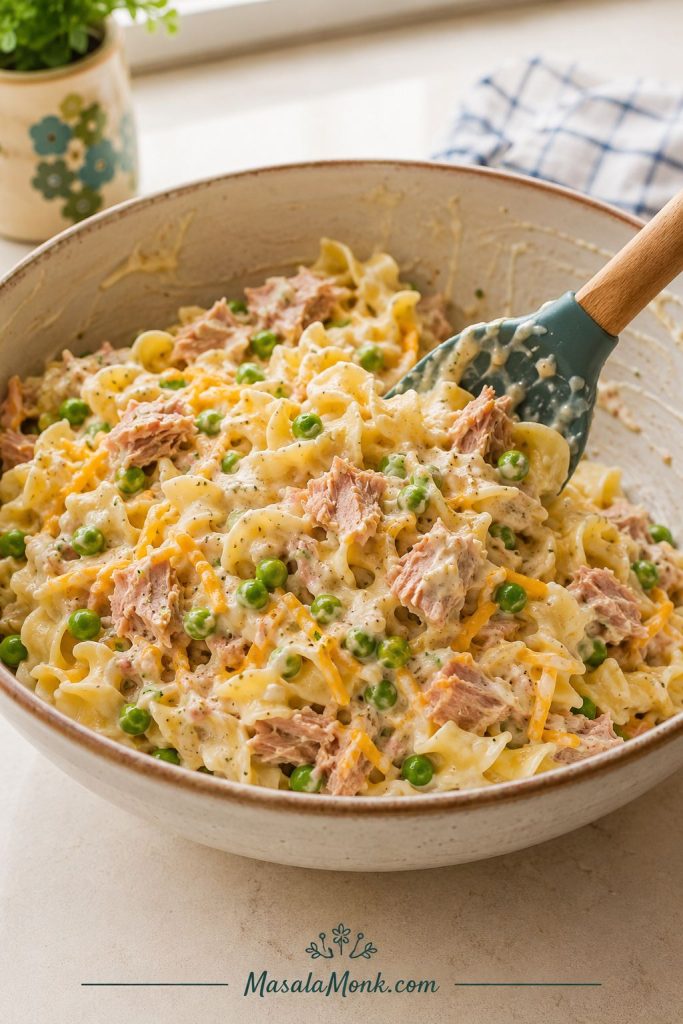
  9. Serve slices over vegetables with spooned juices.

When to add potatoes and carrots so they don’t turn mushy in slow cooker

Most of the time, adding them at the start works well—especially if pieces are large. However, slow cookers vary.

  • On LOW: add vegetables at the start; cut them large.
  • On HIGH: if your slow cooker runs hot, consider adding carrots and potatoes after the first 45–60 minutes, or keep pieces very large and check earlier.
Infographic titled “Finish + Serve” for slow cooker pork tenderloin with potatoes and carrots, showing three finishing moves: stir butter or Dijon into hot pot juices for gloss, add lemon or vinegar for brightness, and finish with parsley/cilantro or chimichurri. Includes three serving moods—cozy, bright, herby—and the rule to add sauces at the end.
Your one-pot pork tenderloin with potatoes and carrots is already comforting—this is how you make it pop. Use the pot juices like a built-in sauce: stir in butter or Dijon for instant gloss, add lemon/vinegar to lift the whole pot, then finish with fresh herbs (or chimichurri) right before serving. Pick a mood (cozy / bright / herby) and keep the rule: finish sauces go in at the end so flavors stay bold and the sauce stays glossy. Save this as your “final 3 moves” checklist.

Serving variations for the potatoes-and-carrots version

Because this meal has a hearty base, small finishing touches matter.

  • Herb finish: parsley or cilantro adds freshness.
  • Bright finish: a squeeze of lemon or a small splash of vinegar lifts the whole pot.
  • Sauce finish: a spoon of chimichurri turns this into a more vibrant, “special” dinner.
Infographic titled “Leftover Pork + Potato Hash” showing a before-and-after: leftover pork, potatoes, and carrots in a bowl versus a crispy skillet hash. Includes a 3-step method: chop leftovers into 1-inch pieces, cook in a hot oiled skillet pressed into one layer without stirring for 3–4 minutes, then add a splash of juices or broth and finish with lemon or herbs. Golden rule: one layer + no stirring = crisp.
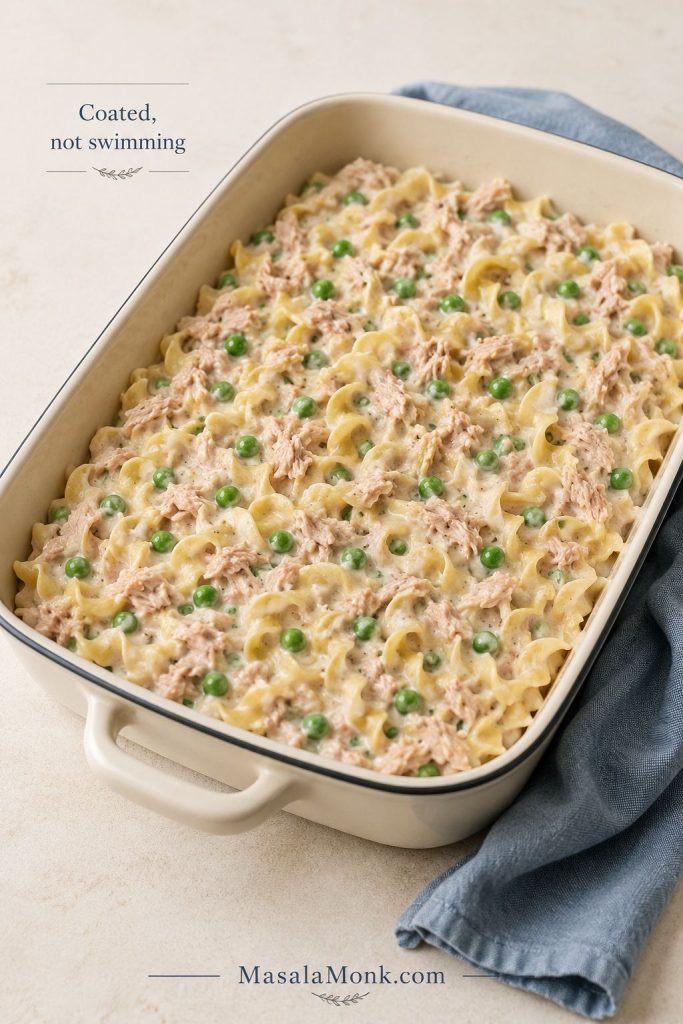
Leftovers don’t have to taste like reheats. This 10-minute skillet hash turns leftover slow cooker pork tenderloin + potatoes + carrots into crispy edges and big flavor—fast. Chop into 1-inch pieces, heat a skillet with oil, press into one layer, and don’t stir for 3–4 minutes (that’s where the crunch happens). Finish with a small splash of reserved juices/broth, then lemon or herbs for lift. It’s the easiest “second meal” that feels brand new—perfect with eggs, salad, or a quick sauce. Save this for tomorrow-night dinner.

Turning leftovers into a second meal

This version reheats especially well because the vegetables hold moisture.

  • Reheat gently with a splash of broth or reserved juices.
  • Alternatively, chop leftover pork and vegetables, then crisp them in a skillet for a hash-like dinner.

Also Read: 10 Low Carb Chia Pudding Recipes for Weight Loss (Keto, High-Protein, Dairy-Free)


Pork Tenderloin with Vegetables in the Slow Cooker (Easy Mix-and-Match)

Once you’ve made the base method a couple of times, you start seeing how flexible it is. The vegetables section becomes less of a recipe and more of a rhythm: use what you have, add vegetables according to how quickly they soften, and keep the pork endpoint in mind.

Infographic titled “Vegetable Timing Map — Slow Cooker Pork Tenderloin” showing three columns: Add Early (onions, carrots, potatoes/sweet potatoes, parsnips, turnips), Add Mid-Cook (bell peppers, mushrooms, green beans), and Add Late (zucchini, spinach, peas). Bottom strip shows finish endpoints: slices at 145°F/63°C plus rest, or shred at 190–200°F/88–93°C plus sauce. MasalaMonk.com footer.
This is the easiest way to make pork tenderloin with vegetables in the slow cooker without ending up with mush. Add sturdy veg early (potatoes, carrots), add faster softeners mid-cook (peppers, mushrooms, green beans), and add delicate veg late (zucchini, spinach, peas). Then match it to your finish: juicy slices at 145°F / 63°C + rest or shredded pulled at 190–200°F / 88–93°C + sauce. Save this as your “use what you have” dinner map—once you follow the timing rhythm, it becomes effortless. MasalaMonk.com
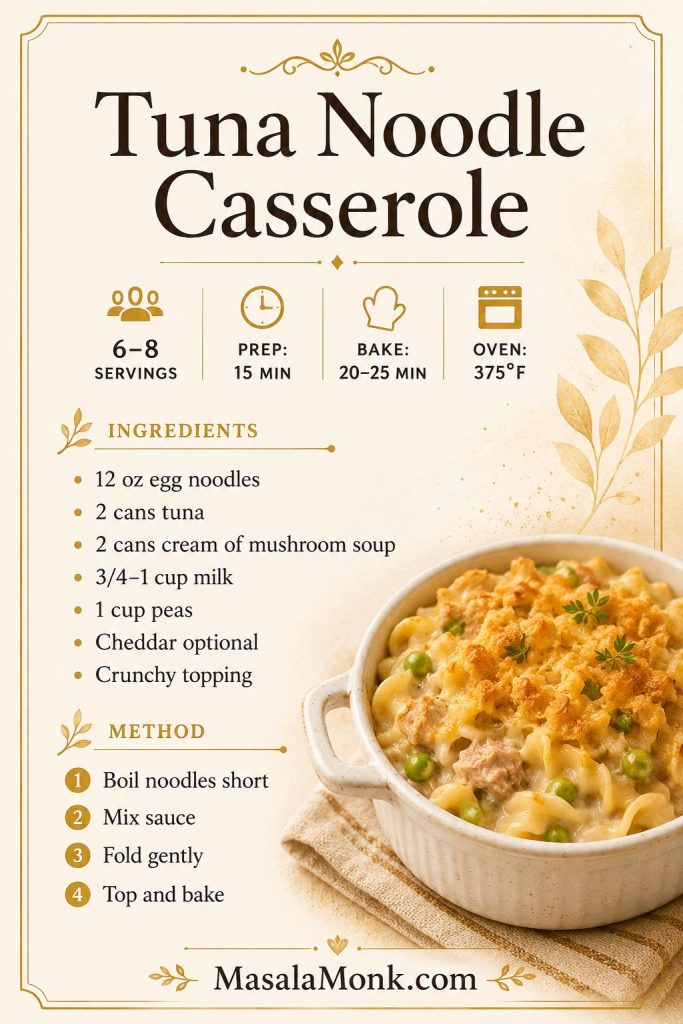
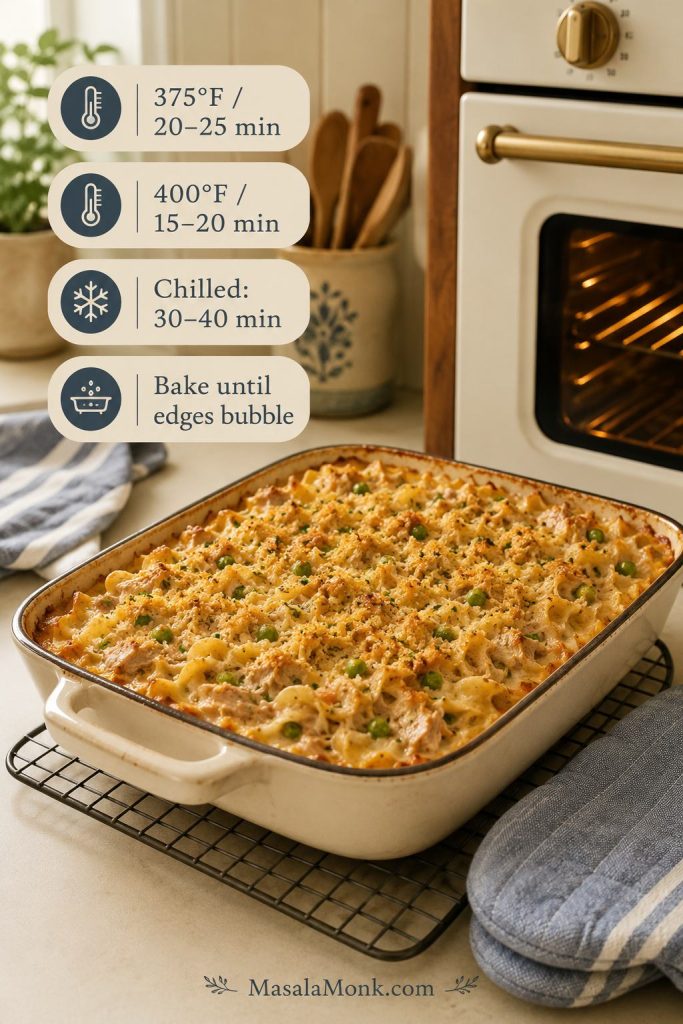
Vegetables to add early (they can handle long heat)

  • onions
  • carrots
  • potatoes and sweet potatoes
  • parsnips
  • turnips

Vegetables to add mid-cook (they soften faster)

  • bell peppers
  • mushrooms (they can go early too, but they’ll get very soft)
  • green beans

And Vegetables to add late (they go mushy if overcooked)

  • zucchini
  • spinach
  • peas

If you like this hands-off approach and want a similar dinner style with a different protein, this post about crock pot chicken breast recipes is a great read, since the timing logic and “finish with sauce” idea overlaps nicely.

Also Read: Eggless Yorkshire Pudding (No Milk) Recipe


Can You Cook Pork Tenderloin from Frozen in a Crock Pot?

It’s tempting to drop frozen meat into a slow cooker and call it dinner. Still, with a slow cooker, the safety concern is time spent warming through the temperature range where bacteria can grow.

Infographic titled “Frozen Pork Tenderloin? Don’t use the slow cooker from frozen” explaining it warms too long through the danger zone (40°F–140°F / 4°C–60°C). Shows two safe options: thaw overnight in the fridge, or thaw in cold water in a sealed bag while changing water regularly, then cook immediately. Includes note that thawing first is safer, improves texture, and gives more predictable timing. MasalaMonk.com footer.
Frozen pork tenderloin feels like the ultimate shortcut, yet a crock pot isn’t the place for it—it can spend too long warming through the 40°F–140°F / 4°C–60°C danger zone. The easy fix is still hands-off: thaw overnight in the fridge, then make slow cooker pork tenderloin as written. Need it faster? Thaw in cold water in a sealed bag, changing the water regularly, then cook right away. You’ll get safer results, better texture, and timing you can actually trust—especially with a lean cut like pork tenderloin. MasalaMonk.com

USDA guidance advises against cooking frozen meat directly in a slow cooker. Their direct Q&A on cooking frozen foods in a slow cooker or crock pot is a clear citation for this. If you’d like a simple explanation of why, this USDA page on the 40°F to 140°F danger zone supports the reasoning without getting overly technical.

A safer workaround that still feels easy

  • Best option: thaw overnight in the fridge, then cook as written.
  • Faster option: thaw in a sealed bag in cold water, changing the water regularly, then cook immediately after thawing.

Besides being safer, thawing first usually gives you better texture and more predictable timing—especially important with a lean cut like tenderloin.

Also Read: Crock Pot Chicken Breast Recipes: 10 Easy Slow Cooker Dinners (Juicy Every Time)


How to Make Slow Cooker Pork Tenderloin Taste Bold (Not “Slow Cooker Plain”)

Sometimes the only downside of slow cooker pork is that it can taste… polite. Not bad, just a little quiet. Fortunately, boldness is simple to build.

Infographic titled “Bold Flavor Formula” for slow cooker pork tenderloin with “3 moves that wake it up.” Step 1: Base—salt + aromatics (seasoned not timid, onion + garlic for sweetness and depth, don’t over-dilute). Step 2: Add one contrast (vinegar/lemon, mustard, pepper sauce, herbs). Step 3: Finish fresh (chimichurri-style herb sauce, lemon or vinegar splash, fresh herbs). Example line: BBQ shredded + vinegar + a few drops pepper sauce. MasalaMonk.com.
Slow cooker pork tenderloin can turn out tender yet a little “quiet.” This quick Bold Flavor Formula fixes that in a repeatable way: (1) build a strong base with proper salt plus onion/garlic, (2) add one contrast like lemon/vinegar, mustard, a touch of heat, or herbs, then (3) finish fresh so the whole pot tastes bright and intentional. The example at the bottom is money for shredded BBQ: a little vinegar plus a few drops of pepper sauce keeps it balanced instead of overly sweet. Use this guide, then follow the full method and variations in this post.

Start with salt and aromatics

If the salt level is timid, the pork tastes muted. Meanwhile, onions and garlic add sweetness and depth without requiring extra work.

Add one contrast element to Slow Cooker Pork Tenderloin

Contrast wakes up the palate. Pick one:

  • vinegar or lemon (brightness)
  • mustard (sharpness)
  • pepper sauce (heat)
  • herbs (freshness)

In the BBQ shredded version, for example, vinegar plus a few drops of pepper sauce can make the sauce taste balanced rather than just sweet.

Finish with something fresh

This is where an herb sauce like chimichurri shines. It brings acidity, herbs, and richness in one spoon—exactly what lean pork loves.

Also Read: 10 Vegan Chocolate Cake Recipes (Easy, Moist, & Dairy-Free)


Troubleshooting Slow Cooker Pork Tenderloin (Real Fixes That Work)

Even with a good method, dinner can occasionally go sideways. The good news is most problems have practical solutions.

Troubleshooting infographic for slow cooker pork tenderloin with four common problems and fixes: pork is dry (slice and spoon warm juices; next time pull at 145°F/63°C and rest), tastes bland (add salt, vinegar, Dijon), vegetables are mushy (timing and cut size; cut 1.5 in/4 cm and add soft veg late), sauce is watery (simmer 5–8 minutes or stir in butter + Dijon).
Dinner went sideways? This “real fixes” card is the fastest way to rescue slow cooker pork tenderloin without starting over. It shows exactly what to do when pork turns dry, tastes bland, veggies go mushy, or the sauce stays watery—plus the one tweak that prevents each issue next time (hello: 145°F/63°C + rest, modest liquid, and quick sauce fixes).

“My pork tenderloin is dry.”

This usually comes from one of three things:

  • it cooked past the sliceable endpoint
  • it sat on WARM too long
  • it was sliced immediately, without resting

Fix right now: slice it, then spoon warm pot juices over the slices and let them sit for a few minutes. If you overshot significantly, pivot to shredded: pull it apart and sauce it BBQ-style so it eats better.

“It tastes bland.”

This is often a salt issue, not a spice issue.

Fix right now: adjust the cooking liquid. Add a pinch of salt, a splash of vinegar, and a spoon of Dijon. Stir well, then spoon over slices.

“The vegetables are mushy.”

This is timing and cut size.

Fix next time: cut vegetables larger, add them later on HIGH, or choose vegetables that tolerate longer cooking.

“The sauce is watery.”

Slow cookers don’t reduce liquids much.

Fix right now: remove pork and simmer the cooking liquid in a small saucepan for 5–8 minutes, or stir in butter and Dijon to give it body and shine.

Also Read: Peanut Butter Fudge: Recipes & Guide (8 Methods + Easy Variations)


Storage, Freezing, and Reheating (So It Stays Juicy)

A slow cooker pork tenderloin often turns into two meals. That’s a win—especially if you store it correctly.

Infographic titled “Store + Reheat (Stay Juicy)” for slow cooker pork tenderloin (sliced or shredded) with fridge storage 3–4 days and freezer storage up to 3 months, plus reheating tips for microwave, skillet, and slow cooker and a reminder to add a splash of juices so the pork stays tender, on a cool slate background with MasalaMonk.com in the footer.
Dry leftovers are optional. This quick “store + reheat” guide keeps slow cooker pork tenderloin juicy whether it’s sliced or shredded: refrigerate for 3–4 days, freeze up to 3 months in portions with sauce, then reheat gently—short microwave bursts, low skillet heat with a splash of broth, or LOW/WARM briefly in the slow cooker. The simplest win is the golden rule at the bottom: add a splash of juices so every bite stays tender. Save this for busy weeknights and meal-prep days.

Storage

  • Refrigerate in an airtight container for 3–4 days.
  • Store with a few spoonfuls of cooking liquid whenever possible.

Freezing

  • Freeze sliced or shredded pork with a little liquid for 2–3 months.
Infographic titled “Leftover Pork Tenderloin: 5 Fast Ways (Sliced or Shredded)” showing five meal ideas for leftover slow cooker pork tenderloin: BBQ sandwich with pickles and slaw, rice bowl with greens, tacos with quick slaw and lime, loaded potato finished with sauce, and a meal-prep salad, plus the note “Works for sliced OR shredded” and MasalaMonk.com in the footer.
Leftovers don’t have to feel like repeat dinner. This quick board turns leftover slow cooker pork tenderloin into five fast meals: a saucy BBQ sandwich with pickles and slaw, a rice bowl with greens and a drizzle, quick tacos with slaw and lime, a loaded baked potato finished with sauce, and a crisp meal-prep salad you can pack ahead. Save this for the next day-after dinner moment—whether your pork is sliced or shredded—then use the full post for cook times, temperature targets, and the 3 easy ways.

Reheating Slow Cooker Pork Tenderloin without drying out

  • Stovetop: warm gently in a covered pan with a splash of broth or reserved juices.
  • Microwave: cover and reheat in short bursts with a spoon of liquid.

The shredded BBQ version is especially forgiving because the sauce protects the meat. Conversely, sliceable tenderloin appreciates gentle heat and a little moisture.

Also Read: Sourdough Recipe: 10 Easy Bread Bakes (Loaves, Rolls & Bagels)


Flavor Variations (Same Method, New Mood)

Once you’ve made pork tenderloin in slow cooker form a few times, it’s fun to keep the method and shift the flavor. These are simple pivots that don’t demand extra effort.

Infographic titled “Flavor Switchboard” for slow cooker pork tenderloin showing three finish options: Teriyaki-style (glaze after cooking; reduce glaze to cling), Herb-bright chimichurri (spoon on slices at serving; add lemon/vinegar), and Spicy BBQ shredded (sauce after shredding; add a few drops pepper sauce). Rule: finish sauces go in at the end to keep flavor bold and sauce glossy.
Same slow cooker pork tenderloin… totally different dinner. This “Flavor Switchboard” makes it foolproof: Teriyaki (glaze AFTER cooking so it stays glossy), Chimichurri (spoon on slices at serving for instant lift), or Spicy BBQ shredded (sauce AFTER shredding so it clings). The rule is the real secret—finish sauces go in at the end so flavor stays bold instead of “slow cooker plain.”

Teriyaki-style finish Slow Cooker Pork Tenderloin

Cook using the base method, then glaze after cooking so the sauce stays glossy. This homemade teriyaki sauce is a natural read here because it’s best added at the end rather than simmered for hours.

Herb-bright finish Slow Cooker Pork Tenderloin

Slice the tenderloin and spoon chimichurri over the top. Add a salad, and the meal feels lighter instantly.

Spicy BBQ finish Slow Cooker Pork Tenderloin

In the shredded version, add a few drops of pepper sauce right before serving. The heat tastes clean and intentional, not random.

Also Read: Chicken Adobo — Step-by-Step Recipe — Classic Filipino Adobong Manok


Closing: The Method That Makes It Repeatable

Slow cooker pork tenderloin becomes easy when you treat it like what it is: a lean cut that rewards you for cooking to the right endpoint. After that, it turns into a repeatable method you can bend toward whatever you want—sliceable plates, saucy pulled-style sandwiches, or a full pot of potatoes and carrots that tastes like comfort.

Infographic titled “Slow Cooker Pork Tenderloin: 3 Easy Ways” showing three methods: juicy slices pulled at 145°F (63°C) with a 10-minute rest, shredded BBQ cooked to 190–200°F (88–93°C) and sauced after shredding, and a potatoes-and-carrots crock pot dinner, on a cool slate background with food photos and MasalaMonk.com in the footer.
One pork tenderloin, three dependable options: this slow cooker pork tenderloin guide breaks down the exact finish to choose—juicy slices at 145°F / 63°C (plus a rest), shredded BBQ at 190–200°F / 88–93°C (sauce after shredding), or a full crock pot dinner with potatoes and carrots. Save it for cooking nights when you want clear doneness targets and an easy plan that actually works, then use the post for the full method, timing ranges, and serving ideas.

Slow Cooker Pork Tenderloin FAQs

1) How long does it take to cook slow cooker pork tenderloin?

Most pork tenderloin in a slow cooker is done in 2.5–4 hours on LOW or 1.5–2.5 hours on HIGH, depending on thickness and your crock pot. Even so, the most reliable approach is checking the thickest part for doneness rather than trusting the clock.

2) What is the best internal temperature for slow cooker pork tenderloin?

For a sliceable, juicy result, cook slow cooker pork tenderloin to 145°F / 63°C, then rest it for about 10 minutes. Afterward, the juices settle back into the meat, which keeps the slices noticeably more moist.

3) Is it better to cook pork tenderloin in a crock pot on LOW or HIGH?

LOW is often more forgiving for even cooking, whereas HIGH can work well when you’re watching timing closely. That said, if your goal is the best pork tenderloin crock pot texture, using a thermometer matters more than the setting.

4) Can you overcook pork tenderloin in a slow cooker?

Yes. Because pork tenderloin is lean, it can turn dry if it stays cooking well past the sliceable endpoint. Instead, pull it at the right temperature and rest it; otherwise, consider shifting to a shredded finish where sauce helps the eating experience.

5) How do you keep pork tenderloin in the slow cooker from drying out?

First, avoid extended “keep warm” time. Next, use a modest amount of liquid and cook to the correct internal temperature. Finally, rest before slicing and spoon a little cooking juice over the meat for extra moisture.

6) Do you need to sear pork tenderloin before putting it in the crock pot?

Not necessarily. Searing adds a deeper, roasted flavor, yet slow cooker pork tenderloin can still taste excellent without it. If you’re short on time, seasoning well and finishing with flavorful juices can deliver plenty of richness.

7) Can you make pulled pork with pork tenderloin in a slow cooker?

You can make a pulled-style result, although it won’t be as fatty as classic shoulder. For pork tenderloin pulled pork in slow cooker form, cook until it shreds easily, then mix in sauce afterward so the flavor stays bold.

8) What cooking time works best for shredded pork tenderloin crock pot style?

For slow cooker pork tenderloin shredded, plan on 3–5 hours on LOW in many slow cookers, depending on size and thickness. Still, focus on the texture: if it pulls apart easily with forks, it’s ready to shred.

9) When should you add BBQ sauce for bbq pulled pork tenderloin crock pot recipes?

Rather than adding all the sauce at the beginning, add a small amount early and most of it after shredding. This way, bbq pork tenderloin crock pot results taste more concentrated and less watery.

10) Can you make pork loin pulled pork in a slow cooker the same way?

Pork loin for pulled pork in slow cooker recipes can work, but it behaves differently from tenderloin and often needs longer to become shreddable. Additionally, it can still dry out if cooked too long, so cooking to tenderness and saucing well is important.

11) What’s the difference between pork loin pulled pork and pork tenderloin pulled pork?

Pork loin pulled pork is typically a bit firmer and less delicate, while pulled pork made with pork tenderloin tends to shred into finer, softer strands. Either way, the finish—especially sauce and acidity—makes the biggest difference in how it eats.

12) Can you cook pork tenderloin with potatoes and carrots in the crock pot?

Absolutely. Pork tenderloin in crock pot with potatoes and carrots works best when vegetables are cut into larger chunks so they hold their shape. Meanwhile, placing the tenderloin on top helps it cook evenly without turning the vegetables mushy too soon.

13) When should you add vegetables to pork tenderloin in slow cooker recipes?

Hard vegetables like potatoes and carrots can go in early, particularly on LOW. Conversely, softer vegetables are better added later so they don’t collapse into the cooking liquid.

14) Can you cook pork tenderloin from frozen in a crock pot?

It’s not recommended to cook pork tenderloin from frozen in a slow cooker because it can take too long to heat through safely. Instead, thaw first, then cook normally for more predictable timing and better texture.

15) What’s the best way to reheat slow cooker pork tenderloin?

For the juiciest results, reheat slices gently with a splash of broth or reserved cooking juices. Similarly, shredded pork tenderloin reheats well when warmed in its sauce, which helps prevent dryness.

16) How do you store shredded pork loin crock pot recipes and leftovers safely?

Cool leftovers promptly, store them in airtight containers, and keep some juices or sauce with the meat for moisture. Then, reheat only what you need, warming it until it’s hot throughout.

17) Can you make crock pot pulled pork loin recipe results that stay moist?

Yes, especially if you avoid overcooking and finish with sauce after shredding. Additionally, adding a small splash of broth or cooking liquid while reheating helps maintain a tender, juicy texture.

18) What are the easiest flavor variations for slow cooker pork tenderloin?

For a simple change, swap the finishing sauce: go BBQ for a pulled-style option, add mustard and butter for a savory pan-juice finish, or use herbs and a splash of vinegar for a brighter plate. Either way, the core method for slow cooker pork tenderloin stays the same.