Posted on — Leave a comment

How to Make Paneer at Home: Soft Homemade Paneer

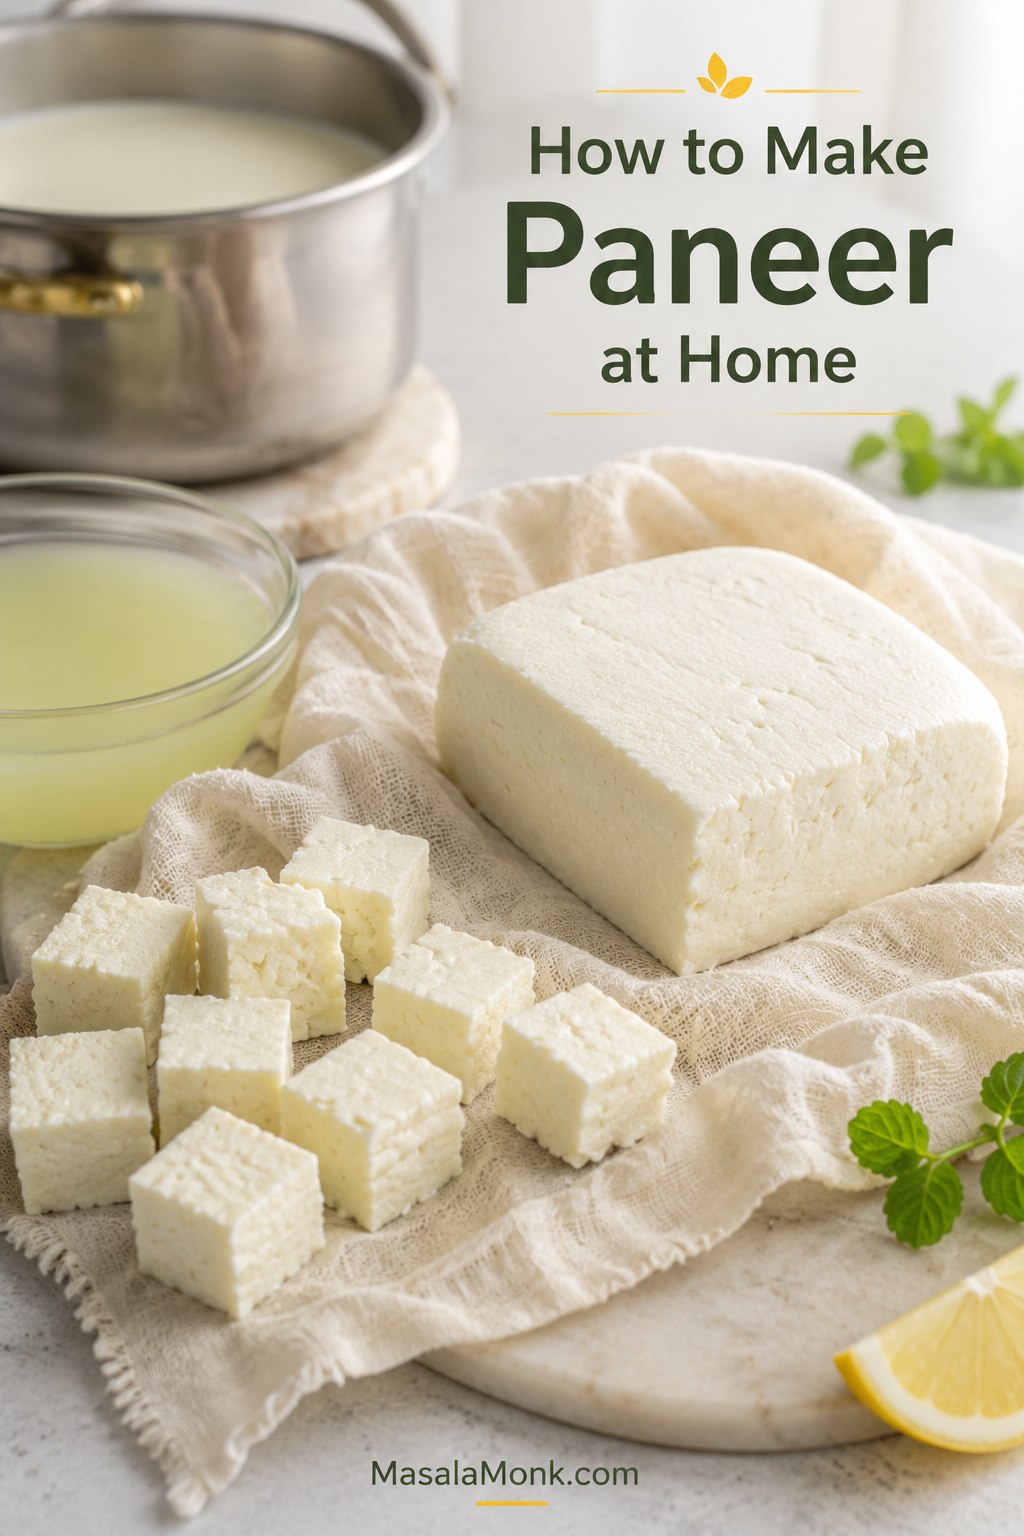
Fresh homemade paneer block on muslin with cut paneer cubes, pale whey in a glass bowl, and a milk pot in the background.

If you want to know how to make paneer at home, the process is simpler than it looks: heat milk, add just enough acid, strain the curds, and press only as much as your dish needs. Paneer may look like something you have to buy from an Indian grocery store, already pressed into a neat block for palak paneer, paneer tikka, or a creamy restaurant-style curry, but fresh homemade paneer is very doable in a regular kitchen.

The goal is not just paneer that sets. The goal is paneer that curdles cleanly, cuts neatly when you need cubes, and still stays tender when it goes into sauce.
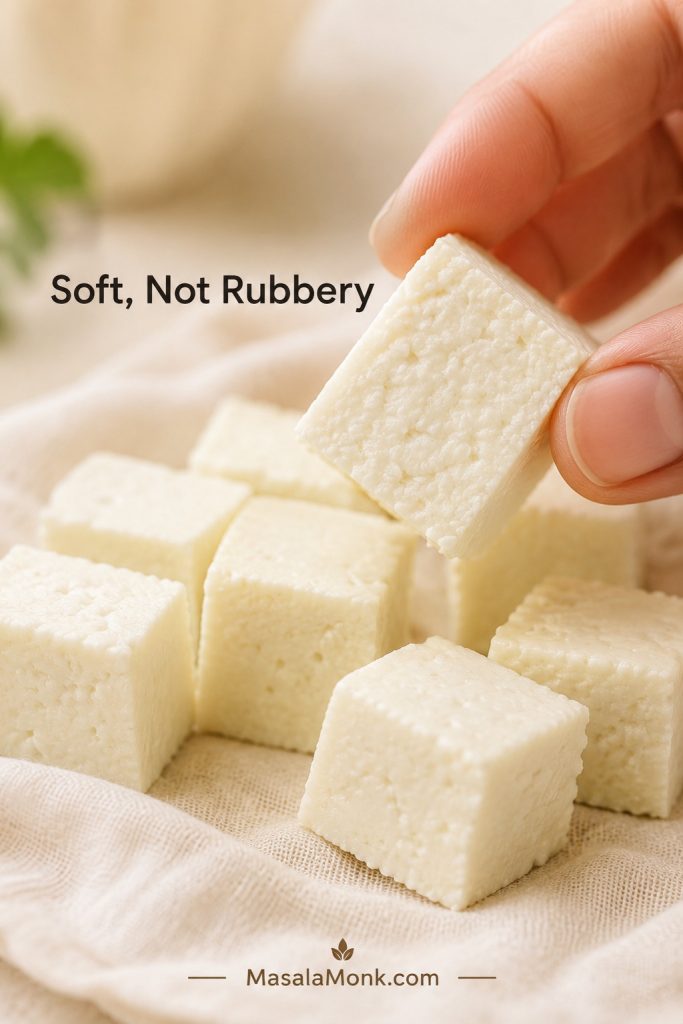
Close-up of a soft homemade paneer cube being held to show its moist interior.
This is the texture to aim for: paneer that sets cleanly but still looks moist inside. That softness is what keeps it tender in curry, bhurji, wraps, and bowls.

That texture comes from stopping at the right moments: before the milk boils too hard, before too much acid makes the curds tight, and before pressing turns soft curds into a dry block.

You do not need to understand cheesemaking to make paneer. You only need to know when the milk is hot enough, when the curds have separated, and when to stop pressing.

This guide helps most when you do not live near an Indian grocery store, feel unsure about supermarket milk labels, or have only found dense packaged paneer. If packaged paneer near you is firm, squeaky, or rubbery, homemade paneer can feel like a different ingredient.

If you have tried making paneer before and ended up with sour crumbs, weak curds, rubbery cubes, or milk that refused to curdle, you probably did not fail. Milk behaves differently from brand to brand: one batch may need gentler heat, another may need less acid, and another may need a shorter press. If you are nervous about wasting a large pot of milk, start with the 1-litre batch in the scaling table below.

If you are here because a batch already went wrong, jump to Troubleshooting Homemade Paneer first, then come back to the recipe with the problem in mind.

Once you have a good block, you can use it anywhere paneer texture matters: a rich curry like Balti Paneer Gravy, a quick filling, a salad bowl, a pan-seared snack, or a simple vegetarian dinner.

Quick Answer: How to Make Paneer at Home

The easiest way to make paneer at home is to heat whole milk to 185–195°F / 85–90°C, or until it is steaming, foamy, and just about to rise. Add diluted lemon juice or plain white vinegar gradually until soft white curds separate from pale yellow-green, slightly translucent whey. Strain the curds through cloth, rinse briefly if needed, then press for 10 minutes for soft crumbles, 30–40 minutes for curry cubes, or up to 50 minutes for firmer tikka-style paneer.

The active work is about 20–25 minutes. The rest is mostly resting, draining, pressing, or chilling, depending on how firm you want the final paneer.

Best milkWhole milk / full-fat milk
Avoid if possibleSkim milk, fat-free milk, UHT milk, and ultra-pasteurized milk
Best beginner acidLemon juice or plain white vinegar, diluted with water
Temperature cue185–195°F / 85–90°C, or steaming and just about to rise
Yield from 2 litres / 8½ cups milkAbout 300–400 g / 10.5–14 oz paneer, depending on milk and pressing
Fridge storage2–3 days, covered or submerged in fresh cold water
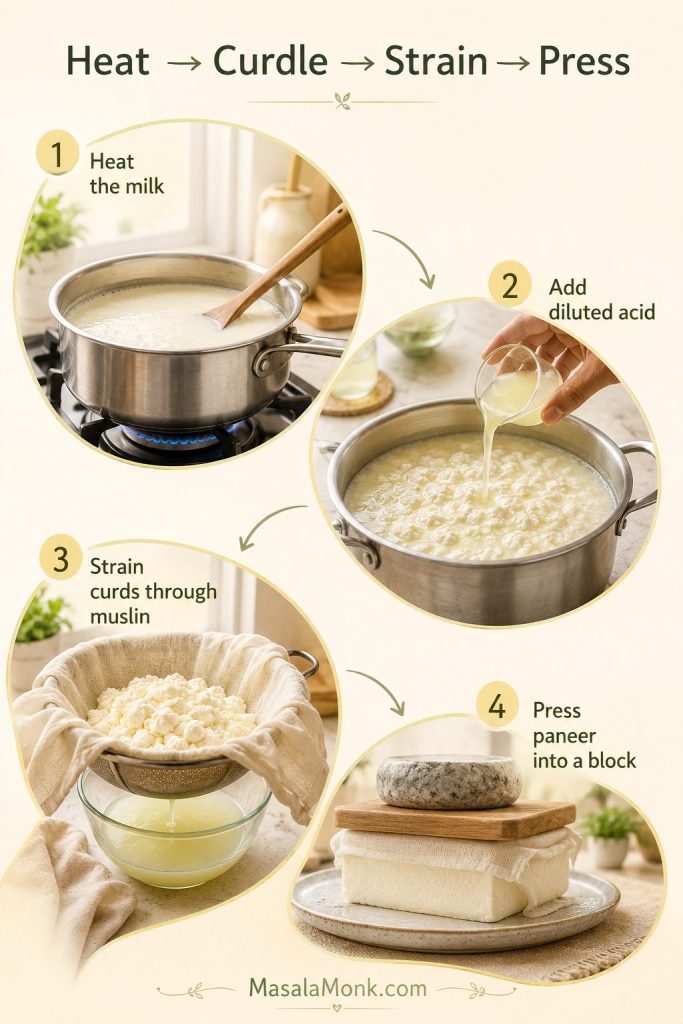
Four-step paneer process showing milk heating, diluted acid being added, curds strained through muslin, and paneer being pressed.
The basic paneer recipe is simple, but each stage has a cue. Heat the milk, add acid gradually, strain when the whey clears, then press for the texture you need.

Still choosing ingredients? Start with Best Milk for Paneer. Already curdled the milk? Use the Pressing Times section to choose soft crumbles, curry cubes, or firmer tikka paneer.

Before You Start: 3 Things That Decide Paneer Texture

Most paneer problems come down to three simple choices: the milk, the acid, and how long you press. Get those right and the recipe becomes much more reliable.
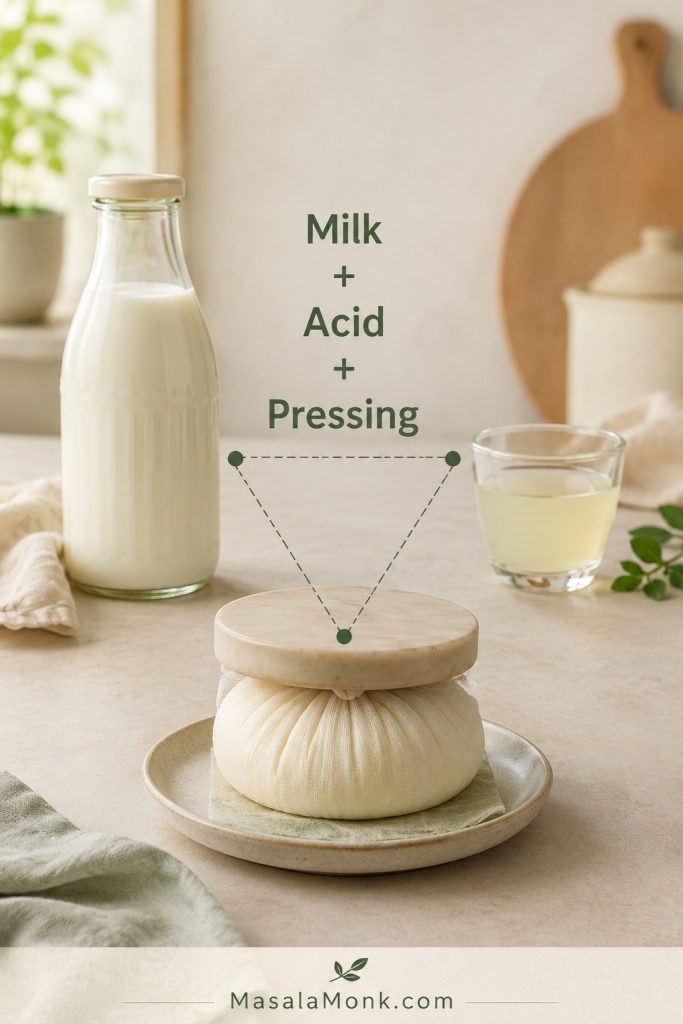
Milk, diluted acid, and paneer wrapped in muslin under a light weight shown as the three main texture factors.
If homemade paneer turns crumbly, sour, or rubbery, the cause is usually one of three things: milk choice, acid control, or pressing time.

Three things decide paneer texture: use whole milk for better curds, add diluted acid gradually, and press for the dish you are making. Bhurji needs almost no pressing, curry cubes need moderate pressing, and tikka needs a firmer block. Acid is the trigger, not the target.

At its simplest, paneer is just hot milk plus a little acid. The details below help you keep it soft, but the basic process is only heat, curdle, strain, and press.

Once you have seen milk split cleanly into curds and clearer yellow-green whey, the whole process feels much less mysterious.

Homemade Paneer Recipe

This is the base recipe if you want to make paneer at home with whole milk and lemon juice or vinegar. Use the pressing chart later in the guide to adjust the texture for bhurji, curries, tikka, wraps, bowls, or grilling.
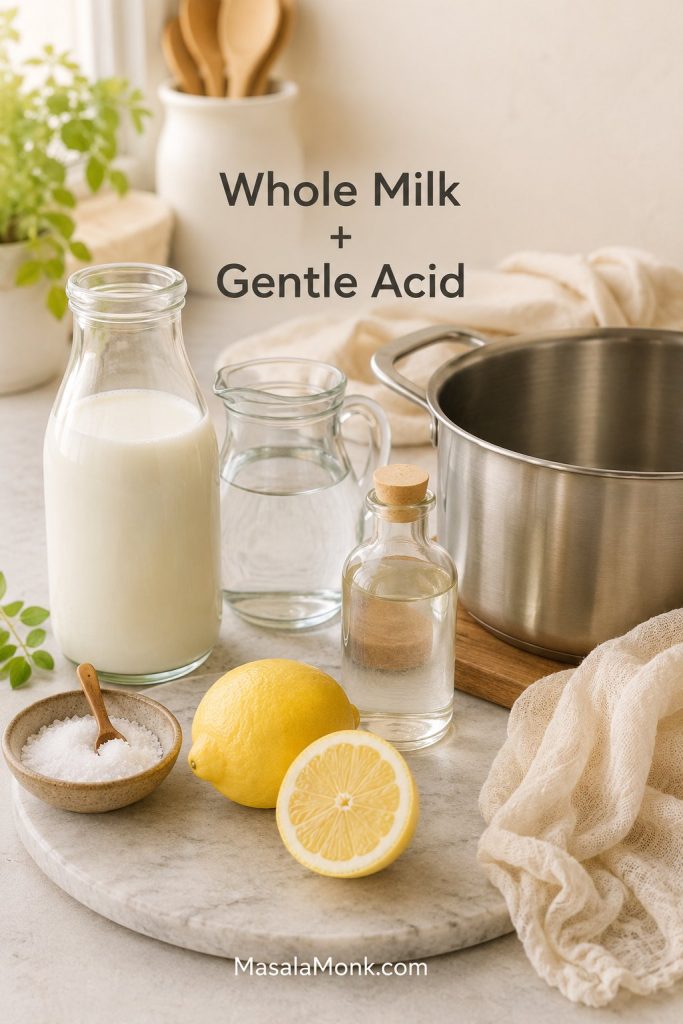
Whole milk, lemon, vinegar, water, salt, muslin cloth, and a cooking pot arranged for making paneer at home.
Paneer does not need a long ingredient list. However, whole milk, diluted acid, and gentle handling matter more than any extra add-in.
Yield300–400 g / 10.5–14 oz paneer
Prep Time5 minutes
Cook Time15–20 minutes
Total Time45–70 minutes, plus optional chilling for firmer cubes

Equipment

  • Large heavy-bottomed pot, with room for the milk to rise
  • Wooden spoon or silicone spatula
  • Thermometer, optional but helpful for first-timers
  • Colander or large sieve
  • Cheesecloth, muslin, thin cotton towel, clean handkerchief, or nut milk bag
  • Large bowl to catch the whey
  • Plate or tray for pressing
  • Moderate weight, such as canned beans, a small pot, or a heavy skillet

Ingredients

  • 2 litres / 8½ cups / about 2.1 quarts whole milk
  • 3 tablespoons / 45 ml lemon juice or plain white vinegar, plus 1 tablespoon / 15 ml more if needed, diluted before adding
  • 3–4 tablespoons / 45–60 ml water, plus a little more if using the extra acid
  • ¼–½ teaspoon / about 1.5–3 g fine salt, optional

Step-by-Step Method

Heat, curdle, and strain the milk

  1. Prepare the strainer. Line a colander with cheesecloth, muslin, a thin cotton towel, or a nut milk bag. Place it over a large bowl to catch the whey.
  2. Heat the milk. Pour the milk into a heavy-bottomed pot. Heat over medium-low to medium heat, stirring often so the bottom does not scorch.
  3. Watch the temperature. Heat the milk to 185–195°F / 85–90°C. Without a thermometer, look for milk that is steaming, foamy at the edges, and just about to rise. Avoid a violent rolling boil.
  4. Dilute and add the acid. Mix the lemon juice or vinegar with the water. Turn the heat to low or switch it off, then add the diluted acid about 1 tablespoon at a time, stirring gently for a few seconds after each addition.
  5. Stop when the milk separates. Stop once you see soft white curds and pale yellow-green, slightly translucent whey. If the liquid still looks milky after 1–2 minutes, dilute the extra acid and add it 1 teaspoon at a time, waiting briefly between additions.
  6. Let the curds settle. Once curds form, stir as little as possible. Too much stirring can break soft curds into small grains. Let the curds sit in the hot whey for 5–10 minutes so they settle and gather.
  7. Strain and rinse. Pour the curds and whey into the lined colander. Gather the cloth gently and let gravity drain first. If you used lemon juice or vinegar, rinse the curds briefly under cool water to remove excess sourness and stop the cooking.

Salt, press, and cut the paneer

  1. Salt only if needed. For unsalted paneer, skip the salt. For lightly salted paneer, sprinkle the salt over the drained curds before shaping and pressing. If the paneer is going into a curry, you can skip the salt and season the sauce instead.
  2. Shape and press for your dish. Shape the curds into a flat square or disc inside the cloth. Press according to your final use: 0–10 minutes for soft crumbles, 15–20 minutes for a tender block, 30–40 minutes for curry cubes, or 45–50 minutes for firmer tikka cubes.
  3. Cut if needed. You can use soft paneer right away. For neat cubes, chill the pressed block for 20–30 minutes before cutting. For firmer tikka-style cubes, you can instead dip the pressed block in cold water for 5–10 minutes, then pat dry before cutting. Skip this for soft crumbled paneer.

Important cue: Once the curds have formed and the whey is no longer milky, pause. More acid will not make better paneer. It will only make sharper, firmer, more sour paneer.

Unsure which acid to use? The lemon, vinegar, yogurt, and citric acid comparison explains which option gives the cleanest flavor and which one makes softer curds.

Milk Temperature Cue

Use the thermometer reading or the visual cues together: the milk should be hot, steaming, foamy at the edges, and close to rising before you add acid.
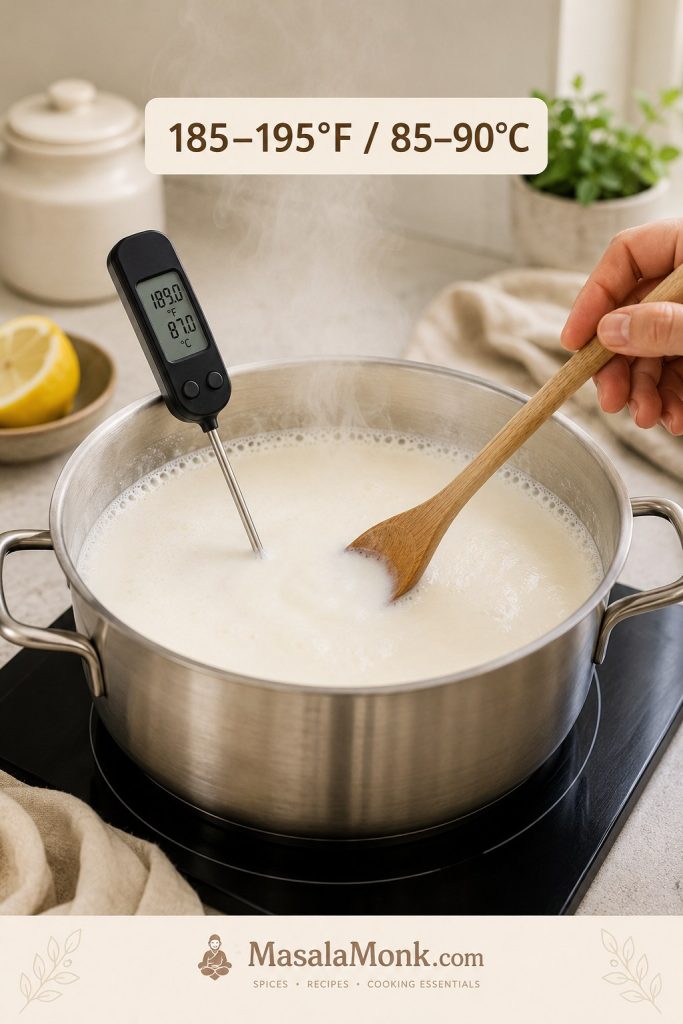
Milk heating gently in a pot with a thermometer showing the paneer temperature range of 185–195°F or 85–90°C.
The milk does not need a violent boil to make paneer. Look for steam, edge foam, and a near-rise so the curds form cleanly without tightening too early.

Curds and Whey Cue

After adding diluted acid, watch the liquid around the curds. Soft curds and pale yellow-green whey mean the milk has separated cleanly.
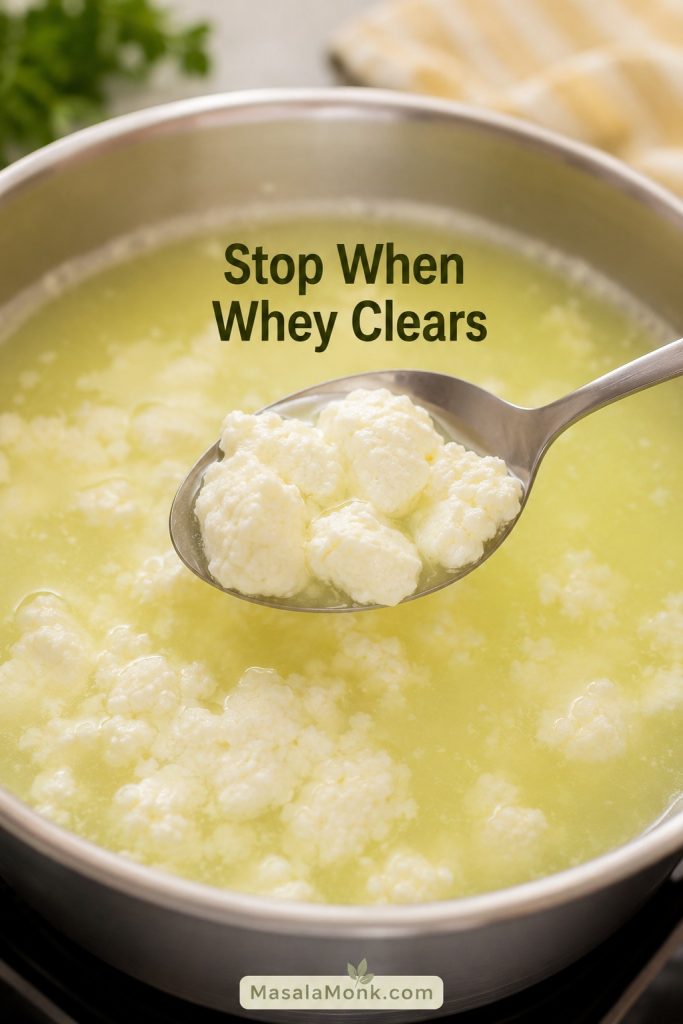
Soft white paneer curds forming in pale yellow-green whey inside a pot, with a spoon lifting the curds.
Clear whey is your stop sign. When soft curds gather and the liquid shifts from milky white to pale yellow-green, the acid has done its job.

Straining Paneer Curds

Once the curds have settled, pour them into the lined colander and let the whey drain first before you gather the cloth.
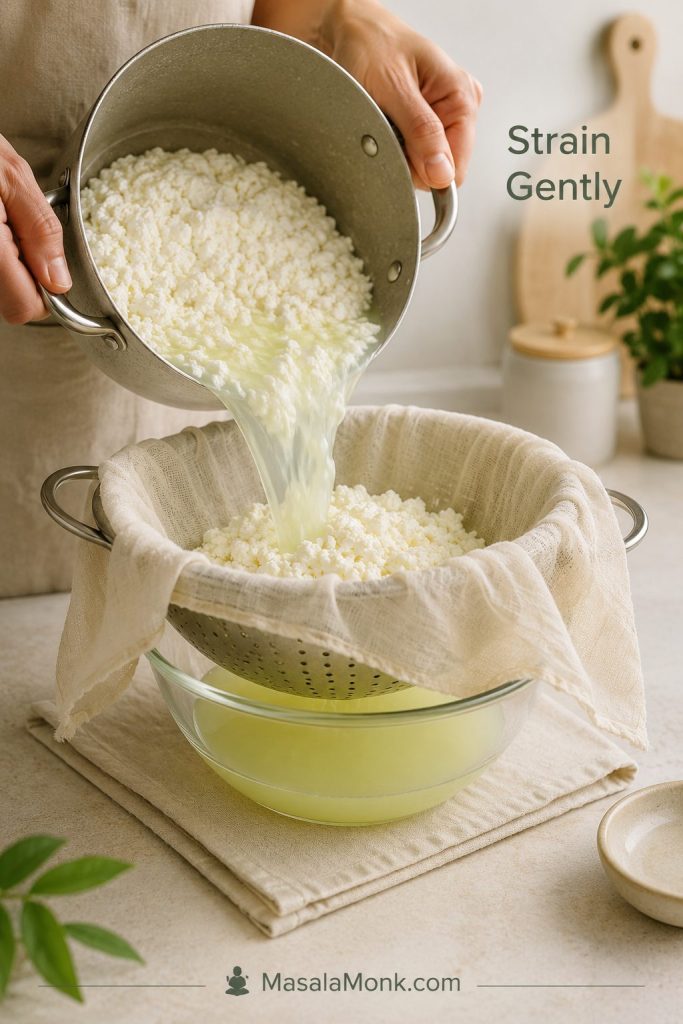
Paneer curds being poured into a muslin-lined colander over a bowl as pale whey drains below.
Let gravity do the first part of the draining. Squeezing too early can remove the moisture that makes homemade paneer soft and pleasant to eat.

How to Make Paneer with 1 Litre, 2 Litres, or 1 Gallon Milk

The recipe above uses 2 litres / about 8½ cups milk because it gives a useful home batch. You can scale homemade paneer up or down, but keep the acid flexible. Lemons vary, vinegar brands can differ slightly, and milk behaves differently by country, season, and processing method.

If this is your first time making paneer or you are testing a new milk brand, start with 1 litre. It is a smaller commitment, and it teaches you how that milk behaves before you make a larger batch.

Milk amountAcid to start withUse more only if…Expected paneer
1 litre / about 4¼ cups1–1½ tablespoons / 15–22 ml lemon juice or vinegar, dilutedThe whey still looks milkyAbout 150–200 g / 5–7 oz
2 litres / about 8½ cups3 tablespoons / 45 ml lemon juice or vinegar, dilutedUse up to 4 tablespoons / 60 ml if neededAbout 300–400 g / 10.5–14 oz
1 gallon / about 3.8 litres6 tablespoons / 90 ml lemon juice or vinegar, dilutedUse up to 8 tablespoons / 120 ml if neededAbout 600–750 g / 21–26 oz

Use these as practical ranges, not fixed guarantees. Richer milk gives more paneer. Leaner milk gives less. Longer pressing removes more moisture, so the final block weighs less. A 300–400 g block usually works for a family-style curry serving 3–4 people, depending on how paneer-heavy you like the dish.

What Soft Homemade Paneer Looks and Feels Like

The first batch is less stressful when you know what “right” looks like. These are the cues to trust as the milk changes from liquid to curds.
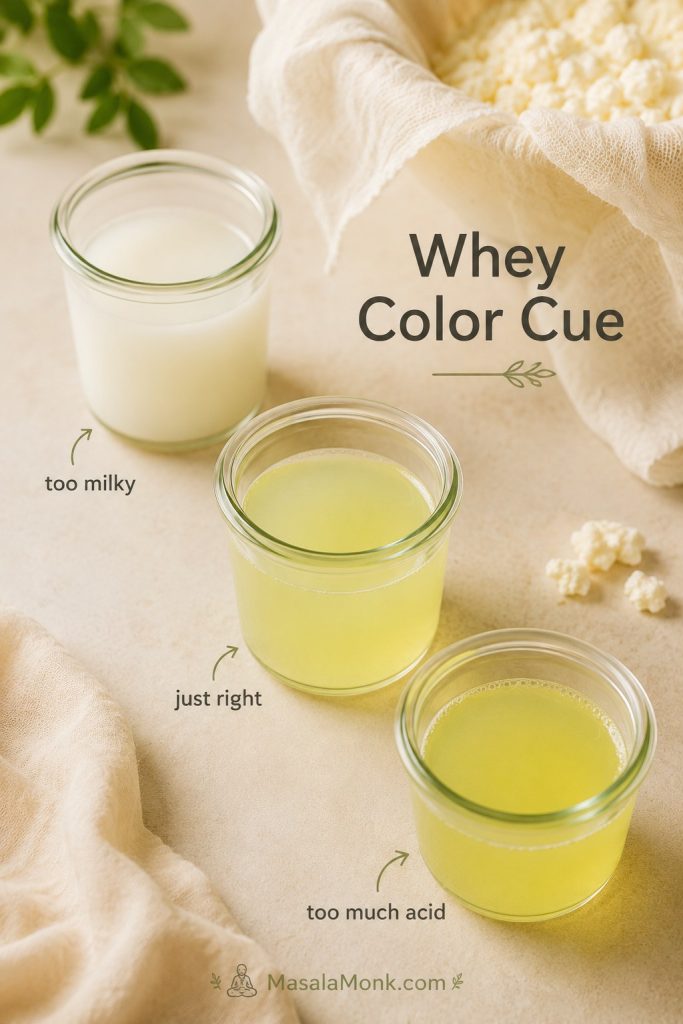
Three glasses showing milky whey, clear pale yellow-green whey, and over-acidified whey for making paneer.
Whey color tells you what to do next. Milky whey needs more time or a little more acid; clear yellow-green whey means the curds are ready to strain.
StageGood signWarning sign
Milk before acidSteaming, foamy at the edges, almost risingViolently boiling for several minutes
Curds formingSoft white clumps pulling away from the liquidTiny, tight, dry-looking grains
WheyPale yellow-green and slightly translucentCloudy, white, and still milky
Pressed blockSet but still slightly tender when touchedHard, dry, dense, or squeaky
Taste and smellClean, milky, faintly sweetSharply vinegary, harshly lemony, or stale-smelling

The curds should look soft and pillowy, not dry and pebbly. The pressed block should hold together, but it should not feel like a brick. If the paneer smells sharply acidic, rinse briefly and use less acid next time.

If your curds look tight, the whey is still milky, or the block feels squeaky, compare it with Troubleshooting Homemade Paneer before you throw the batch away.

What Is Paneer?

Paneer is a fresh Indian cheese made by curdling hot milk with an acid such as lemon juice, vinegar, yogurt, buttermilk, or citric acid. It is not aged, it does not need rennet, and it does not melt into strings like mozzarella or cheddar. Instead, paneer holds its shape when cooked, which is why it works so well in curries, skewers, stir-fries, wraps, sandwiches, and rice bowls.

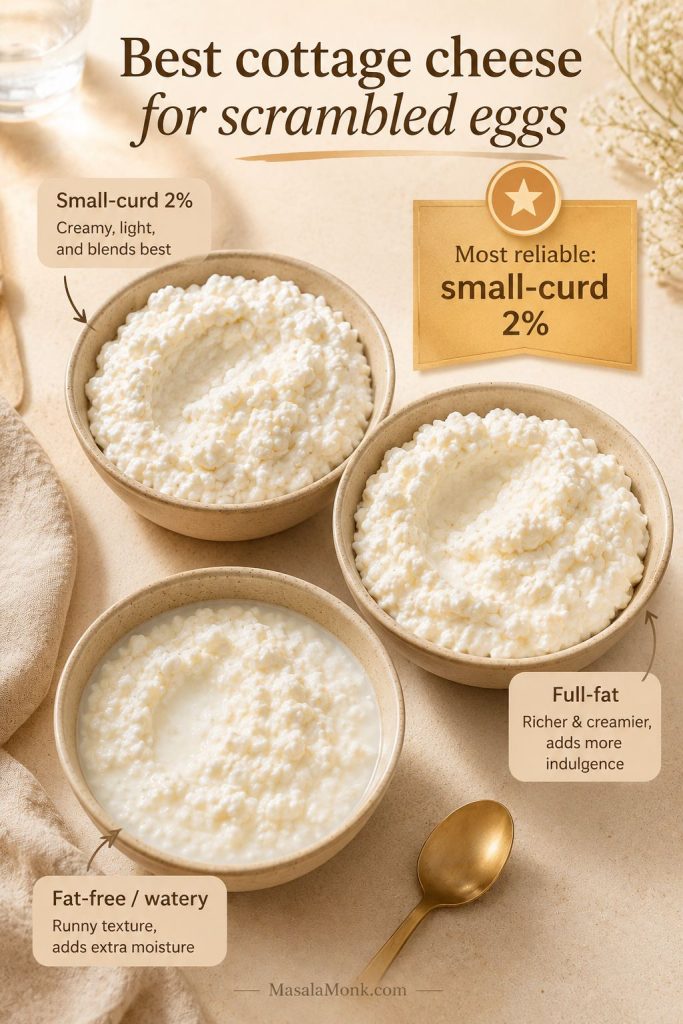
Paneer is often called Indian cottage cheese, but that phrase can be confusing outside India. Western cottage cheese is loose, wet, and spoonable. Paneer is usually drained and pressed into a sliceable block. Depending on how long you press it, it can be soft and crumbly, tender and cubeable, or firm enough for tikka.

The flavor is mild, milky, and slightly sweet by design. That gentleness is exactly why paneer works so well with bold gravies, smoky marinades, peppery sauces, and spicy vegetables.

Best Milk for Homemade Paneer Outside India

Your carton matters more than the brand name here. The best milk for homemade paneer is whole milk, also called full-fat milk in many countries. It gives better curds, better yield, and a softer finished texture. Different countries sell milk under different labels, so do not worry if your carton does not say “full cream.” Look for regular pasteurized dairy milk with enough fat.
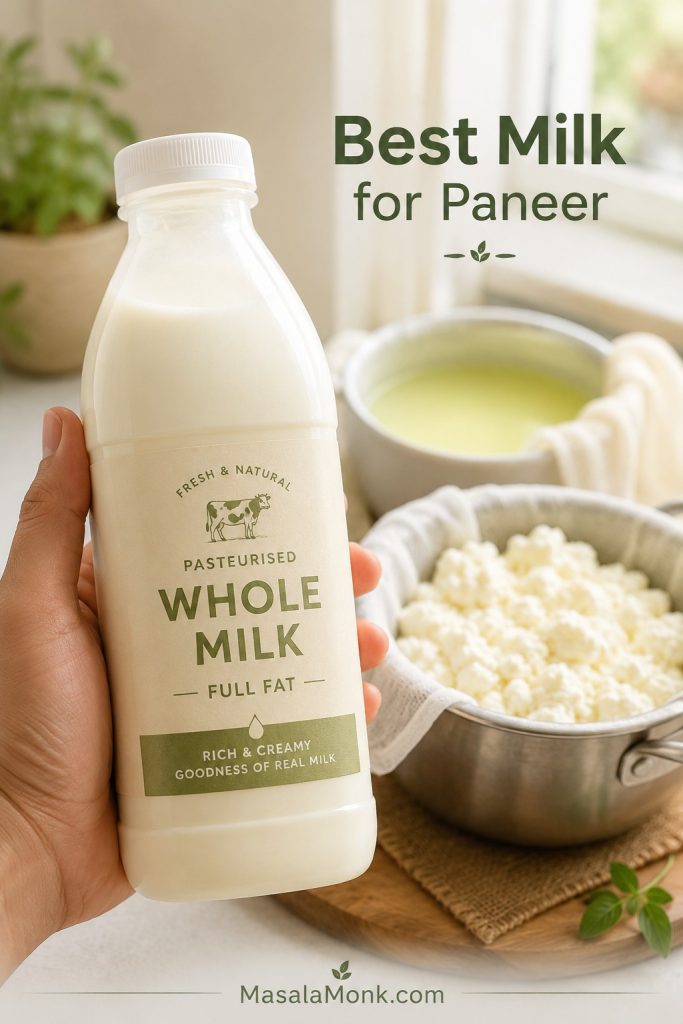
Generic whole milk carton held near soft paneer curds, muslin, and whey in a bright kitchen.
Start the paneer recipe at the milk carton. Whole milk or full-fat milk usually gives better curds, better yield, and a softer finished block.

Regular pasteurized whole cow’s milk is the best supermarket default. Buffalo milk is excellent if you can find it because it is richer and usually gives a softer, higher-yield paneer. Goat milk can work too, though the flavor is tangier and the curds may be more delicate.

The milk to be careful with is UHT, long-life, or ultra-pasteurized milk. These milks are treated at higher temperatures for longer shelf life, and that extra processing can make curd formation less reliable. If you are unsure what UHT or ultra-pasteurized means on a carton, this pasteurization guide explains the terms clearly.

Do not confuse regular pasteurized milk with ultra-pasteurized milk. Regular refrigerated pasteurized whole milk usually works well for paneer. The bigger issue is long-life, shelf-stable, UHT, or ultra-pasteurized milk, which can form weaker curds.
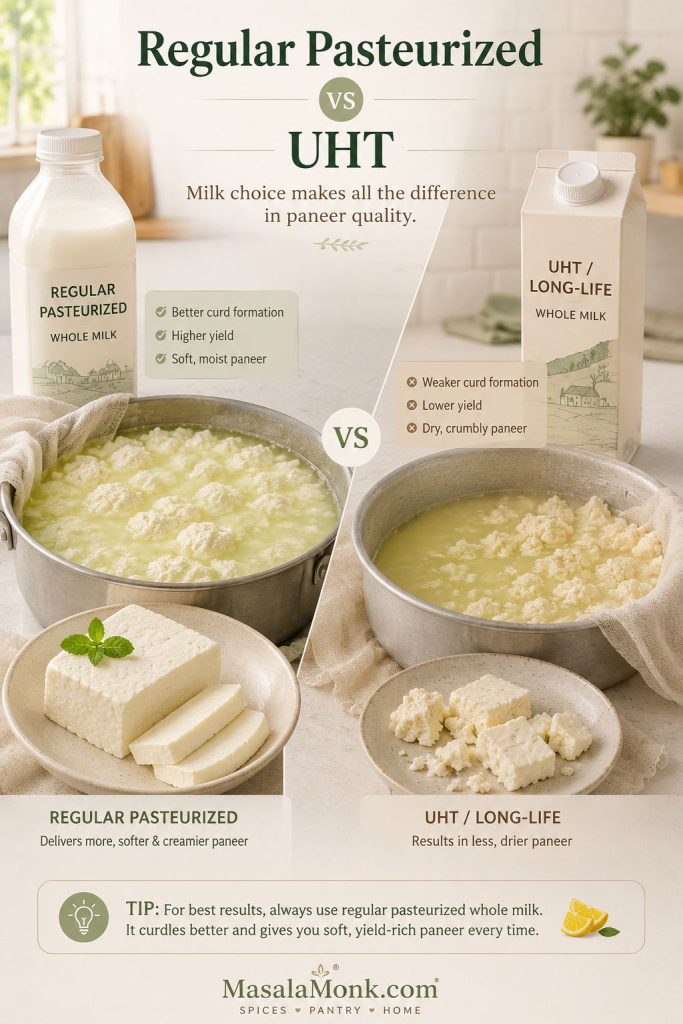
Regular pasteurized milk shown making clean paneer curds beside UHT milk shown with weaker curds.
Regular pasteurized milk and UHT milk are not equal for homemade paneer. If your milk will not curdle cleanly, long-life processing may be the reason.

Milk Labels That Work Best for Homemade Paneer
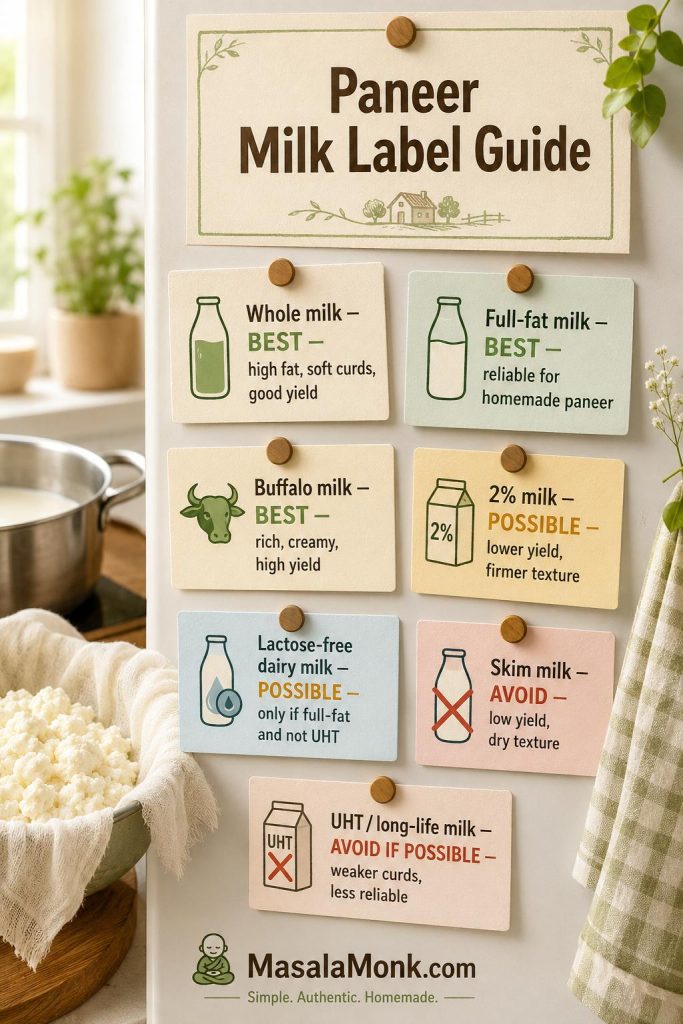
Milk label guide showing whole milk, full-fat milk, buffalo milk, 2 percent milk, lactose-free milk, skim milk, and UHT milk for paneer.
For soft homemade paneer, choose whole, full-fat, or buffalo milk when possible. Use 2% milk with lower-yield expectations, and avoid UHT or skim milk for reliable curds.
Milk labelUse for paneer?What to expect
Whole milk / full-fat milkBest choiceSoft, reliable curds and good yield.
Regular pasteurized cow’s milkYesThe best supermarket default for most readers.
Buffalo milkExcellentRicher, higher-yield, and traditionally prized for soft paneer.
Lactose-free dairy milkSometimesCan work if it is full-fat and not UHT or ultra-pasteurized.
2% milkPossible, not idealLower yield and a firmer, less creamy texture.
Skim or fat-free milkAvoidDry, weak, low-yield paneer that can crumble easily.
Organic milkCheck labelWorks if regular pasteurized, but some brands are ultra-pasteurized.
UHT / ultra-pasteurized / long-life milkAvoid if possibleMay curdle poorly or form weak curds.
Goat milkPossibleSofter curds and a tangier flavor.
Plant milkNot true paneerYou can make a vegan curd or tofu-style alternative, but it is not dairy paneer.

Important: Milk varies by country, brand, season, fat level, and processing. If one carton gives weak curds, do not blame yourself or the whole recipe. Try a different full-fat, non-UHT brand before changing the method.

If your milk is already hot but still not separating, go to Troubleshooting Homemade Paneer before adding too much acid.

Best Acid for Homemade Paneer: Lemon, Vinegar, Yogurt, or Citric Acid

Once the milk question is sorted, the next decision is acid. Paneer needs an acid to separate the milk into curds and whey. Lemon juice and plain white vinegar are the easiest choices for beginners because they are available almost everywhere. Yogurt, buttermilk, and citric acid also work, but they behave differently.

Watch the liquid around the curds; it tells you when to stop. The most important rule is not which acid you choose. It is how you add it. Dilute the acid with water, add it gradually, and stop as soon as the milk separates clearly. Too much acid can make paneer sour, grainy, firm, or rubbery.
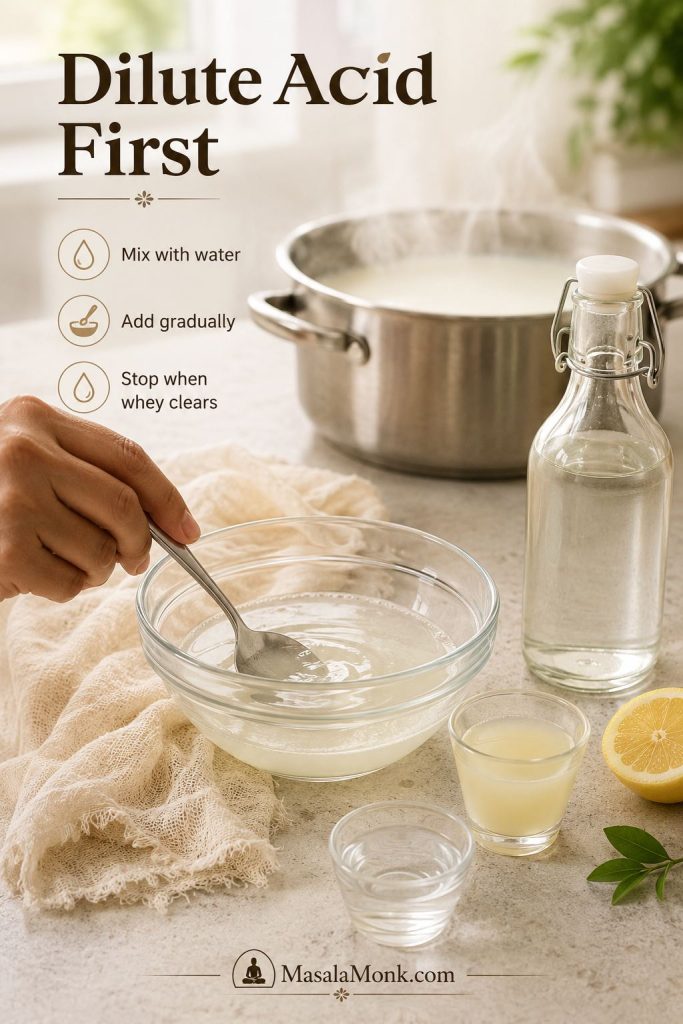
Lemon juice or vinegar being mixed with water in a glass bowl before being added to milk for paneer.
Think of acid as a trigger, not the main ingredient. Diluting it first helps you add it gently and stop before the paneer turns sour or grainy.

Paneer Acid Options

Choose the acid by flavor and texture, but keep the method the same: dilute it, add it gradually, and stop when the milk separates clearly.
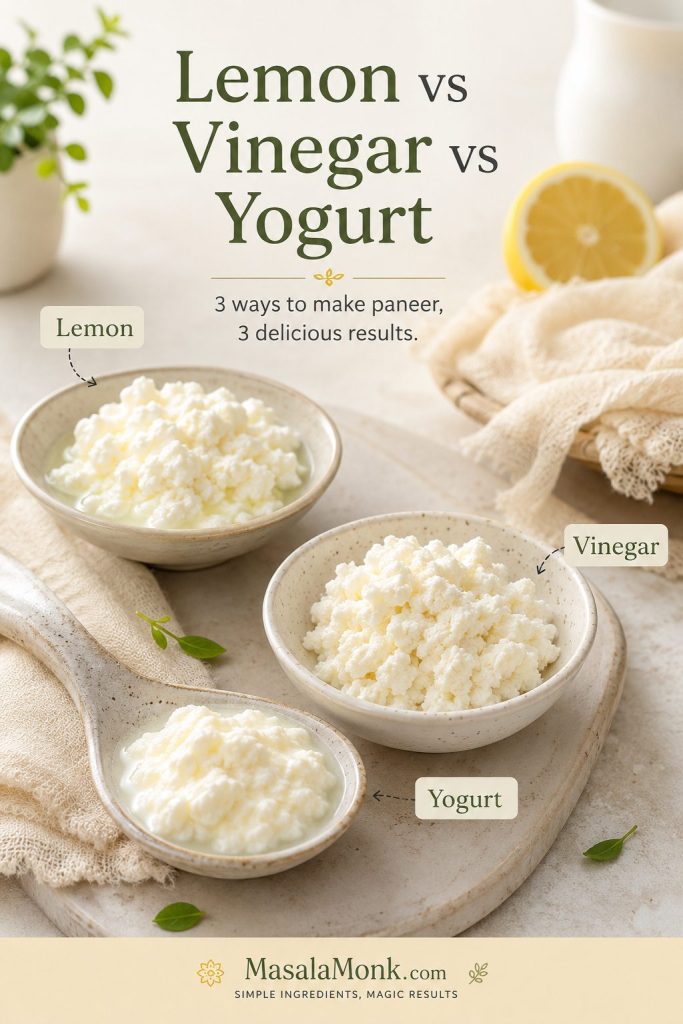
Lemon juice, vinegar, and yogurt shown with small paneer curd samples as acid options.
Lemon, vinegar, and yogurt can all make paneer. The choice affects flavor, but success still depends on adding acid gradually and stopping at the right whey cue.
AcidBest forFlavorTexture
Lemon juiceBeginner homemade paneerLight citrus note if not rinsedSoft to medium
Plain white vinegarReliable curdling and clean cubesNeutral if diluted and rinsedClean, firm curds
Yogurt / curdSofter paneerMild dairy tangSofter and moister
ButtermilkGentle curdlingMild tangSoft and delicate
Citric acidPrecise curdlingNeutral if measured carefullyCan turn firm if overused

How Much Acid to Use for Paneer

Practical starting point: for 2 litres / 8½ cups milk, start with 3 tablespoons / 45 ml diluted lemon juice or white vinegar. If using yogurt, start with ¼ cup / 60 g whisked plain yogurt and add more only if the whey still looks milky. If using citric acid, dissolve a very small amount in water first and add gradually; it is easy to overdo and can make paneer firm or sharp.
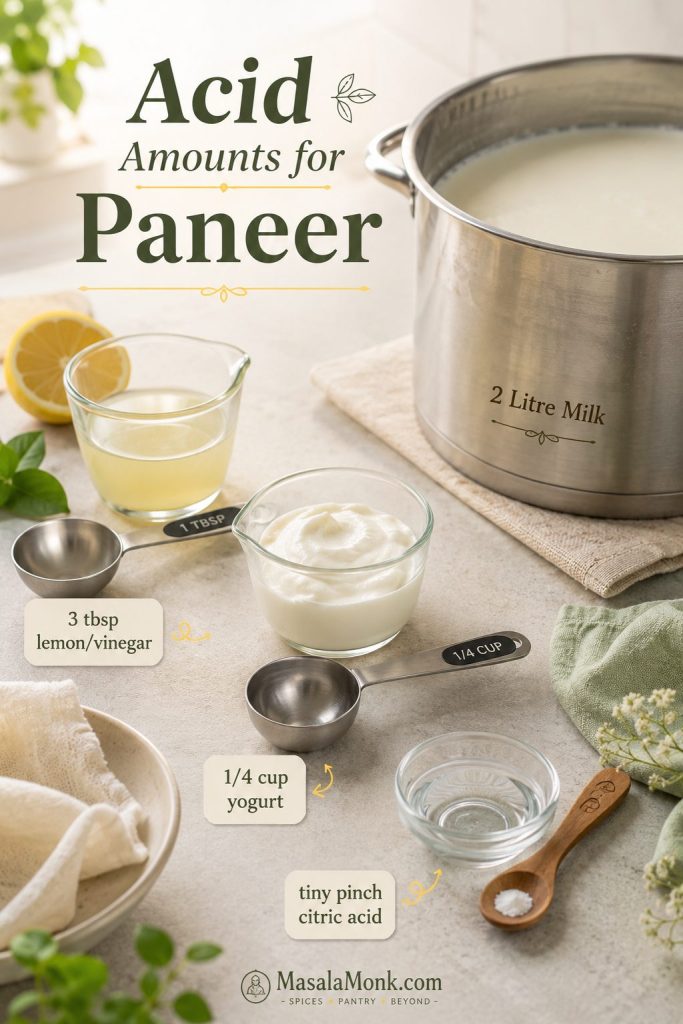
Measured lemon juice, vinegar, yogurt, and dissolved citric acid arranged beside a milk pot for paneer.
Measurements give you a safe starting point, but the pot gives the final answer. Stop when the curds gather and the whey clears.

Fresh lemon juice tastes clean, but lemons vary, so you may need a little more or less. Bottled lemon juice can work because it is consistent, though the flavor may be flatter than fresh lemon. Plain white vinegar is usually more predictable than fresh lemon juice and usually tastes neutral after dilution and rinsing.

Avoid strongly flavored vinegars unless you want that flavor in the paneer. Apple cider vinegar can work in a pinch, but plain white vinegar is cleaner. Whatever acid you use, add it slowly and watch the whey. The goal is not to empty the cup; the goal is to use only enough.

Step-by-Step Paneer Cues That Matter Most

The recipe card gives you the full method. These four cues keep homemade paneer soft instead of tight, sour, or rubbery.
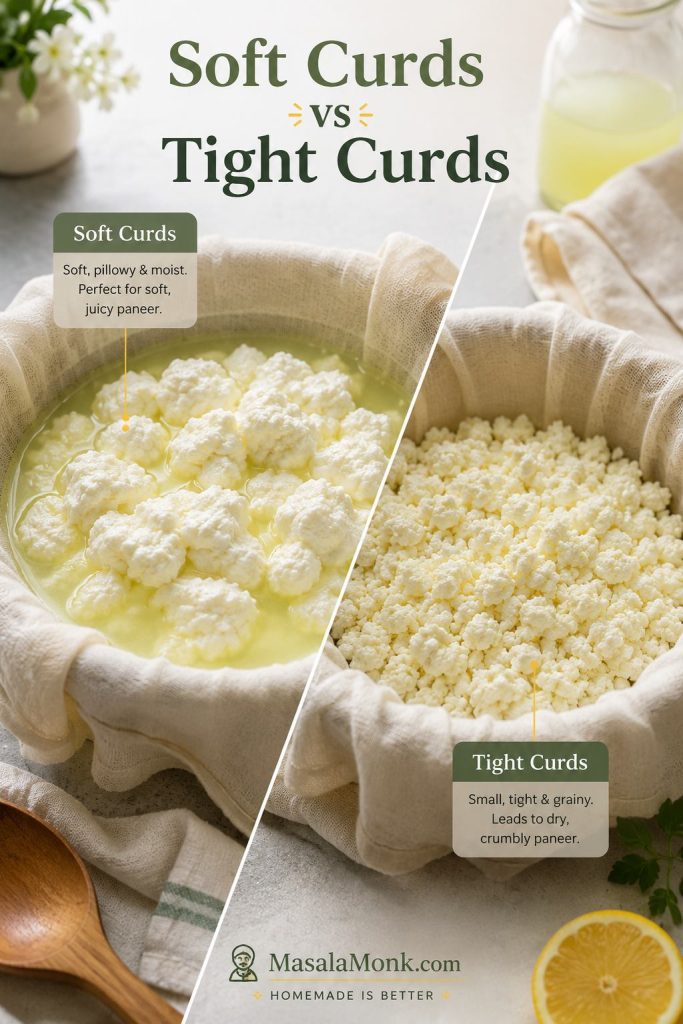
Soft pillowy paneer curds compared with tight grainy paneer curds in pale whey.
Good paneer curds should look soft, moist, and gathered. Tiny dry grains usually point to overheated milk, excess acid, or rough stirring.
  • Milk: use full-fat, non-UHT milk that separates cleanly.
  • Heat: stop at steaming and foamy, not a violent boil.
  • Acid: add it slowly and stop when the whey turns pale yellow-green and slightly translucent.
  • Draining: let gravity work before pressing; hard squeezing steals softness.

Rinsing Paneer Curds

Rinsing is useful when you used lemon juice or vinegar and want to remove sharpness. Keep it brief so the curds stay rich and delicate.
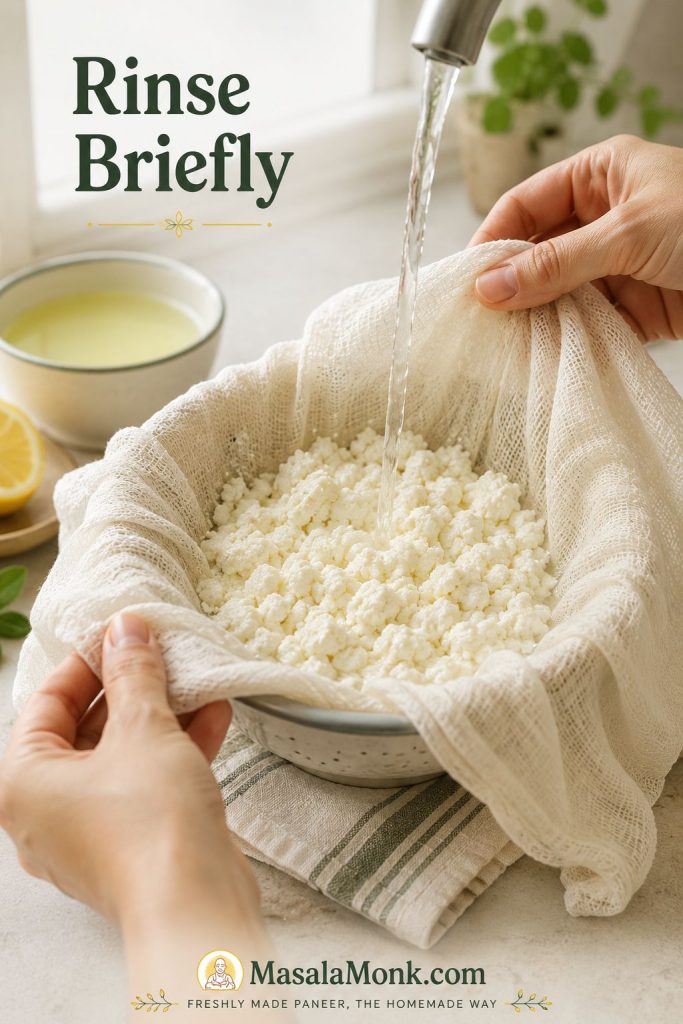
Paneer curds in muslin being briefly rinsed under cool water to reduce lemon or vinegar sourness.
A brief rinse can soften sharp lemon or vinegar flavor after straining. Keep it quick so the curds stay rich and do not lose too much dairy flavor.

Shape Before Pressing

Before you add weight, gather the drained curds neatly in the cloth. A tidy shape helps the paneer press evenly and cut more cleanly later.
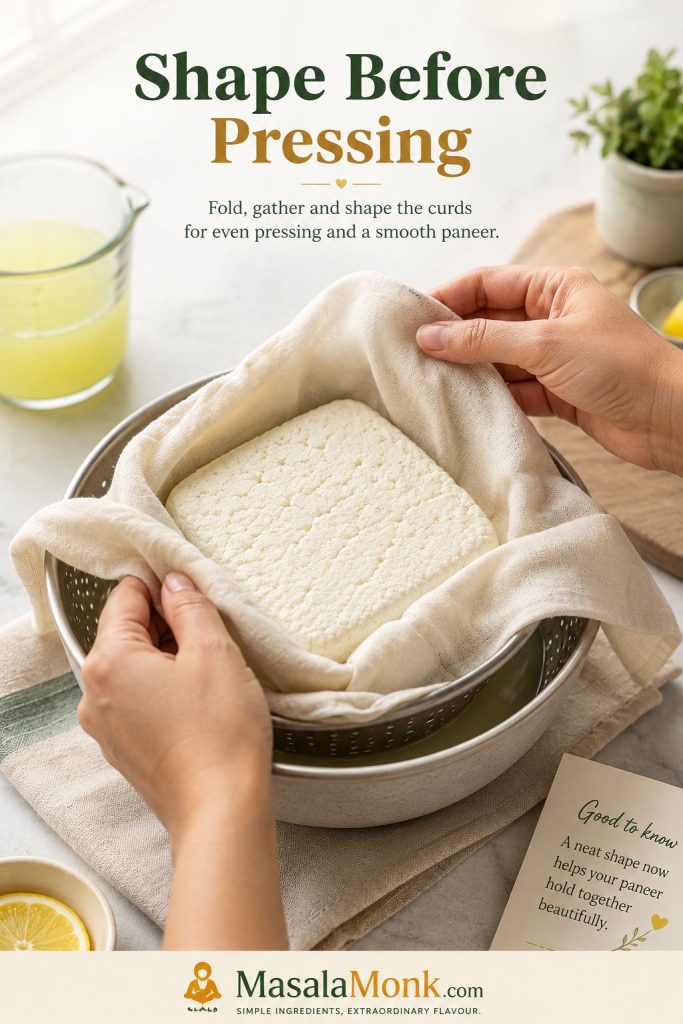
Hands folding muslin around drained paneer curds to shape them into a block before pressing.
Shape the curds before adding weight. This helps paneer set evenly, which makes cleaner cubes possible without forcing the block under heavy pressure.

How Long to Press Homemade Paneer

This is where you choose the paneer you actually want to eat: loose and soft for bhurji, tender for curry, or firm enough for skewers. Less pressing gives softer paneer. Longer pressing gives cleaner, firmer cubes.

If your paneer often turns hard, this is the section to slow down on. Pressing is not just a shaping step; it decides whether the paneer stays moist or becomes dense.
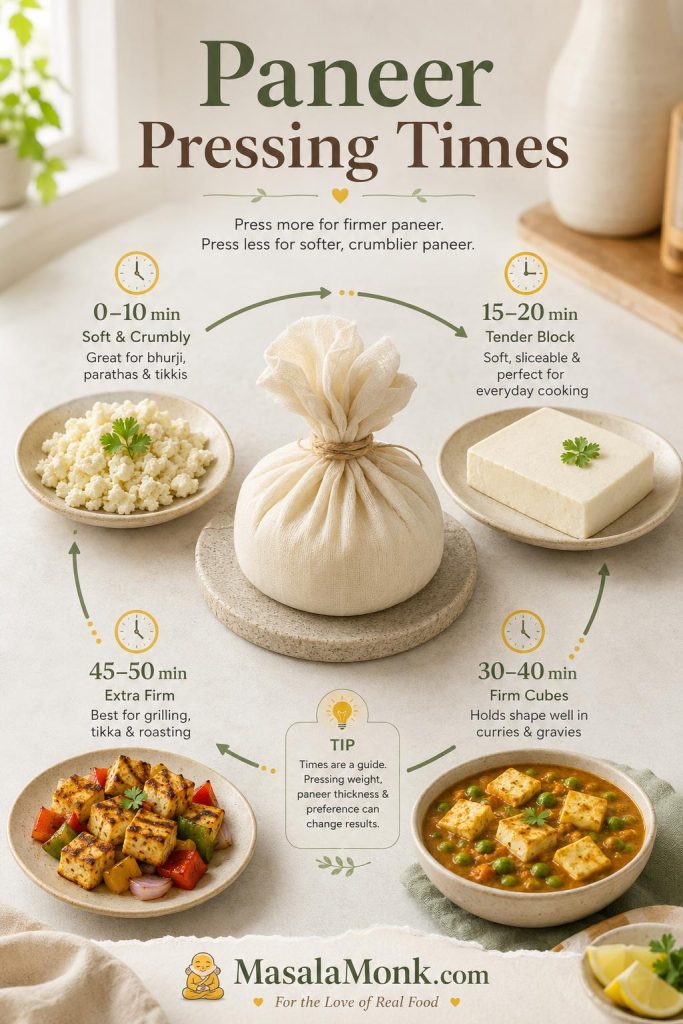
Paneer pressing guide showing soft crumbles, a tender block, curry cubes, and firmer tikka cubes with time cues.
The same paneer recipe can become soft bhurji curds, curry cubes, or tikka pieces. The difference is usually pressing time, not extra ingredients.
Final usePressing timeSuggested weightResult
Paneer bhurji, fillings, toast, sandwiches0–10 minutesNo weight or a very light plateLoose, soft curds
Bowls, salads, gentle pan-frying15–20 minutes400–600 g / 14–21 ozTender block
Curries like palak paneer, matar paneer, or balti paneer30–40 minutes600–900 g / 1.3–2 lbSliceable cubes that still stay moist
Paneer tikka, skewers, grilling45–50 minutes, then chill900 g–1.2 kg / 2–2.6 lbFirmer cubes that handle marinating and skewering
Very heavy pressing for several hoursAvoid for soft paneerAvoid heavy crushing weightCan become dense, dry, or rubbery

Use moderate weight, not crushing pressure. Two cans, a small pot, or a heavy skillet is enough for most home batches. If the paneer is for curry, a 30–40 minute press is usually plenty. If you want tidy cubes, chill the pressed block briefly before cutting.

Light vs Heavy Pressing

Use enough weight to form the block, not so much that the paneer loses all its moisture. This is especially important for curry cubes.
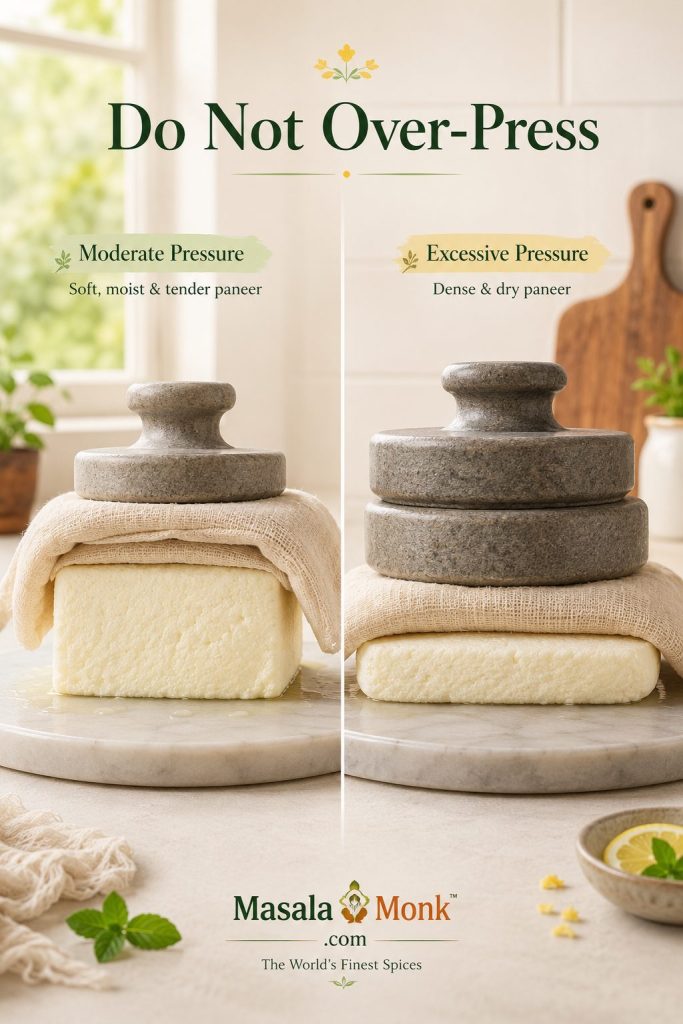
Light pressing compared with heavy pressing for paneer, showing a moist block and a denser compressed block.
Heavy pressing is one of the easiest ways to lose softness. For most paneer curries, moderate weight forms cubes without squeezing out all the moisture.

Once the paneer is pressed, the next texture risk happens in the pan. See How to Keep Paneer Soft When Cooking before adding the cubes to curry.

Soft Paneer vs Firm Paneer: Both Can Be Right

The best paneer is not always the firmest paneer. The right texture depends on what you are cooking next.
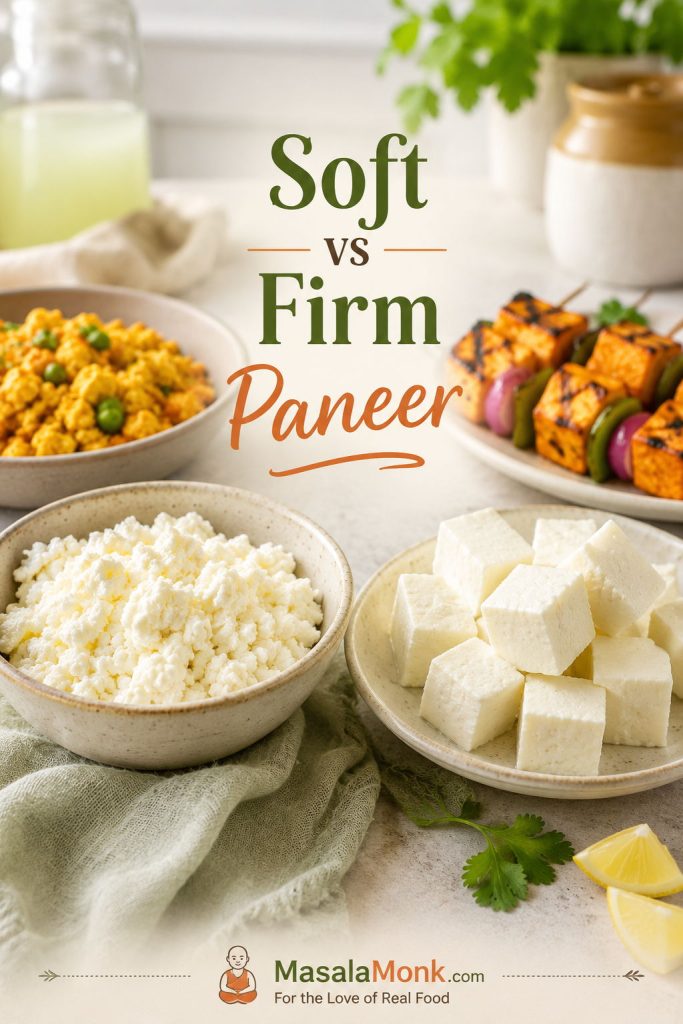
Soft crumbled paneer in a bowl beside firm paneer cubes, with bhurji and tikka-style uses in the background.
Soft paneer and firm paneer are both useful. Crumbles belong in fillings and bhurji, while firmer cubes work better for tikka, skewers, searing, and thicker gravies.

Soft paneer is delicate, moist, and slightly crumbly, so it works beautifully for bhurji, fillings, wraps, cutlets, quick bowls, and gentle curries where perfect cubes do not matter.

Firm paneer is better for tikka, skewers, grilling, pan-searing, or restaurant-style cubes in thick gravy. However, firm should not mean rubbery. Good firm paneer still has moisture inside.

How to Cut Paneer Cubes Cleanly

If you want tidy cubes, chill the pressed paneer briefly and cut with a sharp knife. Slightly larger cubes are easier to handle in curry.
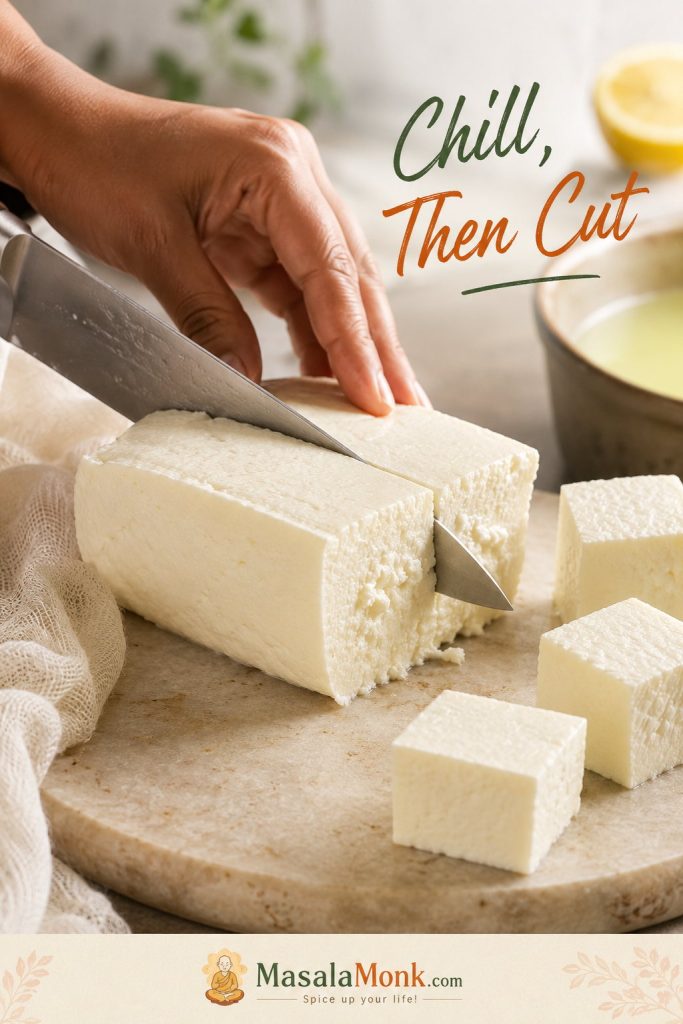
Pressed paneer block being cut into cubes with a sharp knife on a stone board.
If homemade paneer breaks when you cut it, chill the pressed block briefly first. A sharp knife and slightly larger cubes help tender paneer hold its shape.

How to Keep Paneer Soft When Cooking

Paneer can be perfect after pressing and still turn dry if it is cooked too aggressively. Most paneer dishes do not need the paneer to simmer for a long time. Add it when the sauce is already cooked, let it warm through gently, and avoid hard boiling. This matters in creamy gravies such as Kali Mirch Paneer, where paneer should stay tender rather than chewy.
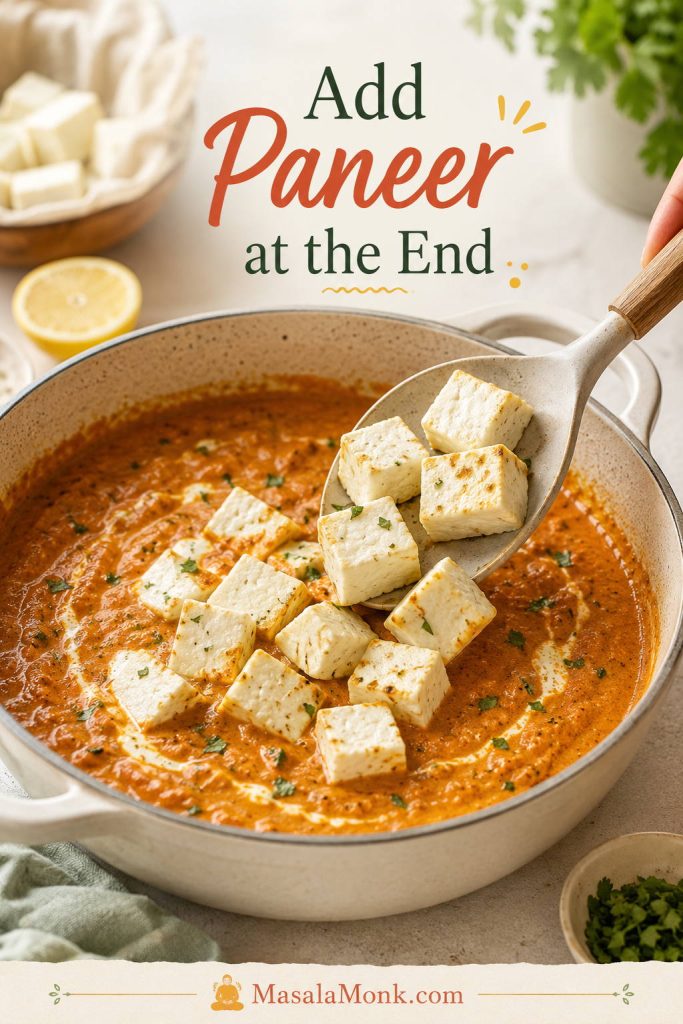
Paneer cubes being gently added to a finished curry with a spoon.
Let the gravy finish cooking before the paneer goes in. Then the cubes only need a gentle warm-through, which helps them stay tender.
  • Curries: add paneer near the end and simmer gently for only a few minutes.
  • Pan-frying: sear quickly, then remove or add sauce. Long frying can toughen paneer.
  • Store-bought paneer: soak cubes in warm water for 10–15 minutes before cooking, especially if the block feels cold and stiff.
  • Homemade paneer: avoid over-pressing if it is going into a soft curry.
  • Paneer tikka: press firmer, chill before cutting, and handle gently while marinating.

Homemade paneer is often softer than store-bought paneer, so treat it gently. Use a sharp knife, cut slightly larger cubes if the paneer feels delicate, and avoid aggressive stirring after adding it to curry. If you are making a rich paneer gravy, the sauce should be ready before the paneer goes in. Paneer should finish the dish, not endure the whole cooking process.

Homemade Paneer vs Store-Bought Paneer

Store-bought paneer is convenient, and there is nothing wrong with using it. It is helpful when you are short on time or cooking a quick dinner. But homemade paneer gives you freshness and texture control that packaged paneer often cannot match.
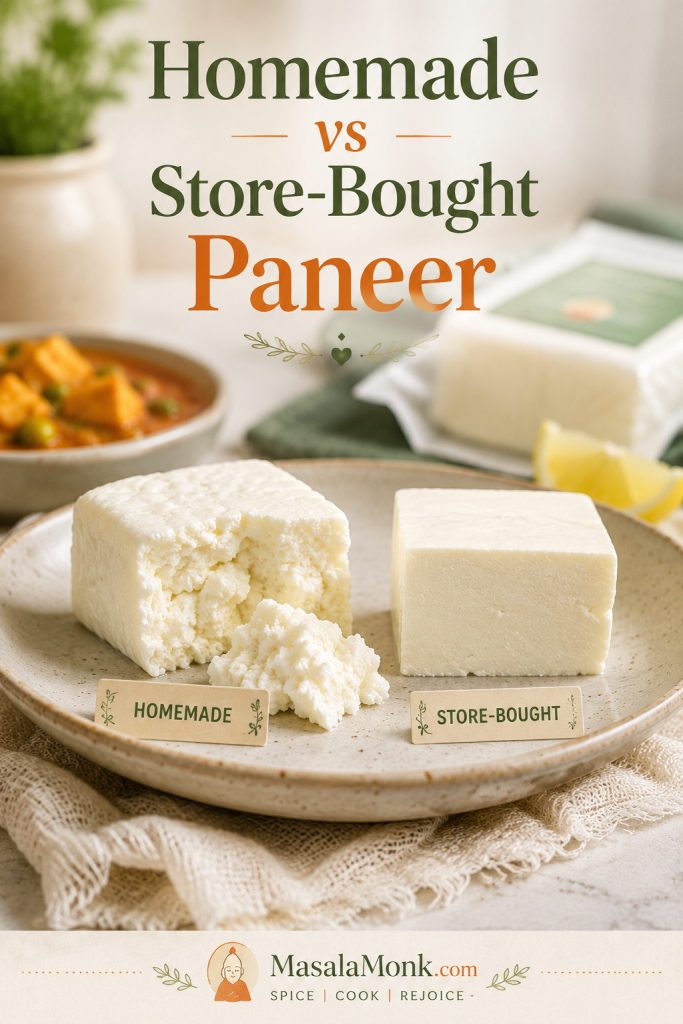
Homemade paneer cube broken open beside a firmer store-bought-style paneer cube with generic packaging blurred behind.
Store-bought paneer is useful when you are short on time, but homemade paneer lets you control moisture, pressing, and softness from the start.

Many store-bought paneer blocks are firmer because they are pressed, packaged, transported, refrigerated, and stored before you cook with them. Some are excellent, but many are denser than the paneer you would make fresh at home.

If your only experience with paneer has been hard cubes that sit separately from the sauce, homemade paneer can change how you think about the dish. Good paneer should be gentle, milky, and tender enough to belong inside the gravy, not feel like a separate chewy block.

You can also fold homemade paneer into vegetable dishes near the end, as in an Aloo Gobi with Paneer variation, where the cubes add protein without needing a long cooking time.

Already Bought Paneer? Here’s How to Soften It

Warm-water soaking can relax cold store-bought paneer and make it feel less stiff, but it may not fully rescue a very dense block. Choose the method based on the dish.
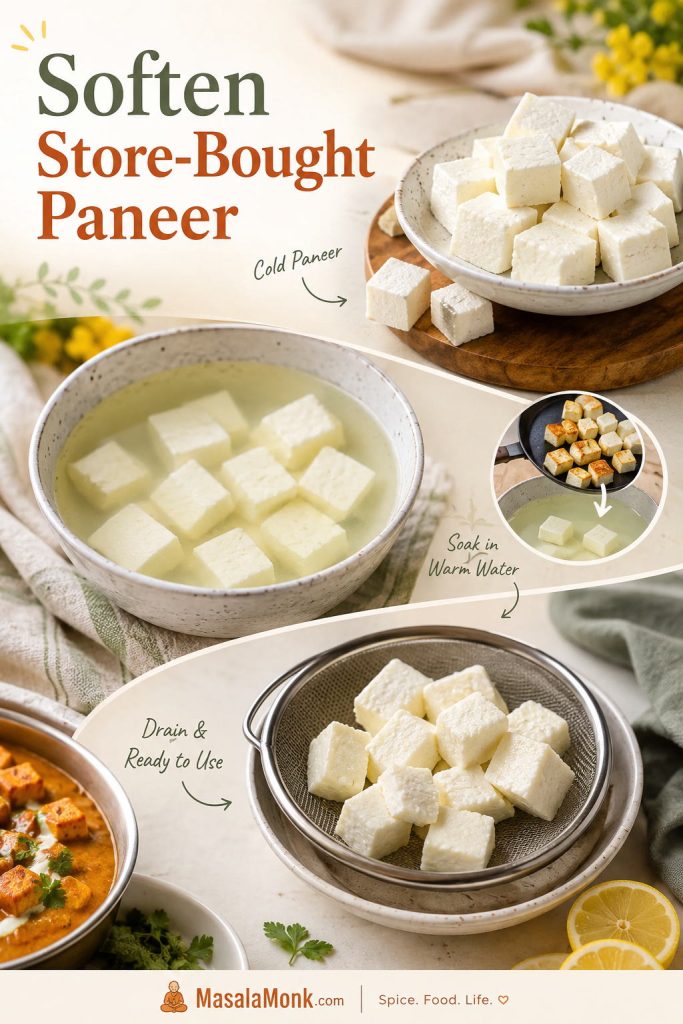
Store-bought paneer cubes shown cold, soaking in warm water, and drained after softening.
Warm-water soaking can relax cold packaged paneer before it goes into curry. It will not fix every dense block, but it often makes store-bought paneer gentler to eat.
  • Quick curries: cut the paneer into cubes and soak in warm water for 10–15 minutes, then drain gently.
  • Browned paneer in saucy dishes: shallow-fry the cubes briefly, then soak them in warm water before adding them to the gravy.
  • Delicate creamy gravies: skip hard frying and add paneer near the end so it only warms through.
  • Very rubbery paneer: soaking helps, but it may not completely fix an over-pressed or low-moisture block.

If packaged paneer keeps turning dense for you, the pressing guide shows how homemade paneer can be adjusted for softer curry cubes or firmer tikka pieces.

Paneer vs Tofu, Halloumi, Ricotta, Queso Fresco, and Cottage Cheese

If you are new to paneer, think of it as a mild, dairy-based cheese that holds its shape. Firm tofu is the closest non-dairy shape-holder, halloumi is saltier and springier, and queso fresco or queso blanco can be crumbly or tangier. Ricotta works better for soft fillings than cubes, while Western cottage cheese is wet and curdy rather than pressed.
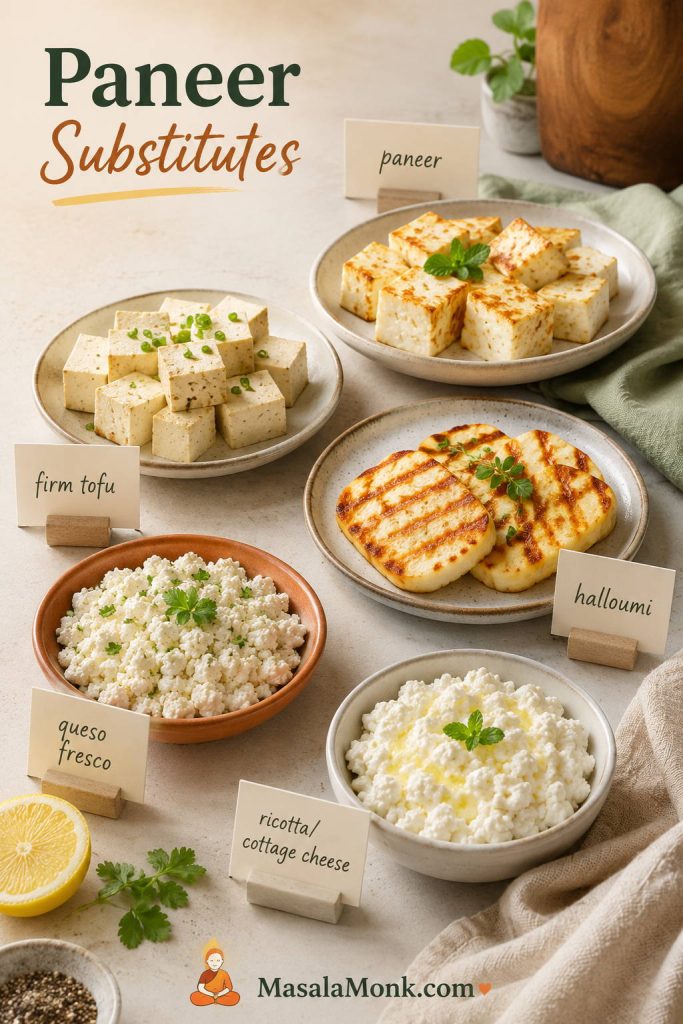
Small plates of paneer, firm tofu, halloumi, queso fresco, and ricotta or cottage cheese arranged for comparison.
Paneer is mild, fresh, and sturdy enough to hold its shape. Tofu, halloumi, queso fresco, and ricotta can help in some recipes, but none behave exactly the same.

If paneer is not sold where you live, homemade is often easier than hunting for the perfect substitute.

Richer Malai-Style Paneer Variation

If you are using regular cow’s milk and want richer, softer paneer, you can make a malai-style variation by adding cream. This is especially useful if your local milk produces firmer paneer than you like.
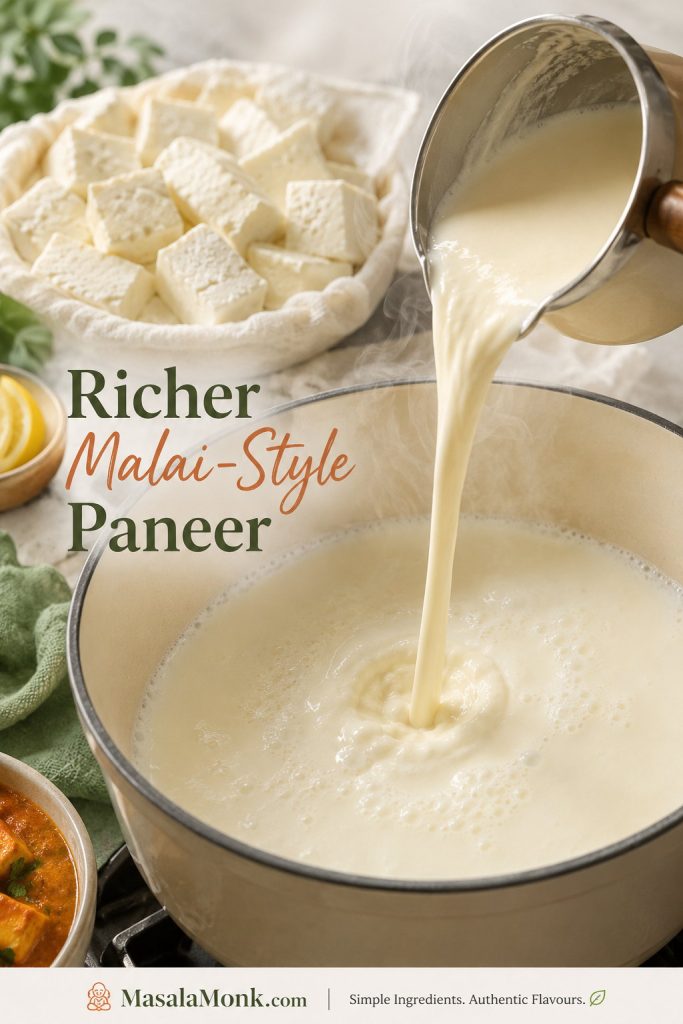
Cream being poured into warm milk in a pot with soft paneer cubes in the background.
A malai-style paneer variation adds richness when local milk gives firmer curds. Use a little cream with whole milk for a fuller, softer homemade paneer texture.

For 2 litres / 8½ cups whole milk, add ¼–½ cup / 60–120 ml heavy cream or replace ½ cup / 120 ml of the milk with cream. Use plain dairy cream without strong stabilizers if possible. Heat, curdle, strain, and press as usual. Because the extra fat makes the curds richer and softer, press gently unless you specifically need firm tikka cubes.

Can You Make Paneer with 2% or Low-Fat Milk?

You can make paneer with 2% milk, but it will not behave like whole-milk paneer. Expect less yield, leaner curds, and a block that may taste firmer or more crumbly. It can still work for bhurji, fillings, or macro-focused cooking, but whole milk is better for soft curry cubes.
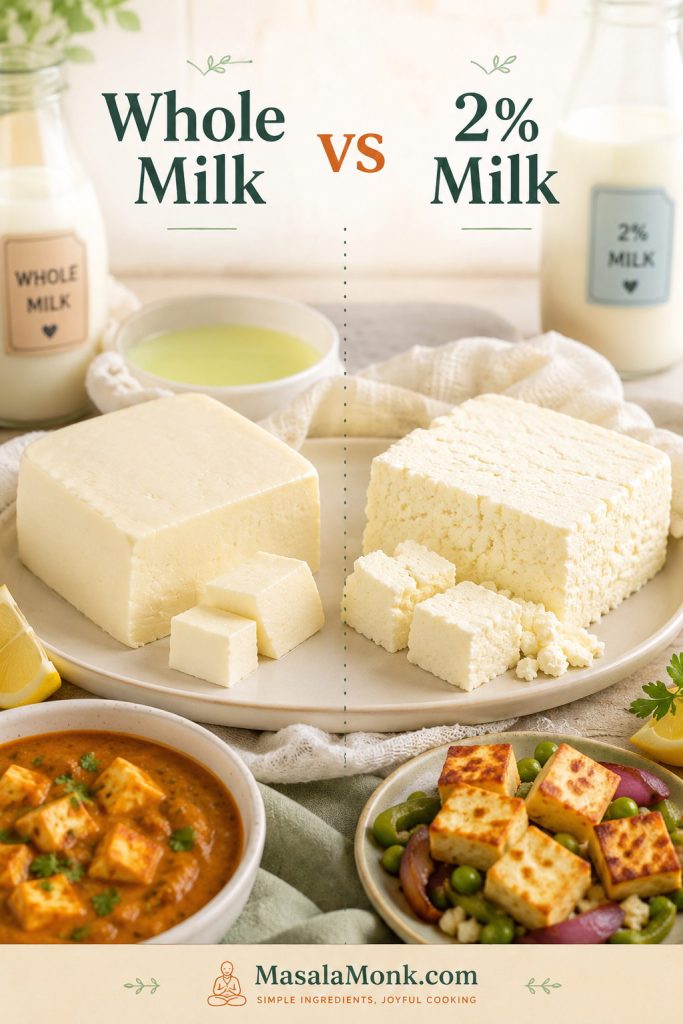
Whole milk paneer compared with a firmer and more crumbly 2 percent milk paneer result.
Low-fat milk can curdle, but the paneer is usually leaner, lower-yield, and more crumbly. For soft curry cubes, whole milk is the more forgiving choice.

Skim milk or fat-free milk is not recommended for this recipe. If you must use lower-fat milk, keep the method gentle: avoid harsh boiling, add acid gradually, rinse briefly, press lightly, and store the paneer in water. Expect a different result from full-fat paneer.

Instant Pot Note

You can make paneer in an Instant Pot, especially with the yogurt-boil function. Use it only to heat the milk; do not pressure cook the paneer. Once the milk is hot and foamy, add diluted lemon juice or vinegar gradually, then follow the same resting, straining, and pressing method. For your first batch, the stovetop is still easier because you can see exactly when the milk is hot enough and when the curds separate.

How to Use Homemade Paneer

Homemade paneer is best when you match the texture to the dish: soft curds for fillings, tender cubes for curries, and firmer cubes for grilling or skewers.

Homemade paneer used in curry, bhurji, tikka skewers, wraps, salad, and pan-seared cubes.
Once you know how to make paneer at home, it becomes a flexible vegetarian protein. Use soft curds in fillings, tender cubes in curry, and firmer pieces for tikka or searing.

Use soft crumbled paneer for fillings and quick meals

Soft paneer curds are excellent for paneer bhurji, toast, wraps, paratha fillings, sandwiches, cutlets, and snack-style recipes. They also work well in comfort-food ideas like Indian Cottage Cheese Jaffles, where a soft filling matters more than tidy cubes.

Use soft cubes for curries and vegetable dishes

For curries, you want paneer that holds shape but still feels moist. Press for 30–40 minutes, chill if needed, then add the cubes near the end of cooking. The sauce should be ready first; paneer only needs a few gentle minutes to warm through. This works for palak paneer, matar paneer, paneer butter masala, kadai paneer, and similar gravies.

Use firmer cubes for tikka, skewers, and grilling

For paneer tikka or skewers, press a little longer and chill before cutting. Firmer paneer is easier to marinate and thread onto skewers. Handle it gently, especially if your homemade paneer is softer than packaged paneer.

Use paneer for vegetarian protein

Paneer is also useful in vegetarian meal prep because it adds protein and richness without needing a long cooking time. Use it in salads, rice bowls, wraps, cutlets, and Indian-style meal prep plates. For more protein-focused Indian meal ideas, see MasalaMonk’s High-Protein Indian Meal Prep.

Do Not Throw Away the Whey

After you strain paneer, you will be left with whey: the pale yellow liquid that separated from the curds. It may look like something to discard, but it is useful in the kitchen.
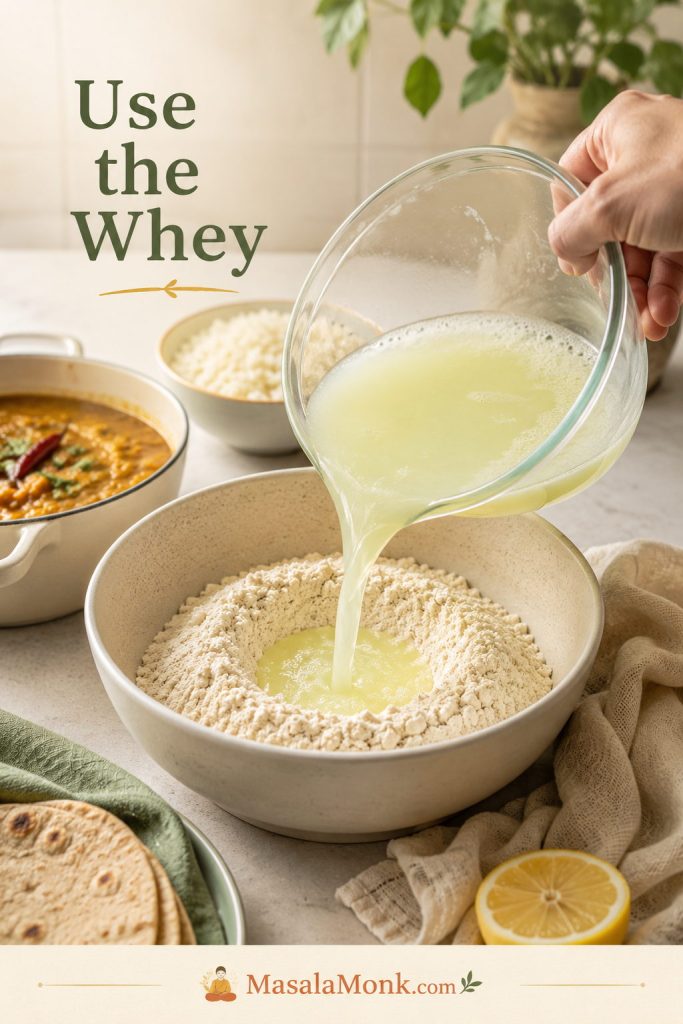
Leftover paneer whey being poured into flour or dough, with dal and rice in the background.
Mild paneer whey is too useful to throw away. Add it to roti dough, dal, soups, rice, oats, or grains whenever a little extra dairy tang fits the dish.
  • Use whey to knead flatbread, roti, naan, paratha, or bread dough.
  • Add it to lentils, dals, soups, stews, and curries.
  • Use it as part of the liquid for rice, quinoa, oats, or other grains.
  • Add a small amount to smoothies if it is not too sour.
  • Freeze it in small portions for later cooking.
  • Use very sour whey carefully, because it can change the flavor of delicate dishes.

Mild whey is useful in dough, rice, dals, and soups. Very sour whey is better in robust curries, breads, or flatbreads where a little tang makes sense. Avoid using sour whey in delicate desserts or plain rice unless you specifically want that flavor.

Refrigerate whey promptly and use it within 2–3 days, or freeze it in small portions. If you make paneer often, you can also use leftover whey from one batch to help curdle a future batch, although lemon juice or vinegar is easier for beginners.

Storing the paneer too? Use the storage and freezing guide so the cubes stay fresh while the whey gets used in dough, dal, rice, or soup.

How to Store and Freeze Homemade Paneer

Homemade paneer is a fresh, high-moisture cheese, so treat it gently and use it soon. Fresh paneer is softest the day it is made, but it can be refrigerated for a short time. Do not leave it sitting at room temperature for long. Cool it, cover it, and refrigerate it promptly.

Storage methodBest timeNotes
Same dayBest textureUse fresh paneer the day you make it for the softest result.
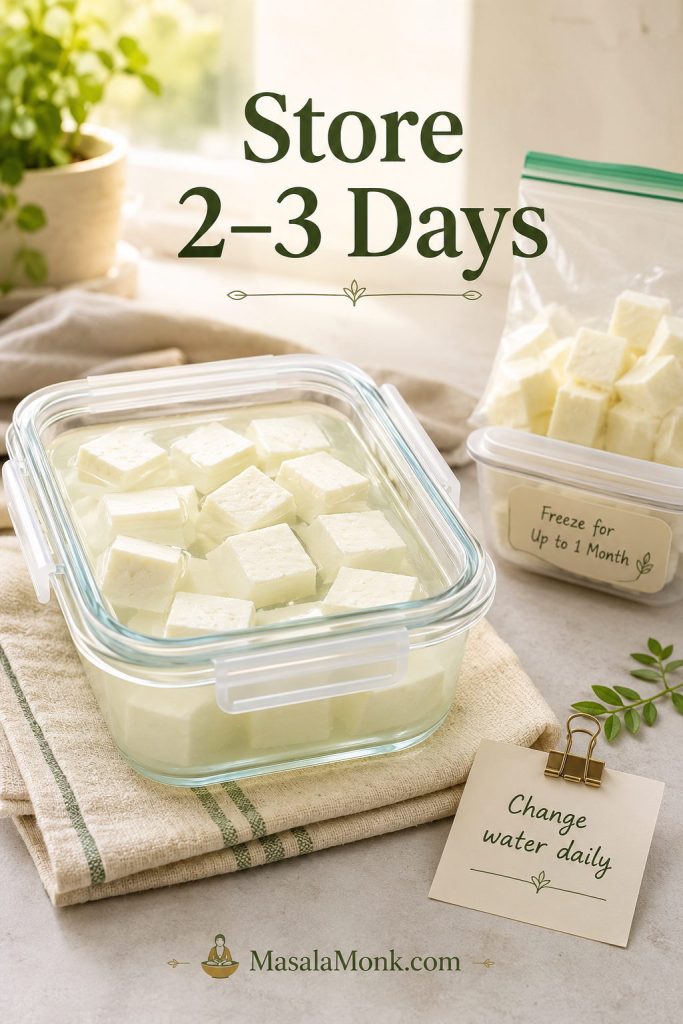
Refrigerator2–3 daysStore covered or submerged in fresh cold water. Change water daily.
FreezerUp to 1 month for best textureFreeze in portions. Thaw in the fridge and soak briefly in warm water before using if needed.
Homemade paneer cubes stored in fresh water inside a glass container with freezer portions and a note to change water daily.
Water storage keeps fresh paneer from drying out, but it does not make it long-keeping cheese. Change the water daily and use the paneer within 2–3 days.

To refrigerate paneer, cool it first, then store it in an airtight container. For softer paneer, cover it with fresh drinking water, keep the container covered, and change the water daily. Avoid storing paneer in very sour whey unless you want the flavor to become tangier. For broader cold-storage guidance, FoodSafety.gov has a useful reference, but for homemade paneer, the simple rule is: refrigerate promptly and use it within 2–3 days.

Unsalted homemade paneer tastes freshest sooner; if you lightly salt the curds, it may taste seasoned for snacks but should still be treated as a fresh cheese and used quickly.

If paneer smells sour in a bad way, feels slimy, looks moldy, becomes fizzy, or feels unusually sticky, discard it.

Troubleshooting Homemade Paneer

When you make paneer at home, an imperfect batch does not always mean failure. Paneer that will not cube neatly can still become bhurji, a sandwich filling, paratha stuffing, cutlets, toast, or a quick scramble. Most paneer problems are texture problems, not total failures.
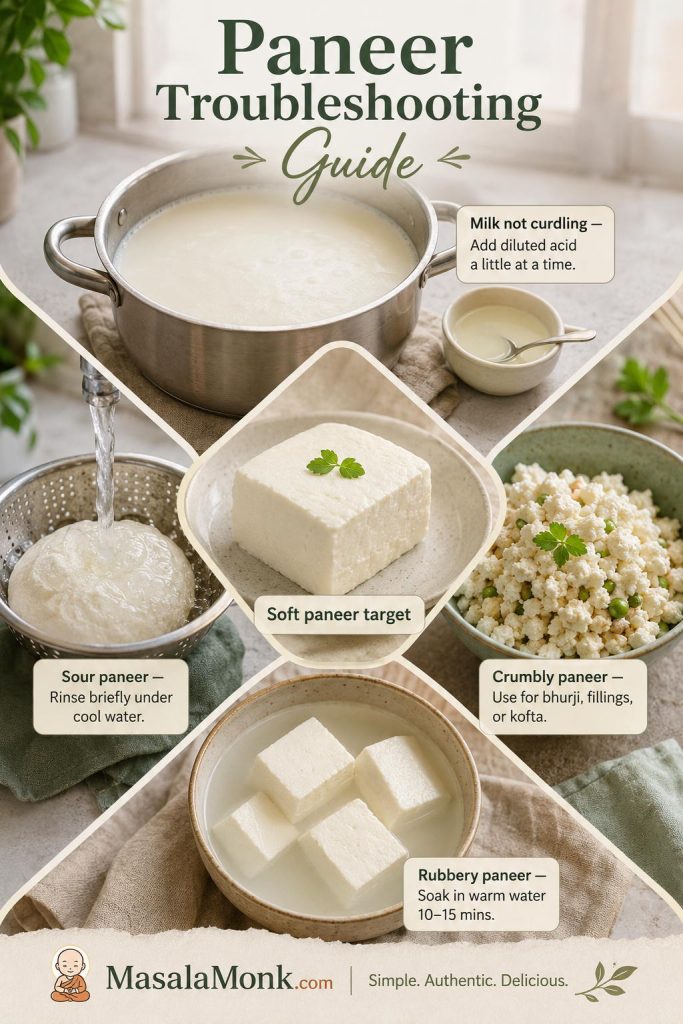
Paneer troubleshooting guide showing milk not curdling, sour paneer, crumbly paneer, rubbery paneer, and a soft paneer target.
Not every imperfect paneer batch is wasted. Milk that will not curdle can be adjusted slowly, sour curds can be rinsed, and crumbly paneer can still become bhurji or fillings.

Use the table below to decide what to do now and what to change next time.

ProblemLikely causeFix nowFix next time
Milk did not curdleMilk was not hot enough, not enough acid, or UHT/ultra-pasteurized milkReheat gently and add diluted acid 1 teaspoon at a timeUse full-fat, non-UHT milk
Whey still looks milkyIncomplete separationRest longer or add a little more diluted acidWait for pale yellow-green, slightly translucent whey before straining
Paneer tastes sourToo much acid or not rinsedRinse briefly under cool waterDilute acid and stop adding it earlier
Paneer is rubberyOverheating, too much acid, over-pressing, or harsh cookingSoak cubes in warm water for 10–15 minutesUse gentler heat, gradual acid, and shorter pressing
Paneer is crumblyWeak curds, low-fat milk, over-acidified curds, or not enough pressingUse it as bhurji or fillingUse richer milk and press slightly longer
Paneer breaks in curryToo soft, cut too soon, or stirred too roughlyAdd gently when the sauce is readyPress 30–40 minutes and chill before cutting
Paneer is dry after cookingFried or simmered too longSoak briefly in warm waterCook the sauce first, then warm paneer through gently

Why did my milk not curdle?

Usually, the milk was not hot enough, the acid was too weak, or the milk was UHT / ultra-pasteurized. Bring the milk back to 185–195°F / 85–90°C, add 1 teaspoon diluted lemon juice or vinegar, stir gently, and wait 30–60 seconds. Repeat only until the whey clears and the curds separate.

If the milk still refuses to separate, the milk itself may be the issue. Try another full-fat, non-UHT brand next time.

Why is my paneer rubbery?

Rubbery paneer usually comes from hard boiling, too much acid, heavy pressing, or long cooking in sauce. To rescue a batch, soak the cubes in warm water for 10–15 minutes. This will not fully reverse overcooking, but it can make the texture noticeably softer.
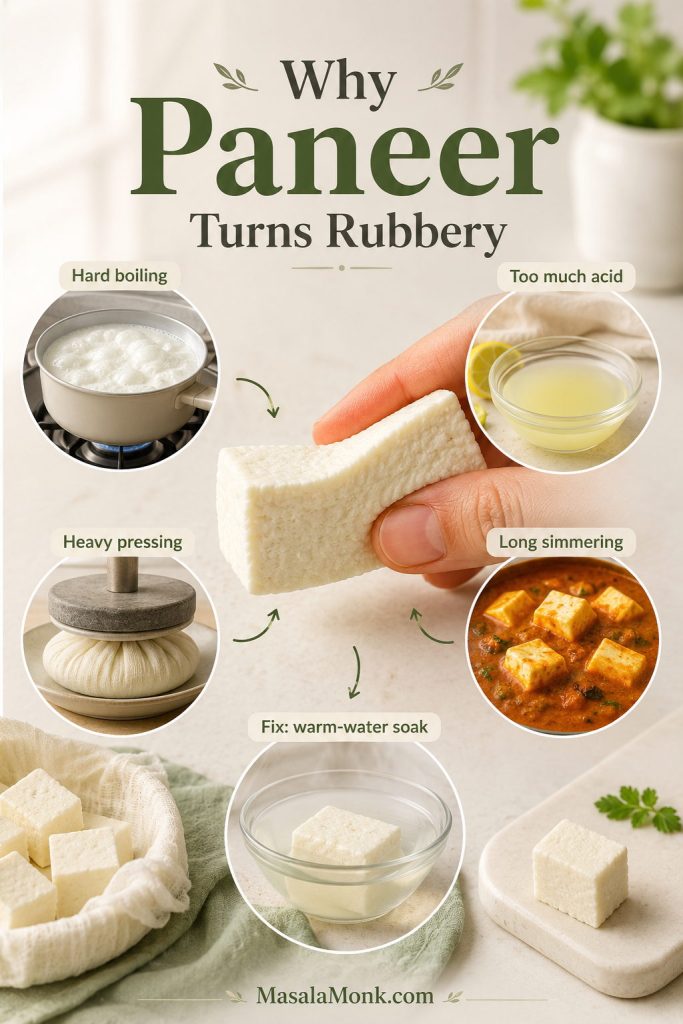
Causes of rubbery paneer shown around a firm paneer piece, including hard boiling, too much acid, heavy pressing, and long simmering.
Rubbery paneer is usually a moisture-loss problem. Harsh heat, extra acid, heavy pressing, and long simmering all tighten the curds, so controlling those steps keeps paneer softer.

Why does my paneer taste sour?

Sour paneer usually means too much lemon juice or vinegar remained in the curds. Rinse the curds briefly under cool water after straining. Next time, dilute the acid and add it gradually. Stop once the whey is clear enough and no longer looks milky.

Why is my paneer crumbly?

Crumbly paneer is not always bad. If it is moist and soft, use it for paneer bhurji, sandwich fillings, paratha fillings, cutlets, or toast. For a snackier route, lightly pressed or crumbled paneer also works in vegetarian patties such as Protein Packed Millet Cutlets.

For cleaner cubes next time, use full-fat, non-UHT milk, add acid slowly, rest the curds before straining, press for 30–40 minutes, and chill before cutting.

Why did my paneer break in curry?

The paneer may have been too soft for cubes, cut before it fully set, or stirred too roughly in the sauce. For curries, press the paneer for 30–40 minutes, chill it briefly, cut with a sharp knife, and add it only when the sauce is ready. Stir gently after adding paneer.

How do I make softer paneer next time?

Use richer milk, gentler heat, gradual acid, and shorter pressing. For especially soft paneer, add a little cream to the milk or use yogurt as the acid once you are comfortable with the basic method.

After you identify the problem, return to the homemade paneer recipe and watch the step-by-step paneer cues more closely on your next batch.

FAQs About Homemade Paneer

What is the best milk for making paneer at home?

Whole milk or full-fat milk is best because it gives better curds, better yield, and a softer texture. Regular pasteurized whole cow’s milk is the safest supermarket default.

Why did my milk not curdle?

Usually the milk was not hot enough, the acid was too weak, or the milk was UHT / ultra-pasteurized. Reheat gently, add diluted acid 1 teaspoon at a time, and stop once the whey clears.

Lemon juice or vinegar: which is better for paneer?

Both work. Lemon juice tastes fresher but varies in acidity. Plain white vinegar is more predictable and usually tastes neutral after dilution and rinsing.

How much paneer do you get from 1 litre, 2 litres, or 1 gallon of milk?

Yield varies by milk, fat level, draining, and pressing. Expect about 150–200 g from 1 litre, 300–400 g from 2 litres, and 600–750 g from 1 gallon / 3.8 litres.

How do you make paneer soft instead of rubbery?

Rubbery paneer usually comes from hard boiling, too much acid, heavy pressing, or long cooking in sauce. Use gentler heat, add acid gradually, press for less time, and add paneer near the end of cooking.

Is paneer the same as cottage cheese?

Not exactly. Paneer is sometimes called Indian cottage cheese, but Western cottage cheese is loose and wet, while paneer is drained and pressed.

Can ultra-pasteurized or UHT milk be used for paneer?

It may work sometimes, but it is not the best choice. Ultra-pasteurized and UHT milk can form weak, grainy, or unreliable curds. For your first batch, use full-fat, non-UHT milk if you can.

Can lactose-free milk be used for paneer?

Lactose-free dairy milk can work if it is full-fat and not UHT or ultra-pasteurized. Check the carton carefully, because some lactose-free milks are processed for long shelf life and may curdle less reliably.

What should I do with leftover whey?

Use whey in doughs, dals, soups, curries, rice, oats, or grains. You can also freeze it in small portions. If the whey is very sour, use it in recipes where a slight tang makes sense.

How long does homemade paneer last?

Homemade paneer tastes best the day it is made. Refrigerate it for 2–3 days, covered or submerged in fresh cold water. Change the water daily if storing submerged. Freeze for up to 1 month for best texture.

When should paneer be added to curry?

Add paneer near the end of cooking. The sauce should already be cooked and seasoned. Once the paneer goes in, simmer gently for a few minutes so it warms through without becoming tough.

Final Thought

Once you learn how to make paneer at home, the process becomes less about doing something complicated and more about reading what the milk is telling you. Use milk that curdles cleanly, heat it gently, add only enough acid, and press the curds for the dish in front of you.

After one good block, paneer stops feeling like a specialty-store ingredient. It becomes something you can make when a curry needs soft cubes, a wrap needs a filling, or a quick vegetarian meal needs something fresh, milky, and satisfying.
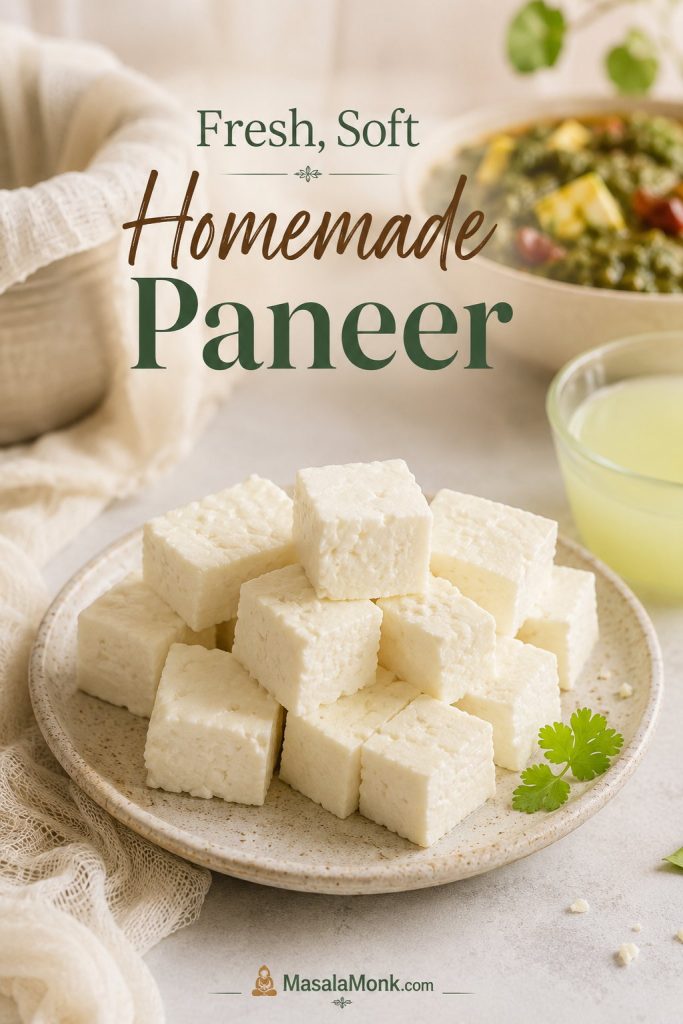
Fresh homemade paneer cubes on a ceramic plate with muslin, pale whey, and a blurred curry or greens in the background.
Good homemade paneer should feel simple by the end: clean curds, gentle pressing, soft cubes, and a fresh milky texture ready for the dish you want.

Back to top

Posted on — Leave a comment

Pav Bhaji Masala Recipe: Homemade Powder, Best Brands & Substitutes

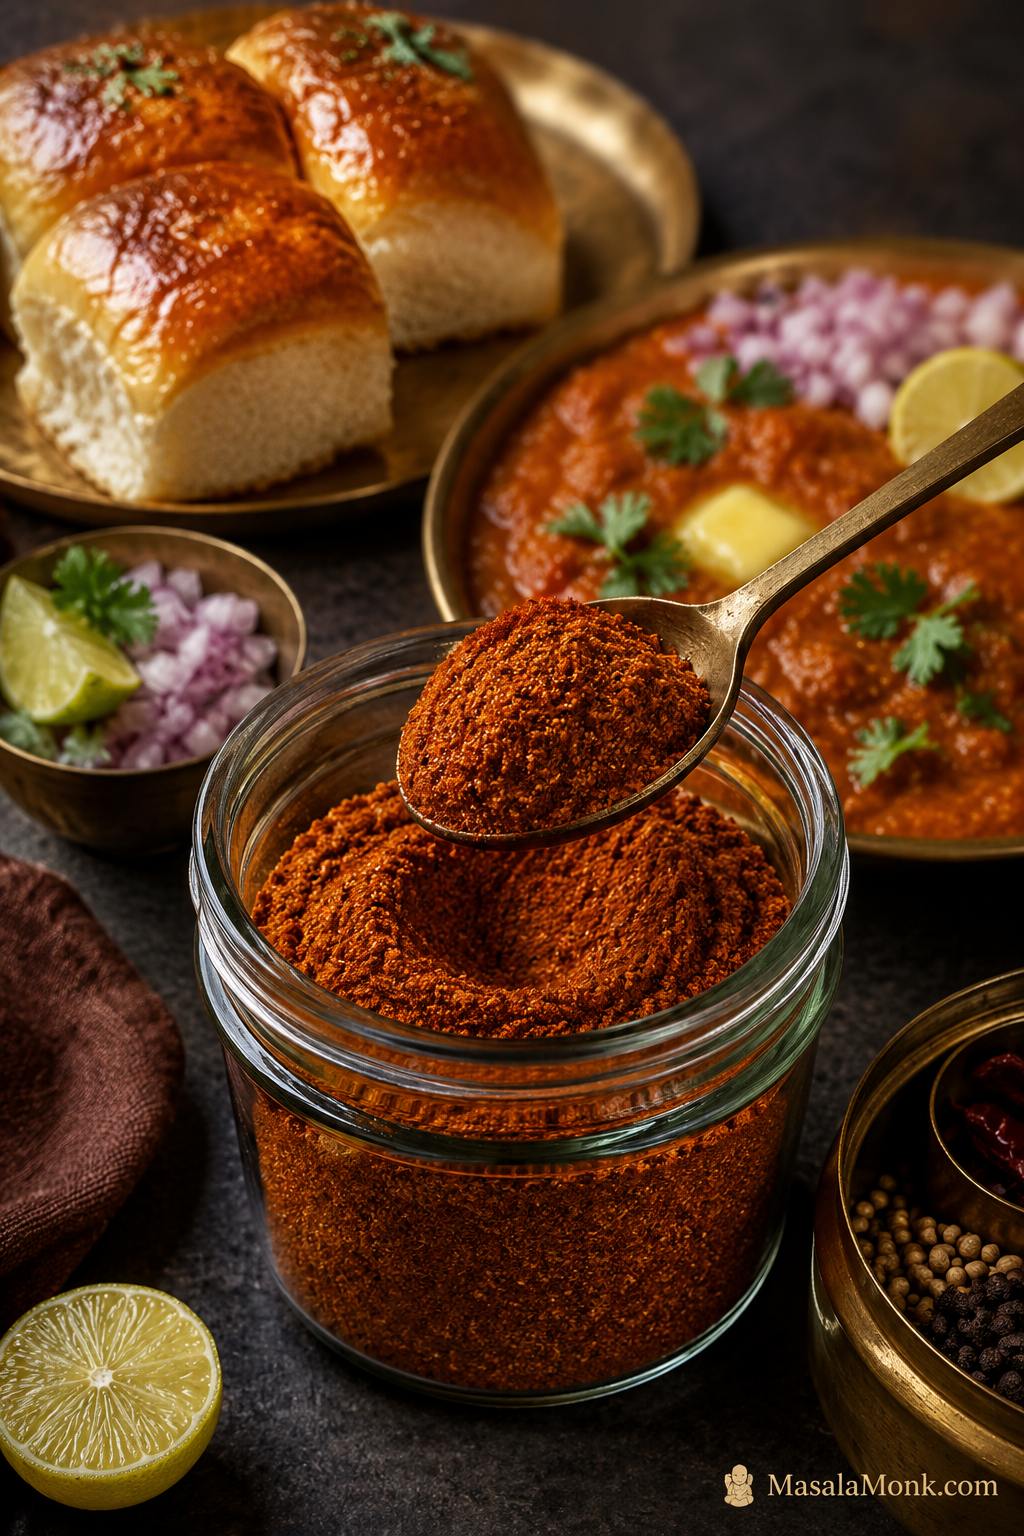
Glass jar of reddish-brown homemade pav bhaji masala with a spoon of spice powder, served beside pav bhaji, buttered pav, onion, lemon, and coriander.

A good pav bhaji masala recipe is often the difference between a pan of mashed vegetables and bhaji that actually tastes like pav bhaji. With the right blend, the dish gets its tang, color, warmth, Mumbai-style aroma, and that buttery, chatpata depth people keep trying to recreate at home.

The confusing part is that this masala is not one fixed thing. One packet may taste too salty. Another may taste flat. A homemade batch can smell wonderful but turn bitter if the spices are roasted too hard. Sometimes the bhaji looks pale, tastes dusty, or never gets that deep snack-shop finish no matter how much powder you add.

So instead of stopping at a spice list, let’s solve the whole problem: how to make the blend fresh, how much to use, which store-bought options are worth trying, what to use in an emergency, and how to get bhaji that tastes warm, tangy, buttery, and rounded instead of flat, dusty, or over-spiced.

The good news is that pav bhaji is forgiving. You do not need the “one true” packet or a perfect spice shelf. You need a blend with warmth and tang, enough butter and tomato to carry it, and the patience to let the bhaji simmer before you decide what is missing.

The goal is that familiar first bite: soft pav, glossy bhaji, butter on top, onion and lemon on the side, and a masala flavor that feels deep without tasting muddy.

Quick Answer: Homemade or Store-Bought Pav Bhaji Masala?

The best choice depends on what you need. If you want the freshest aroma and full control over salt, heat, and tang, make the homemade blend below. If you want convenience, a good packet works well, but every brand has a different strength.

Best choice Use it when
Homemade blend Best for fresh aroma, less hidden salt, and better control over chilli, tang, and warmth.
Everest Pav Bhaji Masala Familiar, easy to find, and useful as a first packet.
Badshah Pav Bhaji Masala Bolder and more Mumbai-style in direction.
MDH Pav Bhaji Masala Classic household masala-box choice.
Organic Tattva or Pure & Sure Useful for kitchens that already prefer organic spice blends.
Homemade pav bhaji masala in a glass jar, neutral packet-style masala, and finished pav bhaji arranged as a decision guide.
Homemade masala gives you control over salt, heat, and tang; meanwhile, a good packet helps when convenience matters and time is short.

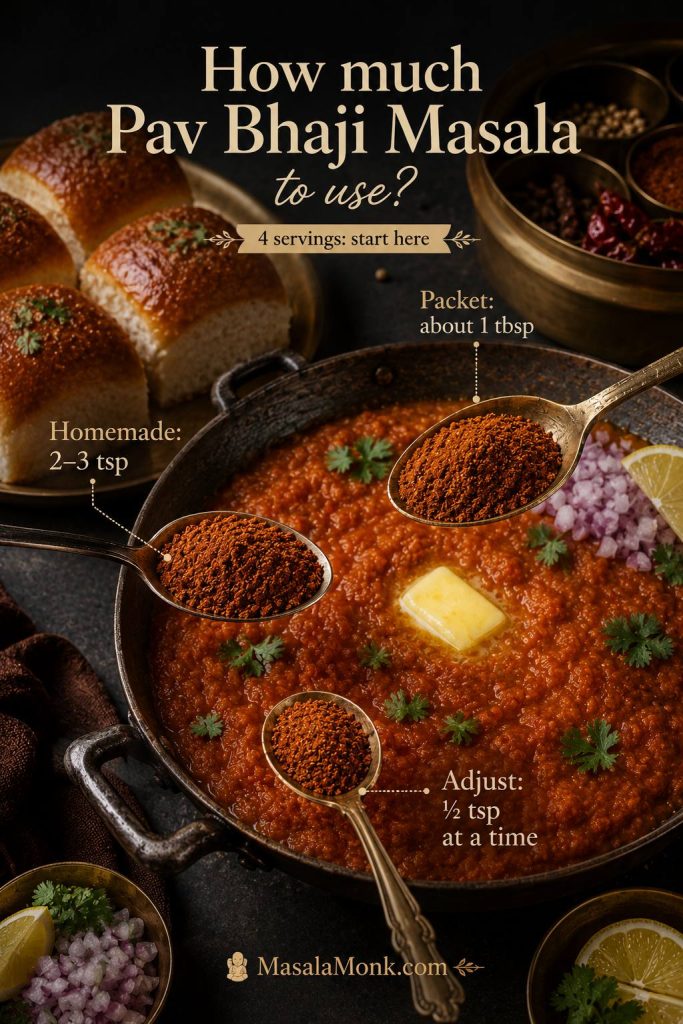
For 4 servings of pav bhaji, start with 2–3 teaspoons homemade masala or about 1 tablespoon store-bought masala. Cook it into the tomatoes and butter, simmer with the vegetables, then add more only in small ½-teaspoon steps if the flavor still feels weak.

What Is Pav Bhaji Masala?

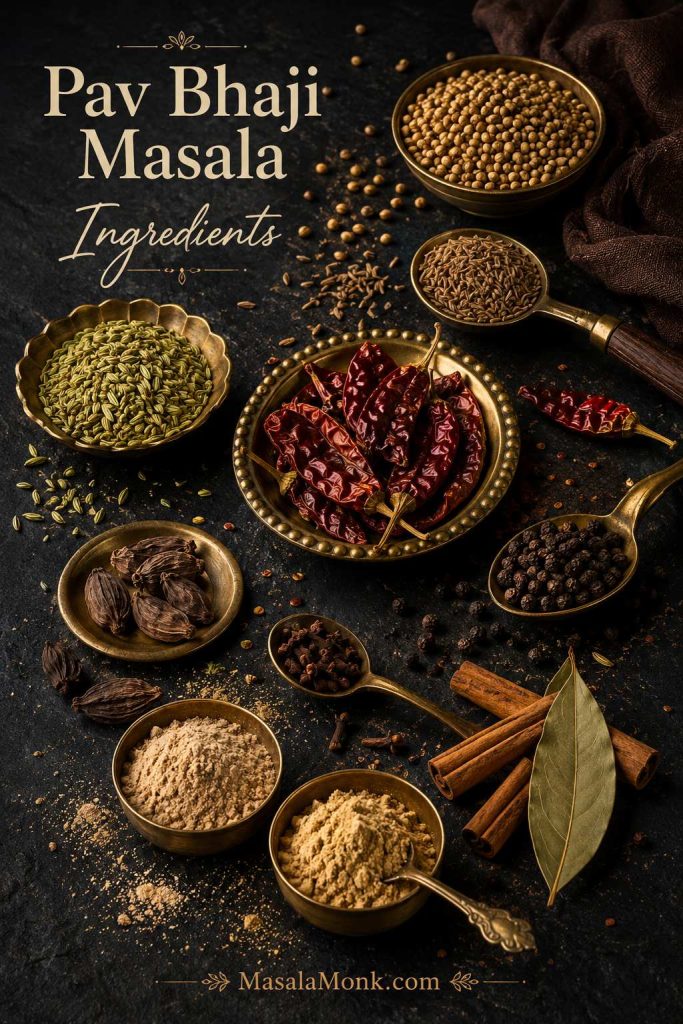
Pav bhaji masala is a spice blend made for pav bhaji, the Mumbai street-food dish of mashed vegetables cooked with tomatoes, butter, chillies, and spices, then served with toasted pav. The blend usually includes coriander, cumin, fennel, dried red chillies, black pepper, cinnamon, cloves, black cardamom, bay leaf, amchur, dry ginger, and sometimes stone flower, black salt, mace, nutmeg, turmeric, or other warming spices.

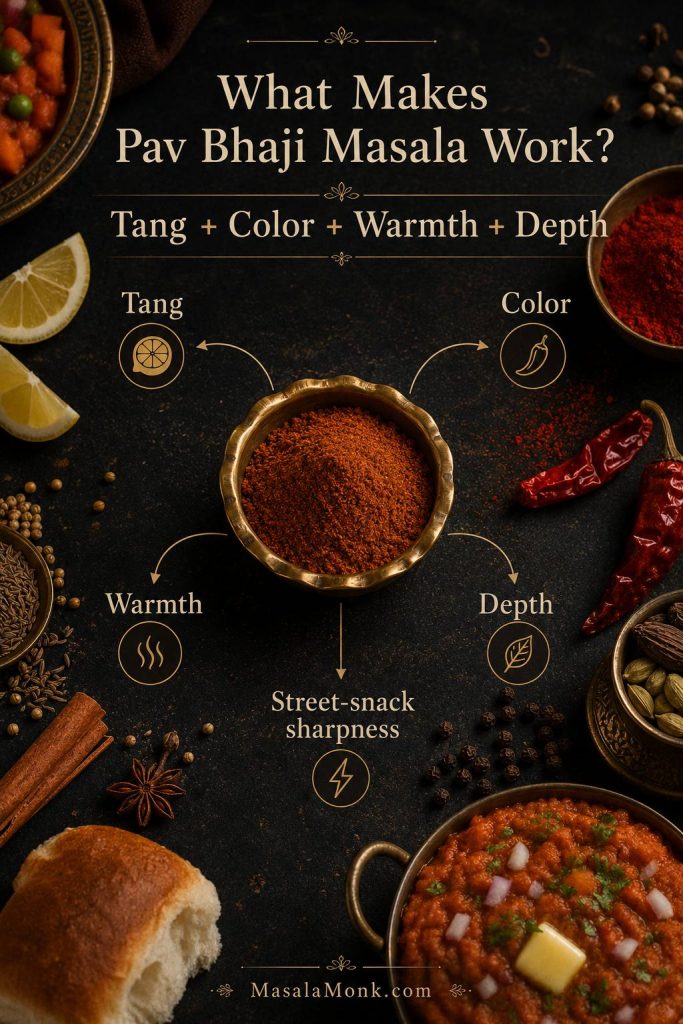
Bowl of pav bhaji masala surrounded by flavor labels for tang, color, warmth, depth, and street-snack sharpness.
Pav bhaji masala works because it is not only spicy; it balances tang, color, warmth, and depth against potatoes, tomatoes, butter, and pav.

Garam Masala vs Pav Bhaji Masala

It is not the same as garam masala. Garam masala can make bhaji warm, but it will not give the same tangy, red-orange, street-snack profile on its own. This blend is sharper, brighter, and built to stand up to potatoes, tomatoes, butter, and bread.

Diagonal comparison of darker garam masala and redder pav bhaji masala with a small pav bhaji serving cue.
Garam masala can warm the pan, but pav bhaji masala adds the chilli color, amchur tang, and snack-style sharpness that bhaji needs.

If garam masala is all you have, do not use it alone; jump to the emergency pav bhaji masala substitute for a better balance of color, tang, and warmth.

If you want to understand the broader warm-spice base first, MasalaMonk’s authentic Indian garam masala recipe is a helpful companion. Some spices overlap, but the goal here is tangier, sharper, and more snack-focused.

Simple way to understand it: garam masala adds general warmth. Pav bhaji masala adds the specific bhaji flavor: tang from amchur, color from Kashmiri chilli, depth from whole spices, and chaat-like sharpness from black pepper, black cardamom, and optional stone flower.

Homemade vs Store-Bought Pav Bhaji Masala

Both homemade and store-bought masala can make excellent bhaji. Homemade gives you freshness and control. A ready-made blend gives you speed and consistency. The bigger question is how often you cook pav bhaji and how much control you want over salt, chilli, and tang.

Option Why it works Watch out for
Homemade Fresh aroma, adjustable chilli, no mandatory salt, and better control over tang and heat. Needs whole spices and a grinder. Over-roasted spices can turn bitter.
Store-bought Convenient, consistent, easy for quick cooking, and practical if you make pav bhaji casually. Brand strength varies across salt, heat, color, and tang.

Frequent pav bhaji cooks will get more value from a small homemade batch. For occasional cooking, a good packet is practical. Either way, the flavor depends not just on the spice mix but on whether it is cooked properly into the bhaji.

If you enjoy making spice blends from scratch, MasalaMonk’s authentic sambar masala recipe follows a similar make-ahead logic: roast carefully, cool fully, grind fresh, and store the powder dry.

Pav Bhaji Masala Ingredients

A good powder needs body, heat, tang, color, and depth. The ingredient list looks long, but most of the flavor comes from a few core spices. The optional spices are there for a deeper packet-style flavor or a more Mumbai-style finish.

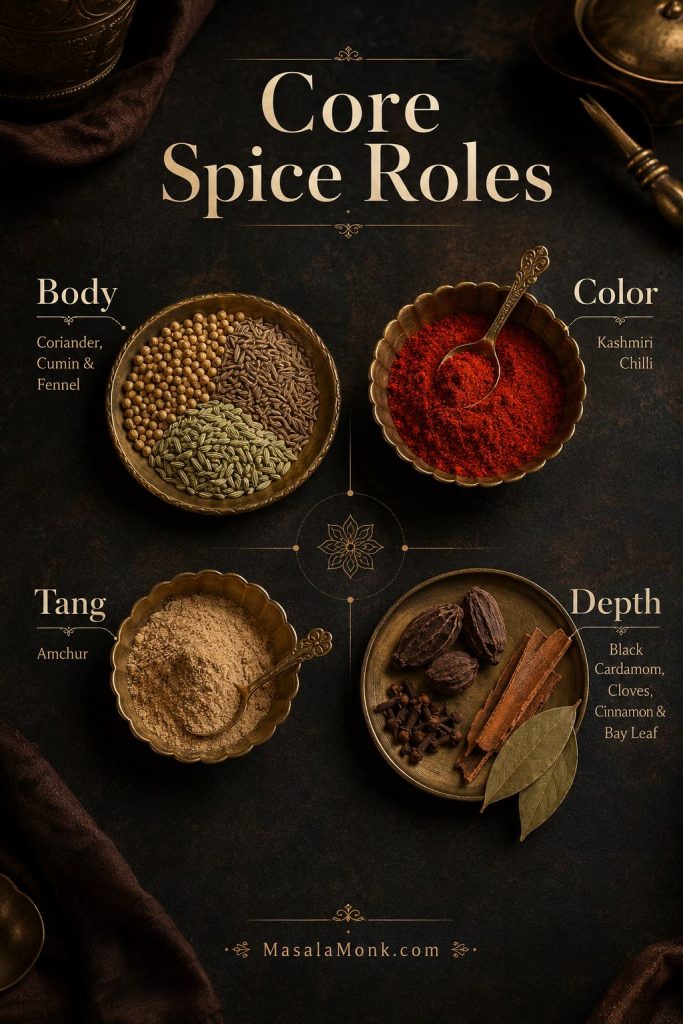
Think of the blend in layers: coriander and cumin build the body, chilli and amchur bring color and tang, and the darker spices add that deep background aroma that makes the bhaji taste rounded instead of plain.

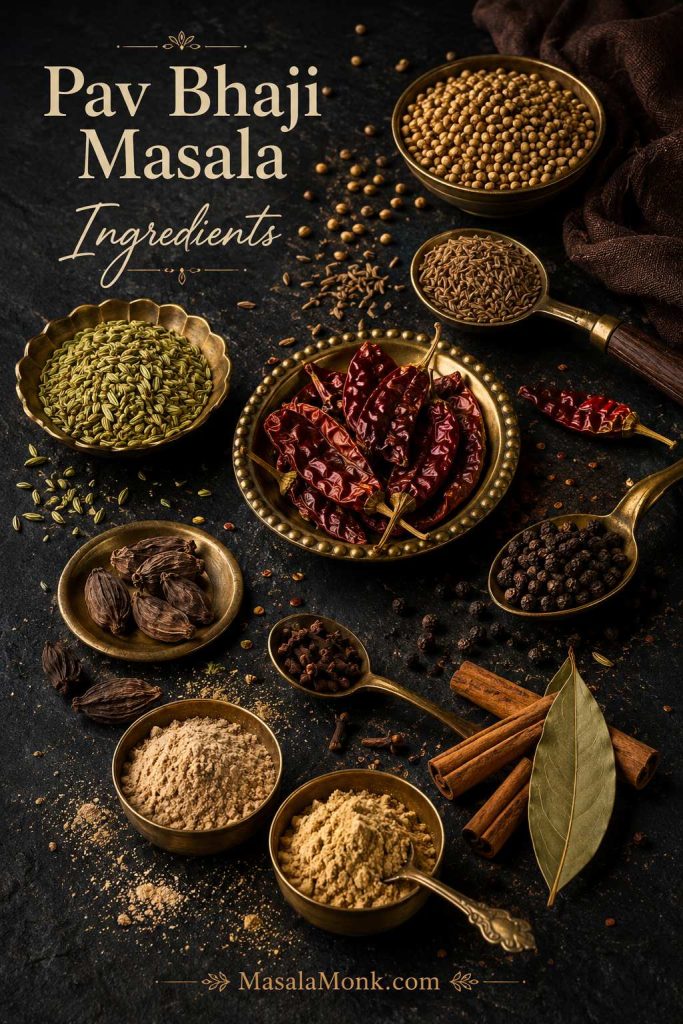
Pav bhaji masala ingredients including coriander seeds, cumin, fennel, Kashmiri chillies, amchur, dry ginger, black cardamom, cloves, cinnamon, and bay leaf.
The ingredient list looks long, yet each spice has a job: coriander for body, cumin for earthiness, Kashmiri chilli for color, and amchur for brightness.

Already have the spices ready? Go straight to the grams and spoon measurements or the step-by-step method.

Core Spices

Ingredient What it does
Coriander seeds Forms the body of the blend with citrusy, warm, slightly sweet flavor.
Cumin seeds Brings earthy tawa-style depth.
Fennel seeds Lifts the powder with a sweet aromatic note so it does not taste too heavy.
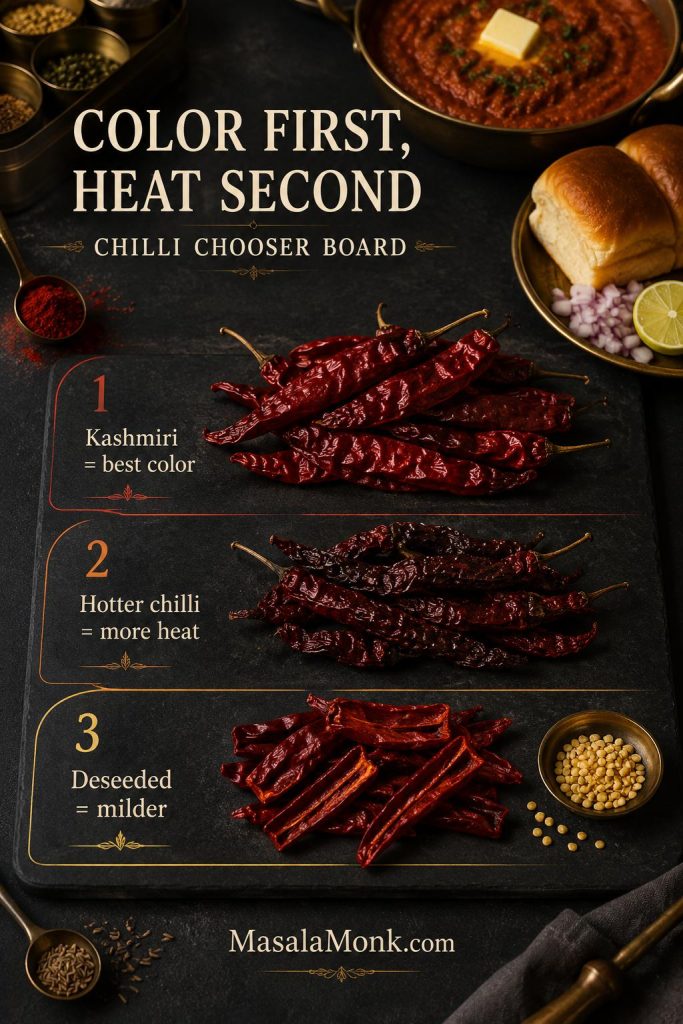
Kashmiri dried red chillies Gives red-orange color and mild heat. Use hotter chillies only if you want a spicier batch.
Black peppercorns Sharpens the heat in a way that works well with butter and potatoes.
Cinnamon and cloves Bring warm, sweet, intense spice notes. Both are strong, so use them carefully.
Black cardamom Creates smoky depth and a more pav bhaji stall-style aroma.
Bay leaf Builds background warmth and savory complexity.
Amchur powder Supplies the tang that separates this masala from garam masala.
Dry ginger powder Finishes the blend with warmth and a subtle dry spice note.
Core pav bhaji masala spices grouped by body, color, tang, and depth on a dark spice-pantry background.
Grouping spices by role makes the blend easier to adjust; instead of adding powder blindly, you can fix the flavor layer that is actually missing.

This blend is coriander-forward because pav bhaji needs body before it needs heat. Cumin and fennel keep the base earthy but not heavy, Kashmiri chillies give color without harshness, and amchur is added after roasting so the tang stays clean. The darker spices — black cardamom, cloves, cinnamon, bay leaf, and optional stone flower — should stay in the background. If they dominate, the bhaji tastes more like generic heavy masala than pav bhaji.

Street-Style Spices: Stone Flower, Amchur and Black Cardamom

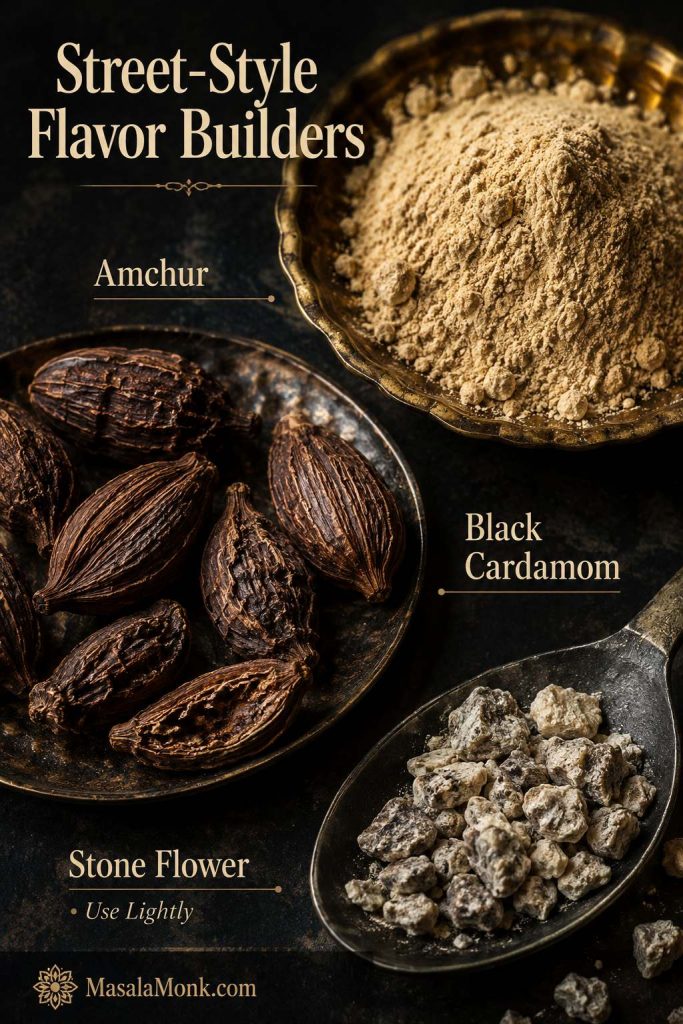
If you want the blend to lean more Mumbai-style, three ingredients matter most: amchur, black cardamom, and a tiny amount of stone flower, also called dagad phool or pathar phool.

Amchur gives tang. Black cardamom adds smoky depth. Stone flower gives a slightly smoky, earthy, restaurant-style note, but it is powerful and not always easy to use. If your stone flower smells dusty, muddy, or stale, skip it.

Close-up of amchur powder, black cardamom pods, and a small pinch of stone flower for street-style pav bhaji masala flavor.
Amchur, black cardamom, and stone flower can move the blend toward a street-style pav bhaji flavor, provided they stay in the background.

Optional Spices You Can Skip

  • Stone flower: good for depth, but optional and easy to overdo.
  • Mace or nutmeg: adds packet-style depth; use only a tiny pinch.
  • Black salt: gives a chaat-like savory note, but can make the blend salty.
  • Turmeric: helps color, but too much can taste earthy.
  • Star anise: adds sweet depth; one small piece is enough.
Important: salt is not mandatory in homemade pav bhaji masala. It is usually better to salt the bhaji separately, especially because store-bought masalas vary widely in salt level.

Do not let the long spice list scare you. Get the coriander-cumin base right, use Kashmiri chilli for color, add amchur for tang, and avoid burning the spices. That will get you much closer than simply adding garam masala to mashed vegetables.

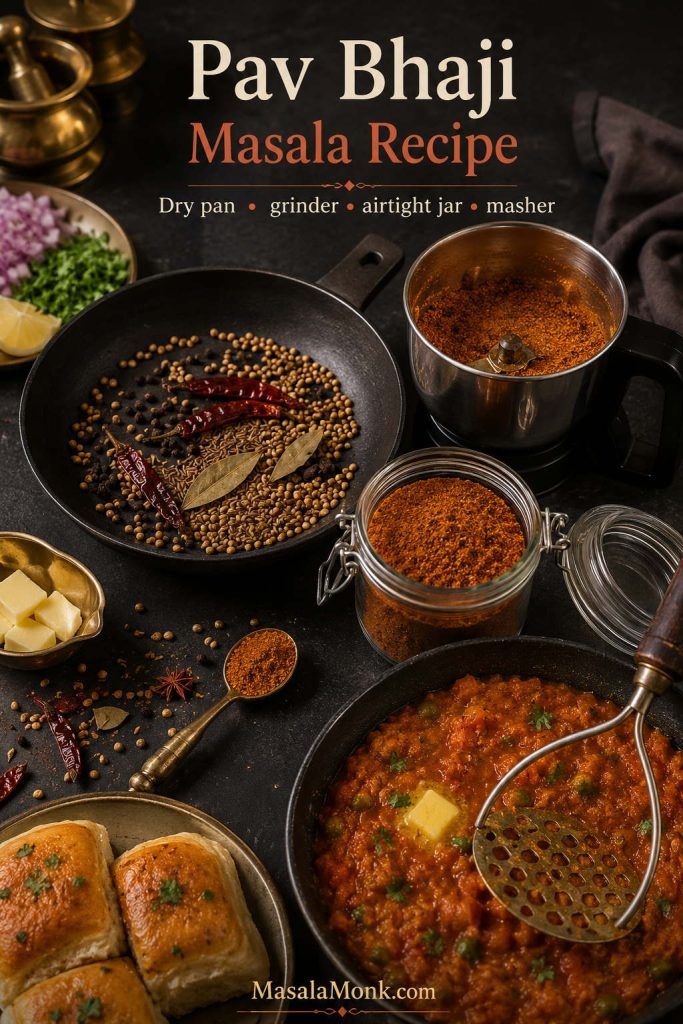
Homemade Pav Bhaji Masala Recipe

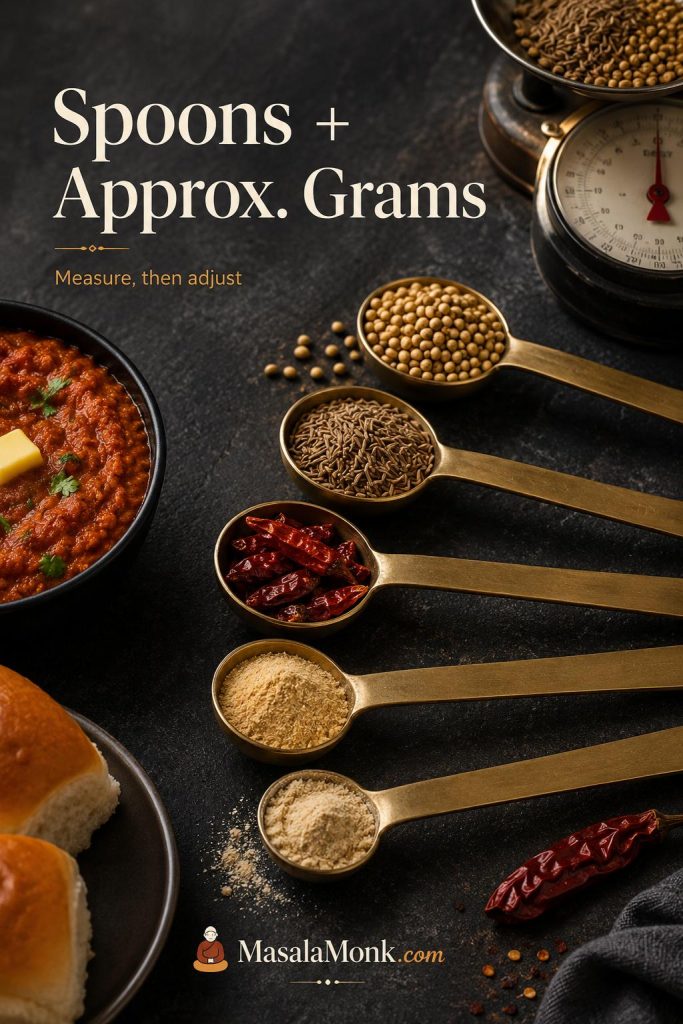
This homemade pav bhaji masala recipe makes a practical small batch: enough for several rounds of pav bhaji, but not so much that the jar sits around until the aroma fades. The spoon measures are the working recipe; the gram weights are approximate because whole spices vary in size and freshness.

I prefer making this as a small batch because the aroma is noticeably better in the first few weeks. Bigger batches are convenient, but once the powder starts smelling dull in the jar, the bhaji needs more help from butter, lemon, and fresh coriander.

Freshness matters: if your coriander, cumin, or chillies have been sitting open for a year, the masala will taste dull no matter how carefully you roast it. Use fresh-smelling whole spices for the best result.

Measurements in Grams and Spoons

Measuring spoons, kitchen scale, and pav bhaji masala spices arranged to show spoon measures and approximate gram measurement.
Spoon measures keep this pav bhaji masala recipe easy for everyday cooking; approximate grams help when you want the next homemade batch to taste consistent.
Ingredient Spoon measure Approximate grams
Coriander seeds 4 tbsp 20–24g
Cumin seeds 2 tbsp 12–14g
Fennel seeds 1 tbsp 6g
Dried Kashmiri red chillies 6–8 whole chillies 8–12g, depending on size
Black peppercorns 1½–2 tsp 4–5g
Cinnamon 1 stick, about 2 inches 2–3g
Cloves 8–10 cloves 2g
Black cardamom 2 pods 3–4g
Bay leaf 1–2 leaves 1g
Star anise 1 small piece 1g
Amchur powder 1 tbsp 7–8g
Dry ginger powder ½–1 tsp 1–2g
Turmeric powder, optional ½ tsp 1–2g
Black salt, optional ½ tsp 2–3g
Stone flower / dagad phool, optional Tiny pinch Less than 1g
Mace or nutmeg, optional Tiny pinch Less than 1g

Step-by-Step Method

1. Check and clean the spices

Pick through the whole spices and remove any stones, stems, dust, or stale pieces. Wipe chillies if needed. Avoid washing the spices unless you plan to dry them completely afterward, because moisture can make the powder clump or spoil faster.

2. Choose the chillies based on color and heat

Use Kashmiri dried red chillies if you want good color with mild heat. For a spicier batch, replace 1–2 Kashmiri chillies with a hotter dried chilli. For a family-friendly version, shake out some of the chilli seeds before roasting.

Kashmiri dried red chillies, hotter dried chillies, and deseeded chillies compared for color, heat, and mildness in pav bhaji masala.
Kashmiri chillies are the safest first choice because they build red-orange color without pushing the masala into harsh, overpowering heat.

3. Dry roast the whole spices on low heat

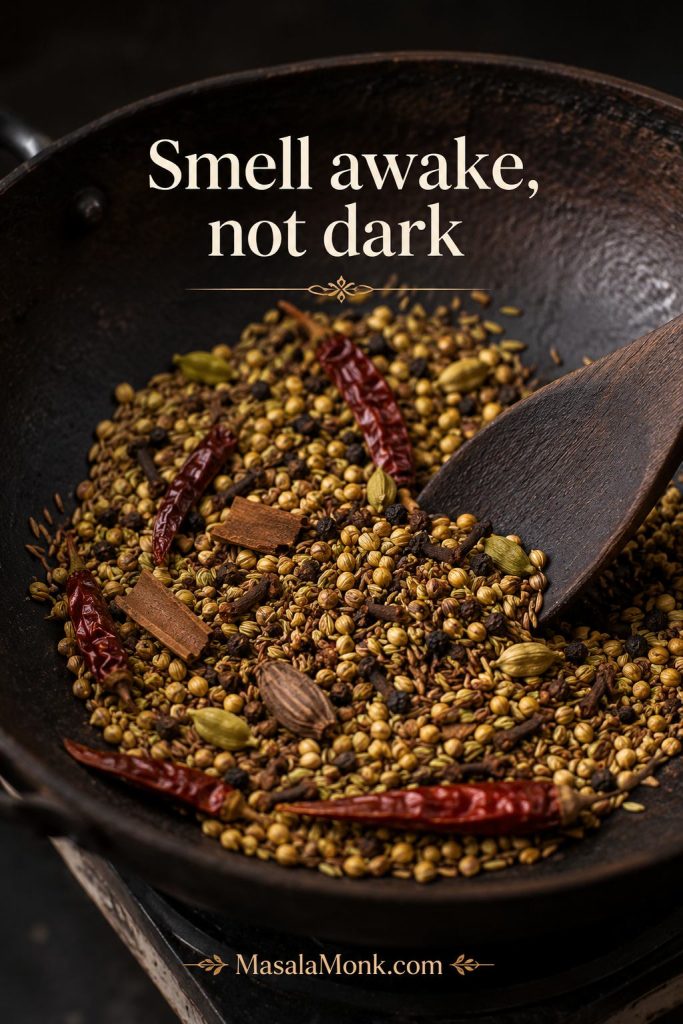
Heat a thick-bottomed pan on low to low-medium heat. Add coriander seeds, cumin seeds, fennel seeds, dried red chillies, black peppercorns, cinnamon, cloves, black cardamom, bay leaf, star anise, and optional stone flower.

Roast gently for 5–7 minutes, stirring often. Stop when the spices smell awake, not when they look dark. The coriander should smell warm, the chillies should look slightly deeper, and the whole pan should smell lively rather than smoky or scorched.

Whole spices dry roasting in a dark pan with coriander, cumin, fennel, dried red chillies, black cardamom, bay leaf, and cloves.
Dry roast the whole spices on low heat until they smell lively; if they darken too much, the finished powder can taste bitter.

If the chillies darken faster than the other spices, remove them from the pan early and keep roasting the coriander, cumin, and larger spices for another minute or two.

4. Cool completely before grinding

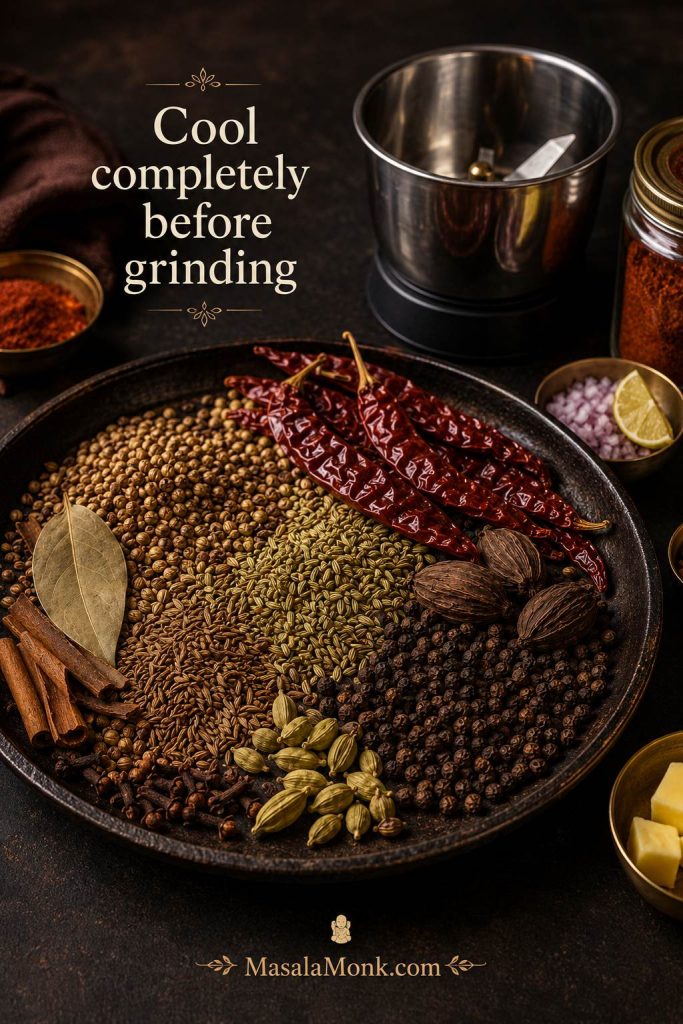
Transfer the roasted spices to a plate and let them cool fully for about 10 minutes. This is not a fussy step. Warm spices can trap steam in the grinder, dull the aroma, and make the powder clumpy.

Roasted pav bhaji masala spices cooling on a dark tray with a mixer grinder jar waiting nearby.
Cooling the roasted spices first prevents trapped steam, dull aroma, and clumps, which is especially important for homemade pav bhaji masala powder.

5. Add the powdered spices after cooling

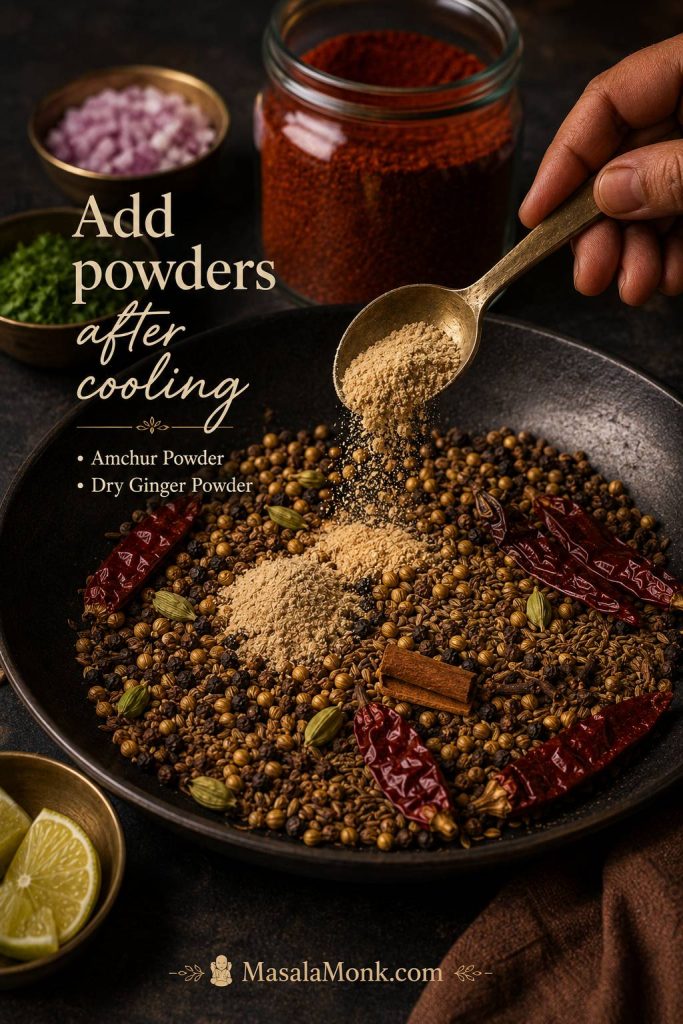
Once the roasted spices are cool, add amchur powder, dry ginger powder, optional turmeric, optional black salt, and optional mace or nutmeg. These powdered spices can scorch quickly, so they are better added after the pan step.

Amchur powder and dry ginger being added to cooled roasted spices before grinding pav bhaji masala.
Add amchur and dry ginger after roasting so the tang stays clean; otherwise, powdered spices can scorch and make the blend taste muddy.

6. Grind in short pulses

Grind the mixture in a dry spice grinder or the dry jar of a mixer grinder. Pulse a few times first, then grind until fine. Avoid running the grinder continuously for too long because heat can dull the aroma.

The finished powder should smell warm, tangy, and rounded. If it smells harsh, burnt, or dusty, the spices were likely stale or roasted too aggressively.

7. Sieve if needed

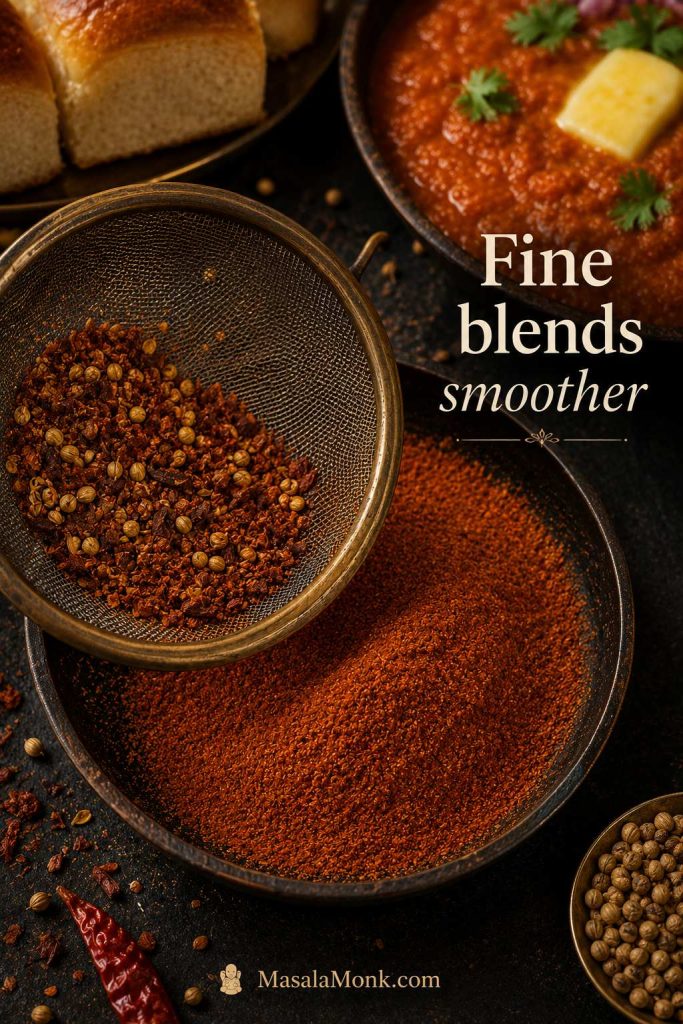
If the powder is coarse, pass it through a sieve and regrind the larger bits. A slightly coarse texture is still usable, but a finer powder blends more smoothly into bhaji.

Fine reddish-brown pav bhaji masala powder compared with coarse spice bits caught in a sieve.
Fine pav bhaji masala powder blends smoothly into tomatoes, butter, and mashed vegetables, while coarse bits can leave the bhaji tasting uneven.

8. Store in an airtight jar

Transfer the powder to a clean, dry, airtight glass jar. Keep it away from heat, sunlight, steam, and wet spoons.

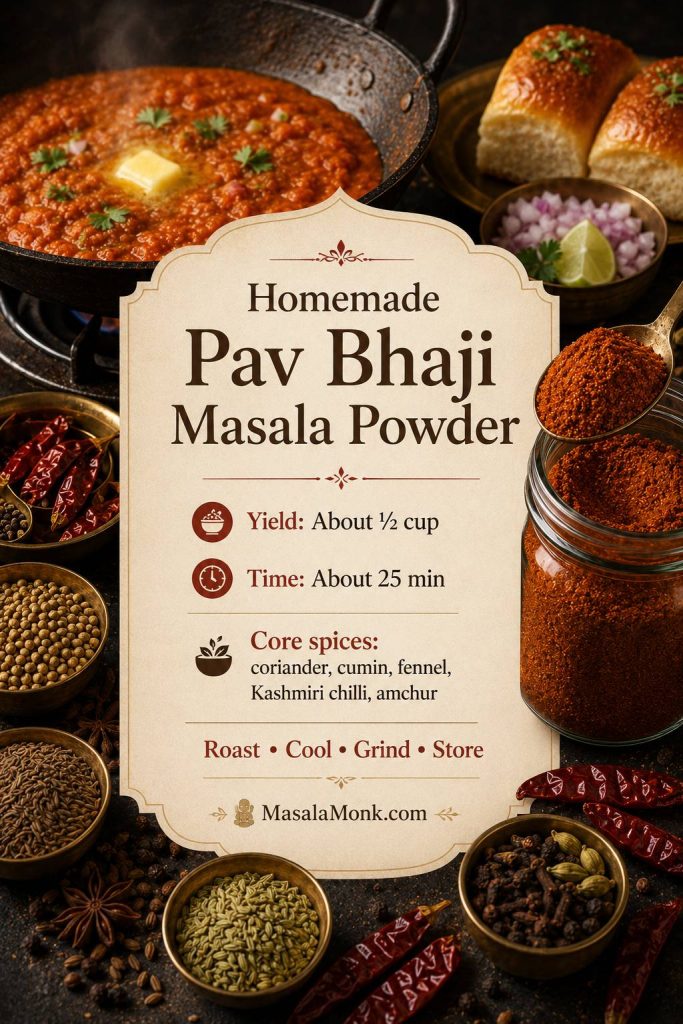
Recipe Card: Homemade Pav Bhaji Masala Powder

YieldAbout ½ cup / 75–90g
Prep Time10 minutes
Roast + Cool5–7 min roast + 10 min cool
Total TimeAbout 25 minutes

Ingredients

  • 4 tbsp coriander seeds
  • 2 tbsp cumin seeds
  • 1 tbsp fennel seeds
  • 6–8 dried Kashmiri red chillies
  • 1½–2 tsp black peppercorns
  • 1 cinnamon stick, about 2 inches
  • 8–10 cloves
  • 2 black cardamom pods
  • 1–2 bay leaves
  • 1 small star anise
  • 1 tbsp amchur powder
  • ½–1 tsp dry ginger powder
  • ½ tsp turmeric powder, optional
  • ½ tsp black salt, optional
  • Tiny pinch stone flower / dagad phool, optional
  • Tiny pinch mace or nutmeg, optional

Method

  1. Check and clean the spices.
  2. Choose Kashmiri chillies for color and adjust seeds for heat.
  3. Dry roast the whole spices on low to low-medium heat for 5–7 minutes.
  4. Cool the roasted spices completely for about 10 minutes.
  5. Add amchur, dry ginger, and optional powdered spices.
  6. Grind in short pulses until fine and aromatic.
  7. Sieve and regrind coarse bits if needed.
  8. Store in a clean airtight glass jar.

Notes

  • For 4 servings of pav bhaji, start with 2–3 teaspoons of this homemade blend.
  • Use Kashmiri chillies for color and mild heat. Add hotter chillies only if you want a spicier version.
  • If the chillies darken too quickly while roasting, remove them early and continue roasting the sturdier spices.
  • Add amchur, dry ginger, turmeric, black salt, mace, and nutmeg only after the roasted whole spices cool. Powdered spices can scorch quickly in the pan.
  • The final weight can vary because dried chillies, bay leaves, cardamom pods, and grind fineness all change the volume and weight of the powder.
  • Skip black salt if you prefer to adjust salt separately in the bhaji.
  • For a brighter red-orange bhaji, use Kashmiri chilli rather than extra turmeric.
Saveable homemade pav bhaji masala recipe card with yield, timing, core spices, and roast-cool-grind-store method.
A small-batch homemade masala usually stays more aromatic than a large jar kept for months, especially when it is stored dry and airtight.

How Much Pav Bhaji Masala to Use

This is where many pav bhaji recipes become confusing. Homemade powder, Everest-style masala, Badshah-style masala, MDH-style masala, and organic blends do not all have the same strength. One packet may be saltier, another may taste sharper, a third may run hotter, and milder blends may need more quantity to show up in the bhaji.

Measurement guide showing homemade pav bhaji masala, packet masala, and half-teaspoon adjustment amounts for four servings.
For 4 servings, treat the amount as a starting point, not a final verdict; pav bhaji masala tastes more balanced after it simmers.
Masala type Starting amount for 4 servings Adjustment note
Fresh homemade blend 2–3 tsp Use ½ tsp more only if the bhaji still tastes flat after simmering.
Store-bought blend 1 tbsp Start lower if the brand is salty, hot, or very strong.
Strong/chatpata brand 2 tsp–1 tbsp A little can dominate quickly, so build the flavor gradually.
Milder brand 1 tbsp The bhaji may need ½–1 tsp more after the vegetables cook down.
Final adjustment ½ tsp at a time Use only after the raw spice taste has cooked out.

If the bhaji tastes almost right but still dull, pause before adding another spoon of powder. Usually the missing piece is butter, salt, lemon, or simmering time. When the pan is already salty, reach for butter, tomato, lemon, coriander, or unsalted homemade powder before adding more packet masala.

If the amount looks right but the bhaji still tastes flat, raw, dusty, or too salty, go to the flavor and texture fixes before adding more powder.

The same measured-spice logic works in simple vegetable dishes too. For example, a dry potato-and-cauliflower dish like MasalaMonk’s easy aloo gobi recipe also depends on letting spices coat the vegetables properly instead of tasting raw on the surface.

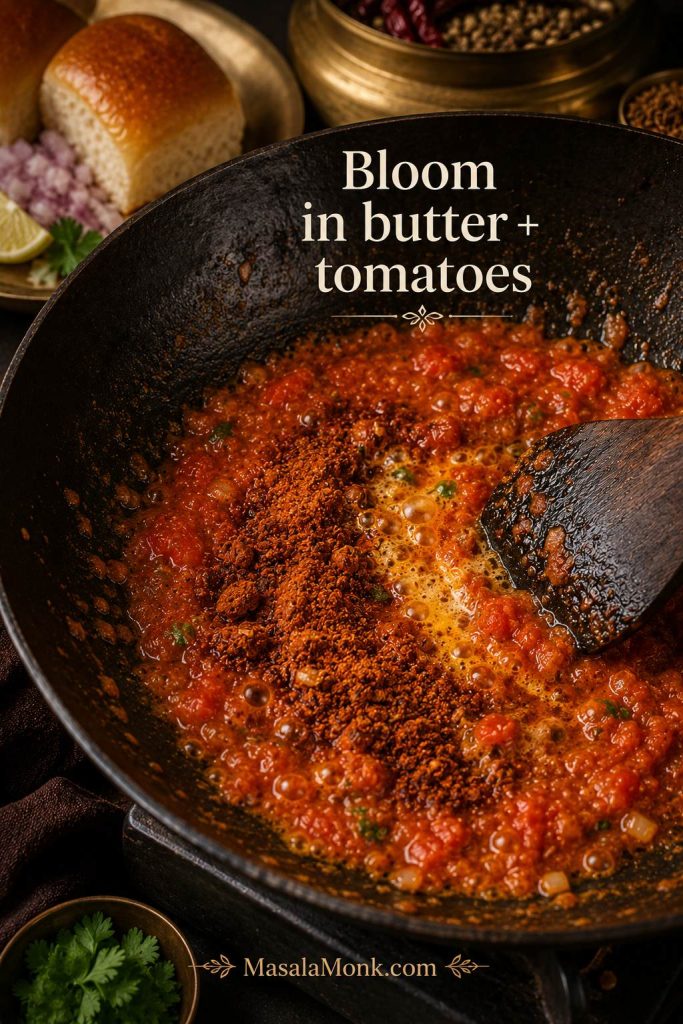
How to Bloom Pav Bhaji Masala in the Bhaji

The timing matters. The blend tastes best when it is cooked into the bhaji, not sprinkled over the finished dish like a garnish.

  1. Cook onions, garlic, tomatoes, and capsicum until the tomatoes soften and the pan looks glossy.
  2. Add butter or oil, then add the masala.
  3. Fry for 30–60 seconds on medium-low heat so it blooms without burning.
  4. Add the boiled vegetables and mash everything together.
  5. Simmer for 5–10 minutes before deciding whether the flavor needs anything else.
Pav bhaji masala blooming in butter and softened tomatoes in a dark pan with a spatula stirring the glossy red-orange base.
Bloom the masala before adding vegetables so the tomato, butter, and spice taste like one cooked base instead of separate layers.

This is the moment the powder turns into bhaji flavor: the tomatoes look glossier, the butter carries the spice, and the raw edge disappears. If the bhaji tastes like raw spice powder, the masala was probably added too late or not cooked long enough with the tomatoes and butter.

When it is right, the pan stops smelling like separate tomato and spice powder and starts smelling like pav bhaji.

What Good Pav Bhaji Masala Should Do in Bhaji

When the masala is working, the bhaji should not taste like separate potatoes, tomatoes, and spice powder. It should taste cohesive: warm from the whole spices, tangy from amchur or lemon, rounded by butter, and bright enough that one buttered pav is never quite enough.

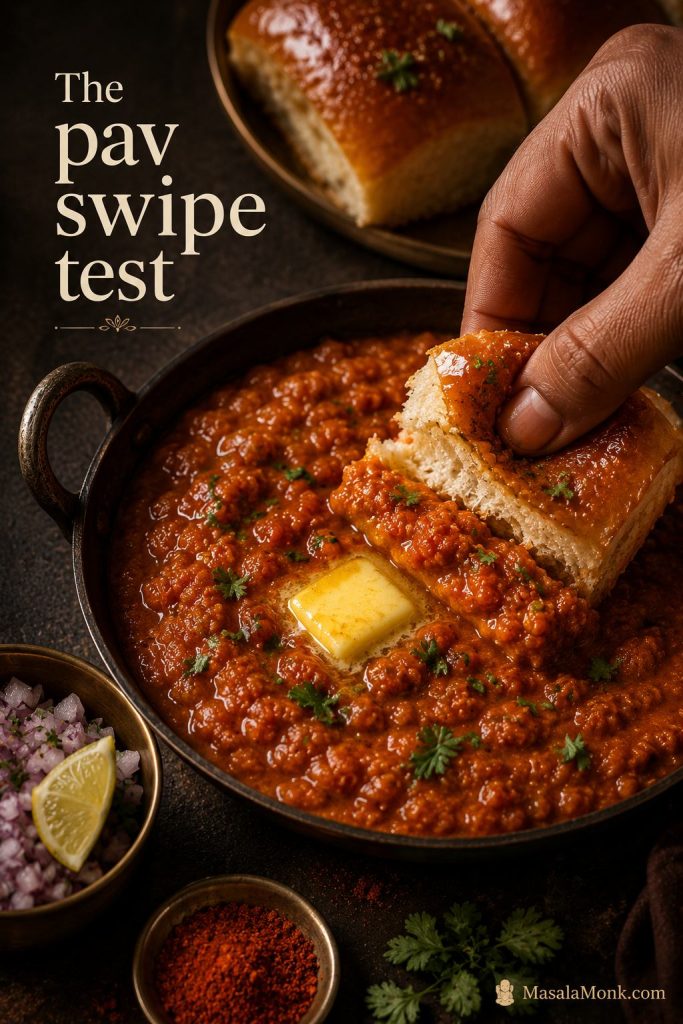
Buttered pav being swiped through glossy red-orange pav bhaji with onion, lemon, coriander, and melted butter.
The pav swipe test tells you if the masala worked: the bhaji should cling to the bread as a glossy, buttery mash with tang and depth.

A heavy-tasting bhaji usually needs acid or freshness. Sharp, powdery flavor means the powder needs more time in the pan. When the bhaji tastes rich but sleepy, add lemon, coriander, or a tiny final pinch after the main cooking is done.

The moment it comes together is easy to recognize: the bhaji looks glossy, the masala stops smelling raw, the butter rounds the edges, and the lemon-onion-coriander finish makes the whole pan taste brighter.

How to Store Pav Bhaji Masala

A homemade batch tastes best when it is fresh. Whole spices keep their aroma longer than ground spices, so once you grind the blend, storage matters.

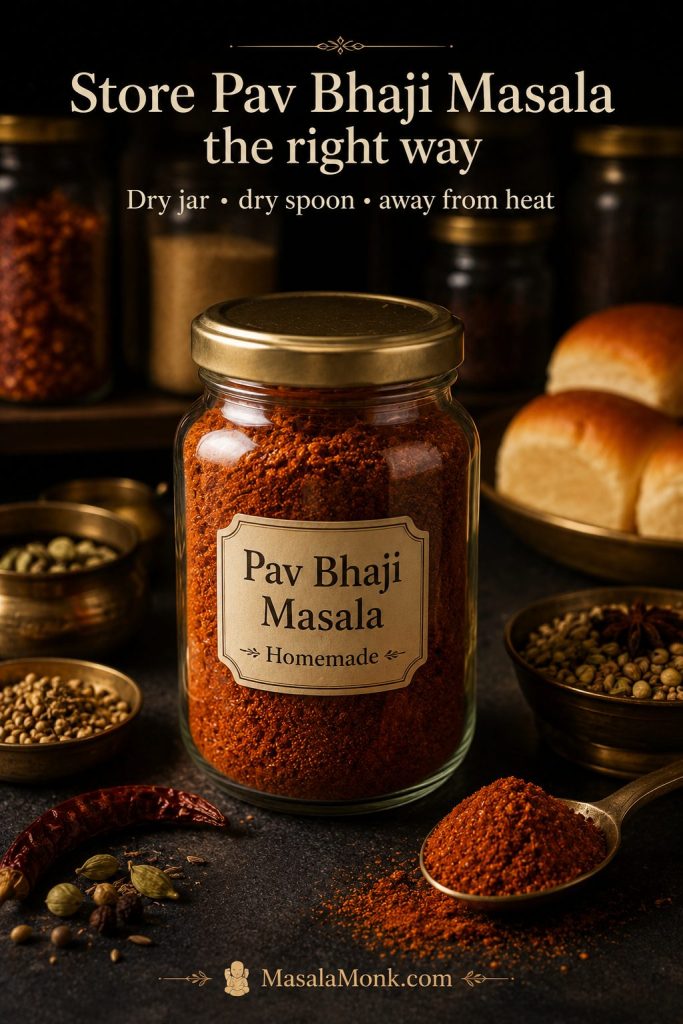
Homemade pav bhaji masala stored in a clean airtight glass jar with a dry spoon on a dark pantry-style surface.
A dry spoon matters as much as the jar; even a little steam can turn homemade pav bhaji masala dull and clumpy.
  • Use a clean, dry, airtight glass jar.
  • Keep the jar away from stove heat, sunlight, and steam.
  • Always use a dry spoon.
  • Make smaller batches if you do not cook pav bhaji often.
  • Use within 2–3 months at room temperature for best aroma.
  • Refrigerate up to about 6 months if tightly sealed.
  • If freezing, seal well so the powder does not absorb freezer smells.

A dull-smelling masala will taste dull in the bhaji too. For freezer storage, let the container come closer to room temperature before opening it so condensation does not hit the powder.

If your stored masala has clumped, faded, or started tasting bitter, check the color, bitterness, and storage fixes.

Best Pav Bhaji Masala Brands in India

A packet can still make excellent bhaji when it suits your taste and you cook it properly. The trick is not chasing the loudest masala on the shelf, but choosing one that matches the kind of bhaji you like: mild and familiar, bolder and more Mumbai-style, lower-salt, organic, or simply easy to find.

Pav bhaji pan surrounded by neutral labeled spice bowls and packet silhouettes for Everest, Badshah, MDH, Tata, and organic masala options.
Treat store-bought pav bhaji masala as a flavor choice: familiar, bolder, organic, lower-salt, or simply easier to find.

Store-bought pav bhaji masala is useful when you want convenience or do not keep many whole spices at home. Choose by flavor style, not by hype: familiar all-rounder, bolder Mumbai-style, classic household, organic option, or easy backup. This is a practical buying guide, not a blind taste-test ranking, so treat these as starting points.

Affiliate note: As an Amazon Associate, MasalaMonk earns from qualifying purchases. Some links below are affiliate links, which means MasalaMonk may earn a commission at no extra cost to you. The recommendations are limited to spice blends, storage jars, and tools that directly help with homemade pav bhaji masala or the bhaji you make from it.

Everest and Badshah are the strongest starting recommendations: Everest for the most familiar all-rounder direction, Badshah when your bhaji usually tastes too mild. MDH fits the classic pantry lane, while Tata, Catch, MTR, Suhana, Shan, and Zoff are better treated as availability or preference picks. Even the best packet still needs the same basics: cooked tomatoes, enough butter, proper mashing, and a final lift of lemon or coriander.

Whichever packet you buy, choose sealed, clearly labelled masala from a source you trust. Avoid loose ground spice blends if you cannot judge freshness, storage, or handling; FSSAI’s safe ground spices guidance is a useful reminder that ground spices need proper packaging and quality control.

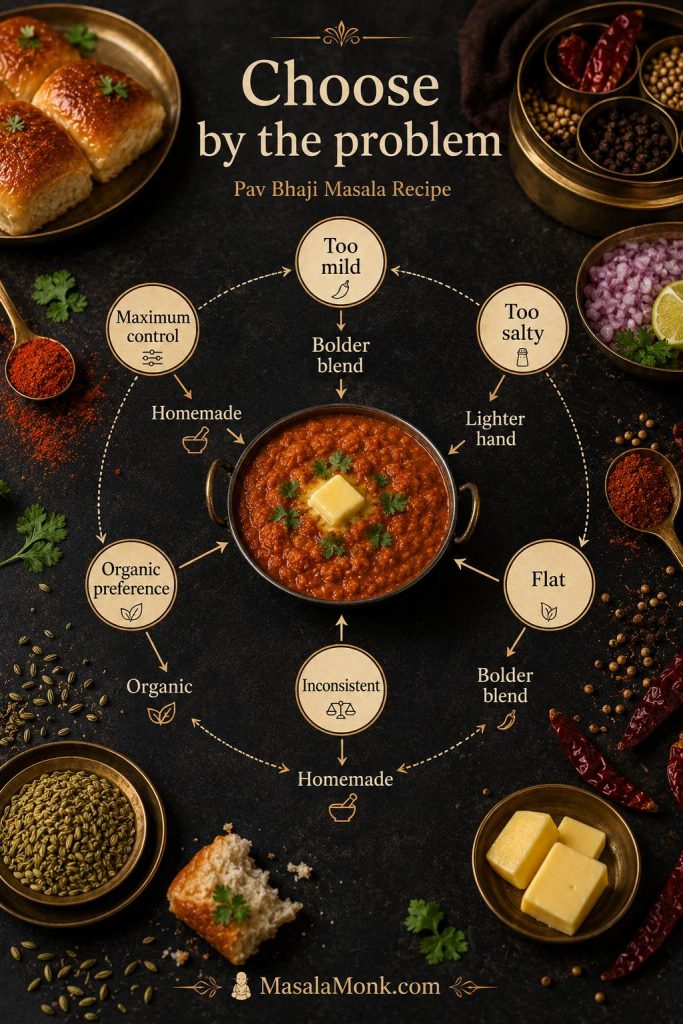
Choose by Flavor Problem

Decision wheel for choosing pav bhaji masala by flavor problem, including too mild, too salty, flat, inconsistent, organic preference, and maximum control.
Choose by the problem first: a salty bhaji needs control, a mild bhaji needs bolder flavor, and an inconsistent bhaji needs reliability.
If your bhaji usually tastes… Choose this direction
Too mild or too home-style Badshah-style bolder blend
Flat but not especially spicy Everest or Badshah direction
Too salty with packets Homemade blend, or use a lighter hand with any packet
Good but inconsistent Everest/MDH/Tata-style familiar packet
Organic matters more than a street-style profile Organic Tattva or Pure & Sure
You want maximum salt and heat control Homemade batch

Quick Brand Picks

Quick pick Brand Best for
Familiar all-rounder Everest Pav Bhaji Masala One easy, recognizable first packet.
Bolder Mumbai-style direction Badshah Pav Bhaji Masala For bhaji that needs a stronger masala push.
Classic household option MDH Pav Bhaji Masala A traditional Indian masala-box brand.
Easy mainstream backup Tata Sampann Pav Bhaji Masala A convenient pantry option for occasional use.
Organic option Organic Tattva / Pure & Sure For kitchens that already prefer organic spices.

Use Everest when you want the safest familiar profile, Badshah when your bhaji usually tastes too mild, MDH when you want a classic pantry option, and Tata or other backups when availability matters more than a specific street-style profile.

Everest vs Badshah Pav Bhaji Masala

Use this comparison as a flavor-direction shortcut, not as a hard ranking. Everest is the safer familiar lane, while Badshah is better when the bhaji needs a stronger snack-shop push.

Everest-style and Badshah-style pav bhaji masala compared with two pans of pav bhaji showing familiar balanced flavor and bolder snack-shop flavor.
Choose Everest when you want a familiar, balanced packet; choose Badshah when your bhaji tastes too mild and needs a bolder Mumbai-style push.

Main Store-Bought Options

Everest is the familiar all-rounder to start with if you want a recognizable, easy-to-find packet. Check Everest Pav Bhaji Masala 100g on Amazon.

Badshah is the better direction if you want a bolder, more snack-shop profile. Check Badshah Pav Bhaji Masala 100g on Amazon.

MDH fits the classic masala-box lane: familiar, straightforward, and easy to keep in the pantry. Check MDH Pav Bhaji Masala 100g on Amazon.

Tata Sampann is an easy mainstream backup for occasional pav bhaji, tawa pulao, or quick masala pav. Check Tata Sampann Pav Bhaji Masala 100g on Amazon.

Other Store-Bought Options

Catch, MTR, Suhana, Shan, and Zoff are useful backup options when they are easier to find, better priced, or already familiar in your pantry. They are not essential to buy if you already have a fresh packet that works for your taste.

Backup options: Catch, MTR, Suhana, Shan, and Zoff.

Organic Pav Bhaji Masala Options

Choose Organic Tattva or Pure & Sure if you already buy organic spices and want the same approach here. They are preference picks, not shortcuts to a stronger or more street-style pav bhaji flavor.

Check Organic Tattva Pav Bhaji Masala 100g on Amazon

Check Pure & Sure Organic Pav Bhaji Masala 100g on Amazon

If you do not want to use a packet today, use the emergency substitute or build the flavor from scratch in the without ready-made masala section.

Pav Bhaji Masala Substitute

If you do not have the blend, you can make an emergency substitute from common spices. It will not taste identical because the original has a specific tangy, smoky, snack-style profile, but it will move your bhaji in the right direction.

Emergency Substitute for 1 Tablespoon Pav Bhaji Masala

  • 1½ tsp coriander powder
  • ¾ tsp cumin powder
  • ½ tsp Kashmiri chilli powder or paprika
  • ¼ tsp garam masala
  • Pinch black pepper
  • Pinch amchur powder, or finish the bhaji with lemon/lime juice
  • Optional tiny pinch fennel powder
  • Optional tiny pinch black salt
Emergency pav bhaji masala substitute with coriander, cumin, Kashmiri chilli, garam masala, black pepper, and amchur or lemon around a spoon of spice mix.
This pav bhaji masala substitute will not taste identical, but coriander, cumin, Kashmiri chilli, black pepper, and amchur can still build warmth, color, and tang.

Mix these together and add them while the bhaji is cooking. Fry or simmer the substitute with the tomatoes, butter, and vegetables so it does not taste raw.

If you have chaat masala, use it carefully. It can help with tang, but it can also be salty and sour, so add only a pinch and taste before adding more.

If the bhaji tastes heavy even after the spice balance is fixed, serve it with something fresh on the side. MasalaMonk’s green chutney recipe gives that bright coriander-mint lift that works well with street-style snacks, sandwiches, and pav-based dishes.

Substitute warning: garam masala alone is not a 1:1 replacement. It gives warmth, but it misses the tang, color, and snack-shop edge of pav bhaji masala.

How to Make Pav Bhaji Without Ready-Made Masala

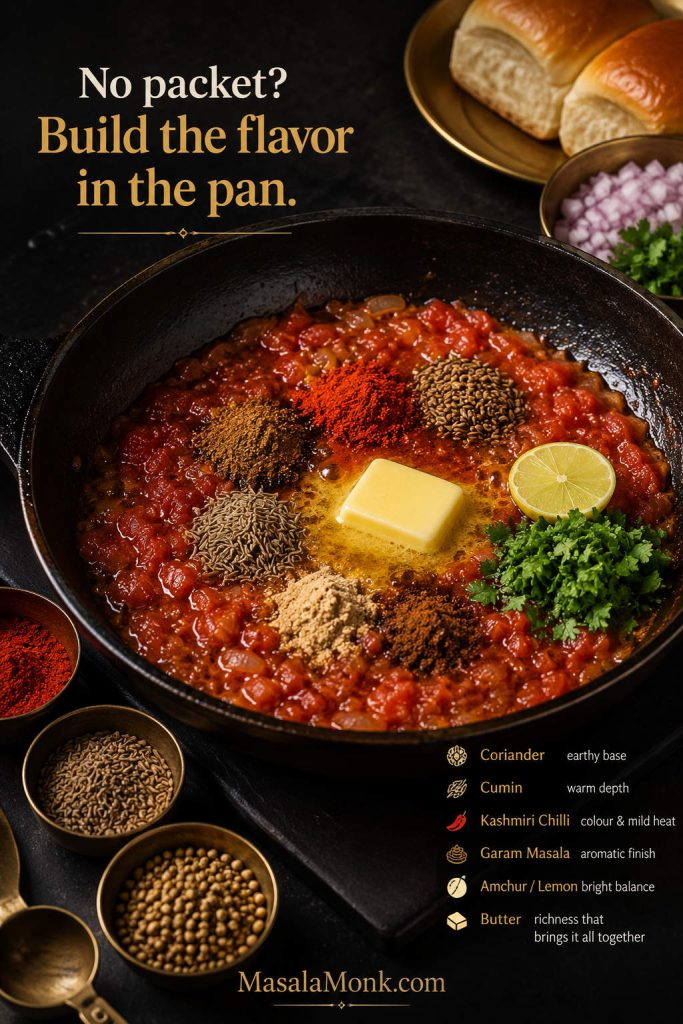
If you want pav bhaji without a packet, use the homemade recipe above or build the flavor directly in the pan. The goal is to create four things: warmth, tang, color, and savory depth.

Tomatoes, butter, coriander, cumin, Kashmiri chilli, garam masala, amchur or lemon, and herbs cooking in a pan without ready-made masala.
No packet does not mean no pav bhaji flavor; tomatoes, butter, Kashmiri chilli, cumin, coriander, and lemon can still build a convincing base.

For a quick bhaji without packaged masala, use coriander powder, cumin powder, Kashmiri chilli powder, a small amount of garam masala, amchur or lemon, black pepper, and enough butter. Cook these into tomatoes and mashed vegetables until the raw spice smell disappears.

The result will be more home-style than packet-masala Mumbai-style, but it can still taste excellent if the vegetables are well mashed and the tomato-butter masala is cooked properly.

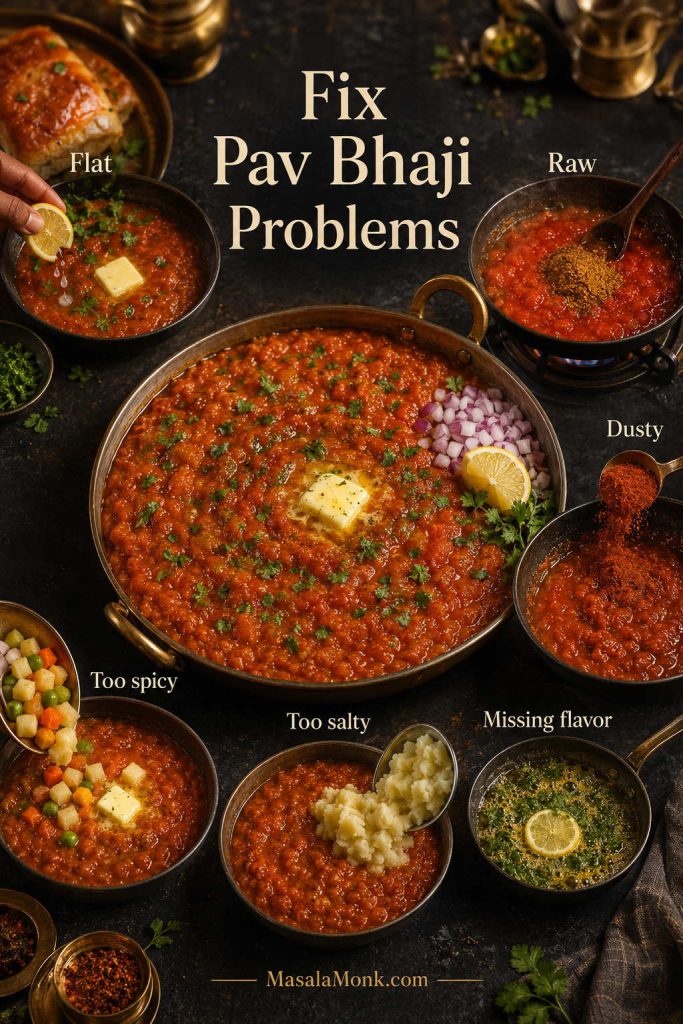
How to Fix Pav Bhaji Masala Problems

Most pav bhaji problems are fixable once you identify the real issue: salt, acid, raw spice, weak aroma, poor mashing, or over-roasting. Unless the masala is badly burnt, adjust slowly with simmering, fat, acid, or unsalted vegetable bulk instead of adding more powder blindly.

Flavor and Texture Fixes

Central pan of glossy pav bhaji surrounded by small fix scenes for flat, raw, dusty, too spicy, too salty, and missing flavor problems.
More powder is not always the fix; flat bhaji needs brightness, raw masala needs cooking, and salty bhaji needs dilution.
Problem Likely reason Fix
Flat flavor Not enough salt, acid, butter, or cooked masala Add a little salt, butter, lemon, or ½ tsp more masala after simmering.
Raw masala taste Added too late or not fried into the tomatoes Cook it with butter/oil and tomatoes for a few minutes.
Dusty or powdery bhaji Too much dry powder added at once, or masala added late Fry the masala in butter and tomatoes, add a splash of water, simmer, then finish with butter and coriander.
Spices show, but pav bhaji flavor is missing Butter, tomato reduction, mashing, or final brightness may be missing Mash more, simmer longer, add butter, and finish with coriander and lemon.
Too spicy Chilli level is too high, or the packet is very strong Soften the heat with mashed potato/vegetables, butter, and a little tomato.
Overly sour Too much amchur, lemon, or tomato Round it out with more potato/vegetables and butter; avoid more tangy masala.
Too salty Packet masala may contain salt, or salt was added twice Dilute with unsalted mashed potato or vegetables. Avoid adding more packet masala.

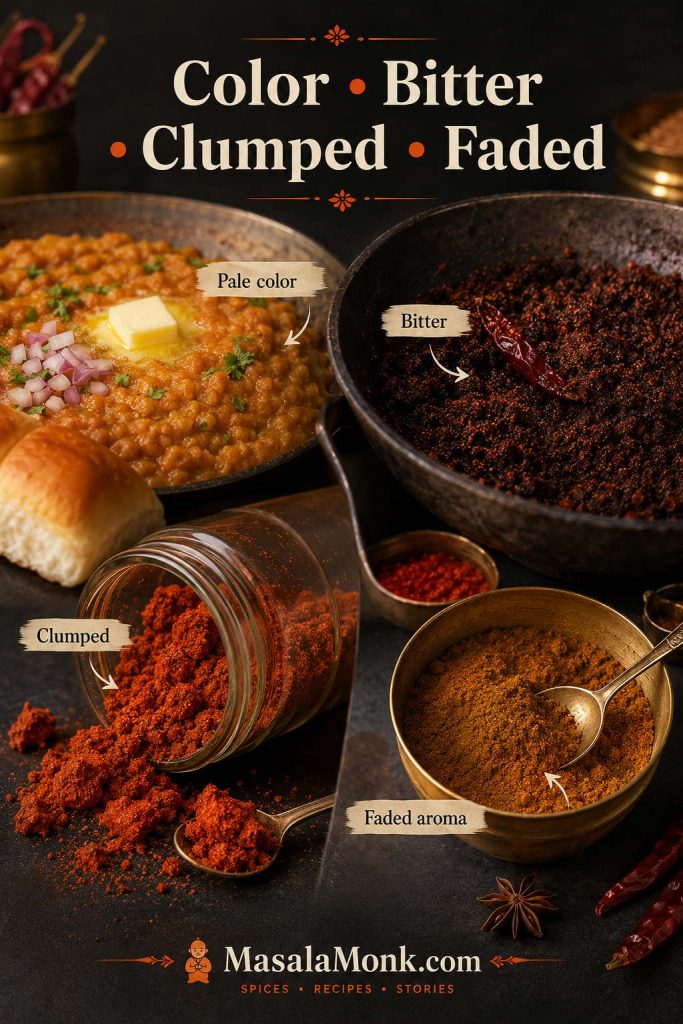
Color, Bitterness and Storage Fixes

Troubleshooting board showing pale pav bhaji, bitter over-roasted masala, clumped spice powder in a jar, and faded old masala powder.
Pale color usually points to chilli choice, bitterness to over-roasting, clumps to moisture, and faded aroma to old spices or poor storage.
Problem Likely reason Fix
Bitter masala Spices were roasted too hard or burnt Use low heat next time. For the current bhaji, soften with potato, butter, and tomato.
Pale or weak color Kashmiri chilli, tomato, or proper cooking may be missing Boost color with Kashmiri chilli powder, tomato paste, or better chillies. Avoid relying only on food color.
Clumped homemade powder Moisture entered the jar or spices were ground warm Store airtight, use a dry spoon, and cool spices fully before grinding.
Faded aroma Old spices or poor storage Make smaller batches and store away from heat, light, and steam.

Most fixes work better when the masala is cooked into the tomato-butter base first, so revisit how to bloom pav bhaji masala if the flavor still tastes raw or separate.

For a different Mumbai-style dry spice hit, MasalaMonk’s vada pav dry chutney recipe is a useful contrast. It is roasted, garlicky, peanut-coconut based, and meant to be sprinkled rather than cooked into a bhaji.

Useful Tools for Homemade Pav Bhaji Masala

Once the blend is chosen, equipment matters only if it changes the result: a finer grind, drier storage, or smoother bhaji. You only need three basics — a dry pan, a grinder, and an airtight jar — but these tools can help if you cook this often.

Dry pan, mixer grinder jar, airtight glass jar, dry spoon, roasted spices, potato masher, pav, and pav bhaji arranged as useful tools for the recipe.
You do not need many tools for homemade pav bhaji masala; a dry pan, grinder, airtight jar, and masher cover the steps that affect flavor most.

For Making the Masala

Sujata Supermix Mixer Grinder: the main practical grinder pick for turning roasted whole spices into a fine, aromatic powder.

Check Sujata Supermix Mixer Grinder on Amazon

Nestasia Airtight Glass Jars: helpful for storing homemade masala away from steam, heat, and moisture.

Check Nestasia Glass Jars on Amazon

For Making Pav Bhaji with the Masala

Wonderchef Ambrosia Potato Masher: useful when cooking pav bhaji because it helps mash potatoes, peas, tomatoes, capsicum, and cooked vegetables directly in the pan.

Check Wonderchef Ambrosia Potato Masher on Amazon

Optional upgrades: a heavier mixer grinder or cast iron tava can help if you cook Indian snacks often, but they are not necessary for this homemade masala. For this post, the most useful tools are still a reliable grinder, a dry airtight jar, and a masher for the bhaji itself.

That same tawa-and-butter style also shows up in Mumbai sandwiches. If you want another snack built around chutney, vegetables, butter, and heat, MasalaMonk’s authentic grilled Bombay sandwich recipe fits naturally beside this pav bhaji masala guide.

Other Ways to Use Pav Bhaji Masala

This blend is not only for pav bhaji. Once you have a fresh homemade jar or a good store-bought mix, use it in small amounts to add Mumbai street-food flavor to quick dishes.

Dishes made with pav bhaji masala including masala pav, tawa pulao, tawa paneer, potato filling, egg bhurji, and masala toast.
A fresh jar of pav bhaji masala can season more than bhaji, so use small amounts in tawa pulao, masala pav, paneer, potato fillings, eggs, or toast.
  • Masala pav: cook onions, tomatoes, capsicum, butter, and pav bhaji masala until glossy, then toss pav in the mixture.
  • Tawa pulao: add a small spoon to rice with vegetables, tomato, butter, and coriander.
  • Masala upma: use just a pinch when you want everyday upma to taste fuller and more lunch-like; MasalaMonk’s upma recipes already include a masala-upma direction.
  • Tawa paneer: use a little in a tomato-capsicum masala.
  • Potato filling: add a little to mashed potatoes for sandwiches, rolls, toasties, or snack fillings. For more snack-style potato ideas, see MasalaMonk’s potato appetizers guide.
  • Egg bhurji: use a small pinch for a tawa-style twist.
  • Vegetable stir-fry: add near the end, but cook briefly so it does not taste raw.
  • Masala toast: mix with butter, onions, tomatoes, and capsicum.
  • Quick spiced rice: add a small amount to leftover rice with butter and vegetables.
Use lightly outside pav bhaji: this blend is assertive. Start with ¼–½ teaspoon in small dishes and increase only after tasting.

FAQs

What is pav bhaji masala made of?

It is usually made from coriander seeds, cumin, fennel, dried red chillies, black pepper, cinnamon, cloves, black cardamom, bay leaf, amchur, dry ginger, and sometimes stone flower, black salt, turmeric, mace, or nutmeg.

Which pav bhaji masala brand is best?

Everest is a good familiar first packet, Badshah leans bolder, and MDH fits the classic household masala lane. Choose the rest based on availability, price, heat level, salt level, and whether you prefer organic spices.

Is homemade better than store-bought?

Homemade is better for freshness and control. Store-bought is better for convenience. Both can make good bhaji if used correctly.

How much should I use for 4 servings?

Start with 2–3 teaspoons homemade powder or about 1 tablespoon store-bought masala for 4 servings. Add more only after the bhaji has simmered.

What can I use instead of pav bhaji masala?

Use coriander powder, cumin powder, Kashmiri chilli powder, a little garam masala, black pepper, and amchur or lemon juice. It will not taste identical, but it gives warmth, color, and tang.

Does pav bhaji masala contain salt?

Some store-bought blends may contain salt. Homemade versions do not need to. Taste before adding extra salt, especially when using a packet.

Is it the same as garam masala?

No. Garam masala is warmer and more general-purpose. Pav bhaji masala is tangier, more savory, and built specifically for pav bhaji-style flavor.

Why does my pav bhaji not taste street-style?

The usual reasons are weak masala, undercooked tomatoes, not enough butter, poor mashing, not enough salt or acid, or adding the powder too late. Cook it into the tomatoes and butter, mash well, then finish with butter, coriander, onion, and lemon.

How long does homemade masala last?

For best aroma, use it within 2–3 months at room temperature. It can last longer if refrigerated or frozen tightly, but the flavor is brightest when fresh.

Can I use it in other recipes?

Yes. Use it in masala pav, tawa pulao, tawa paneer, egg bhurji, vegetable stir-fries, potato fillings, sandwiches, and spiced rice. Start small because the blend is strong.

Which spices are optional in homemade pav bhaji masala?

Stone flower, mace, nutmeg, black salt, turmeric, and star anise are optional. The core blend can still work without them.

Should I roast store-bought masala before using it?

No. Do not dry-roast store-bought powder in an empty pan because it can burn quickly. Bloom it briefly in butter or oil with tomatoes instead.

Final Thoughts

The best pav bhaji masala is not the packet with the loudest flavor or the homemade blend with the longest spice list. It is the one that makes the bhaji taste whole: warm, tangy, buttery, bright, and deep enough that the potatoes, tomatoes, vegetables, and spices feel like one glossy pan of pav bhaji.

Once you learn that rhythm, pav bhaji stops feeling like a packet-masala gamble and starts feeling like something you can control from the pan.

That is the real win: bhaji that tastes glossy, tangy, buttery, and whole, not like vegetables trying to hide under spice powder.

Posted on — Leave a comment

Avocado Toast Recipe

Avocado toast on thick sourdough with seasoned avocado, chili flakes, flaky salt, lemon, and a soft fried egg on a café plate.

A good avocado toast recipe should not taste like plain mashed avocado on dry bread. The best version is creamy, bright, salty, crisp at the edges, and finished with just enough contrast to make the next bite interesting. That contrast can be as simple as chili flakes and lemon, or as filling as egg, cottage cheese, smoked salmon, or crisp vegetables.

The everyday formula is easy: 1 thick slice of toast + 1/2 ripe avocado + 1–2 teaspoons lemon or lime juice + salt + pepper. Once that base tastes right, you can turn it into a fast breakfast, a high-protein toast, a brunch plate, or a simple lunch without making the recipe complicated.

If your toast usually tastes bland, soft, or overrated, the fix is rarely more avocado. It is better bread, a riper avocado, enough salt, enough citrus, and one topping that changes the bite.

The goal is not to pile everything on. The goal is to make the base so good that toppings feel like a choice, not a rescue mission.

Quick Answer: Best Ratio

For one slice, use 1 thick piece of well-toasted bread, 1/2 ripe avocado, 1–2 teaspoons lemon or lime juice, a generous pinch of salt, and black pepper. Mash the avocado with the citrus and seasoning, spread it over hot sturdy toast, and eat it right away.

Avocado toast ratio guide with one toast, half an avocado, citrus, salt, pepper, and mashed avocado on a pale café surface.
Use this base ratio first because balanced avocado toast depends more on seasoning and texture than on extra toppings.

In a hurry, stop there. Toast well, season the avocado properly, spread it thickly, and finish with pepper, chili flakes, flaky salt, or everything bagel seasoning.

Best everyday build: Start with sourdough or seeded bread, 1/2 avocado, lemon or lime, fine salt, black pepper, flaky salt, and chili flakes. Add a fried egg when you want breakfast, or cucumber/radish when the slice needs crunch.

Everyday avocado toast build with seasoned avocado, chili flakes, lemon, fried egg, cucumber, and radish as topping options.
Once the base tastes bright and salty enough, choose one direction: egg for breakfast or crisp vegetables for crunch.

This is the version to make before you start loading on toppings. If this tastes good, every variation after it gets easier.

For two toasts, use 2 slices bread, 1 ripe avocado, 2–4 teaspoons lemon or lime juice, 1/4 teaspoon fine salt, and black pepper. Egg makes it breakfast, cottage cheese makes it more filling, and smoked salmon turns it into brunch.

Not sure what to add next? Jump to What Your Toast Needs to choose by crunch, salt, freshness, protein, or heat.

Base Formula

For 1 toast1 thick slice bread
Avocado1/2 ripe avocado
Citrus1–2 tsp lemon/lime
Time5–8 minutes

Use this base: 1 thick slice sourdough or whole-grain bread, 1/2 ripe avocado, 1–2 teaspoons lemon or lime juice, 1/8 teaspoon fine salt, black pepper, and optional flaky salt, olive oil, chili flakes, or one topping for contrast.

Avocado toast process scene with crisp toast, seasoned avocado mash, and avocado being spread onto bread.
Build the base in order: crisp the bread, season the mash, then spread it while the toast still has bite.

Once the base tastes right, use the toast ideas or the Fix the Bite guide to choose a topping.

That is the difference between toast that tastes like a café breakfast and toast that tastes like avocado spread on bread.

The Rule: Toast, Season, Contrast

The best version follows one simple rule: toast, season, contrast. Toast the bread deeply enough to hold the avocado. Season the avocado before it touches the bread. Then add one topping that changes the bite.

Toast, Season, Contrast

  • Toast: Use bread with enough structure, and toast it until the edges have crunch.
  • Season: Mash the avocado with lemon or lime, fine salt, and black pepper before spreading.
  • Contrast: Add one thing that changes the bite: egg for fullness, cucumber for crunch, feta for salt, tomato for freshness, or chili crisp for heat.
Toast Season Contrast guide with avocado toast, seasoned mash, crisp bread, and contrast toppings arranged around the toast.
A contrast topping should solve a real problem: add crunch, salt, freshness, heat, or fullness.

The first bite should feel creamy and crisp. If the second bite already feels boring, the toast needs contrast.

Once the base tastes good on its own, toppings become optional upgrades instead of rescue attempts.

Ingredients

Avocado toast ingredients including bread, ripe avocado, lemon, olive oil, salt, pepper, chili flakes, and flaky salt.
Do not try to fix weak bread or underripe avocado with extra toppings; better ingredients make the simple version work.

This recipe is simple, so there is nowhere for weak ingredients to hide. The avocado should be ripe, the bread should be sturdy, and the seasoning should be bold enough to wake up the mild, creamy avocado. Lemon or lime gives brightness, salt brings the flavor forward, and pepper, chili, herbs, seeds, or crunchy vegetables keep each bite from feeling one-note.

Use the table as a starting point, then taste the avocado before it goes on the bread. That one small step is what keeps the whole slice from tasting flat.

Ingredient Amount for 2 toasts Why it matters
Thick bread 2 slices Gives the avocado somewhere to sit without turning the whole slice soft.
Ripe avocado 1 medium-large avocado, about 140–160 g flesh Mashes smoothly and gives the toast a creamy, buttery base.
Lemon or lime juice 2–4 tsp / 10–20 ml, to taste Cuts through the creamy avocado so the toast tastes fresh, not flat.
Fine salt 1/4 tsp, plus more to taste Brings the avocado forward instead of leaving it muted.
Black pepper 1/8 tsp Adds a warm, sharp finish.
Extra-virgin olive oil 1–2 tsp, optional Adds café-style richness, especially with sourdough.
Red pepper flakes Pinch, optional Adds a small kick so the avocado does not feel too creamy or quiet.
Flaky salt To finish Gives the top a crisp, salty pop.

How to Pick a Ripe Avocado

Look for fruit that gives slightly when pressed near the top or side. It should not feel rock-hard, hollow, wrinkled, or mushy. Underripe avocado tastes grassy and firm, while overripe avocado can taste dull and may have brown stringy patches inside.

Avocado ripeness guide showing hard, ripe, and overripe avocado examples with cut flesh and pressure cues.
A ripe avocado should give slightly; otherwise, the finished toast can turn grassy, dull, or hard to mash.

If the small stem nub comes off easily and the flesh underneath looks green, the avocado is usually close. If it looks brown underneath or the fruit feels very soft, it may be overripe.

Not ripe yet? Leave it at room temperature. To speed things up, place it in a paper bag with a banana or apple. Once ripe, refrigerate it to slow things down.

If your avocado is hard, make something else today. Toast cannot fix fruit that is not ready.

Best Bread

Bread is where many avocado toasts quietly fail. It has to do more than sit underneath the avocado. It needs enough structure to hold the mash, enough crunch to stay interesting, and enough flavor that the toast still tastes good after the first bite.

Toasted bread choices for avocado toast including sourdough, seeded bread, rye, bagel, English muffin, and gluten-free bread.
Choose bread with structure, because soft bread turns a good avocado topping into a soggy slice.

Sourdough is the best all-around choice, but whole grain, seeded bread, rye, bagels, English muffins, and gluten-free bread can all work if you toast them well.

Bread Best for Tip
Sourdough Classic café-style toast Toast until deeply golden so the center stays firm.
Whole grain Everyday healthy breakfast Choose a sturdy slice with good texture, not soft sandwich bread.
Seeded bread Crunch, fiber, and extra flavor Excellent with egg, tomato, cottage cheese, or cucumber.
Rye or pumpernickel Smoked salmon avocado toast Pairs well with capers, dill, onion, and lemon.
Bagel Bigger brunch-style serving Use half a bagel if you want a balanced portion.
English muffin Smaller breakfast portion Good with poached egg or cottage cheese.
Gluten-free bread Gluten-free avocado toast Toast it longer than usual so it does not turn soft.
Low-carb bread Lower-carb version Add protein so the meal feels complete.

Whatever bread you choose, toast it a little more than you would for buttered toast. Avocado is soft and rich, so the bread needs extra structure.

Toast doneness guide for avocado toast showing pale toast, golden toast, and deeply golden toast with avocado spread.
Toast the bread a little darker than usual so it can hold creamy avocado without collapsing.

Soft sandwich bread can work in a pinch, but only if you toast it harder than usual; otherwise, the avocado will flatten it quickly.

If sogginess is the main issue, jump to How to Keep It from Getting Soggy.

If you like making toast from homemade bread, this sourdough bread recipes guide is a useful place to start, especially if you want a loaf, sandwich bread, English muffin bread, or bagel that works well for breakfast toast.

How to Toast Bread Properly

Most disappointing slices start with bread that is too soft. The toast should be firm enough to resist the avocado, especially if you are adding tomato, cucumber, poached egg, smoked salmon, pickled onions, or cottage cheese.

Bread toasting options for avocado toast with a toaster, griddle, toaster oven, and golden toasted bread.
Whether you use a toaster, griddle, or toaster oven, aim for firm golden bread with crisp edges.
  • Toaster: Best for fast everyday toast. Toast until golden and firm, not just warm.
  • Skillet or griddle: Best for thicker sourdough or café-style toast. Use medium heat and toast for 2–3 minutes per side.
  • Toaster oven: Best for multiple slices. Toast until the edges have crunch and the center feels sturdy.
  • Garlic rub: Rub hot toast lightly with the cut side of a garlic clove for extra savory flavor.
  • Olive oil or butter: Use a thin layer before pan-toasting, or a light drizzle after toasting, for a richer café-style finish.

Restaurant-style upgrade: Rub the hot toast lightly with garlic, brush or drizzle with a little olive oil, season the avocado before spreading, and finish with flaky salt. Those small details make the toast taste brighter and more complete.

Do not cook the avocado mixture in the skillet. Toast the bread first, then add the avocado after. Warm bread is good; cooked avocado mash usually tastes dull.

How to Make It

It works best when the bread is hot and sturdy, the avocado is seasoned before spreading, and the finished toast is eaten while the edges still have crunch. The method is short, but the order matters: toast first, season the avocado second, then build the toppings right before serving.

Step-by-step avocado toast method showing bread, avocado, mashing, seasoning, spreading, and finishing the toast.
Assemble only after the toast is ready, because avocado and wet toppings soften bread quickly.
  1. Toast the bread. Toast until golden and firm, not pale and soft.
  2. Prepare the avocado. Halve the avocado, remove the pit, and scoop the flesh into a small bowl.
  3. Season the mash. Add lemon or lime juice, salt, and black pepper. Mash with a fork until mostly smooth but still a little textured.
  4. Taste before spreading. Add more salt, citrus, pepper, or chili flakes if it tastes flat.
  5. Spread over hot toast. Use about 1/2 avocado per thick slice.
  6. Finish and serve. Add flaky salt, olive oil, chili flakes, herbs, egg, cottage cheese, smoked salmon, feta, or another topping with contrast. Eat immediately.

Season before spreading: This small step helps the avocado taste bright and balanced before it ever touches the bread.

Close-up of avocado mash being seasoned with lemon juice, salt, pepper, and a fork before spreading.
Season the mash before spreading it; otherwise, the top may look good while the avocado still tastes flat.

Texture tip: Mash the avocado in a bowl if you want even seasoning and a creamier bite. Slice it if you want a cleaner café-style look, especially with smoked salmon, feta, tomato, or poached egg. Either way, season it before you add the toppings.

Two avocado toasts comparing mashed seasoned avocado with clean sliced avocado on café plates.
Mashed avocado holds seasoning better, while sliced avocado gives a cleaner café-style finish.

Avocado Toast with Egg

Egg turns the slice into breakfast, not a snack. One egg is enough for most slices. Two makes sense when the toast is the meal, not the side.

Avocado toast with a fried egg, soft yolk, herbs, chili flakes, and crisp sourdough edge.
Avocado toast with egg works best when the yolk adds richness without hiding the seasoned avocado.
Egg style Choose it when you want Watch out for
Fried egg Classic café-style toast with a rich yolk Do not over-salt if using bacon, feta, capers, or smoked salmon.
Poached egg Brunch-style toast Drain well or the bread gets wet.
Scrambled egg Soft, filling breakfast Keep the eggs creamy, not dry.
Jammy egg Meal-prep-friendly breakfast Slice gently so the yolk stays neat.
Egg whites Lighter high-protein toast Season more because egg whites are mild.

For the safest first version, choose fried egg. It gives the toast richness without making the method fussy. Poached egg is prettier for brunch, scrambled is softer and more filling, and jammy egg is the easiest make-ahead option.

Egg styles for avocado toast showing fried, poached, scrambled, and jammy egg versions on small toasts.
Each egg style changes the meal: fried is rich, poached feels brunchy, scrambled is cozy, and jammy is prep-friendly.

Want a no-cook protein version instead? Jump to the Cottage Cheese Version.

Fried Egg Version

Spread 1/2 mashed avocado over one slice of toast, then top with one fried egg. Cook the egg on medium heat until the white is set and the yolk is still soft, about 2–3 minutes if covered, or a little longer if your pan runs cooler. Finish with salt, pepper, chili flakes, and herbs.

Close-up fried egg avocado toast with a soft yolk, seasoned avocado, chili flakes, and crisp bread crust.
A fried egg is the easiest upgrade when you want the slice to feel like a real breakfast.

Poached Egg Version

Poach the egg at a bare simmer for 3–4 minutes, then drain it well before placing it on the toast. This version is excellent with chives, flaky salt, black pepper, lemon, and a little chili oil.

Poached egg avocado toast with chives, flaky salt, black pepper, lemon, and seasoned avocado.
Drain poached eggs well before serving, so the yolk adds richness without soaking the toast.

Scrambled Egg Version

Use soft scrambled eggs rather than dry curds. Cook them on low to medium-low heat for 2–3 minutes, then spoon them over the avocado base. Chives, black pepper, chili flakes, and a little feta work well here.

Scrambled egg avocado toast with soft eggs, seasoned avocado, chives, black pepper, and toasted bread.
Soft scrambled eggs make the toast warmer and more filling, especially when the avocado base is already seasoned.

Boiled or Jammy Egg Version

For a jammy egg, lower the egg into simmering water and cook for 6–7 minutes, then cool briefly before peeling. For clean hard-boiled slices, cook for 9–10 minutes. This is the best egg version when you want to prep part of breakfast ahead.

Jammy egg avocado toast with sliced boiled egg, golden yolk, microgreens, black pepper, and a peeled egg nearby.
Jammy eggs are a smart make-ahead topping because they add protein without another pan in the morning.

If you are cooking for more than one person, a toast bar can get messy fast. For a bigger egg breakfast, this frittata recipe is easier to prep ahead than building every slice one by one.

Cottage Cheese Version

The cottage cheese version is the no-cook protein route: cool, creamy, tangy, and more filling without another pan of eggs. Choose it when you want the toast to feel like a real breakfast but do not want to cook anything.

Cottage cheese avocado toast with seasoned avocado, creamy cottage cheese, cucumber or tomato, chili flakes, and crisp bread.
Cottage cheese adds cool tang and protein, but it works best when the texture is creamy rather than wet.

One thick slice needs 1/4 to 1/2 avocado, 1/3 cup / about 75 g cottage cheese, 1 teaspoon lemon or lime juice, salt, black pepper, and chili flakes. Watery cottage cheese should be drained first so the bread stays firm.

Cottage cheese avocado toast guide showing one-third cup or about 75 grams of cottage cheese with avocado and lemon.
Use about 1/3 cup cottage cheese per toast; however, drain it first if it looks watery.

Low-fat cottage cheese is usually lighter but can be wetter. Full-fat cottage cheese is creamier and richer. Both work, but season carefully because cottage cheese is already salty. For contrast, add something crisp, spicy, or fresh.

For a warmer version of the same high-protein idea, these scrambled eggs with cottage cheese give you a creamy breakfast option without relying on toast.

Brunch Versions: Smoked Salmon, Feta, and Bagel

Once the base is right, richer versions are easy. The trick is restraint: smoked salmon, feta, bagels, and cheese can make the toast feel special, but they also add salt, richness, or weight. Let one main topping lead, then use lemon, herbs, pepper, or crunchy vegetables to keep the bite balanced.

Smoked Salmon Version

For brunch, keep the avocado quieter and let salmon, lemon, capers, onion, and dill lead. Because smoked salmon is already salty, season the mash more lightly and use citrus or herbs for lift.

For one toast, use 1 slice sourdough, rye, seeded bread, or 1/2 toasted bagel; 1/2 avocado; 1–2 ounces / 30–60 g smoked salmon; 1 teaspoon lemon juice; 1 teaspoon capers; thin red onion or shallot; and dill, chives, or microgreens. Cream cheese, goat cheese, or cottage cheese can go under the avocado if you want a richer version.

Smoked salmon avocado toast with folded salmon, capers, dill, red onion, lemon, and mashed avocado on sourdough.
Smoked salmon brings brunch richness, so lemon, dill, capers, and onion help keep the slice balanced.

Feta Version

Feta is the fastest fix for a mild, creamy base. It brings salt and edge, especially when you add tomato, cucumber, herbs, black pepper, or a little lemon.

For one toast, spread 1/2 avocado over sturdy toast, then add 1–2 tablespoons crumbled feta. If using olives, capers, or pickled onions too, reduce the salt in the avocado mash.

Feta avocado toast with crumbled feta, cucumber, tomato, dill, black pepper, lemon, and seasoned avocado.
Feta brings salt and sharpness, so it quickly makes a mild avocado base taste brighter.

Bagel Version

A bagel turns this into a bigger breakfast, so the build needs more restraint. Toast the cut side well, use 1/2 avocado per bagel half, and choose one main direction: egg, cottage cheese, smoked salmon, tomato, or everything bagel seasoning.

If the bagel is large, start with half. A full bagel with avocado and toppings can become very filling quickly.

Avocado bagel toast on half a toasted bagel with seasoned avocado, cucumber, tomato, and everything seasoning.
A bagel makes the toast more filling; therefore, half a bagel with focused toppings often feels more balanced.

If you like the bagel direction, MasalaMonk’s breakfast sandwich ideas have more ways to build egg, cheese, avocado, sauce, and toasted bread into a fuller morning meal.

What Your Toast Needs: Fix the Bite

Do not choose toppings randomly. Choose them by what the bite is missing. If the base already tastes good, one topping is usually enough.

Take one bite of the base first; the answer is usually obvious once you notice whether it needs crunch, salt, heat, freshness, or protein.

Diagnostic avocado toast guide with a bitten toast and surrounding cues for salt, citrus, crunch, freshness, protein, and heat.
Before adding more, decide what is missing: salt, crunch, freshness, protein, or heat.

What Your Toast Needs

  • Bland? Add salt, lemon or lime, chili flakes, hot sauce, flaky salt, or everything bagel seasoning.
  • Soft-on-soft? Add cucumber, radish, seeds, crispy garlic, toasted nuts, or crisp bacon.
  • Too rich? Add tomato, herbs, pickled onion, lemon or lime, capers, sprouts, or cucumber.
  • Not filling? Add egg, cottage cheese, beans, tuna, smoked salmon, tofu, or seeds.
  • Too plain? Add feta, goat cheese, za’atar, pesto, chili crisp, hot sauce, or a garlic rub on the toast.

15 Ideas That Actually Work

Think of these as starting points, not rules. A weekday toast might only need lemon and chili flakes, while a weekend brunch version can handle egg, smoked salmon, capers, herbs, and a little extra crunch.

Quick Everyday Ideas

Board of quick avocado toast ideas with classic, egg, tomato, bacon, cottage cheese, feta, hummus, and sprout toppings.
For quick avocado toast ideas, pick one main topping and one fresh or crunchy finish instead of overloading the slice.
Idea What to add Why it works
Classic café toast Avocado, lemon, flaky salt, chili flakes, olive oil The cleanest version when the avocado is ripe and well-seasoned.
Fried egg avocado toast Avocado, fried egg, pepper, chives Rich yolk makes it feel like a full breakfast.
Tomato avocado toast Avocado, tomato, basil or coriander/cilantro, black pepper Tomato makes the toast feel juicy and summery.
Bacon avocado toast Avocado, crisp bacon, egg, hot sauce Salty crunch cuts through the creamy avocado.
Cottage cheese avocado toast Avocado, cottage cheese, cucumber, chili flakes Cool, creamy, tangy, and more filling without cooking another egg.
Feta avocado toast Avocado, feta, cucumber, tomato, oregano or za’atar Salty cheese and fresh vegetables balance the avocado.
Hummus avocado toast Hummus, avocado, olive oil, paprika Creamy, savory, and vegan-friendly.
Sprouts avocado toast Avocado, sprouts, cucumber, seeds, lemon Crunchy, fresh, and lighter.

Filling, Brunch, and Bigger Ideas

Brunch avocado toast spread with smoked salmon, beans, caprese toppings, tuna, pesto, pickled onion, lemon, and herbs.
Brunch versions can handle bigger flavors, but one main topping should still lead so the slice stays balanced.
Idea What to add Why it works
Smoked salmon avocado toast Avocado, salmon, capers, dill, red onion Premium brunch flavor with salt, tang, and herbs.
Black bean salsa avocado toast Avocado, black beans, salsa, coriander/cilantro, lime Filling, bright, vegan-friendly, and strong enough for brunch.
White bean avocado toast Avocado, white beans, lemon, herbs, pepper Creamy, mellow, and more satisfying without egg or cheese.
Caprese avocado toast Avocado, tomato, mozzarella or burrata, basil Fresh, creamy, and summer-friendly.
Tuna avocado toast Avocado, tuna, lemon, pepper, onion Protein-heavy and lunch-friendly.
Pickled onion avocado toast Avocado, pickled onions, herbs, black pepper Sharp, colorful, and useful when the toast tastes too rich.
Pesto avocado toast Avocado, pesto, tomato, flaky salt Herby, savory, and a fast way to make the base taste more complete.

You do not need to turn every slice into a loaded café plate. Most days, one strong direction is enough: egg and pepper, tomato and basil, cottage cheese and cucumber, or beans and salsa.

Crunch fix for avocado toast with cucumber, radish, crispy garlic, seeds, and a fork bite showing crisp bread.
When the bite feels soft all the way through, add cucumber, radish, seeds, or crispy garlic for contrast.

Still unsure what to add? Use What Your Toast Needs to choose by texture, salt, freshness, protein, or heat.

For the bacon version, keep the bacon crisp and the portion modest; the crunch matters more than piling it on. This air fryer bacon recipe is handy when you want a few crisp strips for breakfast without standing over a skillet.

Best Seasoning

If the toast tastes bland, it usually needs more salt, citrus, heat, or crunch — not more avocado. Start with salt and lemon or lime, then build from there. The seasoning should make the avocado taste brighter, not cover it completely.

Close-up of bland avocado toast being fixed with lime juice, flaky salt, black pepper, and chili flakes.
When the avocado tastes bland, start with salt and citrus before reaching for more toppings.
  • Classic: flaky salt, black pepper, red pepper flakes, and olive oil.
  • Bagel-style: everything bagel seasoning, garlic powder, onion powder, or sesame seeds.
  • Fresh and herby: lemon pepper, za’atar, dill, basil, coriander/cilantro, or chives.
  • Warm and smoky: smoked paprika, chili flakes, chili crisp, or hot sauce.
  • Rich and savory: pesto, garlic rub, goat cheese, feta, or a light drizzle of olive oil.

For a safe first version, use lemon, flaky salt, black pepper, and chili flakes. For a bigger savory finish, try everything bagel seasoning, pesto, chili crisp, or a light garlic rub on the hot toast.

Seasoning palette for avocado toast with flaky salt, chili flakes, everything seasoning, za’atar, pesto, chili crisp, lemon, and herbs.
The best seasoning for avocado toast should brighten the avocado, not hide it; start with salt, citrus, heat, and herbs.

If seasoning does not fix the problem, check Mistakes & Fixes next.

Healthy & High-Protein Notes

This can be a healthy breakfast, but it depends on how you build it. Avocado brings fiber and mostly unsaturated fat, while the bread, toppings, and portion size decide whether the toast feels light, balanced, or too heavy.

Plain avocado toast can be delicious, but it is not automatically a full breakfast. Protein is what turns it from a good slice into a meal.

High-protein avocado toast breakfast with seeded toast, avocado, scrambled egg, yogurt with berries, greens, cucumber, and kiwi.
Protein is what turns avocado toast from a light slice into a breakfast that keeps you satisfied longer.

Think of avocado as the creamy fat-and-fiber part of the meal; then add egg, cottage cheese, beans, tuna, tofu, seeds, or smoked salmon if you want it to keep you full longer.

A good everyday version is 1 slice of whole-grain or seeded toast, 1/2 avocado, lemon or lime, salt, pepper, egg or cottage cheese, and tomato, cucumber, sprouts, herbs, or seeds. For a deeper nutrition read, Harvard’s avocado nutrition guide is a helpful reference.

If you are making it for weight loss, focus on portion and protein rather than treating one version as automatically “diet-friendly.” Use one slice of sturdy bread, about 1/2 avocado, plenty of lemon or lime, and a protein topping. Be careful with oversized bread, extra oil, heavy cheese, bacon, or several rich toppings at once.

For days when you want another protein-focused breakfast that is not toast, this high-protein oatmeal guide gives you a warmer bowl-style option with yogurt, egg whites, cottage cheese, tofu, or protein powder.

For practical protein builds in this post, jump to Avocado Toast with Egg or the Cottage Cheese Version.

Restaurant-Style Ideas

Restaurant-style versions work best when you borrow the method, not every exact detail. Toast the bread deeply, season the avocado before spreading, finish with flaky salt or olive oil, and add one fresh or crunchy topping so the slice tastes finished.

Restaurant-style avocado toast with olive oil being drizzled over avocado, radish, cucumber, herbs, and crisp bread.
Café-style toast usually wins on small details: deeper toast, seasoned avocado, and a deliberate final finish.

Dunkin-Style Version

For a Dunkin-style version, use toasted sourdough, a smooth avocado spread, lemon juice, sea salt, black pepper, and a generous finish of everything bagel seasoning. The official Dunkin avocado toast announcement confirms those signature details, which makes this one of the easiest copycat versions to echo at home.

Dunkin-style avocado toast with smooth avocado spread on sourdough, everything seasoning, lemon, and black pepper.
For a Dunkin-style avocado toast, keep the spread smooth and finish generously with everything seasoning.

Café-Style Whole-Grain Version

For a café-style whole-grain version, use thick toast, smashed avocado, extra-virgin olive oil, lemon, flaky salt, and eggs. It gives you the bigger breakfast-plate feel without needing a restaurant copycat.

Why Your Avocado Toast Tastes Bland, Soggy, or Boring

Avocado toast gets mocked when it is made badly: pale bread, underripe avocado, no salt, no lemon, no crunch, and nothing to break up the creaminess. Fortunately, the fix is usually simple. Toast the bread harder, season the avocado before spreading, and add one topping that changes the bite.

Avocado toast mistakes and fixes guide showing pale toast, hard avocado, watery toppings, bland mash, and improved toast examples.
If the slice tastes disappointing, check the bread, avocado ripeness, and seasoning before blaming the toppings.
Problem Why it happens Fix
Bland avocado toast Not enough salt, citrus, or seasoning Add salt, lemon or lime, black pepper, chili flakes, hot sauce, or everything seasoning.
Soggy toast Bread is too soft or toppings are wet Use thicker bread, toast it darker, drain wet toppings, and assemble right before eating.
Hard avocado Avocado is underripe Wait until it gives slightly when pressed. Do not force hard avocado into toast.
Brown avocado Avocado was cut too early or exposed to air Add lemon or lime and use it fresh. Press wrap directly onto leftovers if needed.
Too rich Too much avocado, oil, cheese, or creamy topping Add tomato, cucumber, herbs, pickled onion, lemon, or capers.
Not filling No protein Add egg, cottage cheese, smoked salmon, beans, tofu, tuna, or seeds.
Flat texture Everything is soft Add radish, cucumber, seeds, crispy garlic, onions, or toasted nuts.

When the toast tastes too rich, freshness is the fix. Tomato, herbs, pickled onion, lemon, capers, cucumber, or radish cut through the creamy base without making the slice heavier.

Too-rich avocado toast freshness fix with tomato, herbs, pickled onion, lemon, capers, cucumber, radish, and seasoned avocado.
When the toast tastes too rich, add freshness with tomato, herbs, pickled onion, lemon, capers, cucumber, or radish.

If sogginess is the main issue, the next section shows how to protect the bread.

How to Keep It from Getting Soggy

Toast the bread until it is deeply golden, not just warm. Thick sourdough, seeded bread, rye, and bagels hold up better than soft sandwich bread. If using tomato, cucumber, poached egg, pickled onion, or smoked salmon, drain or pat the topping before adding it. For tomatoes, remove watery seeds or pat slices dry before they hit the toast.

Soggy avocado toast prevention guide with tomato slices being dried, crisp toast, cottage cheese, poached egg, and a finished toast.
To keep avocado toast from getting soggy, remove extra moisture first and assemble only when you are ready to eat.

Do not let wet toppings do the bread’s job. The bread should carry the avocado; the toppings should add contrast, not soak the slice.

The safest rule is simple: assemble right before eating. Avocado softens the bread as it sits, and wet toppings speed that up. If you are making breakfast for several people, toast the bread, prep the toppings, and mash the avocado last.

Storage and Make-Ahead Tips

This toast is best fresh. The bread loses its edge, the avocado browns, and wet toppings can make the slice soft. However, you can still prep the parts ahead.

Make-ahead avocado toast prep with boiled eggs, sliced cucumber, radish, whole avocado, lemon, bread, seasonings, and herbs.
Prep toppings ahead, but save the avocado and toast for last so the finished slice stays bright and crisp.
  • Boil eggs ahead and refrigerate them.
  • Slice cucumber, radish, onion, or tomato shortly before serving.
  • Toast the bread right before eating.
  • Mash avocado with lemon or lime as close to serving time as possible.
  • If you must store avocado mash briefly, press plastic wrap directly onto the surface and refrigerate.

Do not freeze assembled avocado toast. It will not come back with a good texture.

Ready to make it now? Use the saveable guide below, then jump into the recipe card for the full amounts and steps.

Avocado toast recipe card with finished toast, yield for two toasts, five-to-eight-minute timing, base ratio, and six steps.
Save the base avocado toast recipe first; then choose egg, cottage cheese, smoked salmon, vegetables, or seasoning based on the bite you want.

Avocado Toast Recipe

This easy avocado toast recipe gives you a bright, well-seasoned base first: crisp bread, ripe avocado, lemon or lime, salt, and pepper. Keep it simple, or choose one direction: egg for breakfast, cottage cheese for protein, smoked salmon for brunch, or tomato and cucumber for freshness.

Yield2 toasts
Prep Time5 minutes
Toast Time2–3 minutes
Total Time5–8 minutes

Ingredients

  • 2 thick slices sourdough, whole-grain, seeded, or multigrain bread
  • 1 ripe avocado, about 140–160 g flesh
  • 2–4 tsp lemon or lime juice / 10–20 ml, to taste
  • 1/4 tsp fine salt, plus more to taste
  • 1/8 tsp black pepper
  • 1–2 tsp extra-virgin olive oil, optional
  • Pinch red pepper flakes, optional
  • Flaky salt, for finishing
  • Optional toppings: egg, cottage cheese, smoked salmon, feta, tomato, cucumber, herbs, or your favorite seasoning

Instructions

  1. Toast the bread until crisp and golden.
  2. Mash the avocado with lemon or lime juice, fine salt, and black pepper until creamy but still slightly textured.
  3. Taste and adjust with more salt, citrus, pepper, or chili flakes if needed.
  4. Spread the avocado over the hot toast, using about half an avocado per slice.
  5. Finish with flaky salt, olive oil, chili flakes, herbs, egg, cottage cheese, smoked salmon, feta, or your chosen topping.
  6. Serve immediately while the bread still has bite.

Notes

  • Use 1/2 avocado per thick slice of toast as the base ratio.
  • For the egg version, add 1 fried, poached, scrambled, boiled, jammy, or egg-white topping per toast.
  • For the cottage cheese version, use 1/3 cup / about 75 g cottage cheese per toast and drain it if watery.
  • For the smoked salmon version, use 1–2 oz / 30–60 g smoked salmon per toast and reduce the added salt.
  • Toast the bread deeply enough to stay crisp under the avocado.
  • Assembled toast does not store well. Eat it right away.

FAQs

Most avocado toast questions come back to the same few problems: the bread got soft, the avocado tasted flat, or the toast did not feel filling enough.

What is the best bread?

Sourdough is the best all-around bread because it gets crisp, tastes slightly tangy, and holds the avocado well. Whole grain, seeded bread, rye, bagels, English muffins, and gluten-free bread also work if you toast them properly.

How much avocado do you need per slice?

Use about 1/2 medium-large avocado per thick slice. That is usually 70–80 g avocado flesh per toast. Use less if you are adding cottage cheese, egg, smoked salmon, or another rich topping.

Should avocado be mashed or sliced?

Mashed avocado is better for everyday toast because it spreads evenly and holds seasoning well. Sliced avocado looks cleaner and works nicely with smoked salmon, feta, tomato, or a poached egg. Either way, season it with salt and lemon or lime.

Do you cook the avocado?

No. Toast the bread first, then add the avocado after. Cooking the avocado mixture in a skillet can make it taste dull. The bread should be hot and crisp, but the avocado should stay fresh and seasoned.

What seasoning is best?

Start with salt, black pepper, and lemon or lime. Then add one stronger finish if needed: everything bagel seasoning, chili crisp, hot sauce, pesto, za’atar, smoked paprika, or flaky salt.

Why does it taste bland?

It usually tastes bland when the avocado is underripe or under-seasoned. Add more salt, lemon or lime, black pepper, chili flakes, or something crunchy. A little citrus and enough salt make a much bigger difference than adding more avocado.

What can I add for protein?

Egg and cottage cheese are the easiest breakfast options. For lunch or brunch, smoked salmon, tuna, beans, tofu, seeds, or egg whites can also make the toast more filling.

What goes with it besides egg?

Choose one direction: cottage cheese for creamy protein, tomato or cucumber for freshness, feta for salt, beans or hummus for a plant-based version, or chili crisp, pesto, and seeds for more flavor and texture.

Is cottage cheese good here?

Yes. Cottage cheese adds protein, tang, and creaminess. Use about 1/3 cup / 75 g cottage cheese per toast, and drain it first if it looks watery.

Is this healthy?

It can be a healthy breakfast when it uses sturdy whole-grain or seeded bread, about half an avocado, and a protein or vegetable topping. The avocado brings creaminess and healthy fats; the extra protein or vegetables make the meal more balanced.

Is it enough for breakfast?

It can be enough for a light breakfast. For a longer-lasting meal, add egg or cottage cheese so the toast has more staying power.

Is it good for weight loss?

It can fit into a weight-loss breakfast if the portion is sensible. Use one slice of bread, about 1/2 avocado, lemon or lime, and a protein topping such as egg or cottage cheese. Be careful with oversized bread, extra oil, heavy cheese, bacon, or too many rich toppings together.

Can you meal prep it?

You can prep the toppings, but assembled toast is best fresh. Boil eggs, slice vegetables, and keep toppings ready, then toast the bread and mash the avocado right before eating.

How do you keep it from getting soggy?

Use thick bread, toast it until crisp, drain wet toppings, and assemble right before serving. If using poached egg, tomato, cucumber, pickled onion, or smoked salmon, remove excess moisture before adding it.

Why do restaurant versions taste better?

Restaurant versions usually taste better because each small detail is handled well: the bread is toasted harder, the avocado gets enough salt and citrus, and the top has a finishing touch like olive oil, flaky salt, herbs, chili flakes, or something crunchy.

How do you make the Dunkin-style version?

Use toasted sourdough, mashed avocado, lemon juice, sea salt, black pepper, and everything bagel seasoning. Keep the avocado spread smooth and finish with enough seasoning to give the toast a savory, garlicky crunch.

Final Thoughts

Good avocado toast comes down to that same rule: crisp bread, seasoned avocado, and one topping that changes the bite. That will beat a loaded but bland slice every time.

Egg makes it breakfast, cottage cheese makes it more filling, smoked salmon makes it brunch, feta brings salt, and cucumber or radish brings crunch. Once the base is right, your best version can be simple, loaded, spicy, crunchy, or somewhere in between.

What is your go-to avocado toast topping — fried egg, cottage cheese, smoked salmon, feta, chili crisp, pesto, everything bagel seasoning, or something I should try next? Share it in the comments so other readers can try it too.

Posted on — 2 Comments

Garlic Mashed Potatoes Recipe

Creamy garlic mashed potatoes in a ceramic bowl with melted butter, chives, and a spoon pulling through soft swirls.

These garlic mashed potatoes are the kind you want under a spoonful of gravy: soft buttery ridges, mellow garlic in every bite, and enough body to hold melted butter without turning stiff, sticky, or gluey.

The secret is simple. Start with good potatoes, cook them until they are truly tender, let the extra steam escape after draining, then fold in warm garlic butter and milk while the potatoes are still hot. That gives you creamy spoonfuls, fluffy edges, and garlic flavor that runs through the whole bowl instead of sitting in sharp little pockets.

The goal is not restaurant-perfect smoothness at any cost. Instead, it is a warm, spoonable bowl that tastes buttery, garlicky, and comforting from the first bite to the last — the kind of mashed potatoes that make gravy, roast chicken, steak, or mushrooms feel like a complete meal.

Serve them with roast chicken, steak, meatloaf, mushrooms, turkey, gravy, or a holiday table. They are especially good beside a slow cooker roast chicken because the soft potatoes catch all those garlic-herb juices.

Make the classic version first, then use the variations below for roasted garlic mashed potatoes, garlic parmesan mashed potatoes, red skin mashed potatoes, no-milk mashed potatoes, dairy-free mashed potatoes, or a richer sour cream and cream cheese version.

In This Garlic Mashed Potatoes Recipe

Start with the classic creamy method, then adjust the potato, garlic, dairy, batch size, and make-ahead details to fit your meal.

Quick Answer: How to Make Garlic Mashed Potatoes

To make creamy garlic mashed potatoes, boil 2½ lb / 1.1 kg Yukon Gold potatoes in salted water until very tender. Drain them well, return them to the warm pot for a minute so excess moisture can steam off, then mash gently with warm garlic butter and milk.

For the garlic butter mixture, warm 6 smashed garlic cloves with 6 tbsp / 85 g butter and ¾ cup / 180 ml whole milk or half-and-half. Strain the garlic out for a smooth, rounded flavor, or mash the softened cloves into the potatoes if you want a deeper garlic taste. Finish with salt, pepper, and optional sour cream.

The full recipe takes about 35 minutes. For the best texture, use hot potatoes, warm dairy, enough salt, and a masher or ricer instead of a blender or food processor.

Best basic formula: 2½ lb Yukon Gold potatoes + 6 garlic cloves + 6 tbsp butter + ¾ cup warm milk or half-and-half + salt + optional ¼ cup sour cream.
Close-up of garlic mashed potatoes with a spoon drag, melted butter in the ridges, and small chive flecks.
Look for soft ridges that hold butter without looking stiff or pasty. That is the visual cue for creamy mashed potatoes that are spoonable, not gluey.

Garlic Mashed Potatoes at a Glance

  • Best potato: Yukon Gold for creamy and buttery, russet for lighter and fluffier, red potatoes only for rustic skin-on mash.
  • Best garlic method: Warm smashed garlic in butter and milk for smooth everyday flavor.
  • Best texture rule: Drain well, steam-dry briefly, use warm dairy, and stop mixing once creamy.
  • Best tool: Potato masher for homestyle texture, ricer for smoother potatoes.
  • Make-ahead: Best within 2 days, with leftovers refrigerated for 3–4 days.

Which Version Should You Make?

The classic recipe is the best place to start, but different meals call for different mashed potatoes. Use this quick guide if you already know the flavor or texture you want.

Four small bowls of mashed potatoes showing classic, roasted garlic, parmesan, and red skin versions.
Choose the version by the meal: classic for gravy, roasted garlic for deeper flavor, parmesan for savory richness, and red skin mashed potatoes for rustic texture.
If You Want… Make This Version Best For
Classic creamy mashed potatoes Main recipe Weeknights, holidays, gravy
Sweeter, softer garlic flavor Roasted garlic version Turkey, roast beef, dinner parties
Bigger garlic flavor Mash in the softened garlic cloves, add roasted garlic, or finish with a little garlic powder Garlic lovers, steak dinners, bold savory sides
Steakhouse-style flavor Garlic parmesan version Steak, chicken, mushrooms
No peeling Red skin version Rustic weeknight dinners
Tangier, richer potatoes Sour cream or cream cheese version Make-ahead meals, holiday sides
No milk or dairy-free Broth, olive oil, or dairy-free butter version Dairy-free guests, lighter sides
A smaller dinner batch Small batch version Steak night, dinner for two or three
A bigger holiday bowl Double batch Thanksgiving, Christmas, Easter, potlucks

Why This Garlic Mashed Potatoes Recipe Works

Good mashed potatoes should feel generous before you even add gravy. They should be warm, soft, buttery, and seasoned all the way through. In this recipe, each step protects that texture.

The method works because it avoids the three things that ruin mashed potatoes: raw garlic, wet potatoes, and overmixing. The garlic is warmed so it tastes smooth instead of sharp. After draining, the potatoes are dried briefly so they do not water down the butter. Everything is folded together gently, so the mash stays silky instead of tightening into paste.

Cooking the potatoes until completely tender also matters. If the potatoes are still firm in the center, you will have to keep mashing to chase out lumps, and that extra work can make the potatoes heavy. When they are cooked properly, they mash easily and absorb the warm dairy without a fight.

A potato masher gives you a cozy homemade texture, while a ricer gives you a smoother, fluffier bowl. Either way, the goal is the same: stop once the potatoes are spoonable, soft, and able to hold gentle swirls.

Ingredients for Garlic Mashed Potatoes

You do not need many ingredients, but small choices make a big difference. Warm dairy blends better than cold milk, enough butter carries the garlic flavor, and the right potato keeps the mash creamy instead of pasty.

Yukon Gold potatoes, garlic, butter, milk, sour cream, salt, pepper, chives, and a potato masher arranged on a counter.
Even a simple garlic mashed potatoes recipe depends on balance: starchy potatoes for structure, butter for richness, and warm dairy so everything folds together smoothly.

Potatoes

Yukon Gold potatoes are the best default. They have a naturally creamy texture and a buttery flavor, so they make the recipe taste rich without needing a huge amount of cream.

Russets make a lighter, fluffier mash. Red potatoes work well when you want a rustic, skin-on version, but they should be mashed gently because they are waxier.

Garlic

Use 6 garlic cloves for the main batch. Smashed cloves warmed in butter and milk give the potatoes a mellow garlic flavor. If you love a stronger garlic note, mash the softened cloves into the potatoes instead of straining them out.

Butter

Use 6 tbsp / 85 g unsalted butter. Butter gives the potatoes richness and helps carry the garlic into every bite. If you use salted butter, season carefully at the end.

Milk or Half-and-Half

Use ¾ cup / 180 ml whole milk or half-and-half. Whole milk keeps the potatoes lighter. Half-and-half makes them richer and more holiday-worthy. Warm it before adding it to the potatoes.

Sour Cream

Sour cream is optional, but it adds a gentle tang and a fuller texture. Use ¼ cup / 60 g for balance, or up to ½ cup / 120 g if you want a tangier, richer mash.

Salt, Pepper, and Herbs

Salt the cooking water, then season again after mashing. Potatoes need salt in layers; otherwise, they can taste flat. Black pepper, white pepper, chives, parsley, and a little melted butter are all good finishing touches.

Salt reality: If the potatoes taste creamy but flat, they usually need more salt before they need more garlic. Add salt in small pinches, stir gently, and taste again.

Best Potatoes for Garlic Mashed Potatoes

Because texture is the goal, the best potato depends on whether you want creamy, fluffy, or rustic mashed potatoes. Yukon Gold is the easiest choice for a smooth, buttery bowl. Russet is better for a lighter texture. Red potatoes are best when you want skins and a little more bite.

Yukon Gold, russet, and red potatoes shown with different mashed potato textures.
Before choosing a potato, choose the texture. Yukon Gold leans creamy, russet leans fluffy, and red potatoes are best when you want a skin-on rustic mash.
Potato Best For Texture How to Use It
Yukon Gold Classic creamy mashed potatoes Buttery, smooth, rich Use as the default for this recipe.
Russet Fluffy mashed potatoes Light, airy, absorbent Use alone or mix with Yukon Gold.
Yukon + Russet Balanced texture Creamy with fluffy edges Use half and half for a very reliable batch.
Red Potatoes Red skin mashed potatoes Rustic, slightly chunky, skin-on Mash gently and avoid electric mixing.

Think of the potato choice as a texture choice, not a strict rule. Yukon Gold gives the creamiest, most buttery everyday mash. Russet gives you a lighter, fluffier bowl that absorbs butter and milk easily. Red potatoes work when you want skins and a rustic texture, but they are not the best choice for perfectly smooth garlic mashed potatoes.

Yukon Gold vs Russet: Creamy or Fluffy?

If you are choosing between Yukon Gold and russet potatoes, pick by texture first. Yukon Gold gives a creamier bowl, while russets make the mash lighter and more absorbent.

Side-by-side comparison of Yukon Gold mashed potatoes and russet mashed potatoes with cut potatoes nearby.
Yukon Gold gives a buttery, creamy mash, while russets absorb butter and milk more easily for a lighter, fluffier bowl.

For potato choice, higher-starch potatoes such as russets and Yukon Golds are usually better for a smooth, fluffy mash, while waxier red potatoes are better kept rustic. Better Homes & Gardens explains why chefs often prefer russets and Yukon Golds for creamy mashed potatoes.

Fresh Garlic vs Roasted Garlic vs Garlic Powder

Garlic can taste sweet, sharp, mellow, or bold depending on how it is added. That is why one garlic mashed potatoes recipe can taste completely different from another.

Fresh garlic warming in butter and milk beside roasted garlic being squeezed, with mashed potatoes between them.
For a weeknight bowl, fresh garlic in warm butter keeps the flavor rounded. For a deeper holiday-style side, roasted garlic adds sweetness and depth.
Garlic Method Flavor Best Use How Much to Use
Garlic warmed in butter and milk Smooth, rounded, balanced Best everyday method 6 cloves for 2½ lb potatoes
Garlic boiled with potatoes Soft and simple Quick shortcut 5–6 cloves
Roasted garlic Sweet, deep, mellow Holiday or special version 1 whole head garlic
Garlic powder Bold, familiar garlic flavor Flavor boost or backup ¼–½ tsp
Raw minced garlic Sharp and harsh Usually best avoided Sauté first if using

The main method uses garlic warmed in butter and milk because it gives the best balance of speed and flavor. Roasted garlic is deeper and sweeter, but it adds extra time. Garlic powder is useful when the finished potatoes taste good but need a little more punch.

How to Build More Garlic Flavor Without Raw Bite

If you want the garlic to stand out more, layer it instead of only adding more raw garlic. Warm smashed cloves in the butter and milk, mash in the softened cloves, and add a tiny pinch of garlic powder only if the finished potatoes still taste too mild. That gives you deeper garlic flavor without the harsh bite of raw minced garlic.

Garlic-infused butter, softened garlic cloves, garlic powder, and mashed potatoes arranged as a flavor-layering setup.
If the potatoes need more garlic, layer the flavor gradually instead of adding raw garlic. Infused butter, softened cloves, and a tiny pinch of garlic powder add depth without harshness.

Avoid stirring raw minced garlic straight into mashed potatoes. It can taste hot and harsh, especially if the potatoes are mild. If you want to use minced garlic, cook it gently in the butter first.

How to Make Garlic Mashed Potatoes

This method keeps the potatoes creamy and the garlic smooth. The steps are simple, but the little details make the bowl taste much better.

Step-by-step process showing cut potatoes, simmering, garlic butter, steam-drying, and gentle mashing.
The sequence matters because texture is built in stages: tender potatoes first, dry potatoes next, then warm garlic butter and gentle mashing.

Step 1: Cut the potatoes evenly

Peel the potatoes and cut them into 1 to 1½-inch chunks. Even pieces cook at the same pace, which helps you avoid hard centers and lumpy mashed potatoes.

Step 2: Start in cold salted water

Put the potatoes in a large pot and cover them with cold water by about 1 inch. Add a generous spoonful of salt. Starting cold helps the potatoes cook evenly from edge to center.

Step 3: Simmer until very tender

Bring the water to a boil, then reduce to a steady simmer. Cook for 15–20 minutes, or until a knife slides through the potatoes with no resistance. If the potatoes are undercooked, the mash will stay lumpy no matter how much you stir.

A fork testing a tender cooked potato chunk over a pot or colander.
A fork should slide through easily before you drain the pot; otherwise, firm centers can force extra mashing and make the texture heavier.

Step 4: Warm the garlic, butter, and milk

While the potatoes cook, add the butter, milk or half-and-half, and smashed garlic cloves to a small saucepan. Warm over low heat until the butter melts and the garlic smells mellow. Keep the mixture warm and fragrant, but do not let it boil hard or scorch.

Smashed garlic cloves warming gently in butter and milk in a small saucepan.
Keep the pan gentle here. Low heat lets the garlic perfume the butter and milk without turning sharp, bitter, or scorched.

Step 5: Drain and steam-dry

Drain the potatoes well, then return them to the warm empty pot for about 1 minute. Gently shake the pot or stir once so extra moisture can evaporate. This keeps the finished potatoes from tasting loose or watery.

Drained Yukon Gold potato chunks steaming in a warm pot before mashing.
Once drained, let the potatoes steam-dry briefly in the warm pot so the final mash tastes rich instead of watery.

Step 6: Mash gently

Mash the hot potatoes with a potato masher, or pass them through a ricer. Add the infused butter-milk mixture gradually, then strain out the garlic for a smoother background flavor or mash the softened cloves in for a deeper garlic taste.

Warm garlic butter being folded into hot potatoes with a masher or spoon.
Add the warm garlic butter gradually, then stop once the potatoes are creamy. Too much mixing can turn a soft mash tight and gluey.

Step 7: Finish and serve

Fold in sour cream if using, then season with salt and pepper. Taste before serving. The finished potatoes should hold soft swirls but still spoon easily. Transfer them to a warm bowl and finish with melted butter, chives, parsley, or extra pepper.

Common Garlic Mashed Potato Mistakes

Often, mashed potato problems happen before the bowl reaches the table. Avoid these mistakes and the final texture will be much easier to control.

Small scenes showing raw garlic, cold dairy, wet potatoes, undercooked potatoes, and overmixing.
Most mashed potato problems start early, so avoid raw garlic, cold dairy, wet potatoes, firm centers, and aggressive mixing before they ruin the texture.
  • Using raw garlic: It can taste sharp and harsh. Warm it gently in butter or roast it first.
  • Undercooking the potatoes: Firm centers lead to lumps and extra mashing.
  • Adding cold dairy: Cold milk or cream cools the potatoes and makes blending harder.
  • Skipping the steam-dry step: Wet potatoes can taste watery and loose.
  • Overmixing: Too much stirring, blending, or whipping can make potatoes gluey.

How to Make Them Creamy, Not Gluey

Because gluey mashed potatoes usually come from overmixing, aggressive blending, or wet potatoes, a silky bowl needs a gentler touch.

Three mashed potato textures compared: too tight, too loose, and just right.
The best texture sits between loose and tight: soft enough to spoon, thick enough to hold swirls, and never worked into paste.

Cook them all the way through

Potatoes should be tender enough to mash easily. If they are still firm in the center, you will have to work them too much, and that extra mixing can make the texture heavy.

Let extra moisture escape

After draining, return the potatoes to the warm pot for a minute. This tiny step makes the mash taste more concentrated and helps the butter and milk blend in properly.

Use warm dairy

Warm milk, cream, or half-and-half folds into hot potatoes more smoothly than cold dairy. It also keeps the potatoes from cooling too quickly while you mash.

Choose the right tool

A potato masher gives a cozy homemade texture. A ricer makes the smoothest, fluffiest potatoes. A blender or food processor can turn potatoes sticky, so leave those tools for soups and sauces.

Potato masher and ricer shown with homestyle mashed potatoes and smoother riced potatoes.
Use a masher for homestyle garlic mashed potatoes, or use a ricer when you want a smoother, fluffier texture.

Stop once they look right

When the potatoes are creamy and the dairy has disappeared into the mash, stop stirring. Extra mixing rarely makes mashed potatoes better; it usually makes them tighter.

Garlic Parmesan Mashed Potatoes

Garlic parmesan mashed potatoes are savory, salty, and a little more steakhouse-style. Make the main recipe, then fold in ½ to ¾ cup finely grated parmesan while the potatoes are still hot.

Garlic parmesan mashed potatoes with grated parmesan, black pepper, melted butter, and chives.
Parmesan adds salt, nuttiness, and a savory edge, so garlic parmesan mashed potatoes pair especially well with steak, mushrooms, roast chicken, or pan sauce.

Add the cheese after mashing so it melts smoothly into the potatoes. Since parmesan brings salt, season lightly at first and adjust after the cheese is fully mixed in. For a bolder garlic-parmesan flavor, add ¼ tsp garlic powder with the warm butter and milk.

This version is especially good with steak, roast chicken, meatballs, mushrooms, or a simple pan sauce. It gives the potatoes a deeper savory finish without making them feel like a completely different dish.

Roasted Garlic Mashed Potatoes

Roasted garlic mashed potatoes taste deeper, sweeter, and more holiday-worthy than the classic version. The garlic loses its sharp edge in the oven, turns soft and golden, then melts into the potatoes like a savory spread.

Roasted garlic being squeezed into hot mashed potatoes with a creamy finished bowl nearby.
Roast the garlic until the cloves turn soft and golden, then mash them in while the potatoes are hot so the flavor spreads evenly.

To make roasted garlic mashed potatoes, slice the top off 1 whole head of garlic, drizzle with a little olive oil, wrap in foil, and roast at 400°F / 200°C for 40–45 minutes, until the cloves are soft and golden. Squeeze the roasted cloves into the hot potatoes and mash them in with the warm butter and milk.

One whole head of roasted garlic sounds like a lot, but roasted garlic is much softer than fresh garlic. It melts into the potatoes and gives them a round, almost sweet savory flavor.

How Much Roasted Garlic Should You Use?

Use one roasted garlic head for a balanced batch. Go down to half a head for a gentler family-style bowl, or use two heads only when you want roasted garlic to be the main flavor.

Roasted Garlic Amount Flavor Level Best For
½ head Gentle and mellow Family dinners or lighter garlic flavor
1 whole head Balanced roasted garlic flavor Classic roasted garlic mashed potatoes
2 heads Deep garlic-lover flavor People who want roasted garlic to be the main flavor
Roasted garlic guide showing half a head, one head, and two heads for mashed potatoes.
Start with one roasted garlic head for balance. Use less for a gentle background flavor, or use more when you want roasted garlic to lead.

For the best flavor, mash the roasted cloves while the potatoes are still hot, then taste before adding garlic powder. Roasted garlic brings sweetness and depth, while garlic powder brings sharper garlic punch. Used together carefully, they make the potatoes taste fuller without turning harsh.

Red Skin Garlic Mashed Potatoes

Red skin garlic mashed potatoes are more rustic than the classic Yukon Gold version. They are slightly chunky, a little more textured, and lovely when you want a no-peel side dish.

Red potatoes are not wrong for mashed potatoes; they are just a different style. Use them when you want a skin-on, homestyle bowl, not when you want the smoothest, fluffiest mash.

Rustic red skin mashed potatoes with visible potato skins, melted butter, chives, and a hand masher nearby.
Red potatoes work best when the mash stays a little chunky and rustic because that texture makes the skins feel intentional instead of tough.

Use 2 lb / 900 g red potatoes, scrubbed well. Leave the skins on if they are thin and tender. Mash with 5–7 garlic cloves, 6 tbsp / 85 g butter, ½ cup / 120 ml milk or half-and-half, and optional ¼ cup / 60 g sour cream.

Keep this version gently mashed rather than perfectly smooth. Red potatoes can get sticky if they are overworked, so use a hand masher and stop while there is still a little texture.

Sour Cream, Cream Cheese, and Heavy Cream Versions

These add-ins change the mood of the bowl: sour cream makes it tangier, cream cheese makes it thicker and richer, and heavy cream gives it more of a holiday-table feel. Add them after the potatoes have been mashed with the warm garlic butter and milk.

Choose sour cream when you want brightness, cream cheese when you want a thicker make-ahead mash, and heavy cream when you want a richer holiday bowl. For everyday garlic mashed potatoes, half-and-half is usually the easiest middle ground.

Garlic mashed potatoes with sour cream, cream cheese, and heavy cream in small bowls around the main bowl.
Use sour cream when the mash needs brightness, cream cheese when it needs body, and heavy cream when you want a richer holiday-style bowl.
Add-In Amount for 2½ lb Potatoes What It Does
Sour Cream ¼–½ cup / 60–120 g Adds tang and creaminess
Cream Cheese 4 oz / 115 g, softened Makes the mash thicker and richer
Heavy Cream Use instead of milk Creates a denser holiday-style texture
Half-and-Half Use instead of milk Gives a balanced creamy finish
Garlic Herb Cheese 3–5 oz / 85–140 g Adds rich, herby flavor

If you are making the potatoes ahead, cream cheese is especially useful because it helps the mash reheat with a thicker, smoother body. If you want a lighter everyday version, stick with milk or half-and-half and use sour cream only as a small finishing touch.

Garlic Mashed Potatoes Without Milk

You can make garlic mashed potatoes without milk. They will not taste exactly the same, but they can still be rich, smooth, and flavorful if you use warm liquid and enough fat.

The important thing is not milk itself; it is moisture plus fat. Broth or potato water loosens the mash, while butter, olive oil, or dairy-free butter keeps it from tasting dry.

Garlic mashed potatoes with broth or potato water, butter or olive oil, and garlic for a no-milk version.
Without milk, the same rule still applies: add moisture to loosen the mash and fat to keep it rich.
No-Milk Option Use This Result
Butter + potato water 6 tbsp butter + ½ cup reserved cooking water Simple, rich, potato-forward
Broth + olive oil ½ cup warm broth + 3–4 tbsp olive oil Savory and lighter
Dairy-free butter + plant milk Dairy-free butter + unsweetened oat or almond milk Creamier vegan-style mash

For the best no-milk flavor, warm the garlic in butter, olive oil, or dairy-free butter before adding it to the potatoes. If you are using broth, add it gradually. You can always loosen thick potatoes, but it is harder to fix a watery bowl.

Dairy-Free or Vegan Garlic Mashed Potatoes

For a dairy-free version, use Yukon Gold potatoes, roasted or sautéed garlic, olive oil or dairy-free butter, warm vegetable broth, and optional unsweetened plant milk. Oat milk works well when it is plain and unsweetened. Almond milk can also work, but avoid anything sweetened or vanilla-flavored.

A good dairy-free formula for 2½ lb potatoes is 5–6 garlic cloves, 4 tbsp olive oil or dairy-free butter, and ½ to ¾ cup warm vegetable broth or unsweetened plant milk. Add the liquid slowly and stop when the potatoes are spoonable.

Dairy-free mashed potatoes with roasted garlic, olive oil, vegetable broth, plant milk, and herbs.
Roasted garlic and olive oil help dairy-free garlic mashed potatoes taste full and rounded, even without cream or butter.

Roasted garlic is especially good here because it adds sweetness and depth without needing cream. Finish with chives, parsley, black pepper, and a small drizzle of olive oil.

If you are looking for a lower-carb mash instead of a potato-based dairy-free version, you may also like MasalaMonk’s keto cauliflower mashed potatoes.

Small Batch and Holiday Scaling

The main recipe makes 6 servings, which works well for a family dinner or a modest holiday side. For a smaller dinner or a bigger table, scale the recipe with the same basic ratio and adjust the warm liquid at the end.

Small Batch Garlic Mashed Potatoes

For 2–3 servings, make a half batch. This is the right size for steak night, roast chicken for two, or a smaller dinner where you do not want a refrigerator full of leftovers.

Ingredient Small Batch Amount
Yukon Gold potatoes 1¼ lb / 565 g
Garlic cloves 3 cloves
Butter 3 tbsp / 42 g
Milk or half-and-half ⅓ cup / 80 ml, plus more if needed
Sour cream 2 tbsp, optional
Salt and pepper To taste

How to Scale for a Holiday Table

For 10–12 servings, double the main recipe: use 5 lb / 2.25 kg potatoes, 12 garlic cloves, 12 tbsp / 170 g butter, and 1½ cups / 360 ml milk or half-and-half. Start with slightly less liquid, then add more after mashing until the potatoes are soft enough to spoon but still hold gentle swirls.

Holiday mashed potato scaling guide with a large bowl and ingredients for 10 to 12 servings.
For a holiday batch, scale the ingredients carefully and make the potatoes slightly softer than usual so they stay spoonable as they sit.

When scaling up, use a large enough pot so the potato pieces cook evenly. If the pot is crowded, the potatoes may cook unevenly and the bottom pieces can soften before the top pieces are ready.

For a fuller holiday plate, these potatoes pair naturally with a creamy green vegetable side like MasalaMonk’s green bean casserole.

Make-Ahead Garlic Mashed Potatoes

Garlic mashed potatoes can be made ahead, which is helpful for holidays, dinner parties, and busy evenings. Since mashed potatoes firm up as they cool, make them slightly softer than you want them at serving time.

Garlic mashed potatoes stored in an airtight container with butter and milk nearby for reheating.
Make-ahead garlic mashed potatoes work best when you plan for reheating, so keep butter and warm dairy nearby to refresh the texture before serving.

How far ahead can you make them?

For the best texture, make them up to 2 days ahead. They can be refrigerated for 3–4 days, but they are creamiest when reheated within the first couple of days. For general leftover safety, the USDA recommends refrigerating leftovers for 3–4 days and reheating them to 165°F.

How to store them

Let the potatoes cool, then transfer them to an airtight container. If you want to reduce drying, press a piece of parchment or plastic wrap against the surface before covering.

How to reheat them

Reheat gently with extra butter and a splash of warm milk, cream, broth, or half-and-half. Stir slowly and avoid whipping. For oven reheating, place the potatoes in a covered baking dish and warm at 325°F / 160°C, stirring once or twice and adding more liquid as needed.

Garlic mashed potatoes being reheated gently with warm milk or cream and butter in a pot.
Reheat slowly and add moisture back gradually. Warm milk, cream, broth, or butter helps cold mashed potatoes become creamy again.

The gentlest way to revive cold mashed potatoes is to warm a little milk, cream, or broth first, then fold the chilled potatoes into it slowly. This loosens the mash without forcing you to whip it, which helps protect the texture.

How to keep them warm

For a holiday meal, transfer hot mashed potatoes to a buttered slow cooker and hold on the warm setting. Stir occasionally and add a splash of warm milk or broth if they thicken too much. Avoid holding them on high heat, because the edges can dry out.

Can you freeze garlic mashed potatoes?

You can freeze them, although the texture may change after thawing. Mashed potatoes with enough butter, cream, sour cream, or cream cheese freeze better than lean versions. Reheat slowly and stir in extra warm dairy or broth to bring back creaminess.

If you end up with extra mashed potatoes, turn them into something crisp the next day. MasalaMonk’s croquettes recipe includes a potato croquette method that works beautifully with leftover mash.

Slow Cooker and Instant Pot Garlic Mashed Potatoes

The stovetop method gives the most control, while slow cooker and Instant Pot notes are useful when the stove is full or you are cooking for a crowd.

Method Best Use Texture
Stovetop, then hold warm Best overall method for holidays and company Creamiest and easiest to control
Cook fully in slow cooker When the stove is full Useful, but usually denser
Instant Pot Fast cooking Soft and convenient, but less controlled than stovetop

Slow Cooker Method

The slow cooker is most useful for keeping finished mashed potatoes warm. For the best texture, make the potatoes on the stovetop first, then hold them warm in a buttered slow cooker.

Garlic mashed potatoes held warm in a slow cooker with butter, chives, and soft spoon marks.
Once the potatoes are finished, a buttered slow cooker keeps them warm without taking up burner space during a crowded meal.

Add the hot mash to the buttered insert, cover, and keep on warm. Stir gently before serving and add a splash of warm milk, cream, or broth if the potatoes thicken while they sit.

If you want to cook the potatoes fully in the slow cooker, use peeled potato chunks, garlic, salt, butter, and a small amount of broth or water. Cook until the potatoes are fully tender, then mash with warm dairy. The texture is usually denser than stovetop mashed potatoes, but the method is useful when the stove is full.

If the slow cooker is already out for dinner, these potatoes are a natural side for a saucy main like MasalaMonk’s slow cooker pork loin. Make the potatoes on the stovetop, then hold them warm while the rest of the meal finishes.

Instant Pot Method

For Instant Pot garlic mashed potatoes, use about 2 lb / 900 g potatoes, 5–6 garlic cloves, 1 cup water or broth, and salt. Cook on high pressure for about 8 minutes, then quick release. Drain if needed, or mash in the remaining liquid if only a small amount is left. Add butter and warm milk or half-and-half after cooking.

Cooked potato chunks and garlic in a pressure cooker insert with butter and warm milk nearby.
Pressure cooking saves time, but tenderness still matters; check the potatoes before mashing so you do not chase lumps later.

Pressure cooker timing can vary depending on potato size, so cut the potatoes evenly and check that they are fully tender before mashing.

Troubleshooting Garlic Mashed Potatoes

If the bowl is not perfect, do not panic and do not keep whipping. Most mashed potato problems get worse with more mixing. Instead, first decide what is wrong: texture, moisture, seasoning, or garlic strength. Then fix that one thing gently.

Check the Texture Before You Add More

Before adding anything, taste and check the texture separately. A bowl can be bland but perfectly creamy, or well-seasoned but too thick, so fix only the problem you actually have.

Troubleshooting guide for mashed potatoes with fixes for thick, thin, bland, and too-garlicky potatoes.
Start with texture before you change the flavor. A splash of warm dairy, extra potato, salt, or garlic should fix the specific problem you see.

Texture and Moisture Fixes

Problem Likely Cause How to Fix It
Gluey Overmixed, blended, or processed too hard Stop mixing. Then fold in warm butter or cream and serve as a rustic mash.
Lumpy Potatoes were undercooked Next time, cook until a knife slides through easily. For small lumps, a ricer can help.
Too thick Not enough warm liquid Add warm milk, cream, or broth 1–2 tbsp at a time. After each addition, stir gently and check again.
Too thin Too much liquid or potatoes were not dried Warm gently uncovered to evaporate moisture. If available, add more mashed potato to bring back body.
Watery Potatoes were not drained or steam-dried well Warm gently in the pot and stir carefully. Next time, steam-dry after draining.

Flavor and Garlic Fixes

Problem Likely Cause How to Fix It
Bland Not enough salt, butter, or garlic Add salt gradually first. Then add more butter, parmesan, garlic butter, or herbs if needed.
Too garlicky Garlic was raw or harsh Add more potato, butter, cream, sour cream, or parmesan to soften the flavor.
Not garlicky enough Garlic was too soft or strained out Add garlic powder, roasted garlic, or extra garlic butter in small amounts. However, taste after each addition because garlic powder gets strong quickly.
Bitter or harsh garlic Garlic scorched, was old, or was added raw Use fresh cloves, warm them gently over low heat, or switch to roasted garlic next time.

Once mashed potatoes turn gluey, there is no perfect way to reverse the texture. At that point, stop mixing, add flavor, and serve them as a thicker homestyle mash. Leftovers can also become potato cakes, mashed potato pancakes, or a casserole topping.

What to Serve with Garlic Mashed Potatoes

A bowl of garlic mashed potatoes can carry a simple dinner, so you do not need much else on the plate. They are soft enough for gravy, rich enough for steak, and comforting enough to sit beside roast chicken, mushrooms, or green beans.

They are especially good with anything rich enough to drag through the potatoes: roast chicken drippings, mushroom pan sauce, turkey gravy, steak juices, garlicky butter, or extra melted butter settling into the ridges.

Weeknight dinners

Holiday mains

  • Roast turkey
  • Roast beef
  • Baked ham
  • Turkey gravy
  • Green bean casserole
  • Roasted carrots or Brussels sprouts

Steakhouse-style dinner

  • Steak with pan sauce or chimichurri
  • Garlic butter mushrooms
  • Roasted asparagus
  • Creamed spinach
  • Red wine gravy

For a cozy everyday plate, serve them with roast chicken, a spoonful of pan juices, and something green. For a richer dinner, add steak, mushrooms, or gravy, then let the soft swirls catch the butter, sauce, and juices. That is where these garlic mashed potatoes do their best work.

Garlic mashed potatoes served with roast chicken, gravy or pan juices, green beans, and mushrooms.
The best pairings give the potatoes something rich to catch, whether that is gravy, roast chicken juices, mushroom sauce, or melted butter.

Garlic Mashed Potatoes Recipe

Creamy, buttery garlic mashed potatoes made with Yukon Gold potatoes, warm garlic butter, milk or half-and-half, and optional sour cream. The method keeps the potatoes smooth, flavorful, and not gluey.

Prep Time15 minutes
Cook Time20 minutes
Total Time35 minutes
Yield6 servings
CourseSide Dish
CuisineAmerican
MethodStovetop
Best ToolMasher or ricer

Equipment

  • Large pot or Dutch oven
  • Colander
  • Small saucepan
  • Potato masher or potato ricer
  • Spatula or wooden spoon

Ingredients

  • 2½ lb / 1.1 kg Yukon Gold potatoes, peeled and cut into 1 to 1½-inch chunks
  • 6 garlic cloves, smashed and peeled
  • 6 tbsp / 85 g unsalted butter
  • ¾ cup / 180 ml whole milk or half-and-half
  • ¼ cup / 60 g sour cream, optional
  • 1½–2 tsp fine salt, plus more for the cooking water
  • ¼ tsp black pepper or white pepper
  • Chives or parsley, optional
  • Extra melted butter, optional for serving

Instructions

  1. Cook the potatoes. Add the potato chunks to a large pot and cover with cold water by about 1 inch. Salt the water generously. Bring to a boil, then reduce to a steady simmer and cook for 15–20 minutes, until the potatoes are very tender. The potatoes are ready when a knife slides through the center with no resistance.
  2. Warm the garlic butter and milk. While the potatoes cook, combine the butter, milk or half-and-half, and smashed garlic cloves in a small saucepan. Warm over low heat until the butter melts and the garlic smells mellow. The mixture should smell fragrant and garlicky, not scorched or boiled.
  3. Drain and dry. Drain the potatoes well. Return them to the warm empty pot for about 1 minute so excess moisture can steam off.
  4. Mash. Mash the hot potatoes with a potato masher, or pass them through a ricer. Add the warm garlic butter and milk gradually. For a softer garlic flavor, strain out the garlic. For stronger flavor, mash the softened garlic into the potatoes.
  5. Finish. Fold in sour cream if using. Season with salt and pepper. Taste and adjust until the potatoes are creamy, buttery, and well seasoned. The finished potatoes should hold soft swirls but still spoon easily.
  6. Serve. Spoon into a warm bowl and finish with melted butter, chives, parsley, or extra black pepper.

Notes

  • Use Yukon Gold potatoes for the creamiest texture.
  • Use a ricer for smoother, fluffier mashed potatoes.
  • Avoid a blender, food processor, or aggressive electric mixing.
  • For garlic parmesan mashed potatoes, fold in ½–¾ cup finely grated parmesan after mashing.
  • For roasted garlic mashed potatoes, use 1 whole head roasted garlic for balanced flavor, or 2 heads only if you want roasted garlic to be the main flavor.
  • For red skin mashed potatoes, use red potatoes, leave the skins on, and keep the texture rustic rather than perfectly smooth.
  • Serve hot. Mashed potatoes thicken as they sit, so loosen with a splash of warm milk or broth before serving if needed.
  • For the most inviting bowl, make shallow swirls on top and let melted butter settle into the ridges before serving.
  • Store leftovers in an airtight container in the refrigerator for 3–4 days.
  • Reheat gently with extra butter and a splash of warm milk, cream, or broth.
  • Freezing is possible, but the texture may change after thawing.

FAQs About Garlic Mashed Potatoes

What is the best potato for garlic mashed potatoes?

Yukon Gold potatoes are the best default because they are creamy, buttery, and forgiving. Russets make a fluffier mash, while red potatoes are better for rustic red skin mashed potatoes.

Fresh garlic or roasted garlic: which tastes better?

Fresh garlic warmed in butter and milk gives a balanced everyday flavor. Roasted garlic tastes sweeter, deeper, and more mellow. Use fresh garlic when you want speed, and roasted garlic when you want a richer holiday-style side dish.

How much garlic should I use?

Use 6 garlic cloves for 2½ lb / 1.1 kg potatoes. If using roasted garlic, use 1 whole head because the flavor is softer. If the finished potatoes need more punch, add ¼–½ tsp garlic powder.

Are garlic mashed potatoes and garlic whipped potatoes the same?

People often use the names loosely, but garlic whipped potatoes are usually smoother and lighter. For a whipped-style texture, use a ricer or mash very well by hand, then fold in warm dairy. If you use a hand mixer, keep it on low and stop quickly so the potatoes do not become gummy.

Why did my mashed potatoes turn gluey?

They were probably overmixed or blended too aggressively. Potatoes release starch when worked too much. Use a masher or ricer, add warm dairy gradually, and stop once the potatoes are creamy.

How do you make garlic mashed potatoes creamier?

Use Yukon Gold potatoes, warm milk or half-and-half, enough butter, and optional sour cream. Also make sure the potatoes are fully cooked and steam-dried before mashing.

Do garlic mashed potatoes need sour cream?

Not necessarily. Butter and warm milk or half-and-half are enough for a creamy batch. Sour cream adds tang and body, so use it when you want a richer flavor.

Can I make garlic mashed potatoes with cream cheese?

For a thicker, richer batch, add 4 oz / 115 g softened cream cheese after mashing. It is especially useful for make-ahead garlic mashed potatoes because it helps the texture reheat with more body.

Can I boil garlic with the potatoes?

Boiling garlic with the potatoes gives a soft, simple garlic flavor. For a smoother and more rounded taste, warm smashed garlic in butter and milk. For a sweeter holiday-style version, use roasted garlic.

What should I do if my mashed potatoes are not garlicky enough?

Add garlic flavor gradually. Mash in the softened garlic cloves if you strained them out, add a little roasted garlic, or stir in ¼ tsp garlic powder. Taste before adding more because garlic powder gets strong quickly.

What can I use instead of milk?

You can use half-and-half, heavy cream, warm broth, reserved potato cooking water, unsweetened plant milk, or a mix of broth and olive oil. Add any liquid gradually so the potatoes do not become too loose.

Are red potatoes good for this recipe?

Red potatoes are good for rustic, skin-on mashed potatoes. They are not the best choice for an ultra-smooth mash because they are waxier. Mash them gently and avoid electric mixing.

How far ahead can I make them?

For the best texture, make them up to 2 days ahead. Store in an airtight container in the refrigerator, then reheat gently with extra butter and a splash of warm milk, cream, or broth.

How do I reheat garlic mashed potatoes without drying them out?

Reheat slowly and add moisture back in. Use a splash of warm milk, cream, broth, or half-and-half, plus a little butter. Stir gently and avoid whipping them aggressively.

Back to top
Posted on — 1 Comment

Scrambled Eggs with Cottage Cheese Recipe

Scrambled eggs with cottage cheese served on a plate with toast, chives, and black pepper.

Scrambled eggs with cottage cheese can go one of two ways: creamy, soft, and surprisingly good, or loose and a little strange. The difference is not luck. It is the ratio, the cottage cheese you use, and how gently you cook the eggs.

This recipe is built for the good version: high-protein scrambled eggs that stay tender, creamy, and satisfying without turning wet or rubbery. It walks you through the ratio, the smoother blended option, the egg-white version, microwave method, add-ins, and the fixes that keep cottage cheese eggs from turning watery.

This is especially useful if you want a higher-protein breakfast but still want food that feels warm, familiar, and satisfying. It is not trying to turn eggs into a diet trick; it is just a better, creamier scramble with more staying power.
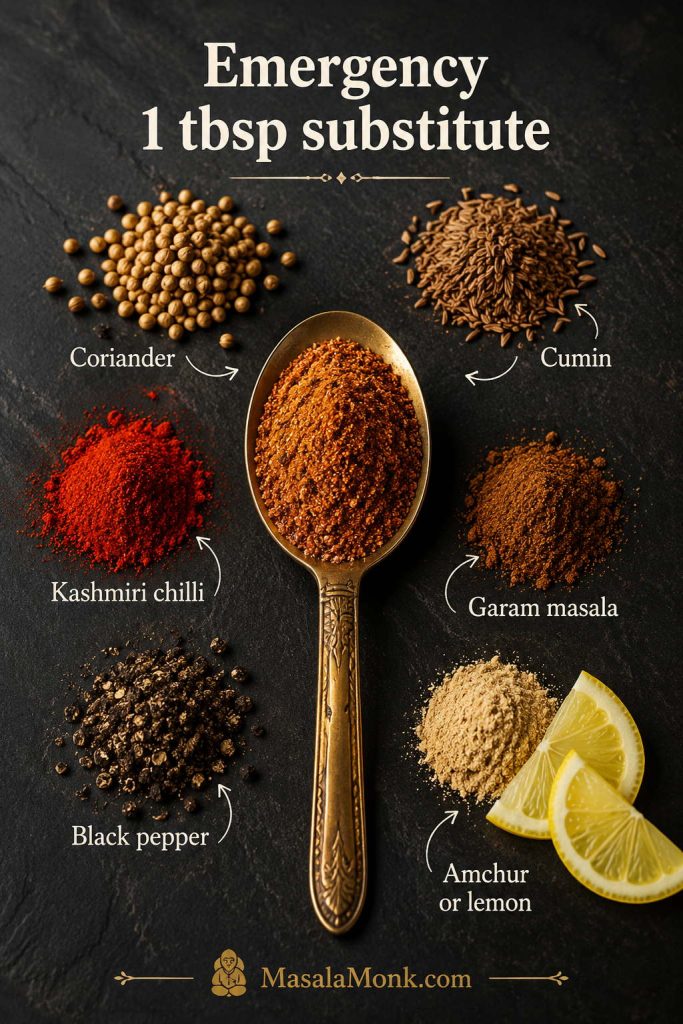
Quick Answer: How to Make Scrambled Eggs with Cottage Cheese

To make scrambled eggs with cottage cheese, whisk 2 large eggs with 1/4 cup cottage cheese, then cook the mixture gently in a nonstick skillet over medium-low heat. Push the eggs slowly with a silicone spatula until they are thickened, creamy, and just set through.

Best Starting Ratio

The best starting ratio is 1/4 cup cottage cheese for every 2 eggs. Small-curd 2% cottage cheese gives the most reliable texture, while full-fat cottage cheese tastes richer. If the eggs look loose in the pan, use less cottage cheese next time, drain very liquid cottage cheese, avoid high heat, and cook gently long enough for extra moisture to evaporate.

The full cottage cheese egg ratio guide below shows how to make the eggs subtler, creamier, or better suited to egg whites.

You do not need milk here. Cottage cheese already adds moisture and body, so milk can push the eggs toward watery instead of creamy.

If your last batch turned loose or watery, skip ahead to the watery cottage cheese egg fixes before you cook again.

At a glance: Use 4 large eggs, 1/2 cup / 110–120g cottage cheese, and 1 tablespoon / 14g butter for 2 servings. Cook in a nonstick skillet over medium-low heat for 4–5 minutes. Most reliable cottage cheese: small-curd 2% or full-fat. Texture goal: creamy, soft, and fully set, not runny.

Ratio guide showing 2 eggs with 1/4 cup cottage cheese and 4 eggs with 1/2 cup cottage cheese.
For the easiest cottage cheese egg ratio, start with 1/4 cup cottage cheese for every 2 large eggs. Then adjust slightly if your cottage cheese is extra thick or watery.

What the Texture Should Look Like

The goal is not a runny protein hack or a rubbery diet scramble. The best version should taste like soft scrambled eggs with a little extra creaminess, body, and staying power.

Done right, the eggs taste creamy and lightly savory, not aggressively cheesy. The curds soften into the scramble, the pepper gives it a little lift, and a handful of chives or scallions makes the whole plate feel fresher.

A good plate feels simple but a little upgraded: soft eggs, gentle creaminess from the cottage cheese, enough protein to hold you over, and a texture that still feels like breakfast instead of a food trend.

Close-up of creamy scrambled eggs with cottage cheese showing soft folds, chives, pepper, and no pooling liquid.
Look for soft folds that hold together on the fork. That texture means the eggs are creamy and set, rather than loose, wet, or overcooked.

Why Add Cottage Cheese to Scrambled Eggs?

Cottage cheese changes scrambled eggs in three useful ways: it adds protein, makes the eggs more satisfying, and gives them a creamy texture when cooked gently. It is also mild enough that the eggs still taste like eggs, especially if you use a balanced ratio and season them well.

More Protein Without Protein Powder

Eggs are already a strong breakfast ingredient, but cottage cheese makes them more filling. That is why cottage cheese eggs are popular with people looking for high-protein breakfasts, lighter brunch ideas, and quick post-workout meals.
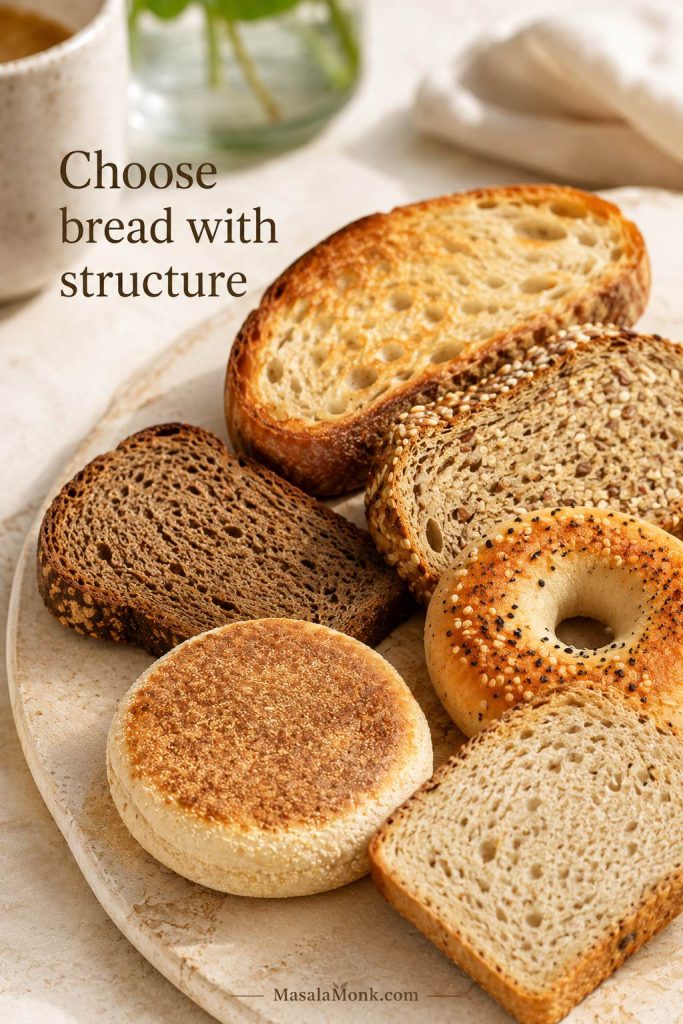
The exact protein will depend on your eggs and cottage cheese brand. If you are tracking closely, use the nutrition label on your cottage cheese and a food database such as USDA FoodData Central.

For another breakfast built around everyday protein-rich ingredients, this protein oatmeal guide uses options like eggs, yogurt, cottage cheese, paneer, nuts, and seeds without relying only on protein powder.

Creamier Texture When Cooked Gently

Cottage cheese adds moisture and body to the eggs. With medium-low heat, the curds soften into the scramble and help the eggs stay tender. With high heat, the eggs can tighten too quickly and turn rubbery before the cottage cheese has a chance to settle into the mixture.

Mild Flavor, Easy Add-Ins

These eggs do not have to taste strongly of cottage cheese. If you use small-curd cottage cheese and whisk it in well, the flavor is mild, creamy, and lightly savory. Chives, scallions, black pepper, hot sauce, chili crisp, avocado, spinach, and toast all work well with the flavor.

Ingredients for Scrambled Eggs with Cottage Cheese

You only need a few ingredients, but each one affects the final texture. In a simple recipe like this, small choices matter: the cottage cheese style, pan heat, and amount of salt all change the result.

Ingredients for scrambled eggs with cottage cheese including eggs, cottage cheese, butter, pepper, salt, and chives.
Because this recipe uses only a few ingredients, each choice matters. Thick cottage cheese, light salt, black pepper, and fresh chives help the scramble taste balanced.

Eggs

Use large eggs. Four large eggs make two servings, while two large eggs plus 1/4 cup cottage cheese make a good single serving. Whole eggs give the best flavor, color, and structure. You can add egg whites for more protein, but an all-egg-white cottage cheese scramble is easier to overcook and can turn thin if the ratio is not controlled.
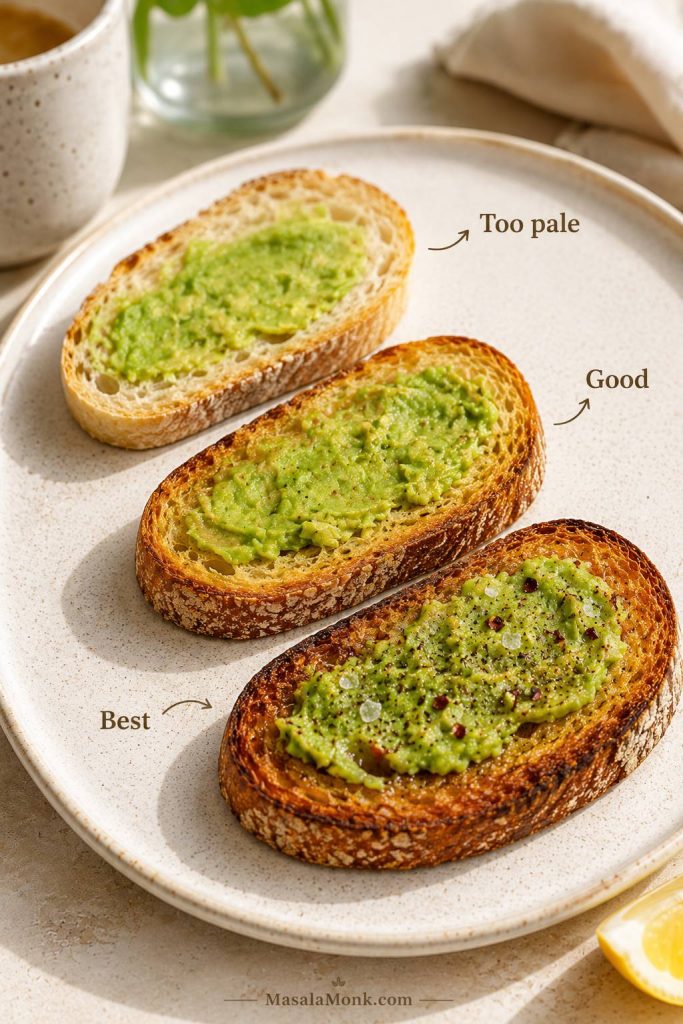
Cottage Cheese

Use 1/2 cup / about 4 oz / 110–120g cottage cheese for 4 eggs, or 1/4 cup / 55–60g cottage cheese for 2 eggs. Small-curd cottage cheese is the easiest choice because it blends into the eggs more naturally. Large-curd cottage cheese works, but the curds stay more visible.

For the most reliable texture, use 2% cottage cheese. Full-fat cottage cheese gives richer eggs. Fat-free cottage cheese can work, but it often contains more moisture, so it can make the eggs wetter if you use too much.

Butter, Oil, or Cooking Spray

Butter gives the richest flavor and helps the eggs cook into soft folds. Use 1 tablespoon / 1/2 oz / 14g butter for 4 eggs. Olive oil works well if you want something lighter; use 1–2 teaspoons / 5–10ml. Cooking spray is fine for a lower-calorie version, but use a truly nonstick pan and keep the heat gentle.

Salt, Pepper, and Herbs

Cottage cheese is already salty, so season carefully. Start with black pepper and only a tiny pinch of salt, then taste after cooking. Chives, scallions, dill, parsley, and cracked black pepper are especially good here.
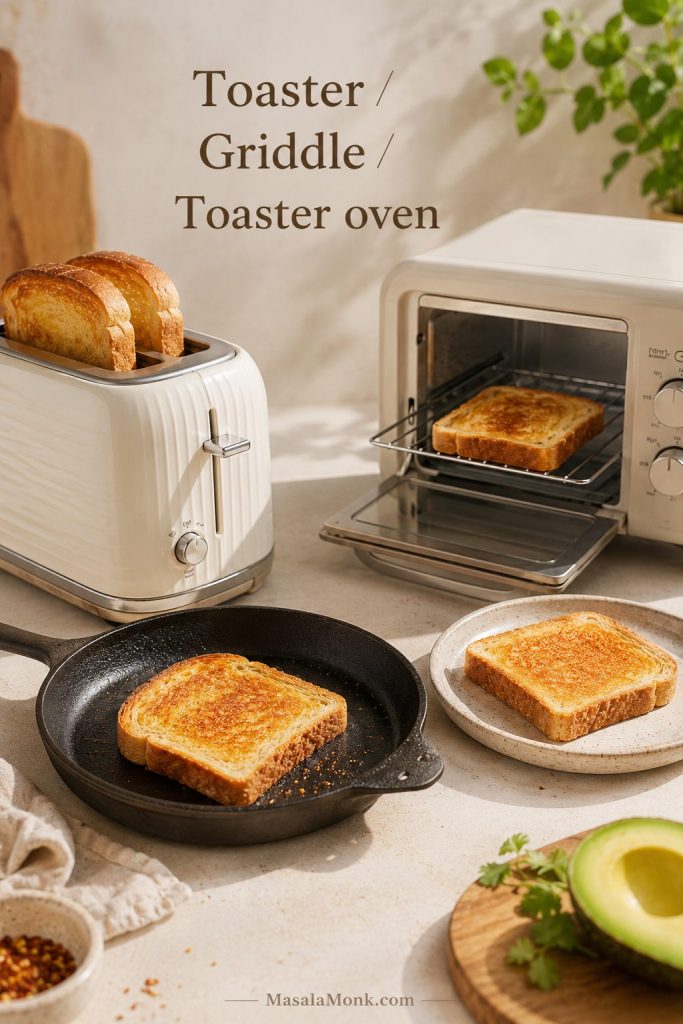
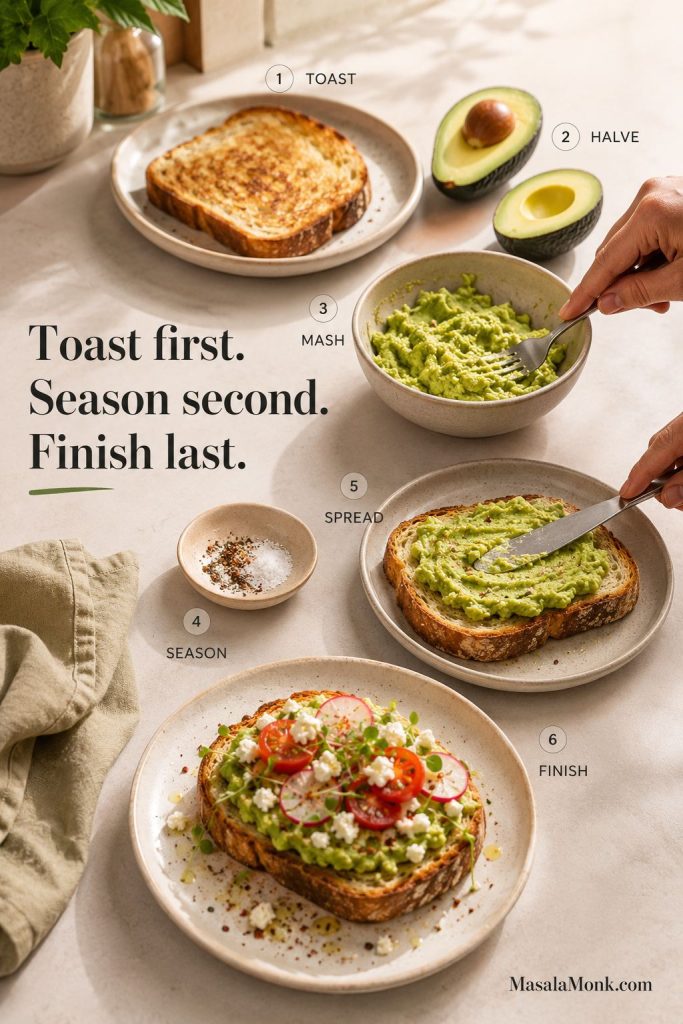
Best Cottage Cheese for Scrambled Eggs

The most reliable cottage cheese for scrambled eggs is small-curd 2% cottage cheese. It is creamy enough to soften into the eggs but not so rich that the scramble feels heavy. It also tends to behave better in the pan than watery fat-free cottage cheese.

Three bowls comparing small-curd, full-fat, and watery fat-free cottage cheese for scrambled eggs.
For most batches, 2% small-curd cottage cheese is the safest starting point because it softens into the eggs more evenly, while watery cottage cheese can loosen the scramble.

Small-Curd vs Large-Curd Cottage Cheese

The smaller curd disperses more evenly and gives a softer texture. Large-curd cottage cheese is fine if you like visible curds, but it can make the eggs look more uneven.

Small-curd and large-curd cottage cheese scrambled eggs compared side by side.
A smaller curd gives smoother scrambled eggs, while large-curd cottage cheese keeps more visible texture. Choose the one that matches how much curd you want to notice.

If you are cooking for someone who is skeptical of cottage cheese, use small-curd cottage cheese or blend the eggs and cottage cheese together for a smoother scramble.

For the full texture breakdown, compare the whisk, blend, and fold methods.

2%, Full-Fat, or Fat-Free?

Cottage Cheese Type Result in Scrambled Eggs Best Use
2% Creamy, balanced, reliable Best everyday choice
Full-fat Richest and softest Best for extra-creamy eggs
Low-fat Can work well, depending on brand Good if it is thick, not watery
Fat-free More likely to release moisture Use less and cook gently

If your cottage cheese looks especially liquidy, spoon off a little of the excess before adding it to the eggs. Thick, creamy cottage cheese gives you a much easier path to a soft scramble.

Should You Blend the Cottage Cheese First?

Blend the cottage cheese with the eggs if you want a smooth texture with no visible curds. Do not blend if you like the soft, slightly cheesy texture of cottage cheese eggs. For most people, whisking small-curd cottage cheese directly into the eggs is enough.

Scrambled Eggs with Cottage Cheese Ratio Guide

Start with the Balanced Ratio

The safest starting ratio is 1/4 cup cottage cheese for every 2 large eggs. Another way to think of it is about 1–2 tablespoons cottage cheese per egg, depending on how creamy or subtle you want the scramble.

If you are nervous about curds or wateriness, start with 2 tablespoons cottage cheese for 2 eggs. Then, if you love cottage cheese and want a creamier, more filling scramble, increase slightly without overloading the eggs.

Ratio Options by Texture

Style Eggs Cottage Cheese Metric Best For
Subtle / beginner 2 large eggs 2 tbsp 25–30g Less curdy, safer first try
Balanced default 2 large eggs 1/4 cup 55–60g Creamy, high-protein everyday eggs
Family batch 4 large eggs 1/2 cup / about 4 oz 110–120g Main recipe-card version
Extra creamy 2 large eggs 1/3 cup 75–80g More cottage-cheese-forward
Egg-white boosted 2 eggs + 1/4–1/3 cup egg whites 1/4 cup 60–80ml egg whites + 55–60g cottage cheese Higher-protein version
Cottage cheese scrambled eggs ratio guide showing subtle, balanced, extra creamy, and egg-white boosted versions.
The ratio changes the whole scramble. Start balanced, then go lighter for subtle cottage cheese flavor or creamier when you want a more filling breakfast.

What Testing Showed

After testing the whisked, blended, and folded versions, the tradeoff is simple: the whisked 2-eggs-to-1/4-cup cottage cheese ratio is the most reliable everyday balance. Blending makes the smoothest scramble, but it tastes a little less like classic soft eggs. Folding the cottage cheese in near the end gives the most visible curds and works only when the cottage cheese is thick, not watery.

For your first try, choose the balanced default. Once you know how your cottage cheese behaves in the pan, you can go lighter, smoother, or more cottage-cheese-forward next time.

Make this first: If this is your first time making scrambled eggs with cottage cheese, use 2 eggs, 1/4 cup / 55–60g cottage cheese, 1/2 tablespoon butter, black pepper, and medium-low heat. It is the safest balance of creamy, high-protein, and not too wet.

Once the ratio is set, use the gentle stovetop method to keep the eggs creamy instead of dry.

How to Make Scrambled Eggs with Cottage Cheese

The whole recipe comes down to gentle heat and patience. A few quiet minutes in the pan can turn the eggs into soft, creamy folds instead of dry curds or a loose scramble.

Step-by-step guide showing eggs being whisked, cottage cheese being added, eggs cooking gently, and the finished scramble.
The steps are simple, but the heat does the real work. Cook slowly so the eggs gather into soft folds instead of tightening into dry curds.

Step 1: Whisk the Eggs

Crack the eggs into a mixing bowl and whisk until the yolks and whites are fully combined. This helps the cottage cheese distribute evenly instead of sitting in pockets.

Step 2: Add the Cottage Cheese

Whisk in the cottage cheese, black pepper, and only a small pinch of salt. If you want smoother eggs, blend the eggs and cottage cheese for a few seconds instead of whisking by hand.

Step 3: Heat the Pan Gently

Warm a nonstick skillet over medium-low heat. For 2 eggs, an 8-inch skillet works well. For 4 eggs, use a 10-inch skillet. Add butter or oil and let it melt without browning.

Step 4: Cook Slowly Into Soft Folds

Pour in the egg mixture. Let the edges set for 10–20 seconds, then use a silicone spatula to slowly push the eggs from the outside of the pan toward the center. Keep moving gently so the eggs gather into soft, creamy folds instead of breaking into tiny dry curds. The pan should look calm, not sizzling.
Scrambled eggs with cottage cheese cooking gently in a nonstick pan with a silicone spatula.
A quiet pan is a good sign. When the eggs move slowly under the spatula, they have time to turn creamy before they dry out.

Step 5: Stop While Creamy, Not Runny

Remove the eggs from the heat when they are thickened, creamy, and set through. They will keep cooking slightly from residual heat, so do not wait until they look completely dry in the pan.

You will know they are ready when the eggs hold soft folds on the spatula, look creamy instead of shiny-wet, and slide onto the plate without liquid pooling behind them. If the eggs look glossy but hold together, they are usually ready; if liquid runs around them, give them a little more time over gentle heat.

Doneness guide for cottage cheese scrambled eggs showing too wet, just right, and too dry textures.
“Just right” is creamy but not runny. If the eggs still slide apart with liquid around them, keep them on gentle heat a little longer.

If the eggs still look shiny, separated, or loose, the troubleshooting section will help you fix the next batch.

For food safety, scrambled eggs should be cooked until they are not runny. The FDA’s egg safety guidance recommends cooking egg dishes thoroughly, especially when serving children, older adults, pregnant people, or anyone with a weakened immune system.

Whisk, Blend, or Fold? Three Texture Options

There is more than one way to add cottage cheese to scrambled eggs. The best method depends on whether you want the cottage cheese to disappear into the eggs or stay slightly visible.

Method How to Do It Texture Best For
Whisk Whisk cottage cheese into raw eggs Soft, lightly curdy, fluffy Best everyday version
Blend Blend eggs and cottage cheese briefly Smooth and creamy Cottage-cheese skeptics
Fold Cook eggs first, then fold cottage cheese near the end More visible curds People who like cottage cheese texture
Whisk, blend, and fold methods for adding cottage cheese to scrambled eggs.
Whisking is the everyday method, blending makes the smoothest cottage cheese eggs, and folding gives the most noticeable curd texture.

Choose blended if visible curds bother you, whisked for the easiest weekday scramble, and folded only if you actually enjoy the cottage cheese texture.

Using egg whites changes the texture, so check the egg-white version before swapping out too many yolks.

When Should You Add the Cottage Cheese?

Add cottage cheese before cooking for the whisked or blended versions. Fold it in near the end only if you want a more visible cottage cheese texture and your cottage cheese is thick enough not to loosen the eggs.

Egg Whites with Cottage Cheese

Egg whites with cottage cheese are useful if you want a lighter, higher-protein scramble, but the ratio matters. Because they contain more water than yolks, they need a little more care in the pan. Use too many whites with too much cottage cheese, and the eggs can turn thin.

Best Egg-White Ratio

For the creamiest texture, keep at least some whole egg in the scramble. The yolk adds flavor, color, and a little structure, which helps the egg whites feel less flat.

Version Use This Ratio Texture
Balanced egg-white boost 2 eggs + 1/4 cup / 60ml egg whites + 1/4 cup / 55–60g cottage cheese Creamy, lighter, still flavorful
Leaner version 1 egg + 1/2 cup / 120ml egg whites + 2–3 tbsp cottage cheese Lighter, less rich, more delicate
All egg whites 3/4 cup / 180ml egg whites + 2 tbsp cottage cheese Leanest, but easiest to overcook or make watery
Egg-white cottage cheese scrambled eggs ratio guide with balanced, leaner, and all-egg-white versions.
Egg whites add protein, but they also add water. Keeping one yolk in the mix helps cottage cheese eggs stay creamy, structured, and less likely to turn thin.

If your egg-white scramble turns thin, the watery egg fixes explain how to adjust the cottage cheese and heat.

Lighter High-Protein Version

For a lighter plate, use 1 whole egg, 1/2 cup / 120ml egg whites, and 2–3 tablespoons cottage cheese. Serve it with spinach, tomatoes on the side, or avocado toast depending on whether you want a lower-calorie breakfast or a more filling meal. It is not a shortcut or a promise; it is simply a protein-rich breakfast that can fit into many eating styles depending on what you serve with it.

How to Keep Egg-White Cottage Cheese Eggs from Getting Watery

Use a thick cottage cheese, skip the milk, and cook over medium-low heat until the eggs are set through. If liquid starts pooling in the pan, keep the heat gentle and give the eggs a little more time. Do not crank the heat up to rush them; that usually makes the eggs rubbery before the moisture cooks off.

Macro-Friendly Add-Ins

Spinach, mushrooms, scallions, tomatoes on the side, hot sauce, and herbs all work well. If you are adding mushrooms, peppers, or vegetables that release moisture, cook them first so they do not loosen the eggs.

Microwave Cottage Cheese Scrambled Eggs

The skillet version tastes best, but microwave cottage cheese eggs are useful for busy mornings, office breakfasts, and quick solo meals. The texture will be firmer than stovetop scrambled eggs, so cook in short bursts and stir often.

Mug Method for One

Whisk 1 large egg with 1 tablespoon / about 15g cottage cheese in a large microwave-safe mug. Add black pepper and a tiny pinch of salt if needed. Microwave for 30 seconds, stir, then microwave in 15–30 second bursts until the egg is just set through.
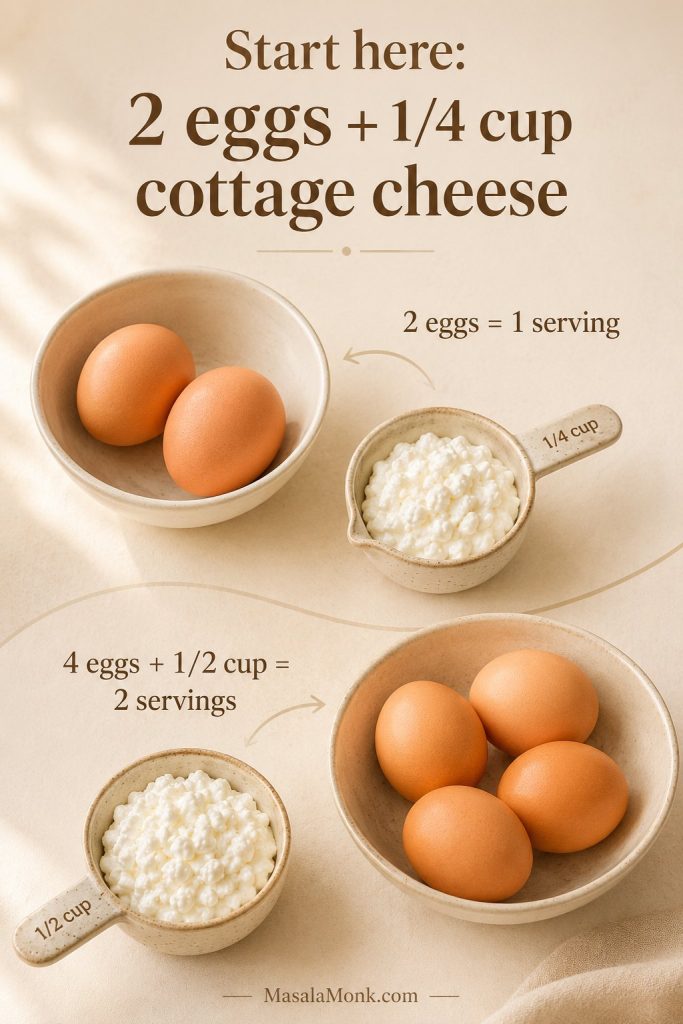
Microwave cottage cheese scrambled eggs made in a mug with a whisked egg mixture and a finished bowl of eggs.
For microwave cottage cheese eggs, short bursts are safer than one long cook. Stirring between rounds helps the center set without turning spongy.

Microwave Texture Tips

  • Use a bigger mug than you think you need.
  • Stir between bursts so the egg cooks evenly.
  • Microwave power varies, so treat the final 15–30 seconds as flexible.
  • Stop when the egg is just set, then let it stand for 20–30 seconds before eating.
  • Add herbs, hot sauce, or chives after cooking.
  • For 2 eggs, use a small microwave-safe bowl instead of a narrow mug.

Add-Ins and Serving Ideas

Scrambled eggs with cottage cheese are mild enough to go savory, spicy, herby, or brunch-style. Avoid adding raw vegetables that release a lot of water directly to the pan in large amounts. Instead, cook them first or serve them on the side.

Best Add-Ins for the Eggs

Add-In How to Use It Notes
Spinach Wilt before or during cooking Adds volume and color
Mushrooms Cook first Prevents loose eggs
Bell pepper Dice small and sauté first Good for veggie scrambles
Scallions or chives Add near the end Fresh, simple, and not watery
Tomatoes Serve on the side or add cooked Raw tomatoes can release water
Chili crisp or hot sauce Add after cooking Best for flavor contrast
Everything bagel seasoning Sprinkle after cooking Use lightly because it is salty
Add-ins for cottage cheese scrambled eggs including cooked spinach, mushrooms, chives, tomatoes, and hot sauce.
Add-ins work best after the moisture is under control. Cook mushrooms, spinach, and peppers first, then finish with herbs, hot sauce, or chili crisp.

Three Easy Ways to Serve Them

  • Simple weekday plate: cottage cheese eggs, buttered toast, black pepper, and chives.
  • Avocado toast version: mashed avocado, creamy eggs, chili crisp, and scallions on sourdough.
  • Breakfast taco version: warm tortilla, cottage cheese eggs, potatoes, salsa, and hot sauce.
Three serving ideas for cottage cheese scrambled eggs with toast, avocado toast, and a breakfast taco.
Once the base scramble is right, it can go three ways: a simple toast plate, creamy avocado toast, or a breakfast taco with potatoes and salsa.

What to Serve with Cottage Cheese Eggs

  • Buttered sourdough toast
  • Avocado toast
  • Breakfast tacos
  • Roasted potatoes or air fryer hash browns
  • Sautéed spinach or mushrooms
  • Fresh tomatoes
  • Fruit on the side
  • Hot sauce, chili crisp, or salsa

For the easiest plate, keep it simple: creamy eggs, crisp toast, something fresh, and something sharp or spicy. A little hot sauce, salsa, chili crisp, or black pepper keeps the cottage cheese from making the plate taste too mild.

Cottage cheese scrambled eggs served with crispy potatoes, fresh tomatoes, and hot sauce.
A few sides make the eggs feel complete. Crisp potatoes add contrast, tomatoes add freshness, and hot sauce cuts through the creamy cottage cheese.

If you want to turn the eggs into a handheld breakfast, tuck them into a tortilla with potatoes, peppers, salsa, or avocado. This breakfast burrito recipe has more ideas for building a filling wrap without making it soggy.

How to Fix Watery or Loose Cottage Cheese Eggs

If your first batch is not perfect, do not write off the recipe. Cottage cheese brands vary a lot, and one small ratio or heat adjustment usually fixes it.

This is the section to read if you tried cottage cheese eggs once and wondered why everyone else seemed to be getting a creamy scramble while yours looked loose, shiny, or separated.

If your eggs tasted good but looked loose, shiny, or a little separated, the recipe probably does not need to be abandoned. It usually just needs less liquid, thicker cottage cheese, or gentler heat.

Watery cottage cheese scrambled eggs compared with creamy set eggs in a troubleshooting guide.
Watery cottage cheese eggs usually come from too much liquid, high heat, or a loose cottage cheese brand. Fix those first before changing the whole recipe.

Why Cottage Cheese Eggs Turn Watery

  • Too much cottage cheese
  • Very liquid cottage cheese
  • Watery fat-free or low-fat cottage cheese
  • Heat that was too high
  • Not enough gentle cooking time
  • Raw mushrooms, tomatoes, or peppers
  • Too many egg whites
  • Added milk

Troubleshooting Watery Cottage Cheese Eggs

What Happened Most Likely Cause Next Batch Fix
Eggs tasted good but looked loose Too much liquid in the cottage cheese Drain the cottage cheese or use 2 tbsp per 2 eggs
Eggs turned rubbery and wet Heat was too high Use medium-low heat and cook a little longer
Eggs looked separated Curds released moisture before the eggs set Whisk better, use thicker cottage cheese, and stir gently
Egg-white version turned thin Too much water from whites plus cottage cheese Keep one yolk or reduce cottage cheese to 2 tbsp
Diagnostic guide showing fixes for loose, rubbery, separated, and thin egg-white cottage cheese eggs.
Use the pan clues to fix the next batch: drain liquidy cottage cheese, lower the heat, stir gently, or keep one yolk when using egg whites.

Fixes Before Cooking

Problem to Prevent What to Do
Cottage cheese looks liquidy Spoon off excess liquid or use slightly less cottage cheese
You dislike curds Blend the cottage cheese with the eggs
You want less moisture Use 2 tbsp cottage cheese per 2 eggs
Using vegetables Cook moisture-heavy vegetables first
Using egg whites Keep at least one yolk or cook gently a little longer

Fixes While Cooking

What You See Fix
Liquid pooling in the pan Keep cooking gently and fold slowly until the extra moisture evaporates
Eggs setting too fast Lower the heat or remove the pan briefly
Curds separating Stir less aggressively and use lower heat
Eggs getting rubbery Pull from the heat sooner next time and use medium-low heat

What Not to Do

  • Skip the milk; cottage cheese already brings moisture.
  • Avoid high heat, which can make the eggs tighten before the moisture cooks off.
  • Do not start with an extra-heavy cottage cheese ratio on your first try.
  • Cook mushrooms, tomatoes, or peppers first if you are adding more than a small handful.
  • Once soft folds form, stir gently instead of aggressively breaking the eggs apart.

Once the ratio and heat are right, the recipe is simple: whisk, cook gently, stop while creamy, and serve while the eggs are still soft and warm.

Scrambled Eggs with Cottage Cheese Recipe

Soft, creamy scrambled eggs with cottage cheese for a protein-rich breakfast that feels cozy, filling, and ready in about 10 minutes.

Prep Time5 minutes
Cook Time4–5 minutes
Total Time10 minutes
Yield2 servings

Approximate nutrition: One serving, made with 2 large eggs, 1/4 cup cottage cheese, and 1/2 tablespoon butter, is usually around 220–270 calories with about 18–22g protein. Exact numbers depend on your cottage cheese brand and cooking fat. Because cottage cheese brands vary widely in protein, sodium, and moisture, treat these numbers as an estimate unless you calculate with your exact label.

Equipment

  • Mixing bowl
  • Whisk or fork
  • 10-inch nonstick skillet
  • Silicone spatula

Ingredients

  • 4 large eggs
  • 1/2 cup cottage cheese, about 4 oz / 110–120g, preferably small-curd 2% or full-fat
  • 1 tablespoon butter, about 1/2 oz / 14g, or 1–2 teaspoons / 5–10ml olive oil
  • 1/8 teaspoon fine salt, optional
  • Black pepper, to taste
  • 1 tablespoon chopped chives or scallions, optional

Method

  1. Crack the eggs into a mixing bowl and whisk until the yolks and whites are fully combined.
  2. Whisk in the cottage cheese, black pepper, and a tiny pinch of salt if using.
  3. Place a nonstick skillet over medium-low heat. Add the butter or oil and let it melt without browning.
  4. Pour in the egg mixture and let the edges begin to set for 10–20 seconds.
  5. Use a silicone spatula to slowly push the eggs from the outside of the pan toward the center, forming soft folds. The pan should look calm, not sizzling.
  6. Keep cooking gently until the eggs are thickened, creamy, and set through. If liquid runs around the eggs, give them another minute over gentle heat.
  7. Remove from the heat, sprinkle with chives or scallions if using, and serve immediately.

Notes

  • Blend the cottage cheese with the eggs first for a smoother texture.
  • Use 2 tablespoons cottage cheese per 2 eggs if you want less cottage cheese texture.
  • For an egg-white boosted version, use 2 eggs, 1/4 cup / 60ml egg whites, and 1/4 cup / 55–60g cottage cheese.
  • Salt lightly because cottage cheese is already salty.
  • Use medium-low heat. High heat can make the eggs rubbery.
  • Do not add milk; cottage cheese already adds moisture.
Saveable recipe card for scrambled eggs with cottage cheese showing the main ratio, cooking time, and method notes.
This saveable version keeps the formula simple: four eggs, half a cup of cottage cheese, medium-low heat, and no milk for a creamy two-serving scramble.

Once you make it once, adjust the ratio to match your cottage cheese and your pan. Some brands melt in softly, some release more liquid, and some taste saltier than others. The recipe gets easier after the first batch.

Storage and Reheating

These are absolutely best right from the pan, so treat leftovers as a backup breakfast rather than the main plan. Still, if you have extra, they can work if you cool and reheat them gently.

For the freshest texture, make the main recipe card version right before serving.

How Long Do They Keep?

Store leftover cottage cheese scrambled eggs in an airtight container in the refrigerator for up to 2 days. Let them cool before closing the container so steam does not create extra moisture.

How to Reheat Without Making Them Rubbery

Reheat in the microwave at reduced power in 15–30 second bursts, stirring gently between bursts. Stop as soon as the eggs are warm. You can also reheat them in a nonstick skillet over low heat.

For a freezer-friendly breakfast instead of fresh scrambled eggs, use the same soft-cooked egg logic in meal prep breakfast burritos, where the eggs need to stay tender without making the tortilla soggy.

Can You Freeze Cottage Cheese Scrambled Eggs?

I would not freeze them. Eggs and cottage cheese can both release moisture after thawing, so the texture usually suffers. For a better make-ahead breakfast, try egg muffins or a sliceable frittata instead.

When you need breakfast for a table instead of one skillet, a breakfast casserole with hash browns is a better make-ahead option than stovetop scrambled eggs.

Final Serving Texture Cue

Before you leave the recipe, remember the main visual cue: the eggs should look creamy, softly folded, and set enough to hold together on the plate.

Final serving of scrambled eggs with cottage cheese with toast, a fork, cottage cheese, and a warm breakfast table setting.
A good cottage cheese scramble should feel warm and familiar, with enough protein and creaminess to make breakfast last longer than plain eggs.

FAQs About Scrambled Eggs with Cottage Cheese

What does cottage cheese do to scrambled eggs?

Cottage cheese adds protein, creaminess, and a mild savory flavor. When cooked gently, it softens into the eggs and makes them more filling without needing milk or cream.

Do scrambled eggs with cottage cheese taste like cottage cheese?

They taste creamy, lightly savory, and only a little tangy. With the balanced ratio, the eggs still taste like eggs; the cottage cheese mostly adds body and richness.

Is it better to blend cottage cheese into eggs?

Blend it if you want smooth eggs with no visible curds. This is the best choice for anyone who likes the protein boost but does not want the cottage cheese texture. Whisk it in if you like a soft, lightly curdy scramble.

Why did my cottage cheese scrambled eggs turn watery?

They probably had too much cottage cheese, a very liquidy brand, too many egg whites, raw watery vegetables, milk, or not enough gentle cooking time. Use 1/4 cup cottage cheese per 2 eggs, choose a thicker cottage cheese, and cook over medium-low heat until the eggs are set through.

What type of cottage cheese works best?

Small-curd 2% cottage cheese is the most reliable everyday choice. Full-fat cottage cheese gives richer eggs. Fat-free cottage cheese can work, but it is more likely to release moisture.

Should I add milk to cottage cheese scrambled eggs?

Skip the milk here. Cottage cheese already brings moisture and body, and adding milk can push the scramble from creamy into loose or wet.

Are cottage cheese eggs good for a high-protein breakfast?

They are a strong high-protein breakfast, especially if you use the balanced ratio of eggs plus cottage cheese instead of stretching the scramble with milk. The exact protein depends on your egg size and cottage cheese label.

Do egg whites work with cottage cheese?

Egg whites work, but the best texture usually comes from keeping at least one whole egg in the mixture. The yolk adds flavor, color, and structure, so the scramble feels creamy instead of thin.

Can I make cottage cheese scrambled eggs in the microwave?

Yes. For one serving, whisk 1 large egg with 1 tablespoon cottage cheese in a large microwave-safe mug. Microwave for 30 seconds, stir, then cook in 15–30 second bursts until set. Let it stand briefly before eating so the center finishes without becoming spongy.

What is the best ratio of cottage cheese to eggs?

The best balanced ratio is 1/4 cup cottage cheese for every 2 large eggs. Use 2 tablespoons for a subtler version, or up to 1/3 cup if you want a richer cottage-cheese-forward scramble.

Can I use boiled eggs with cottage cheese instead?

Yes, but that becomes a different kind of meal. Boiled eggs with cottage cheese work as a quick snack plate, while chopped boiled eggs mixed with blended cottage cheese become a high-protein cottage cheese egg salad.

Back to top