Posted on Leave a comment

How to Make Paneer at Home: Soft Homemade Paneer

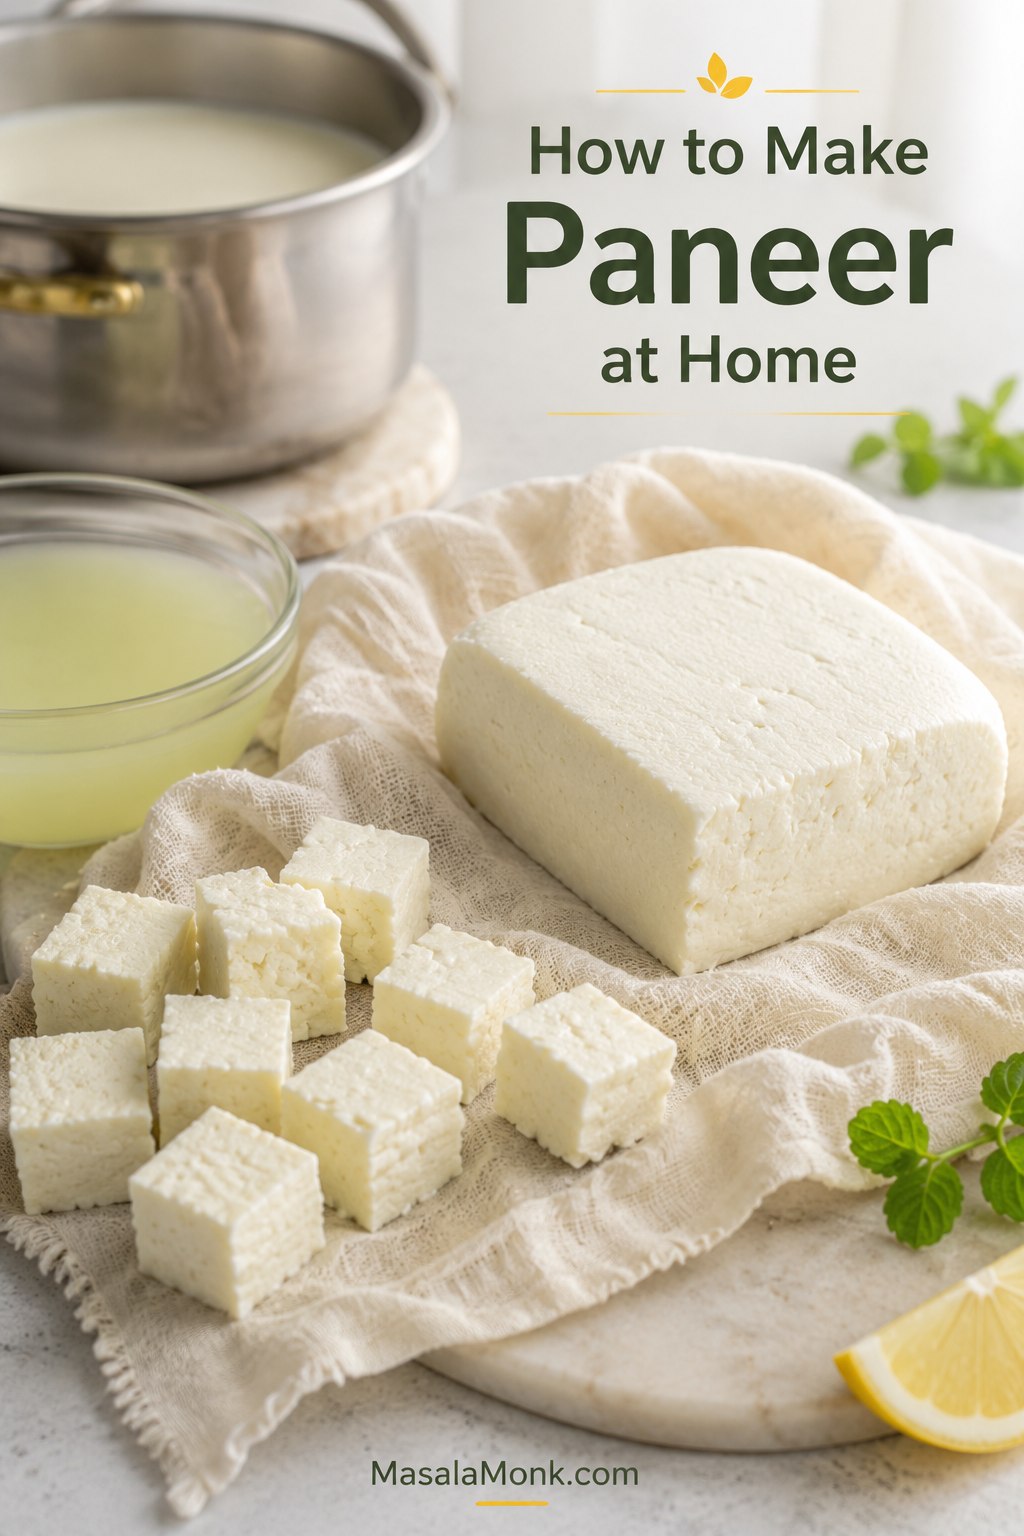
Fresh homemade paneer block on muslin with cut paneer cubes, pale whey in a glass bowl, and a milk pot in the background.

If you want to know how to make paneer at home, the process is simpler than it looks: heat milk, add just enough acid, strain the curds, and press only as much as your dish needs. Paneer may look like something you have to buy from an Indian grocery store, already pressed into a neat block for palak paneer, paneer tikka, or a creamy restaurant-style curry, but fresh homemade paneer is very doable in a regular kitchen.

The goal is not just paneer that sets. The goal is paneer that curdles cleanly, cuts neatly when you need cubes, and still stays tender when it goes into sauce.
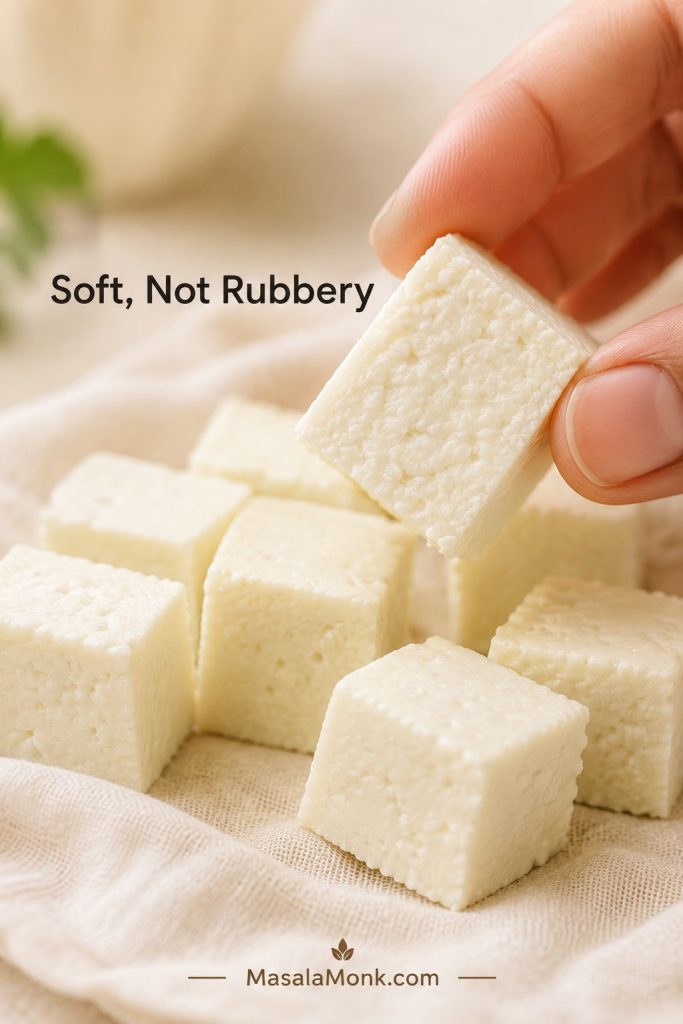
Close-up of a soft homemade paneer cube being held to show its moist interior.
This is the texture to aim for: paneer that sets cleanly but still looks moist inside. That softness is what keeps it tender in curry, bhurji, wraps, and bowls.

That texture comes from stopping at the right moments: before the milk boils too hard, before too much acid makes the curds tight, and before pressing turns soft curds into a dry block.

You do not need to understand cheesemaking to make paneer. You only need to know when the milk is hot enough, when the curds have separated, and when to stop pressing.

This guide helps most when you do not live near an Indian grocery store, feel unsure about supermarket milk labels, or have only found dense packaged paneer. If packaged paneer near you is firm, squeaky, or rubbery, homemade paneer can feel like a different ingredient.

If you have tried making paneer before and ended up with sour crumbs, weak curds, rubbery cubes, or milk that refused to curdle, you probably did not fail. Milk behaves differently from brand to brand: one batch may need gentler heat, another may need less acid, and another may need a shorter press. If you are nervous about wasting a large pot of milk, start with the 1-litre batch in the scaling table below.

If you are here because a batch already went wrong, jump to Troubleshooting Homemade Paneer first, then come back to the recipe with the problem in mind.

Once you have a good block, you can use it anywhere paneer texture matters: a rich curry like Balti Paneer Gravy, a quick filling, a salad bowl, a pan-seared snack, or a simple vegetarian dinner.

Quick Answer: How to Make Paneer at Home

The easiest way to make paneer at home is to heat whole milk to 185–195°F / 85–90°C, or until it is steaming, foamy, and just about to rise. Add diluted lemon juice or plain white vinegar gradually until soft white curds separate from pale yellow-green, slightly translucent whey. Strain the curds through cloth, rinse briefly if needed, then press for 10 minutes for soft crumbles, 30–40 minutes for curry cubes, or up to 50 minutes for firmer tikka-style paneer.

The active work is about 20–25 minutes. The rest is mostly resting, draining, pressing, or chilling, depending on how firm you want the final paneer.

Best milkWhole milk / full-fat milk
Avoid if possibleSkim milk, fat-free milk, UHT milk, and ultra-pasteurized milk
Best beginner acidLemon juice or plain white vinegar, diluted with water
Temperature cue185–195°F / 85–90°C, or steaming and just about to rise
Yield from 2 litres / 8½ cups milkAbout 300–400 g / 10.5–14 oz paneer, depending on milk and pressing
Fridge storage2–3 days, covered or submerged in fresh cold water
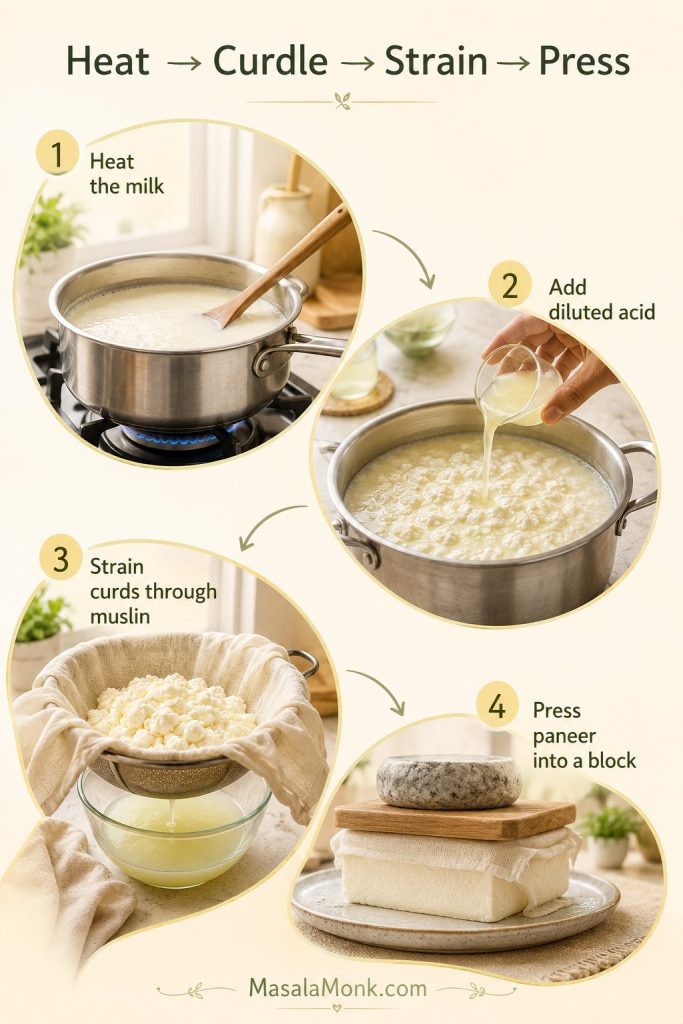
Four-step paneer process showing milk heating, diluted acid being added, curds strained through muslin, and paneer being pressed.
The basic paneer recipe is simple, but each stage has a cue. Heat the milk, add acid gradually, strain when the whey clears, then press for the texture you need.

Still choosing ingredients? Start with Best Milk for Paneer. Already curdled the milk? Use the Pressing Times section to choose soft crumbles, curry cubes, or firmer tikka paneer.

Before You Start: 3 Things That Decide Paneer Texture

Most paneer problems come down to three simple choices: the milk, the acid, and how long you press. Get those right and the recipe becomes much more reliable.
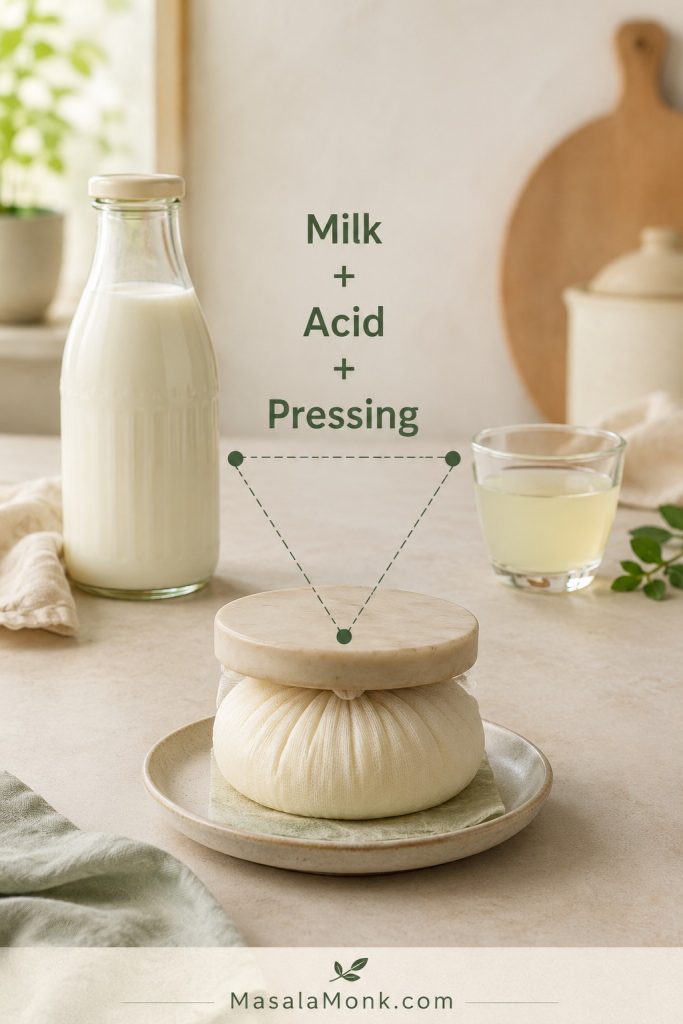
Milk, diluted acid, and paneer wrapped in muslin under a light weight shown as the three main texture factors.
If homemade paneer turns crumbly, sour, or rubbery, the cause is usually one of three things: milk choice, acid control, or pressing time.

Three things decide paneer texture: use whole milk for better curds, add diluted acid gradually, and press for the dish you are making. Bhurji needs almost no pressing, curry cubes need moderate pressing, and tikka needs a firmer block. Acid is the trigger, not the target.

At its simplest, paneer is just hot milk plus a little acid. The details below help you keep it soft, but the basic process is only heat, curdle, strain, and press.

Once you have seen milk split cleanly into curds and clearer yellow-green whey, the whole process feels much less mysterious.

Homemade Paneer Recipe

This is the base recipe if you want to make paneer at home with whole milk and lemon juice or vinegar. Use the pressing chart later in the guide to adjust the texture for bhurji, curries, tikka, wraps, bowls, or grilling.
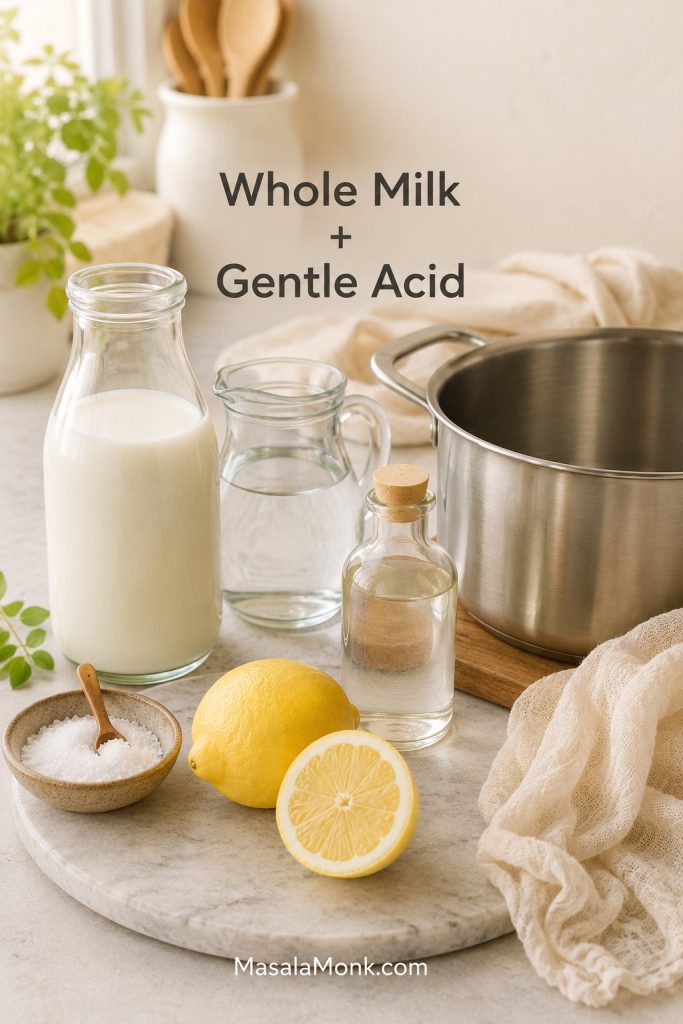
Whole milk, lemon, vinegar, water, salt, muslin cloth, and a cooking pot arranged for making paneer at home.
Paneer does not need a long ingredient list. However, whole milk, diluted acid, and gentle handling matter more than any extra add-in.
Yield300–400 g / 10.5–14 oz paneer
Prep Time5 minutes
Cook Time15–20 minutes
Total Time45–70 minutes, plus optional chilling for firmer cubes

Equipment

  • Large heavy-bottomed pot, with room for the milk to rise
  • Wooden spoon or silicone spatula
  • Thermometer, optional but helpful for first-timers
  • Colander or large sieve
  • Cheesecloth, muslin, thin cotton towel, clean handkerchief, or nut milk bag
  • Large bowl to catch the whey
  • Plate or tray for pressing
  • Moderate weight, such as canned beans, a small pot, or a heavy skillet

Ingredients

  • 2 litres / 8½ cups / about 2.1 quarts whole milk
  • 3 tablespoons / 45 ml lemon juice or plain white vinegar, plus 1 tablespoon / 15 ml more if needed, diluted before adding
  • 3–4 tablespoons / 45–60 ml water, plus a little more if using the extra acid
  • ¼–½ teaspoon / about 1.5–3 g fine salt, optional

Step-by-Step Method

Heat, curdle, and strain the milk

  1. Prepare the strainer. Line a colander with cheesecloth, muslin, a thin cotton towel, or a nut milk bag. Place it over a large bowl to catch the whey.
  2. Heat the milk. Pour the milk into a heavy-bottomed pot. Heat over medium-low to medium heat, stirring often so the bottom does not scorch.
  3. Watch the temperature. Heat the milk to 185–195°F / 85–90°C. Without a thermometer, look for milk that is steaming, foamy at the edges, and just about to rise. Avoid a violent rolling boil.
  4. Dilute and add the acid. Mix the lemon juice or vinegar with the water. Turn the heat to low or switch it off, then add the diluted acid about 1 tablespoon at a time, stirring gently for a few seconds after each addition.
  5. Stop when the milk separates. Stop once you see soft white curds and pale yellow-green, slightly translucent whey. If the liquid still looks milky after 1–2 minutes, dilute the extra acid and add it 1 teaspoon at a time, waiting briefly between additions.
  6. Let the curds settle. Once curds form, stir as little as possible. Too much stirring can break soft curds into small grains. Let the curds sit in the hot whey for 5–10 minutes so they settle and gather.
  7. Strain and rinse. Pour the curds and whey into the lined colander. Gather the cloth gently and let gravity drain first. If you used lemon juice or vinegar, rinse the curds briefly under cool water to remove excess sourness and stop the cooking.

Salt, press, and cut the paneer

  1. Salt only if needed. For unsalted paneer, skip the salt. For lightly salted paneer, sprinkle the salt over the drained curds before shaping and pressing. If the paneer is going into a curry, you can skip the salt and season the sauce instead.
  2. Shape and press for your dish. Shape the curds into a flat square or disc inside the cloth. Press according to your final use: 0–10 minutes for soft crumbles, 15–20 minutes for a tender block, 30–40 minutes for curry cubes, or 45–50 minutes for firmer tikka cubes.
  3. Cut if needed. You can use soft paneer right away. For neat cubes, chill the pressed block for 20–30 minutes before cutting. For firmer tikka-style cubes, you can instead dip the pressed block in cold water for 5–10 minutes, then pat dry before cutting. Skip this for soft crumbled paneer.

Important cue: Once the curds have formed and the whey is no longer milky, pause. More acid will not make better paneer. It will only make sharper, firmer, more sour paneer.

Unsure which acid to use? The lemon, vinegar, yogurt, and citric acid comparison explains which option gives the cleanest flavor and which one makes softer curds.

Milk Temperature Cue

Use the thermometer reading or the visual cues together: the milk should be hot, steaming, foamy at the edges, and close to rising before you add acid.
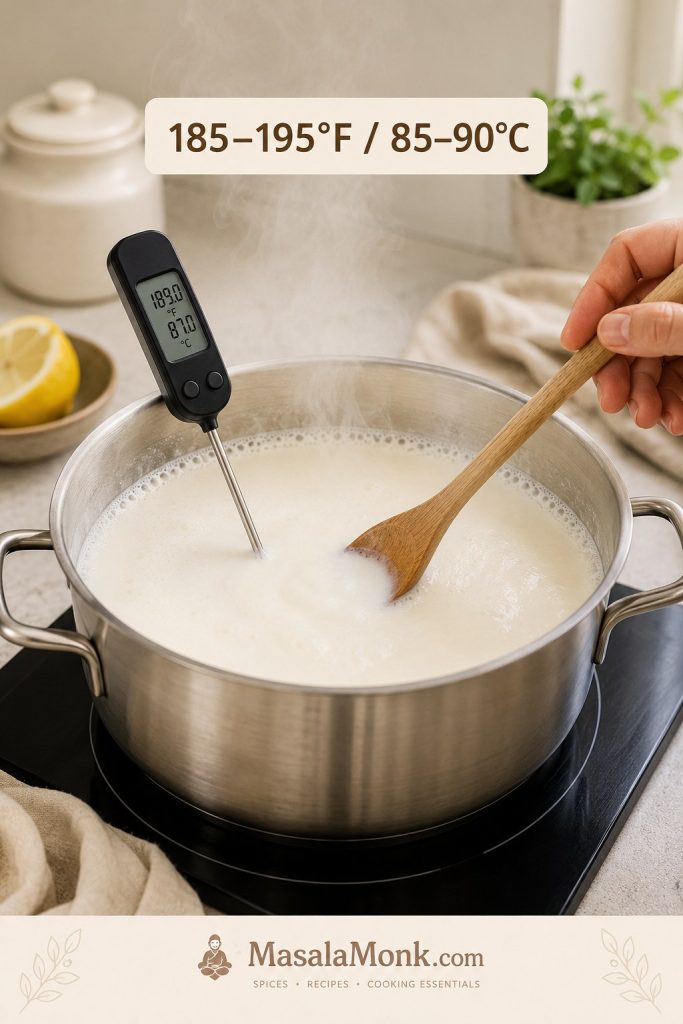
Milk heating gently in a pot with a thermometer showing the paneer temperature range of 185–195°F or 85–90°C.
The milk does not need a violent boil to make paneer. Look for steam, edge foam, and a near-rise so the curds form cleanly without tightening too early.

Curds and Whey Cue

After adding diluted acid, watch the liquid around the curds. Soft curds and pale yellow-green whey mean the milk has separated cleanly.
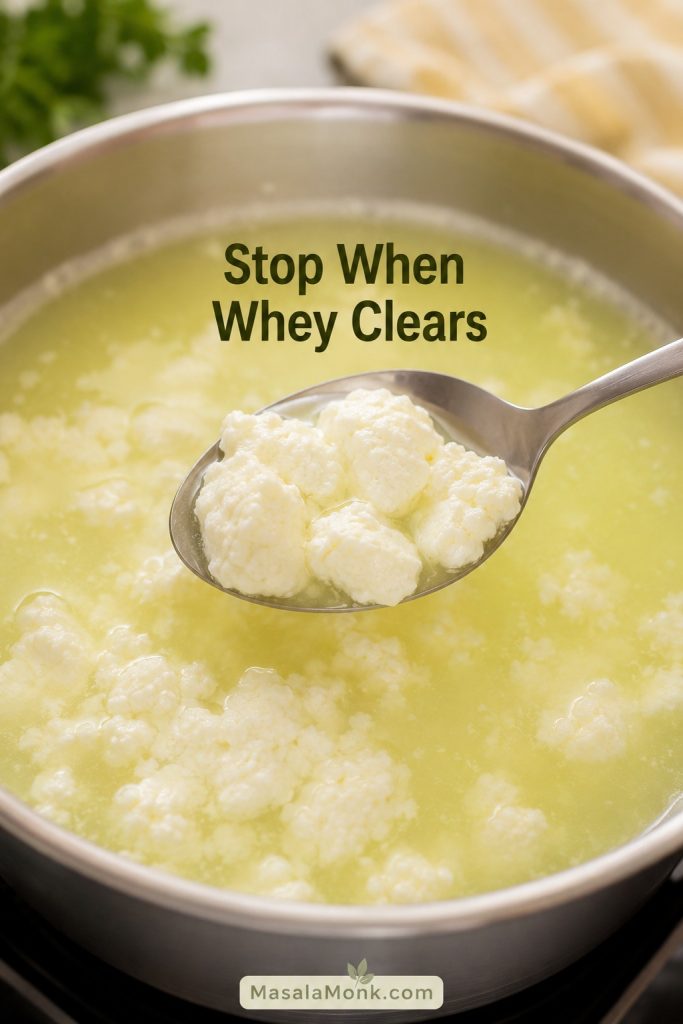
Soft white paneer curds forming in pale yellow-green whey inside a pot, with a spoon lifting the curds.
Clear whey is your stop sign. When soft curds gather and the liquid shifts from milky white to pale yellow-green, the acid has done its job.

Straining Paneer Curds

Once the curds have settled, pour them into the lined colander and let the whey drain first before you gather the cloth.
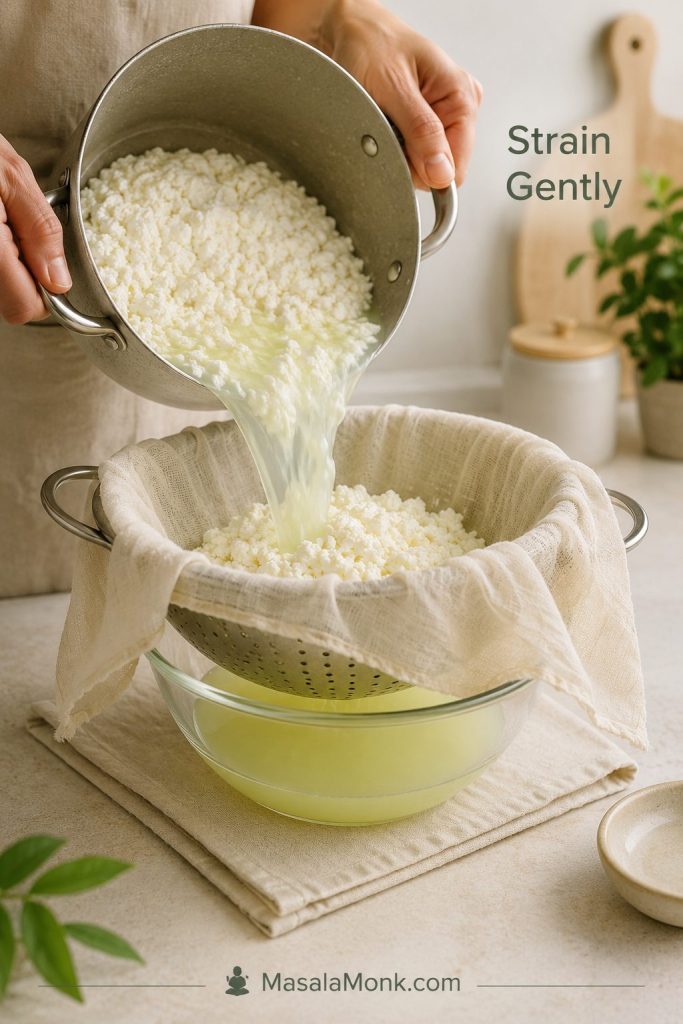
Paneer curds being poured into a muslin-lined colander over a bowl as pale whey drains below.
Let gravity do the first part of the draining. Squeezing too early can remove the moisture that makes homemade paneer soft and pleasant to eat.

How to Make Paneer with 1 Litre, 2 Litres, or 1 Gallon Milk

The recipe above uses 2 litres / about 8½ cups milk because it gives a useful home batch. You can scale homemade paneer up or down, but keep the acid flexible. Lemons vary, vinegar brands can differ slightly, and milk behaves differently by country, season, and processing method.

If this is your first time making paneer or you are testing a new milk brand, start with 1 litre. It is a smaller commitment, and it teaches you how that milk behaves before you make a larger batch.

Milk amountAcid to start withUse more only if…Expected paneer
1 litre / about 4¼ cups1–1½ tablespoons / 15–22 ml lemon juice or vinegar, dilutedThe whey still looks milkyAbout 150–200 g / 5–7 oz
2 litres / about 8½ cups3 tablespoons / 45 ml lemon juice or vinegar, dilutedUse up to 4 tablespoons / 60 ml if neededAbout 300–400 g / 10.5–14 oz
1 gallon / about 3.8 litres6 tablespoons / 90 ml lemon juice or vinegar, dilutedUse up to 8 tablespoons / 120 ml if neededAbout 600–750 g / 21–26 oz

Use these as practical ranges, not fixed guarantees. Richer milk gives more paneer. Leaner milk gives less. Longer pressing removes more moisture, so the final block weighs less. A 300–400 g block usually works for a family-style curry serving 3–4 people, depending on how paneer-heavy you like the dish.

What Soft Homemade Paneer Looks and Feels Like

The first batch is less stressful when you know what “right” looks like. These are the cues to trust as the milk changes from liquid to curds.
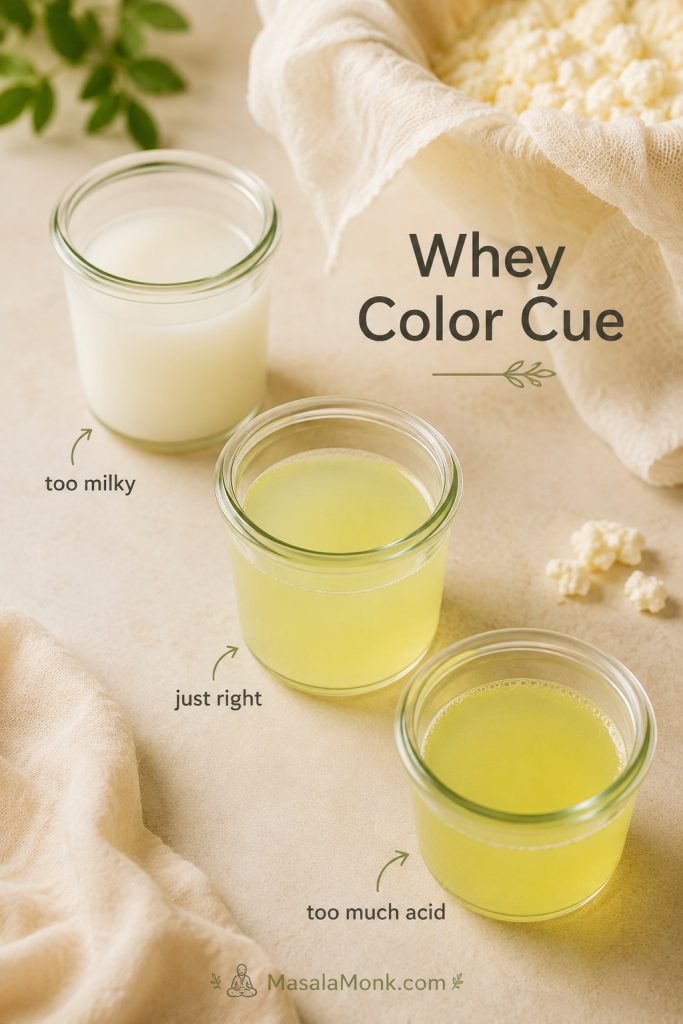
Three glasses showing milky whey, clear pale yellow-green whey, and over-acidified whey for making paneer.
Whey color tells you what to do next. Milky whey needs more time or a little more acid; clear yellow-green whey means the curds are ready to strain.
StageGood signWarning sign
Milk before acidSteaming, foamy at the edges, almost risingViolently boiling for several minutes
Curds formingSoft white clumps pulling away from the liquidTiny, tight, dry-looking grains
WheyPale yellow-green and slightly translucentCloudy, white, and still milky
Pressed blockSet but still slightly tender when touchedHard, dry, dense, or squeaky
Taste and smellClean, milky, faintly sweetSharply vinegary, harshly lemony, or stale-smelling

The curds should look soft and pillowy, not dry and pebbly. The pressed block should hold together, but it should not feel like a brick. If the paneer smells sharply acidic, rinse briefly and use less acid next time.

If your curds look tight, the whey is still milky, or the block feels squeaky, compare it with Troubleshooting Homemade Paneer before you throw the batch away.

What Is Paneer?

Paneer is a fresh Indian cheese made by curdling hot milk with an acid such as lemon juice, vinegar, yogurt, buttermilk, or citric acid. It is not aged, it does not need rennet, and it does not melt into strings like mozzarella or cheddar. Instead, paneer holds its shape when cooked, which is why it works so well in curries, skewers, stir-fries, wraps, sandwiches, and rice bowls.

Paneer is often called Indian cottage cheese, but that phrase can be confusing outside India. Western cottage cheese is loose, wet, and spoonable. Paneer is usually drained and pressed into a sliceable block. Depending on how long you press it, it can be soft and crumbly, tender and cubeable, or firm enough for tikka.

The flavor is mild, milky, and slightly sweet by design. That gentleness is exactly why paneer works so well with bold gravies, smoky marinades, peppery sauces, and spicy vegetables.

Best Milk for Homemade Paneer Outside India

Your carton matters more than the brand name here. The best milk for homemade paneer is whole milk, also called full-fat milk in many countries. It gives better curds, better yield, and a softer finished texture. Different countries sell milk under different labels, so do not worry if your carton does not say “full cream.” Look for regular pasteurized dairy milk with enough fat.

Generic whole milk carton held near soft paneer curds, muslin, and whey in a bright kitchen.
Start the paneer recipe at the milk carton. Whole milk or full-fat milk usually gives better curds, better yield, and a softer finished block.

Regular pasteurized whole cow’s milk is the best supermarket default. Buffalo milk is excellent if you can find it because it is richer and usually gives a softer, higher-yield paneer. Goat milk can work too, though the flavor is tangier and the curds may be more delicate.

The milk to be careful with is UHT, long-life, or ultra-pasteurized milk. These milks are treated at higher temperatures for longer shelf life, and that extra processing can make curd formation less reliable. If you are unsure what UHT or ultra-pasteurized means on a carton, this pasteurization guide explains the terms clearly.

Do not confuse regular pasteurized milk with ultra-pasteurized milk. Regular refrigerated pasteurized whole milk usually works well for paneer. The bigger issue is long-life, shelf-stable, UHT, or ultra-pasteurized milk, which can form weaker curds.
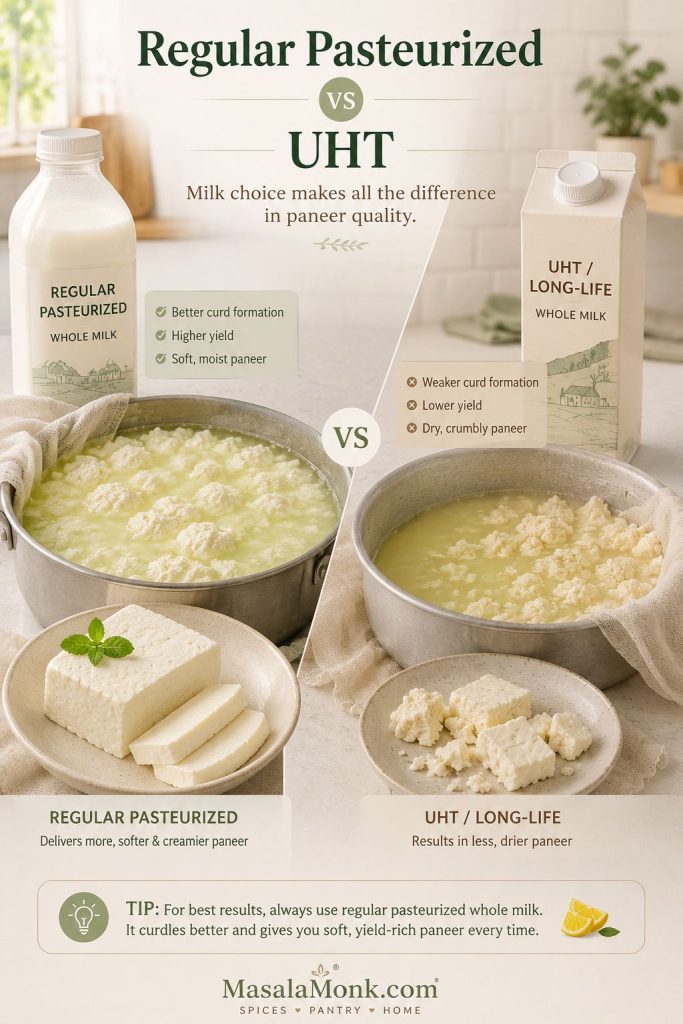
Regular pasteurized milk shown making clean paneer curds beside UHT milk shown with weaker curds.
Regular pasteurized milk and UHT milk are not equal for homemade paneer. If your milk will not curdle cleanly, long-life processing may be the reason.

Milk Labels That Work Best for Homemade Paneer
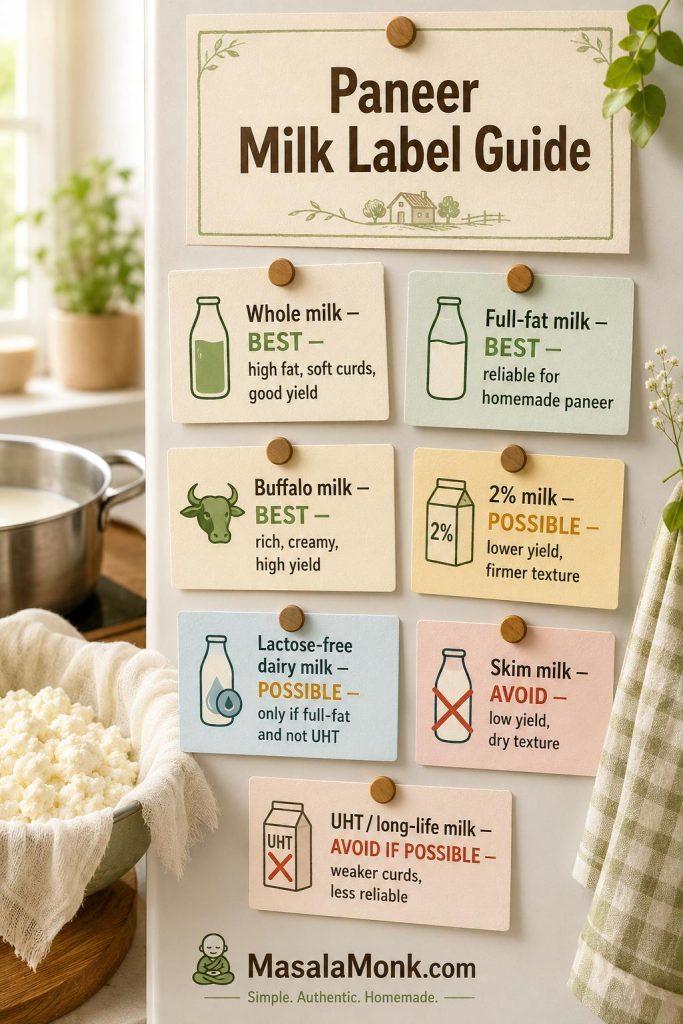
Milk label guide showing whole milk, full-fat milk, buffalo milk, 2 percent milk, lactose-free milk, skim milk, and UHT milk for paneer.
For soft homemade paneer, choose whole, full-fat, or buffalo milk when possible. Use 2% milk with lower-yield expectations, and avoid UHT or skim milk for reliable curds.
Milk labelUse for paneer?What to expect
Whole milk / full-fat milkBest choiceSoft, reliable curds and good yield.
Regular pasteurized cow’s milkYesThe best supermarket default for most readers.
Buffalo milkExcellentRicher, higher-yield, and traditionally prized for soft paneer.
Lactose-free dairy milkSometimesCan work if it is full-fat and not UHT or ultra-pasteurized.
2% milkPossible, not idealLower yield and a firmer, less creamy texture.
Skim or fat-free milkAvoidDry, weak, low-yield paneer that can crumble easily.
Organic milkCheck labelWorks if regular pasteurized, but some brands are ultra-pasteurized.
UHT / ultra-pasteurized / long-life milkAvoid if possibleMay curdle poorly or form weak curds.
Goat milkPossibleSofter curds and a tangier flavor.
Plant milkNot true paneerYou can make a vegan curd or tofu-style alternative, but it is not dairy paneer.

Important: Milk varies by country, brand, season, fat level, and processing. If one carton gives weak curds, do not blame yourself or the whole recipe. Try a different full-fat, non-UHT brand before changing the method.

If your milk is already hot but still not separating, go to Troubleshooting Homemade Paneer before adding too much acid.

Best Acid for Homemade Paneer: Lemon, Vinegar, Yogurt, or Citric Acid

Once the milk question is sorted, the next decision is acid. Paneer needs an acid to separate the milk into curds and whey. Lemon juice and plain white vinegar are the easiest choices for beginners because they are available almost everywhere. Yogurt, buttermilk, and citric acid also work, but they behave differently.

Watch the liquid around the curds; it tells you when to stop. The most important rule is not which acid you choose. It is how you add it. Dilute the acid with water, add it gradually, and stop as soon as the milk separates clearly. Too much acid can make paneer sour, grainy, firm, or rubbery.

Lemon juice or vinegar being mixed with water in a glass bowl before being added to milk for paneer.
Think of acid as a trigger, not the main ingredient. Diluting it first helps you add it gently and stop before the paneer turns sour or grainy.

Paneer Acid Options

Choose the acid by flavor and texture, but keep the method the same: dilute it, add it gradually, and stop when the milk separates clearly.
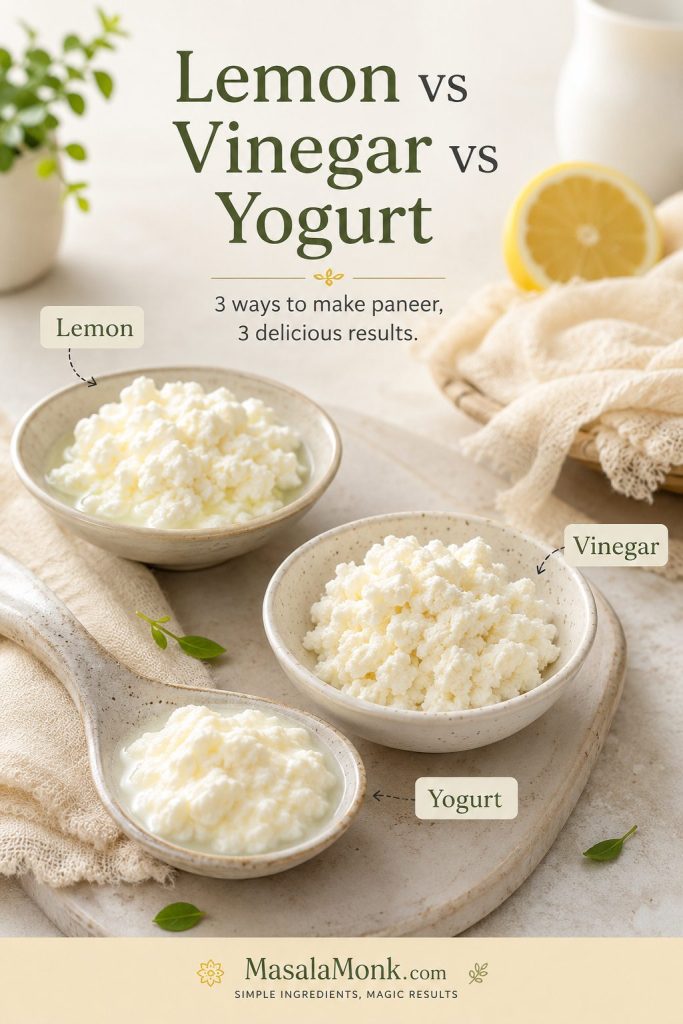
Lemon juice, vinegar, and yogurt shown with small paneer curd samples as acid options.
Lemon, vinegar, and yogurt can all make paneer. The choice affects flavor, but success still depends on adding acid gradually and stopping at the right whey cue.
AcidBest forFlavorTexture
Lemon juiceBeginner homemade paneerLight citrus note if not rinsedSoft to medium
Plain white vinegarReliable curdling and clean cubesNeutral if diluted and rinsedClean, firm curds
Yogurt / curdSofter paneerMild dairy tangSofter and moister
ButtermilkGentle curdlingMild tangSoft and delicate
Citric acidPrecise curdlingNeutral if measured carefullyCan turn firm if overused

How Much Acid to Use for Paneer

Practical starting point: for 2 litres / 8½ cups milk, start with 3 tablespoons / 45 ml diluted lemon juice or white vinegar. If using yogurt, start with ¼ cup / 60 g whisked plain yogurt and add more only if the whey still looks milky. If using citric acid, dissolve a very small amount in water first and add gradually; it is easy to overdo and can make paneer firm or sharp.
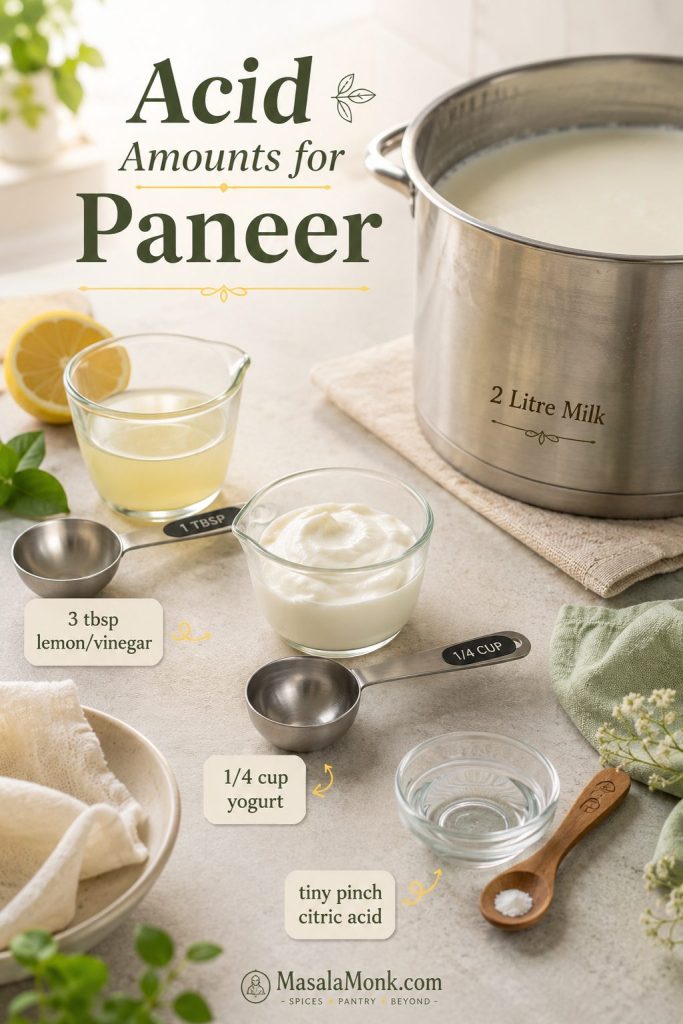
Measured lemon juice, vinegar, yogurt, and dissolved citric acid arranged beside a milk pot for paneer.
Measurements give you a safe starting point, but the pot gives the final answer. Stop when the curds gather and the whey clears.

Fresh lemon juice tastes clean, but lemons vary, so you may need a little more or less. Bottled lemon juice can work because it is consistent, though the flavor may be flatter than fresh lemon. Plain white vinegar is usually more predictable than fresh lemon juice and usually tastes neutral after dilution and rinsing.

Avoid strongly flavored vinegars unless you want that flavor in the paneer. Apple cider vinegar can work in a pinch, but plain white vinegar is cleaner. Whatever acid you use, add it slowly and watch the whey. The goal is not to empty the cup; the goal is to use only enough.

Step-by-Step Paneer Cues That Matter Most

The recipe card gives you the full method. These four cues keep homemade paneer soft instead of tight, sour, or rubbery.
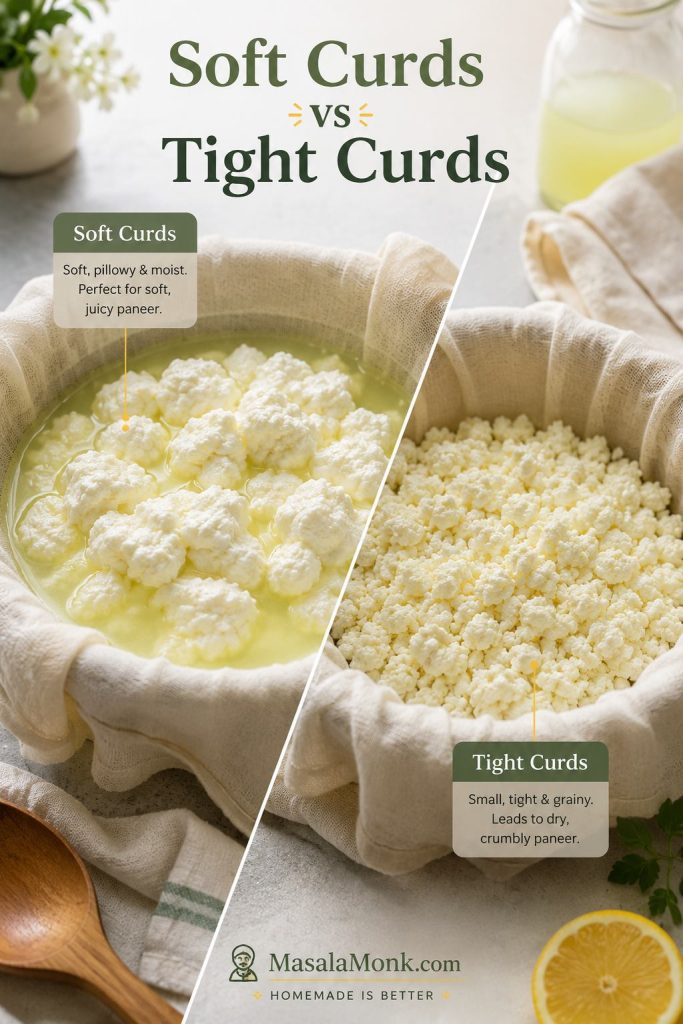
Soft pillowy paneer curds compared with tight grainy paneer curds in pale whey.
Good paneer curds should look soft, moist, and gathered. Tiny dry grains usually point to overheated milk, excess acid, or rough stirring.
  • Milk: use full-fat, non-UHT milk that separates cleanly.
  • Heat: stop at steaming and foamy, not a violent boil.
  • Acid: add it slowly and stop when the whey turns pale yellow-green and slightly translucent.
  • Draining: let gravity work before pressing; hard squeezing steals softness.

Rinsing Paneer Curds

Rinsing is useful when you used lemon juice or vinegar and want to remove sharpness. Keep it brief so the curds stay rich and delicate.
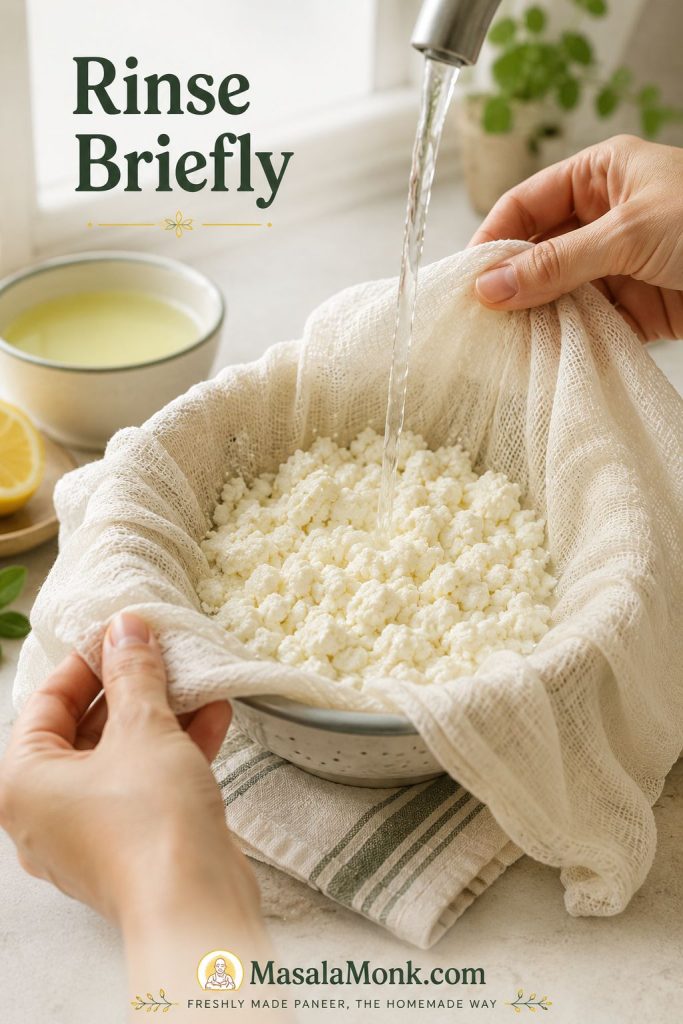
Paneer curds in muslin being briefly rinsed under cool water to reduce lemon or vinegar sourness.
A brief rinse can soften sharp lemon or vinegar flavor after straining. Keep it quick so the curds stay rich and do not lose too much dairy flavor.

Shape Before Pressing

Before you add weight, gather the drained curds neatly in the cloth. A tidy shape helps the paneer press evenly and cut more cleanly later.

Hands folding muslin around drained paneer curds to shape them into a block before pressing.
Shape the curds before adding weight. This helps paneer set evenly, which makes cleaner cubes possible without forcing the block under heavy pressure.

How Long to Press Homemade Paneer

This is where you choose the paneer you actually want to eat: loose and soft for bhurji, tender for curry, or firm enough for skewers. Less pressing gives softer paneer. Longer pressing gives cleaner, firmer cubes.

If your paneer often turns hard, this is the section to slow down on. Pressing is not just a shaping step; it decides whether the paneer stays moist or becomes dense.
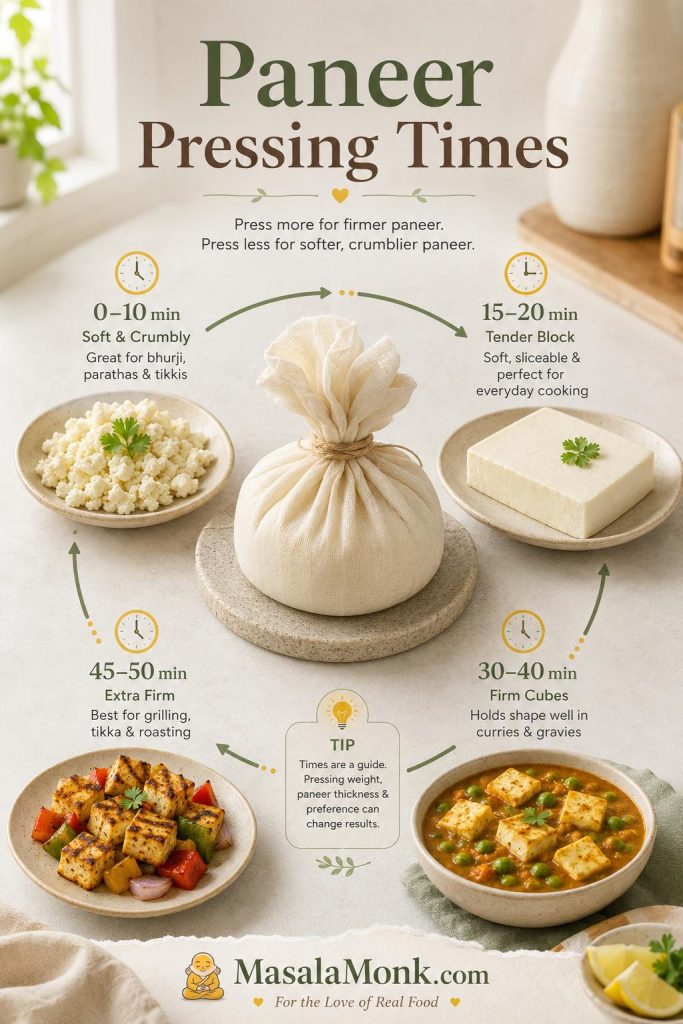
Paneer pressing guide showing soft crumbles, a tender block, curry cubes, and firmer tikka cubes with time cues.
The same paneer recipe can become soft bhurji curds, curry cubes, or tikka pieces. The difference is usually pressing time, not extra ingredients.
Final usePressing timeSuggested weightResult
Paneer bhurji, fillings, toast, sandwiches0–10 minutesNo weight or a very light plateLoose, soft curds
Bowls, salads, gentle pan-frying15–20 minutes400–600 g / 14–21 ozTender block
Curries like palak paneer, matar paneer, or balti paneer30–40 minutes600–900 g / 1.3–2 lbSliceable cubes that still stay moist
Paneer tikka, skewers, grilling45–50 minutes, then chill900 g–1.2 kg / 2–2.6 lbFirmer cubes that handle marinating and skewering
Very heavy pressing for several hoursAvoid for soft paneerAvoid heavy crushing weightCan become dense, dry, or rubbery

Use moderate weight, not crushing pressure. Two cans, a small pot, or a heavy skillet is enough for most home batches. If the paneer is for curry, a 30–40 minute press is usually plenty. If you want tidy cubes, chill the pressed block briefly before cutting.

Light vs Heavy Pressing

Use enough weight to form the block, not so much that the paneer loses all its moisture. This is especially important for curry cubes.
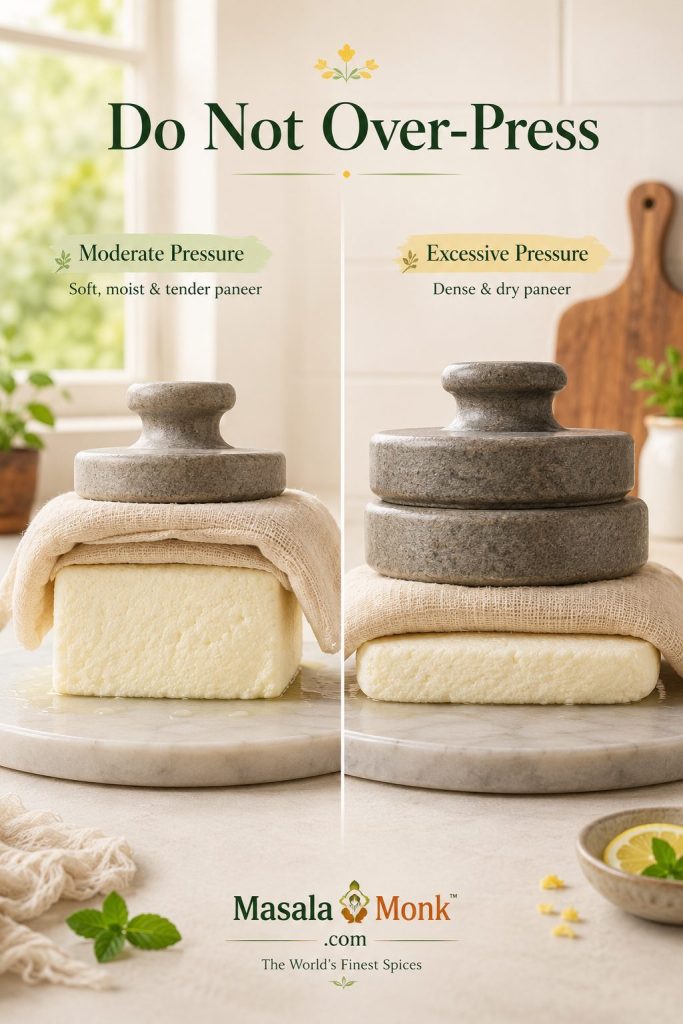
Light pressing compared with heavy pressing for paneer, showing a moist block and a denser compressed block.
Heavy pressing is one of the easiest ways to lose softness. For most paneer curries, moderate weight forms cubes without squeezing out all the moisture.

Once the paneer is pressed, the next texture risk happens in the pan. See How to Keep Paneer Soft When Cooking before adding the cubes to curry.

Soft Paneer vs Firm Paneer: Both Can Be Right

The best paneer is not always the firmest paneer. The right texture depends on what you are cooking next.
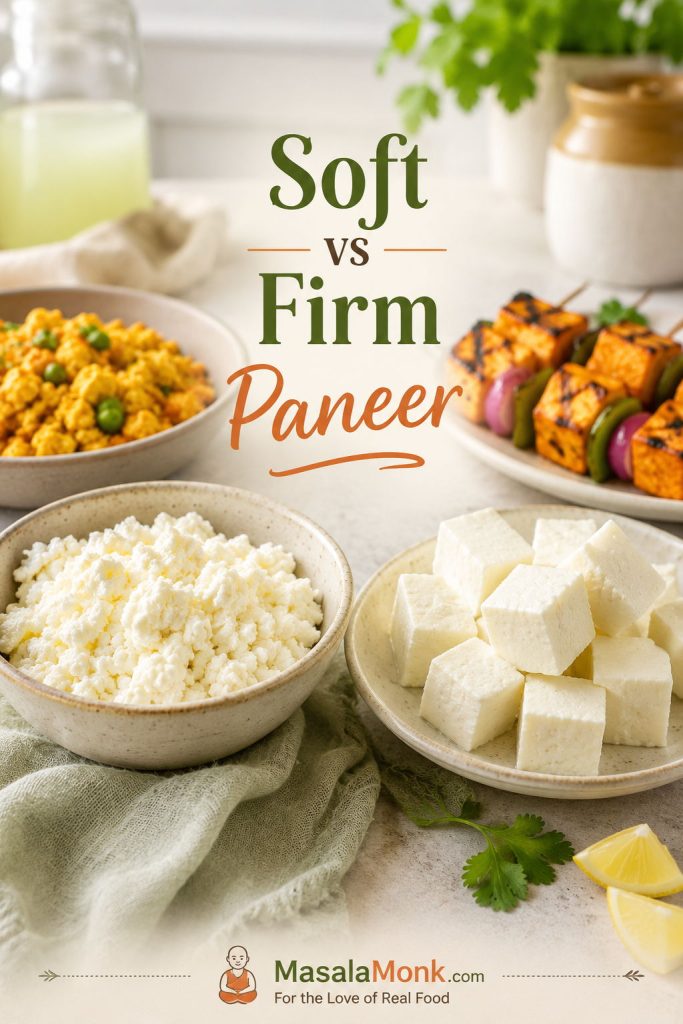
Soft crumbled paneer in a bowl beside firm paneer cubes, with bhurji and tikka-style uses in the background.
Soft paneer and firm paneer are both useful. Crumbles belong in fillings and bhurji, while firmer cubes work better for tikka, skewers, searing, and thicker gravies.

Soft paneer is delicate, moist, and slightly crumbly, so it works beautifully for bhurji, fillings, wraps, cutlets, quick bowls, and gentle curries where perfect cubes do not matter.

Firm paneer is better for tikka, skewers, grilling, pan-searing, or restaurant-style cubes in thick gravy. However, firm should not mean rubbery. Good firm paneer still has moisture inside.

How to Cut Paneer Cubes Cleanly

If you want tidy cubes, chill the pressed paneer briefly and cut with a sharp knife. Slightly larger cubes are easier to handle in curry.
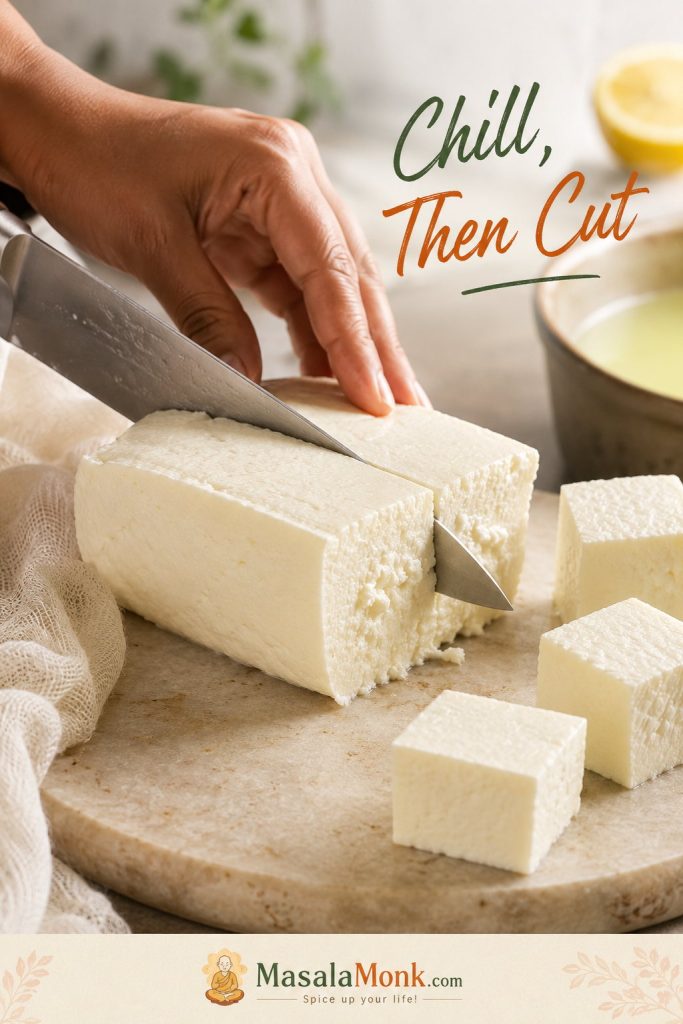
Pressed paneer block being cut into cubes with a sharp knife on a stone board.
If homemade paneer breaks when you cut it, chill the pressed block briefly first. A sharp knife and slightly larger cubes help tender paneer hold its shape.

How to Keep Paneer Soft When Cooking

Paneer can be perfect after pressing and still turn dry if it is cooked too aggressively. Most paneer dishes do not need the paneer to simmer for a long time. Add it when the sauce is already cooked, let it warm through gently, and avoid hard boiling. This matters in creamy gravies such as Kali Mirch Paneer, where paneer should stay tender rather than chewy.

Paneer cubes being gently added to a finished curry with a spoon.
Let the gravy finish cooking before the paneer goes in. Then the cubes only need a gentle warm-through, which helps them stay tender.
  • Curries: add paneer near the end and simmer gently for only a few minutes.
  • Pan-frying: sear quickly, then remove or add sauce. Long frying can toughen paneer.
  • Store-bought paneer: soak cubes in warm water for 10–15 minutes before cooking, especially if the block feels cold and stiff.
  • Homemade paneer: avoid over-pressing if it is going into a soft curry.
  • Paneer tikka: press firmer, chill before cutting, and handle gently while marinating.

Homemade paneer is often softer than store-bought paneer, so treat it gently. Use a sharp knife, cut slightly larger cubes if the paneer feels delicate, and avoid aggressive stirring after adding it to curry. If you are making a rich paneer gravy, the sauce should be ready before the paneer goes in. Paneer should finish the dish, not endure the whole cooking process.

Homemade Paneer vs Store-Bought Paneer

Store-bought paneer is convenient, and there is nothing wrong with using it. It is helpful when you are short on time or cooking a quick dinner. But homemade paneer gives you freshness and texture control that packaged paneer often cannot match.

Homemade paneer cube broken open beside a firmer store-bought-style paneer cube with generic packaging blurred behind.
Store-bought paneer is useful when you are short on time, but homemade paneer lets you control moisture, pressing, and softness from the start.

Many store-bought paneer blocks are firmer because they are pressed, packaged, transported, refrigerated, and stored before you cook with them. Some are excellent, but many are denser than the paneer you would make fresh at home.

If your only experience with paneer has been hard cubes that sit separately from the sauce, homemade paneer can change how you think about the dish. Good paneer should be gentle, milky, and tender enough to belong inside the gravy, not feel like a separate chewy block.

You can also fold homemade paneer into vegetable dishes near the end, as in an Aloo Gobi with Paneer variation, where the cubes add protein without needing a long cooking time.

Already Bought Paneer? Here’s How to Soften It

Warm-water soaking can relax cold store-bought paneer and make it feel less stiff, but it may not fully rescue a very dense block. Choose the method based on the dish.

Store-bought paneer cubes shown cold, soaking in warm water, and drained after softening.
Warm-water soaking can relax cold packaged paneer before it goes into curry. It will not fix every dense block, but it often makes store-bought paneer gentler to eat.
  • Quick curries: cut the paneer into cubes and soak in warm water for 10–15 minutes, then drain gently.
  • Browned paneer in saucy dishes: shallow-fry the cubes briefly, then soak them in warm water before adding them to the gravy.
  • Delicate creamy gravies: skip hard frying and add paneer near the end so it only warms through.
  • Very rubbery paneer: soaking helps, but it may not completely fix an over-pressed or low-moisture block.

If packaged paneer keeps turning dense for you, the pressing guide shows how homemade paneer can be adjusted for softer curry cubes or firmer tikka pieces.

Paneer vs Tofu, Halloumi, Ricotta, Queso Fresco, and Cottage Cheese

If you are new to paneer, think of it as a mild, dairy-based cheese that holds its shape. Firm tofu is the closest non-dairy shape-holder, halloumi is saltier and springier, and queso fresco or queso blanco can be crumbly or tangier. Ricotta works better for soft fillings than cubes, while Western cottage cheese is wet and curdy rather than pressed.

Small plates of paneer, firm tofu, halloumi, queso fresco, and ricotta or cottage cheese arranged for comparison.
Paneer is mild, fresh, and sturdy enough to hold its shape. Tofu, halloumi, queso fresco, and ricotta can help in some recipes, but none behave exactly the same.

If paneer is not sold where you live, homemade is often easier than hunting for the perfect substitute.

Richer Malai-Style Paneer Variation

If you are using regular cow’s milk and want richer, softer paneer, you can make a malai-style variation by adding cream. This is especially useful if your local milk produces firmer paneer than you like.

Cream being poured into warm milk in a pot with soft paneer cubes in the background.
A malai-style paneer variation adds richness when local milk gives firmer curds. Use a little cream with whole milk for a fuller, softer homemade paneer texture.

For 2 litres / 8½ cups whole milk, add ¼–½ cup / 60–120 ml heavy cream or replace ½ cup / 120 ml of the milk with cream. Use plain dairy cream without strong stabilizers if possible. Heat, curdle, strain, and press as usual. Because the extra fat makes the curds richer and softer, press gently unless you specifically need firm tikka cubes.

Can You Make Paneer with 2% or Low-Fat Milk?

You can make paneer with 2% milk, but it will not behave like whole-milk paneer. Expect less yield, leaner curds, and a block that may taste firmer or more crumbly. It can still work for bhurji, fillings, or macro-focused cooking, but whole milk is better for soft curry cubes.
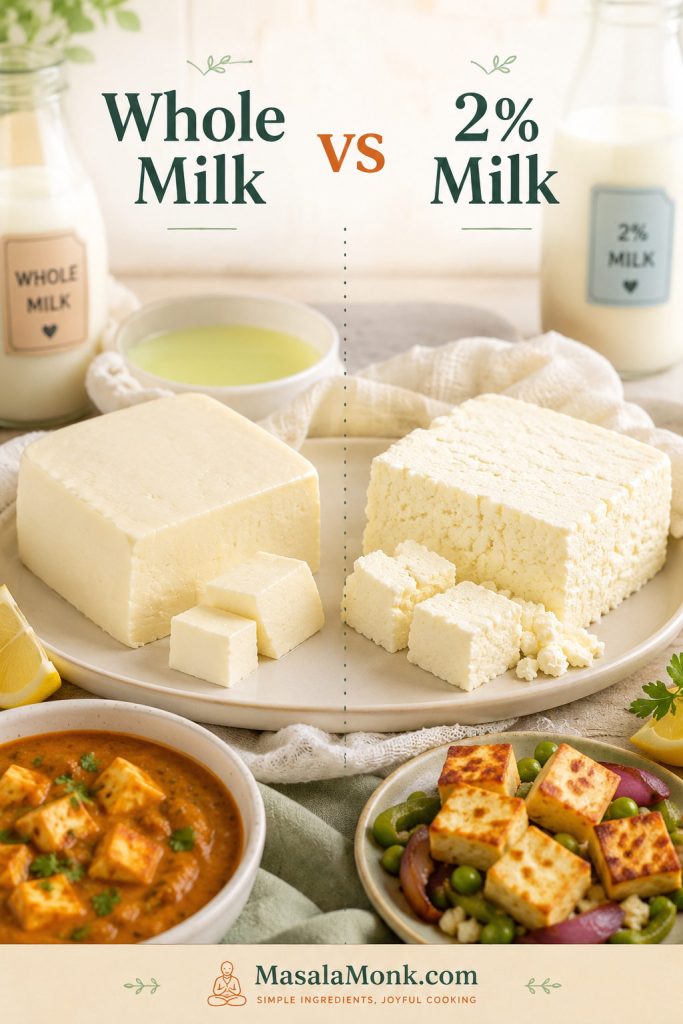
Whole milk paneer compared with a firmer and more crumbly 2 percent milk paneer result.
Low-fat milk can curdle, but the paneer is usually leaner, lower-yield, and more crumbly. For soft curry cubes, whole milk is the more forgiving choice.

Skim milk or fat-free milk is not recommended for this recipe. If you must use lower-fat milk, keep the method gentle: avoid harsh boiling, add acid gradually, rinse briefly, press lightly, and store the paneer in water. Expect a different result from full-fat paneer.

Instant Pot Note

You can make paneer in an Instant Pot, especially with the yogurt-boil function. Use it only to heat the milk; do not pressure cook the paneer. Once the milk is hot and foamy, add diluted lemon juice or vinegar gradually, then follow the same resting, straining, and pressing method. For your first batch, the stovetop is still easier because you can see exactly when the milk is hot enough and when the curds separate.

How to Use Homemade Paneer

Homemade paneer is best when you match the texture to the dish: soft curds for fillings, tender cubes for curries, and firmer cubes for grilling or skewers.

Homemade paneer used in curry, bhurji, tikka skewers, wraps, salad, and pan-seared cubes.
Once you know how to make paneer at home, it becomes a flexible vegetarian protein. Use soft curds in fillings, tender cubes in curry, and firmer pieces for tikka or searing.

Use soft crumbled paneer for fillings and quick meals

Soft paneer curds are excellent for paneer bhurji, toast, wraps, paratha fillings, sandwiches, cutlets, and snack-style recipes. They also work well in comfort-food ideas like Indian Cottage Cheese Jaffles, where a soft filling matters more than tidy cubes.

Use soft cubes for curries and vegetable dishes

For curries, you want paneer that holds shape but still feels moist. Press for 30–40 minutes, chill if needed, then add the cubes near the end of cooking. The sauce should be ready first; paneer only needs a few gentle minutes to warm through. This works for palak paneer, matar paneer, paneer butter masala, kadai paneer, and similar gravies.

Use firmer cubes for tikka, skewers, and grilling

For paneer tikka or skewers, press a little longer and chill before cutting. Firmer paneer is easier to marinate and thread onto skewers. Handle it gently, especially if your homemade paneer is softer than packaged paneer.

Use paneer for vegetarian protein

Paneer is also useful in vegetarian meal prep because it adds protein and richness without needing a long cooking time. Use it in salads, rice bowls, wraps, cutlets, and Indian-style meal prep plates. For more protein-focused Indian meal ideas, see MasalaMonk’s High-Protein Indian Meal Prep.

Do Not Throw Away the Whey

After you strain paneer, you will be left with whey: the pale yellow liquid that separated from the curds. It may look like something to discard, but it is useful in the kitchen.
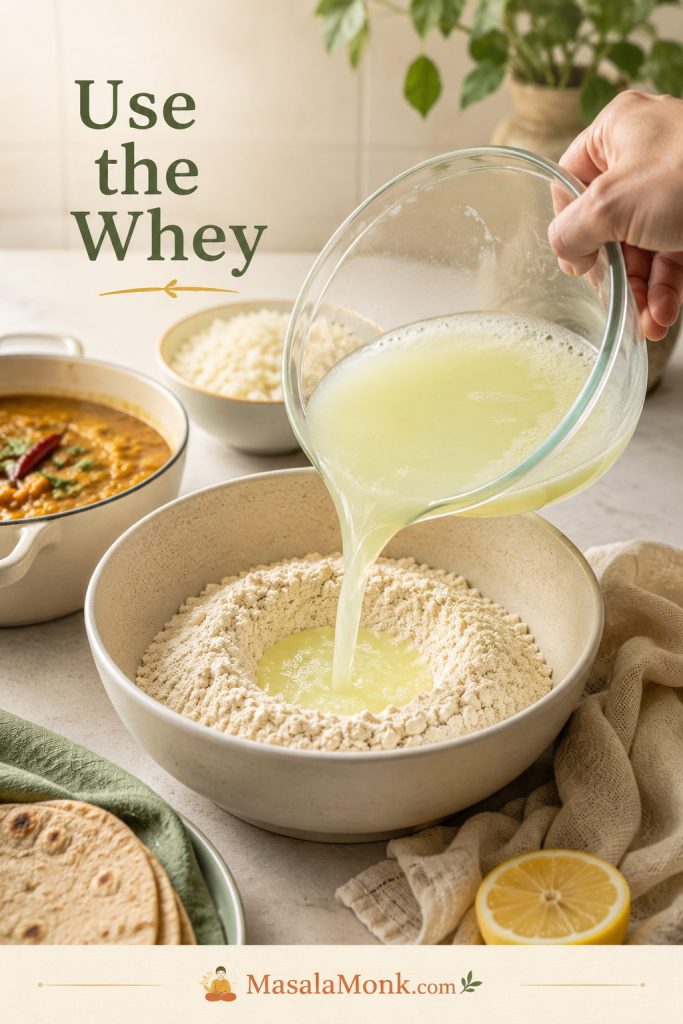
Leftover paneer whey being poured into flour or dough, with dal and rice in the background.
Mild paneer whey is too useful to throw away. Add it to roti dough, dal, soups, rice, oats, or grains whenever a little extra dairy tang fits the dish.
  • Use whey to knead flatbread, roti, naan, paratha, or bread dough.
  • Add it to lentils, dals, soups, stews, and curries.
  • Use it as part of the liquid for rice, quinoa, oats, or other grains.
  • Add a small amount to smoothies if it is not too sour.
  • Freeze it in small portions for later cooking.
  • Use very sour whey carefully, because it can change the flavor of delicate dishes.

Mild whey is useful in dough, rice, dals, and soups. Very sour whey is better in robust curries, breads, or flatbreads where a little tang makes sense. Avoid using sour whey in delicate desserts or plain rice unless you specifically want that flavor.

Refrigerate whey promptly and use it within 2–3 days, or freeze it in small portions. If you make paneer often, you can also use leftover whey from one batch to help curdle a future batch, although lemon juice or vinegar is easier for beginners.

Storing the paneer too? Use the storage and freezing guide so the cubes stay fresh while the whey gets used in dough, dal, rice, or soup.

How to Store and Freeze Homemade Paneer

Homemade paneer is a fresh, high-moisture cheese, so treat it gently and use it soon. Fresh paneer is softest the day it is made, but it can be refrigerated for a short time. Do not leave it sitting at room temperature for long. Cool it, cover it, and refrigerate it promptly.

Storage methodBest timeNotes
Same dayBest textureUse fresh paneer the day you make it for the softest result.
Refrigerator2–3 daysStore covered or submerged in fresh cold water. Change water daily.
FreezerUp to 1 month for best textureFreeze in portions. Thaw in the fridge and soak briefly in warm water before using if needed.
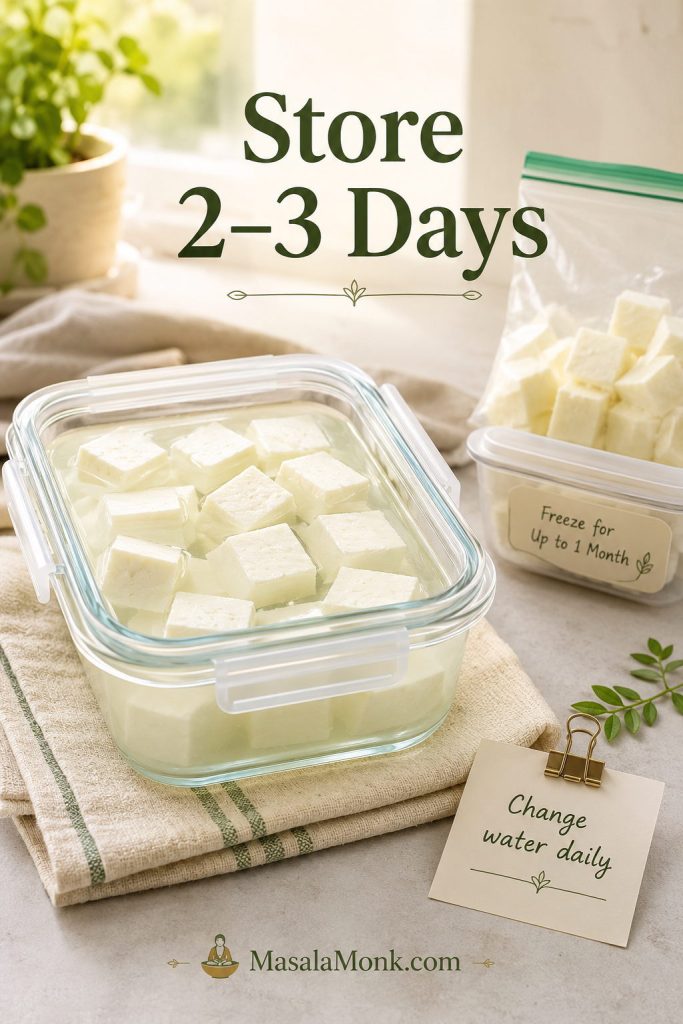
Homemade paneer cubes stored in fresh water inside a glass container with freezer portions and a note to change water daily.
Water storage keeps fresh paneer from drying out, but it does not make it long-keeping cheese. Change the water daily and use the paneer within 2–3 days.

To refrigerate paneer, cool it first, then store it in an airtight container. For softer paneer, cover it with fresh drinking water, keep the container covered, and change the water daily. Avoid storing paneer in very sour whey unless you want the flavor to become tangier. For broader cold-storage guidance, FoodSafety.gov has a useful reference, but for homemade paneer, the simple rule is: refrigerate promptly and use it within 2–3 days.

Unsalted homemade paneer tastes freshest sooner; if you lightly salt the curds, it may taste seasoned for snacks but should still be treated as a fresh cheese and used quickly.

If paneer smells sour in a bad way, feels slimy, looks moldy, becomes fizzy, or feels unusually sticky, discard it.

Troubleshooting Homemade Paneer

When you make paneer at home, an imperfect batch does not always mean failure. Paneer that will not cube neatly can still become bhurji, a sandwich filling, paratha stuffing, cutlets, toast, or a quick scramble. Most paneer problems are texture problems, not total failures.
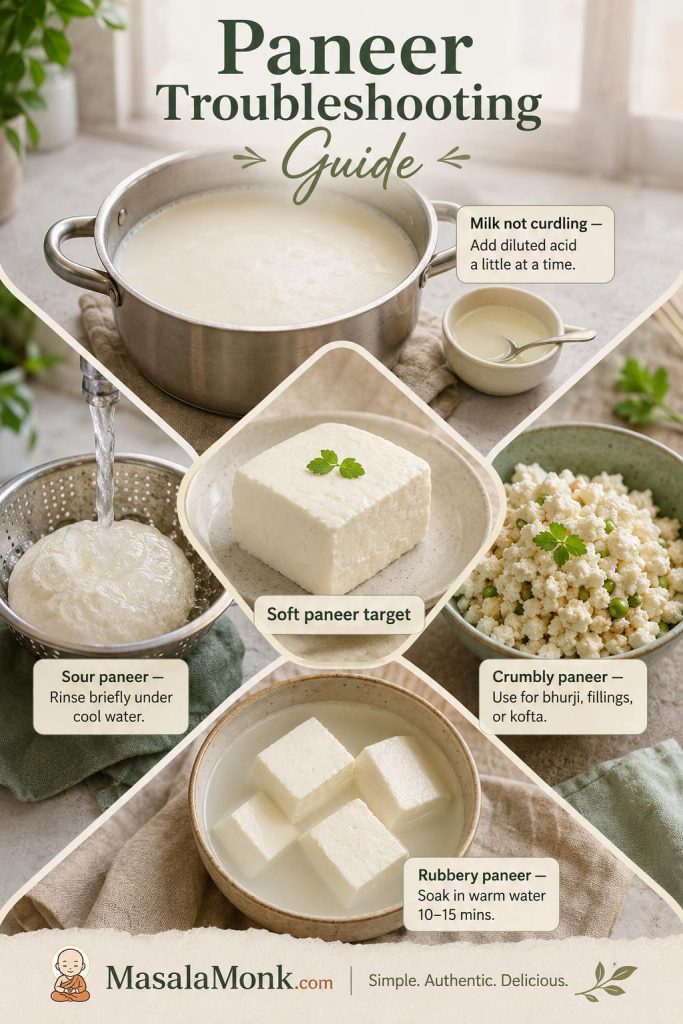
Paneer troubleshooting guide showing milk not curdling, sour paneer, crumbly paneer, rubbery paneer, and a soft paneer target.
Not every imperfect paneer batch is wasted. Milk that will not curdle can be adjusted slowly, sour curds can be rinsed, and crumbly paneer can still become bhurji or fillings.

Use the table below to decide what to do now and what to change next time.

ProblemLikely causeFix nowFix next time
Milk did not curdleMilk was not hot enough, not enough acid, or UHT/ultra-pasteurized milkReheat gently and add diluted acid 1 teaspoon at a timeUse full-fat, non-UHT milk
Whey still looks milkyIncomplete separationRest longer or add a little more diluted acidWait for pale yellow-green, slightly translucent whey before straining
Paneer tastes sourToo much acid or not rinsedRinse briefly under cool waterDilute acid and stop adding it earlier
Paneer is rubberyOverheating, too much acid, over-pressing, or harsh cookingSoak cubes in warm water for 10–15 minutesUse gentler heat, gradual acid, and shorter pressing
Paneer is crumblyWeak curds, low-fat milk, over-acidified curds, or not enough pressingUse it as bhurji or fillingUse richer milk and press slightly longer
Paneer breaks in curryToo soft, cut too soon, or stirred too roughlyAdd gently when the sauce is readyPress 30–40 minutes and chill before cutting
Paneer is dry after cookingFried or simmered too longSoak briefly in warm waterCook the sauce first, then warm paneer through gently

Why did my milk not curdle?

Usually, the milk was not hot enough, the acid was too weak, or the milk was UHT / ultra-pasteurized. Bring the milk back to 185–195°F / 85–90°C, add 1 teaspoon diluted lemon juice or vinegar, stir gently, and wait 30–60 seconds. Repeat only until the whey clears and the curds separate.

If the milk still refuses to separate, the milk itself may be the issue. Try another full-fat, non-UHT brand next time.

Why is my paneer rubbery?

Rubbery paneer usually comes from hard boiling, too much acid, heavy pressing, or long cooking in sauce. To rescue a batch, soak the cubes in warm water for 10–15 minutes. This will not fully reverse overcooking, but it can make the texture noticeably softer.
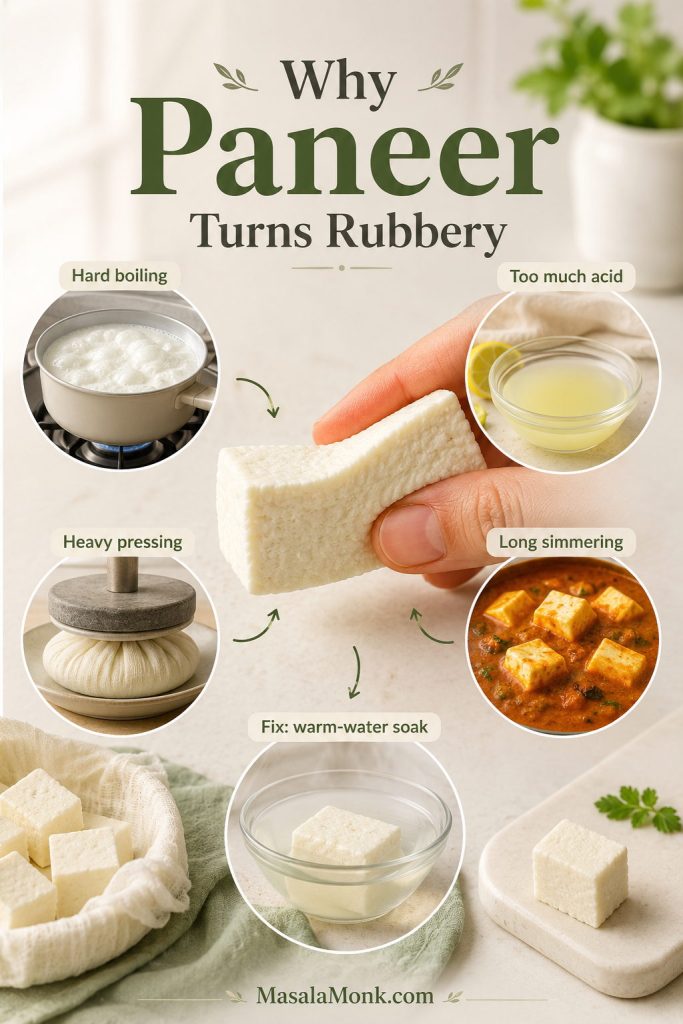
Causes of rubbery paneer shown around a firm paneer piece, including hard boiling, too much acid, heavy pressing, and long simmering.
Rubbery paneer is usually a moisture-loss problem. Harsh heat, extra acid, heavy pressing, and long simmering all tighten the curds, so controlling those steps keeps paneer softer.

Why does my paneer taste sour?

Sour paneer usually means too much lemon juice or vinegar remained in the curds. Rinse the curds briefly under cool water after straining. Next time, dilute the acid and add it gradually. Stop once the whey is clear enough and no longer looks milky.

Why is my paneer crumbly?

Crumbly paneer is not always bad. If it is moist and soft, use it for paneer bhurji, sandwich fillings, paratha fillings, cutlets, or toast. For a snackier route, lightly pressed or crumbled paneer also works in vegetarian patties such as Protein Packed Millet Cutlets.

For cleaner cubes next time, use full-fat, non-UHT milk, add acid slowly, rest the curds before straining, press for 30–40 minutes, and chill before cutting.

Why did my paneer break in curry?

The paneer may have been too soft for cubes, cut before it fully set, or stirred too roughly in the sauce. For curries, press the paneer for 30–40 minutes, chill it briefly, cut with a sharp knife, and add it only when the sauce is ready. Stir gently after adding paneer.

How do I make softer paneer next time?

Use richer milk, gentler heat, gradual acid, and shorter pressing. For especially soft paneer, add a little cream to the milk or use yogurt as the acid once you are comfortable with the basic method.

After you identify the problem, return to the homemade paneer recipe and watch the step-by-step paneer cues more closely on your next batch.

FAQs About Homemade Paneer

What is the best milk for making paneer at home?

Whole milk or full-fat milk is best because it gives better curds, better yield, and a softer texture. Regular pasteurized whole cow’s milk is the safest supermarket default.

Why did my milk not curdle?

Usually the milk was not hot enough, the acid was too weak, or the milk was UHT / ultra-pasteurized. Reheat gently, add diluted acid 1 teaspoon at a time, and stop once the whey clears.

Lemon juice or vinegar: which is better for paneer?

Both work. Lemon juice tastes fresher but varies in acidity. Plain white vinegar is more predictable and usually tastes neutral after dilution and rinsing.

How much paneer do you get from 1 litre, 2 litres, or 1 gallon of milk?

Yield varies by milk, fat level, draining, and pressing. Expect about 150–200 g from 1 litre, 300–400 g from 2 litres, and 600–750 g from 1 gallon / 3.8 litres.

How do you make paneer soft instead of rubbery?

Rubbery paneer usually comes from hard boiling, too much acid, heavy pressing, or long cooking in sauce. Use gentler heat, add acid gradually, press for less time, and add paneer near the end of cooking.

Is paneer the same as cottage cheese?

Not exactly. Paneer is sometimes called Indian cottage cheese, but Western cottage cheese is loose and wet, while paneer is drained and pressed.

Can ultra-pasteurized or UHT milk be used for paneer?

It may work sometimes, but it is not the best choice. Ultra-pasteurized and UHT milk can form weak, grainy, or unreliable curds. For your first batch, use full-fat, non-UHT milk if you can.

Can lactose-free milk be used for paneer?

Lactose-free dairy milk can work if it is full-fat and not UHT or ultra-pasteurized. Check the carton carefully, because some lactose-free milks are processed for long shelf life and may curdle less reliably.

What should I do with leftover whey?

Use whey in doughs, dals, soups, curries, rice, oats, or grains. You can also freeze it in small portions. If the whey is very sour, use it in recipes where a slight tang makes sense.

How long does homemade paneer last?

Homemade paneer tastes best the day it is made. Refrigerate it for 2–3 days, covered or submerged in fresh cold water. Change the water daily if storing submerged. Freeze for up to 1 month for best texture.

When should paneer be added to curry?

Add paneer near the end of cooking. The sauce should already be cooked and seasoned. Once the paneer goes in, simmer gently for a few minutes so it warms through without becoming tough.

Final Thought

Once you learn how to make paneer at home, the process becomes less about doing something complicated and more about reading what the milk is telling you. Use milk that curdles cleanly, heat it gently, add only enough acid, and press the curds for the dish in front of you.

After one good block, paneer stops feeling like a specialty-store ingredient. It becomes something you can make when a curry needs soft cubes, a wrap needs a filling, or a quick vegetarian meal needs something fresh, milky, and satisfying.
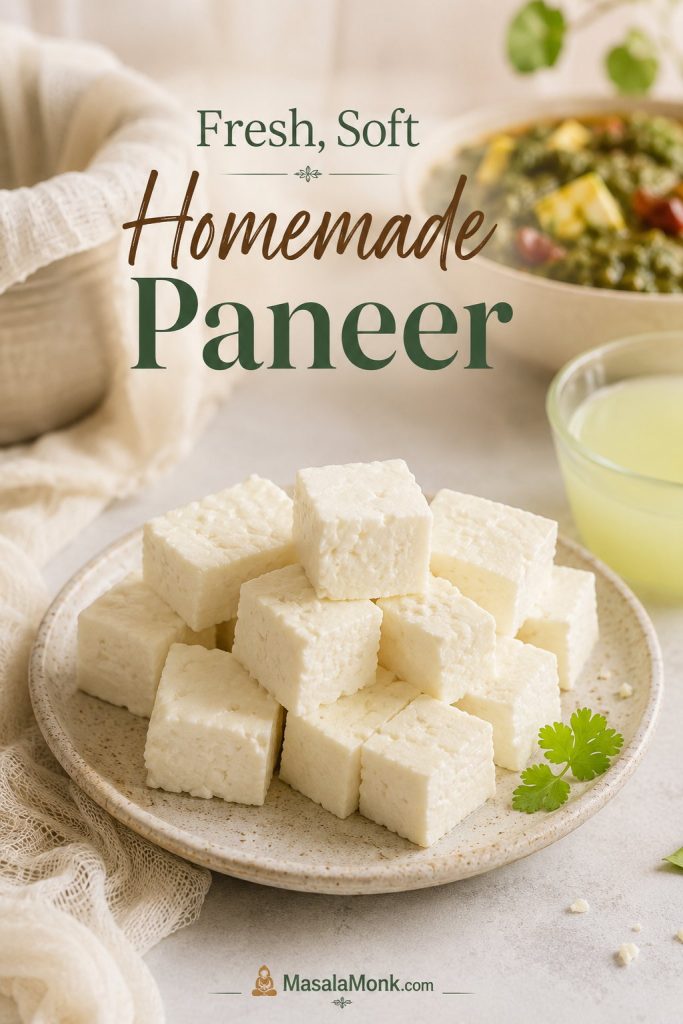

Fresh homemade paneer cubes on a ceramic plate with muslin, pale whey, and a blurred curry or greens in the background.
Good homemade paneer should feel simple by the end: clean curds, gentle pressing, soft cubes, and a fresh milky texture ready for the dish you want.

Back to top

Posted on 2 Comments

Apple Cider Vinegar & Lemon Juice for Weight Loss

Woman stirring a glass of diluted apple cider vinegar and lemon water in a sunlit kitchen; overlaid text shows the safe recipe and enamel-care tips.

People love simple rituals. A tall glass of water. A splash of vinegar. A squeeze of lemon. The routine feels clean and doable, which is part of its charm. Still, it helps to be honest. Apple cider vinegar and lemon juice for weight loss can support better choices for some people, mostly because it makes water more appealing and may help a few folks feel fuller. Even so, it’s not a switch you flip to change your body overnight. Progress still leans on ordinary decisions repeated often: meals anchored by protein and plants, everyday movement, and decent sleep.

Rather than pitching another miracle, let’s slow down and explore the drink in a realistic way—what research actually says, how lemon genuinely helps, what safety looks like in real life, and the gentlest way to try the ritual if you’re curious. Along the way, you’ll find straightforward resources from trusted health publishers and several MasalaMonk reads to make the journey tastier and easier to keep.

Also Read: Lentil Pasta for Weight Loss: Nutrition, Best Brands & 5 Healthy Recipes.


What apple cider vinegar and lemon juice for weight loss can and can’t do

To begin with, expectations matter. The Mayo Clinic puts it plainly: vinegar alone is unlikely to drive significant weight loss, and the evidence just isn’t strong enough to promise big results. Their concise guidance on apple cider vinegar is a useful reset if you’re sorting through bold claims you’ve seen online (Mayo Clinic’s guidance on ACV for weight loss).

That said, there are reasons the habit keeps getting attention. Some small studies and reviews report that vinegar can blunt post-meal blood-sugar rises and slow gastric emptying. In plain language, digestion may take a touch longer, and energy swings may feel steadier. For some, that translates into modest appetite control. However—and this is important—the effect tends to be small, short-term, and heavily dependent on your overall pattern. For a measured, readable overview that balances interest with caution, Harvard Health’s discussion of the “ACV diet” is worth a skim (Harvard Health’s overview). Likewise, Health.com has a recent explainer that lands in the same place: there might be a small nudge when ACV is used alongside a calorie deficit, but robust proof is limited (Health.com’s explainer).

Stepping back, the pattern is consistent: apple cider vinegar and lemon juice for weight loss might be a possible nudge, not a cure-all. If you enjoy the taste and you use the drink to replace a sweetened beverage, it may tilt the day in your favor. If you dislike it or it bothers your stomach, you can safely skip it—plenty of people reach their goals without ever sipping vinegar.

Also Read: Chia Seed Water: Benefits, Recipes & Best Time to Drink for Weight Loss


Where lemon genuinely helps—and where it doesn’t

Lemon earns its place here for reasons that are refreshingly down-to-earth. It brightens water, adds a familiar aroma, and turns hydration into a habit you might actually look forward to. That alone can change a day. A squeeze of juice offers a little vitamin C and makes the ritual feel fresh. However, honest evidence that lemon juice directly drives fat loss in humans is thin. Consider it flavor and hydration support, not a fat-burning trigger.

If citrus rituals appeal to you, two simple MasalaMonk companions can help you fine-tune the vibe you enjoy: the cozy routine of warm lemon water in the morning and the crisp refreshment of cold lemon water. Pick the version you’ll actually repeat.


Safety first: protect teeth, throat, and stomach

Because vinegar is acidic, the biggest long-term concerns with sloppy use aren’t your waistline—they’re your teeth and comfort. Enamel erosion creeps up slowly; throat irritation can turn a once-pleasant ritual into something you avoid. In addition, vinegar slows stomach emptying. Some people like the lingering fullness; others, especially those with reflux or delayed gastric emptying, find it uncomfortable. For a clear consumer-level rundown of common pitfalls—enamel wear, low potassium with heavy long-term intakes, and potential interactions with medications—see Verywell Health’s side-effects summary (Verywell Health on ACV side effects). Harvard also underscores two evergreen rules: dilute thoroughly and prefer food-first uses over “shots” (Harvard Health’s overview).

Practical steps you can trust:

  • Always dilute ACV in plenty of water.
  • Sip through a straw, then rinse your mouth with plain water.
  • Give enamel ~30 minutes before brushing.
  • Pair the drink with food if you’re prone to heartburn or queasiness.
  • Check with your clinician first if you live with diabetes and gastroparesis, significant reflux/ulcer symptoms, kidney disease, or if you take insulin, digoxin, or certain diuretics.

These guardrails keep a small habit from becoming a big problem.

Also Read: Apple Cider Vinegar for Arthritis & Joint Pain: Myths vs Facts


How to make apple cider vinegar and lemon juice for weight loss (gentle method)

Let’s keep the method simple, the taste pleasant, and the dose sensible.

One-glass method (1 serving):

  • Apple cider vinegar: start with 1–2 teaspoons; only increase if you feel fine. Most people don’t need more than 1 tablespoon per serving.
  • Water: 250–300 ml (room temperature or warm).
  • Lemon juice: 1–2 teaspoons (optional).
  • Optional flavor: a slice of fresh ginger, or ½ teaspoon honey (remember honey adds calories).

How to:
Stir the vinegar into the water, add lemon, sip through a straw, then rinse with plain water.

When to drink:
With a meal or just before your most carbohydrate-heavy meal. There’s no proven “best time,” so choose a moment you’ll remember. The Mayo guidance emphasizes dilution and moderation above timing or brand (Mayo Clinic on ACV basics).

Daily ceiling:
Without medical advice, keep total intake around 15–30 ml (1–2 tablespoons) per day, always well diluted.

Brand note:
Choose a pasteurized vinegar you like and can find easily. There’s nothing magical about a label; dilution and habits matter more than logos.

Also Read: Best Nuts and Seeds for Weight Loss (Chia, Flax, Almonds & More)


Prefer not to sip? Put vinegar in food and smile

You do not have to drink acid to get the flavor benefits. In fact, using vinegar in meals may be the smarter path for your teeth and your tastebuds. A simple vinaigrette over crisp greens gives you the same acetic-acid experience while bundling it with fiber, protein, and healthy fats. If you’d like enamel-friendlier ideas that still feel indulgent, browse MasalaMonk’s safe apple cider vinegar salad dressing and a set of ACV dressing recipes. Use those approaches broadly—not only during pregnancy.

As you experiment, lean into texture and contrast: peppery greens, toasted seeds, juicy tomatoes, and a vinaigrette that makes you crave the next bite. When a salad becomes the part of lunch you anticipate, you’ve shifted the whole day in your favor without feeling deprived.


Morning or empty stomach: is it necessary?

Plenty of people adore a morning ritual; it feels like a reset. Nevertheless, there isn’t convincing evidence that sunrise timing or an empty stomach makes vinegar more effective for fat loss. If an empty stomach leaves you queasy, place the drink with breakfast. If you prefer an even gentler start, consider warm lemon water on its own and then use ACV later in the day inside food. For tuning your routine to your taste, the MasalaMonk guide to warm lemon water in the morning is a friendly read.


Variations of apple cider vinegar and lemon juice for weight loss

Because taste keeps habits alive, it’s worth exploring small tweaks.

  • Honey: A drizzle rounds off sharp edges and makes the ritual feel softer. Just remember that sweetness brings energy; a half teaspoon adds roughly 20–25 calories. That’s easy to fit into your day when you plan for it.
  • Ginger: Grated ginger adds warmth without much energy cost and can make the drink feel cozier. For more zesty, hydrating ideas, MasalaMonk’s cucumber, lemon, and ginger water has crisp combinations you can borrow.
  • Spices: A pinch of black pepper brings a gentle kick. If you enjoy playful seasonings that don’t sneak in calories, lemon and black pepper offers easy variations.

Finally, some readers ask whether one famous ACV brand matters. It doesn’t, assuming you choose a pasteurized product and keep the dose modest. The basics—dilution, consistency, and an overall balanced plate—do the heavy lifting.


Tiny habit upgrades that compound over time

Instead of asking, “Will this drink make me lose weight?”, consider, “How can this ritual help me show up for myself the rest of the day?” A single glass won’t change your life. A small cascade of better choices might.

  • Pair it with protein. Aiming for ~25–35 g of protein at meals steadies appetite and protects lean mass as you lose fat.
  • Swap, don’t stack. Let the drink replace a sweetened beverage rather than adding on top of your usual routine.
  • Front-load plants. Start lunch or dinner with a generous salad dressed in a light ACV vinaigrette.
  • Walk after meals. Even a short stroll can steady post-meal blood sugar and clear your head.
  • Guard your bedtime. Hunger and cravings improve when sleep is consistent.

If you like myth-free fundamentals, the Mayo Clinic’s weight-loss basics is calm and useful (weight-loss basics). And for perspective from dietitians who see the ACV trend often, EatingWell recently summarized their take: interesting, but far from magical (dietitians’ view at EatingWell).

Also Read: How Does a High Protein, High Fiber Diet Support Weight Loss?


A seven-day starter plan using apple cider vinegar and lemon juice for weight loss

Trying something new is easier with a script. Use this as a soft landing and adjust freely.

Days 1–2
Stir 1 teaspoon ACV into 300 ml water. Add a little lemon. Drink with lunch. Rinse your mouth after.

Days 3–4
Increase to 2 teaspoons if you feel fine. Keep the same dilution. Stay with meals so your stomach has company.

Days 5–7
Try 1 tablespoon once per day, or split across two smaller servings. Keep your daily total within 1–2 tablespoons. If you notice throat irritation, reflux, or tooth sensitivity, switch to food-first uses and reassess later.

Alongside the drink, build a plate you enjoy: a protein you actually like, plenty of vegetables, and a starch that suits the day. If you need citrus refreshers between meals, cold lemon water is a bright companion to keep you sipping without added sugar (cold lemon water ideas).


What results feel like with apple cider vinegar and lemon juice for weight loss

Outcomes vary—and that’s completely normal. One person feels fewer afternoon cravings. Another feels no change. Someone else decides the drink isn’t for them and keeps vinegar strictly in dressings. None of these experiences are wrong; they simply reflect biology and preference.

If you enjoy the ritual and it helps you replace a sugary beverage, you may notice slow, steady benefits. If you dislike it, you won’t miss anything by skipping. A bright salad often delivers the same nudge with fewer dental worries. For a realistic, dietitian-led take, EatingWell sums it up neatly: evidence is limited; any help is likely small; food-first habits do the heavy lifting (dietitians’ view). Meanwhile, Health.com’s recent explainer lands in the same place, with a simple reminder to dilute and keep expectations modest (Health.com explainer).

Also Read: Guide to Body Fat Percentage


A kind closing thought on apple cider vinegar and lemon juice for weight loss

Choose the version of this habit that fits your life. If you enjoy the taste, keep it well diluted and pair it with meals. If you prefer food-first, whisk a quick vinaigrette and enjoy a generous salad. Both paths can support a calmer appetite and better choices—the quiet way real change happens. If questions about safety linger, the Verywell Health side-effects overview is clear and practical, and the Harvard Health pieces add helpful context without sensationalism (Verywell Health side-effects; Harvard Health overview).

Finally, a quick note to keep you safe: because vinegar can interact with certain conditions and medications, and because tolerance varies, it’s wise to speak with your clinician if you have diabetes (especially with gastroparesis), kidney disease, or chronic reflux, or if you take insulin, digoxin, or particular diuretics. A short conversation now is worth more than a long detour later.

FAQs

1. Can I mix lemon juice with apple cider vinegar?

First, yes—you can mix them. Apple cider vinegar and lemon juice for weight loss is mostly about taste and a simple ritual; the combo can make water more appealing while you aim for balanced meals and steady movement.

2. Does apple cider vinegar and lemon juice in the morning work better?

Next, timing isn’t magic. Morning feels motivating for many, yet the gentle benefits are similar whether you drink it with breakfast, lunch, or another meal you’ll remember.

3. Should I drink it on an empty stomach?

Also, not everyone tolerates acid well on an empty stomach. Pairing the drink with food often feels easier on the throat and may reduce reflux or queasiness.

4. How much should I drink daily?

Meanwhile, start small—1–2 teaspoons of apple cider vinegar in 250–300 ml water—with a squeeze of lemon if you like; if it sits well, you can work up to 1 tablespoon per serving and keep your daily total near 1–2 tablespoons.

5. Is apple cider vinegar and lemon juice good for weight loss?

Still, consider expectations. Apple cider vinegar and lemon juice for weight loss may help you feel a little fuller and swap out sugary drinks, yet the real progress comes from your overall eating pattern, steps, and sleep.

6. What are the benefits and risks?

That said, potential upsides include a more satisfying beverage habit and, for some, steadier appetite; possible downsides include enamel wear, throat irritation, delayed stomach emptying, and interactions if you have certain conditions or take specific medications.

7. Is there a simple recipe I can follow?

However, keep it basic: 1–2 teaspoons ACV + 250–300 ml water + 1–2 teaspoons lemon juice; sip through a straw and rinse your mouth with plain water afterward; adjust tartness to taste.

8. Can I add honey or ginger?

Moreover, tiny tweaks help adherence—½ teaspoon honey softens sharpness (remember the calories), while a slice of fresh ginger adds warmth without much energy.

9. Is warm water better than cold?

Additionally, temperature is personal. Warm water can feel soothing, cold water can feel refreshing; choose whichever helps you repeat the habit comfortably.

10. Is apple cider vinegar better than lemon juice alone?

On balance, vinegar has the stronger tradition of modest effects; lemon mainly brightens flavor and supports hydration, which can indirectly help you stick to your plan.

11. How long before I notice changes?

Practically speaking, give any routine a few weeks while you also stack fundamentals—protein-forward meals, vegetables, walking—so any small nudge from the drink has room to matter.

12. Who should avoid this drink?

Generally, skip or speak with your clinician first if you have diabetes with gastroparesis, chronic reflux or ulcers, kidney issues, low potassium history, or if you take insulin, digoxin, or certain diuretics.

13. Can I use apple cider vinegar and lemon juice for weight loss at night?

Typically, evenings are fine if you tolerate acid well; if nighttime triggers reflux, place the drink earlier in the day or use vinegar in a salad dressing instead.

14. Does it target belly fat?

Ultimately, no single drink targets fat from one area. Apple cider vinegar and lemon juice for weight loss may support better choices, but body fat reduces overall when your daily pattern creates a gentle calorie deficit.

Posted on 1 Comment

Lemon Juice for Acne: Harnessing the Power of Citrus for Clearer Skin

Lemon Juice for Acne?

Acne, a stubborn and often frustrating skin issue, has driven people toward countless DIY remedies in the quest for clearer skin. Among these, lemon juice stands out as a popular home remedy—but is it truly effective, or is it just another skincare myth?

Let’s explore the science, the reality, and practical tips if you’re curious about using lemon juice for your skin.

Understanding the Appeal of Lemon Juice

Lemon juice is appealing for several reasons:

  • Citric Acid: A natural exfoliant (alpha-hydroxy acid or AHA), it can remove dead skin cells and unclog pores.
  • Vitamin C: Known for brightening the skin and fading dark spots, it holds potential for acne marks.
  • Antimicrobial Properties: Lemon juice’s acidity can combat bacteria that might worsen acne.

What Does the Latest Research Say?

While lemon juice itself hasn’t been the subject of extensive human trials, ingredients like citric acid have been studied in professional skincare formulations. Recent research suggests:

  • Triple-Acid Peels: Combining citric acid with salicylic and mandelic acids significantly reduces acne and hyperpigmentation safely when applied professionally.
  • Formulated Serums: Serums blending citric acid with other acids have shown a reduction in oil production and acne marks.

Pure lemon juice, however, remains untested in formal studies, and its effectiveness on acne-prone skin is largely anecdotal and theoretical.

Risks and Precautions

Despite potential benefits, lemon juice can be harmful if misused:

  • Skin Irritation and Burns: Lemon juice is highly acidic (pH ~2–3) and can lead to redness, irritation, or even chemical burns.
  • Sun Sensitivity (Phototoxicity): Exposure to sunlight after applying lemon juice can cause severe burns or discoloration (phytophotodermatitis).

Practical Tips for Trying Lemon Juice Safely

If you’re determined to give lemon juice a try, follow these guidelines:

  1. Dilute the Lemon Juice: Mix 1 part lemon juice with at least 3–4 parts water, honey, or aloe vera.
  2. Patch Test First: Apply diluted juice to a small area (like your inner arm) and observe for reactions over 24 hours.
  3. Nighttime Only: Use lemon juice exclusively at night, thoroughly rinsing your face afterward to prevent phototoxic reactions.
  4. Short Contact Time: Limit application to 5–10 minutes, followed by gentle cleansing and moisturizing.
  5. Sunscreen is a Must: Always apply sunscreen the next day to protect sensitive skin from sun damage.

Safer Alternatives for Acne Treatment

If you’re hesitant about lemon juice but still seeking clear skin, consider dermatologist-approved treatments:

  • Vitamin C Serums: Offer controlled doses of vitamin C without irritation.
  • Salicylic Acid Products: Penetrate and exfoliate pores effectively and gently.
  • Benzoyl Peroxide: Proven antibacterial treatment targeting acne-causing bacteria directly.
  • Niacinamide: Helps manage inflammation and reduces redness.

The Bottom Line

While lemon juice holds theoretical promise for treating acne, the real-world risks often outweigh potential benefits. Professional skincare formulations containing citric acid offer safer, proven alternatives. If you choose to experiment with lemon juice, do so cautiously, following the practical guidelines above.

Ultimately, clearer skin comes from consistent, safe skincare practices, professional advice, and proven ingredients. Citrus may have its appeal, but when it comes to your skin, safety and evidence-based choices should always lead the way.

🍋 FAQs: Lemon Juice for Acne

1. Can lemon juice really help clear acne?
Pure lemon juice has anecdotal support, but lacks scientific proof. Its acidic nature might exfoliate, but risks irritation or burns.

2. Is lemon juice safe for all skin types?
Not really. Sensitive, dry, or damaged skin can react badly, causing redness, irritation, or chemical burns.

3. How do I safely apply lemon juice on my skin?
Dilute it (1:3 with water or aloe), apply at night, patch test first, and limit use to 5–10 minutes.

4. Why does lemon juice sometimes cause skin discoloration?
Lemon juice contains compounds that cause phototoxic reactions when exposed to sunlight, leading to discoloration.

5. Can lemon juice lighten acne scars?
Potentially, due to Vitamin C content—but safer, formulated serums are more effective and less risky.

6. What are safer alternatives to lemon juice for acne?
Vitamin C serums, salicylic acid, benzoyl peroxide, niacinamide, and professionally formulated chemical peels.

7. Can lemon juice make acne worse?
Yes, if it irritates your skin, damages the skin barrier, or triggers an allergic or phototoxic reaction.

8. How often can I safely use lemon juice on my face?
Very sparingly—no more than once or twice a week, always diluted, and never before sun exposure.

9. What immediate steps should I take if my skin reacts badly to lemon juice?
Rinse thoroughly with water, apply soothing moisturizers or aloe vera gel, and avoid sun exposure. Consult a dermatologist if irritation persists.

10. What’s the best takeaway regarding lemon juice and acne?
It’s a risky DIY remedy with theoretical benefits but real safety concerns. Dermatologist-approved treatments are always safer and more reliable.

Posted on Leave a comment

Is Lemon Juice Good for Your Liver? Unraveling the Truth

Is Lemon Juice Good for Your Liver?

Type “lemon juice and liver health” into any search engine and you’ll be greeted by a flood of claims: lemon water “detoxifies,” “cleanses,” or even “heals” your liver. Social media is packed with reels and TikToks promising that squeezing half a lemon into your water will undo years of liver abuse. But is there any truth behind these ideas—or are we chasing sour myths? Let’s dig deep into what science really says about lemon juice and your liver.


The Liver: Your Body’s Original Detox Organ

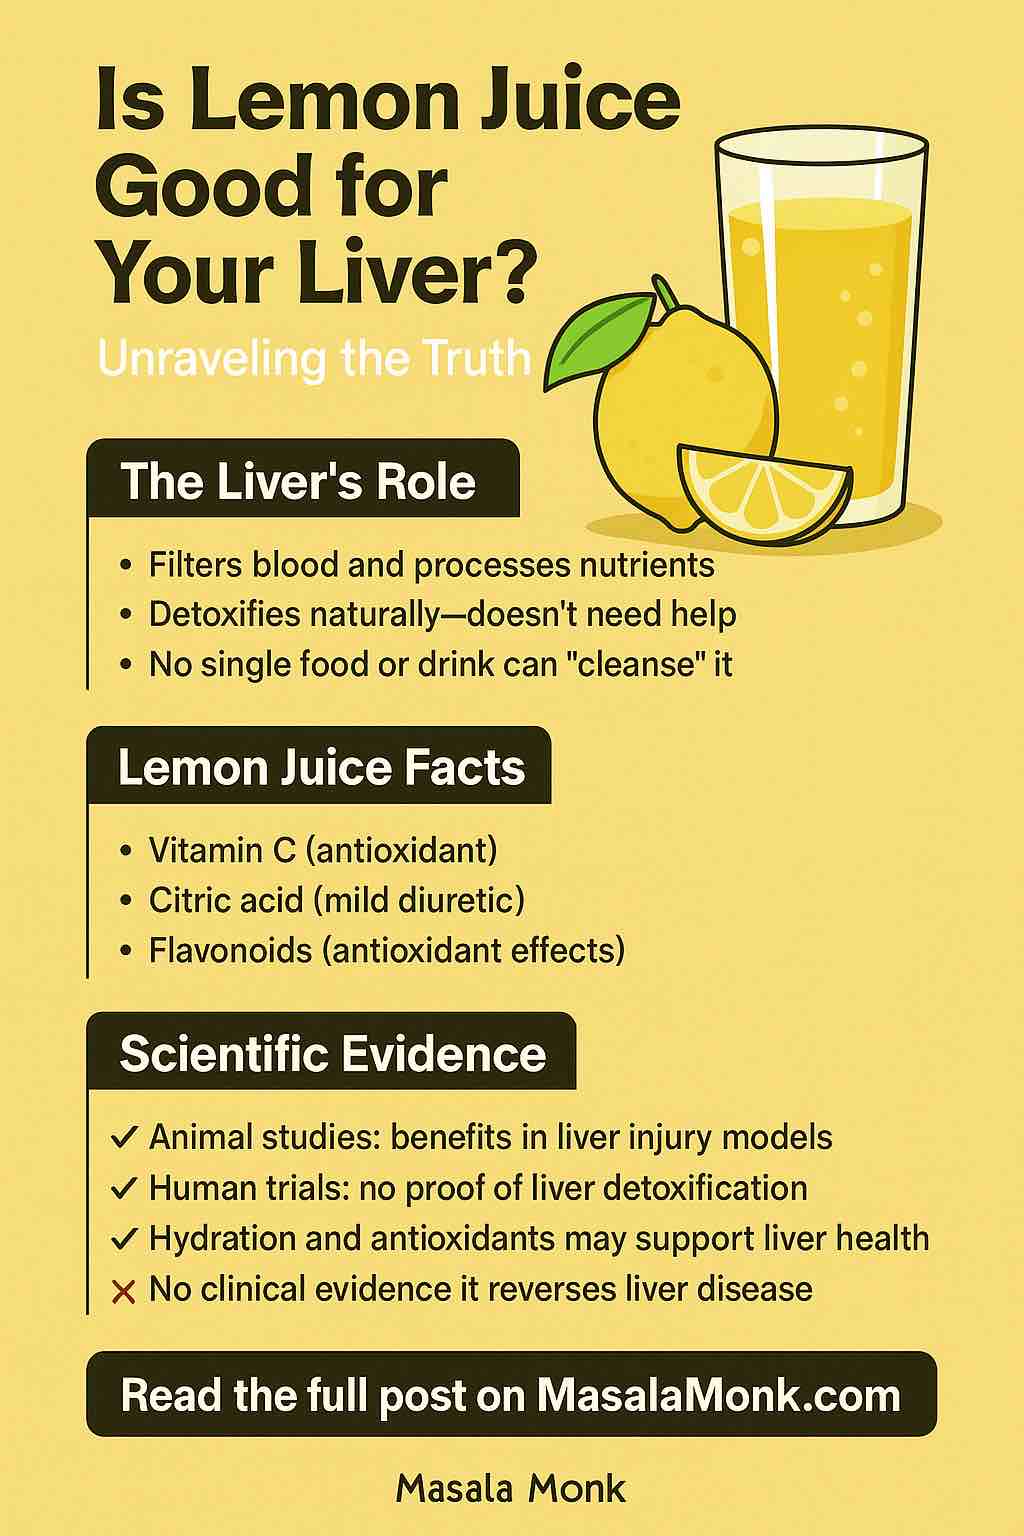
Before we look at lemon juice, it’s crucial to understand the liver’s real job. This powerhouse organ:

  • Filters your blood 24/7, breaking down toxins from food, drink, and your environment.
  • Processes nutrients and regulates metabolism.
  • Produces bile to help digest fats.

Fun fact: Your liver naturally “detoxifies” itself. No juice, cleanse, or superfood can do the work your liver is built to do—unless it’s sick or overwhelmed by chronic abuse.


Lemon Juice: What’s in It?

Lemon juice is more than just tang and zest. It contains:

  • Vitamin C: A powerful antioxidant.
  • Citric acid: Gives lemons their tart flavor and mild diuretic effect.
  • Flavonoids (like hesperidin, eriocitrin, limonin): Plant compounds with antioxidant and anti-inflammatory effects.
  • Trace minerals: Small amounts of potassium, magnesium, and others.

These nutrients all play a role in health—but does that translate to a healthier liver?


The Science: Lemon Juice and Liver Health

1. Animal Studies: Promising, but Not the Whole Story

Much of the excitement comes from animal research:

  • Alcohol-induced liver damage in mice: Lemon juice significantly reduced elevated liver enzymes (ALT/AST), liver fat, and cell death. Liver tissue looked much healthier under the microscope.
  • Toxin-induced liver injury (rats/mice): Lemon extracts and limonin (a lemon compound) lessened inflammation, fat buildup, and markers of oxidative stress.

BUT: These studies used concentrated lemon extracts or pure compounds—doses far higher than you’d get from a glass of lemon water. Animal results don’t always translate directly to humans.

2. Human Studies: The Evidence Is Thin

  • A handful of small studies suggest that limonin glucoside (a lemon extract) may reduce liver inflammation and some disease markers in overweight adults. But these are isolated extracts, not lemon juice.
  • No large, high-quality human trials have proven that lemon juice, on its own, can reverse liver disease or “detoxify” the liver.

3. Hydration and Antioxidants: Indirect Liver Support

  • Staying hydrated helps all your organs—including your liver—work efficiently. If adding lemon to water encourages you to drink more, that’s a genuine plus.
  • Antioxidants in lemons can help lower oxidative stress (a factor in many chronic diseases), but a balanced diet full of fruits and vegetables will do this better than lemons alone.

What About Detoxing? Busting the Lemon Juice Myth

No drink or food “detoxifies” your liver.
Your liver is the detox center. What lemon juice (and other citrus) can offer is mild support—mainly through hydration and a few antioxidants.

Some wellness influencers claim you can “flush out toxins” by drinking lemon water. There’s no scientific evidence for this, and the liver doesn’t store toxins in a way that lemon juice could “wash out.” Serious liver damage (from alcohol, hepatitis, fatty liver, etc.) requires medical attention, not a citrus remedy.


Potential Risks of Too Much Lemon Juice

  • Tooth enamel erosion: The high acidity can wear down enamel if sipped frequently, especially undiluted.
  • Heartburn or reflux: Citrus juices can trigger symptoms in sensitive individuals.
  • Medication interactions: Uncommon, but in high doses, lemon compounds could interact with certain drugs (always check with your doctor).

Practical Takeaways: Should You Drink Lemon Juice for Your Liver?

Enjoy Lemon Water for These Reasons:

  • Adds flavor to help you drink more water.
  • Provides a small vitamin C boost.
  • Freshens breath and can aid digestion for some.

But Remember:

  • It’s not a “magic detox.”
  • It won’t reverse serious liver problems.
  • The key to a healthy liver is a healthy lifestyle—not any single food or drink.

What Actually Protects Your Liver?

Science-backed tips for liver health:

  • Limit alcohol. Chronic drinking is the leading cause of liver damage.
  • Maintain a healthy weight. Obesity is a major risk factor for fatty liver disease.
  • Eat a balanced diet. Lots of vegetables, fruits (not just lemons!), whole grains, lean proteins, and healthy fats.
  • Exercise regularly. Movement helps prevent fat buildup in the liver.
  • Get vaccinated. Against hepatitis A and B, if recommended.
  • Regular checkups. Especially if you’re at risk.

The Bottom Line

Lemon juice is healthy, refreshing, and a great way to jazz up your water—but it is not a liver cure or a detox miracle. The best thing you can do for your liver is to treat it well with healthy habits every day.

Enjoy your lemon water as part of a balanced diet—and let your liver do its job.


References & Further Reading


Got questions, or want to see more science-backed deep dives? Drop a comment below!

FAQs

1. Does lemon juice detoxify the liver?
No. Lemon juice does not detoxify or cleanse the liver. The liver is naturally self-cleaning and does not need special drinks or foods for detoxification.

2. Can lemon juice reverse fatty liver disease?
No. There is no scientific proof that lemon juice can reverse fatty liver disease. Medical management, weight loss, and a healthy diet are the best-proven strategies.

3. Is there any human research showing lemon juice heals the liver?
No robust clinical trials exist. Most positive effects seen in studies use concentrated lemon extracts in animals, not lemon juice in humans.

4. Why do people say lemon juice is good for the liver?
This belief comes from animal studies, the general health benefits of vitamin C and flavonoids, and the popularity of “detox” trends, not from direct evidence in people.

5. Can drinking lemon water every day harm you?
Generally, it’s safe. However, excessive amounts can erode tooth enamel or trigger heartburn in sensitive individuals.

6. Does lemon juice have any benefits for the liver at all?
Indirectly, yes. Lemon juice provides antioxidants and supports hydration, both of which are generally good for health, including liver health.

7. Should I drink lemon water instead of taking medication for my liver?
Absolutely not. Never replace prescribed medication or medical treatment with lemon water or any home remedy.

8. How much lemon juice is safe to drink daily?
Most people can safely enjoy the juice of half to one lemon per day in water. Listen to your body, especially if you have acid reflux or dental concerns.

9. What’s the healthiest way to drink lemon water?
Dilute fresh lemon juice in plenty of water, and drink through a straw to protect your teeth. Rinse your mouth afterward if concerned about enamel.

10. What actually protects the liver?
A healthy lifestyle: limit alcohol, maintain a healthy weight, eat a balanced diet, exercise regularly, and get regular checkups.

Posted on Leave a comment

Lemon During Pregnancy 🤰


Have you ever found yourself eyeing the bright, sun-kissed lemons in your kitchen, wondering if they’re more than just a tangy addition to your water or a garnish for your meals? Especially now, when you’re embarking on the extraordinary journey of pregnancy, every bite and sip carries newfound significance. In this vibrant chapter of life, as you navigate the sea of dietary dos and don’ts, the humble lemon emerges not just as a citrusy delight but as a topic of curiosity and concern.

Lemons, those zesty spheres of Vitamin C, have been the subject of many a kitchen-table discussion among expectant mothers. Can these sour gems be the unsung heroes of your pregnancy diet, or do they hide risks beneath their yellow cloak? The truth is, when it comes to pregnancy, nutrition transforms into a kaleidoscope of both opportunities and cautions. And lemons, with their vibrant color and invigorating scent, are no exception.

In this comprehensive guide, “Lemons in Pregnancy: A Zesty Guide to Benefits, Risks, and Tasty Tips,” we peel back the layers (quite literally!) to explore the multifaceted role of lemons during pregnancy. We delve into the heart of scientific research and expert opinions, sift through myths and facts, and bring to you a treasure trove of information that balances taste with health, zest with caution.

Why lemons, you ask? This seemingly simple fruit is a powerhouse of nutrients, each playing a pivotal role in supporting both you and your growing baby. But as with any superhero, lemons have their kryptonite too. Their high acidity can be a double-edged sword, offering benefits and presenting challenges unique to pregnancy. It’s a balancing act – understanding how to harness the goodness of lemons while sidestepping the pitfalls.

So, whether you’re battling morning sickness and looking for natural remedies, seeking ways to boost your immunity, or just craving a refreshing lemonade on a warm afternoon, this guide has got you covered. We’ll walk you through the sunlit orchards of lemon benefits, tread carefully through the thorny bushes of risks, and even share some delectable, pregnancy-safe recipes that will make lemons your loyal companions on this incredible journey.

Grab a glass of lemon-infused water, make yourself comfortable, and let’s embark on this zesty adventure together – where every squeeze of lemon is packed with potential and every slice is a slice of knowledge!


The Nutritional Profile of Lemons: A Deep Dive into What Makes Them Special


As we embark on this exploratory journey into the world of lemons, let’s first pause to appreciate the intricate tapestry of nutrients woven into each of these vibrant fruits. The lemon, often seen merely as a source of sour delight, is, in fact, a cornucopia of health benefits, especially crucial during the unique life stage of pregnancy. But what exactly does this citrus wonder offer? Let’s unpack its nutritional profile, revealing how each element contributes to the wellbeing of both the expectant mother and the developing baby.

A Symphony of Vitamins and Minerals

At the heart of a lemon’s health benefits is its impressive array of vitamins and minerals. Here’s a closer look:

  1. Vitamin C – The Immunity Booster: Widely known for its immune-boosting properties, Vitamin C is a potent antioxidant. In pregnancy, it takes on an added significance, safeguarding both the mother and the baby against potential infections and playing a pivotal role in the absorption of iron – an essential mineral for preventing anemia in expectant mothers.
  2. Folate – The Neural Protector: Folate, or Vitamin B9, is a hero for early fetal development. It’s crucial in forming the neural tube, which later develops into the baby’s brain and spinal cord. Adequate folate intake reduces the risk of neural tube defects, making lemons an invaluable addition to a prenatal diet.
  3. Potassium – The Electrolyte Regulator: This vital mineral keeps the body’s fluid balance in check, aids in nerve function, and helps regulate muscle contractions – a function especially important for those tiny, growing baby muscles.
  4. Flavonoids – The Silent Guardians: These potent antioxidants are known for their anti-inflammatory and anti-cancer properties. During pregnancy, they work silently yet effectively to protect the body against diseases and aid in the overall health of the mother and baby.
  5. Dietary Fibers – The Digestive Aids: Lemons contain dietary fibers, which are beneficial for digestive health. They help prevent common pregnancy-related issues like constipation and ensure a smooth digestive process.

Beyond the Basics: Lesser-Known Compounds

It’s not just the well-known nutrients that make lemons a worthy contender in a pregnancy diet. Lesser-known compounds in lemons, such as citric acid, limonene, and hesperidin, also play significant roles. Citric acid aids in metabolism and energy production, limonene offers its anti-inflammatory and antioxidant benefits, while hesperidin strengthens blood vessels, which is vital as the body undergoes significant changes during pregnancy.

The Lemon’s Edge: Nutrient Density Per Calorie

What makes lemons particularly appealing for pregnancy is their nutrient density per calorie. They pack a punch of essential nutrients while being low in calories, making them an ideal choice for maintaining a balanced prenatal diet without the added worry of excessive weight gain.


The Multifaceted Benefits of Lemons During Pregnancy


Embarking further into our lemon-laden journey, we now turn our attention to the myriad ways in which this citrus powerhouse can positively impact pregnancy. Each nutrient in a lemon doesn’t just sit idly; it plays an active role in nurturing both mother and baby. From bolstering the immune system to aiding fetal development, let’s zestfully explore these benefits.

1. Immunity Enhancement: A Citrus Shield Against Illness

During pregnancy, a woman’s immune system undergoes a complex transformation, often becoming more susceptible to infections. This is where the high Vitamin C content of lemons comes into play. Acting as a formidable shield, it strengthens the body’s defenses. Moreover, the antioxidant properties of Vitamin C help reduce oxidative stress, a factor linked to several pregnancy complications.

2. Navigating the Seas of Nausea with Lemon’s Aid

Morning sickness, an unwelcome companion for many during the first trimester, can often be mitigated by the refreshing scent and flavor of lemons. The mere act of inhaling the aroma of a freshly cut lemon can bring a sense of relief to expectant mothers battling nausea. Drinking lemon-infused water or simply sucking on a lemon slice can be surprisingly effective remedies.

3. Fetal Development: Building Blocks Provided by Lemons

The growth and development of the fetus are paramount concerns during pregnancy. Lemons, rich in folate, contribute significantly to the development of the baby’s brain and spinal cord. Furthermore, the potassium in lemons plays a critical role in the development of baby’s bones, muscles, and nervous system.

4. Iron Absorption: Maximizing Benefits from Every Meal

Iron deficiency is a common concern during pregnancy, often leading to anemia. Vitamin C, abundantly found in lemons, enhances the body’s ability to absorb iron from dietary sources. This is particularly beneficial for those who rely on plant-based iron sources, as the non-heme iron in plants is made more bioavailable through the presence of Vitamin C.

5. Digestive Comfort: Easing the Digestive Turmoil of Pregnancy

Constipation and irregular digestion are frequent issues faced during pregnancy, owing to hormonal changes and the pressure exerted by the growing uterus. The dietary fibers in lemons assist in regulating the digestive system, making bowel movements smoother and less discomforting.

6. Hydration: The Understated Hero of Pregnancy Health

Staying adequately hydrated is crucial during pregnancy, and the enticing flavor of lemon-infused water can encourage regular fluid intake. Proper hydration is vital for maintaining amniotic fluid levels, aiding in nutrient transport, and reducing the risk of common pregnancy-related problems such as urinary tract infections and constipation.

7. A Sip of Lemon Water: The Ally for Blood Pressure Regulation

Lemons, being a good source of potassium, help in regulating blood pressure, a crucial aspect of prenatal health. High blood pressure during pregnancy can lead to complications such as preeclampsia. Incorporating lemon into the diet can be a natural and tasty way to help keep blood pressure in check.


In each drop of lemon juice and every whiff of its zest lies a spectrum of benefits, intricately woven to support the journey of pregnancy. As we savor the knowledge of these benefits, it’s equally important to tread cautiously and be aware of the potential risks and how to mitigate them. In the following section, we’ll peel off the layers of caution, balancing our love for lemons with the wisdom of moderation.

Trimester-Wise Breakup: Leveraging Lemons Throughout Pregnancy and Beyond


As we delve deeper into the journey of pregnancy, it becomes evident that each trimester presents its unique set of challenges and needs. Lemons, with their versatile benefits, can be a valuable ally throughout these stages. Moreover, their role continues postpartum, supporting new mothers in their recovery and breastfeeding journey. Let’s explore how lemons can be optimally used in each trimester and beyond.

First Trimester: The Foundation Phase

  1. Combating Morning Sickness: With nausea and vomiting being prominent in the first trimester, lemon’s natural ability to alleviate these symptoms is invaluable. Sipping lemon water or inhaling the scent of fresh lemons can provide relief.
  2. Folate Boost: As the neural tube development is crucial during this phase, leveraging lemons for their folate content supports this essential growth process.
  3. Hydration and Gentle Detoxification: The diuretic properties of lemons, coupled with their hydrating effect, can help in gently detoxifying the body, which is beneficial during the early stages of pregnancy.

Second Trimester: The Growth Phase

  1. Nutrient Absorption: As the baby’s growth accelerates, the need for increased iron and other nutrients becomes critical. Lemon’s role in enhancing iron absorption is particularly beneficial during this trimester.
  2. Maintaining Energy Levels: The refreshing quality of lemons can be a natural energy booster, helping to combat the increased fatigue often experienced during the second trimester.
  3. Dental Health: With increased risk of gingivitis and other dental issues during pregnancy, rinsing with lemon water (while being cautious of its acidity) can help maintain oral hygiene.

Third Trimester: The Preparatory Phase

  1. Blood Pressure Management: Lemons can aid in regulating blood pressure, which is crucial during the later stages of pregnancy to prevent conditions like preeclampsia.
  2. Digestive Aid: As the uterus expands, putting pressure on the digestive system, lemons can help ease digestion and prevent constipation.
  3. Immune Support: Building up the immune system in preparation for delivery is vital, and the Vitamin C in lemons plays a significant role in this strengthening process.

Postnatal: The Recovery and Breastfeeding Period

  1. Breastfeeding Support: Lemons can help in maintaining hydration, which is crucial for milk production during breastfeeding.
  2. Postpartum Recovery: The nutrients in lemons support the body’s recovery process post-delivery, aiding in the replenishment of essential vitamins and minerals.
  3. Mood Enhancement: The refreshing scent and taste of lemons can have a mood-lifting effect, which can be beneficial in combating postpartum blues.

By understanding and respecting the unique demands of each trimester and the postnatal period, lemons can be strategically incorporated into the diet to maximize their benefits. Each stage of this miraculous journey brings its own challenges and joys, and with the right nutritional support, like that offered by lemons, it can be navigated with grace and health. In the next section, we will present creative and practical ways to incorporate lemons into your daily diet throughout your pregnancy and beyond.

Addressing Different Pregnancy Conditions with Lemons: A Targeted Approach


Pregnancy, while a universal experience, manifests uniquely for each woman, bringing forth a spectrum of conditions and symptoms. Lemons, in their versatility, can be tailored to address various specific conditions that often accompany pregnancy. Let’s explore how this citrus fruit can be strategically used to cater to these diverse needs.

1. Gestational Diabetes: Managing Blood Sugar Levels

For those navigating the challenges of gestational diabetes, lemons can be a beneficial addition to the diet:

  • Low Glycemic Index: Lemons have a low glycemic index, which means they have minimal impact on blood sugar levels.
  • Flavor Enhancement Without Sugar: Using lemon juice as a flavor enhancer in foods and drinks can reduce the need for added sugars, helping to manage blood sugar levels.

2. Preeclampsia: Aiding in Blood Pressure Regulation

Preeclampsia, characterized by high blood pressure, can be a serious concern during pregnancy. Lemons may assist in managing this condition:

  • Potassium Content: The potassium in lemons helps balance out the negative effects of sodium, aiding in blood pressure regulation.
  • Hydration: Staying well-hydrated is essential for maintaining healthy blood pressure, and lemon water can be an appealing way to increase fluid intake.

3. Anemia: Enhancing Iron Absorption

Iron-deficiency anemia is common during pregnancy, and lemons can play a significant role in preventing it:

  • Vitamin C: The high vitamin C content in lemons enhances the absorption of iron from dietary sources, especially important for those relying on plant-based iron.

4. Swelling and Edema: Providing Natural Relief

Many women experience swelling and edema, especially in the later stages of pregnancy. Lemons can offer some relief:

  • Diuretic Effect: The mild diuretic effect of lemons can help reduce water retention, alleviating swelling in the legs and feet.

5. Immune System Support: Warding Off Infections

With the immune system being compromised during pregnancy, boosting it becomes crucial:

  • Antioxidants and Vitamin C: The antioxidants and vitamin C in lemons strengthen the immune system, helping the body ward off infections and colds.

6. Digestive Issues: Easing Discomfort

Digestive problems, including heartburn and constipation, are common during pregnancy:

  • Digestive Aid: While lemons can exacerbate heartburn for some, for others, they can aid in digestion and help alleviate constipation due to their fiber content.

7. Mood Swings and Stress: The Calming Effect of Lemons

Pregnancy can be an emotional rollercoaster, and the refreshing scent of lemons can have a calming effect:

  • Aromatherapy: Simply inhaling the scent of a fresh lemon can help reduce stress and improve mood, making it a simple yet effective natural remedy.

In summary, lemons can be a versatile and natural way to address various pregnancy-related conditions. However, it’s important to remember that individual reactions can vary, and what works for one person may not work for another. Always consult with a healthcare provider before making any significant changes to your diet or relying on natural remedies for specific conditions. In our next section, we’ll dive into creative and practical ways to include lemons in your pregnancy diet, making it both healthful and enjoyable.

Creative and Safe Lemon Infusions: Incorporating Lemons into Your Pregnancy Diet


As we embrace the diverse facets of lemons in the context of pregnancy, it becomes essential to explore practical, enjoyable, and safe ways to incorporate this versatile fruit into your daily diet. This section of our citrus journey is dedicated to creative culinary explorations that respect the balance between benefit and moderation, ensuring that every lemony addition is as delightful as it is beneficial.

1. The Art of Moderation: Crafting a Lemon-Infused Diet Plan

The key to safely enjoying lemons during pregnancy lies in moderation. Here are some ideas for incorporating lemons into your diet in a balanced way:

  • Lemon Water Rituals: Start your day with a glass of warm lemon water. This not only hydrates but also provides a gentle, vitamin-rich start to your morning. Remember, the water should be lukewarm, not hot, to preserve the Vitamin C content.
  • Zesty Dressings and Marinades: Use freshly squeezed lemon juice in homemade dressings for salads or as a marinade for proteins like chicken or fish. This adds a burst of flavor and nutrients without overwhelming your system with acidity.

2. Culinary Creativity: Lemon-Infused Recipes for Every Meal

Lemons can brighten up meals while offering their nutritional benefits. Here are some pregnancy-safe recipes:

  • Morning Boost: Lemon and ginger tea. Grate some fresh ginger and steep in hot water, then add a squeeze of lemon for a soothing, nausea-reducing beverage.
  • Lunch Special: Quinoa lemon salad. Combine cooked quinoa, chopped vegetables (like cucumber and tomatoes), and a lemon-olive oil dressing for a refreshing and nutritious lunch option.
  • Dinner Delight: Lemon-baked fish. Bake your choice of fish with slices of lemon, herbs, and a dash of olive oil for a simple yet elegant dinner.

3. The Sweet Side: Lemon in Pregnancy-Safe Desserts

Even desserts can benefit from the zest of lemons:

  • Lemon Yogurt Parfait: Layer Greek yogurt with lemon zest and a drizzle of honey for a tangy and sweet treat.
  • Baked Lemon Custard: Enjoy a soft, baked lemon custard, made with reduced sugar and fresh lemon juice for a satisfying after-dinner dessert.

4. Snack Time: Healthy Lemon Snacks for the Pregnant Palate

Healthy snacking is important during pregnancy, and lemons can play a role here too:

  • Lemon and Herb Hummus: Blend chickpeas, tahini, lemon juice, and herbs for a nutritious dip for your veggies or whole-grain crackers.
  • Lemon-Infused Nuts and Seeds: Toss your favorite nuts and seeds with a bit of lemon juice and roast them lightly for a tangy twist.

5. Hydration with Flavor: Lemon-Infused Water Variations

Staying hydrated is essential, and lemon can make it more appealing:

  • Cucumber and Lemon Water: Add slices of cucumber and lemon to your water for a refreshing and hydrating drink.
  • Herbal Lemon Water: Infuse water with lemon slices and herbs like mint or basil for a flavorful hydration option.

6. Celebratory Drinks: Festive Lemon Mocktails

Pregnancy doesn’t mean missing out on festive drinks:

  • Sparkling Lemonade: Mix sparkling water with freshly squeezed lemon juice and a touch of honey for a celebratory mocktail.
  • Lemon and Berry Punch: Combine lemon juice, berries, and sparkling water for a fruity and festive drink.

7. The Precautionary Measures: Ensuring Lemon Safety in Your Diet

While exploring these recipes and ideas, keep in mind the precautionary measures:

  • Wash Well: Always thoroughly wash lemons to remove any pesticides or contaminants.
  • Organic Options: Consider organic lemons to reduce exposure to pesticides.
  • Watch for Reactions: Pay attention to how your body responds to lemons and adjust your consumption accordingly.

Incorporating lemons into your pregnancy diet can be a delightful culinary adventure. From starting your day with a refreshing glass of lemon water to enjoying a zesty lemon dessert, the options are both varied and nutritious. By following these creative yet safe ideas, you can harness the benefits of lemons while ensuring a joyful and healthy pregnancy journey. As we conclude this section, remember that the essence of a balanced diet lies in diversity and moderation, making every lemon-infused bite a harmonious blend of flavor and nutrition.

Lemon Lore: Myths, Facts, and Expert Insights on Lemons During Pregnancy


In the realm of pregnancy and nutrition, there’s often a fine line between myth and fact. Lemons, despite their straightforward nature, are sometimes shrouded in misconceptions. This part of our journey is dedicated to demystifying lemons, providing expert insights, and empowering expectant mothers with knowledge that goes beyond the peel.

1. Debunking Lemon Myths: Separating Fact from Fiction

Pregnancy is a time rife with advice, not all of which is accurate. Let’s address some common myths about lemons during pregnancy:

  • Myth: Lemons Alter Baby’s Gender or Complexion: A popular myth suggests that consuming lemons can influence the baby’s gender or skin tone. This is a complete fallacy with no scientific basis. The baby’s gender is determined genetically at conception, and complexion is a complex interplay of genetics.
  • Myth: Excessive Lemon Intake Guarantees Heartburn Relief: While lemons can offer some relief from nausea, their efficacy in treating heartburn is individual. In fact, for some, the acidity in lemons might exacerbate heartburn.

2. Expert Insights: What Do Healthcare Professionals Say?

Healthcare experts often emphasize the importance of a balanced diet during pregnancy. Here’s what they have to say about lemons:

  • Moderation is Key: Nutritionists and obstetricians commonly advise that lemons can be part of a healthy pregnancy diet when consumed in moderation.
  • Tailored Advice: Dietitians might recommend lemons for their Vitamin C content, particularly for vegetarian or vegan expectant mothers who need to boost iron absorption from plant sources.

3. Scientific Evidence: What Does Research Say About Lemons and Pregnancy?

Recent studies shed light on the role of lemons during pregnancy:

  • Vitamin C and Iron Absorption: Research validates that Vitamin C-rich foods like lemons enhance iron absorption, essential in preventing pregnancy-related anemia.
  • Nausea Relief: Some studies suggest the aroma of lemon as beneficial in reducing pregnancy-related nausea, although results can vary among individuals.

4. Cultural Perspectives on Lemons in Pregnancy

Different cultures have varying beliefs about lemons during pregnancy. While some view them as essential for their health benefits, others may have reservations based on traditional beliefs. It’s fascinating to see how cultural perceptions align or differ from scientific understanding.

5. Nutritional Counseling: Personalizing Lemon Intake

A registered dietitian can offer personalized guidance on including lemons in a pregnancy diet, considering individual health profiles, dietary preferences, and nutritional needs.

6. The Lemon-Dental Health Connection: A Reminder

Dentists might warn about the erosive potential of lemons on tooth enamel, advising rinsing with water after consuming lemon-based foods or drinks.


As we demystify the myths and understand the expert insights on lemons during pregnancy, the picture becomes clearer. Lemons, like any other food, come with their nuances during pregnancy. This knowledge empowers us to make informed decisions, ensuring that our citrus encounters are both safe and enjoyable. In our final section, we’ll wrap up our comprehensive exploration of lemons in pregnancy, summarizing key takeaways and offering a concluding note on this zesty journey.

The Lemon Synopsis: Wrapping Up Our Citrus Journey


As we draw to the close of our comprehensive exploration of lemons in pregnancy, it’s time to reflect on the key learnings, summarize our findings, and offer some concluding thoughts. This journey has taken us through the groves of nutrition, over the hills of health benefits, around the bends of risks and myths, and into the heart of practical, delicious applications. Here, we encapsulate the essence of what we’ve discovered about lemons during pregnancy.

1. Recapitulating the Lemon Benefits

Our journey highlighted the numerous benefits of lemons, which include:

  • Boosting Immunity and Fetal Development: Thanks to their high Vitamin C content, lemons play a significant role in strengthening the immune system and aiding in the development of the fetus.
  • Alleviating Nausea and Digestive Comfort: The natural compounds in lemons can help soothe morning sickness and promote healthy digestion.
  • Enhancing Iron Absorption: A crucial aspect for preventing anemia, particularly in vegan and vegetarian diets.
  • Hydration and Nutritional Support: Lemon-infused water not only aids hydration but also provides additional nutrients essential for both mother and baby.

2. Addressing the Risks: A Balanced View

While lemons are beneficial, our exploration also underscored the importance of being mindful of their risks:

  • Acidity Considerations: Overconsumption can lead to heartburn or acid reflux, and its impact on dental health cannot be ignored.
  • Individual Tolerance: Understanding personal reactions and tolerances to lemons is key to incorporating them safely into a pregnancy diet.

3. Culinary Adventures: Lemon-Inspired Recipes and Ideas

From lemon water rituals to creative cooking and baking, we’ve seen how lemons can add flavor and nutrition to a diverse array of dishes suitable for pregnancy.

4. Lemon Myths Debunked and Expert Insights

We’ve dispelled myths, relied on scientific evidence, and sought expert opinions to ensure that our understanding of lemons in pregnancy is based on facts and research, not hearsay or unfounded beliefs.

5. Personalized Nutritional Guidance

The necessity of personalized nutrition advice from healthcare professionals, tailored to individual health profiles and dietary needs, was a recurrent theme in our discourse.

6. The Lemon-Dental Health Connection Revisited

A final reminder about the importance of dental care when consuming lemons, with practical tips to minimize any adverse effects on dental health.

7. Concluding Thoughts: The Lemon Legacy

In conclusion, lemons are much more than a mere culinary delight; they are a nutrient-packed, versatile fruit that can significantly enhance the pregnancy experience when used wisely. The key takeaway is balance and moderation, along with a mindful approach to how we incorporate this zesty fruit into our diets.

8. A Call to Action: Embrace the Lemon Life

As we conclude, we invite you to embrace the vibrant world of lemons. Experiment with recipes, enjoy the refreshing taste of lemon-infused water, and reap the nutritional benefits, all while being cognizant of the cautions. Let lemons be a part of your joyful and healthy pregnancy journey.

9. Your Feedback and Experiences

We encourage you to share your own lemon experiences during pregnancy. Your insights and stories can be a valuable addition to this citrus narrative, enriching it with personal hues and flavors.


Thus, we wrap up our zesty sojourn through the world of lemons in pregnancy. May this guide serve as a beacon of knowledge, a source of culinary inspiration, and a testament to the harmonious balance between taste, health, and mindful consumption. Here’s to a lemony, healthy, and joyful pregnancy! 🍋💛

10 FAQs on Lemons During Pregnancy

1. Is it safe to drink lemon water every day during pregnancy?

Answer: Yes, it’s generally safe to drink lemon water daily during pregnancy, as long as it’s in moderation. Lemon water can help with hydration and provide vitamin C, but be mindful of its acidity, which might cause heartburn in some women.

2. Can consuming lemons during pregnancy improve my immune system?

Answer: Yes, lemons are high in Vitamin C, a key nutrient for boosting the immune system. This can be particularly beneficial during pregnancy when the immune system is slightly suppressed.

3. Will eating lemons help with my morning sickness?

Answer: Many women find that the scent and flavor of lemons help alleviate nausea associated with morning sickness. However, this can vary from person to person.

4. Are there any risks of eating too many lemons during pregnancy?

Answer: While lemons are generally safe, consuming them in excess can lead to heartburn, acid reflux, and dental enamel erosion due to their high acidity.

5. Can lemon intake affect my baby’s weight or skin tone?

Answer: No, there is no scientific evidence to suggest that lemon consumption during pregnancy can influence a baby’s weight or skin tone. These factors are determined by genetics.

6. How can lemons aid in iron absorption during pregnancy?

Answer: Vitamin C in lemons enhances the absorption of iron from dietary sources, which is crucial during pregnancy to prevent iron deficiency anemia.

7. Is it better to consume organic lemons during pregnancy?

Answer: Organic lemons are a good choice to reduce exposure to pesticides. However, if you’re using non-organic lemons, make sure to wash them thoroughly.

8. Can I drink hot lemon water, or should it be cold?

Answer: It’s best to drink lemon water warm or at room temperature. Very hot water can degrade some of the vitamin C content.

9. Are lemon-based desserts safe during pregnancy?

Answer: Yes, lemon-based desserts can be enjoyed during pregnancy, but it’s advisable to watch the sugar content and consume them in moderation.

10. How much lemon is too much during pregnancy?

Answer: There’s no specific limit, but it’s important to listen to your body. If you experience heartburn or other discomforts after consuming lemons, it’s best to reduce the amount.


Blog Tags for the Post

pregnancy nutrition, lemon benefits, morning sickness remedies, immune system during pregnancy, healthy pregnancy diet, lemon water, vitamin C in pregnancy, digestive health, pregnancy myths, culinary tips for pregnancy, hydration in pregnancy, pregnancy-safe recipes