Posted on Leave a comment

Rotel Dip Recipe: Easy Velveeta Cheese Dip with Sausage, Beef & Crock Pot Tips

A tortilla chip lifting warm Rotel dip with melted Velveeta, sausage crumbles, diced tomatoes, and green chilies from a dark serving bowl.

This Rotel dip recipe is for the moment when the chips are open, people are hovering, and the cheese needs to stay creamy long after the first scoop. It is not fancy food. Think warm, glossy, salty, tomato-chile cheese dip that does exactly what party food should do: disappear from the table.

The best bowl should be soft enough to drag through with a chip, thick enough to cling, but not so stiff that the chip snaps. That texture comes from a few simple choices: use the Rotel undrained, melt the cheese gently, drain the meat well, and keep the finished dip warm instead of hot.

Keep it classic with Velveeta and Rotel when you need something fast. Add ground beef when you want it hearty and mild. Choose sausage when you want a bolder game-day bowl. Stir in cream cheese when you want it thicker and richer. Use the slow cooker when people are going to keep coming back for one more scoop.

Quick Answer: How to Make Rotel Dip

To make classic Rotel dip, combine 16 oz Velveeta with one 10 oz can of Rotel, undrained. Melt gently on the stovetop, in the microwave, or in a slow cooker until smooth. For a heartier dip, add 1 lb cooked and drained sausage or ground beef.

For the best all-around party dip, use sausage. A milder, family-friendly bowl works better with ground beef. Need the fastest version? Skip the meat. Want the thickest scoop? Add cream cheese.

There is no fancy sauce technique here. The Rotel liquid loosens the cheese, Velveeta keeps it steady, and cooked meat makes it hearty. Once everything is melted, your only job is to keep it soft and stir it now and then.

  • Classic ratio: 16 oz Velveeta + one 10 oz can Rotel, undrained
  • Cream cheese version: add 4 to 8 oz cream cheese for a thicker scoop
  • Crock pot version: cook on low for 2 to 3 hours, then switch to warm
  • Main rule: melt gently; do not boil the cheese mixture

The Easy Rotel Dip Ratio

This simple ratio gives the dip enough cheese to stay creamy, enough Rotel to loosen it, and enough meat to feel like a real party bowl.

Velveeta, an open can of Rotel, cooked ground meat, and tortilla chips arranged on a dark wooden table.
For the easiest Rotel dip ratio, use 16 oz Velveeta, one 10 oz can of Rotel, and 1 lb cooked meat for a heartier batch.

Rotel Dip Recipe Card

Rotel Dip Recipe

A creamy, scoopable cheese dip made with Velveeta, Rotel tomatoes with green chilies, and optional ground beef or sausage. Make it on the stovetop for a quick appetizer, or move it to a crock pot to keep it warm for a crowd.

  • Prep time: 5 minutes
  • Cook time: 10 to 15 minutes
  • Total time: 15 to 20 minutes
  • Servings: 10 to 12 appetizer servings
  • Best for: game day, potlucks, parties, movie nights, nachos, and snack boards

Ingredients

  • 1 lb ground beef or breakfast sausage / 454 g, optional but recommended for a heartier dip
  • 16 oz Velveeta, cubed / 454 g
  • 1 can Rotel diced tomatoes and green chilies, undrained / 10 oz / about 283 g
  • 1/2 tsp chili powder or 1 to 2 tbsp taco seasoning, optional
  • 1 to 3 tbsp milk / 15 to 45 ml, optional, only if the cheese needs thinning
  • 4 to 8 oz cream cheese / 113 to 227 g, optional, for a thicker and richer dip
Cubed Velveeta, an open can of Rotel, cooked meat, cream cheese, milk, seasoning, and a spoon arranged on a wooden board.
Before cooking, set up each ingredient by job: Velveeta melts smoothly, Rotel adds tomato-chile flavor, meat adds body, and cream cheese makes the dip richer.

Instructions

  1. Brown the ground beef or sausage in a large skillet over medium-high heat, breaking it into small crumbles as it cooks.
  2. Drain the meat very well. Keep the crumbles, not the grease.
  3. Reduce the heat to medium-low.
  4. Add the cubed Velveeta, undrained Rotel, and chili powder or taco seasoning if using.
  5. If using cream cheese, add it now in small cubes so it melts evenly.
  6. Stir until the cheese melts and the mixture looks smooth, glossy, and creamy.
  7. If it is too thick, add milk 1 tablespoon at a time until it is easy to scoop.
  8. Taste before serving. Add a pinch of chili powder, taco seasoning, or hot sauce only if it needs more flavor.
  9. Serve warm with tortilla chips, or transfer to a slow cooker on warm for parties.

Recipe Notes

  • For 2-ingredient Rotel dip, skip the meat and use only Velveeta and Rotel.
  • Mild breakfast sausage keeps the batch crowd-friendly, while hot sausage adds more heat.
  • Lean ground beef works well because it keeps the bowl hearty without adding too much grease.
  • Use 4 oz cream cheese for a slightly richer dip or 8 oz for a thick sausage-style batch.
  • If using sausage or taco seasoning, taste before adding extra salt.
  • Cook ground beef or sausage fully before adding the cheese. Ground meat and sausage should reach 160°F / 71°C; FoodSafety.gov has a safe minimum temperature chart if you want a reference.
  • Do not boil the cheese after it melts. Low, steady heat keeps the texture smoother.

What the Dip Should Look Like

Finished Rotel dip should look glossy, melted through, and thick enough to coat a chip. You should see small tomato and green chile pieces suspended in the cheese, not watery liquid around the edges.

When the dip falls from a spoon in slow ribbons, it is ready. A stiff clump needs gentle heat and a little milk. Grease pooling on top usually means the meat needed more draining. The final test is simple: a sturdy chip should scoop through without snapping.

Look for Slow Ribbons

The spoon tells you more than the clock. Smooth ribbons mean the cheese has melted evenly and the dip is ready to serve.

A spoon lifting glossy Rotel dip with diced tomatoes and green chilies so the dip falls back into the bowl in thick ribbons.
Once the cheese falls from the spoon in slow ribbons, the texture is right: melted through, easy to dip, and still strong enough for chips.

Which Version Should You Make?

Keep this ratio handy: 16 oz Velveeta, one 10 oz can Rotel, and 1 lb meat if you want the bowl hearty. From there, choose the version that fits the table.

SituationMake This
Need dip in 10 minutes2-ingredient Velveeta + Rotel
Want the best all-around party bowlSausage + Velveeta + Rotel
Serving kids or spice-sensitive guestsGround beef + mild Rotel
Want thicker scoopsAdd 4 to 8 oz cream cheese
Want the richest versionSausage + cream cheese + Velveeta + Rotel
Keeping it warm for a partyUse the crock pot on warm after melting
Dip got too thickRewarm gently and add milk slowly
Making a bigger party batch32 oz Velveeta + two cans Rotel + 1 to 2 lb meat

Match the Version to the Table

Use the version guide when you are choosing between fast, mild, bold, thick, or slow-cooker friendly.

Four bowls of Rotel dip on a dark table labeled meatless, ground beef, sausage, and cream cheese, with tortilla chips nearby.
Next, match the version to the table: meatless for speed, ground beef for mild flavor, sausage for game day, and cream cheese for thicker scoops.

For most parties, sausage with original Rotel is the safest bold version. A milder family bowl is easier to love with ground beef and mild Rotel.

Need more detail before choosing? Compare the ground beef version, sausage version, cream cheese version, or crock pot method.

Why This Cheese Dip Works

This dip works because every ingredient has a job, and none of them ask much from you.

  • Velveeta melts smoothly. It gives the bowl that classic creamy texture without needing a roux or careful cheese sauce technique.
  • Rotel adds flavor and moisture. The tomatoes and green chilies bring tang, gentle heat, and enough liquid to loosen the cheese.
  • Well-drained meat keeps it clean. Ground beef or sausage makes the bowl more filling, but extra grease can float on top if the meat is not drained.
  • Low heat protects the texture. Cheese dip does not need to boil. It needs to melt gently until loose, glossy, and dippable.
  • A slow cooker solves the party problem. Once melted, the warm setting keeps the cheese soft enough for chips without constant reheating.

If you like understanding why cheese turns smooth instead of grainy, this easy cheese sauce recipe goes deeper into gentle heat and creamy texture.

What Is Rotel Dip?

Rotel dip is the quick American-style cheese dip people make when they want melted cheese, tomato-chile flavor, and almost no prep. The classic version uses Velveeta because it melts smoothly and stays creamy, while Rotel adds tomatoes, green chilies, and just enough liquid to loosen the cheese.

The familiar 10 oz can plus 16 oz cheese ratio is also the brand-style queso formula. Ro-Tel’s Famous Queso Dip uses a 10 oz can of Ro-Tel, undrained, with a 16 oz package of Velveeta.

Searchers may call this Rotel cheese dip, Velveeta Rotel dip, Rotel queso dip, sausage Rotel dip, or hamburger cheese dip, but the idea is usually the same: melted cheese, Rotel, and sometimes meat.

Once you know the basic idea, the ingredient choices are simple: cheese controls the texture, Rotel brings the tomato-chile flavor, and meat decides how filling the bowl feels.

Ingredients You’ll Need

Velveeta

Velveeta gives this recipe its familiar party texture: creamy, steady, and almost impossible to mess up if you keep the heat low. A 16 oz block gives one standard batch the texture people expect from Velveeta Rotel dip.

Regular Velveeta gives the classic flavor. Queso blanco Velveeta also works for a lighter-colored dip. Shredded cheddar alone can turn grainy, so it works better with cream cheese in the no-Velveeta option.

Rotel Tomatoes and Green Chilies

One 10 oz can is the right amount for one 16 oz block of Velveeta. Pour in the tomatoes, chilies, and liquid together; that liquid keeps the cheese from turning stiff. The tomato and green chile pieces also keep the bowl from tasting flat.

Original Rotel is the default for that familiar tomato-chile bite. Mild Rotel is better for a gentle, crowd-friendly bowl. Hot Rotel works when you want more heat.

Ground Beef or Sausage

Meat is optional, but it makes the cheese dip more filling. Ground beef brings a milder, heartier flavor. Sausage makes it bolder, saltier, and more game-day friendly.

For one standard batch, cook 1 lb of ground beef, breakfast sausage, pork sausage, or hot sausage. Break it into small crumbles, spoon off excess fat, and then add the cheese and Rotel.

Cream Cheese

A little cream cheese gives the dip more body; a full 8 oz block turns it into a thicker, richer party scoop. It works especially well with sausage and in no-Velveeta versions.

Cut it into small cubes before adding it so it melts evenly. Use 4 oz when you still want classic queso energy; go up to 8 oz when you want the chip to come up loaded.

Seasoning and Heat

You do not need much seasoning because Velveeta, Rotel, and sausage already bring flavor. For more depth, add a little chili powder, taco seasoning, garlic powder, hot sauce, or chopped jalapeños. Start light, especially with sausage or taco seasoning.

How to Make Rotel Dip

The method is simple: cook the meat if you are using it, turn the heat down, melt the cheese with Rotel, and thin only if the dip needs it.

Stovetop Method

  1. Brown the ground beef or sausage in a large skillet over medium-high heat.
  2. Drain the meat well and return it to the pan.
  3. Lower the heat to medium-low.
  4. Add cubed Velveeta and undrained Rotel.
  5. Add cream cheese now if using it.
  6. Stir until the cheese melts into a smooth dip.
  7. Add a splash of milk only if the dip is too thick.

Drain the Meat Well

Draining the meat is the small step that keeps the finished dip rich instead of oily.

Cooked sausage crumbles in a skillet with a spoon removing excess grease before the meat is added to cheese dip.
After browning sausage or ground beef, drain it well so the cheese dip stays savory and rich without a greasy layer on top.

Once the meat is drained, add the Rotel with its liquid. That can liquid is part of the sauce, helping the cheese loosen while carrying tomato-chile flavor through the whole pan.

Use the Rotel Liquid

Pour in the tomatoes, green chilies, and liquid together before the cheese fully melts, so the mixture has enough moisture from the start.

Undrained Rotel tomatoes, green chilies, and liquid being poured from a can over cubed Velveeta in a dark pan.
When adding Rotel, pour in the tomatoes, green chilies, and liquid together; that juice loosens the Velveeta and keeps the dip scoopable.

Stop when the cheese looks glossy and the dip moves slowly from the spoon, not when it starts bubbling. High heat can make the edges oily, the texture heavy, or real cheese grainy.

Melt the Velveeta Gently

Low heat gives the cheese time to melt into the Rotel liquid, so the dip stays glossy and smooth.

Cubed Velveeta melting with Rotel tomatoes and green chilies in a skillet while a spoon stirs the mixture.
As the Velveeta melts, keep the heat gentle. The goal is glossy, dippable cheese, not a bubbling pot that turns heavy or oily.

Making this ahead for a crowd? Use the crock pot method. If the texture changes while it sits, the troubleshooting guide will help you bring it back.

Microwave Method

The microwave is best when you are making the fast meatless version and just need cheese dip on the table now. Add cubed Velveeta and undrained Rotel to a microwave-safe bowl. Microwave on high for 2 to 3 minutes, stir well, then continue in 30 to 60 second bursts until the cheese is melted through.

If adding ground beef or sausage, cook and drain the meat separately first, then stir it into the melted cheese mixture.

Slow Cooker Method

For parties, the slow cooker is the easiest method. Brown and drain the meat first, then add the meat, cubed Velveeta, and undrained Rotel to the slow cooker. Cook on low for 2 to 3 hours or high for 1 to 2 hours, stirring occasionally. Once smooth, switch to warm for serving.

2-Ingredient / Meatless Rotel Dip

When speed matters more than making it hearty, skip the meat and keep the bowl simple: Velveeta and Rotel. This is the fastest version and the easiest one to make at the last minute.

  • 16 oz Velveeta, cubed / 454 g
  • 1 can Rotel, undrained / 10 oz / about 283 g

Melt them together on the stovetop or in the microwave, stirring until smooth. It is lighter than the ground beef or sausage batch, but it still gives you that classic warm cheese-and-chile flavor. Corn or beans can make it more filling, but they move the recipe into a different style.

Ground Beef Version

Start here when you want the dip to feel like food, not just a snack, but still keep the flavor mild enough for everyone. Ground beef makes the bowl feel more like a filling snack than plain melted cheese, while still letting the tomato-chile flavor come through.

For one batch, use 1 lb ground beef, 16 oz Velveeta, and one 10 oz can Rotel. Brown the beef, break it into small crumbles, and drain it well before adding the cheese and Rotel. You may know this as hamburger Rotel dip, hamburger cheese dip, or Velveeta cheese dip with hamburger meat.

A dark bowl of Rotel dip with fine ground beef crumbles, melted Velveeta, diced tomatoes, green chilies, and tortilla chips.
For a milder bowl, ground beef gives this dip taco-night flavor that works with chips, nachos, baked potatoes, or a mixed crowd.

Sausage Version

Sausage is the game-day version: bolder, saltier, and a little more “people keep coming back” than ground beef. The sausage version smells richer and more savory as it melts, which is why it feels especially right for game day.

A standard sausage batch needs 1 lb breakfast sausage, 16 oz Velveeta, and one 10 oz can Rotel. Mild sausage keeps the dip crowd-friendly. Hot sausage makes it spicier and pairs well with original or hot Rotel. Cook the sausage fully, drain it well, and leave the grease behind before the cheese goes in.

Close-up of sausage Rotel dip with melted cheese, browned sausage crumbles, diced tomatoes, and green chili pieces.
For a bolder party dip, sausage brings deeper savory flavor, more texture, and a stronger game-day feel than ground beef.

This is also the option that works especially well with cream cheese. Add 4 to 8 oz when you want a thicker, richer scoop.

Cream Cheese Version

Cream cheese is for the thick-scoop people. It turns the dip into a heavier, richer scoop — the kind that sits on a sturdy chip instead of sliding right off.

Add 4 oz cream cheese for extra creaminess or 8 oz cream cheese for a thick sausage-style dip. Cut it into small cubes and let it soften slightly so it melts evenly.

A hand holding a tortilla chip topped with thick cream cheese Rotel dip, diced tomatoes, green chilies, and small meat pieces.
Add cream cheese when you want a heavier scoop; it makes the cheese dip richer, sturdier, and easier to load onto thick chips.

Because cream cheese makes the dip thicker, it pairs especially well with the chip test and the sturdy serving ideas below.

Slow Cooker / Crock Pot Rotel Dip

The slow cooker is the best choice when the cheese needs to stay soft for a party. It melts everything gently and keeps the finished bowl ready for repeat scoops.

BatchUse ThisSlow Cooker Size
Standard batch1 lb cooked meat + 16 oz Velveeta + 1 can Rotel3 to 5 quart
Small meatless batch16 oz Velveeta + 1 can Rotel2 to 3 quart
Big party batch1 to 2 lb cooked meat + 32 oz Velveeta + 2 cans Rotel4 to 6 quart
A slow cooker filled with Rotel dip on a party table with tortilla chips, diced tomatoes, jalapeños, green onions, and serving utensils.
For parties, the crock pot is about holding as much as cooking. Once melted, the warm setting keeps each scoop soft and ready.

Cook on low for 2 to 3 hours or high for 1 to 2 hours. Once the cheese is smooth, switch to warm. A large slow cooker batch may need up to 1/4 to 1/2 cup milk as it sits, but add it slowly so the cheese does not become thin.

Do not add raw ground beef or sausage directly into the cheese dip. Cook and drain the meat first. If using 2 lb sausage, taste before adding seasoning because sausage can make the dip salty.

Serving this for a longer party? Keep the dip on warm, then use the troubleshooting section if it thickens, turns oily, or needs loosening later.

For another slow-cooker bite that can stay warm for a crowd, grape jelly meatballs fit the same potluck and game-day table.

Do You Drain the Rotel?

No, do not drain Rotel for regular cheese dip. The liquid in the can helps the cheese melt into a smooth, creamy, dippable texture. The Rotel pour visual above shows how the tomatoes, green chilies, and liquid go in together.

Drain part of the liquid only for a very thick bowl, a doubled recipe that needs more control, or a different recipe where extra moisture causes problems. For the classic dip, use the whole can.

No-Velveeta Version

Real cheese can work, but it will not behave exactly like Velveeta. The no-Velveeta version tastes more like homemade queso, with stronger cheese flavor but less foolproof texture. Keep the heat low and give it help from cream cheese so it stays smoother.

  • 8 oz cream cheese / 227 g
  • 1 to 1 1/2 cups freshly shredded cheddar or pepper jack
  • 1 can Rotel, partly drained if you want a thicker dip
  • A splash of milk if the cheese needs loosening

Freshly shredded cheese melts better than pre-shredded cheese because bagged shredded cheese often has anti-caking ingredients. Add shredded cheese off the heat or over very low heat, and stir gently.

How to Make It Spicier

The easiest way to add heat is to use hot Rotel instead of original. For a stronger kick, add spicy sausage, chopped jalapeños, cayenne, hot sauce, pepper jack, or a little extra chili powder.

Add heat slowly. Cheese dip can become too spicy faster than expected, especially if you use hot sausage and hot Rotel together. For a brighter bowl beside all that cheese, salsa verde adds a tangy green contrast for chips, tacos, bowls, and nachos.

How to Keep It Creamy and Warm

Rotel dip is best when it stays soft enough to scoop. As it cools, the cheese naturally tightens; that is normal, and it is easy to fix.

  • Serve it from a slow cooker on warm.
  • Stir every 20 to 30 minutes during a party.
  • Keep the lid on when people are not serving.
  • Add milk slowly if it gets too thick.
  • Keep the heat low after the cheese melts.
  • Drain meat well so grease does not collect on top.

If the bowl has been sitting for a while, stir it before adding more liquid. Sometimes the top looks thick, but the inside is still creamy once stirred. The same rule applies to other dairy-heavy dips, like spinach artichoke dip: once it is hot and melted, warm is safer than high.

Troubleshooting

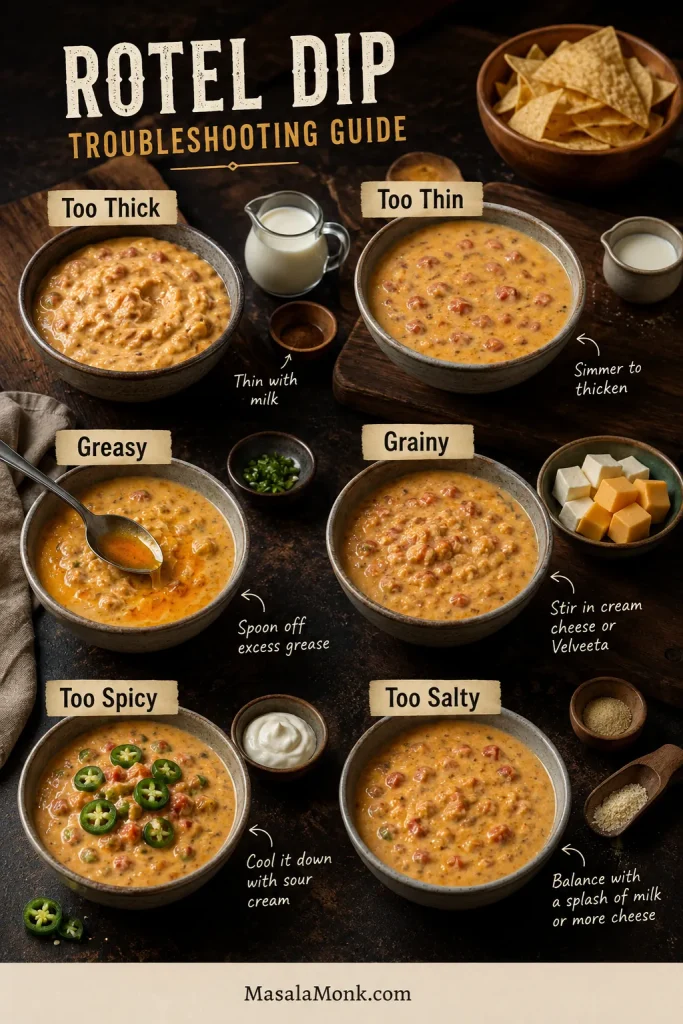
When the cheese changes while it sits, do not panic. Warm dips thicken, cool, and sometimes look oily before a quick stir brings them back. Most problems are easy to fix if you control heat, thickness, and grease.

ProblemWhy It HappensHow to Fix It
Too thickThe cheese cooled, or too much liquid evaporatedWarm gently and add milk 1 tablespoon at a time
Too thinToo much liquid or not enough cheeseAdd more cubed Velveeta, or warm uncovered on low for a few minutes while stirring often
GreasyThe meat was not drained wellSpoon off excess grease or blot the surface lightly
Oily edgesThe heat is too high, or the meat was greasyLower the heat, stir gently, and spoon off excess oil
GrainyHeat was too high, or real cheese did not melt smoothlyLower the heat and use Velveeta or cream cheese for a smoother base
Skin on topIt sat uncovered or unstirred for too longKeep covered and stir every 20 to 30 minutes
Too spicyHot Rotel, spicy sausage, or too much hot sauceAdd more Velveeta or cream cheese to mellow it
BlandMild meat and mild Rotel need more seasoningAdd taco seasoning, chili powder, garlic powder, or hot sauce
Too saltySausage, Velveeta, or seasoning added more salt than expectedAdd cream cheese, a splash of milk, or more unsalted meat if you have it

Quick Fix Guide

Most dip problems come down to heat, liquid, or grease. Fix one at a time and the bowl usually comes back quickly.

A Rotel dip troubleshooting board with bowls labeled too thick, too thin, greasy, grainy, too spicy, and too salty, plus small fix ingredients.
If the dip gets too thick, thin, greasy, grainy, spicy, or salty, small fixes like milk, gentle heat, cream cheese, or extra cheese can bring it back.

What to Serve with Rotel Dip

Once the cheese is warm and glossy, the only real question is what gets dipped first. Set out the sturdy chips first. The thin ones can wait for salsa.

Use the Chip Test Before Serving

A sturdy tortilla chip should scoop through the dip without snapping. That tells you the dip is thick enough to cling but still soft enough to serve.

A hand pushing a sturdy tortilla chip into Rotel dip with melted cheese, meat crumbles, diced tomatoes, and green chilies.
Before serving, try the chip test: a sturdy tortilla chip should scoop through cleanly and bring up cheese, meat, tomato, and chile.
  • Best dippers: thick tortilla chips, scoop-style corn chips, Fritos Scoops, pretzels, or sturdy crackers.
  • Fresh contrast: celery sticks, bell pepper strips, cucumber rounds, jalapeño slices, green onion, cilantro, pico de gallo, or a little sour cream drizzle.
  • Load it onto: nachos, fries, tater tots, baked potatoes, tacos, rice bowls, burgers, or hot dogs.
  • Game-day spread: pair it with something crisp and savory like air fryer chicken wings.

The best scoop should bring up cheese, tomato, chile, and little bits of meat in one bite. That is why thick chips matter, especially with sausage or cream cheese versions.

Make Ahead, Storage, Reheating, and Freezing

Yes, you can make Rotel dip ahead. Let it cool, store it in the fridge, and reheat it gently on the stovetop, in the microwave, or in a slow cooker. Add a splash of milk if it has thickened.

Store leftovers in an airtight container in the fridge for 3 to 4 days. Refrigerate leftovers within 2 hours; during serving, keep the dip warm rather than letting it sit at room temperature for long stretches.

Reheating is easy; the only trick is not rushing it. Use low heat on the stovetop or short microwave intervals, stirring often so the edges do not overheat before the center is warm.

Freezing is not ideal. Cheese dips can separate, turn grainy, or lose their smooth texture after thawing. For the best texture, refrigerate leftovers and reheat them within a few days instead.

Make It a Snack Table

A good snack table needs contrast. Keep this cheese dip warm, add a cold 7 layer dip, set out something crunchy, and bring in one savory bite like wings, meatballs, or sliders. That way the Rotel dip stays the warm centerpiece without having to carry the whole table.

Build the Serving Board

Put sturdy chips closest to the warm dip, then use vegetables, jalapeños, green onion, pico, and toppings to add freshness around the rich cheese.

A serving board with Rotel dip, tortilla chips, scoop chips, celery sticks, red bell pepper strips, jalapeños, green onion, diced tomatoes, shredded cheese, and cilantro.
Finally, serve the dip with sturdy chips first, then add scoop chips, vegetables, jalapeños, green onion, pico, and toppings for contrast.

For a second warm dip, buffalo chicken dip brings a spicy, creamy option beside this cheesy one. If you are turning the snack table into dinner, slow cooker pulled pork works for sliders, nachos, rice bowls, and loaded baked potatoes.

FAQ

What is Rotel dip made of?

The classic version is Velveeta plus Rotel diced tomatoes with green chilies. Many versions also add ground beef, sausage, cream cheese, taco seasoning, or chili powder.

Do you drain Rotel before adding it?

No. Use Rotel undrained for regular cheese dip. The liquid helps the cheese melt smoothly and keeps the texture scoopable.

How much Velveeta do I need for one can of Rotel?

Use 16 oz Velveeta for one 10 oz can of Rotel. That is the classic ratio for smooth, scoopable Rotel dip.

Is Rotel dip better with sausage or ground beef?

Sausage gives the dip a bolder, saltier, more party-style flavor. Ground beef is milder and better for a crowd that does not want much spice.

How do you make Rotel dip in a crock pot?

Cook and drain the meat first, then add it to the slow cooker with cubed Velveeta and undrained Rotel. Heat on low for 2 to 3 hours or high for 1 to 2 hours, then switch to warm.

What does cream cheese do in Rotel dip?

Cream cheese makes the dip thicker, richer, tangier, and sturdier on chips. Use 4 oz for a small creamy boost or 8 oz for a thick sausage-style batch.

How do I thin Rotel dip without making it watery?

Warm it gently and add milk 1 tablespoon at a time. Stir before adding more because the center may be creamier than the top looks.

What can I use instead of Velveeta?

Use cream cheese with freshly shredded cheddar or pepper jack. It will taste more like homemade queso, but it will not be as foolproof as classic Velveeta dip.

How long does Rotel dip last in the fridge?

Leftover Rotel dip keeps well in an airtight container in the fridge for 3 to 4 days. Reheat gently and stir in a little milk if it has thickened.

Does Rotel dip freeze well?

Freezing is not the best choice because the cheese can separate or turn grainy after thawing. Refrigerate leftovers and reheat them within a few days for the best texture.

Rotel dip should make the table easier, not more complicated. Start with Velveeta and Rotel, add sausage or ground beef if the bowl needs to feel hearty, stir in cream cheese for a thicker scoop, and let the slow cooker do the quiet work while people come back for more.

Made it with sausage, ground beef, cream cheese, or just Velveeta and Rotel? Tell us which version disappeared first.

Posted on Leave a comment

Sausage Rolls Recipe: Easy Homemade Puff Pastry Sausage Rolls

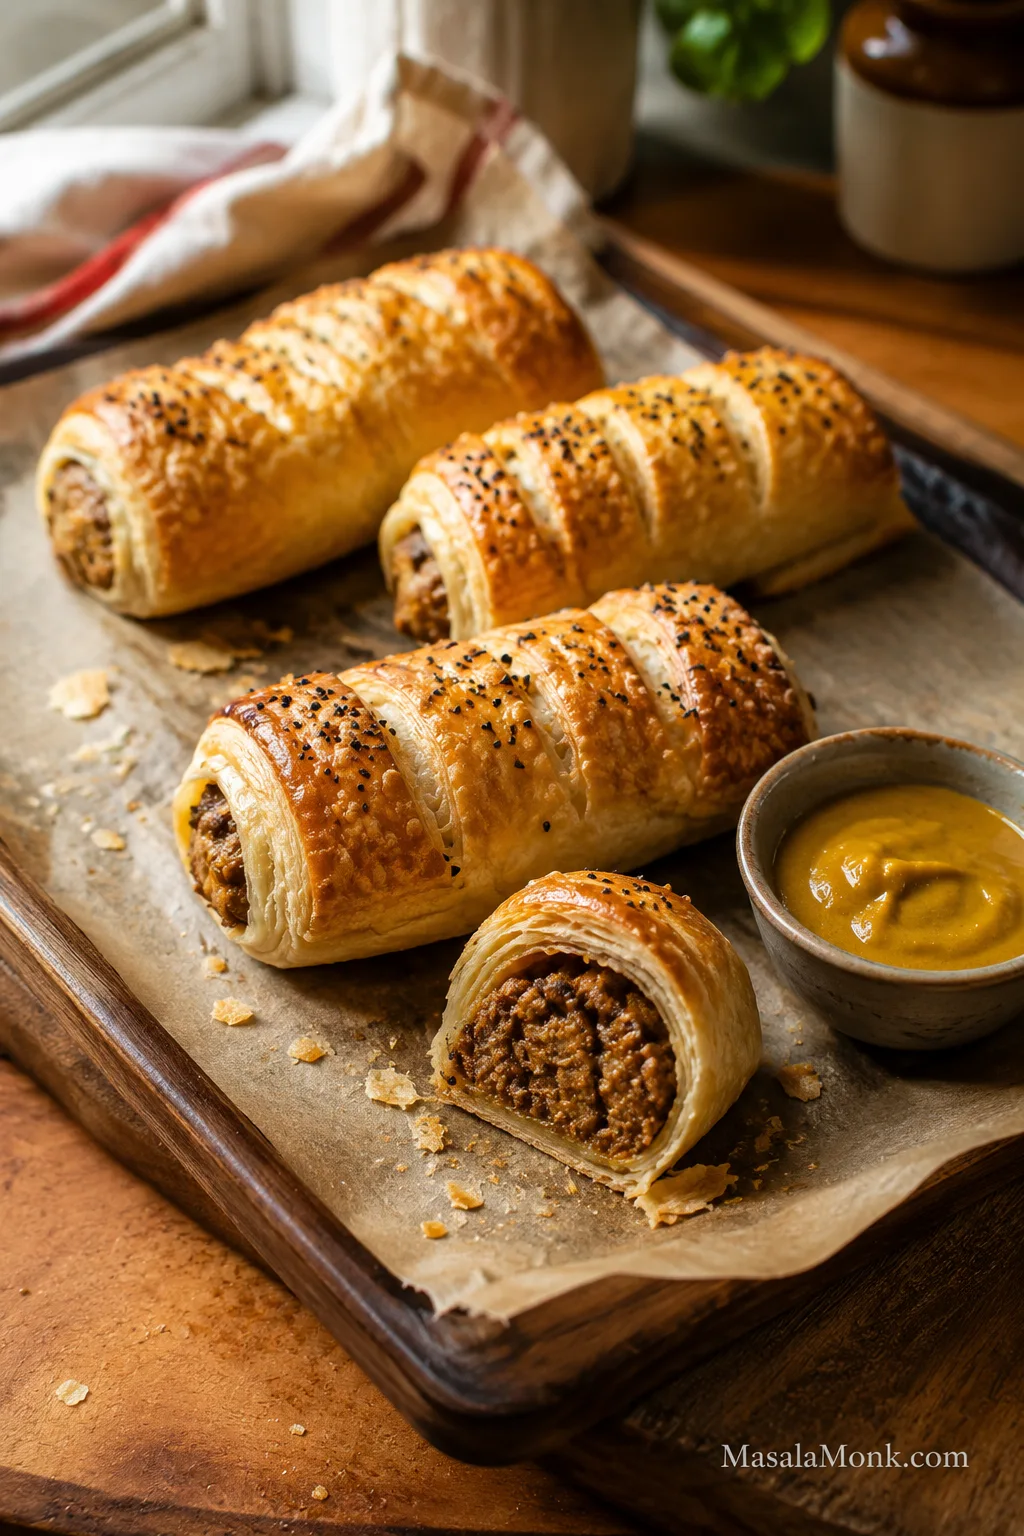
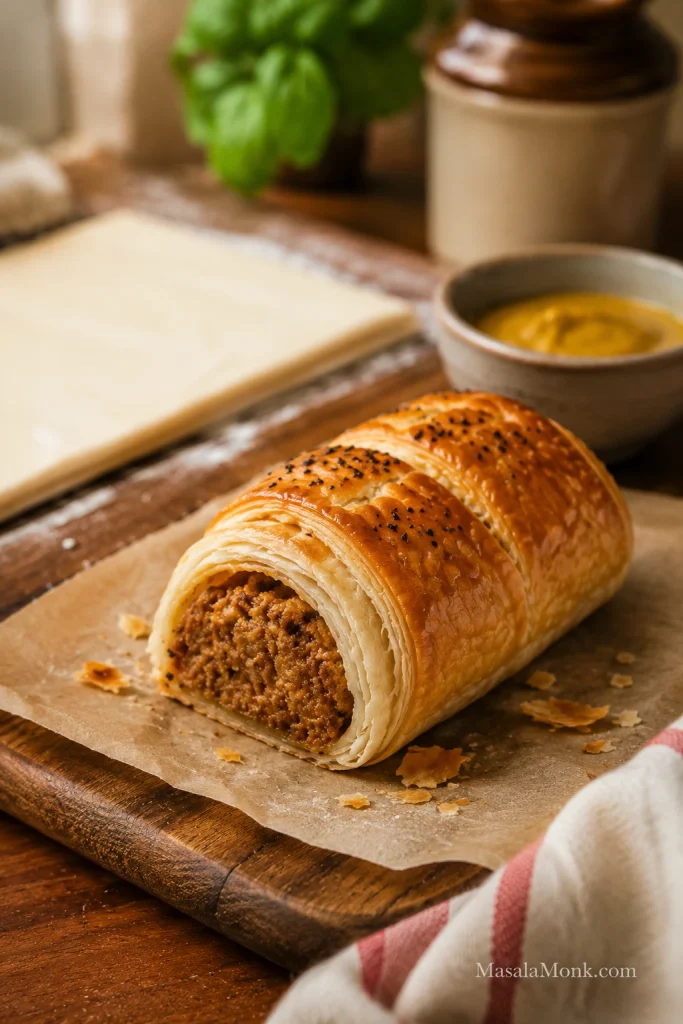
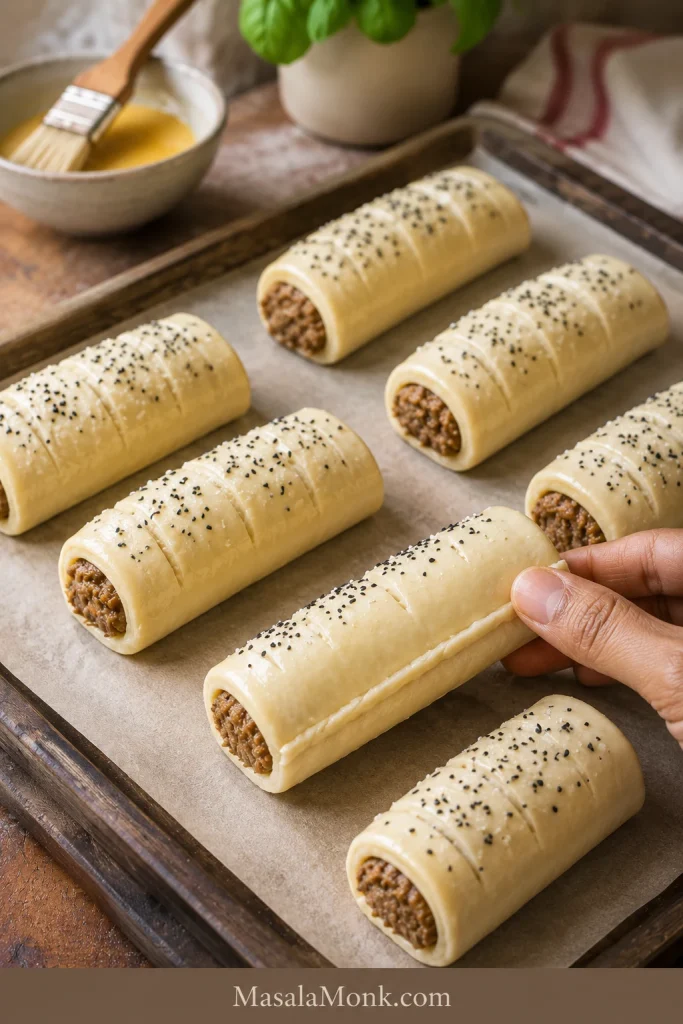
Homemade puff pastry sausage rolls on parchment with one roll cut open beside a small bowl of mustard.

If you have puff pastry and sausages, you are already close to a tray of homemade sausage rolls: buttery layers, savory filling, crisp bottoms, and the kind of warm snack people reach for before you have even moved the tray to the table.

Sausage rolls are savory pastry rolls filled with seasoned sausage meat and baked until flaky, golden, and hot in the center. This version keeps the classic idea but makes it practical for real kitchens: store-bought puff pastry, everyday sausages if that is what you have, clear cutting sizes, and enough small technique to avoid greasy, soft pastry.

The method itself is simple: fill, roll, seal, cut, glaze, and bake. You do not need special sausage meat, you do not need to guess the bake time, and you do not have to settle for soggy bottoms.

Make them large for dinner, small for parties, or freeze them unbaked for later. Once you know the basic shape, the same method works for lunchboxes, snack trays, and the kind of warm batch that disappears faster than expected.

Quick Answer: How to Make Sausage Rolls

To make sausage rolls, fill cool puff pastry with seasoned sausage meat or regular sausages with the skins removed, roll and seal the pastry, brush with egg wash, then bake at 200°C / 400°F, or 180°C fan / convection, until the pastry is puffed and well browned.

Large sausage rolls usually take 25–30 minutes, 16 medium rolls usually take 22–25 minutes, and mini sausage rolls usually take 18–22 minutes.

The easiest version uses puff pastry, sausages, and egg wash. The better version adds softened onion, breadcrumbs, herbs, and a little mustard, so the filling tastes rounder, stays juicy, and does not soak the pastry as it bakes.

For pork or beef sausage rolls, the filling should reach 160°F / 71°C in the center. For chicken or turkey sausage rolls, use 165°F / 74°C. If the pastry browns before the center is done, lower the oven slightly and bake a few minutes longer.

When they come out right, you get the best kind of contrast: flaky pastry on top, a clean, crisp base, and a savory filling that stays juicy without soaking through.

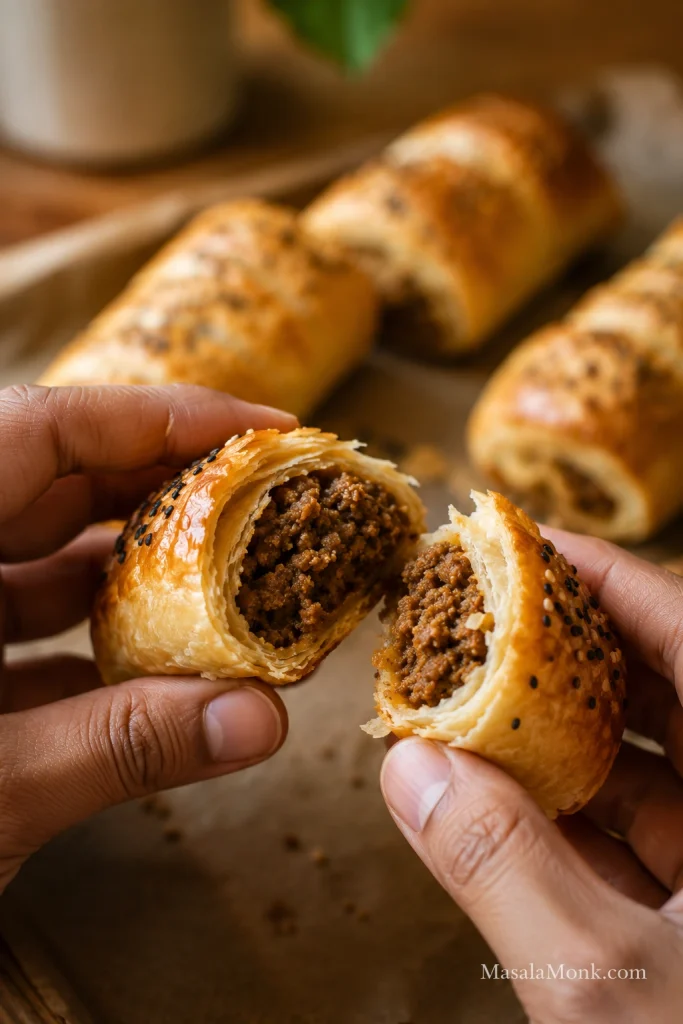
Hands holding a sausage roll broken open to show flaky puff pastry layers and cooked sausage filling.
When the roll breaks open, the pastry should flake instead of collapse, and the filling should look moist, cooked, and evenly packed.

Sausage Rolls Recipe Card

Easy Homemade Puff Pastry Sausage Rolls

This recipe makes flaky homemade sausage rolls with ready-rolled puff pastry and sausage meat, or regular sausages with the skins removed. Make them big enough for lunchboxes, small enough for party trays, or somewhere in the middle for the kind of snack that disappears while it is still warm.

Prep time20 minutes
Optional chill time10–20 minutes
Cook time18–30 minutes, depending on size
Total time40–60 minutes
Yield8 large, 16 medium, or 24–32 mini sausage rolls
Oven200°C / 400°F, or 180°C fan / convection

Equipment: You need a baking sheet, parchment paper, mixing bowl, small pan, sharp knife, pastry brush, and wire rack. An instant-read thermometer is helpful for large rolls or chicken and turkey fillings.

Sausage Roll Ingredients

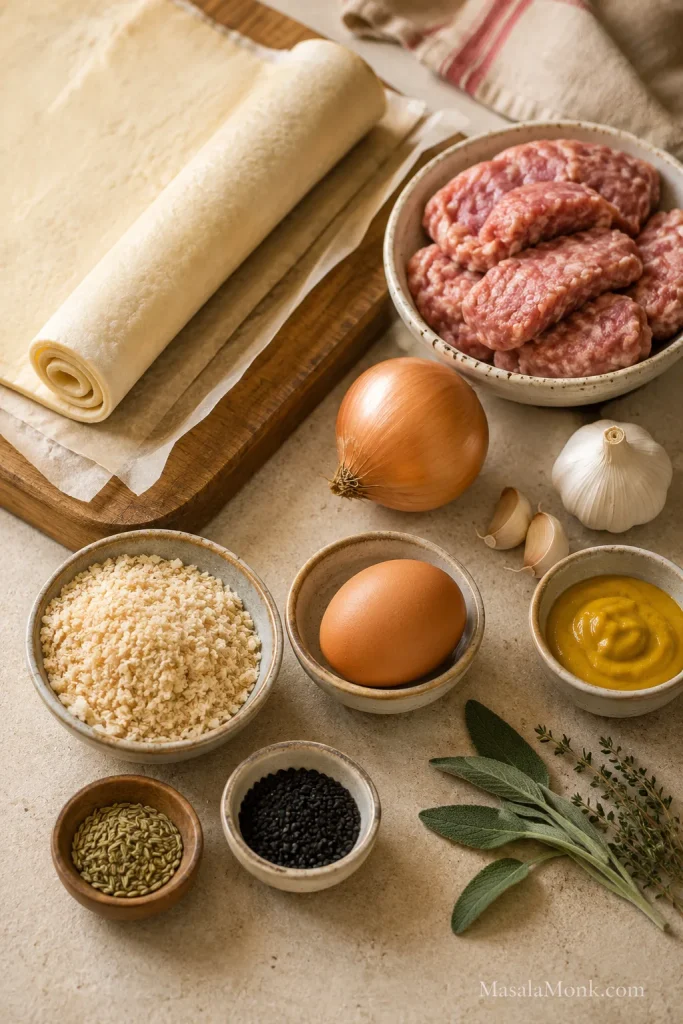
Puff pastry, sausage meat, onion, garlic, breadcrumbs, egg, mustard, herbs, and seeds arranged on a kitchen work surface.
This ingredient mix shows why the full version tastes rounder: breadcrumbs hold moisture, onion adds sweetness, and mustard sharpens the sausage filling.
  • 320–375g / 11–13 oz ready-rolled puff pastry, thawed if frozen but still cool
  • 450–500g / about 1 lb sausage meat, or 6–8 medium sausages with skins removed
  • 1 teaspoon oil or butter, for softening the onion
  • 1 small onion, about 70–90g / ½ cup very finely chopped
  • 1–2 garlic cloves, minced
  • 35–40g / about ½ cup panko breadcrumbs or fresh breadcrumbs, plus more if the filling feels loose
  • 1 egg for the filling
  • 1 egg for egg wash
  • 1 tablespoon / 15ml Dijon mustard or English mustard, optional
  • 1 teaspoon dried sage or thyme, or 1 tablespoon finely chopped fresh herbs
  • ½–1 teaspoon fennel seeds, lightly crushed, optional
  • Black pepper, to taste
  • Salt, only if using plain ground meat instead of seasoned sausage meat or sausages
  • Sesame seeds or nigella seeds, optional topping

If using plain ground pork or beef: start with about ¾ teaspoon fine salt per 500g / 1 lb meat. To check the seasoning safely, cook a tiny pinch of the filling in a pan before shaping the rolls.

Make the Filling and Shape the Rolls

  1. Preheat and line the tray. Preheat the oven to 200°C / 400°F, or 180°C fan / convection. Line a large baking sheet with parchment paper.
  2. Prepare the pastry. If frozen, thaw the puff pastry until flexible but still cool. It should unroll without cracking.
  3. Cook the onion. Warm the oil or butter in a small pan. Soften the onion for a few minutes, then add garlic for 30 seconds. Cool completely.
  4. Prepare the sausage meat. If using regular sausages, slit the skins lengthwise and squeeze the meat into a mixing bowl.
  5. Mix the filling. Combine sausage meat, cooled onion and garlic, breadcrumbs, 1 egg, mustard, herbs, optional fennel, and black pepper. Mix gently.
  6. Check the texture. You want a soft log that holds together without spreading like paste or crumbling apart. Add 1–2 tablespoons more panko if it feels loose, or 1–2 teaspoons cold water or milk if it feels dry.
  7. Cut the pastry. For one 320–375g sheet, cut the pastry in half lengthwise to make 2 long strips. If your pastry sheet is a different size, aim for strips wide enough to wrap around the filling without stretching.
  8. Add the filling. Divide the sausage filling into 2 even logs and place one log down the center of each pastry strip. For mini sausage rolls, shape thinner logs rather than simply cutting overfilled rolls smaller.
  9. Seal. Leave a small border beside the filling. Brush the edge lightly with beaten egg, fold the pastry over, and press just enough to close. Place seam-side down. Too much egg wash can make the edge slippery, and too much pressure can flatten the layers.
  10. Chill if soft. Chill the shaped rolls for 10–20 minutes if the pastry feels sticky, warm, or loose.

Cut, Bake, and Cool

  1. Cut and glaze. Cut each long roll into 4 pieces for 8 large rolls, 8 pieces for 16 medium rolls, or 12–16 pieces for 24–32 mini rolls. Brush tops with egg wash, add seeds if using, and slash lightly.
  2. Bake. Space the rolls at least 2.5cm / 1 inch apart on the baking sheet. Bake large rolls for 25–30 minutes, 16 medium rolls for 22–25 minutes, or mini rolls for 18–22 minutes.
  3. Cool. Rest for a few minutes on the tray, then move to a wire rack so the bottoms stay crisp.

Doneness: Look for well-browned pastry and cooked-through filling. Pork or beef sausage filling should reach 160°F / 71°C. Chicken or turkey filling should reach 165°F / 74°C.

What good looks like: the rolls should feel firm before baking, sit seam-side down, and come out browned on top with crisp bottoms and hot filling.

Freezer note: For best texture, freeze sausage rolls unbaked after shaping and cutting. Bake from frozen at 200°C / 400°F, or 180°C fan / convection, and add extra time. Do not thaw first unless your pastry packet specifically recommends it.

First batch recommendation: make the full version with onion, breadcrumbs, mustard, and herbs. It gives you the best balance of juicy filling and crisp pastry. Once you know how your pastry and sausages behave, use the 3-ingredient shortcut for faster batches.

The 3 Rules for Better Sausage Rolls

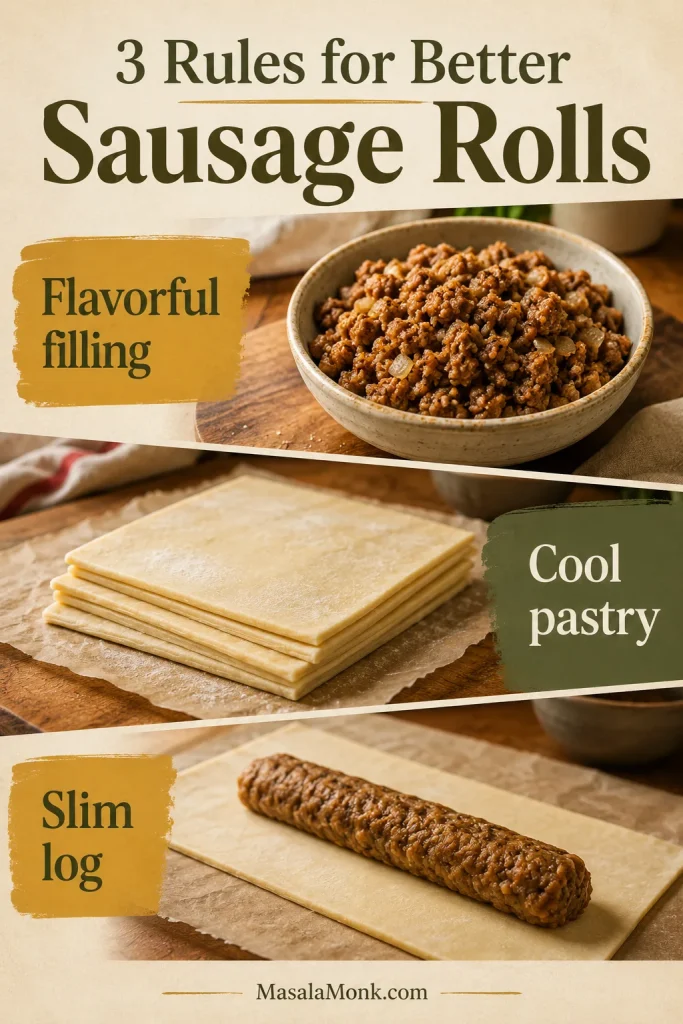
Good sausage rolls do not need fancy pastry or special sausage meat. They need three small things done well: filling that tastes good before it goes in, pastry that stays cool enough to puff, and a filling log slim enough for the pastry to close without a fight.

Visual guide showing flavorful filling, cool pastry, and a slim filling log for making sausage rolls.
Think of this as the sausage roll safety net: seasoned filling for flavor, cold pastry for lift, and a slim log for a clean seal.
  • Use filling that tastes good before it goes in. Sausage rolls are simple, so bland sausage has nowhere to hide.
  • Keep the pastry cool. Sticky, greasy, or slack pastry is a sign to pause and chill the tray.
  • Shape thinner than you think. The pastry should close like a wrapper, not stretch like a blanket.

Get those right and the rolls bake neater, crisper, and juicier, with fewer split seams, fewer soggy bottoms, and a center that cooks through before the pastry over-browns. Next, choose the filling, pastry, and size that fit the batch you actually want to make.

Need the exact amounts now? Jump back to the recipe card, or compare options in Choose the Sausage Roll Version You Want.

Choose the Sausage Roll Version You Want

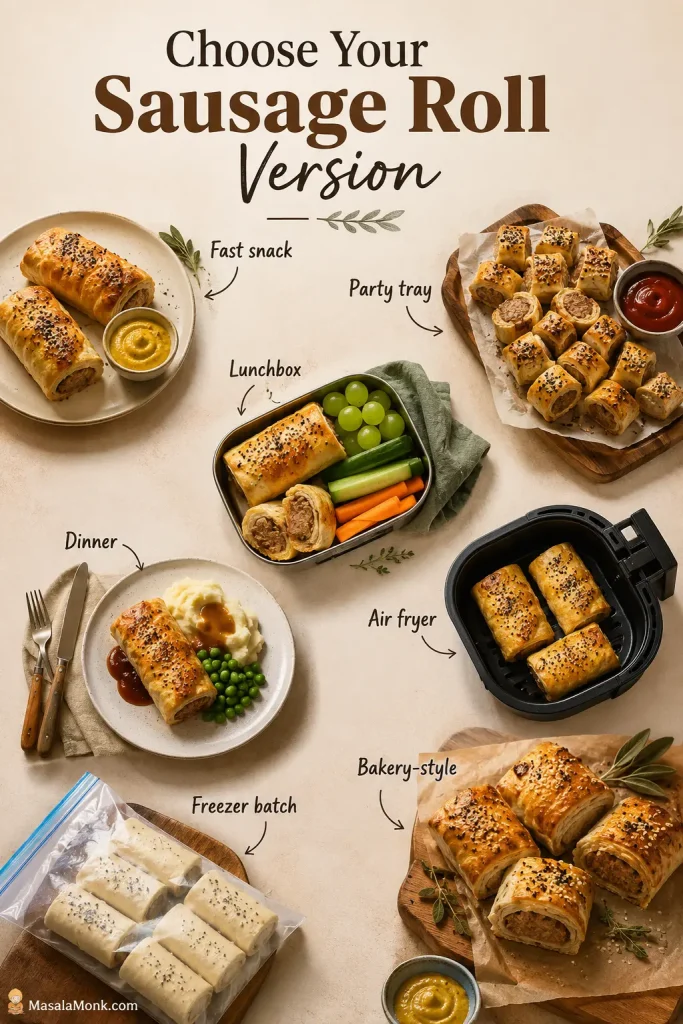
A party tray, lunchbox roll, freezer batch, and fast snack all use the same base method, but the size and filling choices change slightly. Start with the version that fits the moment, then use the rest of the guide to fine-tune it.

Decision board showing sausage rolls for a fast snack, party tray, lunchbox, dinner, air fryer batch, freezer batch, and bakery-style serving.
Once the base method is clear, the same sausage roll recipe can become a snack, party tray, lunchbox option, air fryer batch, or freezer prep.
SituationBest sausage roll version
Fast snack3-ingredient sausage rolls with puff pastry, sausages, and egg wash
Best flavorMain recipe with onion, breadcrumbs, mustard, herbs, and optional fennel
Party trayMini sausage rolls, shaped thinner and frozen unbaked if making ahead
LunchboxesMedium rolls, cooled completely before packing
DinnerLarger rolls with salad, beans, soup, or potatoes
Air fryer batchMini or medium rolls cooked in one layer
Rich bakery-stylePork sausage, all-butter puff pastry, generous egg wash, and a short chill before baking

Can I Use Regular Sausages?

Yes. Most people do not buy “sausage meat” every week. Regular sausages are usually easier to find, and they work beautifully when the flavor is already good. Slit the skins, squeeze out the meat, and loosen it with a fork so it shapes evenly inside the pastry.

Hands opening regular sausages and shaping the sausage meat into a log on a kitchen counter.
Regular sausages can become sausage roll filling once the skins are removed; after that, shape the meat evenly so the pastry wraps cleanly.

Choose sausages you already like because the filling is the main flavor of the roll. If the sausage tastes bland before it goes in, the pastry cannot fix it.

Ingredient note: In the UK and Australia, “sausage meat” usually means seasoned loose sausage filling. In the US, look for bulk sausage, breakfast sausage meat, or simply remove the meat from sausages. Plain ground pork works too, but it needs proper seasoning.

  • Sausage meat: fastest and most classic, but check salt before adding more.
  • Regular sausages: easiest supermarket shortcut; slit the skins and use the filling.
  • Plain ground pork or beef: works if you season it properly and keep enough fat or moisture for juiciness.
  • Chicken, turkey, or vegetarian sausage: useful alternatives, but watch dryness or excess moisture.

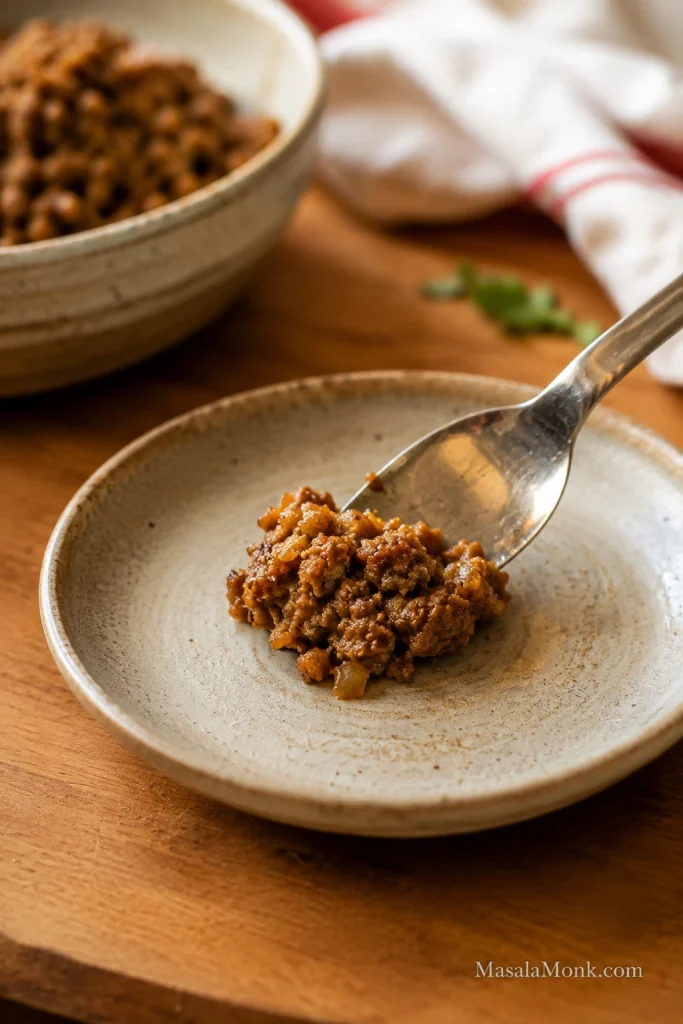
Check the Seasoning Safely

Salt note: most sausages are already seasoned, so cook a tiny test piece before adding more salt. If you are using plain ground pork or beef instead, season it properly and test a small cooked piece before shaping.

Small cooked spoonful of sausage roll filling on a plate with a bowl of filling in the background.
A tiny cooked test piece lets you adjust seasoning before the pastry is involved, so the final sausage rolls taste balanced from the center out.

Which Sausages Make the Best Filling?

The best sausage rolls start with sausages you would happily eat on their own: savory, well-seasoned, and juicy without flooding the pan. Pork sausages are the classic choice because they usually have enough fat to stay tender. Breakfast sausage, Cumberland-style sausage, mild Italian sausage, chicken, turkey, and vegetarian sausage can all work too, as long as they are not too lean or watery.

For your first batch, avoid sausages that release a lot of liquid in the pan. Extra moisture can soften the pastry before it has time to crisp.

Simple rule: use sausage meat when you want speed, sausages when that is what you already have, and plain ground meat only when you are ready to season the filling properly.

What Pastry Is Best for Sausage Rolls?

Puff pastry is best for classic sausage rolls because it gives them lift, flakes, and crisp edges. Store-bought puff pastry is the right choice here because the point is a reliable homemade roll, not a pastry project.

All-butter puff pastry gives the richest flavor and the cleanest flaky bite: the kind that shatters a little when you bite in. Standard ready-rolled puff pastry still works well, especially if it stays cold and is not stretched around too much filling.

Close-up of a baked sausage roll with flaky puff pastry layers and cooked sausage filling on parchment.
Puff pastry gives sausage rolls their classic lift and crisp edges; keeping it cool helps those layers rise instead of melting flat.

Shortcrust pastry gives a firmer, more crumbly shell. Crescent roll dough makes a softer, breadier shortcut. Both can work, but neither gives the same flaky puff pastry bite.

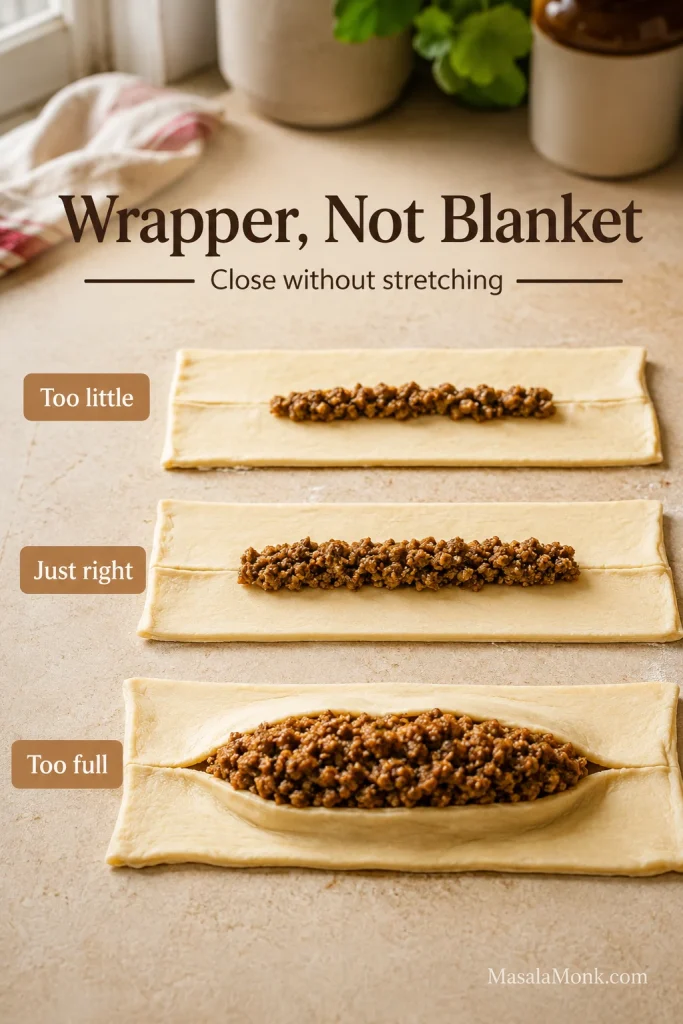
How Much Filling Fits the Pastry?

Puff pastry sheets vary by country and brand. Use this table to avoid overfilling the pastry.

Pastry-to-filling ratio guide showing too little, just right, and too much sausage filling on puff pastry strips.
The best sausage roll ratio leaves a visible pastry border, so the roll seals better, puffs cleaner, and leaks less.
Pastry amountFilling amountBest use
280g / 10 oz puff pastry350–400g / 12–14 oz fillingSmaller batch or mini rolls
320g / 11 oz puff pastry400–450g / 14–16 oz fillingOne ready-rolled sheet
375g / 13 oz puff pastry450–500g / about 1 lb fillingStandard full batch
1 smaller US puff pastry sheet, about 225–250g / 8–9 oz275–350g / 10–12 oz fillingSmall batch
2 US puff pastry sheets, about 450–500g / 16–18 oz450–500g / about 1 lb fillingFull batch

When in doubt, use the visual cue: the filling log should let the pastry wrap around it without stretching. Think slim log, not stuffed tube. A sausage roll that looks slightly modest before baking often comes out neater, flakier, and better balanced after the pastry puffs.

The pastry is a wrapper, not a stretchable blanket. If you have to pull it hard to close, the roll is overfilled.

What Makes the Filling Better?

Cooked onion gives the filling deeper flavor without raw sharpness. Breadcrumbs are not just filler; they catch juices from the sausage so the filling stays tender without soaking the base. Mustard adds lift, sage and thyme bring classic savory flavor, and fennel seeds give pork sausage rolls a more aromatic, bakery-style finish.

Egg wash note: A whole beaten egg gives good shine and color. Egg yolk gives a deeper golden finish. Milk gives a softer, lighter color. For vegan sausage rolls, use plant milk, aquafaba, or a little oil depending on the finish you want.

The 3-Ingredient Sausage Roll Shortcut

Yes, you can make 3-ingredient sausage rolls with puff pastry, sausages, and egg wash. They will be simpler than the full recipe, but still good if the sausages are well seasoned and the pastry stays cool.

Use the full recipe when you want a juicier filling with onion, breadcrumbs, mustard, and herbs.

  • Unroll the pastry and cut it into strips.
  • Remove the sausage skins and shape the meat into logs.
  • Roll, seal, brush with beaten egg, and bake until golden and cooked through.

Step-by-Step Visual Cues for Better Sausage Rolls

The recipe card tells you what to do. This section shows you what to look for, because sausage rolls are much easier when you know how the pastry and filling should feel before they go into the oven.

1. Look for Pastry That Bends Without Grease

The puff pastry needs to unroll without cracking while still feeling cool to the touch. Sticky pastry is a sign to pause, not push through. A few minutes in the fridge gives the butter a cleaner start in the oven.

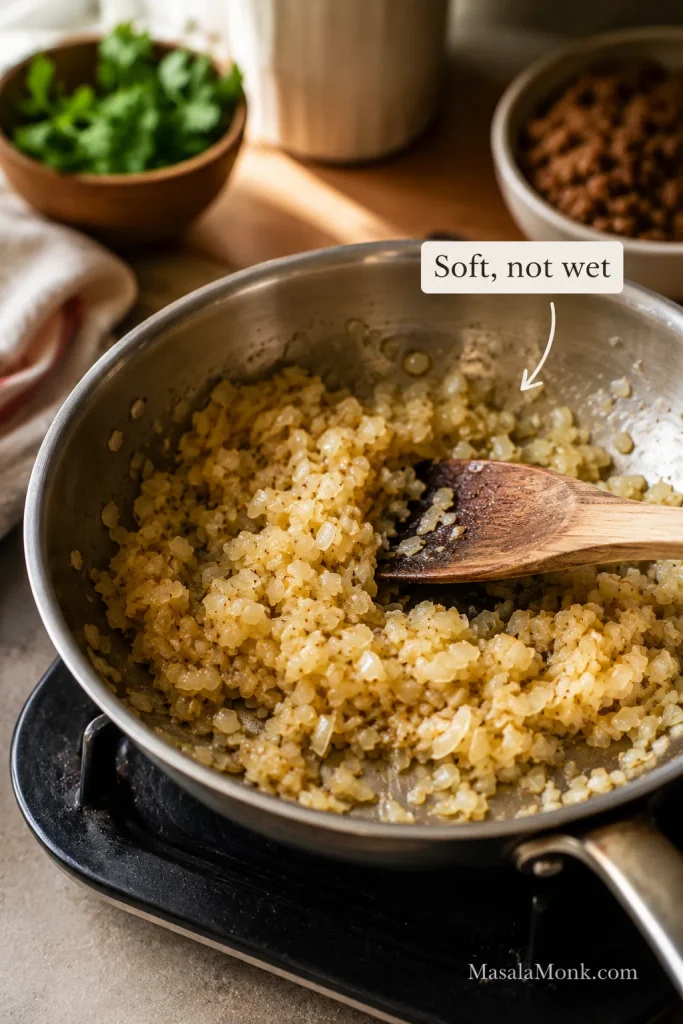
2. Cook the Onion Until Soft, Not Wet

The onion should be soft and fragrant before it goes into the sausage mixture, but not watery. Cooking it first gives sweetness and keeps raw onion moisture from softening the pastry.

Finely chopped onion softened in a pan with a wooden spoon for sausage roll filling.
Softened onion should look glossy and dry around the edges; that gives the filling sweetness without adding steam inside the pastry.

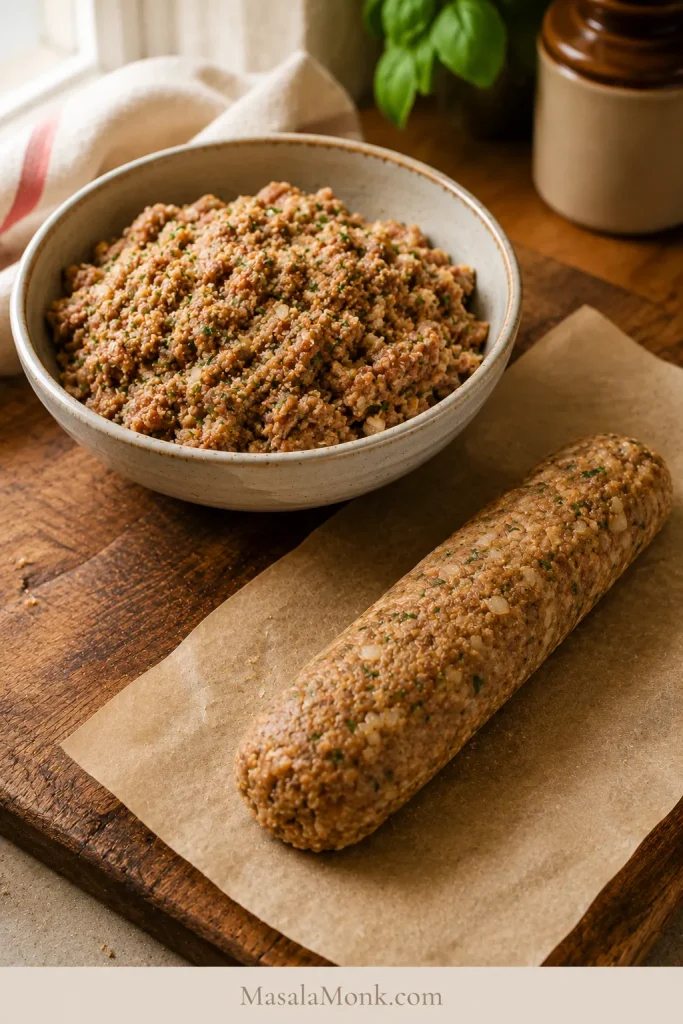
3. Shape a Filling Log That Holds Together

A good filling log holds its shape without slumping across the pastry. Loose filling needs a little more panko before it reaches the pastry. Dry, crumbly filling can take a teaspoon or two of cold water or milk.

Mixed sausage roll filling in a bowl with a shaped sausage filling log on parchment.
A filling that holds as a soft log is easier to roll, seal, and bake evenly; loose filling is more likely to soften the pastry.

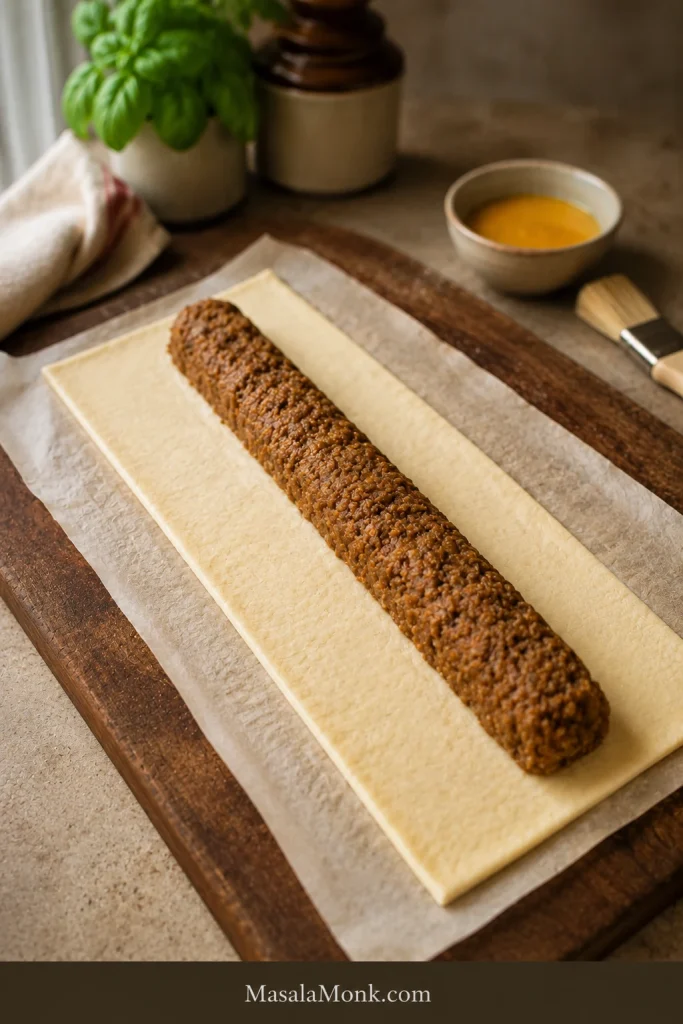
4. Place the Filling on the Pastry

The pastry needs to wrap easily around the filling. If you have to pull hard to close it, the log is too thick. Shape thinner than you think, especially for mini sausage rolls.

A slim sausage filling log placed down the center of a puff pastry strip with clear pastry borders.
Center the filling like a narrow ridge, not a mound; then the pastry can wrap around it without stretching thin at the seam.

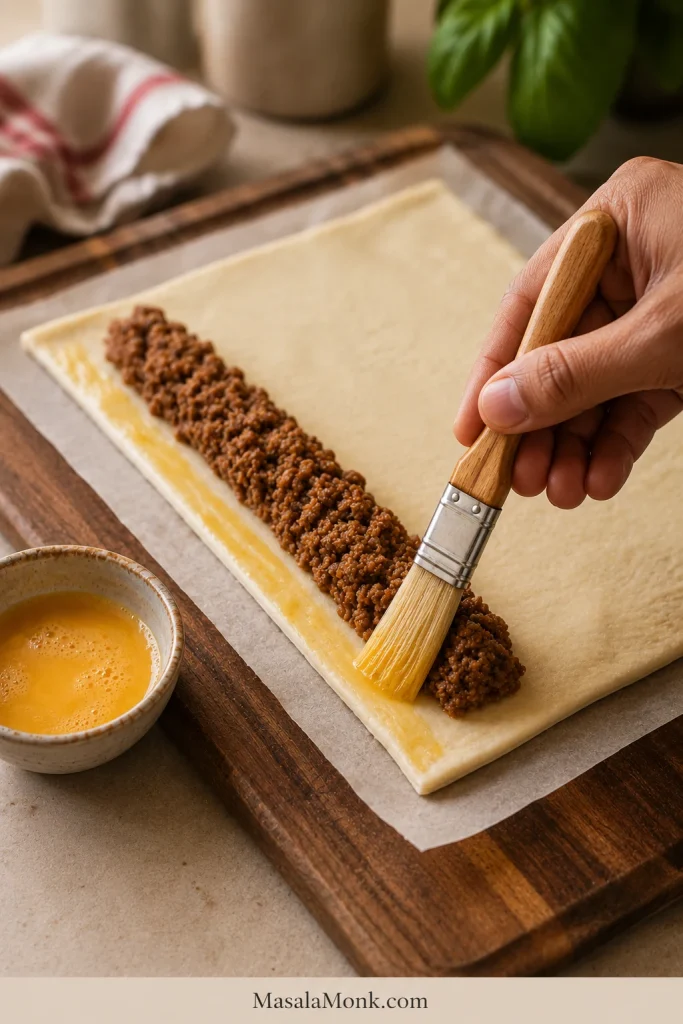
5. Seal with a Light Line of Egg Wash

Brush the edge lightly with egg wash, fold the pastry over, and press just enough to close. The seam needs to hold, but the layers should not be flattened.

A pastry brush applying egg wash along the edge of puff pastry beside sausage filling.
Egg wash works best as a thin glue line; a heavy brush of liquid can make the pastry edge slide open.

6. Bake Seam-Side Down

The sealed edge should sit against the tray, not face up. That way, the baking sheet supports the roll while the filling heats and the pastry expands.

Unbaked sausage rolls brushed with egg wash and arranged seam-side down on a parchment-lined tray.
Seam-side down placement turns the tray into support, so the pastry stays closed while the sausage filling heats and expands.

7. Cut Large, Medium, or Mini Sausage Rolls

Cut larger rolls for dinner or lunchboxes, medium rolls for snacks, and mini rolls for parties. Small rolls need thinner filling logs, not just shorter pieces of an overfilled roll.

Guide showing large, medium, and mini sausage rolls cut into different sizes.
Size changes the eating moment: large rolls suit dinner, medium rolls suit snacks, and mini sausage rolls suit parties or lunchboxes.

8. What the Tray Should Look Like Before Baking

The final tray should look tidy but not crowded: glossy tops, clear gaps between rolls, and pastry that still holds its shape when moved.

Unbaked sausage rolls brushed with egg wash, topped with seeds, and spaced on a parchment-lined tray.
Before baking, the best tray looks tidy but not crowded: glazed tops, visible gaps, and pastry firm enough to hold its shape.

9. Look for Bronzed Tops and Clean Bottoms

Look for deeply browned tops, set seams, and bottoms that lift cleanly from the paper. If the pastry bends or feels damp underneath, it likely needs more time or better air circulation after baking.

10. Cool on a Rack, Not a Plate

Let the rolls sit briefly on the tray, then move them to a wire rack. A plate traps steam underneath; a rack keeps the base crisp while the filling settles.

Before baking check: the rolls should be easy to lift, not stretched tight, with the seam tucked underneath and small gaps between each piece. If the pastry feels greasy or the filling is bulging through the seam, chill the tray before baking.

Changing the size? Check sausage roll cooking times before baking. If the pastry feels soft or crowded, go to How to Stop Soggy Sausage Rolls.

How Long to Cook Sausage Rolls

Once the rolls pass that before-baking check, size matters more than anything else. A mini party roll and a thick lunchbox roll should not bake for the same amount of time.

Most homemade sausage rolls bake best at 200°C / 400°F, or 180°C fan / convection. That temperature is hot enough to puff and brown the pastry while giving the sausage filling time to cook through.

The goal is not pale pastry with cooked meat, or dark pastry with a doubtful center. The sweet spot is a bronzed top, a clean base, and filling that is hot all the way through.

Cooking time guide for mini, medium, large, and frozen unbaked sausage rolls.
Size is the reason one timing never fits all; mini rolls, large rolls, and frozen unbaked rolls each need their own bake cue.
TypeTemperatureApprox. timeDoneness cue
Large fresh sausage rolls, 8 pieces200°C / 400°F, or 180°C fan25–30 minWell browned pastry, hot center
Medium sausage rolls, 16 pieces200°C / 400°F, or 180°C fan22–25 minGolden, crisp, cooked through
Mini sausage rolls, 24–32 pieces200°C / 400°F, or 180°C fan18–22 minPuffed, browned, and crisp
Frozen unbaked sausage rolls200°C / 400°F, or 180°C fanAdd 6–10 min to the fresh time for that sizeGolden pastry with bubbling edges
Reheating baked rolls180°C / 350°F, or 160°C fan8–12 minHot center and crisp pastry

When they are ready, look for bronzed, firm tops, set seams, and bottoms that lift cleanly from the paper instead of bending or feeling damp.

Check the Internal Temperature

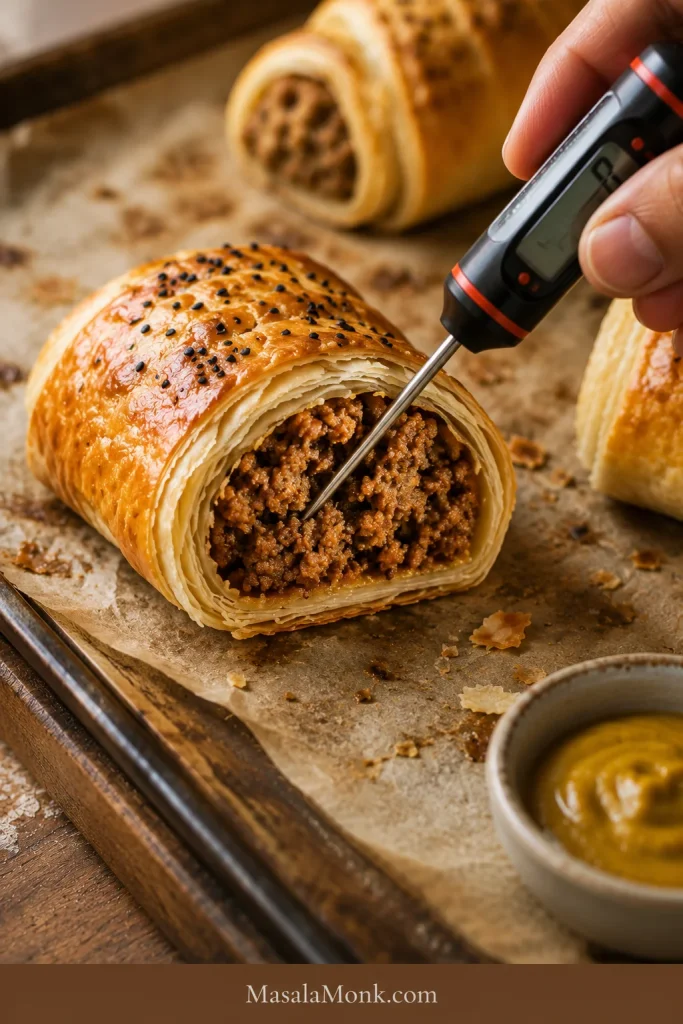
Instant-read thermometer inserted into the cooked filling of a baked sausage roll.
A thermometer checks what pastry color cannot show: whether the center of a thicker sausage roll is cooked through.

Use color as a clue, not the only test. Puff pastry should look well browned, but thick rolls can brown before the center is fully cooked. For a safe check, use an instant-read thermometer in the thickest part of the filling. For the official temperature chart, FoodSafety.gov has a simple safe minimum internal temperatures guide.

Making a batch for later? Go to Freezing, Reheating, and Making Ahead, or jump back to the recipe card.

How to Stop Soggy Sausage Rolls

Soggy sausage rolls are disappointing, but they are rarely mysterious. If the base is soft, the seam opens, or fat leaks around the edges, the problem usually started before the tray went into the oven: wet filling, warm pastry, overfilling, or trapped steam after baking.

The oven can brown pastry, but it cannot fully rescue a filling that went in too wet.

Troubleshooting guide showing wet filling, warm pastry, crowded tray, and trapped steam as causes of soggy sausage rolls.
Soggy sausage rolls usually start before serving, with wet filling, warm pastry, crowding, or trapped steam weakening the crisp base.
ProblemLikely causeFix
Soggy bottomWet filling or pastry sitting in steamUse breadcrumbs, cool cooked onion, avoid watery vegetables, and move baked rolls to a wire rack.
Pastry leaking fatVery fatty filling, warm pastry, or oven too lowChill the shaped rolls if needed, bake at the right heat, and space rolls apart.
Pastry split openOverfilled rolls or weak sealUse egg wash on the edge, press firmly, and bake seam-side down.
Pale pastryWeak egg wash or underbakingBrush well with beaten egg and bake until golden and firm.
Dry fillingMeat too lean or filling overmixedUse sausage with enough fat, mix gently, and do not overbake.
Soft after bakingRolls cooled on a plate or covered too tightlyCool on a wire rack and avoid trapping steam.

A sturdy metal baking sheet also helps. Very thin trays can brown unevenly, and crowded trays trap steam. For extra-crisp bottoms, place the rolls on parchment on a hot tray only if you can transfer them safely.

What a Crisp Bottom Looks Like

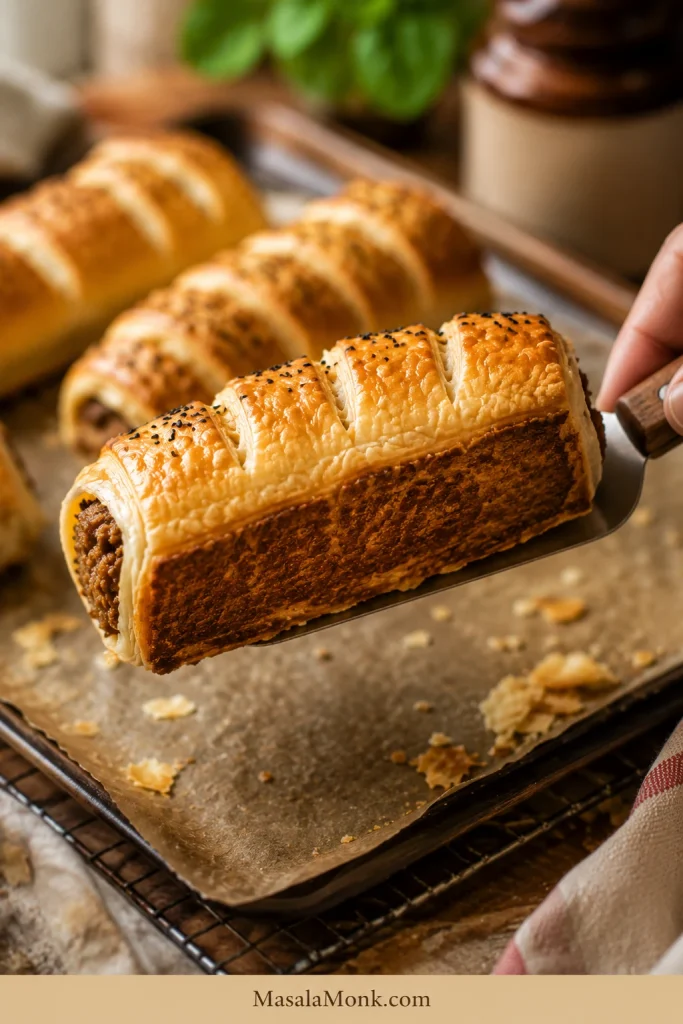
A baked sausage roll lifted with a spatula to show an evenly browned crisp bottom.
A golden underside shows the pastry baked instead of steamed, which is why rack cooling matters as much as oven heat.

Cold pastry, confident bake: if the puff pastry feels greasy, sticky, or slack, pause and chill the tray before it goes into the oven.

Most batches do not need every fix here. If the pastry is cool, the rolls are not overfilled, and the tops are deeply browned, you are already most of the way there.

That is the sweet spot: hot filling, crisp base, and pastry that flakes instead of bending.

Mini Sausage Rolls for Parties, Lunchboxes, and Snacks

Mini sausage rolls are the party version for a reason: they bake faster, serve neatly, and disappear from a platter while people are still deciding what to drink. They are the thing people pick up while talking, then return for before they realize they have already had three.

Mini sausage rolls on a wooden party platter with dips and a hand reaching for one roll.
Mini sausage rolls stay easy to grab, dip, and share, which makes them especially useful for appetizers, party boards, and casual snack trays.
  • Cut each long roll into 12–16 small pieces for party-size sausage rolls.
  • Bake mini sausage rolls at 200°C / 400°F, or 180°C fan, for 18–22 minutes.
  • Shape thinner filling logs so each mini roll is balanced, not overstuffed.
  • Leave space between pieces so the pastry can puff.
  • Use sesame or nigella seeds if you want a more finished party-platter look.
  • Cool fully before packing into lunchboxes so steam does not soften the pastry.

Party math is simple: plan on 3–4 mini sausage rolls per person if they are one of several snacks, and more if these are the main warm bite on the table. Think two-bite snacks, not tiny overstuffed parcels.

How to Keep Sausage Rolls Warm for a Party

Keep baked sausage rolls in a low oven, loosely covered, so steam can escape. Wrapping them tightly in foil while hot softens the pastry. Softened rolls come back quickly in the oven or air fryer for a few minutes before serving.

For another easy party appetizer in the same make-ahead lane, these grape jelly meatballs are a useful option beside mini sausage rolls.

If you are baking a full party tray, the oven is still easier. For a handful of mini rolls, leftovers, or a small frozen batch, the air fryer is the faster tool.

Baking only a few? The air fryer section covers small batches. Planning ahead? Go to freezing and reheating.

Air Fryer Sausage Rolls

The air fryer is not the best tool for a full tray, but it is excellent for small batches, leftovers, and frozen mini sausage rolls when you want hot pastry without heating the oven.

It is especially useful for the last few frozen rolls in the bag: enough for a snack, not enough to justify a full oven.

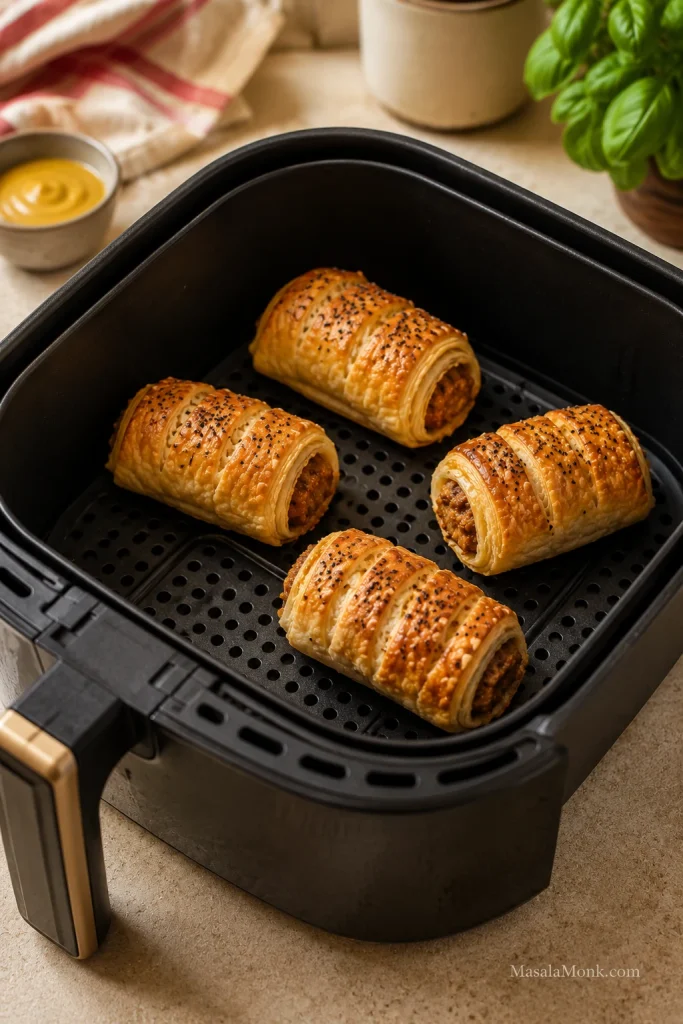
Golden sausage rolls arranged in one layer inside a clean air fryer basket.
Air fryer sausage rolls need breathing room; with one open layer, hot air can reach the pastry instead of steaming it.
Air fryer useTemperatureApprox. time
Fresh mini sausage rolls180–190°C / 350–375°F10–14 min
Fresh medium sausage rolls190°C / 375°F13–16 min
Frozen unbaked sausage rolls180°C / 350°F18–22 min
Reheating cooked sausage rolls180°C / 350°F4–6 min

These air fryer times are for homemade sausage rolls. Store-bought frozen mini sausage rolls can vary by brand, so start checking early and use the package instructions as the first guide.

Air fryer timing is most reliable for mini and medium rolls. Cook in one layer with space for the pastry to expand, and start checking early the first time because machines vary. Large rolls can brown outside before the middle is hot, so lower the heat and cook a little longer if needed.

Freezing, Reheating, and Making Ahead

This is the kind of tray that earns its keep: hot enough for dinner, small enough for a party, and easy enough to freeze before you need it.

Freeze sausage rolls unbaked for the best texture. Shape, cut, freeze on a tray, then bake from frozen with extra time whenever you want a hot batch later.

When the rolls bake for the first time from frozen, the pastry stays fresher than it does after being baked, frozen, and reheated. It is the quiet freezer win: a tray you shaped when you had time, ready to bake when you do not.

That is the freezer version at its best: no flour on the counter, no filling bowl to wash, just a cold tray becoming hot, flaky sausage rolls when you need them.

Freezing Unbaked Sausage Rolls

Unbaked sausage rolls on a parchment-lined tray beside a freezer bag labeled for sausage rolls.
Freezing unbaked keeps the pastry from drying out twice; when baking from frozen, use the size of the roll to judge the extra time.
  1. Shape and cut the sausage rolls.
  2. Place them on a parchment-lined tray.
  3. Freeze until firm.
  4. Transfer to a freezer-safe bag or container.
  5. Bake from frozen at 200°C / 400°F, or 180°C fan, adding extra time.

Frozen unbaked sausage rolls usually need 6–10 minutes longer than fresh rolls, depending on size; very large rolls may need a few minutes more. Brush with egg wash before baking if possible. If the egg wash does not stick well to frozen pastry, bake the rolls plain or brush lightly after the first few minutes. Bake unbaked frozen rolls straight from the freezer unless the pastry packet says otherwise.

Simple Party-Day Plan

  • A few hours ahead: shape and cut the sausage rolls, then refrigerate until baking.
  • The day before or earlier: freeze them unbaked for the best texture.
  • Before guests arrive: brush with egg wash and bake until golden and cooked through.
  • To hold briefly: keep warm in a low oven, loosely covered, so steam can escape.
  • To refresh: return softened rolls to the oven or air fryer for a few minutes instead of wrapping them tightly.
  • For the table: serve with mustard or chutney, one creamy dip, and one fresh side so the pastry does not feel too heavy.

Can You Freeze Baked Sausage Rolls?

Yes, baked sausage rolls can be frozen, but the pastry is usually better when the rolls are frozen unbaked. If you freeze baked rolls, cool them completely first, pack airtight, and reheat in the oven or air fryer until hot and crisp again.
Storing Leftovers

Sausage rolls are best the day they are baked, especially while the pastry is crisp. Once cooled, store leftovers in an airtight container in the fridge for up to 3 days. Try to refrigerate them within 2 hours of baking.

Reheating Without Soft Pastry

Reheat baked sausage rolls in the oven at 180°C / 350°F, or 160°C fan, for 8–12 minutes. You can also use the air fryer at 180°C / 350°F for 4–6 minutes. Avoid the microwave when you want crisp pastry. It heats quickly, but it makes puff pastry soft.

Making Them Ahead

You can assemble sausage rolls a few hours ahead and keep them covered in the fridge until baking. For longer storage, freeze them unbaked. If the pastry softens while sitting, give the tray a short fridge rest before baking.

Serving a tray now? See what to serve with sausage rolls, or go back to top.

Sausage Roll Variations

Once the base recipe works, sausage rolls become easy to riff on. Keep the filling savory and not too wet, then change the mood: fennel for bakery-style rolls, apple for sweetness, cheddar for comfort, chili for heat, or cranberry and sage for a holiday tray.

  • Pork and fennel sausage rolls: add ½–1 teaspoon lightly crushed fennel seeds for an aromatic, bakery-style finish.
  • Pork and apple sausage rolls: add a small amount of grated apple, squeezed dry, for gentle sweetness.
  • Beef sausage rolls: use beef sausage meat and stronger seasoning such as mustard, pepper, or Worcestershire-style flavor.
  • Chicken sausage rolls: use chicken sausage or ground chicken and cook to 165°F / 74°C.
  • Cheese and onion sausage rolls: add grated cheddar and softened onion for a richer, more savory filling, but avoid overfilling.
  • Spicy sausage rolls: add chili flakes, smoked paprika, black pepper, or mustard.
  • Christmas sausage rolls: use sage, onion, apple, cranberry, chutney, or a little stuffing-style seasoning.
  • Bakery-style sausage rolls: keep the filling simple, use well-seasoned sausages, chill before baking, and egg wash generously.

When adding vegetables, be careful with moisture. Carrot, zucchini, mushrooms, spinach, and apple can all work, but watery ingredients should be cooked, squeezed, or used sparingly so the pastry does not turn soggy. For a completely different sausage dinner, this smoky kielbasa pasta is better when you want a full meal instead of a pastry snack.

Vegetarian, Vegan, Gluten-Free, and Lighter Sausage Rolls

Vegetarian, vegan, gluten-free, and lighter sausage rolls can all work, but they need the same care as the classic version. The filling needs body, the pastry needs to stay cool, and anything watery needs to be cooked, squeezed, or used sparingly before it is wrapped.

Vegetarian Sausage Rolls

For vegetarian sausage rolls, build savoriness first. Mushrooms, lentils, cheese, paneer, onions, herbs, and plant-based sausage can all work, but the mixture should be thick enough to shape into a log. If it slumps before baking, it will likely soften the pastry.

Vegan Sausage Rolls

For vegan sausage rolls, use vegan puff pastry and a plant-based filling. Replace egg wash with plant milk, aquafaba, or a little oil depending on the finish you want. Check both the pastry and the filling: many puff pastries are accidentally vegan, but not all are.

Gluten-Free Sausage Rolls

For gluten-free sausage rolls, check the pastry, sausage, breadcrumbs, mustard, and sauces. Gluten-free pastry can crack more easily, so let it soften just enough to fold, then chill again before baking if it turns sticky or fragile.

Healthy or Lighter Sausage Rolls

For a lighter version, make smaller rolls, use leaner sausage or chicken/turkey filling, add cooked vegetables, and serve with salad instead of heavier sides. Keep the promise honest: these are lighter sausage rolls, not diet food. Puff pastry and sausage are still rich ingredients.

What to Serve with Sausage Rolls

The best sausage rolls do not need much around them; they just need contrast. Add one sharp thing, one fresh thing, or one dip that cuts through the buttery pastry and makes people reach for another. A crisp wedge salad works especially well because the cold lettuce and creamy dressing balance the hot, flaky pastry.

Warm sausage rolls served on a wooden board with mustard, chutney, pickles, and green salad.
Sharp mustard, chutney, pickles, or fresh salad cut through the buttery pastry and make sausage rolls feel complete on the plate.
  • Sharp: English mustard, Dijon mustard, brown sauce, steak sauce, onion chutney, apple chutney, or pickles.
  • Fresh: green salad, wedge salad, slaw, cucumber salad, or a simple tomato salad.
  • Cozy: baked beans, soup, mashed potatoes, potato wedges, or chips.
  • Party-style: ketchup, creamy dips, chutney, mustard, pickles, or a cheese ball.

For a party platter, serve mini sausage rolls with two or three dips rather than too many sides. In lunchboxes, cool the rolls completely before packing so the pastry does not steam itself soft. On another sausage dinner night, this slow cooker sausage casserole gives you the opposite comfort-food mood: soft sausages, beans, vegetables, and a spoonable sauce.

FAQs About Sausage Rolls

Do you need sausage meat for sausage rolls?

No. Sausage meat is convenient, but regular sausages work well. Slit the skins, squeeze out the meat, and loosen the filling before shaping.

Do you cook sausage meat before making sausage rolls?

No. The sausage meat usually goes into the pastry raw and cooks as the pastry bakes. Cook only the onion, garlic, or watery vegetables first, then cool them before mixing. The filling is done at 160°F / 71°C for pork or beef, and 165°F / 74°C for chicken or turkey.

How do you make sausage rolls with regular sausages?

Remove the skins, loosen the meat with a fork, shape it into logs, and roll it inside cool puff pastry. Season only if needed because most sausages are already salted.

What pastry is best for sausage rolls?

Puff pastry is best for classic sausage rolls because it bakes flaky, crisp, and golden. All-butter puff pastry gives the richest flavor, but standard ready-rolled puff pastry works well if you keep it cool.

Can you use crescent dough instead of puff pastry?

Yes, but the result will be softer and breadier. Puff pastry gives the classic flaky sausage roll texture. Crescent dough is better for a quick shortcut than for a bakery-style sausage roll.

How long do sausage rolls take to cook?

Large sausage rolls usually take 25–30 minutes at 200°C / 400°F, or 180°C fan. Medium rolls usually take 22–25 minutes, while mini sausage rolls usually take 18–22 minutes. Frozen unbaked rolls need extra time.

What temperature should sausage rolls be cooked at?

Cook sausage rolls at 200°C / 400°F, or 180°C fan, for the best balance of puffed pastry and cooked filling. For reheating, use a slightly lower temperature such as 180°C / 350°F, or 160°C fan.

How do you know sausage rolls are cooked inside?

Use three checks: browned pastry, a base that lifts cleanly from the paper, and hot filling in the center. For thick rolls, use a thermometer rather than color alone.

Why is my sausage roll filling still pink?

Some sausage fillings stay slightly pink because of seasoning, curing ingredients, or the type of meat used. Use temperature, not color alone, as the final check. Pork or beef filling should reach 160°F / 71°C, and chicken or turkey filling should reach 165°F / 74°C.

Why are my sausage rolls soggy underneath?

Usually, moisture got trapped somewhere: wet filling, warm pastry, underbaking, or cooling on a tray. Breadcrumbs, a hot bake, and a wire rack solve most of it.

Why did my sausage rolls burst open?

Sausage rolls usually burst open when they are overfilled, sealed weakly, or baked seam-side up. Leave a pastry border, seal with a little egg wash, press gently, and bake seam-side down.

Should sausage rolls be frozen before or after baking?

Before baking is best. Shape and cut the rolls, freeze them on a tray, then store them in a freezer-safe bag or container. They bake up fresher because the pastry gets its first full bake from frozen.

Can sausage rolls be served cold?

Yes, sausage rolls can be served cold once they are fully cooked and properly cooled. They are best warm if you want crisp pastry, but cold rolls work well for lunchboxes, picnics, and party platters. Keep leftovers refrigerated.

How do you keep sausage rolls warm for a party?

Keep sausage rolls in a low oven, loosely covered, so steam can escape. Avoid wrapping them tightly while hot. If the pastry softens, refresh the rolls in the oven or air fryer for a few minutes before serving.

How do you reheat sausage rolls without making them soft?

Reheat sausage rolls in the oven at 180°C / 350°F for 8–12 minutes or in the air fryer for 4–6 minutes. Avoid the microwave if you want crisp pastry.

What is the best way to make mini sausage rolls?

Use thinner filling logs, then cut each long roll into small pieces before baking. Mini sausage rolls usually bake in 18–22 minutes at 200°C / 400°F, or 180°C fan.

Final Tip for Better Sausage Rolls

Good sausage rolls come down to three things: filling that tastes good before it goes in, pastry that stays cool and relaxed, and a bake that goes far enough for real color. Once those are right, the same base method works for regular sausages, mini party rolls, freezer batches, and air fryer snacks.

Make the first batch plain and classic. After that, sausage rolls become the kind of recipe you can adapt without overthinking: a warm tray for dinner, a freezer stash for later, lunchbox rolls for the next day, or the party snack people keep circling back to while pretending they are only having one more.

Back to top

Posted on Leave a comment

Crispy Zucchini Chips Recipe: Air Fryer, Oven, Panko, Keto & Dehydrator Methods

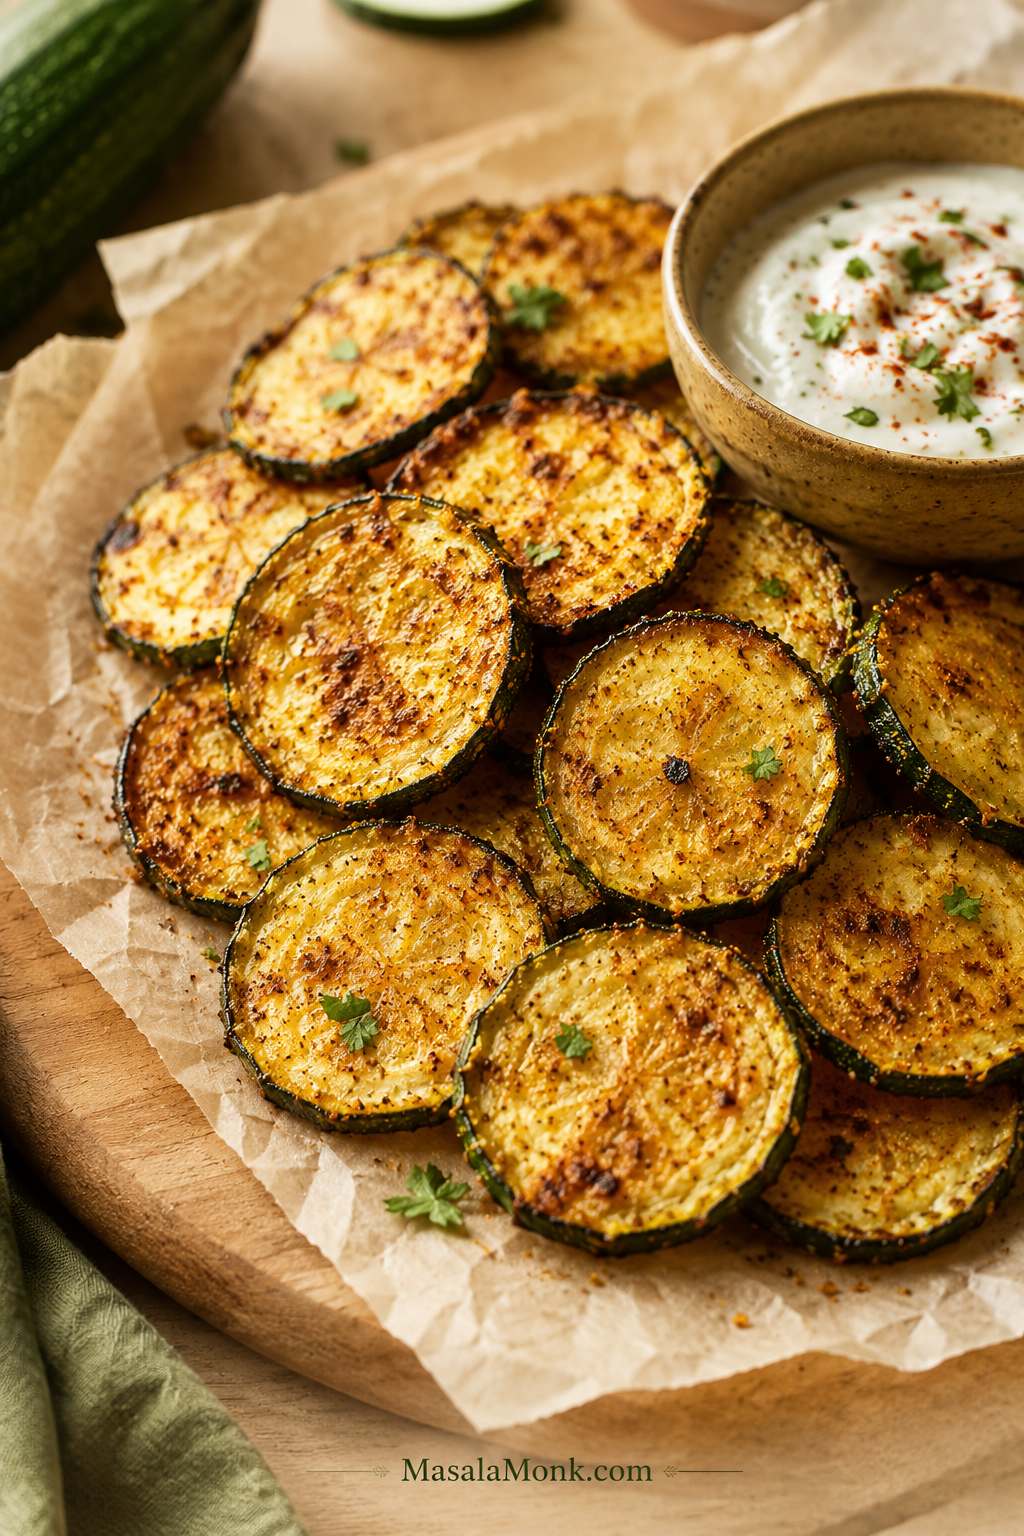
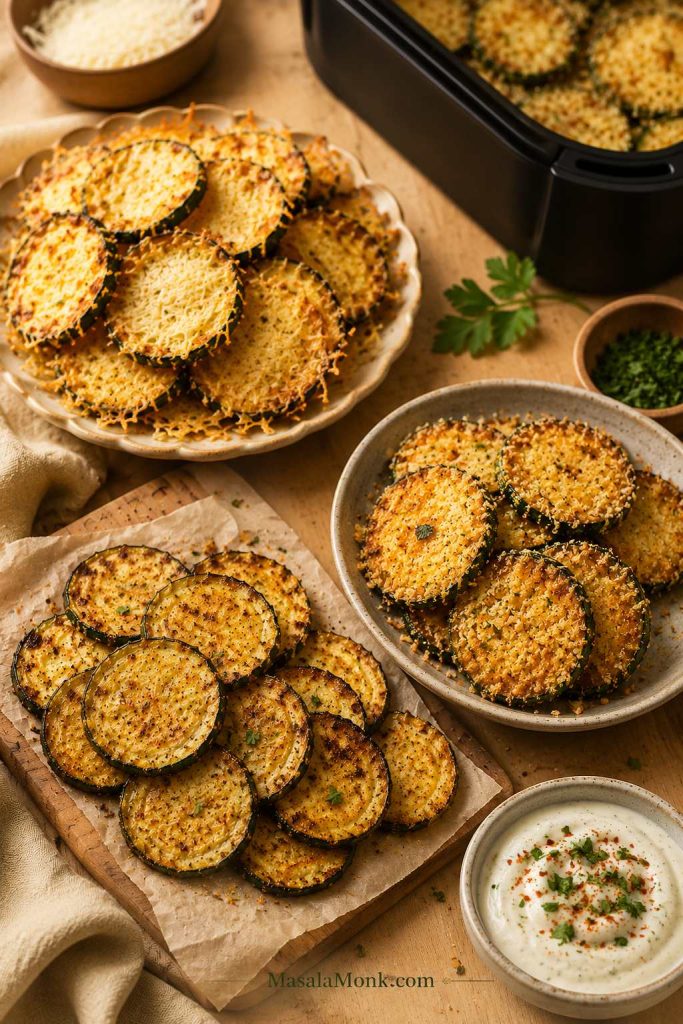
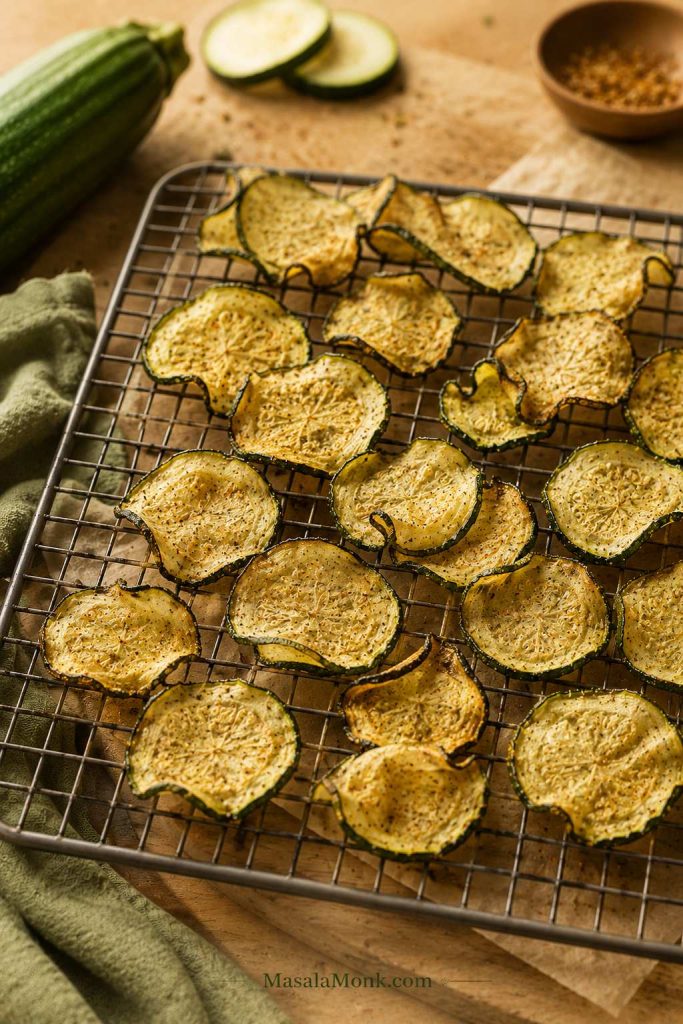
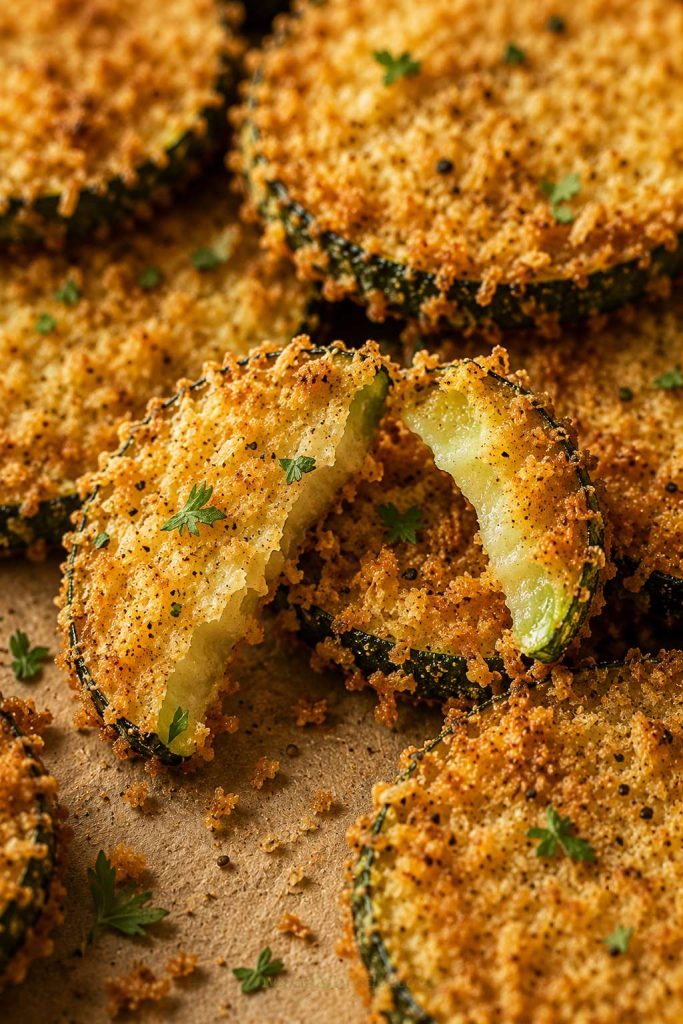
These crispy zucchini chips are golden at the edges, tender in the center, and best dipped while the parmesan still has its crunch.

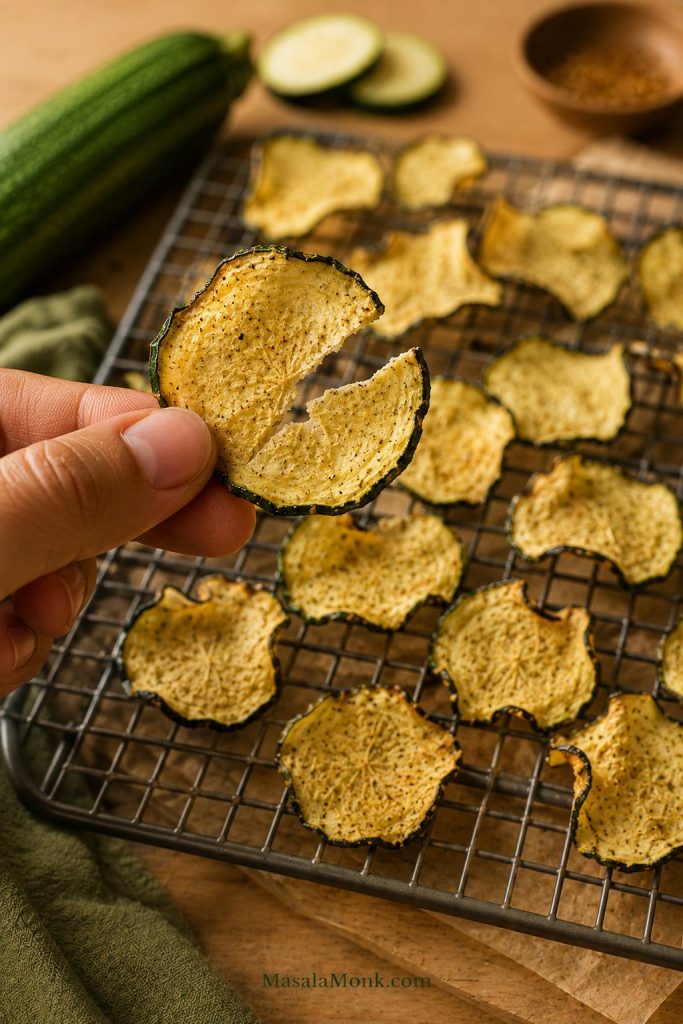
Zucchini chips sound easy until you pull them from the oven or air fryer and find the same annoying problem: browned edges, soft centers, and slices that look like chips but bend like roasted zucchini.

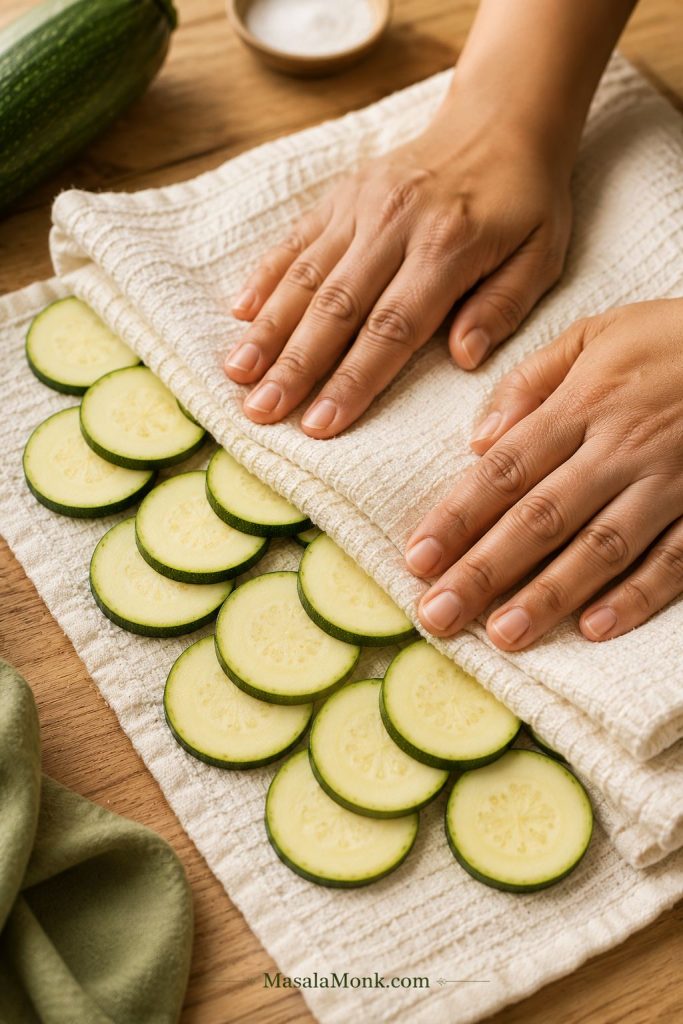
If that has happened to you, the problem was probably not just the cooking time. Zucchini is naturally tender and water-rich, so it needs a little help before it can become crisp. Even slicing, a short salting step, proper drying, light oil, enough space, and the right heat make the difference between limp slices and a snack you actually want to keep reaching for.

Most zucchini chips recipes are not actually disagreeing with each other. They are making different snacks. This guide starts with the easiest crisp-edged air fryer parmesan version, then shows when to use the oven, panko, keto/no-breadcrumb, or dehydrator method for the texture you actually want. If you already know the texture you want, compare the styles first.

These will not behave exactly like packaged potato chips, and that is okay. The win is a crisp-edged, salty bite that lets zucchini be zucchini without turning limp.

Quick Answer: How to Make Crispy Zucchini Chips

To make crispy zucchini chips, slice the zucchini evenly, salt the slices briefly, pat them very dry, season lightly, and cook in a single layer. Start with air fryer parmesan zucchini chips at 370°F / 188°C for 10–12 minutes, then cool them spread out for a few minutes so the cheese can firm. Need amounts and steps? Jump to the recipe card.

Seasoning helps, but the real win happens before the zucchini hits the heat. If the slices go in wet, they soften before the edges can firm up. Use only a little oil or oil spray, avoid crowding, and do not judge the final texture until the chips have cooled for a few minutes.

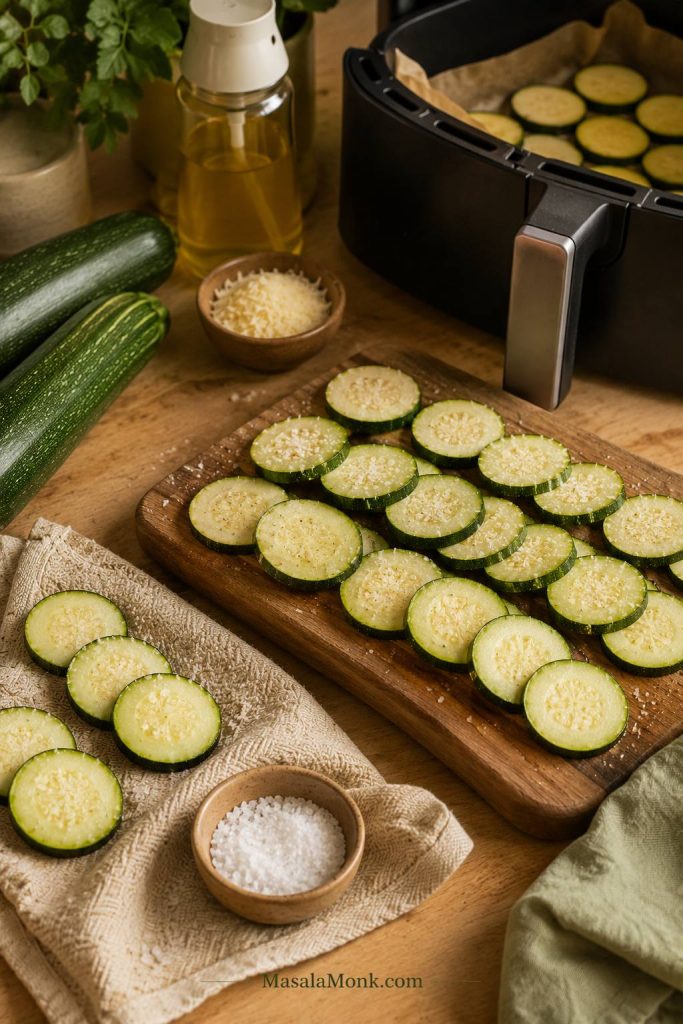
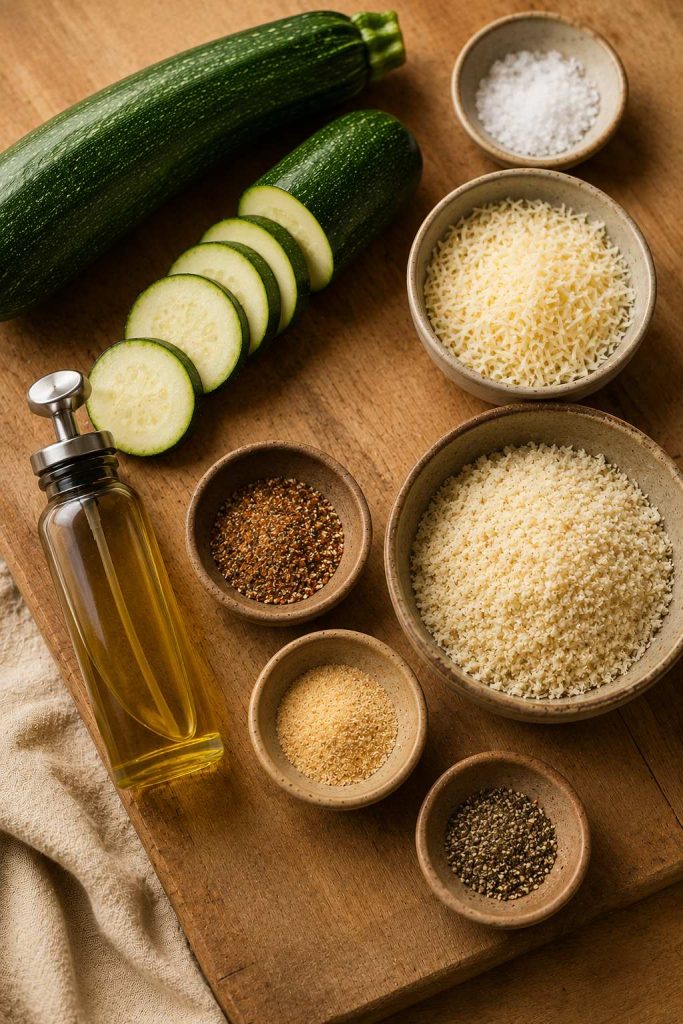
Sliced zucchini, salt, parmesan, oil spray, towel, and air fryer basket arranged on a wooden surface.
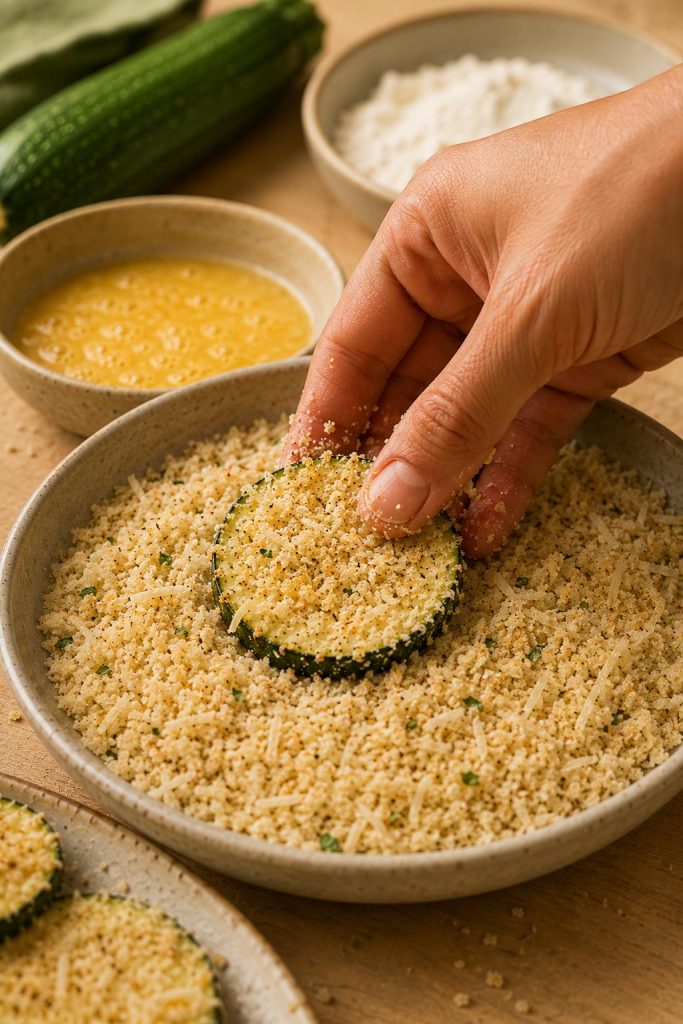
Before the air fryer or oven does any work, set the zucchini up for success with even slices, salt, towels, light oil, and parmesan.

Best first batch: air fryer parmesan zucchini chips.

The crispness rule: slice evenly, salt briefly, pat very dry, cook in one layer, and cool spread out.

Crispy Air Fryer Parmesan Zucchini Chips Recipe

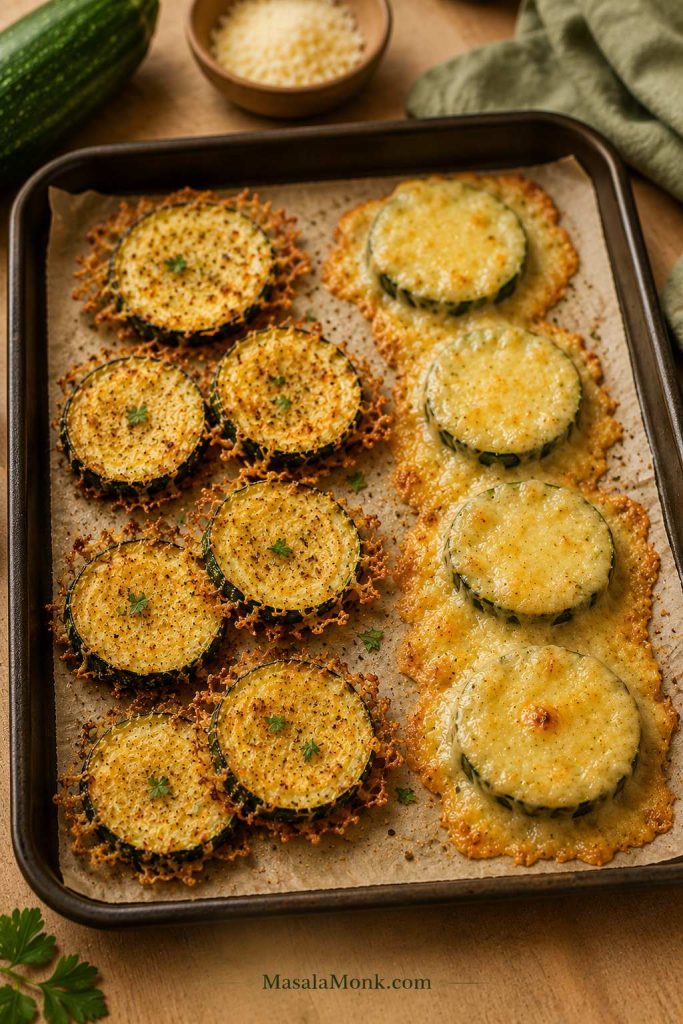
This is the first batch to make because parmesan gives zucchini a shortcut to crisp edges. The slices still need salting and drying, but the cheese browns quickly, firms as it cools, and turns a soft vegetable into something snackable without breadcrumbs or a long oven bake.

Texture: crisp parmesan edges, tender centers, and a salty snack bite. Not packaged potato-chip snap, but much better than limp zucchini rounds.

Yield4 servings

Prep Time20 minutes

Cook Time10–12 minutes

Total Time30–35 minutes

Ingredients

  • 2 medium zucchini, about 400 g / 14 oz total
  • ½ tsp fine salt, about 3 g, for salting the zucchini
  • 1 tbsp olive oil or avocado oil, 15 ml, or use oil spray
  • ½ tsp garlic powder, about 1.5 g
  • ½ tsp paprika or smoked paprika, about 1 g
  • ¼ tsp black pepper, about 0.5 g
  • ⅓ cup finely grated parmesan, about 30 g
  • Extra salt only if needed, after cooking

Instructions

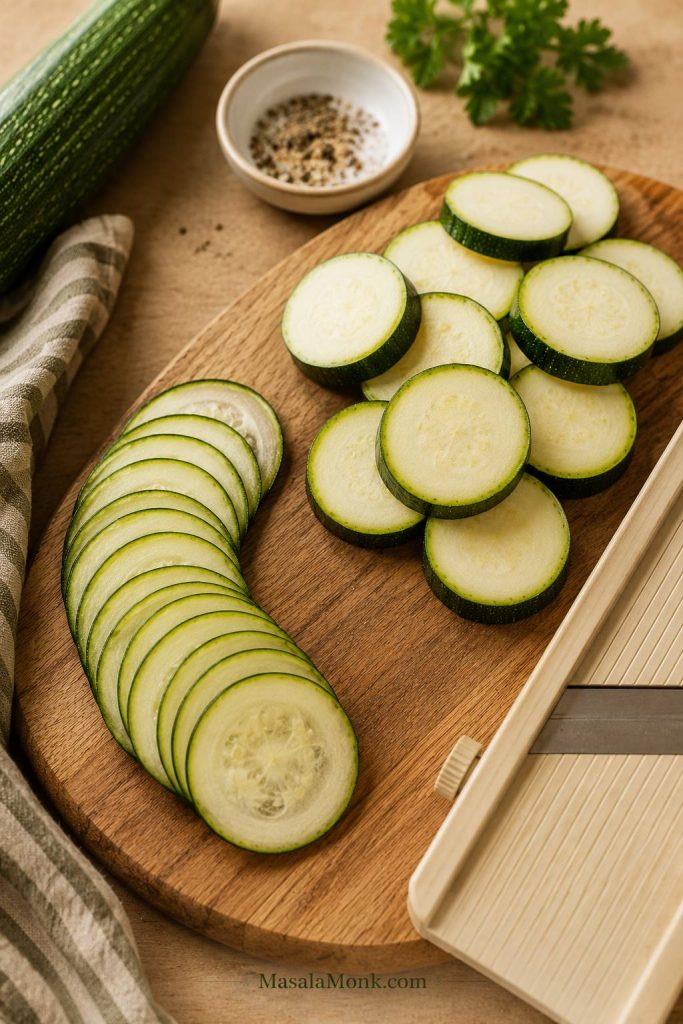
  1. Slice the zucchini. Slice into even rounds, about ⅛ inch / 3 mm for thinner chips or slightly thicker if your air fryer tends to blow thin slices around.
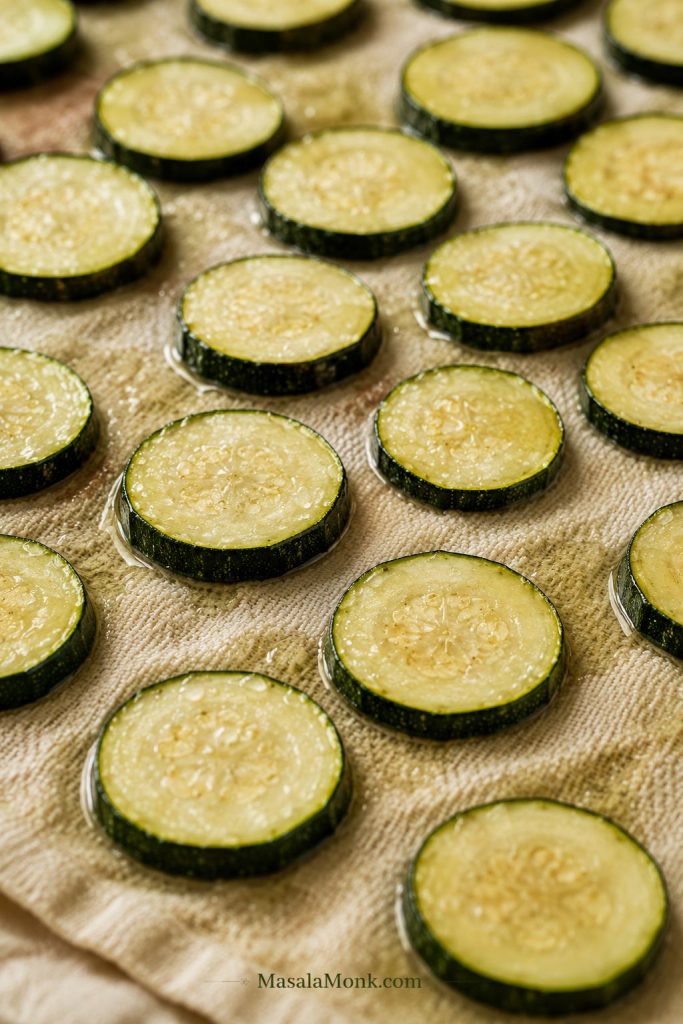
  2. Salt the slices. Arrange the zucchini on a towel or in a colander. Sprinkle with the salt and let rest for 15–20 minutes.
  3. Dry very well. Pat the slices dry with a clean kitchen towel or paper towels. The surface should look matte, not shiny-wet.
  4. Season lightly. Toss the zucchini with oil, garlic powder, paprika, black pepper, and finely grated parmesan. The slices should look lightly glossy, with seasoning clinging to the surface instead of sliding around.
  5. Arrange in the air fryer. Place slices in a single layer in the basket. Cook in batches if needed; it is better to cook two quick batches than one crowded soft batch.
  6. Air fry. Cook at 370°F / 188°C for 10–12 minutes, flipping or shaking gently halfway, until the parmesan smells toasted, the edges look dry, and the slices feel lighter. Start checking around 8 minutes.
  7. Remove finished chips early. If some slices are golden before others, remove them and keep cooking the softer pieces.
  8. Cool before serving. Spread the chips out for a few minutes. The parmesan firms up and the edges crisp more as they cool.
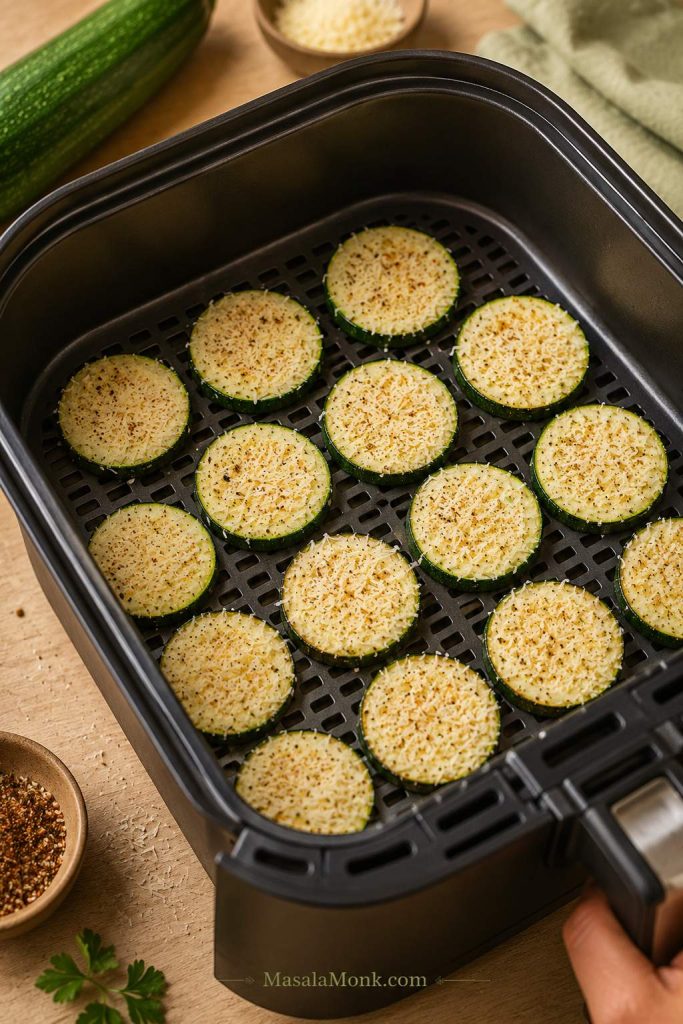
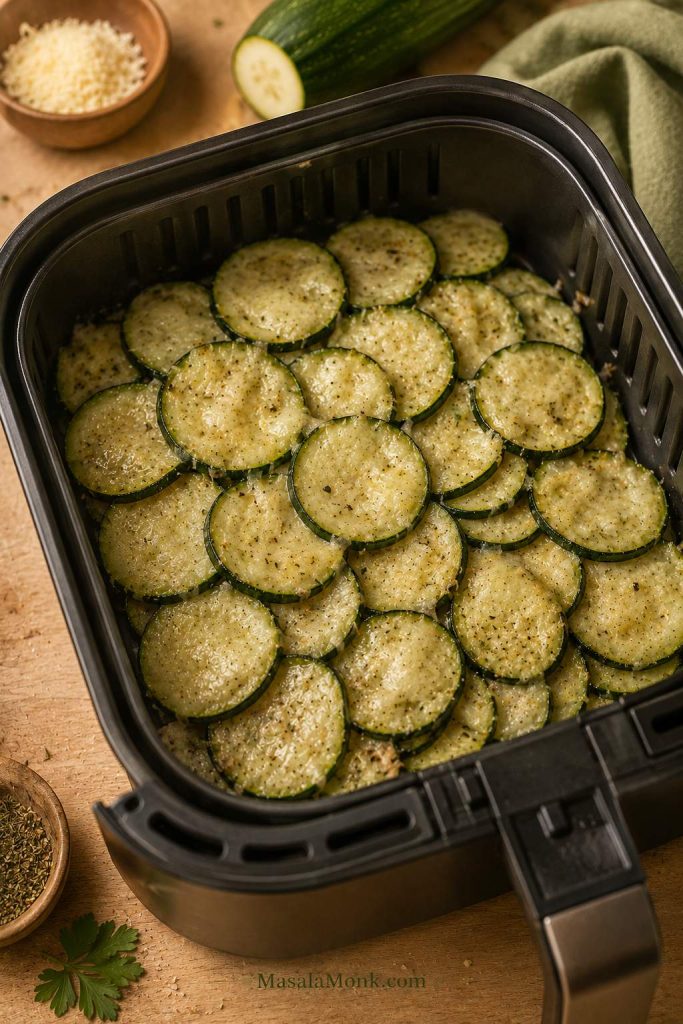
Parmesan-coated zucchini rounds arranged in one layer inside an air fryer basket.
For air fryer zucchini chips, keep the rounds in one layer. Hot air needs open gaps to dry the edges instead of steaming the centers.

Recipe Notes

  • Use finely grated parmesan for the most reliable crisping.
  • Smaller or thinner slices may finish first; pull them out early.
  • Do not add extra salt until after cooking, especially if using parmesan.
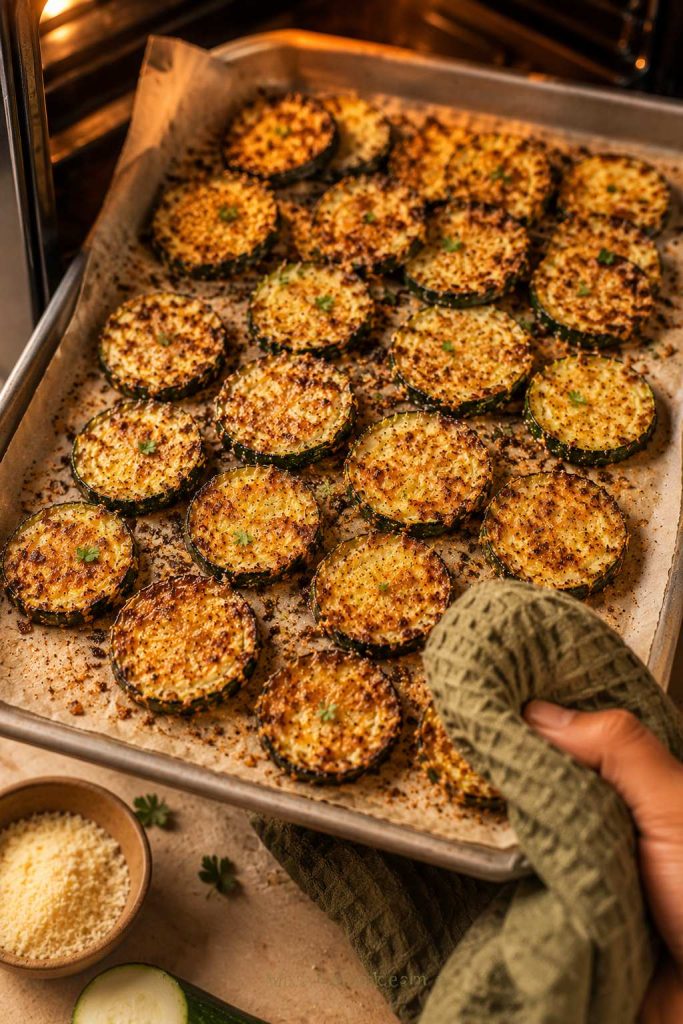
  • No air fryer? Use the hot oven parmesan method.
  • Serve soon after cooling, while the parmesan edges are still crisp.
  • Re-crisp leftovers in the air fryer or oven, not the microwave.

Why this works: salting gives the slices a better start, parmesan browns quickly, and cooling lets the cheese firm up. That is why the chips often feel crisper after a few minutes on the plate than they do straight from the air fryer. If they still come out soft, use the soggy-chip fixes.

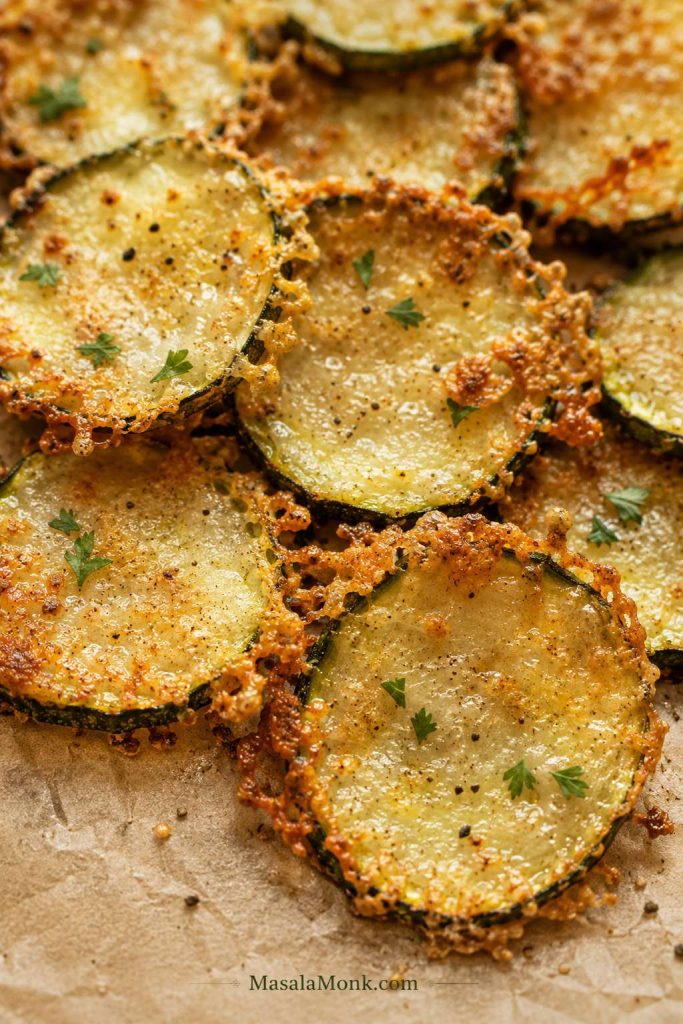
Close-up of parmesan zucchini chips with golden lacy cheese edges on parchment.
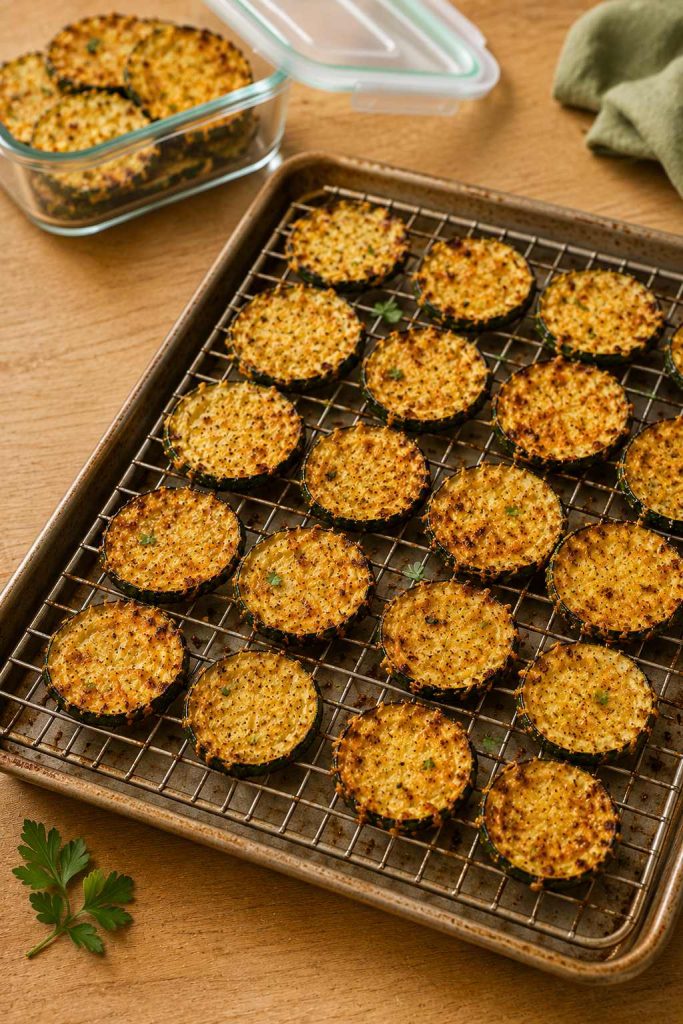
With parmesan zucchini chips, the best sign is a lacy golden edge. Let them cool briefly so the cheese can firm and crisp.

The first successful batch feels obvious in hindsight: the slices look lighter, the parmesan smells toasted, and the edges firm up while you are getting the dip. A few softer pieces are normal. At their best, they taste salty and cheesy, with crisp edges and tender centers.

The first crisp one is the cook’s tax. Eat it while the edges are still at their best.

Want a Different Texture? Choose Your Zucchini Chip Style

From here, the same idea can shift into oven trays, panko coating, keto chips, or make-ahead dehydrated chips. You do not need to master every version today. Choose the one that matches what you want to eat: the air fryer method for speed, the panko method for crunch, or the dehydrator method for make-ahead chips.

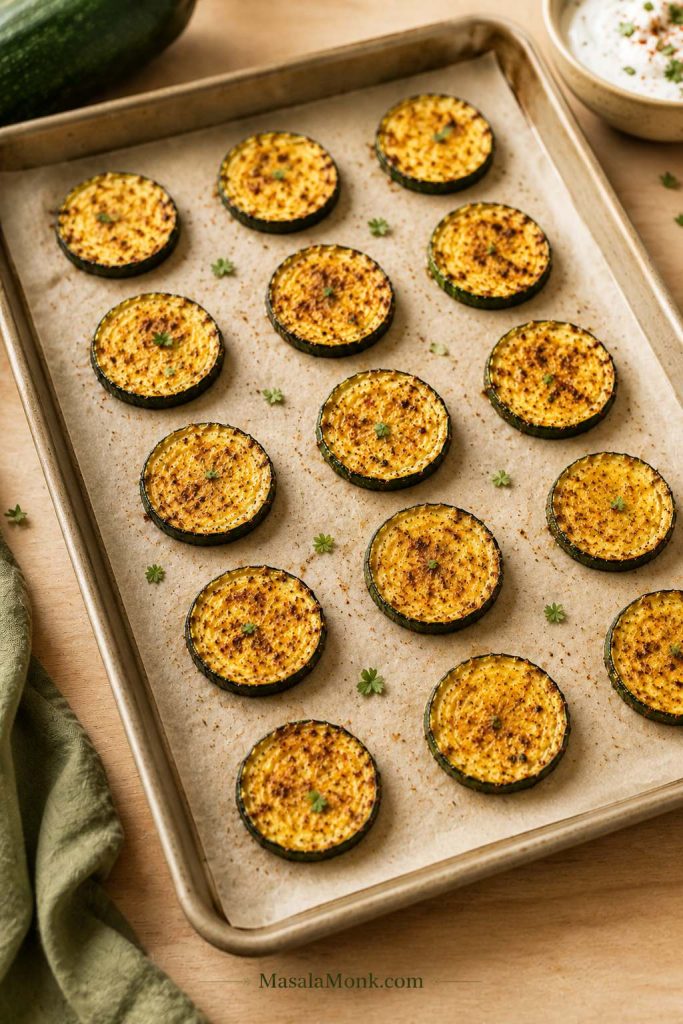
Thin chips dry. Parmesan rounds crisp. Panko rounds crunch. Once you know which style you are making, the times stop looking random.

Three zucchini chip styles shown together: thin plain chips, parmesan rounds, and panko-coated rounds.
Not every zucchini chip should look the same: thin chips dry, parmesan rounds crisp at the edges, and panko rounds bring the loudest crunch.
If You Want…Make ThisWhy It Works
The easiest first tryFast cheesy: air fryer parmesanParmesan helps the edges crisp quickly and adds salty, snacky flavor.
The crunchiest appetizerCrunchy appetizer: panko roundsPanko creates a crisp coating while the zucchini stays tender inside.
Keto or no-breadcrumb snackLow-carb: plain or parmesanParmesan gives better low-carb crispness than almond flour alone.
Larger sheet-pan batchSheet-pan: oven-bakedA baking sheet gives the slices more room than most air fryer baskets.
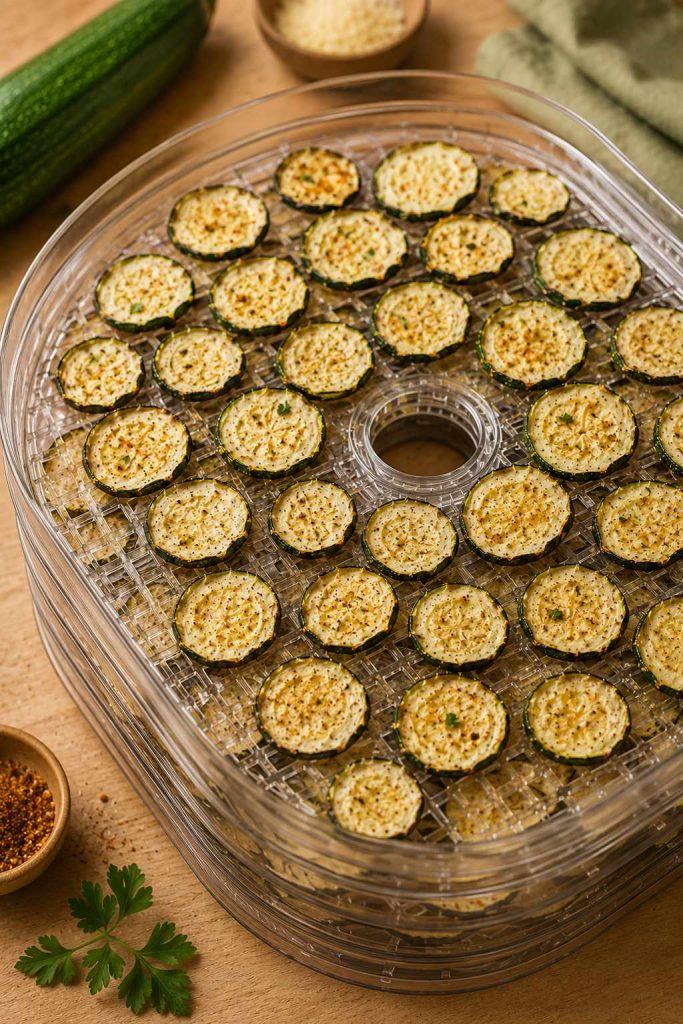
The most chip-like thin slicesThin veggie chips: low oven or dehydratorSlower heat gives thin slices time to turn light and crisp.
A sturdy dipperSturdy dippers: panko or thick parmesanThin plain chips are delicate; coated rounds hold up better.

Best choice guide: air fryer parmesan for the first batch, low oven or dehydrator for the most chip-like thin texture, panko for party crunch, parmesan for keto, and dehydrator or low-and-slow oven for better storage.

This is the kind of tray that disappears by the edges first: the lacy parmesan pieces, the extra-golden rounds, the ones everyone says they are “just testing.”

Why Zucchini Chips Turn Soggy

Most failed batches come down to one problem: the slices steam before they crisp. Already dealing with a limp tray? Skip to the troubleshooting table.

Zucchini carries a lot of moisture. When the slices are too thick, too crowded, or too wet, that moisture gets trapped. Instead of crisping at the edges, the zucchini softens. That is how you get chips that look browned but still bend in the middle.

If your last batch came out limp, you are not alone. This vegetable can make even a good recipe feel unpredictable until you give the slices a better start.

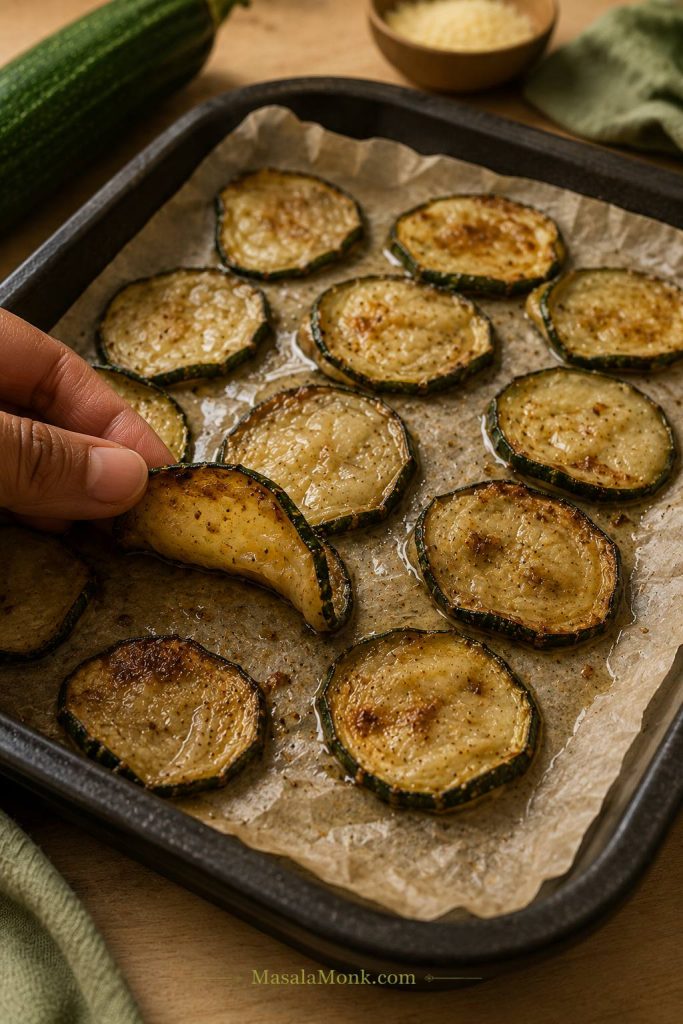
Soft browned zucchini chip being bent above a tray of limp zucchini slices.
If zucchini chips brown but still bend, they probably steamed before they crisped. Next time, go thinner, drier, or less crowded.

The rule that saves most batches: slice evenly, salt briefly, pat very dry, cook with space, and cool the chips spread out. That matters more than adding extra oil.

Once you solve that, the reward is simple: golden edges, better seasoning, and chips that feel like a snack instead of a side dish.

The Mistakes That Keep Zucchini Chips Soft

If a batch stays limp, the fix usually points back to one of these habits. This is not about being fussy; it is about giving zucchini a fair chance to crisp.

  • You salted but did not dry. Salting brings moisture to the surface; drying removes it. If the slices still look shiny, press them between towels before cooking.
  • You used too much oil. Glossy is good. Wet or slick is not. Too much oil coats the surface and keeps the chip soft.
  • You crowded the basket or pan. Overlapping slices steam each other. Cook in batches if needed.
  • You sliced unevenly. Thin pieces brown first while thick pieces stay soft. Pull the crisp ones early instead of waiting for the whole tray to match.
  • You used wet flavors too early. Lemon juice, hot sauce, fresh garlic paste, and watery marinades belong after cooking.
  • You piled them hot. Stacked chips lose their edge quickly. Spread them out for a few minutes first.
  • You expected every method to crunch the same way. Thin chips dry, parmesan rounds crisp, and panko rounds crunch. Choose the texture first.

Why These Ingredients Help Zucchini Chips Crisp

The ingredient list is short, but every item has a job. Medium zucchini gives you neat slices, salt draws moisture to the surface so you can pat it away, oil helps browning, parmesan firms into crisp edges, and panko gives the loudest crunch.

Zucchini, salt, grated parmesan, panko, oil spray, and spices arranged on a wooden board.
Keep the ingredient list simple, but choose each one for a job: salt manages moisture, parmesan builds crisp edges, and panko adds crunch.
  • Best zucchini: medium, firm zucchini with fewer watery seeds. Oversized zucchini can stay soft in the center.
  • Best crisping helper: finely grated parmesan. It clings better than large shreds and sets as it cools.
  • Best crunch coating: panko. Use it for appetizer-style rounds, not thin delicate chips that need to stay light.
  • Best oil approach: a light toss or spray. Glossy is enough; greasy slices soften.
  • Best seasoning type: dry spices and dried herbs. Save lemon juice, hot sauce, and fresh garlic paste for after cooking.

If you only have a very large zucchini, cut it lengthwise and scoop out the soft, seedy center if it looks watery. Use the firmer outer flesh for chips. And if you are comparing it with cucumber, remember that zucchini and cucumber are different vegetables, even though they can look similar at first glance.

Equipment That Actually Helps

You do not need a perfect kitchen setup here. A sharp knife, a clean towel, and enough space on the tray will get you most of the way there.

  • Mandoline or sharp knife: for even thickness.
  • Kitchen towels or paper towels: for drying after salting.
  • Parchment or wire rack: for oven batches and cooling.
  • Oil spray: for a light coating without greasiness.
  • Tongs: for pulling finished chips early.
  • Dehydrator: optional, but helpful for dry, make-ahead veggie chips.

Dry towels, even slices, and a little patience will do more for crispness than another spoonful of seasoning.

How Thin Should You Slice Zucchini for Chips?

Thickness decides whether you get a delicate chip, a cheesy round, or a sturdy dipper.

Thin zucchini slices and thicker zucchini rounds shown on a cutting board with a slicing tool.
Slice thickness decides the snack: thin rounds make delicate chips, while thicker rounds hold parmesan or panko coatings better.

For thin plain chips, aim for about ⅛ inch / 3 mm. These slices dry better, but they can burn quickly or fly around in some air fryer baskets.

For breaded or panko chips, slice closer to ¼ inch / 6 mm. Thicker rounds hold the coating better and are less fragile. They will be crunchy outside and tender inside, not dry all the way through; see the panko method if that is the texture you want.

For parmesan chips, either thickness can work. Choose thinner slices for a more chip-like result, or slightly thicker slices for a snacky zucchini round with crisp cheese edges.

A good batch will not all finish at the same second. Pull the crisp ones early. That is not fussiness; that is how zucchini behaves.

Should You Salt Zucchini First?

Yes. It is the small step that makes the biggest difference, especially if your zucchini is juicy or your last batch came out soft.

Salt draws moisture to the surface so you can pat it away before the zucchini hits the air fryer, oven, or dehydrator. It also helps breaded coatings stick because the slices are not slippery.

Here is the simple way to do it:

  1. Slice the zucchini evenly.
  2. Spread the slices on a clean towel or place them in a colander.
  3. Sprinkle with salt.
  4. Let them rest for 15–30 minutes.
  5. Pat very dry with a clean kitchen towel or paper towels.

You should see moisture on the surface after the rest. That is good. It means the water is on the towel instead of trapped in the chip.

Salted zucchini rounds resting on a towel with moisture beads visible on the surface.
After salting, moisture should bead on the zucchini surface. That is the water you want on the towel, not trapped inside the chip.

You do not need to rinse if you used a light amount of salt. If you salted heavily, rinse quickly and dry extremely well. For thin low-and-slow chips, you can rest the zucchini longer, even up to 45–60 minutes, but for most batches, 20–30 minutes is enough.

Do not skip the drying after salting. Pat away the surface moisture before cooking, or the slices will steam. Next, see how spacing changes the result in the air fryer and oven methods.

Hands patting zucchini rounds dry between clean towels before cooking.
Once the slices release moisture, press them until they look matte. Shiny zucchini usually means softer chips later.

Air Fryer Zucchini Chips: What Matters Most

The air fryer moves hot air, not magic. If the slices overlap, steam wins.

Overlapping zucchini rounds crowded inside an air fryer basket.
A crowded air fryer basket traps steam fast. Even well-seasoned zucchini chips stay soft when the slices overlap this much.

This is the weeknight version: quick heat, toasted parmesan, and a snack that is ready before anyone gets impatient. Good air fryer chips have browned parmesan around the edges, a garlic-paprika aroma, and enough firmness to dip gently after they cool for a few minutes.

Air Fryer StyleTemperatureTimeWhat to Look For
Plain thin chips370°F / 188°C12–18 minutesEdges dry and lightly browned
Parmesan chips370°F / 188°C10–12 minutesCheese is golden and edges are crisp
Panko chips400°F / 204°C10–12 minutesPanko is golden and crunchy

Very thin slices may finish early; thicker slices may need a few more minutes. Pull the early winners. Waiting for the whole basket to match is how the best chips become bitter.

The second batch is usually better because you already know how fast your air fryer runs.

If very thin chips fly around: slice them slightly thicker next time or use an air fryer rack or mesh insert if your model allows it. Overcrowding the basket will hold them down, but it will also trap steam.

Oven Zucchini Chips: Hot and Fast vs Low and Slow

The oven only looks confusing because thin chips and coated rounds need completely different treatment. Use a hot oven, around 425°F / 218°C, for parmesan or panko-coated rounds that need quick browning. For thin plain slices, a low oven around 225–235°F / 107–113°C gives the zucchini time to dry out.

Hot oven batches should smell toasted and look golden at the edges. Low oven batches should look drier, lighter, and slightly curled.

Golden baked zucchini chips on a parchment-lined sheet pan being pulled from the oven.
Baked zucchini chips need steady heat and enough tray room. Look for golden tops, drier centers, and edges that lift slightly.

Hot Oven Parmesan or Panko Chips

  1. Preheat the oven to 425°F / 218°C.
  2. Slice zucchini into ¼-inch / 6 mm rounds for panko chips, or slightly thinner for parmesan chips.
  3. Salt, rest, and dry the slices.
  4. Coat with parmesan or panko mixture.
  5. Arrange in a single layer on a parchment-lined baking sheet.
  6. Spray lightly with oil.
  7. Bake for 25–30 minutes, flipping halfway, until golden and crisp at the edges.

The chips should look lighter, slightly curled at the edges, and golden where the cheese or coating touches the heat. If they only look browned but still bend like roasted zucchini, give them more time.

Zucchini rounds arranged with space between them on a parchment-lined sheet pan.
On a sheet pan, visible gaps are not wasted space. They let heat move around each zucchini slice so the edges can firm.

Low-and-Slow Thin Zucchini Chips

  1. Preheat the oven to 225–235°F / 107–113°C.
  2. Slice zucchini thinly, about ⅛ inch / 3 mm.
  3. Salt for 20–30 minutes, then pat very dry.
  4. Use very little oil, or just a light spray, then add dry seasoning.
  5. Spread in a single layer on parchment or a wire rack set over a baking sheet.
  6. Bake for 70–120 minutes, rotating trays halfway.
  7. Start checking around 70 minutes, then remove dry pieces every 10–15 minutes as needed.
  8. Cool completely before serving.

They are done when the centers stop looking wet, the edges curl slightly, and the slices feel light. If they still bend like roasted zucchini, they need more time.

Thin lightly curled zucchini chips cooling on a wire rack.
Low-and-slow zucchini chips should look light, thin, and slightly curled. Cooling them on a rack keeps the undersides from softening.

Dehydrator Zucchini Chips

The dehydrator is not the fastest route, but it is the one to choose if you want chips that stay crisp after the first hour. This is the quiet, patient version: less hot-snack energy, more crisp pantry-snack payoff.

  1. Slice zucchini very thin and even.
  2. Salt lightly for 20–30 minutes, then pat dry very well.
  3. Use very little oil or skip oil completely.
  4. Season lightly with garlic powder, paprika, pepper, or dried herbs.
  5. Arrange in a single layer on dehydrator trays.
  6. Dehydrate at 135–150°F / 57–66°C for 4–8 hours.
  7. Rotate trays if your dehydrator heats unevenly.
  8. Cool completely before storing.
Thin zucchini slices arranged in a single layer on a dehydrator tray.
For dehydrator zucchini chips, single-layer spacing is the method. Thin slices dry more evenly and store better after they cool.

Use salt lightly here; dehydrated chips taste saltier as they dry. Humid kitchens, thicker slices, and crowded trays will push the timing toward the longer end.

Home-drying guidance supports the same idea used here: a single layer and steady dehydrator temperature help the slices dry evenly.

Cool one chip, then test it. Warm zucchini can lie to you. Fully dried chips should snap or feel crisp after cooling, not leathery. For keeping that texture, use the storage and re-crisping guide.

Hand holding a thin dried zucchini chip above a rack of dehydrated zucchini chips.
Cool one chip before testing. A dehydrated zucchini chip should feel dry and crisp, not warm, leathery, or bendy.

Parmesan Zucchini Chips: How to Get Lacy, Crisp Edges

Parmesan chips are done when the cheese looks golden and lacy at the edges, not pale and melted. If the parmesan smells sharp, bitter, or turns dark brown before the zucchini looks lighter, the heat is too high or the slices need more drying before cooking.

Finely grated parmesan works best because it clings in a thin layer and firms as it cools. Big shreds melt into patches. Too much cheese can also form a heavy blanket instead of a crisp edge, so use enough to coat lightly, not bury the zucchini.

Zucchini rounds on a tray showing light lacy parmesan coating beside heavy melted cheese coating.
Parmesan helps, but too much can act like a blanket. A lighter coating gives zucchini chips better lacy edges and cleaner crisping.
  • Use finely grated parmesan, not big shreds.
  • Look for golden, lacy edges instead of dark brown spots.
  • Pull the tray or basket if the cheese smells bitter.
  • Let the chips cool spread out so the cheese can firm.
  • Add extra salt only after tasting; parmesan already brings salt.

Parmesan chips are especially good with something tomatoey on the side. A small bowl of marinara sauce makes them feel closer to a crispy zucchini appetizer than a plain vegetable snack.

Breaded or Panko Zucchini Chips

When you want the kind of crunch people hear across the table, use panko. Treat this version as crispy zucchini rounds, not thin vegetable chips. They are golden outside, tender inside, and strong enough for thick dips.

Panko crisps better than regular breadcrumbs because the flakes are larger and airier. Finished panko rounds should sound crisp when tapped with tongs, even though the zucchini inside stays tender.

This is the party version: golden crumbs outside, soft zucchini inside, and enough crunch to scoop a thick dip without collapsing.

Broken panko-coated zucchini chip showing a crunchy golden coating and tender zucchini center.
With panko zucchini chips, the coating turns golden and crisp while the zucchini inside stays tender.

Panko Ingredients

  • 2 medium zucchini, sliced into ¼-inch / 6 mm rounds
  • ½ cup all-purpose flour, about 60 g
  • 2 large eggs, beaten
  • 1 cup panko breadcrumbs, about 55–60 g
  • ½ cup finely grated parmesan, about 45 g
  • 1 tsp Italian seasoning or dried oregano
  • ½ tsp garlic powder
  • Oil spray

Panko Method

  1. Salt the zucchini rounds briefly and pat them dry.
  2. Set up three bowls: flour, beaten eggs, and panko mixed with parmesan and seasoning.
  3. Coat each slice in flour, then egg, then panko mixture.
  4. Press gently so the coating sticks.
  5. Arrange in a single layer and spray lightly with oil.
  6. Bake at 425°F / 218°C for 25–30 minutes, or air fry at 400°F / 204°C for 10–12 minutes, checking early because panko can brown quickly.
Hand pressing a zucchini round into panko crumbs during breading.
For panko zucchini chips, press the crumbs onto dry slices gently. That contact helps the coating cling and brown into a crunchy shell.

If the coating falls off, the zucchini was probably too wet before breading. Salt, drain, and dry the slices well before coating. For more soft-chip fixes, check the troubleshooting table.

The panko version is especially good with buffalo chicken dip or spinach artichoke dip. If you want something simpler, a warm cheese sauce works too.

Keto and No-Breadcrumb Zucchini Chips

If breadcrumbs are off the table, parmesan is the easiest way to get real edge crispness. Plain zucchini can dry nicely, but parmesan gives the snack more structure and a salty bite.

Almond flour can work, but it does not behave like panko. It tends to feel heavier and less crisp, so use it lightly or pair it with parmesan instead of expecting a breadcrumb-style crunch.

If you are building a bigger low-carb snack plate, these parmesan chips can sit alongside other keto chips, cucumber sticks, olives, cheese, and a creamy ranch or garlic yogurt dip.

Dry Seasonings That Work Best

Keep the wet flavors for later. Before cooking, dry spices are your friend.

  • Garlic parmesan: garlic powder, black pepper, and finely grated parmesan.
  • Ranch-style: garlic powder, onion powder, dried dill, parsley, and black pepper.
  • Chili lime: chili powder, garlic powder, lime zest, and a squeeze of lime after cooking.
  • Smoky paprika: smoked paprika, garlic powder, black pepper, and a little parmesan.
  • Italian herb: dried oregano, basil, garlic powder, black pepper, and parmesan.
  • Spicy parmesan: garlic powder, paprika, cayenne, black pepper, and finely grated parmesan.

Taste before adding more salt at the end, especially with parmesan. If you like heat, keep hot sauce or other wet sauces for after cooking; they work better as a finishing touch than as a pre-cook coating.

What to Serve with Zucchini Chips

The dip depends on the style of chip. Thin plain chips are delicate, so they work better with lighter dips like ranch, garlic yogurt, or tzatziki. Parmesan chips are great with marinara or salsa verde. If you want something sweeter and brighter, mango salsa also works.

For a snack board, pair warm zucchini chips with one creamy dip, one bright dip, and a few crunchy extras like cucumber sticks, carrot sticks, crackers, or olives. The contrast is what makes the board work: warm chips, cool dip, crisp edge, creamy finish.

How to Store and Re-Crisp Zucchini Chips

Fresh is best, but leftovers are not hopeless. You just have to bring the dry heat back.

They are best while the cheese has just firmed, the edges still crackle lightly, and the centers are still warm. As they sit, zucchini continues to soften, so even a crisp batch can lose some texture.

Do not seal in the steam you just worked so hard to remove. Spread hot chips out for a few minutes before piling them into a bowl or container.

Same-Day Storage

If you are serving them within a few hours, cool them completely first. Keep them loosely covered rather than sealing them while warm.

Overnight Storage

Refrigerate parmesan or panko chips in an airtight container once fully cool. They will lose some crispness, but you can revive them in the oven or air fryer.

Make-Ahead Chips

Choose low-and-slow oven chips or dehydrator chips if you need something that stores better. They hold up longer because they are dried more thoroughly.

How to Re-Crisp Them

Leftover zucchini chips spread on a rack with an open storage container nearby for re-crisping.
To re-crisp zucchini chips, spread them out and bring back dry heat. The air fryer or oven works better than a microwave.
  • Air fryer: re-crisp at 350–370°F / 175–188°C for 3–5 minutes, checking often.
  • Oven: bake at 350°F / 175°C for 8–10 minutes, uncovered, until the edges crisp again.
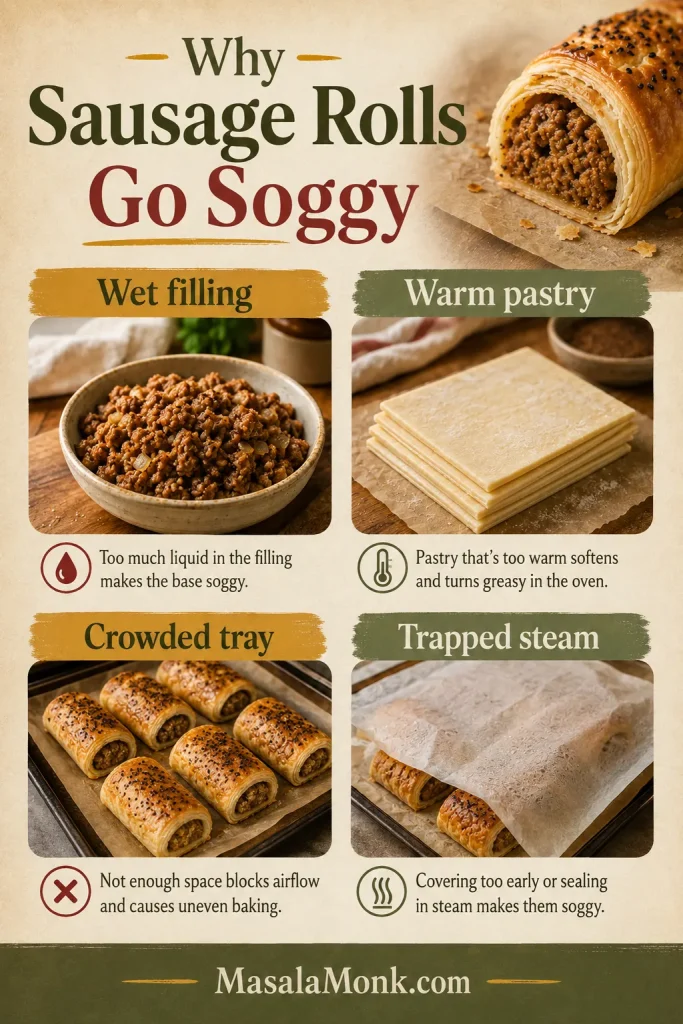
Re-crisped chips will not be exactly like fresh, but dry heat can still bring back that salty edge. The microwave is the one option to skip; it softens zucchini instead of reviving it.

Troubleshooting: Soggy, Burnt, Oily, or Uneven Chips

A soft tray is not a failed recipe. It is usually one adjustment away: drier slices, less oil, more space, or a few more minutes.

Quick Fixes for Soft or Uneven Zucchini Chips

ProblemRight NowNext Batch
Chips are soggyRe-crisp uncovered in the air fryer or oven.Salt longer, pat very dry, use less oil, and avoid crowding.
Chips are soft in the middleCook a few minutes longer at moderate heat.Slice thinner or use a lower, slower oven method.
Edges burned but centers stayed softRemove the burnt pieces and lower the heat slightly.Slice more evenly and check earlier.
Chips stayed softSpread them out and cook a few minutes more.Use a single layer and cook in batches.
Chips feel oilyDrain briefly on a towel and re-crisp with dry heat.Use oil spray or toss with less oil.

Fixes for Coating, Salt, and Air Fryer Problems

ProblemRight NowNext Batch
Parmesan burnedPull the basket or tray before the cheese turns bitter.Use finely grated parmesan, less cheese, or slightly lower heat.
Parmesan stuck to the trayLet it cool briefly before lifting.Use parchment for oven chips or a light oil spray for air fryer chips.
Panko coating fell offServe the loose crumbs as a crunchy topping.Dry zucchini well before breading and press the coating gently.
Panko browned but zucchini stayed wateryReturn the soft pieces to the oven or air fryer for a few minutes.Use ¼-inch / 6 mm slices and dry them better before coating.
Chips taste too saltyServe with an unsalted dip or yogurt sauce.Use less salt before cooking, especially with parmesan.
Chips taste bitterRemove dark pieces and serve the lighter ones.Lower heat slightly and add delicate seasonings after cooking.
Air fryer chips flew aroundPause and settle the chips if needed.Slice slightly thicker or use a rack/mesh insert.
Chips softened after coolingRe-crisp in the air fryer or oven.Cool spread out before storing or serving.

If the first tray bends, do not panic. Moisture usually won the first round, and the next batch often only needs one or two adjustments.

Frequently Asked Questions

Why are my zucchini chips soggy?

Zucchini chips turn soggy when moisture gets trapped. Slice evenly, salt briefly, pat very dry, use little oil, and cook in a single layer.

Why are my air fryer zucchini chips not crispy?

The slices may be wet, thick, crowded, or coated with too much oil. Cook in batches and pull finished pieces early instead of waiting for every slice to match.

Do you have to salt zucchini first?

You do not absolutely have to, but it helps a lot. Even a 15–20 minute rest gives the slices a better start before they hit the heat.

Do they get crispier as they cool?

Yes, especially parmesan chips. The cheese firms as it cools, so give the chips a few minutes before judging the texture.

Air fryer or oven: which is better?

Choose the air fryer for speed and small batches. Use the oven for larger trays, panko-coated chips, and low-and-slow thin chips.

Can I bake zucchini chips without breadcrumbs?

Yes. Use thin slices, salt and dry them well, then bake low and slow at 225–235°F / 107–113°C. Add finely grated parmesan if you want crisp edges without breadcrumbs.

What is the best no-breadcrumb coating?

Finely grated parmesan is the easiest no-breadcrumb coating because it browns, firms as it cools, and adds salty flavor.

How thin should I slice the zucchini?

Slice about ⅛ inch / 3 mm for thin plain chips and about ¼ inch / 6 mm for breaded or panko rounds.

Are zucchini chips keto?

Plain and parmesan versions can be keto-friendly. Panko or regular breadcrumb-coated chips are not keto unless you use a low-carb coating.

Can I use yellow squash or courgette?

Yes. Courgette is another name for zucchini, and yellow summer squash can also work. If you actually have cucumber, use it fresh in a cucumber salad instead of baking it into chips.

Should I peel the zucchini?

No. The skin adds color, helps the slices hold together, and gives better texture.

Can I use frozen zucchini?

Frozen zucchini is not ideal for chips because it releases too much liquid after thawing. Use fresh zucchini for this recipe.

Are these the same as zucchini fries?

No. Chips are usually sliced into rounds, while zucchini fries are cut into thicker sticks and often breaded.

Can I use a dehydrator for zucchini chips?

Yes. Slice very thin, salt and dry the slices, season lightly, and dehydrate at 135–150°F / 57–66°C for 4–8 hours.

How do I store zucchini chips?

Cool them completely first. Store fully dried chips airtight, refrigerate parmesan or panko leftovers, and re-crisp in the air fryer or oven.

Final Thoughts

Zucchini chips stop feeling random once you stop treating every version like the same snack. Thin chips need drying time, parmesan rounds need a light coating and a cool-down, and panko rounds need enough thickness to hold their crunch.

Your first batch teaches you what your zucchini and air fryer are doing. Usually, the next one is the keeper.

When the edges finally crisp, the whole thing clicks: not a packaged potato chip, not a limp roasted round, but a golden, salty zucchini snack that actually earns its dip.

Back to top

Posted on Leave a comment

Fig Jam Recipe

Open jar of homemade fig jam with a spoon lifting glossy no-pectin jam, fresh halved figs, lemon, and toast nearby.

When figs are good, they do not wait. They soften quickly, bruise easily, split at the seams, and can go from perfect to overripe almost overnight. Fig jam is one of the best ways to save that short, honeyed moment before it slips away.

This is the recipe for the day the figs finally give in — too soft to ignore, too fragrant to waste, and exactly ready for a pot of glossy, spoonable jam. The finished jar should taste like figs first: gently sweet, lifted by lemon instead of dulled by sugar, thick enough to spread, and soft enough to spoon over toast, yogurt, brie, goat cheese, cakes, cookies, sandwiches, flatbreads, and roasted meats.

The main method stays simple: fresh figs, sugar, lemon, a little water, and no commercial pectin. This is a fresh fig jam recipe first — soft-set, fruit-forward, and written for the refrigerator or freezer. Once the main method is clear, you will find dried fig, frozen fig, low-sugar, honey, cheese-board, and canning-safe notes clearly separated so you do not have to guess your way through substitutions.

So instead of giving you only one pot of jam, this guide shows you how to choose the right version for the figs you actually have.

Close-up spoonful of glossy fresh fig jam with visible fig seeds and soft fruit pieces.
Because fig jam firms as it cools, the best stopping point is shiny, slow-moving, and spoonable rather than stiff.

In This Guide

Start with the quick answer, or use the deeper sections for dried figs, lower sugar, canning questions, cheese-board ideas, and quick fixes if a batch looks too loose or too thick.

Quick Answer: How to Make Fig Jam

To make easy homemade fig jam, combine 2 lb / 900 g ripe fresh figs, 1½ cups / 300 g sugar, ¼ cup / 60 ml lemon juice, and ¼–½ cup / 60–120 ml water as needed. Start with the smaller amount of water.

Simmer uncovered until the figs soften, collapse, and turn shiny enough to coat the spoon, then mash or blend to your preferred texture. You do not need to peel the figs or add commercial pectin. The jam usually takes 25–45 minutes to cook, yields about 3 cups / 720 ml, and thickens more as it cools.

Keep these four things in mind as you cook: the figs should still smell sweet, the water should start low, the finish should be slow-moving rather than stiff, and this batch belongs in the fridge or freezer unless you use a tested canning recipe.

This recipe is written for the fridge or freezer. Do not water-bath can it unless you switch to a tested canning formula with exact acid, sugar, jar size, headspace, and processing instructions.

That may sound strict, but it keeps the recipe low-stress: make the jam, chill it, use it generously, and freeze the extra.

If the pan still looks loose near the end, use the doneness tests before cooking it much longer.

Recipe Snapshot

Here is the whole batch at a glance before the deeper choices begin.

Fig jam recipe snapshot with fresh figs, sugar, lemon, water, and a no-pectin measurement card.
The simplest fig jam recipe starts with ripe fruit, measured sugar, enough lemon for lift, and only enough water to protect the pan.
Figs to useRipe fresh figs that smell sweet and feel soft, but not sour, fizzy, or moldy
Base ratio900 g figs : 300 g sugar : 60 ml lemon juice : 60–120 ml water
PectinNot needed for this soft-set version
Peel figs?No. Remove stems, but leave the skins on.
Cook timeUsually 25–45 minutes, depending on fig moisture and pan width
Texture to aim forLoose enough to spoon, thick enough to stay on toast
StorageRefrigerator or freezer, unless using a tested canning recipe
Full recipeJump to the recipe card

Before You Start: What This Recipe Gives You

Good fit if you want…

  • A fresh fig jam recipe first
  • No commercial pectin
  • A soft-set, fruit-forward jar
  • Refrigerator or freezer storage
  • Clear notes for dried figs, honey, and lower sugar

Not the right fit if you want…

  • A stiff store-bought jelly set
  • Shelf-stable canning as written
  • Traditional whole-fig preserves
  • No-sugar pantry storage
  • Peeling, deseeding, or a firm jelly finish

With that boundary clear, the actual cooking is simple. Start with ripe figs, use just enough water to protect the pan, and let the fruit tell you when it has softened into jam.

Fig jam jars shown for refrigerator storage, freezer storage, and tested canning only.
Treat this as fridge or freezer fig jam unless you are following tested canning directions with exact acid, jar size, and processing time.

What Is Fig Jam?

Fig jam is made by cooking figs with sugar and acid, usually lemon juice, until the fruit softens and the mixture thickens into a spread. Because figs are full of tiny edible seeds, the texture is naturally a little rustic. It is not usually clear or glassy like jelly. Instead, it is rich, slightly seedy, and naturally honeyed, with a texture that can lean chunky or smooth depending on how much you mash it.

It will not set like a stiff jelly, and it is not supposed to. This is a softer, fruit-forward jar — the kind that spreads on toast but still spoons over yogurt, cheese, cake, or roasted meat.

The best version has balance. Figs are naturally sweet, so lemon stops the jar from tasting like flat sugar syrup. Sugar gives body and shine. A small pinch of salt can make the fruit taste rounder, especially if you plan to serve the finished spread with cheese or savory food.

Fig Jam vs Fig Preserves vs Fig Spread

Fig jam, fig preserves, fig spread, fig jelly, and fig confiture often overlap in everyday use. Still, the texture and best use can be slightly different.

NameUsual TextureWhere It Shines
JamCooked figs, usually mashed or partly broken downToast, yogurt, cheese, pastries, desserts, sandwiches
PreservesChunkier, often with larger pieces of fig or whole small figsBiscuits, cheese boards, spooning over desserts
SpreadSmoother and softer, often less stiff than classic jamCrackers, brie, sandwiches, flatbreads, charcuterie boards
JellyClearer and more strained, with less fruit pulpClassic jelly use, though figs are more commonly made into jam or preserves
ConfitureA French-style word often used for jam or preservesBreakfast, pastry, cheese, gifting
Paste or butterThicker, denser, and more concentratedCookies, fig bars, cheese plates, baking fillings

The finished texture sits between classic jam and a softer fig spread: fruit-forward, spoonable, and easy to adapt. Cook it less for a softer spread, longer for a thicker set, or mash lightly for a preserve-style texture.

Fresh Figs vs Dried Figs: Which Should You Use?

Fresh figs and dried figs both work well, but they make different jars. And then fresh figs also give you a brighter, softer, more seasonal jam. Dried figs make a deeper, denser, more concentrated spread that is useful year-round. Neither is wrong; fresh figs are for a lighter fruit-forward batch, while dried figs are especially good when you want a rich cheese-board spread.

Fresh fig jam is the version you make because the fruit is already asking for it — soft at the neck, fragrant on the counter, and too delicate to keep waiting. Dried fig jam belongs to a different mood: less about saving summer, more about building a rich pantry spread for cheese, toast, and cooler-weather boards.

Fresh fig jam compared with darker dried fig jam, with fresh figs on one side and dried figs on the other.
Fresh fig jam tastes brighter and softer, while dried fig jam turns deeper, darker, and more spread-like for year-round use.
Use ThisWhenWhat to Expect
Fresh figsYou want a brighter, softer, seasonal jamQuick cook time, fresh fruit flavor, soft set
Dried figsYou want a darker, thicker, year-round cheese-board spreadDeeper flavor, denser texture, more water needed
Frozen figsYou already have figs in the freezerMore released liquid and usually a longer simmer
Ripe green-skinned figsThey are soft, sweet, and ripe insideUse them like any other ripe fig
Truly unripe figsThey are hard, dry, bitter, or not sweet yetUse a dedicated green fig preserve method instead

Using dried figs instead of fresh? Go straight to the dried fig jam variation once you understand the main texture cues.

Fresh figs

Fresh figs are the best choice for a classic, bright homemade batch. They are tender, juicy, and quick to cook down when ripe. The flavor can be floral, honeyed, berry-like, or lightly caramelized depending on the variety and ripeness.

Fresh fig ripeness guide showing ripe, usable wrinkled, and hard unripe figs for jam.
Sweet-smelling, soft figs make the best fresh fig jam; meanwhile, hard green figs need a slower preserve-style method.
  • Use ripe figs that feel soft but not fermented.
  • Remove the stems, but do not peel the figs.
  • Quarter or chop them so they cook evenly.
  • Add water only as needed; very juicy figs may need little or none.

Dried figs

Dried figs are sweeter, denser, and lower in moisture. They need water to soften before they can become jam. Once cooked and blended, they make a thick fig spread that gives brie, goat cheese, blue cheese, crackers, toast, and sandwiches a darker, almost caramel-like contrast.

  • Remove any tough stems before cooking.
  • Chop the figs so they soften faster.
  • Simmer with water until very tender before blending or mashing.
  • Use less sugar if the dried figs are already very sweet.

Frozen figs

Frozen figs can work for jam. Thaw them first if possible, then use the fruit and any juices that collect. Frozen figs often release extra liquid, so the batch may need a slightly longer cook time. If you are using a weight-based recipe, weigh the figs consistently either before freezing or after thawing and draining lightly.

Thawed frozen figs in a bowl with released juices and a jam pan in the background.
Frozen figs are useful for jam, although their extra thawed juices usually need more time to simmer down.

Because thawed figs release extra liquid, check the doneness tests carefully before deciding the batch is finished.

What about green or unripe figs?

Green-skinned ripe figs are fine. Truly unripe figs are different. They can be firmer, less sweet, and sometimes bitter or latex-like. Green fig preserves are usually a separate style of recipe and often involve soaking, boiling, draining, and then cooking in syrup. If your figs are ripe but green on the outside, use them here. If they are hard and unripe, use a dedicated green fig preserve method instead.

Ripe green-skinned figs with pink centers compared with hard unripe green figs.
Ripe green-skinned figs can go straight into this recipe; hard unripe figs are less sweet and belong in a different preserve.

Ingredients You Need

The ingredient list is short, which is part of the charm: ripe figs, enough sugar to make them shine, lemon to wake them up, and just enough water to keep the pot moving before the fruit releases its own syrup.

Fresh figs, sugar, lemon, water, salt, vanilla, balsamic, and herbs arranged as ingredients for fig jam.
Figs provide body, sugar helps the jam set, lemon keeps the flavor awake, and small add-ins should stay in the background.

Fresh figs

Use ripe fresh figs for the main version. Black Mission, Brown Turkey, Kadota, Adriatic, or other edible fig varieties can all work. The exact flavor will change, but the method stays the same. Trim away the stems and any spoiled spots. The skins and seeds are edible, so there is no need to peel or deseed the fruit.

Fig condition guide: Fig jam is forgiving, but spoiled fruit is not. Use the table below when the figs are soft enough to make you wonder.

Fig ConditionUse It?What to Do
Soft, fragrant, and sweetYesPerfect for jam
Slightly wrinkledYesTrim stems and use
Split but fresh-smellingUsuallyTrim dry or exposed spots first
Sour, fizzy, or fermented smellNoDiscard
MoldNoDiscard
Hard and not sweetNot for this recipeUse a green fig preserve method instead
Guide showing which figs to use or discard for jam, including soft, wrinkled, split, sour, moldy, and hard figs.
Slightly wrinkled or very soft figs can still work, but sour, fizzy, or moldy fruit should be discarded before cooking.

Sugar

Sugar is not just there for sweetness; it gives the syrup its shine, helps the fruit look glossy instead of dull, and gives the finished jar a little more body. The amount here is moderate compared with many old-fashioned preserves, so the figs still lead. If your fruit is extremely sweet, you can reduce the sugar, but the batch will usually set softer, cook longer, and have a shorter refrigerator life.

Lemon juice

Lemon is what keeps the jar from tasting heavy. It lifts the fig flavor, sharpens the sweetness, and helps the mixture thicken. For refrigerator jam, fresh lemon juice works well. For pantry jars, switch to a tested preservation recipe and follow it exactly; many canning formulas call for bottled lemon juice because its acidity is standardized.

Water

Water keeps the figs from scorching before they release their own juices. Very ripe, juicy figs may need only a splash. Firmer figs, drier figs, or dried figs need more. Start with the smaller amount first; you can always add a little more if the pot looks dry.

Salt

A small pinch of salt is optional, but it makes the fig flavor taste rounder and less flat. It is especially useful if you plan to serve the jam with cheese or savory dishes.

Vanilla, citrus zest, balsamic, or herbs

These are optional, not required. Vanilla makes the jam more dessert-like. Lemon or orange zest adds fragrance. Balsamic pulls the jam into savory territory, where it tastes less like breakfast and more like something you would spoon beside brie, pork, or sharp cheese. Rosemary or thyme makes it more savory.

Equipment That Makes Fig Jam Easier

You do not need special jam gear here, but the pan matters more than most people expect. A wide pan is not fancy equipment; it lets steam escape quickly, so the figs thicken before their flavor turns dull. A masher or blender simply lets you choose whether the fruit stays chunky or turns smooth.

Wide pan of fig jam beginning to simmer with steam rising and a narrower pot in the background.
A wide pan gives steam room to escape, helping the jam thicken before the fig flavor turns dull.
  • Wide heavy-bottomed pan: a saucepan, sauté pan, or Dutch oven with enough surface area for steady evaporation.
  • Non-reactive material: stainless steel or enameled cast iron is best because the recipe includes lemon juice.
  • Wooden spoon or silicone spatula: useful for stirring and checking whether the jam leaves a trail on the bottom of the pan.
  • Potato masher or immersion blender: use a masher for rustic texture or an immersion blender for a smoother spread.
  • Small plate or spoon: chill it in the freezer for a simple doneness test.
  • Clean jars and a kitchen scale: clean jars help with storage, and a scale helps because figs vary so much in size.

A ladle and funnel are helpful but not essential. A narrow pot can still work, but the jam will usually need more time because evaporation is slower. If your pan is thin, keep the heat moderate and stir often so the sugar and fruit do not scorch before the mixture thickens.

The Best Fig Jam Ratio

The sweet spot is enough sugar to make the figs shine, enough lemon to keep the flavor bright, and only enough water to keep the fruit moving. This is not meant to be a stiff, candy-sweet preserve. It is a softer, fruit-forward jar you can use generously.

900 g fresh figs : 300 g sugar : 60 ml lemon juice : 60–120 ml water

Fig jam ratio guide with measured fresh figs, sugar, lemon, and water on a warm kitchen surface.
A reliable fig jam ratio gives the fruit enough sugar for body, enough lemon for balance, and no excess water to cook off later.

In US kitchen measurements, that is about 2 lb fresh figs, 1½ cups sugar, ¼ cup lemon juice, and ¼–½ cup water. The result is sweet enough to feel like jam, but still fig-forward enough that you taste the fruit, not just sugar.

Because this is less sugar-heavy than many old-fashioned preserves, it is best treated as a refrigerator or freezer batch.

BatchFresh FigsSugarLemon JuiceWaterApprox. Yield
Small batch1 lb / 450 g¾ cup / 150 g2 tbsp / 30 ml2–4 tbsp / 30–60 mlAbout 1½ cups / 360 ml
Standard batch2 lb / 900 g1½ cups / 300 g¼ cup / 60 ml¼–½ cup / 60–120 mlAbout 3 cups / 720 ml
Large batch3 lb / 1.35 kg2¼ cups / 450 g6 tbsp / 90 ml⅓–¾ cup / 80–180 mlAbout 4½ cups / 1 liter

The yield is approximate because figs vary in moisture. Very juicy fruit cooks down differently from firmer, drier fruit.

Small-Batch Fig Jam

If you only have a small basket of figs, make a half batch. Use 1 lb / 450 g fresh figs, ¾ cup / 150 g sugar, 2 tbsp / 30 ml lemon juice, and 2–4 tbsp / 30–60 ml water. A small batch usually cooks faster, often in about 20–30 minutes, especially in a wide pan.

This is a good option when you have a few ripe figs that need using immediately. It gives you enough jam for toast, yogurt, a small cheese board, or a quick baked brie without committing to several jars.

Small saucepan of chopped figs cooking into jam beside a small finished jar.
Small-batch fig jam is the right move when a few ripe figs need saving but you do not want multiple jars.

Why This Fig Jam Recipe Works

The pot does most of the work once the balance is right: enough sugar for gloss, enough lemon for brightness, and enough time for the figs to thicken naturally.

  • Moderate sugar keeps the fig flavor clear. The jam tastes sweet and glossy, but not like sugar syrup.
  • Lemon keeps the flavor bright. Without enough acid, the finished jar can taste heavy, flat, or overly sweet.
  • A short maceration helps the figs release juice. This makes the jam easier to start and reduces scorching risk.
  • A wide pan thickens the jam faster. More surface area means better evaporation and less overcooking.
  • No pectin keeps the texture soft and homemade. The jam thickens through cooking, but stays spoonable rather than stiff.
  • Stopping slightly early prevents over-thick jam. It continues to firm as it cools.

Figs are delicate. If you cook them too hard for too long, the flavor can move from honeyed and rounded to dull and sticky. The goal is to reduce the syrup, not punish the fruit.

How to Make Fig Jam

Start with ripe fresh figs and let simmering, lemon, sugar, and evaporation do the thickening. Read through the steps once before starting, especially the texture cues, because the jam thickens more after it cools.

Step 1: Prep the figs

Rinse the figs gently and pat them dry. Trim off the tough stems. Quarter small figs or chop larger figs into small pieces. You do not need to peel them. The skins soften as the jam cooks, and the seeds are part of its natural texture.

Hands trimming stems and quartering fresh figs on a cutting board for homemade jam.
Trim the stems and cut the figs evenly, but skip peeling because the skins soften into the finished jam.

Step 2: Combine figs, sugar, lemon, and water

Add the figs, sugar, lemon juice, a pinch of salt if using, and ¼ cup / 60 ml water to a wide heavy pan. Stir well so the sugar, lemon, and fruit are evenly distributed before heat goes on.

Fresh figs and sugar in a pan while lemon juice is poured in and water waits nearby.
Start with less water, then add a splash only if the figs stick before their own juices release.

If you have time, let the mixture sit for 15–30 minutes before cooking. This short rest helps the sugar draw juice from the figs, so the fruit starts cooking in its own syrup instead of scorching against the pan.

Chopped figs resting with sugar and lemon juice as syrup begins forming in the bowl.
A short rest with sugar and lemon draws juice from the figs, so the batch begins glossy instead of dry.

Add the remaining water only if the figs look dry, stick before releasing juices, or need a little help softening. Starting with less water prevents a thin batch that needs extra time to reduce.

Step 3: Bring the mixture to a simmer

Set the pan over medium heat and stir until the sugar dissolves. Once the mixture starts bubbling, reduce the heat as needed to maintain a steady simmer. You want active bubbling, but not a violent boil that splashes, scorches, or caramelizes too fast.

At this point the pan should look syrupy around the edges, not dry and sandy. If the figs are still sitting in dry sugar, add a splash more water and give them time.

Chopped figs in a pan with syrupy edges forming as a spatula pulls through the mixture.
When syrup forms around the pan edges, the figs are ready to soften evenly without scorching on dry sugar.

Cook uncovered once the figs are simmering. Covering the pan traps moisture and slows thickening.

Step 4: Cook until the figs soften and collapse

Simmer the jam, stirring often, until the figs soften, slump, and begin to collapse into the syrup. The kitchen should smell like warm figs and lemon, not burnt sugar. This usually takes 25–45 minutes. The exact time depends on fig ripeness, moisture, pan width, and heat level.

Fig jam simmering in a wide pan with steady bubbles and softened fruit.
A steady simmer concentrates the syrup gently, which keeps homemade fig jam glossy, rounded, and fruit-forward.

As the fruit softens, mash it with the back of a spoon or a potato masher. For a chunky preserve-style texture, mash lightly and leave some pieces intact. For a smoother spread, mash more thoroughly or blend briefly later.

Potato masher pressing softened figs in a pan to adjust the jam texture.
Mash lightly for a chunky fig preserve feel, or mash longer when you want a smoother spoonable jam.

If foam gathers on the surface, you can skim it off for a clearer finish. A little foam is not a problem for refrigerator jam.

Step 5: Adjust the texture

If you like a rustic jam, leave it slightly chunky. For a smoother fig spread for crackers, cheese boards, sandwiches, or cookies, use an immersion blender for a few short pulses. Do not overblend unless you want a very smooth paste.

Immersion blender smoothing fig jam in a pan into a glossy fig spread.
A brief blend makes fig spread smoother for crackers, cheese boards, cookies, and sandwiches without losing its homemade texture.

After blending, simmer for another few minutes so the texture settles and any extra moisture evaporates.

Step 6: Test the jam

It is ready when it looks shiny, moves slowly, and mounds softly on a spoon. The syrup should bubble slowly, not splash like water. A spoonful should fall slowly, not pour like syrup or sit like paste. A spatula dragged through the pan should leave a short trail before the mixture flows back. You can also use a cold plate test or a thermometer; both are explained below.

If the jam looks too loose or too stiff at this point, use the troubleshooting guide before changing the recipe.

Step 7: Jar, cool, and store

Spoon the hot jam into clean jars. Let it cool, then refrigerate. Do not worry if it looks slightly loose while hot; it will thicken more as it cools. For longer storage, freeze it in freezer-safe containers with headspace.

Texture Target

The target is not a firm jelly set. The best texture for this recipe is thick enough to spread on toast, but loose enough to spoon over yogurt or cheese. Stop when the jam looks shiny and slow, not stiff. If it looks firm in the boiling pan, it will likely cool too thick.

Fig jam texture guide comparing runny, just right, and too thick jam on spoons or toast.
Aim for a texture that clings to toast but still spoons easily over yogurt, brie, pancakes, or desserts.

How to Tell When Fig Jam Is Done

The tricky part is that jam can look loose while hot and much thicker after cooling. Look for several signs together rather than relying on one exact minute mark.

  • Shiny look: the liquid around the figs should look syrupy, not watery.
  • Soft fruit: the figs should be tender, slumped, and partly collapsed.
  • Slow bubbles: the bubbles become thicker and slower as water evaporates.
  • Spatula trail: a spoon or spatula should leave a short path through the jam before it closes.
  • Spoon mound: the jam should mound lightly on a spoon instead of running off like juice.
  • Cold plate test: a small spoonful on a chilled plate should move slowly when tilted.
  • Temperature cue: at sea level, a firmer jam set is often around 220°F / 104°C, but texture matters more than the thermometer reading.
  • Aroma: the jam should smell bright and honeyed, not burnt or overly caramelized.

Spatula Trail Test

Drag a spatula through the pan when the jam looks close. If the path opens briefly and then closes slowly, the texture is moving toward a soft set.

Spatula dragged through thick fig jam in a pan, leaving a short trail that slowly closes.
The spatula trail is a visual doneness cue: it should open briefly, then close slowly as the jam settles.

Cold Plate Test

Chill a small plate, add a spoonful of jam, and tilt it. The cooled jam should move slowly, which helps you avoid overcooking the hot batch.

Spoonful of fig jam on a tilted chilled plate during a cold plate doneness test.
The cold plate test shows the cooled texture, so it prevents overcooking a batch that still looks loose while hot.

Important: Stop slightly before the jam looks perfect in the pot. If it looks stiff while boiling, it may cool into something too thick or sticky. You can always simmer a loose batch a little longer, but it is much harder to undo a stiff, overcooked one.

Do You Need Pectin for Fig Jam?

No, you do not need commercial pectin for this style of fig jam. Figs, sugar, lemon juice, and evaporation can create a soft, spoonable jam on their own. The finished texture will usually be softer than a firm store-bought jelly, but that is exactly why it works so well as both a jam and a fig spread.

Do not chase a store-bought jelly wobble here. For a homemade spread, a softer set is often better because it spoons more easily over cheese, yogurt, toast, desserts, and savory dishes. A soft no-pectin set is not a failure; it is part of what makes the jar so useful.

No-pectin fig jam shown with fresh figs, sugar, lemon, water, and a spoonful of finished jam.
With enough simmering and lemon balance, no-pectin fig jam thickens naturally without needing a boxed setting mix.

If you want a very firm set, commercial pectin can help, but it changes the method. Boxed pectin and products like Sure-Jell often require specific sugar and liquid ratios, so follow the instructions for that product rather than adding it casually to this recipe.

Let the pan do the work: steady simmering, a wide surface, and a few spoon tests matter more than extra thickeners.

Dried Fig Jam Variation

Dried figs are not second-best; they simply make a different kind of jar. The flavor is deeper, darker, and more concentrated, closer to a thick fig spread than a bright fresh-fruit jam. This is the version to make when fresh figs are out of season, expensive, or hard to find.

Think of it as a pantry-friendly spread with a darker mood: less fresh summer fruit, more rich fig, caramel, and cheese-board depth.

Dried fig jam served on a spoon with dried figs, lemon, water, crackers, and cheese-board elements nearby.
Dried fig jam is darker and denser than fresh fig jam, which makes it especially good with crackers and cheese.

Dried Fig Jam Formula

  • Dried figs: 12–14 oz / 340–400 g, stems removed and chopped
  • Water: 2 cups / 480 ml, plus more if needed
  • Sugar: ½–1 cup / 100–200 g to start, plus more to taste
  • Lemon juice: 2 tbsp / 30 ml
  • Optional flavorings: orange zest, vanilla, balsamic vinegar, rosemary, thyme, or a pinch of salt

To make it, simmer the chopped dried figs with water until very soft, usually 20–40 minutes depending on how dry they are. Blend or mash the softened figs, then add sugar and lemon juice. Simmer again until thick and spoonable. Add more hot water if it becomes too dense before the figs fully soften, especially before adding more sugar.

Start with ½ cup / 100 g sugar for a less-sweet fig spread, or 1 cup / 200 g sugar for a sweeter jam. Add more only after tasting. Dried figs are already concentrated, so use up to 1½ cups / 300 g sugar only if you want a very sweet, glossy jam.

The dried fig version thickens quickly after blending, so keep it slightly looser than you want while it is hot. If it looks perfect in the pot, it may cool into a paste.

Low-Sugar, Honey, and No-Added-Sugar Options

Lower sugar changes more than sweetness. It changes set, cook time, and storage life. Figs are naturally sweet, so reducing sugar can work, but the batch will usually be softer, a little less glossy, and shorter-lived in the refrigerator.

Low-sugar fig jam

For a lower-sugar version, use 150–200 g sugar per 900 g figs instead of 300 g. Cook the jam a little longer and expect a softer, more fruit-spread-like texture. A lower-sugar batch may never pass the cold-plate test as firmly as a higher-sugar jam. If it is shiny, thick, and spoonable, it can still be done.

Low-sugar fig jam in a jar with lemon and a smaller amount of sugar nearby.
Lower-sugar fig jam often tastes fruitier, although the softer set makes fridge or freezer storage more important.

Store low-sugar batches in the refrigerator and use within 1–2 weeks for best quality, or freeze for longer storage.

Honey fig jam

Honey adds a floral sweetness that works beautifully with figs. Replace part of the sugar with honey rather than all of it for the best texture. For example, use 200 g sugar plus ¼ cup honey for 900 g figs. Honey-sweetened jam may be softer, darker, and more aromatic than the granulated-sugar version.

Honey being drizzled into glossy fig jam with fresh figs nearby.
Honey brings floral sweetness to fig jam, but it also softens the set and works best as a chilled variation.

Keep honey-sweetened batches refrigerated or frozen for the best texture and freshness.

No-added-sugar fig spread

If you are searching for no-sugar fig jam, think of this version as a no-added-sugar fig spread instead of a classic jam. Cook ripe figs with lemon juice and a splash of water until very soft and thick, then mash or blend. Refrigerate and use within about 5–7 days, or freeze for longer storage.

Storage note: Low-sugar, honey, and no-added-sugar versions are softer, shorter-life batches. Keep them refrigerated or frozen rather than treating them like pantry preserves.

Before reducing sugar further, read the storage and canning safety notes so you choose the right storage path.

Fig Jam Variations

Once you understand the base recipe, the flavor is easy to adjust. Start small with add-ins because figs are delicate and can be overwhelmed by strong spices, vinegar, or herbs.

The Best First Variations

  1. Lemon-orange: brighter and more fragrant for breakfast and desserts.
  2. Vanilla: softer, rounder, and more dessert-like.
  3. Balsamic: deeper and better for cheese, pork, chicken, and sandwiches.
  4. Rosemary or thyme: savory enough for boards, baked brie, and grilled cheese.
  5. Chili: just enough heat for cheese, flatbreads, and sandwiches.
Five fig jam variations in small bowls labeled citrus, vanilla, balsamic, herbs, and chili.
Use fig jam flavor variations sparingly: citrus brightens, vanilla rounds, balsamic deepens, herbs turn savory, and chili adds heat.
VariationWhat to AddWhere It Shines
LemonExtra lemon zest or a little extra lemon juiceToast, yogurt, scones, breakfast boards
OrangeOrange zest, or a mix of orange and lemonCroissants, cakes, desserts, cheese boards
VanillaVanilla bean or vanilla extractPastries, cakes, ice cream, cheesecake
Balsamic1–2 tbsp balsamic vinegar near the endBrie, goat cheese, blue cheese, pork, chicken, sandwiches
HoneyReplace part of the sugar with honeySoft floral jam, yogurt, toast, cheese
Brown sugarReplace part or all of the white sugar with light brown sugarA deeper caramel note, toast, baking, cheese boards
GingerFresh grated ginger or a pinch of ground gingerWinter breakfasts, cheese boards, roasted meats
Rosemary or thymeA small herb sprig while cooking, removed before jarringSavory boards, baked brie, grilled cheese
ChiliA small pinch of chili flakesCheese, sandwiches, flatbreads
StrawberryReplace part of the figs with strawberriesA fruitier Southern-style jam
Fig onion-style condimentOnions, vinegar, and savory cookingA separate condiment, better treated as its own recipe

For cheese boards, the best directions are balsamic, rosemary, thyme, honey, orange, brown sugar, and chili. For breakfast and desserts, vanilla, lemon, orange, ginger, and strawberry are especially good.

How to Store Fig Jam

Think of this as the kind of jam you keep in the fridge and actually use: spooned over breakfast, tucked beside cheese, or frozen in small jars for later. It is flexible, lower-stress, and less sugar-heavy than a shelf-stable canning preserve.

Fig jam storage guide showing a refrigerator jar, freezer container, and tested canning-only jar cue.
For this recipe, choose fridge or freezer storage; pantry jars need tested canning instructions, not casual adjustments.

Refrigerator storage

Cool the jam, transfer it to clean jars, and refrigerate. For best quality, use the main version within 2–3 weeks. Always use a clean spoon, keep the jar chilled, and discard it if you see mold, fermentation, off smells, or unusual bubbling.

Freezer storage

The jam freezes well. Spoon it into freezer-safe jars or containers, leaving headspace because it expands as it freezes. Freeze for up to 3 months for best quality. Thaw overnight in the refrigerator and stir before using.

Canning fig jam

For pantry jars, switch to a tested preservation recipe and follow it exactly. Canning safety depends on the exact fruit, sugar, acid, headspace, jar size, and processing time. Figs also need proper acidification for safe boiling-water canning.

Canning safety setup for fig jam with jars, lemon juice, jar lids, water-bath pot, and a tested recipe checklist.
Shelf-stable fig jam depends on tested acidity, headspace, jar size, and processing time, so do not guess with canning.

Canning safety: Do not can this version as written. Sterilized jars do not make an untested refrigerator jam shelf-stable.

For shelf-stable jars, use a tested canning recipe and follow its processing instructions exactly. The National Center for Home Food Preservation has a tested fig jam without pectin formula, and Oregon State University Extension explains why figs need added acid for safe preservation.

Do not use low-sugar, honey-sweetened, or no-added-sugar variations for room-temperature storage unless you are following a tested recipe designed for that exact style.

What to Eat With Fig Jam

This is where the jar earns its space in the fridge. A spoonful can rescue plain yogurt, make toast feel planned, or turn a last-minute cheese plate into something generous. The easiest rule: pair it with something creamy, salty, tangy, smoky, or crisp so the sweetness has contrast.

Fig jam served with yogurt, cheese and crackers, grilled cheese, pork, tart, and cookies.
After chilling, fig jam moves easily from breakfast to cheese boards, savory glazes, sandwiches, and simple desserts.
UseTexture to Aim ForFlavor Direction
Toast, yogurt, oatmealSoft and spoonableLemon, vanilla, honey
Brie or goat cheeseSlightly thicker spreadBalsamic, orange, rosemary
Sandwiches and grilled cheeseSmooth or lightly chunkyChili, balsamic, thyme
Cookies, cakes, tartsThicker jamVanilla, orange, brown sugar
Pork or chicken glazeLoosened with acid or pan juicesBalsamic, chili, thyme

For cheese-specific serving ideas, jump to fig jam with brie and cheese boards.

Breakfast ideas

At breakfast, use it where you would use berry jam, but expect a deeper, honeyed flavor.

  • Spread on toast, English muffins, biscuits, or croissants
  • Spoon over Greek yogurt or labneh
  • Swirl into oatmeal or overnight oats
  • Serve with pancakes, waffles, or French toast
  • Add to a bowl of granola, nuts, and fruit

If you like breakfast bowls, fig jam pairs naturally with nuts, oats, yogurt, and dried fruit. Spoon it into overnight oats, or serve it with a crunchy bowl of this homemade granola recipe.

It is also excellent with warm toast, biscuits, or English scones, especially when the jam is soft enough to spoon rather than slice.

Cheese and board ideas

On a cheese board, fig jam gives you the sweet-tart contrast that makes salty, creamy, sharp, and funky cheeses taste better. Brie loves lemon, orange, balsamic, or rosemary. Goat cheese works beautifully with honey or vanilla. Blue cheese needs a smaller spoonful and a stronger direction like balsamic, orange, or chili.

  • Brie or baked brie
  • Goat cheese or whipped goat cheese
  • Blue cheese or Gorgonzola
  • Camembert
  • Manchego
  • Cream cheese
  • Sharp cheddar
  • Charcuterie boards with crackers, nuts, fruit, and cured meats
Cheese board with fig jam, brie, goat cheese, blue cheese, cheddar, crackers, nuts, figs, and sliced fruit.
On a cheese board, fig jam bridges creamy, salty, sharp, and tangy cheeses with one sweet-tart spoonful.

For party boards, fig jam fits naturally into a larger spread like this charcuterie board guide.

Savory uses

In savory food, use fig jam like a sweet-tart glaze or condiment, especially with salty, smoky, roasted, or sharp flavors.

Fig jam grilled cheese: Spread a thin layer inside the sandwich so the jam melts into the salty cheese instead of overwhelming it.

Grilled cheese sandwich with melted cheese and a visible layer of fig jam, served with a jar and fresh figs.
Inside grilled cheese, a thin layer of fig jam melts into the salty cheese and adds sweet-tart contrast.
  • Use in turkey, ham, or chicken sandwiches
  • Brush over pork or chicken as a glaze
  • Spoon onto pizza or flatbread with cheese and herbs
  • Serve with roasted vegetables
  • Stir into a pan sauce with vinegar or mustard

For meat, loosen the jam with lemon juice, vinegar, or pan juices and brush it over something simple like pork tenderloin in oven.

Pork tenderloin brushed with glossy fig jam glaze beside lemon, herbs, and a small bowl of jam.
For a quick fig jam glaze, loosen the jam with lemon, vinegar, or pan juices before brushing it over pork or chicken.

Dessert uses

For desserts, choose a thicker batch or simmer the jam a little longer so it holds its place in cookies, cakes, and tarts.

Fig jam used in a tart slice, thumbprint cookies, cream topping, and a spoonful of dessert.
A thicker fig jam holds its shape in cookies, tarts, and cream desserts while adding a glossy fruit center.
  • Fill thumbprint cookies
  • Use in fig bars or Fig Newton-style cookies
  • Layer into cakes
  • Spoon over cheesecake
  • Serve with vanilla ice cream
  • Use as a tart or galette filling
  • Swirl into whipped cream or mascarpone

For tart-style desserts, use a thicker batch the way you would use a glossy fruit layer in an apple tart recipe.

Fig Jam With Brie, Goat Cheese, and Cheese Boards

With cheese, the sweetness and texture do the heavy lifting. The jam brings fruit, acidity, and softness, while the cheese brings salt, fat, and creaminess. The combination tastes generous without needing much work.

For an easy baked brie-style appetizer, use about 2–3 tablespoons per 8 oz brie wheel. Place the brie in a small oven-safe dish, warm it until soft but not completely melted and leaking, then spoon the jam over the top. Add toasted walnuts, pecans, or pistachios. Finish with honey, thyme, rosemary, orange zest, or a few drops of balsamic vinegar. Serve with crackers, baguette slices, apple slices, or pear wedges.

Warm brie topped with glossy fig jam, nuts, crackers, and fresh figs.
Fig jam with brie works because sweet fruit, lemon brightness, creamy cheese, and crunchy nuts balance one another.

If you are serving the brie as part of a drinks-and-snacks spread, a bright French 75 works well because lemon and bubbles cut through creamy cheese and sweet jam.

Add nuts after warming if you want them to stay crisp. A balsamic variation is especially good with stronger cheeses because the vinegar keeps the sweetness from becoming heavy.

Goat cheese is especially good with a spoonful of jam, cracked pepper, toasted nuts, and a drizzle of olive oil or honey. Blue cheese is stronger, so use a smaller spoonful and choose a sharper variation like balsamic, orange, or chili. Sharp cheddar and Manchego work best with a thicker batch, crackers, and crisp fruit.

Want a savory path instead? Use the fig jam glaze idea for pork or chicken.

Fig Jam Troubleshooting

Most jam problems look dramatic while the pot is hot. Usually, they are texture problems — and texture problems can often be fixed before the jar cools. Use this table before adding thickeners or throwing anything away.

Fig jam troubleshooting guide with examples of runny, too thick, too sweet, flat, scorched, and loose-set jam.
Troubleshooting fig jam is easier once you know whether the problem is moisture, heat, sweetness, acid, or cook time.

If you are unsure whether the batch is actually done, compare it with the doneness tests before making a fix.

Common Problems and Fixes

ProblemLikely CauseFix NowNext Time
RunnyToo much water, undercooking, very juicy figs, or low sugarSimmer longer in a wide pan, stirring oftenStart with less water, cook to the doneness tests, and avoid rushing
Too thickOvercooking or too much evaporationStir in a spoonful of hot water or lemon juice until loosenedStop cooking when the jam is shiny and spoonable, not stiff
Too sweetVery ripe figs or too much sugarAdd lemon juice a teaspoon at a timeChoose the lower end of the sugar range
Flat flavorNot enough acid or saltAdd lemon juice and a tiny pinch of saltBuild in zest, lemon juice, or a small balsamic finish
ScorchedHeat too high, pan too thin, or not enough stirringDo not scrape burnt bits into the jam; move unburnt jam to a clean potKeep the heat lower, use a heavier pan, and stir more often
Loose setNo pectin, low sugar, or not enough reductionTreat it as fig spread or simmer longerCheck with the cold plate test or thermometer cue
Noticeable seedsFigs naturally have many tiny seedsBlend the jam smootherChoose a smoother fig spread texture from the start
Dried fig version too denseDried figs absorbed too much liquid or cooked down too farBlend in hot water a spoonful at a timeSimmer figs until fully soft before reducing hard

Runny Fig Jam Fix

A loose batch usually needs more evaporation before it needs anything else, so return it to a wide pan and simmer gently.

Runny fig jam simmering again in a wide pan to thicken.
Runny fig jam usually needs patience, not cornstarch; simmer it in a wide pan until the extra moisture leaves.

Too-Thick Fig Jam Fix

A stiff batch can often be saved while warm if you add liquid slowly and stop as soon as the jam relaxes.

Thick fig jam being loosened with a small amount of liquid from a spoon.
If the jam becomes too thick, loosen it while warm with a small splash of hot water or lemon juice.

About cornstarch: Cornstarch can thicken many fruit sauces, but it is not the best fix for classic fig jam and should not be used in anything you plan to can. If the jam is runny, simmering longer is usually the better solution.

FAQs About Fig Jam

Do figs need to be peeled before making jam?

No. The skins are edible and soften as the fruit cooks. Remove the stems and any damaged spots, but leave the skins on for better texture, color, and flavor.

What kind of figs are best for fig jam?

Use ripe, flavorful figs. Black Mission, Brown Turkey, Kadota, Adriatic, and other edible varieties can all work. Ripeness matters more than the exact variety: the fruit should be sweet and soft, not hard, dry, sour, or spoiled.

Fresh figs or dried figs — which makes better jam?

Fresh figs make a brighter, more classic batch. Dried figs make a darker, denser spread that is available year-round and excellent with cheese. If fresh figs are in season, use them. If not, dried figs are a very good option.

Can green figs be used for fig jam?

Ripe green-skinned figs can be used. Truly unripe figs are different and usually need a separate green fig preserve method with soaking or boiling steps to reduce bitterness and firmness. If the figs are hard, dry, and not sweet yet, do not treat them like ripe figs in this quick jam.

Why is lemon juice used in fig jam?

Lemon juice balances the natural sweetness of figs, brightens the flavor, and helps the mixture thicken. It also matters in canning safety, although shelf-stable canning requires a tested recipe rather than casual adjustments.

Does fig jam need pectin?

No, not for a soft homemade version. This recipe thickens through sugar, lemon juice, and evaporation. Commercial pectin gives a firmer set, but it requires different ratios and instructions.

Why is my fig jam runny?

It may need more cooking time. Runny jam usually comes from too much water, very juicy figs, low sugar, a narrow pot, or stopping before enough moisture has evaporated. Simmer it longer in a wide pan and test again.

How long does homemade fig jam last?

For the main refrigerator version, use it within 2–3 weeks for best quality. Low-sugar batches are best within 1–2 weeks, and no-added-sugar spread is best within about 5–7 days. You can also freeze it for about 3 months. Room-temperature jars require a tested preservation method and proper processing.

Is this fig jam recipe safe for canning?

The version here is meant for refrigerator and freezer storage. For shelf-stable canning, use a tested canning formula and processing time from a trusted source. Sterilized jars alone do not make refrigerator jam safe for room-temperature storage. Do not can low-sugar, honey, or no-added-sugar versions unless the recipe is specifically tested for that method.

Can frozen figs be used for jam?

Frozen figs work well, but they usually bring extra liquid. Thaw the fruit first if possible and include the juices unless they seem excessive. The batch may need a longer simmer to thicken.

Can I double this recipe?

Yes, but use a very wide pan and expect a longer cook time. Jam thickens through evaporation, so one large deep pot can take much longer and may cook unevenly. For the best texture control, two smaller batches are usually easier than one oversized batch.

Brown sugar in fig jam — does it work?

Yes. You can replace part or all of the white sugar with light brown sugar for a deeper, warmer, slightly caramel-like flavor. The finished jar will taste less bright, so lemon juice becomes even more important.

What cheese goes best with fig jam?

Brie, goat cheese, blue cheese, Camembert, Manchego, cream cheese, sharp cheddar, and Gorgonzola all pair well with it. Use a balsamic or herb variation for a more savory board.

Final Tips Before You Make It

  • Do not peel the figs; the skins soften during cooking.
  • Start with less water and add more only if the pot looks dry.
  • Cook uncovered so moisture can evaporate.
  • Use a wide pan so the jam reduces efficiently.
  • Stop cooking before the jam looks stiff; it thickens as it cools.

Once the figs soften and the kitchen smells warm and lemony, the rest is patience: stir, test, stop early, and let the jar finish thickening as it cools.

Fig Jam Recipe

A soft-set fresh fig jam made without commercial pectin. It cooks down into a shiny, fruit-forward spread for toast, yogurt, cheese boards, baked brie, desserts, sandwiches, and savory glazes. Keep it refrigerated or frozen unless you switch to a tested canning recipe.

YieldAbout 3 cups / 720 ml, or three 8 oz jars
Prep Time15 minutes
Cook Time25–45 minutes
Total Time40–60 minutes, plus optional resting and cooling
Saveable fig jam recipe card with no pectin, 2 pounds figs, 300 grams sugar, 60 milliliters lemon, cook time, yield, and fridge or freezer storage.
Keep this no-pectin fig jam card handy for the core ratio, cook-time window, yield, and fridge-or-freezer reminder.

Ingredients

  • Ripe fresh figs: 2 lb / 900 g, stems removed, chopped or quartered
  • Granulated sugar: 1½ cups / 300 g
  • Fresh lemon juice: ¼ cup / 60 ml, plus more to taste
  • Water: ¼–½ cup / 60–120 ml, as needed
  • Fine salt: ⅛ tsp, optional
  • Lemon or orange zest: 1 tsp finely grated, optional
  • Vanilla: 1 tsp vanilla extract or ½ vanilla bean, optional
  • Balsamic vinegar: 1–2 tbsp, optional for a cheese-board variation

Instructions

  1. Prep the figs. Rinse gently, pat dry, remove stems, and chop or quarter the figs. Do not peel them; fig skins soften during cooking.
  2. Combine the ingredients. Add figs, sugar, lemon juice, ¼ cup / 60 ml water, and salt if using to a wide heavy-bottomed pan. Stir well. Let sit for 15–30 minutes if you have time.
  3. Start cooking. Set the pan over medium heat and stir until the sugar dissolves and the figs begin to release juice. Add the remaining water only if the pot looks dry or the figs start sticking before they soften.
  4. Simmer uncovered. Reduce the heat to maintain a steady simmer. Cook uncovered, stirring often, until the figs soften, slump, and begin to collapse, about 25–45 minutes.
  5. Mash or blend. Mash lightly for fig preserves-style texture with visible pieces. Mash more for rustic jam. For a smoother fig spread, pulse briefly with an immersion blender.
  6. Cook to thickness. Continue simmering until the jam looks shiny, mounds softly on a spoon, and moves slowly on a chilled plate. At sea level, a thermometer may read around 220°F / 104°C for a firmer set, but texture matters more than temperature alone.
  7. Adjust flavor. Add more lemon juice if the jam tastes too sweet or flat. Stir in vanilla, zest, or balsamic vinegar near the end if using.
  8. Jar and cool. Spoon into clean jars. Cool, then refrigerate. The jam will thicken more as it cools.

Dried Fig Variation

Use 12–14 oz / 340–400 g dried figs, 2 cups / 480 ml water, ½–1 cup / 100–200 g sugar to start, and 2 tbsp / 30 ml lemon juice. Simmer the chopped dried figs with water until very soft, 20–40 minutes. Mash or blend, add sugar and lemon, then simmer until thick and spoonable. Add more sugar only after tasting. Keep the jam slightly loose while hot because dried fig jam firms quickly as it cools.

Small-Batch Version

Use 1 lb / 450 g fresh figs, ¾ cup / 150 g sugar, 2 tbsp / 30 ml lemon juice, and 2–4 tbsp / 30–60 ml water. Cook time is usually shorter, about 20–30 minutes.

Sugar Notes

For a lower-sugar version, use 150–200 g sugar per 900 g fresh figs and expect a softer set; refrigerate and use within 1–2 weeks. For no-added-sugar fig spread, cook ripe figs with lemon juice and a splash of water until thick, then refrigerate and use within about 5–7 days or freeze.

Storage and Canning

Keep this batch refrigerated and use within 2–3 weeks for best quality, or freeze for up to 3 months. Do not can this version as written. For shelf-stable jars, switch to a tested canning formula.

Once the jars are cool, keep one where you can reach it easily. This is the spoonful that turns plain toast, cheese, or a quick dessert into something finished.

Open jar of homemade fig jam with a spoon, toast with brie, fresh halved figs, lemon, and a linen cloth.
Once cooled, homemade fig jam becomes the jar you reach for at breakfast, with cheese, or when dessert needs fruit.

Back to top

Posted on Leave a comment

Banana Bread with Applesauce Recipe

Sliced banana bread with applesauce on parchment, showing a soft set crumb with ripe bananas and applesauce nearby.

This banana bread with applesauce recipe is for the moment when the bananas on the counter are almost too soft for the fruit bowl but perfect for baking. The loaf comes out moist, sliceable, and a little lighter than classic banana bread, while still holding together after it cools.

The texture comes down to balance. Applesauce is wonderful in banana bread because it adds moisture and lets you use less fat, but it also brings water into the batter. With the wrong ratio, the top can look beautifully baked while the center stays heavy, damp, or gummy.

The goal is a loaf that smells like ripe bananas and cinnamon, slices without dragging, and feels plush rather than damp when you pick up a piece.

Quick Answer: Banana Bread with Applesauce

For one moist loaf, the sweet spot is 1½ cups mashed ripe banana plus ½ cup unsweetened applesauce, with 3 tablespoons oil or melted butter to keep each slice from feeling rubbery or fragile. Bake it in a 9×5-inch loaf pan at 350°F / 175°C until the middle bakes through and the crumb looks even, not shiny or wet.

This is not a fully no-oil loaf by default because applesauce replaces moisture better than it replaces tenderness. The small amount of fat keeps the crumb softer, cleaner, and easier to slice neatly.

This version is built around the texture problem applesauce banana bread often has: plenty of moisture, but not enough structure to slice cleanly. That is why the banana and applesauce are measured, a little fat stays in the batter, and the loaf gets time to bake through and cool before slicing.

At a glance: For one 9×5-inch loaf, use 1½ cups mashed ripe banana, ½ cup unsweetened applesauce, 2 cups flour, 2 eggs, and 3 tablespoons oil or melted butter. Bake at 350°F / 175°C for 55–65 minutes, until the center reaches about 200–205°F / 93–96°C.

For the first bake, make the recipe as written before reducing the oil, cutting the sugar further, or swapping in more whole wheat flour. Once you know how the batter should look and how the cooled loaf should slice, the variations become much easier to control.

Quick answer ratio board for banana bread with applesauce showing mashed banana, applesauce, oil or butter, bake temperature, and time.
Make the first loaf with the full ratio before tweaking. Once you know this baseline, lower-fat and variation decisions become much easier.

What This Loaf Tastes Like

This is a banana-forward loaf first, with gentle apple sweetness in the background. It does not taste like apple cake. The applesauce mostly shows up in the texture: an even crumb, a little extra moisture, and slices that still taste pleasant the next day.

Cinnamon, vanilla, and brown sugar make the banana flavor warmer. If you add walnuts or pecans, the loaf becomes more classic and bakery-style. If you skip them, it stays simple, easy to slice, and lunchbox-friendly.

It should taste like a cozy banana loaf with a softer crumb, not like applesauce trying to take over. It is still a quick bread, so expect a soft, sturdy crumb rather than an airy cake texture.

Close-up of banana bread slices showing an even, moist crumb with no gummy center or shiny wet line.
Look for a crumb that is evenly baked from edge to middle. That is the difference between fruit-rich banana bread and underdone banana bread.

Why You’ll Love This Recipe

  • Moist without the gummy middle: the banana, applesauce, flour, fat, and bake time are balanced so the loaf sets properly.
  • Still tastes like real banana bread: applesauce lightens the loaf, but a small amount of oil or butter keeps each slice from feeling rubbery or fragile.
  • Uses the bananas you were about to lose: heavily speckled bananas give the deepest flavor and natural sweetness.
  • Easy to adjust after the first bake: make it nuttier, less sweet, lower fat, dairy-free, vegan, or muffin-style without starting from scratch.

Why Applesauce Works in Banana Bread

Banana bread already depends on fruit puree, so applesauce fits naturally into the batter. It adds gentle sweetness and helps the loaf stay fresh-tasting for longer.

The catch is that applesauce is not the same as butter or oil. Fat helps coat the flour, which gives the crumb a softer bite. Applesauce brings extra water and fruit solids, which is why the batter needs the right balance. When the batter gets too wet, quick breads can turn dense, chewy, or gummy.

For that reason, this recipe keeps a small amount of oil or melted butter in the batter. It still feels lighter than a classic loaf, but it slices more cleanly once cooled.

You see the same idea in a good applesauce cake, where the applesauce keeps the crumb moist and even without making the cake feel wet.

Ingredients for Banana Bread with Applesauce

The ingredients are familiar, but measuring them makes the loaf much more reliable. A little too much banana or applesauce can make the crumb feel compressed instead of tender.

Labeled ingredients for banana bread with applesauce, including ripe bananas, applesauce, eggs, flour, brown sugar, oil, spices, and nuts.
The ingredient list is simple, but the recipe depends on balance: ripe bananas for flavor, applesauce for moisture, and a little fat for tenderness.

Very Ripe Bananas

Use bananas that are heavily speckled or mostly brown on the outside. They mash easily, taste sweeter, and give the loaf its deep banana flavor. If the bananas are still too yellow, use the ripening shortcuts before you start.

Banana ripeness guide showing bananas from too firm to heavily speckled and mostly brown for banana bread.
Heavily speckled bananas give banana bread the deepest flavor. However, measuring the mashed fruit still keeps the applesauce loaf from getting too wet.

If a banana looks too far gone for eating out of hand, it may be exactly right for this batter. For this recipe, measure 1½ cups mashed banana, which is usually about 3 large bananas or 4 smaller ones. Too little banana gives a bland loaf, while too much can make the middle heavy, especially with applesauce in the batter. Using freezer bananas? Drain them before measuring.

Mashed banana measured to 1½ cups in a glass measuring cup with ripe bananas and a fork nearby.
Banana size changes from bunch to bunch, so measure after mashing. This one step makes banana bread with applesauce much more reliable.

Frozen bananas also work. Thaw them first, drain off excess liquid, then mash and measure. They can release a lot of moisture, so measuring is even more important if you are using bananas from the freezer.

Frozen banana process guide showing thawed bananas, drained liquid, mashed banana, and 1½ cups measured for banana bread.
Frozen bananas work well, but they release extra liquid. Drain first, then mash and measure so the loaf stays soft instead of gummy.

How to Ripen Bananas Faster

If your bananas are yellow but not soft yet, place them in a paper bag and leave them at room temperature until the peels become heavily speckled. For a same-day option, bake unpeeled bananas on a lined baking sheet at 300°F / 150°C until the peels darken and the fruit softens, then cool before mashing.

This shortcut helps with texture, but it does not create the same deep flavor as bananas that ripen naturally over several days. Use it when you need banana bread today, not when you are chasing the strongest banana flavor.

If the bananas release liquid as they cool, leave that liquid behind before measuring so you do not add extra water to the batter.

Two-method guide for ripening bananas faster, showing the paper bag method and oven-ripened bananas at 300°F.
A paper bag is better when you have time; meanwhile, the oven shortcut helps when banana bread needs to happen today.

Unsweetened Applesauce

Plain unsweetened applesauce is best because it adds moisture without making the loaf too sweet. Homemade or store-bought both work, as long as the applesauce is smooth enough to blend evenly into the batter.

Sweetened applesauce is fine, but reduce the brown sugar slightly if you prefer a less sweet loaf. Cinnamon applesauce works too, especially if you want a warmer, spiced flavor.

A Small Amount of Oil or Melted Butter

The few tablespoons of fat are not there by accident. You can make a no-oil version, but the texture is usually more fragile. Three tablespoons of neutral oil or melted butter give the crumb a better bite while keeping the recipe lighter than a traditional butter-heavy loaf.

Use neutral oil when you want the banana flavor to stay clean and simple, with a softer next-day slice. Use melted butter if you want a richer, more classic banana bread flavor and a slightly firmer bite once the loaf cools. Trying to reduce more fat? Compare the applesauce-oil options later in the post.

Oil versus melted butter comparison for banana bread with applesauce, showing texture and flavor differences.
Oil keeps the banana flavor cleaner and softer the next day, while melted butter gives the loaf a richer, more classic banana bread taste.

Flour, Eggs, Sugar, and Leavening

All-purpose flour gives the most reliable loaf. You can replace up to half of it with whole wheat flour for a heartier flavor, but using all whole wheat flour will make the bread denser and may need a little extra moisture.

Whole wheat flour swap guide showing all-purpose flour, whole wheat flour, and a banana bread slice.
A partial whole wheat swap adds heartier flavor without taking over the loaf. Start with half so the crumb still stays tender.

If you want a banana loaf built around oats instead of regular flour, try this healthy banana bread with oat flour for a more oat-forward version.

Brown sugar is doing more than sweetening here. It brings a light caramel note that makes the banana taste rounder, especially when the applesauce is plain and unsweetened. Eggs help the batter set, and a mix of baking soda plus a little baking powder helps lift the fruit-heavy batter.

Walnuts, Pecans, or Chocolate Chips

Walnuts and pecans turn this into banana nut bread with applesauce. Use ½ cup for a lighter crunch or up to ¾ cup for a more classic banana nut loaf. Chocolate chips also work, but they make the bread sweeter and more dessert-like.

Mix-in chooser for banana bread with applesauce showing plain, walnuts, pecans, and chocolate chips.
Mix-ins change the personality of the loaf. Still, keep them under 1 cup so the banana-applesauce batter stays balanced and sliceable.

Equipment for This Loaf

You do not need a mixer for this loaf. In fact, mixing by hand is better because it helps prevent a rubbery crumb. A few small banana lumps are fine; beaten batter is not what you want here.

  • 9×5-inch loaf pan
  • Large mixing bowl
  • Medium bowl for dry ingredients
  • Fork or potato masher for the bananas
  • Whisk
  • Flexible spatula
  • Parchment paper, optional
  • Cooling rack
  • Digital thermometer, optional

The important part is not special equipment. It is gentle mixing, the right pan, and enough cooling time before slicing. A digital thermometer removes the guesswork from fruit-heavy loaves, where the top can brown before the center is ready.

Equipment for banana bread with applesauce, including loaf pan, bowls, fork, whisk, spatula, parchment, rack, and thermometer.
A bowl, whisk, spatula, and loaf pan are enough. The thermometer is the only optional tool that can save an uncertain center.

What Kind of Applesauce Should You Use?

The applesauce you use changes more than sweetness. It can change how loose the batter feels and how quickly the middle bakes through. If you are trying to avoid a damp center, this is one of the easiest places to stay in control.

Applesauce chooser board with smooth unsweetened, sweetened, cinnamon, chunky, and watery applesauce options.
Smooth unsweetened applesauce is the safest choice. If your applesauce is chunky or watery, adjust it before mixing so the crumb bakes evenly.
Applesauce Type Works? What to Adjust
Unsweetened smooth applesauce Best choice No change needed
Sweetened applesauce Yes Reduce the brown sugar slightly if you want a less sweet loaf
Cinnamon applesauce Yes Reduce or skip the extra cinnamon if needed
Homemade applesauce Yes Use smooth applesauce that is not watery
Chunky applesauce Sometimes Mash or blend first for a more even crumb
Very watery applesauce Risky Drain slightly or use 1–2 tablespoons less

If your applesauce looks loose and watery, hold back a little instead of adding extra. The batter may seem thick at first, but extra water shows up later in the baked crumb. The finished batter should mound softly in the pan, not pour like pancake batter.

Best Banana-to-Applesauce Ratio

The best starting ratio for one standard loaf is 1½ cups mashed banana to ½ cup applesauce. That gives enough banana flavor and enough applesauce moisture without flooding the batter.

Applesauce is not the problem. The problem is stacking too much banana and applesauce without giving the loaf enough flour, eggs, bake time, and cooling time.

Loaf Style Mashed Banana Applesauce Result
Balanced classic 1½ cups ½ cup Moist and sliceable
More banana-forward 1⅔ cups ⅓ cup Stronger banana flavor with slightly less added moisture
Lower-fat style 1½ cups ½ cup Lighter and more delicate, especially if you reduce the oil
Risky wet loaf 2 cups or more ½ cup or more More likely to bake up dense or gummy in the center

When the balance is right, the loaf tastes fruit-rich without feeling heavy. The first slice should smell warm, hold together, and look set rather than damp or compressed.

Banana and applesauce ratio guide showing balanced, banana-forward, lower-fat, and risky wet loaf options.
The banana-to-applesauce ratio controls moisture before the loaf ever reaches the oven. Too much fruit can make the crumb slow to set.

That balance is what keeps the loaf tasting like real banana bread, not like a lighter version where the texture feels like a compromise.

Best Pan Size and Pan Type for Banana Bread with Applesauce

Pan size changes how deep the batter sits, which changes how quickly the center sets. For this fruit-rich batter, a 9×5-inch loaf pan is the safest default.

Pan What Changes How to Bake It
9×5-inch loaf pan Best default; bakes most evenly 55–65 minutes at 350°F / 175°C
8½x4½-inch loaf pan Taller loaf; center takes longer Start checking around 55 minutes, but expect extra time
8×5-inch loaf pan Works, but the center can be slower Use a thermometer if possible and avoid pulling early
Dark metal loaf pan Browns faster on the outside Check early, tent if needed, and reduce the oven by 25°F / about 15°C if it over-browns
Glass or ceramic loaf pan Can bake more slowly through the center Expect extra time and use a thermometer; tent if the top browns before the middle is done
Mini loaf pans Smaller loaves bake faster Start checking around 30–35 minutes
Muffin tin Fastest bake with more edges 20–25 minutes at 350°F, or 18–20 minutes at 375°F
Pan size and pan type guide for banana bread with applesauce, including loaf pans, dark metal, glass, mini loaves, and muffin tin.
Pan size and material change how the middle bakes. Because this batter is fruit-rich, the safest default is a 9×5-inch loaf pan.

If the top browns before the middle is done, tent the loaf loosely with foil and continue baking. This is especially useful with smaller loaf pans, dark metal pans, glass pans, ceramic pans, or very ripe bananas.

Dark metal versus glass or ceramic loaf pan comparison for banana bread, with browning and center-baking cues.
Dark metal browns faster, while glass and ceramic can bake more slowly through the center. As a result, doneness cues matter more than color alone.

How to Make Banana Bread with Applesauce

Once the fruit and applesauce are measured, the method is simple. The main thing is to mix gently and give the center enough time to bake through. If you are unsure near the end, use the doneness guide instead of judging by color alone.

Step-by-step process for banana bread with applesauce, showing pan prep, mashed banana, wet ingredients, dry ingredients, folding, baking, and cooling.
The method is simple, but the order helps: measure the fruit, mix wet and dry separately, fold gently, then let the loaf cool before slicing.

1. Prepare the Pan

Heat the oven to 350°F / 175°C. Grease a 9×5-inch loaf pan and line it with parchment if you want to lift the loaf out easily.

2. Mash and Measure the Bananas

Mash the ripe bananas with a fork, then measure 1½ cups. A few small banana lumps are fine. They make the loaf feel homemade and keep the crumb from becoming too uniform.

3. Mix the Wet Ingredients

Whisk the mashed banana, applesauce, eggs, brown sugar, oil or melted butter, and vanilla until combined. The mixture will look loose and glossy.

4. Mix the Dry Ingredients Separately

In another bowl, whisk the flour, baking soda, baking powder, cinnamon, and salt. This helps the leavening spread evenly through the thick fruit-based batter.

5. Fold Gently

Add the dry ingredients to the wet ingredients and fold with a spatula until no dry flour remains. A mixer is not needed here; overmixing is one of the easiest ways to make the crumb rubbery.

The batter should be thick enough to mound on the spatula. If it looks loose before it goes into the oven, the finished crumb is more likely to feel heavy.

Batter texture guide showing banana bread batter mounding on a spatula compared with batter that is too loose.
The batter should mound instead of pour. If it spreads too easily, the baked banana bread is more likely to feel compressed.

6. Add Nuts if Using

Fold in walnuts or pecans at the end. For a prettier top, save a small handful and scatter them over the batter before baking.

7. Bake Until the Center Is Set

Spread the batter into the prepared pan and bake for 55 to 65 minutes. A browned top is only part of the story; this fruit-heavy batter still needs time for the center to finish baking.

Near the end, the loaf should smell deeply banana-rich, and the center should look set rather than glossy. The bread is done when a toothpick inserted into the center comes out with moist crumbs but no wet batter. For the most reliable check, use a digital thermometer; the center should register about 200°F to 205°F / 93°C to 96°C. King Arthur Baking also recommends this internal-temperature range for banana bread doneness in its banana bread doneness guide.

Doneness guide for banana bread with applesauce showing toothpick crumbs, a thermometer reading, and a set center.
A few moist crumbs are fine, but wet batter is not. For extra confidence, check for 200–205°F in the center before cooling the loaf.

8. Cool Before Slicing

Let the loaf cool in the pan for 10 to 15 minutes, then move it to a rack. Banana bread continues to set as it cools, especially when applesauce is in the batter.

Cutting too early can make a properly baked loaf look underdone, because the crumb has not had time to settle. Waiting is annoying, but it is one of the easiest ways to get clean slices.

Once cooled, the slices should look even and plush, with tiny banana flecks through the crumb instead of a shiny wet line in the center.

Cooling timeline for banana bread showing cooling in the pan, cooling on a rack, and clean slices after resting.
Cooling is part of the recipe, not an afterthought. Once the crumb settles, the slices cut cleaner and hold their shape.

Before you use the recipe card, remember the three texture cues that matter most: measured banana, batter that mounds instead of pours, and a fully cooled loaf before the first cut.

Clean slices of banana bread with applesauce showing an even crumb and no wet line.
This is the texture to look for after cooling: even crumb, clean edges, and slices that hold together without crumbling.

Banana Bread with Applesauce Recipe

This fruit-rich loaf is lighter than classic banana bread but still soft, fragrant, and sturdy enough to slice cleanly once cooled.

Yield1 standard loaf
Prep Time15 minutes
Cook Time55–65 minutes
Total TimeAbout 1 hour 20 minutes, plus 45–60 minutes cooling

Pan: 9×5-inch loaf pan
Oven: 350°F / 175°C

Ingredients

  • 1½ cups mashed very ripe banana, about 340 g
  • ½ cup unsweetened applesauce, about 120 g
  • 2 large eggs
  • ½ cup packed light brown sugar, about 105 g
  • 3 tablespoons neutral oil, about 45 ml, or 3 tablespoons melted butter, about 42 g
  • 2 teaspoons vanilla extract
  • 2 cups all-purpose flour, 240 g
  • 1 teaspoon baking soda
  • ½ teaspoon baking powder
  • 1 teaspoon ground cinnamon
  • ½ teaspoon fine salt
  • ½ cup chopped walnuts or pecans, optional, about 55–65 g

Method

  1. Heat the oven to 350°F / 175°C. Grease a 9×5-inch loaf pan and line it with parchment if you want easier lifting.
  2. Mash the bananas, then measure 1½ cups. Banana size varies so much that measuring gives you a more reliable loaf than counting bananas alone.
  3. In a large bowl, whisk the mashed banana, applesauce, eggs, brown sugar, oil or melted butter, and vanilla.
  4. In a separate bowl, whisk the flour, baking soda, baking powder, cinnamon, and salt.
  5. Add the dry ingredients to the wet ingredients and fold gently until no dry flour remains. The batter should be thick enough to mound on the spatula, not runny.
  6. Fold in walnuts or pecans if using.
  7. Spread the batter into the prepared pan. Bake for 55–65 minutes, or until a toothpick inserted in the center comes out with moist crumbs but no wet batter. For the most reliable check, the center should read about 200–205°F / 93–96°C.
  8. If the top browns before the center is done, tent the loaf loosely with foil and keep baking.
  9. Cool in the pan for 10–15 minutes, then move to a rack. Let the loaf cool for at least 45–60 minutes before slicing so the crumb can finish setting.

Notes

  • For your first loaf, use the full 3 tablespoons oil or melted butter. Once you know the texture, you can reduce it to 2 tablespoons for a lighter but more delicate loaf.
  • Use up to ¾ cup nuts, about 85 g, if you want a more classic banana nut loaf.
  • For a less sweet loaf, reduce the brown sugar to ⅓ cup if your bananas are very ripe.
  • If using frozen bananas, thaw and drain off excess liquid before measuring.
  • For the cleanest slices, cool the loaf fully before cutting.

After the first loaf, the best tweak is personal: richer with butter, cleaner with oil, crunchier with walnuts, softer as muffins, or lighter with a little less fat. The sections below help you adjust without losing the clean-slicing texture.

How to Avoid Gummy Banana Bread with Applesauce

A good slice should hold together, with an even crumb and a set center. If your last loaf looked beautiful on top but cut into a compressed middle, you probably do not need a completely different recipe. You usually need better measurement, a little more bake time, and enough cooling before cutting.

Most gummy loaves come from a combination of too much wet fruit, heavy mixing, not enough time in the oven, or slicing before the crumb has set. The good news is that it usually does not mean you are bad at banana bread; it comes down to one of a few fixable choices.

Troubleshooting board for gummy banana bread, showing fixes for gummy middle, rubbery crumb, fast browning, dense loaf, wet slices, and dry edges.
Most gummy banana bread problems come from moisture, mixing, bake time, or cooling. Once you know the cause, the fix is usually simple.

Texture Problems and Fixes

Problem Likely Cause How to Fix It
Gummy middle Too much banana or applesauce, or the loaf was underbaked Measure the banana, keep applesauce to ½ cup, and bake until the middle no longer looks shiny or wet
Rubbery texture The batter was overmixed Fold gently by hand and stop when the flour disappears
Top browns too fast The outside is browning before the center finishes Tent loosely with foil and continue baking
Dense loaf Too much wet ingredient or weak leavening Use fresh baking soda and baking powder, and follow the banana-to-applesauce ratio
Wet-looking slices The loaf was sliced too hot Cool at least 45 minutes before slicing
Dry edges Dark pan, overbaking, or too little wet ingredient Check earlier, use parchment, and try a lighter pan next time if the edges keep drying out
Side-by-side comparison of gummy compressed banana bread crumb and properly set sliceable crumb.
A compressed crumb is a clue, not a disaster. Next time, check the fruit amount, bake time, and cooling window.

Wet Center vs Fully Baked Crumb

A clean toothpick is not always the best goal for banana bread. A few soft crumbs on the toothpick are fine. Wet batter, shiny streaks, or a sunken center mean the loaf needs more time.

Banana bread center guide showing wet batter, shiny streaks, and a fully set crumb.
Moist crumbs are normal in banana bread, but shiny streaks or wet batter mean the center still needs more time.

What to Do If the Top Browns Too Fast

If the top is dark but the center still has wet batter, lay a loose piece of foil over the loaf and continue baking. This keeps the crust from getting too dark while the middle finishes.

Foil tent sequence for banana bread showing a darkening top, loose foil over the loaf, and continued baking.
If the top browns early, do not pull the loaf too soon. Tent it loosely with foil so the crust is protected while the center finishes.

Can Applesauce Replace Oil or Butter in Banana Bread?

Applesauce can lighten banana bread beautifully, but it cannot do everything butter or oil does. It brings moisture; fat brings richness, tenderness, and a cleaner bite.

Because banana bread already contains mashed fruit, it handles applesauce better than many cakes or cookies. Even so, a small amount of oil or melted butter helps prevent the loaf from becoming springy, tough, or too delicate in the middle.

Think of applesauce as a helper, not a perfect stand-in for every bit of fat. Bon Appétit explains this tradeoff in its guide to using applesauce instead of oil or butter.

Version What to Use Texture
Best balanced ½ cup applesauce + 3 tablespoons oil or melted butter Moist, rich enough, and sliceable
Lower-fat ½ cup applesauce + 1–2 tablespoons oil Lighter and more delicate
No-oil ½ cup applesauce and no added fat Moist but more delicate, with a higher risk of a soft center
Richer loaf ⅓ cup applesauce + ¼ cup melted butter or oil More classic banana bread texture

After the first loaf, you can reduce the oil slightly if you prefer a softer, lower-fat version.

Applesauce instead of oil decision board showing balanced, lower-fat, no-oil, and richer banana bread options.
Applesauce adds moisture, but fat adds tenderness. That is why the best banana bread with applesauce usually keeps a small amount of oil or butter.

Banana Bread with Applesauce and Yogurt

Yogurt works best as a small swap, not a big extra addition, because banana, applesauce, and yogurt all bring moisture. For a tangier, softer loaf, replace 2 tablespoons of the applesauce with plain Greek yogurt or regular plain yogurt.

Yogurt variation for banana bread with applesauce showing yogurt, applesauce, measuring spoon, and a loaf slice.
Use yogurt as a swap, not an add-on. A small amount adds tang, while too much extra moisture can slow the center.

It gives the loaf a little tang and softness without turning it into a completely different bake.

Adding a full extra ½ cup yogurt can make this batter too wet unless you also adjust the flour or bake time. The flavor may be good, but the center can turn heavy.

Banana Nut Bread with Applesauce

For banana nut bread with applesauce, fold ½ to ¾ cup chopped walnuts or pecans, about 55–85 g, into the batter just before baking. Walnuts make the loaf taste more old-school; pecans make it a little softer and sweeter.

Banana nut bread with applesauce showing sliced loaf with walnuts, pecans, applesauce, and toasted nut cues.
Toast the nuts, cool them, then fold them in last. That keeps the crunch clear without overworking the batter.

This is the version to make when you want the loaf to feel more classic and bakery-style, with a little crunch against the soft fruit-rich crumb.

Toasting the nuts first gives deeper flavor without changing the recipe. Warm them in a dry skillet for 3–5 minutes, or on a baking sheet for 6–8 minutes at 350°F / 175°C, then cool before folding them into the batter.

Too many nuts can make the loaf crumbly and weigh down an already-moist batter. Keep it under 1 cup if you want neat slices.

No Added Sugar Banana Bread with Applesauce

A no-added-sugar version works best when the bananas are deeply ripe, but it will taste more like a breakfast loaf than a dessert loaf. The bananas carry most of the sweetness, so this is not the place for pale, barely ripe fruit.

This version is not truly sugar-free because bananas and applesauce contain natural sugars. However, you can skip the brown sugar or reduce it to 2 to 3 tablespoons if your bananas are very sweet and heavily speckled.

No added sugar banana bread with applesauce showing ripe bananas, a sliced loaf, cinnamon, vanilla, and reduced sugar cue.
For a no-added-sugar version, very ripe bananas do the heavy lifting. However, the loaf will taste more breakfast-style than dessert-like.

For better flavor in a no-added-sugar loaf, use extra cinnamon, vanilla, and a pinch more salt. These small touches make the banana flavor taste fuller even without much added sugar.

Eggless or Vegan Banana Bread with Applesauce

For a vegan version, use neutral oil instead of butter and replace the eggs with 2 flax eggs. To make 2 flax eggs, mix 2 tablespoons ground flaxseed with 5 tablespoons water and let it thicken for about 10 minutes before adding it to the batter.

Eggless or vegan banana bread with applesauce showing flax egg, neutral oil, applesauce, and a sliced loaf.
Flax eggs help bind the batter, but the crumb is more delicate. Let the loaf cool fully before slicing for the cleanest texture.

It is a helpful option when the loaf needs to work for more people at the table, but full cooling matters even more because the crumb is more delicate.

Applesauce helps with moisture and a little binding, but it does not behave exactly like eggs. An eggless loaf will usually be more delicate and slightly denser, so let it cool completely before slicing.

If you only need the recipe to be dairy-free, the fix is easier: use neutral oil instead of melted butter. The rest of the main recipe can stay the same.

Banana Muffins with Applesauce

This batter also works as banana muffins with applesauce. Divide it into a lined muffin tin, filling each cup about ¾ full. Bake at 350°F / 175°C for about 20 to 25 minutes, or until the tops spring back and a toothpick comes out with moist crumbs.

Banana muffins with applesauce in a lined muffin tin, with bake times, fill level, cooling cue, and split muffins showing crumb.
The same banana-applesauce batter can become muffins. Because they bake faster than a loaf, check early and let them rest briefly in the pan.

Muffins are the better choice when you want faster cooling, easy freezing, or smaller grab-and-go portions with the same banana-applesauce flavor. Overbaking while waiting for a dark top can dry the edges, so look for tops that are set and spring back lightly.

For slightly taller muffin tops, bake at 375°F / 190°C and start checking around 18 to 20 minutes. Muffins bake faster than a loaf, so watch them closely near the end.

This recipe usually makes about 12 standard muffins. Let them sit in the pan for 5 minutes, then move them to a rack so the bottoms do not steam and turn damp.

For a more filling meal-prep bake, these high protein muffins are a good next step.

Storage and Freezing

How to Store the Loaf

Because this loaf is fruit-rich, storage matters almost as much as baking. Wrap it too soon and the outside can turn sticky; cool it fully and the slices keep beautifully. Want smaller portions instead? Use the muffin conversion.

  • Room temperature: keep tightly wrapped or in an airtight container for 2–3 days once fully cool.
  • Refrigerator: store for 5–6 days if your kitchen is warm, though the crumb may firm slightly.
  • Freezer: freeze slices for up to 3 months with parchment between them for easier thawing. For the cleanest setup, use the slice-freezing method below.
Storage guide for banana bread with applesauce showing wrapped loaf, fridge container, and freezer bag.
Cool the loaf fully before storing. Otherwise, trapped steam can soften the crust and make the slices feel sticky.

How to Freeze Slices

To serve frozen slices, thaw at room temperature or warm gently. A quick warm-up makes the banana flavor taste fresher and softens the crumb again.
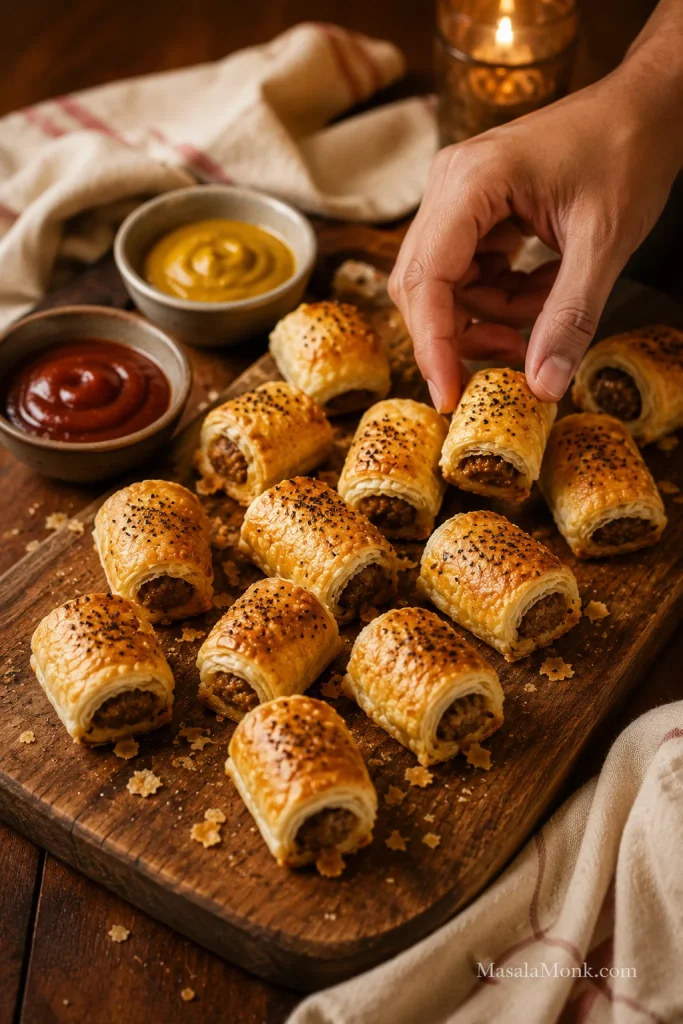
Freezing guide for banana bread slices showing parchment between slices, a freezer container, a freezer bag, and a warmed slice.
Freeze slices with parchment between them so you can thaw one piece at a time. Then warm gently to bring back the soft crumb.

It is especially good the next day, when the banana flavor has had time to settle into the crumb.

If you are baking through ripe bananas often, this sourdough banana bread recipe is another good make-ahead loaf for the same breakfast-and-snack lane.

The Next-Day Slice

Once you know the texture cues, this becomes the kind of banana bread you stop overthinking: ripe bananas, a measured scoop of applesauce, a thick batter, and enough cooling time for clean slices. The first slice is soft and fragrant, but the next-day slice may be even better — more settled, more banana-rich, and exactly the reason those spotted bananas were worth saving.

Next-day banana bread slices on a plate with coffee, applesauce, bananas, and warm morning light.
The next-day slice is often the reward for waiting: the banana flavor deepens, the crumb settles, and the loaf feels even easier to enjoy.

After the first bake, pay attention to your favorite version: oil for a cleaner banana flavor, melted butter for a richer slice, walnuts for a classic banana bread feel, or plain for a softer breakfast loaf. That little preference is what turns the recipe into your house version.
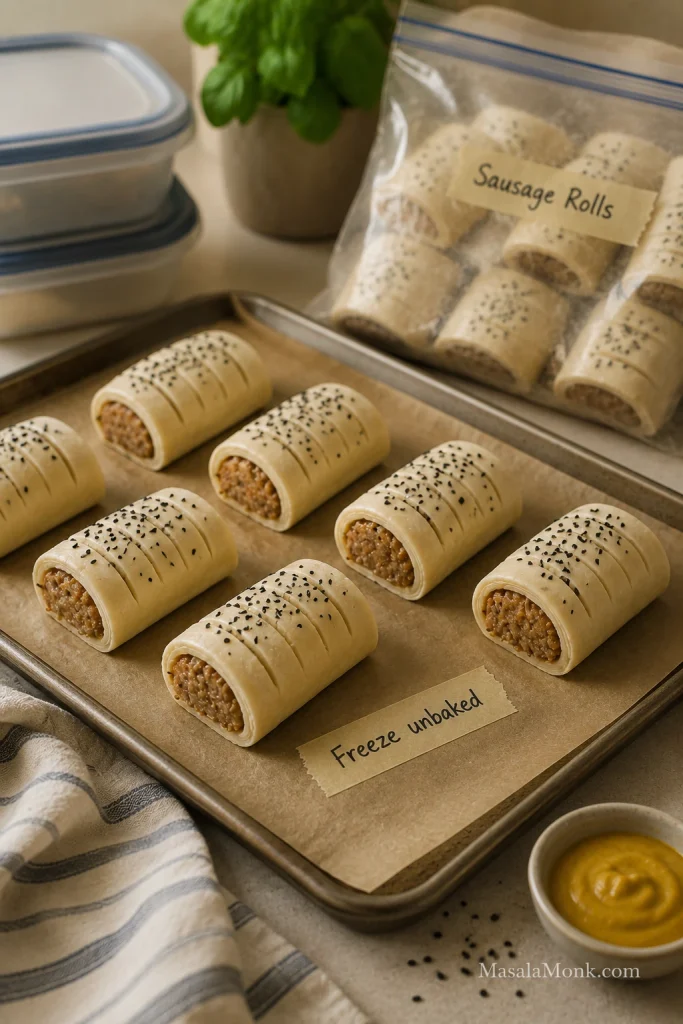
FAQs About Banana Bread with Applesauce

How much applesauce belongs in one loaf of banana bread?

For one standard 9×5-inch loaf, ½ cup applesauce is the best starting point. It adds moisture without making the batter too loose, especially when paired with about 1½ cups mashed banana.

Does applesauce replace all the oil or butter?

Applesauce can replace some of the fat, but the best texture usually comes from keeping a small amount of oil or melted butter in the batter. A fully no-oil loaf can work, although it will be more delicate.

Why did my applesauce banana bread turn gummy?

The usual causes are too much wet ingredient, overmixing, underbaking, or slicing while the loaf is still hot. Measure the banana, keep the applesauce to ½ cup, fold gently, and bake until the middle no longer looks shiny or wet.

Do frozen bananas work?

They do, but thawing and draining matter. Frozen bananas release extra liquid, so drain off the excess, mash the fruit, and then measure the 1½ cups.

How much whole wheat flour can I use?

Up to half is the safest swap. Replacing all the all-purpose flour with whole wheat flour makes the loaf heartier and denser, so start with a partial swap before changing the whole recipe.

What happens if I skip the added sugar?

The loaf will taste more breakfast-style than dessert-style. Very ripe bananas help, but bananas and applesauce still contain natural sugars, so “no added sugar” is the more accurate description.
How do I make this into banana nut bread?

Fold ½ to ¾ cup chopped walnuts or pecans into the batter before baking. Toasted walnuts give the most classic banana nut bread flavor.
Which applesauce types work best?

Unsweetened smooth applesauce is the easiest choice. Sweetened applesauce works if you reduce the sugar slightly, cinnamon applesauce adds warmth, and chunky applesauce should be mashed or blended first.

How do I make it eggless or vegan?

For a vegan loaf, use neutral oil instead of butter and replace the eggs with 2 flax eggs. The loaf will be more delicate and slightly denser, so cool it completely before slicing.

Where does yogurt fit into the recipe?

A small amount works best. Replace 2 tablespoons of the applesauce with plain yogurt for a tangier loaf, but avoid adding much more unless you adjust the flour or bake time.

How do I know the middle is fully baked?

A toothpick should come out with moist crumbs, not wet batter or shiny streaks. For a more precise check, the center should register about 200°F to 205°F / 93°C to 96°C on a digital thermometer.

Back to top ↑

{ “@context”: “https://schema.org”, “@graph”: [ { “@type”: “Organization”, “@id”: “https://masalamonk.com/#organization”, “name”: “MasalaMonk.com”, “url”: “https://masalamonk.com/”, “logo”: { “@type”: “ImageObject”, “@id”: “https://masalamonk.com/#logo”, “url”: “https://masalamonk.com/wp-content/uploads/2018/04/masala-monk-logo.png”, “contentUrl”: “https://masalamonk.com/wp-content/uploads/2018/04/masala-monk-logo.png” } }, { “@type”: “WebSite”, “@id”: “https://masalamonk.com/#website”, “url”: “https://masalamonk.com/”, “name”: “MasalaMonk.com”, “publisher”: { “@id”: “https://masalamonk.com/#organization” }, “inLanguage”: “en-US” }, { “@type”: “ImageObject”, “@id”: “https://masalamonk.com/banana-bread-with-applesauce-recipe/#primaryimage”, “url”: “https://masalamonk.com/wp-content/uploads/2026/05/banana-bread-with-applesauce-recipe.jpg”, “contentUrl”: “https://masalamonk.com/wp-content/uploads/2026/05/banana-bread-with-applesauce-recipe.jpg”, “caption”: “Banana bread with applesauce sliced to show a soft, set crumb.” }, { “@type”: “WebPage”, “@id”: “https://masalamonk.com/banana-bread-with-applesauce-recipe/#webpage”, “url”: “https://masalamonk.com/banana-bread-with-applesauce-recipe/”, “name”: “Banana Bread with Applesauce Recipe”, “headline”: “Banana Bread with Applesauce Recipe”, “description”: “A moist banana bread with applesauce recipe that uses ripe bananas, measured applesauce, and a little oil or butter for tender slices without a gummy center.”, “isPartOf”: { “@id”: “https://masalamonk.com/#website” }, “publisher”: { “@id”: “https://masalamonk.com/#organization” }, “primaryImageOfPage”: { “@id”: “https://masalamonk.com/banana-bread-with-applesauce-recipe/#primaryimage” }, “mainEntity”: { “@id”: “https://masalamonk.com/banana-bread-with-applesauce-recipe/#recipe” }, “datePublished”: “2026-05-28”, “dateModified”: “2026-05-28”, “isAccessibleForFree”: true, “inLanguage”: “en-US” }, { “@type”: “Recipe”, “@id”: “https://masalamonk.com/banana-bread-with-applesauce-recipe/#recipe”, “mainEntityOfPage”: { “@id”: “https://masalamonk.com/banana-bread-with-applesauce-recipe/#webpage” }, “url”: “https://masalamonk.com/banana-bread-with-applesauce-recipe/”, “name”: “Banana Bread with Applesauce Recipe”, “headline”: “Banana Bread with Applesauce Recipe”, “description”: “Moist banana bread with applesauce, ripe bananas, and a small amount of oil or butter for tender slices without a gummy center.”, “image”: [ { “@type”: “ImageObject”, “@id”: “https://masalamonk.com/banana-bread-with-applesauce-recipe/#image-finished-loaf”, “url”: “https://masalamonk.com/wp-content/uploads/2026/05/banana-bread-with-applesauce-recipe.jpg”, “contentUrl”: “https://masalamonk.com/wp-content/uploads/2026/05/banana-bread-with-applesauce-recipe.jpg”, “caption”: “Sliced banana bread with applesauce showing a soft, set crumb.” }, { “@type”: “ImageObject”, “@id”: “https://masalamonk.com/banana-bread-with-applesauce-recipe/#image-slice-texture”, “url”: “https://masalamonk.com/wp-content/uploads/2026/05/banana-bread-with-applesauce-slice-texture-683×1024.jpg”, “contentUrl”: “https://masalamonk.com/wp-content/uploads/2026/05/banana-bread-with-applesauce-slice-texture-683×1024.jpg”, “caption”: “Close-up of banana bread with applesauce slices showing an even crumb.” }, { “@type”: “ImageObject”, “@id”: “https://masalamonk.com/banana-bread-with-applesauce-recipe/#image-clean-slices”, “url”: “https://masalamonk.com/wp-content/uploads/2026/05/clean-slices-of-banana-bread-with-applesauce-683×1024.jpg”, “contentUrl”: “https://masalamonk.com/wp-content/uploads/2026/05/clean-slices-of-banana-bread-with-applesauce-683×1024.jpg”, “caption”: “Clean slices of banana bread with applesauce showing no wet line.” }, { “@type”: “ImageObject”, “@id”: “https://masalamonk.com/banana-bread-with-applesauce-recipe/#image-next-day-slice”, “url”: “https://masalamonk.com/wp-content/uploads/2026/05/banana-bread-with-applesauce-next-day-slice-683×1024.jpg”, “contentUrl”: “https://masalamonk.com/wp-content/uploads/2026/05/banana-bread-with-applesauce-next-day-slice-683×1024.jpg”, “caption”: “Next-day banana bread with applesauce served as a breakfast slice.” } ], “thumbnailUrl”: “https://masalamonk.com/wp-content/uploads/2026/05/banana-bread-with-applesauce-recipe.jpg”, “author”: { “@id”: “https://masalamonk.com/#organization” }, “publisher”: { “@id”: “https://masalamonk.com/#organization” }, “datePublished”: “2026-05-28”, “dateModified”: “2026-05-28”, “inLanguage”: “en-US”, “prepTime”: “PT15M”, “cookTime”: “PT1H5M”, “totalTime”: “PT2H20M”, “recipeYield”: “1 standard loaf (about 10 slices)”, “recipeCategory”: [ “Quick Bread”, “Breakfast”, “Snack” ], “recipeCuisine”: “American”, “keywords”: “banana bread with applesauce, applesauce banana bread, moist banana bread, banana bread recipe, banana nut bread with applesauce, no added sugar banana bread, eggless banana bread, vegan banana bread, banana muffins with applesauce”, “recipeIngredient”: [ “1½ cups mashed very ripe banana, about 340 g”, “½ cup unsweetened applesauce, about 120 g”, “2 large eggs”, “½ cup packed light brown sugar, about 105 g”, “3 tablespoons neutral oil, about 45 ml, or 3 tablespoons melted butter, about 42 g”, “2 teaspoons vanilla extract”, “2 cups all-purpose flour, 240 g”, “1 teaspoon baking soda”, “½ teaspoon baking powder”, “1 teaspoon ground cinnamon”, “½ teaspoon fine salt”, “½ cup chopped walnuts or pecans, optional, about 55–65 g” ], “recipeInstructions”: [ { “@type”: “HowToStep”, “@id”: “https://masalamonk.com/banana-bread-with-applesauce-recipe/#prepare-the-pan”, “position”: 1, “name”: “Prepare the pan”, “url”: “https://masalamonk.com/banana-bread-with-applesauce-recipe/#prepare-the-pan”, “text”: “Heat the oven to 350°F / 175°C. Grease a 9×5-inch loaf pan and line it with parchment if you want easier lifting.”, “image”: “https://masalamonk.com/wp-content/uploads/2026/05/how-to-make-banana-bread-with-applesauce-step-by-step-683×1024.jpg” }, { “@type”: “HowToStep”, “@id”: “https://masalamonk.com/banana-bread-with-applesauce-recipe/#mash-and-measure-bananas”, “position”: 2, “name”: “Mash and measure the bananas”, “url”: “https://masalamonk.com/banana-bread-with-applesauce-recipe/#mash-and-measure-bananas”, “text”: “Mash the bananas, then measure 1½ cups. Banana size varies, so measuring gives you a more reliable loaf than counting bananas alone.”, “image”: “https://masalamonk.com/wp-content/uploads/2026/05/measure-mashed-bananas-for-banana-bread-683×1024.jpg” }, { “@type”: “HowToStep”, “@id”: “https://masalamonk.com/banana-bread-with-applesauce-recipe/#mix-wet-ingredients”, “position”: 3, “name”: “Mix the wet ingredients”, “url”: “https://masalamonk.com/banana-bread-with-applesauce-recipe/#mix-wet-ingredients”, “text”: “In a large bowl, whisk the mashed banana, applesauce, eggs, brown sugar, oil or melted butter, and vanilla.”, “image”: “https://masalamonk.com/wp-content/uploads/2026/05/how-to-make-banana-bread-with-applesauce-step-by-step-683×1024.jpg” }, { “@type”: “HowToStep”, “@id”: “https://masalamonk.com/banana-bread-with-applesauce-recipe/#mix-dry-ingredients”, “position”: 4, “name”: “Mix the dry ingredients”, “url”: “https://masalamonk.com/banana-bread-with-applesauce-recipe/#mix-dry-ingredients”, “text”: “In a separate bowl, whisk the flour, baking soda, baking powder, cinnamon, and salt.”, “image”: “https://masalamonk.com/wp-content/uploads/2026/05/how-to-make-banana-bread-with-applesauce-step-by-step-683×1024.jpg” }, { “@type”: “HowToStep”, “@id”: “https://masalamonk.com/banana-bread-with-applesauce-recipe/#fold-gently”, “position”: 5, “name”: “Fold the batter gently”, “url”: “https://masalamonk.com/banana-bread-with-applesauce-recipe/#fold-gently”, “text”: “Add the dry ingredients to the wet ingredients and fold gently until no dry flour remains. The batter should be thick enough to mound on the spatula, not runny.”, “image”: “https://masalamonk.com/wp-content/uploads/2026/05/banana-bread-batter-texture-guide-683×1024.jpg” }, { “@type”: “HowToStep”, “@id”: “https://masalamonk.com/banana-bread-with-applesauce-recipe/#add-nuts-if-using”, “position”: 6, “name”: “Add nuts if using”, “url”: “https://masalamonk.com/banana-bread-with-applesauce-recipe/#add-nuts-if-using”, “text”: “Fold in walnuts or pecans if using.”, “image”: “https://masalamonk.com/wp-content/uploads/2026/05/mix-ins-for-banana-bread-with-applesauce-683×1024.jpg” }, { “@type”: “HowToStep”, “@id”: “https://masalamonk.com/banana-bread-with-applesauce-recipe/#bake-until-center-is-set”, “position”: 7, “name”: “Bake until the center is set”, “url”: “https://masalamonk.com/banana-bread-with-applesauce-recipe/#bake-until-center-is-set”, “text”: “Spread the batter into the prepared pan. Bake for 55–65 minutes, or until a toothpick inserted in the center comes out with moist crumbs but no wet batter. For the most reliable check, the center should read about 200–205°F / 93–96°C.”, “image”: “https://masalamonk.com/wp-content/uploads/2026/05/banana-bread-doneness-guide-683×1024.jpg” }, { “@type”: “HowToStep”, “@id”: “https://masalamonk.com/banana-bread-with-applesauce-recipe/#foil-tent-banana-bread”, “position”: 8, “name”: “Tent with foil if needed”, “url”: “https://masalamonk.com/banana-bread-with-applesauce-recipe/#foil-tent-banana-bread”, “text”: “If the top browns before the center is done, tent the loaf loosely with foil and keep baking.”, “image”: “https://masalamonk.com/wp-content/uploads/2026/05/top-browning-too-fast-banana-bread-fix-683×1024.jpg” }, { “@type”: “HowToStep”, “@id”: “https://masalamonk.com/banana-bread-with-applesauce-recipe/#cool-before-slicing-step”, “position”: 9, “name”: “Cool before slicing”, “url”: “https://masalamonk.com/banana-bread-with-applesauce-recipe/#cool-before-slicing-step”, “text”: “Cool in the pan for 10–15 minutes, then move to a rack. Let the loaf cool for at least 45–60 minutes before slicing so the crumb can finish setting.”, “image”: “https://masalamonk.com/wp-content/uploads/2026/05/cool-banana-bread-before-slicing-683×1024.jpg” } ] } ] }