Posted on Leave a comment

Butternut Squash Soup Recipe

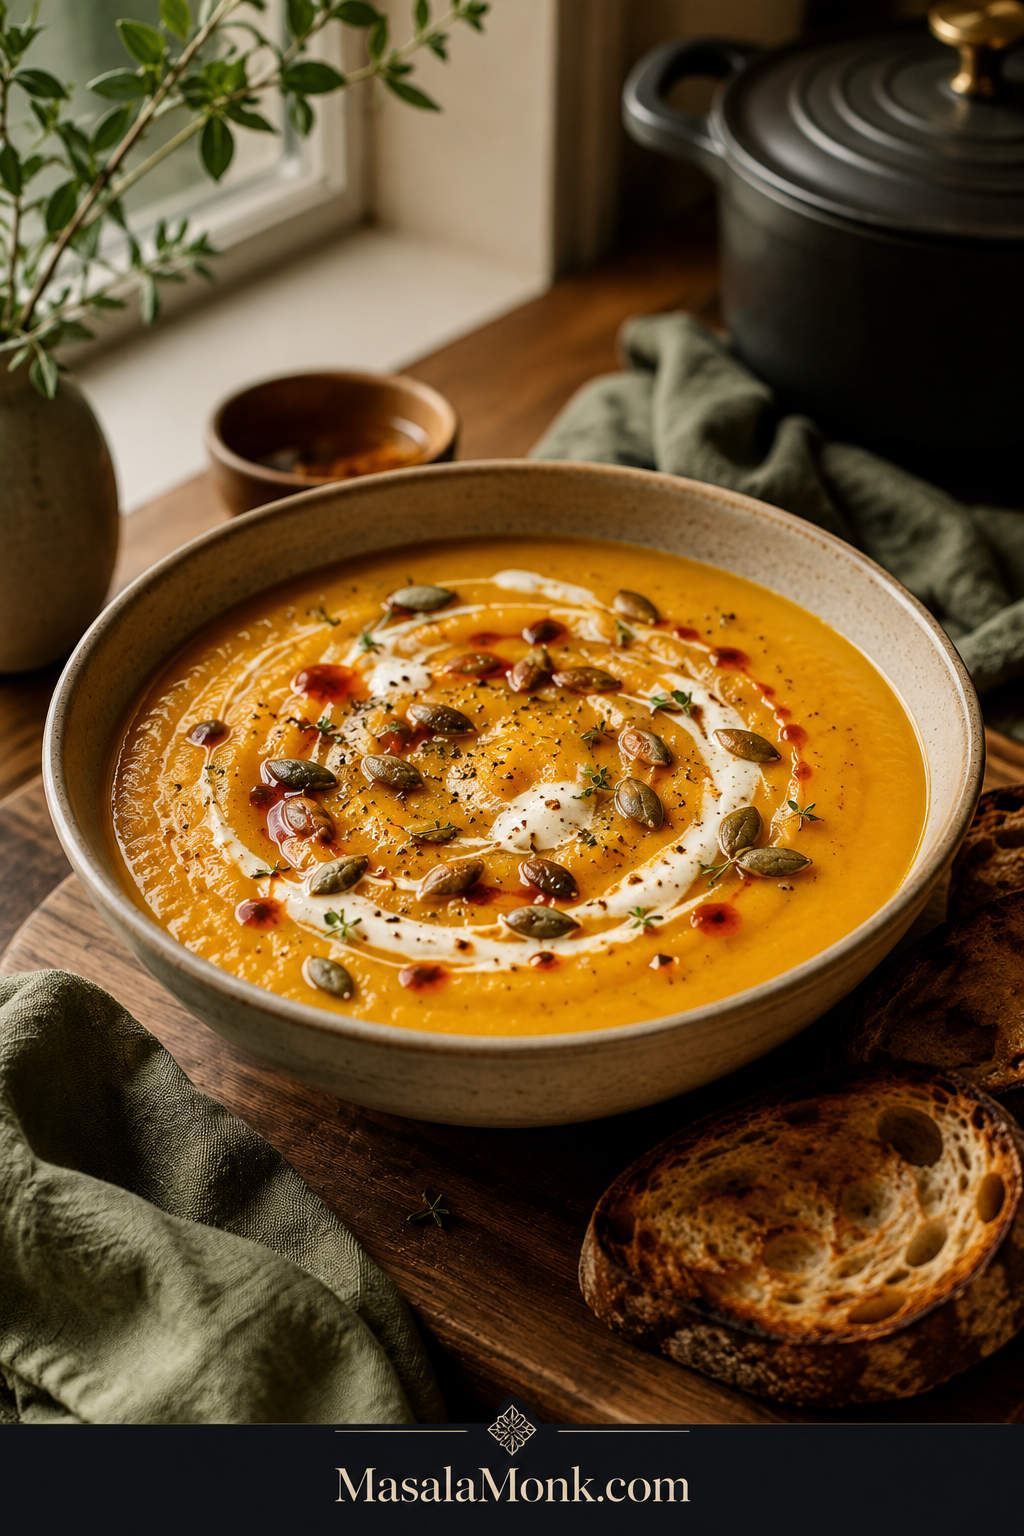
Creamy butternut squash soup in a matte ceramic bowl with pumpkin seeds, chili oil, herbs, black pepper, a cream swirl, and toast on the side.

This is the butternut squash soup for the nights when you want something creamy and comforting, but still balanced rather than heavy — sweet from the squash, savory from onion and garlic, and bright enough at the end that the bowl never tastes flat.

Butternut squash soup can easily go watery, bland, baby-food sweet, or too heavy if the liquid, salt, and finish are not handled carefully. This version avoids that with one simple idea: cook the squash until tender, blend first, thin later, then brighten the pot at the end.

You can roast the squash for deeper caramelized flavor, or make the whole soup on the stovetop when you want something faster. It also works with fresh squash, pre-cut cubes, frozen squash, canned puree, or leftover roasted squash — and you can finish it with cream, coconut milk, olive oil, butter, or no cream at all.

Here is the goal: a smooth, cozy bowl that does not turn watery, bland, or too sweet. At the finish, the soup should coat a spoon, taste savory before it tastes sweet, and end with just enough brightness to make you want the next bite. It is the kind of bowl that makes a piece of toast feel like dinner, especially when the top has something crunchy, creamy, or a little spicy.

Jump to Recipe · Quick Answer · Make It Now · Less-Broth-First Method · Roasted vs Stovetop · Cream, Coconut Milk, or No Cream · Fix Bland or Thin Soup

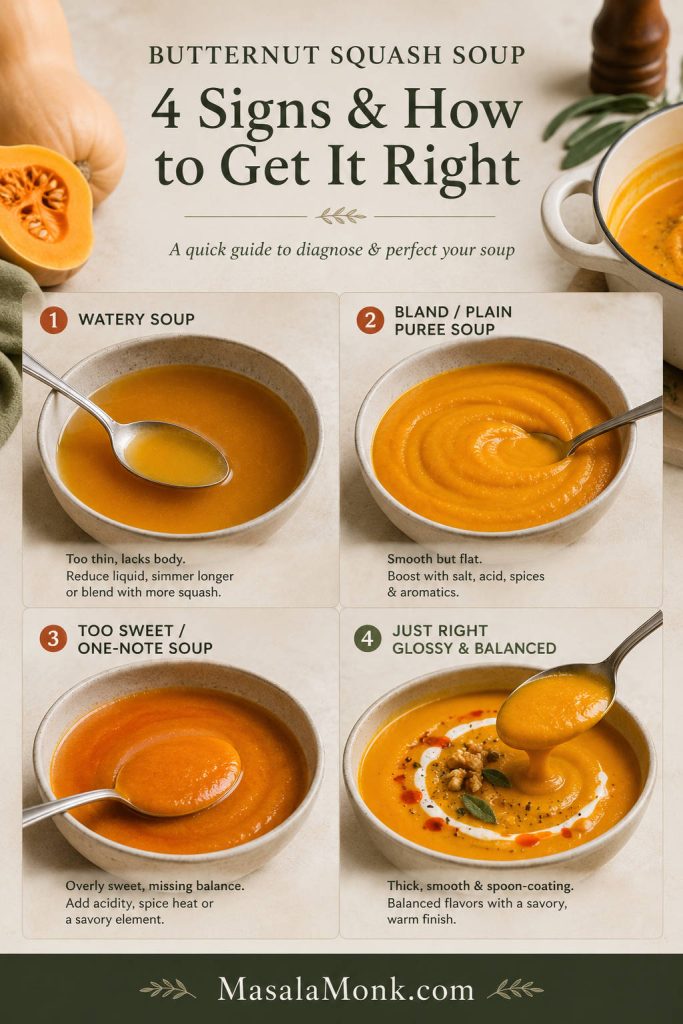
Use this quick visual check before you adjust the pot: watery, bland, and overly sweet butternut squash soup each need a different fix.

Four-panel comparison showing watery butternut squash soup, bland puree-style soup, overly sweet soup, and a thick glossy finished soup.
Before fixing the pot, identify the real problem: thin soup needs body, flat soup needs seasoning, and overly sweet soup needs acid, heat, or savoriness.

Quick Answer: How to Make Butternut Squash Soup

To make butternut squash soup, cook butternut squash until very tender, then blend it with sautéed onion, garlic, carrot, broth, herbs, and seasoning until smooth. Roast the squash at 425°F / 220°C when you want the deepest flavor. When speed matters, simmer peeled squash cubes directly in the pot with broth until soft.

If peeling raw squash feels annoying, roast the halves first and scoop the soft flesh out later. That gives you deeper flavor and skips the hardest part of squash prep.

The most important technique is to use less liquid at first. Start with 3 cups / 720 ml broth, blend the soup, then loosen it only once the texture is clear. That keeps the bowl creamy instead of watery, whether you finish it with cream, coconut milk, olive oil, butter, or no cream at all.

Before serving, taste once and wake the pot with lemon juice, lime juice, or apple cider vinegar. A small acidic finish keeps the squash from tasting dessert-sweet.

Need exact amounts? Go straight to the recipe card. Still choosing a method? Compare roasted vs stovetop, or check the fresh, frozen, pre-cut, and canned squash guide.

Make It Now: The Best Default Version

Do not overthink the versions yet. When in doubt, make the MasalaMonk default: roasted squash, a simple onion-carrot-garlic base, herbs, 3 cups / 720 ml broth, and the creamy finish that fits your bowl — cream, coconut milk, butter, or olive oil.

For the safest, most flavorful bowl tonight, roast one large butternut squash, sauté the onion, carrot, garlic, and herbs in a soup pot, add the roasted squash and broth, then blend until silky. Finish with either ½ cup / 120 ml cream, 1 cup / 240 ml coconut milk, or 1–2 tablespoons butter or olive oil.

Before serving, taste the soup and add a small splash of lemon juice, lime juice, or apple cider vinegar. That simple order keeps the soup thick, smooth, and balanced instead of watery, grainy, or too sweet.

NeedBest Choice
Best flavorRoast the squash first
Fastest methodUse the stovetop method with peeled cubes
No raw peelingRoast squash halves, then scoop the flesh
Dairy-free creamy soupUse full-fat coconut milk
No-cream soupBlend well and finish with olive oil, butter, lemon, or lime
Thicker soupStart with less broth and adjust the body at the end

Butternut Squash Soup Recipe Card

Creamy Butternut Squash Soup

This creamy butternut squash soup is smooth, comforting, and easy to adjust. Roast the squash for deeper flavor, or make it fully on the stovetop for a faster weeknight soup. Finish it with cream, coconut milk, butter, olive oil, or a simple splash of lemon or lime for a lighter version.

Prep Time15 minutes
Cook Time45 minutes roasted / 30 minutes stovetop
Total TimeAbout 1 hour roasted / 45 minutes stovetop
Servings6
YieldAbout 8 cups / 1.9 L soup
Main MethodRoasted or stovetop
Diet NotesVegetarian; gluten-free if using gluten-free stock; vegan and dairy-free options included

Timing note: the roasted total assumes you prep and sauté the aromatics while the squash finishes roasting.

Ingredients

  • 1 large butternut squash, about 3 lb / 1.3–1.4 kg whole, or about 8 cups / 1.1–1.2 kg peeled cubes
  • 2 tablespoons / 30 ml olive oil, plus a little more if roasting cubes
  • 1 large yellow onion, about 200 g, chopped
  • Carrot: 1 large, about 150 g, chopped
  • 3–4 garlic cloves, minced
  • 1 teaspoon grated fresh ginger, optional
  • 3 cups / 720 ml vegetable broth to start, plus up to 1 cup / 240 ml more as needed
  • 1 teaspoon fine salt, plus more to taste
  • ½ teaspoon black pepper
  • ½ teaspoon smoked paprika or ⅛ teaspoon ground nutmeg
  • 1 teaspoon dried thyme, sage, or rosemary, or 1 tablespoon chopped fresh herbs
  • Finish with 1–2 teaspoons lemon juice, lime juice, or apple cider vinegar

Choose One Creamy Finish

  • Classic creamy soup: ½ cup / 120 ml heavy cream
  • Dairy-free creamy soup: 1 cup / 240 ml full-fat coconut milk
  • Creamy soup without cream: 1–2 tablespoons butter or olive oil
  • Lighter soup: skip the creamy finish and use lemon, lime, herbs, and black pepper to brighten the bowl

Equipment

  • Large baking sheet, if roasting
  • Parchment paper, optional
  • Sharp chef’s knife
  • Vegetable peeler, if making the stovetop cube version
  • Large spoon for removing seeds
  • Dutch oven or heavy-bottomed soup pot
  • Immersion blender or countertop blender
  • Ladle
  • Measuring cups and spoons
  • Kitchen scale, optional but helpful

Roasted Method

  1. Heat the oven to 425°F / 220°C.
  2. Cut the butternut squash in half lengthwise and scoop out the seeds. For faster roasting, peel and cube the squash instead.
  3. Rub the squash with 1 tablespoon olive oil and a pinch of salt. If roasting cubes, use enough oil to lightly coat them.
  4. Roast cut-side down on a baking sheet for 40–50 minutes, or until the flesh is very tender and the edges smell sweet and nutty. If using cubes, roast for 35–40 minutes, tossing once, until lightly caramelized.
  5. Heat the remaining 1 tablespoon olive oil in a Dutch oven or soup pot over medium heat.
  6. Add the onion and carrot. Cook for 6–8 minutes, stirring occasionally, until softened.
  7. Add garlic, ginger if using, herbs, smoked paprika or nutmeg, black pepper, and salt. Cook for 30–60 seconds, just until fragrant.
  8. Scoop the roasted squash flesh into the pot. Add 3 cups / 720 ml broth.
  9. Simmer for 5–10 minutes so the flavors come together.
  10. Blend until completely smooth using an immersion blender or countertop blender.
  11. Thin the soup in small splashes until it reaches your preferred texture.
  12. Stir in your chosen creamy finish, if using.
  13. Finish with lemon juice, lime juice, or apple cider vinegar. Taste and adjust salt, pepper, and acidity before serving.

Stovetop Method

  1. Peel, seed, and cube the butternut squash.
  2. Heat 2 tablespoons olive oil in a Dutch oven or soup pot over medium heat.
  3. Add onion and carrot. Cook for 6–8 minutes, until softened.
  4. Add garlic, ginger if using, herbs, smoked paprika or nutmeg, salt, and pepper. Cook for 30–60 seconds.
  5. Add the squash cubes and 3 cups / 720 ml broth.
  6. Bring to a boil, then reduce to a simmer.
  7. Cover and cook for 20–30 minutes, or until the squash is very soft.
  8. Blend until smooth.
  9. Loosen the soup only if it needs more liquid.
  10. Stir in your chosen creamy finish, if using.
  11. Finish with lemon juice, lime juice, or apple cider vinegar, then adjust seasoning.

Important texture note: start with 3 cups / 720 ml broth, not the full amount. Squash size and water content can vary. It is much easier to thin the soup after blending than to fix a watery pot later.

Vegan note: use vegetable broth, olive oil, and coconut milk or cashew cream instead of butter or heavy cream.

Now tune the bowl: texture method · creamy finish · toppings · troubleshooting.

What’s Inside

The recipe above gives you the main bowl. From there, the guide below helps you tune it to your kitchen — the squash you have, the method you prefer, the finish you want, and the fixes that save the pot if something tastes off.

Start Here

Choose Your Version

Serve, Store, Fix

The Less-Broth-First Method

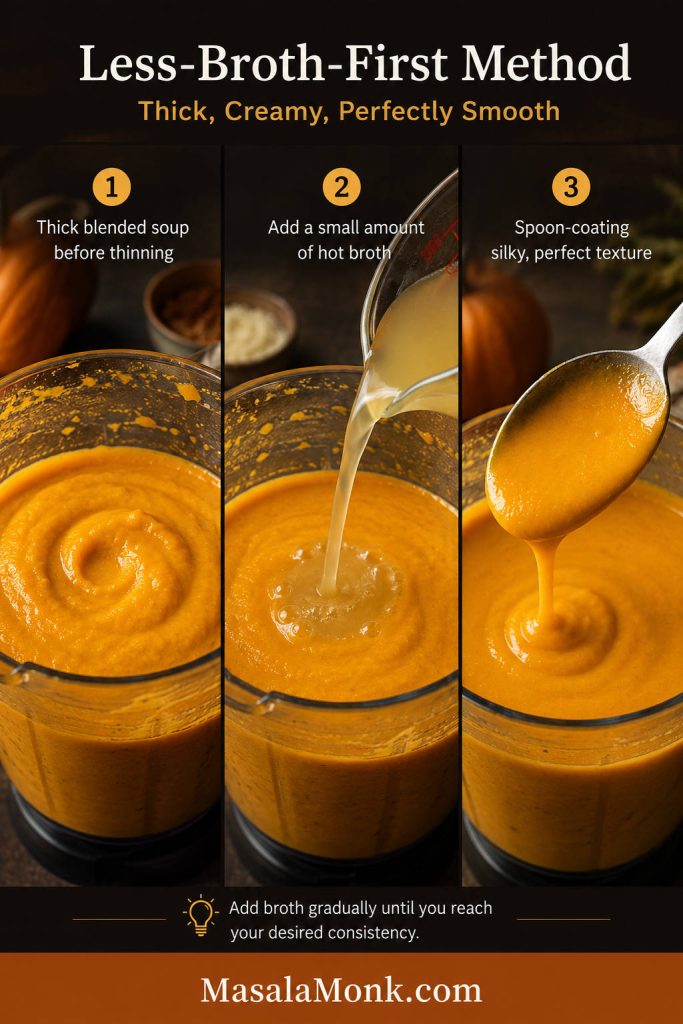
This recipe uses the Less-Broth-First Method: start with 3 cups / 720 ml broth, blend the cooked squash until smooth, then thin only after you know the soup’s real texture.

That one method is what makes the recipe flexible. If your squash is huge, watery, frozen, canned, or already roasted, the soup still works because the final thickness is adjusted after blending, not guessed before cooking.

The finished soup should feel velvety on the spoon, not loose like broth and not stiff like puree. Once the texture is right, salt, richness, herbs, and a little acid make the flavor complete.

Three-panel guide showing thick blended butternut squash soup, a small amount of broth being added, and a spoonful of smooth soup with spoon-coating texture.
Because squash varies in moisture, blend the soup thick first; then loosen it gradually so it stays creamy instead of turning watery.

Why This Butternut Squash Soup Works

This soup tastes complete when the squash’s sweetness has something savory, rich, and bright around it. Onion, garlic, carrot, herbs, spice, salt, fat, and acidity all help the bowl taste full instead of flat.

Roasting brings out deeper, caramelized flavor. The stovetop method is faster and still gives you a smooth, comforting result, especially when the onion, garlic, carrot, and spices are cooked properly before the broth goes in.

When the cut side comes out deeply golden and the kitchen smells sweet and nutty, you know the soup already has a head start. Those roasted edges are where the bowl gets its deeper, almost nutty sweetness.

Seasoning the aromatics before the broth goes in keeps the soup from tasting diluted later. Carrot helps the soup taste rounder and look brighter, while ginger, herbs, black pepper, smoked paprika, or nutmeg add warmth. Lemon juice, lime juice, or apple cider vinegar keeps the final spoonful lively.

Ingredient Notes: What Each One Does

None of the ingredients are here just for show. Squash brings body and sweetness. Onion, garlic, and carrot make the soup savory. Herbs, ginger, and spices add warmth. Broth controls thickness. Your creamy finish decides how rich the final bowl feels.

Ingredients for butternut squash soup arranged on a wooden board, including squash, onion, carrot, garlic, ginger, herbs, broth, cream, olive oil, lime, salt, and pepper.
Notice the balance before cooking: squash brings body, aromatics build depth, broth controls texture, and citrus wakes up the final flavor.

Butternut Squash

Butternut squash is naturally sweet, creamy when blended, and perfect for soup. One large squash, about 3 lb / 1.3–1.4 kg, is usually enough for 6 servings.

Whole fresh squash, peeled cubes, frozen squash, canned puree, and leftover roasted squash can all work. The method changes slightly depending on what you have, but the same rule stays true: cook it until very tender before blending.

Onion, Garlic, and Carrot

Onion and garlic give the soup its savory base. Carrot is part of the default version because it rounds out the flavor and deepens the color. You can skip it if you do not have one, but the bowl may taste slightly less full.

Ginger, Herbs, and Spices

Fresh ginger adds warmth and keeps the soup from tasting heavy. Sage, thyme, rosemary, nutmeg, smoked paprika, curry powder, garam masala, and black pepper all work well here.

Classic version: use sage, thyme, rosemary, or nutmeg. For a warmer spiced bowl, add ginger with a little curry powder or garam masala and finish with lime.

Broth

Vegetable broth keeps the recipe vegetarian and works well with the natural sweetness of the squash. Chicken broth can also be used if you are not keeping the soup vegetarian.

Think of broth as an adjustment, not the whole base. The soup should coat a spoon, not pour like thin broth. Add more only after blending if the texture needs it.

Cream, Coconut Milk, Butter, or Olive Oil

You do not need heavy cream to make this soup creamy. Creaminess comes from fully cooked squash, controlled broth, and thorough blending first. The blender should turn the squash glossy before any cream goes in.

Cream, coconut milk, butter, or olive oil can add richness, but they should not be doing all the work. Coconut milk is the easiest dairy-free finish. For more ways to use it in cooking, see this guide to coconut milk benefits and uses.

Lemon, Lime, or Apple Cider Vinegar

This is the small step that makes the soup taste finished. Use lemon juice for a clean finish, lime juice for a spiced or coconut version, and apple cider vinegar for a warmer fall-style bowl.

Fresh, Frozen, Pre-Cut, or Canned Squash

Fresh, frozen, pre-cut, canned, and leftover roasted squash can all make a good soup. The handling changes, but the method stays forgiving: cook the squash until fully soft, blend, then adjust the texture and flavor.

Guide showing whole fresh butternut squash, pre-cut squash cubes, frozen squash cubes, butternut squash puree, and leftover roasted squash.
Whether you use fresh, frozen, pre-cut, canned puree, or leftover roasted squash, adjust the liquid after blending because moisture levels change.

Choose the Squash You Have

What You HaveAmount for This RecipeWhat to Adjust
Whole fresh butternut squash1 large squash, about 3 lb / 1.3–1.4 kgBest flavor. Roast halves or cubes, or peel and simmer on the stovetop.
Pre-cut fresh squashAbout 8 cups / 1.1–1.2 kg cubesGreat shortcut. Roast for flavor or simmer for speed. Check that the cubes are firm and fresh.
Frozen butternut squash cubesAbout 8 cups / 1.1–1.2 kg cubesAdd directly to the pot. Frozen cubes may release extra water, so start with less broth.
Canned or packaged squash pureeAbout 4 cups / 900–950 g pureeSauté onion, garlic, and spices first. Then whisk in the puree and broth slowly.
Frozen squash pureeAbout 4 cups / 900–950 g pureeWarm gently, then blend with cooked aromatics and hot broth.
Leftover roasted squashAbout 4 cups mashed or scooped fleshFastest option. Blend with sautéed onion, garlic, and hot broth.

Frozen squash may look watery at first. Let it simmer until very soft, blend well, then adjust the body after blending.

Canned or packaged puree can taste flatter than roasted squash, so give the onion, garlic, and spices time to bloom before adding it. A small splash of lemon juice or apple cider vinegar at the end helps wake up the flavor.

Leftover roasted squash makes this almost instant. Since the squash is already cooked, focus on building a good onion-garlic base, then blend with hot broth and finish with salt, fat, and acidity.

Once you know your squash type, compare roasted vs stovetop or move into how to make the soup.

Roasted vs Stovetop Butternut Squash Soup

Both methods work. Pick based on the night you are having: the oven when you want deeper flavor, the stovetop when you want dinner faster.

Side-by-side comparison of roasted butternut squash soup and stovetop butternut squash soup served in two bowls.
For deeper caramelized flavor, choose roasted squash; for a faster butternut squash soup with a softer taste, use the stovetop method.
MethodBest ForFlavorTime
Roasted squashBest overall flavorSweet, caramelized, deepLonger
StovetopFast weeknight soupSmooth, clean, lighterFaster
Pre-cut or frozen squashConvenienceGood if seasoned wellFastest
Leftover roasted squashQuickest rich soupDeep and already cookedVery fast

Use the roasted method when you want the best flavor. Roasting concentrates the squash and adds caramelized edges, which makes the final soup taste richer.

The stovetop method is better when you want a faster, simpler dinner. It will still be smooth and cozy, but it may need a little more seasoning, spice, or acidity at the end.

Pre-cut or frozen squash is for the nights when convenience matters. The bowl can still be very good, especially if you build flavor with onion, garlic, ginger, herbs, and enough salt.

Chosen your route? Go to how to make butternut squash soup, or return to the recipe card.

How to Make Butternut Squash Soup

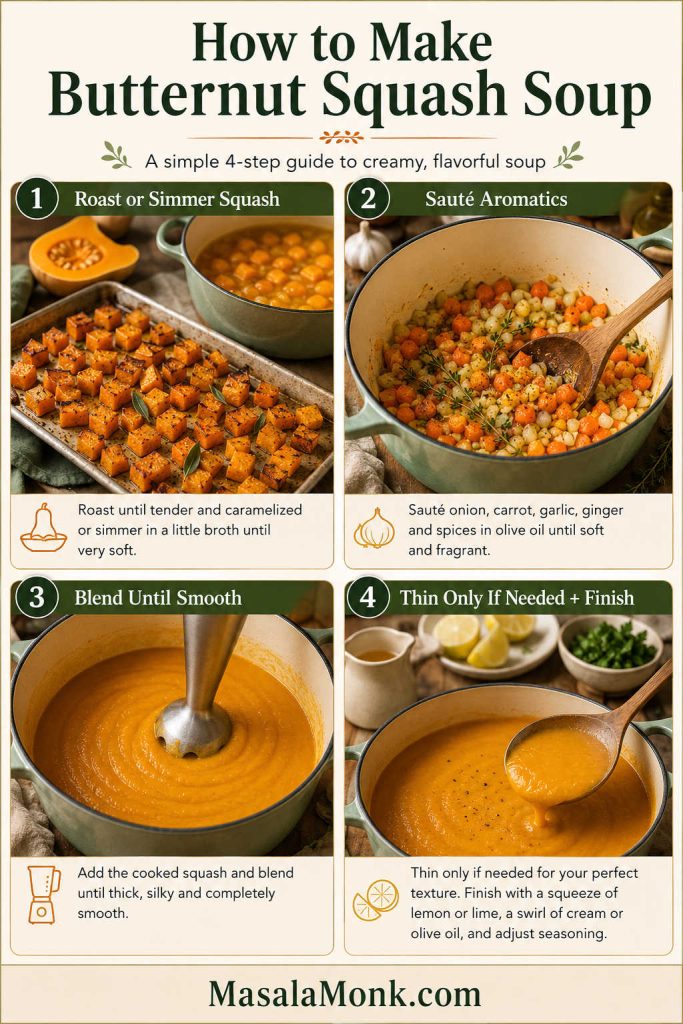
Use this quick method guide as the visual map for the full process: cook the squash, build the savory base, blend until smooth, then thin only if needed.

Four-step guide showing roasted or simmered squash, sautéed aromatics, blended smooth soup, and finished soup thinned only if needed.
First cook the squash, then build the flavor base, blend until silky, and adjust thickness only once you can see the final texture.

1. Prepare the Squash

For roasted soup, cut the squash in half lengthwise and scoop out the seeds. Roast it cut-side down, then scoop out the soft flesh later. This route avoids peeling raw squash.

Roasted butternut squash halves on parchment paper with soft orange flesh being scooped from the skin using a spoon.
Instead of peeling raw squash, roast the halves first; once tender, the flesh scoops out cleanly and blends into a smoother soup.

With the stovetop method, peel the squash, remove the seeds, and cut it into cubes. Smaller pieces cook faster. Pre-cut or frozen cubes can go straight into the pot with only small broth adjustments.

2. Roast or Simmer Until Very Tender

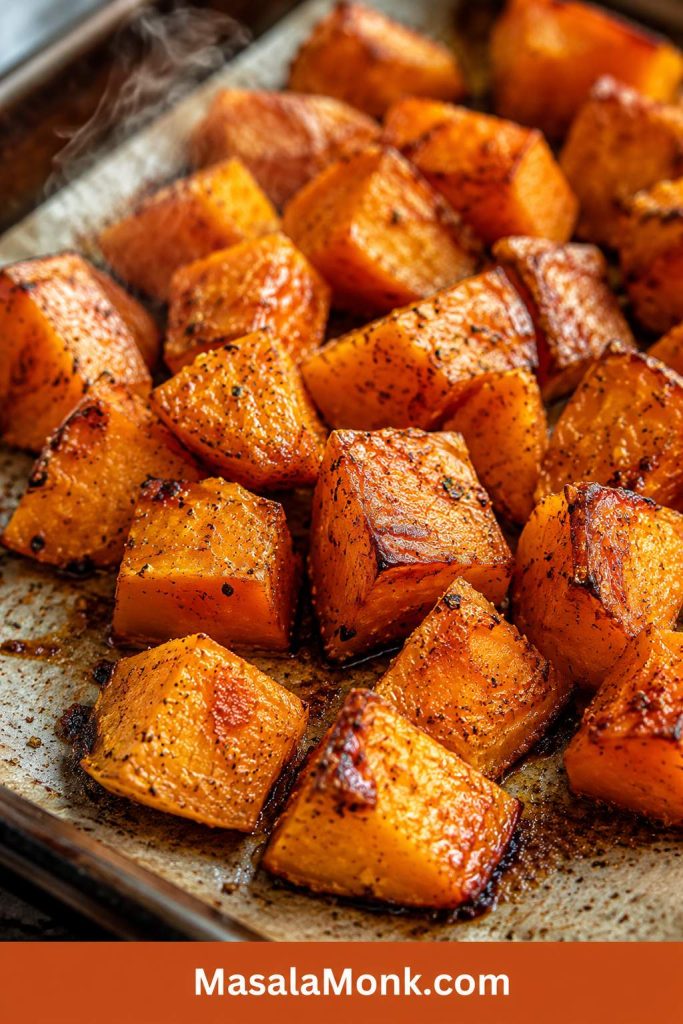
In the roasted method, cook the squash at 425°F / 220°C until the flesh is soft and the edges have some color. This usually takes 40–50 minutes for halves or 35–40 minutes for cubes.

Close-up of roasted butternut squash cubes with browned edges, caramelized spots, black pepper, and steam on a baking sheet.
After roasting, look for browned edges and caramelized spots; that color is what gives roasted butternut squash soup deeper, rounder flavor.

On the stovetop, simmer the cubes with broth for 20–30 minutes, until they are soft enough to mash with a spoon. Do not rush this step. Undercooked squash can make the soup taste grainy instead of silky.

3. Build the Flavor Base

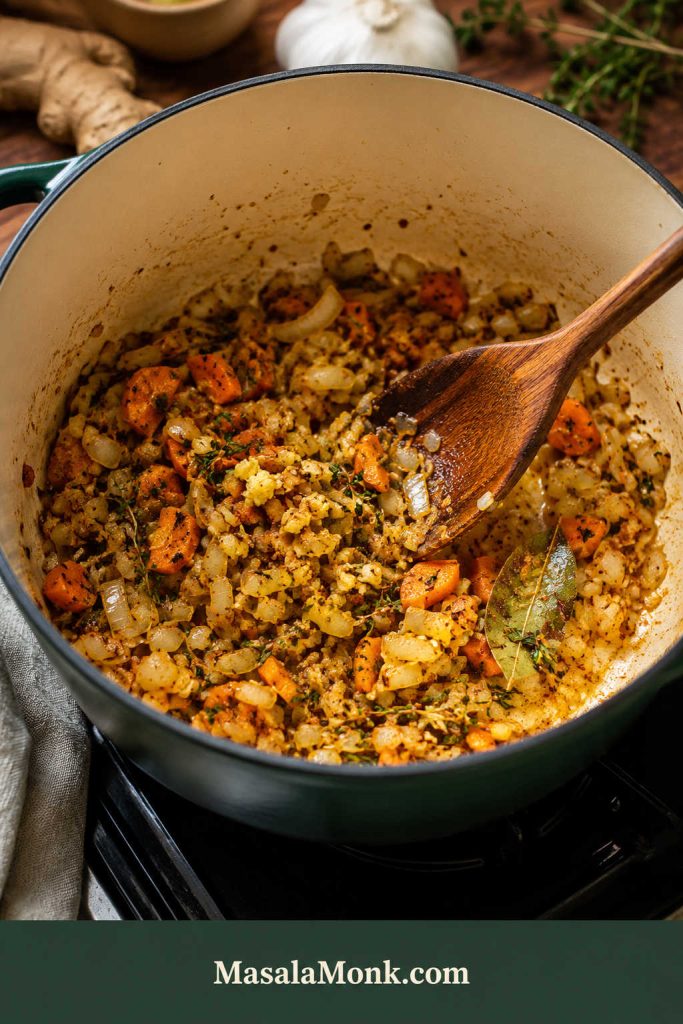
Cook onion and carrot in olive oil until softened. Add garlic, ginger, herbs, and spices only after the onion has softened. Garlic and ground spices can burn if they cook too long over dry heat.

This base is what keeps the soup from tasting like plain squash puree.

Onion, carrot, garlic, ginger, herbs, spices, and bay leaf sautéing in a green Dutch oven with a wooden spoon.
Meanwhile, soften the onion, carrot, garlic, ginger, and herbs before adding broth so the soup starts savory instead of turning flat later.

4. Add Broth Carefully

Add 3 cups / 720 ml broth first. After blending, add more only if the soup is too thick. If too much liquid goes in early, simmer uncovered or blend in more cooked squash, sweet potato, carrots, lentils, or beans.

5. Blend Until Smooth

An immersion blender lets you blend directly in the pot. A countertop blender usually gives the silkiest finish, especially after roasting.

If using a countertop blender, blend in batches and do not fill the jar too high. Hot soup expands when blended. Start on low speed and protect your hand with a towel if steam can escape from the lid.

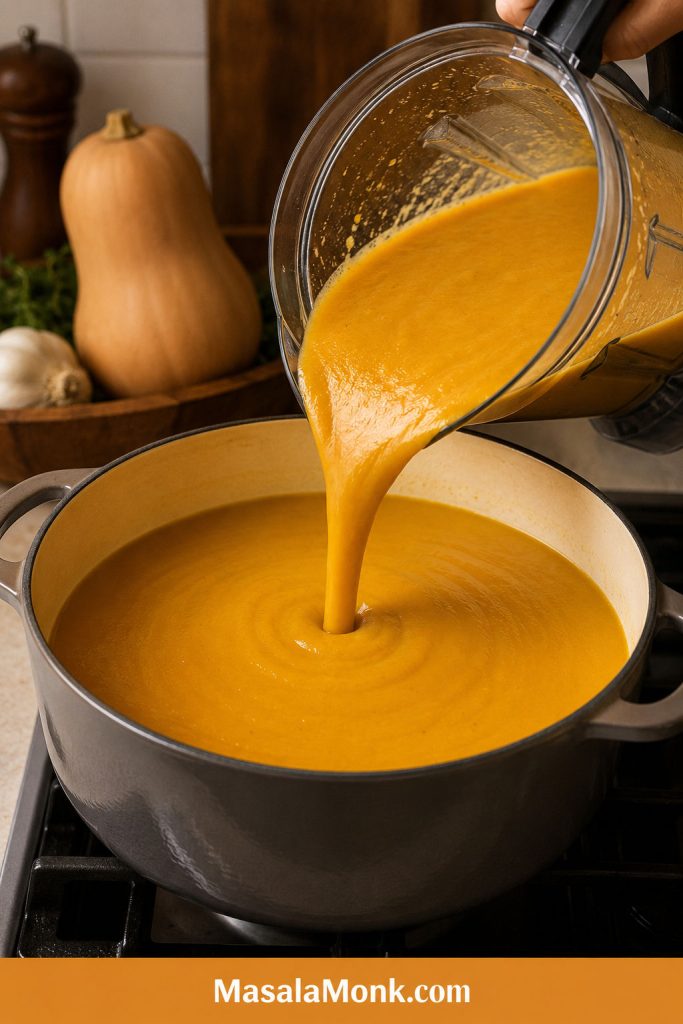
Blend longer than you think you need to. That extra time helps the squash turn glossy and silky instead of pulpy.

Smooth orange butternut squash soup being poured from a blender into a Dutch oven on the stove.
Once blended, the soup should pour in a smooth ribbon with a glossy surface; that is the cue that it is silky, not grainy.

6. Finish and Balance

After blending, choose your finish: heavy cream for classic richness, coconut milk for dairy-free creaminess, butter or olive oil for no-cream richness, or lemon/lime for brightness.

A good batch tastes mellow first, then bright at the end. If it feels sleepy, add salt before adding more spice, then finish with a small splash of lemon, lime, or vinegar.

Instant Pot, Slow Cooker, and Blender Notes

For after-work soup, use the stovetop or Instant Pot method. When you have a little more time, roast the squash and let the oven do the flavor work.

MethodHow to Do ItBest Tip
Instant PotSauté onion, carrot, garlic, ginger, and spices. Add peeled squash cubes and 3 cups / 720 ml broth. Pressure cook on high for 10 minutes, let it naturally release for 5 minutes, then quick release, blend, and finish.Add cream or coconut milk after pressure cooking.
Slow cookerFor best flavor, sauté the onion, carrot, garlic, and spices first. Add them to the slow cooker with peeled squash cubes, broth, herbs, salt, and pepper. Cook on high for 3–4 hours or low for 6–8 hours, until very soft. Blend and finish.Use less broth at first; slow-cooked vegetables release liquid.
High-speed blenderRoast or simmer the squash first, then blend with hot broth and cooked aromatics. Use a heated soup cycle only if your blender is designed for it.Hot soup expands, so blend carefully and never overfill.
Immersion blenderBlend directly in the pot after the squash is fully cooked.Easy and safe, but may not be as silky as a countertop blender.

A countertop blender gives the smoothest result. An immersion blender is less fussy and easier to clean, so use whichever one makes the soup more likely to happen tonight.

If the slow cooker is your favorite route for cozy soups, this slow cooker broccoli cheese soup follows the same gentle-finish idea for keeping creamy soups smooth.

How to Make Butternut Squash Soup Creamy

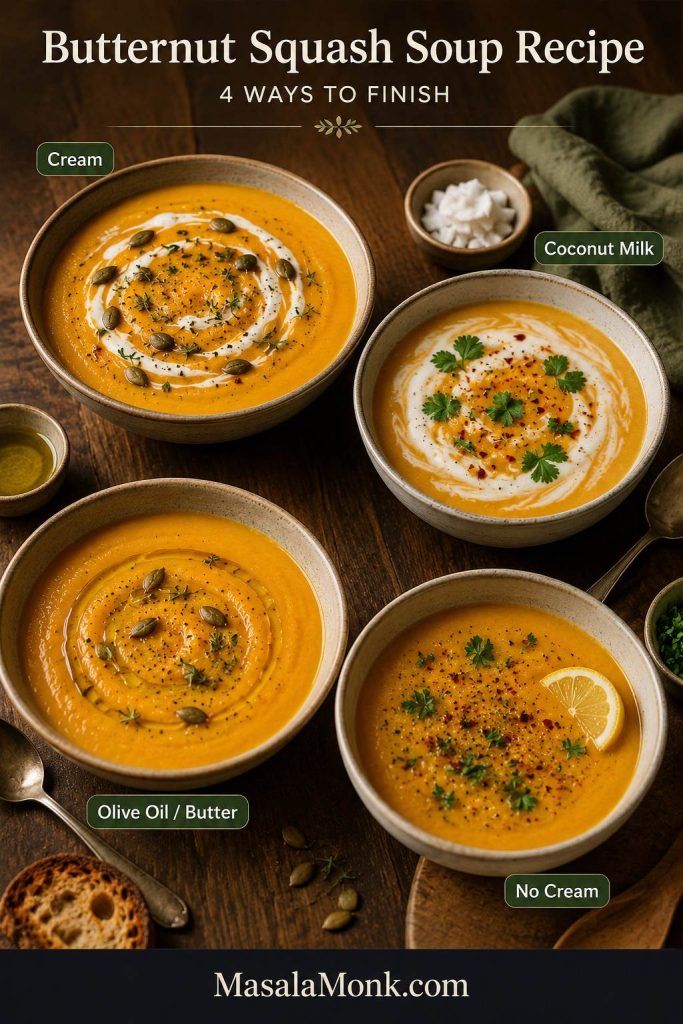
Creaminess does not have to mean heavy cream. It comes from fully tender squash, careful broth, and enough blending. Once the base is smooth, you can make the bowl rich, dairy-free, light, or extra silky with one finishing choice.

Four bowls of butternut squash soup showing cream, coconut milk, olive oil or butter, and no-cream finishing options.
With a smooth base, choose your finish: cream adds richness, coconut milk softens it, olive oil adds gloss, and no cream keeps it lighter.
Creamy OptionBest ForHow to Use It
Heavy creamClassic creamy soupStir in ½ cup / 120 ml after blending. Do not boil hard.
Coconut milkDairy-free or vegan soupAdd 1 cup / 240 ml after blending. Great with ginger, curry, chili, and lime.
ButterCreamy without creamBlend in 1–2 tablespoons at the end.
Olive oilLighter no-cream versionDrizzle in after blending or blend in 1 tablespoon.
Cashew creamVegan richnessBlend soaked cashews with water, then stir in.
Sweet potato or potatoThicker bodyReplace part of the squash or add a small amount while simmering.
No creamLightest versionBlend very well and finish with lemon/lime and a little olive oil.

A coconut milk version works best with full-fat coconut milk. Light coconut milk is fine, but the soup will be thinner and less silky.

For a vegan bowl, use vegetable broth, olive oil, coconut milk or cashew cream, and plant-based toppings like pumpkin seeds, roasted chickpeas, herbs, or chili oil.

Add cream, coconut milk, or cashew cream near the end, after blending. This keeps the texture smoother and prevents dairy from boiling too hard.

After choosing your finish, try a flavor variation or use troubleshooting if the soup tastes flat, thin, or too sweet.

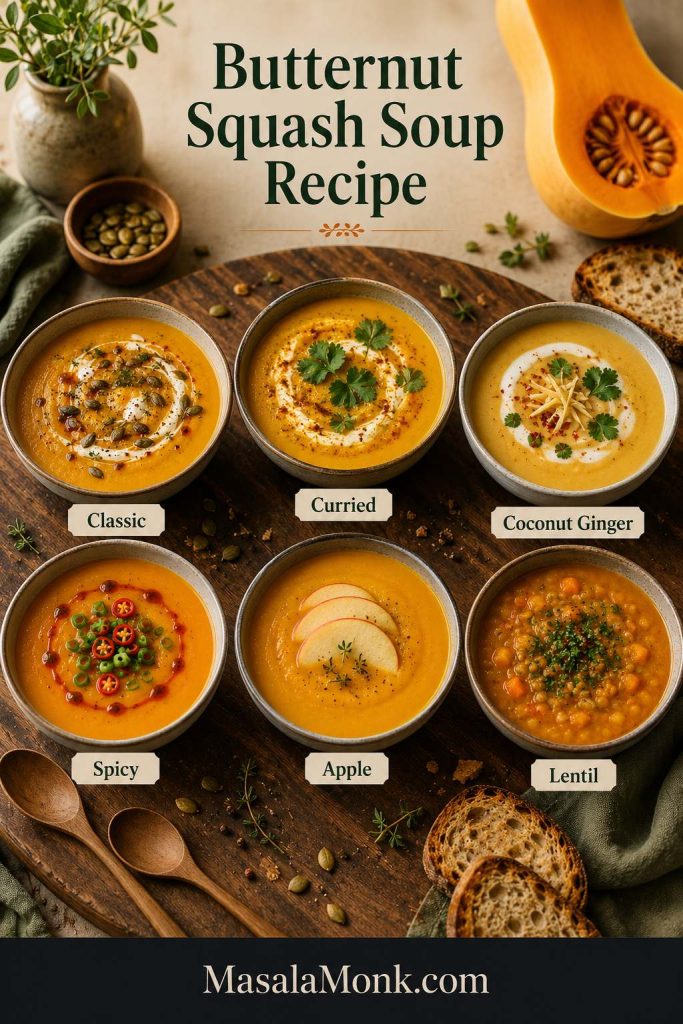
Butternut Squash Soup Variations

Think of the variations as small turns, not separate recipes. The soup stays familiar; only the mood changes.

Six small bowls of butternut squash soup variations labeled classic, curried, coconut ginger, spicy, apple, and lentil.
Start with the same base, then shift the mood: curry adds warmth, ginger adds brightness, lentils add body, and apple brings autumn sweetness.
VersionWhat to Add
Classic butternut squash soupSage, thyme, rosemary, black pepper, and a little nutmeg
Curried butternut squash soupCurry powder or garam masala, ginger, coconut milk, and lime
Spicy butternut squash soupChili flakes, chili oil, chipotle, or black pepper
Coconut ginger soupCoconut milk, fresh ginger, lime, and cilantro
Apple autumn soup1 peeled apple, cinnamon, nutmeg, and a small drizzle of maple syrup
Sweet potato butternut soupReplace 2 cups of squash with sweet potato cubes
Carrot butternut soupAdd 2–3 carrots and ½ cup extra broth if the soup gets too thick
Lentil butternut soupAdd ½ cup red lentils and 1–1½ cups extra broth for a thicker, meal-style soup
Roasted garlic soupRoast garlic with the squash and blend it in
No-cream light soupSkip cream and finish with lemon, herbs, and olive oil

For a warm spiced version, add ginger, a little curry powder or garam masala, coconut milk, black pepper, and lime juice. It gives the soup depth without making it heavy.

Lentils are the easiest way to turn this into a heartier vegetarian meal. This guide to vegan lentil soup recipes has more ideas for using lentils in cozy, filling bowls.

For the apple-autumn version, a small pinch of homemade pumpkin pie spice can bring cinnamon, ginger, nutmeg, allspice, and clove notes without needing several jars on the counter.

When the flavor lane is set, finish the bowl with toppings or turn it into dinner with serving ideas.

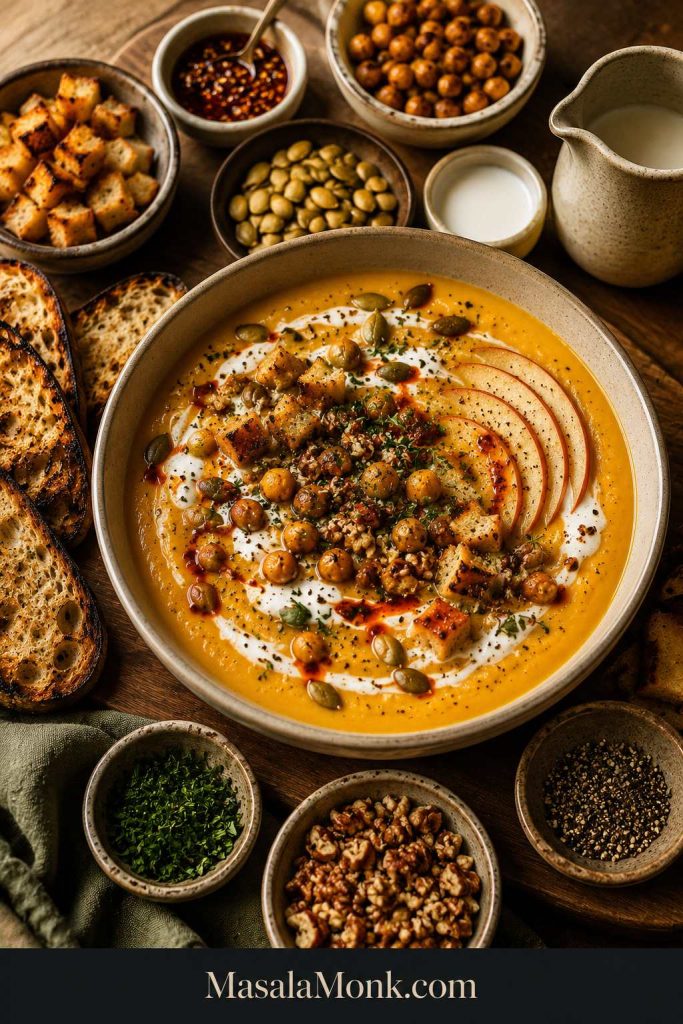
Best Toppings for Butternut Squash Soup

Once the soup is blended and balanced, toppings are where the bowl stops feeling like plain puree and starts feeling like dinner. A silky soup needs something that crunches, swirls, snaps, or wakes it up — seeds, herbs, chili oil, cream, yogurt, roasted chickpeas, or crisp toast.

Bowl of butternut squash soup surrounded by pumpkin seeds, chili oil, herbs, croutons, roasted chickpeas, apple slices, nuts, black pepper, and toast.
Because creamy soup is soft by nature, toppings should add contrast: crunch, heat, herbs, pepper, toast, or something bright.
What the Soup NeedsGood Toppings
CrunchToasted pumpkin seeds, croutons, roasted chickpeas, toasted almonds, walnuts, or pecans
Creamy contrastCream swirl, coconut milk, yogurt, sour cream, or cashew cream
HeatChili oil, chili crisp, red pepper flakes, black pepper, sambal, or hot sauce
FreshnessCilantro, parsley, chives, scallions, basil, or dill
Sweet-salty contrastDiced apple, crispy bacon, blue cheese, feta, or dried cranberries
Meal upgradeRoasted chickpeas, cooked lentils, beans, grilled cheese cubes, or toasted bread

Think of toppings as balance. Sweeter batches need heat, salt, herbs, or acidity. For a fuller meal, add chickpeas, lentils, beans, seeds, or toast.

Easy Topping Combos

StyleUse This Combo
ClassicCream swirl + black pepper + toasted pumpkin seeds
VeganCoconut milk + chili oil + cilantro + roasted chickpeas
Fall dinnerToasted pecans + diced apple + thyme
SpicedLime + chili oil + toasted seeds + cilantro
Protein boostLentils or roasted chickpeas + yogurt or coconut milk
Simple lunchCroutons + olive oil + black pepper + parsley

A swirl of cream softens the edges, pumpkin seeds snap against the silky soup, and chili oil or lime keeps the sweetness awake.

To make the bowl feel more like lunch, serve it with a scoop of chickpea salad on the side. Chickpeas add protein and texture without making the meal feel heavy.

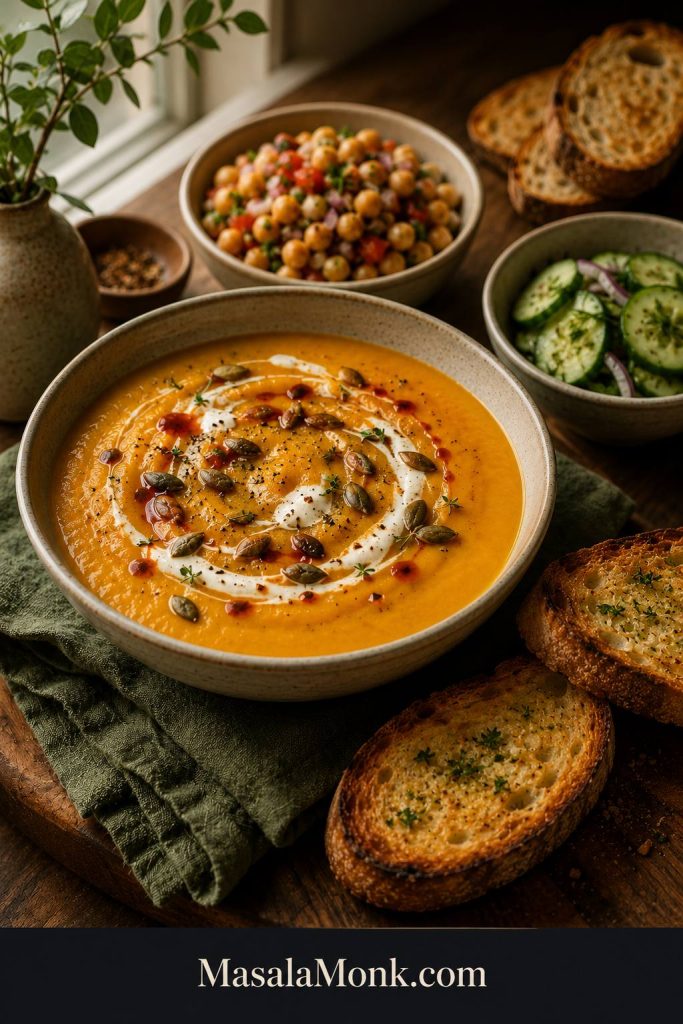
What to Serve With Butternut Squash Soup

This soup can be a starter, lunch, or light dinner. To make it more filling, serve it with something crisp, toasted, or protein-rich.

Butternut squash soup served with garlic toast, cucumber salad, chickpea salad, and rustic bread on a cozy table.
Turn butternut squash soup into dinner by pairing the bowl with crisp toast, garlic bread, chickpea salad, or cucumber salad.
  • Crusty bread
  • Garlic bread
  • Grilled cheese
  • Cheese toast
  • Simple green salad
  • Roasted chickpeas
  • Lentil salad
  • Quinoa bowl
  • Baked potato
  • Sandwiches
  • Roasted vegetables

Bread turns this into the kind of meal people linger over. A warm slice of homemade garlic bread loaf works especially well because it adds crunch, butteriness, and something sturdy to dip.

Cucumber salad keeps the meal from feeling too soft or sweet. The vinegar, dill, and onion cut through the squash’s natural sweetness.

If you love cozy soup dinners, try this French onion soup next. For tonight, keep this butternut squash soup as the main bowl with toast, salad, and crunchy toppings.

Storage, Freezing, and Reheating

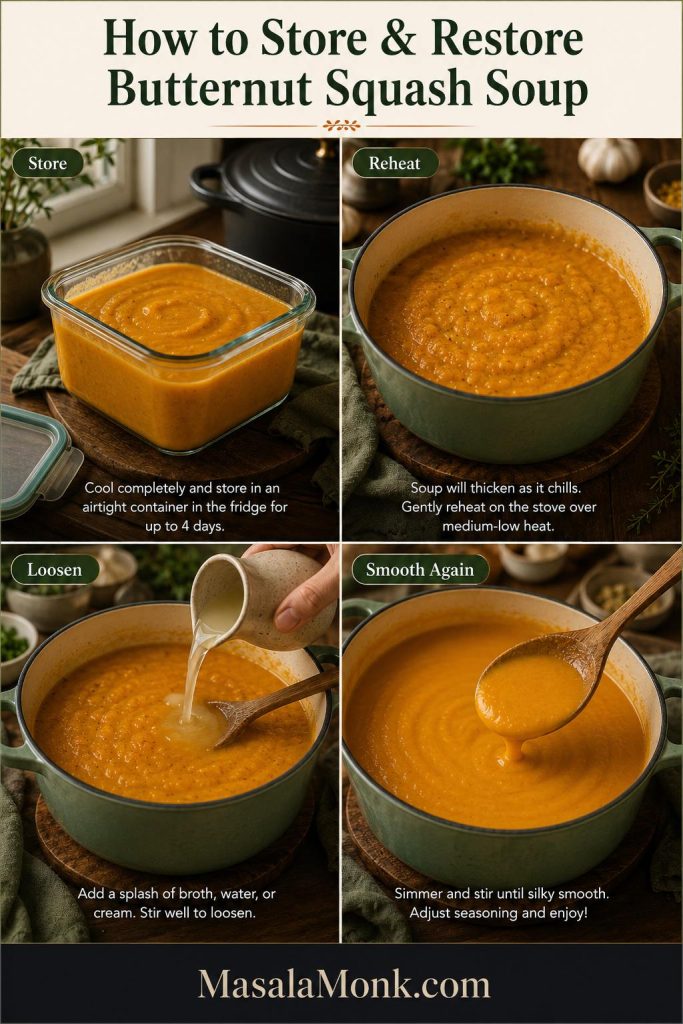
This soup is excellent for meal prep because it stores and reheats well. It may look thicker the next day, but that is normal; a splash of broth, water, cream, or coconut milk brings it back.

Four-panel guide showing butternut squash soup in a storage container, thick reheated soup, liquid being stirred in, and smooth soup on a spoon.
As the soup chills, it thickens. Reheat gently and stir in a small splash of broth, water, cream, or coconut milk until smooth again.
Storage MethodGuidance
FridgeStore in an airtight container for up to 4 days.
FreezerFreeze for up to 3 months for best texture and flavor.
Reheating on stoveWarm gently over medium-low heat, stirring often.
Reheating in microwaveHeat in short intervals, stirring between each one.
If too thick after chillingAdd broth, water, cream, or coconut milk a little at a time.
If separated after freezingWhisk well or blend briefly after reheating.

For general food safety, the USDA leftover safety guidance recommends using refrigerated leftovers within 3–4 days.

Cream-based soup can sometimes separate slightly after freezing. It is still fine to eat, but the texture may need whisking or blending.

Coconut milk versions usually freeze well, though they may also need stirring after reheating.

For the smoothest freezer results, freeze the soup before adding cream, then add cream or coconut milk after reheating.

Need to rescue leftovers or a tricky batch? Jump to fixes for thick, thin, bland, grainy, or separated soup.

Avoid These Common Mistakes

Most problems are easy to avoid if you control the liquid, cook the squash fully, and balance the flavor at the end.

  • Do not add all the broth at once. Start with 3 cups / 720 ml and thin after blending.
  • Do not blend undercooked squash. The squash should be soft enough to mash easily with a spoon.
  • Do not skip salt and acid. Butternut squash is sweet, so it needs seasoning and brightness.
  • Do not boil hard after adding cream. Add cream or coconut milk near the end and heat gently.
  • Do not rely only on sweetness. Use onion, garlic, herbs, ginger, spice, or acidity for balance.
  • Do not judge the texture before blending. The soup often looks chunky or loose before it turns smooth.

Troubleshooting Butternut Squash Soup

If the pot is already made and something feels off, do not start over. A bland or thin soup is not a failure — it usually just needs salt, acid, time, or a little more body.

Why is my butternut squash soup bland?

Most bland soup needs salt first, then acid. Add salt gradually, then wake it up with lemon juice, lime juice, or apple cider vinegar. Still flat? Add black pepper, smoked paprika, curry powder, ginger, or a small amount of butter or olive oil.

Why does my soup taste like plain puree?

If the soup tastes like plain puree or too sweet and one-note, it usually needs contrast. Add salt first, then try lemon, lime, vinegar, black pepper, chili oil, toasted seeds, herbs, roasted chickpeas, or crisp toast on top.

Why is my soup too sweet?

Butternut squash is naturally sweet. Balance it with lemon juice, lime juice, vinegar, black pepper, chili flakes, curry powder, or a little extra broth. Savory toppings like roasted chickpeas, pumpkin seeds, yogurt, or herbs also help.

How do I fix soup that is too thick?

Add hot broth ¼ cup / 60 ml at a time, blending or stirring after each addition, until the soup reaches the texture you want.

How do I fix soup that is too thin?

Simmer it uncovered until some liquid evaporates. You can also blend in more roasted squash, cooked sweet potato, cooked carrots, red lentils, or beans.

Why is my soup grainy?

The squash may not have cooked long enough, or the soup may need more blending. Simmer until the squash is very soft, then blend thoroughly. A countertop blender usually gives the smoothest texture.

Why did my soup separate after freezing?

Cream and coconut milk can separate slightly after freezing and reheating. Warm the soup gently and whisk well. If needed, blend it briefly to bring the texture back together.

How do I make the soup richer without cream?

Blend in 1–2 tablespoons butter, a drizzle of olive oil, coconut milk, cashew cream, or a small amount of cooked sweet potato. Roasting the squash first also gives the soup deeper flavor without needing extra cream.

Is Butternut Squash Soup Healthy?

It can be a nourishing, vegetable-heavy soup, but the final nutrition depends on broth, cream, toppings, and serving size. The base is naturally smooth, so you do not need a lot of cream to make it satisfying.

A lighter version still feels satisfying because the squash does the creamy work before any cream goes in. For the lightest bowl, use broth, olive oil, lemon, herbs, and crunchy seeds.

A more filling vegetarian version can use lentils, beans, chickpeas, Greek yogurt, or pumpkin seeds. Richer cream-or-butter versions work best in smaller bowls.

If you are not keeping it vegetarian, grilled chicken or turkey also works. For lower sodium, use low-sodium broth and adjust salt at the end.

To check ingredient-level nutrition details, search for raw or cooked butternut squash in USDA FoodData Central.

For a low-carb or keto-style approach, butternut squash needs more care because it is naturally starchy. This guide to butternut squash on keto explains that angle in more detail.

Frequently Asked Questions

Do you need to peel butternut squash for soup?

If you are roasting the squash in halves, you do not need to peel it first. Roast it until soft, then scoop the flesh out of the skin. If you are making the stovetop version with cubes, peel it before cooking.

Is roasted butternut squash soup better than stovetop?

Roasting usually gives deeper flavor because the squash caramelizes in the oven. The stovetop version is faster and easier, but it may need a little extra seasoning, spice, or acidity to taste as rich.

What makes butternut squash soup creamy?

Butternut squash itself becomes creamy when cooked until soft and blended well. Cream, coconut milk, butter, olive oil, cashew cream, sweet potato, or potato can make it richer, but good blending and broth control matter most.

How do you make butternut squash soup without cream?

Skip the cream and blend the soup very well. Use less broth at first, then thin only as needed. Finish with olive oil, butter if not vegan, coconut milk, cashew cream, or a splash of lemon or lime juice for balance.

Does coconut milk work in butternut squash soup?

Yes — especially with ginger, curry powder, chili, lime, and cilantro. Full-fat coconut milk gives the creamiest texture.

When should you add cream or coconut milk?

Add cream or coconut milk after the squash is cooked and the soup is blended. Warm it gently after adding. Avoid boiling hard once cream has been added because the texture can become less smooth.

Why does my butternut squash soup taste bland?

Most bland soup needs salt first, then acid. Add salt gradually, then brighten it with lemon juice, lime juice, or apple cider vinegar. For more flavor, add ginger, black pepper, smoked paprika, curry powder, sage, thyme, or chili oil.

How do you thicken butternut squash soup?

Simmer it uncovered, or blend in more cooked squash, sweet potato, carrots, lentils, beans, or potato. For best results, avoid adding too much broth before blending.

What spices go well with butternut squash soup?

Sage, thyme, rosemary, nutmeg, black pepper, smoked paprika, ginger, curry powder, cinnamon, chili flakes, and garam masala all work well here.

Can frozen butternut squash be used for soup?

Yes — use about 8 cups / 1.1–1.2 kg frozen cubes for this recipe. Add them directly to the pot and simmer until very soft. Start with less broth because frozen squash can release extra water.

How much butternut squash puree equals one squash for soup?

For this recipe, use about 4 cups / 900–950 g puree in place of one large 3 lb / 1.3–1.4 kg squash. Sauté the onion, garlic, carrot, and spices first, then whisk in the puree and broth slowly.

Can you make butternut squash soup in an Instant Pot or slow cooker?

Yes. For Instant Pot soup, sauté the aromatics, add squash and broth, pressure cook on high for 10 minutes, naturally release for 5 minutes, then blend and finish. Slow cooker soup takes 3–4 hours on high or 6–8 hours on low, until the squash is very soft. Add cream or coconut milk after cooking.

How long does butternut squash soup last?

It lasts up to 4 days in the fridge when stored in an airtight container. You can also freeze it for up to 3 months. For the best texture, freeze the soup before adding cream, then add cream or coconut milk after reheating.

Back to Recipe Card · Back to Top

Final Tips for the Best Butternut Squash Soup

Use roasted squash when you have time and the stovetop method when dinner needs to happen faster. Start with less broth, blend until the soup turns glossy, then loosen it only if needed.

Before serving, taste once. If the bowl feels flat, add salt first, then a small splash of lemon, lime, or vinegar. Too thick? Loosen it gently. Too sweet? Give it herbs, heat, crunch, or acidity.

That is the bowl you want: creamy without being dull, sweet without being sugary, warm without being heavy, and easy enough to make again next week — especially with toast, seeds, or a little chili oil on top.

Posted on Leave a comment

Slow Cooker Broccoli Cheese Soup Recipe

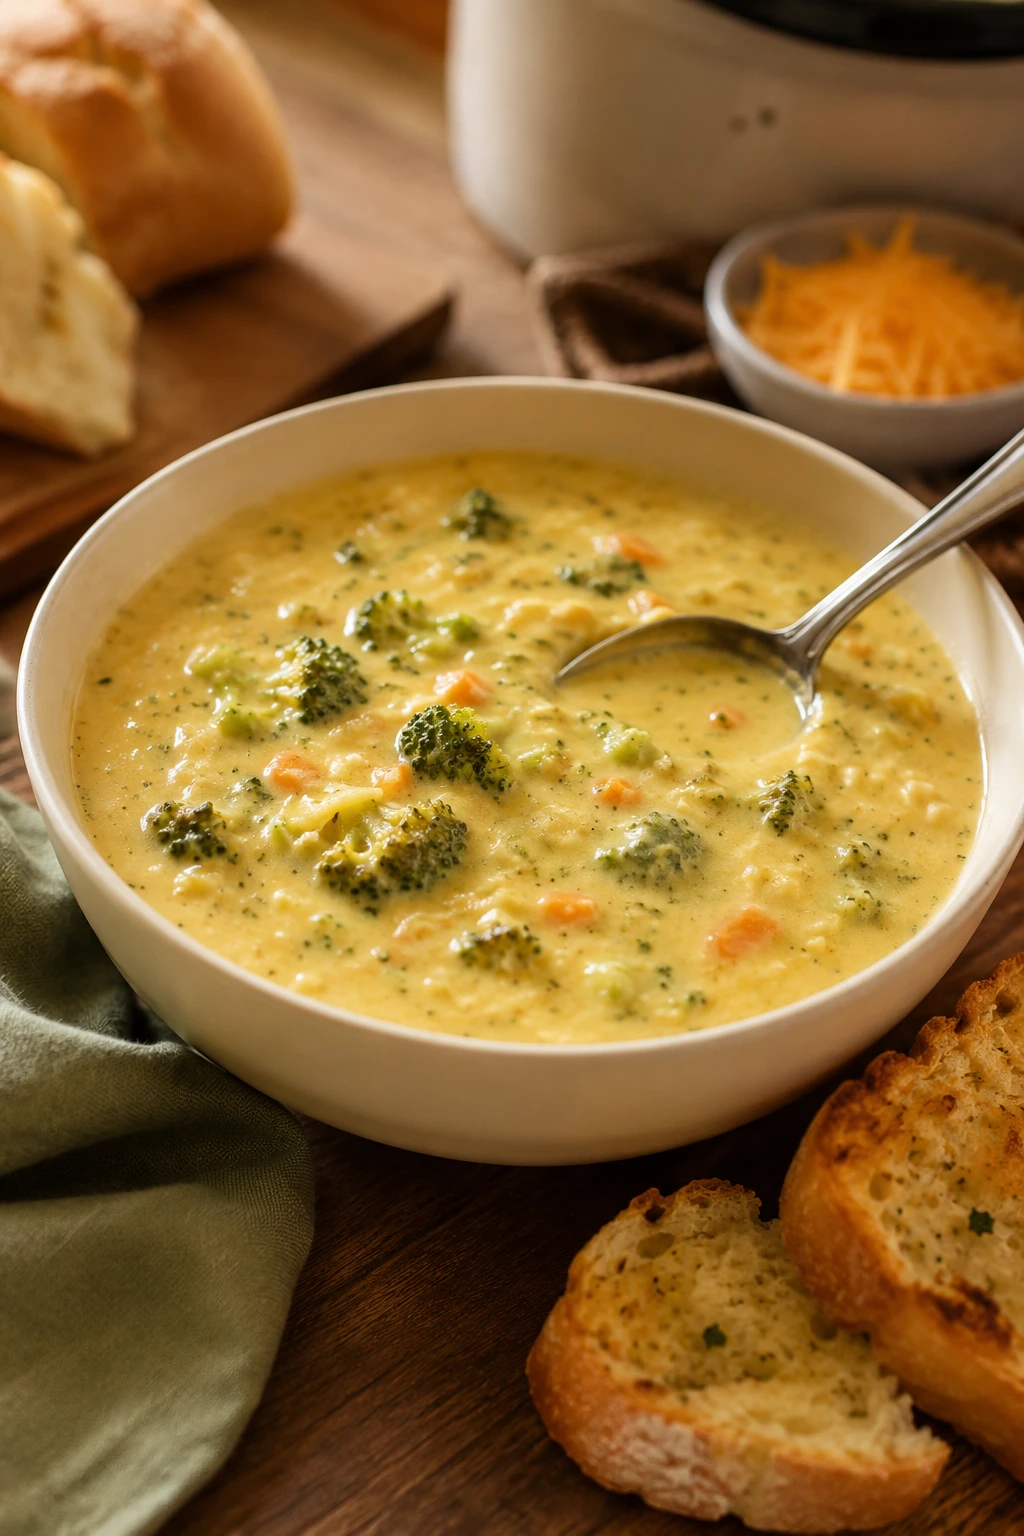
Bowl of creamy broccoli cheese soup with broccoli pieces, carrot bits, shredded cheddar, a spoon, and crusty bread on a wooden table.

A good slow cooker broccoli cheese soup should feel like a full bowl of comfort: thick, creamy, cheddar-rich, and loaded with soft broccoli. It should be cozy enough for a cold night, simple enough for a weeknight, and sturdy enough to hold up to bread, crackers, or a grilled cheese on the side.

This is the slow cooker broccoli cheese soup for people who want real cheddar flavor without a grainy pot. No canned soup, no hours of cooked cheddar, just tender broccoli, a spoonable base, and cheese melted at the finish.

The finished bowl coats the spoon, keeps broccoli in every bite, and tastes cozy instead of heavy. It feels like dinner before you add anything else: warm, creamy, familiar, and balanced with enough broccoli to keep the cheddar from taking over.

Ready to cook? Jump straight to the recipe, or skim the quick notes below if you want the soup thicker, smoother, more Panera-style, or easier to make with what you already have.

Make this tonight:

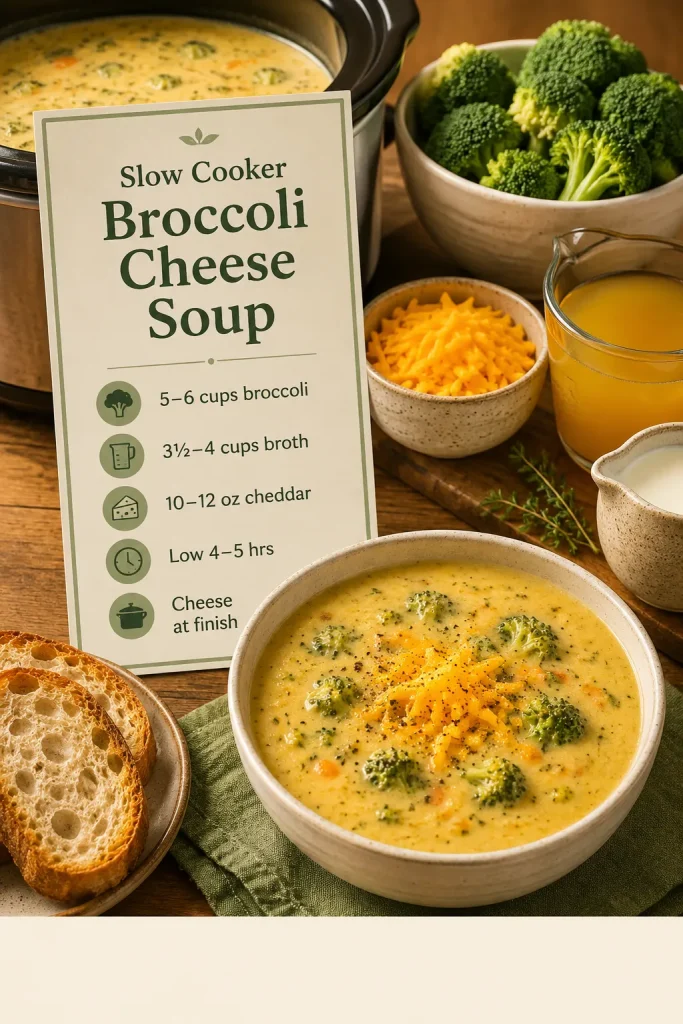
  • Base ratio: 5 to 6 cups / 450 to 500 g broccoli, 3 1/2 to 4 cups / 840 to 960 ml broth, and 10 to 12 oz / 285 to 340 g cheddar.
  • Timing: low for 4 to 5 hours or high for 2 to 3 hours, until the broccoli is tender.
  • Cheese stage: add cheddar at the end, after the heat settles.
  • Thickening: use cornstarch slurry, partial blending, cream cheese, or a potato variation.

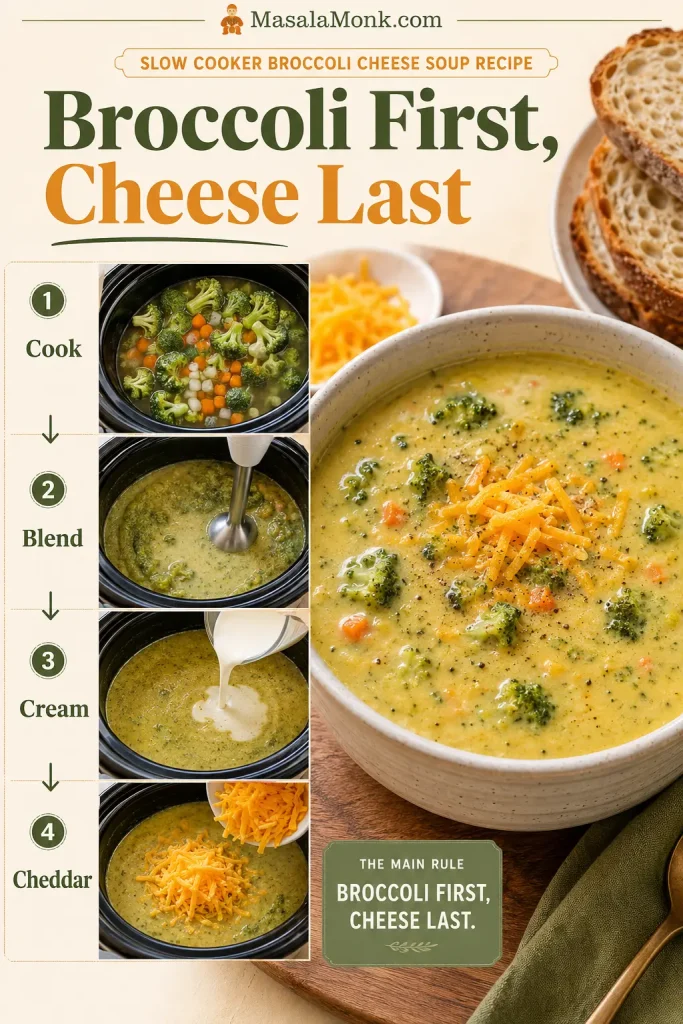
Best version for most people: Use fresh broccoli, 3 1/2 cups broth, evaporated milk or heavy cream, and freshly shredded sharp cheddar. The body comes from broccoli, a small cornstarch slurry, partial blending, and cheese added at the end. The simple rule is broccoli first, cheese last.

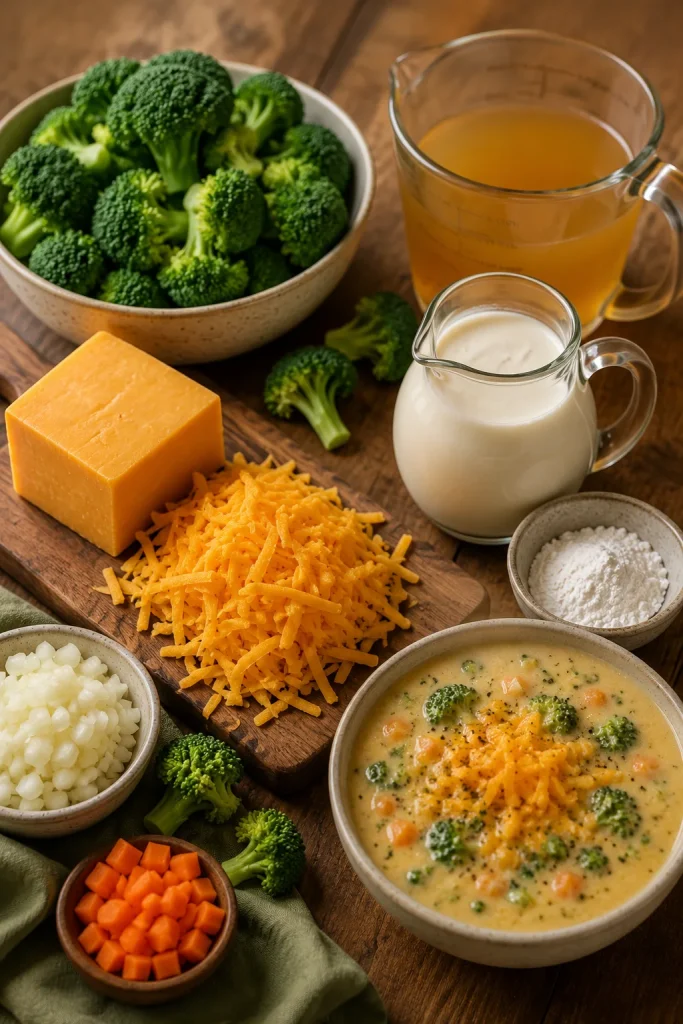
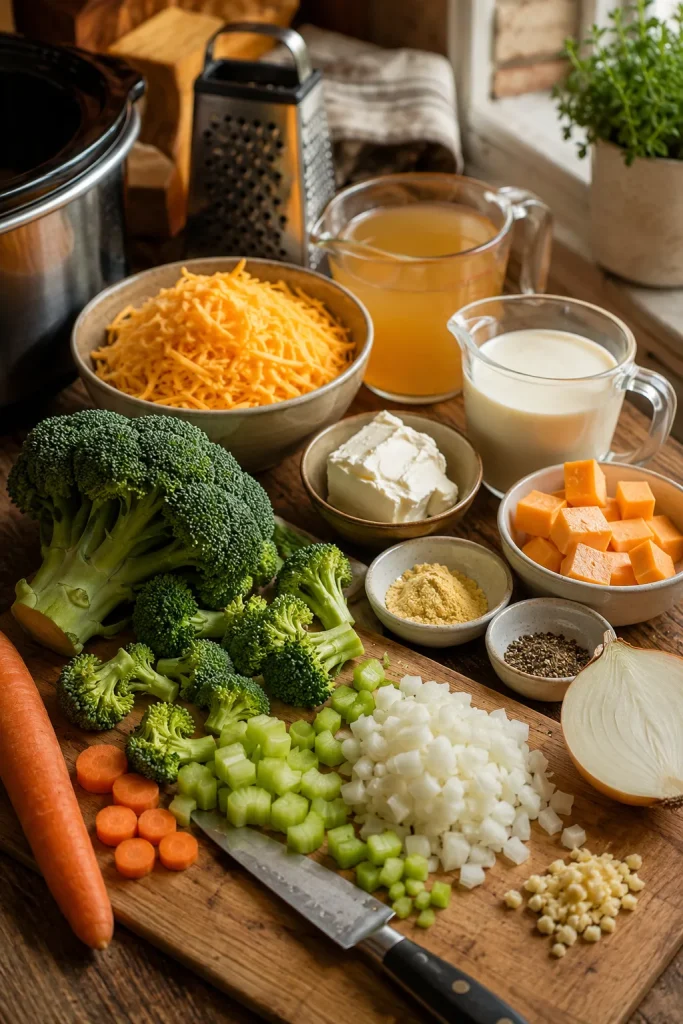
Fresh broccoli, shredded cheddar, broth, cream, cornstarch, and a small bowl of broccoli cheese soup arranged on a wooden board.
For the most reliable slow cooker broccoli cheese soup, keep the ingredient list simple: broccoli, cheddar, broth, aromatics, and dairy added late.

In This Guide

Quick Answer: Slow Cooker Broccoli Cheese Soup

For creamy slow cooker broccoli cheese soup, cook the broccoli, onion, carrot, garlic, broth, and cornstarch slurry first. Once the broccoli is tender, blend about one-third of the soup, turn the slow cooker to warm, low, or off, then stir in cream or evaporated milk and freshly shredded cheddar.

Cheddar belongs near the end, not at the beginning. It can turn grainy when it sits in high heat for hours. Add it by handfuls, stir slowly, and let the finished pot rest for 5 to 10 minutes before serving.

For your first batch: use fresh broccoli, low heat, freshly shredded sharp cheddar, 3 1/2 cups broth for a thicker soup, and evaporated milk or cream added at the end. Frozen broccoli works when convenience matters, and a little Velveeta helps when you want the smoothest finish.

The Recipe

Start here when you are ready to cook. The recipe works as written. Use the notes below only when you want to adjust the pot: frozen broccoli, missing cream, grainy cheese, a too-thin base, or a more Panera-style finish.

You do not need to read every note before cooking. The order matters more than perfection: once the broccoli is tender and the cheese melts over soft heat, the soup is on the right track.

Recipe Details

Serves: 6 bowls · Prep: 15 minutes · Cook: 4 to 5 hours on low or 2 to 3 hours on high · Finish: 10 to 15 minutes · Equipment: 5 to 6 quart slow cooker, box grater, whisk, small bowl, ladle, optional immersion blender.

Ingredients

IngredientUS AmountMetric / Notes
Broccoli florets, chopped5 to 6 cups450 to 500 g / about 1 lb
Yellow onion, finely chopped1 small100 to 120 g
Carrot, shredded or finely diced1 medium / about 1 cup80 to 100 g
Celery, finely chopped, optional1 stalk40 to 50 g
Garlic, minced2 to 3 cloves10 to 15 g
Chicken broth or vegetable broth3 1/2 to 4 cups840 to 960 ml
Cornstarch2 tablespoonsAbout 16 g
Heavy cream or evaporated milk1 cup heavy cream, or 1 cup to one 12 oz can evaporated milk240 ml cream; use 240 to 355 ml evaporated milk depending on how creamy or loose you want it
Sharp cheddar, freshly shredded10 to 12 oz285 to 340 g
Velveeta, optional4 to 8 oz as a partial cheddar replacement115 to 225 g, cubed small
Cream cheese, optional2 oz55 g, cubed small and softened
Parmesan, optional1/4 cupAbout 25 g
Butter, optional2 tablespoons28 g
Fine salt3/4 to 1 teaspoon to startAdd more to taste at the end
Black pepper1/2 teaspoonFreshly ground if possible
Mustard powder or Dijon mustard, optional1/2 teaspoon powder or 1 teaspoon DijonBoosts cheddar flavor
Nutmeg, optionalPinchRounds out the creaminess
Cayenne or paprika, optionalPinch to 1/4 teaspoonFor warmth, not heat

Use less salt with salty broth, Parmesan, Velveeta, bacon, or ham. For a full 12 oz can of evaporated milk, start with 3 1/2 cups broth. When using Velveeta, replace part of the cheddar instead of adding it on top.

Instructions

  1. Make the slurry. Whisk the cornstarch with 1/2 cup cold broth until smooth.
  2. Load the slow cooker. Add the broccoli, onion, carrot, celery if using, garlic, remaining broth, slurry, salt, pepper, and butter if using.
  3. Cook until tender. Cover and cook on low for 4 to 5 hours or high for 2 to 3 hours, until the broccoli presses easily against the side of the pot.
  4. Blend for body. Blend about one-third of the soup, or mash some broccoli against the side. Leave pieces for a chunkier bowl.
  5. Lower the heat. Turn the slow cooker to warm, low, or off. Stir in the cream or evaporated milk. Add softened cream cheese now if using.
  6. Add cheese gradually. Fold in shredded cheddar by handfuls, stirring after each addition. Add small Velveeta cubes with or just before the cheddar if using.
  7. Rest and thicken. Cover for 5 to 10 minutes, then stir again. Aim for a creamy cheddar base with visible broccoli and a spoon-coating texture.
  8. Adjust before serving. Add salt, pepper, mustard powder, cayenne, or Parmesan if needed. Loosen thick soup with warm broth or milk, or use the thickening fixes below if it is thin.

Important: hot enough to melt, not hot enough to boil — that is the creamy zone after the cheddar is added.

Finished broccoli cheese soup in a slow cooker with a creamy cheddar base, visible broccoli pieces, and a ladle in the pot.
After the cheese melts, a short rest helps the soup settle into a smooth, ladleable broccoli cheddar texture.

Need to adjust the pot? Jump to Choose Your Version, Fresh vs Frozen Broccoli, Cheese Choices, or Thickening.

Slow Cooker Broccoli Cheese Soup at a Glance

Use this quick table when you want the main numbers without rereading the full recipe.

Recipe ratio card for slow cooker broccoli cheese soup with broccoli, broth, cheddar, cook time, and cheese-at-finish notes.
Use the ratio as a guardrail: plenty of broccoli, controlled broth, enough cheddar for flavor, and a gentle finish.
Slow cooker size5 to 6 quart slow cooker for a standard batch
Broccoli amount5 to 6 cups / 450 to 500 g chopped broccoli
Broth range3 1/2 cups / 840 ml for thicker soup; 4 cups / 960 ml for looser soup
Cook timeLow for 4 to 5 hours or high for 2 to 3 hours, until broccoli is tender
CheeseFreshly shredded sharp cheddar; optional Velveeta or cream cheese for smoother texture
Texture targetCreamy, thick, spoonable, with visible broccoli pieces

Choose Your Version

Start with the fresh-broccoli, sharp-cheddar version. Once that base is clear, every variation is easier: smoother, thicker, lighter, more shortcut-friendly, or more like a restaurant-style broccoli cheddar soup.

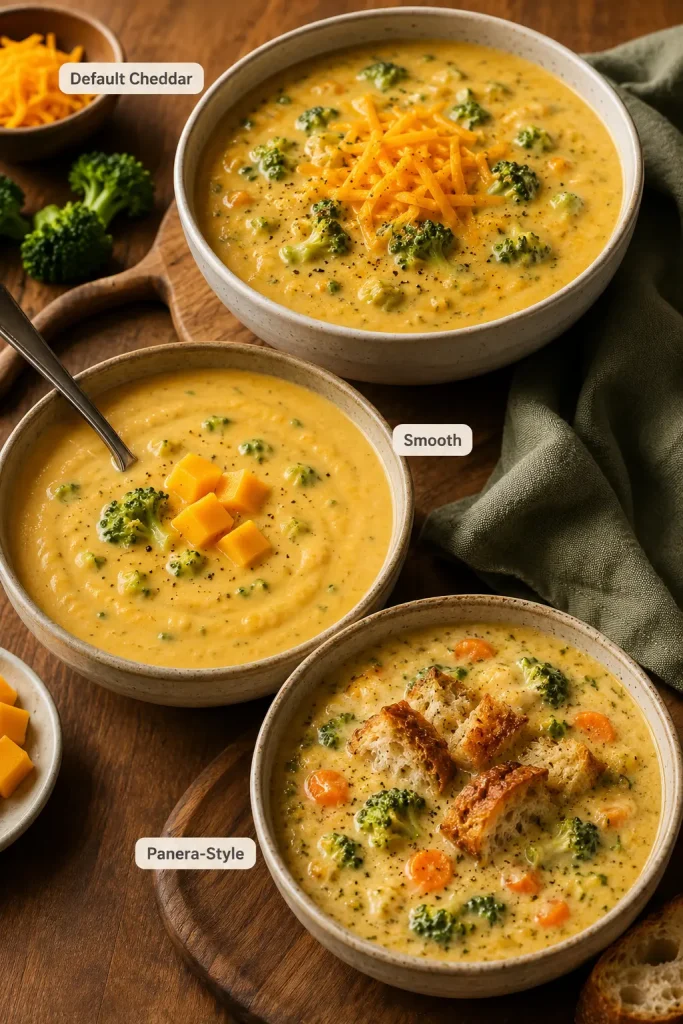
Three bowls of broccoli cheese soup labeled Default Cheddar, Smooth, and Panera-Style on a wooden table.
Whether you want bolder cheddar, a smoother family-style bowl, or a Panera-style feel, the same base method still works.
What You WantUse ThisSmart Move
Best default versionFresh broccoli + freshly shredded sharp cheddarUse 3 1/2 cups broth and melt cheddar at the end
Smooth family-style bowlCheddar + 4 to 8 oz VelveetaCube Velveeta small so it melts easily
Frozen broccoli versionFrozen broccoli + evaporated milk + cheddarDrain thawed broccoli or reduce broth slightly
Thicker bowlLower broth amount + cream cheese + partial blendingLet the soup rest before serving
Panera-styleCarrot, onion, sharp cheddar, mustard powder, partial blendingServe with crusty bread or a bread bowl
Hearty dinnerAdd diced potatoes at the startCook until potatoes are fully tender before adding cheese

Why This Recipe Works

The slow cooker is great at softening vegetables, but it is not great at reducing liquid or babysitting cheese. This recipe works because it gives the slow cooker the job it does best and saves the cheddar for the finish.

That is the structure: let the pot soften the vegetables, use a little blending for body, then finish with cheddar once the base is ready.

Step-by-step guide showing broccoli cooking, soup being blended, cream being added, and cheddar added last.
The method is easy to remember: let the slow cooker soften the broccoli first, then finish with cream and cheddar over steady heat.
  • Moderate broth keeps the soup from turning watery. Slow cookers do not reduce liquid like stovetop pots, so the recipe starts with 3 1/2 to 4 cups broth instead of drowning the broccoli.
  • Cornstarch gives the base an easy head start. It helps the soup thicken without needing a stovetop roux.
  • Partial blending adds body naturally. Blending some broccoli makes the soup feel thicker without making it heavy.
  • Cheddar finishes the soup. This protects the melt and keeps the bowl creamy instead of oily or gritty.
  • Freshly shredded cheese melts better. It gives stronger flavor and a cleaner finish than many pre-shredded cheeses.

If you have ever had a cheese sauce split before, the lesson is the same whether it is soup or a creamy macaroni and cheese recipe: low heat wins.

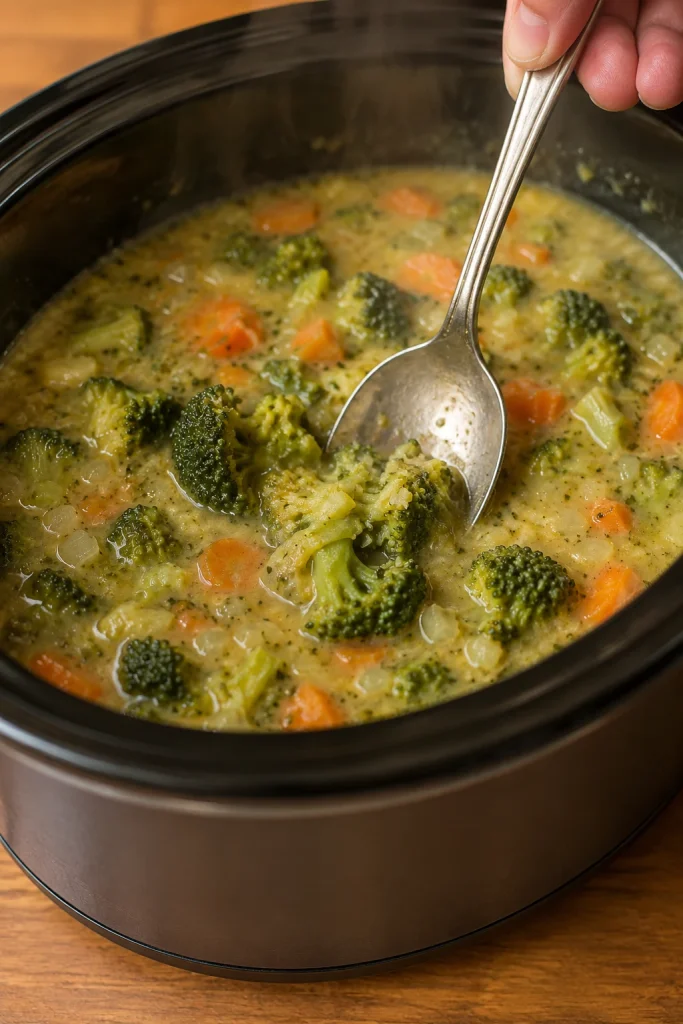
You want the spoon to drag gently through the soup, not splash through it. The broccoli softens into the base, the cheese melts into the cream, and the finished bowl feels thick without turning pasty.

Close-up of creamy broccoli cheese soup coating a spoon with a broccoli piece visible as soup drips back into the bowl.
The spoon test is simple: the soup should coat the spoon, drip slowly, and still pour back into the bowl.

Ingredients and What Each One Does

Nothing here is fancy; every ingredient has a job. The broccoli gives the bowl its heart, the aromatics make it taste like dinner, the broth sets the body, and the cheese brings the comfort.

Broccoli cheese soup ingredients including broccoli, carrot, onion, garlic, celery, broth, cream, cheddar, cream cheese, seasonings, and a box grater.
Before anything goes into the slow cooker, each ingredient has a job: vegetables build flavor, broth carries it, and cheese finishes it.

Broccoli

Use 5 to 6 cups of chopped broccoli florets, about 450 to 500 grams. Fresh broccoli gives steady texture, especially if you like visible pieces in the soup. Frozen broccoli works too, but it usually creates a softer, more blended bowl and can release extra water. Tender peeled broccoli stems can go in as well; chop them small so they soften at the same pace as the florets.

Onion, Carrot, Celery, and Garlic

These are what keep the soup from tasting like cheese melted into broth. Onion adds sweetness, carrot gives color and a mild Panera-style note, celery adds savory depth, and garlic keeps the base from tasting flat. If you dislike celery, skip it. For a smoother soup, chop everything small.

Broth

Chicken broth gives the richest flavor, while vegetable broth keeps the soup vegetarian. Use 3 1/2 cups if you like a thick soup and 4 cups if you prefer it slightly looser. When your broth is salty, start with less added salt and adjust at the end.

Cornstarch

Cornstarch is the easiest thickener for this slow cooker version. Whisk it into cold broth before it goes into the cooker so it spreads evenly. You can also use an extra slurry at the end if the base looks thinner than you want.

Heavy Cream or Evaporated Milk

Heavy cream gives the richest soup. Evaporated milk gives a creamy, stable finish that is a little lighter than cream. Regular milk can work, but it is thinner and more likely to split if overheated, so add it carefully and keep the pot below a hard bubble after the cheddar melts in.

Cheddar

Sharp cheddar gives the strongest broccoli cheddar flavor. Buy a block and shred it yourself if you can. Pre-shredded cheese is convenient, but it often contains anti-caking ingredients that can make the melt less even. For a deeper look at smooth melting, this cheese sauce recipe walks through the same gentle-heat idea in a stovetop sauce.

Velveeta

Velveeta is optional, but it is useful if you want the soup extra smooth and kid-friendly. It does not give the same sharp cheddar flavor as real cheddar, so the most balanced compromise is usually a mix: cheddar for flavor, Velveeta for easy melting.

Cream Cheese

Cream cheese is optional, but helpful. It adds body and helps the soup taste richer. Use block cream cheese, not whipped cream cheese. Cut it into small cubes and let it soften for a few minutes so it melts more easily.

Mustard, Nutmeg, Cayenne, or Paprika

These are small flavor boosters, so they should stay in the background. Mustard powder or Dijon makes cheddar taste sharper. Nutmeg rounds out creamy soups. Cayenne or paprika adds warmth and keeps the bowl from tasting one-note.

Substitutions: No Milk, No Cream, No Chicken Broth, No Carrots

Real weeknight cooking means the fridge is rarely perfectly stocked. This soup can still work as long as you protect the liquid level and keep the cheese heat gentle.

The swaps below help when you are missing one ingredient. They do not make the soup dairy-free unless you also replace the cheese and cream with dairy-free alternatives. The best swaps keep the bowl creamy without flooding the pot.

Practical Swap Guide

NeedMost Practical SwapWhat Changes
No milkUse evaporated milk, heavy cream, or extra broth plus cream cheeseEvaporated milk is creamy and stable; broth alone makes a lighter soup
No heavy creamUse evaporated milk or half-and-halfThe soup will be slightly lighter but still creamy
No evaporated milkUse heavy cream or half-and-halfAdd near the end and keep the pot below a hard bubble
No chicken brothUse vegetable brothKeeps the soup vegetarian and still flavorful
No carrotsSkip themThe soup loses a little sweetness and color, but still works
No onionUse 1/2 teaspoon onion powder or add extra garlicLess depth, but still cozy
No celerySkip itNo major change; celery is optional
No flourUse cornstarch and partial blendingSimple thickening route for this recipe
No VelveetaUse freshly shredded cheddar and optional cream cheeseBetter real-cheese flavor, slightly more heat-sensitive
No cream cheeseUse extra cheddar, partial blending, or a little more slurrySoup may be slightly less rich

As long as you protect the liquid level and the cheese stage, the recipe gives you room to improvise.

Slow Cooker Size and Scaling

The only trick with slow cooker size is giving yourself room to stir. A 5 to 6 quart slow cooker gives the broccoli space to cook and leaves enough room to add the dairy and cheese at the end.

Half Batch, Standard Batch, and Double Batch

BatchCooker SizeBroccoliBrothCheddar
Half batch2 to 3 quart2 1/2 to 3 cups / 225 to 250 g1 3/4 to 2 cups / 420 to 480 ml5 to 6 oz / 140 to 170 g
Standard batch5 to 6 quart5 to 6 cups / 450 to 500 g3 1/2 to 4 cups / 840 to 960 ml10 to 12 oz / 285 to 340 g
Double batch6 to 8 quart10 to 12 cups / 900 g to 1 kg7 to 8 cups / 1.7 to 1.9 L20 to 24 oz / 570 to 680 g

For half or double batches, scale the remaining ingredients in the same direction, but start lower with salt and adjust after the cheese melts. The soup scales well, but the cheese stage still needs space. A too-full slow cooker makes it harder to melt cheddar evenly.

If your slow cooker runs hot, check the broccoli early. Once the dairy goes in, slow down and let the soup settle.

How to Make Slow Cooker Broccoli Cheese Soup

The recipe card gives you the exact steps. This section shows what the pot looks and feels like as you cook, which is especially helpful if your slow cooker runs hot or your broccoli pieces are larger.

Step 1: Build a base that looks full, not flooded

Add the broccoli, onion, carrot, celery, garlic, broth, salt, pepper, and cornstarch slurry to the slow cooker. The vegetables need enough liquid to cook, but they do not need to swim. Slow cookers trap steam, so moderate broth helps the final soup stay spoonable.

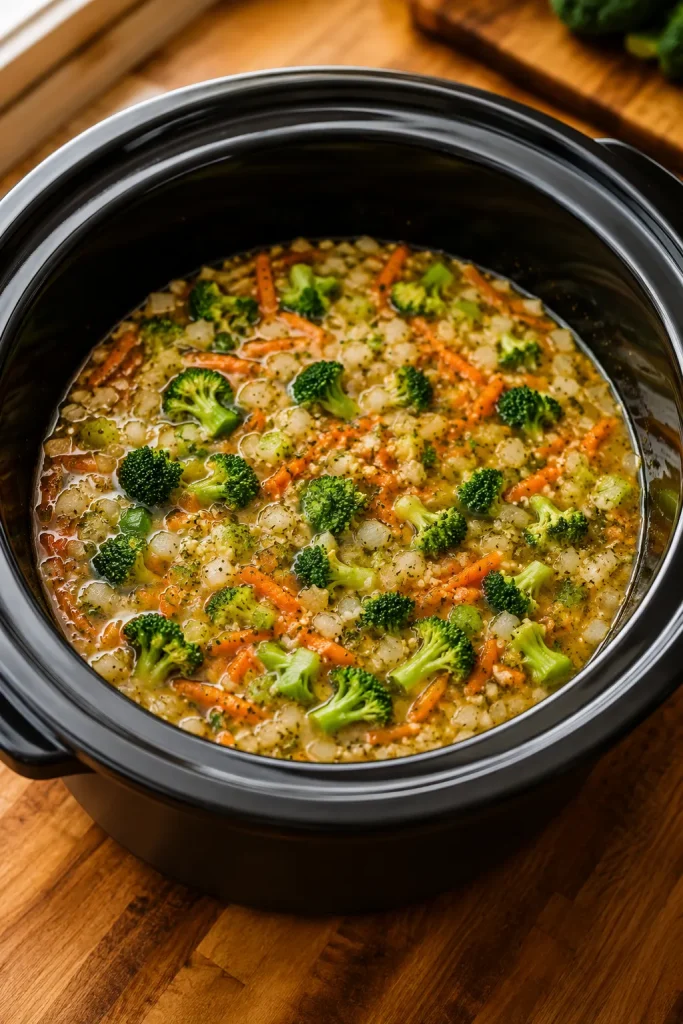
Dark slow cooker filled with raw broccoli, carrot, onion, celery, garlic, seasonings, and golden broth before cooking.
The pot should look vegetable-heavy at the start, because broccoli shrinks and releases moisture as it slowly cooks.

Step 2: Cook until the broccoli gives in

The broccoli is ready when it presses easily against the side of the slow cooker with a spoon. If it still feels firm, give it more time before adding dairy. This is the stage where the soup builds body.

Spoon pressing tender cooked broccoli against the side of a slow cooker to show the vegetables are soft.
Once the broccoli gives way under a spoon, the base is soft enough to blend partly and turn creamy.

Step 3: Blend just enough for body

Blend about one-third of the soup, or mash some broccoli into the base. You are not trying to erase every piece. A good bowl has creamy body and visible broccoli, so stop while it still looks like broccoli cheese soup, not a completely smooth puree.

Immersion blender partially blending cooked broccoli soup inside a slow cooker while some broccoli pieces remain whole.
Instead of loading in more cheese, blend part of the broccoli base for natural thickness and a better spoonful.

Step 4: Let the heat settle before dairy

Look for a steaming base without a hard bubble. Stir in the cream, evaporated milk, or cream cheese after turning the slow cooker down. If the surface is actively boiling, wait a few minutes. Residual heat is enough to bring everything together.

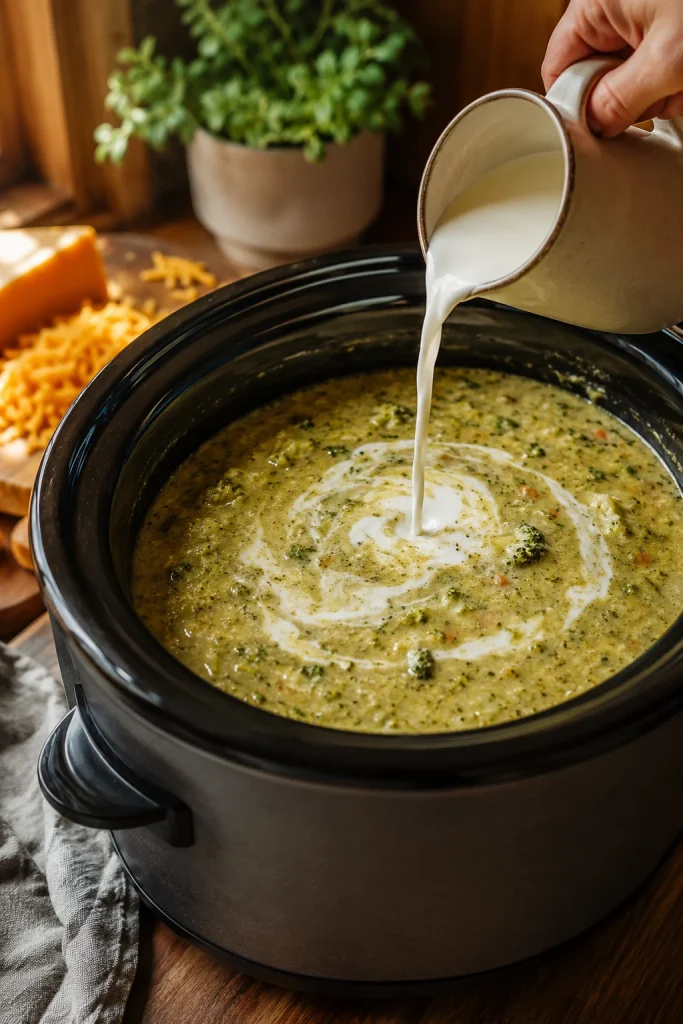
Cream being poured from a small jug into cooked broccoli soup in a slow cooker, creating a white swirl.
After the vegetables are tender, cream or evaporated milk smooths the base without spending hours on heat.

Step 5: Melt the cheddar with patience

Fold in the cheddar by handfuls and let each handful disappear before adding the next. The base should turn glossy and creamy, not stringy. This is the part where you do less, not more: slow down and let the hot base do the melting.

Freshly shredded cheddar falling into hot broccoli soup in a slow cooker with broccoli pieces visible underneath.
Cheddar behaves best when the soup is already hot and ready, so add it slowly rather than cooking it all day.

Low vs High Slow Cooker Timing

Low is the calmer route. It gives the broccoli time to soften without rushing the pot, while high works when dinner needs to happen faster. Either way, the broccoli needs to be tender before the dairy and cheese go in.

  • Low: 4 to 5 hours for steady broccoli texture.
  • High: 2 to 3 hours when dinner needs to happen faster.
  • Cheese finish: 5 to 15 minutes after the heat settles.
  • Potato variation: allow extra time if needed because potatoes must be fully tender before cheese goes in.

The pot will tell you more than the timer. Look for tender broccoli first, then move into the dairy and cheese finish.

For general slow cooker safety, the USDA slow cooker food safety guide notes that slow cookers cook at low temperatures over time. For this recipe, the practical cue is still texture: broccoli tender first, cheese added after, and no hard boiling once the cheese goes in.

Fresh vs Frozen Broccoli

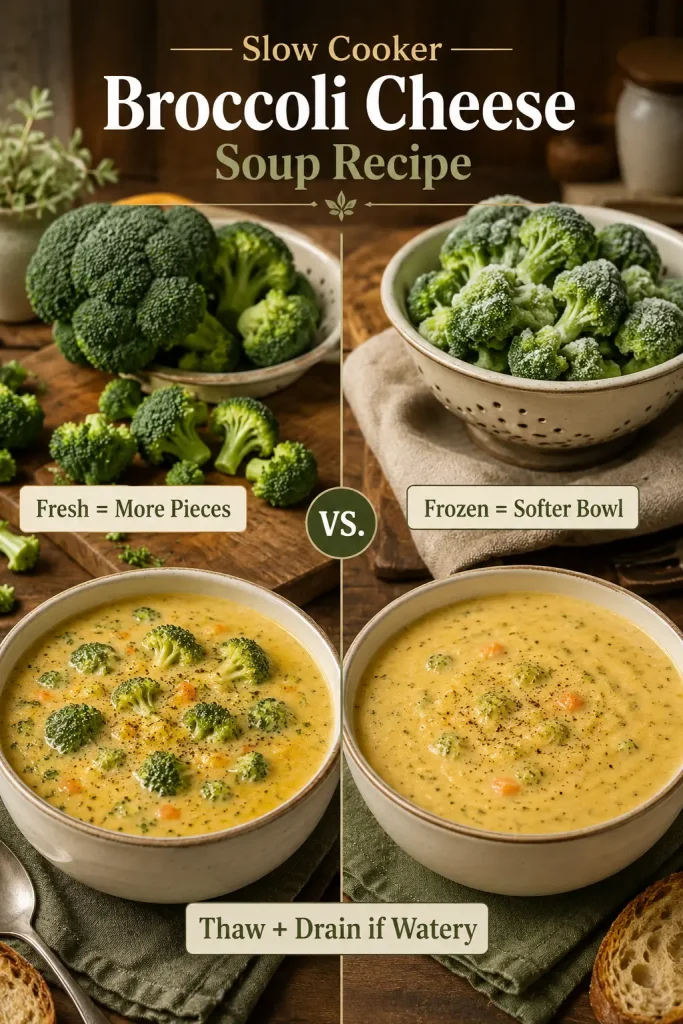
This is one of the few broccoli soups where frozen broccoli can absolutely work. Use fresh broccoli for the best first batch. Use frozen when convenience matters and a softer soup is okay. Fresh holds shape; frozen melts into the bowl.

Fresh broccoli and frozen broccoli compared with two bowls of broccoli cheese soup showing chunkier and smoother textures.
Fresh broccoli keeps more visible bite, while frozen broccoli makes a softer soup; if frozen pieces look wet, drain them first.

If this soup puts you in a broccoli mood but you want something fork-twirly instead of spoonable, this Broccoli Pasta Recipe goes in a garlic-Parmesan direction.

Broccoli TypeHow to Use ItResult
Fresh chopped floretsAdd at the startClassic texture and visible broccoli pieces
Larger fresh floretsAdd at the start, then chop or mash after cookingChunkier soup with more broccoli shape
Frozen chopped broccoliAdd from frozen or thaw and drain firstSofter, creamier, more blended soup
Frozen floretsAdd during the last 1 to 2 hours if you want more shapeLess mushy than cooking frozen broccoli from the start
Watery frozen broccoliThaw and drain, or reduce broth slightlyHelps prevent thin soup

For a softer soup, add frozen broccoli at the beginning. For more visible pieces, add frozen florets later or use fresh broccoli next time.

If frozen broccoli makes the pot look loose, go straight to How to Thicken or Troubleshooting.

Cheese Choices for Smooth Broccoli Cheese Soup

Cheese decides whether this soup tastes sharp and homemade, smooth and kid-friendly, or rich enough to feel restaurant-style. For most batches, use freshly shredded sharp cheddar. Add Velveeta only if smoothness matters more than sharp cheddar flavor.

Pick the cheese based on the finish you want, not just what is in the fridge. The right cheese melts into the base instead of sitting on top of it.

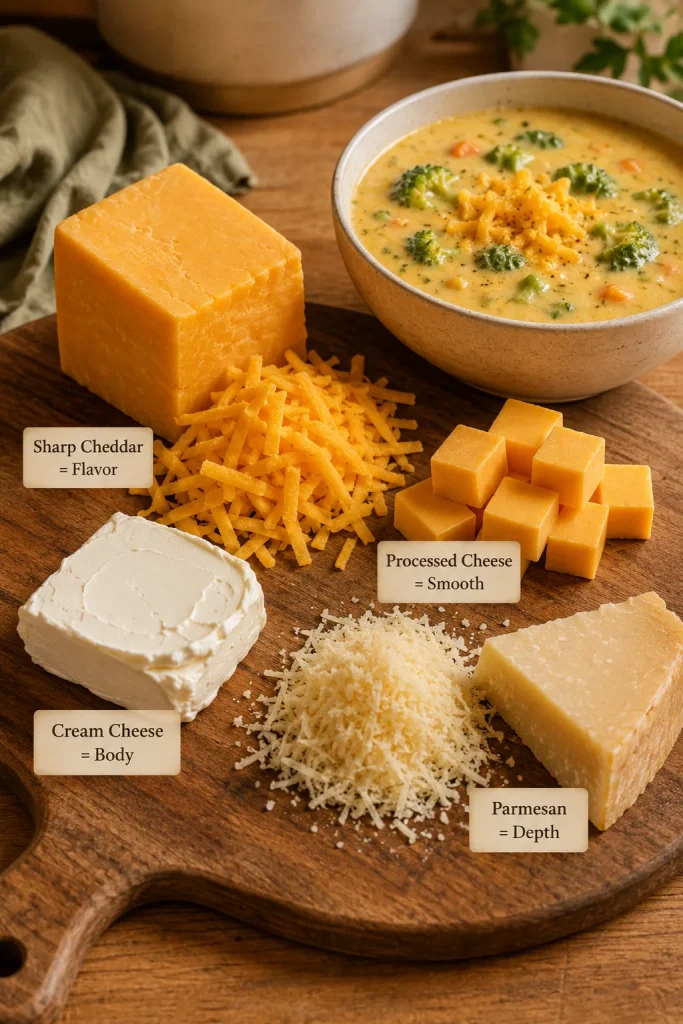
Cheese board with sharp cheddar, shredded cheddar, processed cheese cubes, cream cheese, Parmesan, and a small bowl of broccoli cheese soup.
Cheese choice changes the bowl: sharp cheddar brings flavor, processed cheese smooths the melt, cream cheese adds body, and Parmesan deepens it.
CheeseGood ForWatch Out For
Sharp cheddarClassic broccoli cheddar flavorCan turn grainy if overheated
Mild cheddarSmoother, less sharp flavorLess depth than sharp cheddar
Freshly shredded block cheddarSmooth melt and stronger flavorTakes a few extra minutes to grate
Pre-shredded cheddarConvenienceCan melt less evenly
VelveetaSmooth shortcut, kid-friendly textureLess real-cheddar flavor
Cream cheeseThicker, more stable soupCan taste tangy if too much is used
ParmesanSalty depth and savory finishToo strong to use as the main cheese

Freshly shredded sharp cheddar gives the most balanced result. If you want the soup extra smooth, replace 4 to 8 ounces of the cheddar with Velveeta or add 2 ounces of cream cheese before the cheddar.

Worried about grainy texture? Check When to Add the Cheese before the troubleshooting table.

When to Add the Cheese

The whole pot depends on this moment. Once the vegetables are tender, the slow cooker has done the hard part. From here, the cheese only needs steady warmth.

Cheddar behaves best as a finish, not a long-cooked ingredient. If it cooks for hours in the slow cooker, it can become oily, stringy, grainy, or clumpy. Let the heat already in the soup do the melting.

  • Shred the cheddar yourself if possible.
  • Turn the slow cooker down before adding cheese.
  • Fold in cheese one handful at a time.
  • Stir after each addition.
  • Let the soup rest for 5 to 10 minutes after the cheese melts.

That cheese-at-the-end habit is useful beyond this soup. It also helps in recipes like Slow Cooker French Onion Chicken, where the slow cooker does the tender cooking first and the cheese works better as a finish.

If you are using cream cheese, add it before the cheddar so it has time to soften into the hot soup. If using Velveeta, cube it small so it melts easily into the base.

How to Thicken Slow Cooker Broccoli Cheese Soup

A thin soup can feel disappointing, especially when the kitchen already smells like dinner. Luckily, this is one of the easiest problems to fix if you catch it before boiling the cheese.

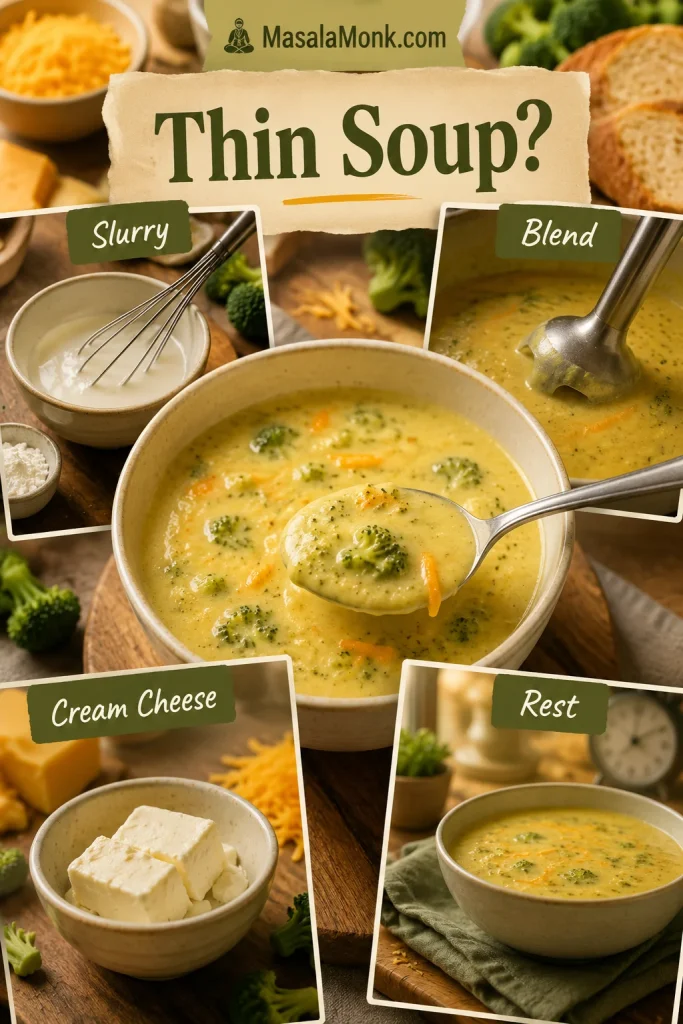
To thicken slow cooker broccoli cheese soup, blend part of the cooked broccoli, use a cornstarch slurry, add softened cream cheese, or let the soup rest after the cheese melts. A thin base needs slurry before cheddar; a loose finished pot usually needs a short rest before any extra fix.

Thickening guide for broccoli cheese soup showing cornstarch slurry, blending, cream cheese, resting, and a bowl of creamy soup.
If the soup looks thin, fix the base first with blending, a slurry, cream cheese, or a few quiet minutes of resting.

Best Thickening Fixes

Thickening MethodGood ForHow to Use It
Cornstarch slurryEasy thickeningWhisk 1 tablespoon cornstarch with 1 tablespoon cold water or broth, then stir into hot soup
Partial blendingNatural bodyBlend one-third of the soup after broccoli is tender
Cream cheeseRich, stable textureAdd small softened cubes before cheddar
PotatoHeartier soupAdd diced potato at the beginning and cook until tender
RouxClassic creamy bodyCook butter and flour separately, then stir into the soup base
Extra cheeseFlavor and bodyAdd at the end, after the heat settles

A roux gives classic cream-soup body, but it adds a skillet step. The cornstarch and partial-blending route is simpler for this slow cooker version and still gives a thick, spoonable soup.

If the soup is only slightly thin, let it rest for 10 minutes after adding the cheese. Cheese soups often thicken as they sit.

Flavor Boosters for Better Broccoli Cheddar Soup

If the soup tastes creamy but a little flat, it usually needs sharper cheese, a touch more salt, or one small background flavor. You do not need to make it spicy or complicated. A tiny amount of the right ingredient can make the cheddar taste more like cheddar.

You should not notice the mustard or nutmeg as separate flavors. They are there to make the cheddar taste fuller.

  • Mustard powder: add 1/2 teaspoon to make cheddar taste sharper without making the soup taste mustardy.
  • Dijon mustard: add 1 teaspoon for gentle tang and a more restaurant-style finish.
  • Nutmeg: add a pinch to round out the creaminess.
  • Cayenne: add a pinch for warmth without making the soup hot.
  • Parmesan: add 1/4 cup for salty, savory depth.
  • Extra sharp cheddar: use it for part or all of the cheddar when you want stronger cheese flavor.
  • Worcestershire sauce: add 1/2 to 1 teaspoon for savory depth, especially in non-vegetarian versions.

Add flavor boosters near the end, then taste again. Once the cheese melts, the salt and sharpness of the soup can change quickly.

Cheddar Version vs Velveeta Version

Some nights you want real cheddar sharpness; some nights you want the soup to melt smoothly with zero drama. The hybrid version gives you both.

Freshly shredded sharp cheddar gives the most homemade broccoli cheddar soup flavor. Velveeta creates the smoothest, most forgiving texture. A mix gives you both flavor and easy melting.

  • Real cheddar version: use 10 to 12 oz freshly shredded sharp cheddar for the strongest flavor. Melt it carefully because real cheddar is more heat-sensitive.
  • Hybrid cheddar-Velveeta version: use 6 to 8 oz cheddar plus 4 to 8 oz Velveeta for a smooth but still flavorful soup.
  • Velveeta-style version: use 12 to 16 oz Velveeta and 1 to 2 cups cheddar if you want the smoothest shortcut version.
  • Three-cheese version: add Parmesan or Colby Jack with cheddar for a richer, deeper cheese flavor.

For most people, the hybrid version is the easiest win: sharp cheddar for flavor, a little Velveeta or cream cheese for smoothness.

Slow Cooker Panera-Style Broccoli Cheddar Soup

This is not an exact Panera copycat, but it moves the soup toward that familiar Panera-style broccoli cheddar bowl: creamy base, visible broccoli, shredded carrot, sharp cheddar, and bread on the side.

When you want the Panera-style feeling, focus on three things: shredded carrot, sharp cheddar, and a creamy base that still leaves little pieces of broccoli in the spoon.

Café-style bowl of broccoli cheddar soup with visible broccoli, shredded carrot, creamy cheddar base, and crusty bread.
For a Panera-style broccoli cheddar soup, keep the carrot visible, use a cheddar-forward base, and serve bread close by.
  • Use sharp cheddar, not only mild cheddar.
  • Keep the carrot in the recipe for color and sweetness.
  • Add onion and garlic for a deeper base.
  • Use evaporated milk or cream for a smooth, creamy finish.
  • Blend part of the soup so it is creamy but still has broccoli pieces.
  • Add a small amount of Dijon or mustard powder to wake up the cheese flavor.
  • Serve it with crusty bread or in a bread bowl.

For a bread-bowl feeling without making actual bread bowls, toast thick slices from a homemade garlic bread loaf and serve them on the side for dipping.

If you want the soup thicker and more restaurant-style, use the lower broth amount, add cream cheese, and let the finished soup rest for 10 minutes before serving.

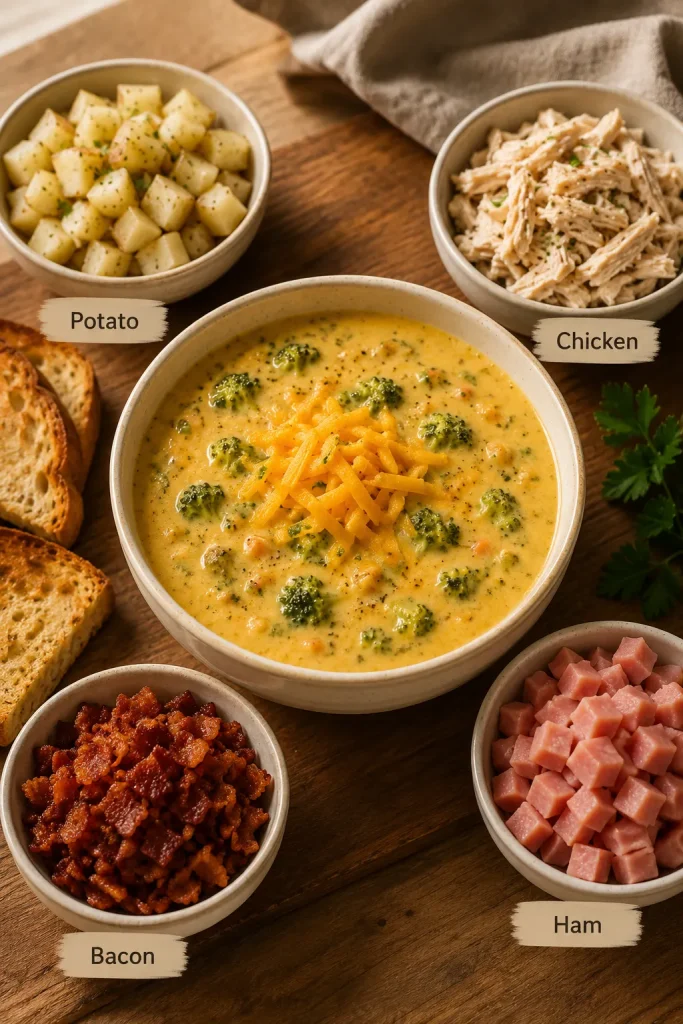
Potato, Chicken, Bacon, and Ham Variations

Once the base is creamy, the soup can turn into dinner in a few different ways. Add-ins work best when they support the soup instead of making it watery, greasy, or overcooked.

Bowl of broccoli cheese soup surrounded by small bowls of diced potatoes, shredded chicken, bacon pieces, and diced ham.
Once the creamy base is ready, potatoes, chicken, bacon, or ham can turn the soup into a fuller dinner.

Easy Add-In Ideas

VariationHow to Adapt ItNotes
Broccoli cheddar potato soupAdd 1 1/2 to 2 cups small diced potatoes at the startCook until potatoes are fully tender before adding cheese
Chicken broccoli cheese soupAdd cooked shredded chicken near the endRotisserie chicken works well
Bacon broccoli cheese soupTop with cooked crumbled bacon before servingDo not slow cook raw bacon in the soup
Ham broccoli cheese soupAdd diced cooked ham near the endGood for leftover ham; reduce salt if ham is salty
Broccoli cauliflower cheese soupReplace 1 to 2 cups broccoli with cauliflowerCauliflower makes the soup milder and creamier
Gluten-free versionUse cornstarch, not flour, and check broth and cheese labelsBest handled with simple ingredients
Keto or low-carb versionSkip potatoes and reduce or skip carrots; use cream, cheese, and partial blending for bodyFor stricter low-carb cooking, avoid flour and use only a small amount of cornstarch or a keto-friendly thickener
Lighter versionUse evaporated milk instead of heavy creamStill creamy, but less rich

For the chicken version, stir in cooked shredded chicken near the end so it stays tender. If you want the same broccoli-cheese comfort in a rice-based dinner, make this Cheesy Chicken Broccoli Rice on another night.

For the ham version, keep the salt lower and add diced cooked ham near the end. If you still have ham left after soup night, this Ham and Cheese Quiche turns it into an easy brunch-style meal.

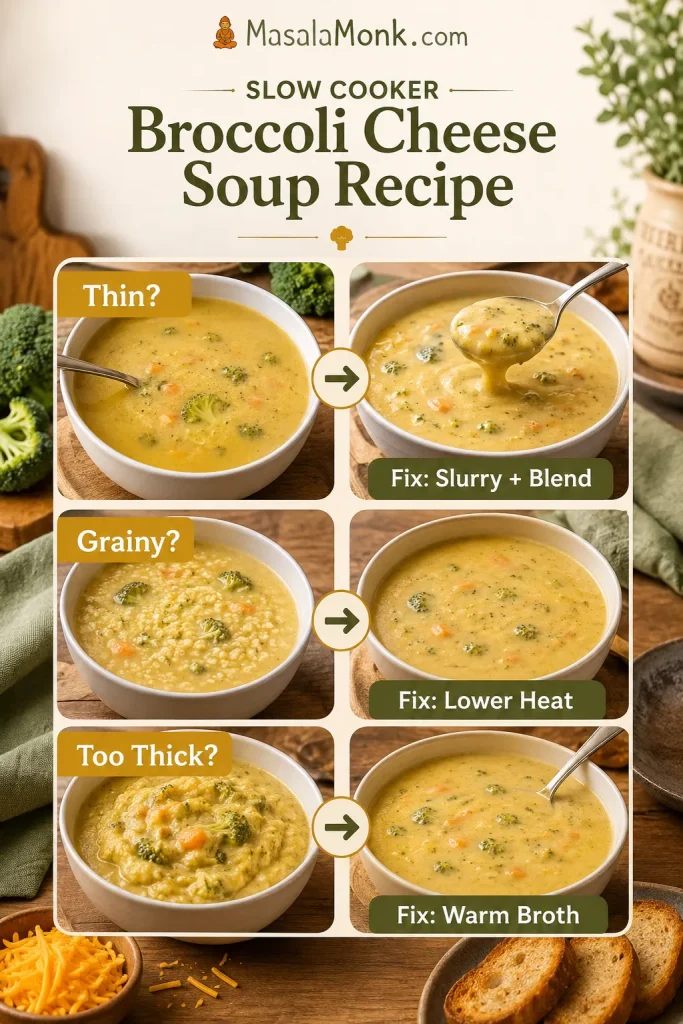
Troubleshooting Slow Cooker Broccoli Cheese Soup

If the soup looks thinner, thicker, or less smooth than you hoped, do not panic. Most broccoli cheese soup problems are easier to fix before the pot gets too hot again.

Match the symptom to the fix below, then bring the soup back slowly.

Troubleshooting guide showing thin, grainy, and too-thick broccoli cheese soup with bowls showing each problem and fix.
Thin, grainy, or too-thick broccoli cheese soup usually needs one small correction, not a full restart.

Problem and Fix Guide

ProblemLikely CauseFix
Soup is grainy or grittyCheese overheated, soup boiled after cheese, or pre-shredded cheese was usedLower the heat, whisk slowly, add a splash of cream, and use block cheese next time
Cheese clumpedCheese was added too fast or the soup was too hotAdd cheese by handfuls on warm, low, or off
Soup is wateryToo much broth, frozen broccoli released water, or not enough thickenerAdd slurry, blend part of the soup, or let it rest after adding cheese
Soup is too thickToo much cheese, starch, cream cheese, or potatoAdd warm broth or milk a little at a time
Broccoli is mushyCooked too long or frozen broccoli was added earlyBlend part of the soup and use the soft broccoli as body
Soup tastes blandMild cheese, weak broth, or too little saltAdd salt, mustard powder, cayenne, Parmesan, or sharper cheddar
Cream cheese has lumpsAdded cold in large piecesCube it small, soften it first, or blend it with a ladle of hot soup
Soup split while reheatingReheated too quickly or boiledReheat slowly with a splash of milk or broth and whisk gently

If the soup breaks badly, blend a portion of it and stir it back in. It may not become perfectly smooth again, but it will usually become creamy enough to serve.

Storage, Freezing, and Reheating

Leftovers are worth saving, but cheese soup asks for patience on the reheat. The goal is to warm the bowl back up without pushing the cheese too hard.

  • Refrigerator: Store cooled soup in an airtight container for 3 to 4 days.
  • Reheating: Warm on low heat on the stove or in the microwave at lower power, stirring often.
  • Loosening leftovers: Add a splash of milk, cream, or broth while reheating.
  • Do not boil leftovers: Boiling can make the cheese split or turn grainy.
  • Freezing: Possible, but not ideal. Dairy-based cheese soups can separate or look grainy after thawing.

For make-ahead cooking, the best texture comes from cooking the vegetable base first, then adding dairy and cheese closer to serving.

If you want this for lunches, store it in single portions and reheat slowly. A splash of milk or broth brings the bowl back to life without pushing the cheese too hard.

For the freezer, a vegetable-and-bean soup is usually easier than a dairy-heavy cheese soup. This Minestrone Soup Recipe is a better make-ahead option when you want something lighter to keep on hand.

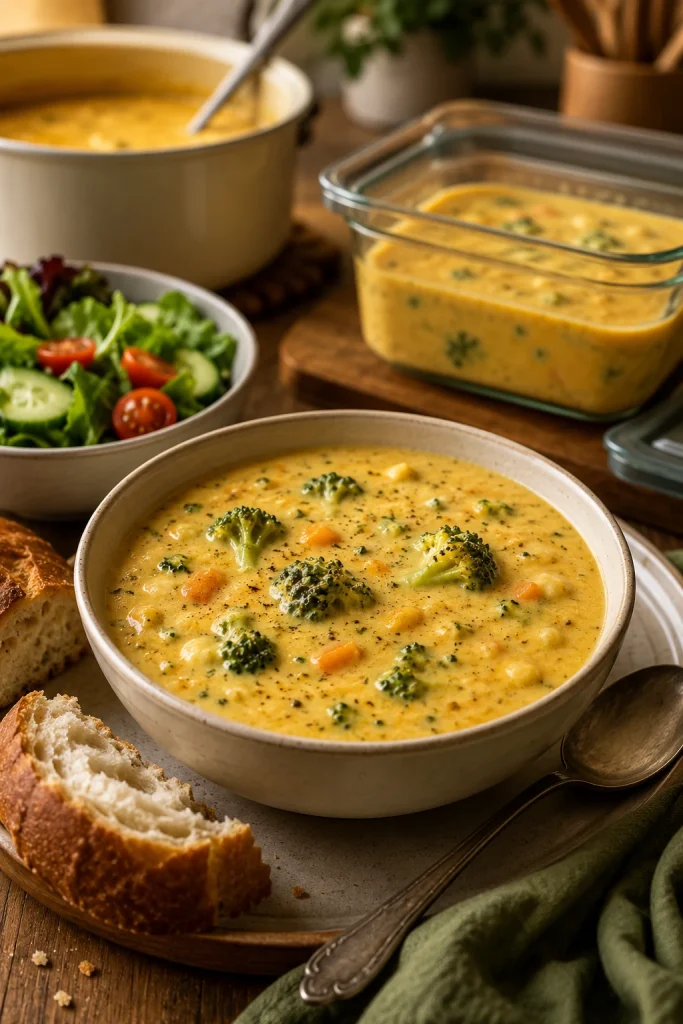
What to Serve with Broccoli Cheese Soup

This soup can stand alone, but the right side makes it feel like the kind of dinner people come back to for seconds. A bowl this rich loves contrast: something crunchy, something toasted, or something cold and crisp on the side.

This is the kind of bowl that makes bread disappear fast.

Bowl of broccoli cheese soup served with bread and salad, with a glass container of leftover soup in the background.
Serve it with bread, crackers, or salad; afterward, reheat leftovers slowly with a splash of broth or milk.
  • Crusty bread
  • Garlic toast
  • Bread bowls
  • Ranch Oyster Crackers for a crunchy topping
  • Wedge Salad Recipe for a cold, crisp side
  • Roasted vegetables
  • Grilled cheese sandwich
  • Baked potatoes
  • Cooked chicken or ham for a heartier meal

For a bigger comfort-food spread, serve the soup with something crisp or baked rather than another heavy, creamy dish. That contrast makes the bowl feel more satisfying.

FAQs

Here are the quick fixes and common questions readers usually need once the soup is in the slow cooker.

Can raw broccoli go straight into the slow cooker?

Yes. Raw chopped broccoli can go straight into the slow cooker with the broth, onion, carrot, garlic, and seasonings. Cut it into small pieces so it softens evenly. Add dairy and cheese only after the broccoli is tender.

When should cheese go into slow cooker broccoli cheese soup?

Add cheese near the end, after the broccoli is tender and the slow cooker has been turned to warm, low, or off. That keeps the cheddar in the creamy zone instead of pushing it into grainy territory.

Why did my broccoli cheese soup turn grainy?

Grainy soup usually comes from overheated cheese, boiling after dairy is added, or using cheese that does not melt smoothly. Use freshly shredded block cheddar, add it gradually, and keep the heat gentle once the cheese goes in.

Can I use pre-shredded cheese?

You can, but freshly shredded block cheddar usually melts more evenly. Pre-shredded cheese is convenient, but it can make broccoli cheese soup more likely to turn grainy or slightly clumpy.

Is frozen broccoli okay for crock pot broccoli cheese soup?

Frozen broccoli works, especially if you like a softer, creamier bowl. For better texture, use frozen florets and add them during the last 1 to 2 hours, or thaw and drain frozen broccoli before using it.

Do you need to thaw frozen broccoli first?

Not always. Frozen broccoli can go in from frozen if you want a softer soup, but thawing and draining helps prevent a watery pot. For more visible broccoli pieces, add frozen florets during the last 1 to 2 hours.

What cheese melts best in broccoli cheese soup?

Freshly shredded block cheddar gives strong flavor and a smoother melt. Velveeta is the smoothest shortcut. A mix of sharp cheddar and a small amount of Velveeta gives both flavor and easy melting.

How do you make crock pot broccoli cheese soup thicker?

Use a cornstarch slurry, blend part of the soup, add a little cream cheese, or let the soup rest after adding cheese. Potato also thickens the pot, but it turns the recipe into a heartier broccoli cheddar potato soup.

Should this cook on low or high?

Low gives steadier texture. Cook on low for 4 to 5 hours, or use high for 2 to 3 hours if you need it faster. Either way, add the cheese only after the broccoli is tender.

How long can broccoli cheese soup stay on warm?

It can sit on warm for a short serving window, but avoid holding it for hours after the cheese goes in. Stir occasionally, keep it below a boil, and loosen with warm broth or milk if it thickens too much.

Does Velveeta work in slow cooker broccoli cheese soup?

Velveeta works well when smoothness matters most. Replace part of the cheddar with it for a creamier, more forgiving pot.

How do you make it more like Panera broccoli cheddar soup?

Use sharp cheddar, keep the carrot, add onion and garlic, blend part of the soup, and add a little Dijon or mustard powder. Serve it with crusty bread or in a bread bowl for a more restaurant-style feel.

Can this soup be vegetarian?

Yes. Use vegetable broth and skip bacon, ham, chicken, and Worcestershire sauce, or use a vegetarian-friendly alternative. If cheese labels matter to you, check those as well.

Can the vegetable base be made ahead?

Yes. Cook the broccoli, vegetables, broth, and thickener ahead, then refrigerate the base. Reheat it gently and add cream and cheese shortly before serving for the smoothest texture.

What size slow cooker works best?

A 5 to 6 quart slow cooker is the easiest size for a standard batch. Use a 2 quart slow cooker only for a half batch, and a 6 to 8 quart slow cooker if doubling.

Is this the same as cream of broccoli soup?

It is similar, but this soup is cheesier and more cheddar-forward. Cream of broccoli soup is usually more cream-focused and may use less cheese.

Does broccoli cheese soup freeze well?

Freezing is possible, but this is not the soup that comes back perfectly every time. Dairy and cheese can separate after thawing, so reheat gently with a splash of milk, cream, or broth.

Back to the recipe · Back to the guide

Final Tips for Better Broccoli Cheese Soup

Once you know the order, this soup becomes easy to trust. Let the slow cooker handle the broccoli, keep the cheese for the finish, and give the pot a few quiet minutes to settle.

Choose sharp cheddar when flavor matters most. Reach for Velveeta when smoothness matters most. Fresh broccoli gives steadier texture, while frozen broccoli keeps the recipe convenient. The result is creamy, cheddar-rich, familiar, and easy to trust the next time you need a warm bowl fast.

Posted on Leave a comment

French Onion Soup Recipe: Classic, Vegetarian, Slow Cooker & No-Wine Options

Classic French onion soup in a ceramic bowl with bubbling browned cheese, toasted bread, and dark onion broth.

This is the kind of soup that rewards the cook who lets the kitchen slow down for a little while. A mountain of sharp raw onions softens in butter, collapses into the pot, turns golden, and slowly becomes mellow, savory, and almost jammy. Then the broth goes in, the bread gets toasted, and the cheese melts over the top until every spoonful breaks through something crisp, bubbling, and deeply comforting.

The best part is that first spoonful: the cheese stretches, the toast softens at the edges, and the broth underneath tastes darker and fuller than the simple ingredient list suggests.

This recipe is built around the three places French onion soup usually fails: pale onions, weak broth, and a risky cheese finish.

This version starts with the classic bistro-style bowl: beef broth, wine or sherry, toasted bread, and Gruyère. The main path is simple — caramelize the onions, deglaze the pot, simmer with broth, toast the bread, and melt the cheese — and every variation in this guide follows that same path.

It is not a weeknight-speed soup. It is the kind of recipe you make when you want a few ordinary onions to slowly turn into something that feels like dinner out, only warmer.

Make It Now

  • Total time: About 1 hour 45 minutes to 2 hours
  • Onion time: 45 to 70 minutes for proper caramelization
  • Best broth: Beef broth for classic; mushroom broth or dark vegetable stock for vegetarian
  • Best cheese: Gruyère, Swiss, or a melty cheese blend
  • No crocks: Broil the cheesy toast separately, then place it on the soup
  • Ready to cook? Jump to the classic recipe

The 3 Things That Make This Soup Work

  1. Cook the onions until deep golden and jammy, not just soft.
  2. Use broth that tastes savory before it goes in.
  3. Toast the bread firmly so the cheese has somewhere to land.

Keep these three foundations in mind as you cook.

Caramelized onions, dark broth, toasted bread, cheese, and French onion soup arranged on a rustic table.
Before assembling the bowl, get the three foundations right: deeply browned onions, broth with real depth, and a cheese finish your kitchen setup can handle safely.

Jump to

Quick Answer

French onion soup is onion soup built around slowly caramelized onions, savory broth, toasted bread, and melted cheese. The cheese-topped version is what most people mean by classic bistro-style French onion soup.

You do not have to use wine or beef broth. For no-wine soup, deglaze with broth and finish with a small splash of vinegar or lemon after simmering. For vegetarian French onion soup, use mushroom broth or dark vegetable stock, then add one savory booster such as vegetarian Worcestershire, tamari, or browned mushrooms.

Need the swaps first? Jump to the vegetarian and no-wine options.

Choose Your French Onion Soup Version

Start with the classic path, then adjust only what your kitchen needs. The onions stay at the center; the broth, wine, cheese, and finishing method can move around them.

Make this when you want a bowl that feels special without needing expensive ingredients. Most of the flavor comes from time, not fuss.

What you wantBest versionRemember
Classic bistro flavorBeef broth, wine or sherry, GruyèreReduce wine before adding broth.
No beef, still savoryDark vegetable stock or mushroom brothAdd one savory booster.
No wine, still balancedDeglaze with brothReplace wine’s acid and fond-loosening job.
Vegetarian, not thinVegetable or mushroom broth plus acid and umamiDo not add every booster at once.
Less stove-watchingSlow cooker onions, then stovetop finish if possibleConvenience improves; browning still matters.
No crocks, no riskBroil cheesy toasts separatelyTop hot soup just before serving.

Classic French Onion Soup Recipe

Start with this stovetop version for the most classic bowl. It looks like restaurant soup, but the actual work is simple: slice onions, cook them slowly, simmer, toast, and melt cheese.

French Onion Soup

Servings: 4 main-course bowls or 6 starter bowls
Prep time: 20 minutes
Cook time: 1 hour 25 minutes to 1 hour 40 minutes
Total time: About 1 hour 45 minutes to 2 hours
Equipment: Large heavy pot or Dutch oven, wooden spoon, baking sheet, broiler-safe crocks or regular bowls plus the separate cheesy-toast method

The timing is flexible because onions vary. Trust the color, smell, and texture more than the clock.

Ingredients

  • 3 lb / 1.35 kg yellow onions, thinly sliced, about 1/8 inch / 3 mm thick
  • 3 tablespoons unsalted butter
  • 1 tablespoon olive oil or neutral oil
  • 1/2 teaspoon fine salt, plus more to taste after simmering
  • 1/2 teaspoon sugar, optional, only if your onions need help browning
  • 3 cloves garlic, minced
  • 1 tablespoon all-purpose flour, optional, for light body
  • 1/2 cup / 120 ml dry white wine or dry sherry, or 1/2 cup / 120 ml extra broth for no-wine soup
  • 6 cups / 1.4 liters beef broth or stock, or up to 7 cups / 1.65 liters for a brothier soup
  • 2 fresh thyme sprigs or 1/2 teaspoon dried thyme
  • 1 bay leaf
  • 1 teaspoon Worcestershire sauce, or vegetarian Worcestershire/tamari for vegetarian soup
  • 1 to 2 teaspoons apple cider vinegar, sherry vinegar, balsamic vinegar, or lemon juice, as needed after simmering
  • Black pepper, to taste
  • 4 to 6 slices baguette, sourdough, or sturdy crusty bread
  • 1 1/2 to 2 cups / 170 to 225 g grated Gruyère, Swiss, provolone, mozzarella, or a mix
  • 2 tablespoons grated Parmesan, optional, for extra savory flavor

Quick notes before you cook: Start light on salt because broth, cheese, Worcestershire, and Parmesan can all be salty. Skip the sugar if your onions brown well. Use 6 cups broth for a thicker bowl, or 7 cups for a brothier one.

Method

Cook the onions

  1. Slice the onions evenly. Aim for about 1/8 inch / 3 mm. Thin, even slices cook more predictably. Too thick and they take much longer; too thin and they can break down or burn at the edges.
  2. Start the onions. Set a large heavy pot or Dutch oven over medium heat. Add the butter and oil. When the butter melts, add the onions and 1/2 teaspoon salt. Stir until coated.
  3. Soften and collapse. Cook for 10 to 15 minutes, stirring often, until the onions release water and shrink down. Do not panic when the pot looks watery at first. That moisture has to cook off before browning can begin.
  4. Caramelize slowly. Lower the heat to medium-low and cook for 35 to 55 minutes more, stirring every few minutes. The onions should turn golden, then deep golden brown, and become soft and jammy. If they hiss loudly, stick hard, or darken too quickly, lower the heat. If the pot gets dry, add a splash of water or broth and scrape the golden browned bits into the onions.
  5. Check before adding liquid. The onion base should already smell like dinner. Look for soft strands, deep golden color, glossy texture, sweet roasted aroma, and browned—not black—bits on the bottom of the pot. If the onions are pale and wet, keep cooking. If the pot smells acrid or the bits are black, do not scrape those burnt spots into the soup.

Build and simmer the base

  1. Add garlic and flour. Stir in the garlic and cook for 30 seconds. If using flour, sprinkle it over the onions and cook for 1 minute, stirring well. The flour should disappear into the onions, not sit in dry clumps.
  2. Deglaze. Add wine or sherry, if using. Scrape the bottom of the pot and simmer until the liquid reduces and no longer smells sharp, about 5 to 8 minutes. The onions should look glossy again. For no-wine soup, use 1/2 cup broth instead.
  3. Add broth and herbs. Pour in 6 cups broth for a thicker onion-forward soup, or up to 7 cups for a brothier bowl. Add thyme, bay leaf, Worcestershire if using, and black pepper. Bring to a simmer.
  4. Simmer and taste. Simmer gently for 20 to 30 minutes. Taste and adjust salt. If the soup tastes too sweet or flat, add 1 teaspoon vinegar or lemon juice, then taste again before adding more. The base should taste savory before the bread and cheese go on. Cheese hides many things, but it will not fix weak broth.

Toast, broil, and serve

  1. Toast the bread. While the soup simmers, toast the bread until dry and crisp. Use a 400°F / 205°C oven for 6 to 10 minutes, or toast it in a skillet or toaster. Cut the bread so it sits just inside the bowl or crock.
  2. Finish with cheese. Ladle hot soup into broiler-safe crocks or bowls. Place toasted bread on top, cover with cheese, and broil for 2 to 5 minutes, watching closely, until melted and browned. Without broiler-safe bowls, broil the cheesy toasts separately on a baking sheet and place them on top of the soup.
  3. Serve hot. Let the bowls sit for a minute before serving. The cheese and soup will be very hot.

Short Recipe Notes

  • Vegetarian: Use mushroom broth or dark vegetable stock, plus one savory booster such as tamari, vegetarian Worcestershire, or browned mushrooms.
  • No wine: Deglaze with broth, then add a small splash of vinegar or lemon after simmering to keep the onion sweetness in check.
  • Slow cooker: Cook onions with butter/oil and salt on LOW for 8 to 10 hours, then finish in a pot on the stove for 10 to 15 minutes for better color.
  • Cheese: Gruyère is classic, but Swiss, provolone, mozzarella with Parmesan, or aged cheddar can work.
  • Broiler safety: Only broil in bowls marked broiler-safe. When in doubt, broil the toast, not the bowl.

Why This Recipe Works

The magic is not in a long ingredient list. It is in what happens when onions are given enough time. They lose their sharpness, release their moisture, brown slowly, and turn into the kind of base that makes the whole pot taste more satisfying than it should.

This is the part where the kitchen starts smelling like dinner is worth waiting for.

The broth matters too, but it should not have to do all the work. Beef broth gives the classic bistro flavor. Mushroom broth or dark vegetable stock can still make a satisfying vegetarian version when the onions are cooked well and the seasoning has a little lift.

That final lift is important because caramelized onions are naturally sweet. Wine, sherry, vinegar, lemon juice, Worcestershire, tamari, or a well-seasoned broth can wake up the pot just enough so the bowl tastes savory instead of syrupy.

Toasted bread gives the melted cheese structure, so it can sit on top instead of disappearing into the soup. That final bubbling layer turns a humble onion soup into the bowl people remember.

Back to top

Ingredients and Onion Tips

You do not need rare ingredients, but each one has a job. The onions bring sweetness, the broth brings backbone, the bread supports the topping, and the cheese makes the bowl feel finished.

How to Choose the Ingredients

Onions: Yellow onions are the safest all-purpose choice. They become sweet without making the soup sugary, and they give the broth a savory backbone. Sweet onions work too, but the finished bowl can taste noticeably sweeter. Red onions make a darker soup with a slightly sharper flavor.

Butter and oil: Butter is where the soup starts to smell like something is happening. A little oil helps keep the butter from scorching during the long cook. All butter is fine too, but keep the heat gentle and watch the bottom of the pot.

Broth, Wine, and Seasoning Choices

Taste the Broth Before It Goes In

If the broth tastes watery now, it will taste watery later. Use better stock, simmer weak broth for a few minutes to concentrate it, or add one savory booster before relying on cheese to rescue the bowl.

Dark broth in a measuring cup with a spoon for tasting before making French onion soup.
Taste the broth before it joins the onions. If it tastes weak by itself, add savory support now instead of hoping cheese will fix it later.

If the broth tastes flat or the onions seem too sweet, jump to troubleshooting before adding cheese.

Broth or stock: Classic French onion soup usually uses beef broth or beef stock. For a vegetarian version, use dark vegetable stock or mushroom broth. The broth should taste good before it meets the onions, because a pale base and thin broth will not become deeply savory just because cheese goes on top.

Wine, sherry, or no wine: Dry white wine or dry sherry adds character and helps keep the onion sweetness in check. It is helpful, but not mandatory. In a no-wine version, broth loosens the browned bits and vinegar or lemon replaces the brightness wine would have added.

Flour: Flour is optional, but a small spoonful gives the broth just enough body to cling to the onions. It should not turn the soup into gravy. Skip it for a thinner, clearer broth. When using flour, cook it briefly with the onions before adding liquid so it does not taste raw.

Herbs and seasoning: Thyme and bay leaf should stay in the background. You want people to taste onion first. Garlic helps, but it should not dominate. Worcestershire, tamari, soy sauce, or a small splash of vinegar can round out the pot, especially in no-wine or vegetarian versions. For vegetarian soup, use vegetarian Worcestershire, tamari, or soy sauce instead of regular Worcestershire.

Best Onions for French Onion Soup

The best onions for French onion soup are usually yellow onions. They are savory, reliable, and easy to find. They caramelize well without making the soup taste too sweet.

  • Yellow onions: balanced, savory, gently sweet, and the best everyday choice.
  • Sweet onions: softer and sweeter; good for a sweeter soup, but even better mixed with yellow onions.
  • Red onions: sharper, darker, and slightly fruitier; useful for variation, but they change the color and flavor.
  • White onions: cleaner and sharper; best used with yellow onions instead of alone.
  • Shallots: delicate and sweet; lovely as part of a mix, but expensive for the whole pot.

The slicing matters almost as much as the onion type. Aim for slices about 1/8 inch / 3 mm thick. Very thick slices take longer to soften. Paper-thin slices can break down too much or burn at the edges before the rest of the pot is ready.

Thinly sliced yellow onions piled high in a Dutch oven before cooking French onion soup.
Do not panic when the pot looks crowded. A mountain of sliced onions will shrink down before it ever starts to caramelize.

How to Caramelize Onions Properly

When it feels like nothing is happening for the first 20 minutes, you are probably doing it right. The onions soften before they brown. The waiting is part of the recipe, not a sign that something has gone wrong. Once the onions are glossy and deep gold, the soup starts doing some of the work for you.

Softened sliced onions with visible moisture in a pot during the early stage of French onion soup.
The onions soften and release water before they begin to brown. Keep cooking past this steamy stage so the flavor can move from raw and sharp to sweet.

Read the Onion Stages

StageWhat you seeWhat to do
Wet and paleSteamy, crowded onionsKeep cooking
Soft and glossySharp smell fadesKeep cooking
GoldenFond starts formingStir and scrape gently
Deep golden and jammySweet roasted smell, soft strandsReady for liquid
Black or acridBurnt smell, black bitsDo not scrape burnt fond into the soup

If the pot looks boring for a while, that is normal. The reward comes late: first the sharp smell fades, then the onions turn glossy, and only near the end does the soup begin to smell deep and savory.

Pale softened onions beside deep golden caramelized onions for French onion soup comparison.
This is the color difference that changes the whole pot. Pale onions give you a lighter soup; deep golden onions give you classic French onion soup flavor.

Control Heat and Fond

Use a heavy pot if possible. A Dutch oven, heavy stainless steel pot, or heavy-bottomed saucepan gives the onions time to brown without scorching too quickly. A thin pot can create hot spots, which makes some onions burn while others stay pale.

Golden onions with browned fond forming on the bottom of a pot while cooking French onion soup.
As the onions turn golden, the brown film on the pot becomes part of the flavor. Scrape it in early, while it tastes toasted instead of burnt.

Keep the heat moderate. When the onions are not browning after a long time, raise the heat slightly. When they are sticking hard or the bottom of the pot is getting too dark, add a splash of water or broth and scrape the browned bits into the onions. Golden brown fond is flavor. Black scorched fond is bitterness.

Brown fond and black scorched bits on the bottom of a pot during onion cooking.
Brown bits can enrich the broth, but black scorch can make it bitter. Deglaze before the bottom of the pot crosses that line.

When the fond stays brown and the onions turn glossy, soft, and deep golden, you have the flavor base the soup needs. This is the success state before adding liquid.

Deep golden jammy caramelized onions in a pot, ready for broth in French onion soup.
The target is glossy, soft, and deep golden. Pale onions need more time before they can carry the soup.

For a deeper look at onion color, Serious Eats has a helpful French onion soup guide that explains why rich golden brown is better than burnt-dark.

A small pinch of sugar can help stubborn onions brown, but do not rely on sugar to replace time. This soup should taste like slowly cooked onions, not sweet onion syrup.

Back to top

How the Stovetop Method Works

The stovetop method gives you the most control. Once you understand what each stage is doing, the recipe feels much less mysterious.

On the stove, the onions release water, collapse, and slowly move from pale to golden to deep golden brown. Wine, sherry, or broth lifts the browned bits from the pot, and the final simmer lets the onion base and broth become one soup.

Broth being poured into caramelized onions in a pot to deglaze for French onion soup.
Deglazing turns the browned bits into soup flavor. Wine, sherry, or broth can all loosen the fond and pull it back into the base.

Taste near the end, before the bread and cheese go on. A little salt, acid, or umami can wake up the pot while you can still adjust it easily.

Finished French onion soup base with caramelized onions and dark broth in a pot before adding bread and cheese.
Before any toast or cheese is added, the soup base should already taste complete: onion-rich, savory, gently sweet, and balanced.

Once the stovetop method makes sense, every variation becomes easier. You are not learning four different soups. You are keeping the onions strong, then changing the broth, deglazing liquid, or finishing method to fit your kitchen.

No broiler-safe bowls? Jump to the no-crock cheese method before you finish the topping.

Back to top

Vegetarian and No-Wine Options

Vegetarian French Onion Soup

Vegetarian French onion soup should not taste like onions floating in weak vegetable broth. The stock needs to be dark, savory, and strong enough to support the caramelized onions.

Use mushroom broth or dark vegetable stock when available. Mushroom broth works especially well because it brings earthy savoriness that helps replace some of the depth people expect from beef broth.

Mushroom broth, browned mushrooms, tamari, and caramelized onions for vegetarian French onion soup.
For vegetarian French onion soup, do not rely on plain vegetable stock alone. Mushroom broth, browned mushrooms, tamari, or vegetarian Worcestershire add the missing savory depth.

For the cleanest vegetarian version, choose one savory booster and one brightener. That keeps the soup controlled instead of turning it into a pantry experiment.

NeedUse one of these
More savory depthMushroom broth, browned mushrooms, tamari, vegetarian Worcestershire
More brightnessSherry vinegar, apple cider vinegar, lemon juice
More bodyLonger simmer, stronger stock, slightly more onions

A vegetarian bowl should still feel complete, not like a compromise. When the stock is dark, the onions are properly browned, and the finish has a little brightness, the soup keeps its cozy bistro feel.

  • Replace beef broth: use mushroom broth or dark vegetable stock.
  • Swap regular Worcestershire: use vegetarian Worcestershire, tamari, or soy sauce.
  • Skip the wine: deglaze with broth, then add vinegar or lemon after simmering.
  • For the cheese topping: use Gruyère, Swiss, provolone, mozzarella, or a vegetarian cheese that melts well.

Cheese eaters can finish the soup with Gruyère, Swiss, provolone, mozzarella, or a mix. For strictly vegetarian soup, check the cheese label because some cheeses use animal rennet. For a vegan version, use olive oil instead of butter, vegan Worcestershire or tamari, and your preferred vegan cheese or cheesy toast alternative.

Skipping wine too? Jump to the no-wine method for deglazing and acid balance.

No-Wine French Onion Soup

No-wine French onion soup can still taste deep and complete. You only need to replace wine’s two jobs: loosening the browned bits from the pot and balancing the natural sweetness of the onions.

Broth, vinegar, lemon, and caramelized onions arranged for no-wine French onion soup.
For a no-wine version, use broth to loosen the fond, then add a tiny splash of vinegar or lemon to balance the onions’ sweetness.

For a no-wine version, deglaze with broth instead of wine. Scrape up the browned bits, then simmer as usual. After the soup has simmered, taste it and add a small balancing ingredient if needed. Start with 1 teaspoon, taste, and stop as soon as the bowl feels brighter.

  • Apple cider vinegar: gently brightens the soup.
  • Balsamic vinegar: adds roundness and a little sweetness.
  • Lemon juice: lifts heavy flavors.
  • Worcestershire sauce: adds savory weight.
  • Vegetarian Worcestershire: adds weight without meat-based ingredients.
  • Tamari or soy sauce: adds umami and saltiness, so use carefully.

The point is not to make the soup sour. The point is to wake up the sweetness of the onions so the bowl tastes rounded instead of heavy.

Making it vegetarian as well? Jump back to the vegetarian broth tips and choose one savory booster.

Back to top

Slow Cooker Option, Plus an Instant Pot Note

Slow Cooker French Onion Soup

The slow cooker does not make the soup faster; it makes the waiting easier. It can handle the long onion softening while you do something else. A short stovetop finish is only there if you want deeper color and a more developed base.

Soft onions cooked down in a slow cooker for French onion soup.
Slow cooker onions save attention, not time. For deeper flavor, give pale or wet onions a quick stovetop finish before adding broth.

For the easiest version, add sliced onions, butter or oil, and salt to a 5-quart or larger slow cooker. Cook on LOW for 8 to 10 hours, until the onions are very soft and browned around the edges. If they look pale and wet, transfer them to a pot and cook for 10 to 15 minutes to concentrate the color and flavor.

Slow cooker baseAmount
Sliced onions3 lb / 1.35 kg
Butter and oil3 tablespoons butter + 1 tablespoon oil
Salt1/2 teaspoon to start
Slow cooker time8 to 10 hours on LOW
Best flavor finish10 to 15 minutes on the stove
Broth simmer20 to 30 minutes on the stove, or 1 to 2 hours more in the slow cooker

Using pressure cooking instead? Jump to the Instant Pot note.

After the onions are ready, add broth, thyme, bay leaf, and seasoning, then simmer until the soup tastes rounded. Finish with toasted bread and cheese.

If you like cozy slow cooker dinners built around French onion flavor, this Slow Cooker French Onion Chicken is another easy comfort-food option.

Instant Pot Note

You can make the soup in an Instant Pot, but pressure cooking does not replace caramelization. Use sauté mode first, give the onions 20 to 30 minutes to soften and brown, then add broth and seasonings. Pressure cook for 5 to 6 minutes, release pressure carefully, taste and adjust, then finish with toasted bread and cheese. If the onions are pale before pressure cooking, the finished soup will taste less developed.

Onions browning on sauté mode inside an Instant Pot for French onion soup.
In an Instant Pot, sauté first and pressure cook second. The onion color has to develop before the broth goes in.

Back to top

Cheese, Bread, and Bowls

Best Cheese for French Onion Soup

Gruyère is the classic choice because it melts smoothly and has a nutty, savory flavor that suits the sweet onions. The best topping melts well, browns in spots, and still tastes good once it stretches.

Close-up of bubbling browned cheese on top of French onion soup after broiling.
Broil just until the cheese bubbles and browns in patches. Pull it before the golden spots turn black.
  • Gruyère: the classic choice; nutty, rich, and beautifully melty.
  • Swiss: mild, melty, and a good substitute for Gruyère.
  • Provolone: smooth, stretchy, and mild.
  • Mozzarella: excellent for cheese pull, but mild in flavor.
  • Parmesan: salty and savory; best mixed with another cheese.
  • Aged cheddar: not classic, but flavorful and practical.
  • Processed cheese: melts easily, but can make the soup taste saltier and more snack-like.

If Gruyère is too expensive or hard to find, use mozzarella for melt and add Parmesan, aged cheddar, or a sharper cheese for flavor. Mostly mozzarella needs a small amount of Parmesan or sharp cheddar so the topping has flavor, not just stretch.

Spoon lifting French onion soup with melted cheese stretching from toasted bread.
When the bread is sturdy and the cheese melts properly, each spoonful catches the best parts: broth, onions, toast, and a satisfying cheese pull.

Best Bread for French Onion Soup

The toast keeps the cheese from sinking straight into the soup. It should be crisp enough to hold, but porous enough to soften at the edges. Baguette is classic because it is sturdy and easy to slice into rounds, but you have options.

Firm toasted bread held above a bowl of French onion soup base to show size and texture.
Toast the bread until it feels dry and firm. That structure helps it support melted cheese without disappearing into the broth.
  • Baguette: classic, sturdy, and ideal for individual bowls.
  • Sourdough: flavorful and strong enough for soup.
  • Country bread: good for larger bowls if cut to fit.
  • Crusty rolls: useful when baguette is not available.
  • Regular sandwich bread: only use if toasted very firm; otherwise it gets soggy quickly.

Cut the bread so it sits just inside the bowl or crock. It should cover much of the surface without forcing you to wrestle with it. Toast it before adding cheese. Soft bread under melted cheese may look good for a moment, but it sinks and turns mushy quickly.

If your cheese sinks or the bread turns soggy, jump to troubleshooting before serving.

For a homemade bread side on another soup night, this Homemade Garlic Bread Loaf can be torn, toasted, or served beside a cheesy bowl.

No Broiler-Safe Crocks? Broil the Toast, Not the Bowl

French onion soup is often served in handled crocks because they can go under the broiler and hold heat well. But you do not need special crocks, and you should not risk a favorite bowl just for melted cheese.

Bowls marked only oven-safe are not automatically safe under the broiler. Broilers use intense direct heat, and some ceramic, stoneware, or glass dishes can crack or break if they are not made for it. For cookware safety, Southern Living’s guide on oven-safe versus broiler-safe dishes is worth checking before putting bowls under direct heat.

Cheesy toasts broiled on a sheet pan with bowls of French onion soup nearby.
Instead of putting regular bowls under intense heat, melt the cheese on toast separately. You still get the browned French onion soup topping without risking cracked dishes.

No-Crock Method

  1. Toast the bread until dry and crisp.
  2. Add cheese on top of the toast.
  3. Broil the cheesy toasts on a baking sheet until melted and browned.
  4. Ladle hot soup into regular bowls.
  5. Place the cheesy toast on top just before serving.

This gives you the same bubbling, browned cheese moment without guessing whether your bowls can handle the heat.

Broiled cheesy toast being placed with tongs on top of French onion soup in a regular bowl.
After broiling, move the cheesy toast onto the hot soup right before serving. The edges stay crisp while the center softens into the onion broth.

Back to top

Troubleshooting French Onion Soup

Most problems show up before the bowls reach the table, which is good news. Taste the pot while you can still fix it.

Scan the row that matches your pot; you do not need to read the whole table before cooking.

ProblemLikely causeHow to fix it
Soup tastes too sweetSweet onions, sugar, or not enough acidAdd a small splash of vinegar, lemon juice, Worcestershire, or tamari. Next time, use yellow onions and skip the sugar.
Soup tastes bitterBurnt onions or blackened fondDo not scrape black bits into the pot. Lower the heat next time and deglaze earlier.
Soup tastes like wineWine was not reduced enoughSimmer longer so the sharp wine flavor cooks off. Next time, reduce wine until the onions look glossy and jammy again.
Soup is too saltySalty broth, bouillon, Worcestershire, cheese, or reduced liquidDilute with unsalted broth or water. Add a small splash of acid to balance. Be careful adding more cheese.
Soup tastes wateryWeak stock or rushed onionsSimmer longer, use better stock, or add a small umami boost like Worcestershire, tamari, or mushroom broth.
Soup tastes flatNot enough salt, acid, or savory weightAdd salt carefully, then a tiny splash of vinegar or lemon. For vegetarian soup, add tamari or vegetarian Worcestershire.
Cheese sinksBread was too soft or too thinUse sturdier bread and toast it until crisp before adding cheese.
Bread turns soggy immediatelyBread was not toasted enoughToast bread until dry and firm. Add it right before serving.
No safe bowls for broilingBowls are not broiler-safeBroil cheesy toasts separately on a baking sheet and place them on top of the soup.

Back to top

Shortcuts and Lighter Options

Shortcut Reality Check

Shortcuts can help on a busy night, but they cannot replace the slow onion flavor that makes the bowl taste homemade.

  • French onion soup mix: seasoning, not a real soup base. Use it for dips, casseroles, and quick pantry meals.
  • Canned, condensed, or frozen soup: convenient, but better with extra caramelized onions, black pepper, thyme, toasted bread, and better cheese.
  • Best homemade shortcut: caramelize the onions ahead, store the base, and finish the soup fresh later.

For less stovetop attention, you can also caramelize onions in a covered Dutch oven in the oven, stirring occasionally, then finish the soup on the stove. It still takes time, but it needs less watching.

Lighter and Special-Diet Options

Once the classic bowl is understood, you can lighten it without losing the point of the soup. The onions still need time, and the broth still needs flavor.

  • Lower sodium: use low-sodium or unsalted broth, start with less salt, and season at the end. Remember that cheese, Worcestershire, bouillon, and Parmesan can all add salt.
  • Lower carb: use a smaller piece of toast or make cheese toasts separately and use less bread. The onions still contain natural carbohydrates, so this is lower-carb, not zero-carb.
  • Gluten-free soup: skip the flour, use gluten-free bread, and check broth, Worcestershire, and tamari labels.
  • Lighter bowl: use less cheese and a slightly brothier ratio, but do not rush the onion caramelization.
  • Lighter vegetarian version: use vegetable or mushroom broth and moderate the cheese, but avoid weak stock or the soup will taste watery.

For a broader look at onions in lower-carb eating, see MasalaMonk’s guide to whether onions are suitable for a keto diet.

Back to top

Storage, Reheating, and Serving

Storage, Freezing, and Reheating

The soup stores best before the bread and cheese are added. Keep the soup base separate, then finish each bowl fresh when you are ready to eat.

French onion soup base stored in glass containers with toasted bread and cheese kept separate.
For the best make-ahead texture, store only the onion soup base. Add fresh toast and cheese after reheating, not before storage.
  • Refrigerator: Store the soup base in an airtight container for 3 to 5 days.
  • Freezer: Freeze the soup base for up to 3 months.
  • Reheating: Reheat gently on the stove until hot. Taste again because salt and sweetness can feel stronger after storage.
  • Bread and cheese: Add fresh toast and cheese after reheating. Do not freeze fully assembled soup with bread and cheese if you care about texture.

If the soup thickens in the fridge, loosen it with a splash of broth or water while reheating. If it tastes flat after reheating, a few drops of vinegar or lemon juice can bring it back.

What to Serve with French Onion Soup

Serve it in small bowls as a starter, or make it the whole dinner with extra toast and a sharp salad. Because the soup is rich, salty, sweet, and cheesy, it pairs best with something fresh, crisp, or simple.

  • A crisp green salad with vinaigrette
  • Roast chicken
  • Steak or simple grilled meat
  • Roasted vegetables
  • Grilled cheese or cheese toast
  • Crusty bread and butter
  • A simple pasta or baked potato on the side

For a crisp, steakhouse-style side, MasalaMonk’s Wedge Salad Recipe works well beside a cheesy bowl because the cold lettuce and sharp dressing cut through the sweetness of the onions.

If you are planning a soup night with more vegetables, beans, and pasta, MasalaMonk’s Minestrone Soup Recipe is a lighter, hearty bowl to keep in rotation.

Give the onions time, finish the bread and cheese safely, and the bowl gives you everything French onion soup is supposed to give: sweet onions, savory broth, crisp toast, bubbling cheese, and that first spoonful that makes the wait feel sensible.

Back to top

FAQs

What are the best onions for French onion soup?

Yellow onions are the best all-purpose choice. They caramelize well and give the soup a rounded, savory-sweet flavor without making it too sweet.

How long should onions caramelize for French onion soup?

Plan on 45 to 70 minutes. The onions should be soft, deep golden brown, and jammy, not pale and not blackened.

Do you need beef broth for French onion soup?

No. Beef broth is classic, but mushroom broth or dark vegetable stock can also work. Taste the broth first; if it tastes weak before simmering, the soup will need help.

How do you make vegetarian French onion soup taste rich?

Use mushroom broth or dark vegetable stock, then add one savory booster such as vegetarian Worcestershire, tamari, or browned mushrooms.

What can replace wine in French onion soup?

Use broth to deglaze the pot, then add 1 teaspoon vinegar or lemon juice near the end. The goal is balance, not sourness.

Which cheese melts best on French onion soup?

Gruyère is classic because it melts smoothly and tastes nutty. Swiss, provolone, mozzarella, and aged cheddar can also work; if using mostly mozzarella, add Parmesan or a sharper cheese for flavor.

What bread works best for French onion soup?

Baguette is classic, but sourdough, country bread, crusty rolls, or any sturdy toasted bread can work. Toast it until dry and firm.

Do you need oven-safe crocks?

No. Without broiler-safe crocks, broil the cheesy toasts separately on a baking sheet and place them on top of the hot soup.

Is slow cooker French onion soup as good as stovetop?

It can be very good, but the flavor is usually deeper when the onions get a short stovetop finish before the broth goes in.

Is French onion soup mix the same as French onion soup?

No. French onion soup mix is a dry seasoning blend; it does not replace the flavor of slowly caramelized onions.

Why is my French onion soup too sweet?

Very sweet onions, extra sugar, or too little acid can make the soup taste sweet. Add a small splash of vinegar or lemon juice to balance it.

Why does French onion soup taste bitter?

Bitterness usually comes from burnt onions or blackened bits scraped from the pot. Brown fond is good; do not scrape black scorched bits into the soup.

Can French onion soup be frozen?

Yes. Freeze the soup base without bread and cheese for up to 3 months, then reheat and finish with fresh toast and cheese.

Back to top

Posted on Leave a comment

Minestrone Soup Recipe

Bowl of minestrone soup with tomato broth, white beans, kidney beans, small pasta, carrots, zucchini, greens, herbs, and bread on the side.

A good minestrone soup should look generous before you even take the first spoonful: tender vegetables, creamy beans, small pasta, herbs, and a tomato broth that tastes rich instead of watery. The first spoonful should catch a little of everything — a soft bean, a piece of pasta, sweet carrot, zucchini, greens, and enough tomato broth to pull it all together.

This pot works because it protects the three things that matter most in minestrone: rich tomato broth, vegetables with texture, and pasta that does not turn the leftovers into mush. Even a half-used zucchini, a tired carrot, two cans of beans, and the last handful of pasta can become a proper dinner.

Homemade minestrone also gives you something canned soup rarely does: better texture. The vegetables do not have to be overcooked, the pasta can stay tender, and you control the salt, broth, and finish.

Cooking now? Jump to the recipe card. The notes below help keep the broth rich, the vegetables tender, and the leftovers useful.

What a Good Minestrone Spoonful Should Show

Before you start, notice the target balance: beans, vegetables, pasta, greens, and tomato broth should all show up in the same spoonful.

Spoon lifting minestrone soup with small pasta, white bean, kidney bean, carrot, zucchini, greens, and tomato broth dripping back into the bowl.
This spoonful shows the balance you want: beans for body, vegetables for freshness, small pasta for comfort, and tomato broth tying everything together.

Recipe at a Glance

Prep time20 minutes
Cook time45 minutes
Total time1 hour 5 minutes
Faster versionAbout 40 to 45 minutes with smaller diced vegetables, the full 6 cups broth, and a shorter 15 to 20 minute base simmer
Servings6 generous bowls
YieldAbout 11 to 13 cups soup
MethodStovetop
Best pot5 to 6 quart / 5 to 6 liter Dutch oven or heavy soup pot
Best forWeeknight dinner, meal prep, and freezer-friendly soup base
DietMeatless when made with vegetable broth; vegan option

The Minestrone Rule of 5: soften the aromatics, build the tomato base, add beans for body, keep the pasta small, and save tender greens for the end. Vegetables can change; the rhythm is what keeps the pot balanced.

Why this works: tomato paste gives the soup depth, beans make it feel full, late-added vegetables keep their shape, and pasta goes in only when the broth already tastes good. That is what keeps the soup hearty without letting it turn heavy or dull.

The Minestrone Rule of 5

This visual is the memory hook for the whole recipe: keep the rhythm steady, even when the vegetables change.

Rustic board showing minestrone ingredients arranged as aromatics, tomato base, beans, small pasta, and leafy greens.
Use the Minestrone Rule of 5 when you want the recipe to feel flexible: aromatics, tomato base, beans, small pasta, and greens are the core building blocks.

Easy minestrone ratio: for 6 bowls, use about 5 to 6 cups broth, 2 cans beans, 4 to 5 cups chopped vegetables, and 3/4 cup small pasta.

Short on time? Dice the vegetables smaller, use the full 6 cups broth, and simmer the soup base for 15 to 20 minutes before adding pasta and greens. The full cook gives deeper flavor, but the faster version still makes a good weeknight bowl.


Minestrone Soup Recipe Card

Description: A hearty minestrone soup with vegetables, beans, small pasta, and a rich tomato broth. It is meatless when made with vegetable broth, cozy without cream, and easy to adjust for leftovers or a thicker dinner-style bowl.

Prep: 20 minutes | Cook: 45 minutes | Total: 1 hour 5 minutes | Serves: 6 generous bowls | Yield: about 11 to 13 cups

Equipment: 5 to 6 quart / 5 to 6 liter Dutch oven or heavy soup pot, knife, cutting board, can opener, colander, wooden spoon, and ladle.

Ingredients

Base

  • 2 tablespoons olive oil, plus more for finishing, about 30 ml
  • 1 medium yellow onion, diced, about 150 to 180 g
  • 2 medium carrots, diced, about 130 to 160 g
  • 2 celery ribs, diced, about 90 to 120 g
  • 4 garlic cloves, minced
  • 3 tablespoons tomato paste, about 45 g

Broth and Seasoning

  • 1 can crushed or diced tomatoes, 28 oz / 794 g
  • 5 to 6 cups vegetable broth, 1.2 to 1.4 liters
  • 1 bay leaf
  • 1 1/2 teaspoons Italian seasoning
  • 1/2 teaspoon dried oregano, optional
  • 1/4 teaspoon red pepper flakes, optional
  • 1 teaspoon kosher salt or 3/4 teaspoon fine salt, plus more to taste; start with less if your broth is salted
  • 1/2 teaspoon black pepper, plus more to taste
  • 1 parmesan rind, optional; skip for vegan minestrone

Beans, Vegetables, and Pasta

  • 1 can cannellini beans or white beans, 15 oz / 425 g, drained and rinsed
  • 1 can kidney beans, 15 oz / 425 g, drained and rinsed
  • 1 cup chopped green beans, about 100 to 125 g
  • 1 medium zucchini, diced, about 180 to 220 g
  • 3/4 cup small pasta such as ditalini, small shells, elbows, or macaroni, about 75 to 90 g
  • 2 cups packed spinach or chopped kale, about 60 to 80 g

Finish

  • 1 to 2 teaspoons lemon juice or red wine vinegar, 5 to 10 ml
  • 1/4 cup chopped parsley or basil, about 10 to 15 g
  • Extra olive oil, for finishing
  • Grated parmesan, optional, for serving

Instructions

  1. Heat olive oil in a 5 to 6 quart / 5 to 6 liter Dutch oven or heavy soup pot over medium heat.
  2. Add onion, carrot, celery, and salt. Cook for 7 to 10 minutes, stirring often, until softened and fragrant.
  3. Add garlic and tomato paste. Cook for 1 to 2 minutes, stirring often, until the tomato paste darkens slightly.
  4. Add crushed or diced tomatoes, vegetable broth, bay leaf, Italian seasoning, oregano if using, red pepper flakes if using, black pepper, and parmesan rind if using. Stir well and scrape the bottom of the pot.
  5. Add the cannellini beans and kidney beans. Bring to a boil, then reduce to a gentle simmer.
  6. Simmer partly covered for 20 to 25 minutes, until the broth tastes developed. Add firm vegetables such as cabbage, potato, or squash during this simmer if using them.
  7. Add green beans, zucchini, and pasta. Cook for 8 to 10 minutes, or until the pasta is just tender.
  8. Stir in spinach or kale and cook for 1 to 3 minutes, just until wilted.
  9. Remove the bay leaf and parmesan rind. Stir in lemon juice or red wine vinegar, parsley or basil, and a drizzle of olive oil.
  10. Taste and adjust salt, pepper, and acidity. Let the soup rest for 5 minutes before serving.
  11. Serve hot with parmesan, extra herbs, crusty bread, garlic bread, or a simple salad.

Recipe Notes

  • Brothier soup: use 3/4 cup pasta and the full 6 cups broth.
  • Thicker soup: use 1 cup pasta or mash 1/2 cup beans into the broth.
  • Firmer zucchini: add zucchini during the final 5 minutes instead of with the pasta.
  • Better leftovers: cook pasta separately and add it to bowls.
  • Vegan version: use vegetable broth and skip parmesan rind and parmesan cheese.
  • Meal prep: toss separately cooked pasta with a tiny drizzle of olive oil after draining so it does not clump.
  • Gluten-free version: use gluten-free pasta or rice, preferably cooked separately.
  • Rice version: cooked rice is easiest. Add it near the end or directly to bowls because rice absorbs broth quickly.
  • Extra richness: simmer with a parmesan rind or finish with olive oil and herbs.

The recipe works on its own, but the notes below help you adjust the beans, pasta, vegetables, storage, and appliance methods without losing the minestrone feel. If leftovers matter, the storage and freezing notes are especially useful.

Before the deeper notes, this quick visual ratio gives you a flexible way to adjust the pot without losing the minestrone balance.

Easy Minestrone Ratio

Use this ratio when you want to adjust the recipe without losing the soup’s balance.

Broth, beans, chopped vegetables, and small pasta arranged on a rustic counter as an easy minestrone ratio guide.
Instead of measuring every vegetable perfectly, follow the ratio: broth keeps it loose, beans make it filling, vegetables add bulk, and pasta should stay modest.

What Is Minestrone Soup?

Minestrone is an Italian vegetable soup made with vegetables, beans, tomatoes, broth, herbs, olive oil, and usually pasta or rice. Classic minestrone is not about one fixed vegetable list; it is about building a generous, seasonal soup with enough beans and starch to feel like a meal.

That is why one pot might have zucchini and green beans while another has cabbage, kale, potato, or squash. A good bowl should be crowded, not dry: enough vegetables and beans to make it feel like dinner, but enough tomato broth to keep it unmistakably soup.

Why You’ll Like This Recipe

  • The broth tastes built, not diluted. Tomato paste, sautéed aromatics, herbs, beans, and olive oil give it a rounded tomato flavor.
  • The vegetables keep their texture. Firm vegetables simmer first, while zucchini and greens go in later.
  • The pasta will not hijack the leftovers. Cook it in the soup when serving right away, or separately when you want better storage.
  • It starts meatless. Use vegetable broth, and the whole pot stays hearty without meat.
  • It gives you room to use what you have. Small shells, elbows, ditalini, zucchini, green beans, cabbage, kale, spinach, white beans, kidney beans, or chickpeas can all work.
  • It can be lighter or heartier. Use more greens and less pasta for a lighter bowl, or extra beans and a little more pasta for a thicker dinner-style soup.

Minestrone feels hearty without cream because beans, vegetables, pasta, and olive oil do the work. If you like cozy tomato-and-pasta dinners, this sits near the same comfort zone as baked ziti, but it is lighter, brothier, and packed with vegetables.

Minestrone Soup Ingredients

These ingredients follow the same Rule of 5: aromatics, tomato broth, beans, small pasta or rice, and tender greens at the end. Do not worry if you are missing one vegetable. Minestrone is forgiving as long as the base stays balanced.

If you are missing one vegetable or bean, check the easy minestrone swaps before changing the broth or pasta ratio.

Ingredients for minestrone soup on a counter, including tomatoes, broth, beans, pasta, carrots, celery, onion, garlic, zucchini, green beans, greens, herbs, olive oil, and parmesan rind.
Each minestrone ingredient has a role: aromatics create sweetness, tomatoes shape the broth, beans add substance, pasta brings comfort, and greens freshen the finish.

If you remember one thing: taste the broth before adding pasta. When it tastes thin or flat at that point, fix the broth first; pasta will not rescue a weak soup.

Build the Aromatic Base

Onion, carrot, celery, garlic, and olive oil create the base. Cook the onion, carrot, and celery until the sharp onion smell softens and the pot starts smelling sweet. The onion should look translucent and the carrot edges should soften. This is the first moment the soup starts smelling like dinner instead of chopped vegetables.

Onion, carrot, and celery sautéing in olive oil inside a Dutch oven with a wooden spoon.
First, cook the onion, carrot, and celery until they soften and smell sweet. This step gives homemade minestrone a deeper base before the tomatoes arrive.

Cook the Tomato Paste Before Broth


Tomato paste and a large can of crushed or diced tomatoes give the broth its color and flavor. Cook the tomato paste until it darkens slightly; it should leave orange-red streaks on the bottom of the pot, not black bits. Crushed tomatoes make a fuller, smoother broth, while diced tomatoes give a chunkier texture.

Tomato paste cooked with onion, carrot, and celery in a pot, with a wooden spoon dragging through the red paste.

Next, let the tomato paste cook briefly with the aromatics. It deepens the soup base and helps the broth taste rich instead of thin.

Broth


Vegetable broth keeps the soup meatless and easy to make vegan. Chicken broth also works if you are not keeping the soup vegetarian. Low-sodium broth gives you more control because canned beans, tomatoes, pasta, and cheese can all add salt.

Beans


White beans and kidney beans are a strong everyday combination. The white beans soften into the tomato broth and make the soup feel fuller, almost as if it simmered longer than it did. Kidney beans add color, bite, and the familiar minestrone look. Rinse canned beans before adding them so the broth stays clean and balanced.

Pasta or Rice


Small pasta is what keeps minestrone easy to eat by the spoonful. Ditalini is classic, but small shells, elbows, macaroni, or orzo all work. Use 3/4 cup for a brothier soup and up to 1 cup for a thicker bowl. Cooked rice also works when you want a pasta-free version. If you are cooking for leftovers, see how to keep minestrone pasta from getting mushy before adding pasta directly to the pot.

Vegetables


Zucchini, green beans, spinach, kale, cabbage, potato, peas, squash, carrots, and celery can all work. Dense vegetables such as potato, squash, cabbage, and carrots need more time. Zucchini, peas, spinach, and tender greens should go in later so they keep some color and shape.

Minestrone is not a test of whether you bought the exact vegetables; it is a way to turn the vegetables you have into a balanced soup.

Herbs and Finishers


Italian seasoning, oregano, basil, thyme, bay leaf, black pepper, parsley, and fresh basil all fit well. A parmesan rind is optional for extra depth, but use vegetarian-style parmesan if that matters to you, or skip cheese completely for a vegan version.

A small splash of lemon juice or red wine vinegar wakes up the whole pot at the end, especially after the beans and pasta have softened the broth. A spoonful of pesto can make the finish taste brighter; these basil pesto variations are useful if you like that herby direction.

How to Make Minestrone Soup

The steps follow the same rhythm as the Rule of 5: sauté, deepen, simmer, add quick-cooking ingredients late, finish fresh.

1. Sauté the Onion, Carrot, and Celery


Heat olive oil in a large Dutch oven or heavy soup pot over medium heat. Add onion, carrot, celery, and salt. Cook for 7 to 10 minutes, stirring often, until the vegetables soften and the onion turns translucent. The pot should smell sweet and savory before you move on.

2. Add Garlic and Tomato Paste


Stir in the garlic and tomato paste. Cook for 1 to 2 minutes, stirring often. The tomato paste should darken slightly and smell richer, but it should not scorch. A watery minestrone usually means the base was rushed, so give this step its minute.

3. Build the Broth


Add crushed or diced tomatoes, broth, Italian seasoning, bay leaf, black pepper, and parmesan rind if using. Scrape the bottom of the pot so all the tomato paste and aromatics dissolve into the broth.

Minestrone soup base in a Dutch oven with tomato broth, beans, carrots, celery, and firm vegetables before pasta and greens are added.

Let the tomato broth, beans, and firm vegetables simmer before adding pasta. As a result, the base tastes rounded instead of rushed.

4. Add Beans and Simmer Gently


Add the rinsed beans and any firm vegetables such as cabbage, potato, or squash. Bring the soup to a boil, then reduce it to a gentle simmer. You want small bubbles, not a rolling boil. Cook partly covered for 20 to 25 minutes, until the broth tastes fuller and the vegetables are tender.

Taste the broth before adding pasta. If it tastes thin or flat now, give it more simmering time, adjust the salt, or brighten it with a little lemon juice or vinegar. The broth should already taste good before the pasta goes in; if it still tastes weak, use the troubleshooting section before adding pasta.

Minestrone soup gently simmering in a Dutch oven with tomato broth, beans, carrots, celery, pasta, and vegetables.

Keep minestrone at a gentle simmer, not a hard boil. Small bubbles build flavor while helping the vegetables stay tender and intact.

5. Add Quick-Cooking Vegetables and Pasta


Add green beans, zucchini, and small pasta near the end. Cook for 8 to 10 minutes, or until the pasta is just tender. Stop while it still has a little structure, because it will keep softening in the hot broth.

Small pasta being poured into a pot of minestrone soup with spinach added near the end of cooking.

Add pasta and greens near the end. This keeps the soup brighter, protects the greens, and helps prevent pasta from swelling in the pot.

6. Finish with Greens, Herbs, and Brightness


Stir in spinach or kale for the final 1 to 3 minutes. The greens only need to wilt; they do not need to cook down into the broth. Remove the bay leaf and parmesan rind. Finish with parsley or basil, a drizzle of olive oil, and lemon juice or red wine vinegar. Rest the soup for 5 minutes before serving so the broth settles and the flavors come together.

Finished pot of homemade minestrone soup with tomato broth, beans, pasta, carrots, zucchini, green beans, greens, herbs, and olive oil.

When the pot is ready, it should look colorful and ladle easily. If it feels crowded, loosen it with a splash of broth before serving.

Easy Minestrone Swaps

Once the base makes sense, the soup becomes forgiving. You do not need the exact same vegetables every time; you just need the right balance of broth, beans, pasta or rice, and timing.

Use What You Have

Use this section when the pot needs to adapt to the vegetables, beans, and pasta you already have.

Rustic board with minestrone swaps including zucchini, carrot, cabbage, kale, potato, white beans, green beans, herbs, and small pasta.

Minestrone is made for flexible cooking. Therefore, zucchini, cabbage, kale, potato, beans, herbs, and small pasta can all work when you add them at the right time.

If you do not have Use this instead
Cannellini beans Navy beans, great northern beans, white beans, or chickpeas
Kidney beans More white beans, borlotti beans, chickpeas, or lentils
Zucchini Cabbage, green beans, peas, spinach, kale, or squash
Ditalini Small shells, elbows, macaroni, or orzo
Vegetable broth Water with extra tomato paste, herbs, olive oil, and careful seasoning
Fresh greens Frozen spinach, frozen kale, or chopped cabbage added earlier
Parmesan rind Skip it, or finish with olive oil, herbs, and a little lemon juice or vinegar

This is also where minestrone becomes personal. One cook adds cabbage, another adds potato, another uses chickpeas, and another keeps it brothy. The base stays the same, but the pot can still feel like yours. For more timing help, see the firm-early, tender-late vegetable guide.

What the Soup Should Look and Taste Like

You are looking for a soup that is chunky but still brothy. The tomato broth should taste rounded rather than sharp or thin. Vegetables should be tender without collapsing, beans should stay creamy but mostly intact, and the pasta should be just tender, not swollen.

Finished Bowl Texture Check

Use the finished bowl as a quick check before serving: the soup should look full, but it should still move like soup.

Close-up bowl of finished minestrone soup with tomato broth, white beans, kidney beans, pasta, carrots, zucchini, greens, and herbs.

Use the finished bowl as a texture check. The vegetables and beans should stand out clearly, while the tomato broth still fills the gaps around them.

Chunky but Still Soup

If the pot looks crowded but still has enough broth to move around the vegetables, you are in the right place. You should be able to drag the spoon through the bowl and see vegetables and beans settle back into the tomato broth, not sit in a dry pile. The final olive oil, herbs, and lemon juice or vinegar should make the bowl taste brighter, not sour.

Close bowl of chunky but brothy minestrone soup with visible tomato broth, beans, pasta, carrots, zucchini, greens, and herbs.

Aim for chunky but not dry. The spoon should catch vegetables and beans, while the broth still makes the bowl feel like soup.

Best Beans, Pasta, and Vegetables for Minestrone

Beans, pasta, and vegetables are where minestrone becomes dinner. The choices do not need to be fancy; they just need to make sense together in the spoon.

Best Beans and Pasta for Minestrone

Start with spoon-friendly beans and small pasta shapes, then choose vegetables that match the season and cooking time.

Bowls and spoons of cannellini beans, kidney beans, ditalini pasta, small shells, elbows, and orzo for minestrone soup.

Choose beans and pasta that fit easily on a spoon. Cannellini beans, kidney beans, ditalini, elbows, or small shells keep minestrone hearty without making it clumsy.

Best Beans


  • Cannellini or white beans: creamy, mild, and classic.

  • Kidney beans: firmer, colorful, and familiar in restaurant-style minestrone.

  • Borlotti beans: rustic and soft with a fuller bean flavor.

  • Chickpeas: nutty and firmer, good when you want more bite.

  • Lentils: useful for a thicker, higher-protein variation.

Best Pasta


  • Ditalini: classic and spoon-friendly.

  • Small shells: good for catching tomato broth.

  • Elbows or macaroni: easy pantry choice.

  • Orzo: soft and pleasant, but it thickens leftovers quickly.

  • Rice: useful if you do not want pasta. Cooked rice is easiest.

Once the beans and pasta are chosen, the vegetables are mostly about timing: firm ones early, tender ones late. That is what keeps the bowl generous without making it taste tired.

Firm Vegetables Early, Tender Vegetables Late


A good minestrone should never feel trapped by one vegetable list. Keep the tomato broth, aromatics, beans, herbs, and small pasta structure, then choose vegetables that fit the pot.

  • Summer: zucchini, green beans, fresh tomatoes, basil, spinach.

  • Winter: cabbage, kale, potato, squash, carrots, celery.

  • Spring: peas, asparagus, spinach, leeks, fresh herbs.

  • Pantry version: canned tomatoes, canned beans, frozen vegetables, cabbage, carrots, small pasta.

Add dense vegetables like potato, squash, cabbage, and carrots earlier. Add zucchini, peas, spinach, and tender greens near the end. Try not to overload the pot; minestrone should be hearty, but it should still have enough broth to feel like soup.

Rustic vegetable timing board showing firm vegetables like potato, cabbage, carrot, and squash beside tender vegetables like zucchini, peas, spinach, kale, and herbs.

Vegetable timing matters more than a perfect shopping list. Add firm vegetables early, then save tender greens, zucchini, peas, and herbs for the final minutes.

How to Fix Minestrone Soup Problems

If your minestrone tastes bland, watery, too thick, too acidic, or overcooked, it can usually be fixed. Most problems come down to seasoning, simmering, pasta timing, vegetable timing, or broth balance.

Fix Bland Minestrone Soup

Before rebuilding the whole pot, taste for salt, acid, herbs, pepper, and olive oil; those small finishes often fix a flat bowl.

Bowl of minestrone soup beside salt, lemon wedge, red wine vinegar, olive oil, parsley or basil, and black pepper.

Bland minestrone often needs a finish, not a rebuild. Salt, lemon or vinegar, herbs, black pepper, and olive oil can wake up the whole pot.

Problem Fix
Soup tastes flat Add salt first, then a small splash of lemon juice or red wine vinegar.
Broth is too thin Simmer uncovered for a few minutes or mash 1/2 cup of beans into the broth.
Soup is too thick Add broth or water until it becomes spoonable again.
Pasta is too soft Add more broth, fresh herbs, and a little acidity. Next time, cook pasta separately.
Vegetables are overcooked Freshen the bowl with herbs, olive oil, and extra broth. Next time, add zucchini and greens later.
Soup tastes too acidic Add a drizzle of olive oil or a tiny pinch of sugar to round the tomato flavor.
Soup is too salty Add unsalted broth, water, extra beans, or more vegetables.

Most of the time, the fix is smaller than you think. A little salt, a little acid, a splash of broth, or a few mashed beans can bring the pot back.

Fix Watery Minestrone Soup

When the broth looks thin, mashed white beans are the quickest natural thickener because they add body without changing the soup into cream sauce.

Two bowls of minestrone comparing thin watery broth with richer tomato broth, with mashed white beans shown as the thickening fix.

If the broth tastes watery, mash a few white beans into the soup and simmer briefly. This thickens minestrone naturally without cream or flour.

How to Make Minestrone Richer

  • Cook the onion, carrot, and celery until they soften and smell sweet.

  • Cook the tomato paste before adding broth.

  • Use crushed tomatoes for a fuller broth.

  • Add a parmesan rind if you are using cheese.

  • Mash some of the beans into the soup for natural body.

  • Simmer partly uncovered when the soup looks too thin.

  • Finish with olive oil, herbs, and a small splash of lemon juice or vinegar.

How to Keep Pasta from Getting Mushy


Minestrone pasta gets mushy when it sits in hot broth for too long or stays in the soup through storage. The safest method depends on how you plan to serve it.

  • Serving immediately: add dry pasta during the final 8 to 10 minutes.

  • Meal prep: cook pasta separately and add it to each bowl.

  • Freezing: freeze the soup without pasta and add fresh pasta later.

  • Thick leftovers: reheat with extra broth or water.

Glass containers showing minestrone soup base stored separately from cooked small pasta, with pasta being added to a serving bowl.

For better leftovers, store the soup base and pasta separately. Then add pasta to each serving so the next bowl stays fresh instead of soggy.

Slow Cooker and Instant Pot Minestrone

Slow Cooker vs Instant Pot Minestrone

For both appliance methods, the texture rule is the same: cook the base first and keep pasta and greens late. The pasta texture notes are especially useful for meal prep.

Slow cooker and Instant Pot filled with minestrone soup, with small bowls of pasta and greens nearby for adding near the end.

Whether you use a slow cooker or Instant Pot, cook the soup base first. Meanwhile, keep pasta and greens for the end so the texture stays better.

Slow Cooker Minestrone

Slow cooker minestrone is best for a hands-off soup base. Cook the broth, beans, aromatics, and firm vegetables first, then add zucchini, pasta, and greens near the end so they do not overcook.

  1. Add onion, carrot, celery, garlic, tomato paste, tomatoes, broth, herbs, bay leaf, beans, and firm vegetables to the slow cooker.

  2. Cook on low for 6 to 8 hours or high for 3 to 4 hours.

  3. Add zucchini and green beans during the final 30 minutes.

  4. Add pasta only during the final 20 to 30 minutes, or cook pasta separately.

  5. Stir in spinach or kale at the end, then finish with herbs, olive oil, and lemon juice or vinegar.

Instant Pot Minestrone


Instant Pot minestrone is best for a fast soup base. Pressure cook the broth, beans, and firm vegetables, then add cooked pasta and greens at the end so the pasta does not turn soft under pressure.

  1. Use sauté mode to cook onion, carrot, celery, and olive oil for 4 to 5 minutes.

  2. Add garlic and tomato paste. Cook for 1 minute.

  3. Add tomatoes, broth, herbs, bay leaf, beans, and firm vegetables.

  4. Pressure cook on high for 4 to 5 minutes.

  5. Let pressure release naturally for 5 to 10 minutes, then quick release carefully.

  6. Stir in greens and cooked pasta, then finish with herbs, olive oil, and lemon juice or vinegar.

Olive Garden-Style Minestrone Soup

If you like Olive Garden’s lighter tomato-broth style, use these adjustments while keeping the main recipe homemade. Olive Garden describes its minestrone as vegetables, beans, and pasta in a light tomato broth, so this is a home version in that familiar direction, not the official recipe. You can see Olive Garden’s menu description for the style reference.

Light tomato-broth minestrone soup in a cream bowl with kidney beans, white beans, pasta, carrots, zucchini, green beans, celery, spinach, and herbs.

For Olive Garden-style minestrone at home, keep the broth lighter, the beans whole, the vegetables small, and the pasta modest.

  • Use diced tomatoes instead of crushed for a lighter restaurant-style texture.

  • Do not mash the beans into the broth.

  • Keep the pasta modest so the soup stays brothy.

  • Use kidney beans, white beans, zucchini, green beans, carrots, celery, and spinach.

  • Finish with herbs and acidity so the bowl tastes bright, not heavy.

Minestrone Soup Variations

After the base tastes good, you can take the soup in a few different directions without losing the minestrone feel. Keep the tomato base, beans, vegetable timing, and small pasta structure in place, then adjust the bowl you want. For gluten-free, rice-based, or pasta-free versions, the storage section is useful if you plan to cook the starch separately.

Three bowls of minestrone variations showing a vegan version, a gluten-free or rice version, and a thicker bean-rich version on a rustic table.

Once the tomato-bean base tastes good, you can take minestrone in several directions: vegan, gluten-free, rice-based, or thicker and extra hearty.

  • Vegan minestrone: use vegetable broth and skip parmesan rind, parmesan cheese, meat, and egg pasta. Finish with olive oil, herbs, nutritional yeast, or vegan pesto.

  • Gluten-free minestrone: use gluten-free pasta or rice. Cook gluten-free pasta separately for the best texture. Do not use barley or farro.

  • Minestrone without pasta: skip the pasta and add extra beans, cabbage, zucchini, potato, kale, spinach, or cooked rice.

  • Thick and hearty minestrone: use crushed tomatoes, 1 cup pasta, extra white beans, and a small potato. Mash some beans into the broth.

  • Brothy minestrone: use 3/4 cup pasta, unmashed beans, and an extra cup of broth for a lighter, restaurant-style bowl.

  • Low-sodium minestrone: start with low-sodium broth, rinse canned beans well, and choose no-salt-added tomatoes if available. Use garlic, herbs, lemon juice, vinegar, and olive oil to build flavor.

  • Add meat: brown Italian sausage or ground beef before adding the aromatics, or stir in shredded cooked chicken near the end.

Think of these as directions, not separate recipes. The same pot can become lighter, heartier, vegan, gluten-free, or meatier without losing its minestrone backbone.

What to Serve with Minestrone Soup

Minestrone can stand alone as dinner, especially with beans and pasta, but a simple side makes the meal feel complete.

  • A lighter meal: serve minestrone with a crisp salad, roasted vegetables, or something bright like beet salad.

  • For a heartier dinner: add garlic bread, focaccia, grilled cheese, parmesan toast, or pesto toast.

Bowl of minestrone soup served with garlic bread, a green salad with tomatoes, herbs, and a spoon on a wooden table.

Minestrone can stand alone, but the sides change the meal. Garlic bread makes it heartier, while a fresh salad keeps dinner lighter.

The best side is something that balances the tomato broth without making the meal feel heavy.

Make-Ahead, Storage, Freezing, and Reheating

Make-Ahead Plan


Yes, you can make minestrone ahead of time. For the best texture, make the soup base without pasta, refrigerate it, and add freshly cooked pasta when serving.

  • Chop the onion, carrot, celery, zucchini, and green beans up to 1 day ahead.

  • Drain and rinse the beans ahead of time.

  • Make the soup base without pasta up to 3 days ahead.

  • Add greens when reheating so they stay brighter.

  • Cook pasta fresh, or store cooked pasta separately with a tiny drizzle of olive oil.

Store and Freeze Minestrone with Pasta Separately

This storage setup keeps the soup base useful and protects the pasta from swelling before the next serving.

Glass containers of minestrone soup base and a separate bowl of cooked small pasta for storing and freezing.

For freezing, leave pasta out of the soup base. This way, the broth, beans, and vegetables reheat well, and fresh pasta can be added later.

Fridge

Store minestrone soup in an airtight container in the fridge for 3 to 4 days, which matches the USDA’s general guidance for refrigerated leftovers. The next-day soup is often thicker and more flavorful. Loosen it with broth before reheating.

Freezer


Minestrone freezes best without pasta. Freeze the soup base for up to 3 months, then add freshly cooked pasta when reheating. If you freeze it with pasta, the flavor will still be good, but the pasta will become softer.

Reheating


Reheat gently on the stovetop over low to medium-low heat. Add broth or water to loosen the soup. After reheating, freshen the bowl with olive oil, herbs, lemon juice, vinegar, or parmesan. For the fastest fix when leftovers get thick, see the troubleshooting table.

Serve Minestrone Family-Style

Family-style Dutch oven of minestrone soup on a wooden table with a ladle, bowls of soup, bread, herbs, cheese, and a hand serving soup.

Serve minestrone family-style when you want the meal to feel relaxed and generous, with herbs, cheese, bread, or extra broth added at the table.

Once you have the rhythm down, minestrone becomes one of those soups you can make again and again without overthinking it. Keep the tomato broth, beans, small pasta, and vegetable timing in place, then let the pot change with the season.

The best minestrone is not the one with the longest ingredient list; it is the one where the broth, beans, vegetables, and pasta all still feel like they belong in the same spoonful.

Minestrone changes from kitchen to kitchen. If your pot had cabbage, potato, chickpeas, kale, extra zucchini, or a pasta shape that worked beautifully, tell us. Those small choices are often what help the next person make a better pot from what they already have.


Frequently Asked Questions

What is minestrone soup made of?


Minestrone soup is an Italian vegetable soup made with vegetables, beans, tomatoes, broth, herbs, olive oil, and usually pasta or rice. Common vegetables include onion, carrot, celery, zucchini, green beans, cabbage, spinach, kale, potato, and peas.

Is minestrone soup vegetarian?


Minestrone soup is vegetarian when it is made with vegetable broth and no meat. If you add parmesan, choose vegetarian-style parmesan if that matters to you.

Is minestrone soup vegan?


Minestrone soup is vegan when it is made with vegetable broth and no parmesan, parmesan rind, meat, or egg pasta. For a vegan finish, use olive oil, herbs, nutritional yeast, or vegan pesto.

What is the best pasta for minestrone?


Ditalini is one of the best pasta shapes for minestrone because it is small and spoon-friendly. Small shells, elbows, macaroni, and orzo also work.

What beans are best for minestrone?


Cannellini beans, white beans, and kidney beans are the best everyday beans for minestrone. Borlotti beans, navy beans, chickpeas, and lentils also work.

Why does my minestrone taste bland?


Bland minestrone usually needs salt, acidity, or more simmering time. Cook the aromatics well, cook the tomato paste until it darkens slightly, taste the broth before adding pasta, then finish with lemon juice or vinegar if the tomato flavor tastes flat.

How do you make minestrone less watery?


To make minestrone less watery, simmer it uncovered, mash some beans into the broth, use crushed tomatoes, or add a parmesan rind if you are using cheese. A watery soup often means the aromatics or tomato paste needed more time at the beginning.

How do you keep pasta from getting mushy in minestrone?


To keep pasta from getting mushy in minestrone, add it only near the end and stop when it is just tender. For leftovers, meal prep, or freezing, cook pasta separately and add it to each bowl.

Can you make minestrone soup ahead of time?


Yes, minestrone is a good make-ahead soup, especially if you make the soup base without pasta. Refrigerate the base for 3 to 4 days, then add freshly cooked pasta when serving.

Can you freeze minestrone soup?


Yes, minestrone soup freezes well, but it freezes best without pasta. Freeze the soup base for up to 3 months, then add freshly cooked pasta when serving.

What is the difference between minestrone and vegetable soup?


Minestrone is usually heartier than plain vegetable soup because it often includes beans, pasta or rice, tomatoes, Italian herbs, and olive oil. Vegetable soup can be any broth-based soup made with vegetables.

What is the difference between minestrone and pasta e fagioli?


Minestrone is a vegetable-heavy soup that often includes beans plus pasta or rice. Pasta e fagioli means pasta and beans, so it is more focused on those two ingredients and is often thicker and more bean-forward.

Can I make minestrone without pasta?


Yes, you can make minestrone without pasta. Add extra beans, cabbage, zucchini, potato, kale, spinach, or cooked rice instead.

Can I use frozen vegetables in minestrone?


Yes, frozen peas, green beans, spinach, kale, and mixed vegetables can work well in minestrone. Add quick-cooking frozen vegetables near the end unless they are dense vegetables. If frozen spinach releases too much water, squeeze it before adding.

Can I make minestrone with canned vegetables?


Yes, canned vegetables can work in minestrone when you need a pantry version. Drain them well and add them near the end because they are already cooked and can become too soft if simmered for a long time.

Posted on 13 Comments

Crock Pot Lasagna Soup (Easy Base + Cozy Slow-Cooker Recipes)

Woman ladling creamy crock pot lasagna soup from a black slow cooker into a bowl, with spinach and lasagna noodles on the table.

Some nights call for a bowl you can wrap your hands around—steamy, tomato-rich, and finished with a cloud of creamy cheese. That’s exactly what this crock pot lasagna soup delivers. You’ll do a brief sauté to build flavor, then let the slow cooker do the patient work while you get on with life. Toward the end, in go the broken lasagna noodles so they stay pleasantly toothsome, and right before serving, a lemon-zesty ricotta (or protein-forward cottage-cheese) dollop brings the full lasagna effect.

If you’re into creamier spins, you’ll also find a white, Alfredo-inspired version below; if you lean plant-based, there’s a hearty vegetarian and a fully vegan path; if you crave extra comfort, a tortellini twist waits for you; and if you want maximum convenience, there’s a five-ingredient crock-pot shortcut too. As you read, you’ll see links to deeper dives—MasalaMonk articles for noodles, sauces, and plant-protein ideas; and a few trusted external pieces for technique nerdery and food safety.

Also Read: How to Make Churros (Authentic + Easy Recipe)


The Base: Crock Pot Lasagna Soup, From Pantry to Ladle

Hands-on time: about 15 minutes
Cook time: 3–4 hours on HIGH or 6–7 hours on LOW
Serves: 6 cozy bowls

What you’ll gather

  • Olive oil for a quick sauté
  • Aromatics: 1 medium onion (diced), 3 garlic cloves (minced)
  • Tomato backbone: 2 tablespoons tomato paste + 1 can crushed tomatoes (800 g) or one 700–720 ml jar of spaghetti sauce
  • Broth: 4 cups low-sodium chicken or vegetable
  • Seasoning: Italian seasoning, a pinch of chili flakes, salt, black pepper
  • Pasta: about 225 g broken lasagna noodles (press them under the liquid so they soften evenly)
  • Finishers: a small splash of cream or half-and-half (optional), plus a ricotta or cottage-cheese topping whisked with grated parmesan, lemon zest, and parsley
Slow-cooker lasagna soup in an ivory bowl with tomato-rich broth, ruffled noodles, and a ricotta dollop topped with basil and black pepper.
Cozy, tomato-rich crock pot lasagna soup with ricotta and basil. Hands-on 15 min; cook 3–4 hr on HIGH or 6–7 hr on LOW. Tip: add noodles in the last 25–30 min so they stay pleasantly al dente.

How it comes together

  1. Sauté for depth. Heat a drizzle of oil in a skillet. Soften onion with a pinch of salt until sweet and glossy; add garlic for 30 seconds.
  2. Bloom and brown. Stir in tomato paste and Italian seasoning; let the paste darken a shade. If you’re using meat (beef, turkey, or sausage), brown it now.
  3. Layer the base. Transfer everything to the slow cooker with crushed tomatoes (or jarred sauce) and broth. Cover and let it go—LOW 6–7 hours or HIGH 3–4.
  4. Time the noodles. Add broken lasagna sheets for the final 25–30 minutes, stirring once so they don’t clump. For leftover-friendly texture, you can boil pasta separately and add per bowl; that move keeps the soup brothy rather than starchy, and mirrors what pasta pros suggest about managing starch and sauce. For more on why timing, starch, and emulsification matter, see the technique explainer on the right way to sauce pasta and the cold-start experiment that explores starchier pasta water for better cling.
  5. Finish and serve. Off heat, swirl in a touch of cream if you want it plush. Ladle into bowls and crown each with a spoon of ricotta-parmesan (or whipped cottage cheese), a few basil ribbons, and cracked pepper.

A quick word on safety. If you’re cooking ground beef or turkey, aim for 160°F / 71°C internally; for chicken, 165°F / 74°C is your mark. Slow cookers make tenderness easy; a digital thermometer makes doneness certain. See the USDA and FoodSafety.gov temperature charts if you want a reliable reference at your fingertips.

Also Read: How to Cook Bacon in the Oven (Crispy, No-Mess, Crowd-Ready Recipe)


Crock Pot Lasagna Soup with Ground Beef (Classic & Comforting)

When your mood says “lasagna like Nonna makes,” reach for ground beef. Brown 450 g in the skillet after the aromatics and tomato paste, breaking it into small, even crumbles. Its richness seeps into the tomato base during the slow cook, giving you the kind of depth that feels like dinner at a red-sauce joint.

Ground-beef lasagna soup in a stoneware bowl with tomato broth, ruffled noodles, whipped ricotta, parsley, and cracked pepper; slow-cooked.
Classic crock pot lasagna soup with ground beef and a whipped-ricotta finish. Brown the beef well for “red-sauce” depth, drain excess fat, and add the lasagna noodles in the last 25–30 minutes so they stay pleasantly al dente.

Right before serving, whipped ricotta makes it taste unmistakably like lasagna; however, if you’re nudging the bowl lighter without losing indulgence, a dollop based on cottage cheese is shockingly good. For proof of concept—and a super handy reference for balancing dairy and acidity—peek at Cottage Cheese Lasagna for how cottage’s clean, tangy profile behaves with tomato and parmesan.

Also Read: French Toast Sticks (Air Fryer + Oven Recipe) — Crispy Outside, Custardy Inside


Italian Sausage Slow-Cooker Lasagna Soup (Savory, Aromatic, Irresistible)

Prefer a touch of fennel and a whisper of heat? Use 450 g Italian sausage (casings removed). Brown it with a pinch of fennel seed and a shake of chili flakes; drain the fat if needed, then carry on with the base. Because sausage runs salty, hold back on extra salt until the end. A little parmesan stirred in off heat helps everything taste round, while the ricotta spoon on top keeps the spice in check.

Charcoal bowl of Italian-sausage lasagna soup—tomato broth, ruffled noodles, sausage coins, ricotta with chili flakes; fennel and parmesan props.
Italian Sausage Lasagna Soup: fennel-kissed with gentle heat. Brown sausage well, hold extra salt until the end, and add noodles in the last 25–30 minutes; finish with parmesan for a rounded, trattoria-style bite.

Also Read: Homemade Salami: Minimal Processing, Maximum Flavor


Turkey or Turkey Sausage Crock Pot Lasagna Soup (Light but Satisfying)

When you want the nostalgic flavor without quite as much richness, turkey is your friend. A teaspoon of olive oil in the pan helps lean turkey stay juicy, and the slow cooker does the rest. You’ll still get that cozy tomato-garlic aura—especially if you perfume the pot with a bay leaf—and a lemon-zest ricotta (or a cottage-cheese whip) makes the finish feel luxurious rather than “diet.” If you’re exploring macro-friendly swaps or high-protein sides, you might like the research-forward primer Are Lentils Good for Weight Loss? which breaks down protein, fiber, and satiety science in practical terms.

Light turkey lasagna soup in a white bowl with tomato broth, ruffled noodles, lemon-zest ricotta, bay leaf, and cracked pepper; overhead.
Lighter, zesty turkey lasagna soup topped with lemon-zest ricotta. Brown turkey in 1 tsp oil, add a bay leaf for aroma, and drop noodles in the last 25–30 minutes for a bouncy, non-mushy bite.

Also Read: 10 Best Chicken Sandwich Recipes (BBQ, Parm, Buffalo & More)


White Chicken Alfredo Crock Pot Lasagna Soup (Creamy, Balanced, Weeknight-Tame)

Sometimes the soul wants creamy. This crock pot lasagna soup variation begins with boneless, skinless chicken thighs; nestle them into the slow cooker with broth, aromatics, and a measured amount of Alfredo. After the long simmer, shred the chicken with two forks, add noodles for the last half hour, and finish with parmesan and a handful of baby spinach to wilt. The result is luscious but not heavy, especially if you dial the Alfredo and use broth for balance.

Creamy white chicken Alfredo lasagna soup in a white coupe bowl with shredded chicken, wilted spinach, ruffled noodles, and parmesan curls.
Silky Alfredo-style lasagna soup with shredded chicken and spinach. Balance the sauce with broth, stir Alfredo in off heat, and add noodles in the last 25–30 minutes for a plush, non-gluey finish.

Craving ideas for seasoning profiles that play nicely with cream? Browse Chicken Alfredo Pasta, 5 Ways for riffs that translate beautifully to soup, and—if you love a whisper of warm spice—consider the thoughtful tweaks in Alfredo Pasta Reinvented: Indian-Inspired Twists to layer in cumin, coriander, or a pinch of garam masala without overpowering the bowl.

Also Read: 10 Best Espresso Martini Recipe Variations (Bar-Tested)


Vegetarian Crock Pot Lasagna Soup (Big Flavor, Plant-Forward)

Skip the meat and load up savory depth with mushrooms, zucchini, and a teaspoon of soy sauce or tamari to boost umami. For stick-to-your-ribs satisfaction, stir 1 cup brown lentils into the slow cooker at the start; they’ll tenderize right alongside the tomatoes and broth, giving you a stew-like body that feels satisfying without dairy.

Vegetarian crock pot lasagna soup with tomato broth, mushrooms, zucchini, brown lentils, ruffled noodles, parsley and herb-oil drizzle.
Big-flavor, plant-forward lasagna soup—mushrooms, zucchini, and brown lentils. Add 1 tsp soy/tamari for umami, put lentils in at the start, zucchini in the last 30–40 min, and noodles in the last 25–30 min for the best texture.

When it’s time to add noodles, consider lentil-based lasagna sheets or mini mafaldine for extra protein and fiber. If that’s new territory, Lentil Pasta for Weight Loss: Nutrition, Brands & 5 Recipes is a practical guide to textures, blends, and cooking cues so your pasta stays pleasantly firm. For additional soup-night inspiration, Wholesome & Hearty: Red Lentil Soup Recipes gives you flavor maps that echo nicely with Italian seasonings.

Also Read: Macaroni & Cheese Recipe: Creamy Stovetop, Baked & Southern


Vegan & Dairy-Free Slow-Cooker Lasagna Soup (Luxurious Without Cream)

Go with vegetable broth, build body with mushrooms and lentils (or plant-based crumbles), and finish with cashew cream: blend soaked cashews with a ladle of hot soup, a squeeze of lemon, and a spoon of nutritional yeast, then swirl it in off heat. The texture becomes velvety; the flavor stays bright.

Vegan lasagna soup with mushrooms and lentils in a rustic bowl, tomato broth, ruffled noodles, cashew-cream swirl and herb oil; lemon and cashews nearby.
Plant-based and luxurious: blend soaked cashews + a ladle of hot soup + lemon + nutritional yeast for a velvety finish. Stir in off heat. Season with 1 tsp tamari for umami and add noodles in the last 25–30 minutes so they stay bouncy.

If you’re also cutting back on refined carbs, you can stretch or replace pasta with vegetable “noodles.” For a practical overview—zoodles, spaghetti squash, shirataki, and more—skim Finding Pasta Alternatives for the Keto Diet and the companion thought piece Is There a Place for Pasta in Keto? to choose swaps that make sense for your bowl.

Also Read: Vegan French Toast: 6 Easy Recipes (Pan, Air Fryer, GF & High-Protein)


5-Ingredient Crock Pot Lasagna Soup (Dump, Go, Devour)

There are evenings when you need dinner to take care of itself. This streamlined crock pot lasagna soup is exactly that: jarred spaghetti sauce, broth, ground beef or turkey, broken lasagna noodles, and ricotta. You’ll still sauté the meat with garlic for a minute or two, because the browned bits deliver outsized flavor. Everything else simply simmers until the noodles are tender. Right before serving, a spoon of ricotta and a flutter of parmesan make it taste more complex than the ingredient list suggests.

Five-ingredient crock pot lasagna soup in a white bowl with ruffled noodles, meat, and ricotta; jarred sauce, broth carton, pasta, and ricotta nearby.
Dump-and-go weeknight lasagna soup: jarred sauce + broth + ground meat + lasagna sheets + ricotta. Brown meat 2–3 minutes for flavor, then add noodles in the last 25–30 minutes so they turn tender but keep their bite.

Also Read: Pumpkin Spice, Your Way: Master Blend, Variations & Real-World Recipes


Tortellini Lasagna Soup (Slow-Cooker Shortcut, Extra Cheesy)

Here’s the cheat code: swap the lasagna sheets for fresh cheese tortellini and add them during the final 20 minutes. Because tortellini bring their own dairy and salt, you can skip cream entirely and still get a luscious bowl. A small handful of chopped spinach or kale at the end adds color and balance; a grating of parmesan brings fragrance.

Tortellini lasagna soup in an off-white coupe bowl with tomato broth, cheese tortellini and spinach; parmesan wedge, bay leaf, and grater nearby.
Shortcut comfort: swap lasagna sheets for fresh cheese tortellini and add them in the last 20 minutes so they stay plump. No cream needed—finish with parmesan and a handful of greens for color and balance.

Butternut “White” Lasagna Soup (Autumny, Silky, Comforting)

Blend roasted butternut squash into the broth for a naturally sweet, velvety base. A pinch of nutmeg leans cozy; a swirl of cream (or coconut milk) right before serving makes it indulgent. If you’re minding carbs or just curious about portions, The Keto Guide to Butternut Squash offers helpful context about servings and smart swaps without scolding you for loving soup.

Butternut “white” lasagna soup in an ivory bowl—silky squash base with a cream swirl, ruffled noodles, parsley; roasted squash and parmesan on the side.
Silky without heaviness: roast squash for sweetness, purée into broth, then finish with cream or coconut milk off heat. Add a pinch of nutmeg and drop noodles in the final 25–30 minutes to keep the ruffles intact.

Healthy High-Protein Crock Pot Lasagna Soup (Lighter, Not Lesser)

If your goal is something that tastes like a hug and still fits a training day, try this approach:

  • Use half lean turkey and half finely chopped mushrooms to keep things juicy yet modest.
  • Choose high-protein lasagna noodles (lentil or chickpea-based) and add them near the end so the texture stays bouncy.
  • Whip cottage cheese with parmesan and lemon as your topping instead of heavy ricotta; it’s creamy, tangy, and protein-rich.
High-protein lasagna soup in a matte black bowl with red-lentil pasta, lean turkey, and a whipped cottage-cheese dollop with lemon zest.
Protein-forward comfort: use chickpea or red-lentil lasagna noodles and finish with a whipped cottage cheese + parmesan + lemon zest dollop. Add legume pasta in the last 25–30 minutes so it stays bouncy and doesn’t cloud the broth.

For long-run habits that make bowls like this sustainable, the deep dive Are Lentils Good for Weight Loss? pairs the science with actionable ideas, while Lentil Pasta: Nutrition & Brands helps you pick a noodle that suits your texture preferences.


Ingredients & Noodles: How to Make Every Bowl Shine

Although this is a forgiving recipe, a few thoughtful choices help your crock pot lasagna soup taste restaurant-good on a Monday.

Tomatoes & paste. Tomato paste that’s briefly cooked until brick-red tastes deeper and slightly caramelized; that one extra minute is worth it. If you’re using jarred spaghetti sauce, you may barely need salt—always taste first.

Broth. Chicken broth gives meat versions a savory lift; vegetable broth keeps vegetarian and vegan versions bright and clean. If you’re feeling fancy, toss in a parmesan rind at the start and fish it out later—that old-school trick perfumes the whole pot.
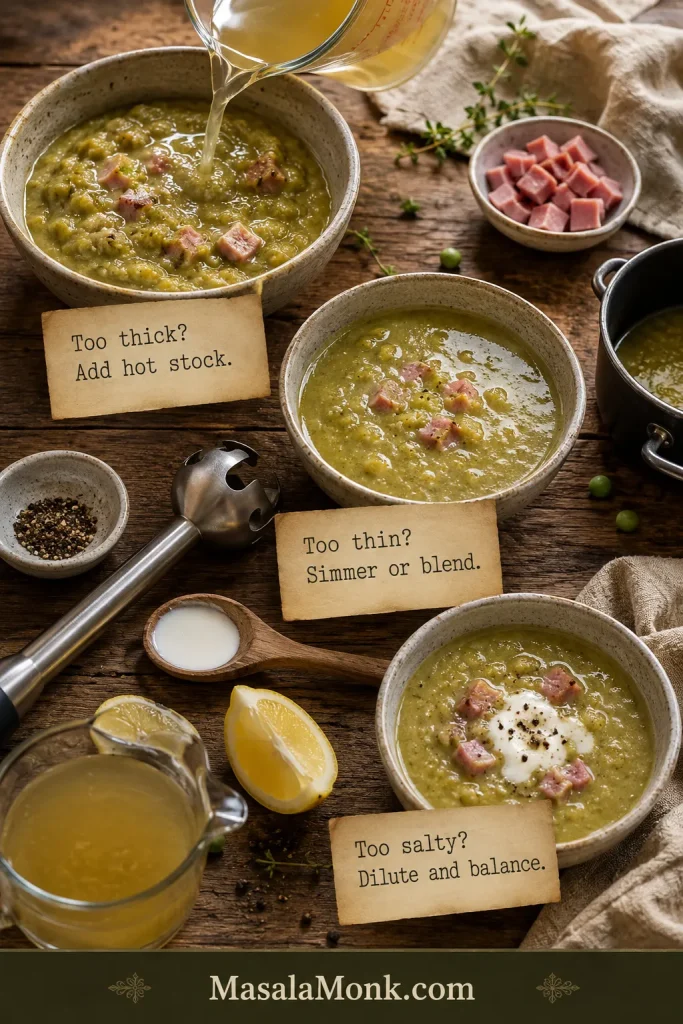
Pasta. Broken lasagna sheets are classic for texture and nostalgia. Mini mafaldine also work: their ruffles echo lasagna’s edges and offer a great bite. Want to explore higher-protein options? Lentil Pasta outlines one-ingredient pastas and blended versions (e.g., lentils + brown rice flour), with cooking cues to keep them from going mushy.

Creaminess. A small splash of cream or half-and-half added off heat prevents splitting and keeps the soup glossy, not heavy. For dairy-free richness, cashew cream is your friend. And for a lighter spin that still tastes decadent, a whipped cottage-cheese dollop—shown in Cottage Cheese Lasagna—is endlessly useful beyond baked casseroles.

Timing & texture. Pasta improves when it finishes cooking in a flavorful liquid; what you’re really after is a gentle exchange, where starch slightly thickens the broth and the noodles sip up seasoned tomato. If you’re curious about the “why” behind timing and starch management, the Serious Eats pieces on properly saucing pasta and cold-start cooking show how adjusting water and timing changes surface starch, which translates to better cling and less watery soup.

Safety, reheating & leftovers. With slow cookers, the food practically takes care of itself; nonetheless, internal temps matter. Think 160°F / 71°C for ground meats and 165°F / 74°C for chicken; then store leftovers in shallow containers and reheat to 165°F / 74°C. The official charts from USDA/FSIS and FoodSafety.gov are the gold standards, and they’re easy to keep bookmarked.

Also Read: Lemon Drop Martini Recipe (Classic, 3-Ingredient, & More)


The Instant Pot Detour (If You Insist)

This is a slow-cooker celebration, but life sometimes demands speed. If you pivot to pressure cooking, you’ll follow the same logic—sauté aromatics and protein, add liquids and pasta, then cook briefly under pressure and quick-release. The texture is different—more direct, less simmered—but it scratches the lasagna itch on a tight timeline. Afterward, come back to the crock-pot version when you want deeper melded flavors and that plush, rested finish only a long, quiet simmer achieves.

Instant Pot lasagna soup in a ceramic bowl with tomato broth, ruffled noodles, and ricotta; Instant Pot blurred in background on dark slate.
Instant Pot detour: sauté aromatics and meat, add liquids and pasta, cook 4–5 min on High Pressure, quick release, then finish with a ricotta dollop. Use the slow-cooker method when you want deeper, long-simmered flavor.

Serving Ideas That Elevate Without Effort

  • Fresh herb finish. Basil is obvious; parsley and chives are terrific too.
  • A lemony note. A quick zest over the bowl perks up tomato and dairy.
  • A peppery edge. Coarsely cracked black pepper right before serving gives every spoonful lift.
  • Crusty bread or garlic toast to dunk—an old-fashioned pleasure that never gets old.
  • A side salad with a sharp vinaigrette if you like contrast.

Also Read: Punch with Pineapple Juice: Guide & 9 Party-Perfect Recipes


Make-Ahead, Freezing, and Leftover Magic

Slow-cooker soups are forgiving with schedules, which makes this crock pot lasagna soup exactly the kind of recipe to batch on a Sunday. If you plan to freeze portions, stop before adding pasta and dairy; then, on reheat day, cook noodles fresh and finish with ricotta or cottage-cheese topping. Your future self will thank you when the bowl tastes as lively as day one.

If you’re the kind of cook who enjoys stretching leftovers, consider the “next-day bake”: combine thickened soup (pasta included) with a little extra sauce, spoon into a dish, top with mozzarella and parmesan, and broil until bubbly. It transforms yesterday’s comfort into a fresh, golden-topped dinner.

Also Read: Daiquiri Recipe (Classic, Strawberry & Frozen Cocktails)


When You Want to Improvise

Once you’ve made the base, tweaking becomes second nature:

  • Heat seekers: add Calabrian chili paste or a pinch of red pepper flakes to the aromatics.
  • Umami boosters: a teaspoon of miso or a splash of Worcestershire disappears into the pot and makes everything taste more savory.
  • Vegetable lift: shredded carrots or diced bell peppers melt right into the saucey base.
  • Greens: chopped kale or baby spinach stirred in with the noodles adds color and nutrition without drama.
  • Cheese play: pecorino romano instead of parmesan shifts the profile to sharper, saltier, and wonderfully aromatic.

Also Read: Piña Colada: Classic Recipe + 10 Variations (Virgin & On the Rocks)


A Final Ladle

There’s a reason this crock pot lasagna soup lands on repeat: the method is calm, the ingredients are familiar, and the results feel like a hug you can eat. On busy days, the slow cooker holds the line for you; on relaxed evenings, it asks almost nothing and gives you back a simmered, savory depth you can’t fake in a rush.

If creamy white bowls call your name, let Classic vs. Authentic Alfredo nudge your seasoning instincts before you go the white-chicken route; if you’re leaning plant-based or just curious about higher-protein noodles, Lentil Pasta: Nutrition & Brands has your back; and when you want to understand the “why” behind pasta texture and timing, the Serious Eats explorations on saucing and cold-start cooking are endlessly illuminating.

And now, ladles up. Dinner’s ready.

FAQs

1) What is crock pot lasagna soup, exactly?

Think of it as all the cozy flavors of classic lasagna—tomato, herbs, noodles, and a creamy cheese finish—gently simmered into one bowl. Moreover, crock pot lasagna soup trades layers for ease: you slow-cook the saucey base, then add broken lasagna noodles near the end for the ideal bite.

2) How long does crock pot lasagna soup take in a slow cooker?

On HIGH, plan about 3–4 hours; on LOW, budget 6–7 hours. Additionally, factor in 25–30 minutes at the end for noodles to turn perfectly al dente without going soft.

3) When should I add noodles for the best texture?

Add broken lasagna noodles during the last 25–30 minutes of cooking. Consequently, they absorb flavor yet keep structure. If you expect leftovers, cook pasta separately and stir into each serving afterward.

4) What are the best noodles for crock pot lasagna soup?

Broken lasagna sheets are classic; however, mini mafaldine or ruffled short pasta also cling nicely to the sauce. For protein-focused bowls, chickpea or lentil lasagna sheets work well if added late.

5) Can I use jarred spaghetti sauce instead of crushed tomatoes?

Absolutely. In fact, spaghetti sauce is a speedy shortcut. Taste before salting, though, since many jars are pre-seasoned; afterward, adjust spices to your preference.

6) How do I keep noodles from getting mushy?

Stir once after adding, keep the lid on, and set a timer for 25 minutes. Furthermore, for meal prep, boil noodles separately and combine just before serving to preserve texture.

7) Can I make creamy white crock pot lasagna soup?

Yes. Alternately to a tomato-only base, swirl in a measured amount of Alfredo or a splash of cream at the end. Importantly, add dairy off heat so the soup stays silky and doesn’t split.

8) What cheeses work best—ricotta or cottage cheese?

Ricotta tastes traditional and lush; nevertheless, whipped cottage cheese with parmesan and lemon zest delivers a lighter, high-protein finish. Both give that “lasagna” signature on top.

9) Can I make crock pot lasagna soup with ground beef?

Definitely. Brown beef with onion, garlic, tomato paste, and Italian seasoning first. Subsequently, slow-cook with broth and tomatoes, then add noodles late and finish with ricotta.

10) What about Italian sausage, turkey, or chicken?

Italian sausage brings fennel-forward savoriness; turkey offers a leaner profile; chicken thighs become tender and shred beautifully. Notably, each protein works—choose based on flavor and nutrition goals.

11) How do I make vegetarian lasagna soup in the crock pot?

Skip the meat, add mushrooms and zucchini, and use vegetable broth. Beyond that, include brown lentils at the start for fiber and body; finish with ricotta or a dairy-free swirl.

12) Can I make vegan and dairy-free versions?

Yes. Use plant-based crumbles or lentils, vegetable broth, and finish with cashew cream or a creamy oat-almond blend. Even so, add plant “cream” at the end to maintain a velvety texture.

13) Is there a 5-ingredient crock pot lasagna soup?

There is. Combine spaghetti sauce, broth, ground beef or turkey, broken lasagna noodles, and ricotta for serving. In short, it’s a weeknight lifesaver with minimal prep.

14) Can I do a tortellini lasagna soup in the slow cooker?

You can. Reduce or skip lasagna sheets and add fresh cheese tortellini for the final 20 minutes. As a result, you’ll get an extra cheesy bowl without extra dairy.
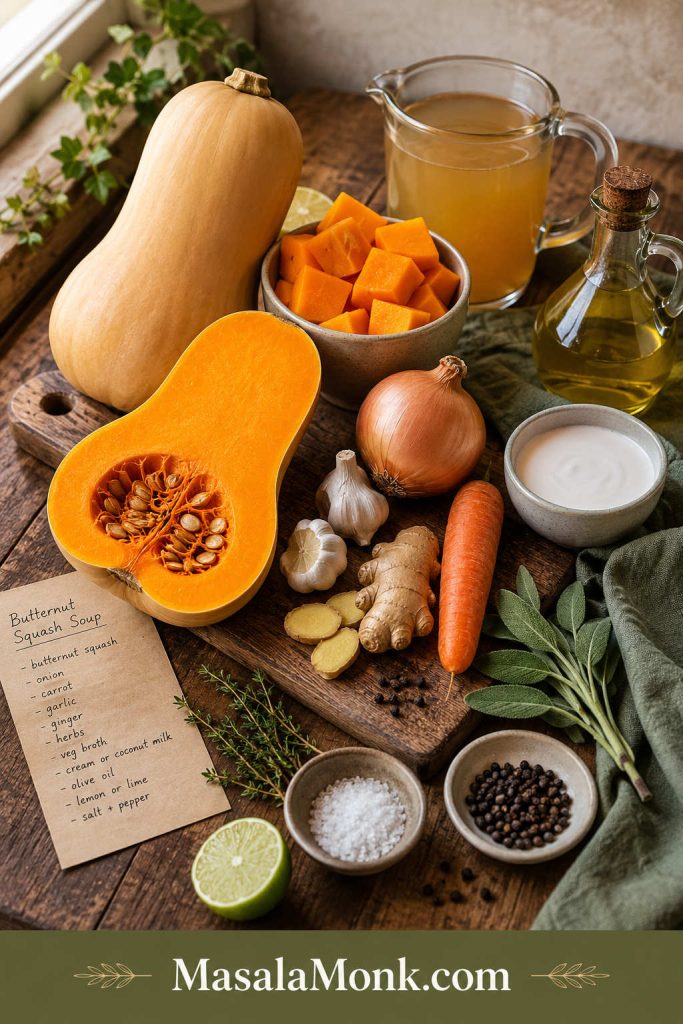
15) How do I make a high-protein or lighter option?

Choose lean turkey, fold in finely chopped mushrooms, use high-protein noodles, and top with whipped cottage cheese. Generally, seasoning generously keeps “lighter” from tasting bland.

16) What gluten-free options work for crock pot lasagna soup?

Opt for gluten-free lasagna sheets or short ruffled pasta made from corn, rice, chickpea, or lentils. Ideally, add them late and check doneness a few minutes early.

17) Can I add spinach or other vegetables?

Absolutely. Stir in baby spinach, chopped kale, or roasted peppers in the final 5 minutes. Conversely, if adding water-heavy veggies earlier, reduce broth slightly to keep the soup robust.

18) What’s the right slow-cooker setting for rich flavor?

LOW yields deeper melded flavors; HIGH gets dinner on the table sooner. That said, either setting works—just remember to time noodles near the finish either way.

19) How do I thicken crock pot lasagna soup without heavy cream?

Use a parmesan rind during the slow cook, blend a ladle of soup with a spoon of ricotta, or simmer uncovered the last 10 minutes. Additionally, a small cornstarch slurry (added at the end) tightens the base quickly.

20) Can I make crock pot lasagna soup in an Instant Pot?

Yes, with adjustments. Sauté aromatics and protein, add liquids and pasta, pressure cook briefly, then quick-release. On the flip side, flavor is a bit fresher and less slow-simmered than the crock pot method.

21) How do I season crock pot lasagna soup properly?

Start with Italian seasoning, garlic, and tomato paste; afterward, balance acidity with a pinch of sugar if needed and finish with parmesan, black pepper, and fresh basil. Notably, salt last if using sausage or jarred sauce.

22) What’s the ideal noodle-to-liquid ratio?

For about 225 g noodles, 4 cups broth plus tomatoes usually hits a hearty-but-soupy sweet spot. To clarify, thicker preferences can add fewer noodles or a little less broth.

23) Can I freeze crock pot lasagna soup?

Freeze the base without pasta or dairy; subsequently, add freshly cooked noodles and cheese when reheating. This approach avoids swollen noodles and keeps the broth vibrant.

24) How long do leftovers keep and how should I reheat?

Refrigerate up to 4 days in airtight containers. Reheat gently until steaming throughout; meanwhile, add a splash of broth if the soup thickened overnight.

25) Why did my noodles clump together?

They likely sat on top or weren’t stirred initially. Next time, push noodles under the liquid and give one gentle stir midway through the final 25–30 minutes.

26) Can I make crock pot lasagna soup without onions or garlic?

Certainly. Use scallions or shallots for milder sweetness; alternatively, add a pinch of asafoetida or extra herbs to keep the aroma inviting.

27) What herbs pair best beyond the basics?

Basil is classic; oregano and thyme deepen savoriness; a touch of rosemary adds perfume. Crucially, finish with fresh herbs off heat for brightness.

28) How do I build umami if I skip meat?

Mushrooms, tomato paste cooked until brick-red, a parmesan rind, and a splash of soy sauce or tamari deliver savory depth. Beyond that, roasting vegetables first adds gentle smokiness.

29) Does cottage cheese really taste like ricotta on top?

Whipped cottage cheese with parmesan and lemon zest is surprisingly close. Importantly, blend until smooth for a velvety dollop that mimics ricotta’s creaminess.

30) Can I make a low-carb crock pot lasagna soup?

Yes—use fewer noodles, lean on vegetables, and finish with a cheesy dollop. Alternatively, add zucchini ribbons near the end so they stay crisp-tender and don’t water down the soup.

31) How spicy can I take it without overwhelming the lasagna profile?

Add chili flakes with aromatics or spoon in a little Calabrian chili paste. Nevertheless, keep cheese on top to balance the heat and preserve that familiar lasagna comfort.

32) What’s the simplest way to scale for a crowd?

Double everything except noodles, then add pasta gradually and stop when the texture feels right. Afterward, finish with extra parmesan and a big bowl of whipped ricotta for topping.

33) Any tricks for a richer tomato flavor?

Toast tomato paste until it darkens, use fire-roasted tomatoes, and finish with a knob of butter off heat. Consequently, the sauce tastes rounder and slightly sweet without extra sugar.

34) Can I prepare components the night before?

Yes. Brown aromatics and protein, refrigerate, then load the slow cooker in the morning. Subsequently, add noodles when you return so the texture lands just right.

35) Why does dairy sometimes split in soup?

High heat or long simmering can cause separation. Therefore, add cream or dairy substitutes at the very end, stir gently, and serve promptly.
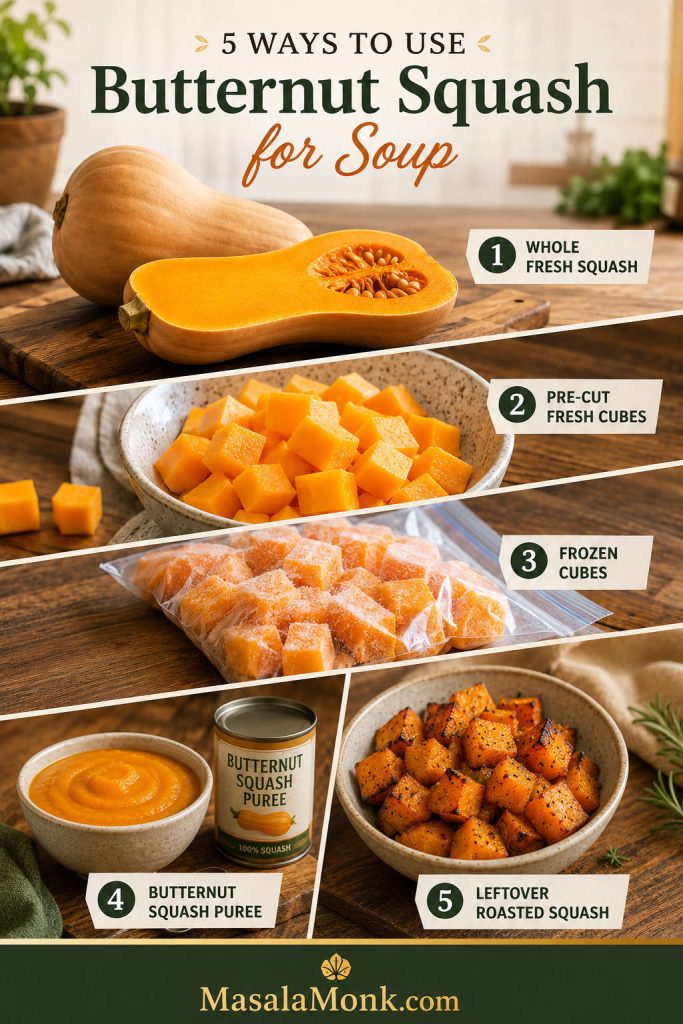
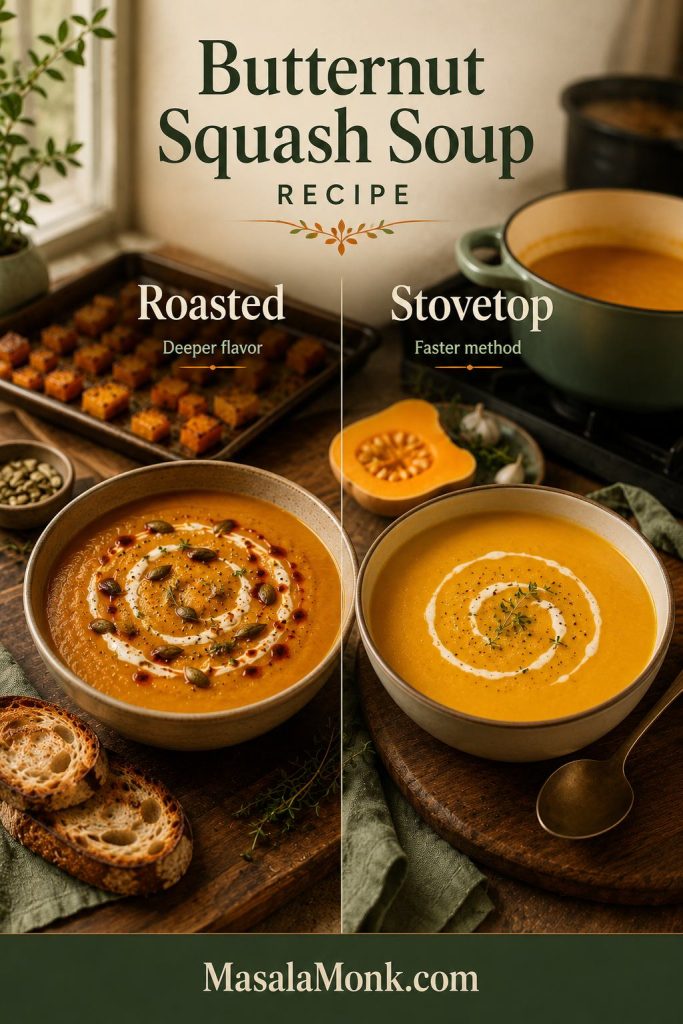
36) What’s the most reliable finishing move for restaurant-level flavor?

A squeeze of lemon zest over each bowl, freshly grated parmesan, and a drizzle of good olive oil. Finally, a few basil ribbons make the aroma bloom and the whole bowl sing.