Posted on 3 Comments

Fish and Chips Recipe: Crispy Beer Batter, Best Fish, Sauce, and Air Fryer Option

Plate of crispy beer-battered fish with thick golden chips, tartar sauce, lemon wedges, and malt vinegar.

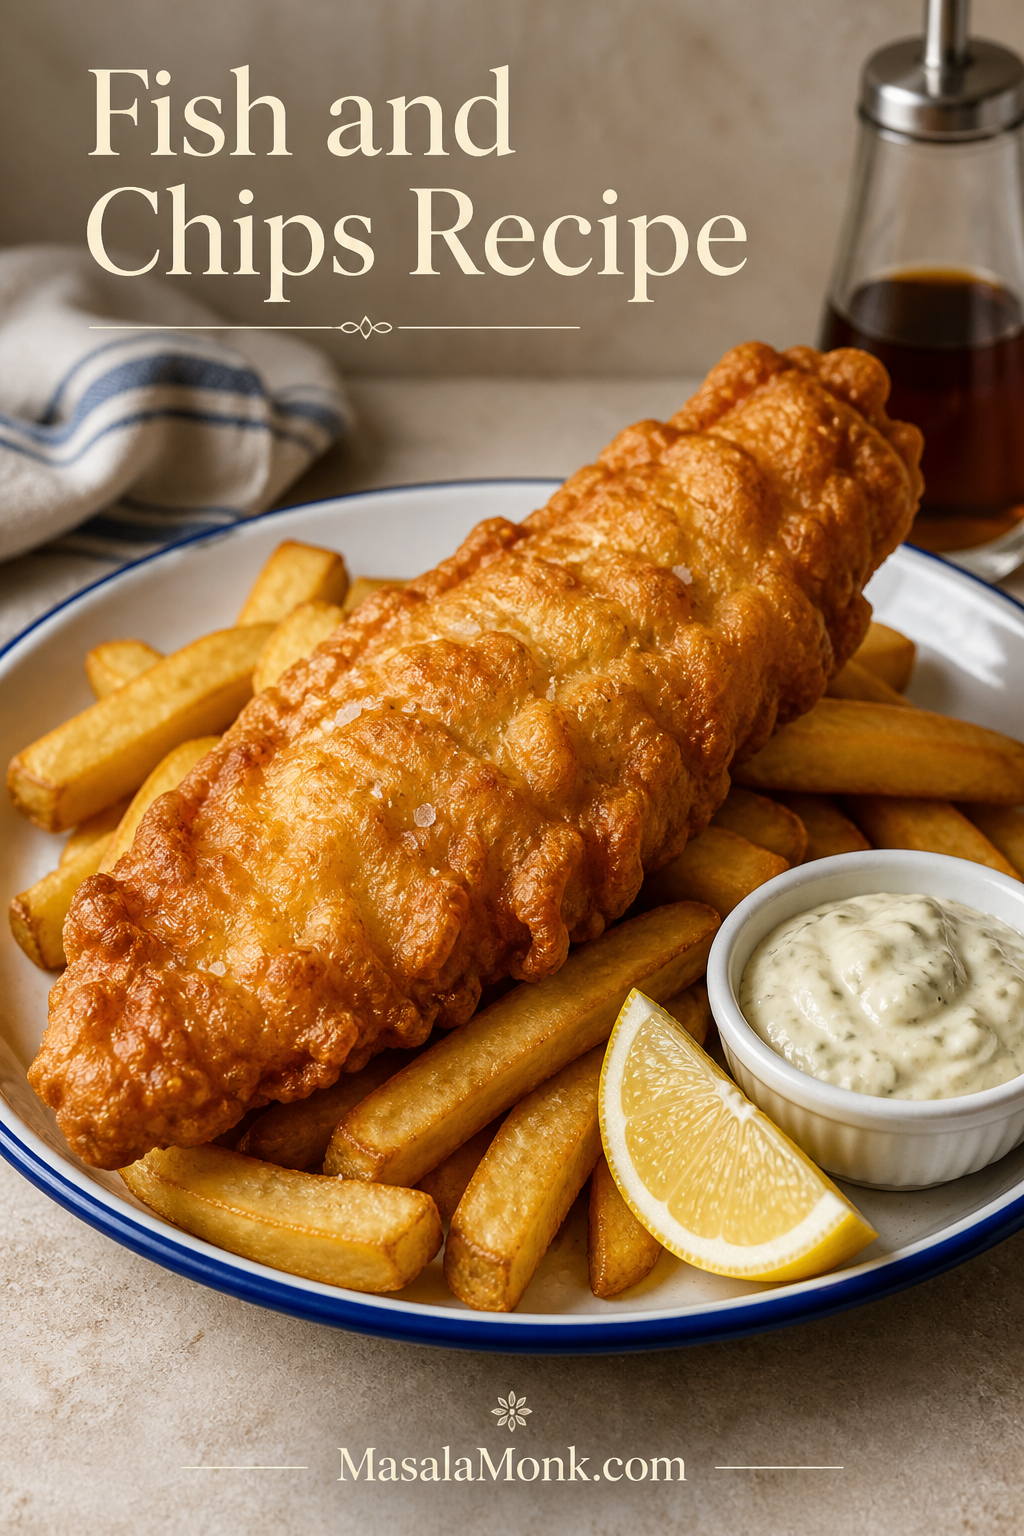
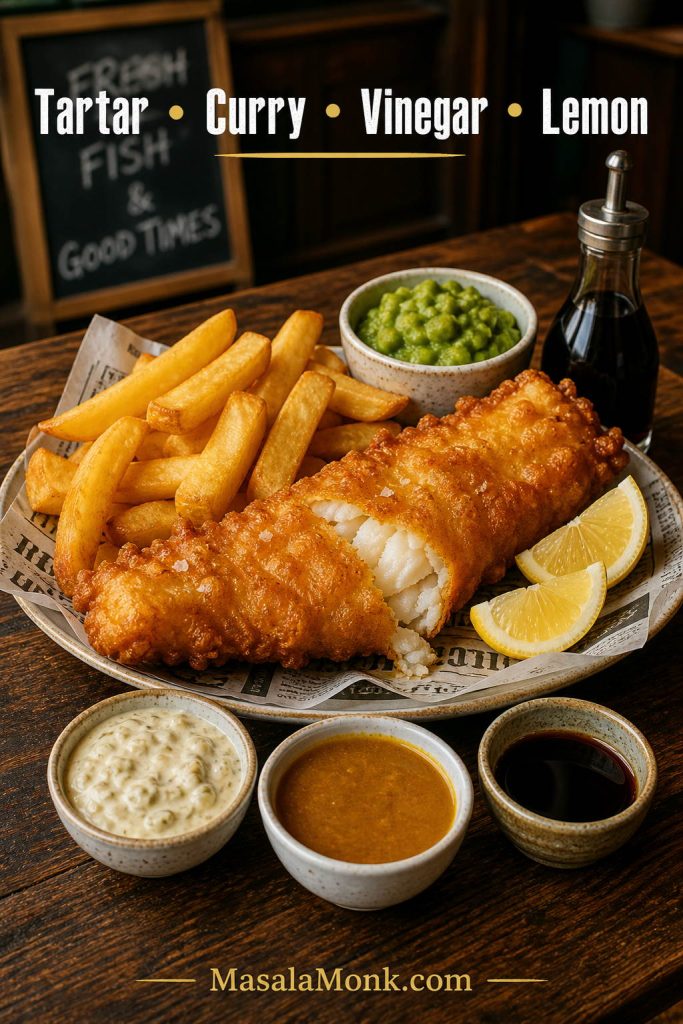
This fish and chips recipe is built for the plate everyone actually wants: crisp beer-battered cod or haddock, thick golden chips, tartar sauce, malt vinegar, optional curry sauce, and no soggy coating sliding off the fish.

The method is classic, but the instructions are practical for a home kitchen. You will dry the fish properly, mix the batter cold, keep the oil in the right temperature range, and time the chips so the whole plate lands hot instead of one part waiting while the other goes soft.

Use the fried version as the main recipe. Then use the no-beer batter, air fryer, baked, and gluten-free notes when you want a different route without pretending every method gives the exact same chip-shop crunch.

Close-up of a broken piece of beer-battered white fish showing crisp golden coating and flaky fish inside.
The coating should break cleanly while the fish stays moist and flaky inside. If both happen together, your batter thickness and oil temperature are working.

Quick Answer: How to Make This Fish and Chips Recipe

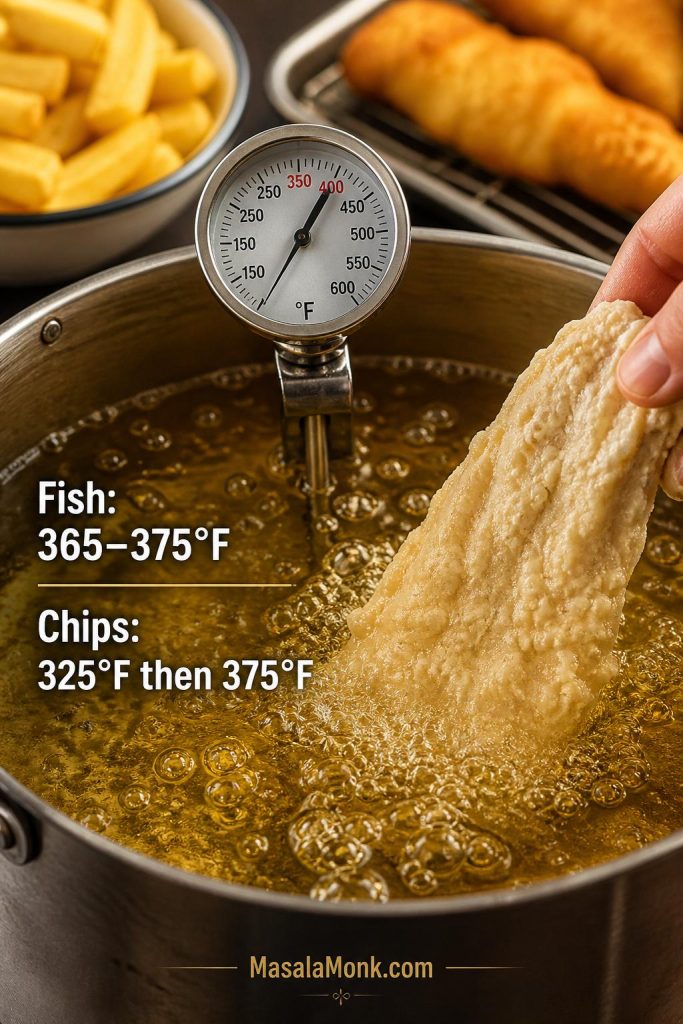
To make crispy fish and chips, use firm white fish like cod or haddock, pat the fish very dry, dust it lightly with flour, dip it in cold beer batter, and fry it in hot oil at about 365°F to 375°F / 185°C to 190°C. Meanwhile, cut floury potatoes into thick chips, rinse or soak them, dry them well, and fry until crisp and golden.

At a glance: Serves 4. Use 1½ lb / 680 g cod or haddock, 2 lb / 900 g floury potatoes, very cold beer batter, and oil at 365°F to 375°F / 185°C to 190°C for the fish. Mix the batter only when you are ready to fry.
Fish and chips prep setup with cod or haddock, potatoes, cold batter ingredients, and frying temperature notes.
Before frying, set up the essentials first: firm white fish, floury potatoes, cold batter ingredients, and a thermometer so the oil stays in the crisp zone.

Serve everything immediately with tartar sauce, malt vinegar, lemon wedges, and optional curry sauce. Fish is best checked with a thermometer and should reach 145°F / 63°C, or be opaque and flaky.

Need the exact method? Jump to the recipe card, or check the batter guide and oil temperature table first.

Why This Fish and Chips Recipe Works

A great plate of fish and chips is not about a complicated ingredient list. Instead, it comes down to moisture control, cold batter, hot oil, and good timing.

White fish fillets being patted dry with a towel before dusting and battering.
Surface moisture is one of the biggest reasons batter slips. Patting the fish dry first gives the dusting flour something to grip.
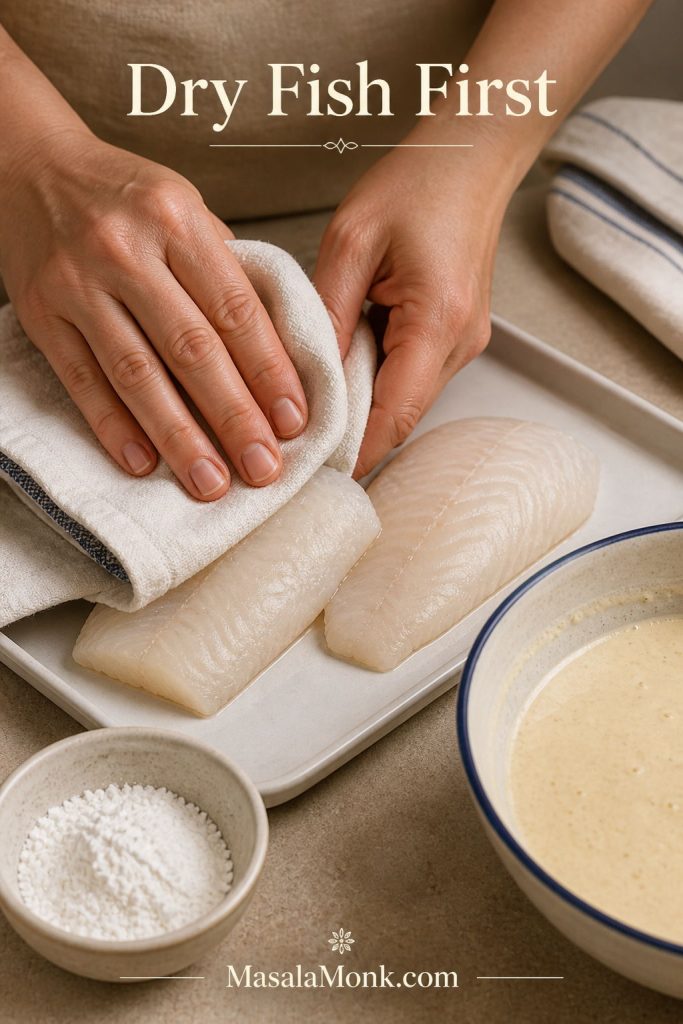
  • Dry fish holds batter better. Moisture on the surface makes batter slide off, so the fish is patted dry before seasoning and dusting.
  • A light flour dusting gives the batter grip. The coating clings instead of peeling away in the oil.
  • Cold beer or sparkling water makes a lighter batter. Cold carbonated liquid helps the batter puff quickly when it hits hot oil.
  • Rice flour, cornflour, or cornstarch improves crispness. A little starch lightens the coating and helps avoid a heavy, doughy crust.
  • Baking powder gives lift. It helps the batter puff instead of lying flat against the fish.
  • A thermometer protects the texture. Oil that is too cool makes greasy fish; oil that is too hot browns the batter before the fish cooks.
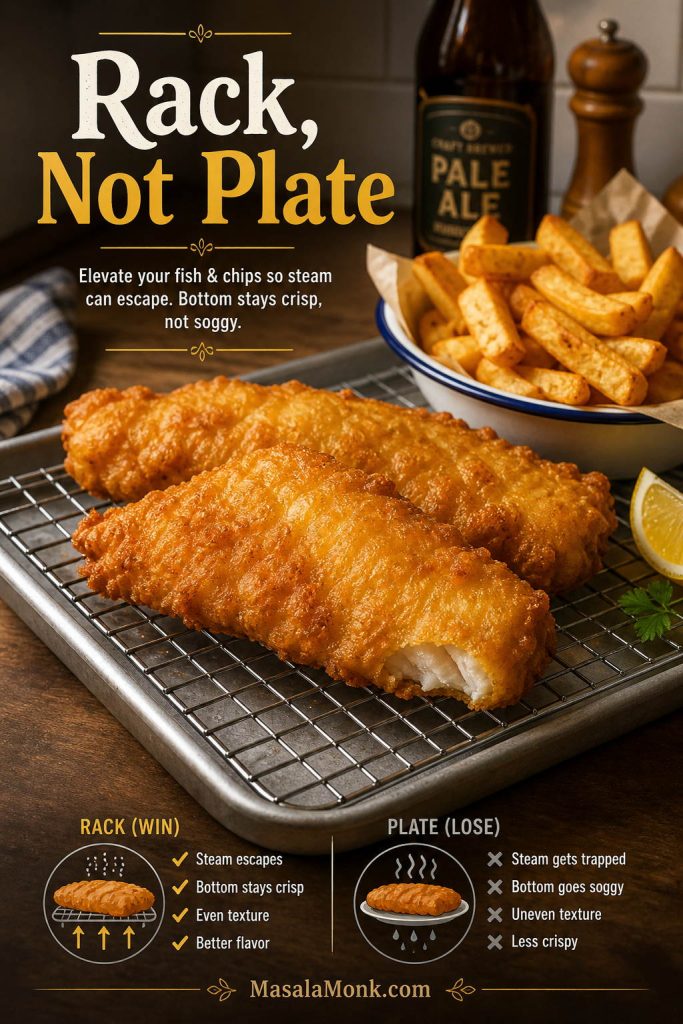
  • A wire rack keeps the underside crisp. Draining fried fish on a plate traps steam underneath.
Do this, not that: Dry the fish instead of battering it wet. Use cold beer or sparkling water instead of warm liquid. Fry in small batches instead of crowding the pot. Drain on a rack instead of a plate. Salt the chips while hot instead of after they cool.

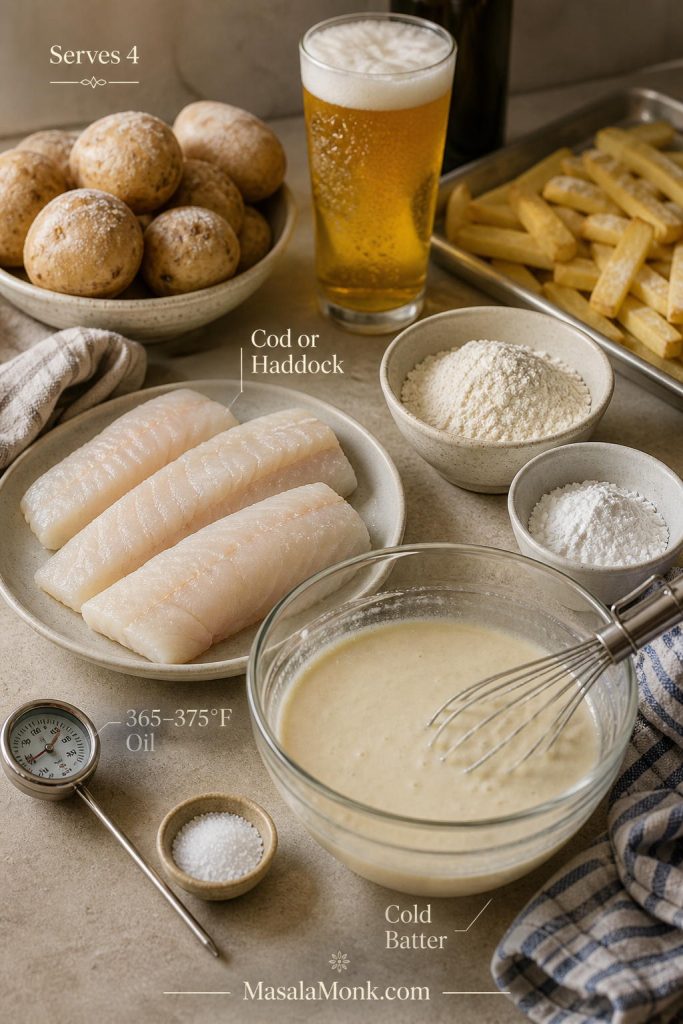
Fish and Chips Recipe Ingredients

The ingredients are simple, but each one affects the final crunch: firm white fish, floury potatoes, very cold liquid, starch, baking powder, and clean high-heat oil.
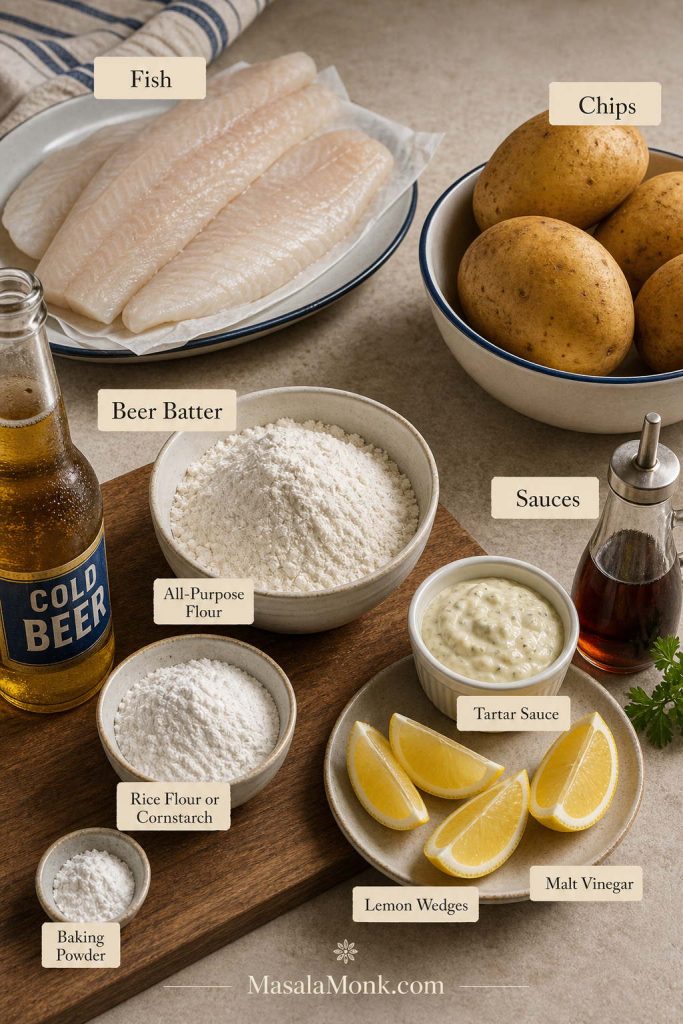
Ingredients for homemade fish and chips including white fish, potatoes, flour, starch, cold beer, lemon, tartar sauce, and malt vinegar.
The ingredient list is simple, but each choice affects texture: firm fish for clean flakes, floury potatoes for better chips, and starch for a lighter coating.

Fish

  • Cod or haddock: Cod is the easiest all-purpose choice. However, haddock gives a more classic British-style fish and chips flavor.
  • Salt and black pepper: Season the fish directly before battering.
  • Rice flour, cornflour/cornstarch, or all-purpose flour: This is used for dusting the fish so the batter clings.

Beer Batter

  • All-purpose flour: Gives the batter structure.
  • Rice flour, cornflour, or cornstarch: Keeps the coating lighter and crisper.
  • Baking powder: Adds lift.
  • Fine salt: Seasons the batter.
  • Very cold lager or pale beer: Adds carbonation and lightness.
  • Optional turmeric or paprika: Adds a warmer golden color and mild flavor.

Chips

  • Russet potatoes, Maris Piper, or another floury potato: These give a fluffy inside and crisp outside.
  • Neutral oil: Use sunflower, canola, vegetable, or peanut oil.
  • Salt: Add it immediately after frying.
  • Optional malt vinegar: A small amount in the chip water can help the potatoes hold together before frying.

Serving Sauces and Sides

  • Tartar sauce
  • Malt vinegar
  • Lemon wedges
  • Chip-shop-style curry sauce
  • Mushy peas
  • Pickles or coleslaw

Best Fish for Fish and Chips

The best fish for fish and chips is a firm white fish that stays moist inside while the batter crisps outside. Cod and haddock are the two most common choices, although they are not the only options.
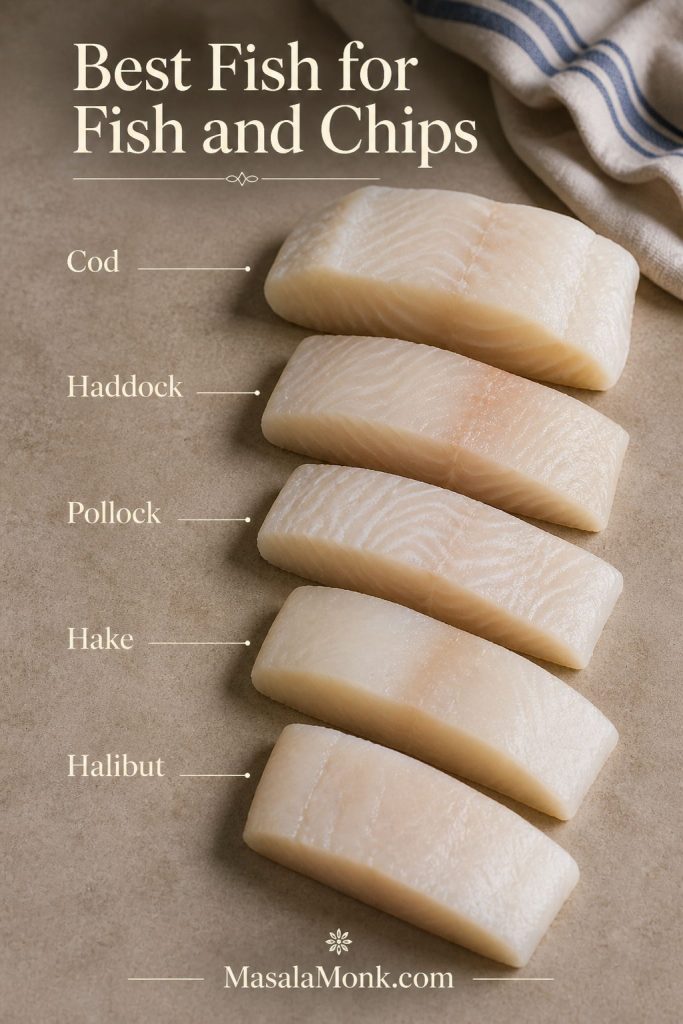
Comparison of white fish portions labeled cod, haddock, pollock, hake, and halibut for fish and chips.
Cod is mild and beginner-friendly, while haddock gives a more classic chip-shop flavor. Either way, choose firm white fish that can hold its shape in hot oil.
Fish Best For Notes
Cod Easiest first choice Mild, flaky, widely available, and very beginner-friendly.
Haddock Classic British-style fish and chips Slightly stronger flavor than cod and excellent in beer batter.
Pollock Budget-friendly batches Good texture when battered and fried, usually more affordable.
Hake A softer, delicate version Works well, but handle gently because it can be more delicate.
Halibut Premium fish and chips Firm, thick, and excellent, but more expensive.
Whiting or ling Traditional-style alternatives Good options where available, especially for thinner fillets.

For the main version, cod is the safest first choice. However, haddock is better when you want a more classic pub-style flavor. The same fish also works beautifully in Baja-style fish tacos, where it is paired with slaw, lime crema, and a lighter taco-style build.

Can You Use Frozen Fish?

Yes, frozen cod or haddock can work well, but thaw it completely and pat it very dry before seasoning. Frozen fish releases extra moisture as it thaws, and that moisture can make the batter slide off or turn soft in the oil.

Frozen or thawed cod being dried before battering for fish and chips.
Frozen fish can work, but it needs extra care. Thaw it fully, then dry it well so the batter does not loosen as it fries.

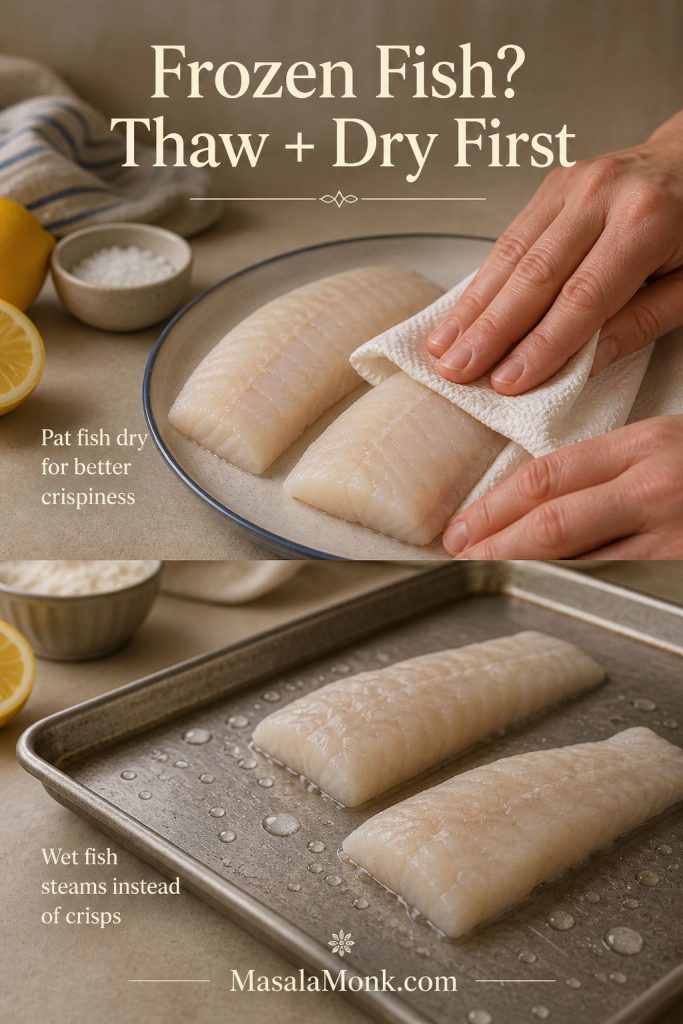
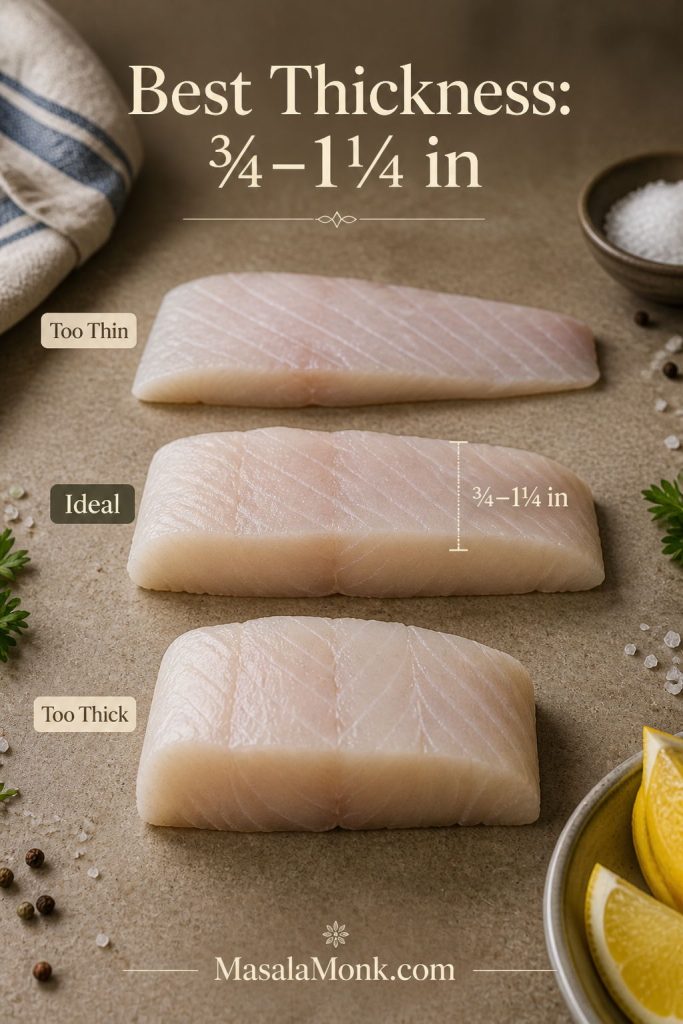
Fish thickness cue: Aim for pieces that are thick enough to stay moist, but not so thick that the batter browns before the center cooks.

Fish thickness guide showing white fish portions that are too thin, ideal thickness, and too thick for fish and chips.
Fish that is too thin dries quickly, while very thick pieces can brown outside before cooking through. Moderate thickness gives the batter and fish time to finish together.
Best thickness: Aim for fish pieces about ¾ to 1¼ inches / 2 to 3 cm thick. Very thick fish can brown outside before cooking through, while very thin fish can dry out quickly.

Once you’ve chosen your fish, move to the fish and chips batter guide or go straight to how to make fish and chips step by step.

Fish and Chips Batter

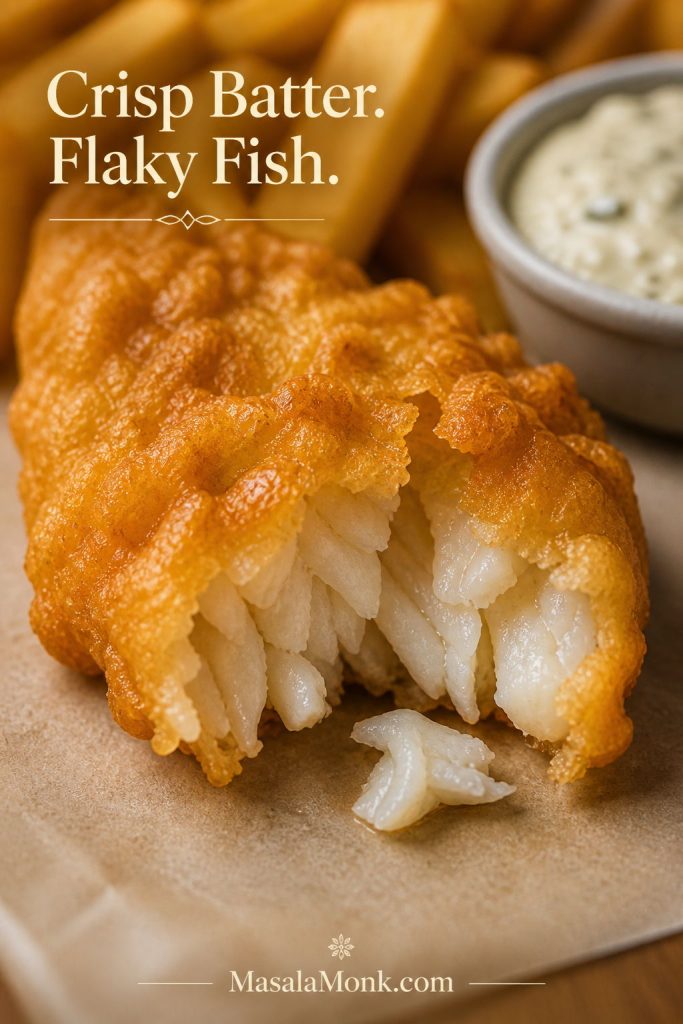
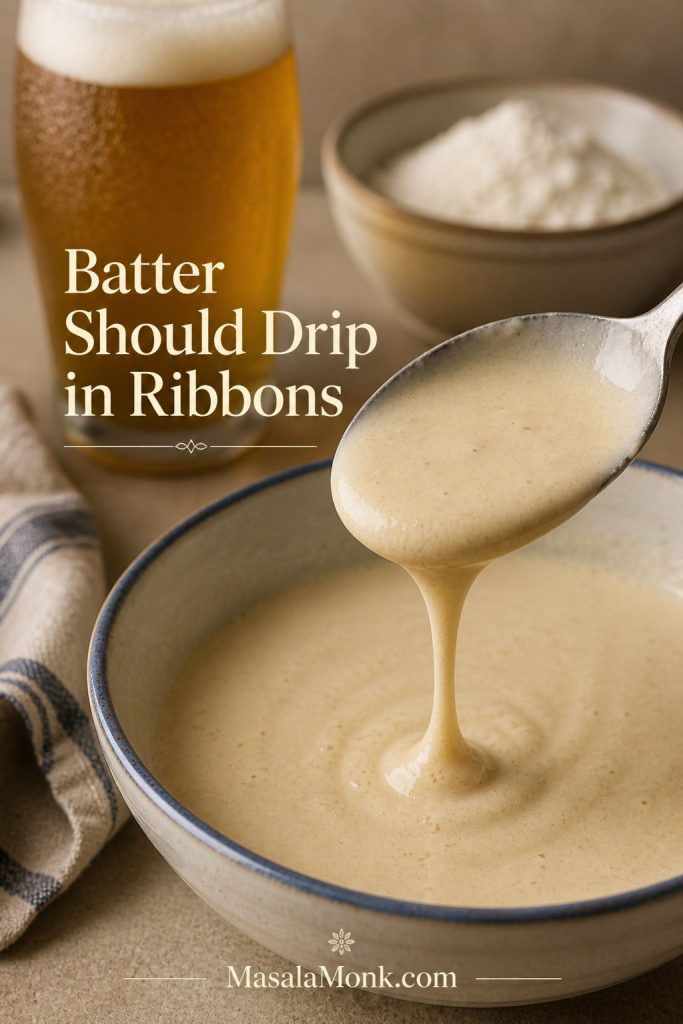
The batter should shatter lightly when you bite into it, not sit on the fish like a thick doughy coat. You are looking for a mixture that feels loose but not watery — closer to thin pancake batter or double cream than a heavy fritter mix.

It should coat the back of a spoon, then drip off in ribbons. If it runs off like water, it is too thin. If it clings in a heavy layer, it is too thick.

Batter texture cue: The batter should coat the spoon and drip in slow ribbons before you dip the fish.

Spoon lifting fish and chips batter from a bowl with batter dripping in ribbons.
The right fish batter should coat the spoon and fall in slow ribbons. If it runs off or clumps heavily, adjust before dipping the fish.

Beer Batter for Fish and Chips

Cold beer being poured into flour and starch mixture to make beer batter for fish and chips.
Cold beer adds bubbles and lightness to the batter. Mix it just before frying so the batter stays cold, active, and ready to puff in the oil.

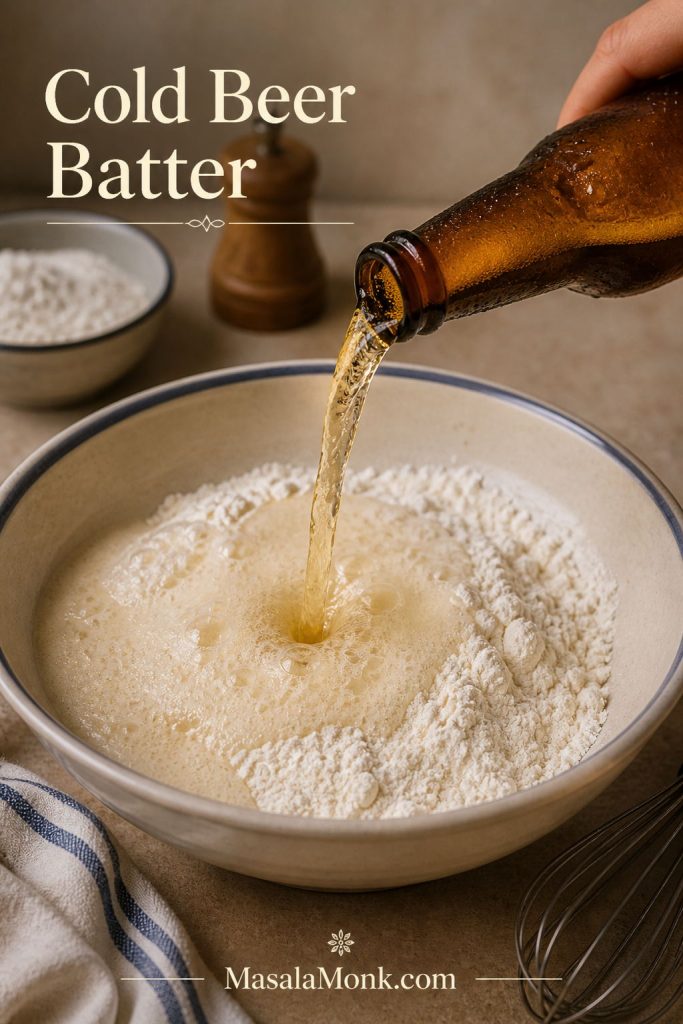
For the main version, use cold lager or pale beer. The beer should be chilled, and the batter should be mixed just before frying. Do not overmix it; a few tiny lumps are fine.

A good basic beer batter for fish and chips uses:

  • ¾ cup / 95 g all-purpose flour
  • ¼ cup / 40 g rice flour, cornflour, or cornstarch
  • 1¼ teaspoons baking powder
  • ½ teaspoon fine salt
  • 1 cup / 240 ml very cold lager or pale beer

Lighter beers give the cleanest flavor and the most classic golden color. Save stout or porter for a darker, more bitter batter.

Fish and Chips Batter Without Beer

Sparkling water being poured into batter ingredients for a no-beer fish and chips batter.
Sparkling water or club soda is the best no-beer swap because it still brings carbonation. Keep it ice-cold so the coating fries lighter and crisper.

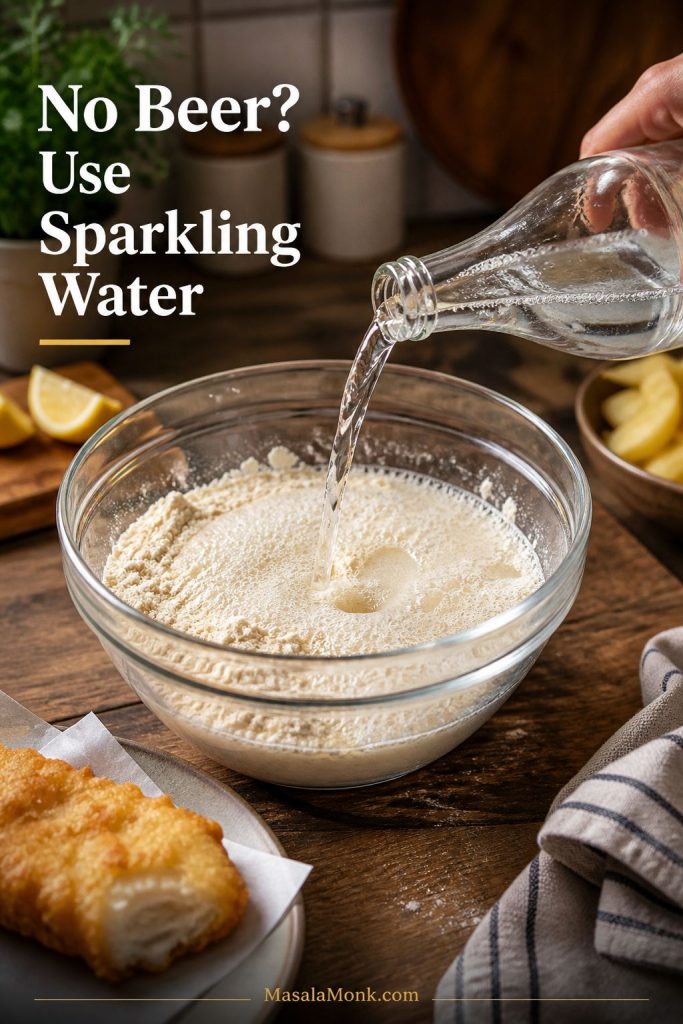
To make fish and chips batter without beer, use the same dry ingredients and replace the beer with 1 cup / 240 ml ice-cold sparkling water or club soda. Then add an extra ¼ teaspoon baking powder to help the batter puff.

The no-beer version tastes less malty, but it can still fry up crisp if the liquid is ice-cold and the oil is hot.

Should Fish and Chips Batter Have Egg?

Comparison of fried fish batter made without egg and with egg, showing a lighter crisp coating and a thicker coating.
Egg makes fish batter sturdier, but it can also make the coating heavier. For classic crispy fish and chips, the lighter egg-free version is the better first choice.

For the crispiest classic fish and chips batter, skip the egg. Egg can make the coating richer and sturdier, but it also pushes the batter toward a heavier, chewier, more cakey texture. This recipe uses flour, rice flour or cornstarch, baking powder, salt, and very cold beer or sparkling water for a lighter crisp shell.

If you prefer a thicker, more old-fashioned coating, you can add 1 beaten egg, but start with 2 to 3 tablespoons less beer or sparkling water and thin the batter only if needed. For a crisp pub-style finish, the egg-free batter is the better first choice.

Optional Extra-Crisp Batter Upgrade

For an extra-crisp batter, replace 2 to 4 tablespoons / 30 to 60 ml of the beer with vodka. This is optional, not required. The standard beer batter already works well for a home kitchen.

How to Fix Batter Thickness Before Frying
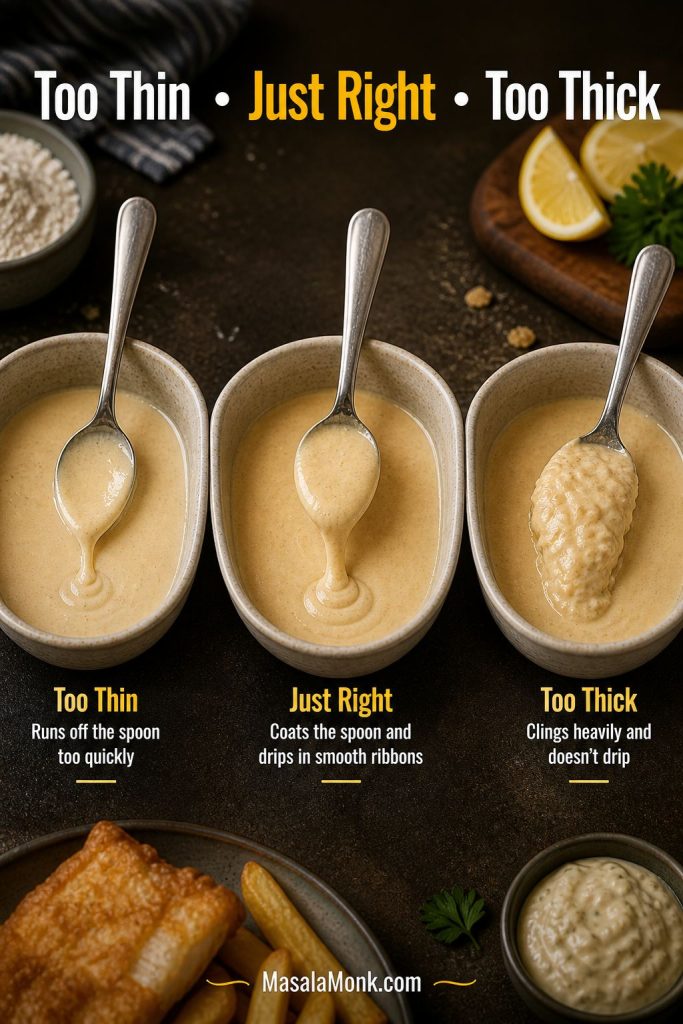
Three spoons of fish batter showing too thin, just right, and too thick consistencies.
Batter texture is easier to judge by sight than by mixing time. Aim for a smooth coating that clings lightly, then drips slowly.
Batter Problem What It Looks Like Fix
Too thin Runs straight off the fish and leaves bare patches. Add flour or rice flour 1 tablespoon at a time.
Just right Coats the fish and drips slowly in ribbons. Use immediately while cold.
Too thick Clings in a heavy, doughy layer. Add cold beer or sparkling water 1 tablespoon at a time.

Batter ready? Check the oil temperature and frying timing before you fry, or use the troubleshooting table if your batter feels too thick, thin, or loose.

Equipment You’ll Need

You do not need a restaurant fryer for homemade fish and chips, but the right setup makes a big difference. A heavy pot, thermometer, and wire rack will do more for crispness than extra batter ever will.
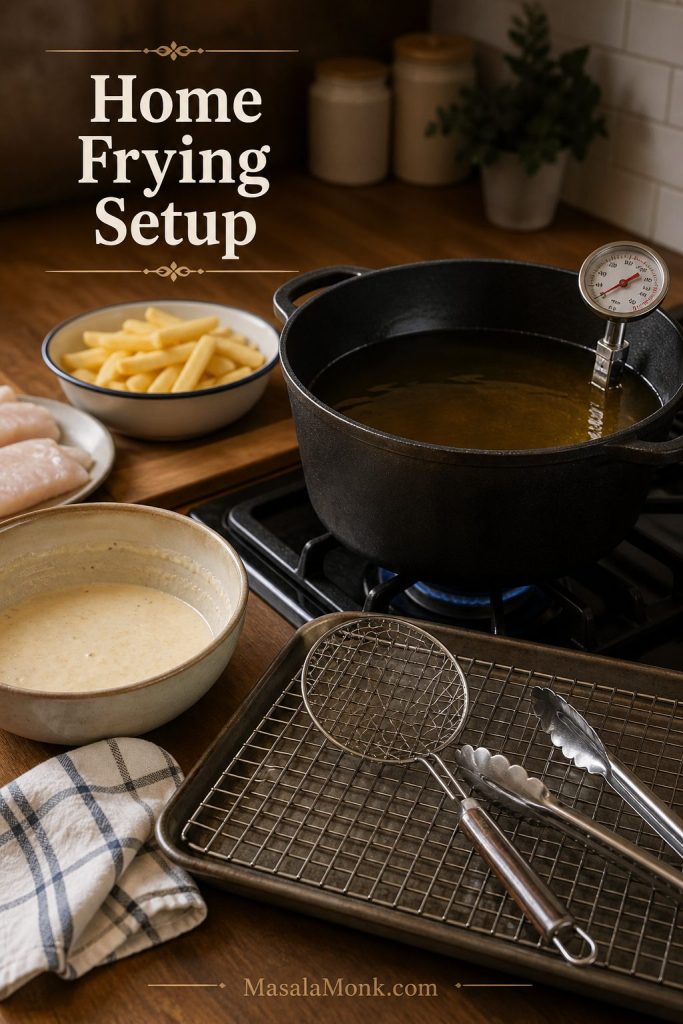
Home frying setup with a heavy pot, thermometer, wire rack, tray, skimmer, towel, and batter bowl.
A heavy pot, thermometer, and wire rack are the real crispness tools. Control the oil first, then drain the fish where steam can escape.
Equipment Why It Helps
Dutch oven, deep heavy pot, wok, or deep fryer Holds heat better and gives the fish enough room to fry.
Deep-fry thermometer Keeps the oil in the crisp zone instead of guessing.
Wire rack and rimmed baking sheet Lets steam escape so the underside of the fish stays crisp.
Spider skimmer or tongs Makes lowering and removing fish safer.
Mixing bowls Useful for dredging flour, batter, and sauces.
Kitchen towels or paper towels Dry fish and potatoes before frying.
Kitchen scale Gives better accuracy for flour and fish weight.
Instant-read thermometer Confirms the fish has reached 145°F / 63°C.

How to Make Fish and Chips Step by Step

This homemade version works best when you cook in the right order. Prepare the sauce first, start the chips next, mix the batter only when the oil is ready, then fry the fish and finish the chips close to serving.

Beer-battered fish being lowered into hot oil with bubbles forming around the coating.
Small batches protect the oil temperature. As a result, the batter sets quickly instead of absorbing oil and turning greasy.
  1. Make the sauce first. Tartar sauce and curry sauce can sit while you fry.
  2. Cut the potatoes. Slice them into thick chips about ½ to ⅝ inch / 1.2 to 1.5 cm thick.
  3. Rinse or soak the chips. This removes excess starch.
  4. Dry the chips very well. Wet potatoes splatter and soften in the oil.
  5. Pat the fish dry. This is one of the most important steps.
  6. Season the fish. Use salt and black pepper before dusting.
  7. First-fry or par-cook the chips. This softens the inside before the final crisping step.
  8. Mix the cold batter. Do this just before frying the fish.
  9. Dust the fish with flour or starch. Use rice flour, cornflour, cornstarch, or plain flour.
  10. Dip the fish in batter. Let excess batter drip off.
  11. Fry the fish. Cook until deeply golden, crisp, and flaky inside.
  12. Finish the chips. Fry or final-fry them hot until crisp and golden.
  13. Serve immediately. Add salt, tartar sauce, malt vinegar, lemon, and curry sauce if using.

How to Make Crispy Chips for Fish and Chips

The chips need to earn their place on the plate: crisp-edged, fluffy inside, salted while hot, and sturdy enough for malt vinegar or curry sauce.

Best Potatoes for Fish and Chips

Comparison of potatoes for fish and chips, including floury or starchy potatoes and waxy potatoes.
Floury potatoes make chips with fluffy centers and crisp edges. Waxy potatoes can still fry, but they usually taste denser.

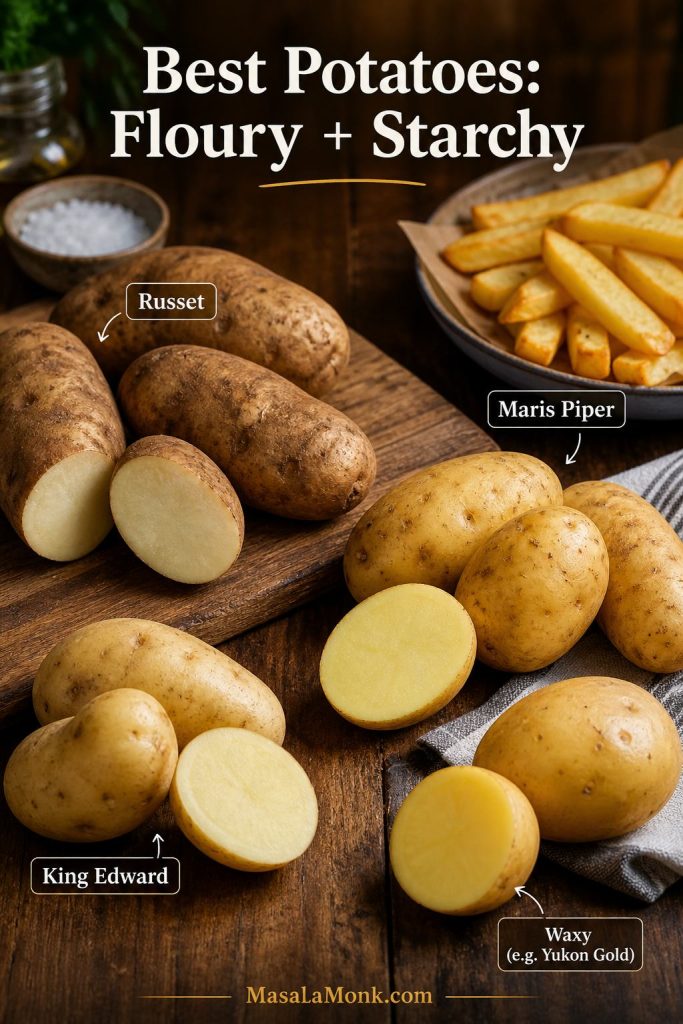
The best potatoes for fish and chips are floury or starchy potatoes because they cook up fluffy inside and crisp outside. Use russet potatoes in the U.S., Maris Piper or King Edward in the U.K., or another floury potato where you live. Waxy potatoes can work, but they usually make denser chips with less fluffy centers.

There are two good ways to handle the potatoes: double-fry them, or parboil them first and then fry. You do not have to do both unless you want the extra step.

Option 1: Double-Fry Chips

Double-fried chips showing pale first-fried chips and golden final-fried chips.
The first fry cooks the potato through; the second fry builds the golden edge. That is why double-fried chips hold up better with vinegar or curry sauce.
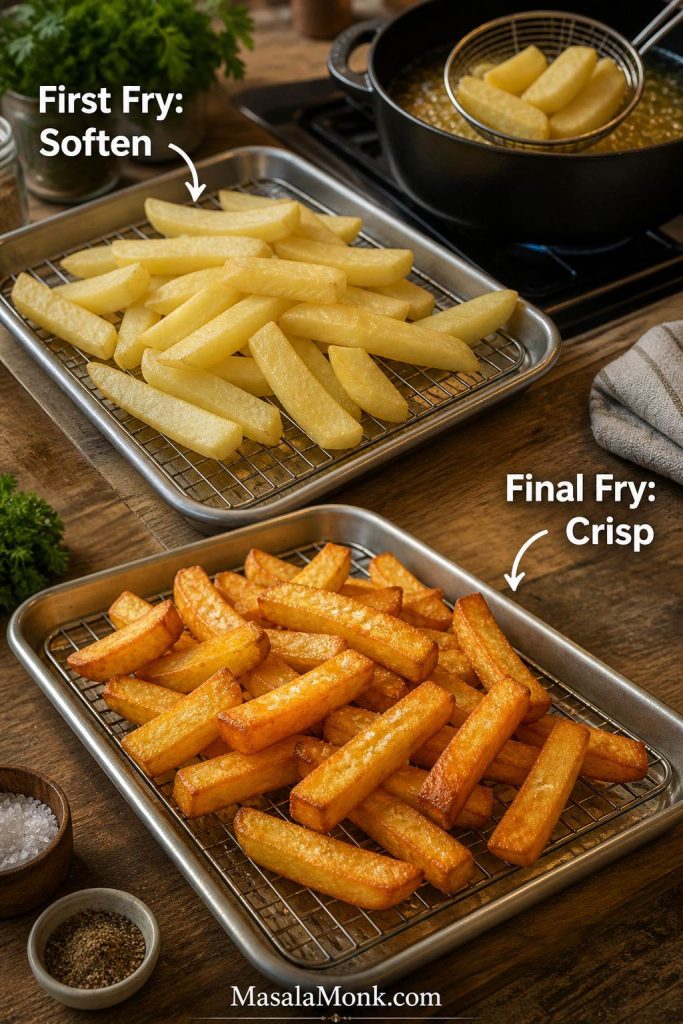
  • Cut chips about ½ to ⅝ inch / 1.2 to 1.5 cm thick.
  • Rinse or soak until the water is mostly clear.
  • Dry the chips very well before frying.
  • First-fry at 325°F / 160°C until softened but pale.
  • Rest briefly, then final-fry at 375°F / 190°C until golden.
  • Salt immediately after frying.

Option 2: Parboil, Dry, Then Fry

Thick-cut chips being parboiled, dried, and fried for fish and chips.
Parboiling helps chips turn fluffy inside, but drying is the step that makes frying work. Wet potatoes soften and splatter instead of crisping.
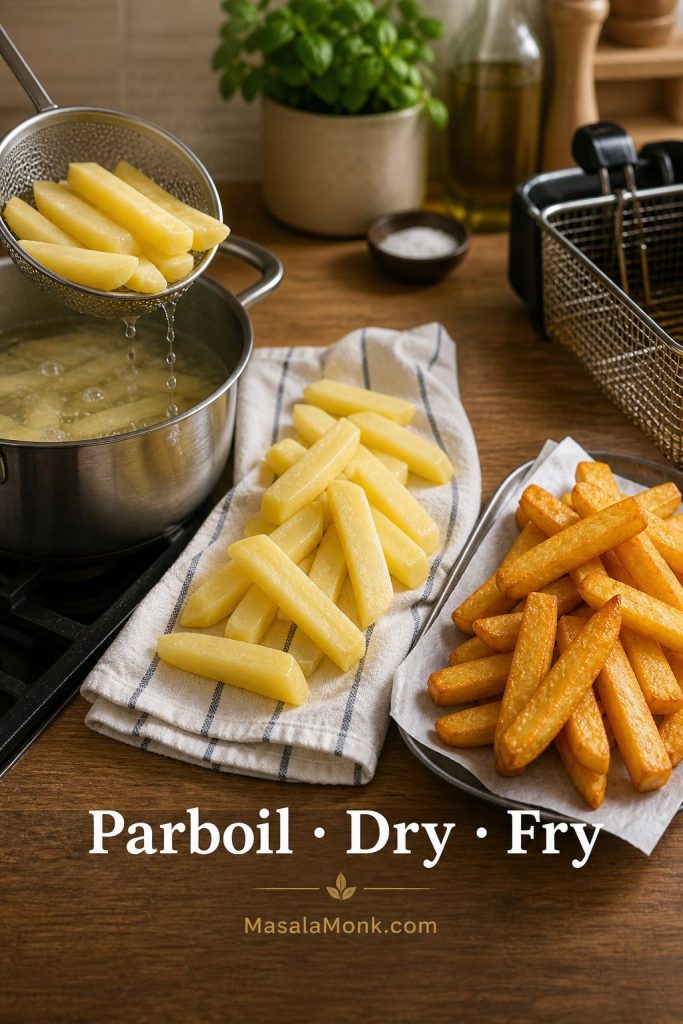
  • Cut the potatoes into thick chips.
  • Simmer in salted water with 1 teaspoon malt vinegar for 8 to 10 minutes, until just tender at the edges but not falling apart.
  • Drain carefully and dry very well.
  • Chill if you have time, then fry once at 375°F / 190°C until crisp and golden.
  • Salt immediately after frying.

For a deeper potato-only guide with double-fry timing, air fryer fries, oven fries, cuts, coatings, and seasoning ideas, use MasalaMonk’s crispy homemade French fries guide alongside this fish and chips recipe.

To time the chips with the fish, use the serve everything hot sequence before starting the final fry.

Best Oil Temperature for Fish and Chips

Oil temperature is where homemade fish and chips usually succeed or fail. Too cool, and the batter drinks oil. Too hot, and the coating browns before the fish turns flaky inside.

Frying thermometer in hot oil with fish and chips nearby for fish and chips temperature control.
Oil temperature decides whether fish batter crisps or turns greasy. Let the oil recover between batches rather than rushing the next piece in.
Item Temperature Time
First-fry chips 325°F / 160°C 3 to 5 minutes
Final-fry chips 375°F / 190°C 2 to 4 minutes
Fry fish 365°F to 375°F / 185°C to 190°C 4 to 6 minutes for 5 to 6 oz pieces
Fish doneness 145°F / 63°C internal temperature Until opaque and flaky

Start the oil slightly hotter than your minimum target because the temperature drops when cold battered fish goes in. Then fry in small batches and let the oil recover between batches.

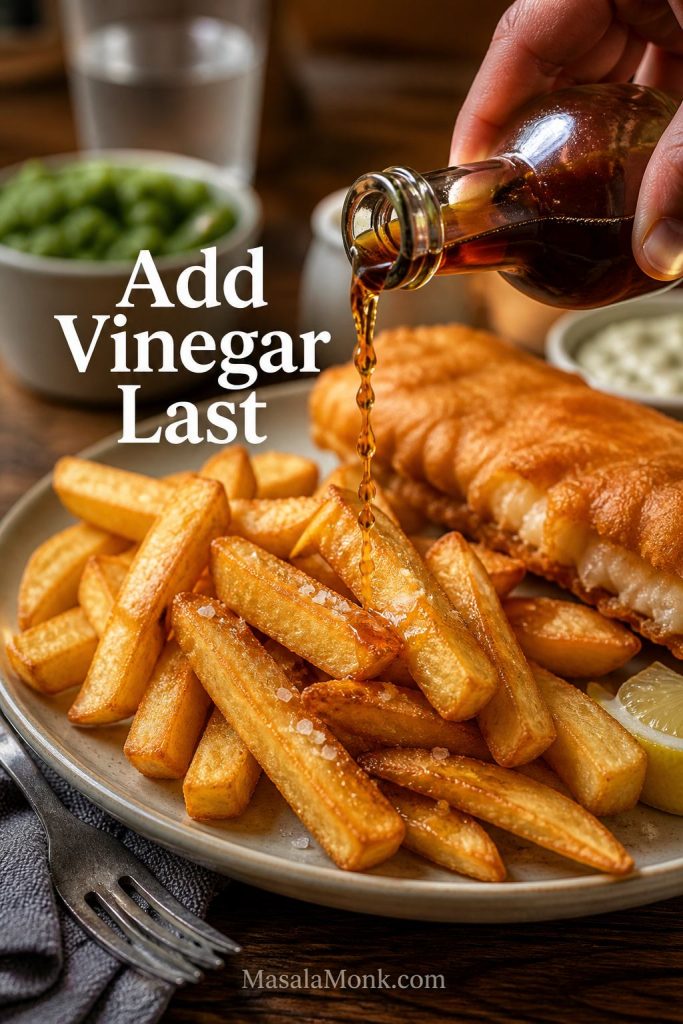
Vinegar timing cue: Add malt vinegar at the table or right before eating so the chips keep their crisp edges longer.

Vinegar timing: Add malt vinegar at the table or right before eating. If the fish or chips sit too long after vinegar is added, the crisp coating softens quickly.
Malt vinegar being poured over thick chips beside crispy battered fish.
Malt vinegar gives fish and chips their sharp finish. However, add it right before eating so the chips stay crisp longer.

If your oil temperature keeps dropping or the coating turns greasy, jump to common fish and chips fixes.

How to Serve Fish and Chips Hot at the Same Time

The danger zone is not the frying itself; it is letting one part of the meal sit while the other finishes. Fish and chips should land on the plate hot, crisp, and uncovered, with the chips salted while they are still fresh from the oil.

Crispy battered fish draining on a wire rack over a tray with chips nearby.
A wire rack keeps fried fish crisp underneath because steam can escape. By contrast, a plate traps moisture and softens the coating.

Use this order:

  1. Make tartar sauce and curry sauce first.
  2. Cut, rinse, and dry the chips.
  3. Pat the fish dry and portion it.
  4. First-fry or par-cook the chips.
  5. Heat the oil for fish.
  6. Mix the cold batter right before frying.
  7. Fry the fish and drain it on a wire rack.
  8. Final-fry or finish the chips while the fish rests briefly.
  9. Salt the chips and serve everything immediately.

If needed, keep cooked chips warm in a low oven around 250°F / 120°C while you finish the fish. However, do not cover fried fish tightly or it will steam and soften.

Ready to cook? Use the full recipe card below, and keep the oil temperature table handy while frying.

Saveable fish and chips recipe card with crispy battered fish, chips, tartar sauce, lemon, and recipe notes.
Keep the main method simple: dry the fish, mix the batter cold, fry in hot oil, then drain on a rack before serving.

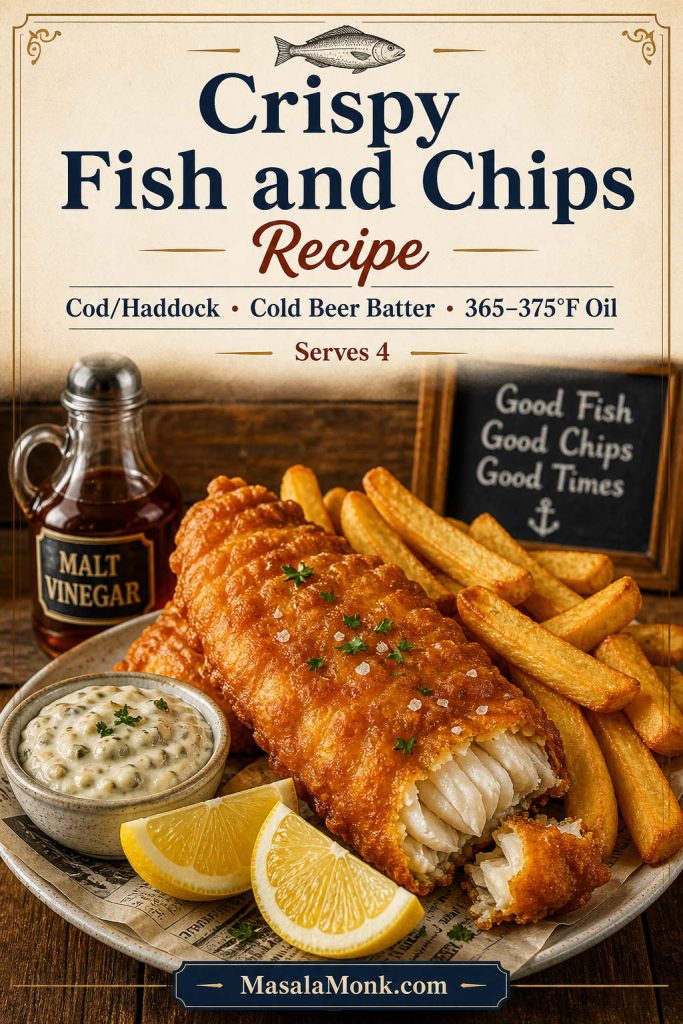
Crispy Fish and Chips Recipe

This homemade fish and chips recipe uses cod or haddock, a cold beer batter, thick-cut chips, and a clear frying method so the fish turns crisp outside and flaky inside. It also includes no-beer, air fryer, baked, and gluten-free notes.

Servings4
Prep Time30 minutes
Cook Time30 minutes
Total Time1 hour
Best texture targets: Fry fish at 365°F to 375°F / 185°C to 190°C, keep the batter ice cold, cut fish into 5 to 6 oz pieces, and drain on a wire rack instead of a plate.

Ingredients

Fish

  • 1½ lb / 680 g cod or haddock fillets, cut into 4 large pieces or 6 to 8 smaller pieces
  • ½ teaspoon fine salt
  • ¼ teaspoon black pepper
  • ¼ cup / 40 g rice flour, cornflour, cornstarch, or all-purpose flour, for dusting

Chips

  • 2 lb / 900 g russet potatoes, Maris Piper, or other floury potatoes
  • 1 teaspoon malt vinegar, optional for parboiling
  • Fine salt, to taste
  • 1½ to 2 litres neutral high-heat oil, or enough for 2 to 3 inches / 5 to 7 cm depth

Beer Batter

  • ¾ cup / 95 g all-purpose flour
  • ¼ cup / 40 g rice flour, cornflour, or cornstarch
  • 1¼ teaspoons baking powder
  • ½ teaspoon fine salt
  • ¼ teaspoon turmeric, optional for color
  • ½ teaspoon paprika, optional
  • 1 cup / 240 ml very cold lager or pale beer

Serving Sauces and Sides

  • Tartar sauce
  • Malt vinegar
  • Lemon wedges
  • Curry sauce, optional
  • Mushy peas, optional

Instructions

Prep the Sauces, Chips, and Fish

  1. Start with the sauces. Prepare tartar sauce and curry sauce, if using, before anything comes out of the oil.
  2. Cut the chips. Peel if desired, then cut the potatoes into thick chips, about ½ to ⅝ inch / 1.2 to 1.5 cm wide.
  3. Rinse or soak. Rinse until the water is mostly clear, or soak in cold water for 20 to 30 minutes.
  4. Dry well. Drain and dry the potatoes thoroughly with a clean kitchen towel.
  5. Prepare the fish. Pat the fish very dry, then season with salt and black pepper.

Cook the Chips

  1. Choose your chip method. For double-fried chips, first-fry at 325°F / 160°C until softened, then final-fry at 375°F / 190°C until crisp. Alternatively, parboil with 1 teaspoon malt vinegar for 8 to 10 minutes, until just tender at the edges, dry very well, then fry once at 375°F / 190°C until crisp and golden.
  2. Heat the oil safely. Keep the pot no more than halfway to two-thirds full. Use 325°F / 160°C for the first fry, or 375°F / 190°C for the parboil-and-fry method.
  3. Cook the chips. Use your chosen method, transfer to a rack or tray, and salt while hot.

Mix the Batter and Fry the Fish

  1. Raise the oil temperature for fish. Aim for 365°F to 375°F / 185°C to 190°C.
  2. Mix the batter just before frying. Whisk together the flour, rice flour or cornstarch, baking powder, salt, turmeric, and paprika. Add the cold beer and whisk briefly. Do not overmix; a few small lumps are fine.
  3. Dust the fish. Coat each piece lightly in rice flour, cornflour, cornstarch, or plain flour, then shake off the excess.
  4. Batter the fish. Dip the fish into the batter and let the excess drip off in ribbons.
  5. Fry the fish. Fry for 4 to 6 minutes for 5 to 6 oz pieces, turning once after the batter has set. The coating should be deep golden, crisp at the edges, and firm enough that it does not dent easily when lifted from the oil; the fish inside should be opaque, flaky, and 145°F / 63°C if checked with a thermometer.
  6. Drain properly. Move the fish to a wire rack set over a baking sheet. Do not stack or cover tightly.

Finish and Serve

  1. Finish the chips if needed. If you double-fried them, do the final fry now at 375°F / 190°C for 2 to 4 minutes. If you used the parboil method and already fried once, briefly refresh in hot oil only if needed.
  2. Serve hot. Salt the chips immediately and serve this fish and chips recipe with tartar sauce, malt vinegar, lemon wedges, and curry sauce if using.

No-Beer Batter Note

Replace the beer with 1 cup / 240 ml ice-cold sparkling water or club soda. Add an extra ¼ teaspoon baking powder. The batter will be lighter and less malty but still crisp.

Egg Note

For the crispiest coating, skip the egg. If you prefer a thicker, sturdier batter, add 1 beaten egg but start with 2 to 3 tablespoons less beer or sparkling water.

Frozen Fish Note

Frozen cod or haddock can work, but thaw it completely and pat it very dry before seasoning, dusting, and battering.

Air Fryer Note

For air fryer fish and chips, do not use wet beer batter. Use a flour, egg, and panko coating instead. Air fry at 375°F to 400°F / 190°C to 200°C for about 10 to 12 minutes, flipping halfway.

Baked Note

For baked fish and chips, use a panko coating and bake in a 400°F / 200°C oven. Bake the chips first, then add the coated fish and bake until crisp and flaky.

Gluten-Free Note

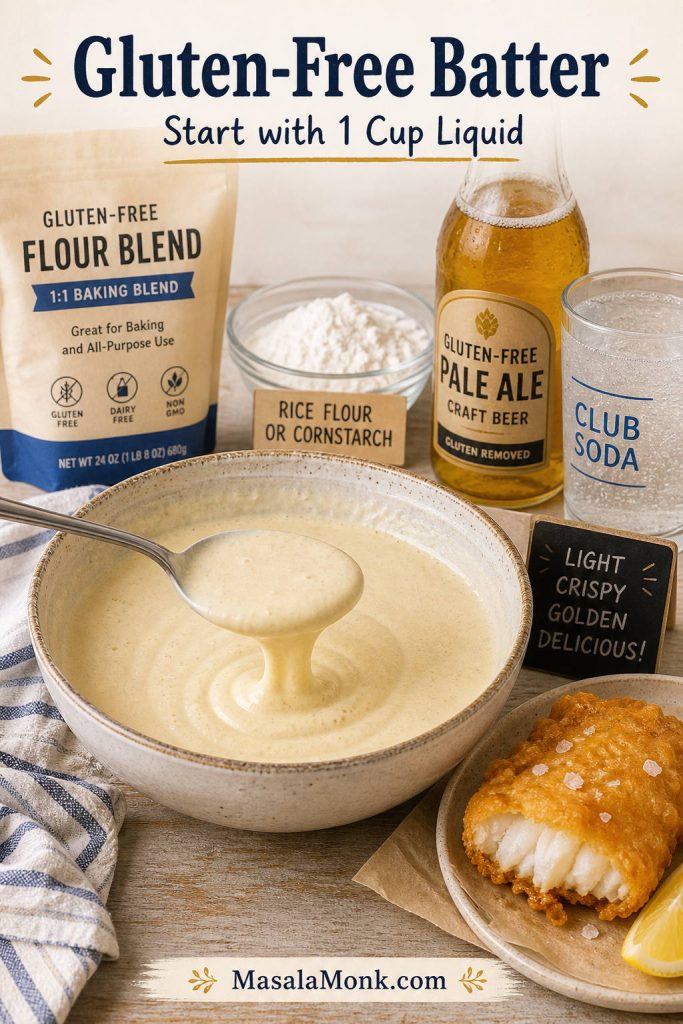
Use a gluten-free flour blend, rice flour or cornstarch, gluten-free baking powder, and gluten-free beer or club soda. Start with 1 cup / 240 ml liquid, then add 1 to 3 tablespoons more only if needed. Dust the fish with rice flour before battering.
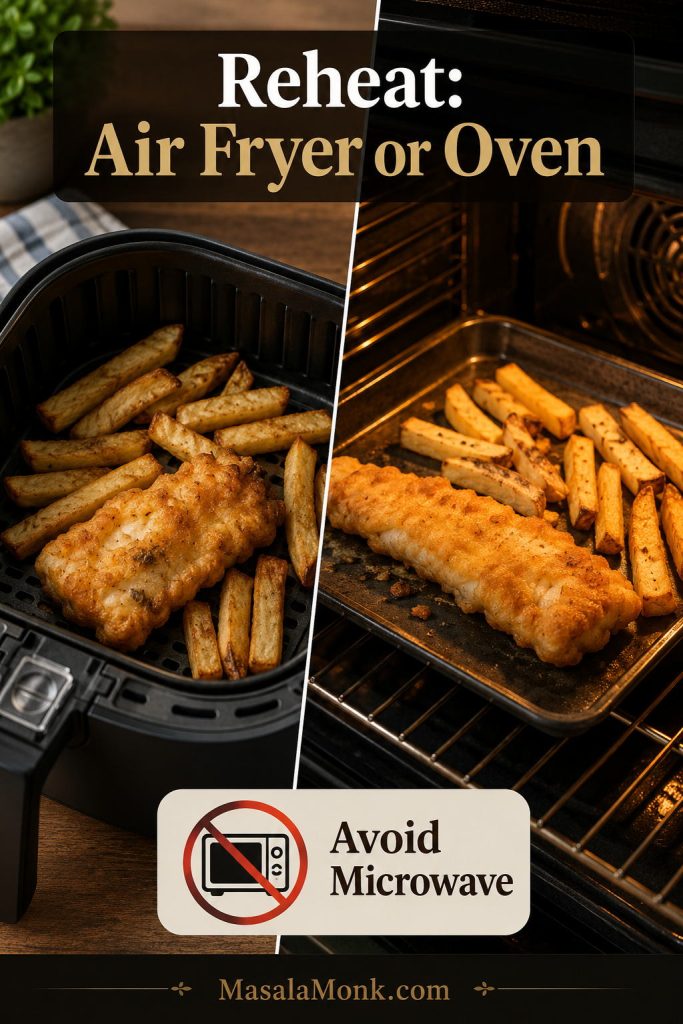
Storage Note

This fish and chips recipe is best fresh. Refrigerate leftovers up to 2 days and reheat in an oven or air fryer. Avoid microwaving if you want the coating to stay crisp.

Fish and Chips Sauce: Tartar Sauce, Curry Sauce, and Vinegar

Fish and chips need contrast: creamy tartar sauce, sharp malt vinegar, lemon for brightness, and curry sauce if you want that proper chip-shop comfort-food finish.

Fish and chips served with tartar sauce, curry sauce, malt vinegar, lemon, and mushy peas.
Sauces complete the plate: tartar sauce adds creaminess, lemon adds brightness, malt vinegar cuts the fried coating, and curry sauce brings chip-shop comfort.

Tartar Sauce for Fish and Chips

For a quick tartar sauce, stir together:

  • ½ cup mayonnaise
  • 2 tablespoons finely chopped cornichons or pickles
  • 1 teaspoon chopped capers
  • 1 tablespoon lemon juice
  • 1 tablespoon chopped parsley or dill
  • ½ teaspoon Dijon mustard, optional
  • Black pepper, to taste

If you want to make the creamy base from scratch, start with this homemade mayonnaise guide, then fold in pickles, capers, lemon, herbs, and mustard for tartar sauce.

Curry Sauce for Fish and Chips

For a simple chip-shop-style curry sauce, use:

  • 1 tablespoon butter or neutral oil
  • ¼ small onion, finely chopped
  • 1 small garlic clove, grated or minced
  • ½ teaspoon grated ginger, optional
  • 1½ teaspoons mild curry powder
  • ¼ teaspoon turmeric
  • ¾ cup stock
  • 1 teaspoon malt vinegar
  • 1 teaspoon cornstarch mixed with 1 tablespoon water
  • Salt, pepper, and a small pinch of sugar, to taste

First, soften the onion in butter or oil. Next, add the garlic, ginger, curry powder, and turmeric, then stir in the stock. After that, simmer for a few minutes, add the cornstarch slurry, and cook until glossy and pourable. Finally, finish with malt vinegar and adjust salt, pepper, and sweetness.

This does not need to be fiery. A good fish and chips curry sauce should be warm, savory, lightly sweet, and loose enough to spoon over chips.
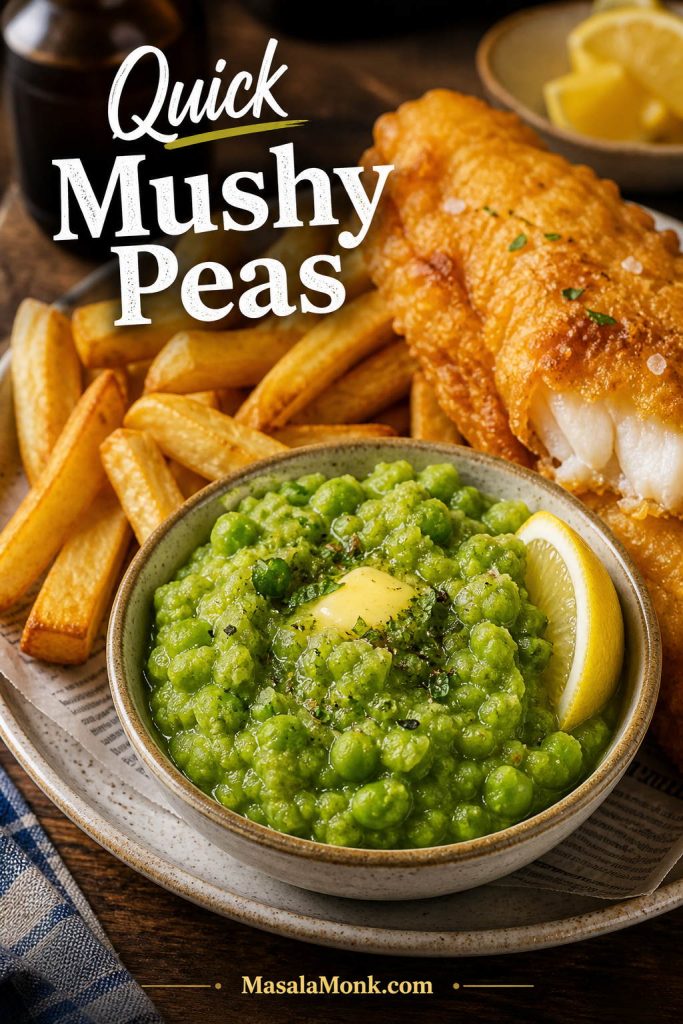
Quick Mushy Peas

For a quick green-pea version, simmer 2 cups peas with 1 tablespoon butter, a pinch of salt, black pepper, and 1 to 2 tablespoons water until hot. Mash roughly with lemon juice and chopped mint or parsley. Keep them chunky rather than completely smooth so they feel like a proper side, not a puree.

Bowl of chunky mushy peas with butter and lemon served beside fish and chips.
Quick mushy peas add freshness and color beside fried fish. For better texture, keep them chunky instead of turning them into a smooth puree.

Other Serving Ideas

  • Malt vinegar
  • Lemon wedges
  • Garlic mayo or aioli
  • Ketchup for a family-friendly plate
  • Coleslaw
  • Pickled onions or gherkins

Sauces sorted? Go back to the full fish and chips recipe or see what to serve with fish and chips.

Air Fryer Fish and Chips

For air fryer fish and chips, switch from wet beer batter to a panko coating. Wet batter needs hot oil to set instantly; in an air fryer, it drips before it crisps.

Panko-coated fish and chips in an air fryer basket for air fryer fish and chips.
Air fryer fish and chips need panko or breadcrumbs because wet batter drips before it sets. It is a different method, not a direct deep-fried copy.

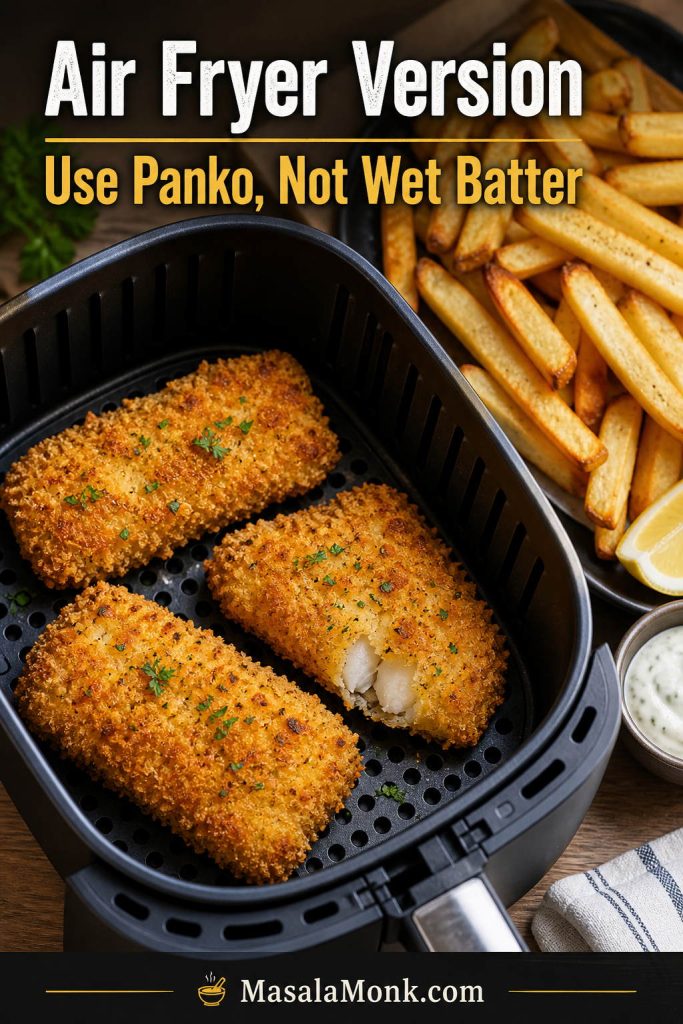
Instead, use a breadcrumb or panko coating:

  1. Pat cod or haddock dry and cut into pieces.
  2. Season flour with salt, pepper, paprika, and garlic powder.
  3. Dip fish in flour, then beaten egg, then panko breadcrumbs.
  4. Spray lightly with oil.
  5. Air fry at 375°F to 400°F / 190°C to 200°C for about 10 to 12 minutes, flipping halfway, until the coating is crisp and the fish is opaque, flaky, and 145°F / 63°C inside.
  6. Cook air fryer chips separately or start them first so they finish around the same time.
Air fryer rule: Use panko or breadcrumbs, not wet beer batter, for the cleanest result. Also, keep fish in a single layer and do not block airflow with heavy parchment or foil.

If air-fried food often turns pale, soft, or uneven in your kitchen, check these common air fryer mistakes before adjusting the fish recipe itself.

Want the classic fried version instead? Go back to the beer batter guide. Having air fryer issues? Check the fixes section.

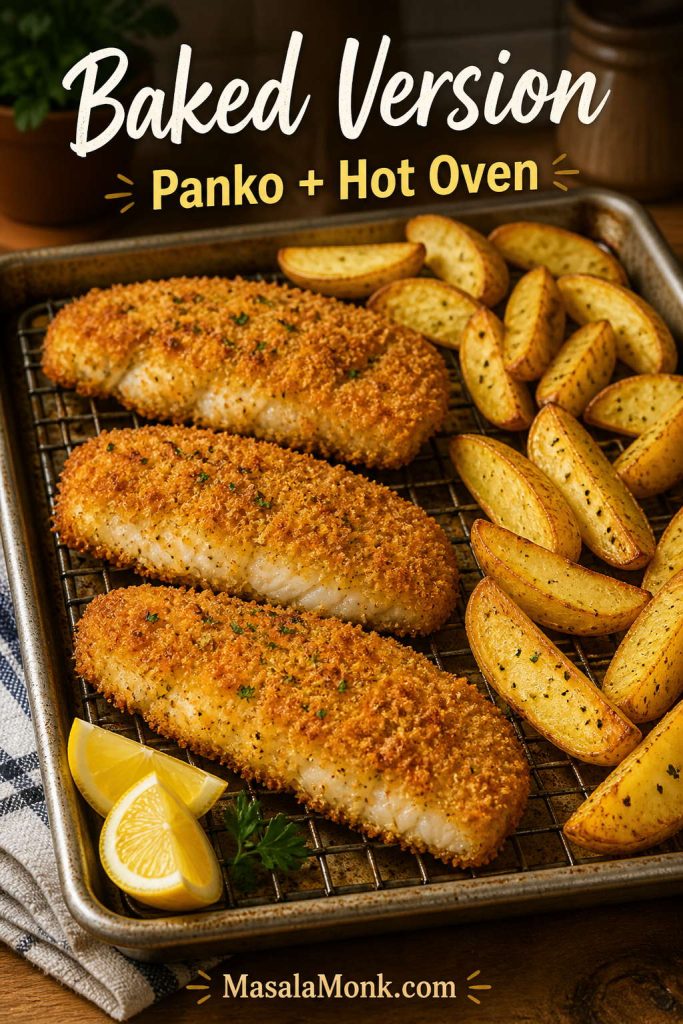
Baked Fish and Chips

Baked fish and chips works best as its own version: panko-coated fish, a hot oven, a lightly oiled tray, and chips or wedges that crisp while the fish cooks. It will not mimic deep-fried beer batter, but it can still be a very good weeknight version.

Panko-coated baked fish with oven chips or potato wedges on a sheet pan.
Baked fish and chips work best with panko, a hot oven, and space on the tray. Instead of imitating beer batter, this version gives you a crisp weeknight alternative.

Use this method:

  1. Heat the oven to 400°F / 200°C.
  2. Cut potatoes into wedges or thick fries, toss lightly with oil and salt, and bake until partly tender.
  3. Coat the fish in flour, egg, and panko breadcrumbs.
  4. Place fish on a lightly oiled rack or lined tray.
  5. Bake until the coating is crisp and the fish is opaque, flaky, and 145°F / 63°C inside.

For better browning, spray or brush the coated fish lightly with oil before baking.

Gluten-Free Fish and Chips

For a gluten-free version of this fish and chips recipe, build the batter around rice flour, cornstarch, gluten-free flour, and cold carbonated liquid.

Gluten-free fish and chips batter setup with flour blend, rice flour or cornstarch, liquid, and fried fish.
Gluten-free batter varies by flour blend, so start with less liquid and loosen slowly. The goal is still a ribbon-like batter that coats the fish.

Use:

  • 1 cup gluten-free flour blend
  • ¼ cup white rice flour or cornstarch
  • 1 teaspoon baking powder
  • ½ to 1 teaspoon salt
  • Paprika, garlic powder, or black pepper, optional
  • 1 cup / 240 ml gluten-free beer or club soda, plus 1 to 3 tablespoons more only if needed

Start with 1 cup / 240 ml liquid, then add more only until the batter coats the back of a spoon and drips off in ribbons. Gluten-free flour blends vary, so the texture matters more than the exact final tablespoon count.

Before battering, dust the fish with rice flour. Then fry in small batches at about 375°F / 190°C, knowing the oil will drop once the fish goes in.

Also, check that your baking powder, sauces, and serving sides are gluten-free.

How to Fix Common Fish and Chips Recipe Problems

Most fish and chips problems come from moisture, batter thickness, or oil temperature. Before changing the whole recipe, use this table to identify the likely issue.
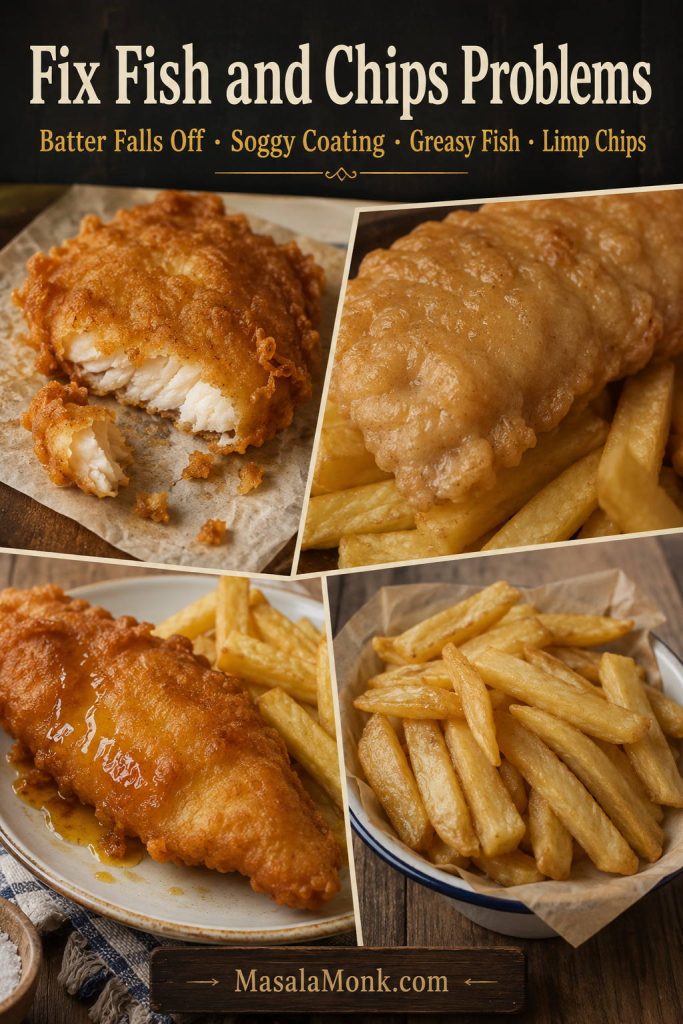
Troubleshooting guide for fish and chips showing batter falling off, soggy coating, greasy fish, and limp chips.
Most fish and chips problems trace back to moisture, batter thickness, oil temperature, or crowding. Once you find the cause, the fix is usually simple.
Problem Likely Cause Fix
Batter falls off Fish was too wet or not dusted first. Pat fish very dry and dust lightly with flour or rice flour before battering.
Batter is soggy Oil was too cool or the pot was crowded. Fry fewer pieces and keep oil above 350°F / 175°C.
Fish is greasy Oil temperature dropped too much. Let the oil recover between batches.
Batter browns too fast Oil was too hot. Lower heat slightly and use pieces that are not too thick.
Fish is undercooked Pieces were too thick or oil was too hot outside. Cut fish into thinner portions and check for 145°F / 63°C inside.
Batter is too thick Too much flour or not enough liquid. Add cold beer or sparkling water 1 tablespoon at a time.
Batter is too thin Too much liquid. Add flour or rice flour 1 tablespoon at a time.
Chips are limp Potatoes were wet or only fried once. Dry thoroughly and double-fry, or parboil, dry, and fry.
Fish tastes bland Only the batter was seasoned. Season the fish, the dredge, and the batter lightly.

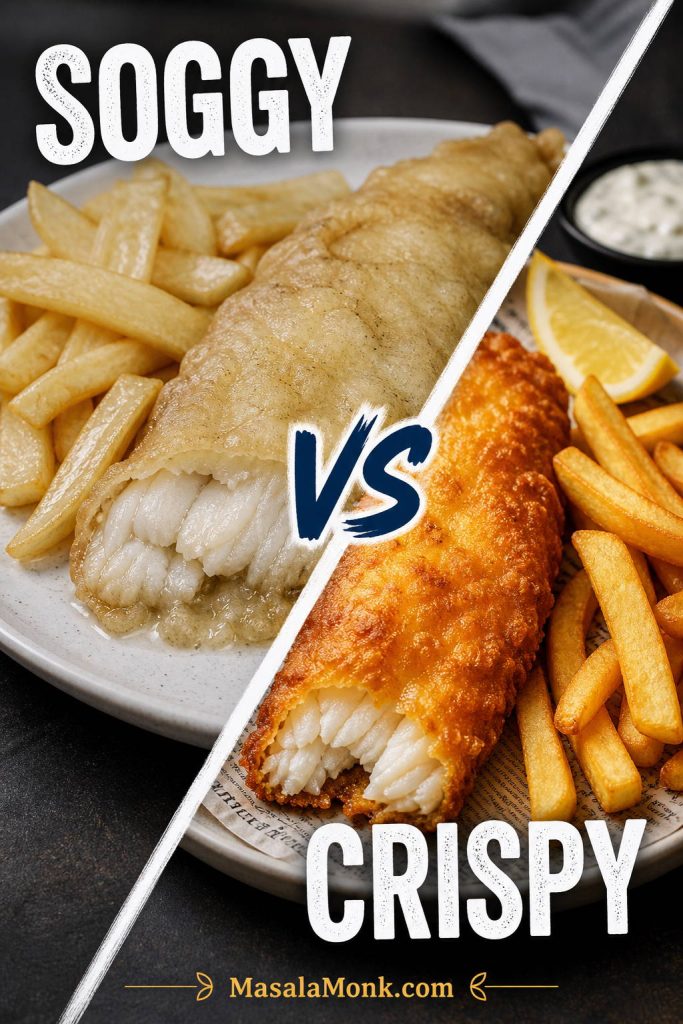
Soggy vs crispy cue: If the coating turns pale, greasy, or soft, check moisture, oil temperature, batch size, and draining method first.

Side-by-side comparison of soggy fish and chips and crispy golden fish and chips.
Crispy fish and chips need hot oil, small batches, and proper draining. Otherwise, the coating can turn pale, greasy, or soft before serving.

What to Serve with Fish and Chips

Classic fish and chips can be served simply with tartar sauce, malt vinegar, lemon, and salt. To make the plate fuller, add mushy peas, coleslaw, pickles, or curry sauce.

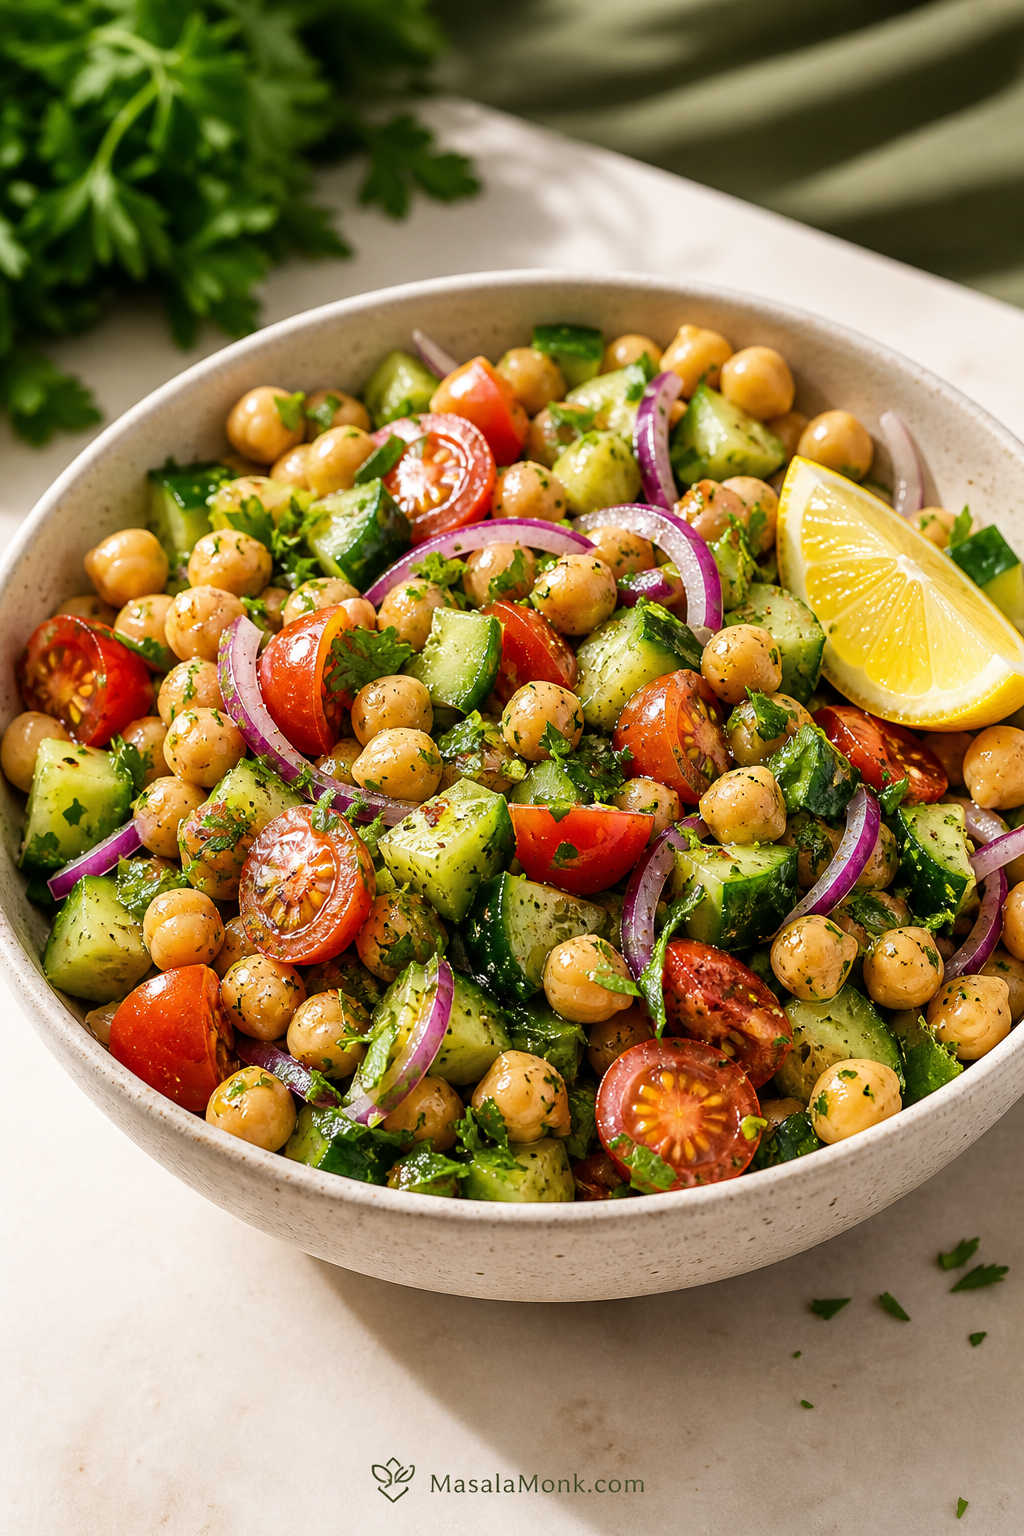
A cold cucumber salad recipe works especially well on the side because it is crisp, tangy, and quick enough to make while the potatoes soak.

When you want a bolder version with masala batter, chutney dips, and chaat-style chips, try MasalaMonk’s Indian twists on fish and chips. Keep this classic version as the base, then use that guide for a spicier variation.

Storage and Reheating

Fish and chips are best eaten fresh. Over time, the batter softens, especially if the fish is stacked or covered while hot.

Fish and chips being reheated in an air fryer and oven with a reminder to avoid the microwave.
Reheat leftovers in an air fryer or oven when you want some crispness back. The microwave is faster, but it makes the batter and chips soft.
  • Fridge: Store leftover fish and chips in separate airtight containers for up to 2 days.
  • Air fryer reheating: Reheat at 350°F / 175°C for 4 to 6 minutes, or until hot and crisp.
  • Oven reheating: Reheat on a wire rack at 375°F / 190°C until hot.
  • Avoid the microwave: It makes the batter and chips soft.

Leftover cooked fish or extra potatoes can also be folded into patties or a croquettes recipe, especially when the pieces are still flavorful but no longer crisp enough to serve as fish and chips.

Fish and Chips Recipe FAQs

What is the best fish for fish and chips?

Cod is the easiest all-purpose fish for fish and chips because it is mild, flaky, and widely available. Haddock is the classic British-style choice with a slightly stronger flavor. Pollock, hake, halibut, whiting, and ling can also work.

Is cod or haddock better for fish and chips?

Cod is milder and easier to find, while haddock has a more traditional fish-and-chip-shop flavor. Use cod for the easiest first batch and haddock when you want a more classic taste.

How do you make fish and chips batter crispy?

To make this fish and chips recipe crisp, use very cold beer or sparkling water, add rice flour or cornstarch to the batter, avoid overmixing, pat the fish dry, dust it before battering, and fry at the correct oil temperature.

Can I make fish and chips batter without beer?

Yes. Replace the beer with ice-cold sparkling water or club soda and add an extra ¼ teaspoon baking powder. The batter will be lighter and less malty but still crisp.

Should fish and chips batter have egg?

For a lighter crisp coating, skip the egg. Egg makes the batter richer and sturdier, but it can also make the coating heavier or more cakey. If you add one, reduce the beer or sparkling water slightly and thin only if needed.

What beer is best for fish batter?

A cold lager or pale ale is best for fish batter. Avoid very dark beers for the main recipe because they can make the batter taste heavier and look darker.

Can I use frozen fish for fish and chips?

Yes, but thaw it completely and pat it very dry before seasoning and battering. Extra surface moisture can make the batter slide off or turn soft.

Why is my fish batter soggy?

Soggy batter usually means the oil was too cool, the pot was crowded, or the fish was too wet before battering. Keep the oil hot, fry in small batches, and dry the fish well.

Why does batter fall off fish?

Batter falls off when the fish is wet or not dusted first. Pat the fish dry and coat it lightly in flour, rice flour, cornflour, or cornstarch before dipping it in batter.

Can I make fish and chips in an air fryer?

Yes, but use a breadcrumb or panko coating instead of wet beer batter. Wet batter can drip in an air fryer before it sets.

Can I bake fish and chips instead of frying?

Yes. Baked fish and chips work best with panko-coated fish and oven-baked potato wedges or chips. It will be lighter than deep-fried fish and chips, but not exactly the same texture.

What sauce goes with fish and chips?

Tartar sauce, malt vinegar, lemon, curry sauce, mushy peas, garlic mayo, ketchup, and coleslaw all work well with fish and chips.

Is fish and chips the same as fish and fries?

In British-style fish and chips, “chips” usually means thicker fried potatoes. In the U.S., the same dish is sometimes described as fish and fries, especially when served with thinner fries.

Can I make gluten-free fish and chips?

Yes. Use a gluten-free flour blend, rice flour or cornstarch, gluten-free beer or club soda, and gluten-free baking powder. Also check sauces and sides for hidden gluten.

What temperature should oil be for fish and chips?

For the fish, aim for 365°F to 375°F / 185°C to 190°C. Do not let the oil fall below 350°F / 175°C, or the batter can turn greasy.

How do I reheat fish and chips?

Reheat fish and chips in an air fryer at 350°F / 175°C for 4 to 6 minutes, or in an oven at 375°F / 190°C until hot and crisp. Avoid the microwave if you want the batter to stay crisp.

Posted on 1 Comment

Apple Cinnamon Roll Bake with Apple Pie Filling

Apple cinnamon roll bake with apple pie filling in a dark 9x13 pan, topped with icing, pecans, and glossy apple pieces.

Apple cinnamon roll bake with apple pie filling is the shortcut dessert you make when you want warm apple pie flavor without rolling pie crust, peeling apples, or making cinnamon roll dough from scratch.

At its simplest, this can be a 2-ingredient apple cinnamon roll bake made with refrigerated cinnamon rolls and apple pie filling. This version keeps that easy shortcut, then adds a few small upgrades — butter, brown sugar, cinnamon, optional cream, and better ratio guidance — so the pan tastes more finished and bakes more evenly.

If you are looking for apple cinnamon rolls with apple pie filling, this is the easy bake-style version: soft cinnamon roll pieces, warm apple filling, sticky icing, and clear fixes for the common problem of wet or doughy centers.

Quick Answer: Apple Cinnamon Roll Bake with Apple Pie Filling

Cut refrigerated cinnamon rolls into pieces, toss them with melted butter, cinnamon, brown sugar, and apple pie filling, then bake everything in a greased 9×13 inch pan at 350°F / 175°C until the center is puffed and cooked through. For the most reliable texture, use 2 tubes of cinnamon rolls with 1 can of apple pie filling. Use 1½ to 2 cans only if you want a very gooey, apple-heavy bake and are comfortable baking it a little longer.

This is not a from-scratch cinnamon roll recipe. It is the easy refrigerated cinnamon roll bake, and the best way to make it taste more homemade is to upgrade the filling first. Diced homemade apple pie filling gives better texture without turning the recipe into a full dough project.

Best default ratio: 2 large tubes refrigerated cinnamon rolls, about 35 oz / 990 g total, plus 1 can apple pie filling, 21 oz / 595 g. This gives you a soft, gooey bake without overloading the pan.

Quick guide for apple cinnamon roll bake with apple pie filling showing a 9x13 pan, 350°F bake temperature, 40 to 50 minute time, and 2 tubes to 1 can ratio.
For the safest first version, use this starting formula: 2 tubes of cinnamon rolls, 1 can of apple pie filling, a 9×13 pan, and enough bake time for the middle to set before icing.

Need exact amounts? Jump to the recipe. Still choosing filling amount? Check the ratio guide.

Apple Cinnamon Roll Bake at a Glance

Best pan9×13 inch / 23×33 cm baking dish for a full batch
Oven temperature350°F / 175°C
Best cinnamon rollsRefrigerated cinnamon rolls, cut into quarters; jumbo rolls can be cut into 6 pieces
Best filling ratio2 tubes cinnamon rolls + 1 can apple pie filling
Homemade filling replacementUse 2 to 2½ cups homemade apple pie filling to replace one 20–21 oz can
Bake timeUsually 40–50 minutes for a 9×13 pan
Center cueThe middle should be puffed, set, and no longer wet or raw
Rest time10–15 minutes before adding icing
Yield8–10 servings

Why This Apple Cinnamon Roll Bake Works

This recipe works because it treats the filling ratio as the main decision, not an afterthought. Apple pie filling is sweet, saucy, and heavy, so using too much can keep the cinnamon roll pieces from baking evenly in the center. Starting with 1 can of filling for 2 tubes of cinnamon rolls gives you enough apple flavor without turning the middle wet.

Cutting the rolls into smaller pieces also matters. Smaller pieces bake through faster, hold the apple filling better, and give you more soft edges for the icing to settle into. A wide 9×13 pan helps the dough spread instead of steaming in a deep pile.

The result is still gooey, cozy, and generous, but the center cooks through properly.

Before mixing the pan, compare the best filling ratios and choose the right version for your pan.

Ingredients You Need

This recipe starts with the easy version: refrigerated cinnamon rolls and apple pie filling. The small upgrades — butter, brown sugar, cinnamon, salt, and optional cream — make it taste more like a finished bake and less like two packaged ingredients stirred together.

Ingredients for apple cinnamon roll bake including cinnamon roll tubes, apple pie filling, butter, brown sugar, cinnamon, salt, cream, pecans, and icing.
The shortcut comes from refrigerated cinnamon rolls and apple pie filling, but the small upgrades matter. Butter adds richness, brown sugar deepens the flavor, cinnamon reinforces the apple-pie taste, and a pinch of salt keeps the bake from tasting flat.

Using smaller tubes or extra filling? Check the filling ratio before mixing the pan.

Refrigerated Cinnamon Rolls

Use 2 tubes of refrigerated cinnamon rolls for a full 9×13 pan. Large tubes are often about 17.5 oz / 496 g each, giving you about 35 oz / 990 g total dough. If your tubes are smaller, use the ratio guide below instead of guessing.

Use any brand of refrigerated cinnamon rolls you like. The important part is the total dough weight, not the brand name. If your tubes are smaller than the large 17.5 oz / 496 g size, reduce the filling slightly or use the small-batch guide.

Reserve the icing packets. Drizzle the icing after the bake has rested, not before it goes into the oven.

Apple Pie Filling

Use 1 can of apple pie filling, usually 21 oz / 595 g, for the most reliable full-pan bake. If the apple slices are large, chop them into smaller pieces before mixing. Smaller apple pieces distribute better and reduce wet pockets in the center.

You do not need to drain the apple pie filling. If the can looks extremely saucy, spoon off a little excess gel, but do not strain it dry. The sauce is part of what makes the bake soft and gooey.

You can also use homemade apple pie filling. For this recipe, diced apple pie filling works better than long slices because it spreads evenly between the cinnamon roll pieces.

Butter, Brown Sugar and Cinnamon

Melted butter coats the dough pieces and helps the edges bake up richer. Brown sugar adds a light caramel note, while cinnamon or apple pie spice reinforces the apple-pie flavor.

  • Melted butter: ¼ cup / 4 tablespoons / 57 g
  • Light brown sugar: 2 tablespoons / about 25 g
  • Cinnamon or apple pie spice: ½ to 1 teaspoon
  • Fine salt: a small pinch, optional but useful

Heavy Cream, Optional

Heavy cream can make the bake softer and more gooey, but too much can slow down the center. For this recipe, use only 2–3 tablespoons / 30–45 ml if you want the cream upgrade.

Icing or Cream Cheese Glaze

The easiest option is the icing that comes with the cinnamon rolls. For a thicker finish, make the quick cream cheese glaze in the recipe card. Add icing while the bake is warm, not piping hot, so it melts slightly without disappearing completely.

Pecans or Walnuts, Optional

Chopped pecans or walnuts add crunch and make the bake feel more holiday-ready. Use about ½ cup / 55–60 g, and sprinkle some inside the bake or over the top before baking.

Best Ratio of Cinnamon Rolls to Apple Pie Filling

This is where many apple cinnamon roll bakes go wrong. One version may call for two cans of apple pie filling, while another uses one can for the same amount of dough. Both can work, but they do not give the same result.

For the most reliable center, use 1 can of apple pie filling with 2 large tubes of cinnamon rolls. If you want a wetter, cobbler-style bake, increase the filling and bake longer.

If you want visible apple pieces in every bite, chop the filling smaller before adding a second full can. Smaller pieces distribute better without flooding the center.

Ratio guide comparing small batch, balanced full batch, and extra apple-heavy apple cinnamon roll bake with apple pie filling.
The filling ratio changes the whole texture of the bake. One can gives a safer, more evenly baked center, while extra filling creates a gooier dessert-style pan that usually needs more time in the oven.
VersionCinnamon rollsApple pie fillingPanBake time
Small batch1 tube / 12–17.5 oz / 340–500 g1 to 1½ cups8×8 inch or 9-inch round22–30 minutes
Balanced full batch2 large tubes / about 35 oz / 990 g total1 can / 21 oz / 595 g9×13 inch / 23×33 cm40–50 minutes
Extra apple-heavy2 large tubes / about 35 oz / 990 g total1½ to 2 cans / 31–42 oz / 880–1190 g9×13 inch / 23×33 cm45–55 minutes
Homemade filling version2 large tubes2 to 2½ cups homemade filling per can replacement9×13 inch / 23×33 cm40–50 minutes

One Can vs Two Cans of Apple Pie Filling

If you are making this apple cinnamon roll bake for the first time, one can of apple pie filling is the safer starting point. Two cans can taste extra gooey, but the added sauce makes the center slower to bake and easier to undercook.

One can versus two cans of apple pie filling comparison for apple cinnamon roll bake, showing balanced and extra-gooey versions.
One can is the best default for a balanced apple cinnamon roll bake. Two cans can be deliciously gooey, but the center needs more attention because extra sauce slows down the bake.

Want the simplest shortcut? See the 2-ingredient version. Ready to bake? Jump to the method.

Small-roll note: If your cinnamon roll tubes are smaller than 17.5 oz / 496 g each, do not automatically use a full can of filling for every tube. Smaller tubes need less filling, or the pan can turn wet before the dough cooks through.

Can You Make This with Just 2 Ingredients?

Yes. You can make a 2-ingredient apple cinnamon roll bake with only refrigerated cinnamon rolls and apple pie filling. Cut the rolls, fold them with the filling, bake until the center is cooked through, then drizzle with the icing. The butter, brown sugar, cinnamon, and salt in this recipe are small upgrades that make the bake taste more finished, but they are not required.

Comparison of 2-ingredient apple cinnamon roll bake and upgraded version with butter, brown sugar, cinnamon, and optional cream.
The 2-ingredient version works when you need the fastest shortcut. However, the upgraded version adds better flavor balance and a softer, more bakery-style finish without turning this into a from-scratch cinnamon roll recipe.

Which Version Should You Make?

The best version depends on what you want from the pan. If this is your first time making it, start with the balanced 9×13 bake. Once you know how your oven, pan, and cinnamon rolls behave, you can make it more apple-heavy or richer with cream.

Choose this versionUse it whenWhat to expect
Balanced 9×13 bakeYou want the safest first trySoft rolls, clear apple flavor, less risk of a doughy center
Extra apple-heavy bakeYou want a gooier dessert-style casseroleMore filling, more sauce, longer bake time
Small batchYou are using 1 tube of cinnamon rollsBetter for an 8×8 pan or 9-inch round pan
Homemade filling versionYou want better apple texture and less canned sweetnessBest flavor, especially with diced apple pie filling

Canned vs Homemade Apple Pie Filling

Canned apple pie filling is the fastest option, and it works well for this recipe. Homemade filling gives you better control over sweetness, apple texture, and spice. The best homemade version for this bake is diced or chopped, not long slices.

Canned and homemade apple pie filling comparison for apple cinnamon roll bake, showing canned filling and diced homemade filling in bowls.
Canned apple pie filling is the fastest option, but homemade diced filling gives better control over sweetness and texture. For this bake, small apple pieces distribute more evenly than long slices.
FillingBest forHow much to use
Canned apple pie fillingFastest shortcut bake1 can / 21 oz / 595 g for a balanced 9×13 bake
Homemade diced apple pie fillingBetter texture and less canned sweetness2 to 2½ cups to replace one can
Extra saucy fillingGooey casserole-style bakeUse carefully; too much sauce can delay the center
Fresh raw applesNot the best direct swapCook them first or use a proper apple pie filling method

If you want to make the filling from scratch, use this apple pie filling recipe and dice the apples for this bake. Use about 2 to 2½ cups homemade filling for every 20–21 oz can you are replacing.

Long Slices vs Diced Apple Pie Filling

For this bake, diced or chopped apple pie filling works better than long slices. Smaller pieces spread between the cinnamon roll pieces more evenly, which gives you apple flavor throughout the pan without creating wet pockets.

Comparison of long apple slices and diced apple pie filling for apple cinnamon roll bake, showing diced filling as the better choice for even distribution.
Long apple slices can look beautiful, but they may leave wet pockets between the dough pieces. Diced or chopped apple pie filling spreads more evenly, which helps the center bake through cleanly.

Filling ready? Go to the step-by-step method. Worried about the center? Check the doughy-center fixes.

How to Make Apple Cinnamon Roll Bake with Apple Pie Filling

The goal is simple: keep the dough pieces small, spread the filling evenly, and give the center enough time to bake through. The apple filling should sit around and between the cinnamon roll pieces rather than forming one thick layer over the top.

Step-by-step apple cinnamon roll bake method showing cut cinnamon rolls, chopped apple filling, seasoned dough, unbaked 9x13 pan, and iced baked rolls.
Cutting the rolls smaller and chopping the apple filling before baking helps every bite cook more evenly. As a result, you get soft cinnamon roll pieces with apple flavor throughout instead of wet pockets in the middle.
  1. Preheat the oven. Heat oven to 350°F / 175°C. Grease a 9×13 inch / 23×33 cm baking dish.
  2. Reserve the icing. Open the cinnamon roll tubes and set the icing aside for later.
  3. Cut the cinnamon rolls. Cut regular rolls into quarters. If using jumbo rolls, cut each roll into 6 pieces.
  4. Chop the apple filling. If the apple slices are large, chop them into roughly ½-inch / 1.25 cm pieces.
  5. Season the dough. In a large bowl, toss the cinnamon roll pieces with melted butter, brown sugar, cinnamon or apple pie spice, and a small pinch of salt.
  6. Add the apple pie filling. Fold in the filling gently so the dough pieces are coated but not crushed.
  7. Spread in the pan. Transfer the mixture to the baking dish and spread it in one even layer.
  8. Add cream, if using. Drizzle 2–3 tablespoons / 30–45 ml heavy cream over the top. Keep it light so the center still bakes through cleanly.
  9. Bake. Bake for 40–50 minutes, checking the center around 35–40 minutes. Tent loosely with foil if the top browns before the middle is done.
  10. Rest and ice. Let the bake rest for 10–15 minutes, then drizzle with the reserved icing or cream cheese glaze.

Center still looks soft? Use the doughy-center checklist. Different pan size? Check pan sizes.

Common Mistakes to Avoid

  • Using too much filling the first time. Two cans can work, but 1 can is the better starting point for a full 9×13 bake.
  • Leaving the cinnamon rolls too large. Big pieces brown on the outside before the middle cooks through.
  • Using a deep pan for a full batch. A deep dish traps steam and slows the center.
  • Adding icing too early. If the pan is piping hot, the icing melts away instead of sitting on top.
  • Judging only by the edges. The edges cook first. Always check the center before pulling the pan from the oven.

How to Keep Apple Cinnamon Rolls from Staying Doughy

A doughy center is the most common problem with this kind of shortcut bake. It usually happens because the dough pieces are too large, the pan is too deep, or there is too much wet filling sitting over the middle.

Troubleshooting guide for fixing a doughy center in apple cinnamon roll bake, comparing a wet underbaked center with a puffed and set center.
A doughy center usually means the pan was too deep, the filling was too heavy, or the roll pieces were too large. If the top browns first, tent it with foil and keep baking until the middle is set.
  • Use a wide pan. A 9×13 pan is safer for a full batch than a deep round dish.
  • Cut the rolls small enough. Quarter regular rolls; cut jumbo rolls into 6 pieces.
  • Start with 1 can of filling. Two cans can work, but the bake becomes wetter and needs more time.
  • Chop large apple slices. Big apple pieces create wet pockets around the dough.
  • Spread everything evenly. Avoid leaving a mound of filling in the center.
  • Tent with foil if needed. If the top is browning but the center is not done, cover loosely and keep baking.
  • Check the middle, not just the edges. The center should be puffed and no longer raw or collapsed.
  • Use a thermometer if unsure. The thickest doughy part should be about 190–200°F / 88–93°C, a helpful doneness range for soft baked dough.
  • Rest before icing. Resting helps the filling settle and keeps the icing from disappearing into the hottest parts of the pan.

Glass and ceramic pans: These may need a little longer than metal pans. If the edges look done but the middle is still soft, tent with foil and continue baking in 5-minute intervals.

For other texture issues, see the taste and texture fixes. For pan-specific help, check the pan guide.

How to Fix the Taste and Texture

If the first pan is not exactly how you like it, the fix is usually simple. Adjust the filling, pan, or bake time rather than changing the whole recipe.

Texture Guide: Too Wet, Just Right or Too Dry

The texture should be soft and gooey, but the center should still look set. Use the visual cues below to decide whether the bake needs more time, less filling next time, or a little more moisture.

Texture guide for apple cinnamon roll bake showing too wet, just right, and too dry examples with apple filling and icing.
The ideal texture is soft, gooey, and set in the center. If the bake looks loose or sunken, give it more time; if it looks dry and crumbly, use a little more filling or check it earlier next time.
ProblemWhy it happenedFix it next time
Center is doughyToo much filling, large dough pieces, or deep panUse a 9×13 pan, cut rolls smaller, start with 1 can filling
Top is too brownTop cooked before the center finishedTent loosely with foil and keep baking
Bake is too wetToo much apple filling or heavy creamUse less filling or skip cream next time
Rolls feel dryToo little filling or baked too longUse the balanced ratio and check earlier
Too sweetSweet filling plus icing plus caramel or extra sugarSkip caramel, reduce brown sugar, or use homemade filling
Not enough apple flavorFilling pieces were too sparse or too largeChop the apples smaller and spread them evenly

Pan Sizes and Bake Times for Apple Cinnamon Roll Bake

The pan changes everything. A full batch needs room to spread. A smaller batch can work beautifully in an 8×8 pan, but a full 2-tube recipe crowded into a deep dish is more likely to stay doughy.

Pan size guide for apple cinnamon roll bake showing 8x8 pan, 9-inch round pan, 9x13 pan, muffin tin, and pie plate options.
A full batch spreads and bakes best in a 9×13 pan, while one tube works better in an 8×8 pan or 9-inch round dish. In other words, matching the pan to the batch size is one of the easiest ways to avoid a doughy center.
PanBest forSuggested amountBake cue
8×8 inch / 20×20 cmSmall batch1 tube rolls + 1 to 1½ cups fillingCenter puffed and no raw dough
9-inch / 23 cm roundSmall pull-apart style bake1 tube rolls + 1 to 1½ cups fillingKeep the dough in an even layer
9×13 inch / 23×33 cmFull batch2 tubes rolls + 1 can fillingBest all-around option
12-cup muffin tinApple cinnamon roll cupsFlatten rolls into cups and fill lightlyDo not overfill
9-inch pie plateCinnamon roll apple pie variationPressed cinnamon roll crust + fillingBetter as a separate pie-style version

Small-Batch Apple Cinnamon Roll Bake

A small batch is best when you only have one tube of cinnamon rolls or do not want a full 9×13 pan. Use an 8×8 pan or 9-inch round dish so the dough sits in an even layer and bakes through cleanly.

Small-batch apple cinnamon roll bake in an 8x8 pan with 1 tube cinnamon rolls, 1 to 1.5 cups apple pie filling, and 22 to 30 minute bake time.
A small-batch apple cinnamon roll bake is the better choice when you only have one tube of cinnamon rolls or do not want a full 9×13 pan. Because the layer is smaller, it also bakes faster and is easier to monitor.

Making the full version instead? Return to the ratio guide. Need exact amounts? Jump to the recipe card.

Should You Add Heavy Cream?

Heavy cream is optional. It can make cinnamon rolls softer and richer, but it also adds moisture. For this apple filling version, a small amount is enough.

Heavy cream guide for apple cinnamon roll bake comparing no cream, 2 to 3 tablespoons of cream, and too much cream.
Heavy cream can make the rolls more tender, but apple pie filling already adds moisture. Therefore, 2–3 tablespoons is the safest upgrade if you want a softer bake without risking a wet center.
Heavy cream amountResultBest use
NoneCleanest, most reliable bakeBest default if you worry about a doughy center
2–3 tbsp / 30–45 mlSofter, slightly gooierBest controlled cream option
⅓ cup / 80 mlRicher and wetterWorks, but watch the center carefully
½ cup / 120 ml or moreVery gooey, casserole-likeHigher risk of a wet center with apple filling

If you use extra apple pie filling, skip the heavy cream the first time. The filling already brings moisture and sauce.

Not sure about texture yet? Compare the texture fixes. Ready to bake? Go to the recipe card.

Icing, Cream Cheese Glaze and Caramel Drizzle

The icing packet that comes with refrigerated cinnamon rolls is the easiest finish. Let the bake rest first, then drizzle the icing over the top while the rolls are still warm.

Three finish options for apple cinnamon roll bake: classic icing, cream cheese glaze, and caramel drizzle.
Choose the finish based on how sweet and rich you want the bake to feel. Classic icing is the simplest, cream cheese glaze adds tang, and caramel drizzle pushes the pan further toward dessert.

For a thicker glaze, stir together:

  • 2 oz / 55 g softened cream cheese
  • 1 tablespoon / 14 g softened butter
  • ½ cup / 60 g powdered sugar
  • 1–2 tablespoons / 15–30 ml milk
  • ½ teaspoon vanilla extract
  • Small pinch of salt

Caramel drizzle also works well, especially if you are making a fall dessert or holiday brunch bake. Use it lightly so the pan does not become too sweet.

Variations

Once the basic method is clear, you can change the finish, pan, or serving style without changing the whole recipe. These variations are useful when you want more crunch, more caramel flavor, or a portioned version for guests.

Variation guide for apple cinnamon roll bake showing pecan, caramel apple, muffin-tin cups, pie-plate version, and slow cooker options.
Once the basic apple cinnamon roll bake works for you, choose a variation based on how you want to serve it. Muffin cups are better for portions, pecans add crunch, caramel makes it more dessert-like, and a pie plate gives a more sliceable bake.

Apple Cinnamon Roll Casserole with Pie Filling

Use the same 9×13 method, but make it extra gooey with 1½ cans of apple pie filling and a slightly longer bake. Tent with foil if the top browns too quickly.

Caramel Apple Cinnamon Rolls

Drizzle caramel sauce over the rested bake after icing. Add chopped pecans for a caramel-apple-pie flavor.

Apple Pie Cinnamon Roll Bake with Pecans

Fold ½ cup chopped pecans or walnuts into the mixture before baking, or scatter them over the top for crunch.

Cinnamon Roll Apple Pie Cups

For a portioned version, flatten individual cinnamon rolls into a greased muffin tin, add a spoonful of chopped apple pie filling, and bake until puffed and golden. Keep the filling light so the cups rise properly instead of bubbling over.

Apple cinnamon roll cups made in a muffin tin with apple pie filling, icing drizzle, pecans, and a plated single-serving cup.
Muffin-tin cinnamon roll cups are a good variation for parties or portioned desserts. Even so, fill them lightly because apple pie filling expands and bubbles as the dough bakes.

Prefer the main 9×13 version? Use the recipe card. Looking for serving ideas? See how to serve it.

Cinnamon Roll Apple Pie Crust

For a pie-style variation, flattened cinnamon rolls can be pressed into a pie plate and filled with apple pie filling. If you want a classic pie instead, use this apple pie crust recipe.

Apple Cinnamon Roll Monkey Bread

Use smaller pieces of cinnamon roll dough, toss with butter and cinnamon sugar, and layer with chopped apple pie filling in a Bundt pan. This is a separate bake style and usually needs careful timing so the center cooks.

Crock Pot Apple Cinnamon Roll Bake

A slow cooker version can work, but the top will not brown the same way. Use less filling, line or grease the cooker well, and cook until the dough is fully set in the center.

How to Serve This Apple Cinnamon Roll Bake

Serve this warm while the icing is still soft. It works as a sweet brunch bake, a holiday breakfast, or an easy apple dessert with very little prep.

Close-up serving of apple cinnamon roll bake with glossy apple filling, icing drizzle, pecans, and a fork on a dark plate.
Let the bake rest briefly before serving so the filling thickens slightly and the scoops hold together better. Then serve it warm, when the icing is still soft and the apple filling tastes richest.
  • For breakfast or brunch, serve it with coffee, tea, fresh fruit, or something salty like eggs or breakfast potatoes.
  • For dessert, add vanilla ice cream, whipped cream, or a light caramel drizzle. Keep the topping light if your bake is already extra apple-heavy or very sweet.
  • For a holiday table, sprinkle chopped pecans over the top and serve it straight from the baking dish.

Make Ahead, Storage, Freezing and Reheating

Because this bake is soft and saucy, the best make-ahead approach is to keep the icing separate and reheat gently. That way, the rolls stay tender instead of drying out or turning overly sticky.

Make ahead, storage, freezing, and reheating guide for apple cinnamon roll bake with covered pan, storage container, wrapped portion, and warm serving.
For make-ahead baking, assemble the pan up to 24 hours ahead and keep the icing separate. Later, reheat leftovers gently so the rolls warm through without drying out.

Can You Make It Ahead?

Yes. Assemble the bake up to 24 hours ahead, cover tightly, and refrigerate. For the most even bake, let the pan sit at room temperature for 20–30 minutes while the oven preheats. If baking straight from the fridge, add a few extra minutes.

When Should You Add the Icing?

Add icing after baking, not before. If you are making the bake ahead, keep the icing separate until the pan is baked and rested.

How Long Do Leftovers Keep?

Store leftovers covered in the refrigerator for up to 3 days. This fits within the USDA’s 3-to-4-day leftover storage guidance. The rolls will soften as they sit because of the apple filling, but they reheat well.

How Do You Reheat It?

Reheat individual portions in short microwave bursts until warm. For a larger portion, cover loosely with foil and warm in a low oven until heated through.

Can You Freeze Apple Cinnamon Roll Bake?

You can freeze it, but the texture is best fresh. If freezing, freeze before icing. Thaw overnight in the refrigerator, reheat gently, and add icing after warming.

Making it now? Return to the recipe card. Need quick answers? Jump to FAQs.

Apple Cinnamon Roll Bake with Apple Pie Filling Recipe

Saveable recipe card for apple cinnamon roll bake with apple pie filling listing prep time, bake time, yield, ingredients, and basic method.
Use this saveable recipe card when you want the full bake in one glance. It keeps the key numbers together, so you do not have to scroll back for the filling ratio, oven temperature, or bake time.

Prep Time
15 minutes

Cook Time
45 minutes

Total Time
1 hour

Yield
8–10 servings

Description: Easy apple cinnamon roll bake made in a 9×13 pan with refrigerated cinnamon rolls, apple pie filling, optional heavy cream, and icing drizzle. The recipe uses a reliable filling ratio so the rolls stay soft and gooey without leaving the center raw.

Equipment

  • 9×13 inch / 23×33 cm baking dish
  • Large mixing bowl
  • Knife or kitchen shears
  • Spatula or large spoon
  • Foil for tenting, if needed
  • Optional instant-read thermometer

Ingredients

  • 2 tubes refrigerated cinnamon rolls, about 17.5 oz / 496 g each, about 35 oz / 990 g total, icing reserved
  • 1 can apple pie filling, 21 oz / 595 g, chopped if slices are large
  • ¼ cup / 4 tablespoons / 57 g unsalted butter, melted
  • 2 tablespoons / about 25 g light brown sugar
  • ½ to 1 teaspoon ground cinnamon or apple pie spice
  • Small pinch fine salt, optional
  • 2–3 tablespoons / 30–45 ml heavy cream, optional
  • ½ cup / 55–60 g chopped pecans or walnuts, optional

Homemade filling option: Replace one 20–21 oz can with 2 to 2½ cups homemade diced apple pie filling.

Optional Cream Cheese Glaze

  • 2 oz / 55 g cream cheese, softened
  • 1 tablespoon / 14 g butter, softened
  • ½ cup / 60 g powdered sugar
  • 1–2 tablespoons / 15–30 ml milk
  • ½ teaspoon vanilla extract
  • Small pinch salt

Instructions

  1. Preheat oven to 350°F / 175°C. Grease a 9×13 inch / 23×33 cm baking dish.
  2. Open the cinnamon roll tubes and reserve the icing for later.
  3. Cut regular cinnamon rolls into quarters. If using jumbo rolls, cut each roll into 6 pieces.
  4. Chop large apple slices in the apple pie filling into smaller pieces, about ½ inch / 1.25 cm.
  5. In a large bowl, toss cinnamon roll pieces with melted butter, brown sugar, cinnamon or apple pie spice, and salt.
  6. Fold in the apple pie filling gently until the dough pieces are evenly coated.
  7. Spread the mixture in one even layer in the prepared baking dish.
  8. Drizzle 2–3 tablespoons heavy cream over the top, if using. Sprinkle with nuts, if using.
  9. Bake for 40–50 minutes, checking the center around 35–40 minutes. Tent loosely with foil if the top browns before the center is done.
  10. The bake is ready when the center is puffed, set, and no longer wet or raw. If using a thermometer, the thickest doughy center should be about 190–200°F / 88–93°C.
  11. Let the pan rest for 10–15 minutes.
  12. Drizzle with reserved icing or cream cheese glaze. Serve warm.

Notes

  • For the most reliable texture, start with 1 can of apple pie filling for 2 large tubes of cinnamon rolls.
  • For an extra apple-heavy bake, use 1½ to 2 cans filling and bake longer.
  • Glass and ceramic pans may need extra time compared with metal pans.
  • If the top browns too quickly, tent with foil and continue baking until the center is done.
  • Add icing after the bake rests, not immediately out of the oven.

FAQs

Can I use homemade apple pie filling?

Yes. Use 2 to 2½ cups homemade apple pie filling to replace one 20–21 oz can. Diced filling works best because it spreads evenly between the cinnamon roll pieces.

Should I use one can or two cans of apple pie filling?

Use one can for the most reliable 9×13 bake. Use 1½ to 2 cans if you want a very gooey, apple-heavy version, but expect a longer bake time and check the center carefully.

Can I make this with only cinnamon rolls and apple pie filling?

Yes. You can make a 2-ingredient version with only refrigerated cinnamon rolls and apple pie filling. The butter, brown sugar, cinnamon, and salt are optional upgrades that make the bake taste richer and more balanced, but the shortcut version still works without them.

Why are my cinnamon rolls doughy in the middle?

The most common reasons are too much filling, dough pieces that are too large, a pan that is too deep, or not enough bake time. Use a wide 9×13 pan, cut the rolls smaller, spread the filling evenly, and bake until the center is puffed and set.

Can I make this with one tube of cinnamon rolls?

Yes. Use an 8×8 inch pan or 9-inch round pan with 1 tube of cinnamon rolls and about 1 to 1½ cups apple pie filling. Bake until the center is cooked through, usually 22–30 minutes depending on the dough size and pan.

Can I use jumbo cinnamon rolls?

Yes. Cut jumbo rolls into 6 pieces instead of quarters so the center cooks more evenly. Jumbo rolls often need a longer bake time.

Do I need heavy cream?

No. Heavy cream is optional. Use 2–3 tablespoons if you want a softer, richer bake. Skip it if you are using extra apple pie filling or if you are worried about a wet center.

Can I make apple cinnamon rolls with apple pie filling overnight?

Yes. Assemble the pan, cover it tightly, and refrigerate for up to 24 hours. Let it sit at room temperature for 20–30 minutes while the oven heats, or bake straight from chilled with a little extra time.

Can I make this in a muffin tin?

Yes. Flatten individual cinnamon rolls into greased muffin cups, spoon in chopped apple pie filling, and bake until puffed and cooked through. Keep the filling light so the cups do not overflow.

Can I use fresh apples instead of apple pie filling?

Fresh raw apples are not the best direct swap because they release moisture and may not soften enough before the dough bakes. For better results, cook the apples into a quick apple pie filling first.

Can I freeze apple cinnamon roll bake?

Yes, but the texture is best fresh. Freeze before icing if possible. Thaw overnight in the refrigerator, reheat gently, and add icing after warming.

Back to top

Posted on 5 Comments

Air Fryer Hash Browns: Frozen Shredded, Patties, and Homemade

Golden crispy air fryer hash browns served on a dark plate, with loose shredded hash browns in the center and smaller supporting sections showing hash brown patties and diced breakfast potatoes against a dark editorial background.

Crispy air fryer hash browns are one of those small breakfast wins that feel much bigger than the effort: golden edges, tender potato centers, and no skillet babysitting. Once you know which temperature works for each hash brown style, the air fryer does most of the work.

Loose frozen shredded hash browns need a thin layer, a little oil, and regular shaking. Frozen hash brown patties cook faster because they are already shaped and usually contain some oil. Meanwhile, homemade hash browns need one extra step before cooking: the grated potatoes must be rinsed or soaked, then squeezed very dry so they crisp instead of steaming.

This guide gives you the right air fryer time and temperature for frozen shredded hash browns, frozen patties, homemade shredded hash browns, diced breakfast potatoes, and leftovers. You will also learn when to use oil, why thawing usually hurts crispness, how to tell when each style is done, and how to fix hash browns that turn out soggy or pale.

Quick Answer: How Long to Cook Hash Browns in the Air Fryer?

Frozen shredded hash browns take 15–20 minutes at 375°F / 190°C. Toss the potato shreds with a little oil, spread them in a thin layer, and shake or flip every 5 minutes so they crisp evenly.

Frozen hash brown patties take 8–12 minutes at 400°F / 200°C. Cook them from frozen in a single layer and flip halfway through.

Homemade shredded hash browns take about 13–18 minutes at 360–380°F / 182–193°C. Fresh potatoes need to be rinsed or soaked, then squeezed very dry before they go into the air fryer.

Frozen diced or cubed breakfast potatoes take 15–22 minutes at 380–400°F / 193–200°C. Shake every 5–7 minutes and use the lower temperature for larger cubes.

If your first batch is a little pale or a little soft, do not start over. Most air fryer hash brown problems can be fixed with a thinner layer, a few more minutes, or a quick shake halfway through cooking.

Best starting point: For classic loose, crispy air fryer hash browns, use 15–16 oz / 425–450 g frozen shredded potatoes, 1½–2 tbsp oil, and 375°F / 190°C for 15–20 minutes, shaking every 5 minutes.

Which Hash Browns Do You Have?

Start here before choosing a method. The timing changes because each style has a different shape, moisture level, and surface area.

Infographic titled Which Hash Browns Do You Have showing four air fryer options: frozen shredded hash browns, frozen hash brown patties, homemade shredded hash browns, and frozen diced or cubed breakfast potatoes, each with a short time and temperature guide.
Start by identifying the hash brown style you have, because frozen shredded potatoes, patties, homemade shreds, and diced breakfast potatoes all need different air fryer timing and handling.
If you have… Use this air fryer method Best for
Loose frozen shredded hash browns 375°F / 190°C for 15–20 minutes Crispy diner-style shredded potatoes
Frozen hash brown patties 400°F / 200°C for 8–12 minutes Breakfast sandwiches or quick plate sides
Fresh grated potatoes Rinse, squeeze dry, then cook at 360–380°F / 182–193°C for 13–18 minutes Homemade hash browns from scratch
Frozen diced or cubed breakfast potatoes 380–400°F / 193–200°C for 15–22 minutes Country-style potatoes and crisp potato cubes
Leftover cooked hash browns 350–375°F / 175–190°C for 3–5 minutes Bringing back crisp edges

Best Method for Crispy Air Fryer Hash Browns

For the classic loose, crispy hash brown texture, frozen shredded hash browns are the easiest and most reliable starting point. Use 15–16 oz / 425–450 g frozen shredded potatoes, toss them with 1½–2 tbsp oil, spread them in a thin layer, and air fry at 375°F / 190°C for 15–20 minutes, shaking every 5 minutes.

The best batch should taste like classic diner hash browns with extra crisp edges: golden and frilly on the outside, tender in the center, salty enough to eat plain, and sturdy enough for eggs, ketchup, hot sauce, or a breakfast sandwich.

If you enjoy crisp potato recipes, MasalaMonk’s crispy homemade French fries guide is a useful companion because it also focuses on moisture control, hot cooking, and getting the potato surface properly browned.

Use frozen patties when you want the fastest option, homemade shredded potatoes when you want a from-scratch version, and diced or cubed potatoes when you want country-style breakfast potatoes with crisp edges.

Air Fryer Hash Browns Time and Temperature Chart

Use this chart as your main guide. Air fryer models vary, so check a few minutes early the first time you cook a new bag, basket size, or potato style.

Hash brown type Amount Temperature Time Flip or shake? Oil?
Frozen shredded hash browns 15–16 oz / 425–450 g 375°F / 190°C 15–20 minutes Shake or flip every 5 minutes Yes, 1½–2 tbsp / 22–30 ml
Frozen hash brown patties 4 patties 400°F / 200°C 8–12 minutes Flip halfway Usually no
Homemade shredded hash browns 1 lb / 450 g potatoes 360–380°F / 182–193°C 13–18 minutes Optional, depending on layer thickness Yes, 1–2 tbsp / 15–30 ml
Frozen diced or cubed breakfast potatoes 16 oz / 450 g 380–400°F / 193–200°C 15–22 minutes Shake every 5–7 minutes Yes, 1–2 tbsp / 15–30 ml
Reheating cooked hash browns Any amount in one layer 350–375°F / 175–190°C 3–5 minutes Optional No
Basket size matters: In a smaller air fryer, 15–16 oz / 425–450 g shredded hash browns may need two batches. In a wider basket, the same amount can spread thinner and crisp faster.
Time and temperature chart infographic for air fryer hash browns comparing frozen shredded hash browns, frozen hash brown patties, homemade shredded hash browns, frozen diced or cubed breakfast potatoes, and reheating times.
Use this air fryer hash browns chart as your quick reference, since it helps you compare the best time and temperature for shredded potatoes, patties, homemade hash browns, diced potatoes, and leftovers in one glance.
Doneness guide infographic for air fryer hash browns showing three stages: pale and soft hash browns needing more time, golden and crisp hash browns that are done, and hash browns browning too fast on the edges while the center stays soft.
Use color and texture as your doneness guide: pale potatoes need more time, golden edges usually mean the hash browns are ready, and dark edges with a soft center often mean the layer is too thick.

What Is the Best Temperature for Air Fryer Hash Browns?

The best temperature depends on the potato format. A single number does not work equally well for patties, loose shreds, diced potatoes, and homemade grated potatoes.

  • 400°F / 200°C is best for frozen hash brown patties because patties are compact and already shaped. As a result, higher heat helps crisp the outside quickly.
  • 375°F / 190°C is better for frozen shredded hash browns because loose potato shreds need enough time to dry, brown, and crisp without burning at the edges too fast.
  • 360–380°F / 182–193°C works well for homemade hash browns because fresh grated potatoes hold more moisture. Therefore, slightly gentler heat gives them time to cook through after they are squeezed dry.
  • 380–400°F / 193–200°C works best for diced or cubed potatoes because cube size matters. Smaller diced potatoes can handle 400°F / 200°C for faster browning, while larger cubes often do better at 380°F / 193°C so the centers turn tender before the edges get too dark.

If the potatoes look cooked but pale, add a few more minutes before increasing the heat. However, if the edges are browning too fast while the center stays soft, the layer is probably too thick.

Ingredients You Need

You only need potatoes, a little fat, and seasoning. However, the best ingredient list depends on the style of hash browns you are cooking. Start with the group that matches what you have, then adjust the seasoning after cooking while the potatoes are still hot.

Ingredients guide infographic for air fryer hash browns showing frozen shredded hash browns, oil, fine salt, black pepper, garlic powder, smoked paprika or onion powder, and optional oil spray arranged on a dark background.
Air fryer hash browns need only a short ingredient list, yet the exact mix changes with the potato style, so shredded potatoes often need oil and seasoning while patties usually need much less.

Frozen Shredded Hash Browns

  • Frozen shredded hash browns, 15–16 oz / 425–450 g: Keep them frozen until cooking so they do not release extra moisture before they hit the hot air fryer basket.
  • Oil, 1½–2 tbsp / 22–30 ml: Olive oil, avocado oil, or a neutral cooking oil all work. Because loose potato shreds dry out as they cook, a light coating of oil helps them brown more evenly.
  • Fine salt, ½ tsp: Start lightly, especially if your frozen hash browns are already seasoned.
  • Black pepper, ¼ tsp: Add a small amount before cooking, then adjust at the end if the potatoes need more bite.
  • Garlic powder, ½ tsp: This gives the hash browns a savory breakfast flavor without adding fresh garlic, which can burn in the air fryer.
  • Smoked paprika or onion powder, ¼ tsp: Either one adds deeper flavor. For a simpler batch, skip both and stay with salt, pepper, and garlic powder.

Frozen Hash Brown Patties

  • Frozen hash brown patties, 4: Cook them straight from frozen and keep them in a single layer.
  • Oil spray, optional: Most patties already contain enough oil to crisp. Still, a light spray can help if the surface looks dry or pale halfway through cooking.
  • Salt, optional: Since many frozen patties are already salted, taste after cooking before adding more.

Homemade Shredded Hash Browns

  • Russet or Yukon potatoes, 1 lb / 450 g: Russets crisp well and give you a more classic hash brown texture. Yukon potatoes, meanwhile, have a creamier center.
  • Oil or melted butter, 1–2 tbsp / 15–30 ml: Oil gives better crispness, while butter adds richer flavor. If using butter, watch the edges because it browns faster.
  • Fine salt, ½ tsp: Season only after the grated potatoes have been rinsed and squeezed dry.
  • Black pepper, ¼ tsp: Add it with the salt, then adjust after cooking if needed.
  • Garlic powder or onion powder, ¼–½ tsp: Use either one for a more savory homemade hash brown without adding wet ingredients.

Equipment

You do not need much equipment, although a few small tools make the process easier.

  • Air fryer basket or tray: A basket-style air fryer is easiest for shaking loose shredded potatoes.
  • Mixing bowl: Use it to coat shredded or diced potatoes evenly with oil and seasoning.
  • Oil spray: This helps with sticking and browning, especially if your basket is not very nonstick.
  • Silicone spatula: Helpful for pressing, lifting, and flipping sections of shredded potatoes.
  • Box grater or food processor: Needed only for homemade hash browns from fresh potatoes.
  • Clean towel or cheesecloth: Essential for squeezing moisture from grated potatoes.
  • Perforated parchment or silicone liner: Useful if loose shreds fall through the basket holes.
Equipment guide infographic for air fryer hash browns showing an air fryer basket, perforated parchment or liner, oil spray, silicone spatula, mixing bowl, box grater, and towel or cheesecloth used for squeezing potatoes dry.
A few simple tools make air fryer hash browns easier to handle; for example, perforated parchment helps with loose shreds, while a towel or cheesecloth is especially helpful for homemade potatoes.

Frozen Shredded Hash Browns in the Air Fryer

Loose frozen shredded hash browns are the main method in this guide because they give you the classic diner-style texture: crisp edges, soft potato centers, and a loose shredded finish. They need more attention than patties because the potato shreds can clump, steam, or fall through the basket if the layer is too thick.

How to Cook Frozen Shredded Hash Browns

  1. Keep them frozen. Do not thaw the potatoes first.
  2. Toss with oil and seasoning. Add 15–16 oz / 425–450 g frozen potato shreds to a bowl with 1½–2 tbsp / 22–30 ml oil, salt, pepper, and garlic powder.
  3. Spread in a thin layer. Aim for about ½ inch / 1.25 cm thick. If your basket is small, cook in two batches.
  4. Air fry at 375°F / 190°C for 15–20 minutes. Shake, stir, or flip sections every 5 minutes.
  5. Crisp to taste. Add 2–4 minutes at the end if the potatoes are cooked but not golden enough.
Step-by-step infographic for frozen shredded hash browns in the air fryer showing frozen potatoes tossed with oil and seasoning, spread in a thin layer, air fried at 375 degrees Fahrenheit, and shaken during cooking until golden and crisp.
Frozen shredded hash browns crisp best when they stay frozen, get a light coating of oil, and cook in a thin layer; as a result, the edges brown well while the center stays tender instead of steamy.

The biggest mistake is using too much potato in one batch. As a result, the potatoes trap steam instead of crisping. A thin layer, meanwhile, gives you better browning and a cleaner shredded texture.

When the potatoes are ready, the outer shreds should look golden and crisp, while the center should feel tender rather than wet or starchy. If the middle still looks damp after 15 minutes, spread the potatoes out again and cook a few minutes longer before serving.

Air Fryer Hash Brown Patties

Frozen hash brown patties are the easiest air fryer version because they are already shaped, compact, and usually contain enough oil to brown well. They are ideal for breakfast sandwiches, quick sides, and busy mornings.

They also work especially well inside breakfast sandwiches. For more filling ideas, sauces, and make-ahead combinations, see MasalaMonk’s breakfast sandwich recipes.

How to Cook Frozen Hash Brown Patties

  1. Set the air fryer to 400°F / 200°C. Preheat if your model works better that way.
  2. Add the patties in one layer. Do not stack or overlap them.
  3. Air fry for 8–12 minutes. Flip halfway through.
  4. Add time for extra crispness. Cook 2–3 minutes longer if you want deeper browning.
  5. Season after cooking. Many frozen patties are already salted, so taste before adding more.
Infographic for air fryer hash brown patties showing frozen patties placed in a single layer in the air fryer, cooked at 400 degrees Fahrenheit, flipped halfway, and served golden brown.
Frozen hash brown patties usually crisp faster than loose shreds, so a single layer and one halfway flip are often all you need for evenly browned, crisp-edged potatoes.

The patties should be golden on both sides and crisp around the edges. If they look pale after 8 minutes, keep cooking rather than removing them too early. Because patties are already shaped, they usually need more time, not more oil.

Patties vs shredded: Frozen patties usually need little or no added oil. Loose shredded hash browns need oil because the potato shreds dry and brown differently.

Homemade Hash Browns in the Air Fryer

Homemade air fryer hash browns taste fresher than frozen ones, but they need proper prep. Freshly grated potatoes hold water and surface starch. If that moisture stays in the potatoes, the hash browns can turn soft, gummy, or pale.

Rinsing removes excess surface starch, while squeezing removes water. Both steps matter: starch can make the potatoes gummy, and water makes them steam. The Idaho Potato Commission’s classic hash brown guide also points to the same core technique: rinse out excess starch, squeeze out as much water as possible, keep the potatoes thin, and cook hot for crisp results.

How to Make Homemade Shredded Hash Browns

  1. Grate the potatoes. Use 1 lb / 450 g russet or Yukon potatoes.
  2. Rinse or soak. Rinse the grated potatoes under cold water until the water looks clearer, or soak them for 10–20 minutes and rinse again.
  3. Squeeze very dry. Wrap the potatoes in a clean towel or cheesecloth and squeeze out as much water as possible.
  4. Season after drying. Toss with 1–2 tbsp / 15–30 ml oil or melted butter, salt, pepper, and optional garlic powder.
  5. Spread thinly. Press into an even layer in the air fryer basket.
  6. Air fry at 360–380°F / 182–193°C for 13–18 minutes. Check early and add time as needed for browning.
Infographic for homemade hash browns in the air fryer showing grated fresh potatoes being rinsed, squeezed dry in a towel, seasoned, spread in the basket, and cooked until crisp.
Homemade hash browns turn out much better when the grated potatoes are rinsed or soaked, then squeezed very dry, because less starch and moisture means a crisper air fryer finish.

For one large pressed layer, avoid moving the potatoes too early. However, if you want looser breakfast-style hash browns, stir or flip sections partway through cooking.

Homemade Hash Brown Patties Variation

Homemade hash brown patties are possible, although they are more of a variation than the main method here. Mix squeezed-dry shredded potatoes with a little starch, shape them into thin patties, chill or freeze until firm, then air fry until crisp.

A good starting point is 500 g / 1.1 lb grated potatoes, 1 tbsp cornstarch, 1 tbsp rice flour if you want extra crispness, 1 tbsp oil, 2–3 tbsp melted butter, salt, pepper, and garlic powder. Shape into patties about 1 cm thick, chill until firm, then cook at 400°F / 200°C for 13–15 minutes.

Diced or Cubed Hash Browns in the Air Fryer

Diced or cubed hash browns are often sold as frozen breakfast potatoes, country potatoes, or cubed potatoes. They need more time than patties because the pieces are thicker. However, they can still get crisp edges if they are tossed with oil and shaken during cooking.

  1. Use 16 oz / 450 g frozen diced or cubed potatoes. Do not thaw.
  2. Toss with 1–2 tbsp / 15–30 ml oil. Add salt, pepper, garlic powder, paprika, or your favorite breakfast potato seasoning.
  3. Spread in one layer. A little overlap is fine, but avoid a deep pile.
  4. Air fry at 380–400°F / 193–200°C for 15–22 minutes. Use 400°F / 200°C for smaller diced potatoes or faster browning. Use 380°F / 193°C for larger cubes so the centers have more time to turn tender.
  5. Shake every 5–7 minutes. Add 3–5 extra minutes if the cubes are large, crowded, or still firm in the center.
Infographic for diced or cubed breakfast potatoes in the air fryer showing seasoned potato cubes cooked in the basket with notes about 380 to 400 degrees Fahrenheit and shaking during cooking.
Diced or cubed breakfast potatoes need a little more time than patties; however, they still brown beautifully when tossed with oil, spread out well, and shaken a few times during cooking.

The cubes are done when the edges are browned and the centers are fully tender. When the outside browns before the middle softens, lower the temperature to 380°F / 193°C and cook a few minutes longer. For pale but tender potatoes, raise the heat near the end or add 2–3 more minutes.

Beyond breakfast, MasalaMonk’s air fried chilli garlic potato bites are another crisp air fryer potato idea with a snack-style, spicy finish.

Do You Need to Thaw Hash Browns First?

No. For most air fryer hash browns, frozen is better than thawed. Loose shredded potatoes, patties, and diced breakfast potatoes can all go straight into the air fryer.

Thawing often adds surface moisture, especially with shredded potatoes. That extra water can make the hash browns steam before they brown. If your frozen hash browns are stuck together in a block, break them apart as much as possible instead of fully thawing them.

Homemade hash browns are different because they start fresh, not frozen. The key is still moisture control: rinse or soak the grated potatoes, then squeeze them dry before adding oil and seasoning.

Prep decision infographic for crisp air fryer hash browns comparing keep frozen versus thaw first, use oil versus no extra oil, and thin layer versus crowded basket, with a homemade shredded potato note at the bottom.
The best prep decisions for crisp hash browns are simple but important: keep frozen potatoes frozen, use oil on loose shreds or diced potatoes, and avoid crowding so the hot air can circulate properly.

Oil or No Oil?

The oil question depends on the style. Patties and loose shredded potatoes do not cook the same way in the air fryer.

Type Oil needed? Why
Frozen hash brown patties Usually no Many frozen patties already contain oil and crisp well on their own.
Frozen shredded hash browns Yes Oil helps the loose potato shreds brown instead of drying out or staying pale.
Homemade shredded hash browns Yes Fresh potatoes need fat for crisp edges and better color.
Diced or cubed breakfast potatoes Yes Oil helps the thicker potato edges brown evenly.

You can make oil-free air fryer hash browns, but they usually turn out drier and less golden. For the best texture, use a small amount of oil on loose shredded or diced potatoes, and skip extra oil on patties unless the surface looks dry or pale.

How to Make Air Fryer Hash Browns Extra Crispy

Extra crispiness comes from airflow, surface dryness, and enough time. Therefore, focus on the layer first before adding more seasoning or turning the heat higher.

  • Use a thin layer. Loose shredded hash browns should not be piled too deep. Around ½ inch / 1.25 cm is a useful guide.
  • Do not overcrowd the basket. If the potatoes steam, they will soften before they crisp.
  • Use oil for shredded or diced potatoes. Patties can often cook without it, but loose potatoes need help browning.
  • Shake or flip regularly. Shredded hash browns should be moved every 5 minutes. Patties usually need one flip halfway through.
  • Add time at the end. If the potatoes are cooked but not crisp enough, cook 2–4 minutes longer.
  • Serve immediately. Hash browns soften as they sit, especially if they are stacked on a plate.
Comparison infographic showing thin-layer hash browns on one side with crisp golden edges and overcrowded hash browns on the other side looking pale and steamy, with labels explaining the difference.
A thin layer gives hash browns the airflow they need for crisp edges, whereas an overcrowded basket traps steam and leaves the potatoes softer, paler, and less evenly cooked.

For another deep dive into air fryer crisping, MasalaMonk’s air fryer chicken wings guide follows the same bigger principle: dry surfaces, enough airflow, and the right finish make the difference between soft and crisp.

Common Air Fryer Hash Brown Mistakes

If your hash browns come out soft, pale, or uneven, it usually does not mean the method failed. Most problems come from a few small air fryer habits that are easy to fix.

If your air fryer results are inconsistent across recipes, MasalaMonk’s common air fryer mistakes guide is a useful side read for crowding, airflow, temperature, and limp results.

  • Adding too many shredded potatoes to the basket: A thick pile steams instead of crisping.
  • Thawing frozen hash browns first: Thawed potato shreds often release extra moisture.
  • Skipping oil on loose shredded or diced potatoes: These styles need some fat for better browning.
  • Moving homemade hash browns too early: Let them firm up before flipping or stirring.
  • Stacking patties: Frozen patties need direct airflow on both sides.
  • Serving them too late: Hash browns lose crispness as they sit and steam on the plate.

Why Are My Air Fryer Hash Browns Soggy?

If your hash browns are soft instead of crisp, the problem is usually moisture, crowding, or not enough air circulation. Use this table to fix the most common issues.

Problem Likely reason Fix
Loose shredded hash browns are soggy The layer is too thick or the potatoes were not moved during cooking. Keep the layer thin and shake or flip every 5 minutes.
Hash browns are pale Not enough oil, not enough time, or temperature too low. Use a light coating of oil and add 2–4 minutes.
Patties are soft in the middle They were stacked, crowded, or not cooked long enough. Cook in one layer at 400°F / 200°C and flip halfway.
Homemade hash browns are gummy The fresh potatoes kept too much starch and moisture. Rinse or soak the grated potatoes, then squeeze very dry.
Edges burn but the middle is soft The potato layer is too thick. Use a thinner layer or cook in batches.
Shreds fall through the basket The air fryer basket holes are too wide. Use perforated parchment, a silicone liner, or a tray-style basket.
Hash browns stick to the basket Not enough oil or the potatoes were moved too early. Spray the basket lightly and let the potatoes firm up before flipping.
Troubleshooting infographic for air fryer hash browns showing common problems such as soggy shredded hash browns, pale potatoes, soft patties, gummy homemade hash browns, and burnt edges with soft centers, along with fixes.
If your air fryer hash browns come out soggy, pale, gummy, or uneven, the fix is usually small—less crowding, better moisture control, or a few more minutes—rather than a whole new method.

Storage and Reheating

Air fryer hash browns taste best right after cooking, but leftovers can still be reheated well. The air fryer is much better than the microwave when you want to bring back crisp edges.

  • Refrigerate: Store cooked hash browns in an airtight container for 3–4 days.
  • Reheat refrigerated hash browns: Air fry at 350–375°F / 175–190°C for 3–5 minutes.
  • Reheat frozen homemade patties: Air fry at 375–400°F / 190–200°C for 5–8 minutes.
  • Avoid stacking while cooling: Steam softens the crisp surface.

For food safety, refrigerate leftovers quickly and eat them within 3–4 days. If you are checking temperature, FoodSafety.gov lists 165°F / 74°C for reheating leftovers.

For homemade shaped patties, freeze them in a single layer first. Once firm, transfer them to a freezer bag so they do not stick together.

Infographic for reheating and serving crispy hash browns showing leftover hash browns being reheated in the air fryer and serving suggestions such as eggs, avocado, hot sauce, sour cream, cheddar, and breakfast bowls.
The air fryer is the easiest way to reheat hash browns because it quickly brings back crisp edges; meanwhile, toppings like eggs, cheddar, avocado, salsa, or hot sauce make them more satisfying.

What to Serve with Air Fryer Hash Browns

Air fryer hash browns work with almost any breakfast plate. Keep it simple with air fryer hard-boiled eggs, avocado, and hot sauce, or turn the hash browns into the crispy base for a bigger brunch bowl.

  • Fried, scrambled, or poached eggs
  • Breakfast sandwiches with eggs, cheese, and sauce
  • Avocado, hot sauce, and lime
  • Sausage, bacon, or vegetarian breakfast patties
  • Baked beans or grilled tomatoes
  • Sour cream, chives, and cheddar
  • Ketchup, hot sauce, or spicy mayo
  • Breakfast bowls with eggs, cheese, salsa, and greens

To make the meal more filling, use the hash browns as the crisp base and add eggs, cheese, sautéed vegetables, and a spoonful of salsa or hot sauce on top.

For a snack-style plate, top crispy patties with sour cream, chives, cheddar, hot sauce, or a little chaat masala for a sharper MasalaMonk-style finish.

More Potato Ideas

If potatoes are the main event, MasalaMonk’s potato appetizers guide has more crisp, cheesy, party-friendly potato options for brunch spreads, snacks, and sides.

Once you know your hash brown style, the method is simple: keep frozen potatoes frozen, keep loose shreds thin, give patties direct airflow, and use a few extra minutes when the color is not there yet. That is usually all it takes to move from soft potatoes to crisp, golden hash browns.

Crispy Air Fryer Hash Browns

This crispy air fryer hash browns recipe starts with frozen shredded potatoes because they give the easiest classic breakfast texture: golden edges, tender centers, and loose crispy shreds. The notes below include quick adjustments for frozen hash brown patties, homemade shredded hash browns, diced breakfast potatoes, and reheating.

Prep Time5 minutes
Cook Time15–20 minutes
Total Time20–25 minutes
Servings4

Ingredients

  • 15–16 oz / 425–450 g frozen shredded hash browns, not thawed
  • 1½–2 tbsp / 22–30 ml olive oil, avocado oil, or neutral oil
  • ½ tsp fine salt, plus more to taste
  • ¼ tsp black pepper
  • ½ tsp garlic powder
  • ¼ tsp smoked paprika or onion powder, optional
  • Oil spray, for the basket if needed

Instructions

  1. Preheat if needed. Set the air fryer to 375°F / 190°C. Some models do not need preheating, but preheating helps if your air fryer runs cool.
  2. Season the hash browns. Add the frozen shredded hash browns to a mixing bowl. Toss with oil, salt, pepper, garlic powder, and optional smoked paprika or onion powder.
  3. Spread in the basket. Lightly spray the basket if needed. Spread the potatoes in a thin, even layer, around ½ inch / 1.25 cm thick. Cook in batches if your basket is small.
  4. Air fry. Cook for 15–20 minutes, shaking, stirring, or flipping sections every 5 minutes.
  5. Crisp to taste. Once the potatoes are golden and cooked through, add 2–4 minutes if you want deeper crisp edges.
  6. Serve immediately. Taste and adjust salt while hot.

Recipe Notes

  • Frozen hash brown patties: Cook from frozen at 400°F / 200°C for 8–12 minutes, flipping halfway. No oil is usually needed.
  • Homemade shredded hash browns: Grate 1 lb / 450 g potatoes, rinse or soak, squeeze very dry, toss with oil and seasoning, then air fry at 360–380°F / 182–193°C for 13–18 minutes.
  • Diced or cubed breakfast potatoes: Toss 16 oz / 450 g frozen diced or cubed potatoes with 1–2 tbsp / 15–30 ml oil and air fry at 380–400°F / 193–200°C for 15–22 minutes, shaking every 5–7 minutes.
  • Extra crispy: Keep the layer thin, avoid overcrowding, and add a few minutes at the end.
  • Storage: Refrigerate leftovers for 3–4 days. Reheat in the air fryer at 350–375°F / 175–190°C for 3–5 minutes.
Saveable recipe card infographic for crispy air fryer hash browns showing frozen shredded hash browns, oil, seasonings, the 375 degree Fahrenheit temperature, 15 to 20 minute cooking time, and a note to shake every 5 minutes.
This crispy air fryer hash browns recipe card gives you the core shredded-potato method in one place, so you can quickly save the temperature, timing, and shaking pattern for repeatable results.

FAQs About Air Fryer Hash Browns

Do frozen hash browns work in the air fryer?

Frozen shredded hash browns, frozen hash brown patties, and frozen diced potatoes all work well in the air fryer. Cook them from frozen rather than thawing first so they crisp instead of steaming.

How long do frozen shredded hash browns take in the air fryer?

Frozen shredded hash browns usually take 15–20 minutes at 375°F / 190°C. Shake or flip them every 5 minutes so the potato shreds brown evenly.

What is the best air fryer temperature for hash brown patties?

Frozen hash brown patties usually crisp best at 400°F / 200°C for 8–12 minutes. Flip them halfway through, then add 2–3 minutes if you want deeper browning.

Should frozen hash browns be thawed before air frying?

Keep frozen hash browns frozen before air frying. Thawing can add surface moisture, especially with loose shredded potatoes, which makes them steam before they crisp.

Do you need to preheat the air fryer for hash browns?

Preheating helps hash brown patties and loose shredded hash browns start crisping faster, but it is not always required. If your air fryer runs hot or preheats automatically, check early. If your first batch turns out pale, preheat the next batch for 2–3 minutes before adding the potatoes.

Why are my air fryer hash browns not crispy?

The most common reasons are overcrowding, too much moisture, not enough oil for shredded potatoes, or not enough cooking time. Use a thinner layer, toss loose potatoes with oil, and add a few extra minutes if needed.

How do you make homemade hash browns in the air fryer?

Grate the potatoes, rinse or soak them, squeeze them very dry, then season with oil and salt. Air fry at 360–380°F / 182–193°C for 13–18 minutes, checking early for browning.

How long do diced hash browns or breakfast potatoes take?

Frozen diced or cubed hash browns usually take 15–22 minutes at 380–400°F / 193–200°C. Shake every 5–7 minutes and use the lower temperature for larger cubes.

Do hash brown patties need extra oil?

Most frozen hash brown patties already contain enough oil to crisp in the air fryer. A light spray helps only if the surface looks dry or pale during cooking.

Should hash brown patties be stacked in the air fryer?

Keep frozen hash brown patties in a single layer so hot air can reach both sides. Stacking traps steam between the patties, which leaves the middle surfaces soft instead of crisp.

Does parchment paper work for air fryer hash browns?

Perforated parchment or an air fryer-safe liner can help with loose shredded hash browns that fall through wide basket holes. Avoid solid parchment that blocks airflow, and do not preheat with loose parchment inside the basket because it can lift toward the heating element.

What is the best way to reheat hash browns?

The air fryer is the best way to bring back crisp edges. Reheat cooked hash browns at 350–375°F / 175–190°C for 3–5 minutes, depending on thickness.

Why do homemade hash browns turn gummy?

Homemade hash browns usually turn gummy when the grated potatoes hold too much starch and water. Rinse or soak the potatoes first, then squeeze them very dry before adding oil and seasoning.

Which oil works best for air fryer hash browns?

Olive oil, avocado oil, and neutral cooking oils all work. Use enough to lightly coat loose shredded or diced potatoes, but skip extra oil for frozen patties unless they look dry.

Do frozen shredded hash browns go straight into the air fryer?

Frozen shredded hash browns go straight into the air fryer without thawing. Toss them with oil and seasoning, spread them in a thin layer, and cook at 375°F / 190°C for 15–20 minutes, shaking every 5 minutes.

Posted on 1 Comment

Chickpea Salad Recipe

Bowl of chickpea salad with cucumber, cherry tomatoes, red onion, parsley, and lemon dressing on a light surface.

This chickpea salad recipe turns canned chickpeas into a fresh no-cook salad with cucumber, tomatoes, red onion, herbs, and lemon dressing in about 15 minutes. It is bright enough for a side dish, filling enough for lunch, and sturdy enough for meal prep.

Keep the chickpeas whole for a crisp salad bowl, lightly mash them for wraps or pita pockets, or smash them more deeply for a creamy chickpea salad sandwich. The same recipe can lean Mediterranean with feta and olives, vegan with avocado or tahini, or Indian-style with cilantro, cumin, chili, and lemon.

Chickpeas and garbanzo beans are the same ingredient, so this also works as a garbanzo bean salad recipe. The key is simple: drain the chickpeas well, season them boldly, and use enough lemon, salt, herbs, and crunch so the salad tastes fresh instead of flat.

At a glance: This recipe takes about 15 minutes, uses 2 cans of chickpeas, serves 4 as a main or 6 as a side, and needs no cooking. Keep it whole for a salad bowl, lightly mash it for wraps, or smash it for sandwiches.
Why this version is easy to use: The base salad stays simple, but you also get dressing ratios, substitution options, storage cues, and texture choices. As a result, the same chickpeas can become a bowl, wrap, pita filling, sandwich, or meal-prep lunch without starting over.

Quick Answer: 15-Minute Chickpea Salad

Canned chickpeas make this a fresh salad with cucumber, tomatoes, herbs, and lemon dressing in about 15 minutes. Make the dressing first, drain and rinse the chickpeas, chop the vegetables, toss everything together, and let the bowl sit for 10 minutes if you have time.

The salad can be served cold or at room temperature. For a side salad or lunch bowl, leave the chickpeas whole. However, if you are making wraps or pita pockets, lightly mash some of them so the filling holds together. When you want a thicker sandwich filling, smash most of the chickpeas instead.

First time making it? Start with chickpeas, cucumber, tomatoes, red onion, parsley, lemon, olive oil, garlic, salt, and pepper. Once the base tastes good, add feta, olives, avocado, paneer, or extra spices.
Infographic showing chickpea salad facts including 15 minutes, no-cook method, two cans of chickpeas, serving size, and texture options.
Before you start, note the useful basics: this chickpea salad takes about 15 minutes, needs no cooking, and works as a bowl, wrap, sandwich filling, or meal-prep lunch.

Ingredients for Chickpea Salad

You only need a few ingredients, so each one should add something useful. The chickpeas make the salad filling, cucumber and tomatoes keep it fresh, herbs lift the flavor, and lemon dressing pulls this recipe together.

Labeled ingredient board for chickpea salad with chickpeas, cucumber, tomatoes, red onion, herbs, lemon, olive oil, garlic, Dijon mustard, and optional add-ins.
A good chickpea salad needs contrast, so chickpeas make it filling, cucumber adds crunch, tomatoes bring juiciness, herbs lift the flavor, and lemon dressing keeps everything bright.

Chickpeas or Garbanzo Beans?

Chickpeas and garbanzo beans are the same ingredient, so this recipe works no matter which name is on the can or how the salad is labeled. Use two cans of chickpeas or garbanzo beans, drain and rinse them well, and treat them the same way in the bowl.

Why Canned Chickpeas Work in This Salad Recipe

Canned chickpeas are already cooked, which makes this recipe quick enough for a weekday salad or lunch bowl. Use two 15-ounce / 425 g cans, or two 400 g cans, drained and rinsed. Once drained, that usually gives you about 480–500 g chickpeas total, or about 3 cups cooked chickpeas.

Rinsing matters because it removes excess canning liquid and gives the salad a cleaner flavor. After rinsing, let the chickpeas drain well. If they still look wet, pat them lightly with a clean towel so the dressing does not get diluted.

Using Cooked Chickpeas Instead of Canned

If you cook chickpeas from dry, use about 3 cups / 480–500 g cooked chickpeas. They should be tender enough to eat cold in the salad, but not so soft that they collapse when tossed.

Cooked-from-dry chickpeas can taste nuttier than canned ones. However, canned chickpeas are still the easiest choice when you want a fast salad.

Comparison image showing canned chickpeas on one side and cooked chickpeas on the other for use in chickpea salad.
Canned chickpeas are the easiest choice when you want a fast chickpea salad recipe; however, cooked chickpeas work just as well if they are tender, well-drained, and not too soft.

Fresh Vegetables That Keep the Salad Crisp

For this recipe, chickpeas give the salad body, so the vegetables should bring crunch, juice, and freshness. Cucumber adds crispness, cherry or grape tomatoes bring sweetness, red onion gives bite, and bell pepper adds color if you want extra crunch.

Vegetable guide for chickpea salad featuring cucumber, cherry tomatoes, red onion, bell pepper, and celery with short usage notes.
For the freshest texture, choose vegetables that add contrast: cucumber brings crunch, tomatoes add juiciness, red onion adds bite, and bell pepper adds extra color as well as crispness.

If you like fresh no-cook sides, this pairs well with MasalaMonk’s cucumber salad recipe. That one leans lighter and tangier, while this chickpea version is more filling.

Herbs That Make Chickpea Salad Taste Fresher

Parsley is the most classic choice, but mint, dill, and cilantro all work. For a Mediterranean-style salad, pair parsley with mint. For a cooler, brighter bowl, add dill. If you want the recipe to lean closer to Indian chana salad, go with cilantro, cumin, and chili.

Be generous with the herbs. Chickpeas are dense, so a small sprinkle can disappear in the bowl.

Herb comparison board for chickpea salad showing parsley, mint, dill, and cilantro with flavor notes.
Herbs can shift the whole direction of a chickpea salad, so parsley keeps it classic, mint makes it brighter, dill makes it cooler, and cilantro pushes it toward a chana-style version.

Optional Add-Ins for This Recipe

Olives, feta, roasted red pepper, avocado, and paneer all work, but they change the salad in different ways. Olives and feta make it more Mediterranean. Avocado makes it creamy. Paneer adds a firmer vegetarian protein option. Roasted red pepper brings sweetness and color.

If you are making this recipe ahead, add avocado just before serving. It tastes great with chickpeas, but it browns and softens quickly once mixed into the salad.

Guide to optional add-ins for chickpea salad including feta, olives, avocado, paneer, and roasted red pepper.
Once the base tastes balanced, add-ins can change the whole mood: feta and olives make it more Mediterranean, avocado makes it creamier, and paneer makes it more filling.

Easy Substitutions

This salad is flexible, so you do not need every optional ingredient. As long as you keep the chickpeas, something crisp, something juicy, enough herbs, and a bright dressing, the recipe still works. Then you can adjust with what you have.

If you do not have… Use this instead
Cherry tomatoes Diced regular tomatoes, drained if they are very juicy
English or Persian cucumber Regular cucumber, peeled if the skin is tough and seeded if watery
Red onion Shallots, green onion, or white onion soaked in cold water for 10 minutes
Fresh lemon Red wine vinegar or apple cider vinegar, added to taste
Dijon mustard A small spoon of regular mustard, or skip it and whisk the dressing well
Parsley Mint, dill, cilantro, or a mix of fresh herbs
Feta Paneer, avocado, olives, toasted seeds, or simply leave it out
Substitutions guide for chickpea salad showing ingredient swaps for tomatoes, cucumber, onion, lemon, mustard, herbs, and feta.
Missing one ingredient should not stop the recipe, because a good chickpea salad still works when you keep the same balance of chickpeas, crunch, herbs, acidity, and seasoning.

The Lemon Dressing That Makes the Salad Work

The dressing should taste bright, salty, and slightly sharp before it touches the chickpeas. Once everything is tossed together, the chickpeas, cucumber, and tomatoes soften that intensity, so the dressing needs enough lemon, garlic, mustard, and salt to season the whole salad.

Dressing ratio guide for chickpea salad showing bright, balanced, softer, and creamy lemon dressing options.
A small change in oil, lemon, or creamy binder can shift the whole bowl, so this dressing guide helps you choose the best chickpea salad texture for bowls, meal prep, wraps, or sandwiches.

Balanced Lemon Dressing

For the main recipe, use ¼ cup / 60 ml olive oil and 3 tablespoons / 45 ml fresh lemon juice. Add Dijon mustard, garlic, salt, black pepper, and either cumin or oregano. This gives the salad a balanced flavor without making it oily or sour.

A Brighter Lemon Dressing

If your chickpeas taste a little flat or your vegetables are very juicy, use equal parts olive oil and lemon juice. This sharper version works well for summer salads, cucumber-heavy bowls, and versions served with pita or grilled foods.

Creamy Dressing for Chickpeas and Sandwiches

When the recipe is going toward wraps or sandwiches, add 2 tablespoons of tahini, Greek yogurt, hummus, vegan mayo, or mashed avocado. A creamy dressing helps the chickpeas hold together instead of rolling out of the bread.

Indian-Style Lemon Dressing

For a chana salad variation, use lemon juice, olive oil, roasted cumin powder, black pepper, chopped cilantro, chili flakes or green chili, and salt. A tiny pinch of chaat masala can work if you want a sharper snack-style flavor, but keep it light so it does not overpower the chickpeas.

Bright, Balanced, and Creamy Dressing Guide

Dressing style Olive oil Lemon or vinegar Best for
Bright and tangy 3 tbsp / 45 ml 3 tbsp / 45 ml Summer salad, cucumber-heavy versions
Balanced ¼ cup / 60 ml 3 tbsp / 45 ml Main recipe
Softer meal-prep ¼ cup / 60 ml 2 tbsp / 30 ml Fridge-friendly version
Creamy 3 tbsp / 45 ml 2 tbsp / 30 ml plus 2 tbsp tahini, yogurt, hummus, or vegan mayo Sandwiches, wraps, and bowls
Comparison board showing bright, balanced, and creamy dressing styles for chickpea salad with short notes about each style.
Choose a brighter dressing when you want a sharper summer salad, a balanced dressing for the classic version, and a creamy dressing when the chickpea salad is headed for wraps or sandwiches.

Equipment You Need

You do not need special equipment for this salad. A colander, cutting board, sharp knife, large mixing bowl, small bowl or jar for the dressing, and a spoon or spatula are enough. For the sandwich version, keep a fork or potato masher nearby so you can lightly smash the chickpeas.

Equipment board for chickpea salad showing a colander, knife, cutting board, mixing bowl, dressing jar, spoon or spatula, and fork or masher.
This chickpea salad recipe stays practical because it only needs a few everyday tools, so you can make it easily without special equipment or unnecessary cleanup.

How to Make Chickpea Salad

Because this is a no-cook recipe, making the salad is mostly about dressing the chickpeas well, chopping the vegetables, tossing gently, and tasting at the end.

  1. Make the dressing first. Whisk olive oil, lemon juice, Dijon, garlic, salt, pepper, and cumin or oregano in a large bowl. You can also shake it in a jar.
  2. Drain, rinse, and dry the chickpeas. Let them sit in a colander for a minute, then pat them lightly with a clean towel if they still look wet. Drier chickpeas hold the lemon dressing better and keep the salad from turning watery.
  3. Chop the vegetables. Dice the cucumber, halve the tomatoes, and finely chop the onion or shallot.
  4. Add everything to the bowl. Add chickpeas, vegetables, herbs, and sturdy add-ins to the dressing.
  5. Toss gently. Coat everything without crushing the chickpeas.
  6. Rest briefly. Let the salad sit for 10 minutes if you have time.
  7. Check the bowl. The chickpeas should look lightly glossy, not oily, and the salad should taste bright before it tastes salty.
  8. Taste and adjust. Add more lemon, salt, pepper, herbs, or olive oil as needed.
Step-by-step board showing how to make chickpea salad by whisking dressing, drying chickpeas, chopping vegetables, combining, tossing, and adjusting seasoning.
The method matters more than it first seems: whisk the dressing first, dry the chickpeas well, toss gently, and then taste again so the salad stays bright instead of bland or watery.
Avoid bland chickpeas: rinse them well, season the dressing boldly, and let the salad rest for 10 minutes before judging the flavor.
Avoid a watery salad: drain the chickpeas well, dry them if needed, do not over-salt cucumber and tomatoes too early, and add avocado only when you are close to serving.

Dry the Chickpeas Before Making Salad

Close-up of rinsed chickpeas being patted dry with a clean towel before making chickpea salad.
Drying the chickpeas is one of the easiest upgrades because it helps the dressing cling better and, in turn, keeps the chickpea salad from turning loose or watered down.

Recipe Card

Chickpea Salad Recipe

A 15-minute no-cook salad made with chickpeas, cucumber, tomatoes, herbs, and lemon dressing. Serve it whole as a fresh salad bowl, lightly mashed in wraps or pita, or smashed into a creamy chickpea salad sandwich filling.

Prep Time15 minutes
Cook Time0 minutes
Total Time15 minutes
Servings4 main or 6 side servings

Optional rest time: 10 minutes
Course: Salad, Lunch, Side Dish
Cuisine: Mediterranean-inspired
Diet: Vegetarian; vegan if feta or paneer is omitted

Ingredients

Salad

  • 2 cans chickpeas, 15 oz / 425 g each, or two 400 g cans, drained and rinsed
  • Or use about 3 cups / 480–500 g cooked chickpeas
  • 1 large English cucumber or 3 Persian cucumbers, diced
  • 2 cups cherry or grape tomatoes, halved
  • 1 small red onion or 2 shallots, finely chopped
  • ½ cup olives, sliced, optional
  • ½ cup roasted red pepper, chopped, optional
  • ¾–1 cup chopped fresh herbs: parsley, mint, dill, cilantro, or a mix
  • ½ cup feta or paneer cubes, optional
  • 1 avocado, diced, optional and best added just before serving

Lemon Dressing

  • ¼ cup / 60 ml extra-virgin olive oil
  • 3 tbsp / 45 ml fresh lemon juice
  • 1 tsp Dijon mustard
  • 1 garlic clove, grated or minced
  • ½ tsp fine salt, plus more to taste
  • ½ tsp black pepper
  • ½ tsp ground cumin or dried oregano
  • ½–1 tsp sumac or lemon zest, optional
  • Pinch chili flakes or Aleppo pepper, optional

Instructions

  1. Whisk olive oil, lemon juice, Dijon mustard, garlic, salt, pepper, cumin or oregano, and sumac or lemon zest if using in a large bowl.
  2. Drain and rinse the chickpeas well. Let them sit in a colander for a minute, then pat dry if needed so the salad does not turn watery.
  3. Add chickpeas, cucumber, tomatoes, onion, olives, roasted red pepper, and herbs to the dressing. Toss gently.
  4. Add feta, paneer, or avocado only if serving soon.
  5. Let the salad rest for 10 minutes if possible.
  6. Taste and adjust with more lemon, salt, pepper, herbs, or olive oil.
  7. Serve cold or at room temperature as a salad, side dish, wrap filling, pita filling, or sandwich base.

Notes

  • For the cleanest flavor, rinse canned chickpeas well and let them drain before mixing.
  • If the chickpeas still look wet after draining, pat them lightly with a clean towel before mixing.
  • For a vegan version, skip feta and paneer. Use olives, avocado, roasted pepper, tahini, or extra herbs for richness.
  • For sandwiches, mash 60–70% of the chickpeas and add 2–4 tablespoons of a creamy binder.
  • For meal prep, add avocado, crispy chickpeas, and delicate herbs right before serving.
  • If using dried chickpeas, cook them until tender and use about 3 cups / 480–500 g cooked chickpeas.
Recipe card graphic for chickpea salad with prep time, servings, core ingredients, method steps, and storage note.
Keep this recipe card handy when you need the short version: drain and dry the chickpeas, whisk the lemon dressing, toss gently, rest briefly, and adjust before serving.

Why This Recipe Works

The salad works because chickpeas make it filling without any cooking, while cucumber, tomatoes, onion, herbs, and lemon keep it fresh. The dressing is bright enough to season the chickpeas properly, and the same base can stay whole for bowls, lightly mashed for wraps, or smashed for sandwiches.

Whole, Lightly Mashed, or Smashed Chickpeas?

A small change in texture changes how you can use the salad. Whole chickpeas make the best fresh bowl. Lightly mashed chickpeas help the salad sit better in wraps or pita. Smashed chickpeas turn the same ingredients into a sandwich filling that holds together instead of rolling out of the bread.

Texture What to do Best use
Whole chickpeas Toss gently and do not mash Fresh salad bowls and side salads
Lightly mashed Press ¼–⅓ of the chickpeas Wraps, pita pockets, and lunch bowls
Smashed Mash 60–70% of the chickpeas Chickpea salad sandwiches
Creamy Mash deeply and add mayo, yogurt, tahini, hummus, or avocado Vegan tuna-style chickpea salad
Texture comparison board showing whole chickpeas, lightly mashed chickpeas, and smashed chickpeas with suggested uses.
Texture changes how the recipe works, so whole chickpeas suit salad bowls, lightly mashed chickpeas hold better in wraps, and smashed chickpeas make the most reliable sandwich filling.
Need the base recipe? Jump to recipe card · Main method · Recipe guide

Mediterranean-Style Chickpea Salad

To make this recipe more Mediterranean, add olives, feta, roasted red pepper, parsley, mint, oregano, and extra lemon. Keep the cucumber, tomato, and red onion because they give the salad the fresh chopped texture that works so well with chickpeas.

This version is especially good with pita, hummus, grilled vegetables, rice bowls, roasted chicken, fish, or a simple soup. If you like herb-heavy Mediterranean salads, it also sits well next to MasalaMonk’s tabbouleh recipe, especially when serving pita, hummus, grilled vegetables, or mezze-style plates.

Mediterranean chickpea salad with feta, olives, roasted red pepper, cucumber, tomatoes, herbs, and lemon.
For a Mediterranean chickpea salad, feta, olives, roasted red pepper, and extra herbs deepen the flavor while still keeping the recipe fresh, colorful, and easy to serve.

Turn This Recipe Into a Chickpea Salad Sandwich

For a sandwich, mash most of the chickpeas and add a creamy binder. Greek yogurt, vegan mayo, tahini, hummus, mashed avocado, or a mix of mayo and yogurt all work. Then add something crunchy, such as celery, cucumber, onion, radish, or pickles.

Toasted bread, pita, wraps, and lettuce cups all work. If you are packing lunch, store the filling separately and assemble the sandwich later so the bread stays firm. This is also a useful plant-based alternative when you want a creamy, tangy sandwich filling. For a non-vegetarian comparison, see MasalaMonk’s chicken salad sandwich recipe.

Sandwich formula: 2 cups chickpea salad + 2–4 tbsp creamy binder + ¼ cup crunchy vegetables + lemon, mustard, herbs, salt, and pepper to taste.

If you want a cooler, yogurt-based sauce for wraps or pita, MasalaMonk’s Greek tzatziki sauce recipe is a natural fit with cucumber, herbs, chickpeas, and toasted bread.

Toasted chickpea salad sandwich cut in half, showing a thick filling of mashed chickpeas, vegetables, and herbs.
Turning chickpea salad into a sandwich works best when you mash more of the chickpeas, because the filling becomes thicker, creamier, and much easier to hold together.
Need the base recipe? Jump to recipe card · Main method · Recipe guide

Chickpea Tuna Salad and Vegan Tuna-Style Version

This base can move in two directions. To make a real chickpea tuna salad, add drained tuna, celery, lemon, herbs, and a little Greek yogurt or mayo. If you want a vegan tuna-style version, skip the tuna, mash the chickpeas more deeply, and add celery, lemon, pickles or capers, herbs, and a creamy binder such as vegan mayo, tahini, hummus, or avocado.

A more sea-like vegan flavor can come from finely crushed nori or a tiny pinch of kelp flakes. Keep it optional; the mashed chickpea version still works as a creamy salad filling without any sea flavor.

Comparison board showing chickpea tuna salad on one side and vegan tuna-style chickpea salad on the other.
For a chickpea tuna salad, add real tuna for a chunkier, savory version; for a vegan tuna-style salad, mash the chickpeas more and use capers, pickles, or nori for extra depth.
Need the base recipe? Jump to recipe card · Main method · Recipe guide

Meal Prep and Storage for This Salad

Chickpea salad is good for meal prep because chickpeas hold their shape better than leafy greens, so the salad stays useful for lunches over several days. However, a few ingredients are better added fresh. For example, avocado browns, crispy chickpeas soften, and delicate herbs taste brighter when added closer to serving.

Storage guide for chickpea salad with airtight containers, meal-prep jars, dressing jar, and notes about keeping avocado and crunchy toppings separate.
Chickpea salad is meal-prep friendly; however, it stores best when avocado, crispy toppings, and delicate herbs are added later instead of being mixed in too early.
Need the base recipe? Jump to recipe card · Main method · Recipe guide

For the best make-ahead version, store the base salad without avocado and add delicate toppings just before serving. If you are making lunch jars, put the dressing at the bottom, then chickpeas and firmer vegetables, then herbs or greens near the top.

If you are making the salad more than a few hours ahead, keep some of the herbs fresh for serving and go lighter on the salt at first. Salt draws water from cucumber and tomatoes, so a final pinch right before serving keeps the salad fresher.

How to Store This Recipe Without Making the Salad Watery

Drain and dry the chickpeas well, avoid over-salting watery vegetables too early, and keep avocado or crispy toppings separate. If the salad sits overnight, refresh it with a little lemon juice, olive oil, and fresh herbs before serving.

Infographic showing tips to keep chickpea salad from getting watery, including drying chickpeas, salting vegetables later, and adding avocado fresh.
If your chickpea salad turns watery, the fix usually starts earlier: dry the chickpeas well, salt juicy vegetables later, and add avocado or crunchy toppings closer to serving time.
Version Fridge life Best method
Plain chickpea salad, no avocado 3–4 days Store in an airtight container
With avocado Same day best Add avocado fresh just before serving
With feta or paneer 2–3 days best Add fresh if you want the cleanest texture
Dressing mixed in 2–3 days best texture Stir before serving and refresh with lemon or herbs
Dressing only 7–10 days Keep in a sealed jar in the fridge
Sandwich filling 3–4 days Store filling separately from bread
Crispy chickpeas Same day best Keep separate and add just before eating
Meal-prep jars 4–5 days Dressing bottom, chickpeas and vegetables middle, herbs top

Recipe Variations with Chickpeas

Once the base recipe is balanced, the same chickpeas can move in several salad directions. Keep lemon, salt, and herbs as the anchor, then change the add-ins based on how you want to serve it.

Lunch, Meal Prep, and Sandwich Versions

If you want… Make this version What to add
A dairy-free lunch Vegan chickpea salad Avocado, olives, roasted red pepper, extra herbs, toasted seeds, or tahini dressing
A more filling meal High-protein salad with chickpeas Quinoa, tofu, paneer, boiled eggs, Greek yogurt dressing, feta, grilled chicken, or extra chickpeas
A lunchbox or picnic salad Meal-prep chickpea salad Keep avocado and crispy toppings separate, use a slightly softer dressing, and add fresh herbs before serving
A sandwich filling Smashed chickpea salad Mash most of the chickpeas and add yogurt, tahini, hummus, vegan mayo, or avocado
A creamier bowl or wrap Avocado chickpea salad Diced avocado added just before serving, or a little mashed avocado in the dressing
Variation guide for chickpea salad showing vegan, high-protein, meal-prep, smashed sandwich, and avocado versions.
The same base recipe can become a vegan lunch, higher-protein bowl, meal-prep container, smashed sandwich filling, or avocado chickpea salad with only a few targeted changes.
Need the base recipe? Jump to recipe card · Main method · All variations

For more ways to build filling vegetarian bowls around legumes, grains, and seeds, see MasalaMonk’s guide to plant-based protein sources for high-protein meal prep.

Fresh, Crunchy, and Bigger-Flavor Versions

If you want… Make this version What to add
A clean summer side Cucumber tomato chickpea salad Extra cucumber, tomatoes, red onion, parsley, lemon, olive oil, salt, and pepper
A saltier Mediterranean side Feta chickpea salad Feta, olives, oregano, and lemon zest; taste before adding extra salt
A crunchy topping Crispy chickpea salad Add roasted or air-fried chickpeas right before serving so they stay crisp
A meal-prep grain bowl Quinoa chickpea salad Cooked and cooled quinoa plus extra dressing because grains absorb liquid
A pasta salad direction Orzo chickpea salad Cooked and cooled orzo, cucumber, tomato, herbs, feta, and extra lemon dressing
An earthy, colorful bowl Beetroot chickpea salad Cooked and cooled beetroot, feta or paneer, cumin, herbs, lemon, and red onion
An Indian-style side Indian chana salad Use kabuli chana for the closest chickpea salad texture, or kala chana for a firmer, earthier Indian-style version with cilantro, lemon, cumin, chili, onion, cucumber, and tomato
Second variation guide for chickpea salad showing cucumber tomato, feta, crispy chickpea, quinoa, orzo, beetroot, and Indian chana versions.
For more variety, the chickpea salad can turn crisp with cucumber and tomato, salty with feta, hearty with quinoa or orzo, earthy with beetroot, or spicier as Indian chana salad.
Need the base recipe? Jump to recipe card · Main method · All variations

Crispy Chickpeas for Salad

For crispy chickpeas, dry the drained chickpeas very well, toss them with a little oil, salt, cumin, paprika, or garlic powder, and roast at 425°F / 220°C for about 20–30 minutes, shaking the pan once or twice. Add them to the salad right before serving so they stay crisp.

Roasted crispy chickpeas on a sheet pan with seasonings and notes about oven temperature, roasting time, and serving.
Crispy chickpeas add the most texture when they are roasted until dry and added right before serving, so they stay crunchy instead of softening in the salad.

Troubleshooting This Salad

Because this recipe is not cooked, most chickpea salad problems can be fixed before serving. If the chickpeas taste bland, watery, sour, or dry, adjust the dressing first. Then give the salad a few minutes to settle before judging it again.

Problem Likely cause Fix
Salad tastes bland Not enough salt, acid, or herbs Add salt first, then lemon, then more herbs
Salad is watery Chickpeas or vegetables were too wet Drain and dry chickpeas well, and add tomatoes closer to serving
Chickpeas taste canned They were not rinsed well or not seasoned enough Rinse thoroughly and let them sit in dressing for 10 minutes
Onion is too sharp Raw onion is too strong Soak chopped onion in cold water for 10 minutes, then drain
Salad is too sour Too much lemon or vinegar Add olive oil, chickpeas, avocado, or feta to soften it
Salad is too dry Chickpeas absorbed the dressing Add a splash of olive oil and lemon juice before serving
Avocado browned It was added too early Add avocado fresh, or toss it with lemon before mixing
Sandwich filling is too loose Too much dressing or not enough mashing Mash more chickpeas and add a thicker binder
Crispy chickpeas went soft They sat in the wet salad Keep them separate and add just before eating
Troubleshooting guide for chickpea salad showing common problems such as bland, watery, too sour, too dry, sharp onion, and loose sandwich filling with quick fixes.
Before starting over, fix the bowl: bland salad usually needs salt, lemon, and herbs; watery salad needs better draining; and loose sandwich filling needs more mashed chickpeas.

What to Serve with Chickpea Salad

Serve chickpea salad with pita, hummus, grilled vegetables, rice, quinoa, soup, roasted potatoes, grilled chicken, fish, or paneer. It also works inside wraps, lettuce cups, toasted sandwiches, or meal-prep bowls. To make a fuller chickpea-based mezze plate, add MasalaMonk’s falafel recipe on the side.

A lighter plate can be as simple as cucumber salad, tomato soup, or a green salad. For a sharper Middle Eastern-style plate, serve it with pita and a spoon of MasalaMonk’s amba sauce recipe for a tangy mango-chili contrast.

Serving ideas board for chickpea salad with pita, hummus, falafel, soup, rice or quinoa, wraps, grilled vegetables, and paneer, chicken, or fish.
Chickpea salad becomes a fuller meal more easily when you pair it with pita, hummus, soup, falafel, grains, or grilled vegetables, rather than serving it as a plain side alone.

Chickpea Salad Mezze Plate

Chickpea salad served as part of a mezze plate with pita, hummus, falafel, olives, tomatoes, and lemon.
Serving chickpea salad as part of a mezze plate adds variety and makes the recipe more useful for lunch or dinner, especially when paired with hummus, pita, and falafel.

Final Serving Texture

Close-up serving image of chickpea salad in a bowl with cucumber, tomatoes, herbs, and a spoon lifting a portion.
A final serving image highlights the texture that makes this recipe work so well: chickpeas stay distinct, vegetables stay crisp, and the dressing coats the salad without drowning it.
Ready to make it? Jump to recipe card · Main method · Recipe guide

FAQs About This Recipe

Are chickpeas and garbanzo beans the same?

Chickpeas and garbanzo beans are the same ingredient. “Chickpea” is more common in many recipe titles, while “garbanzo bean” often appears on cans and packaging. Use either one for this salad.

What kind of chickpeas work best for this salad?

Canned chickpeas are the easiest choice because they are already cooked and ready to use. Drain and rinse them well, then let them sit in a colander for a minute so extra water does not dilute the dressing.

Do canned chickpeas need to be cooked first?

No cooking is needed. Canned chickpeas are already cooked, so this recipe only needs draining, rinsing, chopping, dressing, and tossing.

How long does this chickpea salad recipe last in the fridge?

This chickpea salad recipe keeps well for about 3–4 days without avocado. Store it in an airtight container, then add avocado, crispy chickpeas, or delicate herbs closer to serving for the best texture.

How do you keep chickpea salad from getting watery?

Drain and dry the chickpeas well, use tomatoes that are not overly watery, and go lighter on salt if you are making the salad ahead. Salt pulls moisture from cucumber and tomatoes, so a final pinch before serving keeps the salad fresher.

Is this chickpea salad vegan?

The base salad is vegan when you skip feta, paneer, yogurt, and any dairy-based creamy add-ins. For richness, use olives, avocado, tahini, hummus, vegan mayo, roasted red pepper, toasted seeds, or extra herbs.

Is chickpea salad healthy?

Chickpea salad can be a nourishing meal or side because chickpeas provide plant-based protein and fiber, while the vegetables and herbs add freshness. Keep the dressing balanced and use richer add-ins like feta, paneer, avocado, or creamy binders according to how filling you want the salad to be. For more general chickpea nutrition background, see the Harvard Nutrition Source guide to chickpeas.

What can I use instead of lemon juice?

Red wine vinegar or apple cider vinegar can replace lemon juice. However, start with a little less than the recipe calls for, then taste and add more only if the salad needs extra brightness.

How do I make chickpea salad without mayo?

The base salad uses lemon and olive oil dressing, so it does not need mayo. For a creamy no-mayo version, use tahini, hummus, Greek yogurt, or mashed avocado.

How do I turn this into chickpea salad sandwiches?

Mash 60–70% of the chickpeas, add 2–4 tablespoons of a creamy binder, and keep the filling thick. Toasted bread, pita, wraps, and lettuce cups all work, but the filling should be stored separately from bread until serving.

What goes well with chickpea salad?

Pita, hummus, grilled vegetables, soup, rice, quinoa, roasted potatoes, paneer, grilled chicken, fish, and simple green salads all pair well with chickpea salad. It also works inside wraps, lettuce cups, and meal-prep bowls.

How can I make the salad higher in protein?

Add quinoa, paneer, tofu, boiled eggs, Greek yogurt dressing, feta, grilled chicken, or extra chickpeas. For a vegan version, use tofu, quinoa, hummus, tahini, seeds, or another legume.

Should you freeze chickpea salad?

Freezing is not worth it for this recipe. Cucumber, tomatoes, herbs, and dressing lose their fresh texture after thawing. If you want to prep ahead, freeze cooked chickpeas separately and make the salad fresh.

Posted on 1 Comment

Tabbouleh Recipe: Fresh Lebanese Tabouli Salad with Bulgur

A dark bowl of parsley-heavy tabbouleh with tomato pieces, mint, lemon wedges, romaine leaves, and a small amount of fine bulgur.

This tabbouleh recipe is fresh, lemony, parsley-heavy, and built around the detail that matters most: tabbouleh should taste like a chopped herb salad, not a bowl of bulgur with a few herbs mixed in.

Also spelled tabouli, this Lebanese-style salad is made with finely chopped parsley, tomato, mint, green onion, fine bulgur, lemon juice, olive oil, salt, and pepper. Although the bulgur adds texture, parsley is the star.

To keep the recipe no-cook, the method below soaks fine bulgur directly in the lemon-olive oil dressing while you chop the herbs. As a result, the bulgur gets more flavor, the salad stays bright, and you avoid the watery, grain-heavy tabbouleh that often happens at home.

Table of Contents

Use this guide to make fresh tabbouleh, choose the right bulgur, keep it from turning watery, and adapt it for quinoa, cauliflower, or couscous versions.

Quick Answer: What Is Tabbouleh?

Tabbouleh is a fresh Middle Eastern parsley salad made with finely chopped parsley, tomato, mint, green onion, fine bulgur wheat, lemon juice, olive oil, salt, and pepper. In a good tabbouleh recipe, the herbs should lead and the bulgur should support.

Classic tabbouleh is usually served as part of a mezze spread with pita, hummus, falafel, grilled meats, or lettuce leaves. It is naturally vegan and dairy-free, though it is not gluten-free because bulgur is made from wheat.

Quick ratio: For a parsley-first tabbouleh, use about 3 packed cups finely chopped parsley with only 1/3 cup fine bulgur. That keeps the salad fresh and herb-heavy instead of turning it into a grain salad.

Tabbouleh Recipe at a Glance

This tabbouleh recipe is built for a fresh, parsley-heavy texture with fine bulgur, bright lemon dressing, and no cooking required when you use the right grain.

Best bulgur Fine #1 bulgur wheat
Cook time 0 minutes for fine bulgur
Total time About 40 minutes
Yield 6 servings, about 5–6 cups
Flavor Fresh, lemony, herb-heavy, lightly juicy
Best texture Finely chopped herbs, tender bulgur, no puddle of dressing
Make-ahead Best same day; leftovers keep 2–3 days
A tabbouleh recipe overview graphic with a finished salad, parsley, lemon, fine bulgur, and text showing no-cook method, 40 minutes, 6 servings, and parsley-first.
This tabbouleh recipe uses fine bulgur, needs no cooking, and takes about 40 minutes. The main texture goal is simple: plenty of parsley with just enough bulgur to support it.

Tabbouleh vs Tabouli: Same Salad, Different Spelling

Tabbouleh and tabouli usually refer to the same salad. The spelling changes because the Arabic word is transliterated into English in different ways.

You may see it written as tabbouleh, tabouli, tabouleh, tabouli salad, or tabbouleh salad. The spellings vary by region, family tradition, and how the Arabic word is transliterated into English.

Here, the salad follows a Lebanese-style direction: finely chopped parsley, tomato, mint, green onion, fine bulgur, lemon juice, and olive oil.

A spelling comparison graphic showing one bowl of tabbouleh labeled with both “Tabbouleh” and “Tabouli.”
Tabbouleh and tabouli usually mean the same salad. The spelling changes, but the base stays familiar: parsley, tomato, mint, fine bulgur, lemon juice, and olive oil.

Why This Tabbouleh Recipe Works

Homemade tabbouleh usually goes wrong in a few predictable ways: too much bulgur, wet herbs, bland dressing, hard grains, or a watery bowl after 20 minutes. To avoid those problems, this version uses a parsley-first ratio, fine bulgur, careful draining, and a simple dressing that seasons the grain as it softens.

  • It is parsley-first. The salad tastes fresh and green, not heavy or grainy.
  • Fine bulgur keeps it no-cook. Fine #1 bulgur softens in lemon juice and olive oil while you chop the herbs.
  • The tomatoes are drained if needed. That keeps the salad juicy without turning soupy.
  • The dressing is simple. Lemon juice, olive oil, salt, and pepper are enough when the herbs are fresh.
  • The amounts are precise. Cups, grams, and milliliters are included so the parsley-to-bulgur balance stays right.

Best Parsley-to-Bulgur Ratio for Tabbouleh

The easiest way to keep tabbouleh fresh is to use a lot of parsley and only a small amount of bulgur. The bulgur should soften the bite and absorb flavor, but it should not make the salad heavy.

Style Parsley Bulgur Result
Parsley-heavy Lebanese-style 3 packed cups 1/4 to 1/3 cup fine bulgur Fresh, green, herb-led tabbouleh
Balanced everyday style 3 packed cups 1/2 cup fine bulgur Still fresh, but slightly more filling
Grain-heavy style 2–3 cups 3/4 cup or more More like bulgur salad than classic tabbouleh
A ratio comparison graphic with three tabbouleh bowls showing parsley-heavy, balanced, and grain-heavy versions.
For a Lebanese-style tabbouleh ratio, start with about 3 packed cups of chopped parsley and only ¼ to ⅓ cup fine bulgur. More bulgur makes the salad heavier and less herb-led.

Tabbouleh Ingredients

For tabbouleh, this recipe keeps the ingredient list simple but pays close attention to texture: dry herbs, firm tomatoes, fine bulgur, fresh lemon, and enough olive oil to round everything out.

A dark ingredient board with parsley, mint, tomatoes, green onions, fine bulgur, lemon, olive oil, salt, pepper, and optional cucumber for tabbouleh.
The best tabbouleh ingredients are simple, but prep matters. Dry the herbs, use firm tomatoes, choose fine bulgur, and rely on fresh lemon juice rather than bottled citrus.

Parsley

Because parsley is the main ingredient, its texture matters. You can use curly parsley or flat-leaf parsley, but the leaves need to be very dry before chopping. Wet parsley is one of the main reasons tabbouleh becomes watery.

Chop the parsley finely with a sharp knife. A food processor can bruise the herbs and turn them wet or pasty if you overdo it.

Tomatoes

Use firm Roma tomatoes or another firm, meaty tomato. Chop them small, then drain off extra liquid if they are very juicy. You want tomato freshness, not a pool of tomato water at the bottom of the bowl.

Mint

Fresh mint gives tabbouleh its cooling lift. Do not use dried mint as a full replacement here; it will not give the same fresh, bright finish.

Green Onions or Scallions

Green onions add mild onion flavor without overpowering the herbs. Slice them finely so they disappear into the salad rather than standing out in large pieces.

Fine Bulgur

Fine #1 bulgur is best for Lebanese-style tabbouleh. It softens quickly and blends into the herbs without making the salad feel heavy.

Lemon Juice and Olive Oil

Fresh lemon juice gives tabbouleh its sharp, clean brightness. Extra-virgin olive oil rounds out the dressing and helps soften the bulgur. Bottled lemon juice is not ideal because the salad depends on a fresh citrus flavor.

Cucumber, Optional

Cucumber is optional. It adds crunch and freshness, especially in modern tabouli salad versions, but the salad still works beautifully without it. If you use cucumber, dice it small and drain it if it is watery.

If cucumber is the part you love most, you may also like this crisp cucumber salad recipe with vinegar, dill, and onion.

Tabbouleh Dressing

In this tabbouleh recipe, the dressing is simple: fresh lemon juice, extra-virgin olive oil, salt, and black pepper. It should lightly coat the herbs, season the tomatoes, and soften the fine bulgur without drowning the salad.

Lemon juice and olive oil being whisked into a tabbouleh dressing with salt, pepper, lemon halves, and fine bulgur nearby.
Tabbouleh dressing is not a thick vinaigrette. Lemon juice, olive oil, salt, and pepper should lightly coat the herbs and help fine bulgur soften without drowning the salad.

Here, the fine bulgur sits in the lemon-olive oil dressing while you chop the parsley, mint, tomatoes, and green onions. That gives the bulgur better flavor than soaking it in plain water.

Once the salad rests, taste before adding anything else. A pinch of salt usually fixes flat flavor, extra lemon brings brightness, and a small drizzle of olive oil softens a sharp edge.

Best Bulgur for Tabbouleh

The best bulgur for tabbouleh is fine #1 bulgur. It is small enough to soften without boiling and delicate enough to stay in the background. That matters because tabbouleh should taste like a fresh herb salad, not a bulgur bowl.

Bulgur is wheat that has already been parboiled, dried, cracked, and sorted by size. That is why fine bulgur can soften quickly in dressing instead of needing a full boil. For more background, see the Whole Grains Council guide to bulgur and freekeh.

If your bulgur is medium or coarse, you can still use it, but the texture will be different and it usually needs hot water before mixing.

Bulgur or Swap Best For How to Prepare It
Extra-fine / #1 bulgur Best choice for Lebanese-style tabbouleh Soak in the lemon-olive oil dressing for 20–30 minutes. No cooking needed.
Fine bulgur Good everyday choice Soak until tender. Drain if you use water.
Medium bulgur Usable, but less delicate Soak in hot water, drain well, and cool before mixing.
Coarse bulgur More of a grain-salad texture Cook or hot-soak until tender, then cool completely. Use less than you would in a grain salad.
Cracked wheat Depends on grind and processing Usually needs longer soaking or cooking. Check texture before adding.
Quinoa Gluten-free tabbouleh variation Cook, cool completely, then mix with the herbs and dressing.
Cauliflower rice Grain-free variation Use raw or lightly salted and drained. Keep the pieces small and dry.
Couscous Quick variation, not classic tabbouleh Steam or soak, fluff, cool completely, then mix.
A bulgur comparison graphic showing fine, medium, and coarse bulgur, with fine bulgur marked as the best choice for tabbouleh.
Fine #1 bulgur is best for tabbouleh because it softens quickly and stays delicate. Medium or coarse bulgur can work, but it usually needs hot soaking and gives a heavier texture.
Do not overuse bulgur. If you add too much, the salad shifts from tabbouleh into a bulgur salad. For this recipe, 1/3 cup fine bulgur is enough for 6 servings.

What If You Only Have Medium or Coarse Bulgur?

If you only have medium or coarse bulgur, you can still make tabbouleh, but the texture will be less delicate. Put the medium or coarse bulgur in a bowl, cover it with hot water, and let it sit until tender. Drain it very well, press out excess moisture, and cool it completely before adding it to the herbs.

Use a smaller amount than you would in a grain salad. The goal is still a parsley-forward tabbouleh, not a heavy bulgur salad.

How to Buy Bulgur for Tabbouleh

When shopping, look for fine #1 bulgur, extra-fine bulgur, or fine burghul. It is often easier to find in Middle Eastern grocery stores, international aisles, or natural-food stores than in the regular grain aisle. If the package says it must be boiled, treat it like medium or coarse bulgur and cool it before mixing.

A shopping guide graphic with bags or jars labeled fine #1 bulgur, extra-fine bulgur, and fine burghul for tabbouleh.
When buying bulgur for tabbouleh, look for fine #1, extra-fine bulgur, or fine burghul. If the package says it must be boiled, treat it like a coarser grain.

Equipment You’ll Need

You do not need special equipment, but a few basic tools make a big difference in the final texture.

  • Sharp chef’s knife: for finely chopping parsley without bruising it.
  • Large cutting board: tabbouleh uses a lot of herbs, so space helps.
  • Salad spinner or clean towels: for drying parsley and mint thoroughly.
  • Large mixing bowl: gives you room to toss without crushing the herbs.
  • Small bowl or measuring jug: for the lemon-olive oil dressing.
  • Fine-mesh strainer or colander: useful for draining tomatoes, cucumber, or soaked bulgur.

How to Make Tabbouleh

Good tabbouleh is mostly about prep. Although the ingredients are simple, the herbs need to be dry, the chopping needs to be fine, and the bulgur needs enough time to soften.

A step-by-step tabbouleh method graphic showing washing herbs, soaking bulgur, chopping parsley, chopping vegetables, and tossing the salad.
The tabbouleh method is mostly about order: dry the herbs first, soak fine bulgur in dressing, chop everything small, toss gently, then rest before the final seasoning check.

Step 1: Wash and Dry the Herbs

Wash the parsley and mint, then dry them very well. A salad spinner is helpful, but you can also spread the herbs on clean towels and pat them dry.

This step matters because wet herbs dilute the dressing and make the salad watery faster.

Fresh parsley and mint being washed, drained, and dried on a towel and in a salad spinner before making tabbouleh.
Dry parsley and mint thoroughly before chopping. Even a little extra water on the herbs can dilute the lemon-olive oil dressing and make tabbouleh turn watery.

Step 2: Soak the Fine Bulgur in the Dressing

In a large mixing bowl, whisk together the lemon juice, 1/4 cup olive oil, salt, and pepper. Stir in the fine bulgur and let it sit for 20–30 minutes while you chop the herbs and vegetables.

The bulgur should soften but not become mushy. If it still tastes hard after resting, add 1 tablespoon of warm water or lemon juice, stir, and wait another 10 minutes.

Fine bulgur soaking in lemon and olive oil dressing in a dark bowl, with lemon and olive oil nearby.
Fine bulgur does not need boiling for this tabbouleh recipe. Let it sit in the lemon-olive oil dressing for 20–30 minutes so it becomes tender and better seasoned.

Step 3: Chop the Parsley Finely

Gather the dry parsley into small bunches and chop it finely with a sharp knife. You want small, even pieces, not large leaves and not a wet green paste.

Tender stems are fine if they are chopped very small. Thick stems should be removed.

A parsley chopping guide showing finely chopped parsley on a cutting board and an inset warning against overprocessed wet parsley.
Hand-chopped parsley gives tabbouleh a lighter texture. A food processor can work only if pulsed carefully, but overprocessing turns the herbs wet, dark, and pasty.

Step 4: Chop the Tomatoes, Mint, and Green Onions

Finely chop the tomatoes, mint, and green onions. If the tomatoes release a lot of juice, drain them briefly before adding them to the bowl. If using cucumber, dice it small and drain it too.

Finely chopped tomatoes, mint, and green onions arranged on a dark cutting board for tabbouleh.
Chop tomatoes, mint, and green onions small enough to blend into every bite. If the tomatoes are juicy, drain them before mixing so the salad stays fresh instead of soupy.

Step 5: Toss, Rest, and Adjust

Add the parsley, mint, tomatoes, green onions, and optional cucumber to the soaked bulgur. Toss gently until everything is evenly coated, but do not crush the herbs.

Let the tabbouleh rest for 10 minutes, then taste and adjust. Start with salt if the flavor feels flat, brighten it with lemon if needed, or round it out with a little olive oil if the salad tastes too sharp. Add the remaining olive oil only if the salad needs a softer finish.

Hands gently tossing parsley-heavy tabbouleh with a spoon in a dark bowl.
Once the herbs, tomatoes, and softened bulgur are combined, toss gently and let the salad rest for about 10 minutes. After that, adjust salt, lemon, or olive oil.

How to Keep Tabbouleh from Getting Watery

Watery tabbouleh usually comes from wet herbs, juicy tomatoes, too much dressing, or bulgur that has not been drained properly. The best fix is to control moisture before everything goes into the bowl.

Drain Juicy Tomatoes and Cucumber First

If your tomatoes or cucumber are very juicy, sprinkle them with a small pinch of salt and let them sit in a strainer for 10 minutes while you chop the herbs. After 10 minutes, drain the liquid before mixing. This keeps the salad fresh and juicy without creating a puddle at the bottom of the bowl.

A watery tabbouleh prevention graphic showing dry herbs, drained tomatoes, gradual dressing, and a finished bowl of tabbouleh.
Watery tabbouleh usually comes from wet herbs, juicy tomatoes, or too much dressing. Fix it before mixing by drying the herbs, draining the tomatoes, and adding dressing gradually.

Quick Fixes for Watery Tabbouleh

Problem Likely Cause Best Fix
Tabbouleh is watery Wet parsley, juicy tomatoes, or too much dressing Dry herbs thoroughly, drain tomatoes, and add dressing gradually.
Bulgur is hard Bulgur is too coarse or under-soaked Add 1–2 tablespoons warm water or lemon juice and rest 10–15 minutes.
Bulgur is soggy Too much soaking liquid Drain or blot if possible, then add more parsley, mint, or tomato.
Salad tastes flat Not enough salt or lemon Add salt first, then lemon juice in small amounts.
Salad tastes too sharp Too much lemon juice Add a little olive oil and extra tomato to round it out.
Parsley tastes harsh Pieces are too large or salad has not rested Chop finer next time and let the salad rest 10–20 minutes before serving.
Herbs look mushy Food processor overuse or wet herbs Chop by hand and dry herbs well before cutting.

What the Finished Tabbouleh Should Look Like

For the best texture, serve tabbouleh the same day it is made. Although it keeps well for a couple of days, the herbs soften as they sit.

Best texture target: The finished tabbouleh should be finely chopped, glossy, lemony, and lightly juicy, but there should not be a puddle of dressing at the bottom of the bowl.

Do not worry if the herbs darken slightly after dressing. Proper tabbouleh should look moist and glossy, not dry and fluffy. The warning sign is excess liquid pooling underneath, not a lightly dressed herb texture.

A tabbouleh texture guide comparing too dry, just right, and too watery versions of the salad.
Finished tabbouleh should be glossy and lightly juicy, not dry and not puddled. If liquid collects at the bottom, lift the salad out with a slotted spoon and drain juicier vegetables next time.

Authentic Lebanese-Style Tabbouleh Tips

Lebanese-style tabbouleh is usually much more herb-heavy than many restaurant or grocery-store versions. Parsley should be the main ingredient, while the bulgur should add texture in the background rather than making the salad feel like a grain bowl.

A Lebanese-style tabbouleh tips graphic showing a mostly green parsley-heavy bowl with lemon wedges and romaine leaves.
Lebanese-style tabbouleh is usually much more herb-led than many store-bought versions. Use fine bulgur sparingly so the salad stays light, fresh, and finely chopped.
  • Use more parsley than bulgur. A small amount of fine bulgur is enough to give texture without taking over.
  • Chop everything finely. The parsley, tomatoes, mint, and green onions should feel evenly mixed in every bite.
  • Use fine bulgur if possible. Fine #1 bulgur gives the most delicate texture and does not need boiling.
  • Keep cucumber optional. Cucumber is common in many modern tabouli salad versions, but the salad still works beautifully without it.
  • Serve it fresh. Tabbouleh can be stored, but the brightest flavor and best herb texture are usually the same day.
Texture cue: If the bowl looks mostly green with small flecks of tomato, mint, onion, and bulgur, you are close to a Lebanese-style tabbouleh texture. If it looks mostly grain-based, there is probably too much bulgur.
A comparison graphic with a green parsley-heavy tabbouleh bowl beside a beige grain-heavy bulgur salad bowl.
A parsley-heavy tabbouleh bowl looks green, fresh, and finely chopped. When the bowl looks beige or grain-led, the recipe has moved closer to bulgur salad.

Tabbouleh Recipe Card

Tabbouleh Recipe: Fresh Lebanese Tabouli Salad with Bulgur

This fresh tabbouleh recipe is parsley-first, lemony, and no-cook. Fine bulgur softens in the lemon-olive oil dressing while you chop the herbs, keeping the salad bright instead of watery.

Prep Time40 minutes
Cook Time0 minutes
Total Time40 minutes
Yield6 servings, about 5–6 cups

Ingredients

  • 1/3 cup fine #1 bulgur wheat, about 50g
  • 1/4 cup fresh lemon juice, 60ml
  • 1/4 to 1/3 cup extra-virgin olive oil, 60–80ml
  • 3/4 teaspoon fine salt, plus more to taste
  • 1/4 teaspoon black pepper
  • 3 packed cups finely chopped parsley, about 90–120g chopped leaves and tender stems
  • 2–3 firm Roma tomatoes, finely chopped and drained, about 250–300g
  • 3–4 green onions or scallions, finely chopped, about 45–60g
  • 1/4 to 1/3 cup finely chopped fresh mint, about 10–15g
  • 1 cup finely diced English cucumber, about 120–150g, optional
  • Romaine lettuce leaves, optional, for serving

Instructions

  1. Wash and dry the herbs. Wash the parsley and mint, then dry very well in a salad spinner or with clean kitchen towels.
  2. Soak the bulgur. In a large bowl, whisk lemon juice, 1/4 cup olive oil, salt, and pepper. Stir in the fine bulgur and let it sit for 20–30 minutes while you chop the herbs and vegetables.
  3. Chop the parsley. Finely chop the parsley by hand. Remove thick stems, but tender stems are fine if chopped small.
  4. Prepare the vegetables. Finely chop the tomatoes, green onions, mint, and optional cucumber. Drain tomatoes and cucumber if they release a lot of liquid.
  5. Mix the tabbouleh. Add the parsley, tomatoes, green onions, mint, and cucumber to the soaked bulgur. Toss gently until evenly combined.
  6. Rest and adjust. Let the salad rest for 10 minutes. Taste and adjust with more salt, lemon juice, or olive oil as needed. Use the remaining olive oil only if the salad needs a softer finish.
  7. Serve. Serve chilled or at room temperature, with romaine leaves, pita, hummus, falafel, or grilled dishes.

Notes

  • Fine #1 bulgur gives the best no-cook texture for tabbouleh.
  • If using medium or coarse bulgur, soak it separately in hot water, drain very well, and cool completely before mixing.
  • Dry the parsley thoroughly before chopping. Wet herbs make watery tabbouleh.
  • Drain juicy tomatoes and cucumber before adding them to the bowl.
  • For a stricter parsley-heavy version, skip the cucumber.
  • For gluten-free tabbouleh, use cooked and cooled quinoa or finely riced cauliflower instead of bulgur.
  • Best texture is the same day, but leftovers keep 2–3 days in the fridge.
A visual tabbouleh recipe card with a finished salad, 6 servings, 40 minutes, no-cook fine bulgur, key ingredients, and method steps.
This tabbouleh recipe card keeps the essentials together: 6 servings, about 40 minutes, no-cook fine bulgur, fresh herbs, lemon dressing, and a short rest before serving.

Make-Ahead and Storage

Although tabbouleh can be made ahead, it is best when the herbs still taste fresh and lively. If you want to prepare it early, wash and dry the herbs first, then chop and mix closer to serving.

For the freshest texture, keep the chopped herbs, drained tomatoes, and soaked bulgur separate until close to serving, then toss and adjust the seasoning. This is especially helpful if you are making tabbouleh for guests.

  • Best same day: Tabbouleh has the brightest texture and flavor within a few hours of mixing.
  • Best for guests: Mix the salad within 30–60 minutes of serving for the freshest herb texture.
  • Best for leftovers: Store dressed tabbouleh in an airtight container for 2–3 days, knowing the herbs will soften over time.
  • Make-ahead tip: Wash and dry parsley up to 1 day ahead. Keep it wrapped in towels in the fridge.
  • Do not freeze: The tomatoes and herbs turn limp and watery after thawing.
A make-ahead tabbouleh guide showing dried parsley, dried mint, drained tomatoes, fine bulgur soaked in dressing, and finished tabbouleh in a container.
For make-ahead tabbouleh, prep the herbs, tomatoes, and fine bulgur separately. Then mix close to serving and store leftovers in the fridge for 2–3 days.

If the salad tastes dull after sitting, refresh it with a small squeeze of lemon juice, a pinch of salt, and a drizzle of olive oil before serving. This brings back brightness without needing a full new batch of dressing.

What to Serve with Tabbouleh

Tabbouleh works as a salad, side dish, or part of a mezze spread. Its bright lemon and herb flavor makes it especially good beside richer dishes.

  • Hummus and warm pita
  • Falafel
  • Grilled chicken, kebabs, or kofta
  • Lentil soup
  • Stuffed pita wraps
  • Roasted eggplant or grilled vegetables
  • Romaine lettuce leaves for scooping
  • Rice bowls or grain bowls
A mezze spread with tabbouleh, pita, hummus, falafel, pickles, grilled vegetables, lemon, and lettuce leaves.
Tabbouleh works well with mezze because its lemony herbs cut through richer foods. Serve it with pita, hummus, falafel, grilled dishes, pickles, or crisp lettuce leaves.

For a full mezze-style meal, serve tabbouleh with warm pita, hummus, pickles, and homemade falafel. If you are building a falafel, shawarma, or pita spread, a spoon of amba sauce adds a sharp, tangy contrast beside the fresh herbs.

For grilled chicken, wraps, or pita plates, tabbouleh also works well with a cooling tzatziki sauce. You can also spoon it into pita pockets with hummus, cucumber, and crisp vegetables, similar to this hummus veggie sandwich.

For a lighter plate, serve tabbouleh with hummus, raw vegetables, olives, and pita. For a fuller dinner, pair it with grilled chicken or lamb and a creamy yogurt sauce.

Tabbouleh Variations

Once you understand the base recipe for tabbouleh, the variations are easy. For example, you can swap bulgur for quinoa, cauliflower rice, or couscous while keeping the herbs generous, the pieces small, and the lemon-olive oil balance bright.

A tabbouleh variations graphic showing classic bulgur, quinoa, cauliflower, and couscous versions in separate bowls.
Once the parsley-heavy base is clear, tabbouleh variations are easy. Use quinoa for gluten-free tabbouleh, cauliflower rice for grain-free tabbouleh, or couscous for a quick variation.

Quinoa Tabbouleh

Use cooked and fully cooled quinoa instead of bulgur. Quinoa tabbouleh is the best gluten-free version because quinoa has a small grain size and absorbs lemon dressing well. Keep the parsley generous so it still tastes like tabbouleh, not just quinoa salad.

If you are using quinoa for meal prep, this quinoa and chickpea salad idea shows how well quinoa works with cucumber, tomatoes, red onion, and lemon-tahini dressing.

Cauliflower Tabbouleh

Use finely riced cauliflower instead of bulgur for a grain-free version. Raw cauliflower rice works well if it is chopped small and not watery. For a softer texture, salt it lightly, let it sit for a few minutes, then squeeze out extra moisture before mixing.

Couscous Tabbouleh

Couscous tabbouleh is a quick variation, but it is not the traditional version. Cook or soak the couscous, fluff it, cool it completely, then mix with the herbs, tomato, lemon, and olive oil.

No-Bulgur Tabbouleh

You can skip the bulgur for a lighter herb salad. The texture will be less traditional, but it works if you want a very fresh salad with parsley, tomato, mint, lemon, and olive oil.

Extra-Lemony Tabbouleh

If you like a sharper salad, add another tablespoon of lemon juice after the salad rests. Add it gradually because too much lemon can overpower the herbs.

Tabbouleh FAQs

Is tabbouleh the same as tabouli?

Yes. Tabbouleh and tabouli usually mean the same parsley, tomato, mint, bulgur, lemon, and olive oil salad. The difference is mostly spelling.

What is tabbouleh made of?

Tabbouleh is made with parsley, tomatoes, mint, green onions, fine bulgur, lemon juice, olive oil, salt, and pepper. Some versions also include cucumber.

What kind of bulgur is best for tabbouleh?

Fine #1 bulgur is best for tabbouleh because it softens quickly and does not overpower the parsley. Medium or coarse bulgur can work, but it usually needs hot water and gives the salad a heavier texture.

Do you cook bulgur for tabbouleh?

You do not need to cook fine bulgur for tabbouleh. In this recipe, it softens in the lemon-olive oil dressing while you chop the herbs and vegetables. Medium or coarse bulgur should be hot-soaked or cooked, then cooled before mixing.

Can I make tabbouleh without bulgur?

Yes. You can leave out the bulgur for a lighter parsley salad, but the texture will be less traditional. If you want a gluten-free version with a similar small-grain feel, cooked and cooled quinoa is the best swap.

Is tabbouleh gluten-free?

Classic tabbouleh is not gluten-free because bulgur is made from wheat. For a gluten-free version, use cooked quinoa or cauliflower rice instead of bulgur.

Is tabbouleh vegan?

Yes. Traditional tabbouleh ingredients are plant-based, so the salad is naturally vegan and dairy-free.

Is tabbouleh healthy?

Tabbouleh is a fresh, herb- and vegetable-heavy salad made with parsley, tomatoes, mint, lemon juice, olive oil, and a small amount of bulgur. It can fit well into a balanced Mediterranean-style meal with vegetables, legumes, whole grains, and olive oil. For broader context, Harvard’s Nutrition Source has a useful overview of the Mediterranean diet pattern.

Why is my tabbouleh watery?

Tabbouleh becomes watery when the parsley is wet, the tomatoes are too juicy, the cucumber is not drained, or too much dressing is added. Dry the herbs well, drain juicy vegetables, and let the salad rest before adjusting the final seasoning.

Should tabbouleh be served cold?

Tabbouleh can be served chilled or at room temperature. It tastes best after a short rest, but it should not sit out for too long because the herbs soften and the tomatoes release more liquid.

How long should tabbouleh rest before serving?

Let tabbouleh rest for about 10–30 minutes after mixing. That gives the bulgur time to finish softening and lets the lemon, olive oil, herbs, and tomatoes settle into a brighter flavor.

Can I make tabbouleh ahead of time?

Yes, but it tastes freshest the same day. You can wash and dry the herbs ahead of time, then chop and mix the salad closer to serving. Leftovers keep 2–3 days in the fridge.

Can I freeze tabbouleh?

No. Tabbouleh does not freeze well because the herbs and tomatoes become limp and watery after thawing.

Can I use quinoa instead of bulgur?

Yes. Use cooked and cooled quinoa instead of bulgur for a gluten-free quinoa tabbouleh. Keep the herbs generous so the salad still tastes fresh and parsley-forward.

Can I use couscous instead of bulgur?

Yes, but couscous tabbouleh is a quick variation rather than the classic version. Cook or soak the couscous, cool it completely, then mix with the herbs, tomatoes, lemon, and olive oil.

Can I use cauliflower rice instead of bulgur?

Yes. Finely riced cauliflower makes a grain-free tabbouleh variation. Use it raw for crunch or salt and drain it lightly for a softer texture.

Should I use curly parsley or flat-leaf parsley?

Both can work. Curly parsley gives a fluffy, traditional-looking texture, while flat-leaf parsley has a stronger flavor and is easier to chop. Whichever you use, dry it very well before chopping.

Can I chop parsley in a food processor?

You can, but hand-chopping gives better texture. If using a food processor, pulse carefully and stop before the parsley becomes wet or pasty.

A close serving image of fresh parsley-first tabbouleh with a spoon, pita wedges, lemon, and romaine leaves.
Before serving, taste the rested tabbouleh one last time. Salt fixes flat flavor, lemon adds brightness, and a small drizzle of olive oil softens sharp edges.

Tabbouleh Recipe Tips to Remember

For the best tabbouleh, keep the salad parsley-first, use fine bulgur, dry the herbs thoroughly, drain juicy tomatoes, and taste after the salad rests. Those small details make the difference between a fresh, bright herb salad and a watery, grain-heavy bowl.