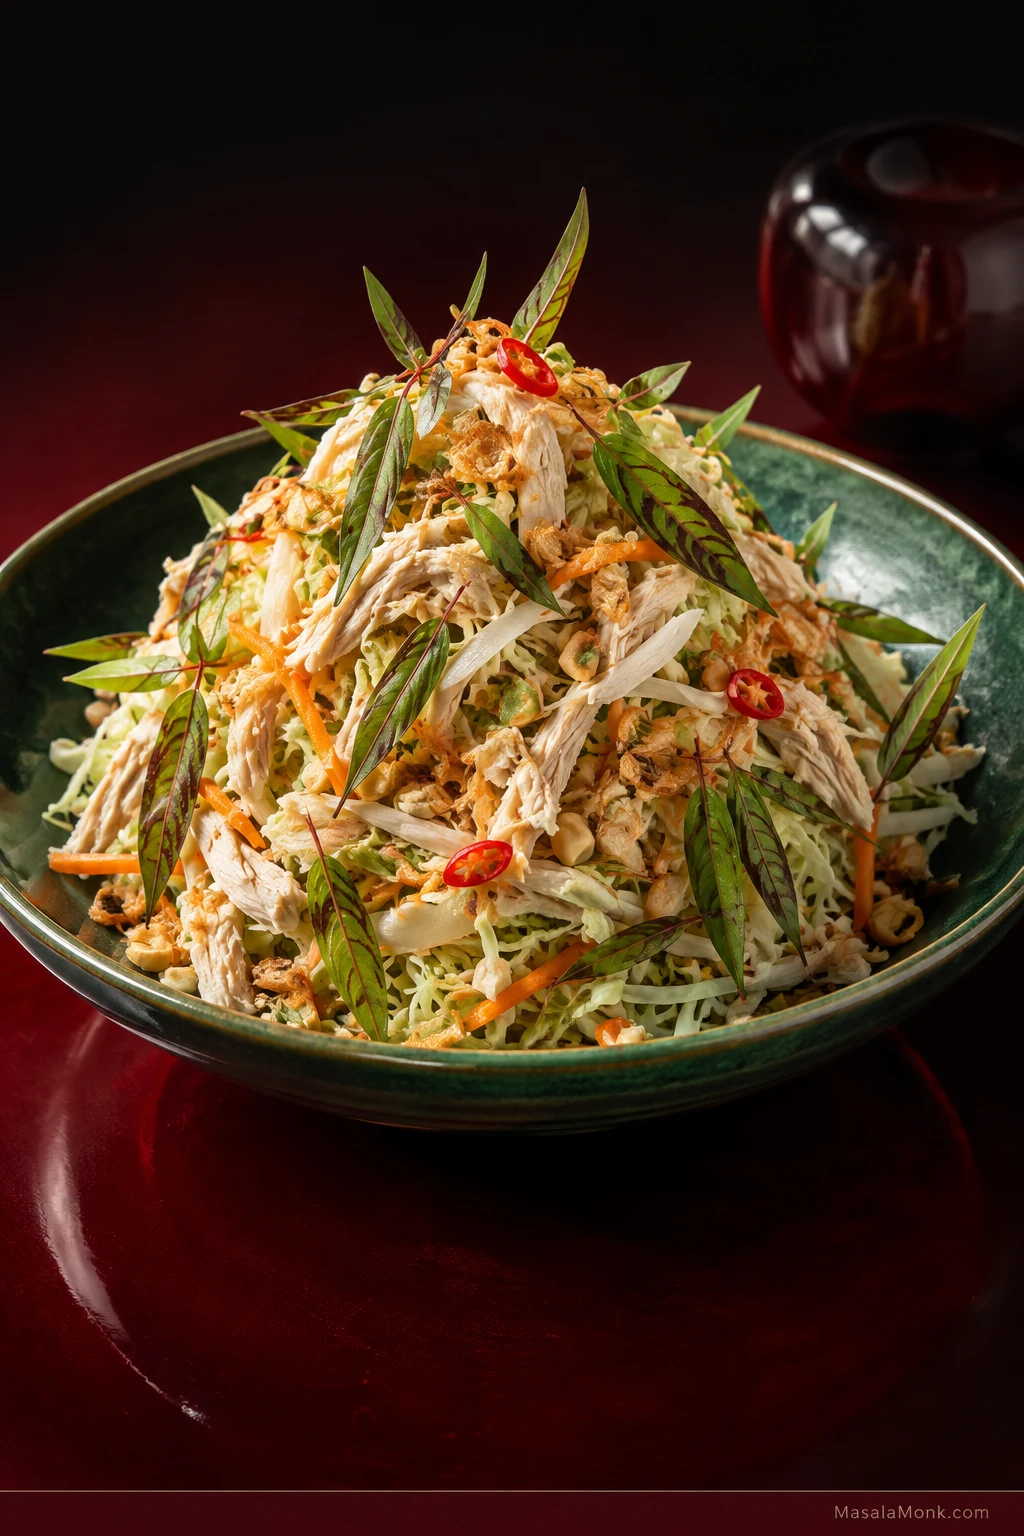
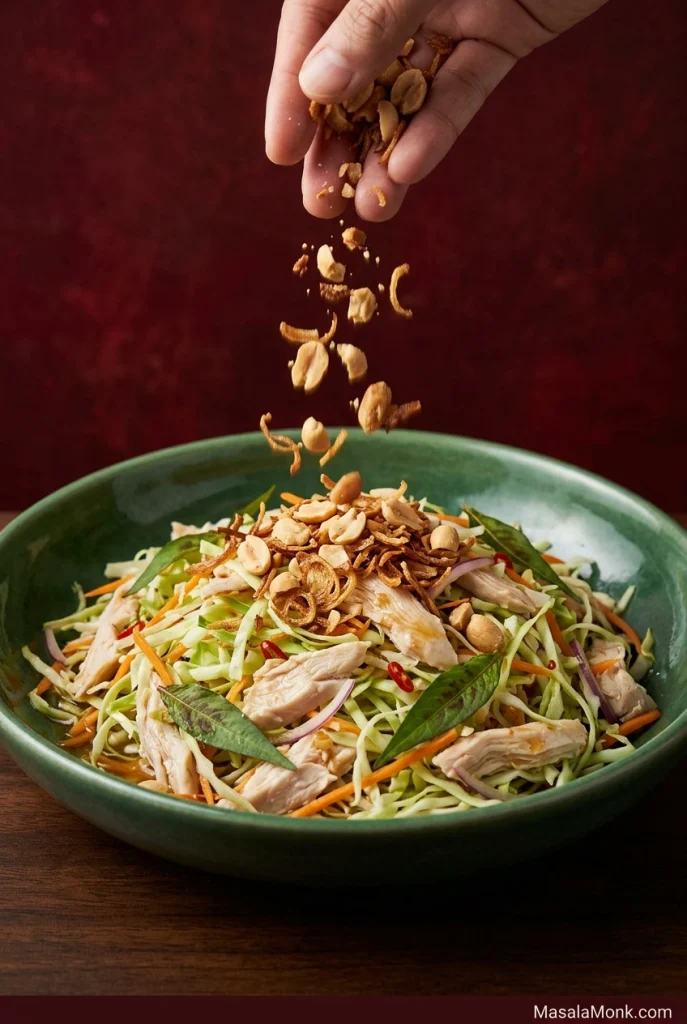
Finely shredded cabbage, juicy chicken and peppery rau răm get tossed with a lime-bright fish-sauce dressing, then finished with roasted peanuts and crisp fried shallots. Every forkful comes out a little differently: maybe mostly cool cabbage, maybe a soft shred of chicken with rau răm, maybe the lucky bite with a peanut and still-crisp piece of shallot.
Keep the cabbage dry, cook the chicken gently, tame the onion and save the fried shallots for the end. Those small choices keep the salad lively: moist chicken, sharp herbs and cabbage that still has some snap.
A little softening is not a failed salad. The real trouble starts when enough water leaves the cabbage to collect underneath and weaken the dressing.
Dry the cabbage, dress in stages, and add the crunch last.
Gently poach 450 g / 1 lb chicken, shred it, and combine it with 450 g / 1 lb finely sliced green cabbage, carrot, thin onion and rau răm. Give the chicken some dressing first, then add the vegetables and dress everything gradually.
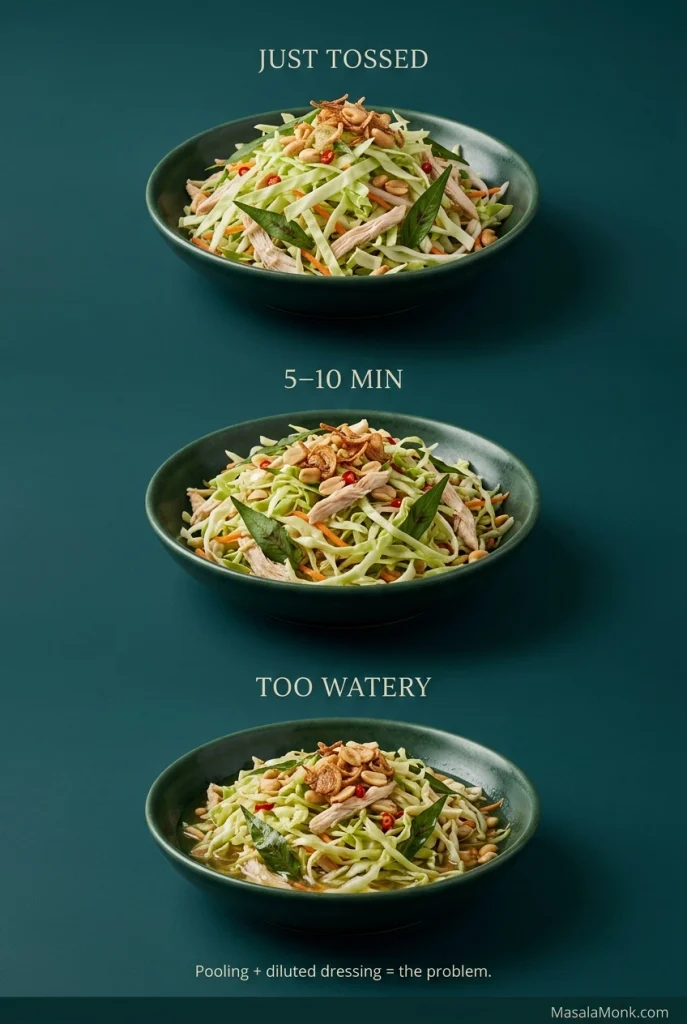
Resting time controls the cabbage texture, so use the guide below to choose how crisp or softened you want it.
The dressing combines fish sauce, lime, unseasoned rice vinegar or white vinegar, sugar, water, garlic and chile. Keep some back and make the final adjustment after tasting chicken and cabbage together.
For this texture
Do this
Very crisp
Dress and serve immediately.
Crisp but seasoned
Rest 5–10 minutes.
Softer and more marinated
Rest longer and expect more moisture to leave the cabbage.
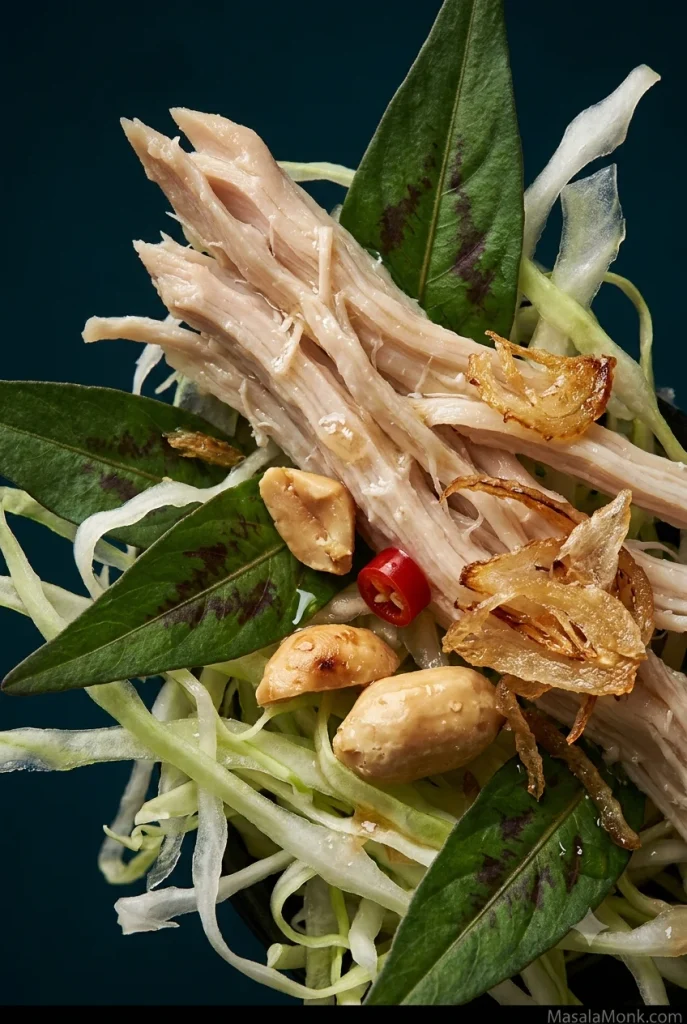
At close range, three textures should still read separately—moist torn chicken, cabbage with a clean edge, and fried shallots that look dry and brittle rather than glossy with dressing.
Make It Now: Vietnamese Chicken Cabbage Salad
Recipe at a Glance
Yield
4 light main-course servings or about 6 side servings
Chicken
450 g / 1 lb raw boneless chicken
Cabbage
450 g / 1 lb green or white cabbage
Prep
About 25 minutes
Cook
About 20–30 minutes including heating the poaching liquid
Ready in
About 45–55 minutes when you prep the vegetables while the chicken cooks and cools
Rest
5–10 minutes for crisp-but-seasoned cabbage
Chicken endpoint
165°F / 74°C at the thickest part
Fast route
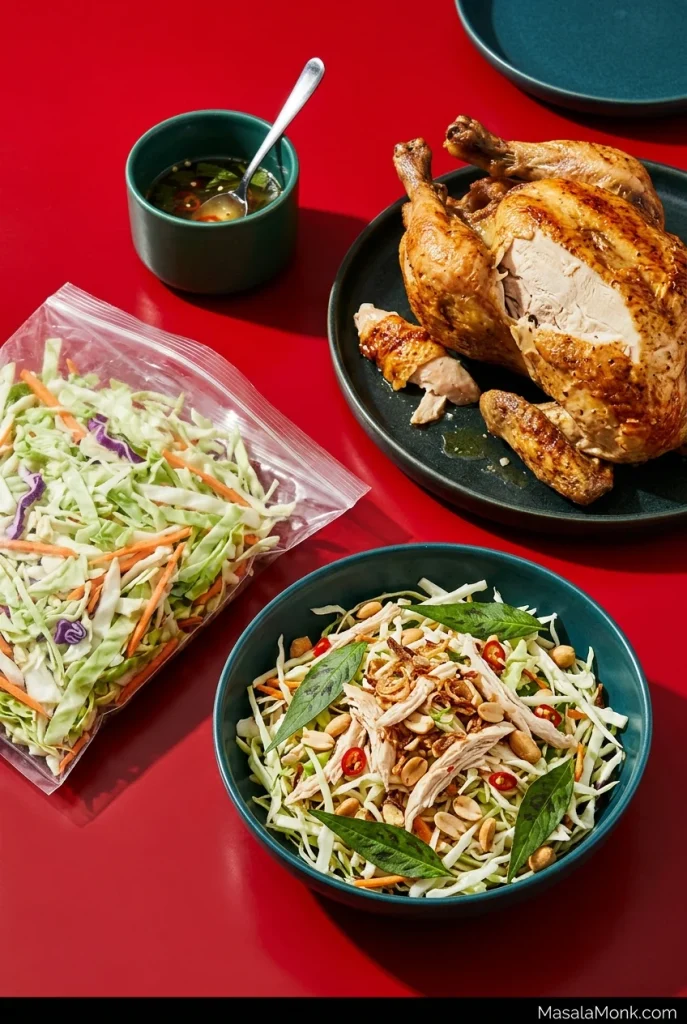
Cooked chicken + bagged slaw; about 15 minutes active prep
An instant-read thermometer is handy for the chicken, a salad spinner makes drying shredded cabbage much easier, and a mandoline gives very even ribbons. Use the hand guard or a cut-resistant glove if you use one.
Ingredients
Chicken
450 g / 1 lb boneless skinless chicken breast
Water, enough to comfortably cover the chicken
1 tsp fine salt
4–5 slices fresh ginger
2 scallions, cut into large pieces or lightly crushed
Cabbage, Herbs and Toppings
450 g / 1 lb green or white cabbage, very finely shredded
100 g / 3½ oz carrot, julienned or finely shredded
75–80 g / about 3 oz red or white onion, very thinly sliced
20 g / about ¾ oz rau răm, leaves and tender stems roughly torn
5 g cilantro leaves, about a small handful, optional
40 g / 1½ oz roasted peanuts, roughly chopped
30 g / about 1 oz fried shallots
1 tbsp extra unseasoned rice vinegar or distilled white vinegar, optional, for the tangier onion treatment
Fish-Sauce Dressing
45 ml / 3 tbsp plain bottled fish sauce
45 ml / 3 tbsp fresh lime juice
15 ml / 1 tbsp unseasoned rice vinegar or distilled white vinegar
25 g / 2 tbsp sugar
30 ml / 2 tbsp water
2 small garlic cloves, finely minced or crushed
½–1 small bird’s-eye chile, very finely sliced, to taste
Use plain fish sauce here, not prepared nước chấm or bottled dipping sauce. Prepared nước chấm is already diluted and seasoned, typically with water, sugar and acid; this recipe balances those separately.
The dressing makes about 150 ml / ⅔ cup. You may not need every drop.
Instructions
1. Gently Poach the Chicken
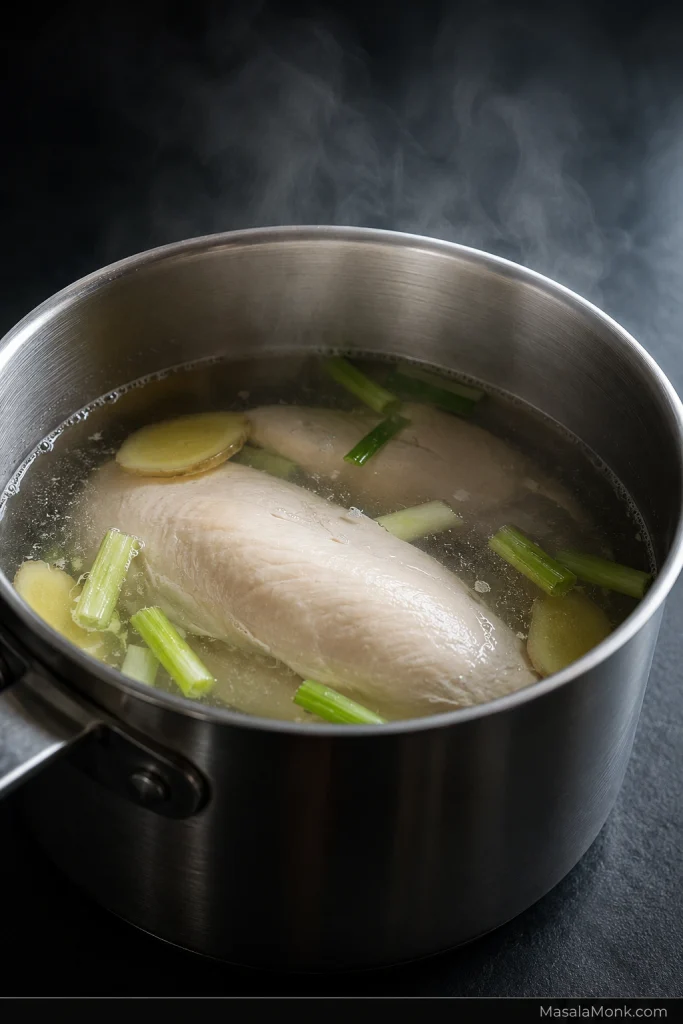
Put the chicken in a saucepan and add enough water to cover it comfortably. Add the salt, ginger and scallions.
Bring the water just up to a boil, then lower the heat immediately to a very gentle simmer. The liquid should move quietly; the chicken should not be bouncing around the pan.
Tiny bubbles gathering at the edge are enough; once the whole surface starts actively bubbling, the poaching liquid is hotter than the chicken needs.
Cover and cook until the thickest part reaches 165°F / 74°C. Once the liquid is hot and gently simmering, medium chicken breasts often need around 12–18 minutes. Thickness matters more than the timer.
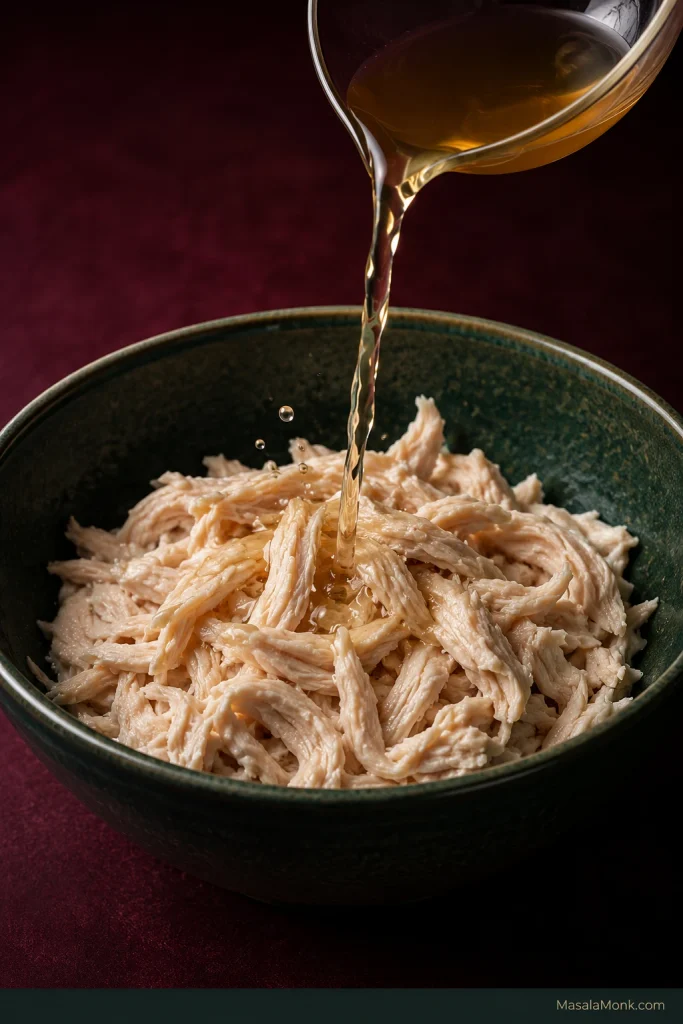
Lift the chicken out as soon as it is done. Properly poached breast should pull into moist strands with ragged edges that catch the dressing, not stiff fibres that feel woolly or dry.
2. Cool, Then Shred
Let the chicken cool until it is comfortable to handle, then tear or shred it into bite-size pieces. Keep the shreds loosely covered until they are no longer hot before they meet the cabbage.
3. Wash, Shred and Dry the Cabbage
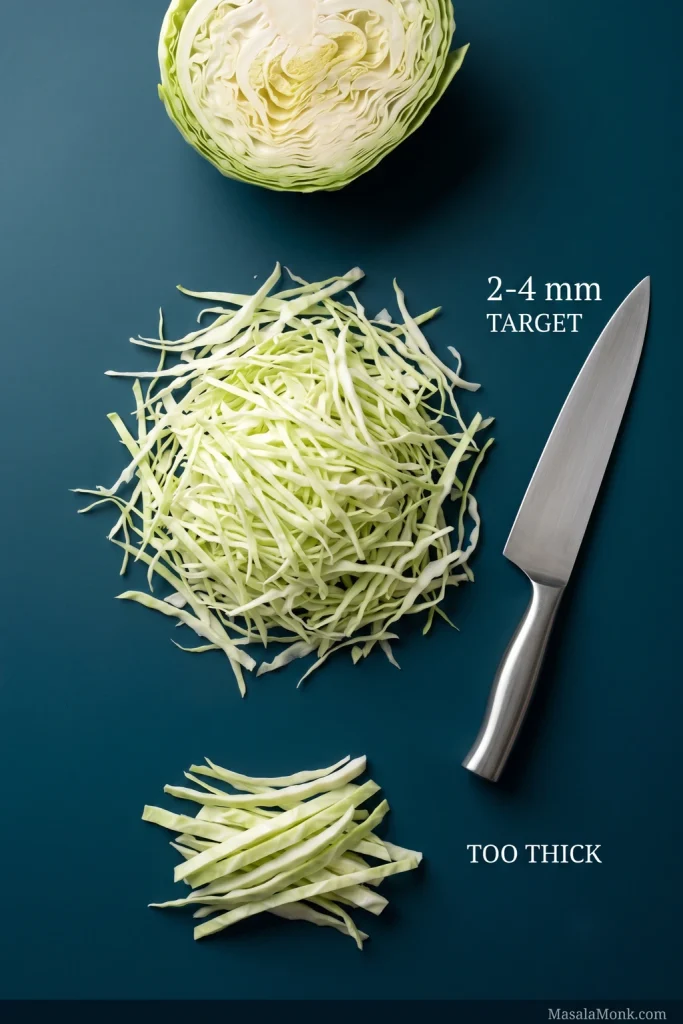
Remove any tired outer leaves. Shred the cabbage into fine ribbons, ideally about 2–4 mm wide, and julienne or finely shred the carrot.
Use the 2–4 mm pile as a visual ruler: those fine ribbons bend and mingle easily, while noticeably wider strips stay stiffer and take longer to taste fully seasoned.
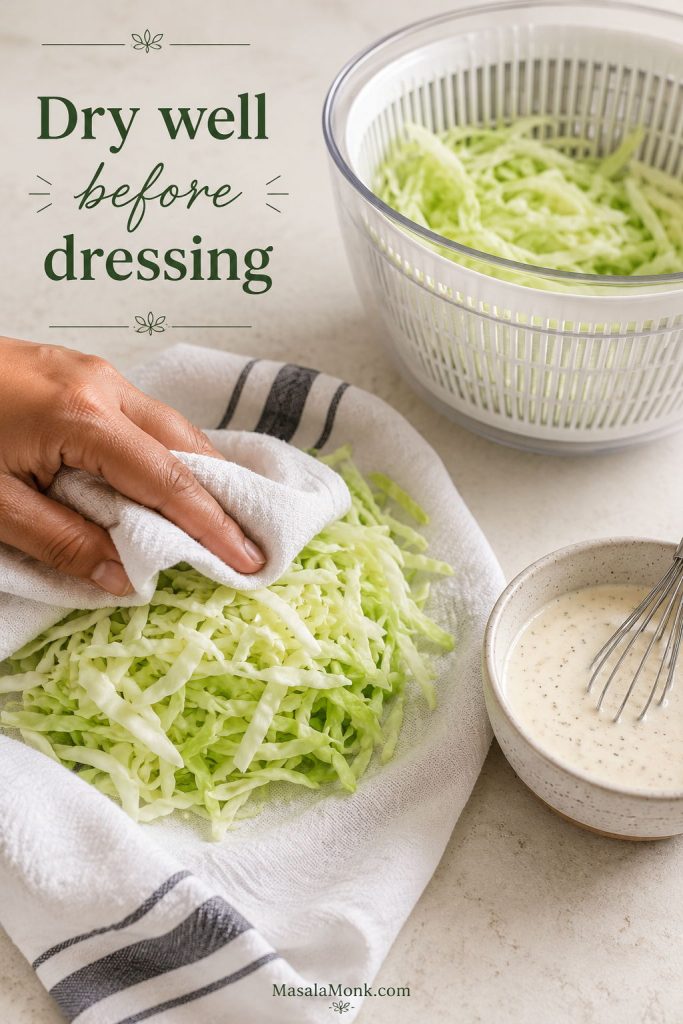
Rinse the cabbage if needed, then spin it thoroughly dry or spread it over clean kitchen towels. Pick up a handful before you move on: the shreds should feel dry rather than slick with wash water.
4. Soften the Onion’s Raw Edge
Put the sliced onion in ice-cold water for about 10 minutes, then drain and pat it dry. It keeps its crunch while losing some of the raw burn that can overpower the herbs.
For a tangier onion, toss the slices with the 1 tbsp additional vinegar listed above plus 2 tbsp cold water. Leave for 10–15 minutes, turning once or twice, then drain thoroughly.
5. Make the Dressing
Stir together the lime juice, vinegar, sugar and water until the sugar has mostly dissolved. Add the fish sauce, garlic and chile.
Taste it now. Too strong? Don’t fix it yet. A spoonful on its own can seem almost alarmingly salty or fishy and then taste much calmer once it is spread through all that chicken and cabbage.
6. Season the Chicken First
Toss the cooled shredded chicken with 2 tbsp / 30 ml dressing and leave it for 2–3 minutes. A larger shred of chicken can stay surprisingly bland inside even when the cabbage around it is well seasoned.
Aim for a light, even sheen on the chicken rather than a puddle of dressing underneath.
7. Toss the Salad
Add the cabbage, carrot and well-drained onion. Pour over about 5 tbsp / 75 ml more dressing and toss thoroughly but gently. Keep the remaining dressing beside you for the final adjustment.
8. Give the Cabbage a Few Minutes
For cabbage that is crisp but no longer tastes completely raw, let the salad stand for 5–10 minutes. Thin green cabbage should still crack lightly between the teeth, then soften as you chew beside the chicken. Prefer a louder crunch? Toss and serve straight away.
9. Add the Herbs and Finish
Fold in the rau răm and cilantro, if using. The salad should smell fresh and peppery before the toppings even go on.
Take one proper bite with chicken, cabbage and herbs together. The chicken should taste seasoned even without a pile of cabbage attached to it. Check the cabbage and the bottom of the bowl too: if the texture feels right and the dressing still tastes bright rather than watered down, you’re there.
Add more dressing 1 tbsp at a time only if it needs it. Scatter over the peanuts and fried shallots and serve.
Swaps
Chicken thighs: Use the same raw weight. They are juicier and more forgiving than breast.
No rau răm: Start with about ½ cup total cilantro and fresh mint, roughly equal parts. Add a few Thai basil leaves if you have them. The flavour will be different, so omit the separate optional cilantro from the main ingredient list when using this fallback.
No peanuts: Use extra fried shallots or toasted sunflower or pumpkin seeds.
No chile: Leave it out and put sliced chile on the table for anyone who wants heat.
Gluten-free: The core salad can be gluten-free; check the labels on fish sauce and packaged fried shallots.
What Is Gỏi Gà Bắp Cải?
Gỏi refers to a broad Vietnamese family of dressed salads; gà means chicken and bắp cải means cabbage. These salads are commonly called gỏi in southern Vietnamese usage and nộm in northern usage. You may also see this dish written without Vietnamese diacritics as goi ga bap cai.
Fresh herbs and contrasting textures are central to this broad style of salad. Gỏi can be everyday food or sit within a larger shared meal, where something sharp and fresh provides an easy counterpoint to richer dishes.
In English, Gỏi Gà Bắp Cải sometimes gets called Vietnamese chicken slaw or Vietnamese chicken coleslaw because of all that shredded cabbage. The resemblance mostly ends with the shape: unlike classic creamy coleslaw, there is no mayonnaise or oil in this dressing. Fish sauce, lime, vinegar, sugar and herbs give it its character.
This version starts from the crisper end of the spectrum: finely cut green cabbage, plenty of rau răm, chicken seasoned before mixing, and dressing added gradually so everything tastes seasoned without the cabbage sitting in a pool of liquid. Other versions are deliberately softer and more deeply marinated; here, you can simply let the bowl sit longer when that is the texture you prefer.
Choosing and Cooking the Chicken
Chicken breast is the default here because its mild flavour keeps the salad light and lets the herbs and dressing lead. Thigh is richer and more forgiving if juiciness is the priority, and a mixture of the two works well too.
A whole chicken makes particular sense when you also want broth for the rest of the meal. Whichever cut you use, firm and juicy is fine; dry, stringy meat usually means too much heat or too much time.
Already-cooked chicken skips the poaching entirely. Leftover roast works beautifully, and rotisserie chicken can take you straight to the 15-minute version; our juicy baked chicken breast is another way to cook plain chicken ahead for lunches and salads. Breast that has gone too far is not hopeless either: shred it finely and get some dressing directly onto the meat.
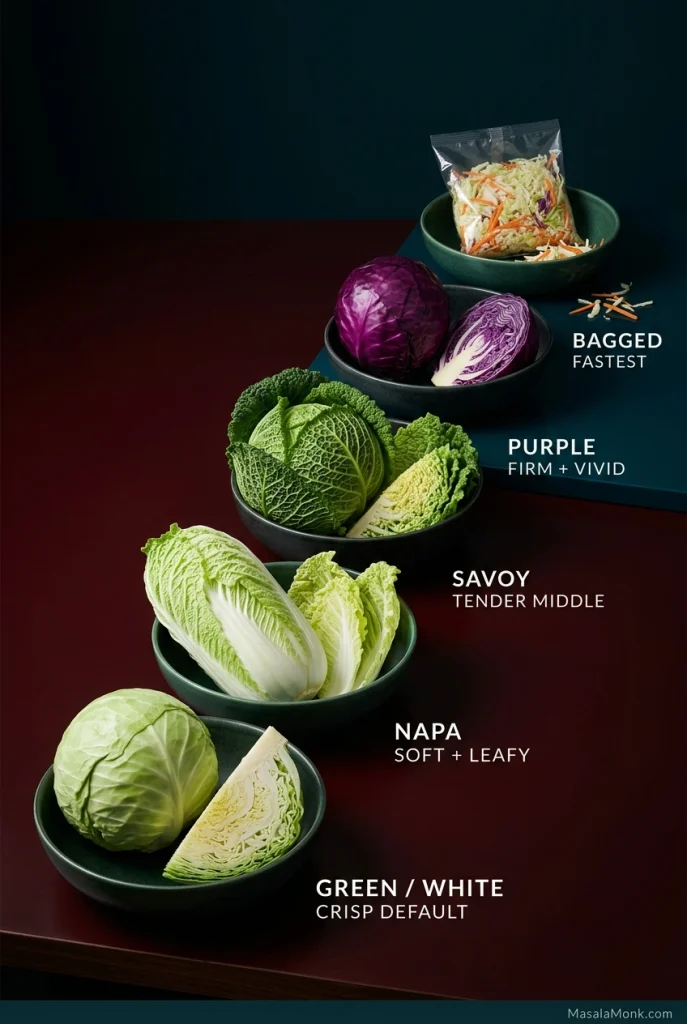
Green, Napa, Savoy or Bagged Slaw?
Cabbage
Texture
Best approach
Green / white
Firmest and crunchiest
Best default for this version
Napa / wombok
Softer and leafier
Dress close to serving
Savoy / pointed
Tender but still structured
Sits between Napa and green cabbage
Purple
Firm with strong colour
Usually nicest mixed with green
Bagged slaw
Depends on freshness and cut
Fastest; adjust any extra carrot
If you’re buying cabbage specifically for this recipe, choose green or white cabbage. It gives the clearest snap and can sit briefly in the dressing without collapsing.
The leaf structure explains the timing difference: tightly layered green cabbage gives firmer ribbons, while Napa’s thinner, softer leaves relax much sooner once dressed.
Thickness matters almost as much as variety. A mature green cabbage sliced too thickly can make even a good dressing feel as though it is fighting its way through raw leaves. Aim for those 2–4 mm ribbons rather than broad strips.
Napa is the choice when you deliberately want something softer and leafier; it needs much less persuasion and may be ready after the first toss. A fresh bag of slaw is the speed-first option when chopping cabbage is the last thing you feel like doing—just skip extra carrot when the mix already contains plenty.
Texture gets you halfway there. Rau răm is what makes the bowl smell unmistakably different from an ordinary chicken slaw.
Rau Răm and the Herbs
Often sold as Vietnamese coriander or Vietnamese mint, rau răm (Persicaria odorata) is peppery and aromatic. Despite the confusing English name, it tastes quite different from ordinary mint.
Look for pointed green leaves on reddish-green stems; many leaves also show darker chestnut markings.
Tear a leaf and smell it before it goes into the salad. That sharp, peppery aroma is one of the things that makes a bowl of chicken and cabbage suddenly feel much more distinctive. Twenty grams gives it a proper presence; use less in the bowl and put the rest on the table if the herb is new to everyone eating.
Cilantro and mint do not recreate rau răm exactly, but together they give the salad freshness and herbiness when the real thing is unavailable.
No rau răm? Make dinner anyway.
Balancing the Fish-Sauce Dressing
The dressing follows the same sweet-sour-salty balancing logic as nước chấm, though here it has a whole pile of cabbage and chicken to season rather than a single dipped bite.
Start with 3 tbsp fish sauce, 3 tbsp lime juice, 1 tbsp vinegar, 2 tbsp sugar and 2 tbsp water, plus garlic and chile. Lime brings fragrance. Distilled white vinegar is sharper; unseasoned rice vinegar is gentler.
Fish sauce brands differ enough that the same three tablespoons can push two dressings in different directions. Judge any correction on the chicken and cabbage rather than trying to make the undiluted dressing taste gentle on its own.
When the balance is right, lime arrives bright and fragrant, rau răm follows with its peppery edge, and the fish sauce makes the chicken taste fuller underneath.
If the Dressing Needs Fixing
Problem
Try this first
Too fishy or intense
Dilute with 1 tsp water, taste, then add a small squeeze of lime if needed.
Overly salty
Start with 1–2 tsp water and retaste before adding anything sweet.
Too sour
Stir in ½ tsp sugar + 1 tsp water, then taste again.
Overly sweet
Balance with 1 tsp lime or vinegar; add a few drops of fish sauce only if it also needs more savoury depth.
Flat
Try a small squeeze of lime for brightness or a few drops of fish sauce for savouriness.
Far too spicy
Make more chile-free dressing and combine the two mixtures.
Make one small correction and taste again before changing anything else.
Once the dressing tastes right, what happens next is mostly about time.
Crisp, Softened or Watery?
Some people want the cabbage almost squeaky-fresh. Others like it after the leaves have relaxed into the dressing and picked up more seasoning. Both can be good.
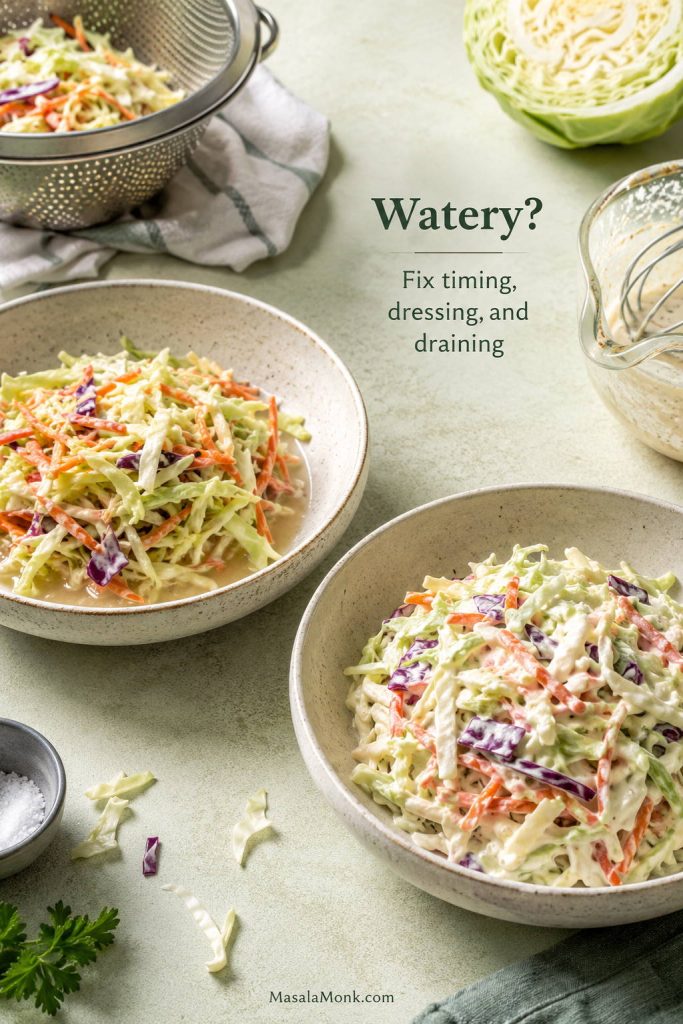
A small amount of liquid at the bottom is normal. Look again once the salad has been sitting: a real puddle, paired with dressing that now tastes noticeably weaker, means enough water has left the cabbage to change the balance.
The middle bowl is intentionally lower and glossier yet still successful; the failure cue is the third bowl’s visible puddle, not softness by itself.
Why Did My Salad Turn Watery?
The cabbage was still wet after washing.
Too much dressing went in at once.
The salad was dressed long before it was eaten.
Tender Napa cabbage sat as long as firm green cabbage.
The chicken was still hot.
The onion carried extra water into the mixture.
Moderately wet salad can often be rescued with fresh finely shredded cabbage. Toss some through and refresh the herbs. A large puddle may need some draining first; taste afterward because seasoning leaves with the liquid too.
Tough cabbage is a different problem. If the salad is already mixed, give it a few more minutes with the dressing. Next time, slice it finer. A particularly mature head can also be lightly salted, rested and squeezed dry before assembly, though most ordinary cabbage does not need that extra step.
Half a rotisserie chicken, a bag of slaw and very little enthusiasm for cooking are already most of dinner.
Check the slaw bag before you buy it: crisp shreds with no visible pooled moisture give you a longer texture window after dressing.
Allow about 15 minutes of active prep. Use 350–400 g / 12–14 oz shredded cooked chicken and 450–550 g / 1–1¼ lb fresh slaw mix, plus the same fish-sauce dressing, herbs, peanuts and fried shallots.
Season the chicken first, add the slaw and dress gradually. Skip extra carrot when the mix already contains plenty, and go gently with the dressing when the chicken is salty to begin with.
Make Ahead and Lunchbox Gỏi Gà
For crisp cabbage, prepare the components ahead and bring them together closer to eating.
1–2 days ahead: cook and shred the chicken; make the dressing.
Earlier the same day: shred the cabbage and carrot; wash and thoroughly dry the herbs.
10–30 minutes before assembly: slice and ice-water-soak the onion, or give it the quick vinegar treatment.
Keep separate until serving: dressing, peanuts and fried shallots when maximum crunch matters.
The vinegar-treated onion can be made earlier the same day and refrigerated. The plain ice-water soak is best done closer to assembly.
For a packed lunch, keep the dressing in a small separate container and toss it through when you are ready to eat. Keep the chicken and salad refrigerated, or use an insulated lunch bag with a cold pack until lunchtime.
Extra shredded cabbage and carrot can become the filling for crispy vegetable spring rolls. Cook the filling until its loose moisture has evaporated before wrapping.
What to Serve With Gỏi Gà Bắp Cải
A generous portion makes a fresh, light lunch or dinner, especially when something cool and crisp sounds better than another heavy hot meal. Smaller servings sit easily alongside other Vietnamese dishes.
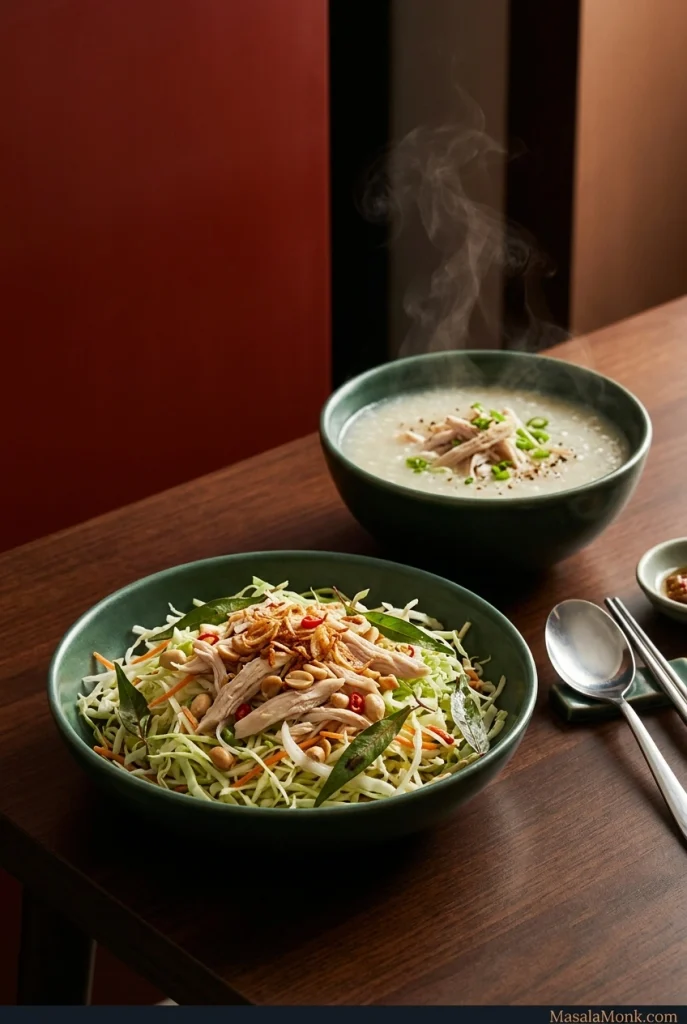
Gỏi Gà is particularly at home beside cháo gà, or chicken congee. With a whole poached chicken, the broth can become the congee while some of the meat goes into the salad. Chicken rice, or cơm gà, is another natural partner.
Gỏi Gà and cháo gà work through contrast: cool, sharp cabbage and herbs beside warm, soft congee, with one chicken able to supply both the salad meat and the broth.
For a larger table with rice-paper rolls, our peanut sauce for spring rolls gives the rolls something rich and nutty to dip into while the salad stays bright and sharp.
Storage and Leftovers
For the best texture, keep cooked chicken, vegetables and dressing in separate covered containers, with peanuts and fried shallots kept dry until serving. USDA chicken-safety guidance recommends cooking poultry to 165°F / 74°C and using refrigerated cooked chicken within 3–4 days.
With rotisserie chicken, count from when it was originally cooked or purchased rather than restarting the storage clock when it becomes salad.
Dressed leftovers will be softer and usually wetter the following day. If that deeper, more marinated texture appeals to you, they can still be very good. Fresh cabbage and herbs help when the salad has softened farther than you wanted.
Do you prefer your gỏi very crisp, or after it has had a little time to soften into the dressing?
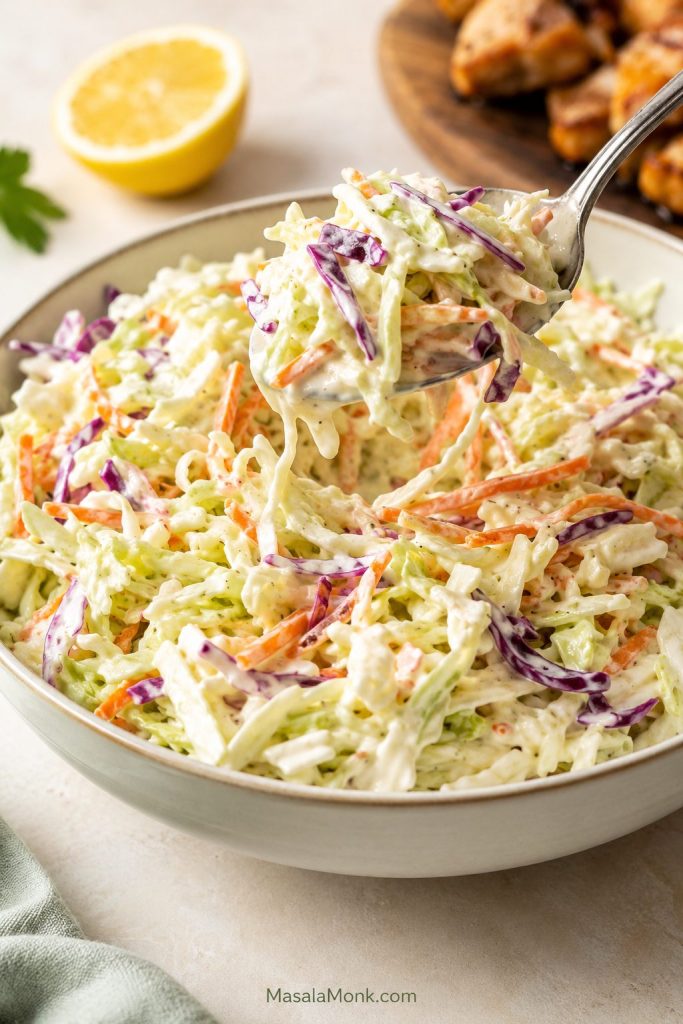
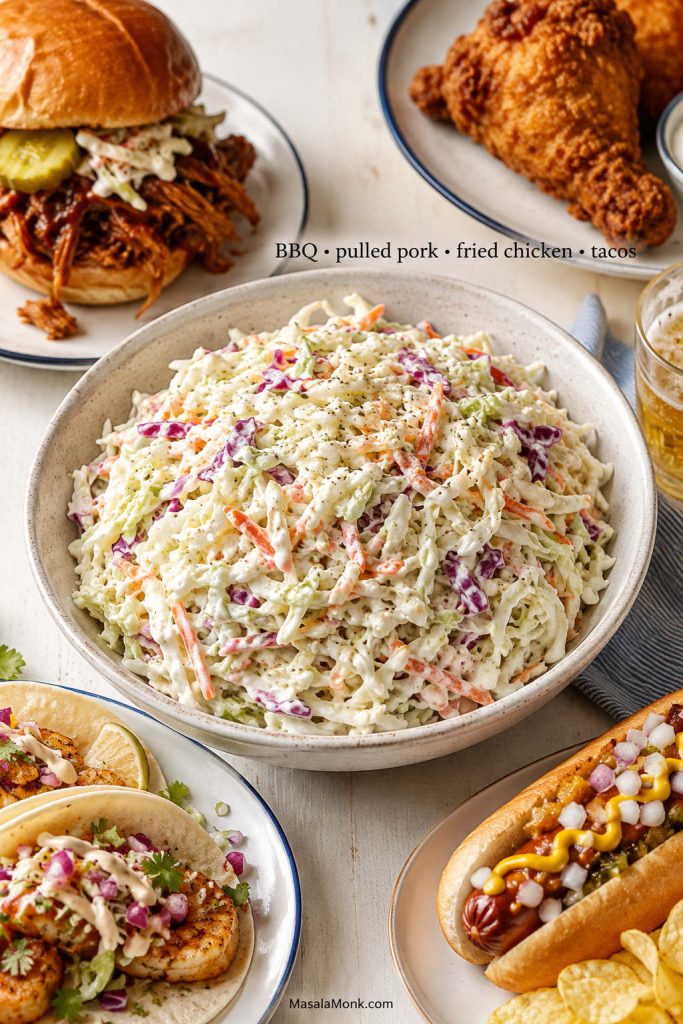
This coleslaw recipe is the cold, crunchy side that makes a cookout plate feel complete. It is creamy without being heavy, lightly sweet without tasting sugary, and tangy enough to cut through BBQ, burgers, fried chicken, fried fish, hot dogs, tacos, and pulled pork sandwiches.
The best version gives you that cold snap of cabbage, a creamy-tangy coating, and just enough sweetness to make smoky, salty, fried, or saucy food taste even better.
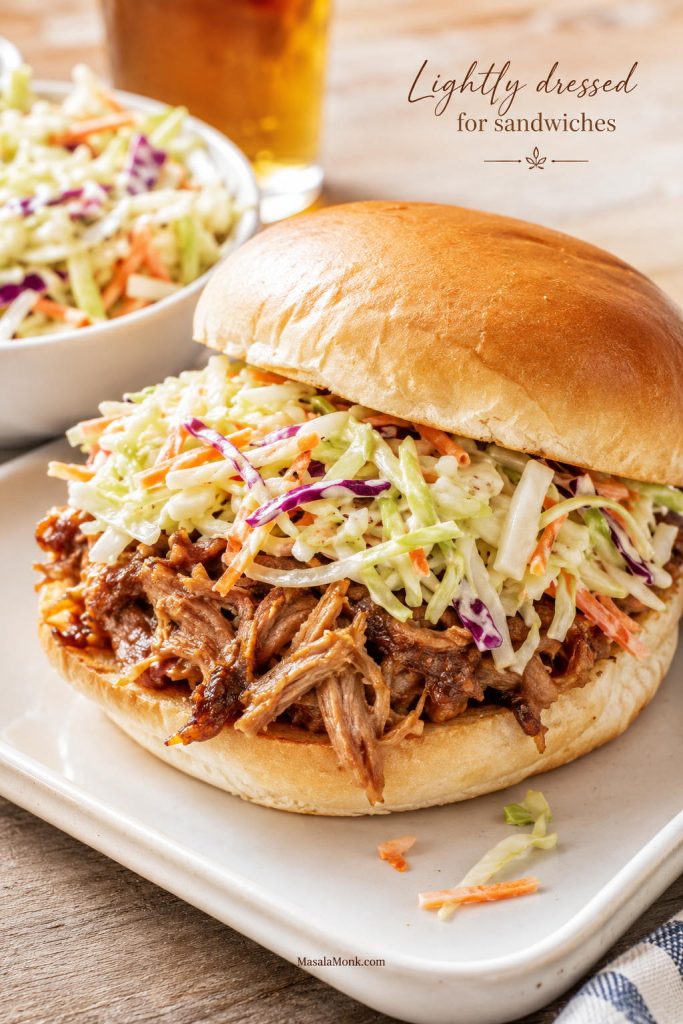
Because coleslaw brings cold crunch to smoky, fried, and saucy foods, it works especially well with BBQ plates, burgers, fried chicken, and pulled pork.
The recipe is simple — shredded cabbage, carrot, and a creamy dressing — but the little choices matter. Shred the cabbage fine enough, mix the dressing separately, chill the bowl, and hold back some dressing until the end. That is how you get homemade coleslaw that tastes fresh, not watery — and the full watery coleslaw fix is below if that is the problem you are trying to avoid.
You can make it with fresh cabbage when you want the strongest crunch, or with bagged coleslaw mix when you need a fast weeknight side. Either way, this is everyday creamy coleslaw: cool, crisp, bright, and sturdy enough to work as a side dish or a sandwich topping.
Best for: BBQ plates, burgers, fried chicken, fried fish, hot dogs, tacos, and pulled pork sandwiches
Texture: cold, crunchy, creamy, lightly sweet, and tangy
Prep time: 15 minutes
Chill time: 30–60 minutes
Servings: 8 side servings
Yield: about 8–9 cups
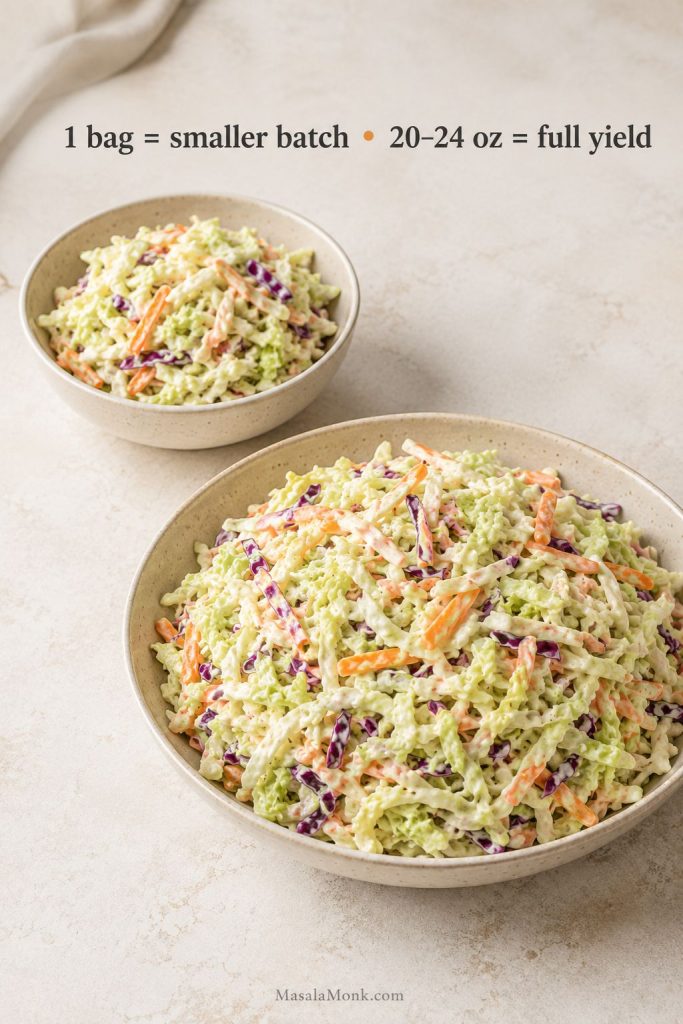
Shortcut: use bagged coleslaw mix; one 14–16 oz bag makes a smaller batch, while 20–24 oz gives the full recipe yield
Most important tip: start with part of the dressing, chill, toss again, then add more only if the slaw needs it
What You’ll Find in This Coleslaw Guide
This guide helps you make classic creamy coleslaw that tastes balanced, stays crisp, and works whether you are serving it in a bowl, beside grilled food, or inside a sandwich.
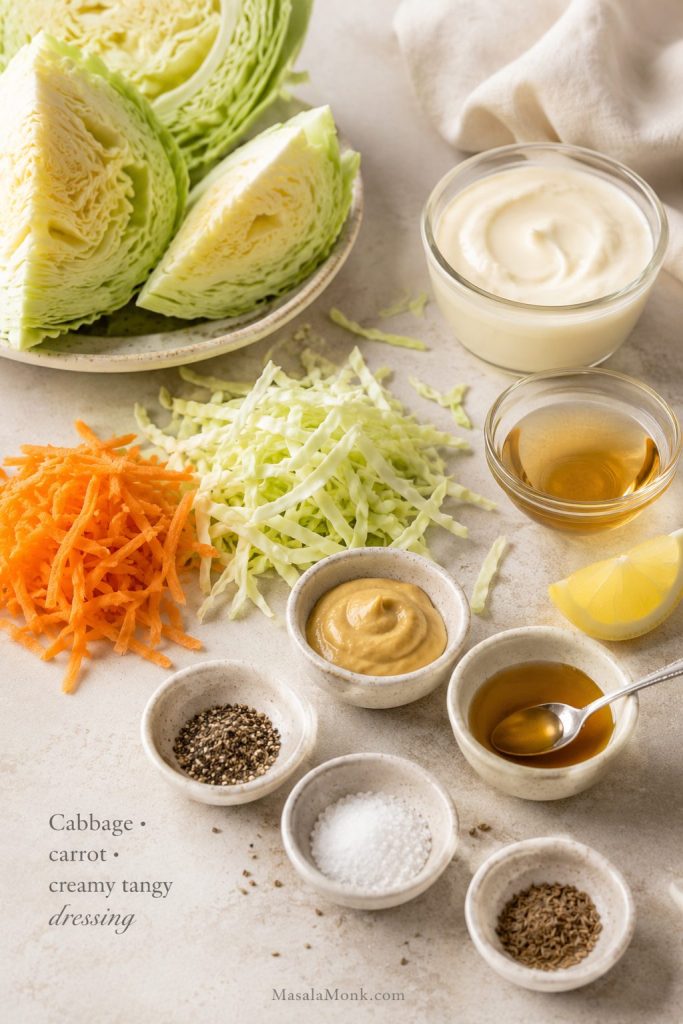
The best easy coleslaw recipe starts with finely shredded cabbage, grated carrot, and a creamy dressing made with mayonnaise, apple cider vinegar, a little lemon juice or mustard, sugar or honey, salt, pepper, and optional celery seed. The simple trick is to dress the cabbage lightly at first, let it chill, then add more dressing only if it needs it.
For a reliable balance, use about 8 cups of shredded cabbage and carrot mixture for every ⅔ cup of mayonnaise-based dressing. That gives you coleslaw that is glossy and lightly coated, not soupy at the bottom of the bowl. It should taste cool, crunchy, tangy, and just sweet enough. For the exact creamy-tangy balance, see the coleslaw dressing section before you adjust the mayo, vinegar, lemon, or mustard.
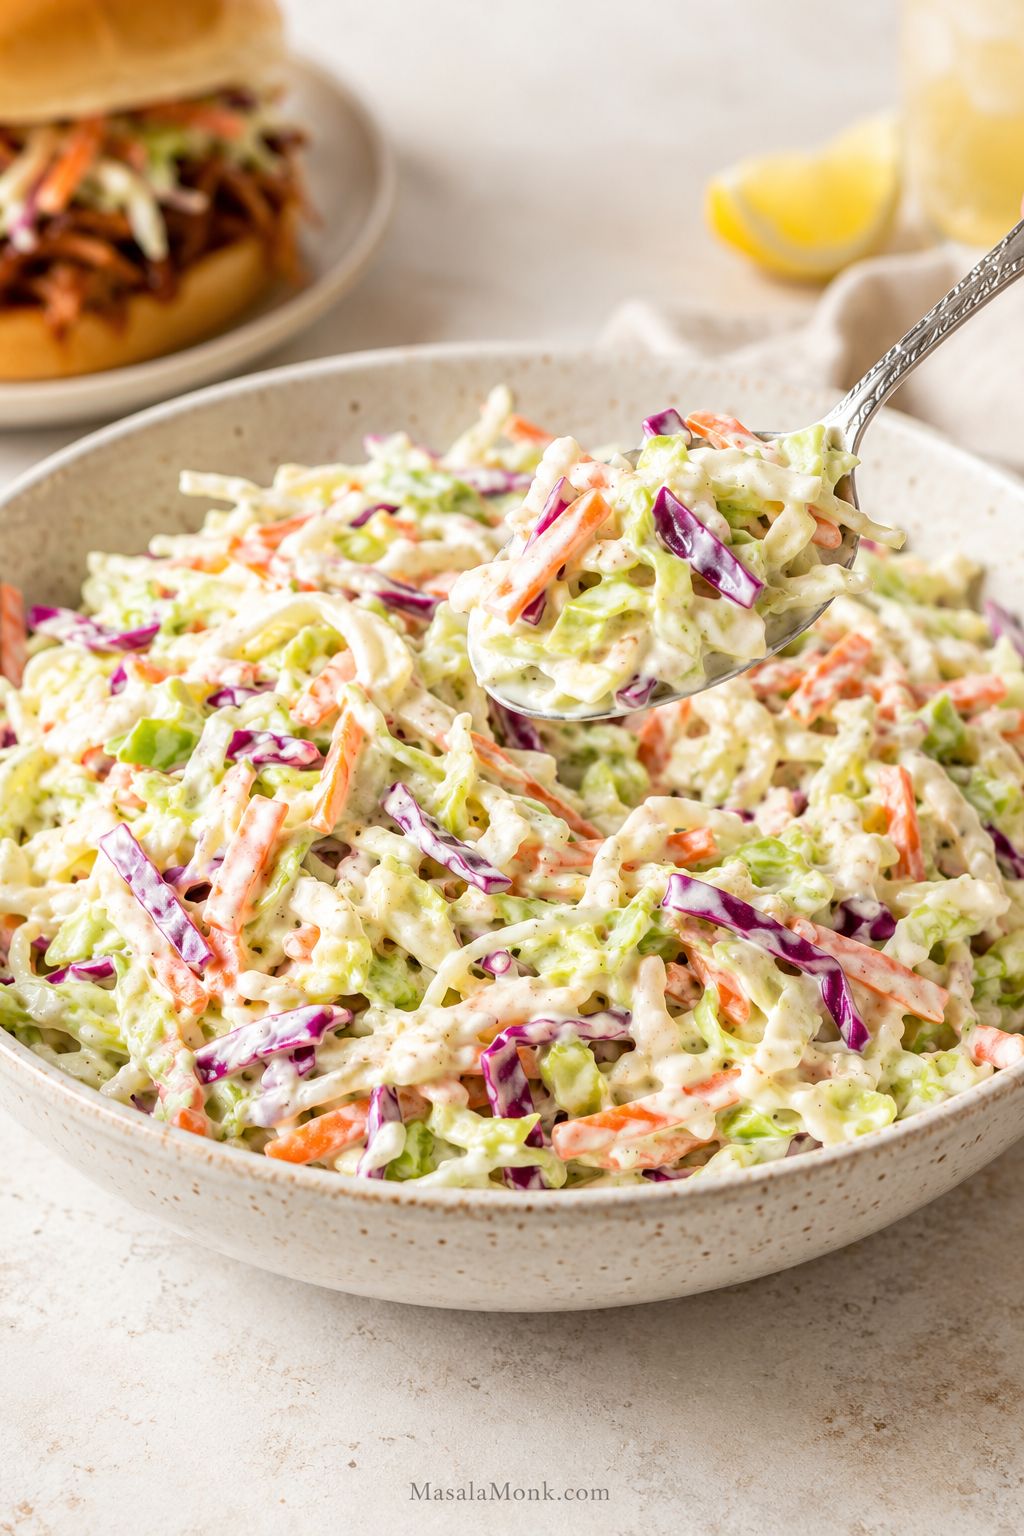
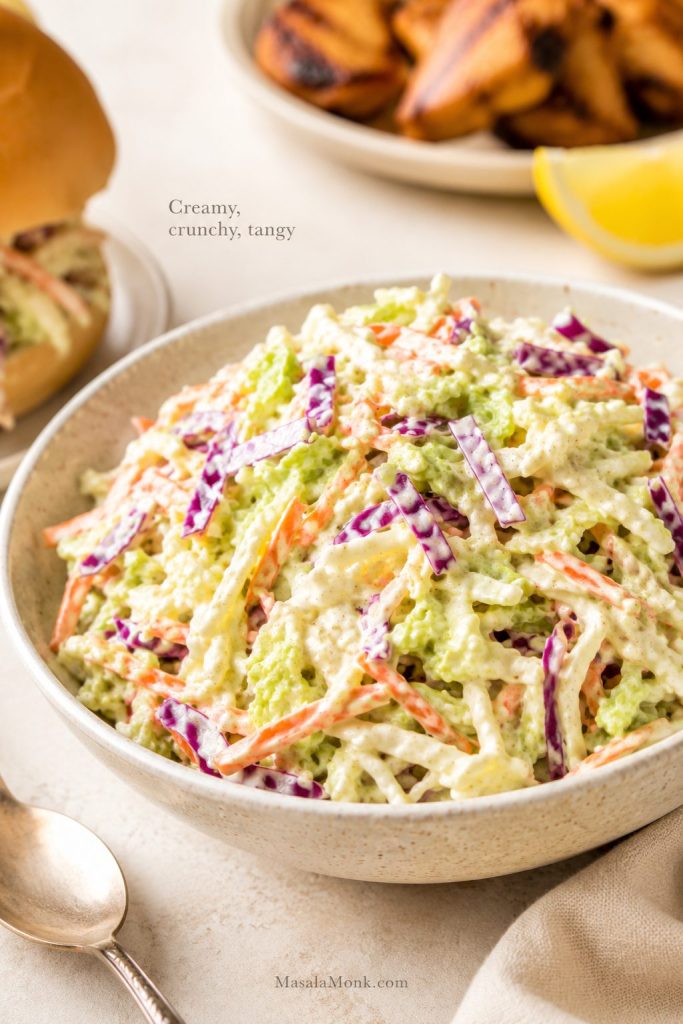
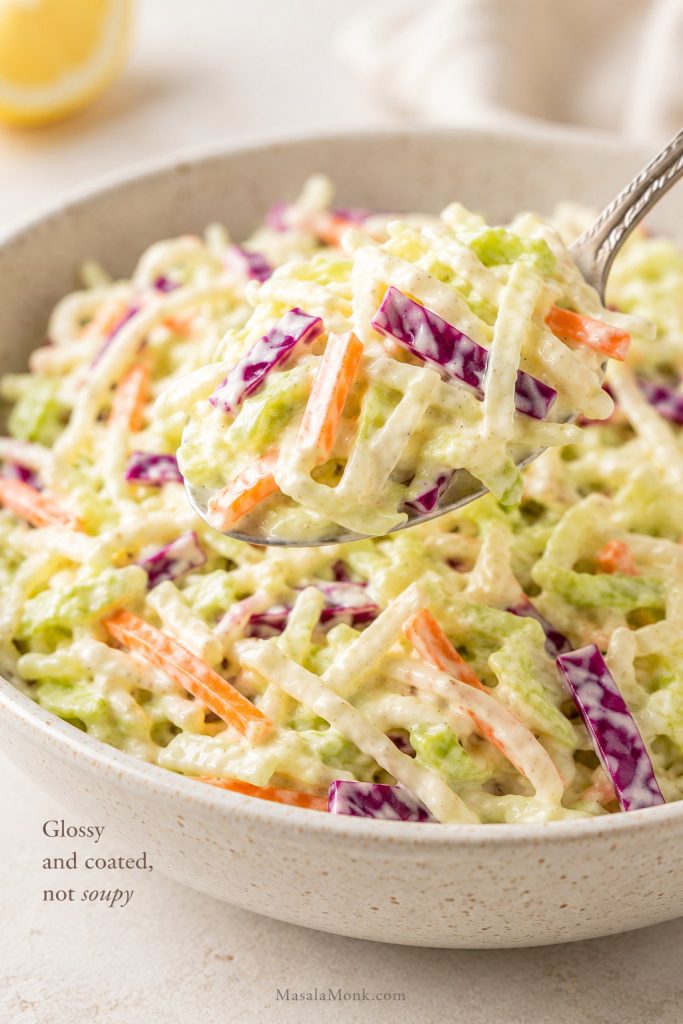
The best easy coleslaw should show contrast in one bite: creamy dressing on the outside, crisp cabbage underneath, and no thin liquid collecting below.
Using bagged coleslaw mix? One 14–16 oz / 400–450 g bag makes a smaller batch than this full recipe. For one bag, start with about half to two-thirds of the dressing. If you are in a hurry, you can serve the slaw after 10–15 minutes, though the texture and flavor are better after 30–60 minutes in the fridge. For the full bagged-mix math, see the bagged coleslaw mix conversion below.
Coleslaw Recipe Card
Coleslaw Recipe
This easy coleslaw recipe is made with crisp cabbage, grated carrot, and a sweet-tangy dressing. It is the kind of cold, crunchy side that works on a cookout plate, inside a sandwich, or beside fried food.
Prep Time 15 minutes
Chill Time 30–60 minutes
Total Time 45–75 minutes
Servings 8 side servings
Yield about 8–9 cups
Equipment
Large mixing bowl
Medium bowl
Whisk
Tongs
Sharp knife or mandoline
Box grater
Airtight container
Optional: colander or salad spinner for make-ahead cabbage
Ingredients
For the slaw:
6 loosely packed cups finely shredded green cabbage, about 420–450 g
2 loosely packed cups finely shredded red cabbage or more green cabbage, about 140–150 g
1 large carrot, grated, about 75–100 g
2–4 tablespoons thinly sliced scallion or red onion, optional
For the creamy coleslaw dressing:
⅔ cup mayonnaise, about 150 g
2 tablespoons apple cider vinegar, 30 ml
1 tablespoon lemon juice, 15 ml, or 2 teaspoons Dijon mustard, 10 ml
1 tablespoon sugar, about 12 g, or honey, about 20 g
½ teaspoon celery seed, optional
½ teaspoon fine salt, plus more to taste
¼ teaspoon black pepper
Instructions
Shred the cabbage. Slice the cabbage finely with a sharp knife or mandoline. Grate the carrot and add it to a large mixing bowl with the cabbage and optional scallion or red onion.
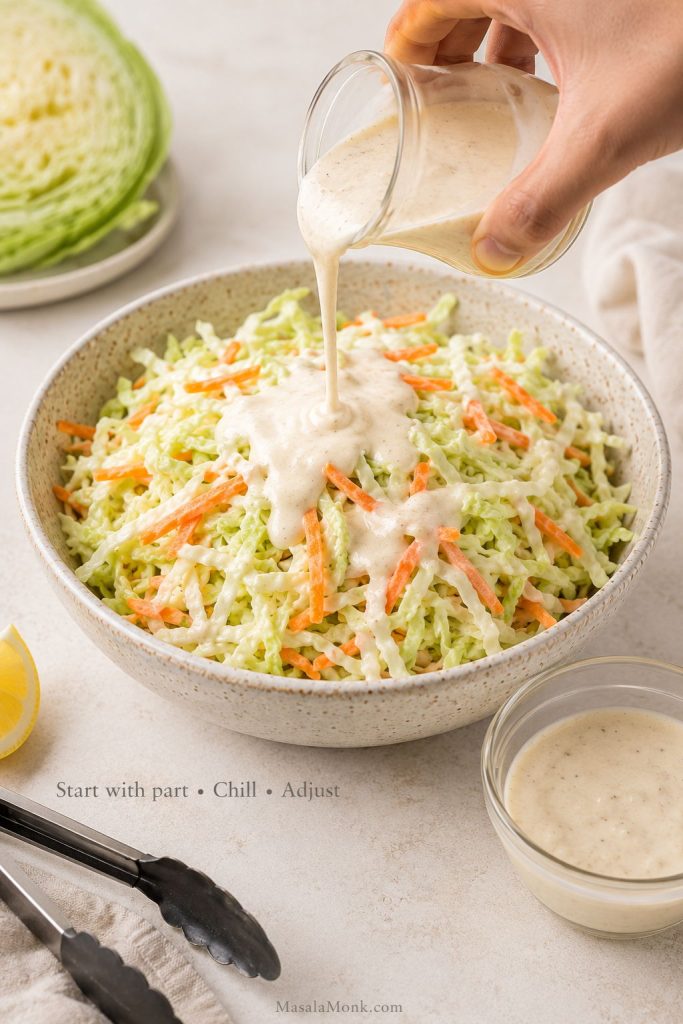
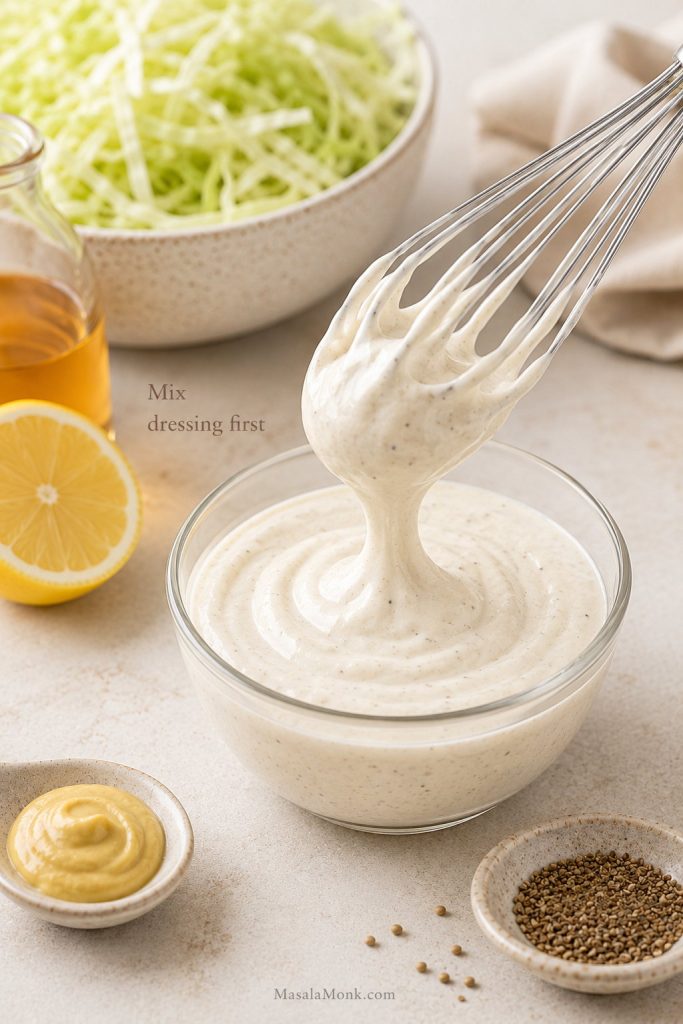
Mix the dressing. In a medium bowl, whisk together the mayonnaise, apple cider vinegar, lemon juice or Dijon mustard, sugar or honey, celery seed, salt, and black pepper until smooth.
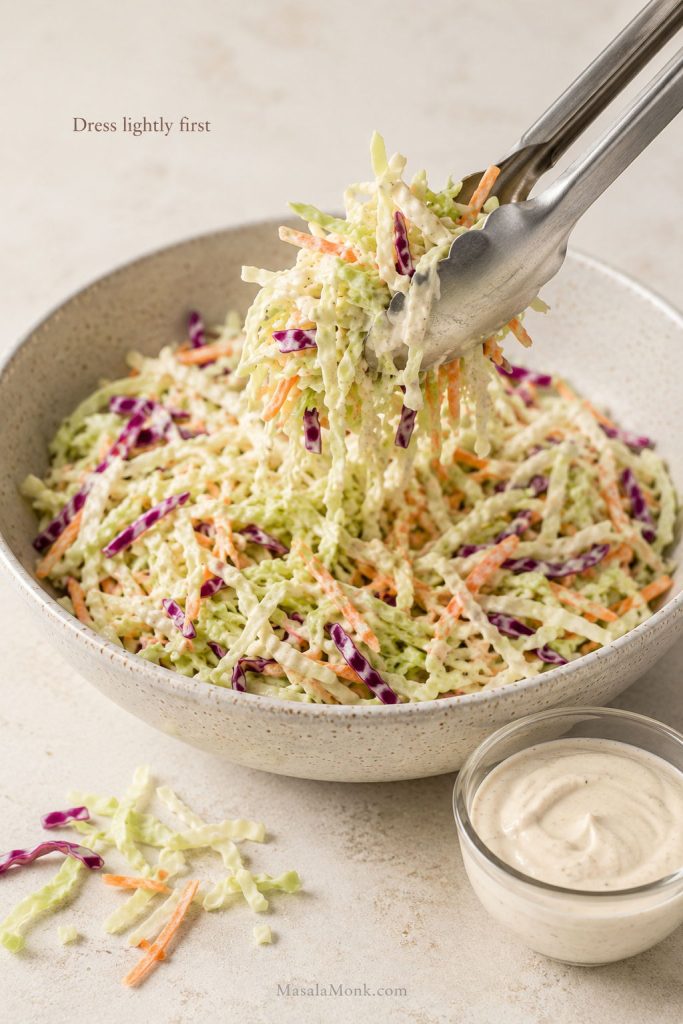
Dress lightly first. Pour about two-thirds of the dressing over the cabbage mixture. Toss well until the cabbage is lightly coated.
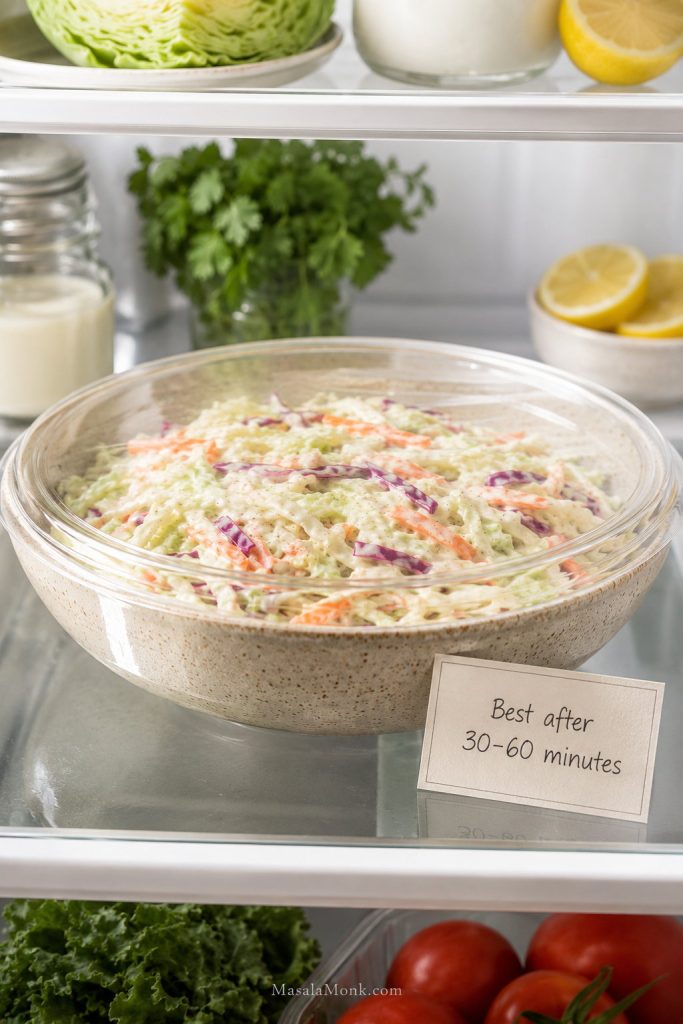
Chill. Cover and refrigerate for 30 to 60 minutes so the cabbage relaxes slightly and the flavors blend.
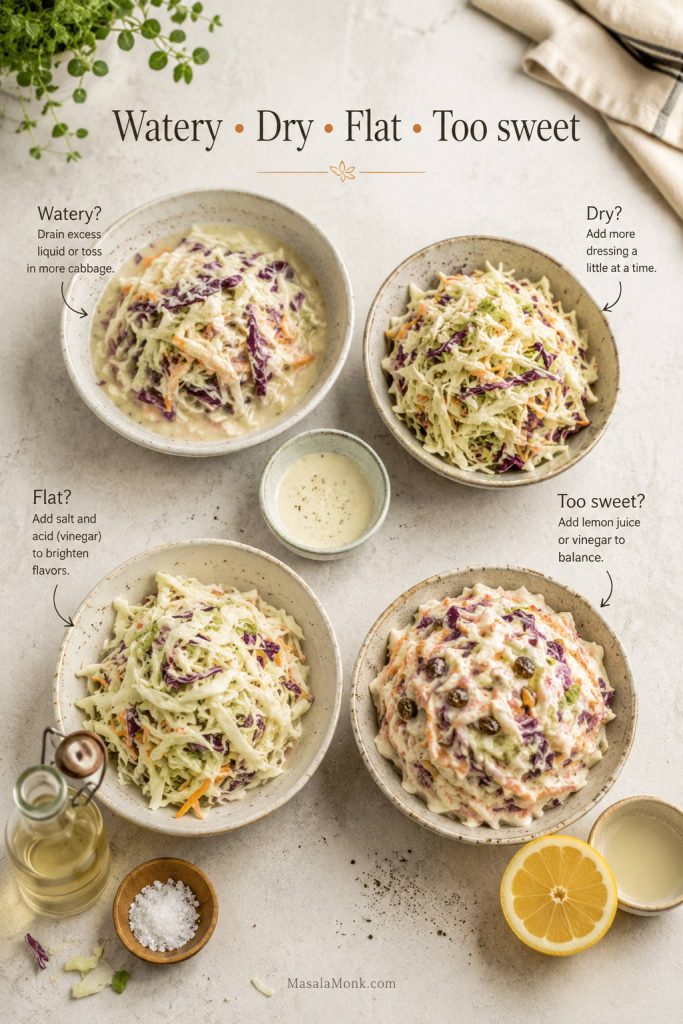
Finish before serving. Toss again. If the slaw looks dry, add more dressing a spoonful at a time. A little salt will wake it up if the flavor feels flat. When it tastes too sweet or heavy, sharpen it with vinegar or lemon juice. If the cabbage tastes bitter or the dressing feels too sharp, balance it with a tiny pinch of sugar.
Notes
One 14–16 oz / 400–450 g bag of coleslaw mix makes a smaller batch. For the full 8–9 cup yield, use about 20–24 oz / 560–680 g mix, or add extra shredded cabbage and carrot.
If using one 14–16 oz bag, start with about half to two-thirds of the dressing. Chill, toss, then add more only if needed.
Do not add all the dressing at once. Cabbage releases moisture as it sits, so the slaw becomes creamier after chilling; the two-thirds dressing rule explains how to control that texture.
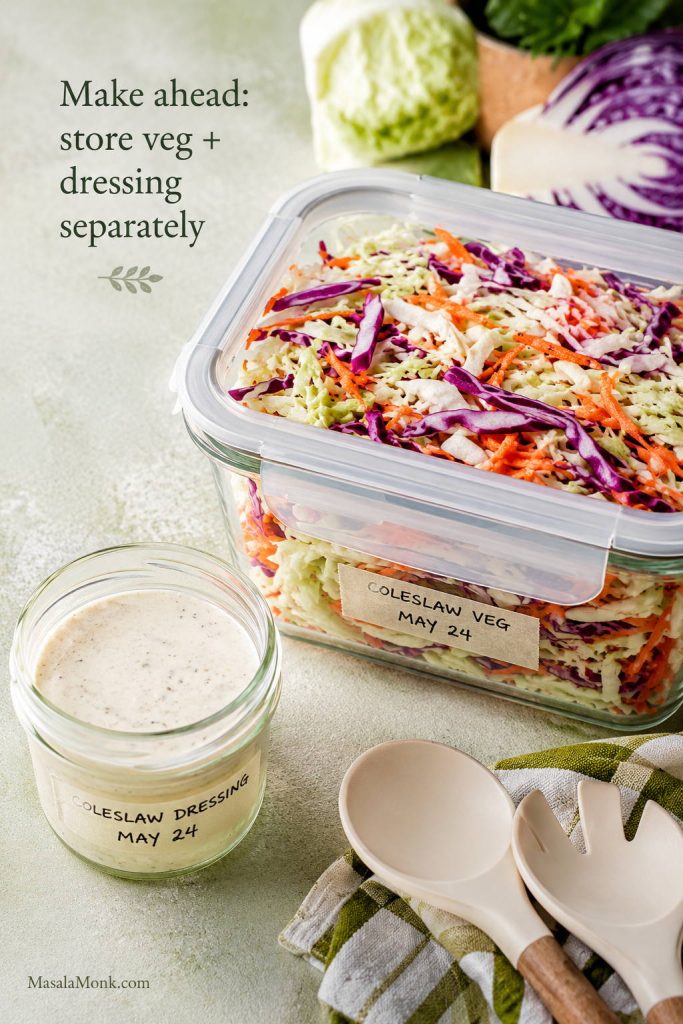
For make-ahead coleslaw, store the dressing and vegetables separately until a few hours before serving; see the make-ahead and storage tips for timing.
If you salt the cabbage first, reduce the dressing salt to ¼ teaspoon or leave it out until the final taste adjustment.
Serve cold or well chilled. Toss again and drain any excess liquid before serving if the slaw has been refrigerated for several hours.
If you make it, try it once as written, then adjust it sweeter, tangier, creamier, or crunchier for your table. Coleslaw is one of those recipes where small preferences matter.
Are you team creamy coleslaw or vinegar slaw? Share how you serve it — as a BBQ side, on pulled pork, with fried chicken, or piled onto hot dogs.
Why This Coleslaw Recipe Works
Good coleslaw is all about contrast. The cabbage should still crunch, the dressing should cling instead of pooling at the bottom, and the flavor should wake up the rest of the plate. When coleslaw is too wet, too sweet, or too mayo-heavy, it stops doing its job.
This is the version to make when you want classic creamy coleslaw that still tastes fresh after chilling. It is not overloaded with dressing, not sugary, and not watery at the bottom of the bowl.
Although this coleslaw recipe keeps the ingredient list classic, the method gives you more control. The cabbage is shredded finely enough to soften as it chills, but not so finely that it turns limp. The dressing has enough vinegar and lemon or mustard to balance the mayonnaise. Finally, the dressing is added in stages because cabbage changes as it sits.
That last part matters most. A bowl that looks slightly underdressed right after mixing can become perfectly creamy after 30 minutes in the fridge. Hold back some dressing at the beginning, let the slaw settle, then finish it right before serving.
The texture goal
The dressing should cling to the cabbage in a light, glossy coat. You want crunch in every bite, not a puddle of thin dressing at the bottom of the bowl.
Coleslaw Recipe Ingredients
A good bowl of coleslaw does not ask for much: crisp cabbage, sweet carrot, a creamy dressing, enough acidity to brighten it, and enough salt to make the vegetables taste like themselves. Once those pieces are balanced, the bowl tastes crisp and fresh instead of heavy.
Classic coleslaw ingredients are simple, yet the balance matters: cabbage gives crunch, carrot adds sweetness, and vinegar or lemon keeps the creamy dressing bright.
Best Cabbage for Coleslaw
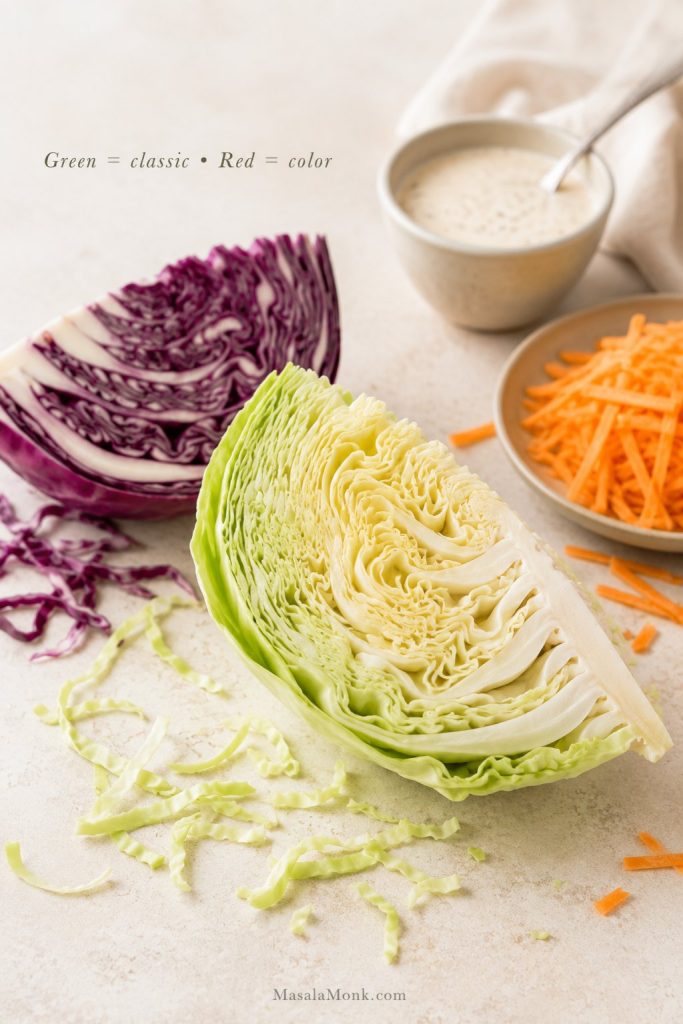
Green cabbage is the most reliable everyday cabbage for coleslaw. It is crisp, sturdy, mild, and strong enough to hold a creamy dressing without collapsing. Red cabbage adds color and extra crunch, but it can tint the dressing pink as the slaw sits.
Green cabbage is the best base for classic creamy coleslaw because it stays crisp, while red cabbage adds color and a slightly sharper bite.
A classic bowl can be made with only green cabbage and carrot. If you want more color, use mostly green cabbage with a smaller amount of red cabbage. The flavor will still be familiar, and the bowl will look brighter on the table.
Ingredient
What It Does
Notes
Green cabbage
Gives the slaw its main crunch
Mild, classic, sturdy, and easy to dress.
Red cabbage
Adds color and a peppery bite
Use less than green cabbage if you want a pale creamy dressing.
Carrot
Brings sweetness and color
Grate it finely so it spreads through the bowl.
Scallion or red onion
Adds optional sharpness
Use a light hand because raw onion can take over quickly.
Fresh Cabbage vs Bagged Coleslaw Mix
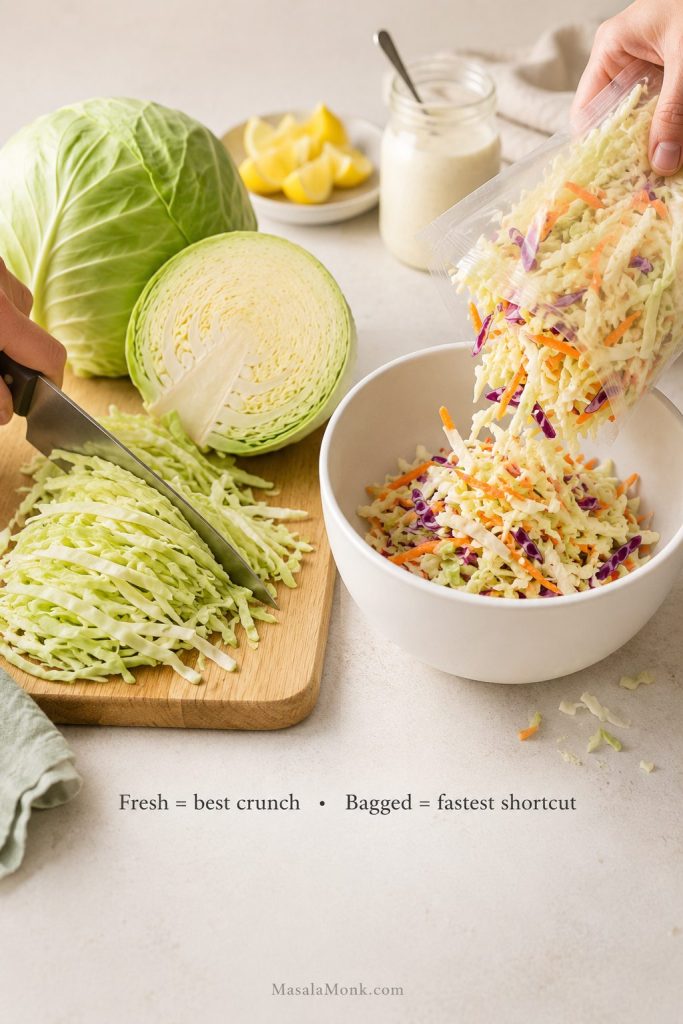
For this coleslaw recipe, fresh cabbage gives you the strongest crunch and the most control over shred size. It is the better choice when coleslaw is one of the main sides at a cookout or when you want it to hold up on sandwiches.
Fresh cabbage lets you choose the crunch and cut, while bagged coleslaw mix saves time as long as the dressing is added with a lighter hand.
However, bagged coleslaw mix is still worth using. It is fast and weeknight-friendly, though the cut and moisture level can vary from bag to bag. Because pre-cut cabbage can range from dry and sturdy to very fine and soft, dress it lightly first and give it a few minutes before deciding whether it needs more. If you are using a bag, the bagged coleslaw mix conversion will help you scale the dressing and yield correctly.
Bagged mix conversion: One 14–16 oz / 400–450 g bag of coleslaw mix makes a smaller batch, about 5–6 side servings. For the full 8–9 cup yield, use about 20–24 oz / 560–680 g coleslaw mix, or add extra shredded cabbage and carrot.
One 14–16 oz bag of coleslaw mix makes a smaller batch, so use 20–24 oz or add extra cabbage and carrot when you want the full recipe yield.
Shredded vs Chopped Coleslaw
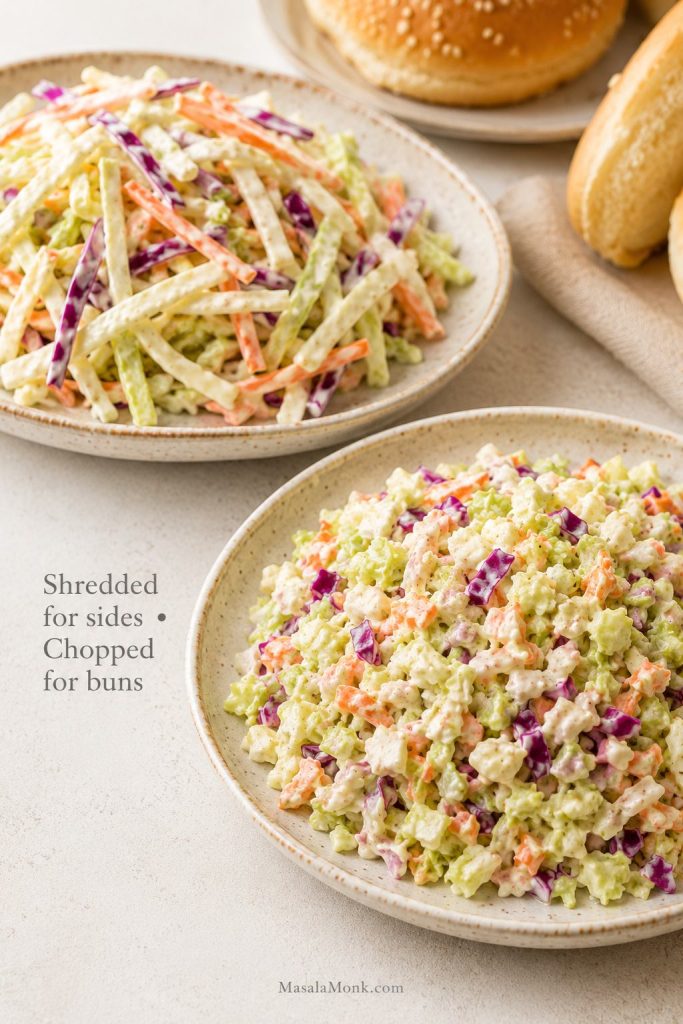
Thinly shredded cabbage gives you the classic creamy coleslaw texture: long, crisp strands that hold dressing and still crunch. This is the best cut when you are serving coleslaw as a side dish.
Shredded coleslaw gives side dishes that classic forkful texture, while chopped slaw stays neater on burgers, hot dogs, and pulled pork sandwiches.
Burgers, hot dogs, pulled pork sandwiches, and slaw dogs need a neater slaw. A finer chop keeps the cabbage from sliding out of the bun. Grated cabbage is softer and wetter, so use it only if you want a very fine deli-style texture.
Cut
Works Well With
Texture Goal
Thin shreds
Classic side dish coleslaw
Crisp, creamy, and traditional
Fine chop
Burgers, hot dogs, pulled pork sandwiches
Compact and bun-friendly
Thicker shreds
Crunchier slaw bowls and BBQ plates
More bite, needs more chilling time
Grated cabbage
Very soft deli-style slaw
Softens quickly and releases more liquid
Carrots, Onion, and Optional Add-Ins
Carrot is almost always worth adding because it brings sweetness and color. Grate it on the large holes of a box grater or use the shredding blade on a food processor.
Onion is optional. Scallions are gentler and fresher. Red onion is sharper and works best when sliced very thinly. If you are making coleslaw for kids, a mixed crowd, or a long cookout table, keep the onion light or leave it out.
Parsley, celery seed, chopped apple, or a little extra mustard can be useful, but the main recipe should stay clean. Too many extras turn classic coleslaw into a different salad.
Creamy Coleslaw Dressing
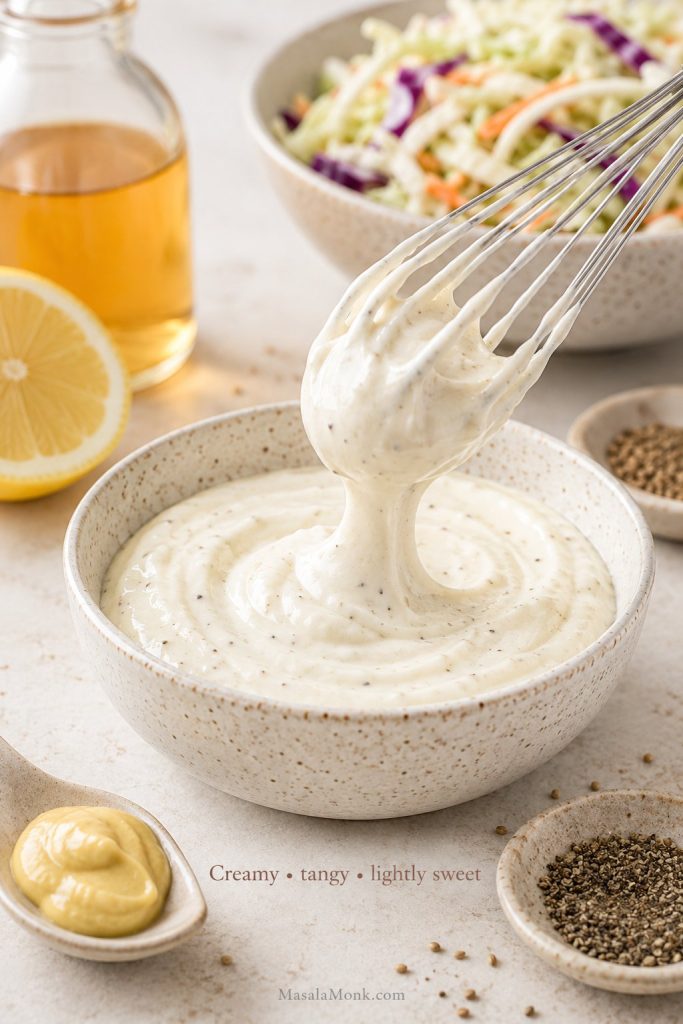
The dressing should make the cabbage taste brighter, not bury it. Mayonnaise gives the slaw its creamy body, vinegar brings the snap, lemon juice or mustard sharpens the edges, and a little sugar or honey rounds out the raw cabbage bite.
A creamy coleslaw dressing should taste slightly bold before mixing because the cabbage will mellow the vinegar, lemon, salt, and sweetness.
If you make your own mayonnaise, this is a good place to use it. A thick homemade mayo gives the dressing a richer texture and a cleaner flavor. You can use this homemade mayonnaise recipe as the creamy base.
The Sweet-Tangy Dressing Ratio
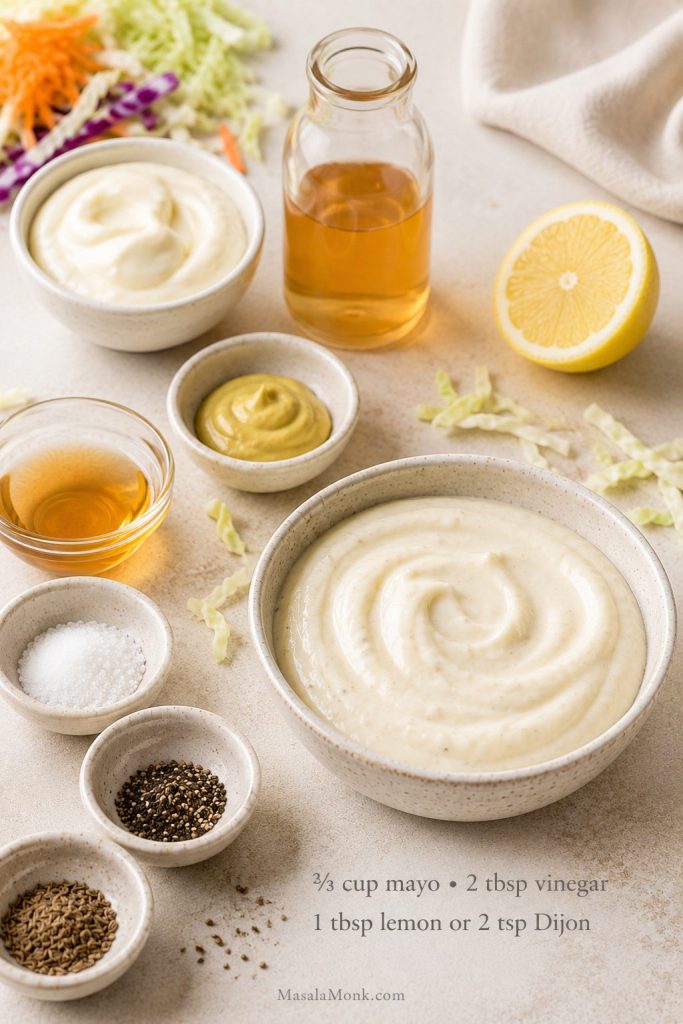
For this coleslaw recipe, about 8 cups of shredded cabbage and carrot works well with ⅔ cup mayonnaise, 2 tablespoons apple cider vinegar, 1 tablespoon lemon juice or 2 teaspoons Dijon mustard, and 1 tablespoon sugar or honey. For example, use lemon juice when you want a brighter dressing, or Dijon mustard when you want a sharper, more savory one.
This coleslaw dressing ratio gives enough creaminess to coat the cabbage, while vinegar, lemon, or Dijon keeps the finished slaw from tasting flat.
This gives you a dressing that is creamy but not bland, tangy but not harsh, and sweet enough to taste classic without turning sugary. If your family likes a sweeter cookout-style slaw, use the sugar or honey. If you want something sharper for pulled pork, fried fish, or tacos, lean a little harder on vinegar and lemon.
Flavor Goal
Adjustment
Works Well With
More tangy
Add 1–2 teaspoons extra vinegar or lemon juice
Fried chicken, fish, BBQ, pulled pork
Sweeter
Add 1–2 teaspoons sugar or honey
Classic cookout slaw, hot dogs, kids’ plates
Creamier
Add 1–2 tablespoons mayo
Potlucks, side dish bowls, BBQ plates
Lighter
Replace part of the mayo with Greek yogurt or buttermilk
Weeknight sides, lighter sandwiches
The Two-Thirds Dressing Rule
Do not drown the cabbage right away. Start with about two-thirds of the dressing, toss well, chill, then add more only if the slaw still looks dry. Cabbage relaxes and releases moisture as it sits, so a bowl that seems slightly underdressed at first often becomes just right after a short rest.
The reserved dressing is the safety net: once the cabbage relaxes in the fridge, you can finish the bowl without making it soupy.
As a result, this one habit prevents the two most common coleslaw problems: dry cabbage right after mixing and watery coleslaw later.
How Much Dressing to Use
The right amount of dressing depends on how finely the cabbage is cut and how long the bowl will sit. Thin shreds need less dressing because they soften quickly. Thicker shreds need a little more time and may need a touch more dressing after chilling. If your bowl often turns loose after chilling, the watery coleslaw section explains when to drain, salt, or hold back dressing.
After that, toss thoroughly, let the bowl settle, then taste again. If the slaw looks glossy and lightly coated, stop there. If it still looks dry after chilling, add the remaining dressing a spoonful at a time.
A glossy coating is the goal; if liquid is pooling underneath, the slaw will taste heavier and lose its crunch faster.
Taste after chilling, not only before. Cold cabbage dulls flavor slightly, and the dressing loosens as the slaw rests.
Mayo, Buttermilk, Sour Cream, or Greek Yogurt?
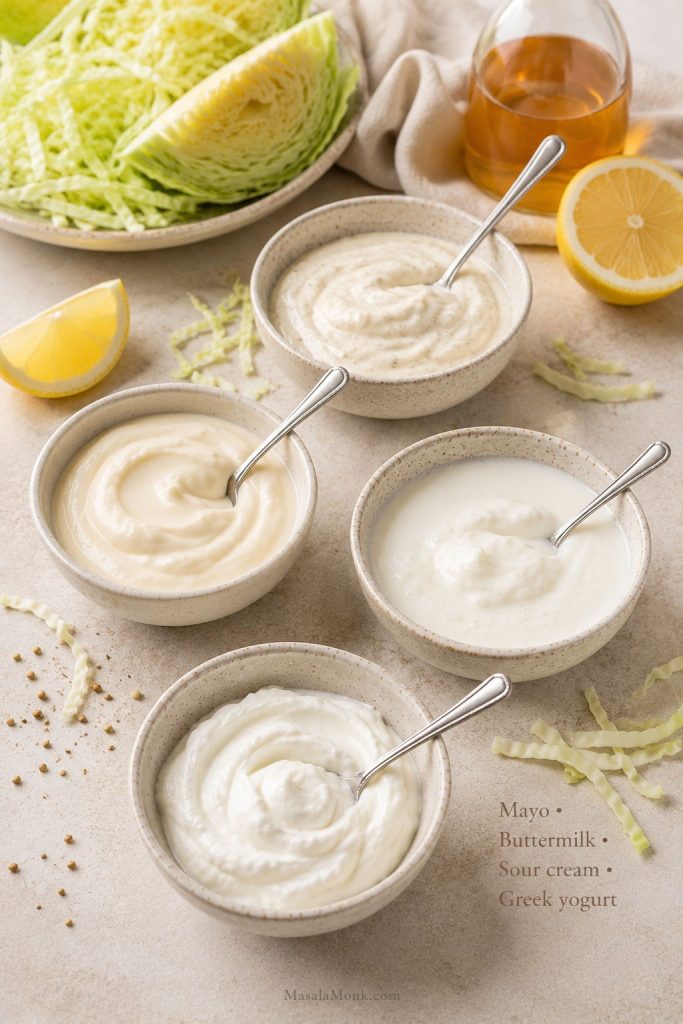
Mayonnaise is the classic choice because it gives coleslaw body and a smooth coating. Buttermilk makes the dressing looser and tangier. Sour cream adds richness with a gentle tang. Greek yogurt makes the dressing lighter and sharper, although it can taste more tart than classic mayo-based slaw.
Mayonnaise gives the most classic coleslaw texture, while buttermilk, sour cream, or Greek yogurt can make the dressing tangier, lighter, or richer.
The safest first version is mayonnaise. Once you understand the texture, you can replace 2–4 tablespoons of the mayo with buttermilk, sour cream, or Greek yogurt depending on the kind of slaw you want.
Need an egg-free version? Use a thick eggless mayo and keep the rest of the recipe the same. This eggless mayonnaise recipe works well when you want the same creamy texture without eggs.
How to Make Coleslaw
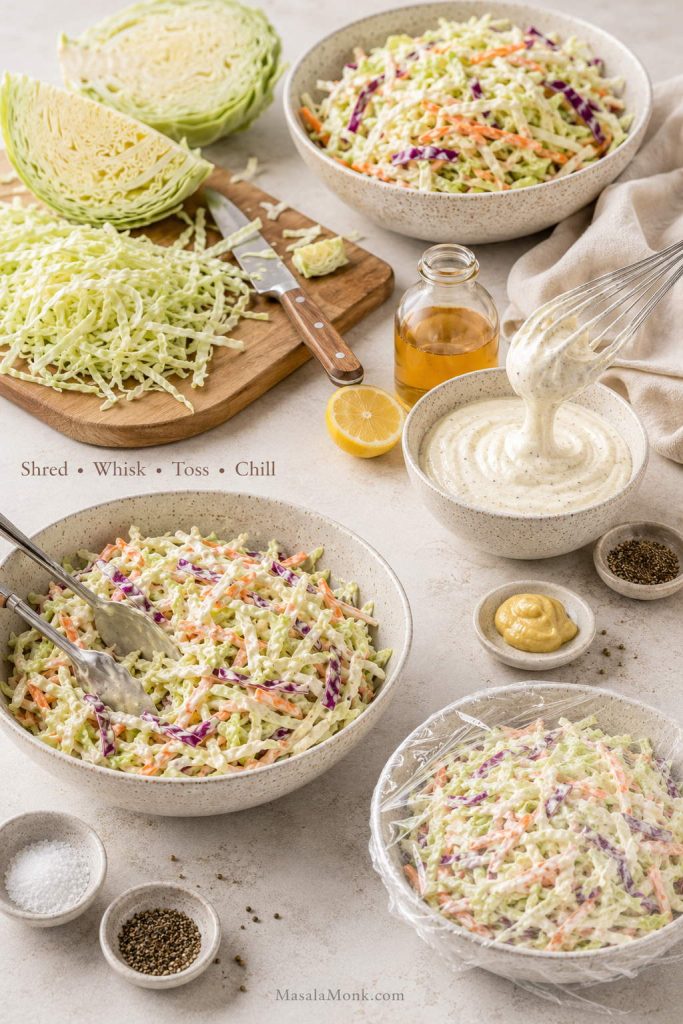
Coleslaw is easy, but the order helps. Shred the vegetables first, whisk the dressing separately, dress lightly, chill, then finish the bowl after it has had time to settle.
Once the cabbage is shredded and the dressing is mixed separately, the key is to toss lightly, chill, and finish the coleslaw after the vegetables settle.
Shred the Cabbage
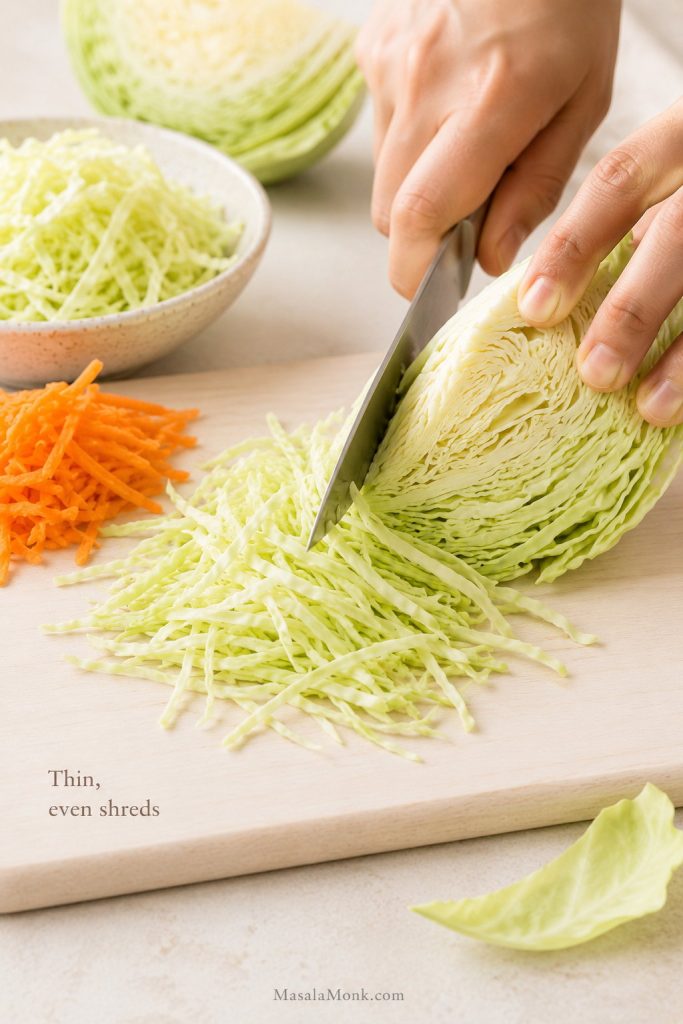
Cut the cabbage into quarters, remove the hard core, then slice it thinly with a sharp knife. A mandoline gives you very fine, even shreds. A food processor with a slicing blade is the fastest method when you are making a bigger batch.
Thin, even cabbage shreds soften evenly in the dressing, which helps homemade coleslaw stay creamy while keeping its crunch.
Side-dish coleslaw can handle longer shreds. Sandwich slaw should be finer or lightly chopped so it stays where you put it.
Mix the Dressing
Whisk the mayonnaise, apple cider vinegar, lemon juice or Dijon mustard, sugar or honey, celery seed, salt, and black pepper in a separate bowl. This gives you a smoother dressing and keeps one part of the slaw from getting too salty, too sweet, or too sharp.
Mixing the coleslaw dressing separately prevents uneven flavor, so one bite does not taste too salty, too sweet, or too sharp.
Taste the dressing before adding it to the cabbage. It should taste a little stronger than you want the finished coleslaw to taste because the cabbage will soften and mellow it.
Toss, Chill, and Adjust
Add about two-thirds of the dressing to the cabbage and carrot mixture. Toss with tongs or clean hands until the vegetables are evenly coated. Cover and chill for 30 to 60 minutes.
Light tossing gives the cabbage room to settle; after resting, you can add more dressing only where the bowl actually needs it.
Before serving, toss again and taste. If the slaw looks dry, add more dressing a spoonful at a time. A little salt will wake it up if the flavor feels flat. When it tastes too sweet or heavy, sharpen it with vinegar or lemon juice. If the cabbage tastes bitter or the dressing feels too sharp, balance it with a tiny pinch of sugar.
Best flavor window: Coleslaw tastes best after 30 minutes to 2 hours in the fridge. It is still good the next day, but the cabbage will be softer and the dressing thinner.
After 30–60 minutes in the fridge, the dressing clings better and the cabbage softens slightly without losing the cold crunch that makes coleslaw refreshing.
How to Keep Coleslaw from Getting Watery
Watery coleslaw usually comes from cabbage releasing moisture after it is dressed. The bowl may look good when you mix it, then an hour later the dressing has thinned out and liquid has collected at the bottom. That does not mean you ruined it. It just means the cabbage did what cabbage does.
Watery coleslaw is usually a timing problem, not a ruined batch; draining, reserved dressing, and final seasoning can bring the bowl back.
Fortunately, the fix is not always “less dressing.” It is better timing. Start with part of the dressing, chill, toss again, then decide whether the bowl needs more dressing, more acid, a pinch of salt, or a quick drain.
Should You Salt the Cabbage?
Salting is optional, not mandatory. Skip it for quick same-day coleslaw. Use it when you need the slaw to hold longer, sit neatly on buns, or avoid watering down the dressing at a cookout.
Salting cabbage is optional for same-day coleslaw, but it helps make-ahead slaw stay crisper by drawing out extra moisture before dressing.
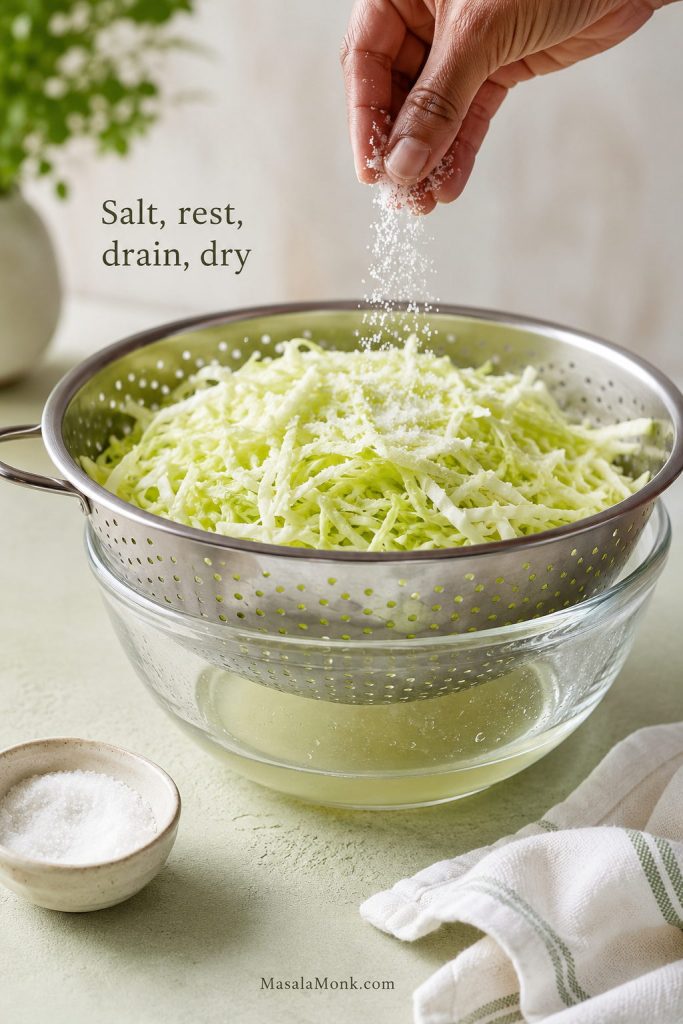
To salt cabbage for make-ahead coleslaw, toss the shredded cabbage with 1 teaspoon fine salt, or up to 1½ teaspoons if the cabbage is especially wet or you are using a larger head. Let it sit in a colander for 20 to 30 minutes. Rinse lightly if it tastes too salty, then dry it very well with a clean towel or salad spinner before adding the dressing. If you are prepping for tomorrow, pair this with the make-ahead storage method so the cabbage stays crisp.
If you salt the cabbage first, reduce the salt in the dressing to ¼ teaspoon or leave it out until the final taste adjustment.
Important: Dry the cabbage well after salting. Wet cabbage plus creamy dressing will still make watery coleslaw.
After salting or rinsing cabbage, dry it well before adding dressing; otherwise, even a thick creamy coleslaw dressing can turn watery.
Same-Day vs Make-Ahead Coleslaw
The best method depends on whether the slaw is for tonight’s dinner, tomorrow’s cookout, or a sandwich tray. A quick weeknight bowl does not need the same prep as a tray of sandwich slaw for a crowd.
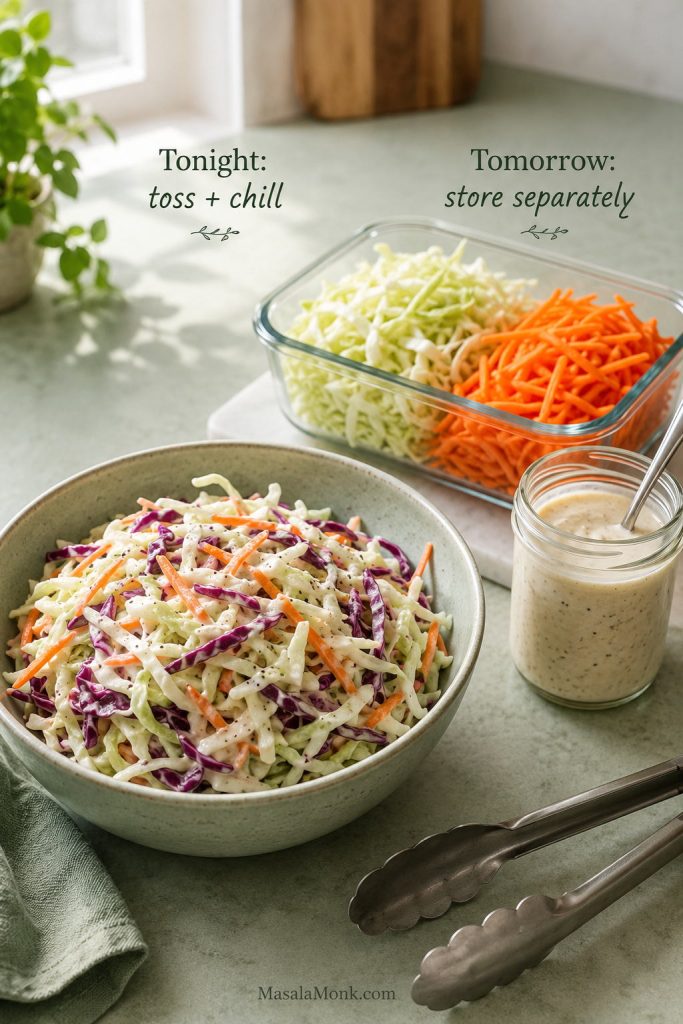
Same-day slaw can be dressed early enough to relax, while tomorrow’s slaw stays crisper when the cabbage and dressing wait apart.
Situation
Should You Salt?
Best Move
Serving within 30–60 minutes
No
Dress lightly, chill, toss, and adjust
Making it tomorrow
Yes, or store dressing separately
Salt, drain, dry well, then dress later
Using bagged coleslaw mix
Usually no
Start with part of the dressing because bagged mix varies
Putting it on pulled pork, burgers, or hot dogs
Optional
Use a lighter hand with dressing and drain before adding to buns
Taking it to a cookout
Optional, but helpful
Salt only if prepping early; otherwise keep cold and dress close to serving
Coleslaw Troubleshooting
If the bowl tastes a little off, do not start over. Coleslaw is forgiving. Most problems need one small adjustment: a splash of vinegar, a pinch of salt, a spoonful of dressing, a few minutes of chilling, or a handful of fresh cabbage.
Most coleslaw problems need a small correction, not a new batch; drain watery slaw, add dressing gradually to dry slaw, and use salt or acid for flat flavor.
Quick Fixes for Common Coleslaw Problems
Use the table below to fix the most common coleslaw texture and flavor problems without starting over.
Problem
Likely Cause
Quick Fix
Coleslaw is watery
Too much dressing, cabbage released liquid, or cabbage was not dried
Drain excess liquid, toss, and refresh with a small spoonful of mayo if needed
Coleslaw is dry
Not enough dressing or very thick cabbage shreds
Add more dressing 1 tablespoon at a time after chilling
Coleslaw tastes flat
Not enough salt or acid
Add a pinch of salt and a splash of vinegar or lemon juice
Coleslaw is too sweet
Too much sugar, honey, or sweet mayo
Add vinegar, lemon juice, or mustard to sharpen it
Coleslaw is too sharp
Too much vinegar, lemon, or mustard
Add a small spoonful of mayo or a pinch of sugar
Coleslaw tastes too much like mayo
Dressing needs acid, salt, or sweetness
Add vinegar or lemon juice first, then a small pinch of sugar if needed
Cabbage is too stiff
Shreds are thick or slaw has not rested long enough
Chill 30–60 minutes longer, or slice thinner next time
Cabbage is too soft
Overdressed, over-salted, or stored too long
Drain well and fold in a handful of fresh shredded cabbage
Red cabbage turned the dressing pink
Red cabbage released color as it sat
Use mostly green cabbage, or add red cabbage close to serving
Bagged mix tastes flat
Pre-cut cabbage can taste dry or dull
Add extra vinegar, lemon, salt, or a handful of fresh herbs
Make-Ahead and Storage Tips for Coleslaw
This coleslaw recipe can be made ahead, but there is a tradeoff. In general, a short chill makes it taste better because the dressing has time to settle into the cabbage. A long chill makes it softer. The trick is deciding whether you want maximum crunch or maximum convenience.
Separate containers protect the crunch; once the dressing touches the cabbage, the countdown to softer, wetter slaw begins.
Best Flavor Window
The sweet spot is 30 minutes to 2 hours before serving. The cabbage softens just enough, the dressing clings better, and the bowl still tastes fresh.
A fully dressed bowl can still taste good the next day, but it will be softer and the dressing will be thinner. When crunch matters, store the vegetables and dressing separately.
How Far Ahead to Make Coleslaw
Use this table as a practical planning guide, especially if the slaw is going to a party, sitting beside grilled food, or going inside sandwiches.
When You Need It
Best Method
Why
Serving in 30–60 minutes
Dress now, chill, toss again
Best balance of flavor and crunch
Serving in 2–3 hours
Dress with two-thirds first, hold cold, adjust before serving
Prevents watery slaw
Serving tomorrow
Store vegetables and dressing separately
Keeps cabbage crisper
Serving on sandwiches
Use a lighter hand with dressing and drain before serving
Prevents soggy buns
Taking to a cookout
Chill well and keep over ice
Protects texture and food safety
A Simple Make-Ahead Plan
1 day ahead: shred cabbage and carrots; make the dressing separately.
2–3 hours before serving: toss with two-thirds of the dressing.
Right before serving: toss again and adjust with more dressing, salt, or vinegar.
How Long Coleslaw Lasts in the Fridge
Dressed coleslaw is best within 2 to 3 days. Keep it refrigerated in an airtight container, and discard it if it smells off, has changed texture noticeably, or has been left out too long.
If liquid collects at the bottom, drain it before serving leftovers. A small spoonful of mayo or a splash of vinegar can refresh the texture and flavor.
Do not freeze creamy coleslaw. The cabbage turns watery after thawing, and mayonnaise-based dressing can split.
Cookout and Potluck Safety
Because creamy coleslaw is served cold, keep it chilled until serving. For outdoor cookouts, place the serving bowl inside a larger bowl filled with ice if it will sit out for a while.
As a general food-safety rule, cold perishable foods should not sit out for more than 2 hours, or more than 1 hour when the outdoor temperature is above 90°F / 32°C. You can read more about the cold food safety window from the USDA food safety guidance.
How Much Coleslaw Per Person?
Coleslaw is one of those sides that disappears fast when sandwiches are involved, but sits longer when the table is full of other BBQ sides. If you are planning a full menu, the serving ideas section shows where coleslaw works best.
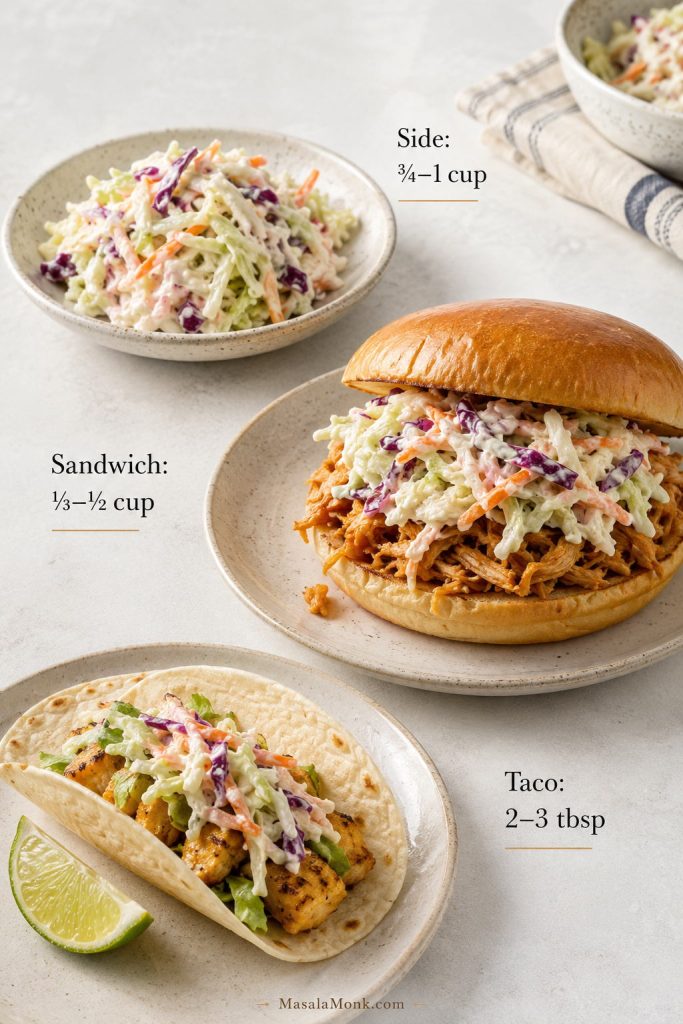
Plan more coleslaw for sides and less for toppings; a sandwich usually needs about ⅓–½ cup, while tacos only need a few tablespoons.
For a side dish, plan on about ¾ to 1 cup per person. If coleslaw is one of several sides, ½ to ¾ cup per person is usually enough. For sandwiches, burgers, hot dogs, or pulled pork, plan on ⅓ to ½ cup per sandwich.
As written, this recipe makes about 8–9 cups, so it serves 8 people generously as a side dish or more if you are using it as a topping. These amounts are approximate because finely chopped slaw packs more tightly than long shredded cabbage.
Use
Amount to Plan
Texture Goal
Side dish
¾–1 cup per person
Creamy, chilled, and lightly coated
Large BBQ spread
½–¾ cup per person
Tangy and not too heavy
Pulled pork sandwich
⅓–½ cup per sandwich
Finely shredded and not too wet
Burgers or hot dogs
¼–⅓ cup per bun
Finely chopped or thinly shredded
Tacos or wraps
2–3 tablespoons per piece
Lightly dressed and crunchy
What to Serve with Coleslaw
Coleslaw earns its place because it makes the rest of the meal easier to enjoy. A spoonful of cold crunch beside smoky meat, a bright layer inside a pulled pork sandwich, or a creamy bite next to fried fish can change the whole plate. For larger BBQ plates or sandwich trays, check the coleslaw per person guide before scaling the batch.
Coleslaw earns its place on cookout plates because cold crunch and tangy creaminess balance rich foods like pulled pork, fried chicken, tacos, and hot dogs.
Coleslaw for BBQ Plates
On a BBQ plate, coleslaw should cool the palate between bites of smoky, saucy, or grilled food. Keep it creamy, crisp, and slightly tangy. A little extra vinegar or lemon juice helps the slaw cut through ribs, grilled chicken, brisket, pulled pork, sausages, or other cookout mains.
If the rest of the plate is already sweet or saucy, avoid making the slaw too sweet. A balanced sweet-tangy dressing tastes fresher.
Coleslaw for Pulled Pork Sandwiches
For pulled pork sandwiches, the slaw has one job: add crunch and brightness without soaking the bun. Keep it finely shredded, lightly dressed, and a little tangier than you would for a side dish.
For pulled pork sandwiches, keep the coleslaw finely shredded and lightly dressed so it adds crunch without making the bun soggy.
Long cabbage strands can pull out of the sandwich, and watery dressing can make the bread soggy. Chill the slaw, drain off any extra liquid, and add it right before serving.
This same logic works for chicken sandwiches too. A creamy, tangy slaw is especially good with BBQ chicken, crispy chicken, and grilled chicken sandwiches. For more sandwich ideas, see these chicken sandwich recipes.
Coleslaw for Burgers and Hot Dogs
For burgers and hot dogs, chop the slaw a little finer so it stays inside the bun and gives every bite some crunch. Hot dogs can handle a slightly sweeter dressing, while richer burgers usually taste better with a sharper, tangier slaw. Either way, drain off extra liquid before adding it to bread.
Coleslaw for Fried Chicken, Fish, Tacos, and Wraps
Fried chicken and fried fish need coleslaw that is bright and cold. If the main dish is already rich and crisp, the slaw should bring freshness. Add a little extra vinegar or lemon juice before serving.
Taco slaw should be lighter than a classic creamy BBQ side. Use this recipe as a starting point, then thin the dressing with extra lime or vinegar and use less mayo if you want a taco-style slaw.
For a lighter taco-style slaw, see the cabbage slaw approach in these fish tacos. The shrimp tacos use a similar fresher direction with creamy sauce and crunch.
Coleslaw also works beside fried fish and chips because the cool cabbage balances the hot, crisp batter. For that style of plate, keep the slaw cold and a little more acidic. You can pair it with this fish and chips recipe.
Easy Coleslaw Variations
Once the classic creamy version is working, you can adjust the dressing and vegetables to match the meal. Choose the version that fits the plate instead of loading one bowl with too many ideas.
No-Mayo Coleslaw
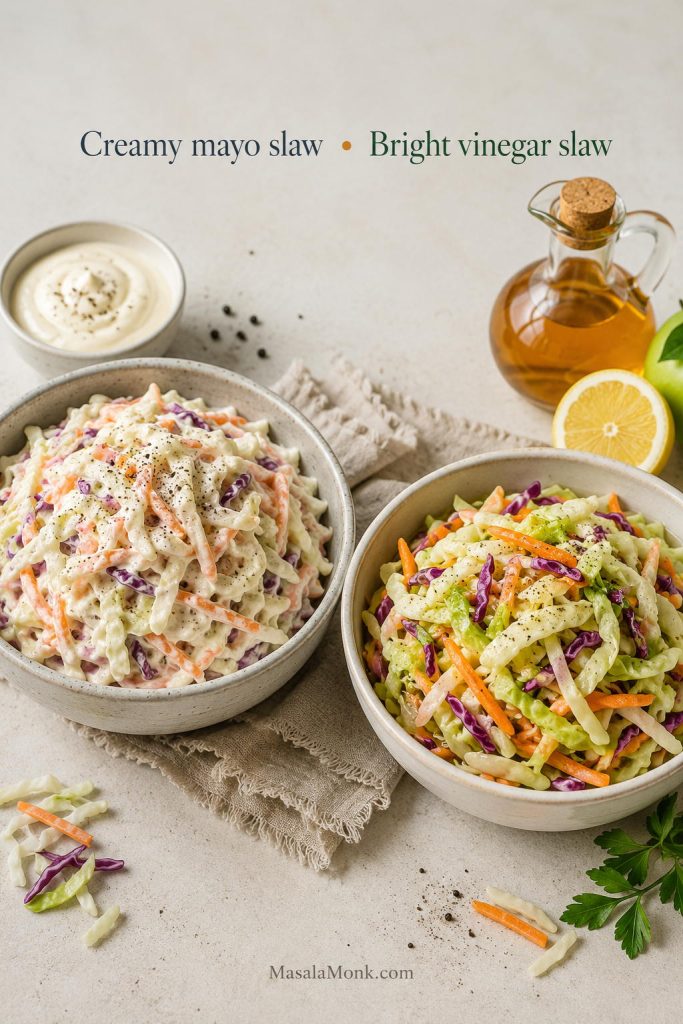
A no-mayo version works best when the dressing is sharp, glossy, and well-seasoned. Use apple cider vinegar, olive oil, a little Dijon mustard, honey or sugar, salt, pepper, and optional celery seed. This style is lighter, brighter, and especially good with pulled pork, tacos, fried food, and picnic plates where you want crunch more than creaminess. For a quick comparison, see the mayo vs vinegar coleslaw answer in the FAQs.
Choose mayo slaw when you want creamy comfort, and choose vinegar slaw when the plate needs a sharper, lighter bite.
Greek Yogurt Coleslaw
To make the dressing lighter, replace part of the mayonnaise with thick Greek yogurt. Start by replacing ¼ cup of the mayo, then taste before swapping more. Greek yogurt is tangier than mayo, so you may need a little more honey or sugar to balance it.
This version is useful for weeknight dinners, meal prep bowls, wraps, and lighter sandwiches.
Sweeter or Tangier Coleslaw
If you like a sweeter cookout-style slaw, add sugar or honey 1 teaspoon at a time. If you want it sharper, add apple cider vinegar, lemon juice, or mustard in small amounts.
Always adjust after the slaw has chilled. The flavor changes as the cabbage softens and the dressing loosens. If the bowl tastes bland, do not automatically add more mayo. Add a pinch of salt first, then a little acid.
Other Slaw Styles to Try Later
Apple slaw, broccoli slaw, red cabbage slaw, vegan coleslaw, keto coleslaw, and Asian slaw are all useful variations, but they each need their own balance. Apple needs enough acid so the bowl does not taste too sweet. Broccoli slaw needs a dressing that can soften firmer shreds. Red cabbage slaw often works better with a brighter vinaigrette. Asian slaw usually moves away from classic mayo dressing and toward sesame, ginger, soy, rice vinegar, lime, or herbs.
Keep this classic coleslaw recipe as the creamy base, then use those ideas when you want a different style of slaw.
Vegan or Egg-Free Coleslaw
Vegan coleslaw needs a thick vegan mayo and enough vinegar or lemon juice to keep the dressing bright. The dressing should taste slightly bold before it hits the cabbage because the vegetables will mellow it.
This vegan mayo recipe is a useful base for a plant-based version. For egg-free but not necessarily vegan coleslaw, use eggless mayo and keep the rest of the recipe the same.
How did you adjust it?
If you made this coleslaw sweeter, tangier, creamier, sharper, or more sandwich-friendly, share your version in the comments so other readers can try it too.
Once you understand the dressing balance, coleslaw becomes easy to adjust. Keep it creamier for cookouts, sharper for pulled pork, lighter for tacos, and colder than you think before serving. That is the difference between a bowl people ignore and a bowl that disappears.
Coleslaw FAQs
What is coleslaw made of?
Classic coleslaw is made with shredded cabbage, grated carrot, and a creamy or vinegar-based dressing. A creamy coleslaw dressing usually includes mayonnaise, vinegar, sugar or honey, salt, pepper, and sometimes mustard or celery seed.
What is the best cabbage for coleslaw?
Green cabbage is the most reliable choice because it is crisp, mild, and sturdy. Red cabbage adds color and crunch, but it can tint the dressing pink as it sits. Green cabbage alone is enough for a classic creamy slaw; red cabbage is mainly for color and extra crunch.
Can I use bagged coleslaw mix?
Bagged coleslaw mix works well, especially for weeknights. One 14–16 oz / 400–450 g bag makes a slightly smaller batch, so start with about half to two-thirds of the dressing. For the full 8–9 cup yield, use about 20–24 oz / 560–680 g mix or add extra shredded cabbage and carrot.
What is the difference between slaw and coleslaw?
Coleslaw usually means a cabbage-based slaw, often with carrots and a creamy or vinegar dressing. Slaw is broader and can include other shredded vegetables such as broccoli, Brussels sprouts, kale, apple, or red cabbage.
How do you keep coleslaw from getting watery?
Watery coleslaw usually happens when cabbage releases moisture after dressing. Start with part of the dressing, chill, toss again, and then decide whether the bowl needs more dressing, a quick drain, or a little extra seasoning. For make-ahead coleslaw, lightly salt the shredded cabbage, let it drain, dry it very well, and then dress it.
Should I salt cabbage before making coleslaw?
Quick same-day coleslaw does not need salted cabbage. Salting helps when you are making the slaw ahead, serving it outdoors, or using it on sandwiches where extra liquid can make the bread soggy. If you salt the cabbage, reduce the salt in the dressing and adjust at the end.
How long should coleslaw chill before serving?
For this coleslaw recipe, a 30 to 60 minute chill gives the cabbage time to soften slightly and lets the dressing flavor the vegetables. If you are in a hurry, even 10 to 15 minutes helps, but the texture is better with a longer rest.
Can I make coleslaw the night before?
You can, but the texture will be softer. For the best crunch, store the shredded vegetables and dressing separately, then combine them a few hours before serving.
How far ahead can I make coleslaw?
The freshest window is 30 minutes to 2 hours before serving. For parties, shred the vegetables and mix the dressing one day ahead, store them separately, and combine them on the day you plan to serve.
How long does coleslaw last in the fridge?
Dressed coleslaw is best within 2 to 3 days. It softens and releases liquid as it sits, so drain off excess liquid before serving leftovers.
Can you freeze coleslaw?
Creamy coleslaw does not freeze well. The cabbage turns watery after thawing, and mayonnaise-based dressing can separate. If you need to prep ahead, keep the shredded vegetables and dressing separate in the refrigerator.
Why does my coleslaw taste bland?
Bland coleslaw usually needs salt or acid, not more mayo. Add a pinch of salt and a small splash of vinegar or lemon juice, toss, and taste again.
Why did my red cabbage turn the dressing pink?
Red cabbage naturally releases color into creamy dressing as it sits. Use mostly green cabbage with a smaller amount of red cabbage if you want a classic pale dressing.
Is coleslaw better with mayo or vinegar?
Mayo coleslaw gives you the classic creamy cookout bowl. Vinegar slaw is sharper, lighter, and better when the main dish is rich, smoky, fried, or piled into a sandwich.
Is coleslaw gluten-free?
Most homemade coleslaw is naturally gluten-free if the mayonnaise, mustard, vinegar, and seasonings are gluten-free. Always check labels if you are cooking for someone with celiac disease or strict gluten sensitivity.
How much coleslaw do I need for pulled pork sandwiches?
Plan on ⅓ to ½ cup coleslaw per sandwich. Keep it finely shredded, lightly dressed, and well drained so it adds crunch without making the bun soggy.
What goes well with coleslaw?
Coleslaw goes well with BBQ, ribs, burgers, hot dogs, fried chicken, fried fish, fish tacos, shrimp tacos, wraps, and pulled pork sandwiches. It works especially well anywhere you want a cold, crunchy contrast to something smoky, sauy, fried, or spicy.