
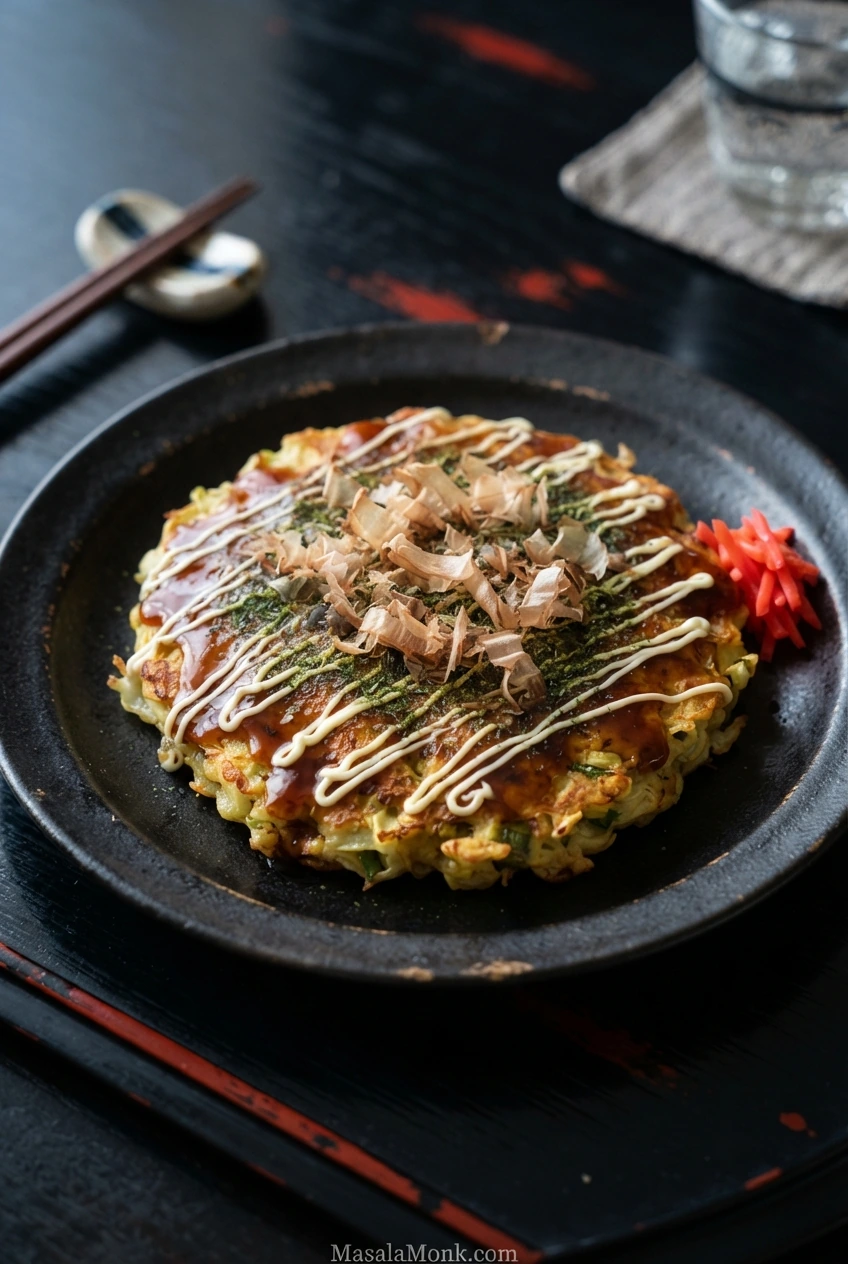
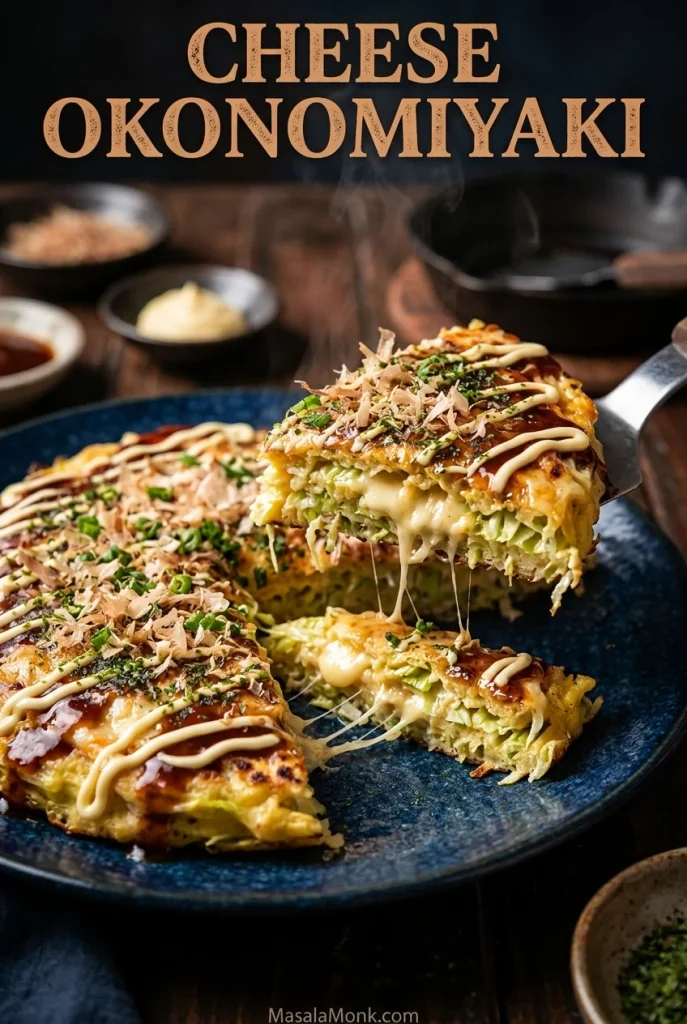
Okonomiyaki is a Japanese savory cabbage pancake that turns a generous heap of chopped cabbage into a satisfying meal. In the Osaka-style version, a little egg-and-flour batter holds the cabbage together as the outside browns and the center cooks tender. Add tangy okonomiyaki sauce, a little mayonnaise and, if you like, pickled ginger for a sharp finish.
This okonomiyaki recipe makes two skillet-sized pancakes using plain flour, eggs and dashi or water—no Japanese mountain yam (nagaimo) required. You mix each portion just before frying, so one pancake can have pork belly while the other has shrimp or mushrooms. Jump to ingredients or go straight to the cooking steps.
On This Page
- Easy Osaka-Style Okonomiyaki Recipe
- Step-by-Step Photo Guide
- How to Flip Okonomiyaki Without Breaking It
- Homemade Sauce and Traditional Toppings
- How Ingredients Affect Flavor and Texture
- Pork, Seafood and Vegetarian Variations
- Why Okonomiyaki Falls Apart or Turns Gummy
- Osaka vs. Hiroshima-Style Okonomiyaki
- Making Ahead, Batch Cooking and Leftovers
- Serving and Sharing Okonomiyaki
Easy Osaka-Style Okonomiyaki Recipe
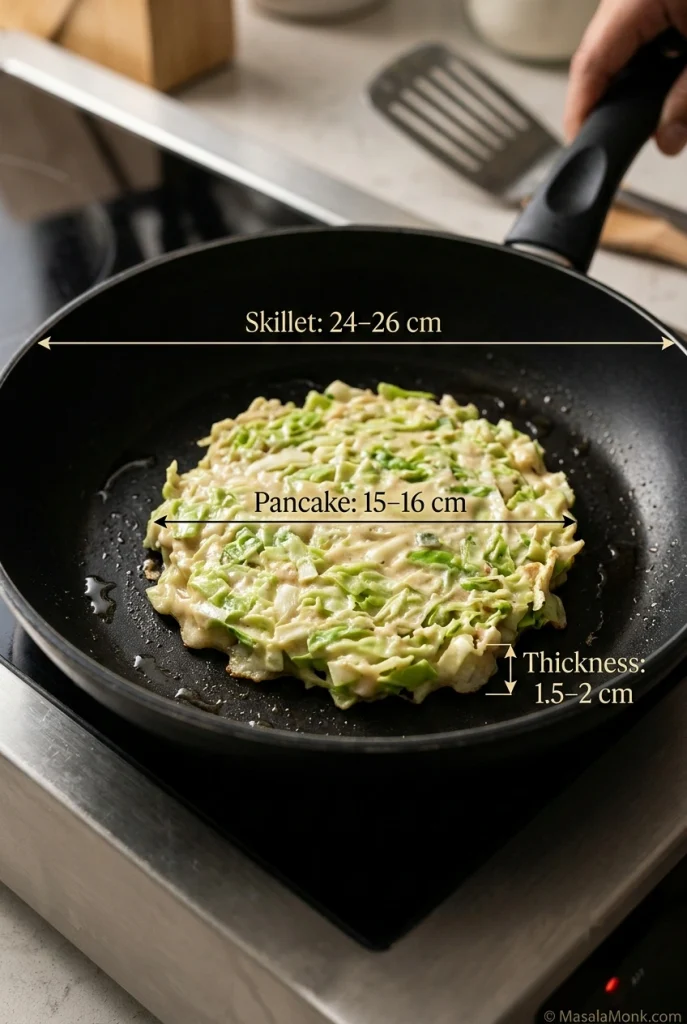
Yield: 2 individual pancakes, 1 per person; about 15–16 cm (6 inches) wide and 1.5–2 cm (⅝–¾ inch) thick. Prep: 15–20 minutes. Cook: 9–13 minutes per pancake. Total: about 40–50 minutes with one skillet.
Equipment: A lidded 24–26 cm (9½–10 inch) nonstick or well-seasoned skillet, two mixing bowls, a small sauce bowl, kitchen scale and broad spatula. A second broad spatula makes turning easier; a suitable instant-read thermometer helps check the center. A smaller skillet is fine if its flat base has room to turn a 15–16 cm pancake.
Serving both pancakes together? Read the optional warm-holding method before heating the skillet; otherwise, you can finish and eat the first while the second cooks.
This is the two-pancake formula at a glance. The detailed instructions below separate the batter into individual portions and distinguish raw pork, raw seafood, cooked mushrooms and finishing toppings.
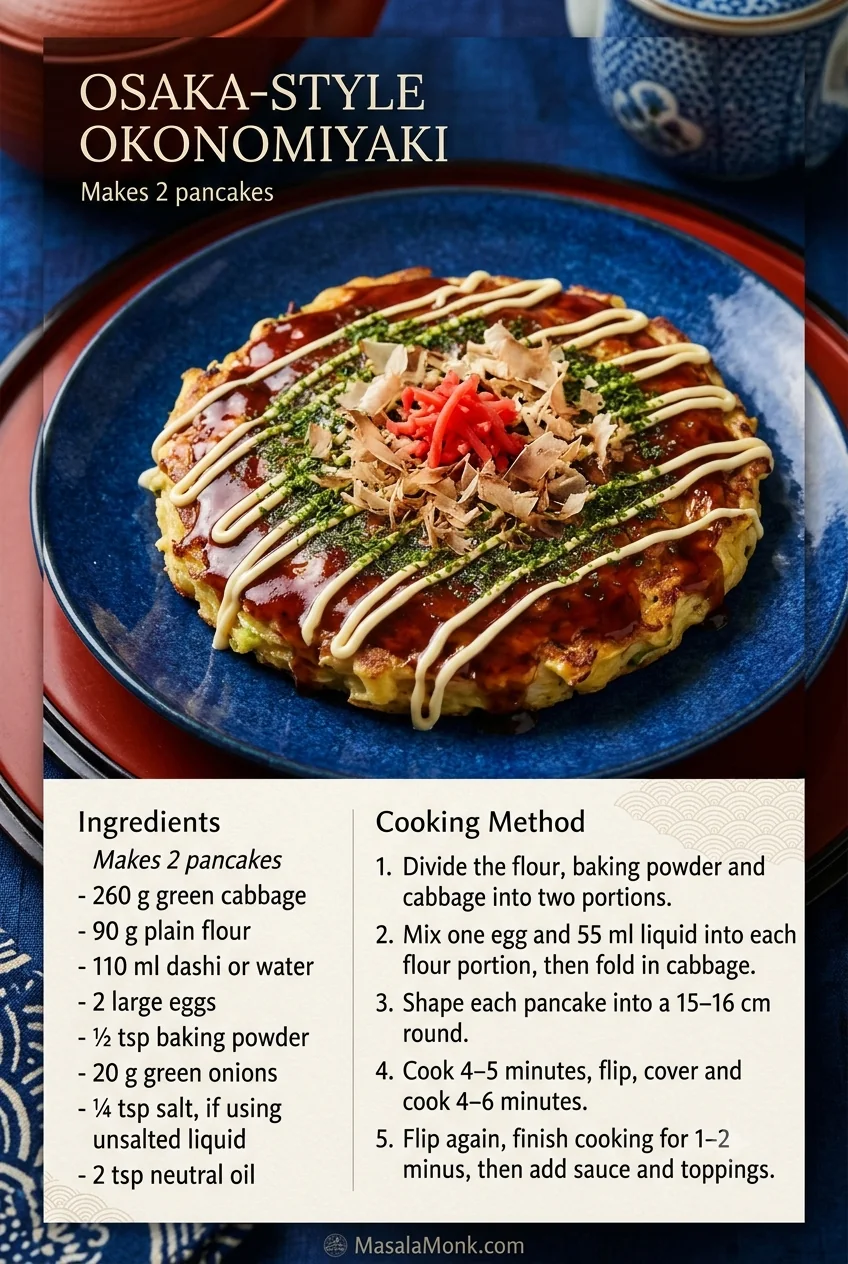
Ingredients for Two Pancakes
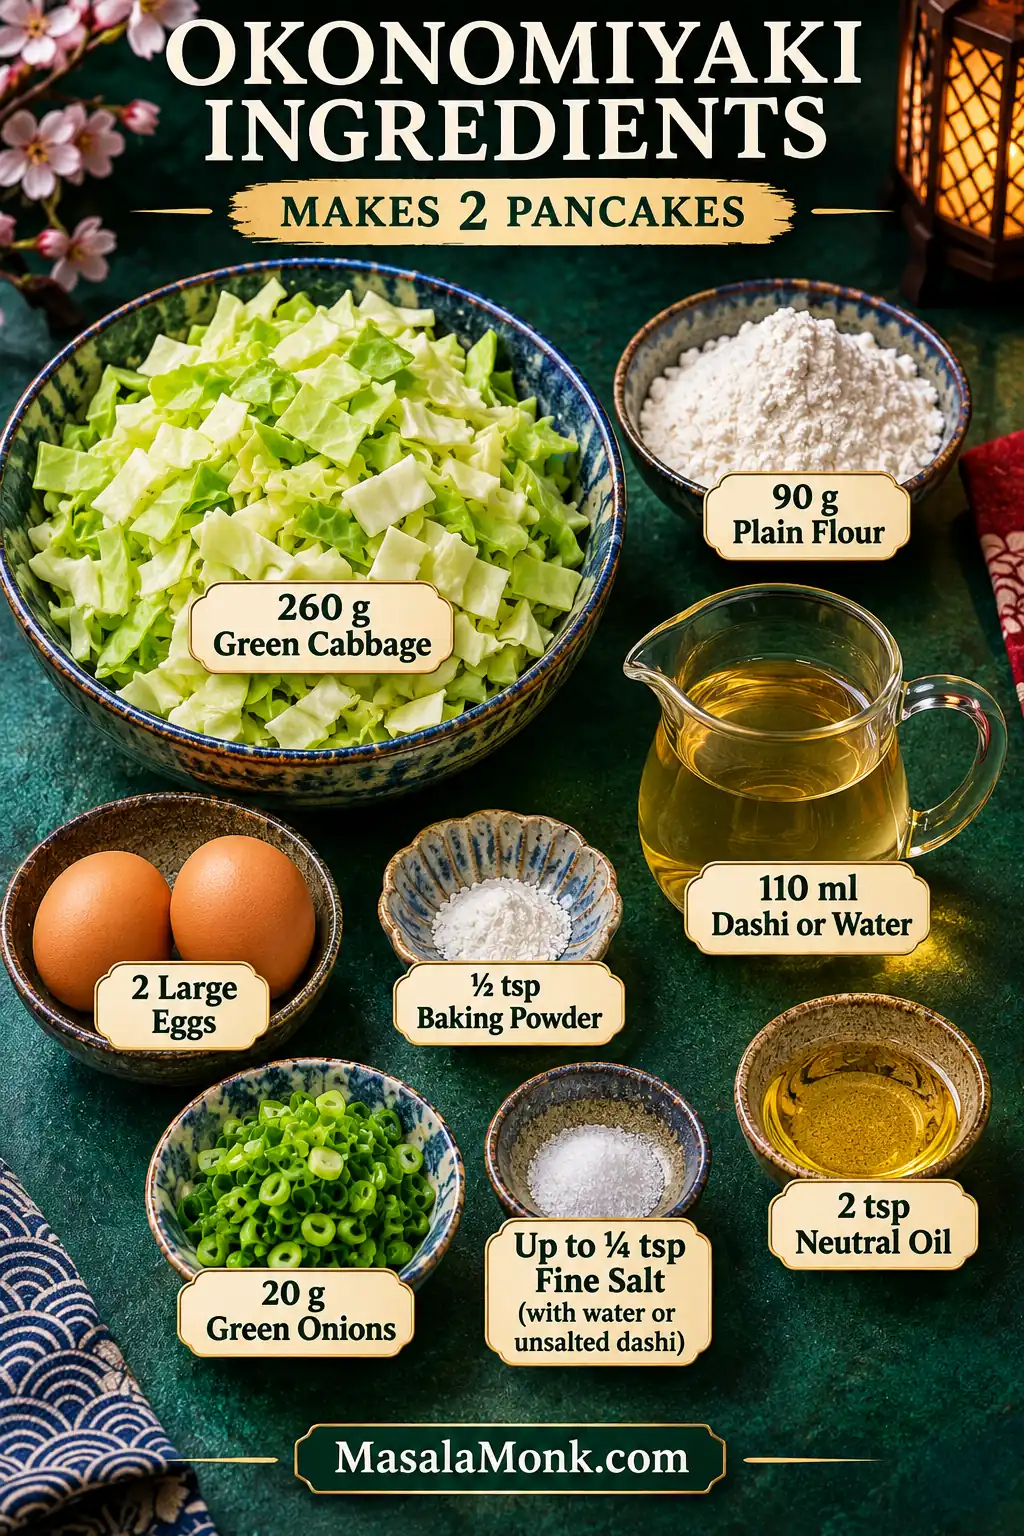
- 260 g (about 9 oz) green cabbage, cored, washed and thoroughly dried before chopping (roughly 3½–4 loosely filled cups; weighing is more reliable)
- 90 g all-purpose/plain flour (about ¾ US cup, spooned and leveled; maida works)
- 110 ml prepared liquid dashi or water (a scant ½ US cup); dashi is Japanese savory stock, preferably unsalted for this recipe
- 2 large eggs, one for each pancake
- ½ tsp baking powder (about 2 g)
- 20 g green onions (scallions/spring onions), finely sliced
- ¼ tsp fine salt (about 1.5 g) when using water or unsalted dashi; omit when using salted prepared dashi
- 2 tsp (10 ml) neutral oil, about 1 tsp per pancake, plus a little more if your skillet needs it
- Optional main filling—choose per pancake: 40 g raw, unsmoked pork belly in 2–3 mm slices or 40 g cleaned, chopped raw shrimp or squid or 30–40 g cooked, thoroughly drained mushrooms. Double the chosen quantity if making both pancakes with the same filling.
- Other optional variations: 15 g grated cheese per pancake, folded into the cabbage; or 40 g fully cooked shredded chicken per pancake, added after cooking. Neither is required for the base recipe.
- Optional additions: 2 tbsp (about 10 g) tenkasu (crispy tempura crumbs) and 2 tsp (about 10 g) finely chopped beni shoga (red pickled ginger), for the batch
Understanding the Base Ratios and Ingredient Choices
For two pancakes, the 260 g of cabbage should outweigh the 90 g of flour by nearly three to one. Weigh the trimmed, dried cabbage rather than adding flour until the bowls look similar in size.
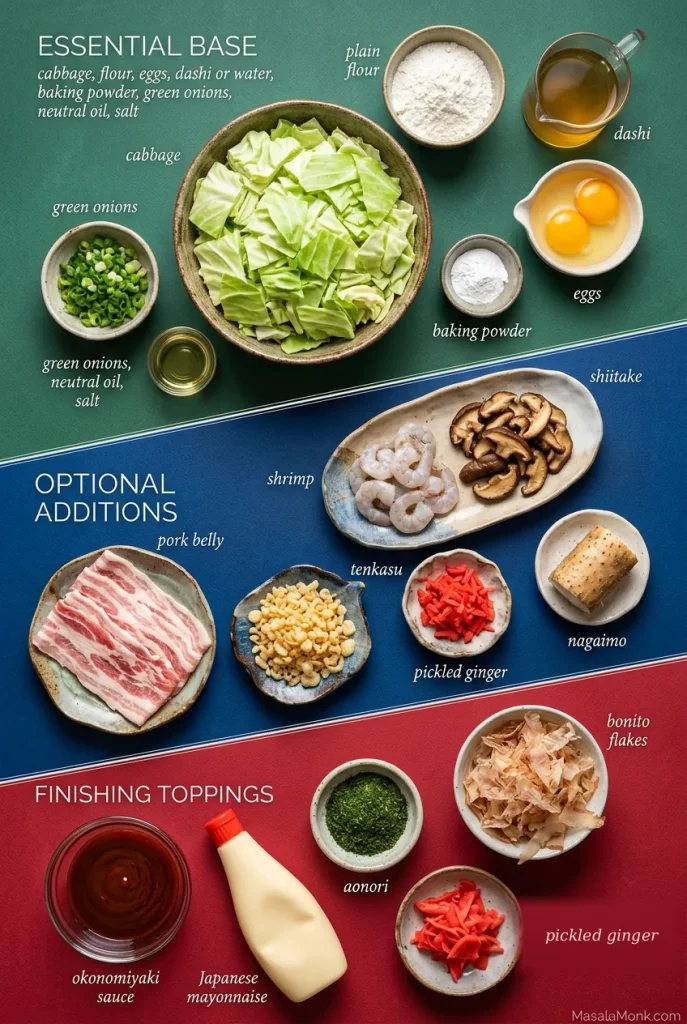
The base requires cabbage, flour, egg, liquid and seasonings; fillings and finishing toppings are choices. Nagaimo appears in this traditional-ingredient chart for comparison, but it is not an add-in to this measured recipe. The proportions here are formulated without it.
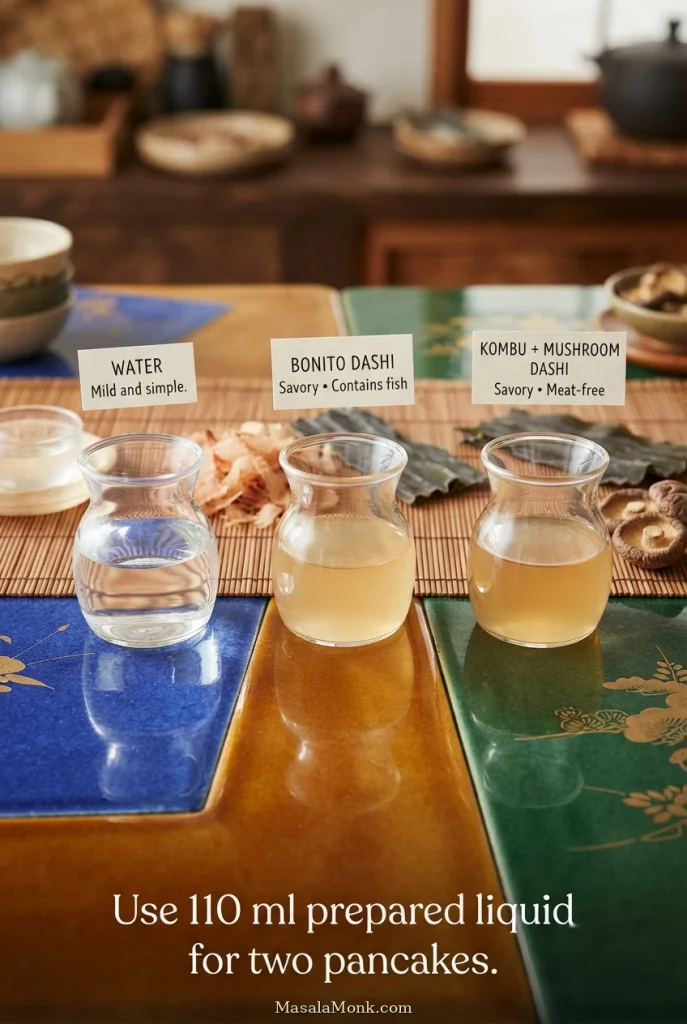
For instant dashi granules, follow the packet directions, let the prepared stock cool, then measure 110 ml of liquid. Reduce or omit the salt if the stock is seasoned. For an egg-containing meat-free pancake, use water or kombu/mushroom dashi; bonito-based dashi contains fish. Compare the dashi and water options if you are deciding which to use.
Quick Sauce and Finishing Ingredients
Have bottled Japanese okonomiyaki sauce? Use about 1–2 tbsp per pancake, to taste, and skip the homemade sauce ingredients below.
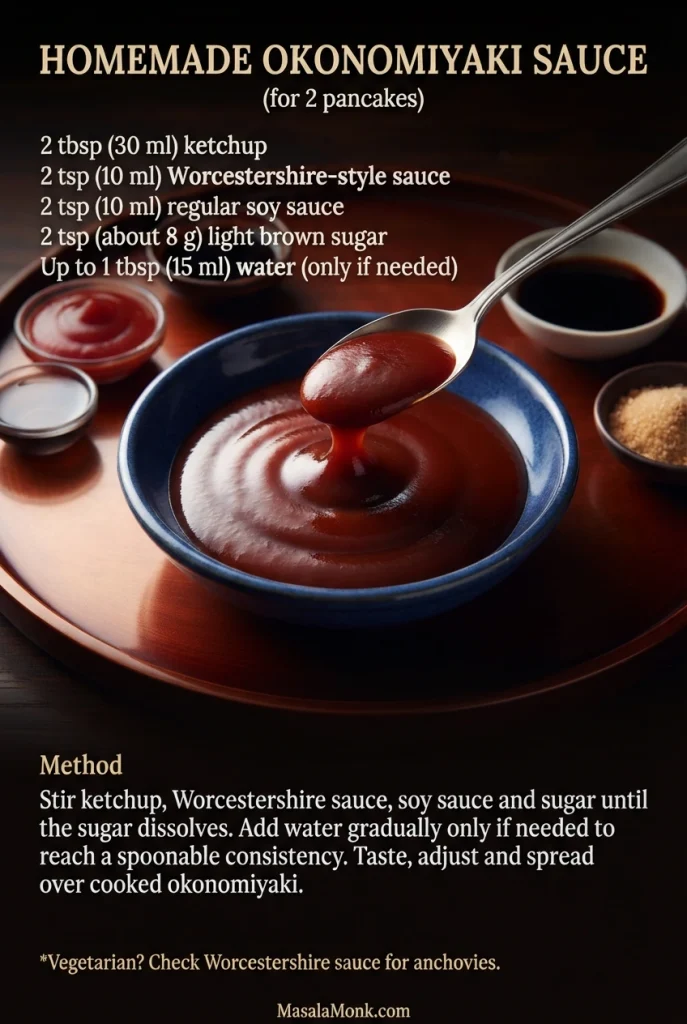
- 2 tbsp (30 ml) ketchup
- 2 tsp (10 ml) Worcestershire-style sauce; start with 1 tsp if yours is particularly strong
- 2 tsp (10 ml) regular soy sauce (not dark soy sauce)
- 2 tsp (about 8 g) light brown sugar
- Up to 1 tbsp (15 ml) water, added gradually if needed
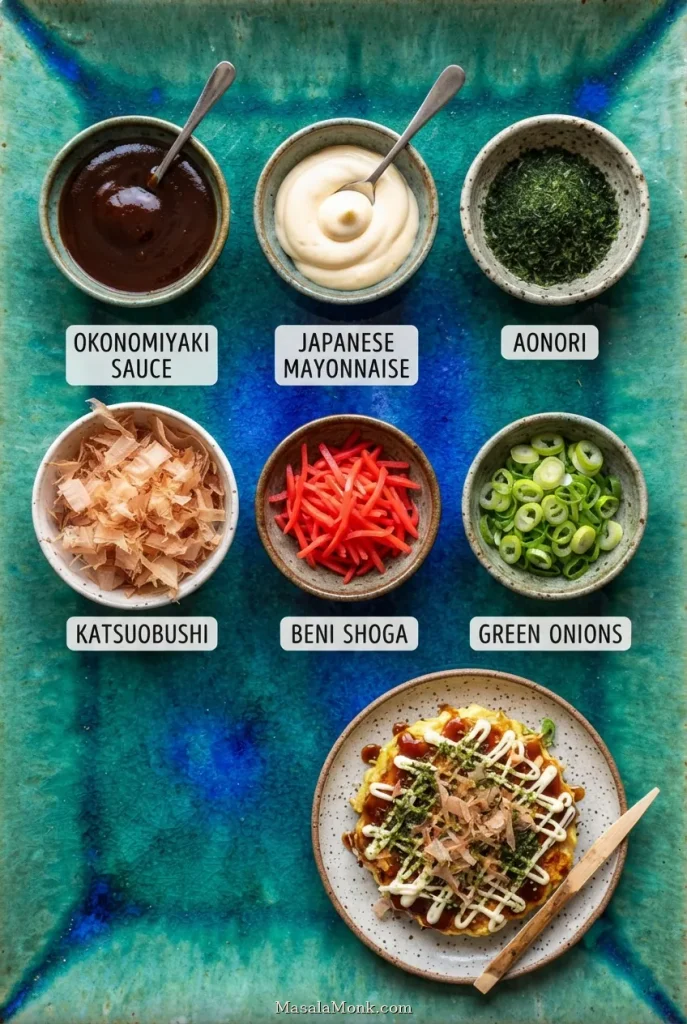
- To finish, optional: 2 tbsp (30 ml) Japanese mayonnaise (or regular mayonnaise), 1 tsp aonori (green seaweed flakes), about 2 g katsuobushi (dried bonito flakes), extra green onions or beni shoga
The homemade sauce yields roughly 50–70 ml, enough for a light coating on two pancakes. For a vegetarian finish, check Worcestershire for anchovies and omit bonito flakes. Regular soy sauce usually contains wheat; our soy sauce guide explains the main varieties.
How to Make Okonomiyaki: Step by Step
- Make the sauce. If using bottled sauce, set it aside. Otherwise, stir the ketchup, Worcestershire, soy sauce and sugar until the sugar dissolves. Add water a teaspoon at a time only if needed, then set the sauce aside.
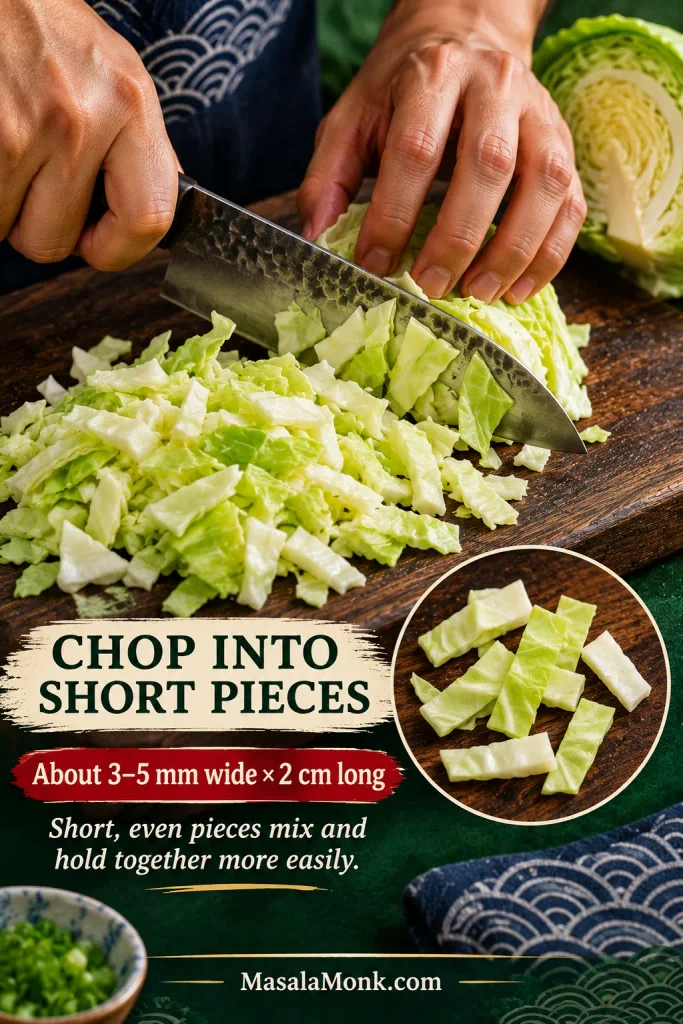
- Prepare the cabbage. Wash and dry the leaves well, remove the tough core, then weigh 260 g of trimmed cabbage. Chop into short, even pieces, roughly 3–5 mm wide and about 2 cm long. They needn’t be identical; just avoid mincing the cabbage into a wet paste. Slice the green onions.
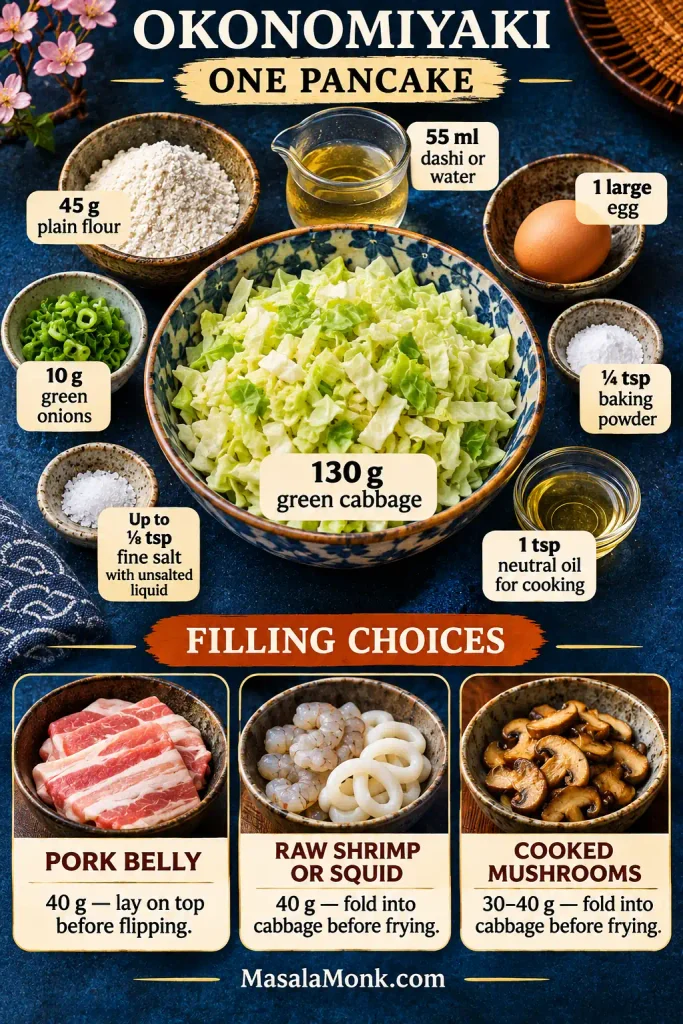
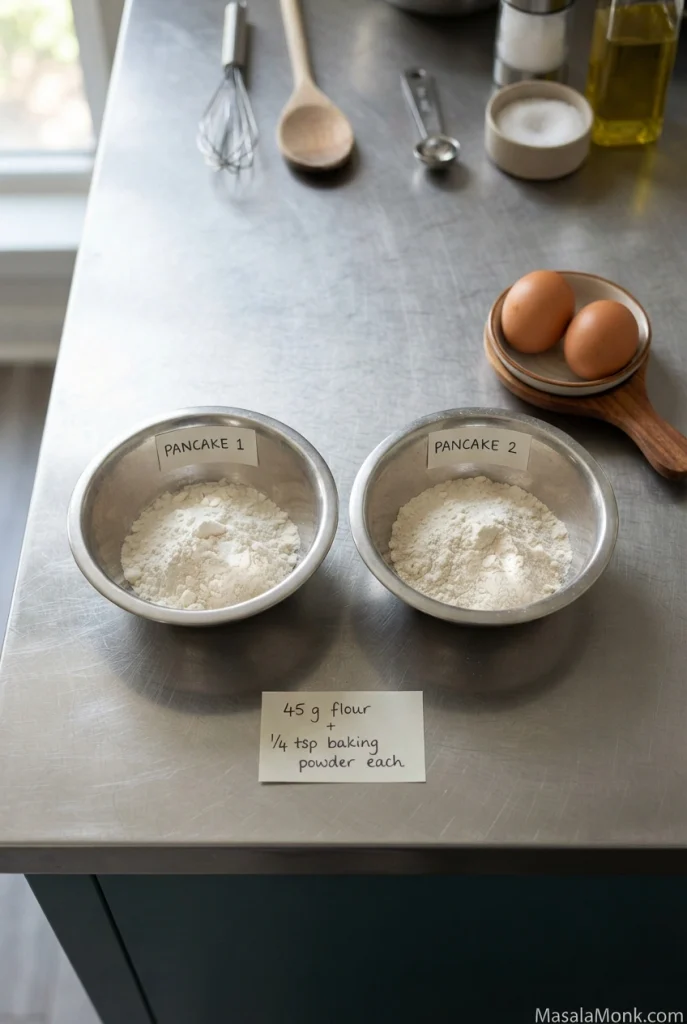
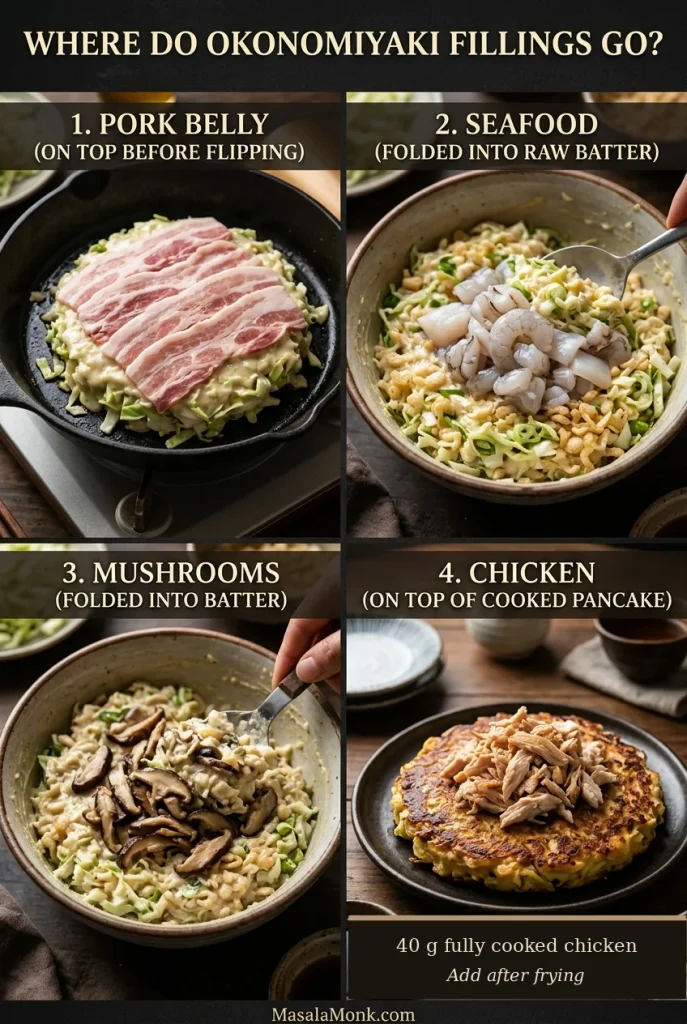
- Set up two portions. Put 45 g flour and ¼ tsp baking powder in each of two bowls. With water or unsalted dashi, add up to ⅛ tsp salt per bowl; use less for salty fillings. Set aside 130 g cabbage, 10 g green onions, one egg and 55 ml cooled dashi or water for each pancake, keeping them separate until frying. Choose each filling now: put 40 g raw pork belly on the uncooked upper surface before flipping; fold 40 g cleaned raw chopped seafood or 30–40 g cooked, drained mushrooms into the cabbage. Optional cheese also goes in the batter; fully cooked chicken is added only after frying.
For each pancake, set out 130 g cabbage, 45 g flour, 55 ml cooled dashi or water, one egg, 10 g scallions and ¼ tsp baking powder. Keep raw pork separate for the upper surface; mix small raw seafood or cooked drained mushrooms into the cabbage.
Cook the First Pancake
- Warm the pan. Heat the skillet over medium heat with 1 tsp oil. A dab of batter should sizzle gently when added, without darkening at once. If the oil starts smoking, lower the heat before adding the mixture.
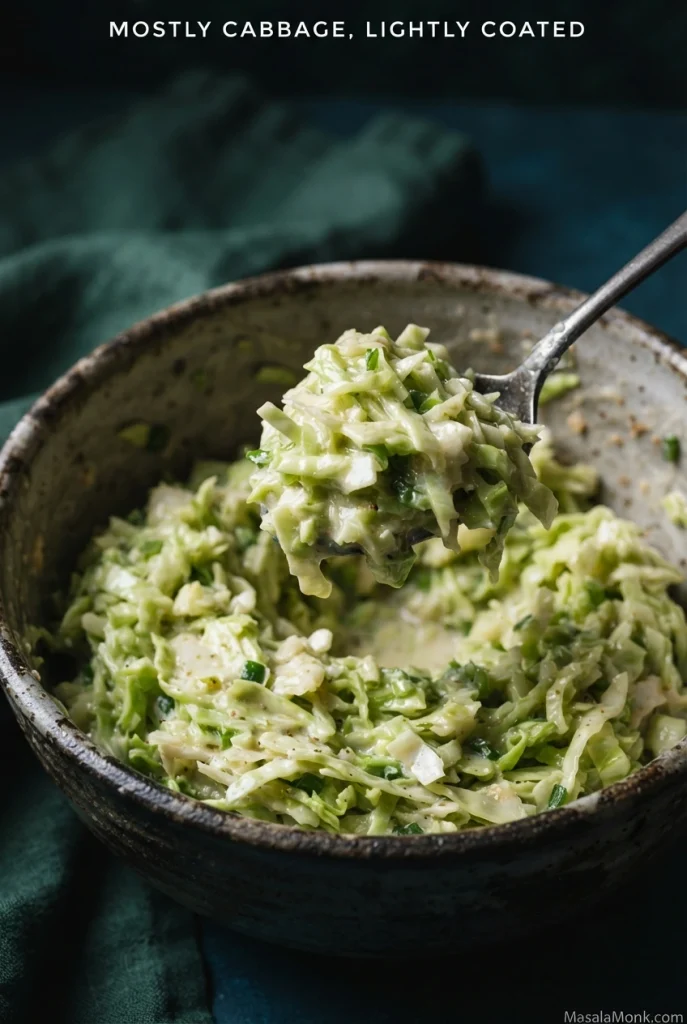
- Mix just before frying. Whisk the first egg and 55 ml cooled dashi or water into one dry-mix bowl. Fold in 130 g cabbage and 10 g green onions with any cleaned raw chopped seafood, cooked drained mushrooms or grated cheese you are using, plus reserved tenkasu or pickled ginger. Keep raw pork belly separate for the uncooked top and fully cooked chicken for serving. It should look like mostly cabbage lightly coated in batter, with almost no loose liquid—not a pourable pancake mix. Not sure what that looks like? Compare the cabbage-heavy batter photo.
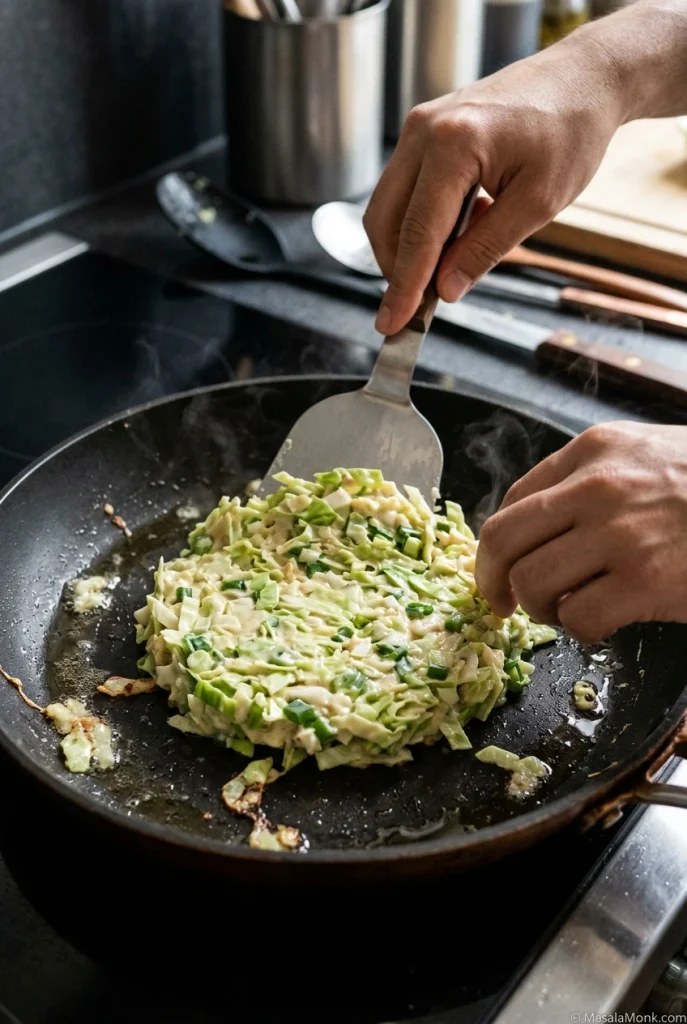
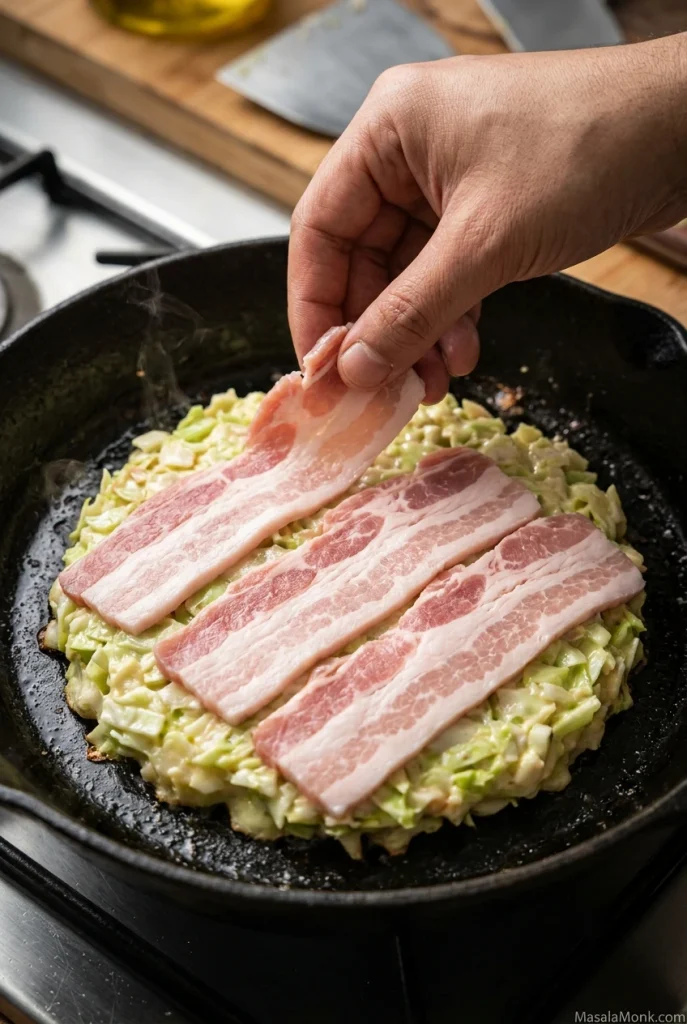
- Shape and brown. Spoon the mixture into a 15–16 cm round, 1.5–2 cm thick. Gently tuck in loose cabbage without pressing the pancake flat. If using pork belly, lay 40 g of 2–3 mm slices across the uncooked top. Cook for 4–5 minutes, until the underside is golden and the edge holds together. If unsure, check the three flip-readiness signs before turning.
Before flipping, lift one edge to check for an evenly golden base. If only a small patch is dark while the surrounding batter is pale, reduce the heat and give the crust longer to set.
Flip, Cover, and Check Doneness
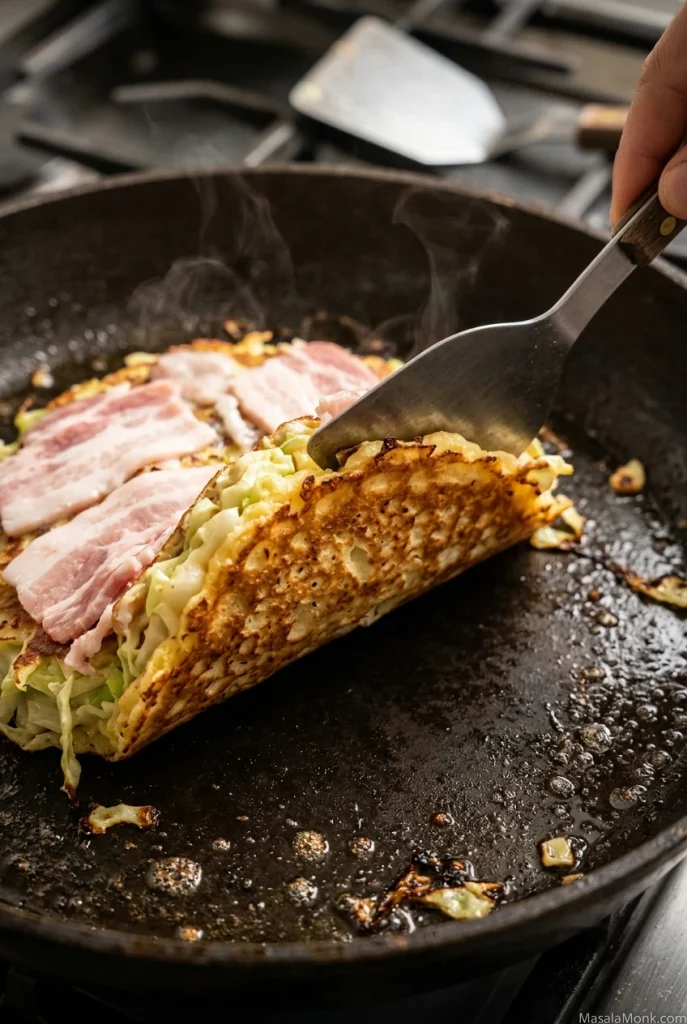
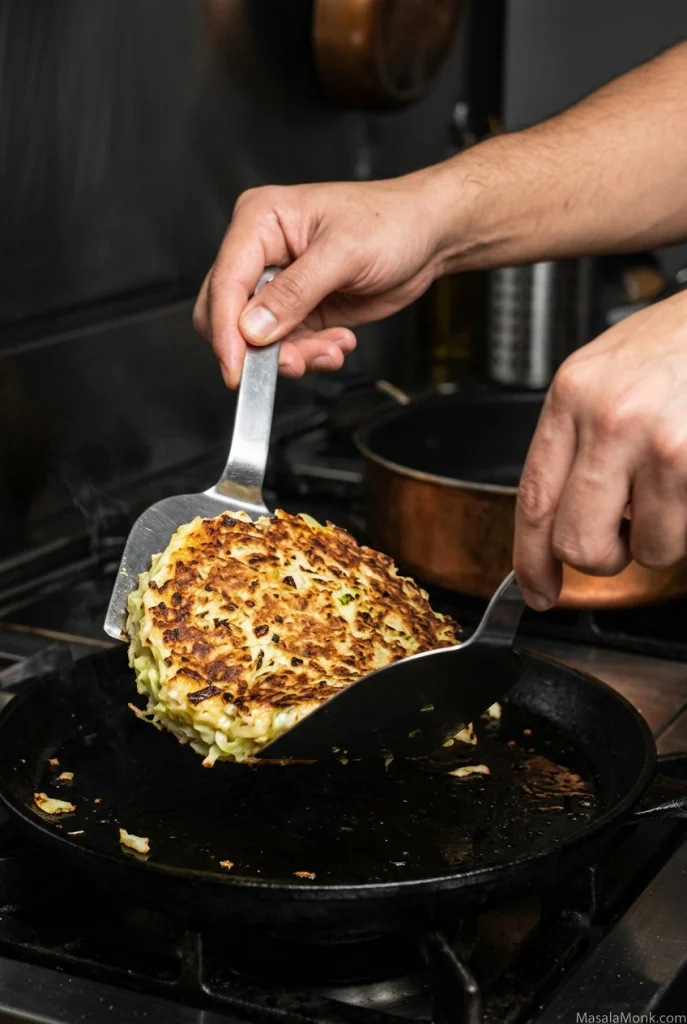
- Flip and cover. Slide a broad spatula under the set base; support the opposite edge with a second spatula if available. Turn it over close to the pan in one movement. Pork slices, if used, now face the skillet. Cover and cook for 4–6 minutes, lowering the heat if it browns too quickly.
- Finish and check. Uncover, flip once more and cook for 1–2 minutes. The center should be moist and cabbage-rich, with no wet raw batter; it will not have the airy crumb of a breakfast pancake. Insert a suitable thermometer sideways into the thickest part, clear of the pan. Aim for 71°C (160°F) in the cabbage-and-egg version or 74°C (165°F) when using raw pork belly. Keep cooking gently, covered if necessary, until done. For a visual comparison, see cooked cabbage versus raw batter.
Check the center rather than the browned crust. Insert the probe sideways so its tip stays inside the thickest part, away from the skillet: 71°C (160°F) for the cabbage-and-egg version, or 74°C (165°F) with raw pork belly.
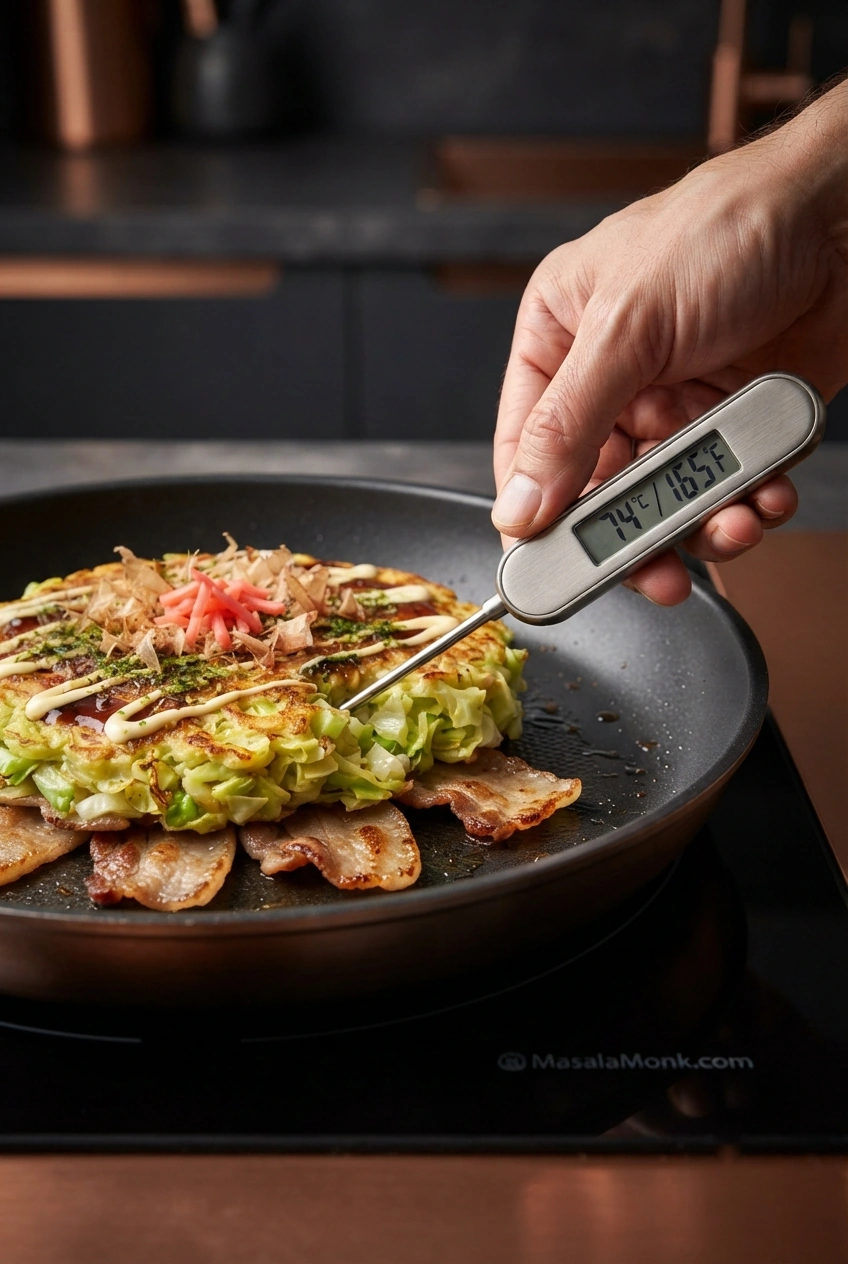
Doneness guidance: FoodSafety.gov’s egg-safety advice distinguishes egg dishes without meat (160°F/71°C) from those containing meat (165°F/74°C). If you are making the seafood filling, also check the seafood pieces near the center as described in the variations.
Cook the Second Pancake and Serve
- Decide how to serve; cook the second. Eating separately? Sauce, top and serve the first pancake now. Eating together? Keep it hot and unsauced using the warm-holding method arranged before cooking. Remove burnt crumbs and add the remaining 1 tsp oil. Whisk the second egg and 55 ml cooled dashi or water into the second dry-mix bowl; fold in 130 g cabbage and 10 g green onions with any raw chopped seafood, drained cooked mushrooms, cheese, tenkasu or pickled ginger chosen for that pancake. Add raw pork before its first flip and fully cooked chicken after frying. Cook as in Steps 6–8.
- Finish the plate. Sauce and top the second pancake—or both pancakes if you held the first. Add Japanese or regular mayonnaise, then aonori, bonito flakes or pickled ginger as you like. Dress held pancakes just before eating so the browned surface stays pleasantly firm.
Okonomiyaki Step-by-Step Photo Guide
Prepare the Cabbage and Dry Ingredients
Dry washed cabbage thoroughly, especially where water collects around the center rib. Keep the leaves’ natural moisture; removing surface rinse water is different from salting and squeezing the cabbage.
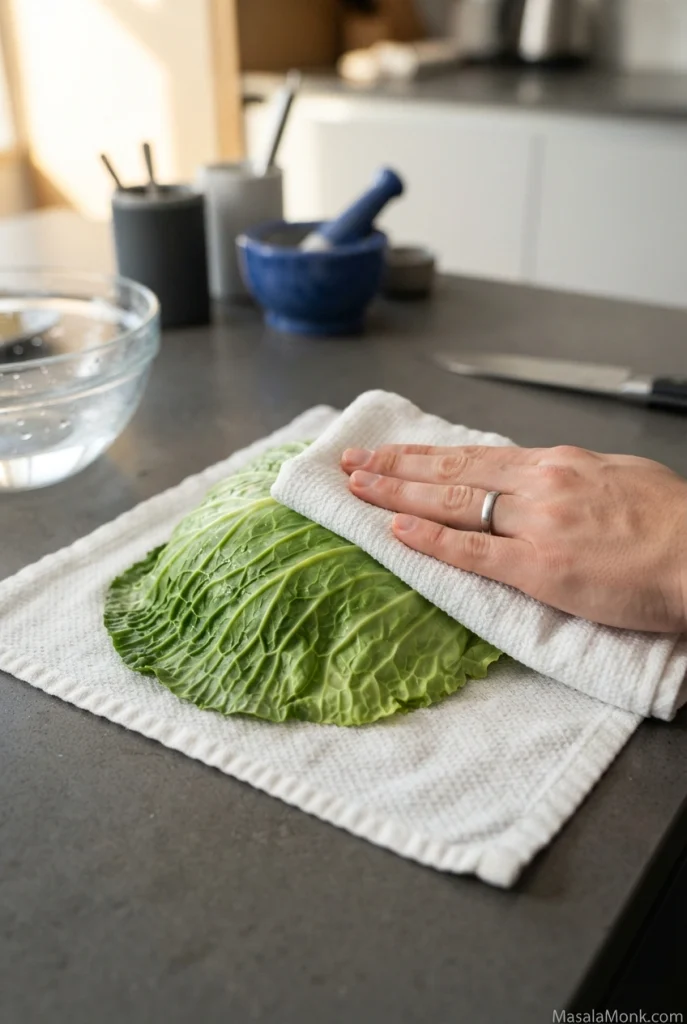
Cut the dry leaves into short pieces, about 3–5 mm wide and 2 cm long. Make thick rib pieces slightly smaller so they soften alongside the thin green leaves.
Divide the flour and baking powder into two dry bowls first. Add each egg and portion of cooled dashi only when its pancake is about to cook; otherwise, the cabbage gradually releases water into the mixture.
Mix, Shape, and Add the Filling
A 15–16 cm cabbage round needs a flat cooking surface with enough room to turn it. Judge skillet capacity by the base, not the rim; a broad spatula needs access to at least one side.
Whisk the egg and cooled liquid into the dry ingredients before folding in cabbage. Stop once the leaves are coated; beating the mixture further does not improve the texture.
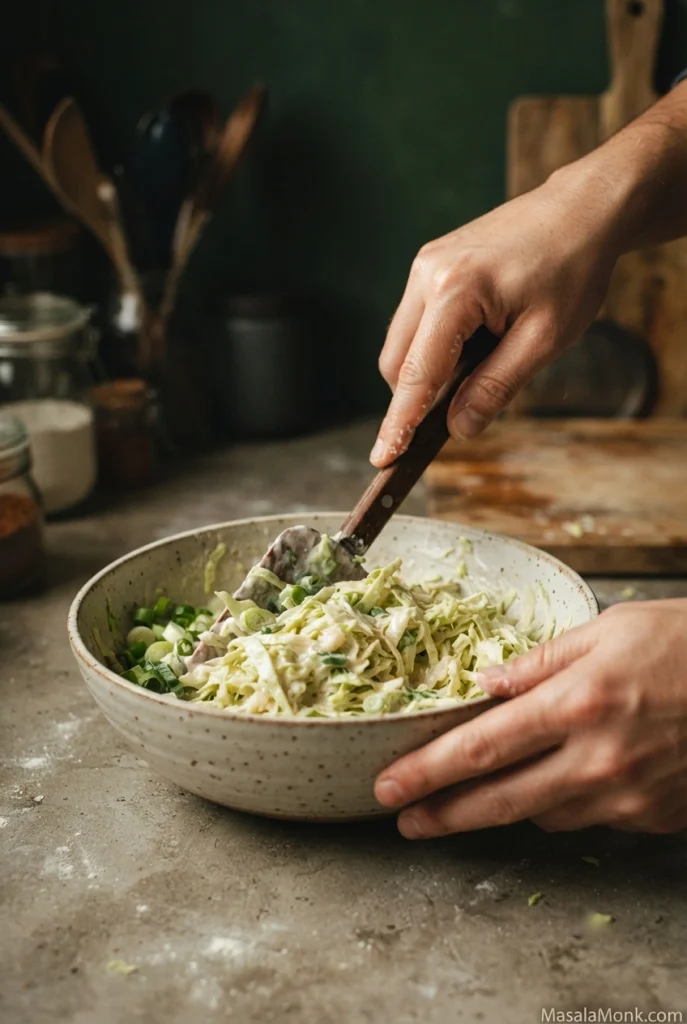
Lift a spoonful before frying. You want individual cabbage pieces joined by a thin binder, with little loose batter pooling at the bottom of the bowl.
Shape the Round and Position the Pork
Spoon the mixture into a compact round and tuck the edges inward with a spatula. Leave the center roughly 1.5–2 cm thick; pressing it flat reduces the tender cabbage-rich interior.
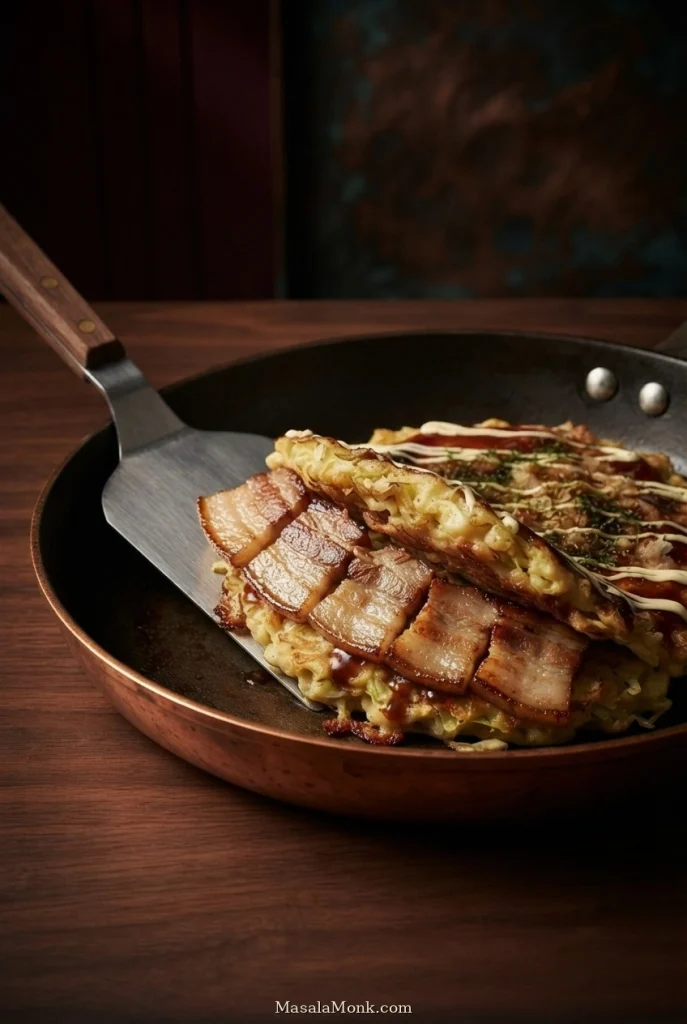
If using pork belly, place its thin raw slices across the uncooked upper surface before the first flip. They will cook against the hot skillet once the pancake is turned.
Flip, Cover, and Examine the Interior
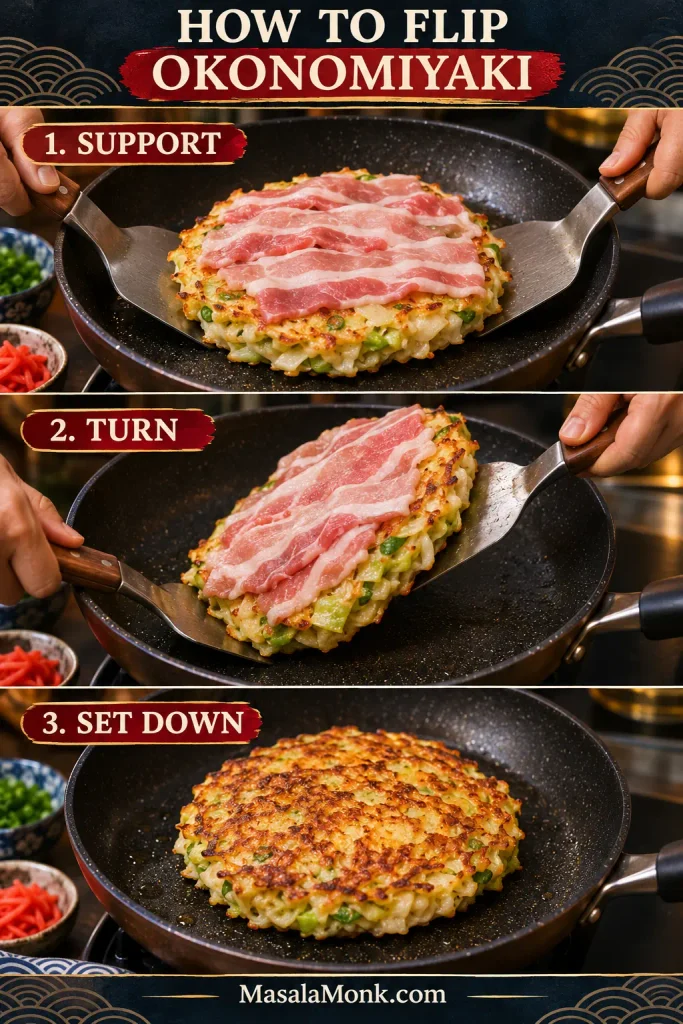
Support the set pancake from two sides, then turn it low over the skillet. Lifting too high or approaching from a single narrow point makes the cabbage round more likely to fold.
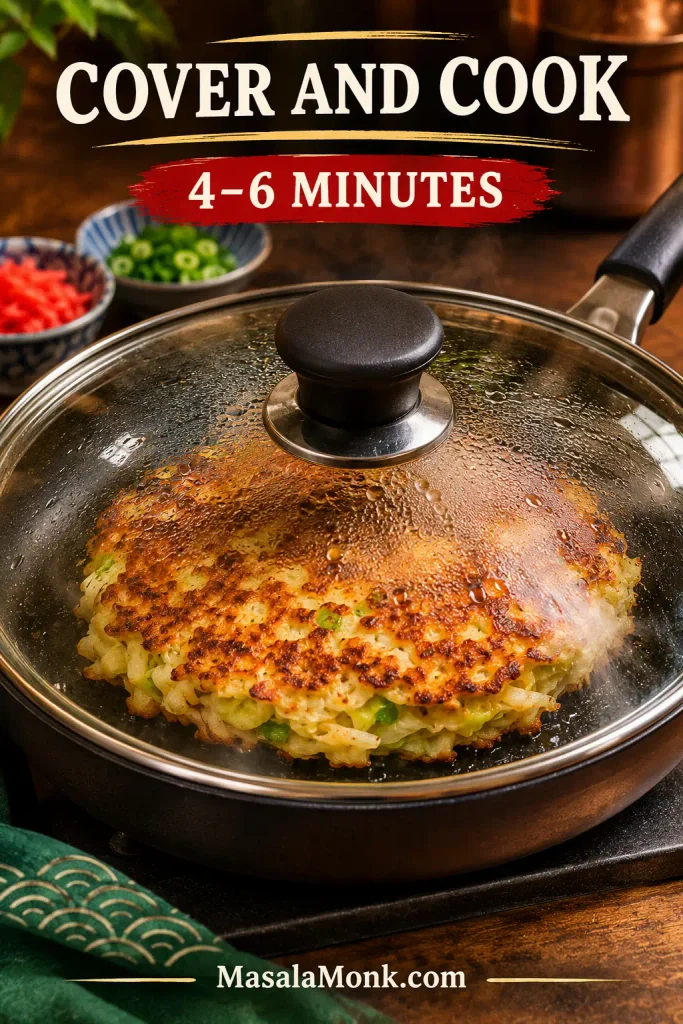
After the first flip, cover the pan for 4–6 minutes on moderate heat. Steam helps the thick center cook, but a fogged lid is not a doneness test.
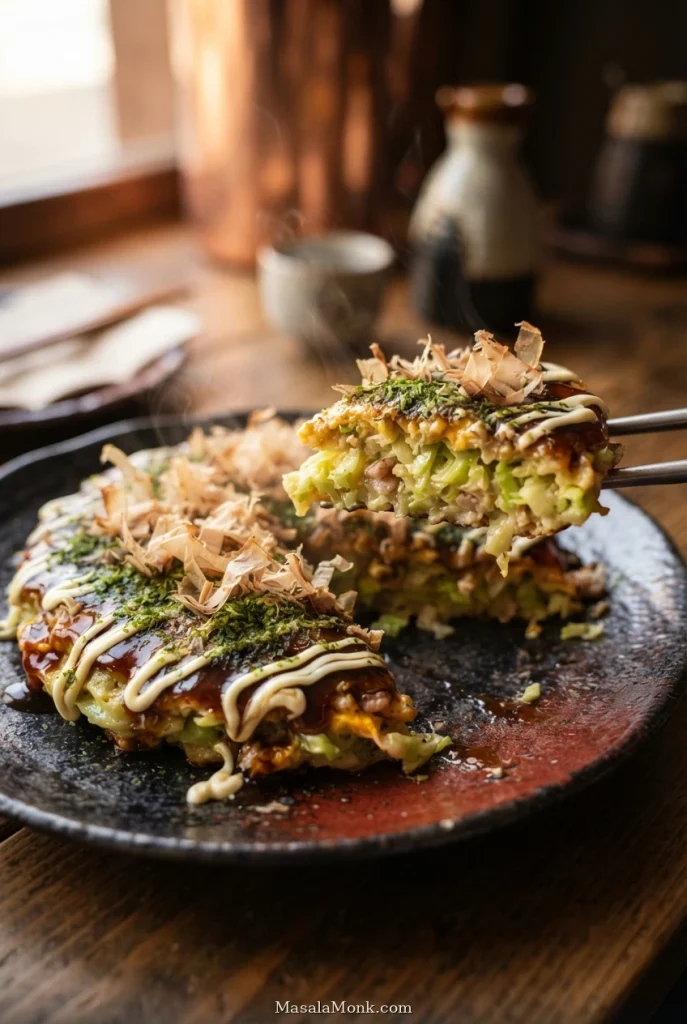
A cut wedge should reveal tender cabbage pieces held by set binder, not a uniform bread-like crumb. Moist cabbage is normal; glossy streaks of unset flour-and-egg batter are not.
How to Flip Okonomiyaki Without Breaking It
The underside matters more than the timer: the pancake needs enough crust to support the cabbage when you turn it. An untidy edge is fine.
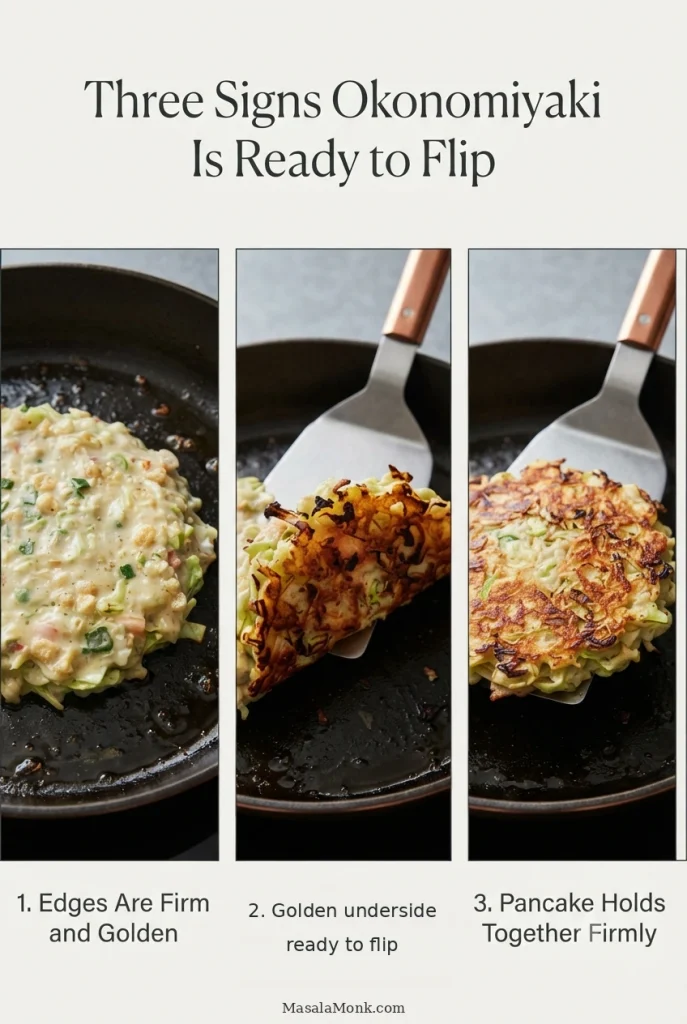
When Is Okonomiyaki Ready to Flip? Three Checks
- The edge holds: stray cabbage is no longer slipping away from the round.
- The bottom is golden: a spatula lifted under one edge reveals browning rather than a pale, wet surface.
- It moves as one piece: you can slide a broad spatula underneath without the center collapsing.
Three signs should agree before you flip: the edges hold, the underside is golden, and a broad spatula can lift the pancake without its center collapsing.
Set both spatulas under the pancake before turning. On a pork version, the uncooked pork should land against the skillet after the first flip while the browned batter side faces up.
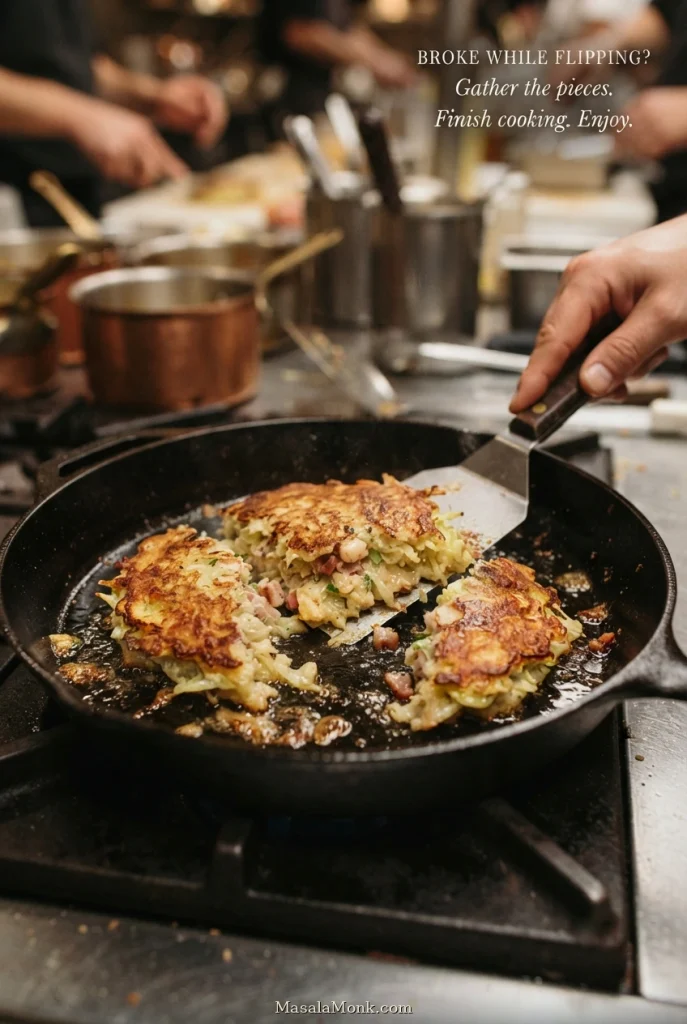
If it breaks, gather the pieces and finish cooking them. You can still add sauce and mayonnaise to a delicious, if less tidy, pancake. On the next one, wait for the base to set before turning. If it keeps happening, check the likely causes before your next batch.
If the pancake tears, bring the pieces back together and finish cooking them. Check the thickest fragment for doneness; a neat shape matters less than fully cooked batter and filling.
Homemade Okonomiyaki Sauce and Traditional Toppings
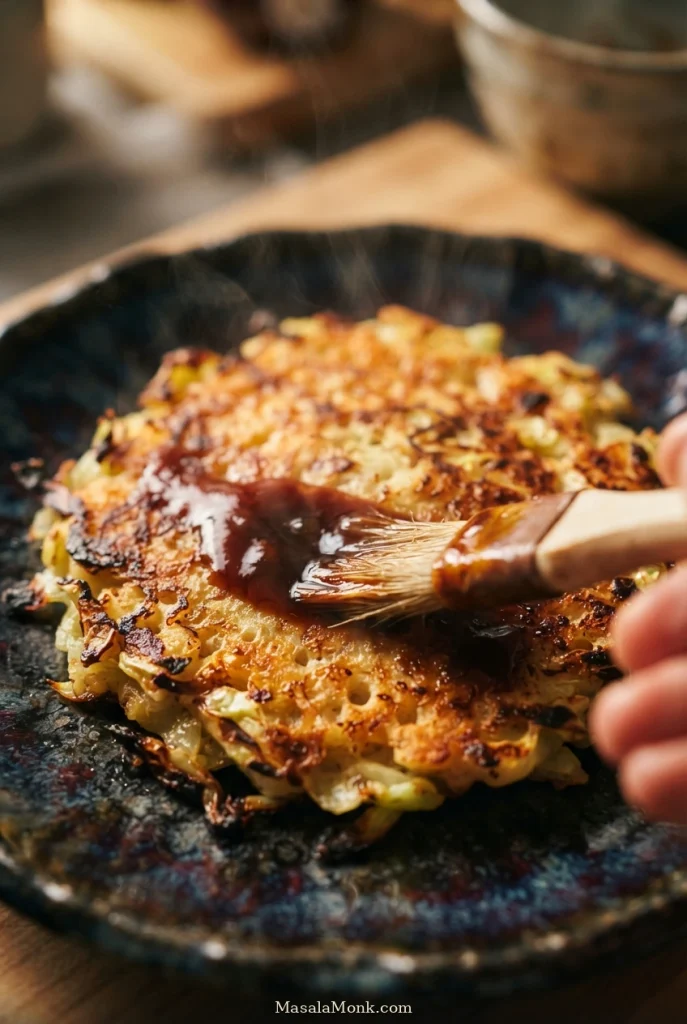
Bottled Japanese okonomiyaki sauce is usually thicker and fruitier than the pantry version here. Either way, add it after cooking so the browned edges stay pleasantly firm.
Brush sauce on the finished pancake while it is hot, using a thin layer that stays above the browned edges. Adding sugary sauce during frying can scorch it and soften the crust.
For the homemade version, use the measured quick sauce ingredients. Stir until the sugar dissolves, then adjust the balance a little at a time: Worcestershire for tang, soy for savoriness or sugar for sweetness.
Japanese mayonnaise, a pinch of aonori and a few bonito flakes make a familiar finish. Regular mayonnaise is fine if that is what you have, though it tastes different; our homemade mayonnaise guide includes a Japanese-style variation. You can leave off the seaweed and bonito and still enjoy the sauce-and-mayo combination.
Finish each pancake to taste: mayonnaise for richness, aonori for seaweed aroma, bonito for savoriness and pickled ginger for a sharp contrast. For a fish-free plate, check both the dashi and sauce as well as the toppings.
How Ingredients Affect Okonomiyaki’s Flavor and Texture
Green Cabbage Versus Napa Cabbage
Green cabbage softens but keeps a little bite, which works well with this small amount of batter. Choose green cabbage for these measurements; wetter, more delicate napa cabbage is not a direct swap. Short, even pieces matter more than cutting every shred to a precise width.
Use firm green cabbage for the measured recipe. Looser napa leaves behave differently at the same weight and may make the small amount of binder seem wetter.
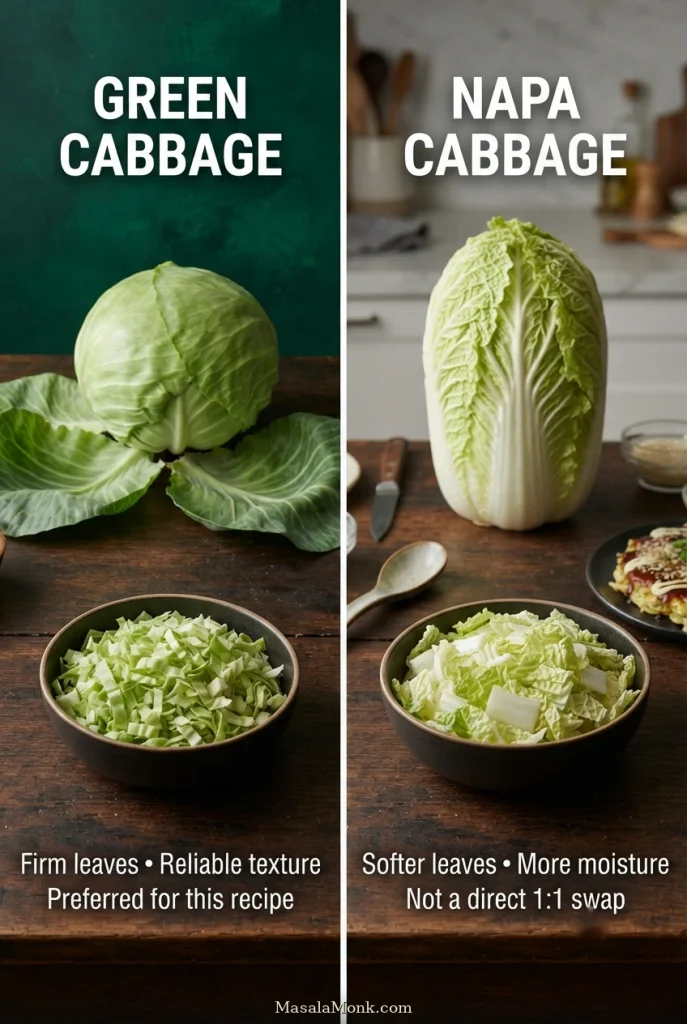
Unlike cabbage for gyoza filling, which is often salted and squeezed to keep dumpling wrappers dry, okonomiyaki cabbage keeps its natural moisture. Dry the washed leaves, but don’t squeeze them.
A whole cabbage head will usually leave you with extra leaves. Keep the measured 260 g for this recipe and use the remainder in homemade coleslaw.
Why Nagaimo and Special Flour Aren’t Required
Grated nagaimo (Japanese mountain yam) gives many traditional batters a soft, slightly springy texture. Tenkasu adds fried-batter richness, though the pieces soften in the moist mixture. Neither is required here: the eggs bind the cabbage, and a little baking powder helps lighten the flour batter. See the texture of the simpler mixture before deciding whether you need a special flour blend.
Traditional batters sometimes use grated nagaimo for a soft, slightly springy texture. This recipe deliberately uses a simpler egg-and-flour binder: do not add yam without changing the formula.
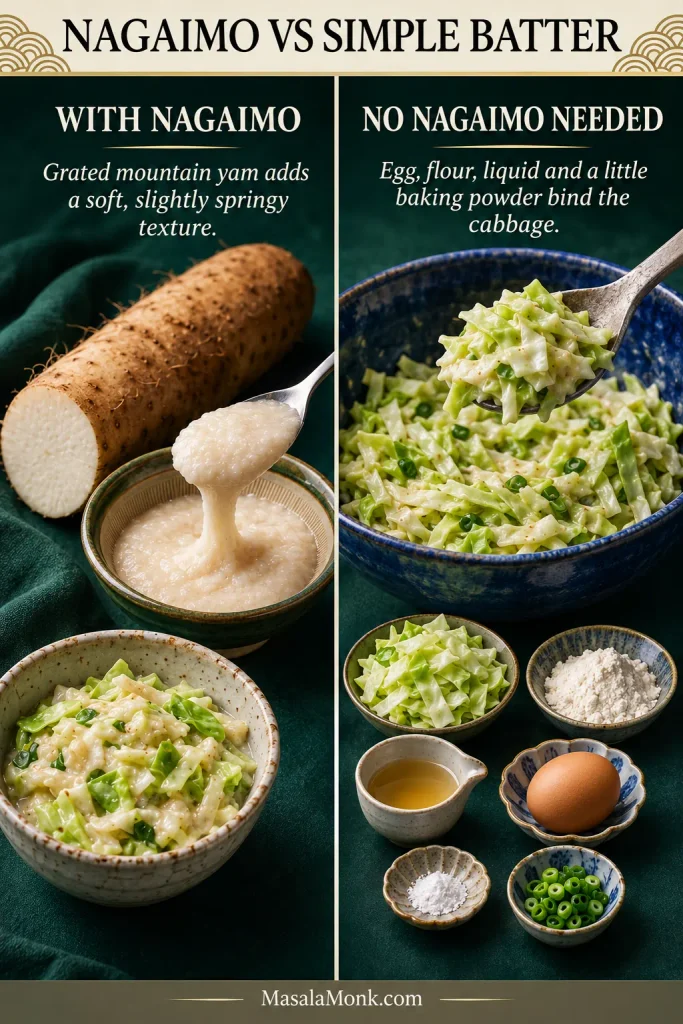
This batter uses plain/all-purpose flour. Packaged okonomiyaki mixes may already contain seasoning or leavening, so follow their packet directions rather than using the same quantities.
Dashi and Eggs
Dashi adds a gentle savory flavor; water produces a milder base. Eggs help bind the cabbage to the small amount of flour, so the two eggs are part of the recipe’s structure—not just an optional addition.
Choose the liquid according to the diners: water is mild, bonito dashi contains fish, and kombu–mushroom stock can be fish-free. In all cases, measure 110 ml of prepared liquid and adjust salt if the stock is seasoned.
Pork, Seafood and Vegetarian Variations
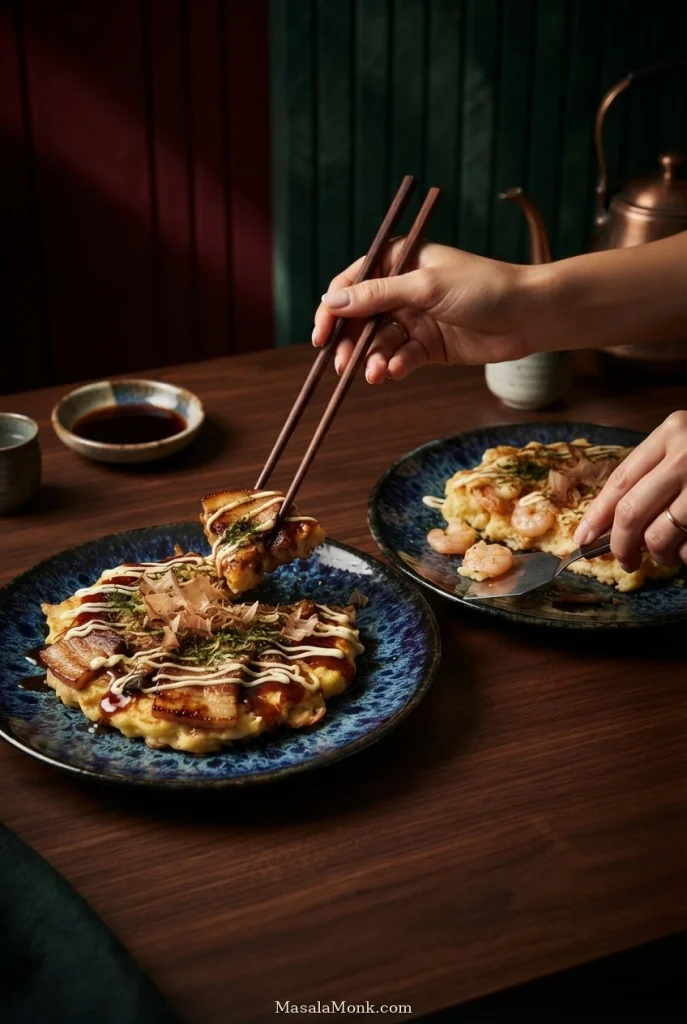
Okonomi means roughly “what you like,” and yaki means grilled. Each portion can suit a different appetite: pork brings richness, shrimp a mild sweetness, and shiitake with kombu dashi a savory meat-free option. Choose one main filling per pancake so the cabbage still holds together. If you are unsure what goes inside or on top, see the filling-placement guide. A rice-vinegar cucumber salad makes a crisp, cool side.
You can serve different fillings from the same base batter. Keep the portions separate while mixing and cooking, especially when one pancake contains pork or seafood and the other is meat-free.
How to Prepare Each Filling
- Pork belly: Lay 40 g raw, unsmoked 2–3 mm slices over each pancake before flipping (80 g total). Bacon is saltier and smokier, so reduce the added salt if using it.
- Shrimp or squid: Use 40 g raw, cleaned seafood per pancake (80 g for two), patted dry and chopped into small, even pieces before mixing. Check a piece near the center after cooking: shrimp should be pearly and opaque, and squid opaque and firm throughout. For previously cooked seafood, warm it separately and use it as a topping; reheat refrigerated leftovers to 74°C (165°F).
- Cooked-chicken topping: Use about 40 g fully cooked shredded chicken per pancake, added after frying and before sauce. Reheat refrigerated leftover chicken separately to 74°C (165°F); raw chicken does not belong in this quick-cooking batter.
- Vegetarian (contains eggs): Use kombu or mushroom dashi and omit pork and bonito. Sauté mushrooms until their moisture has cooked away, then cool and weigh 30–40 g cooked mushrooms per pancake (weight after cooking) before folding them into the cabbage. Check packaged sauce and toppings for fish ingredients.
- Cheese: For a richer, less traditional pancake, fold 15 g grated cheese into each cabbage portion just before frying (30 g total). Keep the heat moderate so any melted cheese at the edge doesn’t burn.
The base contains eggs and wheat. For a vegetarian pancake, also use fish-free stock and sauce and omit bonito flakes. An egg-free or gluten-free version needs a different binder or flour balance; simply omitting the eggs or replacing the flour gram for gram will not give the same result.
Pork and Seafood Filling Results
Thin slices of pork brown beneath the flipped pancake. Keep them inside the cabbage round so no pieces hang over the edge, cook too quickly or catch on a spatula.
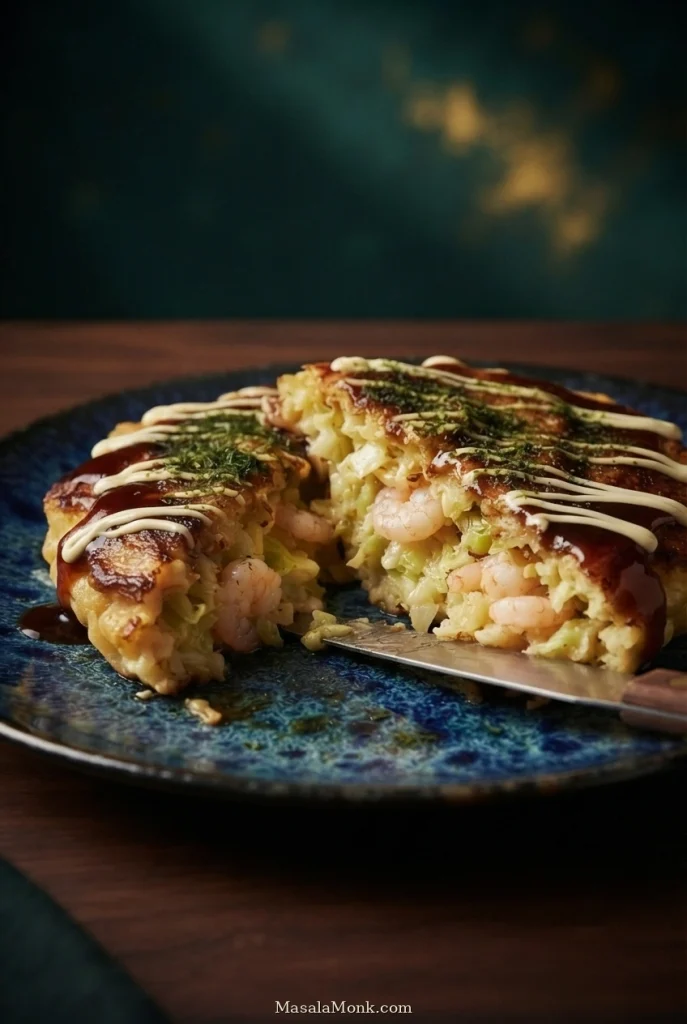
Use cleaned, dry shrimp chopped small enough to cook through inside the cabbage. Check an interior piece before serving; cooked shrimp should be opaque and pearly.
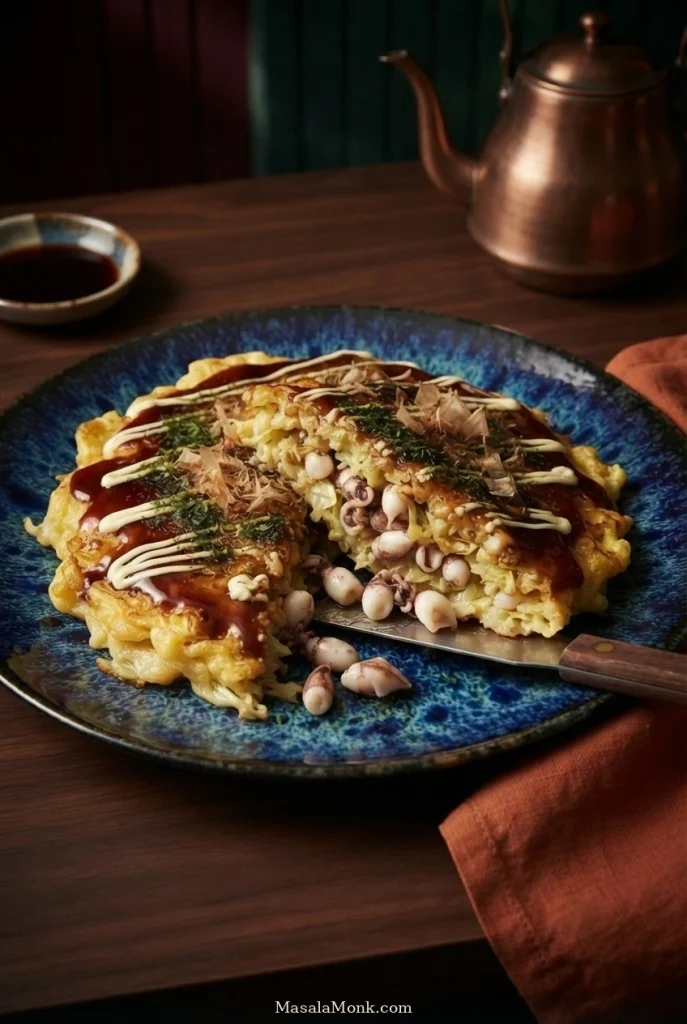
Squid should be chopped into small, similarly sized pieces before it goes into the batter. Look for opaque, firm pieces at the center; unlike shrimp, squid stays pale when cooked.
Mushrooms, Cheese, and Finishing Placement
Sauté shiitake before adding it to the batter, then cool and drain it. Measure 30–40 g of cooked mushrooms per pancake so excess mushroom liquid does not loosen the cabbage binder.
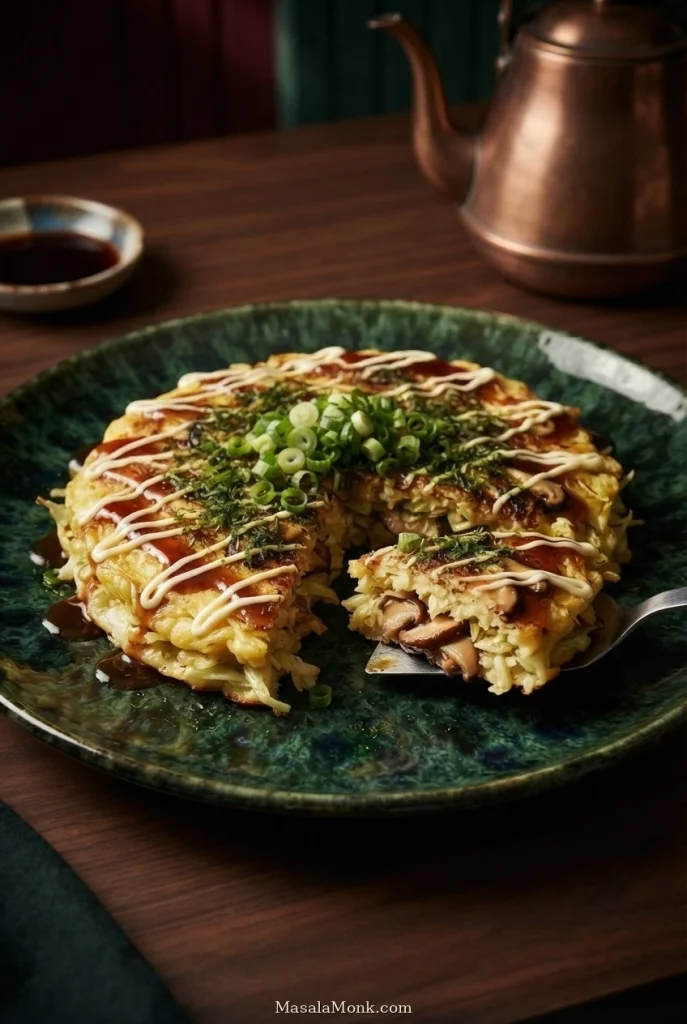
A little grated cheese can melt between the cabbage leaves without changing the base formula. Use about 15 g per pancake and avoid leaving large mounds at the edge where they can scorch.
Raw pork slices go onto the uncooked top; chopped raw shrimp or squid and drained cooked mushrooms go into the cabbage batter; fully cooked chicken is added after frying. Those distinctions affect both texture and food handling.
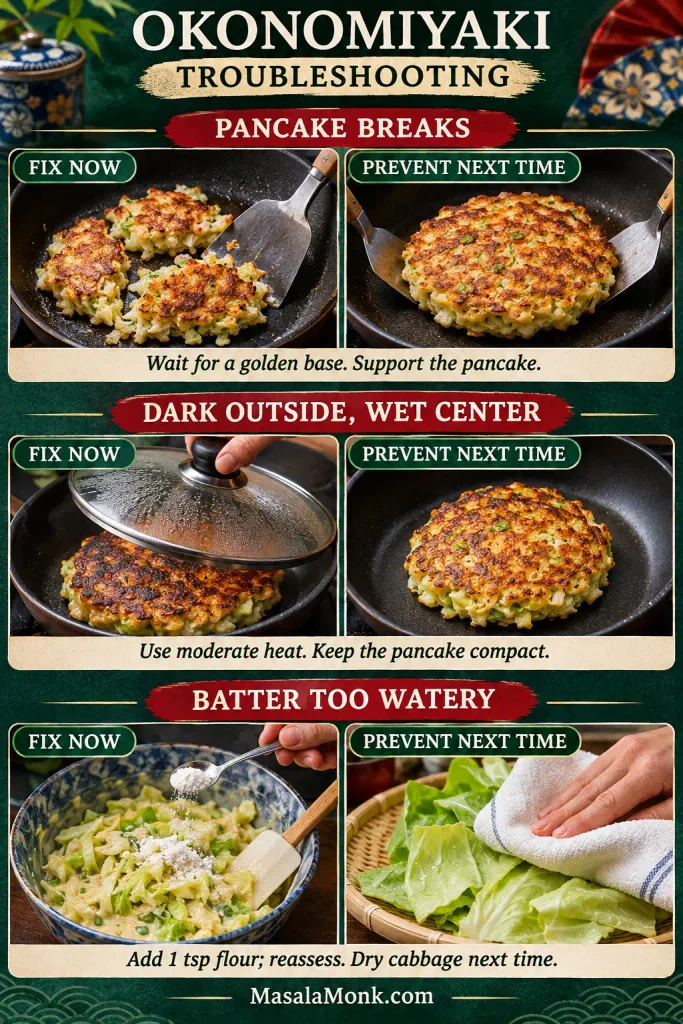
Why Okonomiyaki Falls Apart or Turns Gummy
Okonomiyaki usually breaks because its underside hasn’t set, its cabbage is too wet, or the round is too large to support. A broken pancake can still be cooked and eaten; a raw center needs more gentle heat. A pancake that’s cooked through but rubbery is different—longer cooking won’t undo the density. For a reliable doneness check, revisit the temperature and probe-position illustration.
Compare Watery, Correct, and Dry Okonomiyaki Batter
If the bowl looks wrong, diagnose the mixture before adjusting it. Excess liquid, correctly coated leaves and dry flour pockets call for different responses.
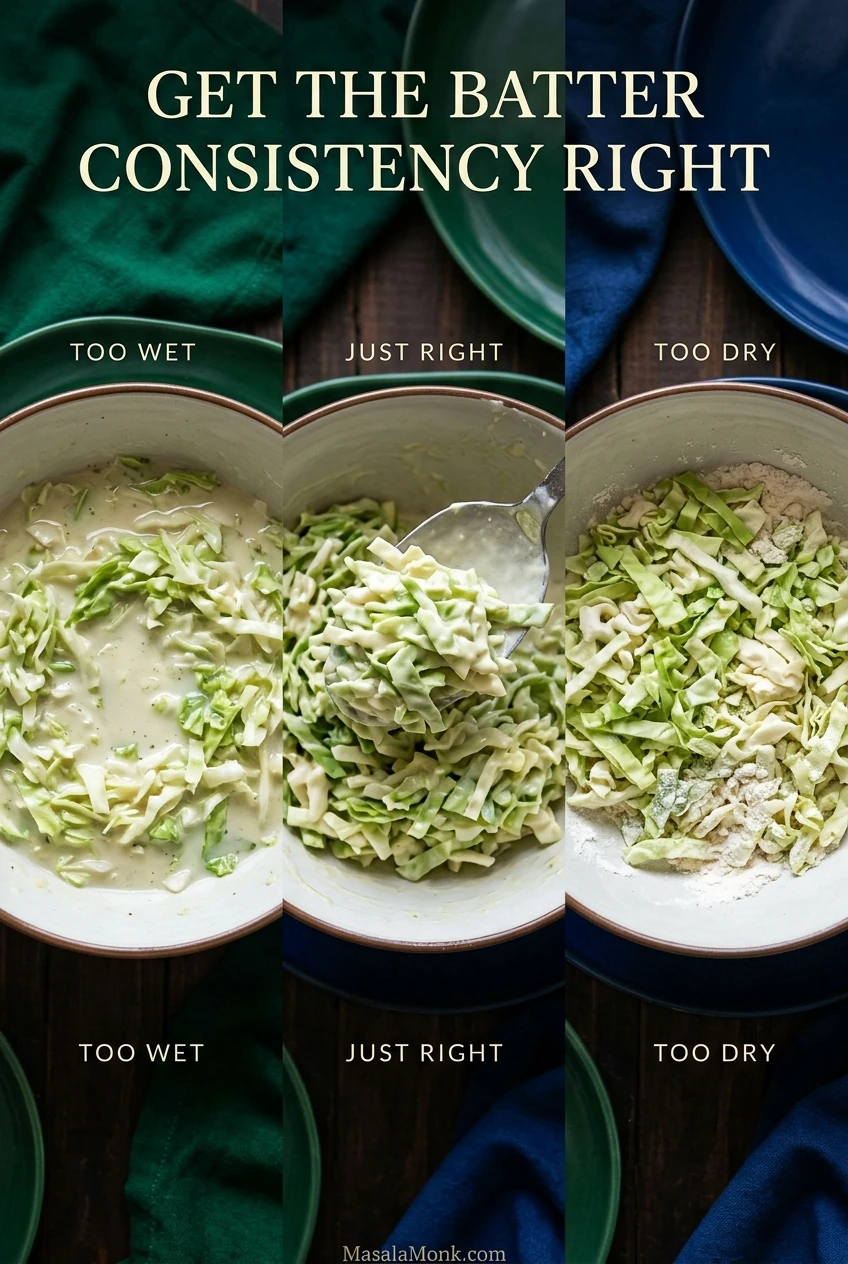
| Problem | Likely cause | What to do now / next time |
|---|---|---|
| Liquid pooling in batter | Wet cabbage or excess liquid | If already mixed, fold in 1 tsp (about 3 g) flour and reassess; don’t strain out the binder. Next time, dry cabbage after washing. |
| Mixture dry or crumbly | Missing egg or liquid; too much flour | Check the measured ingredients. If none was missed, add liquid 1 tsp (5 ml) at a time until the cabbage is lightly coated. |
| Pancake breaks on flipping | Bottom unset or not enough support | Gather the pieces and finish cooking. Next time, wait for a golden crust and turn with two wide spatulas if available. |
| Pancake sticks or tears | Early lifting, inadequate oil or pan surface | Let the crust release and loosen gently; don’t scrape hard. Next time, use a suitable nonstick or seasoned skillet with a little oil. |
| Dark outside, wet center | Too much heat, an oversized round or wet additions | Lower the heat, cover and continue until the center is fully cooked. Next time, make smaller rounds and drain additions. |
| Fully cooked but rubbery | Too much flour, heavy mixing or compression | The texture won’t reverse once cooked. Serve it with toppings; next time, weigh the flour and fold gently without flattening. |
| Cabbage still too crunchy | Pieces too large or cooking too short | Cover and cook a little longer over low heat. Next time, chop more evenly. |
Inspect the Center and Rescue Cooking Problems
Cut into the thickest part if the middle seems suspicious. Tender, shiny cabbage is normal; a connected streak of glossy, unset flour-and-egg paste means the pancake needs more cooking.
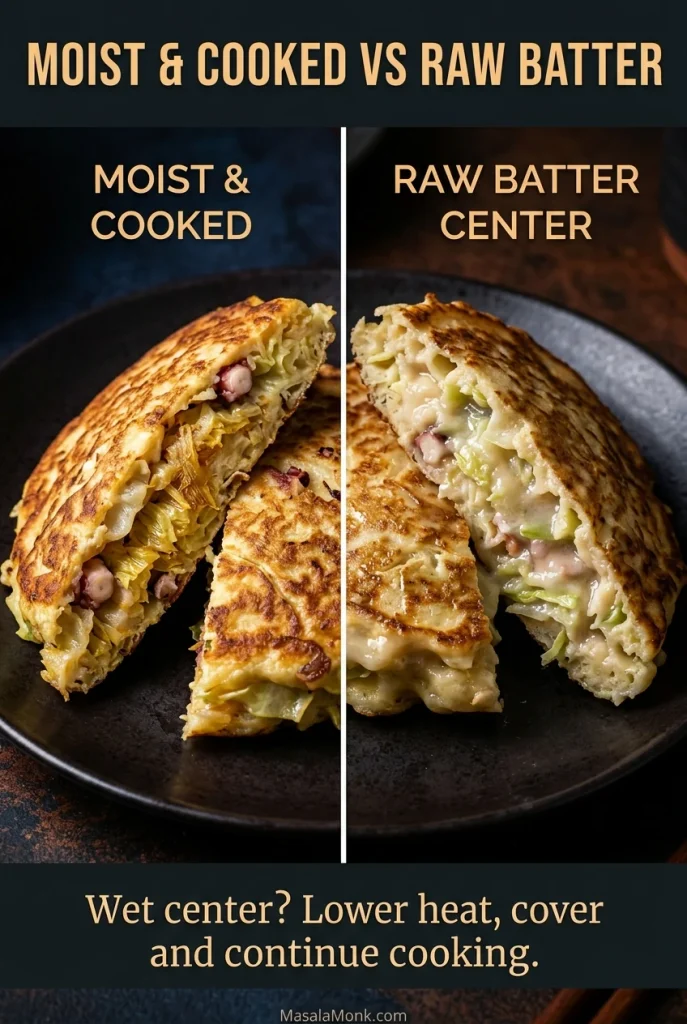
Match the rescue to the stage: loose batter can be adjusted before frying, a dark crust with a wet center needs gentler covered heat, and a broken pancake should be cooked through in pieces.
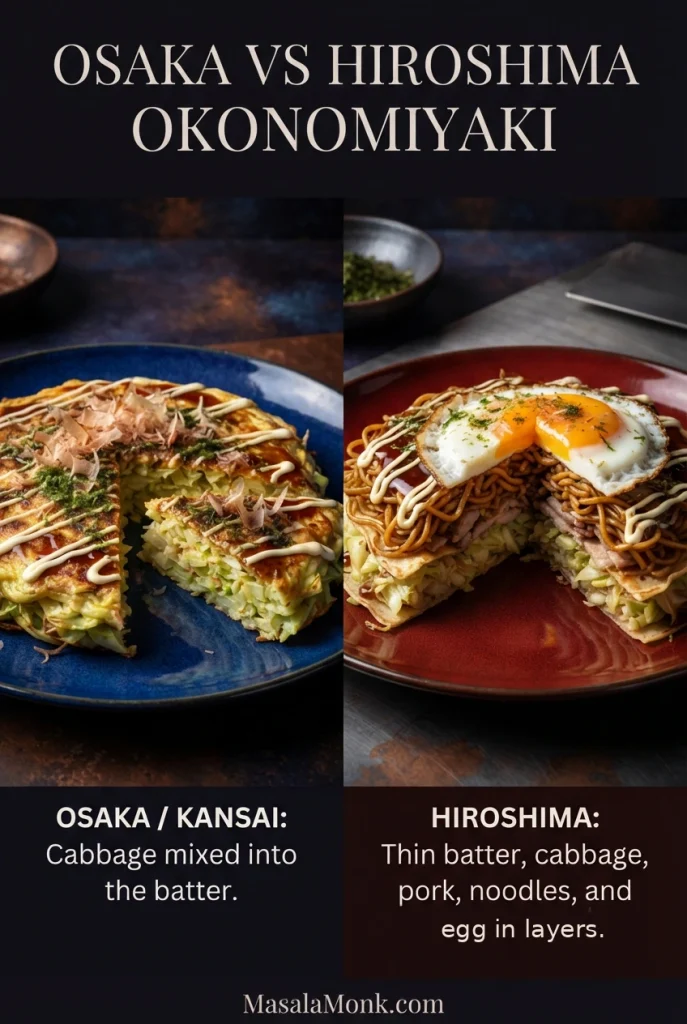
Osaka vs. Hiroshima-Style Okonomiyaki
In Osaka/Kansai-style okonomiyaki, cabbage is mixed into the batter before cooking, giving you one thick, cabbage-rich round. Hiroshima-style builds thin batter, cabbage, pork, noodles and egg in separate layers.
Noodles aren’t exclusive to Hiroshima. Osaka’s modan-yaki also includes noodles, arranged differently from the layered Hiroshima version. Japan’s Ministry of Agriculture documents the Osaka mixed-batter method as part of the region’s flour-based konamon food tradition. Its Osaka okonomiyaki guide is a useful reference.
The distinction shows up in a cross-section: Osaka-style mixes cabbage through the batter, whereas Hiroshima-style stacks cabbage, noodles and egg in distinct layers.
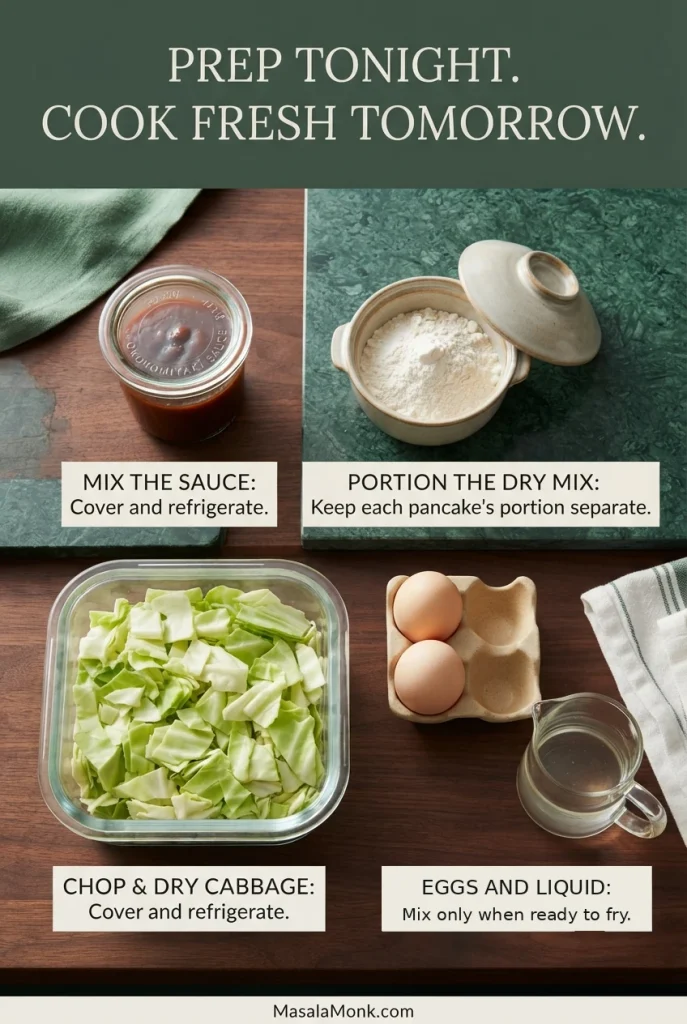
Making Ahead, Batch Cooking and Leftovers
What can you prepare the day before? Mix and refrigerate the sauce, measure the dry ingredients, and chop and thoroughly dry the cabbage. Refrigerate the cabbage covered and keep it separate from the eggs and liquid. Bring everything together only when you are ready to cook each pancake.
The useful make-ahead work is preparing separate components, not pre-mixing wet batter. Keep chopped cabbage cold and dry, flour and leavening separate, and eggs and prepared stock ready for mixing just before frying.
Cooking More Than Two Pancakes
For four pancakes, double the ingredients but keep each round the same size. Measure the ingredients beforehand and mix each portion only when its pan is ready: cabbage releases water if left in batter too long. Two skillets help everyone eat together. An electric griddle can start around 200°C (392°F), with heat adjusted as the pancakes brown.
If you want to serve both pancakes at once, preheat an oven to 90–100°C (195–210°F) before frying the first. Keep the cooked pancake unsauced on an oven-safe tray while the second cooks, and make sure hot-held food stays at 60°C (140°F) or above. Add the sauce only when you serve.
With one skillet, either serve the first pancake as soon as it is cooked or hold it hot and unsauced while the second fries. Sauce, mayonnaise and delicate garnishes go on just before eating.

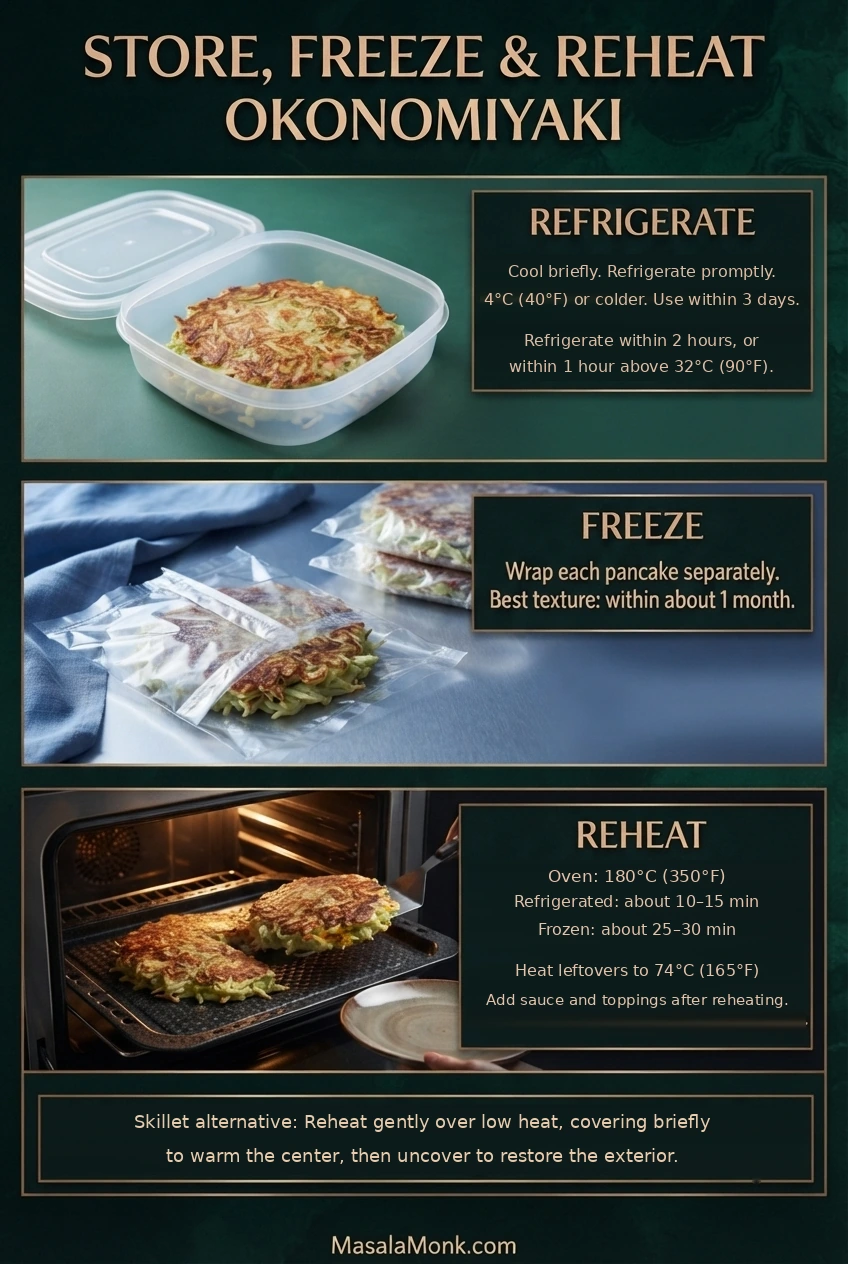
Refrigerating and Freezing
Cool cooked pancakes briefly and refrigerate within two hours, or within one hour when the surrounding temperature exceeds 32°C (90°F). Keep them at 4°C (40°F) or colder, without sauce or mayonnaise, and use within 3 days for best quality. For freezing, wrap each cooked pancake separately and aim to eat within about a month for the best texture.
Reheating
Warm a refrigerated pancake in a 180°C (350°F) oven for about 10–15 minutes, or in a lightly oiled skillet over low heat. Cover briefly to heat the center, then uncover to dry the outside. A frozen pancake may need around 25–30 minutes in the oven. Reheated leftovers should reach 74°C (165°F). Add sauce and delicate toppings afterward; the microwave works too, but leaves the outside softer. For serving ideas, revisit the finishing toppings.
Cool and chill cooked pancakes promptly, then store them without sauce. Reheat until the center reaches 74°C (165°F) before adding fresh toppings; crispness improves if the surface is uncovered at the end.
Serving and Sharing Okonomiyaki
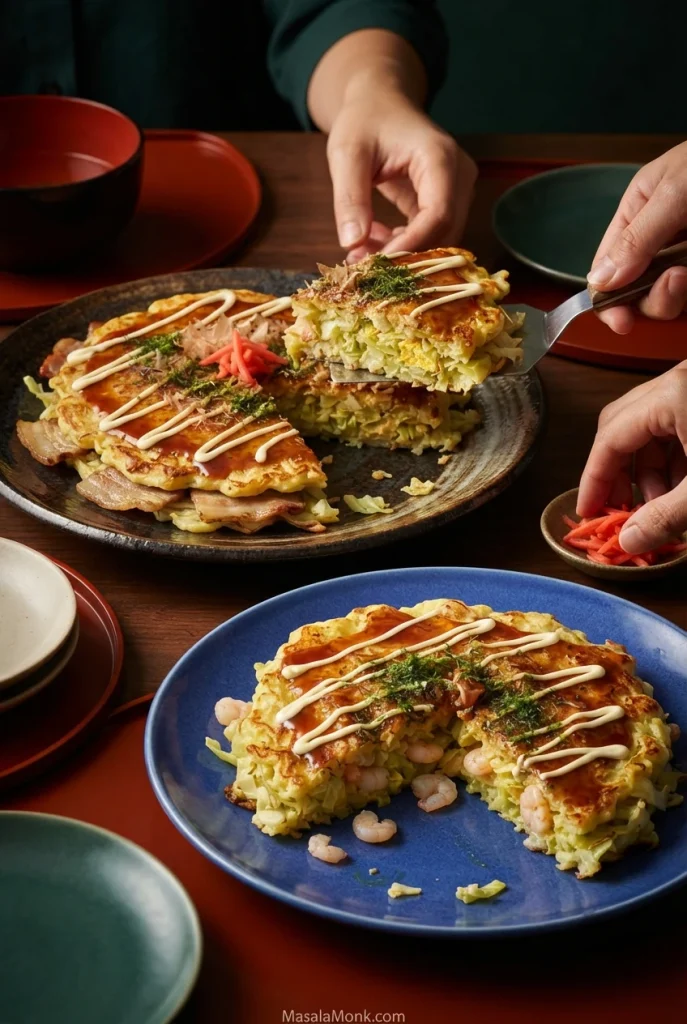
Which filling did you choose—pork, seafood or mushrooms? Tell us in the comments, or share what happened if the flip was tricky. A good okonomiyaki doesn’t have to be perfectly round.








