Posted on — Leave a comment

Edible Cookie Dough Recipe

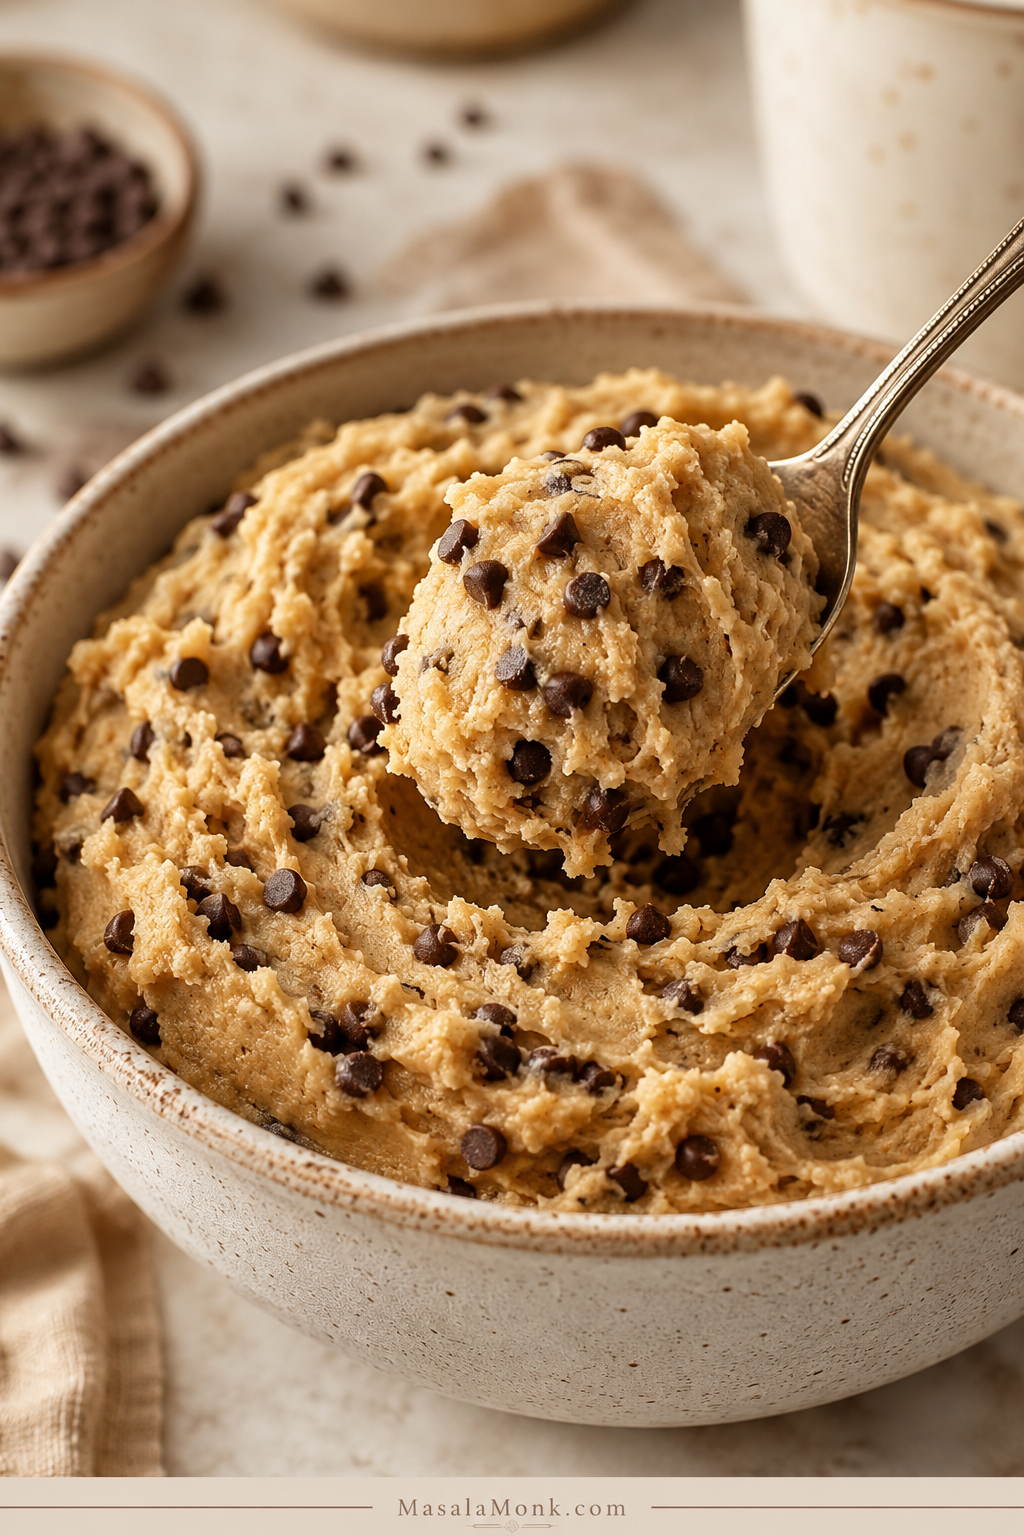
A spoon lifts soft chocolate chip edible cookie dough from a bowl, showing a creamy texture with mini chocolate chips throughout.

This edible cookie dough recipe is for the spoonful you wanted before the cookies ever reached the oven: soft brown-sugar dough, creamy butter, vanilla, a little salt, and tiny chocolate chips in every bite. It tastes like classic chocolate chip cookie dough, but it is made for eating straight from the bowl — no baking tray, no waiting, no pretending you only wanted “one taste.”

The important difference is safety. This version skips raw eggs and treats flour as something that needs attention, not an ingredient to casually stir in raw. For the most cautious batch, use commercially heat-treated flour labeled ready-to-eat; if you use a home flour-heating method, the notes below explain the limits clearly.

Before You Start: Texture and Safety

The good news is that edible cookie dough does not need to be complicated. Once you understand the flour piece, the rest is simple: cream butter and sugar, add vanilla and salt, mix in the flour, then adjust the texture until it tastes like the middle of a chocolate chip cookie.

Once the base is right, you can keep it classic with mini chocolate chips, make a single-serving bowl, turn it into sugar cookie dough, add peanut butter, roll it into bites, or chill little pieces for ice cream. Start with the chocolate chip version first; it teaches you what the texture should feel like.

Before you start mixing, use the texture cue below as your visual target: the dough should look thick, creamy, and spoonable, not dry, runny, or frosting-soft.
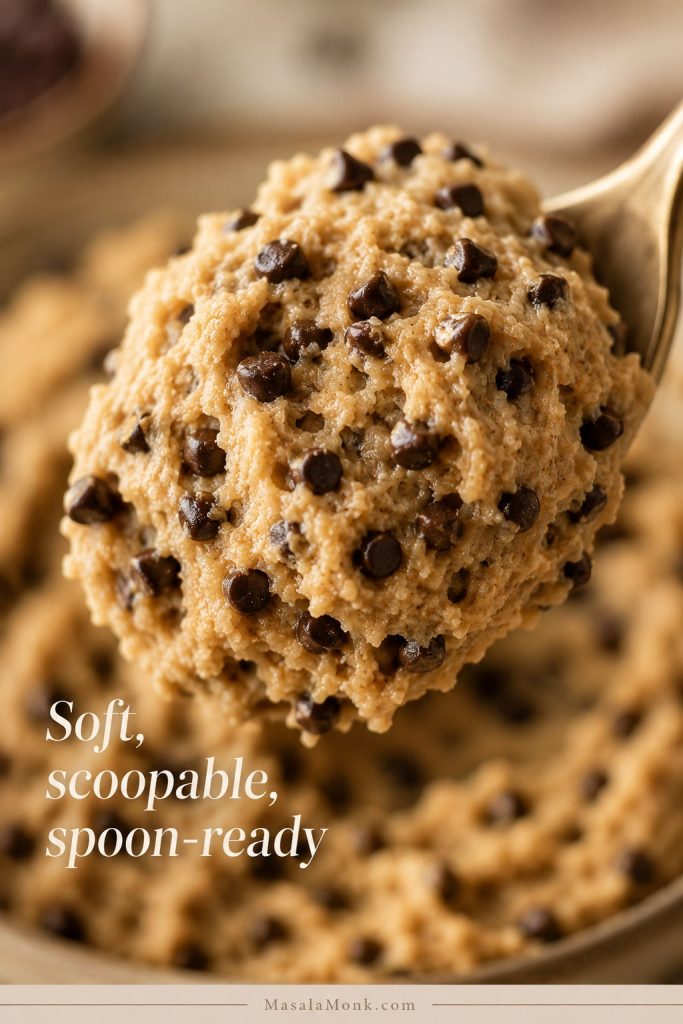
Close-up spoonful of edible cookie dough held above a bowl, showing a thick, creamy texture with mini chocolate chips.
For the smoothest result, the dough should look dense but not dry; in other words, it should stay on the spoon without turning crumbly, stiff, or frosting-soft.

If the craving is really for warm cookies from the oven, use a proper cookie recipe like MasalaMonk’s double chocolate chip cookies instead. This one is built for one job: cookie dough you can enjoy by the spoonful.

What You’ll Find in This Edible Cookie Dough Guide

Use the quick answer if you already know the basics, or go straight to the safety notes if you want to understand the flour and egg issue before mixing.

Quick Answer: How to Make This Edible Cookie Dough Recipe

To make this edible cookie dough recipe, start with ready-to-eat flour or handle the flour using the safety notes below. Let the flour cool completely, then sift it so the dough does not taste lumpy or floury. Cream softened butter with brown sugar and a little granulated sugar, mix in vanilla and salt, add the flour, loosen the dough with milk or cream, and fold in mini chocolate chips.

The texture should be soft and scoopable, like the center of chocolate chip cookie dough before baking. It should not be runny, greasy, sandy, or crumbly. If it feels too thick, add milk one teaspoon at a time. If it feels too soft, chill it for 15 to 20 minutes before serving.

Quick texture cue: the dough should hold on a spoon, but still press easily when you scoop it. If it cracks apart, it needs a little more milk. If it slumps like frosting, it needs chilling or a spoonful of sifted flour.
  • Best flour option: commercially heat-treated flour labeled ready-to-eat
  • Eggs: none
  • Texture: creamy, spoonable, and thick enough to hold on a spoon
  • Best chips: mini semisweet chocolate chips
  • Chill time: optional, 10–20 minutes if the dough feels soft
  • Storage: 4–5 days refrigerated, 1–2 months frozen
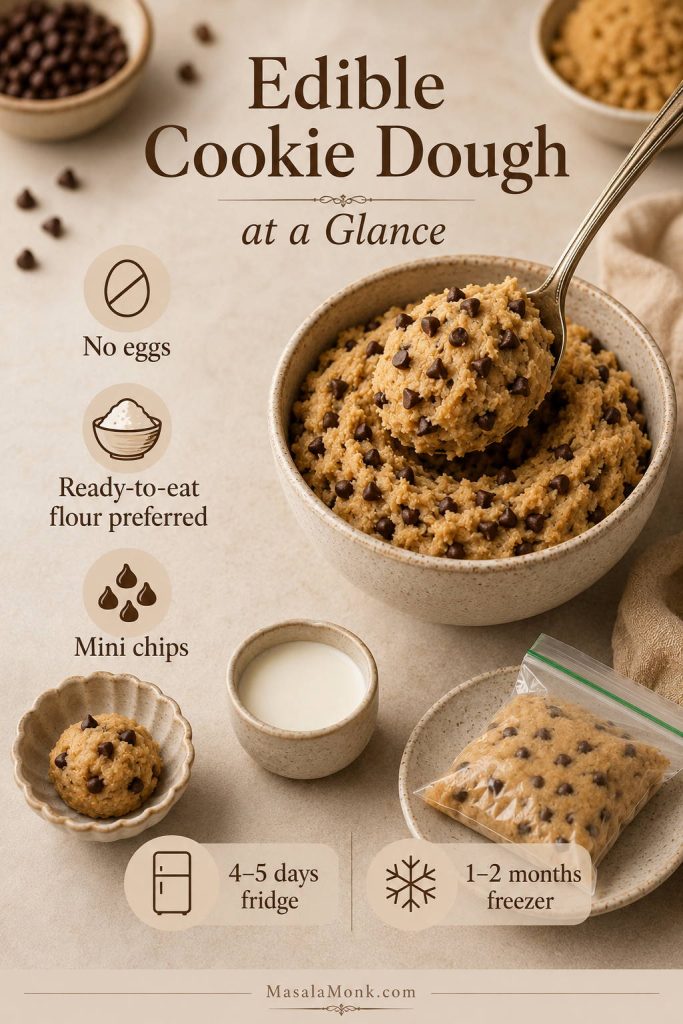
At-a-glance edible cookie dough guide showing no eggs, ready-to-eat flour preferred, mini chocolate chips, and fridge and freezer storage times.
If you only remember the essentials, keep these in mind first: no eggs, ready-to-eat flour preferred, mini chips for a better bite, and short cold storage for the best texture.

Why This Edible Cookie Dough Works

A good edible cookie dough recipe should not taste like sweet flour paste. It should taste like the spoonful you wanted from a real chocolate chip cookie batch: buttery, brown-sugary, vanilla-scented, lightly salty, and soft enough to scoop.

  • No eggs: the dough is made for eating, not baking, so eggs are left out completely.
  • Better flour handling: ready-to-eat flour is the cleanest choice, and the home flour-heating note is explained honestly.
  • Brown sugar leads: it gives the deeper chocolate chip cookie flavor that plain white sugar cannot.
  • Softened butter, not melted: softened butter keeps the texture creamy instead of greasy or loose.
  • Mini chips: smaller chips spread through the dough better, so every spoonful tastes balanced.
  • Adjustable milk: flour behaves differently after heating, so milk is added slowly instead of dumped in all at once.

The safety piece gets much less confusing once you remember one thing: regular cookie dough is meant to be baked, and this dough is not. A safer edible cookie dough recipe starts with no raw eggs and a better flour choice from the beginning.

According to the CDC, raw dough and batter should not be eaten because uncooked flour and raw eggs can contain germs that may cause food poisoning. Commercial edible dough products, the CDC notes, are made with heat-treated flour and pasteurized eggs or no eggs.

So, is this kind of dough safer than sneaking a spoonful from a regular cookie batch? Yes, when it is made without raw eggs and with ready-to-eat flour. The safest route is commercially heat-treated flour labeled ready-to-eat. Home flour-heating methods are common in recipes, but they are not the same as validated commercial heat-treatment.

Why This Recipe Has No Eggs

Eggs stay out because the bowl is not going into the oven. They help baked cookies with structure, richness, and spread, but raw or lightly cooked eggs can carry food-safety risks. Since this is a spoonable dessert, the simplest direction is to leave eggs out completely.

That also means the dough will not bake like regular cookie dough. It has no eggs for structure and no leavening for lift, so treat it as a no-bake dessert rather than a shortcut cookie recipe.

What to Know About Raw Flour

Flour is easy to overlook because it does not look like a risky ingredient. However, the FDA explains that most flour is a raw food and has not been treated to kill bacteria. Baking or cooking is what normally makes flour-containing doughs safe to eat.

That is why the flour choice matters here. If you can get commercially heat-treated flour labeled ready-to-eat, use it. It gives you the cleanest safety story and keeps the method simple.

The Most Cautious Flour Option

For the most cautious batch, use flour labeled commercially heat-treated or ready-to-eat. SDSU Extension explains that commercial heat-treatment uses validated controls, while home flour heating is harder to control perfectly.

That does not mean homemade edible cookie dough is off the table; it just means the flour step deserves a little honesty. Ready-to-eat flour is the strongest option. If you choose to heat flour yourself, treat that step as risk reduction rather than the same thing as commercially processed flour.
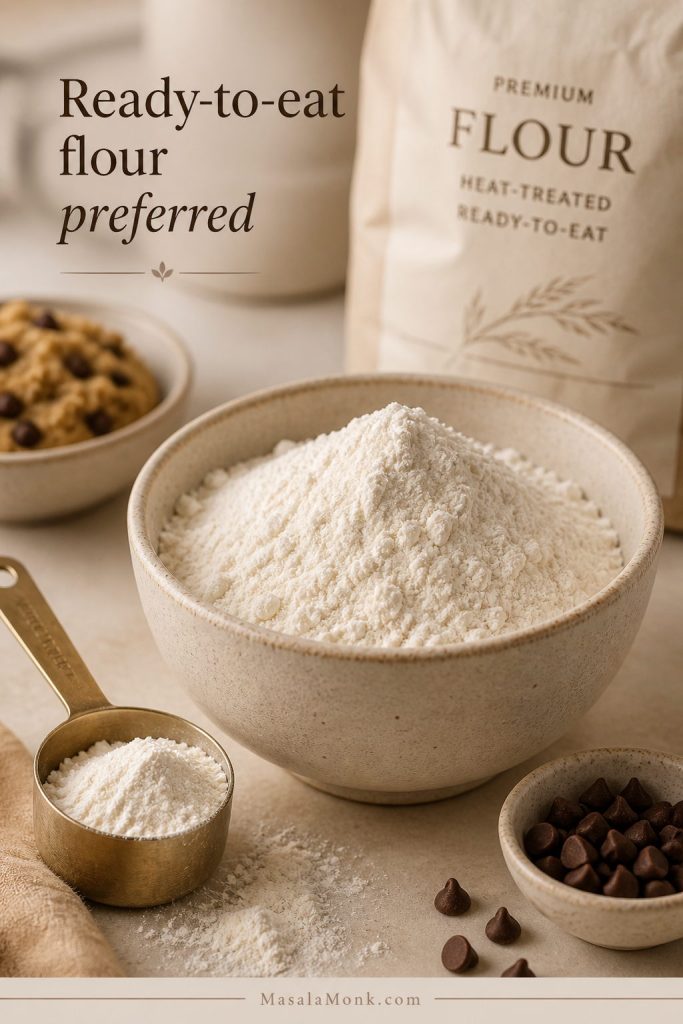
Ready-to-eat flour displayed beside edible cookie dough ingredients as the preferred flour choice for no-bake cookie dough.
Commercially heat-treated ready-to-eat flour keeps the no-bake dough approach cleaner, especially because regular flour is normally made safer through baking or cooking.

About Heating Flour at Home

Many edible cookie dough recipes include a home flour-heating step, but this should be framed carefully. The most cautious choice is still commercially heat-treated flour labeled ready-to-eat. The FDA notes that home flour treatments may not reliably kill all bacteria or make raw flour safe to eat, so treat any home method as a recipe-blog risk-reduction step rather than a validated food-safety process.

For readers who still choose to follow a home flour-heating method, use an instant-read thermometer, spread the flour thinly, stir it during heating, check more than one spot, cool it completely, and sift before mixing.
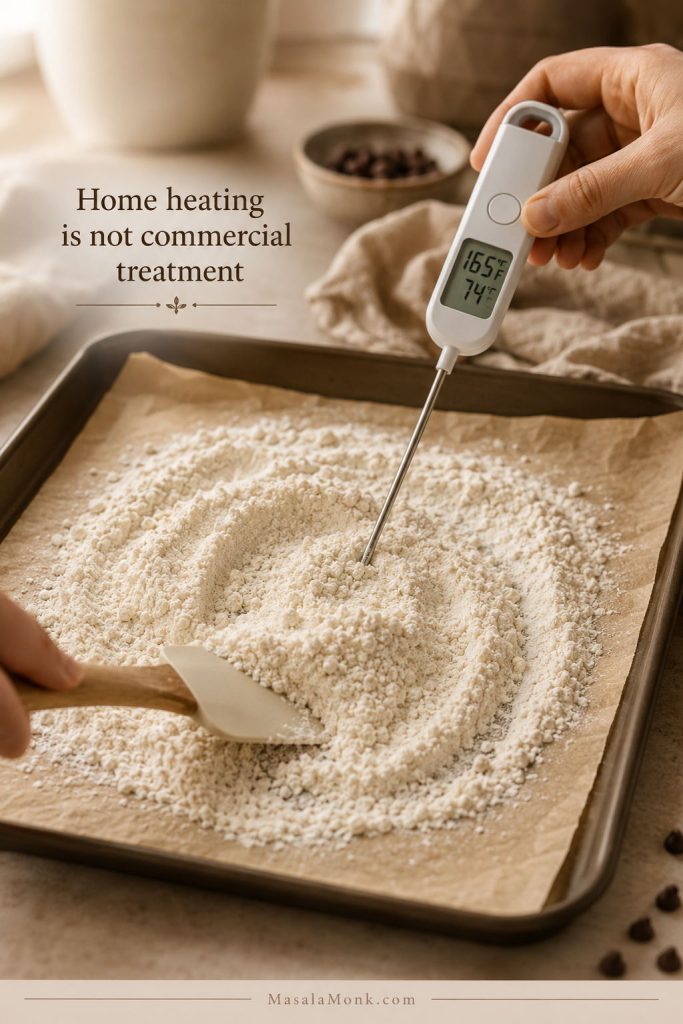
Flour spread on a parchment-lined baking tray with an instant-read thermometer inserted, illustrating a home flour-heating method.
If you heat flour at home, use the thermometer cue as a careful kitchen step, not a promise; the safest route is still flour processed for ready-to-eat use.

Oven Method Used by Many Recipe Blogs

Preheat the oven to 350°F / 175°C. Spread a little more flour than you need in a thin layer on a parchment-lined rimmed baking sheet. Bake for 7 to 10 minutes, stirring once or twice, until the flour reaches 165°F / 74°C when checked in multiple spots with an instant-read thermometer. Cool completely, sift, then measure or weigh the amount needed for the dough.

Microwave Method Used by Many Recipe Blogs

Place flour in a wide microwave-safe bowl. Microwave for 30 seconds, stir well, then continue in 15-second bursts, stirring and checking the temperature in more than one spot. Let it cool completely and sift before using.

Simple takeaway: use ready-to-eat flour if you can find it. If not, read the home-heating note carefully and understand that it is a common recipe-blog risk-reduction step, not the same as commercial heat treatment.

Ingredients for Edible Cookie Dough

The ingredient list stays close to classic chocolate chip cookie dough, but each item has a job. Since the dough is not baked, little details matter more than usual: softened butter works better than melted butter, mini chips are easier to eat than large chips, and milk should be added slowly.
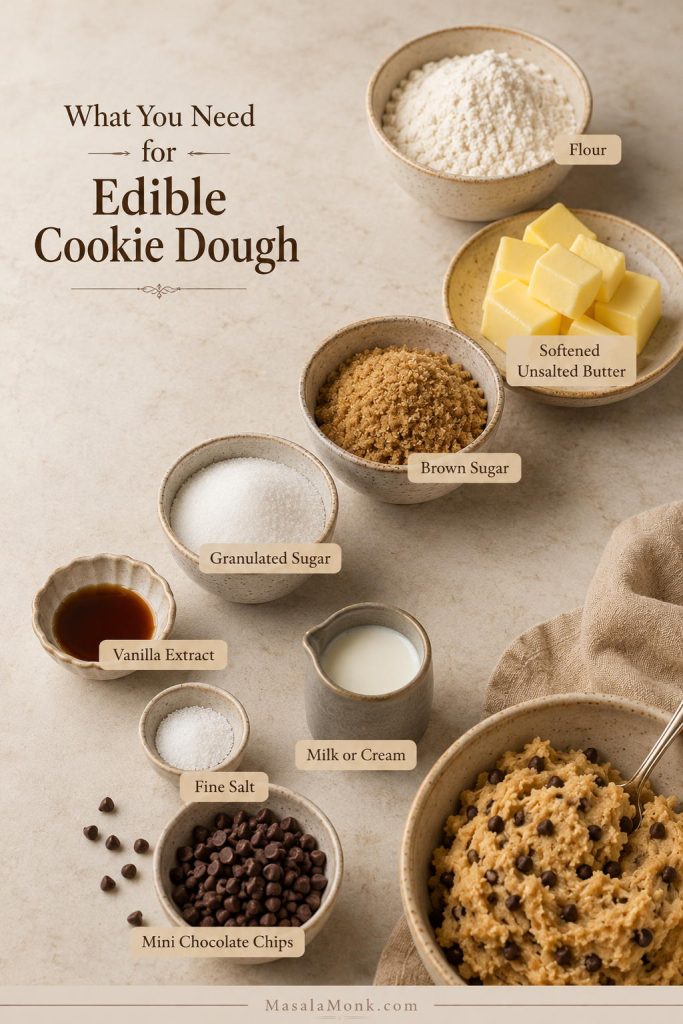
Ingredients for edible cookie dough arranged on a counter, including flour, softened butter, brown sugar, granulated sugar, vanilla, salt, milk, and mini chocolate chips.
Because this no-bake dough is eaten as-is, the ingredient balance matters more than usual: softened butter keeps it creamy, brown sugar adds depth, and milk helps fine-tune the consistency.

Ready-to-Eat or Properly Handled Flour

Flour gives the dough its familiar body. Use 1¼ cups / 150g commercially heat-treated all-purpose flour if you can find it. If you use a home flour-heating method, cool the flour completely, sift it, and then measure the final amount into the bowl.

Softened Butter

Use ½ cup / 113g / 4 oz unsalted butter, softened but not melted. Softened butter creams into the sugar and gives the dough a classic texture. Melted butter can make it greasy, loose, or frosting-like.

Brown Sugar and Granulated Sugar

Brown sugar gives the dough that deep chocolate chip cookie flavor. Granulated sugar adds familiar sweetness, but too much can make the texture gritty. This recipe uses mostly brown sugar with just a small amount of granulated sugar for balance.

Vanilla and Salt

Vanilla makes the dough taste like dessert instead of sweet butter and flour. Salt is just as important because it keeps the sweetness from feeling flat. Do not skip it, especially if you are using unsalted butter.

Milk or Cream

Milk or cream loosens the dough after the flour goes in. Start with 1 tablespoon and add more only if needed. Flour can absorb differently after heating, so the best amount is the one that gives you a scoopable texture.

Mini Chocolate Chips

Mini chocolate chips work better than large chips because this dough is eaten soft, not baked. They distribute evenly, so each spoonful has chocolate without turning the bowl into mostly hard chunks.

Optional Baking Soda for Flavor Only

A tiny pinch of baking soda can make the dough taste more like classic cookie dough, but it is optional. If you use it, add only ⅛ teaspoon. It is there for flavor, not because the dough should be baked.

Tools That Make the Texture Better

You can make this with a bowl and spatula, so do not let the tool list make the recipe feel fussy. A few extras simply make the result more reliable: an instant-read thermometer for the flour if you are using a home-heating method, a fine-mesh sieve for lumps, and a scale so the dough does not turn dry from too much flour.

  • Rimmed baking sheet
  • Parchment paper
  • Instant-read thermometer
  • Mixing bowl
  • Electric hand mixer or stand mixer
  • Rubber spatula
  • Fine-mesh sieve
  • Digital scale, strongly recommended
  • Small cookie scoop, optional
  • Airtight container for storage

A scale is especially useful because flour gets compacted easily. If you scoop too much into the bowl, the dough can turn dry, chalky, or too thick before you even start troubleshooting.

The method is easy, but the order makes a big difference. Handle the flour first, let it cool, then build the dough slowly. Warm flour and melted butter are two of the fastest ways to turn a good bowl of cookie dough into something greasy.
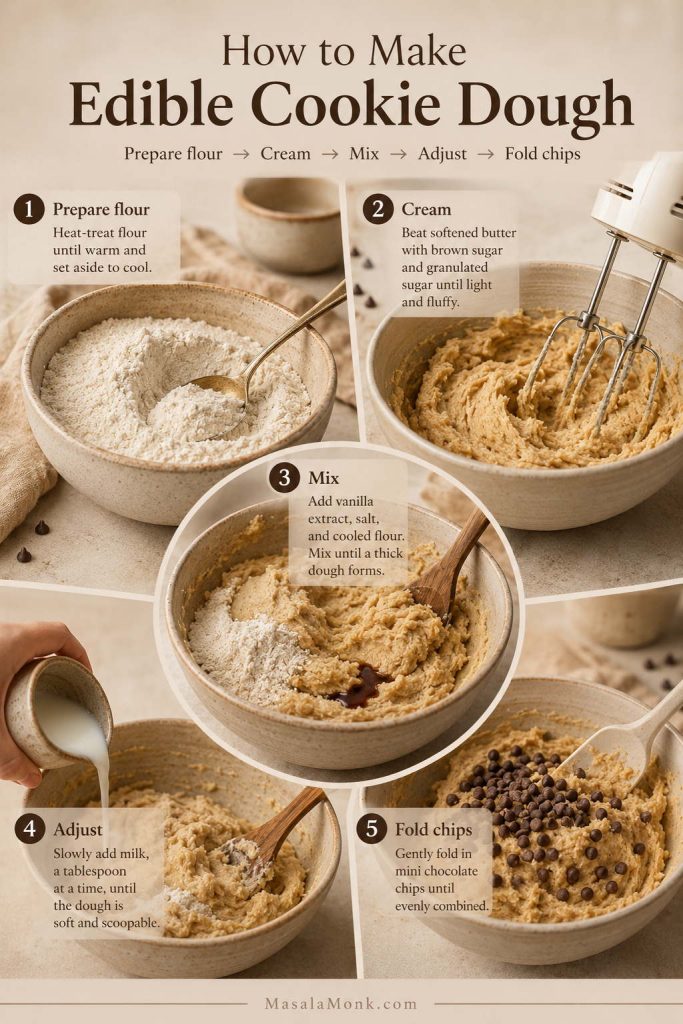
Step-by-step edible cookie dough process showing flour preparation, creaming butter and sugar, mixing ingredients, adjusting texture, and folding in mini chocolate chips.
The method works best in sequence: prepare the flour first, cream the butter and sugars well, then mix, adjust, and fold in the chips once the texture already feels close.

Step 1: Prepare the Flour

If you are using commercially heat-treated flour, measure or weigh it and move on. If you are using a home flour-heating method, follow the note above, cool the flour completely, and sift it before mixing. Do not add warm flour to the butter mixture.

Step 2: Cream the Butter and Sugars

Add softened butter, brown sugar, and granulated sugar to a bowl. Beat until the mixture looks creamy, lighter, and slightly fluffy. You should still see a thick butter-sugar mixture, not melted butter pooling around the edges. This step helps soften the sugar crystals and gives the dough a smoother bite.

Mix in the vanilla and salt, then add the cooled, sifted flour. Add the flour gradually if you are mixing by hand. At first, the mixture may look a little thick; that is normal.

Step 4: Adjust the Texture

Add milk or cream one teaspoon at a time. Stir, pause, and check the texture before adding more. The dough should hold its shape on a spoon but still press easily when you scoop it. Stop before it starts looking like frosting.
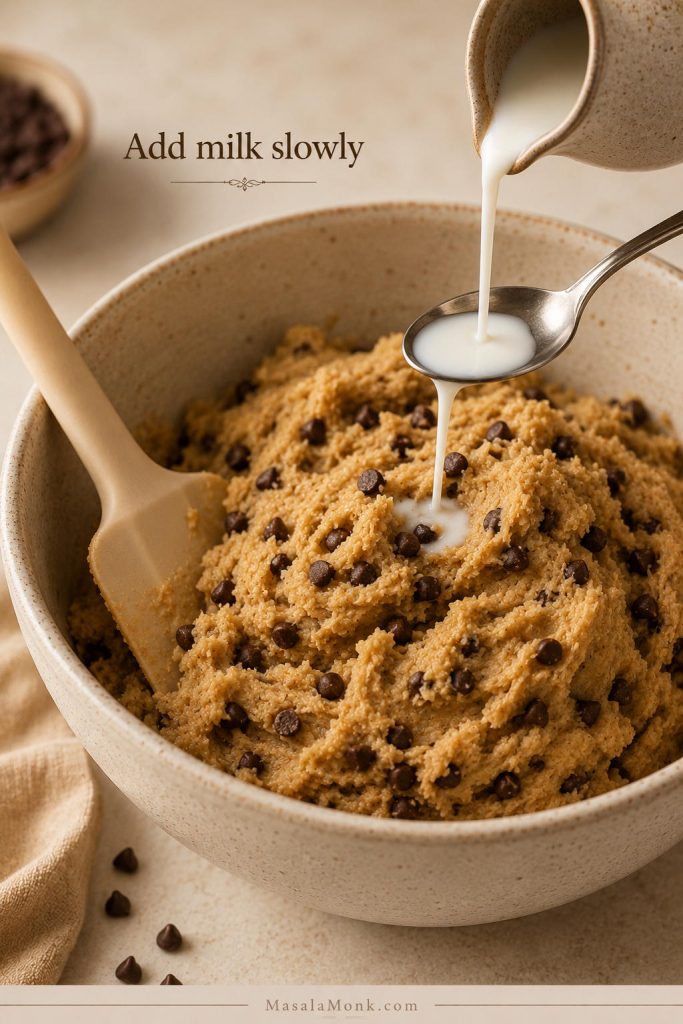
A small amount of milk is being added to thick edible cookie dough in a bowl while a spoon rests nearby.
Add milk slowly, then stir before deciding on more; the dough often softens after a few turns, so patience helps keep it thick and spoonable.

Step 5: Fold in Mini Chocolate Chips

Fold in the mini chocolate chips with a spatula. Taste and adjust with a tiny pinch of salt if it tastes too sweet, or a few extra drops of vanilla if it tastes flat.

Serving cue: this dough is best after a 10-minute rest. That short pause lets the sugar soften slightly and the flour hydrate, so each spoonful tastes smoother.

Spoon test: The dough should lift cleanly and still look creamy before you move to the recipe card.
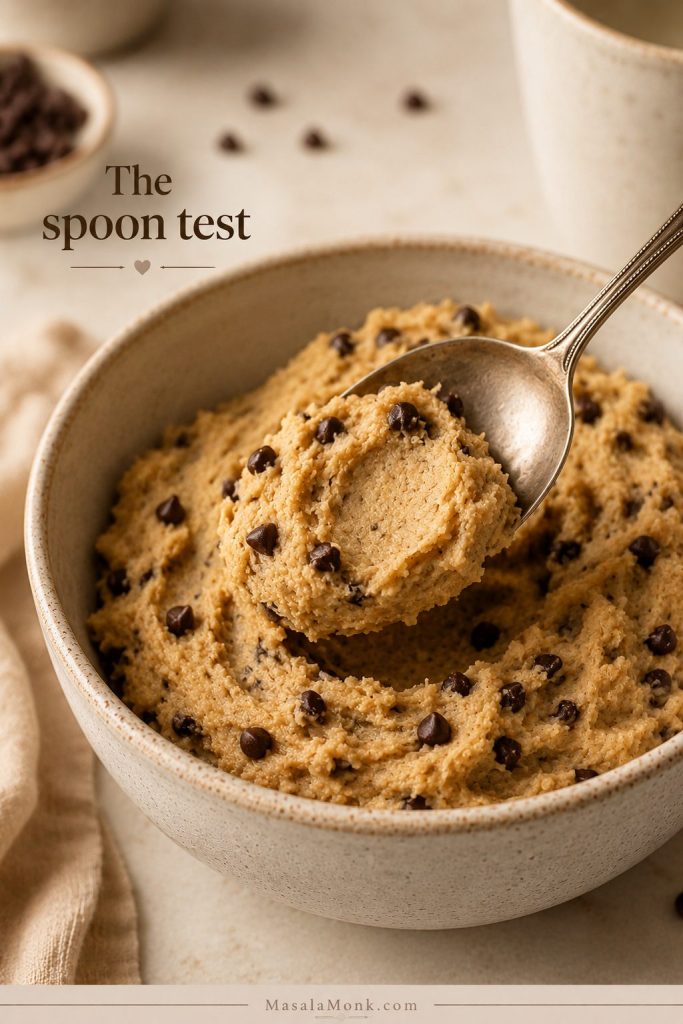
A spoon presses into and lifts edible cookie dough, showing a soft texture that holds its shape.
The spoon test is one of the easiest checks in the whole recipe: if the dough lifts cleanly and still looks creamy, you are usually very close to the ideal finish.

Edible Cookie Dough Recipe Card

This edible cookie dough recipe is a classic chocolate chip version made without eggs and with a safer flour approach. It is designed for eating by the spoonful, rolling into bites, or folding into desserts.

YieldAbout 2½ cups
Servings12–16 small servings
Prep Time10 minutes
Total Time20–25 minutes

Ingredients

  • 1¼ cups / 150g commercially heat-treated all-purpose flour, preferred; or flour handled using the home-heating note above, cooled completely and sifted
  • ½ cup / 113g / 4 oz unsalted butter, softened
  • ½ cup / 100–110g packed light brown sugar
  • 2 tablespoons / 25g granulated sugar
  • 1½ teaspoons / 7ml vanilla extract
  • ½ teaspoon fine salt, or to taste
  • 1–2 tablespoons / 15–30ml milk or cream, added as needed
  • ¾ cup / 120–130g mini semisweet chocolate chips
  • Optional: ⅛ teaspoon baking soda, for classic cookie-dough flavor only

Method

  1. Prepare the flour. Use commercially heat-treated flour if available. If using a home flour-heating method, follow the safety note above, cool the flour completely, sift it, then measure 150g for the recipe.
  2. Cream the butter and sugars. In a mixing bowl, beat softened butter, brown sugar, and granulated sugar until creamy and slightly fluffy.
  3. Add flavor. Mix in vanilla, salt, and optional baking soda if using.
  4. Add flour. Add the cooled, sifted flour and mix until a thick dough forms.
  5. Adjust texture. Add milk or cream 1 teaspoon at a time until the dough is soft and scoopable.
  6. Add chocolate. Fold in mini chocolate chips. Let the dough rest for about 10 minutes before serving for the smoothest texture.

Notes

  • This dough is for eating as edible cookie dough, not for baking into cookies.
  • For the most cautious version, use commercially heat-treated flour labeled ready-to-eat.
  • Home flour-heating methods are common in recipe blogs, but FDA guidance says home treatments may not reliably make raw flour safe to eat. Use commercially heat-treated ready-to-eat flour for the most cautious version.
  • If you choose to heat flour at home, use an instant-read thermometer, stir well, check multiple spots, cool completely, and sift before mixing.
  • If the dough is too dry, add milk 1 teaspoon at a time. If it is too sticky, chill it for 15–20 minutes.
  • Store refrigerated in an airtight container for 4–5 days, or freeze portions for 1–2 months.
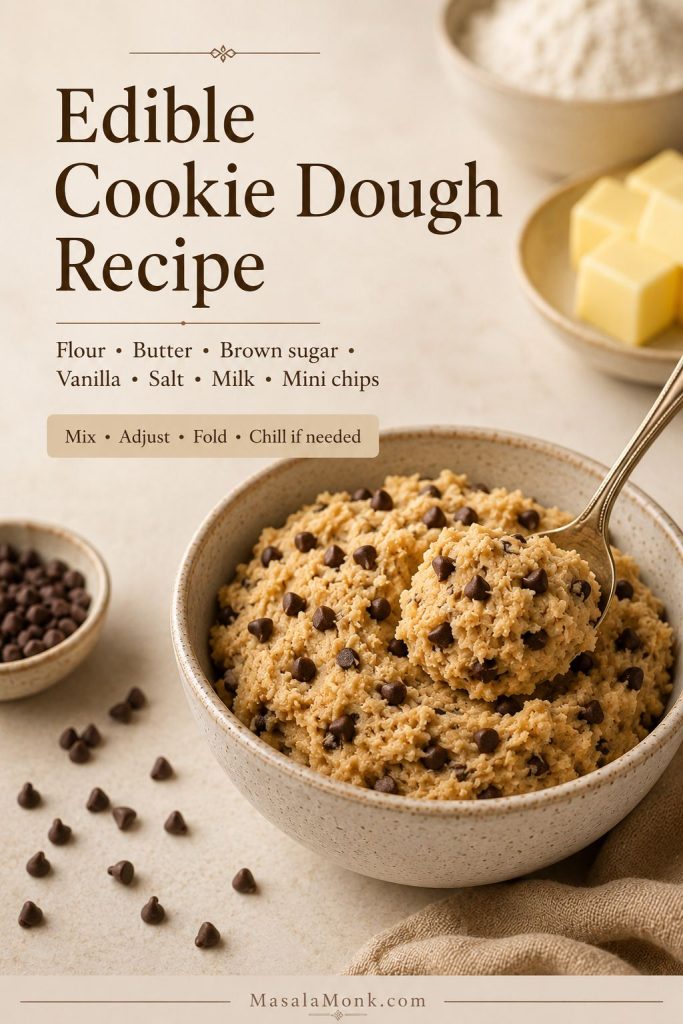
Recipe card image for edible cookie dough showing the main ingredients and a simple method beside a bowl of cookie dough.
Use the recipe card as your baseline, then adjust only the milk or chill time first; those two small changes usually fix the texture without changing the flavor.

Which Batch Size Should You Make?

Choose the batch based on the kind of cookie dough moment you want. The single-serve version is best for one quick craving, the for-two version is perfect for a small dessert, and the full edible cookie dough recipe works better when you want cookie dough bites, ice cream mix-ins, dessert cups, or a make-ahead treat in the fridge.
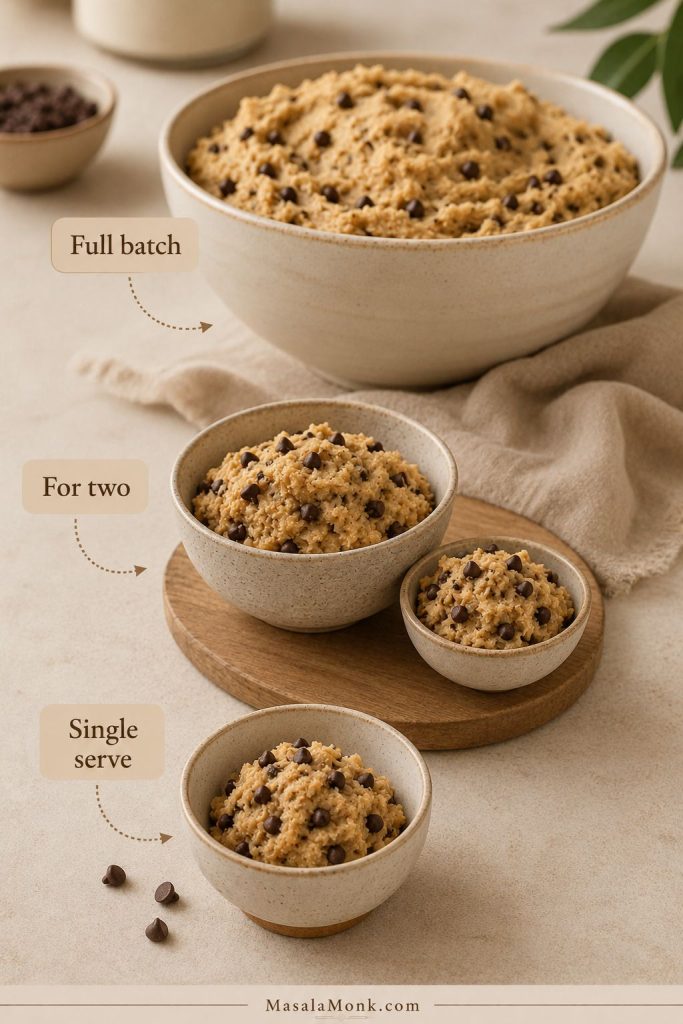
Three edible cookie dough portion sizes are shown, representing single serve, for two, and full batch amounts.
Batch size changes the experience as much as flavor does: a single serve suits one craving, a for-two version feels more dessert-like, while a full batch works better for bites or mix-ins.
Make This Best For Texture Tip
Single serve One craving, no leftovers Add milk slowly because small bowls loosen fast.
For two Movie night, date night, small dessert Rest 10 minutes before eating for a smoother bite.
Full batch Cookie dough bites, dessert cups, ice cream mix-ins Chill before rolling or portioning.

The single-serve version is the bowl to make when you want cookie dough now and do not want leftovers calling your name from the fridge. Because the batch is small, measure the flour and milk carefully; a tiny extra splash can change the texture quickly.
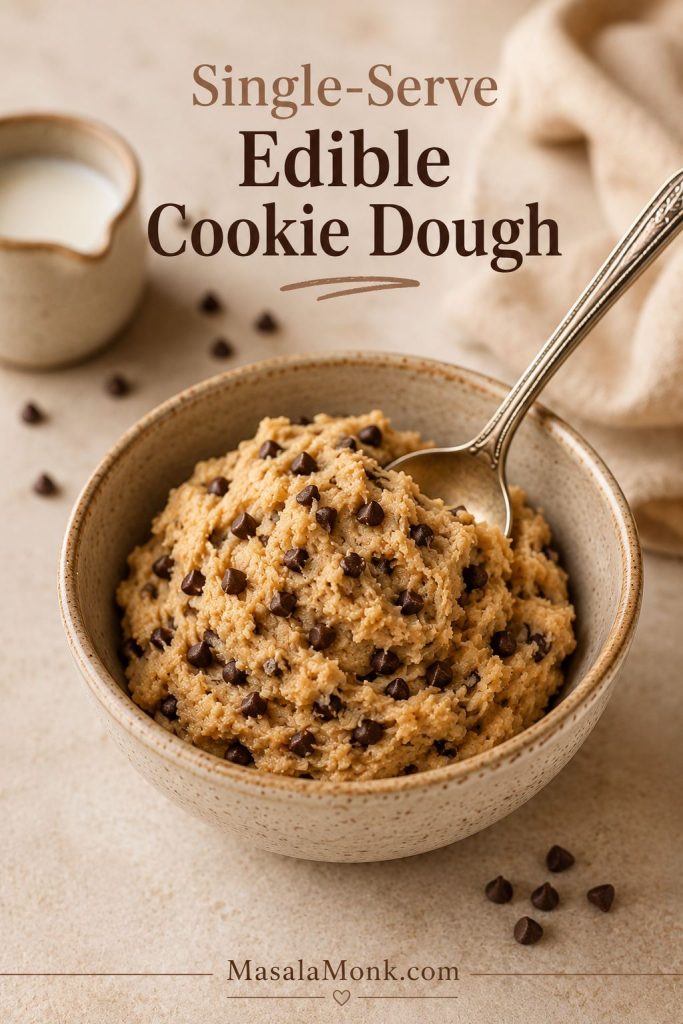
Single-serve edible cookie dough in a small bowl with mini chocolate chips and a spoon.
Choose the single-serve bowl when you want cookie dough for one and nothing left over, but add milk carefully because small batches loosen faster than larger ones.

Single-Serve Formula

  • 6 tablespoons / 48g ready-to-eat flour, preferred; or flour handled using the safety note above
  • 2 tablespoons / 28g / 1 oz softened butter
  • 2 tablespoons / 25–28g light brown sugar
  • 1 tablespoon / 12g granulated sugar
  • ¼–½ teaspoon vanilla extract
  • Small pinch of fine salt
  • ½–1 tablespoon / 7–15ml milk or cream
  • 2 tablespoons / 20–25g mini chocolate chips

Mix it the same way as the main batch: cream the softened butter and sugars, add vanilla and salt, stir in the flour, loosen with milk, and fold in the chips. If you want a firmer scoop, chill it for 10 minutes before eating.

This small-batch version makes enough for two dessert portions without leaving a full container in the fridge. That size works especially well for a movie night, date night, or quick no-bake dessert when you want something sweet without baking a tray of cookies.
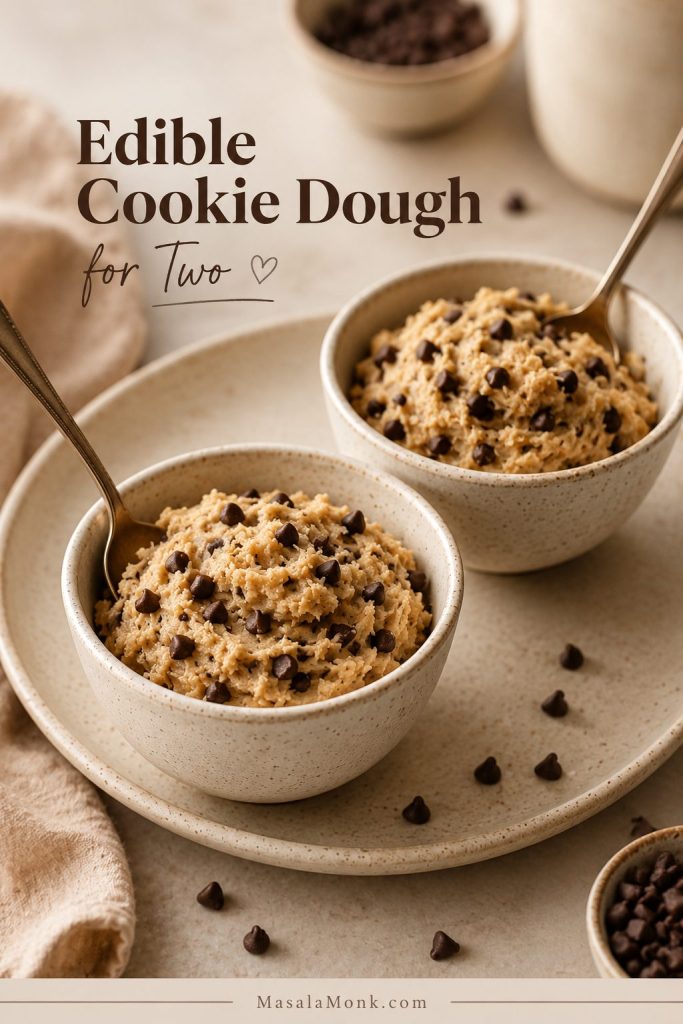
Two small bowls of edible cookie dough with spoons, arranged as a dessert for two.
This small batch is a practical middle ground: enough for a shared dessert, yet still easy to mix without committing to a full container in the fridge.

For-Two Formula

  • ½ cup + 1 tablespoon / about 68g ready-to-eat flour, preferred; or flour handled using the safety note above
  • 4 tablespoons / 56g / 2 oz softened butter
  • ¼ cup / 50–55g light brown sugar
  • 1½–2 tablespoons / 18–25g granulated sugar
  • ½–1 teaspoon vanilla extract
  • ⅛–¼ teaspoon fine salt
  • 1–1½ tablespoons / 15–22ml milk or cream
  • ¼ cup / 40–45g mini chocolate chips

Start with the lower amount of milk, then add more only if the mixture feels too thick. Small batches can go from crumbly to loose quickly, so adjust slowly and give the bowl a minute before adding another splash.

Edible Cookie Dough Variations

Once the base is right, the dough is easy to customize. Keep the same safety logic: no raw eggs, avoid regular raw flour, and adjust the texture slowly because different add-ins change how soft or thick the mixture feels.

Not sure where to start? Make the classic chocolate chip version first, then decide what you want more of next time: extra vanilla, more chocolate, a salty peanut butter edge, a firmer bite for rolling, or a lighter dairy-free version.
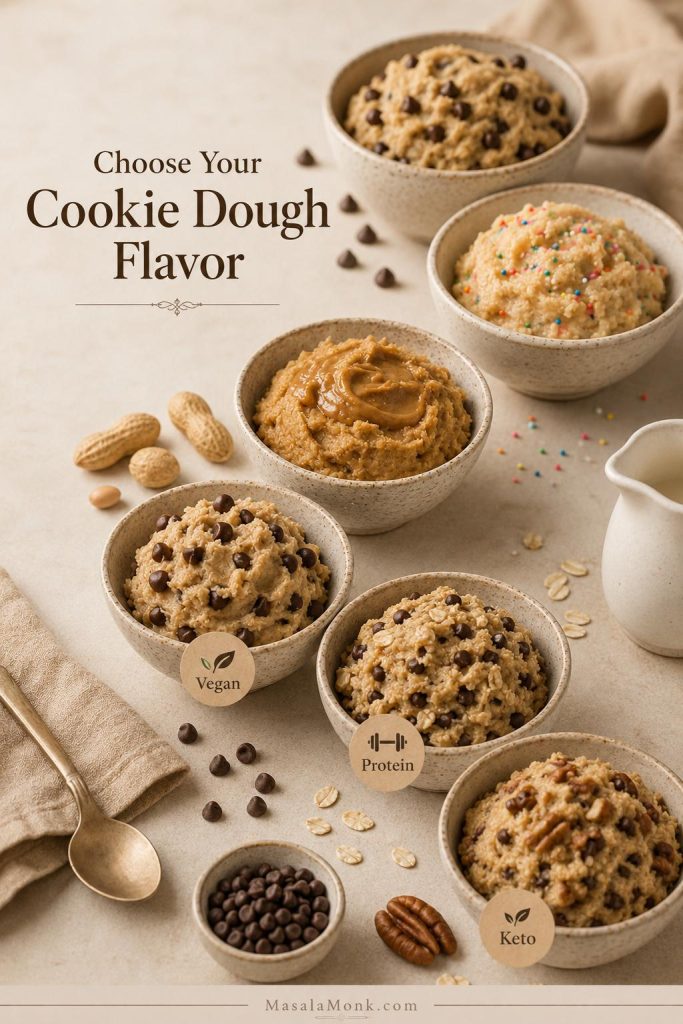
Variation guide showing several edible cookie dough styles, including chocolate chip, peanut butter, vegan, protein, keto, and sprinkle-topped options.
Once the base recipe feels right, use the variations to choose your next direction, whether that means sweeter, nuttier, dairy-free, higher-protein, or lower-carb.
If You Want… Make This Variation Small Adjustment
Classic chocolate chip flavor Chocolate chip edible cookie dough Use mostly brown sugar and mini chips.
A sweeter bakery-style bowl Sugar cookie dough Use more granulated sugar and add sprinkles at the end.
A richer, saltier bite Peanut butter cookie dough Add creamy peanut butter and reduce the milk slightly.
A firmer bite for rolling Cookie dough bites Chill before scooping or dipping.
A lighter dairy-free option Vegan edible cookie dough Use vegan butter, dairy-free milk, and dairy-free chips.

Start here if you want the classic chocolate chip version. Brown sugar, vanilla, salt, softened butter, and mini chocolate chips give you the familiar cookie dough flavor without needing to bake anything.
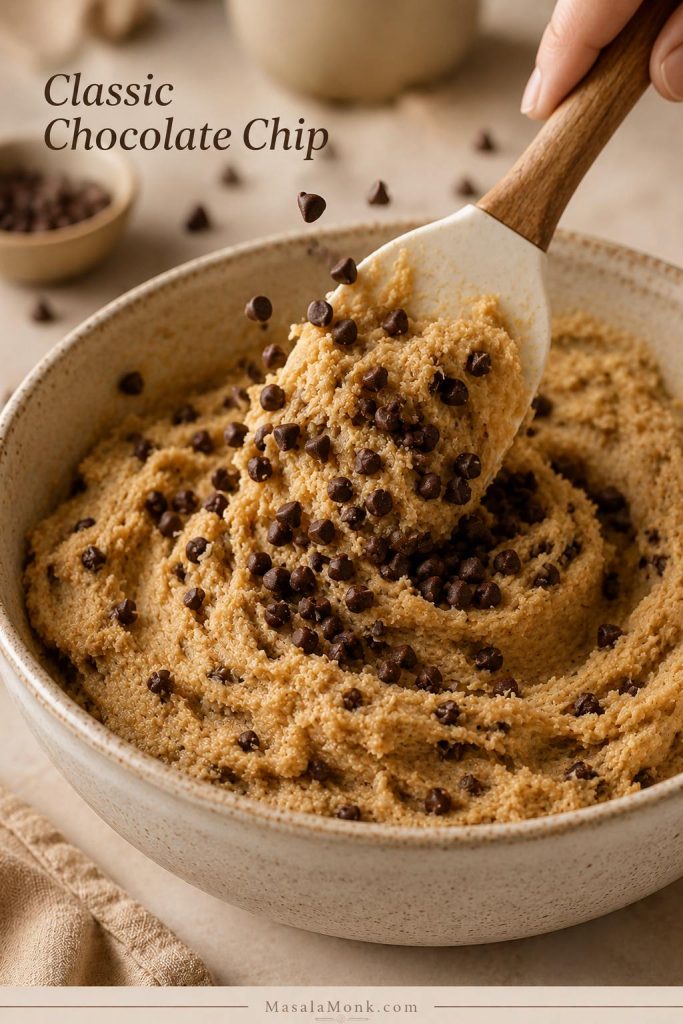
Mini chocolate chips are being folded into edible cookie dough with a spatula.
Classic chocolate chip remains the best place to start, since brown sugar, vanilla, and mini chips come closest to the flavor most people expect from cookie dough.

For deeper chocolate flavor, add 1 to 2 tablespoons of cocoa powder and a splash more milk. For a chunkier bowl, use a mix of mini chips and finely chopped chocolate.

Choose this variation when you want the vanilla-sprinkle side of cookie dough instead of the brown-sugar chocolate chip side. It tastes lighter, sweeter, and more bakery-style.

Use more granulated sugar and less brown sugar. You can replace the brown sugar with granulated sugar for a cleaner vanilla flavor, then add a tiny splash of almond extract if you like bakery-style sugar cookies. Sprinkles, white chocolate chips, and a little extra vanilla work well here. Add sprinkles at the end so they do not bleed too much color into the dough.

This is the richer, saltier variation — the one that tastes like peanut butter cookie dough met chocolate chip cookie dough in the same bowl. Mix ¼ cup creamy peanut butter into the butter and sugar mixture, then reduce the milk slightly. Peanut butter adds richness and salt, so taste before adding extra salt.
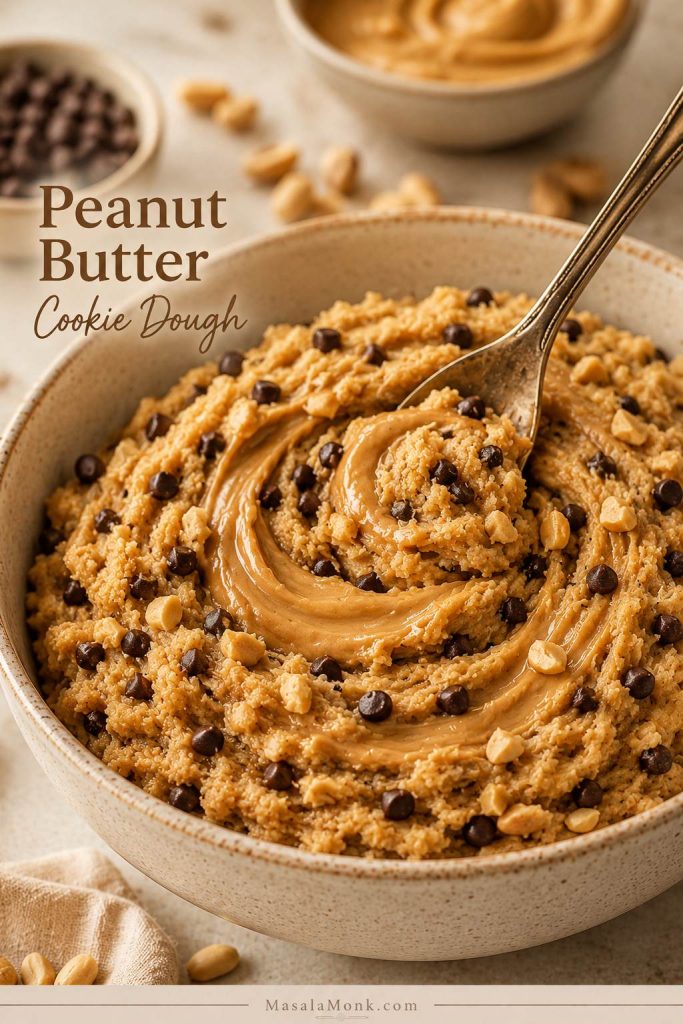
Peanut butter is swirled into edible cookie dough with chocolate chips and chopped peanuts visible on top.
Meanwhile, the peanut butter version turns richer and slightly firmer, so it is a smart choice when you want a saltier edge and a more substantial bite.

Mini chocolate chips are great here, but chopped roasted peanuts also work if you want crunch. For a baked version of this flavor, MasalaMonk’s peanut butter cookies are the better route.

For a gluten-free version, use a gluten-free flour blend you already like in no-bake or raw-style applications. Different blends behave differently when they are not baked, so texture matters more than usual here.

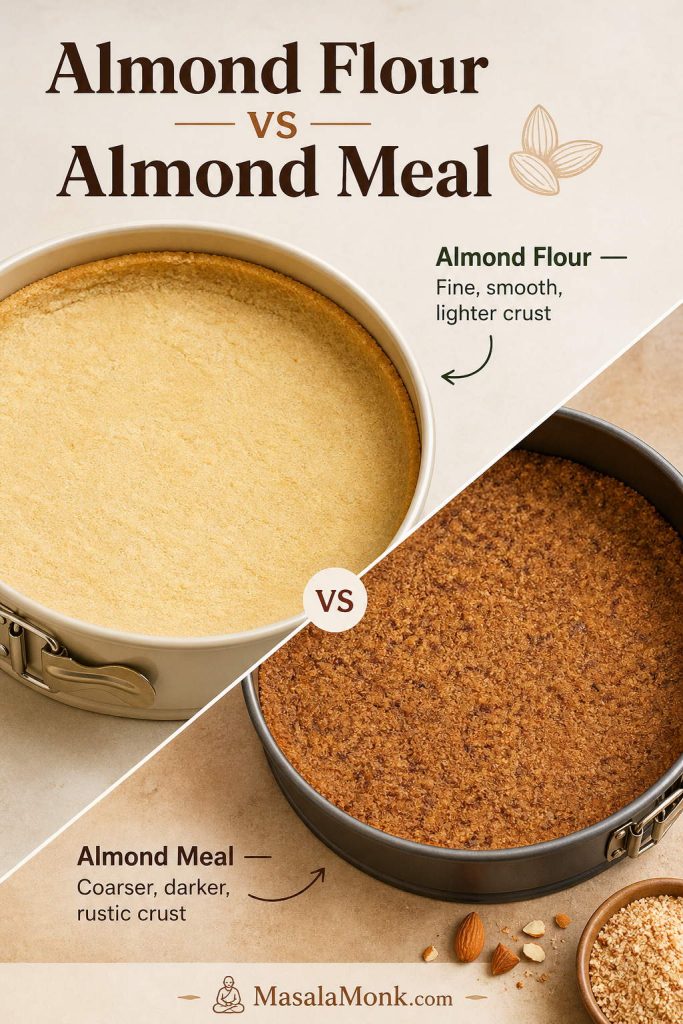
If the dough tastes gummy, try a gum-free gluten-free blend next time. If it tastes grainy, let it rest for 10 to 15 minutes before serving. Almond flour can also work, but it gives a softer, nuttier dough rather than a classic all-purpose-flour texture.

To make the dough vegan or dairy-free, use vegan butter, dairy-free milk, and dairy-free chocolate chips. The same method works, but the mixture may soften faster depending on the vegan butter you use.
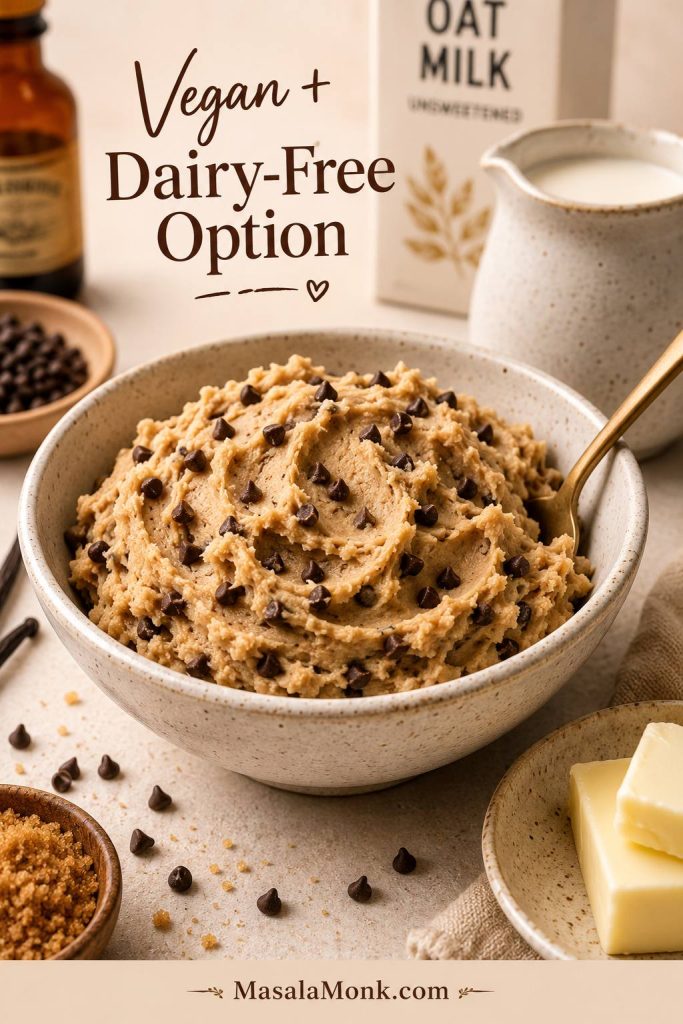
Vegan edible cookie dough in a bowl with dairy-free milk and chocolate chips shown nearby.
The dairy-free version should still feel like dessert first: creamy, scoopable, and close to the original texture, just made with vegan butter, dairy-free milk, and dairy-free chips.

If you want a dairy-free frozen dessert to pair with cookie dough bites, MasalaMonk’s coconut ice cream is a natural next recipe.

The protein version goes in a different direction from the classic butter-and-brown-sugar dough, but it is useful when you want the cookie dough idea in a higher-protein snack. For a quick version, blend cottage cheese until completely smooth, then stir it with almond flour or oat flour, vanilla protein powder, a little maple syrup or sweetener, vanilla, salt, and mini chocolate chips.
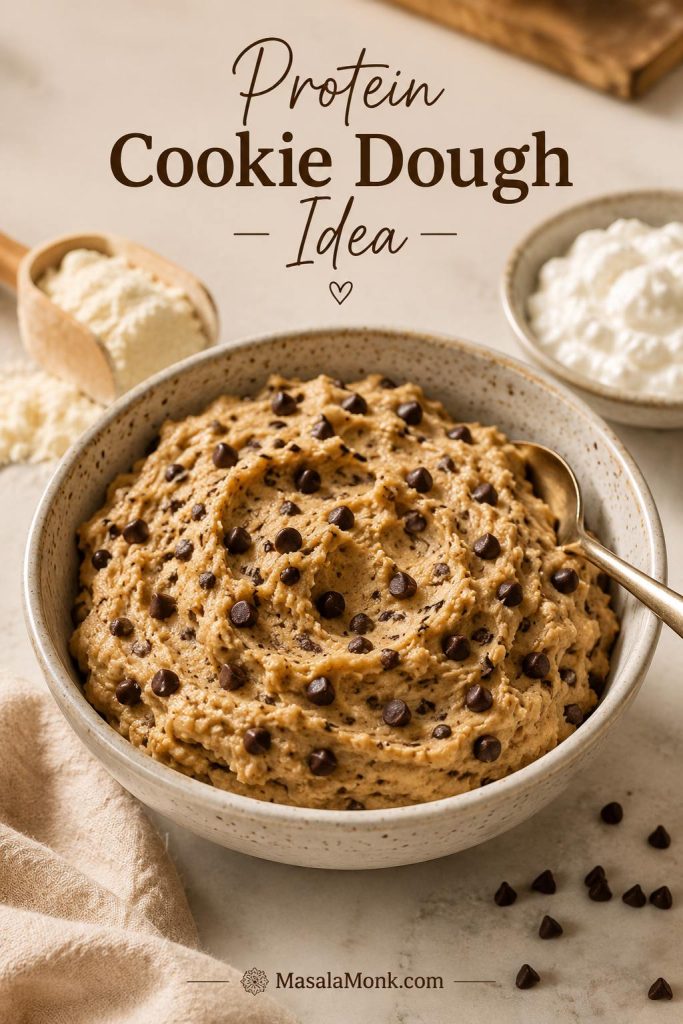
A bowl of protein-style edible cookie dough with mini chocolate chips, a scoop of protein powder, and a small bowl of creamy white protein base nearby.
Protein cookie dough goes in a different direction from the classic bowl; still, it can be useful when you want the same dessert idea in a more filling, snack-like version.

Chill it before eating so the texture firms up. If you like high-protein desserts, MasalaMonk’s protein ice cream goes deeper into protein powder, Greek yogurt, dairy-free, low-calorie, and sugar-free frozen dessert options.

Expect a nuttier, softer dough than the classic chocolate chip version. For a keto-style bowl, use almond flour instead of wheat flour, a low-carb sweetener instead of sugar, and sugar-free chocolate chips. Because almond flour has more fat and less starch than all-purpose flour, start with less added milk and adjust slowly.
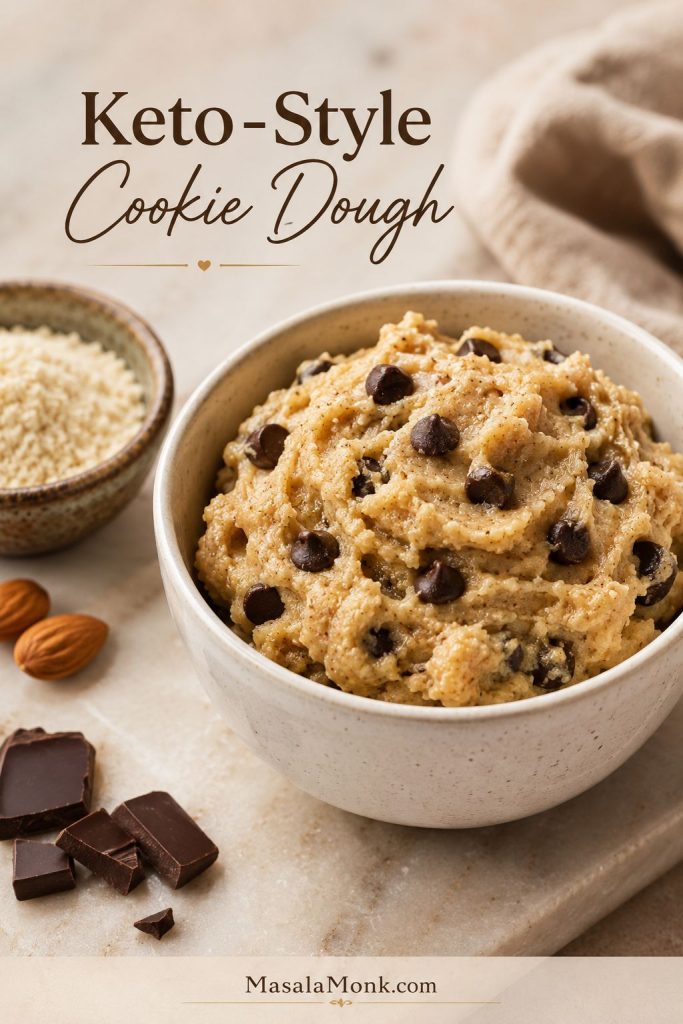
Keto-style edible cookie dough in a bowl with almond flour, almonds, and dark chocolate pieces nearby.
Because almond flour behaves differently from all-purpose flour, keto edible cookie dough usually turns out softer and nuttier, with a flavor that feels less classic but still satisfying.

For another low-carb dessert direction, MasalaMonk’s keto hot chocolate is a good companion recipe.

How to Fix Edible Cookie Dough Texture

If your first spoonful is not perfect, do not panic. Edible cookie dough is one of the easiest desserts to adjust because nothing has been baked yet. Most texture problems come down to flour, butter temperature, or adding the milk too quickly.

The easiest way to fix the dough is to change only one thing at a time. Add milk slowly, chill before adding more flour, and taste again after a short rest.
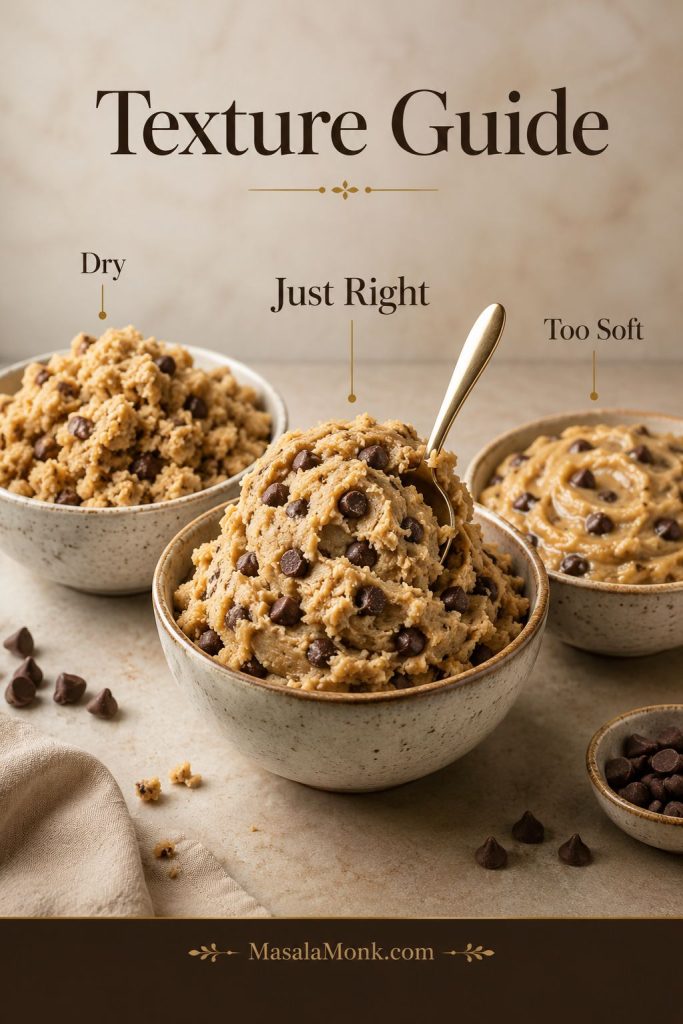
Three bowls compare edible cookie dough textures labeled dry, just right, and too soft.
Look at the texture before changing the recipe: crumbly dough needs slow moisture, loose dough needs chilling, and the best bowl sits somewhere in between.
Problem Likely Cause Fix
Dry or crumbly texture Too much flour, packed flour, or not enough milk Add milk or cream 1 teaspoon at a time until scoopable.
Sticky dough Butter too warm or too much milk Chill 15–20 minutes, or add 1 tablespoon sifted flour.
Gritty bite Sugar has not softened into the butter enough Cream the butter and sugars longer, or let the dough rest 10 minutes.
Floury flavor Flour was overmeasured or not sifted after heating Use grams, sift after heating, and add a little vanilla or salt to balance.
Overly sweet dough Too much sugar or too many chips Add a pinch of salt and 1–2 tablespoons flour.
Greasy or soupy texture Butter was melted instead of softened Chill, then stir. Next time, use softened butter.
Very firm after chilling Butter hardened in the fridge Let the dough sit at room temperature for 10–15 minutes before serving.

Start with a teaspoon of milk or cream, then stir before adding more. Small corrections work better here because dry dough can move from crumbly to loose surprisingly quickly.
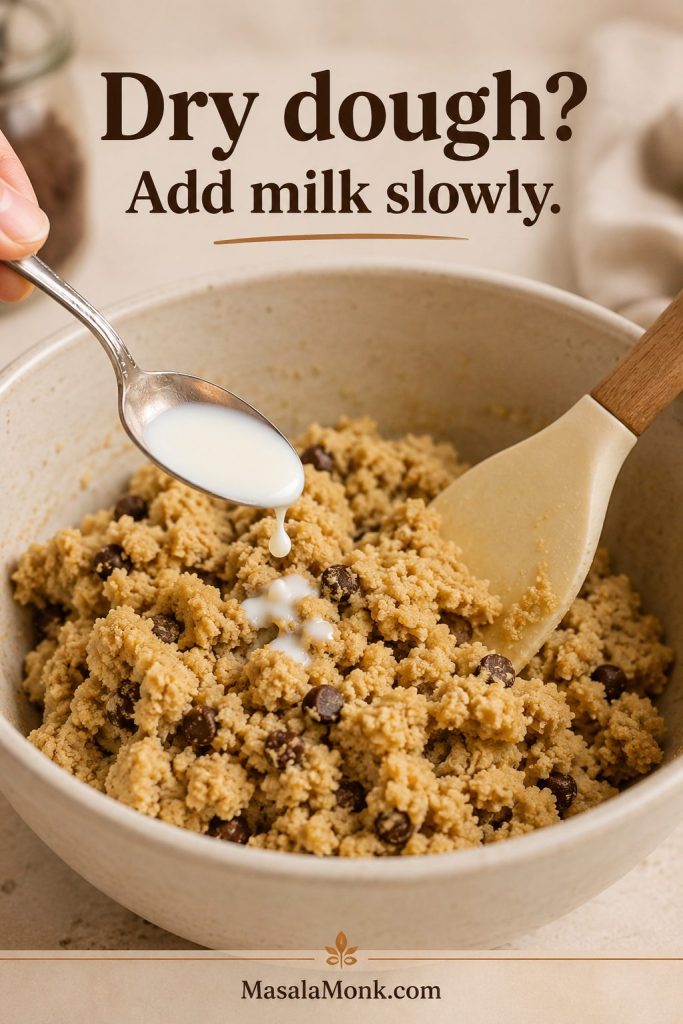
A teaspoon of milk is being added to dry, crumbly edible cookie dough to improve the texture.
If the dough turns dry or crumbly, fix it gradually rather than all at once; a teaspoon of milk or cream is usually enough to start bringing it back together.

Chill first so the butter firms up before you add more flour. After a short rest in the fridge, the same bowl often becomes scoopable without turning heavy or floury.
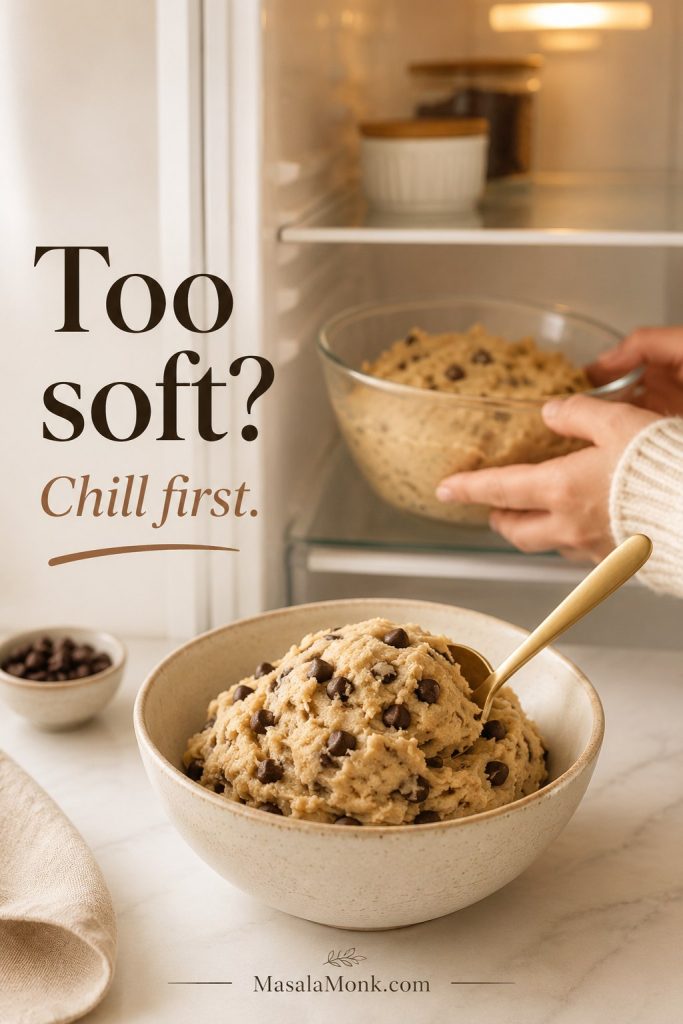
Soft edible cookie dough is shown with a fridge cue, illustrating chilling as a fix for sticky dough.
Chilling gives the butter time to firm up again; as a result, soft dough often becomes scoopable without needing extra flour.

No, this edible cookie dough is made for spooning, scooping, and rolling into bites — not for baking. It has no eggs and no leavening, so it will not behave like regular cookie dough in the oven. Instead of turning into chewy cookies, it may spread, turn greasy, stay dense, or bake up flat.
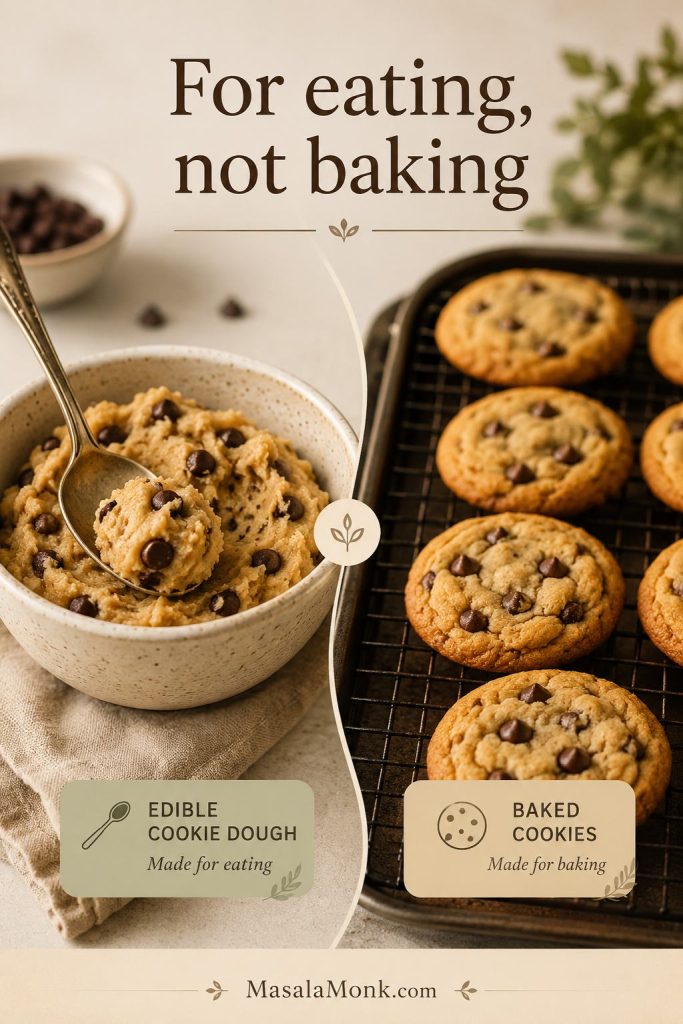
Edible cookie dough in a bowl is shown beside baked cookies on a tray to compare dough for eating with dough for baking.
Edible cookie dough is made for spooning and scooping, not for baking; therefore, use a proper cookie recipe whenever the goal is warm cookies from the oven.

Think of this as a no-bake dessert, not a shortcut cookie dough. If the craving is really for warm cookies from the oven, use a recipe designed for baking, like MasalaMonk’s double chocolate chip cookies. If you want a roll-and-cut dough, MasalaMonk’s gingerbread cookies are a better example of dough built for shaping and baking.

Eating it by the spoonful is the obvious answer, but this dough can do more. Because it is eggless and made with a safer flour approach, you can use it as a no-bake dessert component instead of treating it like leftover raw cookie dough.

Easy No-Bake Ways to Serve It

  • Eat it by the spoonful after a 10-minute rest for smoother texture.
  • Roll it into bites and chill until firm.
  • Dip the bites in melted chocolate and finish with flaky salt.
  • Fold chilled pieces into ice cream for homemade cookie dough ice cream.
  • Blend a spoonful into a milkshake for cookie dough flavor.
  • Use it as a brownie topping after brownies have cooled.
  • Layer it into dessert cups with whipped cream, chocolate sauce, or berries.
  • Press it into mini tart shells for a no-bake cookie dough dessert.
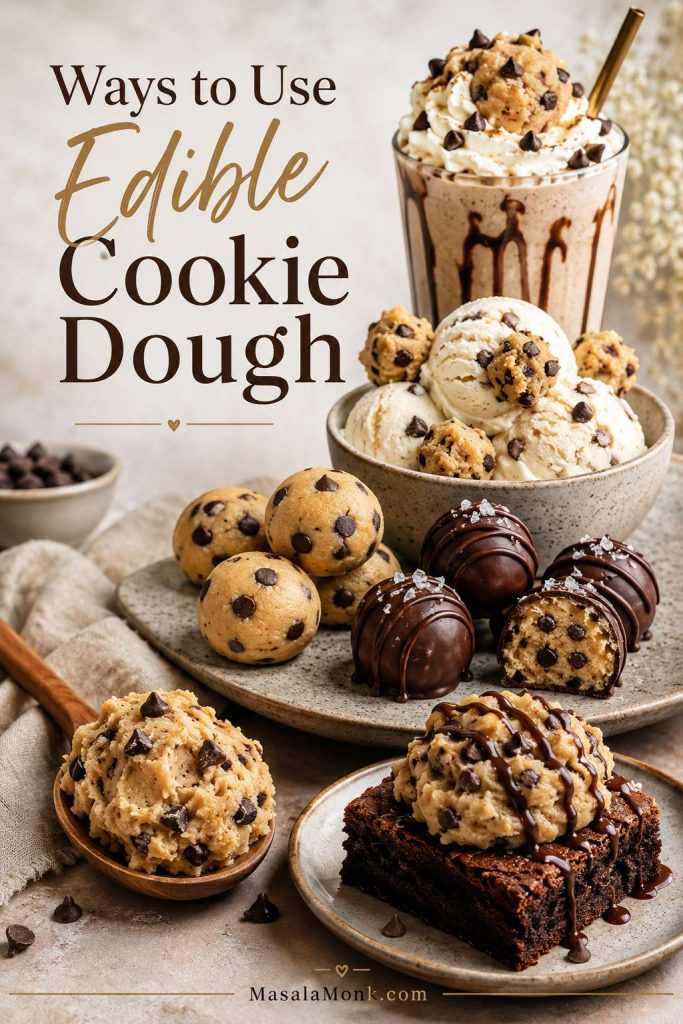
Several ways to use edible cookie dough are shown, including bites, ice cream mix-ins, milkshake, brownie topping, and dessert cups.
Beyond the spoonful, this dough can become bites, brownie topping, milkshake flavor, or ice cream mix-ins, so one batch can stretch into several no-bake dessert ideas.

Cookie Dough Ice Cream and Mix-In Safety

Ice cream note: only use dough made with ready-to-eat ingredients for ice cream mix-ins. Do not fold regular raw cookie dough into ice cream; the pieces should be made without raw eggs and with a safer flour approach.

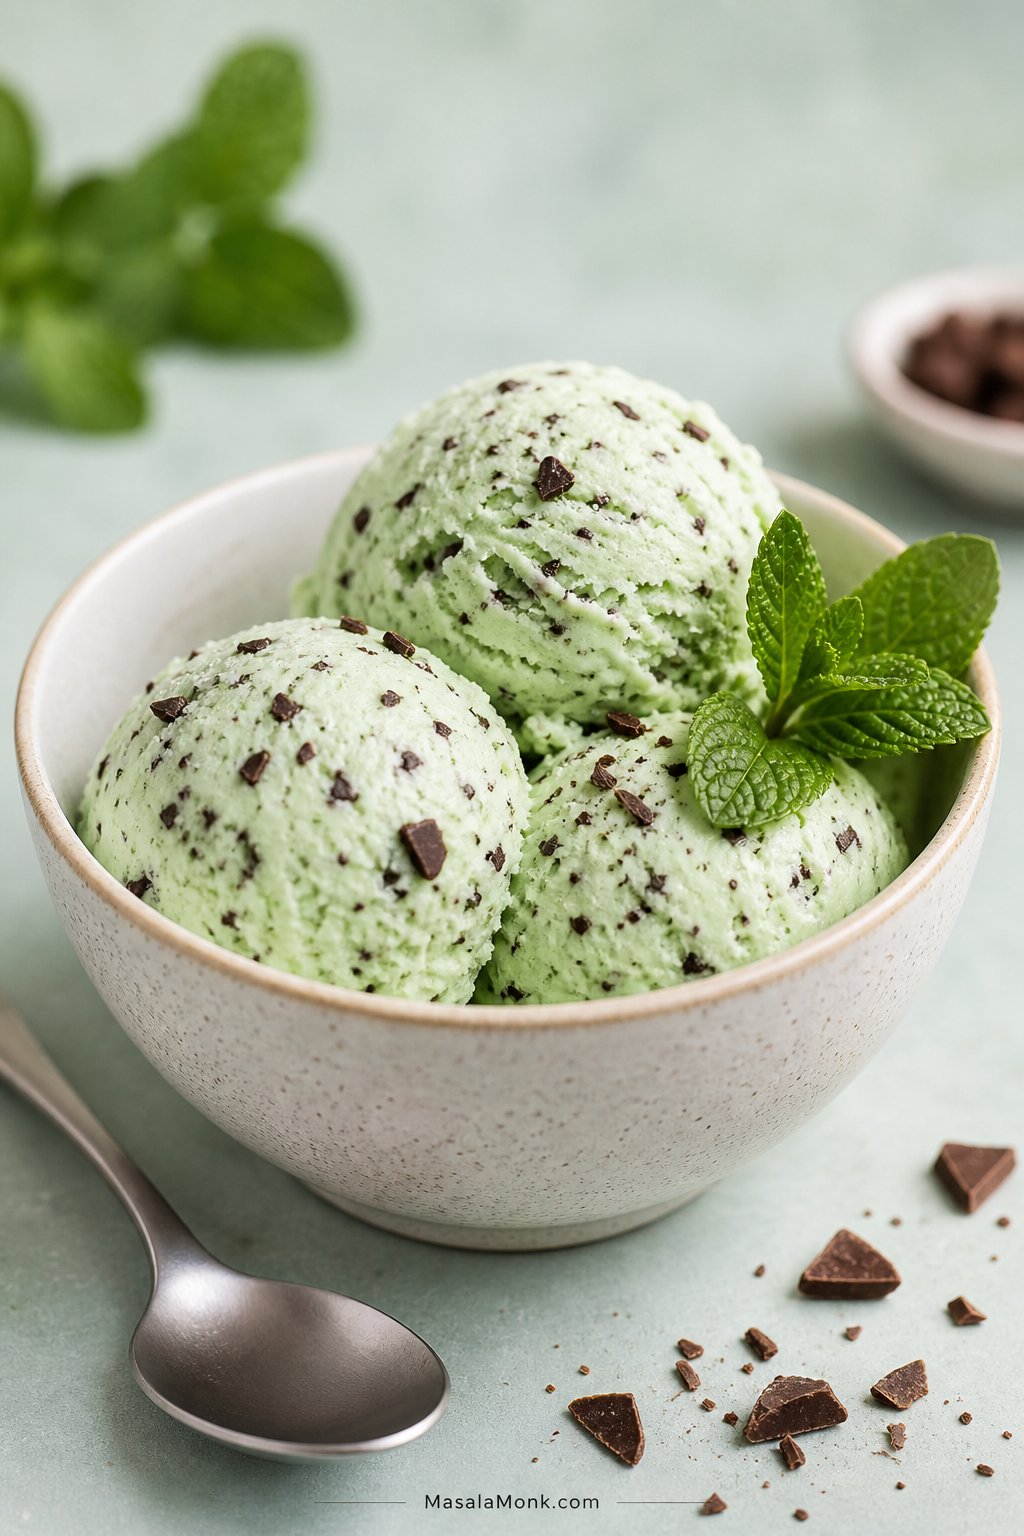
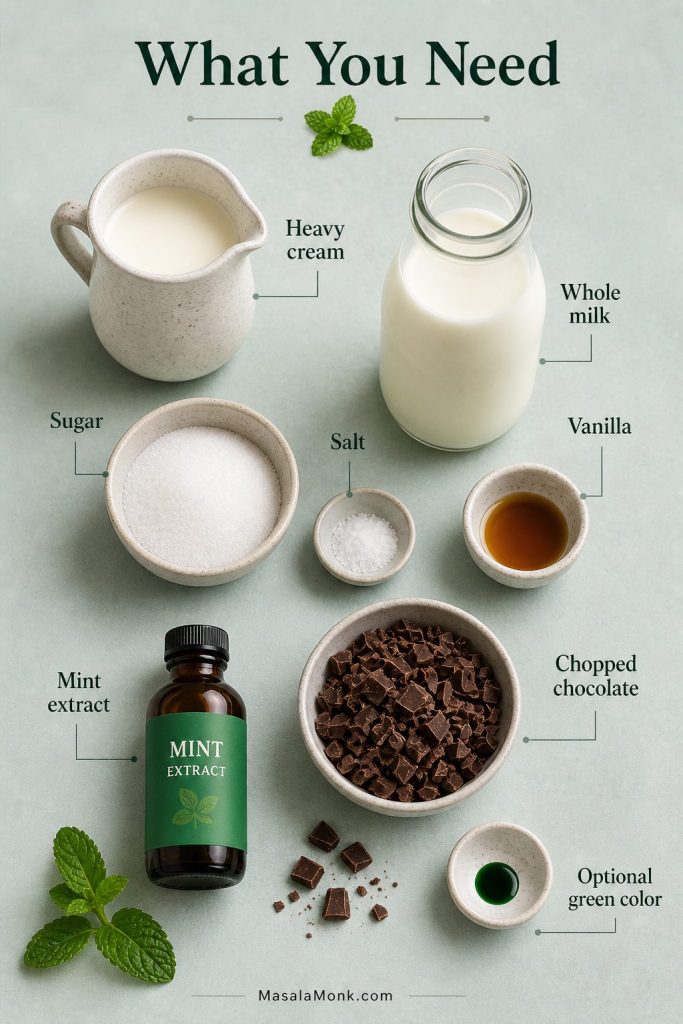
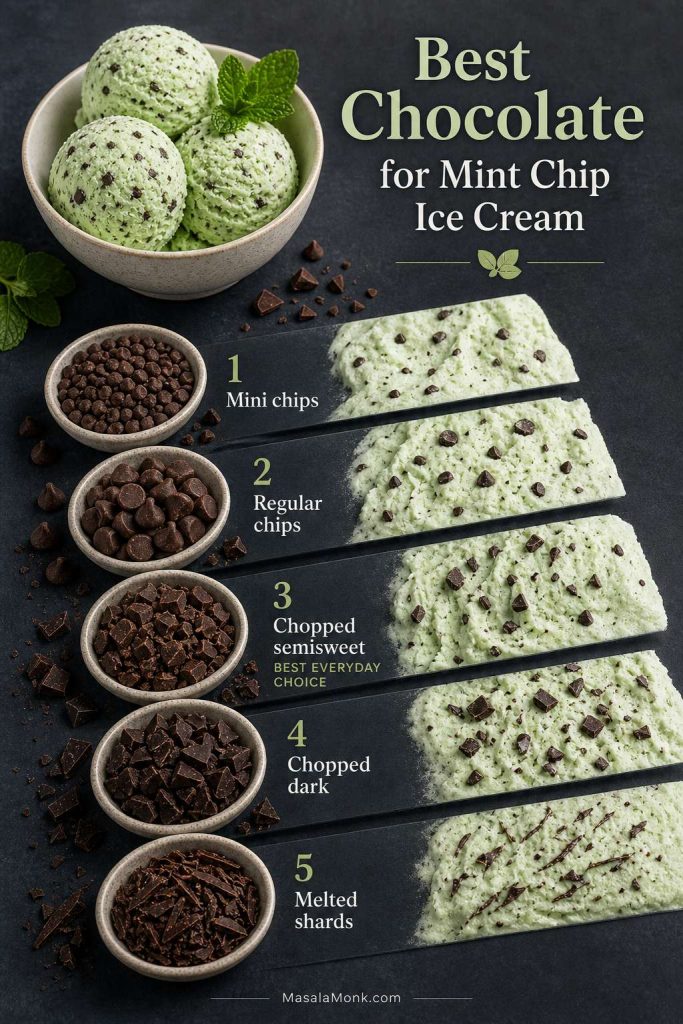
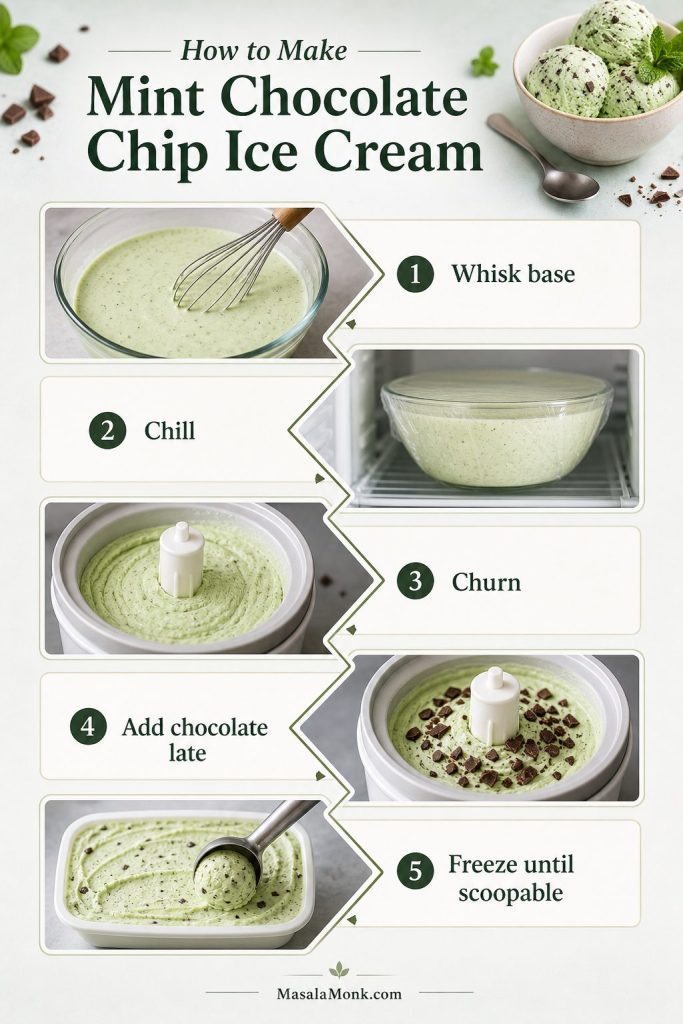
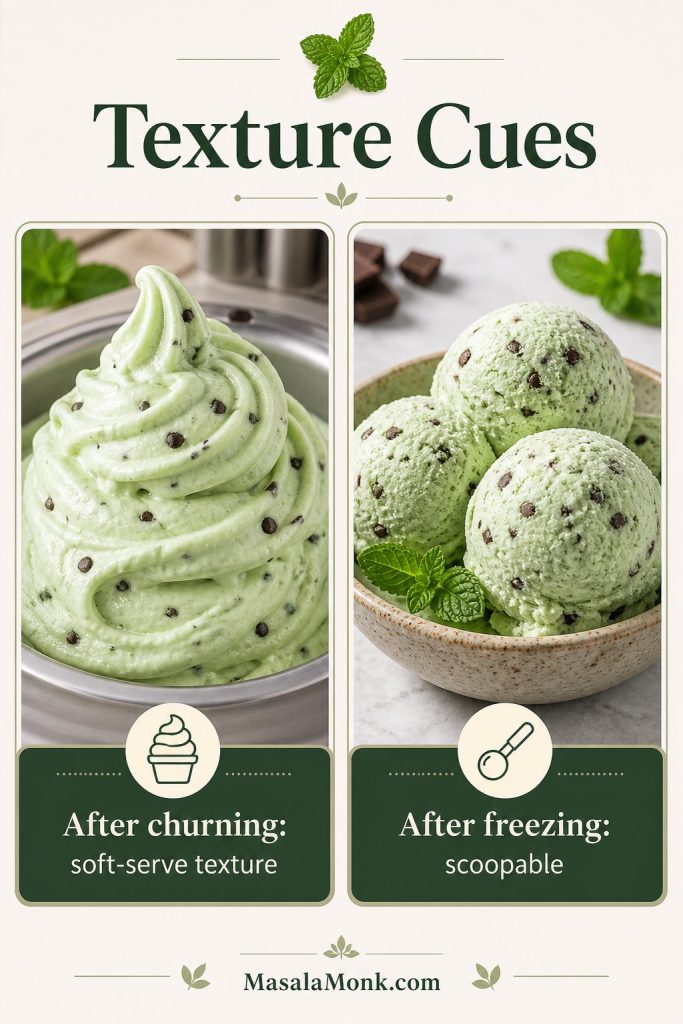
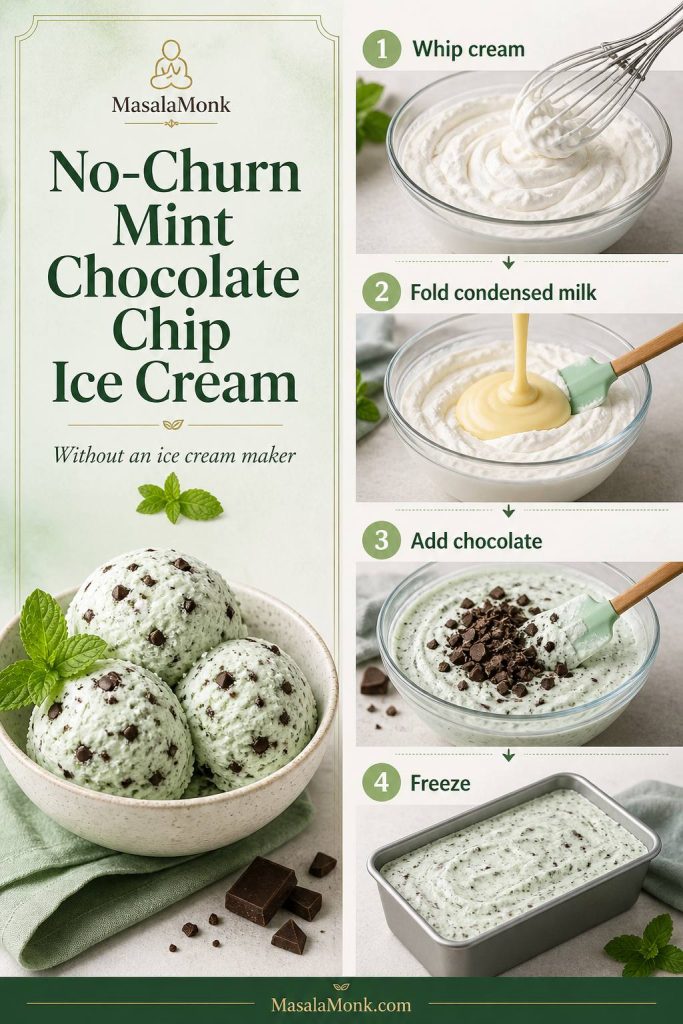
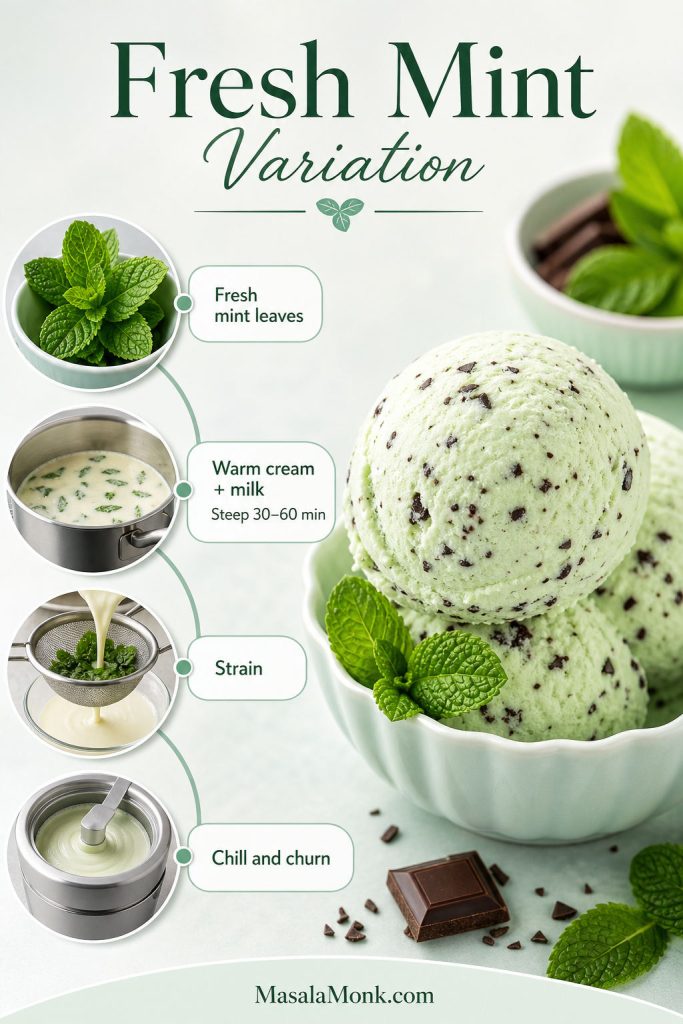
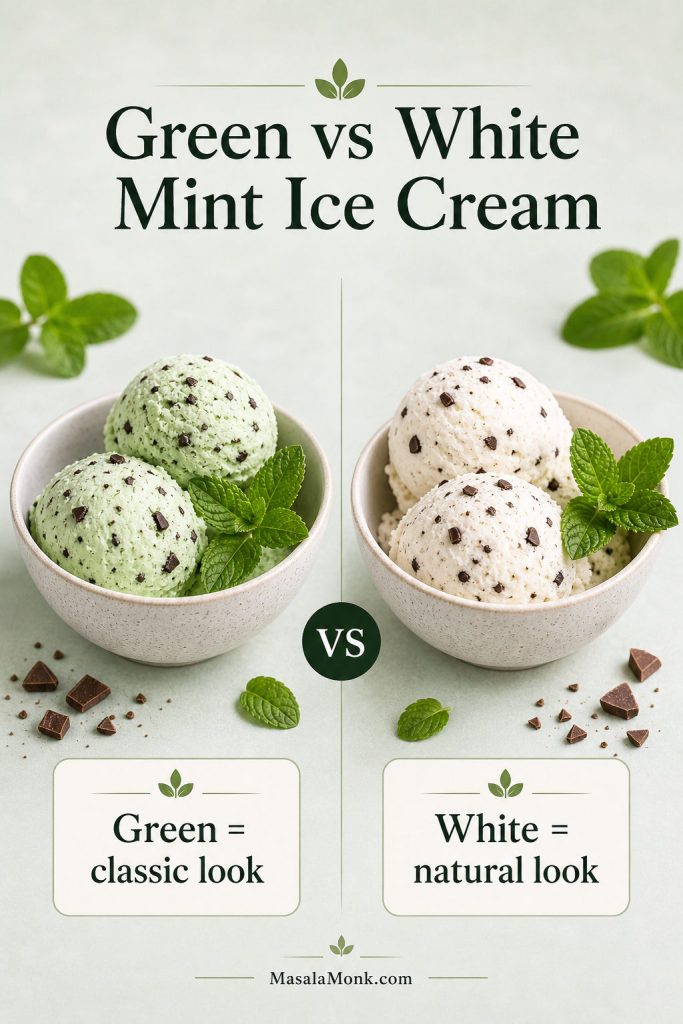
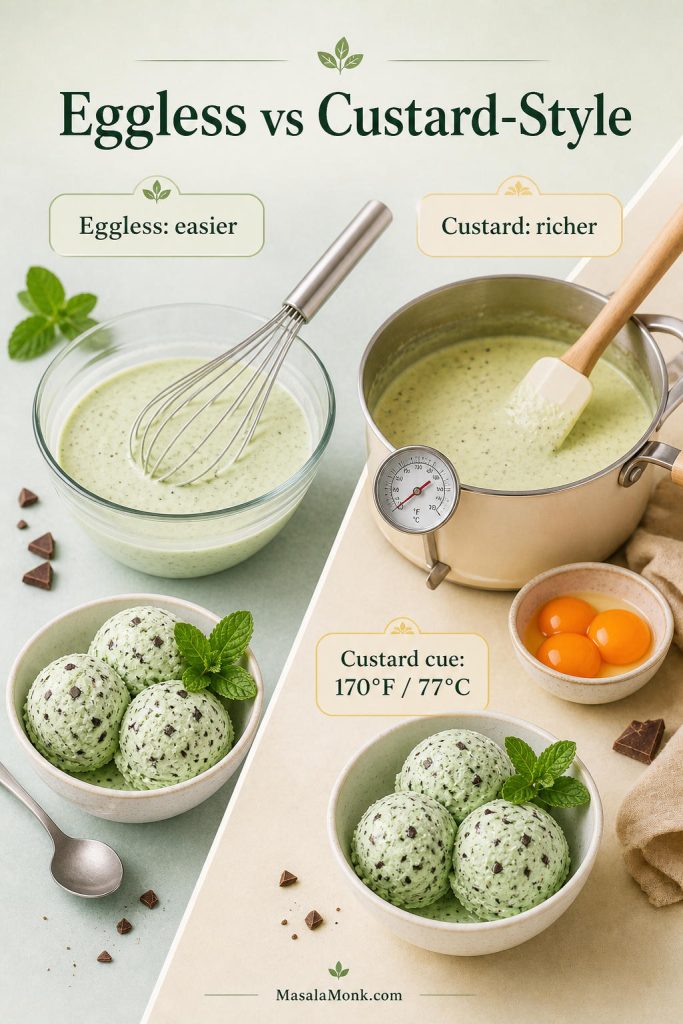
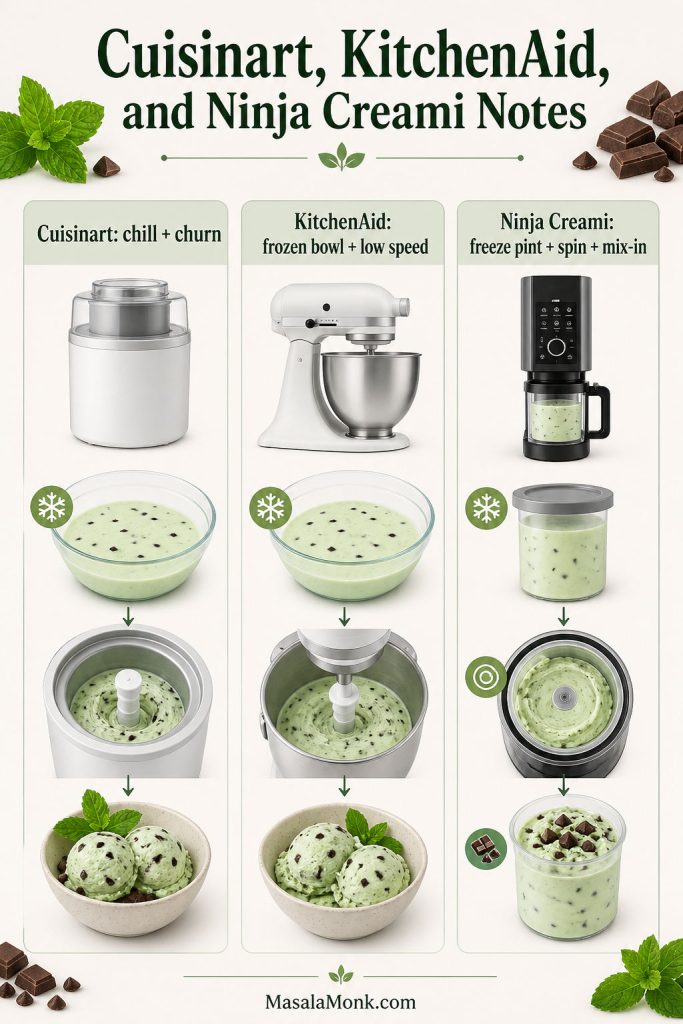
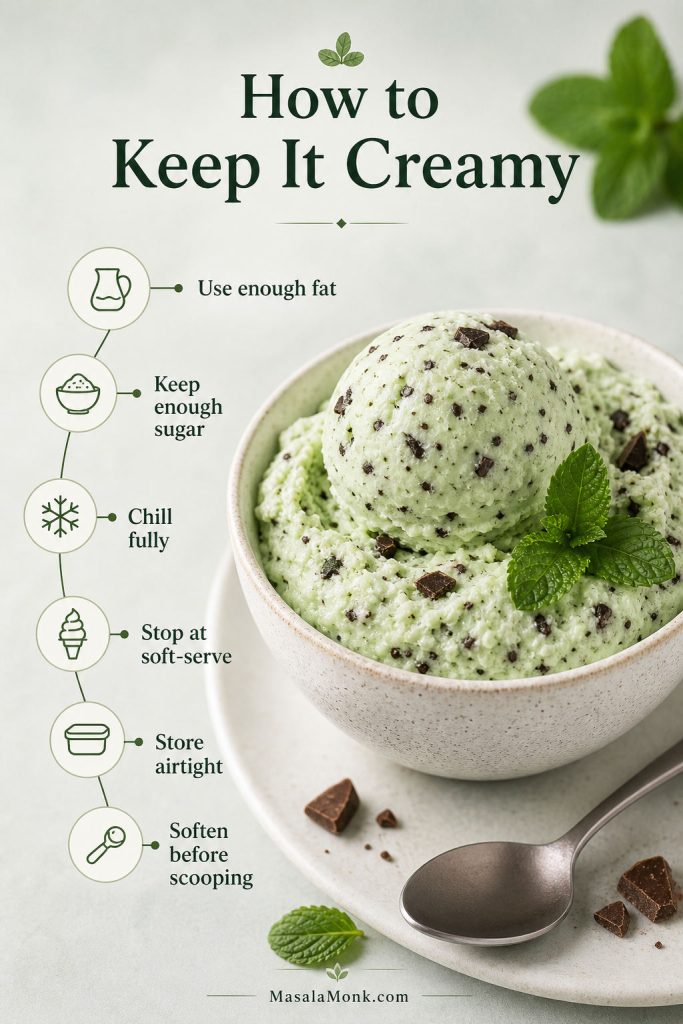
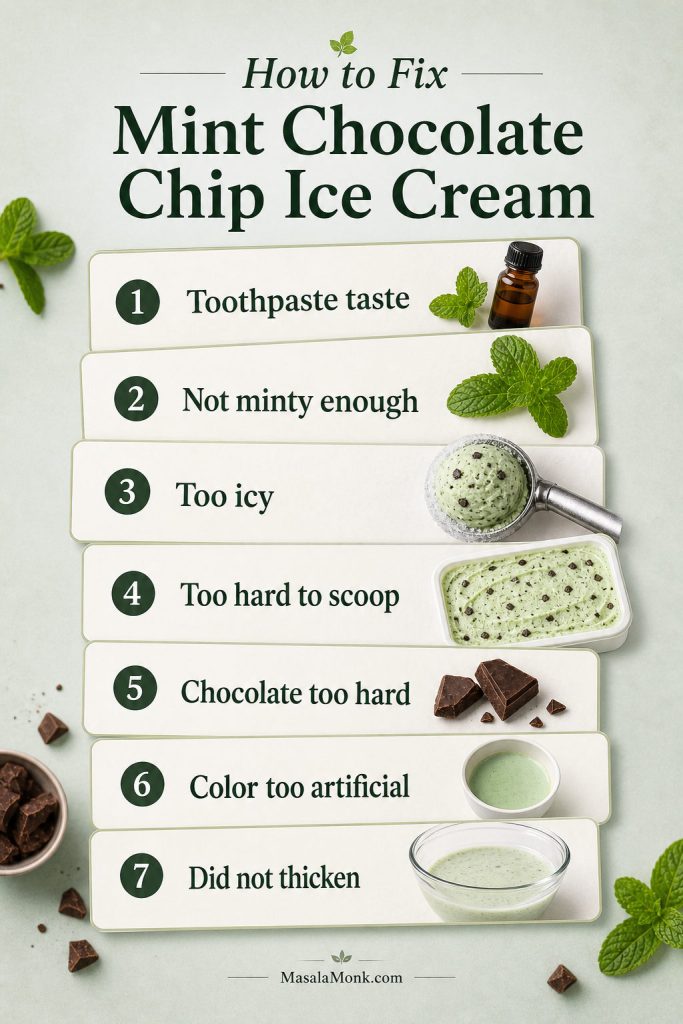
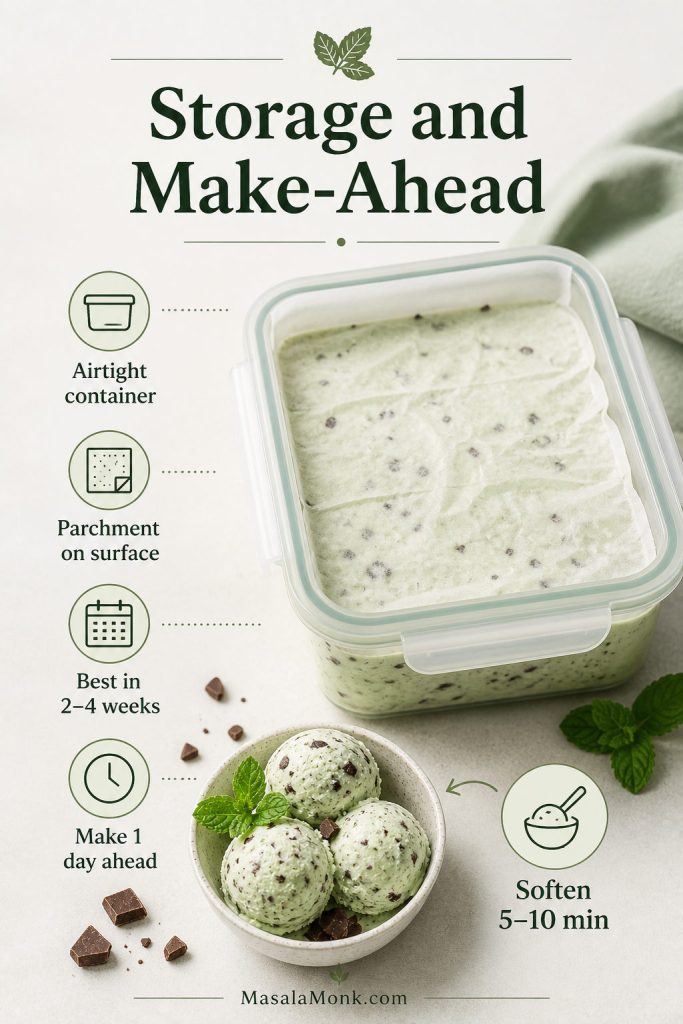
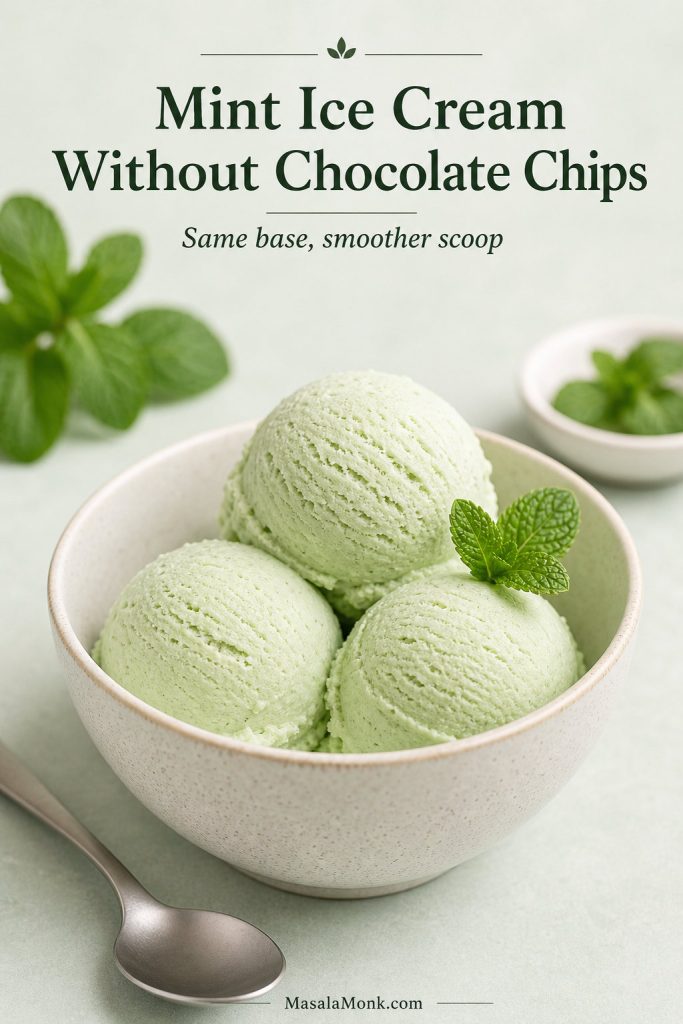
Small chilled pieces are especially good folded into homemade ice cream. For a chocolate-chip frozen dessert direction, see MasalaMonk’s mint chocolate chip ice cream.

If you want another no-bake spoonable dessert, MasalaMonk’s avocado chocolate mousse gives you a chocolate-rich option with a completely different texture.

How to Store and Freeze Edible Cookie Dough

Because the dough contains butter and milk or cream, it should be stored cold. Do not leave it sitting out for long serving windows, especially in a warm kitchen.

  • Refrigerator: Store in an airtight container for 4–5 days.
  • Freezer: Freeze portioned balls or scoops for 1–2 months.
  • To serve from the fridge: Let it sit at room temperature for 10 minutes so the butter softens slightly.
  • To freeze neatly: Scoop into balls, freeze on a lined tray until firm, then transfer to a freezer-safe container.
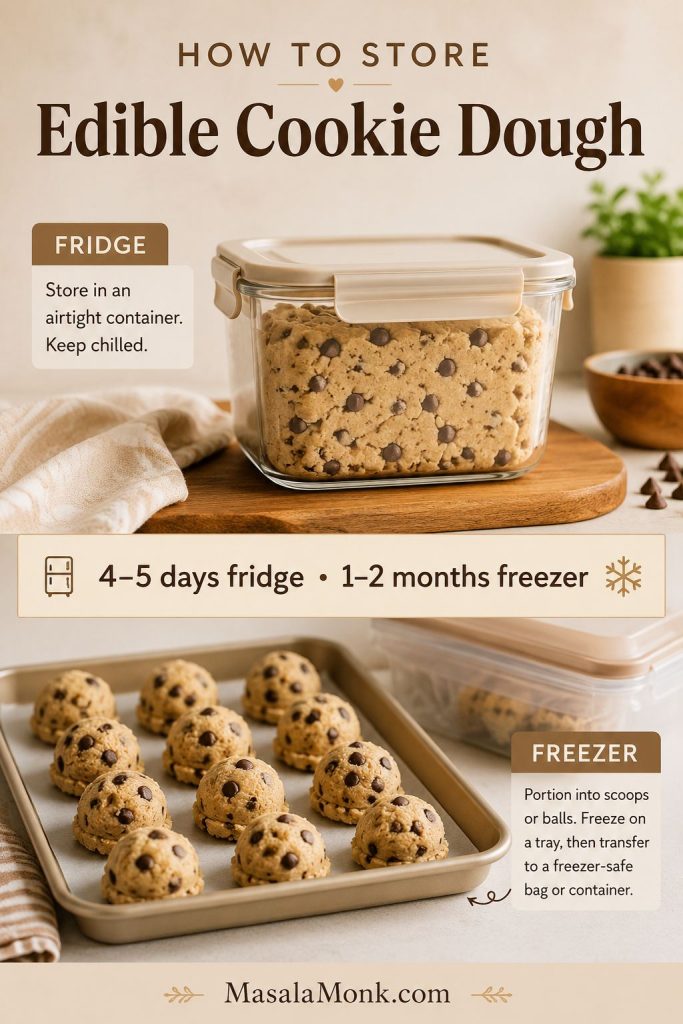
Storage guide for edible cookie dough showing an airtight container for the fridge and portioned scoops for the freezer, with timing notes.
Cold storage firms the butter, so let refrigerated scoops rest briefly before serving; meanwhile, freezing in portions makes later dessert bowls much easier.

If you are making cookie dough bites for a party, keep them chilled until close to serving time. For the best texture, portion them small enough that people can eat them in one or two bites.

Protein versions made with cottage cheese or yogurt should be treated as more perishable. Keep them refrigerated, use clean utensils, and aim to eat them within 2–3 days rather than keeping them as long as the classic butter-based version.

FAQs

Is this edible cookie dough recipe safe to eat?

Edible cookie dough is safest when it is made without raw eggs and with commercially heat-treated flour labeled ready-to-eat. Regular raw cookie dough is not meant to be eaten because it usually contains raw flour and raw eggs. Home flour-heating methods are common in recipes, but they are not the same as commercially validated heat treatment.

What is the safest flour for edible cookie dough?

The safest flour choice is commercially heat-treated flour labeled ready-to-eat. Regular all-purpose flour is raw and is normally made safe through baking or cooking, not by being stirred directly into a no-bake dessert.

Why does edible cookie dough need safer flour handling?

Most flour is raw and has not been treated to kill bacteria. Regular cookie dough becomes safer when baked, but edible cookie dough is not baked. That is why this recipe uses ready-to-eat flour guidance instead of asking you to stir plain raw flour into dessert.

How do I make edible cookie dough without eggs?

This recipe is eggless by design. Eggs are useful in baked cookies, but they are not needed here because the dough is made for spooning, not for going into the oven.

How does almond flour change the texture?

Almond flour makes a softer, nuttier dough and works best in keto, gluten-free, or vegan-style edible cookie dough. It will not taste exactly like classic chocolate chip cookie dough made with all-purpose flour, so start with less milk and adjust slowly.

How do I make this edible cookie dough recipe gluten-free?

Use a gluten-free flour blend you already like in no-bake applications, or use almond flour for a softer variation. If your gluten-free dough feels gummy, try a gum-free blend next time. If it feels grainy, let it rest for 10 to 15 minutes before eating.

How do I make a vegan version?

For a vegan version, use vegan butter, dairy-free milk, and dairy-free chocolate chips. The dough may soften more quickly depending on the vegan butter, so chill it if it feels too loose.

How do I make edible cookie dough for one?

For one serving, use 6 tablespoons / 48g ready-to-eat flour, preferred; or flour handled using the safety note above, plus 2 tablespoons softened butter, 2 tablespoons brown sugar, 1 tablespoon granulated sugar, vanilla, salt, ½ to 1 tablespoon milk, and 2 tablespoons mini chocolate chips. Mix, adjust the texture, and chill briefly if needed.

Why should this dough not be baked?

This dough is made for eating, not baking. It has no eggs and no leavening, so it can bake up flat, greasy, dense, or crumbly. Use a real cookie recipe if you want baked cookies.

How long does edible cookie dough last in the fridge?

Store edible cookie dough in an airtight container in the refrigerator for 4–5 days. Let it sit at room temperature for about 10 minutes before eating if it becomes too firm.

How should you freeze edible cookie dough?

Freezing works best when the dough is portioned first. Scoop it into small balls, freeze them on a lined tray until firm, then move them to a freezer-safe container. Use within 1–2 months for the best texture.

Once you have the base texture right, this edible cookie dough recipe becomes the kind of dessert you can make your own: extra vanilla, darker chocolate, sprinkles, peanut butter, or chilled bite-size scoops tucked into ice cream. Start with the classic chocolate chip version first, then let the next batch follow your craving.

Make a quick note of what you changed — more salt, less milk, extra chips, longer chill time. The best edible cookie dough is the one you can repeat exactly when the craving hits again.
Back to the top

Posted on — 2 Comments

Coconut Ice Cream Recipe: Coconut Milk, Coconut Cream, Cream of Coconut and No-Churn Options

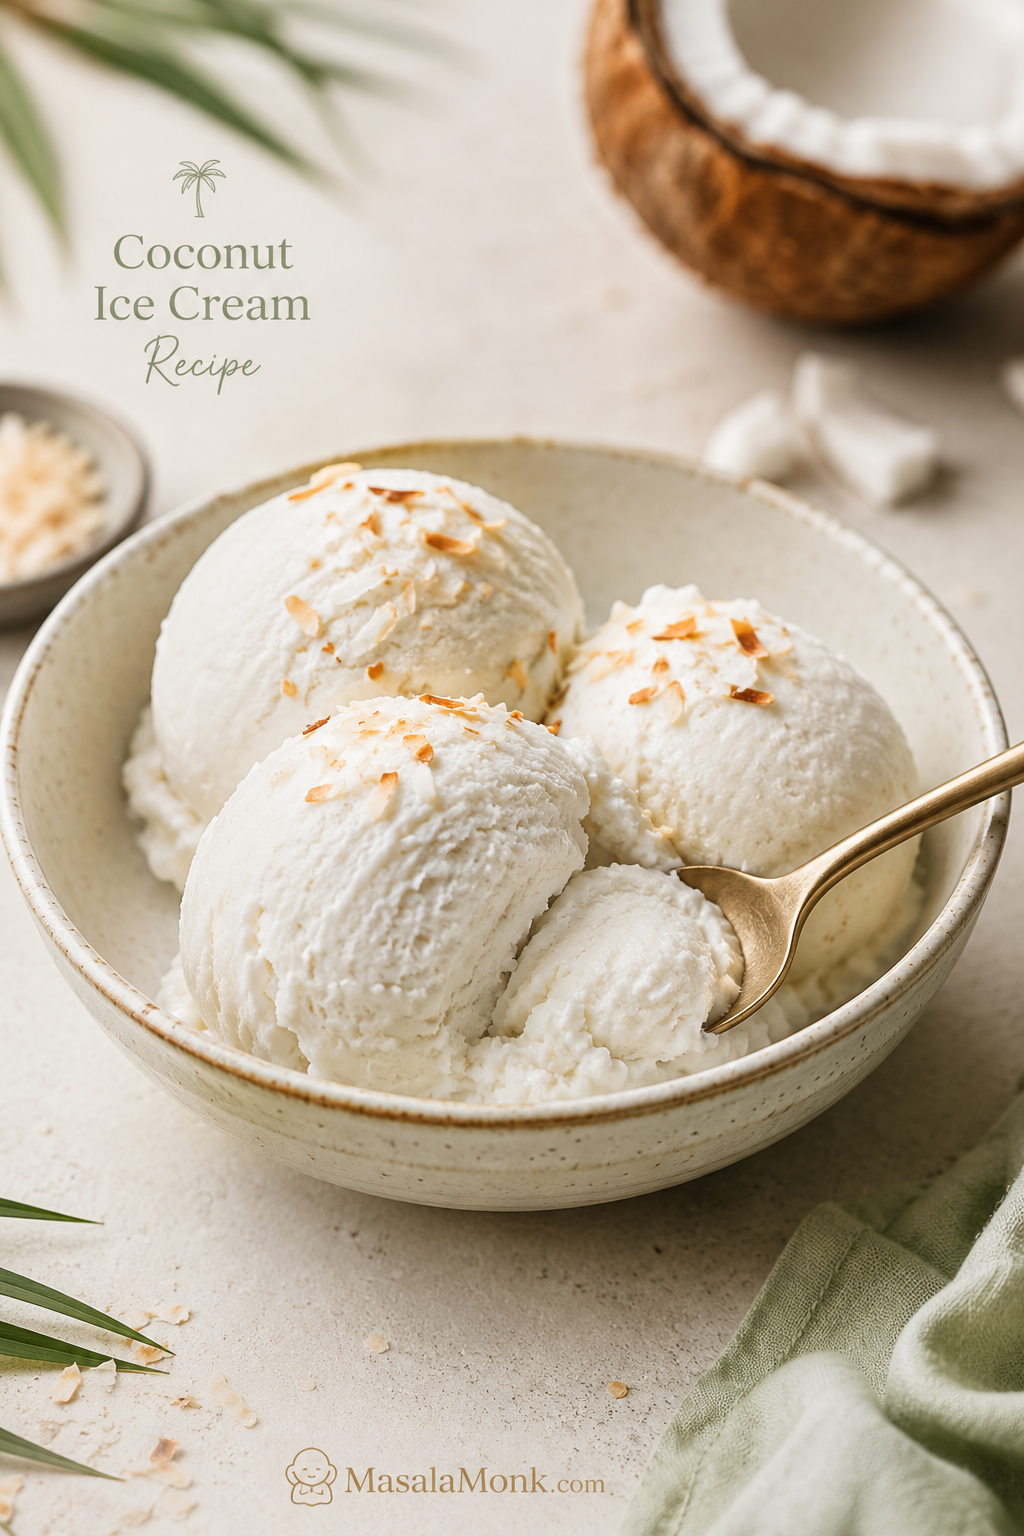
Three scoops of creamy coconut ice cream in a light ceramic bowl with toasted coconut flakes and a spoon cutting into one scoop.

This coconut ice cream recipe is for the kind of scoop that tastes deeply coconutty, creamy, and smooth—not icy, watery, or rock-hard straight from the freezer. The base uses full-fat coconut milk and coconut cream for a rich dairy-free texture, with just enough sugar to keep it soft enough to scoop.

You can churn it for the smoothest, parlor-style finish, or use the no-churn freeze-and-blend method when you do not have an ice cream maker. There is also a sweeter cream of coconut batch, a condensed milk shortcut, Ninja Creami notes, and tender coconut and Thai-style ideas if you want a more tropical bowl.

The only part of this coconut ice cream recipe that really needs care is choosing the right coconut product. Coconut milk, coconut cream, and cream of coconut sound similar, but they behave very differently once frozen. Get that part right, and you are already most of the way to a creamy scoop.

Quick Answer: The Best Coconut Ice Cream Recipe

The creamiest dairy-free coconut ice cream starts with 1 can full-fat coconut milk plus 1 can unsweetened coconut cream, blended with sugar, vanilla, and salt. Churn it for the smoothest, parlor-style texture, then freeze until firm. If you do not have an ice cream maker, freeze the base in cubes and blend it until creamy. For a richer dairy-style shortcut, use the condensed milk method below.

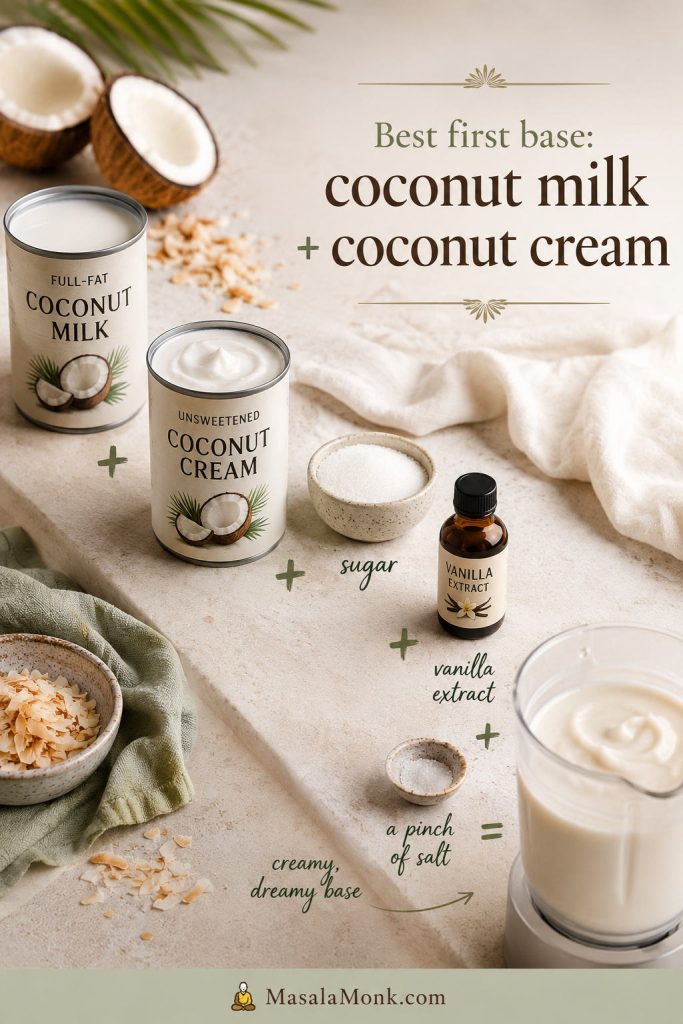
Best base 1 can full-fat coconut milk + 1 can unsweetened coconut cream
Best method Ice cream maker for the smoothest texture; freeze-and-blend for no-churn
Texture Creamy, coconut-forward, scoopable after resting briefly
Avoid Thin carton coconut milk, lite coconut milk, and using sweetened cream of coconut without reducing sugar

Still deciding? See coconut milk vs coconut cream vs cream of coconut, or skip straight to the recipe card.

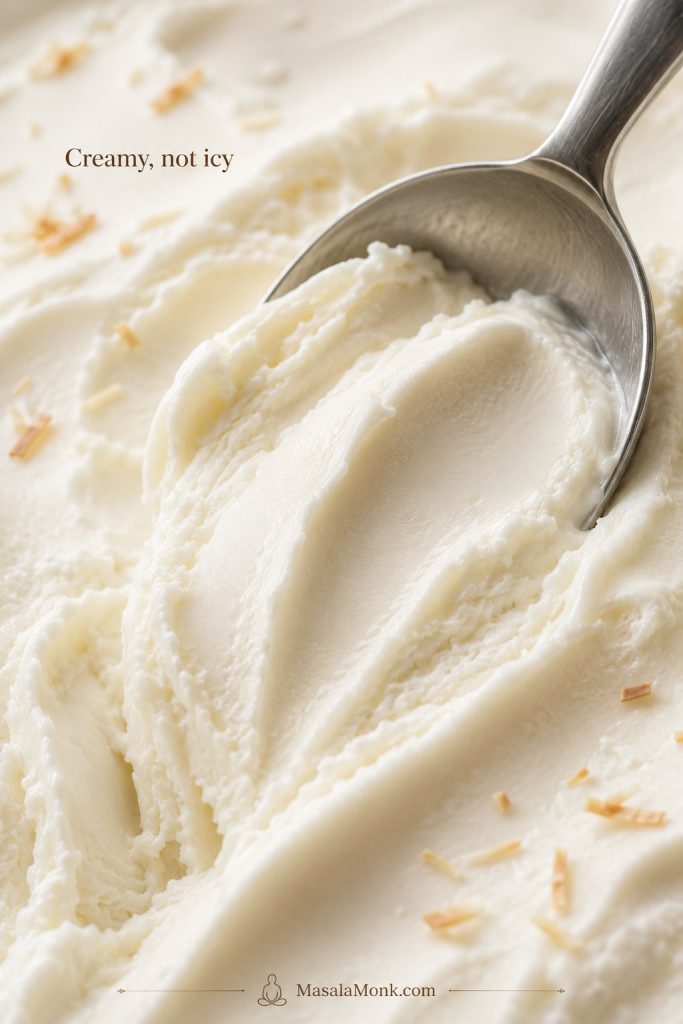
Before you choose a method, look at the texture you are aiming for: smooth, dense, creamy coconut ice cream that drags softly on the spoon instead of breaking into icy crystals.

Close-up of a spoon dragging through smooth coconut ice cream, showing soft creamy ridges and a dense but scoopable texture.
A smooth spoon drag is the texture cue to look for; if the scoop looks brittle or crystalline, the base usually needs better fat balance, chilling, or liquid control.

At a Glance

Yield About 1 quart / 900 ml to 1 liter
Prep time 10 minutes
Base chill time At least 4 hours; overnight is better
Churn time 20–30 minutes for most machines
Final freeze 4–6 hours for firm scoops
No-machine option Freeze the blended base in ice cube trays, then blend the frozen cubes
Equipment Blender, ice cream maker, freezer-safe container, spatula, measuring cups or scale

Why This Coconut Ice Cream Recipe Works

This coconut ice cream recipe works because it balances coconut flavor, fat, sugar, and temperature instead of relying on coconut milk alone. Because of that, the goal is a scoop that tastes rich and coconut-forward, but still feels smooth on the spoon—not icy, brittle, greasy, or waxy.

  • Coconut milk keeps the base pourable. It brings clean coconut flavor without making the mixture too heavy.
  • Coconut cream adds body. The extra fat helps the finished scoop feel creamier and less icy.
  • Sugar improves scoopability. It is not only for sweetness; cutting it too far can make homemade coconut ice cream freeze harder.
  • Blending and chilling protect the texture. Blending dissolves the sugar and smooths the coconut fat, while a cold base churns thicker and faster.

The easiest way to remember the main base is simple: coconut milk keeps it fluid, coconut cream gives it body, and sugar helps the finished scoop stay softer.

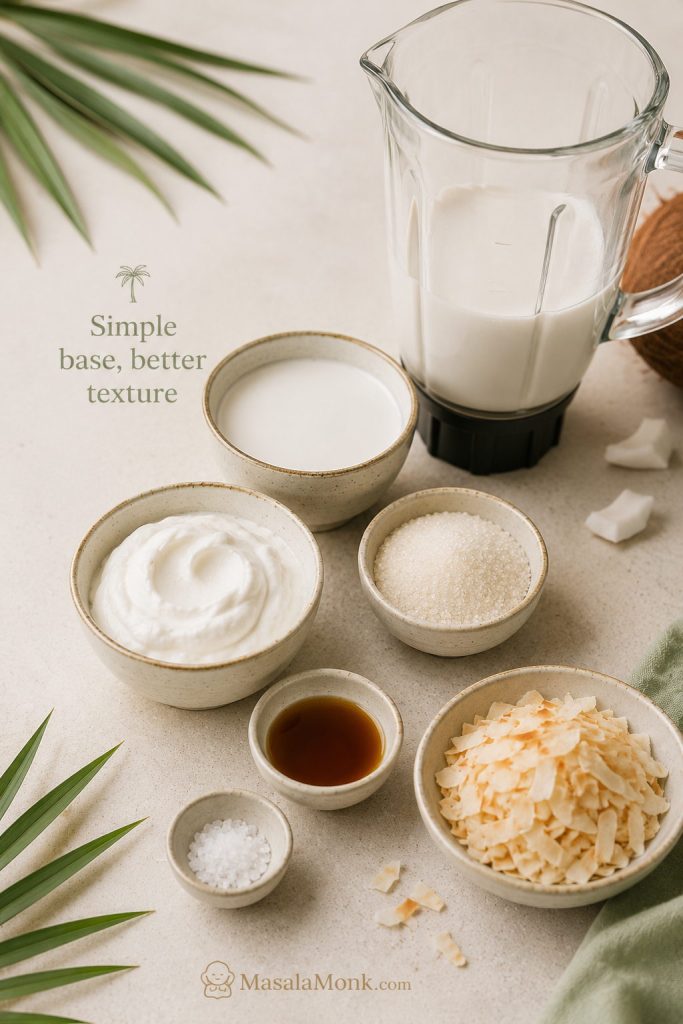
Coconut milk, coconut cream, sugar, vanilla, and salt arranged as the base ingredients for homemade coconut ice cream.
Coconut milk keeps the base fluid, while coconut cream adds body; together, they create a creamier first batch than either one usually gives alone.

Which Coconut Ice Cream Version Should You Make?

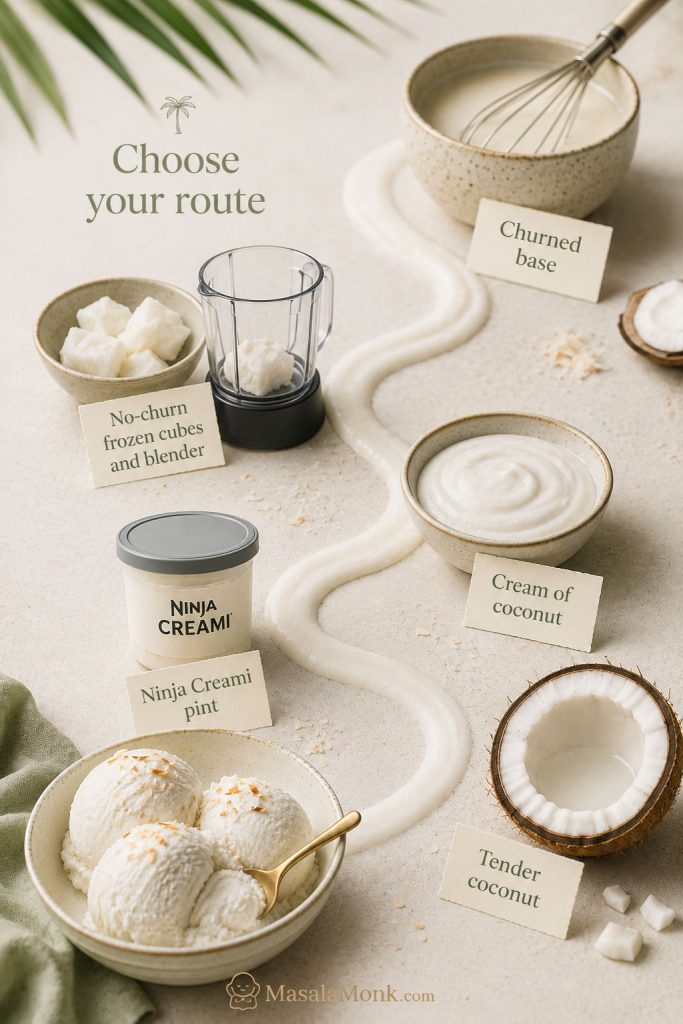
Start here if you are staring at coconut milk, coconut cream, or cream of coconut and wondering whether you bought the right can. You probably can still make a good batch, but the method changes depending on what is in front of you.

If you have ever bought the wrong can for a coconut dessert, this is the section that saves the batch. From there, pick the row that matches your pantry, then follow that route instead of forcing every coconut product into the same recipe.

Visual guide showing coconut ice cream options including churned, no-churn, cream of coconut, Ninja Creami, and tender coconut versions.
Start with what you already have, then choose the method that fits your tools, since coconut milk, cream of coconut, and a Ninja Creami all need slightly different handling.
What you have or want Best route to take What to expect
Full-fat coconut milk + unsweetened coconut cream Best first version Balanced coconut flavor, creamy texture, dairy-free, and less icy than coconut milk alone
Only full-fat canned coconut milk Coconut milk ice cream Lighter coconut flavor, slightly icier texture
Unsweetened coconut cream Coconut cream ice cream Richer, smoother, more indulgent
Sweetened cream of coconut Cream of coconut ice cream Sweeter, stronger coconut flavor, pina-colada-style
No ice cream maker Freeze-and-blend no-churn method Soft-serve texture first, firmer after a short freeze
Heavy cream + condensed milk Condensed milk no-churn shortcut Very creamy and easy, but not dairy-free
Ninja Creami Ninja Creami method Freeze 24 hours, spin, then Re-Spin if crumbly
Tender coconut malai Tender coconut style Fresh coconut texture, Indian-style flavor
Palm sugar or pandan Thai coconut style More fragrant, street-dessert-style coconut flavor
Keto or sugar-free goal See the keto note in variations Needs sweetener-specific testing because texture changes

Picked your path? Jump to the ice cream maker method, no-churn coconut ice cream, cream of coconut ice cream, or Ninja Creami method.

Coconut Milk vs Coconut Cream vs Cream of Coconut

The wrong-can mistake

This is where most coconut ice cream problems start. The names sound almost interchangeable, but the products are not the same. For the main base, reach for full-fat canned coconut milk and unsweetened coconut cream. Save sweetened cream of coconut for the separate cream of coconut batch below.

If you have ever stood in the aisle wondering whether coconut cream and cream of coconut are the same thing, this is the section that prevents the wrong-can mistake.

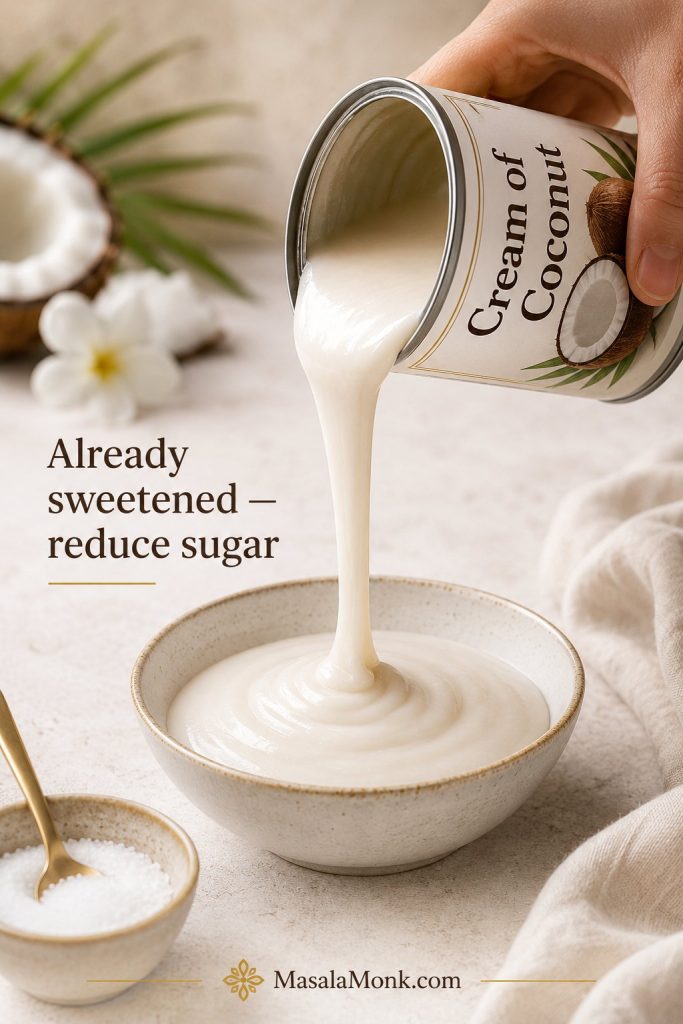
Do not pour cream of coconut into the main recipe as a straight swap. It is already sweetened, so the batch can turn too sweet and heavy unless you reduce the sugar. Instead, use it in the separate cream-of-coconut version below.

Thick cream of coconut being poured into a bowl with a sugar bowl set aside nearby.
Cream of coconut is already sweetened, so reducing added sugar keeps the finished batch rich and coconut-forward without turning heavy or candy-sweet.

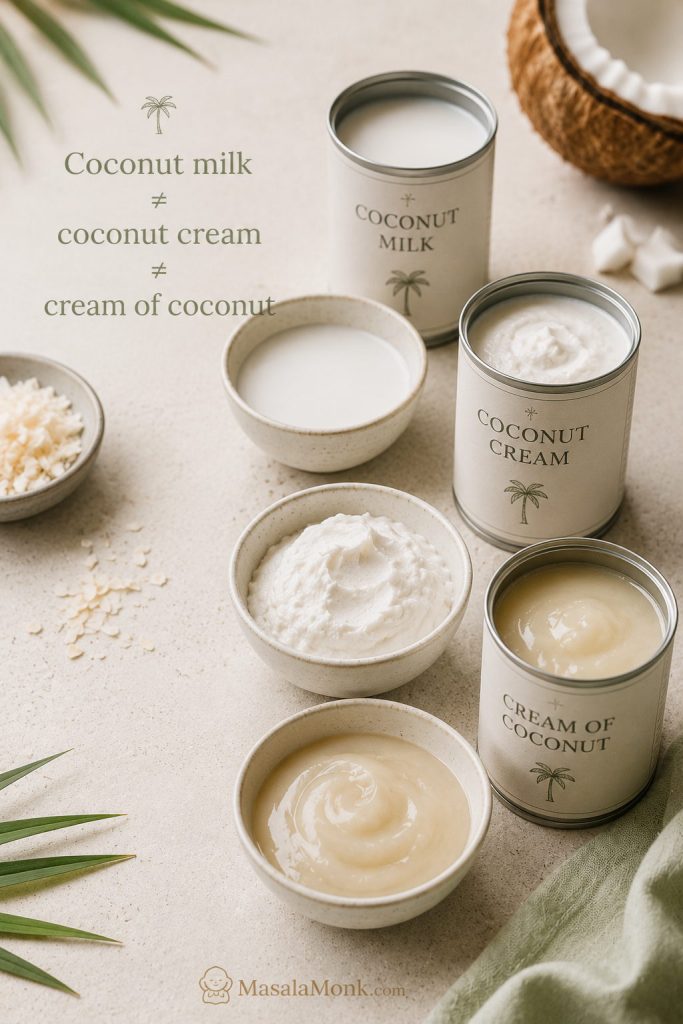
Before you open a can, it helps to see the three products side by side: coconut milk is pourable, coconut cream is thicker, and cream of coconut is sweetened and glossy.

Three coconut products—coconut milk, coconut cream, and cream of coconut—shown in separate bowls beside their containers.
These three coconut products can look similar on the shelf, yet each one changes sweetness, richness, and freezer texture in a different way.

What each can actually does

Coconut product What it is Best use in coconut ice cream Important note
Full-fat canned coconut milk A pourable coconut base with moderate fat Main dairy-free coconut milk ice cream Choose canned full-fat coconut milk, not thin drinking coconut milk
Unsweetened coconut cream Thicker, richer coconut base with more fat Creamier coconut ice cream with better body Best paired with coconut milk so the texture is rich but not waxy
Cream of coconut Sweetened coconut product used in drinks and desserts Sweet, pina-colada-style coconut ice cream Already sweetened, so reduce or skip added sugar
Carton coconut milk Thin drinking-style coconut milk Usually not ideal Often too watery and can freeze icy
Condensed coconut milk Sweetened vegan condensed milk alternative Vegan no-churn or Ninja Creami routes Counts as both sweetener and texture helper
Tender coconut flesh Soft coconut malai from young coconut Tender coconut ice cream style Add it for flavor and texture, not as the only base

Helpful ingredient note: for a deeper ingredient explanation, Epicurious has a useful guide to cream of coconut, including how it differs from coconut cream and coconut milk.

Now that the coconut products are clear, head to the ingredients list, the cream of coconut batch, or the main recipe card.

Ingredients

You do not need a long ingredient list for good coconut ice cream. Instead, what matters most is using full-fat coconut products, dissolving the sugar well, and giving the base enough time to chill before freezing.

In this coconut ice cream recipe, sugar is important not only for sweetness but also for scoopability. When the sweetener is reduced too aggressively, the finished scoop often freezes harder and icier.

Coconut milk, coconut cream, sugar, vanilla, salt, and toasted coconut arranged around a blender jar for coconut ice cream.
The ingredient list is short, yet full-fat coconut products, enough sugar, vanilla, and salt do most of the work in building a smooth homemade scoop.
Ingredient US amount Metric amount Why it matters
Full-fat canned coconut milk 1 can, 13.5–14 oz 400 ml Gives the ice cream its coconut base without making it too heavy
Unsweetened coconut cream 1 can, 13.5–14 oz 400 ml Adds richness and helps prevent an icy texture
Granulated sugar 1/2 cup 100 g Sweetens and improves scoopability
Fine salt 1/8 tsp About 0.7–1 g Makes the coconut flavor taste fuller
Vanilla extract 2 tsp 10 ml Rounds out the coconut flavor
Toasted coconut, optional 1/3–1/2 cup 25–40 g Adds texture and stronger coconut flavor
Coconut extract, optional 1/4 tsp 1 ml Useful if your coconut milk tastes mild

Taste before chilling: the base should taste slightly sweeter than you want the finished ice cream to taste. Cold dulls sweetness, so a base that tastes just right before freezing can taste a little flat once frozen.

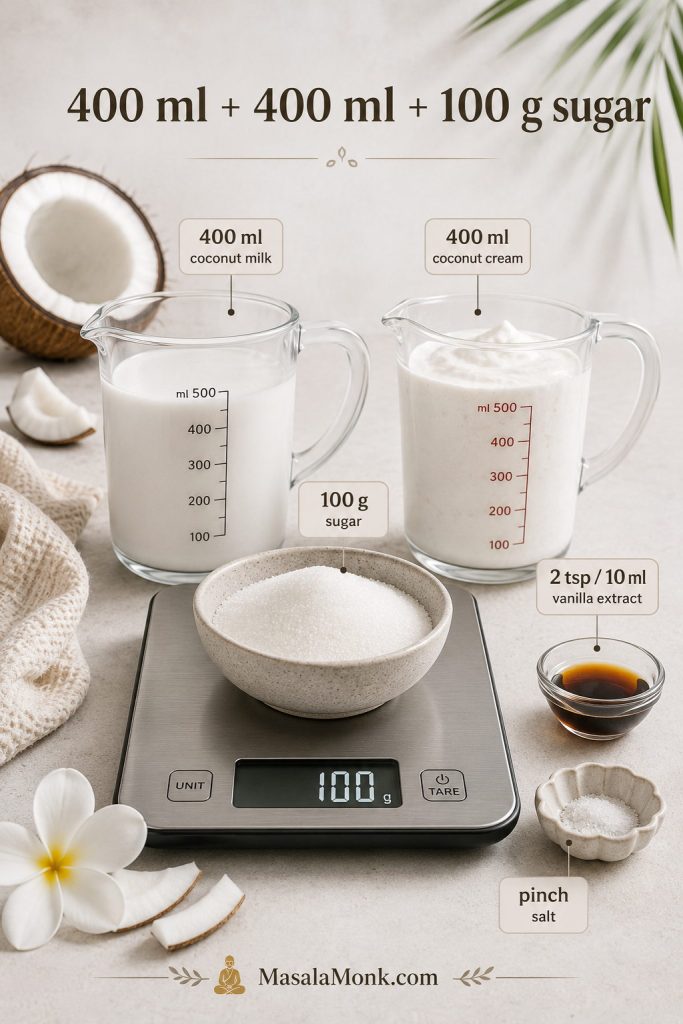
Use the measurements below as a quick check before you blend, especially if you are switching between cans, cups, grams, and milliliters.

Measured coconut milk, coconut cream, sugar, vanilla extract, and salt displayed with quantity labels for coconut ice cream.
Accurate measurements keep the coconut ice cream base balanced, especially when you switch between cans, cups, grams, and milliliters.

Start with full-fat canned coconut milk

For the coconut milk-only version, use canned full-fat coconut milk rather than the thin drinking-style cartons. The canned product has more body, while carton coconut milk is usually too watery for a creamy frozen dessert.

Add unsweetened coconut cream for richness

The cream adds body, but balance matters. One can of each gives you richness without the waxy heaviness that can happen when the base is all cream.

A little salt makes the flavor fuller

A tiny amount of salt makes the coconut and vanilla taste more complete. It should not make the ice cream taste salty; it simply keeps the sweetness from tasting flat.

Ice Cream Maker Method

For this coconut ice cream recipe, an ice cream maker is the easiest route to a smooth, parlor-style scoop because it freezes the base while keeping it moving. That movement keeps ice crystals smaller, which matters with coconut bases because they can freeze firmer than dairy ice cream.

Blend and chill the coconut base

  1. Freeze the ice cream maker bowl. If your machine uses a freezer bowl, freeze it for 12–24 hours, or according to the manufacturer’s directions.
  2. Blend the base. Add coconut milk, coconut cream, sugar, salt, and vanilla to a blender. Blend for 1–2 minutes, until smooth and the sugar is fully dissolved.
  3. Chill the base. Refrigerate for at least 4 hours, preferably overnight. A cold base churns thicker and faster.

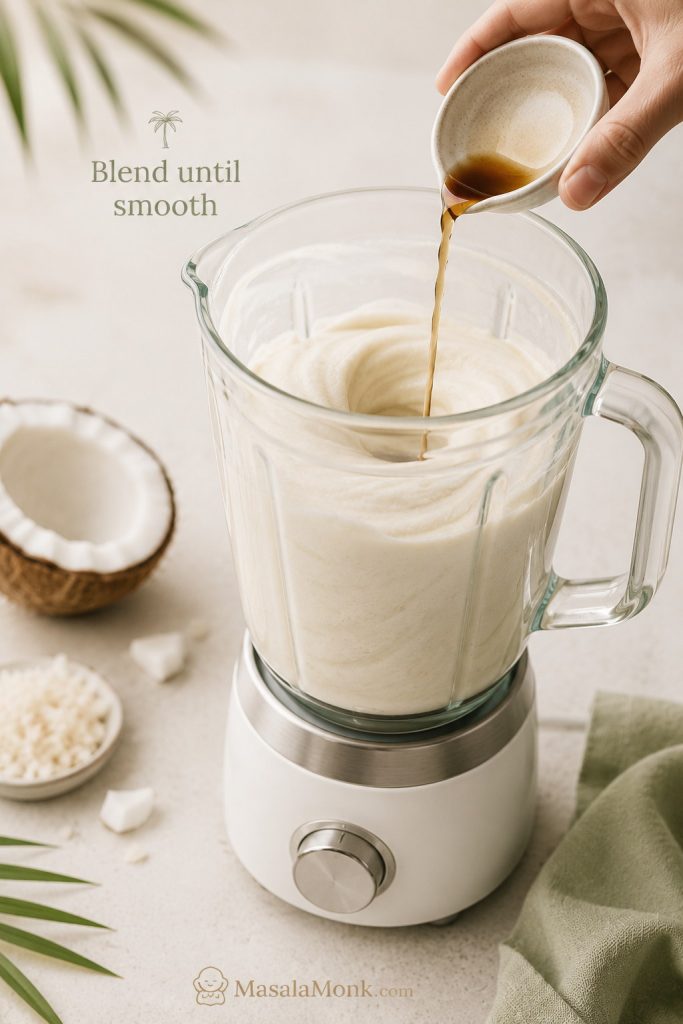
Blend until the base looks completely smooth, because this step helps dissolve sugar and even out the coconut fat before the mixture chills.

Coconut ice cream base blending in a clear blender jar while ingredients are added.
Blending is not just mixing; it helps dissolve the sugar and smooth the coconut fat so the finished ice cream tastes cleaner and creamier.

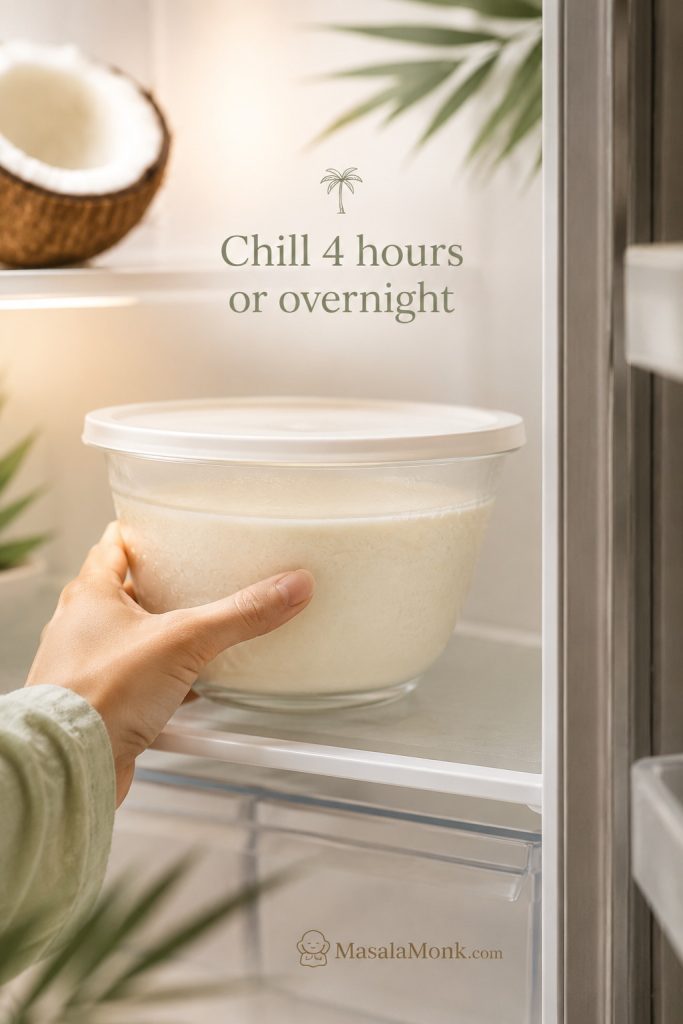
After blending, chill the base until it is properly cold; this gives the machine a better chance to thicken the mixture quickly.

Covered bowl of coconut ice cream base chilling in a refrigerator before churning.
A colder base gives the churn a head start, which means the mixture can thicken faster before large ice crystals have time to form.

Churn, freeze, and rest before scooping

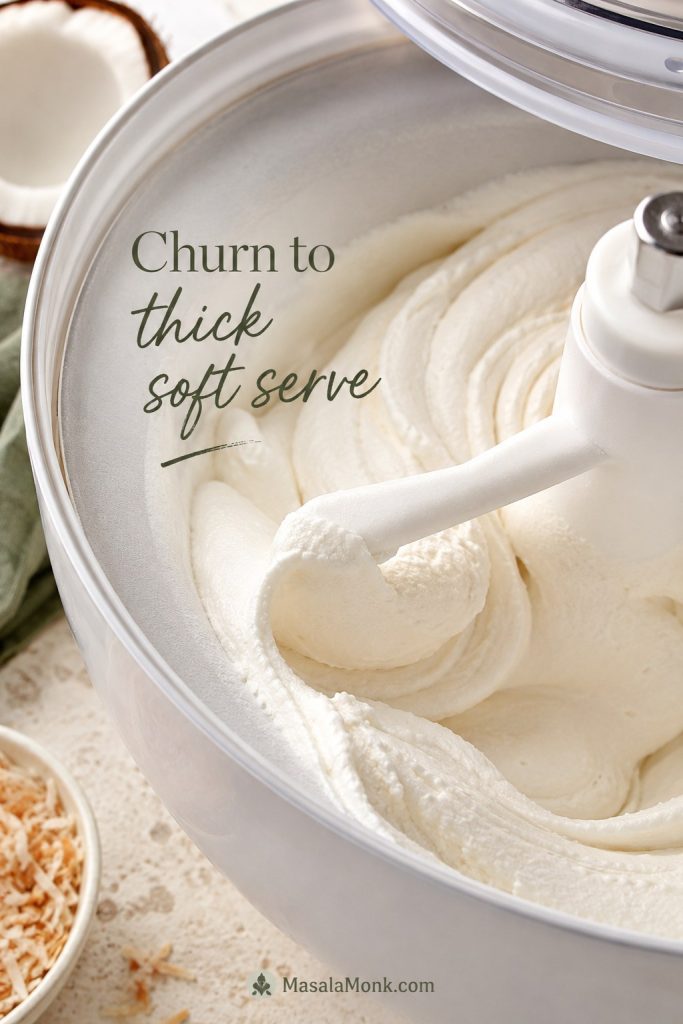
  1. Churn. Pour the chilled base into the ice cream maker and churn for 20–30 minutes, or until it looks like thick soft serve.
  2. Add coconut texture. Fold in toasted coconut at the end if you want little chewy-crisp coconut pieces.
  3. Freeze until scoopable. Transfer to a freezer-safe container and freeze for 4–6 hours.
  4. Rest before scooping. Let the ice cream sit at room temperature for 5–15 minutes before scooping, especially if it has been frozen overnight.

During churning, watch the texture rather than the clock alone; the base should look thick and soft-serve-like before you transfer it to the freezer.

Coconut ice cream churning in an ice cream maker until thick and soft like soft serve.
Stop churning when the base looks like thick soft serve; at this point, the machine has done its job and the freezer finishes the texture.

Texture cue: after churning, the coconut ice cream should look like thick soft serve. It will not be fully firm until it has had several hours in the freezer.

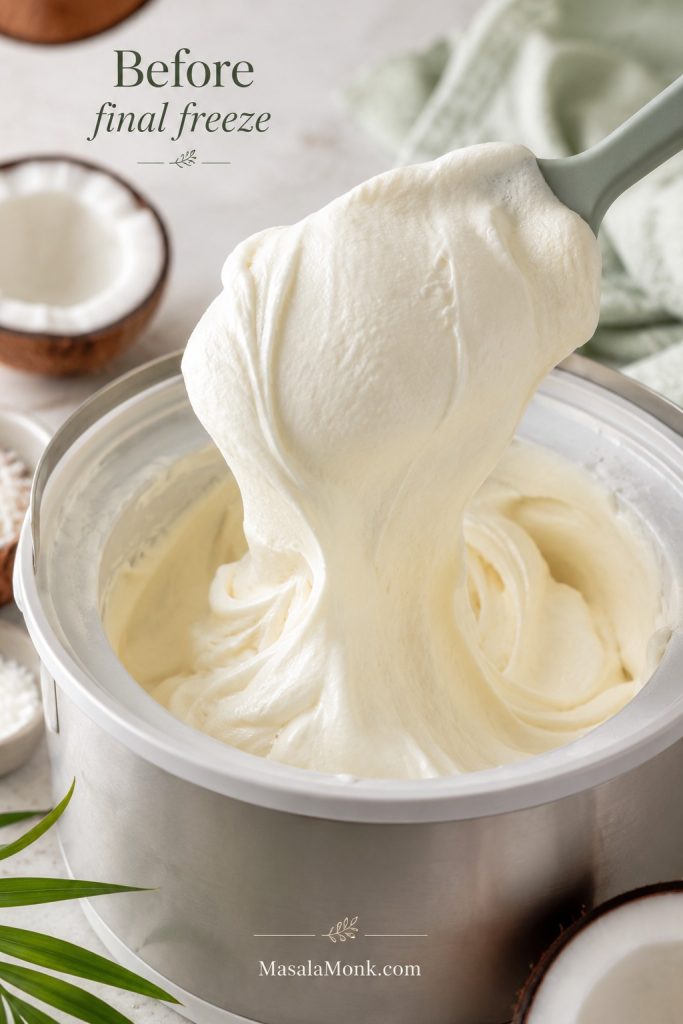
Do not panic if the freshly churned batch is still soft; that soft-serve stage is exactly what should happen before the final freezer rest.

Soft churned coconut ice cream lifted with a spatula, showing a thick creamy fold before final freezing.
This soft stage is normal after churning, so do not keep running the machine just because the coconut ice cream is not scoop-firm yet.

No-Churn Coconut Ice Cream Without an Ice Cream Maker

No ice cream maker? This coconut ice cream recipe still gives you two solid routes. The freeze-and-blend method keeps things dairy-free and fresh-tasting; meanwhile, the condensed milk route gives you the easiest rich, creamy no-churn scoop.

For more no-machine dessert methods, this guide to homemade ice cream without a machine is also useful, while the coconut method below gives more specific coconut milk and coconut cream guidance.

Option 1: Dairy-free freeze-and-blend coconut ice cream

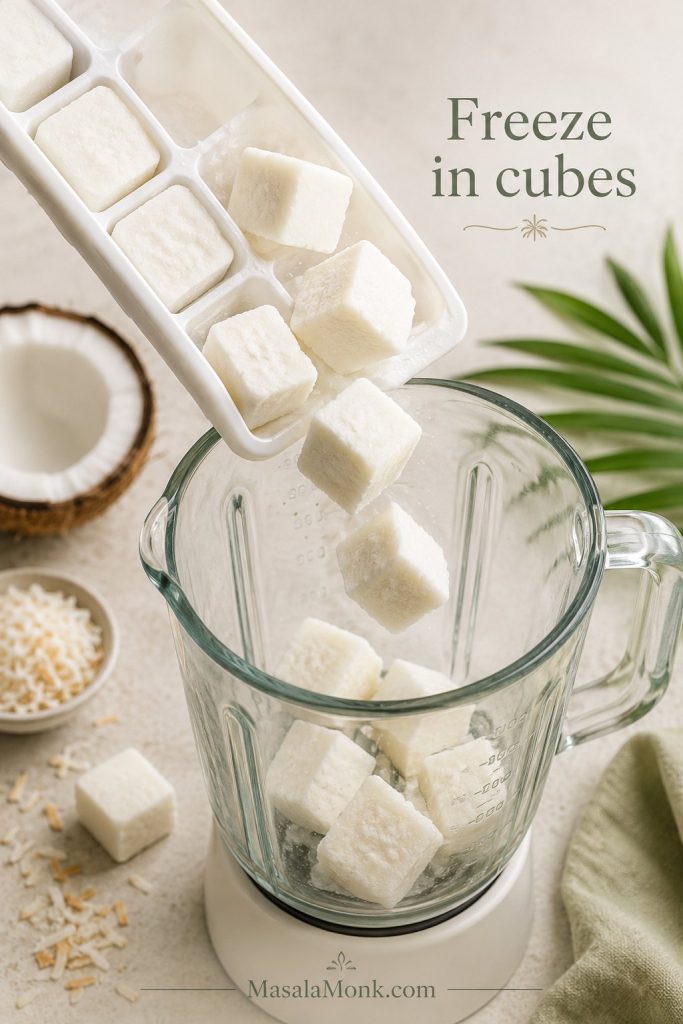
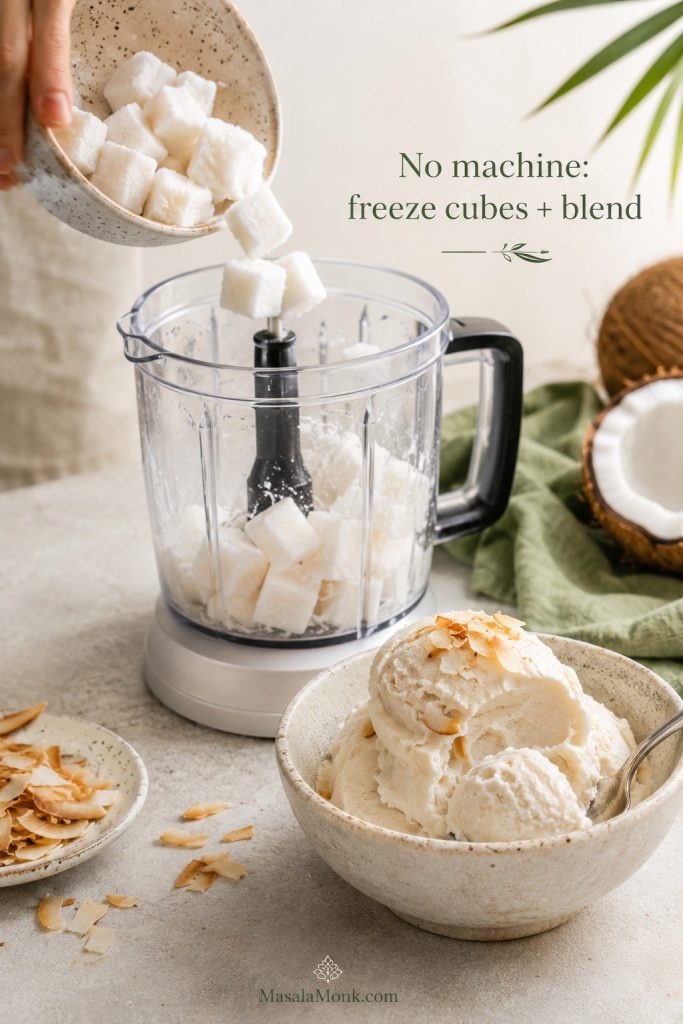
Blend the main coconut base, then pour it into ice cube trays. Freeze for at least 6 hours or overnight. Smaller cubes are easier for the blender to turn smooth than one large frozen block.

Frozen cubes of coconut ice cream base being tipped from an ice cube tray into a blender jar.
Freezing the base in cubes gives the blender smaller pieces to work through, which helps the no-churn method turn creamy instead of chunky.

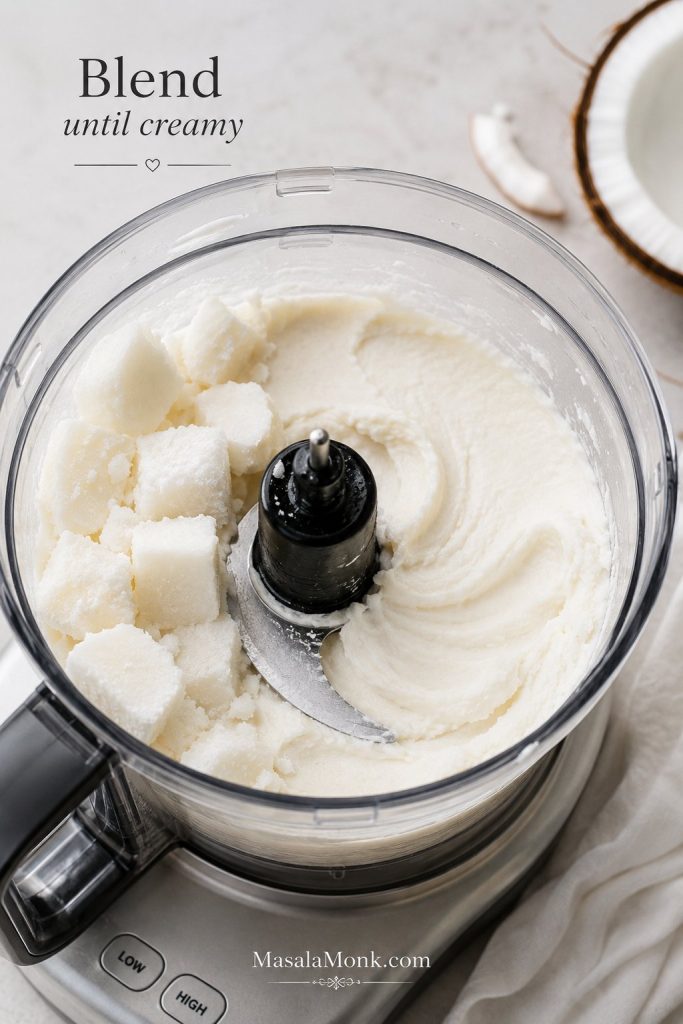
Blend the frozen cubes in a strong blender or food processor until creamy and soft-serve-like, then eat immediately or freeze briefly for firmer scoops.

Frozen coconut base cubes blending into a creamy no-churn coconut ice cream texture.
Once the frozen cubes break down, the mixture turns creamy quickly, so stop blending as soon as it looks smooth and soft.

Option 2: Condensed milk no-churn coconut ice cream

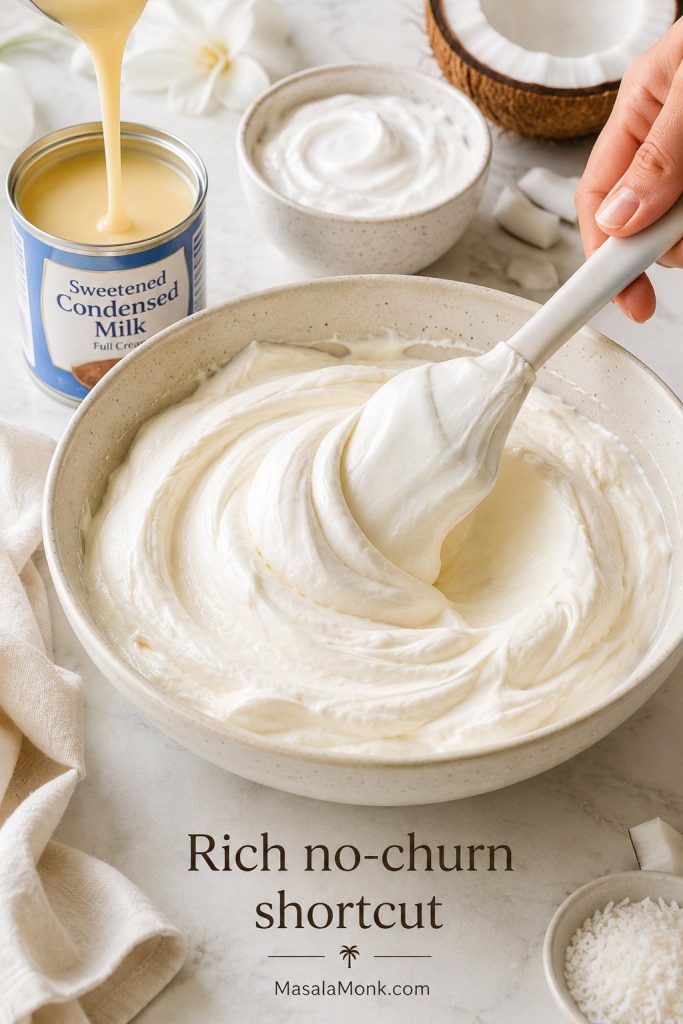
For a richer dairy-style no-churn version, whip 2 cups / 480 ml heavy cream to stiff peaks, then fold in 1 can / 14 oz sweetened condensed milk, 1 can / 400 ml unsweetened coconut cream, 1/8 tsp salt, and 1/2 tsp coconut extract. Freeze in a loaf pan or freezer container for 8 hours or overnight.

Whipped cream, condensed milk, and coconut cream being folded together in a bowl for no-churn coconut ice cream.
The condensed milk version is richer and easier, although it gives a softer, sweeter, more dessert-like scoop than the dairy-free cube-and-blend method.
No-churn method Best for Texture Trade-off
Freeze-and-blend Dairy-free or vegan batches Soft and creamy when freshly blended Needs a strong blender or food processor
Whipped cream + condensed milk Easy no-churn dessert Rich, creamy, softer Not dairy-free unless using vegan alternatives

If you want the most coconut-forward no-machine route, use the freeze-and-blend method rather than the dairy shortcut.

Summary scene showing the no-churn coconut ice cream method from frozen cubes to a creamy blended result.
The freeze-and-blend method is the cleanest dairy-free no-churn route, since it keeps the coconut flavor fresh without depending on whipped cream.

Using the no-churn method? You may also want the troubleshooting guide or the full recipe card.

Coconut Ice Cream Recipe

This coconut ice cream recipe is made with full-fat coconut milk, unsweetened coconut cream, sugar, vanilla, and salt. Churn it in an ice cream maker for the smoothest texture, or use the no-churn freeze-and-blend method if you do not have a machine.

Yield About 1 quart / 900 ml to 1 liter
Prep Time 10 minutes
Chill + Freeze 8–10 hours total
Method Ice cream maker or no-churn

Ingredients

  • 1 can full-fat canned coconut milk, 13.5–14 oz / 400 ml
  • 1 can unsweetened coconut cream, 13.5–14 oz / 400 ml
  • 1/2 cup / 100 g granulated sugar
  • 1/8 teaspoon fine salt
  • 2 teaspoons / 10 ml vanilla extract
  • 1/3–1/2 cup / 25–40 g toasted coconut, optional
  • 1/4 teaspoon coconut extract, optional, for stronger coconut flavor

Ice Cream Maker Method

  1. If using a freezer-bowl ice cream maker, freeze the bowl for 12–24 hours.
  2. Add coconut milk, coconut cream, sugar, salt, and vanilla to a blender.
  3. Blend for 1–2 minutes, until completely smooth and the sugar is dissolved.
  4. Cover and chill the base for at least 4 hours, preferably overnight.
  5. Pour the chilled base into the ice cream maker and churn for 20–30 minutes, or until it reaches thick soft-serve texture.
  6. Fold in toasted coconut, if using.
  7. Transfer to a freezer-safe container and freeze for 4–6 hours, until scoopable.
  8. Rest at room temperature for 5–15 minutes before scooping.

No-Churn Freeze-and-Blend Method

  1. Blend the coconut milk, coconut cream, sugar, salt, and vanilla until smooth.
  2. Pour into ice cube trays and freeze for at least 6 hours or overnight.
  3. Blend the frozen cubes in a strong blender or food processor until creamy.
  4. Serve as soft-serve coconut ice cream, or freeze briefly for firmer scoops.

Notes

  • Use full-fat canned coconut milk, not thin carton coconut milk.
  • A coconut milk-only batch can be made with 2 cans full-fat coconut milk, but the texture will be slightly lighter.
  • A coconut cream-heavy batch still needs some coconut milk so the texture does not turn too heavy or waxy.
  • A cream-of-coconut version should skip the added sugar because cream of coconut is already sweetened.
  • The Ninja Creami method needs a 24-hour freeze in the Creami pint; if the first spin looks crumbly, add 1 tablespoon coconut milk and Re-Spin.
  • For a slightly softer scoop, replace 1–2 tablespoons of the sugar with golden syrup, maple syrup, or agave. Do not remove too much sweetener, or the ice cream may freeze harder.

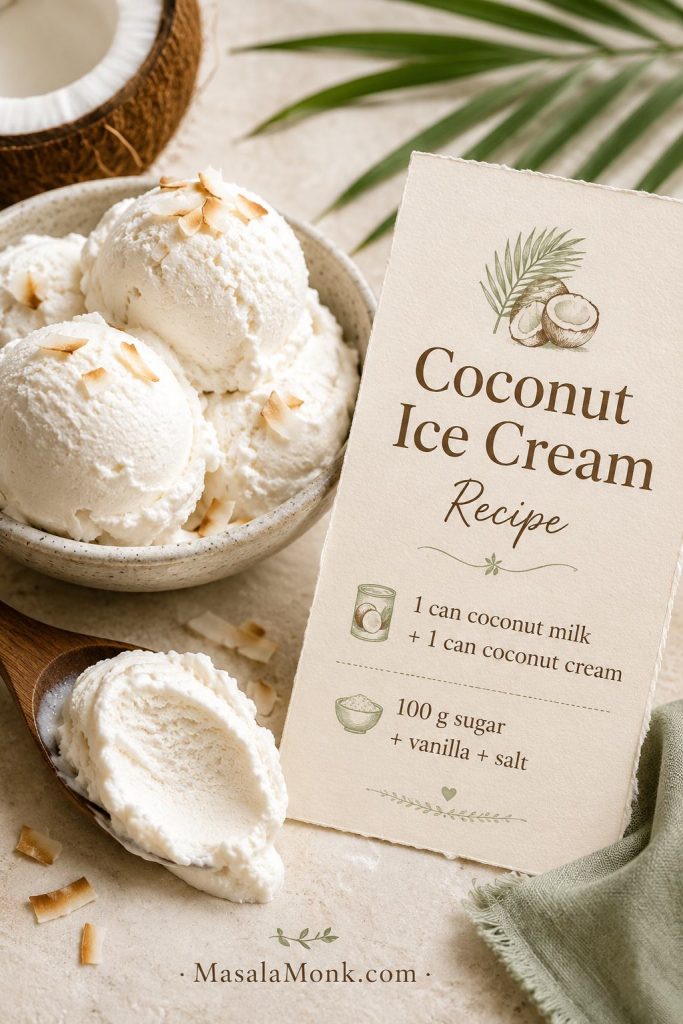
Use this visual recipe card when you want the core formula without scrolling back through every method note.

Saveable recipe card image showing coconut ice cream ingredients and a finished creamy scoop.
This recipe card gives you the core formula at a glance, which is useful when you want the main coconut ice cream base without scrolling through the full guide.

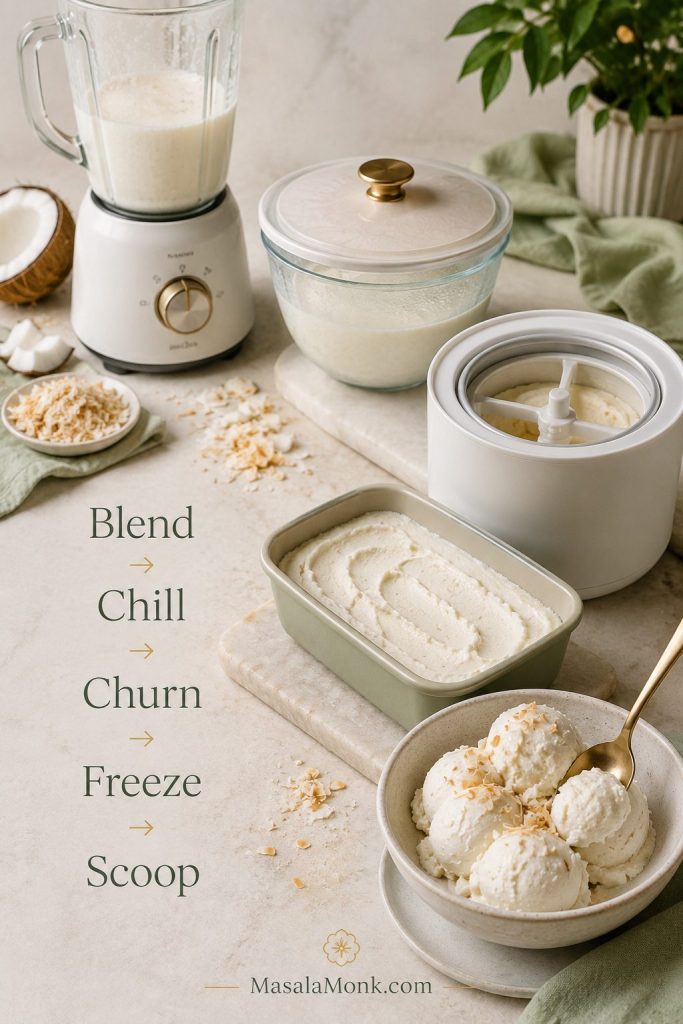
The full workflow is easier to follow when you keep the order clear: blend, chill, churn, freeze, and rest before scooping.

Step-by-step visual showing the coconut ice cream process from blending and chilling to churning, freezing, and scooping.
The sequence matters: blend until smooth, chill until cold, churn until thick, freeze until firm, then rest briefly before scooping.

Easy 2-Ingredient and 3-Ingredient Shortcuts

When speed matters more than the creamiest possible scoop, these shortcut batches can help. They are useful for quick desserts, but the texture will be different from the full coconut milk and coconut cream base.

Shortcut Ingredients Best for Texture note
2-ingredient cream of coconut ice cream Cream of coconut + heavy cream Fast no-churn dessert Sweet, rich, not dairy-free
3-ingredient coconut milk ice cream Full-fat coconut milk + sugar + vanilla Simple dairy-free coconut ice cream Lighter and icier than the coconut cream base
3-ingredient Ninja Creami coconut ice cream Coconut milk + sweetener + vanilla Creami users Needs a 24-hour freeze and usually benefits from a Re-Spin

Coconut Milk Ice Cream Recipe Notes

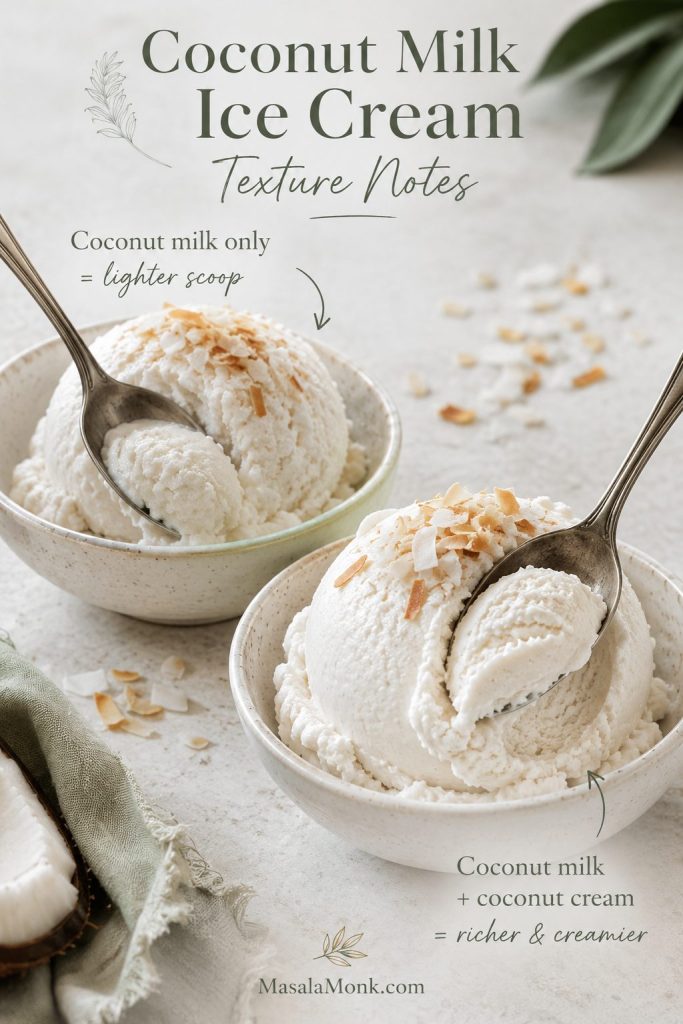
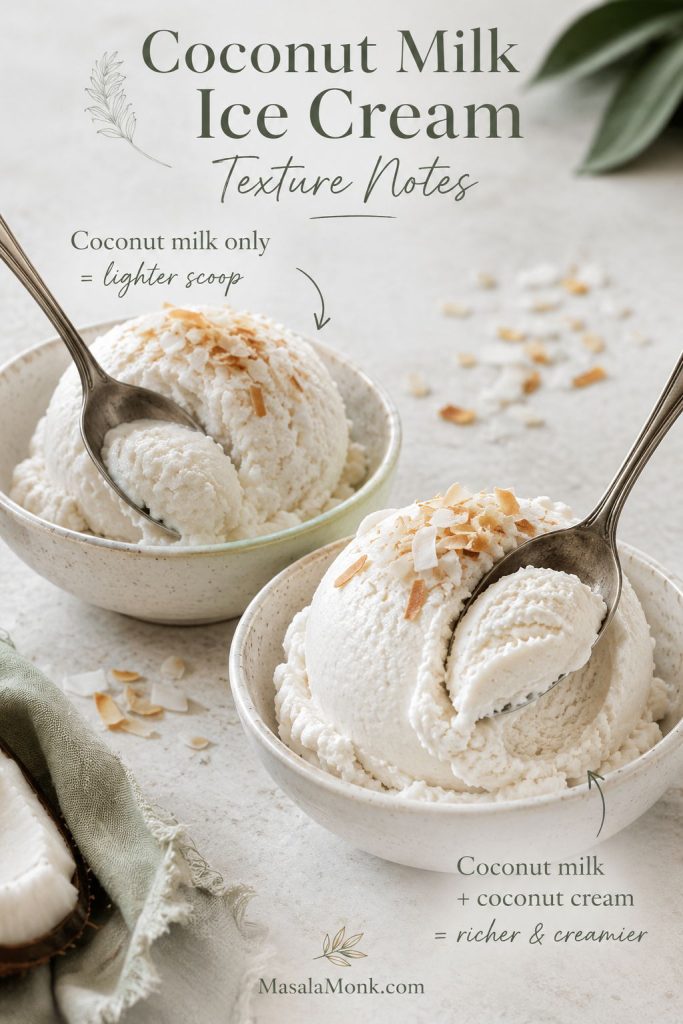
If you only have full-fat canned coconut milk, the recipe will still work. Use 2 cans / about 800 ml full-fat coconut milk in place of the coconut milk and coconut cream combination. The flavor will still be good, but the texture may be slightly lighter and a little icier than the batch made with one can of coconut cream.

Comparison of a lighter coconut milk-only ice cream scoop and a richer scoop made with coconut milk plus coconut cream.
A coconut milk-only batch can still be good; however, it usually tastes lighter and freezes a bit firmer than the milk-and-cream version.

For a smoother coconut milk-only batch, chill the cans overnight and use the thick coconut layer from the top if your coconut milk separates. You can also add 1 tablespoon cornstarch or tapioca starch to a cooked base if you want a more custard-like dairy-free texture.

Coconut Cream Ice Cream Recipe Notes

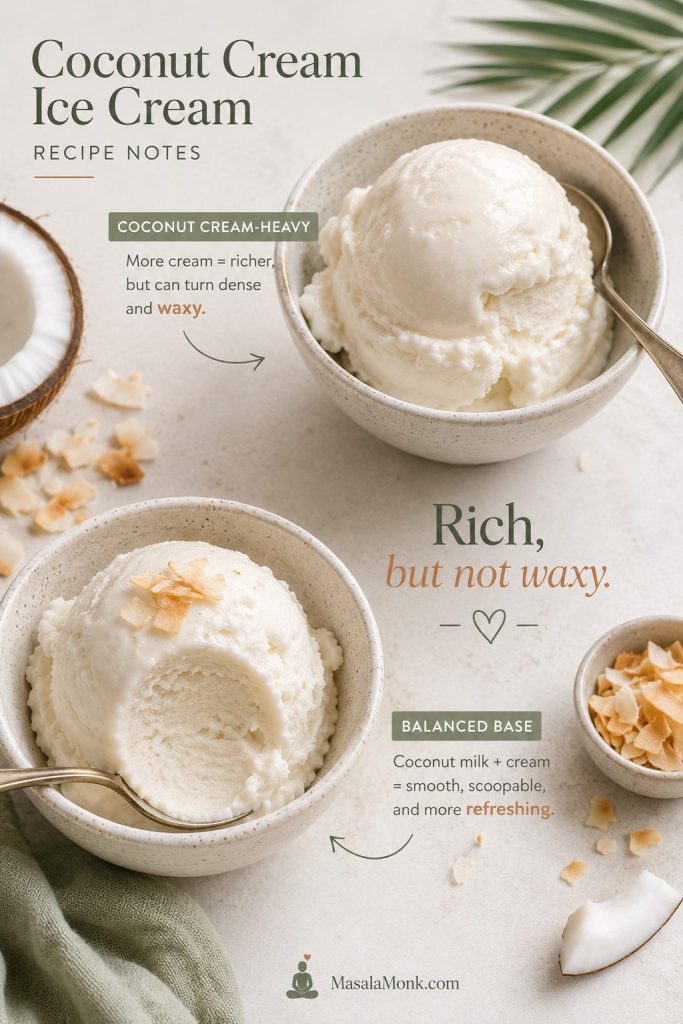
Coconut cream ice cream is richer because the cream has more fat and less water. For the best balance, combine one can of coconut milk with one can of coconut cream. If the base is made only with cream, the result can be very rich but sometimes heavier on the palate.

Comparison between a dense coconut cream-heavy ice cream scoop and a smoother scoop made with a balanced coconut milk and coconut cream base.
More coconut cream does not always mean better texture, because too much richness can feel waxy instead of smooth on the palate.

This is the route to choose when you want a vegan scoop that still feels creamy and indulgent. It also works well with toasted coconut, vanilla bean, dark chocolate pieces, mango puree, or pineapple.

Cream of Coconut Ice Cream

The cream-of-coconut version is its own style because the product is already sweetened. As a result, it gives the finished scoop a stronger, sweeter, almost pina-colada-style flavor. Choose this route when you want a richer dessert-style batch rather than a cleaner coconut milk base.

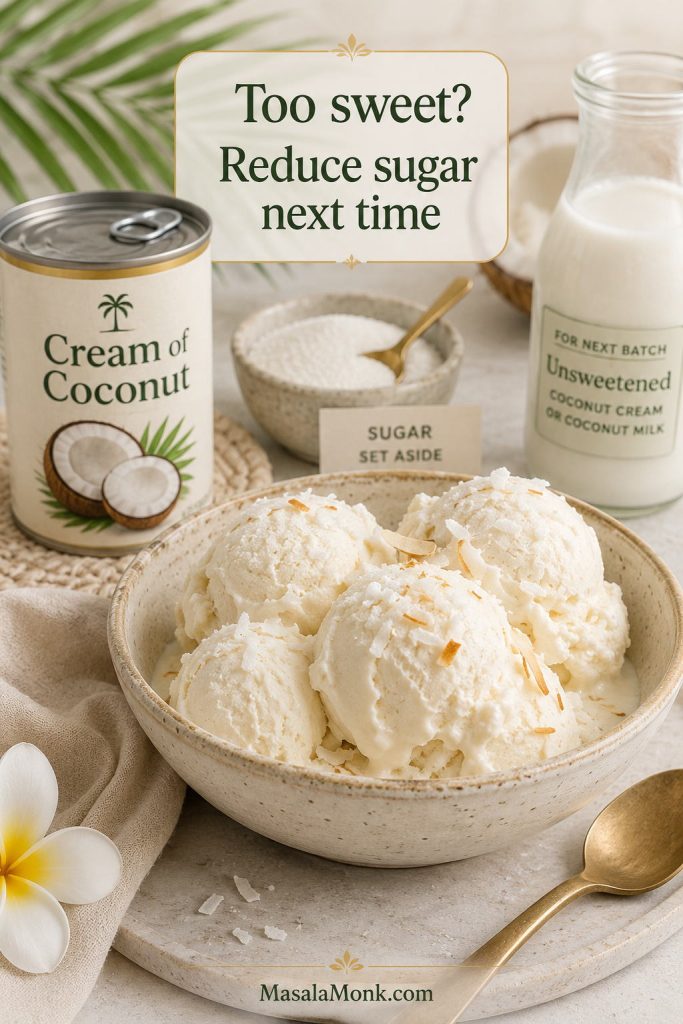
Important: cream of coconut is not the same as unsweetened coconut cream. If you use cream of coconut, skip the 1/2 cup sugar from the main recipe.

For a cream of coconut batch, blend 1 can / 14–15 oz cream of coconut with 1 cup / 240 ml milk or coconut milk, 1 1/2 cups / 360 ml heavy cream or coconut cream, and a pinch of salt. Churn as directed, or freeze and blend for a softer no-churn result.

Cream of coconut ice cream with cream of coconut and sugar shown nearby to explain how to fix an overly sweet batch.
If a cream-of-coconut batch tastes too sweet, reduce the added sugar next time; that small adjustment usually restores balance without losing coconut flavor.

For a very simple no-churn cream of coconut ice cream, whip 2 cups / 480 ml cold heavy cream to soft peaks, then fold in 1 can / 14–15 oz cream of coconut and a pinch of salt. Freeze for 8 hours or overnight. This shortcut is rich and sweet, so it does not need extra sugar.

Using cream of coconut? Check why coconut ice cream turns too sweet or icy, or compare it again with coconut milk and coconut cream.

Vegan and Dairy-Free Notes

The main coconut milk and coconut cream base is naturally dairy-free and vegan as long as your sugar is vegan-friendly. It does not need eggs, heavy cream, or condensed milk. For the creamiest vegan coconut ice cream, keep the fat level high and avoid thin coconut beverages.

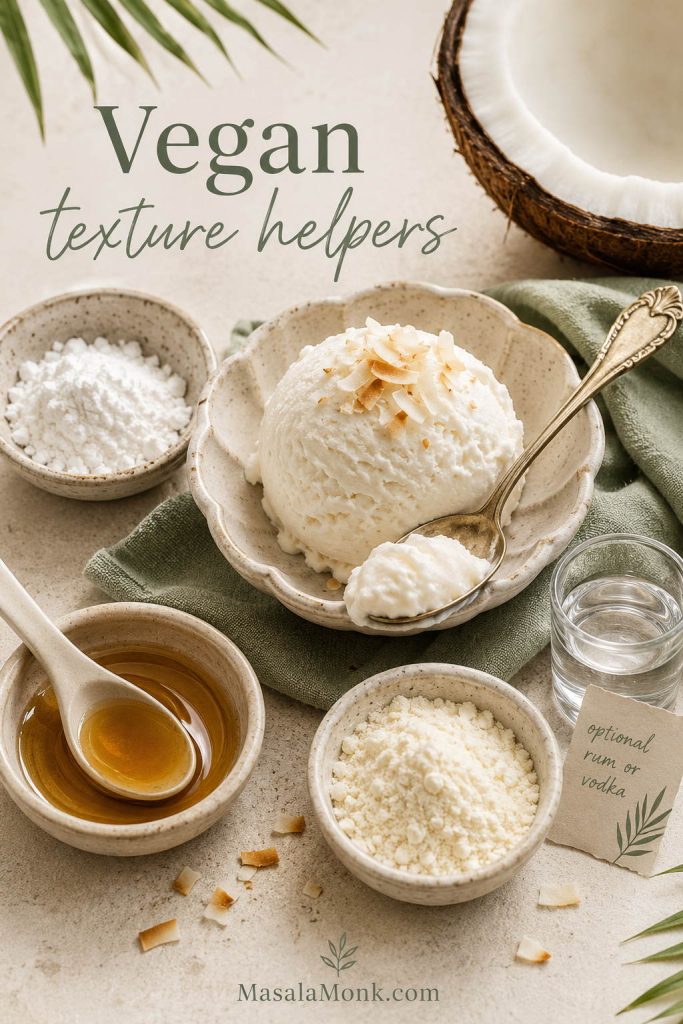
For an even smoother vegan batch, however, one of these optional helpers can improve the texture:

Vegan coconut ice cream texture helpers including starch, syrup, coconut milk powder, and a small optional alcohol cue around a spoonful of ice cream.
Vegan texture helpers can improve the scoop, but they work best as support tools; fat balance, sugar level, and chill time still matter most.
  • 1 tablespoon cornstarch or tapioca starch, cooked briefly into the base for a vegan custard feel.
  • 1–2 tablespoons golden syrup, maple syrup, or agave, replacing part of the sugar for softer scooping.
  • 1–2 tablespoons coconut milk powder, for extra coconut flavor and body.
  • 1 teaspoon vodka or rum, optional, to slightly soften the freeze and add a grown-up note.

Thai-Style and Tender Coconut Notes

Thai coconut ice cream and tender coconut ice cream are related to this recipe, but they have their own flavor logic. Thai-style coconut ice cream often uses coconut milk, coconut cream or coconut water, palm sugar, salt, and sometimes pandan. Tender coconut ice cream usually includes soft tender coconut flesh, also called malai, for a fresh coconut texture.

Thai coconut ice cream variation

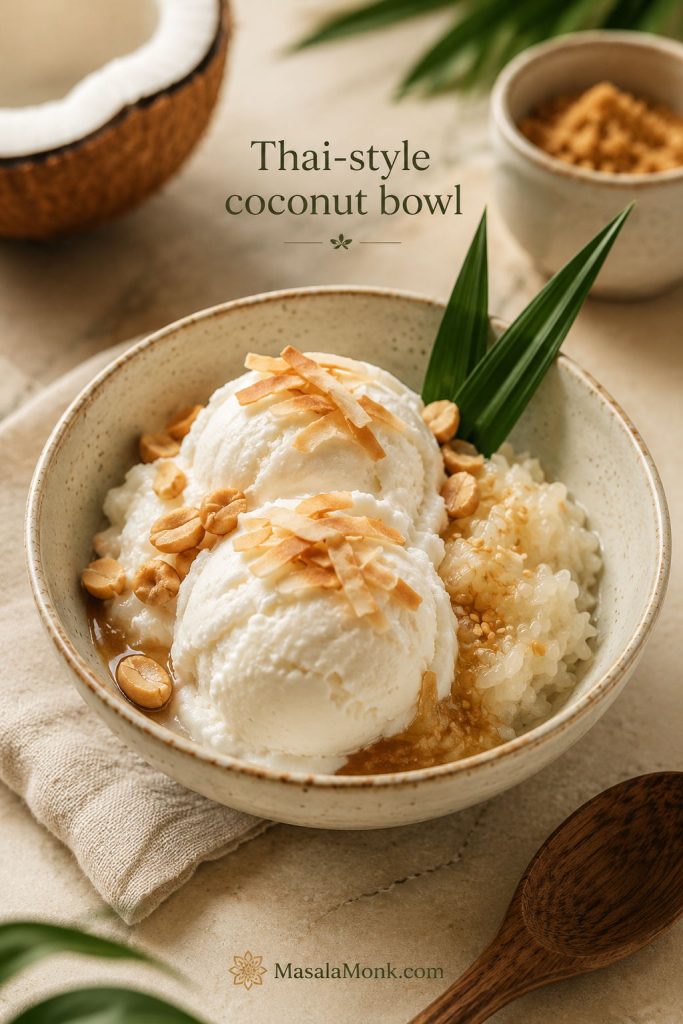
For a Thai-inspired batch, replace the granulated sugar with palm sugar, add a pandan leaf while gently warming the base, then remove it before chilling. Serve with roasted peanuts, sticky rice, toasted coconut, jackfruit, or sweet corn if you want a Thai street-dessert style bowl.

Thai-style coconut ice cream in a bowl with roasted peanuts, sticky rice, toasted coconut, and palm sugar.
Thai-style coconut ice cream leans fragrant and textured, so toppings like sticky rice, peanuts, palm sugar, and toasted coconut add contrast as well as flavor.

Tender coconut ice cream variation

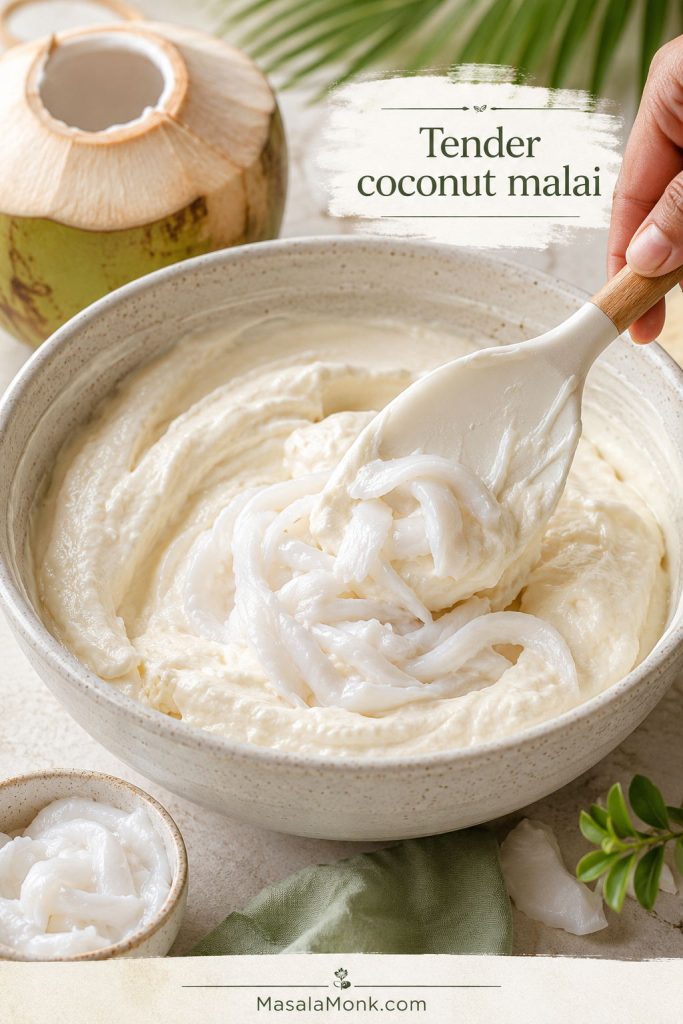
For tender coconut ice cream, blend the main coconut base and add chopped tender coconut flesh after churning, or pulse some of the tender coconut into the base before chilling. A small splash of tender coconut water can brighten the flavor, but too much will make the ice cream icier.

Tender coconut flesh being folded into a creamy coconut ice cream base.
Tender coconut flesh adds soft texture and a delicate fresh-coconut note; however, too much coconut water can make the batch icier.

Ninja Creami Coconut Ice Cream

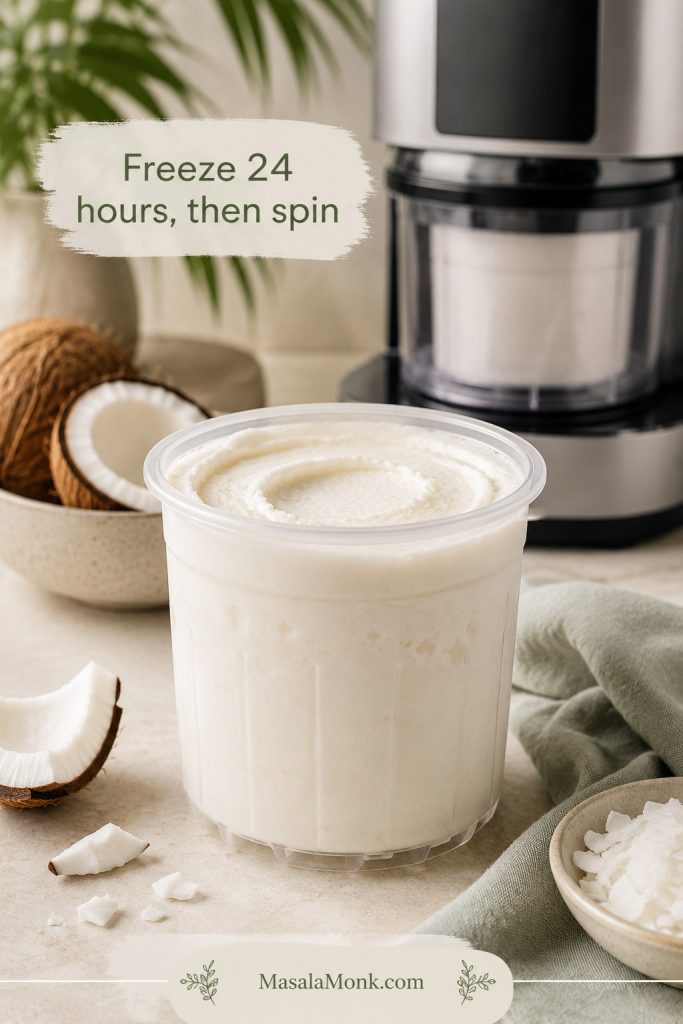
To make coconut ice cream in a Ninja Creami, blend the main base until smooth, pour it into the Creami pint without passing the max fill line, and freeze it level for 24 hours. Process on the Ice Cream or Lite Ice Cream setting depending on your machine and base.

Coconut ice cream in a Ninja Creami-style pint after spinning, with the machine softly visible in the background.
For the Ninja Creami method, a fully frozen pint is essential, since the machine needs a solid base before it can spin the mixture into a creamy texture.

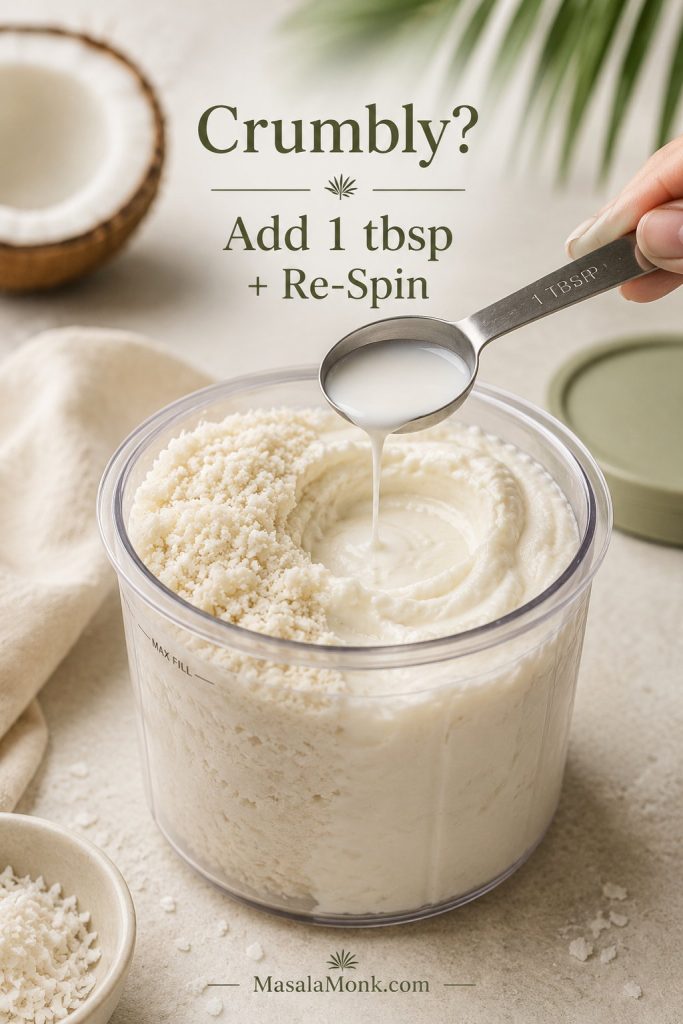
If the mixture looks crumbly after the first spin, add 1 tablespoon coconut milk or coconut cream and use Re-Spin. After that, add toasted coconut, chocolate chips, or chopped fruit with the Mix-In function once the base is creamy.

Freeze the pint level and keep the mixture below the max fill line. If the surface is uneven after freezing, let it sit for a few minutes and level the top before spinning so the blade processes the base evenly.

Creami result What to do
Powdery or crumbly Add 1 tablespoon coconut milk or coconut cream, then Re-Spin.
Too soft Freeze the pint longer and make sure the base was not overfilled or too warm before freezing.
Uneven top Let it sit briefly, level the surface, then process so the blade catches evenly.
Weak coconut flavor Add toasted coconut as a Mix-In or use a small amount of coconut extract next time.

If the Creami pint looks powdery or crumbly after the first spin, use a small splash of coconut milk or coconut cream before you change the whole base.

Ninja Creami coconut ice cream showing a crumbly texture being improved with a tablespoon of liquid before re-spinning.
If a Creami pint comes out crumbly, add about 1 tablespoon of coconut milk or coconut cream and re-spin before changing the whole recipe.

For another fruit-based frozen dessert with blender, no-machine, ice cream maker, and Ninja Creami notes, this mango sorbet recipe is a useful companion.

Flavor Variations

Once the base is balanced, you can take it in several directions without wrecking the texture. Mango makes it sunny and tropical, pineapple pushes it toward a pina-colada-style scoop, chocolate makes it deeper and richer, and toasted coconut gives every bite a stronger coconut finish.

Variation How to make it Best note
Mango coconut ice cream Use thick mango puree, not thin mango juice. If adding a full cup, reduce the coconut milk by 1/4 cup. For a mango-first route, start with this homemade mango ice cream recipe, then use coconut cream or coconut milk as the tropical variation.
Pineapple coconut ice cream Use drained crushed pineapple or thick pineapple puree. Avoid loose pineapple juice unless you want a more icy, sorbet-like result.
Pina colada ice cream Use cream of coconut, pineapple, and optional rum. Reduce added sugar because cream of coconut is sweet.
Chocolate coconut ice cream Use cocoa powder for the easiest version, or cooled melted dark chocolate for a richer texture. Add a pinch more salt to deepen the chocolate flavor.
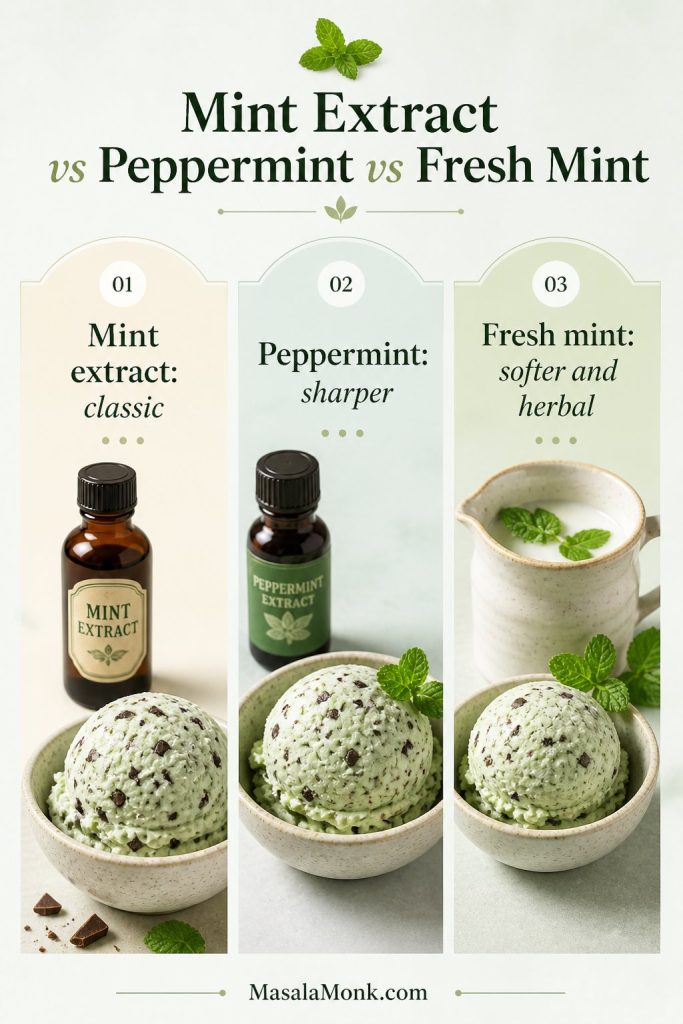
Mint chocolate coconut ice cream Add peppermint extract and chopped dark chocolate or mini chips to the chilled base. For a classic dairy-style flavor path, see this mint chocolate chip ice cream recipe.
Toasted coconut ice cream Fold toasted coconut into the churned base. Best for stronger coconut flavor and texture.
Old-fashioned coconut custard ice cream Use coconut milk with cream, sugar, egg yolks, vanilla, and salt; cook to a custard before chilling and churning. Richest dairy-style route, but not vegan or egg-free.
Keto coconut ice cream Use coconut cream and a freezer-friendly low-carb sweetener. Needs separate sweetener testing because many keto sweeteners freeze harder.

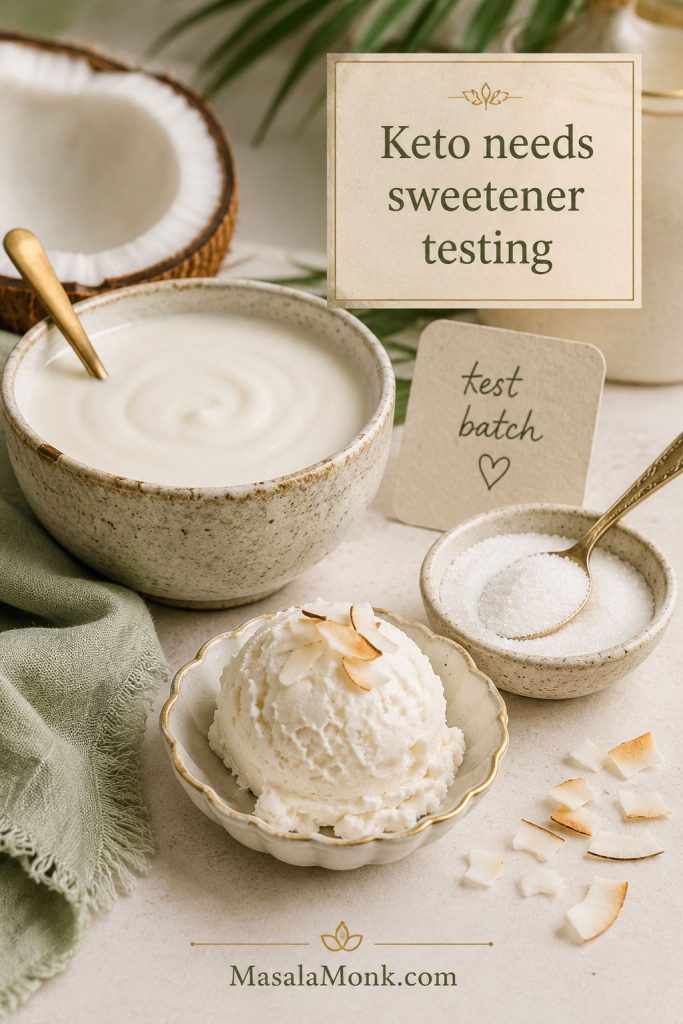
Keto coconut ice cream note

Keto coconut ice cream needs a freezer-friendly sweetener because many low-carb sweeteners freeze harder than sugar. Allulose usually behaves better than many granular sugar alcohol blends, but the texture still needs separate testing.

Coconut cream, low-carb sweetener, and a small test batch of coconut ice cream arranged to illustrate keto sweetener testing.
Keto coconut ice cream depends heavily on sweetener choice, because replacing sugar affects not only sweetness but also softness and freezer texture.

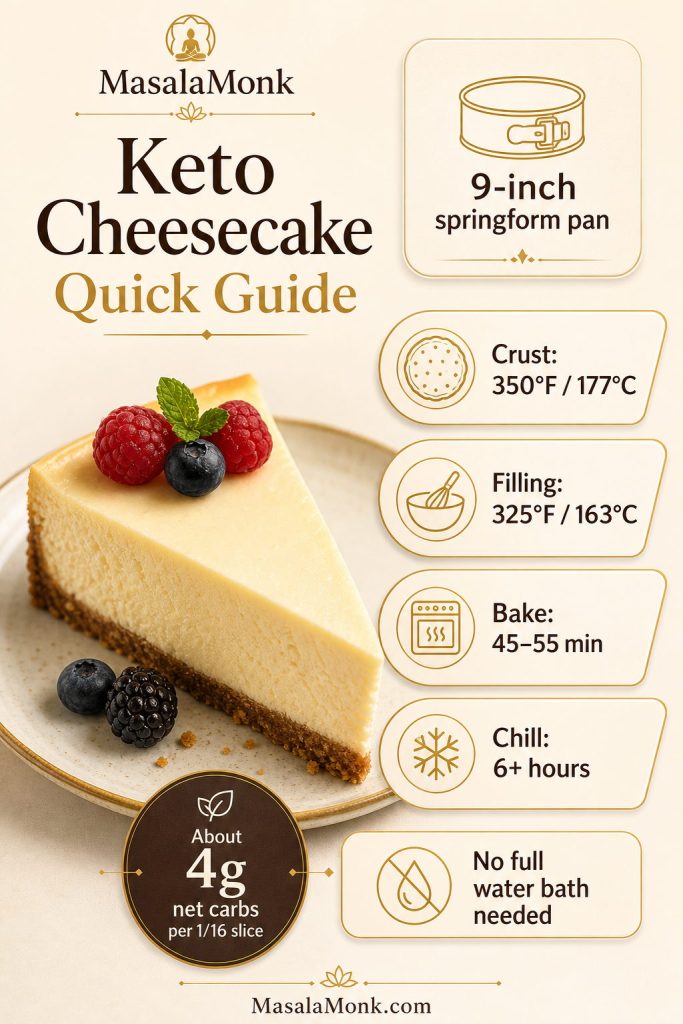
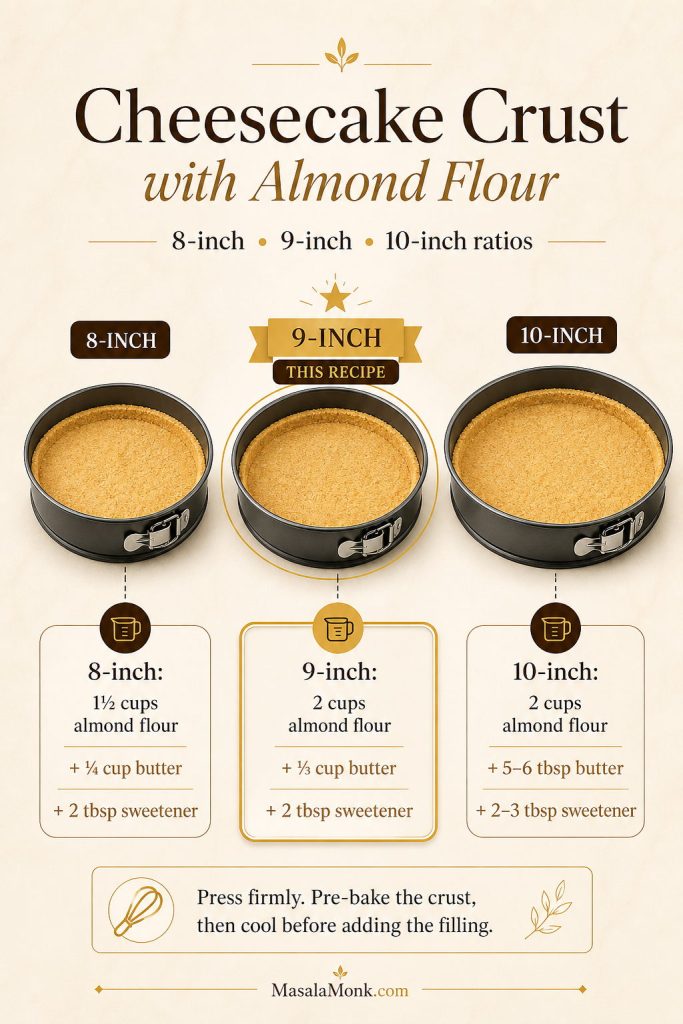
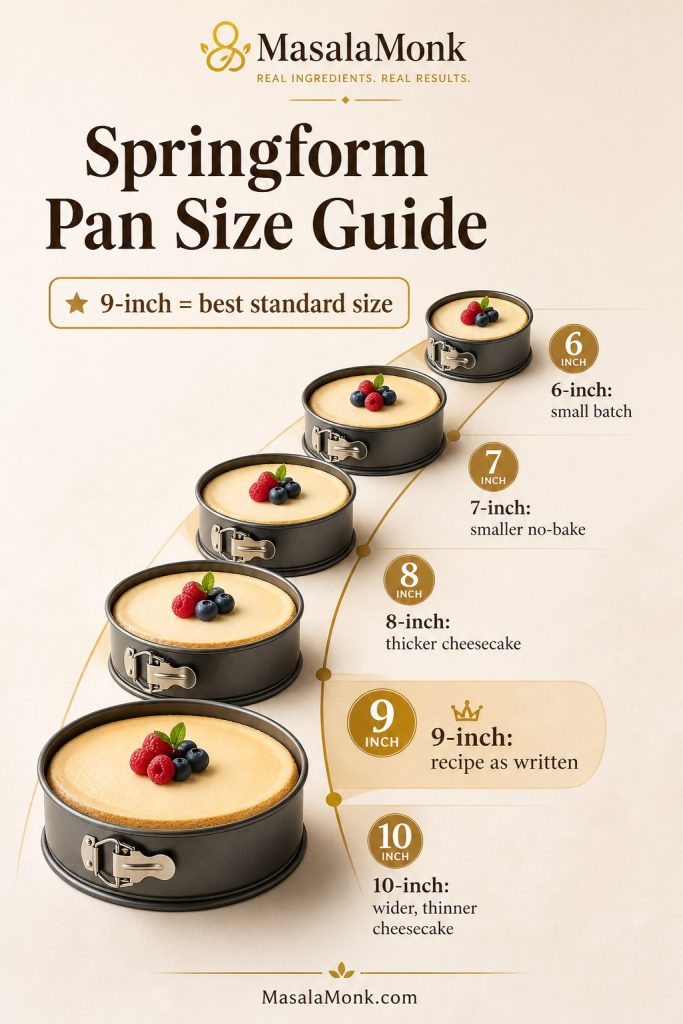
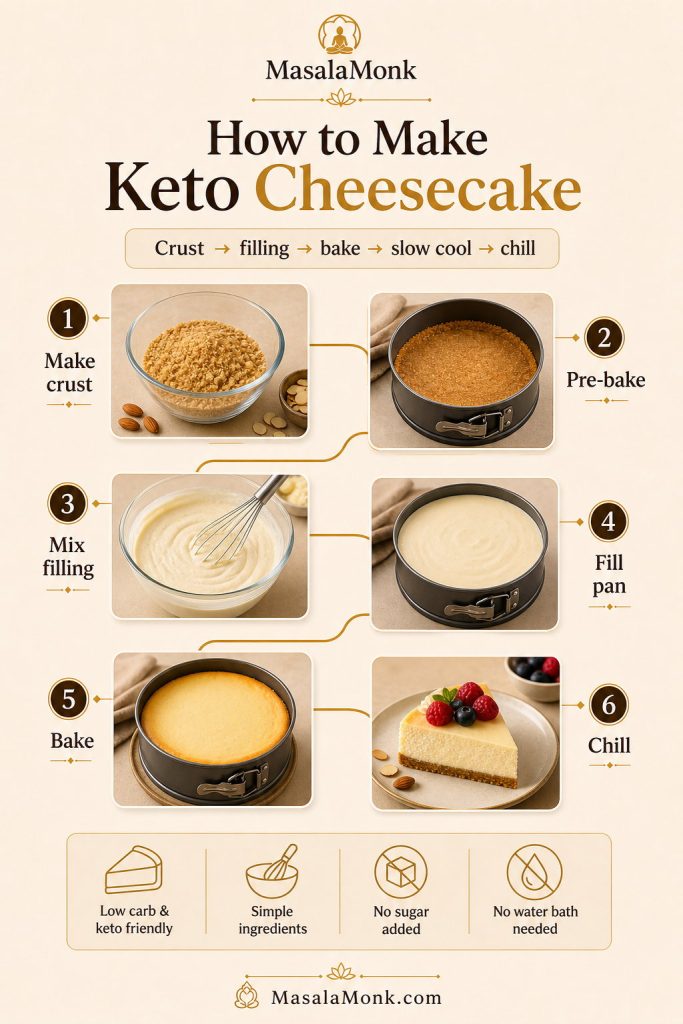
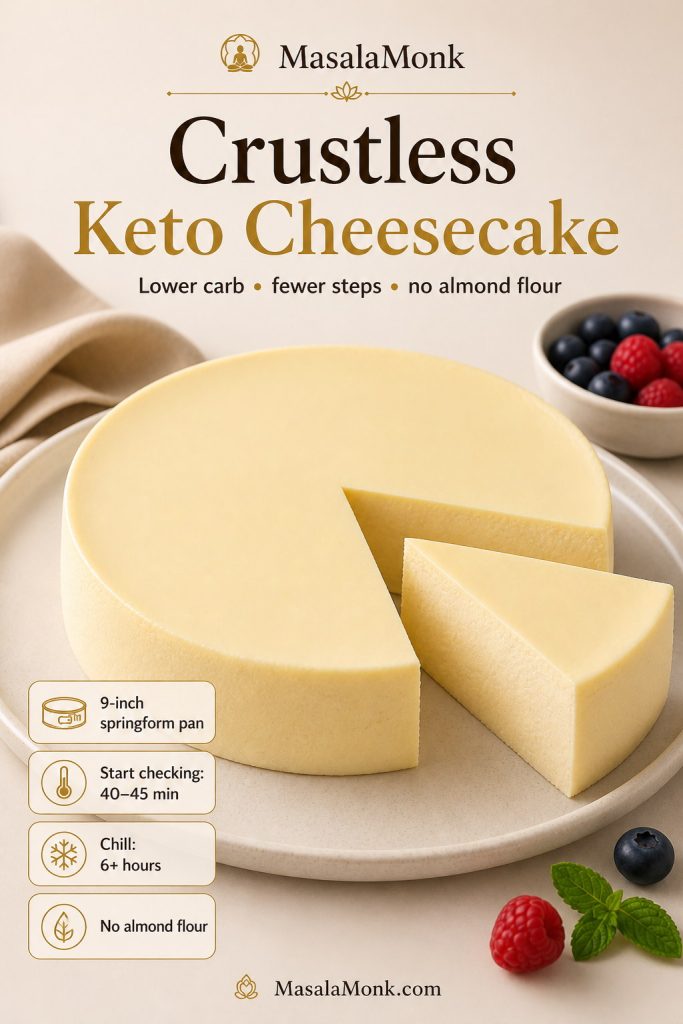
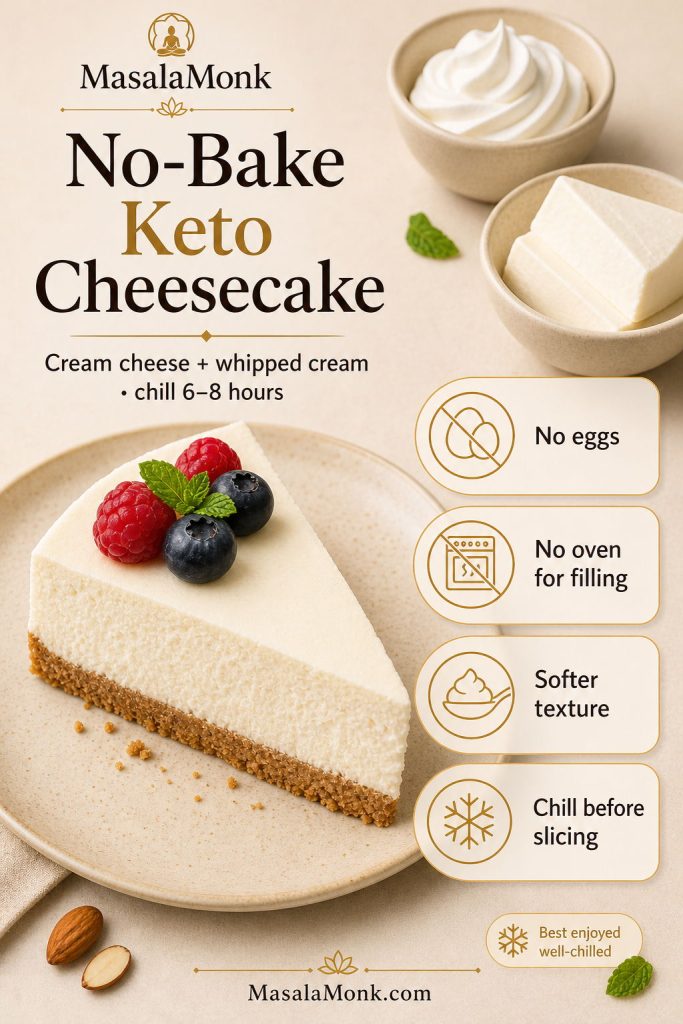
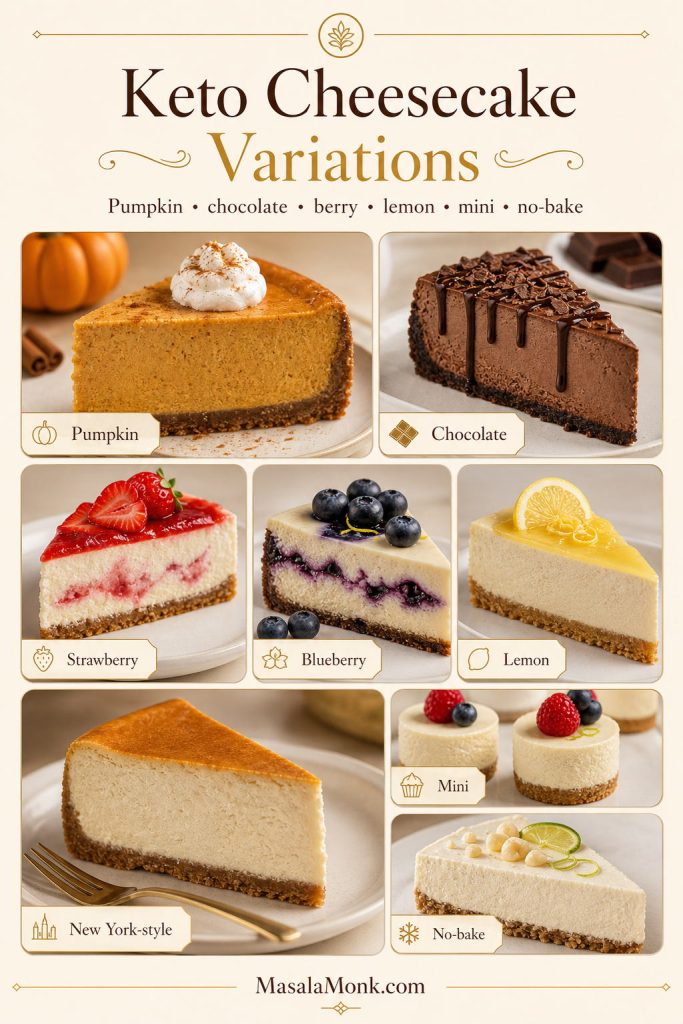
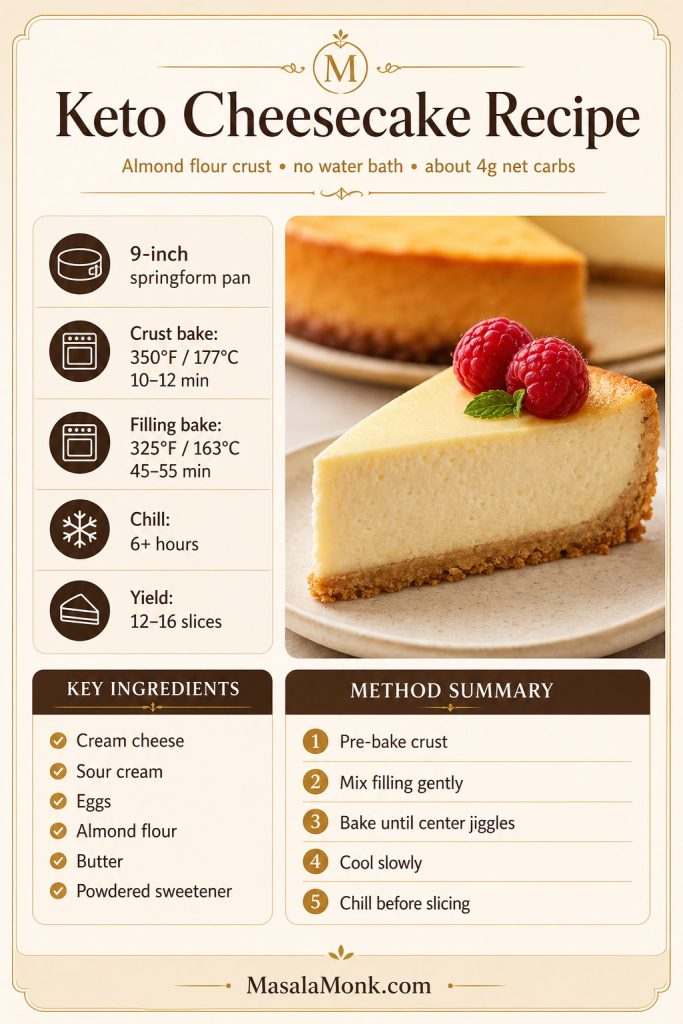
If you are building a low-carb dessert menu rather than only one frozen recipe, this keto cheesecake recipe is a better tested make-ahead option because frozen keto desserts need more careful sweetener choices.

Want to try one of these flavors? Go back to the main recipe card, or revisit coconut cream ice cream notes if you want a richer base.

Troubleshooting

Start with the likely cause

If your first batch is not perfect, do not toss the recipe. Coconut ice cream is sensitive to fat, sugar, water, and temperature, so small changes can make a big difference in how creamy, scoopable, or icy it turns out.

Most failed batches come down to one of four things: too much water, not enough fat, not enough sugar, or a base that was not cold enough. Rather than changing the whole recipe, find the likely problem below and adjust from there.

Three coconut ice cream textures shown together: icy, smooth and just right, and dense or too heavy.
Most texture problems come down to water, fat, sugar, or temperature, so this guide helps you diagnose the batch before changing the whole recipe.

Fix icy or hard coconut ice cream first

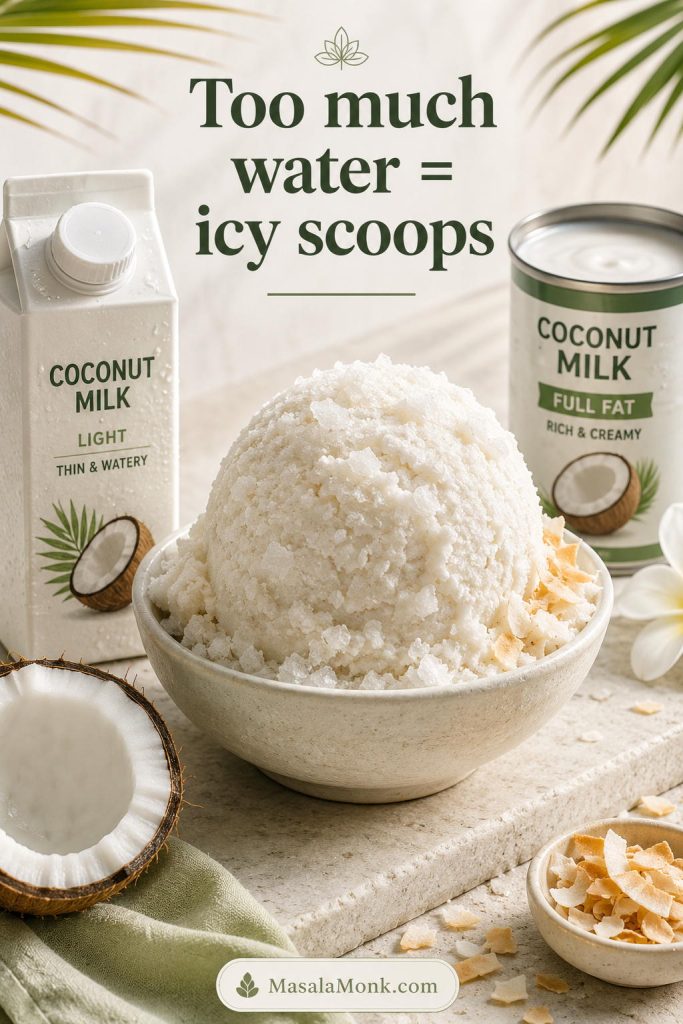
Icy coconut ice cream usually points to too much water, too little fat, thin carton coconut milk, or a base that was not chilled enough before churning.

Thin coconut milk and icy coconut ice cream shown together to explain why a batch can freeze hard and crystalline.
Icy texture usually means the base had too much water or too little fat; therefore, full-fat canned coconut milk works better than thin carton milk.
Problem Likely cause Fix
Icy coconut ice cream Low fat, too much water, carton coconut milk, or warm base Use full-fat canned coconut milk and coconut cream; chill the base at least 4 hours
Too hard to scoop Low sugar, low fat, or long freezer time Rest 5–15 minutes before scooping; slightly increase sugar next time
Grainy texture Sugar not dissolved or coconut fat separated Blend the base for 1–2 minutes; avoid overheating coconut cream
Slushy after churning Ice cream bowl or base was not cold enough Freeze the bowl fully and chill the base overnight if possible
Too sweet Cream of coconut or condensed milk used with extra sugar Use unsweetened coconut cream next time or skip added sugar with cream of coconut
Weak coconut flavor Mild coconut milk or too much vanilla/sugar Add toasted coconut, coconut extract, or more coconut cream
Fatty or waxy mouthfeel Too much coconut cream and not enough coconut milk Use the balanced 1 can coconut milk + 1 can coconut cream formula
Crumbly Ninja Creami result Base froze very hard Add 1 tablespoon coconut milk or cream and Re-Spin

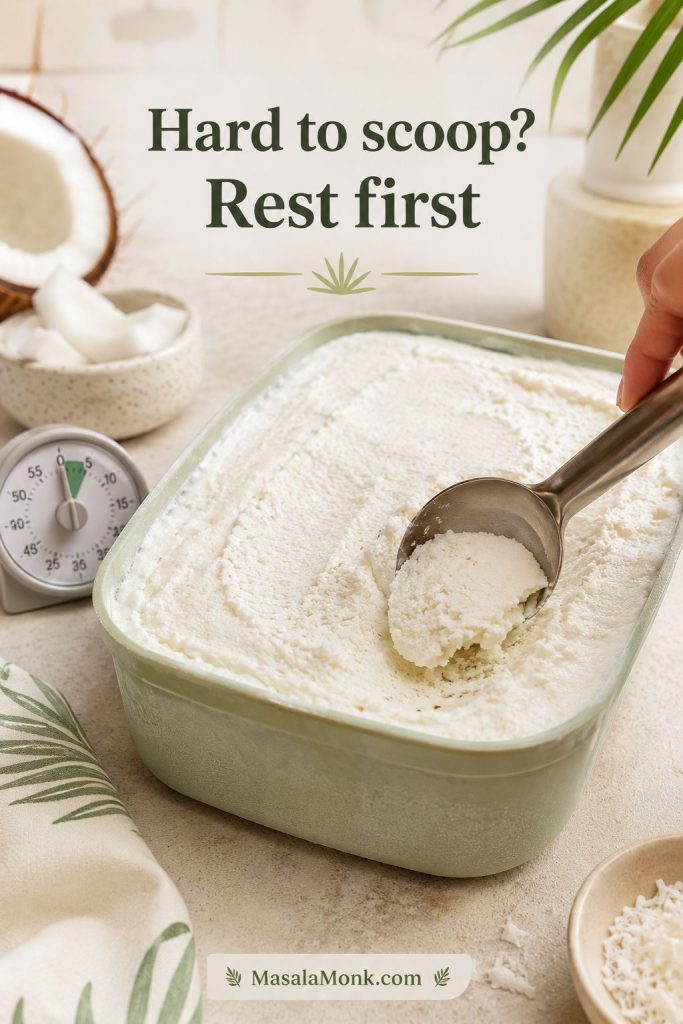
If the batch is hard but not icy, start with resting time before you change the recipe. Coconut-based ice cream often needs a few minutes on the counter.

Firm coconut ice cream resting on the counter with a timer and scoop to show how to soften it before serving.
If the batch freezes too hard, let it rest for a few minutes before scooping; often, that simple pause is enough to improve the texture.

Fix grainy, weak, or waxy batches

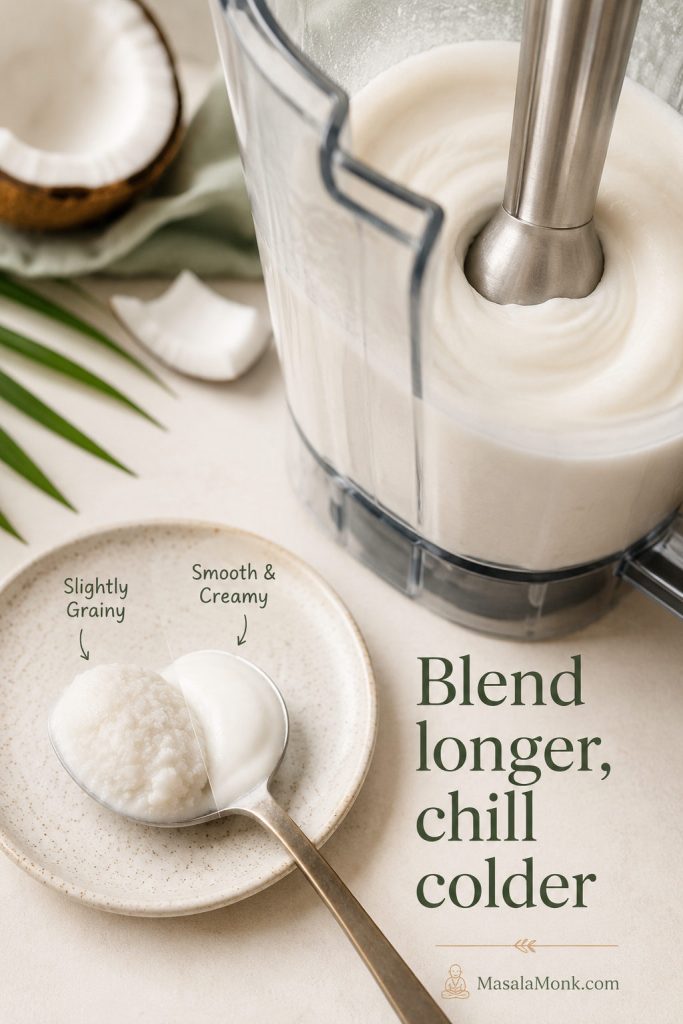
If the texture tastes grainy, the base usually needs better blending, better chilling, or gentler handling so the sugar dissolves and the coconut fat stays smooth.

Coconut ice cream base being blended smooth, with spoon samples showing a smoother texture compared with a slightly grainy one.
Graininess usually points to undissolved sugar or separated coconut fat, so thorough blending and proper chilling can make the next batch smoother.

When the texture is fine but the flavor tastes quiet, strengthen the coconut note with toasted coconut, coconut extract, or a slightly richer base.

Coconut ice cream topped with toasted coconut flakes, with coconut extract and vanilla nearby to show ways to strengthen coconut flavor.
If the flavor tastes mild, toasted coconut is the easiest boost; meanwhile, a small amount of coconut extract can add depth without taking over.

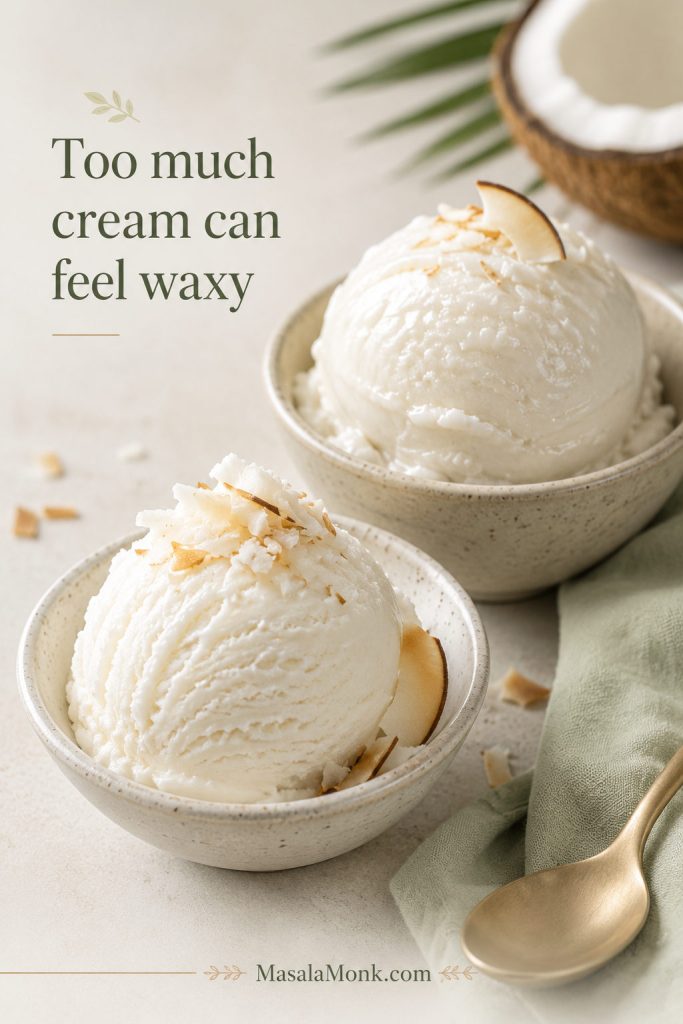
If the scoop tastes rich but leaves a heavy coating on the palate, the base may have too much coconut cream and not enough coconut milk.

Comparison of a dense glossy coconut cream-heavy scoop and a smoother balanced coconut ice cream scoop.
A waxy mouthfeel usually means the base leaned too far toward coconut cream, whereas a balanced mix of coconut milk and cream feels cleaner.

Texture note: sugar affects more than sweetness in homemade ice cream. King Arthur Baking has a helpful explainer on how sugar affects scoopability and freezer texture, which is why this recipe does not cut the sweetener too aggressively.

Storage and Scooping

In practice, homemade coconut ice cream is usually at its best when it is treated a little differently from store-bought dairy ice cream. The container, surface protection, and resting time all matter.

Store it in a shallow freezer-safe container with a tight lid. Press parchment paper or plastic wrap directly against the surface before closing the lid if you want to reduce ice crystals. The texture is best in the first 1–2 weeks.

Coconut ice cream spread in a shallow freezer container with plastic wrap or parchment pressed directly onto the surface.
Pressing wrap or parchment directly onto the surface limits air exposure, which helps reduce ice crystals during freezer storage.

Dairy-free coconut ice cream often freezes firmer than dairy ice cream. Let it sit at room temperature for 5–15 minutes before scooping. If it has been frozen for several days, use a warm scoop and drag firmly through the ice cream rather than forcing it straight down.

Coconut ice cream being scooped cleanly after resting at room temperature with a small timer nearby.
After a short rest at room temperature, the scoop moves more cleanly and the texture tastes softer, creamier, and less frozen-solid.

If this is your first homemade coconut ice cream, do not judge the batch straight from the freezer. First, let it rest for a few minutes; then scoop it with a warm spoon and decide whether it needs more sugar, more coconut cream, or a longer chill next time.

Before you start, check which route fits your ingredients or skim the common coconut ice cream problems if you want to avoid icy, hard, or overly sweet results.

FAQs

Need the main recipe again? Jump back to the recipe card or the quick answer.

What coconut milk works best for coconut ice cream?

Full-fat canned coconut milk works best because it has enough fat and body to freeze into a creamier scoop. Skip thin carton coconut milk for this recipe; it is usually too watery and can leave you with a hard, icy texture.

What is the difference between coconut cream and cream of coconut?

Coconut cream is usually unsweetened and thick. Cream of coconut is sweetened and syrupy. Use coconut cream for the main base. Use cream of coconut only for the sweeter cream-of-coconut batch, and reduce or skip added sugar.

Why did my coconut ice cream turn icy?

Coconut ice cream usually turns icy when the base is too watery, too low in fat, too warm before churning, or made with thin carton coconut milk. Full-fat canned coconut milk, coconut cream, and a fully chilled base make the texture smoother.

Can I make coconut ice cream without an ice cream maker?

The best dairy-free no-churn method is to freeze the blended coconut base in ice cube trays, then blend the frozen cubes until creamy. For a richer dairy route, whipped cream plus sweetened condensed milk makes a softer no-churn coconut ice cream.

Do I need eggs for coconut ice cream?

This coconut ice cream recipe does not need eggs because coconut cream gives the base enough richness. Egg yolks can be used for a custard-style coconut ice cream, but they are not necessary for the main dairy-free method.

How long should I chill the coconut ice cream base?

Chill the base for at least 4 hours, though overnight is better. If the base goes into the machine cold, it churns thicker and smoother; if it starts warm, it can stay loose and slushy for too long.

How do I make coconut ice cream easier to scoop?

Sugar, fat, and a fully chilled base all help the finished scoop stay softer. Let the container sit at room temperature for 5–15 minutes before scooping, especially with dairy-free batches, and use a warm scoop instead of forcing it straight from the freezer.

Is this coconut ice cream vegan?

The main base is vegan and dairy-free as long as your sugar is vegan-friendly. It gets richness from coconut milk and coconut cream instead of heavy cream, condensed milk, or eggs.

Why does keto coconut ice cream need a separate approach?

Keto coconut ice cream needs separate sweetener testing because many low-carb sweeteners freeze harder than sugar. Coconut cream gives a strong base, but the sweetener choice matters for texture. Allulose usually behaves better than many granular sugar alcohol blends.

Once you understand the difference between coconut milk, coconut cream, and cream of coconut, homemade coconut ice cream becomes much easier to control. After one batch, this coconut ice cream recipe becomes easy to adjust: start with the churned base for the smoothest scoop, use the freeze-and-blend method if you do not have a machine, and do not worry if the first try needs a small adjustment. A little more fat, sugar, chill time, or resting time can be the difference between icy and creamy.

Posted on — 3 Comments

Salted Caramel Cheesecake Recipe

Baked salted caramel cheesecake slice with caramel topping, flaky salt, crumb crust, and text reading Salted Caramel Cheesecake Recipe.

This salted caramel cheesecake recipe is for anyone who wants caramel in every bite, not just a sweet drizzle on top. The baked filling is creamy and caramel-flavored, the topping settles into a glossy layer, and the buttery crumb crust keeps each slice rich, balanced, and sturdy enough to cut cleanly.

This is a baked salted caramel cheesecake, so the filling has the structure to hold caramel without turning loose in the middle. A measured amount of cooled caramel goes into the batter for flavor, then more caramel is spread over the chilled cheesecake for a glossy finish. That gives you real caramel depth, clean slices, and a top that looks polished instead of messy.

You’ll also learn how thick the caramel should be, when to add it, how to tell when the cheesecake is done, and why overnight chilling makes such a difference. Once those details are right, this is a deeply creamy, sliceable salted caramel cheesecake with a clean finish of flaky sea salt.

Text-free editorial photo of a salted caramel cheesecake slice with glossy caramel topping, flaky salt, creamy filling, and crumb crust on a dark plate.
A properly chilled baked cheesecake should cut cleanly and still look creamy inside; meanwhile, the caramel topping should sit on the surface instead of disappearing into it.

Quick Answer: Salted Caramel Cheesecake Recipe

To make salted caramel cheesecake, bake a buttery biscuit or graham cracker crust, fill it with a smooth cream cheese batter flavored with brown sugar and cooled salted caramel, then bake it gently at 300°F / 150°C until the edges are set and the center still wobbles slightly. Cool it slowly, chill it for at least 6 hours, then finish with a glossy caramel layer and flaky sea salt.

The trick is to use caramel in the right places. A controlled amount goes into the filling for flavor, while the topping is added after chilling so it stays visible and neat. That way, the cheesecake tastes caramel-forward without turning loose in the middle.

Want the exact measurements? Jump to the recipe card. Unsure about caramel thickness? Go to the caramel guide.

Salted Caramel Cheesecake at a Glance

StyleBaked round salted caramel cheesecake
Pan9-inch / 23 cm springform pan
Yield12 slices
CrustDigestive biscuits, graham crackers, or Biscoff crumbs
TextureCreamy, set, and sliceable after chilling
Caramel textureCooled and thick enough for the filling, glossy and slow-moving for the top
Bake temperature300°F / 150°C after the crust is baked
Fan ovenAbout 285°F / 140°C
Chill time8 hours or overnight for the cleanest slices; 6 hours is the bare minimum
Best finishCaramel topping and flaky sea salt added after chilling
At-a-glance salted caramel cheesecake guide showing pan size, bake temperature, bake time, chill time, yield, and topping timing.
If you want the short version first, this at-a-glance guide covers the details that matter most: pan size, low baking temperature, chill time, yield, and when to add the caramel topping.

Why This Salted Caramel Cheesecake Recipe Works

Balance is the tricky part of caramel cheesecake. With too little caramel, the dessert tastes like plain cheesecake with sauce. Add too much, and the filling can turn soft, overly sweet, or difficult to slice. This version keeps the flavor deep without overloading the batter.

  • A controlled amount of caramel goes into the filling. It is enough to flavor the cheesecake, but not so much that the center turns loose.
  • Brown sugar supports the caramel flavor. It gives the filling a warmer, rounder sweetness than white sugar alone.
  • Sour cream balances the richness. That little tang keeps the cheesecake from tasting flat or cloying.
  • The topping goes on after chilling. The caramel sits as a glossy layer instead of melting into a warm surface.
  • A gentle bake protects the texture. The lower oven temperature gives the eggs time to set around the caramel-enriched filling.
  • Overnight chilling gives the cleanest slices. The cheesecake firms as it rests, and the caramel flavor becomes smoother.

Ready to make it? Skip to the step-by-step method. Prefer the short version? Go straight to the recipe card.

Before You Start This Salted Caramel Cheesecake

Cheesecake is not difficult, but it rewards patience. A few small details make the difference between a creamy slice and a soft, cracked, or lumpy one.

If you are still deciding between baked and chilled cheesecake styles, this no-bake cheesecake recipe explains the no-oven version in detail, including how cream cheese, whipped cream, and chill time create a sliceable texture.

Before you start: Bring the cream cheese, eggs, sour cream, and cream to room temperature. Use cooled caramel, not hot caramel. Mix gently after adding the eggs. Chill the cheesecake overnight if you want the neatest slices.

  • Use full-fat block cream cheese. Spreadable tub-style cream cheese can be softer and may not set as firmly.
  • Cool the caramel first. Warm caramel may seem easier to stir in, but it can soften the filling and make the cheesecake harder to bake evenly.
  • Scrape the bowl often. Cream cheese lumps like to hide at the bottom and sides of the bowl.
  • Mix on low after adding eggs. Too much air can make the cheesecake rise, fall, and crack.
  • Do not rush the chill. A caramel cheesecake needs time to firm up fully.

Salted Caramel Cheesecake Ingredients

This ingredient list is simple, but texture matters. Choose full-fat dairy, a sturdy crumb base, and caramel that is thick enough for cheesecake rather than a thin dessert syrup.

Ingredient board for salted caramel cheesecake showing crumbs, butter, brown sugar, cream cheese, sour cream, cream, eggs, caramel sauce, vanilla, cornstarch, and salt.
The best salted caramel cheesecake starts with a few texture-critical ingredients, so full-fat cream cheese, cooled caramel, and a firm crumb crust matter more than a long shopping list.

Buttery Crumb Crust

  • Digestive biscuits, graham crackers, or Biscoff crumbs: Digestives and graham crackers give the cheesecake a classic base, while Biscoff adds a deeper caramel-cookie flavor.
  • Melted butter: This binds the crumbs and helps the crust set firmly after baking.
  • Light brown sugar: A small amount adds a gentle caramel note to the base.
  • Fine salt: Salt keeps the crust from tasting flat underneath the sweet filling.
Crust options guide comparing digestive biscuit crust, graham cracker crust, and spiced cookie crust for salted caramel cheesecake.
Crust choice changes the whole dessert: digestive biscuits keep the flavor balanced, graham crackers feel classic, and spiced cookie crumbs push the cheesecake toward a deeper caramel-cookie profile.

Salted Caramel Cheesecake Filling

  • Full-fat block cream cheese: This gives the cheesecake its main structure. Let it come to room temperature before mixing so the batter turns smooth.
  • Light brown sugar: Brown sugar tastes warmer and more caramel-like than white sugar.
  • Sour cream: A little tang balances the caramel and keeps the filling from tasting too sweet.
  • Heavy cream or double cream: Cream adds richness and helps the texture feel smooth.
  • Eggs: These set the baked filling. Add them one at a time and mix gently.
  • Cornstarch or all-purpose flour: Either one gives the filling a little extra stability, which helps when caramel is involved.
  • Vanilla extract: Vanilla rounds out the dairy and caramel flavors.
  • Fine salt: This balances the sweetness inside the cheesecake, not just on top.
  • Cooled salted caramel sauce: Use caramel that is thick but stirrable, so it flavors the filling without making the batter too loose.

Salted Caramel Topping

  • Salted caramel sauce: Look for a sauce that falls from a spoon in a slow ribbon. Runny caramel is better saved for drizzling over individual slices.
  • Flaky sea salt: Sprinkle it on just before serving so it stays crisp and gives little salty pops against the caramel.

Need help with caramel texture before you start? See the caramel thickness guide. Ready to bake? Jump to the method.

Caramel for Cheesecake: Filling, Topping, and Drizzle

Caramel decides the texture here. A sauce that works beautifully over ice cream may be too thin for cheesecake. In this recipe, the caramel should be cool enough to protect the filling and thick enough to stay present in each slice.

The Spoon Test for Caramel Cheesecake Topping

Before adding caramel to the filling or spreading it on top, test it with a spoon. This is easier than guessing by color alone.

Caramel thickness guide showing too-thin caramel, pourable caramel, thick but stirrable caramel, and too-firm caramel for cheesecake.
Caramel thickness affects both texture and appearance; for that reason, thick but stirrable caramel works best in the filling, while slow-moving caramel is better for the top.
Caramel textureWhat it looks likeBest use
Too thinRuns off the spoon like syrupUse only as a serving drizzle
PourableCoats the spoon and falls in a slow ribbonBest for the top of the chilled cheesecake
Thick but stirrableA spoon dragged through it leaves a trail for 2–3 secondsBest for mixing into the filling or making a light swirl
Too firmClumps or spreads like cold fudgeWarm very briefly before using

Best Caramel Sauce for Salted Caramel Cheesecake

Best caramel sauce guide for cheesecake showing thick homemade caramel, good store-bought caramel, thin syrup, and cold firm caramel.
Not every caramel sauce belongs in cheesecake. Homemade or thick store-bought caramel works well in the batter, whereas thin syrup is better saved for drizzling over finished slices.

The best caramel sauce for salted caramel cheesecake is thick, glossy, and slow-moving. It should coat a spoon and fall in a ribbon rather than run like syrup. Homemade caramel gives you the most control, but store-bought salted caramel can work if it has enough body. Avoid thin ice cream-style caramel in the filling because it can make the cheesecake softer and harder to slice.

This same thick-caramel logic also matters in a banoffee pie recipe, where the caramel or dulce de leche needs enough body to sit under bananas and cream without turning the slices messy.

Homemade vs Store-Bought Caramel for Cheesecake

Homemade salted caramel gives you the most control because you can cook it to the right thickness. Store-bought caramel can still work, especially for the topping, as long as it is not watery. If your jarred caramel is thin and runny, keep it for a final drizzle instead of mixing it into the cheesecake batter.

For the filling, use caramel that has cooled completely. For the topping, choose a glossy sauce that moves slowly from the spoon. If it has been refrigerated and looks too firm, warm it for a few seconds at a time until it loosens, then let it cool slightly before spreading.

Quick Salted Caramel for This Cheesecake

If you do not already have caramel sauce, make a simple batch before you start the filling. It needs time to cool, so this is best done first.

  • 200 g granulated sugar, about 1 cup
  • 85 g unsalted butter, cubed, about 6 tbsp
  • 120 ml heavy cream or double cream, 1/2 cup
  • 1/2–1 tsp fine salt, to taste
  • 1 tsp vanilla extract, optional

This makes enough caramel for the filling and topping, with a little extra for drizzling depending on how thick you cook it.

Place the sugar in a heavy-bottom saucepan over medium heat and let it melt, stirring gently only as needed until it becomes a deep amber caramel. The sugar may clump at first. Keep the heat moderate and continue stirring gently until the clumps melt. If it darkens too fast, lower the heat.

Carefully whisk in the butter; the mixture will bubble. Slowly add the cream while whisking, then simmer for 1–2 minutes until smooth. Remove from the heat, stir in salt and vanilla, and let it cool until thick but still spoonable.

Caramel safety note: Hot caramel is much hotter than boiling water and bubbles aggressively when butter or cream is added. Use a deep pan, pour the cream slowly, and keep your hands clear of the steam.

When to Add Caramel Topping to Cheesecake

Add the topping after the cheesecake has chilled and set. If you add caramel while the cheesecake is warm, it can sink into the surface or slide toward the edges. If you are making the dessert ahead, bake and chill the cheesecake first, then add the caramel layer on the day you serve it.

Best result: Make the caramel first, bake the cheesecake the day before serving, chill it overnight, then add the caramel topping and flaky salt on the day you serve it.

If your caramel feels too thin or the topping keeps sliding, check the troubleshooting section. Want the full recipe in one place? Go to the recipe card.

Equipment for Baked Salted Caramel Cheesecake

  • 9-inch / 23 cm springform pan: A deeper pan is helpful because the filling rises slightly as it bakes.
  • Parchment paper: Makes it easier to release the cheesecake from the base.
  • Food processor or rolling pin: Use either one to make fine, even crumbs.
  • Stand mixer with paddle or electric hand mixer: Keep the speed gentle, especially after adding the eggs.
  • Roasting pan or deep baking tray: Helpful for a water bath or a steam-pan setup.
  • Heavy-bottom saucepan: Needed if making caramel from scratch.
  • Digital scale: Strongly recommended because small measurement changes affect cheesecake texture.
  • Offset spatula: Helpful for smoothing the batter and caramel layer.
  • Sharp knife: Warm and wipe it between cuts for neat slices.
  • Instant-read thermometer, optional: Useful if you want a precise doneness check.

Common Mistakes to Avoid

  • Do not add hot caramel to the filling. It can loosen the batter and make the cheesecake bake unevenly.
  • Do not use thin caramel syrup in the batter. Save runny caramel for drizzling over individual slices.
  • Do not overmix after adding eggs. Too much air can make the cheesecake rise, fall, and crack.
  • Do not bake until the center looks fully firm. The middle should still wobble gently when the cheesecake leaves the oven.
  • Do not add the caramel topping while the cheesecake is warm. Add it after chilling so the top stays glossy and neat.

How to Make Salted Caramel Cheesecake

The steps are straightforward, but the order makes a big difference. Bake the crust first, let the caramel cool, mix the filling gently, bake the cheesecake slowly, then give it enough time to chill before adding the topping.

Step-by-step board showing how to make salted caramel cheesecake by baking the crust, mixing the filling, baking gently, chilling, topping, and slicing.
To keep the cheesecake smooth and sliceable, follow the order carefully: bake the crust, cool the caramel, mix gently after the eggs go in, then bake, chill, and top only when fully set.

Step 1: Make the Crust

Heat the oven to 350°F / 175°C. Line the base of a 9-inch springform pan with parchment paper. Mix the biscuit crumbs, melted butter, brown sugar, and salt until the crumbs look evenly moistened, like damp sand.

Press the mixture firmly into the base of the pan. Bring the crumbs slightly up the sides to make a low edge, then bake for 8–10 minutes. Let the crust cool while you prepare the filling.

Step 2: Cool or Prepare the Caramel

If you are making caramel from scratch, make it now and let it cool. If you are using prepared caramel, check the texture with the spoon test. For the filling, the caramel should be cool and thick but still easy to stir.

Avoid adding hot caramel to the batter. It can soften the cream cheese mixture and make the cheesecake bake unevenly.

Step 3: Mix the Salted Caramel Cheesecake Filling

Lower the oven to 300°F / 150°C. If using a fan or convection oven, reduce the cheesecake baking temperature to about 285°F / 140°C. Beat the room-temperature cream cheese and brown sugar on low to medium speed until smooth. Stop and scrape the bowl a few times so no firm streaks of cream cheese remain.

Add the sour cream, heavy cream, vanilla, salt, cornstarch, and cooled caramel. Mix just until smooth. Add the eggs one at a time on low speed, mixing only until each egg disappears into the batter.

Mix gently once the eggs go in. Cheesecake batter should be smooth, not whipped. Too much air can make the cheesecake rise in the oven and crack as it cools.

Step 4: Bake the Salted Caramel Cheesecake Low and Slow

Pour the filling into the cooled crust and smooth the top. Bake at 300°F / 150°C for 70–80 minutes, using a water bath or steam pan if possible.

For a full water bath, wrap the outside of the springform pan well, place it in a roasting pan, and pour hot water around it until the water reaches about halfway up the sides. For the easier steam-pan method, place a tray of hot water on the lower rack and bake the cheesecake on the rack above.

The cheesecake is ready when the outer 2–3 inches look set and the center still has a soft wobble. It should move like set custard, not ripple like liquid. The top should look mostly matte rather than wet. If you are using a thermometer, the center should be around 145°F / 63°C; ThermoWorks uses the same internal temperature cue for cheesecake doneness.

Cheesecake doneness guide showing set edges, gently wobbling center, mostly matte top, and optional 145 degrees Fahrenheit or 63 degrees Celsius internal temperature cue.
Cheesecake is done before it looks fully firm, so look for set edges, a gentle center wobble, and a mostly matte top rather than waiting for a completely rigid middle.

Do not wait for the center to look completely firm in the oven. By that point, the cheesecake may be overbaked. It will continue to set as it cools and chills.

Step 5: Cool Gradually

Turn the oven off, crack the door open, and leave the cheesecake inside for 1 hour. After that, move it to the counter and cool for another 1 hour. This slow cooling helps prevent sudden sinking and cracking.

Step 6: Chill Until Fully Set

Refrigerate the cheesecake for at least 6 hours. Overnight is better, and 8 hours gives a more reliable set. The filling becomes smoother and firmer as it rests, and the caramel flavor settles into the cream cheese base.

Step 7: Add the Salted Caramel Layer and Flaky Salt

Once the cheesecake is cold and set, spread the caramel over the top. Let it settle naturally, or guide it gently with an offset spatula. Finish with flaky sea salt just before serving.

For tidy slices, dip a sharp knife in hot water, wipe it dry, cut one slice, then wipe the blade before cutting again.
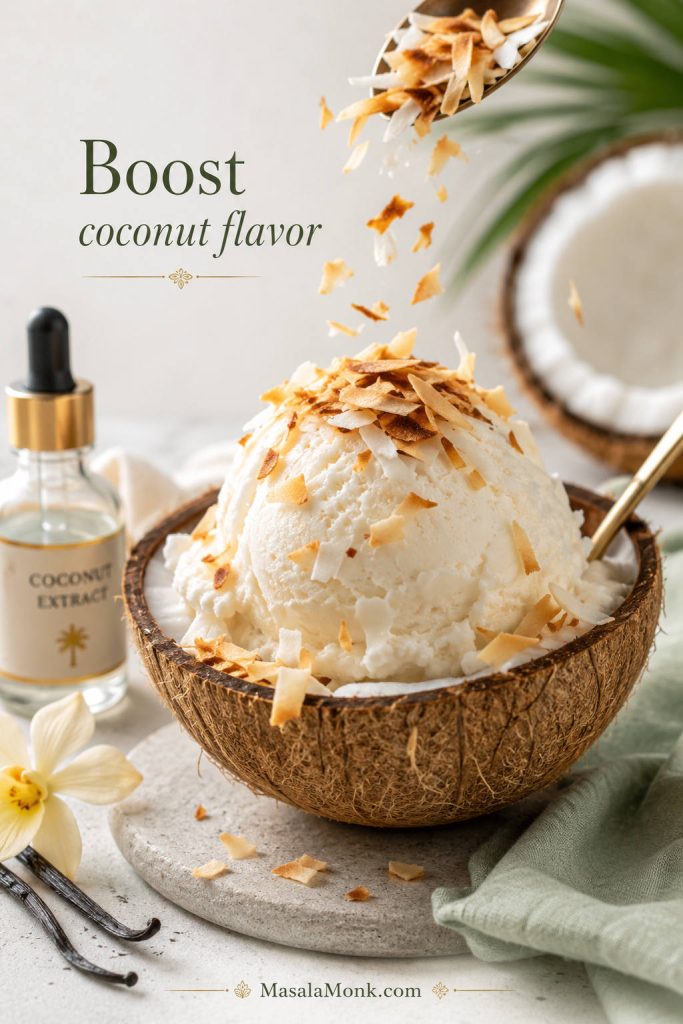
Clean cheesecake slicing guide showing chilling, warming the knife, wiping between cuts, adding topping after chilling, and softening firm topping.
Clean cheesecake slices come from a few small habits that make a big difference: chill thoroughly, warm the knife, wipe between cuts, and let very firm caramel soften slightly before serving.

Need to store it or make it ahead? Jump to storage and freezing. Cheesecake not setting the way you expected? See troubleshooting.

Do You Need a Water Bath for Salted Caramel Cheesecake?

A water bath gives cheesecake the smoothest texture because it surrounds the pan with gentle, moist heat. That is especially helpful here because caramel adds sweetness and moisture to the filling.

If wrapping a springform pan makes you nervous, use a steam pan instead. Place a deep tray of hot water on the lower oven rack and bake the cheesecake on the rack above it. You still get extra moisture in the oven without risking water leaking into the crust.

Comparison board showing a foil-wrapped springform pan in a water bath and a cheesecake baked above a separate steam pan.
A water bath gives the smoothest baked cheesecake texture, but a steam pan is an easier alternative; either way, added moisture helps the cheesecake bake more gently and crack less.
MethodBest forWhat to expect
Full water bathSmoothest texture and lowest crack riskWrap the pan well and place it in hot water while baking.
Steam panEasier setup with less leak riskPlace hot water on the lower rack while the cheesecake bakes above it.
No water bathShortcut bakingThe cheesecake can still work, but cracks and firmer edges are more likely.

For another technical reference, Serious Eats also uses 145°F / 63°C as a cheesecake doneness target, which supports the thermometer cue in this recipe.

If you skip both the water bath and the steam pan, keep the oven temperature low and avoid overbaking. Any cracks can be covered with caramel, but the texture will be creamier if the cheesecake bakes gently.

Saveable salted caramel cheesecake recipe card with yield, prep time, bake time, chill time, ingredient groups, and brief method steps.
Use the recipe card when you want the method in one place, especially for checking the ingredient groups, baking time, chill time, and topping order without scrolling through the full guide.

Salted Caramel Cheesecake Recipe Card

This salted caramel cheesecake recipe makes a creamy baked cheesecake with caramel in the filling, a glossy caramel layer on top, buttery crumb crust, and a clean sliceable texture after chilling.

Yield
12 slices

Prep Time
35 minutes

Bake Time
1 hour 20–30 minutes

Chill Time
6 hours minimum, overnight best

Total Time: About 10 hours minimum including cooling and chilling; overnight chilling is best.

Pan: 9-inch / 23 cm springform pan

Before You Start

  • Bring cream cheese, eggs, sour cream, and cream to room temperature.
  • Use cooled caramel in the filling, not hot caramel.
  • Mix gently after adding eggs.
  • Chill overnight for the neatest slices.
  • Add the caramel topping after chilling.

Ingredients

Crust

  • 225 g digestive biscuits, graham crackers, or Biscoff crumbs, about 2 1/4 cups
  • 100 g unsalted butter, melted, about 7 tbsp
  • 25 g light brown sugar, about 2 tbsp
  • 1/4 tsp fine salt

Salted Caramel Filling

  • 680 g full-fat block cream cheese, room temperature, 24 oz
  • 150 g light brown sugar, about 3/4 cup packed
  • 120 g sour cream, room temperature, 1/2 cup
  • 60 ml heavy cream or double cream, 1/4 cup
  • 120 g cooled salted caramel sauce, about 1/3–1/2 cup
  • 1 tbsp cornstarch or all-purpose flour
  • 2 tsp vanilla extract
  • 1/4 tsp fine salt
  • 3 large eggs, room temperature

Topping

  • 160–200 g salted caramel sauce, slow-moving and pourable, about 1/2–2/3 cup
  • 1/2–1 tsp flaky sea salt, to finish

Optional Quick Caramel Sauce

  • 200 g granulated sugar, about 1 cup
  • 85 g unsalted butter, cubed, about 6 tbsp
  • 120 ml heavy cream or double cream, 1/2 cup
  • 1/2–1 tsp fine salt, to taste
  • 1 tsp vanilla extract, optional

Instructions

Make the Caramel and Crust

  1. If making the caramel sauce, melt the sugar in a heavy-bottom saucepan over medium heat until deep amber. Carefully whisk in butter, then slowly whisk in cream. Simmer for 1–2 minutes, remove from the heat, add salt and vanilla, and cool until thick but spoonable.
  2. Heat the oven to 350°F / 175°C. Line the base of a 9-inch springform pan with parchment paper.
  3. Mix the biscuit crumbs, melted butter, brown sugar, and salt until evenly moistened.
  4. Press the crumbs firmly into the base of the pan, bringing them slightly up the sides to make a low edge. Bake for 8–10 minutes, then cool.

Mix the Cheesecake Filling

  1. Lower the oven to 300°F / 150°C, or about 285°F / 140°C for a fan oven.
  2. Beat the cream cheese and brown sugar on low to medium speed until smooth, scraping the bowl as needed.
  3. Mix in sour cream, heavy cream, cooled caramel, cornstarch, vanilla, and salt.
  4. Add the eggs one at a time on low speed, mixing only until combined.
  5. Pour the filling into the cooled crust and smooth the top.

Bake, Cool, and Chill

  1. For a water bath, place the wrapped springform pan in a roasting pan and pour hot water around it until it reaches about halfway up the sides. For an easier steam-pan method, place a tray of hot water on the lower rack and bake the cheesecake on the rack above.
  2. Bake for 70–80 minutes, until the outer edges are set and the center wobbles gently like set custard.
  3. Turn off the oven, crack the door, and let the cheesecake cool inside for 1 hour.
  4. Move the cheesecake to the counter and cool for another 1 hour.
  5. Refrigerate for at least 6 hours, preferably 8 hours or overnight.

Finish and Slice

  1. Spread the caramel topping over the chilled cheesecake.
  2. Finish with flaky sea salt just before serving.
  3. Slice with a warm, wiped knife for the cleanest cuts.

Notes

  • If the caramel runs like syrup, use it as a serving drizzle instead of mixing it into the filling.
  • The cheesecake should not look fully firm when it leaves the oven. It will finish setting as it cools.
  • Do not add the caramel topping before baking.
  • Biscoff crumbs make the crust taste deeper and more caramel-like.
  • If using store-bought caramel, choose a thick sauce rather than a thin ice cream syrup.

Can You Make This as a No-Bake Salted Caramel Cheesecake?

Yes, but a no-bake salted caramel cheesecake needs a different filling. You cannot simply remove the eggs from the baked recipe and chill it. A no-bake version needs whipped cream or double cream for structure, and the caramel must be thick enough that it does not loosen the filling.

Comparison board showing baked salted caramel cheesecake and no-bake salted caramel cheesecake with notes about texture and best uses.
Baked and no-bake salted caramel cheesecake serve different goals. Baked cheesecake is the better choice for caramel in the filling and clean slices, whereas no-bake is softer and more forgiving.

Baked vs No-Bake: Which Version Should You Choose?

VersionBest forTexture
Baked salted caramel cheesecakeClean slices, richer texture, caramel in the fillingCreamy, set, and sliceable
No-bake salted caramel cheesecakeEasy chilled dessert, no oven, softer finishLighter and softer; best with full-fat dairy
Salted caramel cheesecake cupsMost forgiving no-bake optionSpoonable, neat, and party-friendly

No-Bake Salted Caramel Cheesecake Starting Formula

For a 9-inch no-bake version, use this as a starting point:

  • 250 g digestive biscuit or graham cracker crumbs
  • 100 g melted butter
  • 500 g full-fat cream cheese
  • 100–120 g powdered sugar or icing sugar
  • 1 tsp vanilla extract
  • 150 g thick salted caramel sauce
  • 300 ml cold heavy cream or double cream, whipped to soft peaks
  • Extra caramel and flaky salt for topping

How to Assemble the No-Bake Version

Press the crumb base into the pan and chill it while you make the filling. Beat the cream cheese, sugar, vanilla, and caramel until smooth, then fold in the whipped cream. Spoon the filling over the base and chill for at least 6 hours, preferably overnight. Add the caramel topping only after the filling has set.

If you want more detail on chilled cheesecake structure, the setting notes in this no-bake mango cheesecake recipe are helpful because they show how full-fat dairy, filling thickness, and chill time affect whether a no-bake cheesecake slices cleanly or works better in cups.

Why Cheesecake Cups Are Easier

If you want a more forgiving no-bake dessert, make salted caramel cheesecake cups instead of one large cheesecake. Cups set faster, serve neatly, and are less sensitive to a slightly softer filling.

Still deciding? See the baked method or jump to the main recipe card.

Salted Caramel Cheesecake Variations

The baked round cheesecake should stay the main version, but these variations are easy to adapt once you understand the caramel texture and chill time.

Salted caramel cheesecake variations board showing mini cheesecakes, cheesecake bars, chocolate salted caramel cheesecake, and spiced cookie crust.
Once the main recipe is working well, it becomes easy to branch out; for instance, mini cheesecakes bake faster, bars are easier to portion, and a spiced cookie crust adds extra caramel-style warmth.

Mini Salted Caramel Cheesecakes

Use a muffin tin lined with paper liners. Press a spoonful of crumb base into each cup, add filling, and bake until the centers are just set. Mini cheesecakes bake much faster than a full cheesecake, so start checking early. Add caramel after chilling.

Salted Caramel Cheesecake Bars

For bars, use a parchment-lined square or rectangular pan. Bars are easier to chill, transport, and cut for parties. Keep the caramel layer thin and add it after the cheesecake has set.

Chocolate Salted Caramel Cheesecake

Use chocolate biscuit crumbs for the crust and add a thin chocolate ganache layer before the caramel topping. Keep the filling caramel-forward rather than adding too much cocoa to the base.

Salted Caramel Pecan Cheesecake

Add toasted chopped pecans to the crust or scatter them over the caramel before serving. Pecans add crunch and a slight bitterness that works beautifully with the sweet caramel.

Biscoff Salted Caramel Cheesecake

Use Biscoff crumbs for the crust and keep the filling the same. This gives the cheesecake a spiced caramel-cookie base without needing extra flavorings. If you like thick, baked, sliceable desserts with cookie-style richness, this cookie pie recipe is another good dessert to explore.

Make Ahead, Storage, and Freezing Salted Caramel Cheesecake

Make-ahead and storage guide for salted caramel cheesecake showing refrigerator storage, freezing without topping, thawing, and serving with caramel.
This cheesecake is a strong make-ahead dessert, yet the best finish comes when you chill or thaw the cake first and add the caramel topping later so it stays glossy and neat.

Make Ahead

This is an ideal make-ahead dessert. Bake the cheesecake one day before serving, cool it gradually, and chill it overnight. Add the caramel topping the next day so it looks fresh and glossy.

Refrigerator Storage

Store the cheesecake covered in the refrigerator for up to 4 days. If possible, add flaky salt just before serving rather than before storing.

Freezing

You can freeze salted caramel cheesecake, but it is best to freeze it without the caramel topping. Wrap the fully chilled cheesecake tightly, freeze for up to 2 months, then thaw overnight in the refrigerator. Add caramel after thawing.

Serving After Chilling

Serve the cheesecake cold from the refrigerator for the neatest slices. If the caramel topping is very firm, let the cheesecake sit at room temperature for 10–15 minutes before cutting.

Close-up texture guide of a salted caramel cheesecake slice showing glossy caramel top, creamy set center, and buttery crumb crust.
This is the texture to aim for: a glossy caramel top, a creamy baked center that holds its shape, and a crumb crust firm enough to support the slice without crumbling apart.

What to Do With Extra Caramel

Extra salted caramel keeps well in the refrigerator and can be warmed gently for serving. Spoon it over homemade ice cream, drizzle it into coffee, or use it as a dip for crisp desserts like homemade churros.

Troubleshooting Salted Caramel Cheesecake

Most problems come from three places: caramel that is too thin, filling that was mixed too aggressively, or a cheesecake that was not chilled long enough. Here is how to fix or avoid the common issues.

Need to compare with the main method? Go back to the step-by-step instructions. Want the full measurements again? Open the recipe card.

Troubleshooting board for salted caramel cheesecake showing fixes for soft middle, runny caramel, cracks, messy slices, too-sweet flavor, and soggy crust.
When a salted caramel cheesecake goes wrong, the cause is usually technical rather than mysterious; for example, thin caramel, overmixing, rushed cooling, or too little chill time can all affect the final texture.

Why Is My Cheesecake Soft in the Middle?

It may be underbaked, under-chilled, or made with too much thin caramel. The center should wobble gently when it leaves the oven, but it should not look liquid. Chill for at least 6 hours, and overnight if possible.

Why Did My Caramel Run Off the Cheesecake?

The caramel was probably too thin, too warm, or added before the cheesecake had set. Use a slow-moving sauce for the top and add it only after the cheesecake is cold.

Why Did My Cheesecake Crack?

Cracks usually come from overmixing, overbaking, baking too hot, or cooling too quickly. Mix gently after the eggs go in, bake at a lower temperature, and let the cheesecake cool gradually in the turned-off oven.

Why Are My Slices Messy?

The cheesecake likely needs more chill time, or the knife is dragging through the caramel. Chill overnight, use a warm sharp knife, and wipe the blade between cuts.

Why Does My Cheesecake Taste Too Sweet?

Salted caramel is naturally sweet, so balance matters. Sour cream, fine salt in the filling, and flaky salt on top all help. A Biscoff crust will make the cheesecake taste sweeter, while a plain digestive or graham crust keeps it more balanced.

Why Is My Caramel Grainy?

Grainy caramel usually comes from sugar crystals forming while the caramel cooks. Use a clean heavy pan, melt the sugar evenly, and avoid splashing sugar crystals up the sides. If the caramel is already grainy, it is better mixed into the filling than used as the visible topping.

Why Did the Crust Get Soggy?

The crust may not have been baked long enough, or water may have leaked into the pan during a water bath. Bake the crust until it smells toasty, wrap the springform pan well if using a water bath, or use the steam-pan method instead.

Salted Caramel Cheesecake FAQs

What Makes This Salted Caramel Cheesecake Recipe Different?

This salted caramel cheesecake recipe uses caramel in the filling and on top, but keeps the amount controlled so the baked cheesecake still sets, chills, and slices cleanly.

Is Store-Bought Caramel Sauce Okay?

Yes, especially for the topping. Choose a thick caramel sauce that coats a spoon. Very thin caramel syrup is better for drizzling over slices than mixing into the cheesecake filling.

How Thick Should Caramel Be for Cheesecake?

For the filling, caramel should be thick but stirrable. For the topping, it should be glossy and slow-moving. If it runs off a spoon like water or syrup, it is too thin for the filling and better used as a serving drizzle.

Is a Water Bath Necessary?

No, but it helps. A water bath gives the smoothest texture, while a steam pan is an easier option. If you bake without either, keep the oven temperature low and avoid overbaking.

How Long Should Salted Caramel Cheesecake Chill?

Chill it for at least 6 hours. Overnight is best, and 8 hours gives more reliable clean slices because the caramel-enriched filling needs time to firm up fully.

Can This Cheesecake Be Made Ahead?

Yes. Bake and chill the cheesecake one day ahead, then add the caramel layer and flaky salt before serving. This gives the best texture and the freshest-looking topping.

Does Salted Caramel Cheesecake Freeze Well?

Yes, but freeze it before adding the topping if possible. Wrap the chilled cheesecake tightly, freeze for up to 2 months, and thaw overnight in the refrigerator. Add the caramel after thawing.

How Do You Make Mini Salted Caramel Cheesecakes?

Use a lined muffin tin and bake until the centers are just set. Mini cheesecakes bake much faster than a full cheesecake, so check them early and add caramel only after chilling.

How Do You Turn This Into Salted Caramel Cheesecake Bars?

Use a parchment-lined square or rectangular pan, bake until just set, chill well, then add caramel and cut into bars with a warm wiped knife.

What Is the Best Crust for Salted Caramel Cheesecake?

Digestive biscuits or graham crackers are the most classic choice. Biscoff crumbs make the crust taste more caramel-like, while a pretzel crust gives a saltier contrast.

Should Caramel Be Added Before or After Baking?

Add a controlled amount of cooled caramel to the filling before baking. Add the visible topping after the cheesecake has chilled. This gives flavor inside the cheesecake while keeping the top glossy and neat.

Back to top

Posted on — 2 Comments

Keto Cheesecake Recipe

Finished keto cheesecake with one slice removed, showing creamy filling and a golden almond flour crust with berries nearby.

This keto cheesecake recipe gives you the kind of slice people actually want from cheesecake: cool, creamy, rich, smooth, and firm enough to cut cleanly. It has a buttery almond flour crust, a full-fat cream cheese filling, and a slow-cooling method that helps prevent cracks without needing a complicated water bath.

The flavor is classic first and keto second. You get the tang of cream cheese and sour cream, the warmth of vanilla, a little brightness from lemon juice, and a low-carb crust that feels much closer to a traditional cheesecake base than a dry “diet dessert” crust.

Use this as your classic baked cheesecake base. You will also find a crustless option, a no-bake option, sweetener guidance, pan-size help, storage tips, and fixes for common problems like cracks, grainy filling, soggy crust, and a runny center.

Quick Answer: The Best Keto Cheesecake Recipe

For the best keto cheesecake, make a baked full-fat cream cheese filling in a 9-inch springform pan with a pre-baked almond flour crust. Bake the crust at 350°F / 177°C for 10–12 minutes, then lower the oven to 325°F / 163°C and bake the cheesecake for 45–55 minutes, until the edges are set and the center still has a soft jiggle.

Let it cool slowly, then chill for at least 6 hours or overnight before slicing. A powdered allulose or monk fruit/allulose blend gives the smoothest texture because it dissolves better than coarse granulated sweeteners.

Pan 9-inch springform pan
Crust Almond flour crust
Crust Bake 350°F / 177°C for 10–12 minutes
Filling Bake 325°F / 163°C for 45–55 minutes
Chill Time 6 hours minimum, overnight best
Yield 12 generous or 16 smaller slices
Net Carbs About 4g per 1 of 16 slices
Water Bath Not required
Texture Cool, creamy, dense, and sliceable
Keto cheesecake quick guide showing a cheesecake slice with baking temperature, pan size, chill time, and net carb notes.
Start here if you want the main numbers before baking: pan size, oven temperature, chill time, and approximate net carbs all shape the final keto cheesecake texture.

Need the full formula? Jump to recipe card · Back to guide

Before you start: Soften the cream cheese fully, bring the eggs and sour cream to room temperature, line the springform pan with parchment, use powdered sweetener for the filling, and plan for at least 6 hours of chilling. These five details matter more than any fancy technique.
Texture tip: The cheesecake should not look fully firm when it comes out of the oven. If the center is completely set in the oven, it is more likely to be overbaked after chilling.

Why This Keto Cheesecake Works

A good keto cheesecake has to solve three problems at once: it needs to taste like classic cheesecake, avoid a gritty sweetener texture, and hold together without flour or sugar. This version uses full-fat brick cream cheese for structure, sour cream for a smooth tangy finish, eggs for setting, and powdered keto sweetener so the filling stays creamy.

The almond flour crust is pre-baked before the filling goes in. That gives it a warmer, nuttier flavor and helps it hold together under the cheesecake layer. The filling bakes low and slow at 325°F / 163°C, then cools gradually so the center can finish setting without a dramatic temperature shock.

That slow method is what makes this sugar free cheesecake more reliable. You do not need a full water bath, but you do need room-temperature ingredients, gentle mixing, and enough chill time.

Close-up of a creamy keto cheesecake slice with smooth dense filling and a visible almond flour crust.
This is the texture goal: creamy, dense, and cleanly cut. If the filling looks grainy, the issue usually starts with cold cream cheese or coarse sweetener.

Baked vs No-Bake vs Crustless Versions

Before you start, choose the right style. A baked cheesecake gives the most classic texture, a no-bake version is easier and lighter, and a crustless cheesecake is the simplest way to reduce carbs and skip the almond flour crust.

Comparison board showing baked keto cheesecake, no-bake keto cheesecake, and crustless keto cheesecake slices with texture notes.
Before choosing a method, decide what texture you want. Baked keto cheesecake is classic, no-bake cheesecake is softer, and crustless cheesecake keeps things simpler.
Version Best For Texture Main Watch-Out
Baked keto cheesecake Classic cheesecake flavor and clean slices Dense, creamy, rich Do not overbake; cool slowly to prevent cracks
No-bake keto cheesecake Easy summer dessert or oven-free prep Lighter, softer, mousse-like Needs enough chill time to set properly
Crustless keto cheesecake Lower carbs, fewer steps, no almond flour Creamy and simple Pan lining matters so it releases cleanly

The baked version is the focus here because it gives the most traditional cheesecake texture. The crustless and no-bake sections below show how to adapt the base without turning the main recipe into three different desserts at once.

Is Keto Cheesecake Low Carb or No Carb?

Keto cheesecake is low carb, but it is usually not truly zero carb. Cream cheese, sour cream, eggs, almond flour, lemon juice, and even some keto sweeteners can contribute small amounts of total carbs depending on the brands you use.

Think of this as a low carb cheesecake or sugar free cheesecake, not a misleading zero-carb dessert. If you want the lowest-carb version, make the crustless option and cut the cheesecake into 16 smaller slices. That gives you the creamy filling with fewer carbs from the almond flour crust.

Lowest-carb direction: Make it crustless, use a powdered sweetener that fits your carb target, and keep toppings simple. Fresh berries are usually a better choice than thick sauces if you are watching carbs closely.

If you like make-ahead low-carb desserts, this keto chia pudding with almond milk is another easy no-sugar option with simple net-carb math.

Equipment You Need

You do not need complicated bakery equipment, but a few tools make this cheesecake much easier and cleaner.

  • 9-inch springform pan: The best standard size for this recipe.
  • Parchment paper: Helps the crust release and makes slicing easier.
  • Mixing bowls: One for the crust and one large bowl for the filling.
  • Hand mixer or stand mixer: Helps make the filling smooth without lumps.
  • Rubber spatula: Useful for scraping the bowl and smoothing the top.
  • Flat-bottom cup or measuring cup: Presses the almond flour crust firmly into the pan.
  • Baking sheet: Makes the springform pan easier to move in and out of the oven.
  • Sharp knife: For clean slices after the cheesecake is fully chilled.
Optional but helpful: Place a pan of hot water on the lower oven rack while the cheesecake bakes. This is not a full water bath, but it adds a little humidity and can help the cheesecake bake more gently.

Ingredients for Keto Cheesecake

The ingredient list is simple, but the details matter. For the smoothest low carb cheesecake, use full-fat dairy, room-temperature ingredients, almond flour for the crust, and a powdered sweetener rather than a coarse granulated one.

Labeled keto cheesecake ingredients including cream cheese, sour cream, eggs, powdered sweetener, almond flour, butter, lemon, vanilla, and salt.
Keto cheesecake uses simple ingredients, but they need to behave well together. Therefore, full-fat dairy, powdered sweetener, and room-temperature eggs matter more than extra add-ins.

Next step: choose sweetener · make the crust

Cream Cheese

Use 32 oz / 907 g full-fat brick cream cheese, softened to room temperature. Brick-style cream cheese gives the cheesecake body and structure. Tub-style spreadable cream cheese is usually softer and can make the filling looser.

The cream cheese should be soft enough to beat smoothly, but not melted or oily. If it is too cold, the filling can turn lumpy. If it is too warm, the batter can become loose and overmixed.

Sour Cream

Sour cream adds a classic tang and softens the richness of the cream cheese. Use 1/2 cup / 120 g sour cream at room temperature. Full-fat sour cream works best here because low-fat versions can make the texture thinner and less creamy.

Eggs

Use 3 large eggs, also at room temperature. Eggs help the cheesecake set, but they should be mixed in gently. Once the eggs go in, do not whip the batter aggressively. Too much air can make the cheesecake puff up in the oven and crack as it cools.

Sweetener

Use 1 cup to 1 1/4 cups powdered keto sweetener. The exact amount depends on how sweet you like cheesecake and how sweet your specific sweetener tastes. A powdered allulose or monk fruit/allulose blend gives the smoothest texture.

If you use a strong erythritol-heavy sweetener, the cheesecake may have a cooling finish. If you use a coarse granulated sweetener, the filling can taste slightly grainy.

Lemon Juice, Vanilla, and Salt

Fresh lemon juice brightens the filling and makes the cheesecake taste more classic. Vanilla rounds out the sweetness, while salt keeps the flavor from tasting flat.

  • Lemon juice: 1 tablespoon fresh lemon juice
  • Vanilla extract: 2 teaspoons
  • Fine salt: 1/4 teaspoon

Best Sweetener for a Smooth Cheesecake Filling

The best sweetener for keto cheesecake is one that dissolves smoothly and does not leave the filling gritty. Powdered sweetener is usually better than granulated sweetener for the filling because it blends more evenly into the cream cheese. For a broader baking overview, this low-carb baking guide explains why ingredient choice can affect texture, browning, and aftertaste.

The sweetener matters even more after chilling. Some erythritol-heavy blends can recrystallize in cold desserts, which is why a cheesecake may taste smooth on day one but slightly gritty after a night in the fridge.

Keto cheesecake sweetener guide comparing powdered allulose, monk fruit allulose blend, erythritol blend, granulated sweetener, and liquid stevia.
The best sweetener for keto cheesecake is not only about sweetness. Powdered allulose or a monk fruit/allulose blend helps the filling stay smoother after chilling.

Using the right sweetener? Continue to crust · fix grainy texture

Sweetener Best Use What to Know
Powdered allulose Smoothest filling texture Less likely to taste grainy; may brown slightly faster in some baked goods
Powdered monk fruit/allulose blend Best all-round choice Good sweetness and smooth texture when powdered
Powdered erythritol blend Works if you like the taste Can leave a cooling effect or slight crystallized texture
Granulated keto sweetener Better for crust than filling Can make the filling grainy unless blended very well
Liquid stevia Small sweetness adjustment Does not add bulk; too much can taste bitter
Best choice for this recipe: Use powdered allulose or a powdered monk fruit/allulose blend in the filling. For the crust, powdered or finely granulated keto sweetener both work.

Almond Flour Cheesecake Crust

The almond flour cheesecake crust is one of the most important parts of this recipe. A good cheesecake crust with almond flour should still taste buttery, hold together under the filling, and slice cleanly after chilling.

It replaces the usual graham cracker crust with a gluten-free, low-carb base that still feels like a real cheesecake crust.

Pressed almond flour cheesecake crust in a springform pan with almond flour, melted butter, powdered sweetener, vanilla, and salt.
A good almond flour cheesecake crust should feel compact before it goes into the oven. Pressing firmly helps the low-carb crust bake into a sliceable base.

Need sizing help? See crust ratios · continue to method

For the crust, use:

  • 2 cups / about 224 g blanched almond flour
  • 1/3 cup / 75 g unsalted butter, melted
  • 2 tablespoons powdered keto sweetener
  • 1 teaspoon vanilla extract
  • 1/4 teaspoon fine salt

Mix everything until the almond flour looks evenly moistened. It should feel like damp sand and hold together when pressed. Press it firmly into the bottom of a parchment-lined 9-inch springform pan, then bake at 350°F / 177°C for 10–12 minutes, until lightly golden and fragrant.

Almond Flour Crust Ratio Guide

The same almond flour cheesecake crust does not behave the same in every pan. A smaller pan makes the crust feel thicker, while a wider pan spreads the mixture thinner and may need a little more butter to stay sliceable.

Use the 9-inch ratio for this keto cheesecake recipe as written. If you change pan size, press the crust firmly, pre-bake it until lightly golden, and let it cool before adding the filling.

Pan Size Almond Flour Butter Sweetener Best Use
8-inch 1 1/2 cups / about 168 g 1/4 cup / 57 g 2 tbsp Thicker cheesecake or smaller batch
9-inch 2 cups / about 224 g 1/3 cup / 75 g 2 tbsp This recipe as written
10-inch 2 cups / about 224 g 5–6 tbsp / 70–85 g 2–3 tbsp Thinner, wider cheesecake
Almond flour cheesecake crust ratio guide for 8-inch, 9-inch, and 10-inch pans with butter and sweetener amounts.
When making cheesecake crust with almond flour, pan size changes everything. As a result, the right butter-to-flour ratio keeps the crust from turning greasy or crumbly.

Crust ready? check pan size · start the method

Almond Flour vs Almond Meal

Blanched almond flour gives the neatest crust because it is finer and lighter. Almond meal can work, but it is usually coarser and may make the crust more rustic or crumbly. For a smooth, classic cheesecake look, use fine blanched almond flour.

If you are searching for an almond meal crust for cheesecake, the same basic idea works, but the texture will be darker, coarser, and more rustic. Fine blanched almond flour gives a smoother shortbread-style crust, while almond meal gives a nuttier, more graham-cracker-like look.

Comparison of almond flour cheesecake crust and almond meal cheesecake crust, showing a smoother lighter crust and a darker coarser crust.
Almond flour and almond meal are not identical in cheesecake crust. Almond flour gives a smoother finish, while almond meal creates a darker, more rustic bite.

Chosen your flour? Check crust ratios · jump to recipe

How to Keep the Crust from Crumbling

A crumbly keto cheesecake crust usually means one of three things: not enough butter, not enough pressing, or not enough baking. The crust should be pressed firmly with the bottom of a cup, especially around the edges. After baking, let it cool for a few minutes before adding the filling.

If the crust still seems loose, add 1 extra tablespoon melted butter next time. If it seems greasy, reduce the butter slightly or bake the crust a minute or two longer.

How to Avoid a Soggy Almond Flour Crust

Pre-baking is the easiest fix. A lightly golden crust holds up better under the filling than a raw almond flour crust. You should also avoid pouring very warm or loose filling onto the crust. The cream cheese filling should be smooth and room temperature, not runny.

Cheesecake Crust Without Almond Flour

You can make the crust without almond flour, but do not swap coconut flour 1:1. Coconut flour absorbs much more liquid and will make the crust dry and dense if used in the same amount.

For a nut-free direction, use a tested sunflower seed flour crust or skip the crust completely and make the crustless option below.

Springform Pan Size Guide

This recipe is designed for a 9-inch springform pan. Different pan sizes change the height, bake time, and texture, so use the table below if you need to adjust.

Springform pan size guide for keto cheesecake showing 6-inch, 7-inch, 8-inch, 9-inch, and 10-inch pan options.
A 9-inch springform pan is the safest standard for this keto cheesecake recipe. Smaller pans create more height, while larger pans bake thinner and faster.

Using a 9-inch pan? Start baking · see exact recipe

Pan Size Best Use What Changes
6-inch Small batch or shortcut cheesecake Use a scaled-down recipe; bake time will be shorter
7-inch Taller no-bake cheesecake Works well for smaller no-bake versions
8-inch Thicker baked cheesecake May need a little more bake time because the filling is deeper
9-inch Best standard size Use the recipe as written
10-inch Wider, slightly thinner cheesecake May bake faster; watch the center jiggle carefully

How to Make Keto Cheesecake

The method is simple, but the order matters. Make the crust first, reduce the oven temperature, mix the filling gently, then cool the cheesecake slowly.

Step-by-step keto cheesecake guide showing crust mixing, pre-baking, filling, baking, cooling, and chilling.
The best keto cheesecake method is not rushed. First build the crust, then mix the filling gently, bake until softly set, cool slowly, and chill before slicing.

Mixing the filling? check texture cues · see doneness

Step 1: Prepare the Pan

Line the bottom of a 9-inch springform pan with parchment paper. Lightly grease the sides. If your springform pan is older or tends to leak butter, place it on a baking sheet before it goes into the oven.

Step 2: Make the Almond Flour Crust

In a bowl, stir together almond flour, melted butter, sweetener, vanilla, and salt. The mixture should look like damp crumbs. Press it firmly into the bottom of the prepared pan. Use a flat-bottom cup to compact it evenly.

Bake the crust at 350°F / 177°C for 10–12 minutes, until it smells nutty and looks lightly golden at the edges. Remove it from the oven and let it cool slightly while you make the filling.

Step 3: Mix the Cheesecake Filling

Lower the oven to 325°F / 163°C. Beat the softened cream cheese on medium-low speed until smooth. Add the powdered sweetener and beat again until combined. Scrape the bowl well so no dense pockets of cream cheese remain.

Add the sour cream, lemon juice, vanilla, and salt. Mix until smooth. Add the eggs one at a time, mixing on low speed just until each egg disappears into the batter.

Keto cheesecake filling texture guide showing smooth batter, lumpy filling, and reminders to soften cream cheese and mix eggs gently.
Smooth cheesecake filling starts before the eggs are added. Once the cream cheese is fully beaten, switch to gentle mixing so the batter does not trap excess air.

Ready to bake? check doneness · avoid cracks

Do not overmix after adding eggs. Extra air can make the cheesecake rise too much in the oven and crack as it cools.

Step 4: Fill the Pan

Pour the filling over the cooled almond flour crust. Smooth the top with a spatula. Tap the pan gently on the counter once or twice to release large air bubbles, but do not bang it aggressively.

Step 5: Bake Low and Slow

Bake at 325°F / 163°C for 45–55 minutes. The edges should look set and slightly puffed, while the center should still wobble gently when the pan is nudged.

If the center looks liquid and sloshes, bake for another 5 minutes and check again. If the entire cheesecake looks fully firm in the oven, it is likely overbaked.
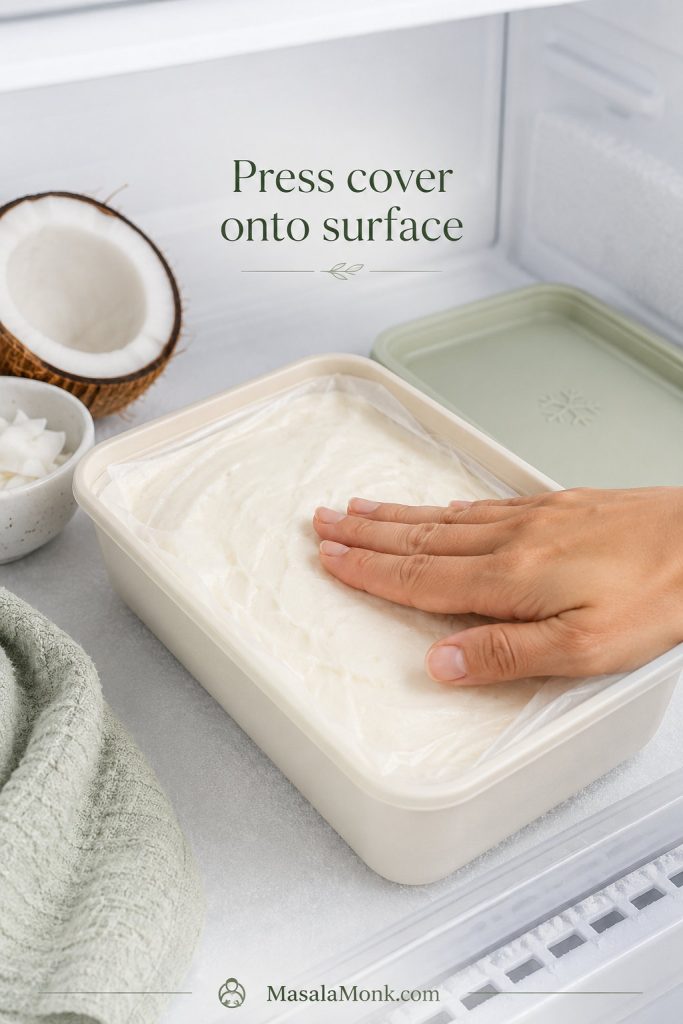
Step 6: Cool Slowly

Turn off the oven. Crack the oven door open and leave the cheesecake inside for 20–30 minutes. Then move it to the counter and let it cool to room temperature.

Once cool, cover and refrigerate for at least 6 hours. Overnight chilling gives the cleanest slices and best texture.

How to Know When the Cheesecake Is Done

The most reliable doneness cue is the jiggle test. The outer 2–3 inches should look set, while the center should still wobble like soft gelatin. It should not look wet, soupy, or liquid, but it should not be completely firm either.

Cheesecake keeps setting as it cools. That is why a slightly jiggly center is correct. If you bake until the center is completely firm, the final chilled cheesecake can turn dense, dry, or cracked.

Doneness guide showing underbaked, just right, and overbaked keto cheesecake centers with a soft jiggle cue.
A softly jiggly center is not a mistake. Instead, it means the cheesecake can finish setting as it cools, which helps prevent a dry or cracked texture.

Center still jiggly? cool without cracks · store it right

What You See What It Means What to Do
Edges set, center softly jiggles Done Turn off oven and begin slow cooling
Center sloshes like liquid Underdone Bake 5 more minutes, then check again
Top is puffed and fully firm Likely overbaked Cool slowly; serve with topping if cracked
Top has deep cracks before cooling Too much heat, air, or bake time Use troubleshooting tips next time

How to Prevent Cracks

Cracks do not ruin cheesecake, but they are easy to reduce. Most cracks come from cold ingredients, overmixing, overbaking, or cooling too quickly.

  • Use room-temperature ingredients: Cold cream cheese creates lumps, and cold eggs can make the batter harder to mix evenly.
  • Mix gently after adding eggs: Eggs trap air quickly. Too much air makes the cheesecake puff and collapse.
  • Do not overbake: The center should still jiggle softly when the cheesecake comes out.
  • Cool gradually: Leave the cheesecake in the turned-off oven with the door cracked before moving it to the counter.
  • Loosen the edge: After cooling slightly, run a thin knife around the edge so the cheesecake does not pull against the pan as it contracts.
No-crack keto cheesecake guide with a smooth cheesecake top and tips for room-temperature ingredients, low-speed mixing, and slow cooling.
No-crack keto cheesecake depends on temperature control. Room-temperature ingredients, low-speed mixing, and slow cooling give the filling a better chance to settle evenly.

Want extra insurance? compare water bath options · fix common issues

No water bath required: This recipe is written to work without a full water bath. If your oven runs hot or you want extra insurance, place a pan of hot water on the lower rack for gentle humidity.

Water Bath or No Water Bath?

You do not need a full water bath for this keto cheesecake recipe. The slow bake at 325°F / 163°C, room-temperature ingredients, gentle mixing, and gradual cooling are enough for a smooth cheesecake in most ovens.

A full water bath can help cheesecakes bake gently, but it also adds extra steps and can leak into a springform pan if the wrapping is not secure. King Arthur Baking explains that a water bath can help reduce cracks, but for this recipe the easier option is to place a pan of hot water on the lower oven rack. It adds a little humidity without putting the cheesecake pan directly in water.

Water bath comparison for keto cheesecake showing no water bath, hot water pan, and full water bath baking setups.
You can make this keto cheesecake without a full water bath. However, a hot water pan on the lower rack can add humidity if your oven tends to run dry.

No full bath needed? Use the recipe card · check doneness cues

Method Best For Downside
No water bath Simplest method; works well with slow cooling Needs careful bake time and cooling
Pan of hot water on lower rack Easy extra insurance against drying Still not a guarantee if the cheesecake is overbaked
Full water bath Very gentle baking More setup; springform pans can leak

Crustless Keto Cheesecake Option

You can make this cheesecake without the almond flour crust. A crustless keto cheesecake is slightly lower in carbs, simpler to prepare, and useful if you are avoiding nuts.

To make it crustless, skip the crust ingredients and line the bottom of the springform pan with parchment. Grease the sides well. Pour the filling directly into the pan and bake at 325°F / 163°C until the edges are set and the center still jiggles softly.

The bake time may be slightly shorter because there is no crust layer. Start checking around 40–45 minutes. Chill completely before slicing, because crustless cheesecake needs time to firm up for clean edges.

Crustless keto cheesecake with a clean slice removed, smooth filling, and notes for checking bake time and chilling.
Crustless keto cheesecake removes the almond flour base, so the pan matters more. Line it well, chill fully, and slice cold for the cleanest edges.

Skipping crust? adapt the recipe · chill and store properly

Best crustless tip: Do not skip the parchment. Without a crust, the filling sits directly against the pan, so lining and chilling are what help the slices release cleanly.

No-Bake Keto Cheesecake Option

A no-bake keto cheesecake is a different style of cheesecake. It is lighter, softer, and more mousse-like because it sets in the refrigerator instead of baking with eggs.

For a 9-inch no-bake keto cheesecake, use the almond flour crust as written, then chill or briefly bake the crust before adding the filling. For the filling, beat 24 oz / 680 g softened full-fat cream cheese with 3/4 to 1 cup powdered keto sweetener, 2 teaspoons vanilla, 1 tablespoon lemon juice, and a pinch of salt until smooth. In a separate bowl, whip 1 cup / 240 ml heavy cream to soft peaks, then fold it into the cream cheese mixture.

No-bake keto cheesecake slice with cream cheese, whipped cream, chilling time, and no-egg filling notes.
No-bake keto cheesecake is a separate style, not just an unbaked version of the main filling. It relies on whipped cream and long chilling instead of eggs.

Making it no-bake? choose pan size · compare with baked recipe

This makes a slightly lower 9-inch no-bake cheesecake. For a taller no-bake keto cheesecake, use an 8-inch springform pan and chill it overnight before slicing.

8-Inch vs 9-Inch No-Bake Keto Cheesecake

No-bake cheesecake height depends heavily on pan width because the filling sets in the refrigerator instead of rising or firming in the oven. An 8-inch pan gives a taller, more bakery-style slice, while a 9-inch pan gives a wider cheesecake with a slightly lower profile.

Both pan sizes work, but the chilling time matters more in the taller version. If you use an 8-inch pan, chill overnight before slicing so the center has enough time to set cleanly.

Comparison of 8-inch and 9-inch no-bake keto cheesecakes showing a taller cheesecake and a lower wider cheesecake.
For no-bake keto cheesecake, pan width changes the look of the slice. An 8-inch pan gives height, while a 9-inch pan gives a lower, wider cheesecake.

Picked your pan? return to no-bake method · see variations

Spread the filling over the crust, smooth the top, cover, and refrigerate for at least 6–8 hours. Overnight is better. If the cheesecake is sliced too soon, it can look soft or collapse at the edges.

Important: Do not use the baked filling from the recipe card for the no-bake version. The baked filling relies on eggs and oven heat to set. The no-bake version needs whipped cream and long chilling instead.

If you want the classic non-keto version with a sweeter filling and regular crumb crust, use this no bake cheesecake recipe instead.

Best use: Choose baked keto cheesecake when you want classic dense cheesecake texture. Choose the no-bake version when you want an easier, lighter, oven-free dessert.

Keto Cheesecake Variations

Once you understand the base, you can use it for other low carb cheesecake flavors. Keep the structure the same, then adjust carefully so the filling still sets properly. In most cases, toppings are safer than mix-ins because they add flavor without loosening the cheesecake.

Keto cheesecake variations board with pumpkin, chocolate, strawberry, blueberry, lemon, New York-style, mini, and no-bake cheesecake options.
Keto cheesecake variations work best when the base stays stable. Therefore, toppings and small flavor accents are safer than adding too much liquid to the filling.

Need a classic slice first? Jump to recipe · see New York-style

Keto Pumpkin Cheesecake

Pumpkin cheesecake needs pumpkin puree, pumpkin pie spice, and a little cinnamon in the filling. Since pumpkin adds moisture, it works better as a dedicated variation than as a casual stir-in. With this base cheesecake, a spoonful of pumpkin spice whipped cream on top gives you the flavor without changing the bake.

Keto Chocolate Cheesecake

A chocolate version works best with melted sugar-free chocolate or cocoa powder in the filling. Chocolate changes both sweetness and texture, so taste the filling before adding eggs and adjust the sweetener if needed. If you want a separate creamy chocolate dessert instead, this avocado chocolate mousse stays in the same rich, spoonable dessert lane.

Keto Strawberry Cheesecake

The cleanest strawberry version keeps the filling vanilla and adds a sugar-free strawberry topping after baking. Fresh berry toppings are easier to control than mixing watery fruit into the batter. Cooked and cooled strawberry sauce gives stronger flavor without making the cheesecake soft.

Keto Blueberry Cheesecake

A thick low-carb blueberry sauce works best as a topping or light swirl. If using a swirl, keep it concentrated and spoon it lightly over the top before baking. Too much fruit sauce can make the center loose.

Keto Lemon Cheesecake

To make the cheesecake brighter, add lemon zest to the filling. Zest gives strong lemon flavor without adding much liquid. Avoid adding too much extra lemon juice because excess liquid can soften the filling.

Mango Cheesecake and Keto Limits

Mango is not usually the easiest strict-keto cheesecake flavor because it brings natural sugar and extra moisture. If you are not keeping the dessert strictly keto and want a fruit-forward no-bake version, this no bake mango cheesecake recipe is the better fit.

Keto New York Cheesecake

For a New York-style keto cheesecake, keep the flavor simple and focus on a dense, creamy texture. Use full-fat brick cream cheese, sour cream, eggs, vanilla, lemon juice, and the almond flour crust. Avoid fruit puree or chocolate in the filling because those move it away from the classic New York-style profile.

The biggest difference is texture. A New York-style keto cheesecake should feel rich, smooth, and slightly dense rather than fluffy. Chill it overnight before slicing, and serve toppings on the side so the clean cheesecake flavor stays central.

Comparison of New York-style keto cheesecake and classic keto cheesecake slices, showing a denser plain slice and a berry-topped slice.
New York-style keto cheesecake should feel denser and cleaner, while classic keto cheesecake is more flexible. Keep toppings lighter if you want that rich bakery-style texture.

Prefer smaller portions? See mini cheesecakes · return to recipe

Keto Ricotta Cheesecake

Ricotta gives keto cheesecake a lighter, slightly more Italian-style texture. It is less dense than an all-cream-cheese filling and can taste a little grainier unless blended very smooth. Use full-fat ricotta, drain excess liquid if it looks wet, and blend it with cream cheese rather than using ricotta alone.

For the most reliable result, treat ricotta cheesecake as a separate variation rather than a direct one-for-one swap. If you are experimenting, replace only part of the cream cheese with smooth ricotta and keep the eggs, lemon, vanilla, and sweetener balanced so the cheesecake still sets.

High-Protein Keto Cheesecake

For a higher-protein direction, cottage cheese, Greek yogurt, ricotta, or protein powder can be used in separate cheesecake styles. For a breakfast-style version of that idea, these high-protein low-carb pancakes use similar cottage cheese and low-carb logic.

Protein powder needs care in cheesecake because it can make the filling dry, chalky, or rubbery if added casually. If using cottage cheese, blend it completely smooth before adding it to a cheesecake filling. A high-protein low carb cheesecake works best as its own tested variation rather than a direct swap inside this classic baked version.

Mini Keto Cheesecakes, Cups, and Bites

You can turn the same flavor idea into mini keto cheesecakes by baking the crust and filling in a lined muffin pan. Mini versions bake faster, chill faster, and are easier to portion for parties, lunch boxes, or meal prep.

Start checking mini cheesecakes around 15 minutes. They are done when the edges look set and the centers still have a slight wobble. Chill them fully before removing the liners. For true keto cheesecake bites or fat bombs, use a separate no-bake cream cheese mixture instead of this baked filling.

Mini keto cheesecakes in paper liners topped with berries, whipped cream, lemon zest, and chocolate shavings.
Mini keto cheesecakes are great for portion control, but they still need proper chilling. Since they bake faster, start checking early and let them set before serving.

Baking minis? use the same doneness cues · store leftovers

3 Ingredient Keto Cheesecake Shortcut

A 3 ingredient keto cheesecake is usually a no-bake shortcut made with cream cheese, keto sweetener, and another creamy ingredient such as whipped cream, Greek yogurt, or keto vanilla yogurt. It is useful for a quick dessert, but it will not have the same baked cheesecake texture as this full recipe.

Keto Cheesecake Troubleshooting

Most keto cheesecake problems are easy to diagnose. Use this table to fix the current cheesecake if possible and prevent the issue next time.

Keto cheesecake troubleshooting board showing cracked top, grainy filling, runny center, dry texture, stuck pan, and sweetener aftertaste fixes.
Troubleshooting keto cheesecake is easier when you match the problem to the cause. Cracks, graininess, runny centers, and stuck slices each need a different fix.

Need a crust fix too? See crust fixes · retry with recipe card

Problem Likely Cause Fix
Cracked top Overbaking, too much air, or fast cooling Cool slowly next time; serve current cheesecake with whipped cream or berry topping
Lumpy filling Cream cheese was too cold Use fully softened cream cheese and beat it smooth before adding eggs
Grainy texture Coarse sweetener or crystallizing sweetener Use powdered allulose or powdered monk fruit/allulose blend
Soggy crust Crust was not pre-baked enough or filling was too loose Pre-bake crust until lightly golden and let it cool before filling
Crumbly crust Not enough butter or not pressed firmly Add 1 extra tablespoon melted butter next time and press with a flat-bottom cup
Runny center Underbaked or sliced too soon Bake until softly jiggly, then chill at least 6 hours before slicing
Dry texture Overbaked cheesecake Pull it from the oven while the center still jiggles
Cheesecake stuck to pan No parchment or not enough chilling Line the pan and chill fully before removing the springform ring
Sweetener aftertaste Sweetener blend does not suit your taste Try allulose or a monk fruit/allulose blend; add lemon and vanilla for balance

Almond Flour Crust Fixes

Almond flour crust problems usually come from pressure, butter balance, or bake time. If the crust crumbles, it often needed firmer pressing or a touch more butter. If it turns soggy, it usually needed a longer pre-bake or more cooling time before the filling went in.

The goal is a crust that feels compact, lightly golden, and sturdy enough to lift with the cheesecake slice. Fixing the crust separately is useful because the filling can be perfect while the base still needs adjustment.

Almond flour crust fixes board showing crumbly, soggy, greasy, and sliceable cheesecake crust results with correction tips.
Almond flour crust problems usually come down to pressure, butter, or baking time. Press firmly, pre-bake until lightly golden, and cool before adding filling.

Crust sorted? continue method · jump to recipe

What the Finished Cheesecake Should Be Like

After chilling, the cheesecake should slice cleanly, hold its shape on a plate, and feel dense but creamy when you cut through it. The center should not be runny, the filling should not taste grainy, and the almond flour crust should stay firm enough to lift with the slice.

The flavor should be rich and tangy, not flat or overly sweet. If your cheesecake tastes slightly muted when cold, let slices sit at room temperature for 10–15 minutes before serving.

Storage and Freezing

Keto cheesecake is an excellent make-ahead dessert because the texture improves after chilling. Keep it covered in the refrigerator until ready to serve. For food safety, the USDA recommends using refrigerated leftovers within 3–4 days or freezing them for longer storage.

Storage guide showing covered keto cheesecake in the refrigerator, wrapped slices, frozen slices, and a thawed slice ready to serve.
Keto cheesecake is one of the better make-ahead desserts. For the best texture, refrigerate covered, freeze slices individually, and thaw overnight before serving.

Serving later? slice cleanly · add toppings

  • Refrigerator: Store covered for 3–4 days for the best balance of texture and food safety.
  • Freezer: Freeze slices or the whole cheesecake for up to 2 months for best quality.
  • Thawing: Thaw overnight in the refrigerator for the best texture.
  • Serving: Slice cold, then let slices sit at room temperature for 10–15 minutes if you prefer a softer texture.

For freezing, place chilled slices on a parchment-lined tray until firm, then wrap individually. This keeps the slices from sticking together and makes it easier to thaw only what you need.

How to Slice Cheesecake Cleanly

For clean slices, chill the cheesecake fully before cutting. Use a sharp knife, dip it in hot water, wipe it dry, then cut one slice. Wipe the knife between cuts so the filling stays smooth and the almond flour crust does not drag through the slice.

Clean cheesecake slicing guide showing a hot knife, wiping the blade, cutting cold cheesecake, and a neat slice on a plate.
Clean cheesecake slices come from cold cheesecake and a warm knife. Wipe between cuts so the creamy filling and almond flour crust stay neat.

Ready to serve? see toppings · save the recipe

Serving Ideas

This keto cheesecake is rich enough to serve plain, but toppings can make it feel more special without adding much sugar.

  • Fresh strawberries, raspberries, or blueberries
  • Sugar-free berry sauce
  • Unsweetened whipped cream
  • Shaved sugar-free chocolate
  • Lemon zest
  • Toasted sliced almonds
  • A light dusting of cinnamon for a warmer flavor
Keto cheesecake topping ideas with fresh berries, sugar-free berry sauce, whipped cream, shaved chocolate, lemon zest, toasted almonds, and cinnamon.
Low-carb toppings should support the cheesecake, not bury it. Fresh berries, whipped cream, lemon zest, shaved chocolate, toasted almonds, and cinnamon all keep the flavor balanced.

Want exact amounts? Jump to recipe card · check FAQs

Keep toppings simple if you want the cheesecake texture to stay the focus. Watery fruit sauces should be cooked down and cooled before adding.

For a cozy pairing, serve a small slice with keto hot chocolate instead of a sugary drink.

Keto Cheesecake Recipe Card

This creamy keto cheesecake has a buttery almond flour crust, smooth sugar-free cream cheese filling, and a slow-cooling method that helps prevent cracks. It is rich, low carb, gluten-free, and made without a water bath.

Prep Time 25 minutes
Crust Bake 10–12 minutes
Cheesecake Bake 45–55 minutes
Cooling Time 1½–2 hours
Chill Time 6 hours minimum, overnight best
Total Time About 9 hours, plus overnight chill if preferred
Yield 12–16 slices
Pan 9-inch springform
Net Carbs About 4g per 1 of 16 slices
Water Bath Not required
Method Baked cheesecake
Difficulty Easy with slow cooling

Ingredients

For the Almond Flour Crust

  • 2 cups / about 224 g blanched almond flour
  • 1/3 cup / 75 g unsalted butter, melted
  • 2 tablespoons powdered keto sweetener
  • 1 teaspoon vanilla extract
  • 1/4 teaspoon fine salt

For the Cheesecake Filling

  • 32 oz / 907 g full-fat brick cream cheese, softened
  • 1 cup to 1 1/4 cups powdered keto sweetener, preferably allulose or monk fruit/allulose blend
  • 1/2 cup / 120 g sour cream, room temperature
  • 3 large eggs, room temperature
  • 1 tablespoon fresh lemon juice
  • 2 teaspoons vanilla extract
  • 1/4 teaspoon fine salt

Instructions

  1. Prepare the pan. Line the bottom of a 9-inch springform pan with parchment paper and lightly grease the sides.
  2. Heat the oven for the crust. Preheat the oven to 350°F / 177°C.
  3. Make the crust. Stir almond flour, melted butter, sweetener, vanilla, and salt until the mixture looks like damp crumbs.
  4. Press and bake the crust. Press the crust firmly into the pan using the bottom of a cup. Bake for 10–12 minutes, until lightly golden. Let it cool slightly.
  5. Lower the oven temperature. Reduce the oven to 325°F / 163°C.
  6. Beat the cream cheese. In a large bowl, beat softened cream cheese until smooth. Scrape the bowl well.
  7. Add sweetener. Add 1 cup powdered keto sweetener and beat until smooth. Taste before adding eggs and add up to 1/4 cup more sweetener if you prefer a sweeter cheesecake.
  8. Add sour cream and flavorings. Mix in sour cream, lemon juice, vanilla, and salt until smooth.
  9. Add eggs gently. Add eggs one at a time on low speed, mixing only until each egg is incorporated. Do not overmix.
  10. Fill the pan. Pour the filling over the cooled crust and smooth the top.
  11. Bake. Bake at 325°F / 163°C for 45–55 minutes, until the edges are set and the center still jiggles softly.
  12. Cool slowly. Turn off the oven, crack the door open, and leave the cheesecake inside for 20–30 minutes.
  13. Cool at room temperature. Move the cheesecake to the counter and cool completely.
  14. Chill. Cover and refrigerate for at least 6 hours, preferably overnight.
  15. Slice and serve. Run a thin knife around the edge before releasing the springform ring. Slice cold with a sharp knife.

Recipe Notes

  • For the smoothest filling, use powdered sweetener rather than coarse granulated sweetener.
  • Do not overbake. The center should still wobble gently when the cheesecake comes out of the oven.
  • For a crustless version, skip the crust, line and grease the pan well, and start checking the bake around 40–45 minutes.
  • For a more New York-style texture, chill the cheesecake overnight and serve toppings on the side rather than mixing fruit into the filling.
  • For the lowest-carb version, make the cheesecake crustless and slice it into 16 smaller portions.
  • Nutrition will vary by brand of sweetener, cream cheese, sour cream, and almond flour.

Approximate Nutrition

Approximate per 1 of 16 slices: 330–360 calories, 7–9 g protein, 32–35 g fat, and about 4 g net carbs. For 12 larger slices, net carbs are closer to about 5 g per slice. Exact values depend on the brands used.

Keto cheesecake recipe card with a cheesecake slice, almond flour crust, no water bath note, baking temperatures, chill time, and key ingredients.
Save this keto cheesecake recipe card for the key numbers: almond flour crust, 9-inch pan, gentle bake, slow cooling, and at least 6 hours of chilling.

Still deciding? Read FAQs · Back to guide

FAQs

Is cheesecake keto?

Traditional cheesecake is usually not keto because the filling contains sugar and the crust is often made with graham crackers. This version uses an almond flour crust and keto sweetener to keep the carbs low.

Is keto cheesecake zero carb?

No. It is usually low carb, not zero carb. Dairy, eggs, almond flour, lemon juice, and some sweeteners can all add small amounts of carbs. For the lowest-carb version, make it crustless and keep toppings simple.

How many net carbs are in keto cheesecake?

This recipe has about 4 g net carbs per slice if cut into 16 slices, or about 5 g net carbs if cut into 12 larger slices. The exact number depends on the almond flour, cream cheese, sour cream, and sweetener brands you use.

What can I use instead of almond flour?

The easiest option is to make the crustless version. You can also use a tested nut-free crust, but coconut flour should not be swapped 1:1 for almond flour because it absorbs much more moisture.

How do I make keto cheesecake no crust?

For keto cheesecake no crust, skip the almond flour base, line the pan with parchment, grease the sides well, and pour the filling directly into the pan. Start checking the cheesecake a little earlier because there is no crust layer.

How is no-bake keto cheesecake different?

A no-bake version uses a different filling structure. It usually sets with whipped cream and long chilling instead of eggs and baking, so the texture is softer and more mousse-like.

Do I need a water bath for keto cheesecake?

A full water bath is not required. This recipe uses room-temperature ingredients, gentle baking at 325°F / 163°C, careful mixing after the eggs go in, and slow cooling. For extra insurance, place a pan of hot water on the lower oven rack.

What is the best sweetener for keto cheesecake?

Powdered allulose or a powdered monk fruit/allulose blend gives the smoothest filling. Coarse granulated sweeteners can taste gritty, and some erythritol-heavy blends can leave a cooling finish.

Why did my keto cheesecake crack?

Cracks usually happen because the filling was overmixed, the cheesecake was overbaked, or it cooled too quickly. Use room-temperature ingredients, mix gently after adding eggs, pull it from the oven while the center still jiggles, and cool it slowly.

Why is my cheesecake grainy?

Grainy cheesecake often comes from coarse sweetener or a sweetener that crystallizes as it chills. Use powdered sweetener in the filling and avoid overmixing once the eggs are added.

Does coconut flour work for the crust?

Not as a direct swap. Coconut flour is much more absorbent than almond flour, so it needs a different ratio of fat and liquid. For this recipe, almond flour is the better choice unless you are using a tested coconut flour crust.

Ricotta vs cottage cheese: do they work?

Both can work in separate cheesecake styles, but the texture will be different. Ricotta gives a lighter, slightly grainier cheesecake, while cottage cheese needs blending until completely smooth. For this classic version, brick cream cheese gives the best result.

How long do mini keto cheesecakes bake?

Mini cheesecakes usually bake faster than a full cheesecake, often around 15–22 minutes depending on size. Use a muffin pan with liners, watch for set edges and slightly wobbly centers, then chill well before serving.

How do you freeze keto cheesecake?

Freeze it only after the cheesecake has chilled completely. Wrap slices individually or freeze them on a parchment-lined tray first, then store them in an airtight container. Thaw overnight in the refrigerator for the best texture.

Posted on — 1 Comment

Mint Chocolate Chip Ice Cream Recipe

Homemade mint chocolate chip ice cream scooped into a bowl with fine chocolate pieces and a creamy pale green texture.

This mint chocolate chip ice cream recipe makes cool, creamy homemade mint chip ice cream with a clean mint flavor, little crisp bits of chocolate, and a smooth scoopable texture. It tastes bright and refreshing without turning sharp or toothpaste-like, and the chocolate stays small enough to melt nicely as you eat.

The main method stays simple: whisk, chill, churn, add chocolate, and freeze. You do not need to cook a custard for the basic version, and you do not need any unusual ingredients. No ice cream maker? There is a no-churn version below. Prefer a softer, more natural mint flavor? The fresh mint variation shows you how to steep real mint leaves into the base.

The small details make the biggest difference here. A little restraint with mint extract keeps the flavor clean, chopped chocolate gives a better bite than large frozen chips, and a fully chilled base helps the ice cream freeze creamy instead of icy.

Quick Answer: How to Make Mint Chocolate Chip Ice Cream

To make mint chocolate chip ice cream, whisk together whole milk, sugar, salt, vanilla, mint extract, and heavy cream to make a cold ice cream base. Chill the base for at least 2 to 4 hours, then churn it in an ice cream maker for about 20 to 25 minutes. Add chopped chocolate during the last 5 minutes of churning, transfer the ice cream to a freezer container, and freeze it for 2 to 4 hours until scoopable.

For the best first batch, start with mint extract or peppermint extract and chopped semisweet or dark chocolate. A more natural herbal flavor comes from steeping fresh mint leaves in the dairy first. Without an ice cream maker, the easiest route is the no-churn version with whipped cream and sweetened condensed milk.

Make this version first: Use the main eggless ice cream maker recipe with mint extract and chopped semisweet or dark chocolate. It gives you the easiest balance of creamy texture, classic mint flavor, and reliable results.
Bowl of homemade mint chocolate chip ice cream with three pale green scoops, chocolate flecks, and a mint garnish.
Once the ice cream has set, the scoops should hold their shape while still looking creamy, with fine chocolate flecks spread evenly through the mint base.

Once you know the basic method, the variations are easy to choose. The no-churn version is best when you do not have a machine, fresh mint gives a softer herbal flavor, and the custard upgrade is there when you want the richest texture.

Why This Mint Chocolate Chip Ice Cream Recipe Works

This is the kind of mint chip ice cream that feels easy enough for a weekend dessert but still gets the important details right: a cold base, balanced mint, enough creaminess, and chocolate pieces that do not freeze into hard chunks.

The goal is not to make the most complicated mint ice cream. It is to make the version most people will actually repeat: creamy, minty, easy to churn, and easy to scoop.

The best mint chocolate chip ice cream is not the strongest mint version or the greenest version; it is the one with balanced mint, creamy texture, and chocolate pieces that are easy to bite once frozen.

  • The main method is easy. The recipe uses an eggless ice cream maker base, so there is no cooking, tempering, or straining required.
  • The texture stays creamy. Heavy cream, whole milk, sugar, and proper chilling help the ice cream churn smoothly.
  • The mint flavor is controlled. You start with a modest amount of extract, then adjust only if you want it stronger.
  • The chocolate bite is better. Chopped chocolate gives smaller, more pleasant pieces than large frozen chips.
  • The color is flexible. Keep the ice cream naturally pale or add a few drops of green coloring for the classic look.
  • There are backup methods. You get no-churn, fresh mint, and custard-style upgrade options without changing the main recipe.

Ingredients for Mint Chocolate Chip Ice Cream

Because the ingredient list is short, each choice matters. Cream and whole milk create the body. Sugar sweetens the base and keeps it scoopable. Mint gives the flavor, but it needs restraint. Chocolate adds the familiar chip texture, provided the pieces are small enough to eat comfortably when frozen.

Ingredients for mint chocolate chip ice cream, including heavy cream, whole milk, sugar, salt, vanilla, mint extract, chopped chocolate, and optional green coloring.
Because this homemade mint chip ice cream uses a short ingredient list, cream builds richness, sugar helps scoopability, mint controls flavor, and chopped chocolate improves the frozen bite.

Heavy Cream and Whole Milk

Heavy cream gives the ice cream its rich, smooth body. Whole milk lightens the base so it stays refreshing instead of tasting overly heavy. The ratio here is simple: 2 cups heavy cream to 1 cup whole milk.

Avoid skim milk for this recipe. A leaner base is more likely to freeze icy, especially in a home freezer.

Sugar and Salt

Sugar does more than make ice cream sweet. It also helps the finished ice cream stay scoopable. Reduce it too aggressively and the ice cream can freeze very hard. A small amount of salt keeps the sweetness from tasting flat and makes the mint and chocolate clearer.

Mint Extract or Peppermint Extract

Mint extract gives the familiar ice cream-shop flavor. Peppermint extract tastes sharper and cooler, so it should be used carefully. Start with 1 teaspoon mint extract or 3/4 teaspoon peppermint extract, taste the chilled base, and add a little more only if you want a stronger mint flavor.

Too much extract is the fastest way to make homemade mint ice cream taste medicinal. You want refreshing, not mouthwash-like.

Vanilla Extract

Vanilla softens the mint and makes the base taste more rounded. One teaspoon is enough for the whole batch.

Chopped Chocolate

Use chopped semisweet or dark chocolate for the best everyday version. Large chocolate chips can freeze hard, while chopped chocolate gives smaller, thinner pieces that are easier to bite through.

For the main recipe, use 4 ounces / 115 grams chopped chocolate. If you love a finer chip texture, use the chocolate shard method below.

Optional Green Food Coloring

Green color is optional. It gives the ice cream the nostalgic mint chip look, but it does not change the flavor. Add 1 to 3 drops if you want a pale green scoop, or skip it for a natural white mint chip ice cream.

Mint Extract vs Peppermint Extract vs Fresh Mint

Your mint choice changes the whole personality of the ice cream. Mint extract gives you the familiar mint chip flavor most people expect, peppermint extract tastes colder and sharper, and fresh mint tastes softer, greener, and more herbal.

Mint option Flavor Best for Watch out for
Mint extract Classic, sweet, ice cream-shop style Easy homemade mint chocolate chip ice cream Strength varies by bottle
Peppermint extract Sharper, cooler, stronger Bold mint flavor Can taste medicinal if overused
Fresh mint leaves Herbal, natural, softer A fresher, more delicate mint ice cream Needs steeping and straining
Comparison board showing mint extract, peppermint extract, and fresh mint as flavor options for homemade mint chocolate chip ice cream.
Using mint extract is the easiest classic route; meanwhile, peppermint extract tastes cooler and sharper, while fresh mint gives a gentler herbal finish.

For the classic mint chip flavor most people expect, use mint extract. Peppermint extract gives a stronger cooling effect, so add it carefully. Fresh mint is best when you want a softer garden-fresh flavor and have extra time for steeping and chilling.

Fresh mint gives a beautiful flavor, but it usually will not make the ice cream bright green by itself. Add a small amount of food coloring separately if you want the classic green look.

Chocolate Chips vs Chopped Chocolate in Mint Ice Cream

Chocolate behaves differently once it is frozen. Regular chocolate chips are convenient, but they can become hard in ice cream. Chopped chocolate gives a better bite because the pieces are thinner and more irregular. Thin chocolate shards give the smoothest texture of all.

Chocolate type Texture in ice cream Best use
Mini chocolate chips Small, crisp, convenient Easiest classic choice
Regular chocolate chips Often too firm once frozen Better chopped lightly first
Chopped semisweet chocolate Uneven pieces with a better bite Best everyday choice
Chopped dark chocolate Cleaner flavor and less sweetness Best grown-up flavor
Melted chocolate shards Thin, crisp, quicker-melting pieces Best premium texture
Comparison of mini chips, regular chocolate chips, chopped semisweet chocolate, chopped dark chocolate, and melted chocolate shards for mint chip ice cream.
Instead of relying on large chips, use chopped chocolate or thin shards when you want chocolate pieces that stay easier to bite after freezing.
Best choice for most batches: Use chopped semisweet chocolate. It is easier than making shards, more pleasant than large frozen chips, and balanced enough for both kids and adults.

If you like the mint-and-chocolate pairing in baked desserts too, MasalaMonk’s double chocolate chip cookies include a mint chocolate variation that uses the same flavor logic in cookie form.

Easy Chocolate Shard Method

Melt 4 ounces / 115 grams semisweet or dark chocolate with 1 teaspoon neutral oil or coconut oil. Let it cool slightly so it is fluid but not hot. During the last 1 to 2 minutes of churning, drizzle the melted chocolate slowly into the moving ice cream. It will harden into thin, irregular shards.

You can skip this step and still get excellent ice cream. However, if you want the chocolate to feel thinner and more delicate, the shard method is worth the extra minute. This stracciatella-style approach is also used in more technical mint chip ice cream methods, where melted chocolate with a little oil is drizzled into the churned base for smoother pieces.

How to Make Mint Chocolate Chip Ice Cream in an Ice Cream Maker

The main method is simple, but the base needs to be cold. If your ice cream maker uses a freezer bowl, that bowl should be fully frozen before you begin. The base should also be chilled before churning. A warm base takes longer to churn and can freeze with a coarser texture.

If you are using a stand-mixer attachment, MasalaMonk’s guide to making ice cream with a KitchenAid mixer explains freezer-bowl timing, base chilling, and churning cues in more detail.

Step 1: Freeze the Ice Cream Maker Bowl

If your machine uses a freezer bowl, freeze it for at least 12 to 24 hours. It should be completely solid before you start.

Step 2: Make the Mint Ice Cream Base

Whisk the whole milk, sugar, salt, vanilla, and 1 teaspoon mint extract or 3/4 teaspoon peppermint extract until the sugar dissolves. Stir in the heavy cream. Add 1 to 3 drops of green food coloring now if you want green mint chocolate chip ice cream.

Step 3: Chill the Base

Cover and chill the base for at least 2 to 4 hours. Overnight is even better. A very cold base churns faster and gives a smoother texture.

Step 4: Churn Until Thick

Pour the chilled base into the ice cream maker and churn according to your machine’s instructions. Most home machines take about 20 to 25 minutes. The churned ice cream should mound on a spoon but still look soft; it will not be scoop-shop firm until after the freezer set.

Step 5: Add the Chocolate Late

Add chopped chocolate during the last 5 minutes of churning. If you are using the melted chocolate shard method, drizzle the chocolate in during the last 1 to 2 minutes instead.

Do not add the chocolate too early: Let the base thicken first, then add chopped chocolate during the last 5 minutes of churning. This keeps the pieces evenly distributed without weighing down the texture.
Step-by-step guide showing mint chocolate chip ice cream being whisked, chilled, churned, mixed with chocolate, and frozen until scoopable.
Chill first, churn second, and add the chocolate near the end; this order keeps the base smooth and the chocolate evenly distributed.

Step 6: Freeze Until Scoopable

Transfer the churned ice cream to an airtight freezer container. Press parchment paper directly onto the surface, cover, and freeze for 2 to 4 hours. The ice cream will be soft right out of the machine and firmer after hardening in the freezer.

Texture Cues: Soft Serve First, Scoopable After Freezing

Texture cue: Right after churning, homemade ice cream usually looks like soft serve. That is normal. Extra freezer time turns it into scoopable ice cream.
Texture comparison showing mint chip ice cream as soft-serve after churning and firmer scoops after freezing.
Freshly churned mint chip ice cream should look like soft serve at first; after a freezer set, it becomes firm enough to scoop cleanly.

Recipe Card: Mint Chocolate Chip Ice Cream Recipe

Mint Chocolate Chip Ice Cream Recipe

This creamy homemade mint chocolate chip ice cream recipe uses an easy eggless base, mint extract or peppermint extract, and chopped chocolate for a smooth, scoopable mint chip ice cream you can repeat all summer.

Yield About 1.5 quarts / 6 cups
Servings 8 to 10
Prep Time 10 minutes
Churn Time 20 to 25 minutes
Chill Time 2 to 4 hours
Freeze Time 2 to 4 hours
Total Time About 4½ to 8½ hours
Method Ice cream maker
Difficulty Easy

Equipment

  • Ice cream maker
  • Mixing bowl
  • Whisk
  • Rubber spatula
  • Measuring cups and spoons
  • Airtight freezer container

Ingredients

  • 2 cups / 480 ml heavy cream
  • 1 cup / 240 ml whole milk
  • 3/4 cup / 150 g granulated sugar
  • 1/4 teaspoon fine salt
  • 1 teaspoon vanilla extract
  • 1 to 1 1/2 teaspoons mint extract, or 3/4 to 1 teaspoon peppermint extract
  • 4 oz / 115 g semisweet or dark chocolate, finely chopped
  • 1 to 3 drops green food coloring, optional

Instructions

  1. Freeze the bowl if needed. If your ice cream maker uses a freezer bowl, freeze it until fully solid, preferably overnight.
  2. Make the base. In a mixing bowl, whisk the whole milk, sugar, salt, vanilla, and 1 teaspoon mint extract or 3/4 teaspoon peppermint extract until the sugar dissolves.
  3. Add cream and color. Stir in the heavy cream. Add 1 to 3 drops green food coloring if you want green mint chocolate chip ice cream.
  4. Chill. Cover and refrigerate the base for at least 2 to 4 hours, or overnight for the smoothest texture.
  5. Taste and adjust. Taste the cold base. Add another 1/4 to 1/2 teaspoon mint extract, or a few drops more peppermint extract, only if you want stronger mint flavor.
  6. Churn. Pour the chilled base into the ice cream maker and churn for 20 to 25 minutes, or until thick like soft serve.
  7. Add chocolate. Add the chopped chocolate during the last 5 minutes of churning.
  8. Freeze. Transfer to an airtight container, press parchment onto the surface, cover, and freeze for 2 to 4 hours until scoopable.
  9. Serve. Let sit at room temperature for 5 to 10 minutes if the ice cream is very firm.

Notes

  • Increase extract gradually for stronger mint flavor. A large splash can quickly turn harsh.
  • Chopped chocolate gives a better frozen bite than large chocolate chips.
  • For chocolate shards, melt the chocolate with 1 teaspoon neutral oil and drizzle it into the ice cream during the last 1 to 2 minutes of churning.
  • For fresh mint ice cream, steep 1 to 2 packed cups / about 25 to 40 g fresh mint leaves in warm milk and cream for 30 to 60 minutes, strain, then chill and churn.
  • For no-churn mint chip ice cream, use the condensed milk and whipped cream method below.
  • You can make the ice cream 1 day ahead. Let it soften for 5 to 10 minutes before scooping if it freezes very firm.

No-Churn Mint Chocolate Chip Ice Cream Without an Ice Cream Maker

No ice cream maker? Use this no-churn version. It is sweeter than churned ice cream because sweetened condensed milk provides both sweetness and structure, but it is easy, creamy, and reliable. For a broader no-machine method, MasalaMonk’s homemade ice cream without a machine guide is a useful companion.

No-churn mint chip ice cream is usually sweeter and slightly denser than churned ice cream. For the cleanest texture, whip the cream to firm peaks and fold gently so you keep as much air in the mixture as possible.

If you want to see how condensed milk and whipped cream behave in a fruit-based no-churn dessert, the homemade mango ice cream recipe is a good comparison.

No-Churn Ingredients

  • 2 cups / 480 ml cold heavy cream
  • 1 can / 14 oz / 397 g sweetened condensed milk
  • 1 teaspoon mint extract or 3/4 teaspoon peppermint extract
  • 1 teaspoon vanilla extract, optional
  • 3/4 to 1 cup chopped semisweet or dark chocolate
  • 1 to 3 drops green food coloring, optional

No-Churn Method

  1. Chill a mixing bowl for 15 to 20 minutes if your kitchen is warm.
  2. Whip the cold heavy cream until stiff peaks form.
  3. In another bowl, stir together the condensed milk, mint extract or peppermint extract, vanilla, and optional green color.
  4. Fold the whipped cream into the condensed milk mixture gently.
  5. Fold in the chopped chocolate.
  6. Spread into a 9×5-inch loaf pan.
  7. Cover and freeze for at least 6 hours, or overnight.
No-churn mint chocolate chip ice cream process with whipped cream, condensed milk, chopped chocolate, and a loaf pan.
When you do not have an ice cream maker, whipped cream and condensed milk create a no-churn mint chocolate chip ice cream that freezes into a creamy scoop.

Fresh Mint Chocolate Chip Ice Cream Variation

Fresh mint gives the ice cream a softer, more herbal flavor. It tastes less like candy and more like real mint leaves. The trade-off is time: you need to steep the mint in warm dairy, strain it out, and then chill the base before churning.

How to Use Fresh Mint

  1. Warm the milk and cream until steaming, not boiling.
  2. Add 1 to 2 packed cups / about 25 to 40 g fresh mint leaves.
  3. Remove from heat, cover, and steep for 30 to 60 minutes.
  4. Strain very well, pressing gently on the leaves.
  5. Whisk in sugar, salt, and vanilla while the dairy is still slightly warm.
  6. Chill completely before churning.
  7. Add chopped chocolate near the end of churning.

Use more leaves and steep longer for a stronger fresh mint flavor. A shorter steep tastes gentler. Fresh mint ice cream usually stays pale, so add a little green color only if you want the classic look.

Fresh mint flavor varies: Young, fragrant mint leaves may need only 30 minutes of steeping, while milder bunches may need closer to 60 minutes. If the chilled base tastes too gentle, add 1/4 teaspoon mint extract before churning.
Fresh mint chocolate chip ice cream process showing mint leaves, warm cream and milk, straining, churning, and a finished scoop.
For fresh mint flavor, steep the leaves in warm dairy and strain them out before churning so the ice cream tastes clean rather than grassy.

Green vs White Mint Chocolate Chip Ice Cream

Mint chocolate chip ice cream can be green, white, or somewhere in between. Green is the nostalgic ice cream-shop version. White or pale mint chip looks more natural and often means no food coloring was used.

Green and white mint chocolate chip ice cream scoops compared side by side, both with chocolate pieces and mint garnish.
Green mint chip ice cream gives the nostalgic look; however, a white or pale mint base can taste just as minty without added color.

Color does not decide flavor. Mint extract, peppermint extract, fresh mint, sugar, dairy, and chocolate do that. If you want green ice cream, use only a few drops of color. Too much color can make the ice cream look artificial even when the flavor is balanced.

Custard-Style Mint Chocolate Chip Ice Cream Upgrade

The main recipe is eggless because it is easier and still creamy. Choose this route if you want a richer, silkier scoop and do not mind cooking the base. Stay with the eggless version if you want the easiest repeatable batch.

Use 4 large egg yolks for the batch. Warm the milk, cream, sugar, and salt in a saucepan until steaming. Whisk the yolks in a separate bowl, slowly stream in some of the hot dairy while whisking, then pour the yolk mixture back into the saucepan. Cook gently, stirring constantly, until the custard thickens enough to coat a spoon and reaches about 170°F / 77°C. Do not boil it.

Strain the custard, stir in vanilla and mint extract, then chill until very cold, preferably overnight. Churn as usual and add the chocolate near the end. This approach takes more attention than the eggless recipe, but the texture is richer and silkier.

Use the custard upgrade when: you want a richer, more premium texture and do not mind cooking the base. Use the eggless version when you want the easiest reliable homemade mint chip ice cream.
Eggless and custard-style mint chip ice cream compared with a cold base, cooked custard, egg yolks, and a 170°F temperature cue.
Choose the eggless base when you want the easiest batch, or use the custard-style method when you want a richer, silkier mint chocolate chip ice cream.

Ice Cream Maker, Cuisinart, KitchenAid, and Ninja Creami Notes

This recipe is written for a standard home ice cream maker, including freezer-bowl machines and stand-mixer ice cream attachments. The same base works well in most Cuisinart-style ice cream makers and KitchenAid freezer-bowl attachments as long as the bowl is fully frozen and the base is very cold before churning.

Equipment comparison for mint chip ice cream showing Cuisinart, KitchenAid, and Ninja Creami methods with churned and frozen pint steps.
Cuisinart and KitchenAid-style machines churn a cold liquid base, whereas the Ninja Creami works from a frozen pint and mixes chocolate in later.

Cuisinart Mint Chocolate Chip Ice Cream

For a Cuisinart ice cream maker, freeze the bowl until completely solid, chill the mint ice cream base for at least 2 to 4 hours, then churn for about 20 to 30 minutes. Add the chopped chocolate during the last 5 minutes, when the ice cream is already thick like soft serve.

KitchenAid Ice Cream Maker Attachment

For a KitchenAid ice cream maker attachment, freeze the bowl for at least 15 to 24 hours, start the mixer on the recommended low speed before pouring in the base, and churn until the ice cream thickens. Add chocolate near the end so it distributes evenly without sinking.

Ninja Creami Mint Chocolate Chip Ice Cream

The Ninja Creami method is different from a traditional ice cream maker. Instead of churning a liquid base, you freeze the base solid in a Creami pint for 24 hours, process it in the machine, then add chocolate using the Mix-In function. If the texture looks crumbly after the first spin, add a small splash of milk and use Re-Spin before adding the chocolate.

Do not pour this churned ice cream maker base directly into a Ninja Creami and expect the exact same timing. Use a Creami-specific base if you want the most reliable result, because the machine is designed around frozen pints rather than traditional churning.

How to Keep Homemade Mint Chocolate Chip Ice Cream Creamy

Homemade ice cream is sensitive to temperature and balance. A good base needs enough fat, enough sugar, and enough chilling time. The way you store it matters too, because air exposure can create ice crystals on the surface.

  • Use whole milk and heavy cream. Lower-fat dairy makes icier ice cream.
  • Keep enough sugar in the base. Sugar helps the finished ice cream stay scoopable.
  • Chill the base fully. A cold base churns smoother and faster.
  • Stop at soft-serve texture. Over-churning can make the texture heavy.
  • Store airtight. Press parchment onto the surface before covering.
  • Soften before scooping. Five to ten minutes at room temperature usually helps.
Guide to keeping homemade mint chocolate chip ice cream creamy, with tips for fat, sugar, chilling, soft-serve texture, airtight storage, and softening.
To keep homemade ice cream creamy, use enough fat and sugar, chill the base fully, stop at soft-serve texture, and store it airtight.

Troubleshooting Mint Chocolate Chip Ice Cream

Most mint chocolate chip ice cream problems come from one of four things: the base was not cold enough, the extract was too strong, the chocolate pieces were too large, or the sugar and fat balance was changed too much.

Problem Likely cause Fix
Tastes like toothpaste Too much peppermint extract Start lower next time and increase only after tasting the cold base.
Not minty enough Mild extract or a very rich base Increase the extract by 1/4 teaspoon before churning.
Too icy Lean dairy, warm base, or heavy sugar reduction Whole milk, heavy cream, full chilling, and balanced sugar give a smoother freeze.
Too hard to scoop Very cold freezer or reduced sugar Rest the container for 5 to 10 minutes before scooping.
Chocolate pieces are too hard Large chips or thick chunks Chopped chocolate, mini chips, or thin chocolate shards are easier to bite.
Color looks too artificial Too much green coloring One to three drops are usually enough for a pale green scoop.
Ice cream did not thicken Bowl or base not cold enough Freeze the bowl longer and chill the base overnight before trying again.
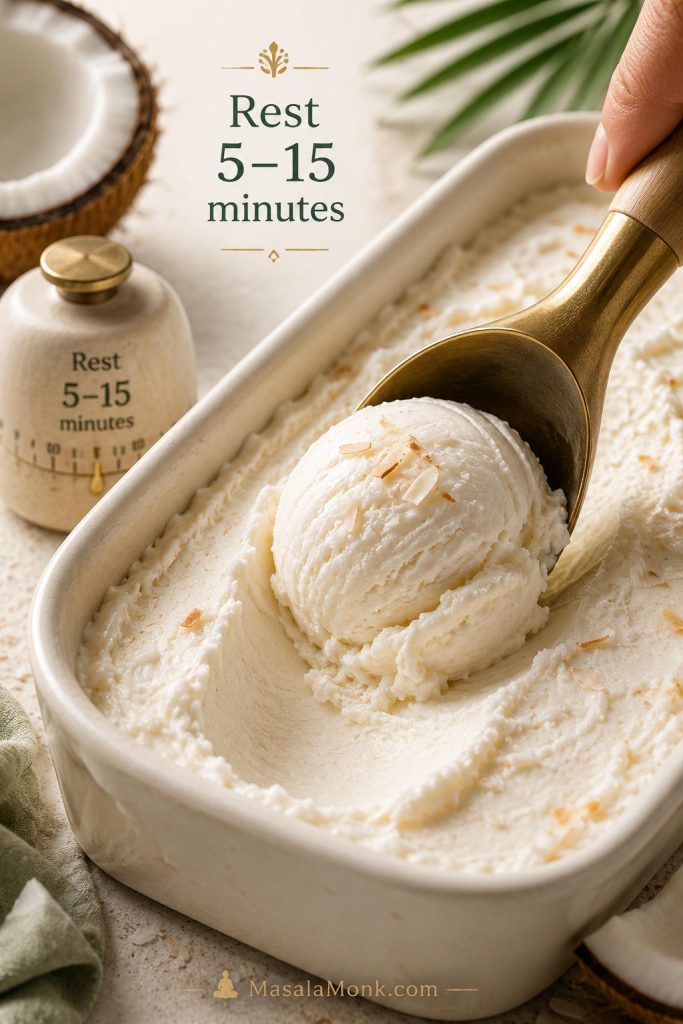
Troubleshooting board for mint chocolate chip ice cream with problems such as toothpaste taste, weak mint, icy texture, hard chocolate, artificial color, and not thickening.
If the texture, color, chocolate, or mint flavor feels off, check four things first: base temperature, extract amount, chocolate size, and sugar balance.

How to Store Homemade Mint Chocolate Chip Ice Cream

Transfer the churned ice cream to a shallow airtight freezer container. Press parchment paper or plastic wrap directly onto the surface, then cover with the lid. This helps reduce ice crystals on top.

Homemade mint chocolate chip ice cream tastes best within 2 to 4 weeks. It will still be safe longer if frozen properly, but the texture is usually best when eaten fresh. FoodSafety.gov notes that freezer storage guidance is about quality, while foods kept continuously at 0°F / -18°C or below remain safe. You can read their cold food storage chart for the broader freezer guidance.

You can make this ice cream a day ahead. Churn it, freeze it overnight, then let it soften for 5 to 10 minutes before serving.

Storage guide for mint chocolate chip ice cream showing an airtight container, parchment on the surface, 2 to 4 week quality guidance, make-ahead note, and softening time.
Press parchment onto the surface before freezing; as a result, the ice cream is better protected from air exposure and surface ice crystals.

Mint Chocolate Chip Ice Cream Variations

Mint Ice Cream Without Chocolate Chips

For plain mint ice cream, simply leave out the chopped chocolate. The same base works well without chips, especially if you want a smoother scoop or plan to serve it with brownies, chocolate sauce, or cookies on the side. Taste the chilled base before churning and keep the mint balanced, because there will be no chocolate to soften a sharp extract flavor.

Plain mint ice cream without chocolate chips served as smooth pale green scoops in a bowl with mint garnish.
For a smoother plain mint ice cream, skip the chocolate pieces and serve the scoop with brownies, cookies, or chocolate sauce on the side.
Need the base recipe? Jump to recipe card · Main method · All variations

Mint Oreo Ice Cream

For a cookies-and-cream style mint ice cream, replace half of the chopped chocolate with crushed chocolate sandwich cookies. Add the cookie pieces during the last 2 to 3 minutes of churning so they stay visible and do not completely dissolve into the base. For a stronger cookie flavor, sprinkle a few extra crushed cookies over the top before the final freezer set.

Mint ice cream with crushed chocolate sandwich cookie pieces mixed through the scoops, with broken cookies nearby.
Fold crushed chocolate sandwich cookies in near the end of churning so this mint Oreo ice cream keeps visible cookie pieces and a creamy base.
Need the base recipe? Jump to recipe card · Main method · All variations

Mint Chocolate Chip Ice Cream Cake Shortcut

For a quick mint chip ice cream cake, press an Oreo-style crumb crust into a loaf pan or small square pan, spread softened mint chocolate chip ice cream over it, add a thin layer of fudge or ganache, and freeze until firm. This is not the full cake method, but it is an easy way to turn one batch into a make-ahead dessert.

Mint chip ice cream cake shortcut with a dark crumb crust, mint chocolate chip ice cream layer, and smooth chocolate fudge layer.
A crumb crust, softened mint chip ice cream, and thin fudge layer turn the same batch into an easy make-ahead ice cream cake shortcut.
Need the base recipe? Jump to recipe card · Main method · All variations

Mint Chocolate Chip Milkshake

Turn a few scoops into a thick milkshake by blending 3 cups mint chocolate chip ice cream with 1 to 1 1/2 cups cold milk. Use 1 cup milk for a spoon-thick shake, 1 1/4 cups for a classic thick milkshake, and 1 1/2 cups for a more sippable texture.

A spoon of chocolate syrup makes the milkshake more dessert-like. For a homemade topping, this 3-minute homemade chocolate syrup works well for drizzling over scoops or blending into the shake.

Tall glass of mint chocolate chip milkshake with chocolate flecks, chocolate drizzle, and a striped straw.
Use 1 cup milk for a spoon-thick mint chocolate chip milkshake, then add more only if you want a lighter, more sippable texture.
Need the base recipe? Jump to recipe card · Main method · All variations

Mint Chocolate Chip Sundae

For a quick sundae, scoop the ice cream into chilled bowls and top with chocolate syrup, whipped cream, extra chopped chocolate, or crushed cookies. Keep the toppings simple so the mint flavor still comes through.

Mint chocolate chip sundae in a glass dish with chocolate syrup, whipped cream, chopped chocolate, and mint garnish.
Keep toppings simple here; chocolate syrup, whipped cream, and a few chopped pieces should support the mint chip ice cream rather than hide it.
Need the base recipe? Jump to recipe card · Main method · All variations

Dairy-Free Mint Chocolate Chip Ice Cream

Use a rich dairy-free base such as full-fat coconut milk or cashew cream, and choose dairy-free dark chocolate. Coconut-based versions can taste slightly tropical, which works well with dark chocolate but changes the classic flavor. If you are building a dairy-free dessert table, MasalaMonk’s avocado chocolate mousse is another creamy chocolate dessert with vegan and keto-friendly options.

Dairy-free mint chocolate chip ice cream with a coconut milk or cashew base, dark chocolate pieces, and a mint garnish.
A rich coconut milk or cashew base can make dairy-free mint chocolate chip ice cream creamy, although the flavor will be different from dairy.
Need the base recipe? Jump to recipe card · Main method · All variations

Sugar-Free, Keto, Low-Calorie, or Protein Mint Chocolate Chip Ice Cream

Sugar-free, keto, low-calorie, and protein versions need a different base because sugar, fat, and protein all affect how ice cream freezes. Do not simply remove the sugar from this recipe; sugar helps homemade ice cream stay scoopable. For a low-carb or keto batch, start with a tested low-carb ice cream formula, then add mint extract and finely chopped sugar-free dark chocolate.

For a higher-protein version, use MasalaMonk’s protein ice cream recipe as the base and adapt it with mint extract plus chopped dark chocolate. If you only want a slightly lighter batch, reduce the sugar modestly in the main recipe rather than cutting it heavily. Too little sugar usually means a harder, icier scoop.

Guide to sugar-free, keto, low-calorie, and protein mint chip ice cream options with notes to use a tested base, avoid simply cutting sugar, and adjust mint carefully.
Sugar-free, keto, low-calorie, and protein versions need their own tested bases because changing sugar, fat, or protein changes how ice cream freezes.
Need the base recipe? Jump to recipe card · Main method · All variations

Final Serving Texture

Final serving of homemade mint chocolate chip ice cream with creamy pale green scoops, chocolate pieces, mint garnish, and a spoon nearby.
After the base is chilled, churned, and frozen, the final scoop should hold its shape, taste cleanly minty, and soften within a few minutes for easy serving.
Ready to make it? Jump to recipe card · Main method · Recipe guide

FAQs

Is mint chocolate chip ice cream made with mint or peppermint?

Either one works. Mint extract usually gives a more classic ice cream-shop flavor, while peppermint extract tastes sharper and stronger. Start with a small amount because peppermint extract can quickly become too intense.

How do I make mint chocolate chip ice cream without an ice cream maker?

Use the no-churn version with whipped heavy cream and sweetened condensed milk. It will be sweeter and a little denser than churned ice cream, but it still freezes into a creamy scoopable dessert.

Why is my mint chocolate chip ice cream white instead of green?

Mint ice cream is not naturally bright green. The green color usually comes from food coloring. Without coloring, homemade mint chocolate chip ice cream will usually be white, cream-colored, or very pale green.
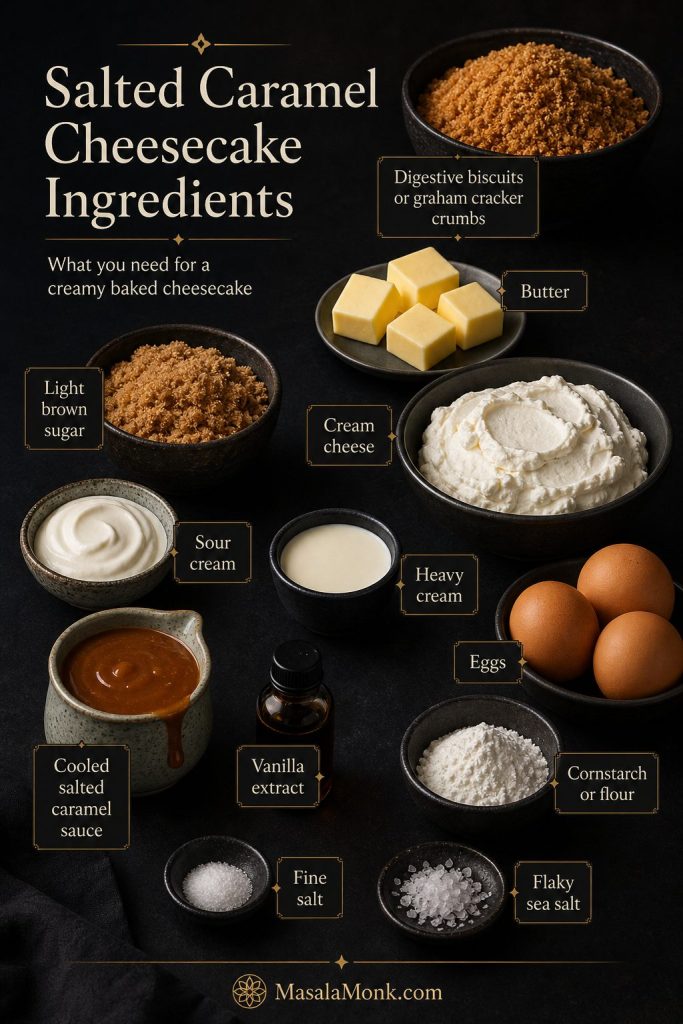
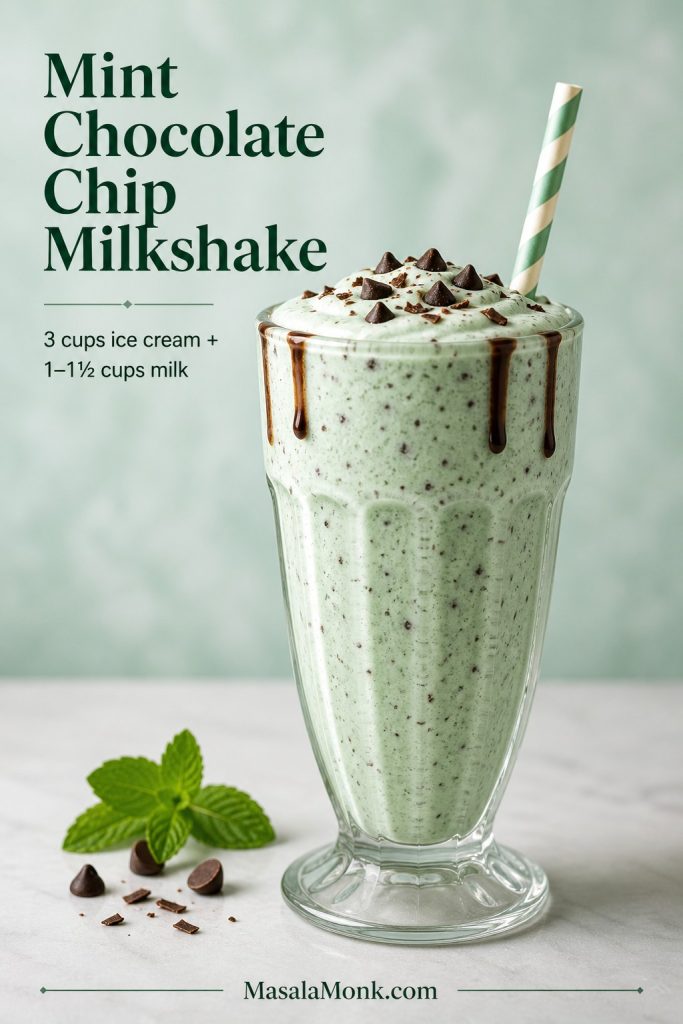
How do I use fresh mint instead of mint extract?

Warm the milk and cream, add fresh mint leaves, steep for 30 to 60 minutes, strain well, then chill and churn the base. Fresh mint gives a softer herbal flavor, while extract gives the classic mint chip taste.
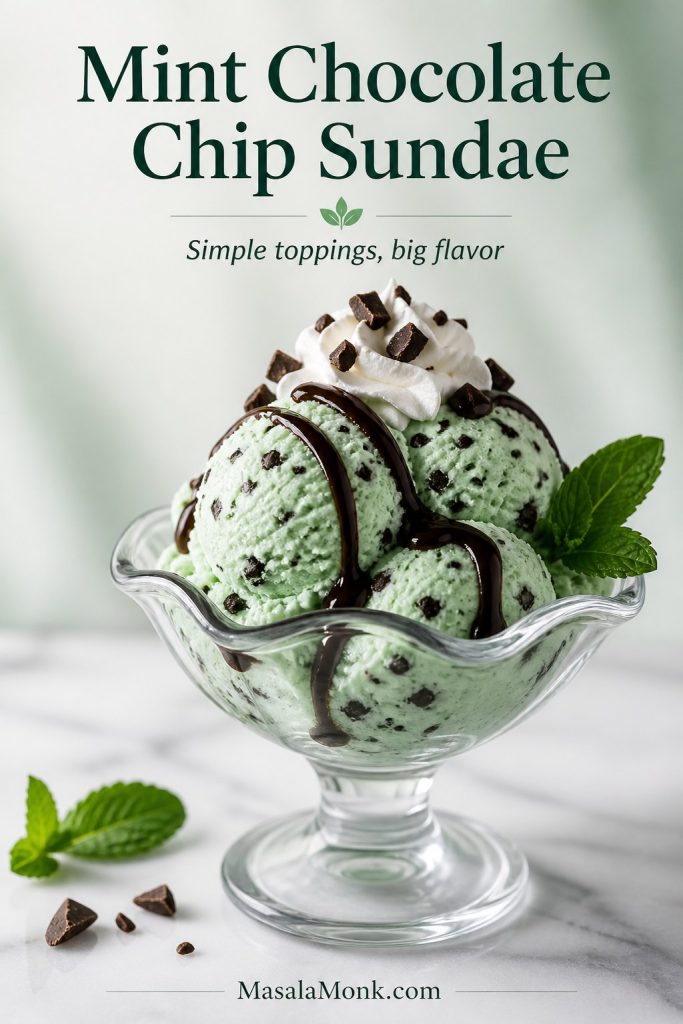
When should I add chocolate chips to ice cream?

Add chopped chocolate or mini chocolate chips during the last 5 minutes of churning. This keeps the pieces evenly distributed without interfering with the base as it thickens.

Why are my chocolate chips too hard in homemade ice cream?

Large chocolate chips freeze very firm. Chopped chocolate, mini chips, or melted chocolate drizzled into the ice cream near the end of churning will give you thinner pieces that are easier to bite.

Is this mint chocolate chip ice cream eggless?

The main recipe is eggless. It uses heavy cream, whole milk, sugar, mint extract, vanilla, salt, and chopped chocolate.

How do I make dairy-free mint chocolate chip ice cream?

Use a rich dairy-free base such as full-fat coconut milk or cashew cream, then choose dairy-free chocolate. The flavor will not be exactly the same as classic dairy mint chip ice cream, but it can still be creamy and satisfying.

How long does homemade mint chocolate chip ice cream last?

It tastes best within 2 to 4 weeks. Store it in an airtight freezer container with parchment pressed against the surface to reduce ice crystals.

What chocolate is best for mint chocolate chip ice cream?

Semisweet or dark chocolate works best because it balances the sweetness of the mint ice cream. Chopped chocolate gives a better frozen texture than large chocolate chips.