Posted on 10 Comments

Mango Salsa Recipe

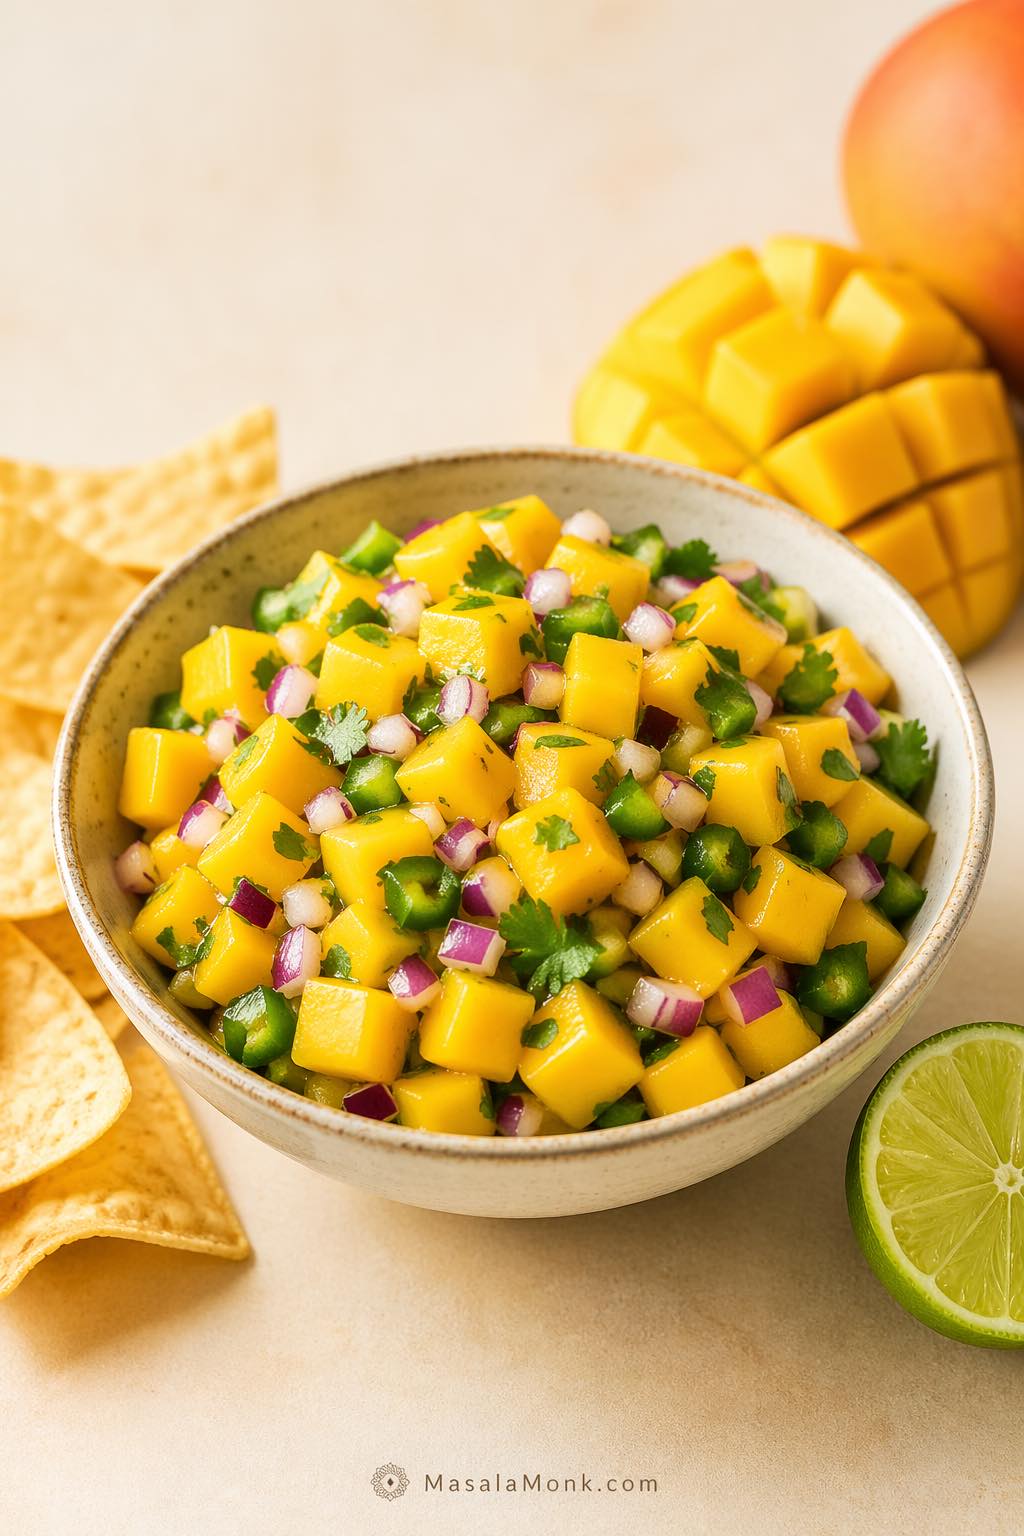
Fresh mango salsa recipe in a bowl with diced mango, red onion, jalapeño, cilantro, lime, and tortilla chips, shown chunky and glossy without tomato.

A mango salsa recipe should do more than taste sweet and bright. It should stay chunky instead of turning watery, balance lime and heat without burying the fruit, and work whether you use it as a salsa dip with chips, a spoonable mango salsa sauce for tacos, or a fresh topping for fish, shrimp, or chicken.

This version starts with the cleanest, most useful base: ripe mango, red onion, jalapeño, cilantro, lime, and salt. It is the best first version to make because it stays bright, fresh, and flexible. From there, you can adjust it depending on how you plan to serve it: add tomato for a scoopable chip dip, avocado for a richer topping, or more chile for a hotter bowl that still tastes fresh instead of harsh.

If you are making mango salsa for the first time, make this clean version first. It gives you the brightest mango flavor, then lets you move toward a chunkier taco topping, a scoopable salsa dip, a saucier spoonful for salmon or shrimp, or a spicy variation without guessing.

Quick Answers

If you want the shortest useful answer, start here. The best mango salsa recipe uses ripe but still firm mangoes, not very soft ones, so the bowl stays fresh and chunky instead of slumping into liquid. The best first version is usually no tomato. That cleaner build lets the mango stay bright and distinct, whether you serve it as a fresh salsa dip, a taco topping, or a spoonable mango salsa sauce for fish, shrimp, grilled chicken, and bowls.

  • Best mangoes: ripe but still firm, so the salsa holds a neat dice.
  • Best first version: no tomato, because it tastes cleaner and works better as a topping.
  • Best for chips: add tomato if you want a more pico-like, scoop-friendly bowl.
  • Best saucier move: mash or blend a few spoonfuls, then stir them back in instead of blending the whole bowl.
  • Best for tacos and fish: keep it fruit-forward, sharp, chunky, and lightly spicy.
  • Best heat move: start with jalapeño, then add more chile only if the bowl tastes flat.
  • Best make-ahead window: a short rest is fine, but it is best the day you make it.
  • Frozen mango: usable in a pinch, but fresh mango gives better texture.

At a Glance

  • Best first version: no tomato
  • Best for: tacos, fish, shrimp, grilled chicken, burrito bowls
  • Best chip-dip tweak: add 1 small seeded tomato
  • Best salsa sauce tweak: mash a small portion and fold it back in
  • Texture goal: chunky, glossy, not watery
  • Heat level: mild to medium, easy to adjust
  • Make-ahead: best the same day

The finished salsa should look glossy, not puddled. The mango pieces should stay distinct when spooned, and the bowl should smell bright and savory, not sharply acidic or raw.
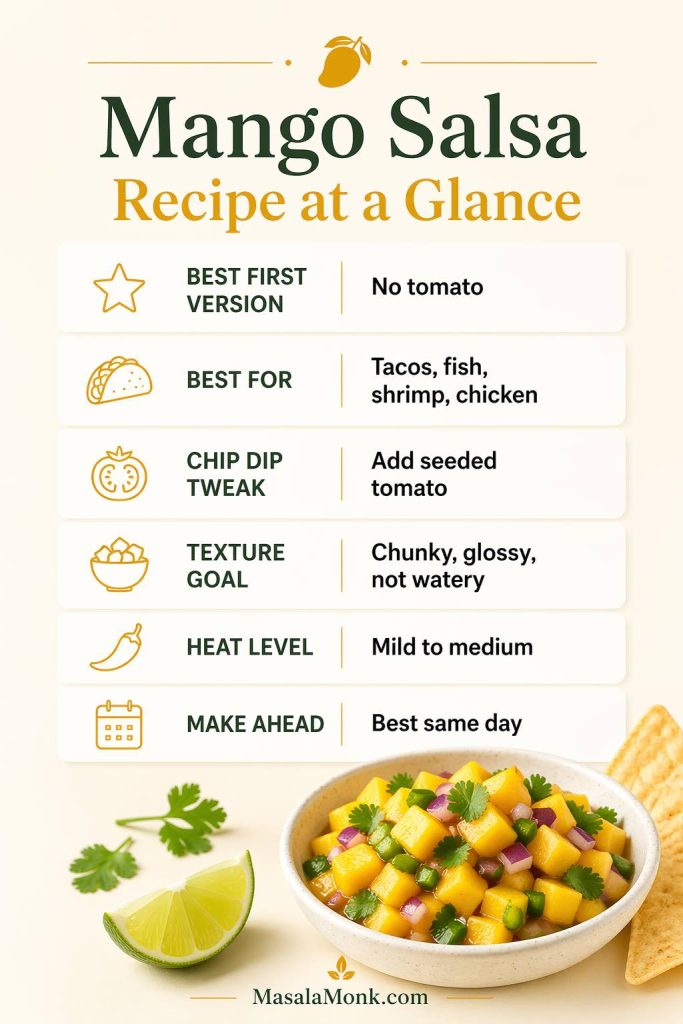
Mango salsa recipe at-a-glance guide showing no tomato as the best first version, serving ideas, chip dip tweak, texture goal, heat level, and make-ahead timing.
Start with the no-tomato version when you want the mango to stay bright and distinct; add tomato only when the salsa is mainly for chips and you want a juicier, more scoopable bowl.

Mango Salsa Recipe Ingredients

The ingredient list for this mango salsa recipe is short on purpose. Because the bowl relies on freshness and contrast, every ingredient should help the mango rather than compete with it.

  • 2 large ripe but firm mangoes, diced small (about 2 cups / 330 to 360 g diced mango)
  • 1/4 to 1/3 cup finely chopped red onion (about 35 to 50 g)
  • 1 small jalapeño, finely chopped
  • 2 to 3 tablespoons chopped cilantro
  • 1 to 2 tablespoons fresh lime juice, plus more to taste
  • 1/4 teaspoon fine salt, plus more to taste
  • Optional: 1/4 cup finely chopped red bell pepper
  • Optional: 1 small tomato, seeded and finely diced
  • Optional: 1/2 avocado, diced

The mango

Use mangoes that smell ripe and feel slightly soft when pressed, but not squishy. Once diced, the pieces should hold clean edges rather than collapse or smear when stirred.

The onion

Red onion gives the bowl the sharp, savory edge that stops it from drifting toward fruit salad. Finely chopped onion works best because it spreads that bite evenly. If your onion tastes very harsh, rinse it briefly under cold water or soak it in cold water for 5 minutes, then dry it well before adding it.

The jalapeño

Jalapeño adds heat, but more importantly, it gives shape to the sweetness. For a milder bowl, remove the seeds and white membranes. For a medium bowl, leave in a little of the membrane. Start smaller than you think you need, then taste.

The cilantro, lime, and salt

Cilantro keeps the salsa tasting green and fresh. Lime lifts everything, while salt makes the fruit and aromatics taste more like themselves. Add lime gradually. You want the mango lightly coated, not sitting in a shallow pool at the bottom of the bowl.

The useful extras

Red bell pepper adds crunch without changing the identity of the bowl very much, so it is the safest extra if you want more texture. Tomato is best when the salsa is mainly for chips. Seed it well, then let the diced tomato sit on a paper towel for a minute if it seems very juicy. Avocado makes the bowl richer and softer, which is especially good over salmon, grilled chicken, or grain bowls. If you use avocado, add it at the very end and fold it in gently.

Best Mangoes to Use

The fruit decides a lot here. Even a well-seasoned bowl struggles if the mango is watery, stringy, or collapsing under the knife.
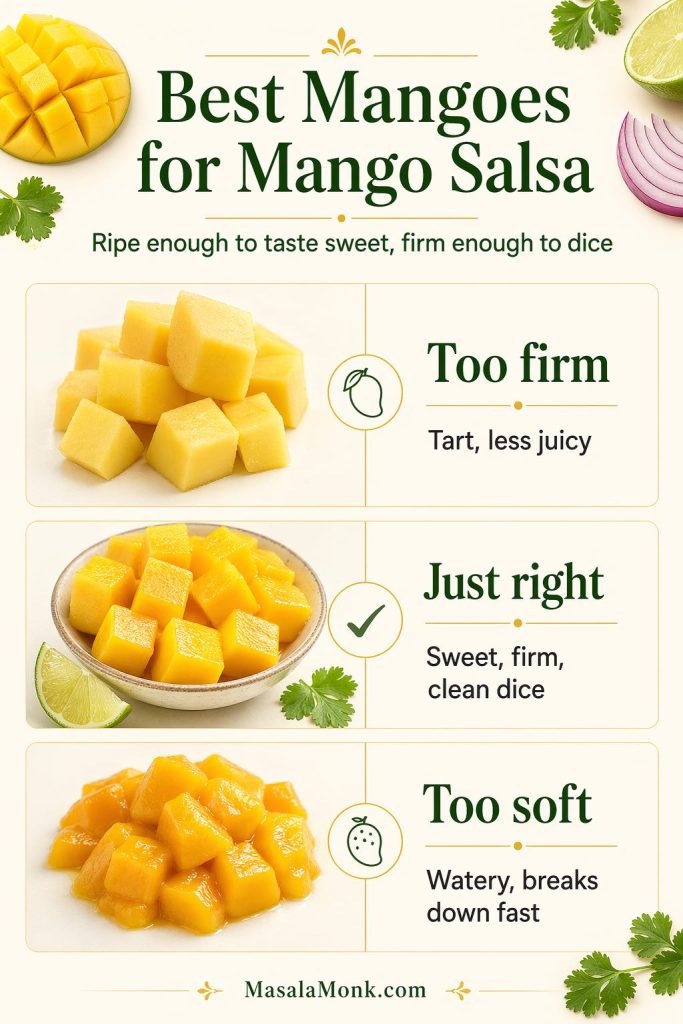
Mango ripeness guide for mango salsa showing too firm, just right, and too soft mangoes with tips for sweetness, clean dice, and avoiding watery salsa.
Choose mangoes that are ripe enough to taste sweet but still firm enough to hold a clean dice; very soft mangoes break down quickly once lime and salt are added.

Ripe but firm is the sweet spot

The best mangoes for salsa give slightly when pressed, smell fragrant, and taste sweet without turning mushy as soon as you cut them. Ataulfo, Champagne, honey, or Kent mangoes can all work well if they are firm enough to dice cleanly, but firmness matters more than variety.

Avoid overly soft mangoes

Very soft mangoes are better in sorbet, smoothies, or dressing. In salsa, they break down quickly once lime and salt are added, and the bowl becomes watery faster than you want.

If your mango is extra sweet or extra tart

When the fruit is especially sweet, lean a little harder on lime, salt, and jalapeño. For mangoes that taste more tart than expected, use less lime at first and let the fruit stay the focus. Taste before serving and adjust there instead of trying to fix everything at once.

How to Cut Mango for Salsa

How you cut the fruit affects both texture and usability in a mango salsa recipe. A good mango salsa should be easy to scoop, easy to spoon, and pleasant to eat in one bite.

Use the cheek-and-score method

Stand the mango upright, slice off the two cheeks, then score the flesh in a grid without cutting through the skin. Turn the cheek outward slightly and slice off the cubes. Then trim the remaining fruit from around the pit.

For another visual reference on cutting around the pit, this mango cutting guide from the National Mango Board is helpful.

Dice small, but not tiny

The mango should be small enough to scoop easily with chips or sit neatly on tacos, yet large enough to stay distinct. Aim for roughly small bean-sized pieces rather than large chunks or very fine mince.

Mix gently

Once the fruit is cut, treat it carefully. Fold the salsa together rather than stirring it hard. Otherwise, even good fruit starts to look tired before it reaches the table.

How to Make This Mango Salsa Recipe

This mango salsa recipe comes together quickly, but the order helps you keep both the texture and the balance under control.
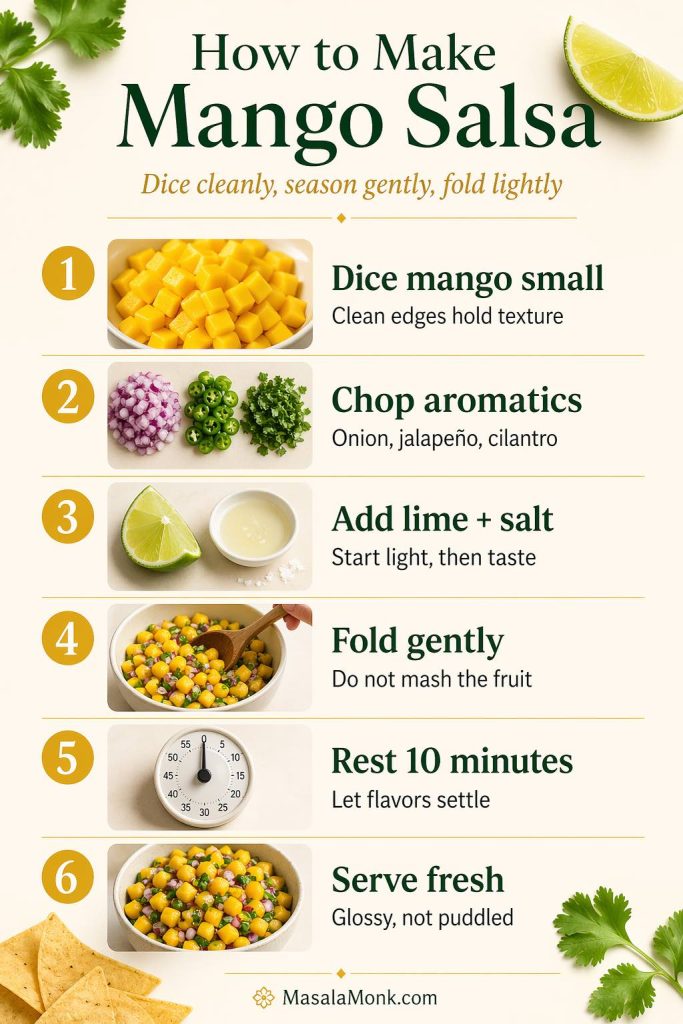
Step-by-step mango salsa recipe guide showing diced mango, chopped onion, jalapeño and cilantro, lime and salt, gentle folding, resting, and finished salsa.
Add the lime and salt lightly at first, then fold instead of stirring hard; this keeps the mango pieces clean-edged, glossy, and distinct when the salsa is served.

1. Dice the mango

Dice the mango into small, even cubes and place them in a medium bowl. The pieces should look clean-edged and firm enough to hold shape when lifted on a spoon.

2. Chop the supporting ingredients

Finely chop the red onion, jalapeño, and cilantro. If you are using red bell pepper, chop that finely too. The onion pieces should be small enough not to dominate a bite, and the jalapeño should be dispersed rather than concentrated in a few hot pockets.

3. Combine gently

Add the onion, jalapeño, cilantro, and bell pepper to the mango. Toss gently so the fruit stays intact. At this stage, the bowl should already look colorful and structured, not crushed.

4. Add lime and salt

Start with 1 tablespoon lime juice and 1/4 teaspoon salt. Toss again, gently, then look at the bottom of the bowl. You want a light gloss on the fruit, not visible pooling liquid.

5. Rest briefly, then taste again

Let the salsa sit for 10 minutes if you have time. That is enough to bring the flavors together without softening the fruit too much. After that short rest, the salsa should smell bright and savory, with the onion and lime settled into the fruit instead of shouting separately.

6. Adjust before serving

When the salsa tastes too sweet, add a little more lime, salt, or jalapeño. For a bowl that tastes too sharp, add a bit more mango. Flat flavor usually means it needs salt. Serve cool or lightly chilled, not ice-cold straight from the back of the fridge, so the flavor reads clearly.

Mango Salsa Recipe

Yield: About 2 cups, enough for 4 to 6 as a topping or 4 as a dip

Prep time: 15 minutes
Cook time: 0 minutes
Total time: 15 minutes

Ingredients

  • 2 large ripe but firm mangoes, diced small (about 2 cups / 330 to 360 g)
  • 1/4 to 1/3 cup finely chopped red onion
  • 1 small jalapeño, finely chopped
  • 2 to 3 tablespoons chopped cilantro
  • 1 to 2 tablespoons fresh lime juice
  • 1/4 teaspoon fine salt, plus more to taste
  • Optional: 1/4 cup finely chopped red bell pepper

Instructions

  1. Add the diced mango to a medium bowl.
  2. Add the red onion, jalapeño, cilantro, and bell pepper if using.
  3. Add 1 tablespoon lime juice and the salt, then toss gently.
  4. Let the salsa sit for 10 minutes, then taste.
  5. Add more lime or salt as needed.
  6. Serve right away for the freshest texture.

Notes

  • Use firm-ripe mangoes, not very soft ones.
  • The finished salsa should look glossy, not puddled.
  • For a milder salsa, remove the jalapeño seeds and membranes.
  • For chips, add 1 small seeded tomato if you want a more dip-like bowl.
  • For a saucier mango salsa, mash or blend 2 to 3 tablespoons of the finished salsa with a squeeze of lime, then stir it back into the bowl.
  • If using avocado, fold it in at the very end.
  • This salsa is best the day you make it.

Why This Mango Salsa Recipe Works

This recipe works because it keeps the job of the salsa clear. It should brighten the food around it, not smother it.

It balances sweet, sharp, and spicy

The mango gives sweetness, but the onion, jalapeño, lime, and salt keep that sweetness from drifting into dessert territory. The result tastes bright and savory rather than merely fruity.

It stays chunky

Because the fruit is diced instead of blended, the finished salsa stays textured and spoonable. That texture is part of what makes it feel useful at the table.

It fits more than one meal

Although it is excellent with chips, it is even more valuable because it works over fish tacos, salmon, shrimp, grilled chicken, burrito bowls, and taco salads.

Tomato or No Tomato?

This is the biggest choice in mango salsa. Some people want a bright topping. Others want a bowl that feels more like a classic fresh dip.
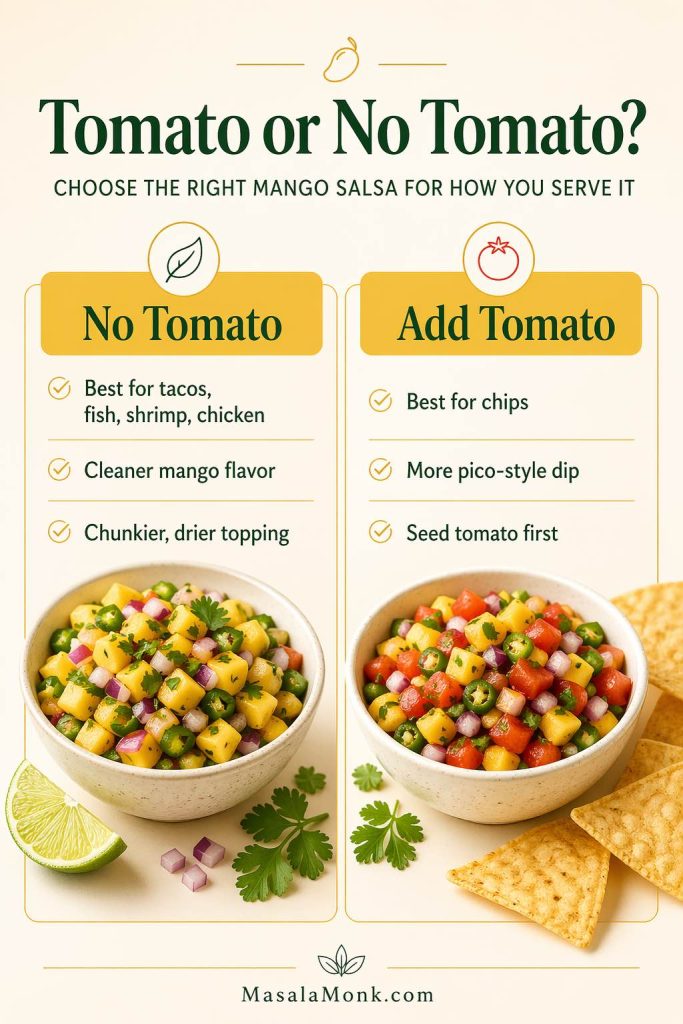
Comparison card showing no-tomato mango salsa for tacos, fish, shrimp, and chicken beside mango salsa with tomato for chips and pico-style dip.
Tomato is not wrong in mango salsa, but it changes the job of the bowl: skip it when you want a cleaner, chunkier topping for tacos or fish; add it when you want a juicier salsa for chips.

When no-tomato mango salsa is better

A no-tomato version is usually better for tacos, fish, shrimp, grilled chicken, and bowls. It tastes cleaner, lets the fruit stay more distinct, and avoids extra moisture.

When tomato makes sense

Add tomato when the bowl is mainly for chips or when you want a more familiar pico-like feel. Seed it first, then keep the pieces small so the salsa stays balanced instead of watery.

How to Fix the Balance

If it tastes too sweet

Add a little more lime, a pinch more salt, or a bit more jalapeño.

If it tastes too sharp

Add more mango first. Extra fruit is usually a cleaner fix than sweetener.

If it tastes too mild

It usually needs a touch more salt or lime.

If it turns watery

Wateriness usually comes from overly soft fruit, overmixing, too much resting time, or undrained tomato. Drain off a little excess liquid if needed, then taste again.

If you want it more like a salsa sauce

If you want a mango salsa sauce for tacos, fish, shrimp, chicken, or bowls, do not blend the whole recipe. Mash or blend 2 to 3 tablespoons of the finished salsa with a little lime juice, then stir it back into the bowl. That makes it more spoonable while keeping the fresh mango pieces intact.

If it feels too spicy

Add more mango if you have it. Avocado can soften the heat too if you want a richer version.

What to Serve with Mango Salsa

Once the bowl is made, use it as a salsa dip, taco topping, fresh side, or spoonable mango salsa sauce depending on the meal.
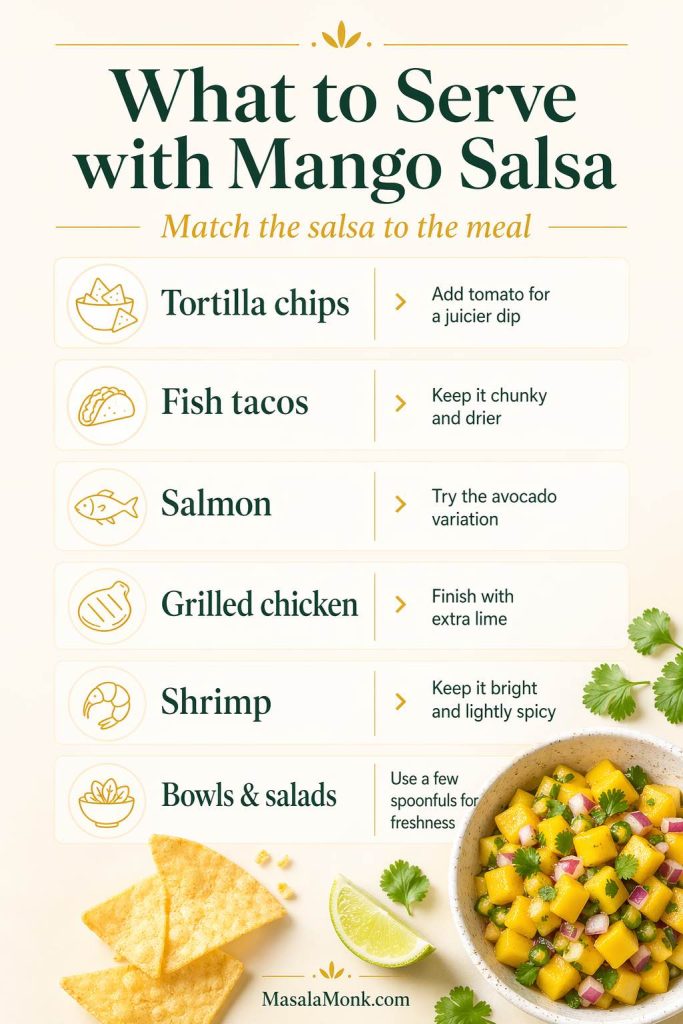
Guide to what to serve with mango salsa, including tortilla chips, fish tacos, salmon, grilled chicken, shrimp, bowls, and salads with serving tips.
Mango salsa works best when you match the texture to the meal: keep it chunkier and drier for tacos or fish, add tomato for chips, and use a few spoonfuls to brighten bowls and salads.

Tortilla chips

For chips, a slightly juicier bowl is fine. This is the best place to add seeded tomato and use a slightly smaller dice if you want a more scoopable, party-friendly dip.

Fish tacos

For fish tacos, keep the salsa chunkier and a little drier. The no-tomato version works best here because it brings brightness and sweetness without making the taco wet or heavy. It pairs especially well with flaky grilled or pan-seared white fish.

Salmon

With baked, grilled, or pan-seared salmon, the lime, onion, and jalapeño do especially useful work. A spoonful on top cuts through the richness and makes a simple fillet feel more finished. If you want a softer, richer topping for salmon, the avocado variation below is the best branch.

Grilled chicken

Chicken gives the salsa a neutral base to wake up. It works especially well with grilled chicken breasts, thighs, or fajita-style chicken. A slightly punchier lime finish works well here, especially if the chicken is smoky, charred, or warmly spiced. For a full meal to pair it with, try these sheet pan chicken fajitas.

Shrimp

Shrimp and mango salsa are a natural pairing. Keep the salsa bright and lightly spicy rather than heavy or very wet. Spoon it over grilled shrimp skewers, tuck it into shrimp tacos, or use it over rice bowls when you want something fresh and quick.

Burrito bowls and taco salads

This is one of the smartest ways to use leftovers. A few spoonfuls add acidity, freshness, and texture to bowls with rice, beans, avocado, chicken, or shrimp.

Variations

Mango salsa with tomato

Add 1 small seeded and finely diced tomato if you want the salsa to feel more like a classic fresh dip. Keep the amount modest so the mango still leads.

Mango avocado salsa

Add diced avocado when you want a richer, softer bowl. Fold it in at the end so it stays intact. This version is especially good with salmon, grilled chicken, and burrito bowls.
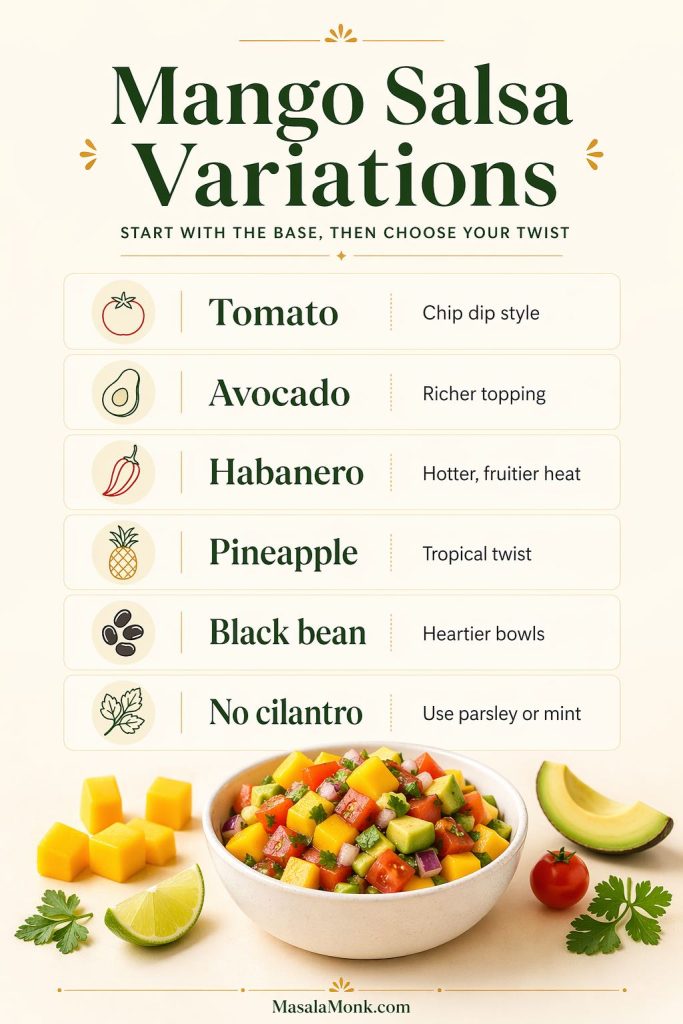
Mango salsa variations guide showing tomato, avocado, habanero, pineapple, black bean, and no-cilantro options for changing the base recipe.
Once the base mango salsa tastes balanced, choose the variation by use: tomato for chips, avocado for richness, habanero for heat, pineapple for sweetness, or black beans for a heartier bowl.

Spicy mango habanero salsa

Swap in a very small amount of habanero if you want a hotter, fruitier heat. Go carefully so the brightness of the base recipe still comes through.

Pineapple mango salsa

Add a small amount of finely diced pineapple if you want a more tropical twist. Keep the ratio in favor of mango so the recipe still reads clearly as mango salsa.

Black bean mango salsa

Add rinsed and well-drained black beans if you want a heartier bowl for chips, burrito bowls, or taco salads. Keep the mango pieces distinct so the salsa still tastes fresh rather than heavy.

Pickled jalapeño or pickled onion

Use a little pickled jalapeño or pickled red onion if you want a sharper, brighter variation. Add these carefully because they bring both acidity and salt.

No cilantro version

If you do not like cilantro, use a smaller amount of parsley or fresh mint instead. The flavor will change, but the salsa can still taste fresh and balanced.

For a smoother mango-based topping for salads, grilled chicken, or seafood, try this sweet and spicy mango salad dressing.

Common Mistakes
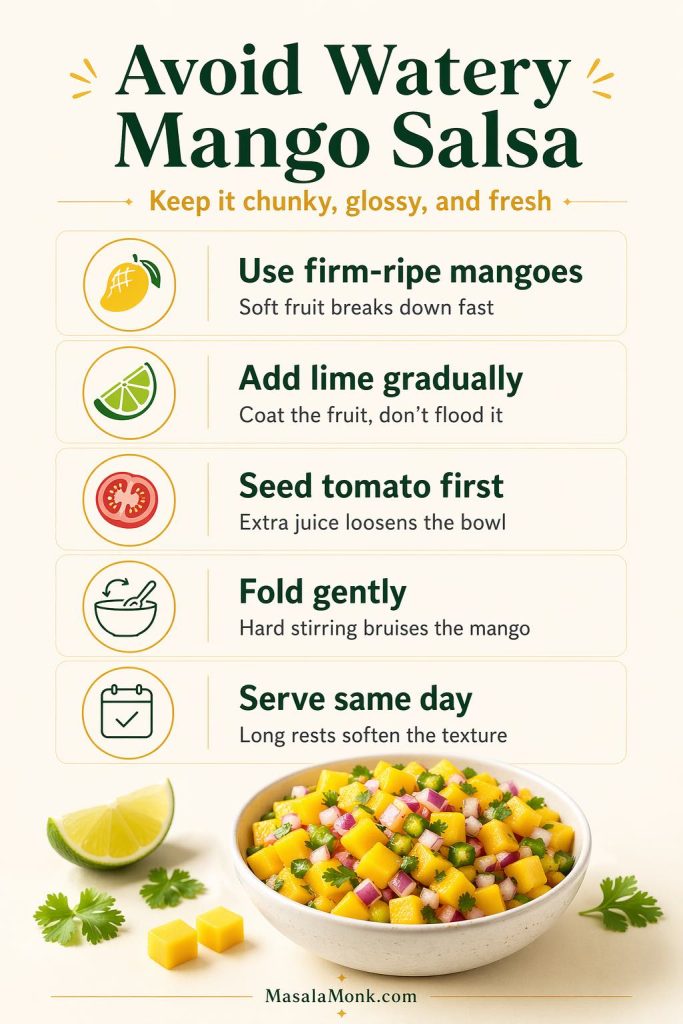
Troubleshooting card for avoiding watery mango salsa with tips to use firm-ripe mangoes, add lime gradually, seed tomato, fold gently, and serve the same day.
Watery mango salsa usually starts with fruit that is too soft, too much lime, juicy tomato, or rough mixing. Keep the bowl glossy instead of puddled by seasoning gradually and folding gently.
  • Using very soft mangoes: they may taste good, but they break down fast and make the bowl watery.
  • Adding too much lime at the start: the fruit should be coated lightly, not swimming.
  • Leaving onion pieces too large: big pieces make the salsa taste sharper and rougher than it should.
  • Not drying soaked onion or juicy tomato: extra water shows up later in the bowl.
  • Not seeding tomato for the chip-dip version: the salsa can turn loose fast.
  • Overmixing: stirring hard bruises the fruit and dulls the texture.
  • Letting it sit too long before serving: a short rest helps, but too long softens the mango and blurs the flavor.

Storage and Make-Ahead

Mango salsa is best fresh, and that is part of what makes it so good.

Best the day you make it

The texture is best on the day it is made. The fruit is firmer, the flavors feel brighter, and the bowl still looks clean and lively.

How long it lasts

Stored in an airtight container in the fridge, it will usually keep well for about 2 days, sometimes 3 depending on the fruit.

What changes after a few hours

A short rest of 10 to 20 minutes can help the flavors settle. After several hours, though, the mango softens more, liquid collects more easily, and the bowl becomes less crisp and defined.

How to freshen leftovers

If leftover salsa seems dull, drain off a little excess liquid, then add a small squeeze of lime and a pinch of salt. Let it sit for a minute, then taste again.

The best bowl is the one that still looks clean when you spoon it: distinct mango pieces, light lime gloss, no puddle at the bottom, and enough salt and chile to keep the sweetness lively.

Mango Salsa Recipe FAQs

Can I make mango salsa ahead of time?

Yes, but it is best within the same day if texture matters to you. Overnight storage softens the fruit and draws out more liquid.

Is mango salsa sauce the same as mango salsa?

Usually, yes. People often use mango salsa sauce to mean mango salsa served as a dip, taco topping, or spoonable sauce. Fresh mango salsa is normally chunky, not fully blended. If you want it saucier, mash or blend a small portion with lime juice and stir it back in instead of turning the whole bowl into a smooth mango sauce.

Is mango salsa better with tomato or without?

Neither is universally better. No-tomato mango salsa is usually better for tacos, fish, shrimp, and chicken, while tomato is better when you want a more scoopable dip for chips.

What mangoes are best for a mango salsa recipe?

Ripe but still firm mangoes are best. Ataulfo, Champagne, honey, and Kent mangoes can all work if they are firm enough to dice cleanly.

Can I use frozen mango?

You can, but fresh mango is better for a truly chunky bowl. Frozen fruit tends to soften more as it thaws.

What goes with mango salsa?

Tortilla chips, fish tacos, salmon, grilled chicken, shrimp, burrito bowls, and taco salads all work well.

Is mango salsa good with shrimp?

Yes. Mango salsa is excellent with grilled shrimp, shrimp tacos, coconut shrimp, shrimp rice bowls, and chilled shrimp appetizers. Keep it bright, lightly spicy, and not too wet so it lifts the shrimp without making the dish soggy.

How spicy should mango salsa be?

Usually just spicy enough to sharpen the sweetness. Most people do not need a very hot bowl unless they are intentionally making a spicy variation.

How long does mango salsa last in the fridge?

Usually 2 days, sometimes up to 3 depending on the fruit. It is most appealing sooner rather than later.

Can I use mango salsa for fish tacos?

Yes. The clean no-tomato base version is especially good here because it brightens the fish without making the taco feel soggy or overloaded.

If you want the best first version, make the clean no-tomato bowl, use firm-ripe mangoes, season lightly and carefully, and serve it while the texture is still bright and distinct. That version gives you the most flexibility and the clearest mango flavor.
↑ Back to top

Posted on 1 Comment

Mango Lassi Recipe (Restaurant-Style, Thick and Creamy)

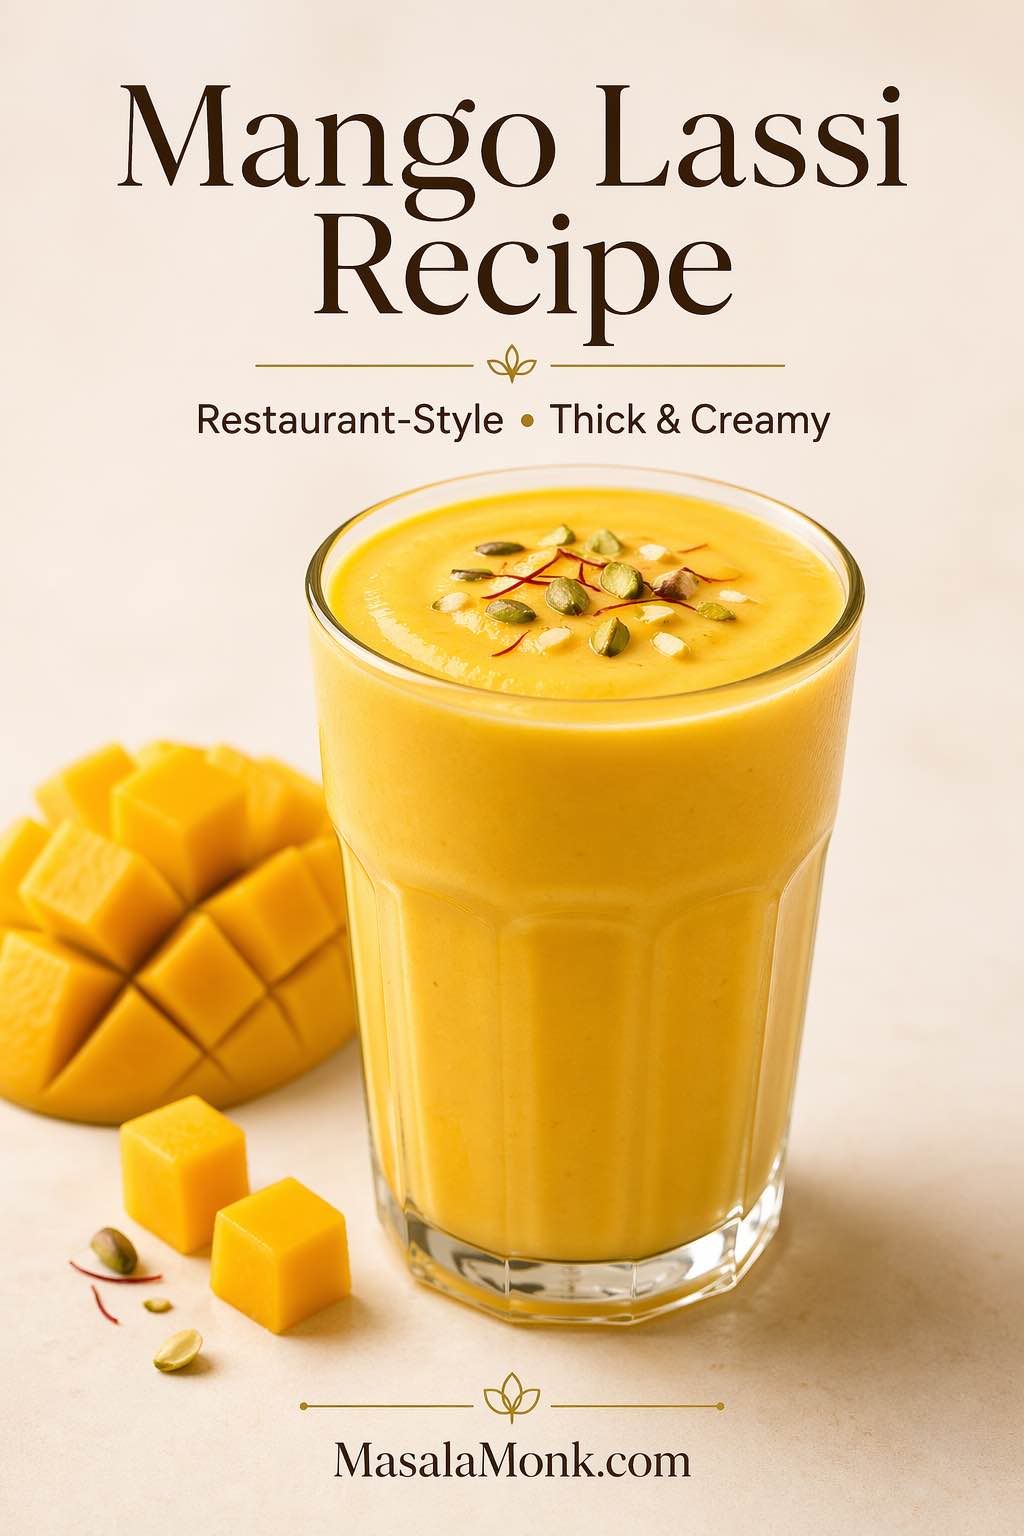
Social-share cover image for mango lassi recipe showing a thick creamy restaurant-style glass of mango lassi

A good mango lassi recipe should taste clearly of mango, feel thick and creamy, and stay balanced between sweet, tangy, and cold. The best versions are rich enough to feel satisfying, but still easy to drink.

This mango lassi recipe is built for that result. It works with fresh mango, frozen mango, or canned mango pulp, and it shows you how to adjust the texture, sweetness, and tang so the drink stays smooth, cold, and properly mango-forward. For the closest restaurant-style Indian mango lassi, use full-fat yogurt and mango pulp.

At a glance: 10 minutes, 2 to 3 servings, thick and creamy, best served very cold.

Mango Lassi Recipe Quick Answer

Mango lassi is a cold yogurt-based Indian drink made by blending mango, yogurt, a little milk or water, and sweetener until smooth and creamy. Britannica gives helpful background on lassi as a traditional yogurt-based drink from India. A good mango lassi recipe should be thick but pourable, strongly mango-flavored, and lightly balanced by yogurt tang. Fresh ripe mango gives the best natural flavor, frozen mango gives extra chill and thickness, and mango pulp is the easiest way to get a richer, more restaurant-style result at home.

If you want a milk-based mango drink instead, try this mango shake for a creamier, less tangy option.

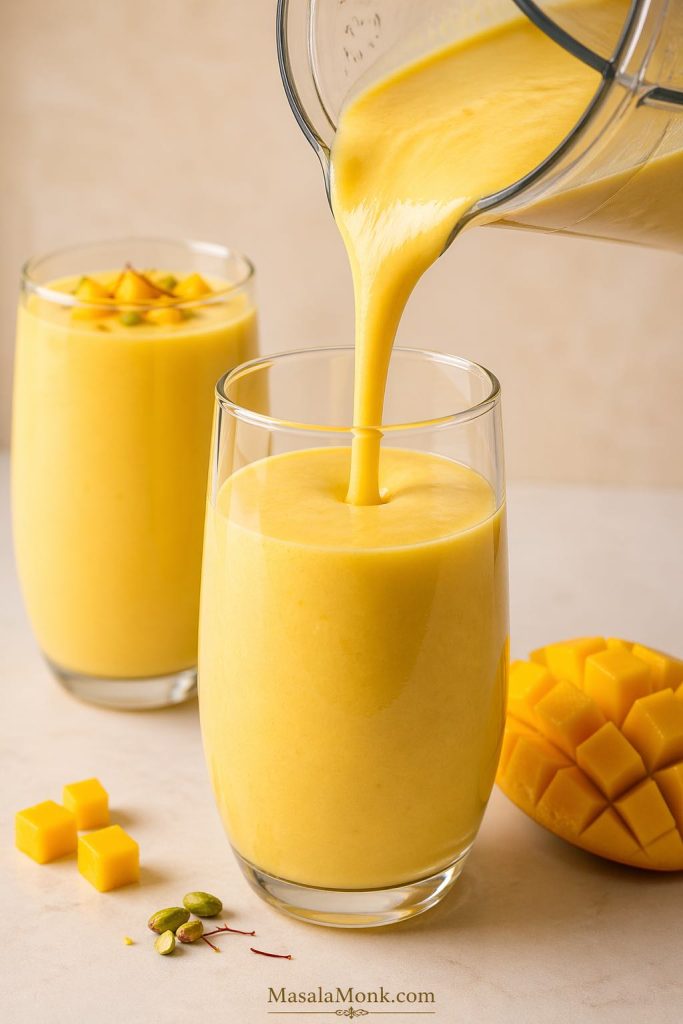
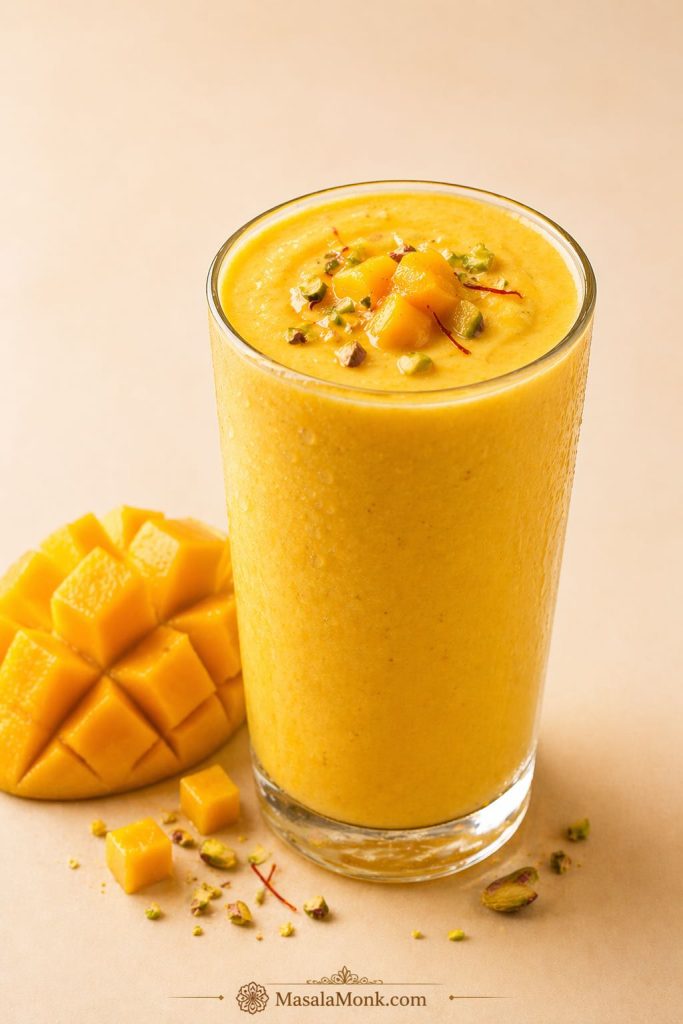
Glass of thick creamy mango lassi topped with mango cubes, pistachios, and saffron, with a scored mango half beside it.
A thick, creamy mango lassi made with a restaurant-style look and a rich mango finish.

Why This Mango Lassi Recipe Works

The difference between an average mango lassi and a very good one usually comes down to balance. A good mango lassi tastes clearly of mango first, not just yogurt and sugar. It feels creamy and rich without turning heavy, and it stays cold enough to be refreshing without becoming watery from too much ice.

The base is simple, but it is flexible enough to work with fresh mango, frozen mango, or canned mango pulp. That matters because small changes in mango type, yogurt thickness, and sweetener can noticeably change the final glass.

Balanced, not overly sweet

A good mango lassi recipe should taste naturally sweet and lightly tangy, not candy-like. Mangoes vary a lot in sweetness, and canned mango pulp is often already sweetened, so the best approach gives you room to adjust instead of forcing the same amount of sugar every time. Starting lighter and correcting after blending gives you a cleaner, more mango-forward result.

Thick but still pourable

The best texture lands somewhere between a smoothie and a milkshake. It should pour easily into a glass, but still look creamy and substantial. Yogurt gives the drink body, mango adds natural thickness, and just enough milk or water loosens it without washing out the flavor. For that reason, this mango lassi recipe works best when the liquid is added carefully instead of all at once.

Works with fresh mango, frozen mango, or pulp

One of the biggest reasons mango lassi recipes disappoint is that they pretend every mango works the same way. They do not. Ripe fresh mango gives the best flavor when it is excellent, frozen mango gives reliable cold thickness, and mango pulp gives the most dependable restaurant-style color and concentrated mango taste. This recipe is designed so you can get a good result with any of the three.

Easy to adjust to taste

Once everything is blended, you can still fix almost anything in seconds. A splash of milk loosens a lassi that feels too thick. More sweetness helps when it tastes too tart, while extra yogurt or mango can fix a thinner-than-expected texture. If the flavor seems flat, the drink usually needs stronger mango, not just more sugar. That flexibility makes this a much more dependable home recipe than a one-note formula.

Mango Lassi Recipe Ingredients

Mango lassi uses a short ingredient list, which means each ingredient matters more. This is not the kind of recipe where average fruit and random yogurt disappear into the background. The mango sets the flavor, the yogurt sets the body, and the liquid and sweetener determine whether the drink feels balanced or diluted.

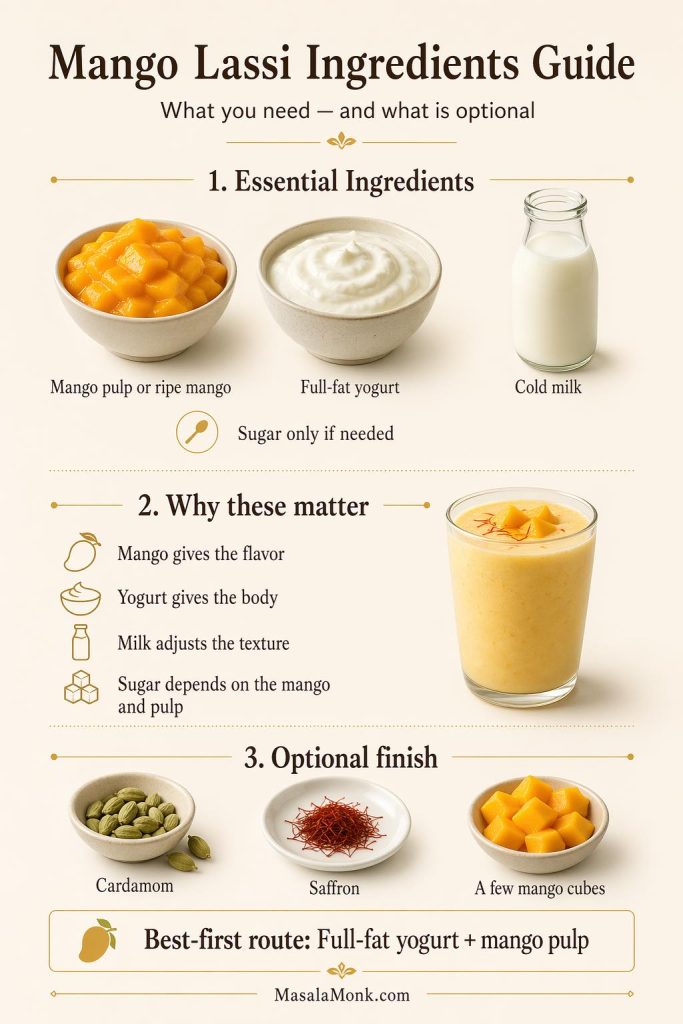
Mango lassi ingredients guide showing mango pulp or ripe mango, full-fat yogurt, cold milk, optional cardamom and saffron, and the best-first route with mango pulp.
Start with mango pulp or ripe mango for flavor, full-fat yogurt for body, and cold milk to loosen the texture without making the lassi watery.

Mango

You can use ripe fresh mango, frozen mango, or canned mango pulp here. Fresh mango gives the best flavor when it is truly ripe and sweet. Frozen mango is excellent when you want the drink colder and thicker without relying on a lot of ice. Mango pulp is the easiest way to get that bright restaurant-style mango flavor and color, especially when your fresh mangoes are only decent instead of exceptional.

Yogurt

Yogurt gives mango lassi its body and tang. Full-fat yogurt makes the drink smoother and richer, while low-fat yogurt can taste thinner and sharper. Traditional dahi gives a softer tang and looser texture, while Greek yogurt makes a thicker lassi and often needs more liquid. Taste the yogurt before blending, because very sour yogurt can throw off the whole drink.

Milk or water

A small amount of milk loosens the yogurt and mango without stripping out richness. Water works too, especially if the mango and yogurt are already full-bodied, but milk usually gives a rounder result. The important thing is restraint. Too much liquid is one of the fastest ways to turn mango lassi from creamy to forgettable.

Sweetener

Sugar is the most straightforward option, but honey can work if you like its flavor. The amount depends on your mangoes and on whether your pulp is already sweetened. The best approach is to start low, blend, and then add more only if the drink still tastes too tart or muted. A good mango lassi recipe should taste sweet enough to feel comforting, not so sweet that it buries the fruit.

Cardamom and optional flavor additions

Cardamom is the classic optional addition, and a small amount can make the drink feel more finished without taking over. Saffron or a tiny drop of rose water can also work in richer versions, but both should stay in the background. This is still a mango drink first.

Best Mangoes and Yogurt for Mango Lassi

This is where ingredient choice matters most. When the mango and yogurt are right, the drink tastes smooth, balanced, and easy to love. When one is off, the lassi needs more correction than most people expect.

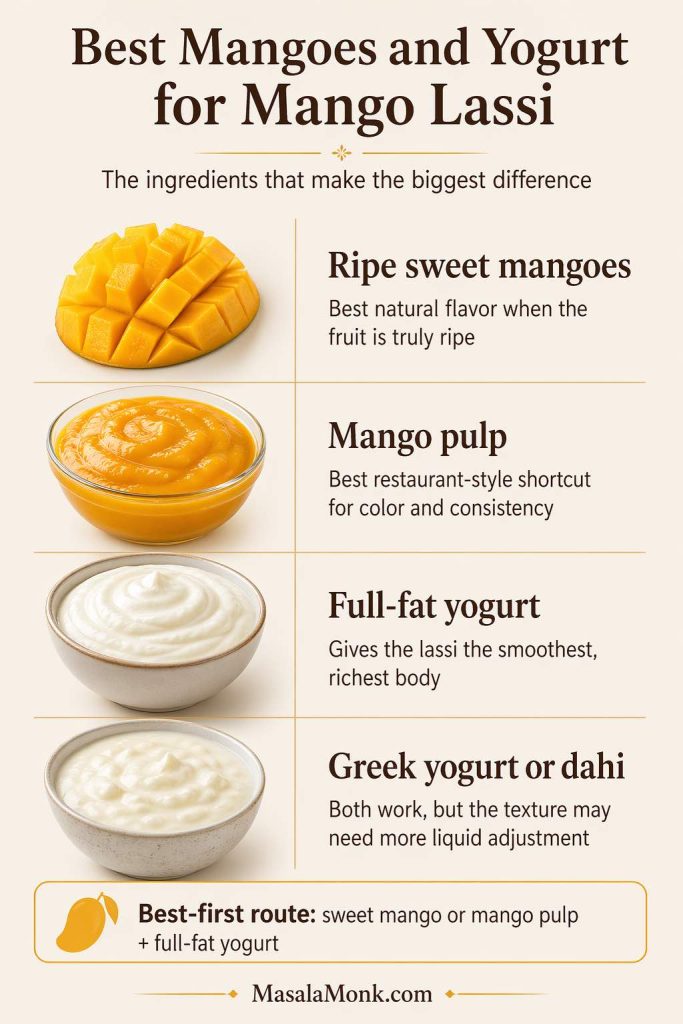
Guide comparing ripe sweet mangoes, mango pulp, full-fat yogurt, and Greek yogurt or dahi for mango lassi.
Sweet ripe mangoes give the best natural flavor, mango pulp gives the easiest restaurant-style shortcut, and full-fat yogurt gives mango lassi its smoothest, richest body.

Best mangoes for flavor

The best fresh mangoes for mango lassi are ripe, sweet, fragrant, and low in fibrous texture. If the mango tastes flat, watery, or slightly sour on its own, the lassi will usually need extra help from sugar or pulp. Soft, fully ripe mangoes give a rounder, more dessert-like result, while underripe fruit tends to make the drink taste sharper and less luxurious.

Alphonso and Kesar mango for restaurant-style lassi recipe

When people talk about restaurant-style mango lassi, they are often chasing the intense color and concentrated flavor associated with Alphonso or Kesar mango pulp. The National Horticulture Board’s mango varieties material is a useful reference for Indian varieties such as Alphonso and Kesar. That does not mean you need those mangoes every time, but it does explain why a lassi made with canned Indian mango pulp can taste more vivid and familiar than one made with average supermarket mangoes. If your fresh fruit is just okay, pulp can help bridge that gap.

Dahi vs Greek yogurt

Dahi usually gives a softer tang and a naturally looser consistency, which makes it very easy to blend into a smooth drinking texture. Greek yogurt gives more body and richness, but it can also make the lassi too thick or slightly too tart if you do not add enough liquid. Both work well. You just want to respect the difference instead of assuming they behave the same way.

What to do if your yogurt is too sour

If your yogurt tastes noticeably sharp, the finished lassi may taste more tangy than creamy even after sweetener is added. The easiest fixes are to use a sweeter mango, add a little more sweetener, reduce the yogurt slightly, or soften the tartness with a spoonful of mango pulp. In other words, do not fight sour yogurt with sugar alone. It is better to rebalance the drink from more than one direction.

Fresh Mango vs Frozen Mango vs Mango Pulp

This choice changes the drink more than almost anything else. Fresh mango gives the best natural flavor when the fruit is excellent. Frozen mango gives easy chill and thickness. Mango pulp gives the most reliable shortcut to the deeper color and fuller flavor many people expect from restaurant-style mango lassi.

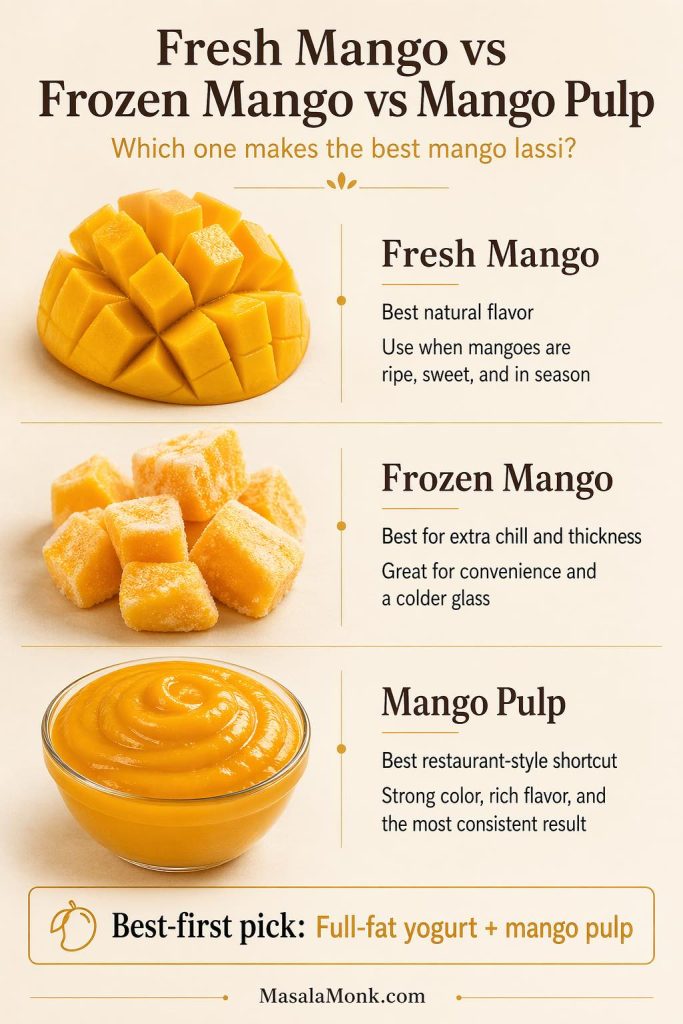
Comparison of fresh mango, frozen mango, and mango pulp for making mango lassi, with notes on flavor, thickness, and restaurant-style results.
Fresh mango gives the best natural flavor, frozen mango adds extra chill and thickness, and mango pulp is the easiest route to a richer restaurant-style mango lassi.

Fresh mango: best flavor

Use fresh mango when your fruit is ripe, sweet, and actually worth showcasing. This is usually the best route when mangoes are in season and full of flavor. The main caution is that room-temperature fresh mango often makes the lassi less cold and slightly looser, so you may want colder yogurt, a little ice, or a brief chill before serving.

Frozen mango: best convenience and chill

Frozen mango is one of the easiest ways to make mango lassi feel thick and very cold without leaning too hard on ice. It is convenient, consistent, and often better than mediocre fresh mango. If you like a thicker glass with a colder finish, frozen mango is often the easiest choice. Just remember that heavily frozen fruit can also make the drink thicker than expected, so add liquid gradually.

The same “start with less liquid, then adjust” idea also helps with smoothie-style blends, and this strawberry smoothie recipe uses that logic well.

Mango pulp: best restaurant-style shortcut

Mango pulp is the easiest shortcut when you want a richer, more restaurant-style mango lassi. It gives stronger color, fuller mango flavor, and a more predictable result than average fresh fruit. Even a small amount can make the drink taste more complete.

How sweetened mango pulp changes the recipe

Most canned mango pulp is already sweetened, which means it does two jobs at once: it adds mango flavor and it adds sweetness. Because of that, you should not treat it like unsweetened fresh mango. Start with less added sugar than you think you need, blend first, and only sweeten more if the drink still tastes too tart. That one adjustment keeps the lassi from becoming cloying.

Mango Lassi Recipe Snapshot

This mango lassi recipe makes a thick, creamy, restaurant-style Indian drink with a strong mango flavor and a balanced sweet-tangy finish. The best-first version uses full-fat yogurt and canned Alphonso or Kesar mango pulp.

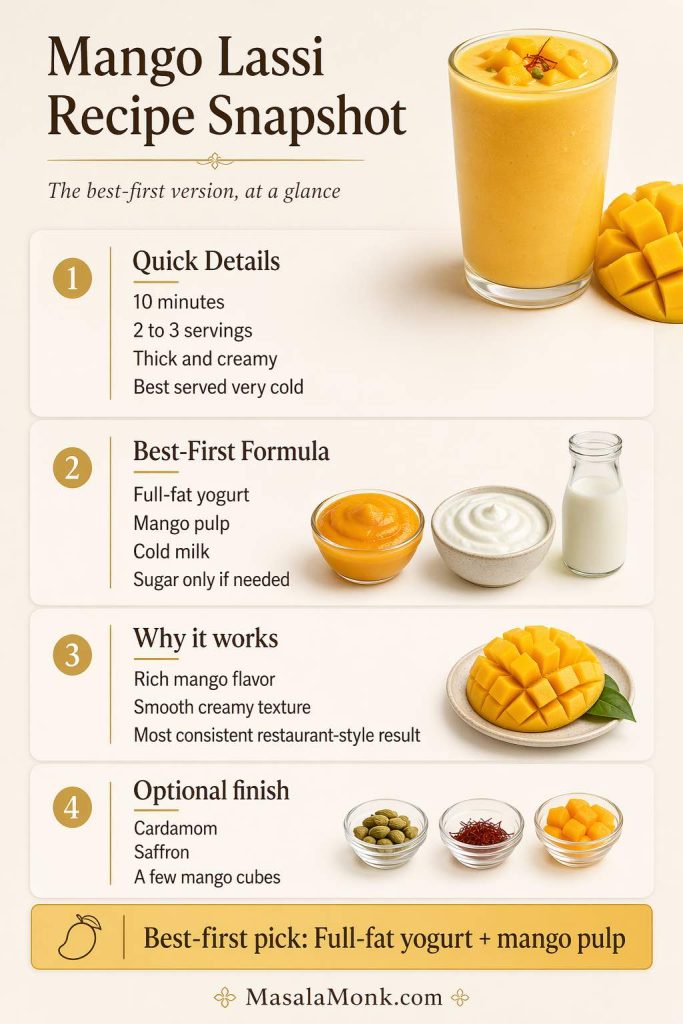
Mango lassi recipe snapshot showing time, servings, best-first formula with full-fat yogurt and mango pulp, and optional finish ingredients.
This mango lassi recipe snapshot shows the best-first route at a glance: full-fat yogurt, mango pulp, cold milk, and just enough sweetness for a thick, creamy restaurant-style result.
  • Prep time: 10 minutes
  • Total time: 10 minutes
  • Yield: 2 to 3 servings
  • Category: Drink
  • Cuisine: Indian
  • Texture: Thick and creamy
  • Best served: Very cold
  • Best-first formula: Full-fat yogurt plus canned mango pulp

How to Make This Mango Lassi Recipe

This mango lassi recipe is easiest to control when you start with less liquid than you think you need. Once the mango, yogurt, and sweetener are blended smooth, you can fine-tune the thickness and flavor in seconds.

Mango lassi texture guide showing too thick, just right, and too thin consistency with quick fixes.
Aim for a mango lassi that feels thick, creamy, and easy to pour, then adjust with a splash of milk if it is too thick or more yogurt or mango pulp if it turns too thin.

Add everything to the blender

Add the mango, yogurt, milk or water, sweetener, and cardamom if using to the blender. If you are using fresh mango and want the drink especially cold, add a few ice cubes or make sure the yogurt and liquid are well chilled before blending. If you are using canned mango pulp, start with less sweetener since the pulp may already be sweet.

Blend until fully smooth

Blend until the mixture looks silky and completely uniform, with no yogurt streaks or visible fruit pieces left behind. This usually takes less time than people expect, especially with mango pulp or very ripe mango. If the drink looks too thick to move well in the blender, add a small splash of liquid rather than a large pour.

Thick smooth mango lassi being poured from a blender jar into a glass, with a finished glass and mango pieces nearby.
Pour the lassi when it flows in a thick, smooth stream and settles into the glass without looking watery, stiff, or grainy.

Taste and adjust

Before pouring, taste the lassi once. This is where the drink starts to feel finished instead of merely acceptable. Add more sweetness a little at a time if needed. If the texture feels too thick, loosen it with a small splash of milk. When the yogurt tastes too sharp, extra mango or mango pulp usually works better than sugar alone.

Serve very cold

Pour into glasses and serve right away while the texture is at its best. Mango lassi is most satisfying when it is very cold, smooth, and freshly blended. If you want, finish with a tiny pinch of cardamom or a few saffron strands, but keep the garnish light so the mango stays at the center.

How to Make It Taste More Restaurant-Style

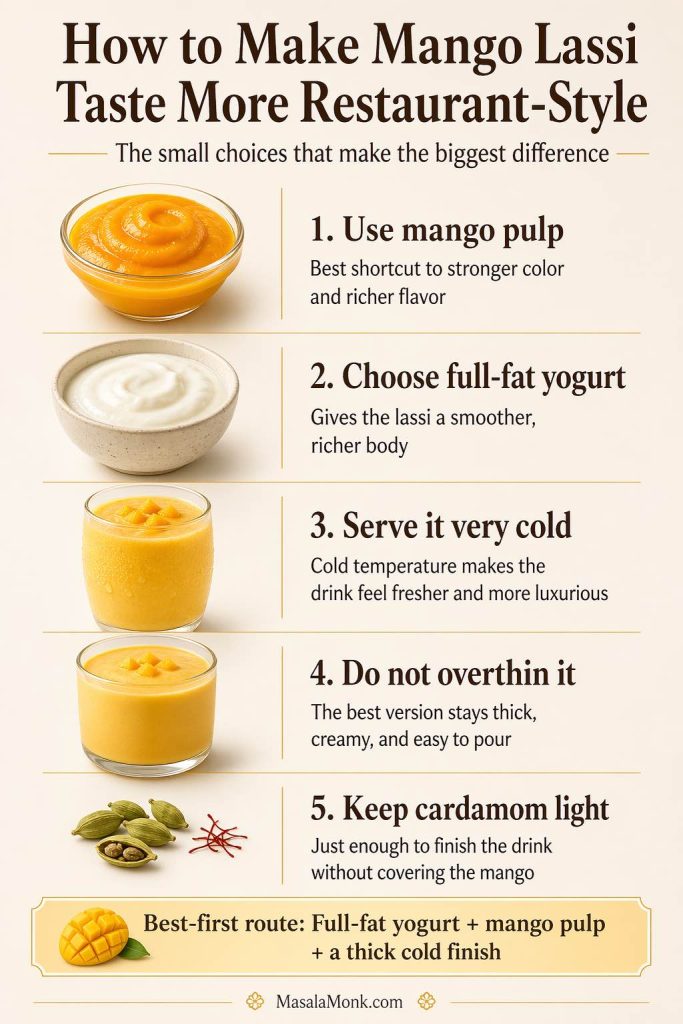
If you want an authentic mango lassi with a more restaurant-style finish, the answer is usually not more sugar or more ice. It is better ingredient choice, colder serving temperature, and a thicker final texture. Mango pulp and full-fat yogurt do most of the heavy lifting.

Guide showing how to make mango lassi taste more restaurant-style with mango pulp, full-fat yogurt, a thick cold finish, and light cardamom.
Use mango pulp for richer flavor, full-fat yogurt for body, and a thick cold finish to bring mango lassi closer to the restaurant-style version, then keep the cardamom light so the mango stays in front.

Use mango pulp for the closest restaurant-style flavor

When homemade mango lassi does not quite taste like the restaurant version, mango pulp is often the missing link. It gives deeper color, fuller mango flavor, and a more consistent result than average fresh fruit. You do not have to use only pulp, either. Even combining a little pulp with ripe fresh mango can bring the drink much closer to that restaurant-style result.

Use full-fat yogurt

Full-fat yogurt gives the drink a smoother, richer feel and helps it stay creamy instead of sharp or thin. Low-fat yogurt can still work, but it usually needs more help from good mango and careful sweetening. If you want the most satisfying texture, full-fat yogurt is the simplest upgrade.

Serve colder than you think

A lukewarm mango lassi tastes flatter and heavier. Cold temperature sharpens the refreshment and makes the texture feel more luxurious. Chill the yogurt, chill the liquid, and use frozen mango or a little ice when needed, but do not water the drink down just to make it colder.

Do not overthin the drink

A restaurant-style mango lassi should feel rich and creamy, not like thin juice with yogurt mixed in. Add liquid gradually and stop as soon as the drink becomes pourable. It is much easier to loosen a thick lassi than to fix one that has already become diluted.

Use cardamom lightly

Cardamom can make mango lassi feel finished and fragrant, but too much turns the drink perfumed and distracts from the fruit. A light hand works best. The same is true for rose water and saffron in richer versions. They should support the mango, not compete with it.

How to Fix Thickness, Sweetness, and Tang

Small adjustments make the biggest difference here. Mangoes vary, yogurt varies, and canned pulp changes the sweetness level a lot. A quick adjustment after blending is normal, not a sign that anything went wrong.

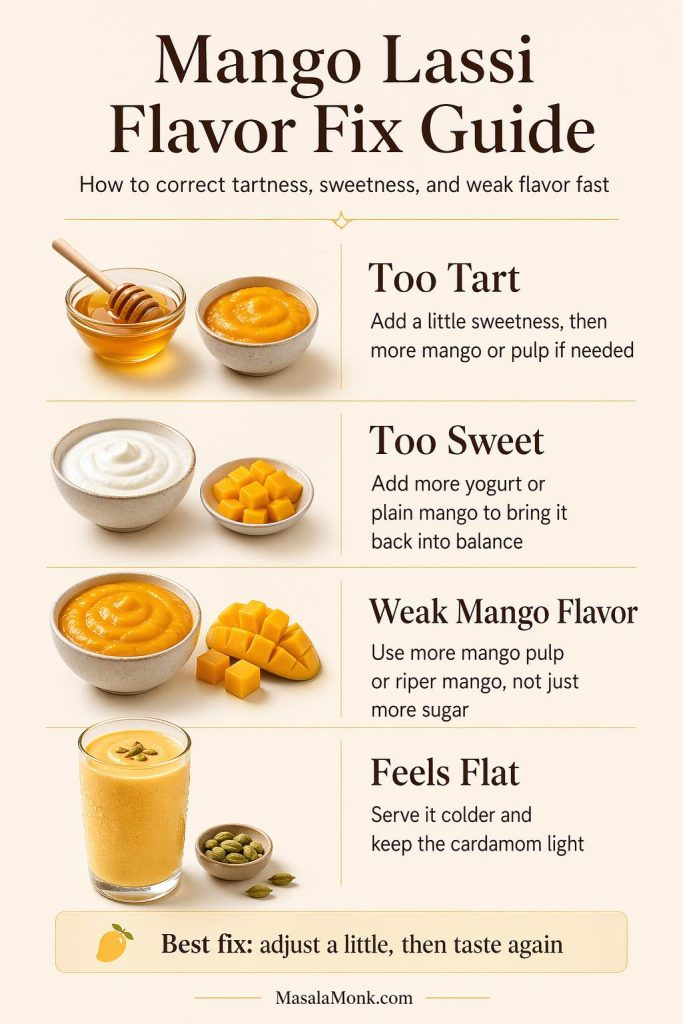
Mango lassi flavor fix guide showing how to correct tart, sweet, weak, or flat flavor with simple adjustments.
Fix a tart mango lassi with a little sweetness and more mango or pulp, bring back an overly sweet batch with yogurt or plain mango, and make flat flavor feel brighter by serving it colder and keeping the cardamom light.

If it is too thick

Add milk or water a splash at a time and blend briefly after each addition. Greek yogurt and frozen mango can make the lassi thicker than expected, so small adjustments are usually all you need. The goal is not a thin drink. It is a creamy one that pours easily.

If it is too thin

Add more yogurt for body or more mango for both body and flavor. Mango pulp can also help because it thickens and boosts mango taste at the same time. Avoid solving thinness with ice, since melting ice usually weakens the drink further.

If it is too tart

A tart lassi usually comes from sour yogurt, not from a lack of sugar alone. Start with a little more sweetener, but also consider adding more mango or mango pulp to round out the flavor. If the yogurt is especially sharp, reducing it slightly next time can give a better balance than simply pouring in more sugar.

If it is too sweet

Add more yogurt or a little more plain mango to pull the drink back into balance. This happens most often when canned pulp is already sweetened and extra sugar gets added too soon. A tiny pinch of salt can also make the sweetness feel less one-dimensional without making the drink taste salty.

If the mango flavor feels weak

More sugar is rarely the best fix here. What the drink usually needs is more mango, riper mango, or some mango pulp for concentration. This is especially useful when fresh mango looks good but tastes milder than expected. Strengthening the fruit works better than trying to sweeten your way into a fuller flavor.

Mango Lassi Recipe Variations

The best way to handle variations is to keep the classic version central and make small, controlled changes from there. That keeps the page useful for the main mango lassi search while still giving readers a few practical ways to adapt the recipe.

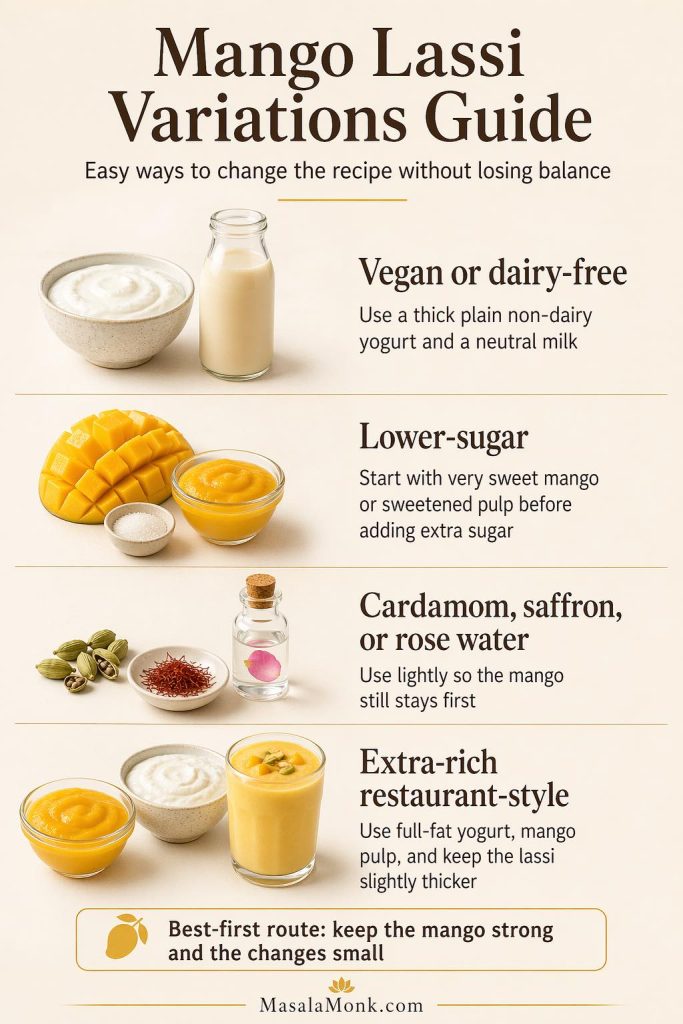
Mango lassi variations guide showing vegan or dairy-free, lower-sugar, lightly spiced, and extra-rich restaurant-style options.
Switch mango lassi toward vegan, lower-sugar, lightly spiced, or extra-rich restaurant-style versions by changing only one or two elements at a time and keeping the mango flavor strong.

Vegan mango lassi

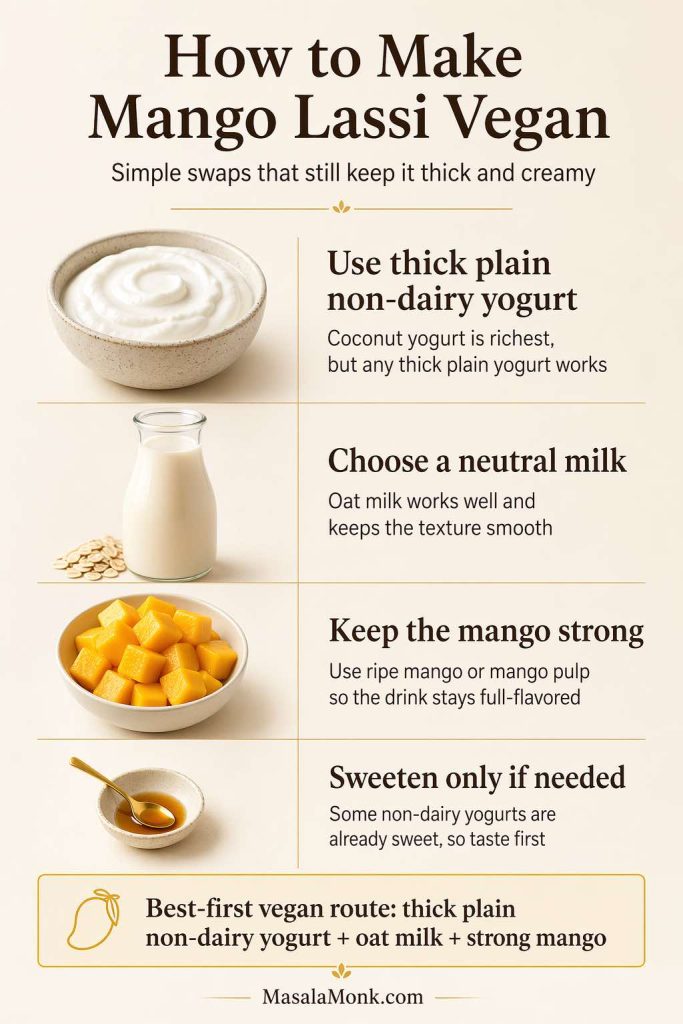
Use a thick plain non-dairy yogurt and enough mango to keep the drink creamy and fruit-forward. Coconut yogurt gives the richest result, but it also adds its own flavor, so it works best when you do not mind that extra note in the background. Taste carefully before adding sweetener because some non-dairy yogurts are already lightly sweet.

Guide showing how to make mango lassi vegan with thick plain non-dairy yogurt, oat milk, strong mango, and sweetener tips.
Keep vegan mango lassi thick and creamy with plain non-dairy yogurt, a neutral milk like oat milk, and enough ripe mango or mango pulp to carry the flavor.

Dairy-free option

This works much like the vegan version, but the main goal is simply replacing the dairy while keeping the body of the drink intact. Use a plain dairy-free yogurt and a neutral or lightly creamy liquid so the mango still leads. Oat milk can work well here because it softens the texture without overpowering the drink.

Healthy or lower-sugar mango lassi

The easiest way to make mango lassi feel lighter is to rely on very sweet ripe mango and reduce the added sugar rather than stripping out all richness. You can also skip extra sweetener entirely if your mango or mango pulp is already sweet enough. Just remember that a lower-sugar version still needs enough mango flavor and enough yogurt body to taste complete.

Cardamom, saffron, or rose water

These are small finishing choices, not full identity changes. Cardamom is the easiest and most classic. Saffron adds warmth and a slightly more festive feel. Rose water can make the drink feel more perfumed and luxurious, but it needs a very light hand. In every case, the mango should still remain the first thing you taste.

Extra-rich restaurant-style Mango Lassi Recipe

If you want the richest, plushest version, use full-fat yogurt and mango pulp, and keep the drink slightly thicker than usual. Some people also like a little condensed milk in this style, but it should be added carefully because it sweetens very quickly. Even then, the goal is still a mango lassi, not a dessert that happens to be drinkable.

For a more tangy, spiced Indian summer drink, aam ka panna is a very different direction built around raw mango instead of ripe mango.

If you want something savory, cooling, and cumin-forward instead of creamy, jal jeera is another classic Indian summer drink worth making.

Storage and Make-Ahead

Mango lassi is at its best right after blending, when the drink is cold, smooth, and fully aerated. That fresh texture is part of what makes it feel rich and refreshing at the same time.

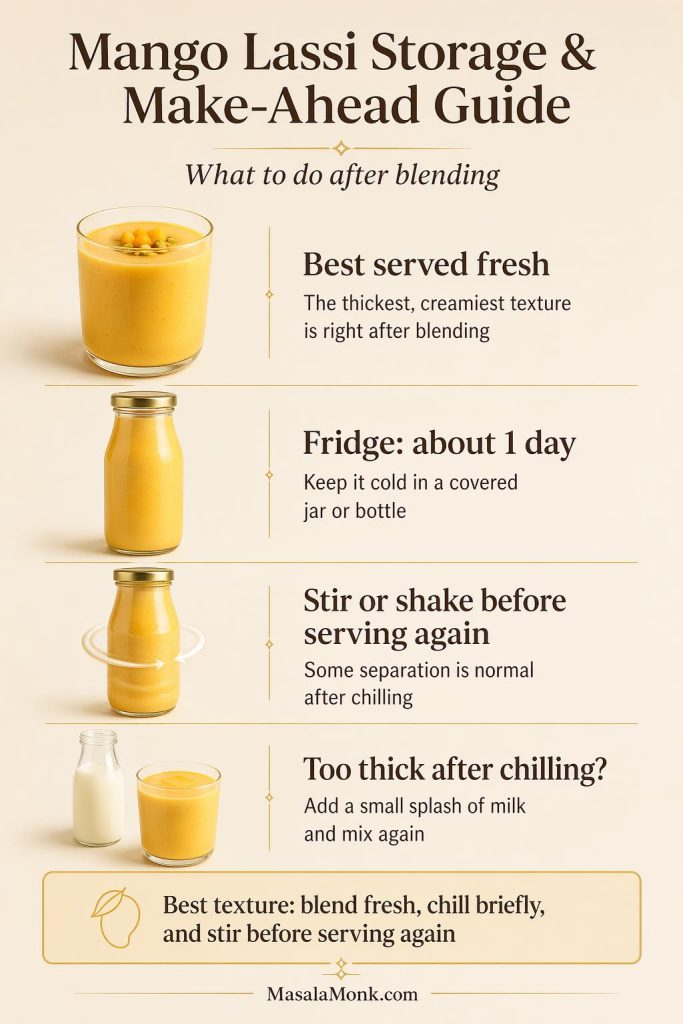
Storage and make-ahead guide for mango lassi showing best served fresh, fridge storage for about 1 day, stirring before serving again, and adding milk if it thickens after chilling.
Serve mango lassi fresh for the best texture, refrigerate leftovers only briefly, then stir well and loosen with a splash of milk if it thickens after chilling.

Best served fresh

If you want the thickest, creamiest texture, serve mango lassi as soon as it is blended. This is especially true when you are using fresh mango or ice, since the drink can loosen as it sits.

How long it keeps in the fridge

You can refrigerate mango lassi for about 1 day if needed. Store it in a covered jar or bottle and keep it cold.

What to do before serving again

Stir or shake well before serving again, because some separation is normal. If it feels too thick after chilling, add a small splash of milk and mix again.

If you want more traditional cooling drinks for hot weather, these Indian sharbats are a good next place to explore.

Mango Lassi Recipe FAQs

Can I make mango lassi with canned mango pulp?

Yes. Canned mango pulp is one of the easiest ways to make mango lassi taste more restaurant-style. It gives a concentrated mango flavor and strong color, but many brands are already sweetened, so add extra sugar carefully and only after tasting.

Can I use frozen mango instead of fresh?

Yes. Frozen mango works very well and often gives a thicker, colder lassi than fresh fruit. It is especially useful when fresh mangoes are out of season or not very flavorful. Just add liquid gradually because frozen fruit can make the drink thicker than expected.

What yogurt is best for mango lassi?

Plain full-fat yogurt usually gives the best balance of richness and smoothness. Dahi gives a softer tang and a looser texture, while Greek yogurt makes a thicker lassi and often needs more liquid. Any plain yogurt can work, but very sour yogurt may need more adjustment.

Why is my mango lassi too thick or too tart?

A too-thick lassi usually comes from Greek yogurt, frozen mango, or not enough liquid. A too-tart lassi usually comes from sour yogurt or mango that is not sweet enough. Both are easy to fix after blending with small, careful adjustments.

Can I make mango lassi without milk?

Yes. You can use water instead of milk, especially if your mango and yogurt already give the drink enough body. Milk makes the texture rounder and richer, but it is not essential. The key is to add only enough liquid to make the lassi pourable.

How do I make vegan mango lassi?

Use a thick plain non-dairy yogurt and a small amount of dairy-free milk or water. Coconut yogurt gives the richest texture, while oat milk can help keep the drink creamy without overpowering the mango too much. Taste before sweetening because some non-dairy products are already sweetened.

Can I make it ahead of time?

You can make it a few hours ahead, but it is best the same day and ideally soon after blending. If you make it ahead, keep it chilled and stir or shake it well before serving.

Is mango lassi supposed to be thick?

Yes. Mango lassi should be thick enough to feel creamy and substantial, but still pourable and easy to drink. It should not be watery, and it should not be so dense that it feels like spoonable yogurt.

Full Mango Lassi Recipe

Mango Lassi Recipe (Restaurant-Style, Thick and Creamy)

This restaurant-style Indian mango lassi recipe is thick, creamy, cold, and strongly mango-forward. For the best-first version, use full-fat yogurt and canned Alphonso or Kesar mango pulp.

  • Prep time: 10 minutes
  • Total time: 10 minutes
  • Yield: 2 to 3 servings
  • Category: Drink
  • Cuisine: Indian

Ingredients

  • 1 1/2 cups canned Alphonso or Kesar mango pulp
  • 1 cup plain full-fat yogurt
  • 1/4 to 1/2 cup cold milk, as needed
  • 1 to 2 tablespoons sugar or honey, only if needed
  • 1/8 teaspoon ground cardamom, optional
  • Ice only if needed for extra chill

Fresh mango option: use 1 cup ripe mango plus 1/2 cup mango pulp for a fresher flavor with similar depth.

Method

  1. Add the mango pulp, yogurt, 1/4 cup cold milk, sweetener if using, and cardamom if using to a blender.
  2. Blend until completely smooth and creamy.
  3. Add a little more milk only if needed to loosen the drink.
  4. Taste and adjust. Add more sweetener only if needed, or a little more mango pulp if the flavor needs more depth.
  5. Add a little ice and blend briefly only if you want the lassi colder and slightly frothier.
  6. Pour into glasses and serve immediately.

Notes

  • Best-first route: full-fat yogurt plus canned mango pulp gives the closest restaurant-style result.
  • Fresh mango: best when the fruit is very ripe, sweet, and fragrant.
  • Frozen mango: gives a colder, thicker lassi and works well when fresh mango is not at its best.
  • Dahi vs Greek yogurt: dahi gives a looser, softer-tang result, while Greek yogurt makes a thicker lassi and may need more milk.
  • Too thick: add milk a splash at a time.
  • Too thin: add more yogurt or more mango.
  • Too tart: add a little more sweetener and, if needed, more mango pulp.
  • Vegan version: use a thick plain non-dairy yogurt and dairy-free milk or water.

Storage

Mango lassi is best served right after blending, but you can refrigerate it for about 1 day. Stir or shake well before serving again, and add a small splash of milk if it thickens too much in the fridge.

For a colder mango finish, this mango sorbet recipe is a good next step when you want something fruit-forward but not creamy.

↑ Back to top

Posted on 4 Comments

How to Make Pineapple Chia Pudding: A Refreshing Low-Carb Breakfast Option

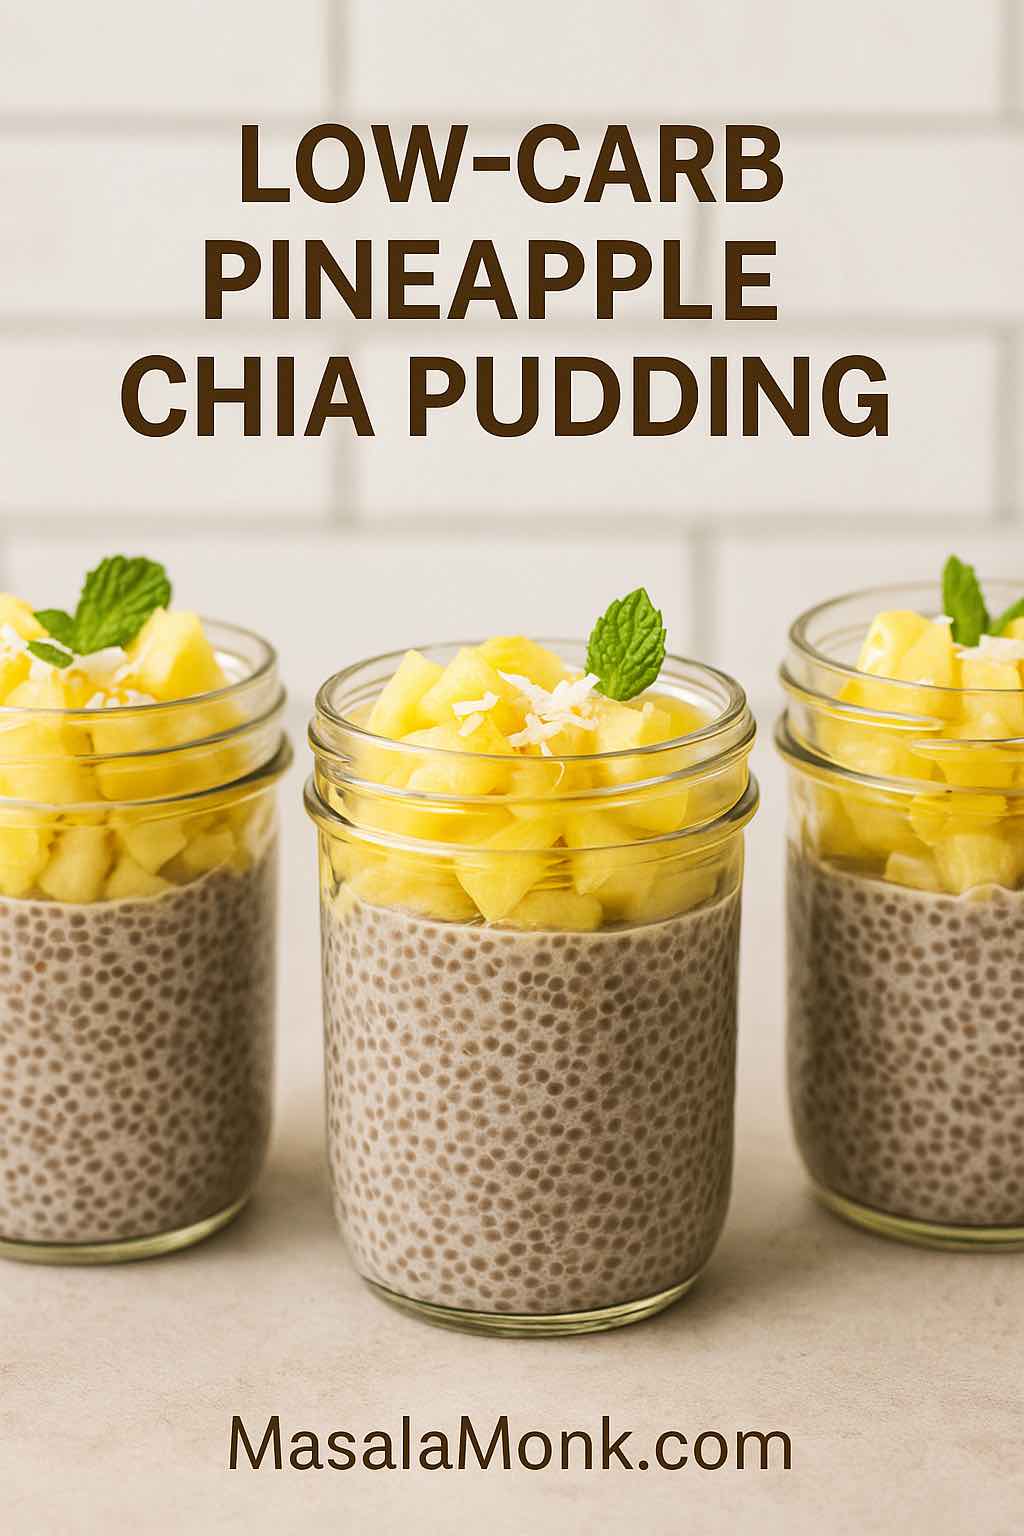
LOW-CARB PINEAPPLE CHIA PUDDING

Are you tired of the same old eggs or overnight oats for breakfast? Do you crave something light, refreshing, and tropical, but still want to keep your carbs in check? Look no further—pineapple chia pudding is about to become your new favorite!


Why Pineapple Chia Pudding?

Chia pudding is a superstar in the world of healthy breakfasts. With just a handful of ingredients, you get a creamy, satisfying dish that’s loaded with fiber, healthy fats, and protein. When you add pineapple into the mix, you get a burst of sunshine in every bite—tart, sweet, and absolutely invigorating.

But here’s the kicker: most tropical puddings are loaded with sugar or carb-heavy ingredients. This version keeps carbs to a minimum while maximizing flavor, texture, and satiety.


What Makes This Breakfast Low-Carb and Healthy?

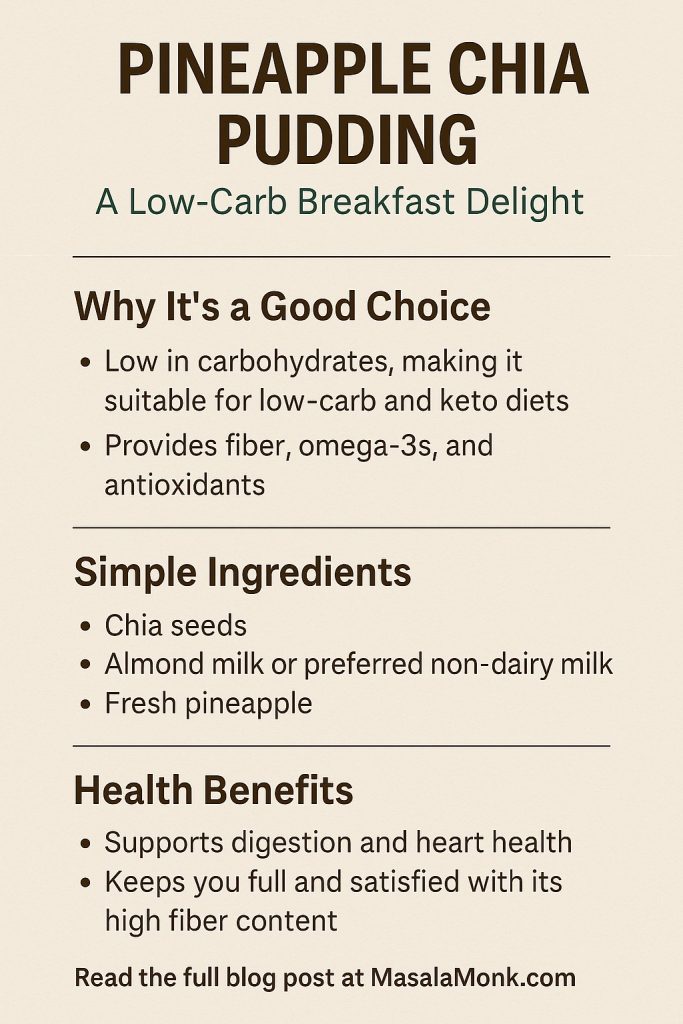
  • Chia Seeds: Nearly all carbs in chia seeds are fiber, which doesn’t spike blood sugar and helps you stay full longer. Chia is also a source of omega-3 fats and plant-based protein.
  • Pineapple: Used sparingly for flavor and nutrition—just enough for a sweet, tangy pop without going overboard on sugar.
  • Unsweetened Non-Dairy Milk: Almond or coconut milk keeps things creamy and super low in carbs compared to dairy milk or fruit juice.
  • Natural Sweeteners: Swap out honey or maple syrup for monk fruit, erythritol, or stevia for a guilt-free treat.

Ingredients: What You’ll Need

Let’s break down everything you’ll need to whip up a perfect low-carb pineapple chia pudding:

IngredientWhy Use It?Carb Impact
Chia seeds (3 tbsp)Thickens, fiber, protein, omega-3s~2-3g net per serving
Unsweetened almond/coconut milk (3/4 cup)Creamy, low-cal, low-carb~1g net per serving
Fresh/frozen pineapple (2-3 tbsp)Tangy, tropical flavor~3-4g net per serving
Monk fruit/stevia/erythritolAdds sweetness, no sugar0g
Lime juice (optional)Brightness, balances flavorsNegligible
Vanilla extract (optional)Depth, classic pudding flavorNegligible
Unsweetened coconut flakes (optional)Texture, more tropical vibesMinimal
Greek yogurt (optional, topping)Creaminess, protein boostCheck label for carbs

PINEAPPLE CHIA
PUDDING
PINEAPPLE CHIA PUDDING

Step-by-Step Guide: From Ingredients to Bowl

1. Prep the Pineapple

  • Use fresh or frozen pineapple, but keep the serving to about 2–3 tablespoons per portion. Dice it small, or better yet, blend it with a little of your chosen milk for a smooth “pineapple milk.” This gives every bite a burst of flavor without overloading on carbs.

2. Mix the Chia Pudding

  • In a jar or bowl, add:
    • 3 tablespoons chia seeds
    • 3/4 cup unsweetened almond or coconut milk
    • 1/2 teaspoon vanilla extract
    • 1–2 teaspoons low-carb sweetener (to taste)
    • Optional: juice from half a lime for zing
  • Stir vigorously. Wait 5 minutes, stir again to break up clumps.

3. Let It Set

  • Cover the container and refrigerate for at least 2 hours (overnight is best). Chia seeds absorb the liquid and become thick, creating a pudding texture.
  • Pro Tip: For an ultra-smooth, quick version, blend everything (including chia) before chilling. This gives a silky “Dole Whip” vibe, as seen in new 2025 recipe trends.

4. Assemble and Top

  • Before serving, give your pudding a stir.
  • Top with your diced/blended pineapple and sprinkle with unsweetened coconut flakes. A dollop of Greek yogurt makes it extra creamy and satisfying.
  • Want to get fancy? Garnish with a mint leaf or a wedge of lime!

How to Keep It Low-Carb (And Delicious!)

  • Watch your pineapple portion. Pineapple is higher in sugar than berries, so moderation is key.
  • Always use unsweetened milks and yogurts. Sweetened versions can double or triple your carb count.
  • Sweeten smartly. A few drops of monk fruit or stevia goes a long way!
  • Protein boost: Add a scoop of your favorite low-carb protein powder, or swirl in Greek yogurt for extra staying power.
  • Make it your own: Add a hint of cinnamon, lime zest, or even a few toasted pumpkin seeds for crunch.

Meal Prep & Storage Tips

  • Batch-friendly: Make a few jars at once; pudding keeps in the fridge for up to 4 days.
  • Travel-ready: Perfect for grab-and-go breakfasts or snacks.
  • Add fruit just before eating to keep it fresh and vibrant.
  • Texture: If pudding is too thick after chilling, just stir in a splash more milk.

Nutrition Facts (Approximate per serving)

  • Calories: 120–160
  • Net carbs: 6–8g (with 3 Tbsp pineapple and low-carb sweetener)
  • Protein: 3–5g
  • Fiber: 5–7g
  • Fat: 5–7g

(Exact numbers will depend on your ingredients and serving sizes—always check labels if you’re carb counting strictly.)


Why Pineapple Chia Pudding Works—And Why You’ll Love It

  • Hydrating and filling: Chia seeds soak up liquid, so you get a sense of fullness that lasts.
  • Gut-friendly: The fiber helps keep your digestion on track.
  • Vegan, dairy-free, and gluten-free: Works for most diets!
  • Versatile: Easily swap in strawberries, mango, or kiwi for variety—or try a coconut‑lime version for a twist.

Common Questions & Troubleshooting

Q: My pudding isn’t thick! What happened?
A: You may need to add a bit more chia, or let it chill longer. Sometimes different brands of chia absorb liquid differently.

Q: Can I use canned pineapple?
A: Fresh or frozen is best—canned often has added sugar. If using canned, look for “in juice, not syrup” and rinse well.

Q: Is this really filling?
A: Yes! The combination of fiber, fat, and a little protein will keep you satisfied for hours.


Variations to Try

  1. Piña Colada Chia Pudding: Use coconut milk, pineapple, and a drop of coconut extract.
  2. Green Power: Add a handful of baby spinach to the blender for a boost (you won’t taste it!).
  3. Berry-Pineapple Swirl: Mix in a tablespoon of chopped strawberries or raspberries.
  4. Spicy Tropic: Add a pinch of cayenne for a fun kick!

Final Thoughts: Your Low-Carb Breakfast Upgrade

With just a few minutes of prep and a handful of pantry staples, you can wake up to a breakfast that’s bright, satisfying, and actually good for you. Pineapple chia pudding is endlessly adaptable—try it for a week, and you’ll never get bored.

Ready to try it? Let me know your favorite twists—or if you need help adapting this for keto, vegan, or nut-free diets! And don’t forget to tag your pudding pics #TropicalChia on Instagram so we can cheer you on.


Printable Recipe Card

Pineapple Chia Pudding (Low-Carb)

  • 3 tbsp chia seeds
  • 3/4 cup unsweetened almond or coconut milk
  • 2–3 tbsp diced pineapple
  • Sweetener (monk fruit/stevia), to taste
  • 1/2 tsp vanilla extract (optional)
  • 1 tsp lime juice (optional)

Directions:

  1. Blend or stir all ingredients except chia, then mix in chia seeds.
  2. Stir well, chill 2+ hours or overnight.
  3. Top with pineapple & coconut before serving. Enjoy!

Try this once, and you’ll see why pineapple chia pudding is the low-carb breakfast that delivers on taste, nutrition, and pure tropical joy—all in one bowl!

10 FAQs for Pineapple Chia Pudding (Low-Carb)

1. Can I use canned pineapple instead of fresh or frozen?
Yes, but choose pineapple canned in its own juice (not syrup) and drain/rinse well. Be aware canned pineapple is often slightly higher in sugar than fresh or frozen.


2. How can I make my chia pudding creamier?
Use full-fat coconut milk or a spoonful of Greek yogurt. Blending the pudding before chilling also results in a smoother, silkier texture.


3. Is this recipe suitable for keto diets?
With careful portioning (1-2 tablespoons pineapple) and zero-carb sweetener, you can keep net carbs low enough for most keto plans. Substitute even lower-carb berries if stricter keto compliance is needed.


4. How long does chia pudding keep in the fridge?
It keeps well for up to 4 days. Store in an airtight container and add fresh toppings just before serving for the best texture and flavor.


5. Why isn’t my chia pudding thickening properly?
Either not enough chia seeds were used, the milk ratio was off, or the pudding needs more time. Stir well after the first 10 minutes, and if it’s still runny after several hours, add an extra teaspoon of chia and let it sit longer.


6. Can I meal-prep pineapple chia pudding for the week?
Yes! Portion individual servings into jars for grab-and-go breakfasts. Add pineapple and toppings the day you plan to eat them for maximum freshness.


7. Are there nut-free options for the milk?
Absolutely. Use unsweetened coconut milk (carton or canned) or oat milk (if carbs are not a concern). Hemp milk is also a low-carb, nut-free alternative.


8. Is pineapple chia pudding suitable for kids?
Yes! It’s a fun, nutritious, and naturally sweet breakfast or snack for children. Consider using less sweetener if your child already enjoys fruit as-is.


9. Can I freeze chia pudding?
You can, but the texture may change upon thawing (it can get a bit watery). Freezing in popsicle molds is a great summer treat option!


10. How do I add more protein to this recipe?
Stir in a scoop of protein powder, use Greek yogurt, or add a layer of cottage cheese. You can also top with chopped nuts or seeds for a protein boost.

Posted on 6 Comments

5 Natural Alternatives for Commercial Processed Drinks this Summer

Natural Summer Drinks

Summer in India (and much of the world) means intense heat, rising humidity, and a constant search for something cool, satisfying, and hydrating. Yet most commercial processed drinks—think sodas, bottled iced teas, energy drinks, and “fruit” beverages—are loaded with refined sugar, artificial flavors, and preservatives that often leave you feeling sluggish, not refreshed.

This year, we challenge you to #ReimagineRefreshment. Skip the processed, and turn to natural, wholesome, and on-trend alternatives—each carefully chosen for taste, nutrition, and practicality in your everyday routine. Let’s discover the top 5, why they work, how you can make them at home, and how each fits with a modern wellness lifestyle.


1. Cortisol Cocktail: Social Media’s Favorite Stress‑Busting Summer Sipper

What is it?
A “cortisol cocktail” is a hydrating, mineral-rich, non-alcoholic drink trending everywhere from TikTok to wellness podcasts. Despite the name, it contains no hormones—just a combination of natural ingredients that support hydration, electrolytes, and calm.

Key Ingredients:

  • Coconut water (natural electrolytes & potassium)
  • Citrus juice (vitamin C boost)
  • Magnesium powder (supports calm, sleep, and nerve function)
  • Sea salt (mineral replenishment)
  • Sparkling water (just for fizz!)

How to Make It (1 glass):

  1. Pour 200ml coconut water into a tall glass.
  2. Squeeze in the juice of half an orange or lime.
  3. Stir in 1/4 tsp magnesium powder (or as per supplement label).
  4. Add a small pinch of sea salt.
  5. Top with sparkling water and a few ice cubes. Garnish with mint or orange wedge.

Why you’ll love it:
It’s lightly sweet, super hydrating, has no added sugar, and the minerals help with both energy and relaxation—a perfect afternoon pick-me-up or post-workout cooler.

Pro Tip: If you take medication or have kidney issues, check with your doctor before using magnesium supplements.


2. Prebiotic Soda: Gut-Friendly, Fizzy, and Fun

What’s new in 2025?
Big beverage brands and indie startups are rolling out “prebiotic sodas”—fiber-infused, naturally sweetened fizzy drinks made for gut health and a lighter summer vibe.

What makes it different?

  • Contains plant-based prebiotic fiber (like inulin) for digestion.
  • Lower in sugar than regular sodas.
  • Naturally flavored with real fruit.
  • Some use stevia or monk fruit for sweetness.

How to Make Your Own:

  1. Add a few fresh orange and strawberry slices to a glass.
  2. Pour chilled sparkling water over.
  3. Stir in 1 tsp inulin powder (available online/health stores).
  4. Add a tiny pinch of sea salt and a dash of stevia or honey if desired.

Why it’s great:
You get the satisfaction of bubbles without the sugar crash. Prebiotics feed the good bacteria in your gut, supporting overall digestion and wellness.

Pro Tip: Start with a small amount of inulin to let your system adjust.


3. Matcha Cooler: Energize with Antioxidants

Why matcha?
Matcha is a finely ground green tea powder rich in antioxidants, L-theanine (for calm focus), and a mild caffeine lift—ideal for summer afternoons or a healthy “mocktail hour.”

Trendy variations:

  • Classic Iced Matcha: Whisk 1 tsp matcha powder with a splash of cold water until frothy. Pour over ice, top with more cold water, and add honey or maple syrup if needed.
  • Pineapple Matcha Fizz: Whisk matcha, add pineapple juice, sparkling water, and ice for a tropical green twist.
  • Matcha Lemonade: Mix matcha with lemon juice, a touch of agave, and plenty of ice.

Why you’ll love it:
Matcha is naturally energizing but gentle on the system—no jitters. It looks beautiful in the glass and tastes bright and grassy.

Pro Tip: Use ceremonial-grade matcha for best color and flavor.


4. Chaas / Buttermilk: India’s Traditional Summer Hero

Why is chaas a classic?
This yogurt-based drink, known as chaas, is the ultimate Indian cooler—full of probiotics, protein, minerals, and natural cooling properties. It’s the perfect digestif after a heavy meal or a sweltering day.

Simple recipe:

  1. Blend 1 cup plain dahi (curd/yogurt) with 1.5 cups cold water.
  2. Add 1/2 tsp roasted cumin powder, a pinch of black salt, and a handful of fresh mint or coriander.
  3. Pour over ice and serve immediately.

Why you’ll love it:
Chaas hydrates, replenishes lost electrolytes, and is ultra-satisfying after spicy food or long hours outside.

Pro Tip:
Add grated ginger, chopped cucumber, or even a dash of chaat masala for variety.


5. Turmeric & Ginger Tonic: Anti-Inflammatory and Zesty

Why this tonic?
Both turmeric and ginger are scientifically proven to fight inflammation, boost immunity, and aid digestion—plus, they make a beautifully golden, Instagram-ready drink.

How to Make:

  1. Boil a 2-inch piece of ginger in 2 cups water for 5 minutes.
  2. Stir in 1 tsp turmeric powder, juice of half a lemon, and 1 tbsp honey or jaggery.
  3. Add a pinch of black pepper (boosts turmeric’s benefits), strain, and chill.
  4. Serve over ice with lemon slices.

Why you’ll love it:
This drink delivers a vibrant flavor punch, supports your health, and looks gorgeous. Perfect as a midday refreshment or post-dinner “digestive.”

Pro Tip:
Make a batch ahead and store in the fridge—it’s even better cold!


Conclusion: Hydrate Smarter, Live Better

This summer, skip the commercial drinks aisle and embrace these natural, practical, and deeply satisfying alternatives. Whether you’re after hydration, gut health, energy, tradition, or an immune boost, there’s a perfect glass waiting for you.

Try them at home, share with family and friends, and tag your creations with #MasalaMonkDrinks for a chance to get featured!


Share Your Favorite

Which drink will you try first? Have your own healthy summer sipper?
Drop your recipes, questions, and reviews in the comments below.


Stay cool, stay hydrated, and enjoy every sip—naturally.
MasalaMonk.com

10 FAQs for Natural Summer Drinks

1. Are these drinks suitable for kids and seniors?
Yes, all drinks can be enjoyed by kids and seniors, but adjust the amount of added salt, spices, or supplements (like magnesium) for age and dietary needs. Always consult a doctor for any chronic health issues.

2. Can I prepare these drinks ahead of time?
Absolutely! Drinks like chaas, turmeric & ginger tonic, and infused prebiotic soda can be refrigerated for up to 24–48 hours. Just stir before serving and add fresh herbs/ice at the end.

3. Are these drinks vegan?
Most are vegan by default. For chaas, use plant-based yogurt. For sweeteners, replace honey with agave or maple syrup.

4. Do I need special equipment to make these drinks?
No special equipment needed! A blender or whisk is helpful for chaas and matcha, but all drinks can be made with basic kitchen tools like a pitcher, knife, and glass.

5. Where can I find inulin powder or magnesium powder?
These are available at health food stores, large supermarkets, or online. Choose a reputable brand and start with small quantities.

6. Can I use bottled coconut water or does it have to be fresh?
Bottled coconut water is fine—just choose unsweetened and no-added-flavor versions for the healthiest option.

7. How much sugar do these drinks contain?
Most drinks are naturally low in sugar. You control sweetness—add fruits, stevia, or minimal natural sweeteners if desired.

8. Are these drinks safe for people with diabetes?
Most are safe in moderation, but always check with your doctor. Use unsweetened versions and low-GI sweeteners if needed.

9. Can I make a big batch for a party or picnic?
Definitely! All recipes can be multiplied, made in pitchers, and served chilled. Add ice and herbs just before serving for freshness.

10. How do I store leftovers?
Store in a covered container or bottle in the fridge for 24–48 hours. Shake or stir well before pouring.

Posted on 2 Comments

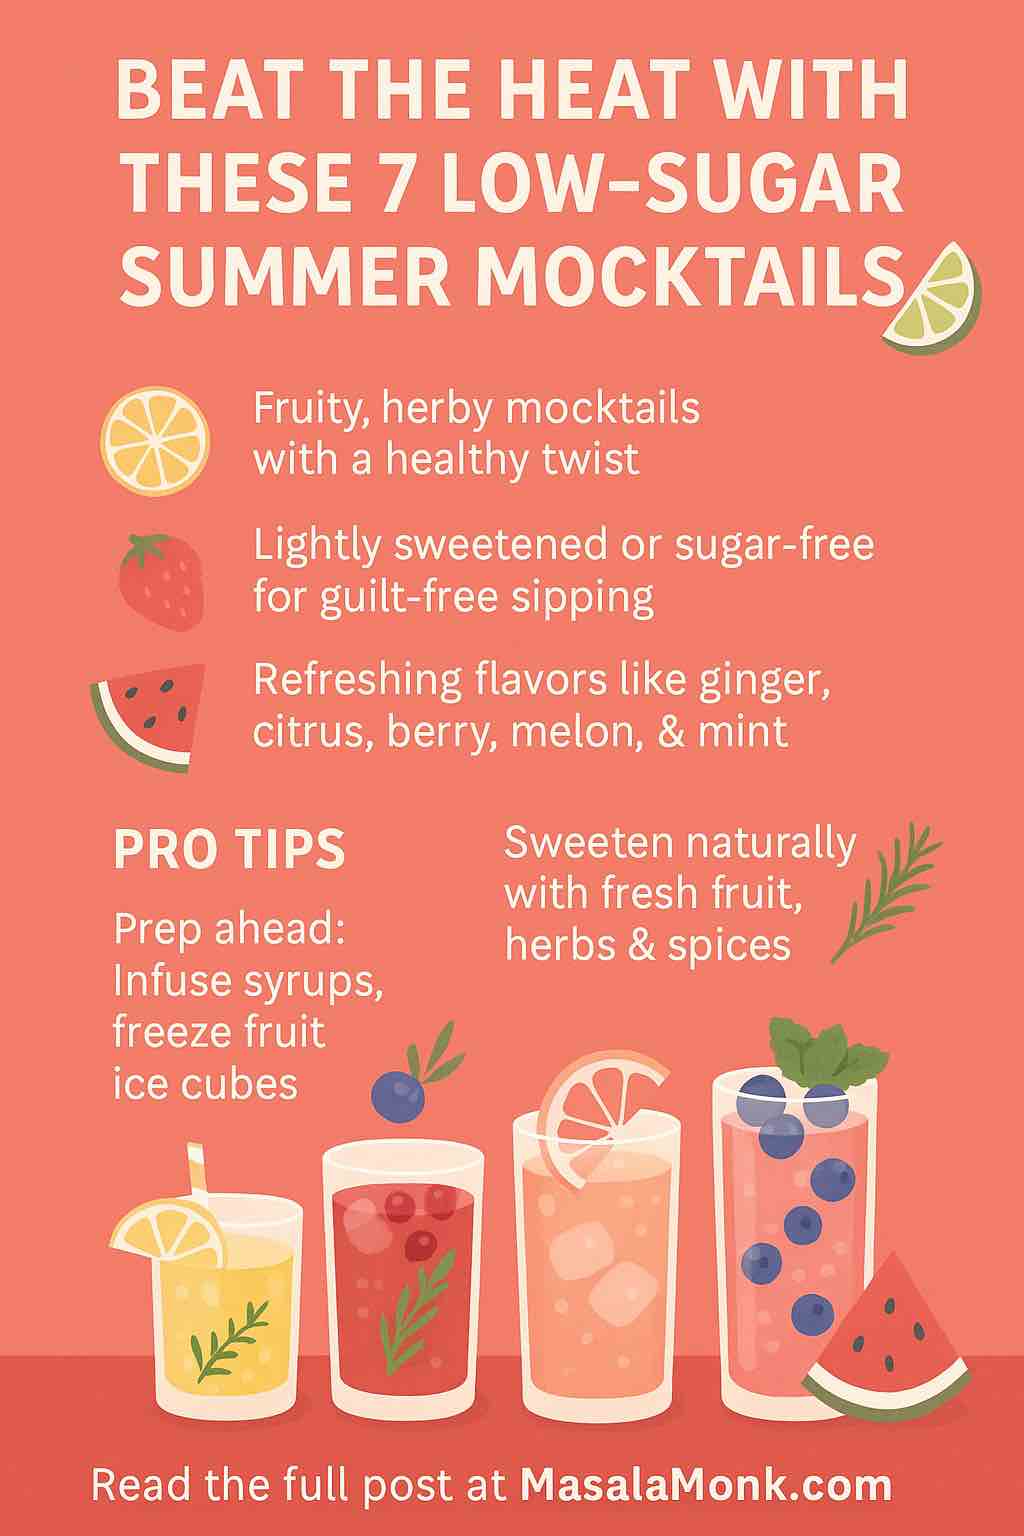
Beat the Heat with These 7 Low-Sugar Summer Mocktails to Keep You Refreshed All Day

LOW-SUGAR SUMMER MOCKTAILS

As summer heats up, staying hydrated becomes a priority—but plain water can get boring fast. Instead of reaching for sugar-laden sodas or juices, why not explore the vibrant world of low-sugar mocktails? These refreshing drinks are packed with natural flavors, are easy to make, and are perfect for all-day sipping without the crash.

In this blog post, we dive deep into seven practical and delicious low-sugar summer mocktails that are guaranteed to cool you down and delight your taste buds. Plus, we’ll share tips on prepping in batches, customizing flavors, and adding that special twist for guests.


1. Ginger-Thyme Sparkling Lemonade

Flavor Profile: Herbaceous, citrusy, lightly sweet

Ingredients:

  • 2 cups water
  • 2/3 cup honey or stevia syrup (adjust to taste)
  • 12 sprigs fresh thyme
  • 3 tbsp chopped fresh ginger
  • 2 tbsp lemon zest
  • 3/4 cup fresh lemon juice
  • 2 liters sparkling water

Method:

  1. In a saucepan, combine water, honey, thyme, ginger, and lemon zest.
  2. Bring to a simmer for 5-7 minutes to infuse flavors. Cool and strain.
  3. Mix in the lemon juice.
  4. Pour over ice and top with sparkling water. Garnish with thyme.

Pro Tip: Prepare the ginger-thyme base in advance and refrigerate. Add fizz just before serving.


2. Sparkling Cranberry Kombucha Mocktail

Flavor Profile: Tart, effervescent, probiotic

Ingredients:

  • 3/4 cup cranberry kombucha
  • 1/2 cup 100% cranberry juice (no sugar added)
  • 1/4 cup ginger beer (low sugar)
  • Fresh rosemary and cranberries (optional)

Method:

  1. In a tall glass, mix kombucha and cranberry juice.
  2. Add ginger beer and ice.
  3. Garnish with a rosemary sprig and a few frozen cranberries.

Health Note: Kombucha adds gut-friendly probiotics, while cranberry offers antioxidants.


3. Sparkling Apple-Cider Citrus Cooler

Flavor Profile: Crisp, tangy, slightly sweet

Ingredients:

  • 1 cup chilled sparkling apple cider (unsweetened)
  • Orange, lime, and grapefruit slices
  • Fresh rosemary sprigs
  • Sparkling water

Method:

  1. Fill a pitcher with sliced citrus and rosemary.
  2. Add apple cider and top with sparkling water.
  3. Serve chilled in glasses with fruit slices.

Pro Tip: Freeze sliced citrus in ice cubes for a show-stopping presentation.


4. Sugar-Free Grapefruit & Ginger Refresher

Flavor Profile: Tart, peppery, clean

Ingredients:

  • 1 cup fresh grapefruit juice
  • 2 tbsp organic ginger juice or freshly grated ginger
  • 1 cup natural ginger ale or club soda
  • Lime wedge and mint leaves (optional)

Method:

  1. Combine grapefruit juice and ginger juice in a shaker with ice.
  2. Shake and pour into a glass.
  3. Top with ginger ale. Garnish with lime and mint.

Variations: Add a splash of cucumber juice for a cooling effect.


5. Watermelon-Mint Cooler

Flavor Profile: Sweet, refreshing, cooling

Ingredients:

  • 3 cups fresh watermelon chunks
  • 1/4 cup fresh lime juice
  • 1/2 cup fresh mint leaves
  • 1 tbsp agave or stevia (optional)
  • 2 cups club soda

Method:

  1. Blend watermelon, mint, lime juice, and sweetener until smooth.
  2. Strain if desired.
  3. Pour into glasses over ice, top with club soda.

Batch Tip: Store watermelon base in the fridge and mix with soda just before serving.


6. Mojito-Style Lime Mint Fizz

Flavor Profile: Zesty, bubbly, classic

Ingredients:

  • 1 lime (cut into wedges)
  • Fresh mint leaves (about 1/4 cup)
  • Stevia or monk fruit sweetener (to taste)
  • Sparkling water
  • Crushed ice

Method:

  1. Muddle lime and mint with sweetener in a glass.
  2. Add ice and top with sparkling water.
  3. Stir and garnish with mint sprig.

Serving Tip: Serve in tall glasses for the full mojito feel.


7. Blueberry Lemonade Sparkler

Flavor Profile: Fruity, tangy, elegant

Ingredients:

  • 1 cup fresh blueberries (mashed or blended)
  • 1/2 cup fresh lemon juice
  • 1/3 cup maple syrup or stevia
  • 4 cups sparkling water
  • Mint leaves for garnish

Method:

  1. Blend blueberries and strain to remove skins.
  2. Mix with lemon juice and sweetener.
  3. Pour into glasses with ice and top with sparkling water.
  4. Garnish with mint and whole blueberries.

Tips for Customizing Your Summer Mocktails

  • Sweeteners: Swap out honey or maple syrup for monk fruit, stevia, or erythritol to lower sugar.
  • Herbs: Mix and match herbs like basil, thyme, or lavender.
  • Ice Cubes: Freeze fruit pieces or herbs into ice cubes for added flavor.
  • Infusions: Steep herbs or fruits in hot water, then chill for enhanced flavor.

Batch Prep & Storage Ideas

  • Prepare syrup bases and juices ahead of time and store in airtight containers.
  • Keep garnishes prepped in the fridge: sliced fruits, washed herbs.
  • Only mix with sparkling water or soda right before serving to maintain fizz.

Final Thoughts

Low-sugar mocktails are more than just a healthier choice; they’re an invitation to get creative with flavors, textures, and presentation. Whether you’re lounging by the pool, hosting a barbecue, or just need something fun to sip on during a hot afternoon, these mocktails bring hydration, elegance, and joy to your glass—without the sugar spike.

Cheers to staying cool, refreshed, and sugar-smart this summer!

1. Can I make these mocktails completely sugar-free?
Yes, all the mocktails in the post can be made sugar-free by using natural sugar substitutes like stevia, monk fruit, or erythritol instead of honey or maple syrup.


2. Are these mocktails suitable for people with diabetes?
Most of these mocktails can be adapted for diabetic diets by using low-GI sweeteners and avoiding fruit juices high in sugar. Always consult with a healthcare provider if you’re unsure.


3. How long can I store the mocktail bases?
You can refrigerate the fruit or herb-infused syrups and purees for up to 3–5 days in airtight containers. Always add sparkling components just before serving to maintain fizz.


4. What’s the best way to batch prep for a party?
Prepare all the fruit purees, infused syrups, and garnishes ahead of time. Store them separately and mix with sparkling water or club soda just before serving.


5. Can I turn these mocktails into cocktails?
Absolutely! You can add a splash of vodka, gin, or rum to most of these mocktails to create light summer cocktails for adult gatherings.


6. Are these drinks kid-friendly?
Yes, all the mocktails are alcohol-free and use whole ingredients, making them perfect for kids. Just adjust tartness and sweetness to suit their taste.


7. Can I use frozen fruit instead of fresh?
Yes. Frozen fruit works well, especially for blending or as ice cubes in the drink. It can also add extra chill and minimize dilution.


8. What sparkling water should I use?
Any unflavored or naturally flavored sparkling water, club soda, or seltzer is ideal. Just watch for added sugars or artificial ingredients in flavored versions.


9. Do I need special tools to make these?
Basic kitchen tools like a blender, shaker, muddler, strainer, and a citrus juicer will cover everything. No bar kit required!


10. Can I substitute herbs like mint or thyme with others?
Yes. You can experiment with basil, rosemary, lavender, or even sage depending on the mocktail. Each adds a unique twist.