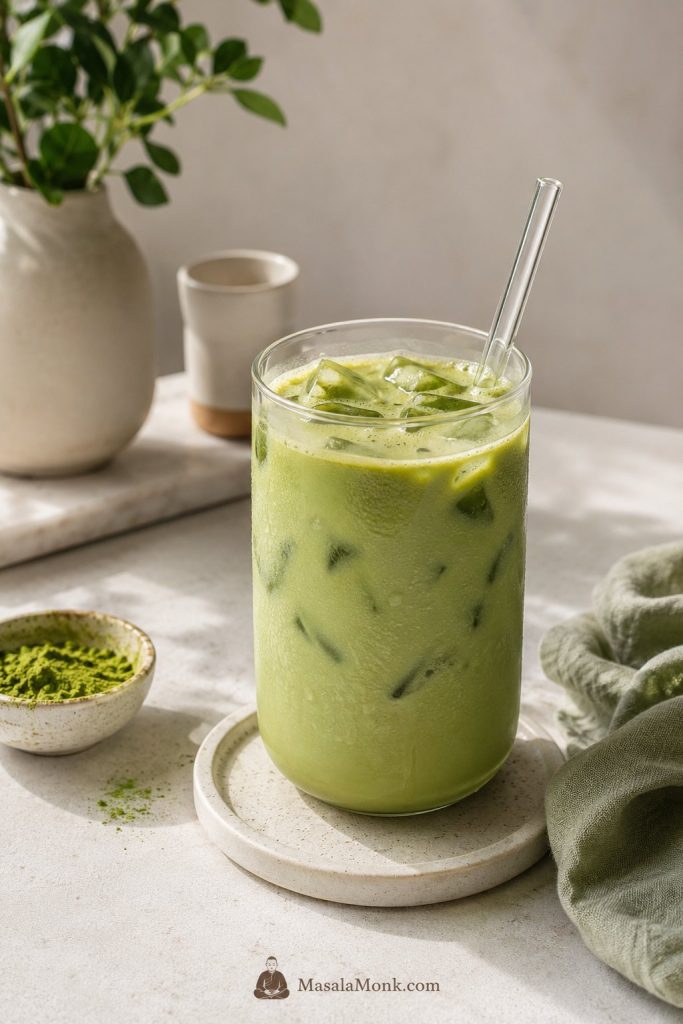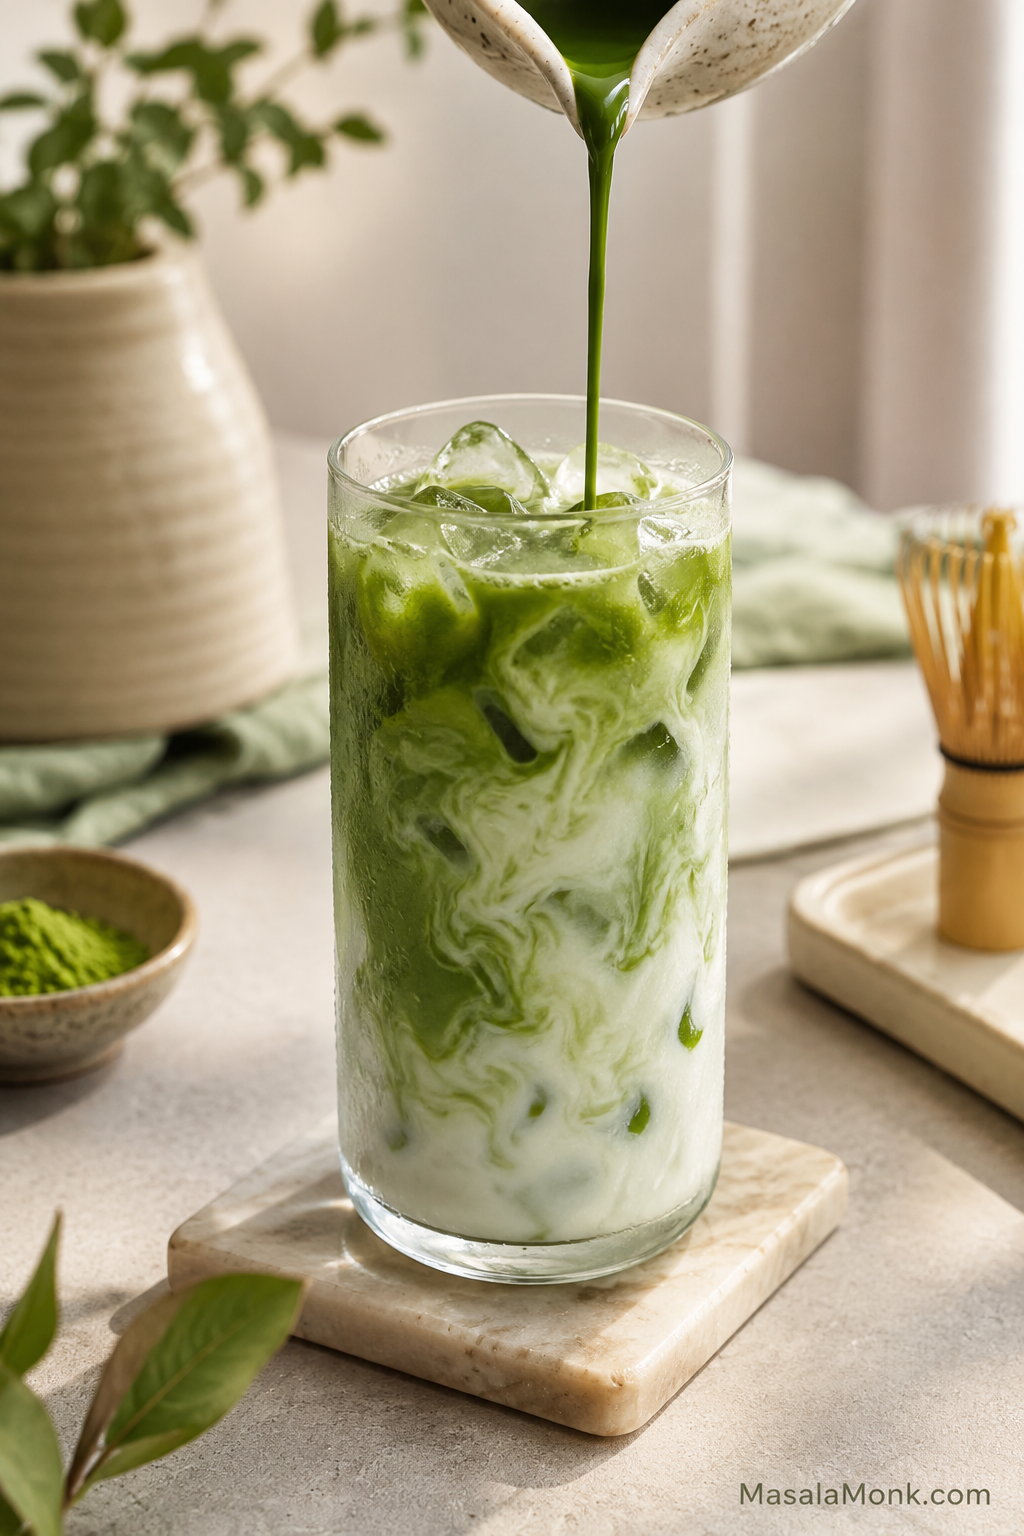
A homemade iced matcha latte should not taste like cold milk with dry green specks drifting through it. The best version is cold, creamy, bright green, and smooth from the first sip to the last. The trick is simple: sift the matcha, whisk it with a small amount of hot water, then pour it over cold milk and ice.
This recipe gives you the everyday version first, then shows you how to adjust it: stronger, less sweet, Starbucks-style, vanilla, oat milk, cold foam, or strawberry. The goal is a chilled, milky green tea drink that tastes clean from the first sip — not powdery, bitter, or watered down.
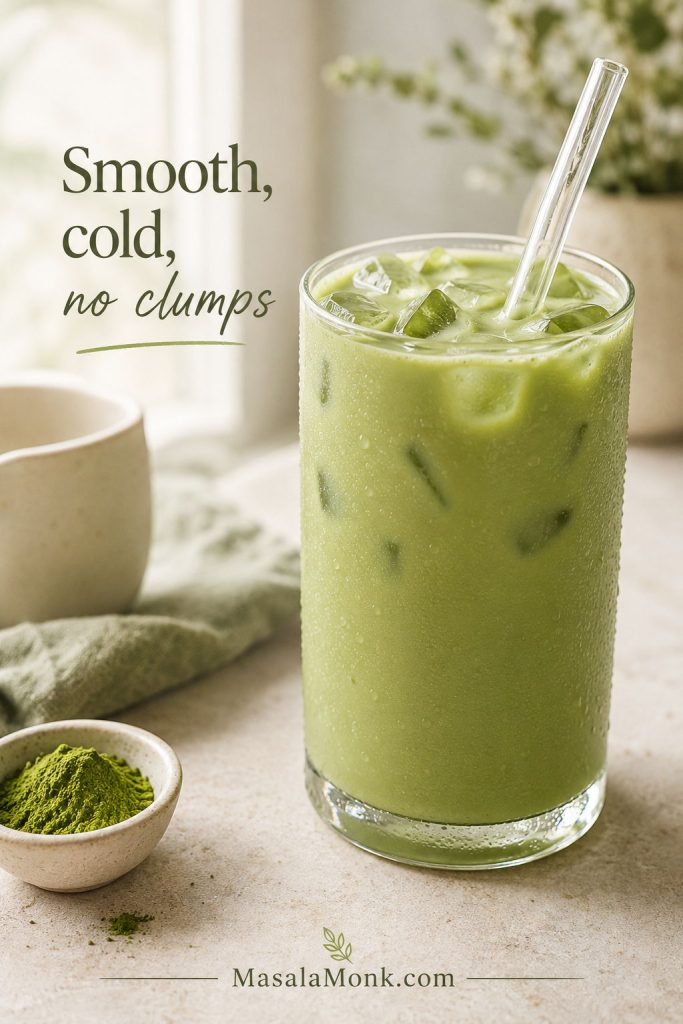
Table of Contents
Quick Answer
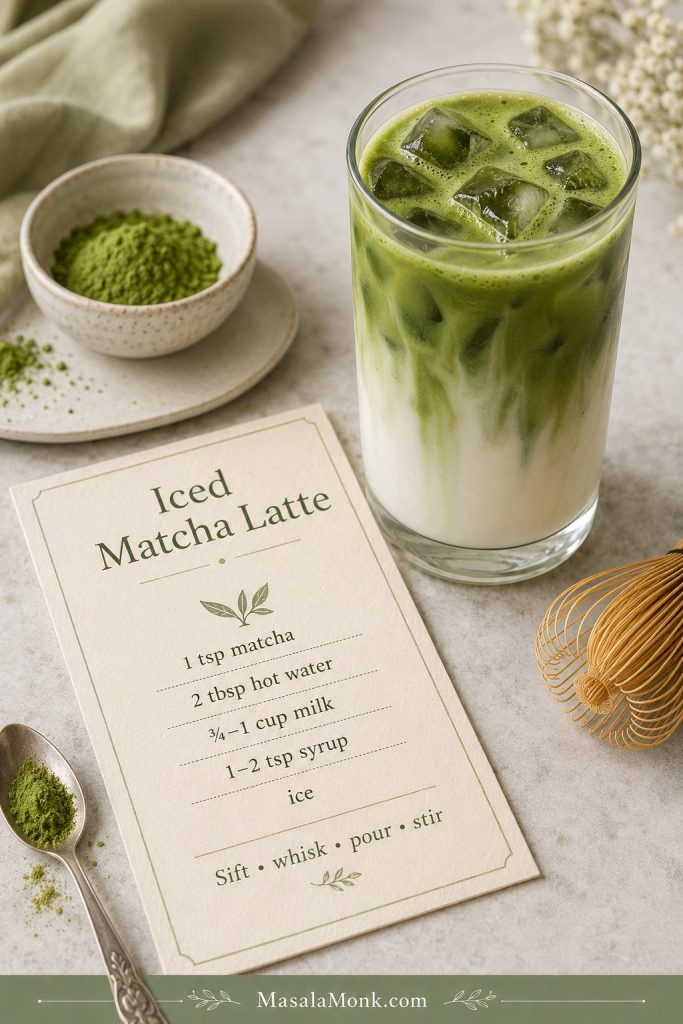
To make an iced matcha latte, sift 1 teaspoon matcha powder into a small bowl or cup, whisk it with 2 tablespoons hot water until smooth, then pour it over a glass filled with ice, cold milk, and a little simple syrup or vanilla syrup if you like it sweet.
- Matcha: 1 teaspoon / about 2 grams
- Water: 2 tablespoons / 30 ml hot water, not boiling
- Milk: ¾ to 1 cup / 180 to 240 ml cold milk
- Sweetener: 1 to 2 teaspoons simple syrup, maple syrup, or vanilla syrup
- Ice: about 1 cup, enough to fill a 12 to 16 oz glass
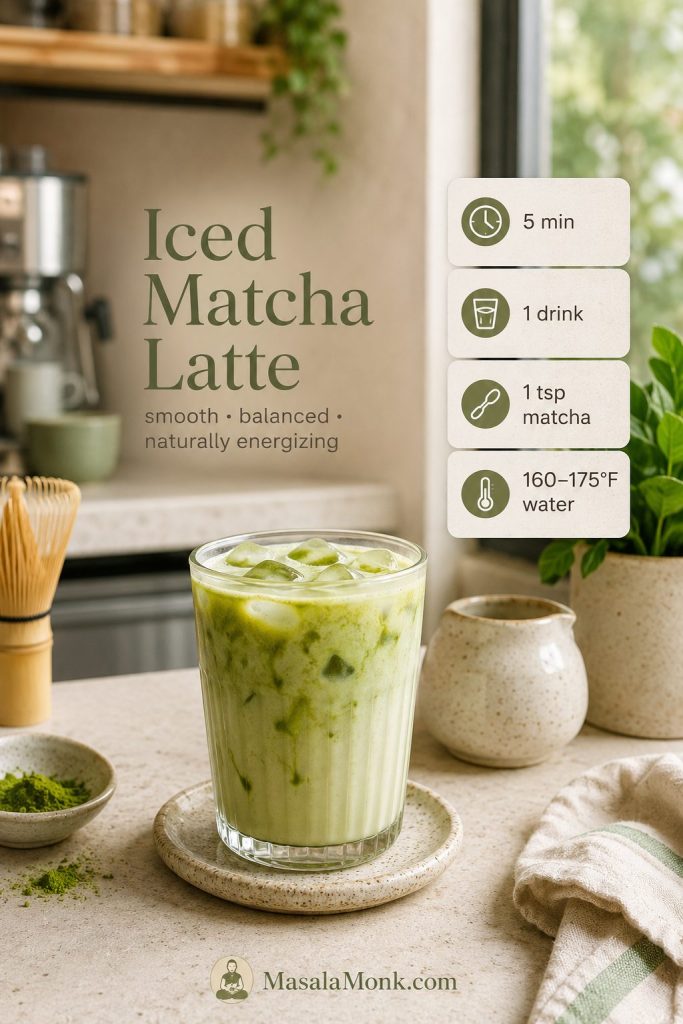
Use the visual formula below as a quick scan of the base iced matcha latte before you adjust sweetness or milk.
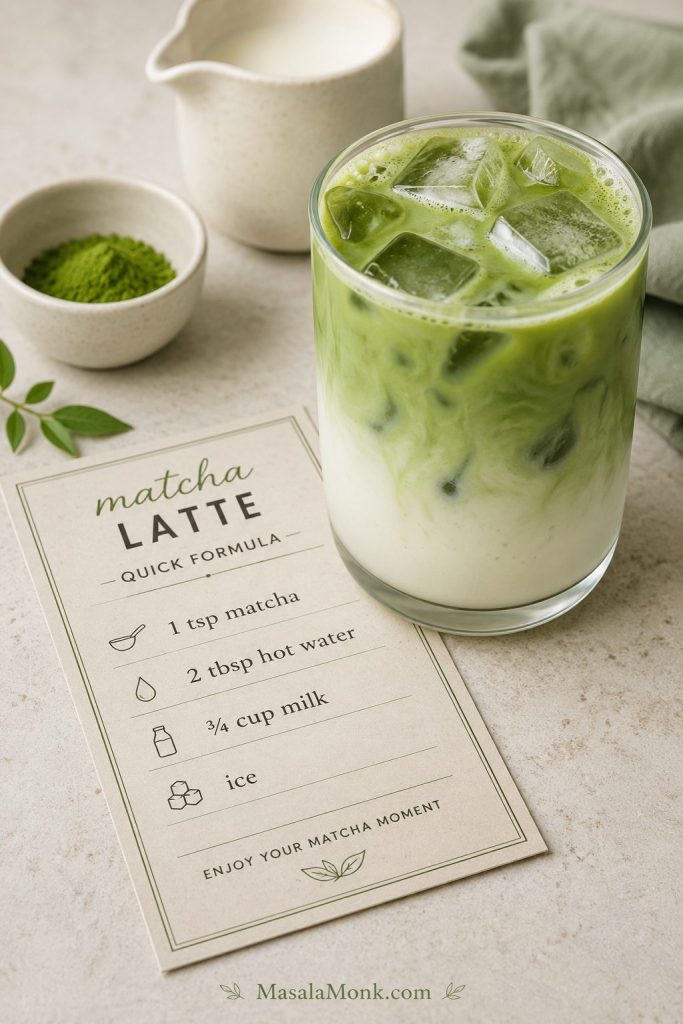
Start here: Choose 1 teaspoon matcha, 2 tablespoons hot water, ¾ cup cold milk, 1 teaspoon syrup, and a full glass of ice the first time.
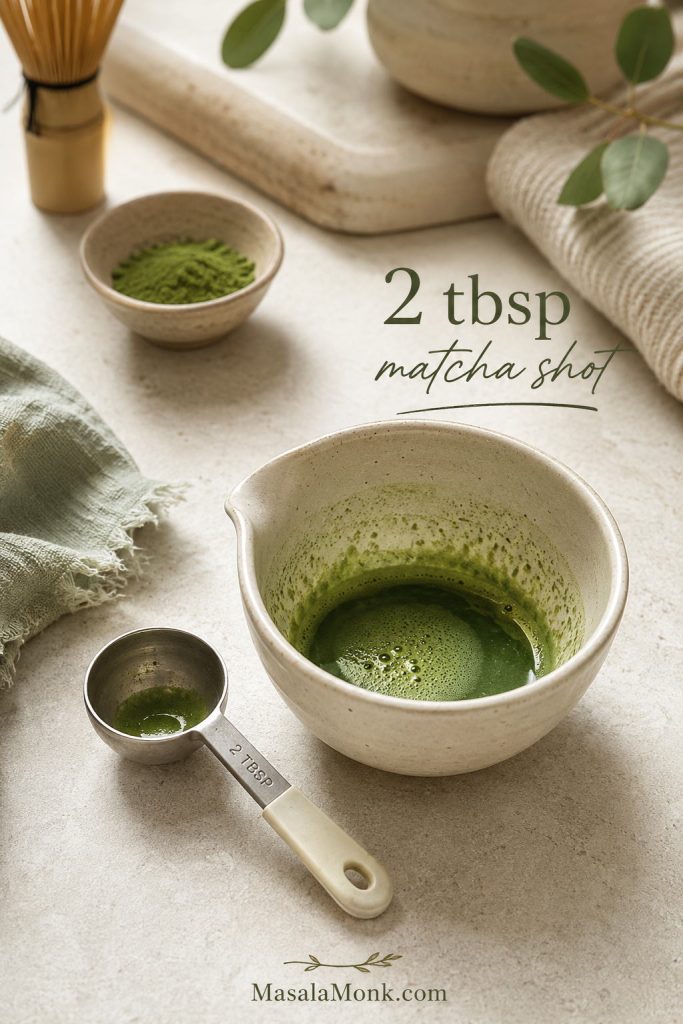
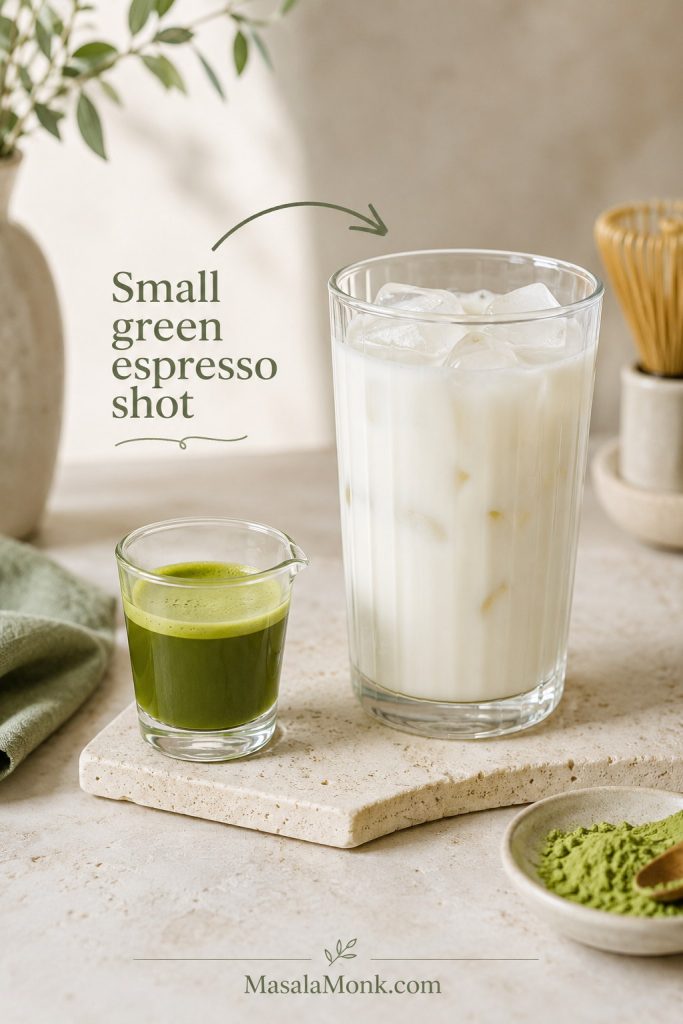
The small 2-tablespoon matcha shot is the key: enough water to smooth the powder, not so much that it thins the latte. Starting with ¾ cup milk also leaves room to soften the drink after tasting instead of making it too pale from the beginning.
Already know the basic method? You can also jump to the ratio guide, which version to make first, or quick fixes.
Keep this 2-tablespoon hot-water shot in mind: it is the difference between a creamy latte and a watered-down glass.
Iced Matcha Latte at a Glance
| Yield | 1 drink, about 12 to 16 oz depending on milk and ice |
| Total time | 5 minutes |
| Matcha amount | 1 teaspoon / about 2 grams |
| Water temperature | 160 to 175°F / 70 to 80°C |
| Milk amount | Start with ¾ cup / 180 ml, then add more if needed |
| Tools | Bamboo whisk, handheld frother, shaker jar, or blender |
| Main fix | Sift first, then whisk matcha with water before adding milk |
Use this quick reference to check the timing, water temperature, and base ratio before you start whisking.

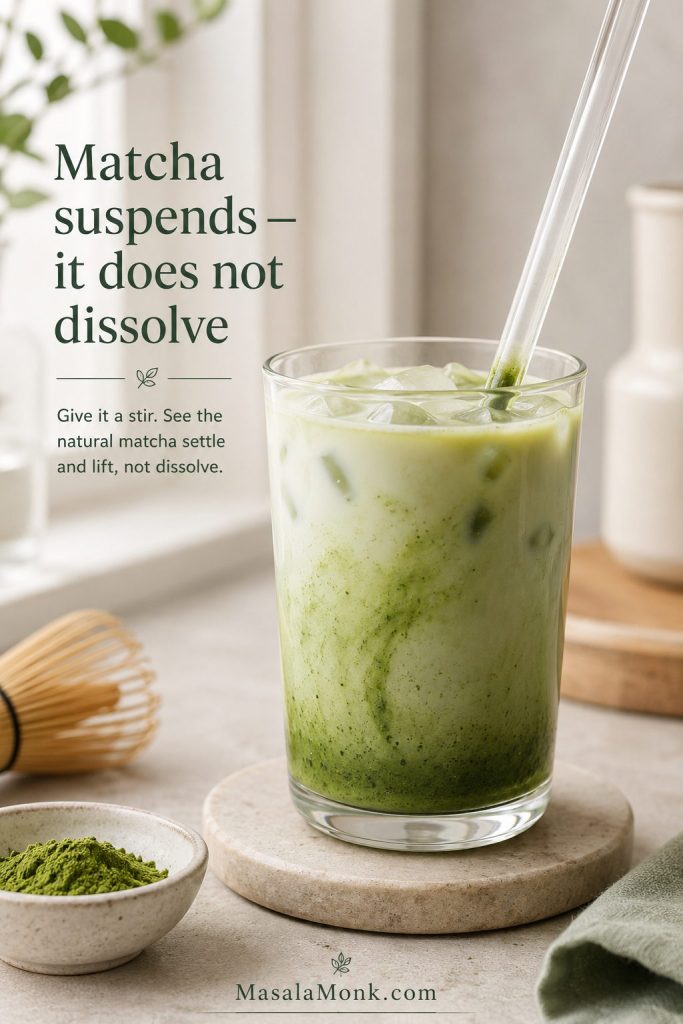
After a couple of tries, the order becomes easy: sift, whisk, ice, milk, pour. Matcha does not dissolve like instant coffee; it stays suspended in the drink. That is why it can settle as it sits, why the last few sips may taste stronger, and why stirring before drinking helps.
Why This Method Works
The key move is the concentrated matcha shot: just 2 tablespoons hot water, enough to blend the powder without watering down the glass. Think of it like a small green espresso shot: smooth, concentrated, and strong enough to flavor the milk without turning the latte thin.
You want a smooth matcha base, not a diluted cup of tea. Cold milk keeps the drink soft and refreshing, while a little syrup rounds off the earthy edge without covering the green tea flavor.
Iced Matcha Latte Ingredients
Before you start, set up the matcha, hot water, milk, ice, and syrup in the same order the drink comes together.

Matcha powder
Plain, unsweetened matcha powder gives you the most control. One teaspoon / about 2 grams makes a balanced drink. If you have a small kitchen scale, 2 grams is more reliable than a packed teaspoon. For a stronger version, increase the matcha to 1½ teaspoons. If you are new to matcha or your powder tastes intense, start with ½ to ¾ teaspoon and increase next time.
Some matcha blends already contain sugar. If yours is sweetened, reduce or skip the syrup so the finished latte does not taste too sweet.
Hot water
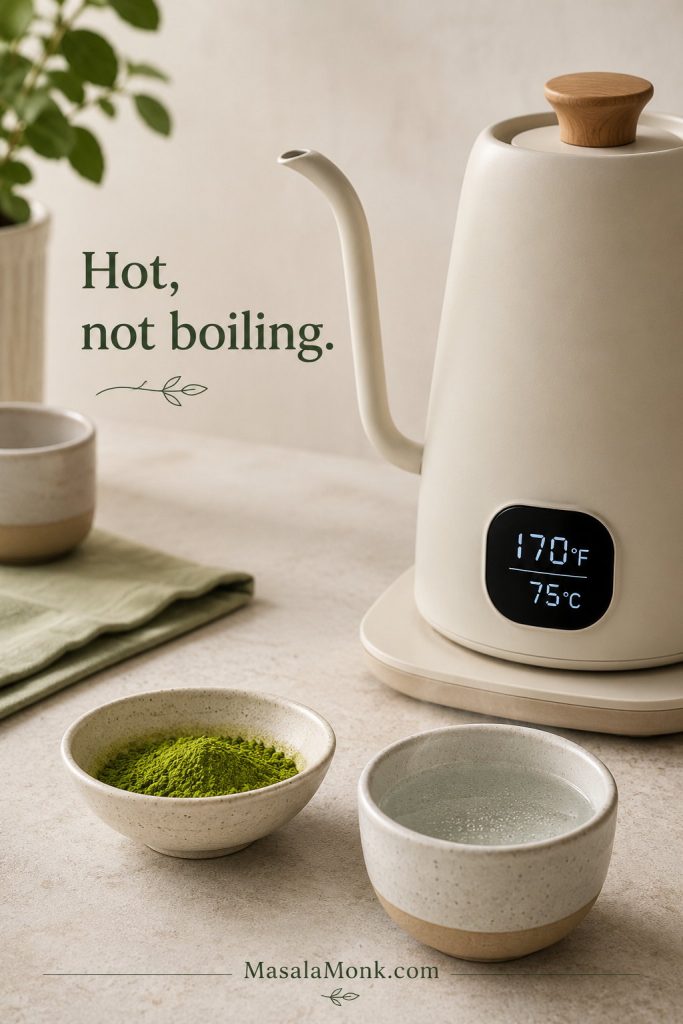
A small amount of hot water turns the powder into a smooth matcha shot before it touches the cold milk. The water should be hot but not boiling, which keeps the flavor smoother and less harsh. If you do not have a thermometer, boil the water, turn off the heat, and wait about 1 to 2 minutes before using it.
Milk
Dairy milk, oat milk, almond milk, coconut milk, and soy milk all work. Whole milk gives the richest texture, 2% milk feels balanced and familiar, and barista oat milk is usually the creamiest dairy-free choice.
Ice
About 1 cup ice is enough for a 12 to 16 oz glass. A full glass keeps the milk cold and helps the matcha pour slowly over the top. Large cubes melt more slowly, while crushed ice feels extra refreshing but waters the drink down faster.
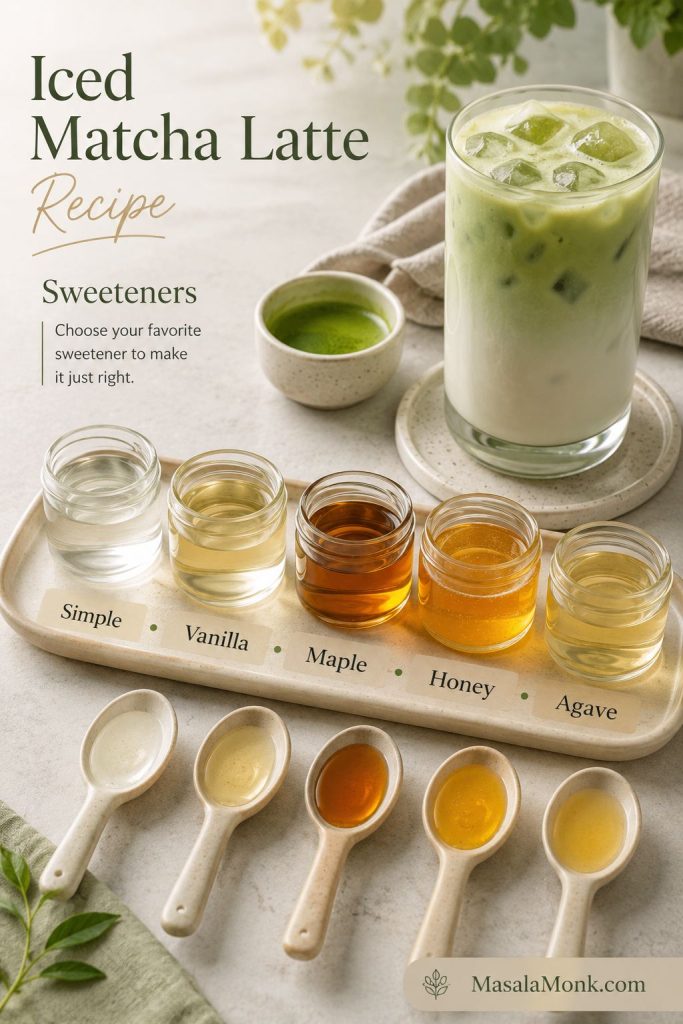
Sweetener
Simple syrup, vanilla syrup, maple syrup, honey, or agave all work. Liquid sweeteners are easier to mix into cold drinks than granulated sugar. If you choose honey, whisk it into the warm matcha shot first so it blends evenly.
If your first sip tastes too grassy, that does not mean you did anything wrong. A little more milk, a touch of vanilla syrup, or fresher matcha can make the drink softer and more rounded.
How to Make an Iced Matcha Latte
The whole drink depends on the matcha shot. When that little green base is smooth, the milk and ice have an easy job.
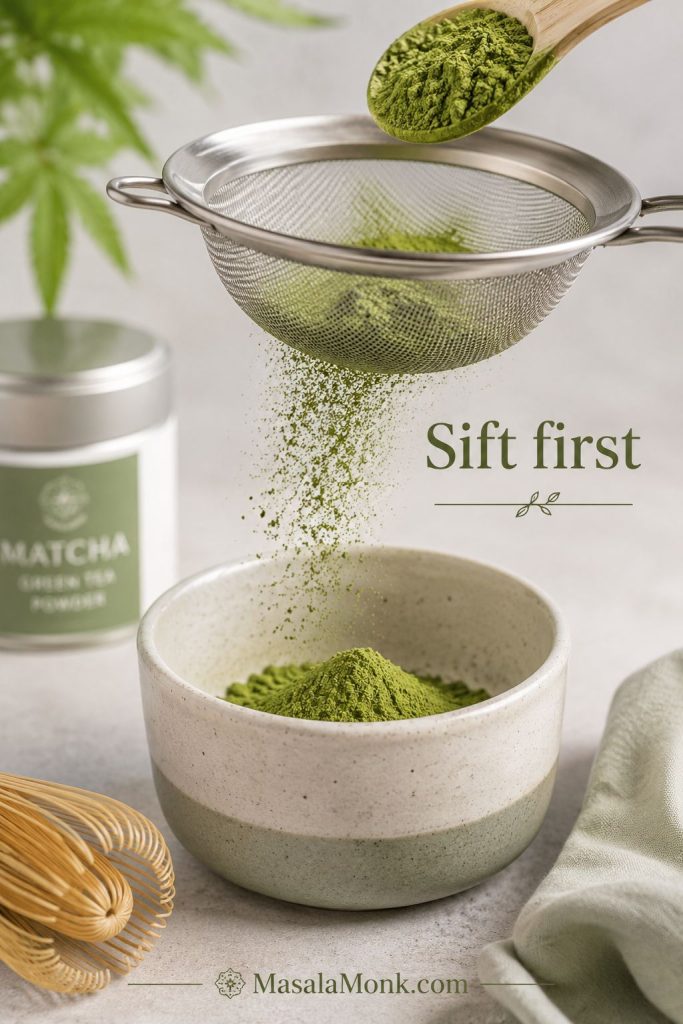
1. Sift the matcha
Sift 1 teaspoon matcha powder into a small bowl, cup, or measuring jug. This step takes only a few seconds, but it prevents the powdery clumps that often float through homemade matcha drinks.
2. Add hot water
Add 2 tablespoons / 30 ml hot water. If you have a temperature-controlled kettle, aim for 160 to 175°F / 70 to 80°C. If not, boil the water, turn off the heat, and let it sit for about 1 to 2 minutes.
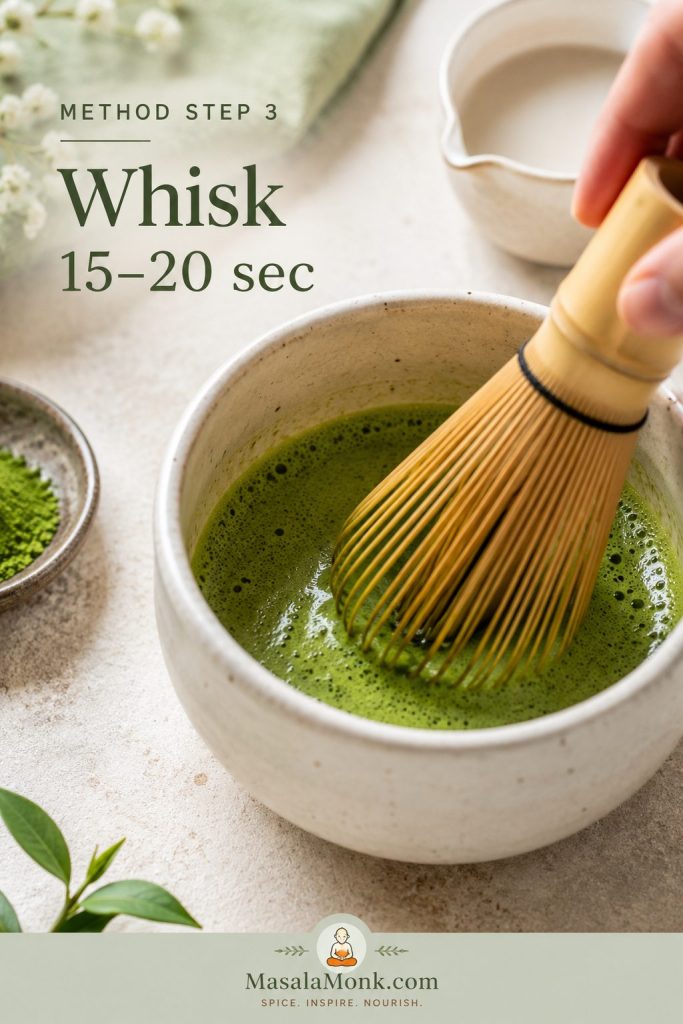
3. Whisk until smooth
Whisk for 15 to 20 seconds, using a quick W or M motion if you have a bamboo matcha whisk. A handheld milk frother also works well. The matcha should look blended and lightly foamy, with no dry powder stuck to the sides.
4. Add ice and milk
Fill a tall glass with ice, then pour in ¾ cup cold milk. Taste after the matcha is added, then add up to ¼ cup more milk if you want the drink softer and creamier. This is easier than trying to rescue a latte that started too milky.
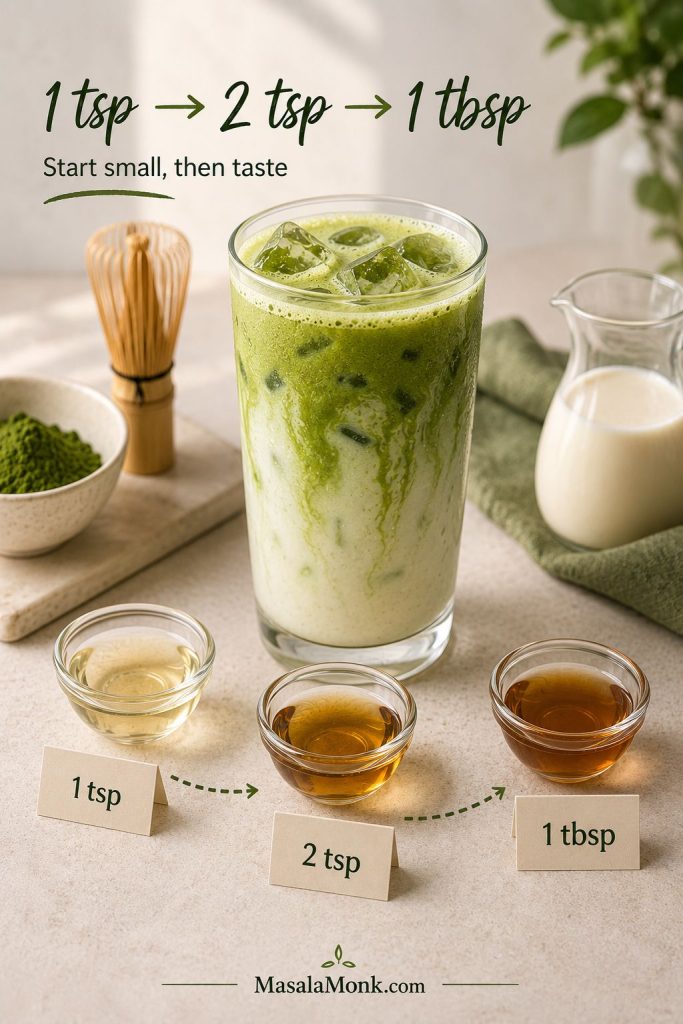
5. Sweeten
Add 1 to 2 teaspoons simple syrup, maple syrup, or vanilla syrup. You can stir it into the milk or whisk it into the warm matcha shot. For a sweeter drink, start with 1 tablespoon syrup and adjust from there.
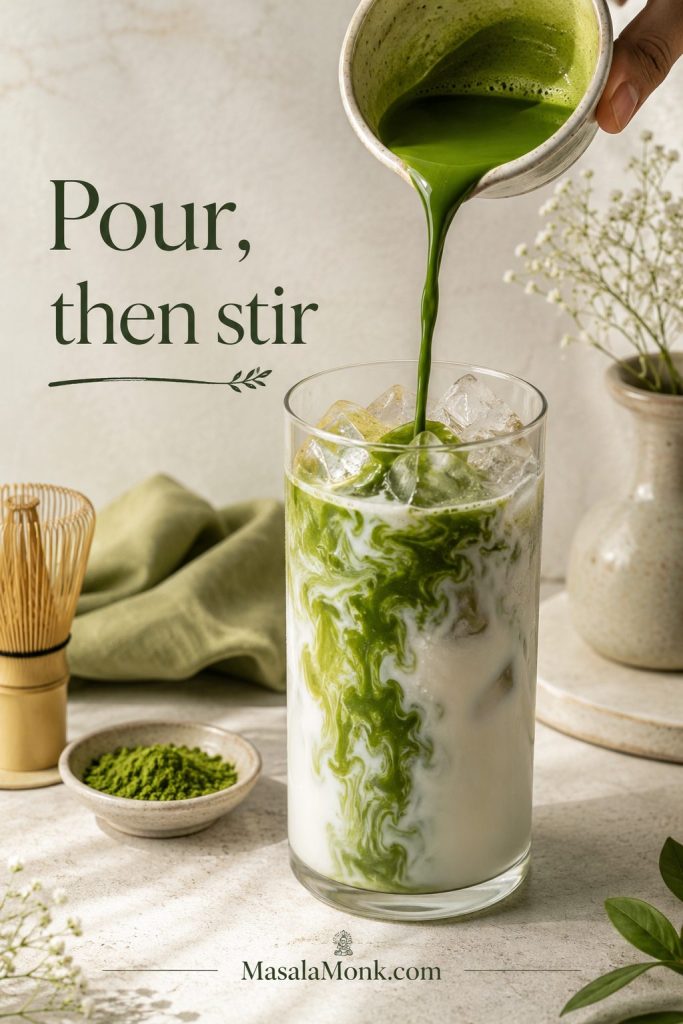
6. Pour and stir
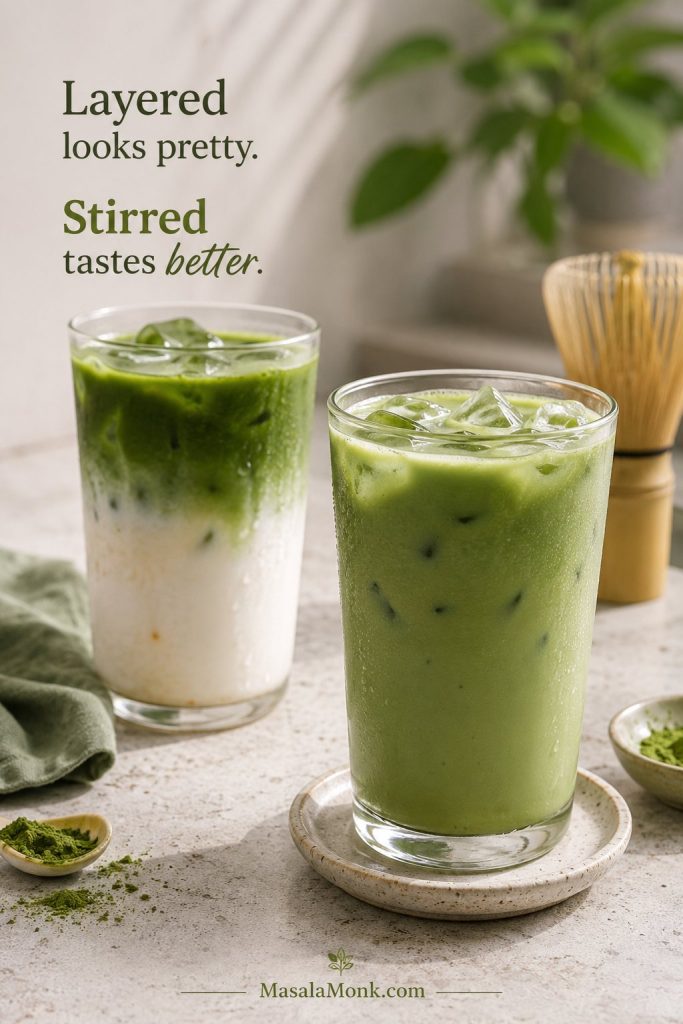
Slowly pour the matcha shot over the milk and ice. At first, the pour gives you the pretty green layer; after that, stirring gives you the best flavor. The layered glass is pretty for a minute, but the stirred glass is better: cold milk, soft sweetness, and a clean green tea finish without powder at the bottom of the glass.
This comparison shows why the layered look is only the starting point and the stirred glass gives the better sip.
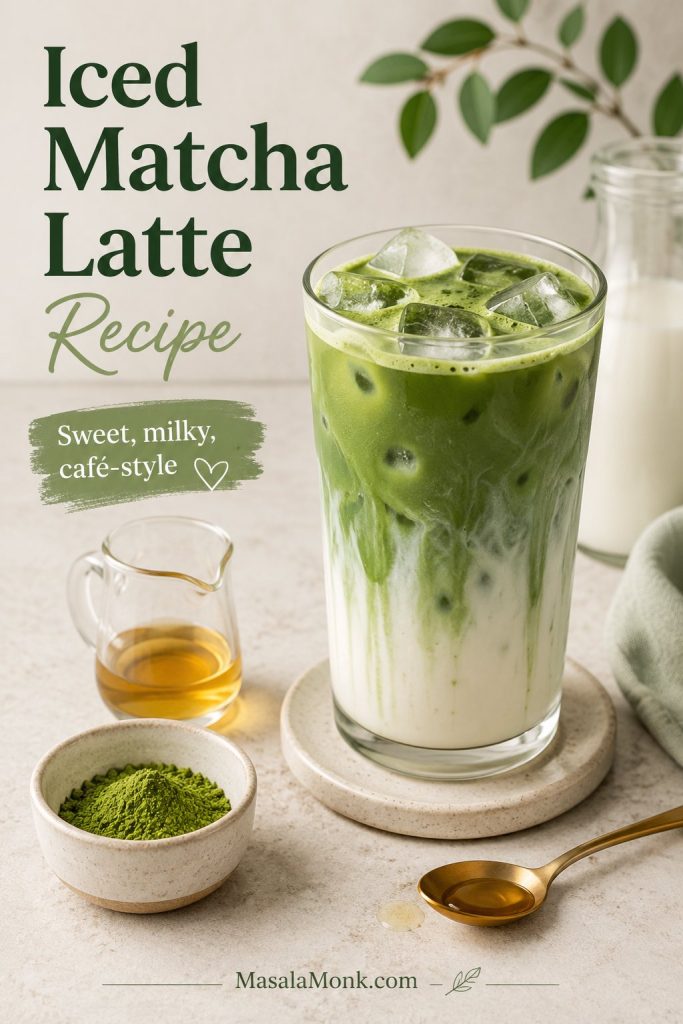
Iced Matcha Latte Recipe
This iced matcha latte is cold, milky, lightly earthy, and easy to adjust. Start with 1 teaspoon matcha for a balanced drink or 1½ teaspoons for a stronger version.
Ingredients
- 1 teaspoon matcha powder / about 2 grams
- 2 tablespoons hot water / 30 ml, 160 to 175°F / 70 to 80°C
- ¾ to 1 cup cold milk / 180 to 240 ml
- 1 to 2 teaspoons simple syrup, maple syrup, or vanilla syrup
- About 1 cup ice, enough to fill a 12 to 16 oz glass
Instructions
- Sift the matcha powder into a small bowl, cup, or measuring jug.
- Add the hot water and whisk for 15 to 20 seconds, until blended and lightly foamy.
- Fill a tall 12 to 16 oz glass with ice.
- Pour in ¾ cup cold milk.
- Add the sweetener to the milk or whisk it into the warm matcha shot.
- Pour the matcha over the milk and ice.
- Stir, taste, and add up to ¼ cup more milk if you want a softer drink.
Notes
- The 2-tablespoon hot-water shot keeps the drink smooth without making it watery.
- A stronger glass starts with 1½ teaspoons matcha.
- For a sweeter coffee-shop style drink, use about 1 tablespoon simple syrup or vanilla syrup.
- Clumps are easiest to prevent before they start: sift first, then whisk.
- If your matcha is already sweetened, reduce or skip the syrup.
Use the saveable recipe-card visual below when you want the base method without rereading the full guide.
That is the whole base drink. When the matcha shot is right, the glass looks café-pretty, but more importantly, it tastes smooth all the way down. After you have made it this way once or twice, it stops feeling like a café trick: you know how strong you like the matcha, how much milk softens it, and exactly when to stir. From here, use the ratio guide if you want to adjust strength, the no-whisk tools if you want an easier method, and the matcha powder guide if your drink tastes flat or bitter.
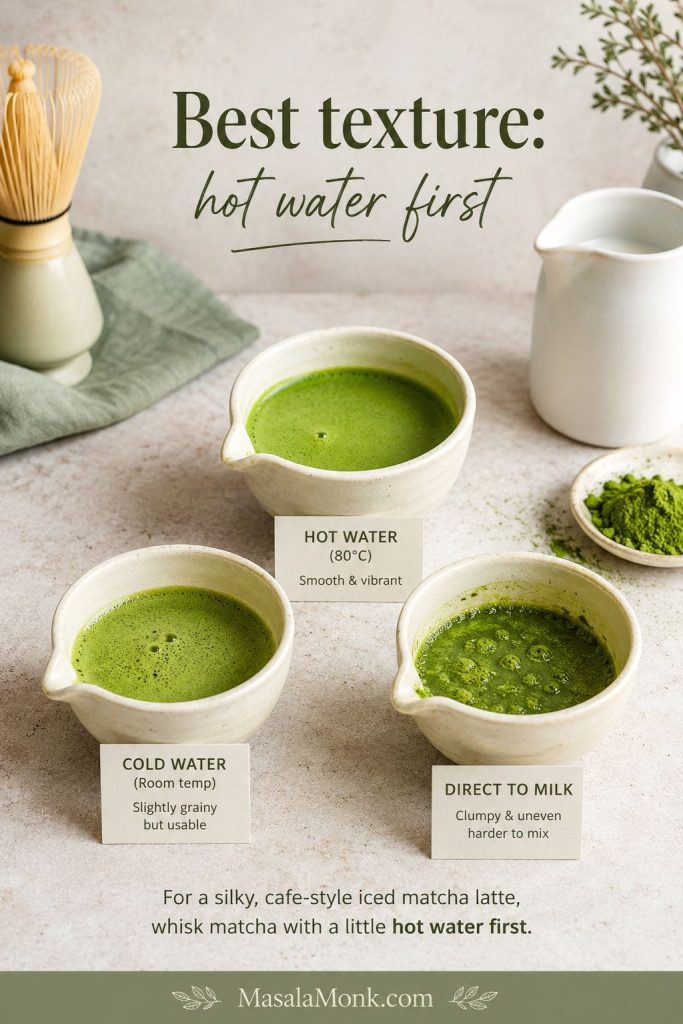
Hot Water vs Cold Water for Iced Matcha
The main texture question is whether the matcha gets mixed with hot water, cold water, or milk. For the most reliable result, whisk the powder with a small amount of hot water first, then pour it over cold milk and ice.
This same sequence — sift, whisk with warm water, then combine with cold milk and ice — also appears in Ippodo’s iced matcha latte method. See Ippodo’s iced matcha latte method here.
| Method | Best for | Downside |
|---|---|---|
| Hot water first | Silky texture, fewer clumps, balanced flavor | Needs hot water |
| Cold water first | Fast shaker or bottle method | Can clump if the matcha is not sifted well |
| Directly into milk | Fastest method | Highest chance of clumps |
| Blender method | Foamy, lump-free, no-whisk version | Extra cleanup |
Water amount matters: Two tablespoons hot water makes a stronger, creamier latte. Up to ¼ cup / 60 ml is easier to whisk, but the drink will taste lighter and more tea-forward.
If clumps are your main issue, the no-whisk tool options and troubleshooting section will help you choose the easiest fix.
This method comparison shows why warm water is more reliable than adding dry matcha straight to cold milk.
How to Make an Iced Matcha Latte Without a Whisk
You do not need a full matcha setup. The only real mistake is expecting dry matcha and cold milk to become silky on their own.
A bamboo matcha whisk is lovely, but it is not required. You can also make a lump-free drink with a frother, shaker jar, or blender if the powder is sifted first.

| Tool | Best use | How to use it |
|---|---|---|
| Bamboo matcha whisk | Best traditional texture | Sift matcha, add hot water, then whisk quickly in a W or M motion. |
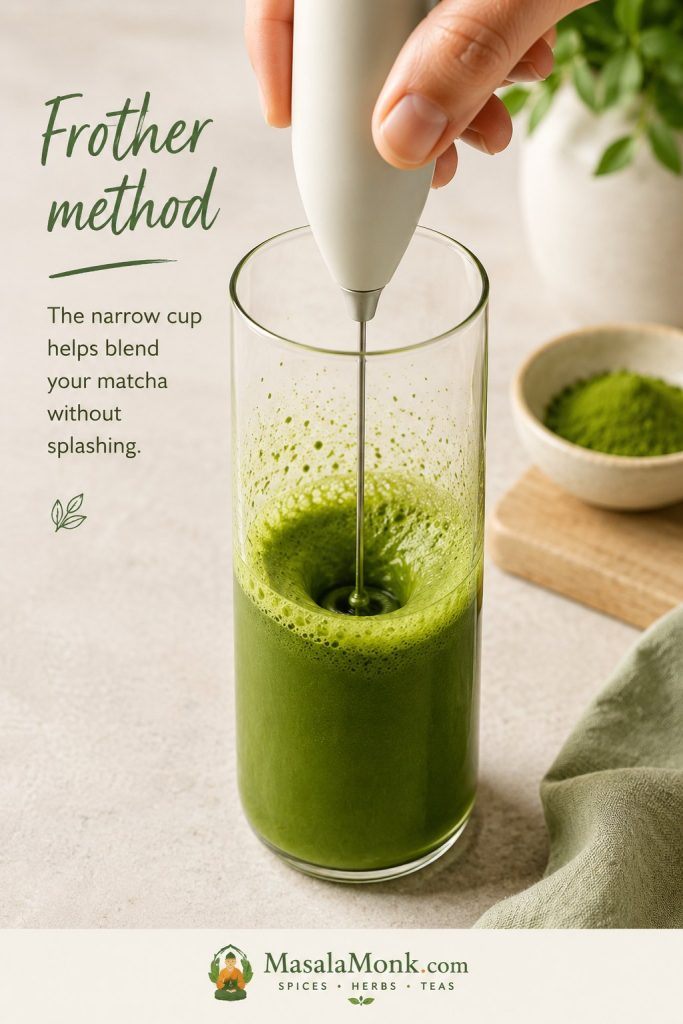
| Handheld milk frother | Fast everyday method | Froth the matcha shot in a tall cup for 15 to 20 seconds. |
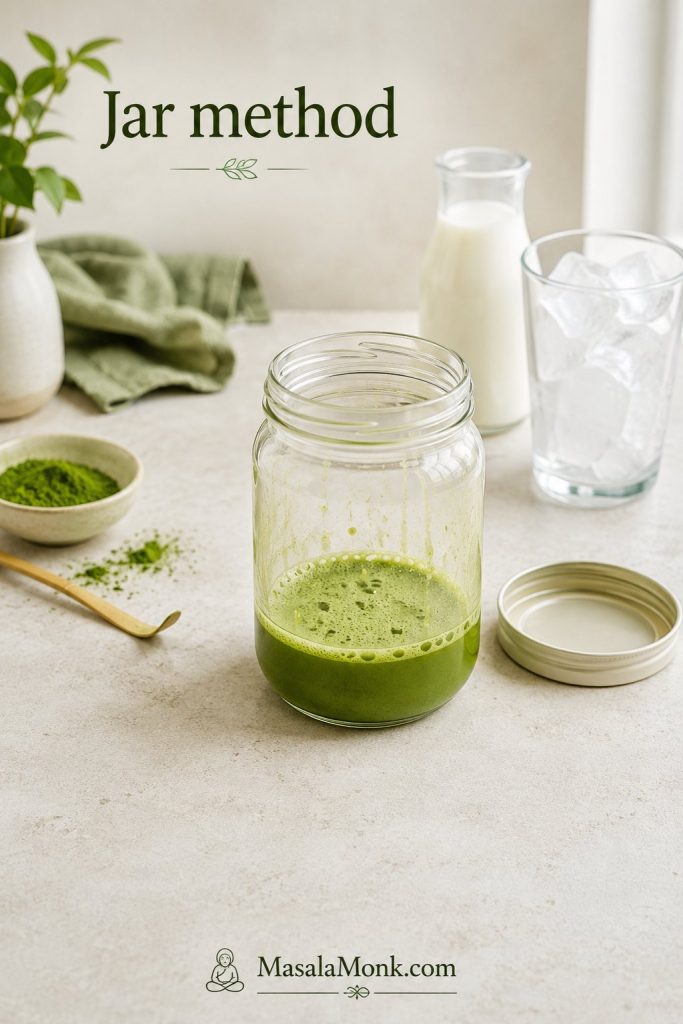
| Shaker jar | No-whisk iced matcha | Shake sifted matcha with water first, then add milk and ice. |
| Blender | Smoothest, foamiest version | Blend the matcha shot or the full latte briefly. |
| Spoon or fork | Last resort | Make a paste first, then slowly loosen it with more water. |
A narrow cup gives the frother less room to splash and more control over the small matcha base.
With the jar method, the order still matters: shake the matcha with water first, then add milk and ice.
Best Matcha Powder for This Latte
What to look for in the powder
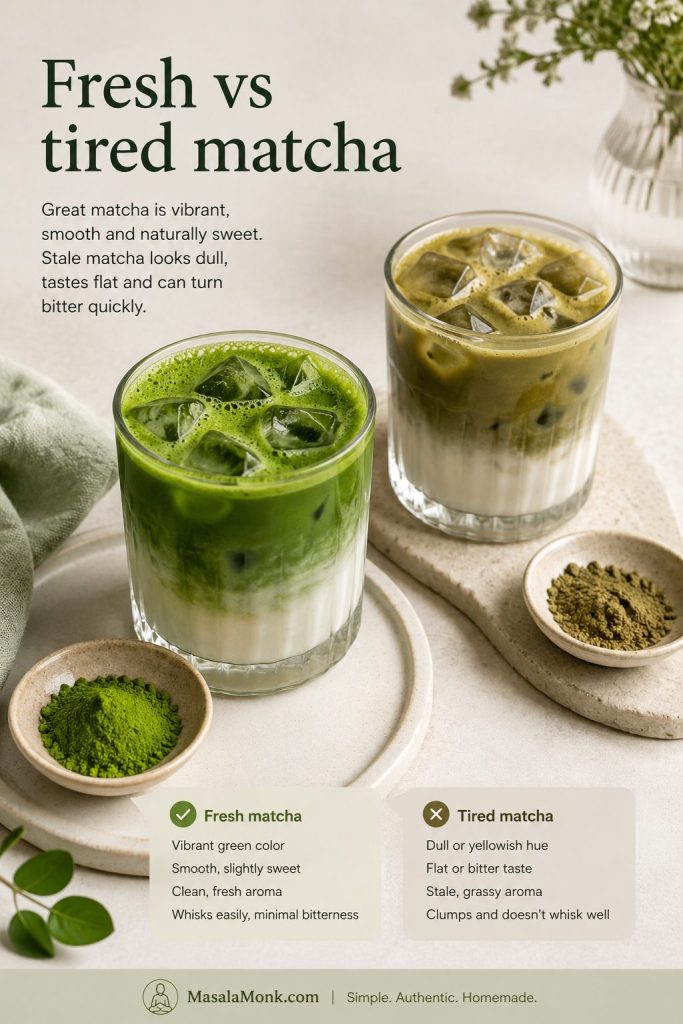
Technique matters most, but the powder still matters. A good method can smooth out matcha, but it cannot completely hide powder that tastes stale before it reaches the glass.
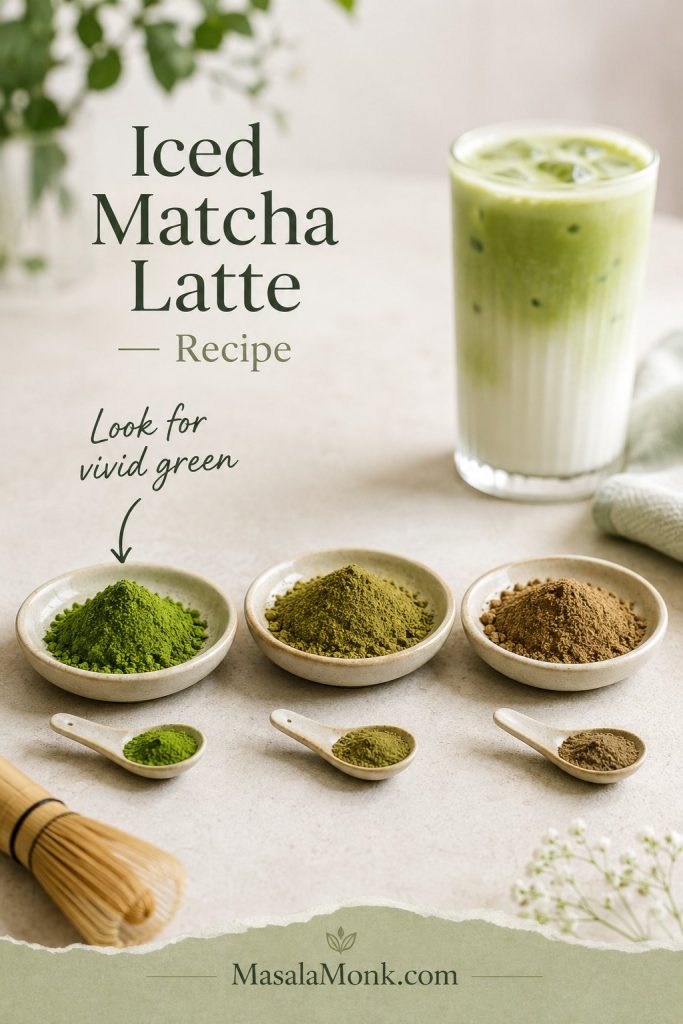
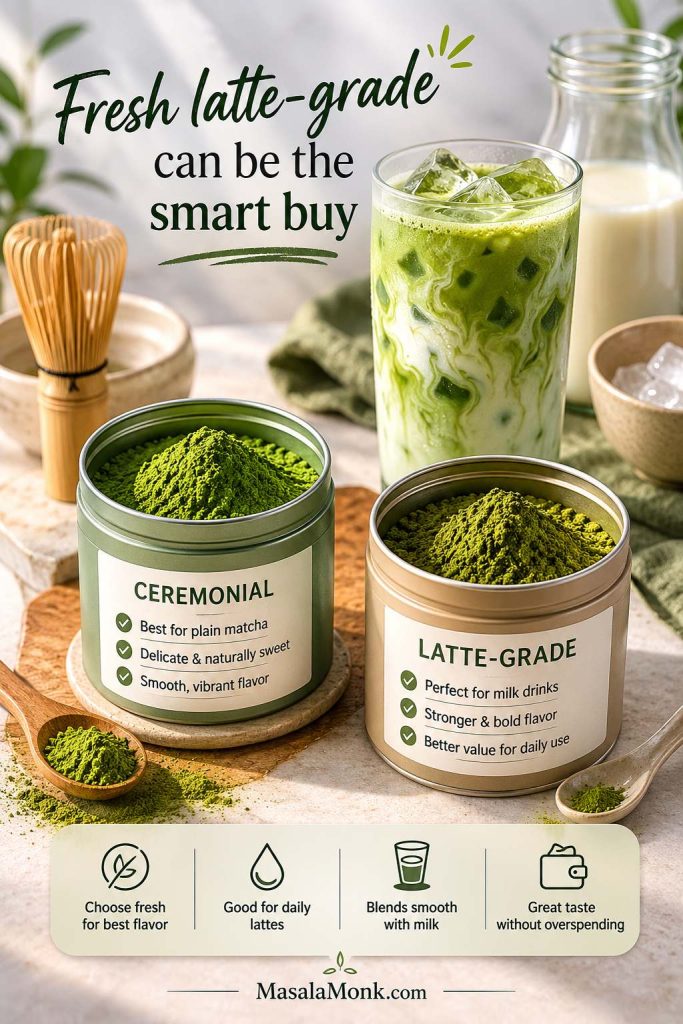
For this recipe, the best buy is usually a fresh, vivid green latte-grade matcha from a seller with good turnover. Save the expensive ceremonial tin for plain matcha if you drink it that way. Good matcha makes the drink feel clean and fresh; tired matcha often makes you keep adding syrup and milk, trying to soften a flavor that has already lost its brightness.
Do not judge matcha only by the word “ceremonial” on the label. Color, aroma, freshness, and taste matter more than marketing language. Vivid green matcha usually gives a cleaner drink, while dull olive, yellow-green, or brownish matcha is more likely to taste flat or muddy.
Ceremonial vs latte-grade matcha
| Matcha type | Best use | What to know |
|---|---|---|
| Ceremonial matcha | Best for drinking | Smooth, bright, and usually less bitter. Good if you drink matcha often. |
| Latte-grade matcha | Best everyday value | Often the smartest choice for milk drinks if it is fresh and vivid green. |
| Culinary matcha | Baking, smoothies, stronger milk drinks | Not automatically bad, but it should not taste muddy, stale, or overly bitter. |
For milk drinks, this comparison helps separate everyday latte value from labels that only sound more expensive.
Keep matcha fresh after opening
If you only make matcha occasionally, buy a smaller tin so it stays fresh. Store it airtight, cool, dark, and dry. Matcha loses its color and aroma when it sits too long near heat, light, or moisture.
If your matcha tastes strong but not stale, use the ratio guide to soften the drink with milk or reduce the powder before adding extra syrup.
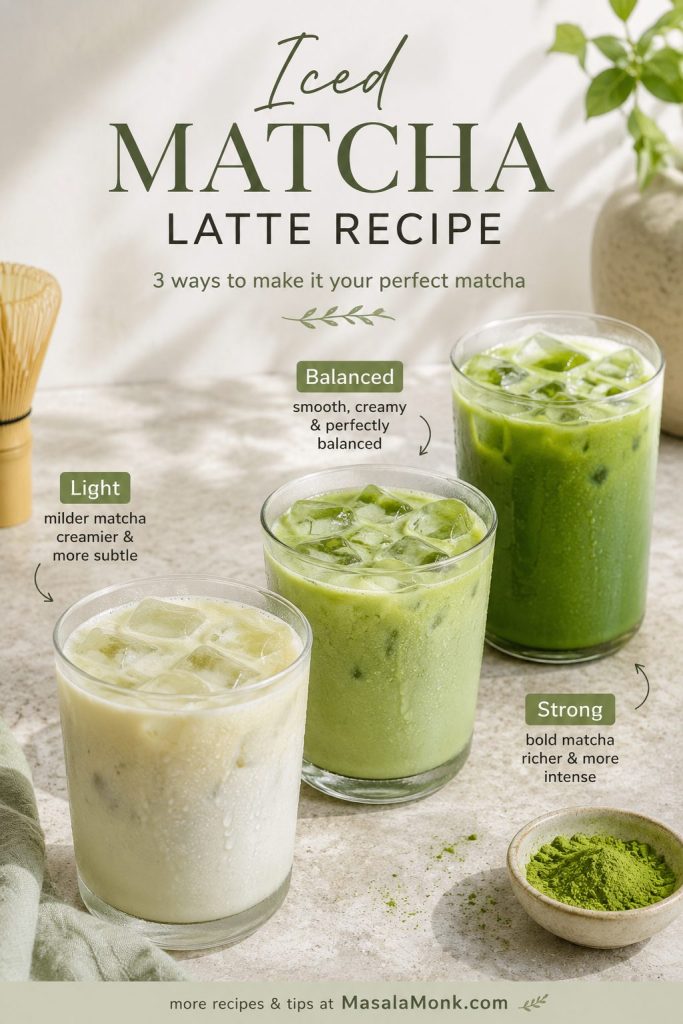
Iced Matcha Latte Ratio Guide
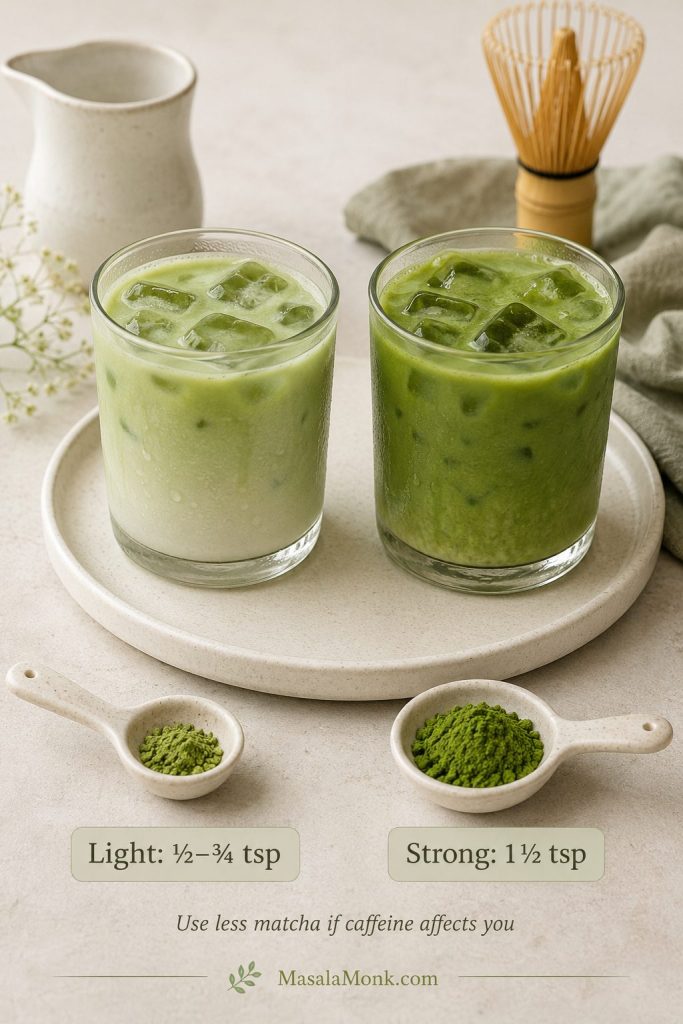
Use the table below to adjust after your first glass. For most people, the balanced version is the best starting point.
If you are still finding your ideal glass, adjust only one thing at a time. More matcha makes it greener and stronger, more milk makes it softer, and more syrup makes it rounder.
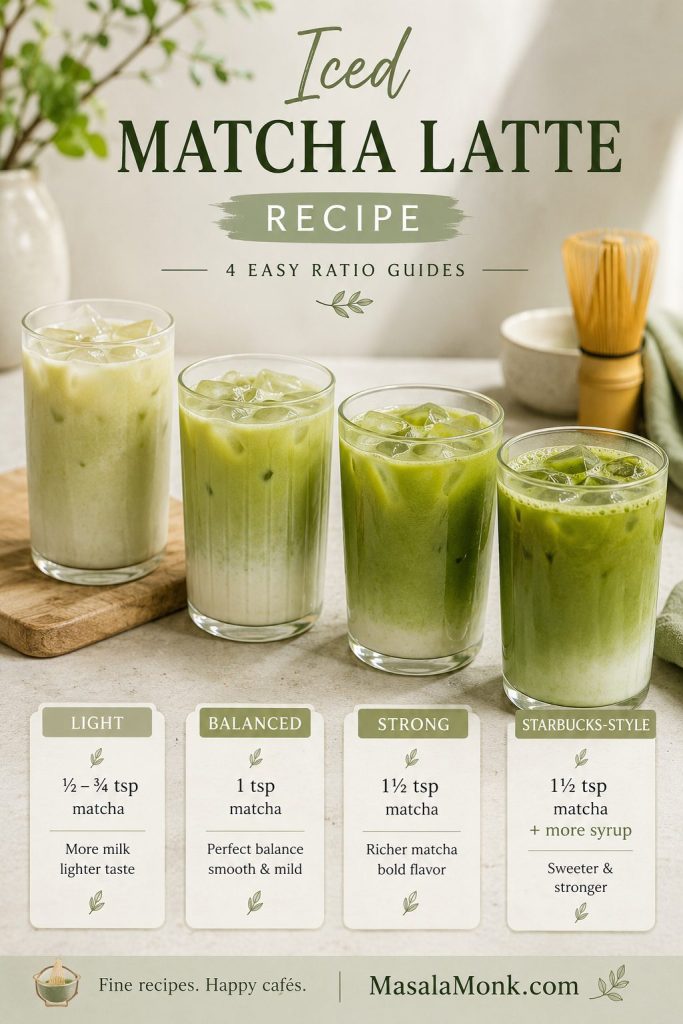
| Style | Matcha | Water | Milk | Sweetener |
|---|---|---|---|---|
| Light | ½ to ¾ tsp | 2 tbsp / 30 ml | 1 cup / 240 ml | 1 tsp |
| Balanced | 1 tsp / about 2 g | 2 tbsp / 30 ml | ¾ to 1 cup / 180 to 240 ml | 1 to 2 tsp |
| Strong | 1½ tsp / about 3 g | 2 to 3 tbsp / 30 to 45 ml | ¾ cup / 180 ml | 1 to 2 tsp, then add more only if it tastes too sharp |
| Less sweet | 1 tsp | 2 tbsp / 30 ml | ¾ to 1 cup / 180 to 240 ml | 0 to 1 tsp |
| Starbucks-style | 1½ tsp | 1 to 2 tbsp hot water if whisking first | 1 cup / 240 ml | 1 to 2 tbsp syrup |
Use the ratio board as a saveable shortcut for light, balanced, strong, and coffee-shop style drinks.
Still unsure where to start? The which version guide turns these ratios into quick choices for gentle, strong, café-style, or dairy-free drinks.
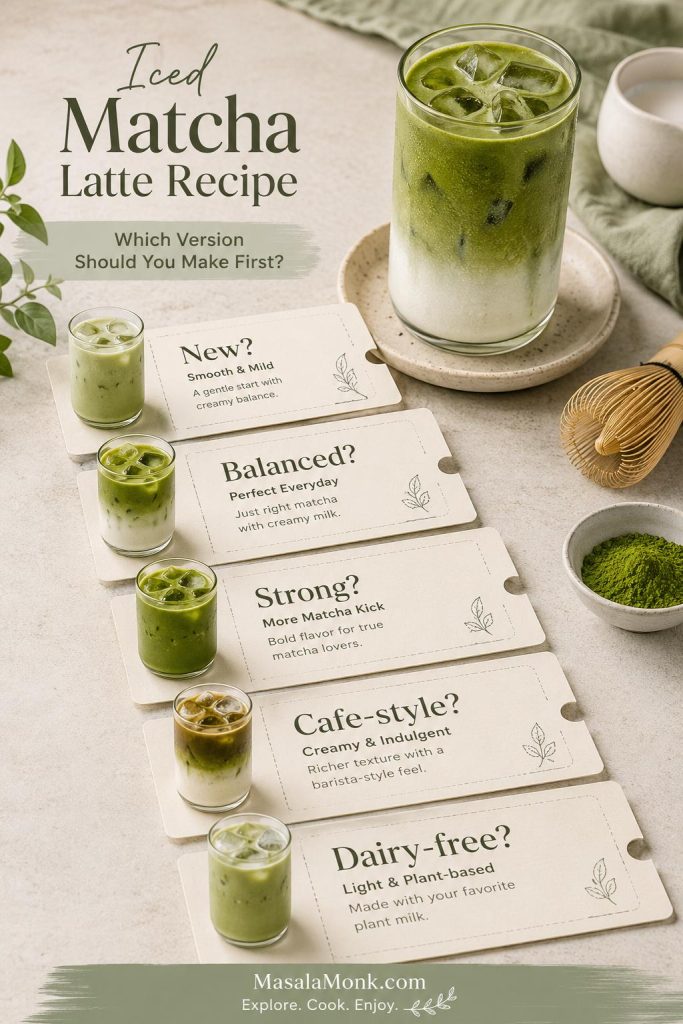
Which Version Should You Make First?
Once you know your ratio, the rest is personal. Make the balanced version once, then use this table to move the drink toward your own taste. Some days you want the cleaner green tea version; other days you want the sweeter café-style glass with more milk, more ice, and vanilla syrup. The method stays the same — only the mood changes.
| If you want… | Start with… |
|---|---|
| A gentle first matcha latte | ½ to ¾ teaspoon matcha, 1 cup milk, and 1 teaspoon syrup |
| The best balanced everyday version | 1 teaspoon matcha, ¾ cup milk, and 1 to 2 teaspoons syrup |
| A stronger green tea flavor | 1½ teaspoons matcha, ¾ cup milk, and 1 to 2 teaspoons syrup; add more only if it tastes too sharp |
| A sweeter coffee-shop drink | 1½ teaspoons matcha, 1 cup milk, and 1 tablespoon vanilla syrup |
| The creamiest dairy-free version | 1 teaspoon matcha, barista oat milk, and 1 teaspoon syrup |
| The least clumpy method | Sift first, then use the hot-water shot with a frother, whisk, shaker, or blender |
This chooser helps you pick a first version before you start changing matcha, milk, or syrup.
Starbucks-Style Iced Matcha Latte
Copy the profile, not the exact sweetness
For a Starbucks-style iced matcha latte at home, the main thing to copy is the sweet, milky profile — not the exact sweetness level. Starbucks’ U.S. iced matcha latte listing includes milk, ice, matcha, and classic syrup, so syrup is what gives the homemade version that sweeter coffee-shop profile. You can see the official Starbucks iced matcha latte page here.
This is where homemade is nicer: you can keep the café feel while choosing exactly how sweet you want the glass.
Adjust sweetness and texture
| Goal | What to do |
|---|---|
| Sweeter Starbucks-style flavor | Add 1 to 2 tablespoons simple syrup or vanilla syrup. |
| Stronger matcha flavor | Increase the matcha to 1½ teaspoons. |
| Creamier texture | Choose whole milk, 2% milk, or barista oat milk. |
| Less sweetness | Start with 1 teaspoon syrup and add more only after tasting. |
| Fewer clumps | Whisk matcha with hot water before adding milk and ice. |
Add syrup in stages so you can stop when the latte tastes rounded instead of overly sweet.
To fine-tune the coffee-shop profile, compare the milk and sweetener options before adding more syrup.
Make a 16-ounce-style glass
A 16-ounce-style drink works well with 1½ teaspoons matcha, 1 cup milk, 1 cup ice, and 1 to 2 tablespoons simple syrup or vanilla syrup. For the most even texture, whisk the matcha with 1 to 2 tablespoons hot water first instead of shaking dry powder directly into cold milk.
Once the method is smooth, the rest of the drink becomes personal. At this point, milk changes the body, sweetener changes the finish, and small adjustments can make the same matcha taste clean, cozy, café-style, or dessert-like.
Milk and Sweetener Choices
After the matcha shot, milk and sweetener decide the mood of the drink: clean and tea-forward, soft and milky, or sweet like a coffee-shop treat.
Choose your milk
| Milk | Result | Best for |
|---|---|---|
| Whole milk | Rich, creamy, rounded | Classic creamy version |
| 2% milk | Lighter but still rounded | Balanced everyday version |
| Barista oat milk | Creamy, slightly sweet, full-bodied | Best dairy-free option |
| Almond milk | Lighter, thinner, nutty | Lower-calorie or lighter version |
| Coconut milk | Rich, tropical, more noticeable flavor | Coconut variation |
| Soy milk | Creamy and neutral if unsweetened | Balanced dairy-free option |
Compare the milks by body as much as flavor: some soften matcha, while others keep it sharper and more tea-forward.
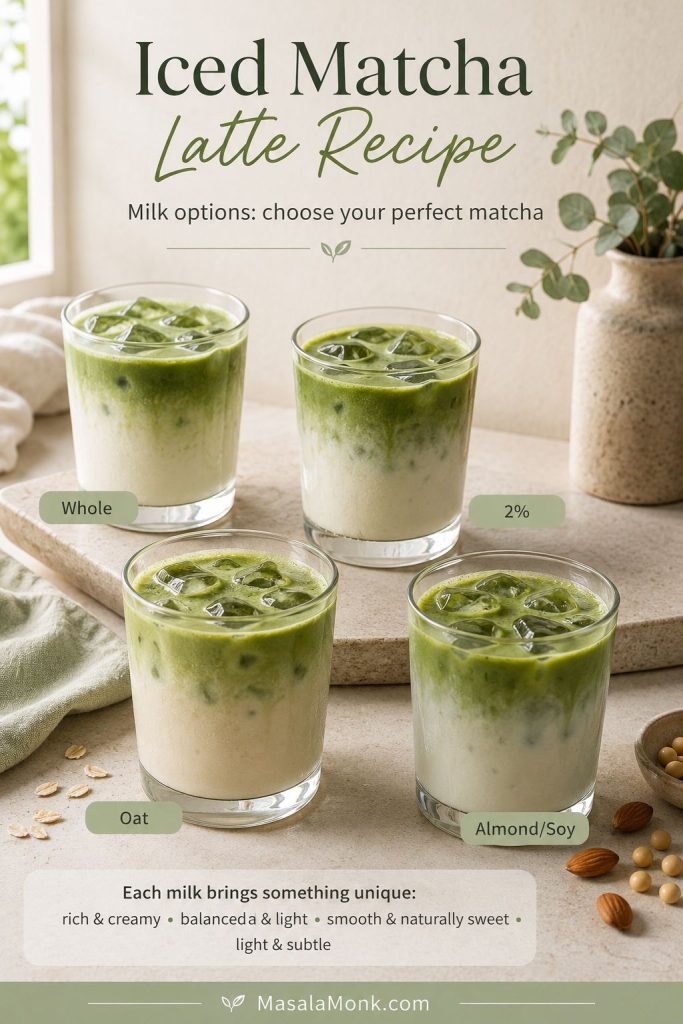
For the creamiest dairy-free drink, barista oat milk is the easiest choice. For a cleaner, less sweet finish, go with unsweetened dairy milk or unsweetened soy milk.
Sweeteners that mix well
Liquid sweeteners work best here because cold milk will not dissolve granulated sugar evenly. Simple syrup keeps the flavor clean; vanilla syrup makes the drink softer and more dessert-like.
| Sweetener | Flavor | Amount |
|---|---|---|
| Simple syrup | Clean, neutral sweetness | 1 to 2 tsp, or 1 tbsp for sweeter |
| Vanilla syrup | Soft, sweet, rounded | 1 to 2 tsp |
| Maple syrup | Warm and rounded | 1 to 2 tsp |
| Honey | Floral and stronger | 1 tsp, whisked into warm matcha first |
| Agave | Mild and smooth | 1 to 2 tsp |
| Sugar-free syrup | Depends on brand | To taste |
Choose a liquid sweetener when possible, since it blends into cold matcha more evenly than dry sugar.
Quick simple syrup: Stir equal parts sugar and hot water until dissolved, then cool before using. Keep it in the fridge for quick iced matcha, iced coffee, lemonade, and other cold drinks.
Variations
This is where the drink starts feeling less like a formula and more like your own café order: the same smooth matcha base, shifted with vanilla, oat milk, fruit, foam, coffee, or coconut.
If a variation tastes too strong, too sweet, or too thin, use the quick fixes instead of starting over.
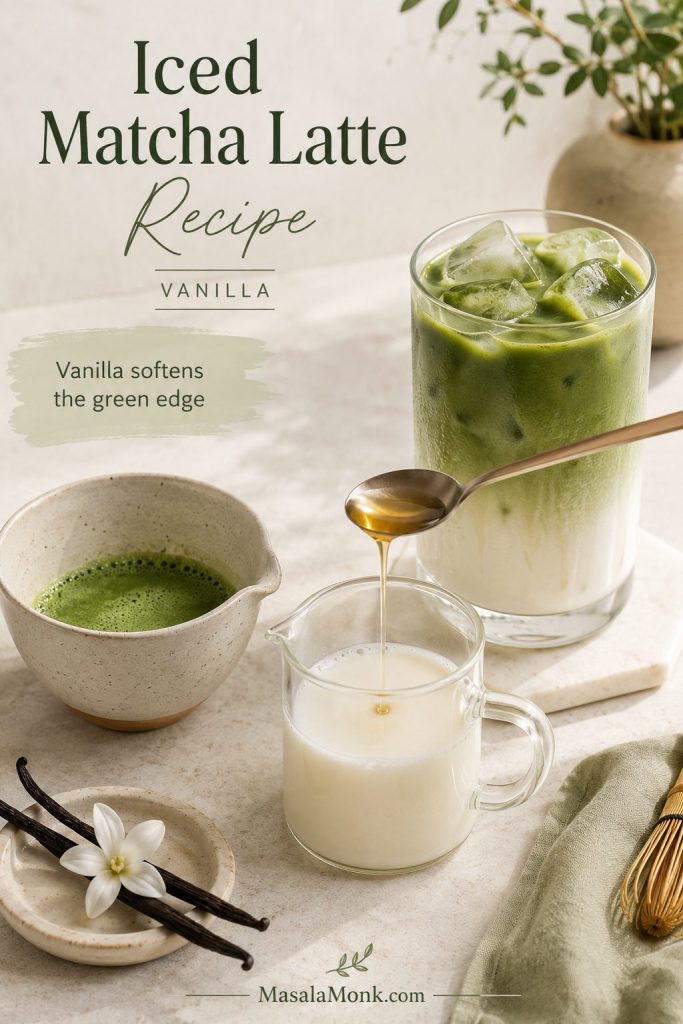
Vanilla iced matcha latte
Vanilla is the easiest coffee-shop adjustment. Add 1 to 2 teaspoons vanilla syrup to the milk or warm matcha shot; it rounds off the grassy edge without making the drink taste like dessert. It is the best first variation if plain matcha tastes a little too green but you do not want the drink to become sugary.
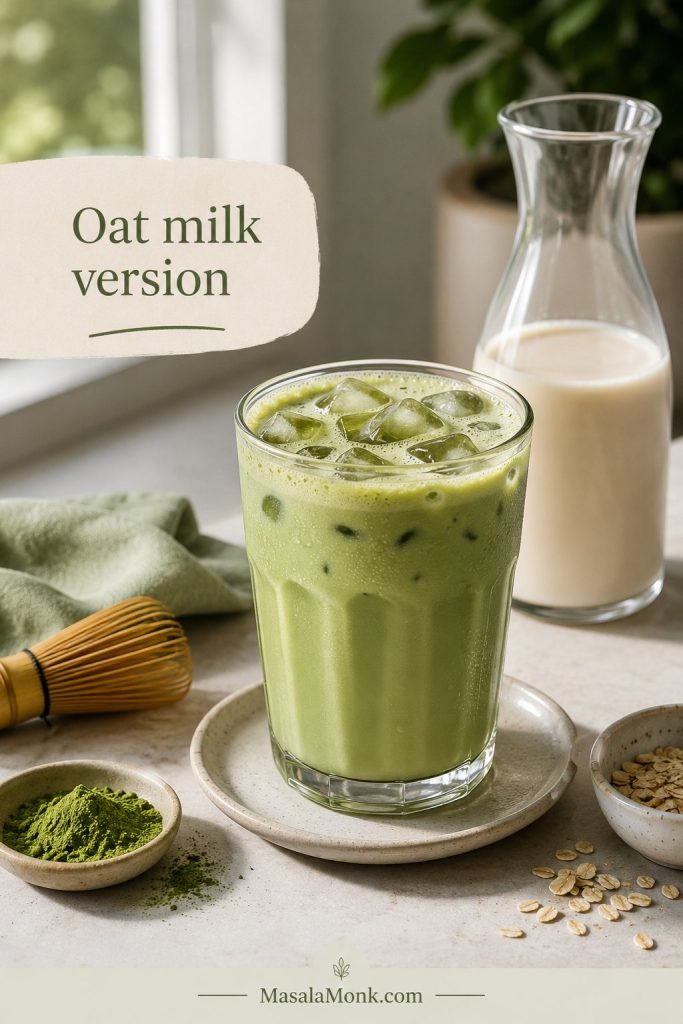
Oat milk iced matcha latte
Barista oat milk makes the latte rounder and fuller, especially if almond milk makes your matcha taste a little sharp. Because oat milk has natural sweetness, start with less syrup and add more only after tasting. It also helps the drink feel fuller without needing as much syrup.
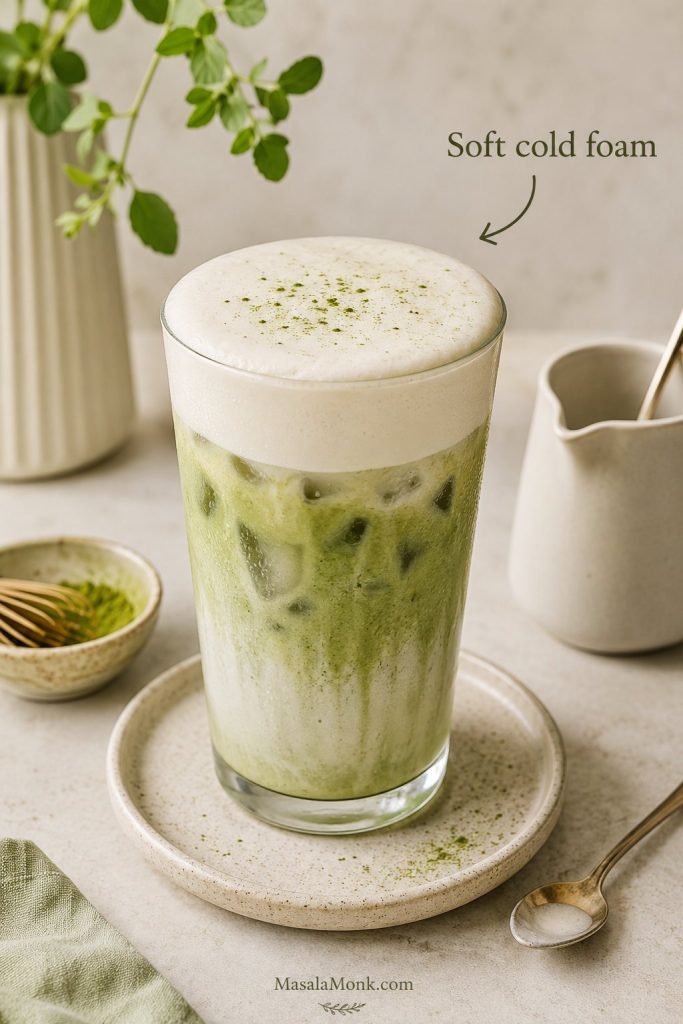
Iced matcha latte with cold foam
Cold foam turns this into a slower, dessert-leaning drink. Make the base latte, then top it with 2 to 3 tablespoons vanilla cold foam. Keep the foam soft and pourable rather than piling it on like whipped cream.
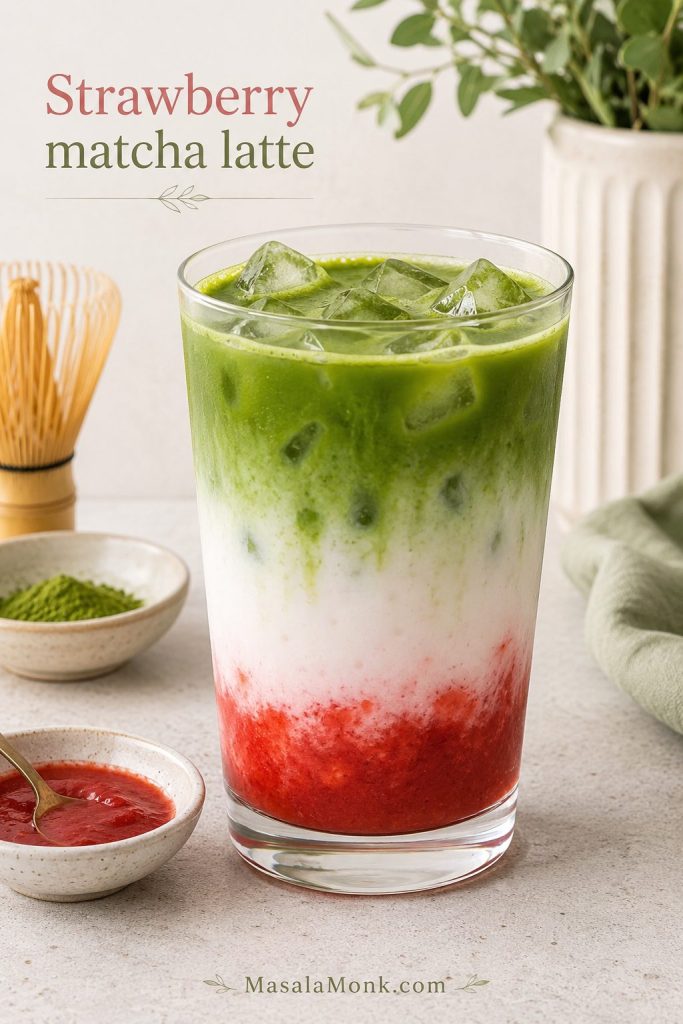
Strawberry iced matcha latte
Spoon strawberry puree or strawberry syrup into the glass first, add ice and milk, then pour the matcha shot over the top. A thicker fruit layer gives you the café look; stirring gives you the better sip. For the full layered version with strawberry base options, ratios, and fixes, see MasalaMonk’s strawberry matcha latte recipe.
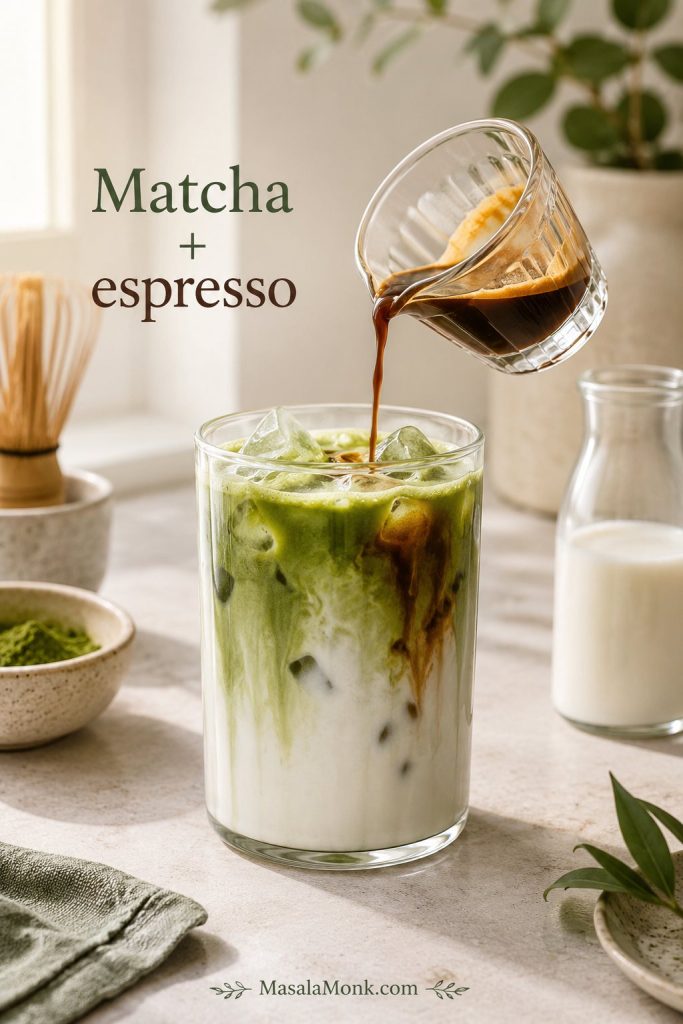
Dirty iced matcha latte
Add one shot of espresso to the milk before pouring over the matcha. This version is stronger, slightly bitter, and more coffee-forward. Vanilla syrup or oat milk helps soften the edges.
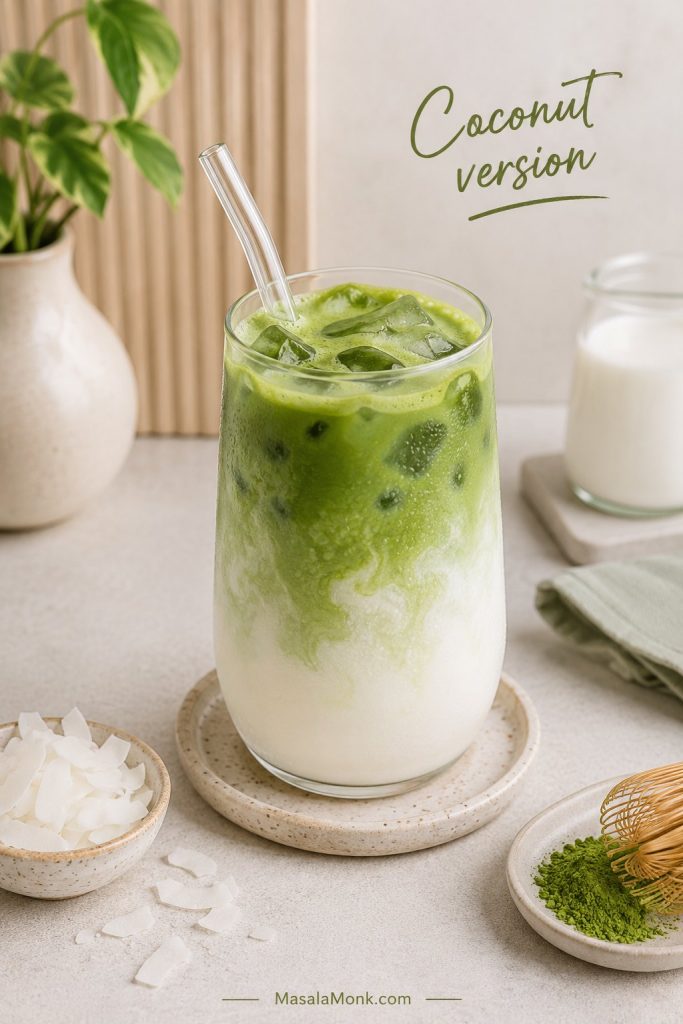
Coconut iced matcha latte
Use coconut milk with a small amount of maple syrup or vanilla syrup. Because coconut milk is richer and more noticeable, it works best if you enjoy a clear tropical flavor.
When you want another chilled café-style drink, MasalaMonk’s iced coffee recipes guide has ideas for iced lattes, cold brew, frappes, syrups, and cold foam.
How to Fix an Iced Matcha Latte
The drink is rarely ruined. Most problems are one small adjustment away from working.
If your first glass is not perfect, do not throw it out. Matcha lattes are unusually easy to correct once you know what went wrong.
Quick fixes by problem
Most issues come from the same few places: dry matcha hitting cold milk, water that is too hot, too much melted ice, or a ratio that does not match your taste.
Texture and dilution fixes
| Problem | Likely cause | Fix |
|---|---|---|
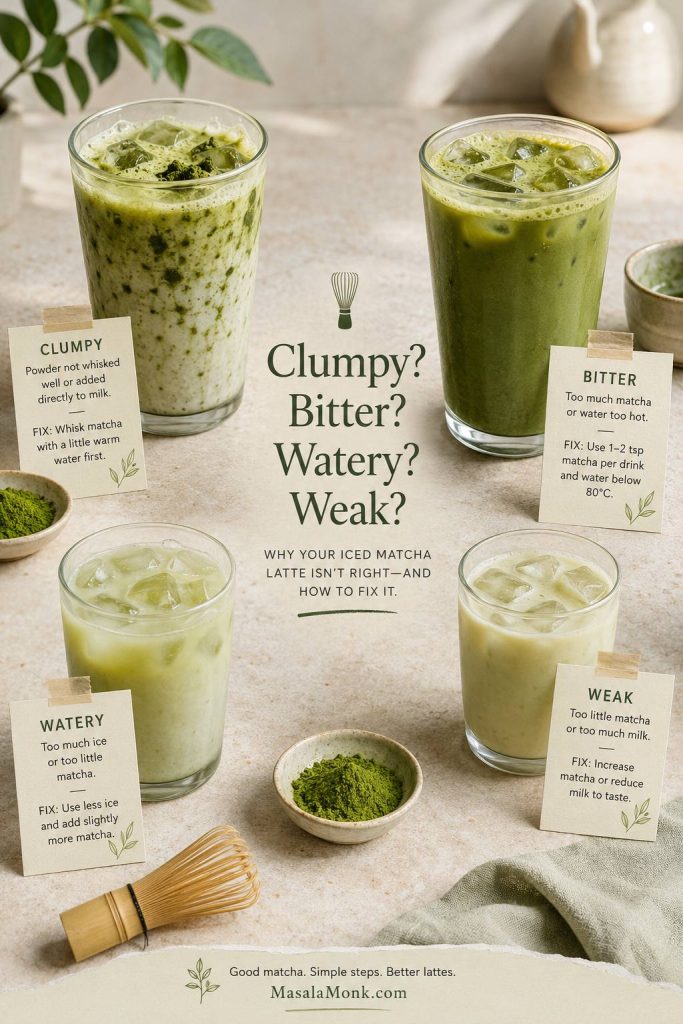
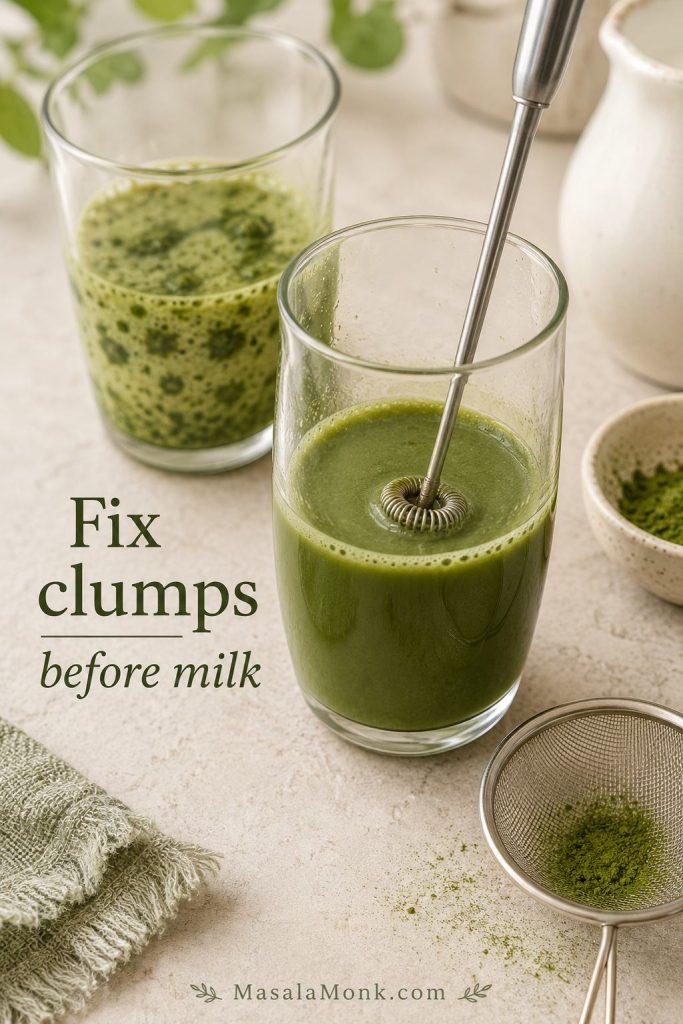
| Clumpy matcha | Matcha was not sifted or was added directly to cold milk | Sift first, then whisk with hot water before adding milk. |
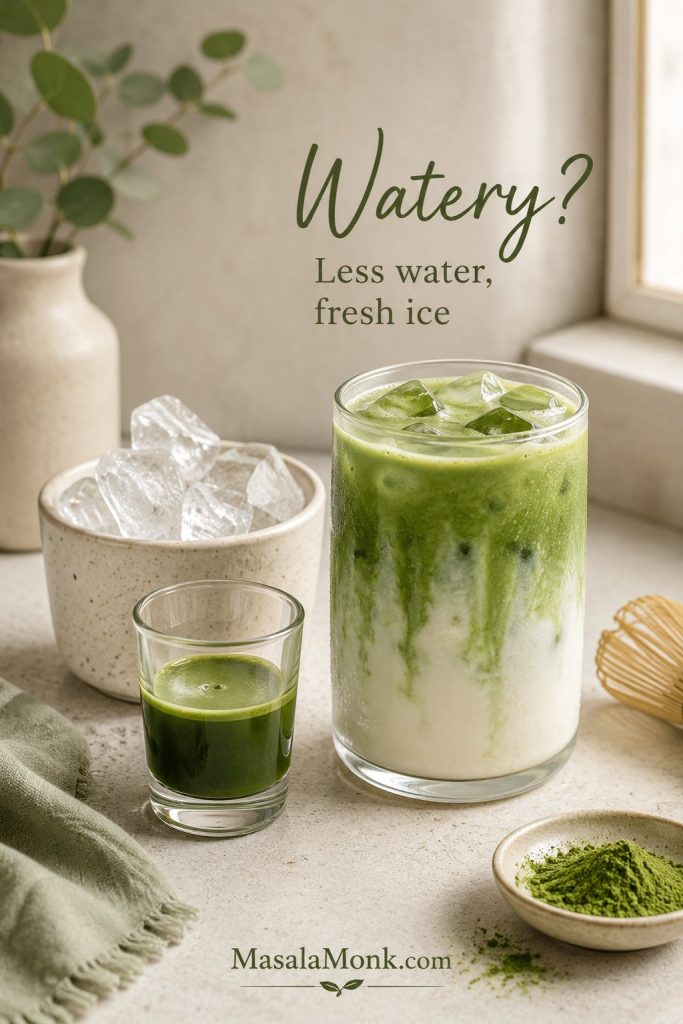
| Watery latte | Too much water or melted ice | Use 2 tablespoons water, cold milk, and fresh ice. |
| Layers disappear | Matcha was poured too fast or the glass had too little ice | Fill the glass with ice and pour matcha slowly over the top. |
Flavor balance fixes
| Problem | Likely cause | Fix |
|---|---|---|
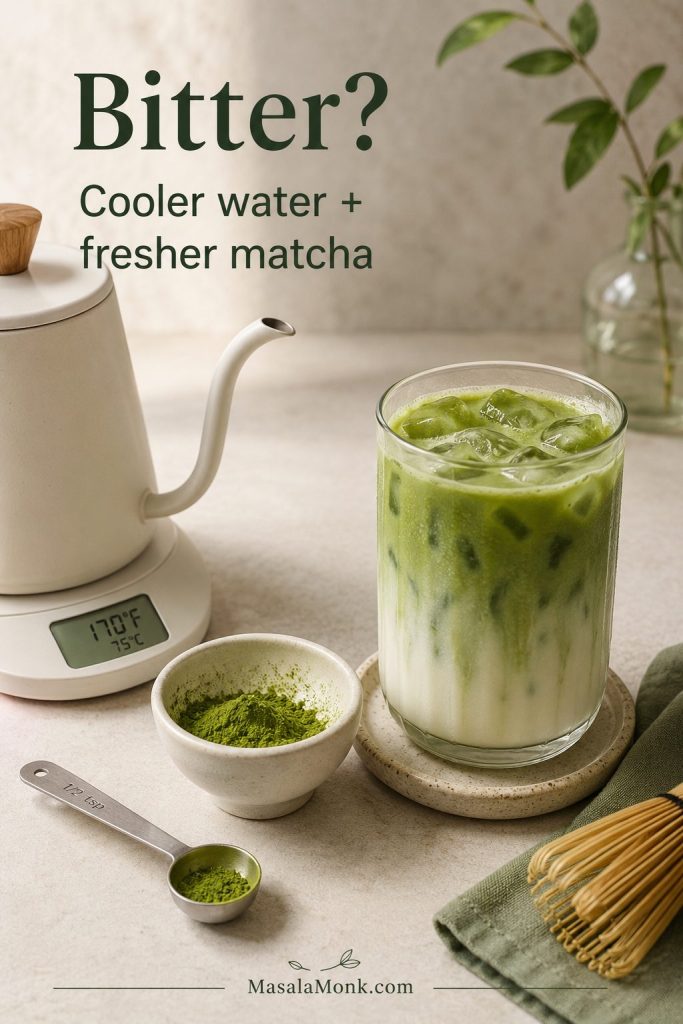
| Bitter taste | Water was too hot, matcha is old, or too much powder was used | Cooler water and fresher matcha usually fix the harsh edge; if it still tastes strong, reduce the powder to ¾ teaspoon. |
| Weak matcha flavor | Too much milk or too little matcha | Increase the matcha to 1½ teaspoons or reduce milk to ¾ cup. |
| Too grassy | Strong matcha, stale matcha, or not enough milk/sweetness | Add vanilla syrup, use oat milk, start with less matcha, or switch to fresher matcha if the flavor tastes harsh rather than pleasantly earthy. |
| Too sweet | Too much syrup or sweetened matcha/milk | Add more unsweetened milk and stir well. Next time, start with 1 teaspoon syrup and taste before adding more. |
Bitter and watery examples
When bitterness shows up, check water temperature, powder freshness, and matcha amount before adding more syrup.
When the latte tastes thin, look at dilution first: too much water or melted ice can flatten even good matcha.
Still clumpy after whisking?
If the drink is still clumpy even after whisking, check the details: the powder may not have been sifted, the cup may be too wide for a frother, the matcha may have stuck to wet sides before whisking, or the milk may have been added before the powder had a chance to fully blend with water.
Can You Make It Ahead?
This drink tastes best right after you make it. Once the ice sits in the milk, the latte slowly becomes watery. However, a few parts can be prepped ahead.
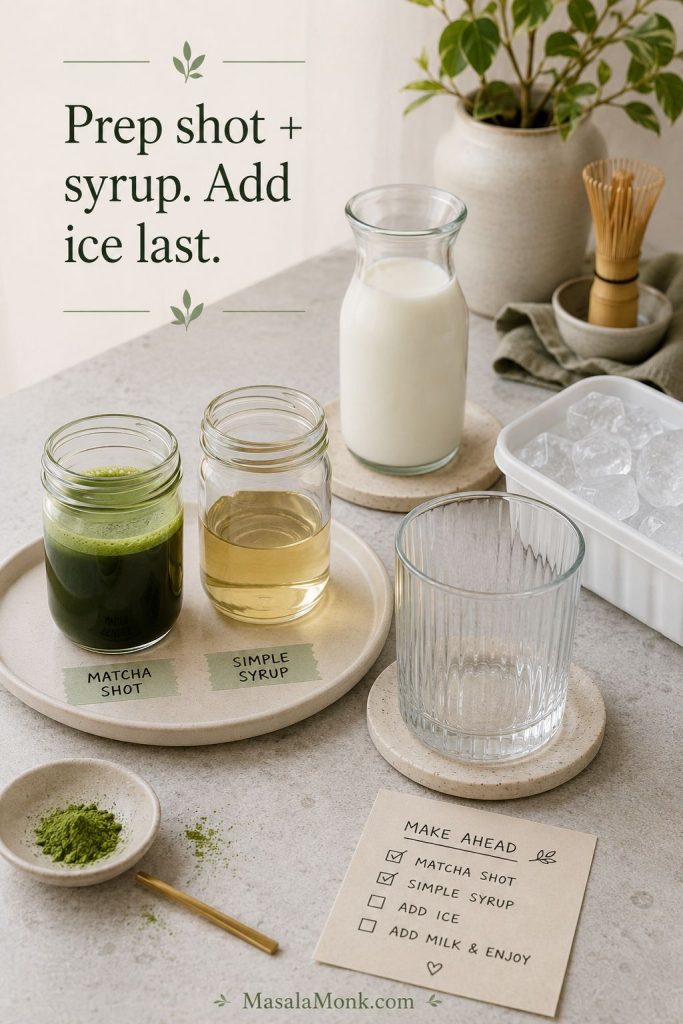
- Simple syrup: Make it ahead and keep it in the fridge.
- Matcha shot: Whisk matcha with water and chill it for a few hours if needed.
- Milk: Keep it cold until serving.
- Finished drink: Assemble with ice right before drinking.
For make-ahead success, prep the stable parts early and save the ice for the moment you serve.
If a chilled matcha shot settles in the fridge, shake or whisk it again before using. Since matcha stays suspended in liquid, a little settling is normal.
FAQs
No whisk? Use a frother, jar, or blender
A handheld frother is the easiest swap, but a shaker jar or blender also works. Sift the matcha first, mix it with water, then add milk and ice.
Hot water or cold water — which is better?
Hot water usually makes a smoother matcha shot. Cold water can work if you sift well and shake or froth strongly, but it is less forgiving if your matcha is compacted or slightly clumpy.
Why the drink gets clumpy
It usually happens when dry matcha is added directly to cold milk, when the powder is not sifted, or when the matcha sticks to the sides of the cup before whisking. Sift the powder, whisk it with hot water first, then pour it over milk and ice.
Does matcha dissolve in milk?
Not exactly. Matcha is finely ground tea leaf, so it suspends in liquid rather than dissolving like sugar or instant coffee. That is why a whisk, frother, shaker, or blender helps — and why stirring before drinking keeps the flavor even.
How much matcha goes in one iced latte?
One teaspoon / about 2 grams gives a balanced drink. For a stronger version, increase the matcha to 1½ teaspoons. If you are new to matcha, start with ½ to ¾ teaspoon and build up from there.
Best milk for a creamy iced matcha latte
Whole milk is richest, 2% milk tastes balanced, and barista oat milk is the best dairy-free option for a full-bodied texture. Unsweetened soy milk is another good choice if you want a dairy-free drink with less natural sweetness than oat milk.
How to make it taste more like Starbucks
Use 1½ teaspoons matcha, 1 cup milk, 1 cup ice, and 1 tablespoon simple syrup or vanilla syrup. Add more syrup only after tasting. The syrup gives the drink its sweeter coffee-shop profile.
How to make a sugar-free iced matcha latte
Skip the syrup or use a sugar-free liquid sweetener, and check that both your matcha powder and milk are unsweetened. Vanilla extract plus unsweetened oat milk or soy milk can make the drink taste softer without adding much sweetness. MasalaMonk’s keto mocktails guide also has a matcha latte spritz for another low-carb matcha drink idea.
Caffeine in matcha lattes
Matcha naturally contains caffeine because it is made from finely ground green tea leaves. A latte made with 1 teaspoon matcha usually feels like a moderate-caffeine drink, while 1½ teaspoons will taste and feel stronger. If you are sensitive to caffeine, use ½ to ¾ teaspoon matcha or drink it earlier in the day.
Strawberry version
Add strawberry puree or syrup to the bottom of the glass, then add ice, milk, and the matcha shot. Stir before drinking, or leave it layered for a pretty green-and-pink drink. A thicker puree gives cleaner layers, while a thinner syrup blends faster. For exact strawberry amounts and step-by-step layering, use the full strawberry matcha latte recipe.
Final Thoughts
Once the matcha shot is smooth, the rest is easy. Pour it over cold milk and ice, sweeten only as much as you like, and you have the kind of iced matcha latte that feels calm, creamy, and worth making again tomorrow.
The small details matter most: sift the matcha, whisk it before adding milk, and avoid boiling water. Those three steps turn a clumpy green drink into something cold, balanced, and genuinely satisfying — the kind of iced matcha latte that tastes like you finally figured out the café version at home.