Posted on — Leave a comment

Cowboy Caviar Recipe: Easy Texas Caviar Dip with Black Beans & Corn

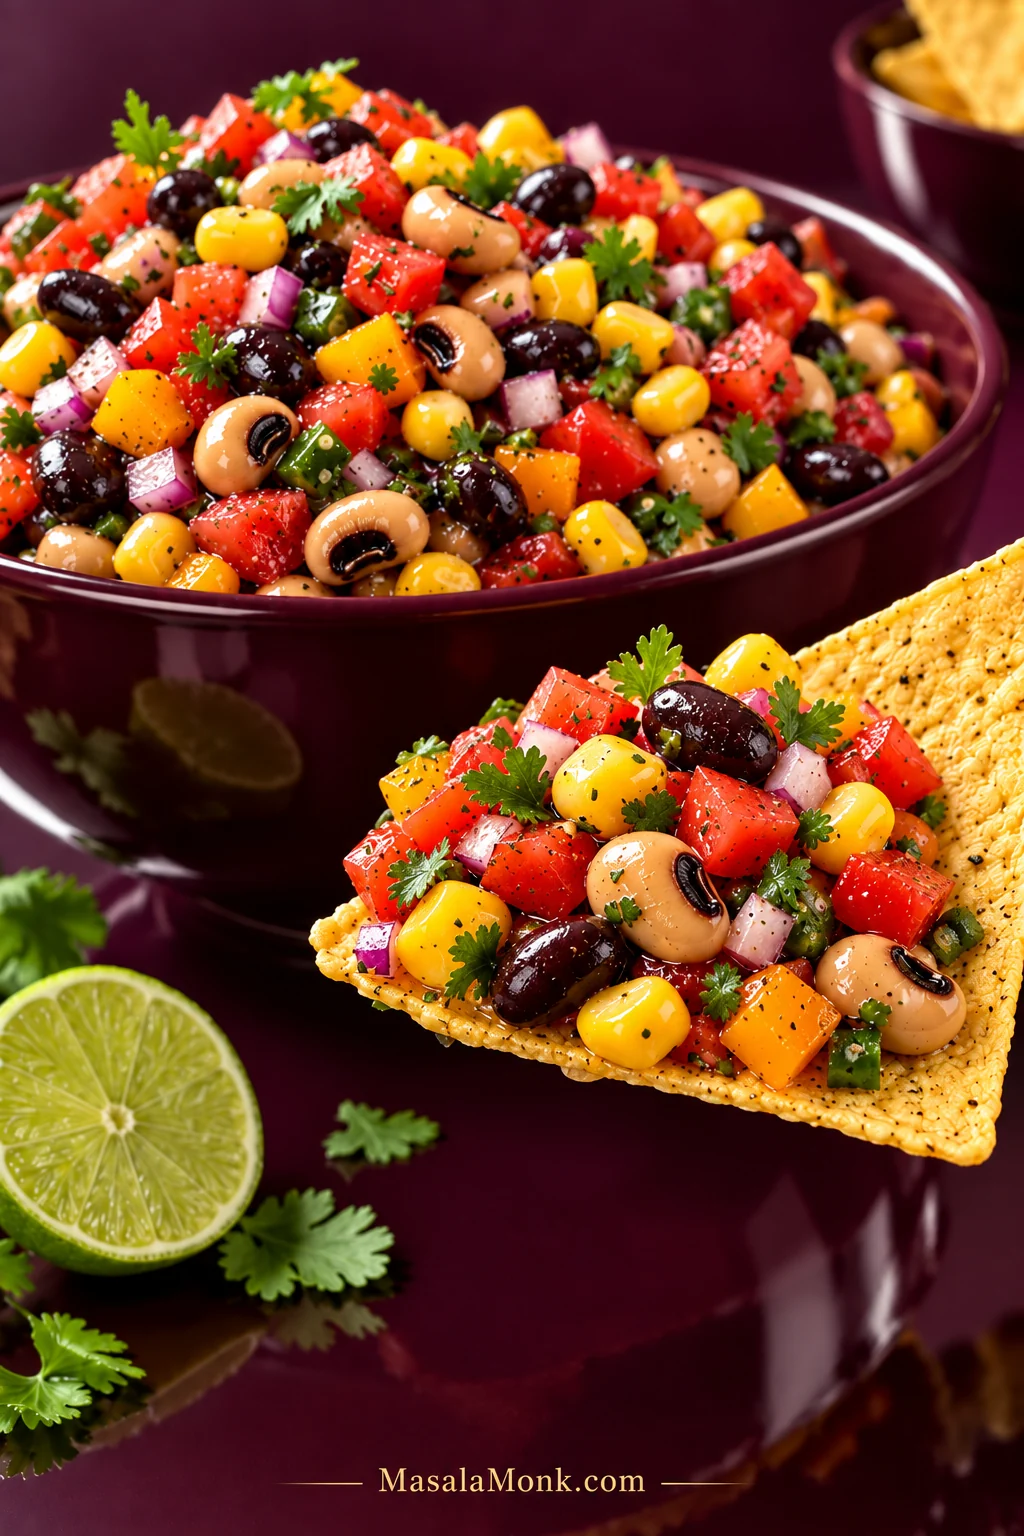
A tortilla chip loaded with Cowboy Caviar, including black-eyed peas, black beans, corn, diced tomato, bell pepper, red onion and cilantro, with a full bowl behind it.

A good Cowboy Caviar recipe should give you a little of everything on one chip: creamy black-eyed peas, firmer black beans, sweet corn, crisp peppers, juicy tomato, fresh herbs and just enough jalapeño to wake it all up. You should not have to chase the good bits around the serving bowl with a broken chip, and the vinaigrette should taste of lime and vinegar rather than oil and sugar.

Cowboy Caviar, also called Texas Caviar, is a chunky bean-and-vegetable salad or dip built around black-eyed peas and dressed with a tangy vinaigrette. Despite the name, there is no fish caviar involved.

Using canned beans and canned corn, there is no cooking at all. The finished dip works with tortilla chips, alongside grilled meat, tucked into tacos or turned into lunch the next day.

Drain well. Cut bean-size. Dress in stages. Taste a bean after it rests.

Cowboy Caviar Recipe

Black-eyed peas, black beans, corn and crisp vegetables tossed with a lime-red-wine vinaigrette.

Prep
25 minutes

Cook
0 minutes with canned corn

Ready to Serve
About 25 minutes

Preferred Rest
30 minutes–2 hours

Yield
About 8 cups / 1.9 L before avocado

As a Side
About 16 × ½-cup portions

As a Party Dip
About 24–32 small portions

Equipment

  • Large mixing bowl, about 4 qt / 4 L
  • Colander or fine-mesh strainer
  • Sharp chef’s knife and cutting board
  • Small bowl or lidded jar for the dressing
  • Whisk or fork

Ingredients

  • 1 (15 oz / 425 g) can black-eyed peas, rinsed and well drained, about 1½ cups / 250 g drained
  • 1 (15 oz / 425 g) can black beans, rinsed and well drained, about 1½ cups / 250 g drained
  • 1¼ cups / about 190 g corn kernels, preferably well-drained canned corn for the no-cook version; see notes for fresh or frozen corn
  • 1½ cups / about 270 g diced Roma tomatoes, about 3 medium; seed only if especially watery
  • 1 cup / about 150 g diced red, orange or yellow bell pepper, about 1 medium-large pepper
  • ½ cup / about 75 g finely diced red onion
  • 1 medium jalapeño, about 15–20 g, ribs and seeds removed for milder heat, finely diced
  • ½ cup loosely packed / about 8–10 g chopped fresh cilantro
  • 1 medium firm-ripe avocado, about 140–150 g flesh, diced, optional

Lime-Vinegar Dressing

  • 3 tablespoons / 45 ml extra-virgin olive oil
  • 2 tablespoons / 30 ml fresh lime juice, from about 1–2 limes depending on size and juiciness
  • 2 tablespoons / 30 ml red wine vinegar
  • 1 small garlic clove, about 3 g, finely grated or minced
  • ½ teaspoon ground cumin
  • ½ teaspoon / about 2 g granulated sugar, optional
  • ¾ teaspoon / about 4 g fine sea salt, divided
  • ¼ teaspoon freshly ground black pepper

Instructions

  1. Rinse and drain the beans. Rinse the black-eyed peas and black beans thoroughly under cool running water, then leave them in the colander while you prepare everything else.
  2. Prepare the vegetables. Drain the canned corn well. Dice the tomatoes, bell pepper and onion into roughly ¼-inch / 6 mm pieces—close to the size of the beans. Finely dice the jalapeño and chop the cilantro.
  3. Taste the onion. Mild and sweet? Use it as it is. Aggressively sharp? Cover the diced onion with cold water for about 10 minutes, then drain and dry it well.
  4. Make the dressing. Whisk the olive oil, lime juice, red wine vinegar, garlic, cumin, sugar, ½ teaspoon of the salt and black pepper. Taste it before it hits the beans. It should seem a little sharper than you want the finished Cowboy Caviar to taste.
  5. Combine and dress. Add the black-eyed peas, black beans, corn, tomatoes, bell pepper, onion, jalapeño and cilantro. Pour in about three-quarters of the dressing and toss gently. Once everything looks evenly coated, stop. Keep the rest.
  6. Serve now or let it rest. Cowboy Caviar can be served immediately. For more integrated seasoning, refrigerate it for 30 minutes to 2 hours. Toss from the bottom and taste a bean, then add up to the remaining ¼ teaspoon salt, more lime, vinegar or reserved dressing as the bowl needs it.
  7. Finish and serve. Fold in avocado gently, if using, just before serving. Serve chilled or cool with sturdy tortilla chips, as a side or as a topping.

Recipe Notes

  • Fresh corn: very tender sweet corn works raw; husk and rinse the ear, then cut off the kernels. If the corn tastes chewy or starchy, blanch or char it first and cool completely.
  • Frozen corn: follow the package cooking directions, cool completely and blot dry before adding it.
  • Beans cooked from dry: replace each can with about 1½ cups / 250 g cooked, cooled and well-drained beans.
  • Italian-dressing shortcut: omit the homemade dressing ingredients and use ⅓ cup / 80 ml zesty Italian dressing plus 1 tablespoon / 15 ml fresh lime juice. Check the salt after mixing because bottled dressings vary.
  • Apple cider vinegar: use the same 2 tablespoons / 30 ml in place of red wine vinegar.
  • Half batch: use about ¾ cup / 125 g each drained black-eyed peas and black beans, ½ cup + 2 tablespoons / about 95 g corn, and halve the remaining ingredients. Expect roughly 4 cups.
  • Double batch: double all ingredients and dressing. Add about three-quarters of the doubled dressing on the first toss and reserve the rest.
  • Dietary note: as written with the homemade dressing, the recipe is vegan and uses no gluten-containing ingredients. For someone with celiac disease, check labels on canned ingredients, seasonings and tortilla chips for cross-contact.
  • Storage: refrigerate promptly; use within 3–4 days for best quality.

Cowboy Caviar Guide
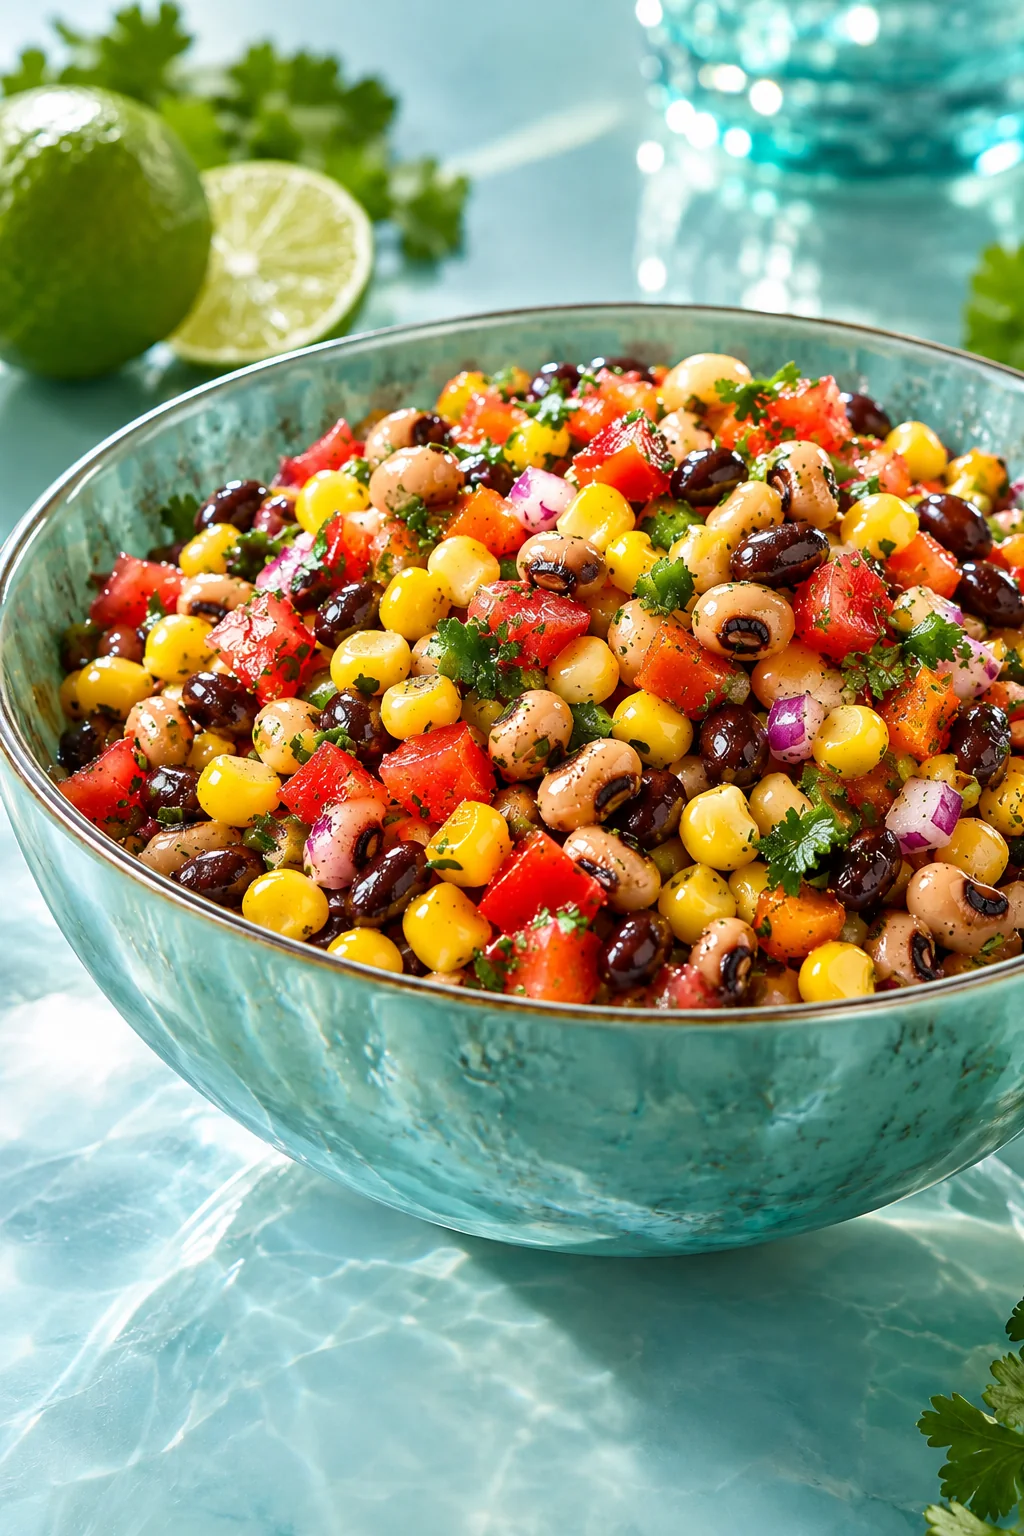
A clear serving bowl filled with Cowboy Caviar made with black-eyed peas, black beans, corn, diced tomatoes, bell pepper, red onion and cilantro.
Look for distinct beans and vegetables with a light gloss, not a wet mixture or a bowl dominated by corn or tomato.

Black-Eyed Peas, Black Beans & Corn

Black-eyed peas are what keep this dish connected to Texas Caviar. The Texas State Historical Association traces Helen Corbitt’s original Texas Caviar to black-eyed peas dressed with oil, vinegar, garlic and onion. As Houstonia notes, the “caviar” name was a tongue-in-cheek comparison with expensive fish roe. Modern versions commonly add ingredients such as black beans, corn, tomatoes and peppers.

Black beans are a particularly good partner because they stay a little firmer than the black-eyed peas. One gives you creaminess; the other gives the scoop more bite.
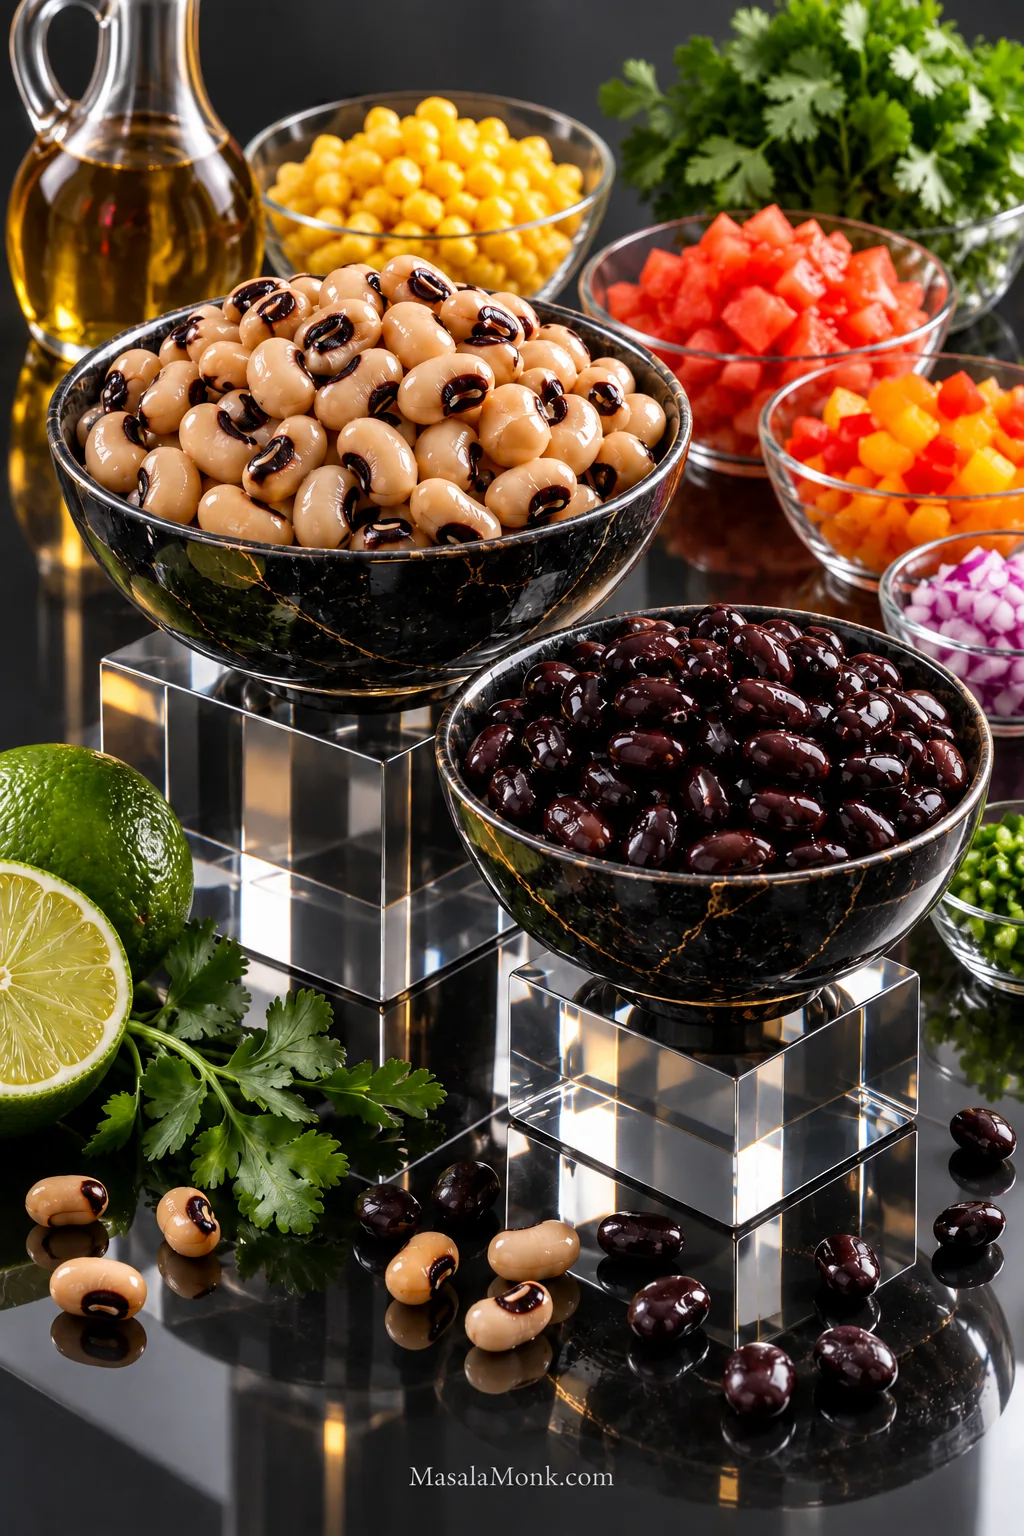
Black-eyed peas and black beans shown as the main Cowboy Caviar ingredients, with corn, tomato, bell pepper, red onion and cilantro around them.
A near 1:1 balance keeps black-eyed peas central while black beans add a firmer bite and darker contrast.

Rinse and Drain the Beans

Give the canned black-eyed peas and black beans a thorough rinse under cool running water and leave them draining while you chop. They can stay slightly damp; they just should not bring a stream of canned liquid into the dressing.
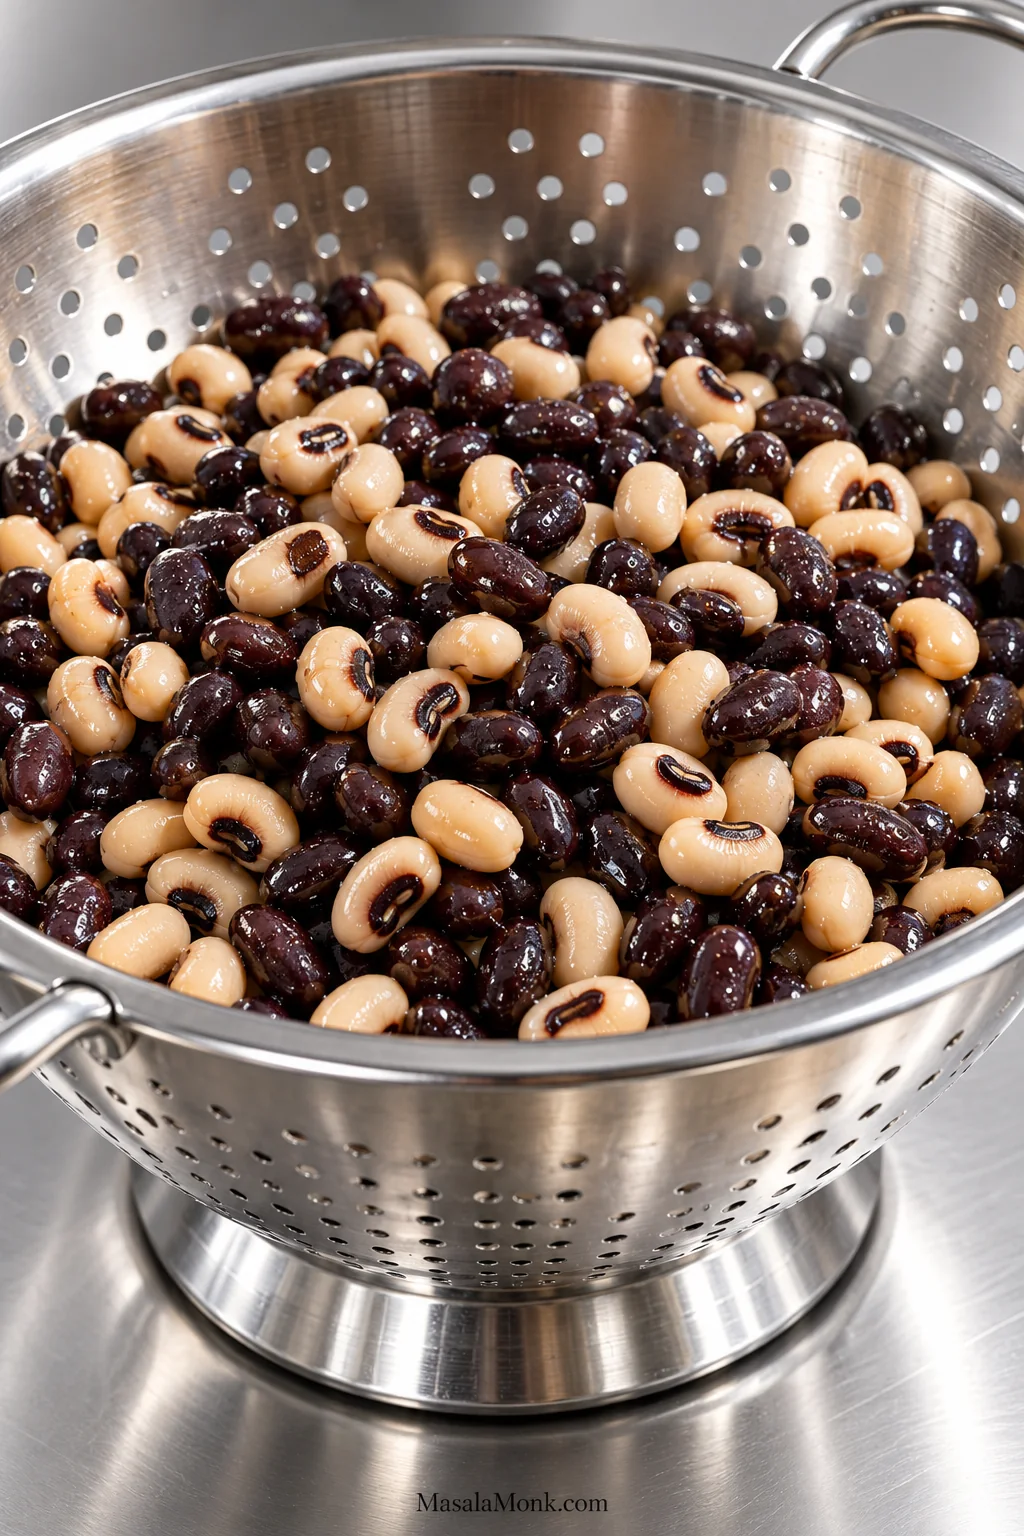
Rinsed black-eyed peas and black beans resting in a stainless steel colander with slight surface moisture and no visible pooled liquid.
Slight surface moisture is harmless; free liquid is what matters. Drain the rinsed beans until nothing is actively collecting beneath them so the measured lime and vinegar are not diluted before the salad even rests.

Fresh, Frozen or Canned Corn

Canned corn is the easiest choice for a completely no-cook batch: drain it well and it is ready. Tender summer corn works raw. If the kernels are chewy, cook them.

For frozen corn, follow the cooking directions on the package, then cool the kernels completely before mixing them with the beans. Blot away obvious moisture first.
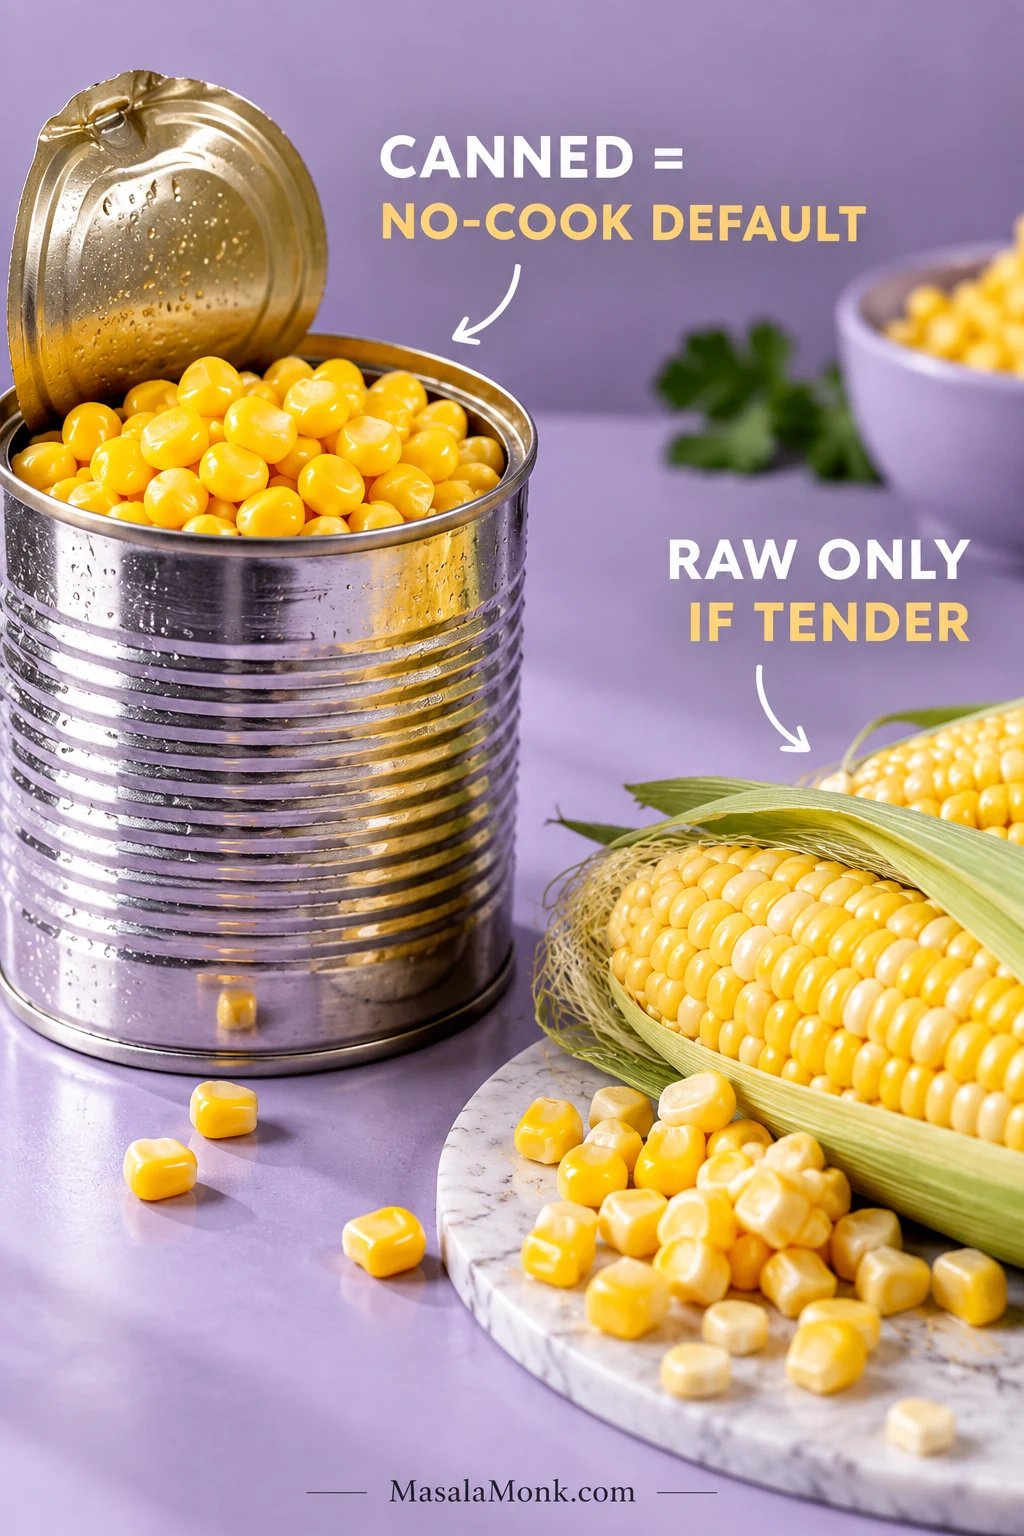
Comparison of canned corn for a no-cook Cowboy Caviar and fresh corn as an alternative when the kernels are tender enough to use raw.
Fresh is not automatically better here; tenderness matters more. Bite through a kernel before using it raw—if it feels dense or starchy rather than juicy and crisp, blanch or char it first.

Shoepeg corn has small, tender kernels that fit nicely onto a loaded chip. Fire-roasted corn adds smoke. Either way, 1¼ cups is plenty here; pile in much more and the sweetness starts pushing the beans into the background.

Cut Everything for the Scoop

Knife work matters because Cowboy Caviar has to fit onto a chip. Huge pieces of tomato and pepper tumble off. Chop everything into confetti and you lose the snap that makes the dip interesting.

For dipping, aim for roughly ¼-inch / 6 mm pieces—about the size of a black bean. You do not need a ruler. Load one chip. It should pick up beans, sweet corn, tomato and pepper together.
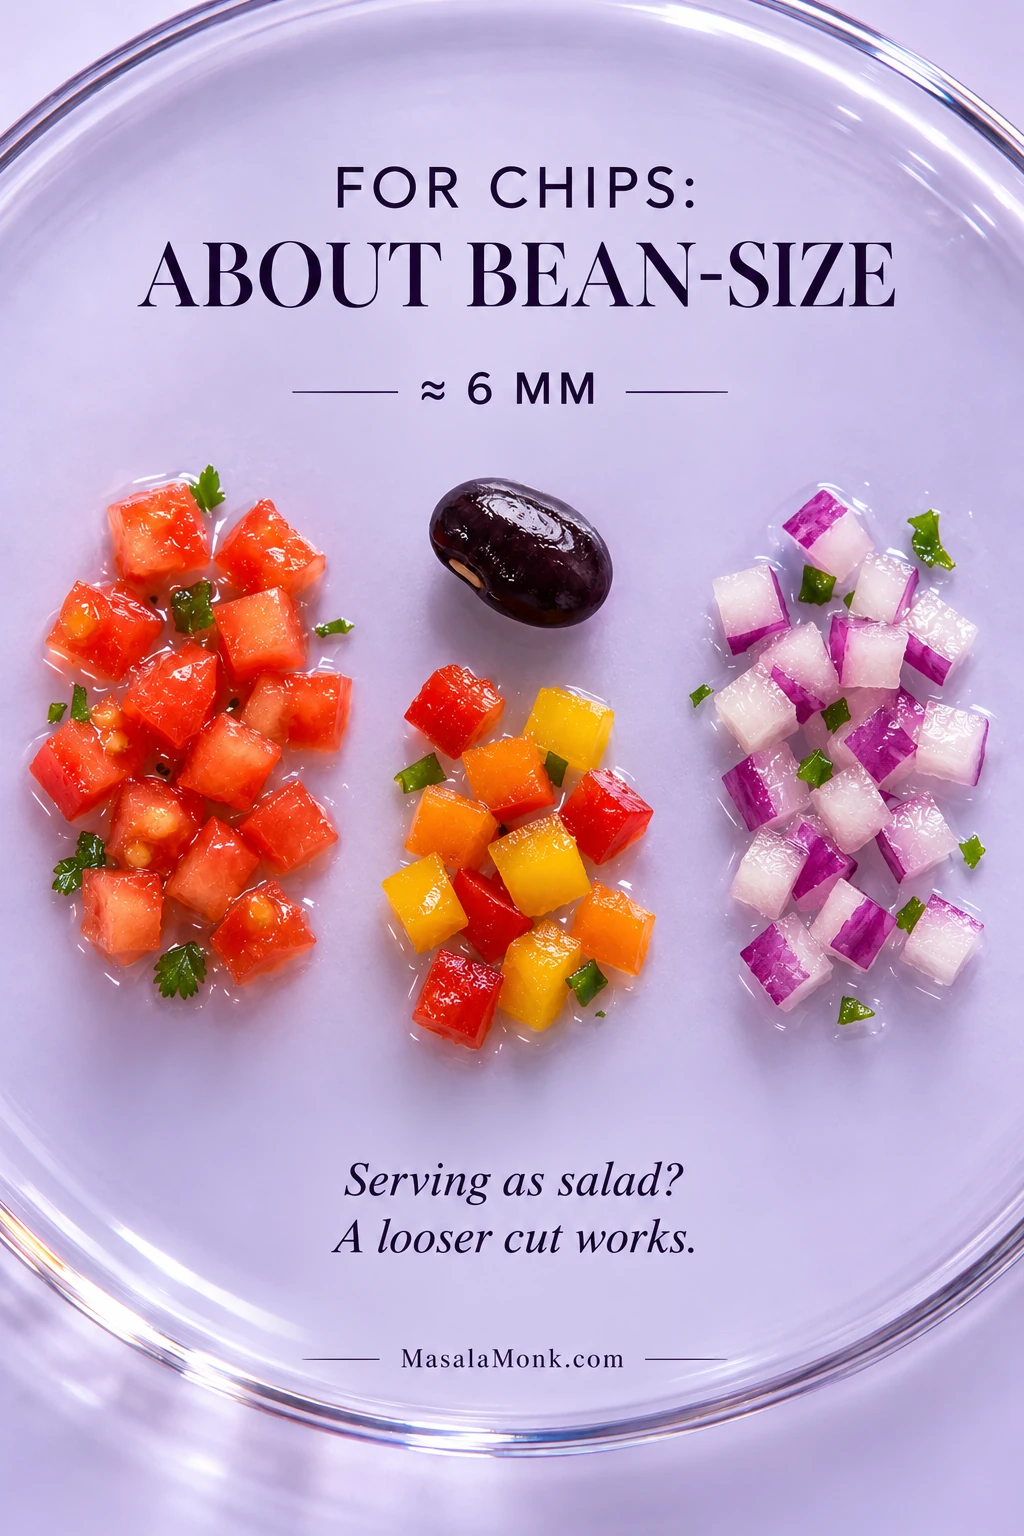
Diced tomato, bell pepper and red onion shown beside a black bean to demonstrate roughly 1/4-inch or 6-millimeter pieces for Cowboy Caviar.
Use a black bean as a visual ruler for tomato and bell pepper, then cut the red onion a little finer. That keeps the scoop substantial while spreading the sharper onion flavor more evenly through each bite.

Serving it mainly as a salad or dinner side? A looser ⅜–½-inch / about 10–13 mm dice is absolutely fine.

Tomatoes: Roma or plum tomatoes hold their shape and usually carry less loose juice than big slicing tomatoes. Scoop out the wettest seed pockets only when the tomatoes are particularly watery. Cherry or grape tomatoes work too. Bad fresh tomatoes are not worth forcing into this; well-drained petite diced tomatoes are the better fallback.

Red onion: taste a piece first. A mild onion can go straight in. A harsh one gets a 10-minute soak in cold water, followed by a thorough drain and dry. Shallot is sweeter and softer; scallions give you a gentler onion bite.

Jalapeño and cilantro: jalapeños vary wildly, so taste yours. Removing the pale ribs and seeds gives you a milder starting point. Serrano gives you more heat. Cilantro can simply be left out, or replaced with a smaller amount of flat-leaf parsley.

Dress It Bright, Not Sweet

For this Cowboy Caviar dressing, use 3 tablespoons / 45 ml olive oil, 2 tablespoons / 30 ml fresh lime juice and 2 tablespoons / 30 ml red wine vinegar, plus garlic, cumin, salt and black pepper. It will taste sharper on its own than it does once spread through the beans, corn and vegetables. The point is not an obviously vinegary salad; it is enough acidity that the finished scoop still tastes lively after the beans have absorbed some of the dressing.

Three clear vessels show a Cowboy Caviar dressing ratio of 3 tablespoons olive oil, 2 tablespoons lime juice and 2 tablespoons red wine vinegar.
The dressing is deliberately acid-forward because a large bowl of beans and vegetables softens that sharpness as it sits.

The ½ teaspoon of sugar is optional. It is there to smooth a particularly sharp batch of lime and vinegar, not to make the salad sweet. When the tomatoes and corn are already sweet, skip it.

Older potluck-style Texas Caviar can be quite different, with beans sitting in a much larger sweet-and-sour marinade before excess liquid is drained away. This version keeps the vinaigrette in the salad, so you need far less of it.

Lime comes through first; as the salad sits, that sharpness softens while the red wine vinegar still gives the beans some tang. Apple cider vinegar works too, with a slightly fruitier edge. Start with ½ teaspoon of cumin so it stays in the background; add more if you want that flavor more pronounced.

Add the Dressing in Two Passes

Pour in about three-quarters first and toss gently until the beans and vegetables are evenly coated. Then stop and keep the rest nearby.
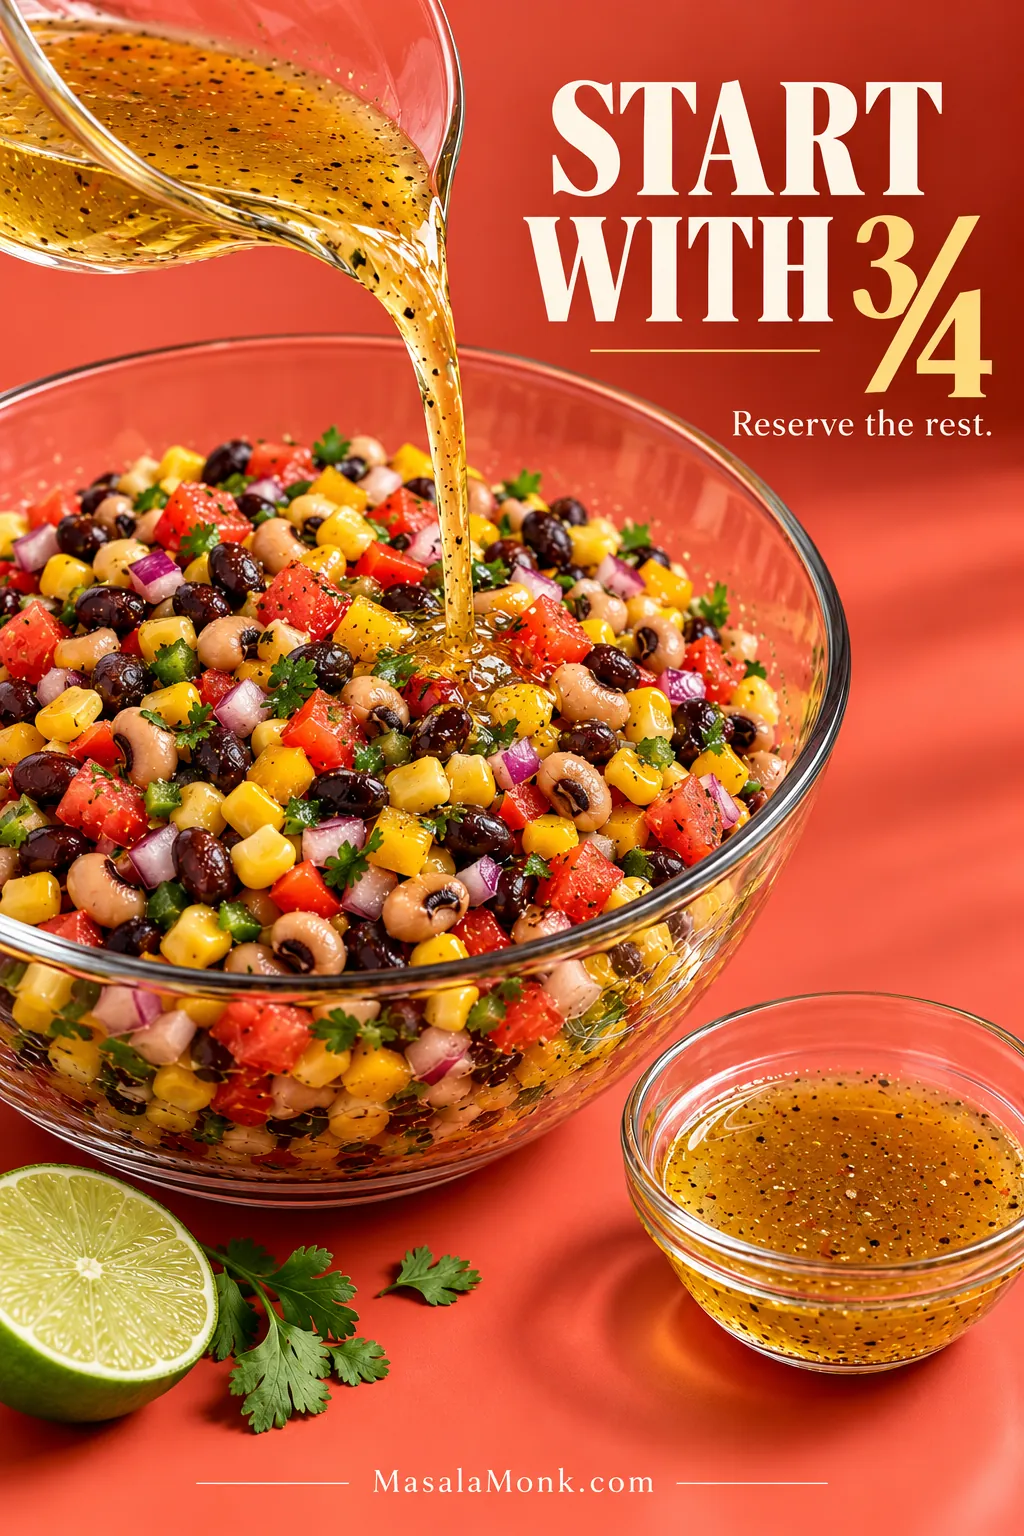
Vinaigrette being poured into Cowboy Caviar while a smaller portion remains reserved, illustrating the instruction to start with about three-quarters of the dressing.
Hold back roughly 2 tablespoons so you can brighten the bowl after it rests without flooding it.

After it rests, decide whether it needs more. Holding some dressing back is much easier than trying to rescue eight cups that have already been overdressed.
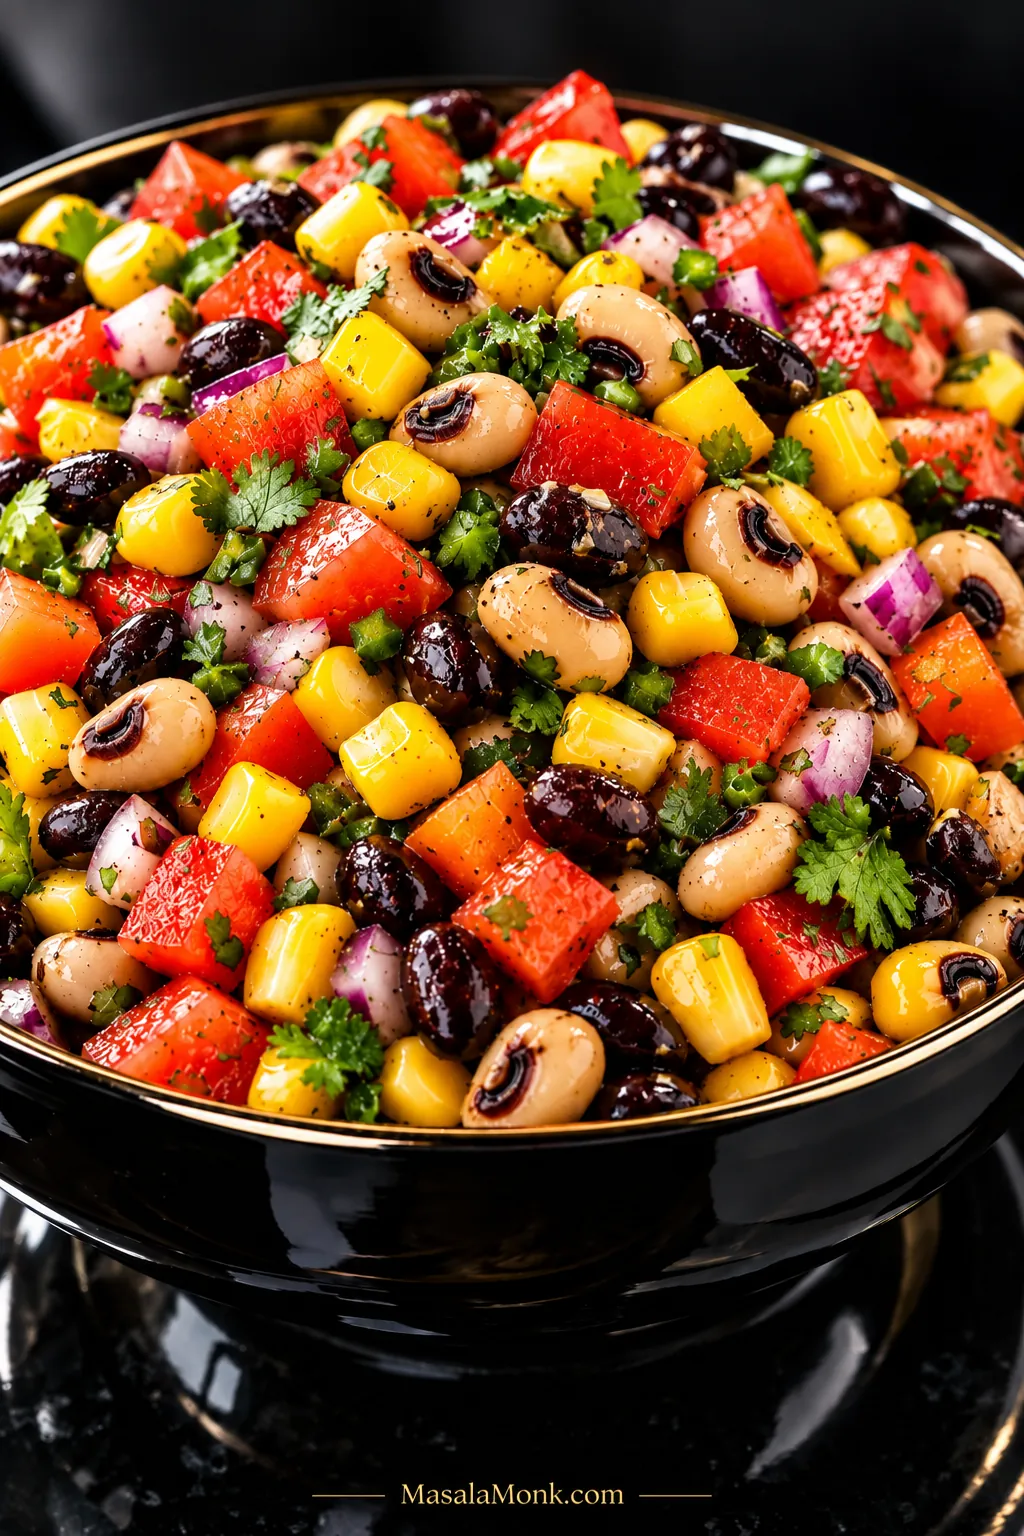
Close-up of Cowboy Caviar with black-eyed peas, black beans, corn, tomato, bell pepper, red onion and cilantro lightly coated in vinaigrette without pooled oil.
An even sheen is enough. Once the beans and vegetables look lightly coated, extra dressing usually adds weight before flavor.

Using bottled Italian dressing? Start with ⅓ cup / 80 ml zesty Italian dressing plus 1 tablespoon / 15 ml fresh lime juice. Check the salt after mixing because brands vary considerably in sweetness and sodium.

Read the Bowl After It Rests

Cowboy Caviar changes while it sits. Beans take up some of the dressing, tomatoes and peppers release a little juice, onion mellows and cilantro softens. A small amount of liquid at the bottom does not mean you ruined it. Toss once before trying to fix anything.
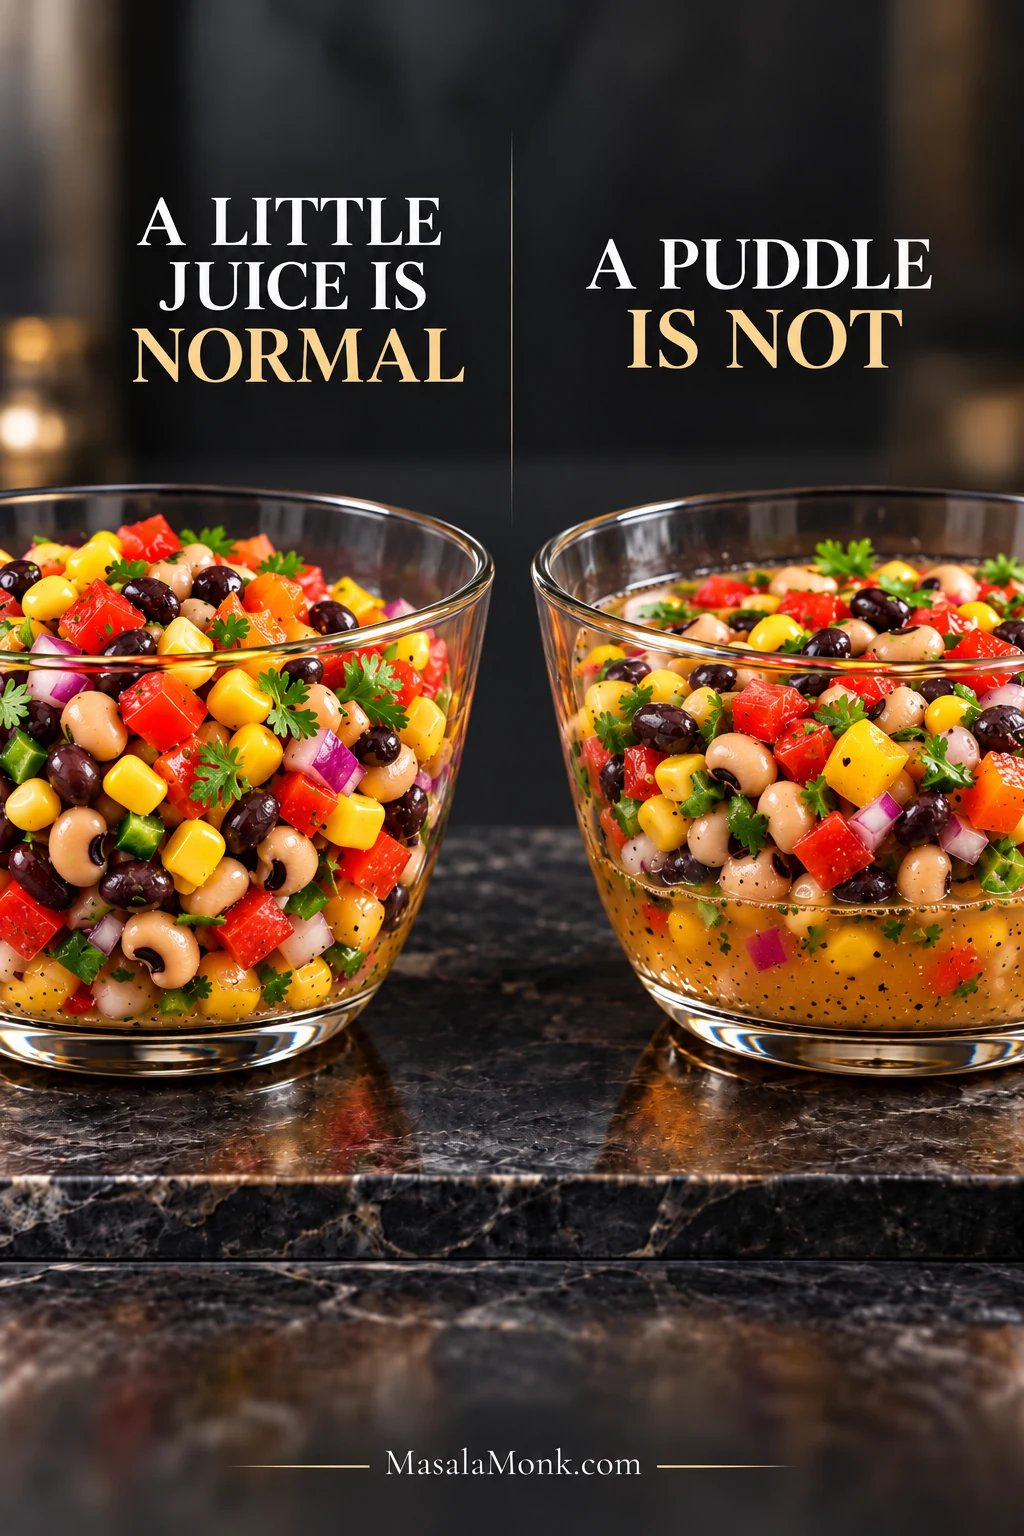
Side-by-side Cowboy Caviar comparison showing a small normal amount of released vegetable juice versus a noticeable puddle of excess liquid.
Run a spoon through the bottom before calling the bowl watery. A thin layer that disappears back into the salad after tossing is normal release; liquid that quickly gathers again in a puddle is a different problem.
After restingWhat to do
Evenly coated and well seasonedLeave it alone. It is ready.
Drier or flatter than beforeAdd a little reserved dressing, lime or salt if the flavor needs lifting.
Some juice appearsToss first. A little released vegetable moisture is normal.
The vegetables are softer but the flavor is goodLeave it alone. The softer texture is simply part of a longer rest.

Still not right after a toss? Jump to Fix Your Cowboy Caviar.

How to Make Cowboy Caviar Ahead

For the best balance of seasoning and crunch, make Cowboy Caviar 30 minutes to 2 hours ahead. If you need more breathing room, 2–4 hours ahead still works well. You do not need to be chopping vegetables as people walk through the door. Get it into the refrigerator, clear the cutting board, and come back later for one final taste.
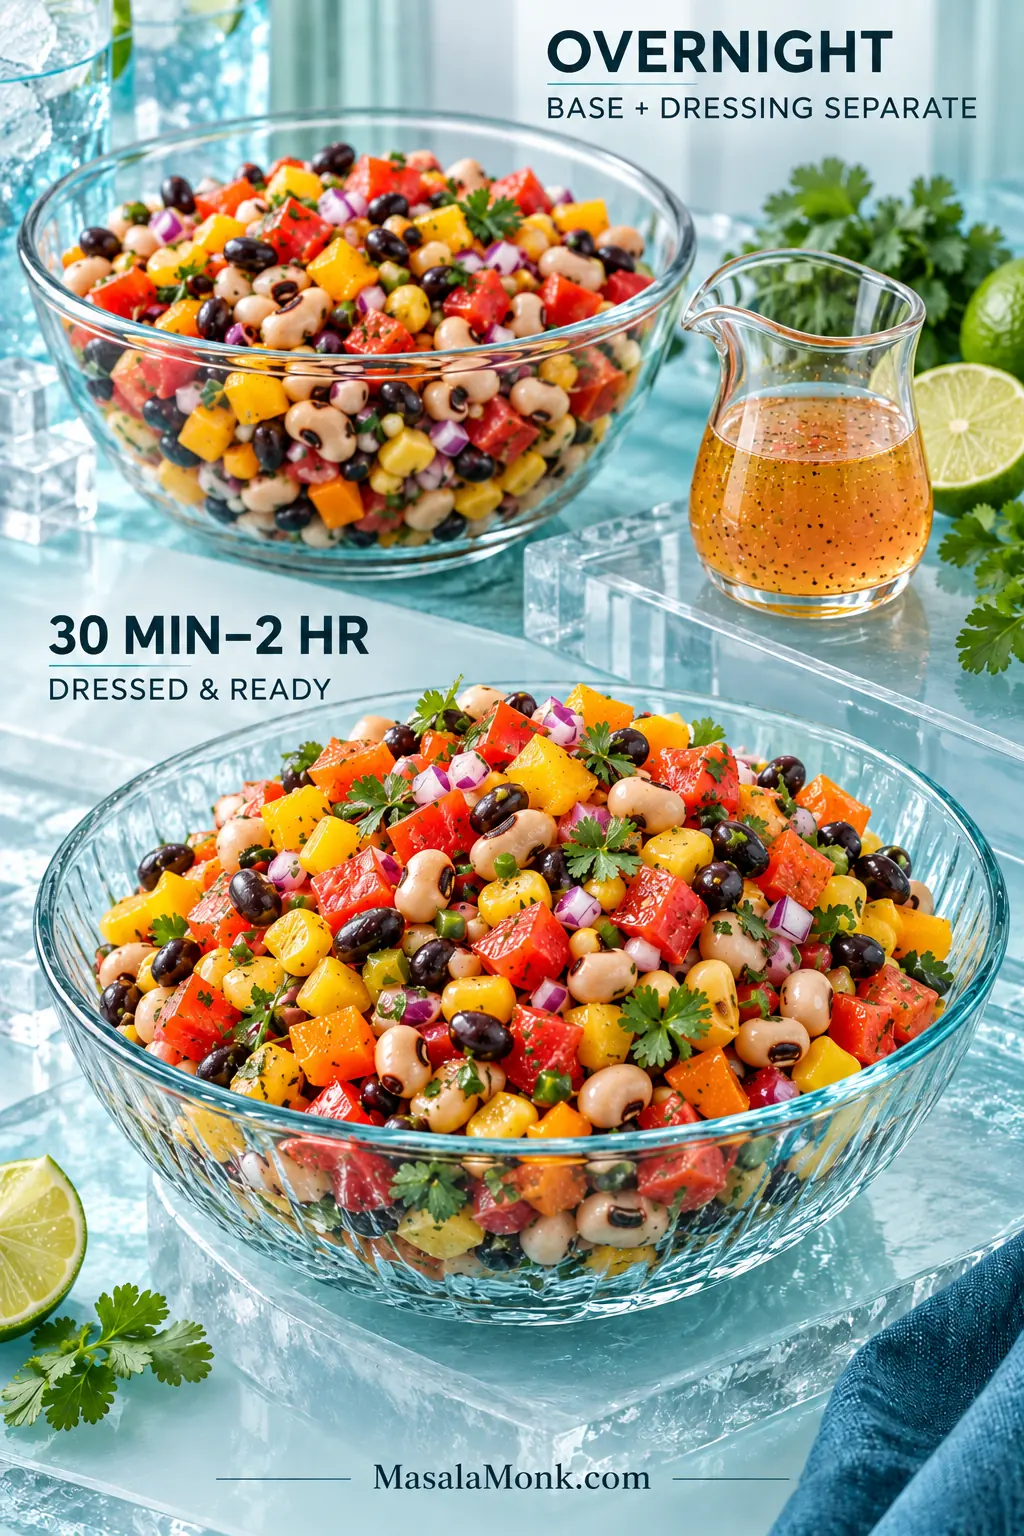
Make-ahead Cowboy Caviar comparison labeled 30 minutes to 2 hours dressed and ready, and overnight base with the dressing kept separate.
Keeping the base and vinaigrette separate overnight protects texture. Once the chopped vegetables are salted and dressed, they gradually release moisture; dressing closer to serving delays that change.
TimingWhat changes
ImmediatelyThe vegetables are at their crunchiest and the individual flavors taste more separate.
30 minutes–2 hoursThis is the preferred window: the beans have time to pick up the dressing while the vegetables keep plenty of snap.
2–4 hours aheadThe flavors are more integrated and the vegetables may soften slightly, but the bowl should still have plenty of crunch. Keep avocado out until serving.
OvernightRefrigerate the chopped base without avocado and keep the dressing separate. Dress it about 30 minutes to 2 hours before serving.

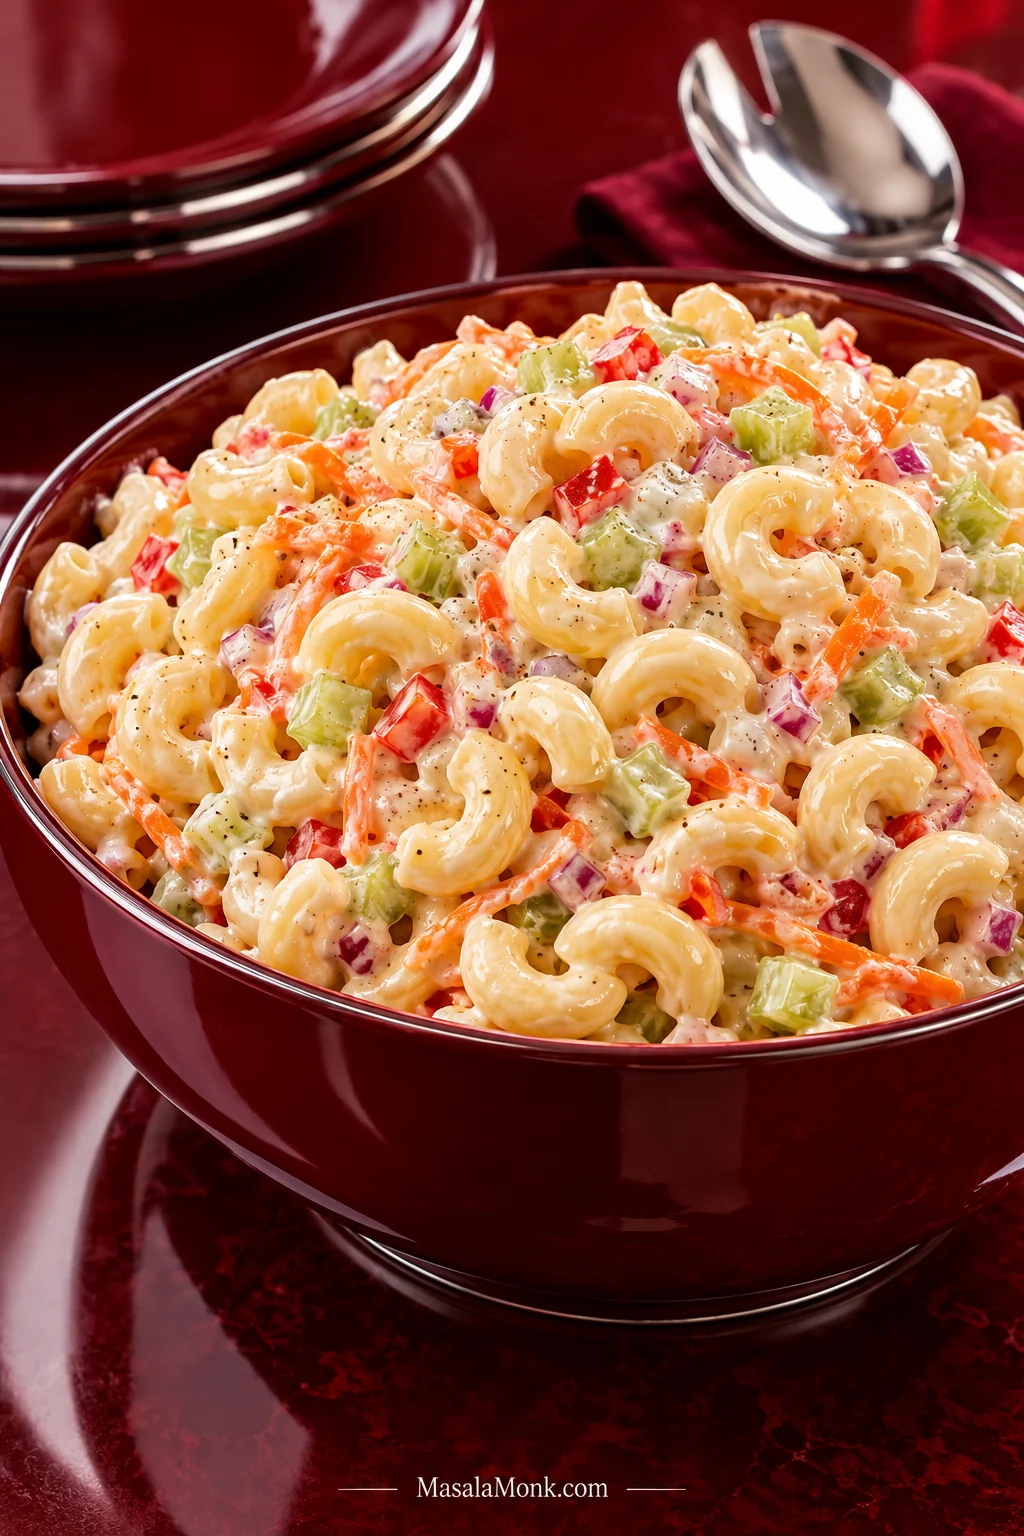
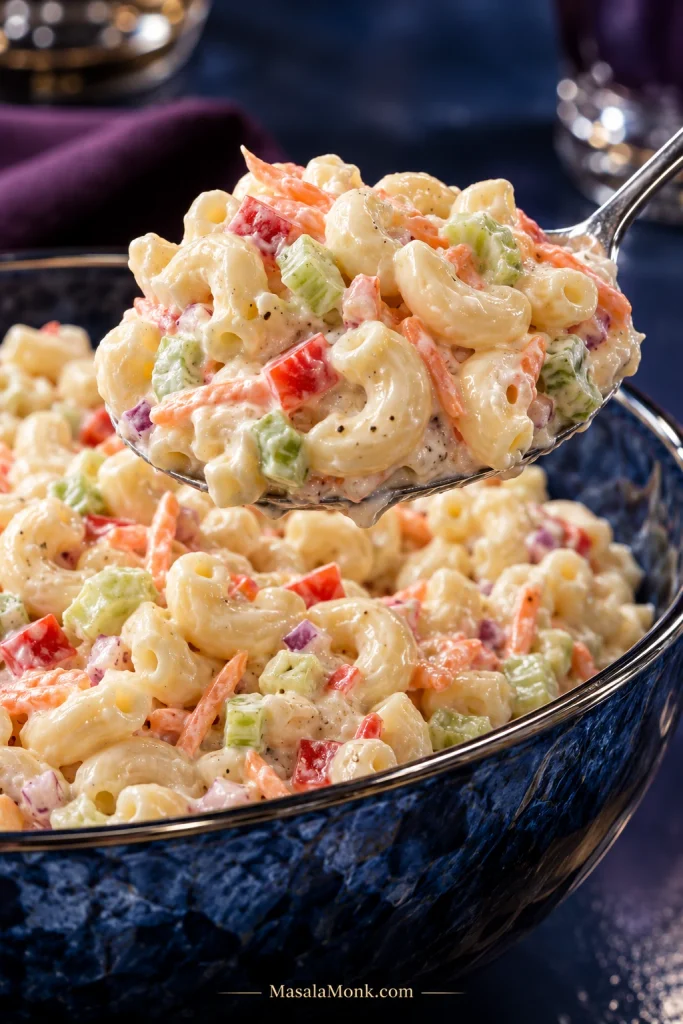
Planning a mostly make-ahead spread? Our creamy macaroni salad can chill alongside it. If you are feeding a crowd, see how much Cowboy Caviar you need.

Fix Your Cowboy Caviar

If the bowl really does need help, identify the problem before changing everything. One odd bite is not a reason to re-season eight cups.

Flavor & Moisture Problems

ProblemWhat to do
Watery or visibly puddledToss once. If excess liquid remains, spoon or tip some away, then recheck the seasoning because salt and acid leave with that liquid too.
Too oilyBalance it with lime or vinegar gradually. Extra beans or vegetables help more than pouring in a large amount of additional acid.
Too sweetUse lime or vinegar a little at a time, followed by a small pinch of salt.
Too acidicSoften the edge with a little olive oil or more beans and vegetables. If needed, a tiny pinch of sugar can help.
Raw onion takes overDilute the onion with more of the other ingredients if available. Next time soak the onion first or switch to shallot or scallion.
Too spicyCool the heat with extra beans, corn or tomato. Avocado also softens it at serving.
Not spicy enoughBuild more heat with jalapeño, serrano or hot sauce after the rest. For mixed heat preferences, serve roasted salsa verde alongside and let everyone adjust their own plate.

Texture & Ingredient Problems

ProblemWhat to do
Corn is toughFirmer fresh kernels need cooking. Blanch or char them next time rather than forcing them into the salad raw.
MushyYou cannot fully restore softened vegetables. If you have them, fold in freshly diced bell pepper, corn or onion for crunch and serve promptly. Next time use firmer tomatoes, toss gently and add avocado at the end.
Beans taste canned or tinnyA strong canned flavor is difficult to remove once everything is mixed. Extra lime, cilantro or fresh tomato may soften it; next time rinse the beans thoroughly and let them drain well.
Fresh diced bell pepper, red onion and corn falling into Cowboy Caviar to add crisp texture back to a softer rested bowl.
Fresh bell pepper, onion or corn can restore contrast, but add them gradually. Because extra vegetables also dilute the seasoning, taste again before automatically reaching for more salt, lime or dressing.

↑ Back to recipe · Back to top

How Much Cowboy Caviar Do You Need?

Plan about ¼–⅓ cup per person when Cowboy Caviar is one of several party dips, ½ cup as a side, or roughly 1 cup for a larger lunch portion. The full recipe makes about 8 cups / 1.9 L before avocado, though produce size and the amount of reserved dressing you use can shift that slightly.
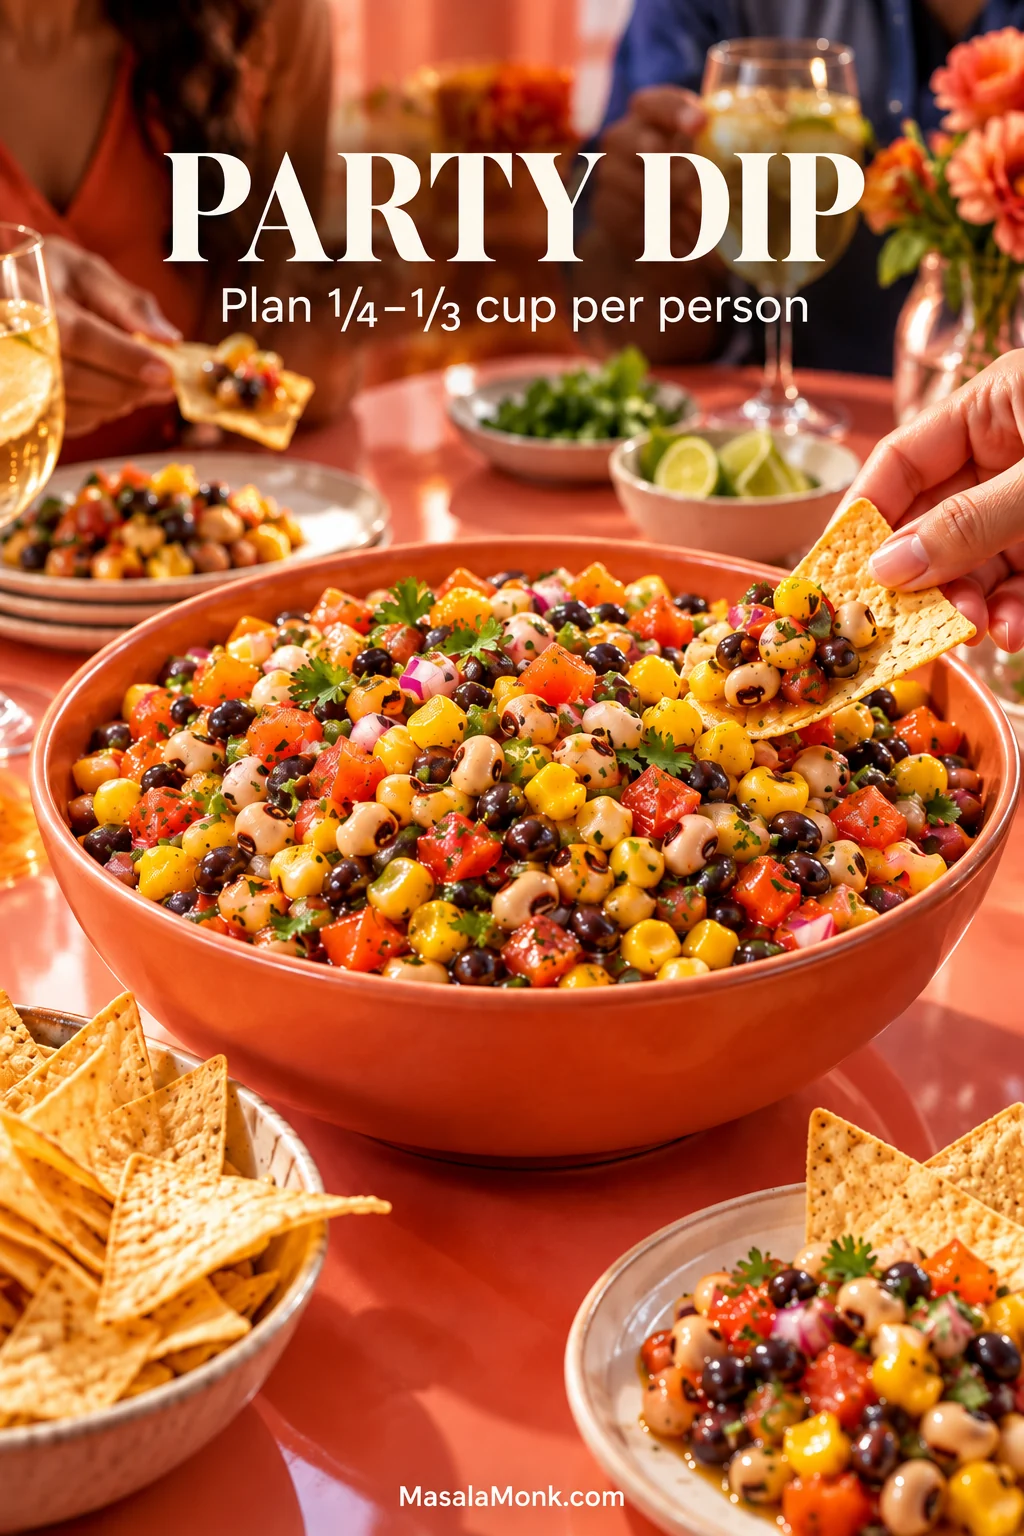
Large party bowl of Cowboy Caviar with tortilla chips and people serving themselves; text reads Party Dip and Plan 1/4–1/3 cup per person.

What else is on the table matters too. Beside something substantial like our slow cooker beef chili, most guests will take a few loaded chips rather than a full side-dish portion.

How you are serving itApproximate yield
Party dip with several other foodsAbout 24–32 small portions at roughly ¼–⅓ cup each
Dinner or BBQ sideAbout 16 portions at ½ cup each
Lunch or main-dish saladAbout 8 generous 1-cup portions

Half batch: it still makes about 4 cups—roughly 12–16 small dip portions, 8 side portions or 4 larger lunch servings. It is the more manageable choice for a smaller gathering or household when you do not want several days of leftovers.

Double batch: double every ingredient, including the dressing, but pour in only about three-quarters of the doubled dressing on the first toss. Reserve the rest and add more after the salad has had time to sit.

Cowboy Caviar Variations

Add avocado: fold it in shortly before serving for softer, creamier bites.

Use Rotel: well-drained Rotel gives you a softer texture and more cooked tomato-chile flavor than fresh tomatoes. Drain it thoroughly before adding it.

Replace the black-eyed peas: pinto beans, chickpeas or additional black beans work in their place. Chickpeas are firmer and nuttier; any of these swaps move the dish farther from traditional Texas Caviar.

How to Store Cowboy Caviar

Cowboy Caviar keeps for about 3–4 days in the refrigerator, though the vegetables have their best snap during the first 1–2 days. Store leftovers promptly in an airtight container. By days 3 and 4, expect softer tomatoes and peppers and more juice underneath.

Keep avocado out of the main batch when you know there will be leftovers. Add fresh avocado to each portion instead.
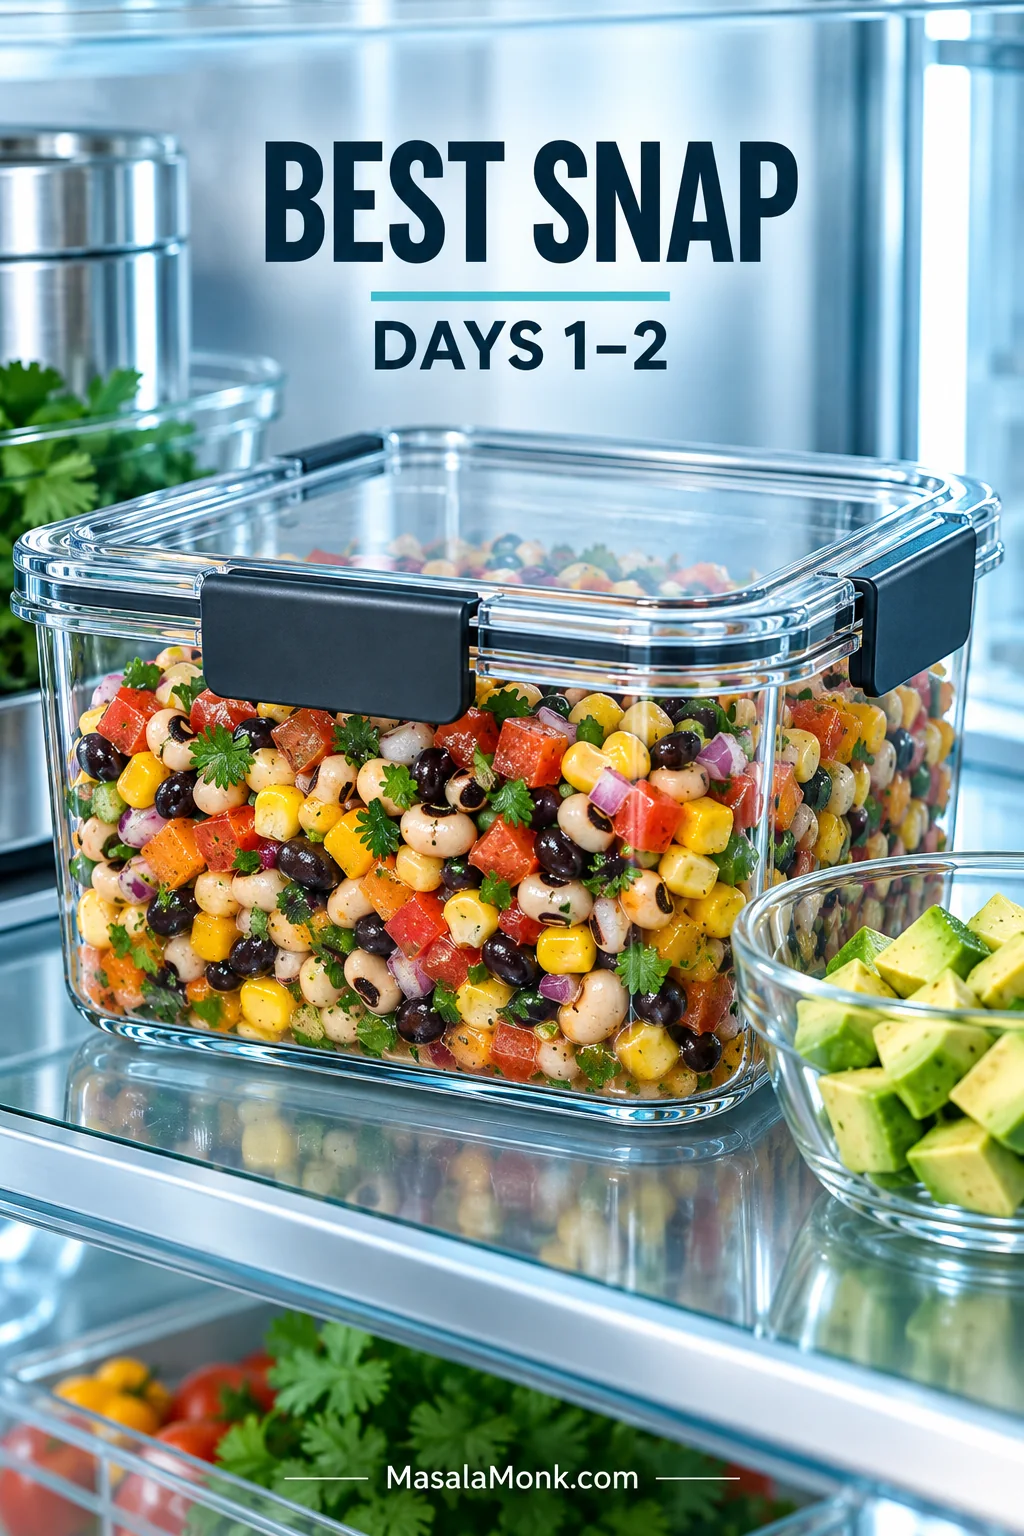
Cowboy Caviar in a clear airtight refrigerator container with avocado stored separately; text reads Best Snap, Days 1–2.
Liquid may settle at the bottom during storage. Toss once before deciding the salad needs more dressing, salt or lime.

Can You Freeze It?

Freezing finished Cowboy Caviar is not worth it for the texture. The beans handle the freezer reasonably well, but tomatoes, peppers, onion and herbs come back much softer.

Use leftovers differently: by the second day, give the chips a break. Drain a scoop and tuck it into a burrito or wrap, serve it beside a crispy chicken quesadilla, spoon it over eggs, or build a rice bowl around it.
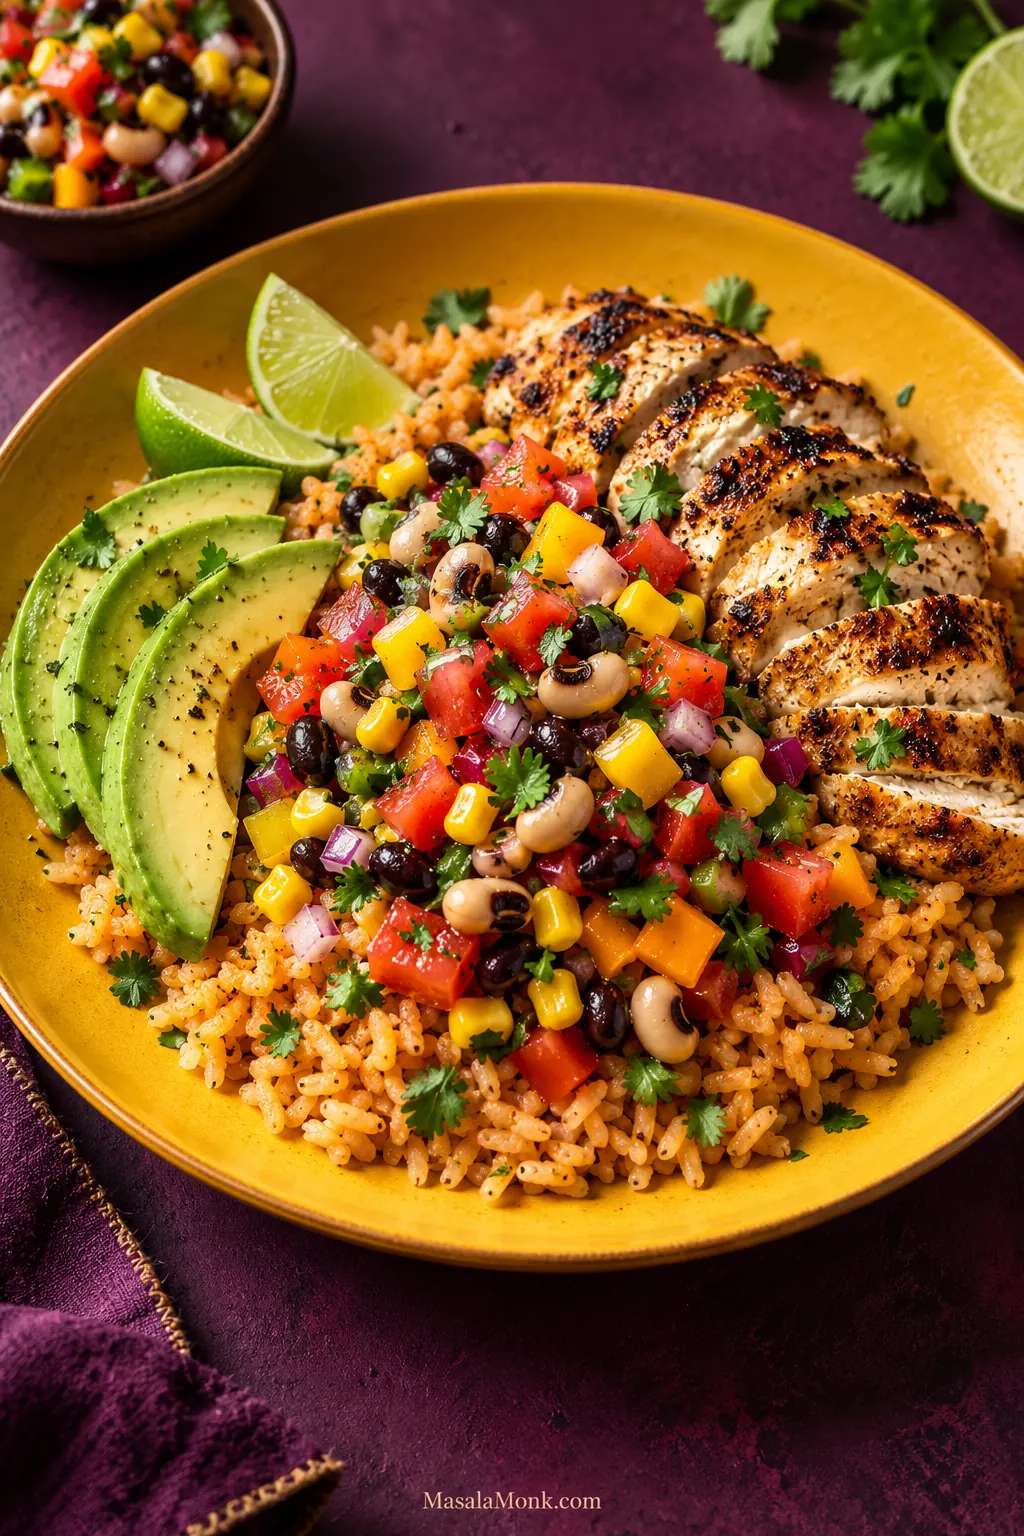
Cowboy Caviar served over Mexican-style rice with sliced grilled chicken, avocado and lime on a golden plate.
For a rice bowl, let the spoonful drain briefly before adding it so the grains underneath stay fluffy rather than soggy.

↑ Back to recipe · Back to top

More Ways to Serve Cowboy Caviar

Sturdy tortilla chips or scoop-shaped corn chips are the obvious first choice. Very thin chips have a habit of snapping just when you finally get the perfect scoop.

Cowboy Caviar is also a cool, sharp contrast to grilled meat. Serve it beside juicy carne asada, grilled chicken or fish and let the lime, tomato and crisp pepper cut through the richer flavors.
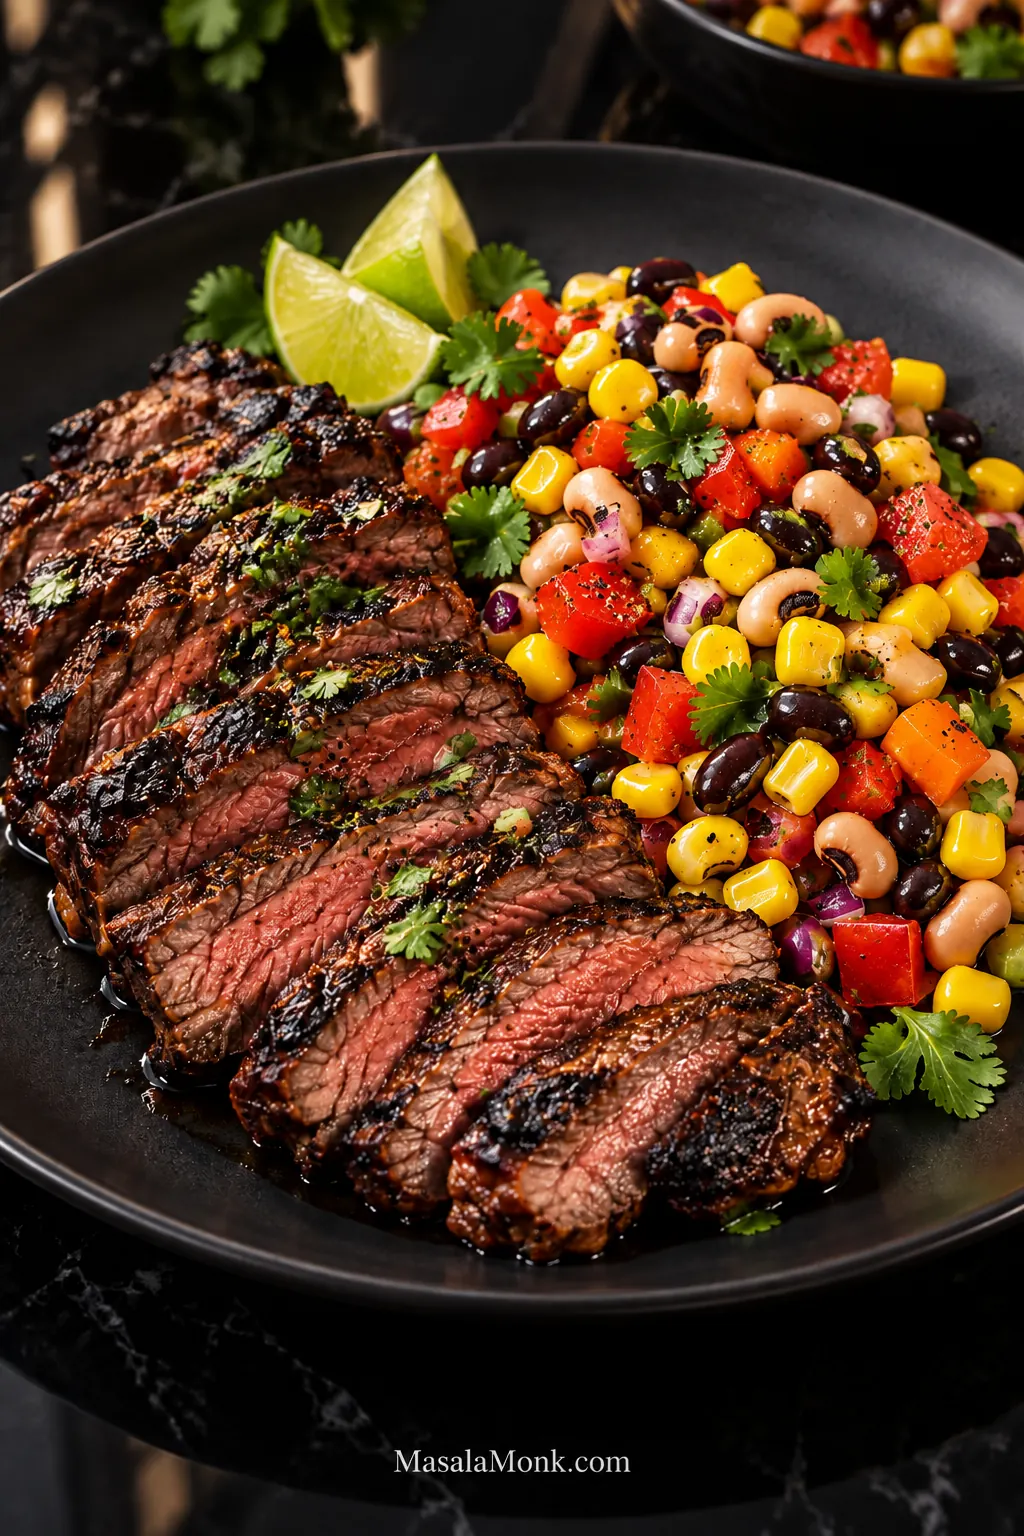
Sliced charred carne asada served beside Cowboy Caviar with black-eyed peas, black beans, corn, tomato, bell pepper, red onion, cilantro and lime wedges.

For tacos and burrito bowls, it can replace separate beans, corn and salsa. Spoon it over our juicy ground beef tacos, or turn a generous serving into lunch over fluffy Mexican rice with avocado, grilled chicken or another protein.
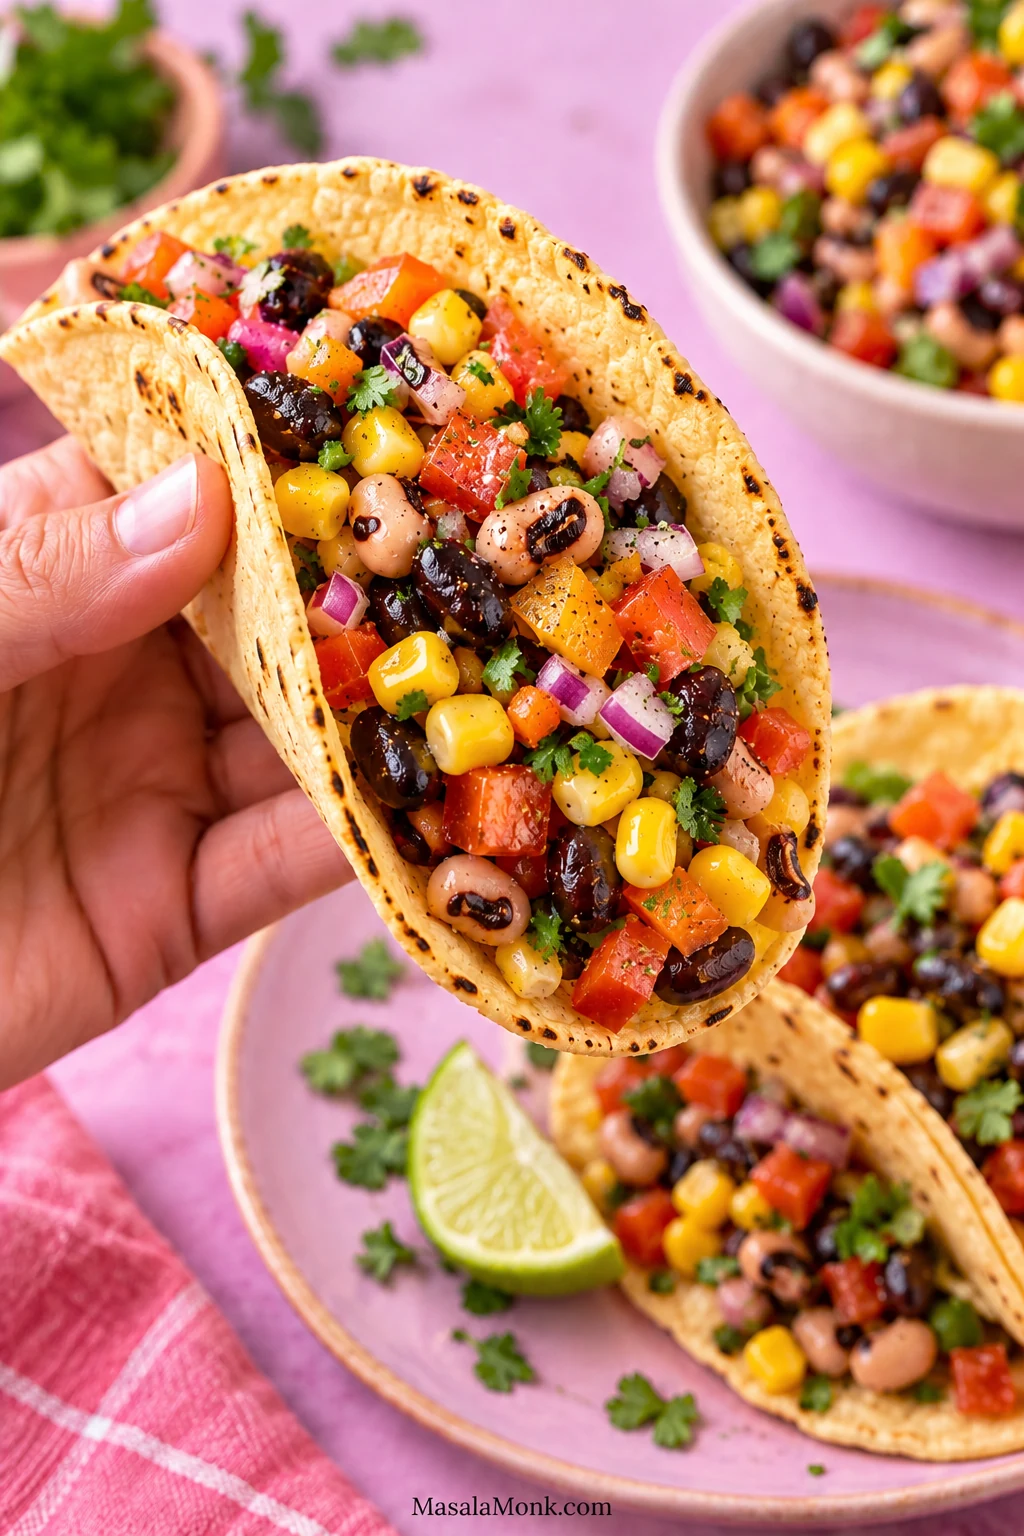
A hand holding a corn tortilla taco filled with Cowboy Caviar made from black-eyed peas, black beans, corn, tomato, bell pepper, red onion and cilantro.
The spoonful already brings beans, corn, tomato and crunch together; leaving excess vinaigrette behind helps the tortilla stay intact.

For Picnics, Cookouts & Tailgates

Keep the salad chilled until serving, and set the serving bowl over ice if it will stay outside for a while. The USDA recommends refrigerating perishable food within 2 hours, or within 1 hour when the temperature is above 90°F / 32°C.
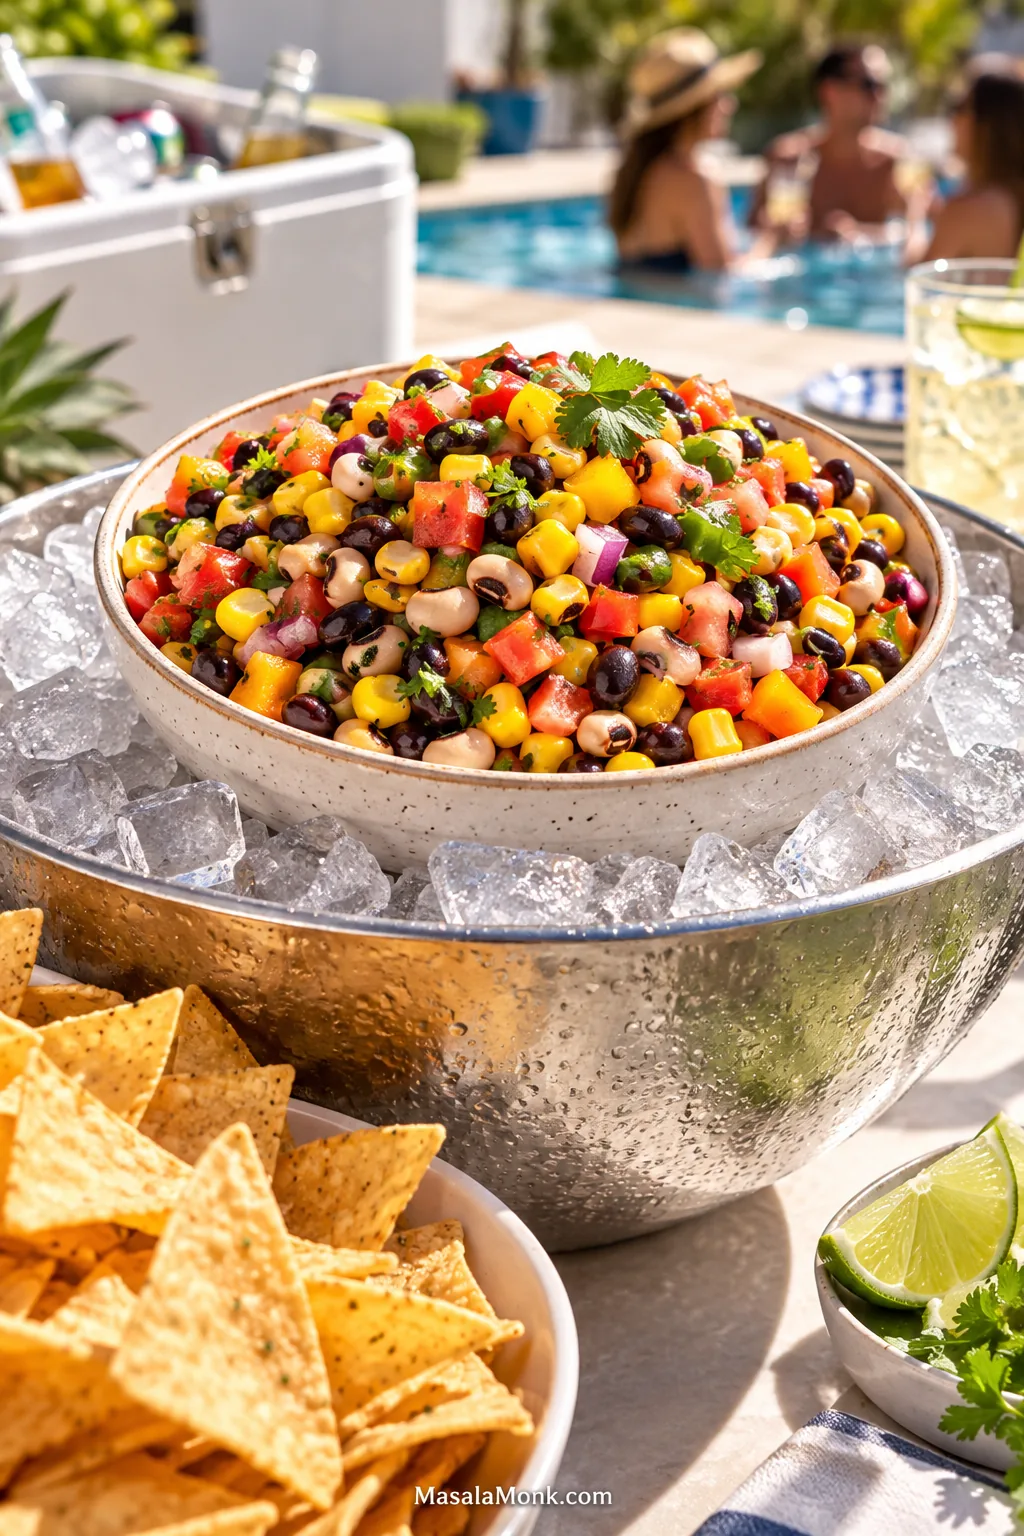
Bowl of Cowboy Caviar nested inside a larger metal bowl filled with ice at an outdoor summer gathering, with tortilla chips nearby.
For a long cookout, put out a smaller bowl over ice and refill it from the refrigerator so each round stays colder and fresher.

One Last Toss Before Serving

Before it reaches the table, give everything one last toss and taste a bean or two. Wake it up with a squeeze of lime if the chilled flavors need it. Then put out the sturdy chips.
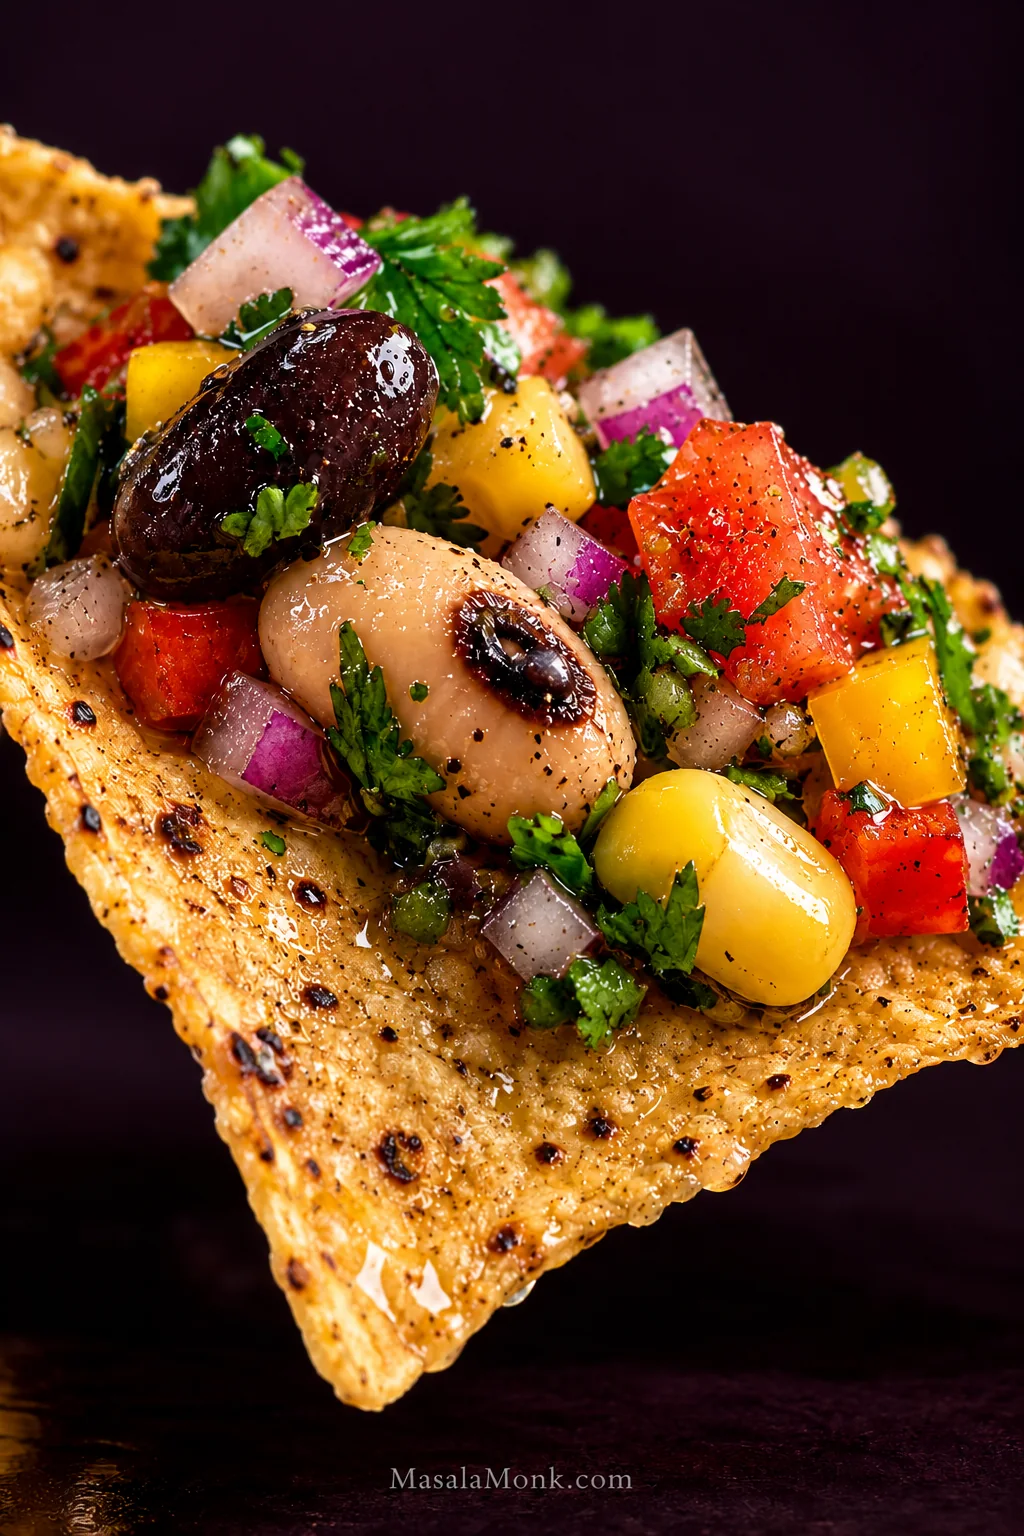
Extreme close-up of a tortilla chip topped with black-eyed peas, a black bean, corn, tomato, red and yellow bell pepper, red onion, cilantro and a light vinaigrette sheen.

A good scoop should bring creamy beans, sweet corn, juicy tomato and crisp pepper together, with enough lime left in the dressing to make the next scoop sound like a very good idea.
↑ Back to recipe · Back to top

Posted on — Leave a comment

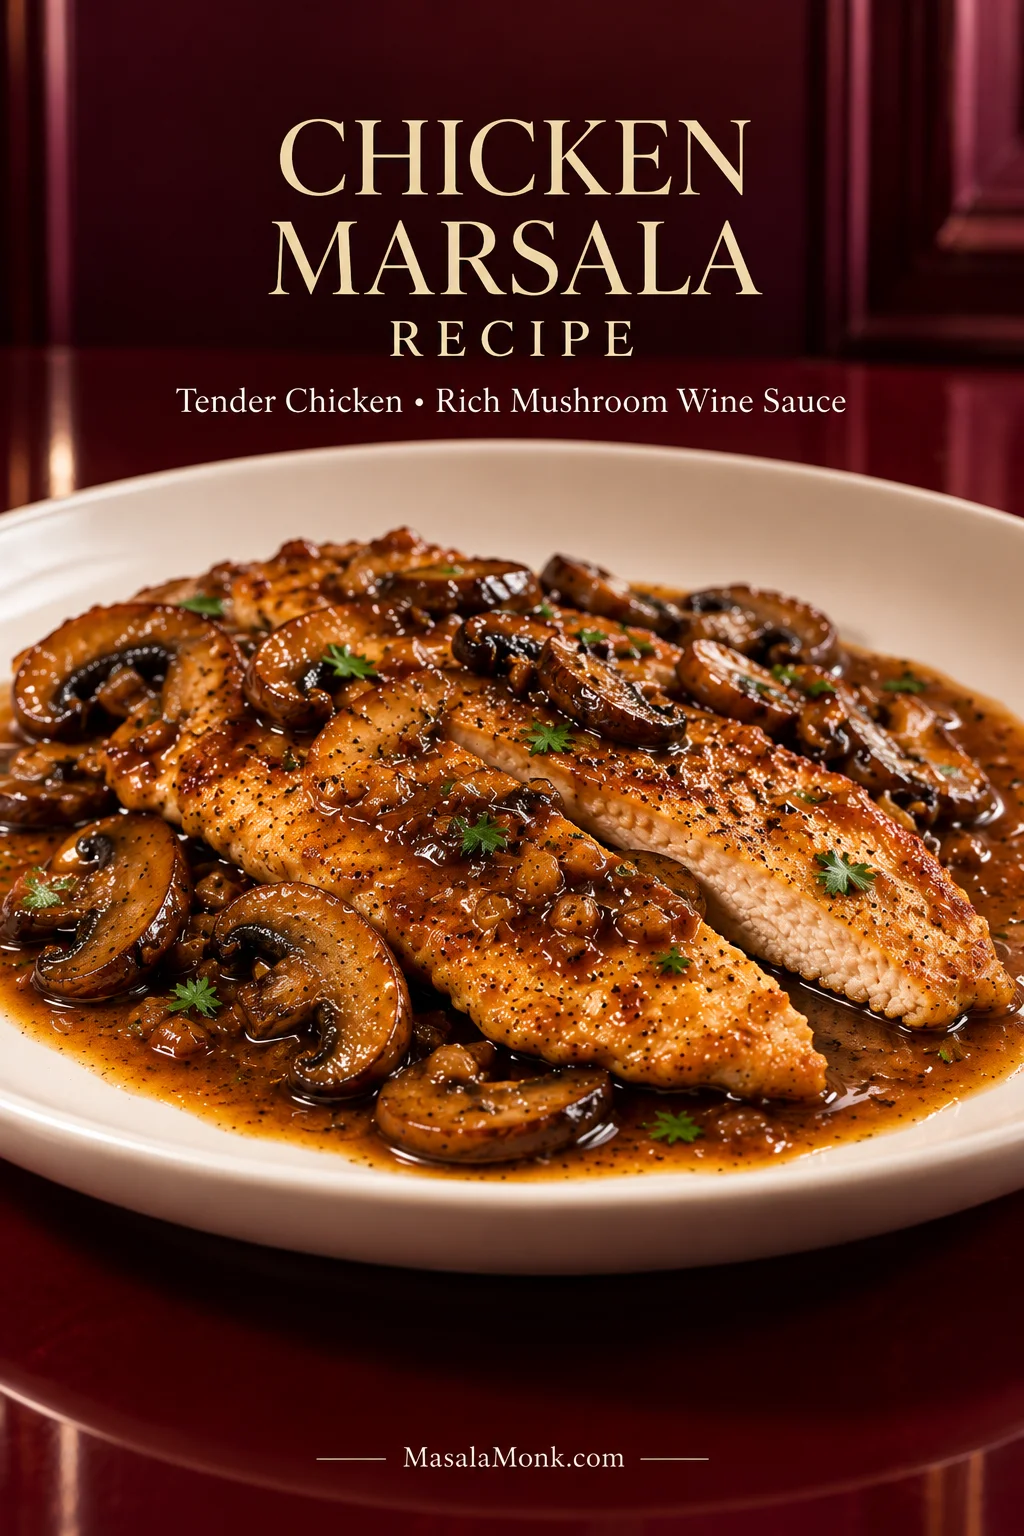
Chicken Marsala Recipe: Tender Chicken in Rich Mushroom Wine Sauce

Thin golden Chicken Marsala cutlets on a white plate with browned sliced mushrooms and glossy dark Marsala wine sauce, garnished lightly with parsley.

The best part of Chicken Marsala is what happens when you cut into the first piece: the chicken is still juicy, mushrooms come with it, and the dark Marsala sauce runs straight into whatever is waiting beside it.

This Chicken Marsala recipe is an Italian-American skillet dish built around thin chicken cutlets, mushrooms, and Sicily’s fortified Marsala wine. It comes together in one skillet in about 45–50 minutes, but each stage gets the time it needs. The mushrooms have to cook off their water, the wine needs time to reduce, and thin chicken can dry out long before the sauce is ready.

This method keeps those jobs separate. Brown first. Reduce second. Return the chicken last. The mushrooms develop real color, the Marsala loses its raw edge, and the chicken only comes back when the sauce is nearly ready.

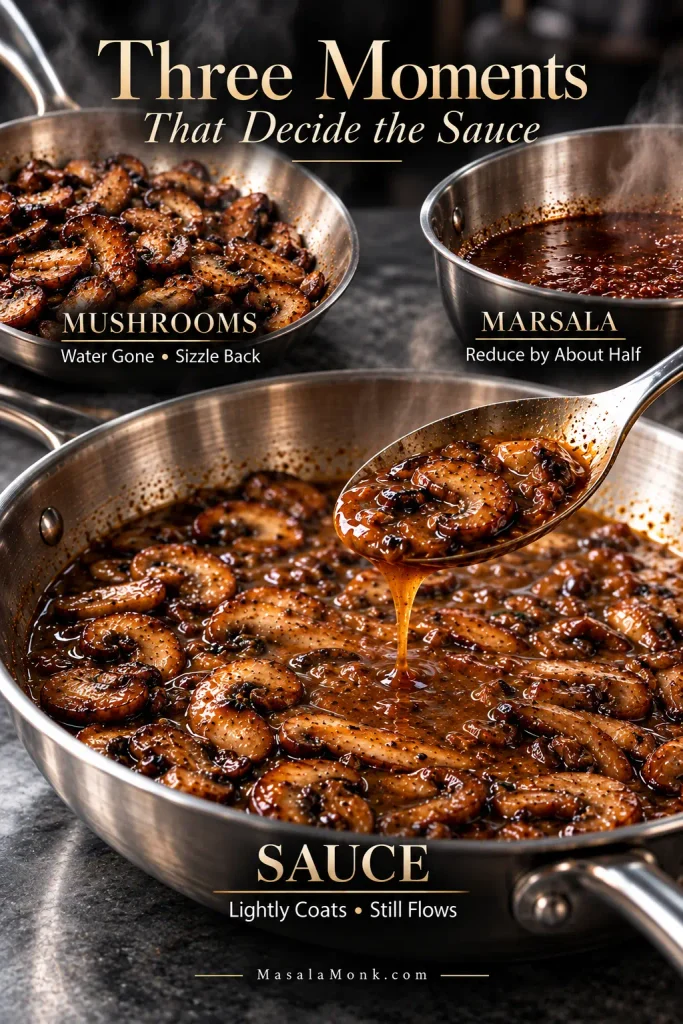
Three Moments That Decide the Sauce

Mushrooms

Wait until their released water is gone, the skillet sounds like it is frying again, and the edges are taking on real brown color.

Marsala

Roughly half the wine should remain, with the sharp alcohol smell replaced by something rounder, nuttier, and more inviting.

Sauce

Stop reducing when it lightly coats a spoon but still moves easily around the skillet.

Keep the browned chicken out of the skillet while all three stages happen. If the sauce needs another few minutes, the chicken does not.

Three cooking stages for Chicken Marsala: browned mushrooms with no pooled water, reduced Marsala in a stainless pan, and glossy mushroom sauce flowing from a spoon.
These three checkpoints are really about sequencing. Letting each stage finish before the next begins prevents one ingredient from waiting in the pan while another catches up—the same principle that keeps the chicken tender and the sauce concentrated.

Chicken Marsala Recipe

Thin golden chicken cutlets and deeply browned mushrooms in a dark Marsala pan sauce, finished with cold butter until glossy and silky.

Serves
4

Prep
15 minutes

Cook
30–35 minutes

Total
45–50 minutes

Equipment

  • 12-inch / 30-cm skillet, preferably stainless steel
  • Meat mallet or rolling pin
  • Shallow plate or bowl for flour
  • Tongs or thin spatula
  • Wooden spoon or silicone spatula
  • Instant-read thermometer
  • Two plates for holding and serving the chicken

Chicken Marsala Ingredients

For the Chicken

  • 1½ lb / 680 g boneless, skinless chicken breasts, prepared as 4 similarly sized cutlets
  • 4 g kosher salt, about 1½ tsp Diamond Crystal or a scant 1 tsp Morton, divided, plus more to taste
  • ½ tsp / about 1 g freshly ground black pepper
  • ⅓ cup / 40 g all-purpose flour, for dredging; some will remain unused
  • 2–3 tbsp / 30–45 ml olive oil, as needed for browning

For the Mushroom Marsala Sauce

  • 4 tbsp / 56 g unsalted butter, divided; keep the final 2 tbsp cold
  • 10 oz / 285 g cremini or baby bella mushrooms, sliced about ¼ inch / 6 mm thick
  • 1 medium shallot / about 40–50 g, finely chopped
  • 2 garlic cloves / about 6 g, finely minced
  • 1 cup / 240 ml real dry (secco) Marsala wine
  • ⅔ cup / 160 ml low-sodium chicken stock
  • 1–2 tsp / 5–10 ml fresh lemon juice, only if needed
  • 2 tbsp / about 8 g chopped flat-leaf parsley

Slice the mushrooms, chop the shallot, mince the garlic, measure the wine and stock, and keep the finishing butter cold before you start cooking. Once the Marsala goes into the skillet, the sauce moves quickly.

Not sure which bottle to use? See which Marsala to buy before you heat the skillet.

How to Make Chicken Marsala

1. Prepare and brown the chicken

Cut the chicken evenly and dredge lightly

Prepare the chicken as 4 similarly sized cutlets. Two very large breasts can each be sliced horizontally through the middle. With smaller breasts, split only the thicker pieces as needed.

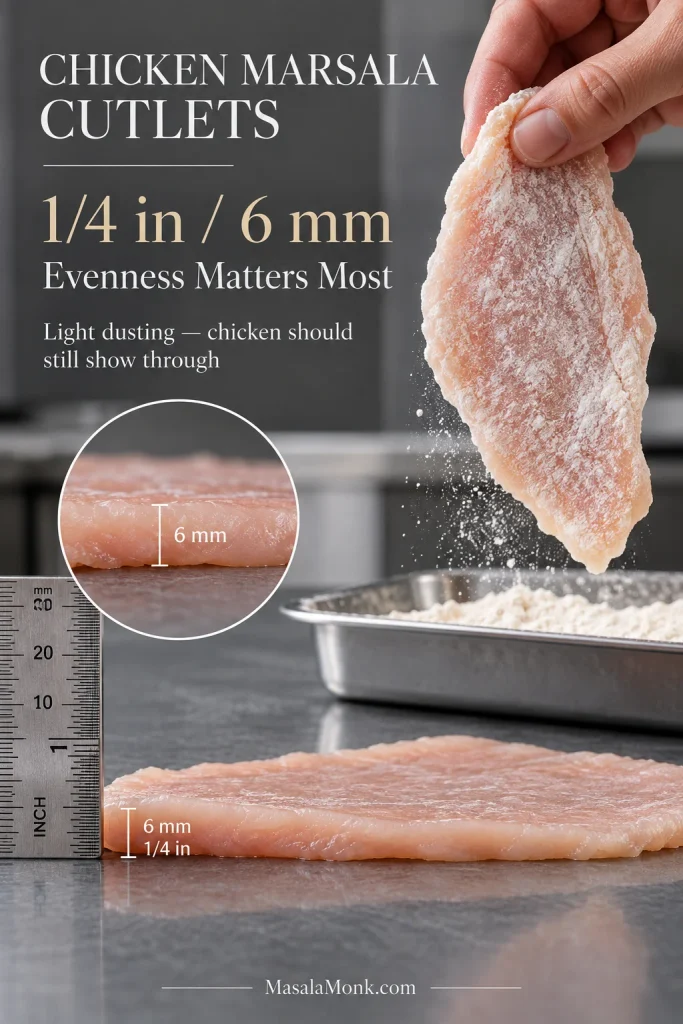
Pound the cutlets between parchment, plastic wrap, or inside a large food-safe bag until the thickest parts are about ¼ inch / 6 mm. Anything up to roughly ⅓ inch / 8 mm will work; evenness matters more than an exact measurement.

Pat the chicken dry. Season both sides with about three-quarters of the measured salt (roughly 3 g) and all of the black pepper. Reserve the remaining salt for the sauce.

Spread the flour in a shallow dish. Dredge each cutlet lightly, then shake off the excess until the chicken is still visible beneath the coating. This is a dusting, not breading.

Raw chicken cutlets shown about ¼ inch or 6 mm thick beside a ruler, with a second cutlet receiving a very light dusting of flour.
Even thickness helps all four cutlets reach doneness at nearly the same time. Meanwhile, a barely visible flour coating creates useful browning and fond without carrying enough starch into the Chicken Marsala sauce to make it pasty.
Brown the cutlets without crowding the pan

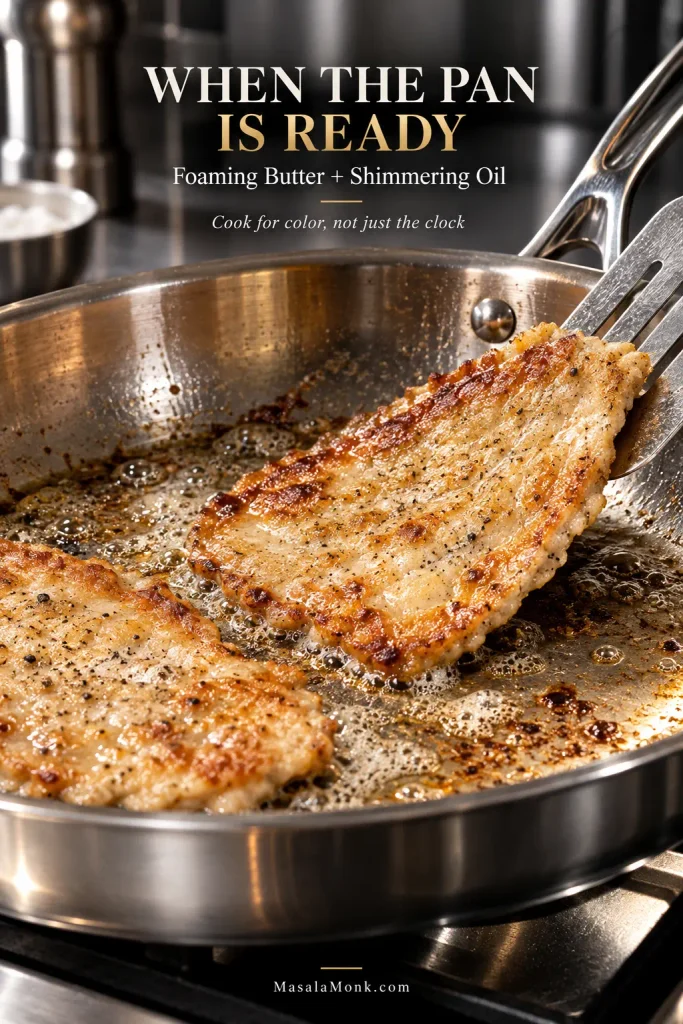
Heat 2 tbsp / 30 ml olive oil with 1 tbsp / 14 g butter in the skillet over medium-high heat. When the butter is foaming and the oil is shimmering, add the first batch. Brown the chicken in 2 batches unless all four pieces fit comfortably without overlapping or crowding. Use the remaining tablespoon of oil only if the second batch needs it.

Cook until the first side develops deep golden patches, roughly 2½–3½ minutes. Turn and brown the second side for around 1½–2½ minutes. Thin cutlets and powerful burners can move faster, so watch the chicken rather than waiting for a timer.

Check one of the thickest pieces as each batch comes out of the skillet. With thin cutlets, sliding an instant-read thermometer horizontally in from the side usually makes it easier to reach the center. The USDA recommends 165°F / 74°C as the safe minimum internal temperature for poultry.

Move any cutlet that has already reached 165°F / 74°C to a clean warm serving plate and loosely cover it. Put pieces that still need cooking on a separate holding plate; they will finish briefly in the sauce later.

Before adding the mushrooms, look at the skillet. Keep the deep brown fond on the pan, but carefully wipe away any loose flour that has actually burned black.

Thin floured chicken cutlets browning in a stainless-steel skillet with foaming butter, shimmering oil and a spatula lifting a golden underside.
Once the chicken hits properly heated fat, give the first side time to brown deeply. If a cutlet is still gripping the stainless steel, a few more seconds often help it release cleanly instead of tearing.

2. Brown the mushrooms after their water cooks away

Reduce the heat to medium and add 1 tbsp / 14 g butter followed by the mushrooms.

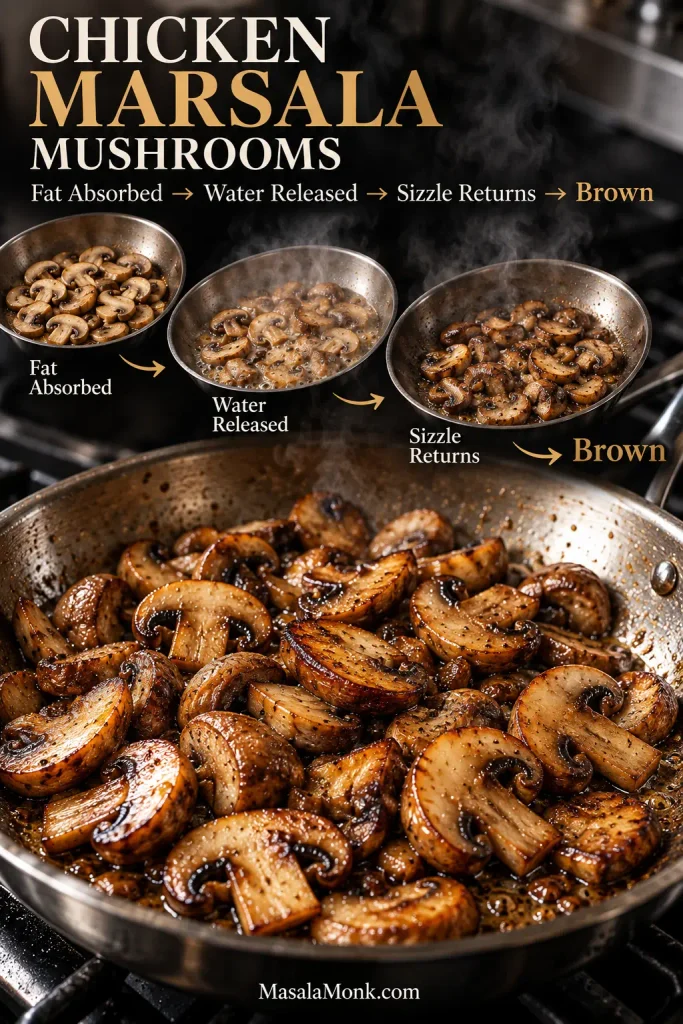
They may soak up the fat and leave the skillet looking dry at first. Nothing has gone wrong. Soon they will soften and release their own moisture.

Keep cooking, stirring occasionally, until that liquid evaporates and the sound changes from simmering back to sizzling. The mushrooms should smell more roasted than simply cooked, with properly golden edges, usually after 6–8 minutes total.

Add the shallot and cook for 1–2 minutes, until softened. Stir in the garlic for about 30 seconds. As soon as it smells fragrant, move on; browned garlic would bring bitterness to the sauce.

Sliced cremini mushrooms shown through stages of cooking, from absorbing fat and releasing liquid to a final dry-skillet stage with deeply browned edges.
Persistent puddles usually mean the mushrooms need either more evaporation time or more room in the skillet. Because browning cannot really begin while excess water remains, crowded mushrooms are better cooked in batches than left steaming together.

3. Reduce the Marsala before adding stock

Pour in the 1 cup / 240 ml dry Marsala and scrape up the fond as the wine begins to bubble.

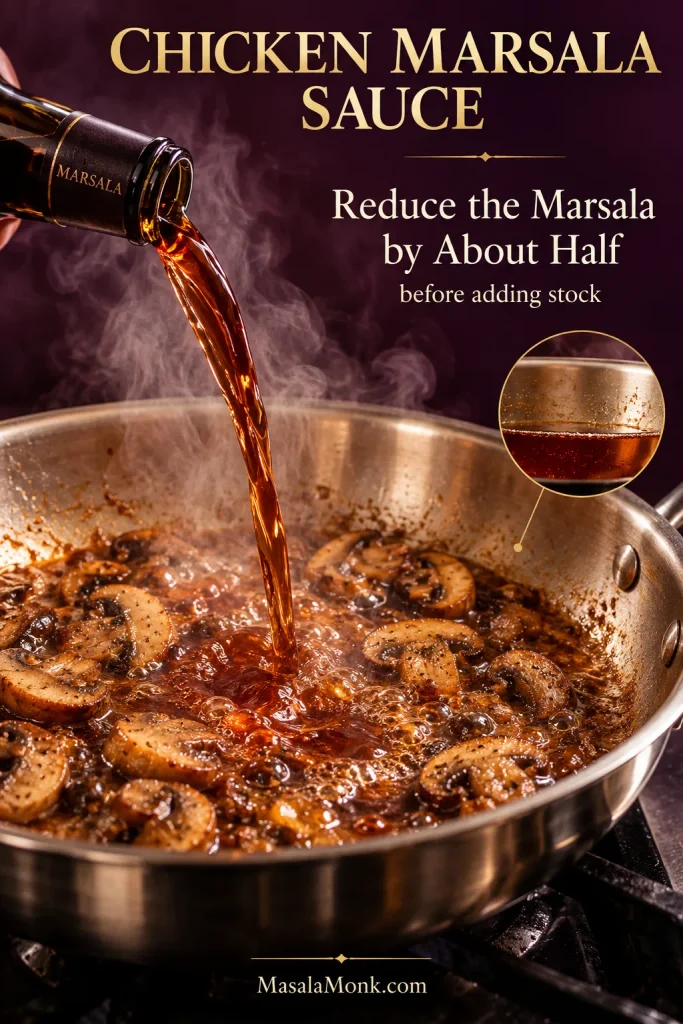
Reduce the Marsala by roughly half before adding the stock. This usually takes 3–5 minutes. The sharp alcohol smell should fade as the wine becomes rounder, nuttier, and noticeably sweeter-smelling.

Dry Marsala wine being poured into a hot stainless-steel skillet with browned mushrooms, with a visual cue showing the wine reduced to about half its original level.
Use aroma and volume together when judging a Marsala wine reduction. Color alone can be misleading: the liquid may look dark before it is concentrated enough, whereas the fading raw-wine aroma tells you the reduction is actually progressing.

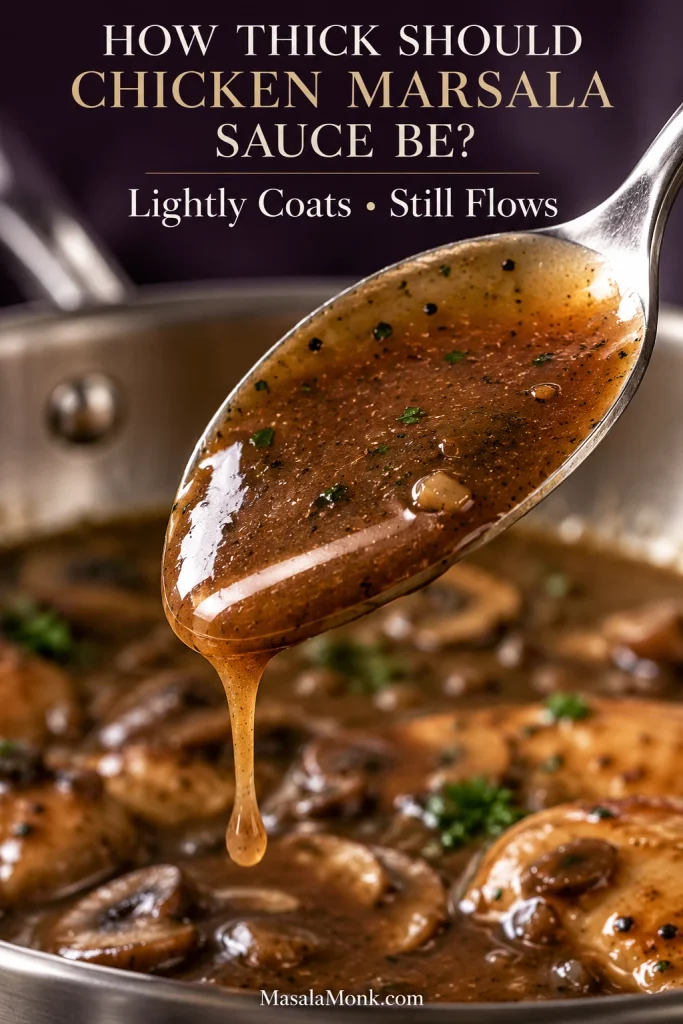
Add the ⅔ cup / 160 ml low-sodium chicken stock. Bring the sauce back to a lively simmer and cook until it leaves a thin coating on the back of a spoon but still runs easily when the spoon is tilted, usually another 3–5 minutes.

If some chicken still needs finishing, stop while the sauce is a touch looser; it will reduce a little more with the cutlets in the pan.

Tip the skillet slightly. You still want enough sauce gathering around the mushrooms to spoon generously over all four cutlets.

Close-up of dark glossy Chicken Marsala sauce lightly coating a metal spoon and dripping back into a skillet in a thin flowing ribbon.
Stop the Chicken Marsala sauce slightly looser than the final texture you want. The cold-butter finish adds a little body, and the sauce tightens again as it leaves the hot skillet, so over-reducing now can leave the plate short on sauce.

If the sauce is not reaching this texture, jump to the troubleshooting table and match the fix to both its flavor and consistency.

4. Finish the chicken, then swirl in the cold butter

Pour any juices from the holding plate into the sauce. Return only the cutlets that still need cooking and turn them through the simmering sauce until the thickest part reaches 165°F / 74°C.

Move those finished cutlets to the clean warm serving plate with the chicken that was already done, then remove the skillet from the heat.

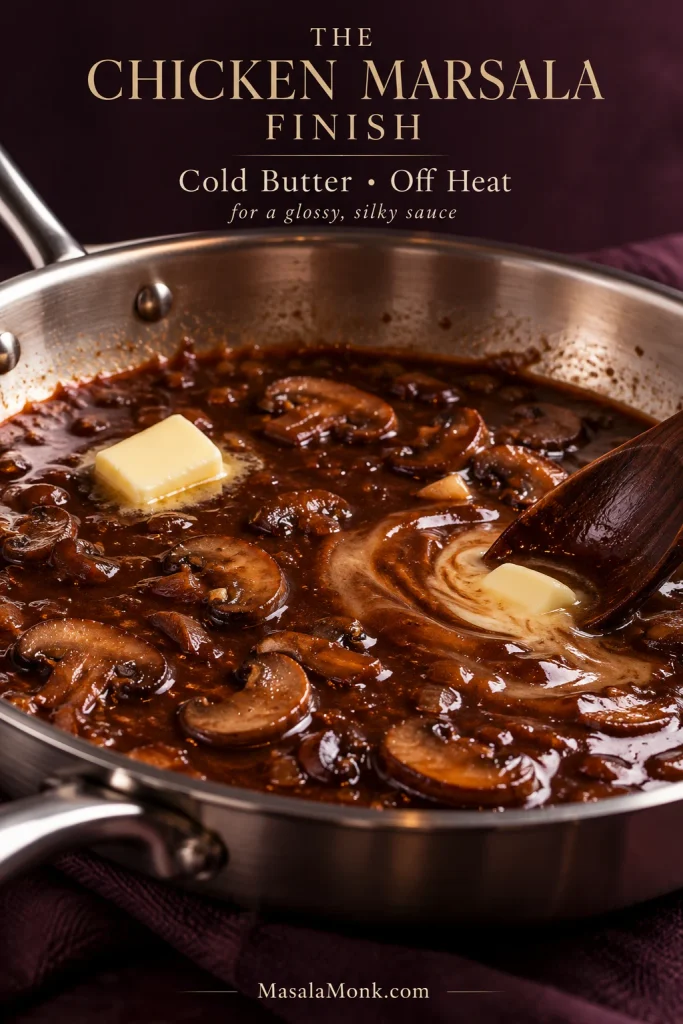
Add the remaining 2 tbsp / 28 g cold butter a few pieces at a time, swirling or stirring until the sauce looks smooth, dark, and glossy enough to cling lightly to the mushrooms.

Cold butter pieces being swirled into dark mushroom Marsala sauce in a stainless-steel skillet off the heat, creating a glossy finish.
Cold butter emulsifies most smoothly once the skillet is off the heat. Add it gradually; greasy droplets on the surface often mean the pan is still too hot for the finish.

Taste before adding the remaining salt. A sauce that feels slightly too sweet or heavy may need ½ tsp / 2.5 ml lemon juice. Add it gradually. The lemon should brighten the sauce without becoming a flavor of its own.

Spoon the finished mushroom Marsala sauce over all four cutlets, scatter with parsley, and serve immediately.

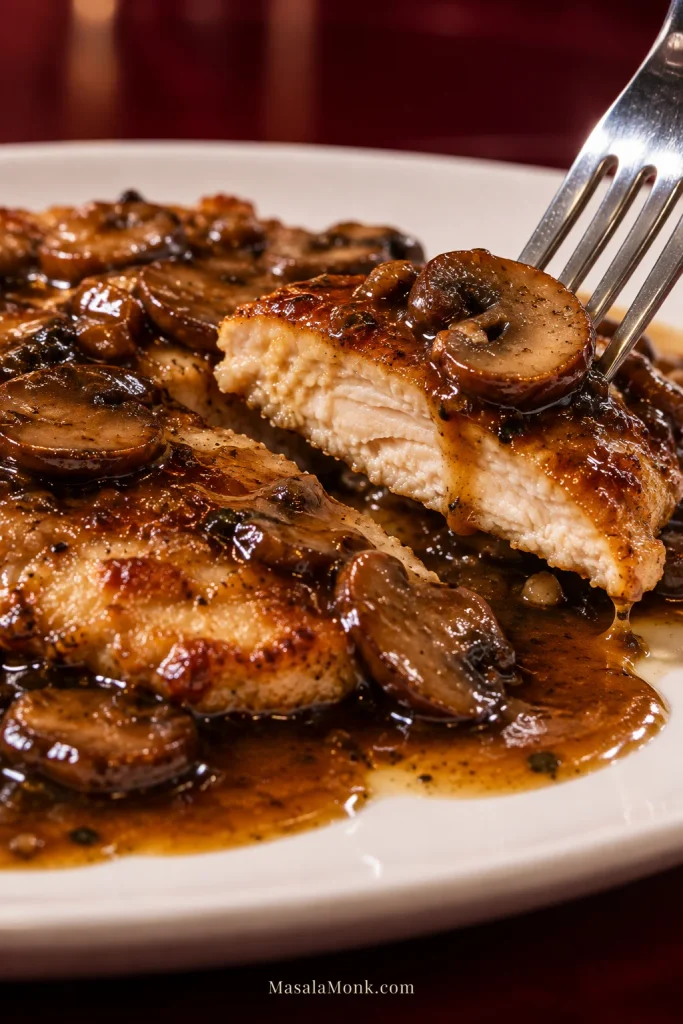
When it’s right: Chicken Marsala should taste savory, mushroomy, and clearly wine-forward, with gentle sweetness but no sharp raw-alcohol bite. The sauce should cling lightly to the chicken, then run onto the plate when you cut into a piece.

Close-up of a thin sliced Chicken Marsala cutlet showing a moist fully cooked interior, with a browned mushroom and glossy Marsala sauce running over the cut surface.
Sauce can make dry chicken easier to eat, but it cannot make it juicy again. With thin Chicken Marsala cutlets, tenderness comes from stopping the cooking promptly and letting the sauce finish on its own.

Which Marsala Should You Buy?

For Chicken Marsala, buy a real dry (secco) Marsala. You do not need an expensive bottle; drinking Marsala gives you better control over both wine flavor and salt than bottled cooking wine, which is often salted.
Marsala labels contain several different pieces of information. Fine and Superiore mainly describe aging/style categories, while Oro and Ambra describe color. Secco, semisecco and dolce describe sweetness. For this recipe, the word that matters most is secco: dry. The official Marsala DOC specifications lay out those classifications in detail.

Bottle labeled Marsala Secco beside a glass of amber-brown Marsala wine, with text explaining that secco means dry.
For this skillet, sweetness matters more than color or aging terms: look for secco, the label for dry Marsala.

Dry or sweet Marsala?

Dry Marsala gives the easiest savory balance because reduction concentrates the wine’s nutty, dried-fruit, and caramelized flavors. By the time it has reduced properly, the skillet should smell less like freshly poured wine and more like the dish you are about to eat.

Sweet Marsala works too. Expect a rounder, noticeably sweeter sauce. Keep the stock low-sodium and decide on lemon only after the sauce has reduced.

What about Marsala cooking wine?

Salt becomes more concentrated during reduction, which is why bottled cooking wine can make the finished sauce unexpectedly salty. Real Marsala simply gives you more control.

Look near sherry, port, Madeira, and other fortified wines rather than beside vinegars and bottled cooking sauces.

How to Read and Thicken Chicken Marsala Sauce

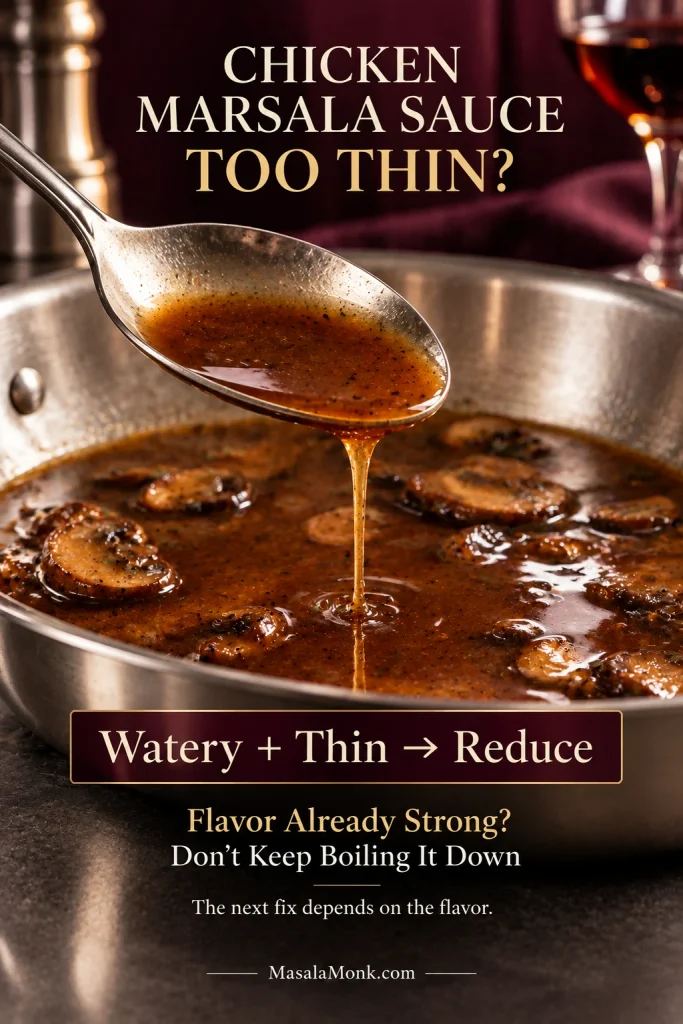
If your Chicken Marsala sauce is thin and watery, simmer it uncovered until the flavor concentrates. If it already tastes strong but is still too thin, use a very small cornstarch slurry instead of reducing away the rest of the sauce.

Use the flavor as your second clue. Watery flavor and watery texture usually mean the liquid simply needs more time to concentrate.

Once the Marsala flavor is already strong—perhaps salty enough or a little sweet—boiling away more liquid can leave you with very little sauce and too much intensity. A tiny starch adjustment makes more sense there.

The texture can also be right while the sauce still looks flat. Cold butter stirred in away from high heat gives it more richness and shine.

Taste before you thicken: reduction, starch, and butter solve different problems.

Thin Marsala mushroom sauce dripping in a narrow stream from a spoon over a stainless-steel skillet, with guidance to reduce watery sauce but avoid over-reducing strongly flavored sauce.
Taste before reducing further: watery flavor needs evaporation, while already-concentrated flavor may need a tiny starch adjustment instead.

Need the exact rescue for the pan in front of you? Jump to Fix My Chicken Marsala Sauce for the full problem-and-solution table.

Want mushrooms and cream to lead instead? The creamy mushroom sauce recipe begins with the same useful step: getting real color on the mushrooms.

Does Chicken Marsala Need Cream?

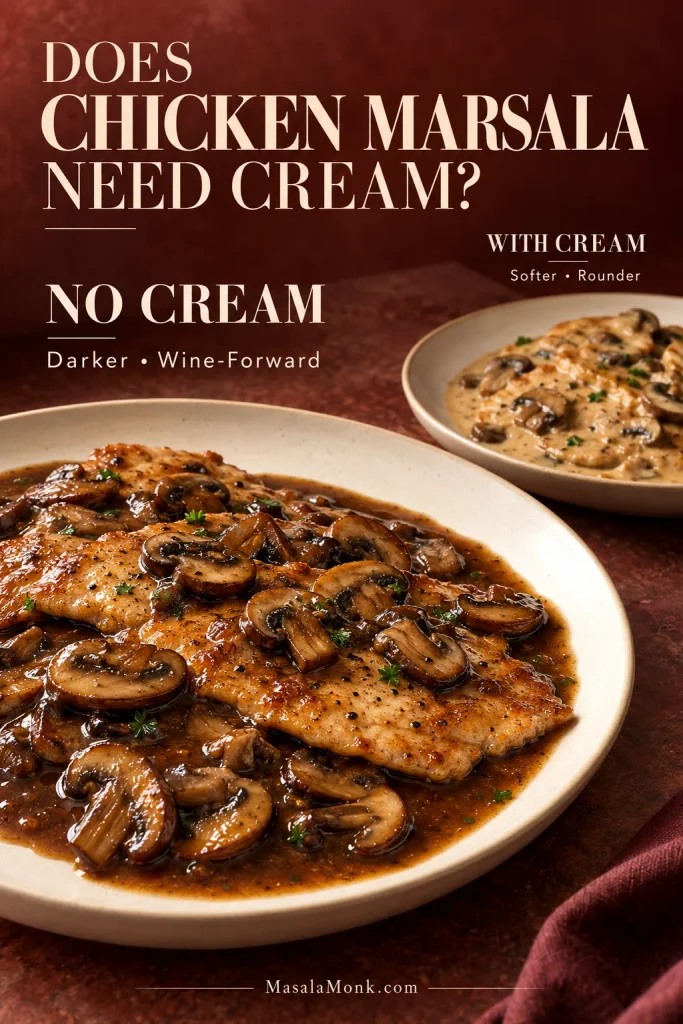
No. The recipe above gets enough body from reduced Marsala and stock, a little flour carried over from the chicken, and the butter stirred in at the end. Without cream, the wine and browned mushrooms stay darker and more distinct.

If thin sauce is the reason you are considering cream, read the sauce first; cream changes the style of the dish rather than fixing the underlying reduction.

Prefer a softer, rounder sauce? Simmer the stock with the reduced Marsala for about 2 minutes, then stir in ⅓ cup / 80 ml heavy cream. Increase that to ½ cup / 120 ml for a richer sauce. Let it simmer until close to the consistency you want, leaving it slightly loose when any chicken still needs finishing.

Return the cutlets that need more cooking and bring them to 165°F / 74°C, then transfer the chicken out of the skillet. Take the pan off the heat and finish the creamy sauce with 1 tbsp / 14 g of the reserved cold butter; the cream supplies enough richness that you do not need the full 2 tbsp finishing amount.

Heavy cream stays smoother under gentle heat than half-and-half. Half-and-half makes a thinner sauce and is more prone to splitting; milk is even more likely to split. Add any lemon after the skillet is off the heat, a few drops at a time.

Two versions of Chicken Marsala: a dominant plate with dark no-cream mushroom Marsala sauce and a smaller plate with a pale creamy mushroom sauce.
Cream changes the style of Chicken Marsala; it cannot replace the flavor developed by properly browning and reducing the sauce first.

Want More Marsala Sauce?

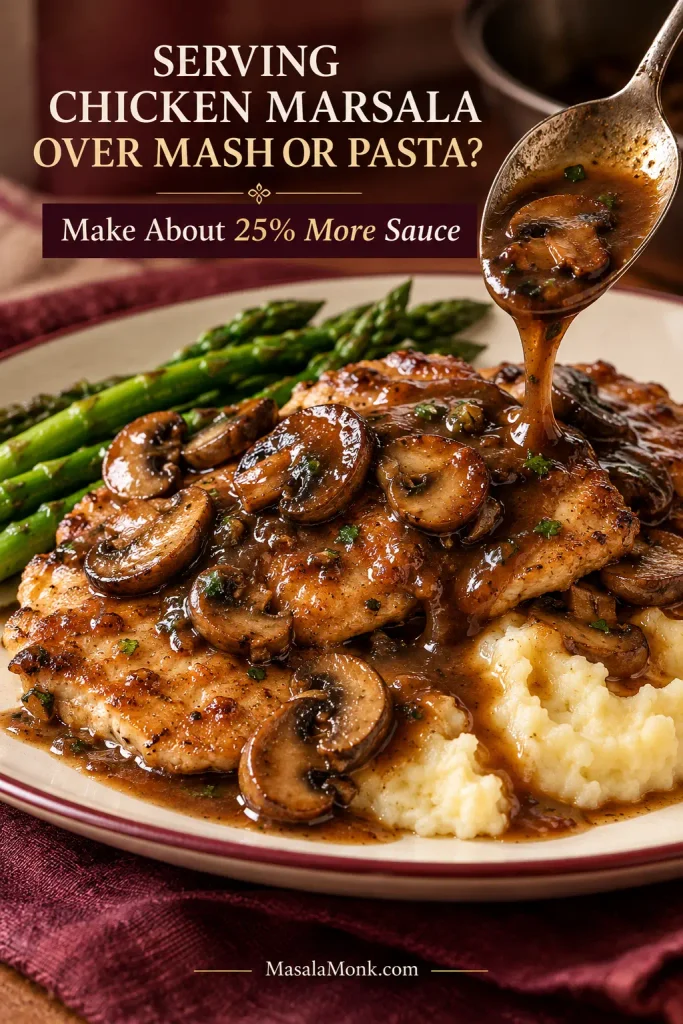
Serving the chicken over creamy mashed potatoes, pasta, noodles, or polenta usually calls for a little more sauce than serving the cutlets alone.

Increase the Marsala to about 1¼ cups / 300 ml and the stock to about ¾ cup + 1 tbsp / 200 ml. That is roughly one quarter more of each. The larger volume will take longer to reduce, so get the sauce base where you want it before finishing the chicken and swirling in the butter.

Potatoes and pasta will absorb plenty on the plate, so stop with the sauce slightly looser than you would for chicken served on its own.

Thin Chicken Marsala cutlets over mashed potatoes with asparagus, browned mushrooms and glossy Marsala sauce being spooned over the chicken and potatoes.
For Chicken Marsala with mashed potatoes, let the sauce do two jobs: lightly coat the chicken and then run into the mash underneath. Spoon it on just before serving so the browned surface stays visible instead of becoming completely saturated.

What to Serve with Chicken Marsala

The best Chicken Marsala sides either catch the sauce or bring something fresh to the plate.

For catching the sauce

  • Mashed potatoes — a classic choice and one of the best ways to catch the sauce.
  • Buttered pasta — especially good with a slightly looser batch of sauce.
  • Polenta — mild, soft, and excellent when you want the Marsala sauce to stay prominent.
  • Egg noodles — soft and mild enough to catch mushrooms and sauce without competing with them.
  • Crusty bread — ideal for swiping up the sauce while keeping the chicken at the center of the meal.

For something fresh or green

  • Green beans almondine — crisp-tender beans, toasted almonds, and lemon add welcome crunch.
  • Asparagus — roasted or quickly sautéed.
  • Broccoli or broccolini — simply seasoned so the sauce stays in charge.
  • Arugula or another sharp green salad — especially good beside the creamy sauce.

A colder, sharper contrast comes from cucumber salad with vinegar, dill, and onion, which cuts through the buttery sauce beautifully.

A classic plate is mashed potatoes with green beans or asparagus. The potatoes catch every spoonful; the green side keeps the next bite feeling fresh.

What wine should you drink with it?

You do not need Marsala in the glass. A fresh, light-bodied red such as Pinot Noir, Gamay, or Frappato works well with the darker sauce. A dry white with enough acidity can cut through the butter while staying light beside the mushrooms.

Fix My Chicken Marsala Sauce

Taste the sauce before changing it. A sauce that’s thin and watery needs a different fix from one that’s thin but already concentrated.

Sauce concentration and flavor problems

ProblemLikely cause + best rescue
Watery and weakThere is still too much unconcentrated liquid. Simmer uncovered until both flavor and texture strengthen.
Flavorful but still too thinMore reduction may make the sauce too salty or sweet. Mix ½ tsp / about 1.5 g cornstarch with 1 tsp / 5 ml cold water; whisk in gradually and simmer briefly, stopping as soon as the sauce lightly coats a spoon.
Hardly any sauce remainsIt has reduced too far. Add low-sodium stock 1 tbsp / 15 ml at a time. If the Marsala flavor has genuinely faded, add only a small splash of wine and simmer long enough for the raw edge to disappear.
Sharp or boozyThe Marsala needs more reduction. Let the sauce simmer until the raw-wine aroma softens.
Barely tastes of MarsalaToo much stock or cream may be diluting the wine. Reduce gently while the sauce is loose; next time concentrate the Marsala before adding other liquids.
Too sweetCheck the salt first. If the sauce still tastes heavy, add lemon juice ½ tsp / 2.5 ml at a time.
Too saltyLoosen with unsalted stock or water 1 tbsp / 15 ml at a time. Avoid reducing it hard again; if the flavor is balanced but the sauce becomes too thin, use the small cornstarch rescue above instead.

Texture, mushroom and chicken problems

ProblemLikely cause + best rescue
Greasy or separatedPull the skillet off the heat and whisk or swirl vigorously. If it still looks separated, whisk in 1 tsp / 5 ml warm water or stock at a time until the sauce comes back together.
Mushrooms are pale and wetBefore adding the shallot or wine, keep cooking until the released moisture is gone and the skillet starts sizzling again. Use batches next time if the pan is crowded.
Chicken is dryIt cooked too long before or after the sauce was ready. Spoon generously with sauce now; next time stop cooking as soon as the cutlet reaches temperature. For more on thickness, temperature, and dryness, see the baked chicken breast guide.
Flour coating is gummyThe dredge was too heavy or the chicken spent too long in the sauce. Use a lighter dusting and keep the final return brief.
Creamy sauce splitPull the skillet completely off the heat and whisk in a small splash of heavy cream or 1 tsp / 5 ml warm water at a time until it comes back together. Next time, keep the creamy sauce below a hard boil.

Once the sauce tastes balanced and moves easily around the pan, stop fixing it.

Variations and Substitutions

Chicken thighs

Boneless, skinless thighs work well and tolerate a little more cooking than thin breast cutlets. Trim visible fat and allow more time to cook through. They are safe at 165°F / 74°C, though thigh meat generally becomes more tender around 175°F / 79°C.

Their extra richness works especially well with the no-cream sauce.

Different mushrooms

Cremini are the easiest default because they brown well and bring more savoriness than plain white mushrooms without much extra cost. White buttons still work. For more depth, replace 2–3 oz / 55–85 g with shiitake or another flavorful fresh mushroom.

When mushrooms deserve to be the main event, Mushroom Stroganoff takes them into a creamy savory sauce for noodles, rice, mash, or polenta.

Without mushrooms

You can leave them out, but their browned flavor normally becomes part of the sauce. Build good color on the chicken, keep the shallot, and use a flavorful low-sodium stock.

What can replace Marsala?

No substitute tastes exactly the same. Dry Madeira is the closest useful alternative; dry sherry also makes an excellent mushroom wine sauce with its own character.

Does the Alcohol Cook Out of Chicken Marsala?

A short simmer should not be treated as a guarantee that all alcohol has disappeared. Strict alcohol avoidance calls for a stock-based mushroom pan sauce instead of relying on cooking time to remove the Marsala.

It will taste different, but it can still be a very good chicken-and-mushroom dinner. If you’d rather skip Marsala entirely and still want a creamy mushroom sauce, Cream of Mushroom Chicken is the better direction.

Pancetta or prosciutto

Crisp about 2 oz / 55 g finely diced pancetta or prosciutto before browning the chicken. Leave a little rendered fat in the skillet, then return the crisp pieces near the end. Season cautiously; the salt contributed by the cured meat becomes much more noticeable as the sauce reduces.

If lemon, butter, and capers are what you want, Chicken Piccata is the better fit. It uses the same idea of thin golden chicken but takes the pan sauce in a much brighter direction.

Make-Ahead Chicken Marsala Without Dry Chicken

If you only want to get the prep out of the way, slice the mushrooms and cut/pound the chicken into cutlets up to 1 day in advance. Refrigerate them separately until cooking.

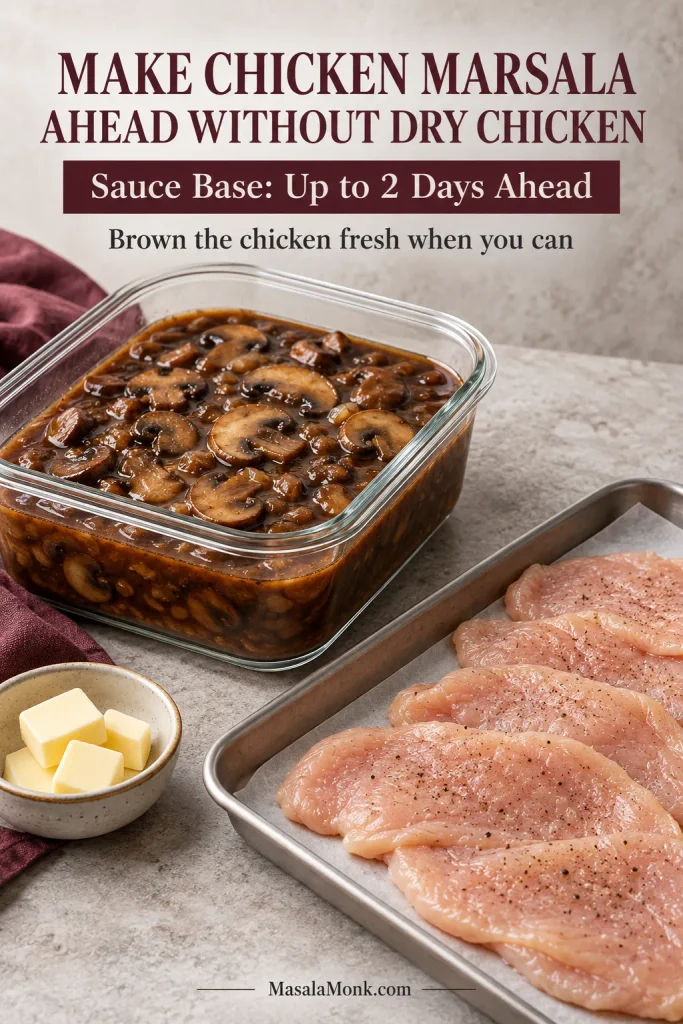
To get further ahead, make the mushroom-Marsala sauce base through the stock-reduction stage and leave out the finishing butter. Cool it, cover it, and refrigerate for up to 2 days.

The chicken is best browned fresh while the sauce reheats. When that is not practical, cook the chicken fully to 165°F / 74°C before chilling it; do not partially cook poultry for later finishing.

At serving time, warm the sauce base gently, then add the chilled cooked chicken and reheat it to 165°F / 74°C without prolonged simmering. Transfer the chicken out, take the skillet off the heat, and swirl in the finishing butter. Taste for salt and lemon after the sauce is back together.

Glass container of mushroom Marsala sauce base beside separate raw thin chicken cutlets and a small bowl of cold butter, illustrating make-ahead preparation.
For the best make-ahead result, prepare the Marsala sauce base ahead, then brown the chicken and finish with cold butter closer to serving.

Cooking for more people? Double the ingredients, then brown the chicken and mushrooms in batches. More food in the same skillet means more steam and less browning, and the larger volume of wine and stock will need more reduction time.

How to Store, Reheat and Freeze Chicken Marsala

Refrigerate leftovers within 2 hours and keep them covered for up to 3–4 days. Reheat gently in a covered skillet, adding low-sodium stock a spoonful at a time if the sauce has tightened. Bring the chicken back to 165°F / 74°C and take it off the heat promptly; prolonged simmering only dries it further.

Freezing works best with the no-cream sauce. Pack the chicken in a freezer-safe airtight container with enough sauce to keep it protected and freeze for up to 3 months for best quality. Thaw overnight in the refrigerator, then reheat gently to 165°F / 74°C, loosening the sauce with a little stock when needed.


When Chicken Marsala is right, nothing on the plate feels buried. The chicken still has its golden edges, the mushrooms taste browned rather than boiled, and the sauce is dark, smooth, and loose enough to run onto whatever you put beside it.

That is the moment to stop cooking and eat it.

Posted on — Leave a comment

Cheeseburger Sliders Recipe: Easy, Cheesy Hawaiian Roll Sliders

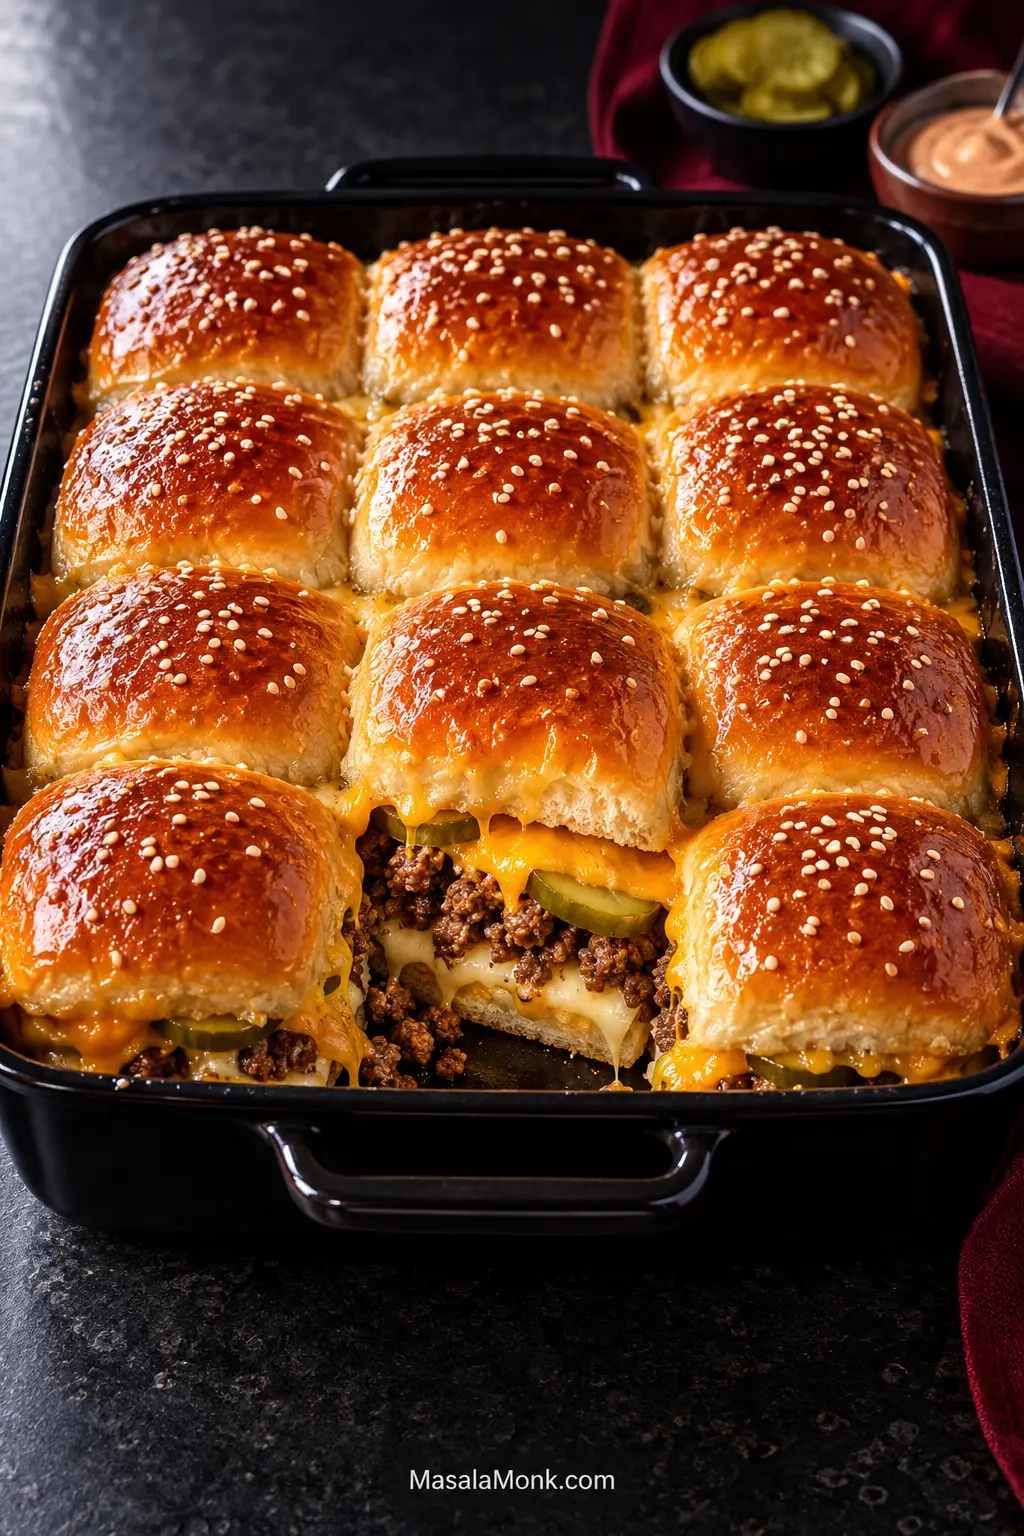
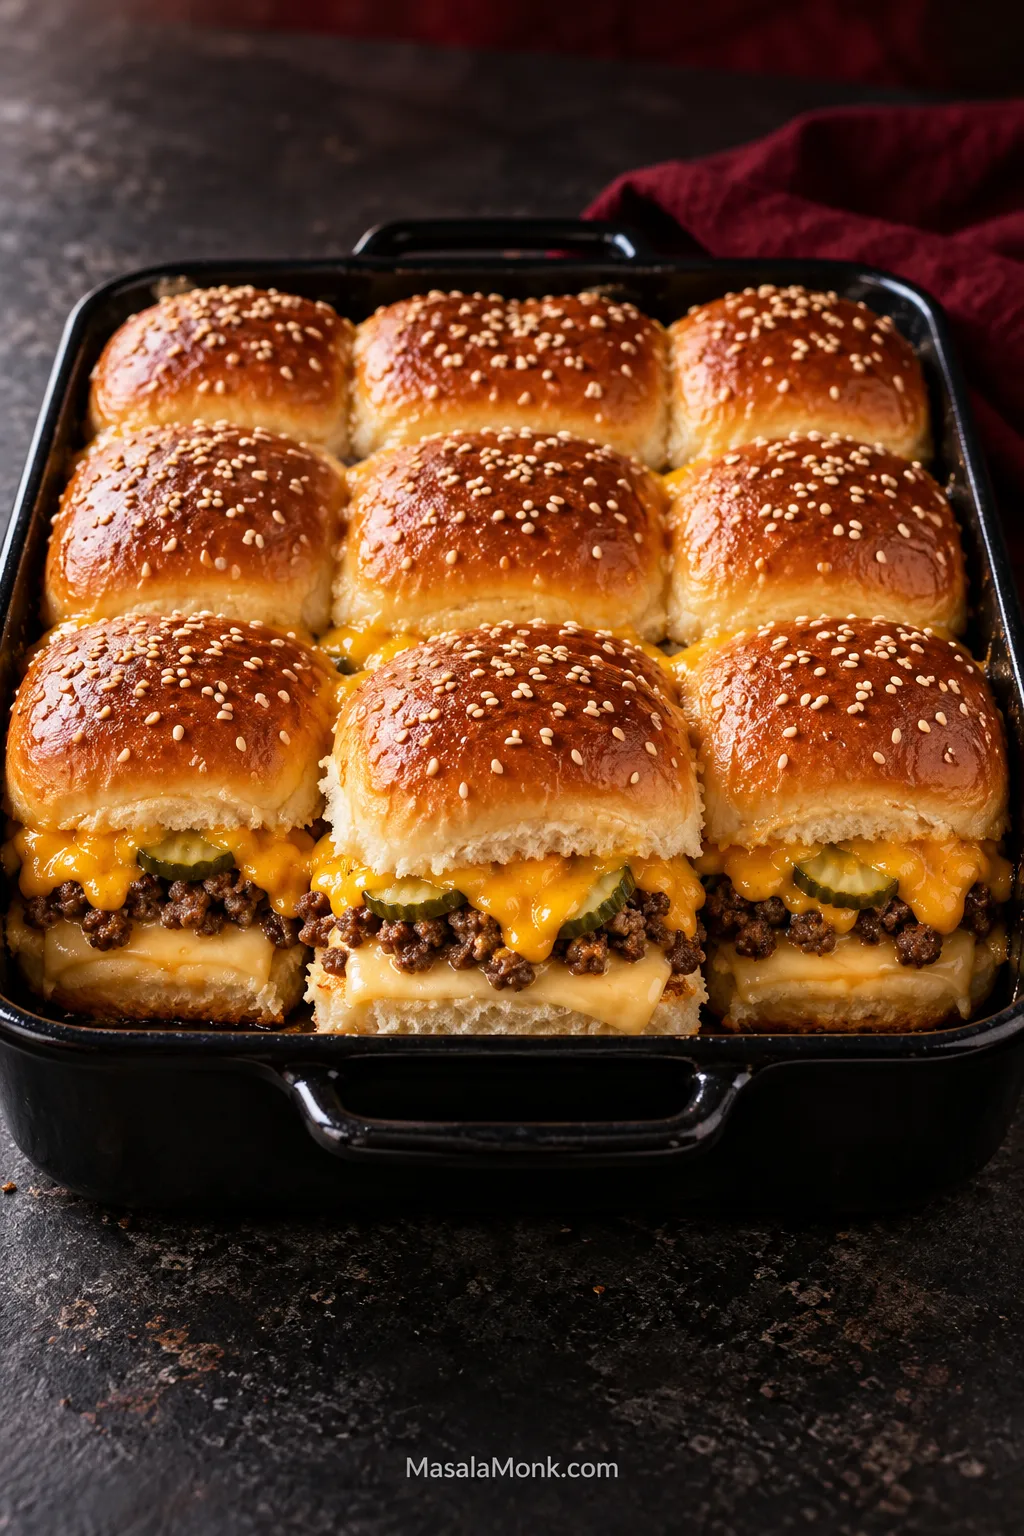
Twelve sesame-topped cheeseburger sliders arranged in four rows of three in a black baking dish. A front slider is opened to show American cheese, crumbled ground beef, dill pickles and melted cheddar between golden Hawaiian rolls.

Cheeseburger sliders are easy until the beef juices reach the bottom rolls. Then a tray that looked perfect can turn greasy underneath while the tops are still beautifully golden.

This cheeseburger sliders recipe keeps the beef juicy but gets rid of the liquid the bread does not need. You get browned beef under two layers of melted cheese, a sharp bite of dill pickle, and soft buttery Hawaiian rolls with sesame-speckled tops. The bottom stays tender enough to pull apart, but sturdy enough to hold the filling.

These baked cheeseburger sliders use crumbled ground beef, so you cook the beef once and assemble all 12 together instead of shaping and flipping tiny patties. They work for an easy dinner, but they are especially handy when you are feeding a group. If you want a more traditional burger bite with one cohesive layer of meat, there is a sheet-pan patty option farther down.

What a Good Tray Looks Like

Keep the beef juicy; keep its liquid off the bread.

  • Beef: browned and juicy, with no puddle of fat or cooking liquid.
  • Bottom rolls: tender and intact, without a greasy or waterlogged underside.
  • Center: hot, with cheese visibly melted at the seams.
  • Top: golden, buttery and still tender.

Easy Cheeseburger Sliders with Hawaiian Rolls

Ground beef, melted cheese and dill pickles baked between connected Hawaiian rolls for an easy tray of pull-apart cheeseburger sliders.

Yield
12 sliders

Serves
4 as a meal
6–12 in a larger appetizer spread

Prep
15 minutes

Cook
20–25 minutes

Rest
5 minutes

Total
About 40–45 minutes

Equipment

  • 9 × 13-inch / 23 × 33 cm baking dish
  • Large skillet, ideally about 12 inches / 30 cm
  • Long serrated bread knife
  • Instant-read food thermometer

Ingredients

  • 12 connected Hawaiian sweet rolls, about 12 oz / 340 g
  • 1 lb / 454 g 90/10 ground beef
  • 1 tsp / 5 ml neutral oil, optional
  • 1 small-to-medium onion, finely diced, about ⅔ cup / 100 g
  • 1 tbsp / 15 ml Worcestershire sauce
  • 1 tsp / about 3 g garlic powder
  • ½ tsp / about 1 g freshly ground black pepper
  • ½ tsp / about 3 g fine sea salt, plus more only if needed after tasting
  • 6–8 slices American cheese, enough to cover most of the bottom roll slab
  • 1¼ cups / 5 oz / 140 g freshly grated medium or sharp cheddar
  • ¾ cup / about 100 g sliced dill pickles, drained and blotted dry
  • 2 tbsp / 28 g unsalted butter, melted
  • 2 tsp / about 6 g sesame seeds

Optional Burger Sauce Ingredients

  • ¼ cup / 60 ml mayonnaise
  • 2 tbsp / 30 ml ketchup
  • 1 tbsp / 15 ml dill or sweet pickle relish
  • 1 tsp / 5 ml yellow mustard or Dijon mustard

Instructions

  1. Heat the oven. Preheat to 350°F / 175°C. Lightly grease a 9 × 13-inch / 23 × 33 cm baking dish.
  2. Slice the rolls. Leave all 12 connected. Use a long serrated knife to cut horizontally through the slab. If practical, leave the bottom half slightly thicker than the top. Put the bottom slab in the baking dish.

Brown and Season the Beef

  1. Brown the beef. Heat a large skillet over medium-high. If the pan tends to stick, use the neutral oil. Spread the beef across the skillet and leave it undisturbed for 1–2 minutes, until the underside has browned in spots and the pan sounds more like a sizzle than a simmer.
  2. Add the onion. Scatter in the diced onion and break the beef into small crumbles. Cook for another 4–6 minutes, stirring as needed, until the onion is soft and the beef is nearly cooked through.
  3. Drain the skillet. Remove the rendered fat and watery cooking liquid. A slotted spoon works well. Return the drained beef to the skillet.
  4. Season the beef. Add Worcestershire, garlic powder, black pepper and salt. Cook for 30–60 seconds, until the Worcestershire has disappeared into the beef and there is no obvious free liquid. Push some crumbles into a small mound around the thermometer probe and check the center without touching the skillet. Ground beef should reach 160°F / 71°C; if it has not, cook briefly until it does.
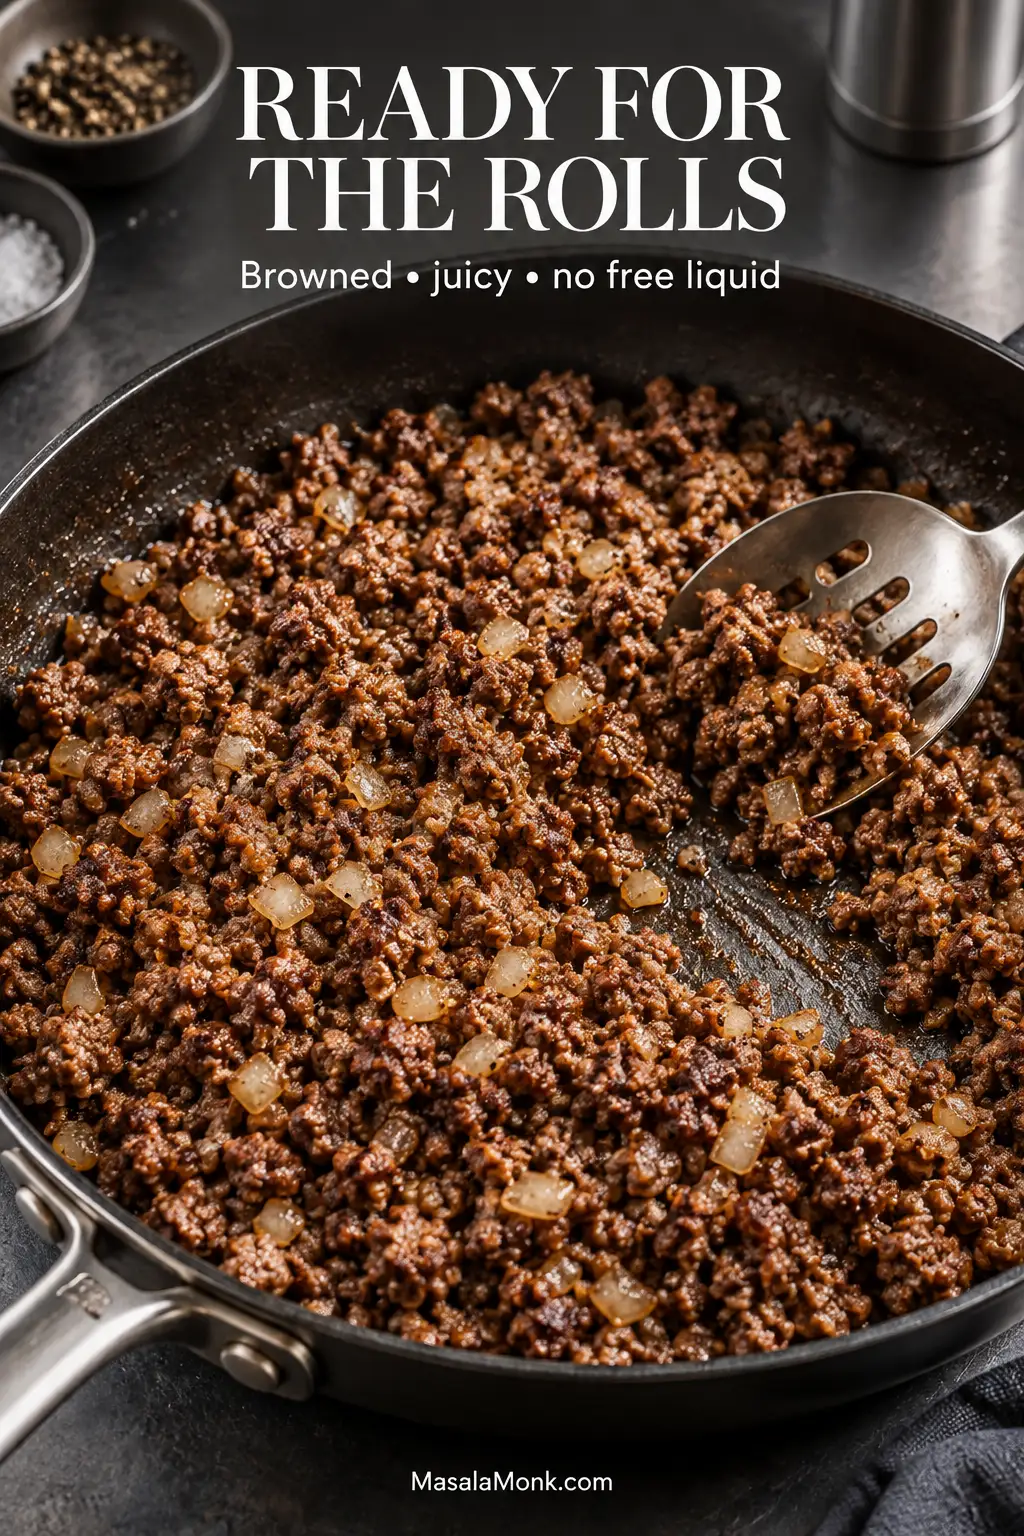
Skillet of browned ground beef and onion with a clear area showing no pooled cooking liquid. Text reads “Ready for the rolls — Browned, juicy, no free liquid.”
Once the skillet has no puddle of cooking liquid, the beef is ready for the rolls.

Layer the Filling

  1. Layer the cheese. Arrange enough American cheese over the bottom rolls to cover most of the cut surface. Six large slices may do it; use eight if yours are smaller.
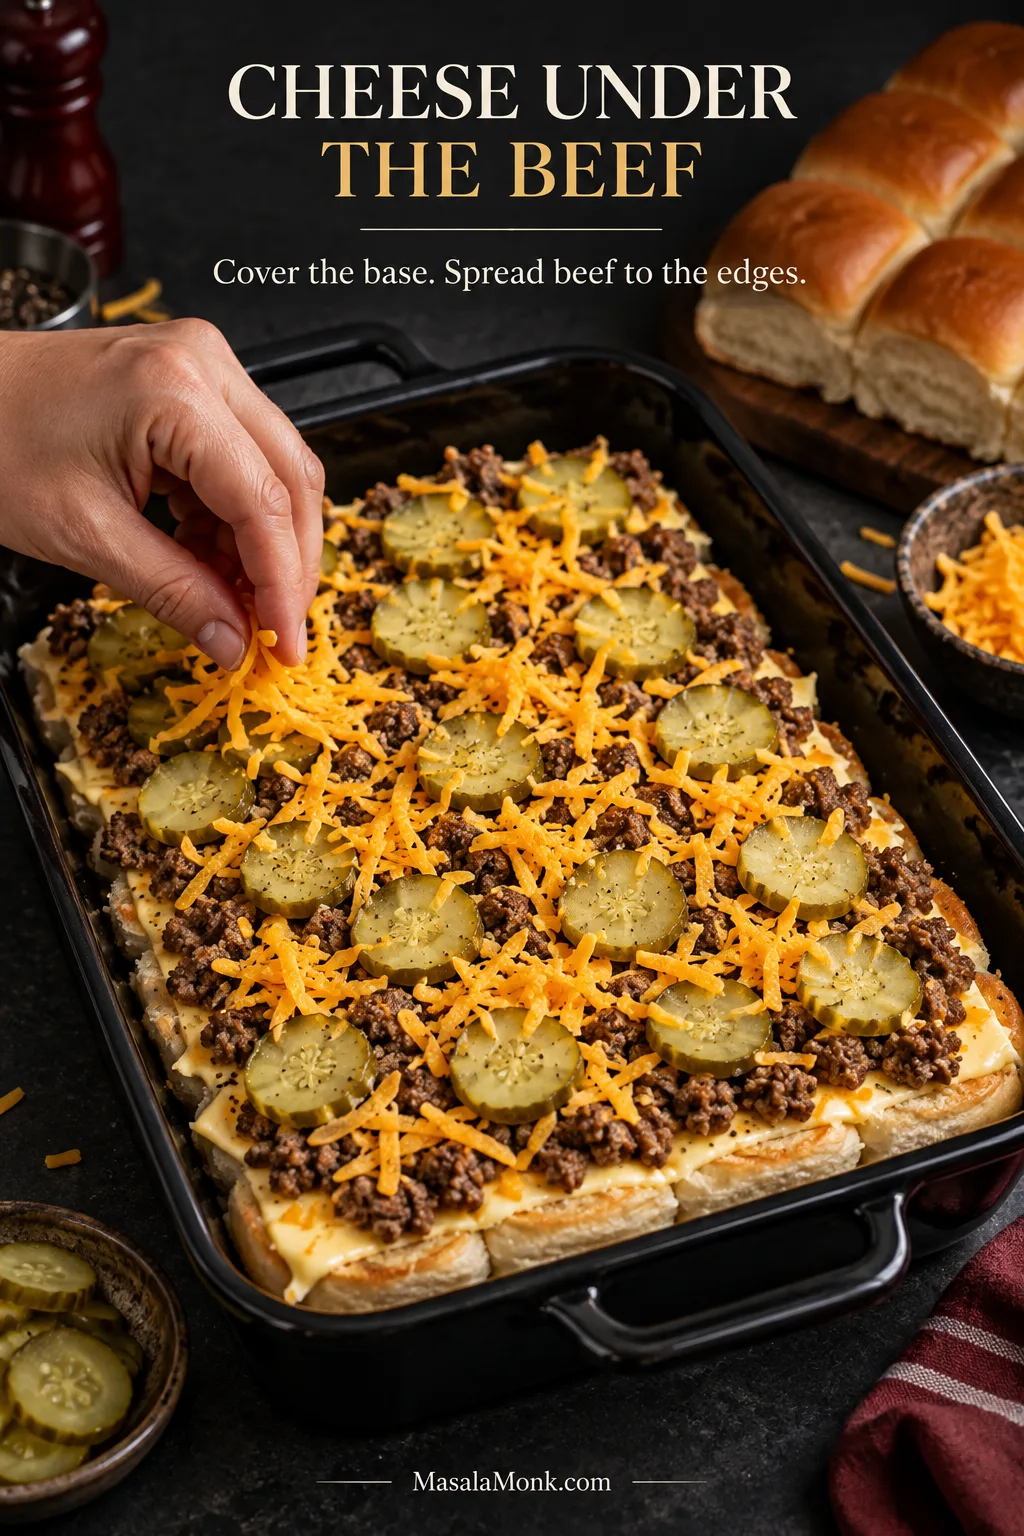
  2. Add the filling. Spread the beef all the way to the edges so the outside sliders are not shortchanged. Scatter the blotted dill pickles over the meat, then cover with the grated cheddar.
Open Hawaiian roll slab layered with American cheese, crumbled beef, dill pickles and shredded cheddar.
Carry the beef right to the outer edges so the corner sliders get the same filling as the middle ones.

Finish and Bake

  1. Add the tops. Replace the upper slab of rolls. Brush lightly with melted butter and sprinkle with sesame seeds.
  2. Bake. With warm beef, bake uncovered for 12–15 minutes. The cheese should be visibly melted at the seams, the center hot and the tops evenly golden. If the tray was assembled with cooked, chilled beef, cover loosely with foil for about 10 minutes, then uncover and continue for another 5–10 minutes, or until the center reaches 165°F / 74°C, the cheese is fully melted and the tops are golden.
  3. Rest and cut. Leave the tray for 5 minutes. The cheese settles slightly during that time, so the filling stays put more easily when you cut through the original roll seams.

Burger Sauce

Stir the mayonnaise, ketchup, relish and mustard together. Dill relish gives you a sharper pickle bite; sweet relish makes the sauce taste a little more like a classic fast-food burger sauce. Keep it on the side and let everyone add their own.

Recipe Notes

  • For a meatier tray: increase the beef to 1½ lb / 680 g. Use about 1½ tbsp / 22 ml Worcestershire, 1½ tsp garlic powder, ¾ tsp black pepper and ¾ tsp fine sea salt. Keep the onion, cheese and pickles at the listed amounts for a deliberately beefier slider. Brown the meat in batches if your skillet is crowded.
  • Using 85/15 beef: keep the seasoning the same and drain the beef thoroughly.
  • A firmer base: broil the bottom roll slab cut-side up for 1–2 minutes, watching constantly. This is optional; the recipe does not depend on toasting the bread.
  • Making them ahead: cool the beef completely before it touches the rolls. Add the butter and sesame seeds just before baking.
  • Toppings: leave pickles out of the oven if you want them cooler and crunchier. Add lettuce, tomato and avocado only after baking.
  • Burger sauce: when made with commercial mayonnaise, it can be mixed 3–4 days ahead, covered and refrigerated.

Rolls, Cheese and Beef: Why the Order Matters

Build from the bottom up: cheese first, then beef, pickles and more cheese. The lower cheese gives the bread some protection, while the cheddar above melts into the crumbles and helps hold everything together when the tray is cut.

Keep the Hawaiian rolls connected while you assemble the sliders. Their soft texture and slight sweetness work especially well with salty cheese and dill pickles. Brioche or plain soft dinner rolls are the easiest substitutes when you want something less sweet.

American cheese underneath and cheddar above give the tray a useful balance: a creamy melt against the bread and stronger cheese flavor over the beef. American works on both layers if that is what you have, while Colby Jack or pepper Jack are easy swaps. Freshly grated cheddar melts more evenly than pre-shredded.

By the time the tray comes out of the oven, the cheddar should have melted into the beef in places rather than sitting on top as a separate stiff layer. That helps the filling stay with the slider when you pull one away.

A cheeseburger slider lifted from the tray with beef, pickles and melted cheese visible between the rolls.
A clean pull-apart is the payoff: the bun stays intact and the filling comes with it.

How much beef to use

One pound / 454 g is enough to cover all 12 small rolls without turning them into oversized burgers. Use 1½ lb / 680 g when you deliberately want a meatier beef-to-bread ratio.

For this style of slider, 90/10 ground beef is easy to work with. An 85/15 blend gives you a richer filling but needs more draining. With 80/20 beef, the extra rendered fat becomes more important because all of it is sitting above soft bread.

Why Browning Comes Before Seasoning

Give the beef a short head start in a hot skillet before the onion goes in. Those browned spots bring more flavor than meat that immediately starts simmering in onion moisture. When the onion is soft and the beef is nearly done, drain the pan before adding Worcestershire and the dry seasonings.

Ground beef should reach 160°F / 71°C on a food thermometer. Color alone is not a reliable doneness test. The USDA safe internal temperature guidance also lists 165°F / 74°C for ground poultry.

How to Keep Cheeseburger Sliders From Getting Soggy

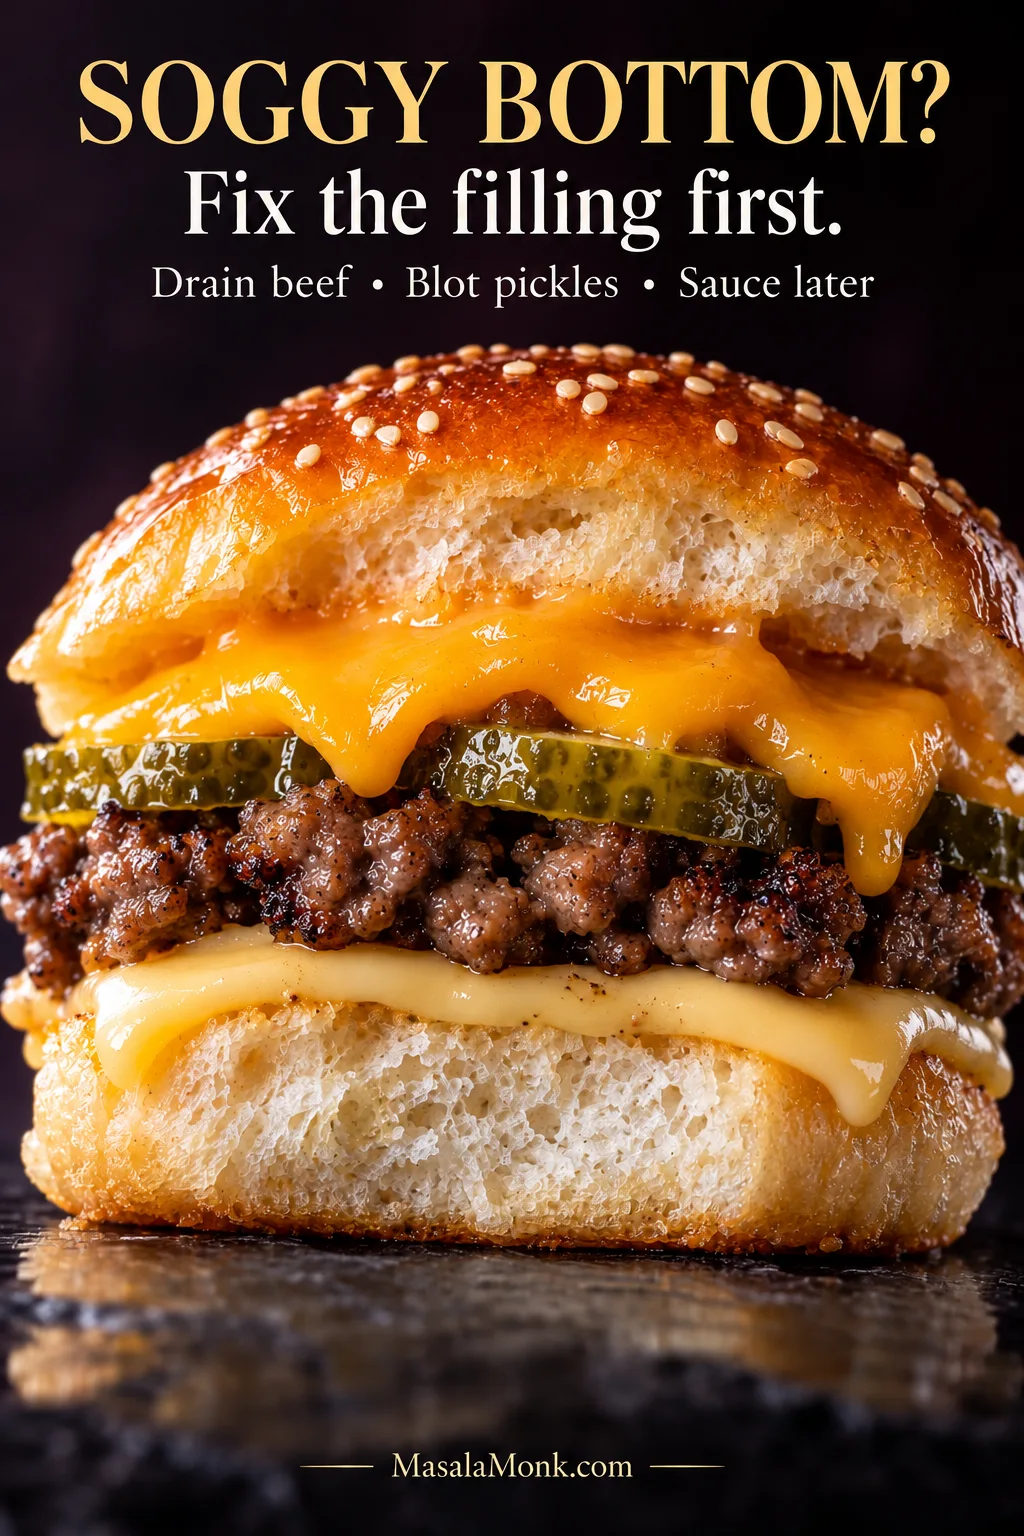
To keep cheeseburger sliders from getting soggy, drain the beef until no grease or cooking liquid is pooling, cover the bottom rolls with cheese, blot the pickles, and save generous amounts of sauce for after baking.

Most soggy sliders start with the filling. Ground beef and onions release water as well as fat, while pickle slices can bring more brine than they appear to. Control those liquids and the cheese can protect the base without the bread becoming saturated.

Sauce can wait too. A thin smear is fine when the sliders are going straight to the table, but spoonfuls of burger sauce are better added after baking. Warm beef also traps steam inside an assembled make-ahead tray; as the tray cools, that steam condenses into the rolls.

Soft is good. Soggy is not. A warm Hawaiian roll should stay tender. The problem begins when enough grease, water or brine soaks in that the bottom loses its structure.

Cross-section of a cheeseburger slider with an intact bottom roll beneath beef, cheese and pickles. Text reads “Soggy bottom? Fix the filling first. Drain beef, blot pickles, sauce later.”
A sound bottom starts with the filling: drain the beef well, blot the pickles and keep excess sauce away from the rolls until serving.

Do you need to toast the bottom rolls?

No. You don’t have to toast the rolls first. A quick 1–2 minute broil, cut-side up, gives the base a little more firmness when the sliders will be eaten straight away. Keep an eye on them; Hawaiian rolls brown quickly.

Skip the extra toast when the tray needs to travel or sit for a while. Small toasted rolls can become hard as they cool.

Back to Recipe · Making them ahead? See Party Prep

Make-Ahead Cheeseburger Sliders and Party Prep

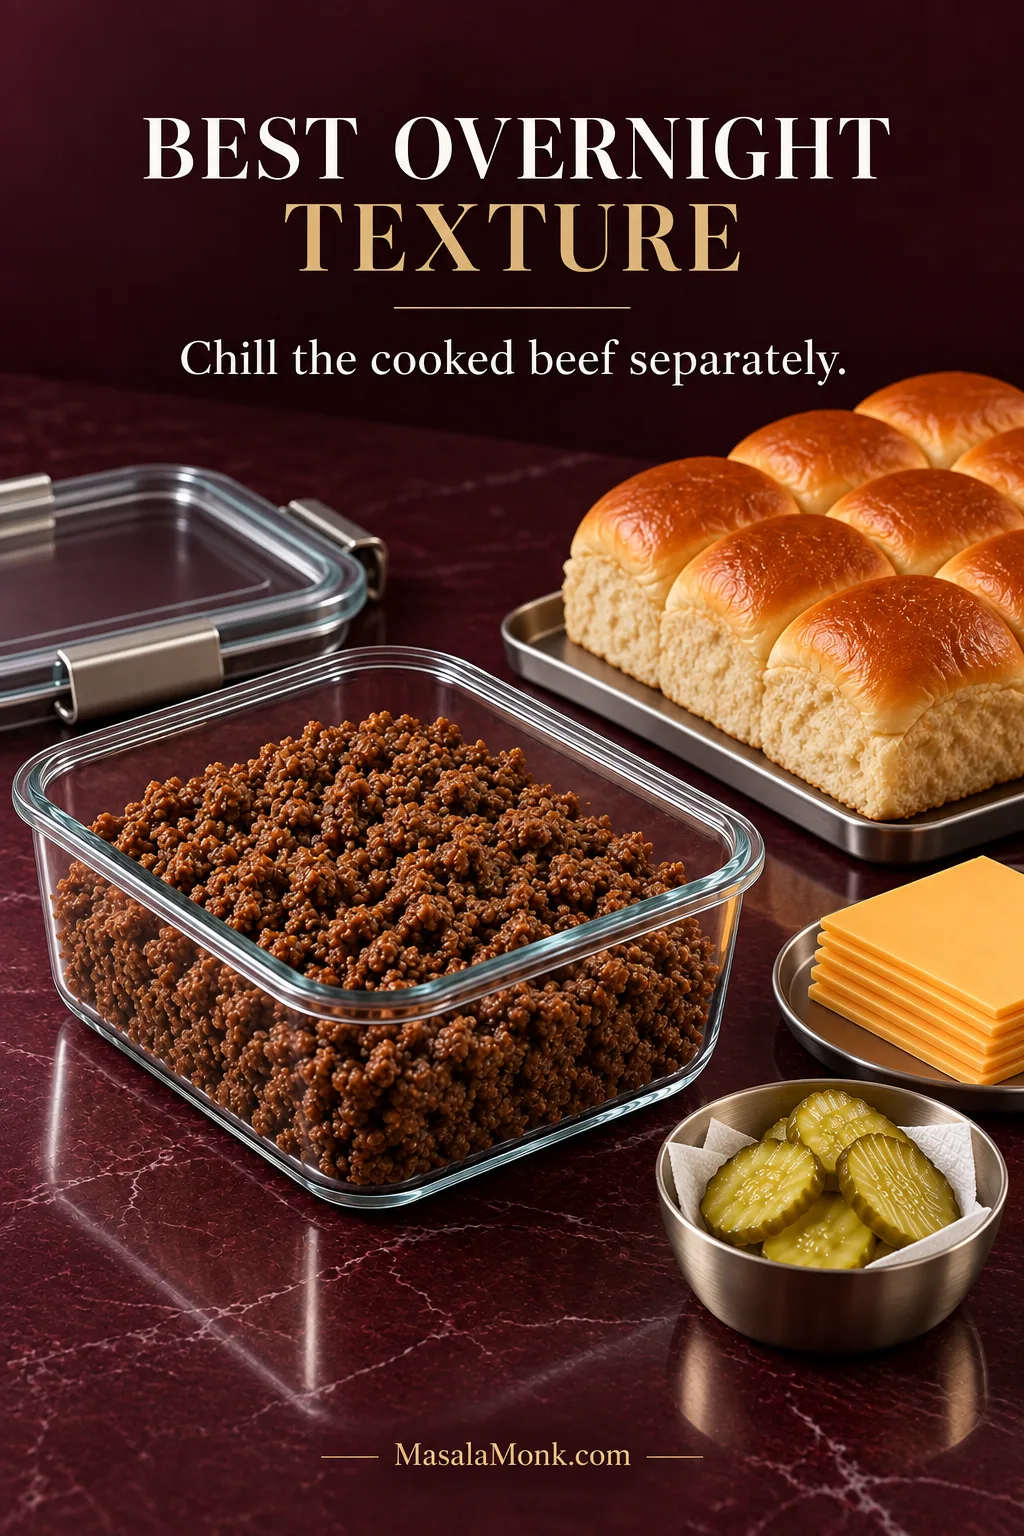
You can assemble cheeseburger sliders overnight, but the bread holds up better when the cooked beef is refrigerated separately and the tray is built closer to baking. Cool the beef completely either way. When the whole tray has to be assembled ahead, leave off the melted butter until just before it goes into the oven.

Getting the beef cooked early also means nobody has to stand over a skillet once people start arriving. With the filling ready, assembly is mostly a matter of layering the rolls, cheese, beef and pickles before the tray goes into the oven.

Container of cooled cooked beef beside Hawaiian rolls, cheese and pickles. Text reads “Best overnight texture — Chill the cooked beef separately.”
For the best overnight texture, chill the cooked beef separately and assemble the tray closer to baking.

How Far Ahead Can You Make Them?

SituationBest Approach
OvernightFor the strongest bread texture, cook and chill the beef separately. A fully assembled tray works when needed, but the rolls will usually be softer.
A few hours aheadUse completely cooled, well-drained beef and refrigerate the assembled tray.
Cold assembled trayCover for the first 10 minutes, then uncover for another 5–10 minutes, or until the center reaches 165°F / 74°C.
Transporting unbakedKeep chilled and bake at the destination when practical.
Transporting bakedRest about 5 minutes before covering; cut close to serving.

Baking at the destination gives the rolls their best chance of staying soft without spending the trip steaming under foil. When that is not practical, let the finished tray rest for about 5 minutes before covering it. Sealing a steaming-hot pan tightly can leave condensation dripping back onto the tops.

Fresh lettuce, tomato, avocado and plenty of burger sauce are better added at the table. They stay fresher, and the sliders travel more cleanly without them tucked inside.

Once the sliders are on a buffet, food safety matters more than keeping them perfectly crisp. Keep hot food at 140°F / 60°C or above. Otherwise, perishable food should not remain in the 40–140°F / 4.4–60°C danger zone for more than 2 hours, or more than 1 hour when the surrounding temperature is above 90°F / 32°C. The USDA Danger Zone guidance explains those limits in more detail.

Back to Recipe · Feeding a crowd? See Sliders Per Person

How Many Cheeseburger Sliders Per Person?

Twelve sliders disappear very differently at dinner than they do on a table full of wings, dips and sides.

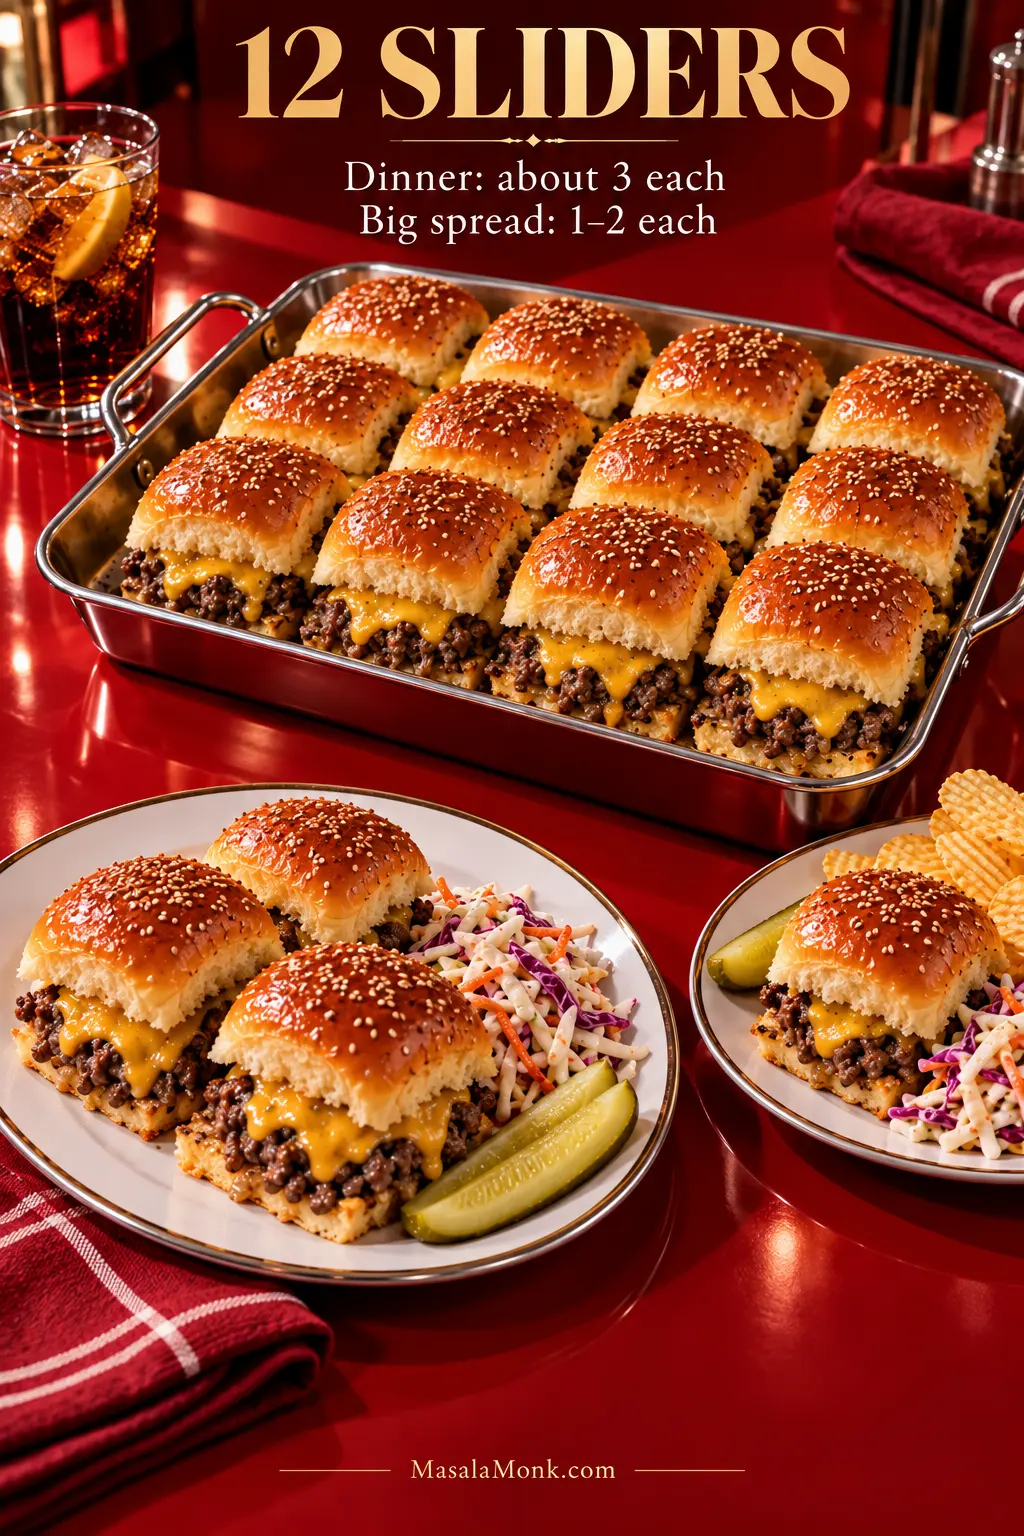
Tray of 12 cheeseburger sliders with a plate holding three sliders and sides. Text reads “Dinner: about 3 each — Big spread: 1–2 each.”
The fuller the spread, the farther 12 sliders go: plan about 3 each for dinner, or 1–2 each with substantial sides.
Serving SituationPlan Per Person
Large appetizer spread1–2 sliders
Sliders are a major appetizer2–3 sliders
Main meal with sidesAbout 3 sliders
Teenagers or very hungry adults3–4 sliders

In practice, one 12-slider tray works for roughly 6–12 people in a larger spread, or about 4 people when sliders are the main meal. With substantial sides such as creamy coleslaw, plan on 1–2 sliders each. One tray can then feed closer to 12 people.

Need 24 or 36? Make two or three normal trays instead of one enormous slab.

Scale the tray, not the skillet. Several pounds of ground beef crowded into one domestic pan release water faster than the pan can evaporate it. Brown large quantities in batches, drain each batch, then combine the cooked beef before assembling the trays.

Want a solid beef layer? See the Sheet-Pan Patty · Back to Top

Easy Cheeseburger Slider Variations

Pick one direction and leave the basic build alone. A slider tray is easier to eat when every topping is not competing for space. When tastes around the table differ, a straightforward beef-and-cheese tray with pickles, lettuce, tomato and sauces served separately is often the easiest answer.

  • Bacon cheeseburger: add about 6 cooked bacon strips, crumbled and well drained, before the upper cheese layer.
  • Jalapeño cheeseburger: add about ¼ cup / 35–40 g well-drained pickled jalapeños and swap some or all of the cheddar for pepper Jack.
  • Caramelized onion: replace the diced onion with 1 medium onion cooked slowly until deeply golden, then spread it over the beef before adding the upper cheese.
  • Extra pickle and burger sauce: add more well-drained dill pickles to taste and keep most of the relish in the sauce. Homemade ketchup also works as the tomato base when you are making the sauce from scratch.
  • Ground turkey: cook ground poultry to 165°F / 74°C. It dries out faster than beef, so stop cooking once it reaches temperature.
  • Less-sweet rolls: use brioche or plain soft dinner rolls instead of Hawaiian rolls.
  • Everything seasoning: replace the sesame seeds with everything-bagel seasoning. Keep the listed salt amount, then taste the cooked beef before adding any more.

Sheet-Pan Burger Patty Option

Choose the sheet-pan version when you want every slider to bite through one clean layer of beef rather than loose crumbles.

Use 1½ lb / 680 g 90/10 ground beef. Season it with ¾ tsp fine sea salt, ¾ tsp black pepper, 1¼ tsp garlic powder and 1 tsp onion powder. Onion powder spreads the onion flavor evenly without pieces interrupting the slab, while leaving out the Worcestershire keeps the mixture a little drier.

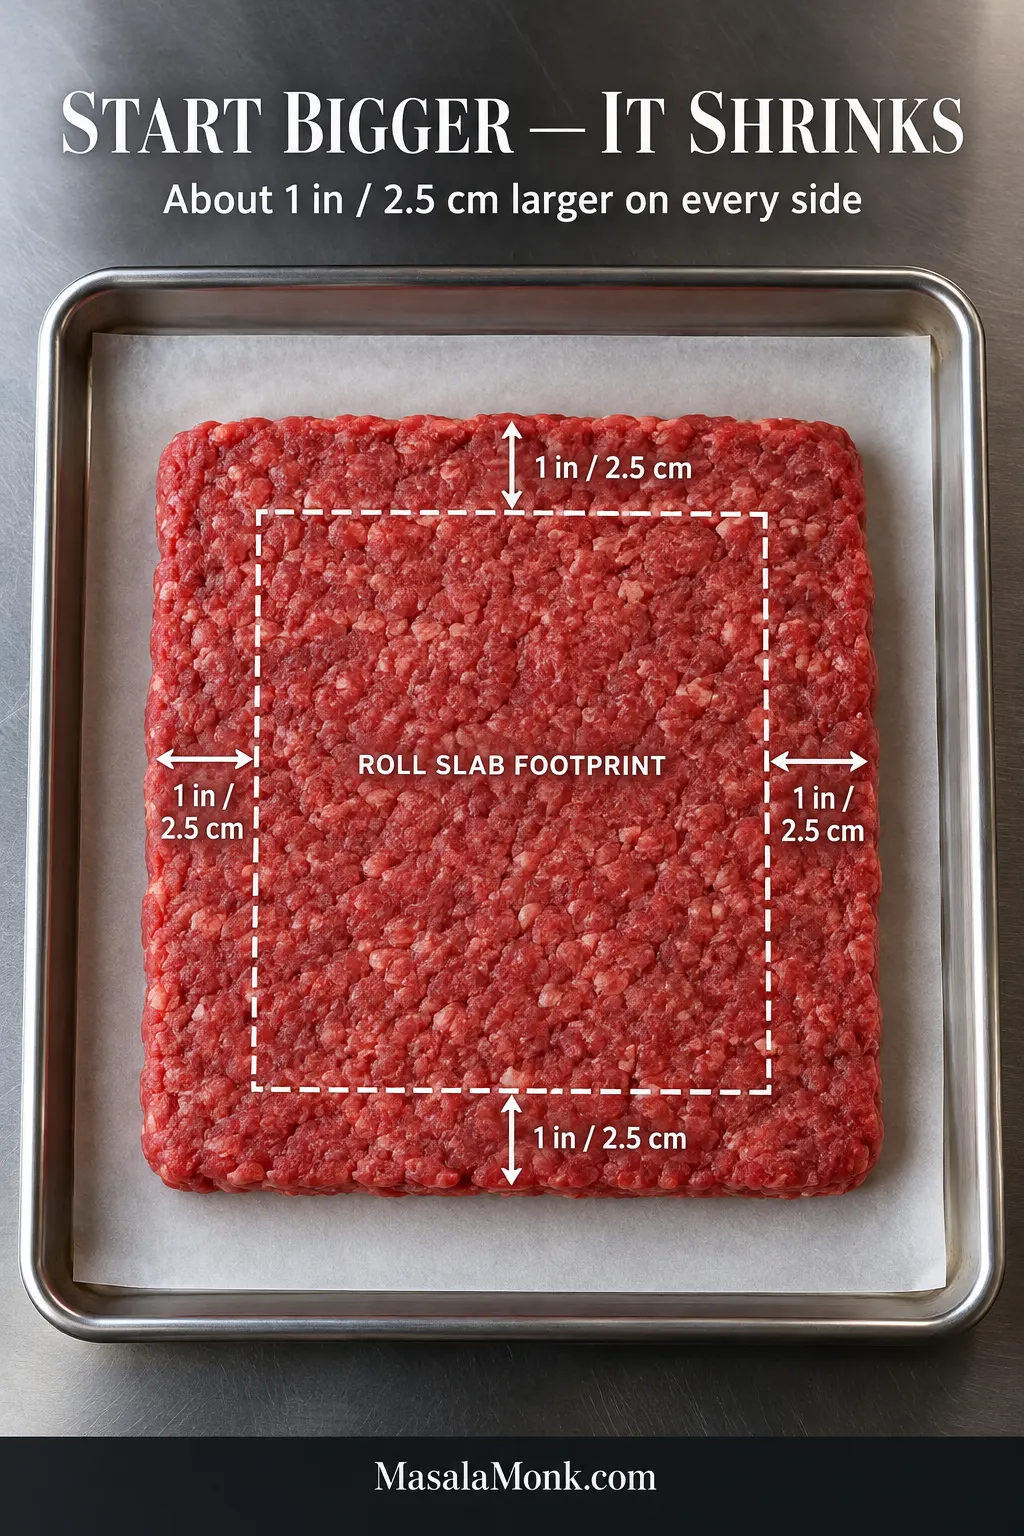
Mix gently, just enough to distribute the seasoning, then press the meat into an even rectangle on a parchment-lined rimmed baking sheet. Shape it about 1 inch / 2.5 cm larger than the roll slab on every side so it still fits after shrinking. Avoid packing the meat firmly.

Raw rectangular beef slab on a sheet pan with a marked roll footprint and a 1 inch / 2.5 cm border shown on every side.
Shape the raw beef larger than the rolls on every side; that extra border compensates for shrinkage in the oven.

Bake at 375°F / 190°C and begin checking around 12 minutes. If a noticeable pool of liquid forms around the patty during baking, carefully drain it away so the beef keeps roasting rather than sitting in liquid. Depending on the shape of the slab and your oven, total cooking time may be roughly 12–18 minutes. The center needs to reach 160°F / 71°C.

When the patty is cooked, reduce the oven to 350°F / 175°C. Move the beef onto the American-cheese-covered rolls, add the pickles and cheddar, replace the tops and finish the tray as directed in the main recipe.

Individually shaped burgers need a different approach. Our burger patty recipe goes deeper into sizing, shrinkage, shaping, dimpling and cooking.

Back to Recipe

Troubleshooting the Tray

When a tray misses the mark, the symptom usually points straight to the cause.

ProblemLikely CauseFix
Bottom buns are greasy or mushyToo much beef fat or cooking liquidDrain the cooked filling more thoroughly or use leaner beef.
Buns are wet even after toastingThe filling is still too wetReduce beef liquid, pickle brine or sauce before worrying about the bread.
Beef is dryLean meat stayed in the skillet too longStop cooking once it reaches 160°F / 71°C.
Rolls turn hard while sittingThey were toasted too muchUse only a light broil for sliders served immediately.
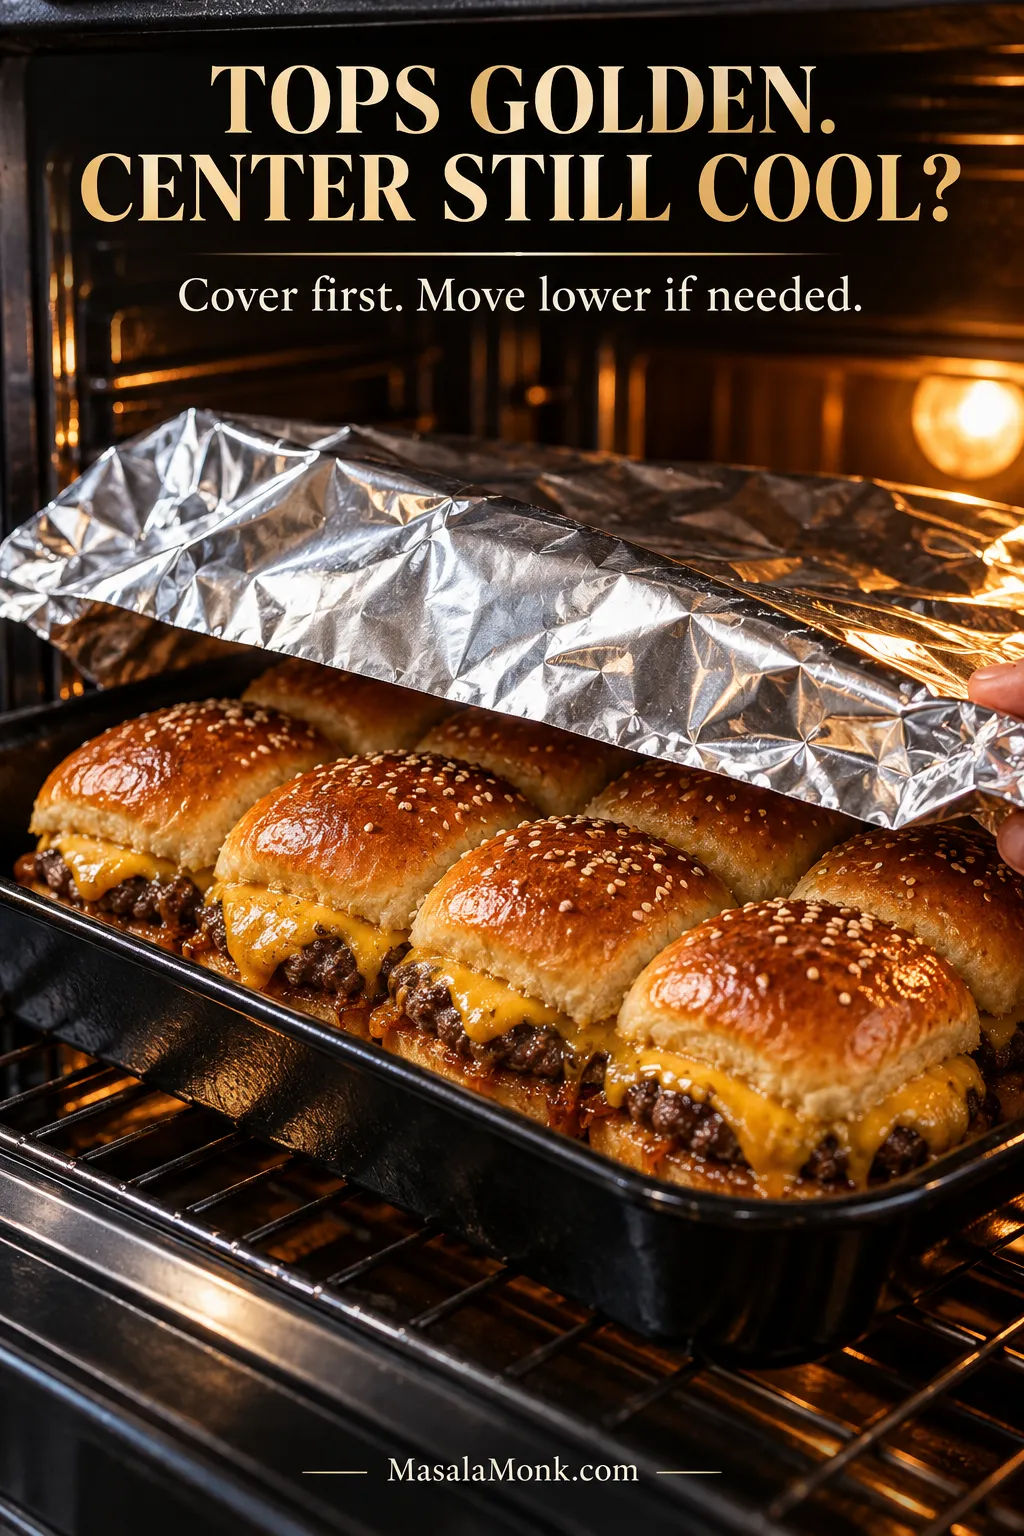
Tops brown before the center gets hotThe tray started cold, the rack is too high, or the oven has strong top heatCover a cold tray initially; move it lower in the oven if the tops are browning too quickly.
Sliders taste too saltySalt from cheese, pickles, Worcestershire and toppings has accumulatedUse unsalted butter and season the beef conservatively.
Beef falls out when cuttingLarge crumbles, uneven upper cheese, or cutting before the 5-minute restBreak the beef smaller, spread the cheddar evenly and give the tray time to settle before cutting.
Wet spots form around the picklesExcess pickle brineDrain and blot the slices before layering.
Sheet-pan patty shrinks too farThe raw rectangle started too smallMake it about 1 inch / 2.5 cm larger than the roll slab on every side.
Sheet-pan beef looks grey and wetReleased liquid is steaming the meatCarefully drain significant pooled liquid during baking.
Leftover bread feels rubberyMicrowave-only reheatingFinish with oven, toaster-oven or air-fryer heat.

Golden Tops, Cool Center?

If the rolls already have the color you want before the middle is hot, treat it as a heat-management problem. Protect the surface you have already browned and give the center more time.

Golden cheeseburger sliders being loosely covered with foil in the oven. Text reads “Tops golden. Center still cool? Cover first. Move lower if needed.”
Foil is a shield here, not a seal: protect the color you already have while the center catches up.

Back to Recipe · Reheating leftovers? See Storage & Reheating

Storage and Reheating

Cool leftover sliders promptly and refrigerate them in an airtight container. Use them within 3–4 days.

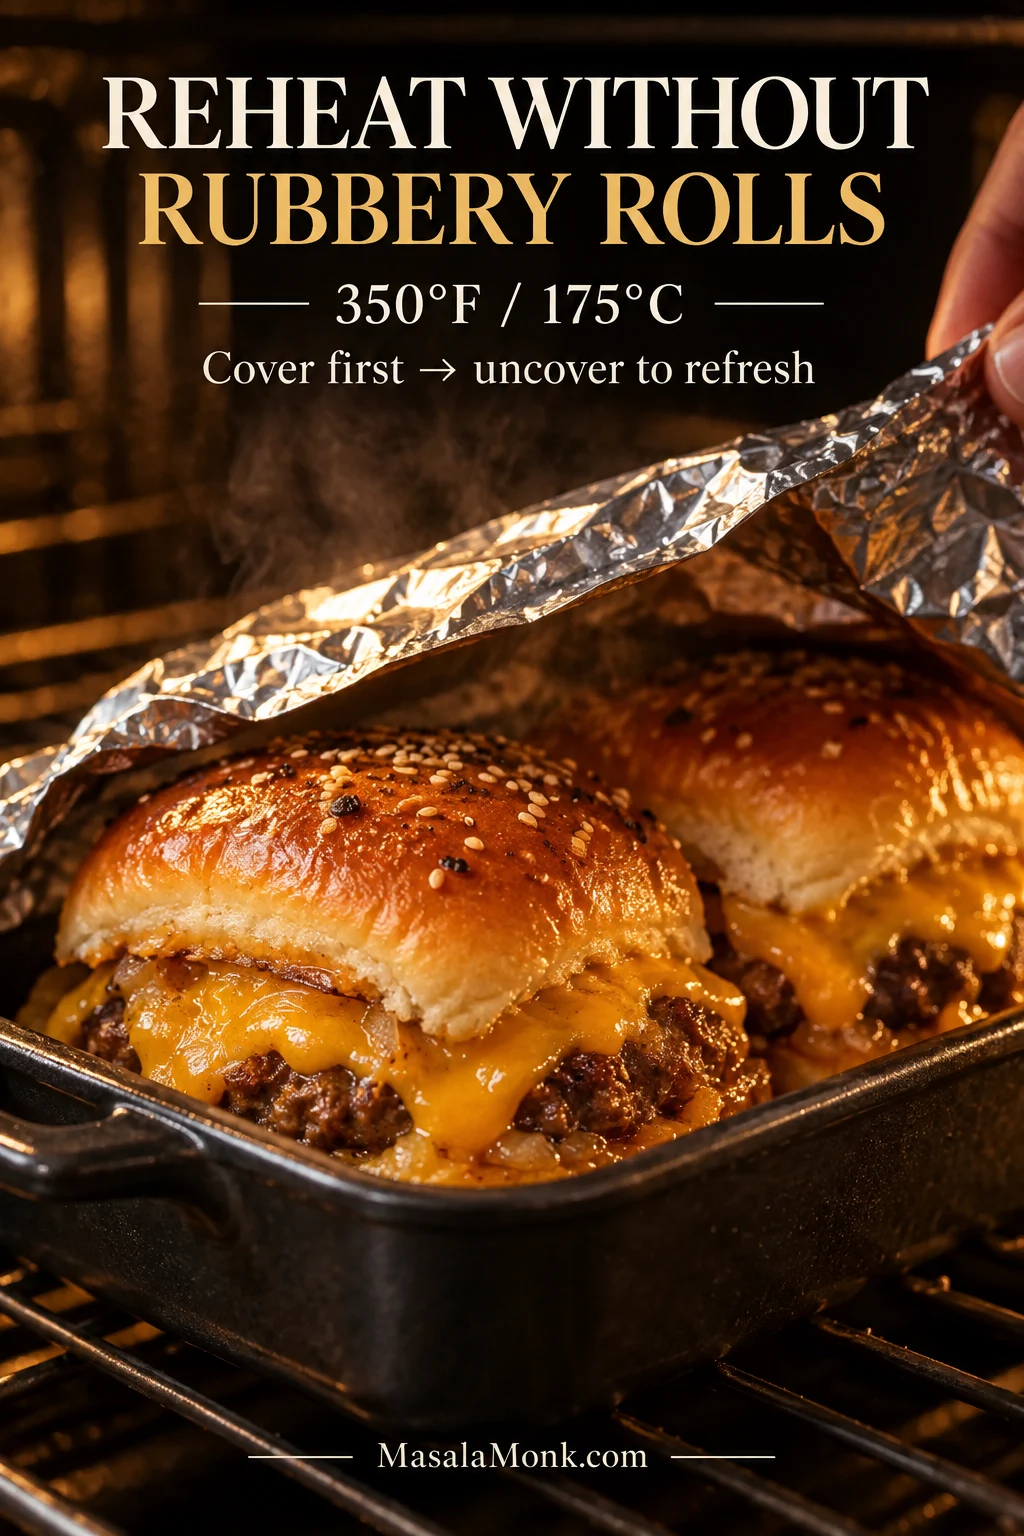
The oven does the best job of restoring the rolls. Reheat cheeseburger sliders covered at 350°F / 175°C, then uncover briefly near the end. Individual sliders usually need about 10–15 minutes; a larger batch can take longer. Bring the center to 165°F / 74°C.

Cheeseburger sliders reheating in the oven as foil is lifted away. Text reads “350°F / 175°C — Cover first, uncover to refresh.”
Covered heat warms the center gently; the short uncovered finish brings the surface of the rolls back.

An air fryer is handy for one or two sliders at about 350°F / 175°C; start checking early because the sweet tops brown fast. The microwave gets the middle hot quickly, but it does not do the rolls any favors. When speed matters, microwave briefly and finish with a minute or two of dry heat.

Freezing

The rolls hold up better when the cooked beef is frozen separately and fresh sliders are assembled after thawing. Fully baked sliders can also be frozen when convenience matters more. Wrap them well, use within about 3 months for best quality, thaw in the refrigerator and reheat with dry oven heat. Expect the bread to be softer than it was on baking day.

What to Serve With Cheeseburger Sliders

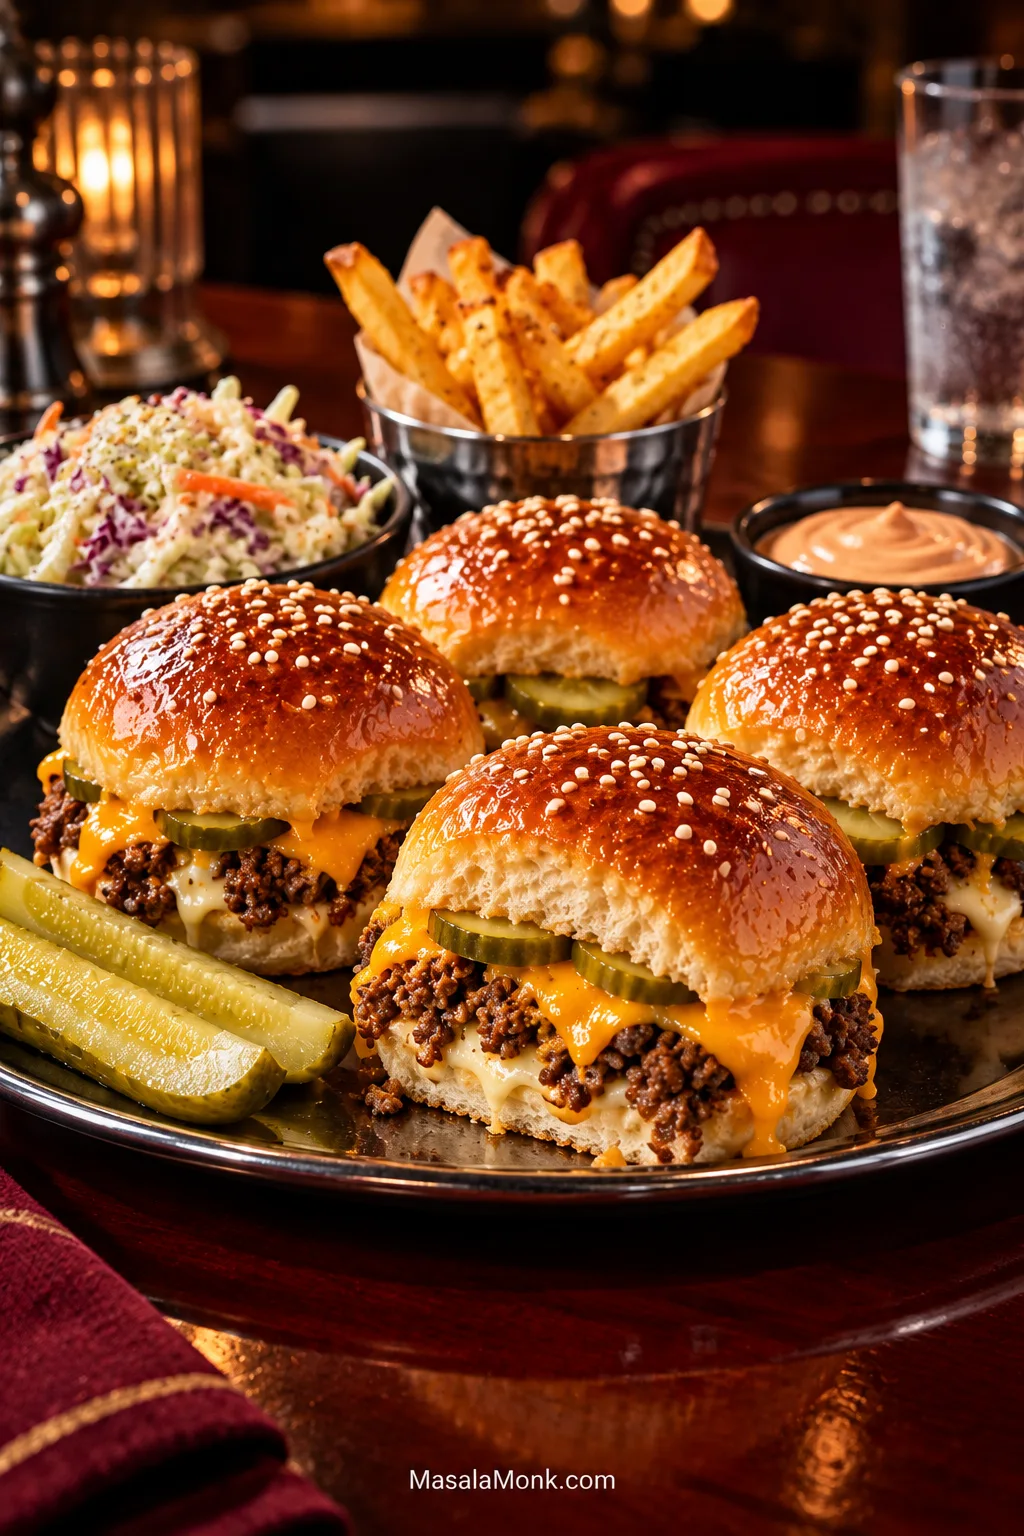
Good sides for cheeseburger sliders include fries, coleslaw, potato salad, baked beans, pickle spears, chicken wings and a crisp green or cucumber salad. Because the sliders already bring beef, melted cheese and buttery bread, the easiest balance comes from something cool, crunchy or acidic.

Cheeseburger sliders served with pickle spears, coleslaw, fries and burger sauce.
The sliders already bring the richness. Use the sides for crunch, coolness or acidity.

Crispy baked chicken wings give a game-day table a completely different texture, while pickle spears, raw vegetables and chips fill things out without requiring another last-minute recipe.

A cool potato salad adds a tangy, creamy contrast and can be finished well before the sliders need the oven.

You do not need much else. Put the tray down while the cheese is still soft and molten, keep pickles and burger sauce nearby, and let people pull apart a slider while the rolls are warm. That is when these are at their best.

Back to Recipe · Back to Top

Posted on — Leave a comment

Avgolemono Soup Recipe: Silky Greek Lemon Chicken Soup

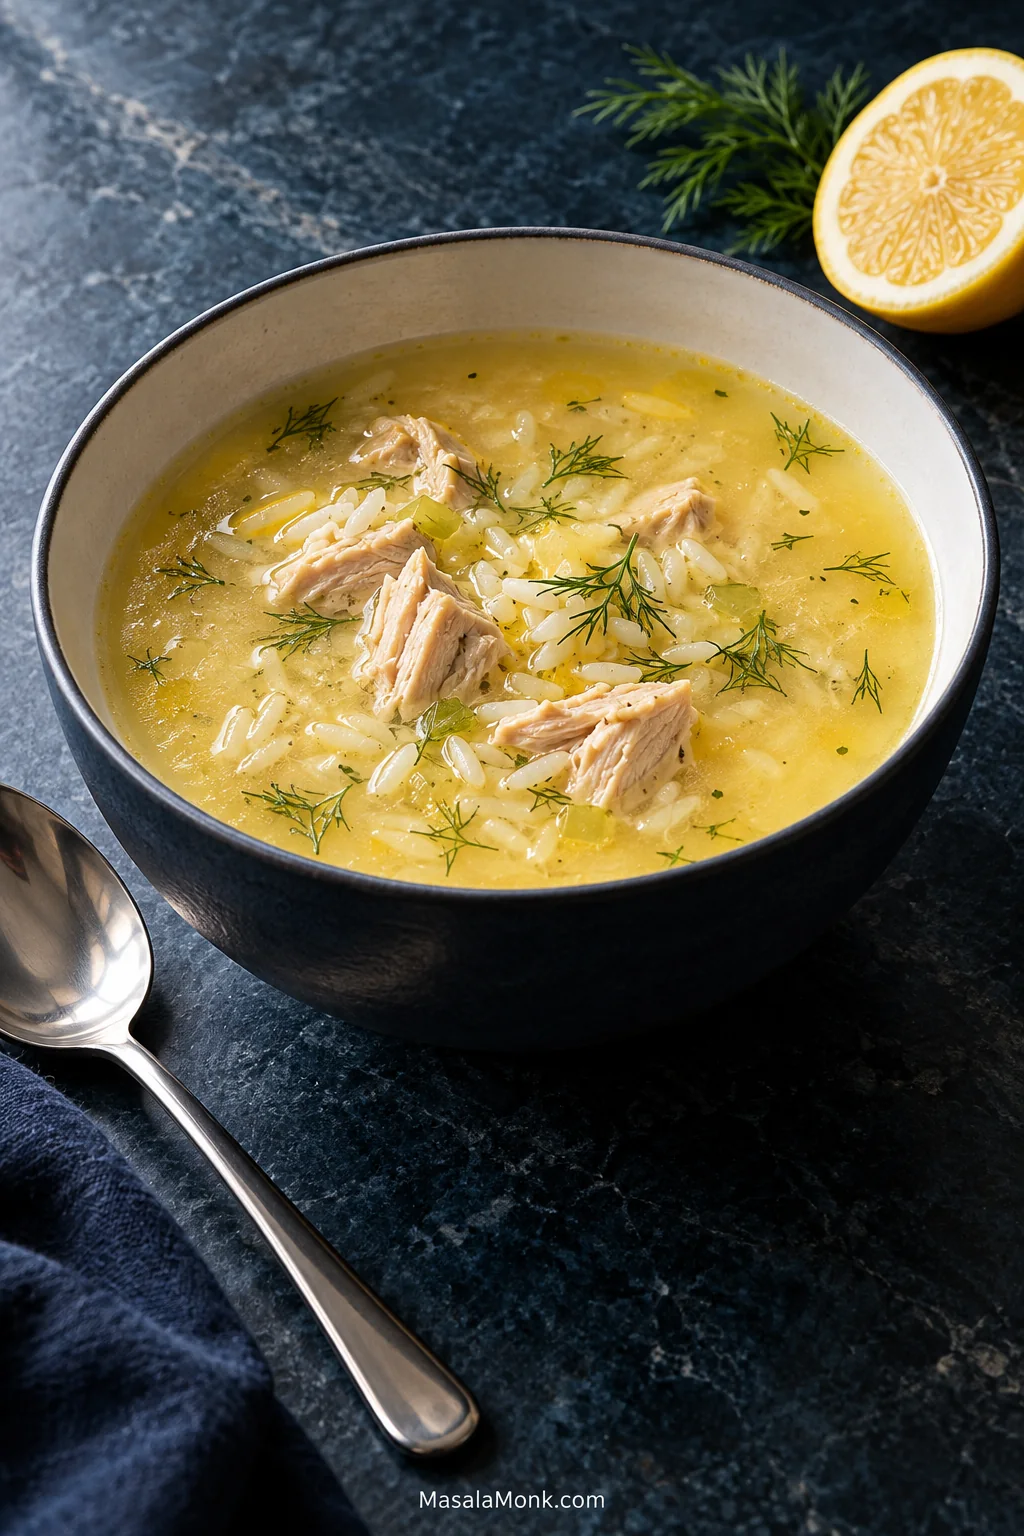
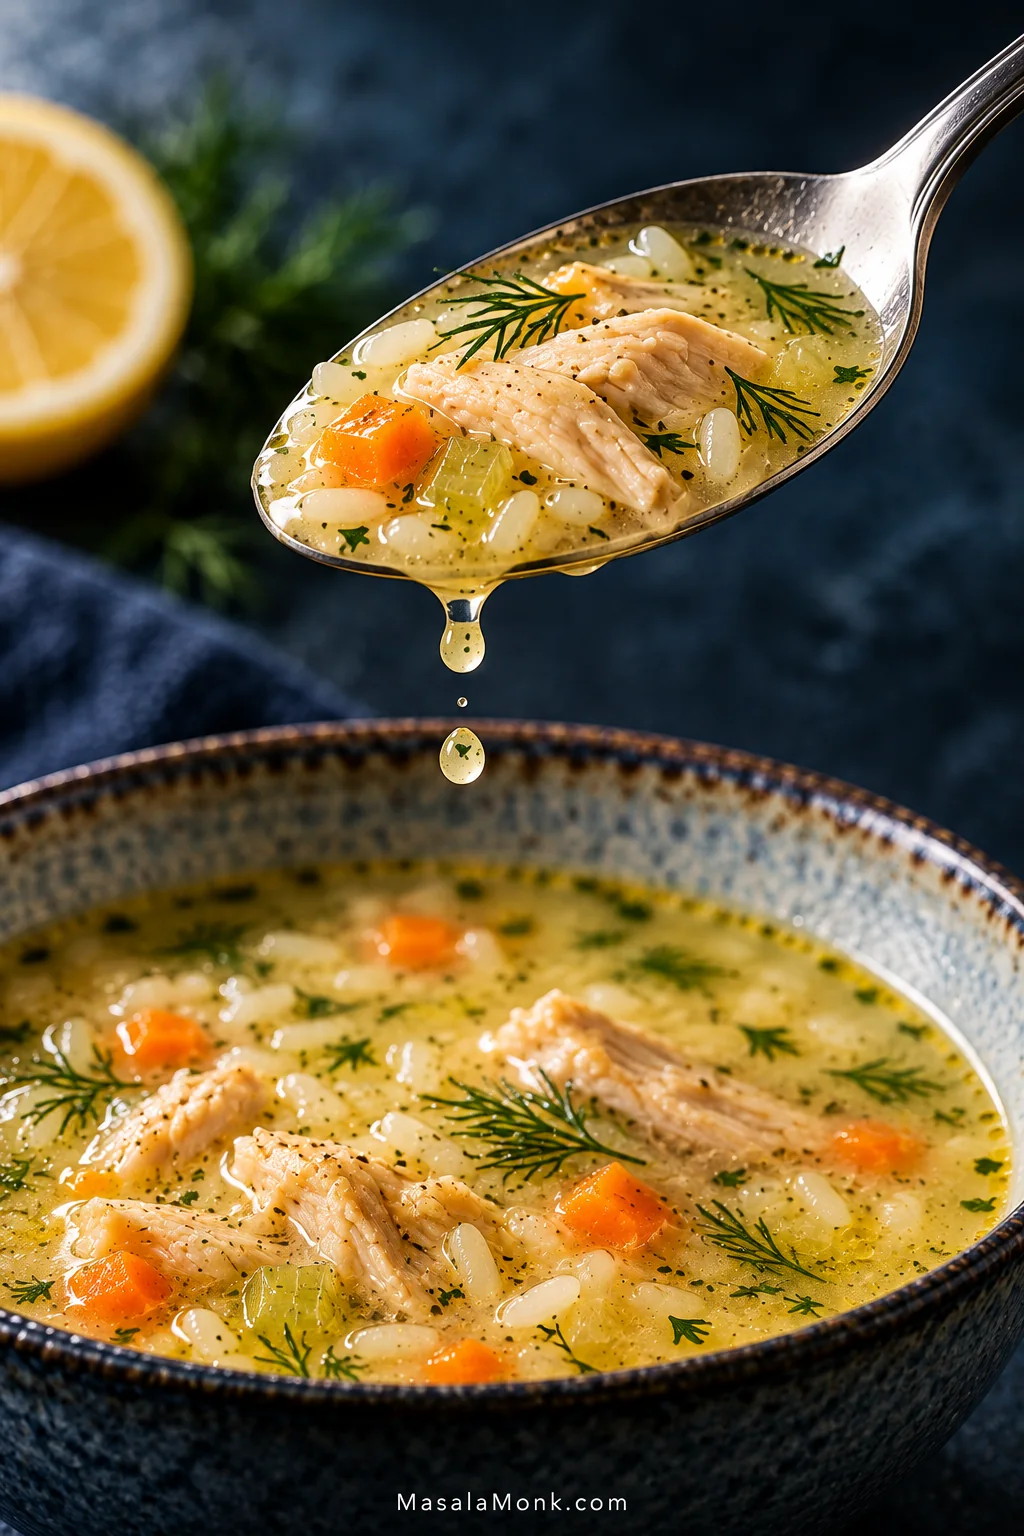
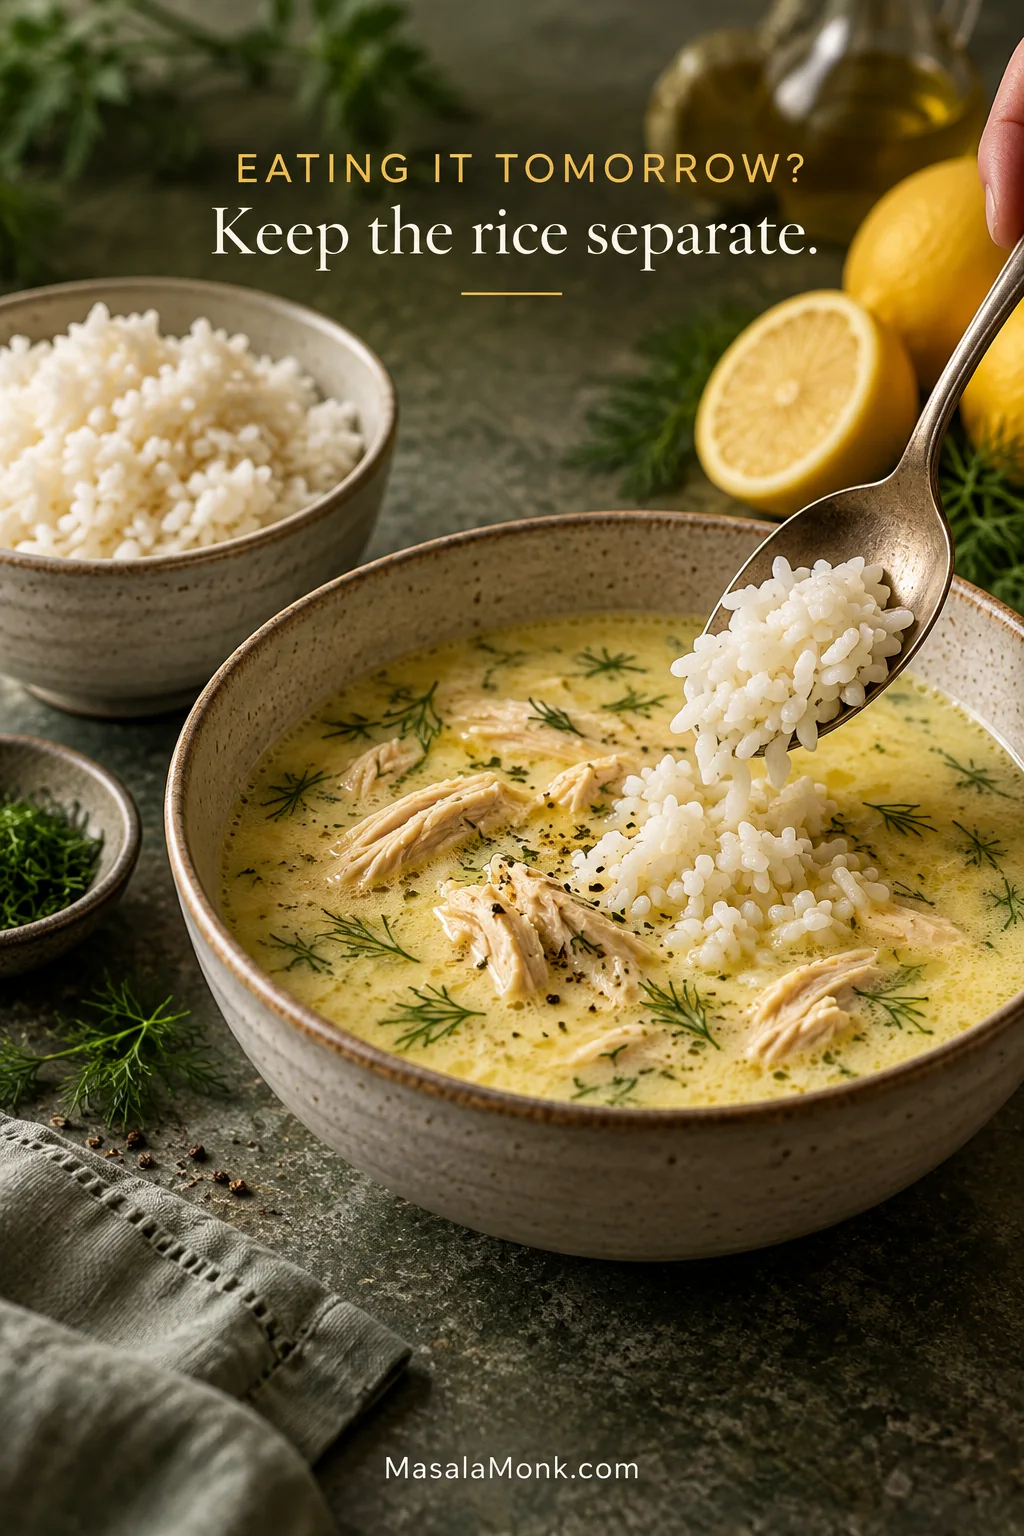
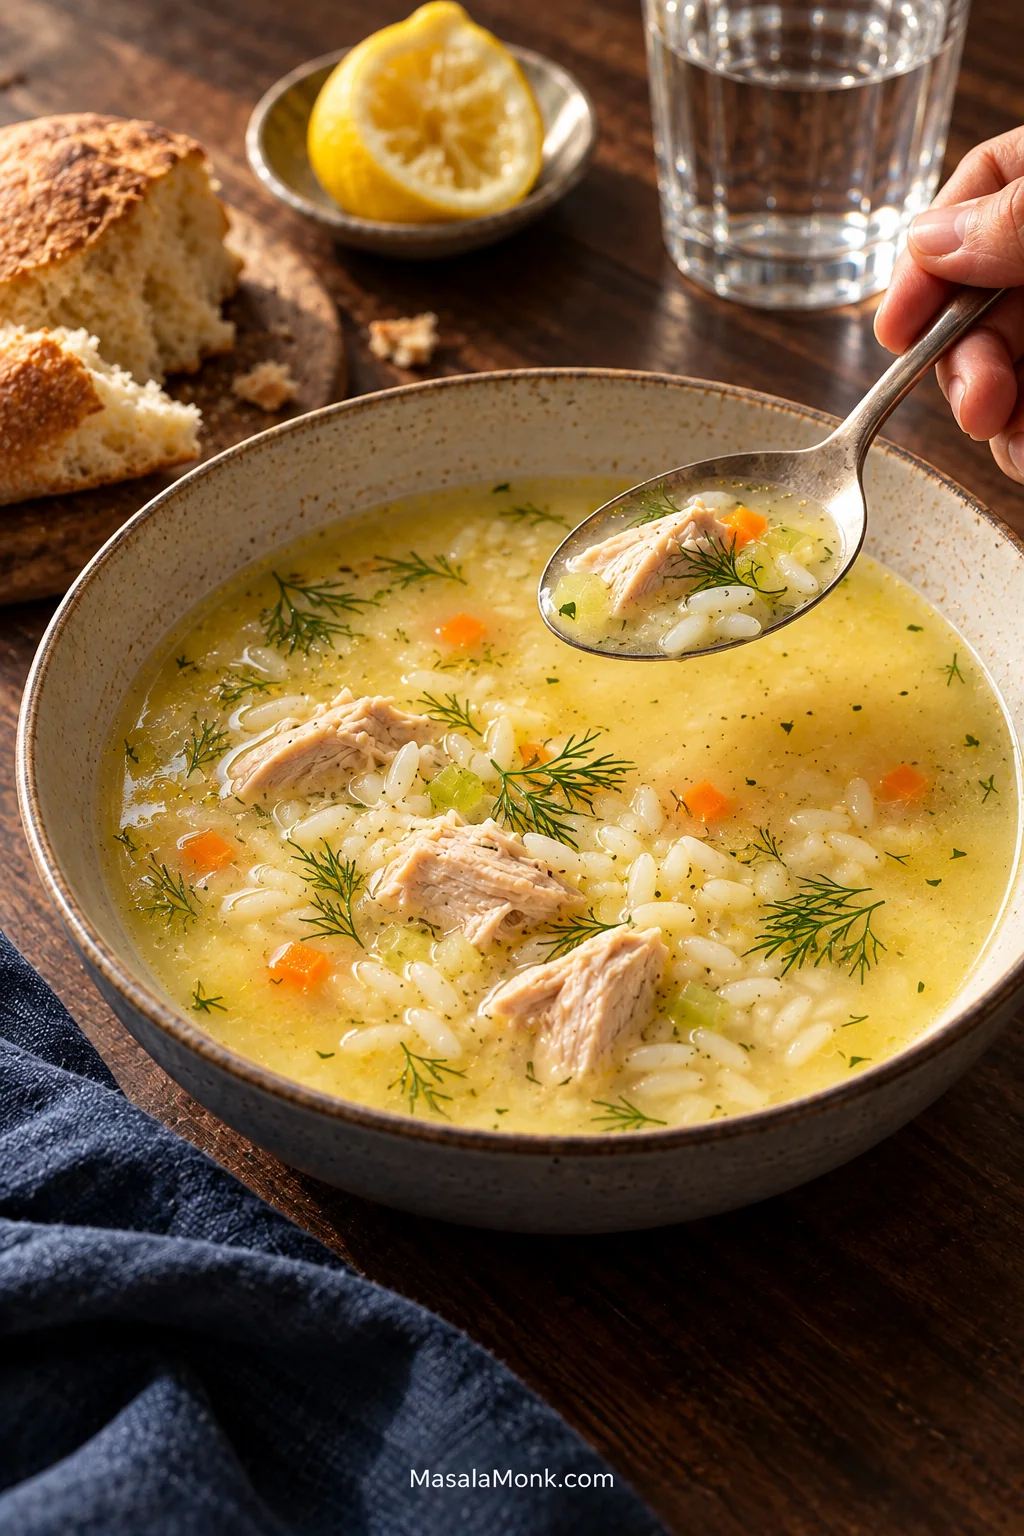
Bowl of pale lemon-gold Avgolemono soup with tender chicken, medium-grain rice, finely diced vegetables and a small amount of fresh dill, with visible broth between the solids.

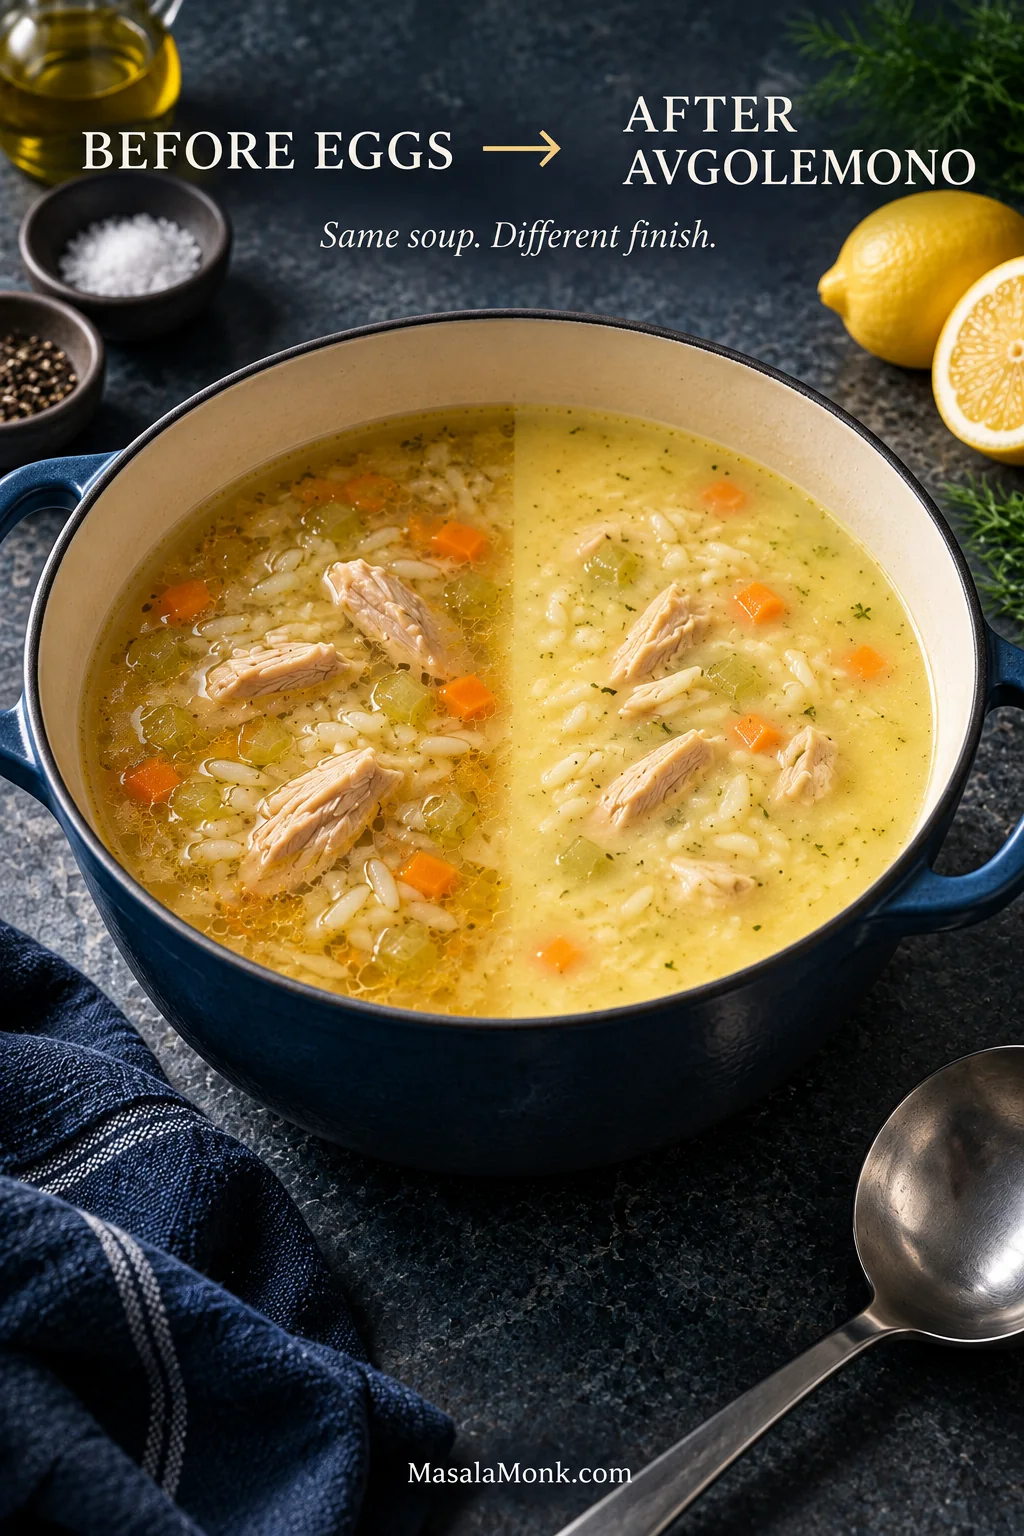
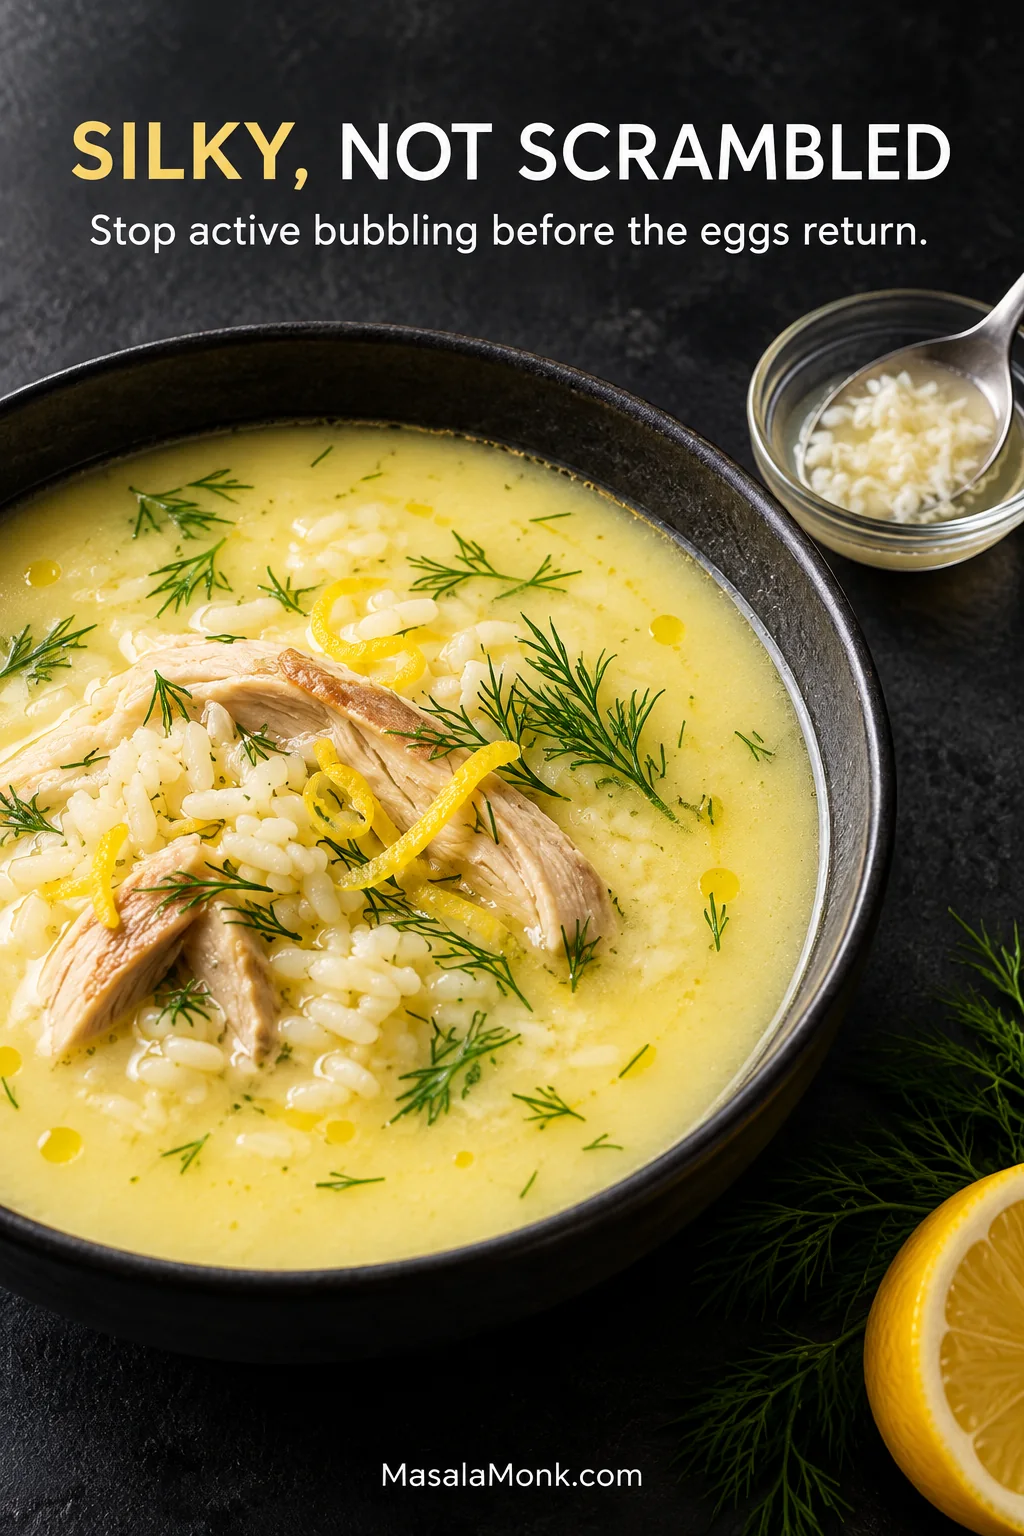
Avgolemono should be silky enough to lightly coat a spoon, bright with fresh lemon, and brothy enough that tender rice and chicken still move freely through the soup. Eggs—not cream—give the broth its creamy body, while lemon keeps it fresh rather than heavy. Underneath the unfamiliar name and egg-lemon technique is something reassuringly simple: warm chicken broth, tender chicken and soft rice.

The main risks are simple too: eggs that get too hot and rice that takes over the broth. Overheated eggs can tighten into white ribbons. Rice that looks perfectly reasonable while the pot is bubbling can keep drinking broth long after the heat is off.

The method below keeps both in check. First comes the chicken, followed by the medium-grain rice. Active simmering stops before the egg-lemon mixture goes back into the pot, leaving you with a Greek lemon chicken soup that stays bright, brothy and smooth without cream.

This Avgolemono soup recipe uses medium-grain rice, with an exact orzo option below. Lemon goes in stages too. Most of the cooking is ordinary soup-making; tempering is the one part that asks for your full attention, and the cues below make it much easier than it sounds.

Four Moments Decide the Soup

SIMMER

Cook the chicken, then the rice, while the broth can still simmer.

Look for: tender rice with plenty of free broth.

STOP

Turn the burner off before the egg-lemon mixture returns.

Look for: active bubbling has stopped.

TEMPER

Whisk measured hot broth gradually into eggs and lemon.

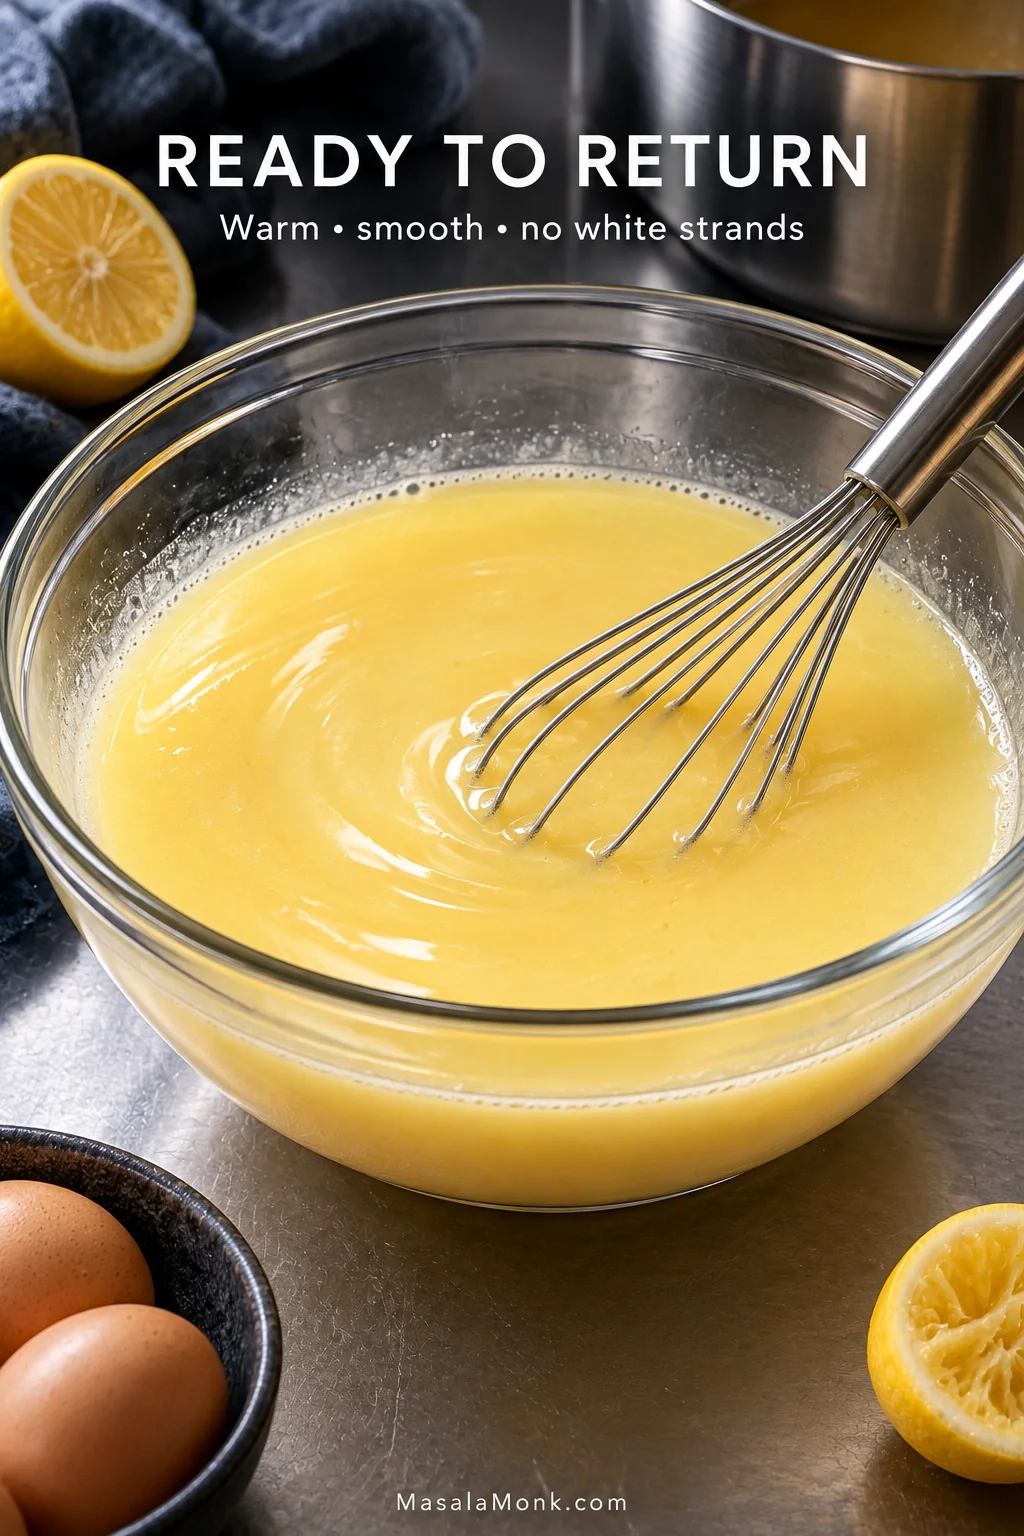
Look for: a warm, smooth mixture with no white strands.

REST

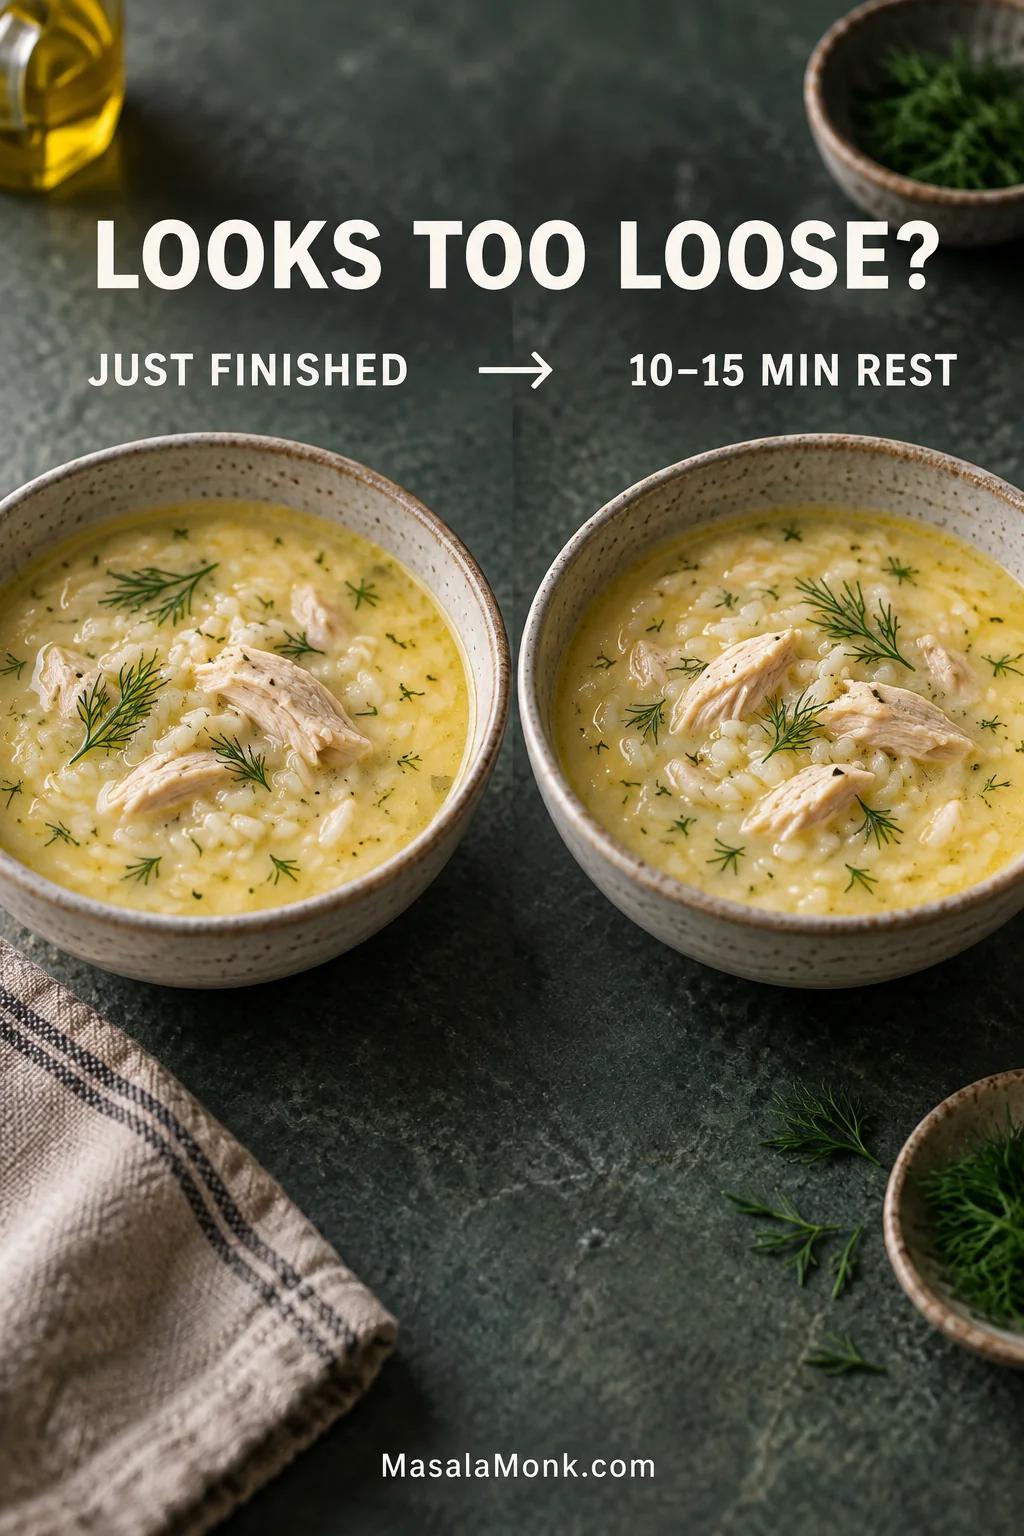
Give the finished soup 10–15 minutes before changing anything.

Look for: broth that lightly coats a spoon but still pours freely.

Avgolemono Soup Recipe

Greek lemon chicken soup with tender chicken, medium-grain rice and a fresh egg-lemon finish. The modest amount of rice leaves plenty of broth, while measured tempering gives the eggs time to warm gradually and disappear into it.

Prep: 15 minutes

Cook: about 40 minutes

Rest: 10–15 minutes

Total: about 1 hour 5–10 minutes

Servings: 6

Equipment

  • 5–6 quart / about 5–6 L Dutch oven or heavy soup pot with lid
  • Medium heatproof mixing bowl
  • Whisk
  • Instant-read thermometer

A ladle or heatproof measuring cup makes tempering easier. For rinsing the rice, a fine-mesh sieve is useful; a fine grater helps if you are adding zest.

Ingredients

IngredientAmount
Extra-virgin olive oil1 tablespoon / 15 ml
Yellow onion, finely diced1 medium, about 150 g / 5.3 oz
Carrot, finely diced1 medium, about 100 g / 3.5 oz
Celery, finely diced1 large stalk, about 60 g / 2 oz
Low-sodium chicken broth or stock8 cups / 1.9 L, plus extra if needed
Boneless skinless chicken thighs1¼ lb / about 570 g
Medium-grain white rice½ cup / about 95 g / 3.4 oz
Large eggs3
Fresh lemon juice¼ cup / 60 ml, plus 1–2 tablespoons / 15–30 ml to taste; about 2–3 medium lemons total
Finely grated lemon zest, optional1 teaspoon
Fresh dill, finely chopped2 tablespoons / about 3 g
Fine salt½ teaspoon / about 3 g to start, plus more to taste
Freshly ground black pepper½ teaspoon, plus more to taste

Before you start: take the eggs from the refrigerator while you prep the vegetables. Rinse the rice in a fine-mesh sieve under cool running water until the runoff is much less cloudy, then drain well. This removes much of the loose surface starch and helps prevent the broth from becoming overly thick. If your broth is already salty, start with less than the listed ½ teaspoon salt.

Instructions

Cook the Broth, Chicken & Rice

  1. Soften the vegetables. Heat the olive oil in the soup pot over medium heat. Add the onion, carrot, celery and ½ teaspoon salt. Cook for about 5 minutes, stirring occasionally, until the onion is translucent and the vegetables begin to soften. Keep them pale rather than browning them deeply.
  1. Add the broth and chicken. Pour in the chicken broth and bring it to a low simmer. Add the thighs, partially cover the pot and adjust the heat so small steady bubbles rise through the broth.
  1. Cook until safe and tender. Simmer until the thickest thigh reaches at least 165°F / 74°C and the meat is tender, usually about 12–16 minutes depending on thickness. Transfer the chicken to a plate. If the broth has reduced noticeably, top it up with some hot broth before the rice goes in.
  1. Cook the rice uncovered. Stir in the rinsed rice and keep the broth at a low simmer until the rice is tender, usually about 14–18 minutes.
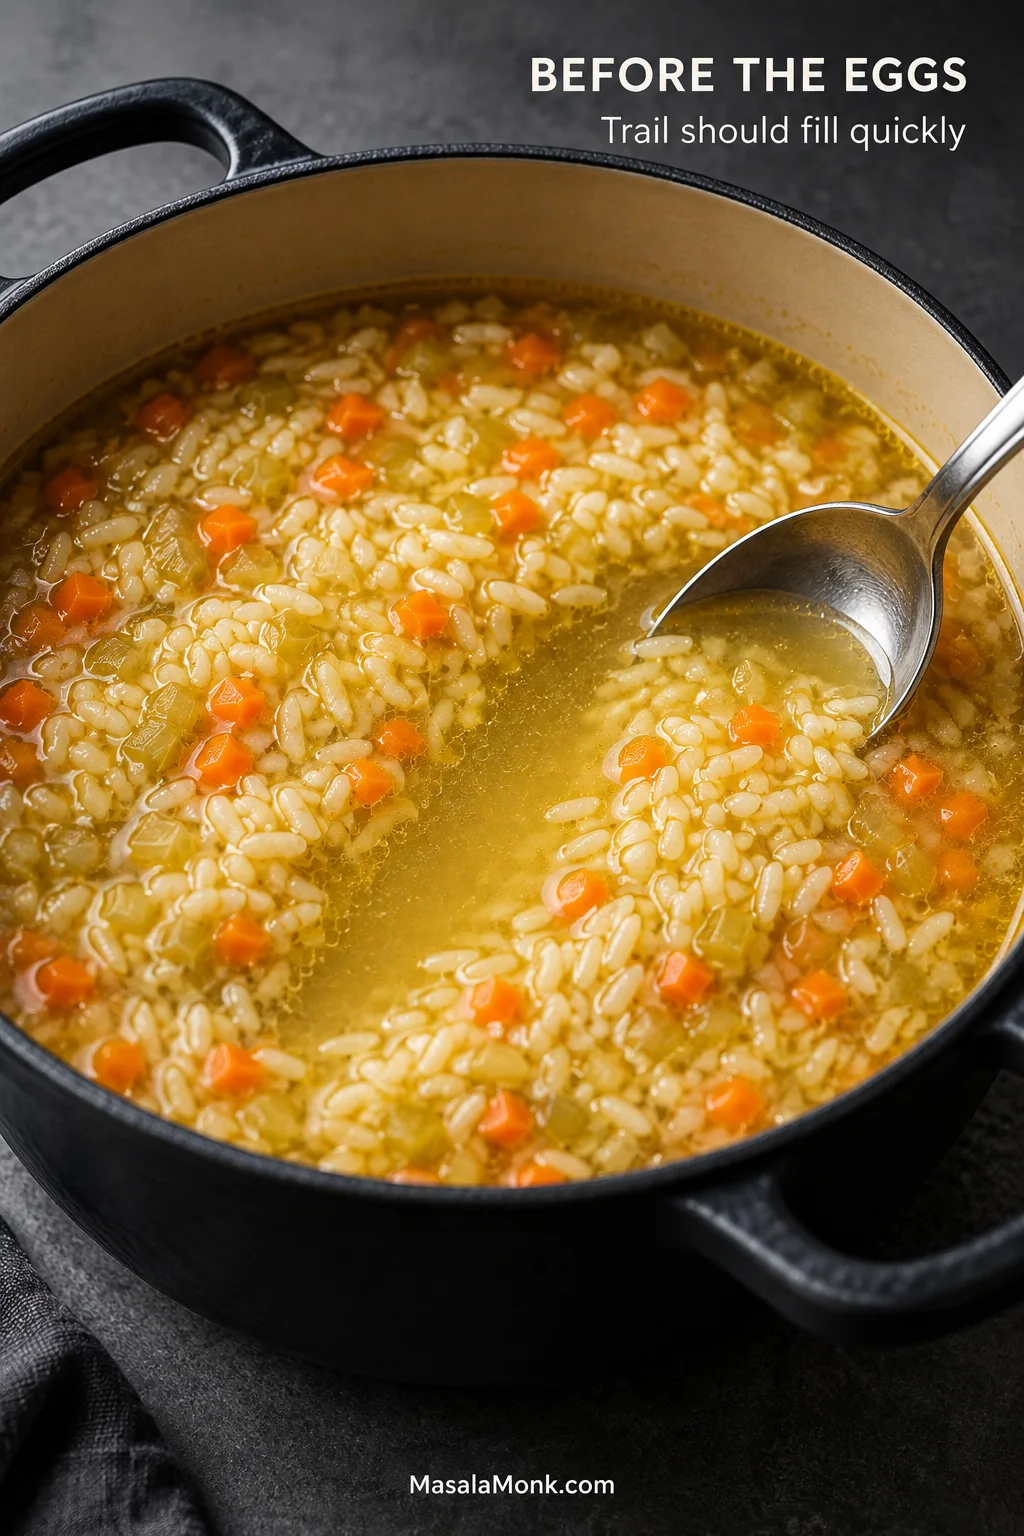
  1. Read the pot. There should be plenty of liquid around the rice. Drag a spoon through the pot; broth should flow back into the trail almost immediately. If that is what you see, you are exactly where you want to be. A pot that already looks thick needs some hot broth now rather than later.
Spoon drawn through golden chicken-and-rice broth before the egg-lemon finish, leaving a temporary trail with liquid flowing back around the rice and vegetables.
Pot width, simmer strength and evaporation can all change the timing. That is why reading the liquid around the rice is more dependable than cooking by minutes alone: the broth should still move freely before the eggs enter the picture.
  1. Prepare the chicken. While the rice cooks, shred or chop the thighs into pieces that fit easily on a soup spoon.

Temper the Egg-Lemon Mixture

  1. Whisk the eggs and lemon. In a medium heatproof bowl, whisk the eggs until completely blended and lightly frothy. Whisk in ¼ cup / 60 ml freshly squeezed lemon juice and the zest, if using.
  1. Turn the burner off. Once the rice is tender, switch off the heat. Wait 1–2 minutes, until active bubbling has stopped.
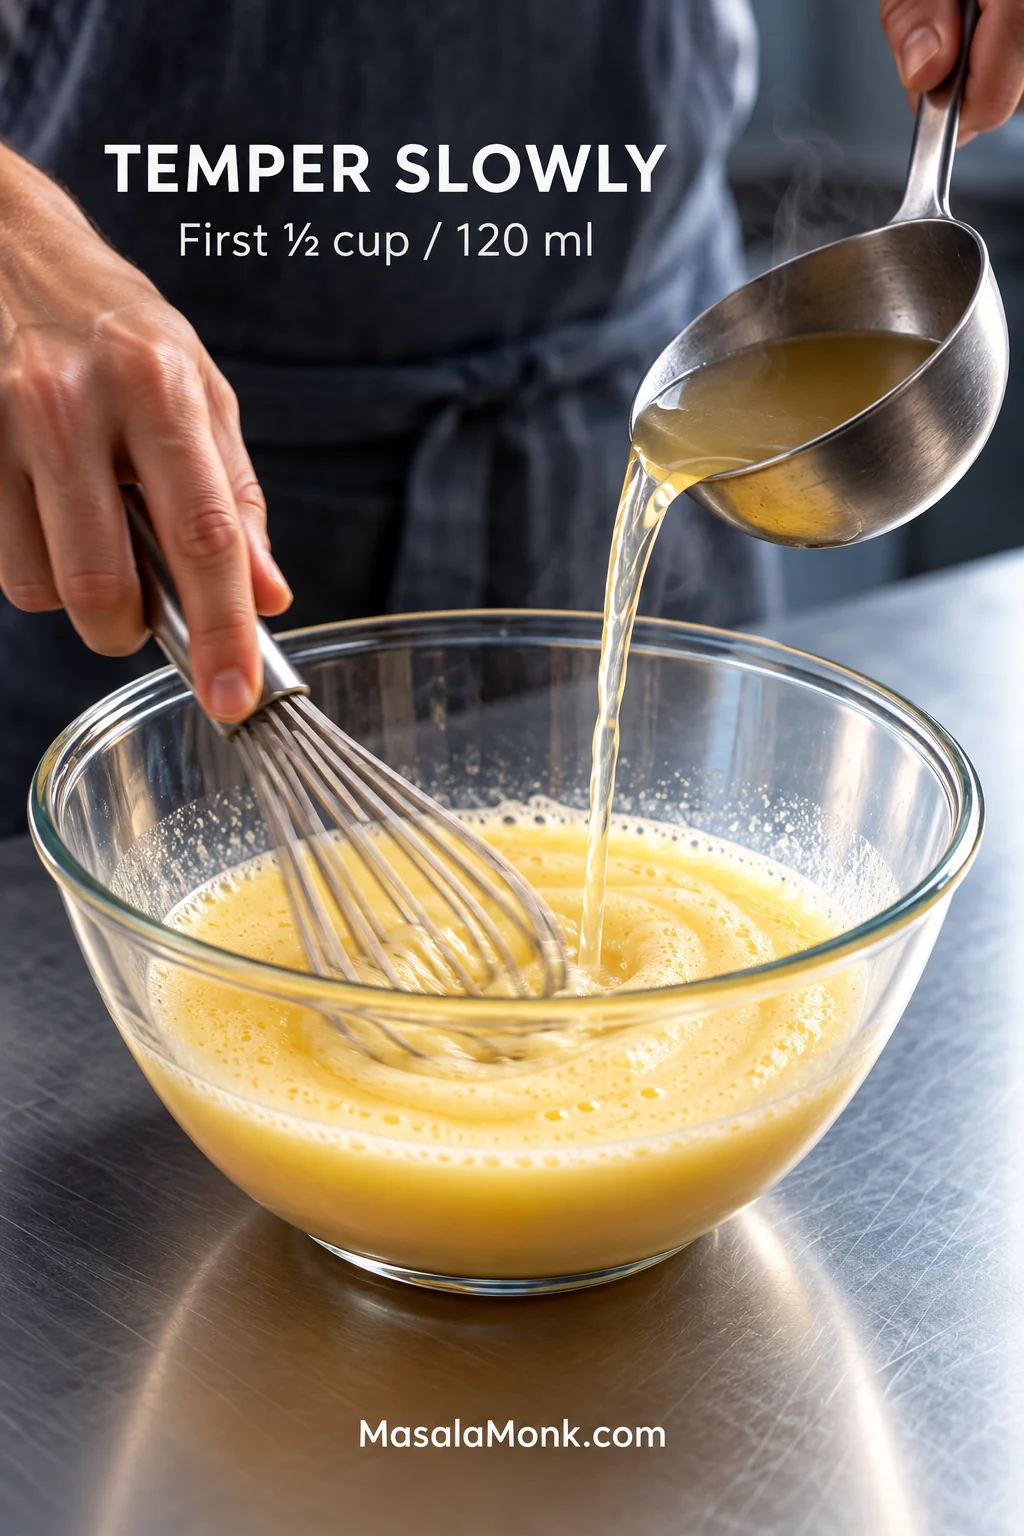
  1. Temper gradually. Measure 2 cups / 475 ml hot broth from the pot. While whisking continuously, slowly stream in the first ½ cup / 120 ml. Once the egg mixture feels warm, add the remaining broth in roughly ½-cup / 120 ml additions, whisking throughout. Lift the whisk at the end: the mixture should run back smoothly, without cooked white strands clinging to it. Once it is warm and smooth, the hardest part is over.
Hot chicken broth being poured in a thin stream into eggs and lemon while the mixture is whisked continuously in a heatproof bowl.
The first stream handles the biggest temperature jump. At that point the hot broth and cool eggs are furthest apart; once the mixture has warmed, the later additions are much less likely to shock the eggs.

Return, Rest & Finish the Soup

  1. Return it to the pot. Slowly pour the tempered mixture into the soup while stirring, then add the chicken. The broth turns pale and fuller.

    Temperature check: if the soup is already 160°F / 71°C or above, the fresh soup needs no more heat. If it is cooler, warm it over low heat while stirring until it reaches 160°F / 71°C. Do not bring freshly finished Avgolemono back to a simmer.
  1. Leave it alone for 10–15 minutes. A soup that looks slightly loose at this point is normal. The texture will settle as it rests. Don’t chase thickness before that happens.
  1. Finish the soup. Check the salt first, then add more fresh lemon juice 1 tablespoon / 15 ml at a time until it tastes as bright as you want it. Stir in the dill and black pepper. Tilt a ladle over the pot: the broth should pour back in a smooth stream rather than drop in heavy clumps. Add warm broth ¼ cup / 60 ml at a time if it needs loosening.

Useful Substitutions

  • Chicken breast: use the same weight and remove it promptly once the thickest part reaches 165°F / 74°C.
  • Rotisserie chicken: use about 3 cups / 400–450 g shredded plain or lightly seasoned chicken. If it is refrigerator-cold, warm it in the broth before turning off the heat and tempering the eggs.
  • Orzo: replace the rice with 4 oz / 115 g dry orzo and cook until just tender, usually about 7–10 minutes depending on the brand.
  • Cooked rice: warm about 1½ cups in the broth before turning off the heat and tempering, or warm it separately and ladle the finished Avgolemono over it.
  • Parsley: flat-leaf parsley can replace the dill.
  • Richer egg finish: use 2 whole eggs + 2 yolks instead of 3 whole eggs.

Texture check: finished Avgolemono should cling lightly to the spoon while still falling back into the bowl as broth.

Close-up of a spoon holding Avgolemono with chicken and rice as a few separate drops of pale broth fall back toward the bowl.
The broth should cling lightly, then fall cleanly from the spoon. A continuous rope-like stream or sauce-like ribbon usually means starch or reduction has pushed the soup beyond the light, brothy texture intended here.

What Makes Avgolemono Avgolemono?

Avgolemono (roughly ahv-go-LEM-uh-no) literally means “egg-lemon.” It is a Greek preparation made with eggs, lemon and hot broth, and it is used to give soups and other dishes body, brightness and a smooth finish.

Here, it transforms chicken-and-rice soup into the pale, silky soup most English-speaking cooks know by the same name. You will also see it described as Greek lemon chicken soup or Greek egg-lemon soup. In Greek-American diners, it may also appear as chicken lemon rice soup.

A lemon chicken soup with rice or orzo is not automatically Avgolemono; the egg-lemon finish is what changes it. Some cooks use rice, others orzo. Whole eggs are common, while extra yolks make the mixture richer. The soup can finish light and brothy or considerably thicker.

The same chicken-and-rice soup shown before and after the egg-lemon finish, changing from clear golden broth to an evenly pale and more opaque Avgolemono broth.
Look for an even change throughout the liquid. After the tempered eggs return, the broth should become uniformly paler and more satin-like; isolated white wisps are different and point to egg beginning to set separately.

Rice or Orzo: Choose the Texture You Want

Both rice and orzo work in Avgolemono. Rice usually gives you a softer, more integrated soup; orzo has a more distinct pasta bite. Either one will continue taking up broth during storage, which is worth remembering when you are cooking ahead.

If you want…Choose…What changes
A fuller, more integrated lemon-rice soupMedium-grain white riceSofter grains and a little more body in the broth
A lighter soup with clearer individual grainsLong-grain white riceMore separation between rice and broth
A defined pasta biteOrzoA more pasta-forward texture while fresh
Several days of leftoversCook either starch separatelyThe stored broth stays much looser
A thick Greek-American diner styleA little more starch or a longer restMore body and a stronger lemon-rice character
Two bowls of Avgolemono side by side, one made with white rice and one with orzo pasta, showing the visibly different shape and texture of the two starches.
Rice and orzo are not best swapped blindly by volume. They pack differently, so use the measured amount for each in the recipe; then choose between them for the eating texture you prefer rather than trying to make one behave like the other.

Start with ½ cup / about 95 g medium-grain rice for 8 cups / 1.9 L broth. That gives the soup substance without making it starch-heavy; the eggs provide most of the body.

Arborio works too, but it releases plenty of starch and thickens the broth quickly. Use the same restrained amount and give the soup time to settle before deciding it needs more body.

If Tomorrow Matters, Keep the Rice Separate

When most of the soup will be eaten at dinner, cook the rice right in the broth. It takes on chicken flavor, and some of its starch becomes part of the soup.

For leftovers over the next couple of days, keep the rice or orzo separate from the start. Spoon some into each serving and add hot Avgolemono over it. The how to cook rice guide has the basic ratios and timings if you are cooking a separate batch.

Cooked white rice being spooned from a separate bowl into a serving of Avgolemono, illustrating keeping the rice apart until serving leftovers.
Separate storage also protects the broth from extra starch. Reheat the soup according to the safety guidance below, warm the rice separately, then combine them in the serving bowl so the grains spend less time soaking in the broth.

Planning for leftovers? See make-ahead, storage and reheating.

Chicken Thighs, Breast or Rotisserie?

Chicken thighs are the main choice here because they are forgiving and bring some richness to the broth. 165°F / 74°C is the safe minimum for poultry, but thighs may become more tender with additional time at a low simmer if the meat still feels firm.

Chicken breast behaves differently: remove it promptly at 165°F / 74°C to keep it from drying out. The baked chicken breast guide goes deeper into thickness and temperature.

Rotisserie chicken is the fastest option. Use a plain or lightly seasoned bird, remove heavily flavored skin, and warm refrigerated meat in the broth before the tempering step. Smoke, barbecue seasoning or a strong herb crust can pull the soup away from its clean chicken-and-lemon flavor.

The Egg-Lemon Handoff

To keep Avgolemono from curdling, take the soup off active heat, warm the egg-lemon mixture gradually with hot broth while whisking, then return it to the pot without letting the freshly finished soup simmer or boil.

Tempering narrows the temperature jump. The eggs warm in stages, so they disperse into the broth instead of tightening into visible strands.

Why 2 Cups of Broth?

Ladles vary enormously. A measured 2 cups / 475 ml hot broth gives you enough liquid to warm the eggs gradually and makes the method repeatable from one kitchen to another.

Watch the mixture: before tempering, the eggs and lemon look yellow and lightly frothy. By the end they are warmer, thinner and completely smooth. White threads mean some egg has already started to coagulate.

Smooth pale-yellow tempered mixture of eggs, lemon and hot broth in a clear bowl, with a whisk resting in the fluid mixture and no cooked egg strands visible.
Another clue is how quickly the whisk marks disappear. A properly tempered egg-lemon mixture remains loose enough to level itself almost immediately instead of holding ridges like custard or sauce.

Those threads are exactly what you want in egg drop soup, where the eggs are encouraged to form ribbons. Avgolemono is aiming for a smooth broth instead.

Three whole eggs keep this version simple; extra yolks make the soup richer and more yellow, while some traditional methods whip the whites separately for a lighter, foamier finish. For more richness without changing the basic technique, use 2 whole eggs and 2 yolks.

Temperature note: chicken needs to reach at least 165°F / 74°C in its thickest part. Egg-containing dishes should reach 160°F / 71°C. If the soup drops below that temperature during tempering, warm it over low heat while stirring until it reaches 160°F / 71°C rather than restarting a simmer. The FDA egg-safety guidance also explains when pasteurized eggs are useful.

Already seeing white strands or graininess? See Avgolemono troubleshooting.

Bright Is Not the Same as Sour

One Avgolemono can taste gently lemony while another makes lemon the first thing you notice. Starting with a moderate amount leaves room to adjust after the soup has rested.

Begin with ¼ cup / 60 ml freshly squeezed lemon juice, then taste again after the rest and add more a tablespoon at a time. Fresh juice has a brighter citrus aroma than bottled lemon juice.

Juice and Zest Do Different Jobs

Lemon juice adds acidity. Lemon zest adds aroma. A soup can already taste tart and still seem strangely short on lemon character. More juice may only sharpen it; some fresh yellow zest can make the citrus smell brighter without adding the same amount of acid.

Hand lightly grating the yellow zest of a fresh lemon over Avgolemono, with fresh lemon juice nearby.
Grate zest directly over the bowl when you can. The fine yellow shreds release aromatic oils that are easy to leave behind on a board or plate; juice, meanwhile, is the better tool when the soup needs more acidity.

Keep the grater on the thin yellow skin and away from the bitter white pith underneath. The same distinction is useful in our lemon pepper chicken, where zest carries much of the citrus aroma and juice supplies the sharper finish.

Still tasting flat? Check the salt before squeezing another lemon. Weak or under-seasoned broth does not become richer just because it becomes more acidic.

Read the Soup Now, in 15 Minutes, and Tomorrow

Fresh Avgolemono changes after the burner goes off. A soup that looks slightly loose right after tempering can settle into exactly the right texture after ten minutes, so the first spoonful from the pot can be misleading.

WhenWhat you are likely to seeWhat to do
Just finishedSlightly looser than the final textureLeave it alone for 10–15 minutes
After the restFuller broth with liquid around the riceAdjust salt, lemon and broth now
An hour laterMore noticeable thickeningAdd some broth if needed
TomorrowUsually much thickerExpect a thicker soup; follow the reheating guidance below
Two matched bowls of Avgolemono showing a looser freshly finished soup and a somewhat fuller texture after resting for 10 to 15 minutes.
When you are unsure, err slightly loose before the rest. Broth can always be adjusted afterward, whereas thickening the soup further too early can overshoot the texture you wanted once the rice continues absorbing liquid.

How Thick Should Avgolemono Be?

There is no single fixed answer. Some Greek versions stay light and broth-forward; others are much more substantial. Greek-American lemon rice soup from Detroit-area Coney Island diners can be thicker still, with rice playing a much larger role.

This recipe aims for broth that lightly coats a spoon but still moves freely around the chicken and rice. If you prefer the thicker diner style, let it stand longer before thinning it or use more rice next time.

When Avgolemono Goes Wrong

Think back to the moment the soup changed. A pot that became thick before the eggs arrived needs broth; white strands appearing during tempering point to too much heat. That timing usually tells you where the problem started.

Problems Before the Egg-Lemon Finish

Smooth finished Avgolemono beside a small sample containing irregular white cooked egg strands, demonstrating the visual difference between an even broth and curdled egg.
Do not mistake normal pale opacity for curdling. The warning signs are irregular opaque flecks, white strands or a broken-looking surface interrupting an otherwise smooth broth—not simply the lighter color created by the egg-lemon finish.
What you seeWhat probably happenedWhat to do
Hardly any broth around the riceThe pot reduced too much or there is too much rice for the remaining brothAdd hot broth before tempering
Firm thigh meat before temperingIf it has already reached 165°F / 74°C, it may be safely cooked but not fully tender yetReturn the chicken to the simmering broth and cook until tender
The pot is still bubbling hardIt has not cooled enough for the egg mixtureWait until active bubbling stops
White threads appear while temperingThe eggs heated too quicklyPause, whisk and add the remaining broth more slowly; a heavily scrambled mixture is better remade
The mixture turns grainySome egg has coagulatedStop applying heat; severe curdling cannot truly be reversed

Problems After the Soup Is Finished

ProblemTry this
Too thinLet it rest before changing anything
Too thickAdd warm broth ¼ cup / 60 ml at a time
Too sourDilute with broth, then recheck the salt
Tart but not very aromaticAdd some fresh yellow zest rather than more juice
Bitter lemon flavorWhite pith or cooked peel is the likely culprit; dilution may soften it
Bland except for lemonFix the broth and salt before adding more acid
Almost porridge the next dayFor future batches, keep the rice separate when leftovers matter
Grainy after reheatingThe egg emulsion has tightened; reheated Avgolemono may not return to its freshly made texture
Warm golden chicken broth being poured into overly thick Avgolemono while a spoon stirs the soup to loosen its consistency.
Fix texture before correcting seasoning. Warm chicken broth loosens an over-thick Avgolemono without thinning the broth’s flavor as much as water; every addition also softens the salt and lemon, so taste again only after the consistency is right.

A few tiny egg flecks are mostly cosmetic and can be strained out if they bother you. Once the whole broth is visibly grainy or full of cooked egg ribbons, blending may hide the appearance, but it cannot uncook the eggs.

Serving Later Today, Tomorrow, or From the Freezer

Making Avgolemono Ahead

If you are serving within about an hour, let the finished soup rest and make the final lemon and broth adjustments just before eating. For a longer gap, refrigerate it promptly rather than leaving a chicken-and-egg soup at room temperature. According to the USDA leftovers guidance, perishable food should be refrigerated within 2 hours, or within 1 hour when the surrounding temperature is above 90°F / 32°C.

For the best texture when you already know the soup is for later, stop earlier: chill the chicken-and-broth base before adding the rice or orzo and egg-lemon mixture, then finish the soup closer to serving. Shallow containers help a large batch cool more quickly.

Glass container holding golden chicken broth with chicken and finely diced vegetables, while dry rice, eggs and fresh lemons remain separate for finishing the soup later.
The chicken-broth base is the most reliable part to make ahead. It freezes and reheats more predictably than cooked rice or orzo and the finished egg-lemon emulsion, whose textures change more noticeably during storage.

Storing & Reheating Avgolemono

How Long Does Avgolemono Keep?

Properly refrigerated leftovers are generally best used within about 3–4 days. Rice or orzo will continue softening during storage, so a finished batch will not look exactly as it did on the first night.

How to Reheat Avgolemono Safely

The USDA leftovers guidance says reheated leftovers should reach 165°F / 74°C and soups should be brought to a rolling boil.

That treatment is hard on Avgolemono’s egg-lemon texture, so a reheated batch may be less smooth than the first pot. Food safety takes priority. If second-day texture matters, the base-only make-ahead method above is the better choice.

Can You Freeze Avgolemono?

You can freeze finished Avgolemono, but the thawed soup may be grainier and the rice or orzo softer. The more reliable approach is the same one used for make-ahead cooking: freeze the chicken-and-broth base before the starch and egg-lemon finish.

Thaw the base safely, heat it, cook the rice or orzo, then make the Avgolemono fresh.

The Finished Bowl

This Avgolemono doesn’t rely on cream or a large amount of rice for its body. The broth should pour rather than sit, the chicken should be tender, and the lemon should smell fresh before the acidity becomes the first thing you notice.

Hand lifting a spoonful of Avgolemono with chicken and rice from a bowl at the table, with rustic bread, lemon and a drink arranged nearby.
For a simple meal, serve Avgolemono with warm pita or crusty bread and a crisp salad. Keep the sides restrained so they complement the lemony chicken broth rather than competing with it.

Once the rhythm makes sense, the technique fades into the background. What is left in the bowl is tender chicken, soft rice, fresh lemon and a broth that somehow feels creamy without being heavy.

Simmer → Stop → Temper → Rest.

Posted on — Leave a comment

Macaroni Salad Recipe: Creamy, Classic & Easy for Cookouts

Large burgundy bowl filled with creamy elbow macaroni salad containing finely diced celery, red bell pepper, red onion, and shredded carrot on a glossy red surface.

Macaroni salad has a maddening little habit: it can look perfect in the mixing bowl and feel dry by the time the cookout starts. Get it right, though, and you have tender little elbows, celery and pepper with a bit of snap, sweet pickle, and a cool dressing that tastes creamy without turning heavy.

Make the salad for the bowl you’re actually going to eat. The macaroni will feel firmer once thoroughly chilled, and it will take up some of the dressing while it sits.

Save some of the dressing. Mix the rest into the fresh salad, let everything get properly cold, then use the reserved portion only if the chilled bowl needs it.

Macaroni Salad Recipe

Creamy macaroni salad with tender elbow pasta, finely chopped vegetables, sweet pickle, and a tangy mayonnaise dressing—the classic deli-style balance that works especially well beside cookout food.

Yield
About 8 side servings

Prep
20 minutes

Cook
About 8–10 minutes, depending on pasta

Chill
At least 2 hours

Total
About 2 hours 30 minutes, including chilling

Ingredients

Macaroni

  • 8 oz (225 g) elbow macaroni
  • Water, for boiling
  • Kosher salt, for the cooking water

Vegetables

  • 1 cup (about 100 g) finely diced celery
  • ½ cup (about 60 g) carrot, shredded on the large holes of a box grater
  • ½ cup (about 75 g) finely diced red bell pepper
  • ¼ cup (about 40 g) finely diced red onion
  • 2 hard-boiled eggs, finely chopped, optional

Dressing

  • 1 cup (240 ml) mayonnaise
  • 2 tablespoons (30 ml) white vinegar
  • 2 tablespoons (30 g) sweet pickle relish
  • 1 tablespoon (12 g) granulated sugar
  • 1 teaspoon (5 ml) yellow mustard
  • ½ teaspoon fine salt
  • ¼ teaspoon black pepper

Equipment

  • Large pot
  • Colander
  • Large mixing bowl
  • Box grater

Instructions

  1. Cook the macaroni. Bring a roomy pot of water to a rolling boil and salt it. Add the macaroni and start checking before the package’s full cooking time. Cook until there is no chalky center and the elbows still hold their shape.
  2. Cool and drain. Drain the macaroni and rinse it briefly under cold water. Toss the colander well and let the excess water drain away.
  3. Prep the vegetables. Finely dice the celery, bell pepper, and red onion, and shred the carrot on the large holes of a box grater. If the onion is especially sharp, soak it in cold water for 10–15 minutes, then drain and dry it well.
  4. Make the dressing. Whisk the mayonnaise, white vinegar, sweet relish, sugar, yellow mustard, salt, and pepper until smooth. Reserve ⅓ cup (80 ml) of the finished dressing, cover it, and refrigerate it.
  5. Mix. Combine the cooled macaroni, vegetables, and eggs if using. Fold in the remaining dressing until everything is evenly dressed.
  6. Chill. Check the seasoning, cover, and refrigerate for at least 2 hours.
  7. Finish it chilled. Stir the salad and taste it cold. If it looks dry, fold in the reserved dressing a spoonful at a time; if it is still creamy, leave the reserve unused. Make the final seasoning adjustment now.

Recipe Notes

  • Judge the macaroni by texture rather than the clock; different brands cook at different rates.
  • Drain the pasta and washed vegetables well so excess water does not thin the dressing.

What You’re Looking For in the Finished Salad

A good forkful has tender macaroni wrapped in cool, creamy dressing, with little interruptions of celery and pepper crunch. The elbows stay intact, but there isn’t a firm center waiting in the middle.

Metal serving spoon lifting creamy elbow macaroni salad with finely diced celery, red bell pepper, red onion, and shredded carrot.
Use the serving spoon as a creaminess check: the dressing should travel with distinct elbows in a glossy coat, with no watery trail left behind.

The vegetables belong in the bite rather than taking it over. Carrot and onion are small enough to spread through the bowl, so you get their sweetness and bite without suddenly meeting a mouthful of either one.

The dressing comes through creamy first, then pickle and tang, with enough sweetness to round the sharper notes. It should make you want another bite, not reach for a glass of water.

Need the exact quantities? Back to the Recipe Card →

Why These Ingredients Work Together

The vegetables aren’t here to turn this into a vegetable-heavy pasta salad. They’re used in small amounts to break up all that soft, creamy macaroni: celery and bell pepper bring the crunch, carrot adds mild sweetness, and onion gives the bowl a little bite.

Sweet relish pulls several jobs together at once—pickle flavor, sweetness, and little bits of texture. White vinegar cuts through the mayonnaise, while yellow mustard keeps the dressing in familiar deli territory.

Elbow macaroni, celery, red bell pepper, red onion, shredded carrot, mayonnaise, mustard, relish, vinegar, sugar, and seasonings arranged on a coral surface.
The ingredient spread shows the hierarchy of classic macaroni salad: pasta and mayonnaise build the base, while smaller amounts of vegetables, relish, mustard, and vinegar change the texture and balance rather than the volume.

What Pasta Works Best for Macaroni Salad?

Elbow macaroni is the clear first choice here. Its small curved shape catches the dressing while leaving room for bits of celery, pepper, and pickle in the same bite.

Small shells are a good second choice. Rotini and other ridged shapes can work, but they hold dressing differently, so don’t assume they will need exactly the same amount after chilling.

Three bowls of creamy pasta salad showing elbow macaroni in front with shell pasta and rotini in bowls behind.
Elbows carry dressing around their curves; shells and rotini trap more in pockets and grooves. If you switch shapes, judge the cold salad before assuming it needs the same amount of dressing.

Gluten-free pasta can work too, although some shapes change texture more noticeably after refrigeration. Follow the package directions closely and judge it by how it eats once cooled.

Easy Substitutions

Keep the basic balance intact when you make a swap. Changing the pickle, mustard, or vinegar shifts the character of the dressing more than changing one of the vegetables.

ChangeWhat happens
Swap red onion for green onionThe onion flavor becomes milder.
Replace relish with finely chopped sweet pickleYou keep the sweet-pickle profile with a little more texture.
Try dill pickle instead of sweet relishThe salad becomes sharper and more savory, moving away from the lightly sweet deli-style balance.
Omit the celeryYou lose some of the classic crunch; add a little extra bell pepper if you want to replace some of it.
Replace part of the mayonnaise with sour creamThe dressing becomes tangier and slightly less rich.
Use Dijon instead of yellow mustardThe mustard flavor becomes sharper and a little less classically deli-style.
Use apple cider vinegar instead of white vinegarThe acidity becomes slightly softer and fruitier.
Leave out the hard-boiled eggsThe salad is a little less rich, while the pickle and vegetables come through more clearly.

For an egg-free version, omit the hard-boiled eggs and use eggless mayonnaise in place of regular mayonnaise. If you’re cooking for an allergy, check the labels on the mayonnaise, mustard, relish, and other packaged ingredients individually.

How to Make Macaroni Salad

1. Cook the macaroni for the cold bite

Bring a roomy pot of water to a rolling boil and salt it. Add the macaroni and start checking before the package time is up.

Stop when the elbows are completely tender through the center but still holding their shape. Macaroni feels firmer once thoroughly chilled, so a hard or chalky center now will be even more noticeable later.

2. Cool it and lose the surface water

Drain the macaroni and rinse it briefly under cold water. Toss the colander well, then let the excess water drain away before the pasta goes into the mixing bowl.

You aren’t trying to dry the macaroni. You just don’t want enough water clinging to it to send the creamy dressing sliding toward the bottom of the bowl.

Cooked elbow macaroni draining in a polished stainless steel colander against a deep blue background.
Water can hide inside the elbows as well as cling to the outside. Give the colander a few firm tosses before dressing the pasta.

Should you rinse macaroni for macaroni salad? For this recipe, yes. Cooling the pasta quickly slows further softening; just drain it thoroughly before dressing. Some macaroni salads dress the pasta warm instead, but this one is built around cooling it first.

3. Keep the vegetables small and dry

Finely dice the celery, bell pepper, and red onion, and shred the carrot on the large holes of a box grater. Pat away obvious water left from washing.

A celery piece should not be so large that it takes over the entire forkful. Smaller pieces spread that crunch through the salad instead.

Spoonful of creamy elbow macaroni salad above bowls of finely diced celery, red bell pepper, red onion, and shredded carrot.
The cuts have different jobs: celery, pepper, and onion stay finely diced for small bursts of crunch, while shredded carrot spreads sweetness and color through more bites.

If the onion is particularly sharp, give it 10–15 minutes in cold water, then drain and dry it well.

4. Whisk the dressing and save some

Whisk the mayonnaise, white vinegar, sweet relish, sugar, yellow mustard, salt, and black pepper until smooth.

The dressing should taste a little stronger on its own than you want the finished salad to taste. The macaroni and vegetables soften the sweetness, salt, and acidity once everything is together.

Measure out ⅓ cup (80 ml) of the finished dressing, cover it, and refrigerate it. Fold the rest into the salad.

Large glass bowl of creamy relish and mustard dressing beside a smaller glass bowl holding a reserved portion.
Reserved dressing is insurance, not a required second pour. Holding some back keeps the fresh salad from starting too wet and leaves room to respond to its cold texture later.

5. Fold the salad together

Combine the cooled macaroni, vegetables, and eggs if using in a large bowl, then fold in the dressing.

Look at the bottom of the bowl. The dressing belongs on the elbows, not in a loose puddle underneath them. If you see pooling, give everything another thorough fold before adding anything else.

Stainless steel bowl of macaroni salad with a metal spoon pushing the salad aside to expose the bowl bottom without a watery puddle.
A creamy film on the bowl is normal. However, liquid that moves independently when the salad is shifted means moisture is collecting underneath instead of clinging to the macaroni.

Seeing a watery layer? Jump to the water-pooling fix →

6. Check the seasoning, then chill

Check the seasoning before the bowl goes into the refrigerator. It should taste well seasoned, with enough acidity to keep the mayonnaise from feeling heavy. Make only a small correction now; the flavor and texture will read differently after chilling.

Cover and refrigerate for at least 2 hours.

7. Finish it chilled

Once the salad is thoroughly chilled, stir it and take a forkful. This is the bite that matters. Make any final texture and seasoning adjustment now.

How to Keep Macaroni Salad Creamy After Chilling

To keep macaroni salad creamy after chilling, reserve some of the dressing, stir the chilled salad first, and add the reserved portion only if the pasta looks dry. Macaroni continues taking up moisture as it sits in the refrigerator, so the bowl can look different several hours later than it did when freshly mixed.

Creamy macaroni salad being stirred with a metal spoon, with a small container of reserved dressing nearby.
Stirring redistributes the cold dressing before you decide whether the bowl actually needs more.
After chillingWhat to do
Still creamyLeave it alone. There is no reason to use the reserved dressing just because it is there.
Looks a little dryStir first, then fold in a little reserved dressing if needed.
Noticeably drier the next dayAdd reserved dressing gradually until the elbows look creamy again.

Making it ahead? Jump to Make-Ahead Macaroni Salad →

The Deli-Style Bite

Tender elbows, finely chopped vegetables, sweet pickle, yellow mustard, and a creamy dressing with a clear tang put this salad squarely in familiar deli territory. The sugar rounds out the vinegar and pickle rather than taking over the bowl.

Most importantly, don’t bury the pasta under extras. The appeal is the way soft macaroni, little bits of crunch, and that sweet-and-sharp dressing land together.

Burgundy bowl of creamy macaroni salad in front of a cheeseburger, sliced pickles, buns, and an iced drink.
Deli-style macaroni salad works especially well beside hot, salty, or charred food. Its cold creaminess softens the plate, while pickle and vinegar keep the contrast bright.

Macaroni Salad Troubleshooting

Start with the symptom before changing the dressing. Dry elbows, free liquid, dull seasoning, mushy pasta, and overpowering onion need different corrections.

Water pooling underneath is a moisture problem

If liquid moves separately at the bottom of the bowl, treat it as excess moisture rather than ordinary dressing absorption. Fold the salad thoroughly first; if a watery layer still remains, spoon off a little before you adjust the seasoning.

Macaroni salad in a stainless steel bowl pushed aside with a spoon to reveal a thin pool of pale watery liquid underneath.
This is the failure state: liquid is moving separately from the creamy coating.

Other common macaroni salad problems

ProblemLikely causeFix
Still dry after the reserved dressing is goneThe pasta has taken up more moisture than expected.Mix a spoonful of mayonnaise with a small amount of the same vinegar used in the dressing, then fold it in gradually.
Dry immediately after mixingThere isn’t enough dressing on the pasta.Use a little of the reserved dressing now rather than waiting until after chilling.
Creamy but dull after chillingThe seasoning isn’t coming through strongly enough.Start with a small pinch of salt, stir, and check again.
Too sharp or vinegaryThe acid is dominating the dressing.Fold in a little mayonnaise to soften it.
Too sweetThe sugar and relish are dominating.Start with ½ teaspoon of the same vinegar used in the dressing and a small pinch of salt; stir before adding more.
Mushy macaroniThe pasta cooked too far or stayed hot too long.Next time, stop once it is tender through the center but still holding its shape, then cool it promptly.
Onion takes overThe pieces are too large or the onion is particularly strong.Dice it more finely or mellow it briefly in cold water.

Need the base recipe? Back to the Recipe Card →

Make-Ahead Macaroni Salad

You can make this macaroni salad one day ahead. Make the salad, cover the reserved dressing separately, and refrigerate both. Give yourself five minutes before serving the next day for a stir and any final adjustment.

Partly covered glass bowl of macaroni salad beside a small covered container of reserved dressing and a polished serving spoon on a blue surface.
The advantage of make-ahead macaroni salad is delaying the final texture decision. Keep the reserve separate, chill the bowl fully, and let the cold pasta tell you whether anything needs changing.

If you’re planning several sides in advance, this classic potato salad can be made ahead too.

That’s the useful part of making macaroni salad ahead: the chopping, cooking, mixing, and washing up are already behind you while everyone else is setting the table.

How Much Macaroni Salad Do You Need for a Crowd?

Approx. side servingsStarting point
4½ batch
81 batch
162 batches
243 batches

Those are side portions, not a promise about how much every person will eat. A cookout with several salads and sides can stretch a batch further than a meal where macaroni salad is one of only two accompaniments.

Bring It to the Cookout

Macaroni salad is at home beside grilled meat, burgers, sandwiches, or anything smoky and charred. The cold, creamy salad gives the plate somewhere softer to land.

Before the bowl goes out, give it one last stir. The elbows should separate easily, with dressing clinging to them rather than water collecting underneath.

Keep it cold. The FDA’s guidance for eating outdoors recommends keeping cold perishable foods at 40°F (4°C) or below. Do not leave macaroni salad at room temperature for more than 2 hours, or more than 1 hour when temperatures are above 90°F (32°C).

Burgundy bowl of creamy macaroni salad nested inside a larger metal bowl filled with ice, with burgers, pickles, buns, and an iced drink behind it.
At a cookout, keep the ice around the serving bowl rather than inside the food. Nesting the bowl securely over ice keeps meltwater out while the macaroni salad stays cold and easy to serve.

Storage

Macaroni salad keeps for about 3–4 days in the refrigerator. Store leftovers covered and chilled. For general leftover-safety guidance, see the USDA recommendations for refrigerated leftovers.

The salad is at its best earlier in that window, while the vegetables still have some snap and the pasta hasn’t absorbed too much of the dressing.

Freezing the finished salad isn’t worth it. The mayonnaise dressing can separate after thawing, while the pasta and vegetables lose the textures that make the salad good in the first place.