Posted on — Leave a comment

Sloppy Joe Recipe: Easy, Homemade & Full of Flavor

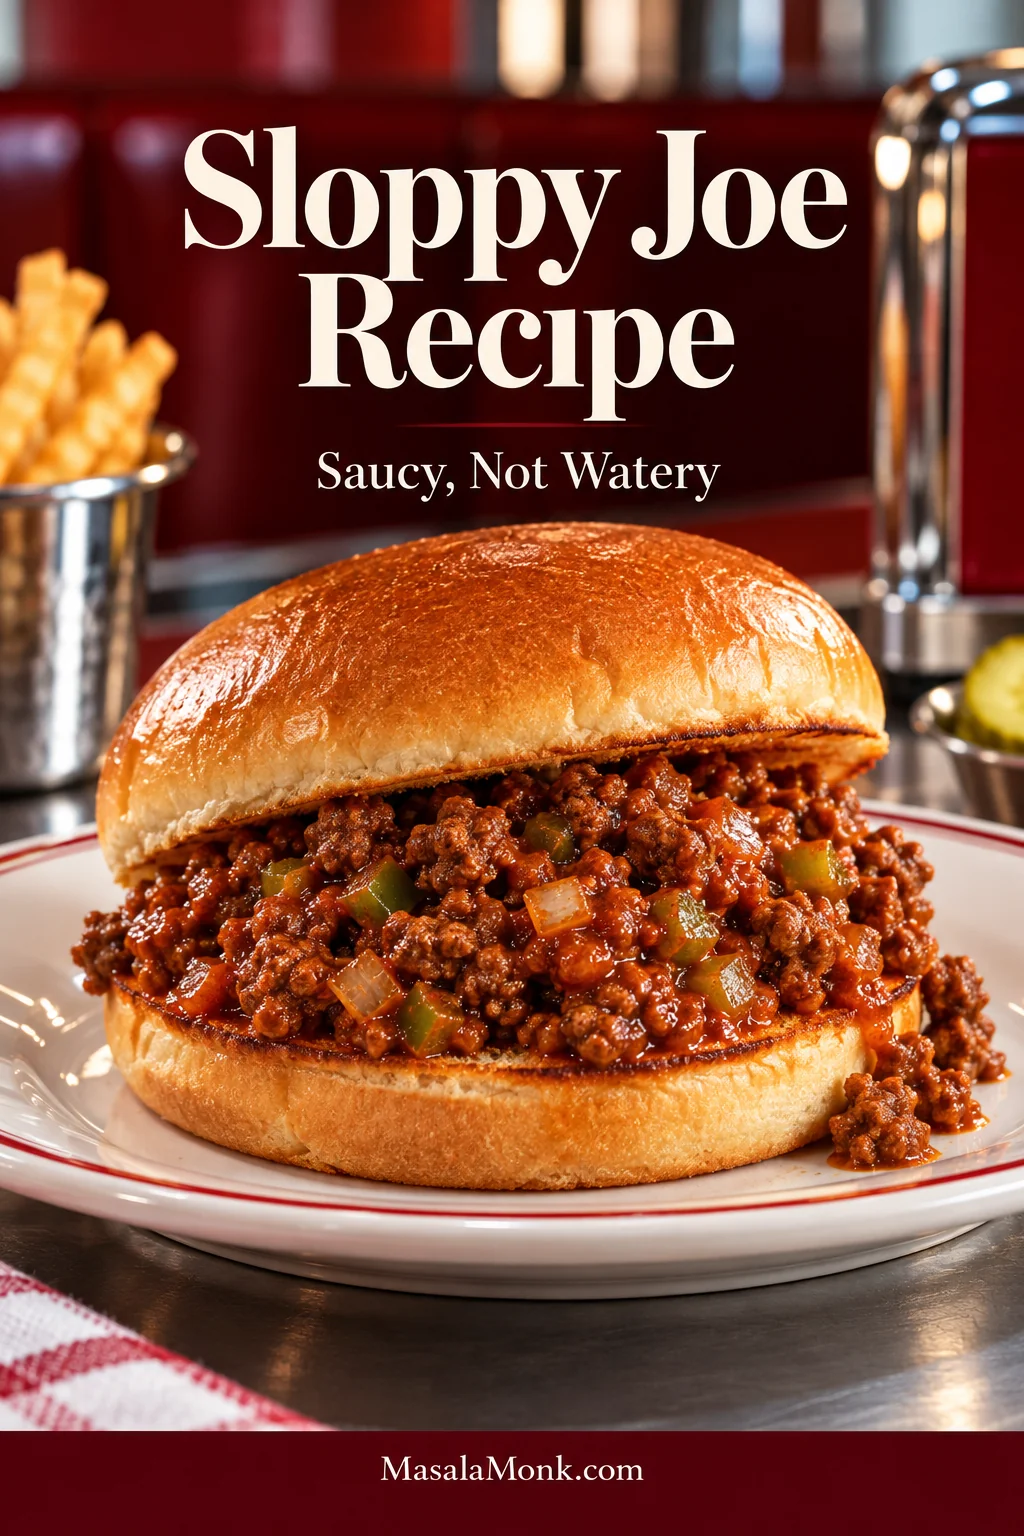
Sloppy Joe on a toasted golden hamburger bun with thick reddish-brown ground-beef filling, finely diced onion and green pepper, served on a diner plate.

Two Sloppy Joe problems show up again and again: filling that tastes mostly like sweet ketchup-coated beef, and filling so loose that the bottom bun turns soggy before you’ve made it halfway through the sandwich.

This homemade Sloppy Joe recipe keeps the familiar sweet-tangy tomato flavor, but stays savory enough that you still taste the beef. Onion, green bell pepper and garlic soften into the filling, mustard adds sharpness, and Worcestershire deepens the savory side of the sauce.

The whole recipe takes about 30–40 minutes, with the filling cooked in one skillet. You end up with browned beef in a glossy sauce, light sweetness, enough tang to keep it lively, and a toasted bun that still has some bite when you pick it up.

Sloppy should mean saucy, not watery.

  • Beef: browned and broken into small irregular crumbles.
  • Sauce: glossy and clinging, with no watery puddle gathering around the meat.
  • Bun: golden on the cut side and sturdy enough to hold the hot filling.

Homemade Sloppy Joe Recipe

Ground beef in a thick homemade sauce that is savory, tangy and only lightly sweet, piled onto toasted hamburger buns.

Yield
4 generous or 5 moderate sandwiches

Prep
10 minutes

Cook
20–30 minutes

Total
About 30–40 minutes

Equipment

  • 12-inch / 30 cm skillet
  • Wooden spoon or sturdy spatula
  • Knife and cutting board
  • Instant-read thermometer, recommended
  • Small baking sheet if broiling the buns

A wide skillet gives the beef room to brown and lets moisture evaporate more quickly while the sauce reduces.

Ingredients

  • 1 lb / 454 g ground beef, preferably 85/15
  • 1 small-to-medium yellow onion (about ¾ cup / 120 g), finely diced to about ¼ inch / 6 mm
  • ½ medium green bell pepper (about ½ cup / 75 g), finely diced to about ¼ inch / 6 mm
  • 2 garlic cloves, minced
  • 2 tablespoons / 32 g tomato paste
  • 8 oz / 227 g plain canned tomato sauce, not marinara or seasoned pasta sauce
  • ¼ cup / 60 ml ketchup
  • 1 tablespoon / 15 ml Worcestershire sauce
  • 2 teaspoons / 10 ml yellow mustard
  • 1 teaspoon / about 4 g brown sugar, plus more only after tasting
  • 1 teaspoon / 5 ml apple cider vinegar, plus more only after tasting
  • ½ teaspoon / about 3 g fine salt, plus more to taste
  • ¼ teaspoon freshly ground black pepper
  • 4–5 soft hamburger buns
  • 1–2 tablespoons / 14–28 g butter, optional, for the buns
  • Dill pickle slices, optional for serving

Start low on the sugar. Ketchup brands vary in sweetness. One teaspoon of brown sugar leaves plenty of room to adjust the sauce after it has reduced.
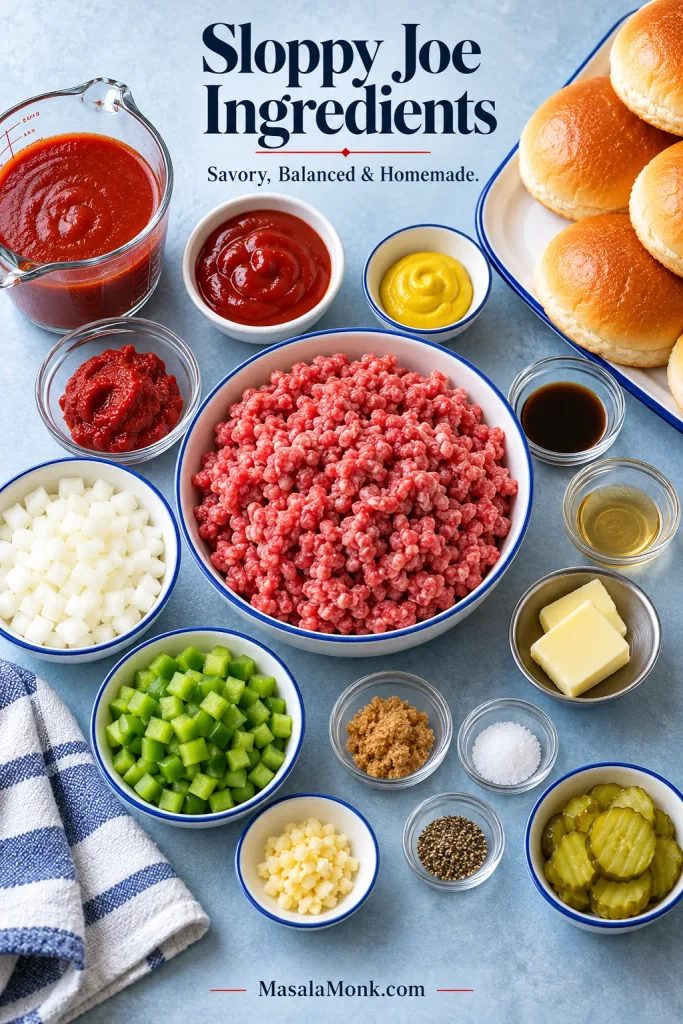
Overhead arrangement of ground beef, diced onion and green pepper, garlic, tomato products, ketchup, mustard, Worcestershire, vinegar, seasonings, buns, butter and pickles.
For this Sloppy Joe recipe, keep the onion and green pepper at about ¼-inch dice. That small cut lets both soften into the beef instead of turning the finished filling into a chunky pepper-and-onion mixture.

Instructions

Brown the Beef and Vegetables

  1. Brown the beef. Heat the skillet over medium-high. Add the ground beef and spread it across the hot surface. Leave it alone for 1–2 minutes so the underside can brown in spots. Continue cooking for another 3–4 minutes, breaking the beef into small irregular crumbles.
  2. Check the skillet. If the beef releases watery cooking liquid, keep cooking until most of it evaporates and the pan sounds more like a sizzle again. Spoon off most of any large pool of rendered fat, leaving a light coating behind.
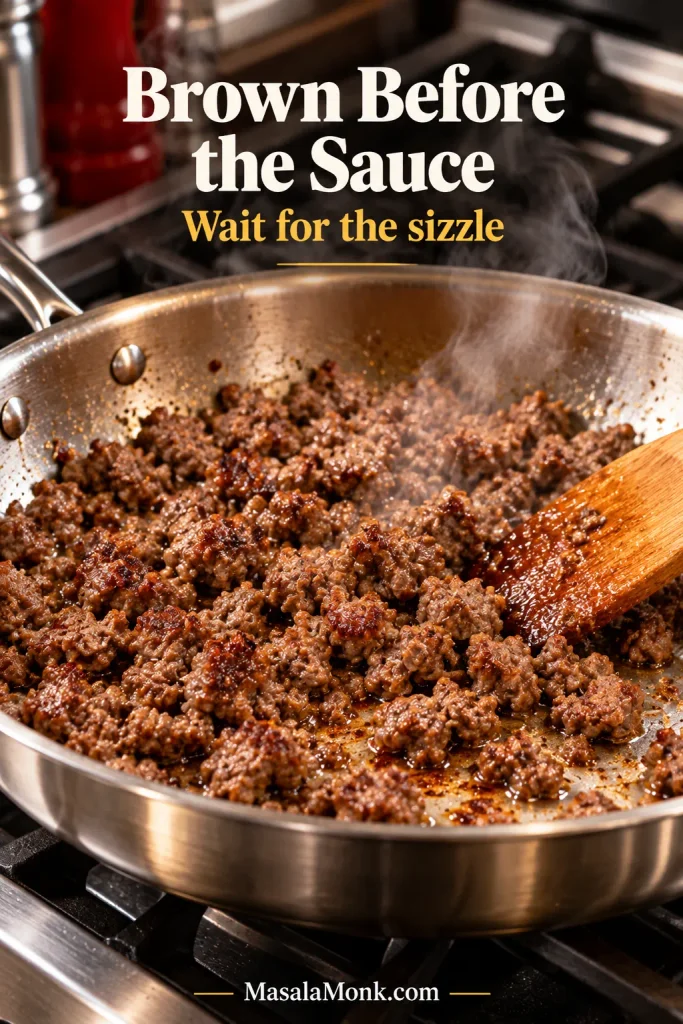
Irregular crumbles of ground beef browning in a stainless steel skillet, with browned surfaces and steam rising from the hot pan.
Instead of trying to make every ground-beef crumble uniformly dark, look for browned contact spots across the pan. Those seared surfaces build savory flavor without requiring every piece to look the same.
  1. Add the onion and bell pepper. Reduce the heat to medium and cook for about 4 minutes, stirring occasionally, until the onion is translucent and the pepper has softened.
  2. Add the garlic and tomato paste. Stir in the garlic for about 30 seconds. Add the tomato paste and cook for another 30–60 seconds, stirring until it darkens slightly and coats the beef and vegetables.

Add and Reduce the Sauce

  1. Build the sauce. Stir in the plain tomato sauce, ketchup, Worcestershire sauce, yellow mustard, 1 teaspoon brown sugar, 1 teaspoon apple cider vinegar, salt and black pepper. Bring everything to a gentle simmer.
  2. Simmer uncovered. Reduce the heat to medium-low and cook for about 8–15 minutes, stirring occasionally. Start checking around minute 8. A wide skillet or strong burner may get there sooner; wetter vegetables or a cooler pan may need longer.
  3. Check the consistency. Drag the edge of the spatula across the bottom of the skillet. The trail should remain visible briefly before the filling slowly settles back. A spoonful should mound, then slump. If liquid immediately floods the trail, keep simmering.

Before tasting or serving: Check that the ground beef has reached 160°F / 71°C; color alone is not a reliable doneness test. See the USDA safe minimum temperature chart.

  1. Taste with the bun, then adjust. Try a spoonful with a small piece of the bun you plan to serve. The bread itself can change the final sweet-savory balance, so make only the correction you need.
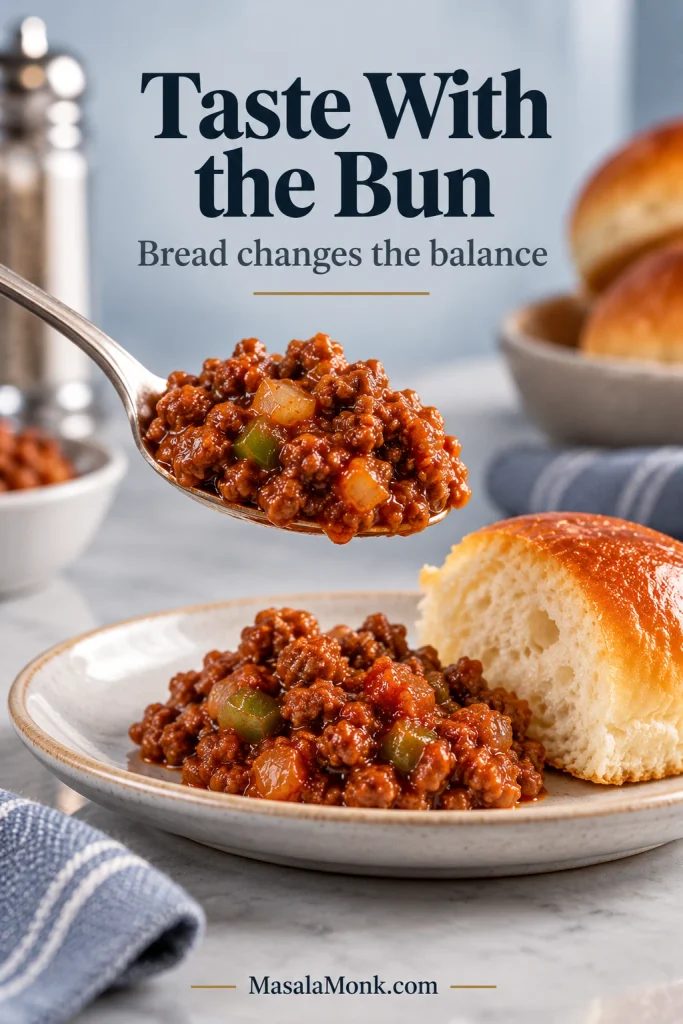
Spoonful of finished Sloppy Joe filling beside a piece of hamburger bun, arranged for tasting before the sandwich is assembled.
Only make the final sweet-sour adjustment after tasting the finished Sloppy Joe filling with the bun. Continued evaporation concentrates sweetness, salt and acidity, so correcting it too early can overshoot.

Quick adjustment guide

  • Want it sweeter? Add brown sugar ½ teaspoon at a time.
  • Too sweet? Add ½ teaspoon apple cider vinegar and a small pinch of salt.
  • Still tastes flat? Add Worcestershire ½ teaspoon at a time.
  • Too thick? Add water 1 tablespoon / 15 ml at a time.

Toast and Assemble

  1. Toast the buns while the filling stays warm. For a broiler or toaster oven, butter the cut sides if using, then toast for about 1–2 minutes, watching closely, until golden. If the bun halves fit your pop-up toaster easily, toast them plain and add butter afterward if you want it. For a skillet-only version, transfer the filling to a bowl, wipe the pan if needed, then toast the buns cut-side down in batches, with or without butter.
  2. Assemble. Divide the hot filling among 4 generous or 5 moderate sandwiches. Add dill pickle slices if using. The filling should stay put when you pick up the sandwich; a little escaping around the edges once you bite in is part of the fun.
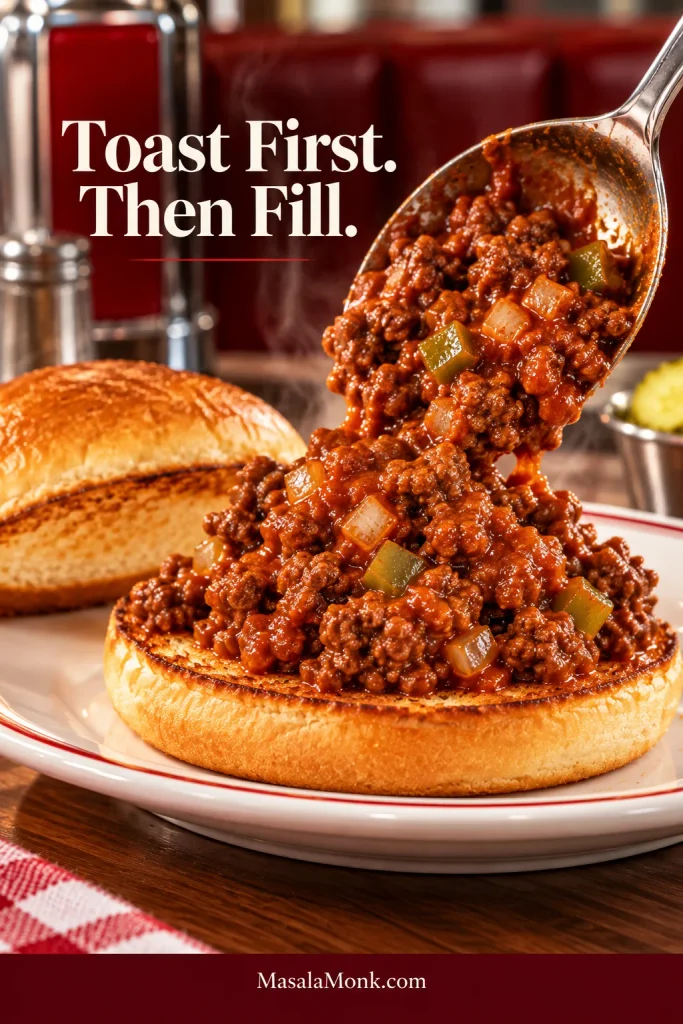
Hot Sloppy Joe filling being spooned onto the golden toasted cut side of a soft hamburger bun on a diner plate.
For a sturdier Sloppy Joe bun, concentrate the browning on the cut face—the surface that actually touches the hot filling. Once toasted, that crisp layer slows how quickly sauce moves into the soft crumb beneath it.

If the filling tastes right and holds on the bun, you’re ready to eat. Use the guide below only if you want to tune the sauce, fix a texture problem or plan ahead.

Sloppy Joe Sauce

The sauce is tomato-based without being ketchup-heavy. Plain tomato sauce provides the base, tomato paste gives the sauce body and helps it cling to the beef, and a smaller amount of ketchup supplies the familiar sweet-tangy character.
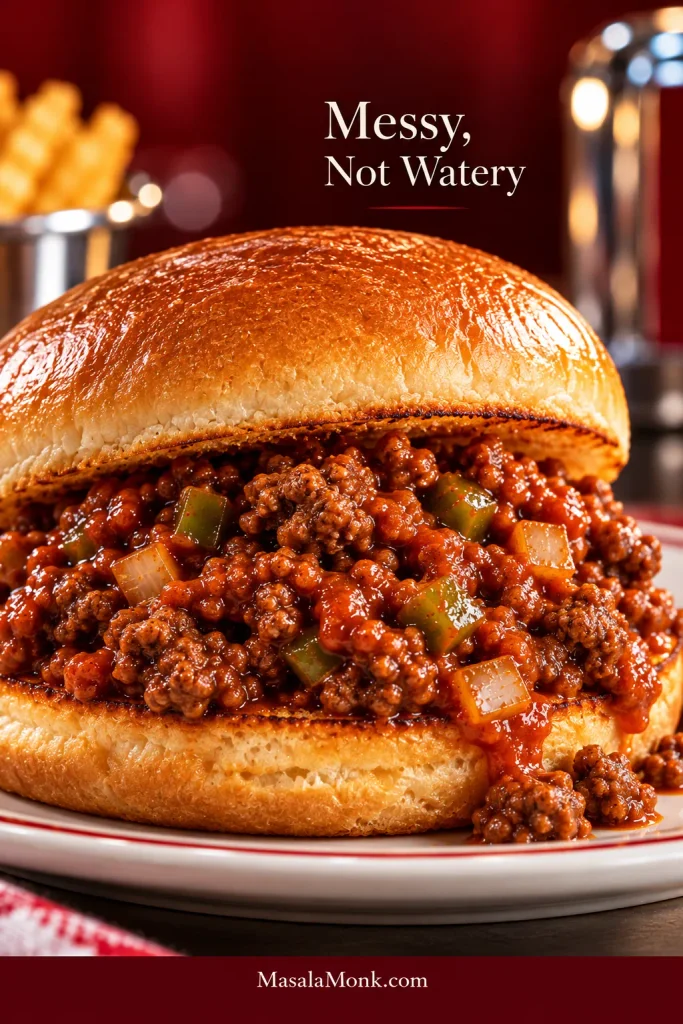
Close-up of thick Sloppy Joe filling with irregular browned beef crumbles, small onion and green pepper pieces, and glossy sauce on a toasted bun.
The finished sauce should cling to the craggy beef instead of pooling around it. Smaller crumbles carry more sauce, while larger pieces preserve a distinct beefy bite.

Ketchup brands vary noticeably in sweetness and acidity; if you want complete control over both, the homemade ketchup recipe includes fresh-tomato and tomato-paste versions.

Sloppy Joes are one of those dinners people remember differently. Some people are chasing the sweeter Sloppy Joe they remember from school lunches; others want something much more savory and beef-forward. That is why this recipe starts low on brown sugar. Taste the sauce after it has reduced, then move it toward the Sloppy Joe you actually want to eat.

Brown sugar softens the sharper edge of the tomato, while mustard and cider vinegar bring enough acidity to keep the sauce from becoming too sweet. Worcestershire adds the deeper savory note. None of them should taste obvious on its own.

Skip Italian seasoning here. An oregano-heavy tomato sauce can quickly start tasting more like pasta sauce than Sloppy Joe filling.

Can You Make Sloppy Joes Without Ketchup?

Yes. Ketchup contributes sweetness, acidity, salt and thickness as well as tomato flavor, so simply leaving it out changes several things at once.

As a starting point, replace the ¼ cup / 60 ml ketchup with the same amount of additional plain tomato sauce. Without ketchup, the filling may take a little longer to reach the same consistency. Once it has reduced to the same physical endpoint, check the salt, sweetness and acidity before adjusting anything.

Back to Recipe · Back to Top

How Sloppy Is Sloppy Enough?

The goal is glossy and saucy, not dry. Ideally, the filling should move slightly with the beef, but there should be no free liquid running separately around it.
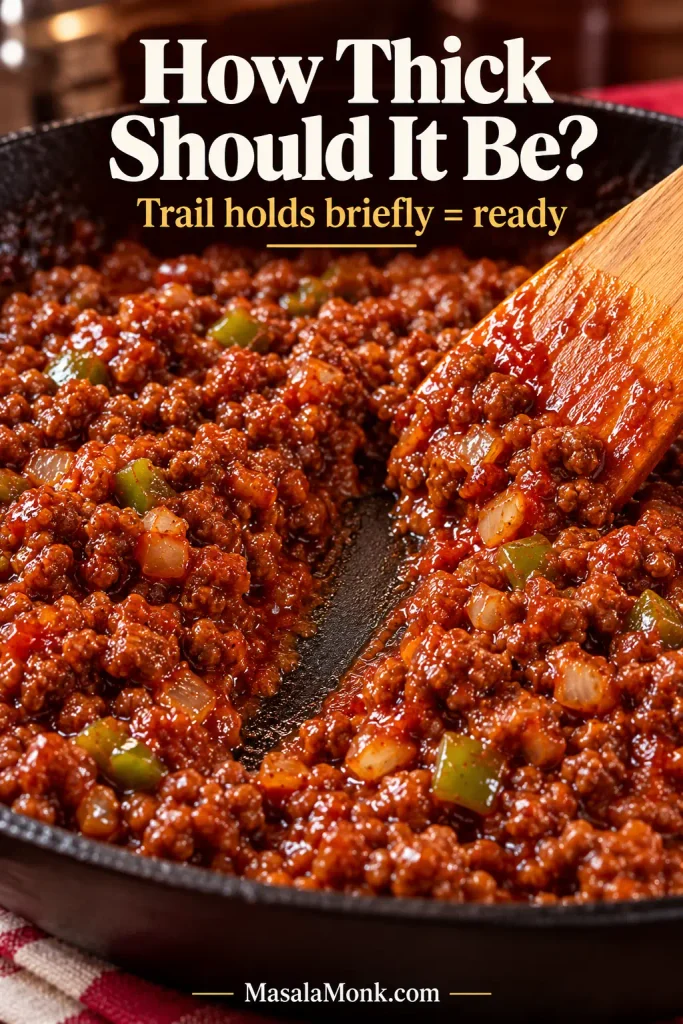
Thick glossy Sloppy Joe filling in a skillet with a spatula trail remaining visible through the center before the mixture settles back.
Use the spatula trail instead of the clock. When the filling slowly relaxes back into place, enough moisture has cooked off for the sauce to cling without turning the beef dry.
What You SeeWhat to Do
Liquid immediately floods the spatula trailKeep simmering uncovered.
Trail stays visible briefly, then slowly closesThe filling is ready.
Meat looks stiff, matte or dryAdd water 1 tablespoon / 15 ml at a time.

If the pan already looks wet before the sauce goes in, see how to tell cooking liquid from rendered fat.

Liquid and Fat From the Ground Beef

Ground beef can release water as well as fat. Water needs time over the heat; fat needs a spoon.
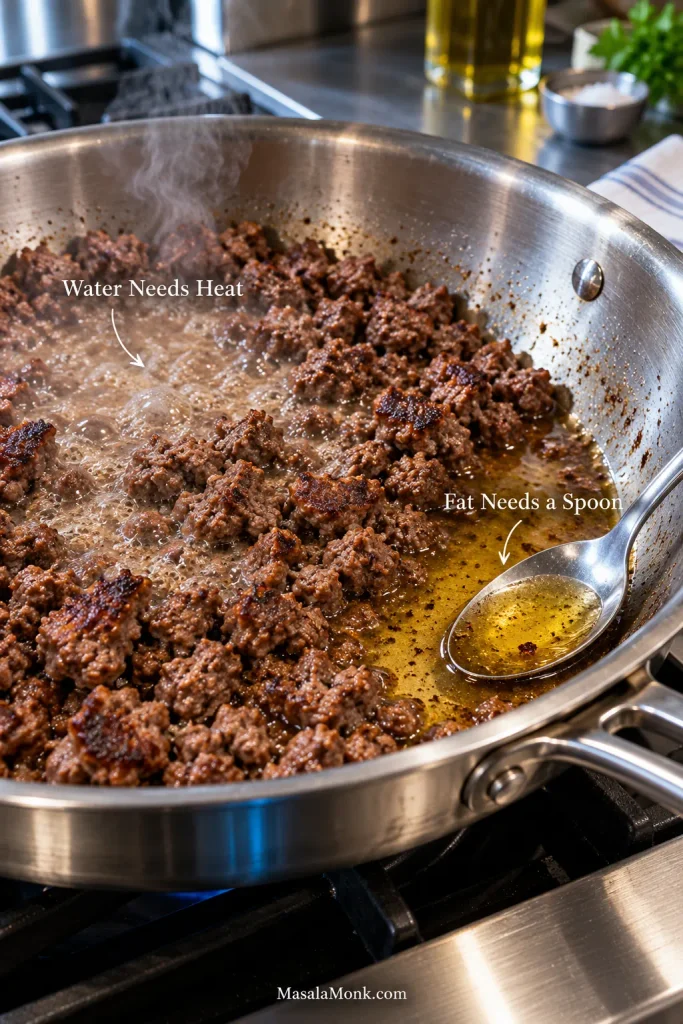
Ground beef browning in a stainless skillet with cloudy bubbling cooking liquid and a clearer golden pool of rendered fat being lifted with a spoon.
Released water and meat juices look cloudy and bubble actively around the beef. Rendered fat is clearer, glossier and tends to collect in calmer golden pools that are easier to spoon away.

For this recipe, 85/15 ground beef is the easiest middle ground: enough fat for good beef flavor without usually leaving a large grease pool.

If the skillet looks watery and the beef sounds as though it is simmering, keep cooking. As that moisture evaporates, the sound shifts toward a clearer sizzle and the beef can brown properly.

A visible pool of rendered fat is different. Spoon most of it off before adding the sauce. With 80/20 beef, expect more fat to remove; 90/10 or leaner beef may leave very little.

Troubleshooting Sloppy Joes

Some problems aren’t simple seasoning problems: raw tomato flavor, excess grease and a soggy bun each need a different fix.

ProblemWhat to Do
Too tangyAdd brown sugar ½ teaspoon at a time, tasting after each addition.
Raw or harsh tomato tasteSimmer uncovered for another 3–5 minutes.
Fully cooked but still too tomato-forwardCheck the salt first, then try ½ teaspoon Worcestershire. Do not keep reducing aggressively; more evaporation can make the tomato flavor stronger.
Too greasySpoon off the excess fat. Longer simmering will not remove it.
Soggy bunReduce the filling until it clings, then toast the bun until golden before assembling.

Toast the Bun Like It Matters

A soft potato bun or a sturdy standard hamburger bun is the easiest default here: soft enough to bite through easily, but strong enough to hold the filling once toasted.

Toast the cut side until golden. Butter helps with browning and flavor, but even an unbuttered toasted bun holds up much better than one that is only warmed.

Brioche works too, although sweeter brioche pushes the finished sandwich noticeably sweeter. Toasted split-top or hot-dog buns are useful when you want the filling a little more contained.

Dill pickles bring crunch and acidity. Cheese is optional: American melts the smoothest, while sharp cheddar gives a stronger contrast against the sweet-tangy sauce.

What to Serve with Sloppy Joes

A creamy, tangy coleslaw works well beside the hot sandwich because it brings cold crunch and acidity without adding more richness.

For a classic diner-style plate, crispy homemade French fries are an easy fit. Potato wedges, corn, dill pickles or a simple green salad need even less planning.
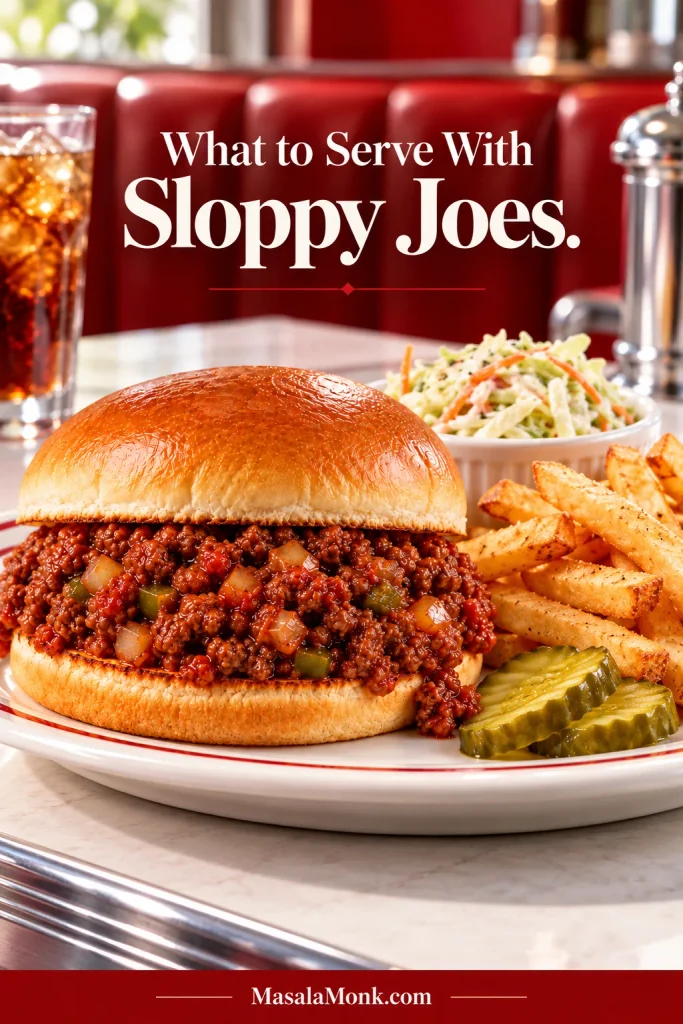
Sloppy Joe sandwich served with golden French fries, creamy coleslaw and dill pickle slices on a plate in a bright modern diner setting.
When deciding what to serve with Sloppy Joes, keep wetter sides such as coleslaw slightly separate from the sandwich. That way, you still get cold crunch and acidity without letting extra dressing soften the toasted bun.

Back to Recipe · Back to Top

Substitutions and Variations

  • Bell pepper: Red or yellow bell pepper makes the filling a little sweeter. You can also leave the pepper out.
  • Mustard: Dijon makes the sauce slightly sharper than yellow mustard.
  • Ground turkey or chicken: Use the same 1 lb / 454 g amount. Cook off any watery liquid before adding the sauce and expect less rendered fat than with 85/15 beef. Bring ground poultry to 165°F / 74°C.
  • More heat: Add hot sauce, cayenne or crushed red pepper at the end.

Make Ahead, Scaling and Storage

Make ahead: Cook the filling up to 3 days ahead and refrigerate it promptly. The sauce will become thicker as it chills. Count those make-ahead days toward the 3–4-day refrigerated window below.

Sloppy Joes for a Crowd

For 8–10 sandwiches, double the ingredients and brown the 2 lb / 908 g beef in two batches. Once everything is combined, use a larger wide pan if the 12-inch skillet is crowded and expect a doubled batch to take longer to reduce. Use the same spatula-trail test rather than the original 8–15-minute range.
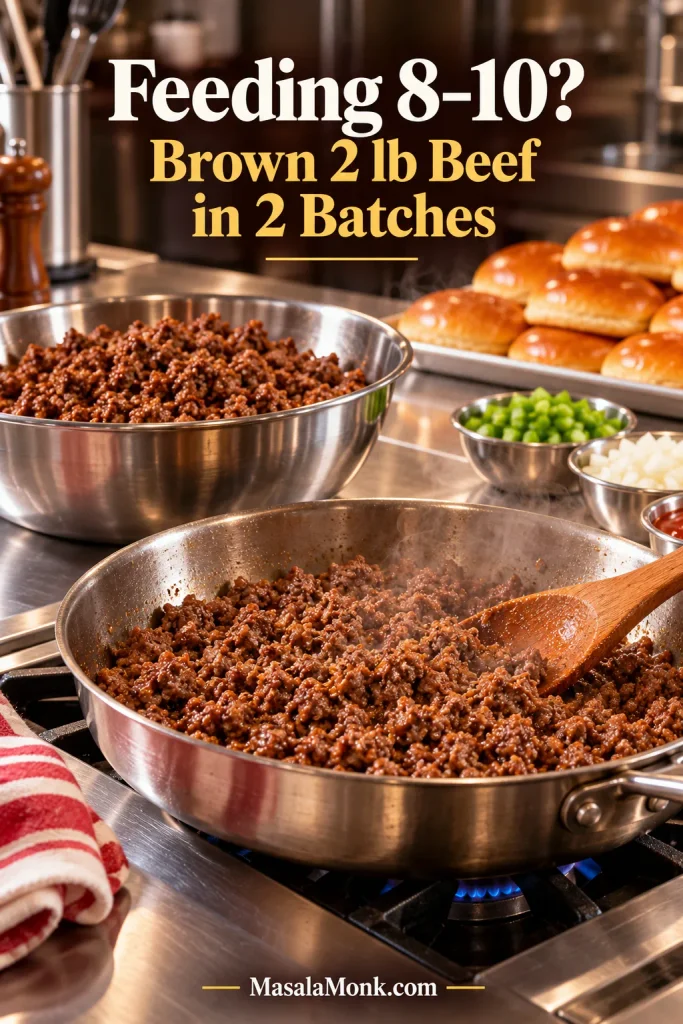
Ground beef being browned in batches in a large skillet, with another cooked batch nearby and hamburger buns ready for serving a crowd.
Browning in batches protects the skillet temperature as much as it creates space. That way, each pound of beef gets real contact with the hot pan instead of releasing enough moisture to steam the whole batch.

Keep Warm, Store and Reheat

Keeping it warm: Freshly cooked filling can be transferred to a preheated slow cooker and held at 140°F / 60°C or warmer. If the filling was cooked and chilled earlier, reheat it to 165°F / 74°C on the stove or in the microwave first, then transfer it to the slow cooker for holding.

Refrigerate: Transfer leftovers to a shallow airtight container and refrigerate within 2 hours, or within 1 hour if the temperature is above 90°F / 32°C. Refrigerated leftovers are best used within 3–4 days, in line with USDA leftovers guidance. Keep the buns separate.

Freeze: Freeze the cooked filling airtight for about 3 months for best quality. Thaw it in the refrigerator before reheating.

Reheat: Warm the filling on the stove or in the microwave until it reaches 165°F / 74°C. If the chilled sauce has tightened too much, add water 1 tablespoon / 15 ml at a time until it loosens.

When the filling is glossy, the beef still tastes like beef and the bun stays intact through the first few bites, you are there. Messy is part of the point. Wet is not.
Back to Recipe · Back to Top

Posted on — Leave a comment

Meatball Recipe: Juicy, Tender & Easy

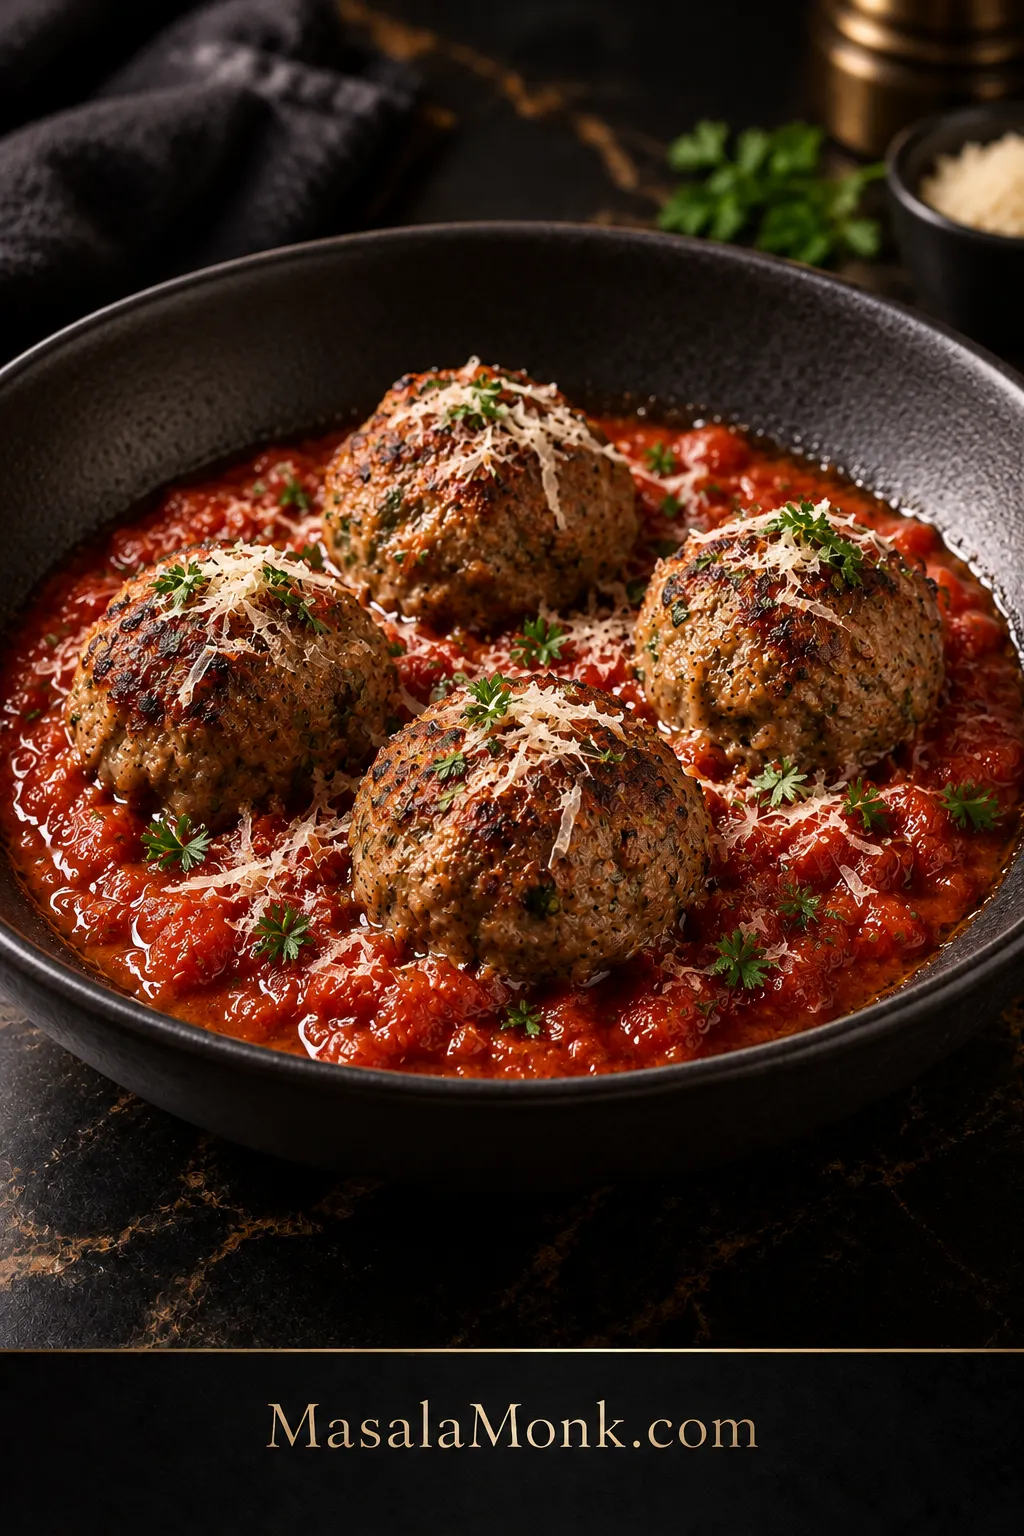
Four baked beef meatballs sitting in chunky red marinara, lightly topped with grated Parmesan and chopped parsley in a dark shallow bowl.

A good meatball has to survive quite a bit of handling. You scoop it, roll it, move it to the pan and often add sauce later. After all that, you still want a savory meatball with a juicy, fork-tender middle.

This meatball recipe uses 80/20 ground beef, milk-softened panko, grated onion, Parmesan, garlic and herbs for easy homemade meatballs with a familiar Italian-American flavor. The all-beef mixture bakes at 400°F / 205°C on one sheet pan, with no need to fry the meatballs in batches.

Quick texture check: the raw beef mixture is soft enough to scoop but stays together when gently pressed. Once shaped, each meatball stays round without feeling hard. After baking to 160°F / 71°C, look for a moist middle that yields easily to a fork.

Juicy, Tender Baked Meatballs

Tender all-beef meatballs baked together on one sheet pan, with a juicy center and enough structure to hold up in sauce.

Yield
About 16 meatballs

Portion
About 42 g / 1½ oz each

Prep
About 20 minutes

Oven
400°F / 205°C

Bake
16–22 minutes

Total
35–45 minutes

What You’ll Need

Use a large mixing bowl, rimmed metal baking sheet and parchment paper. For prep, have a box grater with large holes for the onion, a fine grater or Microplane for the garlic, a cookie scoop or spoon, and an instant-read thermometer. A digital kitchen scale makes evenly sized meatballs especially easy, but it is optional.

Ingredients

  • ½ cup plain panko breadcrumbs — about 30 g
  • ¼ cup whole milk — 60 ml
  • 1 large egg
  • ¼ cup grated yellow onion — about 40 g, including its juice
  • 2 garlic cloves — about 6 g, finely grated or minced
  • ⅓ cup finely grated Parmesan — about 30–35 g
  • 2 tablespoons finely chopped fresh parsley — about 8 g
  • 1 teaspoon dried oregano or Italian seasoning
  • 4.5 g salt — roughly 1½ teaspoons Diamond Crystal kosher salt, 1 teaspoon Morton kosher salt, or ¾ teaspoon fine salt
  • ½ teaspoon freshly ground black pepper
  • 1 lb / 16 oz / 454 g 80/20 ground beef

Method

Prep and Mix the Meatball Base

  1. Heat the oven. Set a rack in the center and preheat to 400°F / 205°C. Line a large rimmed metal baking sheet with parchment paper.
  2. Soften the panko. Stir the breadcrumbs and milk together in the mixing bowl. Leave them for about 5 minutes, until evenly softened with no puddle of loose milk underneath.
  3. Build the flavor base. Mix in the egg, grated onion and its juice, garlic, Parmesan, parsley, oregano, salt and black pepper.
  4. Add the beef last. Mix with clean hands or a fork just until the softened breadcrumbs and flavorings are evenly distributed and the mixture comes together enough to portion. Stop there. It should still look like ground beef, not a smooth paste.

Unsure about the seasoning? Cook a teaspoon-size piece of the mixture through in a small skillet before shaping the rest. Taste it and adjust the bowl while you still can.

Portion, Shape and Bake

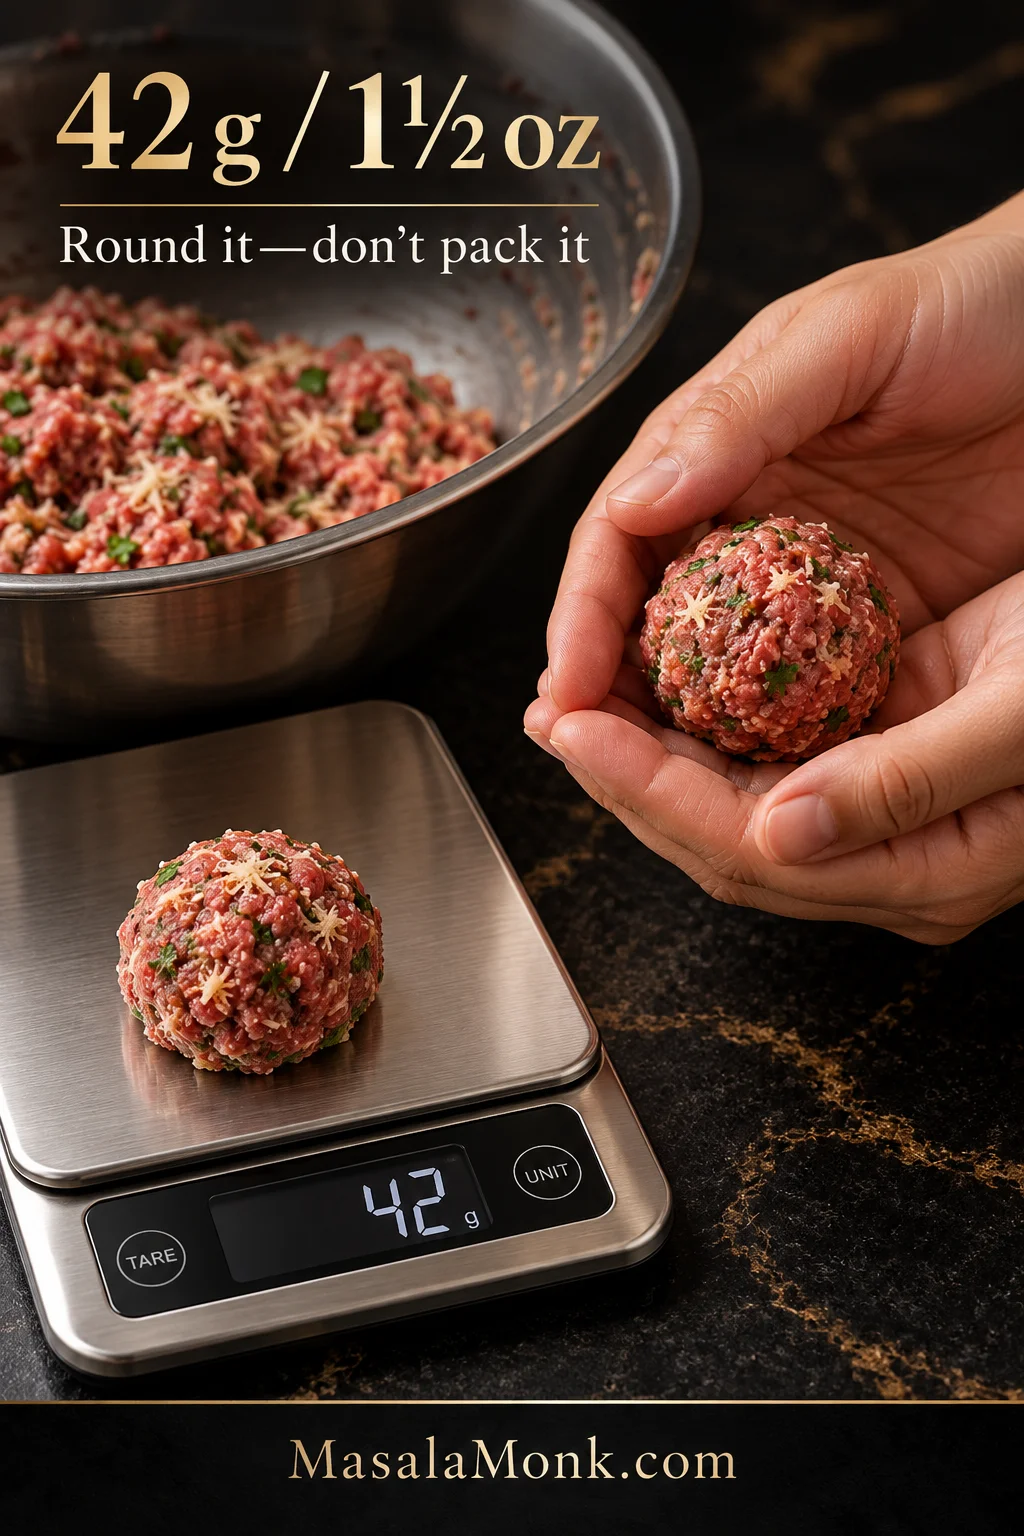
  1. Divide into about 16 portions. Aim for roughly 42 g / 1½ oz each. Without a scale, divide the mixture into four rough sections and then divide each section into four.
  2. Shape the meatballs. Lightly dampen your hands if needed, then roll each portion a few times until it is round and stable. Avoid squeezing it into a hard ball.
  3. Arrange them on the pan. Leave roughly 1–2 inches / 2.5–5 cm between the meatballs so hot air can move around them.
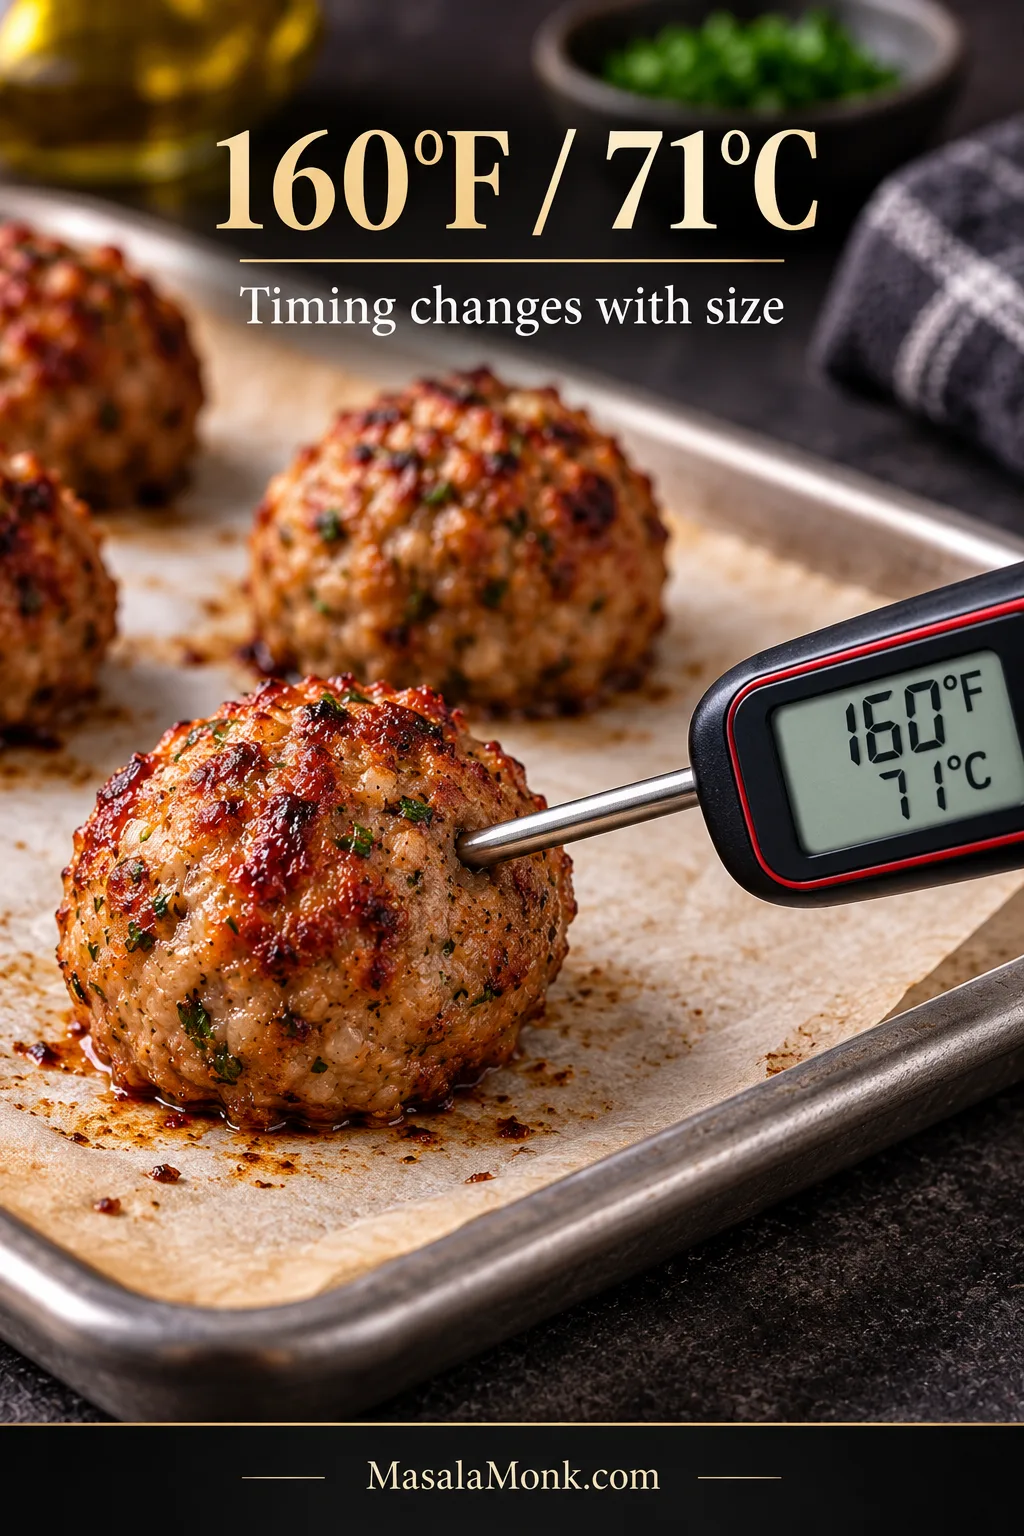
  4. Bake and start checking at 15–16 minutes. Meatballs this size usually finish in 16–22 minutes at 400°F / 205°C, depending on your oven and how cold the mixture was when it went in. There is no need to flip them.
  5. Check one of the larger meatballs. Insert an instant-read thermometer into the center. Ground-beef meatballs are safely cooked when they reach 160°F / 71°C. The timer tells you when to check; the thermometer tells you when to stop.
  6. Serve while hot. If fully cooked meatballs are going into sauce, fold them through gently and avoid another long simmer.

Recipe Notes

  • 85/15 ground beef also works. If you go leaner than that, pay especially close attention to the internal temperature.
  • A little stickiness is normal. When a scooped portion stays together, use damp hands before reaching for more breadcrumbs.
  • For a mixture that truly will not hold its shape, chill it for 15–20 minutes. If it remains unusually loose, add plain panko about 1 tablespoon at a time.
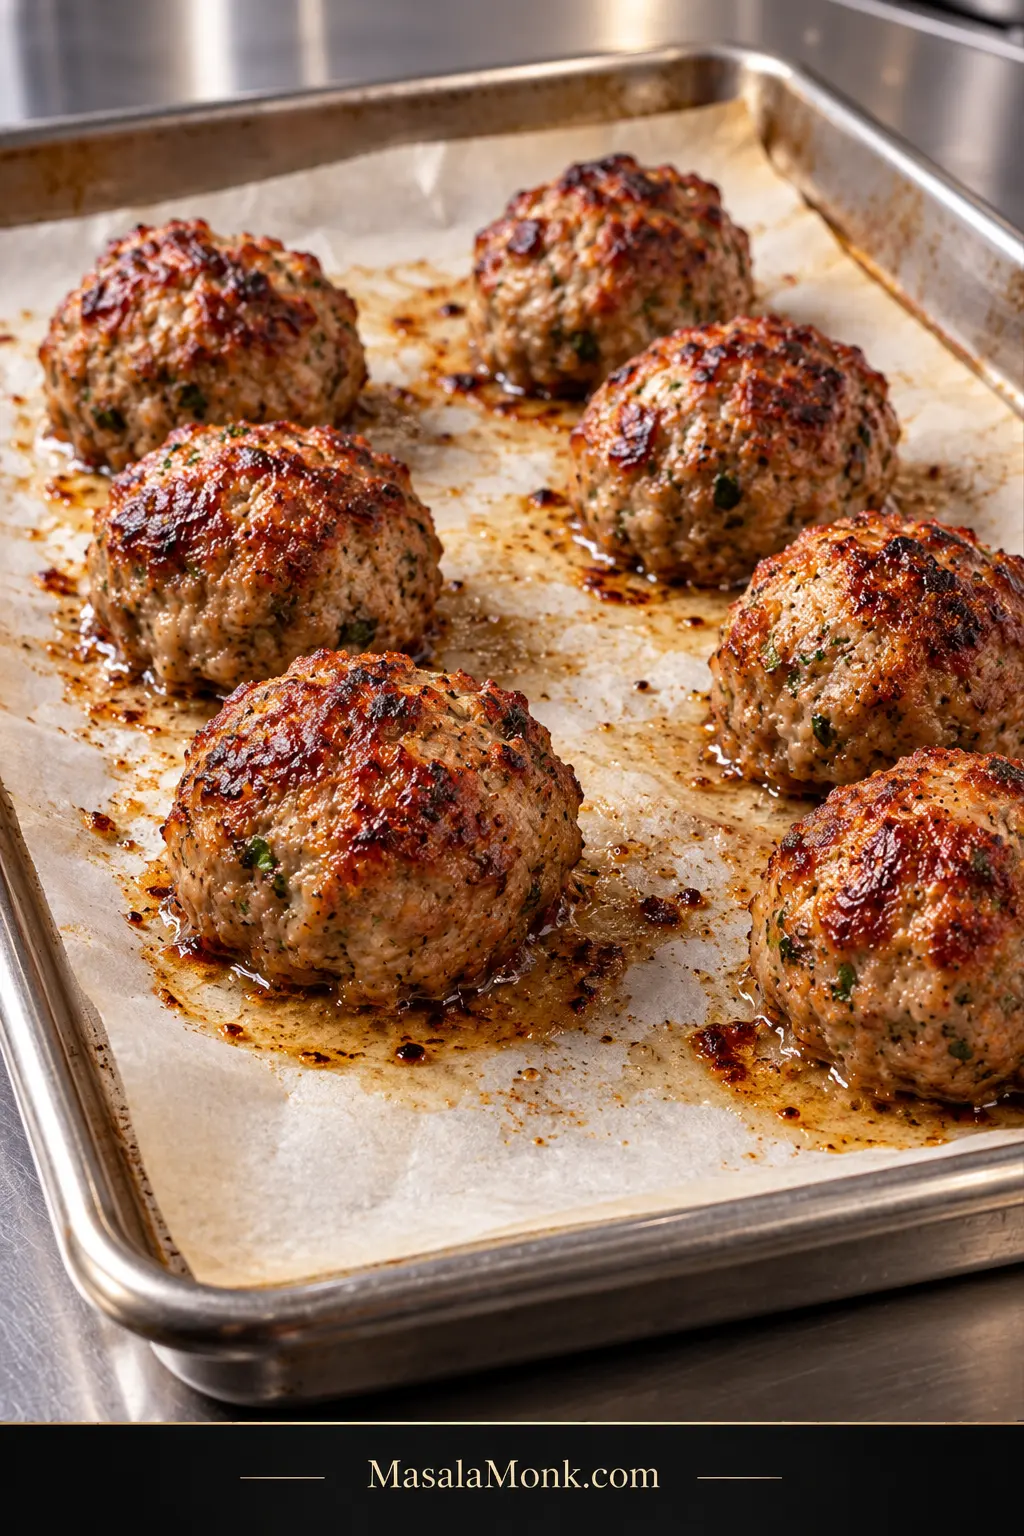
Unsauced baked beef meatballs spaced apart on parchment paper in a rimmed metal baking sheet, showing varied golden-brown surfaces and small rendered-juice marks.
A few darker ridges and lighter patches are normal across a sheet pan of baked meatballs. What matters more for even cooking is keeping the portions close in size.

Cut One Open Before You Add the Sauce

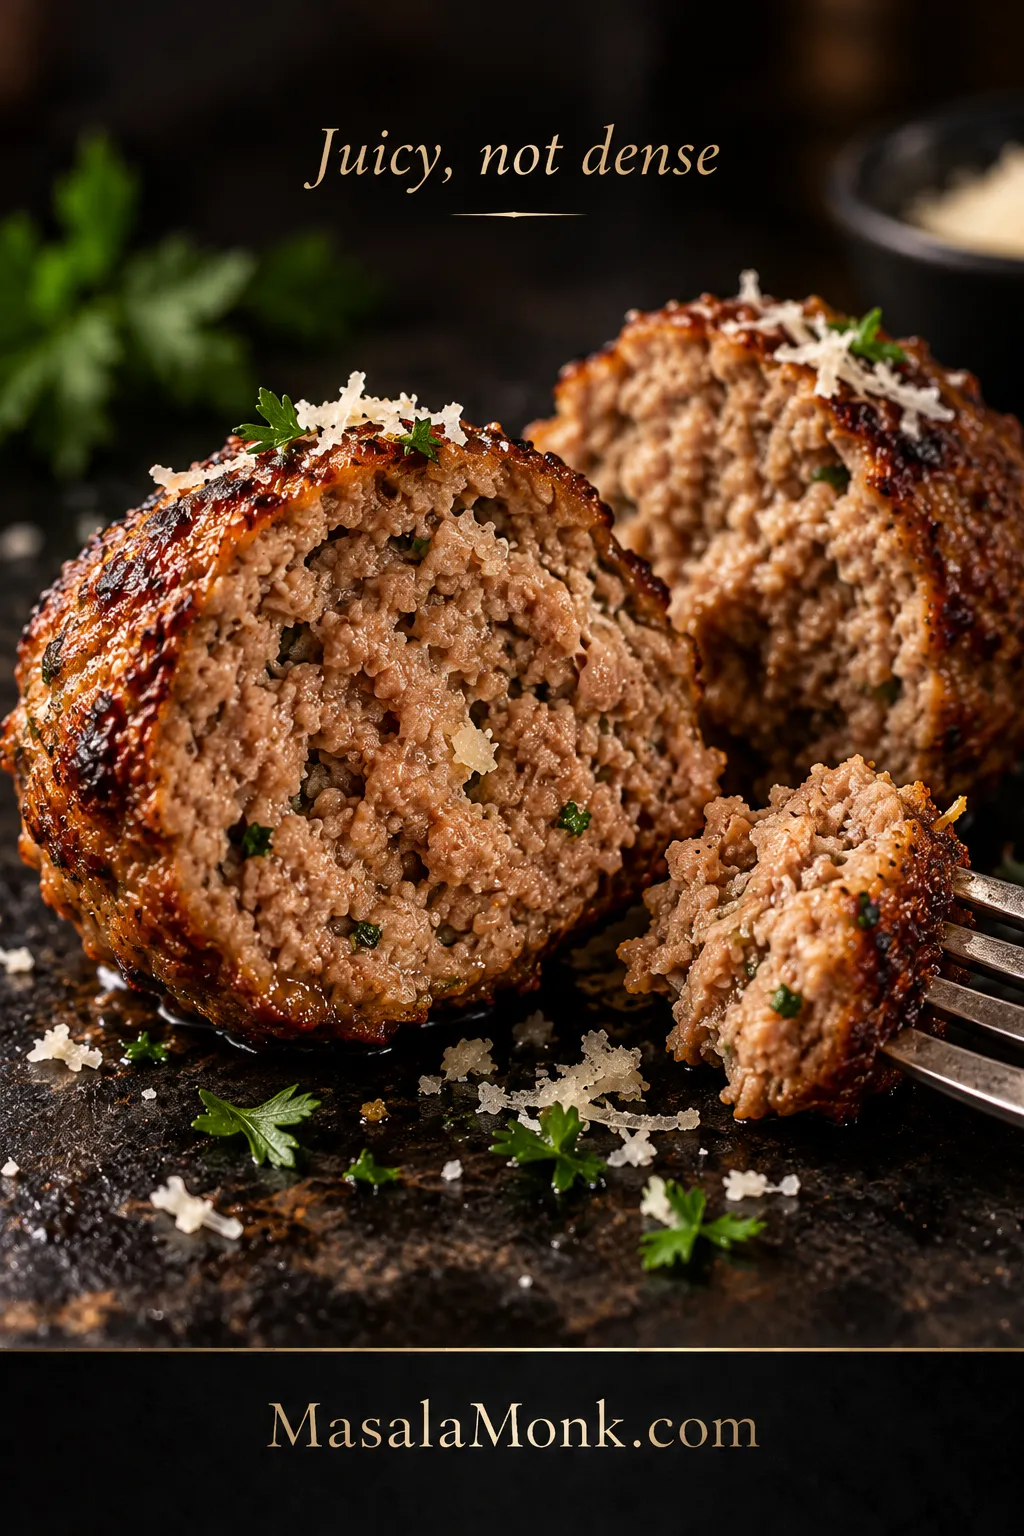
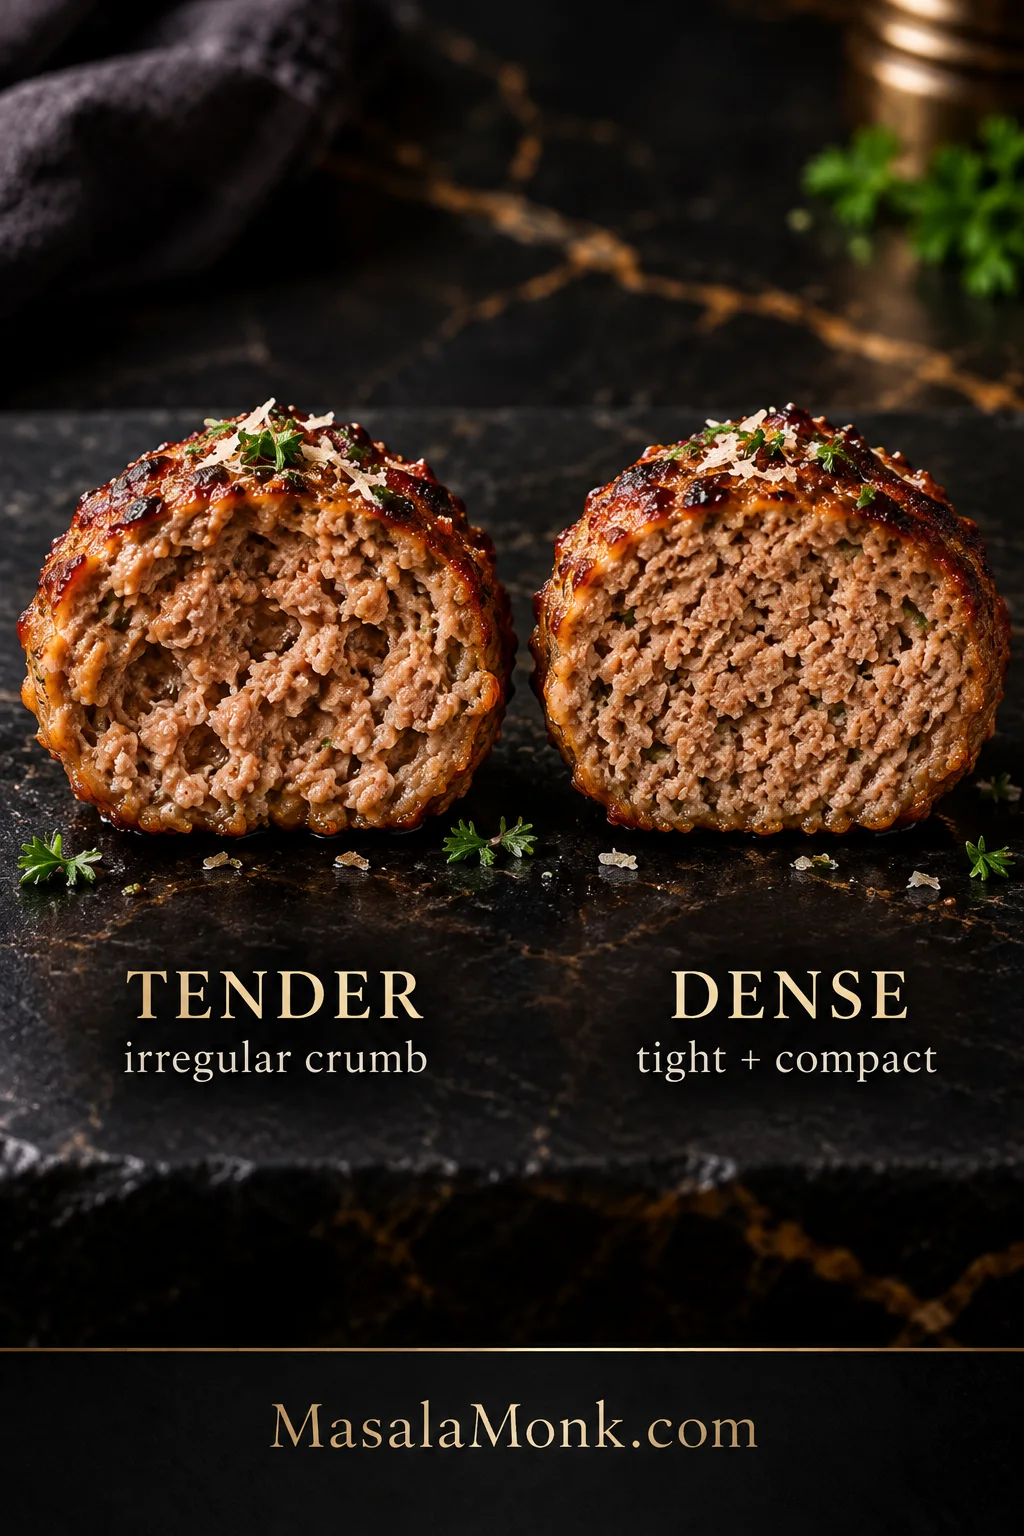
After one of the larger meatballs reaches 160°F / 71°C, cut it in half while it is still hot. The center should look moist and juicy, with the irregular crumb of ground meat instead of a tight, sausage-like texture.

Try a piece with a fork. It gives easily but stays together as you lift it. Then taste it plain. Savory beef comes first, followed by Parmesan, garlic, onion and herbs—not a meatball waiting for sauce to rescue it.

Baked meatball cut open to show a fully cooked, moist, irregular ground-beef crumb, with a fork lifting a tender piece; text reads “Juicy, not dense.”
An uneven cut face is a good sign here: small pockets and irregular strands can still form a meatball that stays intact when lifted. In other words, tender does not mean loose, mushy or falling apart.

Most of that tender texture was decided before the pan ever reached the oven.

If the center looks tight, jump back to mixing and shaping. For a doneness question, see meatball size, oven temperature and doneness.

Why These Meatballs Stay Tender

Tender meatballs start with enough fat, softened breadcrumbs and a light hand with the beef.

The Beef and Breadcrumbs Do Different Jobs

80/20 ground beef brings enough fat to keep an all-beef meatball rich and forgiving. An 85/15 grind works too; leaner beef gives you less room to overcook the center without noticing dryness.

The panko has a different job: holding moisture in the mixture. Softening it with milk before the beef goes in means the crumbs are already hydrated instead of acting like dry filler. We use the same milk-softened breadcrumb idea in our meatloaf recipe.

Grated Onion Melts Into the Meatball

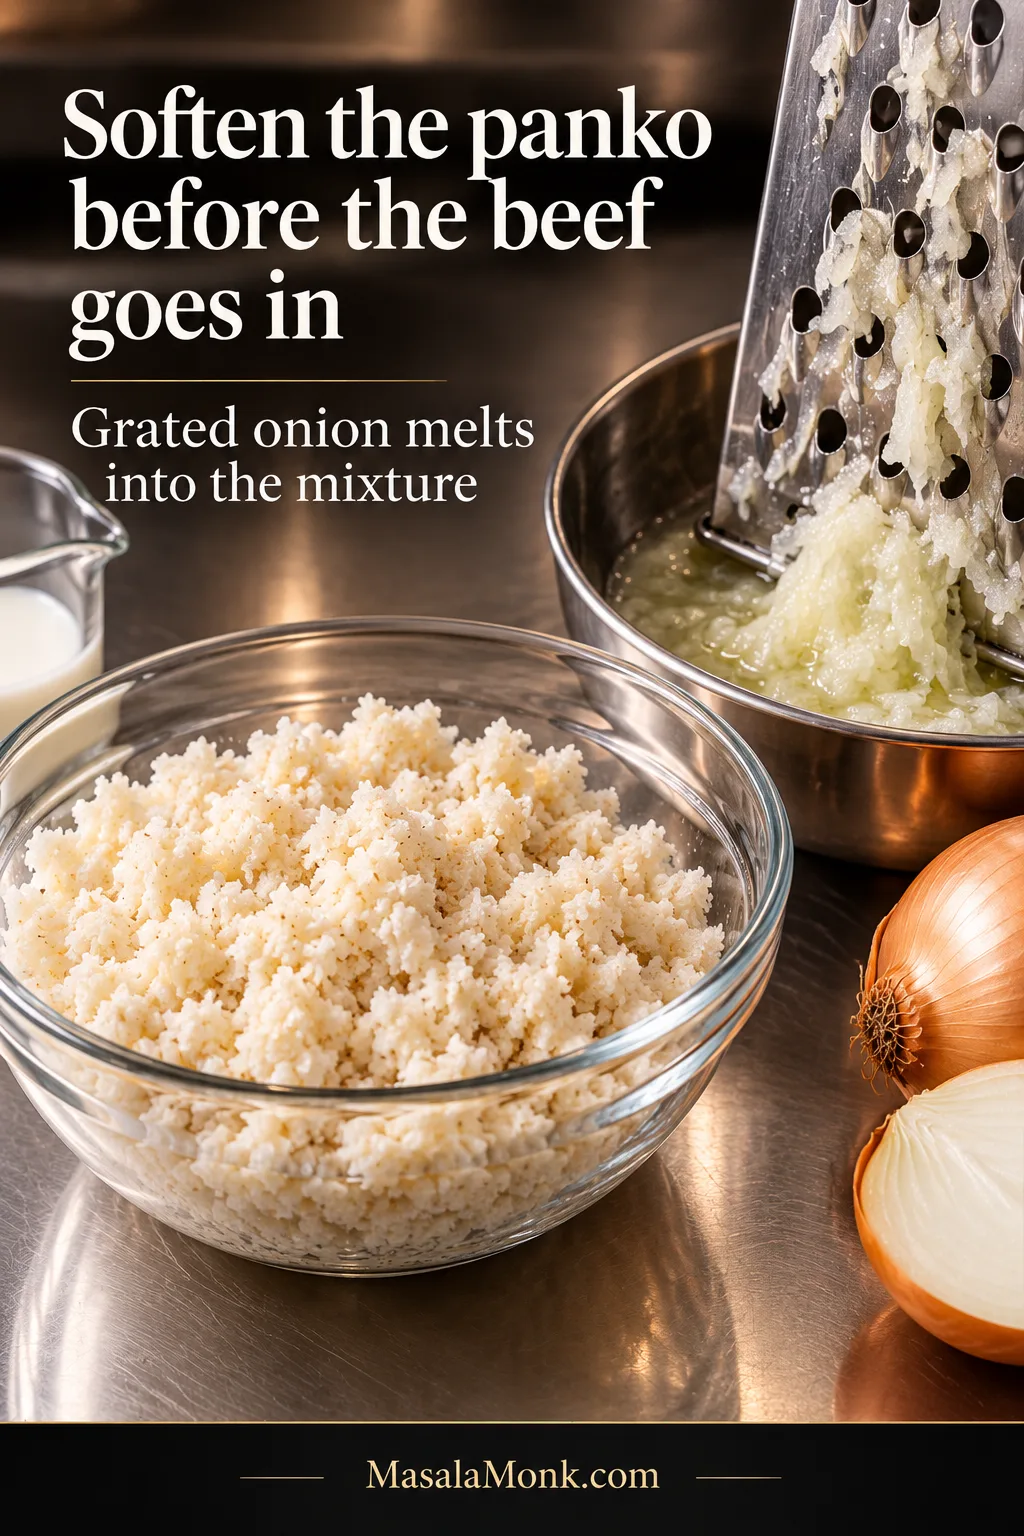
Larger pieces of raw onion can stay crunchy during a short bake. Grating the onion on the large holes of a box grater spreads its juice and flavor through the beef, where it softens into the meat instead of leaving noticeable chunks.

Softened panko in a bowl beside yellow onion grated on the large holes of a box grater, with wet grated onion and its juice visible; instructional text explains the two techniques.
Look for two different prep textures: panko that is evenly damp but still recognizable as breadcrumbs, and onion that is wet and pulpy from the box grater. Once both are ready, they blend into the beef far more evenly.

Season the Meatball, Not Just the Sauce

Parmesan, garlic, onion, parsley and oregano give the meatballs their familiar savory flavor. Marinara should add tomato and acidity to a meatball that already tastes good on its own, not provide all of the flavor.

Mixing and Shaping Without Making Them Dense

The goal is simple: spread the softened breadcrumbs and flavorings through the beef without working it into a smooth paste. Stop while the mixture still has the loose, irregular look of ground meat.

Use the same light touch when shaping. Scoop a portion, roll it a few times between damp palms and put it on the sheet pan. It only needs enough pressure to stay round and make the trip to the oven intact.

Hands gently rounding a raw beef meatball beside a digital kitchen scale reading 42 g; text reads “42 g / 1½ oz” and “Round it—don’t pack it.”
Use the first 42 g / 1½ oz portion as a visual reference for the rest of the homemade meatballs. After that, matching by eye is faster than weighing every piece while still keeping the batch in a similar cooking range.

Meatball Size, Oven Temperature and Doneness

Even portions matter more than one exact minute count. Treat the times below as a checking window, then use the center temperature to decide when the batch is done.

For this batchTarget
PortionAbout 42 g / 1½ oz
Oven400°F / 205°C
Start checking15–16 minutes
Typical window16–22 minutes
Ground-beef center160°F / 71°C
Instant-read thermometer inserted from the side into the center of an unsauced baked meatball on parchment, with a reading of 160°F / 71°C.
Insert the thermometer from the side toward the thickest center of one of the larger baked meatballs. That angle makes it easier to measure the meat rather than the hot baking pan, while 160°F / 71°C gives you the ground-beef endpoint.

Smaller meatballs finish sooner; larger ones need more time for heat to reach the middle. Oven calibration, pan material and how cold the mixture is can shift the timing too.

USDA ground-beef guidance specifically includes meatballs among foods that should reach 160°F / 71°C. A thermometer is more reliable than judging doneness by color.

When Meatballs Fall Apart—and Other Fixes

Where the problem appears tells you a lot. A portion that falls apart in your hands can have a different problem from a baked meatball that only begins to crumble after it reaches the sauce.

What happensWhat to check
Falls apart while shapingMake sure the beef has been mixed enough for a portion to stay together. If it feels unusually loose, chill it before adding more breadcrumbs.
Breaks during frying or raw-in-sauce cookingThe outside may be getting moved before it has had time to set. Leave the first surface alone a little longer.
Breaks after entering sauceHandle the cooked meatballs gently. Spoon sauce around them instead of repeatedly stirring the pot.
Dry or crumblyVery lean beef, too many dry breadcrumbs or cooking well beyond the target temperature are the first things to check.
Dense or springyThe beef may have been mixed until very smooth or the portions packed too firmly.
Good texture but blandCheck the salt first, followed by Parmesan, onion, garlic and herbs. A cooked tester lets you adjust the bowl before shaping the rest.
Two cooked meatball halves compared side by side: the tender half has a more irregular open crumb, while the dense half has a tighter compact interior; both are labeled.
The cut face tells you more about handling than the crust does. A tender meatball keeps an irregular, slightly open structure, whereas a dense one looks noticeably finer and more compressed from edge to center.

What If the Meatballs Are Pale?

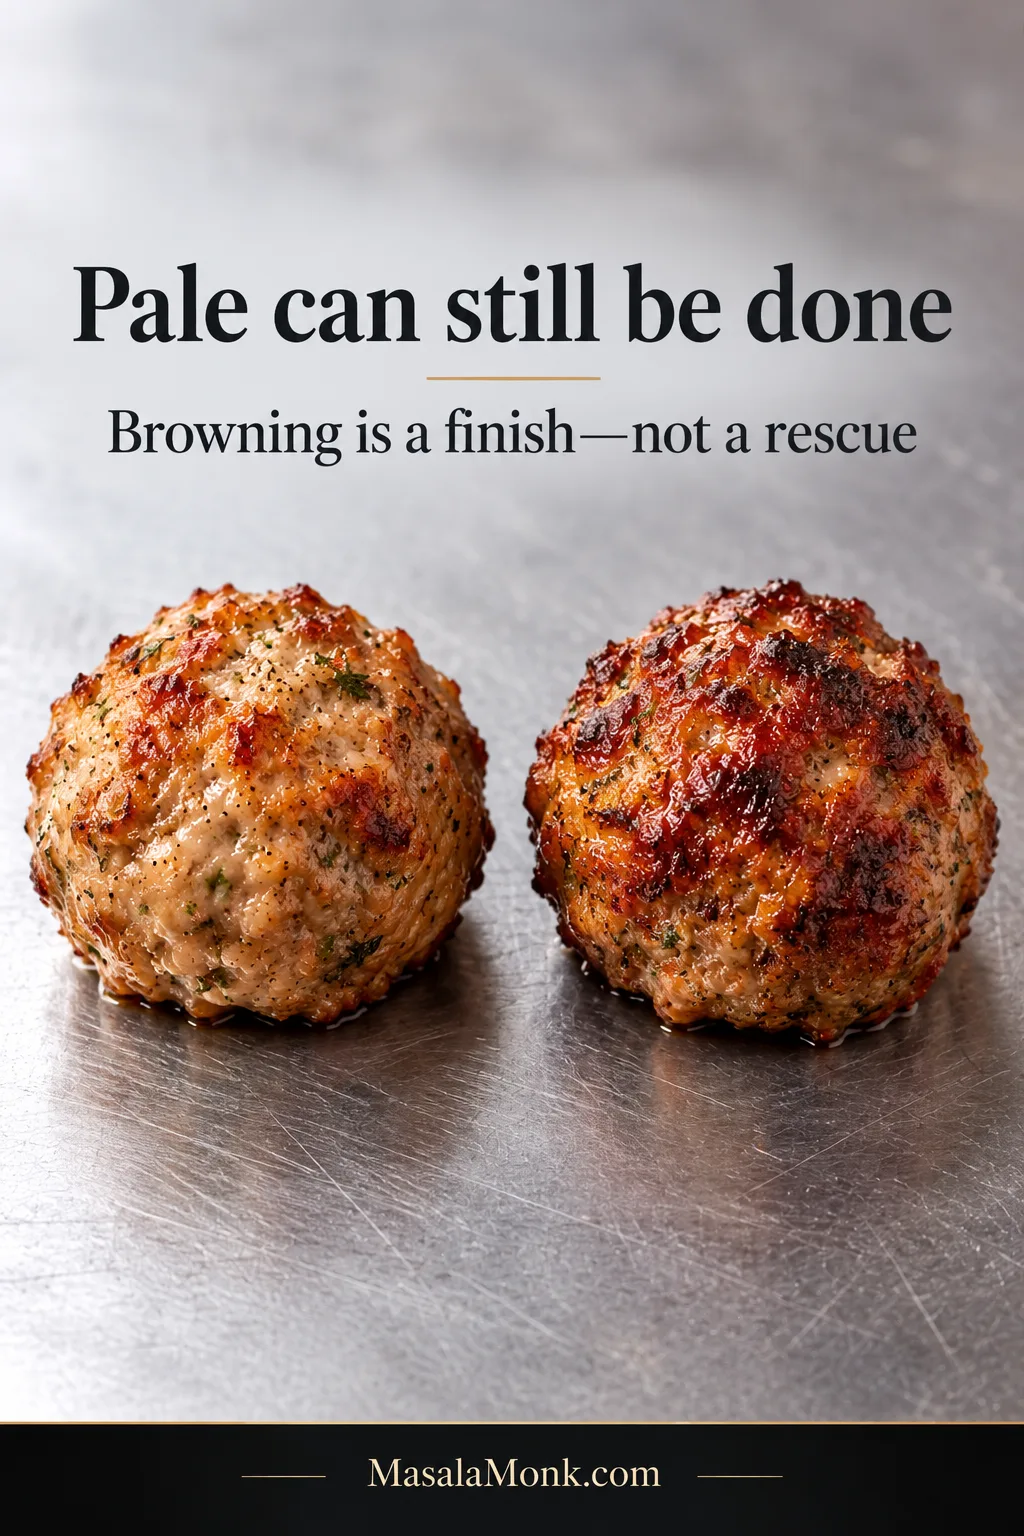
A properly cooked meatball does not need a dark crust to be good. Parchment, spacing, pan material and individual ovens all affect how much browning you see.

Two unsauced baked meatballs on a light metal surface, one pale golden-brown and one more deeply browned, with text explaining that pale meatballs can still be done.
Both meatballs can be properly cooked even when one develops much more color. Use browning as a clue about surface flavor and roasting—not as proof that the middle has reached a safe temperature.

If stronger color matters, move the meatballs to an unlined broiler-safe metal pan near the end of cooking and broil them very briefly while watching closely. Check the center again afterward. Once the meatballs are fully cooked, there is little reason to keep heating them simply to make the outside darker.

Browning is a finish—not a rescue.

Other Ways to Cook and Sauce Meatballs

Baking remains the easiest default because the whole batch cooks together with very little handling. For a classic red-sauce dinner, heat the sauce separately and spoon it over the meatballs, or fold them through just before serving. Our marinara sauce recipe gives you a simple homemade option.

Pan-fry them if you want a deeper crust; the tradeoff is oil, batches and more turning. Let the first side set before trying to move the meatballs.

You can also cook raw meatballs directly in gently simmering sauce. They are especially delicate at the beginning, so give them time to set before moving them around and verify doneness with a thermometer.

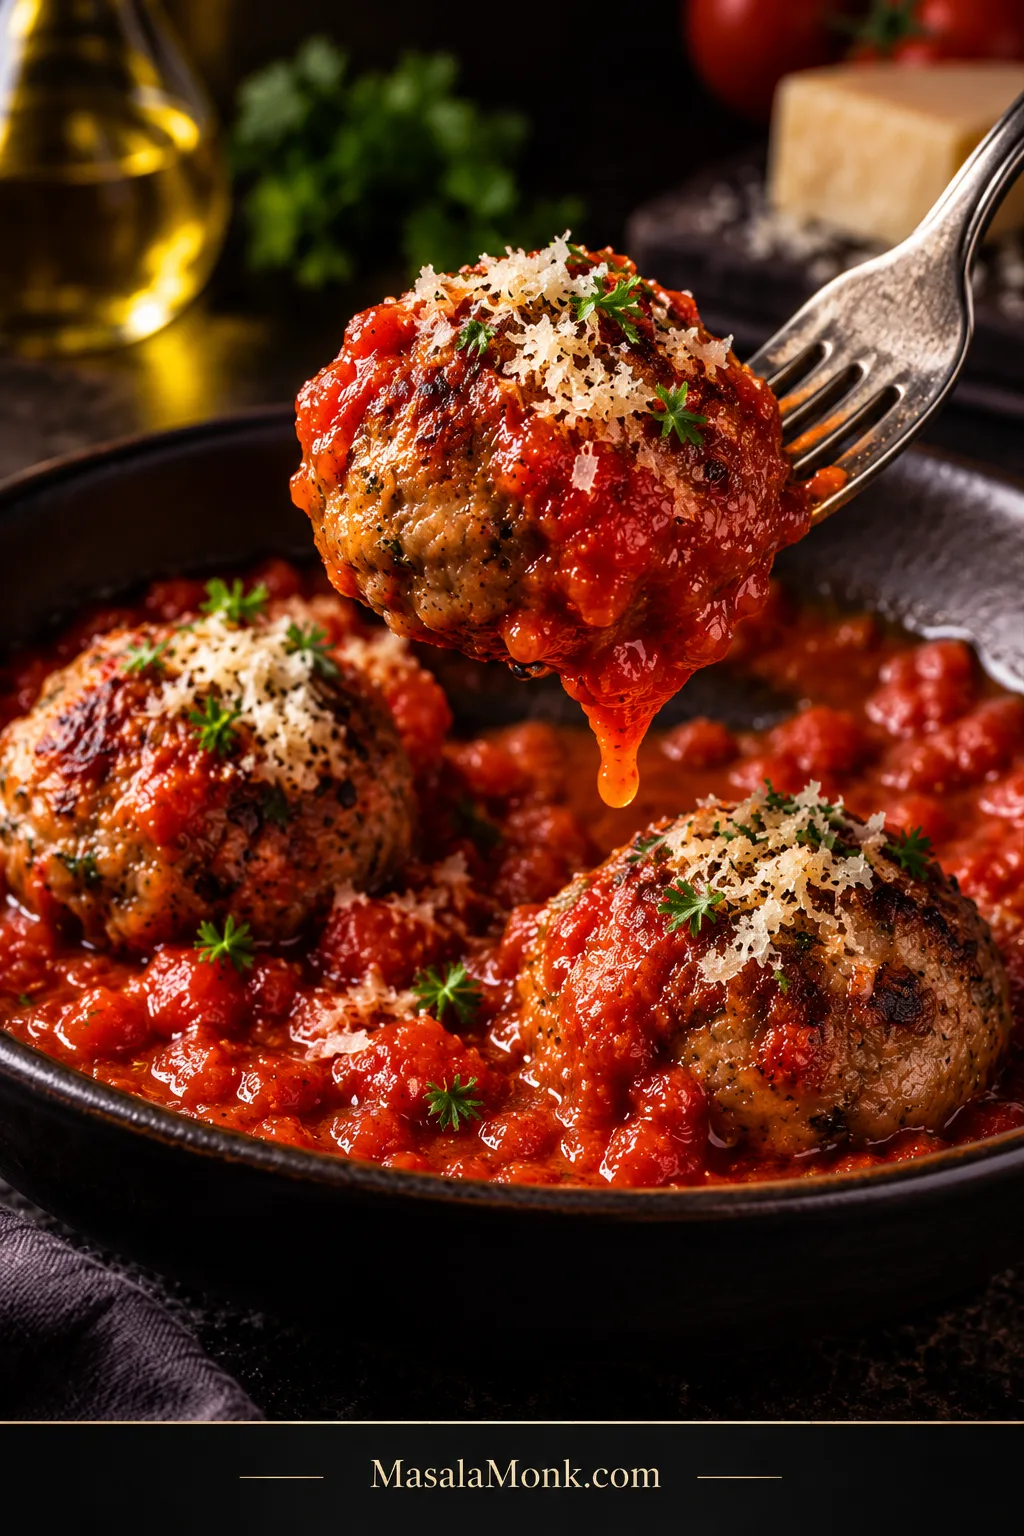
Fork lifting a baked meatball partly coated in chunky red marinara above more sauced meatballs, finished lightly with Parmesan and parsley.
The craggy baked surface gives marinara plenty of places to cling, so the sauce can coat the meatball without completely masking its browned exterior. As a result, you still get both roasted beef flavor and tomato in the same bite.

Useful Variations

Beef and pork: replace 4–8 oz / 115–225 g of the beef with ground pork while keeping the total ground-meat weight at 1 lb / 454 g. Pork changes the flavor and can add richness depending on its fat content; the all-beef version does not depend on pork for tenderness.

Other breadcrumbs: fine dry or gluten-free breadcrumbs may work, but they do not absorb milk exactly like panko. Do not assume a straight volume swap. Soften them first, then add crumbs or milk in small amounts if the mixture is clearly too loose or too stiff. Panko remains the most predictable choice for this version.

Egg-free and poultry versions need their own adjustments. Removing the egg changes both moisture and structure. Ground chicken and turkey have different fat and moisture profiles from 80/20 beef and work better in recipes designed around poultry; ground poultry must reach 165°F / 74°C.

What to Serve With Meatballs

Serve them with marinara and spaghetti, tuck them into a toasted roll with sauce and melted cheese, or spoon them over creamy mashed potatoes. A simple vegetable or salad is plenty alongside.

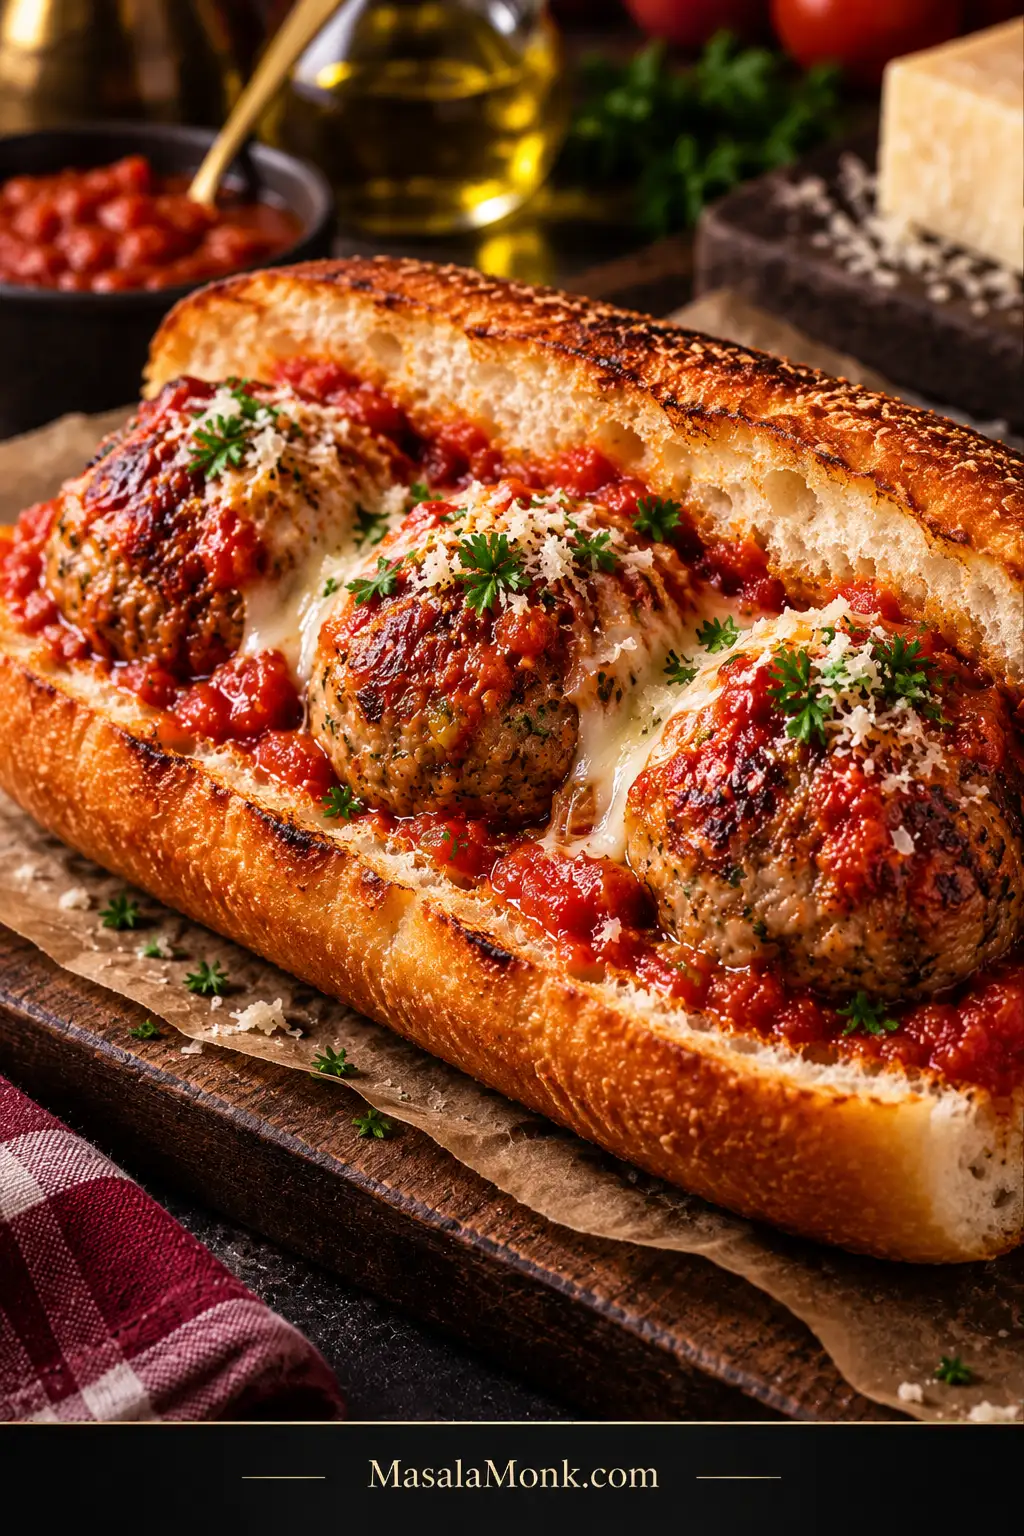
Toasted split roll filled with three baked beef meatballs, marinara and melted cheese, finished with a little grated Parmesan and parsley.
Toast the roll before building a meatball sub; the crisp interior gives the bread more time before hot marinara begins to soften it. Then add enough sauce to coat the meatballs without flooding the bottom of the sandwich.

Make Ahead, Freeze and Reheat

Make ahead or freeze raw: shape the meatballs, cover the tray and refrigerate for up to 1 day before baking. For longer storage, freeze the shaped meatballs on a parchment-lined tray until firm, then transfer them to an airtight freezer container. Thaw them in the refrigerator before baking for the most predictable timing.

Refrigerate cooked meatballs: cool leftovers promptly and store them in an airtight container. USDA leftovers guidance recommends using most refrigerated cooked leftovers within 3–4 days.

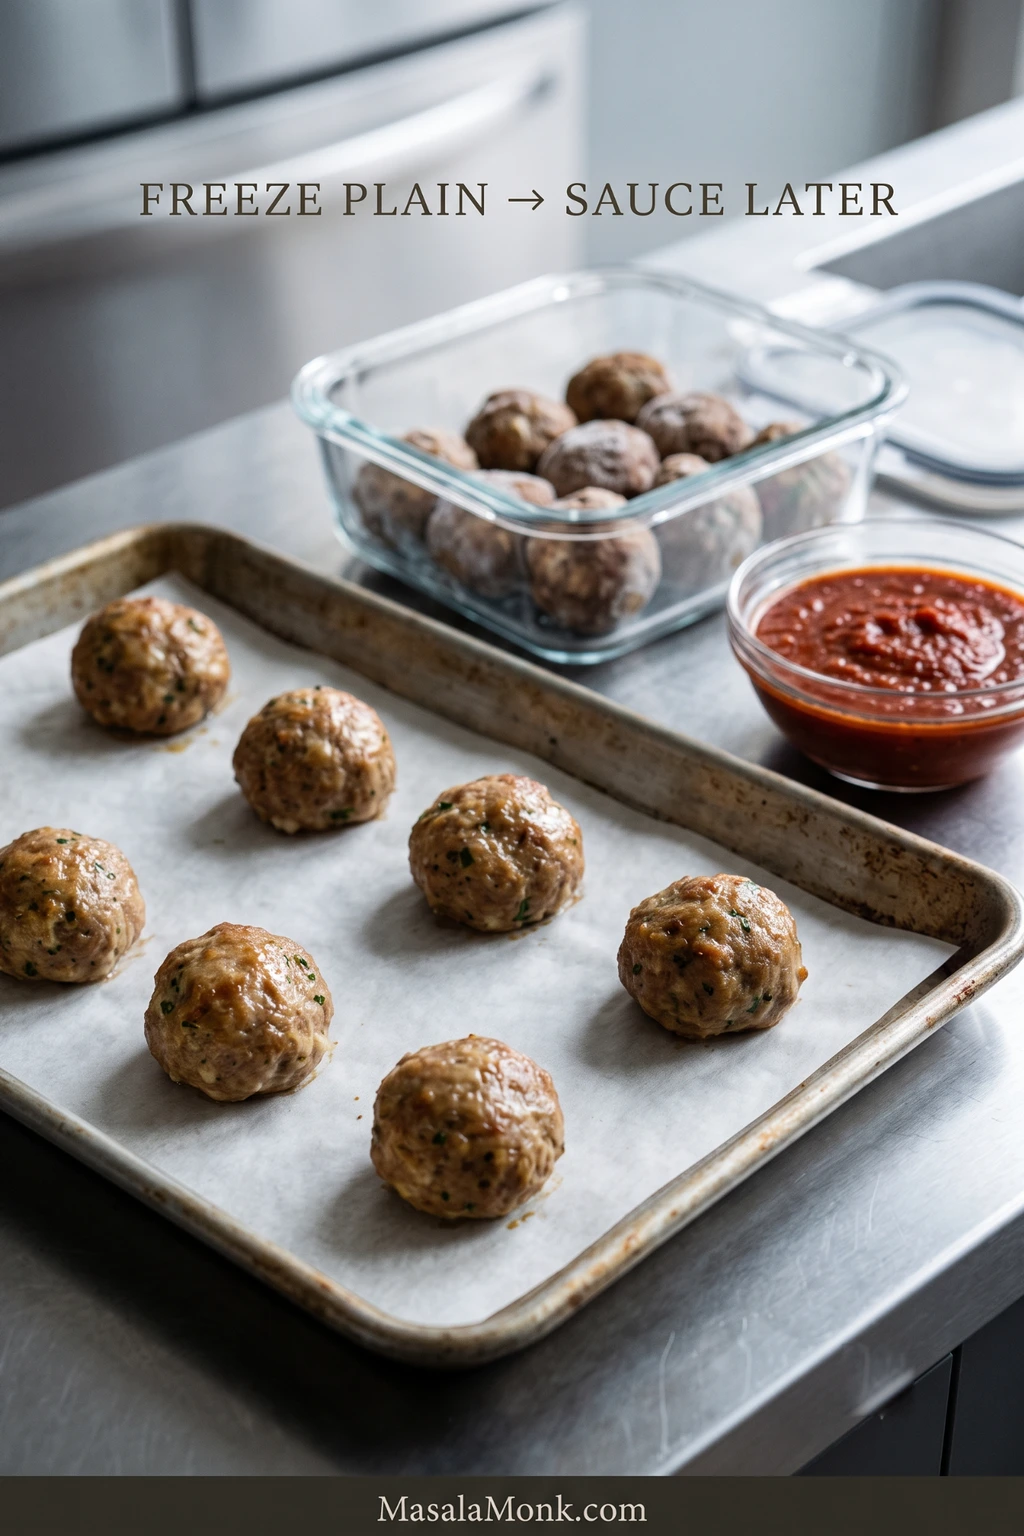
Freeze cooked meatballs: cool them first, freeze them on a tray until firm, then transfer them to a freezer bag or airtight container. Aim to use them within about 3 months for the best texture and flavor. Keeping them plain also leaves you the option of turning them into grape jelly meatballs later.

Cooked meatballs spaced individually on a parchment-lined tray, with frozen meatballs in a clear storage container and a separate bowl of marinara; text reads “Freeze plain → sauce later.”
Once firm, the meatballs separate easily instead of freezing into one clump. Besides letting you pull out only what dinner needs, keeping them plain leaves the sauce decision open for later.

To reheat: warm the meatballs gently in sauce, in a covered baking dish or in the microwave until the center reaches 165°F / 74°C.

Once the mixture feels right in your hands and you know when to stop cooking, meatballs stop being fussy. After that, the rest is dinner.

Posted on — Leave a comment

Stuffed Shells with Meat Recipe: Easy, Cheesy & Baked

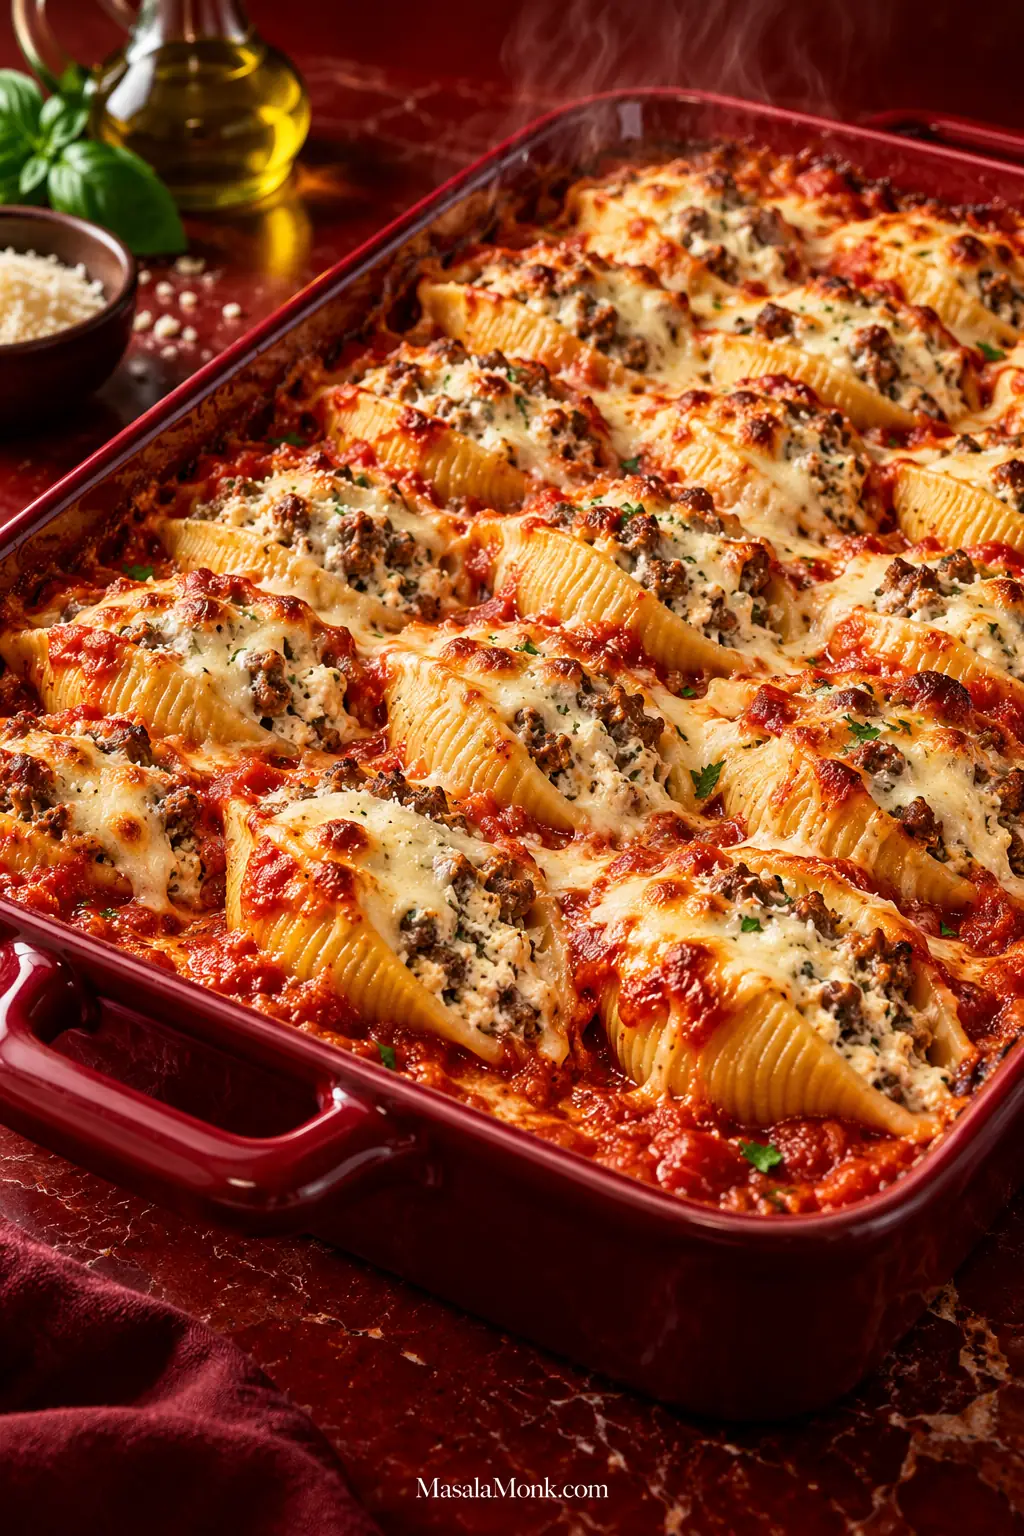
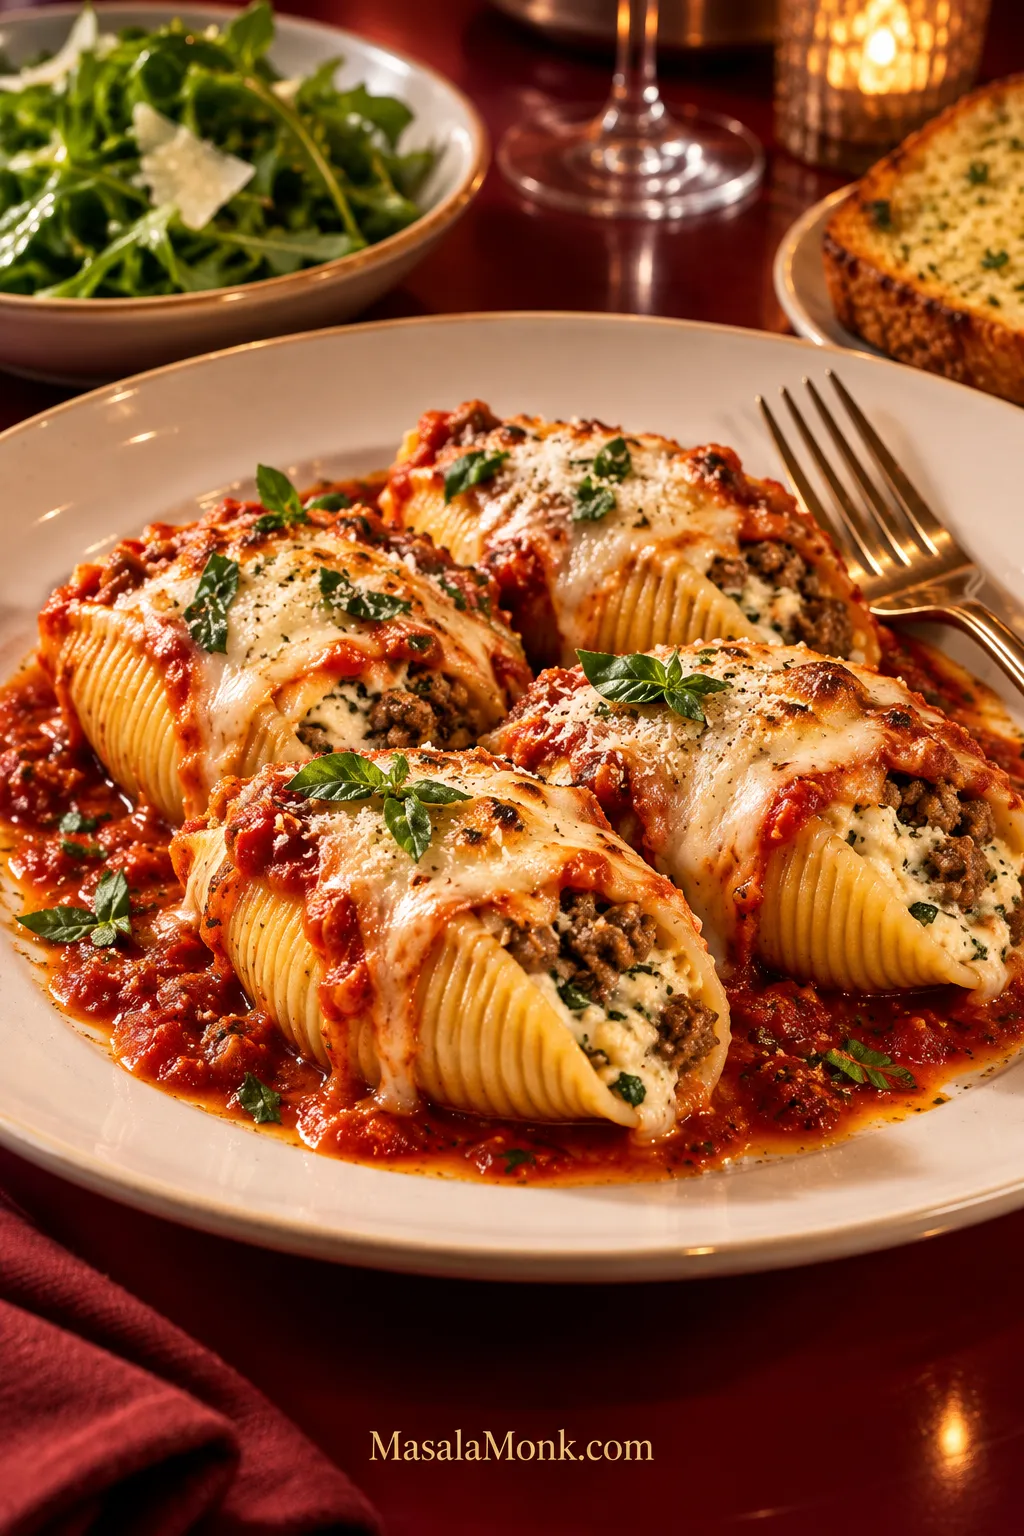
Deep red baking dish filled with jumbo pasta shells stuffed with ricotta and browned ground beef, surrounded by marinara and topped with melted mozzarella.

These stuffed shells with meat are filled with seasoned ground beef, creamy ricotta, mozzarella and Parmesan. They bake in marinara until the sauce bubbles around the edges and the cheese melts over the top. The beef goes right into the filling, so every shell gets a generous, savory center rather than cheese in one bite and meat in another.

Let the beef get properly browned before it goes into the ricotta, and pull the shells from the water while they’re still a little firm. They’ll be easier to fill, and they’ll finish cooking in the sauce without turning mushy.

The recipe makes about 24 stuffed shells—enough for six hearty servings or eight with sides. You can also assemble the casserole a day ahead, which is handy when you’d rather have most of dinner dealt with before the evening gets busy.

Stuffed Shells with Meat Recipe

YieldAbout 24 stuffed shells
Servings6 at 4 shells each, or 8 at 3 each with sides
Oven375°F / 190°C
Baking dish9×13 in / 23×33 cm
Prep timeAbout 35 minutes
Bake time30–35 minutes
Rest time10 minutes
Total timeAbout 1 hour 20 minutes

Ingredients

Pasta and sauce

  • 28 jumbo pasta shells, allowing a few extras in case some break
  • 24 oz / 680 g marinara sauce
  • 2–4 tablespoons / 30–60 ml water, only if needed to loosen a very thick sauce

Beef and ricotta filling

  • 2 teaspoons / 10 ml olive oil
  • ½ medium yellow onion, finely chopped (about ½ cup / 75 g)
  • 1 lb / 454 g ground beef, preferably 90% lean
  • 3 garlic cloves, minced
  • 15 oz / 425 g whole-milk ricotta, drained briefly if visibly watery
  • 8 oz / 225 g low-moisture mozzarella, shredded and divided
  • ½ cup / about 45 g finely grated Parmesan
  • 1 large egg
  • 1½ teaspoons Italian seasoning
  • ¾ teaspoon fine sea salt, divided, plus more for the pasta water
  • ½ teaspoon freshly ground black pepper
  • 2 tablespoons chopped fresh parsley, optional
  • ¼ teaspoon crushed red pepper flakes, optional
Can’t find jumbo shells? Manicotti is a good alternative, and cooked lasagna sheets can be rolled around the filling. Small pasta shells are too small to stuff individually; if that’s what you have, a baked pasta such as baked ziti is a better fit.

For the beef, 90% lean gives you plenty of flavor without producing as much rendered fat as a fattier blend. An 85% lean package works too. Use low-moisture mozzarella for the filling and topping. Freshly shredded melts especially well, but a bag of pre-shredded mozzarella is completely fine here.

Because the sauce flavors every shell, use a marinara you already enjoy. Jarred sauce keeps dinner simple; our homemade marinara sauce is another option when you want to make the sauce too.

If the marinara is very thick, loosen it with a splash of water. If it’s unusually thin, simmer it briefly until it clings lightly to a spoon.

Equipment

  • 9×13-inch / 23×33 cm baking dish
  • Large pot and colander
  • Tray or large plate for the cooked shells
  • Large skillet
  • Aluminum foil
  • Large mixing bowl
  • Large spoon or 2-tablespoon scoop, optional
  • Instant-read thermometer, optional

How to Make Stuffed Shells with Meat

1. Prepare the baking dish

Heat the oven to 375°F / 190°C. Spread about 1 cup of marinara over the bottom of a 9×13-inch / 23×33 cm baking dish. Keep the remaining sauce for the assembled shells.

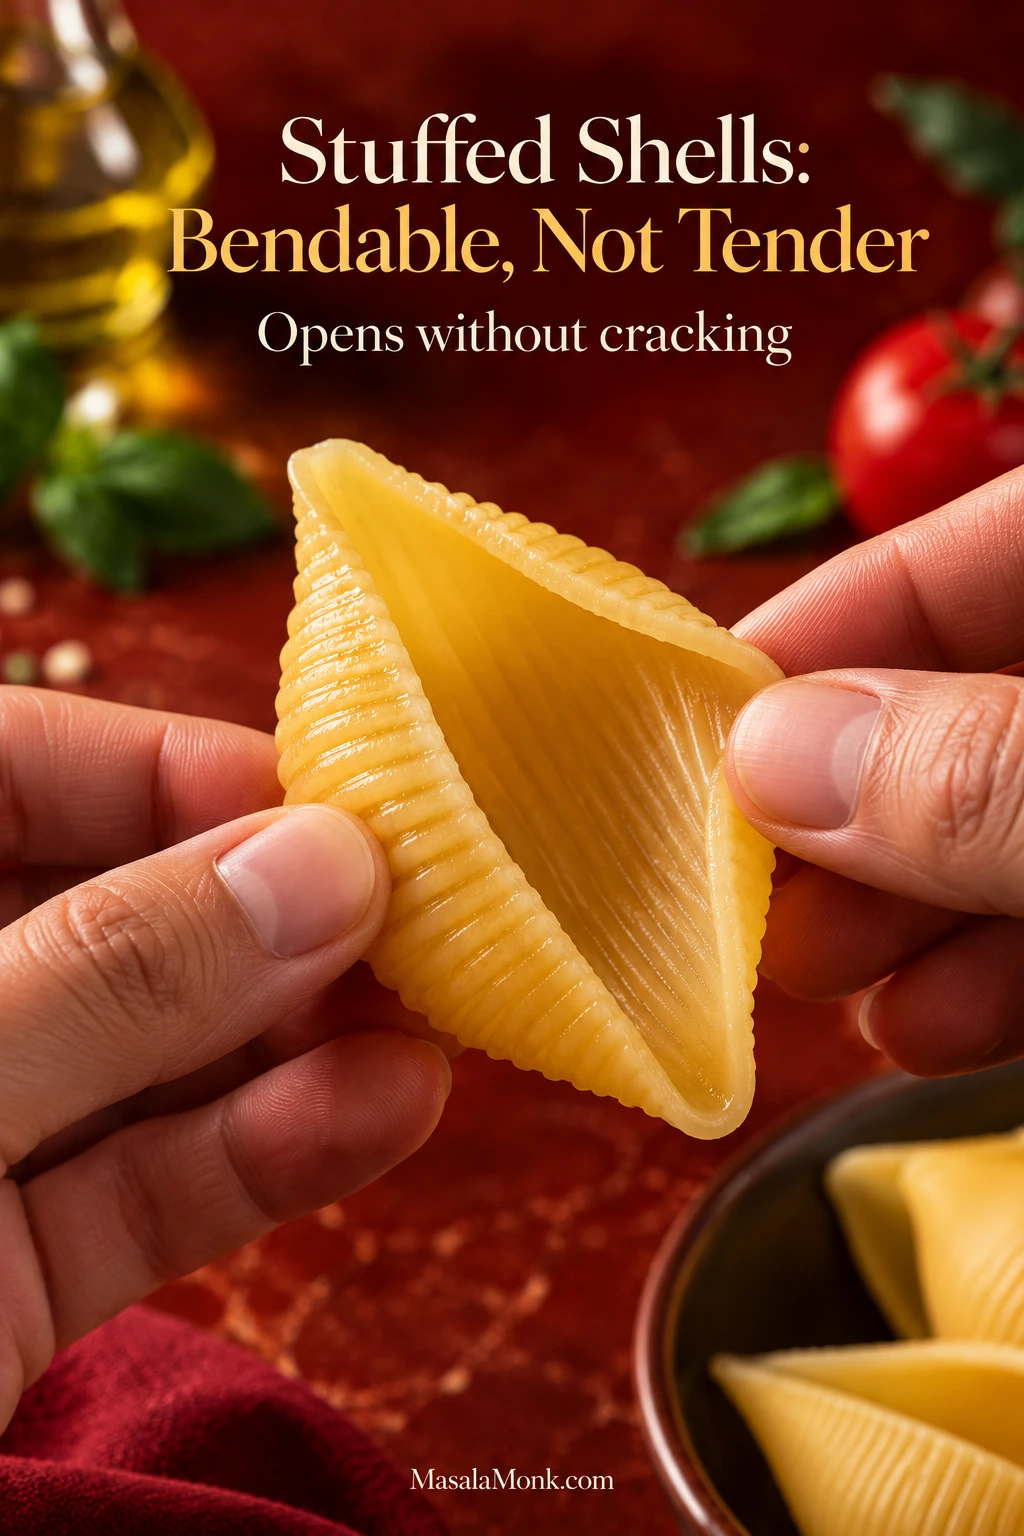
2. Cook the shells until bendable, not tender

Bring a large pot of well-salted water to a boil. Add the 28 jumbo shells and start checking them about 2 minutes before the shortest cooking time listed on the package. Use their texture as the final guide: a shell should open without cracking but still feel distinctly firm.

Drain immediately and spread the shells in a single layer on a tray or large plate. Separate any that begin sticking together. They’ll finish cooking once the casserole goes into the oven.

Hands gently opening a cooked jumbo pasta shell to show that it bends without cracking while remaining firm enough to stuff.
A jumbo pasta shell that is ready to fill should flex with a little resistance. If it turns floppy in the pot, it will be harder to drain, open and stuff without tearing.

3. Brown and season the beef

Heat the 2 teaspoons / 10 ml olive oil in a large skillet over medium heat. Add the onion and cook for 3–4 minutes, until softened.

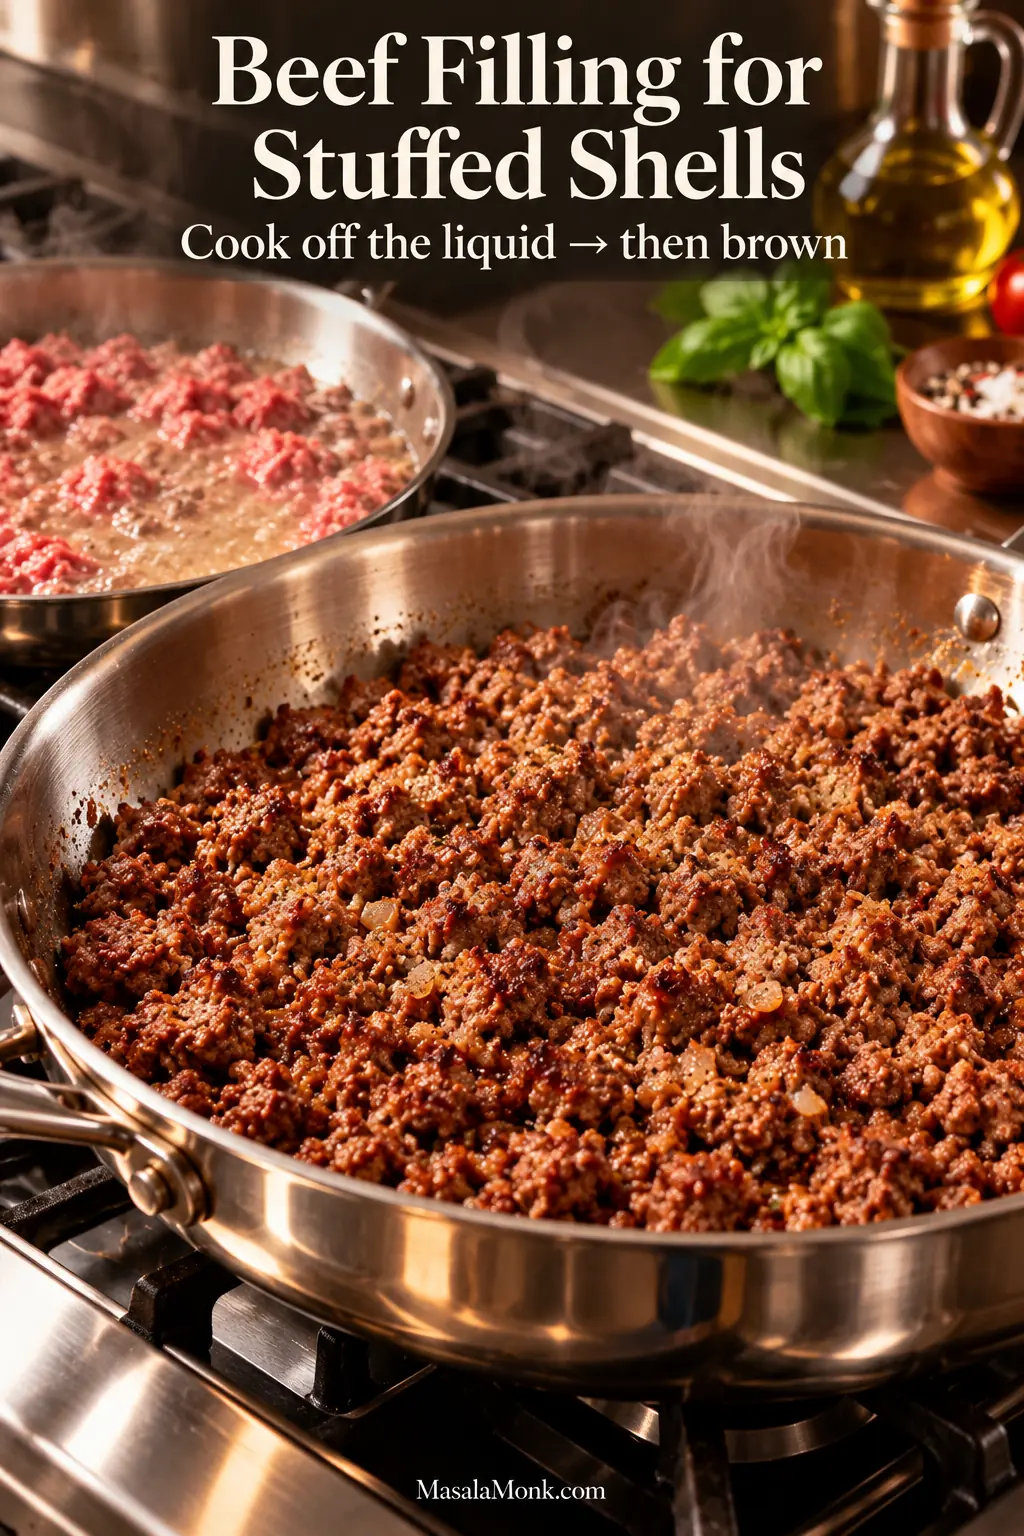
Add the ground beef and break it into small crumbles. Let the released liquid cook away, raising the heat to medium-high if needed. If a large pool of rendered fat remains, spoon or drain off the excess. Then let some of the crumbles sit against the skillet long enough to develop browned edges.

Two stages of ground beef in skillets, with wet simmering beef behind and well-browned crumbles in the foreground.
Listen as well as look when browning ground beef: the pan shifts from bubbling to a sharper sizzle once excess moisture has cooked away. That is the point when real browning can begin.

Reduce the heat to medium. Add the garlic, Italian seasoning, ½ teaspoon salt, black pepper and optional red pepper flakes. Cook for another 30–60 seconds, just until you can smell the garlic. The beef should reach 160°F / 71°C before it comes off the heat.

Taste a small piece of the cooked beef and adjust the seasoning now, before it goes into the ricotta mixture. Once the filling contains raw egg, don’t taste it. Transfer the beef to a bowl or plate and let it cool until warm, not steaming hot.

4. Mix the beef and ricotta filling

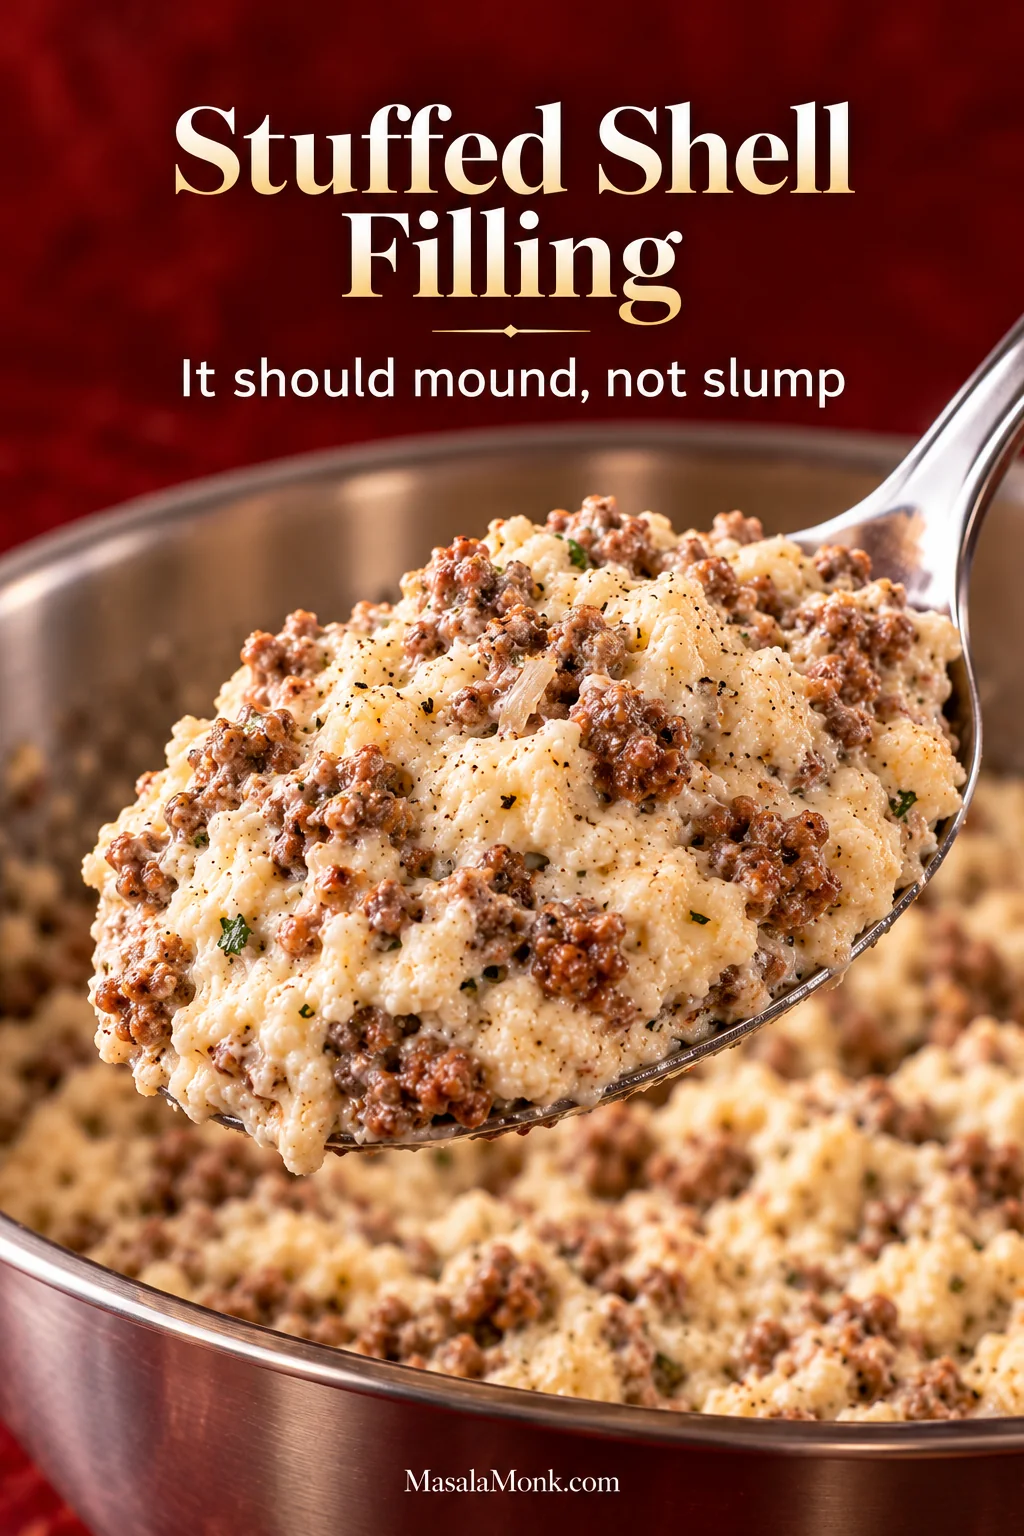
In a large bowl, combine the ricotta, 4 oz / 113 g mozzarella, Parmesan, egg and remaining ¼ teaspoon salt. Add the parsley if using, then fold in the cooled beef. The mixture should be creamy but thick enough to mound on a spoon.

Large spoon holding thick ricotta filling mixed with small browned ground beef crumbles, showing a creamy mixture that holds its shape.
If the beef-and-ricotta filling spreads flat instead of holding a soft mound, check its moisture before stuffing the shells. Watery ricotta or residual skillet liquid is much easier to correct in the bowl than after baking.

5. Fill the shells evenly

Fill about 24 intact shells with roughly 2 heaping tablespoons of filling each, adding more to any especially large shells. A 2-tablespoon scoop makes this quicker if you have one.

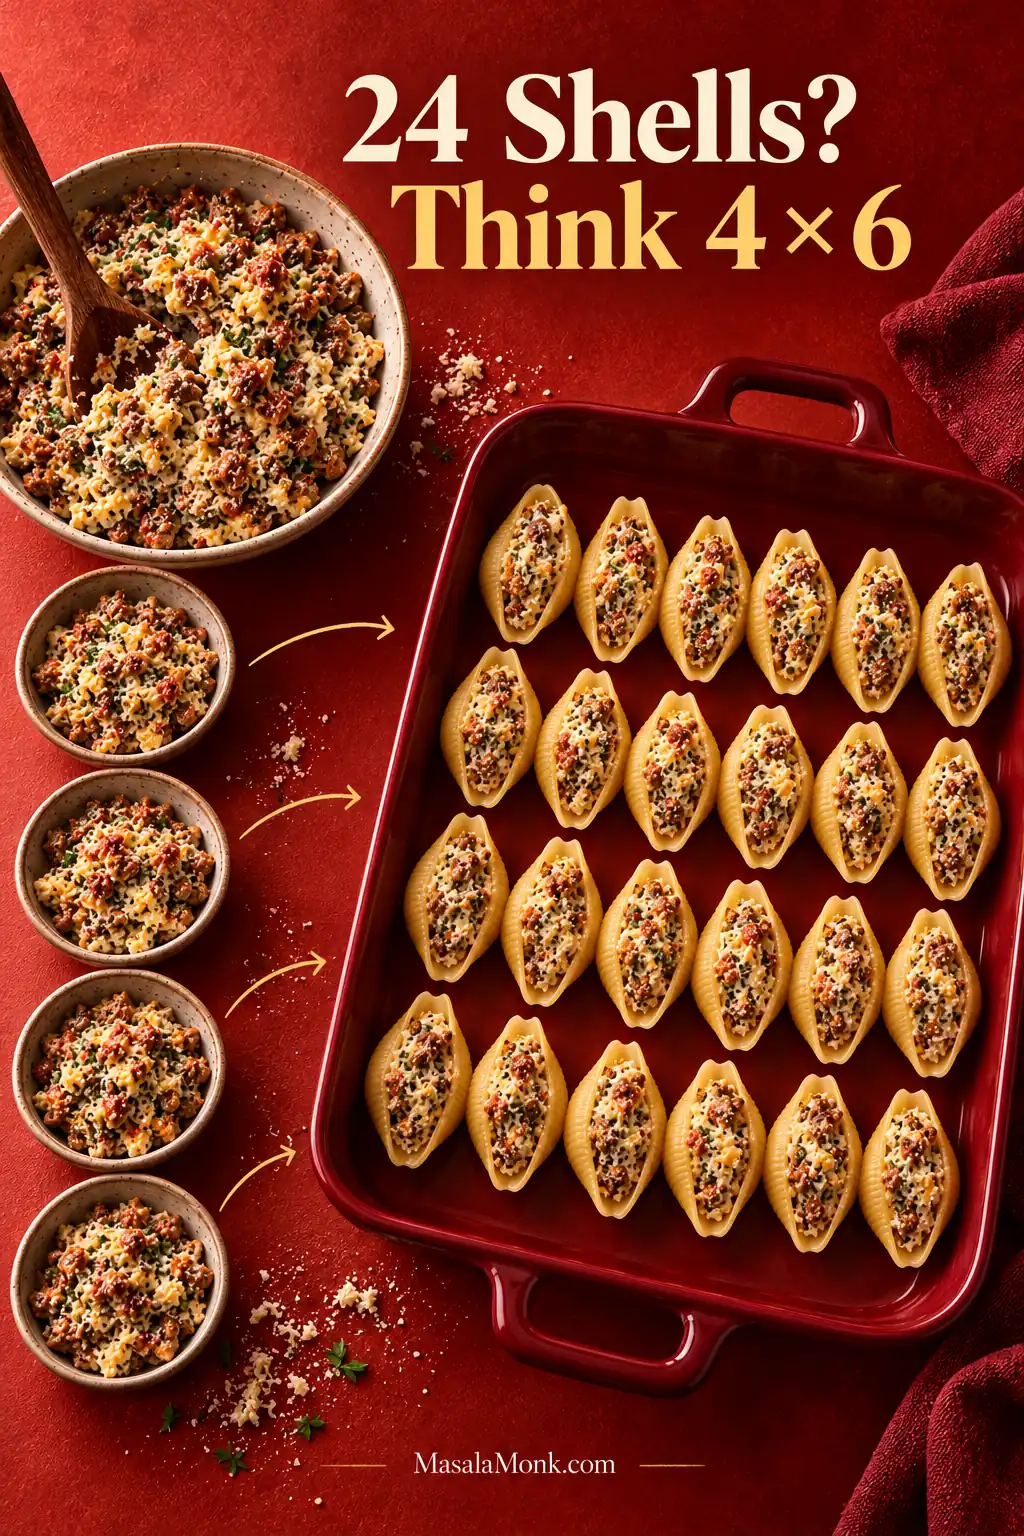
There’s an easy way to avoid beautifully overstuffing the first six and running short at the end. Mentally divide the filling into four portions, then use about one portion for every six shells. They don’t need to look identical. Fill them generously without forcing the pasta open.

Overhead arrangement of stuffed jumbo pasta shells and divided filling portions illustrating a four-by-six filling method.
Treat each group of six stuffed shells as a checkpoint. If one quarter of the filling is nearly gone after only four or five shells, redistribute before continuing. That is easier than discovering the shortage at the final row.

6. Add the sauce and mozzarella

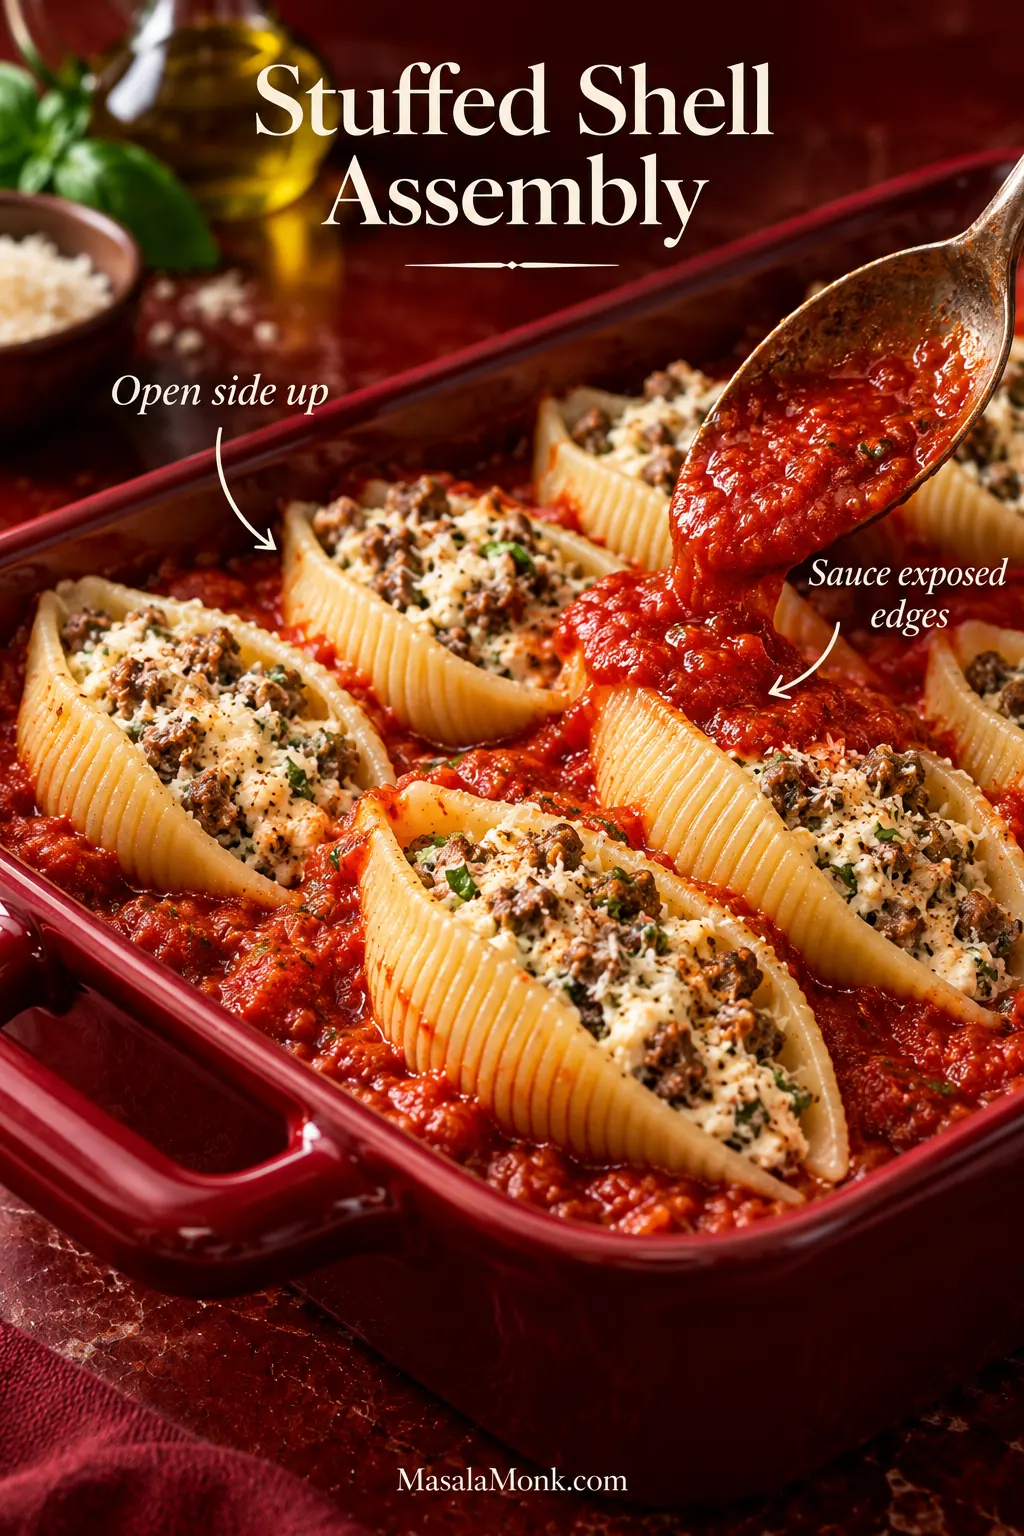
Arrange the filled shells open side up over the marinara. Spoon the remaining sauce around them and over any exposed pasta edges, then scatter the remaining 4 oz / 113 g mozzarella across the top.

It’s fine to leave the ridges visible. Just make sure the exposed pasta isn’t sitting completely dry, since those edges are the first to harden in the oven.

Stuffed jumbo shells arranged open side up in red marinara while a spoon adds sauce over an exposed pasta edge.
Focus extra marinara on the thin lips and exposed tips of the stuffed shells. Those small areas lose moisture faster than the pasta already resting against sauce, even when the main ridges remain uncovered.

7. Bake covered, then uncover

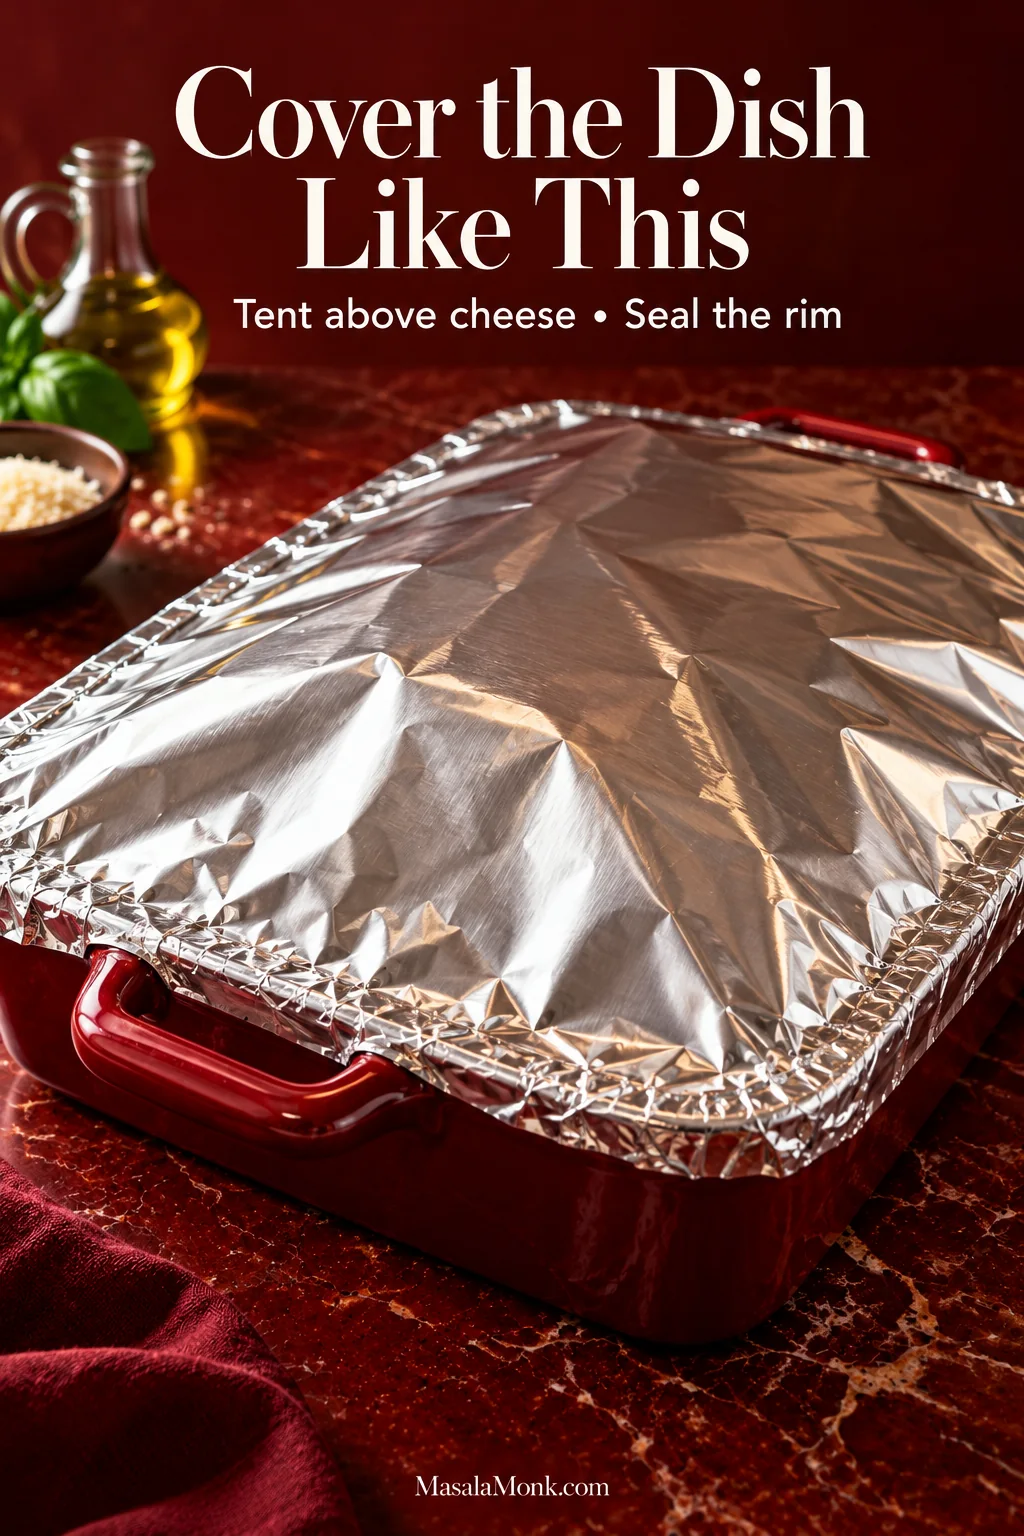
Cover the dish with foil, tenting it above the mozzarella but sealing it around the rim. Bake for 25 minutes, then remove the foil and bake for another 5–10 minutes. The sauce should be bubbling around the shells, with the mozzarella melted across the tops and catching some color in spots.

Oxblood baking dish completely covered with aluminum foil sealed around the rim and raised slightly through the center to form a tent.
The foil only needs a shallow dome above the mozzarella. Meanwhile, a snug seal around the rim keeps humid heat inside the casserole, helping the pasta finish tenderizing without the cheese sticking to the foil.

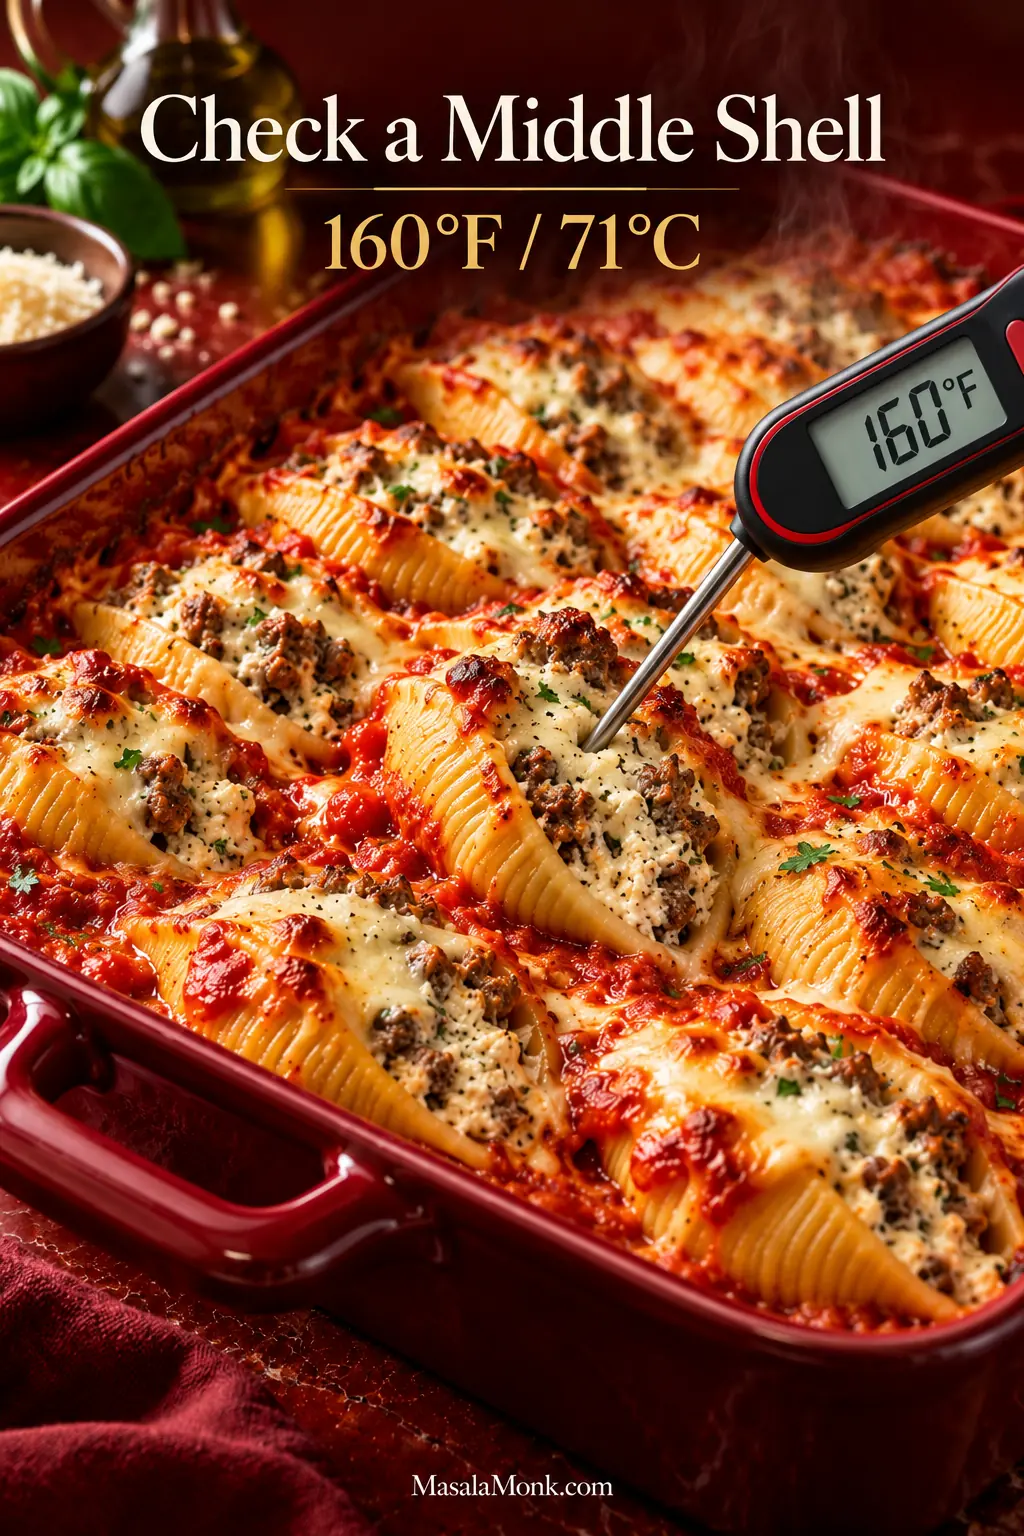
Check one of the shells near the middle of the casserole instead of judging doneness only by the bubbling edges. The pasta should be tender and the filling steaming hot all the way through. If you’re checking with a thermometer, the filling in a shell near the middle should reach 160°F / 71°C.

Instant-read thermometer inserted into the filling of a stuffed shell near the center of a baked casserole, displaying 160 degrees Fahrenheit.
For the most useful temperature check, place the thermometer tip in the filling of a middle shell—not merely in hot marinara, against the pasta wall or near the hotter edge of the baking dish.

8. Rest before serving

Let the casserole stand for 10 minutes. It’ll still be plenty hot, but the shells will lift from the dish more cleanly and the filling will have a chance to settle.

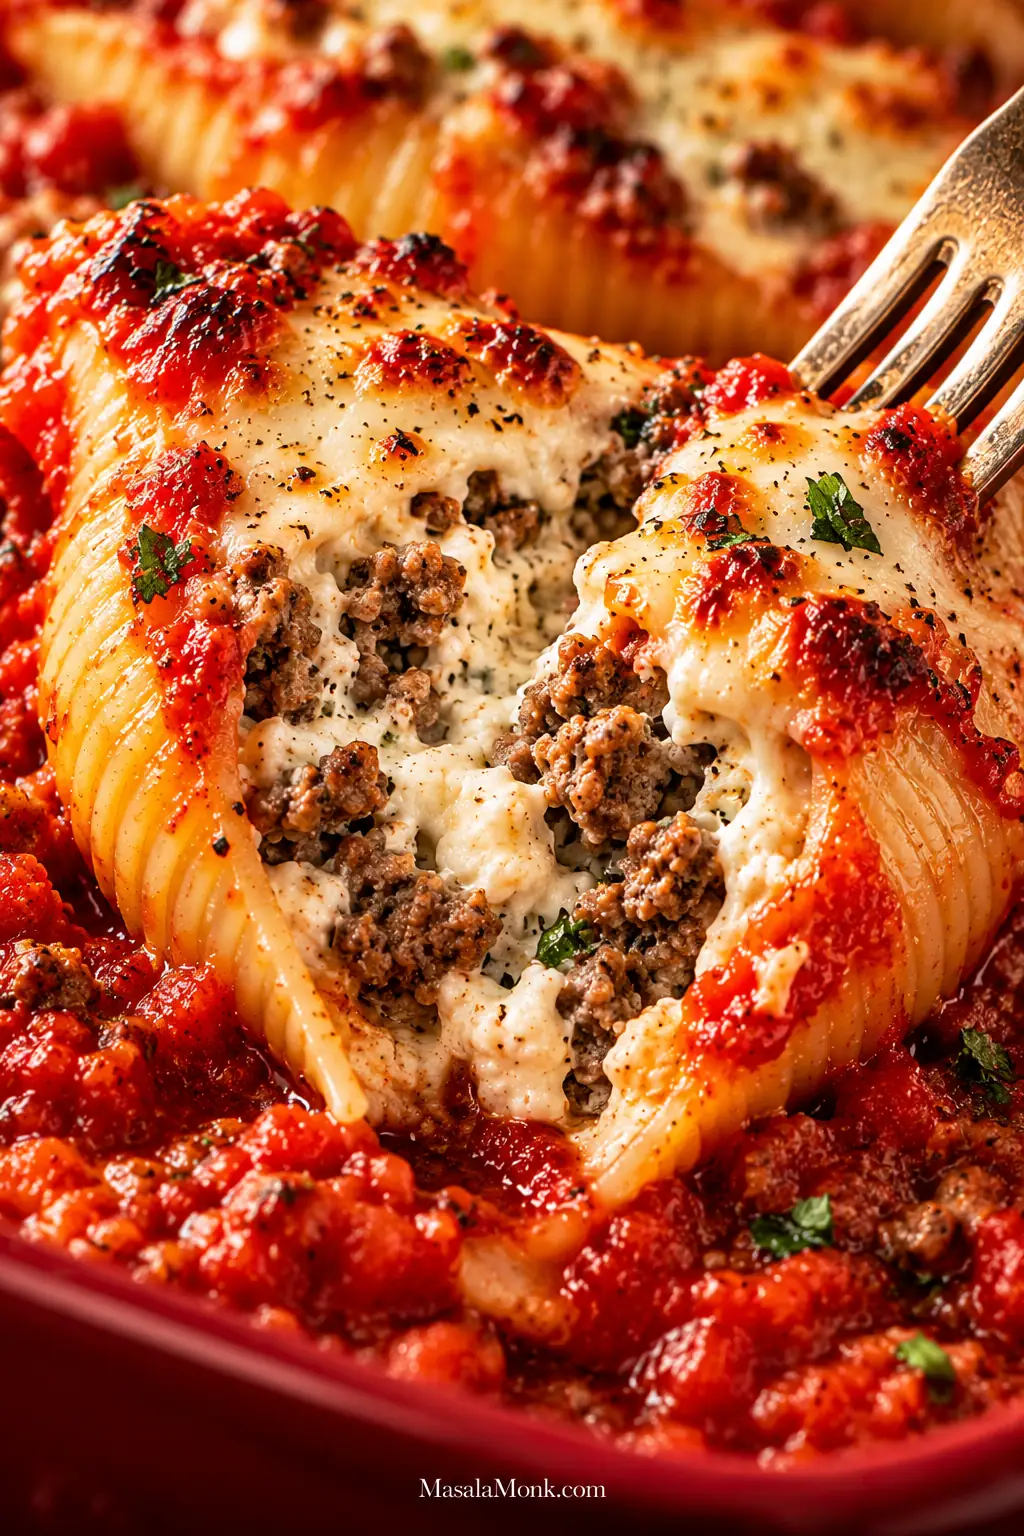
Cut into one and you should find browned beef throughout the ricotta filling, with marinara tucked into the shell’s ridges and mozzarella melted over the top.

Close-up of a baked jumbo pasta shell opened with a fork, revealing creamy ricotta and browned ground beef beneath melted mozzarella and marinara.
A properly rested ground-beef-and-ricotta stuffed shell should hold together when lifted while the center stays soft and creamy. The goal is structure around the filling, not a dry or firmly set interior.

Getting the Meat and Ricotta Filling Right

How much beef and ricotta do you need?

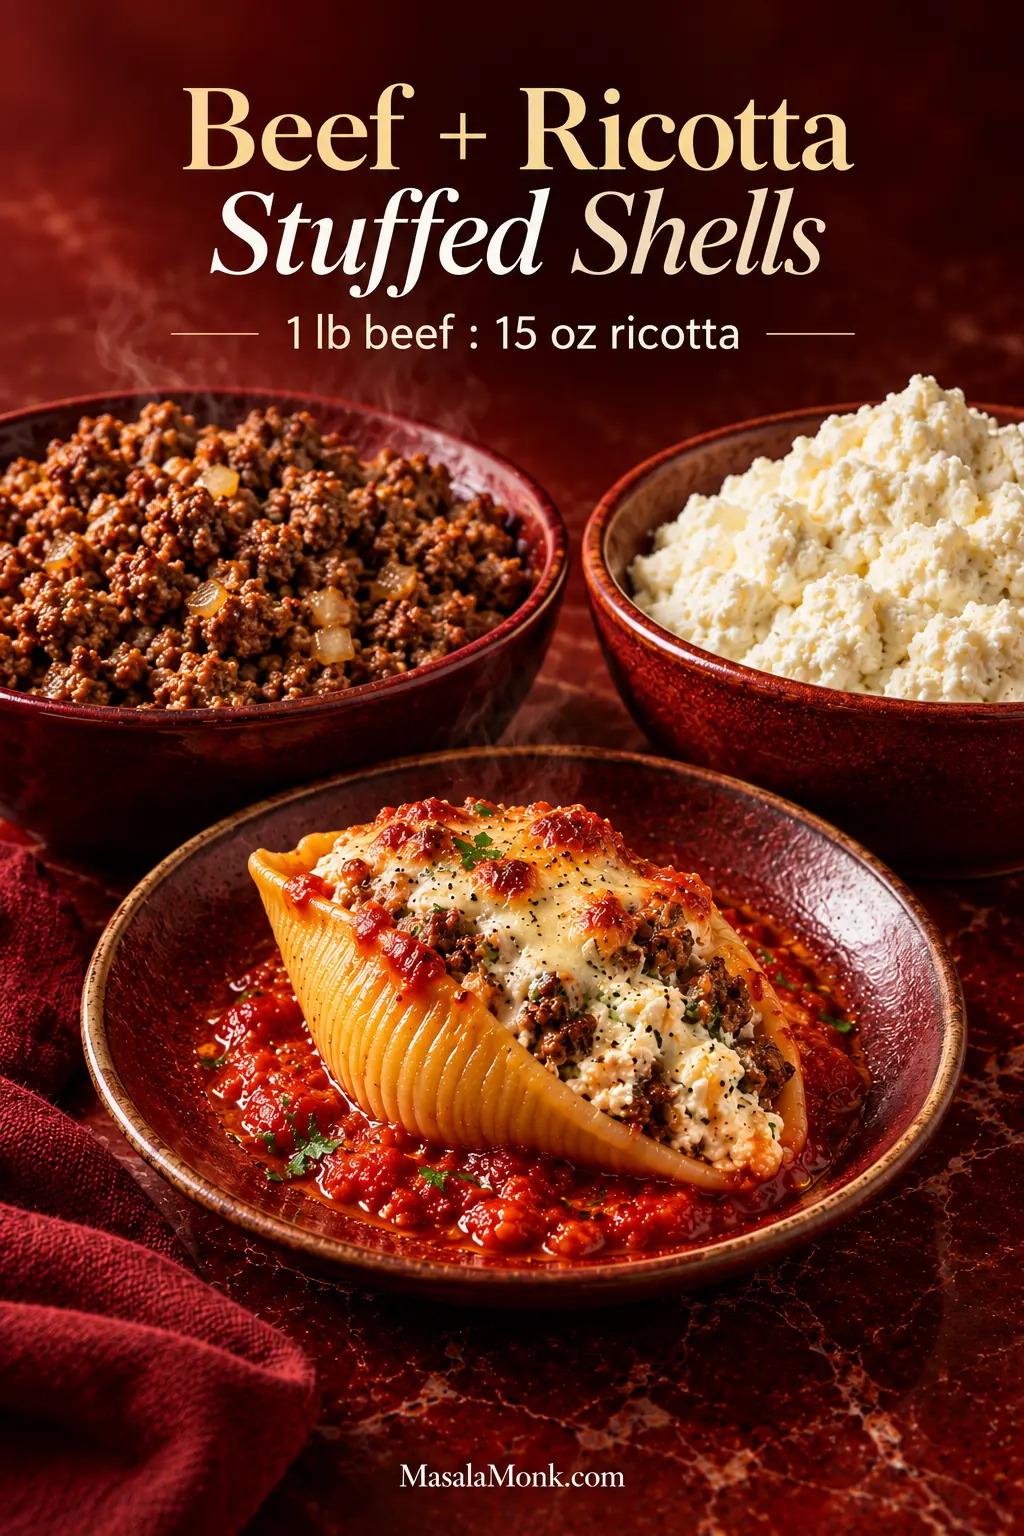
For about 24 stuffed shells, use 1 lb / 454 g ground beef with 15 oz / 425 g ricotta. That gives you beef in every shell without making the filling dense or pushing out the ricotta. The egg helps the beef-and-ricotta mixture hold together once baked.

You can change the ratio, but adding more meat isn’t necessarily the best route to stronger beef flavor. Good browning and seasoning do more without crowding the ricotta out of the shell.

Bowls of browned ground beef and plain ricotta beside a finished stuffed shell, illustrating a one-pound beef to 15-ounce ricotta ratio.
Keep the browned beef in fairly small crumbles so it distributes through the ricotta instead of collecting in a few heavy pockets. That gives each stuffed shell beef throughout while the center stays creamy.

If you want the same meat, cheese and marinara combination without filling two dozen shells, our classic lasagna turns it into a different baked pasta dinner.

Should the meat go in the filling or the sauce?

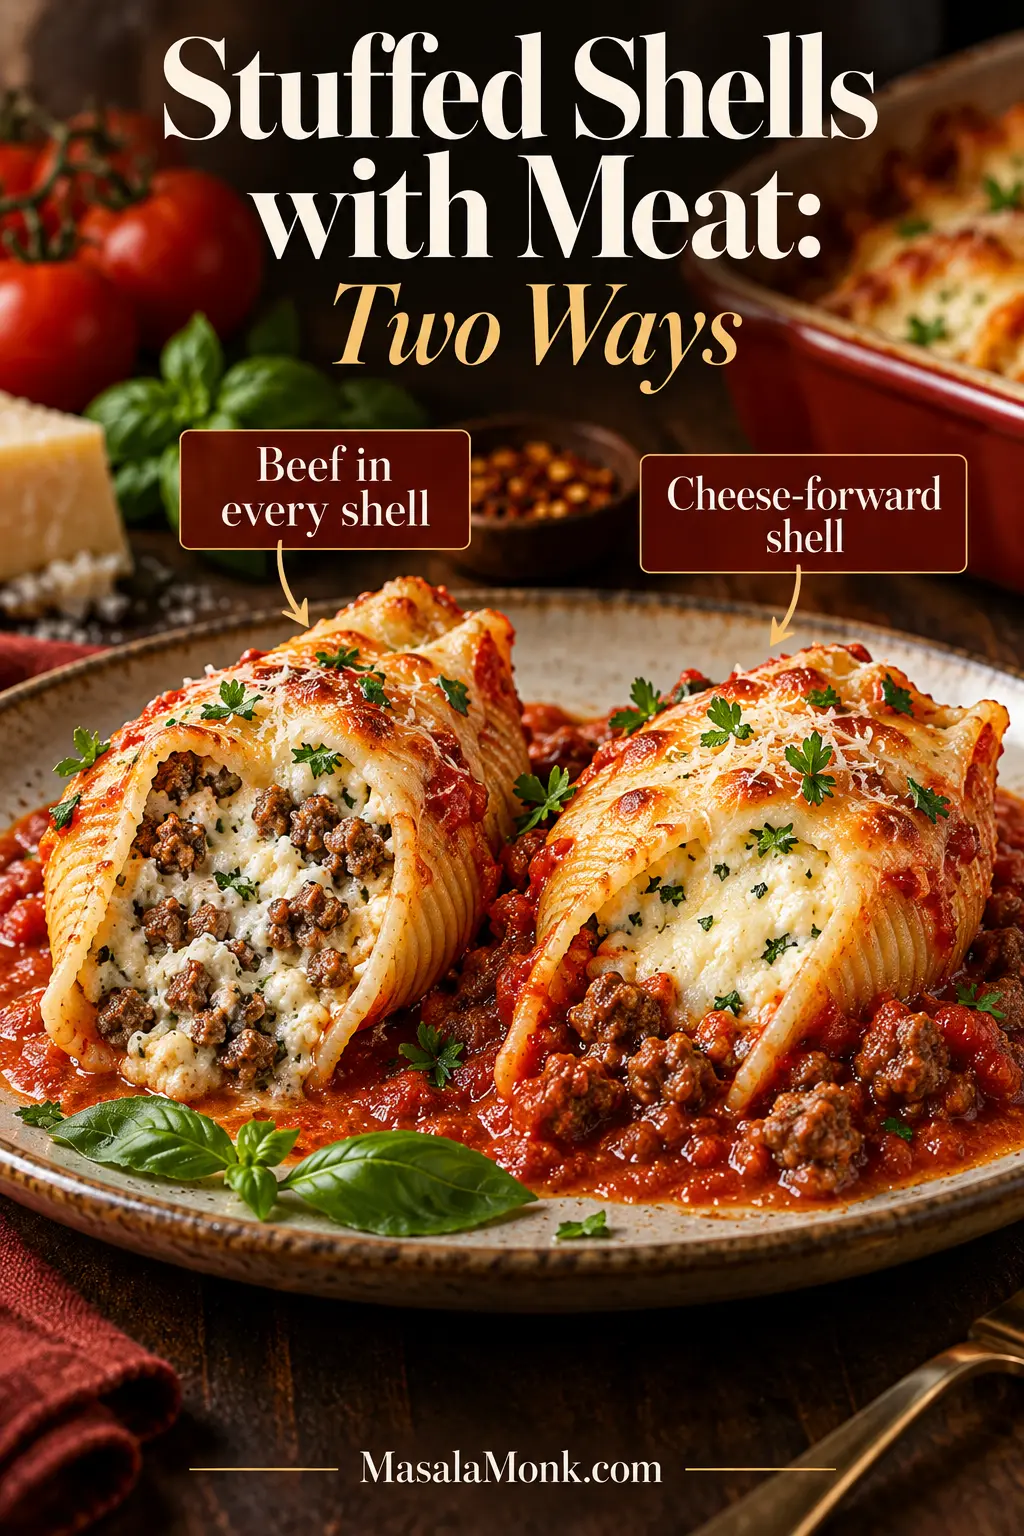
Both work; the difference is where you want the beef. Mixing it with the ricotta gives every shell a substantial meat-and-cheese filling. Stirring it into the marinara keeps the inside more cheese-forward and spreads the beef around the pasta instead.

Two stuffed shells compared side by side, one with browned beef mixed into the ricotta filling and one with cheese filling surrounded by meaty marinara.
Where the beef goes changes each forkful. Meat mixed into the ricotta makes every stuffed shell self-contained. By contrast, beef in the marinara makes the amount of meat depend more on how much sauce is served with it.

For the meat-sauce version, cook the beef as directed but stir it into the marinara instead. Fill the shells with the ricotta, mozzarella, Parmesan and egg mixture, then assemble and bake as above.

For a version without meat, our classic stuffed shells recipe keeps the filling focused on ricotta, mozzarella and Parmesan.

Troubleshooting Stuffed Shells with Meat

Why are my stuffed shells watery?

Watery stuffed shells usually come from loose ricotta, liquid left with the ground beef, wet vegetables, very thin marinara or pasta that was cooked too far before baking.

A loose filling is easiest to fix before the shells are stuffed. Drain visibly watery ricotta, make sure the skillet liquid has cooked away, and squeeze additions such as spinach extremely dry.

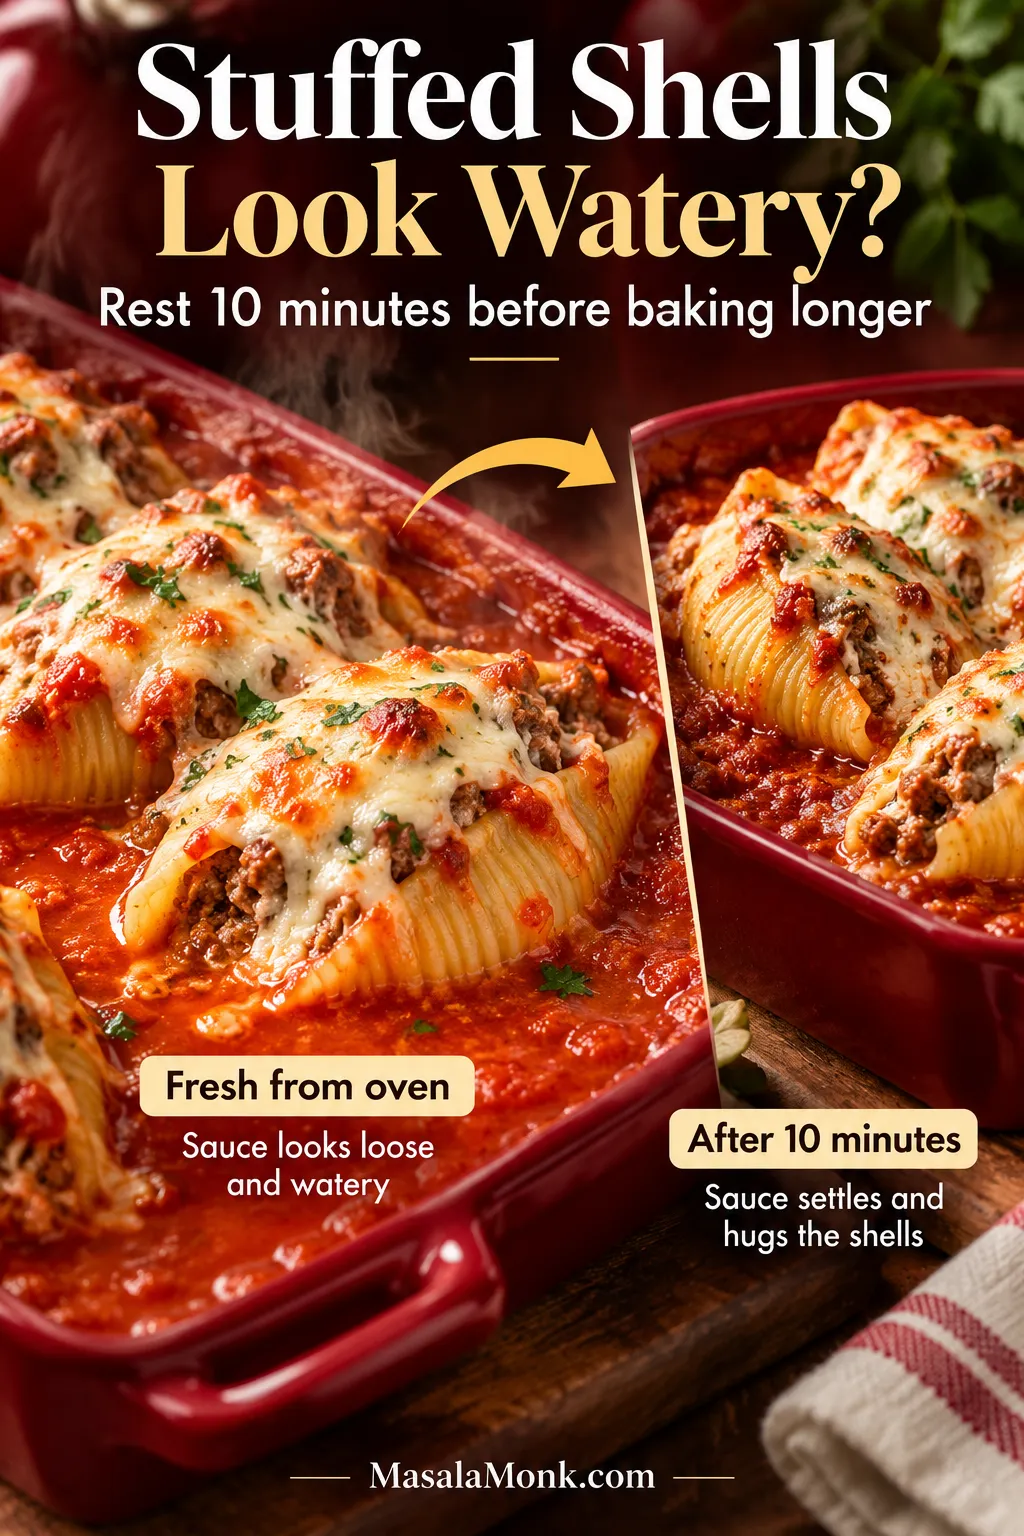
A casserole that simply looks wet when it first leaves the oven is different. Give it the full 10-minute rest before deciding it needs more heat. Some loose sauce around the shells is normal and will settle. Prolonged baking, however, can dry the pasta and make the ricotta grainy without solving the original problem.

Before-and-after comparison of freshly baked stuffed shells in loose marinara and rested shells with thicker sauce settling around the pasta.
After the 10-minute rest, judge what remains. If marinara still pools heavily around the stuffed shells, investigate ricotta, beef liquid, vegetables or sauce consistency. Do that before automatically extending the bake and drying the pasta.

Greasy filling

Too much rendered beef fat probably made it into the cheese mixture. Spoon or drain off an obvious pool of fat while browning the beef before folding it into the ricotta, especially when using a higher-fat ground beef.

Dry or grainy ricotta filling

Too much time in the oven is a common culprit. Whole-milk ricotta helps keep the filling tender, but prolonged heat can still dry it out. Start checking the shells near the end of the recommended baking window instead of extending the bake just because the surface still looks saucy.

Running short on filling

The first shells probably got more than their share. If you are still filling them, use the four-groups-of-six checkpoint for the remaining shells; otherwise, move some filling from the fullest shells into the emptier ones.

Why do stuffed shells tear?

They may have cooked too long or stuck together while cooling. Pull them from the water while they’re still firm, spread them out after draining and open each shell gently. The few extras in the pot are there for the occasional casualty.

Hard pasta edges

Exposed pasta probably didn’t have enough sauce or spent too long in dry oven heat. Spoon marinara over bare edges and keep the casserole covered for most of the bake. The short uncovered finish is enough to melt the cheese and give it some color.

Stuffed Shells with Meat Variations

Italian sausage or half beef, half sausage

For an all-sausage version, replace the beef with 1 lb / 454 g mild or hot Italian sausage. Or use ½ lb / 227 g each of ground beef and Italian sausage. This keeps the familiar beef flavor while adding some of the sausage’s extra seasoning and richness. Drain excess fat after browning, and go lightly with added salt until you’ve accounted for the seasoning already in the sausage.

Ground turkey

Replace the beef with 1 lb / 454 g ground turkey. Turkey is milder and often leaner, so season it well and cook away any liquid in the skillet before adding it to the cheese mixture. Ground poultry should reach 165°F / 74°C.

Beef, ricotta and spinach

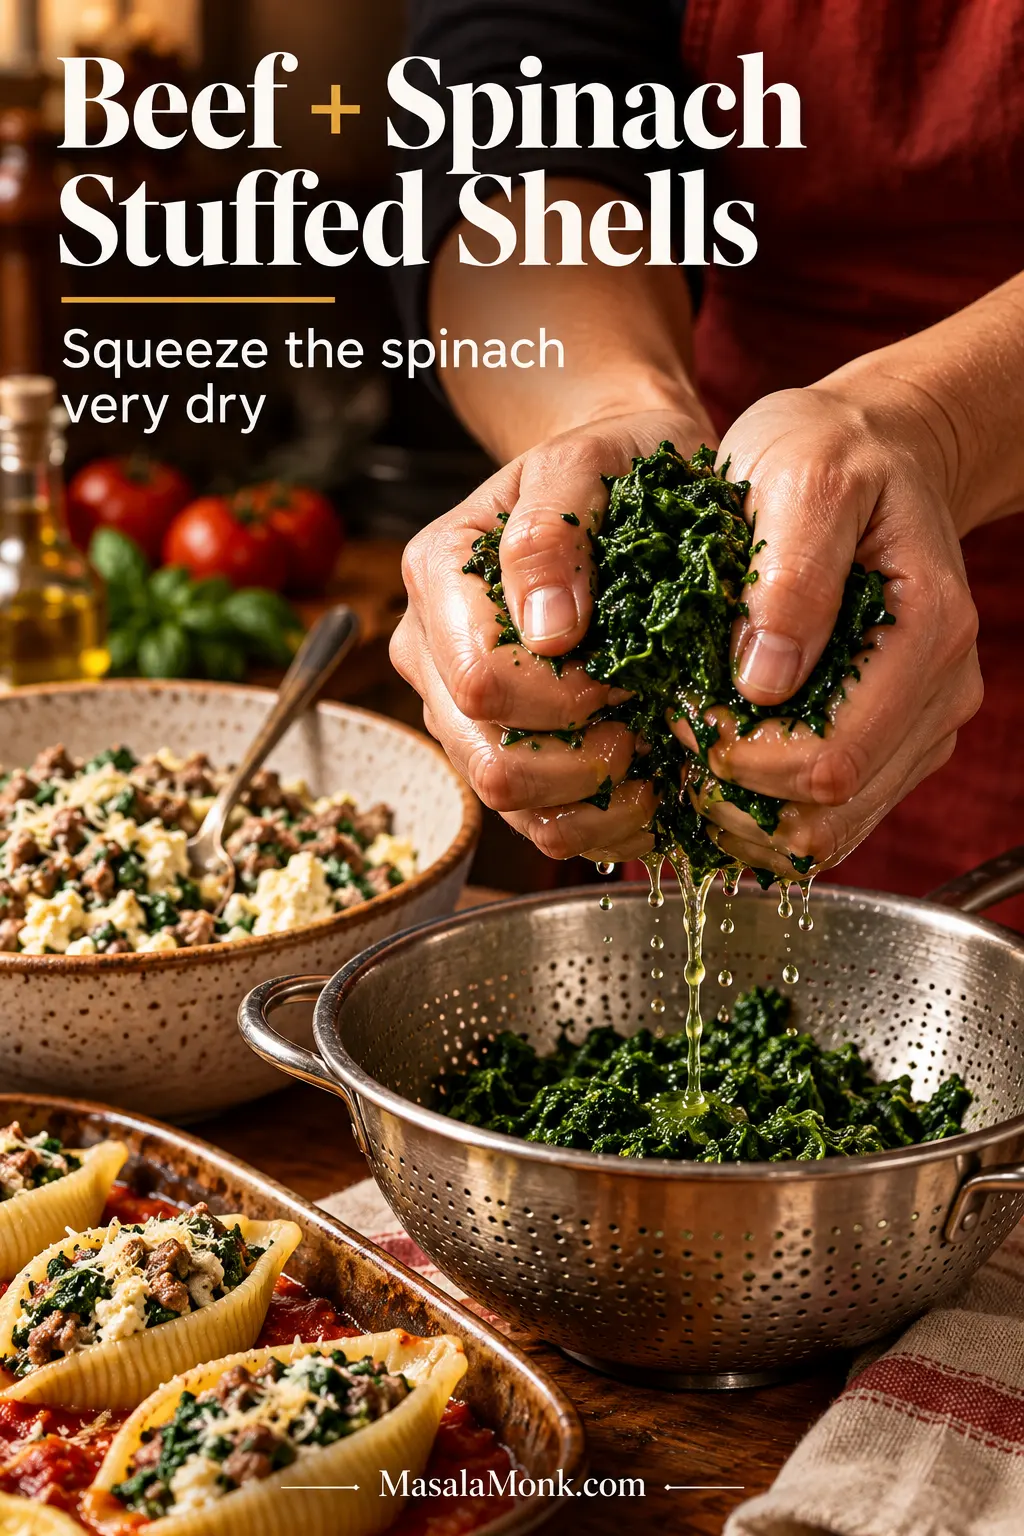
Add about 5 oz / 140 g frozen chopped spinach, thawed and squeezed very dry. Water left in the spinach goes straight into the filling. If you want vegetables to be more than an add-in, our vegetable lasagna builds the dish around them from the start.

Hands squeezing water from thawed chopped spinach over a metal colander, with beef-and-ricotta filling and spinach-stuffed shells nearby.
For beef and spinach stuffed shells, properly drained spinach should form a compact clump and stop releasing water under firm pressure. That physical cue is more reliable than squeezing it for an arbitrary number of seconds.

Make Ahead, Freeze and Reheat

Can I assemble stuffed shells the day before?

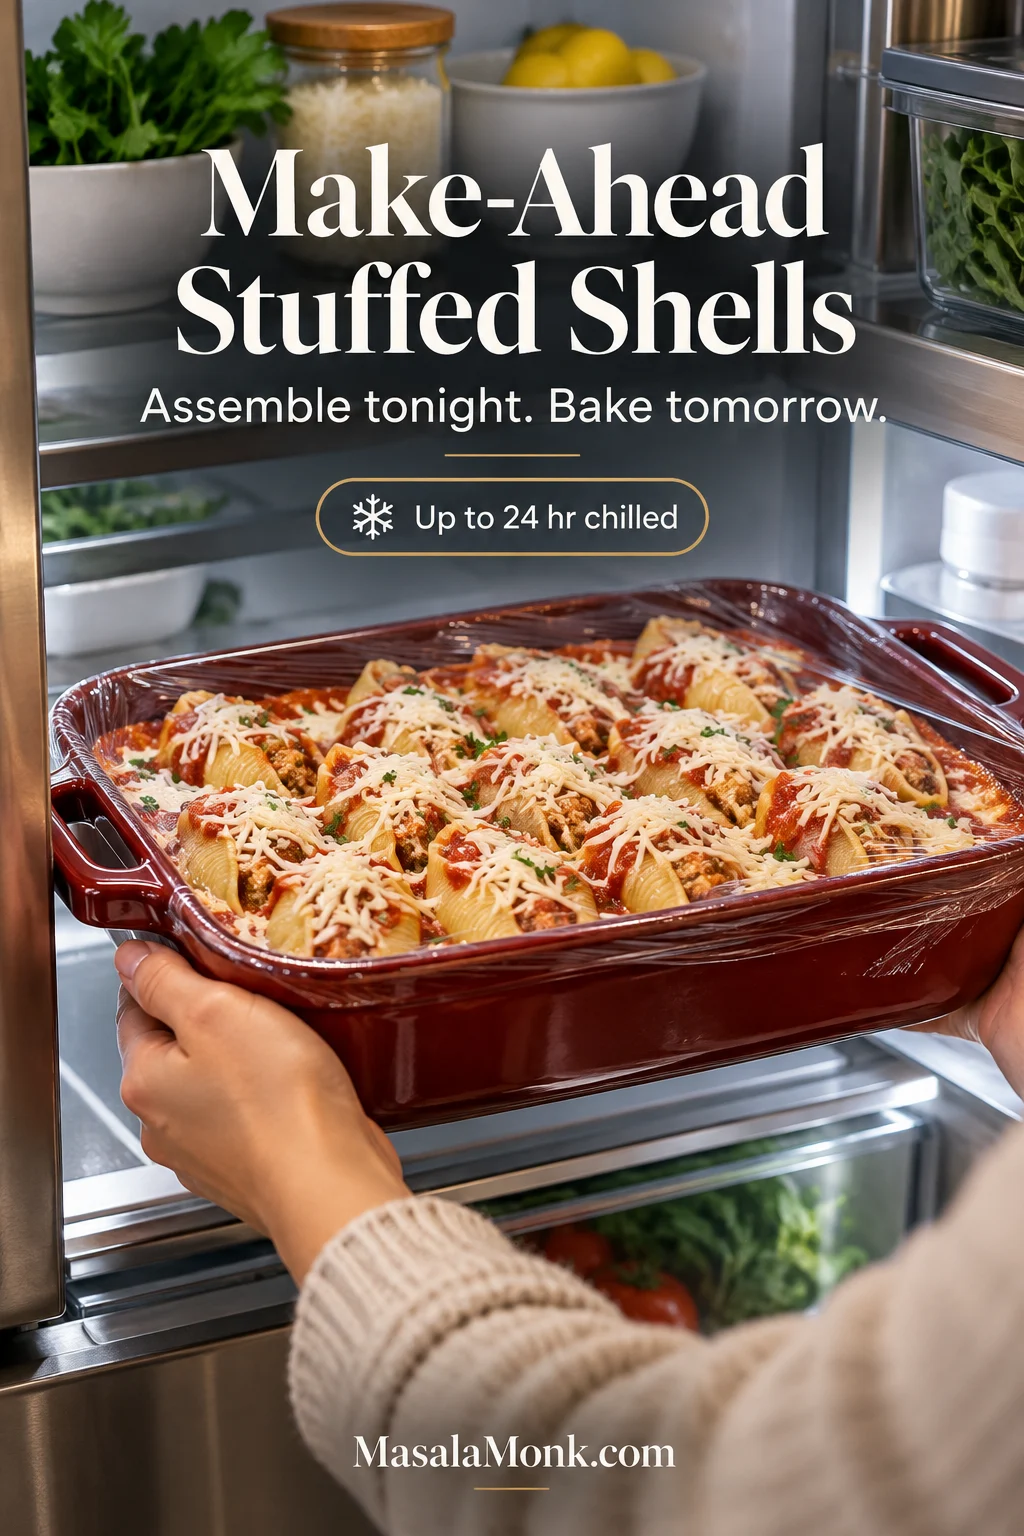
Yes. Assemble the casserole through the mozzarella topping, cover it and refrigerate promptly for up to 24 hours. That gets most of the work out of the way before dinner.

Hands placing a covered red casserole of assembled unbaked stuffed shells with marinara and shredded mozzarella onto a refrigerator shelf.
Keep make-ahead stuffed shells tightly covered while they chill. Otherwise, exposed pasta ridges can begin drying in the refrigerator before the casserole ever reaches the oven, especially around the upper edges.

When baking straight from the refrigerator, allow roughly 10–15 extra minutes of covered baking time as a starting point. A very cold dish may need longer, so check a shell near the middle before uncovering for the final 5–10 minutes.

You can also make the beef-and-ricotta filling up to 24 hours ahead, refrigerate it promptly, then cook and fill the shells closer to baking time.

Can you freeze stuffed shells?

Yes. Bake the stuffed shells first, refrigerate them promptly until chilled, then cover tightly and freeze for up to 2–3 months for best quality.

Thaw the baked shells overnight in the refrigerator for the most even reheating. Individual baked portions can also be frozen separately when you don’t want to reheat the entire casserole.

How to store and reheat leftovers

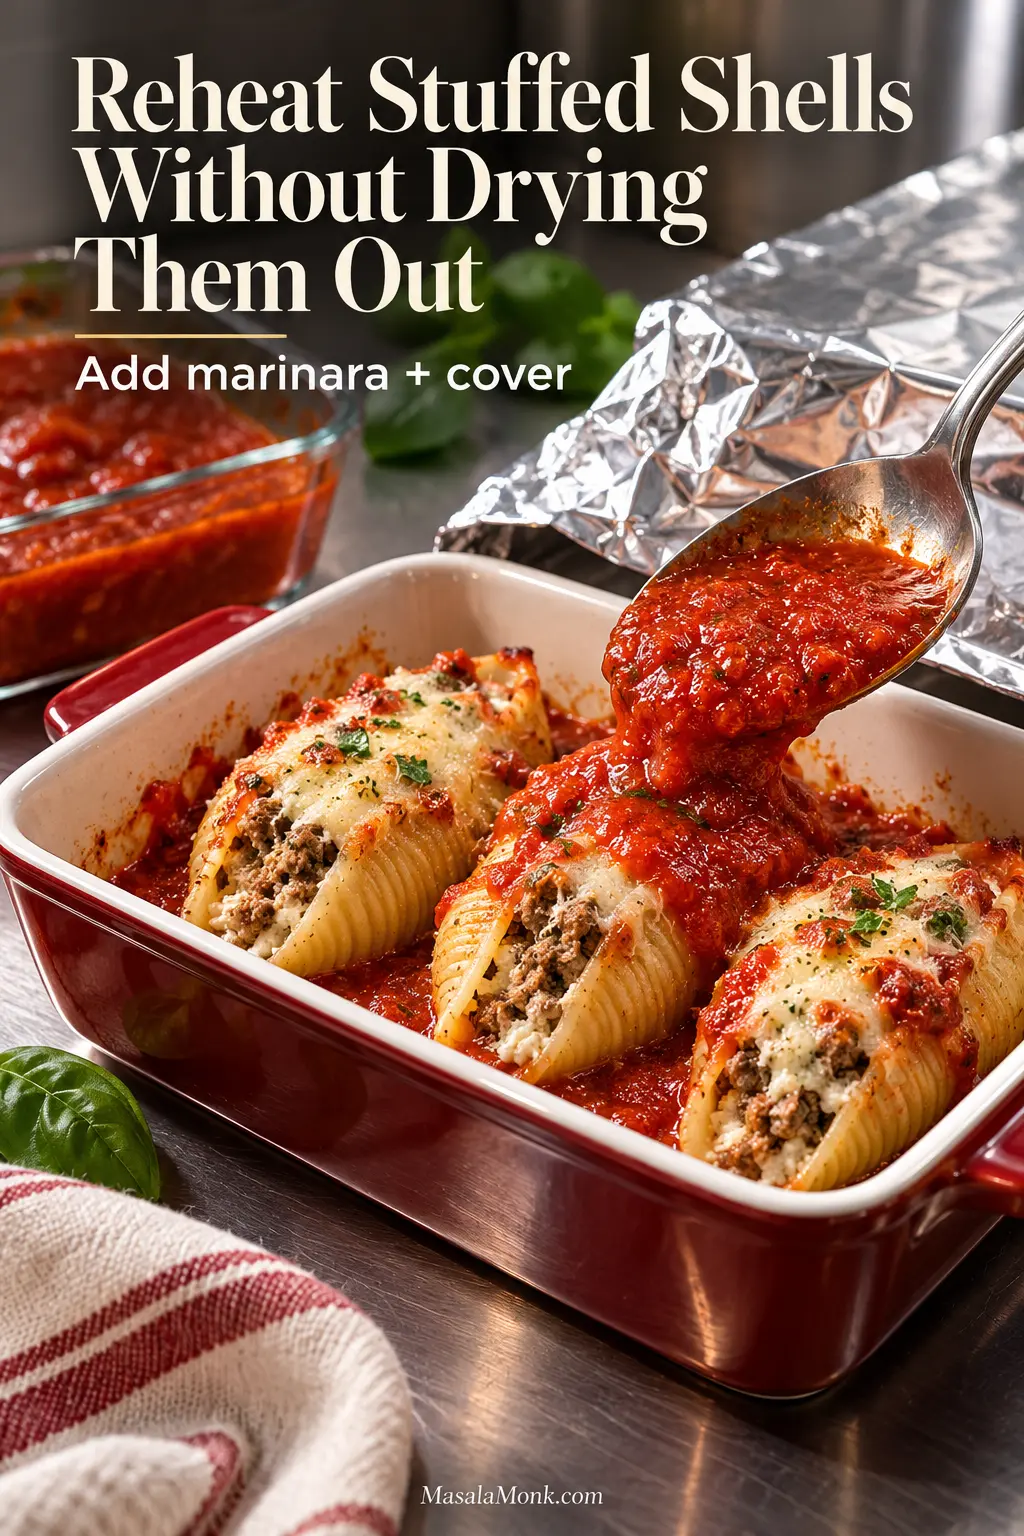
Refrigerate leftovers promptly in a covered container and use them within 3–4 days. A spoonful of marinara helps if the pasta has dried slightly in the refrigerator.

Three leftover stuffed shells in a small baking dish while a spoon adds fresh marinara and aluminum foil sits ready to cover them.
When reheating leftover stuffed shells, aim the extra marinara at pasta that looks matte or dry—particularly exposed lips and ridges. This restores moisture where it is needed without turning the whole portion unnecessarily soupy.

For a larger refrigerated or thawed portion, cover and reheat at 350°F / 175°C for about 20–25 minutes as a starting point. Continue until the center reaches 165°F / 74°C. Individual portions can be loosely covered and reheated in the microwave until hot throughout.

How Many Stuffed Shells Per Person?

These stuffed shells are substantial enough to serve as the main dish. From one batch, plan on:

  • 4 stuffed shells per person for 6 hearty servings.
  • 3 stuffed shells per person for about 8 servings with sides.
Plate of four beef-and-ricotta stuffed pasta shells with marinara and melted mozzarella, served beside green salad and garlic bread.
For a hearty serving of stuffed shells with meat, four shells fill the plate without needing to be buried in sauce. Spoon marinara around and lightly over them so the beef-and-ricotta centers remain visible and easy to portion.

What to Serve with Stuffed Shells

A cold, crunchy side works especially well against the hot casserole. Our broccoli salad brings crisp vegetables and a tangy dressing, while a simple green salad is an easy lighter option.

For something warm, green beans almondine adds lemon and toasted almonds without competing with the marinara. Roasted broccoli works too, and garlic bread is an easy choice when you want something for the sauce left on the plate.

Bring the casserole to the table while the mozzarella is still soft and stretchy, and spoon some of the marinara from the dish over each serving. Add something crisp or green alongside if you like. That’s really all these shells need.

Posted on — Leave a comment

Turkey Meatloaf Recipe: Easy, Moist & Full of Flavor

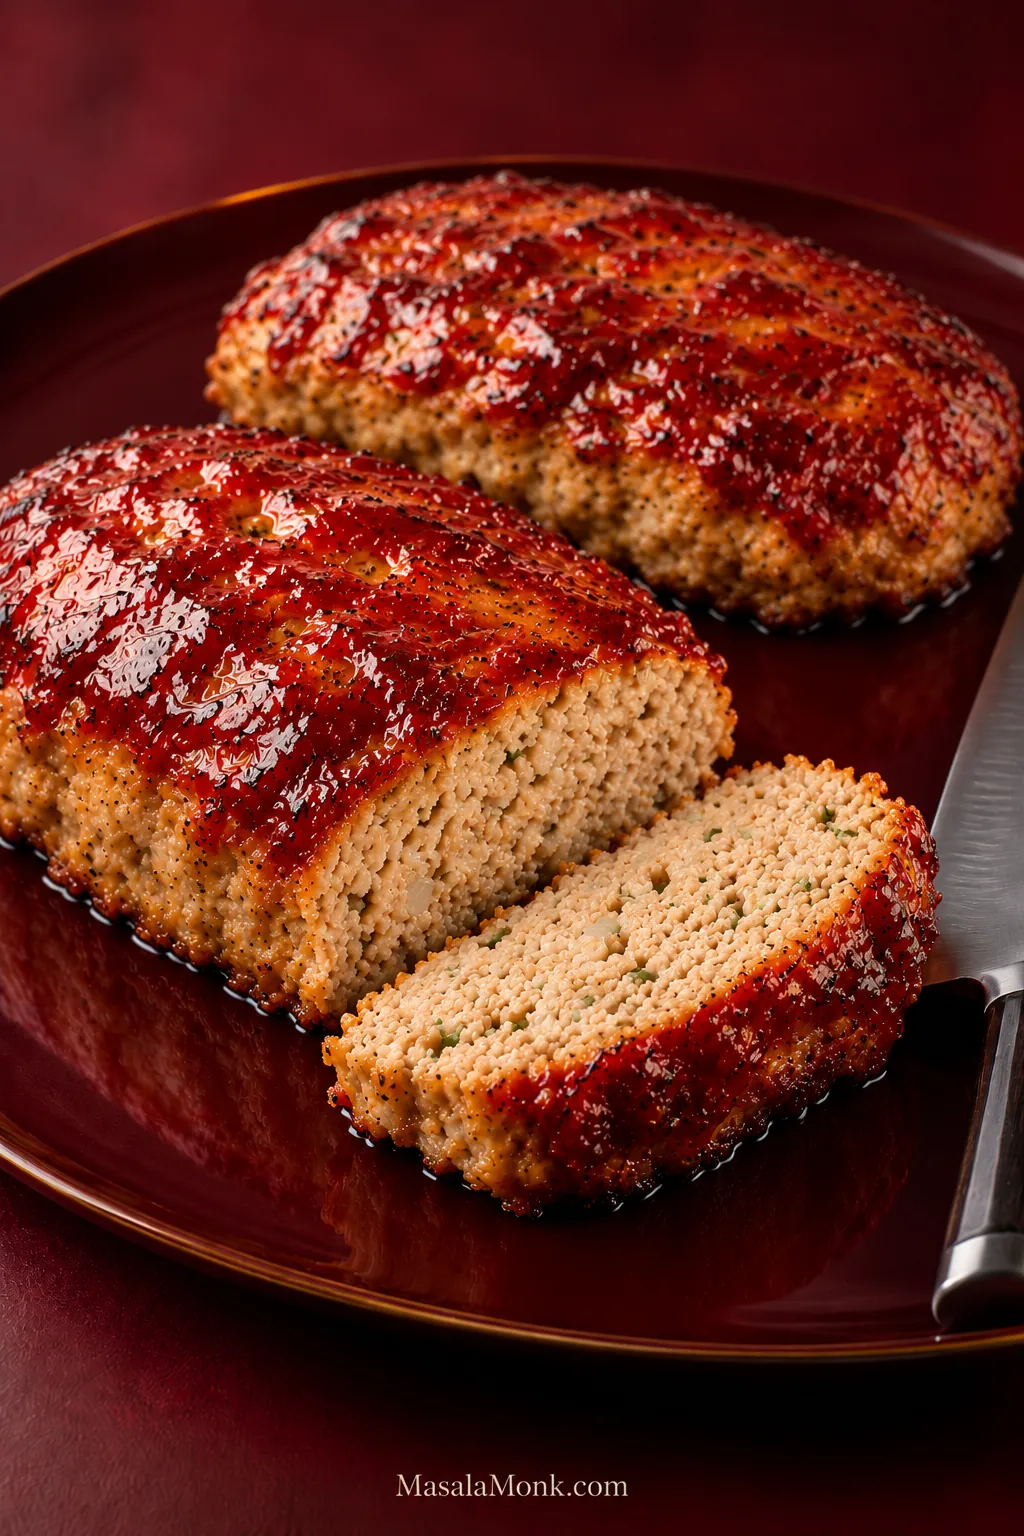
Two glazed turkey meatloaves on a burgundy plate, with one loaf cut open to show its pale cooked interior and a thick slice in front.

The best turkey meatloaf has a sticky, sweet-tangy glaze around the browned edges and a savory center that stays tender enough to cut with a fork. Just as important, a thick slice should lift cleanly onto the plate instead of crumbling apart or slumping into a wet center.

That balance is where turkey meatloaf gets tricky. Too little moisture and lean turkey can turn dry; too much and the loaf struggles to hold together.

Moist is the goal. Wet is not. Ground turkey often feels less firm than a beef meatloaf mixture, and that alone is not a problem.
What Should Turkey Meatloaf Mixture Look Like?

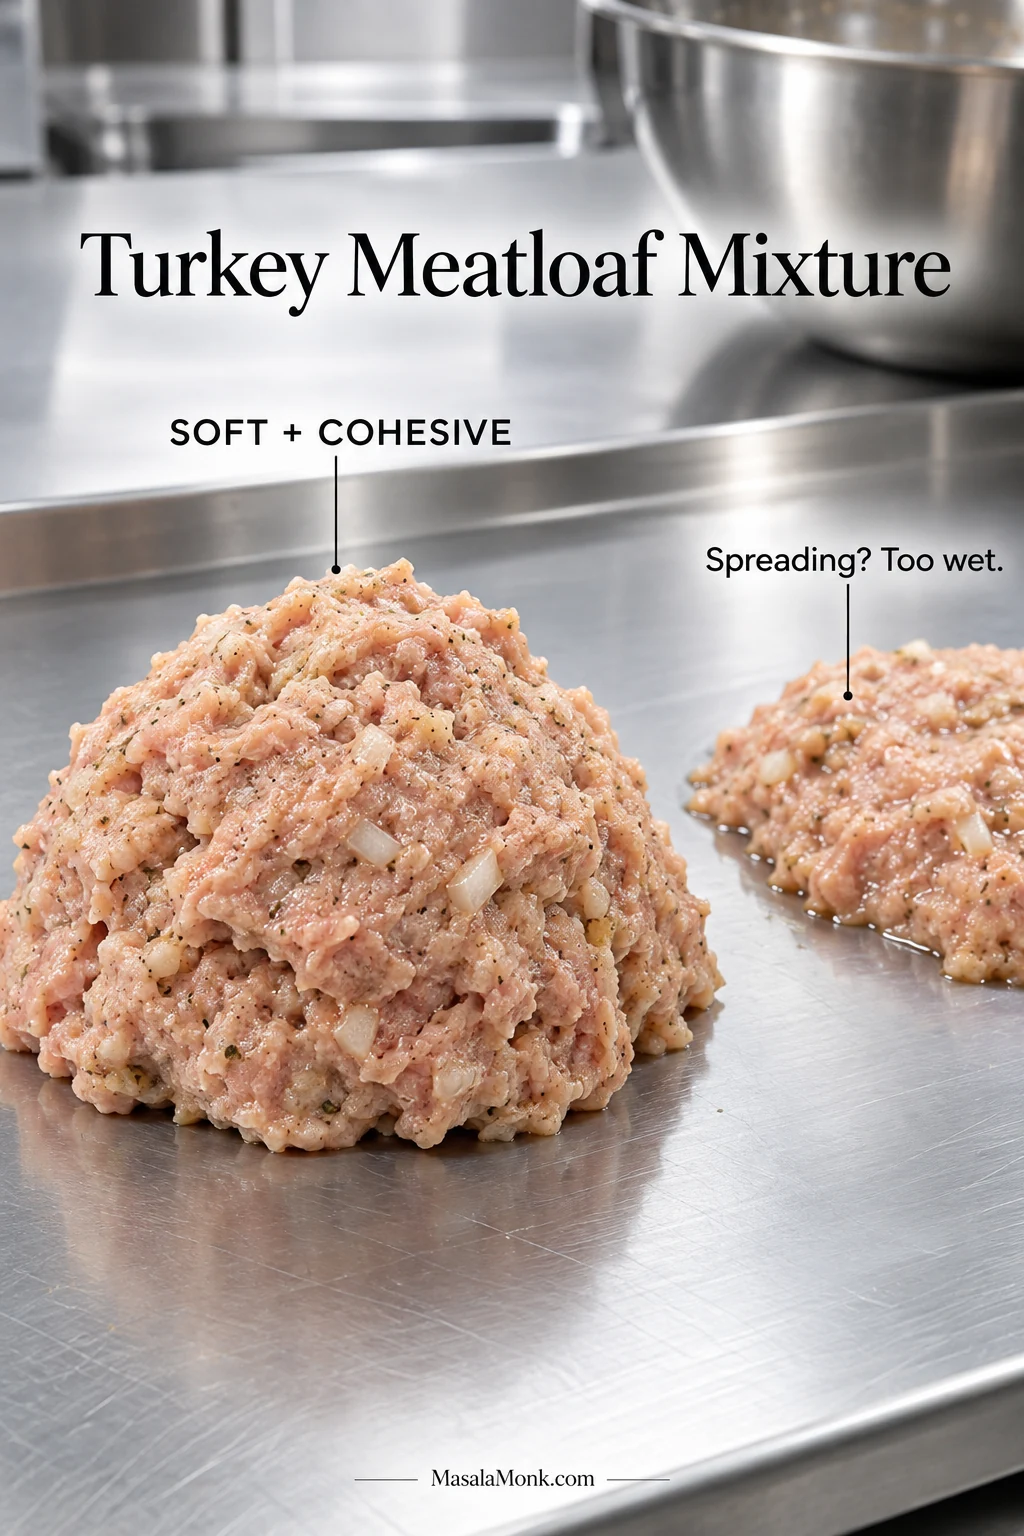
The mixture should be soft but cohesive and stay where you shape it. It should not pour, puddle, or immediately spread flat when you mound it on the baking sheet.

Package-to-package texture varies, so judge the finished mixture by how it behaves rather than expecting every bowl to feel identical.

StageWhat to look for
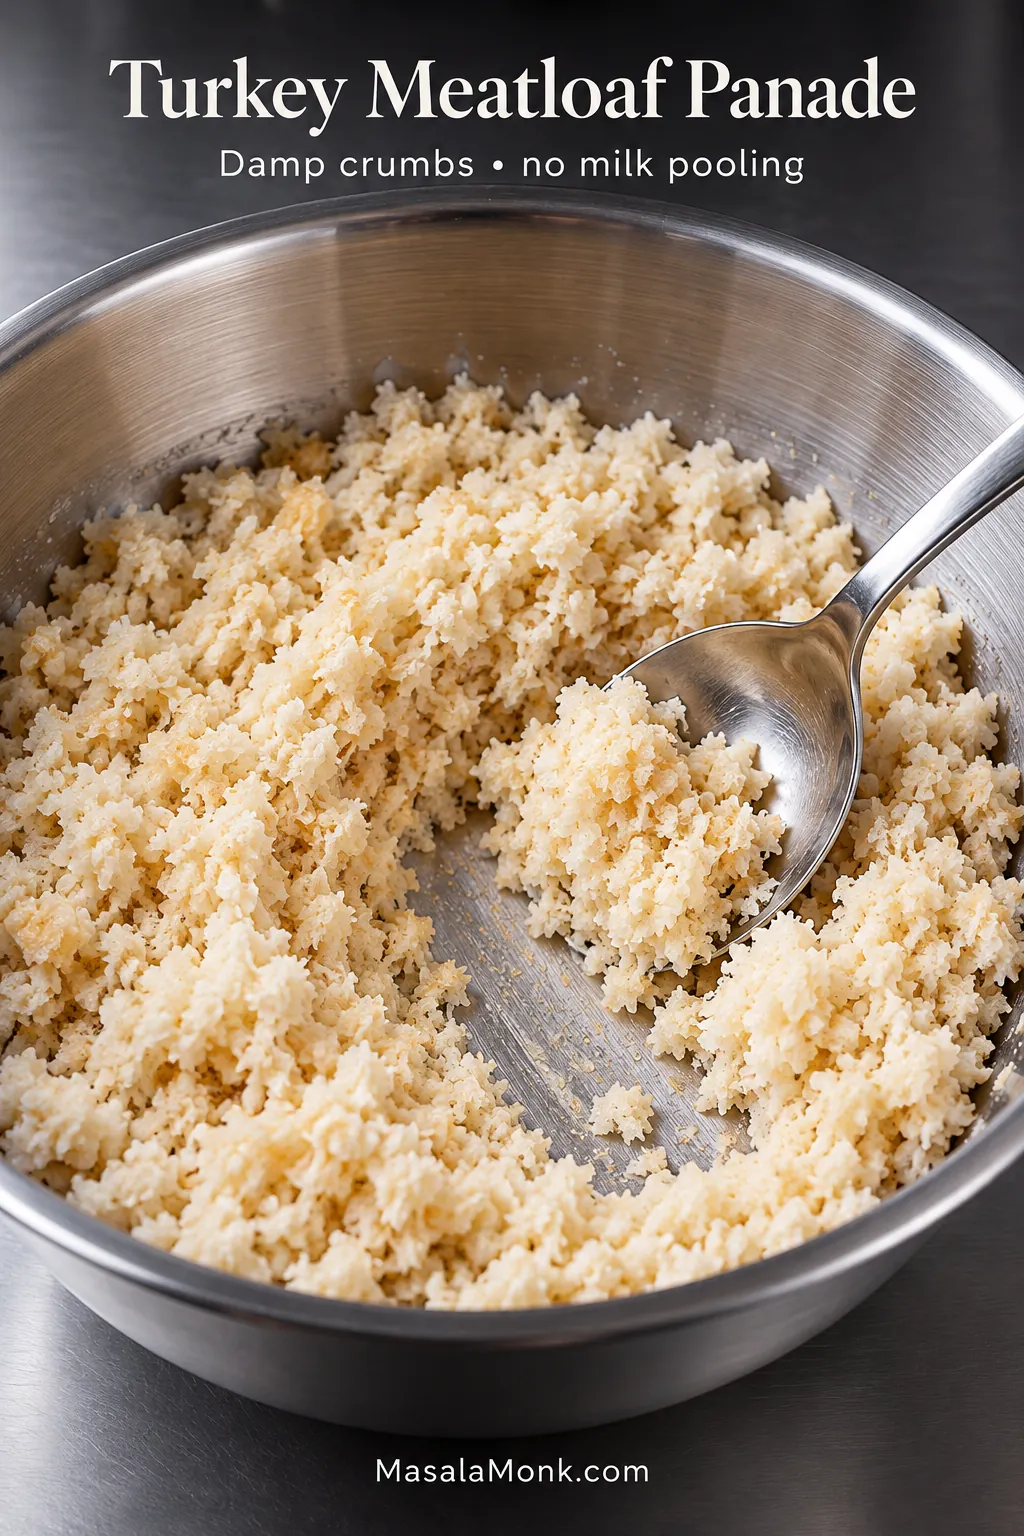
Panko + milkEvenly damp crumbs with no loose milk underneath.
Finished mixtureSoft but cohesive, without puddling or flowing across the bowl.
Shaped loavesRounded sides that stay in place instead of slowly spreading flat.
Raw ground turkey meatloaf mixture shown in two textures, with a cohesive mound beside a softer, wetter mixture on a stainless work surface.
The right turkey mixture stays softly mounded. If it slowly spreads, add panko 1 tablespoon at a time rather than overcorrecting.

Turkey Meatloaf Recipe

Easy Turkey Meatloaf with Sweet-Tangy Glaze

Tender, sliceable turkey meatloaf with seasoned onion and garlic through the middle and a glossy ketchup glaze on top. The mixture is divided into two free-form loaves for more glazed surface and more even cooking.

Prep
20 minutes

Cook
About 40–50 minutes

Rest
10 minutes

Total
About 1 hour 10 minutes–1 hour 20 minutes

Servings
6–8

Oven
375°F / 190°C

Equipment

  • Large rimmed baking sheet
  • Parchment paper or foil
  • Medium skillet
  • Large mixing bowl
  • Small bowl for the glaze
  • Instant-read thermometer

Ingredients for the Turkey Meatloaf

  • 2 lb (907 g) 93% lean ground turkey
  • 1½ cups plain panko breadcrumbs (about 90 g; weigh if possible)
  • ½ cup (120 ml) whole milk
  • 2 large eggs
  • 1 medium yellow onion, finely chopped (about 150 g)
  • 3 garlic cloves, minced
  • 1 tablespoon (15 ml) olive oil
  • 1½ tablespoons (22 ml) Worcestershire sauce
  • 2 teaspoons (10 ml) Dijon mustard
  • 1½ teaspoons Diamond Crystal kosher salt (about 4 g); see salt note
  • 1 teaspoon freshly ground black pepper
  • 1 teaspoon dried thyme
  • 1 teaspoon sweet paprika

For the Sweet-Tangy Glaze

  • ¾ cup (180 ml) ketchup
  • 2 tablespoons (25 g) packed light brown sugar
  • 1 tablespoon (15 ml) apple cider vinegar
  • 2 teaspoons (10 ml) Dijon mustard
  • 1 teaspoon (5 ml) Worcestershire sauce

Instructions

Prepare the mixture
  1. Heat the oven. Preheat to 375°F (190°C). Line a large rimmed baking sheet with parchment. If using foil instead, lightly oil it so the meatloaf and glaze release more easily.
  2. Cook the onion. Heat the olive oil in a skillet over medium heat. Add the onion and cook for 5–7 minutes, stirring occasionally, until soft and translucent. The bottom of the pan should no longer look visibly wet. Add the garlic and cook for another 30–60 seconds, just until fragrant. Let the mixture cool until warm rather than piping hot.
  3. Make the panade. Stir the panko and milk together in the large mixing bowl and leave for 5 minutes. The crumbs should be evenly damp, with no loose milk pooling underneath.
  4. Add the seasonings. Stir the eggs, Worcestershire, Dijon, salt, pepper, thyme, paprika, and warm onion mixture into the panade until evenly combined.
  5. Fold in the turkey. Add the ground turkey and gently fold everything together. Stop as soon as the ingredients are evenly distributed; the mixture does not need to become smooth.
  6. Check the texture. The mixture should be soft but cohesive and stay where you shape it. Still spreading after a few minutes? Fold in 1 tablespoon of panko, wait briefly, and check again before adding any more.
Shape, glaze and bake
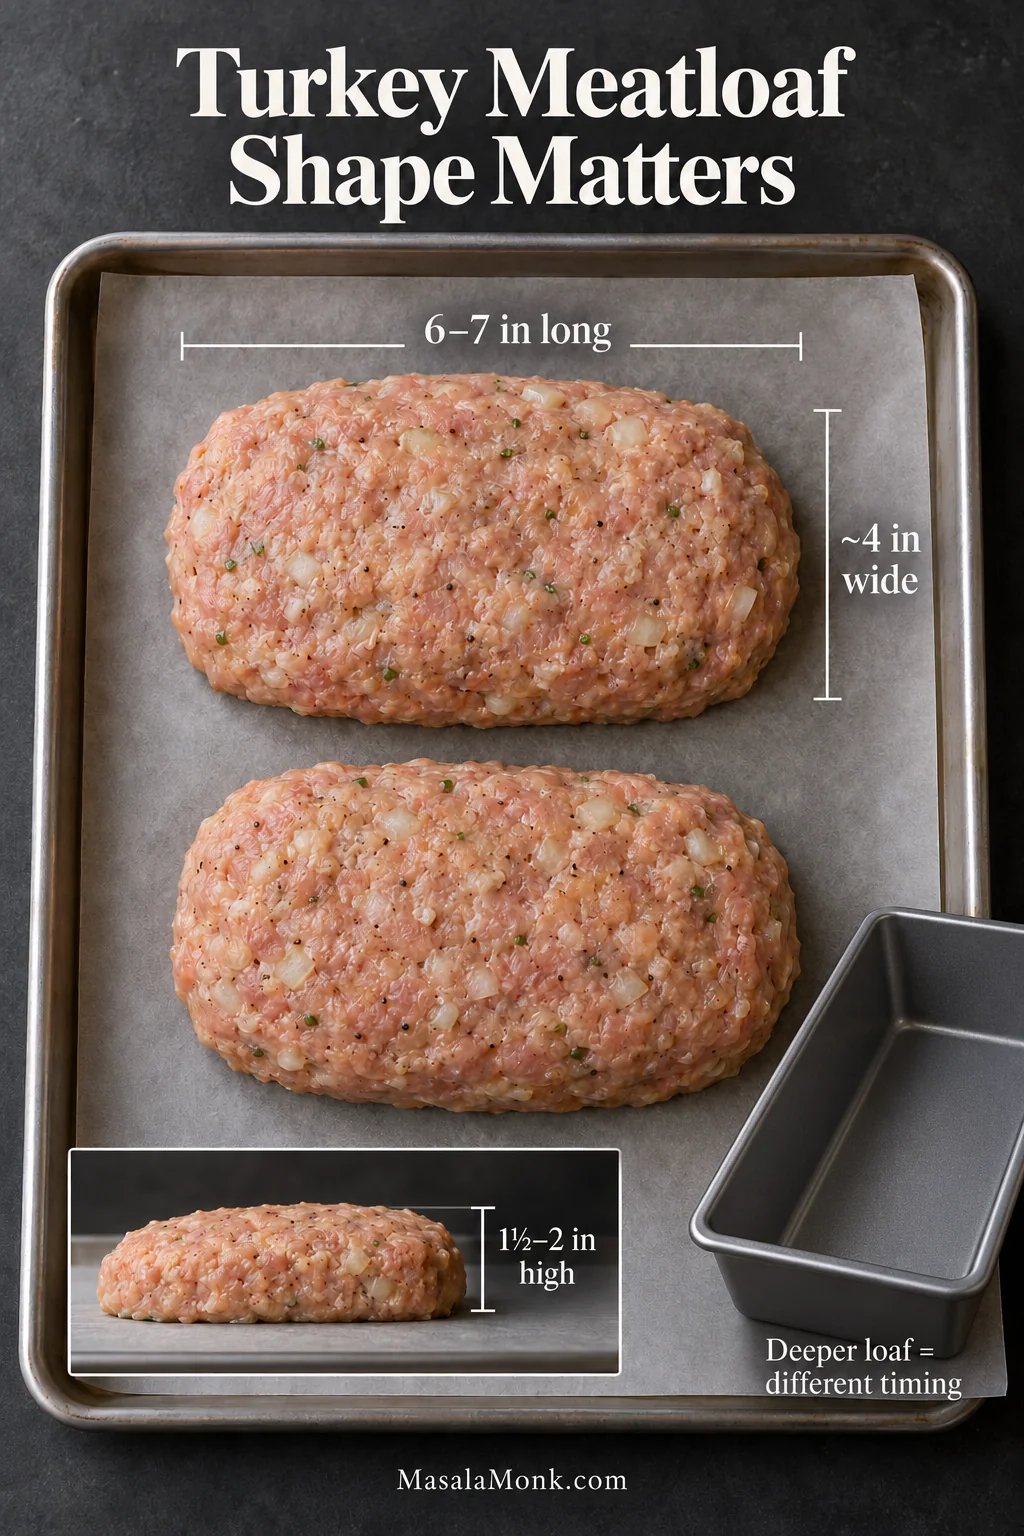
  1. Shape two loaves. Divide the mixture evenly and form two free-form loaves, each about 6–7 inches (15–18 cm) long, 4 inches (10 cm) wide, and 1½–2 inches (4–5 cm) high. Keep their thickness similar and leave space between them.
  2. Make the glaze. Stir together the ketchup, brown sugar, apple cider vinegar, Dijon, and Worcestershire. Reserve about ¼ cup (60 ml) in a clean bowl if you want glaze for serving later. Keep that portion away from the raw turkey.
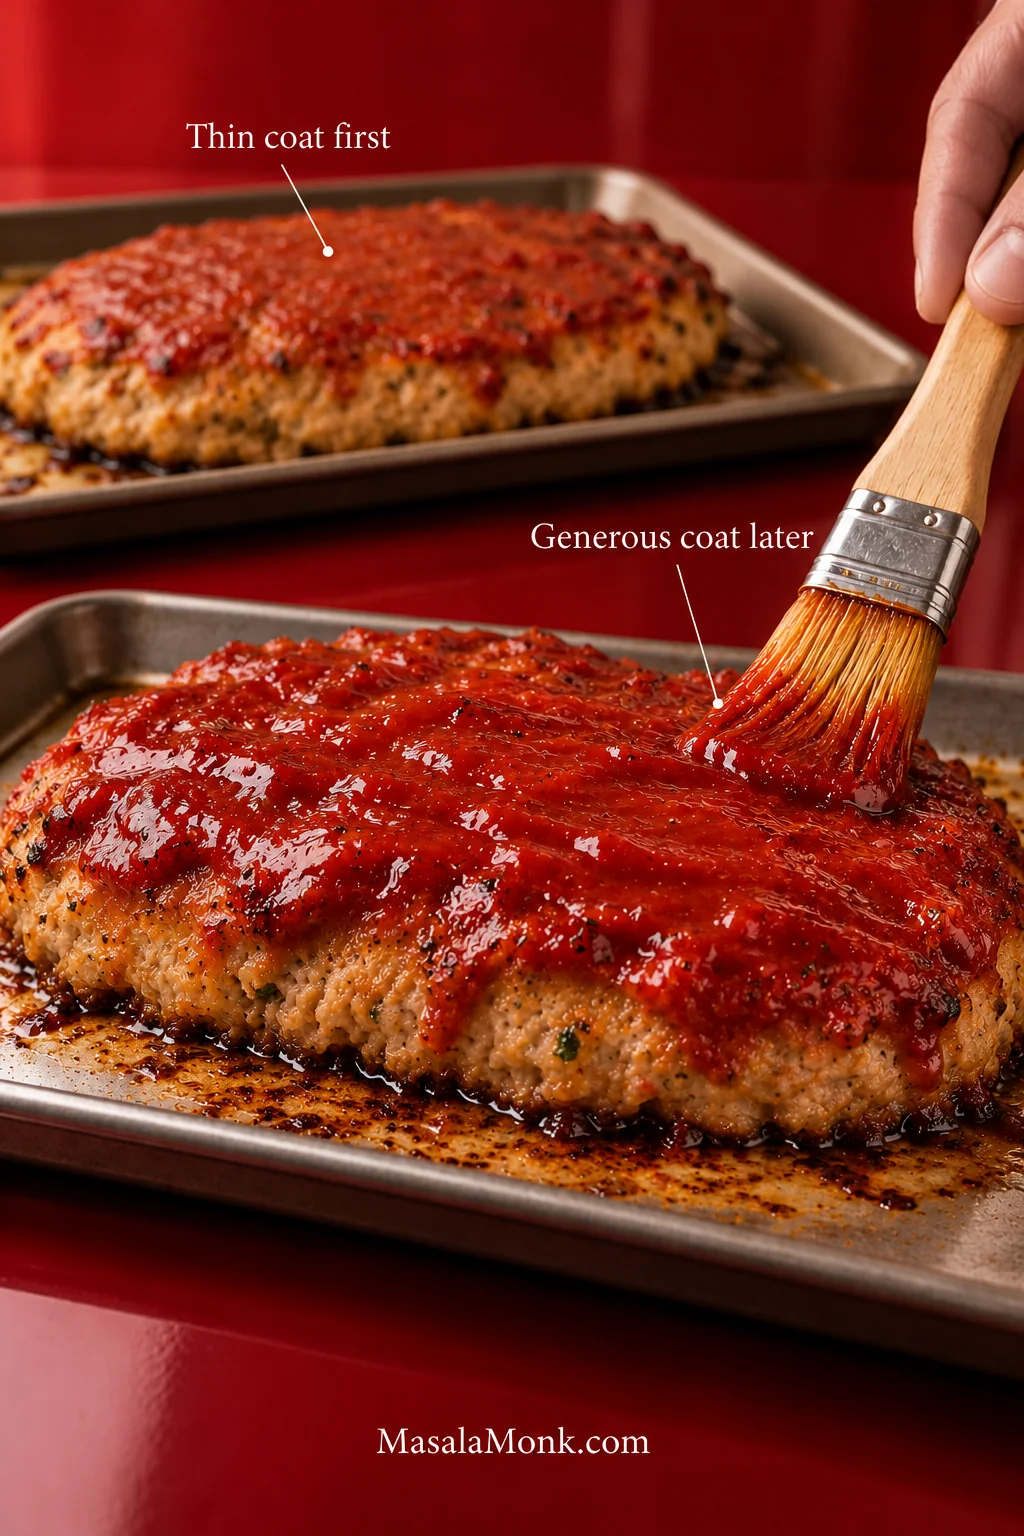
  3. Add the first coat. Brush, spoon, or spread a light layer of glaze over the loaves, then bake for 25 minutes.
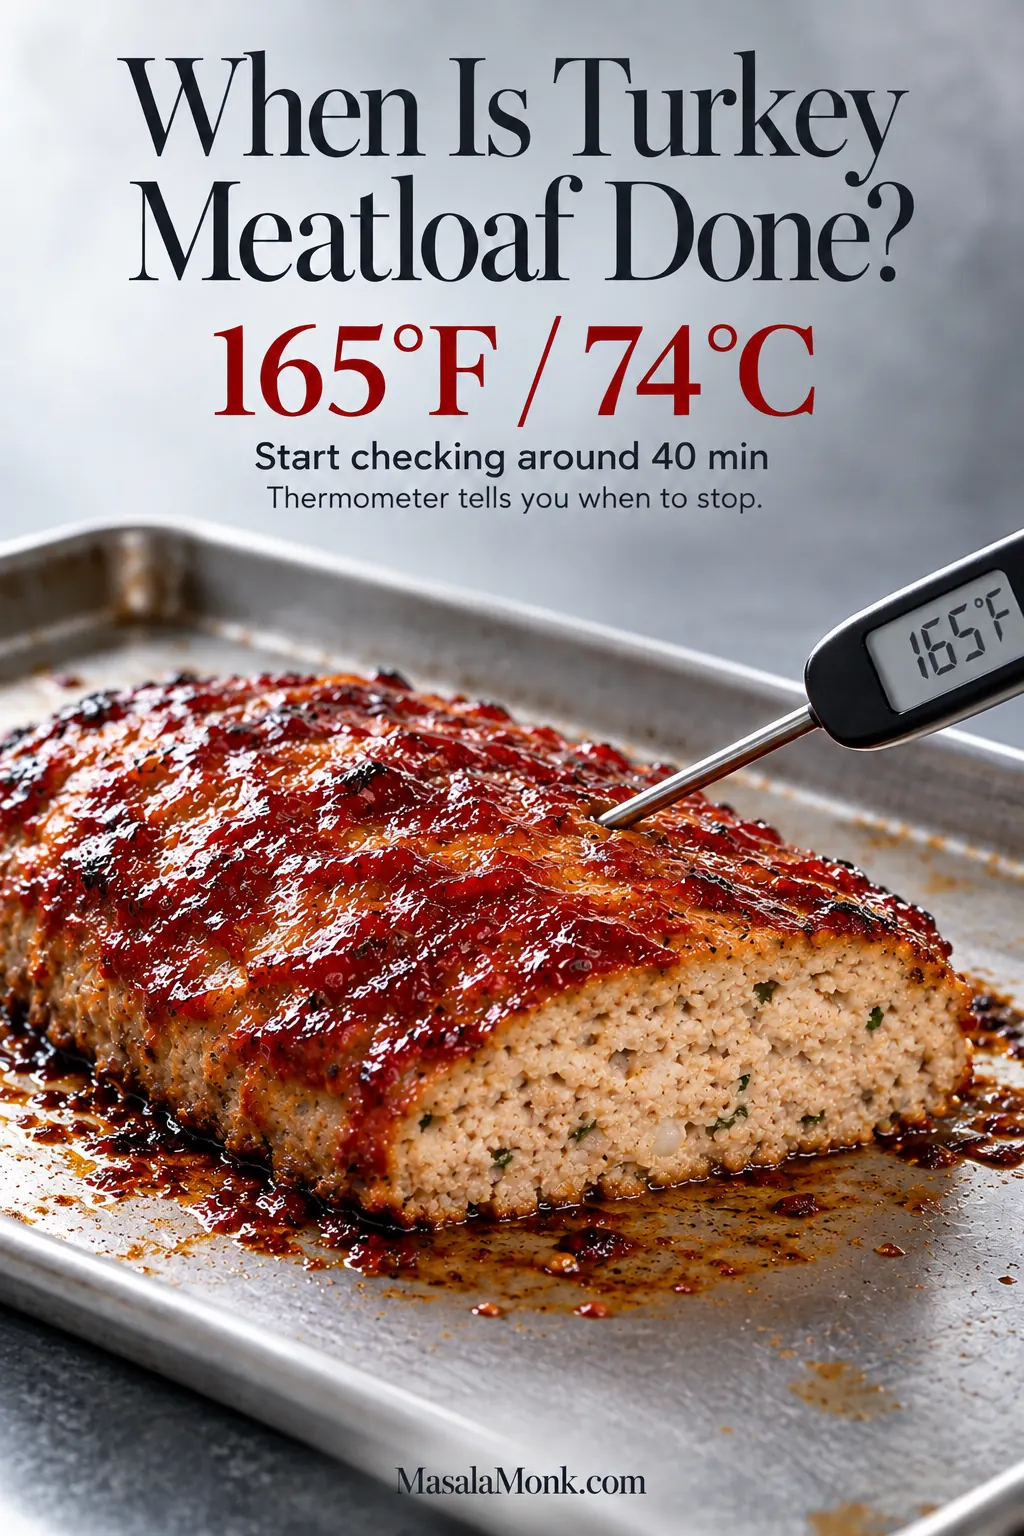
  4. Glaze again. Spread a more generous second coat over the loaves and return them to the oven. Begin checking the thickest part around 40 minutes total cooking time. Remove each loaf when it reaches 165°F (74°C).
  5. Give it 10 minutes. Let the loaves rest before slicing. The glaze will set around the edges, and the meatloaf will be easier to cut cleanly.

Salt note: the volume measure above is for Diamond Crystal kosher salt. If using Morton kosher salt, use about 1 teaspoon; if using fine table salt, use about ¾ teaspoon. Worcestershire and Dijon also contribute salt to the meatloaf, so brand differences can shift the final seasoning slightly.

Getting Turkey Meatloaf Right

Building a Tender, Sliceable Meatloaf

Start with 93% lean ground turkey

93% lean ground turkey is a practical choice here. It brings some fat to a naturally lean meat without making the loaf heavy. Extra-lean 99% turkey can work too, but it gives you less margin for overcooking, so watch the thermometer closely and don’t let the center sail past 165°F.

Turkey also tends to make a softer raw mixture than beef. If you’re used to shaping a classic beef meatloaf, don’t keep adding breadcrumbs simply because the turkey feels different.

Let the panko absorb the milk first

Hydrating the panko before it meets the turkey spreads the milk through the mixture instead of leaving pockets of free liquid. Give it time to absorb before deciding whether the mixture needs adjusting.

Once the turkey goes in, use a light hand. Fold just until the ingredients are distributed and then stop. Kneading the mixture into a smooth paste works against the tender texture we’re after.

Close-up of softened panko breadcrumbs moistened with milk in a stainless bowl, with the crumbs damp and swollen rather than sitting in liquid.
Ready panade looks swollen and evenly damp, with no loose milk collecting at the bottom of the bowl.

Make the middle worth eating, too

Most of each bite is turkey, so the flavor cannot live only on the surface. Softened onion and garlic build the savory base; Worcestershire and Dijon add depth and tang; thyme, paprika, black pepper, and salt carry the seasoning through the loaf.

The ketchup glaze brings the sweeter, sharper finish, especially along the edges. Underneath, the meat should already taste seasoned before the glaze gets involved.

Shape, Glaze and Bake the Meatloaf

Shape the loaves to the same thickness

For two free-form loaves, matching their thickness matters more than making them look identical. Similar-height loaves tend to reach temperature at about the same time.

Two raw free-form turkey meatloaves on a tray with measurements indicating roughly 6 to 7 inches long, 4 inches wide and 1½ to 2 inches high, beside a loaf pan for comparison.
Keep both loaves about 1½–2 inches high. Matching thickness matters more for cooking time than perfectly matching their shape.

Build the glaze in two coats

Glazing twice gives each coat a different job. The first thin layer cooks onto the meatloaf; the second goes on later for a thicker, glossier, stickier finish.

Two shallow turkey meatloaves showing two glazing stages, with a thin cooked-on first coat and a thicker glossy red glaze being spread over the second loaf.
A thin first coat bakes onto the surface; the later coat stays thicker, stickier and glossier.

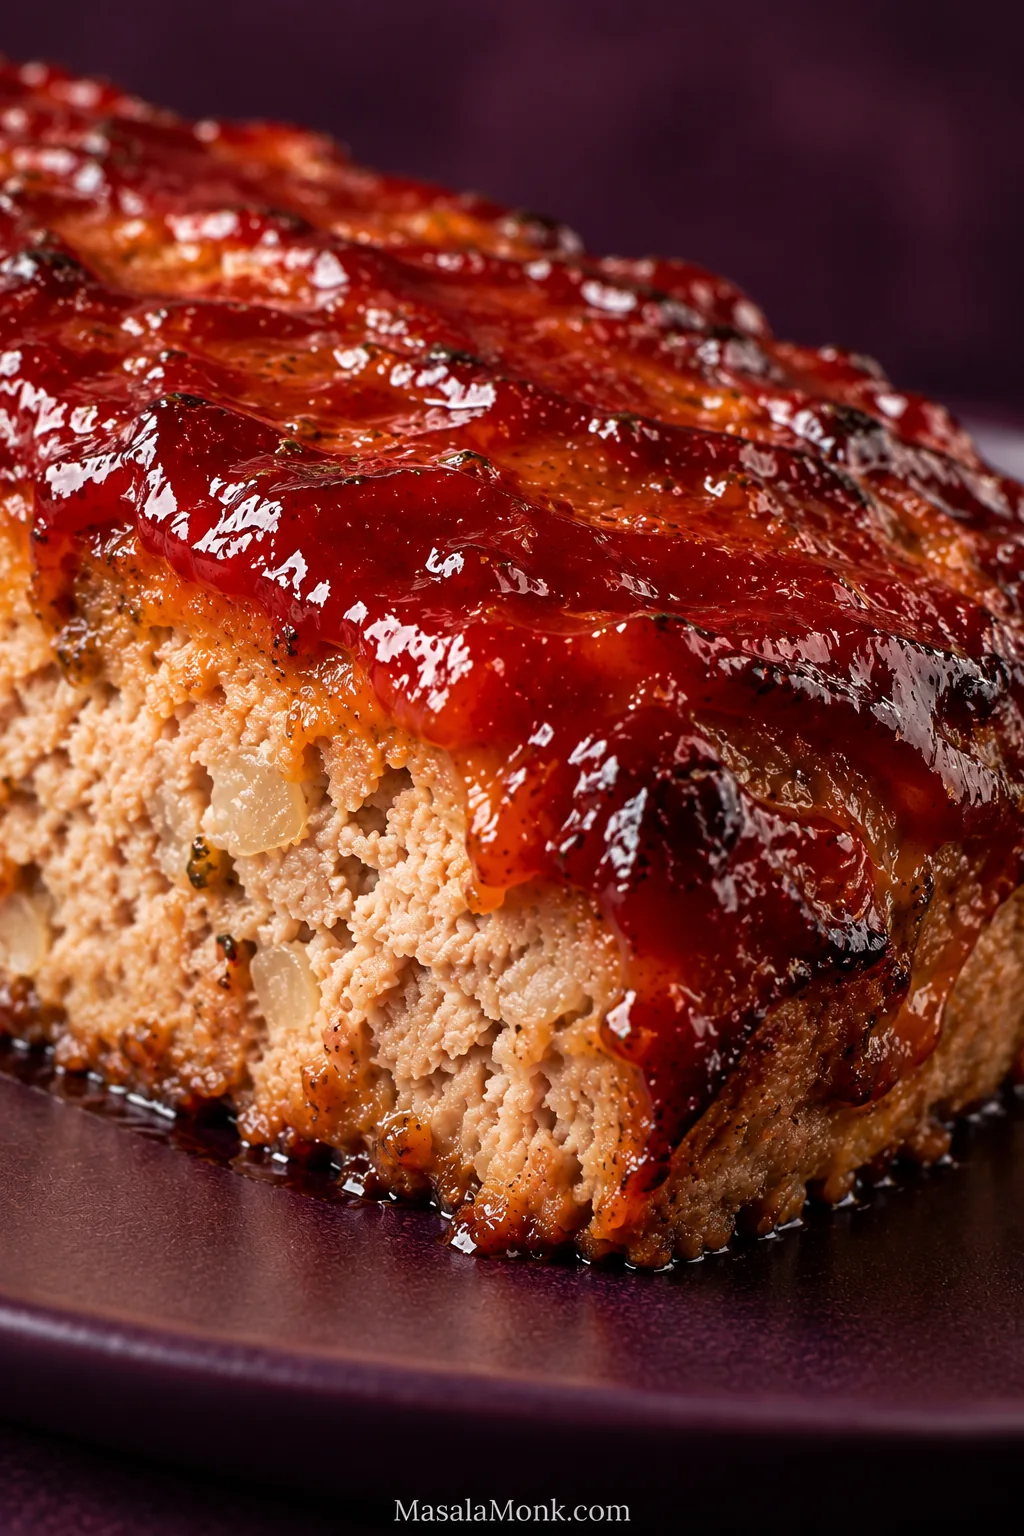
What should the finished glaze look like? It should cling to the surface with a tacky sheen and darker ridges around the edges instead of running freely onto the pan.

Extreme close-up of baked turkey meatloaf with a thick glossy red glaze, caramelized dark edges and a small section of pale cooked turkey visible underneath.
Finished glaze should cling with a tacky sheen and darker caramelized ridges, not run freely onto the pan.

Use 165°F, not the clock, as the endpoint

Bake at 375°F (190°C) and begin checking around 40 minutes. The meatloaf is done when the thickest part reaches 165°F (74°C), the USDA safe minimum for ground poultry. Many loaves finish between 40 and 50 minutes, but their thickness, starting temperature, and your oven can shift that window.

Check both loaves with an instant-read thermometer. Use the clock to tell you when to look; let the thermometer tell you when to stop.

Instant-read thermometer inserted into the center of a glazed turkey meatloaf and displaying 165 degrees Fahrenheit, with doneness guidance above it.
Check each loaf separately at its thickest point; handmade loaves can reach 165°F (74°C) at slightly different times.

Prefer a loaf pan? Use a lightly greased 9 × 5-inch pan, but don’t pack the mixture above the rim; shape any excess as a small free-form loaf. A deeper loaf can take considerably longer than the two free-form loaves above, so ignore their timing and cook to 165°F (74°C) in the thickest part. Check the smaller free-form loaf earlier and remove it separately as soon as it reaches 165°F (74°C).

Making half the recipe? Halve the ingredients and shape one loaf to approximately the same dimensions as either of the two main loaves. Don’t halve the baking time: thickness matters more than total batch weight, so begin checking around the same point and cook to 165°F (74°C).

Rest before you judge the center

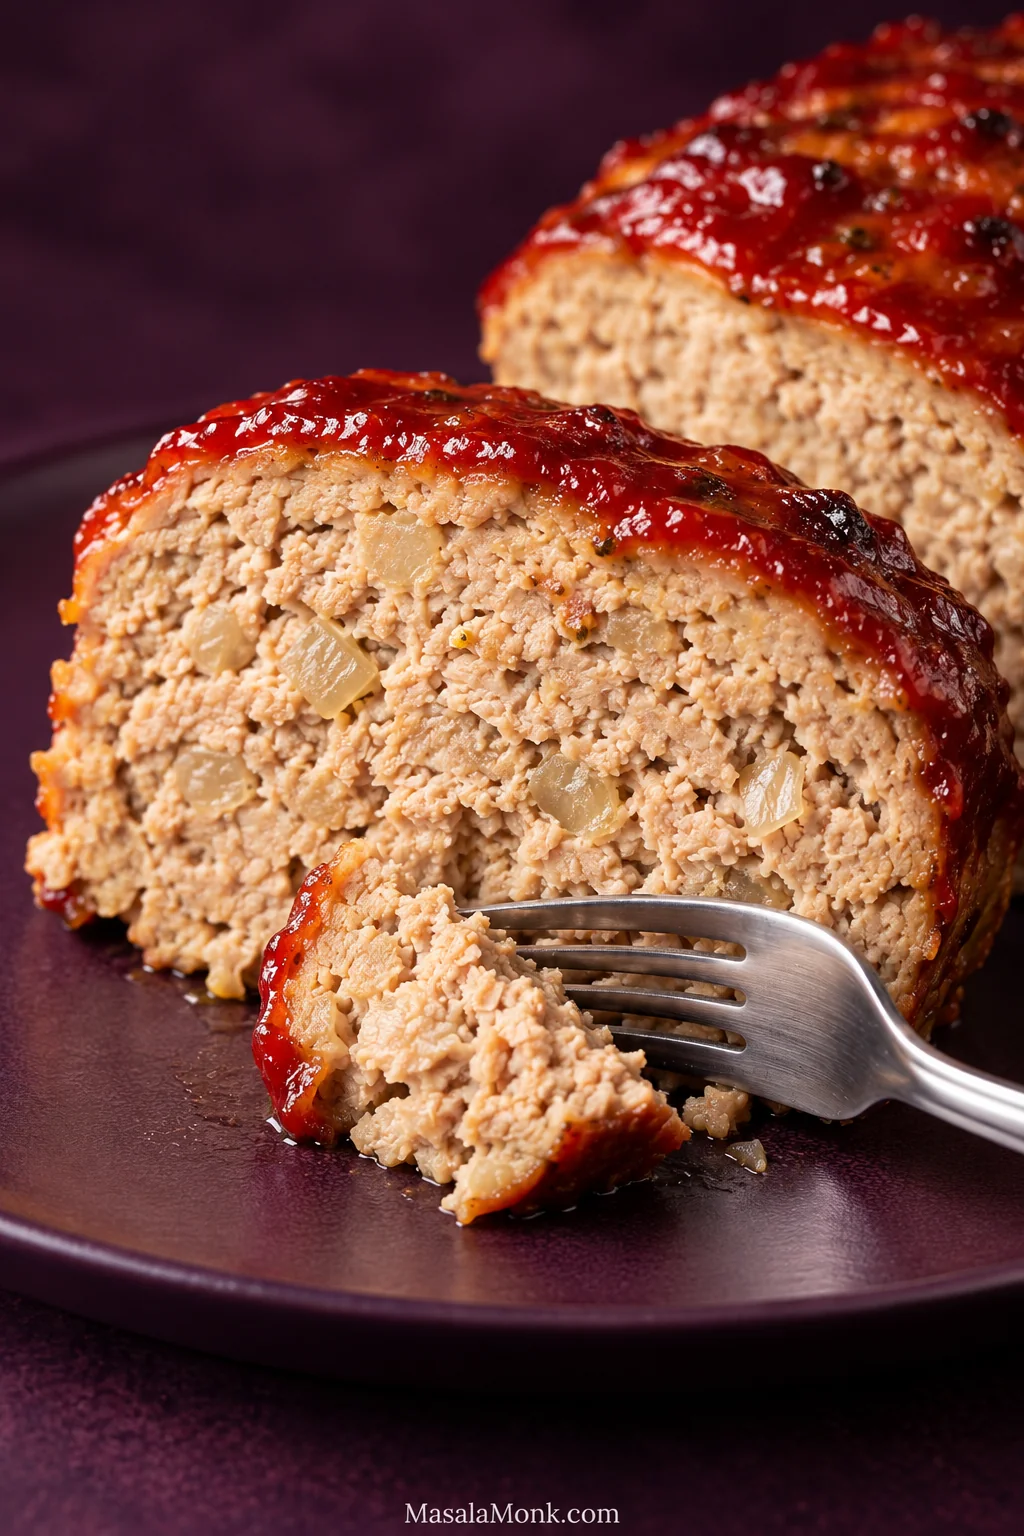
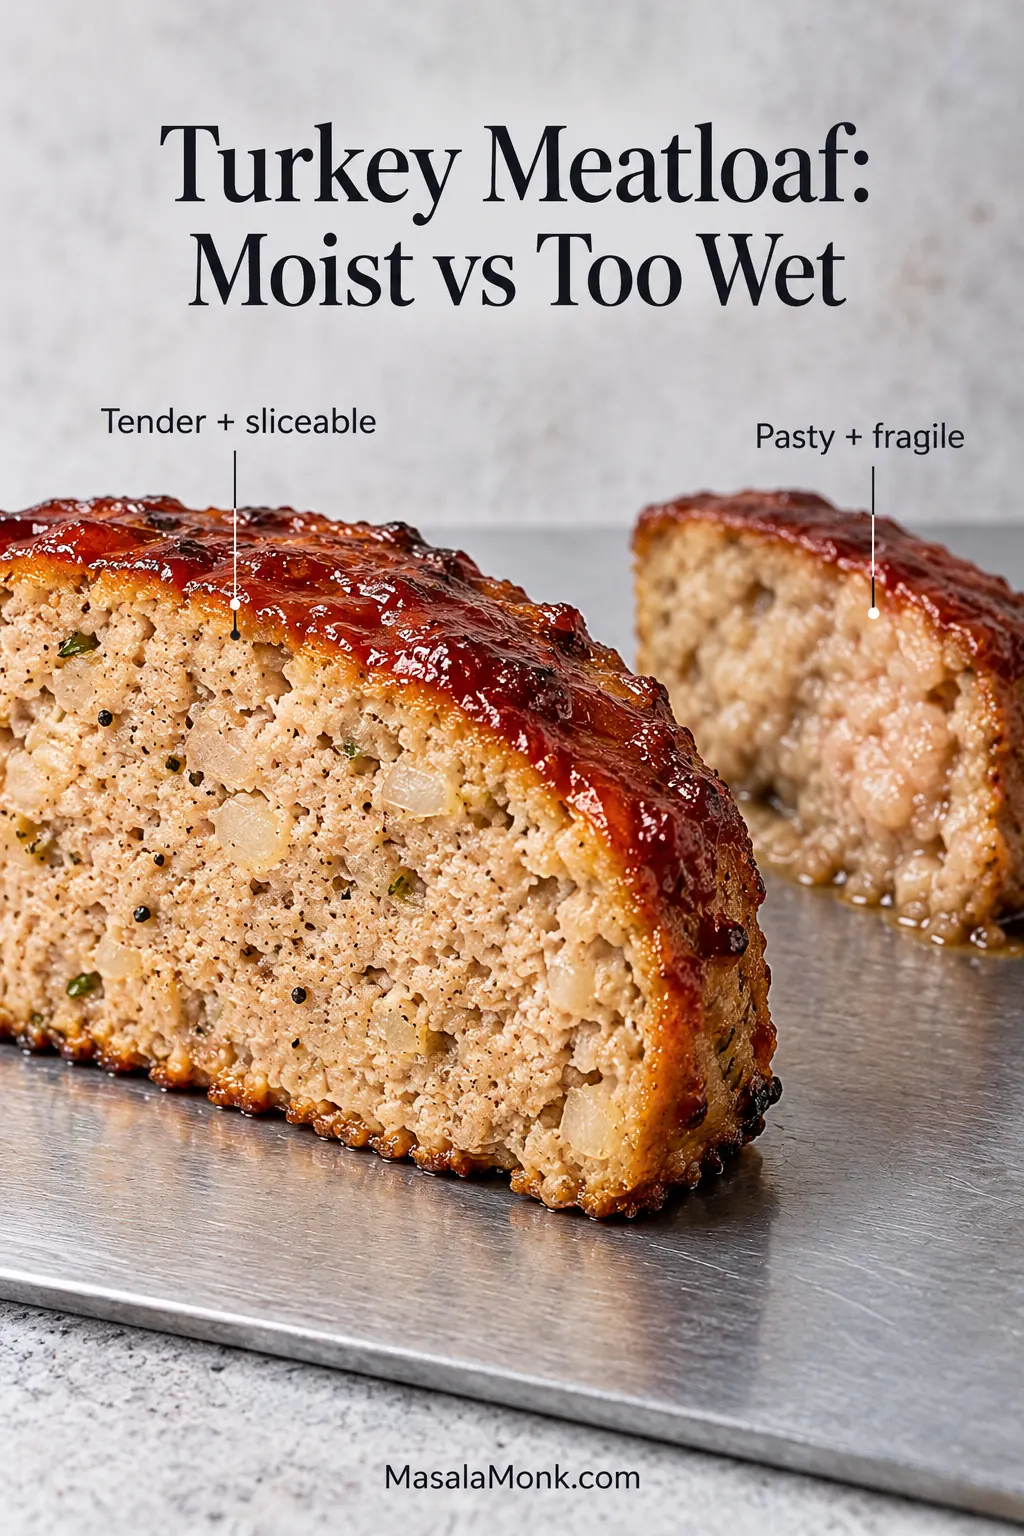
However you shape it, give the cooked meatloaf 10 minutes before slicing. After the rest, the cut surface should look moist rather than wet or pasty, and the slice should hold together when you cut into it.

Close view of glazed turkey meatloaf with a thick cut face showing pale cooked ground turkey, softened onion pieces and a fork lifting a small bite.
After resting, the center should look satin-moist and cohesive—not smeary, wet or paste-like.

Something still looks wrong? Troubleshoot the texture · Back to the recipe

When the Texture Doesn’t Look Right

The raw mixture won’t hold its shape

First, wait. Give the panko time to absorb the milk and make sure the cooked onion isn’t carrying visible liquid into the bowl. A soft mixture is normal; one that puddles or keeps spreading needs attention.

Still spreading after that? Fold in 1 tablespoon of panko and give it another moment before deciding whether it needs more. A mixture that is simply very soft can also be easier to shape after a short chill.

Avoid chasing a very wet mixture back and forth with handfuls of breadcrumbs and extra eggs. Egg helps the loaf set as it cooks, but it also adds liquid to the raw mixture.

The cooked loaf seems soft, wet or fragile

A loaf can feel surprisingly soft straight from the oven without being ruined. Give it the full 10-minute rest first. A properly cooked meatloaf often becomes noticeably easier to slice as it sits.

First make sure the center actually reached 165°F (74°C), then give the loaf its full rest. Still wet and pasty after that? Excess moisture is more likely than undercooking.

Watery vegetables or too much added liquid are the first places to look. More oven time at that point can dry the edges without fixing the center.

Comparison of two cooked turkey meatloaf slices, with one showing a cohesive tender crumb and the other showing a softer, wetter and pastier interior.
A moist slice keeps clean edges; a wet one remains pasty or fragile even after reaching temperature and resting.

The meatloaf is dry, dense or rubbery

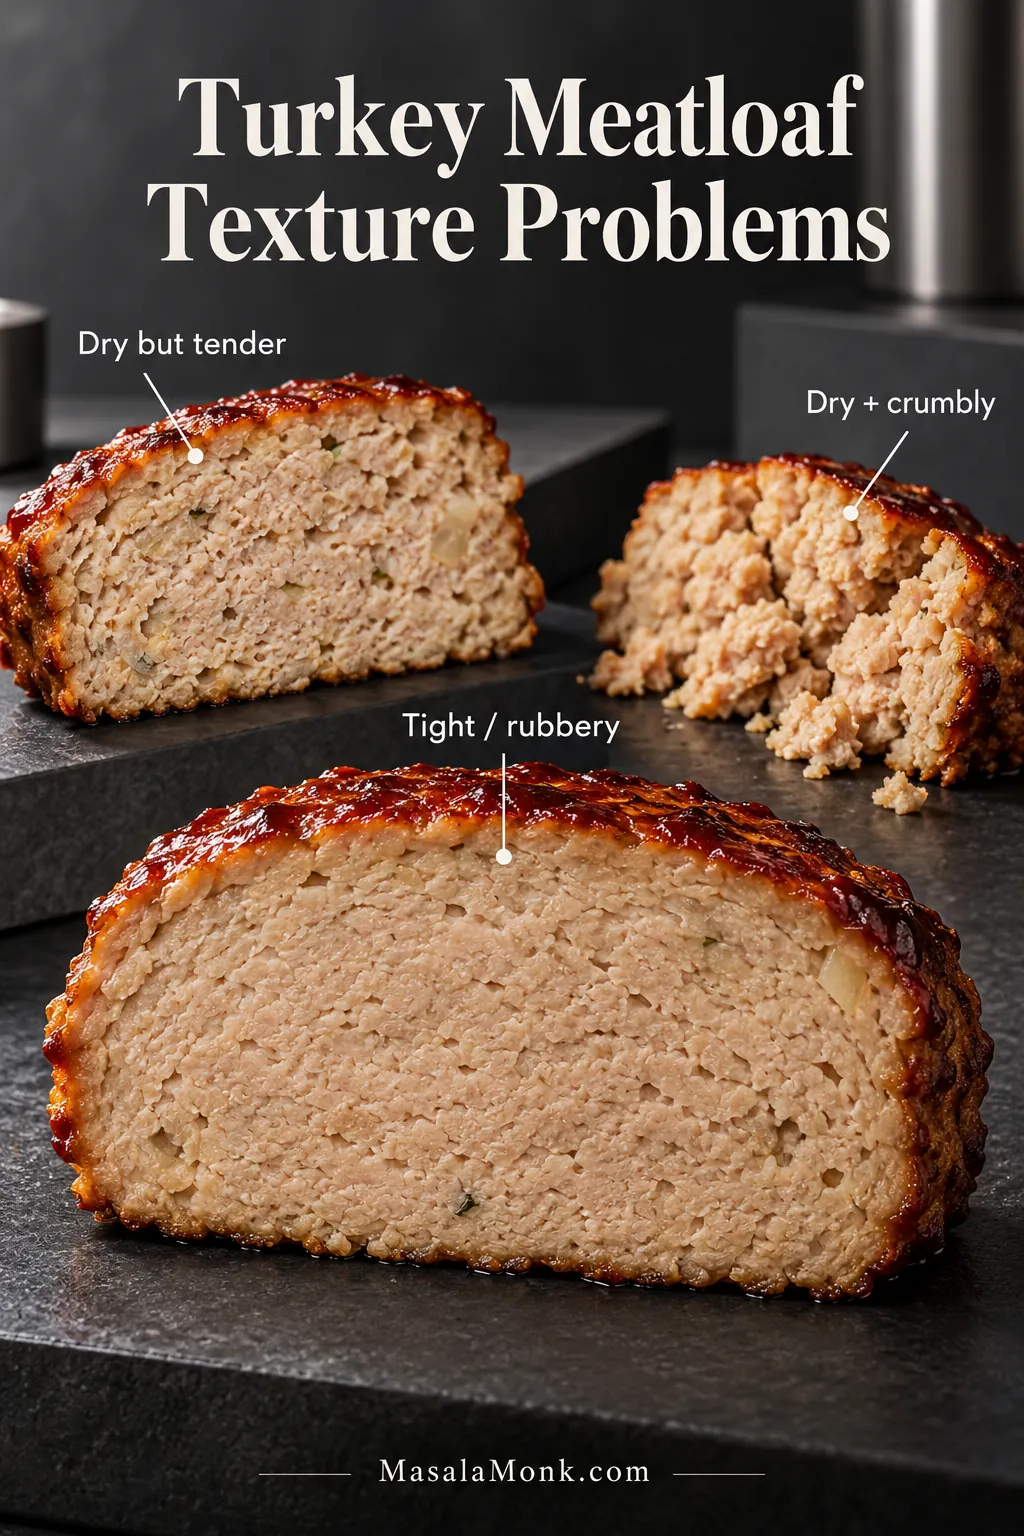
Dry but still fairly tender? Extra-lean turkey or a temperature overshoot is more likely. Tight, firm or rubbery? Heavy mixing moves higher on the list. Dry and crumbly? Lean meat and overcooking deserve another look.

There is no prize for leaving ground turkey in the oven after it has safely reached 165°F.

Three turkey meatloaf slices side by side showing dry but tender, tight and rubbery, and dry crumbly textures.
Dry-tender points toward overcooking; tight-rubbery suggests overmixing; dry-crumbly often combines leanness with temperature overshoot.

There’s liquid on the pan or the glaze is getting too dark

A little juice around the loaf isn’t alarming. By contrast, a large pool can point to especially wet turkey or vegetables that carried too much water into the mixture. When the glaze starts darkening too quickly, loosely shield the dark area with foil and keep cooking until the meatloaf reaches temperature.

Need the method again? Back to the recipe · Recheck time & temperature

Oats, Vegetables and Smaller Loaves

Using oats instead of panko

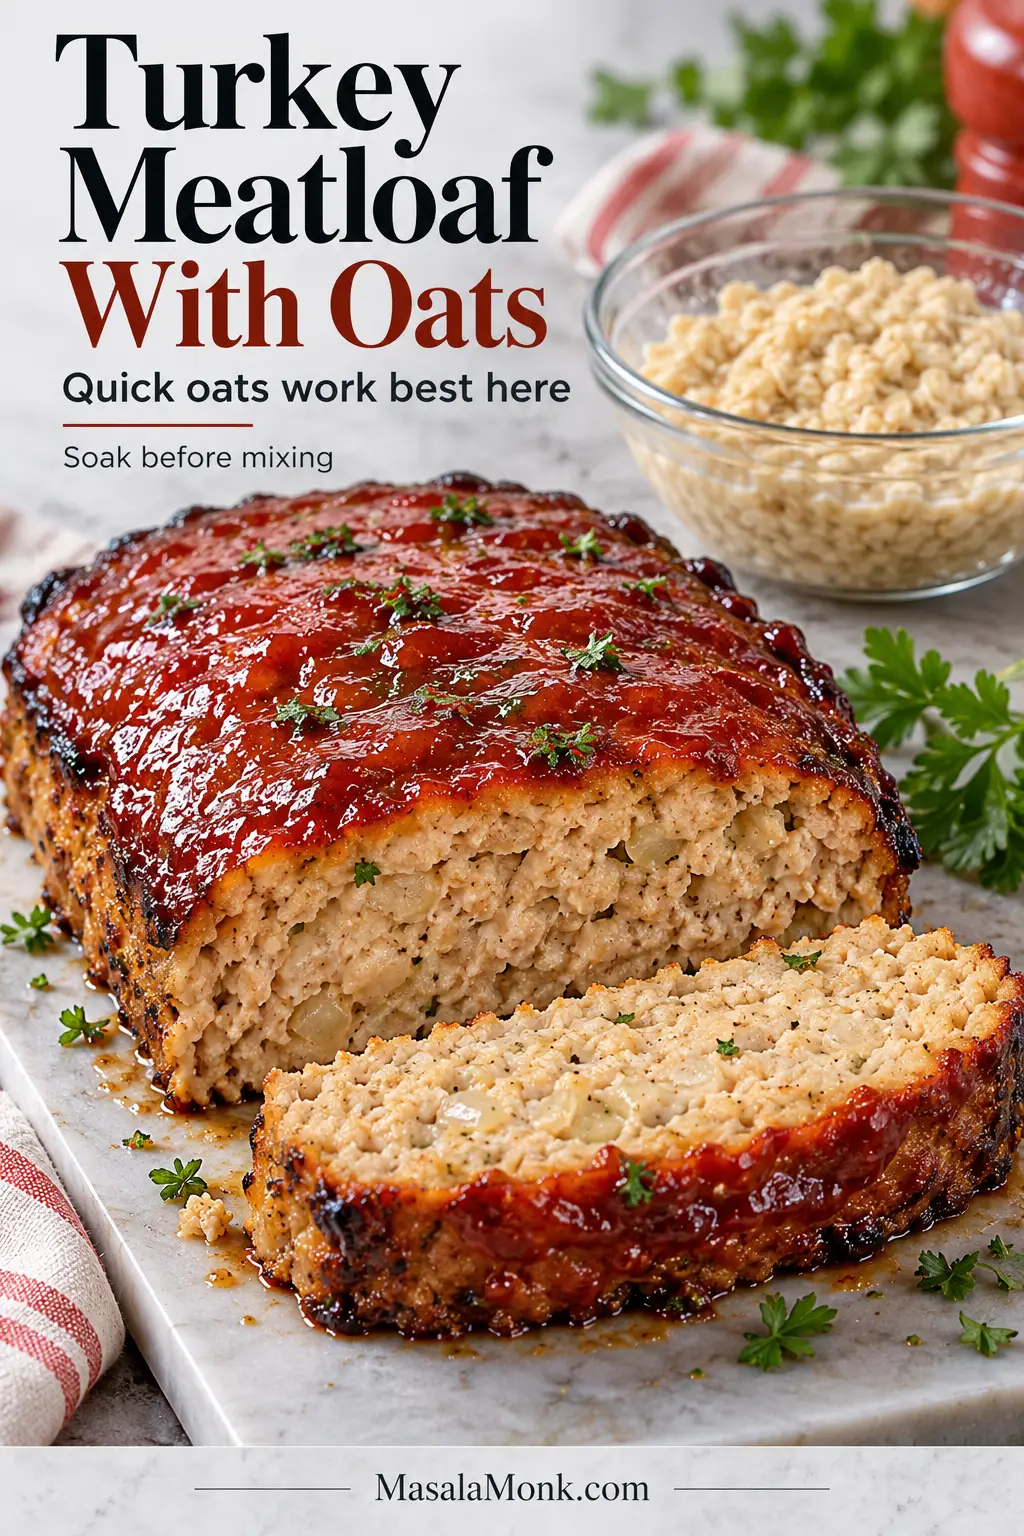
For an oat version of this 2-pound batch, use ¾ cup quick-cooking oats in place of the panko and keep the ½ cup (120 ml) milk. Stir the oats and milk together first and let them soak for 5–10 minutes before adding the remaining ingredients. Quick oats give a finer texture than old-fashioned rolled oats and are the better fit for this substitution.

If gluten is a concern, use certified gluten-free oats or gluten-free panko and check the labels on the Worcestershire, Dijon, ketchup, and other prepared condiments you use rather than assuming the breadcrumb swap alone makes the whole recipe gluten-free.

Glazed turkey meatloaf cut to show a moist pale interior beside a glass bowl of softened hydrated quick oats, with text explaining that quick oats work best when soaked before mixing.
Quick oats should soften into the binder and mostly disappear; rolled oats leave a noticeably coarser finished texture.

Adding vegetables without making the loaf watery

Vegetables can add sweetness, savory depth, color, or tenderness. These amounts keep the added moisture modest while still giving you a noticeable vegetable presence.

  • Mushrooms: use up to 8 ounces (225 g), chop them very finely, and sauté until the liquid they release has cooked away before cooling and adding them.
  • Carrots: use 1 medium carrot, finely grated, and soften it with the onion so it disappears more naturally into the loaf.
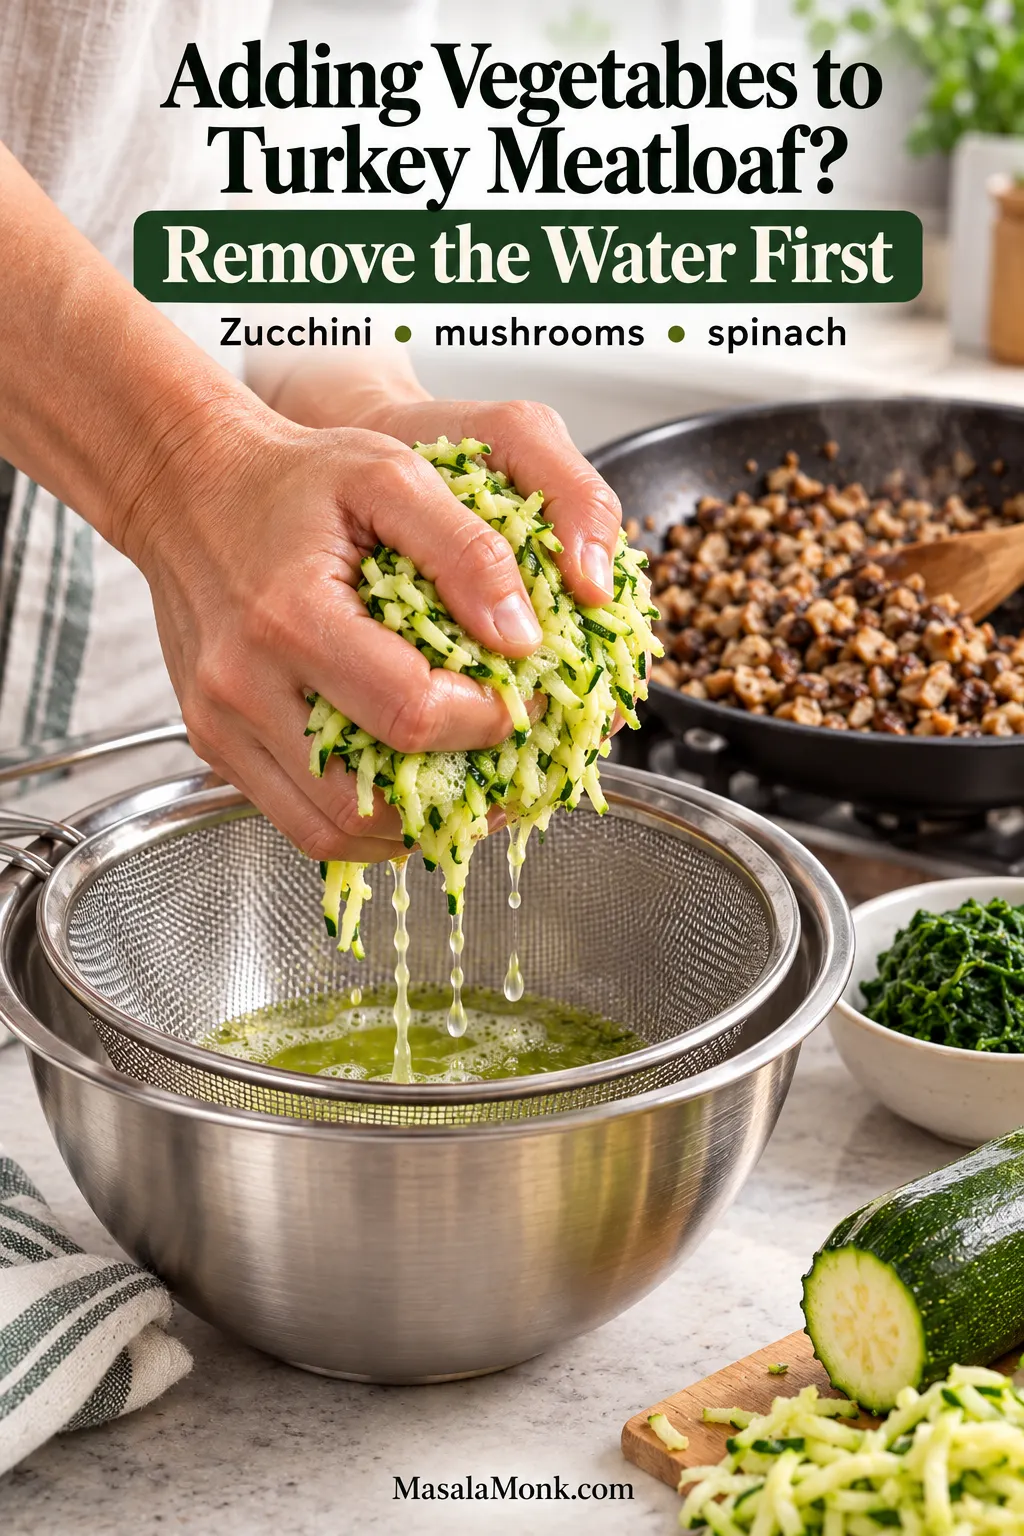
  • Zucchini: use up to 1 cup grated zucchini and squeeze it very thoroughly before adding. The volume should shrink noticeably once the excess water is pressed out.
  • Spinach: use about ½ cup cooked or thawed chopped spinach after squeezing it as dry as you reasonably can.

If combining vegetables, keep the total cooked or well-drained addition to about 1 cup.

Hands squeezing shredded zucchini over a metal strainer and bowl, with cooked chopped mushrooms in a skillet and drained spinach nearby.
Squeeze zucchini until its volume drops sharply, and cook mushrooms until nearly dry before either goes into the mixture.

Or leave the loaf itself alone and put the vegetables beside it. Roasted carrots bring sweet, caramelized edges without changing the meatloaf’s texture at all.

Making mini turkey meatloaves

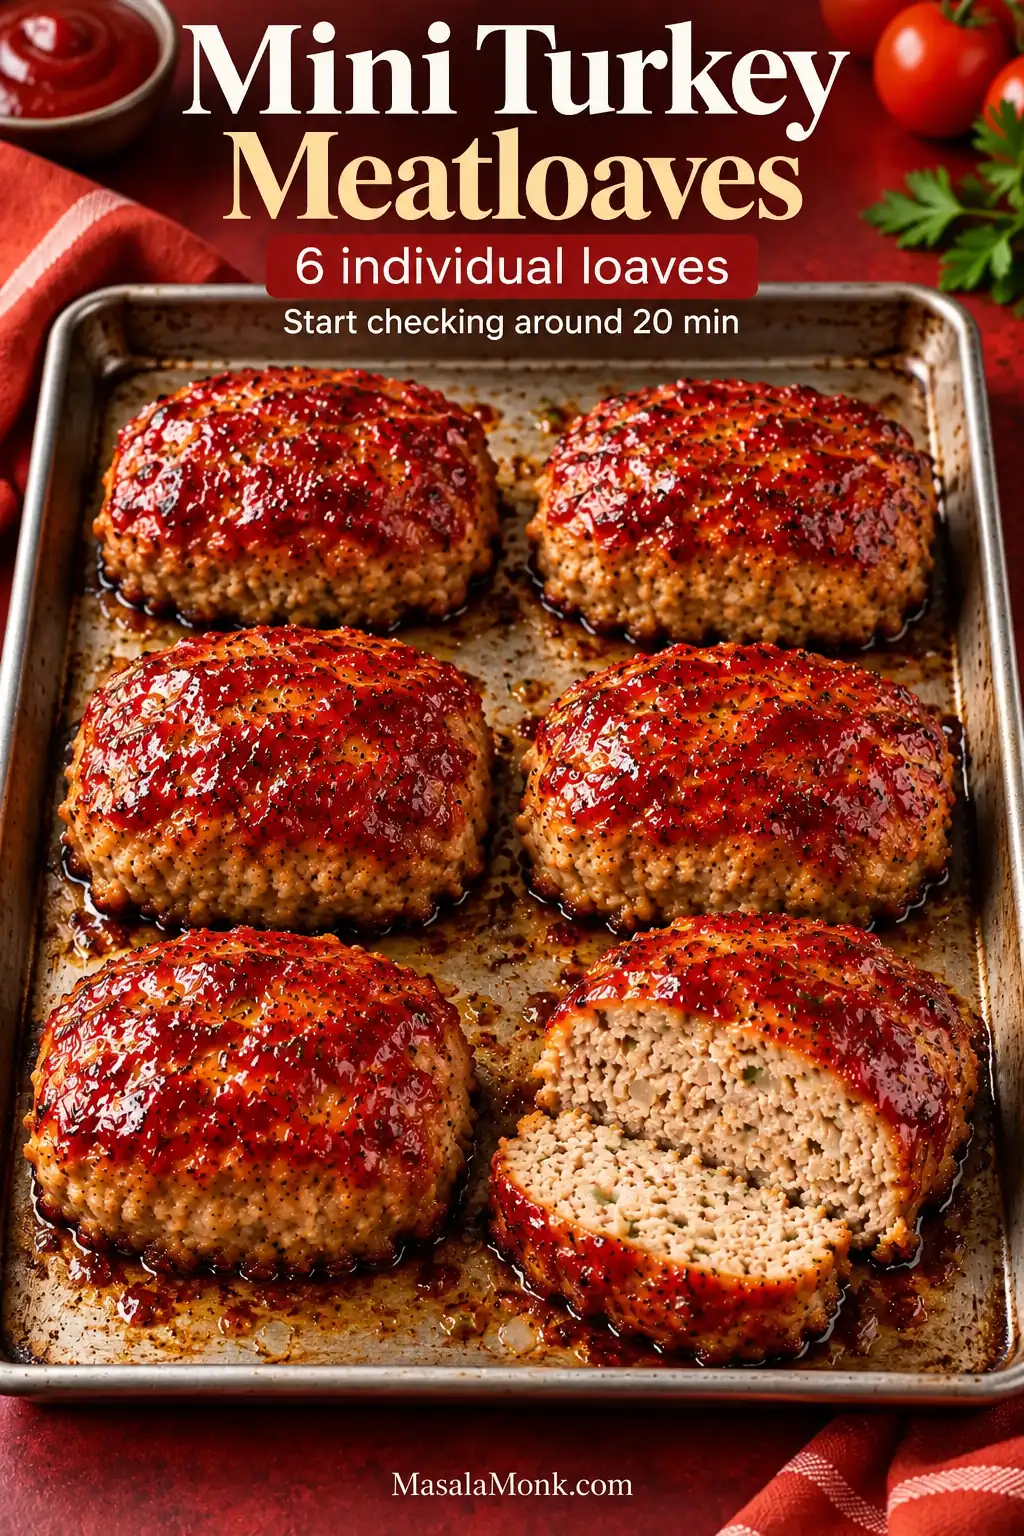
For individual portions, divide this batch into 6 equal pieces and shape each into a small free-form loaf on the baking sheet. Keep them similar in thickness and leave space between them. At 375°F (190°C), begin checking around 20 minutes; many loaves of this size finish in roughly 20–25 minutes, but each one still needs to reach 165°F (74°C).

Six individually shaped glazed turkey meatloaves arranged on a rimmed baking sheet, with one cut open to reveal the cooked turkey interior.
Keep mini loaves similar in thickness and remove them individually as they reach 165°F (74°C); thinner ones may finish first.

What to Serve With Turkey Meatloaf

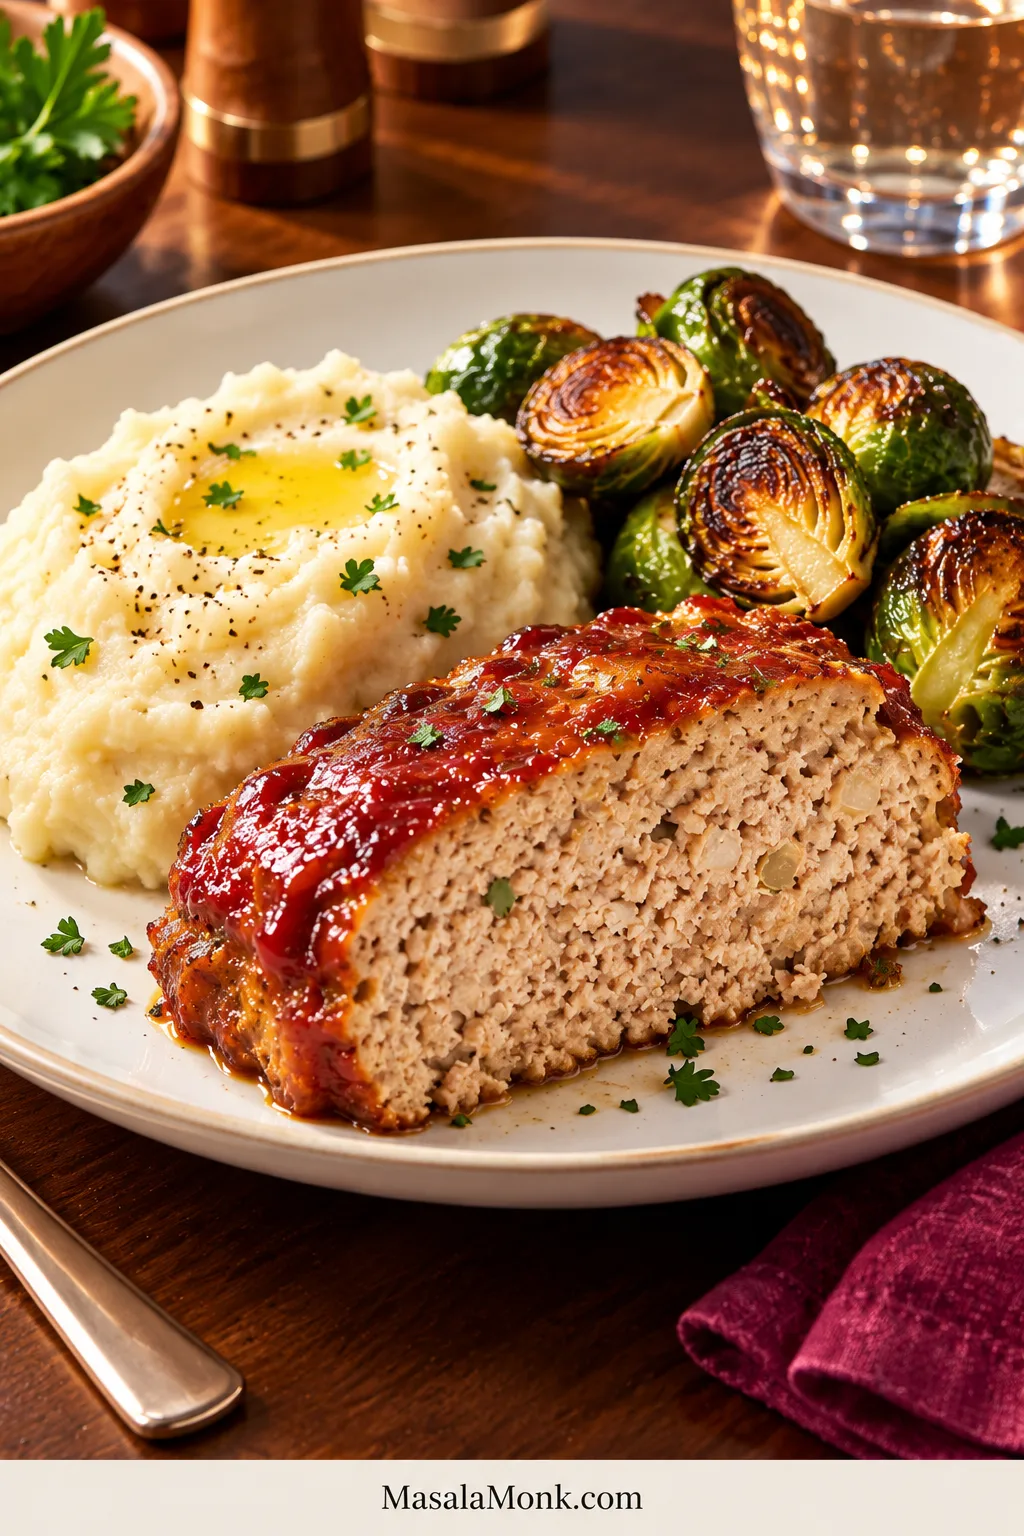
For the classic comfort-food plate, spoon creamy mashed potatoes beside a slice and let them catch some of the glaze.

If you want something greener, roasted Brussels sprouts bring deeply browned, slightly bitter edges that cut through the sweeter glaze. A basket of warm dinner rolls works when you want something soft for the last streaks left on the plate.

White dinner plate holding a thick slice of glazed turkey meatloaf, creamy mashed potatoes and browned roasted Brussels sprouts on a dark wooden table.
Creamy potatoes catch the glaze, while browned Brussels sprouts keep a crisp, slightly bitter contrast.

Make Ahead, Store, Freeze and Reheat

You can shape the uncooked loaves ahead, cover them well, and refrigerate until you’re ready to bake. Keep raw ground turkey refrigerated at 40°F (4°C) or below and cook or freeze it within 1–2 days of purchase. Loaves going straight from the refrigerator may need a little longer in the oven, so use 165°F rather than the clock as the endpoint.

For cooked meatloaf, refrigerate leftovers within two hours in shallow, covered containers or well-wrapped portions. Cooked meat and poultry leftovers generally keep for 3–4 days at 40°F (4°C) or below. The USDA’s leftovers guidance has more detail on refrigeration, freezing, and reheating.

Turkey meatloaf also freezes well. Wrap a cooked loaf or individual slices tightly; for best quality, use them within about 3–4 months. Thaw in the refrigerator and reheat the portion you’re serving to 165°F (74°C). Covering slices as they warm helps keep the exposed surfaces from drying out, and a spoonful of clean reserved glaze doesn’t hurt.

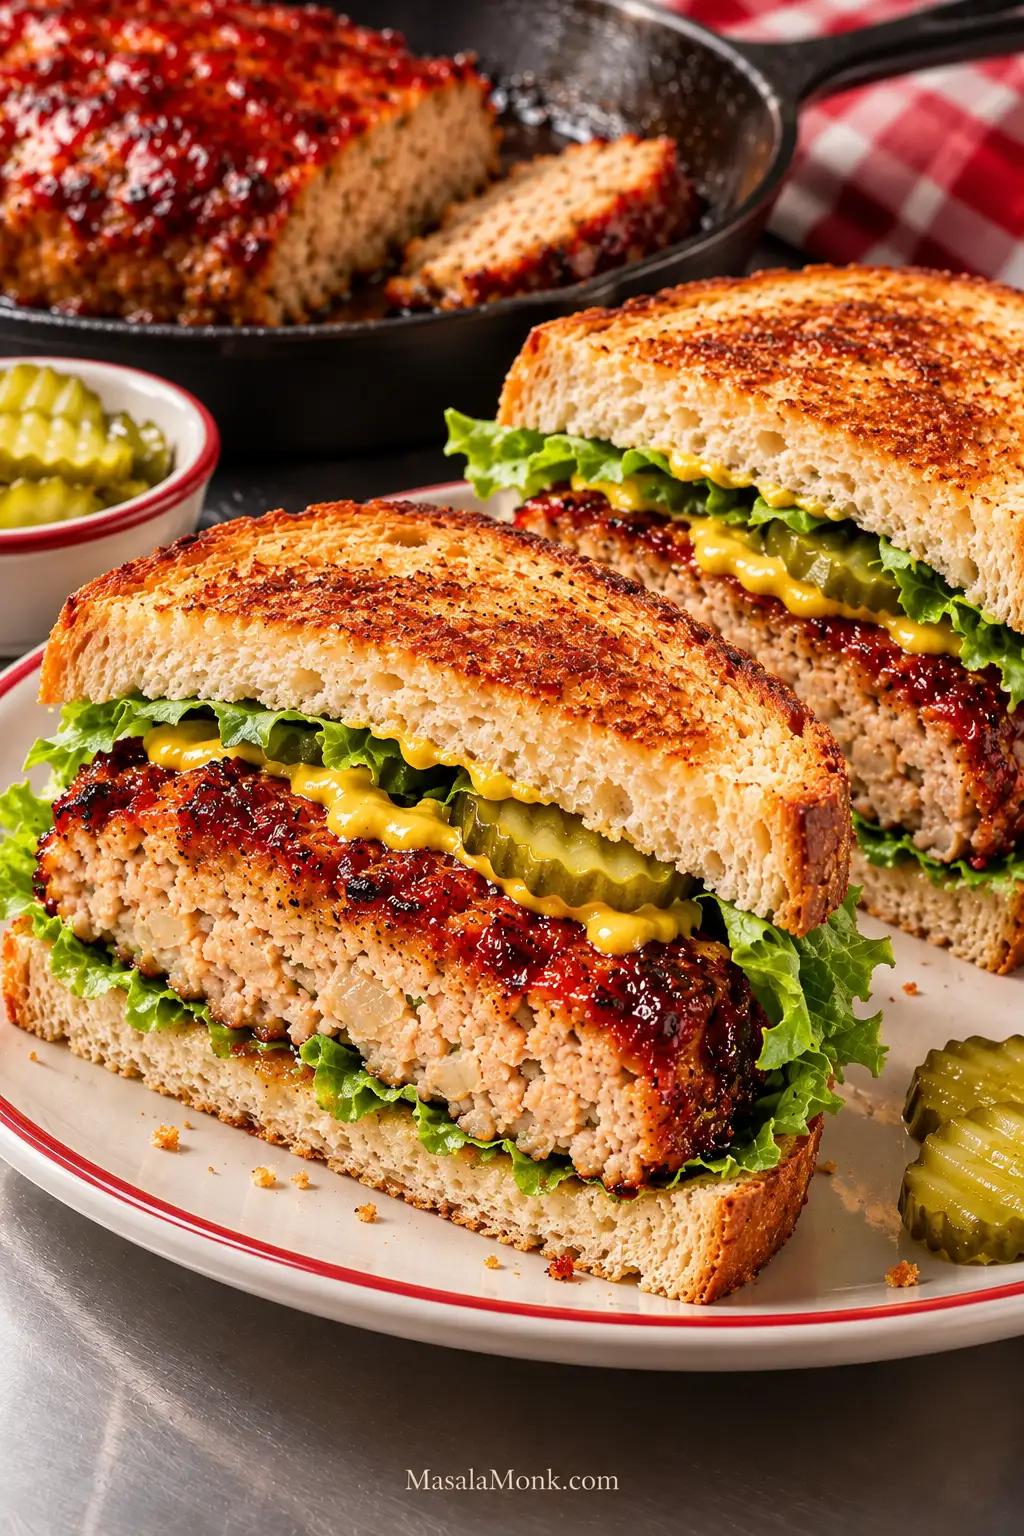
Or skip the attempt to make yesterday’s slice feel exactly like the first one. Warm a slice through in a skillet while letting the cut sides develop a browned crust. Add mustard, pickles, crisp lettuce, or a little leftover glaze and tuck it into bread. Suddenly the second loaf isn’t merely leftovers; it’s tomorrow’s lunch already halfway sorted.

Two turkey meatloaf sandwich halves with skillet-browned meatloaf, mustard, pickle slices and green lettuce on toasted bread, with a skillet in the background.
Brown the cut face first, then add mustard, pickles and lettuce after heating so the sandwich keeps its crisp-fresh contrast.

Back to the recipe · Back to top

Posted on — Leave a comment

Slow Cooker Potato Soup Recipe: Easy, Creamy & Loaded with Flavor

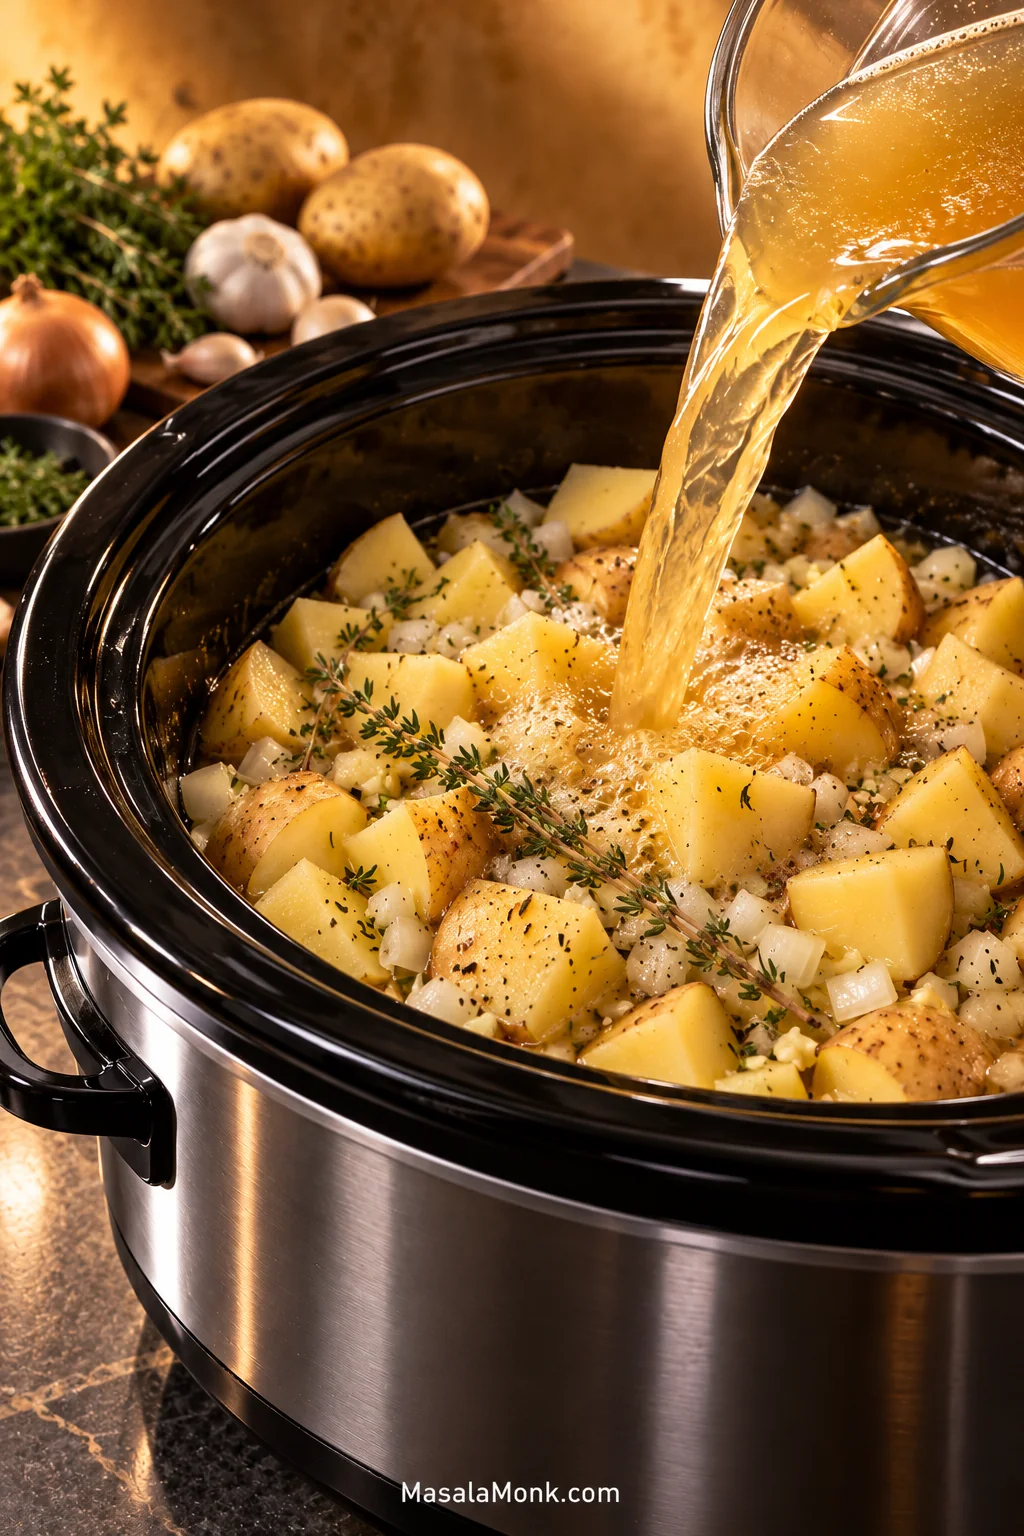
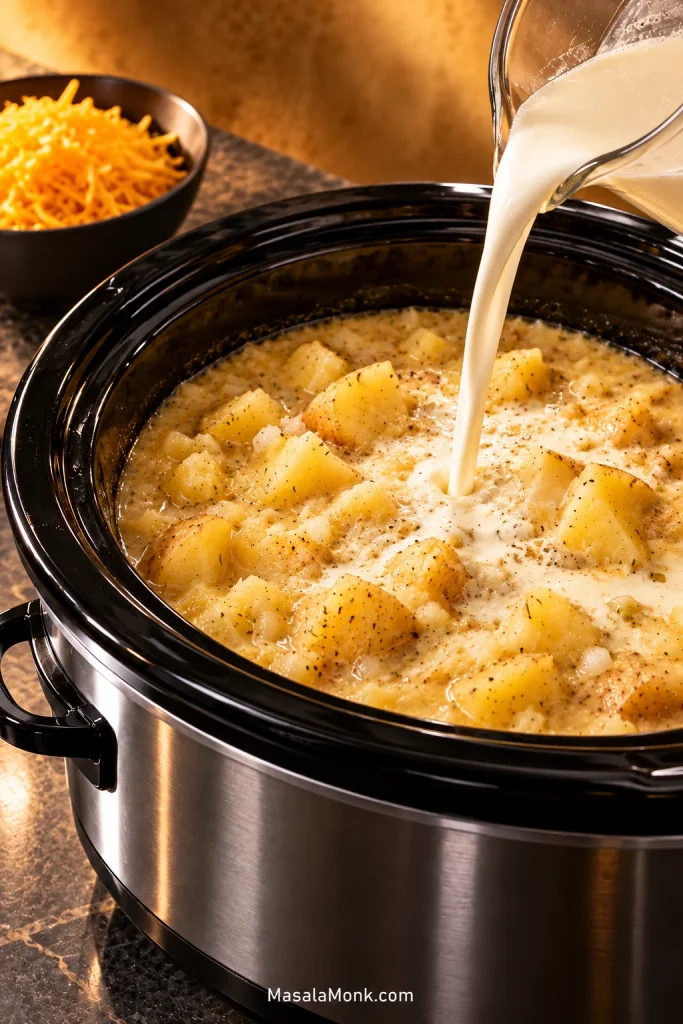
Chicken broth being poured over diced Yukon Gold potatoes, onion, garlic and herbs in a black slow cooker.

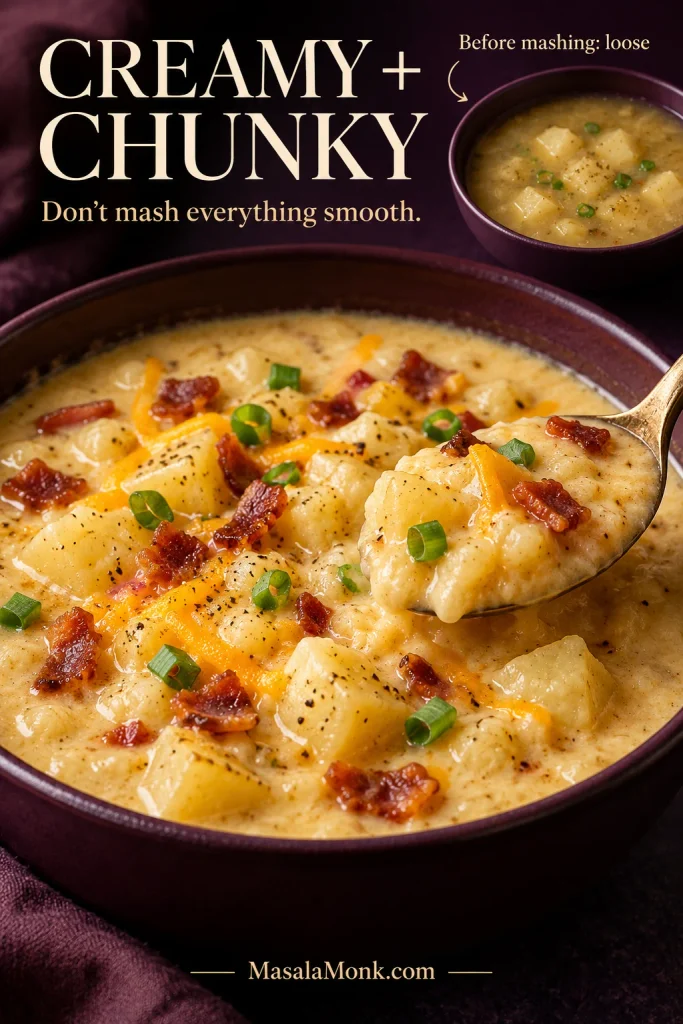
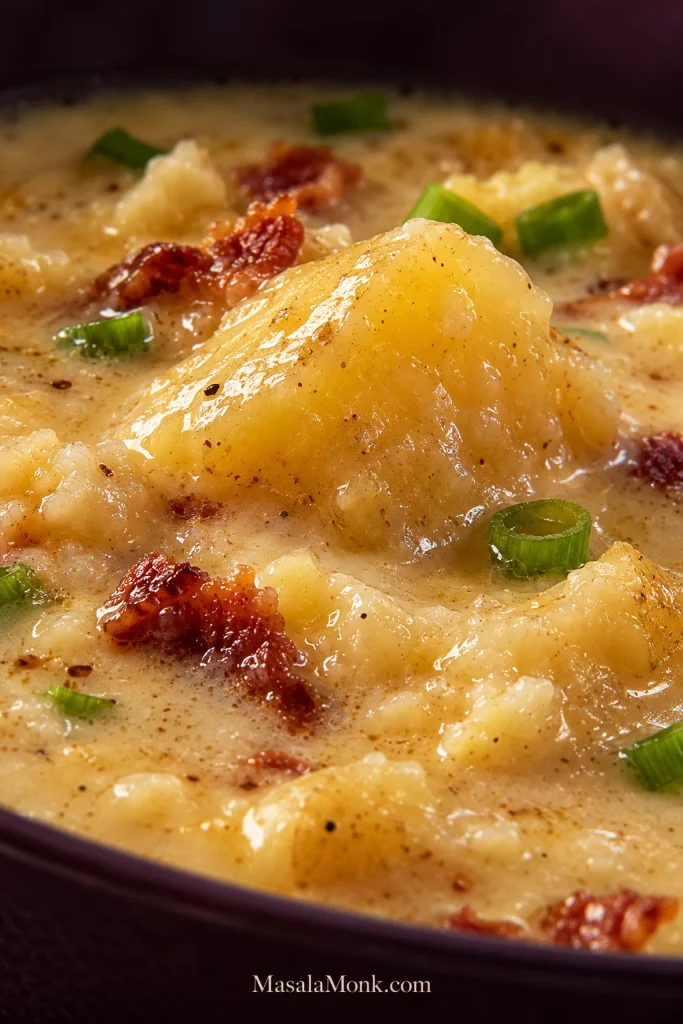
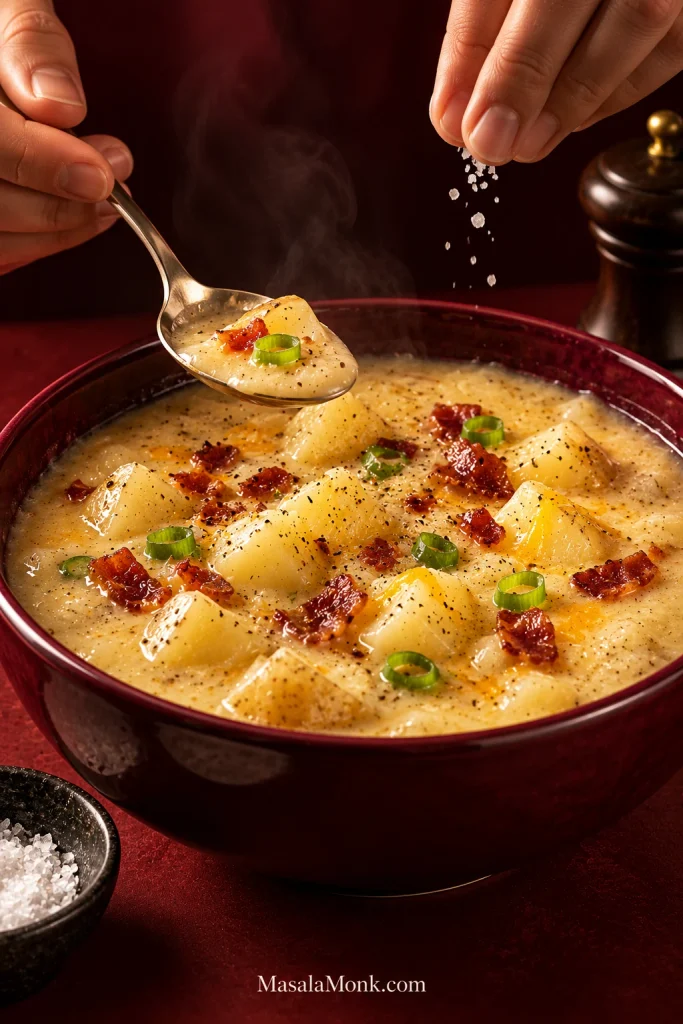
Tender Yukon Gold potatoes, sharp cheddar, and crisp bacon give this slow cooker potato soup the appeal of a loaded baked potato in a warm, satisfying bowl. The broth turns creamy as some of the potatoes are mashed, while the rest stay in tender pieces. Cool sour cream and fresh green onions balance the rich, cheesy finish.

Get the potatoes cooking earlier in the day, then come back once they’re tender to mash some into the broth, stir in the cream and cheddar, and pile crisp bacon onto the bowls. If you have a few extra minutes at the start, softening the onion in bacon fat builds a deeper savory base.

Slow Cooker Potato Soup Recipe

Cook the potatoes, onion, garlic, thyme, and chicken broth until the potatoes are fork-tender. Mash about one-quarter of the potatoes to thicken the broth, then finish with heavy cream and freshly shredded sharp cheddar. Crisp bacon, sour cream, and green onions go on top just before serving.

Prep
About 20 minutes

Cook on LOW
6–8 hours

Cook on HIGH
3–4 hours

Finish
About 10–15 minutes

Yield
About 8 servings

Slow Cooker
6-quart

Equipment: A 6-quart slow cooker, skillet, knife, cutting board, potato masher, and cheese grater. A vegetable peeler is optional. For this texture, a potato masher is all you need.

For the Potato Soup

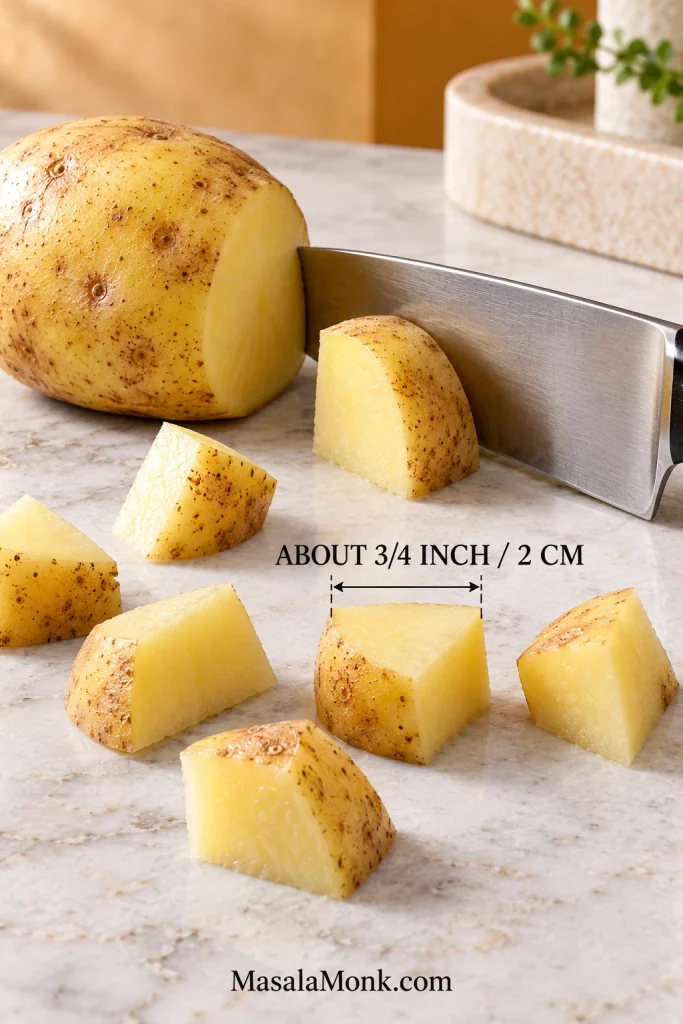
  • 3 lb (1.36 kg) Yukon Gold potatoes, scrubbed and cut into roughly ¾-inch (2 cm) pieces; peel them first if you prefer
  • 1 medium yellow onion (about 150 g), finely diced
  • 4 garlic cloves, minced
  • 4 cups (946 ml) low-sodium chicken broth
  • 1 teaspoon fine salt, plus more to taste
  • ½ teaspoon freshly ground black pepper, plus more to taste
  • ½ teaspoon dried thyme

For the Creamy Finish

  • ¾ cup (177 ml) heavy cream
  • 1½ cups (about 170 g) freshly shredded sharp cheddar cheese

For Serving

  • 6 slices bacon (about 100–120 g before cooking, depending on thickness)
  • 3 green onions, thinly sliced
  • Sour cream, to taste
  • Extra shredded cheddar and black pepper, optional

Instructions

  1. Choose the onion route. For the fastest version, add the diced onion raw in the next step and cook the bacon shortly before serving. For deeper flavor, fry the bacon in a skillet over medium heat until crisp, then transfer it to a paper-towel-lined plate. Leave about 1 tablespoon of bacon fat in the skillet and cook the onion in it for 3–4 minutes, until softened. Once the bacon has cooled slightly, cover and refrigerate it until serving.
  2. Fill the slow cooker. Add the potatoes, garlic, chicken broth, salt, black pepper, and thyme. Add the onion raw, or, if you softened it in bacon fat, scrape the softened onion and any bacon fat remaining in the skillet into the slow cooker. Keep the potato pieces similar in size so they soften at about the same rate. Stir once and cover.
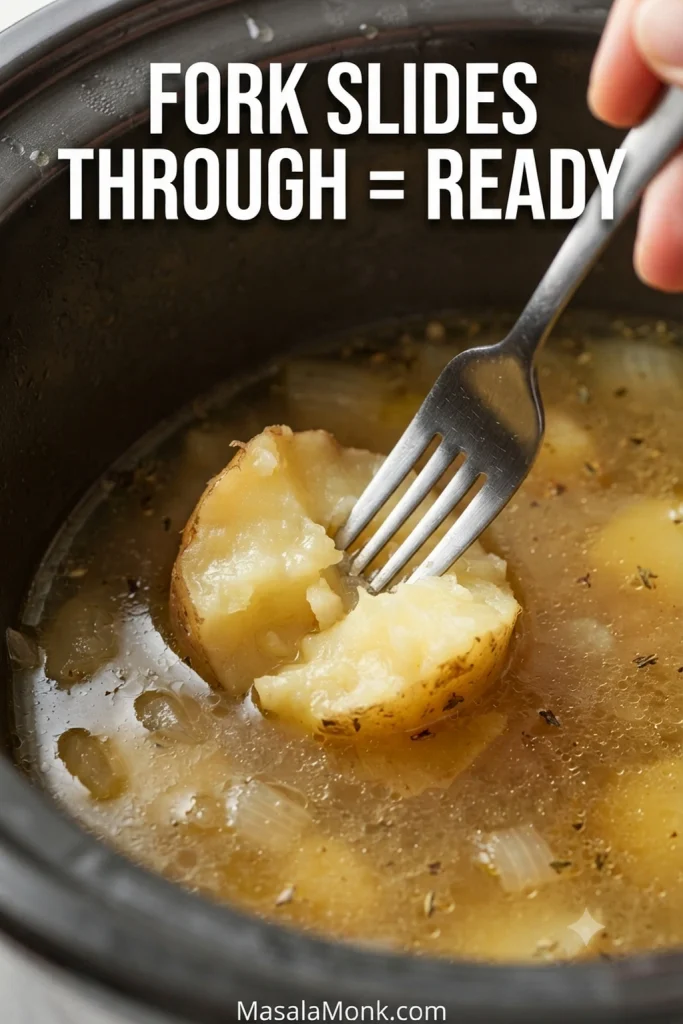
  3. Cook until the potatoes are tender. Use LOW for 6–8 hours or HIGH for 3–4 hours. Start checking at the early end of the range. A fork should slide through the center of one of the larger potato pieces without resistance.
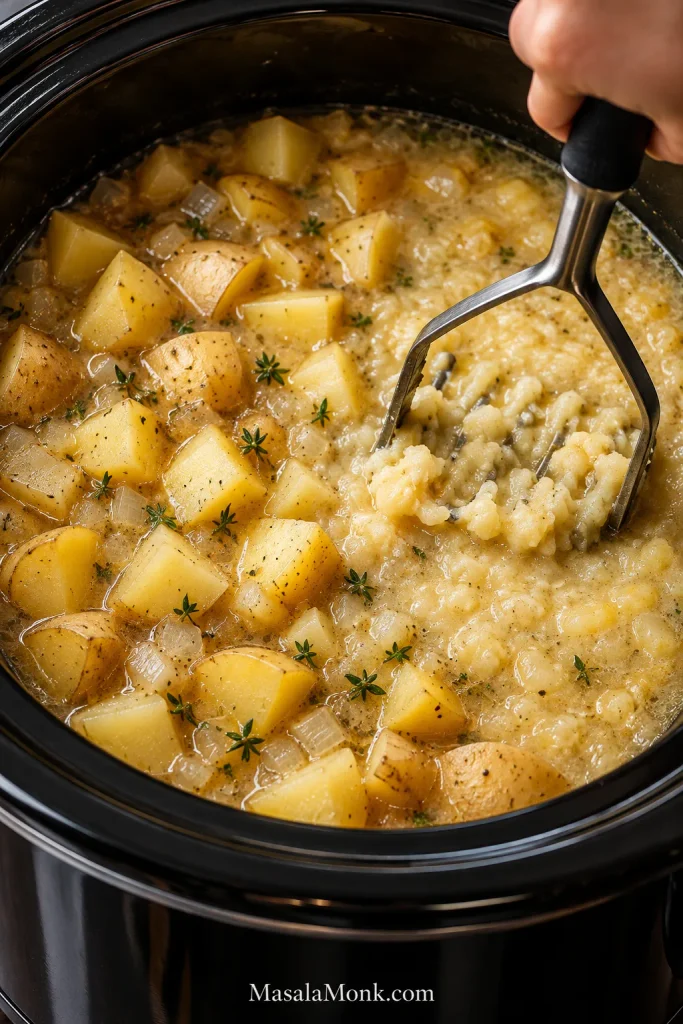
  4. Mash some of the potatoes. Use a potato masher directly in the slow cooker and mash roughly one-quarter of the potatoes. Stir well. The broth should begin to thicken while plenty of potato pieces remain intact. Mash a little more if you’d like a thicker soup.

Finish the Soup

  1. Add the cream. Stir in the heavy cream. If the slow cooker is on HIGH, switch it to LOW for the finishing stage.
  2. Melt in the cheddar. Add the cheese a handful at a time, stirring between additions. Keep the heat gentle and avoid a hard boil once the cheese is in.
  3. Finish and season. Cover and heat on LOW for about 10–15 minutes, or just until the soup is hot and the cheddar has melted smoothly. If it’s ready sooner, don’t keep heating it simply to finish the timer. Taste before adding more salt or pepper; the cheddar and bacon bring salt of their own.
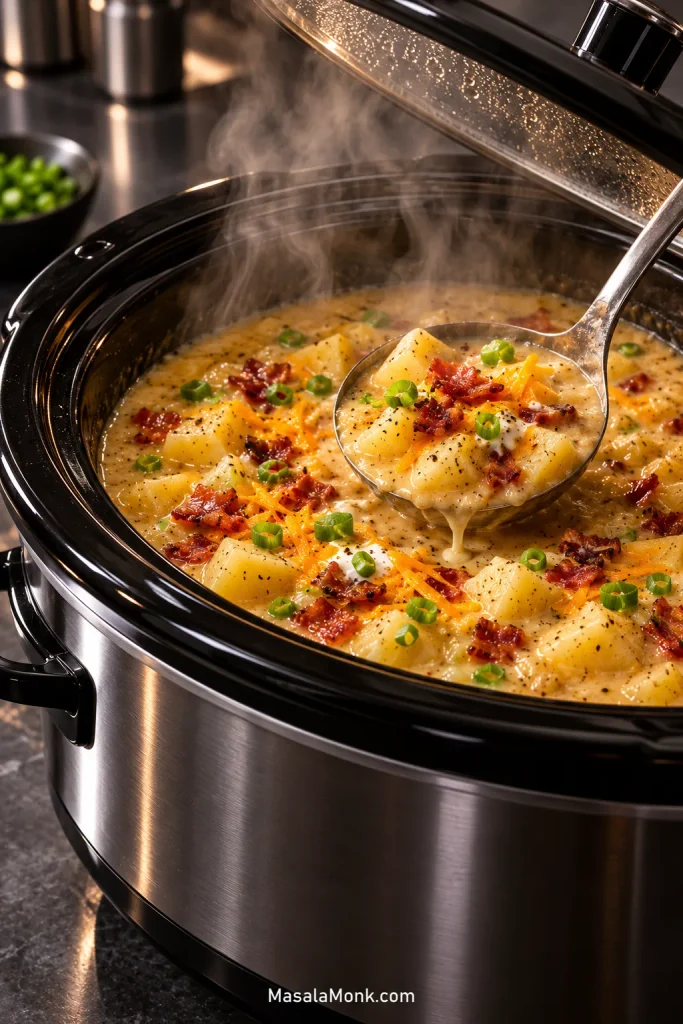
  4. Load the bowls. If you used the raw-onion route, cook the bacon until crisp while the soup finishes, then drain it on paper towels. If you cooked and chilled the bacon earlier, re-crisp it briefly before serving if you like. Ladle in the soup, then finish with bacon, cool sour cream, green onions, and extra cheddar or black pepper if desired. Try to get a little of each in a spoonful—the crisp bacon, cool sour cream, and fresh green onions are what turn the creamy potato base into a loaded baked potato in soup form.

Batch size: This recipe is written for a 6-quart slow cooker. Don’t automatically double it in the same cooker; an overfilled pot can heat differently, and the potatoes may take longer to soften.

Which Potatoes Are Best for Slow Cooker Potato Soup?

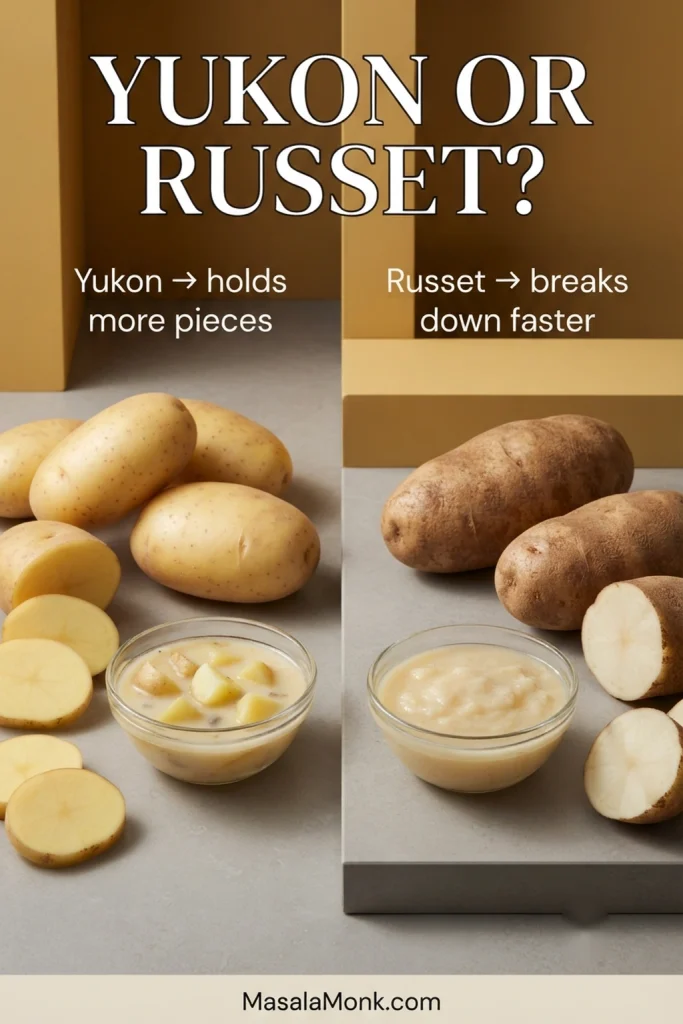
Yukon Golds are the better fit for this version because they can thicken the broth while still leaving tender, recognizable potato pieces behind. Their thin skins are another advantage: after a good scrub, peeling is optional.

Comparison graphic showing Yukon Gold and Russet potatoes with a chunkier Gold potato soup and a smoother Russet potato soup.
If you swap Russets into this recipe, assess the texture earlier: they break down faster, so the same amount of mashing can produce a much smoother potato soup than Yukon Golds.
Potato What to Expect
Yukon Gold Creamy when mashed, with tender pieces that hold their shape reasonably well.
Russet Starchier and quicker to break down, giving the soup a thicker, smoother texture.

Russets work too, but start with less mashing because they break down more readily. If you’d rather make a stovetop version with Russets, milk, and a small roux, try our classic potato soup recipe.

Ready to cook? Jump back to the recipe card.

How Long to Cook Potato Soup in a Slow Cooker

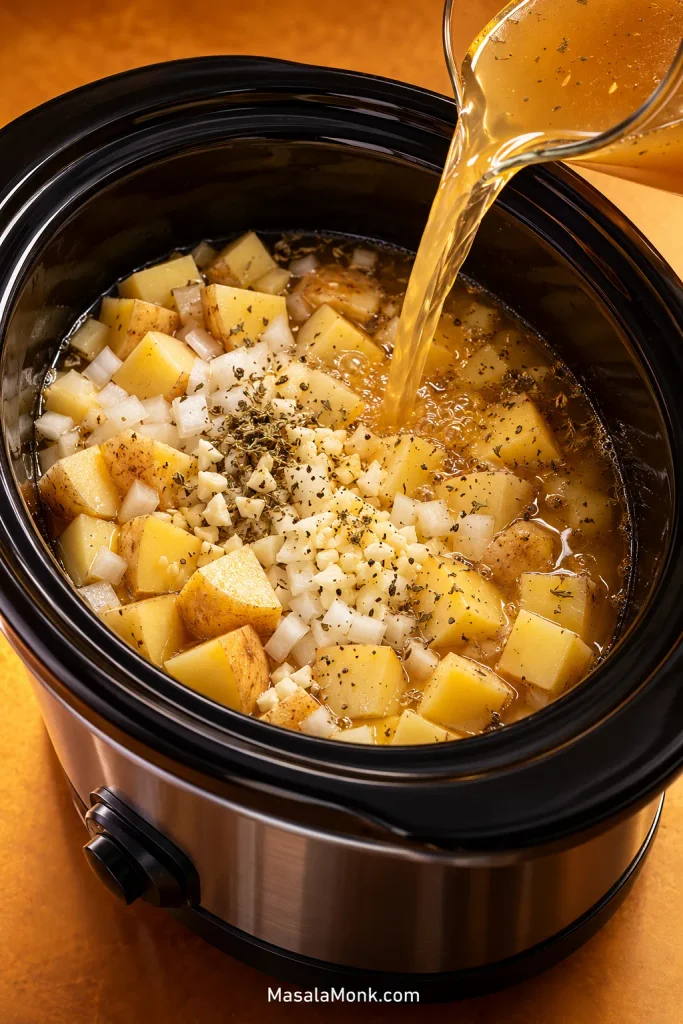
Before the clock starts, the slow cooker should contain the potatoes, onion, garlic, broth, and seasonings. Keep the cream and cheddar for the finishing stage, after the potatoes are tender and you can judge the texture properly.

Diced potatoes and onion in a slow cooker as seasoned broth is poured over them.
At the start, the pot should look simple: potatoes, aromatics, broth, and seasoning. The rich dairy finish comes later, so the long cook develops the potato base first.

For roughly ¾-inch potato pieces, plan on about 6–8 hours on LOW or 3–4 hours on HIGH. Cut size and individual slow cookers affect how quickly the potatoes soften, so start checking at the early end of the range.

Yukon Gold potato beside a knife and several skin-on potato chunks cut to about three-quarter-inch pieces.
Uniform ¾-inch pieces make the doneness test more meaningful: if one of the biggest chunks is tender, the smaller pieces are unlikely to be lagging far behind.

Once a fork slips easily through one of the larger pieces, move on with the recipe. There’s no benefit in making tender potatoes wait for the clock.

Fork pushed through a large tender potato chunk in the slow cooker, with the words “Fork slides through = ready.”
Test the biggest potato piece you can find. It gives you a better read on the whole batch than a small cube that happened to soften early.

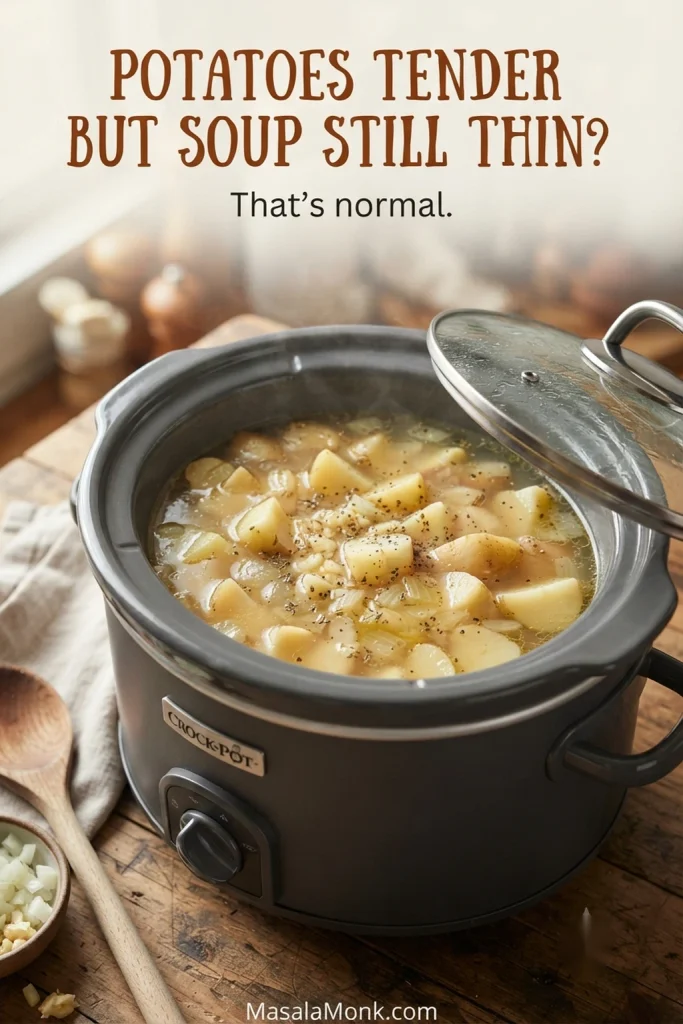
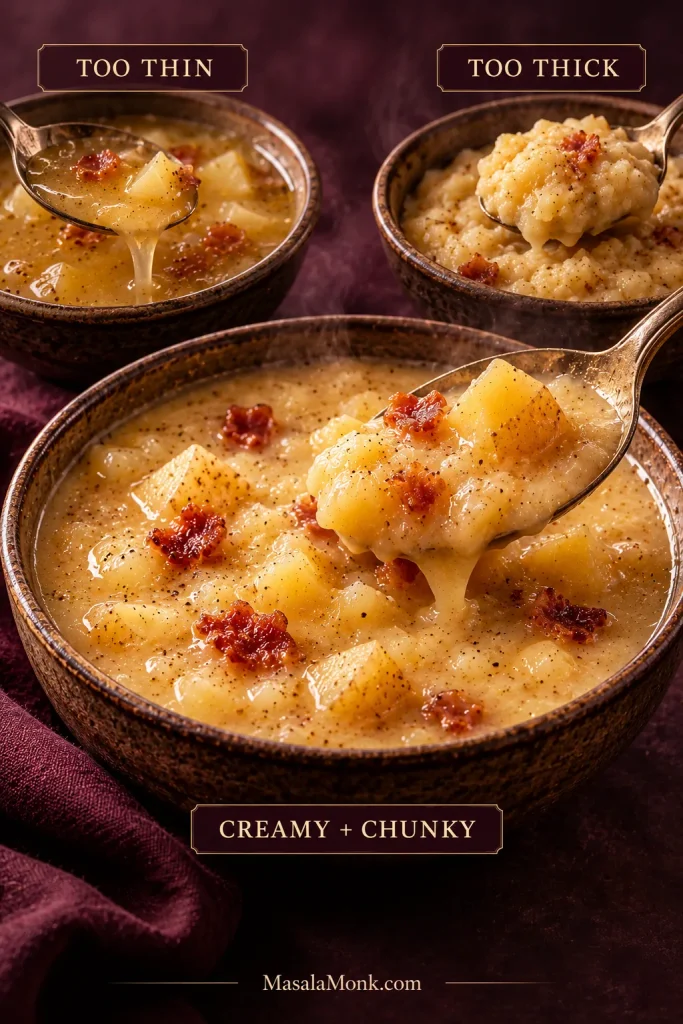
What Should Potato Soup Look Like Before You Add the Cream?

Don’t expect the soup to look thick through most of the slow cooking. Much of its body develops near the end, after the potatoes are tender and you mash some into the broth.

Tender potato chunks sitting in a loose broth inside a slow cooker, with text noting that thin soup at this stage is normal.
A loose broth here is normal. Judge thickness only after partial mashing; correcting it too early can turn an on-track slow cooker potato soup into something much thicker than intended.

After mashing, the broth should lightly coat the remaining potatoes without looking pasty. Leave plenty of tender pieces visible. The cream and cheddar will add richness at the end, so don’t keep mashing simply because the soup doesn’t yet look like the finished bowl.

Potato masher breaking down some cooked potatoes in a slow cooker while many chunks remain intact.
Mash in stages and stir between passes. You can always release more starch, but once too many potato chunks disappear, you cannot put that hearty texture back.

How to Get Creamy Potato Soup Without a Blender

A potato masher is all you need here. Stop once the broth has the body you want and enough tender potato pieces remain for your preferred texture.

Creamy potato soup with visible chunks and an inset showing the thinner soup before mashing, labeled “Creamy + Chunky.”
The target is two textures at once: broth with real body and potato pieces you can still clearly see and bite into.

For a smoother soup, transfer a portion to a tall, heat-safe container suitable for immersion blending. Keep the blender head submerged and use short pulses to reduce splashing, then return the blended soup to the slow cooker. Follow your blender manufacturer’s instructions for handling hot liquids.

Whichever method you use, judge the final consistency on a spoon rather than by how thick the surface looks in the slow cooker.

Close-up spoonful of creamy potato soup with a large potato chunk, bacon, and sliced green onion.
Use the spoon test: the broth should coat a tender potato, then flow back into the bowl rather than sit stiffly on it.

When to Add Cream and Cheese

Wait until the potatoes are tender and you’re happy with the thickness before adding the cream and cheddar. Finish on LOW for about 10–15 minutes, or just until everything is hot and the cheese has melted. If the soup is already piping hot, the cheese may melt sooner.

Cream being poured into partially mashed potato soup in a slow cooker, with shredded cheddar beside it.
The potato base should already have enough body before the dairy enters. Cream adds richness; cheddar adds flavor and fullness rather than having to rescue a thin soup.

Freshly shredded cheddar generally melts more smoothly here. Packaged shredded cheese can contain anti-caking ingredients that sometimes affect the finish, so shred the cheddar from a block if you can. Add it gradually and keep the heat gentle.

Open slow cooker filled with creamy potato soup topped with potato pieces, bacon, cheddar, and green onions.
Once the cheddar is smooth and the soup is hot, more cooking stops helping. At that point, gentle heat is for holding the soup rather than improving its texture.

If you enjoy cheesy slow-cooker soups, our slow cooker broccoli cheese soup also saves the cheesy finish for the end.

If the texture isn’t behaving the way you expected, jump to troubleshooting.

How to Fix Bland Potato Soup

Make the final seasoning decision after the cream and cheddar are in. Potatoes and cream can soften the impression of seasoning, while the broth, cheddar, and bacon can all contribute different amounts of salt.

Hand seasoning a bowl of creamy potato soup topped with potato chunks, bacon, cheddar, and sliced green onions.
If the soup tastes dull, test contrast before adding more salt: black pepper or fresh green onion can wake up a rich bowl without simply making it saltier.
  • Creamy but muted: Add a small pinch of salt, stir well, and taste again.
  • Rich but a little heavy: Try more black pepper or green onion before reaching for more cheese.
  • Still tastes flat: Put a spoonful in a small bowl and add a few drops of lemon juice or mild vinegar. You’re not trying to make the soup taste acidic; you’re checking whether a tiny bit of acidity makes the potato, cheddar, and bacon flavors taste clearer. If it helps, add a very small amount to the pot, stir, and taste again.
  • The cheddar is taking over: Stop adding cheese and reassess the salt, pepper, and fresh toppings instead.

Slow Cooker Potato Soup Troubleshooting

Start with the problem you can actually see or taste, then correct one thing at a time. Texture problems are easier to solve when you resist changing the seasoning, dairy, and thickness all at once.

Three bowls comparing thin, very thick, and creamy chunky potato soup, labeled “Too thin,” “Too thick,” and “Creamy + chunky.”
Fix texture first, then retaste. Thickening or loosening potato soup changes its concentration, so seasoning that seemed right beforehand may need another look.

The soup is too thin

Start by mashing another small scoop of tender potatoes into the broth. Stir and give the soup a moment before judging it again. This thickens the broth without sacrificing all the potato pieces.

If you’ve reached the potato texture you want and the soup is still too thin, mix 1 teaspoon cornstarch with 1 tablespoon cold water. Stir the slurry thoroughly into the hot soup and continue heating gently until the broth visibly thickens. Repeat with another small slurry only if needed; avoid a vigorous boil once the cream and cheddar are in.

If the soup is both thin and bland, fix the consistency first. Once the texture is right, taste again and adjust the flavor separately.

The soup is too thick

Stir in warm broth a splash at a time until the soup loosens to the consistency you want. Remember that it will thicken again as it cools.

The potatoes are still firm

Put the lid back on and keep cooking. Don’t add the cream and cheese just because the suggested time has passed; wait until the potatoes are fully tender.

The soup is smoother than you wanted

Stop mashing or blending. If it’s also too thick, loosen it with a little warm broth. Next time, mash a smaller portion first—you can always mash more, but you can’t put the potato chunks back.

The dairy separated or the cheese looks oily

Turn the heat down immediately and stir gently. If the soup has only started looking oily, gentle stirring may help it come back together; badly separated cheese may not become completely smooth again. Don’t try to rescue it by turning up the heat or adding more cheese.

Close-up of creamy potato soup with potato pieces, bacon, and small orange oily droplets visible on the surface.
A shiny, greasy sheen is an early warning. Lower the heat and stir gently before the cheddar separates further; more heat usually makes the problem worse.

For the next batch, add freshly shredded cheddar gradually after the potatoes are tender and keep the heat gentle while it melts.

Back to the recipe card · Back to top

Can You Use Frozen Potatoes or Hash Browns?

Yes, but the shortcut you choose changes the texture as well as the prep.

Fresh diced Yukon Gold potatoes, frozen diced potatoes, and shredded hash browns displayed side by side for comparison.
The convenience choice changes the texture too: frozen diced potatoes stay closest to fresh chunks, whereas shredded hash browns produce a smoother Crock-Pot potato soup.
  • Fresh Yukon Golds: Best when you want control over how many potato pieces stay intact and how much gets mashed into the broth; they require the most chopping.
  • Frozen diced potatoes: The closest lower-prep shortcut to the fresh-potato version. Use about the same weight as the fresh potatoes. Cooking time can vary by brand and piece size, so rely on the fork test rather than the clock.
  • Shredded hash browns: They break down much more readily, giving you a smoother shortcut-style Crock-Pot potato soup with fewer distinct potato pieces.

Can You Prep Slow Cooker Potato Soup the Night Before?

Yes. If you’d rather get the chopping done ahead, scrub, peel if desired, and cut the potatoes the night before. Keep the cut potatoes submerged in cold water in a covered container in the refrigerator, then drain them well before adding them to the slow cooker the next day. You can dice the onion ahead too; refrigerate it separately in a covered container.

Covered container of cut potatoes submerged in water being placed on a refrigerator shelf.
For make-ahead prep, treat potatoes and onions differently: the potatoes stay under cold water, while the onion stays dry and separate until cooking day.

Keep the prepped ingredients refrigerated until you’re ready to cook. This moves the knife work to the night before without changing the broth or dairy stages of the recipe.

Cooking tomorrow? Jump back to the recipe card.

Easy Potato Soup Variations

Add ham

Stir in 1 cup (about 150 g) diced cooked ham near the end, giving it enough time to heat through. Ham and cheddar both add salt, so taste the soup before seasoning further.

Use milk instead of heavy cream

Replace the ¾ cup (177 ml) heavy cream with ¾ cup (177 ml) whole milk for a lighter soup. Add it at the same finishing stage and keep the heat gentle. The soup will be less rich and may be slightly thinner.

Make the bowl more loaded

Put extra bacon, cheddar, sour cream, and green onions on the table and let everyone build the bowl they want. If that baked-potato combination is exactly what you’re after, our twice baked potato casserole turns the same idea into a bubbling side dish.

Bowl of creamy potato soup topped with bacon, cheddar, sour cream, and green onions, with a loaded baked potato in the background.
Loaded should still look like potato soup. Bacon, cheddar, sour cream, and green onion add contrast while the potato-rich broth and tender chunks remain the main event.

Prefer a smoother potato soup without the cheddar-and-bacon profile? Our potato leek soup takes the flavor in a gentler, leek-forward direction.

What to Serve With Potato Soup

A loaded bowl is substantial enough to be dinner on its own. If there’s crusty bread on the table, use it to catch the last streaks of cheddar-rich broth. A crisp salad is a good counterpoint when you want something fresh alongside all that potato, bacon, and cheese. Our Irish soda bread makes a heartier bread option for the table.

Ladle pouring creamy potato soup with visible potato chunks from a slow cooker into a serving bowl.
Keep the loaded toppings out of the slow cooker. Adding them bowl by bowl preserves the crisp bacon, cool sour cream, and fresh green onion that make each spoonful more interesting.

However you top the bowls, keep the garnishes proportional enough that the creamy potato base remains easy to spoon and the tender pieces still come through.

Spoon holding several potato chunks coated in creamy soup with bacon, cheddar, and sliced green onion.
A good spoonful should carry potato, creamy broth, and a little bacon together—a sign the soup has enough body to hold everything without becoming heavy.

How to Store and Reheat Potato Soup

Expect the soup to be thicker tomorrow than it is tonight. The potatoes continue holding onto liquid as the soup chills, so leftovers often need a splash of broth or milk when reheated.

Thick potato soup in a saucepan being loosened with liquid from a small jug, with text reading “Thicker tomorrow? Normal.”
Second-day potato soup usually needs loosening, not fixing. Warm it first, then add broth or milk gradually until the original spoonable texture returns.

Refrigerating

Refrigerate leftovers within 2 hours in shallow, covered containers and use them within 3–4 days.

Reheating

Reheat leftovers on the stovetop or in the microwave, stirring as they warm. Add a splash of broth or milk if the soup has become too thick. Reheat thoroughly to 165°F (74°C). USDA guidance also advises bringing soups to a rolling boil when reheating; on the stovetop, make that brief rather than continuing to boil the creamy soup once it is hot. For microwave reheating, stir the soup and check the temperature in several places. See the USDA’s leftovers and food safety advice for additional guidance.

Don’t use the slow cooker to slowly bring refrigerator-cold leftovers back up to temperature. Once the soup has been properly reheated, a slow cooker can keep it hot for serving; keep hot food at 140°F (60°C) or above.

Can You Freeze Potato Soup?

You can freeze this soup, but the potatoes may become softer or slightly grainy and the creamy broth may need extra stirring after thawing. Cool the soup promptly, divide it into shallow freezer-safe containers, and refrigerate or freeze it within 2 hours. If you’ll eat the leftovers within 3–4 days, refrigeration generally gives you the better texture.

Thaw frozen soup in the refrigerator when practical, then reheat it thoroughly on the stovetop or in the microwave. Stir as it warms and add a splash of broth or milk only if the consistency needs loosening.

Back to top · Jump to recipe