Posted on — Leave a comment

Beignets Recipe: Easy, Fluffy & New Orleans-Style

Plate of irregular square, puffed beignets generously covered with powdered sugar on a glossy deep-red table, with pale-golden edges visible and a cup of coffee behind them.

Hot, freshly fried beignets should be lightly golden outside, light and tender through the middle, and covered with enough powdered sugar that eating one neatly is almost beside the point. These are the square, yeast-raised beignets associated with New Orleans: simple dough, hot oil, plenty of powdered sugar, and the best texture while they are still warm.

What helps most is knowing what the dough should feel like, when it has risen enough, and how the first piece behaves in the fryer. Once those cues make sense, the whole process becomes much easier to manage.

Beignets Recipe

Fluffy New Orleans-style beignets made with a lightly enriched yeast dough, fried until golden and finished with powdered sugar.

Active prep: about 30 minutes · Same-day rise: 1–2 hours · Fry: 20–35 minutes · Same-day total: 2–3 hours

Yield
20–24 beignets

Dough
Soft & tacky

Roll
¼ in / 6 mm

Cut
2½ in / 6.4 cm

Oil Target
365°F / 185°C

Best Served
Warm

Equipment: a heavy Dutch oven or deep pot, deep-fry or candy thermometer, rolling pin, pizza cutter or sharp knife, spider or slotted spoon, and a wire rack or paper-towel-lined tray. A stand mixer is convenient but not required.

Ingredients

  • ¾ cup (180 ml) warm water, 105–110°F / 40–43°C
  • 2¼ teaspoons (7 g) active dry yeast
  • ¼ cup (50 g) granulated sugar, divided
  • ½ cup (120 ml) whole milk, lukewarm
  • 1 large egg
  • 3 tablespoons (42 g) unsalted butter, melted and slightly cooled
  • 1 teaspoon vanilla extract, optional
  • 4 cups (480 g) all-purpose flour, plus up to ¼ cup (30 g) extra if the dough genuinely needs it
  • Additional all-purpose flour, for lightly dusting the work surface
  • 1¼ teaspoons (about 7 g) fine salt
  • Fresh neutral high-heat oil, such as canola or vegetable oil, enough for a 2–3 inch / 5–7.5 cm depth
  • 1½–2 cups (180–240 g) powdered sugar

Before adding more flour: finish kneading first. Correct beignet dough is soft, elastic and a little tacky. Add extra flour only if, after full kneading, the dough is still too loose to gather and hold itself together as one soft mass, and add it 1 tablespoon at a time.

Instructions

Make and Raise the Dough

  1. Wake up the yeast. Stir the yeast and 1 teaspoon of the measured sugar into the warm water. Leave for 5–10 minutes, until the surface looks creamy or foamy. If the surface is still flat, give it up to 15 minutes; with no activity by then, replace the yeast before continuing.
  2. Mix and knead.
    Mix: add the lukewarm milk, egg, remaining sugar, melted butter and vanilla, if using. Add 4 cups (480 g) flour and the salt, then mix until no dry flour remains.
    Knead: knead for 6–8 minutes in a stand mixer on low to medium-low speed, or 8–10 minutes by hand. The dough should become smooth and elastic while keeping a little tackiness. After full kneading, add extra flour only if the dough remains too loose to gather and hold together as one soft mass, 1 tablespoon at a time.
  3. Let the dough rise.
    Same day: place the dough in a lightly greased bowl, cover and leave until expanded, puffy and about doubled, usually 1–2 hours.
    Overnight: let the covered dough stand at room temperature for 20–30 minutes, then refrigerate for 8–18 hours. In a very warm kitchen, refrigerate it sooner. The next day, well-risen dough only needs enough time to roll comfortably, often 15–30 minutes. It can still be cool. Dough that looks tight and barely risen needs more covered room-temperature time before rolling.

Shape, Fry and Finish

  1. Roll and cut. Turn the dough onto a lightly floured surface and roll evenly to ¼ inch / 6 mm thick. Cut into roughly 2½-inch / 6.4 cm squares with a pizza cutter, pastry wheel or sharp knife. Fry the irregular edge pieces too; repeatedly gathering and rerolling scraps can make them tougher. Keep the cut squares loosely covered while the oil heats. That short wait is enough here; fry them once the oil reaches temperature.
  2. Heat the oil. Pour 2–3 inches / 5–7.5 cm of oil into a deep, heavy pot, keeping the oil below about halfway up the sides. Position the thermometer tip in the oil without letting it rest on the bottom of the pot. Heat to 365°F / 185°C.
  3. Test one piece. Lower a single square gently into the oil, moving it away from you. It should rise quickly toward the surface and begin to puff within several seconds. Fry until golden, turning as needed, 2–3 minutes total. Split it open before starting the full batch. The center should be cooked and tender rather than wet or gummy.
  4. Fry in small batches. Start with 3–4 beignets at a time, leaving room for them to float and expand. Depending on the width of your pot, expect 5–8 batches. Aim for 365°F / 185°C before each batch. A temporary drop toward 350°F / 177°C when the dough goes in is normal; let the oil recover before adding more.
  5. Drain and sugar. Lift the beignets out once puffed and evenly golden. Drain for 30–60 seconds on a rack or paper towels, then sift a generous layer of powdered sugar over them while they are warm. Serve right away.

Recipe Notes

  • Flour: all-purpose flour gives the dough enough structure without pushing the center too far toward chewy. Bread flour can work too, but you do not need it for this recipe.
  • Instant yeast: use the same 7 g amount and mix it directly with the flour. The rise may move faster, so start checking the dough earlier rather than waiting for the full stated time.
  • Measuring flour: weighing is strongly preferred. If using cups, spoon the flour into the cup and level it rather than packing it down.
  • Frying oil: fresh canola or another neutral high-heat vegetable oil works well. Avoid oil previously used for onions, garlic, fish or heavily seasoned foods, since those flavors can carry into the beignets.

How Soft Should Beignet Dough Be?

Beignet dough should feel softer and tackier than a typical bread dough. After kneading, it should still gather and hold together as one elastic mass.

A little sticking to your fingers or mixer bowl is normal. The real problem is dough that remains so loose after kneading that it cannot gather and hold itself together.
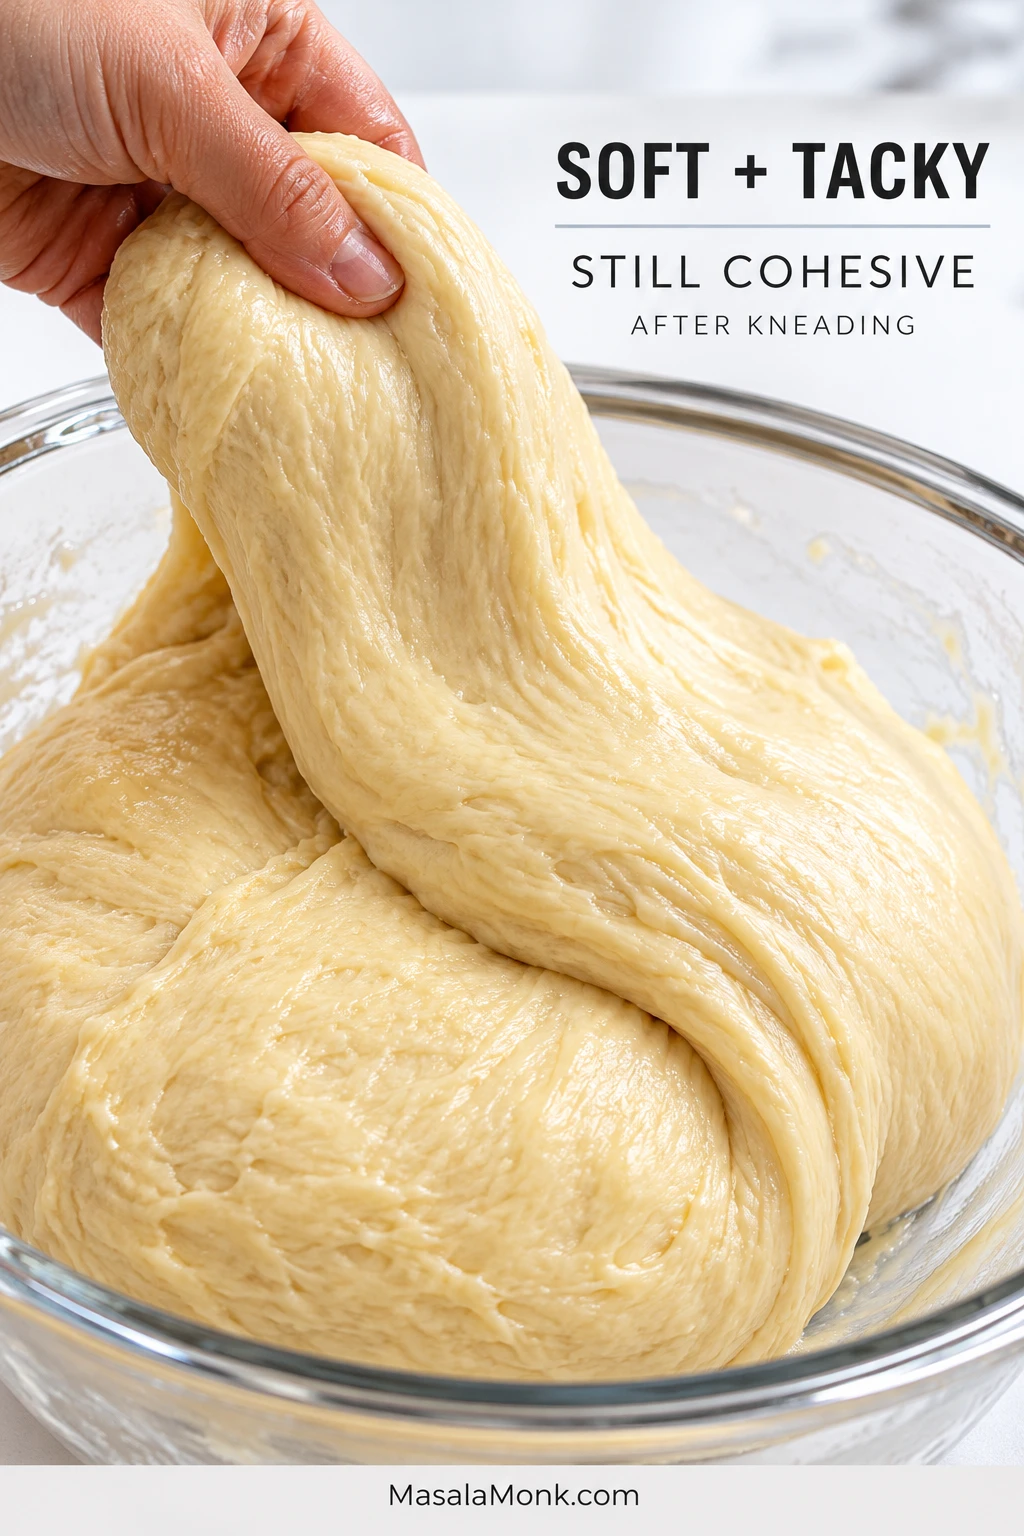
A hand lifts one broad fold of soft, moist beignet dough from a glass bowl; the dough stretches slightly while remaining one cohesive mass. Text reads “Soft + Tacky” and “Still Cohesive.”
Next, use cohesion—not cleanliness—as the test. Beignet dough can still cling lightly to your hand or bowl and be properly kneaded; what matters is that it lifts as one broad, connected fold instead of smearing or behaving like batter.
What the Dough Feels Like What It Means
Too loose to gather into a cohesive mass Finish kneading first. If it still cannot gather and hold itself together, add extra flour a tablespoon at a time.
Soft, cohesive and tacky A little sticking here is exactly what you want.
Firm, neat and very easy to handle Extra flour may have pushed it too far, which can leave the fried center denser and more bread-like.

Knowing When the Dough Is Ready

For a same-day batch, the dough is ready to roll once it has grown noticeably, looks puffy and has lost its tight, freshly kneaded feel. About doubled is a useful visual guide, though a cool kitchen may take longer.
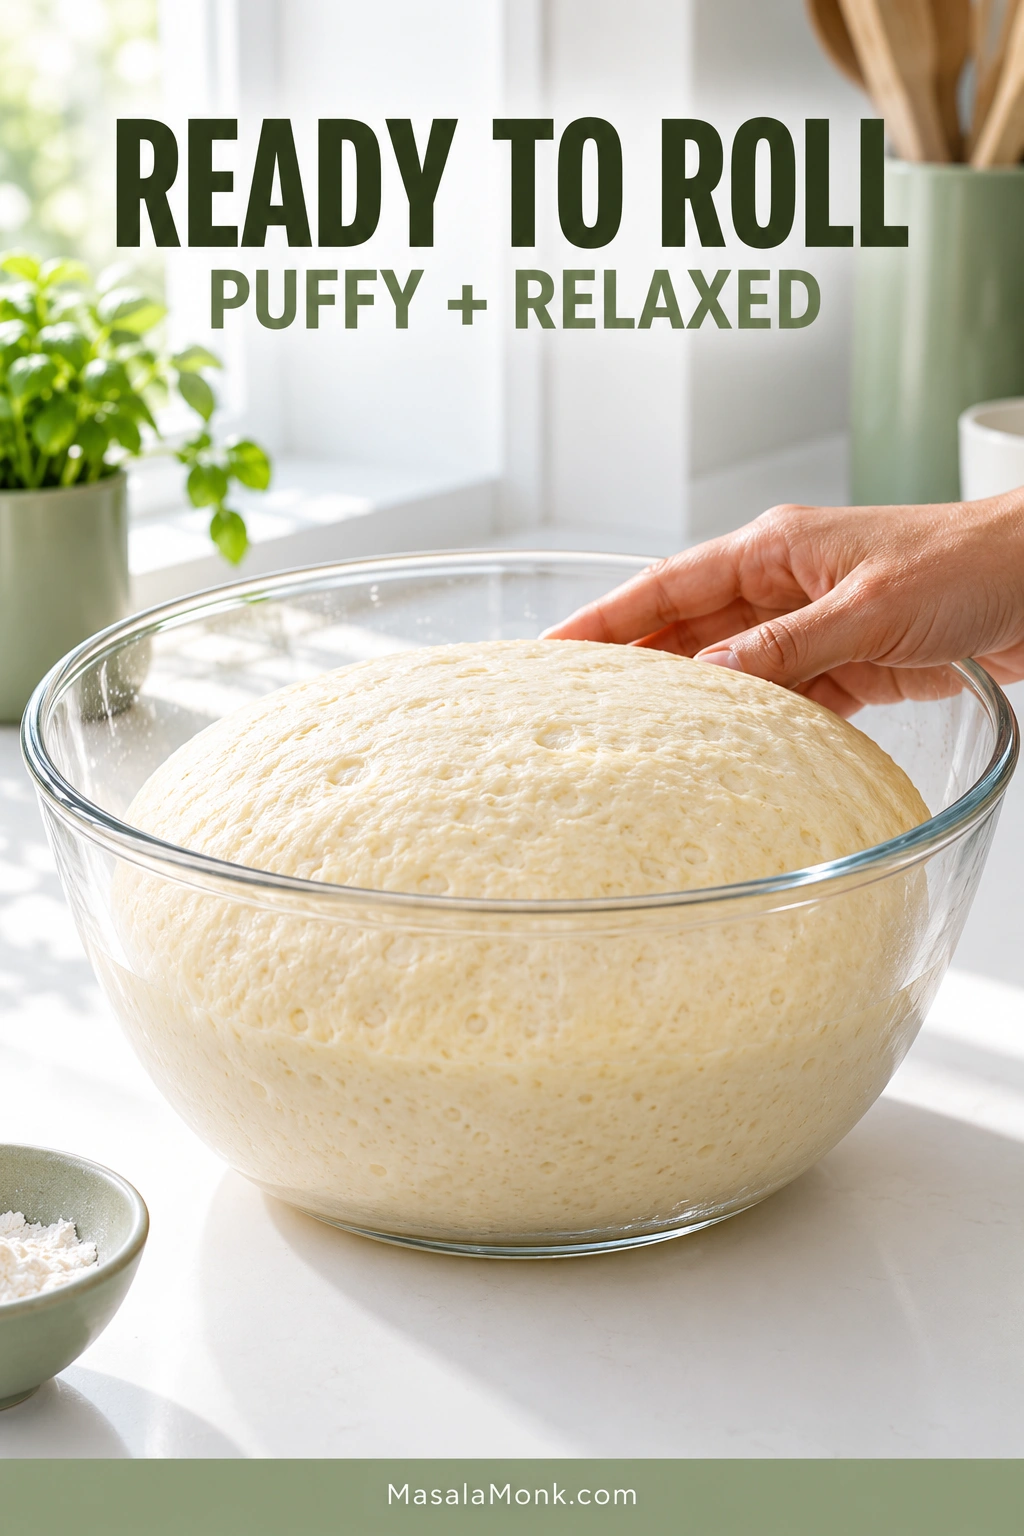
Proofed beignet dough with a gently domed, puffy surface in a clear glass bowl while a hand rests lightly beside it. Text reads “Ready to Roll” and “Puffy + Relaxed.”
As the beignet dough proofs, look for broad expansion across the whole mass rather than isolated surface bubbles. It should look noticeably fuller while still holding itself comfortably in the bowl.
  • Needs more time: little visible expansion; tight and compact.
  • Ready: expanded, puffy and no longer tight.
  • Too far: extremely swollen, fragile or beginning to weaken.

Take a look at overnight dough when it comes out of the refrigerator rather than putting it straight onto another timer. Well-expanded dough only needs to loosen enough to roll comfortably. A tight-looking dough needs more covered time at room temperature first.

By now the dough should feel noticeably lighter than it did after kneading. Roll it and you can feel the difference: it gives under the pin instead of constantly springing back.

Roll, Cut and Set Up the Fryer

Even thickness matters more than perfect corners. A ruler is not required; keep the pieces reasonably similar and they will fry at about the same rate.
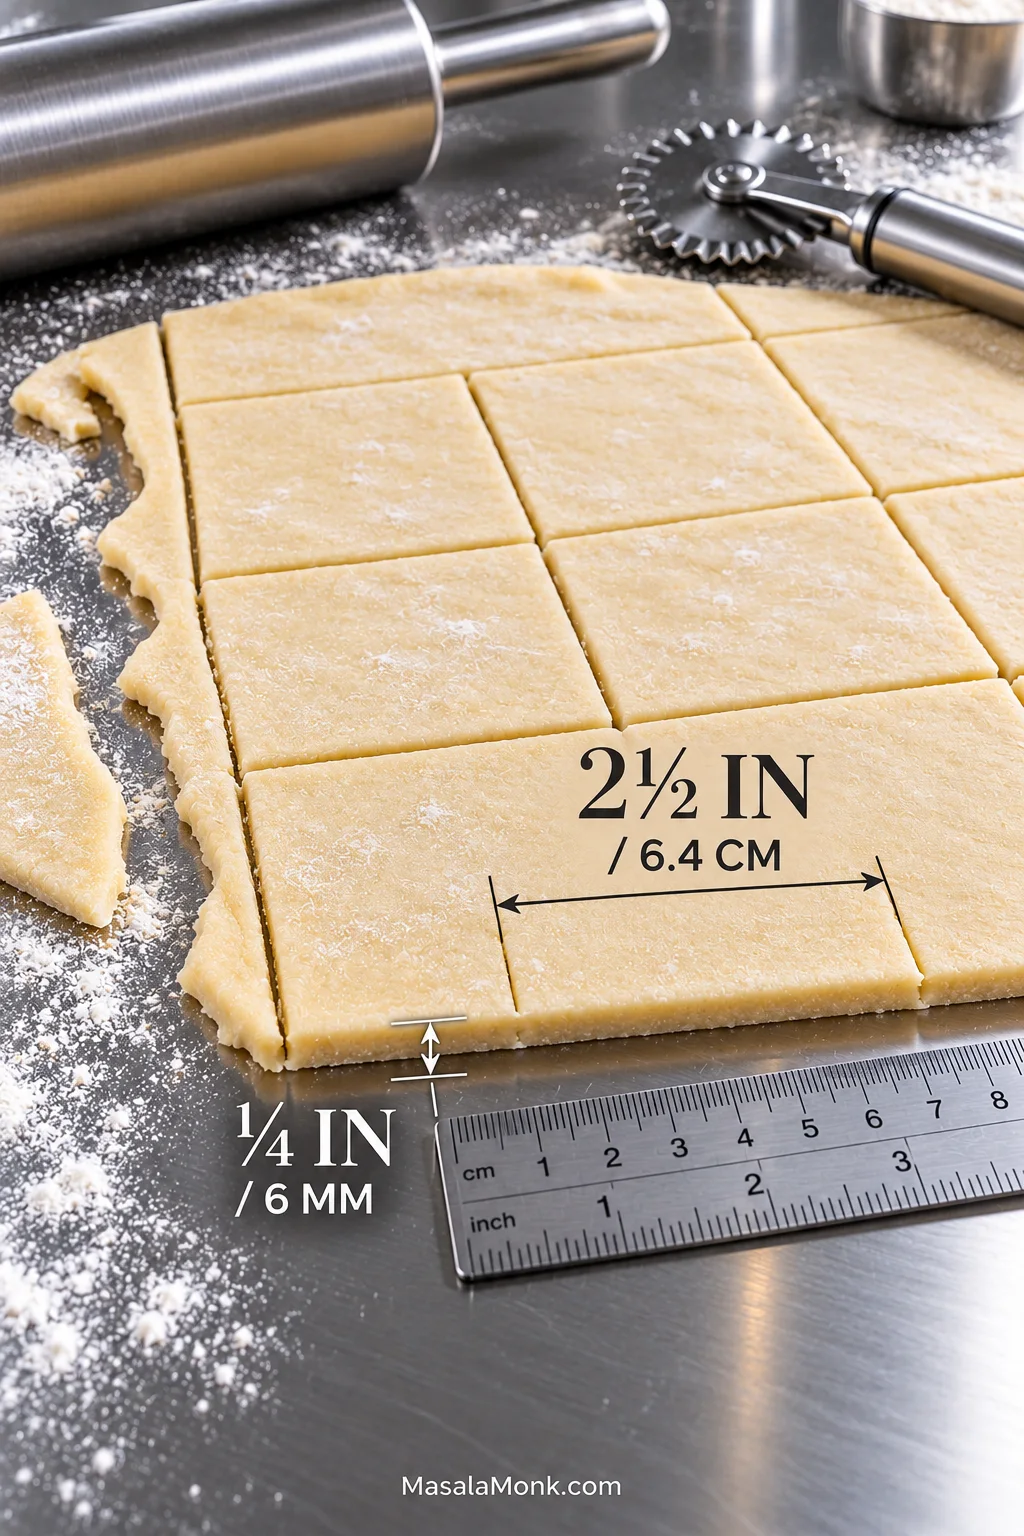
Thin sheet of beignet dough on a stainless-steel counter, cut into squares beside a ruler and pastry wheel. Measurement labels show ¼ inch (6 mm) thickness and 2½ inches (6.4 cm) width.
Then, check thickness at the exposed edge of the sheet, where it is easiest to judge. At about ¼ inch (6 mm), the dough should look distinctly flat rather than biscuit-thick before you cut roughly 2½-inch (6.4 cm) squares.

Aim for ¼ inch / 6 mm. At this thickness, the dough has room to puff without leaving such a thick center that the outside darkens first. Use only enough bench flour to prevent sticking.

Cut roughly 2½-inch / 6.4 cm squares. A pizza cutter or pastry wheel makes quick work of the dough, although a sharp knife is fine. The squares do not need perfect edges to fry well.

Set up the pot with headroom. A deep, heavy pot gives the oil room to surge and bubble when the dough goes in, while the extra mass helps the temperature recover between batches. Leave generous space above the oil rather than filling the pot high.

What Should Happen When a Beignet Hits the Oil?

The first square tells you more than the timer does. It checks the dough thickness, oil temperature and the way your particular pot and stove are behaving.

Things move quickly once the dough goes in: the square rises, its surface swells, the sharp edges soften and the pale dough begins turning gold.
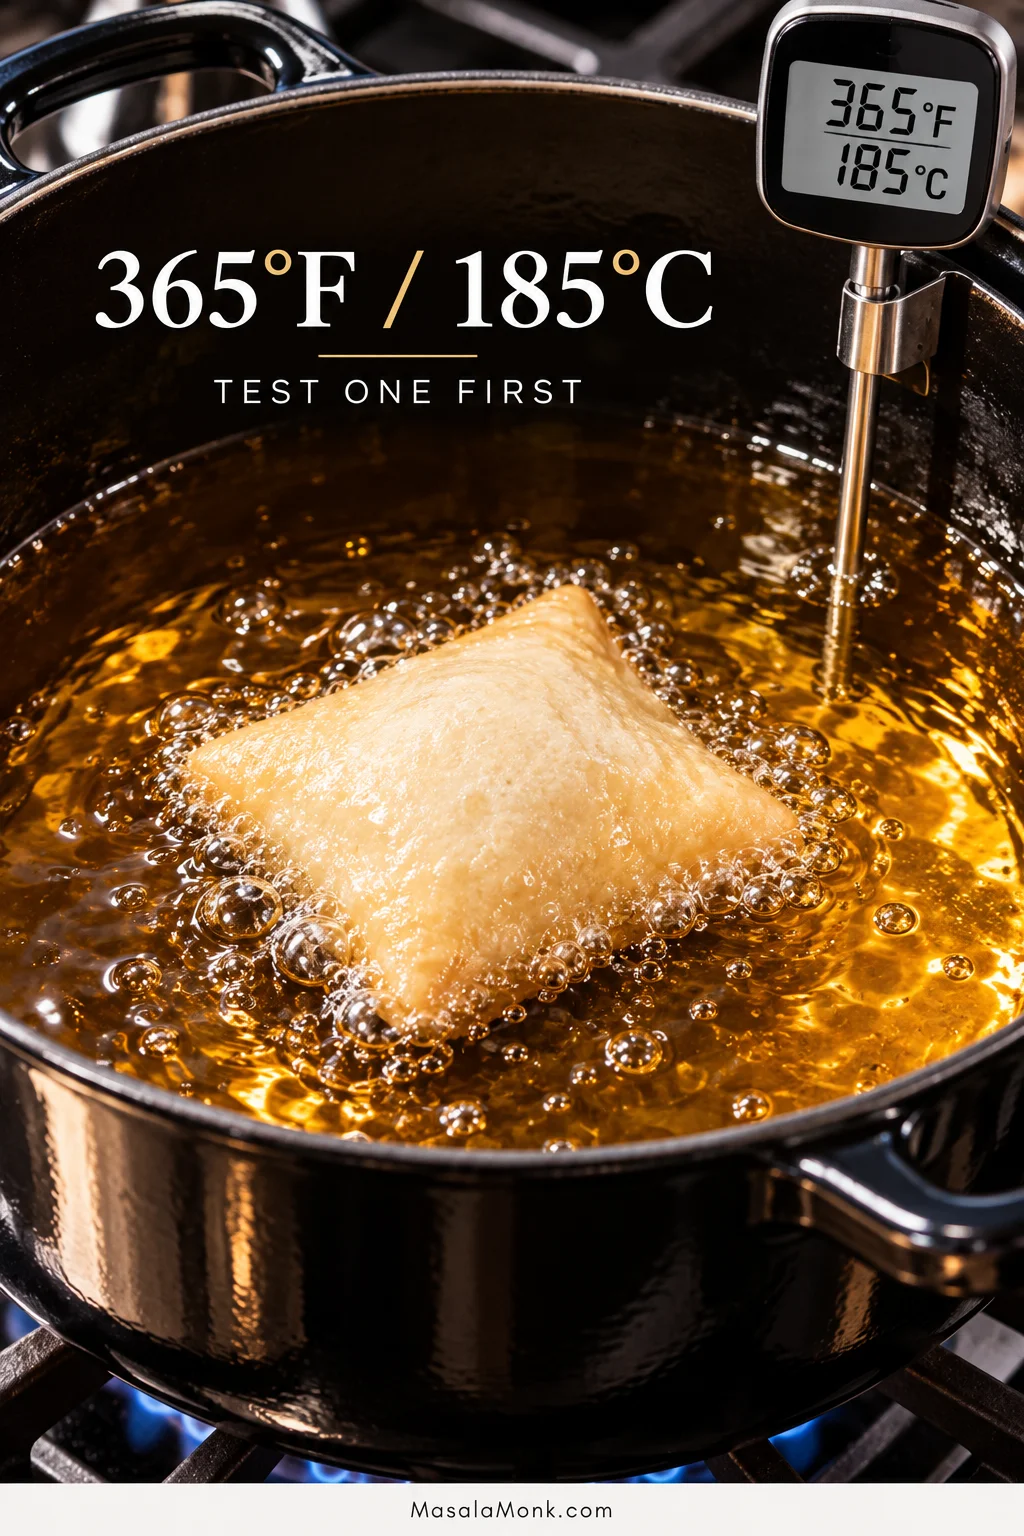
Single pale square of beignet dough beginning to puff near the surface of bubbling oil in a black pot, beside a digital thermometer displaying 365°F and 185°C. Text also reads “Test One First.”
Before adding the rest of the batch, watch the first square at 365°F (185°C). The useful clue is an early rise toward the surface while the dough is still pale; long, sluggish frying before it floats points to a fryer that needs more heat.
What You See What It Suggests
Rises quickly, floats and begins to puff Good start. Watch the color and check the center before frying the rest.
Stays low, pale and sluggish The oil is probably too cool. Let it heat back up.
Colors almost immediately The oil is too hot. Reduce the heat before the next piece.
Early batches are good; later ones turn pale or greasy The pot needs more recovery time, or too many pieces are going in at once.
Dark outside, wet inside Lower the oil temperature or check whether the dough was rolled too thick.

Cut the test piece open before committing the rest of the batch. A golden crust with a cooked, tender center means the temperature and thickness are working together; wet dough inside points toward heat that is too aggressive or a piece rolled too thick.

Once that first one is right, the rest becomes a rhythm: fry a few, let the oil recover, then go again.

If the test piece is flat, greasy or wet inside: jump to Beignet Troubleshooting →

Fluffy Doesn’t Mean Every Beignet Is Hollow

Cut open several beignets and they may not all look alike. One can have a large central pocket while the next has several smaller, irregular spaces. Neither pattern is automatically a problem.

The center should feel light and tender, with no wet or gummy band of raw dough. A tight, heavy crumb tells you more than the size of the air pocket.

Two cut-open powdered-sugar beignets showing different cooked interiors: one has a large irregular air chamber and the other has several smaller air cells. Text reads “Both Can Be Right.”
Instead of judging success by one dramatic hollow center, inspect the crumb around the air spaces. Thin, fully cooked walls can surround one large irregular chamber or several smaller cells; a dense or gummy band is the more useful warning sign.

So if the first piece balloons dramatically, taste it before trying to “fix” it. It may be exactly where it needs to be.

Beignet Troubleshooting

When a batch goes wrong, work backward. Dough consistency, fermentation, thickness and fryer temperature leave different clues.

Barely Any Rise?

No foam during the initial bloom points toward inactive yeast or overly hot water. If the yeast foamed normally but the dough has barely expanded, it probably just needs more time, especially in a cool kitchen.

Clear glass bowl of beige activated yeast mixture topped with a shallow creamy foam and clusters of small bubbles. Text reads “Yeast Ready,” “Creamy + Foamy,” and “5–10 Min.”
Before mixing the beignet dough, check for active bubbles rather than waiting for an enormous head of foam. A shallow creamy layer like this is enough to show that active dry yeast has started working; the mixture does not need to overflow.

Still extremely sticky? If the dough remains too loose to gather and hold together after full kneading, add extra flour 1 tablespoon at a time and stop as soon as it forms a soft, cohesive mass.

Dense instead of light? Dough that became firm after extra flour was added likely took on too much. A supple dough that barely expanded before rolling points instead toward a short rise. Repeatedly rerolled scraps can be tougher too.

When a good rise goes too far. Overproofed dough becomes fragile and harder to handle. Once it is well expanded and puffy, more waiting will not make the finished beignets lighter.

Flat in the fryer? With properly hot oil, flat pieces usually trace back to weak fermentation or dough rolled too thin. Extra frying time will brown them, not create the missing puff.

Greasy Beignets

Pale, greasy beignets usually mean the oil is too cool. Fry fewer pieces and give the pot time to recover before the next batch.
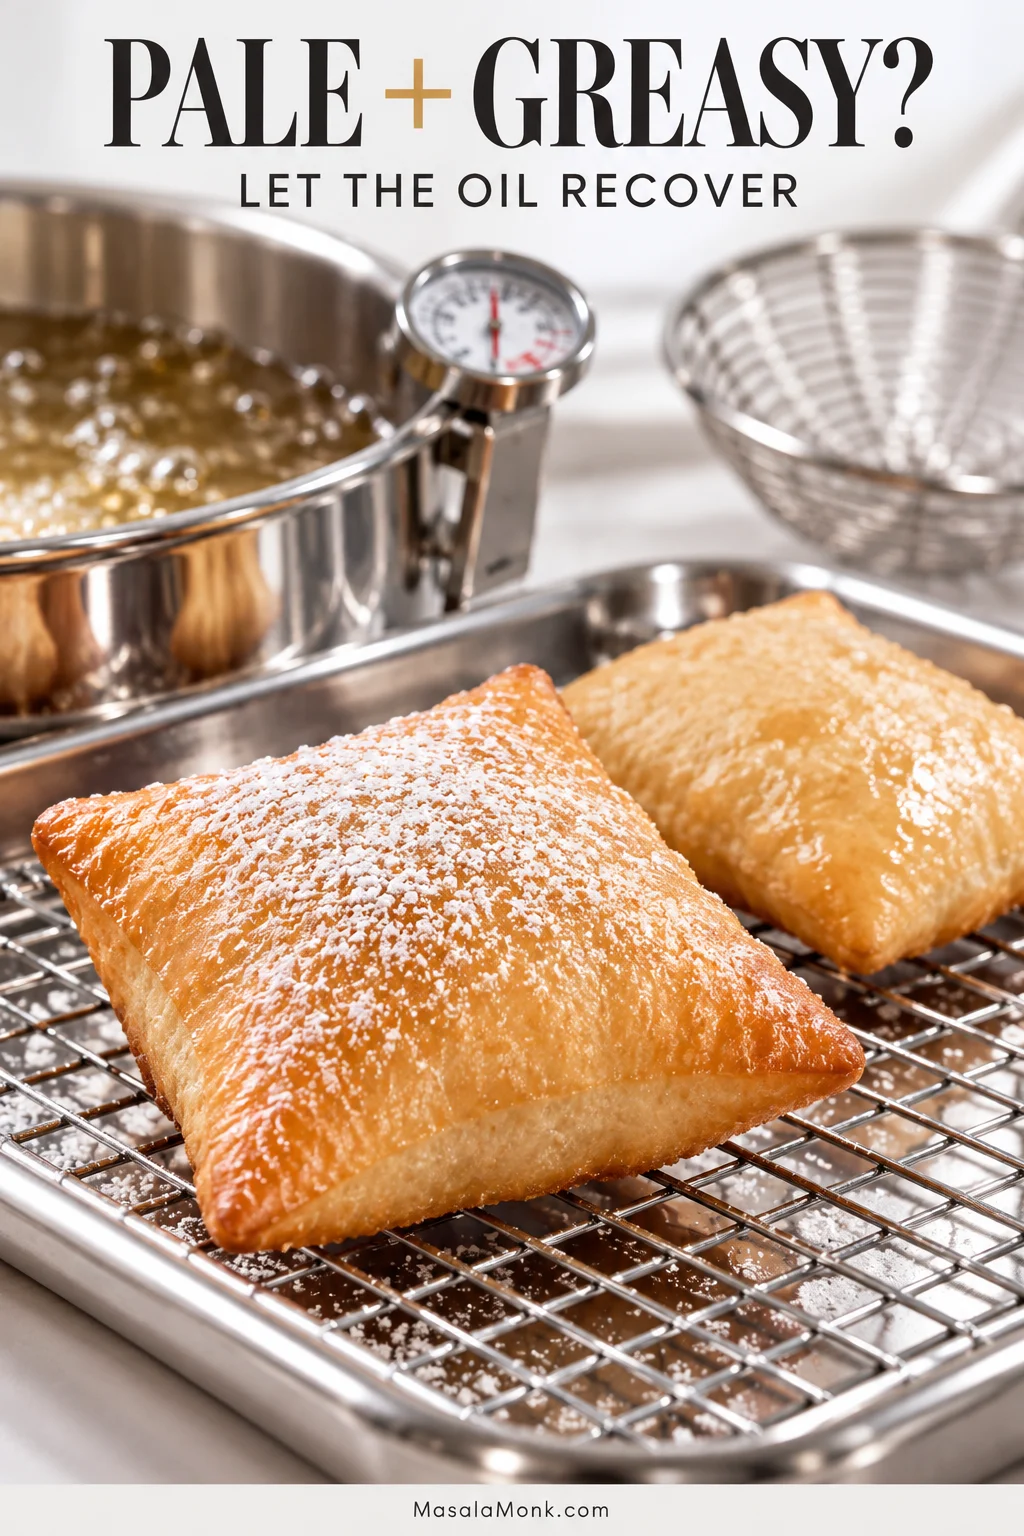
Two fried beignets on a wire rack, one golden and well puffed and the other paler and shinier, with a pot of frying oil and thermometer behind them. Text reads “Pale + Greasy?” and “Let the Oil Recover.”
If early beignets are golden but later ones turn pale and oily, that change is an important clue: the dough itself has not suddenly changed. More often, the fryer is losing heat faster than it can recover between batches.

Solved the problem? Back to the Beignets Recipe ↑

Can You Bake or Air Fry Beignets?

Baked and air-fried versions exist, but this dough is built for hot oil. Changing the cooking method usually means changing the dough too. For the puffed crust and tender center here, fry this version as written. If you would rather skip the pot of oil, our air fryer donuts use a yeast dough developed specifically for the air fryer.

Make the Dough Ahead, Not the Beignets

For the best make-ahead option, use the overnight dough route in the recipe card: refrigerate it for 8–18 hours, then check the rise, roll, cut and fry the next day. Finished beignets do not hold nearly as well.

Fresh powdered-sugar beignets in the foreground with a covered glass bowl of risen beignet dough on a refrigerator shelf behind them. Text reads “Make the Dough Ahead” and “Fry Fresh.”
For make-ahead beignets, cold dough does not automatically need a long warm-up. If it has already expanded well in the refrigerator, let it soften only until it rolls comfortably; dough that still feels tight can have more covered room-temperature time.

Let leftover beignets cool completely before covering them and keep them at room temperature until the next day. An oven, toaster oven or air fryer can bring back warmth and some surface crispness; a microwave mostly makes them softer. Add fresh powdered sugar after reheating. You can recover some of the texture, but not the exact contrast of a beignet eaten minutes after frying.

Making the beignets now? Back to the recipe card ↑

What Makes These New Orleans-Style Beignets?

In this recipe, the square shape, yeast-raised dough and generous powdered-sugar finish give the beignets their familiar New Orleans-style character. The word beignet itself is broader, but in Louisiana this particular version became closely tied to New Orleans. 64 Parishes traces that history through the city’s French foodways.

Beignets vs Donuts

Beignets and yeast donuts share plenty of family resemblance, but New Orleans-style beignets are usually cut into squares rather than rings and finished with a heavy coating of powdered sugar. The dough itself does not need to be very sweet; much of the sweetness arrives after frying.

What About Café du Monde?

If Café du Monde is your reference point, expect the same broad New Orleans style—square, puffed and heavily sugared—not an exact copy of its mix.

Café du Monde’s own beignet tips emphasize soft dough, properly hot oil and small batches. Its mix is different from this yeast dough, but those frying habits work just as well in a home kitchen.

Recipe note: This recipe is based on established yeast-raised New Orleans-style beignet methods and has not been independently kitchen-tested by MasalaMonk. Flour absorption, dough temperature, proofing speed and fryer behavior vary, so use the dough, rise and first-piece cues alongside the measurements.

Serve Them While They’re Hot

A warm pile of beignets needs very little beyond powdered sugar and coffee. Café au lait is the classic companion.

Two hands hold separate halves of a freshly torn powdered-sugar beignet, revealing an airy cooked center, with more beignets, café au lait and a green-and-terracotta café setting behind them.
Finally, café au lait’s roasted bitterness cuts through the generous powdered-sugar finish, which is why the classic New Orleans pairing feels balanced rather than simply sweeter.

The first plate is worth eating exactly as it is. Tear one open while it is still warm and accept that powdered sugar is going to end up on the table.
Back to the Beignets Recipe ↑ · Back to top ↑

Posted on — Leave a comment

Gumbo Recipe: Rich, Hearty & Full of Flavor

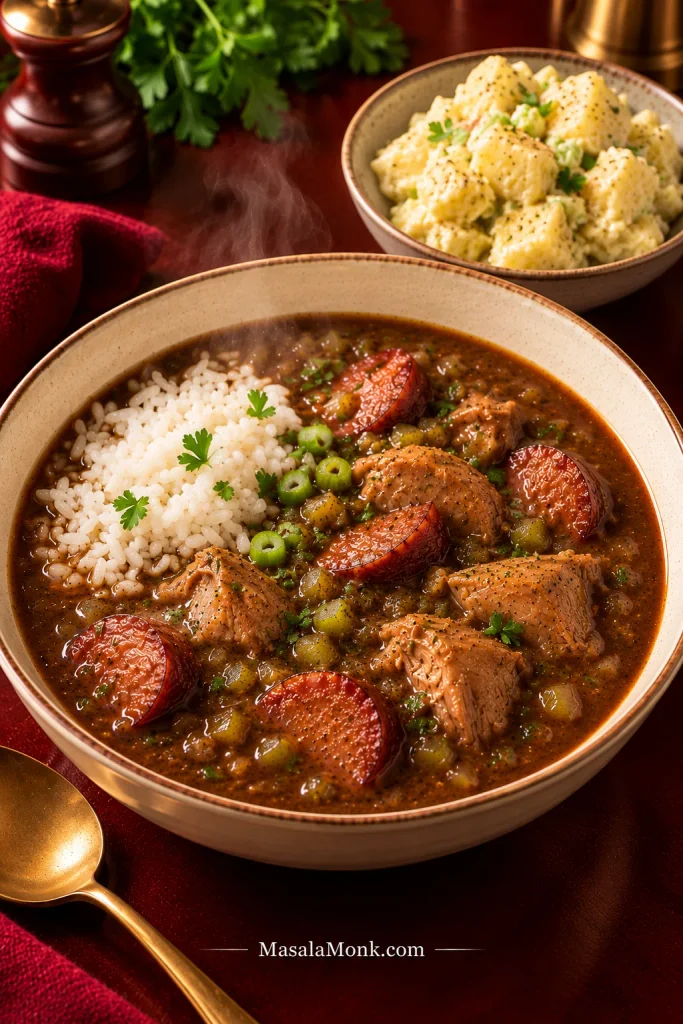
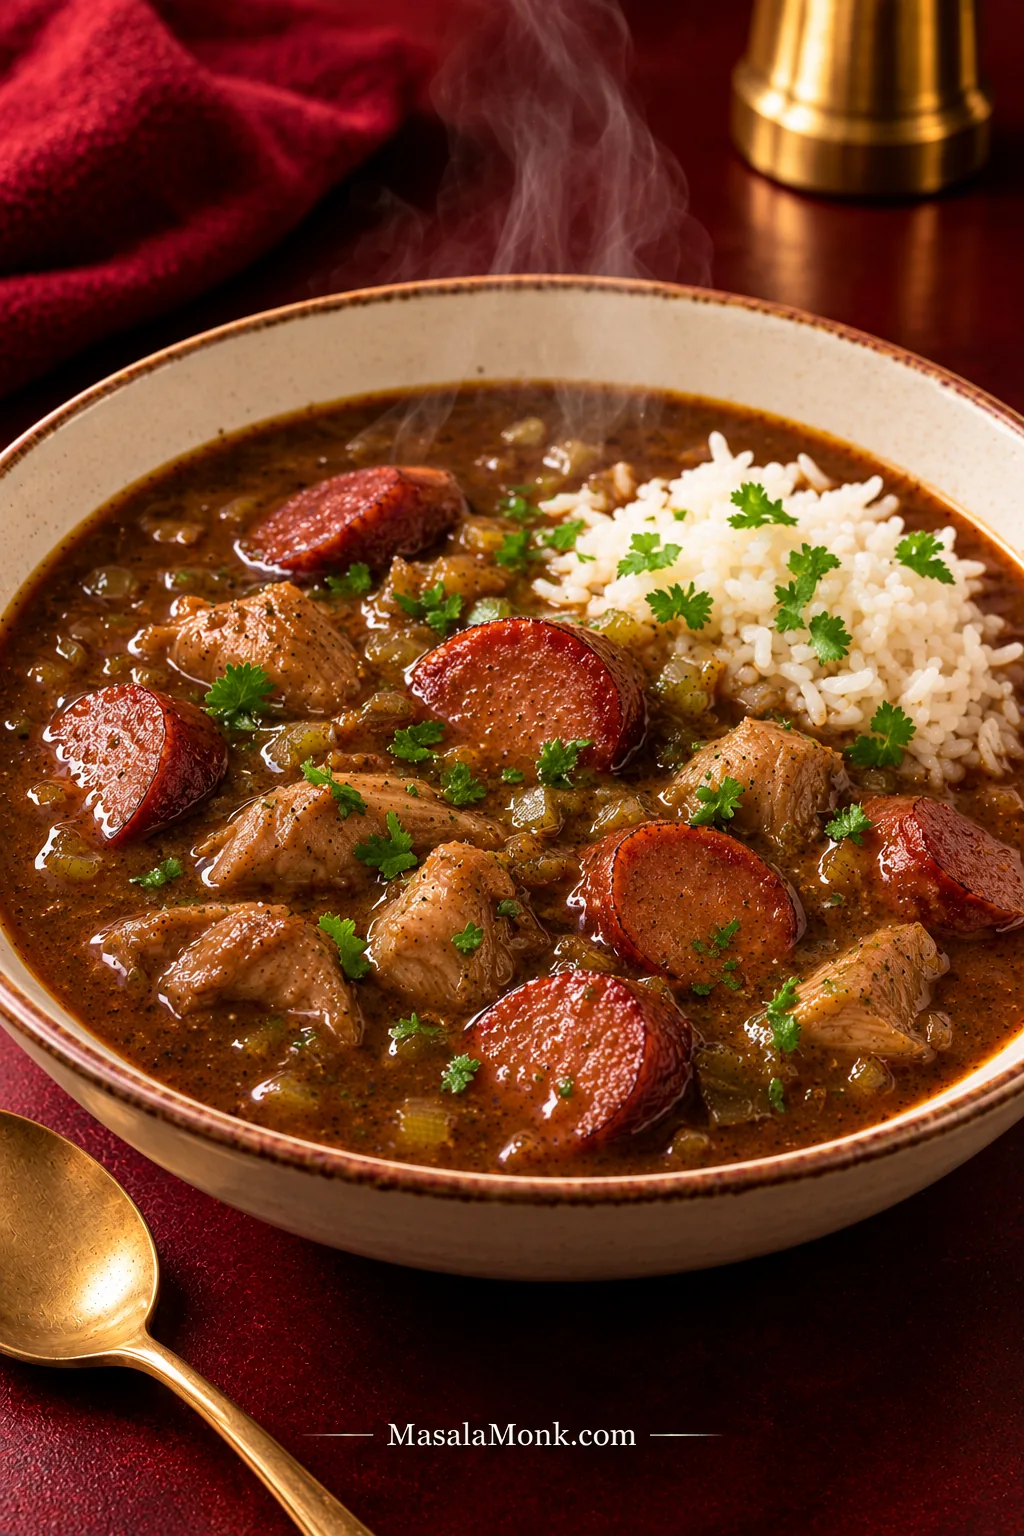
Bowl of dark chicken and andouille gumbo with tender chicken pieces, sliced smoked sausage, white rice, scallions and parsley.

A really good gumbo smells deeply toasted before you even taste it, with dark roux, browned andouille, onion, celery and green bell pepper rising in the steam. The broth should cling lightly to the chicken and sausage, then slip easily around the rice, with tender chicken and andouille that keeps some bite.

This gumbo recipe is a Cajun-leaning chicken and andouille version built around a deep brown roux, onion, celery, green bell pepper and chicken stock. It stays tomato-free, while okra and filé powder remain optional.

If the roux is the part that makes you nervous, remember one thing: use the clock to plan, but let the roux tell you when it is ready. Watch the color. Smell the change from raw flour to deeply toasted flour. And once it gets properly brown, stay with the pot.

Before You Start the Roux

A 6- to 8-quart (5.7- to 7.6-liter) heavy-bottomed pot gives you enough room to stir safely. A light-colored interior also makes the roux easier to read as it darkens.

One safety point matters: dark roux is extremely hot. When the vegetables go in, they can spit and steam hard, so use a long spoon or spatula and keep your face and hands back from the pot.

Gumbo Recipe: Rich, Hearty & Full of Flavor

A dark-roux chicken and andouille gumbo with tender thighs, browned sausage and a rich broth that stays silky and flowing.

Servings
8

Prep Time
30 minutes

Cook Time
About 2 hours 15 minutes

Rest Time
10 minutes

Total Time
About 2 hours 55 minutes

Most of the hands-on work is front-loaded. Once the gumbo reaches a gentle simmer, the pace slows considerably.

Equipment

  • 6- to 8-quart (5.7- to 7.6-liter) heavy-bottomed Dutch oven or pot
  • Flat-edged wooden spoon or heat-resistant spatula
  • Whisk
  • Ladle

Ingredients

Chicken and andouille

  • 1 lb (454 g) andouille sausage, cut into roughly ½-inch (1.25-cm) rounds or half-moons
  • 1½ lb (680 g) boneless, skinless chicken thighs, cut into roughly 1½-inch (4-cm) pieces
  • ¾ tsp (about 4 g) fine sea salt, divided, plus more if needed
  • 1 tsp freshly ground black pepper, divided

Dark roux

  • ¾ cup (90 g) all-purpose flour
  • ¾ cup (180 ml) neutral high-heat oil, such as avocado, canola, peanut or vegetable oil

Trinity and aromatics

  • 1 large yellow onion, diced — about 10 oz (280–300 g)
  • 1 large green bell pepper, diced — about 6 oz (170–180 g)
  • 3 celery ribs, diced — about 5 to 6 oz (150–170 g)
  • 5 garlic cloves, finely minced — about 20 g

Broth and seasoning

  • 6 cups (1.42 L) low-sodium chicken stock, warmed
  • Up to 1 additional cup (240 ml) warm chicken stock, kept in reserve
  • 1 tsp sweet paprika
  • 1 tsp dried thyme
  • ¼ tsp cayenne pepper, or up to ½ tsp for more heat
  • 2 bay leaves
  • 1 tbsp (15 ml) Worcestershire sauce

To finish and serve

  • 4 scallions, thinly sliced
  • ¼ cup (15 g) chopped flat-leaf parsley
  • Hot sauce, to taste
  • 3 to 4 cups cooked long-grain white rice
  • Filé powder, optional, for finishing or serving

Instructions

Prepare and Brown the Andouille

  1. Prepare everything first. Dice the onion, bell pepper and celery, mince the garlic, and slice the sausage. Measure the flour, oil, stock and seasonings. Cut the chicken into roughly 1½-inch (4-cm) pieces and return it to the refrigerator until Step 8. Keep the onion, bell pepper and celery beside the stove and the stock warm.
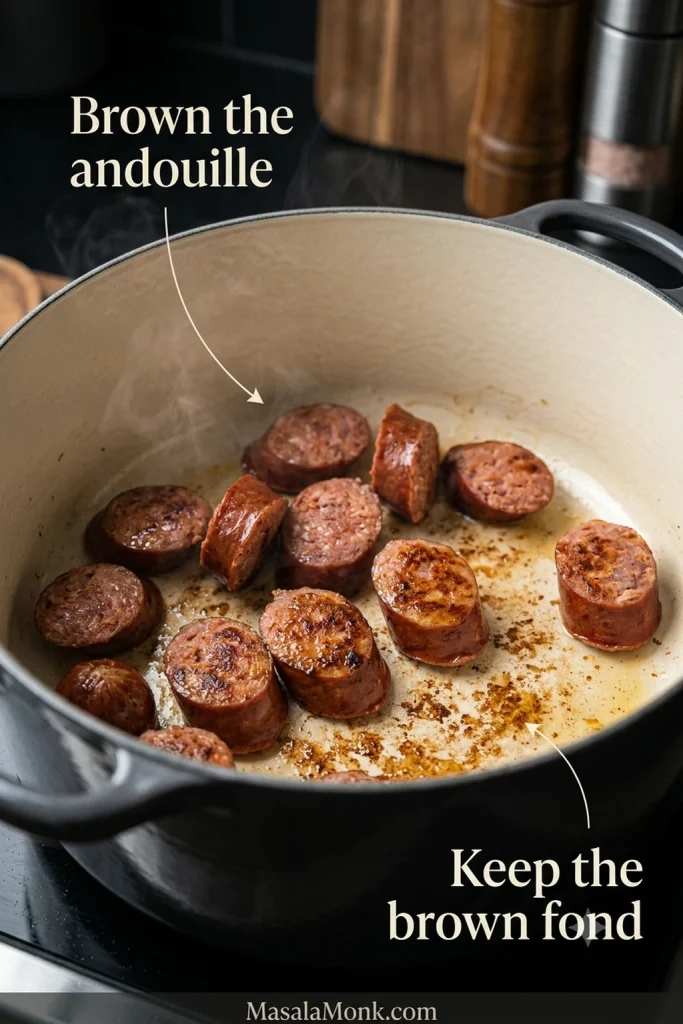
  2. Brown the andouille. Heat the pot over medium heat. Add the sausage and cook for 5 to 7 minutes, turning occasionally, until the cut faces develop deep brown patches and some fat renders out. Transfer the sausage to a bowl.
Andouille sausage browning in a light enameled Dutch oven with rendered fat and caramelized brown fond on the bottom.
Here is an easy way to tell fond from excess fat: the flavorful brown fond stays stuck to the pot, while rendered sausage fat pools and moves. Keep the browned residue for flavor, but drain the loose fat before making the roux.
  1. Drain the excess fat. Pour or spoon off the loose rendered fat. Leave light-to-medium brown fond if it is not scorched, but wipe away anything very dark or black. Add the measured ¾ cup (180 ml) neutral oil for the roux.

Make the Dark Roux

  1. Make the roux. Keep the heat at medium and gradually stir in the flour until smooth. During the pale stages, stir very frequently and keep scraping the entire bottom of the pot. Once the roux reaches peanut-butter brown, stay with it and stir continuously as it passes through copper and milk chocolate toward deep chocolate. This may take roughly 30 to 45 minutes on a moderate burner. For a visual comparison, see the dark roux stages. Color and aroma decide when it is ready. If it smells sharply scorched or develops burnt black flecks, start again.
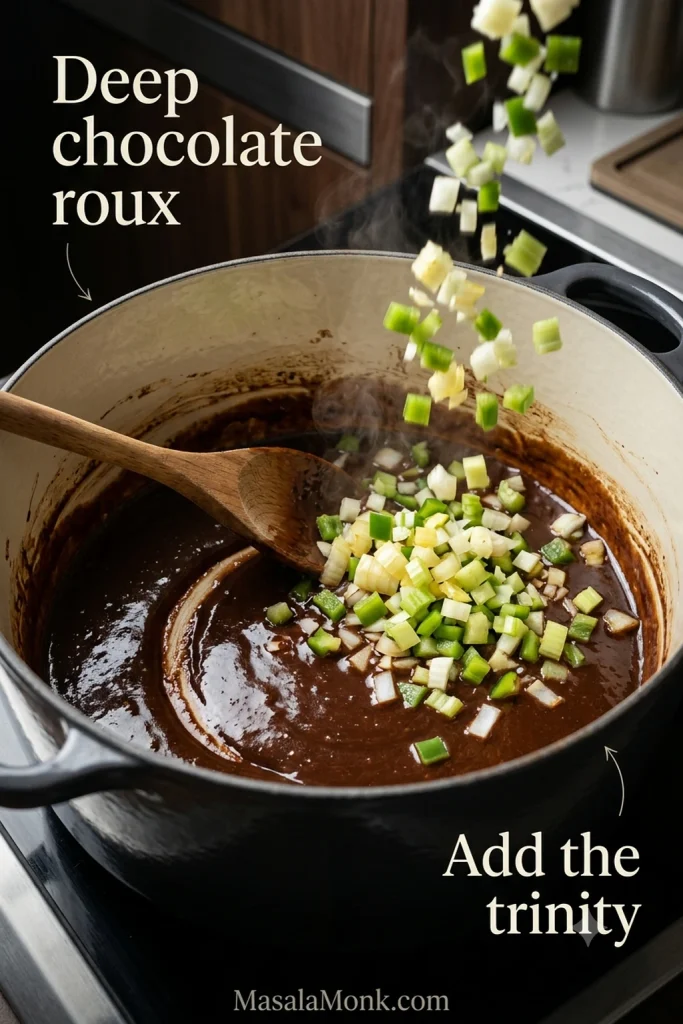
  2. Add the trinity. As soon as the roux reaches deep chocolate, carefully stir in the onion, green bell pepper and celery, keeping your hands and face back from the pot. The vegetables will hiss and steam, and the smell changes almost immediately from toasted flour to onion, pepper and celery. Cook for 6 to 8 minutes, stirring frequently, until the onion looks glossy and softened around the edges. The celery and pepper do not need to disappear. Add the garlic and cook for another 30 to 60 seconds. Once the vegetables are in, the most nerve-racking part is behind you.
Diced onion, green bell pepper and celery being stirred into glossy deep chocolate-brown roux in a light enameled Dutch oven.
The roux may appear lighter as soon as the trinity goes in because the vegetables release moisture and cool the mixture. That change is normal, so once the roux has reached deep chocolate, do not try to cook it back to the same darkness.

Loosen the Roux and Build the Broth

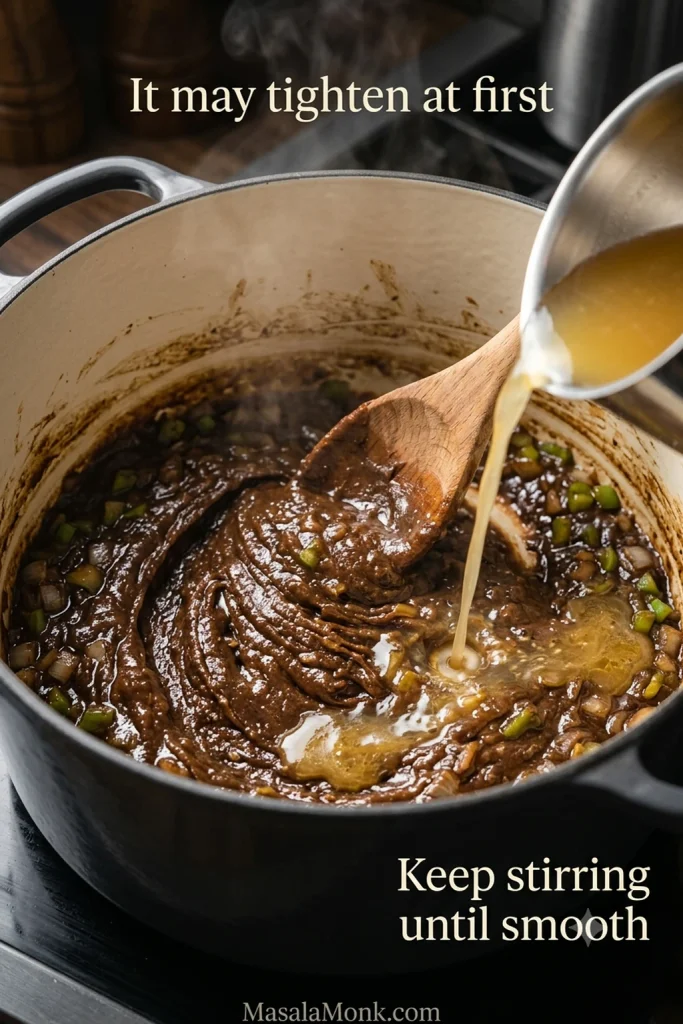
  1. Loosen the roux. Carefully add about 1 cup (240 ml) warm stock. The roux may tighten into a very thick paste at first; that is normal. Keep stirring or whisking until completely smooth. Add a second cup of stock and smooth it out again before moving on.
Chicken stock being poured into thick dark roux and softened vegetables while a wooden spoon stirs the mixture smooth.
At the first stock addition, look for a smooth, shiny paste rather than a thin broth. The important checkpoint is that the gumbo roux becomes cohesive and lump-free before you add more liquid.
  1. Build the broth. Stir in the paprika, thyme, cayenne, Worcestershire sauce and bay leaves. Gradually add the remaining 4 cups (950 ml) of the starting stock. Keep the additional 1 cup (240 ml) of stock aside for later adjustments. Once the stock is smooth, the pot becomes much more forgiving.

Simmer and Check the Consistency

  1. Add the chicken and sausage. Take the chicken from the refrigerator and season it with ¼ teaspoon of the measured salt and ½ teaspoon black pepper. Add it to the hot broth along with the browned andouille and any juices collected in the sausage bowl. Bring the gumbo to a simmer, then lower the heat until the surface bubbles gently.
  2. Simmer. Cook uncovered for 60 to 75 minutes, stirring occasionally and scraping the bottom of the pot. Skim away any obvious pool of excess surface fat. The chicken should become very tender; some pieces may soften and break slightly around the edges. As the gumbo cooks, the broth should become rounder and more integrated, rather than tasting separately of stock, roux and seasoning. If you use a thermometer, the thickest chicken pieces should reach at least 165°F (74°C).
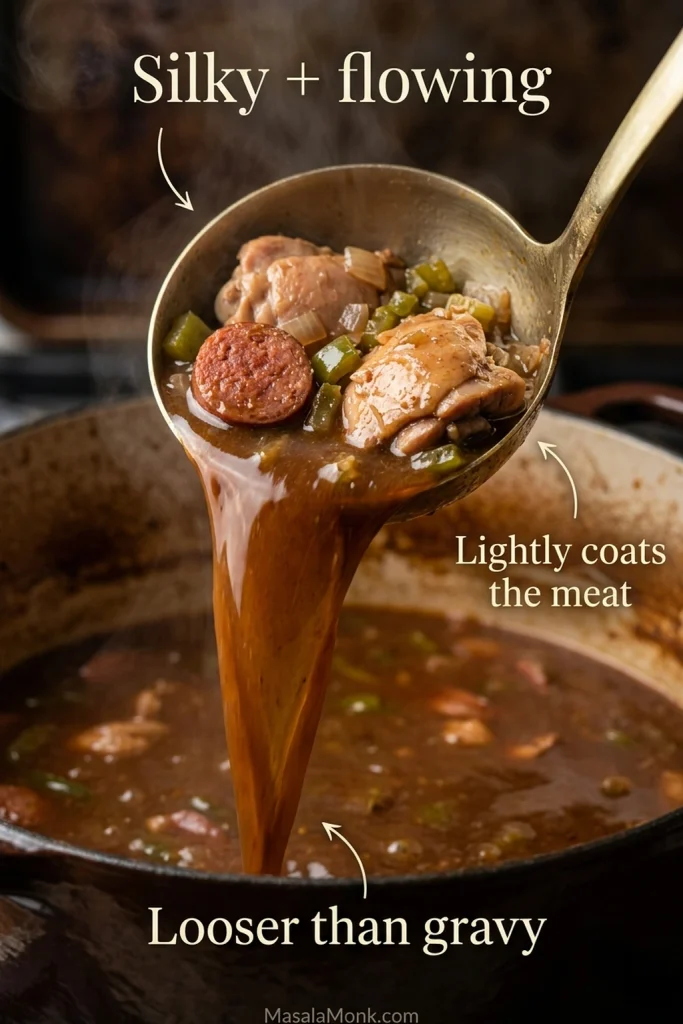
  3. Check the consistency. The broth should lightly coat the meat but still move freely from the ladle. When the gumbo is too thick, add reserved warm stock ¼ cup (60 ml) at a time. If it still seems thin, give it another 10 to 15 minutes uncovered before changing anything else. Do not worry if it looks looser than gravy; a dark-roux gumbo should still flow. The gumbo consistency guide shows the finished texture to aim for.

Finish and Serve

  1. Finish the seasoning. Remove the bay leaves. Add some or all of the remaining ½ teaspoon salt and ½ teaspoon black pepper, tasting between additions. Before reaching for more cayenne, taste for roasted depth from the roux, smoke from the sausage and enough salt to make both come through. A salty andouille may mean you need very little extra salt. Add more cayenne or hot sauce only if you want more heat. Stir in the scallions and parsley.
  2. Rest and serve. Let the gumbo stand for 10 minutes, then skim any last obvious excess fat. Ladle it into bowls with roughly ⅓ to ½ cup cooked white rice per serving. If you need the rice method too, use our guide to cook fluffy long-grain white rice. Offer hot sauce and filé powder at the table if you like.
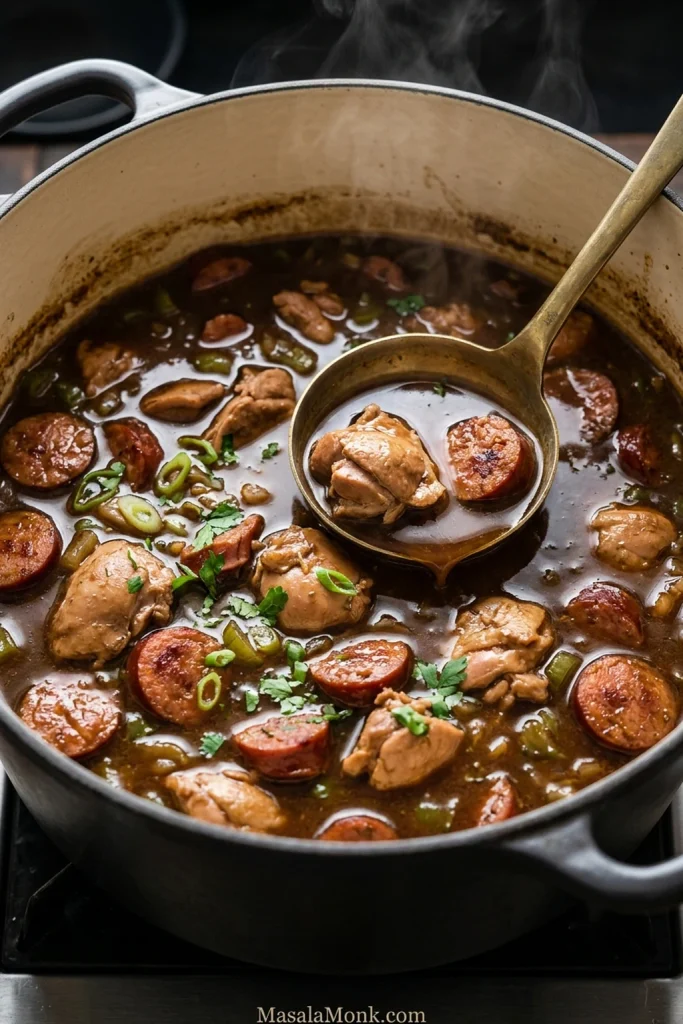
Finished chicken and sausage gumbo in a Dutch oven with dark broth, tender chicken, andouille and softened vegetables.
Check the gumbo before rice enters the picture: after a ladle passes through the pot, the broth should settle back around the chicken and andouille instead of leaving a thick channel behind. That is a useful whole-pot test for the final texture.

Recipe Notes

Sausage and salt: Andouille varies considerably in sodium, so make the final salt adjustment only after the gumbo has simmered.

Optional okra: Sauté 8 to 12 oz (225–340 g) sliced okra separately for 10 to 15 minutes; add it during the final 20 to 30 minutes of simmering. See how okra fits this version.

Optional filé: Offer it at the table, or stir it into the gumbo only after the pot comes off the boil. For the timing and amount, see how to use filé powder.

Rotisserie or other already-cooked chicken: Add it only during the final 10 to 15 minutes so it heats through without drying out.

Longer simmer: Another 30 to 60 minutes at a very gentle simmer is fine if you prefer a longer-cooked gumbo. Watch the liquid level and use some of the reserved stock if needed. The chicken will become softer and may break apart more.

About this recipe: This version draws on established Louisiana gumbo methods, chef recipes and recurring problems reported by home cooks. MasalaMonk has not independently kitchen-tested this exact formulation.


Gumbo Guide: Roux, Texture and Key Choices

What Kind of Gumbo Is This?

Gumbo changes from kitchen to kitchen across Louisiana, so there isn’t one ingredient list that makes every pot “correct.” Okra, filé, tomatoes and proteins all vary with the region, household and style of gumbo; Louisiana’s own gumbo traditions reflect that variety.

This one leans Cajun: chicken and sausage gumbo with andouille, a dark flour-and-oil roux, onion, celery and green bell pepper, and chicken stock.

Dark Roux for Gumbo

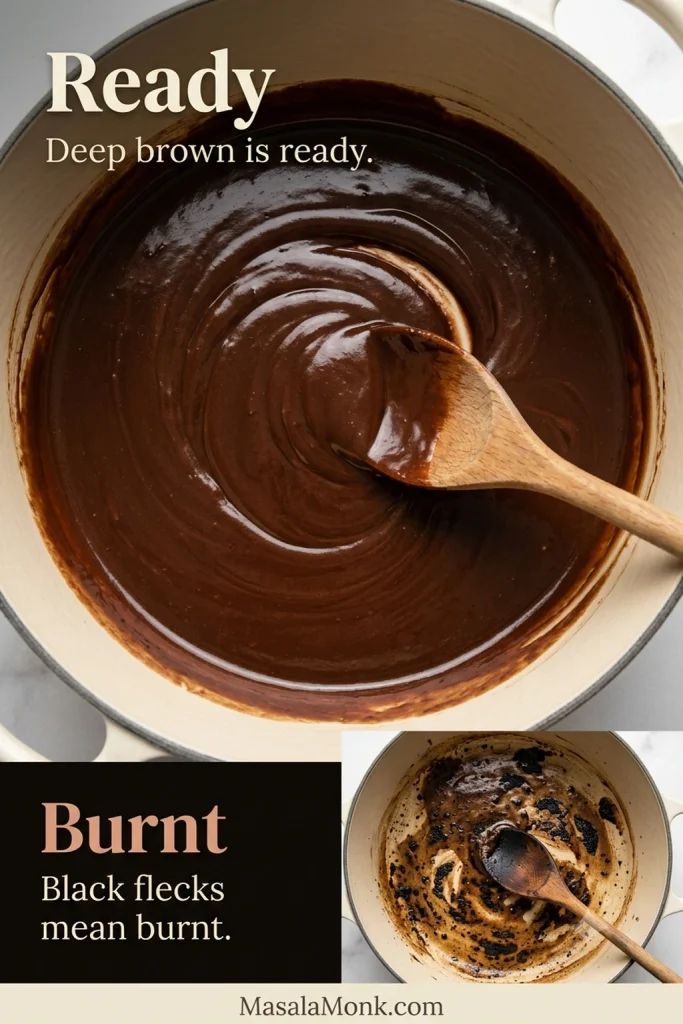
Aim for a deep chocolate-brown roux: dark, deeply toasted and fragrant, but never black or acrid.

Your stove and pot decide the pace more than another recipe’s timer does. Color and smell are the better guides.

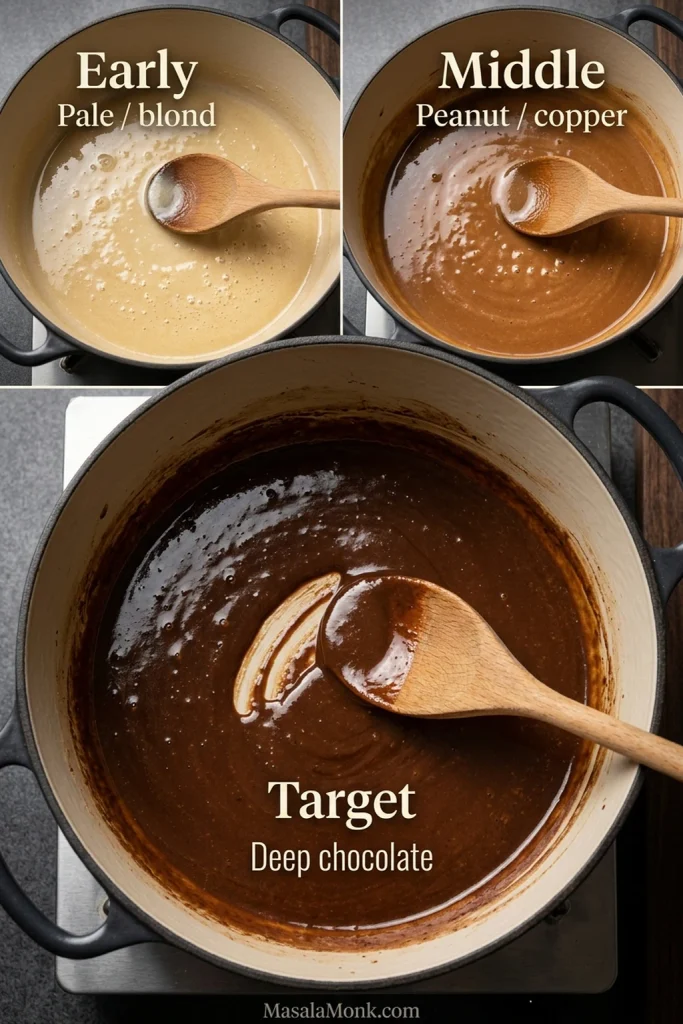
What Dark Roux Looks and Smells Like

  • Early: pale, then blond; the raw-flour smell gradually disappears.
  • Middle: peanut-butter brown to copper; the aroma becomes clearly toasted and nutty.
  • Target: milk chocolate to deep chocolate; roasted, fragrant and dark without smelling scorched.
Three stages of flour-and-oil roux shown in light enameled pots: pale blond, peanut-to-copper brown and deep chocolate brown.
When judging dark roux color, look at the thin sweep left by the spoon against the pale enamel. A deep pool naturally appears darker, while that thinner film makes the shift from blond to copper to deep chocolate much easier to judge accurately.

The final color changes happen much faster than the early ones, so the distance between copper, chocolate and scorched can shrink to a matter of minutes.

Why Dark Roux Behaves Differently

The darker flour gets, the more deeply toasted it tastes and the less strongly it thickens. A dark gumbo can taste remarkably rich while still pouring easily from the ladle.

A heavy Dutch oven also holds heat after you turn the burner down. Keep the diced onion, celery and green bell pepper close so they can go in as soon as the roux reaches the right color and quickly cool the mixture.

Burnt roux is not subtle. If it smells harsh or acrid, trust your nose. Obvious black scorched flecks are another sign it has gone too far. Start over instead of carrying that bitterness into the chicken, sausage and stock.

Smooth glossy deep brown roux beside a smaller example of burnt roux with black scorched flecks and patches.
Scorching often shows up locally before the entire roux looks ruined. An evenly dark, glossy gumbo roux is very different from isolated black specks or scorched patches that remain visible as you stir.

How Thick Should Gumbo Be?

The finished gumbo should be silky and flowing—richer than broth, but noticeably looser than gravy.

A dark roux gives up some of its thickening power as the flour toasts, so a deeply flavored gumbo can remain surprisingly fluid. That is not a failure. The broth should lightly coat the chicken and sausage, then move around the rice when you tilt the bowl.

Ladle holding chicken, andouille and dark gumbo broth as the broth flows back into a Dutch oven.
A properly finished gumbo leaves a thin glossy coating on the ladle, then runs back into the pot in a fluid stream. If it falls in heavy blobs or sits on the ladle like sauce, the broth has moved closer to gravy than gumbo.

Other roux options

Jarred roux: perfectly legitimate. Some products are warmed directly in the pot before the vegetables go in; others are whisked into hot liquid. Brands vary, so follow the amount and incorporation method on the jar instead of replacing homemade roux cup-for-cup.

Very fast roux: experienced cooks can take roux dark over high heat in a fraction of the time. The margin for error becomes tiny. Moderate heat gives a first-time cook much more room to react.

The Ingredient Choices That Matter

Chicken thighs stay tender more reliably than breast through a long, gentle simmer. Andouille brings smoke, garlic, spice and a coarse structure that can stay distinct after an hour in the broth.

Onion, green bell pepper and celery form the trinity and soften into the roux to build the gumbo’s aromatic base. The same trinity also flavors our Louisiana red beans and rice, where creamy beans provide the body instead of roux.

Andouille and Worcestershire sauce already bring salt to the pot, which is why low-sodium chicken stock gives you more control at the end. Paprika, thyme, black pepper and a modest amount of cayenne support the dark roux without burying it. A Cajun seasoning blend can work too, but check its sodium before deciding how much additional salt the pot needs.

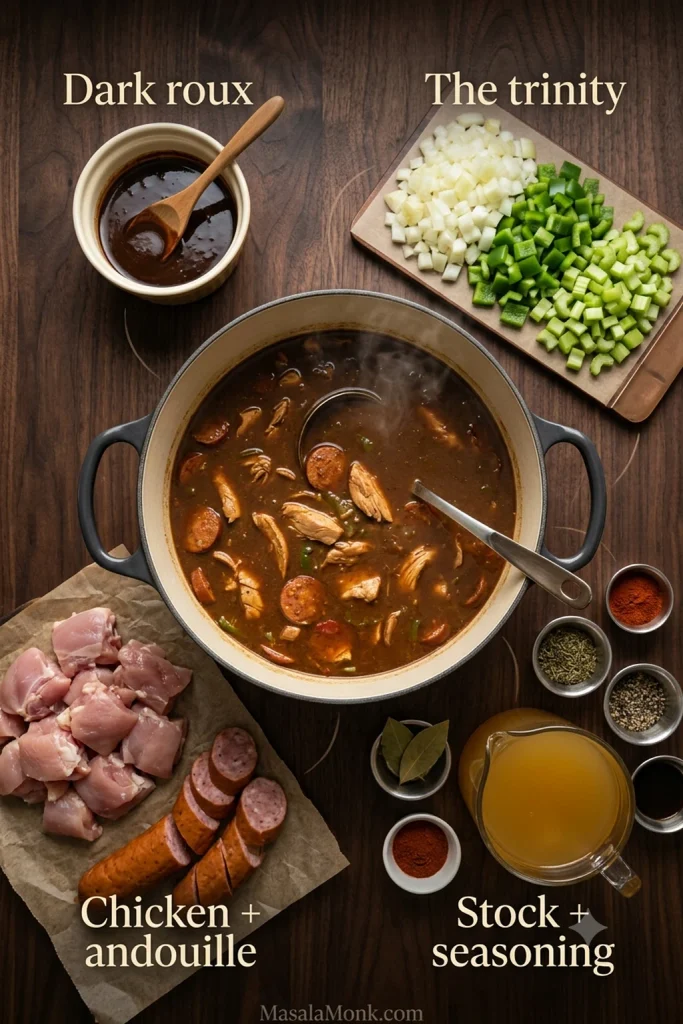
Dark roux, diced onion, green bell pepper and celery, chicken thigh pieces, andouille, chicken stock and seasonings arranged around finished gumbo.
Think of gumbo ingredients by the job they perform: roux controls roasted depth and body, the trinity builds aroma, chicken and andouille add substance and smoke, and stock controls concentration. That framework makes substitutions easier to judge than a simple ingredient list does.

Okra, filé and tomatoes cause more gumbo debate than this pot needs. All three belong in some gumbos; here’s how they fit this one.

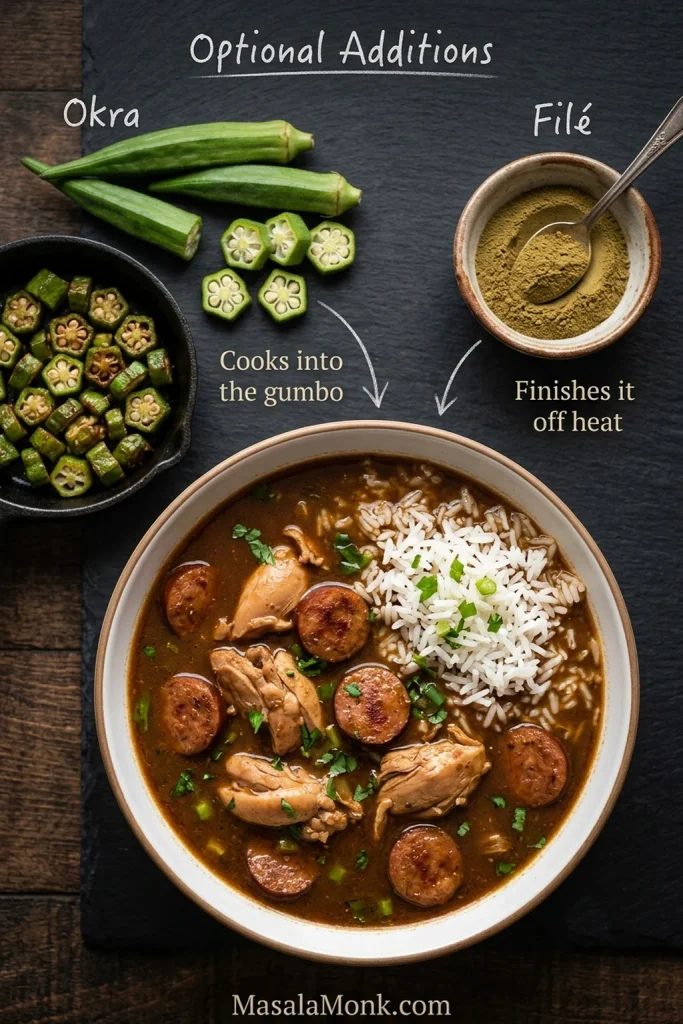
Okra Is Optional Here

Okra belongs in plenty of excellent gumbos, but this one does not depend on it. Sautéing 8 to 12 oz (225 to 340 g) of sliced okra separately for about 10 to 15 minutes cooks away much of the ropy texture and lets the pieces begin to brown. Add it to the gumbo for the final 20 to 30 minutes.

Filé Powder

Filé is ground sassafras leaf with an earthy, herbal flavor. In this pot, it works best as a finishing choice rather than something boiled into the broth.

Add it after the gumbo comes off the heat, or let everyone sprinkle a small pinch to about ¼ teaspoon into individual bowls. Avoid a hard boil afterward.

Chicken and andouille gumbo with sliced and sautéed okra shown separately beside a small bowl of filé powder.
Okra and filé powder are separate choices because they change gumbo in different ways. Okra alters the pot as it cooks, while filé lets you adjust aroma and body at the finish—especially useful when different people want different bowls.

Why There Are No Tomatoes in This Pot

Tomatoes appear in many Creole and New Orleans-style gumbos. Plenty of Cajun chicken-and-sausage versions leave them out. Here, the dark roux, chicken, andouille and stock are enough, so tomatoes stay on the shelf.

Substitutions That Work

  • No andouille: choose a firm, coarse-textured smoked sausage rather than a soft sausage that may turn mealy during the simmer.
  • Cajun seasoning blend: start with about 2 teaspoons of a low-salt blend in place of the paprika, thyme and cayenne, then adjust after simmering.
  • Seafood: do not swap shrimp, oysters or crabmeat directly into this chicken timing. Delicate shellfish needs a different cooking sequence, with shrimp, oysters or crab added much later. If shellfish is what you’re after but you want a shorter roux-based dish, our Cajun étouffée recipe uses a much shorter seafood cooking window.

Fix My Gumbo

Find the symptom closest to what is happening in your pot, then make one correction at a time. Changing several things together can make it harder to tell what actually helped.

Roux and Stock Problems

What you notice What to do
Burnt smell or black flecks Start over. Burnt flour will carry its bitterness through the finished gumbo.
Roux isn’t getting darker Increase the heat slightly and keep stirring. Very low heat can leave you stuck at peanut-butter brown for a long time.
Roux is darkening too fast Lower the heat immediately and keep stirring. The pot will stay hot for a while even after you turn the burner down.
Roux tightens when stock goes in That first tightening is normal. Keep stirring or whisking until completely smooth before adding more stock.

Consistency, Fat and Seasoning

What you notice What to do
Gumbo is too thin Finish the full simmer first. If it still needs more body, simmer uncovered for another 10 to 15 minutes.
Gumbo is too thick Add warm reserved stock about ¼ cup (60 ml) at a time until it flows easily again.
Heavy oil layer Skim it off. Next time, drain more of the rendered sausage fat before starting the roux.
Bitter flavor A dark roux tastes deeply roasted. Harsh, acrid bitterness is different and usually points to scorching.
Hot but still flat More cayenne will not fix it. Check the salt, stock strength and reduction first.
Too salty Add unsalted stock a little at a time, tasting after each addition. Accept a slightly thinner gumbo before reducing aggressively and concentrating the salt again. Unsalted rice also helps balance the bowl.

Ingredient and Meat Problems

What you notice What to do
Okra is very slimy Next time, cook the sliced okra separately until much of that ropy, slimy texture has cooked away before adding it to the pot.
Filé turned stringy or too thick Use less next time and avoid hard boiling after it goes in. Serving it at the table gives you much more control.
Chicken is dry Keep the gumbo at a gentle simmer, not a hard boil. Thighs are forgiving, but aggressive heat can still tighten them. Add already-cooked chicken only near the end.
Sausage is greasy or mushy Choose a firmer, coarse-textured smoked sausage and brown it first so some of the fat renders out.

What to Serve With Gumbo

Keep the rice modest enough that gumbo remains the main event. About ⅓ to ½ cup cooked long-grain white rice per serving gives every spoonful some rice without burying the broth and meat underneath it.

Potato Salad with Gumbo

A cool, mustard-forward potato salad is especially associated with parts of Cajun and Acadiana cooking. Some people keep it beside the bowl; others put a scoop straight into the gumbo.

The combination makes sense as soon as you taste it: cool creamy potato and mustardy acidity against a hot, dark bowl of gumbo.

Bowl of chicken and andouille gumbo with white rice beside a separate bowl of creamy mustard-colored potato salad.
Serving potato salad beside gumbo preserves the contrast that makes the pairing interesting: the potatoes stay cool and creamy while the broth stays hot. Then you can alternate bites or add a little potato to the bowl without committing the whole serving.

At the Table

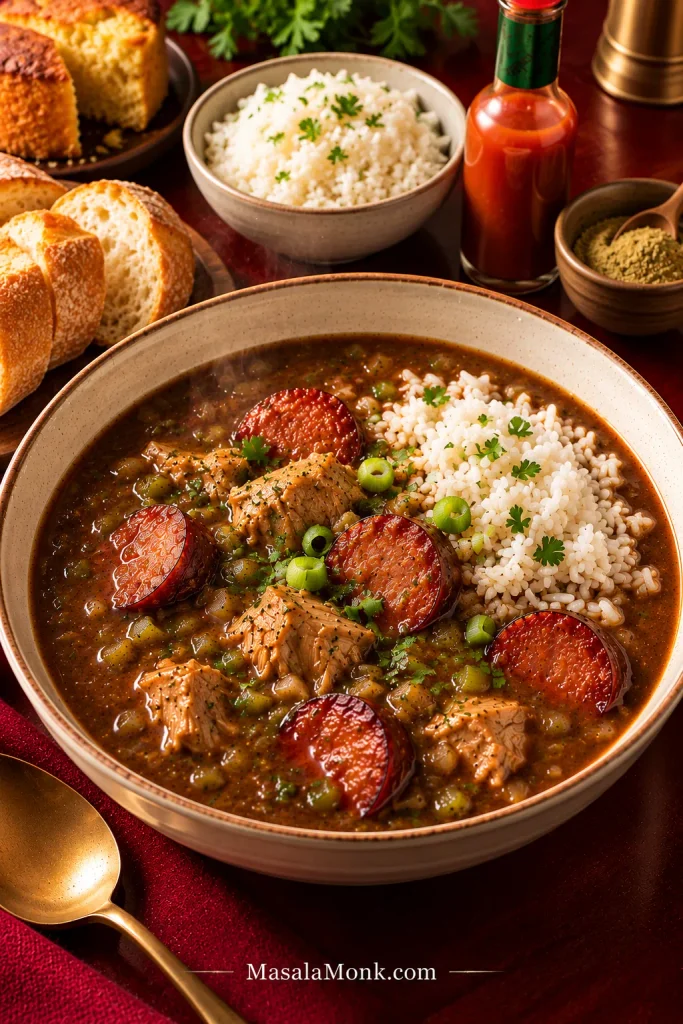
Set out hot sauce and filé so everyone can adjust their own bowl. French bread works well too, or add a wedge of savory Southern cornbread for a crisp edge and tender crumb to drag through the last of the broth.

Chicken and andouille gumbo with rice surrounded by hot sauce, filé powder, bread, cornbread and a separate bowl of white rice.
What to serve with gumbo works best when each accompaniment has a job: rice absorbs broth, bread catches it, hot sauce adjusts heat, and filé changes the finish. You rarely need every option in the same bowl.

In the finished bowl, the roux should come through as roasted depth rather than flour, while the andouille still brings smoke and bite. The scallions and parsley should bring a fresher edge to the dark broth rather than disappearing into it.

Make Ahead, Store and Reheat Gumbo

Gumbo is especially good made ahead. After a night in the refrigerator, the roux, stock and sausage often taste more integrated.

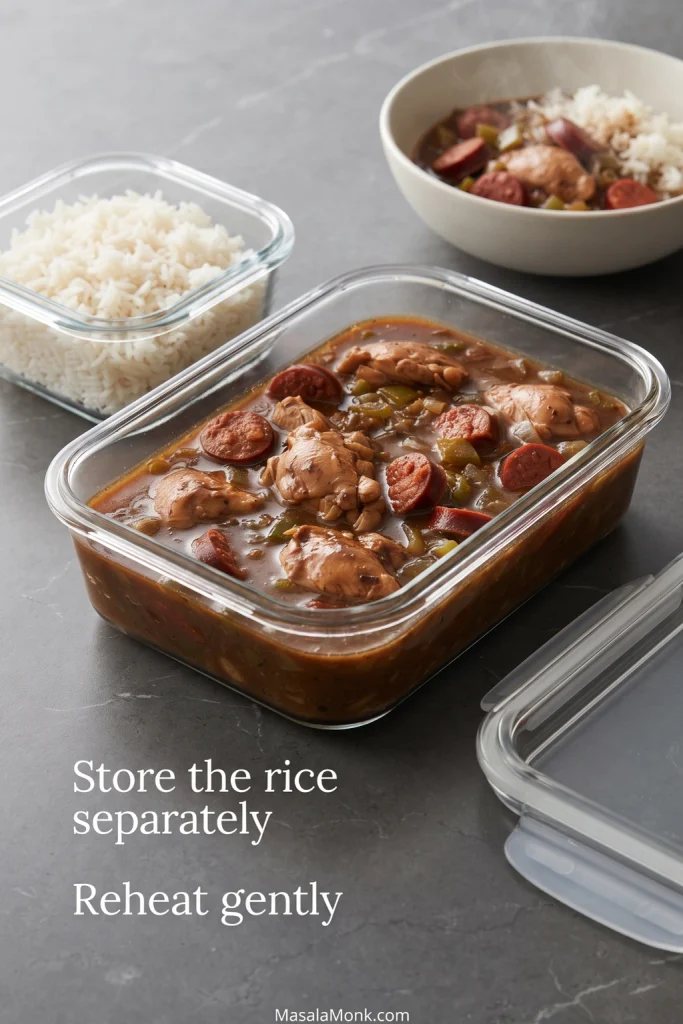
For leftovers, divide the gumbo into shallow containers and refrigerate it within 2 hours rather than leaving a full Dutch oven on the counter until it cools completely. Keep the rice separately. Refrigerated gumbo is best used within 3 to 4 days.

Clear glass container of chicken and andouille gumbo beside a separate container of white rice, with a reheated bowl of gumbo in the background.
For make-ahead gumbo, separate containers give you control at reheating time. Rice keeps absorbing liquid as it sits, while gumbo may thicken slightly when chilled; storing them apart lets you correct each texture independently.

Reheat gently on the stovetop, stirring occasionally, until steaming hot throughout. If using a thermometer, leftovers should reach 165°F (74°C). Add a splash of stock or water if the gumbo has thickened in the refrigerator.

Freeze gumbo without the rice in airtight portions for about 2 to 3 months for best quality. Thaw in the refrigerator and reheat gently.

Once you know what a properly dark roux looks and smells like, the whole pot becomes much calmer to cook.

Posted on — Leave a comment

Chilaquiles Recipe: Crispy, Saucy & Easy

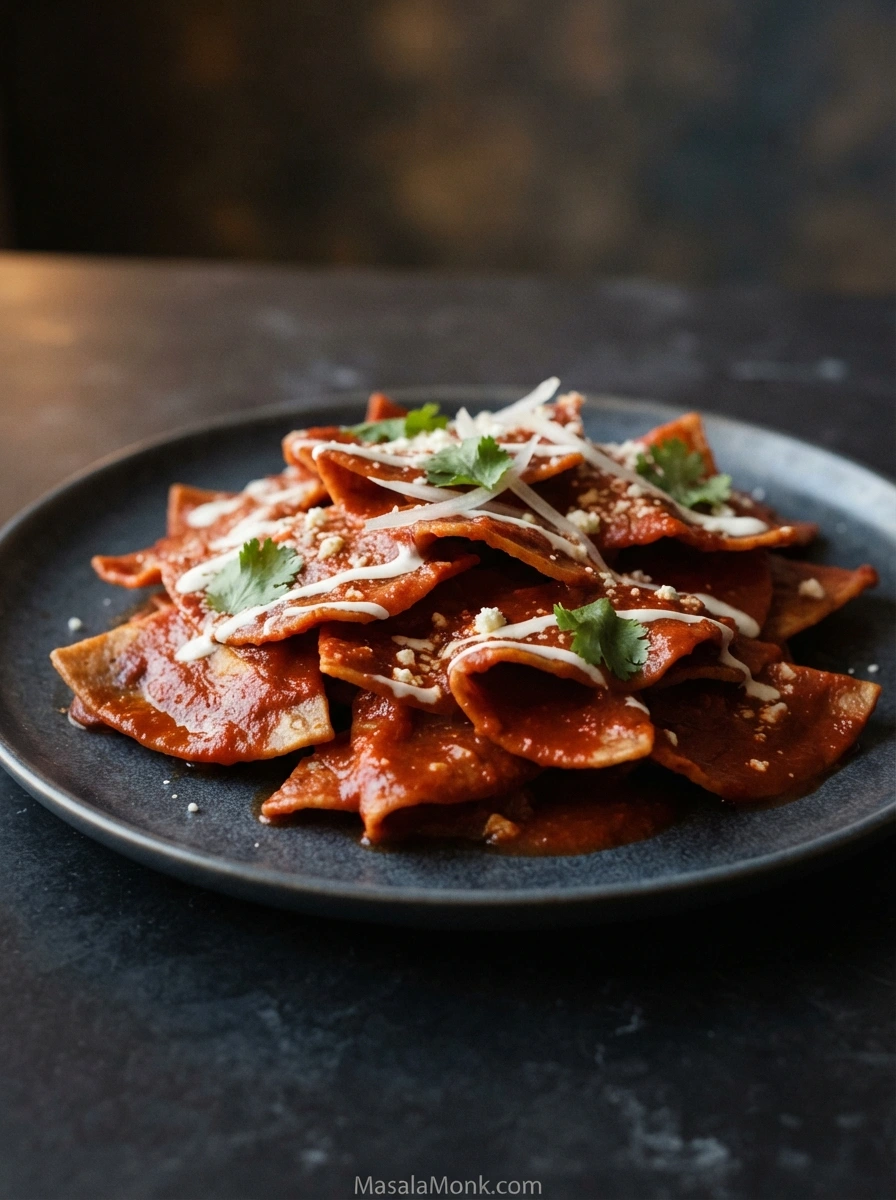
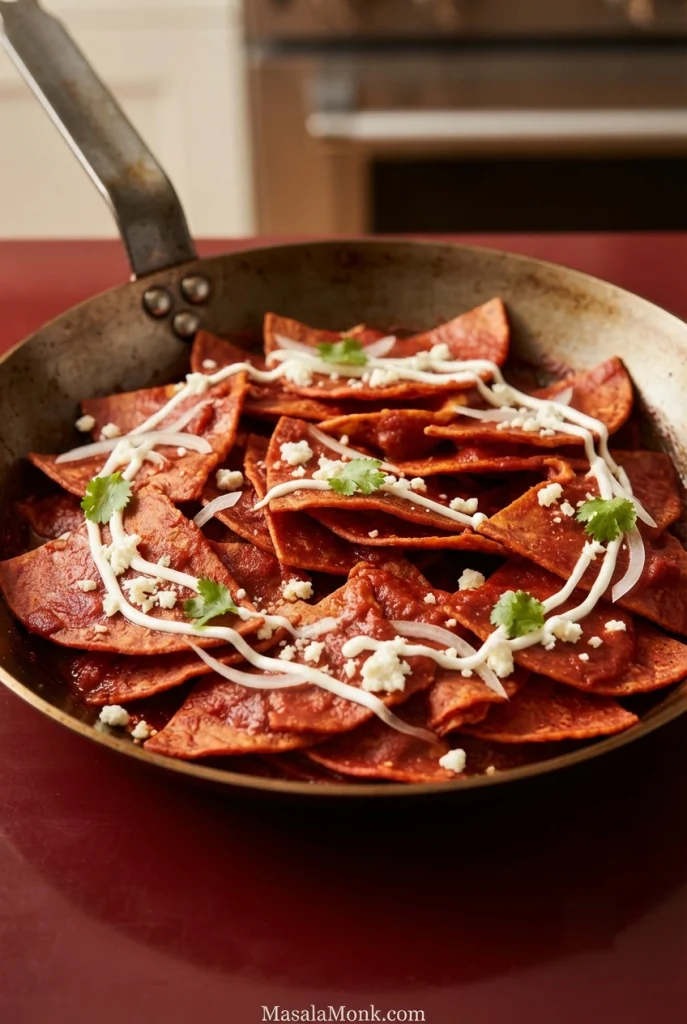
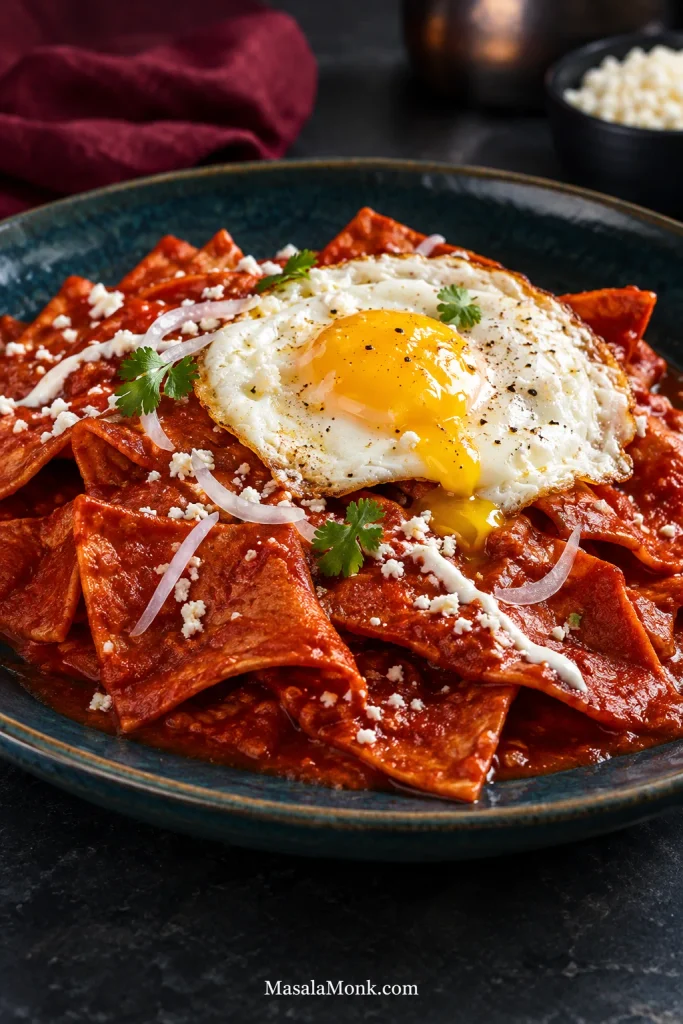
Chilaquiles rojos with red-salsa-coated corn tortilla pieces, crema, crumbled cheese, sliced white onion and cilantro on a dark plate.

Good chilaquiles are saucy, but they should not turn soft by accident. This chilaquiles recipe starts with freshly crisped corn tortillas and a deep red tomato-guajillo salsa. The sauce soaks into the tortillas while a few toasted edges keep their bite, then cool crema, salty cheese and sharp white onion cut through the warm chile sauce.

Chilaquiles (pronounced chee-lah-KEE-lehs) are a Mexican dish of crisp corn tortilla pieces tossed or briefly cooked with salsa, then usually finished with crema, cheese and onion. They are especially common at breakfast and brunch, often with eggs, although they work just as well later in the day.

Need them fast? The packaged-chip version can be on the table in about 15 to 20 minutes with sturdy corn tortilla chips and a smooth prepared red salsa.

Chilaquiles Recipe

Crispy, Saucy & Easy Red Chilaquiles

Red chilaquiles with crisp-fried corn tortillas, tomato-guajillo salsa, crema, cheese and onion, plus timing cues for serving them firmer or softer.

Prep Time
20 minutes

Cook Time
45 minutes

Total Time
1 hour 5 minutes

Servings
4

Equipment

  • 12-inch / 30-cm wide skillet or larger for the salsa and chilaquiles
  • Medium saucepan
  • Blender
  • 10-inch / 25-cm heavy skillet for frying
  • Fine-mesh sieve, optional
  • Slotted spoon, spider or tongs

For the salsa roja

  • 6 Roma tomatoes, about 1½ pounds / 680 grams
  • 4 dried guajillo chiles, stemmed and seeded, about 1¼ ounces / 35 grams
  • 1 to 2 dried chiles de árbol, optional — omit for a milder salsa, or add to taste for more heat
  • ½ medium white onion, about 3½ ounces / 100 grams
  • 3 garlic cloves
  • 1½ cups / 355 ml low-sodium chicken broth, vegetable broth or water, divided, plus a little more if needed
  • 1 tablespoon / 15 ml neutral oil
  • 4 grams fine sea salt, about ¾ teaspoon, to start; more only after tasting

For the crisp tortillas

  • 12 six-inch corn tortillas, preferably slightly stale, about 10 ounces / 285 grams
  • 1 to 1½ cups / 240 to 355 ml neutral oil, or enough for roughly ¼ inch / 6 mm depth in the frying skillet
  • Fine salt, used lightly

Store-bought chip shortcut: replace the tortillas and frying oil with about 8 ounces / 225 grams thick, restaurant-style corn tortilla chips. Need the faster method? Follow the 15–20 minute shortcut for amounts and salsa adjustments.

For serving

  • ⅓ cup / 80 ml Mexican crema, or sour cream thinned with a splash of milk or water until it drizzles easily
  • ½ cup / about 60 grams crumbled queso fresco or Cotija
  • ¼ small white onion, very thinly sliced
  • ¼ cup loosely packed cilantro leaves, optional
  • 1 avocado, sliced, optional
  • 2 to 3 radishes, thinly sliced, optional
  • 1 lime, cut into wedges, optional, for adjusting the salsa and serving
  • 4 fried eggs, optional
  • 1½ cups / about 210 grams cooked shredded chicken, optional; use up to 2 cups / about 280 grams for a more filling meal

1. Make the salsa roja

Heat a dry skillet over medium heat. Toast the guajillo chiles and optional chiles de árbol for about 10 to 15 seconds per side, just until fragrant. Pull them off before they blacken; burnt dried chiles can make the salsa bitter.

Transfer the chiles to a heatproof bowl, cover with very hot water and soak for about 15 minutes. Drain and discard the soaking water.

Meanwhile, place the tomatoes, onion and garlic in a saucepan and cover with fresh water. Bring to a gentle simmer and cook for about 8 to 10 minutes, until the tomatoes soften. Drain.

Add the softened chiles, tomatoes, onion, garlic, 1 cup / 240 ml broth or fresh water and the salt to a blender. Blend until very smooth. If you can still see noticeable pieces of chile skin, pass the salsa through a fine-mesh sieve.

Heat 1 tablespoon / 15 ml oil in a 12-inch skillet or larger over medium heat. Carefully pour in the blended salsa—it may sputter—and cook for about 5 to 7 minutes, stirring often. The raw tomato smell should fade, the guajillo aroma should come forward and the red color should deepen slightly.

Add some or all of the remaining ½ cup / 120 ml broth as needed. Simmer until you have roughly 3½ cups / 830 ml salsa, usually another 7 to 12 minutes depending on the tomatoes.

Check the salsa before adding tortillas

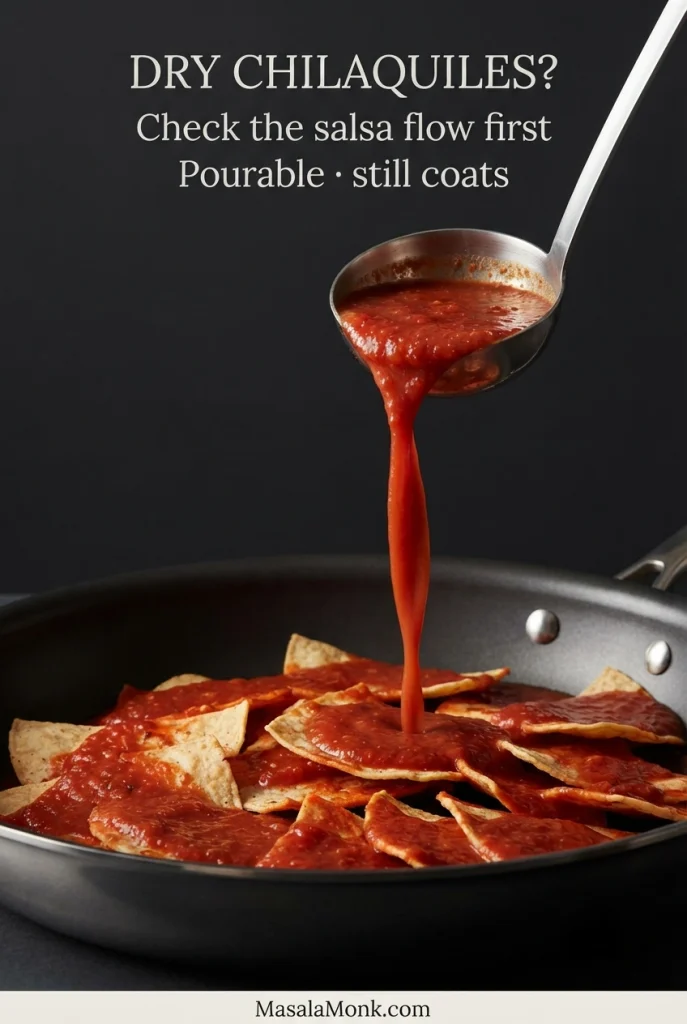
Watch the consistency. The salsa should pour easily but still leave a glossy red coating on a tortilla. Reduce it a little longer if it is watery; loosen it with broth or fresh water if it becomes too thick. If you are unsure whether the sauce needs thinning or the tortillas need more, compare it with the salsa consistency guide below.

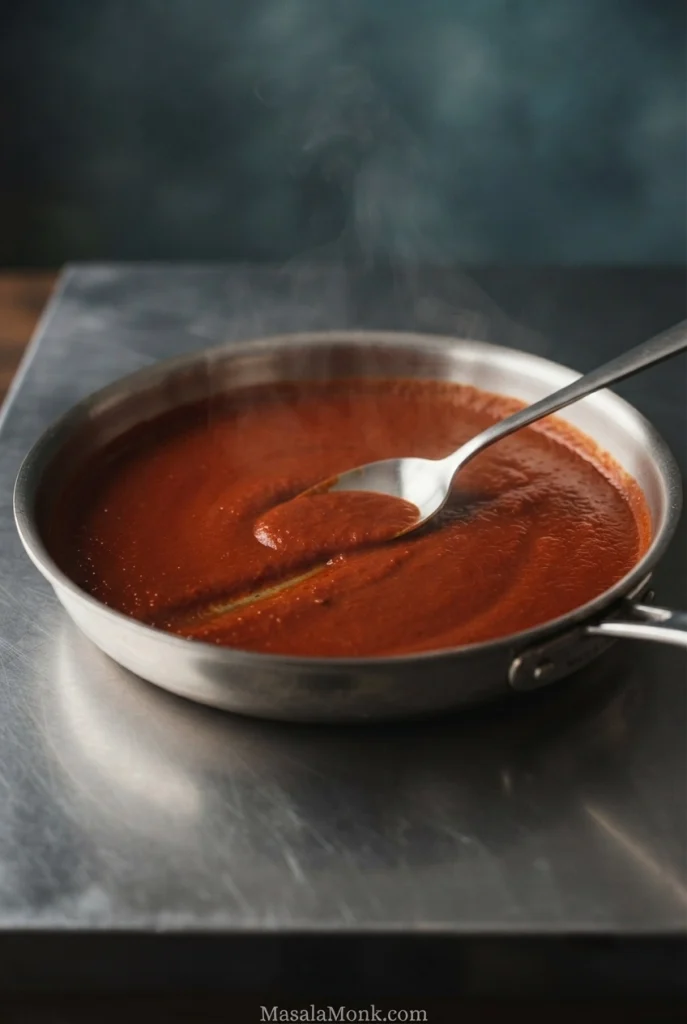
Smooth brick-red tomato-guajillo salsa in a skillet with a metal spoon leaving a shallow trail through the sauce.
Watch the spoon trail in the salsa roja: a groove that begins closing behind the spoon shows enough movement to reach between tortilla layers without becoming watery.

2. Crisp the tortillas

Cut each corn tortilla into 6 wedges.

Pour enough neutral oil into a 10-inch heavy skillet to reach roughly ¼ inch / 6 mm deep. Heat to about 350°F / 175°C. Without a thermometer, test with one tortilla corner: it should start sizzling immediately without browning on contact.

Fry in small batches for roughly 2 to 3 minutes total per batch, moving or turning the pieces as needed. They should become lightly golden and crisp, and the vigorous bubbling around them should calm noticeably.

Transfer to a paper-towel-lined tray with a slotted spoon or spider. Season lightly while warm. Give the wedges room in the oil; overlapping pieces steam and cook unevenly. For more on choosing tortillas that hold their shape after saucing, see the tortilla guide.

3. Get the toppings ready

Crumble the cheese, slice the onion and radishes, portion the crema and prepare any cilantro, avocado or lime. Fry the eggs now if you are serving them. Have cooked chicken ready to warm.

4. Taste the salsa

Bring the salsa back to a lively simmer and taste it for salt and chile heat. Loosen a thick sauce with a splash of broth or water; reduce a watery one briefly before adding the tortillas.

If the salsa tastes flat, a small squeeze of lime can sharpen it.

For a chicken variation, stir the cooked shredded chicken into the hot salsa now and let it warm through.

5. Sauce the tortillas

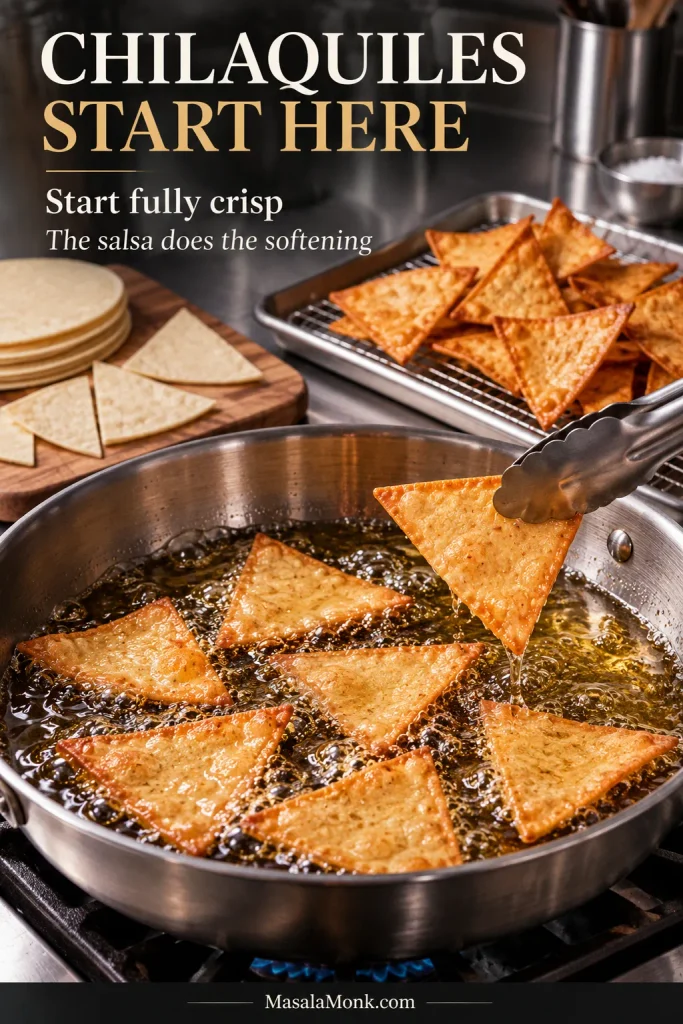
Start with fully crisp tortillas. The salsa will do the softening.

For homemade tortilla wedges, start with about 3 cups / 710 ml hot salsa in the skillet and keep the remaining ½ cup / 120 ml nearby.

Add the crisp tortillas and lift and fold gently with a broad spatula or tongs until the sauce reaches every layer and the obvious dry patches disappear.

At first the wedges will feel rigid under the tongs. Within the first minute, the thinner edges begin to yield while the thicker folds still have some bite.

If dry areas remain, add a little more of the reserved salsa. Once the tortillas begin to soften, handle them gently so the wedges do not break down.

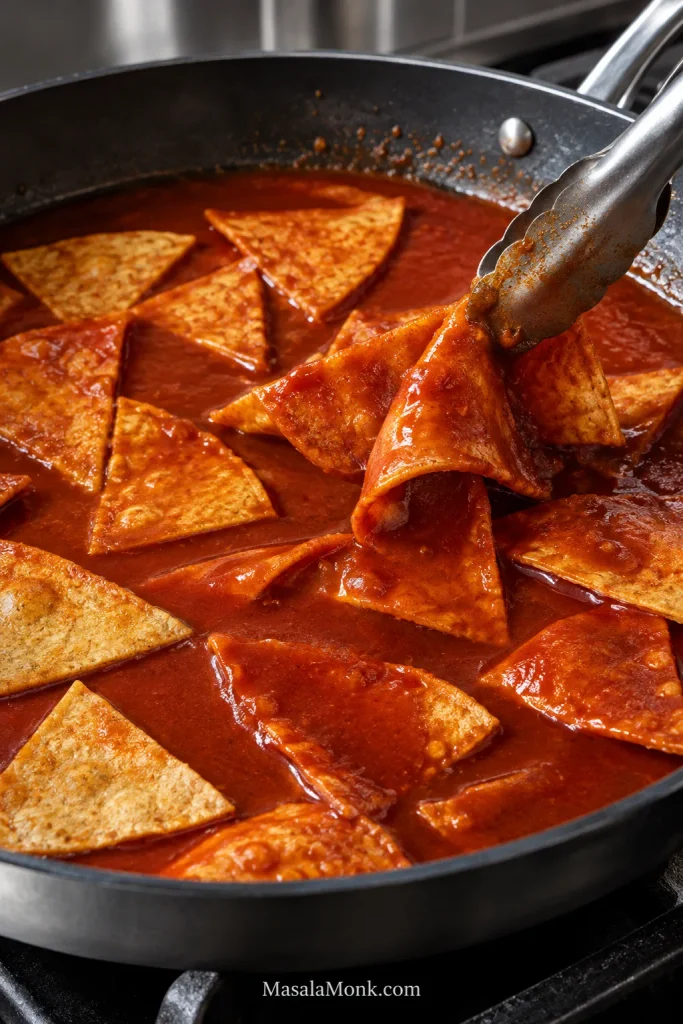
Metal tongs lift salsa-coated corn tortilla wedges from a skillet while other tortilla pieces soften in smooth red salsa below.
Rather than stirring in circles, lift the tortillas from underneath and let them settle back into the hot salsa; that protects the softening wedges from being torn into smaller pieces.

6. Stop where you like them

For the texture used here, remove the skillet from the heat once everything is coated and rest for about 1 to 2 minutes. Taste one piece. The center should be tender while a thicker fold still offers a little resistance.

If that is the texture you want, plate now. For firmer chilaquiles, serve them sooner; for a softer skillet, add more of the reserved salsa and give the tortillas another 1 to 2 minutes. The texture guide compares the firmer, middle and softer finishes.

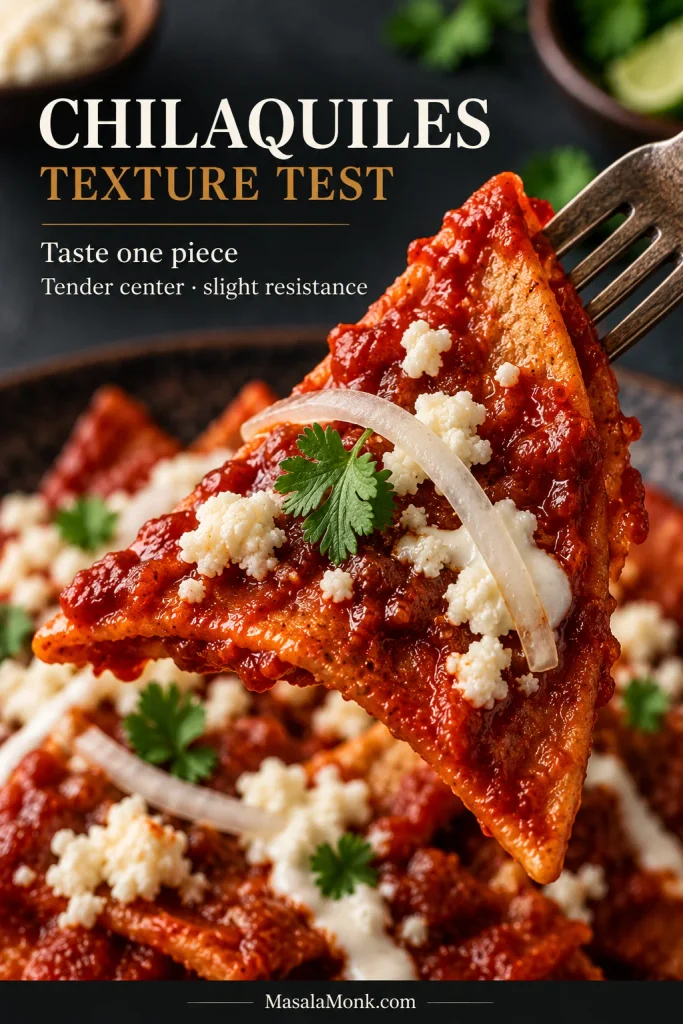
A red-salsa-coated tortilla wedge bends downward from metal tongs over a skillet of chilaquiles. Graphic text gives a chilaquiles texture test.
For a quick chilaquiles texture check, watch the lifted piece: it should bow under its own weight while still holding together instead of staying rigid or falling apart.

7. Finish and serve

Divide among warm plates. Add cool crema, queso fresco or Cotija and thinly sliced white onion. Finish with any cilantro, avocado or radish you want. Add a fried egg if using, and serve lime at the table.
The crema cools the chile heat, while the onion and crumbly cheese give the soft, salsa-soaked tortillas some sharpness and salt.

Eat the chilaquiles while they are hot. The salsa will keep working its way into the tortillas as they sit.

Recipe Notes

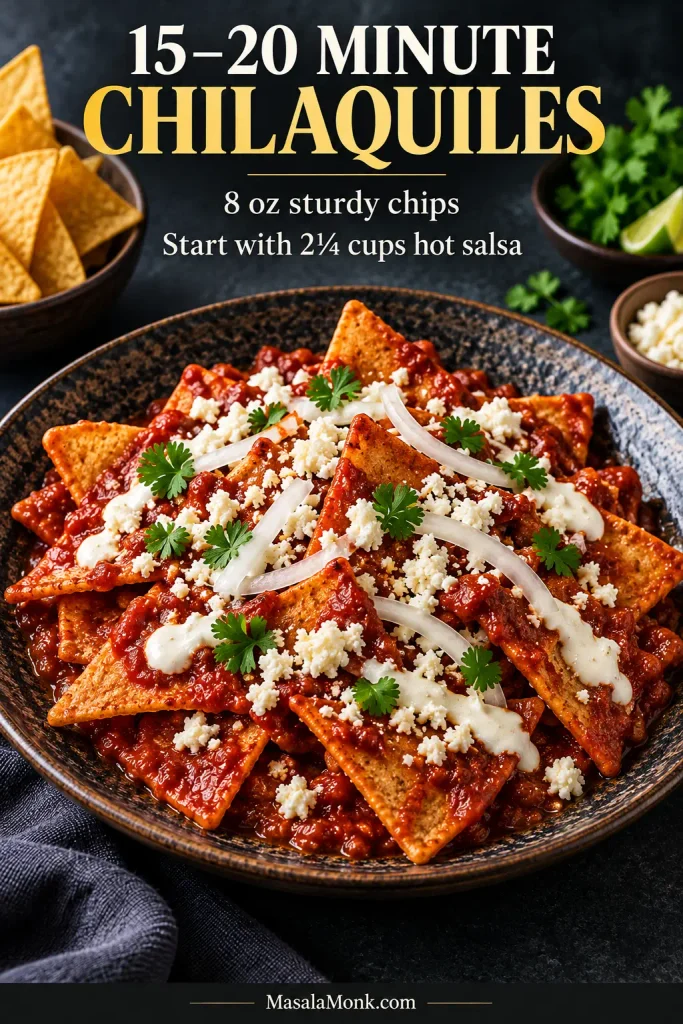
  • Packaged chips with homemade salsa: use about 8 ounces / 225 grams corn tortilla chips. Start with 2¼ cups / 530 ml salsa and keep another ¼ to ½ cup / 60 to 120 ml nearby.
  • Want extra crunch? Reserve a small handful of crisp tortilla pieces and scatter them over the finished plate instead of leaving the whole batch under-sauced.
  • Baked tortilla chips: lightly coat the wedges with oil, spread them in a single layer and bake at 400°F / 205°C for about 10 to 15 minutes, turning once. Let them cool for about 5 minutes so they finish crisping before you use them.
  • Vegetarian chilaquiles: use water or low-sodium vegetable broth and leave out the chicken.

MasalaMonk note: This recipe is research-derived and has not been independently kitchen-tested.

Finished chilaquiles rojos in a wide skillet with softened tortilla layers, crema, crumbled cheese, onion and cilantro.
Keep the finished chilaquiles in a shallow layer rather than piling them deeply; a crowded mound traps steam around the lower layers and softens them faster.

Should Chilaquiles Be Crispy or Soft?

If you have ever wondered whether chilaquiles are supposed to be crisp or soft, the slightly frustrating answer is that both can be right. Some are served fairly firm, others become deeply soaked with salsa, and plenty land somewhere between the two. Rick Bayless’s chilaquiles master recipe describes that same range, from relatively crisp to much softer.

Chilaquiles need the salsa to work into the tortillas; simply spooning salsa over dry chips gives you a different result. How they turn out then comes down mostly to four things: how crisp they started, how fluid the salsa is, how much sauce you use and how long the two sit together.

Choose Your Chilaquiles Texture

If you want…Do this
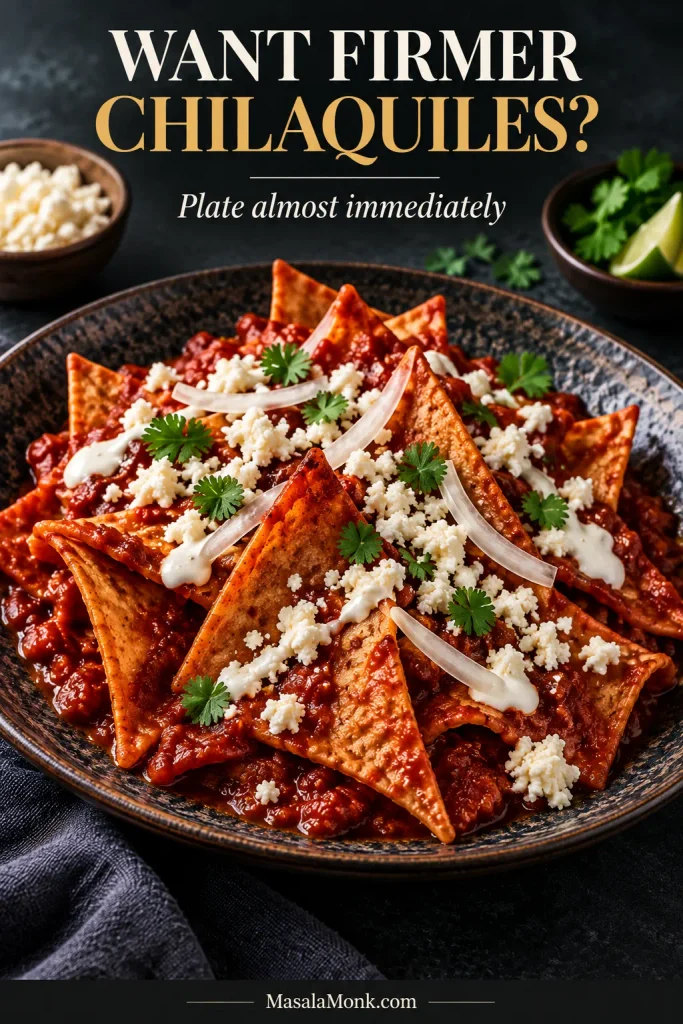
Firmer, crisp-edged chilaquilesCoat well and plate almost immediately.
Tender with some structureRemove from the heat and rest for about 1 to 2 minutes.
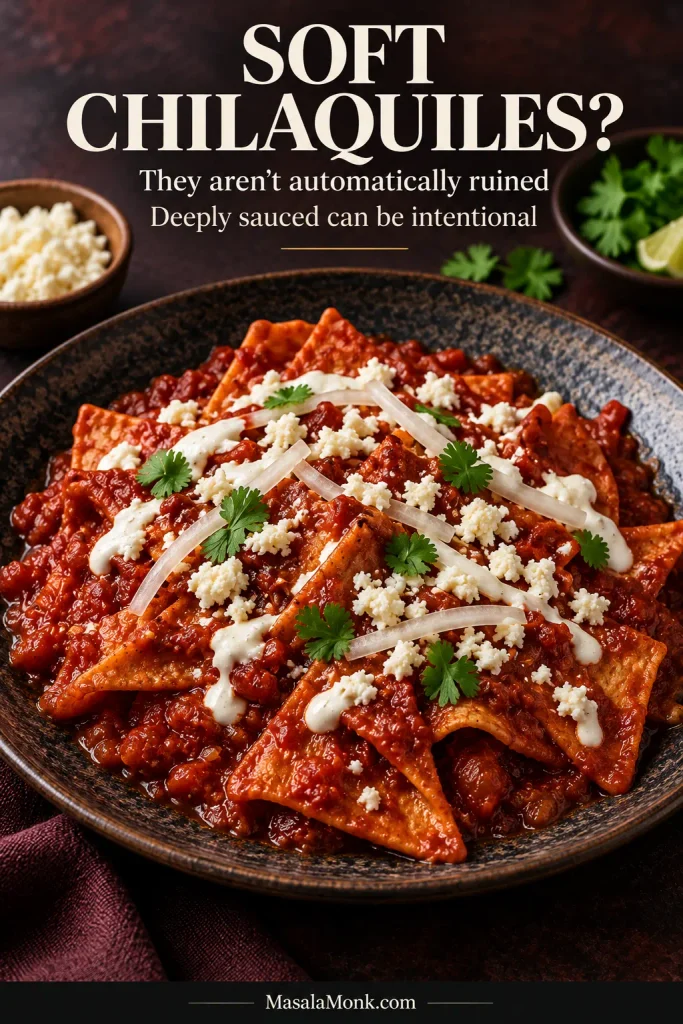
Soft and deeply saucedAdd more salsa and give the tortillas another minute or two to absorb it.
Saucy with extra crunchFinish the tender version with a few reserved crisp tortilla pieces.
The amount of salsa and the time the tortillas rest in it both influence the final texture.
Firmer chilaquiles with clearly defined red-salsa-coated tortilla pieces and light toppings. Graphic text says to plate almost immediately for firmer chilaquiles.
If you prefer firmer chilaquiles, look for fully red, well-coated tortillas with clearer edges and more separation; firmness should come from shorter absorption, not dry tortilla patches.

In the middle range, the salsa has worked into the corn tortilla without erasing every toasted edge. That is the texture this recipe aims for.

If yours go softer than you meant, they are not automatically ruined. Plenty of chilaquiles are served soft and deeply sauced. Eat them as they are, then shorten the sauce time next time if you want more bite.

Soft, deeply sauced chilaquiles with low, relaxed tortilla layers, crema and cheese. Graphic text explains that deeply sauced chilaquiles can be intentional.
For softer chilaquiles, serve from underneath with a broad spoon or spatula; supporting several pieces together helps keep the tender layers intact instead of tearing one wedge away.

The sturdier the tortilla starts, the more room you have to choose where you stop. When you are ready to cook, return to the recipe card for the full ingredient amounts and sequence.

Start With Tortillas That Can Handle the Salsa

Use corn tortillas here, not flour. Corn tortillas crisp firmly enough to absorb salsa while still holding some shape. Flour tortillas behave differently once soaked.

If you want to make them from scratch, the homemade corn tortilla recipe covers masa harina, hydration, pressing and cooking. Let fresh tortillas dry a little before cutting and frying them for chilaquiles.

If you are frying your own

Slightly stale tortillas have already lost some moisture, so they crisp more readily and give you a sturdier base once the salsa goes in. If yours are very fresh, let them dry a little before frying. After a properly fried wedge cools for a minute, it should feel dry and crisp at the surface, not oily or bendy.

Corn tortilla wedges shallow-frying in oil beside crisp, lightly golden wedges. Graphic text says chilaquiles start with fully crisp tortillas.
At the frying stage, prioritize crisp structure over dark color: a dry, rigid tortilla wedge gives the salsa room to soften it gradually while still holding together.

Can You Use Store-Bought Tortilla Chips?

Yes. Use thick, restaurant-style corn tortilla chips. Thin dipping chips soften much faster, and even sturdier brands vary, so watch the texture instead of relying only on the clock.

Measure the chips by weight; use about 8 ounces / 225 grams for four servings. Taste the chips before adding extra salt. If you are using prepared salsa, taste that too; packaged chips, prepared sauce and Cotija can make the finished skillet salty surprisingly quickly.

The 15–20 minute chilaquiles shortcut

For chilaquiles in 15 to 20 minutes, use 8 ounces / 225 grams thick corn tortilla chips and about 2½ cups / 590 ml smooth prepared salsa roja.

Prepared salsa varies a lot. Heat it in a wide skillet first; if it holds its shape on the spoon, loosen it with a little water or low-sodium broth. Start with about 2¼ cups / 530 ml hot salsa, fold in the chips gently and let them sit for about 1 to 2 minutes. Add more of the remaining salsa only where the chips still look dry, then top and serve immediately.

Quick red chilaquiles made with thick corn tortilla chips, crema, cheese and onion. Graphic text gives the 15–20 minute shortcut quantities.
When choosing packaged tortilla chips, look for thick, sturdy pieces; they are less likely to fracture when you lift and fold them through hot salsa.

How Saucy Should Chilaquiles Be?

The salsa should pour easily and still have enough body to cling to the tortillas. When it is too thick, it sits in heavy patches. If it is too thin, the skillet can turn soupy before the tortillas absorb much flavor. A tortilla lifted through the pan should look glossy and red, with salsa in the folds but enough structure to reach the plate intact. If the finished skillet still looks dry, clumpy or soupy, the troubleshooting table helps separate those problems.

For 12 homemade tortillas, start with about 3 cups / 710 ml hot salsa and keep the remaining ½ cup / 120 ml nearby. That gives this recipe its saucy-but-structured middle ground; add more if you want the tortillas softer or the skillet still looks dry.

Why guajillo works well here

Guajillo gives the salsa its deep red color and warm dried-chile flavor without making it fiercely hot. Chile de árbol handles the heat: leave it out for mild chilaquiles, or add one or two for more bite.

Too thick and too little are different problems

A dry-looking skillet does not always need a huge pour of extra salsa. First check whether the sauce is simply too thick to move between the tortilla pieces. Thin it if needed, then add more only where the pan still looks dry.

Smooth red salsa pours in a narrow ribbon over partially softened tortilla pieces and flows between them. Graphic text describes the correct salsa flow.
Watch where the salsa travels after it lands: it should spread sideways and slip beneath overlapping tortillas, not remain perched in a thick mound on top.

Red or Green? Eggs, Chicken and Toppings

This recipe makes chilaquiles rojos with tomatoes and dried red chiles. Green chilaquiles take a brighter, tangier route with tomatillos and green chiles. For the green version, this salsa verde recipe gives you a roasted tomatillo base and explains how to loosen it for dishes such as chilaquiles.

Once the salsa is decided, eggs, chicken and toppings are mostly about how you want to build the plate.

Eggs are optional

Chilaquiles do not require eggs. A fried egg is especially good here because the soft yolk runs into the red chile sauce, although scrambled eggs can be served with chilaquiles too.

Chilaquiles rojos topped with one fried egg with a soft golden yolk, crema, crumbled cheese, sliced onion and cilantro.
With one fried egg, these chilaquiles make a more substantial brunch; leave the yolk intact until serving so each person can choose how much richness to mix into the chile sauce.

If you are thinking of migas, the overlap is real, especially once eggs are involved. The practical distinction is that chilaquiles center on tortillas cooked with salsa, while migas more often center on eggs cooked with tortilla pieces.

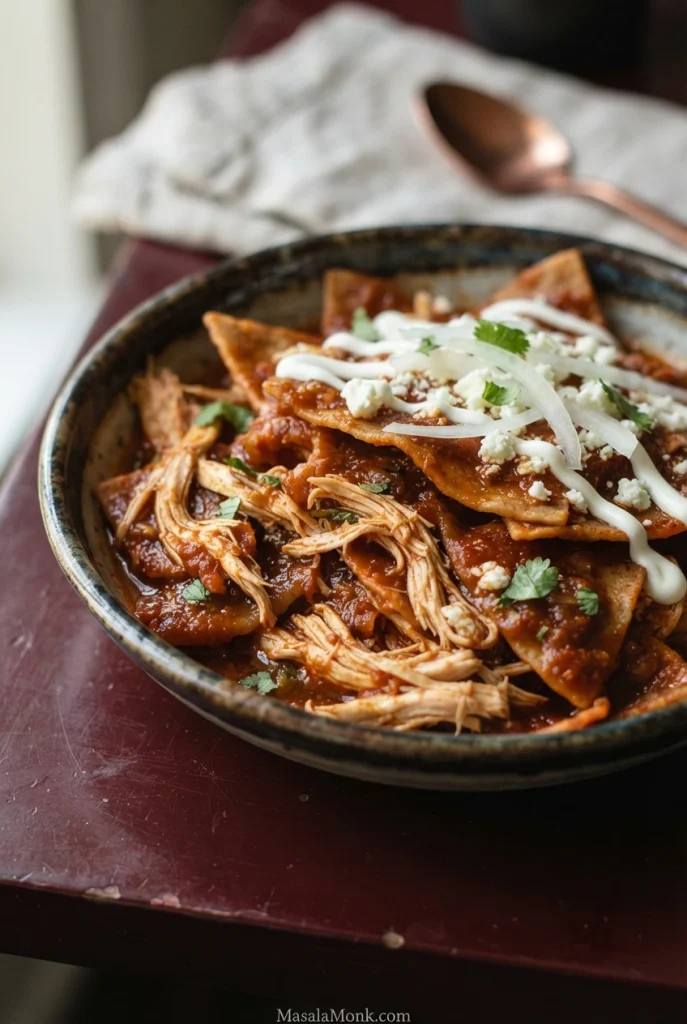
Chicken chilaquiles

For a more filling plate, shredded chicken adds substance without changing the basic chilaquiles method. About 1½ cups / 210 grams cooked shredded chicken is plenty for four servings; use up to 2 cups / 280 grams for a heartier meal. Warm it in the salsa before adding the tortilla pieces.

Chicken chilaquiles with shredded chicken distributed among red-salsa-coated tortilla pieces, crema, cheese, onion and cilantro.
Loosely shredded chicken works better than large chunks here because the strands catch salsa and settle between the tortilla layers instead of sitting heavily on top.

Leftover roast or rotisserie chicken is ideal. Starting with raw chicken? Bake it first, then shred it; the baked chicken breast recipe covers temperature and doneness cues.

Keep the Toppings Simple

Crema, crumbly cheese and thinly sliced white onion are enough on their own. Add avocado, radish or cilantro if you like, but the tortillas and salsa should still be the focus.

Queso fresco keeps the finish mild and fresh, while Cotija brings more salt and punch. Oaxaca or another melting cheese takes the dish in a different direction, giving you melted strands instead of the crumbly finish of queso fresco or Cotija.

Pico de gallo brings a cooler, fresher contrast. Drain off excess tomato juice, or spoon mostly the solids over the plate so you do not water down the chilaquiles.

For a larger breakfast or brunch, serve creamy refried beans alongside.

Chilaquiles Troubleshooting

If the skillet does not look right, first separate tortilla problems from salsa problems; the same dry-looking pan can need either more sauce or a thinner sauce.

Quick fixes by symptom

ProblemWhat to try
They taste dry or more like nachosAdd a ladle of hot salsa and fold gently. If the sauce barely moves, thin it first.
They softened more than you wantedThat can still taste great. Next time, use thicker chips or crisper tortillas and plate sooner.
The tortilla pieces fell apartThin packaged chips, under-crisped tortillas and too much stirring can all contribute. Fold gently once they begin softening.
The salsa sits in clumpsThin it with fresh water or low-sodium broth until it pours easily.
The skillet looks soupyReduce a thin sauce before adding the tortillas, and keep some salsa back instead of pouring in everything at once.
Everything tastes too saltyIf it is already too salty, add unsalted salsa if available and choose queso fresco over Cotija. Next time, taste the chips before seasoning.
The salsa is hotter than you wantedAdd mild tomato salsa or tomato purée. Use broth only if the sauce also needs thinning.
They were perfect in the skillet but soft on the plateServe sooner; have eggs, toppings, chicken and plates ready before saucing the tortillas.
Some pieces are crisp while others are leatheryFry smaller batches and keep the tortilla wedges from overlapping in the oil.
Common chilaquiles problems and the easiest ways to correct them.

Cooking for a crowd? Work in batches. A packed skillet is difficult to fold gently, and the first tortillas keep softening while you fight with the last ones.

Return to the cooking steps  ·  Back to recipe card

Make Ahead and Storage

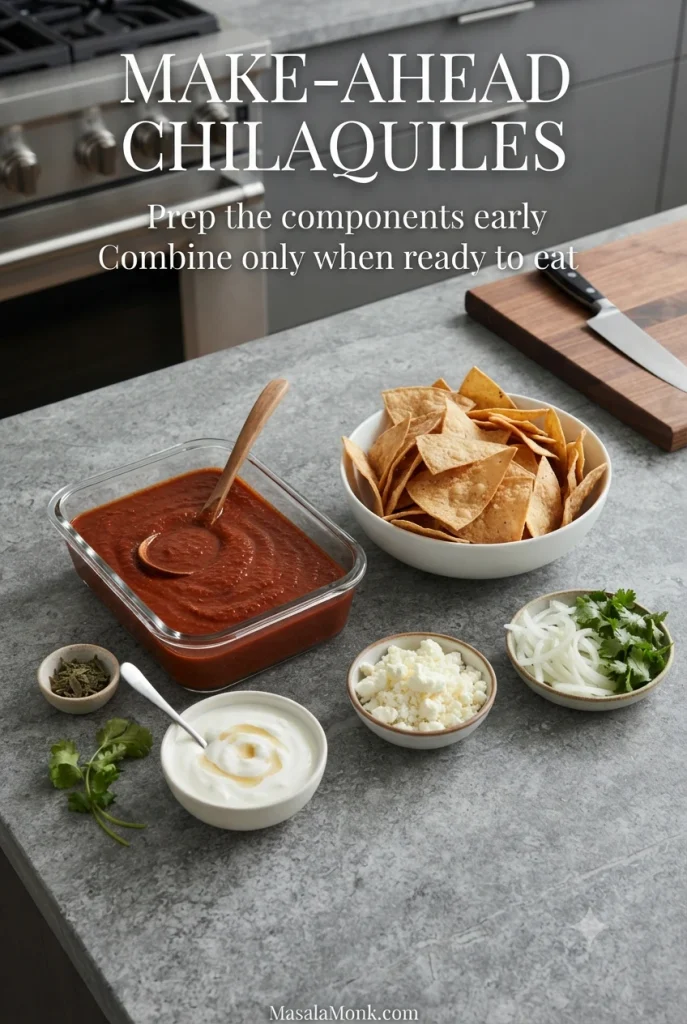
The salsa, tortilla chips and toppings can all be prepared ahead. Wait until you are ready to eat before putting the skillet together.

Store each component separately

Cooked red salsa, crisp tortilla wedges, crema, crumbled cheese and sliced onion arranged separately for make-ahead chilaquiles. Graphic text says to combine only when ready to eat.
Warm tortilla wedges release steam inside a sealed container; that trapped moisture can soften their crisp structure before the salsa ever reaches them.
  • Salsa roja: refrigerate in an airtight container for about 3 to 4 days. Reheat it in the skillet and add a splash of water or broth if it has thickened.
  • Homemade tortilla chips: cool completely and keep airtight at room temperature for about 2 to 3 days for the best crispness.
  • Cooked chicken: refrigerate separately for 3 to 4 days, then warm it in the salsa before assembling.
  • Toppings: prep them ahead where practical and refrigerate anything perishable until serving.
  • Finished chilaquiles: refrigerate leftovers and use within about 3 to 4 days, knowing the tortillas will become much softer.

If you need a breakfast that can be completely assembled in advance, chilaquiles are not the best fit. These meal-prep breakfast burritos are designed for refrigerator and freezer storage and handle reheating much better.

Leftover chilaquiles can be reheated, but reheating cannot recreate the contrast of freshly crisped tortillas folded into hot salsa. When you are ready to make a fresh batch, jump back to the step for saucing the tortillas.

Bring the tortillas and salsa together while the sauce is hot, then finish with cool crema, salty cheese and sharp onion. The point is not to keep every tortilla crisp; give the salsa enough time to soak into the corn, then stop when the chilaquiles have the texture you want.

↑ Back to top  ·  Recipe card  ·  Texture guide  ·  Troubleshooting

Posted on — Leave a comment

Crepe Recipe: Thin, Buttery & Easy

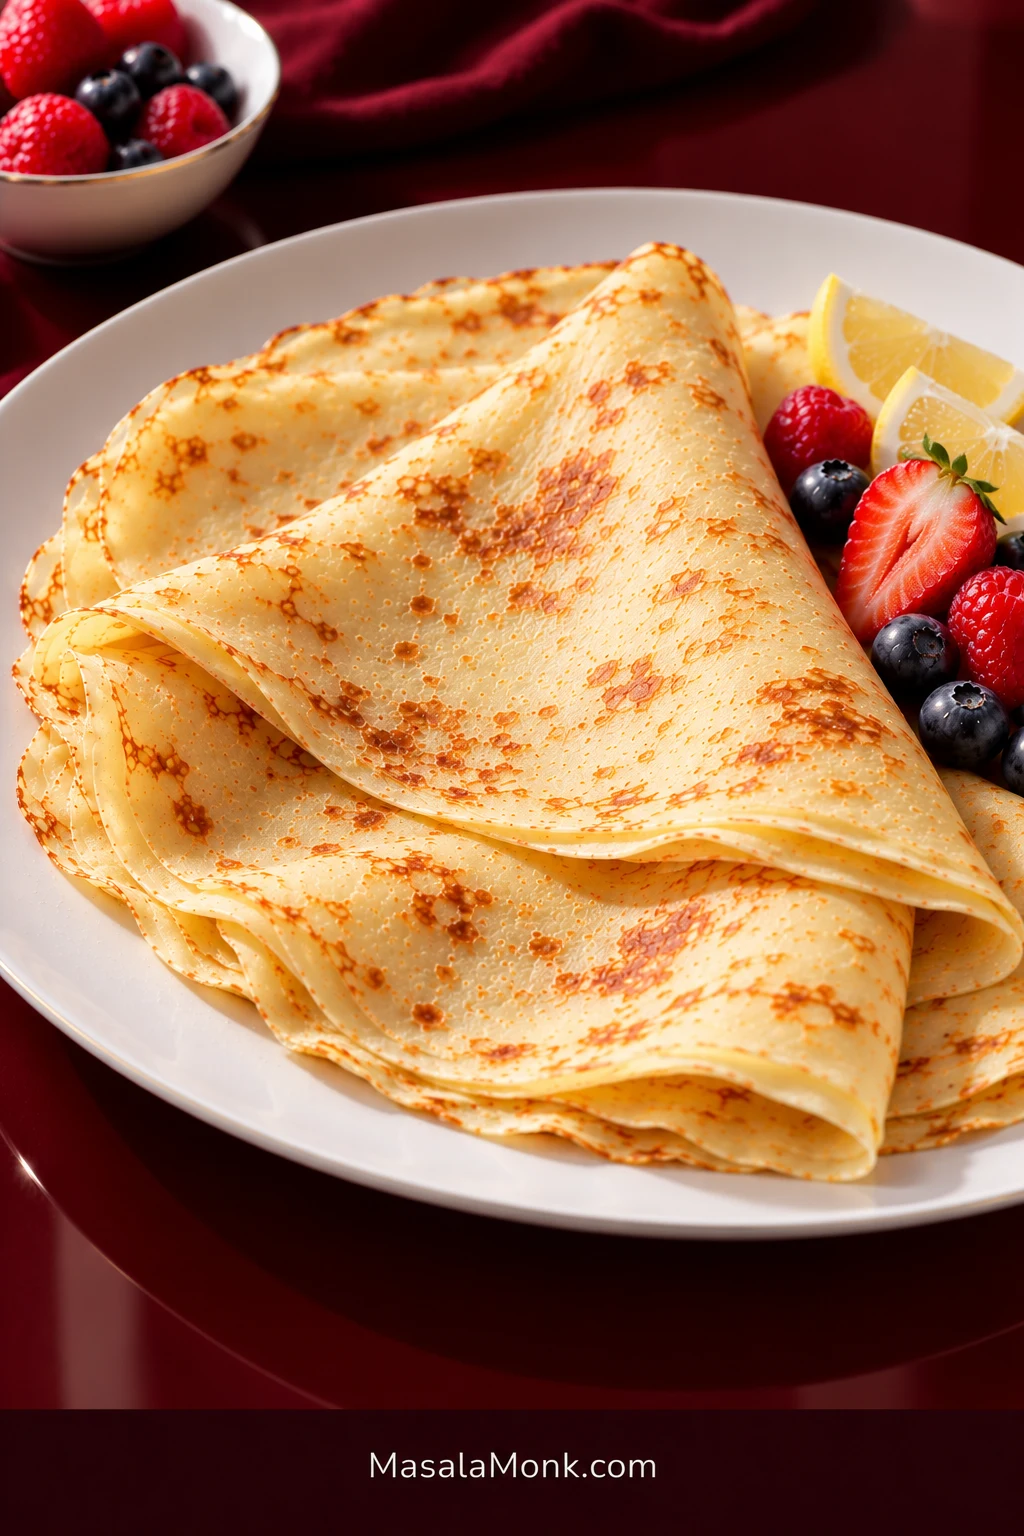
Thin French crepes folded on a white plate with pale golden surfaces, irregular brown freckles, berries, lemon, and cream.

A good French-style crepe is almost startlingly thin when you lift it from the pan, yet it should still feel soft and supple. It bends around a filling without tearing, with golden-brown freckles across the surface and a delicate edge that softens again as the crepes stack.

What matters most is fluid batter, a light film of butter in the pan, an immediate swirl, and recognizing when the first side is ready to turn.

Start with the quantities below, then watch what happens in the skillet. Batter can thicken as it rests, and pans heat differently. Once the batter flows well and the pan heat is right, crepes become much easier than they first appear.

Crepe Recipe: The Cues That Matter Most

These are more useful than trying to memorize one perfect burner setting.

WatchWhat you want
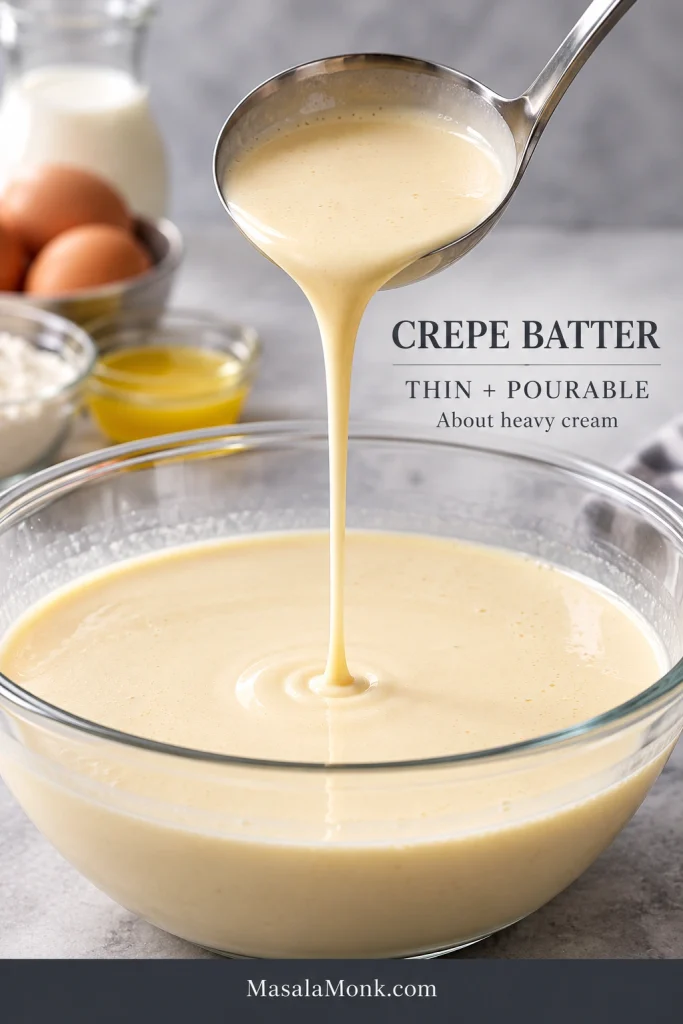
BatterThin and pourable, about the consistency of heavy cream
HeatSets steadily without browning before you finish swirling
Pan fatA thin glossy film, never a puddle
Batter amountJust enough to coat the pan in one fast swirl
Flip cueMatte top, releasing edge, golden-freckled underside

Easy French-Style Crepes

These crepes are thin, tender, lightly buttery, and flexible enough to fold or roll around sweet or savory fillings. The batter stays fluid enough to spread quickly into a thin layer before it sets.

Prep
10 minutes

Rest
30 minutes recommended

Cook
20–25 minutes

Total
About 1 hour 5 minutes

Yield
About 10–12 8-inch crepes

Equipment

  • An 8- to 10-inch nonstick skillet is easiest; a 12-inch skillet also works
  • Blender or mixing bowl and whisk
  • Thin, flexible spatula
  • Measuring cup or ladle

Crepe Ingredients

  • 1 cup + 1 tablespoon all-purpose flour (130g / 4.6 oz), spooned and leveled if using cups
  • 2 large eggs
  • 1 cup / 240ml / 8 fl oz whole milk
  • 1/4 cup / 60ml / 2 fl oz water
  • 2 tablespoons / 28g / 1 oz unsalted butter, melted and cooled until warm
  • 1 teaspoon granulated sugar, optional; omit it for a less-sweet savory crepe
  • 1/4 teaspoon fine salt
  • 1/2 teaspoon vanilla extract, optional for sweet crepes
  • 1–2 teaspoons unsalted butter, as needed, for the skillet

How to Make Crepes

  1. Mix the batter. Add the milk, water, eggs, salt, sugar if using, and vanilla if using to a blender. Follow with the flour and cooled melted butter, then blend for 20–30 seconds, just until smooth. The whisk method is covered in the guide below.
  2. Check the consistency. The batter should pour like heavy cream and run quickly across a tilted skillet. If it sits in a mound, it is too thick.
  3. Rest if you can. Give the batter 30 minutes at room temperature. Stir gently before cooking. If it has thickened, add milk or water 1 tablespoon / 15ml at a time until it flows easily. Short on time? You can start cooking straight away.

Cook, Flip, and Stack

  1. Heat the skillet. Preheat your nonstick skillet over medium to medium-low heat. Wipe in enough butter to leave a thin glossy film with no visible puddles.
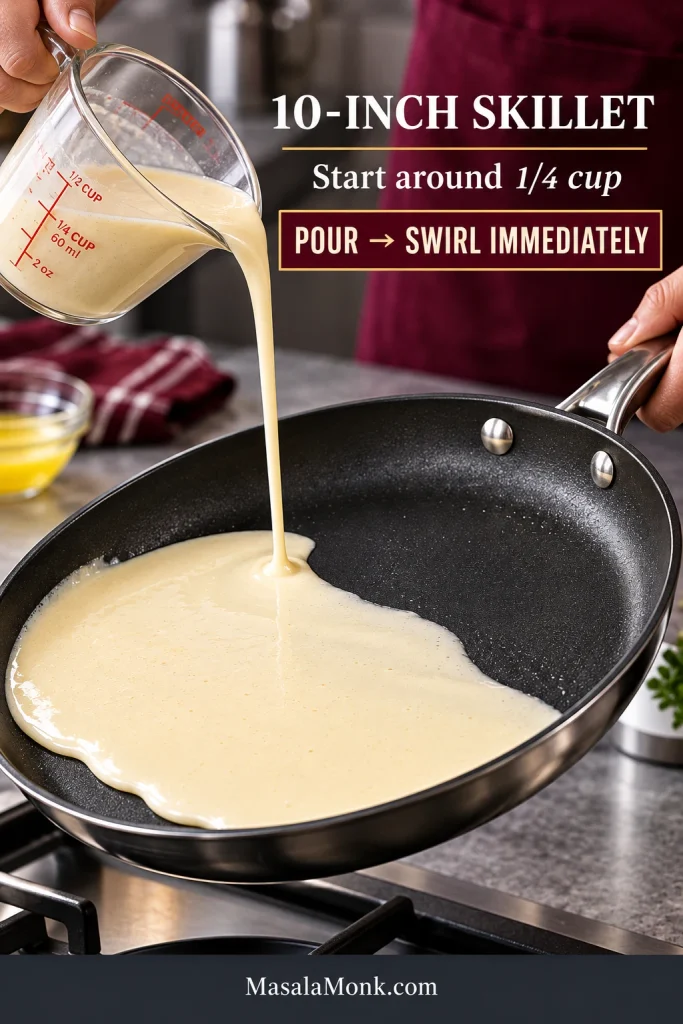
  2. Pour and swirl. Lift the skillet from the burner and add the batter: about 3 tablespoons / 45ml for an 8-inch skillet, 1/4 cup / 60ml for a 10-inch skillet, or about 1/3 cup / 75–80ml for a 12-inch skillet. Tilt and rotate immediately to spread it into a thin layer, then return the pan to the heat.
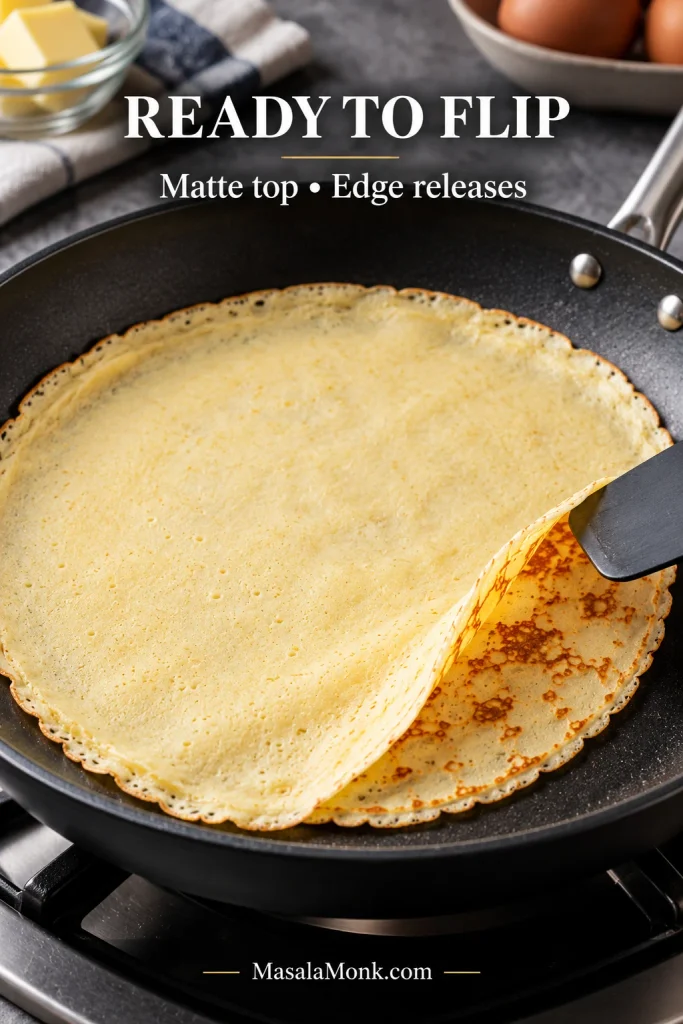
  3. Cook the first side. Wait until the shiny surface turns mostly matte, the edge begins to release, and the underside is lightly golden and freckled. This usually takes about 45–90 seconds.
  4. Flip briefly. Slide a thin spatula underneath and turn the crepe. Cook the second side for about 15–30 seconds, just until set with a few light brown spots.
  5. Stack and repeat. Put each crepe directly on top of the previous one and keep the stack loosely covered. Re-grease the skillet only when the surface looks dry or the crepes start sticking.

Pan Size & Yield Guide

Pan sizeStart withApproximate yield
8-inch skillet3 tbsp / 45ml10–12 crepes
10-inch skillet1/4 cup / 60ml8–9 crepes
12-inch skilletAbout 1/3 cup / 75–80ml6–7 crepes

Skillet bases vary, so treat these as starting amounts. If your pan has a smaller flat cooking surface, pour a little less.

Quick Recipe Notes

  • Sweet crepes: keep the teaspoon of sugar and add vanilla.
  • Savory crepes: leave out the vanilla; keep or omit the small amount of sugar.
  • Crepe tears while flipping: give the first side a little longer. The top should look matte and the edge should release cleanly.
  • Half batch: use 1 egg, 65g flour, 120ml milk, 30ml water, 14g melted butter for the batter, 1/2 teaspoon sugar if using, 1/8 teaspoon salt, and 1/4 teaspoon vanilla if using. Butter the skillet as needed. Use the same batter amount per crepe and expect roughly half the yield.

Recipe development disclosure: MasalaMonk developed this recipe by comparing established crepe methods and recurring problems home cooks report. This exact formulation has not been independently kitchen-tested by MasalaMonk.

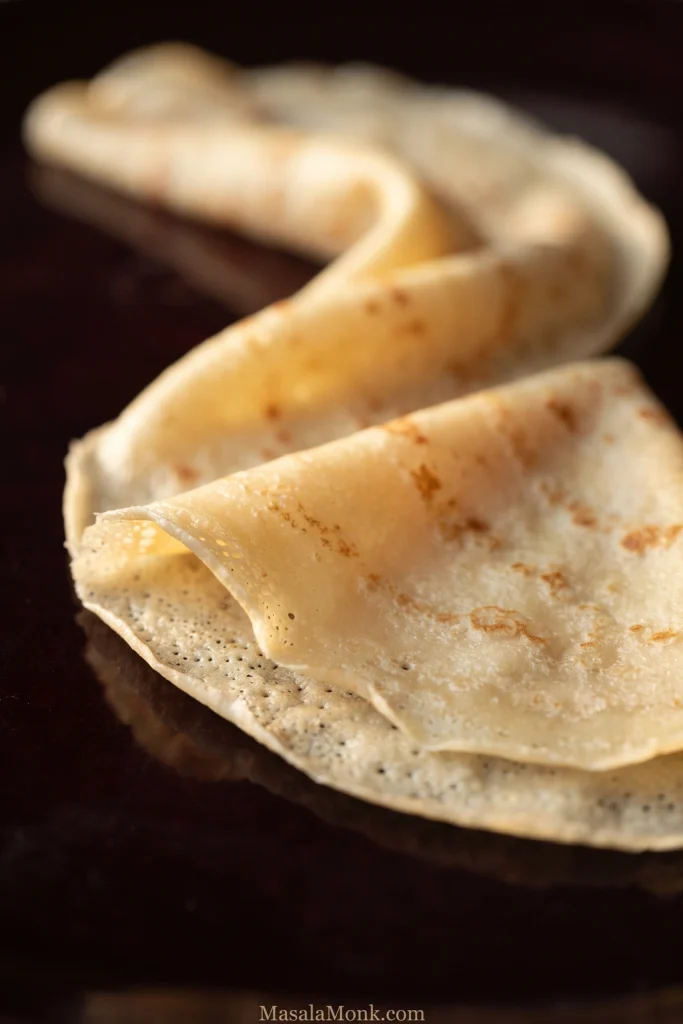
Before moving into the technique, look at the finished crepe’s folded edge: several layers should still look fine and flexible rather than forming a thick ridge. That edge is often the easiest place to judge whether each crepe was spread thinly enough.

Close-up of a very thin pale-golden crepe draped into soft folds, showing fine layered edges and light brown cooking marks.
If the batter is already flowing well but the crepe still looks thick, use a smaller pour next time rather than cooking it longer for more color. Extra pan time dries an oversized layer without correcting its thickness.

Crepe Batter Should Be Thinner Than You Think

Aim for a thin, pourable consistency, roughly like heavy cream. The liquid should travel across a tilted skillet before it begins to set.

If you are used to making fluffy buttermilk pancakes, this can look surprisingly loose. Pancake batter tends to sit where you spoon it. Crepe batter needs to race across a tilted pan.

Pale crepe batter pouring in a narrow stream from a metal ladle into a glass bowl with a smooth batter surface below.
A useful consistency check is how quickly the bowl’s surface closes over the stream. If the ribbon stays raised, stir and reassess before adding liquid; the goal is workable flow, not simply a thinner-looking mixture.

Water keeps the batter loose enough to spread before it starts setting. Meanwhile, eggs give the finished crepe enough structure to lift and fold, while milk and butter add richness and browning.

When the batter thickens after resting: Stir it first. If it still moves slowly, add milk or water 1 tablespoon / 15ml at a time until it flows easily again.

Blender or Whisk?

Blender: add the liquids, eggs, salt, sugar and vanilla if using first, followed by the flour and warm melted butter. Blend for 20–30 seconds and stop once the batter is smooth. A little foam will settle during the rest.

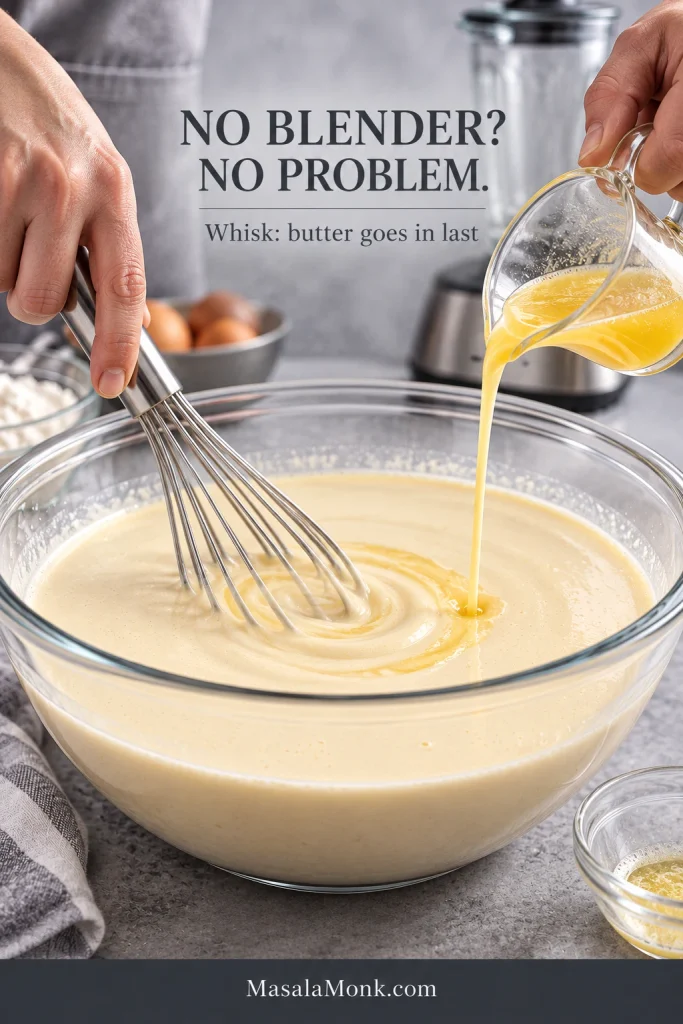
Whisk: combine the flour, salt, and sugar if using, then gradually whisk in about half of the milk until smooth. Add the eggs, remaining milk, water, and vanilla if using. Drizzle in the warm melted butter last while whisking. A few stubborn lumps can simply be strained out.

Let the melted butter cool until warm so it does not heat the eggs. Very cold milk and eggs can chill the butter into a few small beads; blending usually smooths them back into the batter, while gradual whisking helps keep the butter dispersed.

Hands whisking fluid crepe batter in a glass bowl while warm melted butter is poured from a small pitcher, with a blender in the background.
Whisked crepe batter should not hold deep tracks. Instead, the trails should start smoothing over almost immediately; meanwhile, warm melted butter blends in more cleanly when streamed in gradually.

Rest 30 Minutes When You Can

Thirty minutes helps, but do not postpone breakfast for it. Resting gives the flour time to hydrate and lets bubbles from mixing settle, which usually helps the batter spread more evenly. Cooking immediately is still perfectly workable.

The batter can also rest overnight in the refrigerator. Stir before cooking and check the flow again; chilled batter often needs a small splash of liquid.

What About Pancake Mix or Other Batter Changes?

Pancake mix is not a cup-for-cup replacement for the flour here. Prepared mixes may already contain salt, sugar, leavening, dairy, or fat, so use a crepe recipe written for the specific mix you have rather than trying to convert this batter.

  • Plant milk: unsweetened plant milks can work, but thickness varies. Use the batter’s flow rather than the carton as your guide.
  • Oil: neutral oil can replace the melted butter and can also grease the skillet, though the crepes will lose some buttery flavor.
  • Different batters: egg-free and gluten-free crepes need a batter built for those changes rather than a one-for-one swap. Traditional buckwheat galettes use a different batter too.

The Pan Needs a Sheen, Not a Pool of Butter

You do not need a crepe pan. A good nonstick skillet is enough, and the crepe should release cleanly once the first side has set.

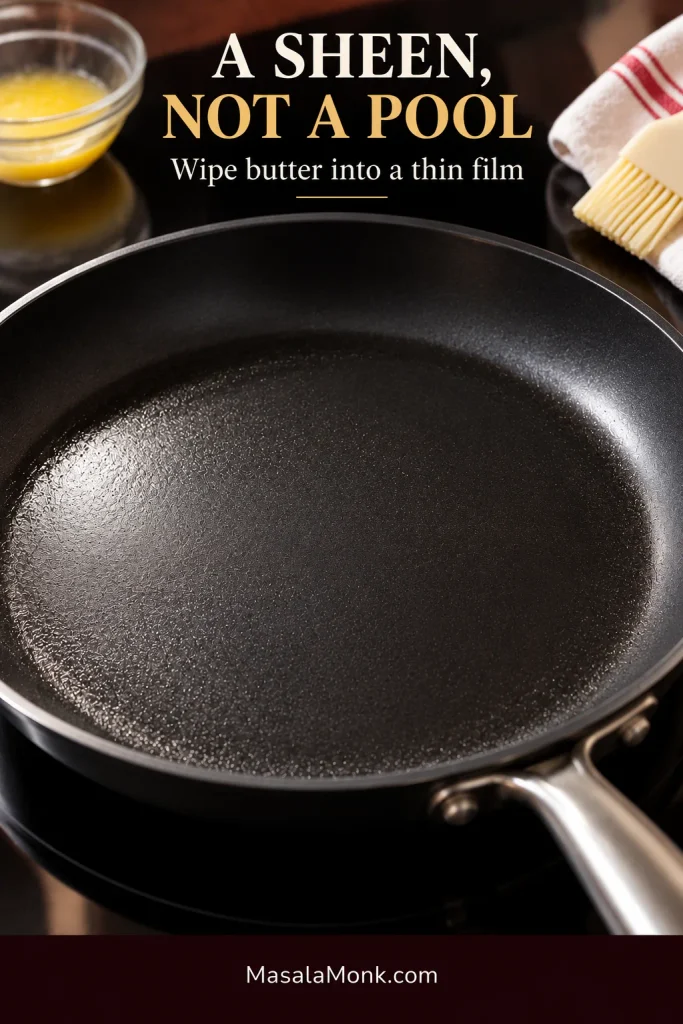
Preheat the skillet over medium to medium-low heat, then wipe the butter into a very thin glossy film. You should not see puddles of fat gathering around the batter. Too much can make the wet batter skate instead of spreading into an even layer.

Black nonstick skillet with a very thin reflective coating of butter, with a pastry brush and melted butter nearby.
Look across the whole skillet, not just the center: a consistent film should have no bright pools at the edges and no dry patches in the middle. Even coverage matters more than a visibly thick coating.

When the skillet is working well, keep going. Add more butter only when the surface looks dry or the crepes start sticking.

“Medium” is only a starting point. Pan weight and burners vary, so watch how the crepe browns and adjust from there.

How Much Batter Should Go in the Pan?

Too much batter gives you a thicker crepe, and a thicker crepe needs longer in the pan. Start with the smallest amount that can coat the pan in one quick swirl.

Pan sizeStarting batter amount
8-inch skilletAbout 3 tbsp / 45ml
10-inch skilletAbout 1/4 cup / 60ml
12-inch skilletAbout 1/3 cup / 75–80ml

A thick crepe despite good batter flow usually means too much batter went into the pan. Pour a little less next time. Already thin, tender, and folding easily? Leave it alone.

How to Make Crepes: Pour, Swirl, Watch, Flip

Most crepes need about 45–90 seconds on the first side and only 15–30 seconds after flipping. Use those times as a guide, but let the surface, edges, and underside tell you when the crepe is ready.

Pour and Swirl the Batter

Lift the skillet from the burner before pouring. That brief pause gives the fluid batter a little more time to spread before the hot surface starts setting it.

Fluid crepe batter pouring into a tilted 10-inch black nonstick skillet while part of the pan remains exposed as the batter spreads.
If the first swirl leaves a small bare patch, resist repairing it with a second pour. A later addition can set at a different time and leave a thicker seam; adjust the amount or tilt on the next crepe instead.
  1. Pour. Add the measured batter to the center of the lifted skillet.
  2. Swirl immediately. Tilt and rotate the pan so gravity carries the batter across the surface, then return it to the burner.

Watch for the Flip Cue

After the batter has spread, watch the top change from shiny and wet to mostly matte. The edge should begin to release, while the underside develops light golden freckles.

  1. Watch the top. As the first side cooks, the wet sheen disappears and the surface becomes mostly matte.
  2. Check underneath. When the thin edge begins releasing, slide a flexible spatula underneath. The bottom should be lightly golden with scattered brown freckles.
Pale matte crepe in a black skillet with one edge lifted by a spatula, revealing a golden-brown freckled underside.
Use the flexible spatula to support the delicate sheet as it turns. Lifting from one small point can make a thin crepe fold over itself before it clears the skillet.
  1. Flip. Cook the second side for only 15–30 seconds. It needs to set; there is no need to chase the same color as the first side.
  2. Stack. Put finished crepes directly on top of one another and keep the stack loosely covered. The warmth softens the delicate edges and keeps the crepes flexible.

Let the First Crepe Teach You Something

A torn, uneven, or slightly lopsided first crepe still did its job: it showed you what to change.

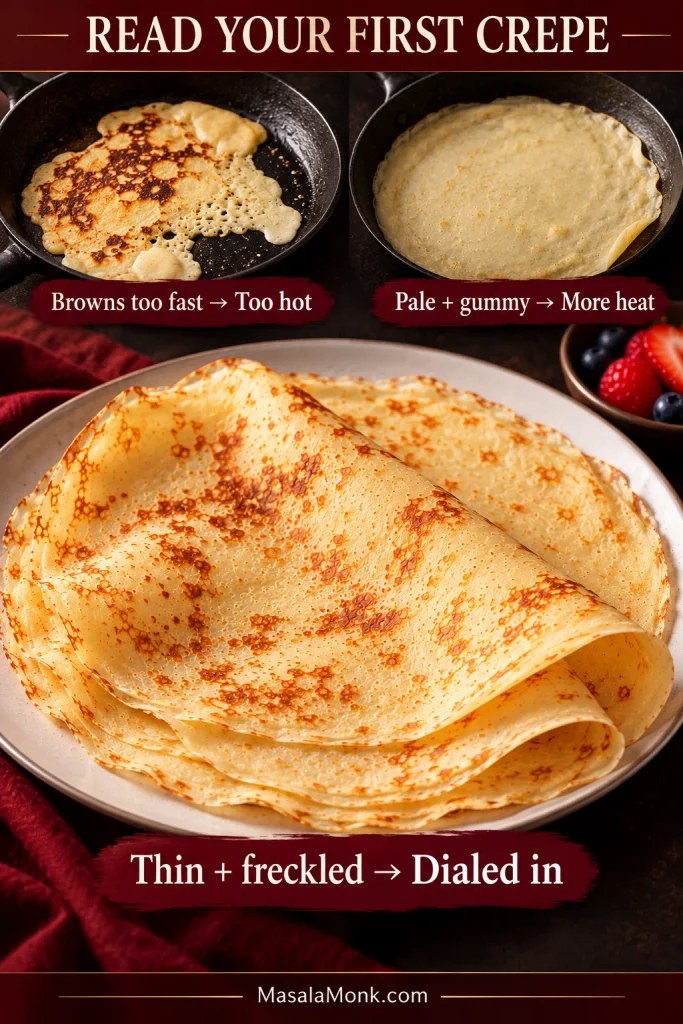
The first crepe is where the batter and pan introduce themselves. Browning before you finish swirling points to too much heat; a pale, gummy crepe usually needs a little more.

Three-state crepe heat guide showing a dark uneven crepe from excessive heat, a pale under-browned crepe needing more heat, and thin golden-freckled crepes at a better pan temperature.
A lopsided first crepe can still be useful. Read its color, release, and tenderness together before changing anything; an imperfect outline alone does not mean the batter formula needs fixing.

Change one thing, then cook the next crepe. Thickness, tearing, sticking and other problems are covered below. After two or three crepes, you may find yourself watching the surface more than the clock.

Once the heat and batter are dialed in, the whole process settles into a rhythm: pour, swirl, watch, flip, stack.

Crepe Troubleshooting: Fix the Crepe You’re Looking At

Use the symptom you can actually see, make the most likely correction, and cook another crepe before changing anything else.

What you seeWhat to try
Batter will not spreadCheck the consistency first. If it flows well, lower the heat slightly so the batter has more time to spread.
Crepes are too thickCheck the batter consistency, then reduce the amount you pour.
Batter slides aroundWipe away excess butter. If needed, let the skillet heat a little more.
Crepe tears when flippedLet the first side set a little longer. Persistent tearing can also point to batter that is too thin or a crepe that is unusually large.
Crepe sticksCheck the heat and condition of the nonstick surface, then add a very thin film of butter if needed.
Crepe is rubberyIt is probably too thick or staying in the pan too long. Check the flour measurement and batter amount, and remove the crepe once it is set and lightly browned.
Crepe is dry or brittleShorten the cooking time, especially on side two, then stack the finished crepes while warm so the edges soften.
Later crepes stop spreading wellStir the batter and check whether it has thickened. Loosen it with a small splash of milk or water if needed.

If the problem persists, revisit batter consistency or pan heat and butter before changing the recipe itself.

Crepe Fillings: Sweet and Savory Ideas

Once the crepes are stacked, the difficult part is over. From here they can go sweet, savory, simple, or substantial enough for a meal.

Sweet crepe with lemon, berries, and cream beside a savory crepe filled with ham and melted cheese.
Treat a crepe as a delicate wrapper rather than a tortilla. Add enough filling to flavor each bite while still letting the thin sheet close easily; overloaded crepes are harder to fold and more likely to tear.

Fillings should already be cooked or ready to eat before they go into the crepe. Cut bulky ingredients fairly small, cook meat through, and sauté or drain wet vegetables so they do not release water into the thin crepe.

A folded crepe can warm a filling or melt cheese; it is not in the pan long enough to cook something from raw. If you are deciding how to serve a filling, the Fold or Roll? guide explains which shape works best.

Sweet Crepe Fillings

  • Lemon + sugar: squeeze fresh lemon juice over the crepe while it is still warm, then scatter over just enough sugar to melt into the surface. For something richer, spread on a thin layer of homemade lemon curd.
  • Chocolate-hazelnut + banana: spread while the crepe is warm and add sliced banana.
  • Strawberries + cream: let sliced berries sit with a little sugar until juicy, then add softly whipped cream.
  • Orange marmalade: a thin layer of homemade orange marmalade gives the crepe a bright, slightly bittersweet citrus finish.
  • Apple + cinnamon: spoon in warm diced apples with cinnamon, or use a little homemade apple pie filling. Keep the filling soft enough to fold easily into the crepe.

Savory Crepe Fillings

  • Ham + cheese: add a thin layer of ham and a good melting cheese, fold the crepe, then return it to the pan just until the cheese softens and the center turns warm.
  • Egg + cheese: soft scrambled eggs, black pepper, and a little cheese make an easy breakfast filling.
  • Chicken + mushroom: use cooked chicken and well-sautéed mushrooms with a little cheese or a spoonful of homemade cheese sauce.
  • Spinach + cheese: cook the spinach first and squeeze out excess moisture. For something richer, use a spoonful of creamed spinach.

Fold or Roll?

Thin fillings such as lemon and sugar or chocolate-hazelnut spread work well folded in half and then into quarters. Larger savory fillings are easier to spoon down the center and roll loosely.

For a quick dessert, fold the crepe first and finish it on the plate. Berries or banana with a little homemade chocolate syrup is plenty.

Quarter-folded strawberry-and-cream crepe beside a rolled savory crepe filled with eggs, mushrooms, and cheese.
Leave a little room at the open edge of a quarter-fold so the filling can settle without spilling. For a roll, place the seam underneath when serving to help it stay closed without compressing the delicate crepe.

Make Ahead, Store, and Reheat Crepes

Make the Batter Ahead

Cover the batter and refrigerate it for up to 24 hours. Stir before cooking and loosen it with a small splash of milk or water if it has thickened.

Store Cooked Crepes

Let the stack cool, cover it well, and refrigerate for up to 2 days for the best texture. Keeping the crepes stacked protects the thin edges from drying out.

For food safety rather than best texture, USDA leftovers guidance says most properly refrigerated cooked leftovers can generally be kept for 3 to 4 days.

To freeze crepes for longer, cool them completely and wrap them airtight. Put parchment between them if you want to remove them one at a time. Freeze for up to 1 month for best texture, then thaw overnight in the refrigerator.

Reheat Crepes

For one or two crepes, warm them in a dry or very lightly buttered nonstick skillet for about 15–20 seconds per side. A larger stack can stay covered in a 275°F / 135°C oven for about 5–10 minutes, just until soft and heated through.

Stack of cooked crepes partly covered with a cloth, with one crepe reheating in a skillet and another stack stored between parchment sheets.
Warm holding and cold storage need different treatment. Loosely cover the fresh stack while serving; however, let cooked crepes cool before sealing them for the refrigerator so excess steam does not become trapped condensation.

Add cold toppings after reheating. Soft homemade whipped cream, for example, is better added to warm crepes just before serving.

Silver fork gently lifting a thin folded crepe from a white plate, showing the pale-golden crepe bending in soft flexible layers.
A warm crepe should bend from the fork without cracking at the fold. That is a useful final check at serving time, when a crepe that has dried out or become rubbery will feel noticeably less supple.
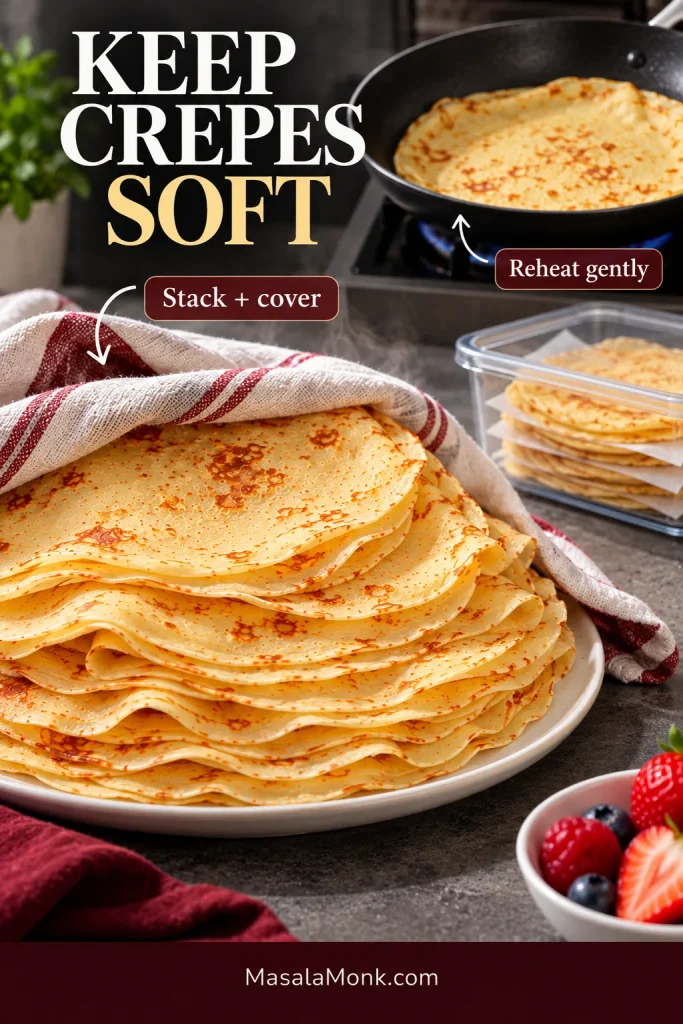
Warm crepes do not need much: lemon and sugar, berries and soft cream, or ham and melted cheese. By the time the stack is growing, the part that looked fiddly at the start often feels almost automatic: pour, swirl, watch, flip, stack.
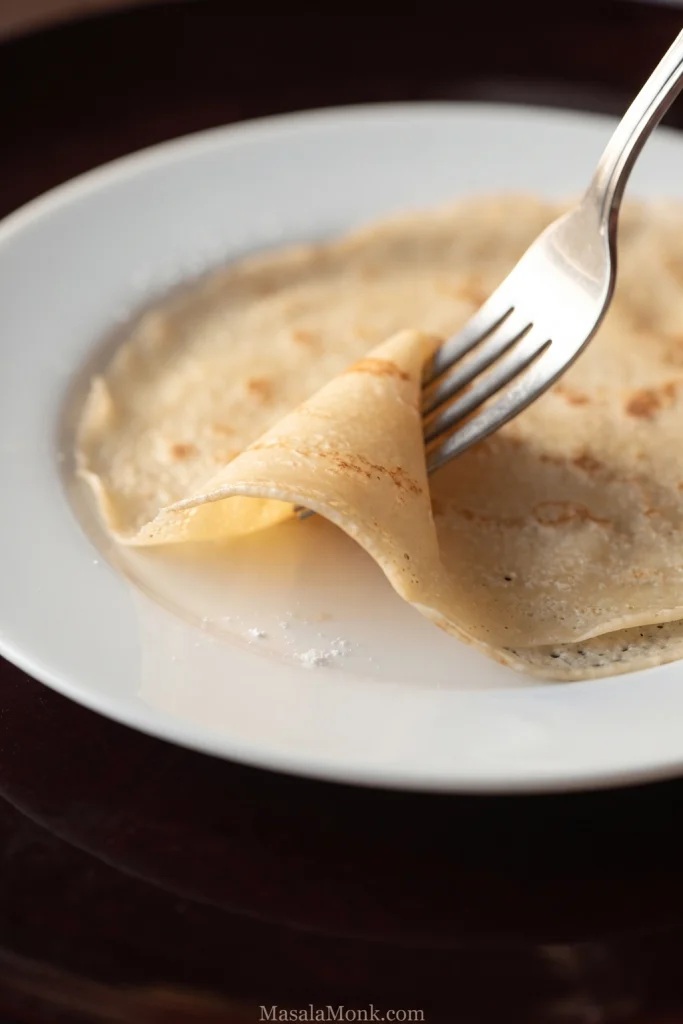
Posted on — Leave a comment

Shepherd’s Pie Recipe: Easy, Hearty & Comforting

Shepherd’s pie in a glossy black-cherry casserole with golden fork-ridged mashed potatoes over ground lamb filling with carrots and peas, with a serving removed to show the layers.

A good spoonful of shepherd’s pie gives you creamy mashed potatoes, crisp golden ridges and rich lamb gravy that stays with the meat and vegetables underneath. The topping should hold its place without becoming stiff, while the filling stays saucy without running across the plate.

This easy shepherd’s pie recipe uses ground lamb, carrots and peas in a savory gravy, finished with a generous layer of buttery mashed potatoes. Most of the important work happens before the casserole reaches the oven: give the lamb some real color, let the gravy reduce, and keep the mash creamy without making it loose.

Shepherd’s pie traditionally uses lamb; make the same style of dish with ground beef and it becomes cottage pie.

Brown. Set. Cap.

Three stages make the biggest difference to the finished pie.

  • Brown: give the lamb enough uninterrupted pan contact to develop real color. Stir it constantly and it is more likely to steam.
  • Set: finish the filling on the stovetop. The gravy should stay with the lamb and vegetables, with no loose liquid gathering underneath.
  • Cap: use warm mashed potatoes that spread easily but still hold their shape. Add them in smaller spoonfuls so you do not push them down into the filling.

Get those moments in place and the rest is mostly assembly, oven time and the patience to let the finished pie rest before you spoon into it.

Editorial cooking guide labeled Brown, Set and Cap, showing browned ground lamb, reduced lamb-and-vegetable gravy, and mashed potatoes being added around the casserole edge.
Use these as stop/go checks: pale lamb needs more pan time, loose gravy needs more reduction, and a very hot filling benefits from a brief pause before the mash goes on.

Ready to cook? Jump to the Shepherd’s Pie recipe.

Shepherd’s Pie Recipe

Easy Lamb Shepherd’s Pie

Ground lamb, carrots and peas in thick savory gravy, topped with creamy Russet potatoes and baked at 400°F / 200°C / 180°C fan for 25–30 minutes, until the filling bubbles and the top turns golden.

Serves
6 generous portions

Before Baking
About 40–45 minutes

Bake
25–30 minutes

Total
About 1 hour 15–30 minutes, including rest

Equipment

  • 12-inch / 30 cm skillet or wide sauté pan; if yours is smaller, brown the lamb in two batches
  • Large saucepan for the potatoes
  • Colander
  • Potato masher or ricer
  • 2½- to 3-quart / 2.4- to 2.8-L baking dish, such as a deep 9×9-inch casserole or another dish of similar capacity
  • Rimmed sheet pan if the casserole dish is fairly full

Lamb Filling

  • 1½ lb / 24 oz / 680 g ground lamb
  • 1 teaspoon olive oil, only if the skillet is dry after browning
  • 1 large yellow onion, finely diced
  • 2 medium carrots, diced small
  • 1 large celery rib, diced small
  • 3 garlic cloves, minced
  • 2 tablespoons / about 30 g tomato paste
  • 2 tablespoons / about 16 g all-purpose flour
  • ½ cup / 4 fl oz / 120 ml dry red wine, optional
  • 1¼ cups / 10 fl oz / 300 ml low-sodium beef or lamb stock
  • Additional ½ cup / 120 ml stock if omitting the wine
  • 1 tablespoon / 15 ml Worcestershire sauce
  • 1 teaspoon dried thyme
  • ½ teaspoon dried rosemary, crushed between your fingers
  • ¾ teaspoon fine salt, divided, plus more if needed
  • ½ teaspoon freshly ground black pepper, plus more to taste
  • 1 cup / about 140 g frozen peas

Mashed Potato Topping

  • 2 lb / 32 oz / 900 g Russet potatoes, weighed before peeling, peeled and cut into roughly 1½-inch / 4 cm chunks
  • 4 tablespoons / 2 oz / 57 g unsalted butter
  • ⅓ to ½ cup / 80–120 ml whole milk, warmed
  • ¾ teaspoon fine salt, plus salt for the cooking water and more if needed
  • Freshly ground black pepper
  • Optional: ¼ cup / about 25 g finely grated Parmesan or 1 tablespoon melted butter for the top

Instructions

Start the Potatoes and Brown the Lamb
  1. Start the potatoes. Put the potato chunks in a large saucepan and cover with cold water by about 1 inch / 2.5 cm. Salt the water generously. Bring to a boil, lower to a steady simmer and cook until a knife passes easily through the center, usually about 15–18 minutes once boiling. As soon as the potatoes are tender, drain them. Return them to the warm saucepan off the heat with the lid slightly ajar until you are ready to finish the mash.
  2. Brown the lamb. While the potatoes cook, heat a 12-inch / 30 cm skillet over medium-high heat. Add the lamb and spread it across the pan. Leave some areas alone long enough to develop brown patches, then break the meat apart and continue cooking until no raw meat remains. If the pan is crowded or the lamb is simmering in its own liquid, brown it in two batches.
  3. Adjust the fat. If a noticeable pool of lamb fat collects in the skillet, spoon off the excess and leave a thin coating behind. If the pan looks dry instead, add up to 1 teaspoon olive oil.
Build and Reduce the Lamb Filling
  1. Cook the vegetables. Add the onion, carrots, celery and ½ teaspoon of the filling salt. Cook for 6–8 minutes, stirring occasionally, until the onion is translucent and the carrots have started to soften. Add the garlic and cook for another 30 seconds.
  2. Build the base. Stir in the tomato paste, thyme and rosemary. Cook for about 2 minutes, until the paste darkens, smells sweeter and begins clinging to the lamb and vegetables. Sprinkle over the flour and cook for another minute.
  3. Add the liquids. If using wine, pour it in and scrape up the browned bits from the skillet. Let it bubble for 2–3 minutes, until the volume has reduced and the sharp wine smell has softened. Add the stock, Worcestershire sauce and black pepper. If you skipped the wine, add the extra ½ cup / 120 ml stock instead.
  4. Reduce the gravy and preheat the oven. Heat the oven to 400°F / 200°C / 180°C fan. Simmer the lamb mixture uncovered over medium to medium-low heat for roughly 8–12 minutes, stirring from time to time. A spoonful should sit in a soft mound, with the gravy staying around the meat and vegetables instead of quickly spreading into a watery ring. If it goes too far and starts looking dry, stir in stock 1–2 tablespoons / 15–30 ml at a time.
  5. Finish the filling. Stir in the frozen peas and cook for about 1 minute. Taste after the gravy has reduced and add the remaining ¼ teaspoon salt if needed, plus more pepper to taste. Transfer the filling to the baking dish if necessary and leave it to settle while you finish the potatoes. Once the gravy looks right, the hardest part is done.
Finish the Mash, Assemble and Bake
  1. Steam-dry the potatoes. Set the saucepan back over low heat for 1–2 minutes, shaking gently, until obvious surface moisture has steamed away.
  2. Make the mash. Add the butter, ¾ teaspoon salt and black pepper. Mash until smooth. Pour in the first ⅓ cup / 80 ml warm milk, then add more only if needed. Stop when the potatoes are creamy and spreadable but still hold soft peaks. If the mash feels stiff, add warm milk a tablespoon at a time.
  3. Add the potato topping. Spoon small amounts of warm mash around the outside edge of the filling first, then distribute the rest across the center. Gently join the spoonfuls into a complete layer without pressing hard into the lamb. Run a fork over the surface to make ridges. Sprinkle with Parmesan, or lightly brush or drizzle the ridges with melted butter, if using.
  4. Bake. Set the casserole on a rimmed sheet pan if it is fairly full. Bake for 25–30 minutes, until the edges are bubbling, the center is thoroughly hot and the potato top is lightly golden. A little gravy bubbling up at one corner is fine. For more color, broil the top for 1–3 minutes if your baking dish is broiler-safe, watching constantly; otherwise leave it in the regular oven a few minutes longer.
  5. Rest. Give the shepherd’s pie 10–15 minutes before serving. The bubbling settles and the gravy tightens just enough for the potato and lamb to come up together on the spoon. Do not expect perfectly cut squares; shepherd’s pie should still be softly spoonable.

Need help with texture or assembly? Read the Shepherd’s Pie Guide · Fix a problem.

Shepherd’s Pie Guide

The recipe gives you the method. What follows focuses on the choices that can actually change the finished pie—and the places where you have room to adapt.

Broad serving spoon lifting an irregular soft portion of shepherd’s pie, with golden mashed potato folding into ground lamb filling with carrots, peas and onions.
A slight slump is a good sign. The potato and lamb should travel together, then relax naturally on the spoon without leaving a watery puddle behind.

Lamb, Beef and What Makes It Shepherd’s Pie

In the traditional distinction, shepherd’s pie uses lamb and cottage pie uses beef. The cooking method is otherwise very similar.

American recipes often use “shepherd’s pie” more loosely for the beef version, so both names turn up for very similar casseroles. Lamb is the first choice here because its richer flavor works particularly well with rosemary, thyme and Worcestershire.

Side-by-side comparison of shepherd’s pie made with ground lamb and cottage pie made with ground beef, each finished with a golden mashed potato topping.
The meat changes the name, but the same pan checks still matter. Whether you use lamb for shepherd’s pie or beef for cottage pie, check the rendered fat after browning and reduce the gravy until it clings to the meat.

If ground beef is what you have, use the same amount. For a beef-first version built around the slow cooker, try our slow cooker cottage pie.

Shepherd’s Pie Ingredients

Ground lamb gives the pie its identity. Onion, carrot, celery and garlic build the savory base. Use ground or minced lamb here; whole lamb shoulder is better suited to a slow cook such as Irish stew.

Tomato paste adds concentration without turning the filling into tomato sauce. Worcestershire sauce deepens the lamb gravy, while rosemary and thyme suit the meat without overwhelming it.

Two tablespoons of flour help give the gravy body. The rest comes from simmering until the liquid has reduced around the lamb. The wine is optional; stock works perfectly well in its place. Add the peas once the gravy is ready—they only need time to heat through.

For the topping, Russet potatoes are the better fit because they cook up fluffy and keep the mash relatively light. Yukon Golds still work if you prefer a denser, naturally buttery topping. Butter adds richness; add the milk gradually to control the texture. Parmesan is optional, adding saltiness and helping the top brown.

Editorial ingredient layout showing ground lamb with onion, carrot, celery and garlic; gravy ingredients including tomato paste, stock and herbs; and potatoes with butter and milk.
Not every shepherd’s pie ingredient has the same job. Lamb and aromatics build the savory base, flour plus reduction control the gravy’s body, and potatoes, butter and milk create the cap. Wine mainly changes flavor, while Parmesan adds saltiness and can help the ridges brown.

Build a Filling That Can Hold the Mash

Pan width changes how quickly moisture escapes. A crowded skillet makes lamb simmer; a wide one gives the meat room to brown and makes the gravy easier to control. The lamb and vegetables also release different amounts of liquid from batch to batch, so resist adding extra stock simply for “more gravy.”

Small irregular ground lamb crumbles browning in a stainless-steel skillet, with darker caramelized patches on meat touching the pan.
Brown patches are enough; every crumble does not need to turn dark. When the wet simmering sound gives way to a drier sizzle and caramelized spots appear, move on while the lamb is still tender.

When the Gravy Is Ready

What the filling looks likeWhat to do
Loose gravy gathers around the meatKeep simmering uncovered.
The lamb is coated in glossy gravy and a spoonful holds togetherReady for the baking dish.
The mixture looks dull or crumblyStir in a small splash of stock.
Ground lamb, carrots, peas and onions in reduced mahogany gravy, with a spoon trail exposing the stainless-steel skillet and a cohesive spoonful lifted above it.
Tilt the skillet slightly. Properly reduced shepherd’s pie filling should move as a cohesive mass while the gravy stays with the lamb instead of racing toward the low side. That movement is often a better stopping cue than the clock.

Keep enough gravy to stay rich beneath the potatoes when you spoon into the pie.

Mash That Spreads Without Slumping

The topping needs to spread easily while still holding soft peaks. Steam-drying the potatoes matters because surface water loosens the mash before any milk goes in; from there, add warm milk gradually and stop while the potatoes still hold their shape.

Creamy mashed potatoes in a metal saucepan holding a soft curved peak, showing the spreadable consistency used for shepherd’s pie topping.
Drop a spoonful of mash back into the pan. It should mound, then bend gently at the tip rather than spreading flat. That texture is soft enough to cover the filling but firm enough to hold fork ridges.

Use a masher or ricer. A blender or food processor can overwork the starch and turn the potatoes gluey.

For more detail on potato varieties, dairy and texture, see our guide to creamy mashed potatoes.

You should now have two good things on their own: rich lamb filling and warm, buttery mash. Assembly is gentle rather than technical.

Assembling and Baking the Pie

Let the filling settle while you finish the mash, and keep the potatoes warm. Cold mash gets stiff and needs more pressure to spread.

Place smaller spoonfuls around the perimeter first, then cover the center. Join them gently with the back of a spoon or spatula and take the potatoes right to the edge of the dish.

Warm mashed potatoes being spooned around the outside edge of a black-cherry casserole filled with ground lamb, carrots and peas while the center remains uncovered.
The first ring of mash gives you something to work against. Join the center with a lighter touch and the lamb stays underneath instead of streaking through the potatoes.

Do not chase a perfectly smooth top. Fork ridges give you more golden, toasted edges while the mash underneath stays creamy.

Close view of mashed potato topping with overlapping dinner-fork grooves, golden-brown raised ridges and pale creamy valleys on baked shepherd’s pie.
Deeper grooves leave creamy valleys while the thin raised peaks catch more heat, giving you toasted edges without drying the mash underneath.

Leave enough room at the top of the casserole for the filling to bubble. A 2½- to 3-quart / 2.4- to 2.8-L dish gives this batch the space it needs without being packed right to the rim.

What the Finished Layers Should Look Like

A finished serving should show a generous potato cap with slightly more lamb filling underneath. The layers should stay recognizable, but the mash should relax over the cut edge rather than stand like a rigid wall.

Open serving cavity in a black-cherry shepherd’s pie casserole showing creamy mashed potato above a deeper ground lamb filling with carrots and peas.
Look for a substantial potato cap over a generous layer of lamb filling. The mash should relax at the cut edge rather than stand like a rigid wall.

Shortcuts and Substitutions

For a faster weeknight version, replace the carrots and peas with a frozen peas-and-carrots mix and start with leftover or refrigerated mashed potatoes. You still make the lamb gravy from scratch, but you skip the potato prep and some of the chopping.

Shortcut or swapWhat to change
Ground beefUse the same amount and method. The finished dish is cottage pie.
No wineReplace the ½ cup / 120 ml wine with the same amount of additional stock.
Frozen peas and carrotsUse about 2 cups frozen peas and carrots in place of the fresh carrots and frozen peas. Add them during the final 4–5 minutes of filling preparation and simmer until the carrots are hot and tender and any extra water has cooked away.
Leftover or refrigerated mashed potatoesWarm until spreadable; add only a small splash of milk if stiff.
Instant mashed potatoesPrepare them slightly firmer than you would for serving on the side.
Oven-safe skilletSkip the transfer if the skillet is deep enough to hold the filling and mash with some headroom left at the top.

Ground Lamb or Leftover Roast Lamb

Already-cooked lamb needs a gentler route. Start the vegetables in about 1 tablespoon olive oil, build and reduce the gravy, then fold in 18–21 oz / 500–600 g chopped or shredded cooked lamb near the end. Leftover roast leg of lamb works particularly well; there is no need to brown the cooked meat again.

Comparison showing raw ground lamb becoming browned crumbles in a skillet and chopped cooked roast lamb being folded into an already-prepared vegetable gravy.
Raw ground lamb needs its browning stage; cooked roast lamb has already had that heat. Build and reduce the gravy first, then fold leftovers in only long enough to warm through.

For a meat-free version, do not replace the lamb with dry lentils and leave everything else unchanged. Lentils absorb liquid differently and need their own cooking method. Our lentil shepherd’s pie is built around that balance.

Make Ahead, Freeze and Reheat

For the best texture, make the filling ahead and the mash fresh. Transfer the cooked lamb filling to a shallow container and refrigerate it promptly rather than leaving it on the counter to reach room temperature. When you are ready to eat, make the mashed potatoes, assemble the pie and bake. Starting with cold filling usually adds about 10–15 minutes; use bubbling edges and a center that reaches 165°F / 74°C as the final cues.

Overhead workflow showing cooled ground lamb filling in a shallow glass container, fresh mashed potatoes in a stainless saucepan, and mash being added to a black-cherry casserole.
For the best make-ahead texture, chill the cooked filling promptly, then make the potatoes fresh when you are ready to assemble. You get the convenience of advance prep without storing the finished potato cap overnight.

Assembled Pie, Freezer and Leftovers

If dinner is tomorrow, cool the filling promptly in a shallow container first. Once chilled, assemble the pie with the mashed potatoes, cover and refrigerate for up to a day. Bake from chilled, allowing roughly 10–15 extra minutes and using bubbling edges plus a 165°F / 74°C center as the final cues. Use bakeware rated for refrigerator-to-oven temperature changes, or follow the manufacturer’s instructions.

For longer storage, freeze before the final bake. Cool the filling promptly in a shallow container, assemble the pie, then refrigerate until cold. Wrap well and freeze for up to about 2 months for the best potato texture. Thaw overnight in the refrigerator and bake as a chilled assembled pie. Freezing can soften the mash somewhat, so refrigeration is the better choice when you only need to work a day ahead.

Leftovers: refrigerate promptly in a covered container and use within about 3–4 days. Microwave individual portions, or reheat a larger amount covered in the oven until the center reaches 165°F / 74°C. For oven reheating, uncover near the end to dry the potato top and regain some color. The USDA recommends reheating leftovers to 165°F / 74°C.

Troubleshooting Shepherd’s Pie

Watery Filling: Check the Movement

Before changing the heat or adding more thickener, look at how the gravy moves around the lamb. The pan itself gives you a quick consistency check.

Troubleshooting image comparing loose watery shepherd’s pie filling with reduced ground lamb filling that holds together and leaves a defined spoon trail in the skillet.
If the sauce runs ahead of the lamb, keep simmering uncovered until the gravy moves with the filling. Judge that change in the pan rather than adding more thickener simply because the clock says it should be ready.

Other Shepherd’s Pie Problems

What you seeLikely reasonWhat to do
Sinking potato toppingThe filling was very hot or loose, or the mash was too soft.Let the filling settle for a few minutes and use mash that still holds soft peaks.
Gravy breaking through the topThe filling is loose or there are gaps in the potato layer.Reduce the gravy fully and spread the mash right to the edge of the dish.
Greasy fillingThe lamb released more fat than the filling needed.Spoon off obvious pooling fat after browning.
Gluey mashThe potatoes were overworked.Use a masher or ricer instead of a blender or food processor.
Pale toppingThe surface is very smooth or needs stronger top heat.Add fork ridges. If the dish is broiler-safe, broil for 1–3 minutes once the casserole is already hot.
Pie spreads when servedThe filling may be loose, or the pie was served immediately.Give it the full 10–15 minute rest. It should be softly spoonable, not stiff enough to cut like lasagna.
Cold center when reheatingThe center is heating more slowly than the surface.Thaw frozen pies overnight when possible and cover the top loosely with foil while the middle catches up.

If the Pie Is Already Baking

If the pie is already in the oven and you realize the filling was looser than it should have been, do not keep turning up the heat. Let it finish and give it the full resting time. It may be softer on the plate, but dinner is hardly ruined.

Problem solved? Back to the recipe · Back to the top.

What to Serve with Shepherd’s Pie

Good sides for shepherd’s pie include green beans, roasted Brussels sprouts, broccoli or a sharp leafy salad. Because the pie already brings meat, potatoes, vegetables and gravy to the plate, a lighter side usually works better than another rich dish.

Finished shepherd’s pie in a glossy black-cherry casserole on an elegant dinner table with golden mashed potato topping, serving spoon, green beans, plates and glassware.
Push a broad spoon through the potato to the base, then scoop underneath. Each serving gets browned ridges, creamy mash and rich lamb filling instead of mostly potato from the surface.

Green Beans Almondine are a particularly good match because the beans keep some bite while lemon and toasted almonds cut through the lamb and potatoes.

Roasted Brussels Sprouts bring crisp browned edges and a slight bitterness that works well beside the lamb gravy.

For something lighter, a simple leafy salad with a sharp vinaigrette is plenty.

After the rest, bring the casserole to the table while the potato ridges are still crisp at the edges and the lamb gravy underneath is rich and steaming.

Brown the lamb. Set the gravy. Cap it gently. Get those three stages right and the gravy stays with the meat, the potatoes stay on top, and every spoonful gets a little of both.

↑ Back to the recipe · ↑ Back to the top