
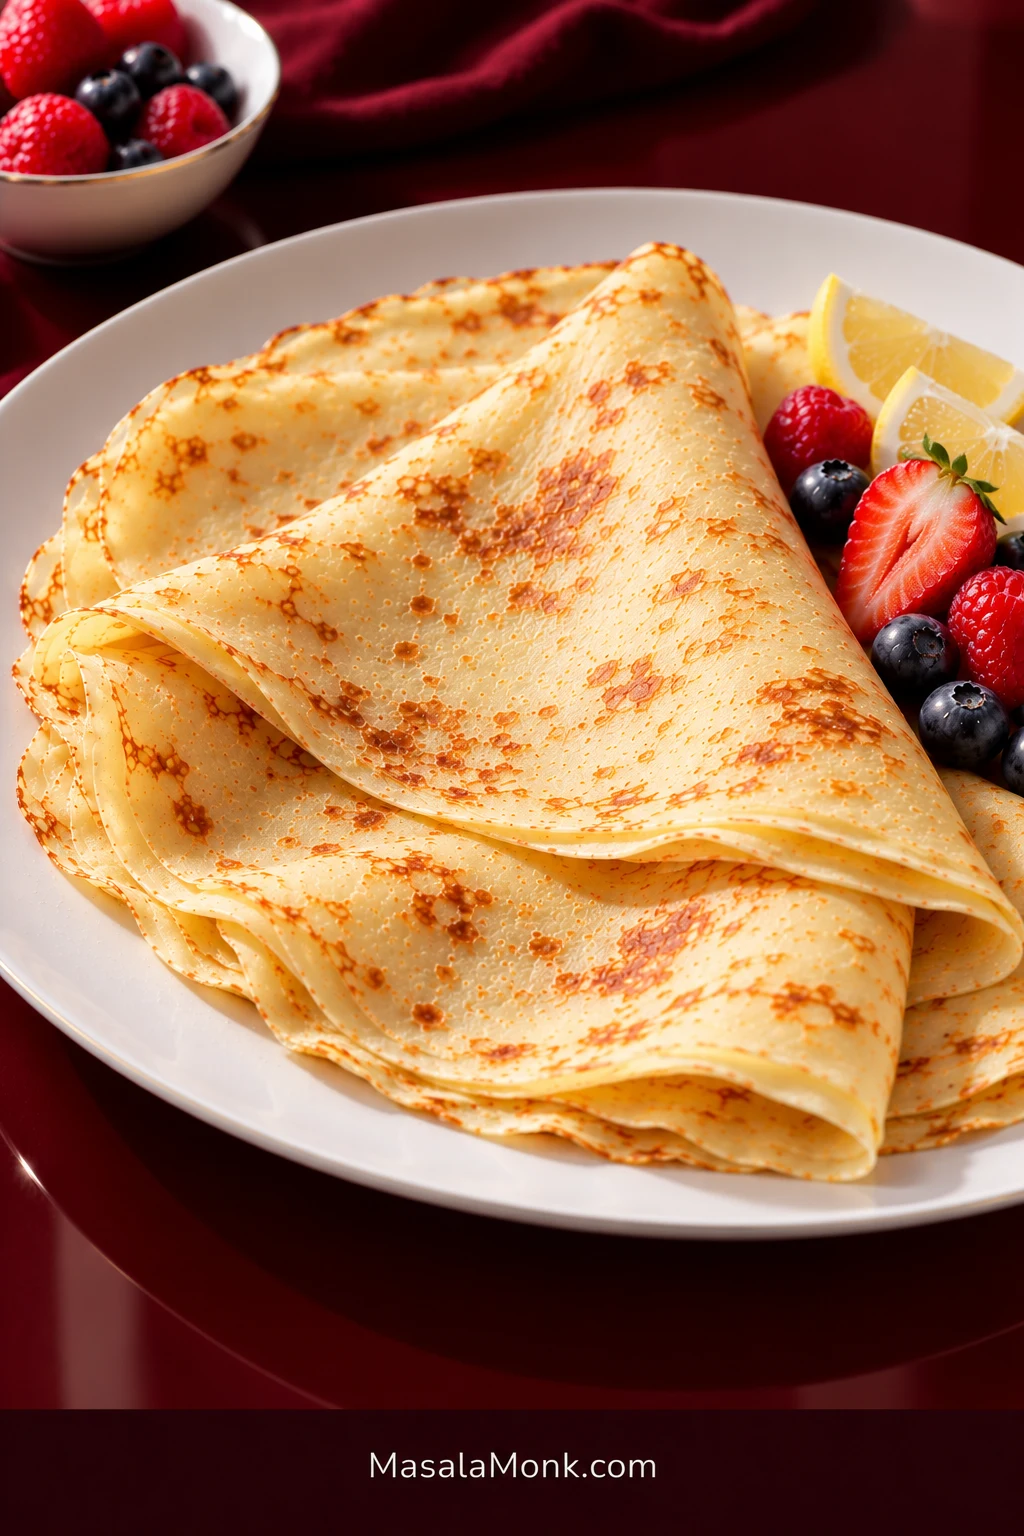
A good French-style crepe is almost startlingly thin when you lift it from the pan, yet it should still feel soft and supple. It bends around a filling without tearing, with golden-brown freckles across the surface and a delicate edge that softens again as the crepes stack.
What matters most is fluid batter, a light film of butter in the pan, an immediate swirl, and recognizing when the first side is ready to turn.
Start with the quantities below, then watch what happens in the skillet. Batter can thicken as it rests, and pans heat differently. Once the batter flows well and the pan heat is right, crepes become much easier than they first appear.
Crepe Recipe: The Cues That Matter Most
These are more useful than trying to memorize one perfect burner setting.
| Watch | What you want |
|---|---|
| Batter | Thin and pourable, about the consistency of heavy cream |
| Heat | Sets steadily without browning before you finish swirling |
| Pan fat | A thin glossy film, never a puddle |
| Batter amount | Just enough to coat the pan in one fast swirl |
| Flip cue | Matte top, releasing edge, golden-freckled underside |
Easy French-Style Crepes
These crepes are thin, tender, lightly buttery, and flexible enough to fold or roll around sweet or savory fillings. The batter stays fluid enough to spread quickly into a thin layer before it sets.
Equipment
- An 8- to 10-inch nonstick skillet is easiest; a 12-inch skillet also works
- Blender or mixing bowl and whisk
- Thin, flexible spatula
- Measuring cup or ladle
Crepe Ingredients
- 1 cup + 1 tablespoon all-purpose flour (130g / 4.6 oz), spooned and leveled if using cups
- 2 large eggs
- 1 cup / 240ml / 8 fl oz whole milk
- 1/4 cup / 60ml / 2 fl oz water
- 2 tablespoons / 28g / 1 oz unsalted butter, melted and cooled until warm
- 1 teaspoon granulated sugar, optional; omit it for a less-sweet savory crepe
- 1/4 teaspoon fine salt
- 1/2 teaspoon vanilla extract, optional for sweet crepes
- 1–2 teaspoons unsalted butter, as needed, for the skillet
How to Make Crepes
- Mix the batter. Add the milk, water, eggs, salt, sugar if using, and vanilla if using to a blender. Follow with the flour and cooled melted butter, then blend for 20–30 seconds, just until smooth. The whisk method is covered in the guide below.
- Check the consistency. The batter should pour like heavy cream and run quickly across a tilted skillet. If it sits in a mound, it is too thick.
- Rest if you can. Give the batter 30 minutes at room temperature. Stir gently before cooking. If it has thickened, add milk or water 1 tablespoon / 15ml at a time until it flows easily. Short on time? You can start cooking straight away.
Cook, Flip, and Stack
- Heat the skillet. Preheat your nonstick skillet over medium to medium-low heat. Wipe in enough butter to leave a thin glossy film with no visible puddles.
- Pour and swirl. Lift the skillet from the burner and add the batter: about 3 tablespoons / 45ml for an 8-inch skillet, 1/4 cup / 60ml for a 10-inch skillet, or about 1/3 cup / 75–80ml for a 12-inch skillet. Tilt and rotate immediately to spread it into a thin layer, then return the pan to the heat.
- Cook the first side. Wait until the shiny surface turns mostly matte, the edge begins to release, and the underside is lightly golden and freckled. This usually takes about 45–90 seconds.
- Flip briefly. Slide a thin spatula underneath and turn the crepe. Cook the second side for about 15–30 seconds, just until set with a few light brown spots.
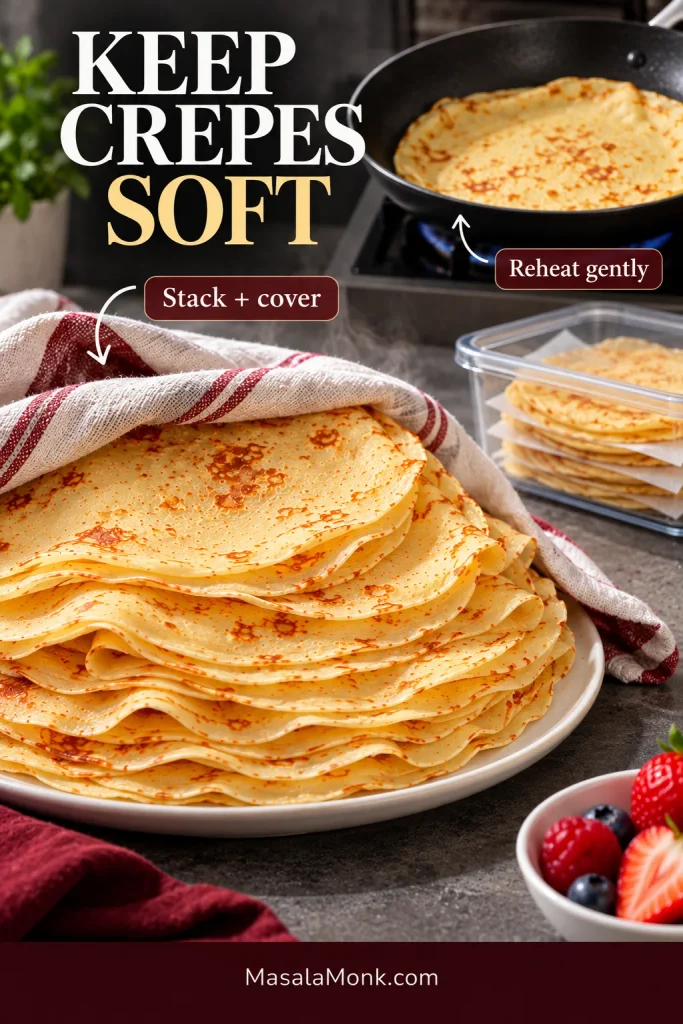
- Stack and repeat. Put each crepe directly on top of the previous one and keep the stack loosely covered. Re-grease the skillet only when the surface looks dry or the crepes start sticking.
Pan Size & Yield Guide
| Pan size | Start with | Approximate yield |
|---|---|---|
| 8-inch skillet | 3 tbsp / 45ml | 10–12 crepes |
| 10-inch skillet | 1/4 cup / 60ml | 8–9 crepes |
| 12-inch skillet | About 1/3 cup / 75–80ml | 6–7 crepes |
Skillet bases vary, so treat these as starting amounts. If your pan has a smaller flat cooking surface, pour a little less.
Quick Recipe Notes
- Sweet crepes: keep the teaspoon of sugar and add vanilla.
- Savory crepes: leave out the vanilla; keep or omit the small amount of sugar.
- Crepe tears while flipping: give the first side a little longer. The top should look matte and the edge should release cleanly.
- Half batch: use 1 egg, 65g flour, 120ml milk, 30ml water, 14g melted butter for the batter, 1/2 teaspoon sugar if using, 1/8 teaspoon salt, and 1/4 teaspoon vanilla if using. Butter the skillet as needed. Use the same batter amount per crepe and expect roughly half the yield.
Recipe development disclosure: MasalaMonk developed this recipe by comparing established crepe methods and recurring problems home cooks report. This exact formulation has not been independently kitchen-tested by MasalaMonk.
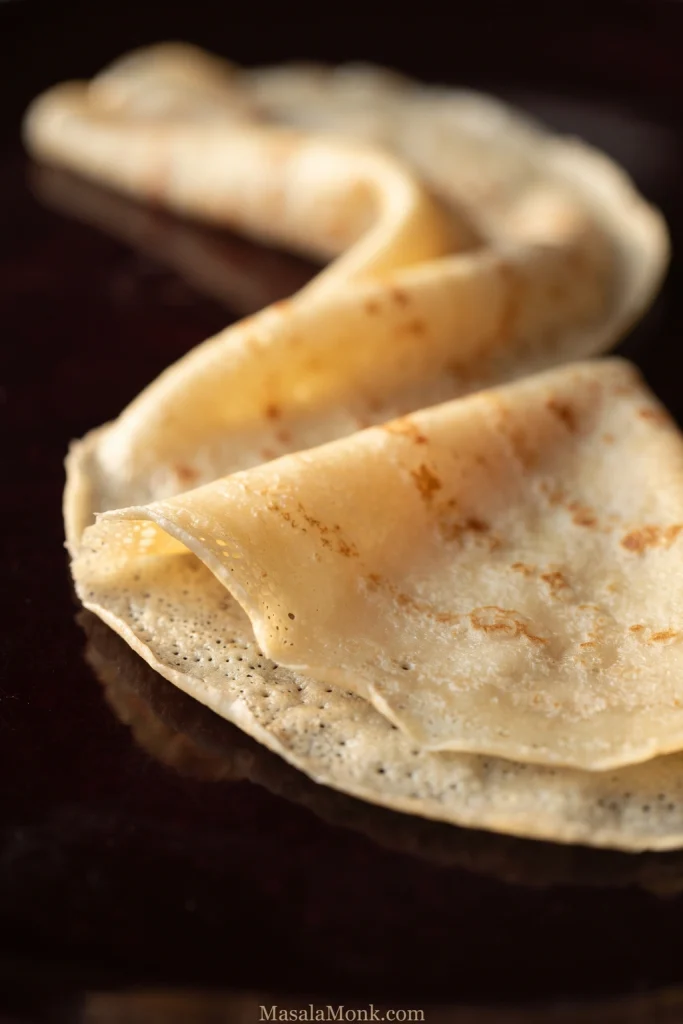
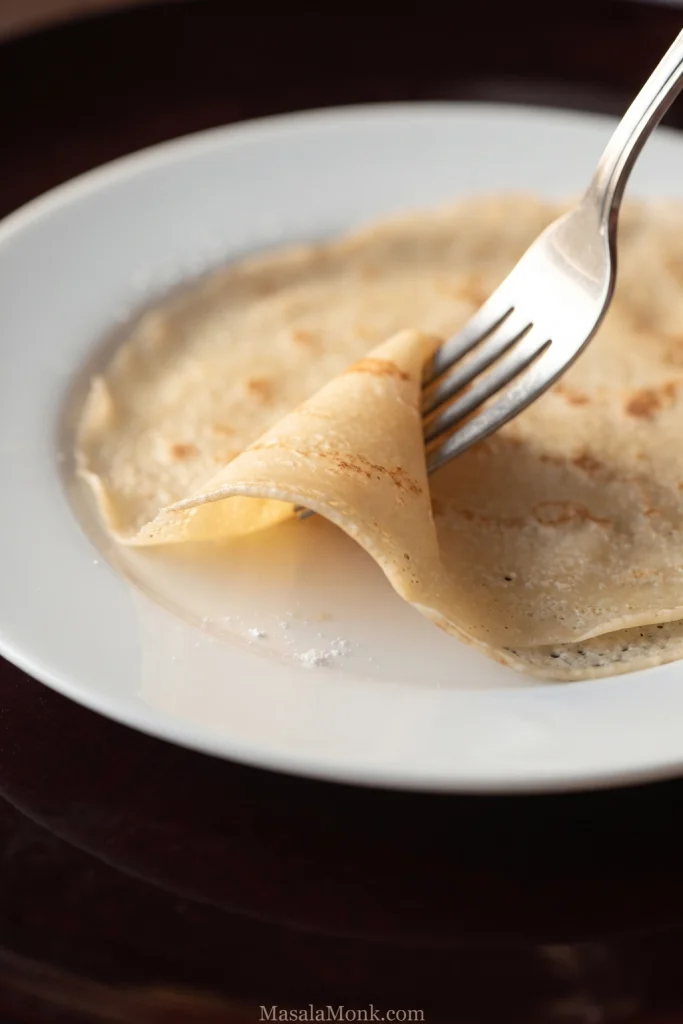
Before moving into the technique, look at the finished crepe’s folded edge: several layers should still look fine and flexible rather than forming a thick ridge. That edge is often the easiest place to judge whether each crepe was spread thinly enough.
Find What You Need
Get the Batter Right
Get the Pan Right
Fix, Fill & Store
Crepe Batter Should Be Thinner Than You Think
Aim for a thin, pourable consistency, roughly like heavy cream. The liquid should travel across a tilted skillet before it begins to set.
If you are used to making fluffy buttermilk pancakes, this can look surprisingly loose. Pancake batter tends to sit where you spoon it. Crepe batter needs to race across a tilted pan.

Water keeps the batter loose enough to spread before it starts setting. Meanwhile, eggs give the finished crepe enough structure to lift and fold, while milk and butter add richness and browning.
When the batter thickens after resting: Stir it first. If it still moves slowly, add milk or water 1 tablespoon / 15ml at a time until it flows easily again.
Blender or Whisk?
Blender: add the liquids, eggs, salt, sugar and vanilla if using first, followed by the flour and warm melted butter. Blend for 20–30 seconds and stop once the batter is smooth. A little foam will settle during the rest.
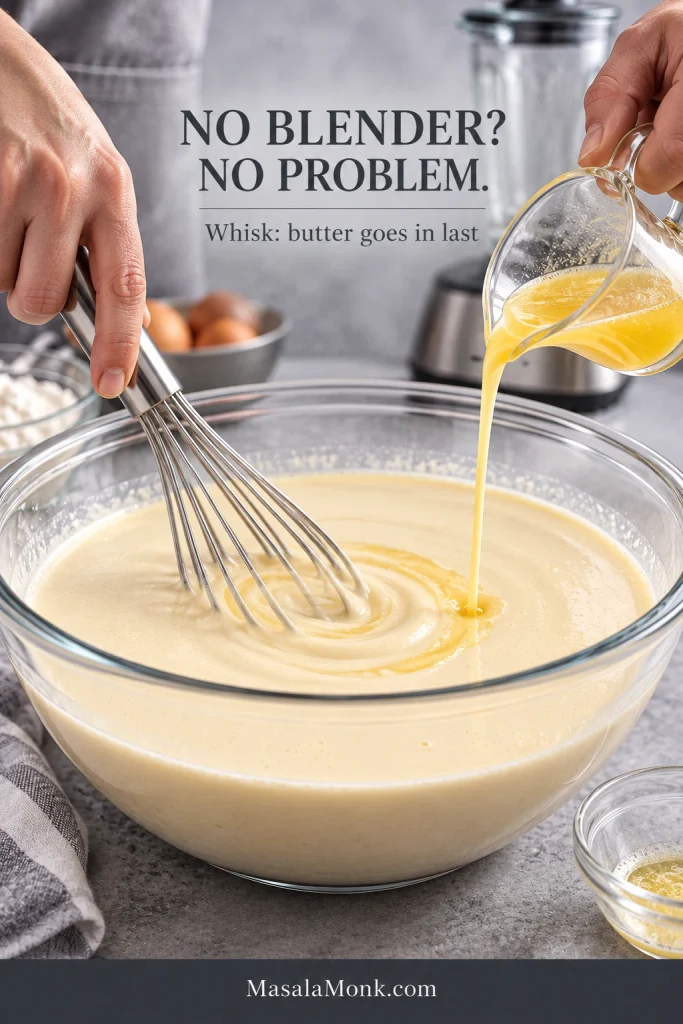
Whisk: combine the flour, salt, and sugar if using, then gradually whisk in about half of the milk until smooth. Add the eggs, remaining milk, water, and vanilla if using. Drizzle in the warm melted butter last while whisking. A few stubborn lumps can simply be strained out.
Let the melted butter cool until warm so it does not heat the eggs. Very cold milk and eggs can chill the butter into a few small beads; blending usually smooths them back into the batter, while gradual whisking helps keep the butter dispersed.
Rest 30 Minutes When You Can
Thirty minutes helps, but do not postpone breakfast for it. Resting gives the flour time to hydrate and lets bubbles from mixing settle, which usually helps the batter spread more evenly. Cooking immediately is still perfectly workable.
The batter can also rest overnight in the refrigerator. Stir before cooking and check the flow again; chilled batter often needs a small splash of liquid.
What About Pancake Mix or Other Batter Changes?
Pancake mix is not a cup-for-cup replacement for the flour here. Prepared mixes may already contain salt, sugar, leavening, dairy, or fat, so use a crepe recipe written for the specific mix you have rather than trying to convert this batter.
- Plant milk: unsweetened plant milks can work, but thickness varies. Use the batter’s flow rather than the carton as your guide.
- Oil: neutral oil can replace the melted butter and can also grease the skillet, though the crepes will lose some buttery flavor.
- Different batters: egg-free and gluten-free crepes need a batter built for those changes rather than a one-for-one swap. Traditional buckwheat galettes use a different batter too.
The Pan Needs a Sheen, Not a Pool of Butter
You do not need a crepe pan. A good nonstick skillet is enough, and the crepe should release cleanly once the first side has set.
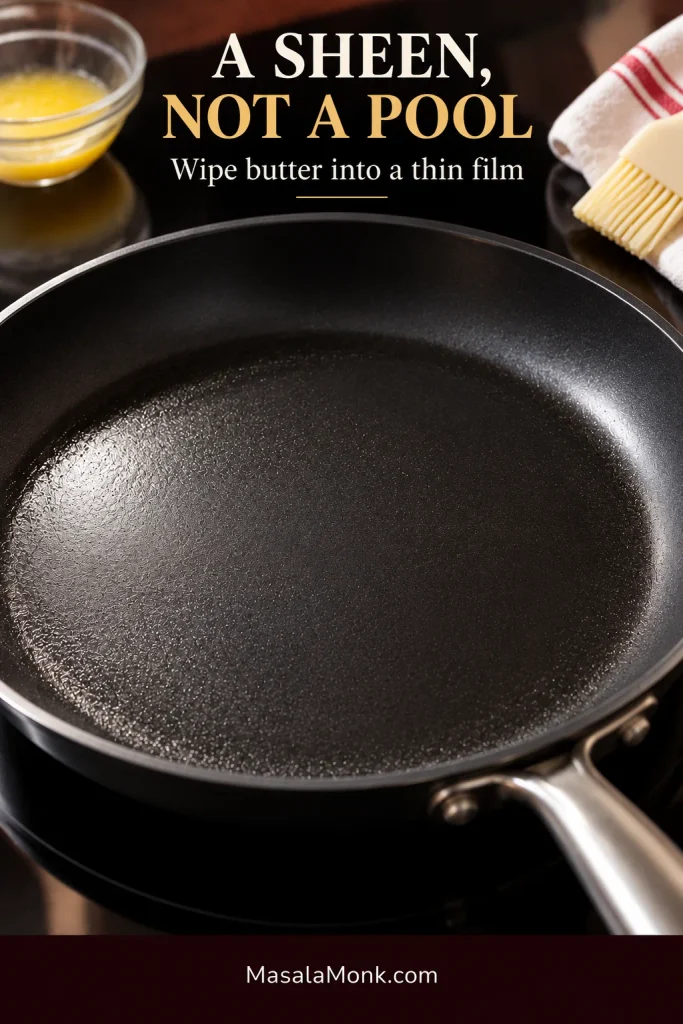
Preheat the skillet over medium to medium-low heat, then wipe the butter into a very thin glossy film. You should not see puddles of fat gathering around the batter. Too much can make the wet batter skate instead of spreading into an even layer.
When the skillet is working well, keep going. Add more butter only when the surface looks dry or the crepes start sticking.
“Medium” is only a starting point. Pan weight and burners vary, so watch how the crepe browns and adjust from there.
How Much Batter Should Go in the Pan?
Too much batter gives you a thicker crepe, and a thicker crepe needs longer in the pan. Start with the smallest amount that can coat the pan in one quick swirl.
| Pan size | Starting batter amount |
|---|---|
| 8-inch skillet | About 3 tbsp / 45ml |
| 10-inch skillet | About 1/4 cup / 60ml |
| 12-inch skillet | About 1/3 cup / 75–80ml |
A thick crepe despite good batter flow usually means too much batter went into the pan. Pour a little less next time. Already thin, tender, and folding easily? Leave it alone.
How to Make Crepes: Pour, Swirl, Watch, Flip
Most crepes need about 45–90 seconds on the first side and only 15–30 seconds after flipping. Use those times as a guide, but let the surface, edges, and underside tell you when the crepe is ready.
Pour and Swirl the Batter
Lift the skillet from the burner before pouring. That brief pause gives the fluid batter a little more time to spread before the hot surface starts setting it.
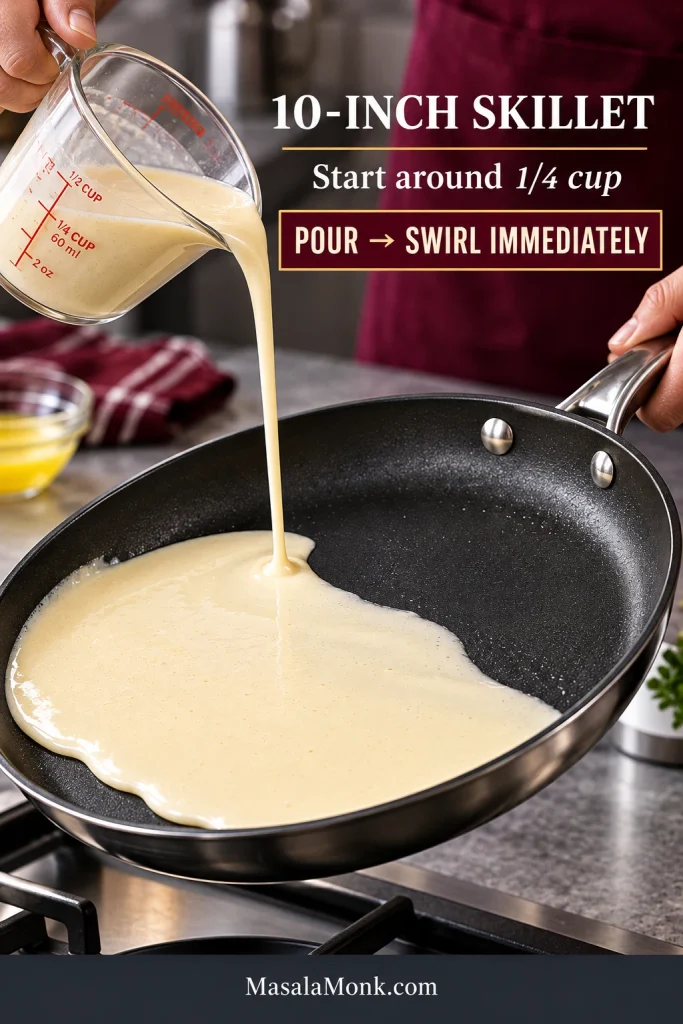
- Pour. Add the measured batter to the center of the lifted skillet.
- Swirl immediately. Tilt and rotate the pan so gravity carries the batter across the surface, then return it to the burner.
Watch for the Flip Cue
After the batter has spread, watch the top change from shiny and wet to mostly matte. The edge should begin to release, while the underside develops light golden freckles.
- Watch the top. As the first side cooks, the wet sheen disappears and the surface becomes mostly matte.
- Check underneath. When the thin edge begins releasing, slide a flexible spatula underneath. The bottom should be lightly golden with scattered brown freckles.
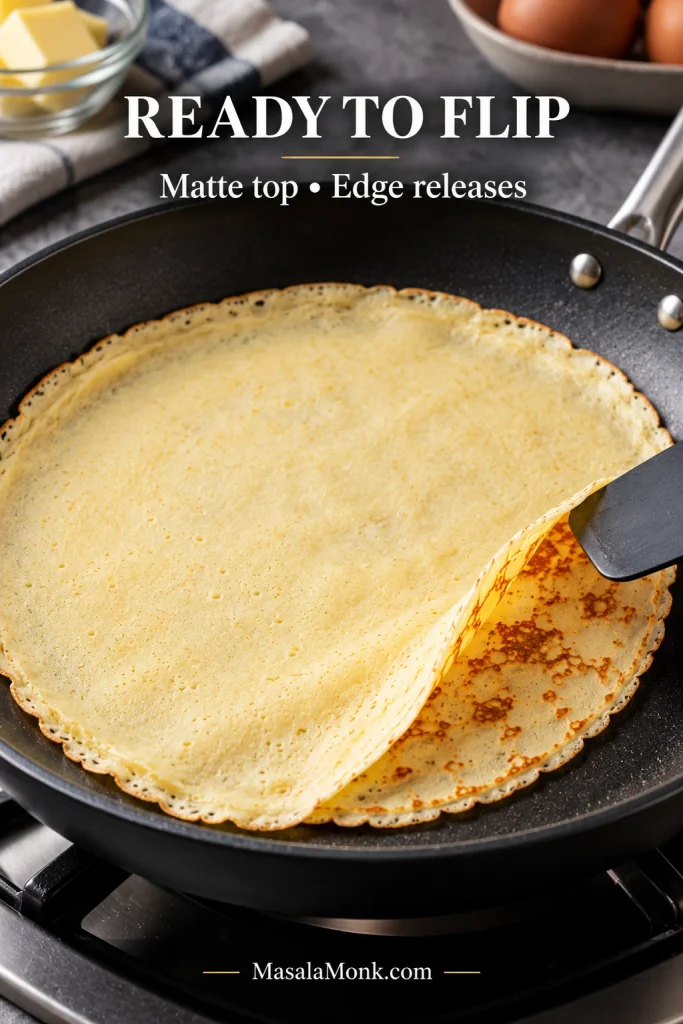
- Flip. Cook the second side for only 15–30 seconds. It needs to set; there is no need to chase the same color as the first side.
- Stack. Put finished crepes directly on top of one another and keep the stack loosely covered. The warmth softens the delicate edges and keeps the crepes flexible.
Let the First Crepe Teach You Something
A torn, uneven, or slightly lopsided first crepe still did its job: it showed you what to change.
The first crepe is where the batter and pan introduce themselves. Browning before you finish swirling points to too much heat; a pale, gummy crepe usually needs a little more.

Change one thing, then cook the next crepe. Thickness, tearing, sticking and other problems are covered below. After two or three crepes, you may find yourself watching the surface more than the clock.
Once the heat and batter are dialed in, the whole process settles into a rhythm: pour, swirl, watch, flip, stack.
Crepe Troubleshooting: Fix the Crepe You’re Looking At
Use the symptom you can actually see, make the most likely correction, and cook another crepe before changing anything else.
| What you see | What to try |
|---|---|
| Batter will not spread | Check the consistency first. If it flows well, lower the heat slightly so the batter has more time to spread. |
| Crepes are too thick | Check the batter consistency, then reduce the amount you pour. |
| Batter slides around | Wipe away excess butter. If needed, let the skillet heat a little more. |
| Crepe tears when flipped | Let the first side set a little longer. Persistent tearing can also point to batter that is too thin or a crepe that is unusually large. |
| Crepe sticks | Check the heat and condition of the nonstick surface, then add a very thin film of butter if needed. |
| Crepe is rubbery | It is probably too thick or staying in the pan too long. Check the flour measurement and batter amount, and remove the crepe once it is set and lightly browned. |
| Crepe is dry or brittle | Shorten the cooking time, especially on side two, then stack the finished crepes while warm so the edges soften. |
| Later crepes stop spreading well | Stir the batter and check whether it has thickened. Loosen it with a small splash of milk or water if needed. |
If the problem persists, revisit batter consistency or pan heat and butter before changing the recipe itself.
Crepe Fillings: Sweet and Savory Ideas
Once the crepes are stacked, the difficult part is over. From here they can go sweet, savory, simple, or substantial enough for a meal.

Fillings should already be cooked or ready to eat before they go into the crepe. Cut bulky ingredients fairly small, cook meat through, and sauté or drain wet vegetables so they do not release water into the thin crepe.
A folded crepe can warm a filling or melt cheese; it is not in the pan long enough to cook something from raw. If you are deciding how to serve a filling, the Fold or Roll? guide explains which shape works best.
Sweet Crepe Fillings
- Lemon + sugar: squeeze fresh lemon juice over the crepe while it is still warm, then scatter over just enough sugar to melt into the surface. For something richer, spread on a thin layer of homemade lemon curd.
- Chocolate-hazelnut + banana: spread while the crepe is warm and add sliced banana.
- Strawberries + cream: let sliced berries sit with a little sugar until juicy, then add softly whipped cream.
- Orange marmalade: a thin layer of homemade orange marmalade gives the crepe a bright, slightly bittersweet citrus finish.
- Apple + cinnamon: spoon in warm diced apples with cinnamon, or use a little homemade apple pie filling. Keep the filling soft enough to fold easily into the crepe.
Savory Crepe Fillings
- Ham + cheese: add a thin layer of ham and a good melting cheese, fold the crepe, then return it to the pan just until the cheese softens and the center turns warm.
- Egg + cheese: soft scrambled eggs, black pepper, and a little cheese make an easy breakfast filling.
- Chicken + mushroom: use cooked chicken and well-sautéed mushrooms with a little cheese or a spoonful of homemade cheese sauce.
- Spinach + cheese: cook the spinach first and squeeze out excess moisture. For something richer, use a spoonful of creamed spinach.
Fold or Roll?
Thin fillings such as lemon and sugar or chocolate-hazelnut spread work well folded in half and then into quarters. Larger savory fillings are easier to spoon down the center and roll loosely.
For a quick dessert, fold the crepe first and finish it on the plate. Berries or banana with a little homemade chocolate syrup is plenty.

Make Ahead, Store, and Reheat Crepes
Make the Batter Ahead
Cover the batter and refrigerate it for up to 24 hours. Stir before cooking and loosen it with a small splash of milk or water if it has thickened.
Store Cooked Crepes
Let the stack cool, cover it well, and refrigerate for up to 2 days for the best texture. Keeping the crepes stacked protects the thin edges from drying out.
For food safety rather than best texture, USDA leftovers guidance says most properly refrigerated cooked leftovers can generally be kept for 3 to 4 days.
To freeze crepes for longer, cool them completely and wrap them airtight. Put parchment between them if you want to remove them one at a time. Freeze for up to 1 month for best texture, then thaw overnight in the refrigerator.
Reheat Crepes
For one or two crepes, warm them in a dry or very lightly buttered nonstick skillet for about 15–20 seconds per side. A larger stack can stay covered in a 275°F / 135°C oven for about 5–10 minutes, just until soft and heated through.
Add cold toppings after reheating. Soft homemade whipped cream, for example, is better added to warm crepes just before serving.
Warm crepes do not need much: lemon and sugar, berries and soft cream, or ham and melted cheese. By the time the stack is growing, the part that looked fiddly at the start often feels almost automatic: pour, swirl, watch, flip, stack.








