Posted on — Leave a comment

Korean Fried Chicken Recipe: Extra Crispy, Juicy & Easy

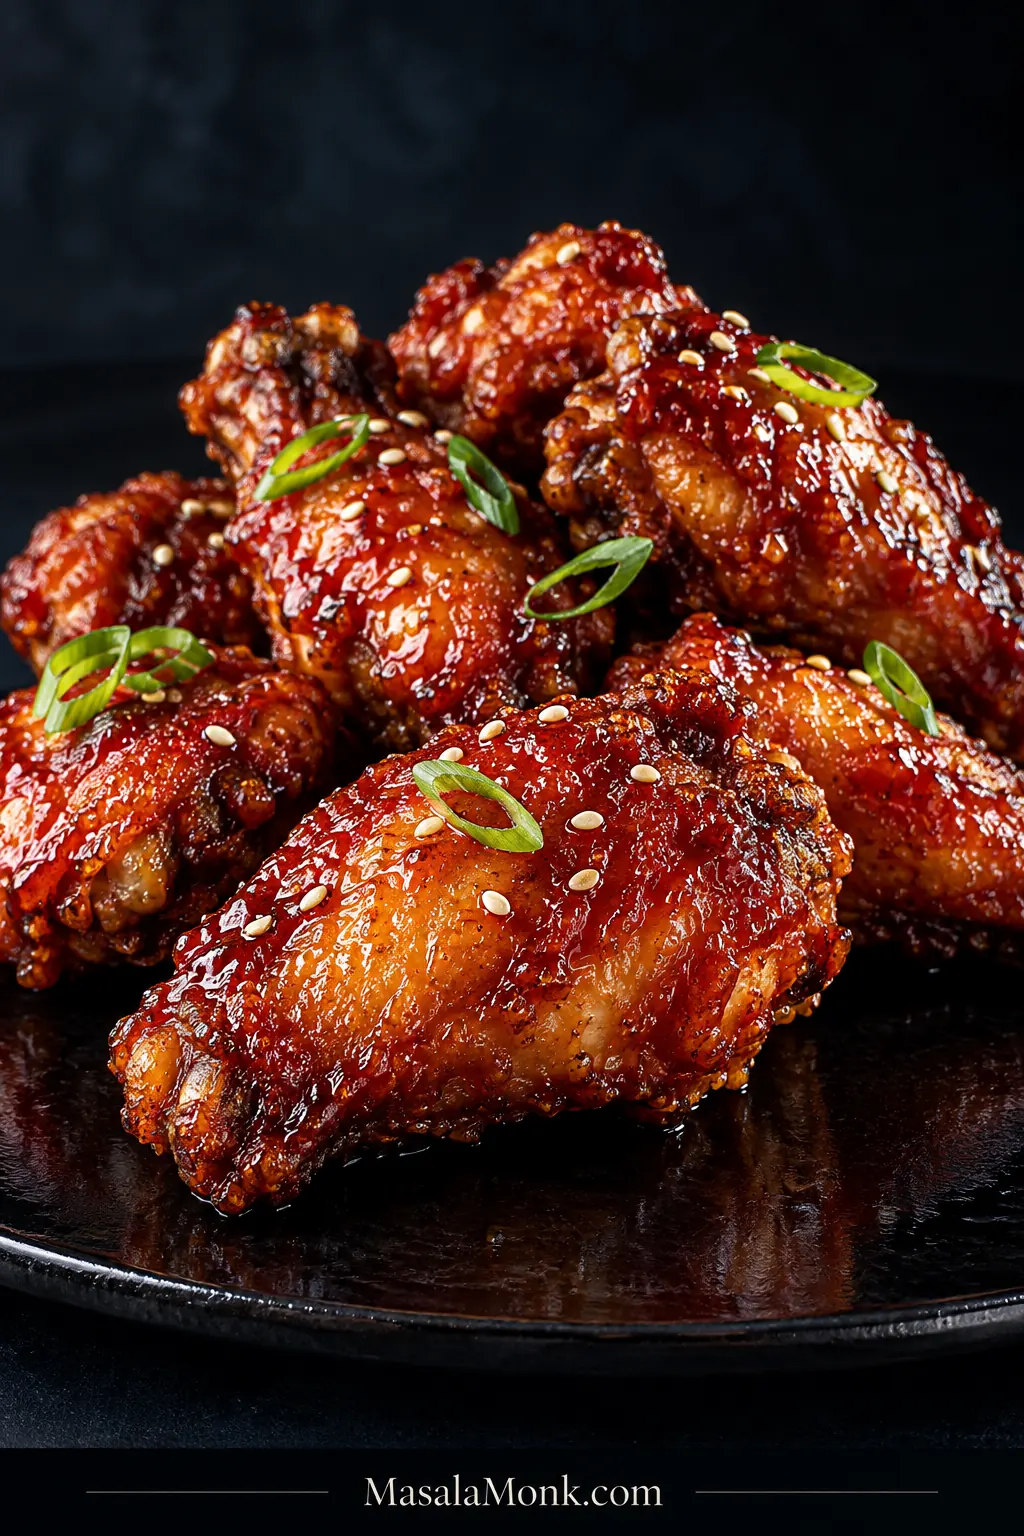
Korean fried chicken flats and drumettes with golden crisp edges, deep red gochujang glaze, sesame seeds and scallions on a dark plate.

The best Korean fried chicken has a crust that looks almost too thin to deliver the crunch it does. Bite through it and the shell cracks first, then gives way to juicy, seasoned chicken underneath. A light glaze adds flavor without burying that texture.
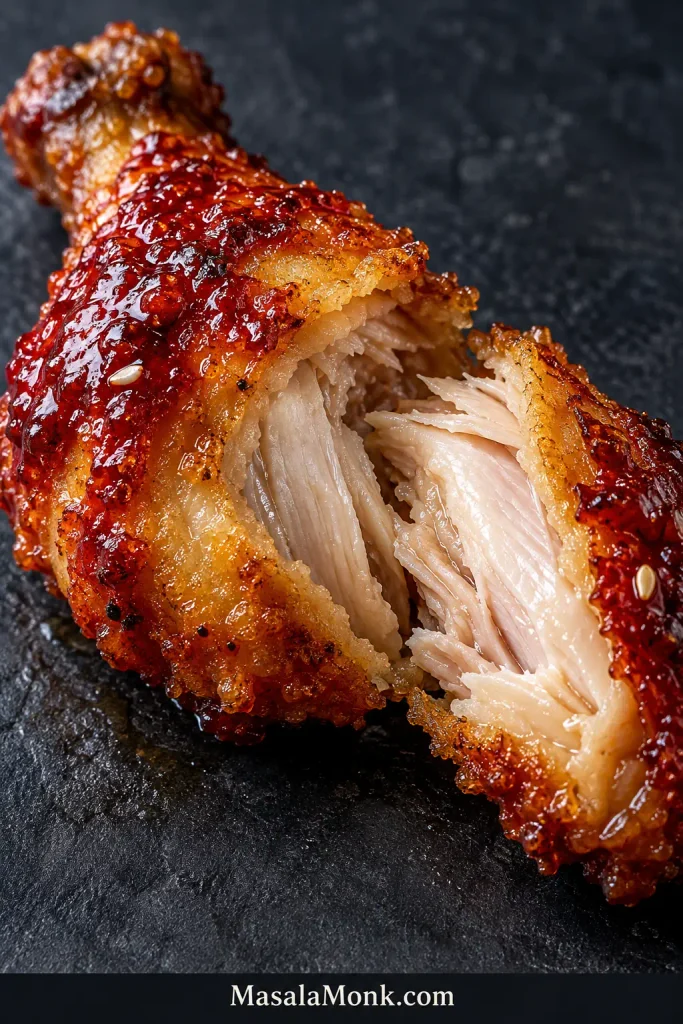
Glazed Korean fried chicken wing broken open to reveal moist cooked chicken beneath a thin golden crust.
Use the broken edge as a crust check: the crisp shell should form only a narrow rim around the juicy chicken. A thick breaded band means too much coating went on before frying.

Wet chicken loosens the coating. Heavy batter turns hard. Too many wings cool the oil. Then, just when the crust is finally crisp, an overly wet glaze can soften it again.

This Korean fried chicken method uses split wings and a thin flour-and-potato-starch coating, followed by a gentler first fry, a short rest, and a hotter second fry. Once the crust is finished, choose sweet-spicy gochujang, savory soy-garlic, or divide the batch and make both.

Research note: This recipe is a research-led synthesis of established Korean fried chicken techniques, recurring troubleshooting guidance, and food-safety recommendations; it is not presented as an in-house test-kitchen trial.

At a Glance: Four Things to Get Right Before the Oil

  • Surface: remove loose liquid before coating. The chicken can be slightly moist, but it should not drip.
  • Batter: think thin veil, not a jacket. Most of it should run back into the bowl when you lift a wing.
  • Oil: 330°F / 165°C is where the first fry starts. Watch what happens after cold chicken goes in.
  • Sauce: make it before frying. It should coat a spoon and still move easily under a brush.

The first fry should look unfinished. If the wings are already deeply golden and ready to serve, you have left very little room for the hotter second fry.

Korean Fried Chicken Recipe

Thin, extra-crispy Korean fried chicken wings with a two-stage fry and your choice of sweet-spicy gochujang or soy-garlic glaze.

Prep
20 minutes

Seasoning Rest
30 minutes minimum

Fry/Cook
About 40–55 minutes

Total
About 1 hr 30 min–1 hr 45 min with the minimum seasoning rest

Yield
About 18–24 wing pieces

Serves
4 light portions; 2–3 larger mains

Equipment

  • 5–6 quart heavy pot or Dutch oven, deep enough to leave plenty of space above the oil
  • Clip-on deep-fry/candy thermometer, or another thermometer rated for continuous oil-temperature monitoring
  • Instant-read thermometer for checking the chicken
  • Wire rack set over a sheet pan
  • Spider/skimmer or sturdy tongs
  • 1 small saucepan, or 2 if making both glazes at once
  • Pastry brush, optional but useful for a light, even glaze

Ingredients

Chicken

  • 2 lb / 32 oz / 900 g split chicken wings, flats and drumettes
  • 1 tsp / about 5 g fine sea salt
  • 1 tsp / about 2 g finely grated fresh ginger
  • ½ tsp / about 1 g black pepper

Light Starch Dusting and Thin Batter

  • Up to 2 tbsp potato starch, for a very light dusting; you may use less
  • ½ cup / 60 g all-purpose flour
  • ⅓ cup / about 50 g potato starch
  • ¾ tsp / about 3 g baking powder
  • ½ tsp / about 3 g fine sea salt
  • ¾ cup / 180 ml cold water, plus up to 1–2 tbsp / 15–30 ml more if needed

For Frying

  • Neutral high-heat frying oil, enough to reach about 2 inches / 5 cm deep in your pot

Canola, vegetable, peanut, rice bran, and grapeseed oil all work well.

For half-and-half: make both glazes as written. If you want one flavor on all the wings, double that glaze.

Sweet-Spicy Gochujang Glaze — Half Batch

  • 2 tbsp / about 35 g gochujang
  • 2 tbsp / about 30 g ketchup
  • 1½ tbsp / about 30 g rice syrup, or 1 tbsp / about 21 g honey
  • 1 tbsp / 15 ml regular or all-purpose soy sauce, not dark soy sauce
  • 1 tbsp / 15 ml rice vinegar
  • 1 tbsp / 15 ml water
  • 2 tsp / about 6 g minced garlic
  • ½ tsp / 2.5 ml toasted sesame oil, stirred in off heat

Soy-Garlic Glaze — Half Batch

  • 1½ tbsp / 22 ml regular or all-purpose soy sauce, not dark soy sauce
  • 2 tbsp / 30 ml water
  • 1 tbsp / about 20 g rice syrup, or 2 tsp / about 14 g honey
  • 2 tsp / about 8 g brown sugar
  • 2 tsp / 10 ml rice vinegar
  • 2 tsp / about 6 g minced garlic
  • ½ tsp / about 1 g finely grated fresh ginger
  • ½ tsp / 2.5 ml toasted sesame oil, stirred in off heat

Optional for serving: toasted sesame seeds and thinly sliced scallions.

Instructions

Prep, Glaze and Coat the Wings

  1. Season the wings. Toss with the salt, ginger, and black pepper. Refrigerate for at least 30 minutes; 2 hours is better, and overnight is fine. Before coating, blot away loose liquid.
  2. Make the glaze or glazes. Combine everything for the glaze you are making except the toasted sesame oil. Simmer gently, stirring often: gochujang for about 2–4 minutes; soy-garlic for 3–5 minutes. Remove when a spoon comes out coated but the sauce still pours, then stir in the sesame oil. For half-and-half, prepare each glaze separately.
  3. Heat the oil. Pour enough oil into a deep heavy pot to reach about 2 inches / 5 cm. Leave generous empty space above the oil. Heat to 330°F / 165°C and set a wire rack over a sheet pan beside the stove.
  4. Dust the chicken lightly. Add only enough potato starch to remove the surface slickness; you may not need all 2 tablespoons. Toss gently and shake off loose excess. Aim for a thin matte haze, not a white dredge.
  5. Mix the batter. Whisk the flour, ⅓ cup / 50 g potato starch, baking powder, and salt, then add ¾ cup / 180 ml cold water. Lift one wing: most batter should stream back, leaving a thin film. If it hangs heavily, add cold water 1 tablespoon / 15 ml at a time, up to 2 tablespoons / 30 ml. Re-whisk before each batch because the starch settles.

Before frying, check one wing: the batter should drain freely and leave the natural ridges and joints visible beneath a thin film.
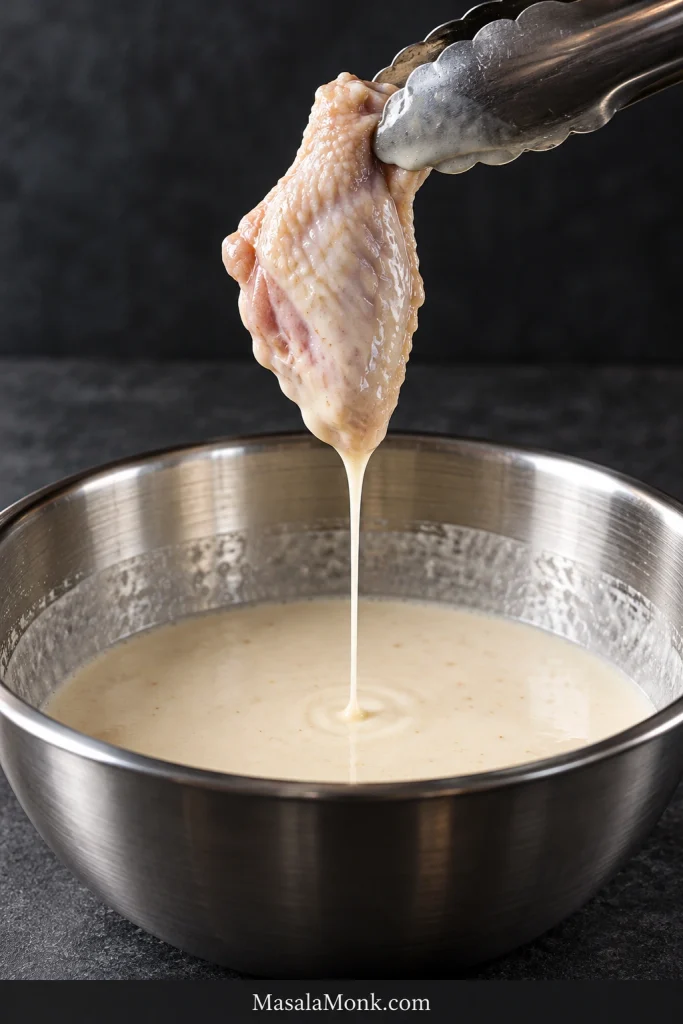
Raw chicken wing above a metal bowl with a thin pale batter film and excess batter dripping back into the bowl.
Besides draining freely, the batter should preserve the wing’s natural ridges and joints underneath. If those contours start disappearing beneath an opaque layer, thin the batter before frying.

First Fry and Rest

  1. First fry. Dip the wings and let excess batter drain for a couple of seconds. Carefully lower about 6–8 pieces at a time into a typical 5–6 quart pot; use fewer if the wings are large or the oil struggles to recover. Once the chicken is in, keep the oil around 315–330°F / 157–165°C and fry for about 6–7 minutes. The wings may look almost disappointingly pale. That is exactly what you want: the coating should be set and dry, but the real color and crunch come later. Transfer the wings to the rack, skim out loose crumbs, and let the oil recover before the next batch.
  2. Rest, then raise the heat. Let each first-fried batch rest on the rack for at least 5 minutes. With several batches, the earliest wings will naturally rest longer while the remaining batches finish. Keep this as one continuous cooking session: the wings are not ready to eat after fry one, and should not be refrigerated or saved to finish later. Once the first-fry batches are done, bring the oil to 375°F / 190°C.

Second Fry, Sauce and Serve

  1. Second fry and check doneness. Fry again in small batches for about 3–5 minutes, starting to check at 3 minutes. Once the wings are in, aim to keep the oil around 365–375°F / 185–190°C. They should feel different now: firmer and drier under the tongs, with a brittle crust instead of the softer coating from fry one. Look for deeper gold and bubbling that has noticeably calmed. This is the payoff from the second fry: a dry, brittle crust sturdy enough for a light glaze, with juicy chicken underneath. Check one of the largest pieces in each batch, especially a thick drumette, with an instant-read thermometer inserted into the thickest meaty part without touching bone. Poultry should reach at least 165°F / 74°C.

At this point, two checks should agree: the crust should look dry and tight, while the thermometer confirms the thickest drumette is safely cooked.
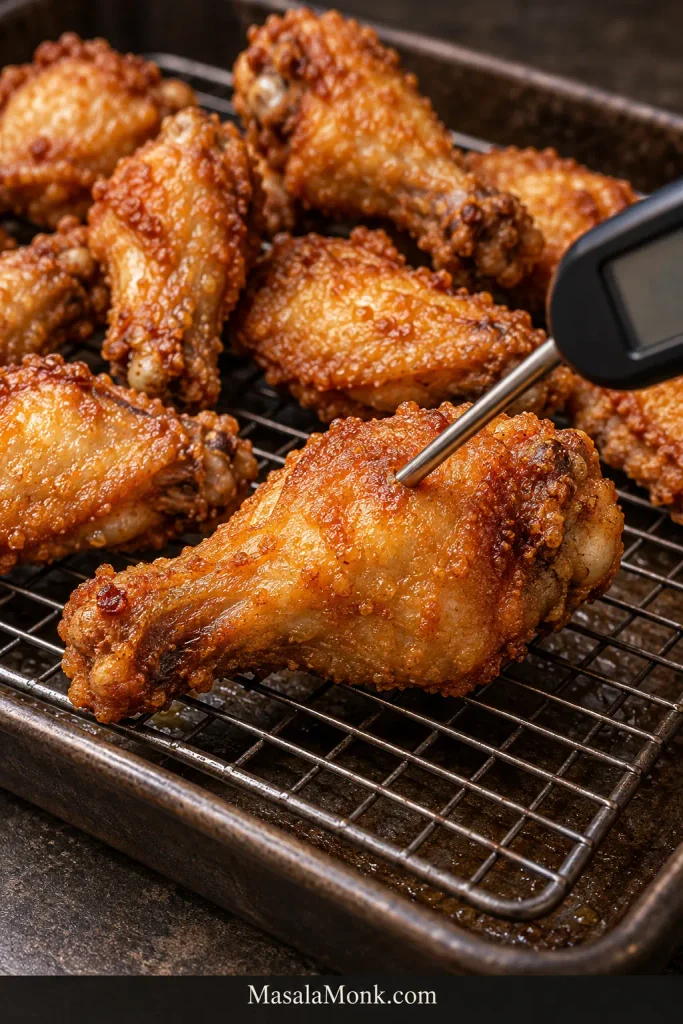
Golden second-fried chicken wings with an instant-read thermometer inserted into the thick meaty part of one wing.
After the second fry, raised areas should deepen to gold while the shell looks tighter and drier overall. Then probe the thickest meaty section from the side so the thermometer avoids bone.
  1. Finish with sauce. Rest the wings for a minute or two. Warm the glaze gently if needed. Brush on a thin layer for the best balance of sauce and exposed crust, toss quickly for fuller coverage, or leave the wings plain and dip them at the table. After brushing, you should still be able to see the fried texture beneath the glaze.
  2. Serve right away. For half-and-half chicken, glaze one half with gochujang and the other with soy-garlic. Finish with sesame seeds or scallions if you like.

Recipe Notes

  • Wing size: these frying times are for split flats and drumettes. Large drumsticks, whole wings, and other bone-in cuts need different timing.
  • Potato starch: it gives the crust the brittle character we want here. Cornstarch works if that is what you have.
  • Sticking: if battered wings tend to stick to the bottom of the pot, use tongs to hold each one partly submerged for a second before releasing it.
  • Leftovers: leave any wings you expect to save unsauced whenever possible.

How the Method Works

The Crust: Thin, Crisp and Built to Take Sauce

Korean fried chicken does not have one universal coating. You will find starch-only versions, frying mixes, thin batters, and heavier dredges. Here, the goal is a close-fitting crust with a brittle bite and very little bread-like bulk.

For this version, flour gives the coating structure while potato starch gives it the brittle crackle. Potato starch on its own produces a thinner, glassier crust.

CoatingWhat You Get
Flour + potato starchThin, structured and brittle-crisp. This is the main method in the recipe.
Potato starch onlyA thinner, glassier crackle with almost no bread-like character.
CornstarchStill light and crisp, but generally a little less brittle and glassy than potato starch.
Korean frying mixA convenient seasoned frying blend that often combines flour and starch with leavening. Formulas vary, so follow the package’s liquid guidance.

Flour and starch absorb water a little differently from one brand to another, so watch the batter rather than worshipping the measuring cup. The lift test in the recipe matters more than forcing every batch to take exactly the same last spoonful of water.

Why the Seasoning Stays Relatively Dry

Salt, ginger, and black pepper season the meat without leaving much extra liquid on the surface. Rice wine and other liquid marinades can be delicious, but here they leave more surface moisture just when the thin coating needs a clean grip.
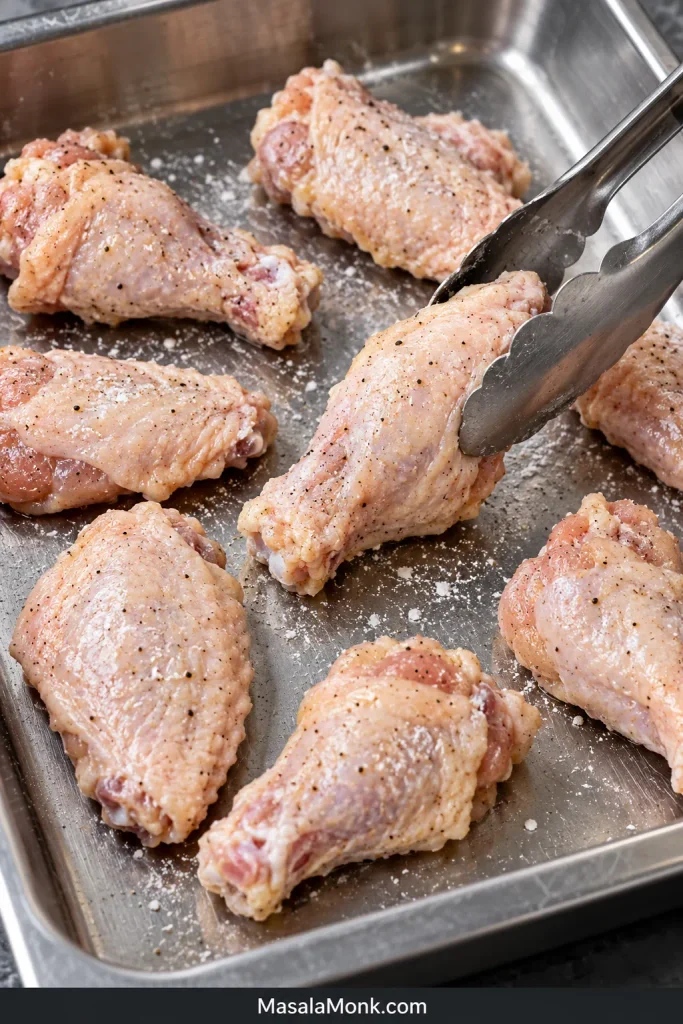
Raw split chicken wings with a very light potato-starch dusting in a stainless-steel tray, with most skin still visible.
Surface shine is the easiest cue here. Once the slick chicken skin turns softly matte, stop adding potato starch; obvious white patches mean the dusting is becoming a dredge.

Why Korean Fried Chicken Is Fried Twice

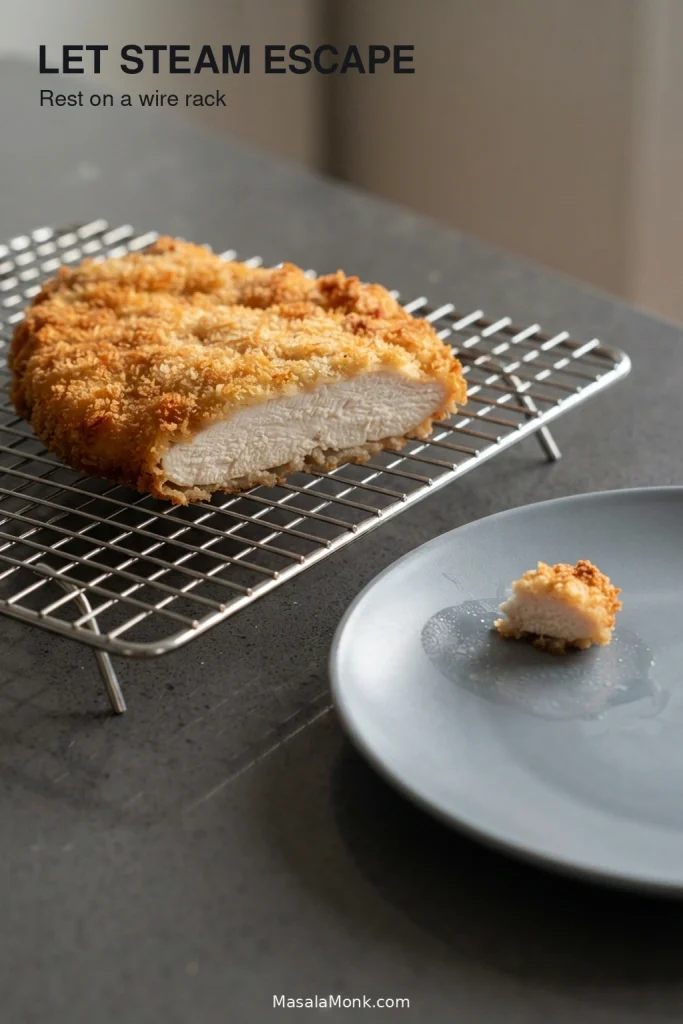
The first fry starts the cooking and sets the coating; the rack rest lets steam escape; the hotter second fry dries the crust and builds the final brittle texture.
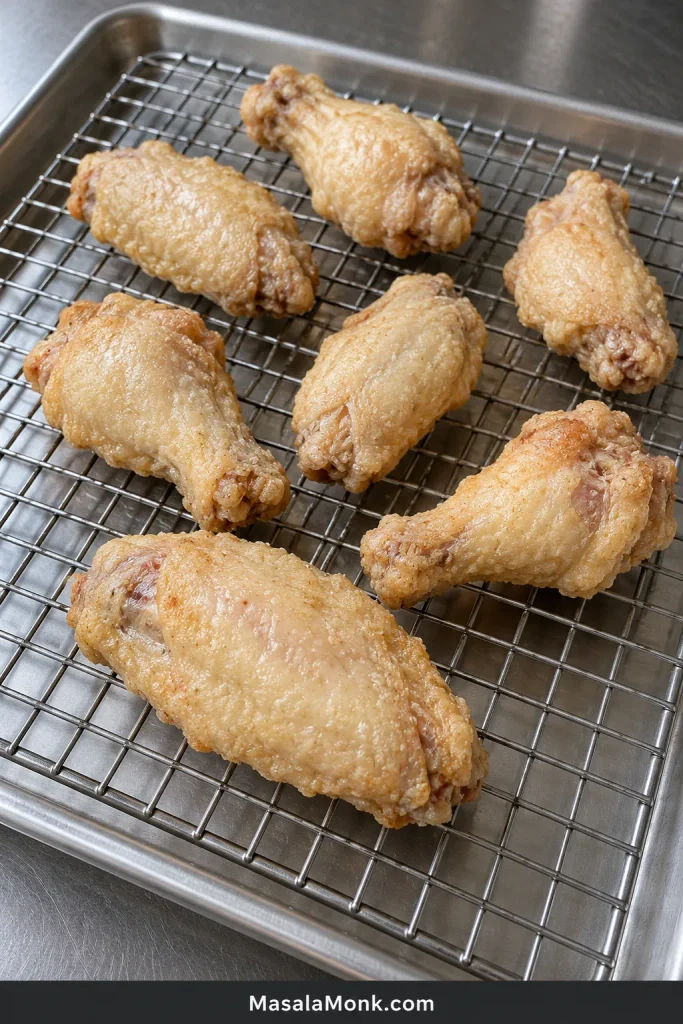
Pale blond first-fried chicken wings resting unsauced on a wire rack over a stainless-steel tray.
Ignore browning and inspect the coating instead: after the first fry it should look matte and dry-set, with no wet batter patches. Pale color alone is not a problem.

Watch the temperature after the wings go in, not just before. Six pieces may be fine in one pot and too many in another. If the oil stays below the target range instead of beginning to climb back, reduce the next batch.
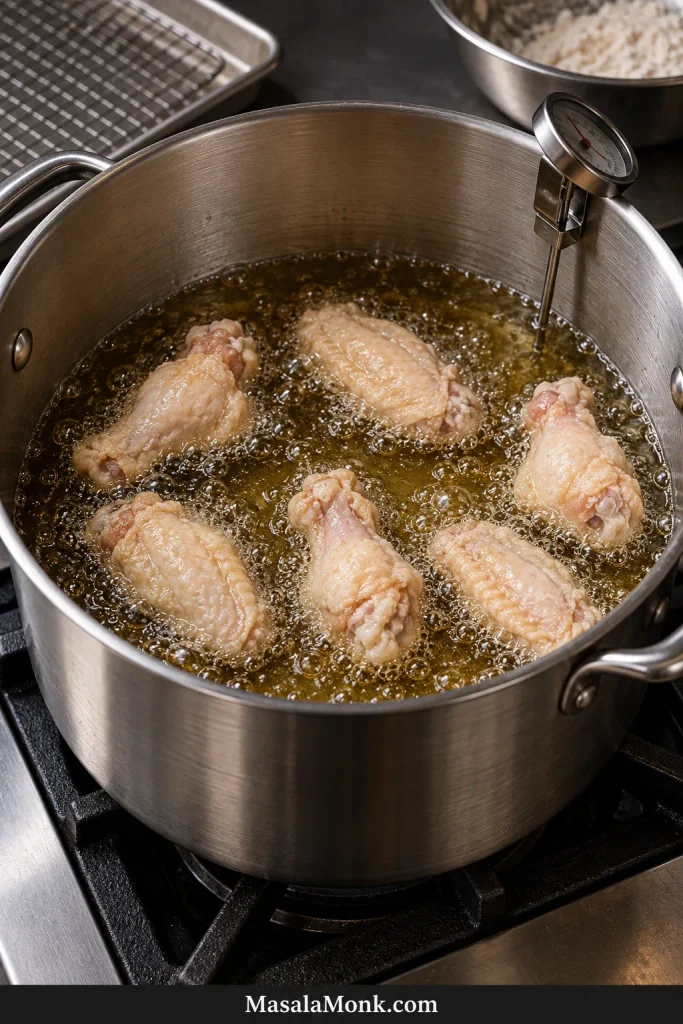
Six battered chicken wing pieces frying with space between them in a deep pot beside a clip-on oil thermometer.
Notice the channels of bubbling oil between the wings. That breathing room helps the oil recover after loading; crowding drops the temperature further and slows its recovery.

Choose Your Glaze: Gochujang or Soy-Garlic

Sweet-Spicy Gochujang

This sweet-spicy Korean fried chicken style is often called yangnyeom chicken; yangnyeom means seasoned. Gochujang gives the red glaze fermented heat and depth. Ketchup softens the sharper edges, soy adds salt and savoriness, and rice vinegar keeps the finish from feeling overly sweet.

Rice syrup adds shine and body with a relatively neutral flavor. Honey is stronger and sweeter, which is why the recipe uses less of it. Taste once the glaze has reduced; brands of gochujang vary enough that the final adjustment is better made in the saucepan than on paper.
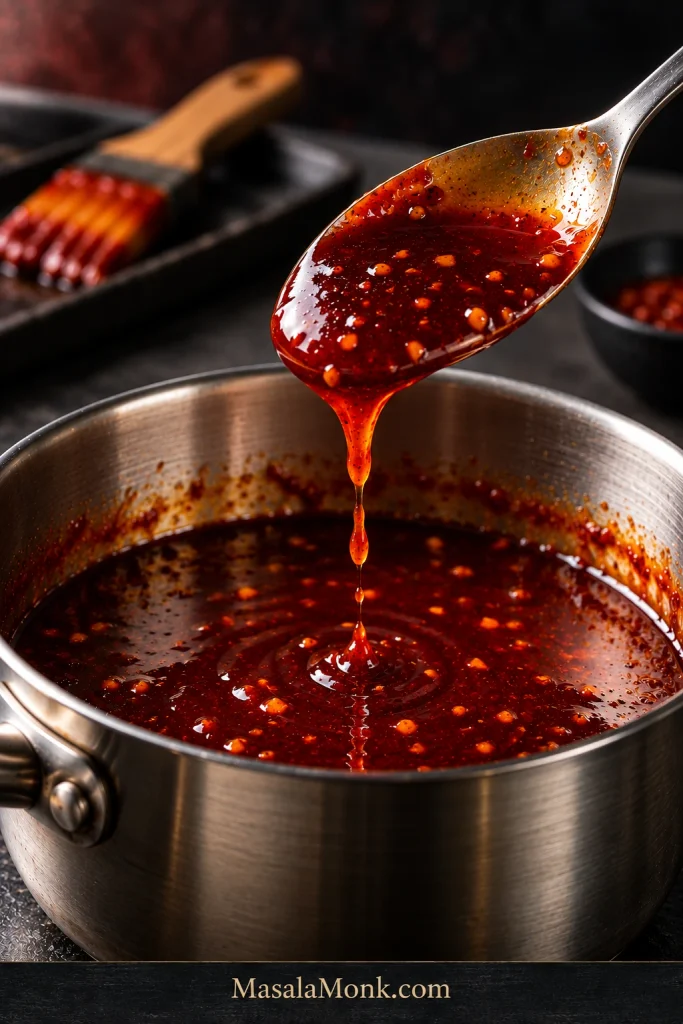
Metal spoon coated with glossy deep red gochujang glaze dripping into a stainless-steel saucepan.
Watch the landing point as the gochujang glaze falls from the spoon. Properly reduced sauce flows back into the pan with a small ripple; a mound that holds its shape has gone too far.

Soy-Garlic

Soy-garlic is the less chile-forward option: salty-sweet, deeply garlicky, and light enough that more of the fried crust comes through.

If you do not have gochujang, make this version rather than replacing gochujang 1:1 with ordinary hot sauce. Pull the glaze from the heat while it still pours; it thickens further as it cools.

Half-and-Half Korean Fried Chicken

Each glaze covers roughly 1 lb / 450 g of wings. Split the chicken after the second fry and finish each half differently, or double one glaze for the full batch. Half-and-half is especially useful when some people want the gochujang heat and others would rather stay with soy-garlic.
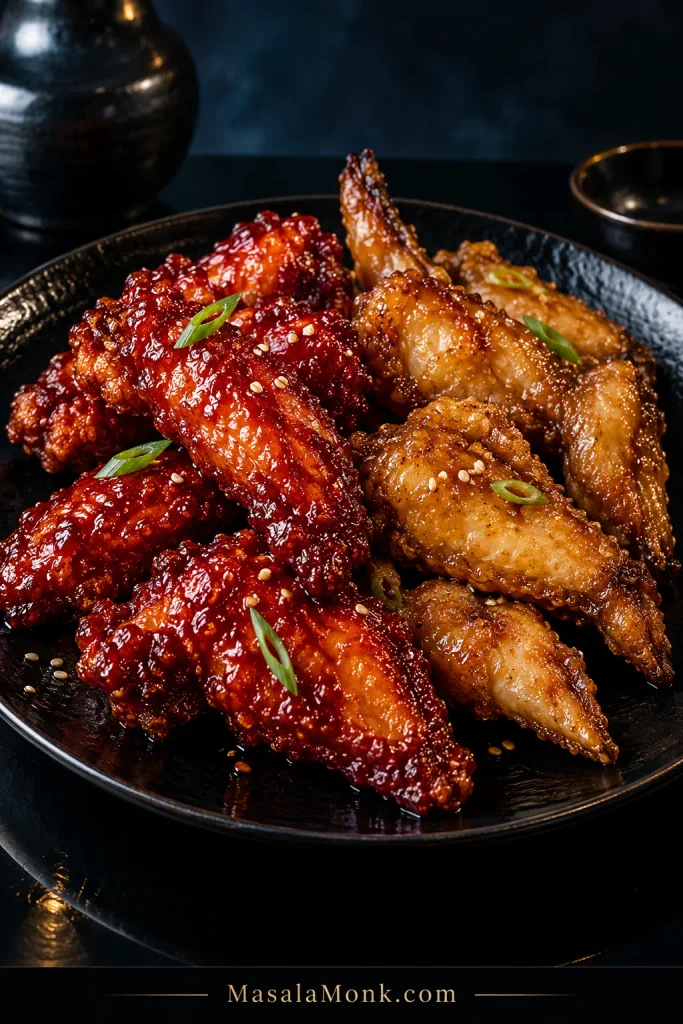
Korean fried chicken with deep ruby gochujang glaze beside wings coated in lighter amber soy-garlic glaze.
The two glazes should separate visually before you taste them: gochujang stays ruby-red, while soy-garlic remains translucent amber. If the soy glaze turns nearly black, it is too dark or reduced too far.

Sauce Is Where Crisp Chicken Goes Soft

The second fry dries the Korean fried chicken crust. Sauce starts softening it almost immediately, so application matters.

FinishWhat Happens
BrushYou get plenty of flavor while leaving some crisp crust exposed.
Quick tossCoverage is fuller, but the crust softens sooner.
DipThe wings stay at their crispest until the moment you eat them.

Whatever you choose, reduce the glaze until it clings and apply it as close to serving as you can.
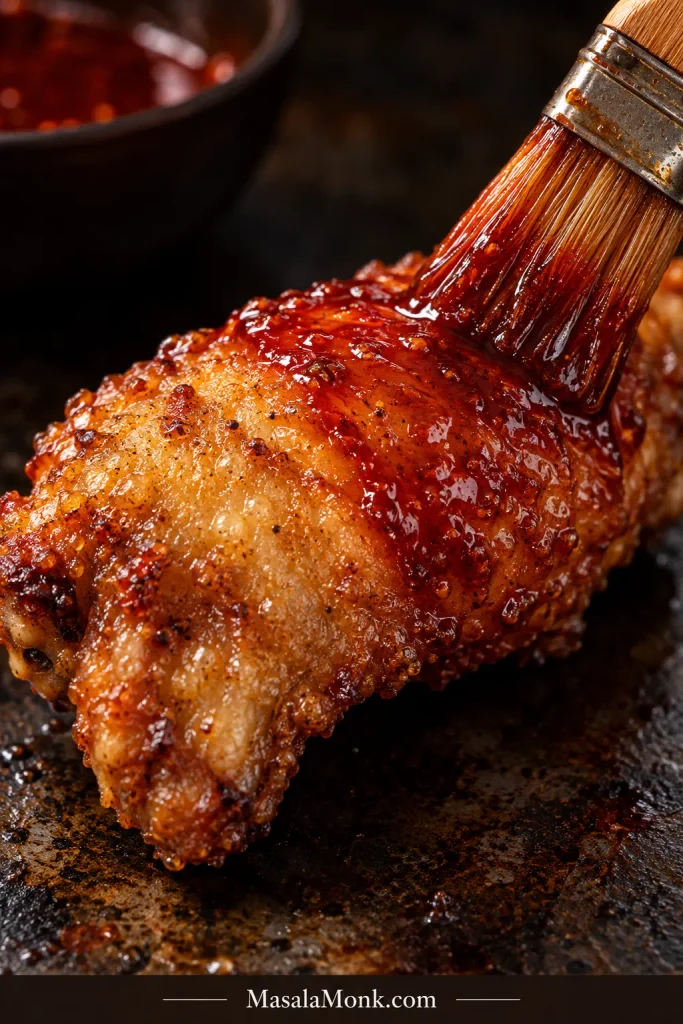
Pastry brush spreading deep red gochujang glaze over part of a freshly fried golden chicken wing.
A well-brushed wing shows two textures at once: glossy gochujang in lower creases and dry golden high points above it. That contrast is the visual sign of restrained glazing.

When the Crunch Goes Wrong

For Korean fried chicken, this troubleshooting check is easiest before frying: batter thickness is much easier to correct while you can still compare the coating against the wing’s natural shape.
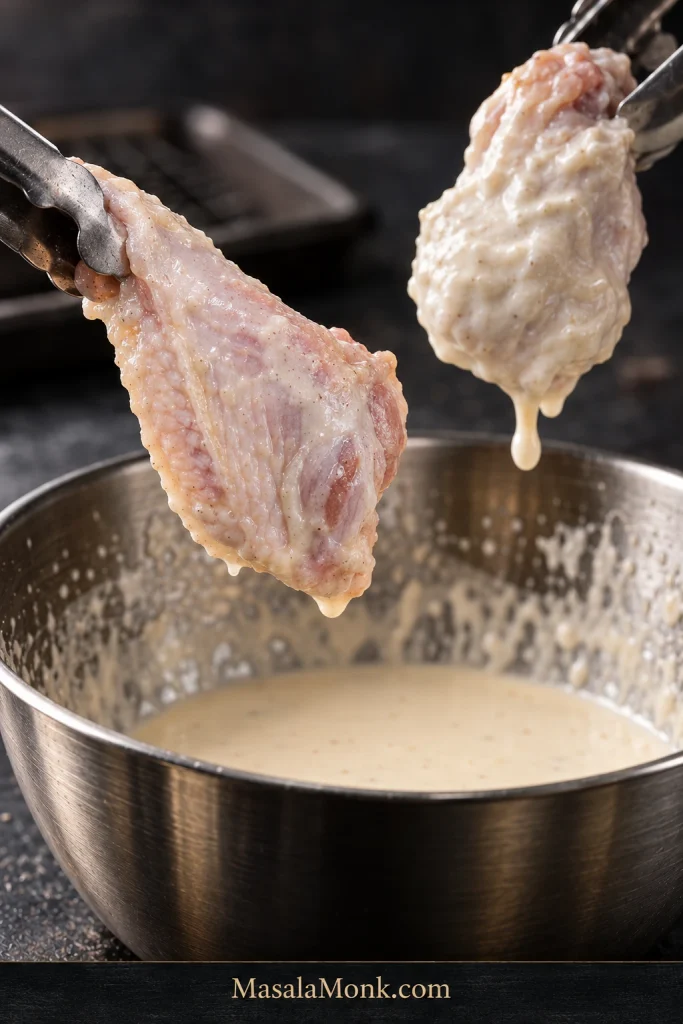
Two raw chicken wings above a batter bowl, one thinly coated and the other covered in thicker opaque batter.
Compare the silhouettes rather than just the color. Correct Korean fried chicken batter follows the wing’s joints and skin folds; a heavy coating rounds those contours and makes the piece visibly bulkier.
What You SeeLikely Cause + Fix
Batter slides away before fryingThe surface is too wet. Blot away loose liquid first, then use only a light starch dusting before battering.
Coating falls off laterThe coating may have been too heavy, not firmly set, or knocked loose during tossing. Drain excess batter well, let the first fry set the coating, and brush rather than toss a fragile batch.
Pale, greasy crustThe oil stayed too cool. Fry fewer pieces and let the oil recover fully.
Thick or hard crustThe batter was too heavy or the wings fried too long. Thin the batter and drain each piece well.
Crisp plain, soft after glazingThe sauce is too thin, too heavy, or went on too early. Reduce it further and use less.
Sauce will not clingIt needs a little more reduction.
Glaze turns sticky or glueyIt reduced too far. Loosen it carefully with a little warm water.

Ways to Adapt the Method

Boneless Korean Fried Chicken

Chicken thighs are the best choice for boneless pieces because they stay juicy through two fries. Cut them into chunks about 1½ inches / 4 cm across and use the same seasoning, starch dusting, batter, and sauces.
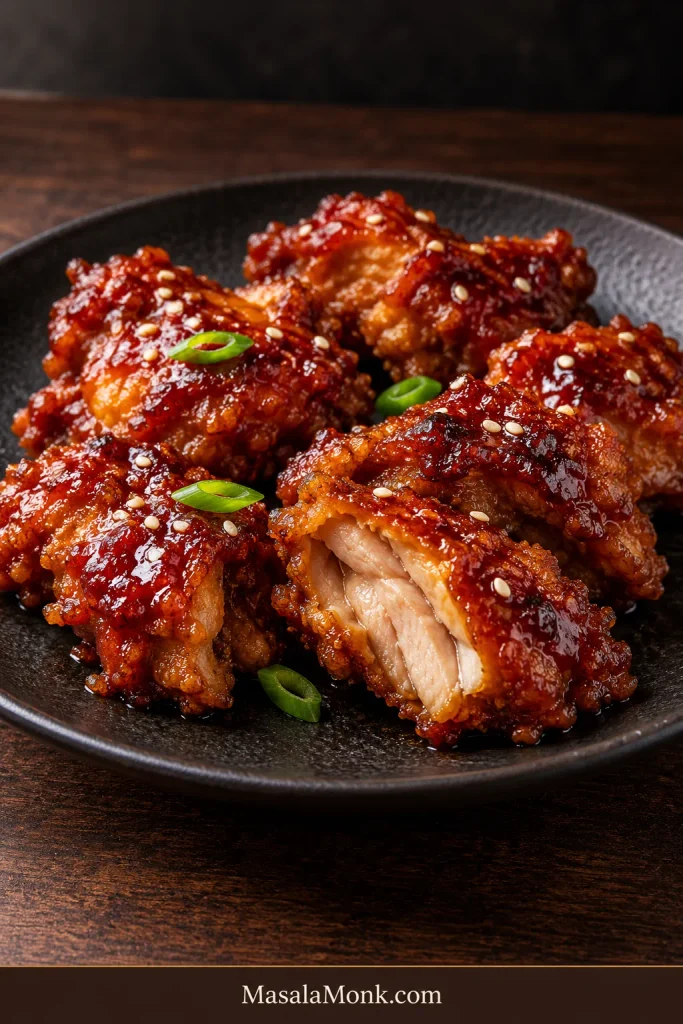
Glazed boneless Korean fried chicken made from irregular thigh chunks, with one piece opened to show moist cooked meat.
The opened piece is the useful checkpoint: juicy thigh should dominate the cross-section, with only a thin fried shell around it. If crust starts outweighing meat, the pieces are too small or too heavily coated.

Start checking the first fry around 4–5 minutes and the second around 2–3 minutes. The exact time depends on piece size, so use the thermometer as well as the clock. Breast meat can work, but it gives you less margin before drying out.

Another crisp boneless option is our Sesame Chicken, which uses smaller pieces and a different sweet-savory glaze.

Potato-Starch-Only Crust

For a thinner, harder crackle, skip both the starch dusting and wet batter. A 2 lb / 900 g batch of wings needs about ½ cup / 75–80 g potato starch.
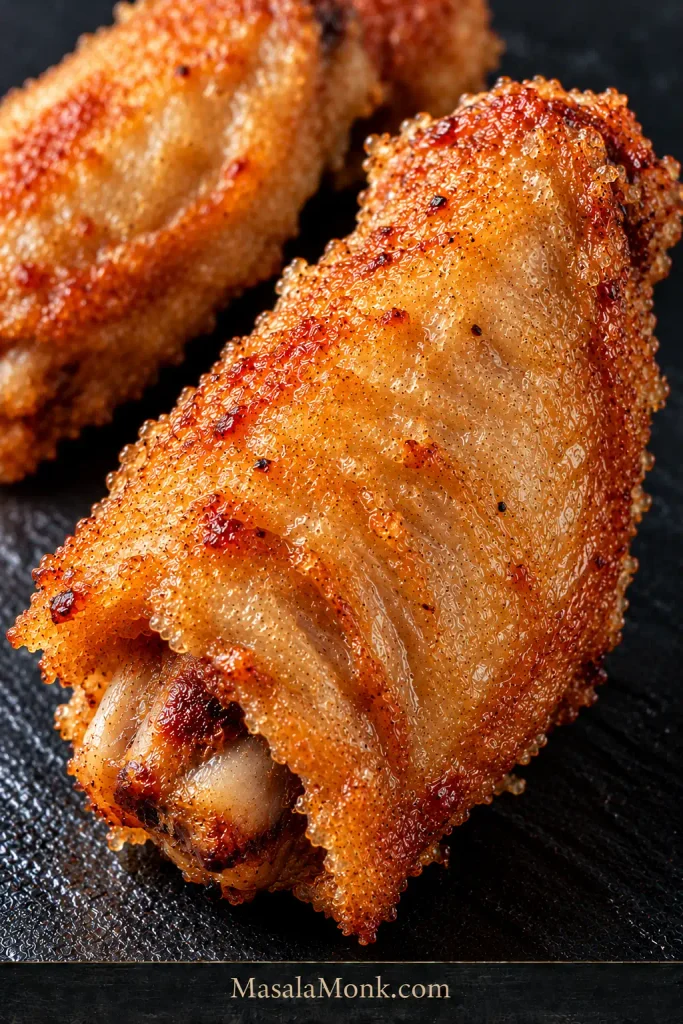
Close-up of an unsauced golden chicken wing with a thin potato-starch crust and fine glassy microblisters.
Potato-starch-only crust catches the light in tiny hard, glassy points while staying close to the skin. Broad floury ridges or a puffy outline would signal a different coating style.
  • Season and blot the wings as directed.
  • Coat them directly in the potato starch, pressing lightly so the surface is covered.
  • Shake off all loose excess before frying.
  • Use the same two-stage frying method and temperature targets as the main recipe, checking the crust and internal temperature rather than relying on time alone.

The result is a more glassy, less bread-like Korean fried chicken crust than the main batter. If the whole dish needs to be gluten-free, check the gochujang and soy sauce labels too and use certified gluten-free versions where needed.

Can You Make Korean Fried Chicken in an Air Fryer?

An air fryer can make crisp Korean-style wings, but the wet batter above is designed for oil. For an air fryer, the potato-starch-only route is easier: coat the wings, mist the surface well with oil, leave space around them, and glaze only after they are crisp.

If deep frying is off the table, our Air Fryer Chicken Wings guide has the full timing and spacing.

For a Party: Prep Ahead, Fry Close to Serving

For Korean fried chicken at a party, do the quiet prep earlier. Leave the battering, frying, and glazing for close to the time everyone is ready to eat.

Earlier in the Day

  • Season the wings and keep them refrigerated.
  • Make the glazes up to a day ahead and refrigerate them.
  • Measure the dry batter ingredients, leaving the water until frying time.

If Cucumber Salad is going alongside the wings, slice the vegetables earlier but dress them closer to serving so they keep their snap.

Close to Serving

  • Mix the batter and heat the oil.
  • First-fry the batches, then move through the hotter second fry as one continuous cooking session.
  • Warm the glaze and finish the wings only when you are ready to serve them.

Storing and Reheating Korean Fried Chicken

Refrigerate cooked chicken within about 2 hours — or within 1 hour if the surrounding temperature is above 90°F / 32°C — and use it within 3–4 days.

Reheat unsauced wings in an oven or air fryer until the thickest pieces reach 165°F / 74°C and the exterior is crisp again, then add warm glaze. Already-sauced wings will improve with dry heat, but they will not return completely to their just-fried texture.
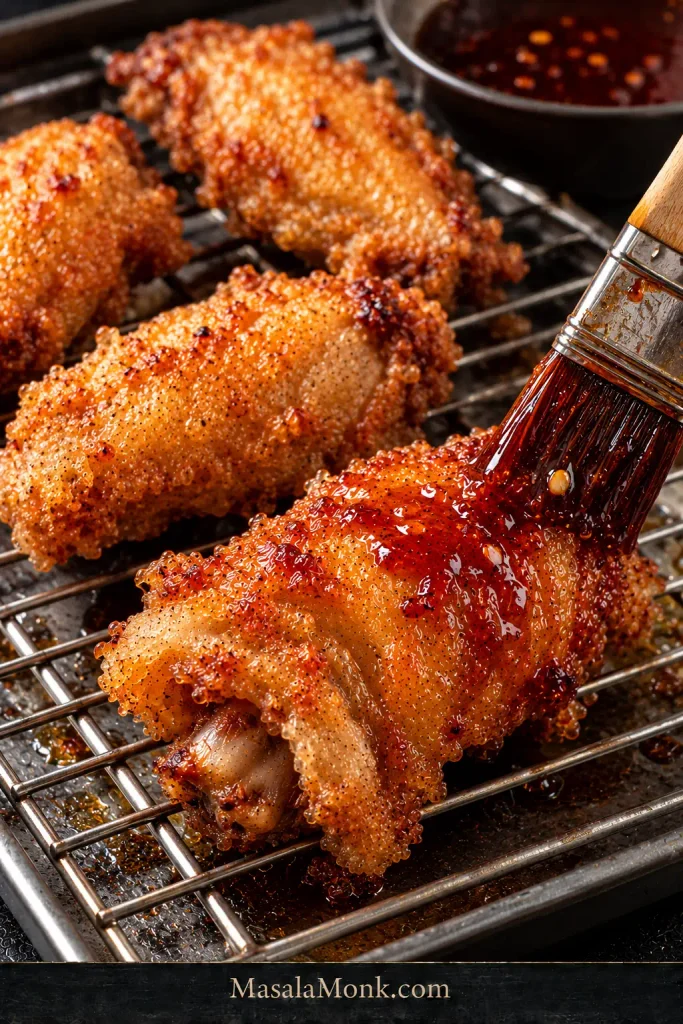
Reheated golden chicken wings on a wire rack while a pastry brush applies red glaze to one foreground wing.
The useful detail is the air gap under the wings: a rack lets dry heat reach the underside, avoiding the soft contact patch that forms when hot chicken sits flat against a tray.

If the exterior needs more help in the oven, our Crispy Baked Chicken Wings guide shows how a rack and dry oven heat can bring back more of the crust.

The easiest leftover rule: sauce only what you are eating now.

What to Serve With It

Cold, crisp chicken-mu—Korean pickled radish—cuts through Korean fried chicken with sharp acidity and crunch. Steamed rice keeps the plate simple; Fried Rice turns the wings into a fuller meal.
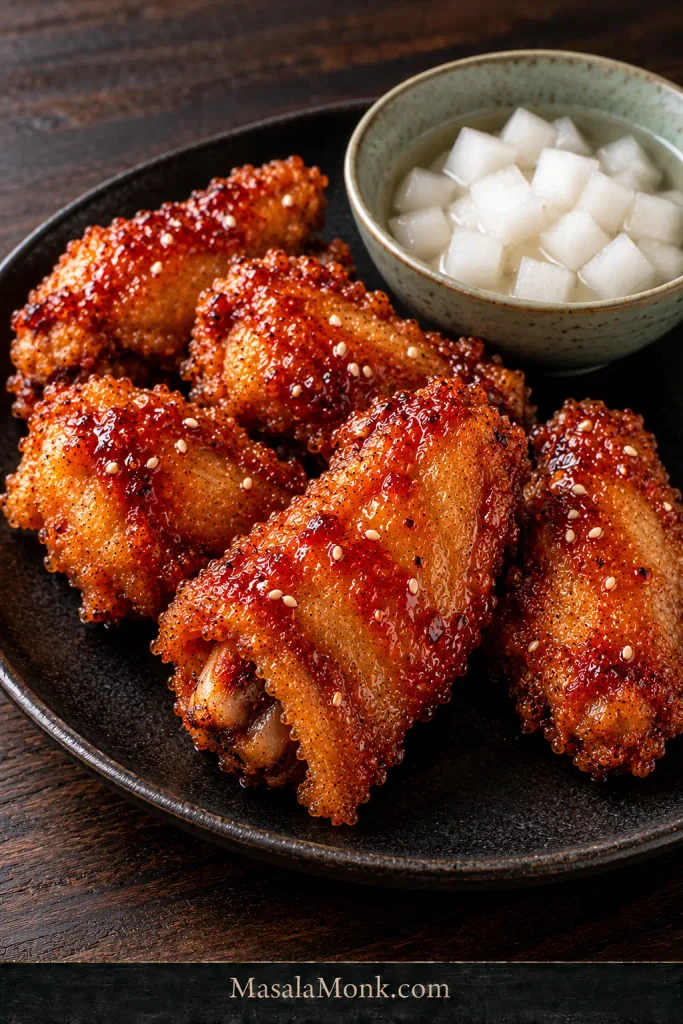
Glazed Korean fried chicken on a dark plate beside a celadon bowl of white pickled radish cubes in clear brine.
Chicken-mu should look clean and refreshing beside the wings: small white radish cubes in clear brine, not a heavy or creamy pickle. That contrast keeps the serving plate from feeling too rich.

For another cool side, our Coleslaw brings crunch and a little creaminess against the hot chicken.

Then eat the chicken while the timing is still on your side: second fry finished, glaze just brushed on, shell still audibly crisp.
Posted on — Leave a comment

Marry Me Chicken Recipe: Creamy, Juicy & Easy

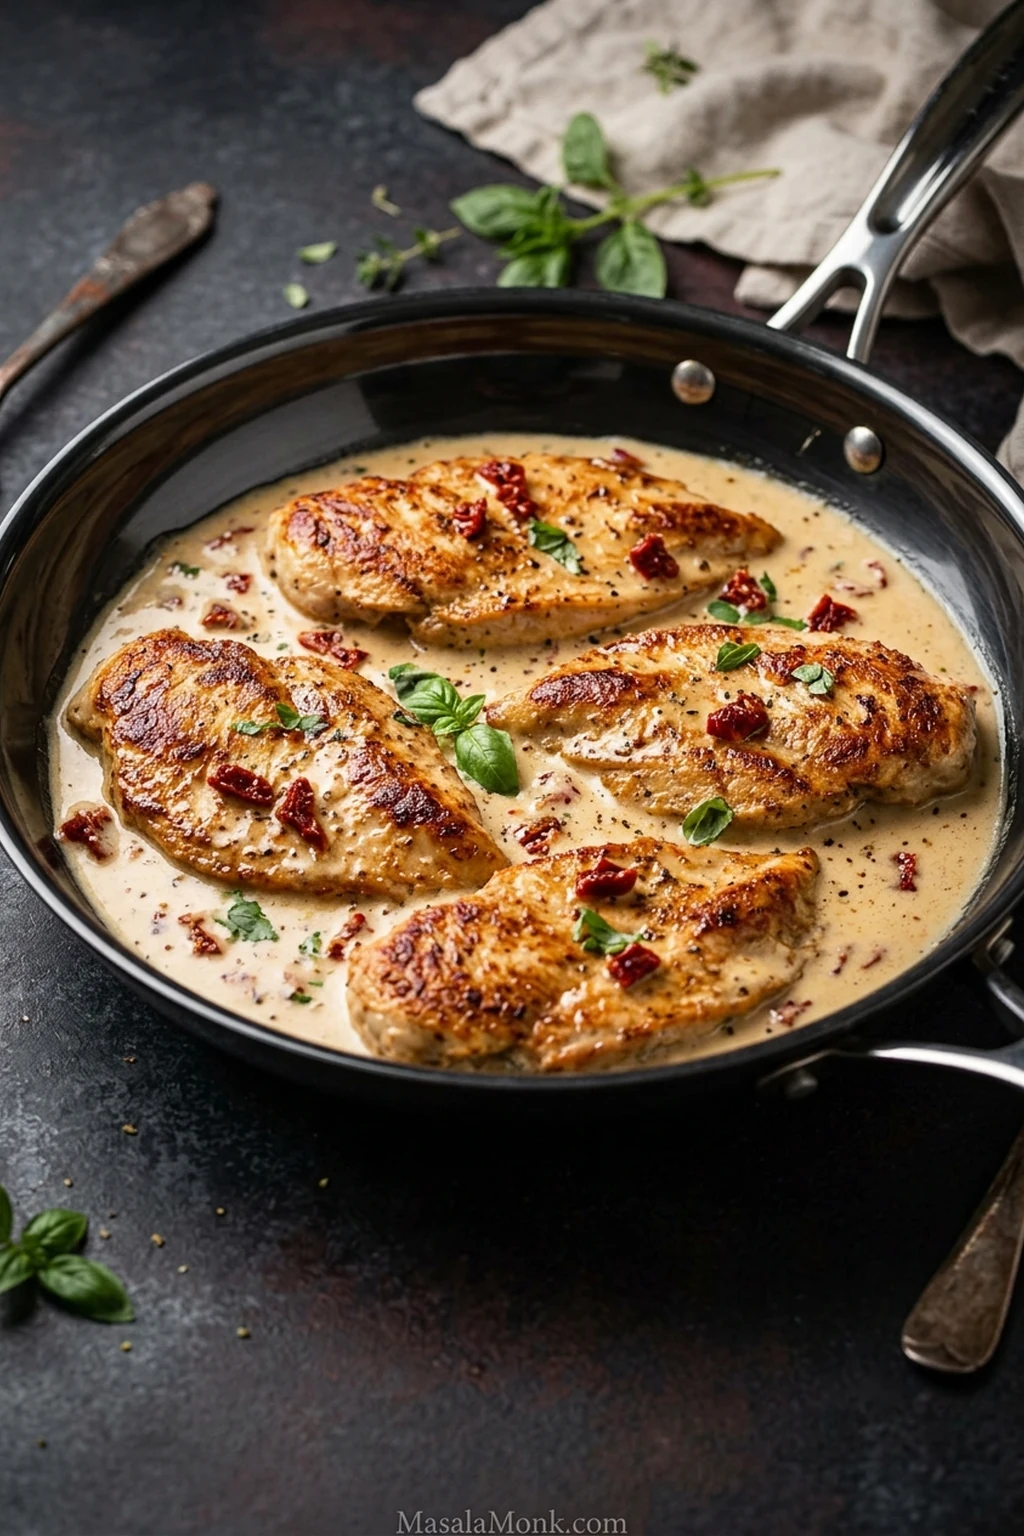
Golden chicken breast cutlets in a skillet with creamy garlic-Parmesan sauce, chopped sun-dried tomatoes, fresh basil and black pepper.

Golden chicken, creamy garlic-Parmesan sauce, little bursts of sun-dried tomato and fresh basil. This Marry Me Chicken recipe has plenty of richness without the sauce feeling heavy.

Marry Me Chicken is a modern one-skillet chicken dinner built around sun-dried tomatoes, garlic, cream and Parmesan. Delish credits Lindsay Funston with creating the original version in 2016. Its memorable name took off after someone tasting the chicken during the video shoot joked that it was good enough to inspire a marriage proposal.

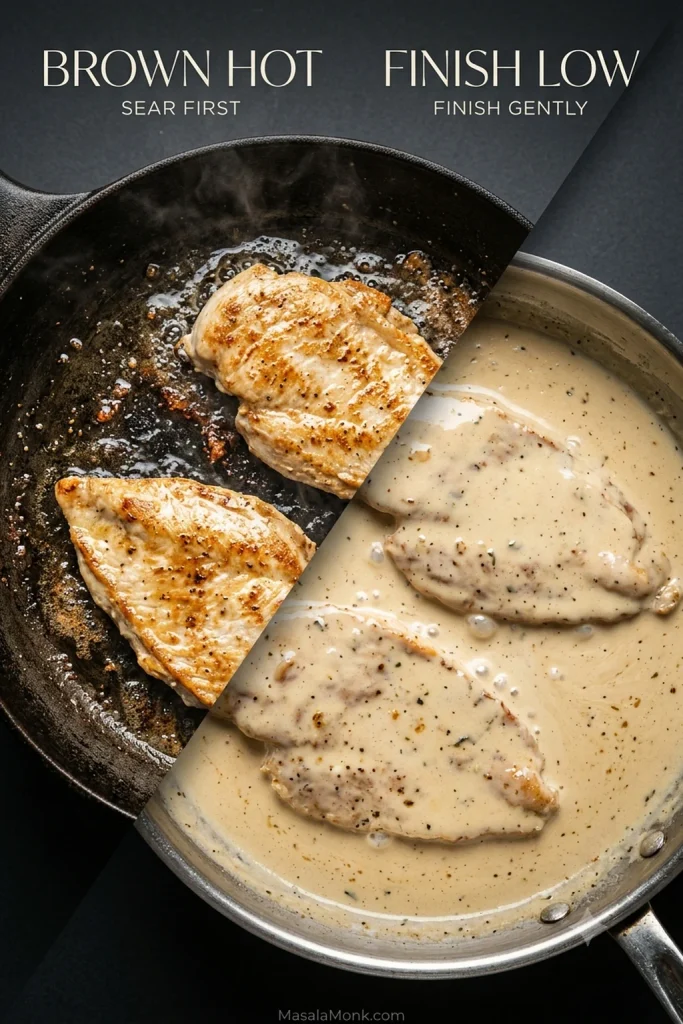
The tricky part isn’t the ingredient list. It’s knowing when the skillet needs to change gears. Give the chicken enough heat to brown properly, then turn things down once the cream sauce starts coming together. Brown hot, finish low. That’s the rhythm of the whole recipe.

The Heat Changes as You Cook

This gets much easier once you stop treating the whole dish as one continuous simmer. The skillet needs something different at each stage.

StageWhat you want
Brown the chickenMedium-high heat; deep golden color and browned bits in the skillet.
Tomato paste + garlicMedium heat; tomato paste darkening slightly, then garlic turning fragrant without scorching.
Broth + creamA low simmer; enough evaporation to give the sauce body without boiling it hard.
ParmesanSkillet off direct heat; finely grated cheese melting after the hard bubbling settles.
Finish the chickenLow heat; chicken reaching 165°F (74°C) without drying out.
Chicken cutlets searing over higher heat and then finishing gently in creamy sun-dried tomato sauce.
Listen for the heat change as well as looking for it. Browning should sound lively in a mostly dry skillet. Once the cream sauce is in, however, aim for small, gentle bubbles rather than the same aggressive sizzle.

Marry Me Chicken Recipe

Golden chicken cutlets finished in a creamy garlic, sun-dried tomato and Parmesan sauce. Brown the chicken first, build the sauce in the same skillet, then finish everything over low heat.

Prep Time
15 minutes

Cook Time
20–25 minutes

Total Time
35–40 minutes

Servings
4

Key equipment: a 12-inch (30-cm) skillet and an instant-read thermometer.

Marry Me Chicken Ingredients

  • 24 oz (680 g) boneless, skinless chicken breast, fully thawed
  • ¾ teaspoon fine sea salt (about 4 g), plus more only if needed at the end
  • ½ teaspoon freshly ground black pepper
  • 2 tablespoons (16 g) all-purpose flour
  • 1 tablespoon (15 ml) oil from the sun-dried tomato jar
  • Up to 1 tablespoon (15 ml) olive oil, only if the skillet needs it
  • 4 garlic cloves, finely minced
  • 1 tablespoon (about 16 g) tomato paste
  • ¾ cup (180 ml / 6 fl oz) low-sodium chicken broth
  • ¾ cup (180 ml / 6 fl oz) heavy cream
  • ½ cup (about 80 g / 2.8 oz) oil-packed sun-dried tomatoes, drained well and chopped into roughly ¼-inch (6-mm) pieces
  • ½ cup (about 40–45 g / 1.5 oz) Parmesan, freshly and finely grated
  • 1 teaspoon Italian seasoning
  • ¼ teaspoon crushed red-pepper flakes, or up to ½ teaspoon for more heat
  • ¼ cup loosely packed fresh basil leaves, torn or thinly sliced
  • Small lemon wedge, optional

How to Make Marry Me Chicken

Brown the Chicken

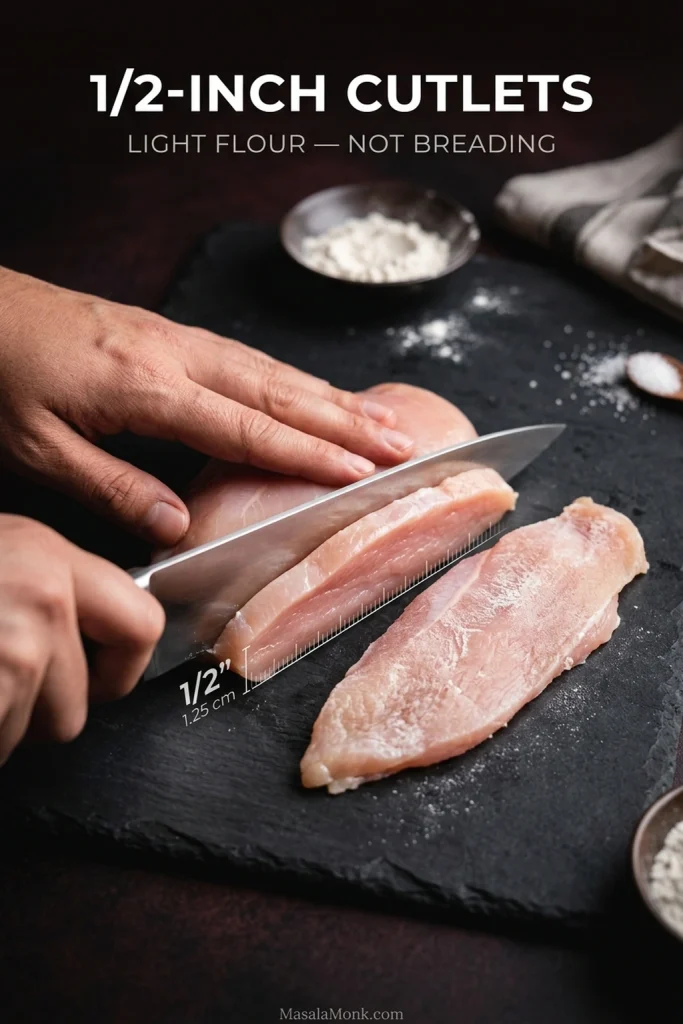
  1. Make four even cutlets. Slice the chicken breasts horizontally, then even out any particularly thick areas. Aim for about ½ inch (1.25 cm) at the thickest point.
  2. Dry, season and flour. Pat the fully thawed chicken dry and season both sides with salt and pepper. Dust with the flour, then shake off the excess. You want only a very light coating, with no visible clumps of flour.
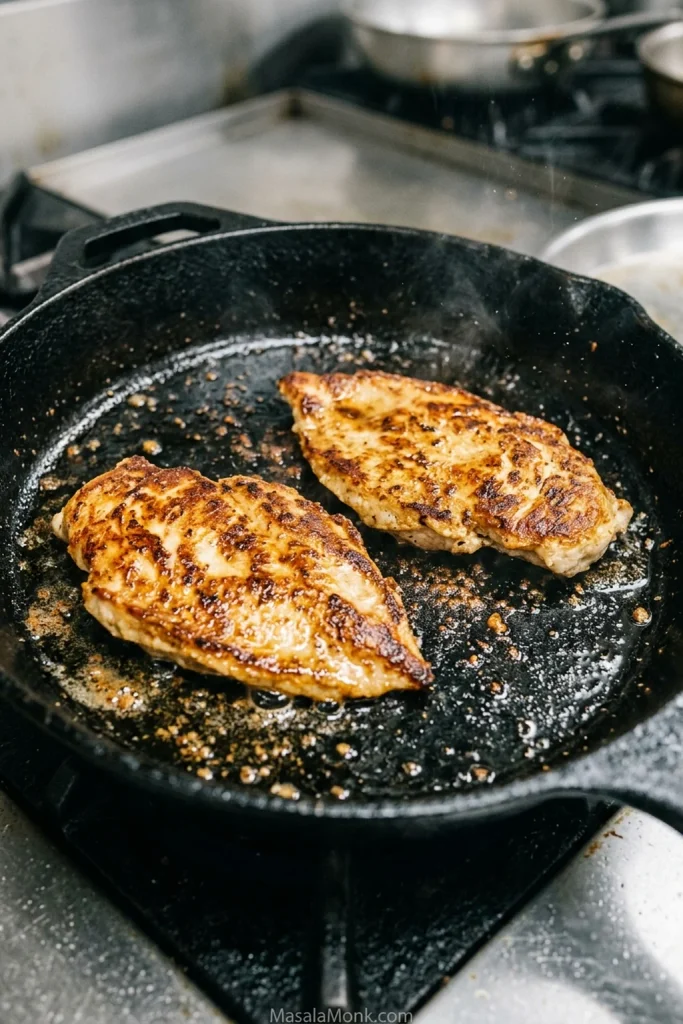
  3. Sear until golden. Heat a 12-inch (30-cm) skillet over medium-high heat. Add the sun-dried tomato oil and only as much additional olive oil as the skillet needs. Arrange the chicken in one uncrowded layer, working in two batches when necessary. Cook about 2–3 minutes on the first side, until deeply golden, then about 1–2 minutes on the second.
  4. Transfer the chicken. Move cutlets that still need cooking to a plate. If a particularly thin piece has already reached 165°F (74°C), place it on a separate clean plate and keep it aside until the sauce is finished.

Build the Sauce

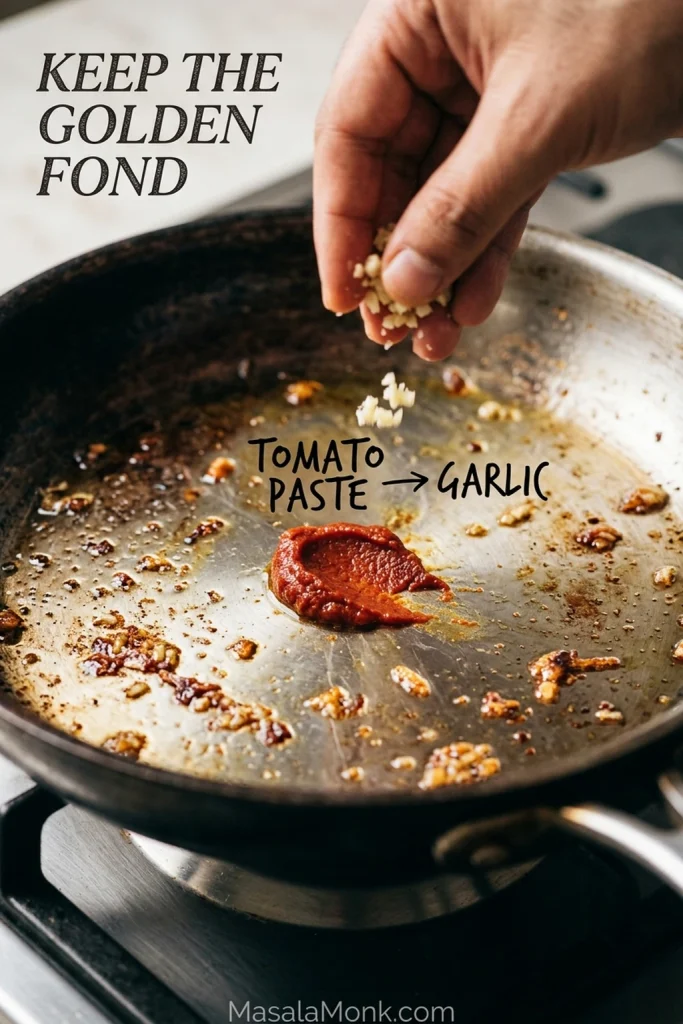
  1. Cook the tomato paste, then the garlic. Reduce the heat to medium. Stir in the tomato paste and cook for about 1 minute, until it begins to darken. Add the garlic and cook for about 30 seconds more, just until fragrant.
  2. Deglaze. Pour in the chicken broth and scrape across the bottom of the skillet to loosen the browned bits. Stir in the chopped sun-dried tomatoes.
  3. Add the cream. Lower the heat and stir in the heavy cream, Italian seasoning and red-pepper flakes. Bring the sauce to a low simmer.
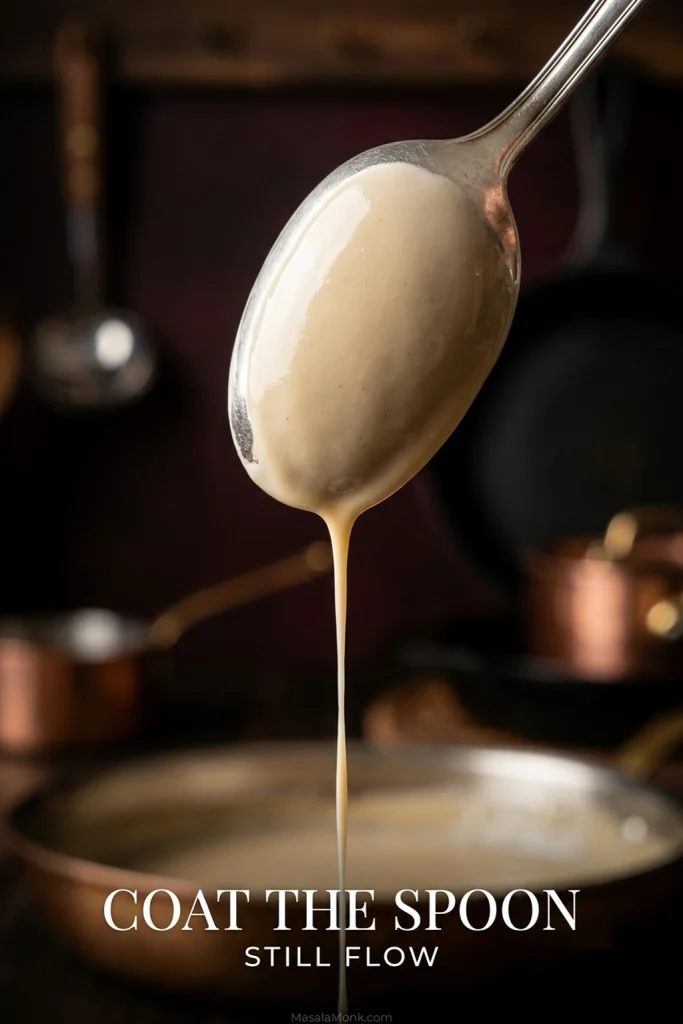
  4. Watch the sauce, not only the clock. Simmer for roughly 2–4 minutes. Stop when it lightly coats the back of a spoon but still runs easily when you tilt it. A slightly loose sauce is safer here than one you’ve already reduced too far.

Finish Over Low Heat

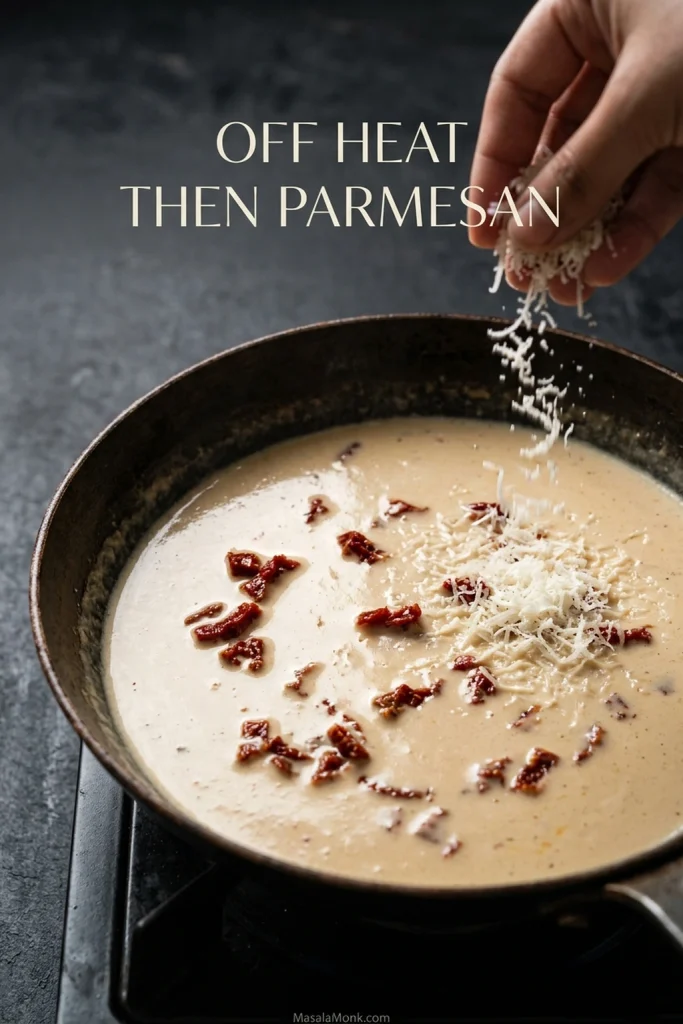
  1. Add the Parmesan off heat. Take the skillet off direct heat and let the hard bubbling settle. Add the Parmesan in two or three additions, stirring until each one melts before adding the next. The sauce should look glossy and still be loose enough to spoon.
  2. Return the chicken and any resting juices. Set the skillet back over low heat, then add the pieces that still need cooking along with the juices collected on the plate.
  3. Cook to temperature. The thickest part of each cutlet should reach 165°F (74°C), the USDA safe minimum temperature for chicken. If one gets there first, take it out. The chicken gets the final say, not the timer.
  4. Finish and serve. Turn off the heat, add the basil and taste for salt. Use a tiny squeeze of lemon only if the sauce still needs brightness. Add any already-cooked cutlets from the clean plate only long enough to coat and warm through, then spoon the sauce over all four pieces.

Recipe Notes

  • Half-and-half: It can work, but the sauce will be thinner and less forgiving of high heat. Keep it at a low simmer and allow a little more reduction time. Regular milk is not a direct substitute here.
  • Gluten-free or no flour: A suitable cup-for-cup gluten-free flour works for the light coating. You can also omit the flour and allow a little more reduction time.
  • Dry white wine: Add ¼ cup (60 ml / 2 fl oz) after cooking the tomato paste and garlic, then reduce it almost completely before adding the broth. Use ½ cup (120 ml) broth instead of ¾ cup.
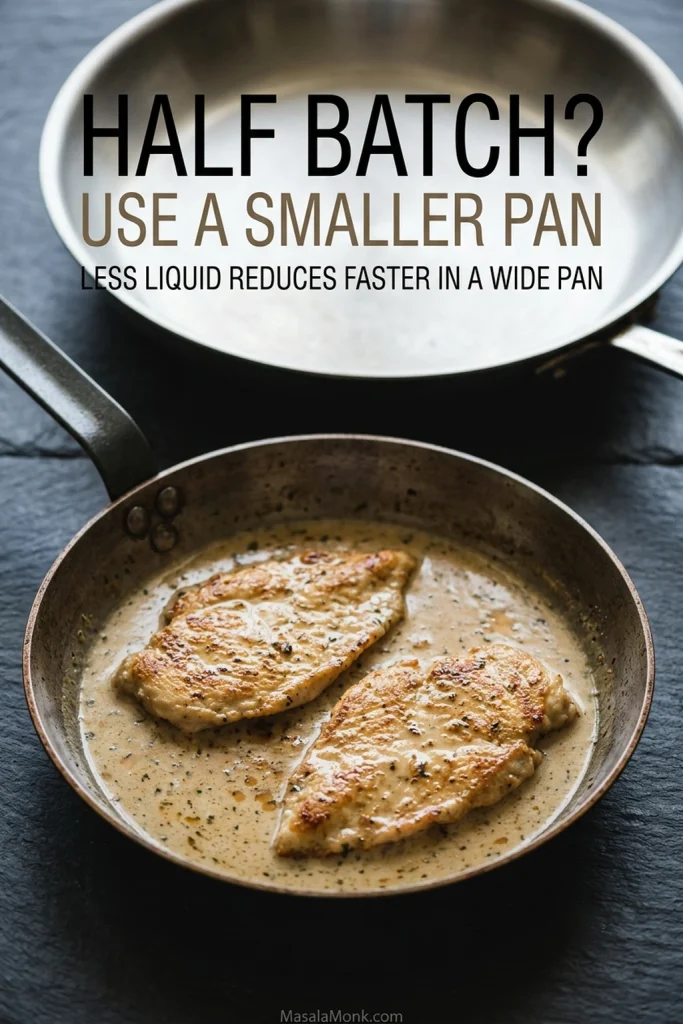
  • Half batch: Use a smaller skillet if you have one. A small amount of sauce can reduce surprisingly fast in a wide 12-inch pan.
  • Thin sauce: Let it reduce before reaching for more Parmesan. Extra cheese is not the best first fix.

A note on testing: This MasalaMonk recipe is research-derived rather than independently kitchen-tested. It is built from established cooking methods and recurring home-cook feedback, so use the visual cues and thermometer readings alongside the approximate timings.

Start With Even Chicken Cutlets

Chicken breast size varies wildly. One piece can be nearly twice as thick as another. Even a single breast can taper from a bulky center to a thin edge. That’s why this recipe starts by making four even cutlets.

Slice the breasts horizontally and aim for cutlets about ½ inch (1.25 cm) thick at their thickest point. They’ll brown quickly, and the center won’t lag far behind the edges.

Frozen chicken should be fully thawed first. Dry the surface well too. Moisture has to evaporate before browning can start. That’s why wet chicken so often looks pale even after several minutes in the pan.

If chicken breast often turns dry or uneven for you, our baked chicken breast guide goes further into thickness, temperature and judging doneness with a thermometer.

The flour coating here is deliberately light. Two tablespoons across the whole batch helps with browning and gives the sauce a little support. Shake off whatever doesn’t stick.

Raw chicken breast cutlets shown at about half-inch thickness, with one cutlet lightly dusted with flour.
Measure the thickest part of each chicken cutlet rather than the naturally tapered end. After flouring, the raw pink surface should still show through. If the chicken looks chalky white, shake off more flour before it hits the skillet.

How to Brown the Chicken

The first sear is mainly about color and flavor. Give the chicken enough time against the hot skillet to turn properly golden and leave browned bits—also called fond—behind.

Leave the first side alone long enough to color. Chicken that has browned properly usually releases from the pan more easily than chicken you keep trying to turn too soon.

Thin chicken breast cutlets with deep golden browning in a skillet and browned fond around them.
Good skillet browning is irregular: expect gold, caramel and a few mahogany patches rather than one uniformly dark crust. Meanwhile, the fond underneath should stay brown; genuinely black flecks are more likely to make the cream sauce bitter than more flavorful.

The same idea matters in chicken piccata: get real color on the cutlets first, then let the skillet do a different job once the sauce starts.

Give the Cutlets Room to Sear

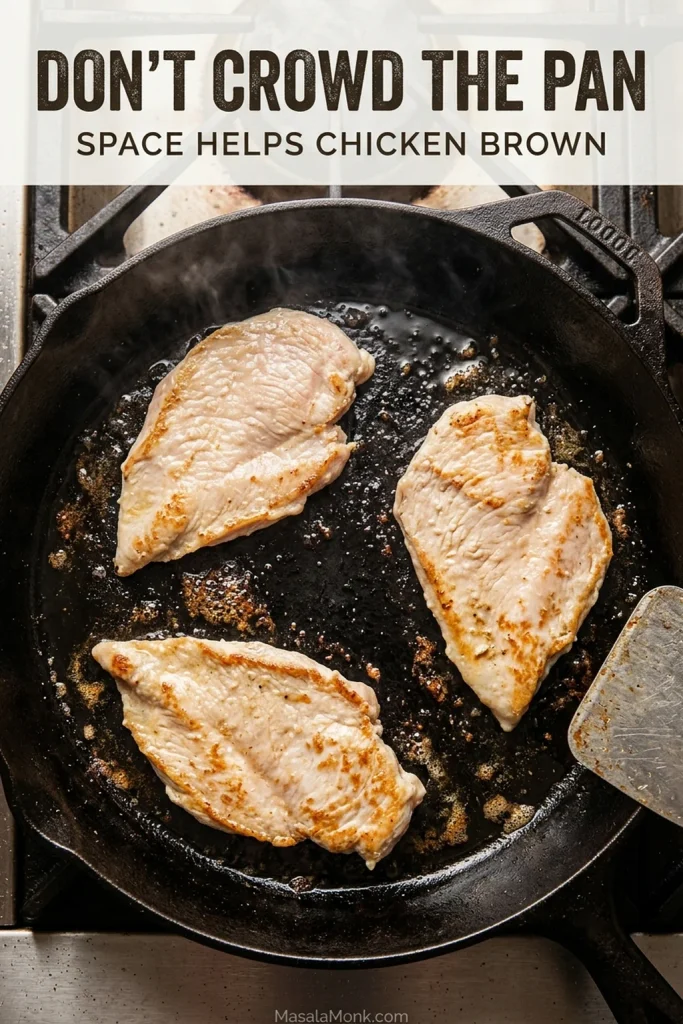
Don’t squeeze broad cutlets into a crowded pan. One skillet doesn’t mean every piece has to occupy it at the same moment. If the pieces overlap or liquid starts pooling around them, cook in two batches.

Chicken breast cutlets spaced apart in a wide skillet with visible open pan surface between the pieces.
A useful spacing check is whether you can still see hot skillet around every cutlet. If the juices from neighboring pieces begin joining into one puddle, the pan is effectively crowded—even when the chicken technically fits.

Pull Each Cutlet When It Is Done

When the chicken comes out, it should look deeply golden even though the centers may still need finishing. Put those partially cooked cutlets on one plate. If a thinner piece has already reached 165°F (74°C), move it to a separate clean plate and leave it there until the sauce is finished.

Thin golden chicken breast cutlet with a small end slice removed, showing a fully cooked moist white interior beside creamy sauce.
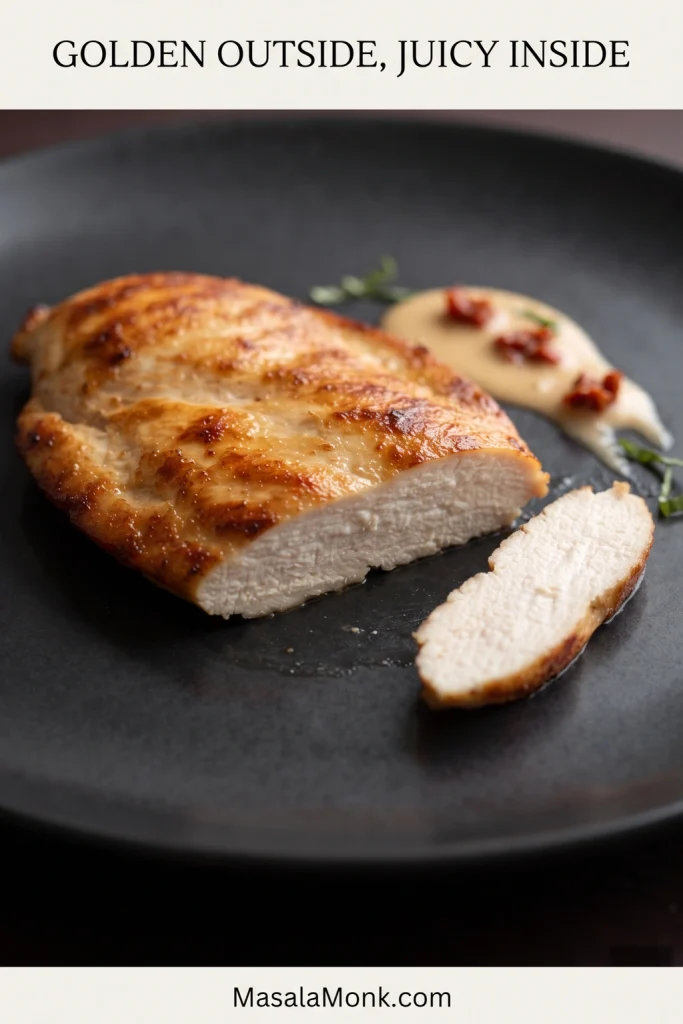
For a thin chicken cutlet, insert an instant-read thermometer from the side toward the thickest part so the probe reaches the center. The opaque, moist interior is a useful visual clue, but 165°F / 74°C is the doneness check that matters.

Build the Sauce Before Adding Cream

Check the skillet once the chicken is out. Keep the golden-brown fond. Remove anything genuinely black or scorched, and pour off excess oil if the bottom looks greasy.

Cook the tomato paste for about a minute, until it starts to darken, then add the garlic for the final 30 seconds. Pour in the broth and scrape the bottom of the pan. Those browned bits already bring plenty of savory flavor, so you don’t need a bouillon cube or a mountain of Parmesan to make the sauce taste fuller.

Golden-brown fond in a skillet with tomato paste and finely minced garlic after the chicken has been removed.
Use both color and aroma here. The fond should smell toasted rather than acrid. Let the tomato paste deepen toward brick red before the garlic goes in; then cook the garlic only until fragrant.

Oil-packed sun-dried tomatoes work especially well here because they’re already tender, and a measured spoonful of their oil adds tomato flavor to the sear. Chop them fairly small so every serving gets some.

The Sauce Should Coat, Not Sit

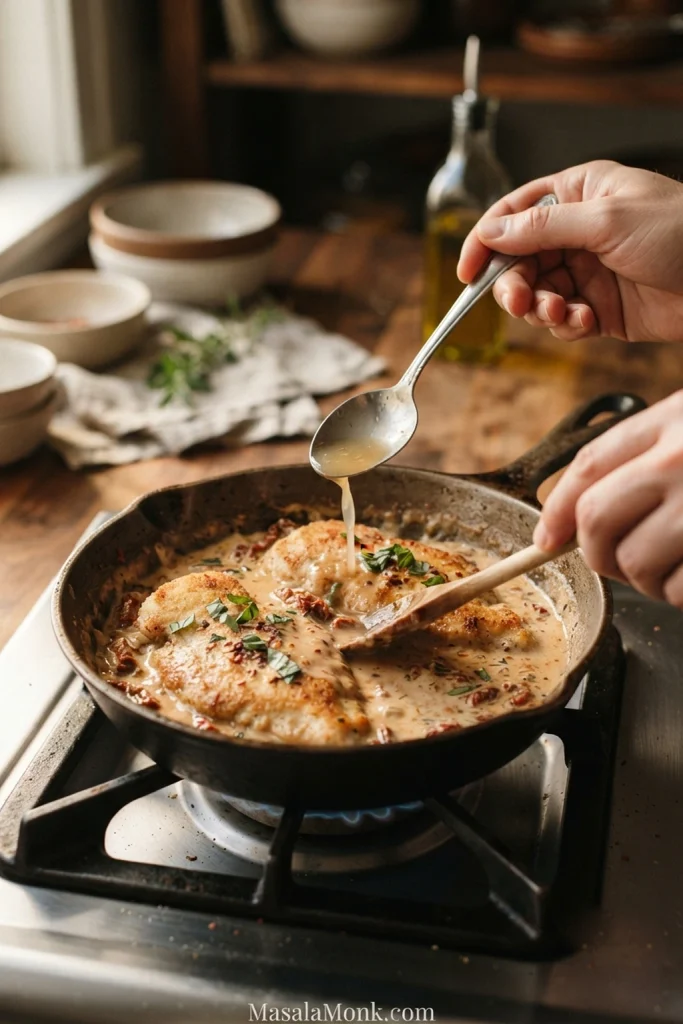
Marry Me Chicken sauce should lightly coat the back of a spoon while still flowing easily when you tilt it.

It shouldn’t run around the plate like broth, and it shouldn’t sit in a stiff mound either. Stop reducing while it is still silky and easy to spoon.

A cream sauce can go from thin to almost paste surprisingly quickly, so watch this stage closely. Parmesan, the little bit of flour carried over from the chicken, and cooling will all give the sauce more body later.

Back of a metal spoon coated with pale cream sauce that still drips freely back toward the skillet.
Before Parmesan, look for an even film on the spoon with a narrow drip that still moves freely. If the sauce hangs in ridges or falls in blobs, it has already reduced farther than this stage needs.

Keep the cream at a low simmer. A hard boil can make the sauce disappear quickly and increases the chance of separation. Already too thick, grainy or oily? Jump to the troubleshooting table instead of trying to correct it blindly.

Why Pan Size Changes the Reduction

If you’ve ever halved a creamy skillet recipe and wondered why the sauce practically vanished, the pan may have been the reason.

With half the sauce in the same wide skillet, you have much less liquid spread across almost the same surface area. It can reduce surprisingly fast. A smaller skillet helps; if the 12-inch pan is all you have, turn the heat down and start checking sooner.

Two chicken cutlets in creamy sauce in a smaller skillet with a larger skillet shown behind it for size comparison.
With a half batch of Marry Me Chicken, watch the depth of the sauce rather than pan diameter alone. In the smaller skillet, the liquid should still pool around two cutlets instead of spreading into a shallow film that disappears quickly.

Once the sauce reaches that loose, spoon-coating stage, stop reducing. The Parmesan is what comes next.

Let the Pan Calm Down Before the Parmesan

Don’t add the Parmesan while the sauce is bubbling hard. Take the skillet off the heat, let the bubbling settle, then stir in freshly and finely grated Parmesan in two or three additions.

Finely grated Parmesan being stirred into a calm creamy sun-dried tomato sauce off direct heat.
Finely grated Parmesan should almost disappear into the warm sauce between additions. Strings, stubborn clumps or grainy specks are a warning to pause. The pan may still be too hot, or the cheese may be too coarsely grated.

If you can, grate the Parmesan from a block. It usually melts more smoothly here than pre-shredded cheese. Once the sauce is glossy and smooth, return the chicken that still needs cooking and keep the heat low.

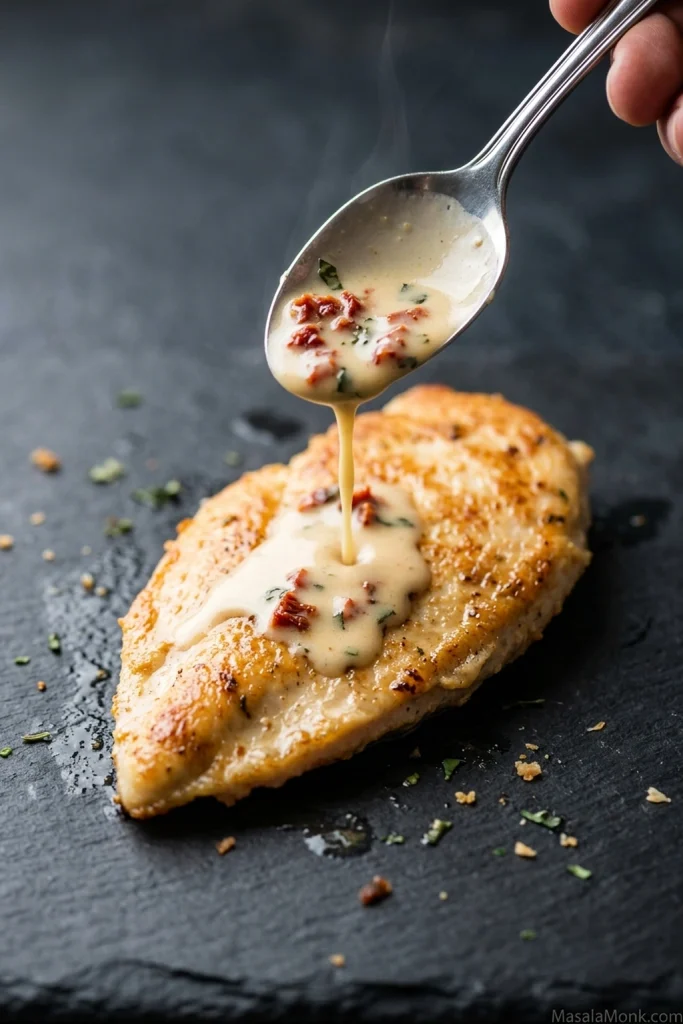
Creamy Marry Me Chicken sauce pouring from a spoon over a golden chicken cutlet with chopped sun-dried tomatoes.
Finished Marry Me Chicken sauce should coat the chicken, then relax and spread instead of sitting where the spoon drops it. A smooth ribbon that quickly settles back into the pan is a better serving cue than thickness alone.

When Marry Me Chicken Goes Wrong

Start with what you can actually see in the skillet. Most problems come back to moisture, heat or how far the sauce has reduced.

What you seeWhat to do
Sauce too thin or wateryBefore adding Parmesan, keep it at a low uncovered simmer until it lightly coats a spoon. If the cheese is already in, use very low heat and remove the chicken while the sauce tightens.
Sauce too thickAdd low-sodium broth 1 tablespoon (15 ml) at a time until the sauce flows easily again.
Sauce grainyThe Parmesan probably got too hot or melted poorly. Remove the skillet from the heat and stir slowly. A fully grainy sauce may not become completely smooth again.
Sauce oily or separatedTake it off the heat and stop boiling. Slow stirring may help if the sauce has only just begun to split, but a fully broken sauce may not recover completely.
Sauce almost disappearedThe pan was too hot, too wide for the quantity, or the sauce simply reduced too long. Add broth gradually until it becomes spoonable again.
Chicken pale instead of goldenDry the surface more thoroughly, preheat the skillet and leave more room between the cutlets. Use two batches when necessary.
Chicken is dryCheck that the cutlets are even and pull thinner pieces as soon as they’re done instead of waiting for every cutlet to finish together.
Sauce tastes rich but flatAdd the basil, taste for salt, then try a tiny squeeze of lemon if it still needs brightness.

Useful Variations

These changes still keep the creamy sun-dried tomato sauce at the center of the dish.

Boneless chicken thighs

Use about 1½ lb (680 g) boneless, skinless chicken thighs. Brown them well, then cook until they reach at least 165°F (74°C). Their shape and thickness usually mean they need a little longer than breast cutlets. Thighs also tend to stay juicy if they cook somewhat beyond the minimum temperature.

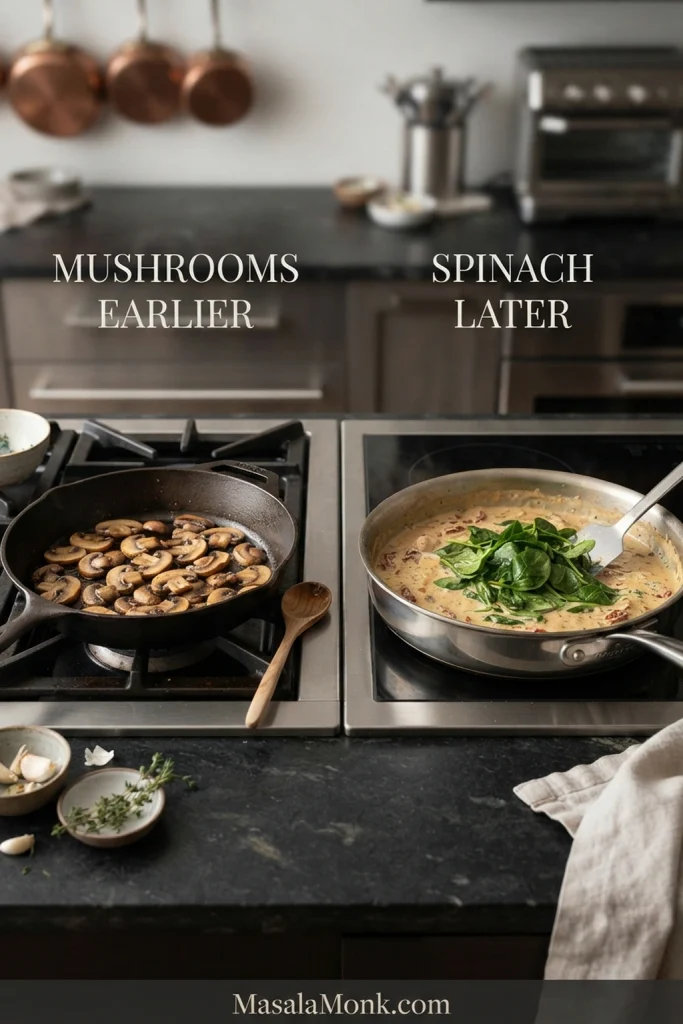
Spinach and Mushrooms Need Different Timing

Spinach

Stir in about 2 packed cups of baby spinach during the final minute of the cream reduction. Let it wilt, then take the skillet off the heat and continue with the Parmesan step. Adding the spinach before the cheese lets any extra moisture cook off first.

Mushrooms

Use about 8 oz (225 g) sliced cremini or button mushrooms. After the chicken comes out, brown the mushrooms in the same skillet. Wait until most of their released moisture has evaporated and the edges pick up color. Transfer them to a clean bowl or plate, build the sauce as written, then return the mushrooms near the end.

Browned sliced mushrooms and spinach shown at different cooking stages for Marry Me Chicken variations.
The visual endpoint is different for each variation. Mushrooms should be browned with little released liquid left in the pan, whereas spinach should only collapse and stay green. Cooking spinach as long as mushrooms would dull it and add unnecessary moisture.

For a much more mushroom-forward dinner, MasalaMonk’s cream of mushroom chicken builds the sauce around them from the start.

No sun-dried tomatoes?

You can leave them out, but the sauce will lose some of the concentrated sweet-tangy flavor associated with Marry Me Chicken. Use 1 tablespoon (15 ml) olive oil for browning in place of the reserved tomato oil, and keep the tomato paste in the sauce.

Fresh tomatoes can still make a very good creamy tomato chicken, but they behave differently and won’t give you the same concentrated flavor.

For a much lighter or dairy-free version: heavy cream and Parmesan affect the structure of this sauce as well as its flavor. Simply replacing the cream with milk or a plant drink won’t give you the same result.

If lemon is what you actually want to lead, MasalaMonk’s lemon pepper chicken is a better fit. For a skillet where wine rather than cream drives the sauce, Chicken Marsala takes things in a different direction.

What to Serve with Marry Me Chicken

A good side either catches some of that sauce or brings freshness to an otherwise rich plate.

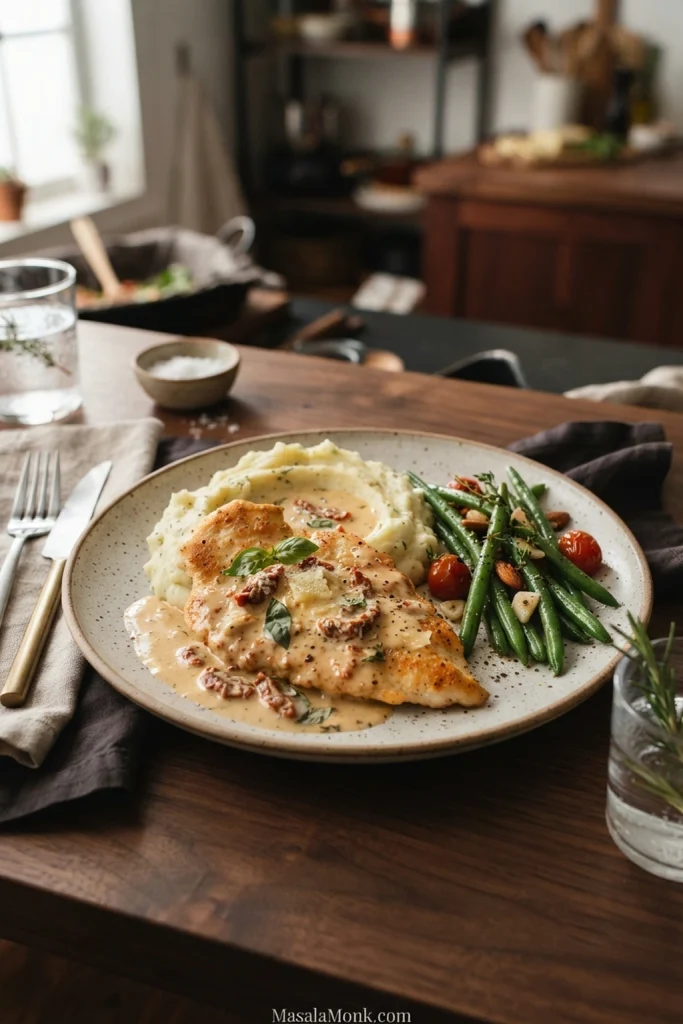
  • Creamy mashed potatoes catch the sauce beautifully without competing with the chicken.
  • Rice or crusty bread keep the plate simple and give the extra sauce somewhere useful to go.
  • Green beans almondine add crisp-tender beans, toasted almonds and a little lemon beside the creamy chicken.
  • Roasted broccoli, asparagus or a sharp green salad bring freshness when you want a lighter contrast.
Marry Me Chicken served with mashed potatoes and green beans, with creamy sauce around the golden chicken.
For a rich Marry Me Chicken dinner, give the sauce one destination and the palate one reset. A modest mound of mashed potatoes catches the creamy sauce, while crisp green beans stay comparatively clean and fresh between bites.

Pasta works underneath the chicken too. Keep the portion modest so the sauce still feels generous instead of disappearing into a large bowl of noodles.

Planning ahead or saving leftovers? Jump to storage and reheating for the low-heat method that keeps the cream sauce from tightening too far.

Make Ahead, Storage and Reheating

If you’re planning ahead, prep the ingredients rather than fully cooking the dish. Slice the chicken, chop the tomatoes, grate the Parmesan and measure the sauce ingredients earlier in the day. The finished chicken and sauce are best soon after cooking.

For leftovers, cool the chicken promptly and refrigerate it in a covered container for up to 3–4 days. Keep some sauce around the chicken rather than storing the pieces dry.

Reheat over low heat and avoid boiling. Cold cream sauce will be firmer, so add 1–2 tablespoons (15–30 ml) low-sodium broth per serving if it needs loosening.

Cooked Marry Me Chicken reheating gently in a small pan as broth is added to loosen the cream sauce.
Refrigerated cream sauce often looks thicker than it will once warmed, so don’t add broth immediately. Reheat Marry Me Chicken gently first; then, if the sauce still needs help flowing, loosen it a tablespoon at a time.

Freezing is possible, but the texture is less dependable. Cream-and-cheese sauces can look grainy or slightly separated after freezing and thawing.

This is the sort of dinner worth bringing to the table in the skillet. Spoon the sauce over the chicken and scatter over a little more basil if you have it. Keep bread, rice or potatoes nearby for whatever is left in the pan.

Posted on — Leave a comment

Air Fryer Fried Chicken Breast Recipe: Crispy, Juicy & Easy

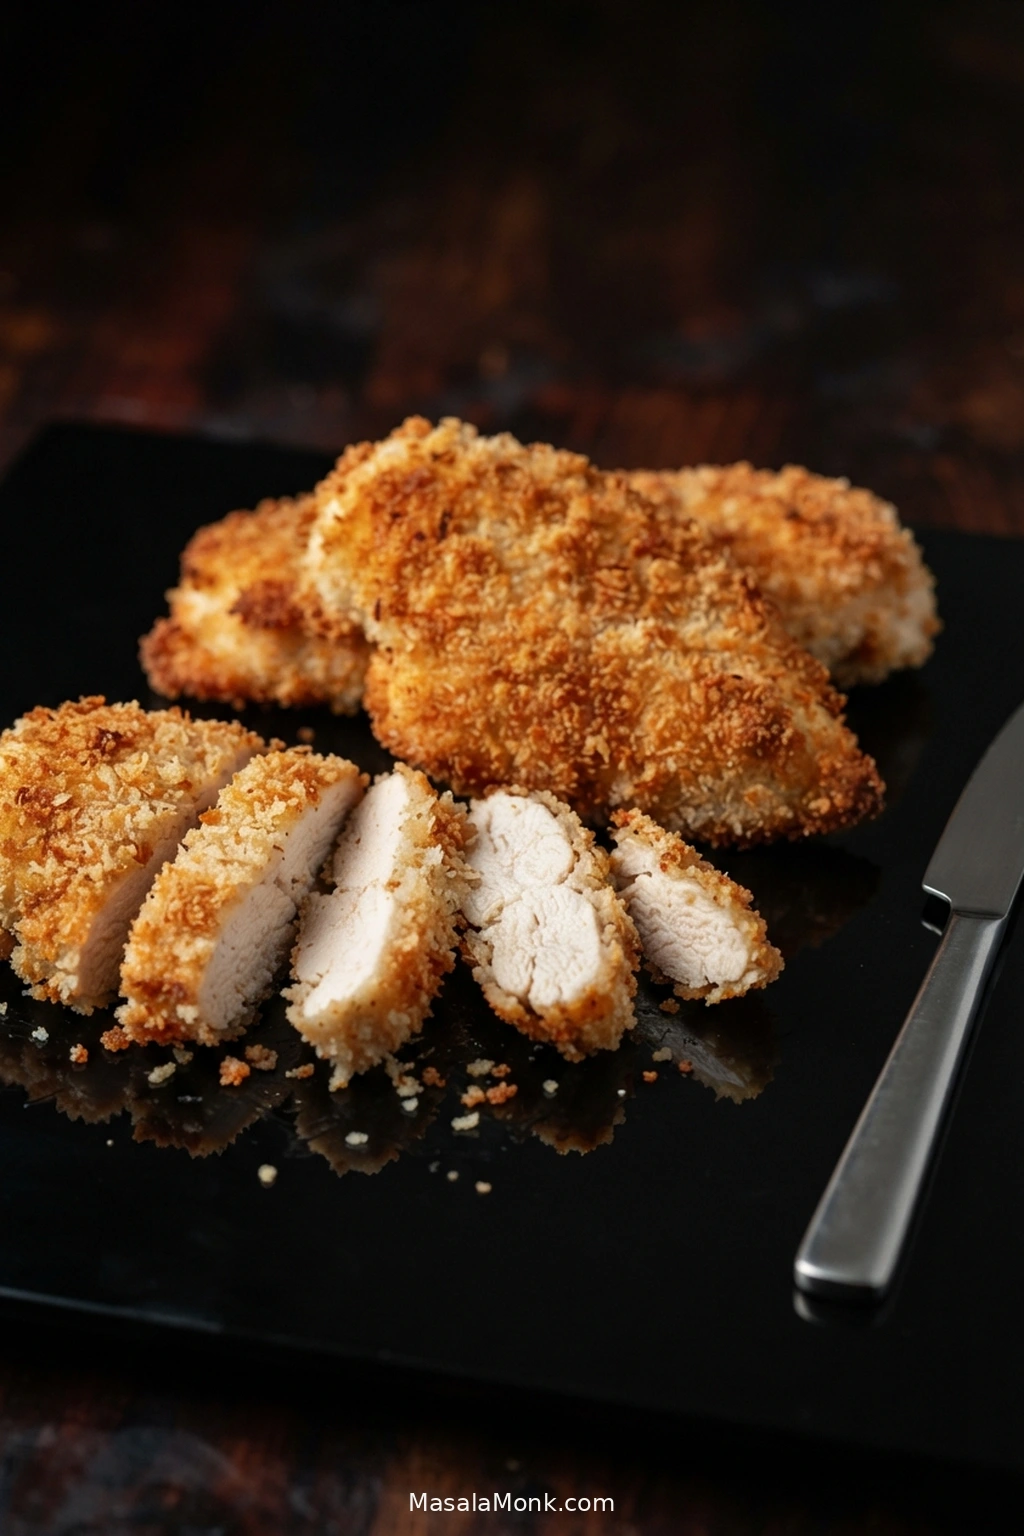
Three golden breaded chicken breast cutlets on a dark surface, with the front cutlet sliced to reveal moist white chicken inside.

This air fryer fried chicken breast recipe gives you crisp, golden breading around juicy chicken without a pan of frying oil. The crust needs enough time to brown and crunch before lean chicken breast has a chance to dry out.

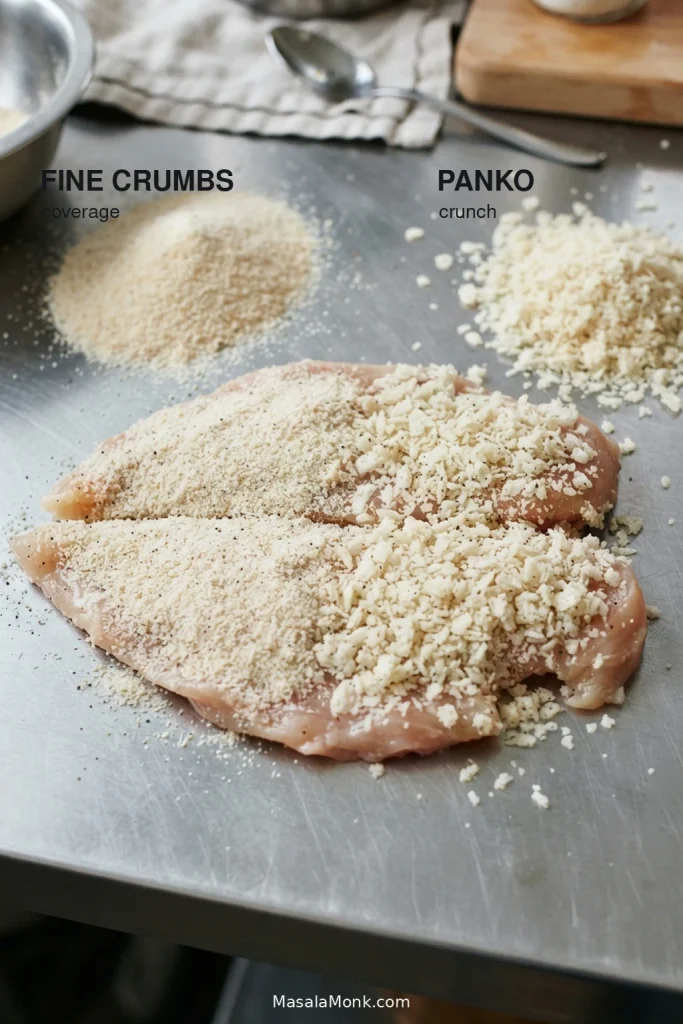
Splitting the breasts into thinner cutlets makes that much easier. A thin mayonnaise-Dijon layer holds the breading in place without the usual flour-and-egg dredging station. Fine breadcrumbs fill the gaps, while panko leaves rougher edges for extra crunch. The coating is light enough that mayonnaise should not dominate; Dijon mainly leaves a little tang behind.

For 1/2-inch / 12–13 mm cutlets, allow 10–12 minutes per batch at 390°F / 200°C. Begin checking the thickest part around 9 minutes and remove each piece when it reaches 165°F / 74°C. Use the clock to know when to start checking and the thermometer to decide when the chicken comes out.

This is the breaded, fried-style version. For chicken breast without breading, use the air fryer chicken breast recipe instead.

Air Fryer Fried Chicken Breast Recipe

Thin chicken breast cutlets with a seasoned breadcrumb-panko crust, air fried until crisp outside and juicy in the center.

Prep
15 minutes

Breading Rest
10 minutes

Cook
10–12 minutes per batch

Total
About 40–55 minutes

Yield
4 cutlets

Equipment

  • Air fryer
  • Sharp chef’s knife
  • Small bowl
  • Shallow bowl or plate for breading
  • Tongs
  • Instant-read thermometer
  • Meat mallet or rolling pin, optional
  • Wire rack, optional

Ingredients

  • 2 large boneless, skinless chicken breasts, about 18–20 oz / 510–565 g total
  • 3/4 teaspoon fine sea salt, about 4 g, divided
  • 1/2 teaspoon black pepper, about 1 g, divided
  • 2 tablespoons mayonnaise, about 30 g
  • 1 tablespoon Dijon mustard, about 15 g
  • 1/2 cup plain fine dry breadcrumbs, about 50 g
  • 1/2 cup plain panko breadcrumbs, about 30 g
  • 1 teaspoon paprika, about 2 g
  • 1 teaspoon garlic powder, about 3 g
  • 1/2 teaspoon onion powder, about 1 g
  • 1/4 teaspoon cayenne pepper, optional
  • 2 teaspoons olive or avocado oil, 10 mL
  • Cooking spray or additional oil for misting, as needed

Instructions

Prepare and Bread the Chicken

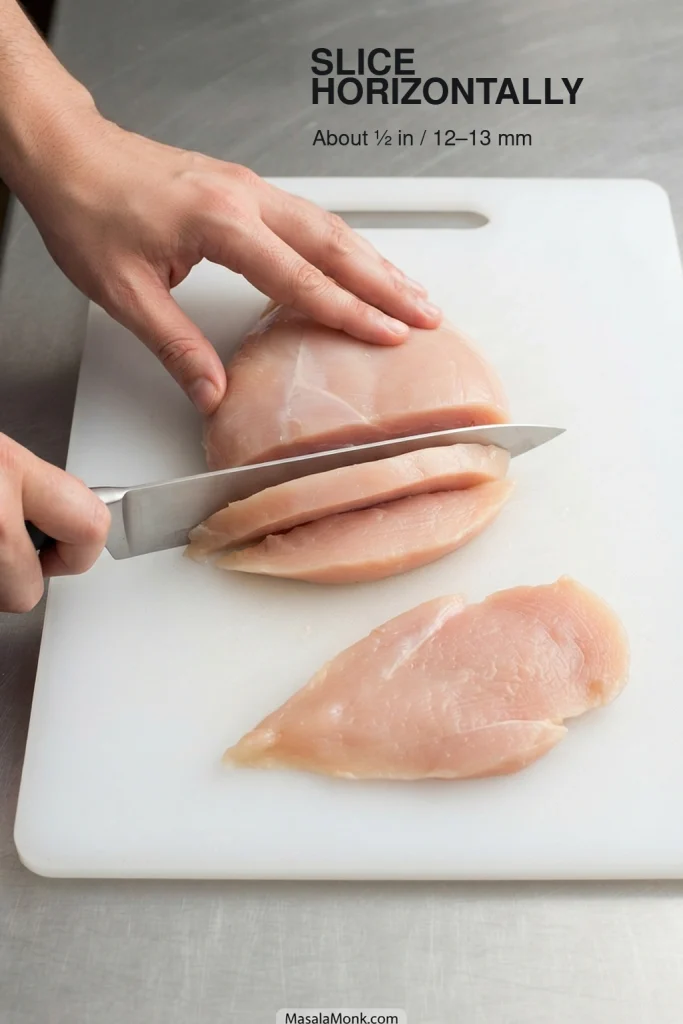
  1. Slice the chicken. Cut each breast horizontally into 2 cutlets. Aim for pieces about 1/2 inch / 12–13 mm thick. They do not need to match perfectly. If one cutlet has a noticeably thicker center, gently pound just that area until the piece is closer to an even thickness.
  2. Dry and season. Pat every surface of the chicken thoroughly dry. Season both sides with 1/2 teaspoon salt and 1/4 teaspoon black pepper.
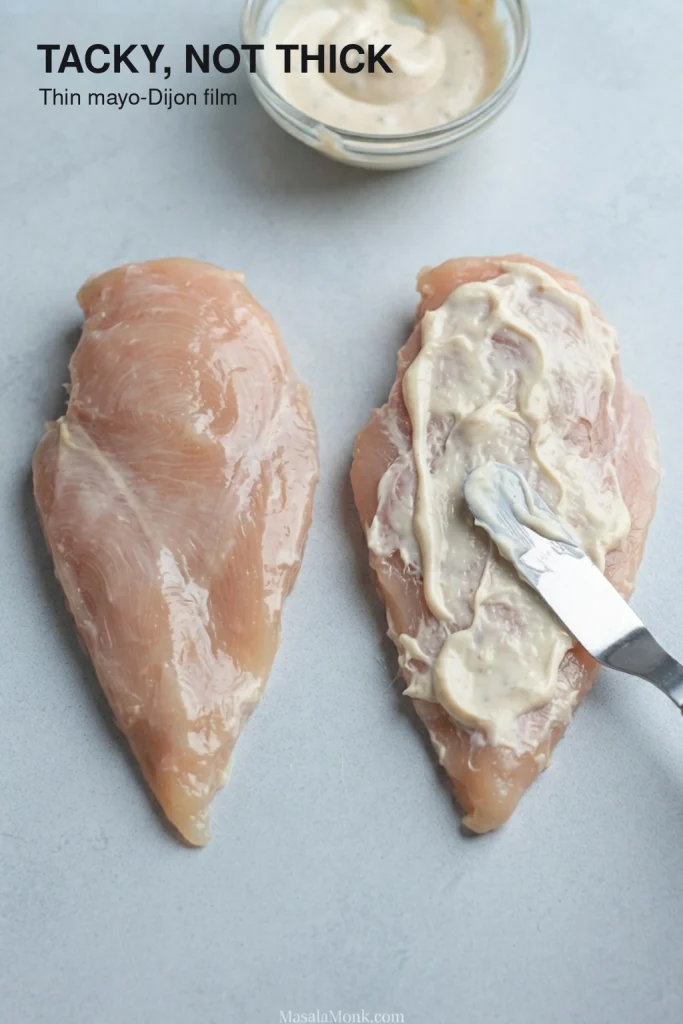
  3. Mix the binder. Stir together the mayonnaise and Dijon mustard. Spread a thin film over every side of the chicken. You need enough to make the surface tacky, not a thick wet coating.
  4. Make the breading. Combine the fine breadcrumbs, panko, paprika, garlic powder, onion powder, optional cayenne, remaining 1/4 teaspoon salt and remaining 1/4 teaspoon black pepper. Drizzle in the 2 teaspoons / 10 mL oil and toss until the crumbs are lightly coated but still loose.
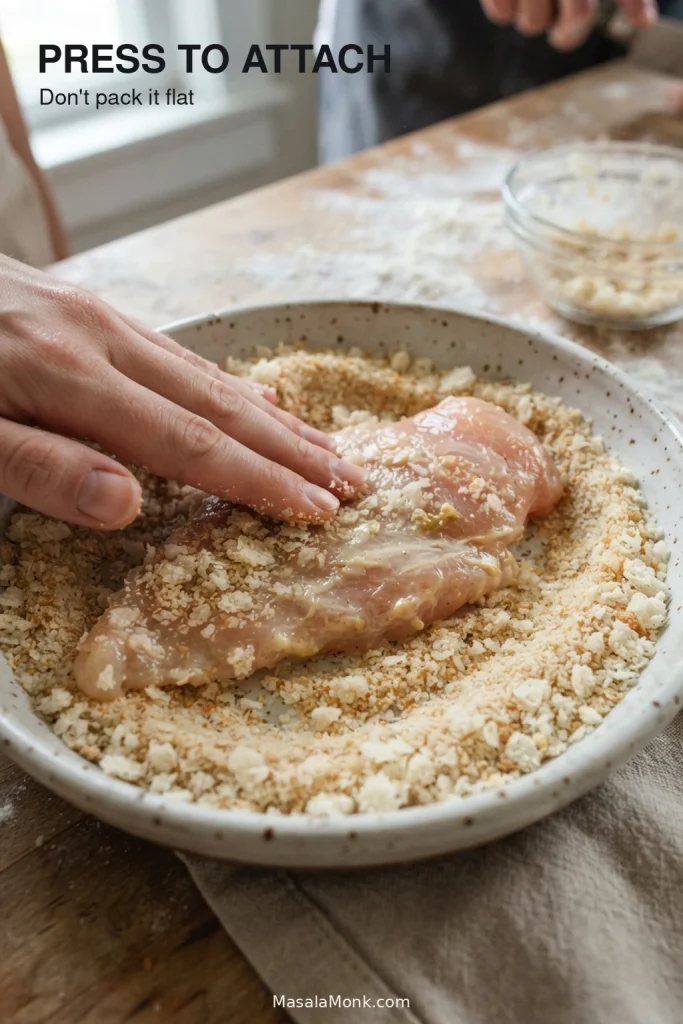
  5. Bread the cutlets. Press each piece into the crumbs just enough for the breading to cling to both sides and the edges. Leave the panko rough instead of packing it flat.

Air Fry the Chicken

  1. Let the breading settle and preheat. Rest the cutlets for 10 minutes. While they sit, preheat the air fryer to 390°F / 200°C for 3 minutes, or use the machine’s preheat cycle.
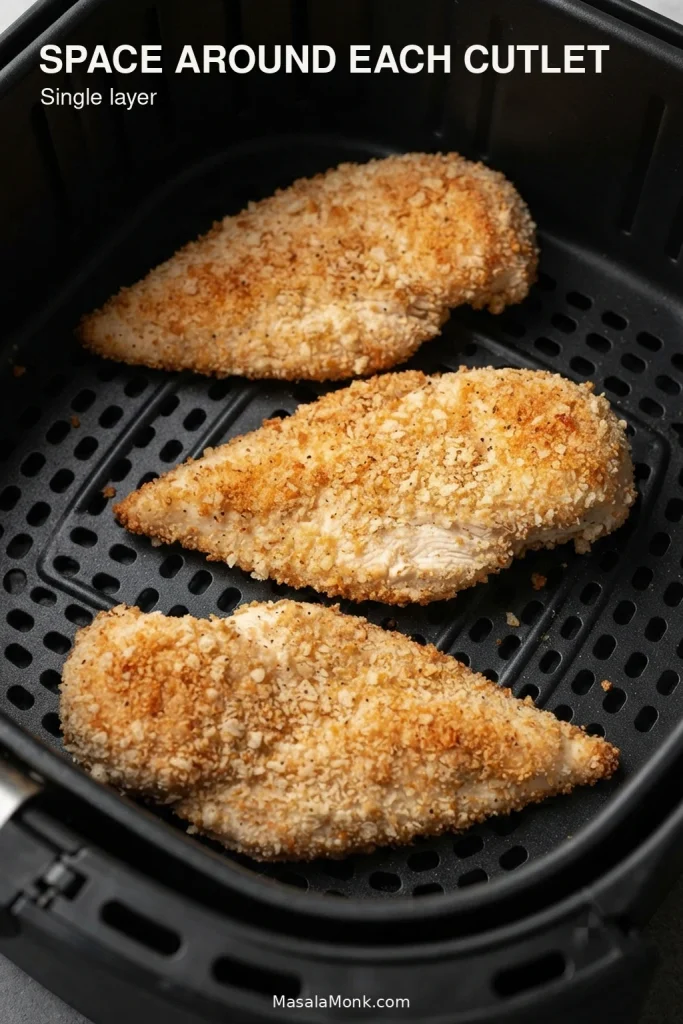
  2. Load the basket. Lightly oil the basket if your model tends to stick. Arrange the cutlets in one layer with space around them. If four pieces feel crowded, cook in two batches.
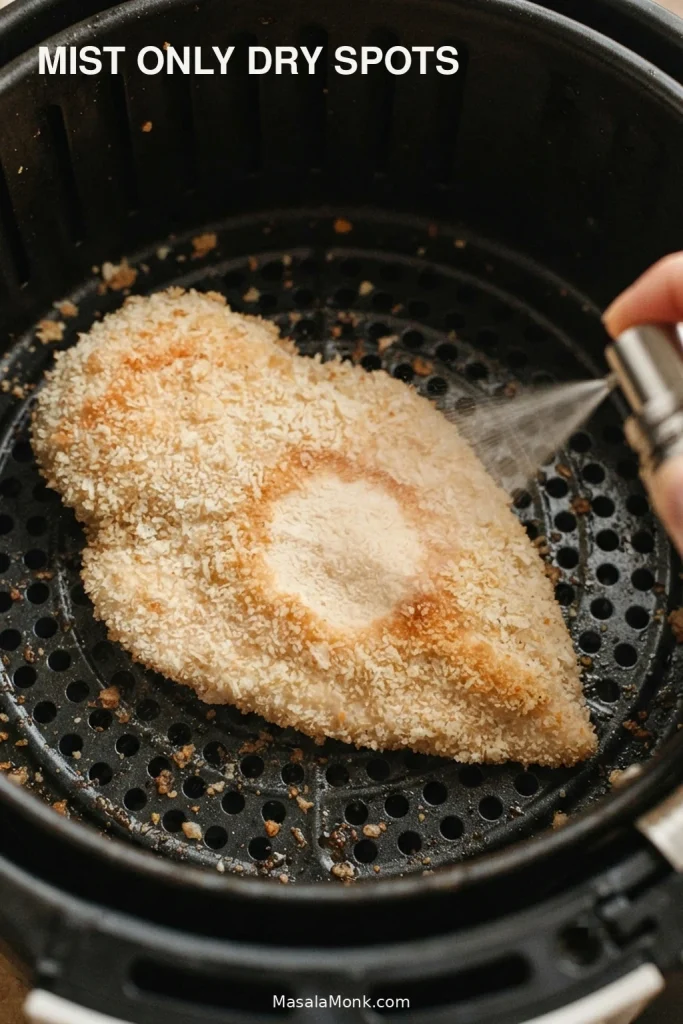
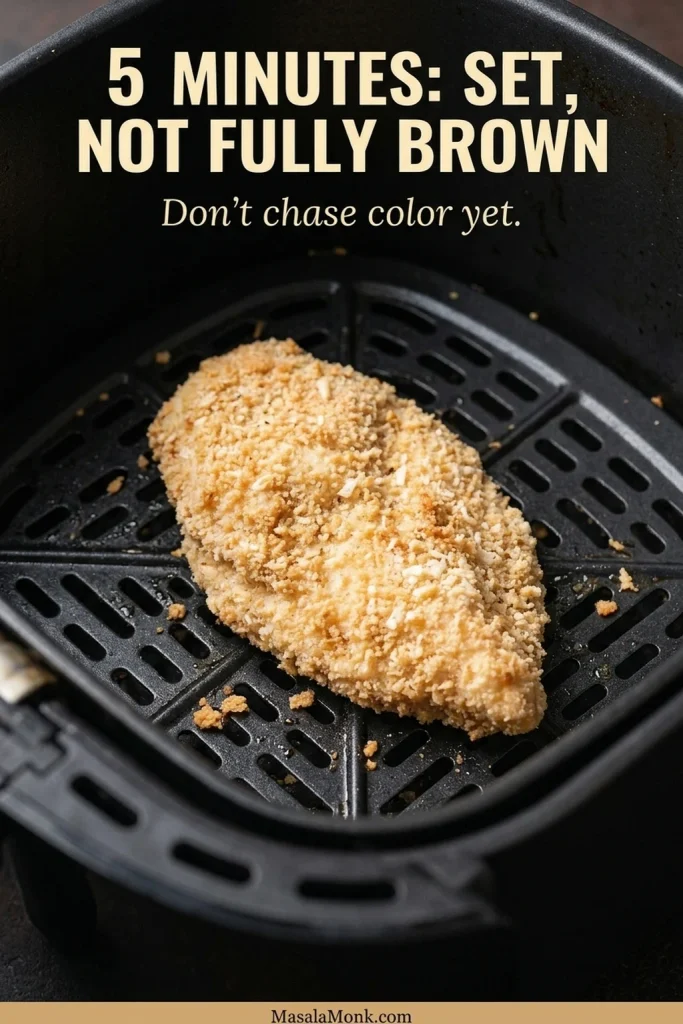
  3. Cook the first side. Mist any obviously dry breading very lightly with oil. Air fry for 5 minutes. A few pale crumbs are normal at this stage; what matters is that the surface looks set rather than wet or pasty.
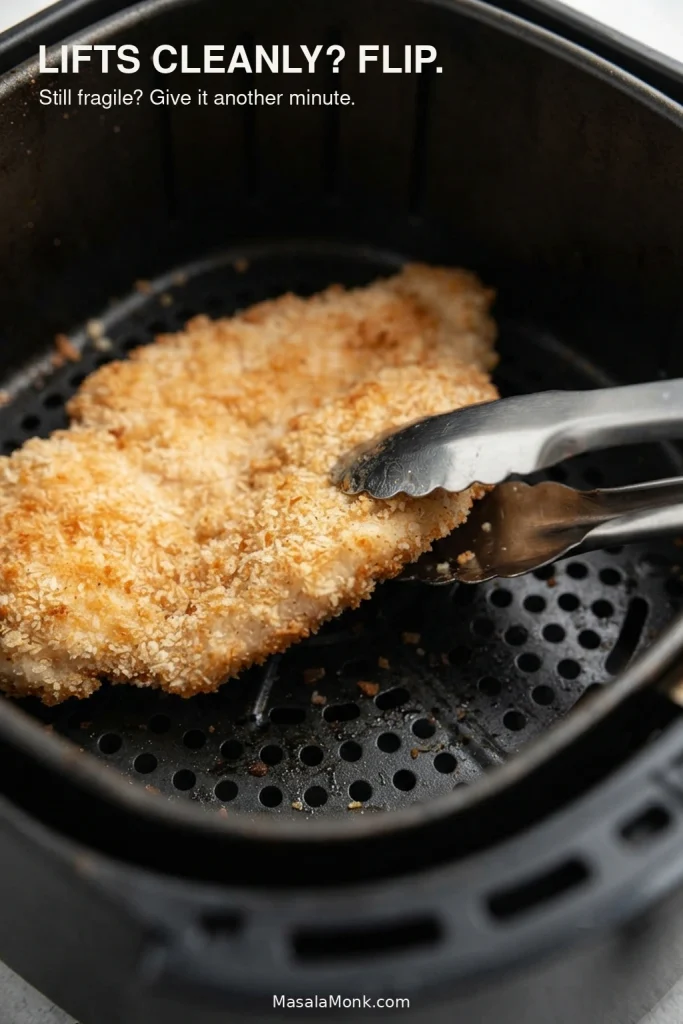
  4. Flip and finish. Slide the tongs under one edge. When the crust lifts cleanly, turn the chicken carefully. If it still feels fragile, give it another minute. Once flipped, mist any pale, dry-looking patches and continue cooking. Begin checking the center when the batch reaches about 9 minutes total.
  5. Remove each piece when it is ready. Most 1/2-inch cutlets finish in 10–12 minutes total. Remove each piece as soon as its thickest center reaches 165°F / 74°C. If the smaller cutlet gets there first, take it out and let the others catch up.

Rest Before Serving

  1. Rest briefly. Move the cooked chicken to a clean wire rack for 3–5 minutes. No rack? Set the pieces separately on a clean plate and serve promptly. Avoid stacking or tightly covering the hot cutlets so trapped steam does not soften the crust.

Recipe Notes

  • Cooking in batches? Start checking every batch around 9 minutes, but let the crust and thermometer tell you when each piece is ready.
  • Keep raw and cooked chicken separate. Discard leftover binder or breading that has touched raw chicken, and move cooked cutlets to a clean plate or rack rather than the surface that held them raw.
  • Using seasoned breadcrumbs? Taste them first and reduce the added salt if necessary.

How to Keep the Crust Crisp and the Chicken Juicy

Thin cutlets, a light, tacky coating and just enough oil do most of the work. From there, watch the crust and check the center.

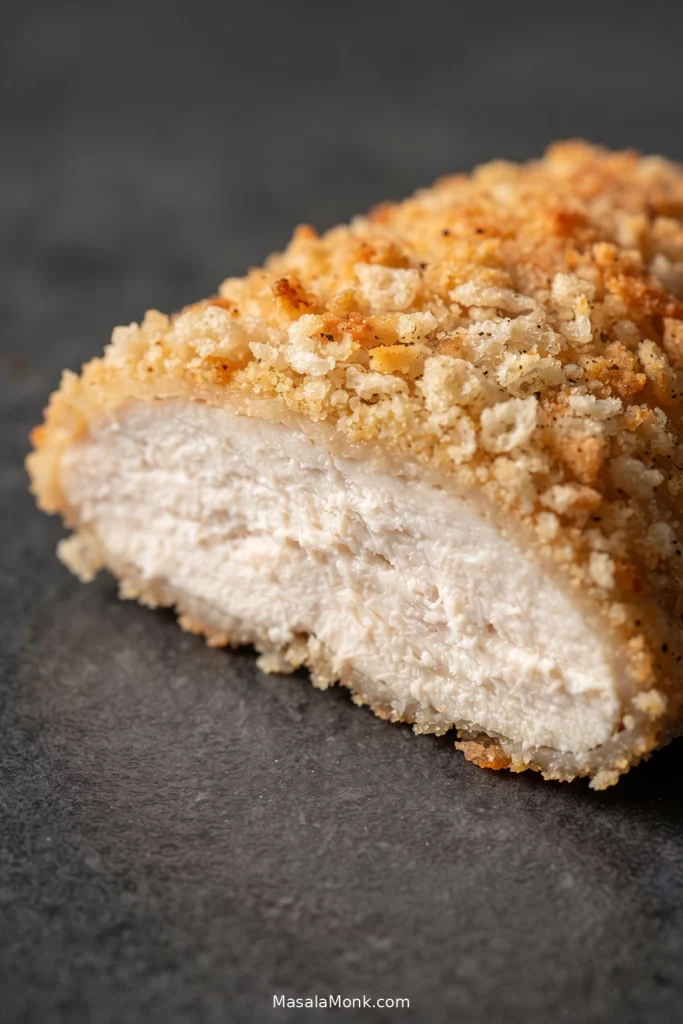
Macro view of sliced chicken breast showing moist white meat surrounded by a thin golden breadcrumb-and-panko crust.
The meat should dominate this cross-section. A thin breadcrumb-panko shell gives you crunch at the edge; however, if the coating starts to rival the chicken in thickness, the breading has become heavier than this air fryer chicken breast needs.

Why We Split the Chicken Breast Into Cutlets

A thick supermarket chicken breast can still be underdone in the center when the crust is already as brown as you want it. Splitting it horizontally to about 1/2 inch gives the meat and breading a much better chance of finishing together. The pieces do not need to be identical; start checking the smaller one first.

Working with very large breasts? Slice them horizontally first. If the center of a cutlet is still noticeably thicker, gently pound just that area rather than flattening the whole piece.

Raw boneless chicken breast being sliced horizontally into a broad, thin cutlet.
Follow the natural horizontal plane of the chicken breast rather than trying to create a perfectly rectangular cutlet. A tapered edge is fine; what matters is removing the thick central hump that would otherwise finish later than the rest.

Next, see how the binder, crumbs and oil build the crisp crust →

How to Build a Crisp Air-Fryer Crust

A deep fryer surrounds breading with hot fat. An air fryer does not, so the coating needs a little more help with adhesion and browning. The three things that matter most are a thin tacky binder, the right crumb texture and enough oil where the crust needs it.

Keep the Mayo-Dijon Layer Thin

Mayonnaise and Dijon leave a tacky film that helps the crumbs stay attached as the cutlet cooks. Spread only enough to coat the surface.

If the cutlet looks heavily frosted with mayonnaise, scrape some off. A thick wet layer can soften the crumbs before they have a chance to crisp.

Raw chicken breast cutlets coated with a thin pale mayo-Dijon layer, with excess coating being scraped from one piece.
The raw chicken should still be visible through the mayo-Dijon. Moreover, carry that thin tacky film around the edges—not just across the flat faces—because bare sides give the breadcrumb coating nowhere to grip.

No mayonnaise? Beat 1 large egg with about 1 teaspoon Dijon mustard. Let the excess drip away before pressing the chicken into the crumbs.

Fine Breadcrumbs Cover; Panko Brings the Crunch

Fine breadcrumbs settle into the gaps for more even coverage, while panko leaves larger golden flakes that give the crust its bigger crunch. Season the crumbs as well as the chicken so the crust has flavor of its own.

Breaded raw chicken breast beside fine dry breadcrumbs and larger irregular panko breadcrumbs.
A properly breaded cutlet should look intentionally uneven: fine breadcrumbs form the continuous base while individual panko pieces remain raised above it. If the surface becomes smooth and compact, the airy panko structure has been pressed away.

Press to Attach, Not to Flatten

Once the chicken has an even layer, stop pressing. The crumbs should cling, but the panko should still look rough rather than flattened into a smooth shell.

Hands gently pressing a thin chicken breast cutlet into a mixture of fine breadcrumbs and panko.
Press once firmly enough to attach the crumbs, then turn the cutlet so the narrow edges get coated too. After that, stop handling it; repeated pressure packs the panko flatter and leaves fewer exposed edges to brown.

Oil the Crumbs, Then Mist Only Dry Spots

A small amount of oil tossed through the crumbs helps them start browning from the beginning. After the flip, look before you spray. If most of the crust is already golden, mist only the pale, dry patches.

Fine oil mist aimed at a pale, dry patch of breading on a chicken breast cutlet inside an air fryer.
Pale does not automatically mean dry. Instead, mist the patch that still looks dusty and matte; crumbs that already have a slight sheen usually need more time, not another coat of oil.

Next, see what the breading should look like as it cooks →

Read the Breading as It Cooks

You do not need every crumb to turn exactly the same shade of brown. Watch for the breading to move from tacky, to set, to dry and golden.

At Five Minutes, Look for a Set Surface

The first side does not need to be deeply browned yet. What matters at this point is that the coating has stopped looking wet or pasty and has formed a stable surface that can survive the flip.

Partially cooked breaded chicken breast in an air fryer with set pale crumbs and scattered early golden browning.
Patchy browning is normal at five minutes. What should worry you is a glossy or smearable patch: leave that area undisturbed until the crumbs look dry enough to hold their shape when the cutlet moves.
Stage What you should see What to do
Before cooking An even layer that looks attached, with no wet sludge or thick piles of loose crumbs Cover any bare spots, then leave the breaded chicken alone for 10 minutes
Ready to flip The first side looks dry and set, and the developing crust lifts without smearing Turn gently and mist only pale, dry-looking areas
Ready to check The raised crumbs look dry and browned rather than damp or dusty Check the thickest center with a thermometer and remove the cutlet when it reaches 165°F / 74°C

Let the Crust Tell You When to Flip

When the first side looks set, slide the tongs underneath one edge. A crust that releases cleanly is ready to turn; if it still clings or smears, give it another minute before trying again.

Stainless-steel tongs lifting one edge of a breaded chicken breast to check whether the crust releases from the air fryer basket.
Slide the tongs underneath rather than pinching the crust from above. If the edge still resists, waiting another minute usually preserves more breading than forcing the cutlet free on schedule.

What a Crisp Finished Crust Looks Like

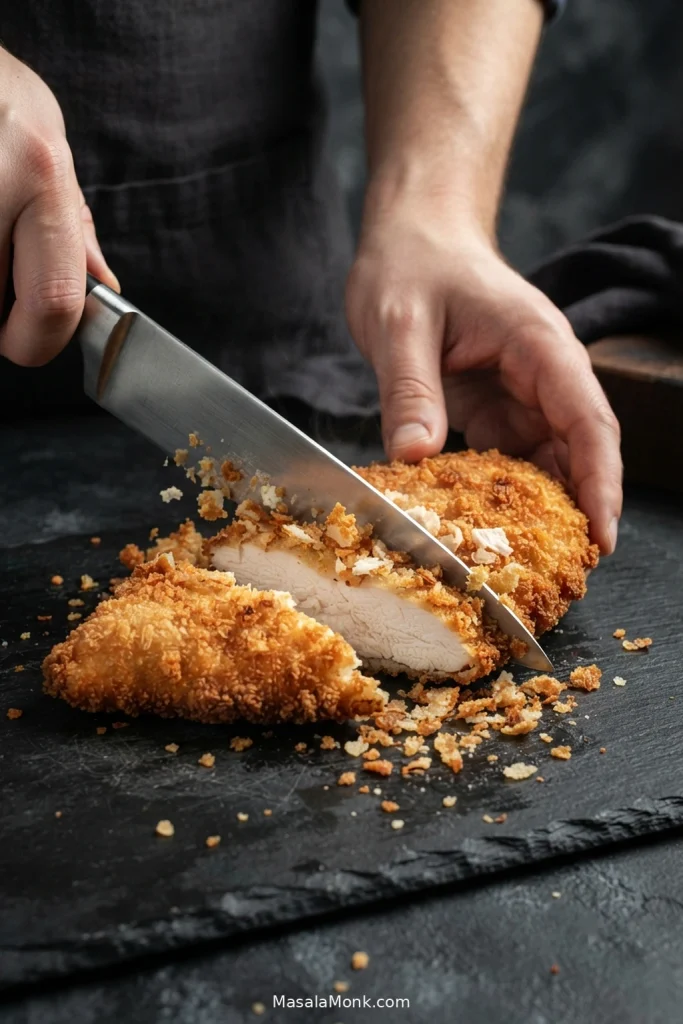
By the end, the raised crumbs should look dry and deeply golden in places while the coating stays bonded when the chicken is cut. Color can tell you the crust is ready to check; the thermometer still gets the final say on the meat underneath.

Knife cutting through golden breaded chicken breast as a few crisp crumbs break away and moist white meat is exposed.
A crisp crust should fracture locally, not detach in one sheet. Ideally, the knife releases a few crunchy crumbs at the cut while the surrounding breading stays bonded to the juicy chicken breast underneath.

Air Fryer Fried Chicken Breast Time and Temperature

For 1/2-inch breaded chicken breast cutlets, air fry at 390°F / 200°C for 10–12 minutes per batch, flipping once. Begin checking around 9 minutes. Thinner pieces can finish sooner, so start checking them earlier rather than relying on the full window.

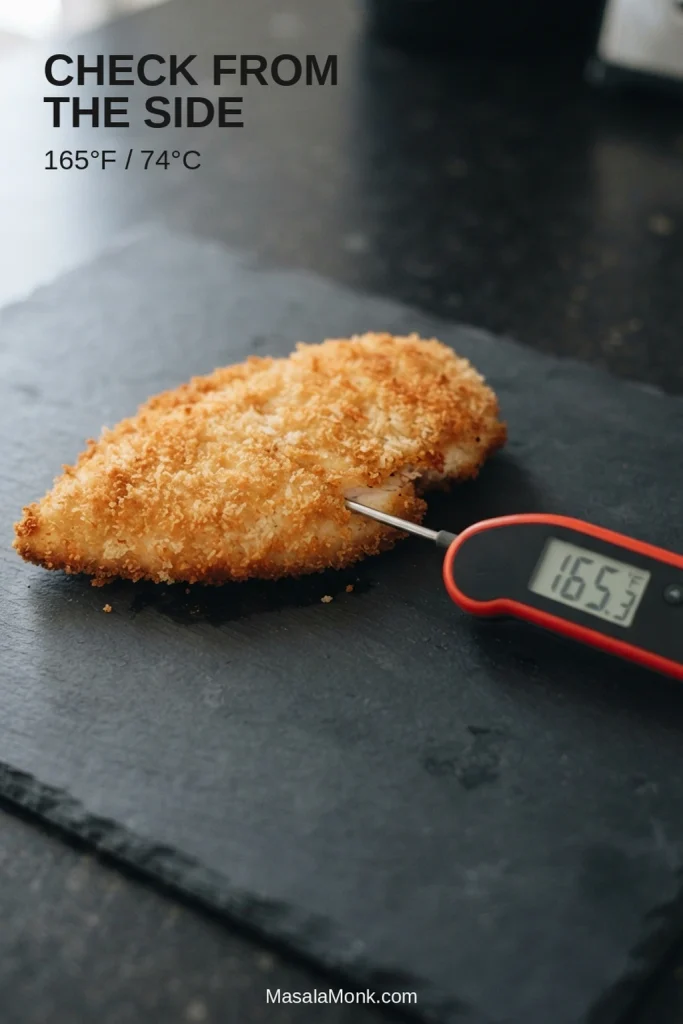
Check a thin cutlet from the side. Insert an instant-read thermometer horizontally into the thickest part so the probe reaches the center. Remove each piece when it reaches 165°F / 74°C. The USDA safe-temperature guidance lists 165°F for poultry.

Digital instant-read thermometer inserted horizontally through the side of a thin breaded chicken breast cutlet.
For thin chicken cutlets, guide the probe through the thickest meat so its sensing area sits in the center—not mostly in crust and not against the basket. Then remove each piece individually when it reaches 165°F / 74°C.

Crust not behaving as expected? Go to troubleshooting →

Troubleshooting Air Fryer Fried Chicken

If the Breading Keeps Falling Off

Breading sliding away from the chicken can come from a wet surface, too much binder or crumbs that never had time to settle. Pat the chicken very dry, keep the mayo-Dijon layer thin and give the breading its 10-minute rest.

Crust tearing as you lift it? Give that side another minute. Once it has properly set, it should release much more cleanly.

If it sticks badly to the basket, lightly oil the basket before loading it. For particularly grabby baskets, perforated parchment can help if your air-fryer manufacturer allows it. Add the liner only with food on top to hold it down, and keep it clear of the heating element and airflow openings.

If the Crust Stays Pale or Soft

Dry, pale patches: mist only those areas lightly with oil. Large dusty-looking spots need a little surface fat to brown.

Give the Cutlets Room for Airflow

A soft underside points to trapped steam. Leave space around the cutlets and keep airflow open underneath; overlapping pieces and solid liners work against you here.

Three breaded chicken breast cutlets arranged separately with visible gaps in a perforated black air fryer basket.
Use the basket itself as your spacing guide: you should still see perforations between the breaded chicken cutlets. If touching pieces hide most of the basket floor, split the batch so steam has somewhere to escape and the edges can crisp.

Keep the Crust Crisp After Cooking

Crisp in the basket but soft on the plate? Hot chicken is still giving off steam. Rest the pieces separately and add wet sauces only when you are ready to eat. A little honey mustard dressing on the side gives you tangy sweetness without soaking the whole cutlet.

Golden breaded chicken breast resting above the surface on a wire rack, with a smaller piece resting directly on a plate nearby.
Using a wire rack is especially helpful when one cutlet finishes before the others. While the remaining chicken cooks, airflow underneath the first piece prevents trapped steam—and keeping the cutlets unstacked stops them steaming one another.

If the Outside and Center Are Not Ready Together

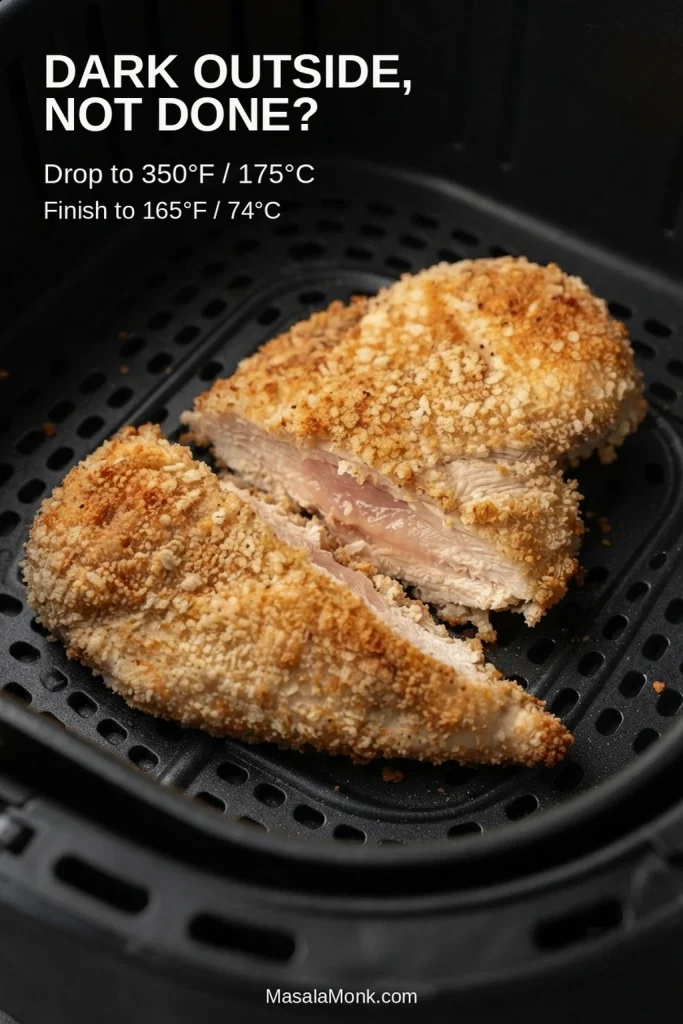
Dark crust with an underdone center: lower the air fryer to 350°F / 175°C and continue cooking, checking the center frequently, until the chicken reaches 165°F / 74°C. Next time, bring the cutlets closer to the 1/2-inch target before breading.

Breaded chicken breast with a deeply browned crust and an underdone-looking center, shown as a troubleshooting example.
Lower heat fixes the current problem; thickness fixes the next one. Continue gently until the chicken reaches 165°F / 74°C, then make the next batch closer to an even 1/2-inch so the center and crust finish on a similar timetable.

When the chicken is nearly done but the crust still looks pale, mist any dry areas and raise the fryer to 400°F / 205°C for 1 minute at a time. Check the center between bursts. You are giving the crust a last push, not starting another full cooking cycle.

If the chicken comes out dry, it likely stayed in the fryer too long. Start checking the next batch sooner, and take finished pieces out individually instead of making the smallest one wait for the largest.

Easy Ways to Change the Crust

Add a Little Flour

Replace 1/4 cup / about 25 g of the fine breadcrumbs with 1/4 cup / about 30 g all-purpose flour. Mix the flour thoroughly through the remaining breadcrumbs and panko so isolated floury patches are less likely to stay pale.

Make It Spicier

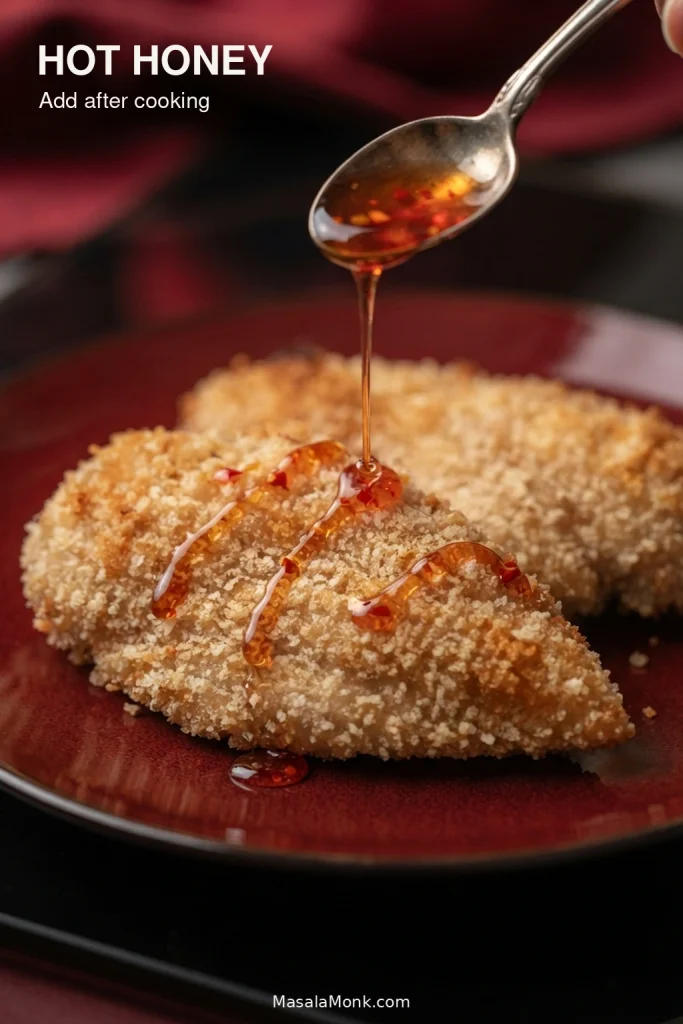
Increase the cayenne to 1/2 teaspoon and add 1/2 teaspoon chili powder to the crumbs. For sweet heat, drizzle hot honey sauce over the chicken just before serving so the crust keeps as much crunch as possible.

Golden breaded chicken breast with narrow ribbons of amber-red hot honey and small chile flecks.
Drizzle hot honey in narrow ribbons rather than glazing the whole cutlet. That way, some bites become sticky and sweet-spicy while other sections of the panko crust stay deliberately dry and crisp.

Add Parmesan

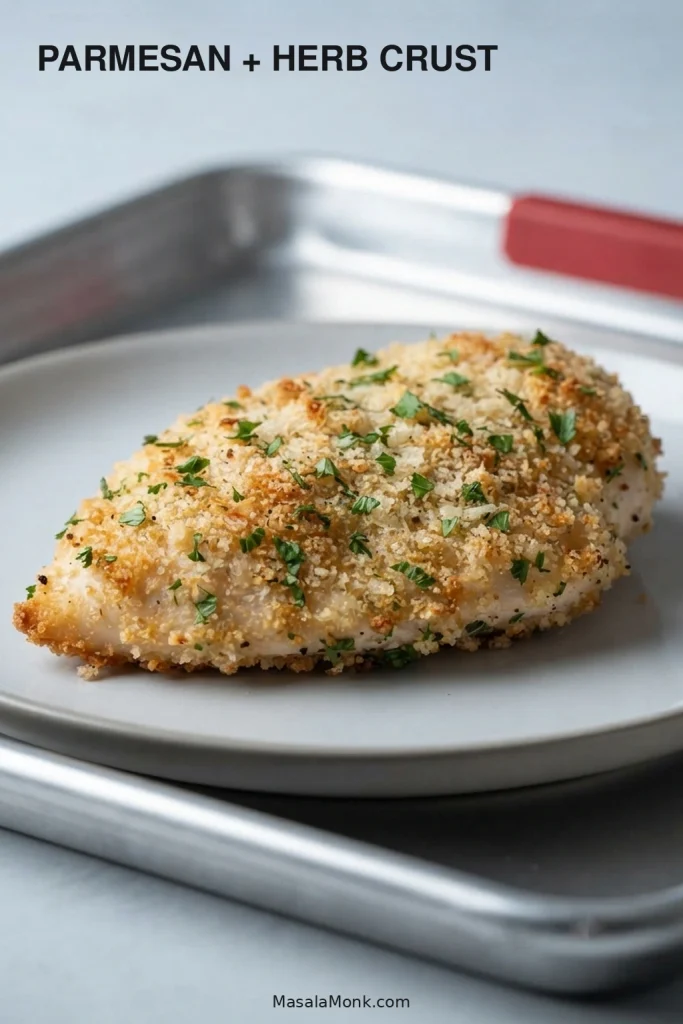
Mix in 1/4 cup / about 20 g finely grated Parmesan and 1/2 teaspoon dried oregano or Italian seasoning. Parmesan brings its own salt, so reduce the salt in the crumb mixture if your cheese or breadcrumbs are already well seasoned.

Golden breaded chicken breast with Parmesan incorporated into the crust and a light scattering of green herb flecks.
Finely grated Parmesan disappears through the breadcrumb mixture more evenly than coarse shreds. As a result, it can toast into the crust without burying the panko; because the cheese also adds salt, season the crumbs accordingly.

Storage and Reheating

Refrigerate cooked chicken within 2 hours, or within 1 hour if the temperature is above 90°F / 32°C. Keep it covered in the refrigerator and use it within 3–4 days, in line with USDA leftovers guidance.

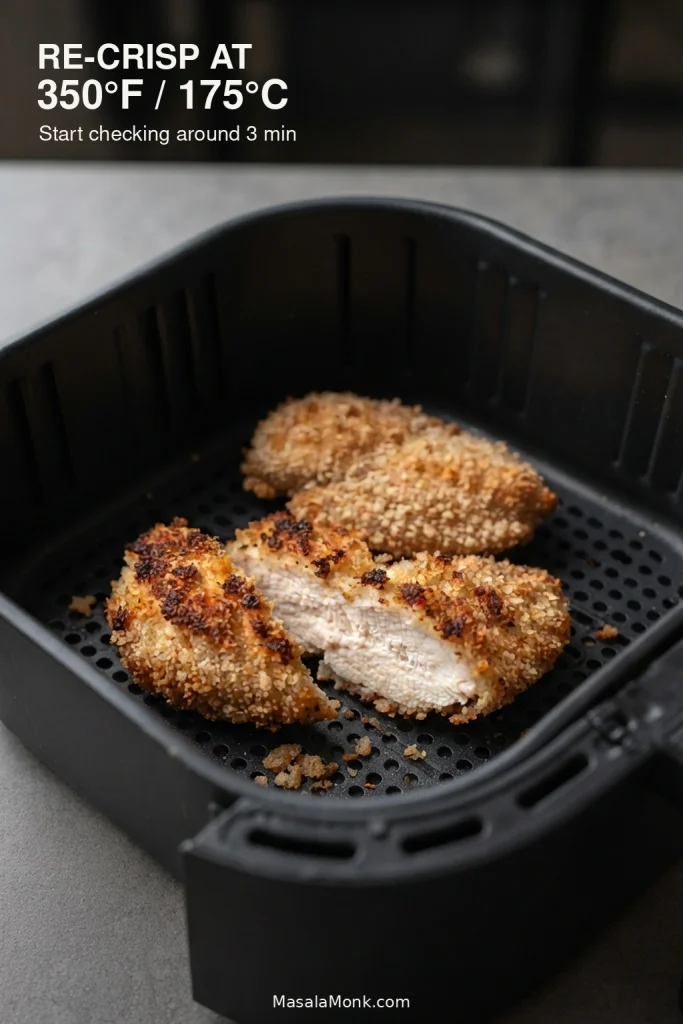
To re-crisp the coating, reheat the cutlets in the air fryer at 350°F / 175°C. Start checking around 3 minutes; a thicker or very cold piece may need closer to 5. Reheat leftovers to 165°F / 74°C.

Previously cooked breaded chicken breast reheating in an air fryer, with a sliced piece showing cooked white meat.
Stop reheating once two things happen together: the center is hot and the breading feels dry and crisp again. Additional air fryer time may deepen the color, but lean chicken breast will keep losing moisture after the crust has recovered.

The microwave is quicker, but the trapped steam softens the breading. Use it when speed matters more than crunch.

What to Serve With Air Fryer Fried Chicken Breast

Serve the cutlets while the crust is still at its best. Cut into one and you should have a crisp shell around moist, steaming chicken rather than a dark crust hiding a dry center.

Build a Comfort-Food Dinner

For a comfort-food dinner, creamy mashed potatoes make a soft, buttery contrast to the crunchy chicken; green beans or broccoli work nicely alongside.

Crispy breaded chicken breast served with creamy mashed potatoes and green beans on a dinner plate.
Keep creamy sides beside the crispy chicken rather than over it. Meanwhile, mashed potatoes provide a soft, buttery contrast and green vegetables freshen the plate without covering the breadcrumb crust you worked to preserve.

If you want something cold and crisp alongside, creamy coleslaw brings crunchy cabbage and enough tang to cut through the savory breading.

Turn It Into a Crispy Chicken Sandwich

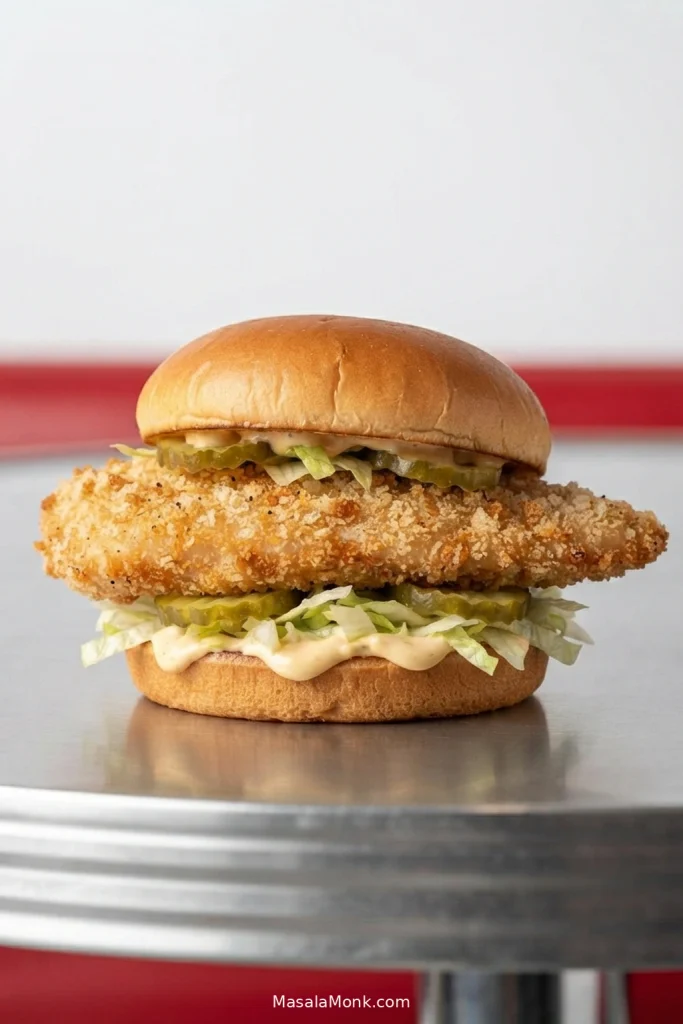
The cutlets are sturdy enough for sandwiches too. Add pickles, lettuce or slaw and a thick sauce just before serving so the crust stays crisp. If that sounds like dinner, the chicken sandwich recipes have more ideas for fillings, sauces and toppings.

Crispy breaded chicken breast sandwich on a soft bun with lettuce, pickle slices and a small amount of creamy sauce.
Build the crispy chicken sandwich close to serving time and let a little cutlet overhang the bun so exposed edges stay crunchy. Then concentrate sauce and pickles instead of wetting every inch of the breading.

Recipe development note: This recipe is research-derived from established air-fryer breaded-chicken methods, common reader troubleshooting patterns and food-safety guidance. MasalaMonk has not independently kitchen-tested this exact formula.

Posted on — Leave a comment

Chicken Parmesan Sandwich Recipe: Crispy, Cheesy & Easy

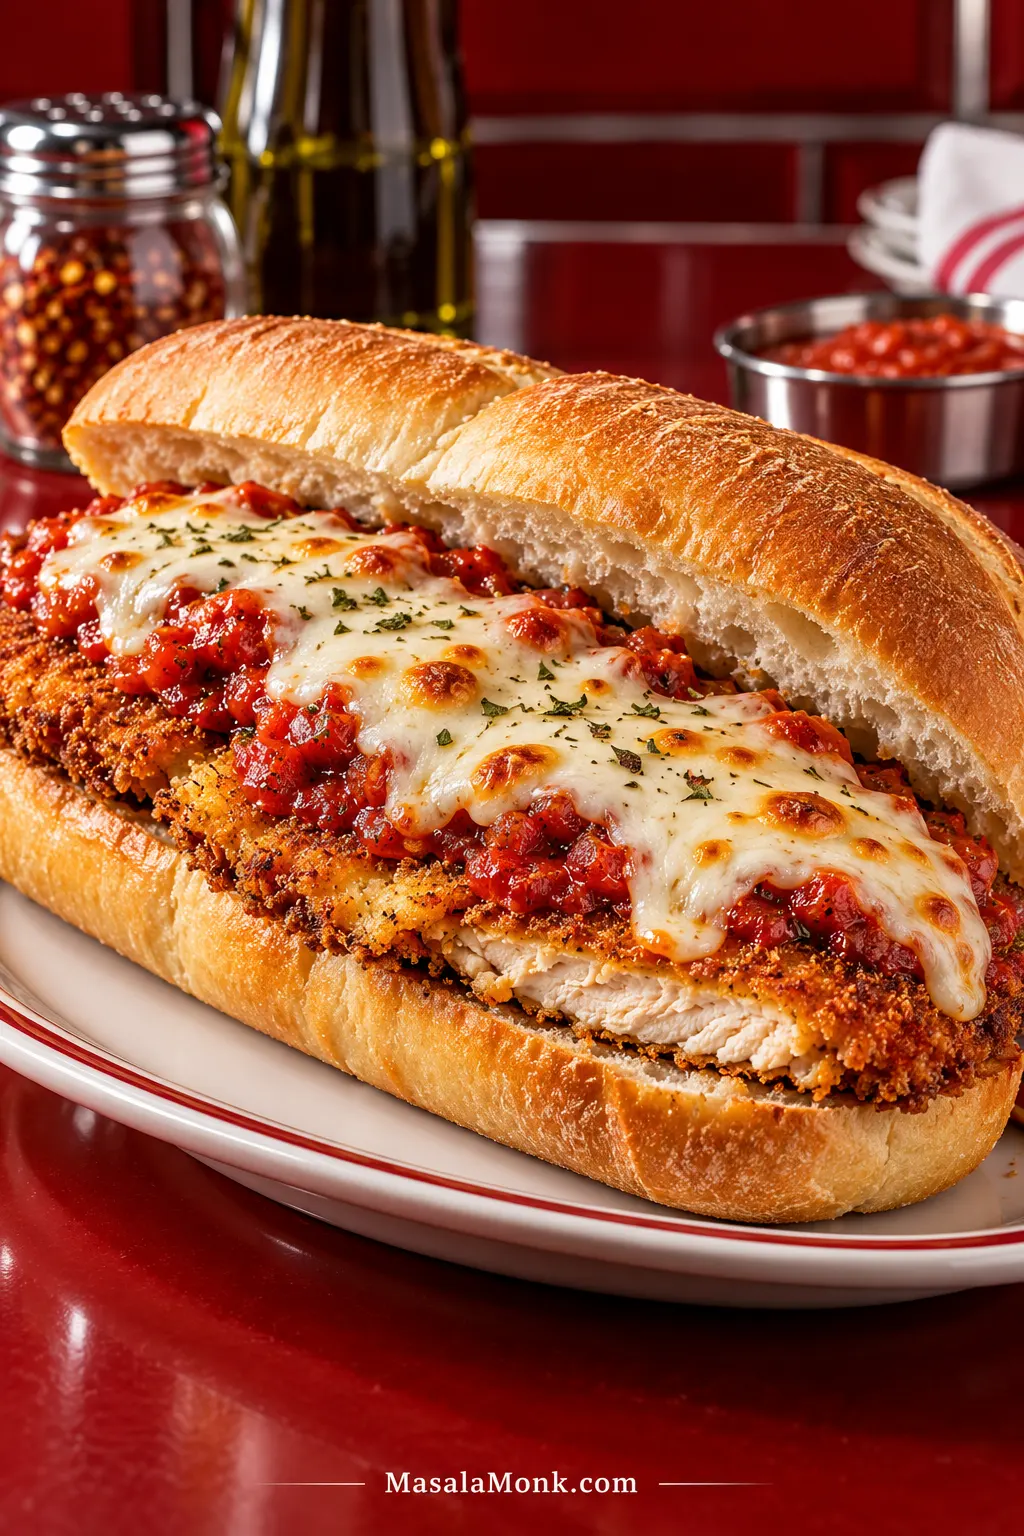
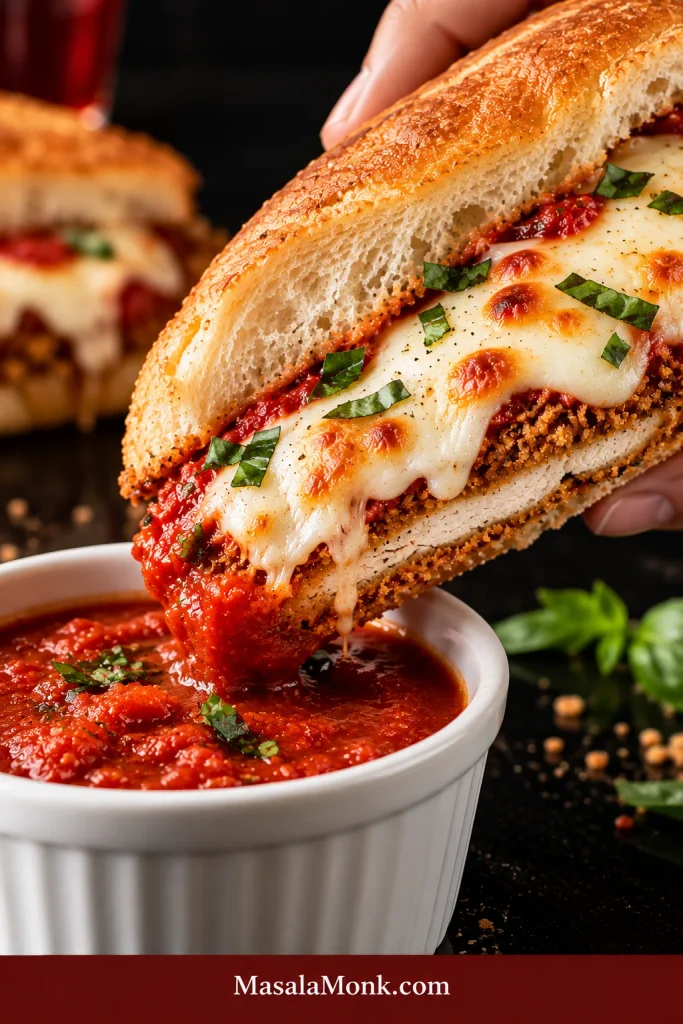
Chicken Parmesan sandwich on a hoagie roll with a thin crispy breaded chicken cutlet, marinara and melted mozzarella.

Hot tomato sauce and melted mozzarella through the middle, fried chicken still crisp around the edges, and a toasted roll soft enough to give when you pick it up—that is the bite worth chasing.

The trouble is that a chicken Parm sandwich can turn soft surprisingly fast. Thin sauce soaks the breading. Melted cheese traps steam. An overly hard roll pushes the filling out on the first bite. This chicken Parmesan sandwich recipe deals with those problems before they happen.

Done well, it should be generous and a little unruly: juicy chicken, molten cheese, bright tomato sauce and enough fried edge to keep the whole sandwich from eating like one soft layer. You’ll want two hands.

Before you start:

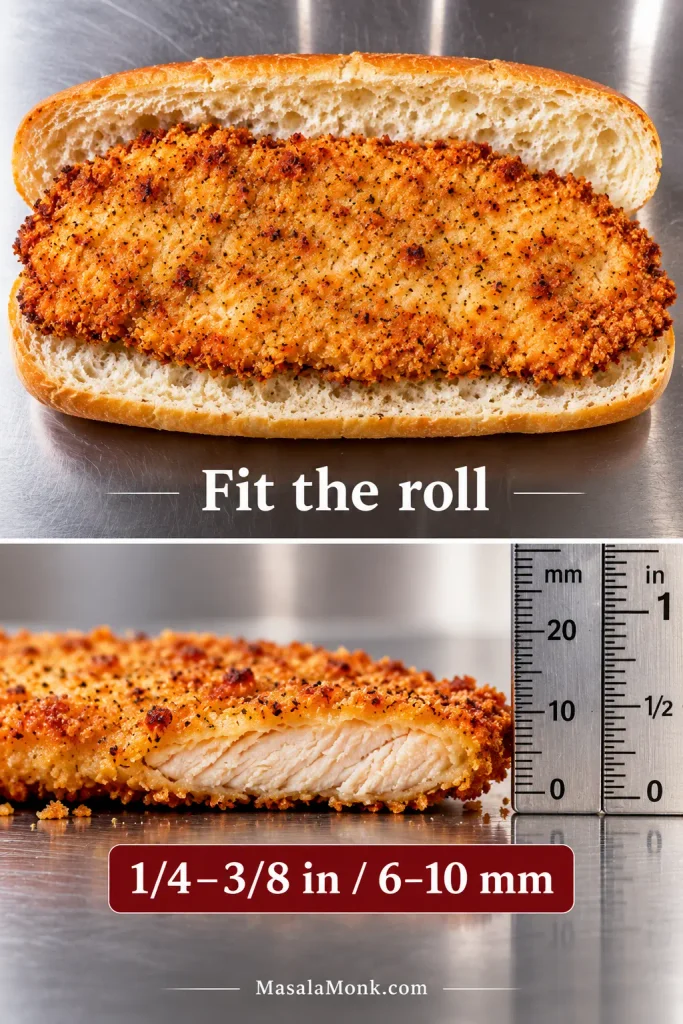
  • Chicken: aim for ¼ to ⅜ inch / 6 to 10 mm thick and roughly sized to the roll.
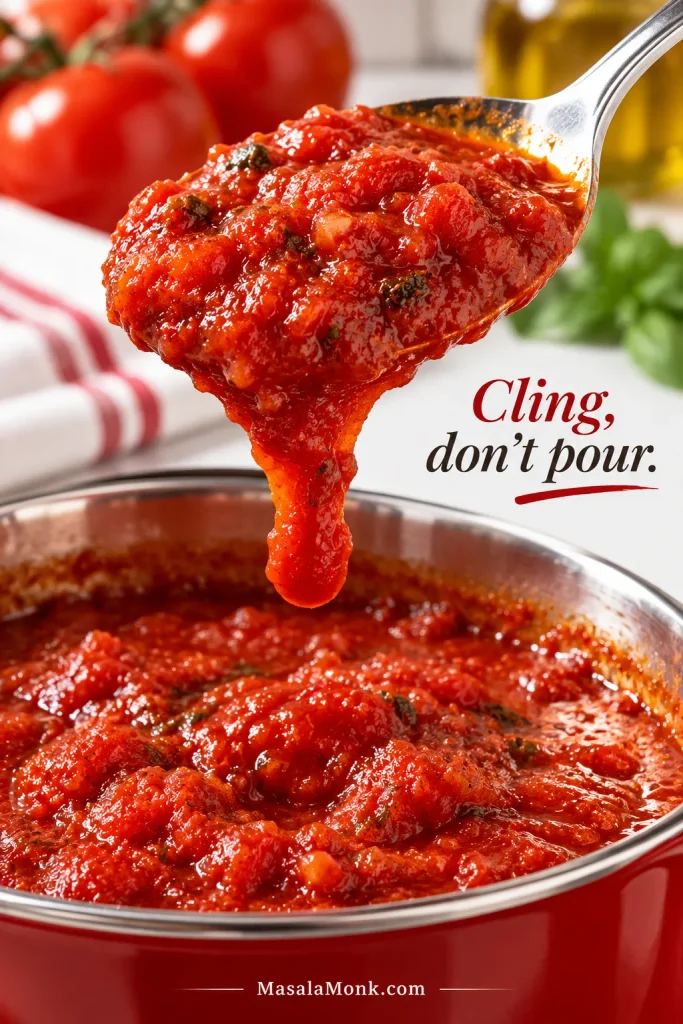
  • Sauce: use marinara that clings to a spoon and falls slowly rather than pouring like soup.
  • Roll: choose bread sturdy enough for the filling but still tender enough to bite through easily.

Crispy Chicken Parmesan Sandwich Recipe

Parmesan-panko chicken, marinara and bubbling mozzarella on garlic-Parmesan-toasted rolls, with extra warm sauce alongside for dipping.

Prep
25 minutes

Cook
25 minutes

Total
50 minutes

Yield
4 large sandwiches

Equipment

  • Heavy 10- to 12-inch / 25- to 30-cm skillet
  • Meat mallet or rolling pin
  • 3 shallow bowls or dishes
  • Large plate or tray for the raw breaded chicken
  • 2 rimmed sheet pans: one fitted with a clean oven-safe wire rack, one for topping and broiling
  • Tongs
  • Instant-read thermometer

Ingredients

Chicken and Parmesan-panko coating

  • 1¼ lb / 570 g boneless, skinless chicken breasts, usually 2 large breasts
  • 1 tsp fine sea salt / about 6 g
  • ½ tsp freshly ground black pepper
  • ½ cup all-purpose flour / 60 g
  • 2 large eggs
  • 1 tbsp water / 15 ml
  • 1¼ cups panko breadcrumbs / about 75 g
  • ½ cup finely grated Parmesan / about 45 g
  • 1 tsp Italian seasoning
  • About 1½ to 2 cups / 360 to 480 ml neutral high-heat oil, such as canola, vegetable, grapeseed or refined avocado oil, or enough to reach about ¼ inch / 6 mm deep in the skillet

Sandwiches

  • 4 sturdy 6- to 8-inch / 15- to 20-cm Italian or hoagie rolls, split lengthwise but left hinged on one side if possible
  • 3 tbsp unsalted butter / 42 g, softened
  • ½ tsp garlic powder
  • ¼ cup finely grated Parmesan / about 22 g, divided
  • 1½ cups marinara / 360 ml, warmed and divided; a good jarred sauce is absolutely fine, or use homemade marinara sauce
  • 8 oz / 225 g low-moisture whole-milk mozzarella, about 2 cups shredded
  • Fresh basil, optional

Prepare the Chicken

  1. Slice, pound and season. Cut the chicken breasts horizontally to make four cutlets. Working between parchment or plastic wrap, gently pound them to an even ¼ to ⅜ inch / 6 to 10 mm. Pat thoroughly dry, then season both sides with the salt and black pepper. One ugly edge does not matter. Uneven thickness does.
  2. Set up the breading. Put the flour in the first shallow dish. Beat the eggs with the water in the second. Combine the panko, ½ cup / 45 g Parmesan and Italian seasoning in the third.
  3. Bread and rest. Dust each cutlet lightly with flour and shake off the excess. Dip into the egg and let the extra drip away. Press the panko mixture firmly onto both sides. Set the breaded chicken in a single layer on a large plate or tray and rest for 5 to 15 minutes. Use that time to get the marinara, cheese and rolls ready.

Fry Until Golden

  1. Heat the oil. Pour enough oil into the skillet to reach about ¼ inch / 6 mm deep. A 10-inch pan will use less than a wide 12-inch pan, so let the depth—not the cup measurement—be the final guide. Heat to about 350°F / 175°C.
  2. Fry in batches. Add the cutlets without crowding the pan. Leave the first side alone until the coating has set and releases easily, then turn. Cook for roughly 2½ to 4 minutes per side, with ¼-inch / 6-mm cutlets often finishing toward the early end. Let the oil recover between batches. Check the thickest part, then move each cutlet to the clean wire rack as soon as it reaches 165°F / 74°C.

Once the final raw cutlet is in the skillet, wash or swap any tongs that touched uncooked chicken before using them on the finished cutlets.

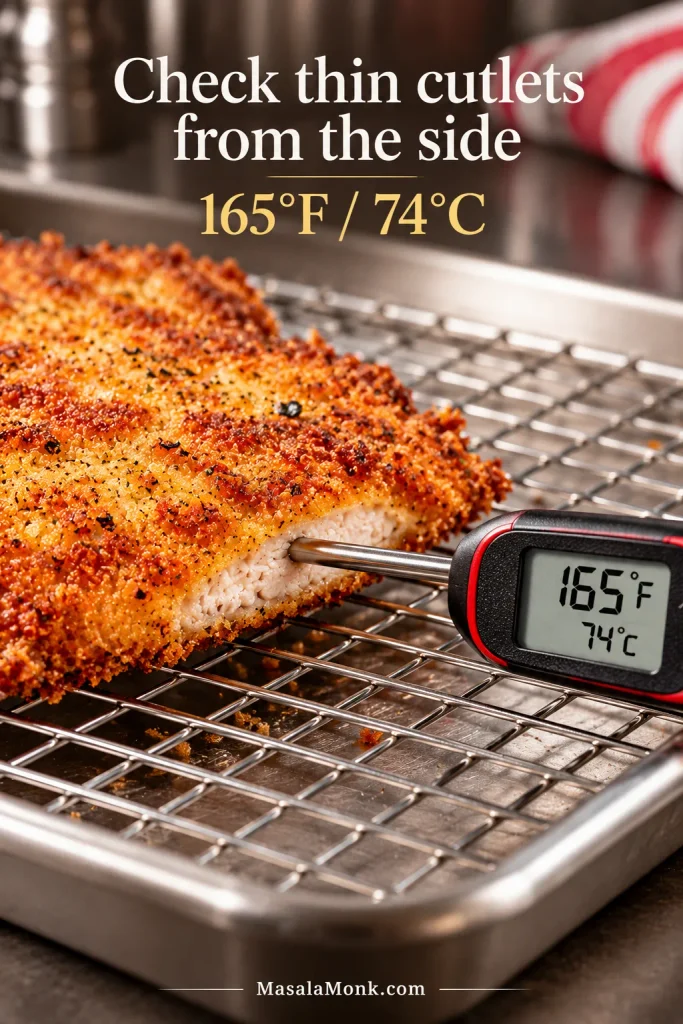
Checking a thin cutlet: insert the thermometer horizontally through the side so the tip reaches the center rather than passing straight through the meat.

Toast and Top

  1. Check the marinara and heat the broiler. The sauce should cling to a spoon and fall slowly. Give a loose marinara a few minutes of uncovered simmering. If your oven setup allows, position the rack about 5 to 6 inches / 13 to 15 cm below the broiler element. Have the chicken, rolls and cheese ready before anything goes underneath.
  2. Toast the rolls. Mix the softened butter with the garlic powder and 2 tablespoons of the sandwich Parmesan, then spread it over the cut faces. Broil cut-side up, watching continuously, for about 1 to 2 minutes, until lightly golden. The toasted surface should feel dry and lightly crisp while the middle of the roll still gives when pressed. Transfer the toasted rolls to a plate.
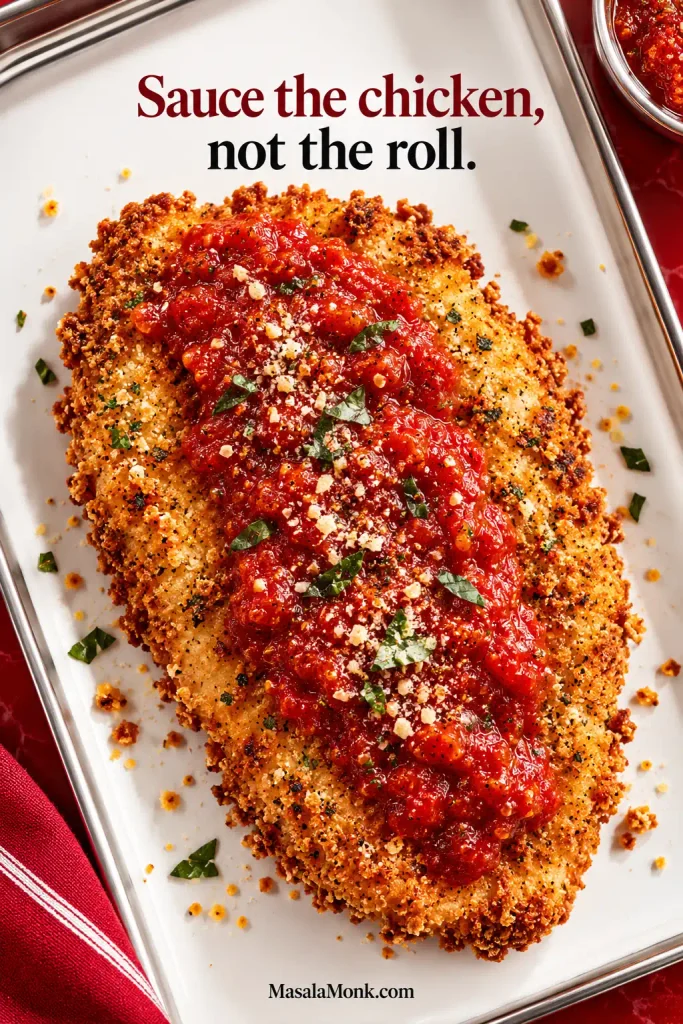
  3. Sauce and cheese the chicken. Set the fried cutlets on that same broiler-safe sheet pan. Spoon 2 to 3 tablespoons / 30 to 45 ml marinara mostly through the center of each cutlet, leaving some fried edges exposed. Do not spread marinara across the rolls in this crispy version—the chicken carries the sauce. Divide the mozzarella over the top, about 2 oz / 55 to 60 g per sandwich, and finish with the remaining Parmesan.

Melt and Build

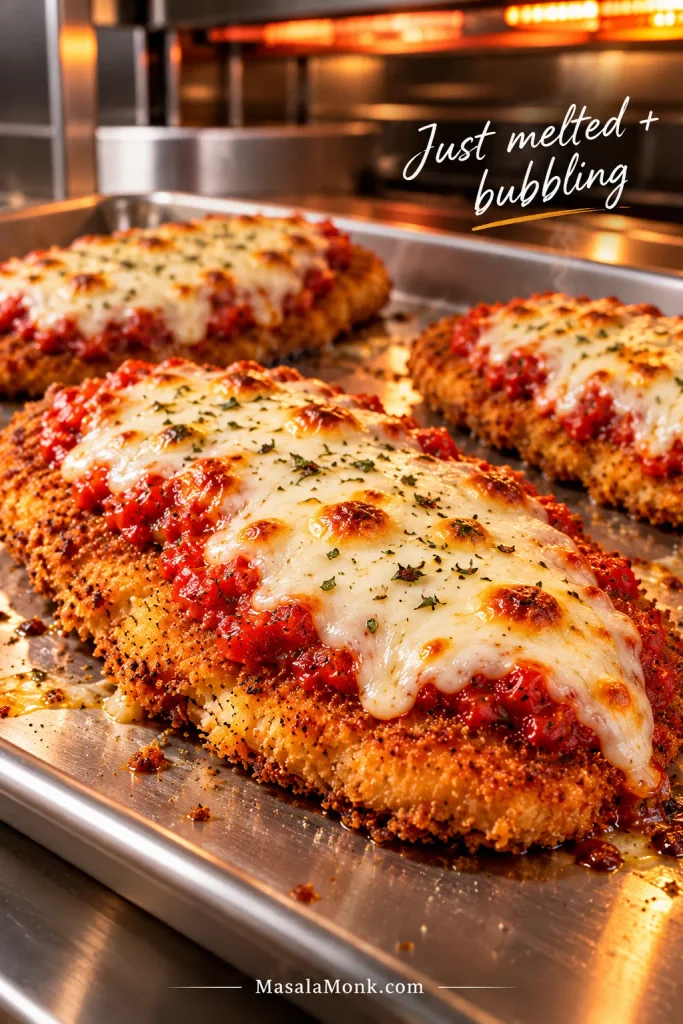
  1. Melt the cheese. Put the topped chicken under the fully heated broiler and watch continuously. Depending on your broiler, this can take anywhere from about 30 seconds to 2 minutes. Pull the tray as soon as the mozzarella has slumped over the chicken, is bubbling and has a few golden spots. The chicken is already cooked, so there is no benefit in leaving it there longer.
  2. Build and serve. Move each cutlet straight into a toasted roll. Add basil if using, close the hinged roll gently and serve while hot. Keep the remaining marinara at the table for dipping or spooning onto individual bites, adding more as you eat instead of letting extra sauce sit in the bread.

Recipe Notes

  • Use the clock as a guide. Let the crust color tell you when to turn; let internal temperature tell you when the chicken is done.
  • Regular breadcrumbs work. The coating will be finer and less craggy. If the crumbs are already well seasoned, reduce or skip the added Italian seasoning.
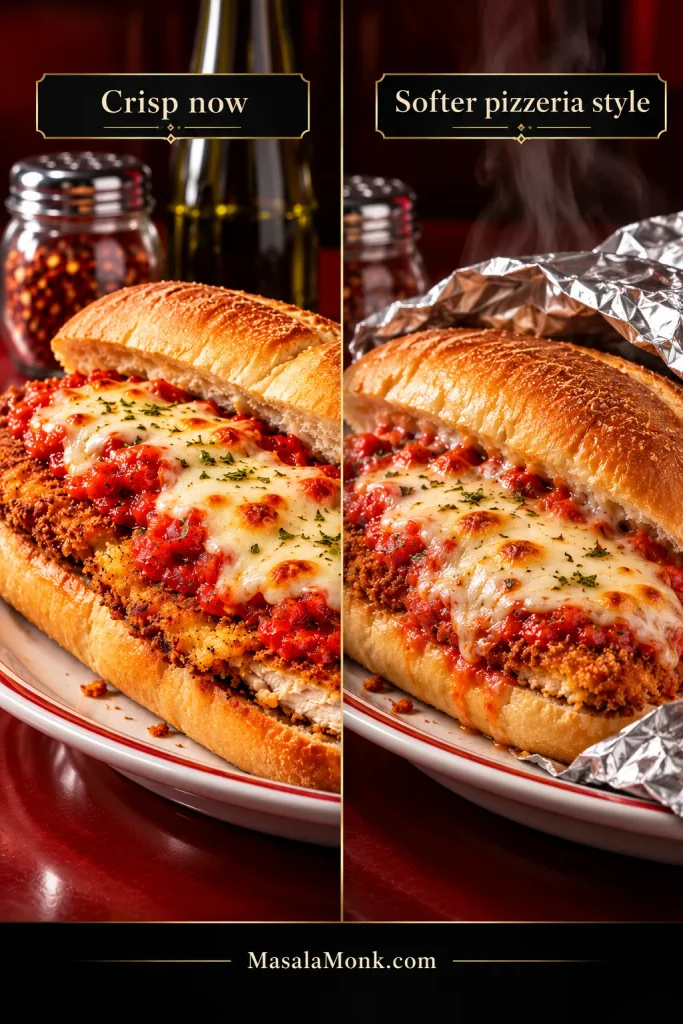
  • Skip the foil wrap if crispness is the goal. Wrapping a finished chicken Parm sub gives you a softer, more melded pizzeria-style sandwich. That’s a valid style, but it is not the one we’re building here.
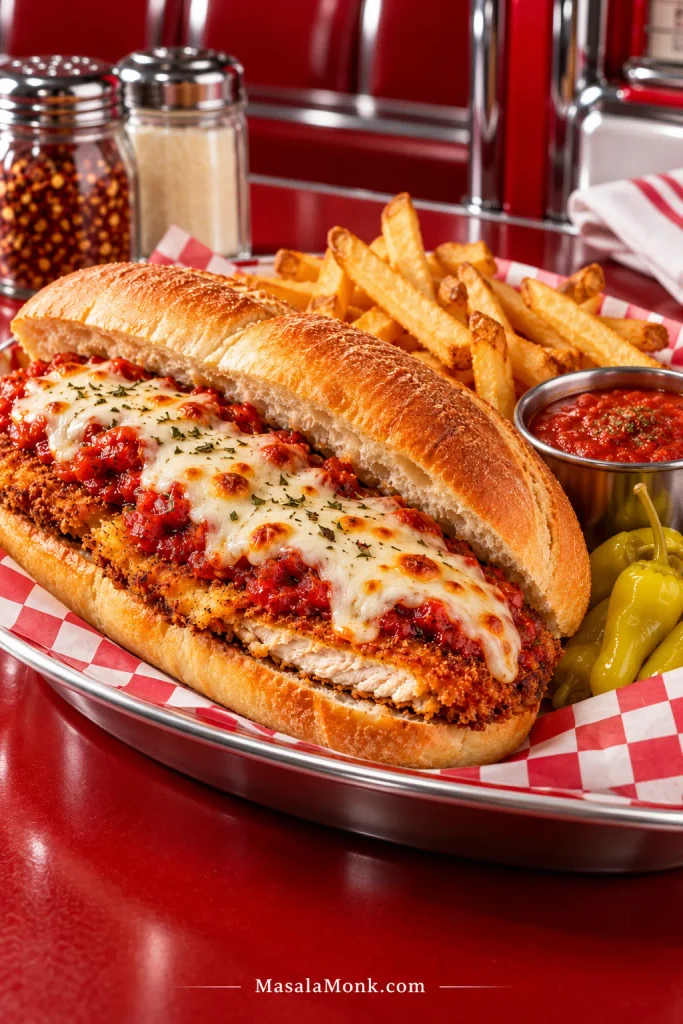
  • Serve it with: hot homemade French fries for the full sandwich-shop treatment, or a sharply dressed green salad or a few pickled peppers when you want something fresher.
Chicken Parmesan sandwich served with golden fries, a ramekin of marinara and pickled peppers on a diner-style tray.
Extra marinara stays on the side, while pickled peppers cut through the fried chicken and melted cheese.

The sandwich works when each layer keeps a distinct job: crisp chicken, controlled marinara, melted mozzarella and bread that stays tender without collapsing.

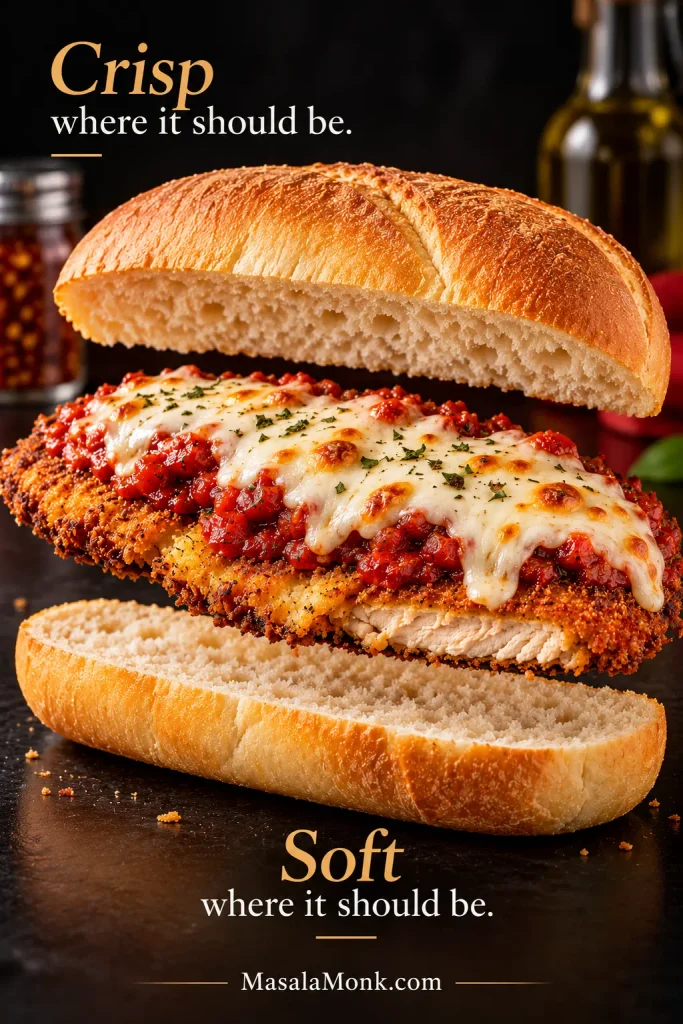
Exploded Chicken Parmesan sandwich with a hoagie roll, thin crispy chicken cutlet, marinara and melted mozzarella shown as separate layers.
Sauce and cheese stay concentrated through the middle, leaving fried edges exposed for contrast.

Size the Cutlet to the Sandwich

Before breading, lay a pounded cutlet over the open roll for a second. If most of the bread is covered, you’re done. There is no prize for making it perfectly rectangular.

Aim for ¼ to ⅜ inch / 6 to 10 mm. Much thicker and the coating can get dark while the center catches up. Go paper-thin and you start losing the chicken underneath all that crust.

Breaded chicken cutlet fitted to an open hoagie roll with a side measurement showing ¼ to ⅜ inch, or 6 to 10 millimeters, thickness.
Flatten the high spots, not the whole cutlet; even thickness matters more than perfect shape.

Oversized pieces can simply be divided. That usually eats better than reaching for a huge roll just because one chicken breast happened to be enormous.

Breading the Chicken

Most breading failures begin before the oil. Wet chicken gives the flour a poor surface to cling to. Too much flour turns pasty. Heavy egg drips create slippery patches. Loosely scattered crumbs come away just as easily as they went on.

Dry the meat well, use a light flour coat, let excess egg drip back into the bowl and press the panko onto both sides. If you’ve made our chicken katsu curry, the flour → egg → panko sequence will be familiar: each layer has a job, and piling on more of any one layer does not make the coating sturdier.

Hand pressing coarse Parmesan-panko crumbs onto a thin chicken cutlet beside a bowl of beaten egg.
Glossy wet patches and heavy crumb clumps are the places most likely to detach in the oil.

Once the crumbs are attached, leave them alone. Re-dipping a half-breaded cutlet usually creates a heavier, less tidy shell rather than fixing it. The short rest gives the coating a little time to grip the chicken more firmly; by the time the oil is hot and the rest of the sandwich is ready, it has had enough time.

Why 350°F Works

For shallow-fried chicken Parm cutlets, keep the oil around 350°F / 175°C. At that temperature the breading starts setting as soon as the chicken hits the pan. Cooler oil gives the crumbs more time to absorb fat; excessively hot oil can darken the Parmesan before the chicken is ready.

Thin breaded chicken cutlet shallow-frying in a skillet with oil marked at ¼ inch or 6 millimeters and a thermometer showing 350°F or 175°C.
Let the oil return toward 350°F / 175°C between batches; cooler oil gives the next crust more time to absorb fat.

No oil thermometer? Look for steady, lively bubbling around the cutlet rather than smoke or violent splattering. Use the instant-read thermometer for the chicken itself, since the color of the crust cannot tell you the temperature at the center.

Instant-read thermometer inserted horizontally through the side of a thin fried chicken cutlet on a wire rack, displaying 165°F and 74°C.
If the probe breaks through the opposite side, pull it back until the sensing area sits fully inside the meat.

Prefer not to shallow-fry? Jump to the Air Fryer or Oven methods →

Sauce, Cheese and Rolls

Keeping the sandwich crisp mostly comes down to where the moisture sits and how long it stays there.

Marinara That Stays Put

Homemade and jarred marinara both work; consistency matters more than pedigree.

Spoon lifting thick chunky marinara that clings before falling slowly back into a saucepan.
If the sauce runs straight off the spoon, reduce it before topping the chicken.

Keep most of the sauce through the middle of the cutlet and leave a few fried edges uncovered. If it spreads across the sheet pan before the cheese even goes on, give it another few minutes in the saucepan. A little crushed red pepper or Calabrian chile can bring heat if you want it, but the basic sandwich does not need a more complicated sauce.

Crispy breaded chicken cutlet with thick marinara spooned through the center while the fried edges remain uncovered.
Keep the middle saucy and the perimeter exposed—that visible fried edge is your reserve of crunch.

Mozzarella Without the Extra Water

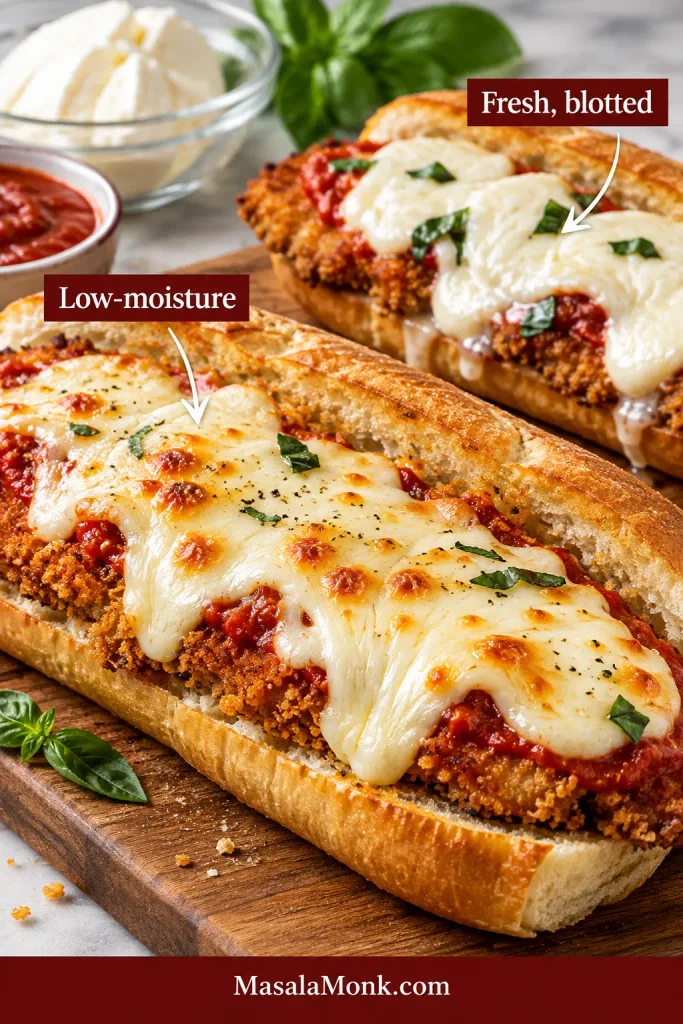
Low-moisture whole-milk mozzarella is the easiest default for a chicken Parm sandwich because it melts smoothly without releasing as much water as fresh mozzarella. It gives you the stretch and richness you want while being easier on the breading underneath.

Two Chicken Parmesan sandwiches comparing evenly melted low-moisture mozzarella with softer pieces of blotted fresh mozzarella.
Fresh mozzarella can work, but smaller well-blotted pieces create fewer wet pockets over the crust.

Low-moisture mozzarella also earns its keep in homemade mozzarella sticks, where excess water causes trouble inside the coating. Fresh mozzarella can still work here; blot it well first. Provolone can replace some of the mozzarella when you want a sharper, more old-school sub-shop flavor.

Breaded chicken cutlets on a sheet pan topped with marinara and bubbling melted mozzarella with a few golden spots.
Once the mozzarella bubbles and slumps over the cutlet, pull it; extra broiler time only works against the chicken.

A Roll That Holds the Filling

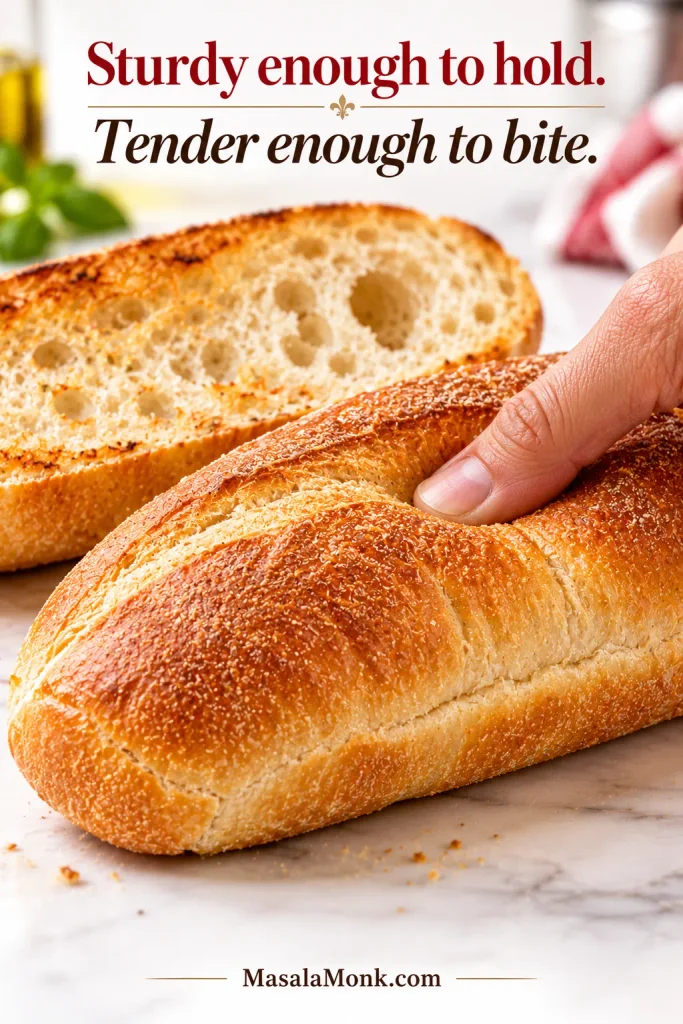
The best bread for a chicken Parmesan sandwich is a sturdy but tender Italian or hoagie roll, about 6 to 8 inches / 15 to 20 cm long. Leave a hinge along one side if the roll allows it; that little bit of structure helps keep the hot filling from escaping out the back.

Italian hoagie roll with an airy crumb and toasted cut surface being gently pressed with a finger to show its softness.
A good hoagie roll should compress under your fingers without cracking or collapsing.

Ciabatta is another good choice when the center is tender. A very hard baguette is less forgiving. If the top half of the roll fights you every time you bite, the filling usually loses.

Toast only the cut faces with garlic-Parmesan butter. The surface touching the chicken gets a little protection while the rest of the bread stays soft.

Ready to cook? Back to the recipe ↑

Fix My Chicken Parm Sandwich

If the first cutlet loses a few crumbs, don’t start over. Look at what happened and correct the next one.

Before treating softness as a problem, decide what happened after assembly. If the sandwich was wrapped, some softening is expected; if it stayed unwrapped and still went limp, moisture or trapped steam is the more useful thing to troubleshoot.

Two Chicken Parmesan sandwiches compared side by side, one crisp and unwrapped and the other partially wrapped in foil with a softer texture.
Serve immediately for sharper fried edges; a brief foil rest intentionally trades some crunch for the softer, melded bite of a pizzeria-style chicken Parm sub.

Troubleshoot the Crust, Chicken and Sandwich

Problem What to check
Breading falls off Dry the chicken well, keep the flour coat light, let excess egg drip away and press the crumbs on. Give the first side time to set before turning.
Crust gets dark too fast The cutlet may be too thick or the oil too hot. Keep the chicken thin and even and the oil around 350°F.
Crust is pale and greasy The oil has probably cooled down. Fry fewer pieces at once and let it recover before adding another cutlet.
The underside softens after frying Hot chicken sitting flat traps steam underneath. Move cooked cutlets to a clean wire rack and leave them uncovered.
The chicken is dry Use thin, even cutlets and pull each one as soon as it reaches 165°F / 74°C. Keep the later cheese melt brief.
The cheese won’t melt quickly Use shredded low-moisture mozzarella and make sure the broiler is fully heated before the tray goes underneath. Thick slices take longer and keep the chicken under heat unnecessarily.
The roll turns soggy Check the sauce first. Watery marinara, untoasted bread, sauce spread directly on the roll or a sandwich built too early will soften it quickly.
The filling slides out The bread may be too hard, the cutlet may be the wrong size for the roll, or there may simply be too much loose sauce inside. A hinged roll helps too.

Keep the Fried Crust Crisp After Frying

Tongs lifting a crispy breaded chicken cutlet from a wire rack, revealing open space beneath the crust.
A bare rack beats a flat plate or paper towel when crispness matters because steam can escape below the cutlet.

Back to the recipe ↑ · Air Fryer or Oven →

Air Fryer or Oven

You can cook the breaded cutlets without shallow frying. The air fryer is quicker but usually means batches; the oven gives you more room, and a wire rack helps the underside stay crisp.
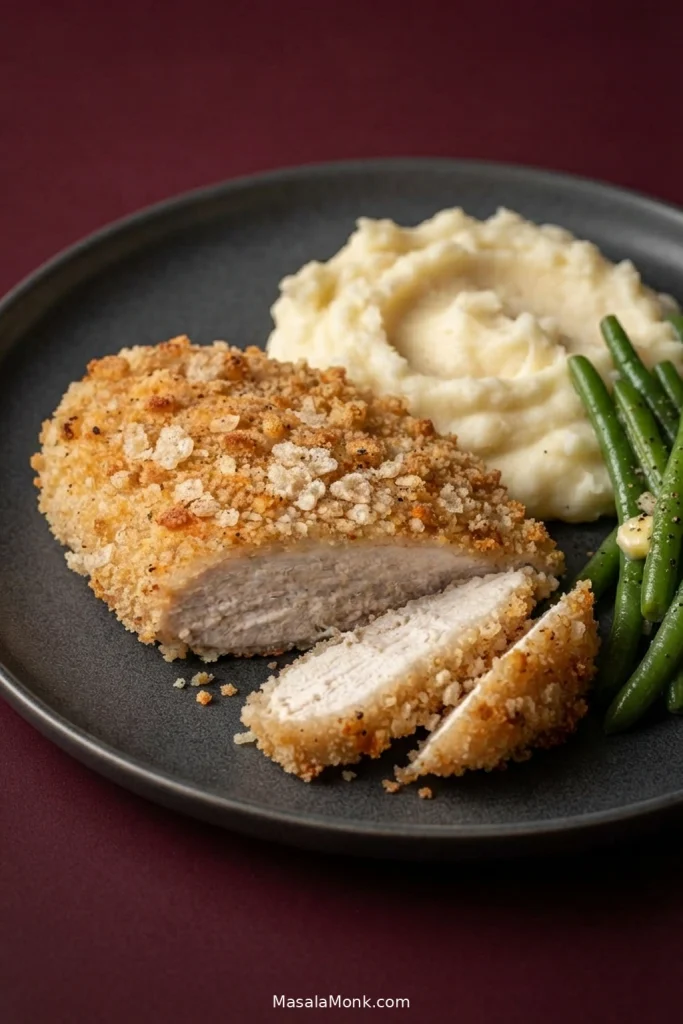
Air Fryer

Lightly spray or brush both sides of the breading with oil. Arrange the cutlets in a single layer at 400°F / 205°C, working in batches if necessary, and flip halfway through.

Three breaded chicken cutlets spaced apart in a single layer inside an air fryer basket at 400°F or 205°C.
Spacing is part of the method: overlapping cutlets shield each other from the circulating hot air.

Begin checking around 7 minutes. Cutlets near ¼ inch / 6 mm may finish around 7 to 9 minutes; pieces closer to ⅜ inch / 10 mm can take longer. Cook each one until the thickest part reaches 165°F / 74°C.

Once the chicken is cooked, add the marinara and mozzarella and return it briefly to the air fryer, or use the broiler, just until the cheese melts.

Oven

Heat the oven to 425°F / 220°C. Set the breaded cutlets on an oiled oven-safe wire rack over a sheet pan and mist or brush the tops with oil. Bake until the raised panko ridges are deeply golden and the chicken reaches 165°F / 74°C, turning once if needed for even browning.

Thin breaded chicken cutlets baking on a wire rack over a rimmed sheet pan inside an oven at 425°F or 220°C.
Check the underside before flipping. Good rack airflow may brown both sides evenly enough that no turn is needed.

Cutlets close to ¼ inch / 6 mm may be ready around 10 to 12 minutes; pieces nearer ⅜ inch / 10 mm often need roughly 12 to 15 minutes. Let 165°F / 74°C in the thickest part make the final call. Add the marinara and mozzarella only after the chicken is cooked, then broil just until the cheese melts. The rack keeps hot air moving underneath instead of letting the bottom breading steam against the pan.

Shortcut night: use fully cooked frozen breaded chicken cutlets and heat them according to the package directions until crisp and hot through, then join the recipe at the sauce-and-cheese step. If the frozen product is raw or labeled not ready to eat, follow its package cooking directions and cook it to 165°F / 74°C before topping. Toast the rolls fresh.
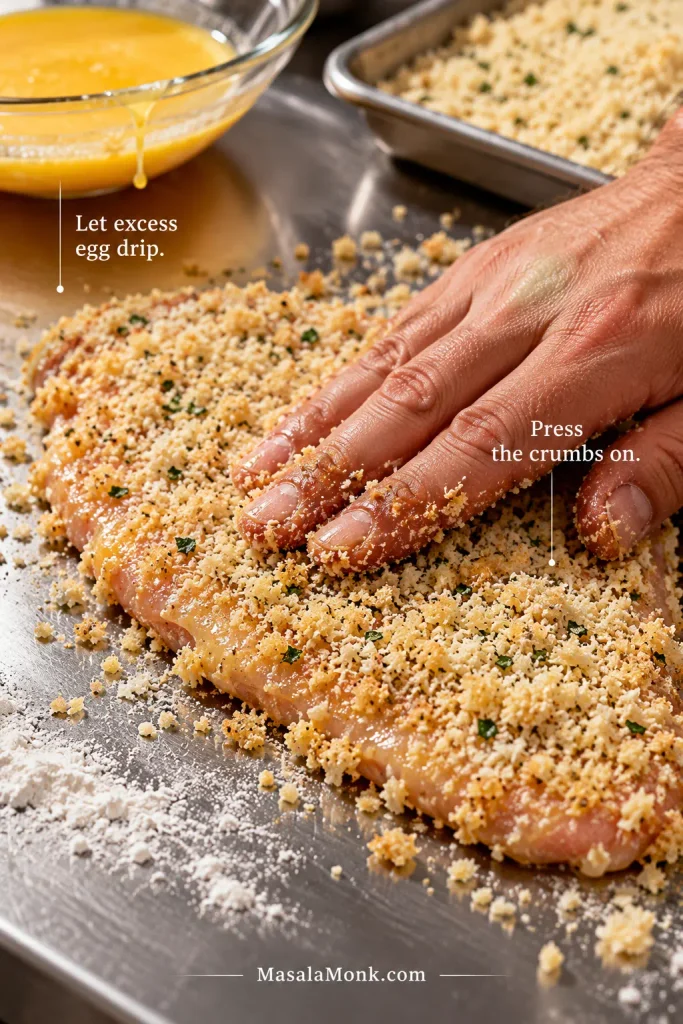
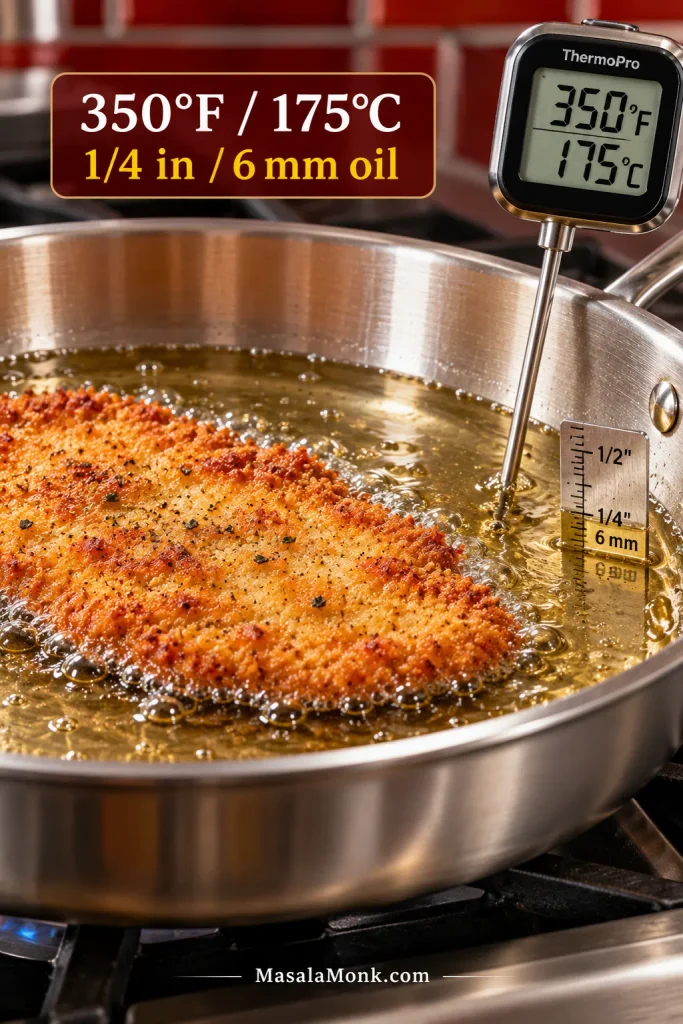
Make Ahead and Reheat

You can prep almost everything ahead; just leave the sandwiches unassembled until you’re ready to eat. Slice and pound the chicken, grate the cheese, mix the garlic butter and have the marinara ready. Breaded cutlets can also be refrigerated, covered, for several hours before cooking.

Keep leftover chicken, sauce and bread separate whenever you can. Refrigerated cooked chicken is best used within 3 to 4 days.

Reheat the Chicken Without Giving Up the Crust

Whichever method you use, reheat leftover chicken to 165°F / 74°C in the center.

  • Air fryer: reheat at 350°F / 175°C in a single layer and check after about 4 minutes. Give it longer if needed until the crust is hot and crisp again.
  • Oven: reheat on an oven-safe wire rack at 375°F / 190°C. Allow roughly 8 minutes before checking, then continue only as long as needed for the edges to crisp again.
Reheated crispy chicken cutlet on a wire rack with a separate toasted hoagie roll, warm marinara and shredded mozzarella nearby.
Recrisp the coating as the chicken reheats, then rebuild promptly once the center reaches 165°F / 74°C.

Warm the marinara separately and give the cut faces of the roll another quick toast, then rebuild the sandwich. Keep extra sauce alongside for dipping instead of spooning it over the whole sandwich. A microwave gets lunch hot faster, but the breading and bread will be softer.

Hand holding a Chicken Parmesan sandwich with a thin crispy chicken cutlet, melted mozzarella and marinara while one edge is dipped into tomato sauce.
Dip only the bite you’re about to eat so the rest of the sandwich keeps its crisp structure.

Pick the sandwich up while the cheese is still loose and the roll is warm. It should give slightly under your fingers, with a little tomato sauce peeking through the mozzarella and a few strips of fried crust still visible around the edges.

The chicken stays juicy. The roll bends instead of cracking or collapsing. That’s enough. Eat it while it’s hot.

Posted on — Leave a comment

Crock Pot Chicken and Noodles Recipe: Easy, Creamy & Comforting

Creamy Crock Pot chicken and extra-wide egg noodles with chunky chicken pieces in a dark serving bowl.

This Crock Pot chicken and noodles recipe gives you wide egg noodles and tender chicken in a savory cream sauce that slips into the folds and clings to every piece, with no pool of broth underneath. If a brothy bowl is what you want, this chicken noodle soup recipe is the better fit.

With slow cooker chicken and noodles, the timing is simple: cook the chicken first and add the noodles only at the end. Most of the cooking is hands-off. Stay nearby once the noodles go in; they can move quickly from firm to tender.

Slow-Cook the Chicken. Quick-Cook the Noodles.

StageWhat to Watch
Cook the chickenCheck it at the early end of the cooking range. Remove it once the thickest part reaches 165°F (74°C).
Start the noodle stageTake the chicken out and stir the cream into the sauce.
Cook the noodlesStay nearby. Stir gently, taste early and stop cooking as soon as the noodles are tender.
ServeFold the chicken back in, taste and serve promptly.

Crock Pot Chicken and Noodles Recipe

Tender chicken and extra-wide egg noodles in a savory cream sauce. Cook the chicken first, then add the noodles to the same sauce at the end.

Prep
15 minutes

Cook
LOW 3–5 hr
HIGH 2–3 hr

Noodles
15–25 minutes

Serves
6

Equipment

  • 6-quart (5.7 L) slow cooker
  • Instant-read thermometer

Ingredients

  • 1½ lb (680 g) boneless skinless chicken breasts, thawed
  • 1 cup (about 150 g) finely diced yellow onion
  • 3 garlic cloves, minced
  • 1 can (10.5 oz / 298 g) condensed cream of chicken soup, undiluted
  • 2½ cups (600 mL) low-sodium chicken broth, divided
  • 1 teaspoon concentrated chicken base or paste, or the amount of bouillon your brand recommends for about 1 cup (240 mL) broth
  • 1 teaspoon dried thyme
  • ½ teaspoon poultry seasoning
  • ½ teaspoon freshly ground black pepper, plus more to taste
  • ½ cup (120 mL) heavy cream, added after the chicken cooks
  • 8 oz (227 g) dried extra-wide egg noodles, shelf-stable from the pasta aisle, not frozen homestyle noodles
  • 2 tablespoons chopped fresh parsley, optional
  • Salt, as needed after cooking

Instructions

1. Slow-cook the chicken

Whisk the condensed cream of chicken soup with 2 cups (475 mL) of the broth, chicken base, thyme, poultry seasoning and black pepper directly in the slow cooker. Stir in the onion and garlic, then nestle the thawed chicken breasts into the sauce.

Cover and cook on LOW for about 3–5 hours or HIGH for about 2–3 hours. Begin taking the chicken’s temperature at about 3 hours on LOW or 2 hours on HIGH. Remove it once the thickest part reaches 165°F (74°C). Do not keep cooking lean breast meat simply because it has not fallen apart on its own; it will rest while the noodles cook.

Use thawed chicken. USDA slow-cooker guidance recommends thawing meat and poultry before they go into a slow cooker.

Hold the salt for now. The condensed soup and chicken base already bring plenty of seasoning to the pot.

2. Remove the chicken and start the noodles

Transfer the chicken to a plate and cover it loosely. Stir the heavy cream into the sauce in the slow cooker. Warm the reserved ½ cup (120 mL) broth separately and keep it nearby.

Heavy cream being poured into seasoned sauce in a slow cooker, with cooked chicken resting on a plate beside it.
Here, cream enriches the slow cooker sauce, while the reserved broth stays back as a consistency fix. Add that broth only if the noodles need more liquid later.

The sauce may look a little loose now. Leave it that way; the noodles still have liquid to absorb.

Turn the slow cooker to HIGH if needed. Add the dried extra-wide egg noodles and press them gently into the sauce. They do not have to be perfectly submerged.

3. Cook the noodles and return the chicken

Cover for 8–10 minutes, then stir gently to separate the noodles. Re-cover and test one for tenderness at 12 minutes. Most extra-wide dried egg noodles will need about 15–25 minutes total, though noodle thickness and slow-cooker temperature vary.

Extra-wide egg noodles softening in creamy sauce inside a slow cooker, with some noodle ribbons still above the liquid.
At the first stir, focus on separating the softening ribbons rather than repeatedly working the pot. Gentle handling helps extra-wide egg noodles stay broad and distinct.

While they cook, pull the rested chicken into chunky bite-size pieces. Fine shreds tend to disappear into the sauce.

If the noodles are still firm and the sauce is getting thick, add the warm reserved broth 2–4 tablespoons at a time. You may use only a little of it.

Once the noodles are tender through the center, switch off the slow cooker and fold the chicken back in. If the sauce still seems loose, leave the pot uncovered for about 5 minutes before doing anything else.

Taste. Add salt or more black pepper if it needs it, then fold in the parsley, if using. Serve while the noodles still hold their shape.

When it’s ready: the sauce should cling to the chicken and noodles and settle lightly between the folds. The noodles should separate easily when you spoon them out.

Finished creamy chicken and extra-wide egg noodles in a slow cooker, with chunky chicken folded through the sauce.
The finished chicken and noodles should still have some movement in the pot. That small amount of looseness matters because the noodles continue taking up moisture after cooking stops.

Recipe Notes

  • Use the right noodles: these timings are for dried, shelf-stable extra-wide egg noodles. Frozen homestyle noodles need a different method.
  • Do not hold the noodles on WARM for hours: egg noodles keep softening as they sit in the sauce. Once they are tender, serve rather than leaving the cooker on WARM.

More Help With Chicken & Noodles

Which Egg Noodles Should You Use?

Dried extra-wide egg noodles are the best fit here because they pick up some of the chicken sauce as they cook and still give you broad, distinct noodles. They can cook directly in the sauce once the chicken comes out. Cook them separately when exact texture or better leftovers matter more than keeping everything in one pot.

Frozen homestyle noodles need a different approach. They are thicker and denser, so follow their package directions rather than the dried-noodle timing in this recipe.

Comparison of dried extra-wide egg noodles, separately cooked egg noodles, and thicker frozen homestyle noodles for chicken and noodles.
Choose the cooking path before choosing the brand: shelf-stable dried, separately cooked and frozen homestyle noodles behave differently. As a result, one timing cannot serve all three.
Noodle ChoiceBest When
Dried extra-wide noodles in the Crock PotBest for the easiest one-pot method and noodles that absorb some of the chicken sauce.
Dried noodles cooked separatelyBest when precise texture or better leftovers matter more than one-pot convenience.
Frozen Reames or homestyle noodlesChoose these when you specifically want thicker homestyle noodles and don’t mind cooking them separately.

Cook dried egg noodles in the Crock Pot

Use 8 oz (227 g) dried, shelf-stable extra-wide egg noodles from the pasta aisle. Start tasting early; once the center is tender, they are done. Thin egg noodles have less room for error, so test them sooner.

Cook the noodles separately

Follow the chicken stage as written, but begin with 1½ cups (360 mL) broth instead of 2 cups. When the chicken is done, remove it and stir in the cream.

Near serving time, boil 8 oz (227 g) dried egg noodles until barely al dente. Drain them well and fold them into the chicken sauce. Keep up to ½ cup (120 mL) warm broth nearby only if the sauce needs loosening. You will not usually need the full 2½ cups of broth listed in the main recipe.

This is also the better method for meal prep because the noodles keep their texture better when stored separately. Combine only the portions you are reheating. For the rest, see storing and reheating chicken and noodles.

Use frozen Reames or homestyle noodles

Do not swap frozen homestyle noodles ounce-for-ounce into the dried-noodle method and expect the same timing.

Reames recommends cooking its frozen noodles according to the package directions before combining them with the other ingredients, and says not to thaw them first. Use the reduced-broth approach above when you fold separately cooked noodles into the chicken mixture.

How to Tell When It’s Done

The timer gets you close. The noodles and sauce tell you when to stop.

Noodles: bite into one. It should be tender through the middle and still look like a distinct ribbon. Swollen noodles that are splitting or losing their shape have gone too far.

Sauce: drag a spoon through the pot. The sauce should move slowly back into the space and cling to the noodles as it does.

Close-up forkful of creamy chicken and a broad egg noodle coated in thick sauce.
Look at the noodle’s outline as well as its center. A finished ribbon keeps clean, defined edges instead of looking swollen, frayed or beginning to split.

Not seeing those cues yet? Match what you’re seeing to the texture fixes.

Fix My Chicken and Noodles

If something looks off, match what you’re seeing in the Crock Pot to the fix below.

What You Are SeeingWhat to Do
Sauce looks too soupy before the noodles go inLeave it alone for now. The dry noodles still need that liquid.
Sauce thickened before the noodles became tenderAdd warm reserved broth 2–4 tablespoons at a time and keep testing the noodles.
Noodles are still firm in the middleStir them back into the sauce, cover the pot and give them a few more minutes on HIGH.
Noodles are starting to get very softSwitch off the slow cooker. They are done, or very close to it.
Chicken turned dry or stringyDry chicken breast usually means it stayed in the slow cooker too long. Next time take its temperature sooner and remove it at 165°F (74°C).
Dish tastes too saltyCondensed soup, chicken base and broth all bring salt. Use low-sodium broth and season only after tasting the dish.
Flavor seems flatCheck the salt, black pepper and chicken base before adding more broth. More liquid usually dilutes the flavor further.
Noodles are done, but the sauce is still thinLeave the pot uncovered for 5 minutes first. Still too loose? Mix 1 teaspoon cornstarch with 1 tablespoon cold water and stir it into the very hot sauce. Keep the cooker on HIGH only until the sauce begins to tighten, then switch it off immediately.
Warm broth being poured into thick chicken and egg noodles in a slow cooker while the noodles are still firm.
Warm broth is a correction tool, not an automatic addition. Its job is to give firm noodles enough liquid to finish without thinning the final sauce more than necessary.

Back to the Crock Pot Chicken and Noodles recipe ↑

Useful Swaps Without Changing the Dish

Chicken thighs

Chicken thighs are the more forgiving choice if your slow cooker runs hot or you need a wider cooking window. Use the same weight of boneless skinless thighs and cook them to at least 165°F (74°C) and until they are tender enough to pull apart easily.

If chicken breast timing is the part you struggle with, the Crock Pot chicken breast recipes guide goes deeper into cooker size, timing and knowing when lean chicken is ready to come out.

Rotisserie or already-cooked chicken

Already have cooked chicken? You can skip the long chicken stage and turn this into a much faster Crock Pot dinner. Replace the fresh onion and garlic with 1 teaspoon onion powder and ½ teaspoon garlic powder, since they will not have hours to soften in the sauce.

Combine the condensed soup, 2 cups (475 mL) broth, chicken base, onion powder, garlic powder, thyme, poultry seasoning and black pepper in the slow cooker. Heat on HIGH for about 30–45 minutes, until steaming, then stir in the cream and add the noodles. Reserve the remaining broth in case the noodles need more liquid.

The cooked chicken goes in only after the noodles are tender. If you’re using chilled leftover chicken, reheat it separately to 165°F (74°C) before folding in about 3 cups shredded chicken. If the rotisserie chicken is still hot, fold it through just before serving.

Cooked chicken pieces being added to creamy egg noodles in a slow cooker after the noodles have cooked.
With rotisserie or already-cooked chicken, the shortcut is in the chicken stage—not the noodles. Get the sauce steaming and cook the noodles properly before the chicken joins the pot.

Got more cooked chicken to use? Chicken tetrazzini is another good home for rotisserie or leftover chicken.

Carrots, celery or peas

Carrots and celery can go in with the onion—up to about 1 cup total. Dice carrots fairly small, especially if you are cooking on HIGH. Stir peas in when the noodles are nearly tender.

For more than a handful of frozen vegetables, warm them separately first. A large cold addition can slow the noodle stage just when the sauce needs steady heat.

For a crisp green side instead, green beans almondine gives you tender-crisp beans, lemon and toasted almonds alongside the tender chicken and broad noodles.

No condensed cream of chicken soup

Skip the condensed soup, increase the heavy cream to ¾ cup (180 mL) and use 1–1½ teaspoons concentrated chicken base or paste, or the amount of bouillon your brand recommends for about 1 cup (240 mL) broth. Use 2 cups (475 mL) broth with the chicken and hold the remaining ½ cup (120 mL) in reserve.

Whisk 2 tablespoons cornstarch into the cold cream until smooth. Cook the chicken as directed, then remove it and stir the cream mixture into the sauce before adding the noodles. Leave the cooker on HIGH while the noodles cook.

This version starts thinner than the condensed-soup recipe and thickens as the cornstarch cooks. Add reserved broth only if the noodles are still firm and the sauce tightens first. Fold the chicken back in when the noodles are tender, then taste before adding more chicken base or salt.

Storing, Reheating and Freezing Chicken and Noodles

The noodles keep taking up moisture as the dish sits, so tomorrow’s chicken and noodles will be thicker than tonight’s.

Refrigerating

Divide leftovers into shallow containers and refrigerate within 2 hours. Use within 3–4 days.

Making it ahead

If this is tomorrow’s lunch as well as tonight’s dinner, keeping the noodles separate is worth the extra container. Reheat the chicken and sauce first, then add noodles only to the portions you are serving. The noodles will hold their texture much better.

Reheating

USDA guidance recommends reheating leftovers to 165°F (74°C), so use the stovetop or microwave rather than the slow cooker. Loosen the sauce with chicken broth a little at a time; if the consistency is already right, a small splash of cream can bring some richness back.

Thick leftover chicken and egg noodles being reheated while broth is added to loosen the creamy sauce.
Judge the sauce after it starts heating. If it is still too tight, add broth a little at a time; if the texture is already right, a small splash of cream restores richness instead.

Freezing

For freezer meal prep, stop after the chicken has cooked and come out of the sauce. Cool and freeze the chicken and sauce base before adding the cream or noodles. Once thawed and reheated, stir in the cream and prepare the noodles fresh.

Fully assembled chicken and noodles can be frozen, but the noodles will be noticeably softer after thawing.

What Goes With Chicken and Noodles?

Chicken and noodles are filling enough to be the whole meal, especially with carrots or peas mixed in. A simple salad, roasted broccoli or green beans adds something fresh against the broad noodles and creamy sauce. Soft dinner rolls are good for catching any sauce left behind.

In parts of the Midwest, thick chicken and noodles are spooned right over creamy mashed potatoes. With something crisp and green alongside, you have a simple, substantial plate of tender chicken, broad noodles and plenty of sauce to catch with every forkful.

Creamy chicken and wide egg noodles spooned over mashed potatoes with green beans on the side.
For a Midwestern-style plate, mashed potatoes are the base rather than part of the slow cooker recipe. Spoon the chicken and noodles over them at serving so the creamy sauce can work like gravy.

Recipe development disclosure: MasalaMonk developed this version by comparing established chicken-and-noodles methods, manufacturer guidance and recurring reader-reported problems. MasalaMonk has not independently kitchen-tested this exact formulation.

Back to the recipe card ↑  ·  Back to top ↑