
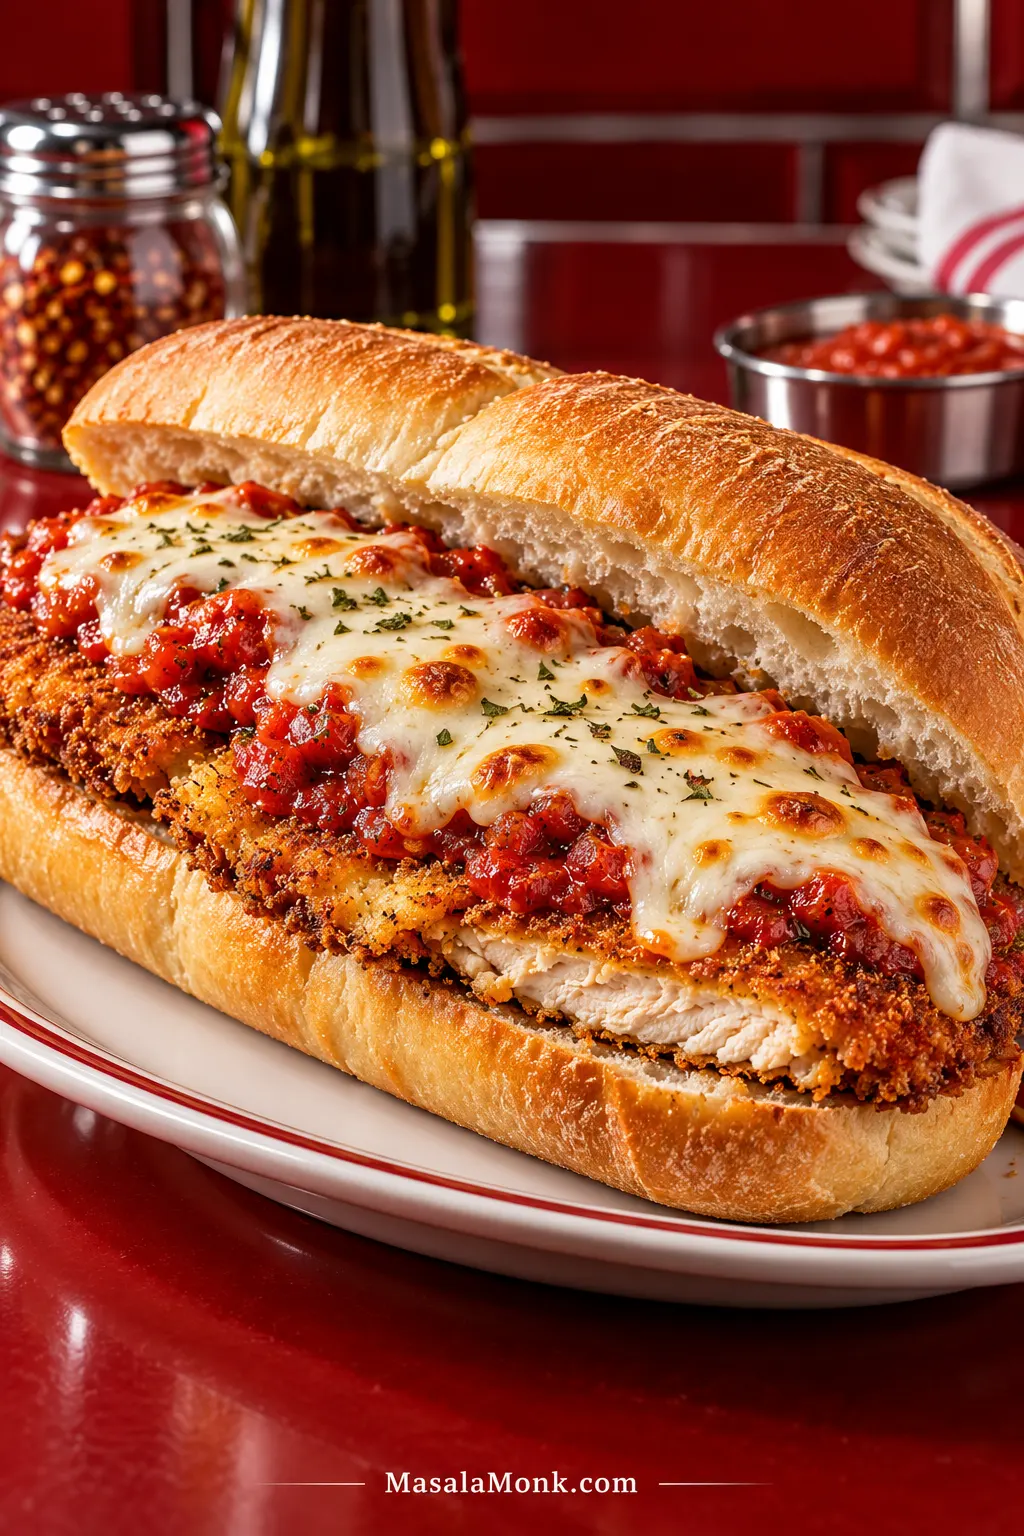
Hot tomato sauce and melted mozzarella through the middle, fried chicken still crisp around the edges, and a toasted roll soft enough to give when you pick it up—that is the bite worth chasing.
The trouble is that a chicken Parm sandwich can turn soft surprisingly fast. Thin sauce soaks the breading. Melted cheese traps steam. An overly hard roll pushes the filling out on the first bite. This chicken Parmesan sandwich recipe deals with those problems before they happen.
Done well, it should be generous and a little unruly: juicy chicken, molten cheese, bright tomato sauce and enough fried edge to keep the whole sandwich from eating like one soft layer. You’ll want two hands.
Before you start:
- Chicken: aim for ¼ to ⅜ inch / 6 to 10 mm thick and roughly sized to the roll.
- Sauce: use marinara that clings to a spoon and falls slowly rather than pouring like soup.
- Roll: choose bread sturdy enough for the filling but still tender enough to bite through easily.
Crispy Chicken Parmesan Sandwich Recipe
Parmesan-panko chicken, marinara and bubbling mozzarella on garlic-Parmesan-toasted rolls, with extra warm sauce alongside for dipping.
Equipment
- Heavy 10- to 12-inch / 25- to 30-cm skillet
- Meat mallet or rolling pin
- 3 shallow bowls or dishes
- Large plate or tray for the raw breaded chicken
- 2 rimmed sheet pans: one fitted with a clean oven-safe wire rack, one for topping and broiling
- Tongs
- Instant-read thermometer
Ingredients
Chicken and Parmesan-panko coating
- 1¼ lb / 570 g boneless, skinless chicken breasts, usually 2 large breasts
- 1 tsp fine sea salt / about 6 g
- ½ tsp freshly ground black pepper
- ½ cup all-purpose flour / 60 g
- 2 large eggs
- 1 tbsp water / 15 ml
- 1¼ cups panko breadcrumbs / about 75 g
- ½ cup finely grated Parmesan / about 45 g
- 1 tsp Italian seasoning
- About 1½ to 2 cups / 360 to 480 ml neutral high-heat oil, such as canola, vegetable, grapeseed or refined avocado oil, or enough to reach about ¼ inch / 6 mm deep in the skillet
Sandwiches
- 4 sturdy 6- to 8-inch / 15- to 20-cm Italian or hoagie rolls, split lengthwise but left hinged on one side if possible
- 3 tbsp unsalted butter / 42 g, softened
- ½ tsp garlic powder
- ¼ cup finely grated Parmesan / about 22 g, divided
- 1½ cups marinara / 360 ml, warmed and divided; a good jarred sauce is absolutely fine, or use homemade marinara sauce
- 8 oz / 225 g low-moisture whole-milk mozzarella, about 2 cups shredded
- Fresh basil, optional
Prepare the Chicken
- Slice, pound and season. Cut the chicken breasts horizontally to make four cutlets. Working between parchment or plastic wrap, gently pound them to an even ¼ to ⅜ inch / 6 to 10 mm. Pat thoroughly dry, then season both sides with the salt and black pepper. One ugly edge does not matter. Uneven thickness does.
- Set up the breading. Put the flour in the first shallow dish. Beat the eggs with the water in the second. Combine the panko, ½ cup / 45 g Parmesan and Italian seasoning in the third.
- Bread and rest. Dust each cutlet lightly with flour and shake off the excess. Dip into the egg and let the extra drip away. Press the panko mixture firmly onto both sides. Set the breaded chicken in a single layer on a large plate or tray and rest for 5 to 15 minutes. Use that time to get the marinara, cheese and rolls ready.
Fry Until Golden
- Heat the oil. Pour enough oil into the skillet to reach about ¼ inch / 6 mm deep. A 10-inch pan will use less than a wide 12-inch pan, so let the depth—not the cup measurement—be the final guide. Heat to about 350°F / 175°C.
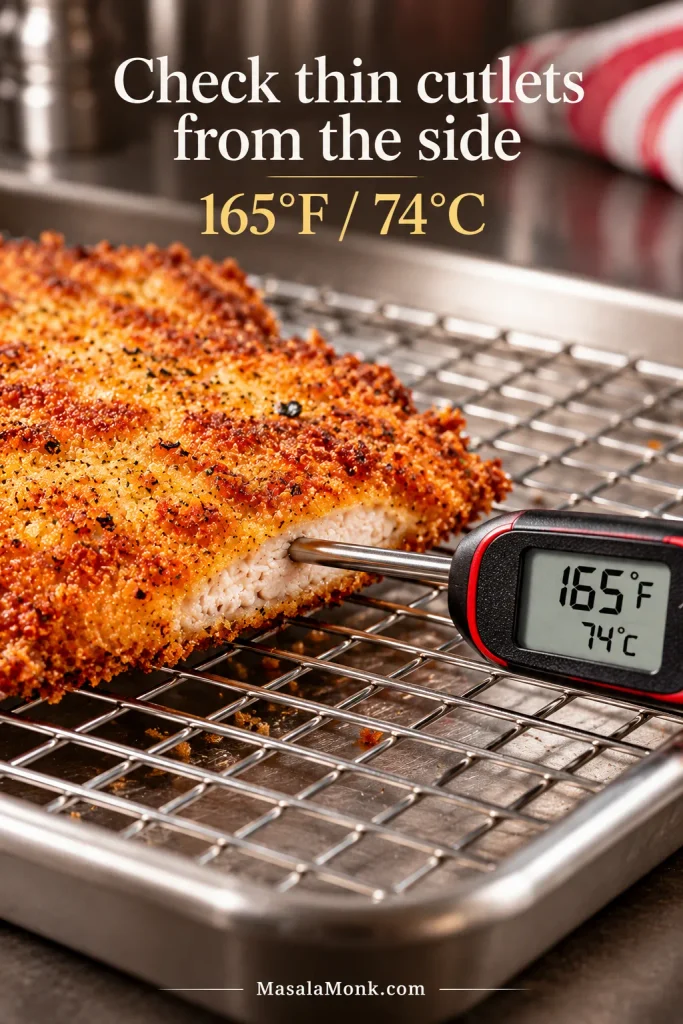
- Fry in batches. Add the cutlets without crowding the pan. Leave the first side alone until the coating has set and releases easily, then turn. Cook for roughly 2½ to 4 minutes per side, with ¼-inch / 6-mm cutlets often finishing toward the early end. Let the oil recover between batches. Check the thickest part, then move each cutlet to the clean wire rack as soon as it reaches 165°F / 74°C.
Once the final raw cutlet is in the skillet, wash or swap any tongs that touched uncooked chicken before using them on the finished cutlets.
Checking a thin cutlet: insert the thermometer horizontally through the side so the tip reaches the center rather than passing straight through the meat.
Toast and Top
- Check the marinara and heat the broiler. The sauce should cling to a spoon and fall slowly. Give a loose marinara a few minutes of uncovered simmering. If your oven setup allows, position the rack about 5 to 6 inches / 13 to 15 cm below the broiler element. Have the chicken, rolls and cheese ready before anything goes underneath.
- Toast the rolls. Mix the softened butter with the garlic powder and 2 tablespoons of the sandwich Parmesan, then spread it over the cut faces. Broil cut-side up, watching continuously, for about 1 to 2 minutes, until lightly golden. The toasted surface should feel dry and lightly crisp while the middle of the roll still gives when pressed. Transfer the toasted rolls to a plate.
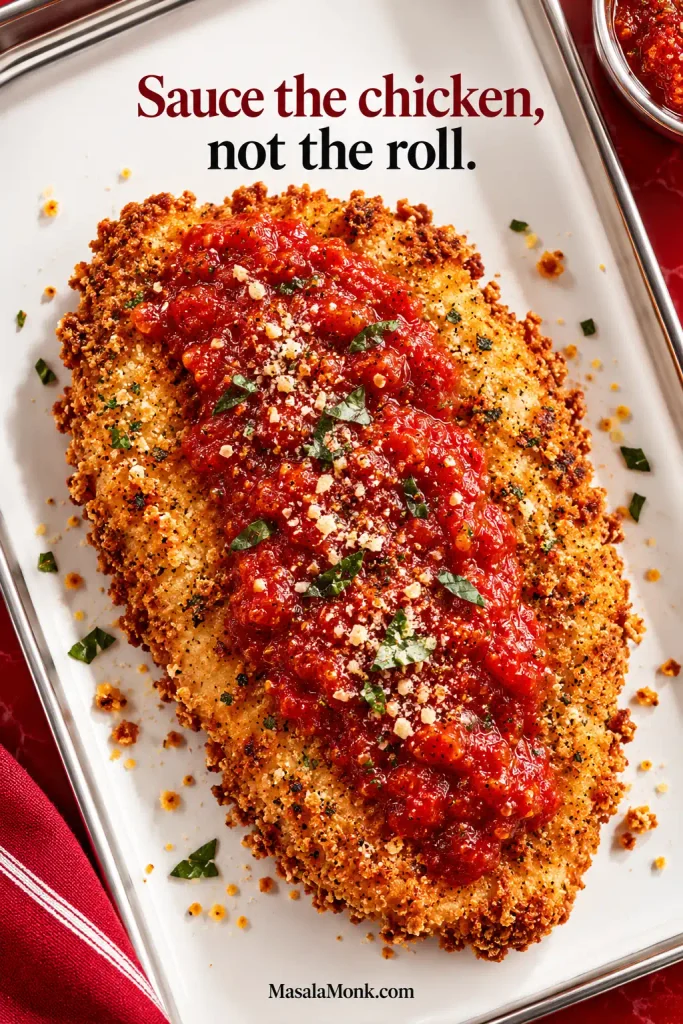
- Sauce and cheese the chicken. Set the fried cutlets on that same broiler-safe sheet pan. Spoon 2 to 3 tablespoons / 30 to 45 ml marinara mostly through the center of each cutlet, leaving some fried edges exposed. Do not spread marinara across the rolls in this crispy version—the chicken carries the sauce. Divide the mozzarella over the top, about 2 oz / 55 to 60 g per sandwich, and finish with the remaining Parmesan.
Melt and Build
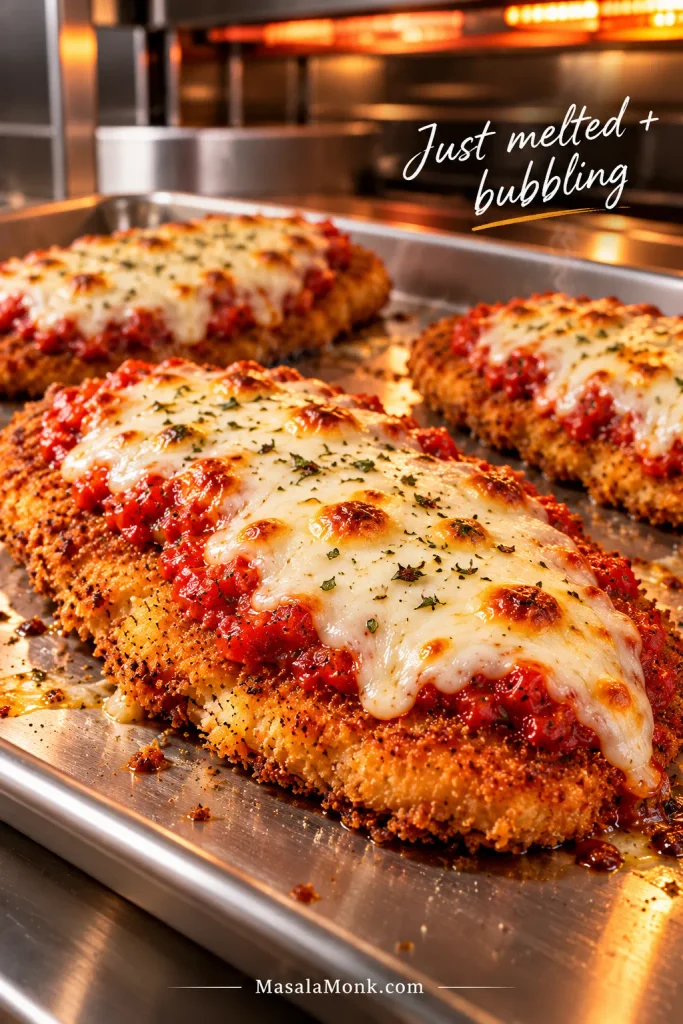
- Melt the cheese. Put the topped chicken under the fully heated broiler and watch continuously. Depending on your broiler, this can take anywhere from about 30 seconds to 2 minutes. Pull the tray as soon as the mozzarella has slumped over the chicken, is bubbling and has a few golden spots. The chicken is already cooked, so there is no benefit in leaving it there longer.
- Build and serve. Move each cutlet straight into a toasted roll. Add basil if using, close the hinged roll gently and serve while hot. Keep the remaining marinara at the table for dipping or spooning onto individual bites, adding more as you eat instead of letting extra sauce sit in the bread.
Recipe Notes
- Use the clock as a guide. Let the crust color tell you when to turn; let internal temperature tell you when the chicken is done.
- Regular breadcrumbs work. The coating will be finer and less craggy. If the crumbs are already well seasoned, reduce or skip the added Italian seasoning.
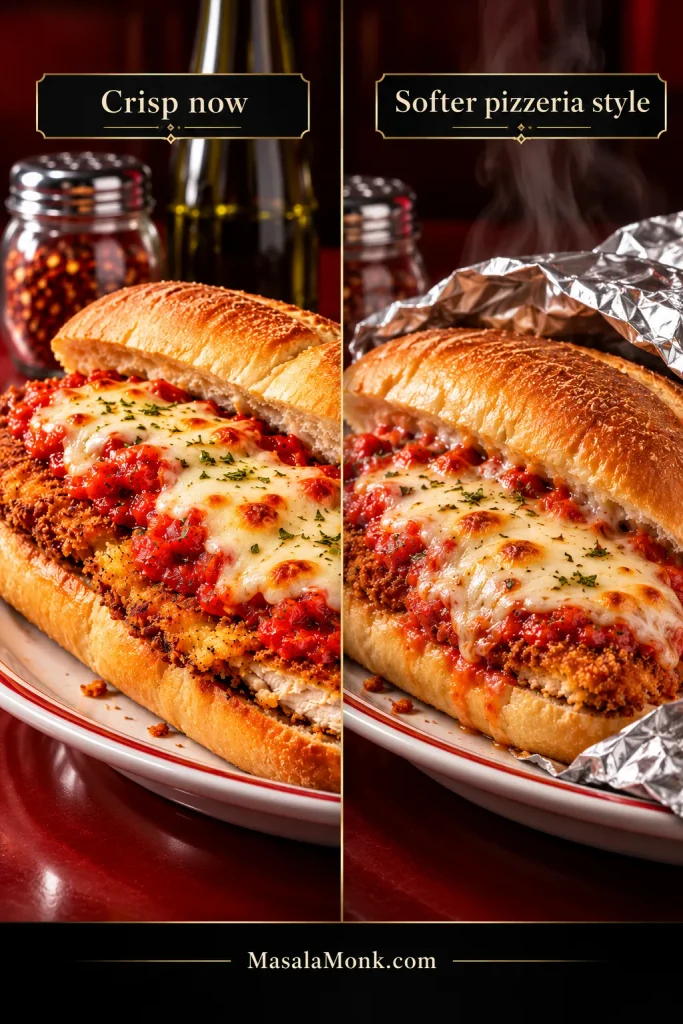
- Skip the foil wrap if crispness is the goal. Wrapping a finished chicken Parm sub gives you a softer, more melded pizzeria-style sandwich. That’s a valid style, but it is not the one we’re building here.
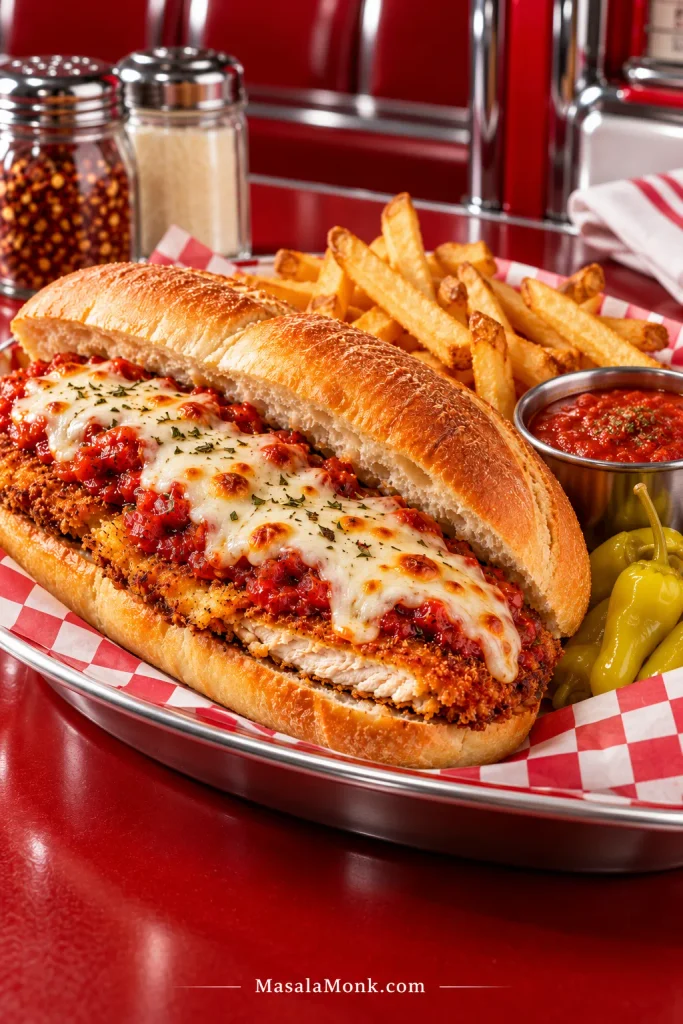
- Serve it with: hot homemade French fries for the full sandwich-shop treatment, or a sharply dressed green salad or a few pickled peppers when you want something fresher.
Why This Chicken Parm Sandwich Works
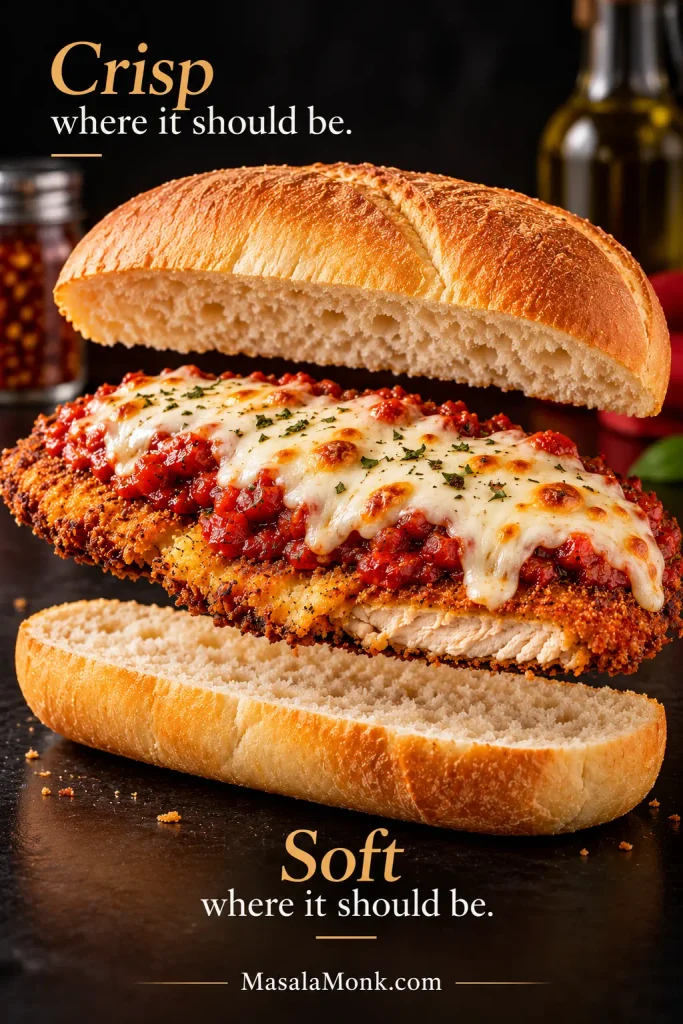
The sandwich works when each layer keeps a distinct job: crisp chicken, controlled marinara, melted mozzarella and bread that stays tender without collapsing.
Size the Cutlet to the Sandwich
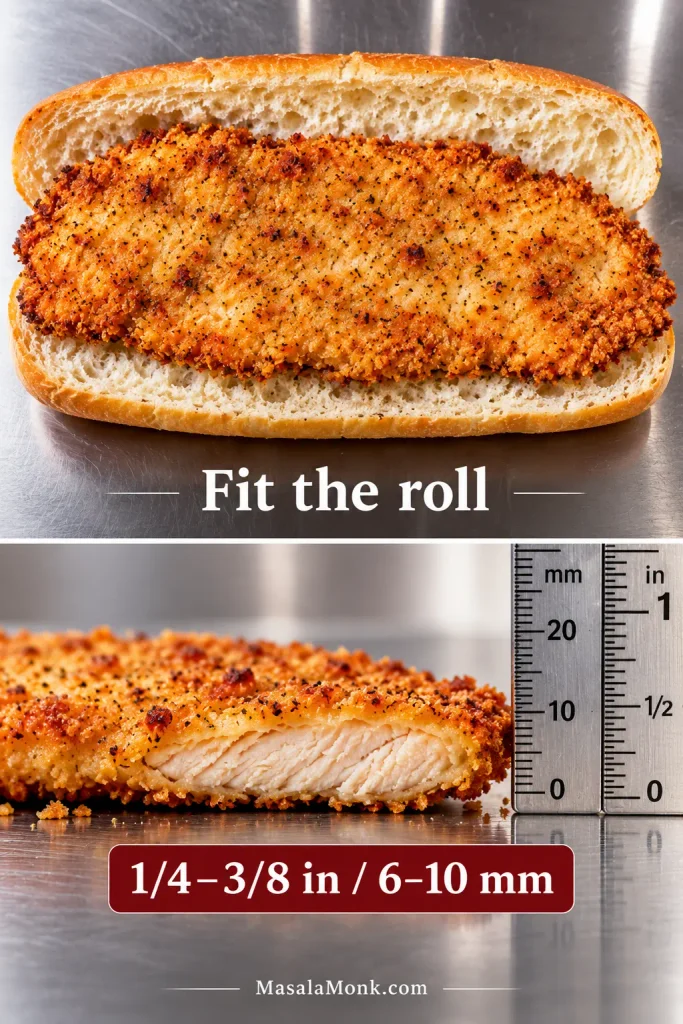
Before breading, lay a pounded cutlet over the open roll for a second. If most of the bread is covered, you’re done. There is no prize for making it perfectly rectangular.
Aim for ¼ to ⅜ inch / 6 to 10 mm. Much thicker and the coating can get dark while the center catches up. Go paper-thin and you start losing the chicken underneath all that crust.
Oversized pieces can simply be divided. That usually eats better than reaching for a huge roll just because one chicken breast happened to be enormous.
Breading the Chicken
Most breading failures begin before the oil. Wet chicken gives the flour a poor surface to cling to. Too much flour turns pasty. Heavy egg drips create slippery patches. Loosely scattered crumbs come away just as easily as they went on.
Dry the meat well, use a light flour coat, let excess egg drip back into the bowl and press the panko onto both sides. If you’ve made our chicken katsu curry, the flour → egg → panko sequence will be familiar: each layer has a job, and piling on more of any one layer does not make the coating sturdier.
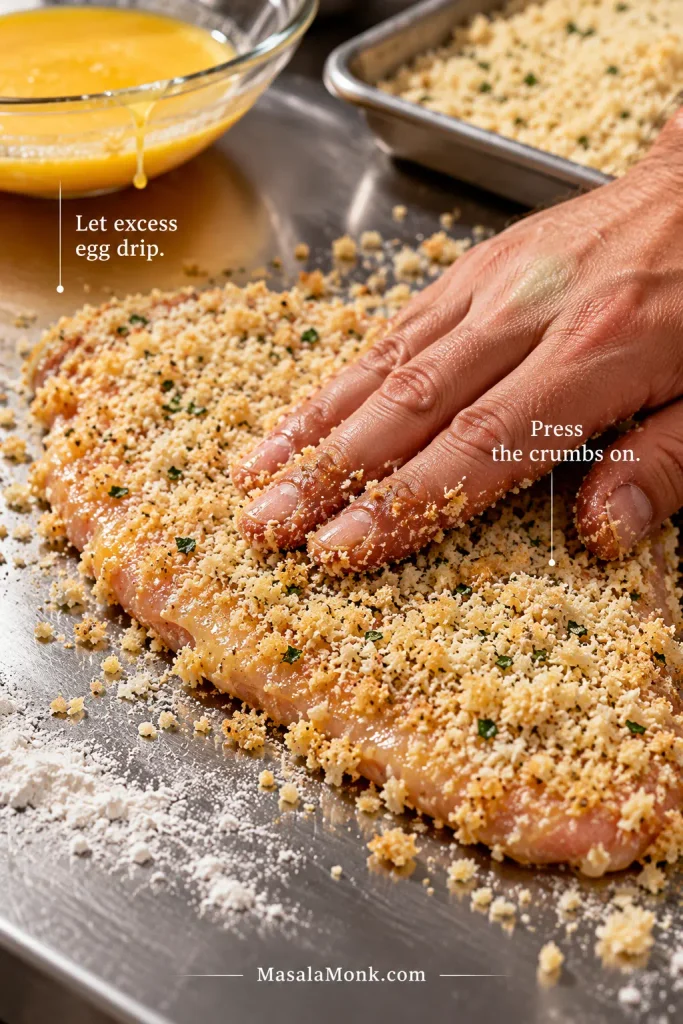
Once the crumbs are attached, leave them alone. Re-dipping a half-breaded cutlet usually creates a heavier, less tidy shell rather than fixing it. The short rest gives the coating a little time to grip the chicken more firmly; by the time the oil is hot and the rest of the sandwich is ready, it has had enough time.
Why 350°F Works
For shallow-fried chicken Parm cutlets, keep the oil around 350°F / 175°C. At that temperature the breading starts setting as soon as the chicken hits the pan. Cooler oil gives the crumbs more time to absorb fat; excessively hot oil can darken the Parmesan before the chicken is ready.
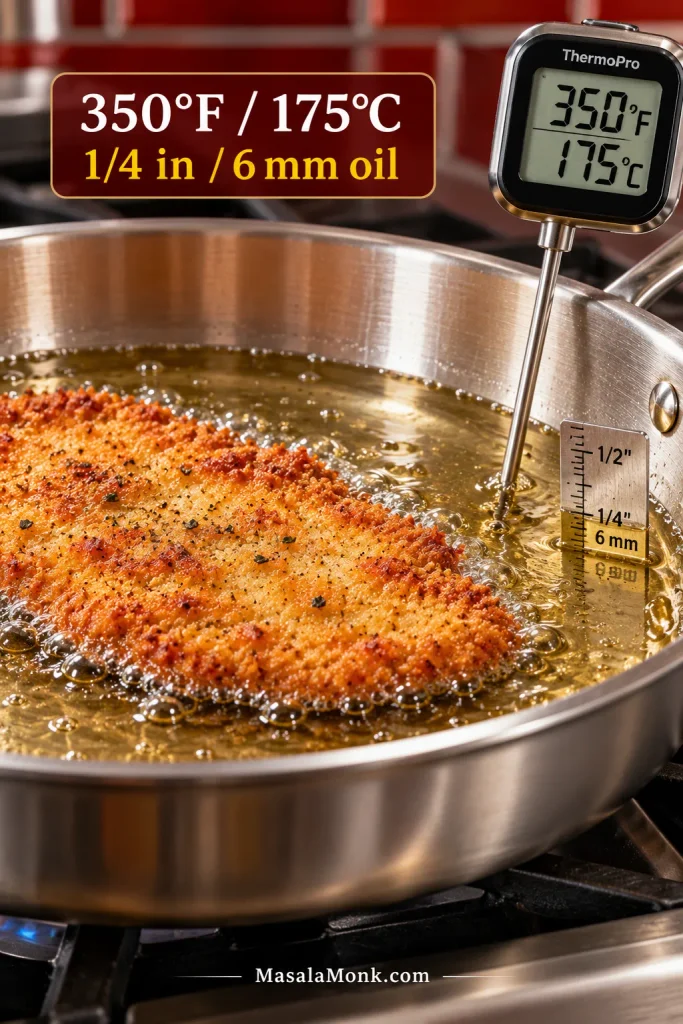
No oil thermometer? Look for steady, lively bubbling around the cutlet rather than smoke or violent splattering. Use the instant-read thermometer for the chicken itself, since the color of the crust cannot tell you the temperature at the center.
Prefer not to shallow-fry? Jump to the Air Fryer or Oven methods →
Sauce, Cheese and Rolls
Keeping the sandwich crisp mostly comes down to where the moisture sits and how long it stays there.
Marinara That Stays Put
Homemade and jarred marinara both work; consistency matters more than pedigree.
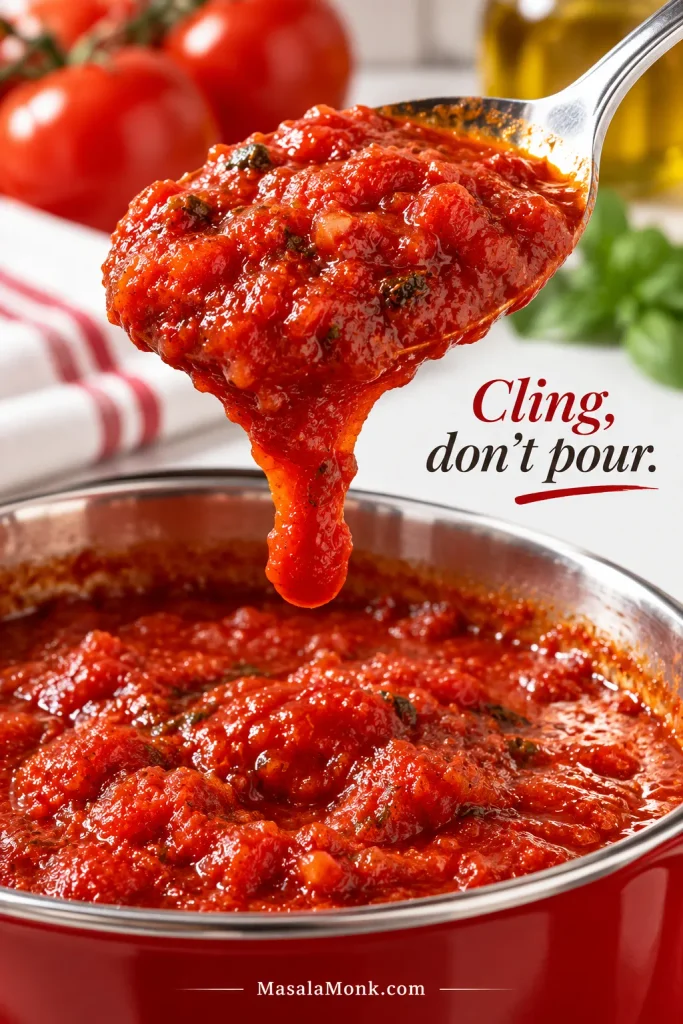
Keep most of the sauce through the middle of the cutlet and leave a few fried edges uncovered. If it spreads across the sheet pan before the cheese even goes on, give it another few minutes in the saucepan. A little crushed red pepper or Calabrian chile can bring heat if you want it, but the basic sandwich does not need a more complicated sauce.
Mozzarella Without the Extra Water
Low-moisture whole-milk mozzarella is the easiest default for a chicken Parm sandwich because it melts smoothly without releasing as much water as fresh mozzarella. It gives you the stretch and richness you want while being easier on the breading underneath.
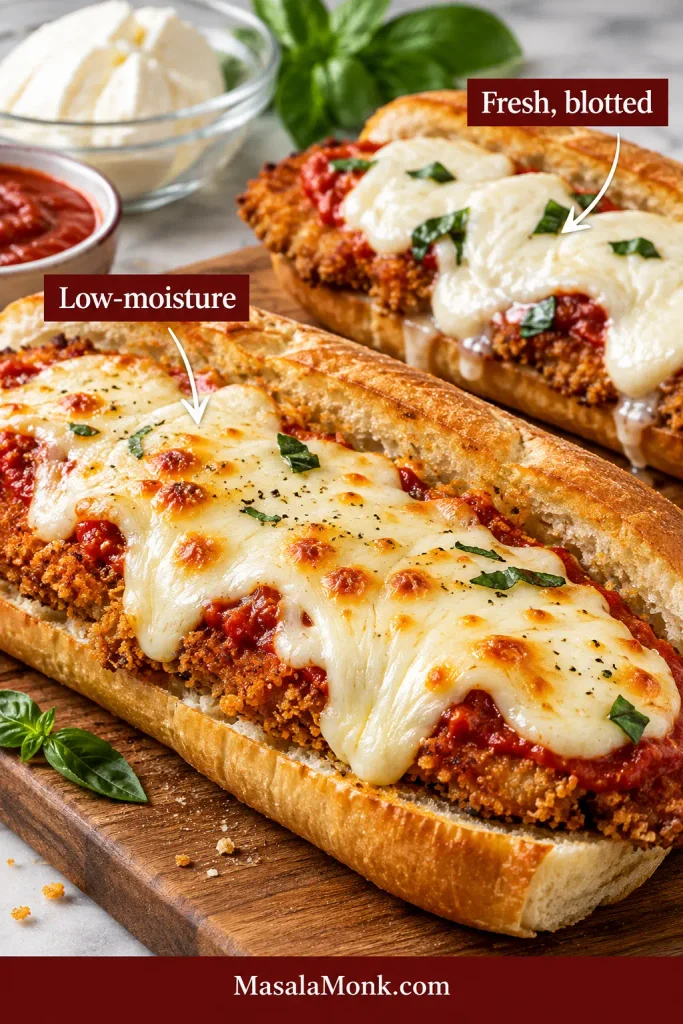
Low-moisture mozzarella also earns its keep in homemade mozzarella sticks, where excess water causes trouble inside the coating. Fresh mozzarella can still work here; blot it well first. Provolone can replace some of the mozzarella when you want a sharper, more old-school sub-shop flavor.
A Roll That Holds the Filling
The best bread for a chicken Parmesan sandwich is a sturdy but tender Italian or hoagie roll, about 6 to 8 inches / 15 to 20 cm long. Leave a hinge along one side if the roll allows it; that little bit of structure helps keep the hot filling from escaping out the back.
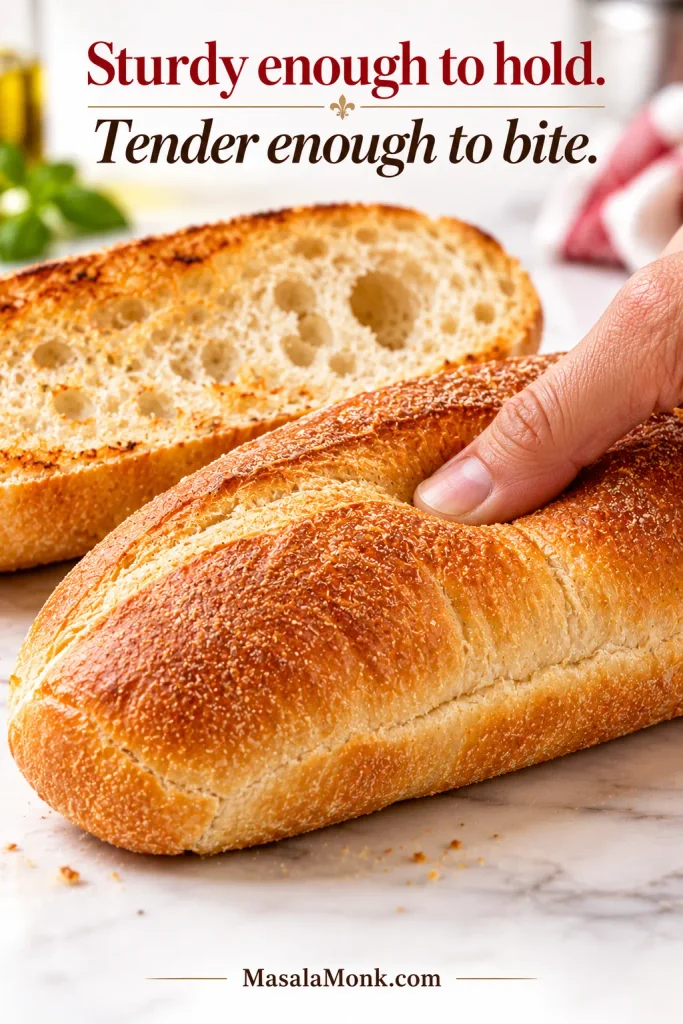
Ciabatta is another good choice when the center is tender. A very hard baguette is less forgiving. If the top half of the roll fights you every time you bite, the filling usually loses.
Toast only the cut faces with garlic-Parmesan butter. The surface touching the chicken gets a little protection while the rest of the bread stays soft.
Ready to cook? Back to the recipe ↑
Fix My Chicken Parm Sandwich
If the first cutlet loses a few crumbs, don’t start over. Look at what happened and correct the next one.
Before treating softness as a problem, decide what happened after assembly. If the sandwich was wrapped, some softening is expected; if it stayed unwrapped and still went limp, moisture or trapped steam is the more useful thing to troubleshoot.
Troubleshoot the Crust, Chicken and Sandwich
| Problem | What to check |
|---|---|
| Breading falls off | Dry the chicken well, keep the flour coat light, let excess egg drip away and press the crumbs on. Give the first side time to set before turning. |
| Crust gets dark too fast | The cutlet may be too thick or the oil too hot. Keep the chicken thin and even and the oil around 350°F. |
| Crust is pale and greasy | The oil has probably cooled down. Fry fewer pieces at once and let it recover before adding another cutlet. |
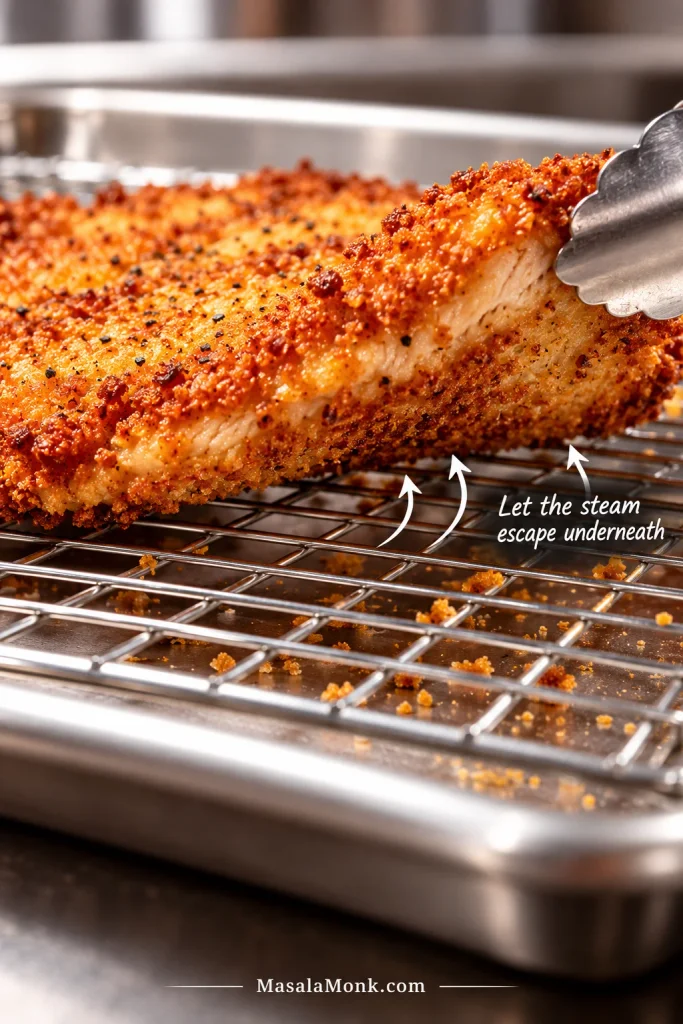
| The underside softens after frying | Hot chicken sitting flat traps steam underneath. Move cooked cutlets to a clean wire rack and leave them uncovered. |
| The chicken is dry | Use thin, even cutlets and pull each one as soon as it reaches 165°F / 74°C. Keep the later cheese melt brief. |
| The cheese won’t melt quickly | Use shredded low-moisture mozzarella and make sure the broiler is fully heated before the tray goes underneath. Thick slices take longer and keep the chicken under heat unnecessarily. |
| The roll turns soggy | Check the sauce first. Watery marinara, untoasted bread, sauce spread directly on the roll or a sandwich built too early will soften it quickly. |
| The filling slides out | The bread may be too hard, the cutlet may be the wrong size for the roll, or there may simply be too much loose sauce inside. A hinged roll helps too. |
Keep the Fried Crust Crisp After Frying
Back to the recipe ↑ · Air Fryer or Oven →
Air Fryer or Oven
You can cook the breaded cutlets without shallow frying. The air fryer is quicker but usually means batches; the oven gives you more room, and a wire rack helps the underside stay crisp.
Air Fryer
Lightly spray or brush both sides of the breading with oil. Arrange the cutlets in a single layer at 400°F / 205°C, working in batches if necessary, and flip halfway through.
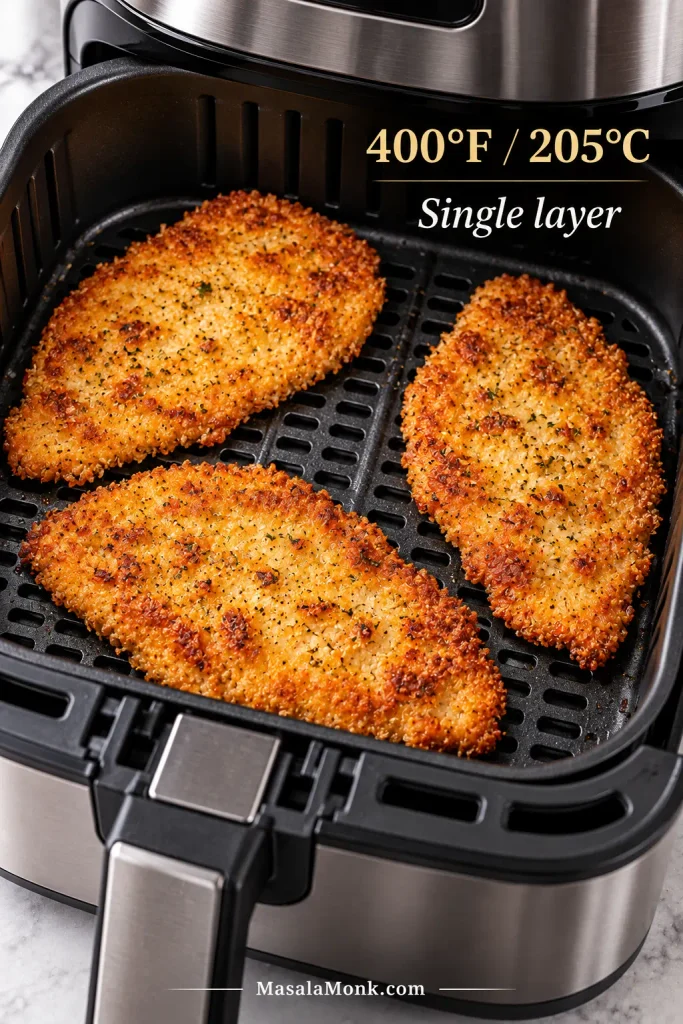
Begin checking around 7 minutes. Cutlets near ¼ inch / 6 mm may finish around 7 to 9 minutes; pieces closer to ⅜ inch / 10 mm can take longer. Cook each one until the thickest part reaches 165°F / 74°C.
Once the chicken is cooked, add the marinara and mozzarella and return it briefly to the air fryer, or use the broiler, just until the cheese melts.
Oven
Heat the oven to 425°F / 220°C. Set the breaded cutlets on an oiled oven-safe wire rack over a sheet pan and mist or brush the tops with oil. Bake until the raised panko ridges are deeply golden and the chicken reaches 165°F / 74°C, turning once if needed for even browning.
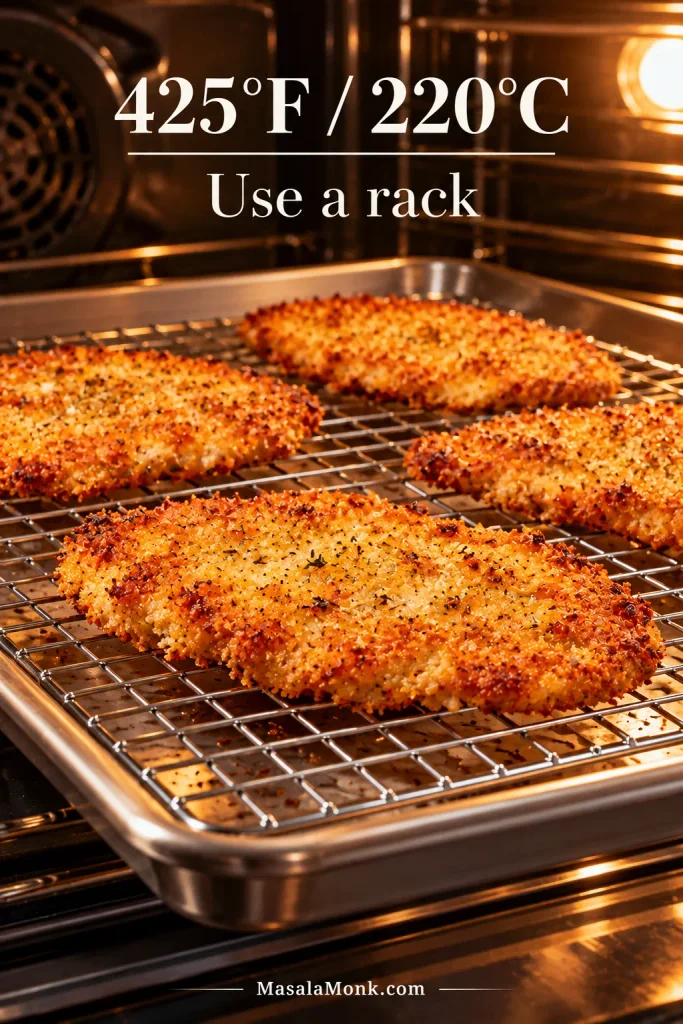
Cutlets close to ¼ inch / 6 mm may be ready around 10 to 12 minutes; pieces nearer ⅜ inch / 10 mm often need roughly 12 to 15 minutes. Let 165°F / 74°C in the thickest part make the final call. Add the marinara and mozzarella only after the chicken is cooked, then broil just until the cheese melts. The rack keeps hot air moving underneath instead of letting the bottom breading steam against the pan.
Shortcut night: use fully cooked frozen breaded chicken cutlets and heat them according to the package directions until crisp and hot through, then join the recipe at the sauce-and-cheese step. If the frozen product is raw or labeled not ready to eat, follow its package cooking directions and cook it to 165°F / 74°C before topping. Toast the rolls fresh.
Make Ahead and Reheat
You can prep almost everything ahead; just leave the sandwiches unassembled until you’re ready to eat. Slice and pound the chicken, grate the cheese, mix the garlic butter and have the marinara ready. Breaded cutlets can also be refrigerated, covered, for several hours before cooking.
Keep leftover chicken, sauce and bread separate whenever you can. Refrigerated cooked chicken is best used within 3 to 4 days.
Reheat the Chicken Without Giving Up the Crust
Whichever method you use, reheat leftover chicken to 165°F / 74°C in the center.
- Air fryer: reheat at 350°F / 175°C in a single layer and check after about 4 minutes. Give it longer if needed until the crust is hot and crisp again.
- Oven: reheat on an oven-safe wire rack at 375°F / 190°C. Allow roughly 8 minutes before checking, then continue only as long as needed for the edges to crisp again.
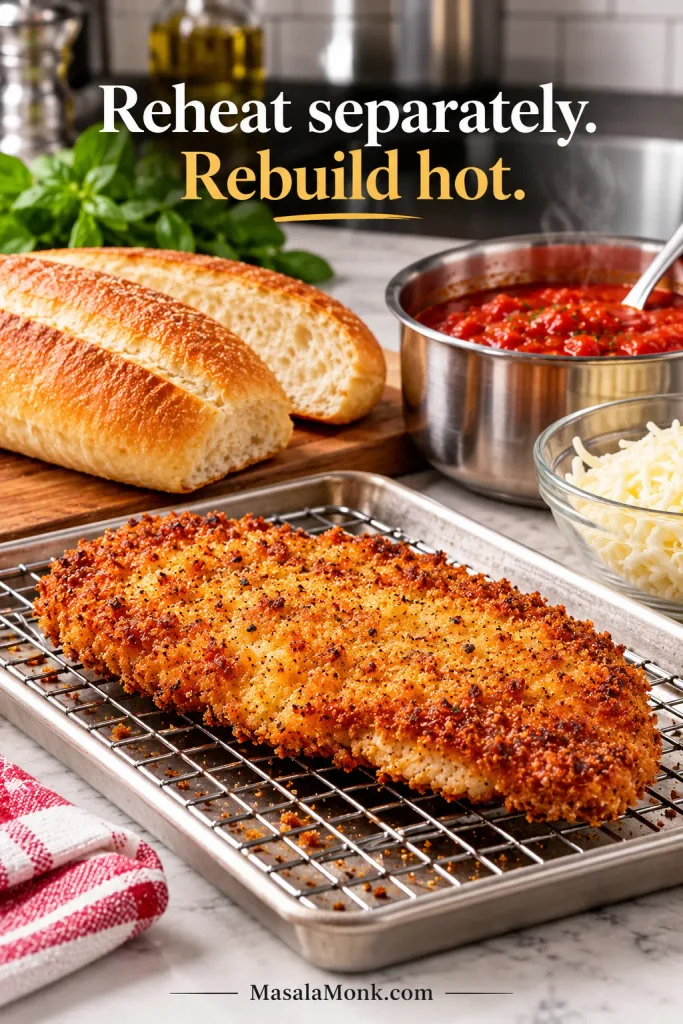
Warm the marinara separately and give the cut faces of the roll another quick toast, then rebuild the sandwich. Keep extra sauce alongside for dipping instead of spooning it over the whole sandwich. A microwave gets lunch hot faster, but the breading and bread will be softer.
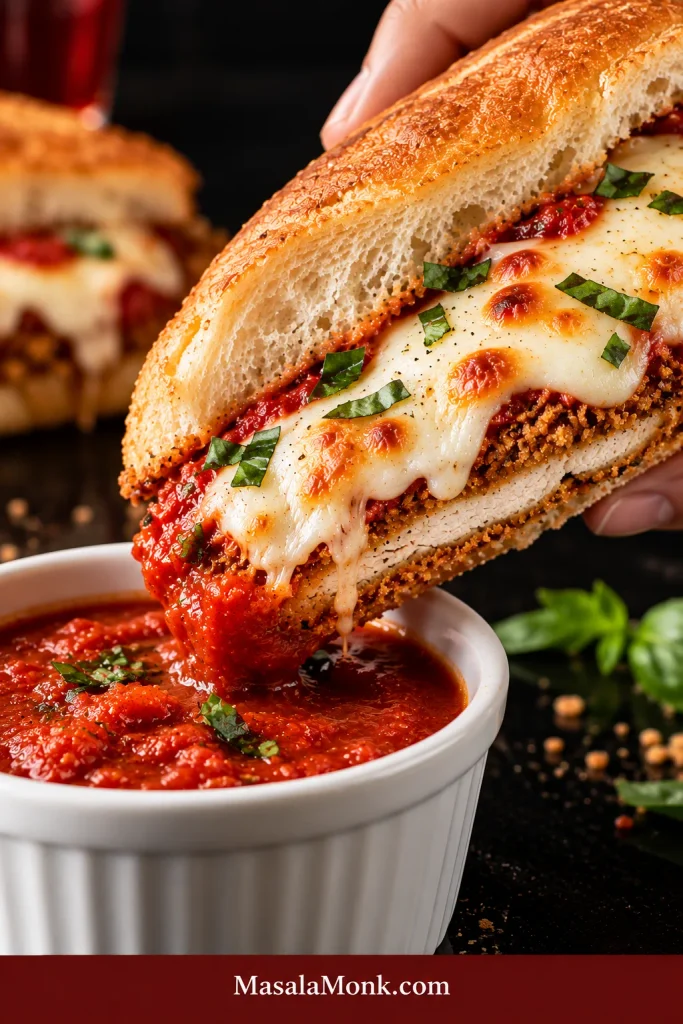
Pick the sandwich up while the cheese is still loose and the roll is warm. It should give slightly under your fingers, with a little tomato sauce peeking through the mozzarella and a few strips of fried crust still visible around the edges.
The chicken stays juicy. The roll bends instead of cracking or collapsing. That’s enough. Eat it while it’s hot.








