Posted on — Leave a comment

Chicken Marsala Recipe: Tender Chicken in Rich Mushroom Wine Sauce

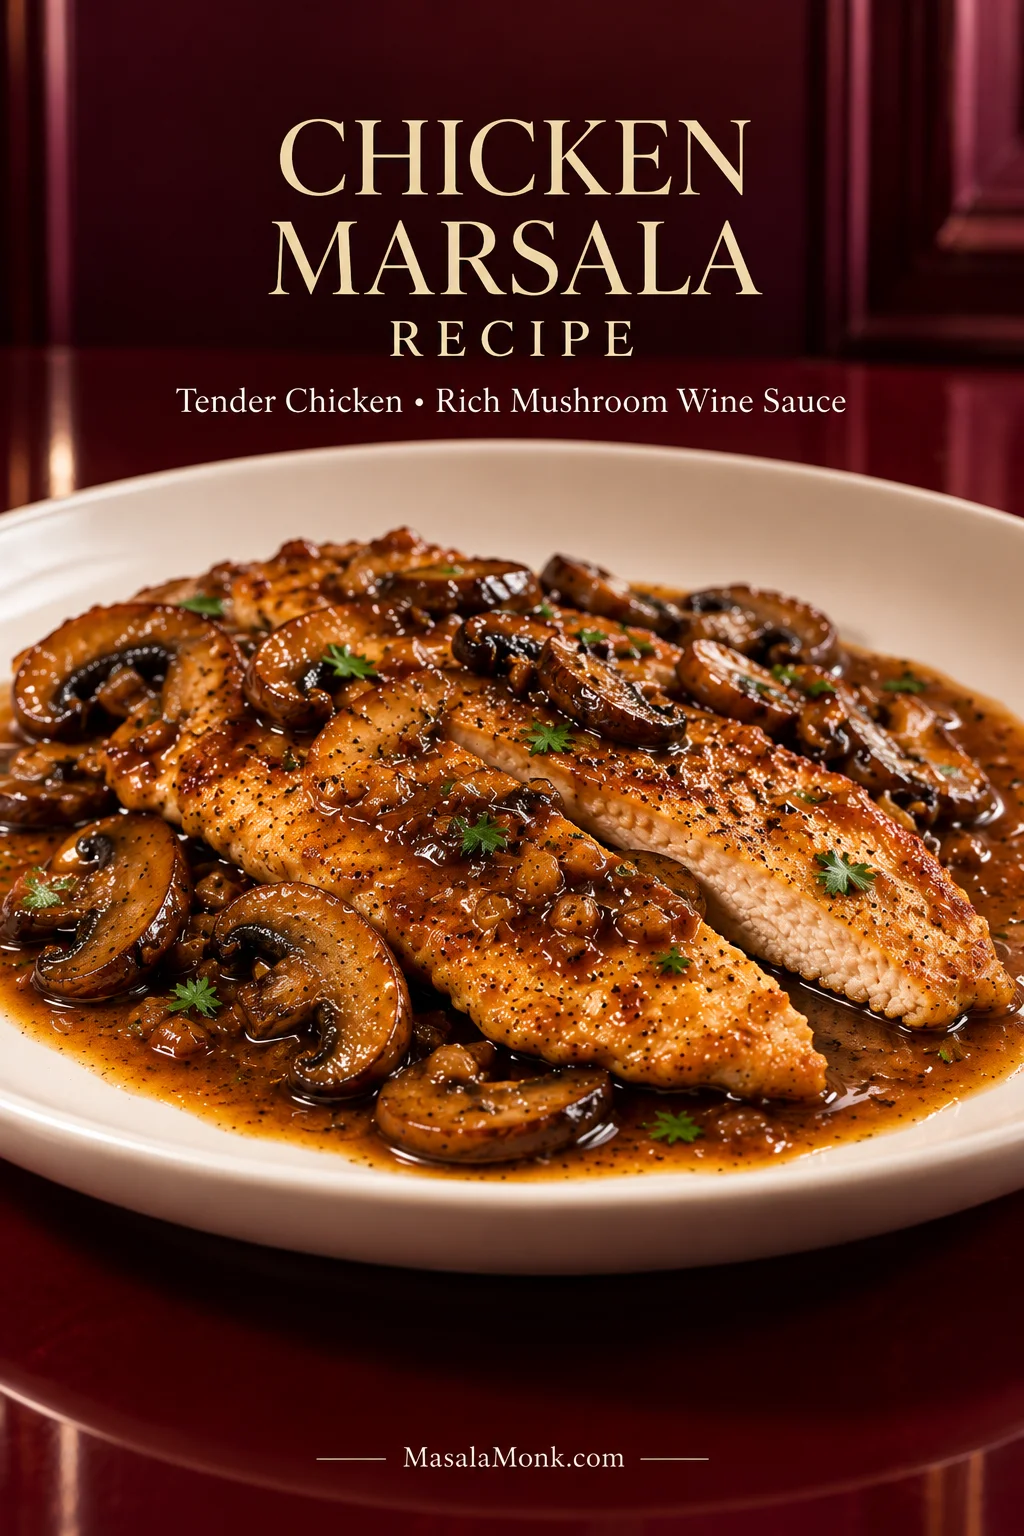
Thin golden Chicken Marsala cutlets on a white plate with browned sliced mushrooms and glossy dark Marsala wine sauce, garnished lightly with parsley.

The best part of Chicken Marsala is what happens when you cut into the first piece: the chicken is still juicy, mushrooms come with it, and the dark Marsala sauce runs straight into whatever is waiting beside it.

This Chicken Marsala recipe is an Italian-American skillet dish built around thin chicken cutlets, mushrooms, and Sicily’s fortified Marsala wine. It comes together in one skillet in about 45–50 minutes, but each stage gets the time it needs. The mushrooms have to cook off their water, the wine needs time to reduce, and thin chicken can dry out long before the sauce is ready.

This method keeps those jobs separate. Brown first. Reduce second. Return the chicken last. The mushrooms develop real color, the Marsala loses its raw edge, and the chicken only comes back when the sauce is nearly ready.

Three Moments That Decide the Sauce

Mushrooms

Wait until their released water is gone, the skillet sounds like it is frying again, and the edges are taking on real brown color.

Marsala

Roughly half the wine should remain, with the sharp alcohol smell replaced by something rounder, nuttier, and more inviting.

Sauce

Stop reducing when it lightly coats a spoon but still moves easily around the skillet.

Keep the browned chicken out of the skillet while all three stages happen. If the sauce needs another few minutes, the chicken does not.
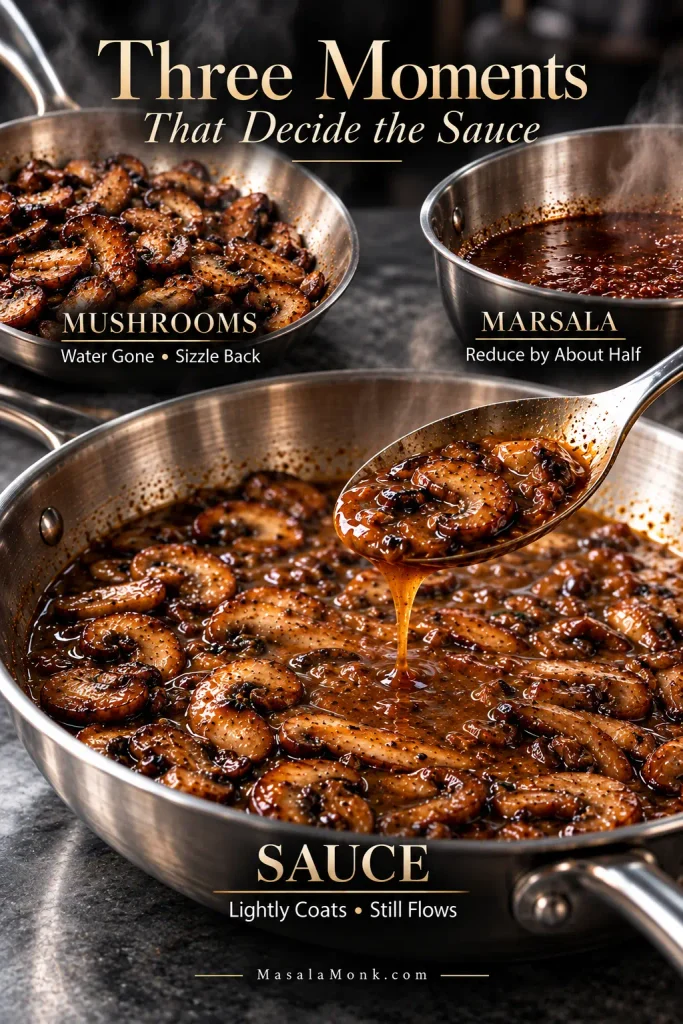
Three cooking stages for Chicken Marsala: browned mushrooms with no pooled water, reduced Marsala in a stainless pan, and glossy mushroom sauce flowing from a spoon.
These three checkpoints are really about sequencing. Letting each stage finish before the next begins prevents one ingredient from waiting in the pan while another catches up—the same principle that keeps the chicken tender and the sauce concentrated.

Chicken Marsala Recipe

Thin golden chicken cutlets and deeply browned mushrooms in a dark Marsala pan sauce, finished with cold butter until glossy and silky.

Serves
4

Prep
15 minutes

Cook
30–35 minutes

Total
45–50 minutes

Equipment

  • 12-inch / 30-cm skillet, preferably stainless steel
  • Meat mallet or rolling pin
  • Shallow plate or bowl for flour
  • Tongs or thin spatula
  • Wooden spoon or silicone spatula
  • Instant-read thermometer
  • Two plates for holding and serving the chicken

Chicken Marsala Ingredients

For the Chicken

  • 1½ lb / 680 g boneless, skinless chicken breasts, prepared as 4 similarly sized cutlets
  • 4 g kosher salt, about 1½ tsp Diamond Crystal or a scant 1 tsp Morton, divided, plus more to taste
  • ½ tsp / about 1 g freshly ground black pepper
  • ⅓ cup / 40 g all-purpose flour, for dredging; some will remain unused
  • 2–3 tbsp / 30–45 ml olive oil, as needed for browning

For the Mushroom Marsala Sauce

  • 4 tbsp / 56 g unsalted butter, divided; keep the final 2 tbsp cold
  • 10 oz / 285 g cremini or baby bella mushrooms, sliced about ¼ inch / 6 mm thick
  • 1 medium shallot / about 40–50 g, finely chopped
  • 2 garlic cloves / about 6 g, finely minced
  • 1 cup / 240 ml real dry (secco) Marsala wine
  • ⅔ cup / 160 ml low-sodium chicken stock
  • 1–2 tsp / 5–10 ml fresh lemon juice, only if needed
  • 2 tbsp / about 8 g chopped flat-leaf parsley

Slice the mushrooms, chop the shallot, mince the garlic, measure the wine and stock, and keep the finishing butter cold before you start cooking. Once the Marsala goes into the skillet, the sauce moves quickly.

Not sure which bottle to use? See which Marsala to buy before you heat the skillet.

How to Make Chicken Marsala

1. Prepare and brown the chicken

Cut the chicken evenly and dredge lightly

Prepare the chicken as 4 similarly sized cutlets. Two very large breasts can each be sliced horizontally through the middle. With smaller breasts, split only the thicker pieces as needed.

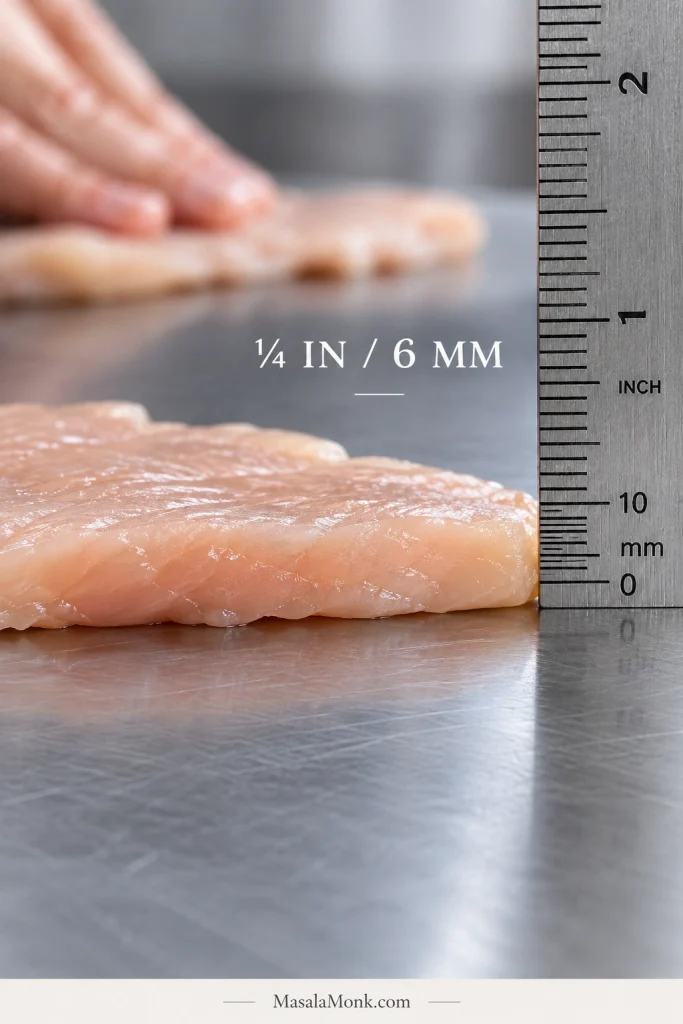
Pound the cutlets between parchment, plastic wrap, or inside a large food-safe bag until the thickest parts are about ¼ inch / 6 mm. Anything up to roughly ⅓ inch / 8 mm will work; evenness matters more than an exact measurement.

Pat the chicken dry. Season both sides with about three-quarters of the measured salt (roughly 3 g) and all of the black pepper. Reserve the remaining salt for the sauce.

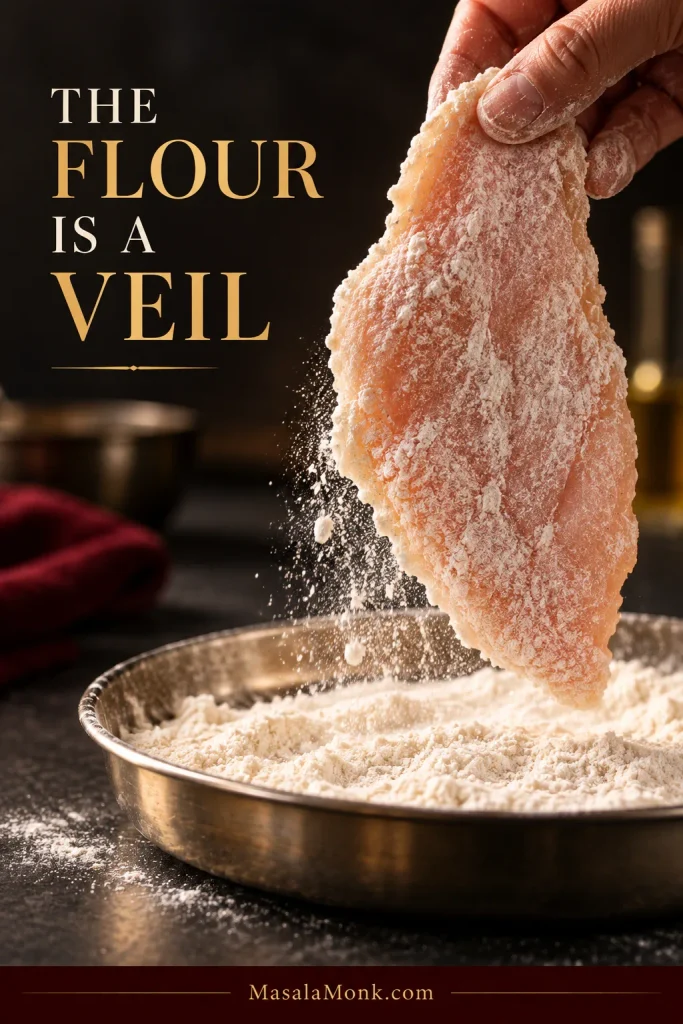
Spread the flour in a shallow dish. Dredge each cutlet lightly, then shake off the excess until the chicken is still visible beneath the coating. This is a dusting, not breading.
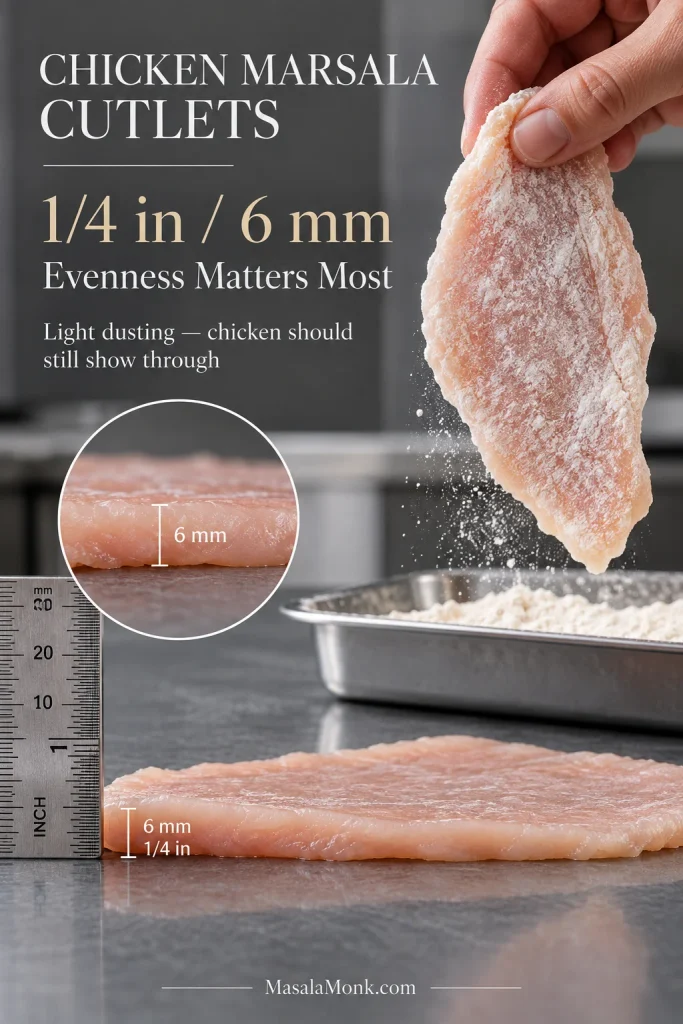
Raw chicken cutlets shown about ¼ inch or 6 mm thick beside a ruler, with a second cutlet receiving a very light dusting of flour.
Even thickness helps all four cutlets reach doneness at nearly the same time. Meanwhile, a barely visible flour coating creates useful browning and fond without carrying enough starch into the Chicken Marsala sauce to make it pasty.
Brown the cutlets without crowding the pan

Heat 2 tbsp / 30 ml olive oil with 1 tbsp / 14 g butter in the skillet over medium-high heat. When the butter is foaming and the oil is shimmering, add the first batch. Brown the chicken in 2 batches unless all four pieces fit comfortably without overlapping or crowding. Use the remaining tablespoon of oil only if the second batch needs it.

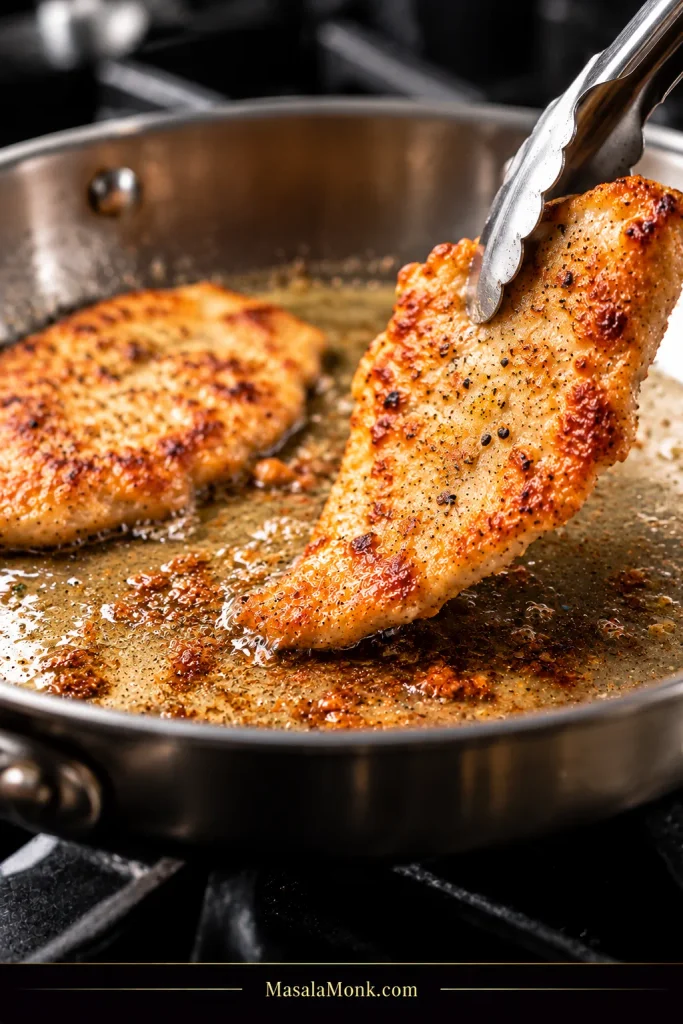
Cook until the first side develops deep golden patches, roughly 2½–3½ minutes. Turn and brown the second side for around 1½–2½ minutes. Thin cutlets and powerful burners can move faster, so watch the chicken rather than waiting for a timer.

Check one of the thickest pieces as each batch comes out of the skillet. With thin cutlets, sliding an instant-read thermometer horizontally in from the side usually makes it easier to reach the center. The USDA recommends 165°F / 74°C as the safe minimum internal temperature for poultry.

Move any cutlet that has already reached 165°F / 74°C to a clean warm serving plate and loosely cover it. Put pieces that still need cooking on a separate holding plate; they will finish briefly in the sauce later.

Before adding the mushrooms, look at the skillet. Keep the deep brown fond on the pan, but carefully wipe away any loose flour that has actually burned black.
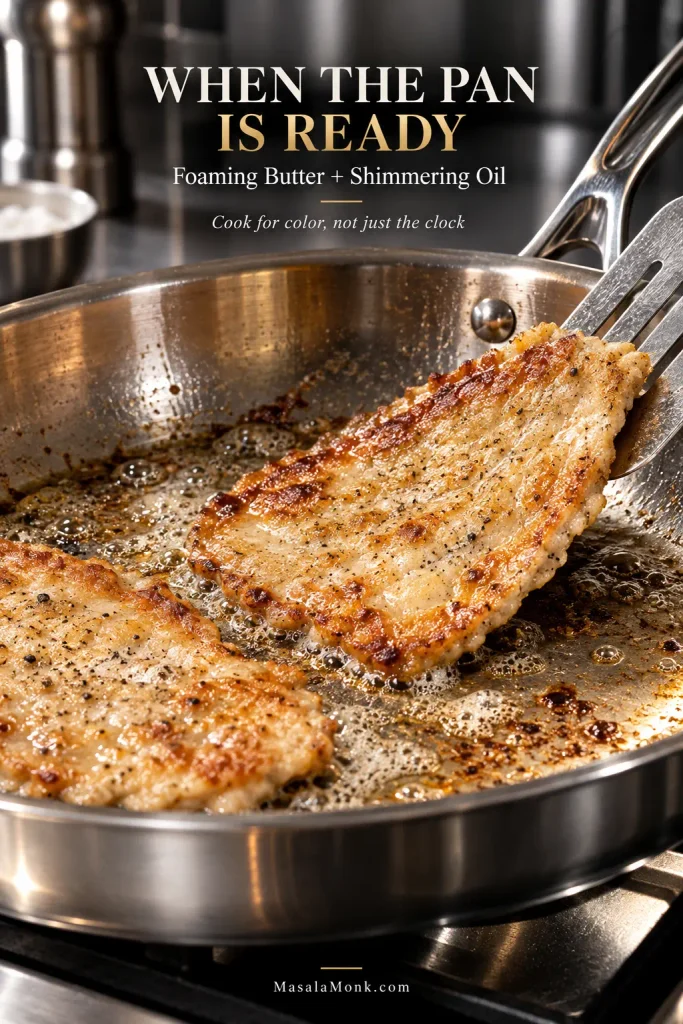
Thin floured chicken cutlets browning in a stainless-steel skillet with foaming butter, shimmering oil and a spatula lifting a golden underside.
Once the chicken hits properly heated fat, give the first side time to brown deeply. If a cutlet is still gripping the stainless steel, a few more seconds often help it release cleanly instead of tearing.

2. Brown the mushrooms after their water cooks away

Reduce the heat to medium and add 1 tbsp / 14 g butter followed by the mushrooms.

They may soak up the fat and leave the skillet looking dry at first. Nothing has gone wrong. Soon they will soften and release their own moisture.

Keep cooking, stirring occasionally, until that liquid evaporates and the sound changes from simmering back to sizzling. The mushrooms should smell more roasted than simply cooked, with properly golden edges, usually after 6–8 minutes total.

Add the shallot and cook for 1–2 minutes, until softened. Stir in the garlic for about 30 seconds. As soon as it smells fragrant, move on; browned garlic would bring bitterness to the sauce.
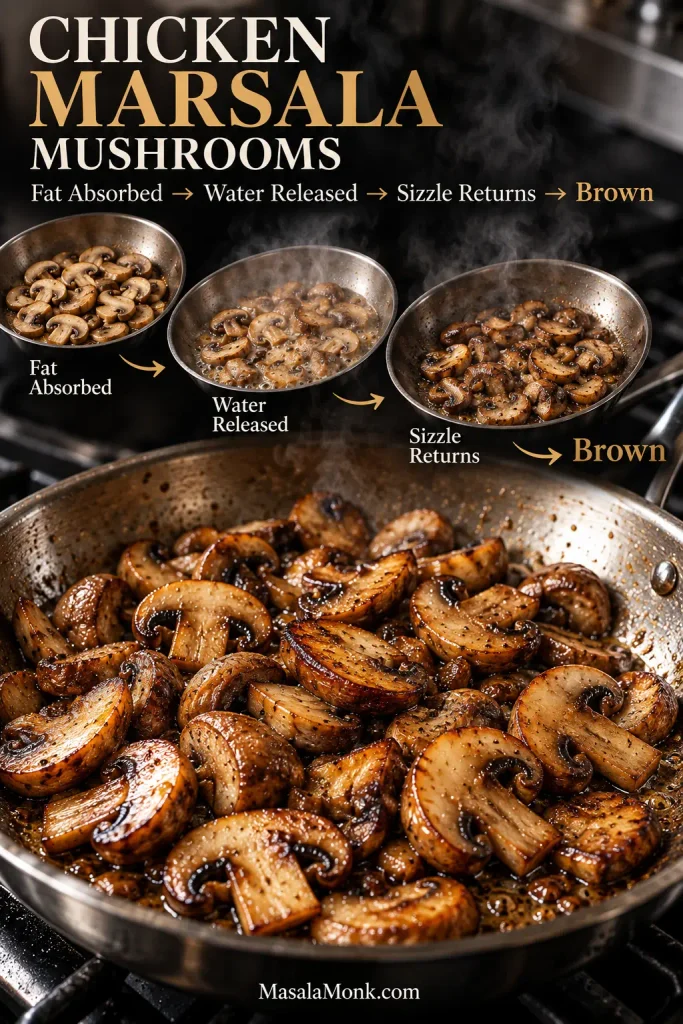
Sliced cremini mushrooms shown through stages of cooking, from absorbing fat and releasing liquid to a final dry-skillet stage with deeply browned edges.
Persistent puddles usually mean the mushrooms need either more evaporation time or more room in the skillet. Because browning cannot really begin while excess water remains, crowded mushrooms are better cooked in batches than left steaming together.

3. Reduce the Marsala before adding stock

Pour in the 1 cup / 240 ml dry Marsala and scrape up the fond as the wine begins to bubble.

Reduce the Marsala by roughly half before adding the stock. This usually takes 3–5 minutes. The sharp alcohol smell should fade as the wine becomes rounder, nuttier, and noticeably sweeter-smelling.
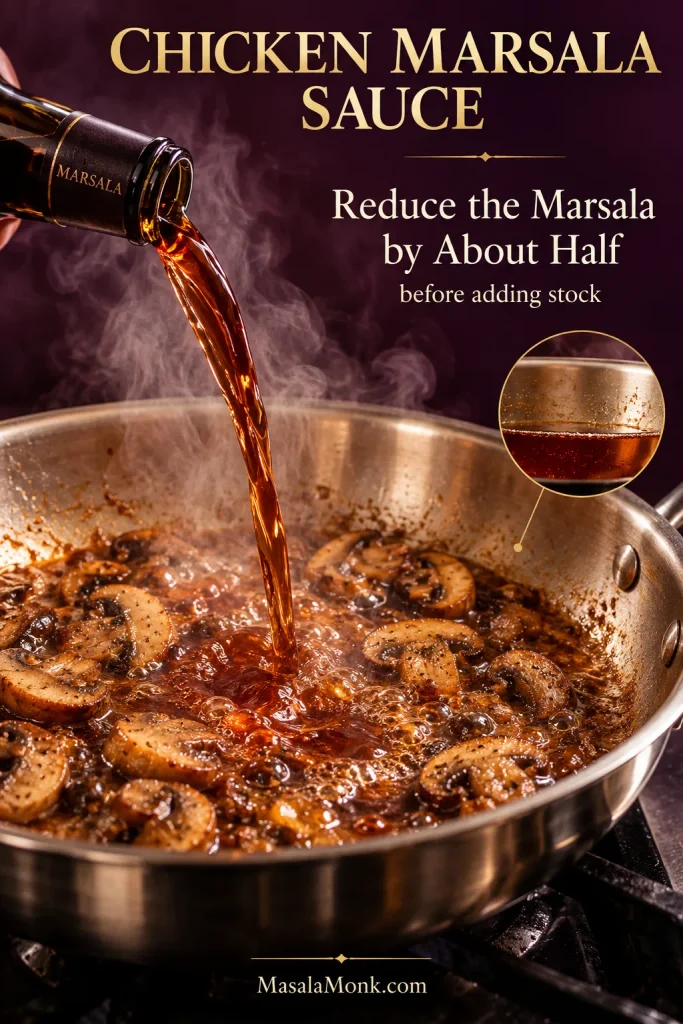
Dry Marsala wine being poured into a hot stainless-steel skillet with browned mushrooms, with a visual cue showing the wine reduced to about half its original level.
Use aroma and volume together when judging a Marsala wine reduction. Color alone can be misleading: the liquid may look dark before it is concentrated enough, whereas the fading raw-wine aroma tells you the reduction is actually progressing.

Add the ⅔ cup / 160 ml low-sodium chicken stock. Bring the sauce back to a lively simmer and cook until it leaves a thin coating on the back of a spoon but still runs easily when the spoon is tilted, usually another 3–5 minutes.

If some chicken still needs finishing, stop while the sauce is a touch looser; it will reduce a little more with the cutlets in the pan.

Tip the skillet slightly. You still want enough sauce gathering around the mushrooms to spoon generously over all four cutlets.
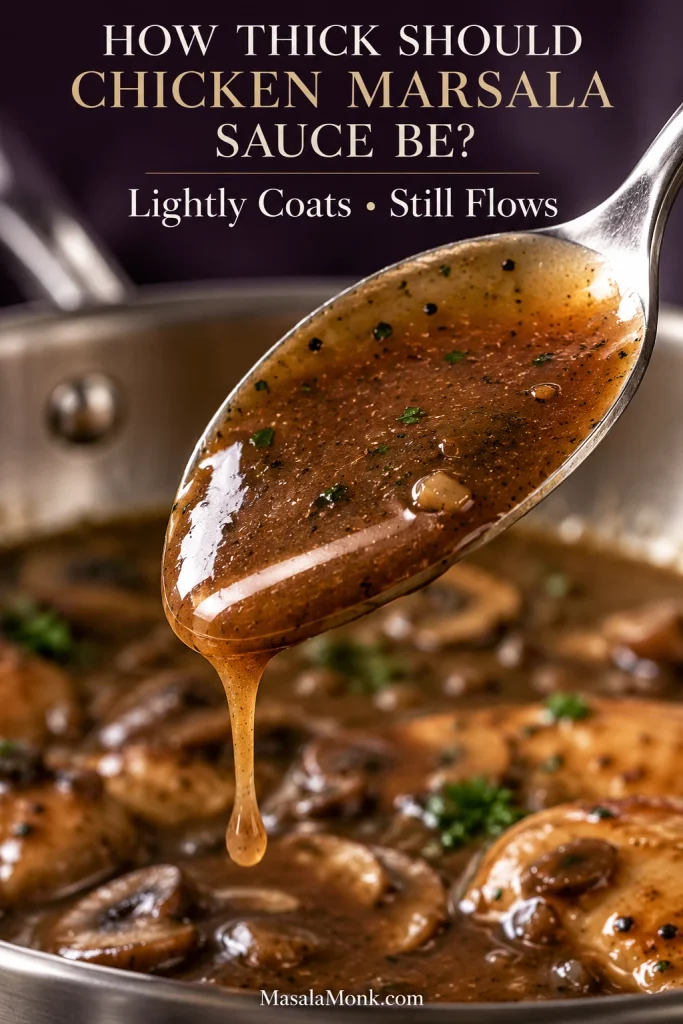
Close-up of dark glossy Chicken Marsala sauce lightly coating a metal spoon and dripping back into a skillet in a thin flowing ribbon.
Stop the Chicken Marsala sauce slightly looser than the final texture you want. The cold-butter finish adds a little body, and the sauce tightens again as it leaves the hot skillet, so over-reducing now can leave the plate short on sauce.

If the sauce is not reaching this texture, jump to the troubleshooting table and match the fix to both its flavor and consistency.

4. Finish the chicken, then swirl in the cold butter

Pour any juices from the holding plate into the sauce. Return only the cutlets that still need cooking and turn them through the simmering sauce until the thickest part reaches 165°F / 74°C.

Move those finished cutlets to the clean warm serving plate with the chicken that was already done, then remove the skillet from the heat.

Add the remaining 2 tbsp / 28 g cold butter a few pieces at a time, swirling or stirring until the sauce looks smooth, dark, and glossy enough to cling lightly to the mushrooms.
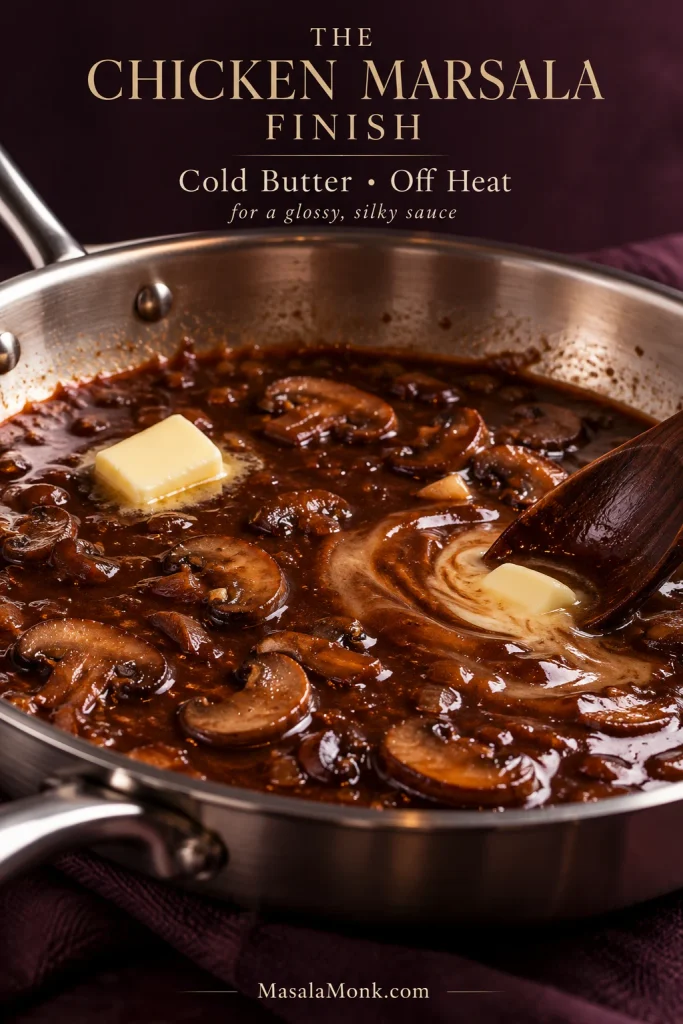
Cold butter pieces being swirled into dark mushroom Marsala sauce in a stainless-steel skillet off the heat, creating a glossy finish.
Cold butter emulsifies most smoothly once the skillet is off the heat. Add it gradually; greasy droplets on the surface often mean the pan is still too hot for the finish.

Taste before adding the remaining salt. A sauce that feels slightly too sweet or heavy may need ½ tsp / 2.5 ml lemon juice. Add it gradually. The lemon should brighten the sauce without becoming a flavor of its own.

Spoon the finished mushroom Marsala sauce over all four cutlets, scatter with parsley, and serve immediately.

When it’s right: Chicken Marsala should taste savory, mushroomy, and clearly wine-forward, with gentle sweetness but no sharp raw-alcohol bite. The sauce should cling lightly to the chicken, then run onto the plate when you cut into a piece.
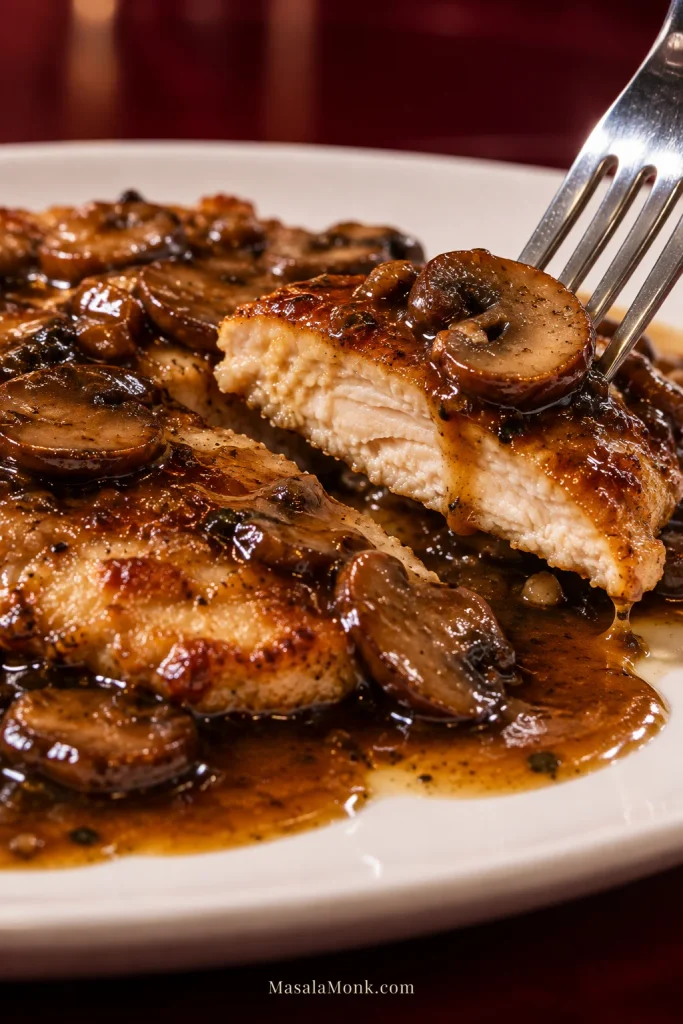
Close-up of a thin sliced Chicken Marsala cutlet showing a moist fully cooked interior, with a browned mushroom and glossy Marsala sauce running over the cut surface.
Sauce can make dry chicken easier to eat, but it cannot make it juicy again. With thin Chicken Marsala cutlets, tenderness comes from stopping the cooking promptly and letting the sauce finish on its own.

Which Marsala Should You Buy?

For Chicken Marsala, buy a real dry (secco) Marsala. You do not need an expensive bottle; drinking Marsala gives you better control over both wine flavor and salt than bottled cooking wine, which is often salted.

Marsala labels contain several different pieces of information. Fine and Superiore mainly describe aging/style categories, while Oro and Ambra describe color. Secco, semisecco and dolce describe sweetness. For this recipe, the word that matters most is secco: dry. The official Marsala DOC specifications lay out those classifications in detail.

Bottle labeled Marsala Secco beside a glass of amber-brown Marsala wine, with text explaining that secco means dry.
For this skillet, sweetness matters more than color or aging terms: look for secco, the label for dry Marsala.

Dry or sweet Marsala?

Dry Marsala gives the easiest savory balance because reduction concentrates the wine’s nutty, dried-fruit, and caramelized flavors. By the time it has reduced properly, the skillet should smell less like freshly poured wine and more like the dish you are about to eat.

Sweet Marsala works too. Expect a rounder, noticeably sweeter sauce. Keep the stock low-sodium and decide on lemon only after the sauce has reduced.

What about Marsala cooking wine?

Salt becomes more concentrated during reduction, which is why bottled cooking wine can make the finished sauce unexpectedly salty. Real Marsala simply gives you more control.

Look near sherry, port, Madeira, and other fortified wines rather than beside vinegars and bottled cooking sauces.

How to Read and Thicken Chicken Marsala Sauce

If your Chicken Marsala sauce is thin and watery, simmer it uncovered until the flavor concentrates. If it already tastes strong but is still too thin, use a very small cornstarch slurry instead of reducing away the rest of the sauce.

Use the flavor as your second clue. Watery flavor and watery texture usually mean the liquid simply needs more time to concentrate.

Once the Marsala flavor is already strong—perhaps salty enough or a little sweet—boiling away more liquid can leave you with very little sauce and too much intensity. A tiny starch adjustment makes more sense there.

The texture can also be right while the sauce still looks flat. Cold butter stirred in away from high heat gives it more richness and shine.

Taste before you thicken: reduction, starch, and butter solve different problems.
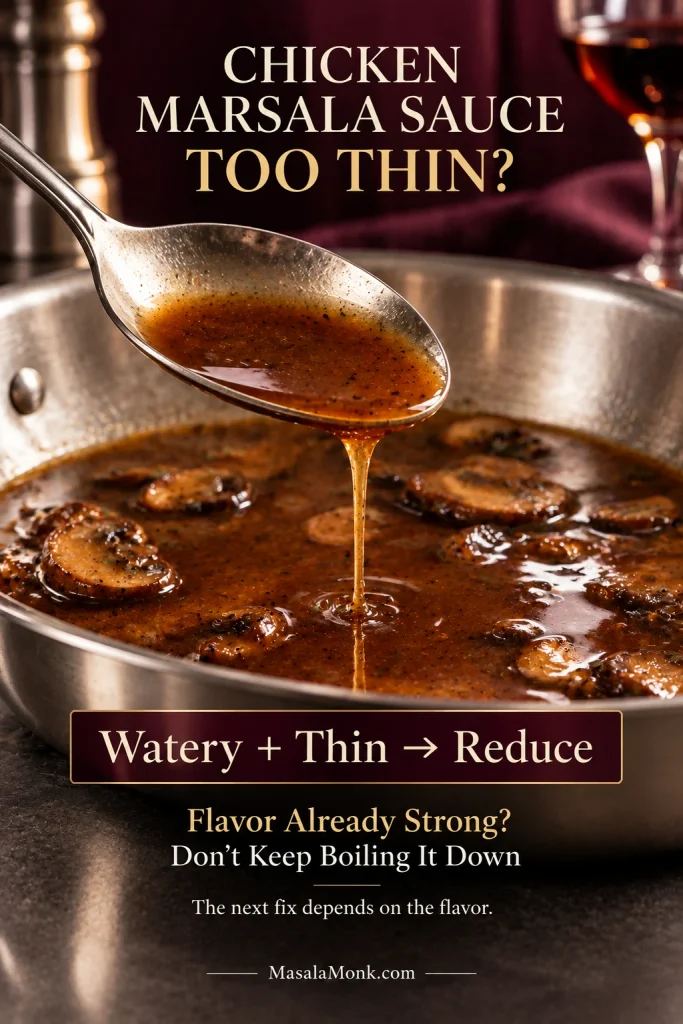
Thin Marsala mushroom sauce dripping in a narrow stream from a spoon over a stainless-steel skillet, with guidance to reduce watery sauce but avoid over-reducing strongly flavored sauce.
Taste before reducing further: watery flavor needs evaporation, while already-concentrated flavor may need a tiny starch adjustment instead.

Need the exact rescue for the pan in front of you? Jump to Fix My Chicken Marsala Sauce for the full problem-and-solution table.

Want mushrooms and cream to lead instead? The creamy mushroom sauce recipe begins with the same useful step: getting real color on the mushrooms.

Does Chicken Marsala Need Cream?

No. The recipe above gets enough body from reduced Marsala and stock, a little flour carried over from the chicken, and the butter stirred in at the end. Without cream, the wine and browned mushrooms stay darker and more distinct.

If thin sauce is the reason you are considering cream, read the sauce first; cream changes the style of the dish rather than fixing the underlying reduction.

Prefer a softer, rounder sauce? Simmer the stock with the reduced Marsala for about 2 minutes, then stir in ⅓ cup / 80 ml heavy cream. Increase that to ½ cup / 120 ml for a richer sauce. Let it simmer until close to the consistency you want, leaving it slightly loose when any chicken still needs finishing.

Return the cutlets that need more cooking and bring them to 165°F / 74°C, then transfer the chicken out of the skillet. Take the pan off the heat and finish the creamy sauce with 1 tbsp / 14 g of the reserved cold butter; the cream supplies enough richness that you do not need the full 2 tbsp finishing amount.

Heavy cream stays smoother under gentle heat than half-and-half. Half-and-half makes a thinner sauce and is more prone to splitting; milk is even more likely to split. Add any lemon after the skillet is off the heat, a few drops at a time.
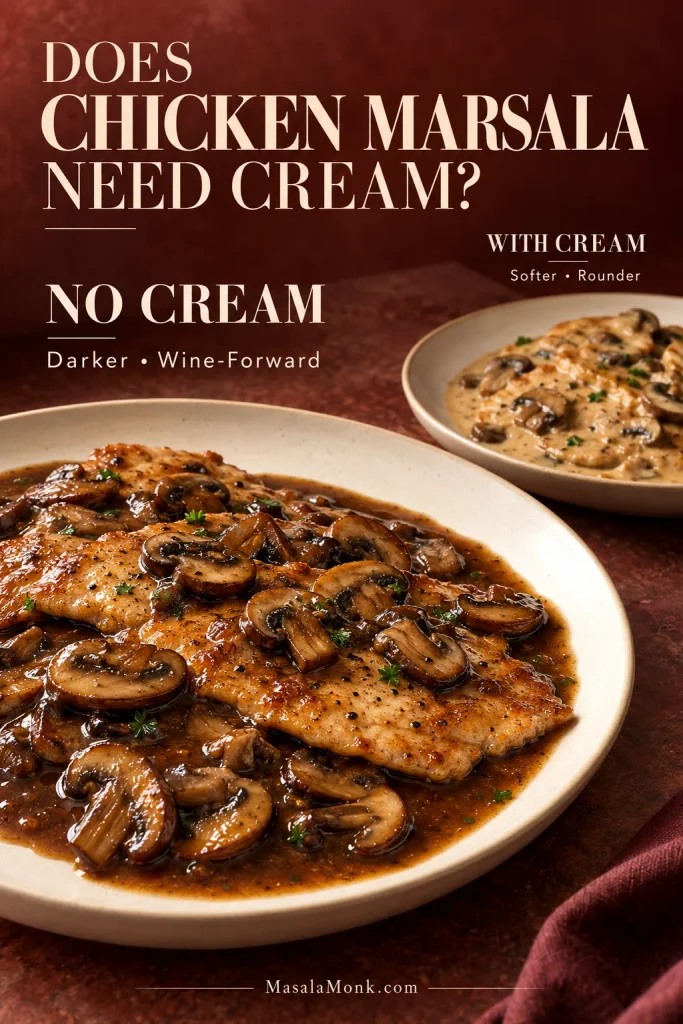
Two versions of Chicken Marsala: a dominant plate with dark no-cream mushroom Marsala sauce and a smaller plate with a pale creamy mushroom sauce.
Cream changes the style of Chicken Marsala; it cannot replace the flavor developed by properly browning and reducing the sauce first.

Want More Marsala Sauce?

Serving the chicken over creamy mashed potatoes, pasta, noodles, or polenta usually calls for a little more sauce than serving the cutlets alone.

Increase the Marsala to about 1¼ cups / 300 ml and the stock to about ¾ cup + 1 tbsp / 200 ml. That is roughly one quarter more of each. The larger volume will take longer to reduce, so get the sauce base where you want it before finishing the chicken and swirling in the butter.

Potatoes and pasta will absorb plenty on the plate, so stop with the sauce slightly looser than you would for chicken served on its own.
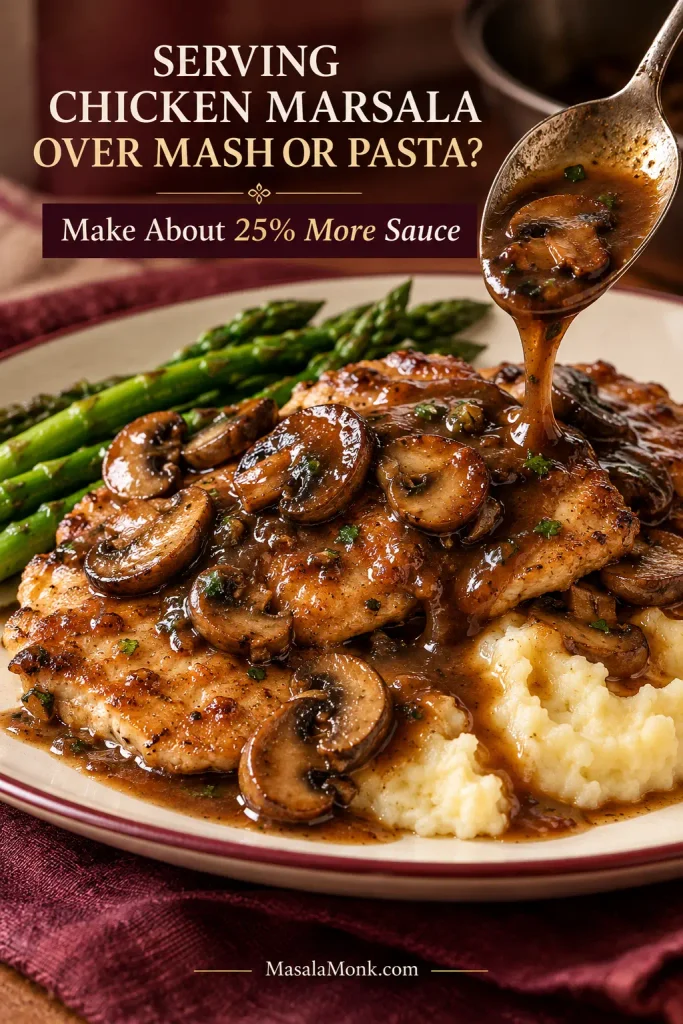
Thin Chicken Marsala cutlets over mashed potatoes with asparagus, browned mushrooms and glossy Marsala sauce being spooned over the chicken and potatoes.
For Chicken Marsala with mashed potatoes, let the sauce do two jobs: lightly coat the chicken and then run into the mash underneath. Spoon it on just before serving so the browned surface stays visible instead of becoming completely saturated.

What to Serve with Chicken Marsala

The best Chicken Marsala sides either catch the sauce or bring something fresh to the plate.

For catching the sauce

  • Mashed potatoes — a classic choice and one of the best ways to catch the sauce.
  • Buttered pasta — especially good with a slightly looser batch of sauce.
  • Polenta — mild, soft, and excellent when you want the Marsala sauce to stay prominent.
  • Egg noodles — soft and mild enough to catch mushrooms and sauce without competing with them.
  • Crusty bread — ideal for swiping up the sauce while keeping the chicken at the center of the meal.

For something fresh or green

  • Green beans almondine — crisp-tender beans, toasted almonds, and lemon add welcome crunch.
  • Asparagus — roasted or quickly sautéed.
  • Broccoli or broccolini — simply seasoned so the sauce stays in charge.
  • Arugula or another sharp green salad — especially good beside the creamy sauce.

A colder, sharper contrast comes from cucumber salad with vinegar, dill, and onion, which cuts through the buttery sauce beautifully.

A classic plate is mashed potatoes with green beans or asparagus. The potatoes catch every spoonful; the green side keeps the next bite feeling fresh.

What wine should you drink with it?

You do not need Marsala in the glass. A fresh, light-bodied red such as Pinot Noir, Gamay, or Frappato works well with the darker sauce. A dry white with enough acidity can cut through the butter while staying light beside the mushrooms.

Fix My Chicken Marsala Sauce

Taste the sauce before changing it. A sauce that’s thin and watery needs a different fix from one that’s thin but already concentrated.

Sauce concentration and flavor problems

ProblemLikely cause + best rescue
Watery and weakThere is still too much unconcentrated liquid. Simmer uncovered until both flavor and texture strengthen.
Flavorful but still too thinMore reduction may make the sauce too salty or sweet. Mix ½ tsp / about 1.5 g cornstarch with 1 tsp / 5 ml cold water; whisk in gradually and simmer briefly, stopping as soon as the sauce lightly coats a spoon.
Hardly any sauce remainsIt has reduced too far. Add low-sodium stock 1 tbsp / 15 ml at a time. If the Marsala flavor has genuinely faded, add only a small splash of wine and simmer long enough for the raw edge to disappear.
Sharp or boozyThe Marsala needs more reduction. Let the sauce simmer until the raw-wine aroma softens.
Barely tastes of MarsalaToo much stock or cream may be diluting the wine. Reduce gently while the sauce is loose; next time concentrate the Marsala before adding other liquids.
Too sweetCheck the salt first. If the sauce still tastes heavy, add lemon juice ½ tsp / 2.5 ml at a time.
Too saltyLoosen with unsalted stock or water 1 tbsp / 15 ml at a time. Avoid reducing it hard again; if the flavor is balanced but the sauce becomes too thin, use the small cornstarch rescue above instead.

Texture, mushroom and chicken problems

ProblemLikely cause + best rescue
Greasy or separatedPull the skillet off the heat and whisk or swirl vigorously. If it still looks separated, whisk in 1 tsp / 5 ml warm water or stock at a time until the sauce comes back together.
Mushrooms are pale and wetBefore adding the shallot or wine, keep cooking until the released moisture is gone and the skillet starts sizzling again. Use batches next time if the pan is crowded.
Chicken is dryIt cooked too long before or after the sauce was ready. Spoon generously with sauce now; next time stop cooking as soon as the cutlet reaches temperature. For more on thickness, temperature, and dryness, see the baked chicken breast guide.
Flour coating is gummyThe dredge was too heavy or the chicken spent too long in the sauce. Use a lighter dusting and keep the final return brief.
Creamy sauce splitPull the skillet completely off the heat and whisk in a small splash of heavy cream or 1 tsp / 5 ml warm water at a time until it comes back together. Next time, keep the creamy sauce below a hard boil.

Once the sauce tastes balanced and moves easily around the pan, stop fixing it.

Variations and Substitutions

Chicken thighs

Boneless, skinless thighs work well and tolerate a little more cooking than thin breast cutlets. Trim visible fat and allow more time to cook through. They are safe at 165°F / 74°C, though thigh meat generally becomes more tender around 175°F / 79°C.

Their extra richness works especially well with the no-cream sauce.

Different mushrooms

Cremini are the easiest default because they brown well and bring more savoriness than plain white mushrooms without much extra cost. White buttons still work. For more depth, replace 2–3 oz / 55–85 g with shiitake or another flavorful fresh mushroom.

When mushrooms deserve to be the main event, Mushroom Stroganoff takes them into a creamy savory sauce for noodles, rice, mash, or polenta.

Without mushrooms

You can leave them out, but their browned flavor normally becomes part of the sauce. Build good color on the chicken, keep the shallot, and use a flavorful low-sodium stock.

What can replace Marsala?

No substitute tastes exactly the same. Dry Madeira is the closest useful alternative; dry sherry also makes an excellent mushroom wine sauce with its own character.

Does the Alcohol Cook Out of Chicken Marsala?

A short simmer should not be treated as a guarantee that all alcohol has disappeared. Strict alcohol avoidance calls for a stock-based mushroom pan sauce instead of relying on cooking time to remove the Marsala.

It will taste different, but it can still be a very good chicken-and-mushroom dinner. If you’d rather skip Marsala entirely and still want a creamy mushroom sauce, Cream of Mushroom Chicken is the better direction.

Pancetta or prosciutto

Crisp about 2 oz / 55 g finely diced pancetta or prosciutto before browning the chicken. Leave a little rendered fat in the skillet, then return the crisp pieces near the end. Season cautiously; the salt contributed by the cured meat becomes much more noticeable as the sauce reduces.

If lemon, butter, and capers are what you want, Chicken Piccata is the better fit. It uses the same idea of thin golden chicken but takes the pan sauce in a much brighter direction.

Make-Ahead Chicken Marsala Without Dry Chicken

If you only want to get the prep out of the way, slice the mushrooms and cut/pound the chicken into cutlets up to 1 day in advance. Refrigerate them separately until cooking.

To get further ahead, make the mushroom-Marsala sauce base through the stock-reduction stage and leave out the finishing butter. Cool it, cover it, and refrigerate for up to 2 days.

The chicken is best browned fresh while the sauce reheats. When that is not practical, cook the chicken fully to 165°F / 74°C before chilling it; do not partially cook poultry for later finishing.

At serving time, warm the sauce base gently, then add the chilled cooked chicken and reheat it to 165°F / 74°C without prolonged simmering. Transfer the chicken out, take the skillet off the heat, and swirl in the finishing butter. Taste for salt and lemon after the sauce is back together.
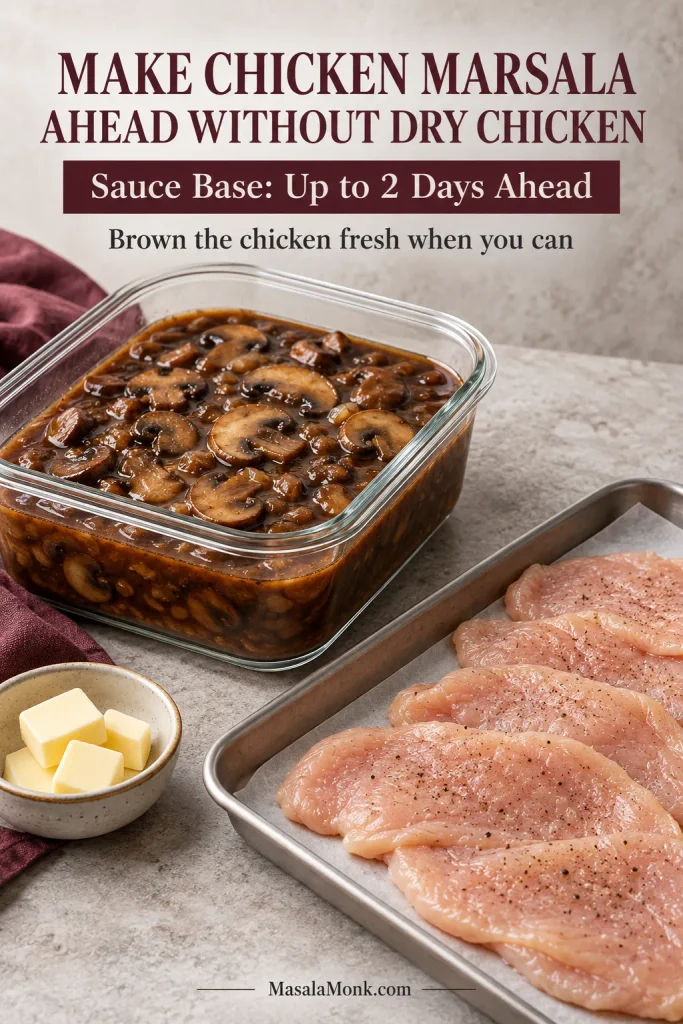
Glass container of mushroom Marsala sauce base beside separate raw thin chicken cutlets and a small bowl of cold butter, illustrating make-ahead preparation.
For the best make-ahead result, prepare the Marsala sauce base ahead, then brown the chicken and finish with cold butter closer to serving.

Cooking for more people? Double the ingredients, then brown the chicken and mushrooms in batches. More food in the same skillet means more steam and less browning, and the larger volume of wine and stock will need more reduction time.

How to Store, Reheat and Freeze Chicken Marsala

Refrigerate leftovers within 2 hours and keep them covered for up to 3–4 days. Reheat gently in a covered skillet, adding low-sodium stock a spoonful at a time if the sauce has tightened. Bring the chicken back to 165°F / 74°C and take it off the heat promptly; prolonged simmering only dries it further.

Freezing works best with the no-cream sauce. Pack the chicken in a freezer-safe airtight container with enough sauce to keep it protected and freeze for up to 3 months for best quality. Thaw overnight in the refrigerator, then reheat gently to 165°F / 74°C, loosening the sauce with a little stock when needed.


When Chicken Marsala is right, nothing on the plate feels buried. The chicken still has its golden edges, the mushrooms taste browned rather than boiled, and the sauce is dark, smooth, and loose enough to run onto whatever you put beside it.

That is the moment to stop cooking and eat it.
Posted on — Leave a comment

Chicken Tetrazzini Recipe: Creamy, Cheesy & Easy Casserole

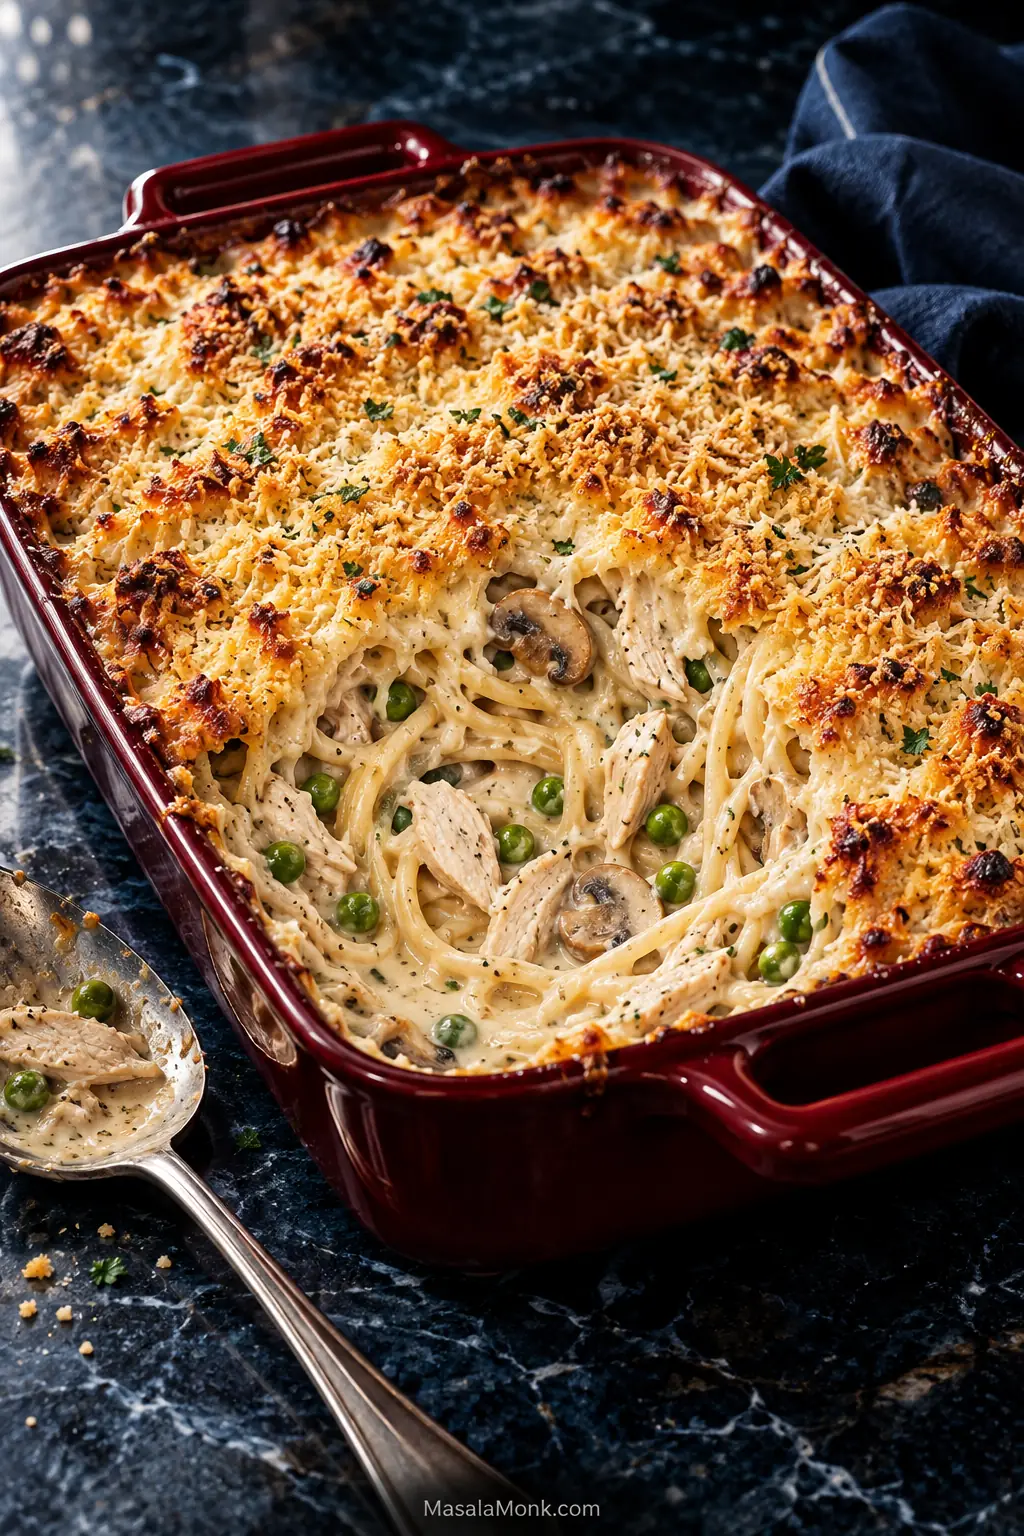
Chicken tetrazzini in a burgundy baking dish with golden breadcrumb topping and a creamy center showing spaghetti, chicken, mushrooms and peas.

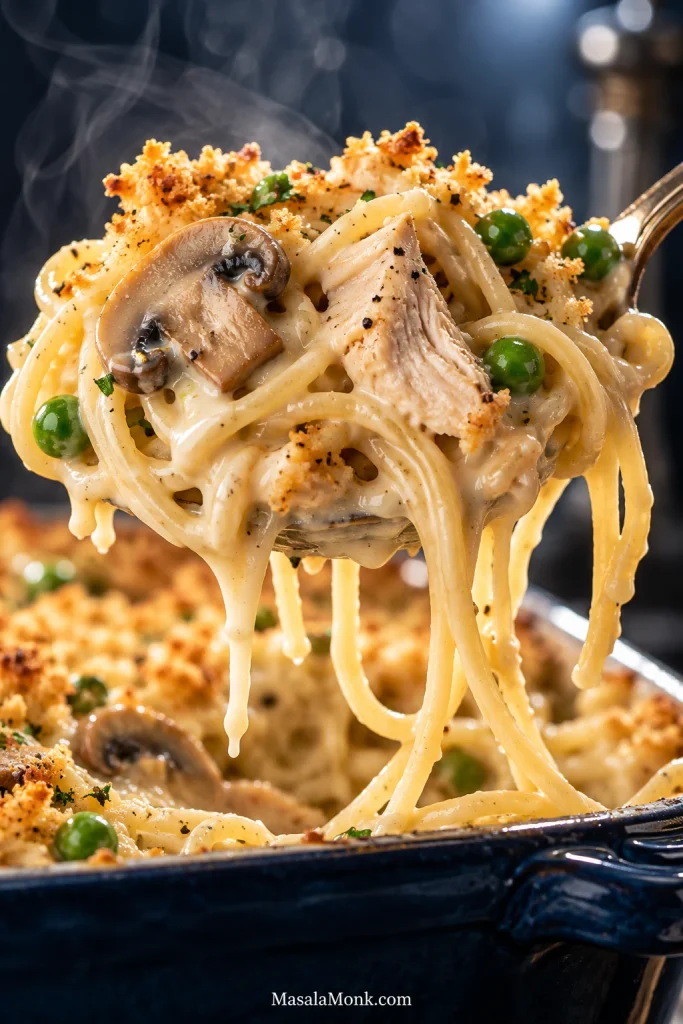
A good chicken tetrazzini recipe comes out of the oven bubbling at the edges, golden across the top and creamy underneath. The spaghetti keeps a little bite, the chicken sits in mushroom-Parmesan sauce, and when you scoop into the pan, the sauce still moves between the noodles instead of leaving you with a dry square.

This is the kind of comfort-food casserole that makes especially good sense when yesterday’s chicken needs to become tonight’s dinner. Rotisserie chicken works beautifully too. With the chicken already cooked and the sauce coming together in one main pan, most of the work is finished before the casserole reaches the oven.

Chicken tetrazzini is an American baked pasta casserole typically made with cooked chicken, long pasta, mushrooms and a creamy sauce, then finished with cheese or breadcrumbs. The trick is to let it look saucier before baking than you want it on the plate. The noodles keep taking up liquid as they bake and rest, so a casserole that already looks thick going into the oven can finish much drier than expected.

Firm pasta
Cook 2 minutes shy of al dente.

Browned mushrooms
Cook off their released liquid.

Pourable sauce
It should move between the noodles.

Short bake
Stop once hot and bubbling.

Make the Chicken Tetrazzini

Spaghetti, cooked chicken and browned mushrooms go into a pourable Parmesan cream sauce, then get a layer of mozzarella and crisp Parmesan-panko crumbs. This main version makes the sauce from scratch rather than using canned soup; the old-fashioned condensed-soup version is included farther down. The oven is mostly there to heat everything through and brown the top, not to cook the casserole until it stiffens. Because the chicken and sauce are already cooked and the pasta is nearly cooked, extra oven time mostly means more moisture loss rather than a better casserole.

Serves
8

Prep
20 minutes

Cook
50 minutes

Total
About 1 hour 20 minutes

Oven: 375°F / 190°C
Pan: 9×13 in / 23×33 cm, roughly 3 qt / 2.8 L
Rest: 10 minutes
Timing note: Times assume cooked chicken is ready to use.

A shallow dish or one filled close to the rim is worth setting on a rimmed sheet pan before baking. It is cheap insurance against bubbling sauce.

Cooking for fewer people? An 8×8-inch pan is the closest match for the depth of a half batch. A 9×9 also works, but the casserole will be shallower, so start checking it earlier.

Equipment

  • Large pasta pot, about 6–8 qt / 5.5–7.5 L
  • Large 12-inch / 30 cm skillet, sauté pan or Dutch oven
  • Colander
  • Whisk
  • Wooden spoon or silicone spatula
  • 9×13-inch / 23×33 cm baking dish, roughly 3 qt / 2.8 L

Ingredients

The sherry, peas, nutmeg and cayenne are optional and can be omitted without changing the core method.

Pasta, Chicken & Mushrooms

  • 12 oz / 340 g dry spaghetti
  • 4 loosely packed cups / about 18–20 oz / 510–565 g cooked chicken, chopped or coarsely shredded
  • 12 oz / 340 g cremini or white button mushrooms, sliced
  • 1 medium yellow onion, diced
  • 4 garlic cloves, minced
  • 1 tbsp / 15 ml olive oil
  • 1 tbsp / 14 g unsalted butter
  • 1 cup / 140 g frozen peas, no need to thaw, optional
  • 1 cup / 240 ml pasta cooking water, reserved and used only if needed

Starting with raw chicken? Cook it first, let it cool enough to handle, then chop and measure what you need. This baked chicken breast recipe is an easy option when rotisserie or leftover chicken is not available.

Creamy Mushroom-Parmesan Sauce

  • ¼ cup / 60 ml dry sherry, optional
  • 4 tbsp / 56 g unsalted butter
  • ¼ cup / 30 g all-purpose flour
  • 3 cups / 720 ml low-sodium chicken broth
  • 2 cups / 480 ml half-and-half
  • ¾ cup / 75 g finely grated Parmesan
  • 1 tsp dried thyme or 1 tbsp fresh thyme leaves
  • 1 tsp fine salt, divided, plus more to taste
  • 1 tsp freshly ground black pepper
  • ⅛ tsp ground nutmeg, optional
  • ⅛ tsp cayenne pepper, optional
  • 1 tbsp / 15 ml fresh lemon juice

For the closest substitute for half-and-half, combine 1½ cups / 360 ml whole milk with ½ cup / 120 ml heavy cream. All whole milk works too when you specifically want a lighter sauce; the roux will still provide body, so there is no need to cook it unusually thick.

Cheese, Crisp Topping & Finish

  • 1½ cups / 170 g shredded low-moisture mozzarella
  • ½ cup / 30 g panko breadcrumbs
  • ¼ cup / 25 g finely grated Parmesan
  • 1 tbsp / 14 g unsalted butter, melted
  • 2 tbsp chopped flat-leaf parsley, for finishing

Use low-moisture mozzarella here; fresh mozzarella can release enough water to loosen the casserole.

Method

1. Heat the Oven and Start the Pasta Water

Heat the oven to 375°F / 190°C and lightly grease the baking dish. Put a large pot of pleasantly salty water over high heat while you begin the mushrooms. Once it boils, lower the heat until you are ready to cook the spaghetti in Step 3.

2. Brown the Mushrooms Properly

Heat the olive oil and 1 tbsp / 14 g butter in the skillet or Dutch oven over medium-high heat. Add the mushrooms and ½ tsp salt.

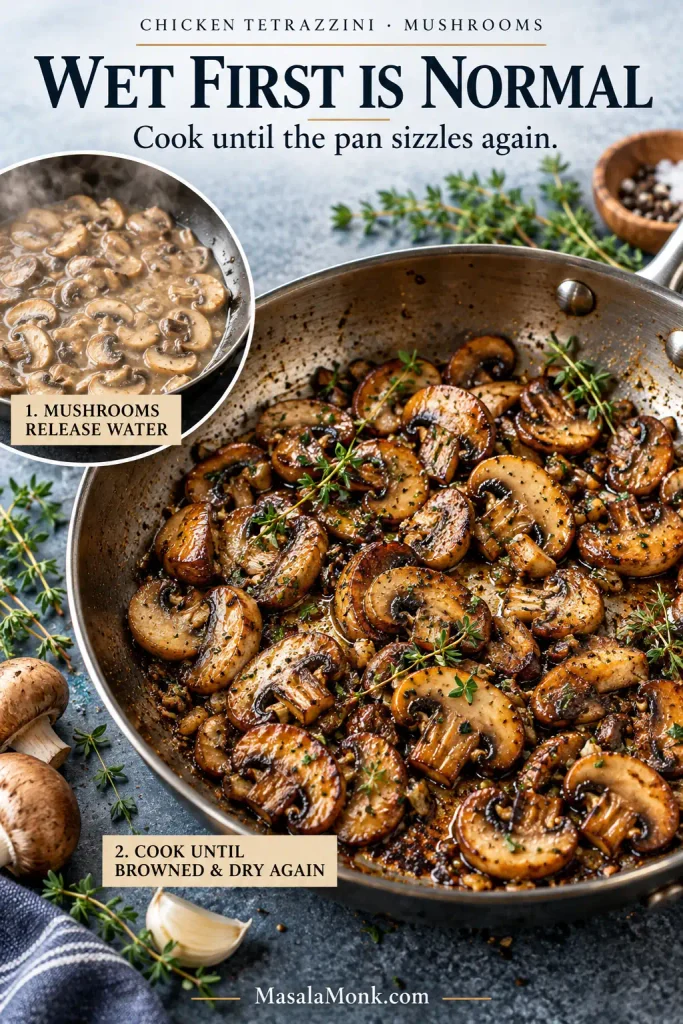
At first, the pan will get wetter, not drier. Keep going. Once the liquid disappears and the sound shifts back toward a sizzle, let the mushroom edges take on color; that is when their deeper savory flavor starts to develop. Depending on your pan and heat, this usually takes 8–12 minutes.

Two stages of sliced mushrooms in a skillet: pale mushrooms releasing liquid and browned mushrooms in a mostly dry pan. Text says “Wet first is normal” and “Cook until the pan sizzles again.”
Browning only starts after the released water is gone; that dry-pan contact is where the mushrooms gain much of their deeper savory flavor.

With a skillet smaller than 12 inches / 30 cm, brown the mushrooms in two batches instead of crowding them into one steaming layer.

Add the onion and cook for 4–5 minutes, until softened. Stir in the garlic and thyme for 30–60 seconds, just until fragrant.

Using sherry? Pour in ¼ cup / 60 ml and let it bubble for 1–2 minutes, until the sharp alcohol smell fades. Skipping it changes nothing else; move straight to the butter and flour without replacing it with extra broth.

3. Make the Cream Sauce and Cook the Spaghetti

Reduce the skillet heat to medium and add the 4 tbsp / 56 g butter. Once melted, sprinkle the flour evenly over the mushrooms and onions and stir for 1–2 minutes so no dry flour remains.

Gradually pour in the chicken broth while stirring and scraping the bottom of the pan. Once the mixture loosens, whisk if needed to smooth out any floury pockets. Add the half-and-half and bring the sauce to a gentle simmer—not a hard boil.

Bring the pasta water back to a full boil and add the spaghetti. Cook it about 2 minutes less than the package’s al-dente time. When the box gives a range, work from the lower end. The strands should bend easily but still resist slightly in the center.

While the spaghetti cooks, finish the sauce: let it simmer gently for 4–6 minutes and judge the texture rather than relying only on the clock.

First Sauce Check: Leave Room for the Pasta

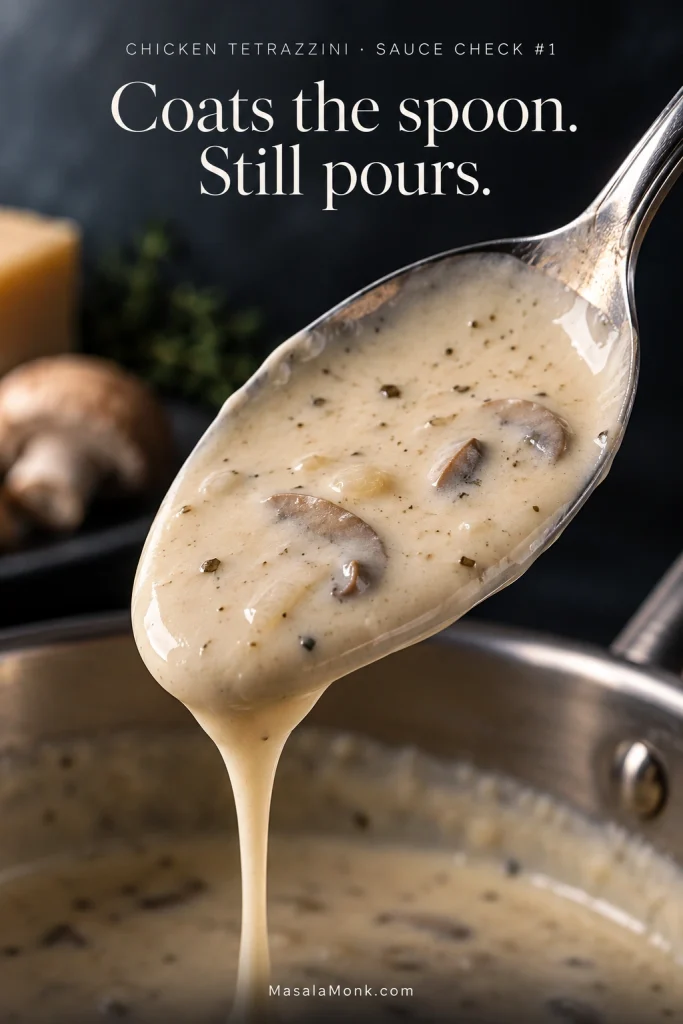
It should lightly coat the back of a spoon and pour easily. If the sauce already sits in a thick mound, stop reducing it.

Creamy mushroom-Parmesan sauce coating a silver spoon and flowing back toward a pan. Text reads “Sauce Check #1 — Coats the spoon. Still pours.”
Parmesan, pasta, baking and resting will all tighten the sauce further, so this stage needs room to thicken later.

Reduce the heat to low. Stir in ¾ cup / 75 g Parmesan, the remaining ½ tsp salt, black pepper, optional nutmeg and optional cayenne. Finely grated Parmesan melts most smoothly; some pre-shredded brands can make the sauce less silky.

Stir in the lemon juice and taste. It should not make the sauce taste lemony; it cuts through the cream, broth and Parmesan so the finished casserole tastes rich rather than flat. Add more salt if needed before the chicken and spaghetti soften the overall seasoning.

Just before the spaghetti reaches its stopping point, scoop out 1 cup / 240 ml pasta water. Drain the pasta without rinsing it and take it straight to the sauce.

4. Combine Before It Goes in the Oven

Fold the cooked chicken, drained spaghetti and frozen peas, if using, into the sauce. Turn everything gently until the sauce works its way between the strands instead of sitting around the outside of a pasta bundle.

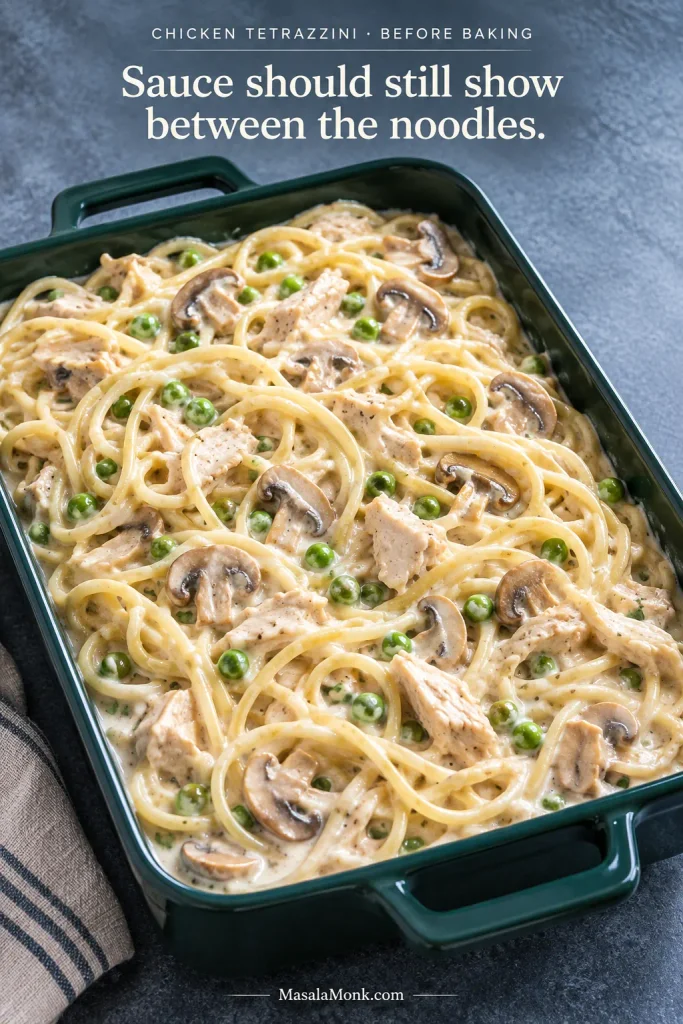
Second sauce check: visible sauce should remain between the noodles and at the bottom of the pan. A tight mixture needs reserved pasta water 2 tbsp / 30 ml at a time. You may not need any at all, so do not add the whole cup automatically.

Unbaked chicken tetrazzini in a green casserole dish with spaghetti, cooked chicken, mushrooms and peas surrounded by visible creamy sauce. Text says sauce should still show between the noodles.
Visible sauce between the strands gives the pasta enough moisture to absorb in the oven without leaving the finished casserole dry.

5. Bake, Brown and Rest

Transfer everything to the prepared dish without packing it down. Scatter the mozzarella over the surface.

Mix the panko with the ¼ cup / 25 g Parmesan and melted butter, then sprinkle it evenly over the mozzarella.

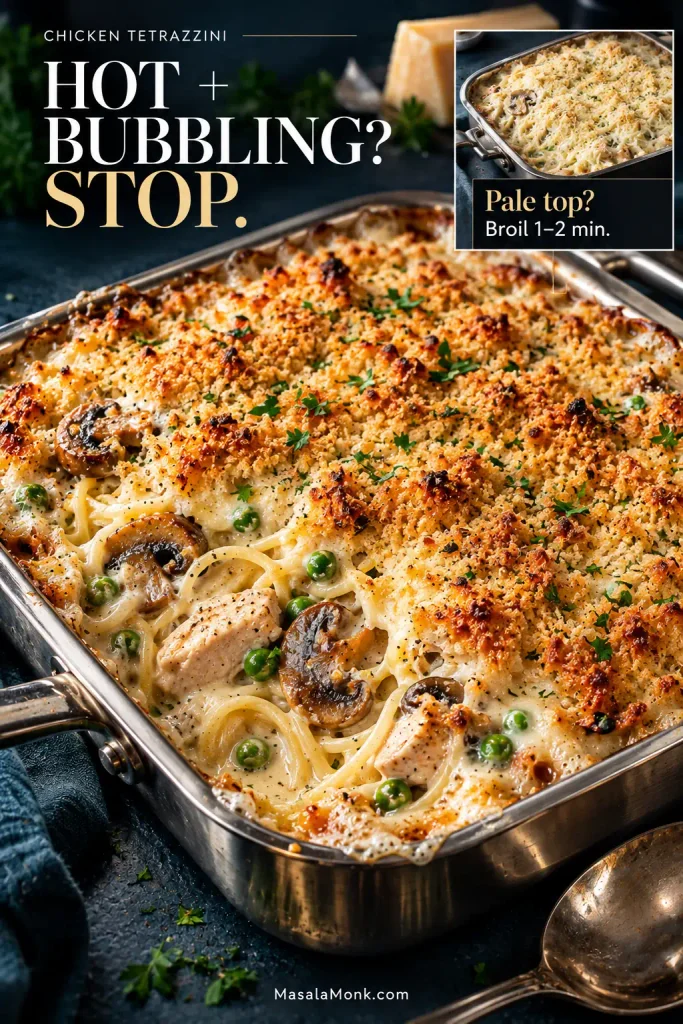
Bake uncovered for 20–25 minutes. Stop when the edges are bubbling, the center is steaming hot, the cheese has melted and sauce remains visible between the noodles.

A hot center with a pale top only needs 1–2 minutes under the broiler. That gives the crumbs color without leaving the whole casserole in the oven longer. Watch it closely.

Golden chicken tetrazzini bubbling in a metal baking dish with chicken, mushrooms, peas and breadcrumbs, plus a small inset showing a paler topping. Text says “Hot + bubbling? Stop. Pale top? Broil 1–2 min.”
Once the center is hot, extra oven time mostly removes moisture; use the broiler for surface color instead.

Rest for 10 minutes, then scatter the parsley over the top. The crisp crumbs and salty Parmesan are a welcome contrast to the creamy middle.

What Creamy Chicken Tetrazzini Should Look Like

Most of the decisions that determine the final texture happen before the baking dish reaches the oven. The finished scoop should confirm those choices: separate strands, sauce that still clings and a crisp topping over a creamy middle.

Close-up spoonful of creamy chicken tetrazzini with spaghetti, chicken, sliced mushrooms, peas and golden breadcrumb pieces.
This is the texture payoff: spaghetti that still separates, sauce that clings, tender chicken and mushrooms, and crisp crumbs scattered through the bite. Creamy should feel generous, not heavy or gluey.

How to Keep Chicken Tetrazzini Creamy

Why the Two Sauce Checks Matter

The first check happens before the spaghetti goes in because the sauce is not finished changing. As it simmers, flour gives it body, Parmesan thickens it further, and both continue tightening as the sauce sits. Taking it too far at this stage leaves very little room for what happens next.

The second check matters because cooked pasta keeps taking up liquid after it meets the sauce, including while the casserole bakes and rests. Only after the chicken and spaghetti are mixed in can you see whether there is enough sauce around the noodles.

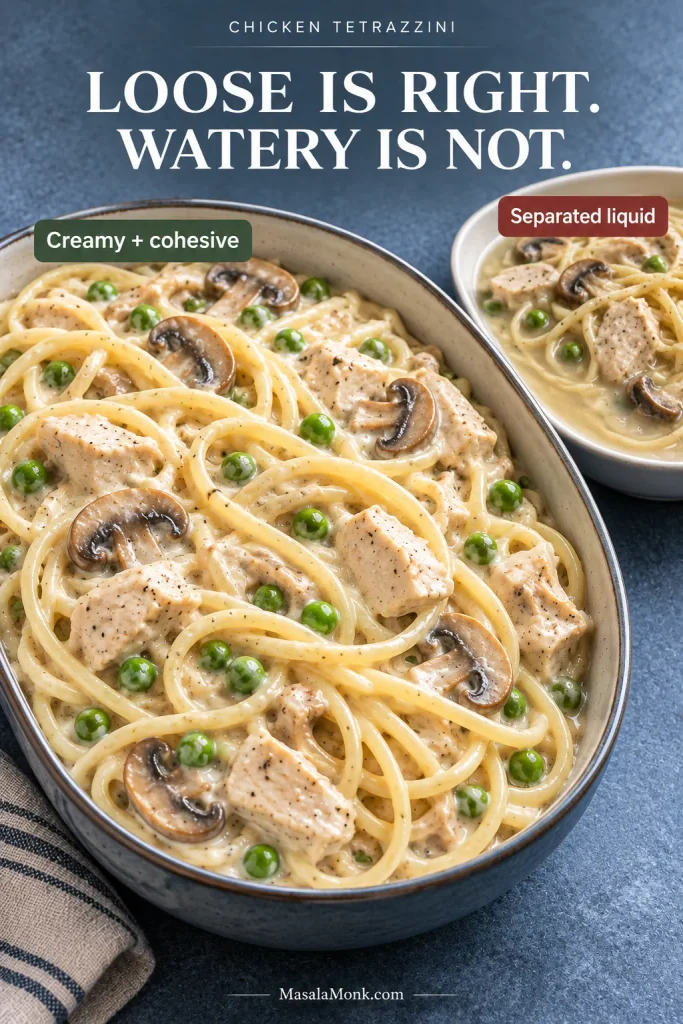
That is also why loose does not mean watery. A good pre-bake mixture is creamy and cohesive. Thin liquid separating around the noodles points to a different problem; a sauce that flows between them is doing what it should.

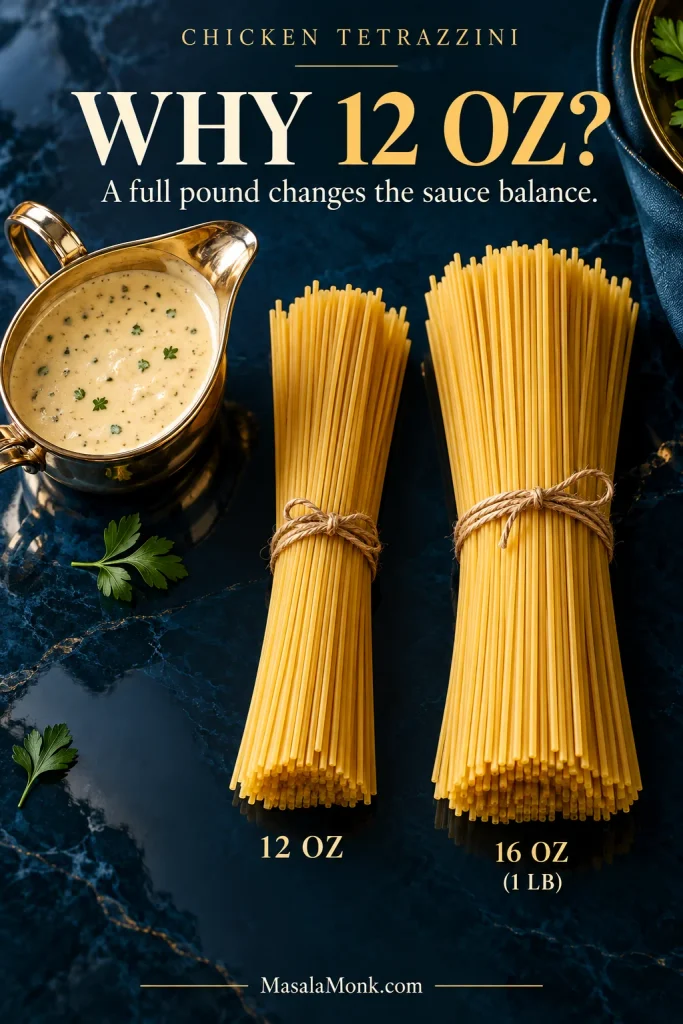
Why This Recipe Uses 12 Ounces of Spaghetti

A full 1-pound box works, but it crowds this amount of sauce. With 12 oz / 340 g spaghetti, the chicken and mushrooms stay noticeable and there is more sauce around each forkful. Using all 16 oz / 454 g pasta calls for more sauce if you want the same creamy balance.

Twelve-ounce and sixteen-ounce bundles of dry spaghetti beside a vessel of creamy sauce, illustrating the pasta ratio for chicken tetrazzini. Text asks “Why 12 oz?”
Choosing 12 ounces does more than preserve sauce. It also keeps the chicken and mushrooms noticeable in every serving, so the casserole still tastes like chicken tetrazzini rather than noodles carrying a few scattered extras.

Using another pasta shape? See spaghetti, linguine and other pasta choices.

Cook the Mushrooms Past Their Watery Stage

Waiting for the pan to dry does two jobs: it lets the mushrooms brown, which builds deeper savory flavor, and it keeps their water out of the cream sauce. A wet pan means they need more time.

The same technique matters in a creamy mushroom sauce. Add dairy while the mushrooms are releasing water and the finished sauce can end up thin and muted.

Other vegetables need similar treatment. Wilt and squeeze spinach, sauté zucchini until its water is gone, and lightly cook broccoli before it goes into the casserole.

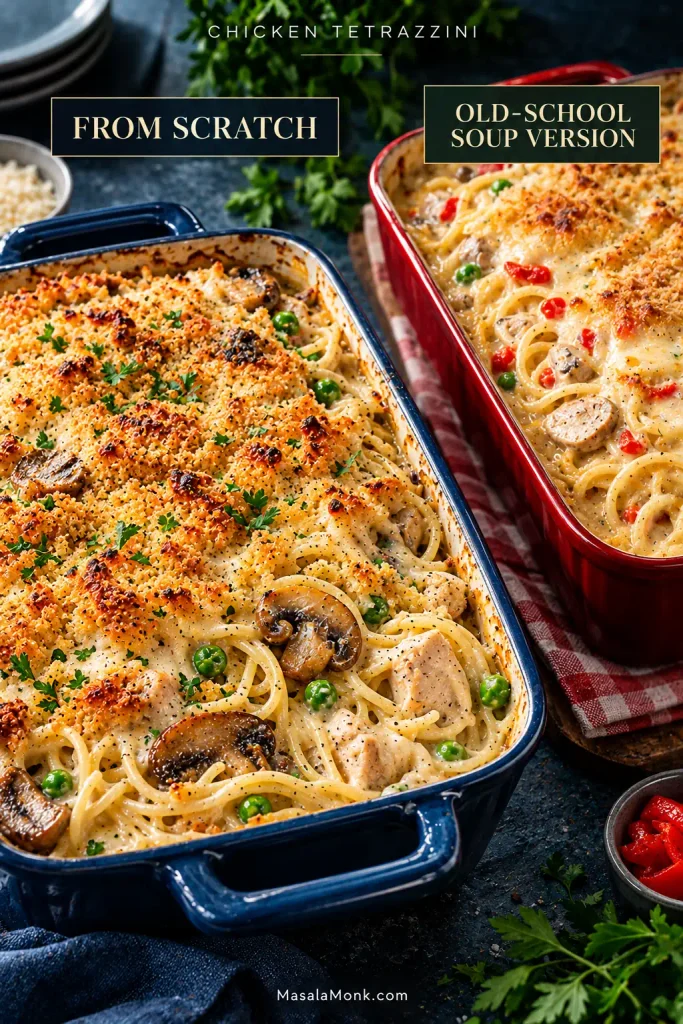
If the Tetrazzini You Remember Used Cream of Mushroom Soup

You are not remembering it wrong. Many American chicken tetrazzini recipes use condensed cream of mushroom or cream of chicken soup, sometimes with sour cream, pimiento, bell pepper, celery or extra cheese.

The homemade sauce above gives you more control over salt and thickness, but that does not make the soup version less legitimate. For plenty of people, that creamy, pantry-friendly casserole is the tetrazzini they grew up eating.

Two chicken tetrazzini casseroles: a from-scratch version in a blue baking dish and an old-school condensed-soup version in a red dish with pimiento.
These are two legitimate versions of the same comfort-food idea. From-scratch chicken tetrazzini gives you more control over seasoning and thickness, while the condensed-soup version delivers the softer, familiar casserole character many people grew up with.

Old-School Condensed-Soup Shortcut

Cook the 12 oz / 340 g spaghetti 2 minutes shy of al dente, then complete the mushroom, onion, garlic and thyme step from the main recipe, including the optional sherry if using. Skip the roux and homemade cream sauce. Instead, whisk together the shortcut sauce below and fold it into the cooked mushrooms, chicken, spaghetti and peas, if using.

  • 1 can condensed cream of mushroom soup, about 10.5 oz / 298 g
  • 1 can condensed cream of chicken soup, about 10.5 oz / 298 g
  • 1 cup / 240 g sour cream
  • 1 cup / 240 ml whole milk
  • ½ cup / 120 ml low-sodium chicken broth, plus more only if needed
  • ½ cup / 50 g grated Parmesan
  • Black pepper to taste

Check the consistency before the mixture goes into the baking dish. Condensed soup, Parmesan and rotisserie chicken can already bring plenty of salt, so taste before adding more. Add the mozzarella and panko topping, then bake at 375°F / 190°C for 20–25 minutes, following the same doneness cues as Step 5. Rest for 10 minutes before serving.

Older-School Details You Can Lean Into

These are directions you can take the casserole rather than requirements for the core recipe:

  • Pimiento: fold in ¼–½ cup drained diced pimiento.
  • Green bell pepper or celery: dice finely and sauté with the onion.
  • Dry sherry: keep it in for the aromatic note common to many older cream-sauce versions.
  • Sage: especially good with turkey.
  • Toasted slivered almonds: add a little retro crunch.
  • Buttery crackers: use them instead of panko for a softer, richer topping.

Chicken Tetrazzini vs. Chicken Spaghetti

Chicken tetrazzini usually uses a creamy white sauce, mushrooms and Parmesan; Southern chicken spaghetti more often leans on cheddar, condensed soup and peppers or tomatoes. The lines can blur in older casserole recipes, but those flavor patterns are a useful way to tell the two styles apart.

← Back to the main recipe · See more variations →

Ways to Change the Recipe

Spaghetti, Linguine and Other Pasta Choices

Linguine can replace spaghetti 1:1 by weight and gives the casserole a broader, slightly heavier bite. Spaghetti keeps the texture a little lighter. Thin spaghetti and vermicelli work too, but both soften faster, so pull them from the water earlier.

No Mushrooms? Leave Them Out

You do not need to replace the mushrooms with an equal amount of something else. Broccoli is probably the easiest vegetable substitute. Wilted spinach also works when squeezed dry, while sautéed bell pepper fits particularly well with the old-fashioned casserole style.

Turkey, Gruyère and Cream Cheese

Cooked turkey can replace the chicken 1:1 and is one of the easiest ways to turn holiday leftovers into a different dinner. For a nuttier top, replace half the mozzarella with Gruyère while keeping the Parmesan in the sauce.

Cream cheese changes the casserole more noticeably. Melt 2–4 oz / 55–115 g into the warm sauce when you want it thicker and tangier, then loosen it with broth or reserved pasta water as needed. If that richer cream-cheese-and-cracker direction is what you are after, Million Dollar Chicken Casserole is built around it.

When the Casserole Goes Sideways

Most problems trace back to four things: pasta cooked too far, water carried in by vegetables, sauce that was too thick or thin, or too much time in the oven. Some can be corrected at the table; mushy pasta is mostly a lesson for the next batch.

Two unbaked chicken tetrazzini mixtures comparing creamy cohesive sauce with thin separated liquid around spaghetti, chicken, mushrooms and peas. Text reads “Loose is right. Watery is not.”
Watch how the liquid behaves when the noodles move. Creamy sauce travels with the pasta; watery liquid separates from it and collects on its own. That distinction is far more useful than judging the casserole simply by how loose it looks.

Too Loose Before Baking

A creamy, cohesive mixture does not need thickening just because it looks loose. The pasta will take up more sauce in the oven and again during the rest. Thin liquid separating from the creamy part means the mixture is genuinely watery, not simply loose.

Watery After Baking

Give the casserole the full 10-minute rest first. Liquid that remains visibly separated after that usually points to excess moisture from mushrooms or another vegetable, or a sauce that was too thin before assembly.

Dry Tetrazzini

The usual causes are overcooked pasta, over-reduced sauce or too much oven time. An already-baked portion can often be improved with a spoonful or two of warm milk or broth.

Working with leftovers rather than a fresh bake? Jump to the reheating method.

Mushy Pasta

Mushy tetrazzini usually starts with pasta cooked too far before baking. There is not much to reverse once that has happened, so stop the first boil sooner next time.

Bland Sauce

Correct the salt first, then look at black pepper, Parmesan and acidity. A small squeeze of lemon can wake up a flat sauce without turning the casserole into lemon pasta.

Grainy Sauce

Keep the dairy below a hard boil and lower the heat before adding Parmesan. At the first sign of graininess, take the sauce off the heat and whisk gently instead of pushing it with more heat.

← Back to the recipe · Make it ahead →

Make It Ahead Without Drying It Out

Tonight → Tomorrow

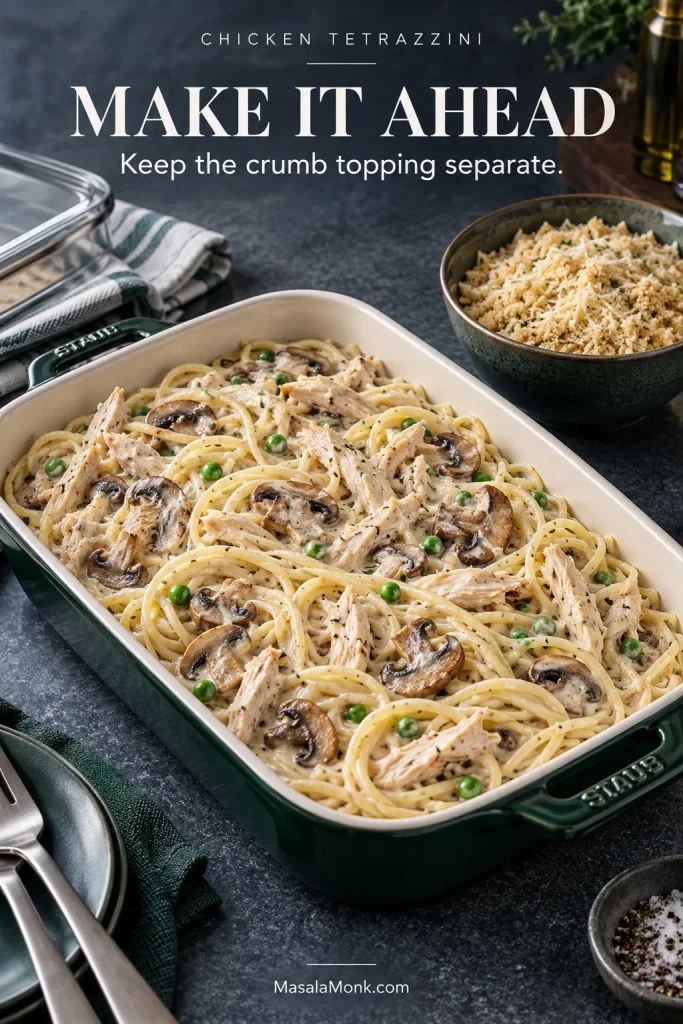
You can assemble chicken tetrazzini up to about 24 hours ahead, which is useful when you want dinner finished before people arrive or need a casserole ready to take somewhere the next day. Stop before adding the panko, cover the casserole and refrigerate it. Keep the crumb mixture separate so it stays crisp.

Unbaked chicken tetrazzini with cooked chicken, browned mushrooms, peas and creamy spaghetti beside a separate bowl of Parmesan-panko crumb topping. Text reads “Make it ahead — Keep the crumb topping separate.”
Make-ahead chicken tetrazzini asks you to protect two different textures at once. The pasta needs enough moisture to survive an overnight rest, while the crumb topping needs to stay away from that moisture until the casserole is ready to bake.

For an overnight casserole, leave the pasta mixture a touch looser than you would for immediate baking because the noodles will continue taking up sauce in the refrigerator. A mixture that already looks tight can take ¼ cup / 60 ml broth or reserved pasta water. Add another ¼ cup / 60 ml only if it still looks tight.

Just before baking, add the panko. A chilled casserole usually needs another 10–15 minutes. Look for bubbling edges and a thoroughly hot center. For food safety, the center should reach 165°F / 74°C.

With a glass baking dish, follow the manufacturer’s guidance before moving a very cold dish into a hot oven.

Freezer → Dinner

Freeze tetrazzini before baking when possible; the pasta holds up better that way. Assemble it with cooled or just-warm components, cover well and chill promptly before freezing. For best quality, use it within about 3 months.

Keep the panko topping separate when convenient. Thaw the casserole overnight in the refrigerator, add the topping and bake it as a chilled casserole.

Leftovers → Lunch

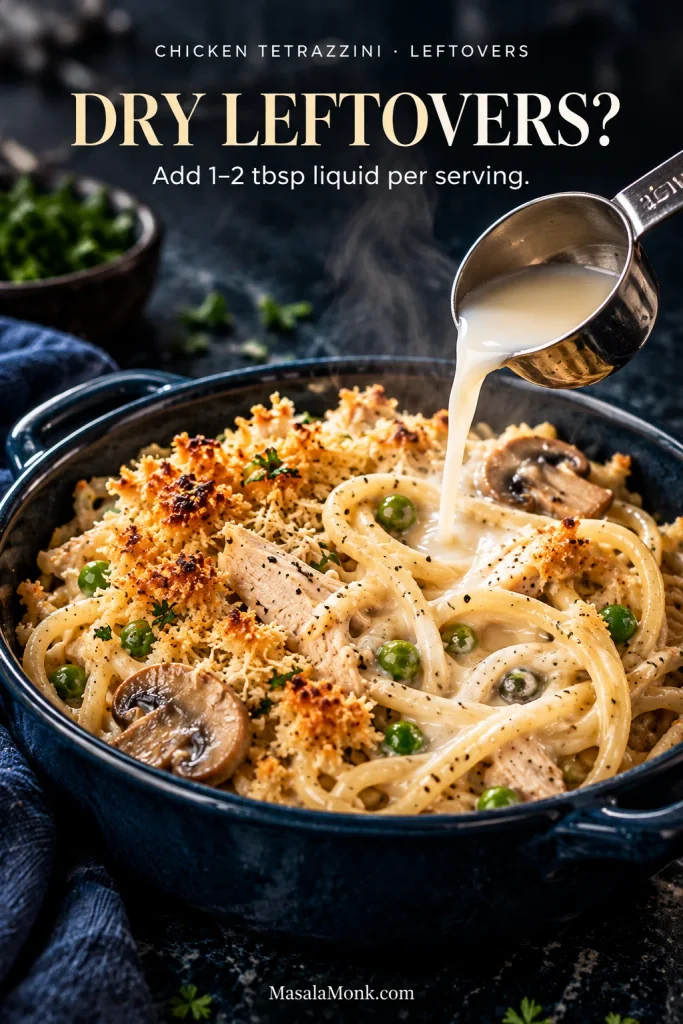
Add 1–2 tbsp / 15–30 ml milk or chicken broth per serving, cover and reheat until thoroughly hot. For a larger amount, drizzle a few tablespoons between portions before covering the dish with foil.

A measuring spoon pours a small amount of liquid over leftover chicken tetrazzini with spaghetti, chicken, mushrooms, peas and breadcrumb topping. Text reads “Dry leftovers? Add 1–2 tbsp liquid per serving.”
Reheating is mostly about replacing what the spaghetti absorbed while it chilled. Add only a little liquid at first; the goal is to loosen the sauce again, not create a new pool of broth or milk around the leftovers.

Refrigerate cooked leftovers within 2 hours and use them within 3–4 days. USDA guidance recommends reheating leftovers to 165°F / 74°C throughout. See the USDA leftovers and food-safety guidance.

← Back to the recipe · Back to top ↑

What to Serve With Chicken Tetrazzini

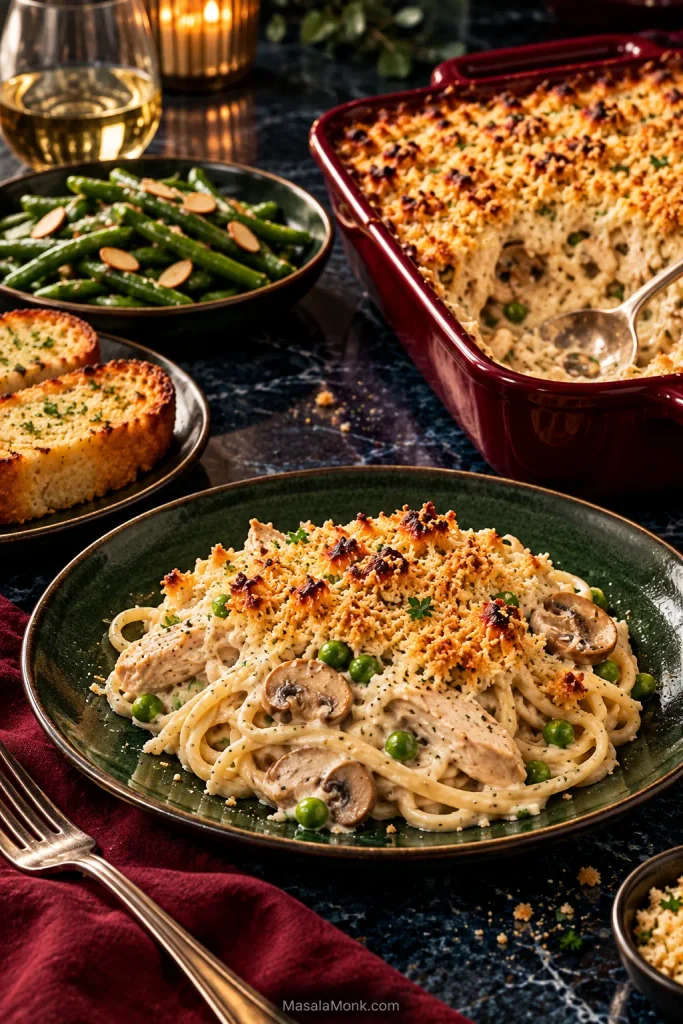
After a creamy casserole, something sharp, crisp or green feels especially good on the plate. A simple salad, roasted asparagus or broccoli all work. Green beans almondine bring lemon, crisp-tender beans and toasted almonds—a useful contrast to the rich pasta. Garlic bread makes sense when you want to lean all the way into comfort food.

Plated chicken tetrazzini with creamy spaghetti, chicken, mushrooms and peas beside a casserole dish, green beans almondine and garlic bread on a dark dinner table.
Because chicken tetrazzini is already rich and creamy, the best sides usually bring contrast rather than more weight. Something green, bright or crisp refreshes the plate, while garlic bread can be the deliberate extra indulgence.

Once you know the cues—firm pasta, properly browned mushrooms, a pourable sauce and a short bake—tetrazzini stops feeling like a casserole you have to hope turns out. It becomes the kind of dinner you can make from leftover chicken, assemble for tomorrow, or put on the table for a crowd with confidence. Give it 10 minutes to rest, then serve while the crumbs are crisp and the middle is creamy.

← Back to the recipe · Back to top ↑

Posted on — Leave a comment

Chicken Piccata Recipe: Tender Chicken with Lemon Butter Caper Sauce

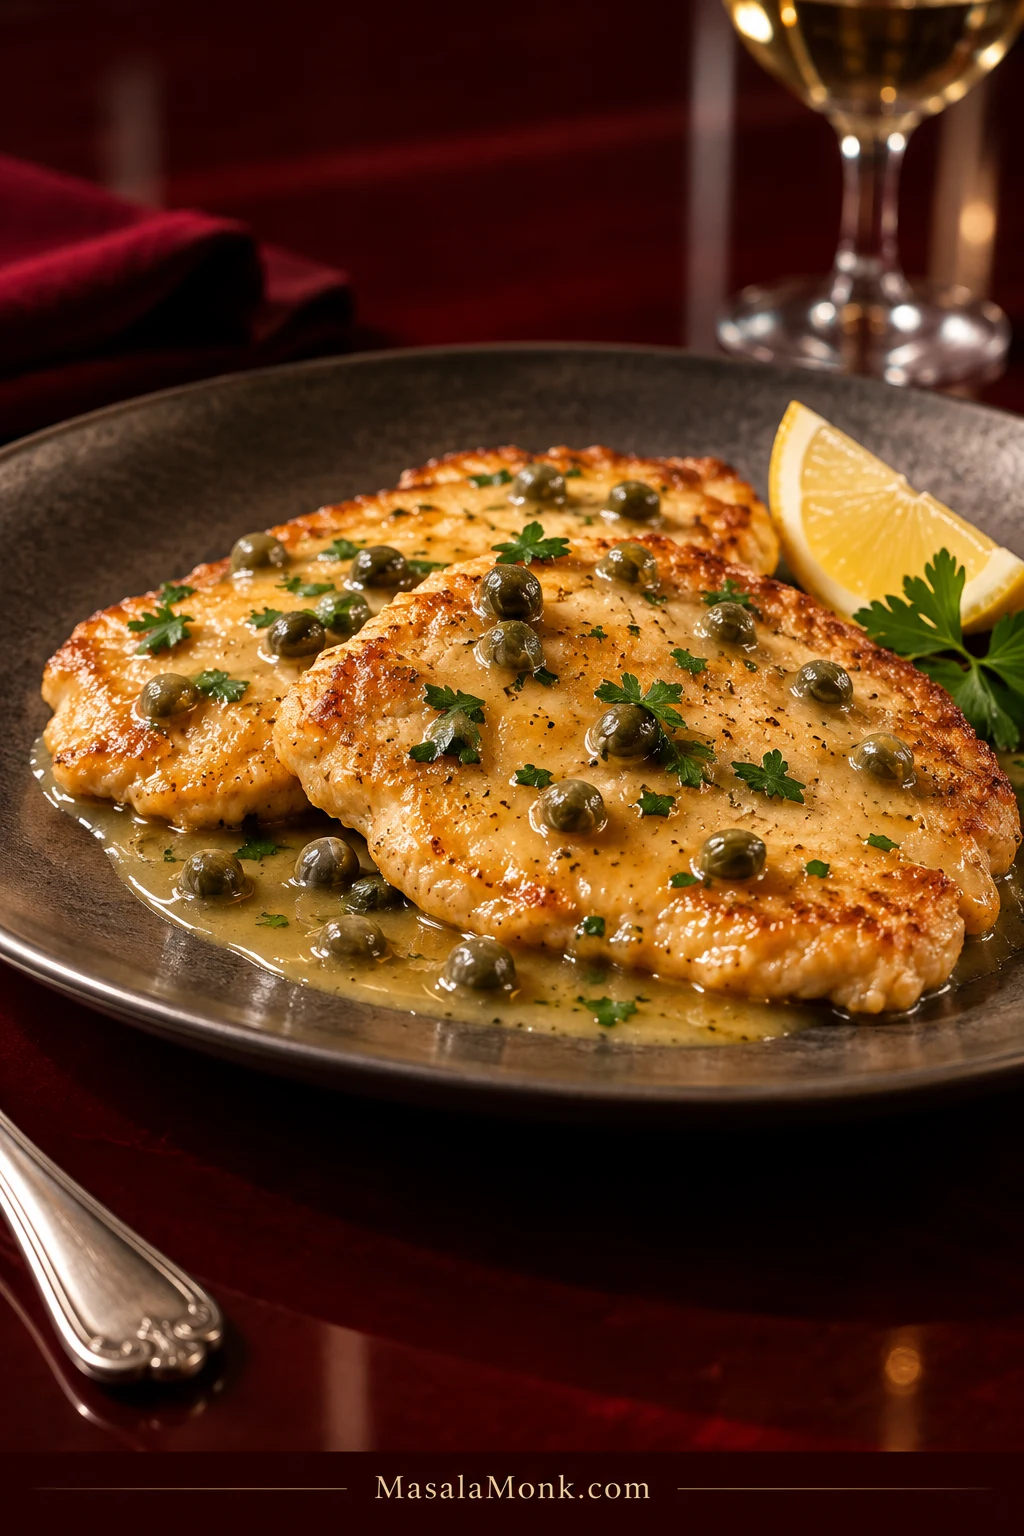
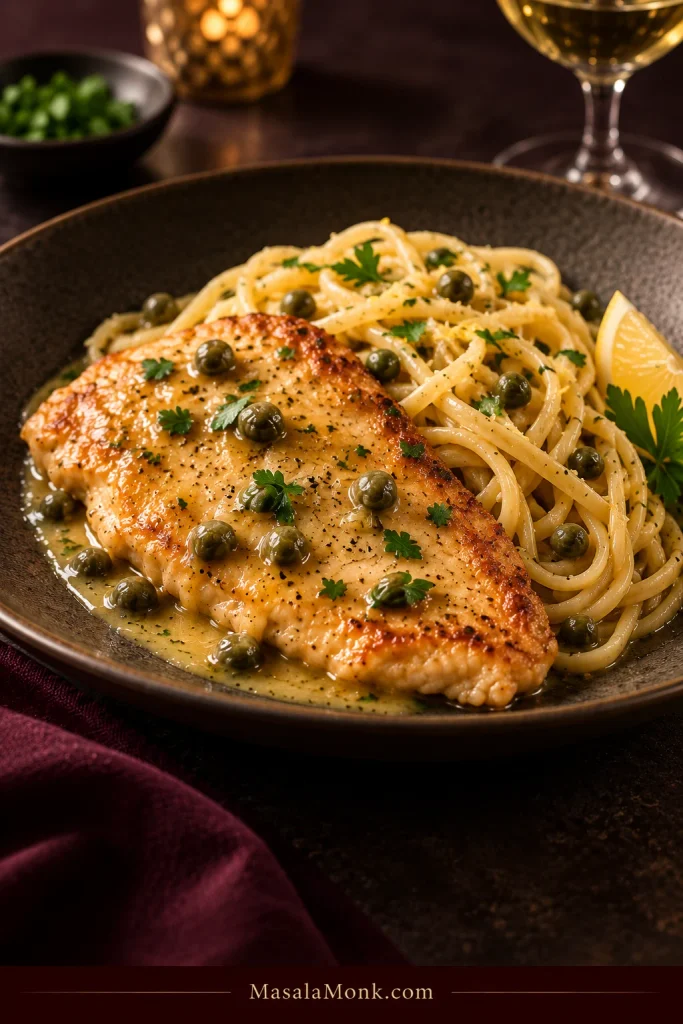
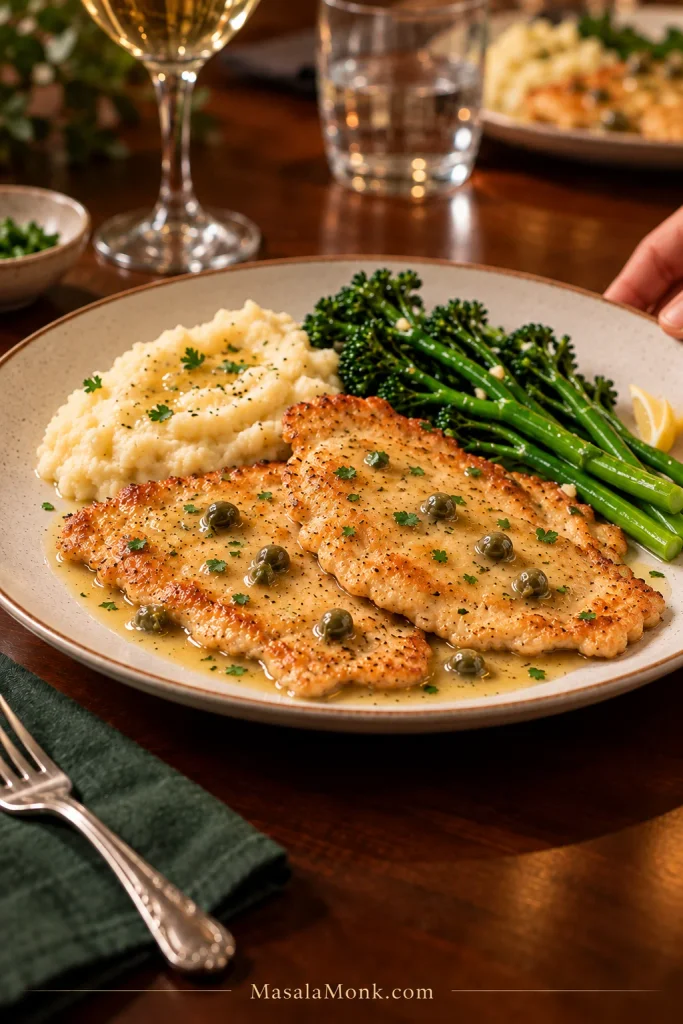
Two thin golden chicken piccata cutlets on a dark plate with glossy lemon butter sauce, green capers, parsley, and a lemon wedge.

Chicken piccata gives you thin golden cutlets and a silky lemon-butter-caper sauce in about half an hour. It feels like a proper sit-down dinner, even though everything happens in one skillet.

The chicken stays tender, the edges pick up real color, and the sauce tastes clearly of lemon without becoming sharply sour. Any sauce left in the skillet is exactly what you want crusty bread or mashed potatoes to catch.

Piccata is simple until the sauce goes wrong. Stop reducing too soon and it stays watery; keep the pan too hot and the sauce can turn greasy; push the lemon too far and it becomes sharply sour. This version is built around recognizing those moments as you cook.

If pasta is part of dinner, there is a larger sauce formula too. Noodles need more sauce—not simply twice as much lemon.

The Piccata Rule

Thin chicken. Reduce first. Butter gently. Adjust the lemon last.

Once those four things make sense, the dish becomes much easier to read while you cook.

Chicken Piccata Recipe

Tender, lightly floured chicken cutlets with a bright lemon-butter-caper sauce. One skillet · 30–35 minutes · Serves 4.

Serves
4

Prep
15 minutes

Cook
15–20 minutes

Total
30–35 minutes

Equipment

  • 12-inch / 30-cm skillet, preferably stainless steel; well-seasoned cast iron also works
  • Meat mallet or rolling pin
  • Shallow dish for flour
  • Tongs or a thin spatula
  • Instant-read thermometer

Ingredients

For the Chicken

  • 1½ lb / 680 g boneless, skinless chicken breasts, usually enough for 4 large or 6 smaller cutlets
  • About 1 tsp kosher salt, adjusting for the salt you use
  • ½ tsp freshly ground black pepper
  • ½ cup / 60 g all-purpose flour, for dredging; some will be left over
  • Up to 3 tbsp / 45 ml olive oil, divided and used only as needed

For the Lemon Butter Caper Sauce

  • 1 small shallot / 30–40 g, finely chopped
  • 2 garlic cloves, finely minced
  • ½ cup / 120 ml dry white wine, such as Pinot Grigio or Sauvignon Blanc
  • ½ cup / 120 ml low-sodium chicken broth
  • 2 tbsp / 30 ml fresh lemon juice, plus up to 1 tbsp / 15 ml more to taste
  • ½ tsp finely grated lemon zest
  • 3 tbsp / about 25–30 g capers, drained
  • 4 tbsp / 56 g cold unsalted butter, cut into small pieces
  • 2 tbsp / about 8 g flat-leaf parsley, chopped

Method

Prepare and Brown the Chicken

  1. Prepare the chicken. Depending on their size, slice each thick breast horizontally into two or three cutlets. Pound any bulky spots until the pieces are about ¼ inch / 6 mm thick. Pat them very dry and season with salt and pepper. Keep the flour nearby, but wait to dredge until the skillet is almost ready.
  2. Have the sauce ingredients ready. Measure the wine, broth and lemon juice. Drain the capers, cube the cold butter, chop the shallot and parsley, mince the garlic, and zest the lemon. Once the chicken leaves the skillet, things move quickly.
  3. Dredge and brown the first side. Heat 2 tbsp / 30 ml olive oil over medium-high heat. Lightly dredge the chicken and shake off enough flour that you can still see the meat beneath it. When the oil shimmers but does not smoke, add the chicken without crowding the skillet. Cook for roughly 2–3 minutes, until deeply golden and easy to release.
  4. Turn and finish the chicken. Cook the second side for about 1–2 minutes, using the clock only as a guide. Start checking early and cook until the thickest part reaches 165°F / 74°C. Transfer the cooked cutlets to a warm plate, work through the remaining batches, and add more oil only if the skillet becomes dry. Discard any flour left in the dredging dish after it has contacted the raw chicken.

Build the Lemon Butter Caper Sauce

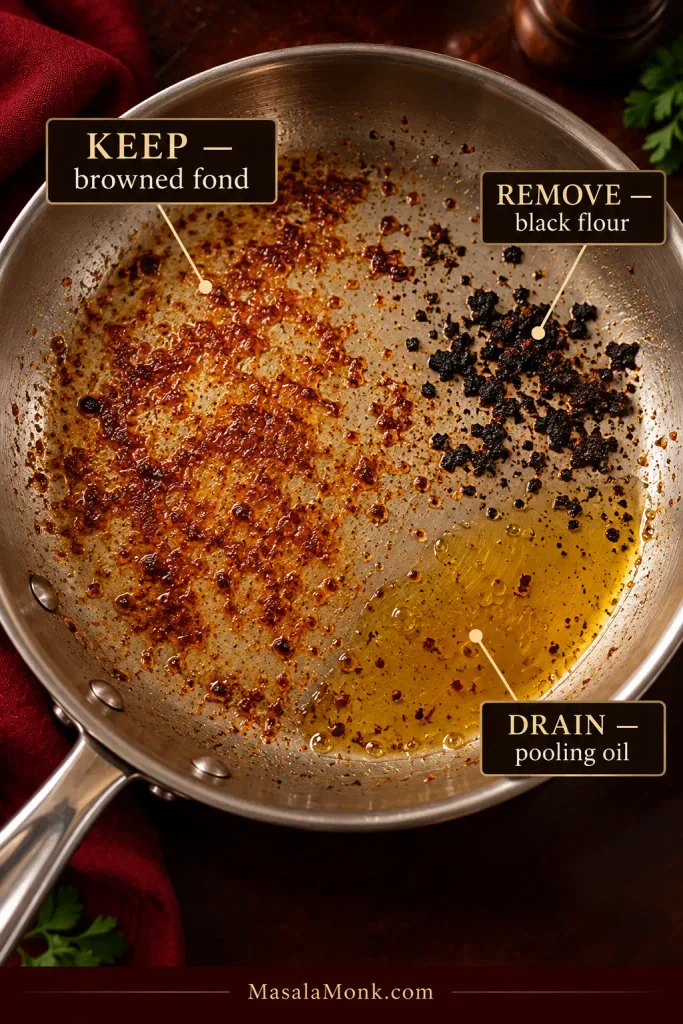
  1. Read the skillet. Pour off any puddle of frying oil and remove black flour crumbs, but leave the browned fond. Lower the heat to medium, cook the shallot for 1–2 minutes, then add the garlic. As soon as it smells fragrant—usually after 20–30 seconds—pour in the wine. Don’t wait for the garlic to brown.
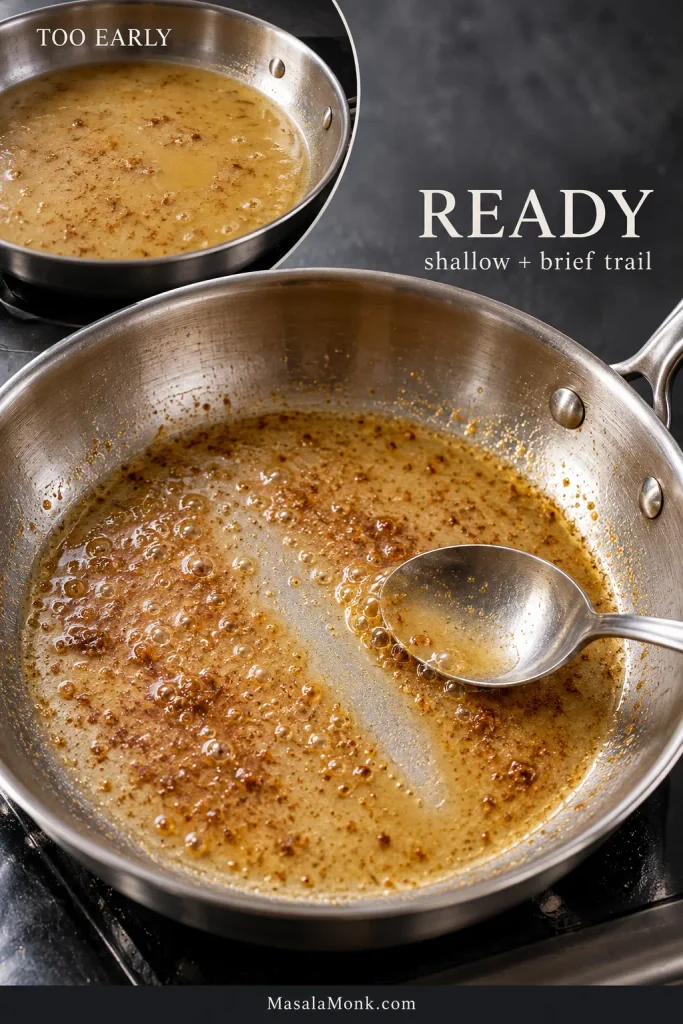
  2. Reduce the wine, then the broth. Scrape the browned bits into the wine. At first the bottom of the skillet will look flooded; give it time. Once the wine has reduced by roughly two-thirds, add the broth and keep simmering. Drag a spoon across the pan. When it briefly leaves a trail before the liquid flows back together, you’re ready for the lemon.
  3. Add the first lemon. Stir in 2 tbsp / 30 ml lemon juice, the zest and capers. Let the capers heat through and become fragrant.

Finish the Sauce and Serve

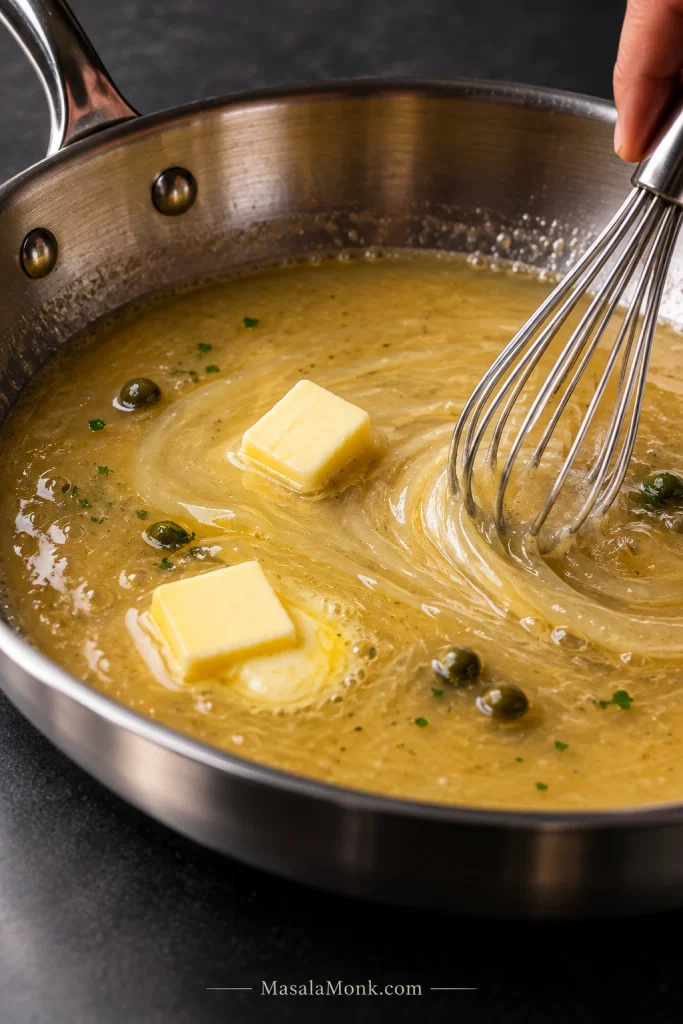
  1. Let the pan calm down, then add butter. Take the skillet off direct heat and give the bubbling a few seconds to settle. Whisk or swirl in the cold butter a few pieces at a time until the sauce comes together.
  2. Taste before adding more lemon. Stir in the parsley. Add the reserved lemon juice 1 teaspoon at a time, up to another 1 tbsp / 15 ml, until the sauce tastes bright without becoming sharply sour. Check the salt only now.
  3. Bring everything together. For the crispest browned edges, leave the cooked cutlets out of the skillet and spoon the sauce over at serving. If you prefer the chicken fully coated, turn it briefly through the finished sauce—just long enough to coat it.
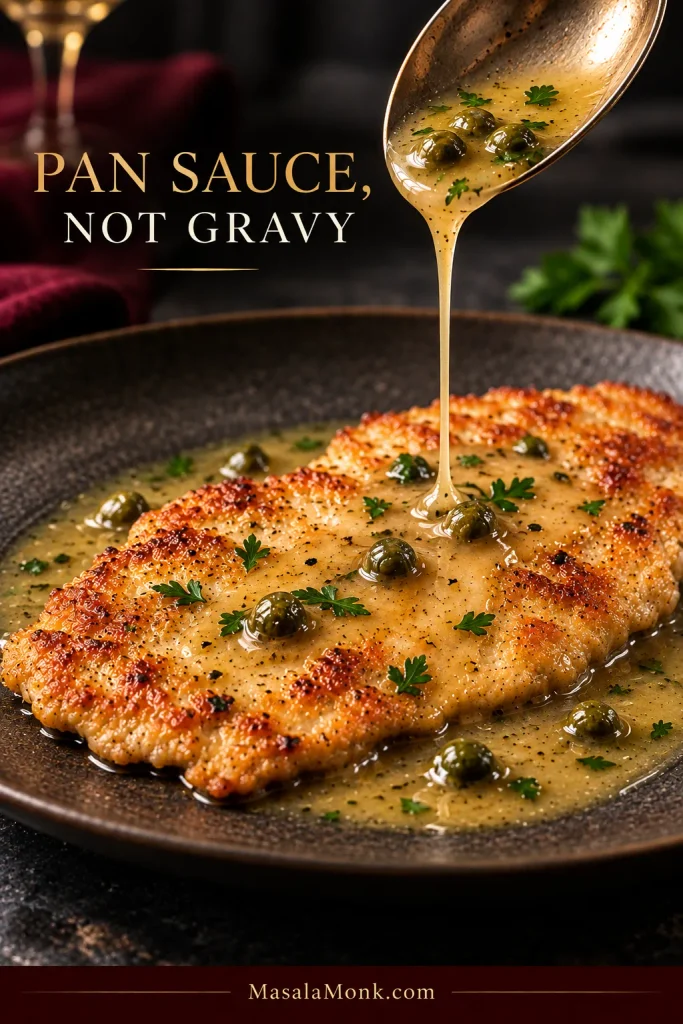
Think pan sauce, not gravy. It should pour freely from a spoon and cling only lightly to the chicken. For the reduction and emulsion cues, go to the glossy sauce guide.

A spoon pouring pale-gold lemon butter caper sauce over a browned chicken cutlet on a dark plate.

Small Choices That Change the Result

  • Salt: kosher salts vary in density. Season the chicken evenly, then make the final salt adjustment only after the broth and capers have reduced into the sauce.
  • Shallot: it adds gentle sweetness and a fuller savory base, but the sauce still works without it.
  • Wine: use a crisp, dry white such as Pinot Grigio or Sauvignon Blanc. Avoid sweet wine and salty bottled cooking wine.
  • Capers: use the small jarred buds rather than the much larger caper berries. If they taste especially salty, rinse them briefly under cool water and drain well.

What to Watch While You Cook

If the recipe card gives you everything you need, you can stop there. The sections below are for the moments when you want to understand the pan more closely, make extra sauce for pasta, or fix something that doesn’t look right.

Start With Thin, Dry Chicken

Aim for about ¼ inch / 6 mm thick. Store-bought cutlets are absolutely fine. If one end is noticeably thicker, give it a few gentle taps so the pieces cook at roughly the same speed.

Raw chicken cutlet shown edge-on beside a metal ruler indicating approximately ¼-inch or 6-millimeter thickness.
Check the thickest part after pounding rather than the naturally tapered edge. The goal is an evenly thin chicken piccata cutlet, so one section does not finish long before another.

Don’t chase perfect geometry. You just don’t want one paper-thin end drying out while a thick middle is still catching up.

Pat the chicken very dry before it touches the flour. Surface moisture has to steam away before useful browning can begin, and it can turn the flour tacky if the dredged cutlets sit around for too long.

The Flour Is a Veil, Not Breading

Shake off enough flour that you can still see the chicken beneath it. That’s all you need.
Raw chicken cutlet being lifted from a shallow dish of flour with a thin coating and loose flour falling away.
Give the cutlet a light shake before it reaches the skillet. Loose flour should fall away; flour packed into folds and edges is the coating most likely to turn pasty instead of crisp.

Use an instant-read thermometer rather than judging doneness by color; the thickest part should reach 165°F / 74°C, the endpoint listed for poultry in the USDA safe temperature chart.

Look for Deep Golden Browning Before You Turn

The clock is only a guide here; the first side is ready when the coating has real color and the cutlet releases without a fight.

Thin golden chicken cutlet being lifted with metal tongs from a stainless skillet with browned fond and oil below.
Peek at one edge before trying to turn the whole cutlet. When the underside has developed an even golden crust, it should release with much less persuasion from the skillet.

Chicken browned? Read the skillet before you start the sauce.

Read the Pan Before You Make the Sauce

Not everything left behind belongs in the sauce.

Keep

Browned fond. Those caramelized bits dissolve into the wine and carry the chicken’s browned flavor into the sauce.

Remove

Black flour crumbs. If they smell burnt, they will taste burnt too.

Drain

Pooling oil. A thin film is fine. A puddle can make the finished sauce greasy.

Stainless skillet with labels marking browned fond to keep, black flour crumbs to remove, and pooled oil to drain.

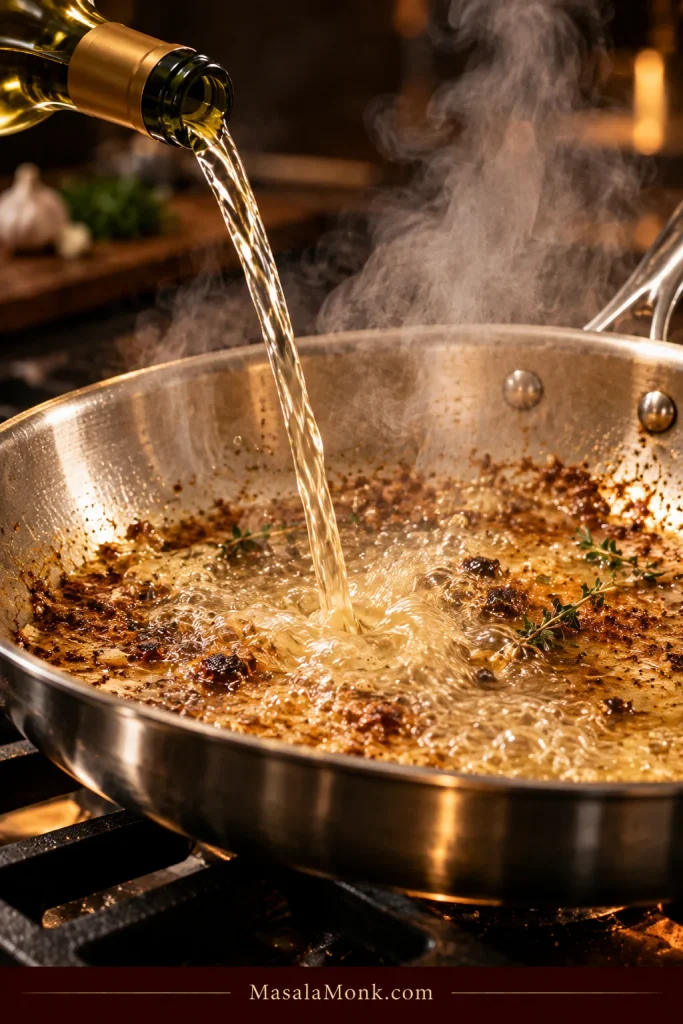
Deglaze the Fond While the Wine Is Plentiful

This is the point where the browned fond stops being residue and becomes part of the sauce.

White wine being poured into a hot stainless skillet as steam rises and browned bits loosen from the pan.
Once the wine is in, work across the skillet while there is still enough liquid to carry the loosened fond. The aim is to dissolve those brown bits into the sauce rather than simply scrape them loose.

How to Get Glossy Piccata Sauce

At first the wine will flood the bottom of the pan. Let it cook down until it sits shallow around the browned bits instead of sloshing from side to side. Add the broth and let that concentrate too.

Two stainless skillets showing an early flooded sauce reduction and a shallower reduced sauce with a visible spoon trail.

By the time the lemon goes in, the sauce should already taste savory and concentrated.

Give the skillet a few seconds to calm down before adding the cold butter. You want gentle heat now, not an angry boil.

Keep the pan moving as the butter melts; the sauce should turn uniform and glossy rather than separating into yellow fat droplets.

Cold butter cubes melting into pale-gold piccata sauce in a stainless skillet while the sauce is whisked.
The whisk should leave a brief wake without streaks of yellow fat collecting around it. If hard bubbling returns, pause and let the pan settle before adding the next pieces of cold butter.
Only then decide whether it needs more lemon. You should taste it clearly, but it shouldn’t make you squint.
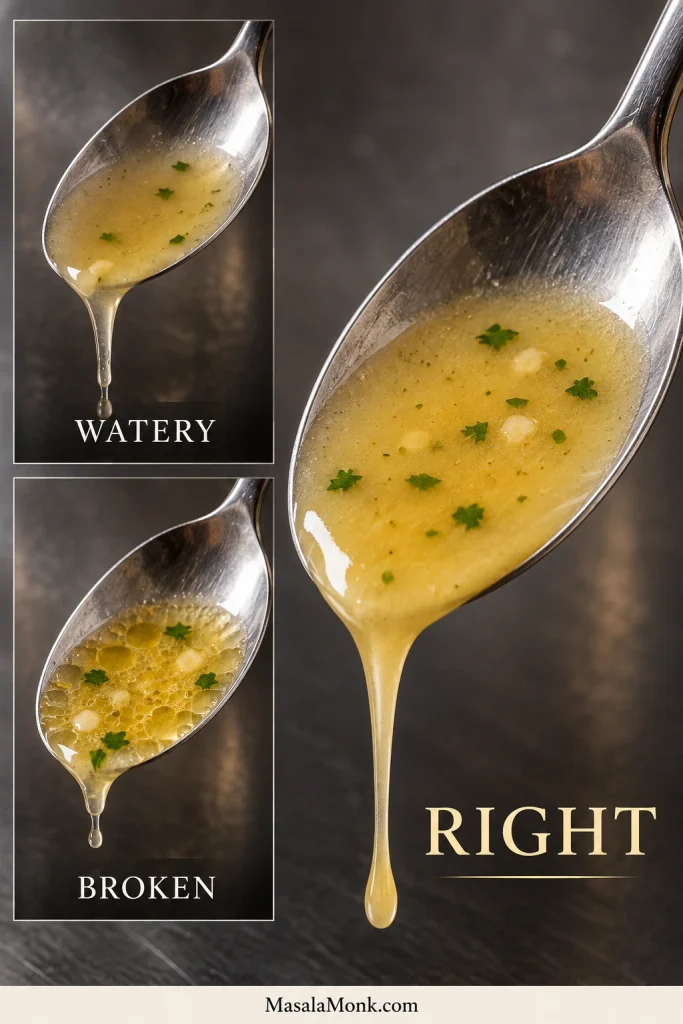
Three Sauce States to Recognize

Watery: thin like broth and immediately runs away from the spoon.
Right: smooth, fluid and just thick enough to cling lightly to the chicken.

Broken: yellow fat forms droplets or an oily layer over thinner liquid.

Three spoonfuls of piccata sauce labeled watery, right, and broken, showing thin sauce, smooth glossy sauce, and separated oily droplets.

If your sauce looks watery or broken rather than “right,” go straight to the troubleshooting fixes.

Serving Chicken Piccata With Pasta? Make More Sauce

For 8 oz / 225 g pasta, use the larger sauce formula below. Pasta needs substantially more liquid, while the lemon and capers should rise much more modestly.

Golden chicken piccata served with long pasta coated in pale lemon butter sauce, capers, and parsley.
The finished pasta should look glossy and lightly dressed, not surrounded by a deep pool of sauce. Enough sauce still needs to remain, however, to season the chicken once everything reaches the plate.

A normal batch looks generous around four chicken cutlets. Add pasta and it disappears surprisingly fast.

Angel hair cooks in only a few minutes, so don’t drop it until the sauce is already underway. Thin spaghetti gives you a little more breathing room; linguine gives you more bite.

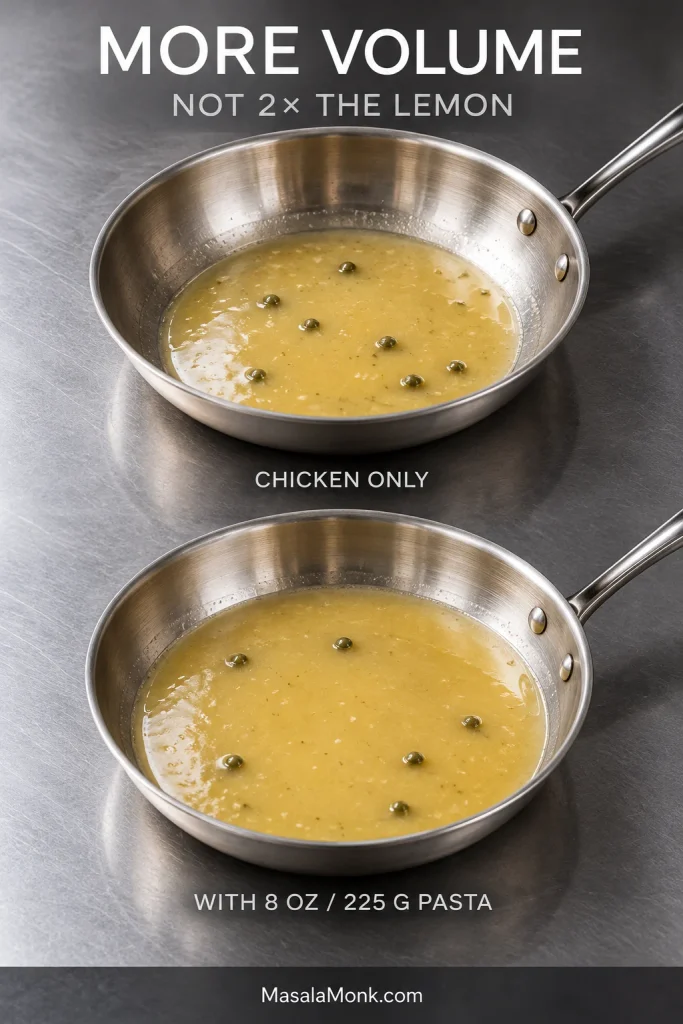
Scale the Sauce Without Doubling the Lemon

Ingredient Chicken only Chicken + 8 oz / 225 g pasta
Dry white wine ½ cup / 120 ml ¾ cup / 180 ml
Low-sodium chicken broth ½ cup / 120 ml 1 cup / 240 ml
Fresh lemon juice 2 tbsp / 30 ml + up to 1 tbsp / 15 ml to taste 2½ tbsp / about 38 ml + up to 1 tbsp / 15 ml to taste
Capers 3 tbsp / about 25–30 g 3½ tbsp / about 30–35 g
Cold unsalted butter 4 tbsp / 56 g 5 tbsp / 70 g
Reserved pasta water — Reserve ½ cup / 120 ml; use only as needed

Expect the larger batch to take a little longer to reduce; more liquid simply needs more time. Cook it until it reaches the same light body as the standard sauce rather than following the smaller batch’s clock.

Two matching stainless skillets showing a smaller amount of piccata sauce for chicken alone and a larger amount for chicken with pasta.
The pasta pan should look fuller, not thicker. If the larger batch is already syrupy before the noodles go in, it has reduced too far to coat them lightly and evenly.

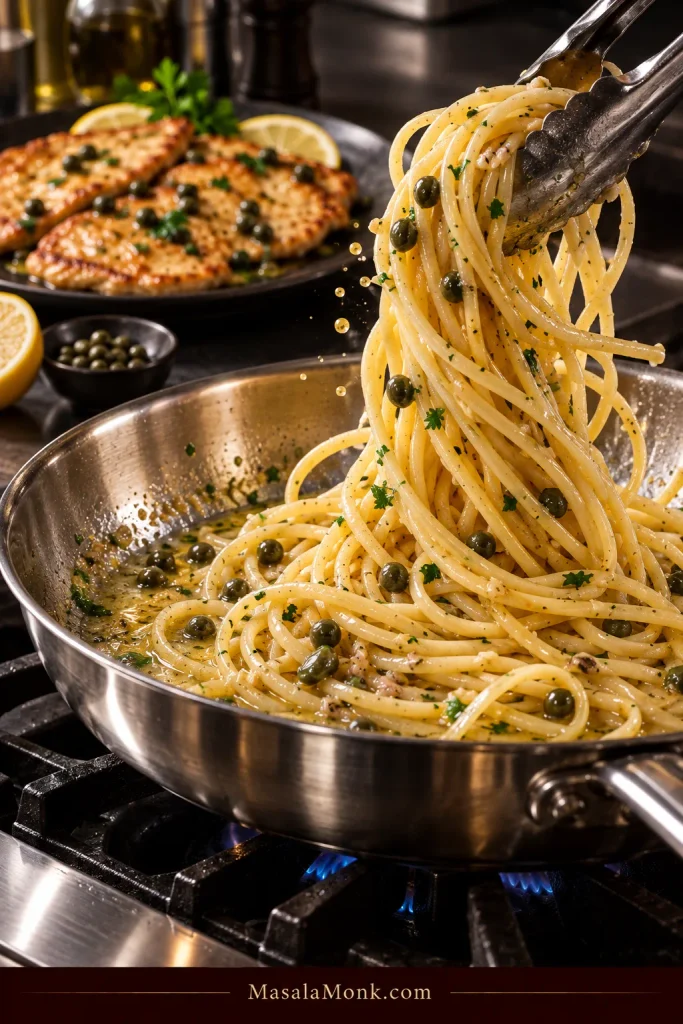
Toss the Pasta, Then Plate the Chicken

Reserve ½ cup / 120 ml pasta water before draining. Keep the chicken on its plate while you toss the drained pasta briefly through part of the sauce. Loosen it with pasta water only if needed, a tablespoon or two at a time, then plate the chicken over or beside the pasta and spoon the remaining capers and sauce over the top.

Long pasta being lifted with metal tongs from a stainless skillet of lemon caper sauce while cooked chicken rests on a separate plate behind it.

Cooking the full dish now? Return to the Chicken Piccata recipe card.

If the sauce doesn’t look right, don’t start adding things at random. What you see usually tells you what happened.

When Chicken Piccata Goes Wrong

What you notice Likely cause What to do
Watery sauce Wine or broth was not reduced enough Reduce before adding butter
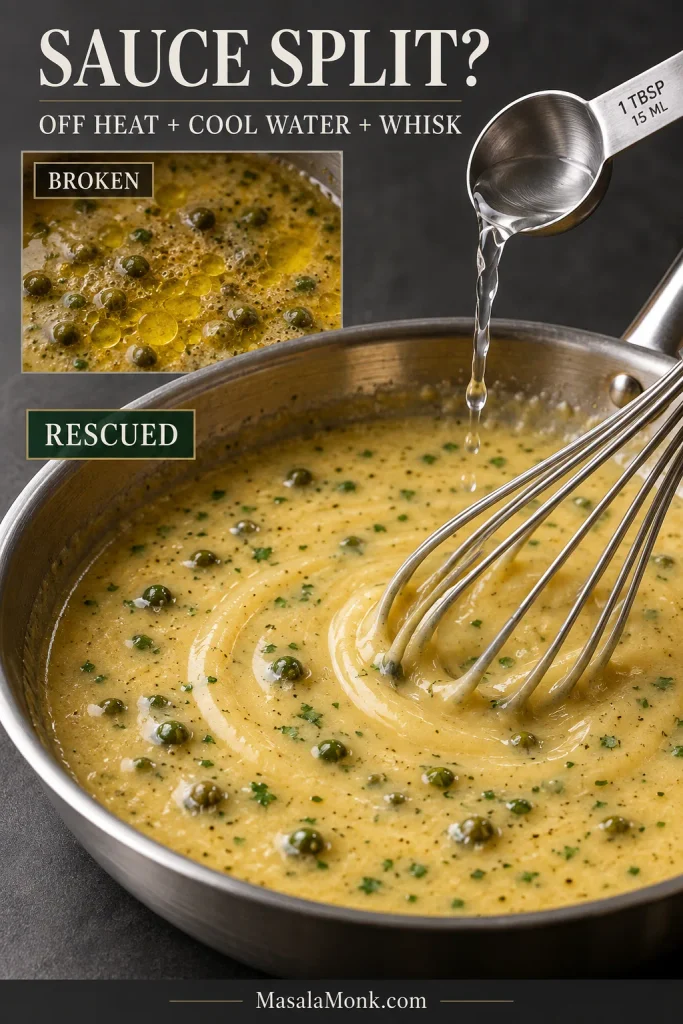
Oily or split sauce Pan too hot, butter added too quickly or excess frying oil remained Off heat + 1 tbsp / 15 ml cool water + whisk
Too sour Too much lemon or too much reduction after acid was added Add unsalted broth and a little butter
Too salty Salty broth, capers and reduction compounded Dilute with unsalted broth or water
Lemony but still bland Wine and broth were not concentrated enough, or the fond was lost Build the savory base instead of adding more lemon
Bitter or burnt Burnt garlic or black flour residue If strongly bitter, restart the sauce in a clean skillet
Pale chicken Wet chicken, cool pan or crowding Dry well and brown in batches
Gummy coating Too much flour or dredged too early Use less flour and dredge last
Soft coating Chicken sat in the sauce too long Spoon sauce over at serving

Two sauce problems deserve a slower hand. For a split sauce, get the skillet completely off the heat and whisk or swirl in 1 tbsp / 15 ml cool water. If it starts coming back together but still looks oily, add another teaspoon.

Broken piccata sauce with visible oil droplets beside a smooth rescued sauce being whisked as cool water is added from a measuring spoon.

Too sour? Start with a small splash of unsalted broth and a little butter, warm gently, then taste again. Too salty? Dilute with unsalted broth or water before adding anything else. Skip the sugar; piccata should stay savory. If you need to compare the sauce visually again, return to the glossy sauce guide.

No Wine, No Gluten—or No Capers?

No wine: use 1 cup / 240 ml low-sodium chicken broth total. Add the first ½ cup / 120 ml where the wine normally goes and reduce it the same way, then add the remaining ½ cup / 120 ml and continue with the recipe.

After the broth has concentrated, 1 tsp / 5 ml white wine vinegar can restore some of the acidity the wine would have brought; then be conservative with the optional finishing lemon.

Gluten-free: white rice flour gives a particularly light dredge. A 1:1 gluten-free all-purpose blend also works.

No capers: you can leave them out. Finely chopped green olives can supply some briny saltiness, but they do not taste the same as capers, so start modestly and add more only after tasting.

If what you really want is bright lemony chicken without wine or capers, MasalaMonk’s lemon pepper chicken is the cleaner route rather than trying to turn piccata into a completely different dish.

What Goes With Chicken Piccata?

MasalaMonk’s creamy mashed potatoes give the lemon-butter sauce somewhere to settle and make the meal feel softer and richer.

For something greener, asparagus or broccolini need little more than salt and olive oil. Green beans almondine add crisp-tender beans and toasted almonds against the soft chicken and sauce.

A sharp leafy salad or cucumber-and-tomato salad works well when you want something fresh to cut through the butter.

Two thin chicken piccata cutlets with lemon butter caper sauce served beside mashed potatoes and broccolini on a dinner plate.

Make It Ahead—or Save the Leftovers

Make ahead: slice and pound the chicken, then cover and refrigerate it until you’re ready to cook. You can also chop the shallot and parsley, measure the wine and broth, drain the capers, and zest and juice the lemon ahead of time. Leave the flour dredge until shortly before the chicken goes into the skillet so its surface stays dry enough to brown well.

Storage and Reheating

Refrigerate cooked leftovers promptly, ideally within 2 hours, in a covered shallow container. Use them within 3–4 days; the USDA leftovers guidance gives the same refrigerator window.

Reheat the chicken and sauce gently in a covered skillet with a splash of broth or water until the chicken reaches 165°F / 74°C. Chilled butter sauce can look a little separated as it warms; if that happens, take the pan off direct heat and swirl in a teaspoon or two of cool water.

The first time you make piccata, you may watch the sauce like a hawk. After a batch or two, the signs become familiar: chicken that releases when it’s properly browned, concentrated liquid, butter that settles smoothly, lemon that tastes bright instead of sharp. Then it becomes an easy skillet dinner that still feels special when it reaches the table.

Back to the Chicken Piccata recipe · Back to top

Posted on — Leave a comment

Orange Chicken Recipe: Crispy Homemade Chicken with Easy Orange Sauce

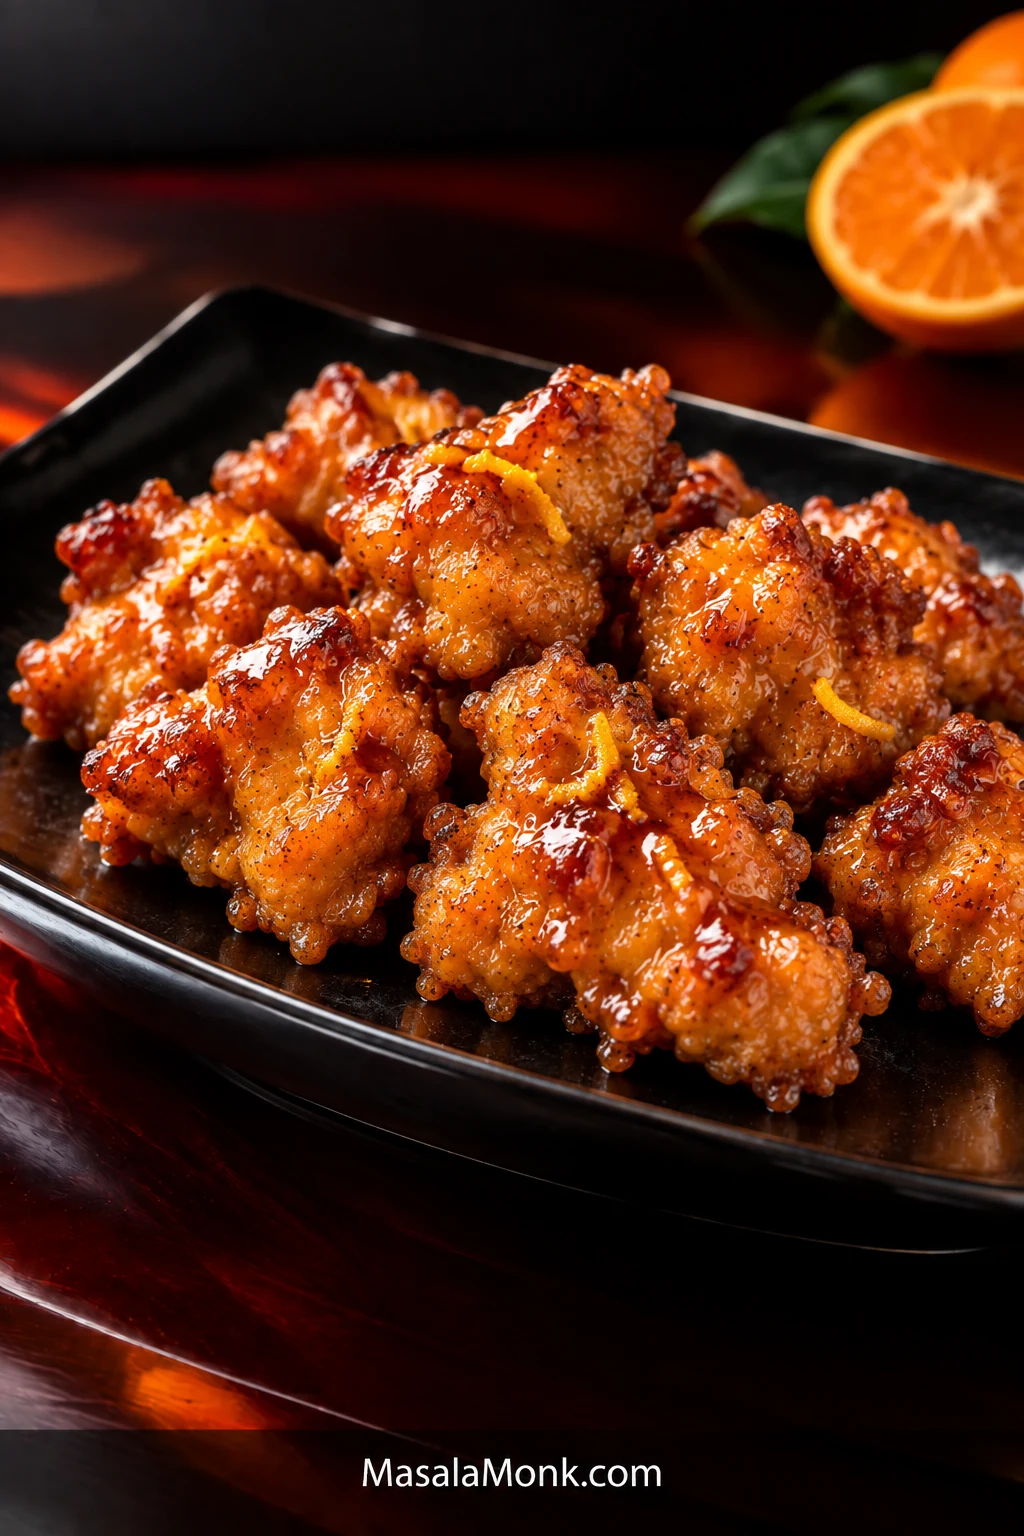
Glossy orange chicken piled on a black rectangular plate, topped with thin orange-peel strips, with a halved orange behind the plate.

Orange chicken has a built-in problem: the sauce needs to reach every crisp ridge, but the moment that wet glaze touches the crust, the crust starts to soften.

When it lands properly, though, the first bite still has a crisp edge under the glaze, the chicken stays juicy inside, and the orange arrives before the sweetness does. That bright citrus smell matters just as much as the sticky finish.

This is Chinese-American takeout-style orange chicken, but it isn’t built as a restaurant copycat. The goal is fresh orange, a manageable shallow fry and just enough glossy sauce to coat the crust.

Coat
Tacky chicken, pressed starch, shaggy surface.

Fry
Hot oil, roomy batches, rack between batches.

Glaze
Thicken first, coat lightly, toss 15–20 seconds.

Crispy Homemade Orange Chicken Recipe

Crisp first. Glaze last. Keep the fried chicken and finished orange sauce apart until serving.

Yield
4 generous servings

Prep
About 25 minutes

Cook
About 25 minutes

Total
About 50 minutes

Equipment: 12-inch / 30 cm heavy skillet, wok or similar wide pan; wire rack set over a tray; fine grater or zester; instant-read thermometer if available; heatproof container for used oil if reusing the frying pan.

Chicken

  • 1½ lb / 680 g boneless skinless chicken thighs
  • 1 tbsp / 15 ml regular or light soy sauce, not dark or sweet soy
  • 1 tbsp / 15 ml Shaoxing wine or dry sherry
  • ¼ tsp ground white pepper

Crisp Coating

  • ¾ cup plus 2 tbsp cornstarch / about 105 g total, divided
  • Neutral high-heat frying oil, enough for about ¼ inch / 5–6 mm depth in the pan

Fresh Orange Sauce

  • About 3 medium oranges, or enough to yield ¾ cup / 180 ml fresh orange juice
  • 2 tbsp / 30 ml water
  • ⅓ cup / about 65 g granulated sugar
  • 2 tbsp / 30 ml regular or light soy sauce
  • 2 tbsp / 30 ml unseasoned rice vinegar
  • ¼–½ tsp red pepper flakes, or omit for mild
  • 2 tsp neutral oil, if using a clean pan for the sauce
  • 3 garlic cloves / about 9 g, finely minced
  • 2 tsp / about 4–5 g finely grated fresh ginger
  • 2 tsp packed / about 4–5 g finely grated orange zest, colored skin only
  • ½ tsp / 2.5 ml toasted sesame oil, optional

Cornstarch Slurry

  • 1½ tbsp / about 12 g cornstarch
  • 2 tbsp / 30 ml cold water

Optional Finish

  • Thinly sliced scallions
  • Sesame seeds

1. Season the chicken

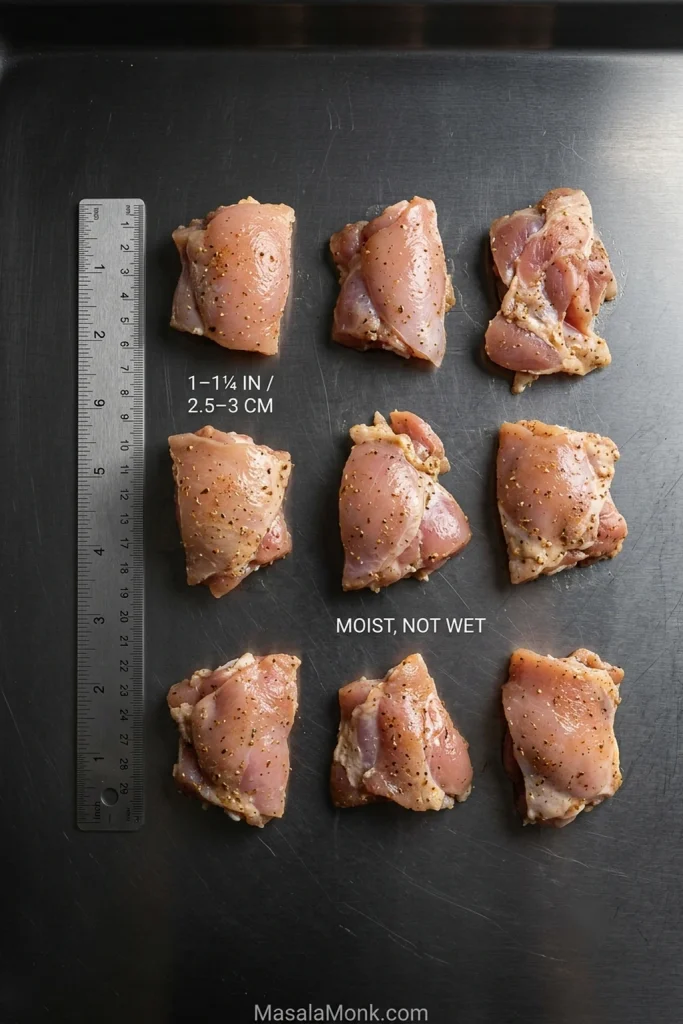
Cut the thighs into fairly even 1 to 1¼-inch / 2.5–3 cm pieces. Toss with 1 tablespoon soy sauce, the Shaoxing wine and white pepper. Leave for 15 minutes while you prepare the sauce ingredients.

You’re looking for moist chicken with no puddle at the bottom of the bowl. Drain off any obvious excess before coating.

2. Mix the sauce and slurry

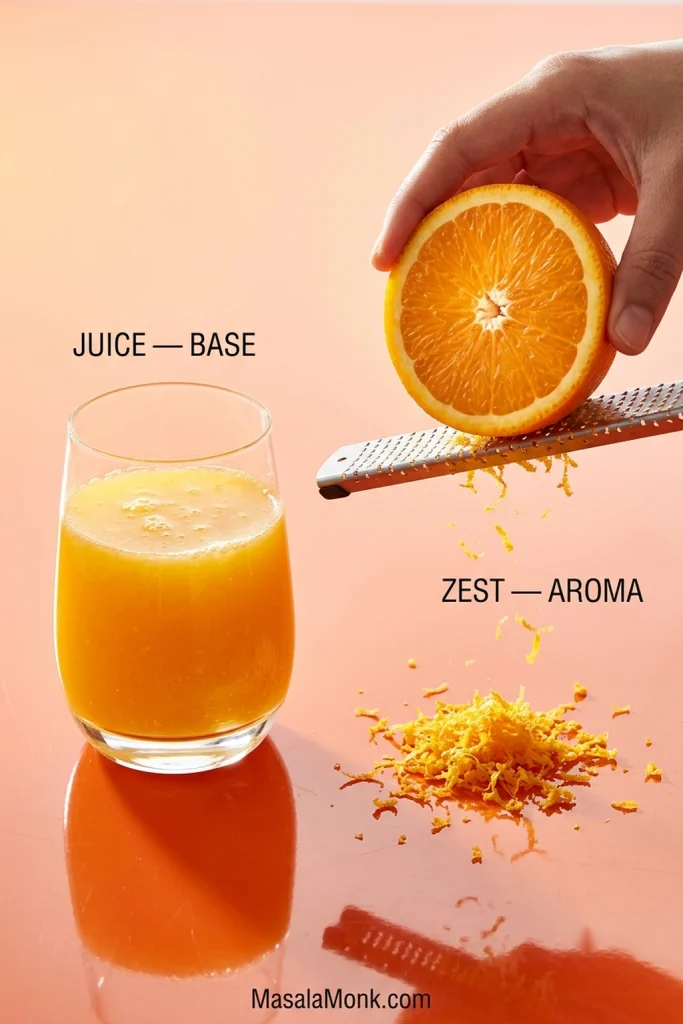
Zest the oranges before juicing them. Then squeeze enough juice to measure ¾ cup / 180 ml.

Whisk the orange juice with the water, sugar, 2 tablespoons soy sauce, rice vinegar and red pepper flakes. Keep the measured zest and optional sesame oil aside.

In a second bowl, stir the cornstarch into the cold water. Mix the sauce now, but wait until the chicken is fried before cooking and thickening it.

Before you start frying, have the sauce mixture, slurry, zest, wire rack and serving plate ready. Once the chicken is done, the rest moves quickly.

3. Coat the chicken

Add 2 tablespoons cornstarch directly to the seasoned chicken and toss until the surface feels lightly tacky.

Put the remaining ¾ cup / about 90 g cornstarch in a wide bowl or shallow dish. Press each piece firmly into the starch, then shake away whatever does not stick.

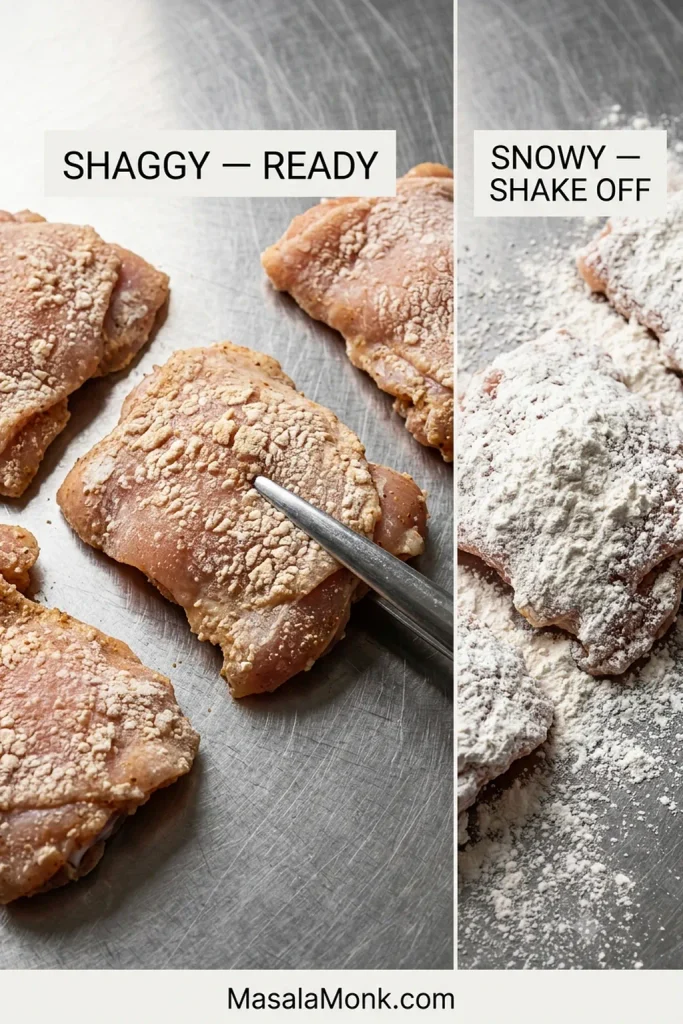
A good coating looks rough, dry and a little shaggy. Fry it once the oil is ready.

4. Shallow-fry in batches

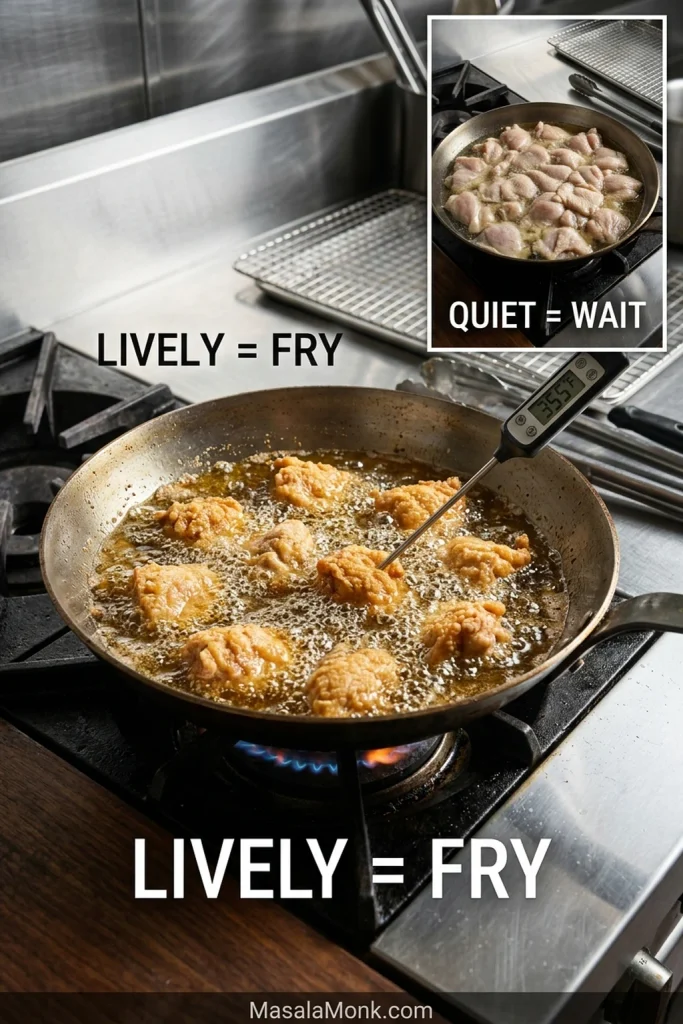
Pour about ¼ inch / 5–6 mm neutral oil into a 12-inch / 30 cm heavy skillet, wok or similar wide pan. Heat to roughly 350–360°F / about 175–180°C.

Lower each piece into the oil away from you and leave visible space between the pieces. A high-sided pan helps contain splatter; a splatter screen is useful if you have one. Listen for a steady, lively sizzle. A suddenly quiet pan means it is time to stop adding chicken and let the oil recover.

Let the first side cook undisturbed until the crust has set before turning. If it still feels soft or wants to cling to the pan, give it a few more seconds. Fry in 2–3 batches; each batch will usually need about 3½–5 minutes total, until crisp and cooked through.

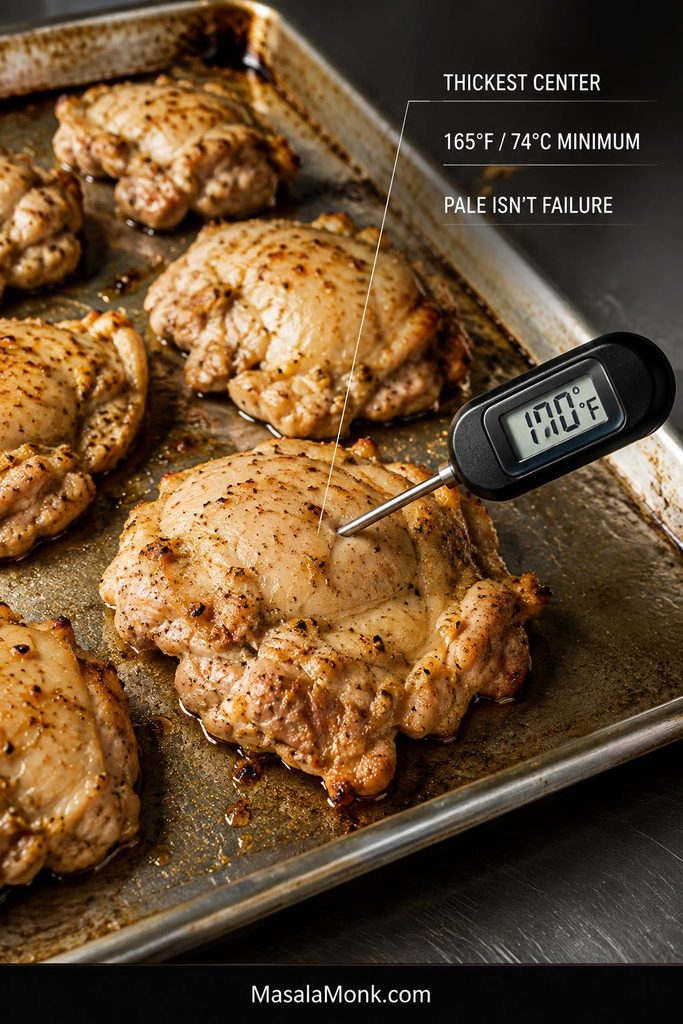
Check one of the larger pieces: poultry should reach 165°F / 74°C in the center. Move each batch to a wire rack rather than piling it into a bowl.

Finish all the frying before you cook the sauce. The chicken can wait on the rack for those few minutes.

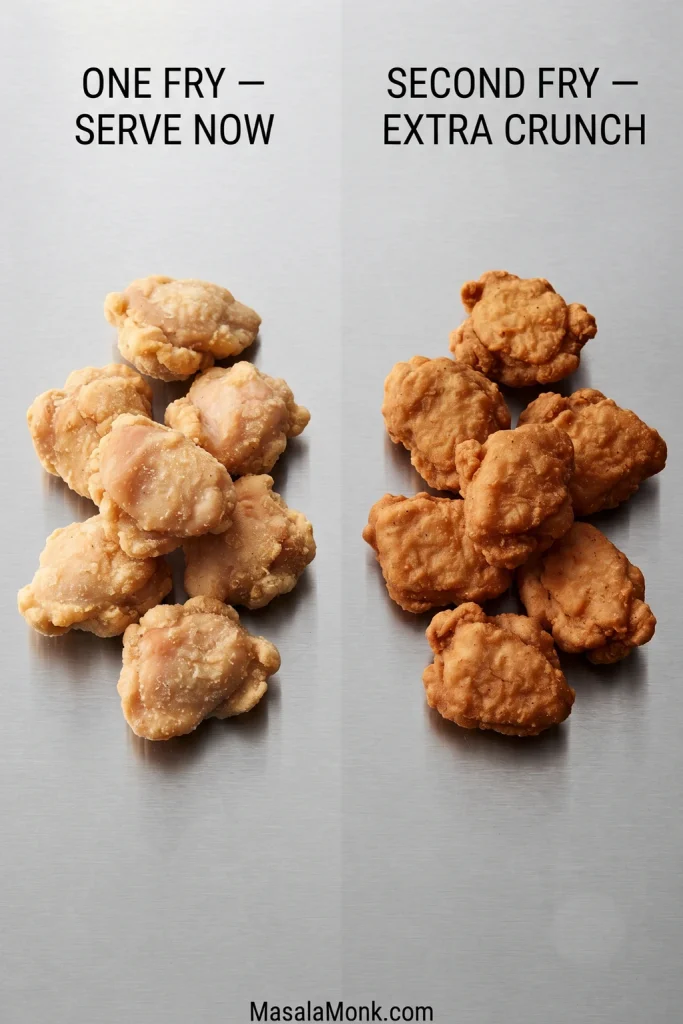
The crust should now feel dry, set and crisp under the tongs instead of dusty or soft. At this point, it should already be crisp enough to make you want to steal a piece. That’s a good sign.

For extra crunch: Once every piece has completed the first fry, raise the oil to about 375°F / 190°C and fry the chicken again for 45–90 seconds. Stop once the crust looks drier and feels more brittle. Allow about 5 extra minutes for this optional step.

5. Cook the orange sauce

Using a clean pan? Heat 2 teaspoons neutral oil over medium. Reusing the frying pan? Carefully transfer the excess frying oil to a heatproof container, leaving about 2 teaspoons in the pan, and remove any loose dark starch bits. Never pour frying oil down the sink.

Add the garlic and ginger and cook for 20–30 seconds, until fragrant. A little color is fine; burnt garlic is not.

Stir the orange-juice mixture, pour it in and bring it to a lively simmer for 1–2 minutes. Taste it now. Orange should lead, sweetness should sit behind it, and enough acidity and soy should remain to keep the sauce from tasting like candy.

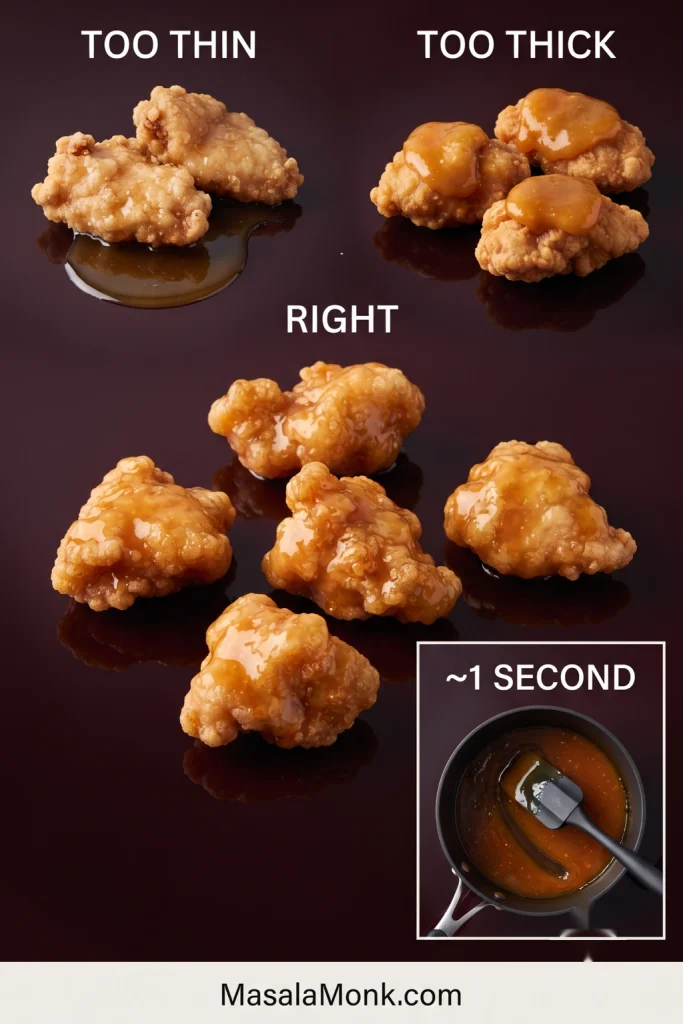
Stir the slurry again and start with about two-thirds. Let it bubble for a few seconds and look at the sauce before adding more. Still thin? Add a little more. You may not need the rest.

The glaze should coat the back of a spoon or spatula in a thin shiny film. Drag the spatula through the pan as a second check: the trail should stay visible for about one second before closing.

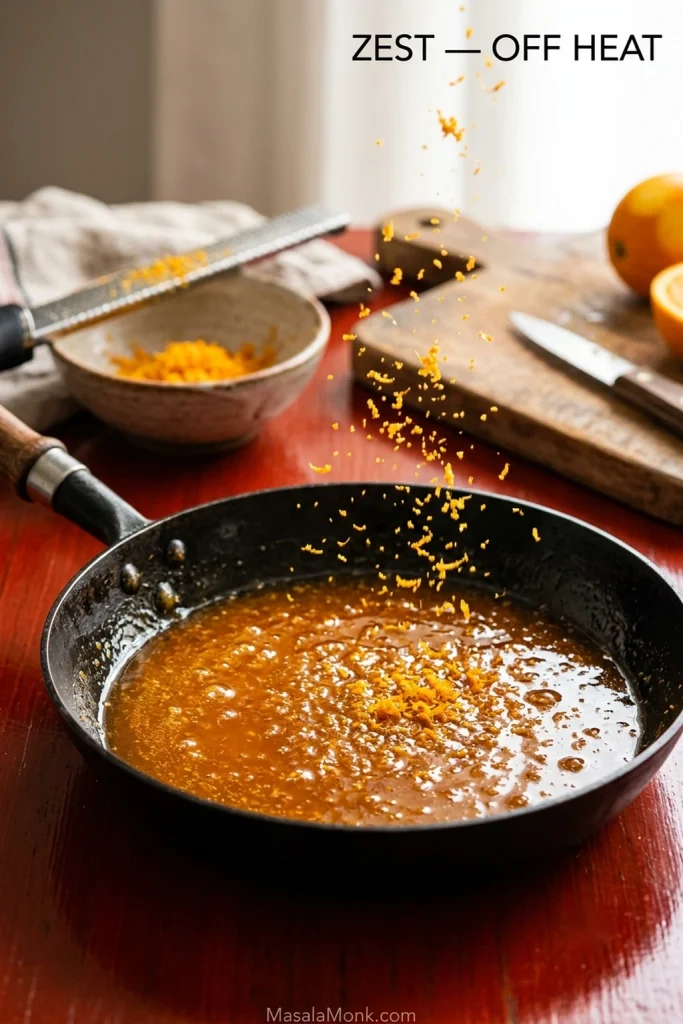
Turn off the heat and stir in the orange zest. Almost immediately, the sauce should smell fresher and unmistakably more orange. Add the optional sesame oil if you want a faint toasted note.

If the glaze tightens before you’re ready to toss the chicken, loosen it over low heat with 1 tablespoon water. Nothing is ruined.

6. Glaze and serve

If there is visibly more sauce in the pan than you need for a thin coating, spoon a little out now and save it for rice. The chicken needs a lacquer, not a bath.

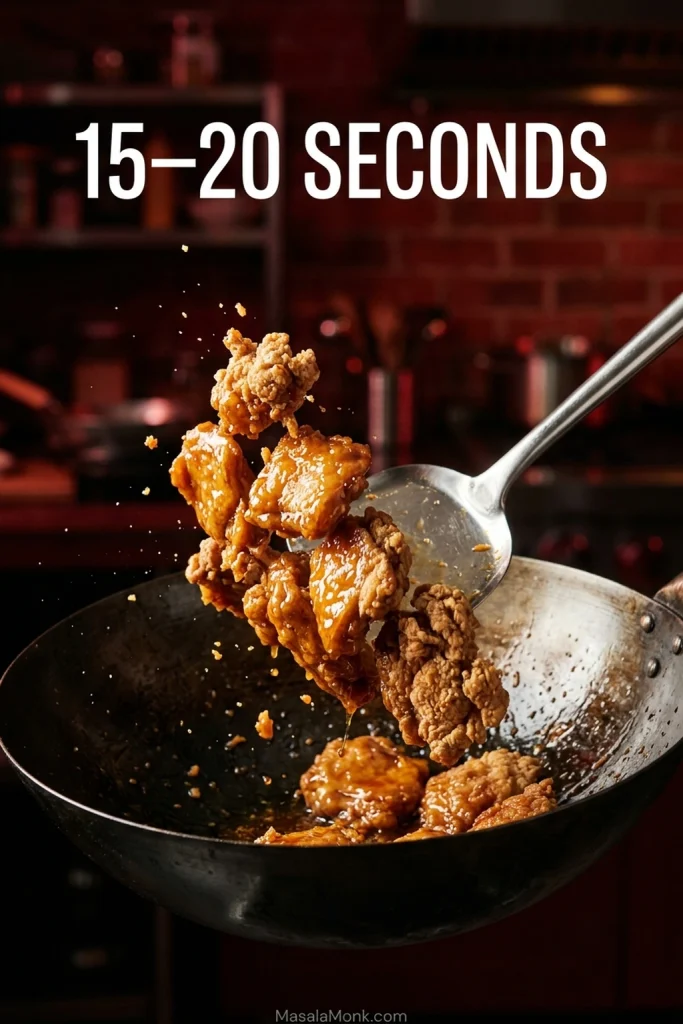
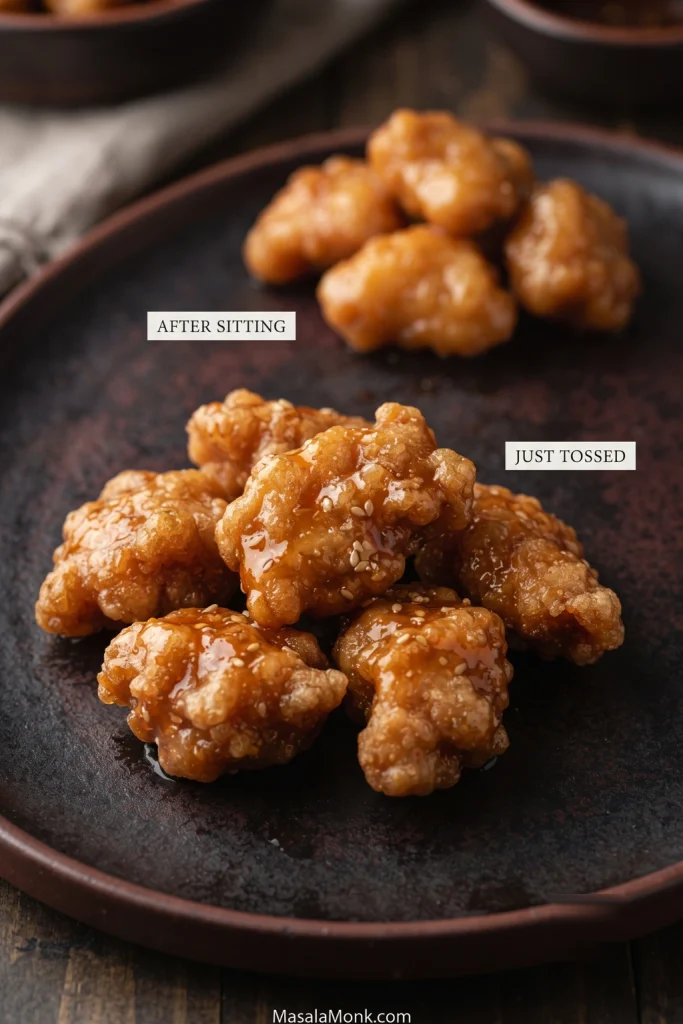
Add the fried chicken and toss for only 15–20 seconds, just until glossy. Plate immediately and finish with scallions and sesame seeds, if using.

Recipe Notes

  • Chicken breast: works, but it dries faster than thigh, so start checking it earlier.
  • Soy sauce: use regular/light soy rather than dark or sweet soy, which can overpower the citrus and darken the glaze.

Cooking now? You can stop here. The rest of the guide is for the moments when the coating falls off, the oil cools down, or the sauce somehow still does not taste orange enough.

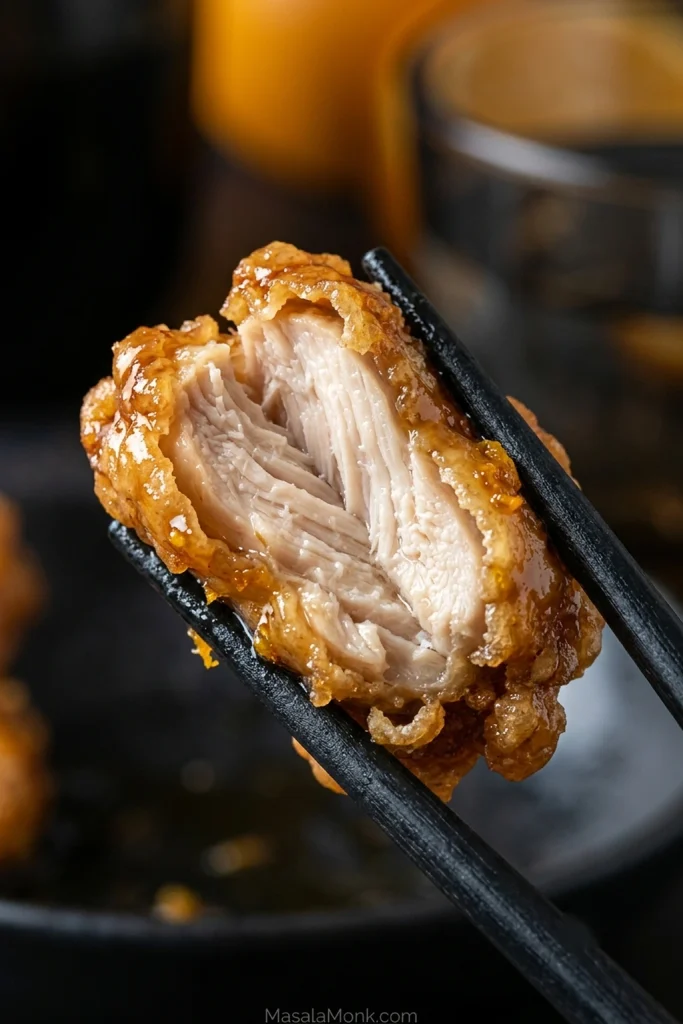
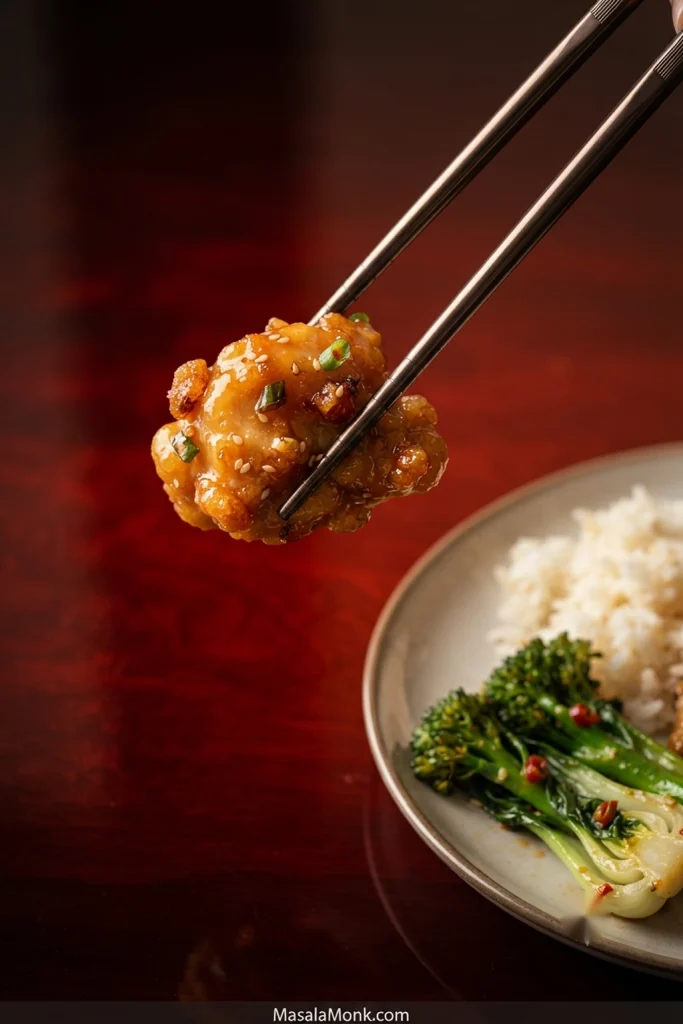
The finished bite is the test for everything above: a thin crisp shell should still give way to juicy chicken underneath, even after the glaze has reached the crust.

Close-up of a glazed piece of orange chicken held in black chopsticks and cut open to reveal juicy chicken inside a thin golden crust.
The best bite keeps both textures in play: crisp coating around the edges and juicy chicken at the center, with neither one overwhelming the other.

Before the Oil: Make the Coating Stay Put

Your coating can start failing before the chicken ever reaches the oil. Too much surface liquid weakens the starch layer and gives it less to hold onto.

Keep the pieces around 1 to 1¼ inches / 2.5–3 cm. That gives you plenty of crisp surface without shrinking the chicken into tiny nuggets that dry out too quickly.

Raw seasoned chicken thigh pieces arranged beside a ruler, with a size guide of 1–1¼ inches / 2.5–3 cm and a note that the surface should be moist, not wet.
Uniform pieces are easier to fry well than a mix of large and small ones; similar sizing helps the centers finish together while the outside turns crisp.

Season first, but don’t soak the surface

The short soy, Shaoxing and white-pepper rest gives the meat some flavor of its own. Liquid collecting at the bottom of the bowl is your cue to drain it before the starch goes on.

Why cornstarch?

A pressed-on starch coating fries into a thin, crisp crust. The first small addition of cornstarch makes the seasoned chicken tacky; the remaining starch then has something to hold onto.

A heavier flour-and-starch dredge, like our hot honey chicken tenders use, creates a much craggier crust. For this shallow-fry method, keep the starch shell lighter.

Look before you fry. The starch should sit in little rough patches that stay put when you lift a piece. Shake away any powder that showers off. Once the coating looks shaggy rather than snowy, you’re there. Those rough ridges are exactly where the glaze will catch later.

Side-by-side chicken pieces comparing a rough, attached cornstarch coating labeled “shaggy — ready” with a heavily powdered coating labeled “snowy — shake off.”
More loose cornstarch does not mean more crunch. What matters is the starch that actually clings, because attached rough patches become the crust instead of falling away in the oil.

In the Oil: Control the Heat

How do you keep orange chicken crispy? Fry in small batches, let the crust set before turning, drain the chicken on a rack, and finish the sauce before the final toss.

A wide high-sided skillet gives you room for batches and some protection from splatter. A wok or Dutch oven works too.

The sound gives you an early warning before a thermometer does. When the steady sizzle fades sharply, check the oil; once it drops much below about 325°F / 165°C, pause before adding more chicken and let the heat recover.

Chicken frying vigorously in a skillet beside an oil thermometer, with a comparison showing a lively frying pan and a quieter pan that needs time to recover.
A fading sizzle is also a batch-size warning: give the pan room and time to regain heat before adding more chicken.

Move each batch straight to a wire rack. Hot chicken keeps giving off steam, and a bowl traps that moisture against the crust.

When is a second fry worth it?

For orange chicken that is going straight from pan to plate, one good fry is usually enough. Use the optional second fry for maximum crunch or when the fried chicken needs to sit longer than the few minutes it takes to finish the sauce.

The second fry drives off a little more surface moisture, leaving the coating harder, drier and noticeably more brittle.

Two groups of fried chicken compared side by side, with one labeled “one fry — serve now” and the crisper second group labeled “second fry — extra crunch.”
The second fry earns its keep when the chicken must wait—the drier crust buys you a little more resistance to steam and sauce.

Check the Crust Before You Move On

Break open one larger piece if you want a final pre-sauce check. The coating should be thin and crisp, while the chicken inside stays juicy. Once that contrast is there, the slow part is behind you. Now build the sauce.

Build an Orange Sauce, Not an Orange-Juice Sauce

More juice does not always make a sauce taste more orange. Once the sauce is already loose enough, another splash can dilute it faster than it improves the aroma.

Orange juice brings sweetness, acidity and the base citrus flavor. Fresh zest supplies the concentrated aromatic oils that make the finished glaze smell unmistakably orange.

A glass of fresh orange juice beside a halved orange being grated, with loose orange zest and labels identifying juice as the sauce base and zest as the aroma.
If the sauce already has enough sweetness and liquid but still smells muted, add zest before reaching for more juice—the missing piece may be aroma, not orange volume.

Taste before you thicken

Balance the sauce while it is still fluid. Once it is thickened, adding water, vinegar or soy also changes its texture, so settle the sweet-sour-savory balance first. If something still tastes off, fix the flavor before thickening.

Fix the Flavor Before the Chicken Goes In

Small corrections are enough.

If the sauce tastes…Try this
Too sweetAdd unseasoned rice vinegar, 1 tsp at a time, then taste again.
Too sharpAdd 1 tsp sugar, dissolve it, then taste again.
Too saltyAdd warm water, 1 tbsp at a time, then taste again. Thicken only after the balance is right.
Flat or one-noteTry ½ tsp soy plus ½ tsp rice vinegar, then taste again.
Sweet but not orange enoughFinish thickening first. Once the heat is off, add extra zest ¼ tsp at a time until the aroma lifts.

Once the balance tastes right, check the glaze thickness before the chicken goes in.

How Thick Should Orange Chicken Sauce Be?

Thickness matters most once the sauce reaches the crust.

Too thin: it runs straight off the crust and gathers underneath, carrying more water into the coating.

Right: it still moves easily in the pan but leaves a translucent, glossy layer across the rough surface of the chicken.

Too thick: it begins sitting on the chicken in sticky blobs instead of flowing over the ridges, and the glaze can turn gummy as it cools.

Three-way comparison of orange chicken coated with sauce labeled too thin, too thick and right, with an inset showing a short trail through properly thickened sauce.
Judge the glaze by how it moves: too thin brings extra moisture to the crust, while too thick sits heavily on it. The sweet spot is glossy, fluid and clingy.

The exact amount of slurry can vary because pan width, simmer intensity and reduction time change how much liquid cooks off. Start with most of it, then let the texture in the pan decide whether the rest is needed.

Once the glaze is where you want it, turn off the heat and stir in the orange zest. The aroma should brighten almost immediately. Add the optional sesame oil now if you want a faint toasted note.

Fresh orange zest falling into a pan of glossy orange sauce, with a grater and a small bowl of zest beside the pan.
Late zest is less about making the sauce more sour and more about restoring the fresh orange aroma lost during simmering.

Glaze ready? Go to the final toss.

The 15–20 Second Window

By now the chicken is crisp and the sauce is finished. Nothing needs more cooking.

Add only enough glaze to coat the chicken thinly and toss for about 15–20 seconds. Then get it onto the plate.

A spoon lifting glossy orange chicken from a wok during the final sauce toss, with “15–20 seconds” displayed above the pan.
The final toss is for coverage, not cooking. Once the glossy sauce has reached the rough surfaces, get the chicken out of the pan before the crust absorbs more moisture.

A wet glaze will eventually soften any starch crust, so those first few minutes are the reward: crisp edges beneath a thin sticky coating, juicy chicken inside, and fresh orange aroma still sitting above the sweetness.

Two portions of glazed orange chicken compared on a dark plate, with crisp pieces labeled “just tossed” and softer-looking pieces labeled “after sitting.”
Crispness starts changing as soon as sauce meets starch. The freshly tossed batch has the strongest contrast between sticky glaze and brittle edges.

Need the quantities or numbered method again? Back to the recipe card.

Orange Chicken Troubleshooting

If a batch goes sideways, don’t change everything at once. Think back to the first moment it looked wrong. That usually tells you what to fix.

Chicken and Coating Problems

ProblemLikely causeWhat to do
Coating looks wet and pastyToo much surface liquidDrain obvious liquid before coating. If the starch is already pasty, press on more dry starch until the surface looks rough rather than wet.
Loose starch keeps falling offCoating is not firmly attachedPress it on, then shake away the excess.
Coating falls off in the oilMoisture, weak adhesion or turning too earlyLet the crust set before turning, handle the pieces gently, and revisit the coating cues if the starch never attached well.
Chicken is pale or greasyOil stayed too coolReduce the batch size and let the oil recover before adding more chicken; see the frying-oil cues.
Outside darkens too fastOil too hot or pieces too largeLower the heat slightly and keep the pieces close to the recipe size.

Sauce, Glaze and Serving Problems

ProblemLikely causeWhat to do
Sauce stays wateryNot enough simmering or slurryBring it back to a simmer and add a little more freshly stirred slurry, using the sauce-thickness cues as your target.
Sauce turns gummyToo much starch or too much reductionWhisk in warm water, 1 tbsp at a time, until it flows again; compare it with the correct glaze consistency.
Sauce tastes bitterToo much white pith or scorched aromaticsMild pith bitterness may soften with a little water and sugar. If the garlic or ginger is genuinely burnt and acrid, remake the sauce.
Chicken loses its crispness too quicklyToo much sauce, sauce too thin or toss too longUse less glaze, finish thickening it first and keep the final toss brief.
Chicken is dry insideIt cooked too longCheck the larger pieces earlier and stop once they reach 165°F / 74°C. Breast has less margin than thigh.

Once you’ve fixed the problem, return to the recipe card and pick up from the step you need.

Swaps That Work Here

Chicken and coating

Chicken breast can replace thigh; start checking it earlier. Potato starch is also a good coating alternative if you already have it, with a slightly more brittle finished crust.

Sauce ingredients

Dry sherry is the easiest substitute for Shaoxing wine; if you have neither, leave it out. Unsweetened bottled orange juice can work, although fresh zest still matters. Orange marmalade brings sugar, peel and pectin together, so it needs its own balanced sauce rather than a straight swap for fresh juice. For more heat, add extra red pepper flakes or a little chile paste.

Air Fryer and Unbreaded Options

For an unbreaded version, brown seasoned bite-size chicken in a lightly oiled skillet and finish it with the orange sauce. Our hibachi chicken recipe goes deeper into pan-browning chicken without a coating.

For an air-fryer adaptation, use the same cornstarch-coated chicken and coat the surface thoroughly but lightly with oil so dry starch does not remain chalky. Arrange the pieces in a single layer and air fry at 400°F / 205°C, turning halfway.

Start checking around 10 minutes; exact timing varies with the air fryer and piece size. Cook until the edges look crisp and the largest pieces reach 165°F / 74°C. Finish the sauce separately and toss only at the end. Expect the crust to be lighter and a little less evenly craggy than the shallow-fried version.

Cornstarch-coated chicken in an open air-fryer basket beside a plate of shallow-fried chicken, with labels identifying the two cooking methods.
With air-fried orange chicken, watch for chalky white starch rather than chasing the darker color of shallow frying; exposed dry patches need a light coating of oil.

What to Serve with Orange Chicken

Because the chicken is sticky, sweet and rich, plain rice and something green are usually all it needs.

Glazed orange chicken served with white rice and green vegetables on a plate set on a wooden dining table.
Plain rice gives stray glaze somewhere to go, while broccoli or another green vegetable brings freshness against the sweet, rich orange chicken.
  • Steamed jasmine rice: simple and excellent for catching the little bit of glaze left on the plate. Our guide to cooking jasmine and other white rice has stovetop ratios and texture cues if rice is the part you tend to second-guess.
  • Broccoli, bok choy or stir-fried greens: something fresh and slightly bitter works well against the sweet citrus glaze.
  • Fried rice: good when you want a fuller takeout-style meal; keep its seasoning relatively restrained so the orange chicken remains the main event.

If you want the same contrast of crisp chicken and glossy sauce with a toasted-sesame profile, our sesame chicken takes it in that direction.

Store, Freeze and Reheat Orange Chicken

If you expect leftovers, leave the portion you will not serve immediately unsauced and keep the chicken and sauce separate. That gives the crust a much better chance of coming back later.

Glass container filled with unsauced fried chicken beside a separate jar of orange sauce, with a plated serving of orange chicken in the background.
Set aside tomorrow’s portion before glazing the whole batch. An unsauced crust responds far better to dry reheating than chicken that has already spent hours absorbing sauce.

For make-ahead cooking, mix the sauce ingredients in advance but keep the zest and slurry separate. Cut the chicken ahead if needed, then coat it close to frying time.

Refrigerate leftovers promptly, within 2 hours of cooking. Store them in shallow covered containers and use refrigerated leftovers within 3–4 days.

For longer storage, keep the chicken and sauce in separate shallow containers and chill them promptly. For best quality, freeze for up to 3 months. Reheat the chicken until hot and crisp again, warm the sauce separately, and toss only when you’re ready to eat.

An oven or air fryer gives the crust the best chance to dry out again. A skillet works for smaller portions. The microwave is fastest, and sometimes that’s what works tonight—just expect a softer coating. Reheat leftovers thoroughly to 165°F / 74°C.

Back to the recipe card · Back to top

When it is time to eat, the finished plate should still look like fried chicken underneath the sauce: glossy enough to catch the light, but textured enough that the crust has not disappeared.

Black chopsticks holding a glossy piece of orange chicken above a plate containing white rice, orange chicken and green vegetables.
A thin sheen is enough. If the fried ridges are still visible beneath the glaze, the sauce is coating the chicken rather than burying it.

The sauce should taste unmistakably orange, cling in a thin glossy layer and leave very little liquid behind in the pan. Once the chicken is crisp and the glaze is there, don’t linger. Toss, plate and eat.

Posted on — Leave a comment

Chicken Shawarma Recipe: Juicy, Spiced & Easy to Make at Home

Sliced chicken shawarma with browned, slightly charred edges and juicy interiors, served with garlic sauce, pink pickled turnips and blistered pita.

Great chicken shawarma gives you two things at once: juicy, deeply spiced chicken and dark edges that taste almost fried in their own rendered fat.

Those edges are usually the difficult part at home. The seasoning can be wonderful, yet the chicken comes out pale and soft—or it stays in the oven so long waiting for color that the meat dries out.

This chicken shawarma recipe handles the two jobs separately. Cook the thighs while they are still juicy. Rest them, slice them thinly, then give the newly exposed surfaces one short blast of hard heat.

Most of the work is hands-off. After the chicken is seasoned, the oven handles the first cook and the final browning takes only a few minutes. No homemade rotisserie required.

Cook for juiciness. Finish for the edges.

Quick Answer: How to Make Chicken Shawarma at Home

Coat 2 lb / 900 g boneless, skinless chicken thighs in a concentrated lemon-garlic shawarma marinade and roast at 425°F / 220°C. Start checking the thickest thigh at 18 minutes. Poultry is safe at 165°F / 74°C, while thighs often become more tender as they move toward roughly 170–175°F / 77–79°C. Rest for 5 minutes, slice thinly, then broil or sear briefly until the fresh edges darken.

Thirty to 60 minutes of marinating gives you good surface seasoning; a few hours is useful when you’re planning ahead. No time to wait? Coat the chicken thoroughly and cook it.

Cooked-but-pale chicken is easy to rescue. Dry chicken is not.

The finished chicken should smell garlicky and savory, with cumin up front and warmer cardamom and allspice behind it. Look for juicy pieces, irregular caramelized edges and a few darker tips.

Choose Your Cooking Method

MethodBest for
OvenThe easiest full batch
SkilletStrong stovetop browning
GrillSmoke, flame and direct char
Air fryerSmaller quantities

Make It Now: Chicken Shawarma

The method is simpler in the kitchen than it looks on paper: season the thighs, roast them, rest and slice, then give the edges one quick finish.

Recipe at a Glance

Chicken2 lb / 900 g boneless, skinless chicken thighs
Yield5–6 medium wraps, or about 6 servings with substantial sides
Active prepAbout 15 minutes
Start to servingAbout 45 minutes without a marinating rest; add your chosen marinating time
Marinate30–60 minutes when possible; several hours or overnight is fine
Oven425°F / 220°C
RoastBegin checking at 18 minutes; expect roughly 20–25 minutes
FinishRest 5 minutes, slice, then broil until the edges darken; 1–3 minutes is common

With the chicken in the oven, you have roughly half an hour of dinner-making left. Mix the sauce, warm the bread and get the fillings ready while it cooks.

Before You Start

Use a 13 × 18-inch / 33 × 46 cm broiler-safe rimmed metal sheet pan. Thighs that are dripping wet straight from the package benefit from a light blot before marinating; you’re only removing the obvious excess liquid.

The full 2 lb / 900 g batch should fit in one open layer. If it doesn’t, use a second pan. Tight packing makes it much harder for moisture to escape.

Equipment

  • Large mixing bowl or food-safe container
  • Broiler-safe rimmed metal sheet pan
  • Tongs
  • Sharp knife and cutting board
  • Instant-read thermometer
  • Heavy skillet, optional

Ingredients

For the Chicken

  • 2 lb / 900 g boneless, skinless chicken thighs
  • 3 tablespoons / 45 ml olive oil
  • 2 tablespoons / 30 ml fresh lemon juice
  • 4 large garlic cloves, finely grated or crushed
  • 2 teaspoons ground cumin
  • 2 teaspoons ground coriander
  • 2 teaspoons sweet paprika
  • 1 teaspoon ground turmeric
  • 1 teaspoon ground black pepper
  • 1 teaspoon ground allspice
  • ½ teaspoon ground cardamom
  • ¼ teaspoon ground cinnamon
  • ¼–½ teaspoon cayenne pepper, depending on the heat you want
  • 10 g fine salt, about 1⅔ teaspoons if using fine table salt

About the salt: coarse and kosher salts vary considerably by volume, so 10 g is the more dependable measurement.

Three portions of fine, medium and coarse salt, each weighing 10 grams but occupying different amounts of space.
Ten grams stays ten grams even when different crystal sizes fill the spoon differently. Weight is the reliable anchor.

Sweet or regular paprika works best here. Too much smoked paprika starts pulling the chicken toward barbecue territory.

Trim large loose pieces of thigh fat, but leave the smaller seams attached. They help the meat stay moist and become especially good around the browned edges.

Quick Garlic Yogurt Sauce

  • 1 cup / 240 g thick Greek yogurt
  • 1 small garlic clove, very finely grated
  • 1 tablespoon / 15 ml fresh lemon juice
  • 1 tablespoon / 15 ml olive oil
  • ½ teaspoon fine salt, or to taste
  • 1–2 tablespoons / 15–30 ml cold water, as needed

For the Wraps

  • 5–6 medium flatbreads or pitas; homemade pita bread is another option
  • About 1 cup garlic yogurt sauce or toum
  • ½–1 cup sliced sour cucumber pickles or pickled turnips
  • Fries, optional
  • Chili sauce or shatta, optional
  • Lettuce, tomato, cucumber and thinly sliced onion, optional for a fresher wrap

How to Make Chicken Shawarma

1. Mix, Coat and Marinate

Combine the olive oil, lemon juice and garlic in a large bowl. Stir in the cumin, coriander, paprika, turmeric, black pepper, allspice, cardamom, cinnamon, cayenne and salt.

Add the thighs and turn them until the spices coat every side. The surface should look glossy and well seasoned, with very little loose liquid underneath.

Three marinated chicken thigh examples labeled runny, too heavy and right, showing loose liquid, thick paste and a thin clingy spice coating.
The useful target is a glossy coating on the chicken, not marinade pooling underneath it.

Cover and refrigerate for 30–60 minutes, a few hours or overnight. There isn’t much to gain by pushing this lemon-based marinade past about 24 hours. If dinner needs to happen now, continue straight to cooking.

2. Heat the Oven and Arrange the Chicken

Heat the oven to 425°F / 220°C with a rack in the middle.

Lift the thighs from the bowl, let the obvious excess marinade drip back and arrange the pieces in a single open layer.

Two sheet pans of marinated chicken thighs showing a crowded arrangement and a properly spaced arrangement on a 13 by 18 inch pan.
If you cannot see metal between the thighs, use a second pan. Extra oven time cannot replace evaporation space.

A bare metal pan gives the most direct heat. Parchment is fine for easier cleanup during roasting, but remove it before broiling. Keep silicone and other non-broiler-safe liners away from intense overhead heat.

3. Roast the Chicken and Make the Sauce

Begin checking the thickest thighs at 18 minutes. Depending on their size and your oven, expect roughly 20–25 minutes.

Check the thickest part of the largest piece with an instant-read thermometer. Poultry is safe at 165°F / 74°C. Thighs often become more tender as they move into roughly the 170–175°F / 77–79°C range, so a few degrees beyond the safety minimum aren’t a problem.

Instant-read thermometer inserted into the thickest part of a lightly browned cooked chicken thigh on a sheet pan, reading 170 degrees Fahrenheit.
Color answers a surface question; the thermometer answers the center. Don’t keep cooking juicy chicken just to chase browning.

When the thighs are safely cooked and tender, get them out of the oven. A pale surface isn’t a reason to keep the center cooking—the color gets another chance in a few minutes.

Meanwhile, mix the yogurt, garlic, lemon juice, olive oil and salt. Add cold water a tablespoon at a time until the sauce is creamy and easy to spoon, then refrigerate until serving.

4. Rest, Check the Pan and Slice

Move the thighs to a cutting board and rest for 5 minutes. Switch the oven to the broiler, or overhead grill.

Take a look at the pan while the chicken rests. A thin glossy film of rendered fat and concentrated juices is useful. An obvious pool of watery liquid is different; carefully spoon or pour that off before the chicken goes back.

Two sheet pans comparing glossy amber rendered fat and concentrated juices with a paler watery pool around cooked chicken thighs.
Tilt the tray: concentrated fat and juices move with a glossy, heavier sheen; excess cooking water runs thin and fast.

Slice into strips about ¼ inch / 6 mm thick. They don’t need to match perfectly.

Cooked chicken thigh being sliced into roughly quarter-inch pieces, showing moist freshly cut surfaces and a 6 millimeter thickness marker.
About ¼ inch / 6 mm keeps a juicy bite while exposing plenty of surface for browning.

5. Brown the Fresh Edges and Taste

Spread the slices across the pan instead of leaving them in a mound. Place the pan about 6 inches / 15 cm below the broiler; move it down one rack if your top position sits much closer.

Sliced chicken spread in one layer on a sheet pan positioned about 6 inches below the glowing broiler element in an oven.
Six inches / 15 cm is a starting point, not a promise. Watch the edges, not just the clock.

Start checking after about 1 minute. A 1–3 minute finish is common, but let the chicken decide: stop when some edges curl and darken while the thicker pieces still look juicy.

Extreme close-up of chicken shawarma showing a dark curled browned edge, caramelized spice crust and moist cooked interior.

Listen as well as look. Once the sliced chicken starts sizzling sharply instead of sitting quietly in moisture, you’re finally working on the edges.

A hot heavy skillet can do the same job. Work in batches for about 60–90 seconds so the pan stays hot.

Taste a piece before building the wraps. It should be well seasoned enough to hold its own next to bread and sauce. Flat? Toss the hot chicken with a small pinch of fine salt and taste again.

6. Warm the Bread and Set Out the Fillings

Warm the pita or flatbread until soft and flexible. Set out the cold sauce, pickles and whatever fries, chili sauce or fresh vegetables you’re using.

7. Build the Wrap

Spread sauce over the bread, add a line of hot chicken and follow with pickles plus any fries or vegetables you want. Roll firmly.

Set the wrap seam-side down in a dry skillet for 30–60 seconds. Turn it briefly if you want a little crispness on the second side too.

Hot chicken, cool garlic sauce, soft bread and a sharp pickle all bring something different to the same bite.

Cut chicken shawarma wrap filled mainly with browned chicken thigh slices, garlic sauce, pink pickles and a small amount of fries in thin flatbread.
Chicken should dominate the wrap; sauce and pickles sharpen it rather than bury it.

Recipe Notes

  • Doubling the recipe? Use two half-sheet pans so the chicken still has room around it.
  • Freezer prep: fresh chicken can be frozen promptly in the marinade and thawed overnight in the refrigerator before cooking.
  • Raw-chicken marinade: don’t use marinade that has touched raw poultry as a ready-to-eat sauce.

Want the why behind the method? Continue to the Chicken Shawarma Guide → · ↑ Back to top


Chicken Shawarma Guide

If dinner is already underway, everything you need is above. The rest explains why the method works and what to do when the chicken in front of you isn’t behaving quite as expected.

What Is Chicken Shawarma?

Chicken shawarma is a Middle Eastern preparation in which seasoned meat traditionally cooks on a vertical rotating spit. The exposed surface darkens and sizzles first. That browned layer is shaved away for serving, revealing another juicy surface to the heat.

A tray of chicken gets one exterior; a shawarma stack keeps creating new ones. That repeated cycle helps explain how freshly shaved shawarma can have so many browned edges while the meat underneath remains juicy.

A sheet pan can’t duplicate a vertical rotisserie, but the same idea gives us a useful home method. Keep the thighs in larger pieces for the first cook, then slice them to expose fresh surfaces that can brown quickly.

Cooked boneless chicken thighs progressing from whole pieces to slicing, freshly exposed cut surfaces and browned shawarma slices.
Slicing after the first cook creates fresh surfaces that can brown quickly without overcooking the whole thigh.

Chicken Shawarma Marinade: Get the Coating Right

A good chicken shawarma marinade combines oil, lemon, garlic and warm spices in a concentrated coating that clings to the meat without leaving it swimming in liquid.

The spices get most of the attention, but the wet ingredients decide whether they cling to the chicken or collect in the pan.

Coat Rather Than Soak

Marinade running freely off the thighs? Leave the loose excess in the bowl. Thick ridges sitting on the meat need smoothing away. What you’re after is a glossy, clingy coating.

Do You Need Yogurt?

No. Plenty of excellent shawarma recipes use yogurt, but you don’t need it here. Yogurt changes the tang, tenderness, spice adhesion and surface moisture; the lighter oil-and-lemon coating keeps this home method straightforward and the later browning easier to manage.

How Long Should It Marinate?

TimeWhat to expect
No restLess developed seasoning, but completely workable
30–60 minutesGood surface seasoning
2–3 hoursA useful longer rest when you’re planning ahead
8–12 hoursA convenient make-ahead window
OvernightCompletely practical
Beyond about 24 hoursNot much to gain with this marinade

That roughly 24-hour recommendation is about how this marinade behaves. For the wider safety limit, the USDA says poultry can marinate in the refrigerator for up to two days.

Ready to cook? Go to Step 2: Heat the Oven and Arrange the Chicken →

Thighs or Breast?

Chicken thighs are the easier route to juicy shawarma because their extra fat gives you more room around high heat. Breast works too, but it needs a lighter touch.

Cooked sliced chicken thigh beside sliced chicken breast, with the thigh darker and more irregular and the breast paler and more uniform.
ThighsBreast
JuicinessStays moist more easilyLeaner
Best shapeLarger boneless piecesThin cutlets
DonenessWider doneness windowMore sensitive to extra cooking
High-heat finishHandles it wellKeep it short
ReheatingHolds up betterEasier to dry

For breast, slice thick pieces horizontally into cutlets about ½ inch / 1.25 cm thick. Once it’s done, get it out of the heat. Rest, slice and keep the final browning stage short.

If breast is what you cook most often, this baked chicken breast method has more detail on thickness and doneness.

What Gives Shawarma Its Flavor?

Cumin and coriander form the savory backbone; paprika and turmeric bring warm color and earthiness, while garlic and black pepper sharpen the base. Cardamom, allspice and a little cinnamon sit behind them with sweeter aromatic notes.

As the cumin and garlic hit the heat, the cardamom and allspice should rise behind them without taking over. Freshly ground cardamom can be far stronger than an older jar, so restraint helps.

Cayenne controls the heat. Keep it low or leave it out for a mild batch, then put chili sauce on the table for anyone who wants more.

Missing one accent spice? Make dinner anyway. Cardamom or allspice can sit this one out; the aroma will simply be a little less complex. Curry powder or five-spice changes the character much more dramatically.

Measured bowls of cumin, coriander, paprika, turmeric, black pepper, allspice, cardamom, cinnamon and cayenne grouped by their role in shawarma seasoning.
The small measures matter: cardamom and cinnamon can shift the aroma even beside much more cumin and coriander.

The spices create the aroma; heat changes what happens on the surface. This is where moisture starts to matter.

How to Get Dark Edges Without Dry Chicken

The surface has to lose enough moisture before meaningful browning can begin. Excess package liquid, loose marinade and too much chicken on too little hot metal all slow that process.

Sliced chicken shawarma sizzling on a dark hot pan with bubbling fat, steam, glossy surfaces and edges beginning to brown.
A sharper sizzle means enough surface water has left for browning to start in earnest.

The center keeps cooking in the meantime. Leave whole thighs in the oven indefinitely and you can eventually get the color you wanted on meat that’s no longer as juicy as it should be.

That’s why the sliced finish matters. After the chicken is cooked, all those thin fresh surfaces can brown quickly under the broiler or against a hot skillet.

Some of the best pieces will have one dark, curled edge and a softer juicy side. Uniform color isn’t the goal.

The Shawarma Edge Test

Four clusters of chicken on one dark pan showing pale and wet, cooked and pale, juicy with dark edges, and dark dry stages.
What you seeWhat it meansYour move
Pale + wetMoisture is winningCook the center safely, then fix the surface separately
Cooked + paleThe meat is ready before the colorRest, slice and finish at high heat
Juicy + irregular dark edgesYou are thereStop cooking
Dark all over + dryThe finishing stage went too longShorten it next time

Chicken already wet, pale or dry? Go straight to troubleshooting →

Skillet, Grill or Air Fryer?

For a full batch, the oven method above is the easiest choice. Smaller amounts open the door to other kinds of heat.

Chicken shawarma cooking in a sheet pan, skillet, grill and air-fryer basket in one professional kitchen setup.
Whatever the method, overcrowding turns browning heat into steam.

Skillet: heat a heavy pan over medium-high heat and work in batches if the thighs can’t sit comfortably. Leave the first side undisturbed for about 4–6 minutes, then turn and cook another 3–5 minutes or so while checking the thickest piece. Increase the heat a little if the chicken isn’t browning; back it off if the spice coating is darkening too quickly. Rest and slice before a short re-sear if you want more browned edges.

Grill: use medium-high direct heat and start around 4–6 minutes per side. Check the thickest piece as you go. After resting and slicing, a brief return to a hotter part of the grill can deepen the char.

Air fryer: cook at about 390°F / 200°C and begin checking around 12–14 minutes. Most basket machines need two batches for 900 g / 2 lb. Especially thick thighs may take longer; these air-fryer chicken thigh timings can help.

Know When the Chicken Is Done

The USDA lists 165°F / 74°C as the safe minimum for poultry. That’s especially useful to remember with breast, which is leaner and dries more readily once it’s done.

Thighs give you a wider doneness window. Their connective tissue continues softening as the temperature rises, so meat in roughly the 170–175°F / 77–79°C range can still be juicy and noticeably tender. When the thighs are where you want them, take them off the heat.

Boneless cooked chicken thigh with a thermometer in its thickest section beside text showing 165 degrees Fahrenheit as the safe minimum and 170 to 175 degrees as a common tender thigh range.
165°F / 74°C is the safety floor; the higher thigh range is about texture, not a second safety threshold.

Sauce, Wraps & What to Serve With Shawarma

When the chicken is right, the rest of dinner is mostly about contrast: something garlicky or nutty, bread, something sharp, and enough fresh or starchy sides to make the meal as simple or generous as you want it.

Which Sauce Belongs Here?

For a Lebanese-style chicken shawarma wrap, toum is the garlic sauce to know: garlic, neutral oil, acid and salt emulsified until pale and fluffy.

The garlic yogurt sauce in this recipe is the easier home option. It’s cool, tangy and takes about a minute to mix, but it has a different character from toum.

Tahini brings a nuttier sesame flavor and works particularly well when shawarma is served as a platter with salad, pita and pickles.

Three dark bowls containing fluffy white toum, thick smooth garlic yogurt and flowing beige tahini sauce.

What Goes in a Shawarma Wrap?

Fillings vary by region and from one shop to another. A common Lebanese-style direction is chicken, toum and sharp cucumber pickles or pickled turnips in thin bread, with fries tucked inside or served alongside.

For a fresher home version, use the garlic yogurt sauce with lettuce, tomato, cucumber and thinly sliced onion.

Whichever direction you take, keep the bread soft and flexible. If it starts cracking as you roll, heat it again before adding more filling.

Wrap, Platter or Rice Bowl?

Pita, hummus, rice, crisp cucumber or herb salads, sharp pickles and fries all work naturally with chicken shawarma. You don’t need all of them on the same table.

For a simple wrap night, chicken, bread, garlic sauce and pickles are enough.

For a platter, add creamy hummus, extra pita and something crisp or lemony. Pickles or salad keep the richer parts of the plate from becoming heavy.

For a rice bowl, spoon the shawarma over hot rice and add cucumber, tomato, pickles and garlic or tahini sauce. Making basmati too? This stovetop rice method covers the water ratios and doneness cues.

Three chicken shawarma meals on one table: a filled wrap, a platter with hummus and pita, and a rice bowl with vegetables and sauce.

Ready to assemble? Jump to Build the Wrap →

Chicken Shawarma Troubleshooting

Most shawarma problems are recoverable, especially while the chicken is still juicy. Start with what you can see or taste right now.

Wet, Watery or Pale

The chicken is gray and wet: excess surface moisture, crowding or insufficient heat may be pushing it toward steaming. Finish cooking the center, then rest and slice before using the broiler or a hot skillet for color.

The tray keeps filling with liquid even though it isn’t crowded: some chicken simply releases more retained moisture than other batches. When the meat is cooked, remove the watery excess and finish the slices separately. There’s no benefit in leaving the center in the oven until every drop has evaporated.

Cooked chicken thighs on a sheet pan with watery liquid being removed by a spoon and sliced pieces spread on a drier area of the same pan.
Once the center is cooked, remove watery excess instead of waiting for it to evaporate around already-done chicken.

It’s cooked but still pale: rest it, slice it and give the fresh edges a short high-heat finish. This is the easiest browning problem to solve.

Burning or Drying Out

The spices are scorching: the coating may be too thick or the pan may be sitting too close to the broiler. Move it down a rack or stop the finishing stage. The chicken is already cooked.

The meat is dry: skip further broiling. Slice it fairly thin and be generous with garlic sauce; hummus or tahini can help on a platter too. Next time, start checking the center sooner and save the serious browning for after slicing.

The texture is strangely soft or mealy: overcooking can contribute, as can a long soak in an aggressive acidic marinade. Stop adding heat and serve this batch with sauce, bread and something crisp or pickled.

The Flavor Is Off

It tastes flat: check the salt before adding more spice. Sprinkle a small pinch of fine salt over the hot sliced chicken, toss and taste again. If the meat itself tastes balanced, make sure the finished bite also includes browned edges, sauce and something sharp.

Cardamom is taking over: bread, sauce and vegetables can soften an over-strong cardamom note in this meal. Use less cardamom next time; piling on extra cumin or lemon usually creates a different imbalance.

Everything tastes too sour: taste the chicken by itself first. Lemon in the marinade, lemon in the sauce and sharp pickles can stack up quickly. For this meal, skip extra lemon and go easier on the pickles. If the chicken alone is aggressively sour, shorten the marinating time next time.

Wrap Problems

Two chicken shawarma wraps showing a damp sagging wrap labeled soggy and a second wrap with visible cracks in the flatbread.
Keep watery juices out of the bread and warm flatbread only when the fillings are ready.

The wrap is soggy: keep watery pan juices out of the bread, let the chicken rest before assembly and don’t flood the wrap with sauce. A soft but intact wrap can often be improved with a short turn in a dry skillet.

The bread cracks: warm it until flexible. If it has already split badly, rebuilding the wrap in fresh bread is usually easier than trying to patch it.

If the chicken is juicy, hot and well seasoned, dinner is still in very good shape. Garlic sauce, bread and pickles are forgiving company.

Need the method again? Return to the full recipe → · ↑ Back to top

Make Ahead, Freeze, Store & Reheat

Freeze & Store Chicken Shawarma

The easiest freezer prep is raw chicken already coated in its marinade. Pack it into a freezer-safe bag, flatten it into an even layer, remove excess air and freeze promptly. Thaw overnight in the refrigerator before cooking.

Raw marinated boneless chicken thighs spread in a single flat layer inside a sealed transparent freezer bag on a metal freezer shelf.
A flat freezer bag freezes, thaws and stacks more efficiently than a thick bundled package.

Cooked shawarma freezes too. The browned edges will soften after thawing, so warm the center gently and give the chicken a short turn in a hot skillet before serving. For best quality, use frozen cooked shawarma within about 4 months.

Refrigerate leftovers within 2 hours, or within 1 hour when the temperature is above 90°F / 32°C. Shallow covered containers help food cool quickly. Use refrigerated cooked chicken within 3–4 days.

Cold shawarma works in a pita or salad too. For meal-prep bowls, keep the hot and cold components separate: chicken and rice together; salad, pickles and sauce in their own containers. A cold tabbouleh works particularly well beside reheated chicken.

How to Reheat Chicken Shawarma

To reheat in a skillet, add 1–2 teaspoons of water and cover briefly so the center warms gently. Uncover and toss for another 30–60 seconds to remove the extra moisture and bring back a little edge texture. Reheat leftovers thoroughly to 165°F / 74°C.

Leftover sliced chicken shawarma steaming in a dark skillet as a metal lid is lifted, with a teaspoon measure beside the pan.
Cover briefly to warm the center; uncover to drive off moisture and restore some edge texture.

Something cold and crisp helps leftovers feel like a proper meal again. This cucumber salad with vinegar and dill gives the warm spices a sharp counterpoint.

Cooking fresh today? Jump to the full recipe →

Scaling Chicken Shawarma for a Crowd

The ingredients scale. The pan does not.

For 4 lb / 1.8 kg chicken, use two half-sheet pans or cook in batches. Give the thighs roughly the same breathing room they had in the original batch.

Two large rimmed sheet pans holding a doubled batch of raw marinated chicken thighs spaced apart in single layers.
Double the chicken and you must also double the hot, exposed pan area available for browning.

Allow about 5–6 oz / 140–170 g raw chicken per person when pita, hummus, rice and salad are substantial parts of the meal. For generously filled wraps or meat-heavy plates, 7–8 oz / 200–225 g is a more comfortable allowance.

For a group, put the bread, pickles, sauces and vegetables on the table and let people build their own while the chicken is hot. It’s easier than making a dozen wraps in advance.

If the meal is growing into a larger spread, homemade falafel fits naturally because the pita, hummus, sauces and pickles are already on the table.

Need the original quantities? Back to the ingredient list →


When Shawarma Night Comes Together

There is a point when the chicken is sliced, the pan is full of uneven dark edges, the garlic sauce is cold and somebody has already torn into the warm bread before you finish setting the table.

Dinner table with a pan of glossy browned chicken shawarma, torn pita, garlic sauce and pink pickles while several hands reach for bread and food.

That’s the dinner we’re after.

Season the chicken well. Give it enough room. Pull it while the center is juicy, then let the sliced edges take the heat.

Cook for juiciness. Finish for the edges.