This cream of mushroom chicken recipe is for the night when you have chicken in the fridge, a can of cream of mushroom soup in the pantry, and no patience for a complicated sauce. The goal is simple: tender chicken, creamy mushroom gravy, and a dinner that works with rice, egg noodles, mashed potatoes, biscuits, or whatever vegetable you already have.
This is the kind of dinner that feels like a shortcut while it cooks, but like comfort food once it hits the plate. It is not fancy food; it is the creamy, spoon-over-something meal you make when the day has been long and everyone still needs to eat.
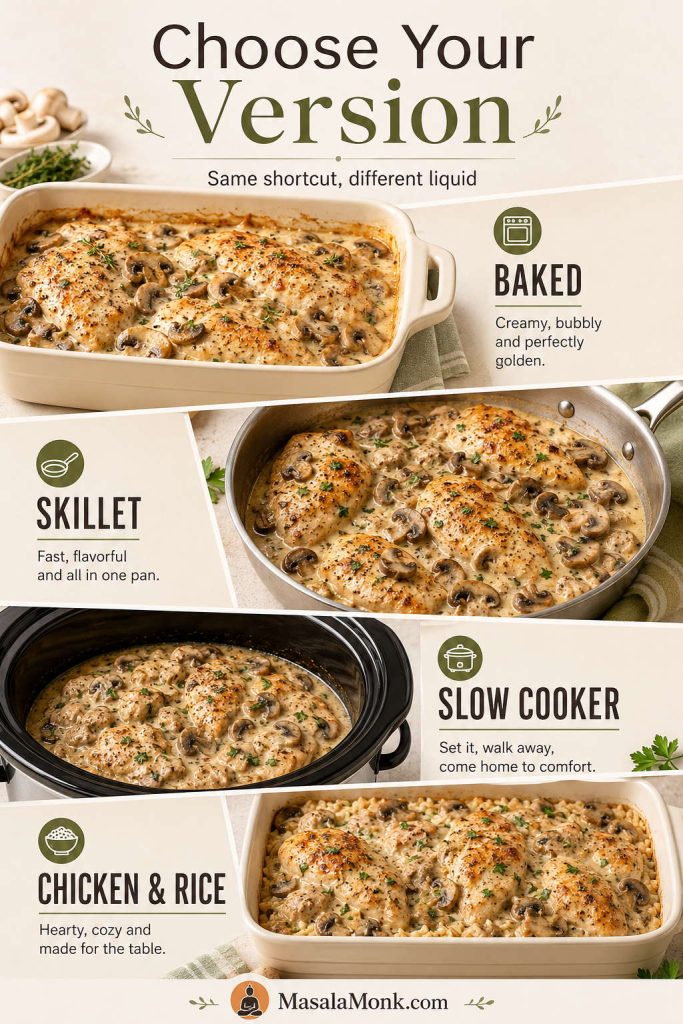
Bake it when you want the easiest family dinner. Use the skillet when dinner needs to happen faster, the slow cooker when the meal should take care of itself, and the rice bake when chicken and rice should land in one dish.
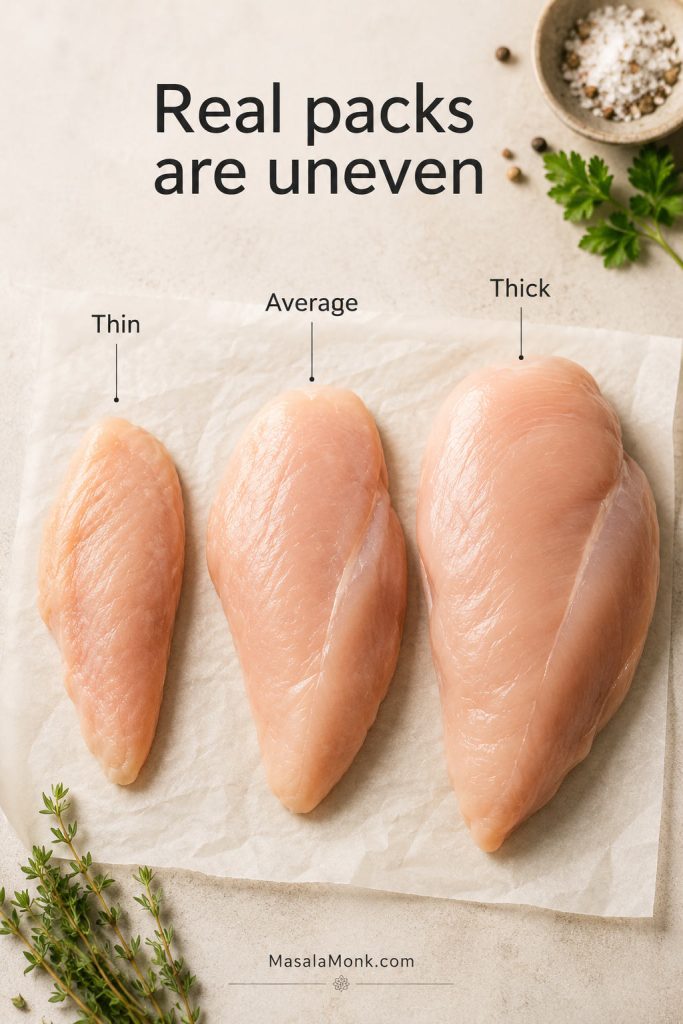
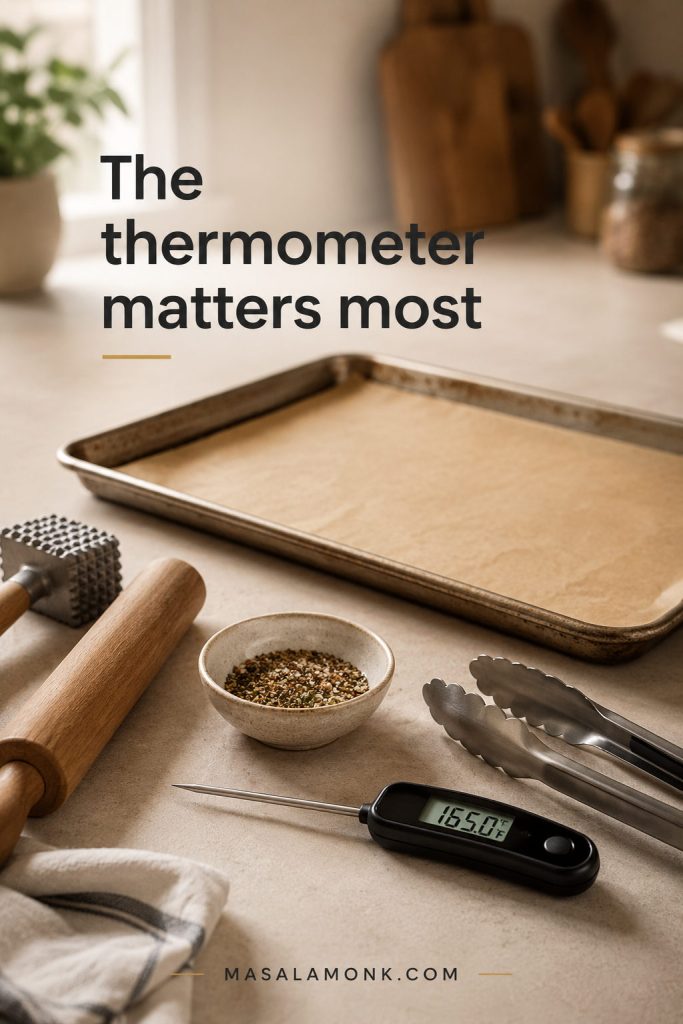
The dish works best with condensed cream of mushroom soup, thin or evenly pounded chicken, and just enough milk or broth to turn the soup into a spoonable sauce. A thermometer keeps the chicken from drying out while still getting it safely to 165°F / 74°C.
What You’ll Find in This Guide
Make the Chicken
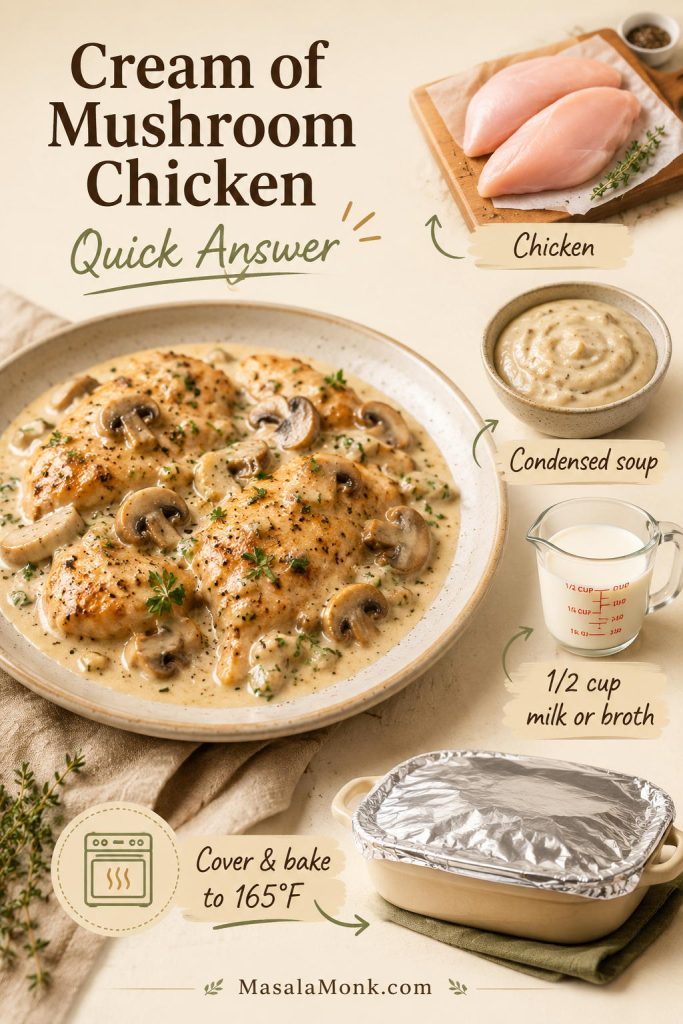
Quick Answer: How to Make Cream of Mushroom Chicken
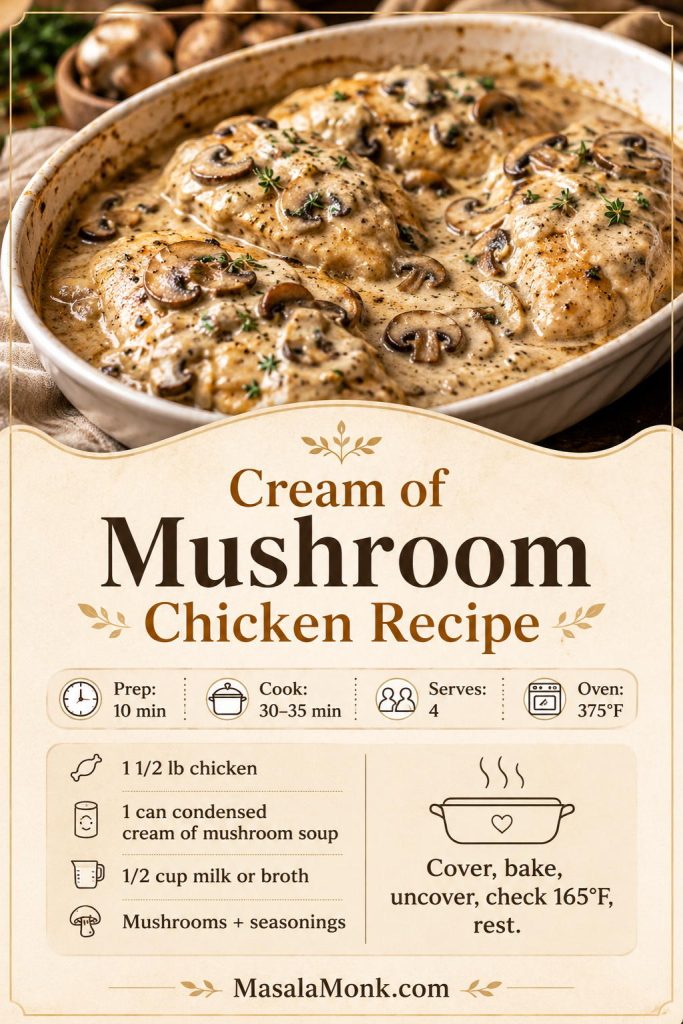
To make cream of mushroom chicken, season chicken breasts or thighs, place them in a baking dish, whisk condensed cream of mushroom soup with milk or low-sodium chicken broth, pour the sauce over the chicken, cover, and bake until the chicken reaches 165°F / 74°C. Uncover near the end if the sauce needs to thicken or cheese is going on top.
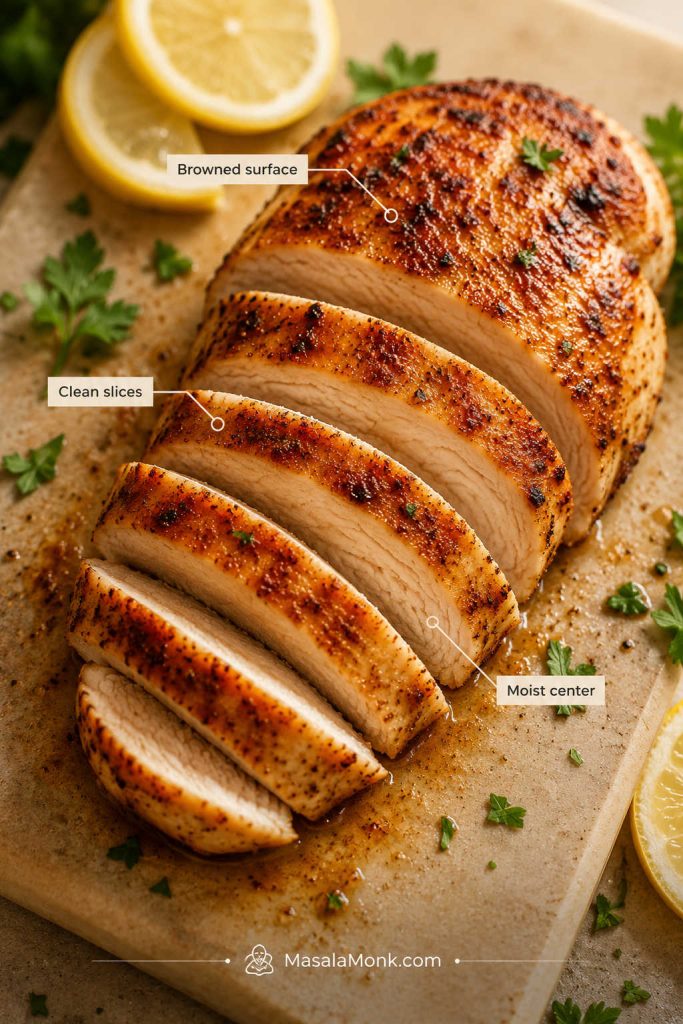
The result should be chicken that slices easily with creamy mushroom gravy you can spoon over rice, noodles, mashed potatoes, biscuits, or vegetables. This is still a low-effort dinner: about 10 minutes of prep, then the oven does most of the work.
The skillet version is faster, the slow cooker version is more hands-off, and the rice bake turns it into a one-dish meal. The trick is changing the liquid slightly for each method, so use the version guide or the soup and liquid ratios before switching methods.
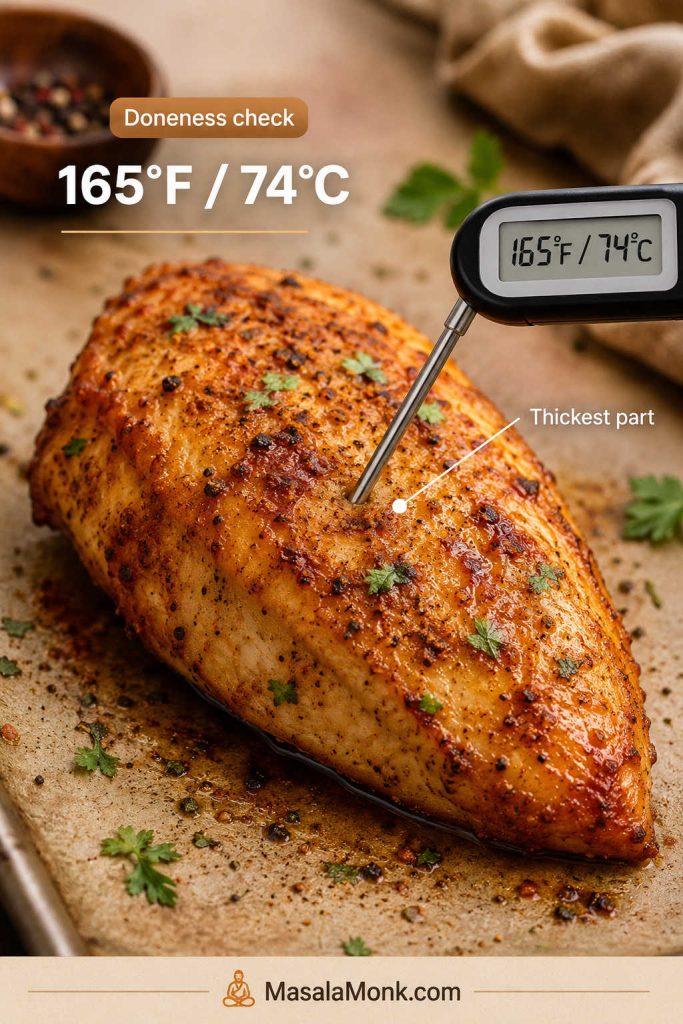
For food safety, chicken should reach 165°F / 74°C in the thickest part; FoodSafety.gov lists poultry and casseroles at this internal temperature.
Which Version Should You Make?
Before you open the soup can, decide how dinner needs to work tonight. The same basic ingredients can become an easy oven dinner, a quick skillet meal, a slow cooker comfort dish, or a chicken-and-rice bake.
The one thing that changes most between versions is the soup-to-liquid ratio. The oven, skillet, slow cooker, and rice bake each need slightly different treatment, which is what keeps the chicken juicy and the sauce creamy instead of watery.
| Choose This Version | Best When | Key Ratio |
|---|---|---|
| Baked cream of mushroom chicken | You want the easiest family dinner with minimal prep. | 1 can soup + ½ cup milk or broth |
| Skillet cream of mushroom chicken | You want dinner faster and more control over the sauce. | 1 can soup + ½–1 cup broth or milk |
| Slow cooker cream of mushroom chicken | You want hands-off creamy chicken for rice, noodles, or potatoes. | 2 cans soup + ½ cup liquid |
| Cream of mushroom chicken and rice | You want a full one-dish meal. | 1 can soup + 1 cup liquid + ¾ cup rice |
| Creamy chicken over egg noodles | You want mushroom-sauce chicken without baking rice. | Cook noodles separately and spoon sauce over them |
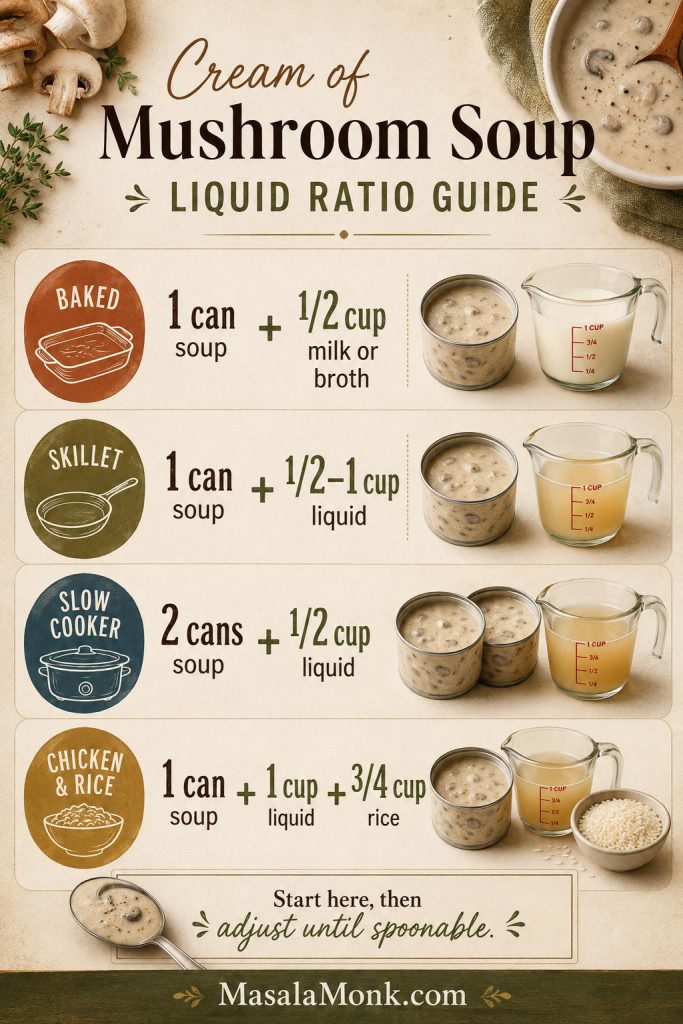
How Much Liquid to Add to Cream of Mushroom Soup
Use these ratios as starting points, then adjust until the sauce looks spoonable, not stiff and not soupy.
| Version | Condensed Soup | Added Liquid | Why It Works |
|---|---|---|---|
| Baked chicken | 1 can / 10.5 oz / 298 g | ½ cup / 120 ml milk or broth | Creates a creamy, spoonable sauce without making the dish watery. |
| Skillet chicken | 1 can / 10.5 oz / 298 g | ½–1 cup / 120–240 ml broth or milk | The sauce reduces as it simmers, so you can loosen or thicken it as needed. |
| Slow cooker chicken | 2 cans / about 596 g total | ½ cup / 120 ml broth or water | The slow cooker traps moisture, so too much liquid makes the sauce thin. |
| Small chicken and rice bake | 1 can / 10.5 oz / 298 g | 1 cup / 240 ml liquid + ¾ cup rice | Rice needs measured liquid and trapped steam to cook properly. |
| Large 9×13 rice bake | 2 cans / about 596 g total | 2 cups / 480 ml broth + 1¼ cups rice | Better for a family-size casserole with more rice and chicken. |
Once the ratio is right, everything gets easier: the chicken cooks gently, the sauce stays spoonable, and the sides do half the work. When you are ready to cook the oven version, go straight to the cream of mushroom chicken recipe card.
Water works in a pinch, but broth gives the dish more savory flavor and milk makes the sauce softer and creamier. Regular condensed soup, regular broth, cheese, and onion soup mix can all add salt, so taste before adding more.
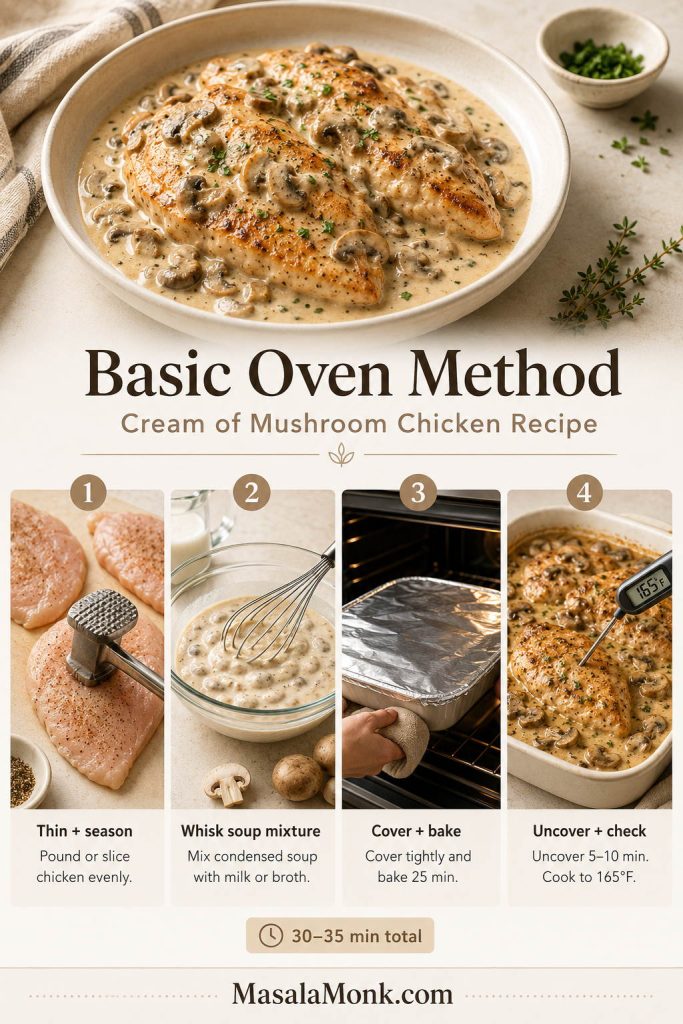
Basic Oven Method at a Glance
Use this as the quick map before the full recipe card.
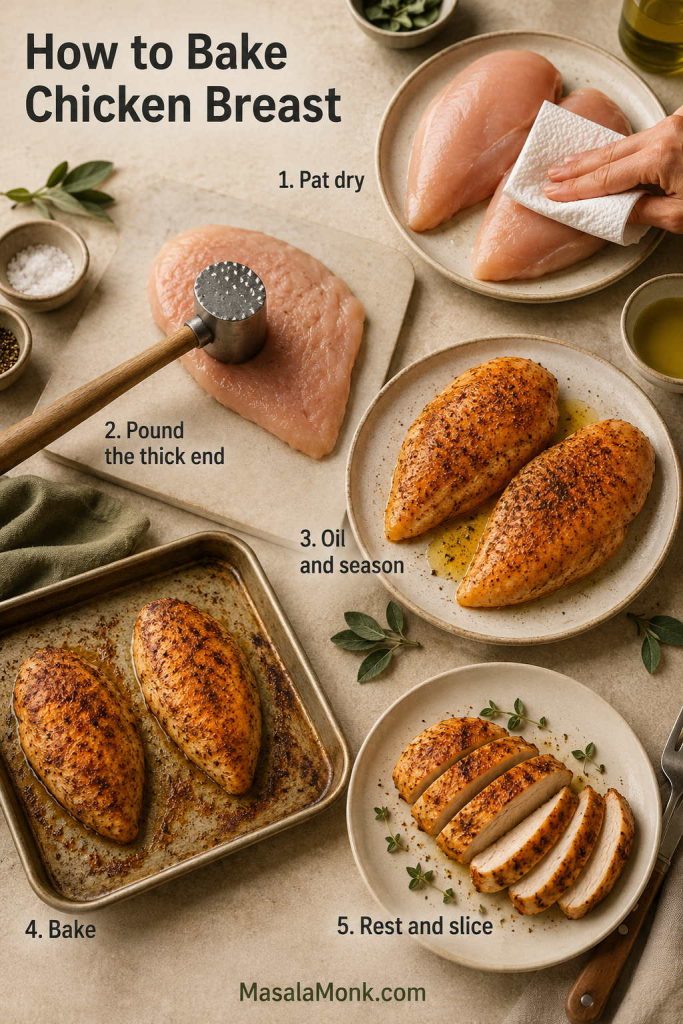
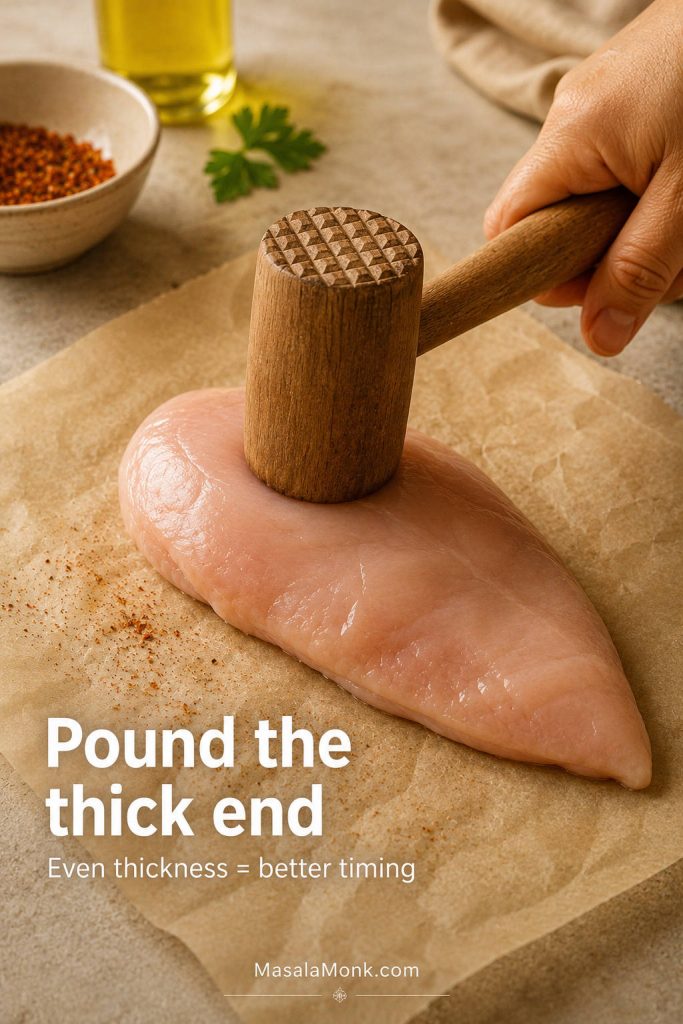
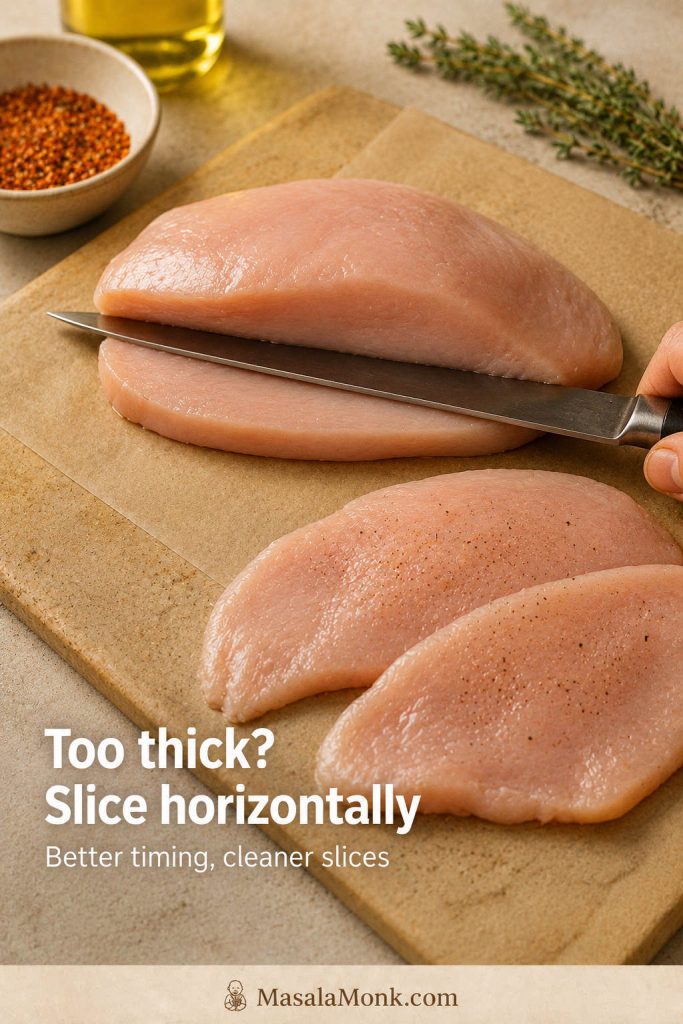
- Thin and season the chicken. Slice large breasts in half lengthwise or pound them evenly, then season lightly.
- Whisk the soup mixture. Mix condensed cream of mushroom soup with milk or broth until smooth.
- Cover and bake. Pour the mixture over the chicken, cover with foil, and bake so the meat stays moist.
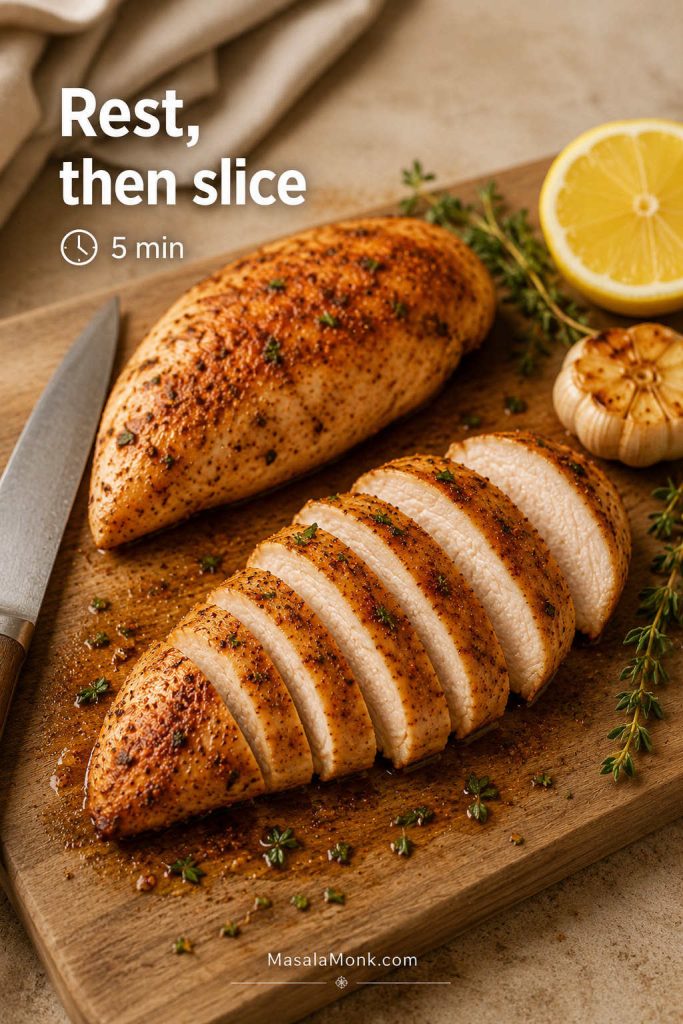
- Uncover, check, and rest. Finish uncovered, cook to 165°F / 74°C, and rest before serving.
Cream of Mushroom Chicken Recipe Card
This baked cream of mushroom chicken is the oven version to make first: tender chicken, condensed cream of mushroom soup, a little milk or broth, simple seasonings, and enough creamy mushroom sauce to spoon over rice, egg noodles, mashed potatoes, or vegetables.
Course: Dinner
Cuisine: American
Method: Baked
Equipment: 9×13-inch baking dish, foil, mixing bowl, instant-read thermometer
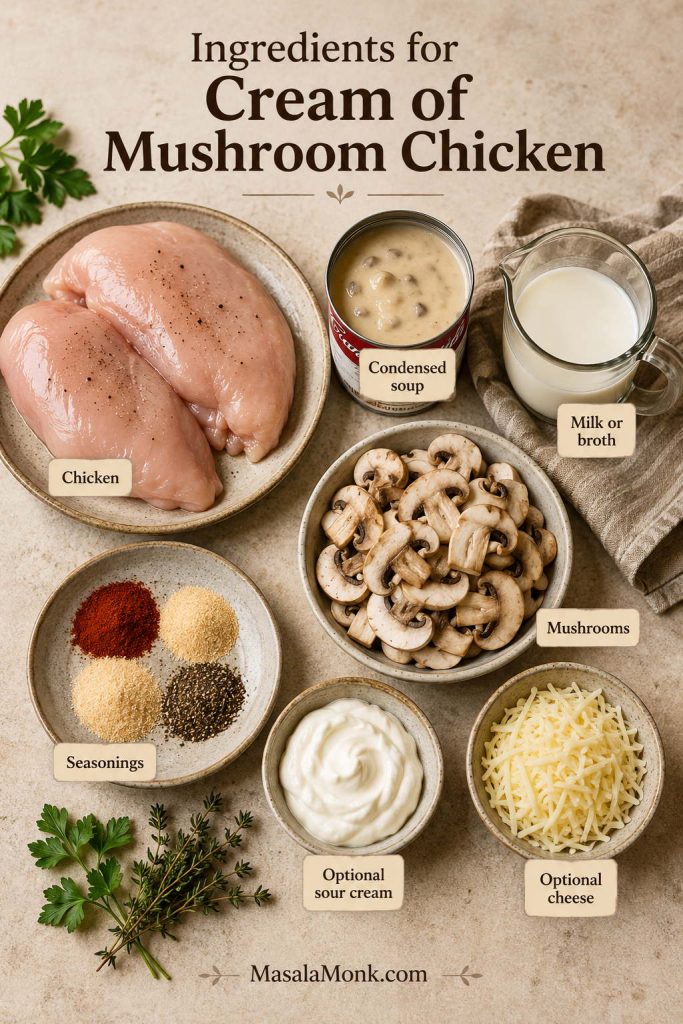
Ingredients
- 1½ lb / 680 g boneless skinless chicken breasts or thighs
- 1 can condensed cream of mushroom soup, 10.5 oz / 298 g
- ½ cup / 120 ml milk or low-sodium chicken broth
- ½ tsp garlic powder, divided
- ½ tsp onion powder, divided
- ½ tsp paprika, divided
- ¼ tsp black pepper, divided, plus more to taste
- 8 oz / 225 g sliced mushrooms, optional
- ¼–½ cup / 60–120 g sour cream, optional
- ¾–1 cup / 85–115 g shredded mozzarella, Monterey Jack, or cheddar, optional
- Salt only after tasting, if needed
Instructions
- Heat oven to 375°F / 190°C. Lightly grease a 9×13-inch baking dish.
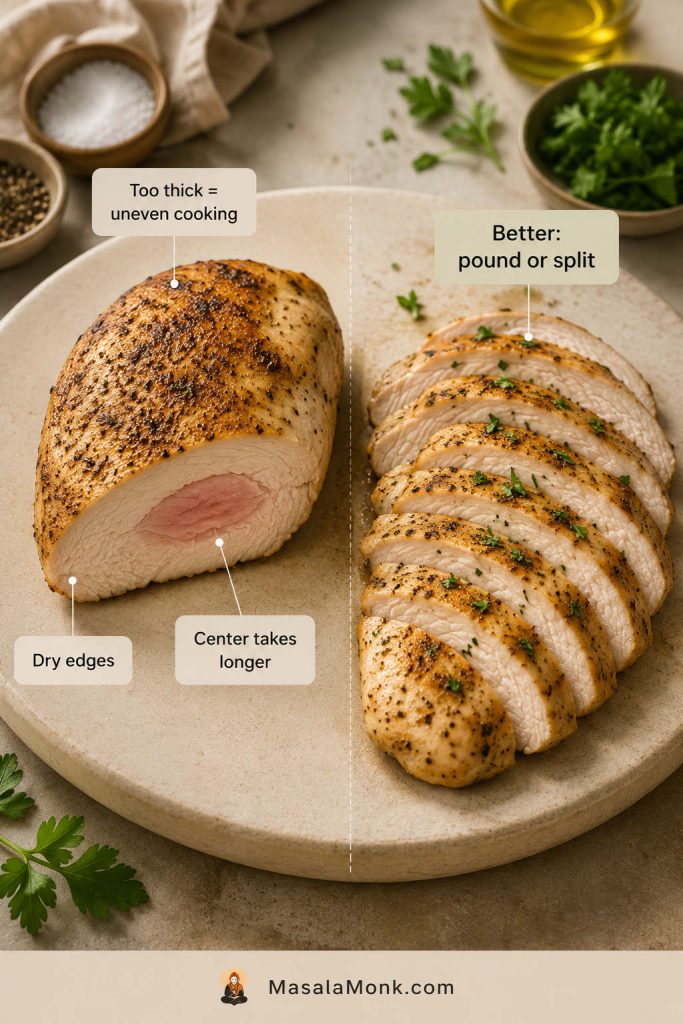
- Slice large chicken breasts in half lengthwise or pound them to an even thickness.
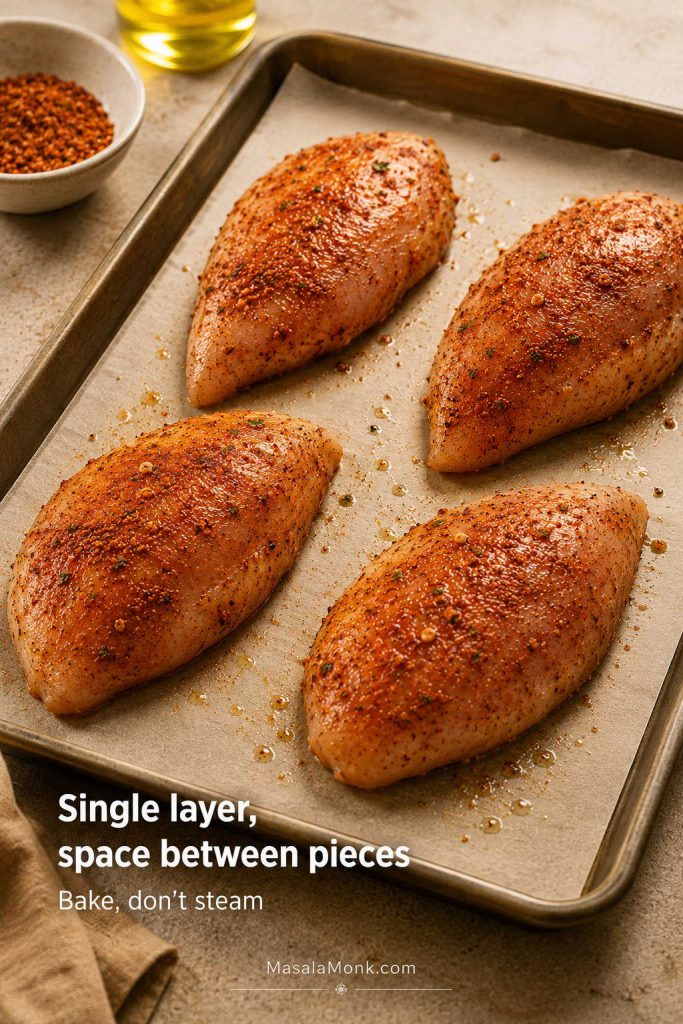
- Place the chicken in the baking dish. Sprinkle with about half of the garlic powder, onion powder, paprika, and black pepper.
- Scatter raw mushrooms around the chicken for convenience, or brown them first for deeper flavor and less extra moisture.
- In a bowl, whisk the condensed cream of mushroom soup with milk or broth and the remaining garlic powder, onion powder, paprika, and pepper until smooth. Whisk in sour cream now if using it for the baked version.
- Taste the sauce. Add salt only if it needs it. A flat-tasting sauce can take a little more pepper, paprika, thyme, garlic powder, or Dijon.
- Pour the sauce over the chicken and spread it so the chicken is mostly covered.
- Cover the dish tightly with foil.
- Bake for 25 minutes.
- Uncover and bake 5–10 minutes more, or until the chicken reaches 165°F / 74°C in the thickest part.
- Sprinkle cheese over the chicken during the uncovered finish if using it, then bake until melted.
- When the chicken is done but the sauce is still thin, move the chicken to a plate and thicken the sauce separately in a small pan, or in the baking dish only if your dish is stovetop-safe.
- Rest for 5 minutes before serving.
- Serve over rice, egg noodles, mashed potatoes, biscuits, broccoli, green beans, or roasted vegetables.
Notes
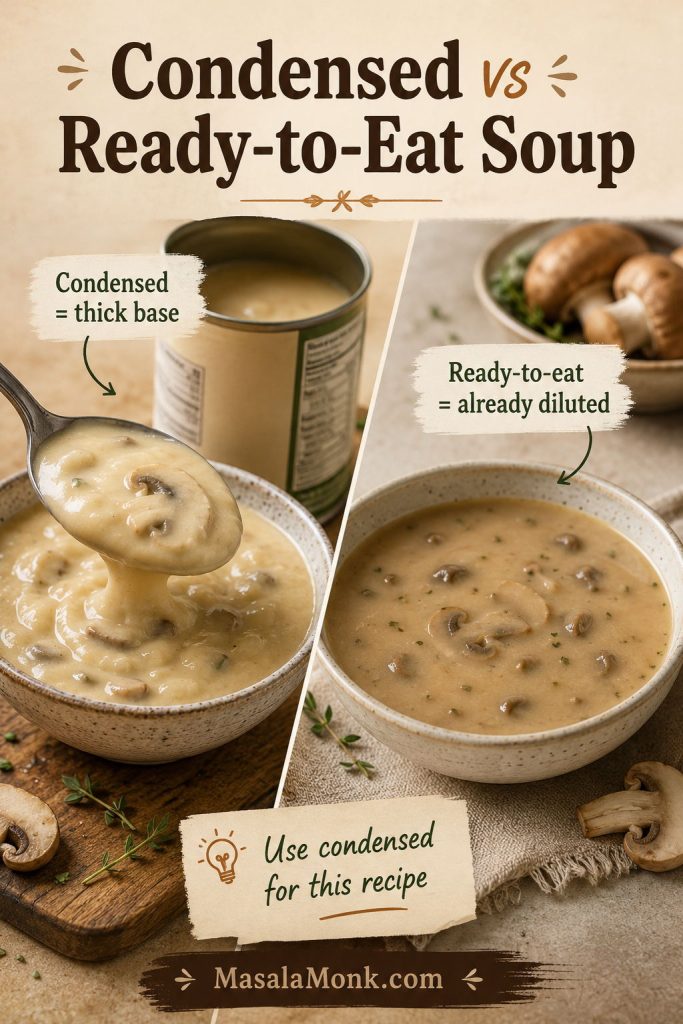
- Use condensed cream of mushroom soup, not ready-to-eat mushroom soup.
- Browned mushrooms give the sauce a deeper, less canned flavor.
- Water works if that is all you have, but broth gives better flavor and milk makes the sauce creamier.
- A cream of chicken swap works too: replace half or all of the cream of mushroom soup with condensed cream of chicken soup.
- For skillet or slow cooker versions, add sour cream or cheese near the end over gentle heat for the smoothest finish.
Making a different version? Use the skillet method, slow cooker method, or chicken and rice bake so the liquid and timing stay right.
Why This Recipe Works
The baked version works because it solves two problems at once: thick chicken and loose sauce. Thin pieces cook before they dry out, while condensed soup gives the sauce enough body to stay creamy. A small splash of milk or broth loosens the canned base, covered baking protects the chicken, and the uncovered finish lets the sauce settle.
The real win is not making it fancy. It is keeping the chicken juicy and turning the canned soup into a sauce that tastes like it belongs on the plate.
Ingredient Notes That Keep It Creamy, Not Watery
Nothing here is precious. The point is knowing which shortcuts help and which ones make the dish watery, salty, or dry.
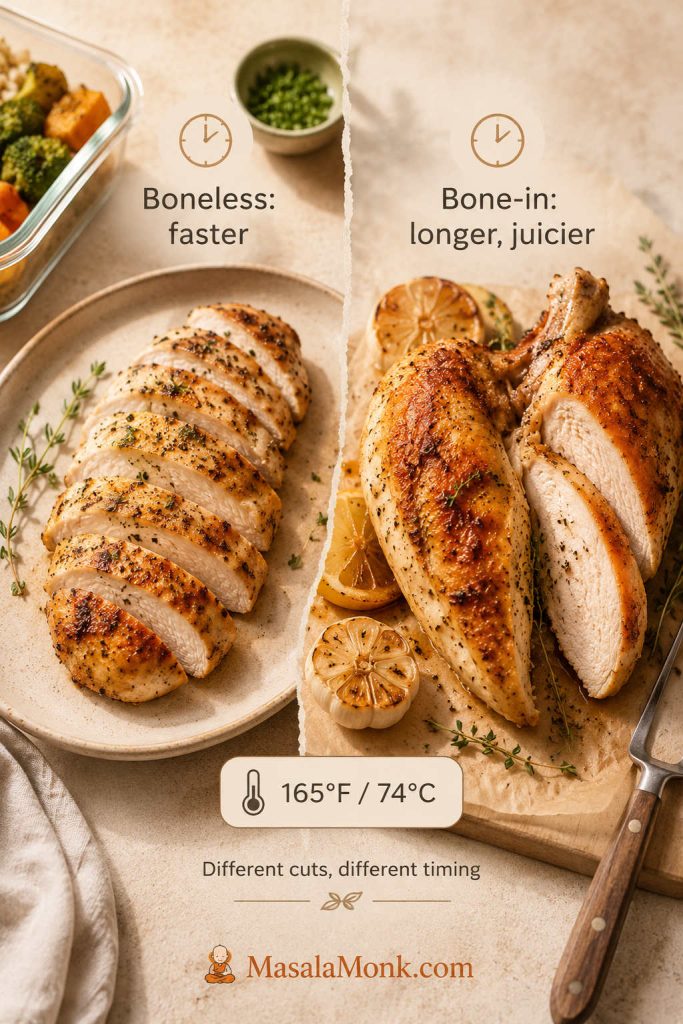
- Chicken: Boneless skinless breasts or thighs both work. Breasts give you a classic sliced dinner; thighs give you more forgiveness.
- Condensed cream of mushroom soup: The word condensed matters because the soup starts thick and becomes sauce when you add liquid.
- Milk, broth, or water: Broth gives savory depth, milk gives a softer creamy finish, and water works when that is all you have.
- Fresh mushrooms: Raw mushrooms are convenient, but browned mushrooms add deeper flavor and release less water into the dish.
- Sour cream: Use it for tang. Whisk it into the oven version before baking, or stir it into skillet and slow cooker versions near the end over gentle heat.
- Cheese: Mozzarella, Monterey Jack, cheddar, Swiss, or Muenster can turn this into a richer family bake.
For the oven version, a 9×13-inch baking dish, foil, a mixing bowl, and an instant-read thermometer are enough. The stovetop route needs a lidded skillet, while the crockpot option works best in a 4–6 quart slow cooker.
Using Campbell’s or Any Condensed Mushroom Soup
Campbell’s condensed cream of mushroom soup works well here, and so do other condensed brands. The label matters less than the word condensed.
Condensed vs Ready-to-Eat Soup
Condensed soup is thick enough to become sauce when mixed with a small amount of milk, broth, or water. Ready-to-eat mushroom soup is already diluted, so it can make the dish watery unless you reduce or skip the added liquid.
Low-sodium condensed soup gives you more control if you are also using broth, cheese, onion soup mix, or another salty ingredient.
The same cream-soup comfort logic shows up in MasalaMonk’s tuna noodle casserole recipe, where condensed soup turns into a creamy noodle bake.
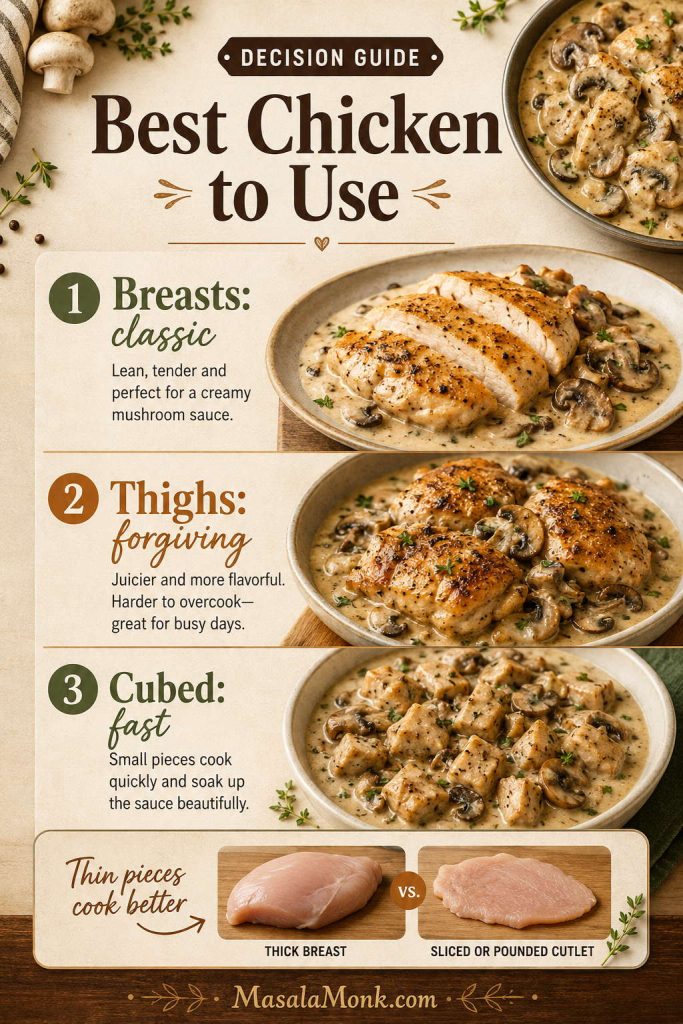
Best Chicken to Use: Breasts, Thighs, or Cubed Chicken
That is really the whole chicken decision: breasts for a classic sliced dinner, thighs when you want more forgiveness, and cubed chicken when you want a faster skillet or casserole-style meal.
Chicken Breasts
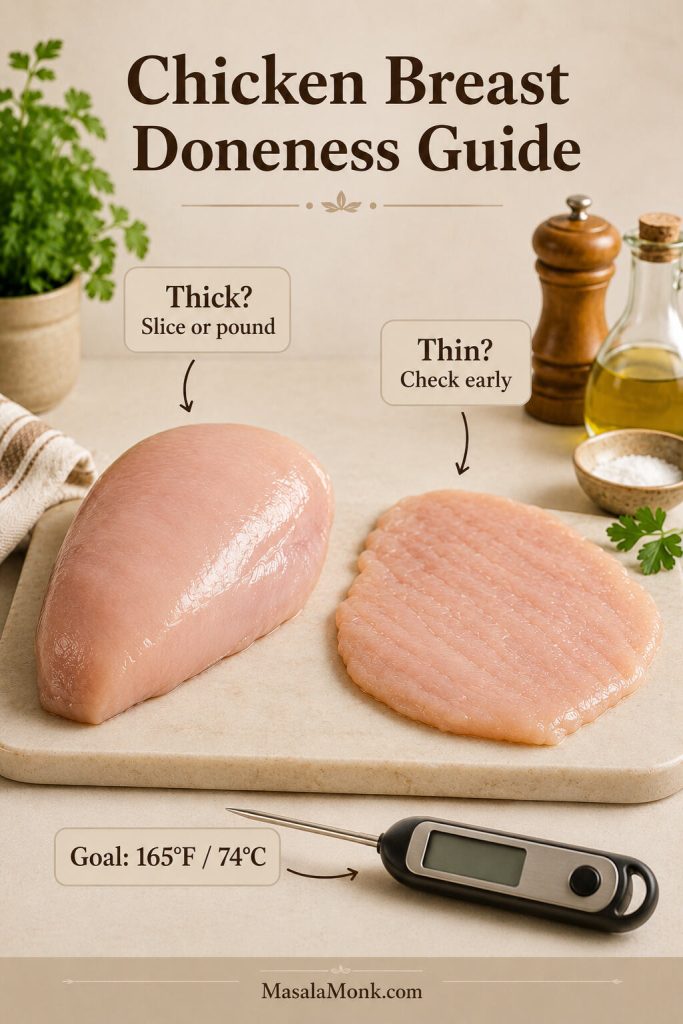
Chicken breasts work well when they are not too thick. Large breasts should be sliced in half lengthwise to make thinner cutlets, or pounded to an even thickness. This helps the chicken cook through before the sauce dries out.
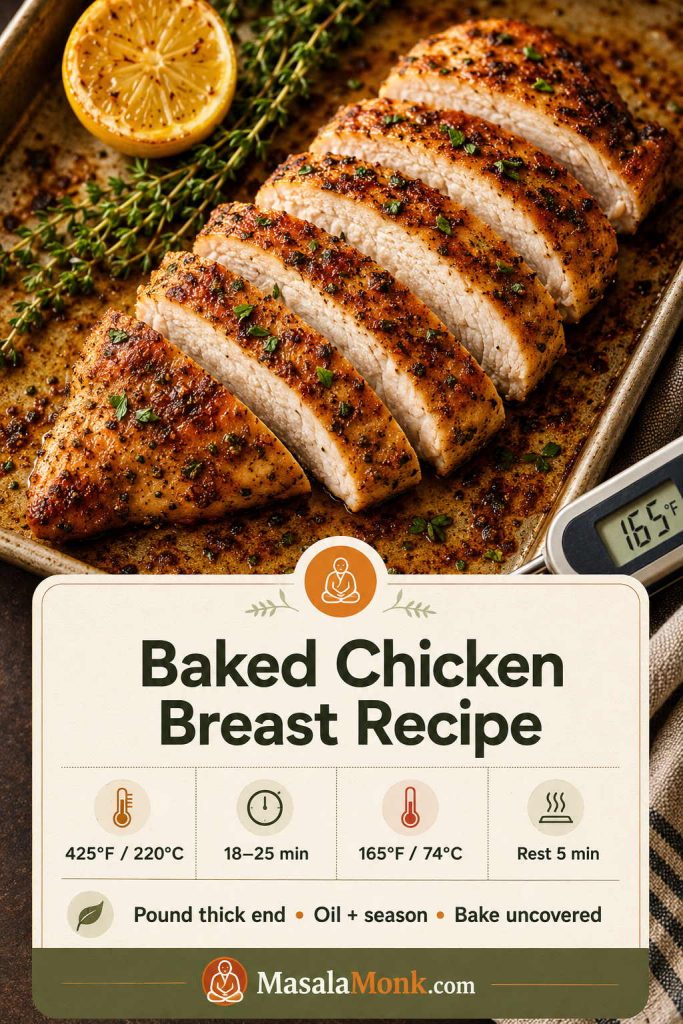
For more detail on baking chicken breast without drying it out, see MasalaMonk’s baked chicken breast recipe.
Chicken Thighs
Boneless skinless thighs stay juicy even when the dish needs a few extra minutes. They are especially good for the slow cooker or chicken-and-rice versions because they can handle longer cooking better than thin breasts.
Cubed Chicken
Cubed chicken is useful for a quick skillet dinner or a casserole-style variation. It cooks faster and mixes easily with noodles or rice, though it does not give you the same sliced-chicken presentation as baked breasts or thighs.
Baked Cream of Mushroom Chicken
This is the version to make first. It gives you the classic creamy mushroom chicken experience without needing a skillet, a roux, or a separate sauce.
The best pan comes out bubbling around the edges, with mushroom gravy tucked around the chicken and enough creamy sauce to drag through rice, noodles, or mashed potatoes.
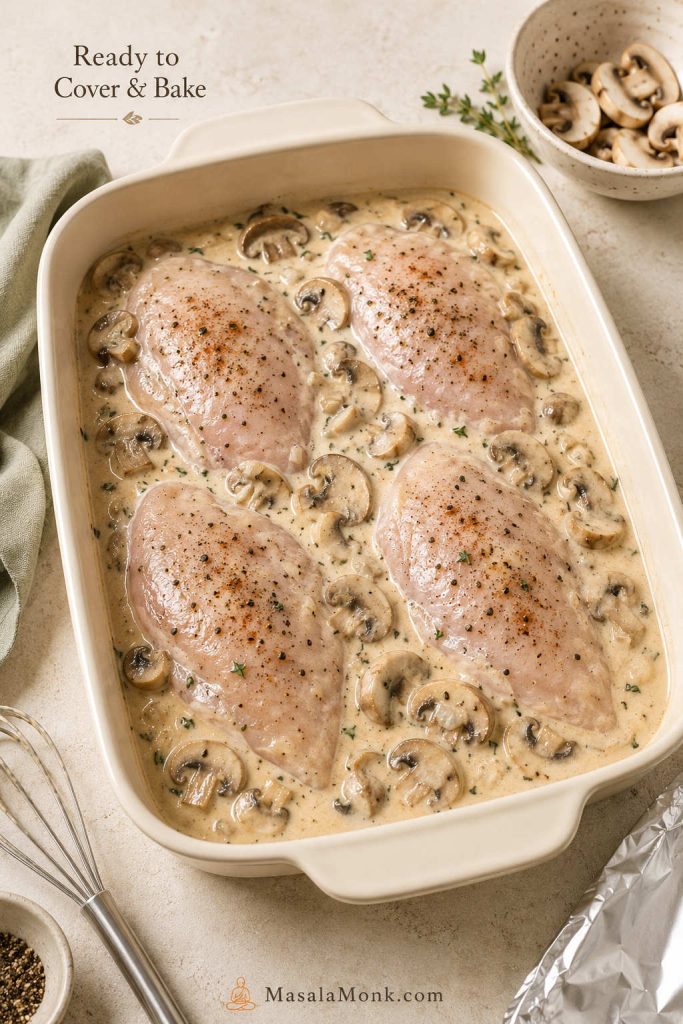
Before Baking
The dish should look assembled but not finished: chicken tucked into the mushroom mixture, mushrooms visible, and just enough sauce to coat the pan before it is covered.
Baked Version at a Glance
| Detail | Best Answer |
|---|---|
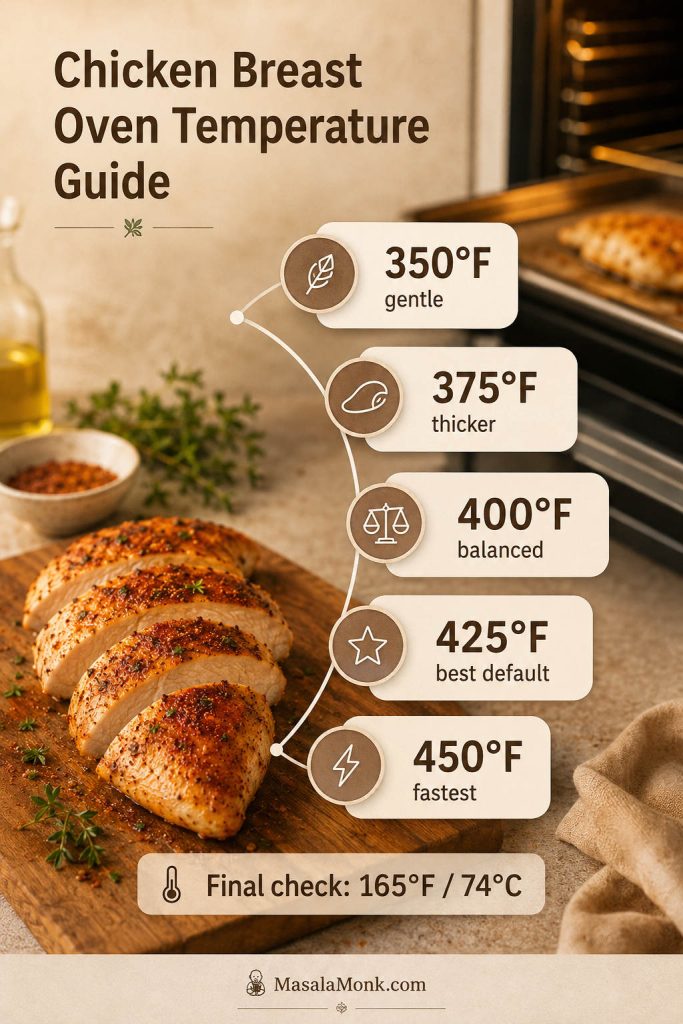
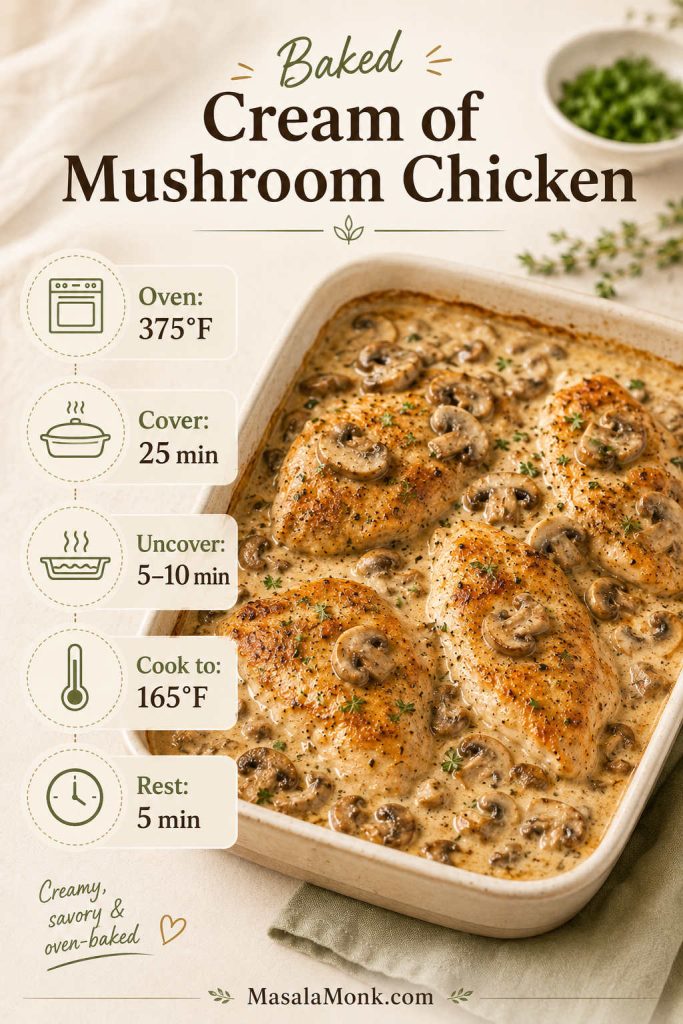
| Oven temperature | 375°F / 190°C |
| Baking dish | 9×13-inch dish |
| Chicken | 1½ lb / 680 g boneless skinless breasts or thighs |
| Soup | 1 can condensed cream of mushroom soup, 10.5 oz / 298 g |
| Liquid | ½ cup / 120 ml milk or low-sodium chicken broth |
| Covered bake | 25 minutes |
| Uncovered finish | 5–10 minutes |
| Safe internal temperature | 165°F / 74°C |
| Resting time | 5 minutes |
Once this version is in the oven, there is not much left to do except make something for the sauce to land on.
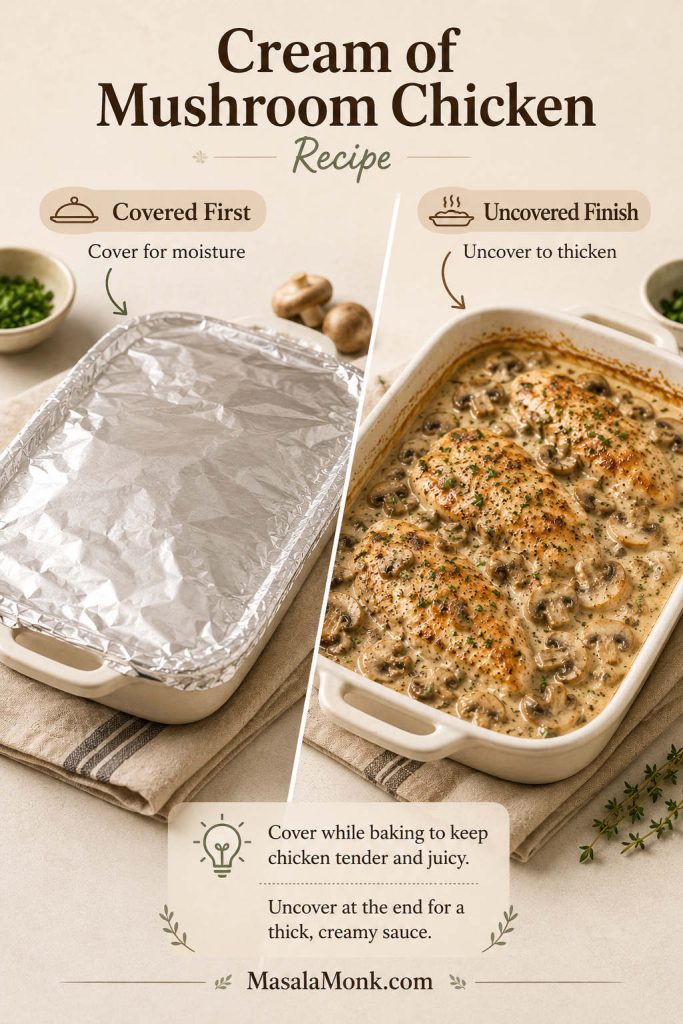
Covered or Uncovered?
Cover the chicken for the first part of baking. The foil traps steam, keeps the meat moist, and prevents the sauce from drying out too quickly. The final uncovered minutes help looseness cook off and let cheese melt if you are using it.
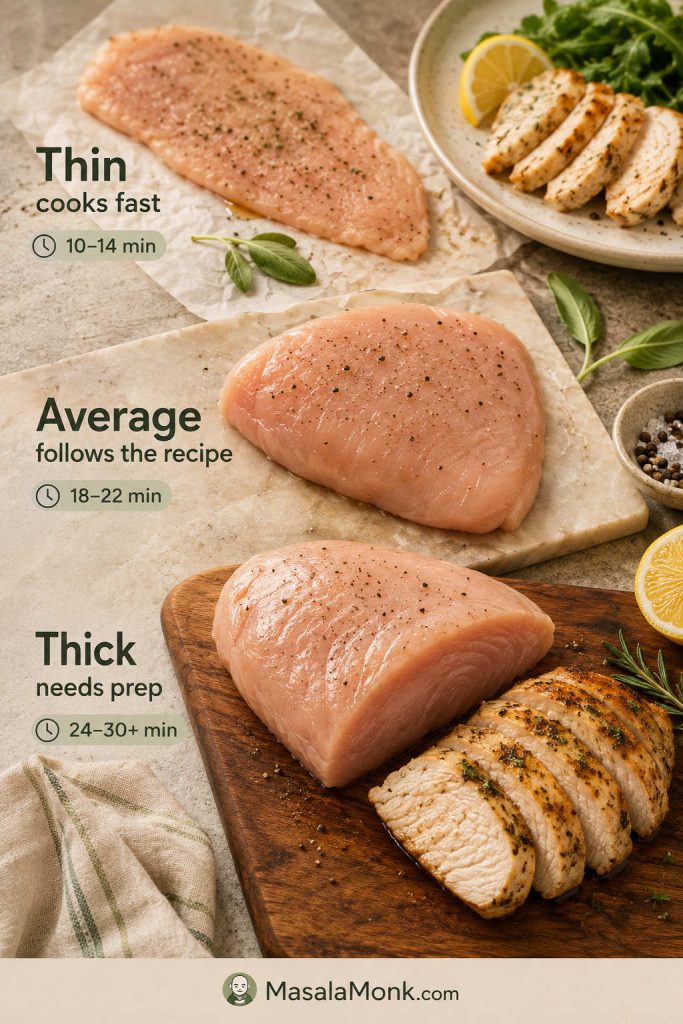
Very thin pieces should be checked early. Thicker pieces need a thermometer more than they need a guessed time.
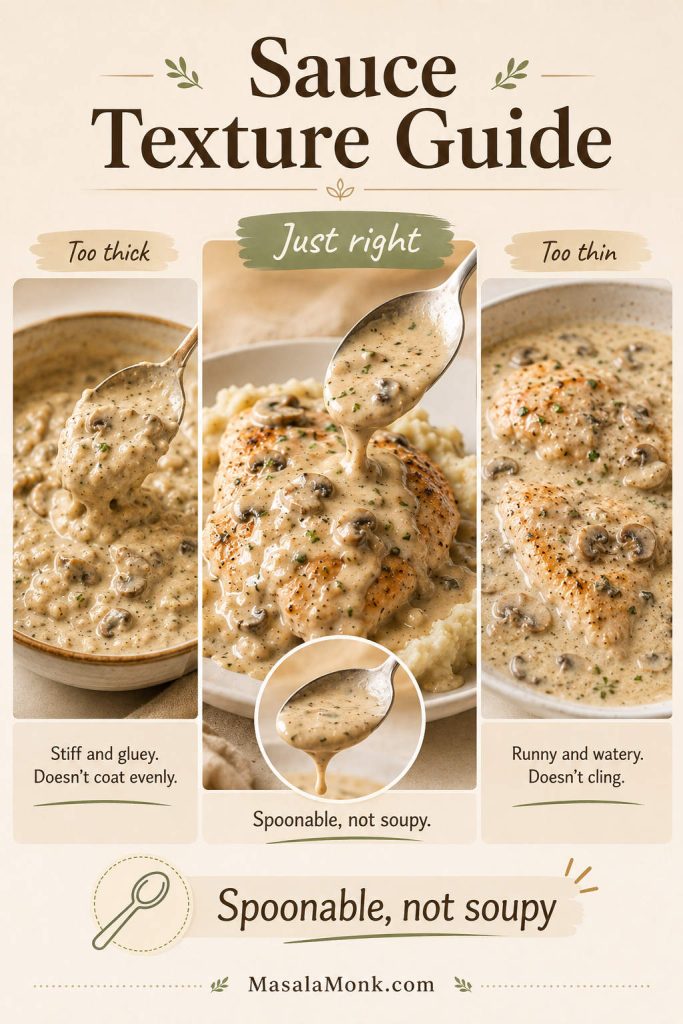
What the Sauce Should Look Like
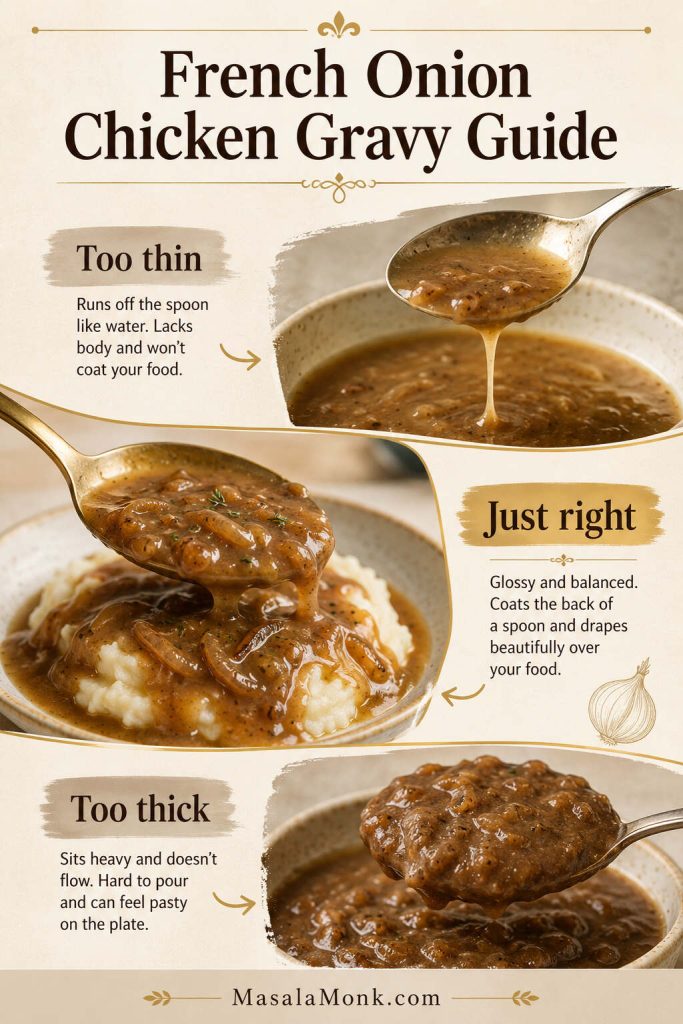
The finished sauce should be creamy and spoonable, thick enough to coat the chicken but loose enough to run into rice, noodles, or mashed potatoes. It should not be stiff like paste, and it should not run like soup.
A sauce that looks too thick before baking needs another splash of milk or broth. When the sauce looks watery but the chicken still needs time, uncover the dish for the last few minutes. Once the chicken is already at 165°F / 74°C, remove it and thicken the sauce separately instead of overbaking dinner.
In the oven version, ½ cup / 120 ml milk or broth per 10.5 oz / 298 g can of condensed soup is the safest starting point. The skillet version can handle more liquid because the pan sauce reduces as it simmers. The slow cooker needs less because the lid traps moisture as everything cooks. When the texture looks off, use the troubleshooting guide instead of guessing.
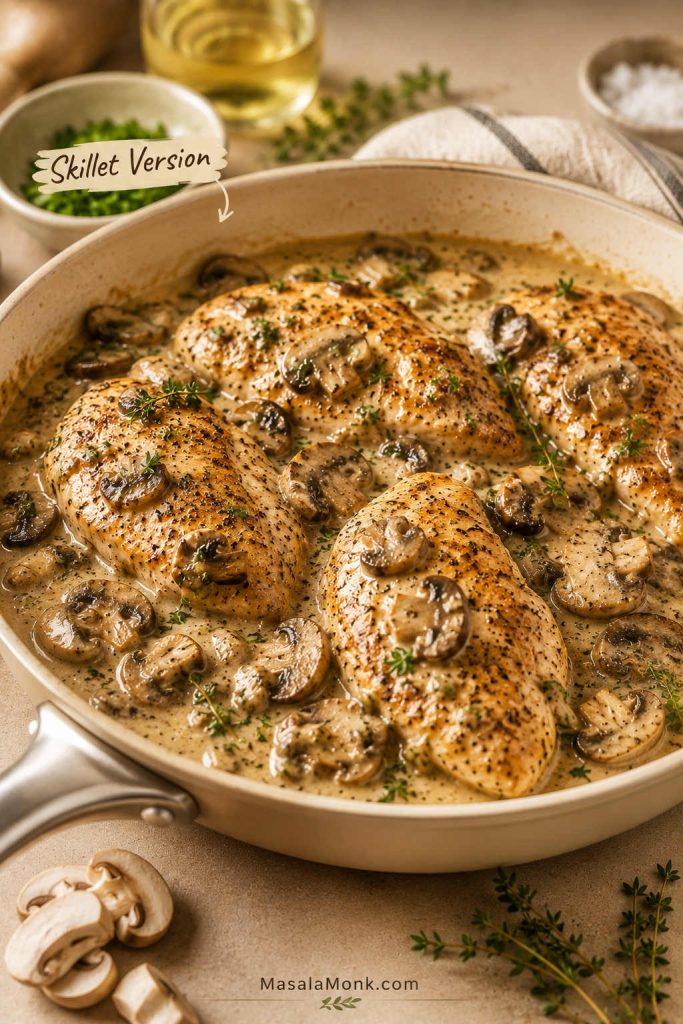
Skillet Cream of Mushroom Chicken
The skillet version is best when dinner needs to be faster and the sauce needs more hands-on control. It tastes a little more cooked, not just assembled, because the chicken and mushrooms get direct heat before the sauce comes together.
This is the version with the most dinner-pan flavor: a little browning, a little butter, and creamy mushroom sauce pulled together in the same skillet.
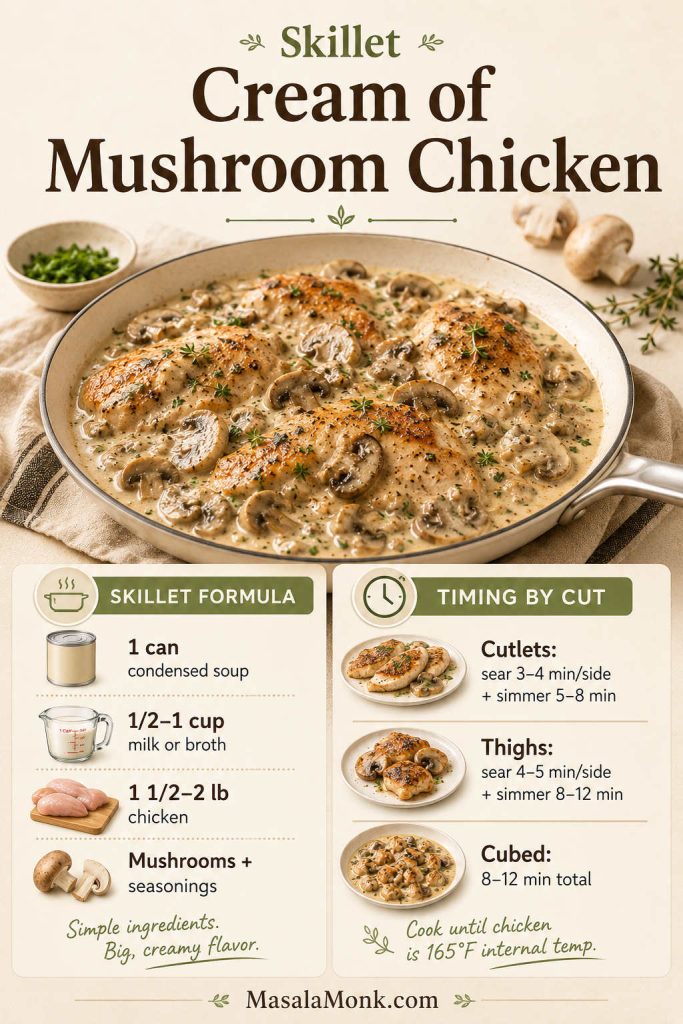
Skillet Formula
- 1½–2 lb / 680–900 g chicken
- 1 tbsp oil or butter, for searing
- 1 can condensed cream of mushroom soup, 10.5 oz / 298 g
- ½–1 cup / 120–240 ml milk, water, or low-sodium chicken broth
- 8 oz / 225 g sliced mushrooms, optional
- Garlic powder, onion powder, paprika, black pepper, and herbs to taste
Oil helps the chicken sear without burning. A small knob of butter added with the mushrooms gives the pan a richer, rounder flavor.
Skillet Timing
| Chicken Type | Timing | What to Watch |
|---|---|---|
| Thin chicken cutlets | Sear 3–4 minutes per side, then simmer 5–8 minutes in sauce | Check early so they do not dry out. |
| Boneless thighs | Sear 4–5 minutes per side, then simmer 8–12 minutes in sauce | They stay juicier and can handle a little longer cooking. |
| Cubed chicken | Cook 8–12 minutes total, depending on cube size | Stir often so the sauce coats the pieces evenly. |
How to Make It in a Skillet
Season the chicken, then sear it in a large skillet until lightly browned on both sides. Add fresh mushrooms after removing the chicken briefly, then cook them until they release moisture and start to brown. Whisk in the condensed soup with enough broth or milk to make a sauce, then return the chicken to the pan.

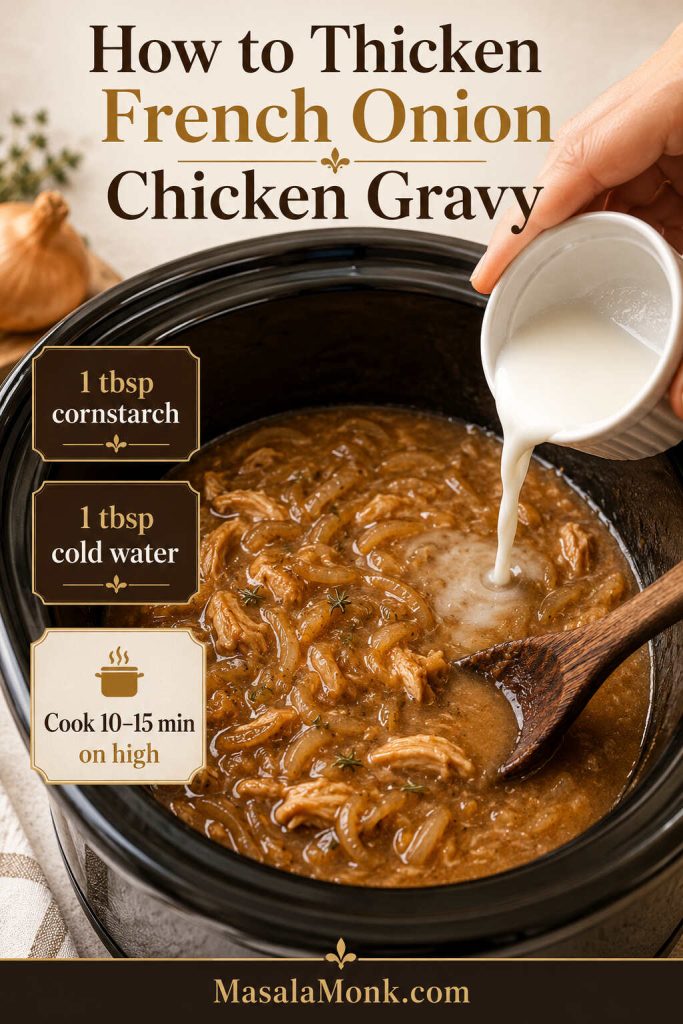
Cover and simmer gently until the chicken reaches 165°F / 74°C. A pan sauce that tightens too much only needs a tablespoon or two of milk or broth. A loose sauce needs the opposite: a few uncovered minutes so extra moisture can cook off. Use the sauce texture guide if you are unsure whether to loosen or reduce it. For a quick slurry, mix 1 tsp cornstarch with 1 tbsp cold water, then stir it into the simmering sauce. Sour cream should go in near the end over low heat so everything stays smooth.
Slow Cooker Cream of Mushroom Chicken
The slow cooker is best when you want tender, saucy chicken waiting for you later. It is less about speed and more about having creamy chicken ready when the rice, noodles, or potatoes are done.
Because the lid traps moisture, start with less liquid than you would use in the oven or skillet. Thawed chicken gives the most predictable timing and texture; frozen chicken releases more moisture and can make the sauce thin.

If you like this kind of hands-off chicken dinner, MasalaMonk’s crock pot chicken breast recipes has more ways to keep slow-cooked chicken juicy instead of dry.
Slow Cooker Formula
- 1½–2 lb / 680–900 g chicken breasts or thighs
- 2 cans condensed cream of mushroom soup, 10.5 oz / 298 g each
- ½ cup / 120 ml low-sodium chicken broth or water
- 8 oz / 225 g sliced mushrooms, optional
- ½ packet onion soup mix, optional, only if you like a saltier old-school flavor
- Sour cream or cheese near the end, optional
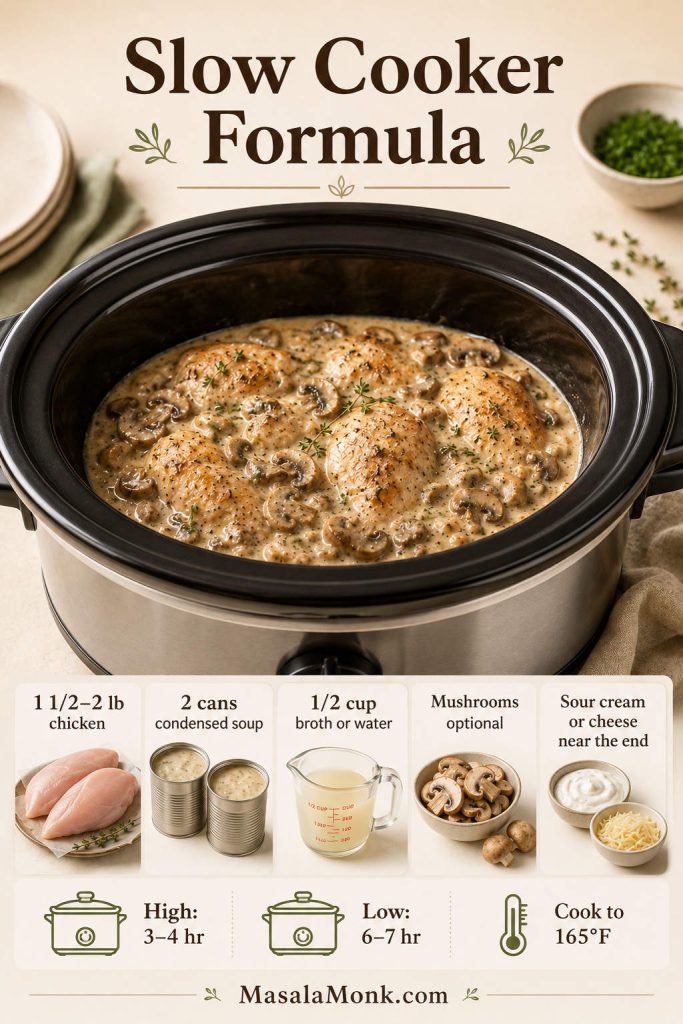
Cook on High for 3–4 hours or Low for 6–7 hours, until the chicken reaches 165°F / 74°C. Thighs handle the longer cook better than thin breasts. By the end, the chicken should be fork-tender and the sauce should taste like it has had time to settle into the meat.
Serve the pieces whole, or shred the chicken into the sauce if you want it to spoon over rice, noodles, or potatoes. Add sour cream or cheese near the end, not at the beginning, for the smoothest finish.
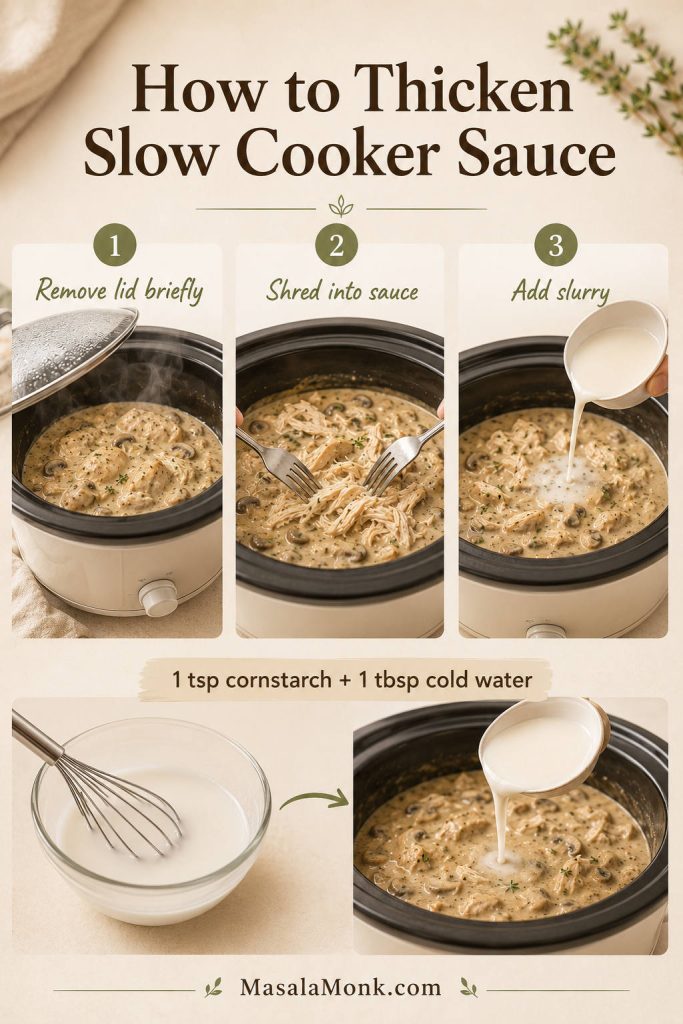
How to Thicken Slow Cooker Cream of Mushroom Chicken
A thin slow cooker sauce can be fixed by removing the lid for a short time, shredding the chicken into the sauce, or thickening it with a small slurry made from 1 tsp cornstarch and 1 tbsp cold water. Use this fix before the chicken overcooks.
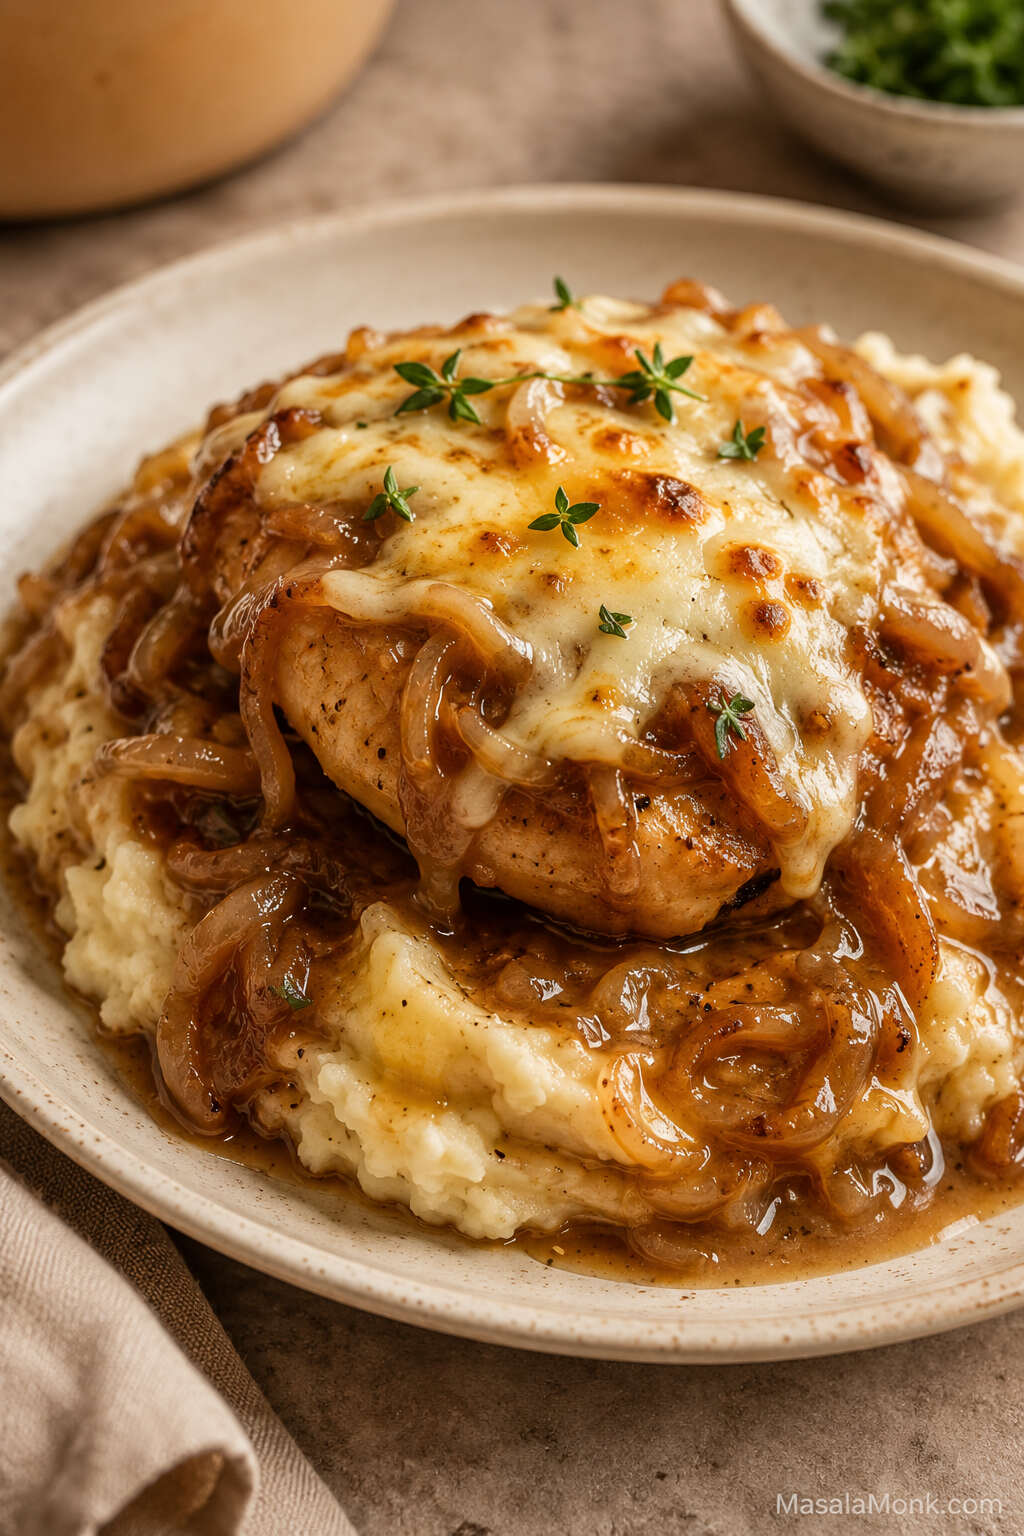
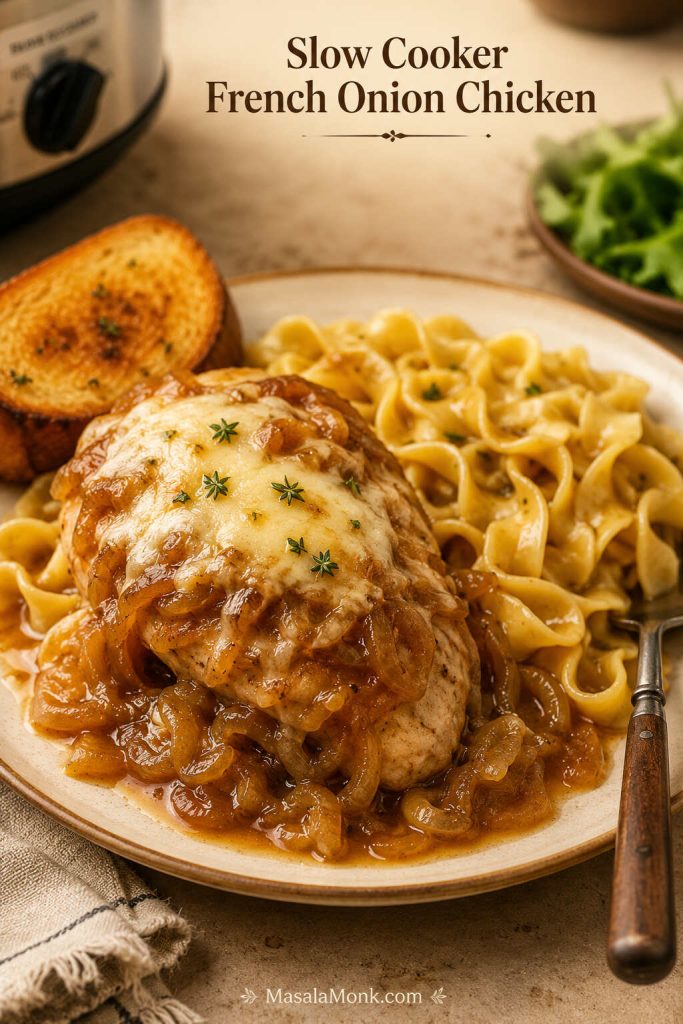
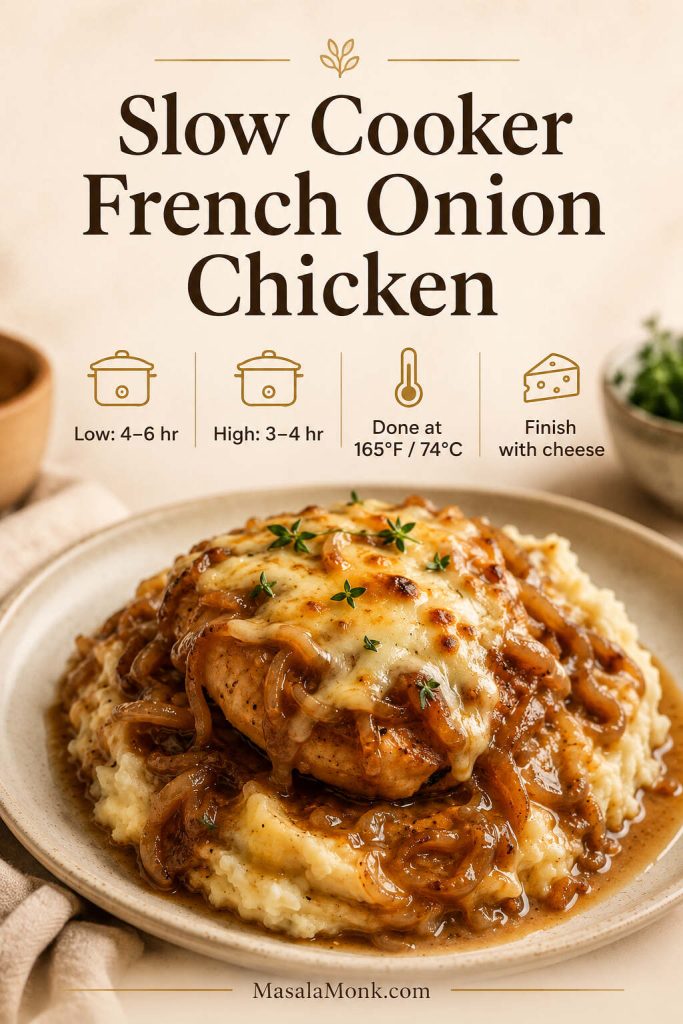
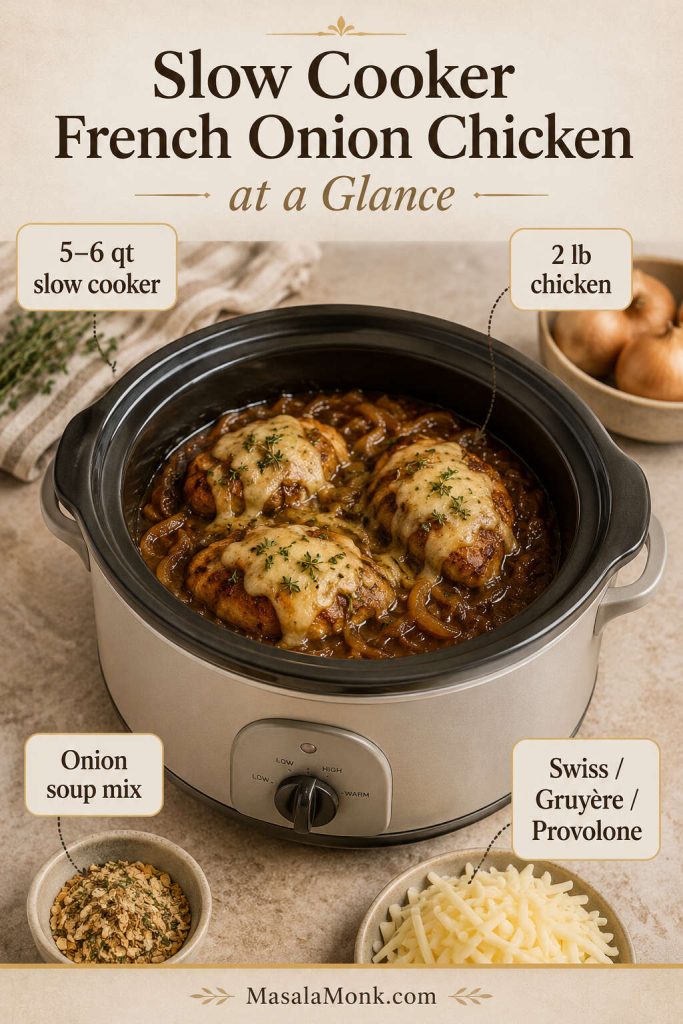
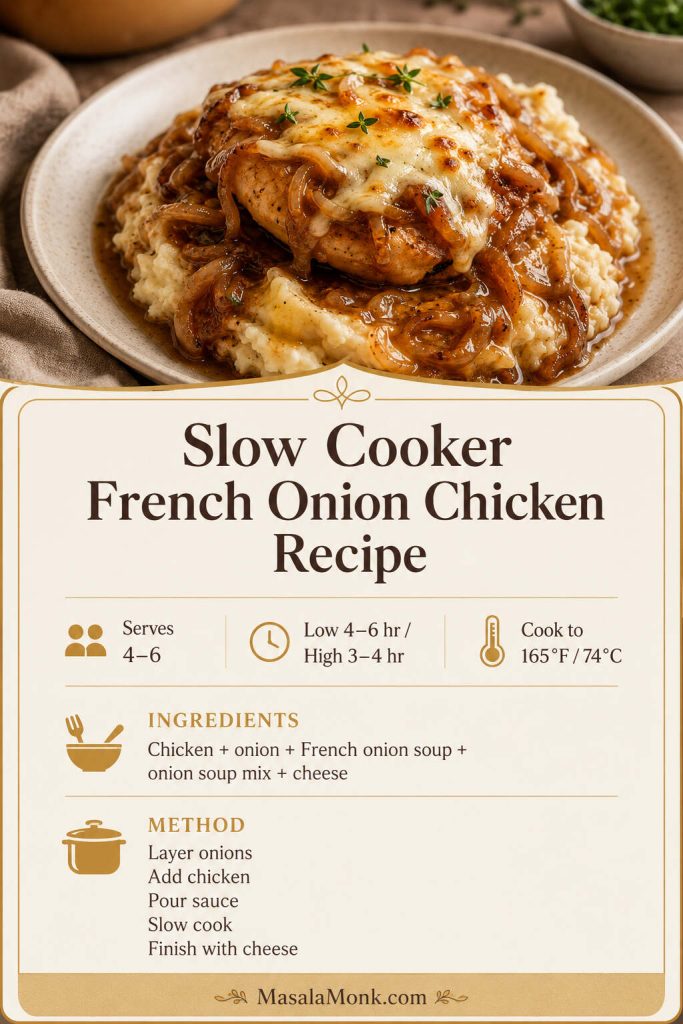
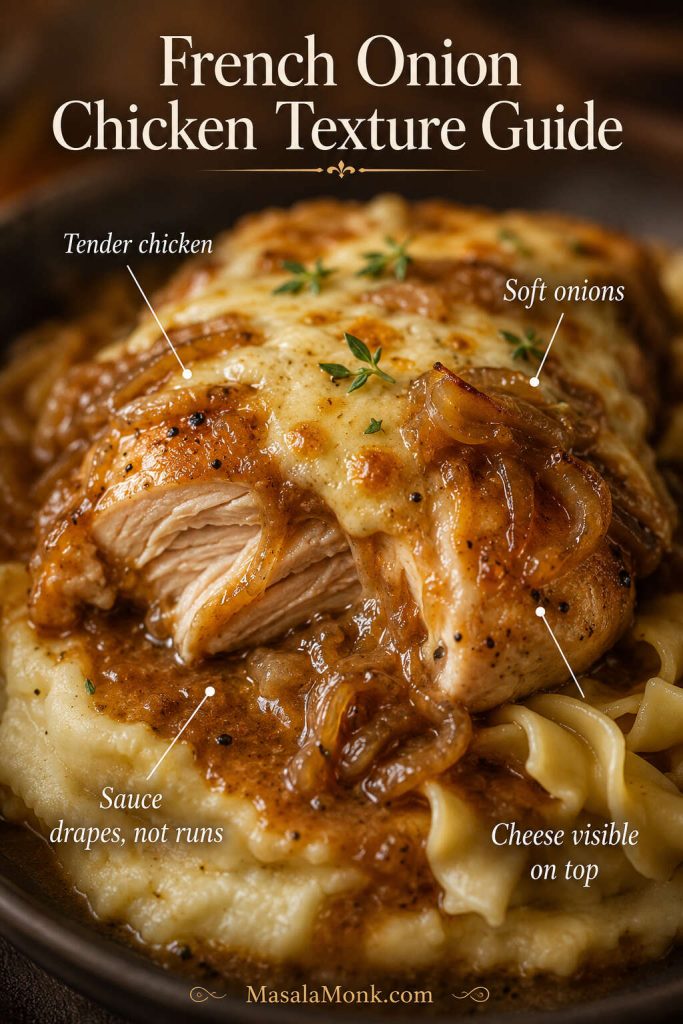
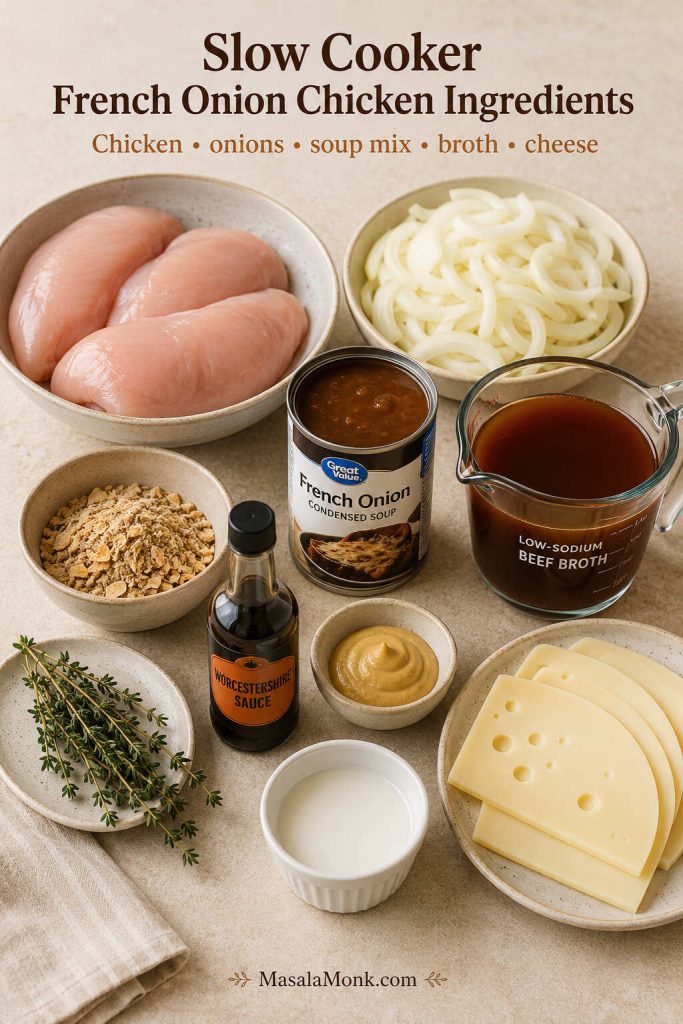
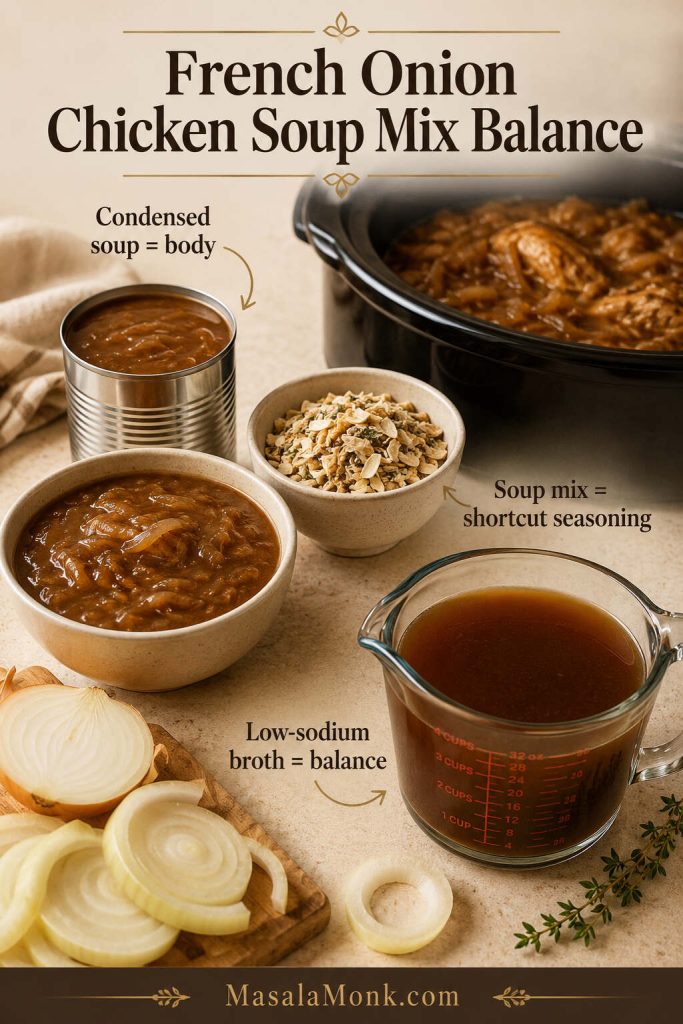
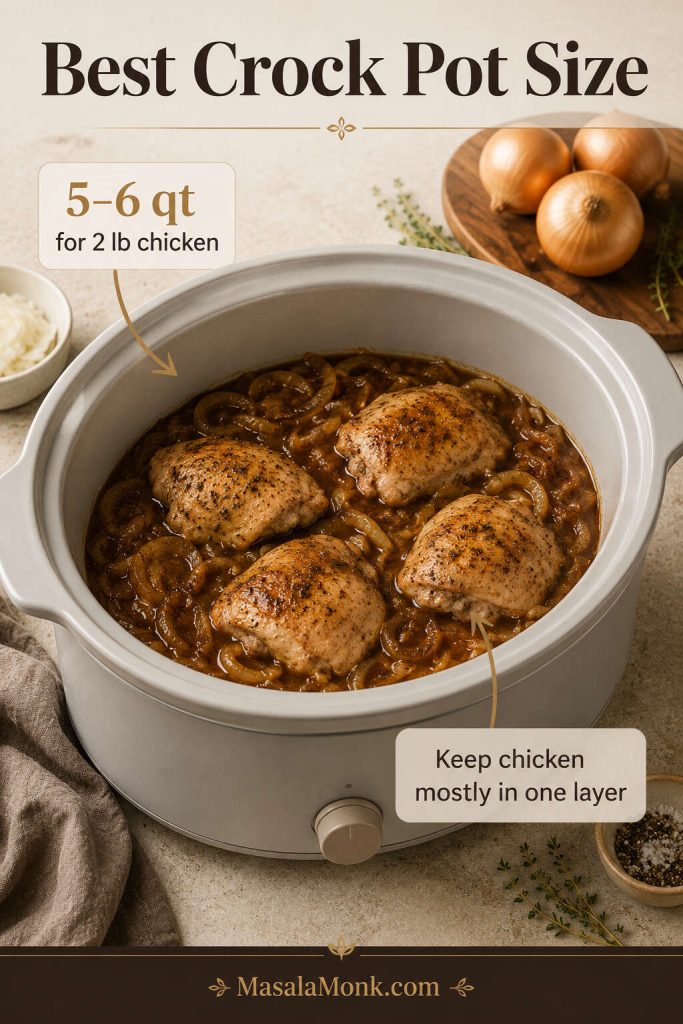
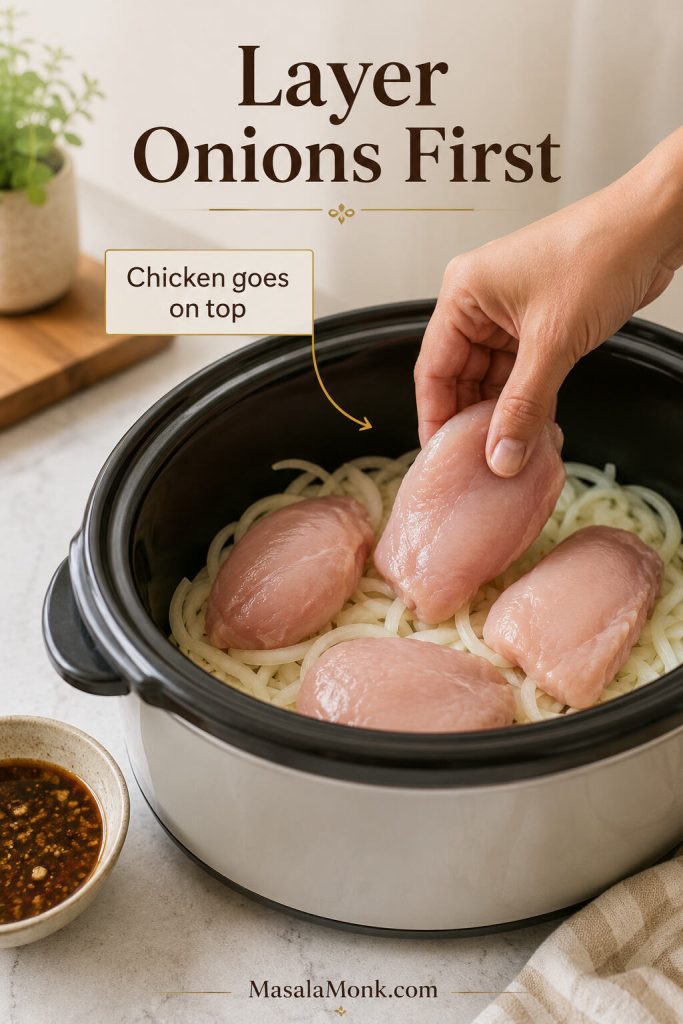
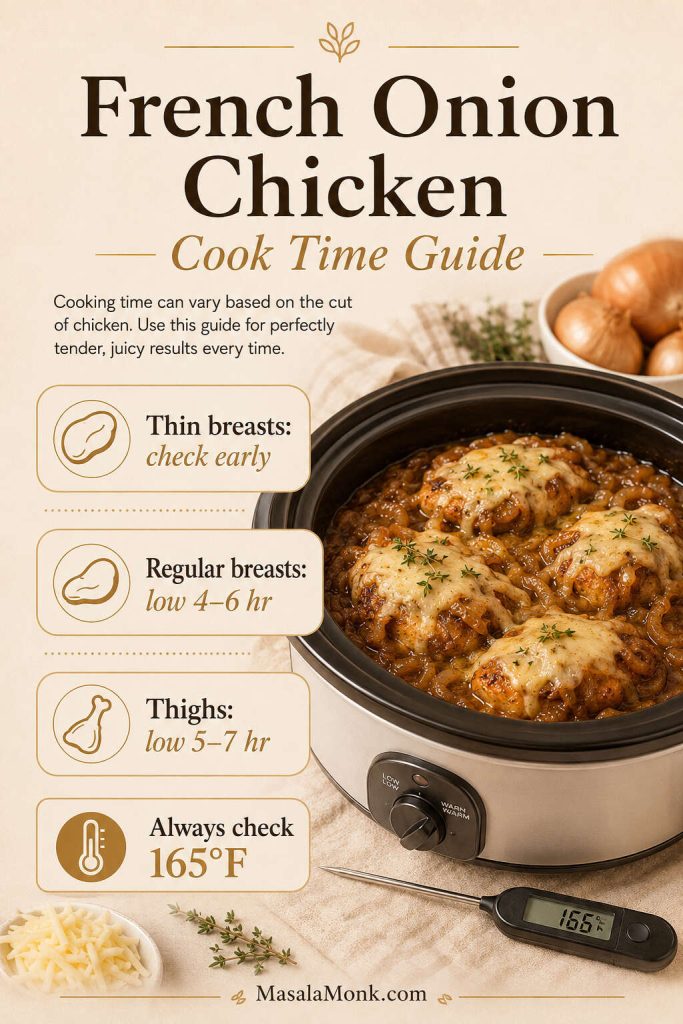
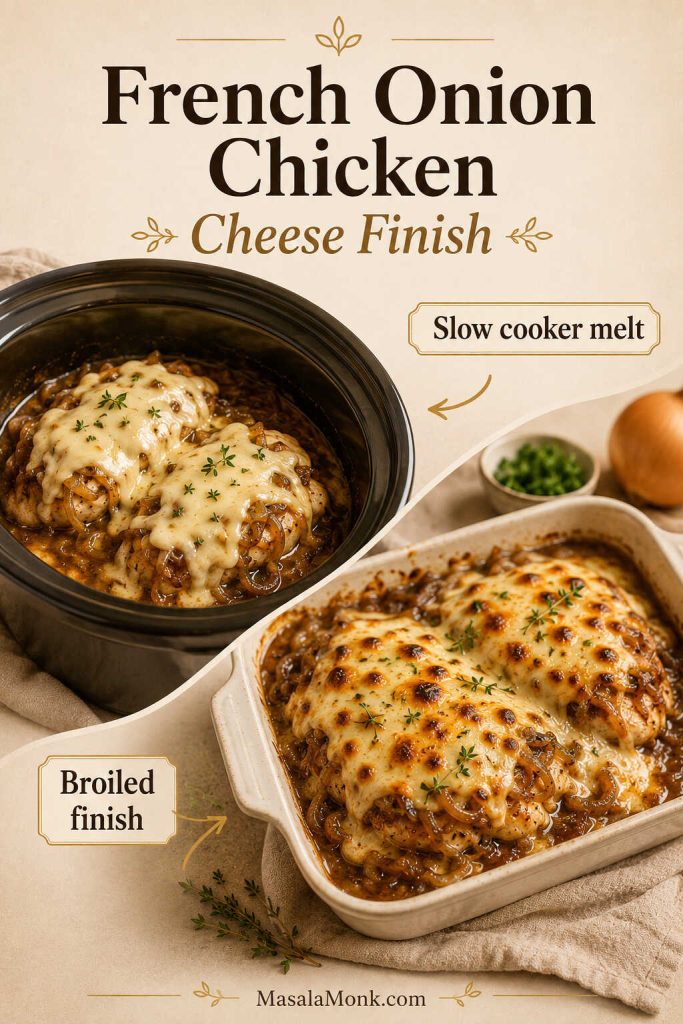
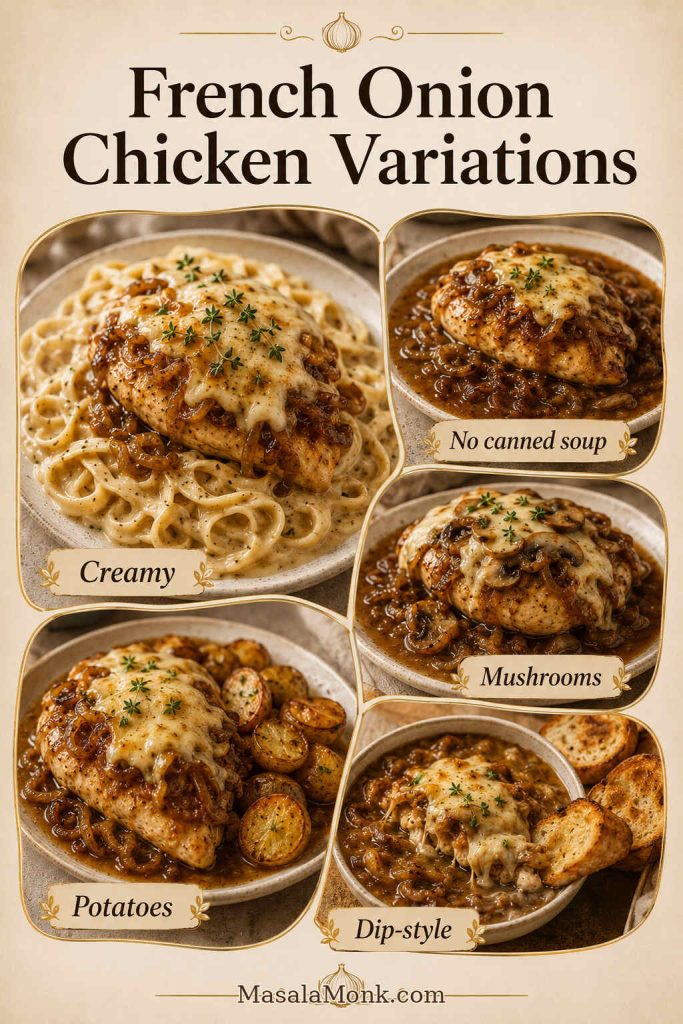
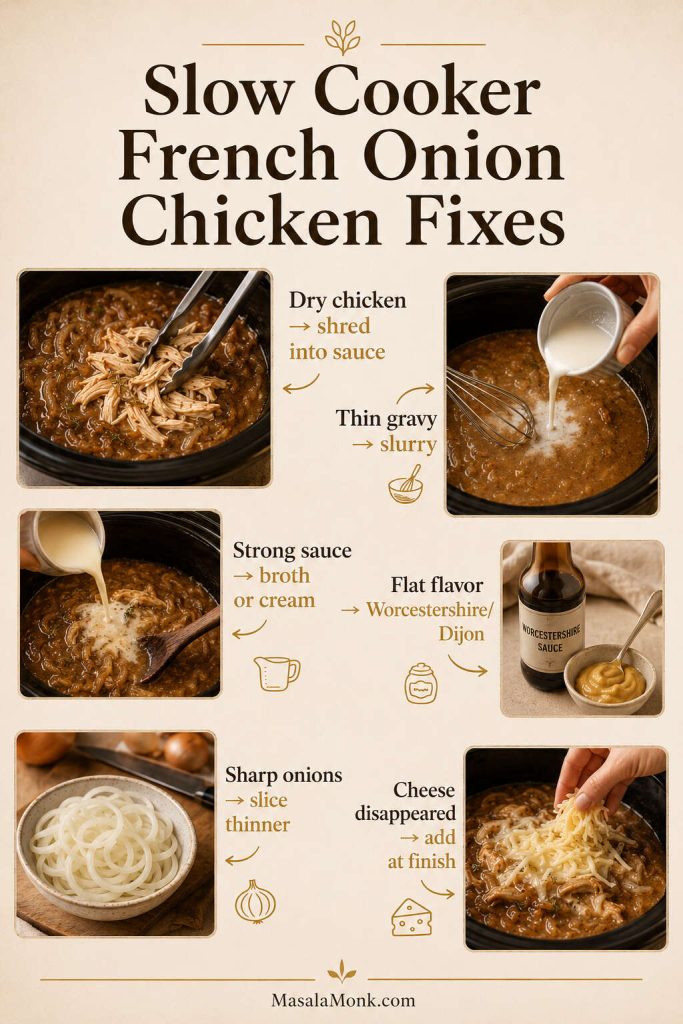
For another saucy crockpot chicken dinner, MasalaMonk’s slow cooker French onion chicken follows a similar comfort-food idea with onion gravy, cheese, and a base of noodles, potatoes, rice, or toast.
Cream of Mushroom Chicken and Rice
Rice can absolutely work here, but it needs its own formula. Dry rice needs extra liquid, trapped steam, and more time than the basic baked chicken version. Before you bake, scan the rice mistakes to avoid if you are using brown rice, instant rice, or thick chicken pieces.

Campbell’s classic one-dish chicken and rice bake follows this same condensed-soup pattern: condensed soup, measured liquid, uncooked long-grain white rice, and chicken baked together under a tight cover. You can see that reference here: Campbell’s One-Dish Chicken & Rice Bake.
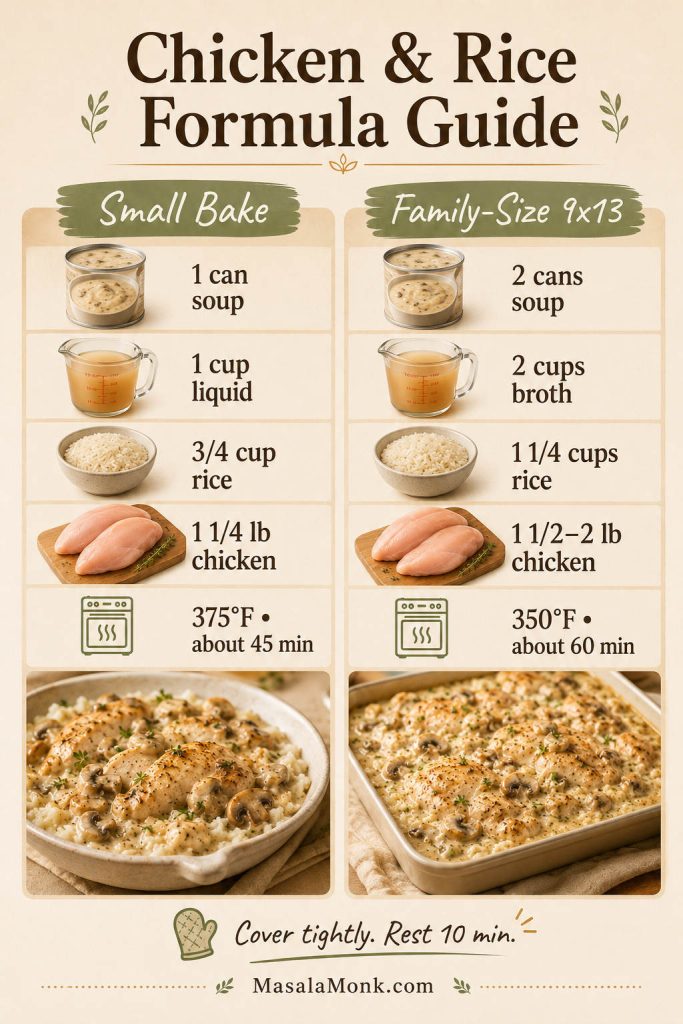
Small Classic Chicken and Rice Bake
This smaller rice bake makes about 4 servings.
- 1 can condensed cream of mushroom soup, 10.5 oz / 298 g
- 1 cup / 240 ml water or low-sodium chicken broth
- ¾ cup / about 140 g uncooked long-grain white rice
- 1¼ lb / 565 g boneless skinless chicken breast or thighs
- ¼ tsp paprika, plus pepper and garlic powder if desired
Mix the soup, liquid, rice, and seasoning in a greased baking dish. Place the chicken on top, cover tightly, and bake at 375°F / 190°C for about 45 minutes, or until the rice is tender and the chicken reaches 165°F / 74°C. Let it stand for 10 minutes before serving so the rice can finish absorbing the sauce.
Larger 9×13 Family Rice Bake
A larger family-style casserole needs more soup, more rice, and more liquid.
- 2 cans condensed cream of mushroom soup, 10.5 oz / 298 g each
- 2 cups / 480 ml low-sodium chicken broth
- 1¼ cups / about 230 g long-grain white rice
- 1½–2 lb / 680–900 g chicken
- Optional onion, thyme, Dijon, black pepper, or Parmesan
Cover tightly and bake at 350°F / 175°C for about 60 minutes. Check the rice, stir gently around the chicken if needed, add a splash of hot broth if the rice is still firm, then cover again and bake 10–15 minutes more. Rest 10 minutes before serving.
Chicken and Rice Formula Guide
Use the small bake when you want a compact dinner, and use the 9×13 formula when the casserole needs to feed more people without leaving the rice undercooked.
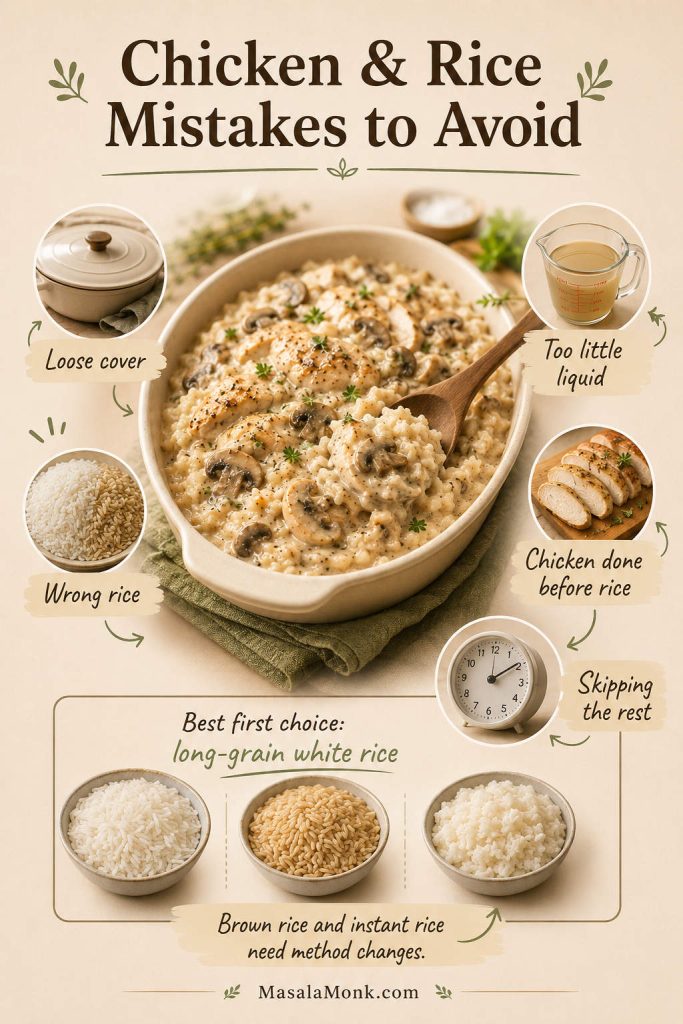
Rice Mistakes to Avoid
The rice version is forgiving once the steam is right, but it is less forgiving when the cover is loose or the liquid is guessed.
- A loose cover will not trap enough steam. Rice needs a tight cover to soften properly.
- Brown rice needs a different plan. It takes more time and usually more liquid than white rice.
- Instant rice cooks too fast for this long bake. It can turn mushy unless you change the method.
- Ready-to-eat soup can make the bake watery. It is already diluted, unlike condensed soup.
- The chicken can finish before the rice. Check both before calling the dish done.
- Resting matters. The rice absorbs the final sauce as it stands.
Serving the chicken over plain rice instead of baking rice in the dish? MasalaMonk’s how to cook rice guide is useful for getting fluffy grains that do not turn gummy under the sauce.
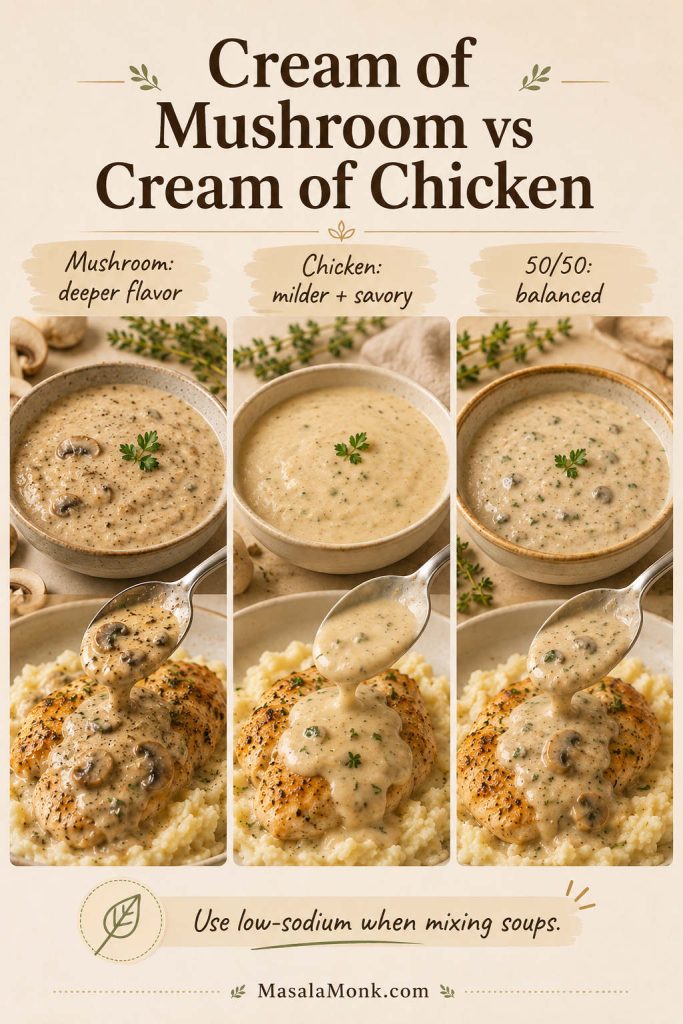
Cream of Chicken + Cream of Mushroom Variation
You can mix cream of chicken and cream of mushroom soup. Cream of chicken makes the sauce milder and more savory, while cream of mushroom adds deeper mushroom flavor. A 50/50 mix works especially well for larger bakes, chicken and rice, and slow cooker meals.
For a bigger casserole or crockpot dinner, try 1 can cream of mushroom soup and 1 can cream of chicken soup. Low-sodium versions are the safest choice because two condensed soups can make the dish salty fast.
This same cream-soup swap logic also shows up in comfort casseroles like MasalaMonk’s green bean casserole recipe ideas, where condensed cream soup is part of the classic creamy base.
How to Make Cream of Mushroom Chicken Taste Better
The shortcut works as-is, but one or two small upgrades can make it taste more like a creamy mushroom dinner than plain canned soup.
The easiest upgrades are browned mushrooms for depth, broth for savoriness, and a small spoon of Dijon or thyme for balance.
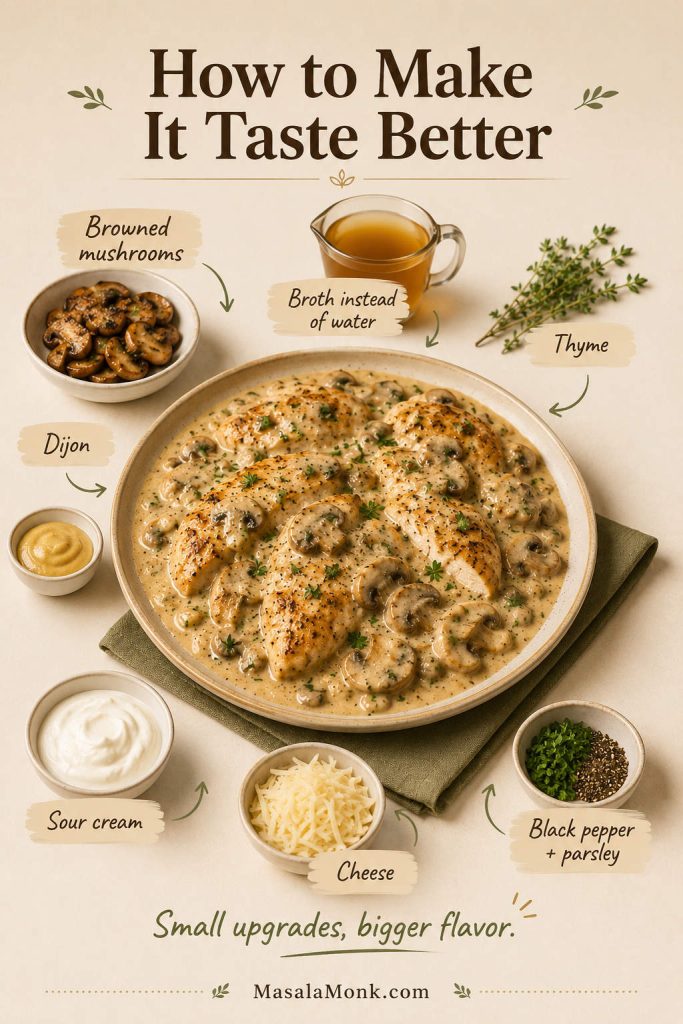
Browned vs Raw Mushrooms
Raw mushrooms can go straight into the dish, but browning them first gives the sauce more flavor and reduces the extra moisture that can loosen the pan.
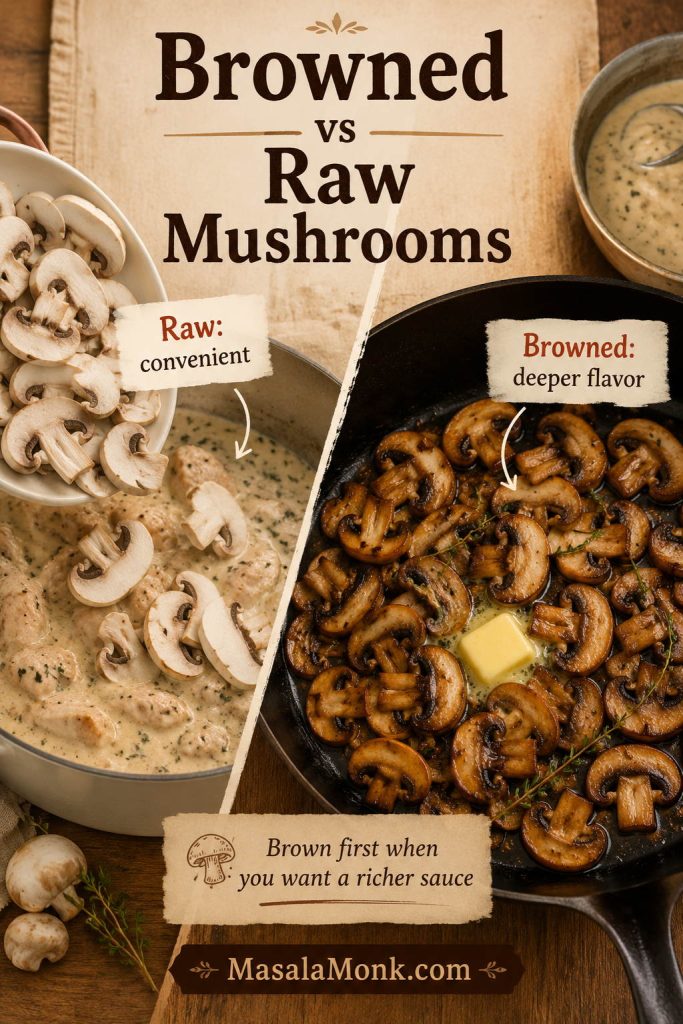
- Brown fresh mushrooms first: This adds real mushroom flavor, cooks off extra moisture, and gives the sauce a deeper base.
- Choose broth instead of water: Low-sodium chicken broth gives the dish more savory depth.
- Add garlic and onion powder: These make the pantry version taste fuller.
- Add thyme: Thyme works naturally with mushrooms and chicken.
- Stir in a small spoon of Dijon: It cuts through the richness without making the dish taste mustardy.
- Finish with sour cream: It gives the sauce a tangier, creamier finish. In skillet and slow cooker versions, add it near the end over gentle heat.
- Melt cheese on top: Mozzarella, Monterey Jack, cheddar, Swiss, or Muenster can turn this into a cheesy baked chicken dinner.
- Add black pepper and parsley at the end: This keeps the final plate from tasting too heavy.
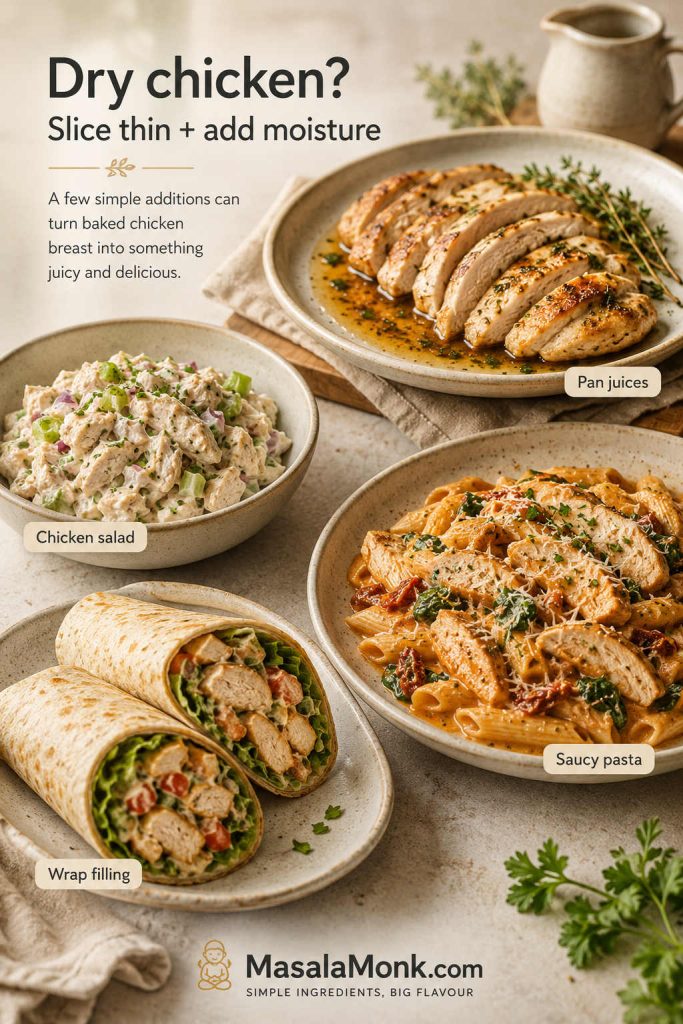
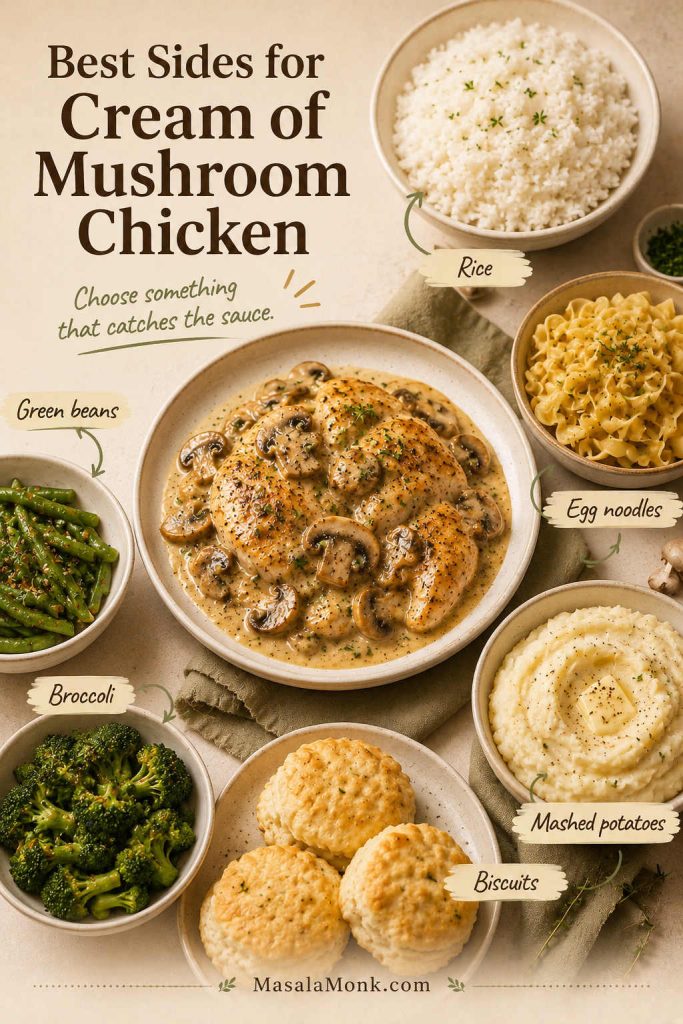
What to Serve with Cream of Mushroom Chicken
The sauce is the point, so serve it with something that catches every spoonful: fluffy rice, buttered egg noodles, mashed potatoes, biscuits, broccoli, or green beans.
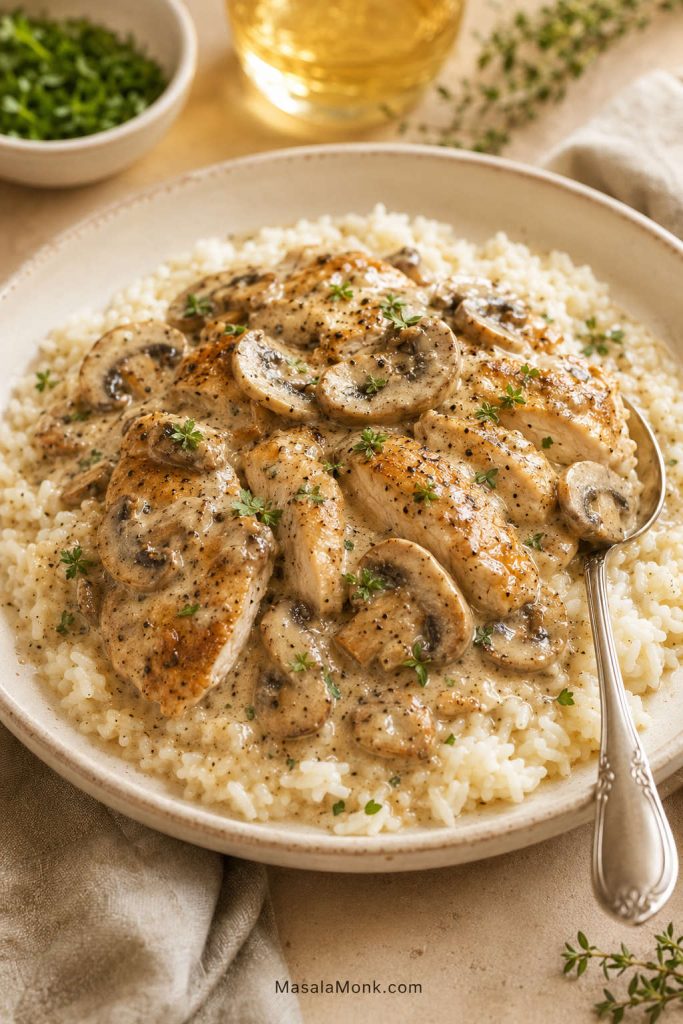
Over Rice
Plain white rice is the easiest pairing. Brown rice, leftover rice, or seasoned rice also work, but keep them separate unless you are following a true chicken-and-rice bake formula.
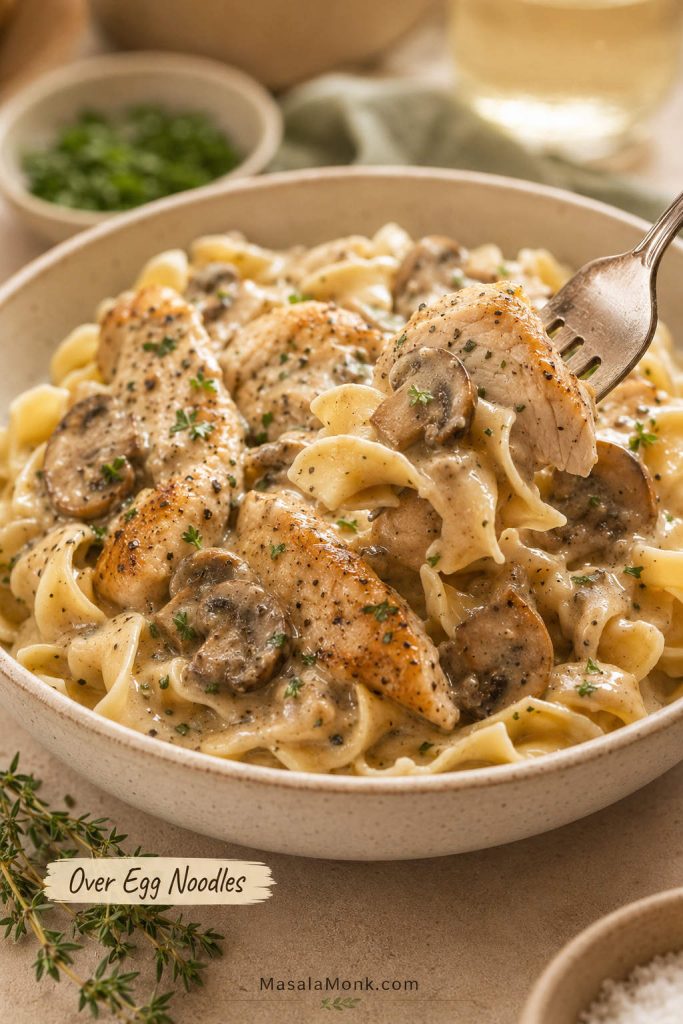
Over Egg Noodles
Egg noodles make this feel like old-school chicken and gravy. Cook the noodles separately, then spoon the chicken and mushroom sauce over the top. Dry egg noodles should not go into the baking dish unless you are using a tested noodle-casserole formula.
Over Mashed Potatoes
Mashed potatoes make the plate even cozier. If you want a creamy potato side that will hold the sauce without turning gluey, try MasalaMonk’s garlic mashed potatoes recipe.

With Vegetables
Green beans, broccoli, peas, carrots, roasted mushrooms, or a simple salad balance the richness. For a holiday-style comfort plate, serve it with green bean casserole, roasted vegetables, or a crisp side salad.
For a bigger comfort-food spread, MasalaMonk’s hashbrown casserole recipe also works as a creamy potato side, especially when the chicken is served with green beans or salad. Planning leftovers? The storage and reheating tips explain how to loosen the sauce again without drying out the chicken.
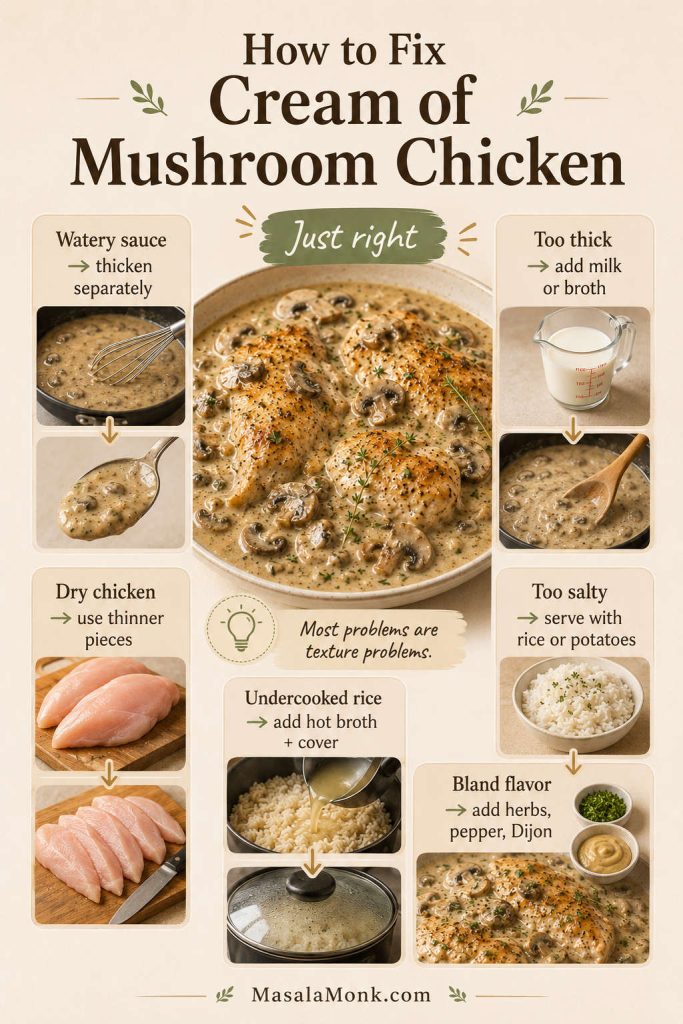
How to Fix Cream of Mushroom Chicken
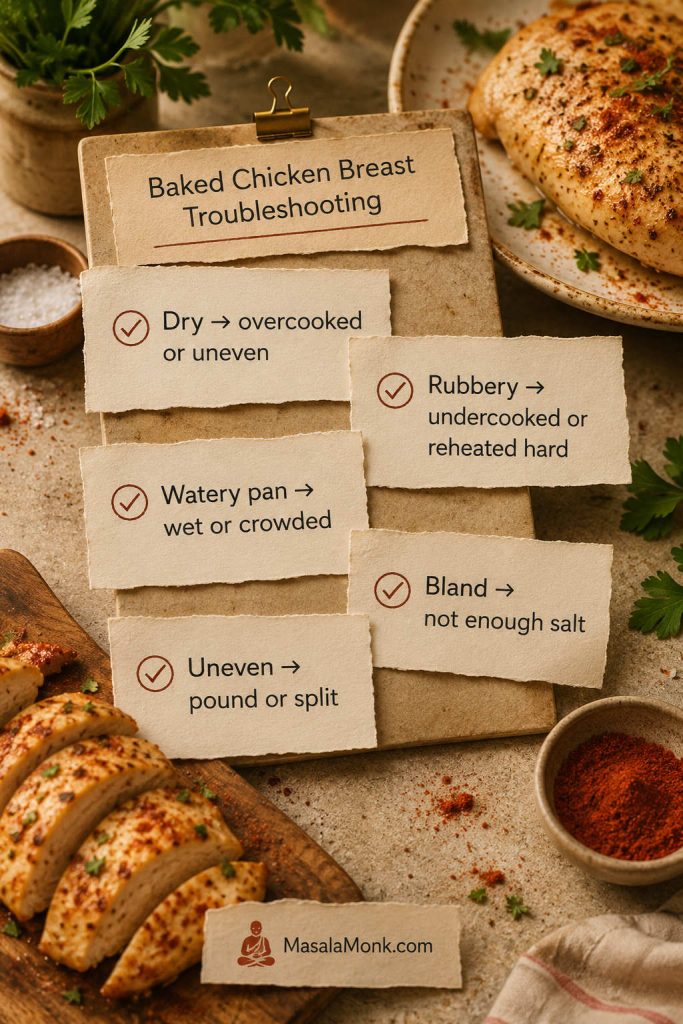
Even when this dish goes a little sideways, it is usually fixable. Most problems are texture problems: the sauce is too thick, too watery, or too salty, while the chicken dries out because the pieces were too thick or cooked too long.
The usual culprits are ready-to-eat soup instead of condensed soup, too much liquid, a loose cover on rice, or thick chicken breasts that needed more time than the sauce did.
Common Sauce, Chicken, and Rice Fixes
| Problem | What Happened | How to Fix It |
|---|---|---|
| Sauce is too thick or gluey | Not enough liquid was added to the condensed soup. | Add milk or broth 1–2 tbsp at a time until it is spoonable. |
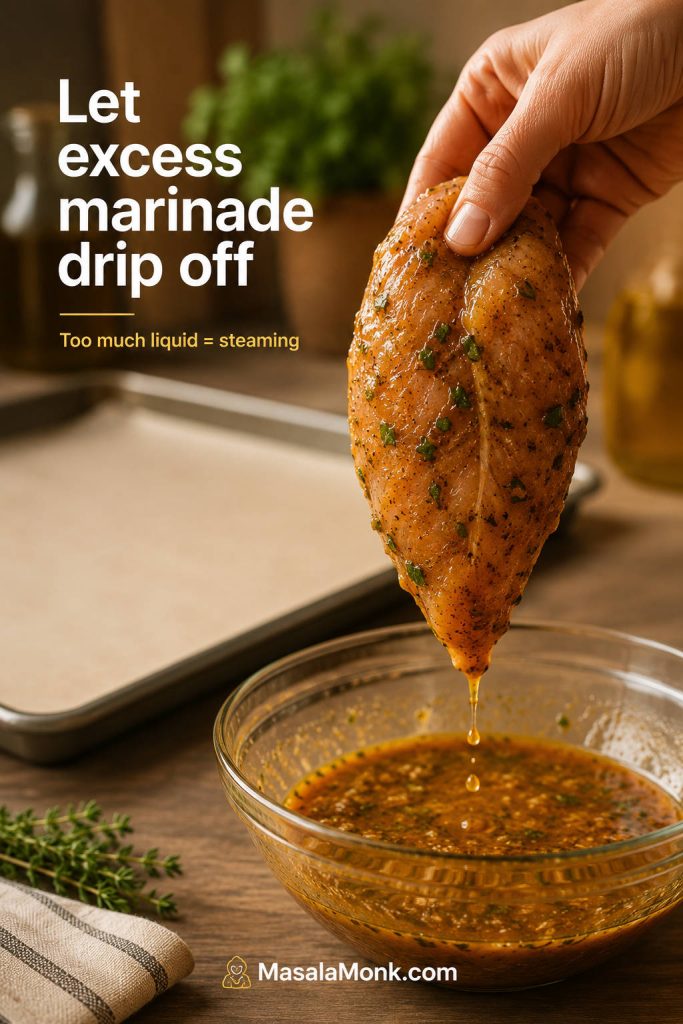
| Sauce is watery | Too much liquid was added, ready-to-eat soup was used, or raw mushrooms released extra moisture. | When the chicken still needs time, bake uncovered 5–10 minutes. When the chicken is already done, remove it and thicken the sauce separately with a small slurry: 1 tsp cornstarch mixed with 1 tbsp cold water. |
| Sauce is too salty | Condensed soup, broth, cheese, or onion soup mix added too much salt. | Serve with rice, noodles, or potatoes to soften the saltiness. A spoonful of sour cream can also mellow the sauce. Next time, use low-sodium soup and broth. |
| Chicken is dry | The pieces were too thick, uncovered too long, or cooked past 165°F / 74°C. | Slice breasts thinner, cover while baking, check early, or use thighs. |
| Chicken is done but sauce is thin | The sauce needs more time, but the chicken does not. | Remove the chicken, cover it loosely, and thicken the sauce separately in a small pan. |
| Rice is undercooked | The dish needed more steam, liquid, or time. | Add ¼–½ cup hot broth, cover tightly again, and bake longer. |
| Rice is mushy | Too much liquid or too much bake time. | Use long-grain white rice, measure carefully, and rest the dish instead of overbaking. |
| Dish tastes bland | The sauce was not boosted with enough seasoning or fresh ingredients. | Add black pepper, garlic powder, onion powder, thyme, paprika, Dijon, or browned mushrooms. |
| Sauce splits when reheated | It was reheated too aggressively. | Reheat gently with a splash of milk or broth and stir slowly. |
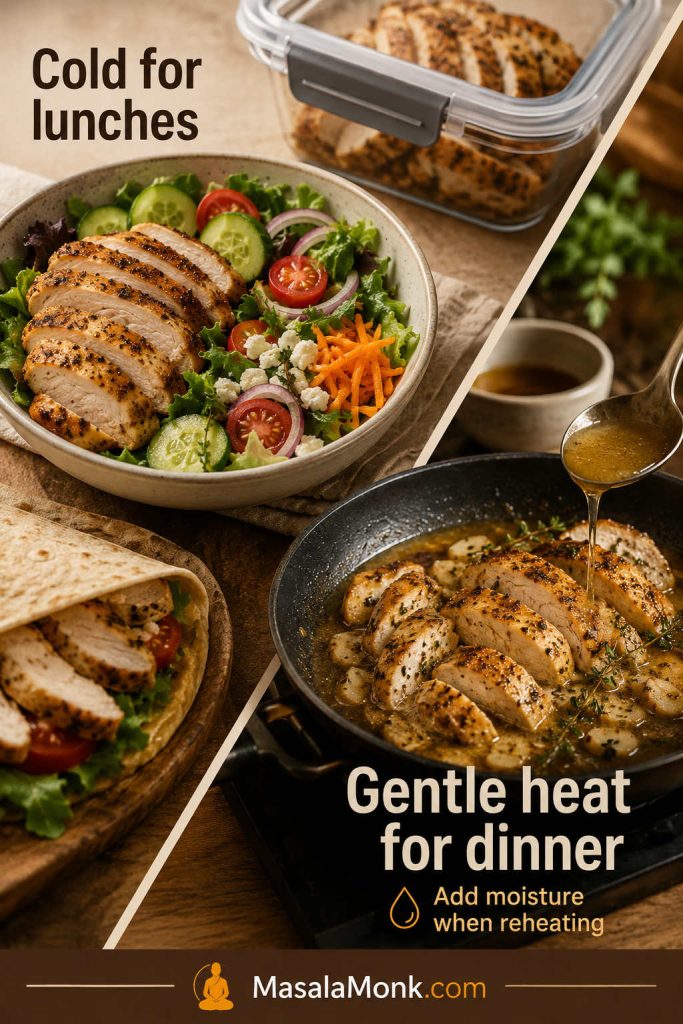
Storage, Freezing and Reheating
Store leftovers in an airtight container in the refrigerator for 3–4 days. Rice or noodles are best stored separately when possible so they do not soak up all the sauce.
To reheat, warm the chicken gently on the stovetop or in the microwave with a splash of milk or broth. The sauce thickens as it chills, so that splash of liquid helps bring it back to a spoonable texture.
You can freeze the cooked chicken and sauce, but the sauce may loosen or look slightly grainy after thawing. It is still usable; reheat gently and whisk in a splash of milk or broth to bring it back together.
Chicken-and-rice leftovers thicken more in the fridge because the rice keeps absorbing the sauce. Reheat them with a splash of broth or milk so the rice loosens instead of turning dry.

Cream of Mushroom Chicken FAQs
How long should cream of mushroom chicken bake?
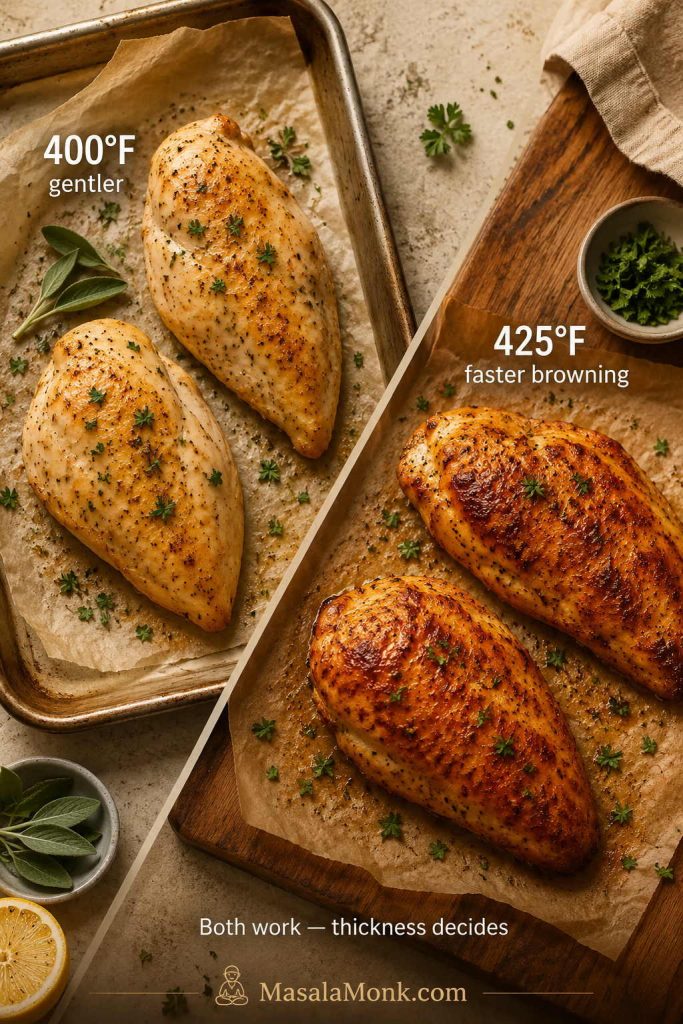
Thin boneless chicken breasts or thighs usually need about 25 minutes covered at 375°F / 190°C, then 5–10 minutes uncovered. Thickness matters more than the clock, so check that the chicken reaches 165°F / 74°C.
Covered or uncovered?
Cover the dish first so the chicken stays moist and the sauce does not dry out. Uncover near the end when the sauce needs to thicken or cheese is going on top.
Campbell’s soup vs other condensed brands
A standard 10.5 oz / 298 g can of Campbell’s condensed cream of mushroom soup works well, but other condensed brands work too. The important detail is that the soup is condensed, not ready-to-eat.
Chicken breasts vs thighs
Boneless skinless thighs are the more forgiving choice because they stay juicy even when the dish needs a few extra minutes. Breasts work well too, but they should be thin and even before baking.
How much liquid should I add to condensed soup?
For baked chicken, ½ cup / 120 ml milk or low-sodium broth per 10.5 oz / 298 g can makes a creamy sauce. Skillet chicken can take ½–1 cup / 120–240 ml because the pan sauce reduces as it simmers.
How to make it on the stove
The stovetop version works best with thin pieces because they cook quickly and stay tender. Sear them first, then simmer gently in the mushroom sauce until they reach 165°F / 74°C. A few uncovered minutes will tighten a loose pan sauce.
Homemade mushroom sauce instead of canned soup
This becomes a different style of recipe, but it can work. For a quick homemade mushroom cream sauce, start with 2 tbsp butter, 8 oz mushrooms, 1 minced garlic clove, 2 tbsp flour, 1 cup broth, and ½ cup milk or cream, then cook the chicken in that sauce. For the classic shortcut flavor, use condensed soup.
Adding rice safely
Rice can work beautifully, but treat it like its own bake, not a last-minute add-in. It needs extra liquid, trapped steam, and more time than the basic chicken version. Start with 1 can condensed soup, 1 cup / 240 ml water or broth, ¾ cup / about 140 g long-grain white rice, and about 1¼ lb / 565 g chicken.
Should you use frozen chicken?
Thawed chicken is the safer bet here because it cooks more evenly and keeps the sauce from turning watery. Frozen chicken can release a lot of moisture, especially in the oven or skillet, so thaw it first when you can.
Why the sauce turns watery
Watery sauce usually comes from too much liquid, ready-to-eat soup instead of condensed soup, raw mushrooms releasing moisture, or keeping the dish covered for the whole bake. Once the chicken is done, remove it and thicken the sauce separately with a small slurry made from 1 tsp cornstarch and 1 tbsp cold water.
Fixing a salty sauce
Condensed soup is already salty, and broth, cheese, or onion soup mix can add even more. Rice, noodles, or potatoes help soften the saltiness on the plate. A spoonful of sour cream can also mellow the sauce.
Best sides for creamy mushroom chicken
Rice, egg noodles, mashed potatoes, biscuits, broccoli, green beans, peas, carrots, and roasted mushrooms all work. The best side is something that catches the creamy mushroom sauce.
Slow cooker ratio
In the slow cooker, use less liquid than you might expect because the lid traps moisture. For 1½–2 lb / 680–900 g chicken, use 2 cans condensed cream of mushroom soup and about ½ cup / 120 ml broth or water. Cook on High for 3–4 hours or Low for 6–7 hours, until the chicken reaches 165°F / 74°C.
Final Thoughts
Start with the oven version first. Once you understand the soup-to-liquid ratio, the recipe bends to the night: faster in a skillet, easier in the slow cooker, or heartier with rice.
However you make it, the goal stays the same: juicy chicken, creamy mushroom gravy, and a dinner that asks very little from you but still feels like someone cared.