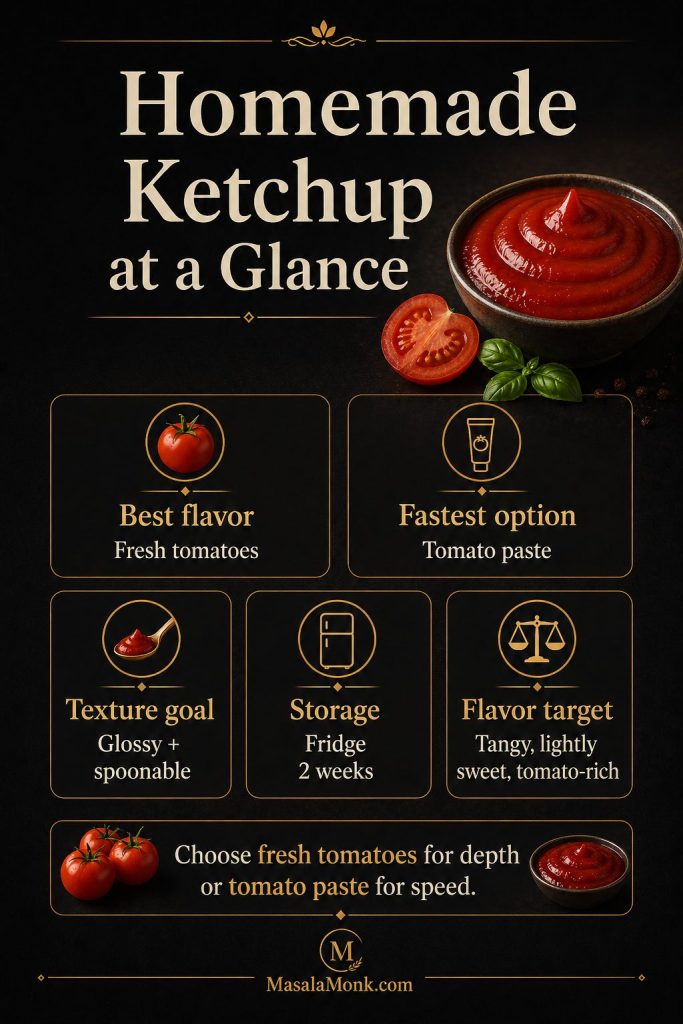
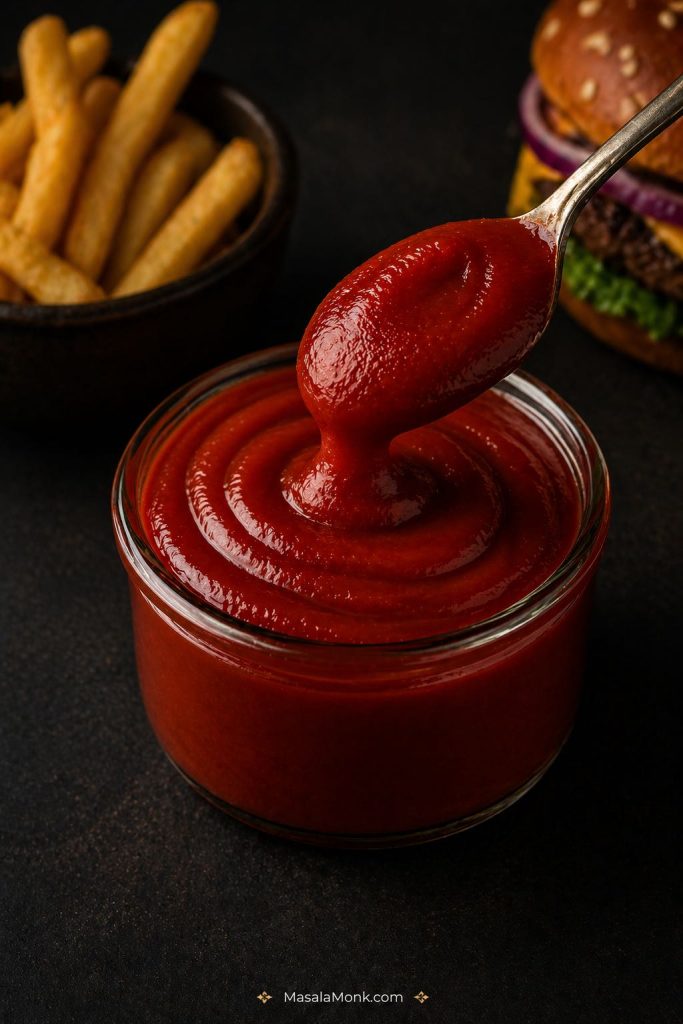
A good homemade ketchup recipe should taste bright, tangy, lightly sweet, deeply tomato-forward, and smooth enough for dipping, spreading, spooning, or squeezing. It should be thicker than tomato sauce, sharper than tomato chutney, and balanced enough for fries, burgers, sandwiches, wraps, pakoras, grilled snacks, and quick dipping sauces. You can also use it as a simple meatloaf glaze or a base for burger sauce.
This homemade tomato ketchup gives you the full fresh tomato method first: ripe tomatoes cooked down with onion, garlic, vinegar, sweetener, salt, mustard, and warm spices until glossy and thick. Then, because real kitchens are not always full of perfect summer tomatoes, you also get a quick tomato paste ketchup recipe, a sugar-free option, texture fixes, storage guidance, and clear canning notes.
In many kitchens, especially in India, this would simply be called a tomato ketchup recipe or homemade tomato sauce. Here, though, the goal is classic ketchup texture: smooth, glossy, thick, tangy-sweet, and easy to dip.
Most importantly, this is a recipe about control. Once you understand the tomato-to-vinegar-to-sweetener balance, you can make ketchup sweeter, tangier, smoother, thicker, spicier, lower in sugar, or closer to bottled ketchup without guessing. That way, the same base can work for fries, burgers, wraps, snacks, and quick sauces without needing a separate recipe every time.
For that reason, the recipe below does not force one version on every kitchen. Instead, it shows you when fresh tomatoes are worth the longer simmer and when tomato paste is the smarter shortcut.
Homemade Ketchup Guide
Before you start: choose the version based on your tomatoes. If they are ripe and flavorful, use the fresh tomato method. However, if they are watery or bland, use the tomato paste shortcut instead. That way, you get a thick, balanced ketchup without fighting the ingredients.
Quick Answer: The Best Homemade Ketchup Recipe Ratio
Fresh Tomato Ketchup Ratio
To make homemade ketchup with fresh tomatoes, first cook ripe tomatoes with onion and garlic until soft. Next, blend them smooth and strain them for a finer texture. From there, simmer the tomato puree with vinegar, sugar or jaggery, salt, mustard powder, and warm spices until thick and glossy.
Tomato Paste Ketchup Ratio
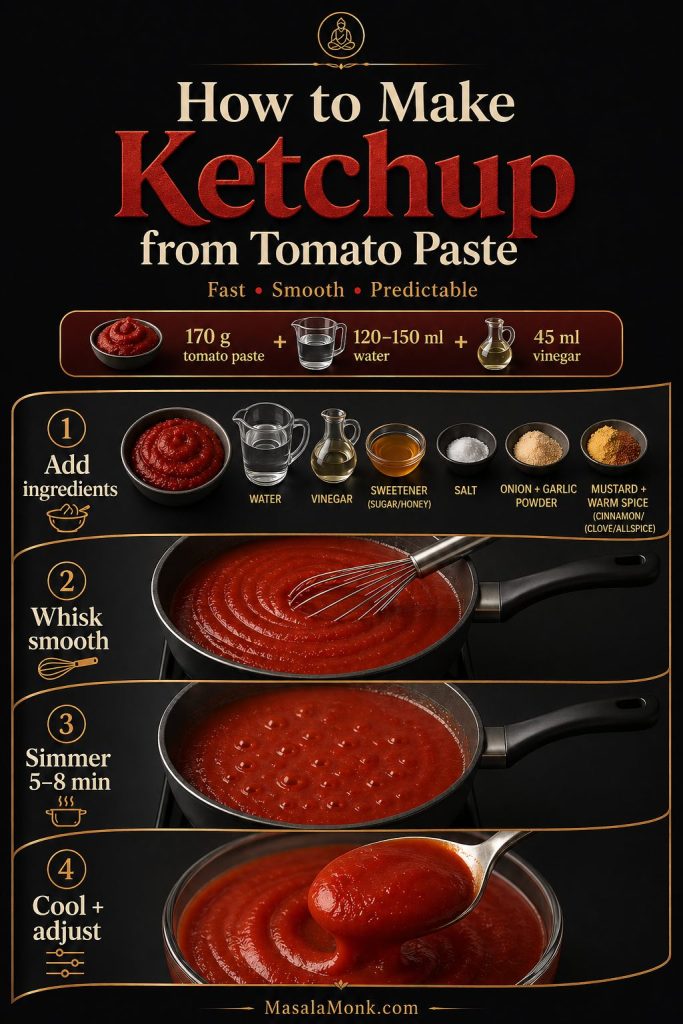
For a faster version, whisk tomato paste with water, vinegar, sweetener, salt, onion powder, garlic powder, mustard powder, and a tiny pinch of warm spice. Then, simmer it for 5–8 minutes. Compared with the fresh tomato version, tomato paste ketchup is quicker, smoother, and more predictable, although it tastes less seasonal.
As a starting point, use the fresh tomato ratio when flavor matters most and the tomato paste ratio when speed and smoothness matter more.
| Version | Quick Ratio | Best For |
|---|---|---|
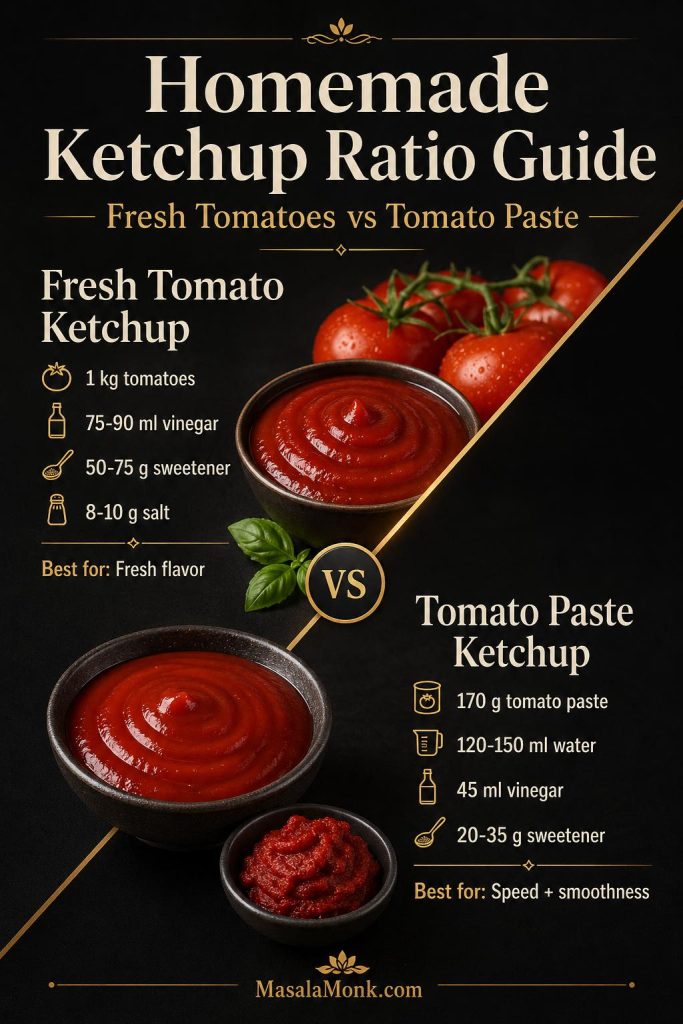
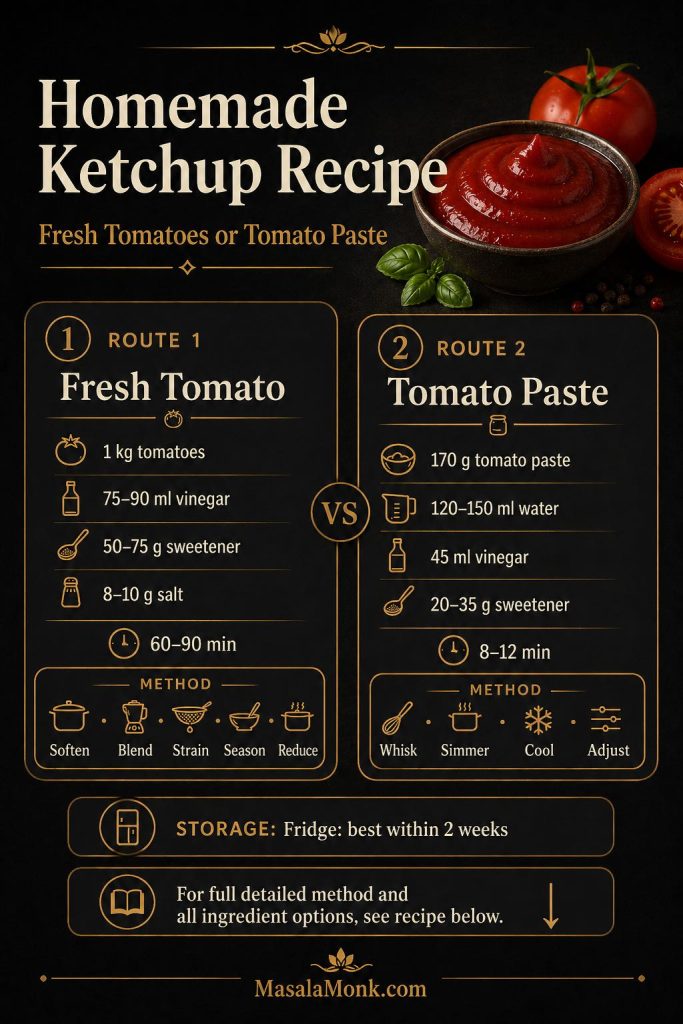
| Fresh tomato ketchup | 1 kg tomatoes + 75–90 ml vinegar + 50–75 g sweetener + 8–10 g salt | Ripe summer tomatoes, fresh flavor, and from-scratch ketchup |
| Tomato paste ketchup | 170 g tomato paste + 120–150 ml water + 45 ml vinegar + 20–35 g sweetener | Quick ketchup, smooth texture, burgers, fries, and weeknight meals |
That is why this ketchup recipe gives you two practical paths: a fresh tomato version for deeper flavor and a quick tomato paste version for speed.
Because this ketchup recipe is homemade, you can adjust the vinegar, sweetener, salt, and spices near the end instead of being locked into one fixed bottled flavor.
How the Ketchup Should Taste
Flavor target: good ketchup should taste tomato-rich first, then tangy, lightly sweet, salty enough to pop, and only gently spiced. If you can clearly taste cinnamon, clove, or allspice, the warm spice is too strong.
That flexibility is what makes a homemade ketchup recipe useful: the method gives you a starting point, but the final balance comes from tasting and adjusting.
The finished ketchup should taste tomato-rich, tangy-sweet, savory, and gently spiced in the background. When it tastes like plain tomato sauce, it needs more vinegar, sweetener, salt, mustard, or a tiny pinch of warm spice. However, when it tastes like chutney, the warm spices or sweetener are probably too strong.
Which Homemade Ketchup Version Should You Make?
Before you start cooking, decide what problem you are solving. Fresh tomatoes give the best homemade flavor when they are ripe, while tomato paste gives better control when the tomatoes are watery, pale, or out of season.
The easiest way to choose is to look at your tomatoes, your time, and how you plan to store the ketchup. When the tomatoes are ripe and red, fresh tomatoes give the best homemade flavor. On the other hand, when the tomatoes are watery, pale, or out of season, tomato paste gives the fastest, smoothest, most predictable result. If you are reducing sugar, however, the ketchup needs a little more balancing so it still tastes like ketchup instead of plain tomato sauce.
In other words, the best homemade version is not always the longest ketchup recipe. It is the version that fits your tomatoes, your time, and the way you want to serve it.
| Situation | Best Version | Why It Works |
|---|---|---|
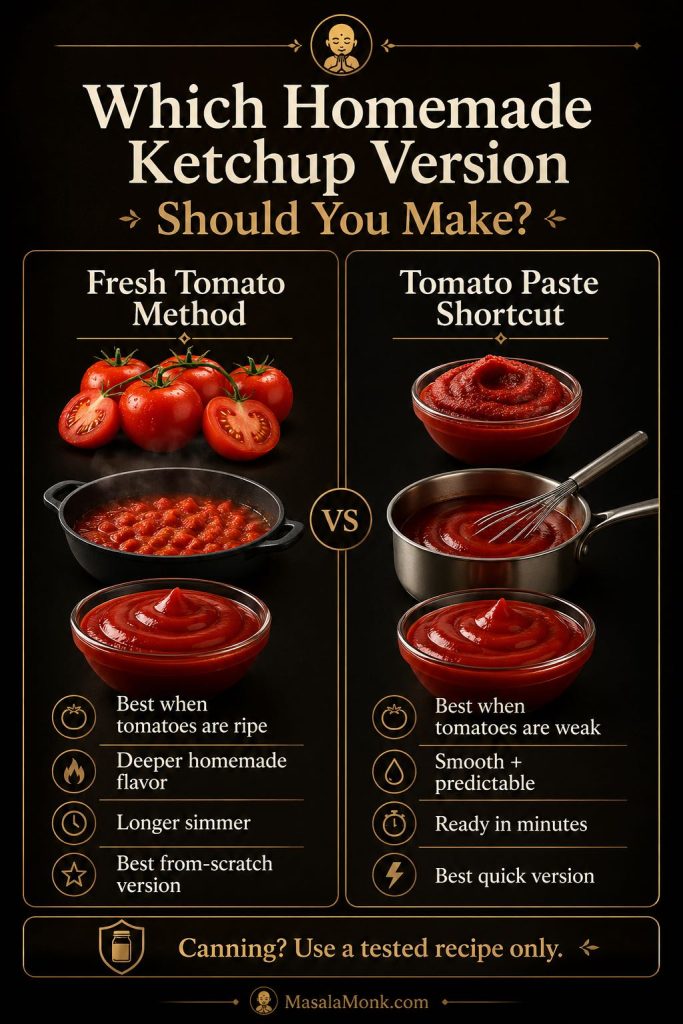
| Ripe summer tomatoes | Fresh tomato ketchup | This gives the best flavor and the most homemade character. |
| Watery, pale, or bland tomatoes | Tomato paste ketchup | The paste gives more predictable color, body, and flavor. |
| Ketchup needed in about 10 minutes | Quick tomato paste ketchup recipe | No long reduction is needed. |
| Lower-sugar ketchup | Sugar-free ketchup option | This lets you control the sweetener while keeping the sauce balanced. |
| Pantry-stable jars | Tested canning recipe only | A flexible fridge ketchup should not be canned casually. |
Why This Recipe Works
This recipe works because it treats ketchup as a balance problem, not just a tomato puree. The tomatoes soften first so their flavor turns rounded, the mixture is blended and strained for texture, and the seasoned puree reduces slowly until the vinegar, sweetener, salt, mustard, and spices taste like one glossy sauce.
The fresh tomato version gives deeper homemade flavor, while the tomato paste version gives speed and consistency. Together, they cover both real kitchen situations: good ripe tomatoes and the nights when you need a quick ketchup for fries, burgers, wraps, or snacks. Because both versions use the same sweet-acid-salt logic, you can adjust them in the same way near the end.
Homemade Ketchup Ingredients: Tomatoes, Vinegar, Sugar, Salt and Spices
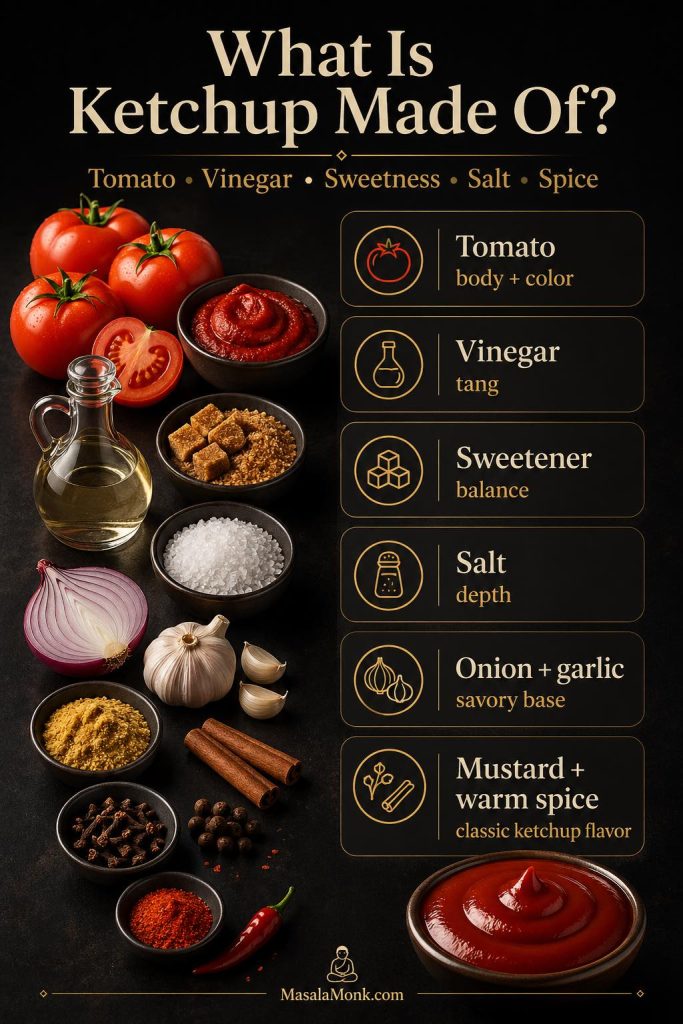
Ketchup tastes simple, but it depends on balance. Tomatoes give the sauce body, while vinegar adds the sharp tang. Sweetener rounds the acidity, and salt makes the tomato flavor pop. Finally, onion, garlic, mustard, and warm spices turn cooked tomato into ketchup instead of plain tomato sauce.
Because the sauce reduces as it cooks, the balance of vinegar, salt, and sweetener becomes more concentrated near the end. Therefore, it is better to start slightly cautious and adjust after the sauce thickens.
What Is Ketchup Made Of?
Ketchup is usually made from tomatoes or tomato paste, vinegar, sugar or another sweetener, salt, onion, garlic, mustard, and warm spices. The main ingredient is tomato, but the familiar ketchup flavor comes from the balance of tomato, vinegar, sweetness, salt, and spice.
Compared with many bottled ketchup ingredients lists, homemade ketchup gives you more control. You can choose fresh tomatoes or tomato paste, adjust the sugar, use 5% acidity vinegar, control the salt, and keep the spice level gentle.
Tomatoes and Vinegar
Tomatoes give the ketchup body, color, and fresh flavor. Meanwhile, vinegar gives the sauce its sharp ketchup tang. For this small-batch fridge version, apple cider vinegar gives a rounder flavor, while white vinegar tastes cleaner and sharper.
Sweetener, Salt and Spices
Sweetener balances tomato acidity, salt sharpens the flavor, and spices make the sauce taste like ketchup instead of plain tomato sauce. In this ketchup recipe, the homemade flavor comes from restraint: mustard powder, cinnamon, and a tiny pinch of clove or allspice are enough. Too much warm spice can push the sauce toward chutney.
Once you understand what each ingredient does, the recipe becomes easier to adjust. The table below shows the fresh tomato amounts first because that version depends most on balance and reduction.
Measurement note: metric weights are more accurate for tomatoes, onion, sweetener, and salt. The US cup and spoon measures are included for convenience, but final yield can vary because tomatoes contain different amounts of water.
Fresh Tomato Ketchup Ingredient Amounts
| Ingredient | Amount for Fresh Tomato Ketchup | Why It Matters |
|---|---|---|
| Ripe red tomatoes | 1 kg / 2.2 lb | Tomatoes form the body, color, and main flavor. Roma, plum, San Marzano-style, or other meaty tomatoes reduce faster and taste richer. |
| Onion | 80–100 g / 3–3.5 oz / 1 small onion | Onion builds a savory base and helps the ketchup taste rounded. |
| Garlic | 8–12 g / 2–3 cloves | Garlic deepens the flavor. Use less if you want a cleaner bottled-style ketchup. |
| 5% acidity vinegar | 75–90 ml / 5–6 tbsp | Vinegar gives ketchup its sharp tang. Apple cider vinegar tastes rounder; white vinegar tastes cleaner and sharper. |
| Sugar, jaggery, or brown sugar | 50–75 g / 1.75–2.6 oz / about ¼–⅓ cup packed | Sweetener balances tomato acidity and keeps the sauce from tasting like sour tomato puree. |
| Fine salt | 8–10 g / about 1½ tsp | Salt sharpens the tomato flavor. Add it carefully because reduction concentrates the sauce. |
| Mustard powder | 1–2 g / ½–1 tsp | Mustard powder brings the classic ketchup sharpness without making the sauce taste mustardy. |
| Cinnamon | Pinch to ⅛ tsp | A small amount adds warmth. Too much can push the ketchup toward chutney. |
| Clove or allspice | Tiny pinch / 1/16 tsp or less | This gives the familiar background spice, but it becomes overpowering quickly. |
| Cayenne or chili powder | Optional, ⅛–¼ tsp | Use this for mild heat without turning the ketchup into hot sauce. |
How Much Sugar Is in This Homemade Ketchup?
This ketchup recipe uses 50–75 g added sugar, jaggery, or brown sugar for a homemade batch that finishes at about 2–2½ cups. That works out to roughly 1.25–2.3 g added sweetener per tablespoon, depending on your final yield and how much sweetener you use.
For a less sweet ketchup, start with 50 g sweetener and adjust only after the sauce has reduced. Because reduction concentrates flavor, the ketchup may taste sweeter and saltier near the end than it did at the start. Still, do not remove all sweetness unless you want a sharper tomato-sauce-style condiment. Instead, reduce the sweetener gradually and taste again after the ketchup cools.
It is also useful when you want a no-corn-syrup ketchup and prefer to choose the sweetener yourself. For a lighter or more controlled version, homemade ketchup lets you adjust the sugar, salt, and vinegar instead of relying on a fixed bottled formula.
Use 5% acidity vinegar for this recipe, especially when you are also reading the canning section. For regular fridge ketchup, apple cider vinegar, white vinegar, or a mix of the two all work. Apple cider vinegar gives a slightly fruitier ketchup; by contrast, white vinegar gives a cleaner, sharper ketchup.
Important: this flexible recipe is for fridge and freezer storage. If you want shelf-stable canned ketchup, use a tested canning formula and do not casually change vinegar, tomato, onion, vegetable, jar, or processing-time ratios.
Homemade Ketchup Recipe with Fresh Tomatoes
This is the main ketchup-from-scratch version to make when tomatoes are ripe, red, and flavorful. In practice, it starts with 1 kg / 2.2 lb fresh tomatoes and reduces into about 500–600 g / 17.5–21 oz / 2–2½ cups of ketchup, depending on the tomato variety and how thick you cook it.
The method is simple, even though the simmer takes time: soften the tomatoes, blend, strain if needed, season, then reduce until the sauce turns glossy and spoonable.

Best Tomatoes for Homemade Ketchup
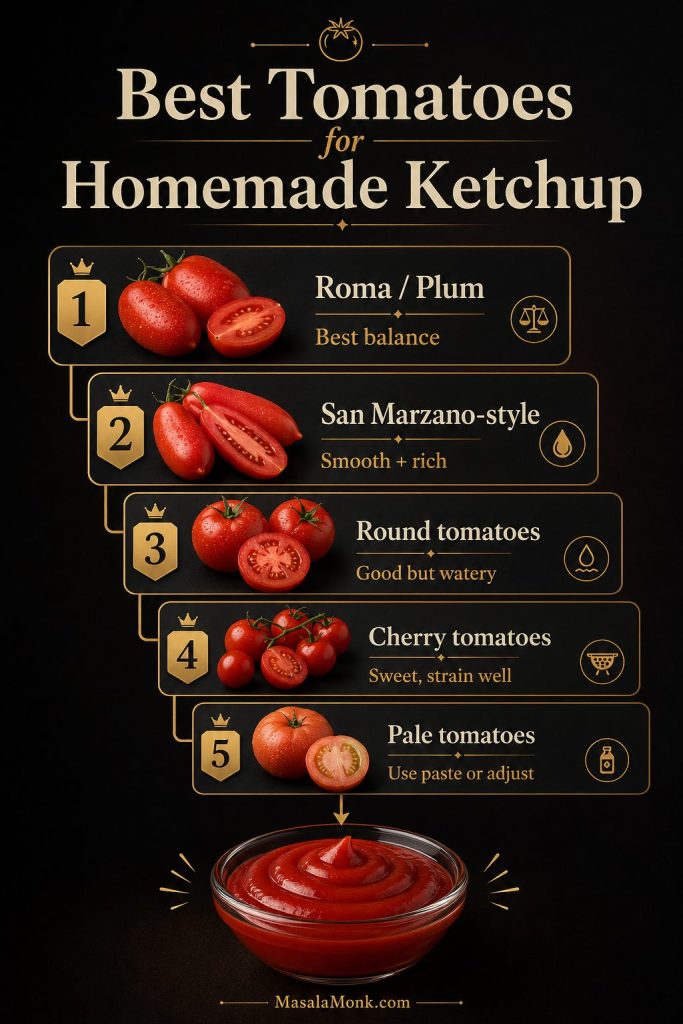
The best tomatoes for homemade ketchup are meaty, ripe, and deeply red. For example, Roma, plum, San Marzano-style, and other paste tomatoes are ideal because they have more flesh and less water. Regular round tomatoes also work; however, they usually take longer to reduce. In addition, cherry tomatoes can make a sweet ketchup, although they are often seedier and may need straining.
Homemade ketchup may look slightly darker or softer red than bottled ketchup, especially if you use brown sugar, jaggery, apple cider vinegar, or long cooking. For the brightest color, use ripe red paste tomatoes, white vinegar, white sugar, and gentle heat.
| Tomato Type | How It Works in Ketchup | Adjustment |
|---|---|---|
| Roma / plum tomatoes | Best balance of flesh, flavor, and low water | Follow the main formula. |
| San Marzano-style tomatoes | Excellent for smooth, rich ketchup | Use the recipe as written. |
| Regular round tomatoes | Good flavor but often watery | Give them extra simmering time in a wide pan. |
| Cherry tomatoes | Sweet and bright but more skins/seeds | Blend thoroughly, then strain for a smoother finish. |
| Pale or underripe tomatoes | Sharper, less sweet, less red | Increase the sweetener slightly or switch to tomato paste. |
Step 1: Cook the Tomatoes, Onion, and Garlic
Wash and roughly chop 1 kg / 2.2 lb ripe tomatoes. Then, add them to a wide heavy-bottomed pan with 80–100 g chopped onion and 2–3 garlic cloves. Once everything is in the pan, cover and cook over medium-low heat for 15–20 minutes, until the tomatoes collapse, release their juices, and soften completely.
At this stage, do not add the vinegar, sugar, or salt yet. Starting with just the tomatoes, onion, and garlic lets the vegetables soften evenly before the final reduction.
Step 2: Blend and Strain
After the tomatoes soften, blend the mixture until smooth. An immersion blender is easiest, but a countertop blender gives a finer texture. When using a countertop blender, work in batches and let steam escape safely.
| Texture Goal | What to Do |
|---|---|
| Rustic homemade ketchup | Blend only, leaving a little skin and seed texture. |
| Smooth ketchup | Pass the blended mixture through a coarse sieve. |
| Bottled-style ketchup | Use a food mill or fine sieve, then blend again after reducing. |
For a smoother finish, strain the puree before the final reduction. If you are new to reducing fresh tomatoes, MasalaMonk’s guide to tomato sauce from fresh tomatoes is useful because it explains the food mill method, the no-food-mill path, and why tomato reduction changes texture.
Step 3: Add Vinegar, Sweetener, Salt, and Spices
From there, return the blended and strained tomato puree to the pan. Add:
- 75–90 ml / 5–6 tbsp 5% acidity vinegar
- 50–75 g sugar, brown sugar, or jaggery
- 8–10 g fine salt, or about 1½ tsp
- ½–1 tsp mustard powder
- Pinch to ⅛ tsp cinnamon
- Tiny pinch clove or allspice
- Optional ⅛–¼ tsp cayenne or chili powder
Start with the lower amount of sugar and vinegar when your tomatoes are already sweet and flavorful. If the tomatoes taste flat, watery, or very acidic, use the higher amount instead. Either way, taste again near the end because the flavor changes as the ketchup reduces.
Step 4: Simmer Until Thick and Glossy
Simmer the ketchup uncovered over low to medium-low heat for 45–70 minutes after blending and seasoning, stirring more often as it thickens. The total cook time is usually 60–90 minutes including the first tomato-softening stage, but watery tomatoes can take longer.
The pan should show small, steady bubbles, not an aggressive boil. Near the end of cooking, the ketchup can catch on the bottom quickly, so use a splatter screen when needed and stir more often as it thickens. Instead of rushing the heat, give the sauce time to reduce slowly; that way, it stays brighter, smoother, and less bitter.
Heat cue: keep the ketchup at a gentle simmer with small, steady bubbles, not a rolling boil. If the sauce spits aggressively, darkens quickly, or sticks to the bottom, lower the heat and stir more often. Gentle reduction gives you brighter flavor, smoother texture, and better color.
| Stage | Approximate Amount | Visual Cue |
|---|---|---|
| Fresh chopped tomatoes | 1 kg / 2.2 lb | Chunky, raw, watery |
| After softening and blending | About 900 ml–1.1 L | Loose tomato puree |
| After straining | About 750–950 ml | Smoother but still thin |
| Final ketchup | About 500–600 g / 2–2½ cups | Glossy, thick, spoonable |
Step 5: Test the Thickness
Rather than relying only on time, use the texture as your guide. Because tomatoes vary so much, the exact cook time can shift from batch to batch. Near the end of cooking, check the ketchup with one or more of these doneness tests:
| Test | What You Should See |
|---|---|
| Spoon mound test | The ketchup should mound slightly on a spoon instead of running off like tomato juice. |
| Trail test | Drag a spatula through the pan; the trail should close slowly, not immediately flood back. |
| Cold plate test | Drop a little ketchup on a chilled plate. After 30 seconds, it should hold shape instead of spreading into a watery puddle. |
When in doubt, stop slightly before it looks perfect because ketchup thickens as it cools.
Step 6: Taste and Adjust
Once the ketchup is thick, taste it before you store it. A flat flavor usually needs a little salt first. When the sauce tastes too sweet, add vinegar 1 teaspoon at a time. If the flavor leans too sour, balance it with sweetener in small amounts. When it tastes like plain tomato sauce instead of ketchup, add vinegar, sweetener, salt, mustard, and a very tiny pinch of clove or cinnamon until the flavor tastes rounded.
Do not worry if the ketchup tastes slightly sharp while hot. After cooling, the vinegar softens, the sweetness feels rounder, and the texture becomes thicker.
Step 7: Cool and Store
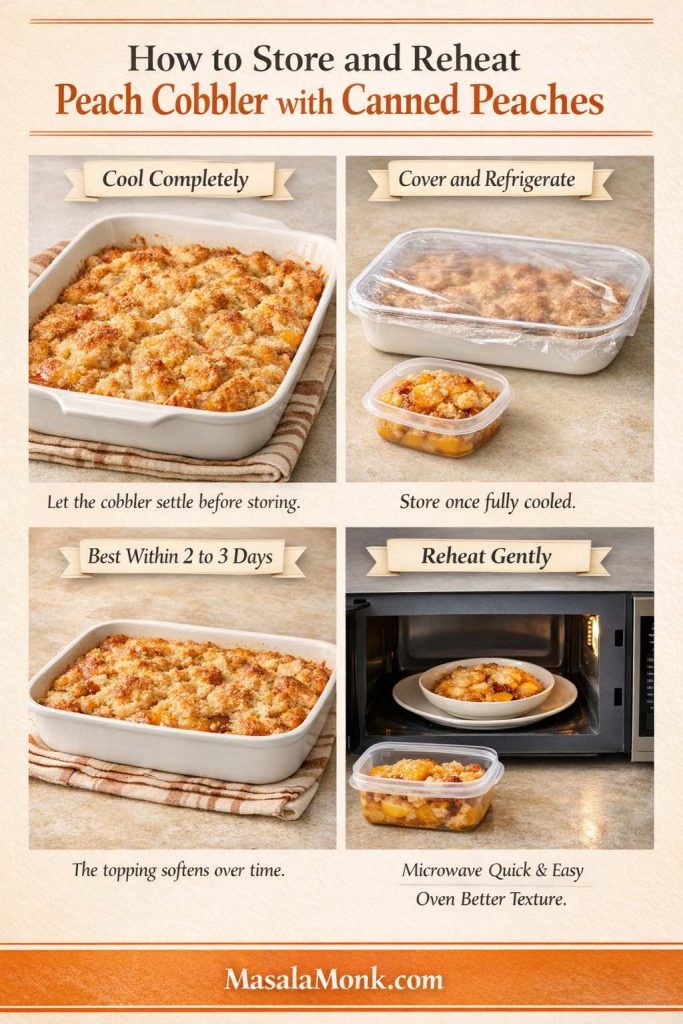
Before you store it, let the ketchup cool fully. Then, transfer it to a clean glass jar. Refrigerate and use within 2 weeks for best quality, or freeze for longer storage.
For the best flavor, chill the ketchup for at least 2 hours before serving. While it is hot, freshly cooked ketchup can taste sharper than expected. After cooling, the sweetness, acidity, salt, and spices settle into a rounder flavor.
Quick Tomato Paste Ketchup: How to Make Ketchup from Tomato Paste
When fresh tomatoes are weak or you need ketchup quickly, tomato paste is the better starting point. Because it has already been cooked down, this version thickens in minutes, needs less guesswork, and gives you a smoother, more predictable ketchup. It is not as fresh-tasting as the fresh tomato version, but it is much faster.
A standard 6 oz / 170 g can of tomato paste is the easiest starting point for this shortcut. If your paste is very thick or double-concentrated, start with the higher amount of water and adjust after simmering.
| Detail | Spec |
|---|---|
| Yield | About 300–350 g / 10.5–12 oz / 1¼–1½ cups |
| Prep time | 3 minutes |
| Cook time | 5–8 minutes |
| Total time | 8–12 minutes |
| Best for | Fries, burgers, sandwiches, dips, and weeknight meals |
Tomato Paste Ketchup Ingredients
| Ingredient | Metric | US / Imperial |
|---|---|---|
| Tomato paste | 170 g | 6 oz can |
| Water | 120–150 ml | ½–⅔ cup |
| 5% acidity vinegar | 45 ml | 3 tbsp |
| Sugar, honey, jaggery, or maple syrup | 20–35 g | 1½–2½ tbsp |
| Fine salt | 4–5 g | About ¾ tsp |
| Onion powder | — | ½ tsp |
| Garlic powder | — | ¼–½ tsp |
| Mustard powder | — | ¼–½ tsp |
| Cinnamon, clove, or allspice | — | Tiny pinch |
How to Make Ketchup from Tomato Paste
- Add tomato paste, water, vinegar, sweetener, salt, onion powder, garlic powder, mustard powder, and spices to a small saucepan.
- Whisk until the mixture is completely smooth.
- Simmer over low heat for 5–8 minutes, stirring often.
- If it is too thick, add more water 1 tablespoon at a time.
- For more tang, add vinegar 1 teaspoon at a time.
- Cool before judging the final thickness.
Best use: tomato paste ketchup is the easiest version for burgers, fries, sandwiches, wraps, and quick mayo-ketchup sauce. It is not as fresh-tasting as the fresh tomato version, but it is smoother and faster.
Sugar-Free, No-Sugar and Keto Homemade Ketchup Option
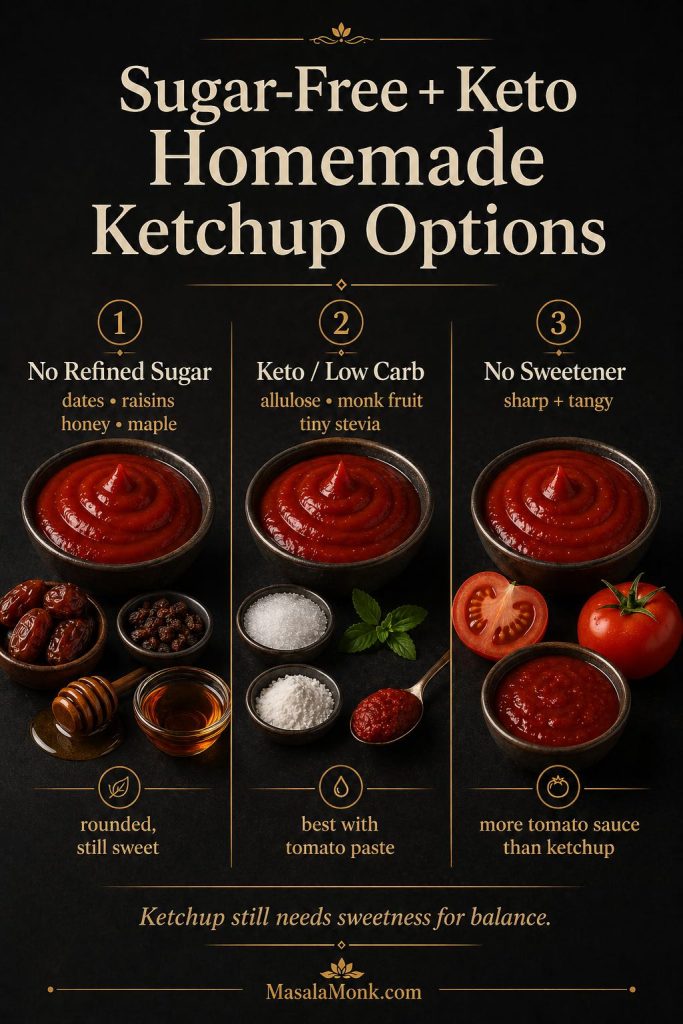
Classic ketchup needs sweetness to balance tomato acidity. Without any sweetness, the sauce will not taste like familiar bottled ketchup. Instead, it will taste sharper, more acidic, and more like seasoned tomato sauce. However, you still have several good options depending on what “sugar-free” means for you.
This section is for readers looking for ketchup without sugar, no-sugar tomato ketchup, zero-sugar ketchup, or a lower-carb ketchup option. The key point is that ketchup still needs sweetness for balance, so the best sugar-free version uses a low-carb sweetener instead of removing sweetness completely.
Once the basic ketchup tastes balanced, you can lower the sugar more safely. The important thing is to replace sweetness thoughtfully instead of removing it all at once.
Sweetener Options for Sugar-Free Ketchup
| Version | What to Use | Flavor Result |
|---|---|---|
| No refined sugar | Dates, raisins, apple, jaggery, honey, or maple syrup | Still rounded and ketchup-like, but not strictly sugar-free |
| Keto / low-carb | Allulose, monk fruit, or a tiny amount of stevia | Closest low-carb option, especially with tomato paste ketchup |
| No sweetener | Skip sweetener | Sharper, tangier, more like tomato sauce than ketchup |
How to Adjust the Sweetness
In the fresh tomato recipe, replace the 50–75 g sugar with 40–60 g chopped dates or raisins and blend very thoroughly. For keto ketchup, the tomato paste version is easier because it is already thick and consistent. Start with 1–2 tablespoons allulose or monk fruit sweetener, then adjust after simmering.
The best sugar-free ketchup still tastes slightly sweet. If you remove sweetness completely, the sauce becomes tangy tomato sauce, not classic ketchup.
If you are building low-carb burger plates or bowls, this sugar-free ketchup variation fits better than sugary bottled sauces. MasalaMonk’s keto hamburger recipes also explain why ketchup-heavy sauces can become a hidden carb trap.
Fresh Tomato Ketchup vs Tomato Paste Ketchup
Neither version is automatically better. Instead, the right choice depends on your tomatoes and your timing. When tomatoes are ripe and flavorful, fresh tomato ketchup gives the best flavor. By contrast, tomato paste ketchup works better when you want speed, smoothness, and consistency.
In short, the best homemade ketchup recipe for you depends on whether you care more about fresh tomato flavor, speed, smoothness, or consistency.
| Need | Fresh Tomato Ketchup | Tomato Paste Ketchup |
|---|---|---|
| Fresh flavor | Best when tomatoes are ripe and sweet | Good, although less fresh |
| Speed | Slower because it needs reduction | Fastest option because paste is already concentrated |
| Texture | Smooth only after careful straining | Usually smooth and consistent |
| Predictability | Depends on the tomatoes | More predictable because the base is concentrated |
| Summer tomatoes | Ideal choice when tomatoes are in season | Useful when fresh tomatoes are weak |
| Beginner-friendliness | Good, although slower | Easiest because it skips long reduction |
| Canning suitability | Only with a tested canning recipe | Only with a tested canning recipe |
How to Make Homemade Ketchup Smooth and Thick
In practice, the two biggest homemade ketchup problems are texture and thickness. Because fresh tomatoes contain a lot of water, ketchup needs reduction. If you stop too early, it tastes like thin tomato sauce. However, if you cook it too hard or too long, it can scorch, darken, or become pasty. Therefore, the goal is slow reduction, not aggressive boiling.
The texture goal is glossy and spoonable, not watery like tomato puree and not stiff like tomato paste.
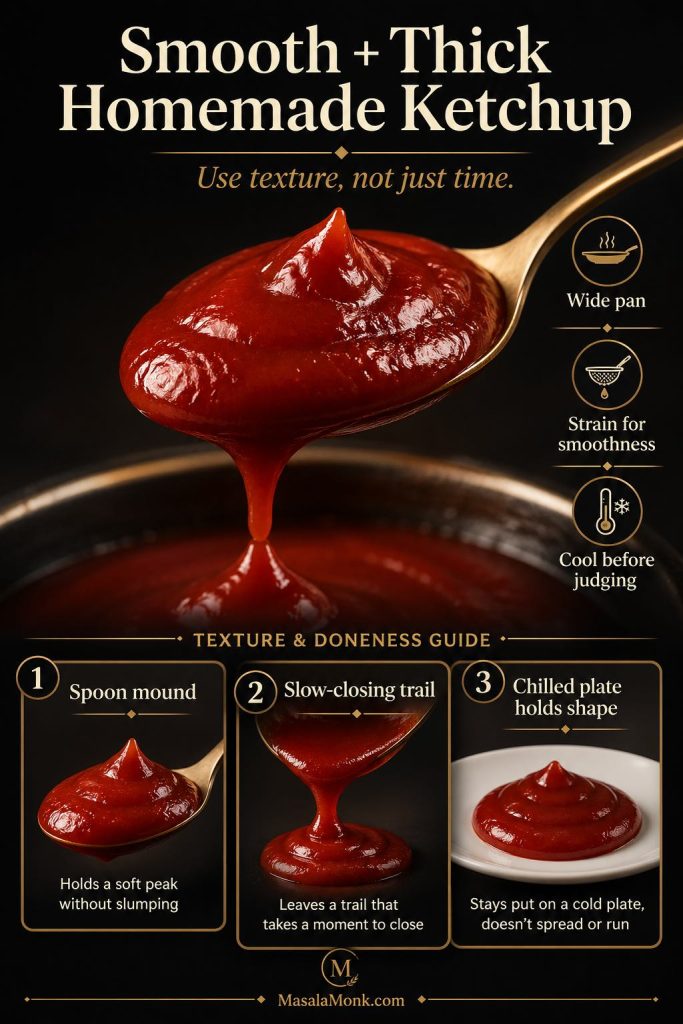
Use a Wide Pan
A wide pan helps water evaporate faster. By contrast, a tall narrow pot traps steam and makes the ketchup take longer to thicken. For a 1 kg tomato batch, a 26–30 cm / 10–12 inch wide pan is ideal.
Strain for a Smoother Finish
Tomato skins and seeds can make homemade ketchup feel rough. For a smoother finish, blend the softened tomatoes, then pass them through a sieve or food mill before the final reduction.
Reduce Slowly
Keep the ketchup at a gentle simmer. As it thickens, stir more often and scrape the bottom of the pan. The sauce should look glossy, not dry or scorched.
Cool Before Judging Thickness
Hot ketchup looks thinner than cooled ketchup. Therefore, stop when it is slightly looser than your ideal final texture, then let it cool before deciding whether it needs more reduction.
Texture reminder: after cooling, ketchup becomes thicker and smoother. Because of that, stop a little early rather than reducing it until it looks perfect in the hot pan.
How to Fix Homemade Ketchup
Homemade ketchup is easy to adjust when you know what is wrong. First, decide whether the problem is texture, flavor, or color. Then, make small changes and taste again after the ketchup cools slightly on a spoon.
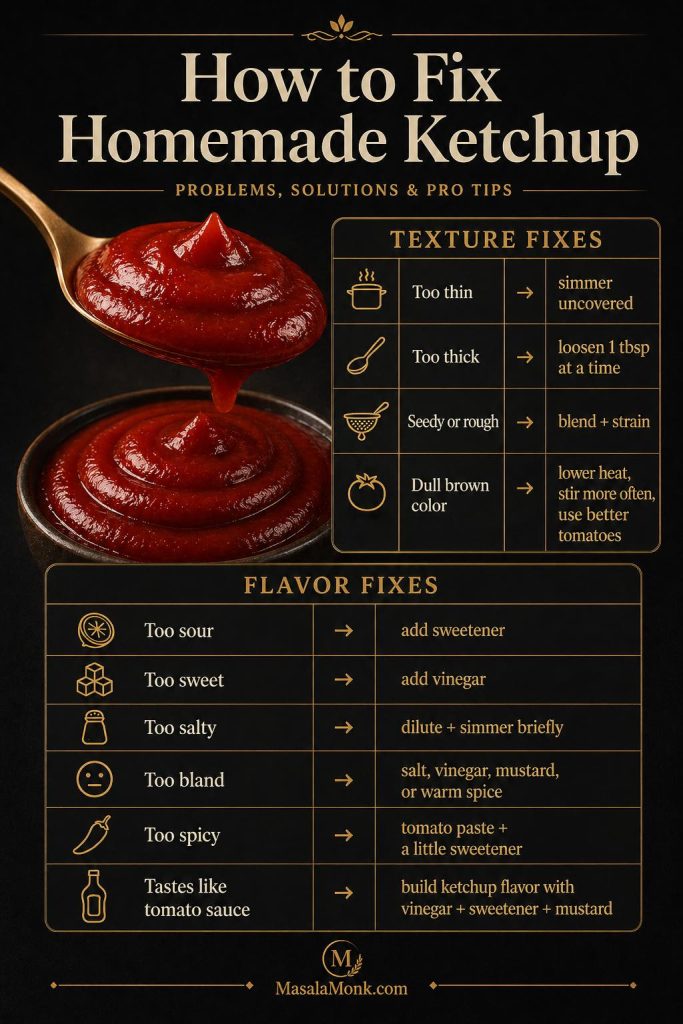
Texture Fixes
| Problem | Likely Cause | Fix |
|---|---|---|
| Runny or thin | Watery tomatoes or not enough reduction | Simmer uncovered in a wide pan until the ketchup thickens and the extra water cooks off. |
| Stiff or pasty | Over-reduced sauce or too much tomato paste | Loosen it with water, tomato juice, or vinegar 1 tablespoon at a time. |
| Rough or seedy | Skins or seeds remain | Blend longer, then strain through a sieve or food mill for a smoother texture. |
Flavor and Color Fixes
| Problem | Likely Cause | Fix |
|---|---|---|
| Sharp or sour | Too much vinegar or underripe tomatoes | Add sugar, jaggery, honey, dates, or raisins in small amounts until the acidity tastes rounded. |
| Overly sweet | Too much sweetener | Add vinegar 1 teaspoon at a time. Afterward, add a small pinch of salt or mustard powder if the flavor still feels flat. |
| Salty or harsh | Salt added early or sauce reduced too far | Dilute the flavor with unsalted tomato paste, tomato puree, or a little water, then simmer briefly. |
| Flat or bland | Not enough salt, vinegar, or spice | Start with salt. Then add vinegar, mustard powder, or warm spice in small amounts. |
| Too spicy | Too much cayenne or chili | Round out the heat with tomato paste and a little sweetener. |
| Brown or dull | Overcooking, burning, dark sugar, or dull tomatoes | Next time, use ripe red tomatoes, lower the heat, stir more often, and avoid scorching. |
| Tomato-sauce flavor | Missing ketchup’s sweet-acid-spice balance | Build ketchup flavor with vinegar, sweetener, salt, mustard powder, and a tiny pinch of clove or cinnamon. |
How to Store Homemade Ketchup
After the ketchup tastes right, storage matters as much as flavor. This is especially true for small-batch homemade ketchup because it does not have commercial stabilizers or a tested shelf-stable process.
Store it in a clean glass jar, use a clean spoon, and keep it refrigerated. After serving, return the jar to the fridge rather than leaving it on the counter.
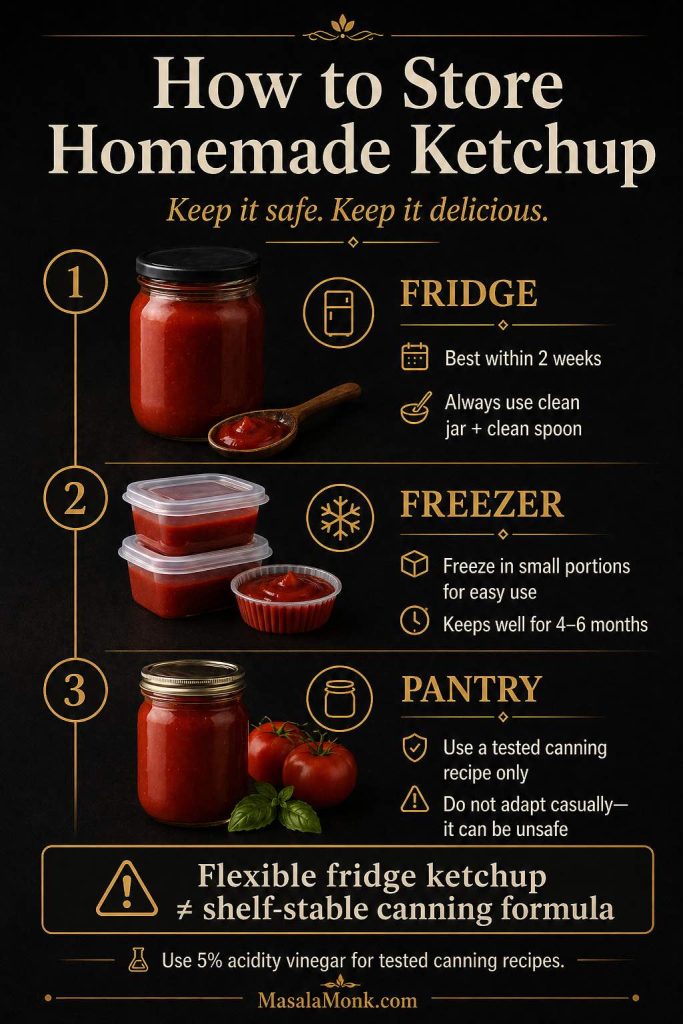
Fridge, Freezer and Room Temperature Storage
| Storage Method | Recommendation |
|---|---|
| Fridge | For best quality, use within 2 weeks. |
| Freezer | For longer storage, freeze for 4–6 months in small portions. |
| Room temperature | Only keep ketchup at room temperature when it has been properly canned with a tested recipe. |
| After thawing | After thawing, stir well; if watery, simmer briefly to bring the texture back. |
| Jar hygiene | Because homemade ketchup has no commercial stabilizers, use clean jars and clean spoons every time. |
Can You Can Homemade Ketchup?
Think of this recipe as a fridge ketchup, not a pantry ketchup. You can freeze it safely, but do not treat it like a shelf-stable jarred product unless you follow a tested canning recipe.
For that reason, this flexible MasalaMonk ketchup recipe is not a shelf-stable canning formula.
For canning ketchup, use a tested canning formula from a reliable source such as the National Center for Home Food Preservation tomato ketchup recipe. Do not casually reduce vinegar, increase tomatoes, add extra onion, add extra vegetables, change jar size, change headspace, or shorten processing time.
For context, the NCHFP tomato ketchup formula is a large tested batch using 24 lb ripe tomatoes, 3 cups chopped onions, 3 cups 5% acidity cider vinegar, sugar, salt, and whole spices, with a yield of 6–7 pints. That is a different type of recipe from this flexible small-batch fridge ketchup.
Canning safety note: fridge ketchup is flexible. Canning ketchup is not. For shelf-stable jars, follow a tested recipe exactly, use vinegar with 5% acidity, and process jars according to the tested time for your altitude.
Healthy Canning’s quick ketchup guidance explains the same principle clearly: sweetness, salt, and dry spices are more flexible, but vinegar and low-acid vegetable ratios should not be casually changed in a water-bath canning recipe. If you want a pantry-stable ketchup, use tested canning instructions instead of adapting this small-batch fridge recipe.
Homemade Catsup vs Ketchup: Are They the Same?
Catsup and ketchup usually refer to the same sweet-tangy tomato condiment. “Ketchup” is the dominant modern spelling, but some readers still search for homemade catsup, homemade tomato catsup, or a recipe for tomato catsup.
If you came here looking for catsup, you are in the right place. The spelling changes, but the method is the same: tomatoes are reduced with vinegar, sweetener, salt, mustard, and spices until the sauce becomes thick, glossy, tangy, and balanced.
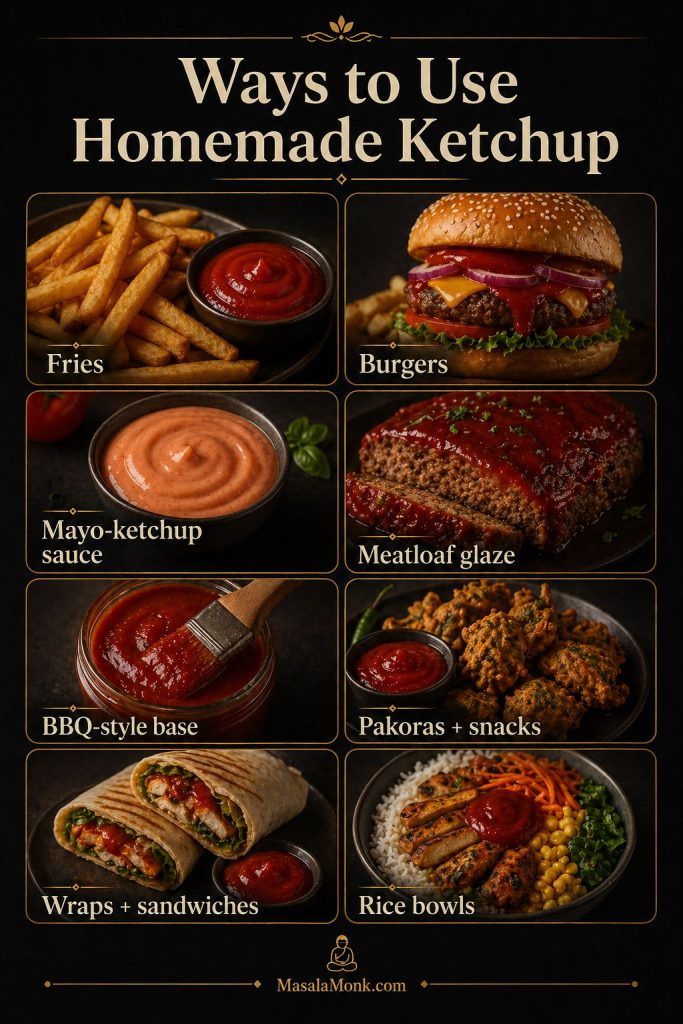
Ways to Use Homemade Ketchup
Homemade ketchup is more than a dip for fries. Once you have a jar in the fridge, it becomes a quick base for sauces, glazes, spreads, marinades, and snack plates. For everyday meals, that means one batch can cover burgers, wraps, fries, bowls, and quick dipping sauces.
| Use | How to Use the Ketchup |
|---|---|
| Fries | Pair chilled ketchup with hot crispy homemade French fries. |
| Burgers | Use it on burger buns or fold it into mayo for a creamy burger sauce. |
| Mayo ketchup sauce | Stir 2 parts mayo with 1 part ketchup for a quick fry sauce. MasalaMonk’s homemade mayonnaise guide already covers mayo-ketchup sauce as a useful variation. |
| Meatloaf glaze | Blend ketchup with brown sugar or honey and a splash of vinegar, then brush it over meatloaf. |
| BBQ sauce base | Turn it into a quick barbecue-style sauce with vinegar, brown sugar, smoked paprika, black pepper, and Worcestershire-style seasoning. |
| Pakoras and snacks | Serve it as a tangy-sweet dip when chutney feels too sharp. |
| Wraps and sandwiches | Add a thin layer inside grilled cheese, paneer rolls, tofu wraps, or egg sandwiches. |
| Rice bowls | Spoon it into spicy tomato rice, fried rice-style bowls, or quick sauce bases. |
For a fruitier, hotter homemade sauce, try MasalaMonk’s mango habanero sauce. For a sharper fruit-and-mustard dip, try the mango mustard sauce. Both fit naturally into the same homemade sauce and condiment family.
Before you jump to the recipe card: choose the fresh tomato version when tomatoes are ripe and flavorful. However, choose the tomato paste shortcut when you want a faster, smoother, more predictable ketchup. Either way, taste again after cooling because ketchup thickens and mellows in the fridge.
Homemade Ketchup Recipe with Fresh Tomatoes or Tomato Paste
A smooth, tangy homemade ketchup made with ripe fresh tomatoes, vinegar, sweetener, salt, onion, garlic, mustard, and warm spices. This small-batch recipe includes a tomato paste shortcut, sugar-free notes, storage guidance, and texture fixes.
Equipment
- Wide heavy-bottomed pan or Dutch oven
- Immersion blender or countertop blender
- Sieve or food mill, optional but recommended
- Spatula
- Clean glass jar
Ingredients
- 1 kg / 2.2 lb ripe red tomatoes, roughly chopped
- 80–100 g / 3–3.5 oz onion, chopped
- 2–3 garlic cloves, about 8–12 g
- 75–90 ml / 5–6 tbsp 5% acidity vinegar, apple cider or white vinegar
- 50–75 g / about ¼–⅓ cup packed brown sugar, jaggery, or sugar
- 8–10 g fine salt, about 1½ tsp
- ½–1 tsp mustard powder
- Pinch to ⅛ tsp ground cinnamon
- Tiny pinch ground clove or allspice, 1/16 tsp or less
- Optional: ⅛–¼ tsp cayenne or chili powder
- Optional: ¼ tsp black pepper
Method
- Prep the tomatoes. Wash and roughly chop the tomatoes. Chop the onion and garlic.
- Soften. Place the tomatoes, onion, and garlic in a wide pot. Cover and cook over medium-low heat for 15–20 minutes, until the tomatoes collapse and release their juices.
- Blend. Blend the mixture until smooth with an immersion blender or countertop blender.
- Strain, optional. For smoother ketchup, pass the blended mixture through a sieve or food mill. For rustic ketchup, skip this step.
- Season. Return the tomato puree to the pot. Stir in vinegar, sweetener, salt, mustard powder, cinnamon, clove or allspice, and optional cayenne or black pepper.
- Reduce. Simmer uncovered over low to medium-low heat for 45–70 minutes. Stir more often as the ketchup thickens so it does not catch on the bottom.
- Test. Check that the ketchup mounds slightly on a spoon, leaves a slow-closing trail in the pan, and holds shape on a chilled plate.
- Adjust. Taste before storing. Add sweetener if sour, vinegar if sweet, salt if flat, or water if too thick.
- Cool and store. Cool the ketchup, transfer it to a clean jar, and refrigerate. Use within 2 weeks for best quality.
Quick Tomato Paste Option
Whisk together 170 g / 6 oz tomato paste, 120–150 ml / ½–⅔ cup water, 45 ml / 3 tbsp vinegar, 20–35 g sweetener, 4–5 g salt, ½ tsp onion powder, ¼–½ tsp garlic powder, ¼–½ tsp mustard powder, and a tiny pinch of cinnamon or clove. Simmer 5–8 minutes, then cool.
Notes
- For faster thickening and better color, use ripe, meaty tomatoes.
- A 26–30 cm / 10–12 inch pan works best for a 1 kg tomato batch because it evaporates water faster.
- Ketchup thickens as it cools, so stop reducing slightly before it looks perfect.
- For the best flavor, chill the ketchup for at least 2 hours before serving.
- If you want a smoother bottled-style finish, strain the tomato mixture before the final reduction.
- If using a countertop blender, blend hot tomatoes in batches and vent the lid so steam can escape safely.
- Reduction concentrates flavor, so add salt carefully.
- When doubling the recipe, use a wider pan or expect a longer reduction time. A double batch will not thicken in the same time.
- For a lower-sugar or sugar-free variation, use allulose, monk fruit, dates, or raisins.
- This homemade ketchup recipe is flexible for fridge and freezer storage, but it should not be used as a canning formula. For shelf-stable jars, follow a tested canning recipe exactly.
FAQs About Homemade Ketchup
How do I make homemade ketchup from fresh tomatoes?
Fresh tomatoes make excellent homemade ketchup when they are ripe, red, and flavorful. To make it, cook them with onion and garlic, then blend, strain if needed, and reduce with vinegar, sweetener, salt, mustard, and spices until thick.
How do I make ketchup from tomato paste?
Tomato paste ketchup is the fastest version because the tomato base is already concentrated. To make it, whisk tomato paste with water, vinegar, sweetener, salt, onion powder, garlic powder, mustard powder, and a tiny pinch of spice. Then simmer for 5–8 minutes.
Why is my homemade ketchup too thin?
Thin ketchup usually means the tomatoes were watery or the sauce has not reduced enough. To fix it, simmer the ketchup uncovered in a wide pan and stir often as it thickens. The sauce is ready when it mounds slightly on a spoon and holds shape on a chilled plate.
Why does my ketchup taste too sour?
Too much vinegar, underripe tomatoes, or not enough sweetener can make ketchup taste sour. To balance it, gradually add sugar, jaggery, honey, dates, raisins, or a low-carb sweetener until the acidity tastes rounded.
Why does my homemade ketchup taste like tomato sauce?
Your ketchup can taste like tomato sauce when it does not have enough sweet-acid-spice balance. To fix that, add a little vinegar for tang, sweetener for roundness, salt for depth, mustard powder for sharpness, and a tiny pinch of clove, cinnamon, or allspice for classic ketchup flavor. After that, chill it briefly and taste again.
Is homemade ketchup good without sugar?
You can make homemade ketchup without refined sugar, but the flavor changes. For a no-refined-sugar version, use dates, raisins, apple, honey, maple, or jaggery. Meanwhile, keto ketchup works better with allulose, monk fruit, or a very small amount of stevia. Without any sweetener, however, the sauce will taste more like tangy tomato sauce than classic ketchup.
How long does homemade ketchup last?
This small-batch fridge ketchup is best within 2 weeks. For that reason, keep it refrigerated in a clean jar and use a clean spoon. For longer storage, freeze it in small portions for 4–6 months. After thawing, stir before serving.
Does homemade ketchup freeze well?
Freezing works well for homemade ketchup. After cooling, use small containers or ice cube trays. Then, after thawing, stir well. If it separates or turns watery, simmer it briefly to bring the texture back.
Is this homemade ketchup recipe safe for canning?
Do not can this flexible recipe as written. Instead, use it for fridge and freezer storage. For shelf-stable canning, use a tested ketchup canning recipe from a reliable source and follow the vinegar, jar size, headspace, and processing-time instructions exactly.
Is catsup the same as ketchup?
Usually, yes. Catsup and ketchup are alternate names for the same sweet-tangy tomato condiment. Today, ketchup is the more common spelling; however, homemade catsup and homemade tomato catsup usually refer to the same type of recipe.
What makes this a homemade ketchup recipe instead of tomato sauce?
A homemade ketchup recipe uses tomato, vinegar, sweetener, salt, mustard, and warm spices in a tighter balance than tomato sauce. As a result, the finished ketchup tastes tangy-sweet, glossy, concentrated, and dip-friendly.
What is ketchup made of?
Ketchup is usually made from tomatoes, vinegar, sugar or another sweetener, salt, onion or onion powder, garlic or garlic powder, mustard, and warm spices. For homemade ketchup, cinnamon, clove, allspice, or celery seed should stay in the background rather than dominate the sauce. Otherwise, the ketchup can start tasting like chutney instead of a classic dip.