Posted on Leave a comment

Sourdough Discard Pancakes: Fluffy, Tender & Easy to Get Right

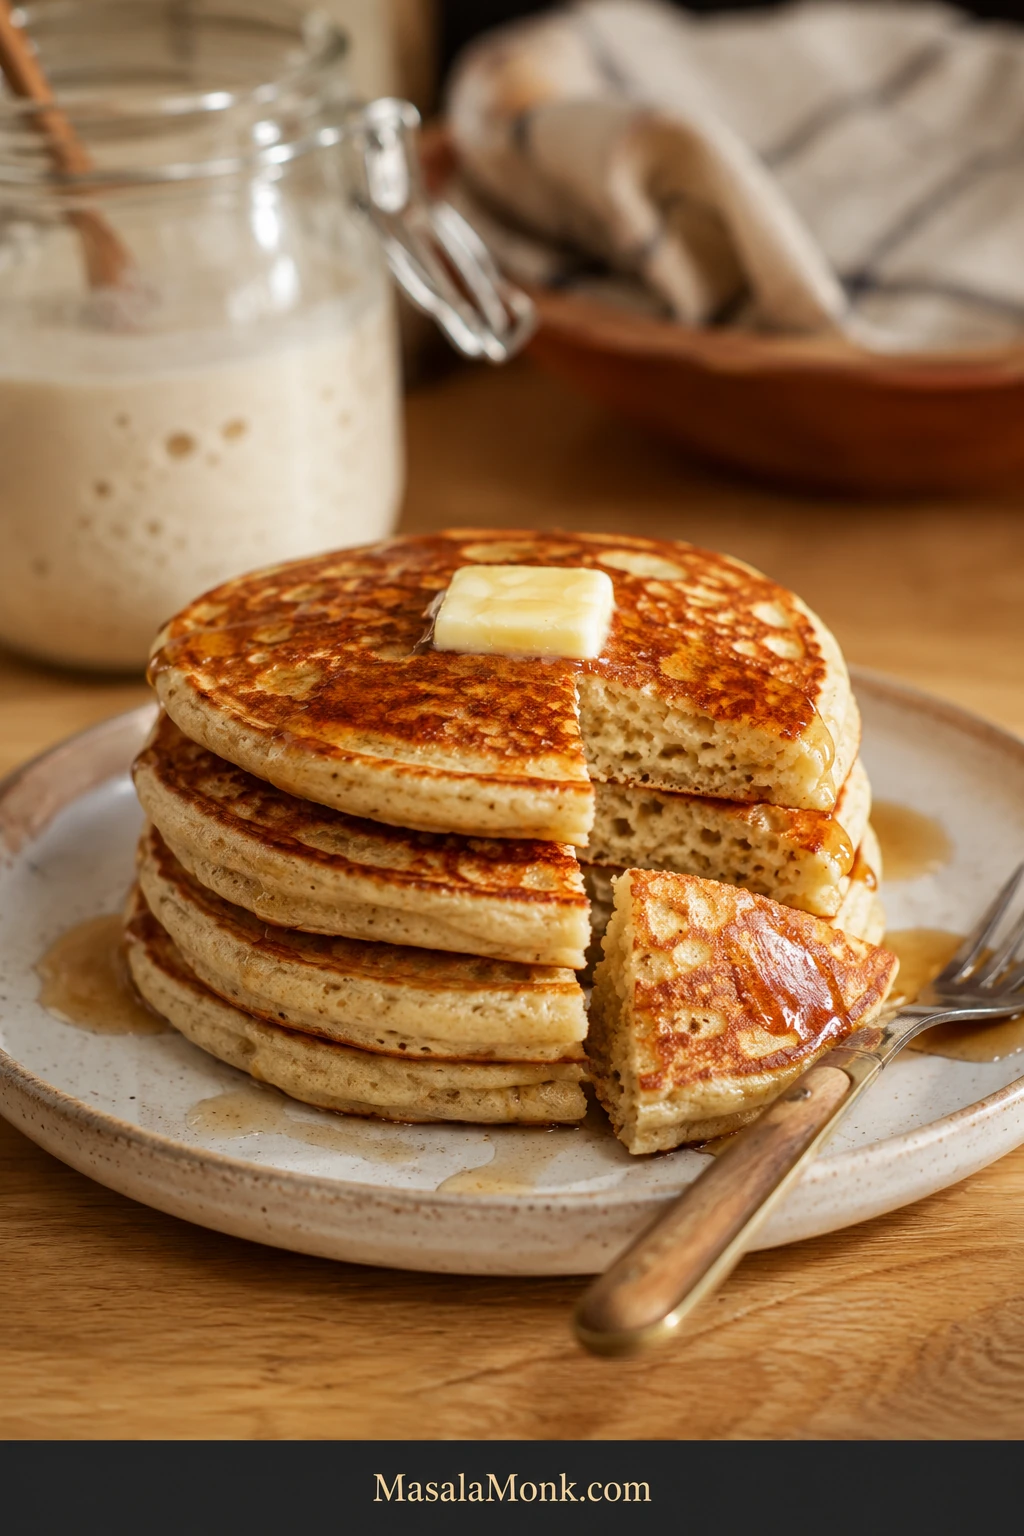
Stack of golden-brown sourdough discard pancakes with melting butter and maple syrup, with one cut pancake showing a soft cream-colored interior with small air pockets.

A jar of sourdough discard has a way of turning breakfast into a small negotiation. There is too much of it to feel good about throwing away.

But you also do not want to feed a starter, wait for it to peak, or spend the morning wondering why the first pancake is beautifully brown outside and still wet in the middle.

These sourdough discard pancakes are fluffy American-style pancakes with lightly crisped golden edges, a soft, springy center, and a mild sourdough tang that still leaves butter and maple syrup in charge. Refrigerator-cold discard works, and active starter works too. This is a same-day recipe: no feeding first, no overnight fermentation, no waiting for a rise.

Jump to the recipe · Check the batter · Troubleshooting

Discard does change from jar to jar. One pours; another mounds. Fresh discard may be thick and mild, while an older refrigerator jar can become sharper and looser.

So instead of pretending every jar needs exactly the same amount of milk, this recipe gives you a dependable starting point and a clear picture of what ready-to-cook batter looks like.
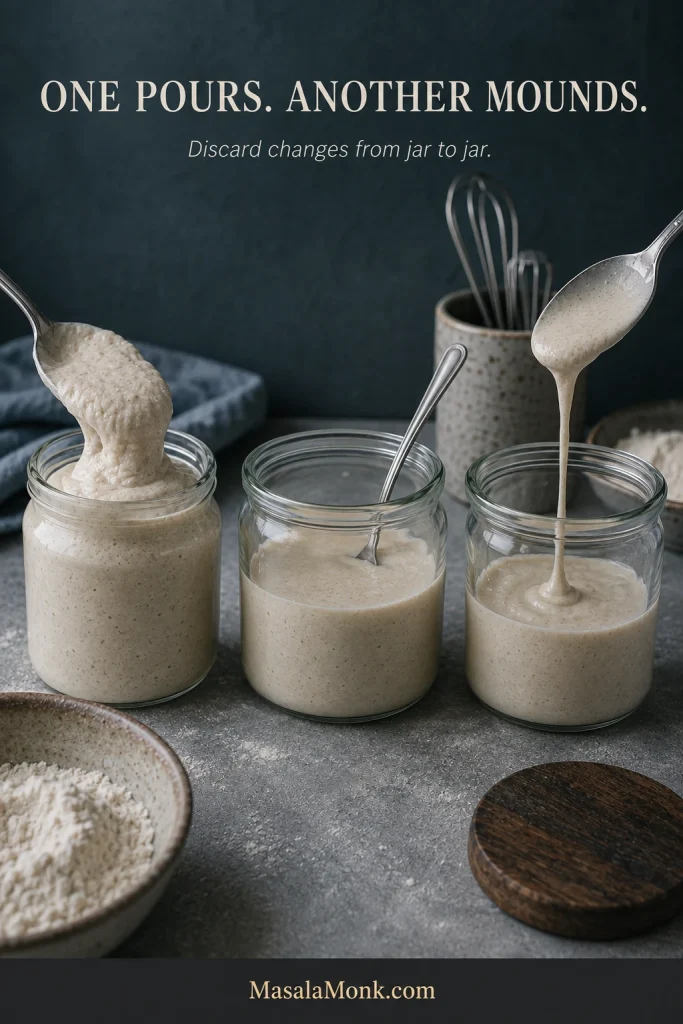
Several portions of sourdough discard showing visibly different consistencies, from thick and mounded to looser and more pourable.
One jar may pour while another mounds. Treat the final batter flow—not the discard’s starting thickness—as the calibration target.

The measurements get you started; the batter and first pancake tell you the rest.

Quick Answer: How Do You Make Fluffy Sourdough Discard Pancakes?

Cold, unfed sourdough discard works. Hands-on prep takes about 10 minutes, with no feeding or overnight wait. Baking powder and baking soda provide the same-day lift.

Use a thick but pourable batter, start the pan around 350°F / 175°C, and cook one tester pancake before filling the griddle. Flip when the edge looks matte, bubbles have formed and begun staying open, and the underside is golden.

Sourdough Discard Pancakes Recipe

This version uses 220 g discard—enough to make a real dent in the jar—while keeping enough fresh flour for a fluffy American-style crumb. Start with 200 ml milk and keep another 30 ml nearby only if the rested batter needs it.

Recipe at a Glance

Hands-on prepAbout 10 minutes
RestAbout 10 minutes
CookAbout 15–20 minutes on a roomy griddle
TotalAbout 35–40 minutes; longer with a small skillet
YieldAbout 12–13 pancakes
Serves3–4

Ingredients

  • 220 g sourdough discard, from a 100%-hydration starter
  • 180 g all-purpose flour, about 1½ cups spooned and leveled
  • 200 ml milk, about ¾ cup + 1½ tablespoons, plus up to 30 ml / 2 tablespoons more as needed
  • 2 large eggs, about 100 g without shells
  • 35 g unsalted butter, about 2½ tablespoons, melted and cooled until just warm, plus a little for the pan
  • 25 g granulated sugar, about 2 tablespoons
  • 8 g baking powder, about 2 teaspoons
  • 2 g baking soda, about ½ teaspoon
  • 4 g fine salt, roughly ⅔–¾ teaspoon
  • 1 teaspoon vanilla extract, optional

Weigh the discard if you can. Its cup volume can vary considerably depending on hydration, temperature, and whether the starter is bubbly or collapsed.
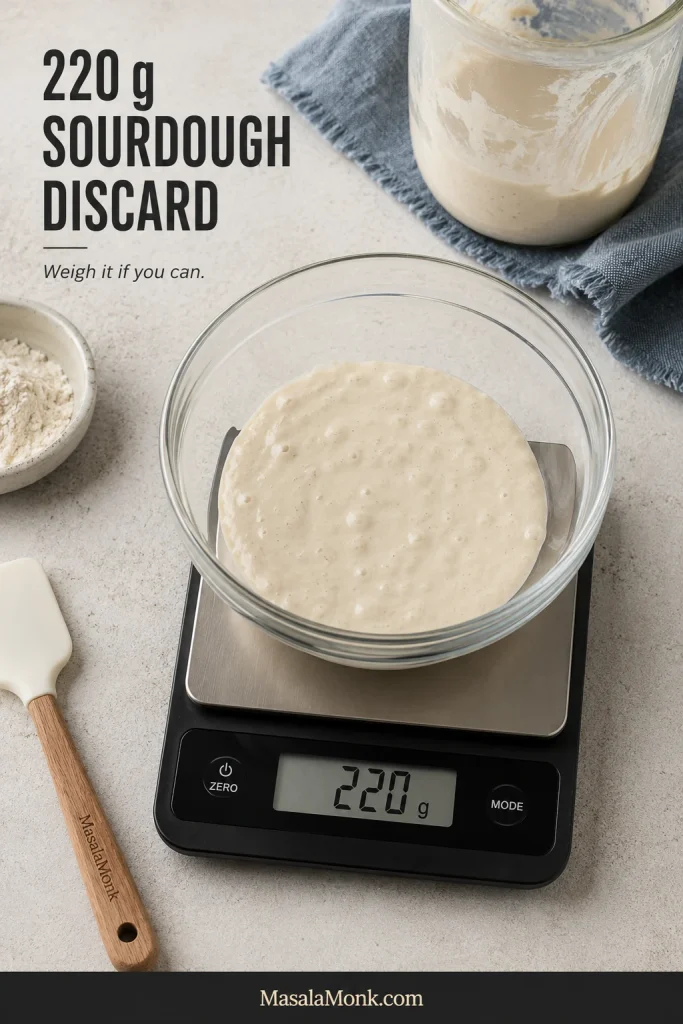
Glass bowl of sourdough discard on a digital kitchen scale reading 220 grams.
Weighing 220 g removes one variable before you begin adjusting the batter.

Instructions: Prepare the Pan and Batter

  1. Preheat the pan. Warm a skillet or griddle over medium to medium-low heat while you make the batter. If you can measure the cooking surface, start around 350°F / 175°C. Heavy cast iron needs a gentler, longer preheat than a thin nonstick pan.

Mix and Rest the Batter

  1. Mix dry and wet separately. In one bowl, whisk together the flour, baking powder, baking soda, and salt. Separately, whisk the discard with 200 ml milk, the eggs, sugar, vanilla, and melted butter. Refrigerator-cold discard can make hot butter firm up, so let the butter cool until just warm first. A few tiny butter flecks are harmless.
  2. Combine and rest. Add the dry ingredients to the wet and mix gently until the large streaks of flour disappear. Small lumps are fine. Let the batter sit for about 10 minutes so the flour can absorb the liquid.

Leave the little lumps alone. Once the large streaks of flour disappear, the short rest can finish hydrating the batter.
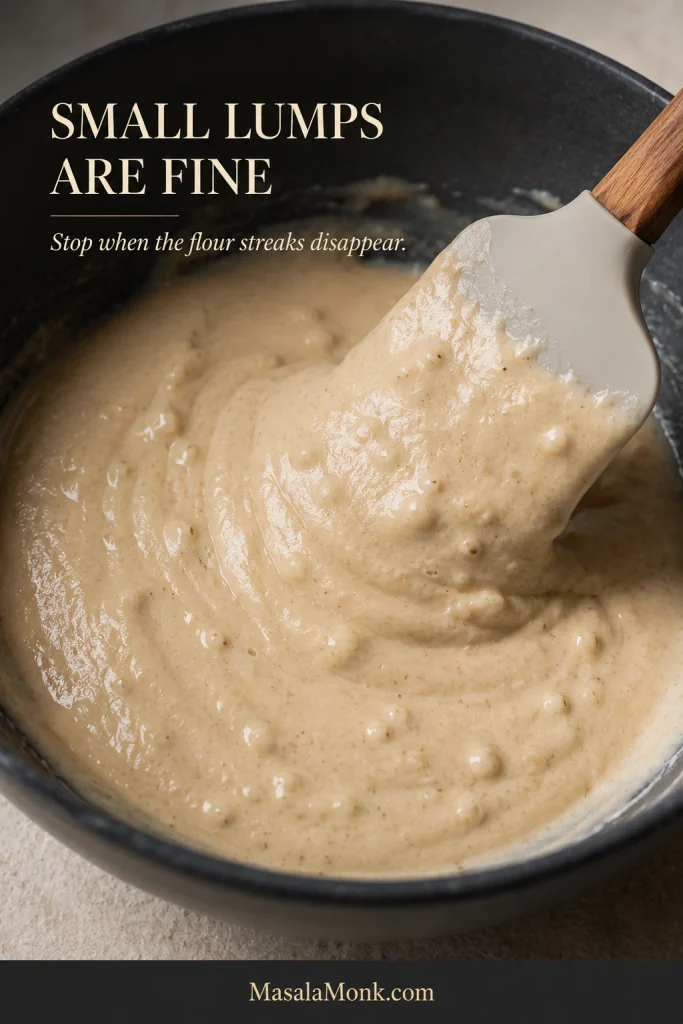
Close-up of pale sourdough pancake batter with small soft lumps and no visible pockets of dry flour.
Small soft lumps are fine; chasing perfect smoothness with extra stirring can make pancakes tougher.
  1. Check the thickness. After the rest, yours may already be ready to cook. The batter should fall in a slow, heavy ribbon and mound briefly before settling. A stiff batter can take milk 1 tablespoon / 15 ml at a time; a clearly runny batter can take flour about 1 tablespoon / 8 g at a time. If you need much more than the reserved 30 ml milk—or repeated additions of flour—pause and recheck the original measurements.

When the ribbon looks like this, stop adjusting. Let it settle briefly, then move on to the tester pancake.
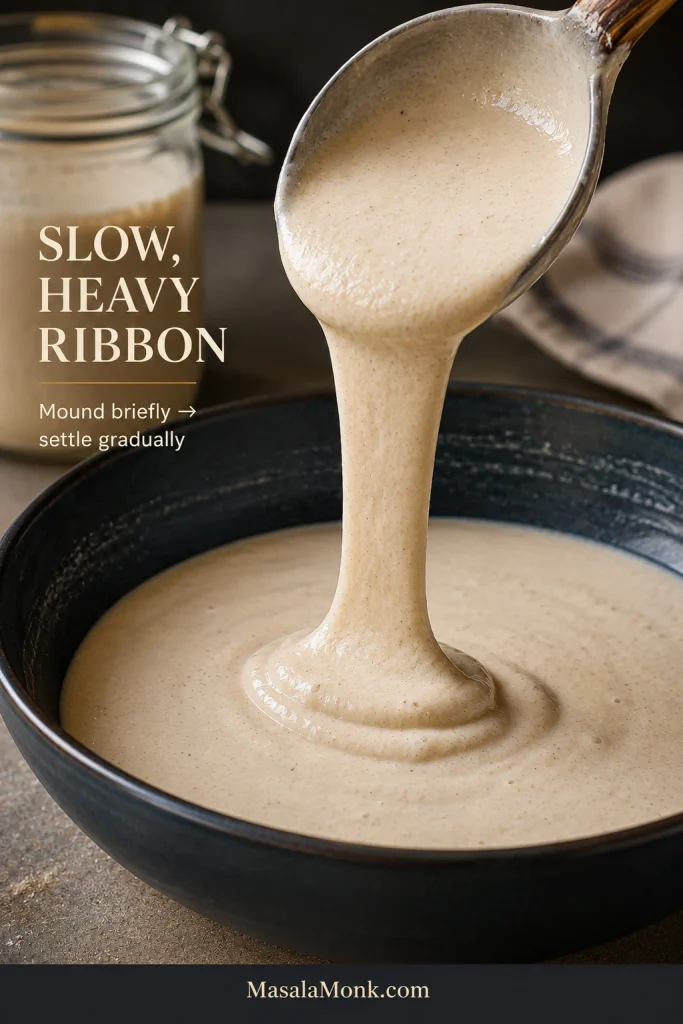
Thick sourdough pancake batter falling from a spoon in a slow ribbon and forming a low mound that begins settling back into the bowl.
Aim for the same slow, heavy ribbon even when two discard jars start differently. Final batter flow matters more than identical milk additions.

Cook the Tester, Then Finish the Batch

  1. Grease lightly and cook one tester. Coat the pan with a thin film of butter or neutral oil, then add about 60 g / a scant ¼ cup batter. The first pancake answers four questions: did it spread correctly, did it brown at the right speed, did the center set, and did the crumb stay tender?

Keep the tester close to 60 g / a scant ¼ cup. That keeps its spread and cooking cues aligned with the timings in this recipe.
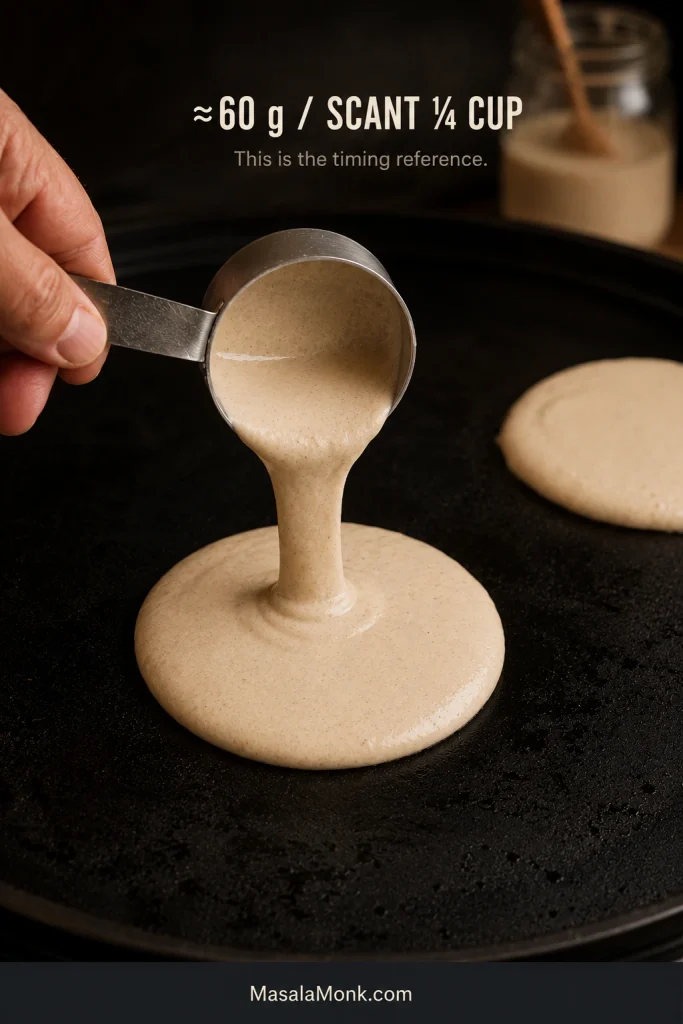
A scant quarter-cup measure portions about 60 grams of sourdough pancake batter onto a dark griddle.
A consistent 60 g portion makes spread, browning and doneness much easier to compare.
  1. Flip when the cues line up. For a roughly 60 g pancake, the first side usually takes about 2–3 minutes. Look for a matte outer edge, bubbles across the surface, a few bubbles that have burst and stayed open, and a golden underside. Flip once and cook the second side for roughly 1–2 minutes.

Use the cues together. The surface should look more set, the edge matte, and the underside golden before you turn the pancake.
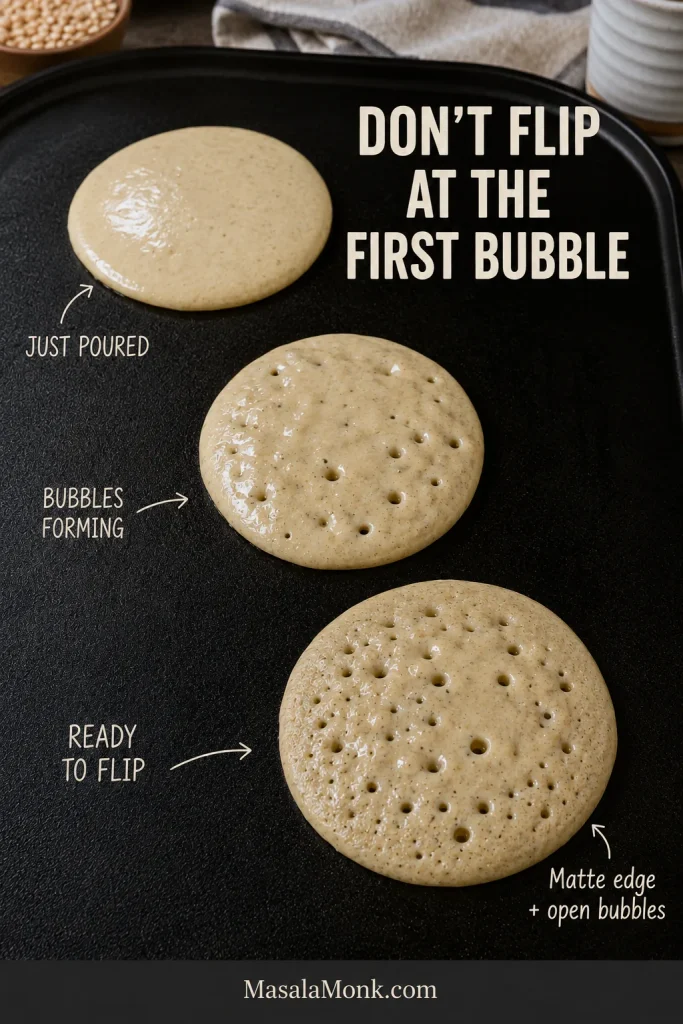
Three pancakes on one griddle show cooking stages from freshly poured batter to forming bubbles and a ready-to-flip pancake with a matte edge and open bubbles.
Don’t flip at the first bubbles. Wait for matte edges and a few burst bubbles that stay open.

Finish the Batch

  1. Adjust the pan, then cook the batch. A dark underside beneath a still-wet top means the pan is running too hot; lower the heat before the next pour. If the tester races outward, the batter needs a little more body. Once the center tears open soft and fully set, cook the remaining pancakes. If butter solids start getting too dark between batches, wipe the pan and grease it lightly again.
  2. Serve or keep warm. Eat the pancakes as they come off the griddle, or hold them on a wire rack over a sheet pan in a 200°F / 95°C oven while the rest cook.

Can I Use Cold Sourdough Discard or Active Starter?

Yes—cold refrigerator discard and active starter both work, as long as the starter is established and healthy. Cold discard can go straight into this same-day batter.
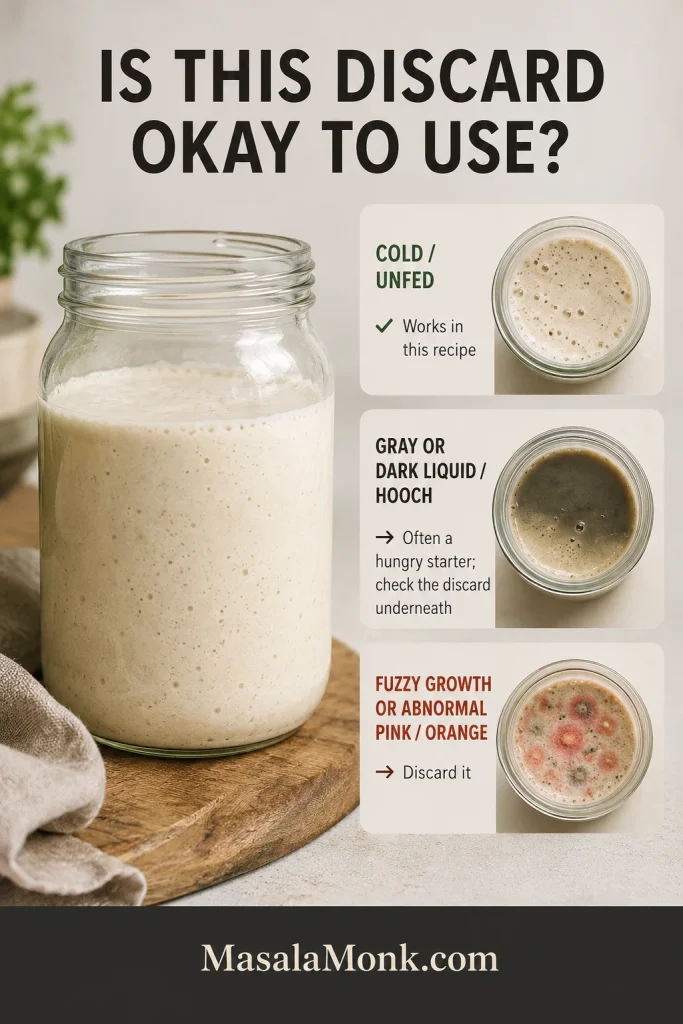
Sourdough discard safety guide showing cold unfed discard as usable, gray or dark hooch as a sign to inspect the discard underneath, and fuzzy growth or abnormal pink or orange color as reasons to discard it.
Gray or dark hooch alone is not mold. Fuzzy growth or abnormal pink/orange discoloration means the discard should not be used.
  • Cold, unfed refrigerator discard: use it directly.
  • Fresh or active starter: use the same weight.
  • Gray or dark liquid on top: this is usually hooch from a hungry starter, not mold. Pour it off if you want a milder result, then check the discard underneath as usual.
  • Discard from a brand-new starter that is not reliably active yet: wait until the starter is established and behaving consistently before saving its discard for cooking.
  • Moldy or abnormally discolored starter: fuzzy growth or unusual pink or orange discoloration means it should not go into breakfast.

How Old Can Sourdough Discard Be for Pancakes?

There is no single day when refrigerated discard suddenly becomes unusable. King Arthur Baking notes that refrigerated discard can keep for several weeks. Older discard usually tastes sharper and may become looser; use the safety checks above rather than age alone to decide whether it belongs in the batter.

If the starter itself is giving you trouble, our sourdough starter recipe for beginners goes deeper into feeding, texture, discard, and keeping a healthy culture.

Discard unusually thick or thin? Go to the batter consistency guide.

Sourdough Pancake Batter: Too Thin, Just Right, or Too Thick?

Get this part right and most of the rest becomes easy. Two people can weigh the same 220 g of discard and still see slightly different batter, especially when one jar is fresh and thick and another is older and looser.

The target is still the same: a slow, heavy ribbon that sits briefly on the surface before easing back into the bowl.

How to Adjust Thin or Thick Pancake Batter

What you seeWhat it meansWhat to do
Runs quickly from the scoop and spreads immediatelyToo thinAdd about 8 g / 1 tbsp flour, mix gently, and check again.
Falls in a thick ribbon and gradually relaxesJust rightCook the tester pancake.
Drops in a mound and barely movesToo thickAdd 15 ml / 1 tbsp milk, mix gently, and check the flow again.

A loose batter runs outward before the pancake has much chance to build height. At the other extreme, batter that barely moves can sit too tall, allowing the underside to brown before enough heat reaches the center.
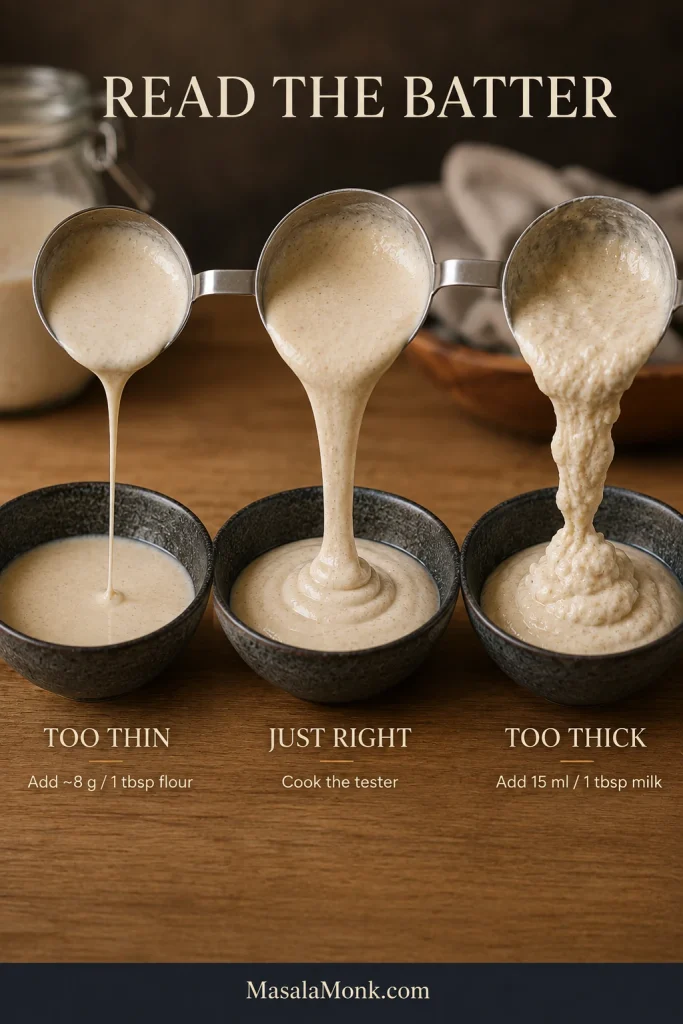
Three bowls compare sourdough pancake batter that is too thin, just right, and too thick; the guide suggests about 8 grams flour for thin batter and 15 milliliters milk for thick batter.
Correct thin or thick batter in small increments, then mix gently and check the flow again before adding more.

Let the First Pancake Check the Pan

The first pancake has a bad reputation. Give it a job instead.

A bad first pancake is useful information; finding the same problem after the whole bowl has been cooked is much more annoying. Check four things:
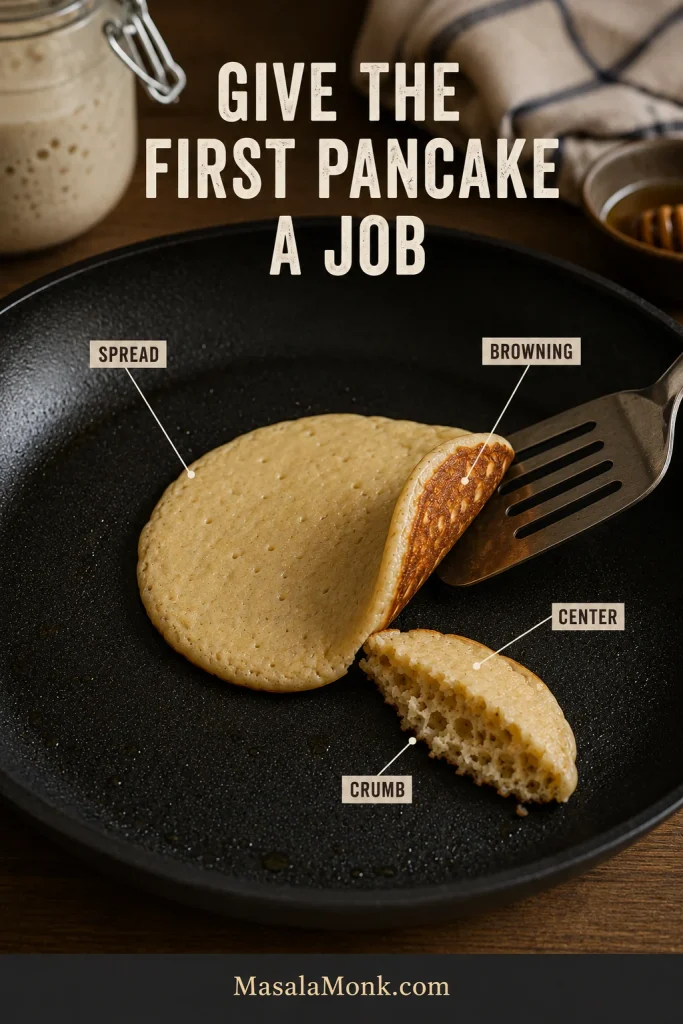
A single tester pancake is used to check its diameter, golden underside, cooked center, and exposed interior crumb before cooking the remaining batter.
After the tester, change one variable at a time so you know which adjustment actually fixed the problem.

What to Check on the Tester

  • Spread: does it widen into a neat, fairly thick round?
  • Browning: does the underside turn golden at roughly the same pace that the top begins to set?
  • Center: does it cook through before the bottom gets too dark?
  • Crumb: when torn open, is it soft and springy instead of shiny or paste-like?

Let that pancake overrule the temperature dial. Electric griddles, heavy cast iron, and thin skillets can behave very differently even when their settings sound similar.
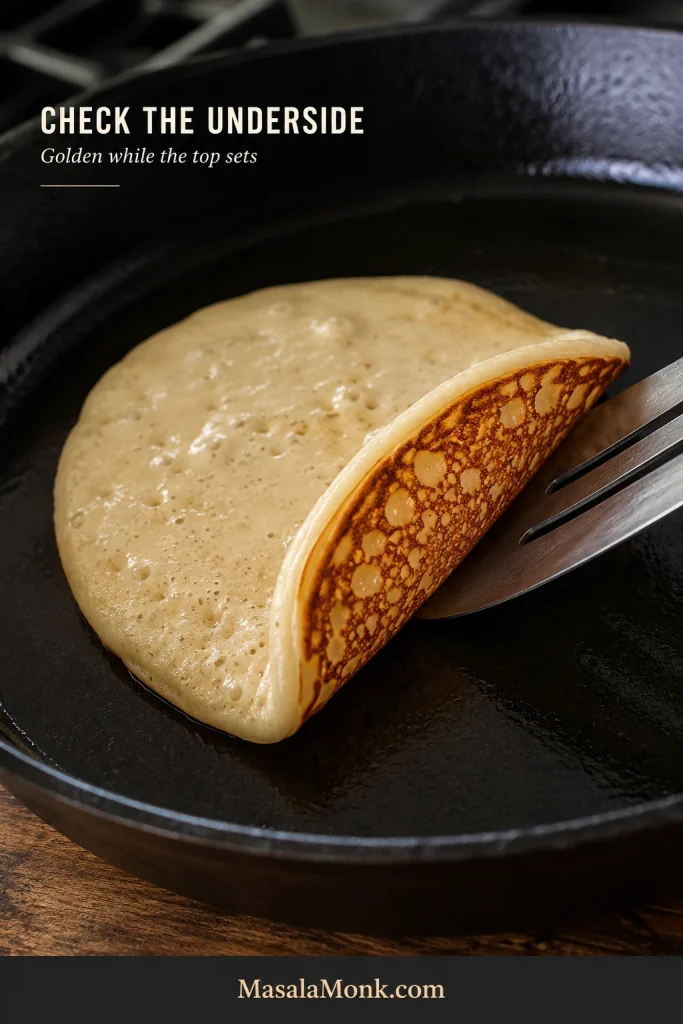
Pancake edge lifted with a spatula to reveal a mottled golden-brown underside while the top shows bubbles and a partly set surface.
The underside and surface should progress together; dark below and wet above usually means too much heat.

Read the Crumb

Once the tester tears open fluffy and fully set, breakfast gets much easier. The edges should be lightly browned and delicately crisp, while the warm center springs back instead of smearing against the fork.
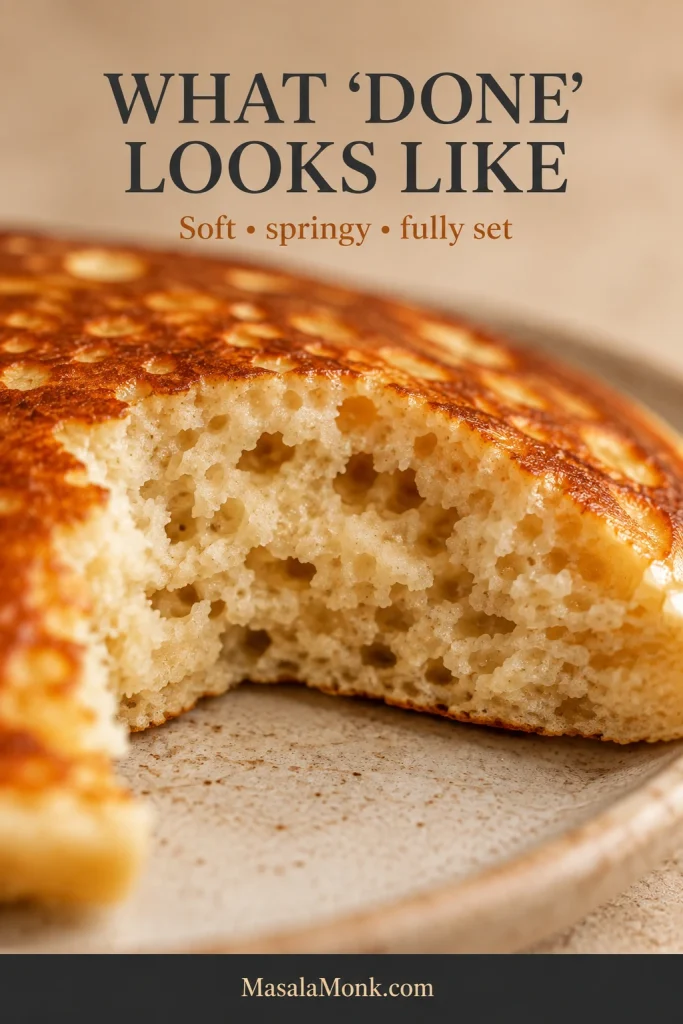
Torn sourdough pancake showing a fully cooked cream-colored interior with small irregular air pockets and a soft, set crumb.
Let a freshly torn pancake sit for a few seconds before judging it. Escaping steam can make a fully cooked center look temporarily wetter.

Once the tester is right, cook the remaining pancakes with the same portion and steady heat.

Side view of a stack of four fluffy golden sourdough discard pancakes with melting butter and lightly syruped edges.
A settled batter and steady griddle should give you a consistent batch.

Tester still not right? Go straight to troubleshooting.

Sourdough Discard Pancake Troubleshooting

Most pancake problems announce themselves early. The first question is simple: does the pan need adjusting, or does the batter?
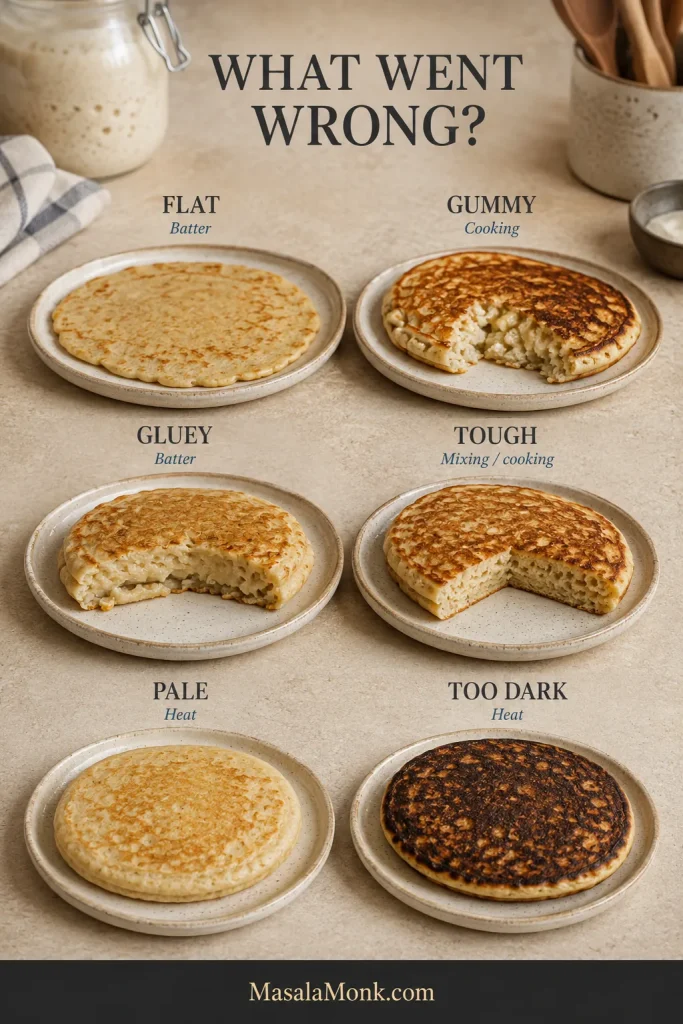
Troubleshooting guide showing six pancake problems: flat, gummy, gluey, tough, pale, and too dark, with each linked to batter, cooking, mixing, or heat.
Start with the symptom, then separate batter problems from heat, mixing and cooking problems before changing the recipe.

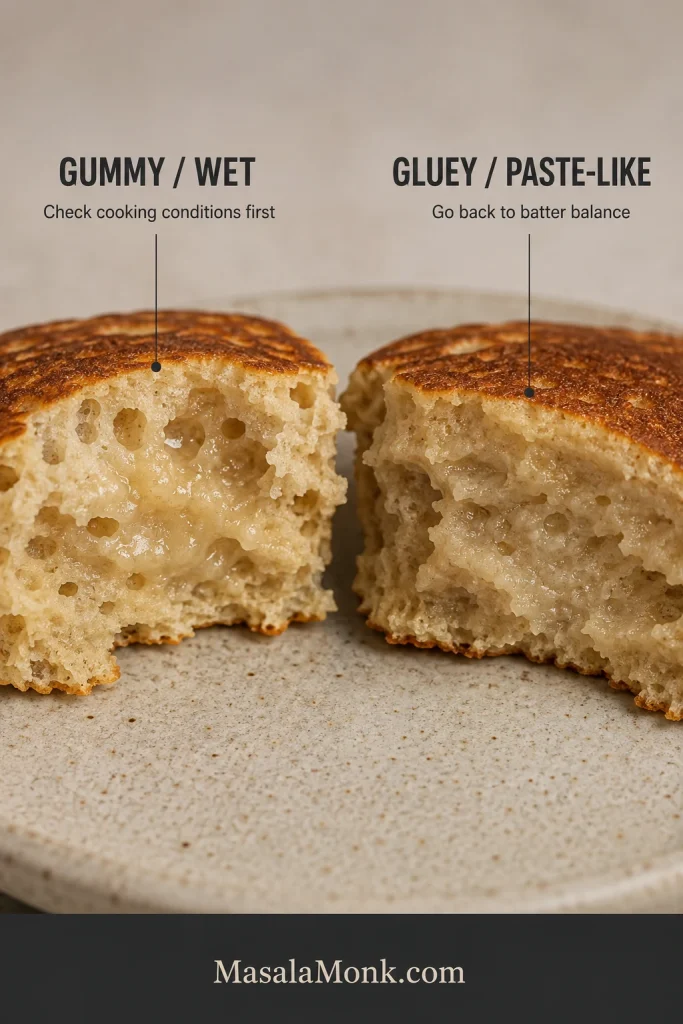
A gummy, wet middle often points to cooking conditions; a persistently gluey, paste-like crumb sends you back to the batter.
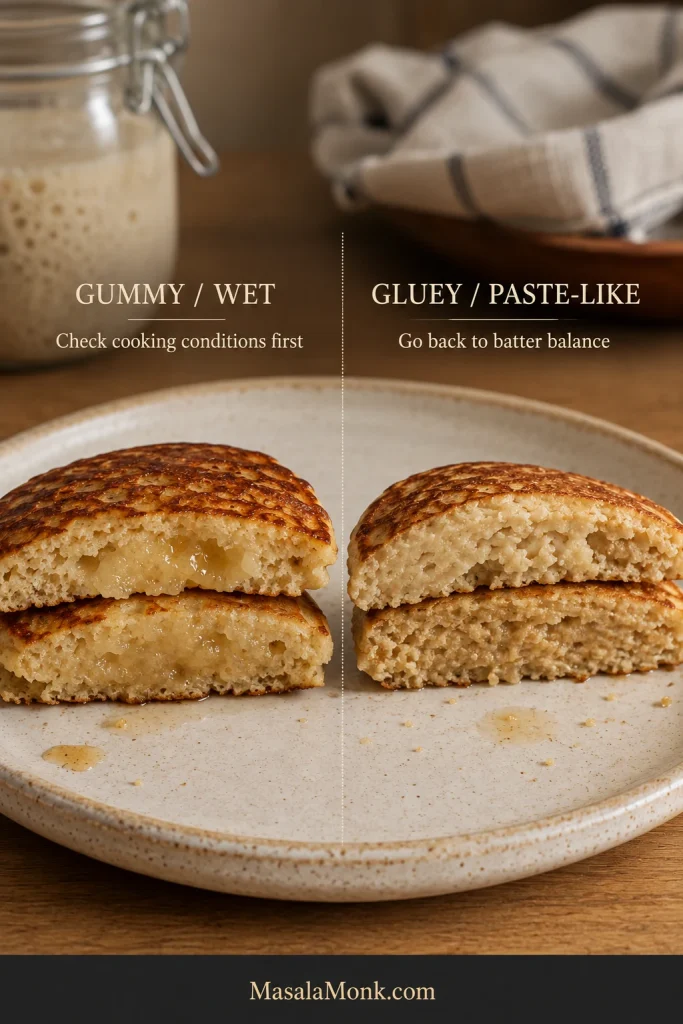
Two cut pancakes compare a gummy wet center with otherwise formed crumb against a broadly dense, paste-like gluey interior with poor air-cell structure.
Try one lower-and-slower tester first. If the wet center disappears, suspect cooking; if the crumb stays paste-like throughout, revisit batter balance.

Start With the Symptom

What happenedCheck firstWhat usually helps
Flat and spreadingBatter too looseThicken slightly; if the consistency already looks right, make sure the baking powder is fresh.
Golden outside, wet or gummy insidePan too hot, pancake too large, or batter sitting too tallLower the heat, make a slightly smaller pancake, or loosen an overly thick batter.
Gluey despite longer, gentler cookingToo much liquid or too little fresh flourRecheck discard thickness, milk, flour, and major substitutions.
Tough or rubberyOvermixing, too much added flour, or overcookingMix less, keep corrections small, and shorten the cook once the center is set.
Pale and slowPan too coolIncrease the heat slightly.
Too sourOlder, more acidic discardUse fresher discard next time.
Soapy or alkaline tasteToo much baking sodaStick to the measured amount.
Bubbly but still denseLoose batter, tired baking powder, or a pan that’s too coolCheck the batter first, then make sure the baking powder is fresh and the pan is hot enough.

Golden Outside, Gummy Inside

A beautifully browned underside with a wet middle means the surface is cooking faster than the center.
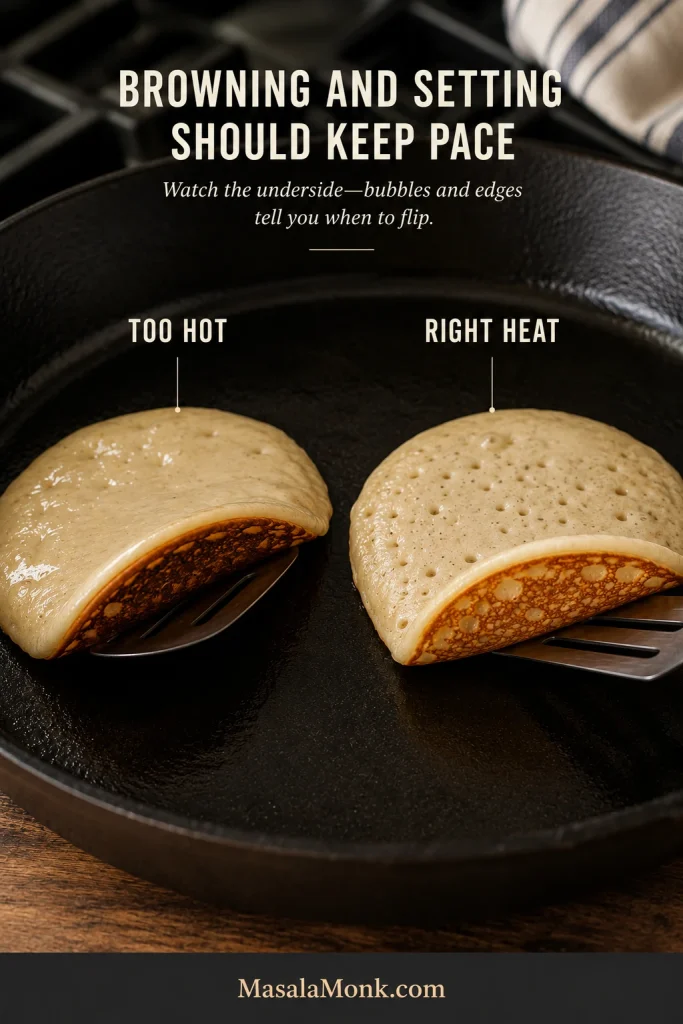
Two pancakes are lifted on spatulas: the too-hot example has a dark underside while the top remains wet, and the correct-heat example has a golden underside with bubbles and a more set top.
If later pancakes brown faster than the first, reduce the heat slightly; the skillet may simply be getting hotter.

Lower the heat for the next pancake. A very tall mound of batter may need a splash of milk. An oversized pour simply needs more time than the roughly 60 g pancakes used for these timings.
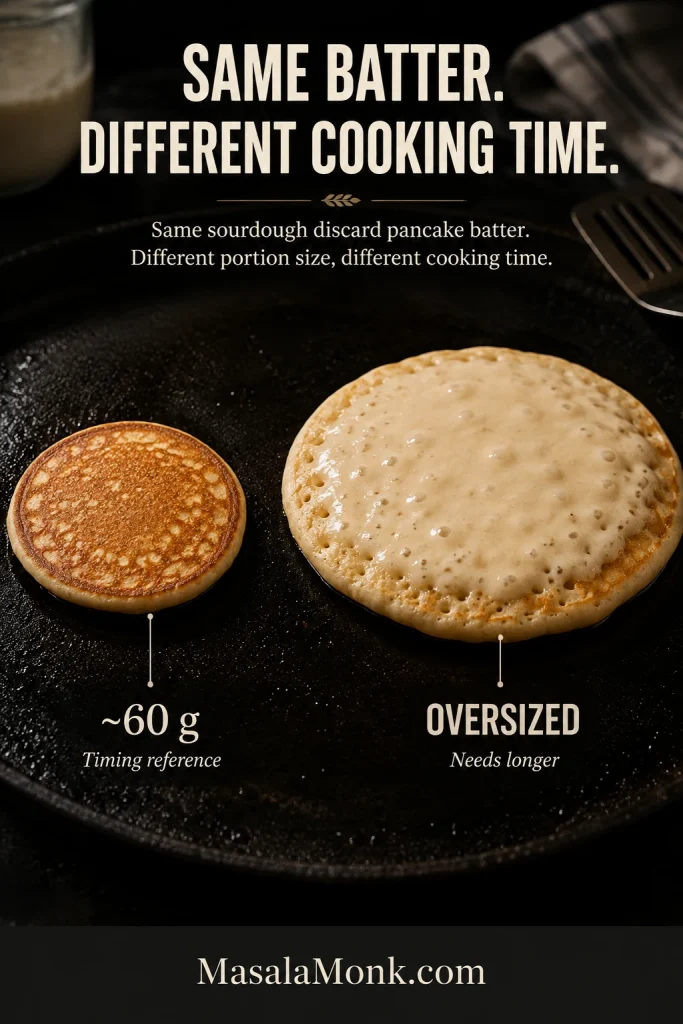
Two pancakes made from the same batter cook side by side; the smaller 60-gram pancake is more evenly set while the oversized pancake remains wetter in the center.
Larger pancakes need more time for heat to reach the center, even when the outside looks ready.

For repeated trouble, an instant-read thermometer can be a temporary learning tool. A center around 190°F / 88°C is a useful cooked-through reference. Once you recognize the correct crumb, there is no reason to measure every pancake.
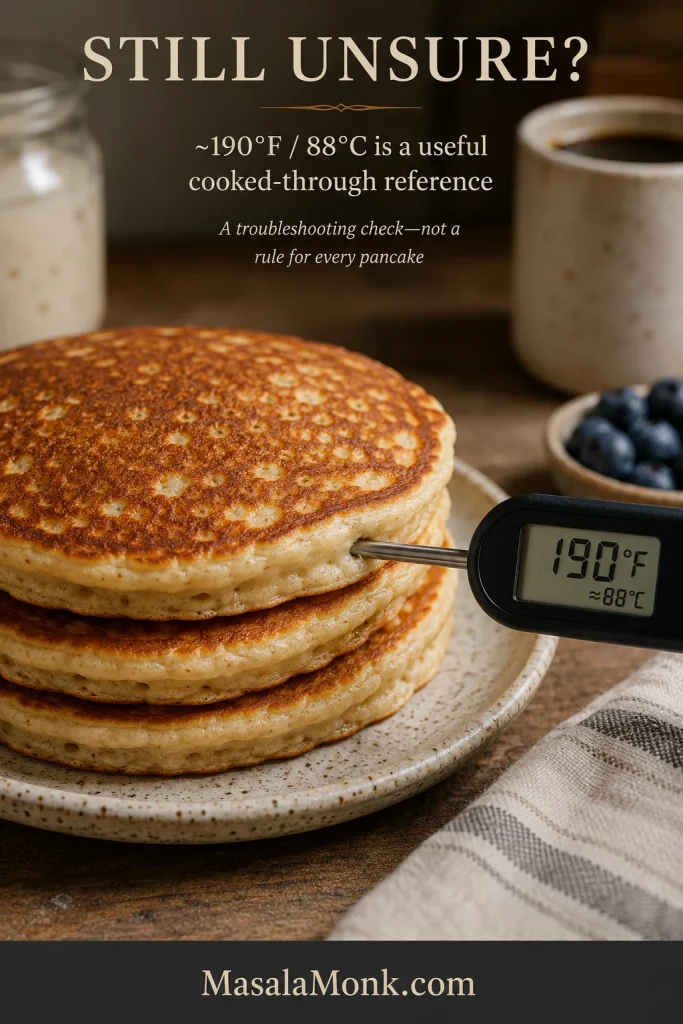
Instant-read thermometer inserted from the side into a stack of sourdough pancakes, displaying 190 degrees Fahrenheit and approximately 88 degrees Celsius.
Measure the thickest center, not the crust or pan-facing edge. Around 190°F / 88°C is a useful cooked-through reference while learning the cues.

The Center Stays Gluey Even After Longer Cooking

A persistently gluey center is different from one that simply needed another minute. When lower heat and enough cooking time still leave a paste-like interior, go back to the bowl before sacrificing the outside of another pancake.

Several things can push the crumb in this direction: very loose batter, using all the optional milk with unusually thin discard, too little fresh flour, or major substitutions.

If the batter is badly out of balance, cooking the pancake until the outside becomes leather will not rescue the middle.

Back to recipe · Check batter consistency · Back to top

Why Does Unfed Sourdough Discard Still Work in Pancakes?

Here, the baking powder and baking soda do the lifting. The discard brings flour, water, acidity, and sourdough flavor, but it does not need to raise the pancakes by itself.

This recipe assumes a 100%-hydration starter, meaning equal weights of flour and water are normally used when feeding it. So 100 g of discard contains roughly 50 g flour and 50 g water.
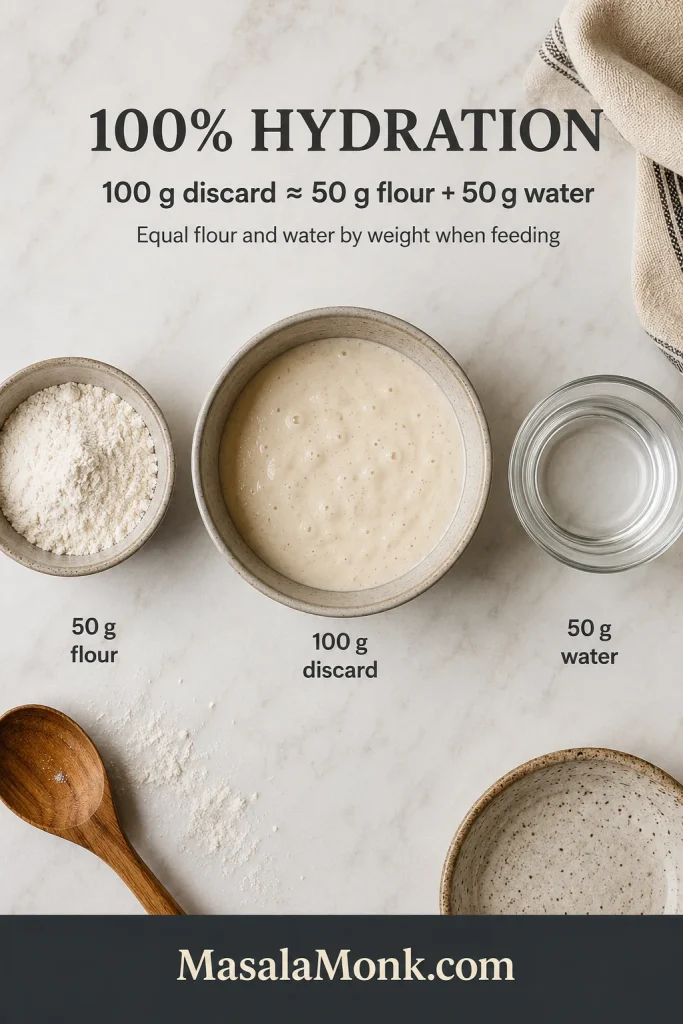
Overhead guide showing 100 grams of sourdough discard beside 50 grams of flour and 50 grams of water to explain 100 percent hydration.
Hydration is the flour-to-water ratio, not a visual thickness score. Two 100%-hydration starters can still look and feel different.

If your starter is much stiffer or wetter than a 100%-hydration starter, you may need a little more or less milk. That’s fine—after the rest, judge the bowl by the same batter cue.

Fresh flour and eggs give the pancakes enough body to set. Once the rested batter looks right, it can go straight to the griddle; the discard does not have to puff up the bowl the way active starter raises bread dough.

How Discard Age and Thickness Affect the Batter

Most jar-to-jar differences come down to flavor and how much extra milk the batter needs.

Your discardLikely effectWhat to do
Fresh or activeMilder flavor; sometimes a more aerated batterStart with the base recipe.
Older refrigeratedSharper flavor; may be looserStart with 200 ml milk and add more only if needed.
Very thinWetter final batterYou may need little or none of the reserved milk.
Very thickStiffer final batterAdd the reserved milk gradually after the rest.

If the batter looks right before you use the full extra 30 ml milk, stop there. The extra milk is there for the jars that need it.
Three bowls show pancake batter made with thin, typical, and thick sourdough discard, with guidance to use little or no reserved milk, check the ribbon, or add milk gradually up to 30 milliliters.
Hold back the extra milk until after the rest. That gives you room to calibrate thick discard without making a thinner jar too loose.

Make the Batch Fit the Discard You Actually Have

Sometimes the jar gives you the full 220 g. On other mornings, you scrape out only 60–70 g and breakfast still needs to happen. A discard recipe should not make you feed the starter again just to create enough discard for breakfast.

Choose the batch closest to what is in your jar. The ingredient amounts change, but each version uses the same mixing, resting, batter-checking, and cooking method as the main recipe.
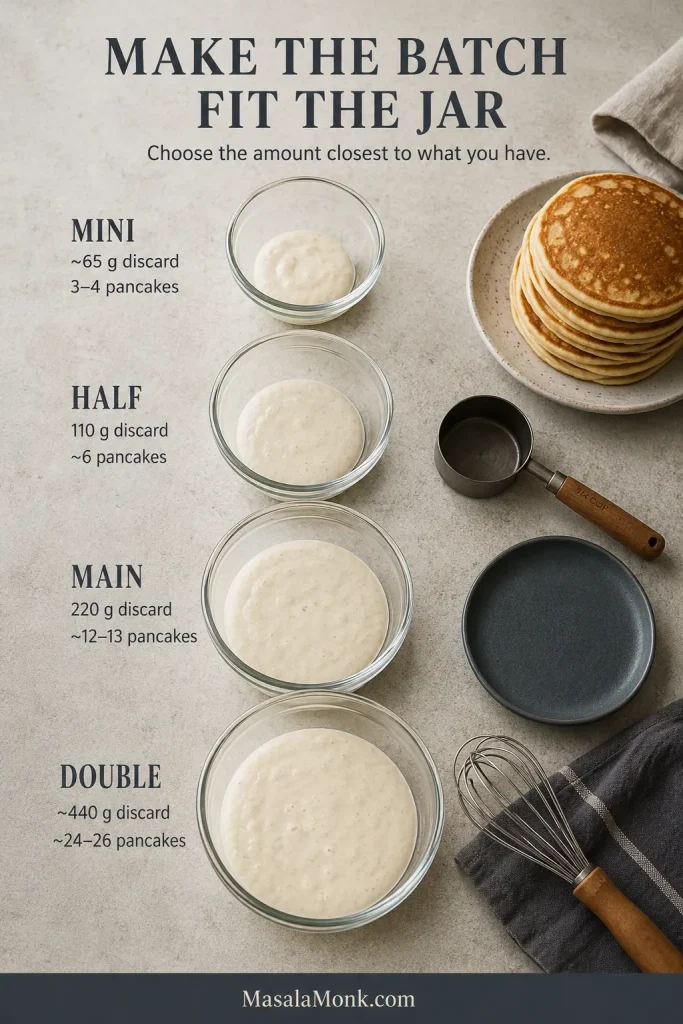
Batch-size guide showing about 65 grams discard for 3 to 4 pancakes, 110 grams for about 6, 220 grams for about 12 to 13, and about 440 grams for about 24 to 26 pancakes.
Choose the nearest established batch instead of forcing every gram into one formula; clean ratios are easier to cook predictably.

Mini Batch: About 65 g Discard

This is the “there really isn’t much in the jar” batch. It makes about 3–4 pancakes.
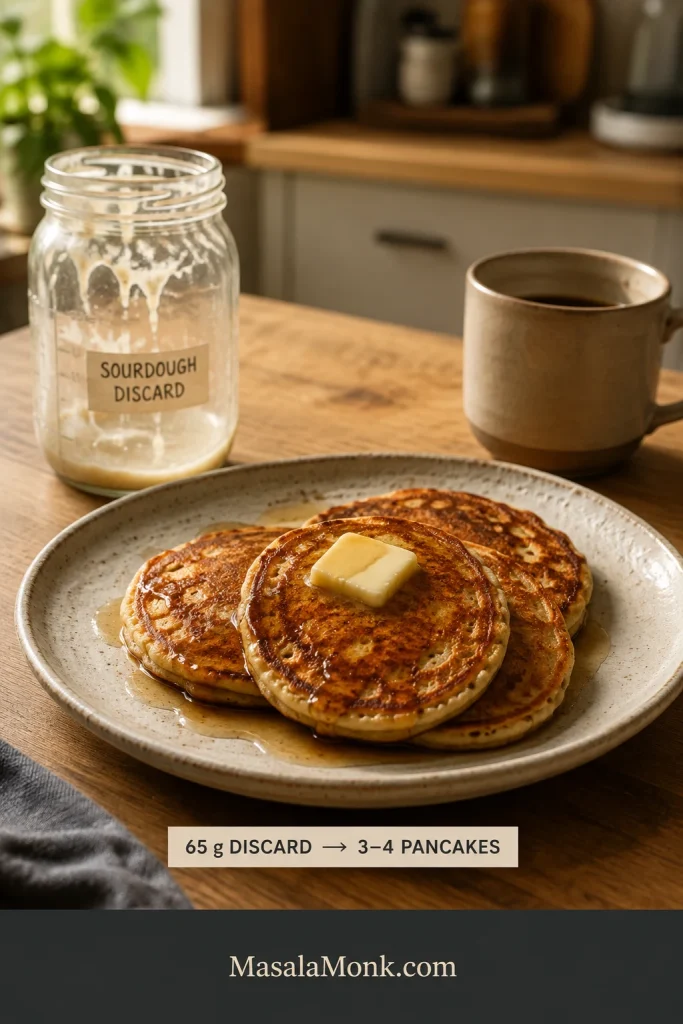
Small breakfast plate with three to four golden sourdough discard pancakes beside a nearly empty discard jar and a mug.
Even 65 g of discard is enough for a small 3–4-pancake breakfast.
  • 65 g sourdough discard
  • 55 g all-purpose flour
  • 60 ml milk, plus up to about 10 ml more if needed; add it 1 teaspoon / 5 ml at a time
  • 30 g beaten egg, about 2 tablespoons
  • 10 g melted butter, about 2 teaspoons
  • 8 g sugar, about 2 teaspoons
  • ½ teaspoon + ⅛ teaspoon baking powder
  • ⅛ teaspoon baking soda
  • Scant ¼ teaspoon fine salt
  • A small splash of vanilla, optional

Beat one egg, use 30 g for the batter, and save the rest for scrambled eggs or another breakfast use.

Half Batch: 110 g Discard

This is the neatest smaller batch because one large egg divides the main recipe cleanly in half. It makes about 6 pancakes.

  • 110 g sourdough discard
  • 90 g all-purpose flour, about ¾ cup
  • 100 ml milk, plus up to 15 ml more if needed; add it 1–2 teaspoons / 5–10 ml at a time
  • 1 large egg
  • 18 g melted butter, about 1 tablespoon + 1 teaspoon
  • 12–13 g sugar, about 1 tablespoon
  • 1 teaspoon baking powder
  • ¼ teaspoon baking soda
  • About ⅓ teaspoon fine salt
  • ½ teaspoon vanilla, optional

For the full 220 g discard batch, use the main recipe above. At every size, start with the listed milk and adjust only when the rested batter clearly needs it.

What If You Have 400–500 g of Sourdough Discard?

Have around 440 g? Double the whole recipe. That gives you roughly 24–26 pancakes.
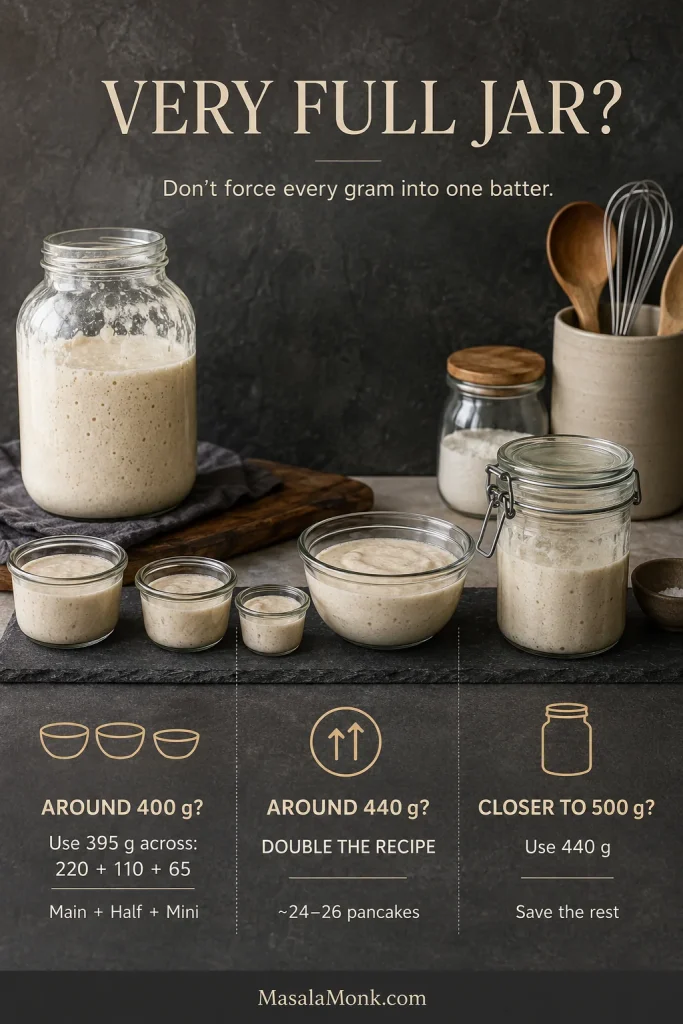
Guide for a large amount of sourdough discard: around 400 grams can use 395 grams across 220, 110 and 65 gram batches; around 440 grams doubles the recipe; closer to 500 grams uses 440 grams and saves the rest.
Around 440 g doubles cleanly. Near 400 g, the full + half + mini batches use 395 g; near 500 g, use 440 g and save the rest.
  • 440 g sourdough discard
  • 360 g all-purpose flour
  • 400 ml milk, plus up to 60 ml more if needed
  • 4 large eggs
  • 70 g melted butter
  • 50 g sugar
  • 16 g baking powder
  • 4 g baking soda
  • 8 g fine salt
  • 2 teaspoons vanilla, optional

Closer to 400 g? The full, half, and mini batches above use 395 g discard altogether, so you can make those three batches without wrestling with awkward egg fractions.

Closer to 500 g? Weigh out 440 g for the double batch and save the rest for another recipe.

Want to use 400–500 g of discard without ending up with two dozen pancakes? That’s a different recipe. Adding more discard here also adds more fermented flour and water, so the whole batter changes.

If the jar is still looking alarmingly full after breakfast, our sourdough banana bread with discard gives some of it another useful destination.

Can I Make This Sourdough Pancake Batter Overnight?

Not as written. This is a same-day batter, and the baking powder and baking soda go in before the short rest.

Don’t simply put the finished batter in the refrigerator until morning. Overnight sourdough pancakes need the long rest and the leaveners timed differently, so use a method written specifically for an overnight batter.

Easy Substitutions—and the Ones That Need a Different Recipe

Plant milk and neutral oil are straightforward changes. Eggs and gluten do much more work in the pancake, so removing either needs a recipe built for that change.
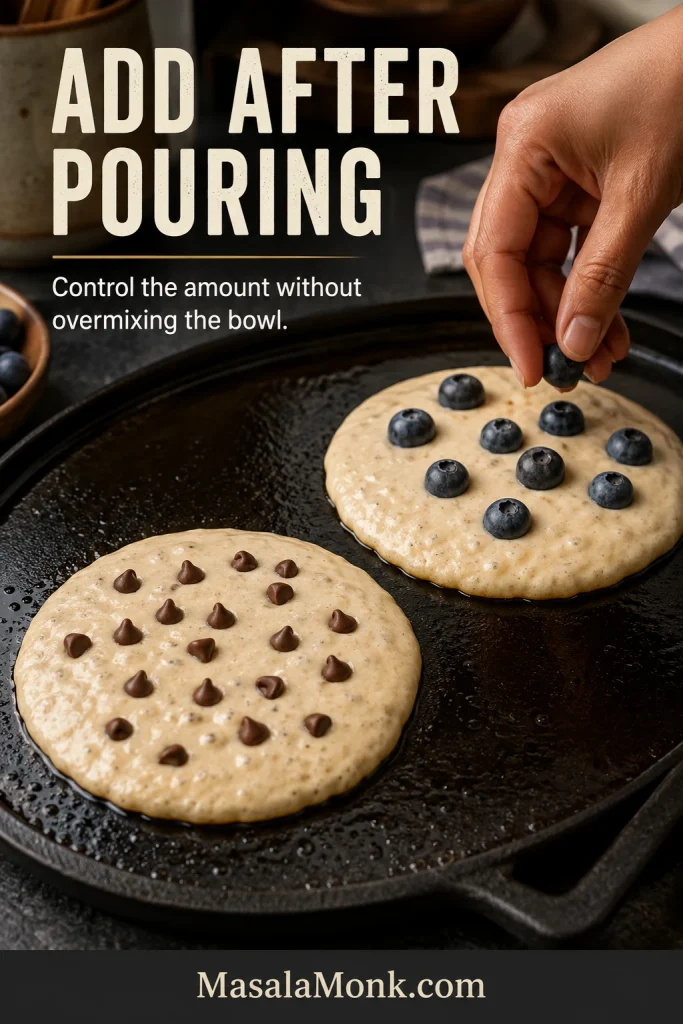
Two wet pancakes on a griddle, one topped with blueberries by hand and the other dotted with chocolate chips after the batter has been poured.
Scatter blueberries or chocolate chips after pouring so one batch can stay partly plain.

Substitution and Add-In Guide

ChangeHow to handle itWhat to expect
Unsweetened plant milkEasy swapUse it in place of the milk and check the rested batter the same way.
Neutral oil for butterEasy swapThe flavor will be less buttery, and the browning may differ slightly.
Blueberries or chocolate chipsEasy add-inScatter them over each pancake after pouring so you can control the amount without repeatedly stirring the whole bowl.
ButtermilkNot a straight 1:1 swapIt changes both acidity and batter thickness.
Eggless or veganUse a recipe designed for itRemoving eggs changes binding, moisture, and crumb.
Fully gluten-freeUse a gluten-free recipeYou need a gluten-free starter and a pancake recipe built around gluten-free flour.
No-added-flour/high-discardUse a high-discard recipeThe flour-to-liquid balance and finished texture will be different.

Buttermilk is a good example of why some swaps deserve their own recipe. If that is the pancake you actually want, our fluffy buttermilk pancakes are built around it from the start.

Thinking about replacing the eggs with flax? Our guide to how to make a flax egg explains what flax contributes and where it behaves differently from a chicken egg. That does not make it an automatic replacement for the two eggs here.

Storing, Freezing, and Reheating Sourdough Pancakes

Keep a Batch Warm

Set a wire rack over a sheet pan and keep cooked pancakes in a 200°F / 95°C oven while the rest cook. The rack lets steam escape instead of trapping it underneath the stack.

Refrigerate

Cool leftovers, refrigerate them promptly in a covered container, and use them within 3–4 days. That matches the USDA guidance for refrigerated cooked leftovers.

Freeze

Cool the pancakes completely, then freeze them in a single layer or separate small stacks with parchment. Once firm, transfer them to a freezer-safe bag or container. For the best texture, try to use them within about 1–2 months.
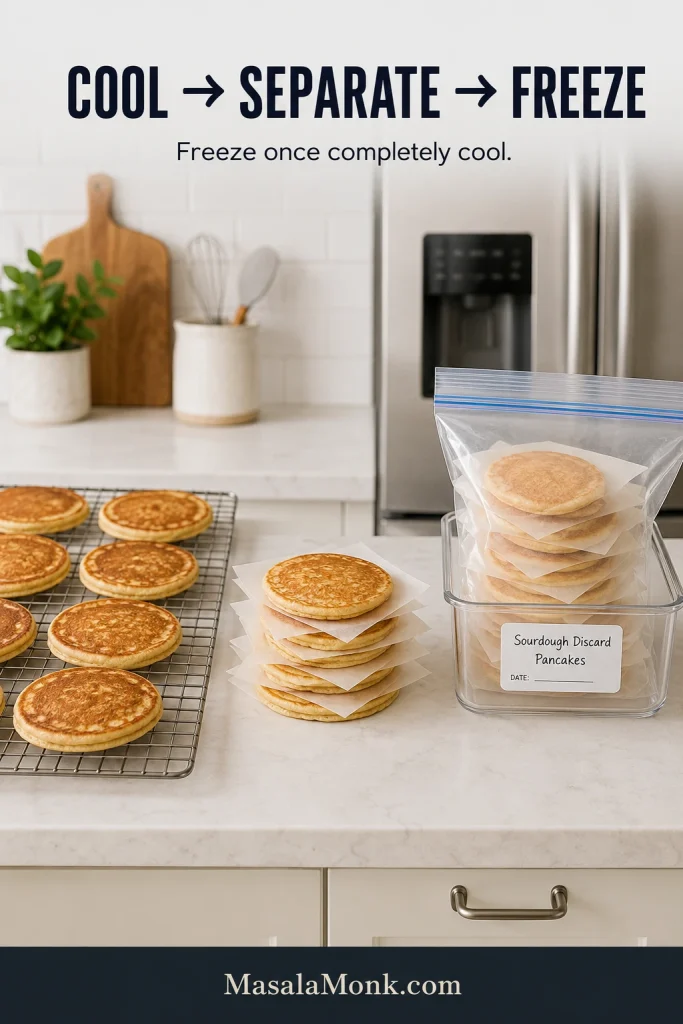
Pancakes shown cooling on a wire rack, stacked with sheets of parchment, and packed in a freezer-safe bag for storage.
Cool pancakes completely before packing; separating them makes it easier to remove only what you need.

Reheat

  • Toaster: great for one or two pancakes when you want slightly crisper edges.
  • Skillet: warm over low to medium-low heat for roughly 1–2 minutes per side.
  • Microwave: use short 15–20 second bursts; fastest, but also the softest finish.
  • Oven: warm several pancakes around 350°F / 175°C for about 5–7 minutes, adding more time when starting from frozen.

Reheating guide showing a toaster for 1 to 2 pancakes, skillet for 1 to 2 minutes per side, microwave in 15 to 20 second bursts, and oven at 350 degrees Fahrenheit or 175 degrees Celsius for 5 to 7 minutes.
Reheat only the pancakes you plan to eat; repeated warming and cooling gradually dries the crumb.

A Better Use for the Jar in the Fridge

The best sourdough discard pancake is not the one made from the most photogenic starter. It is the one that works with the jar you actually have.

Get the batter into that slow, heavy ribbon. Let the first pancake tell you what the pan needs. Then cook the rest while the edges take on color, the centers stay soft and springy, and a little butter starts melting into the warm stack.

When breakfast is finished, the discard jar is a little emptier instead of going into the bin—and the next jar should feel much less mysterious.
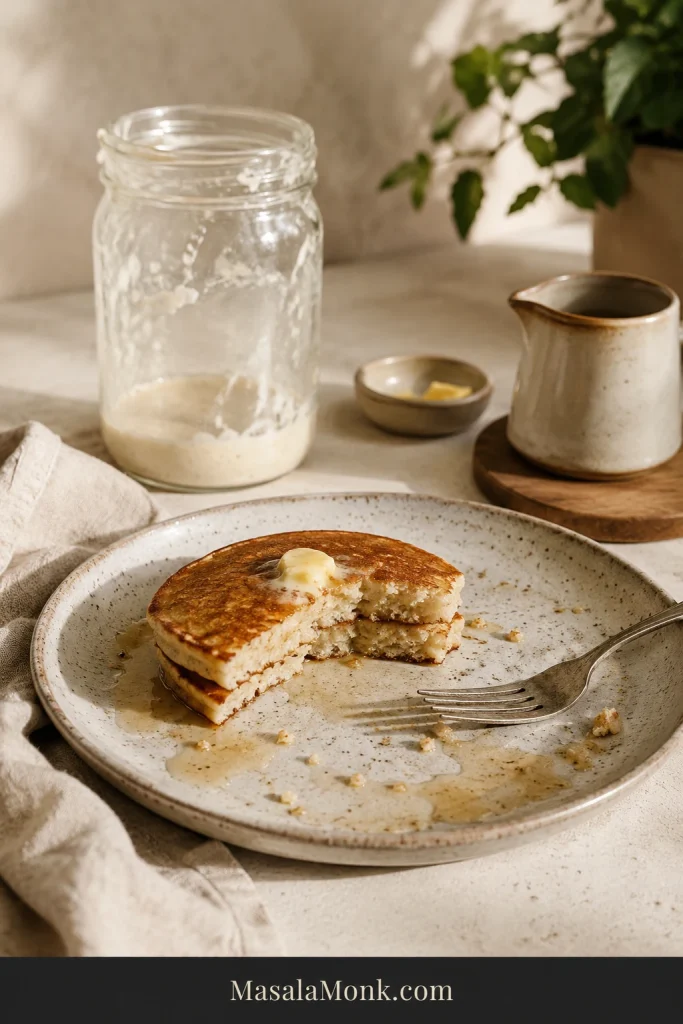
Partially eaten sourdough pancakes on a ceramic plate with a used fork, maple syrup traces, crumbs, and a nearly empty sourdough discard jar in the background.

If you make these, tell us what kind of discard you used and whether the batter needed any of the reserved milk. Sourdough jars behave differently, and your experience may help the next person staring into theirs.

Back to recipe · Back to top

Explore more sourdough: If sourdough is becoming less of a leftover-management project and more of a hobby, our sourdough bread recipes guide is a natural next step into loaves, rolls, buns, and longer-fermented doughs.
Posted on Leave a comment

Sourdough Banana Bread Recipe

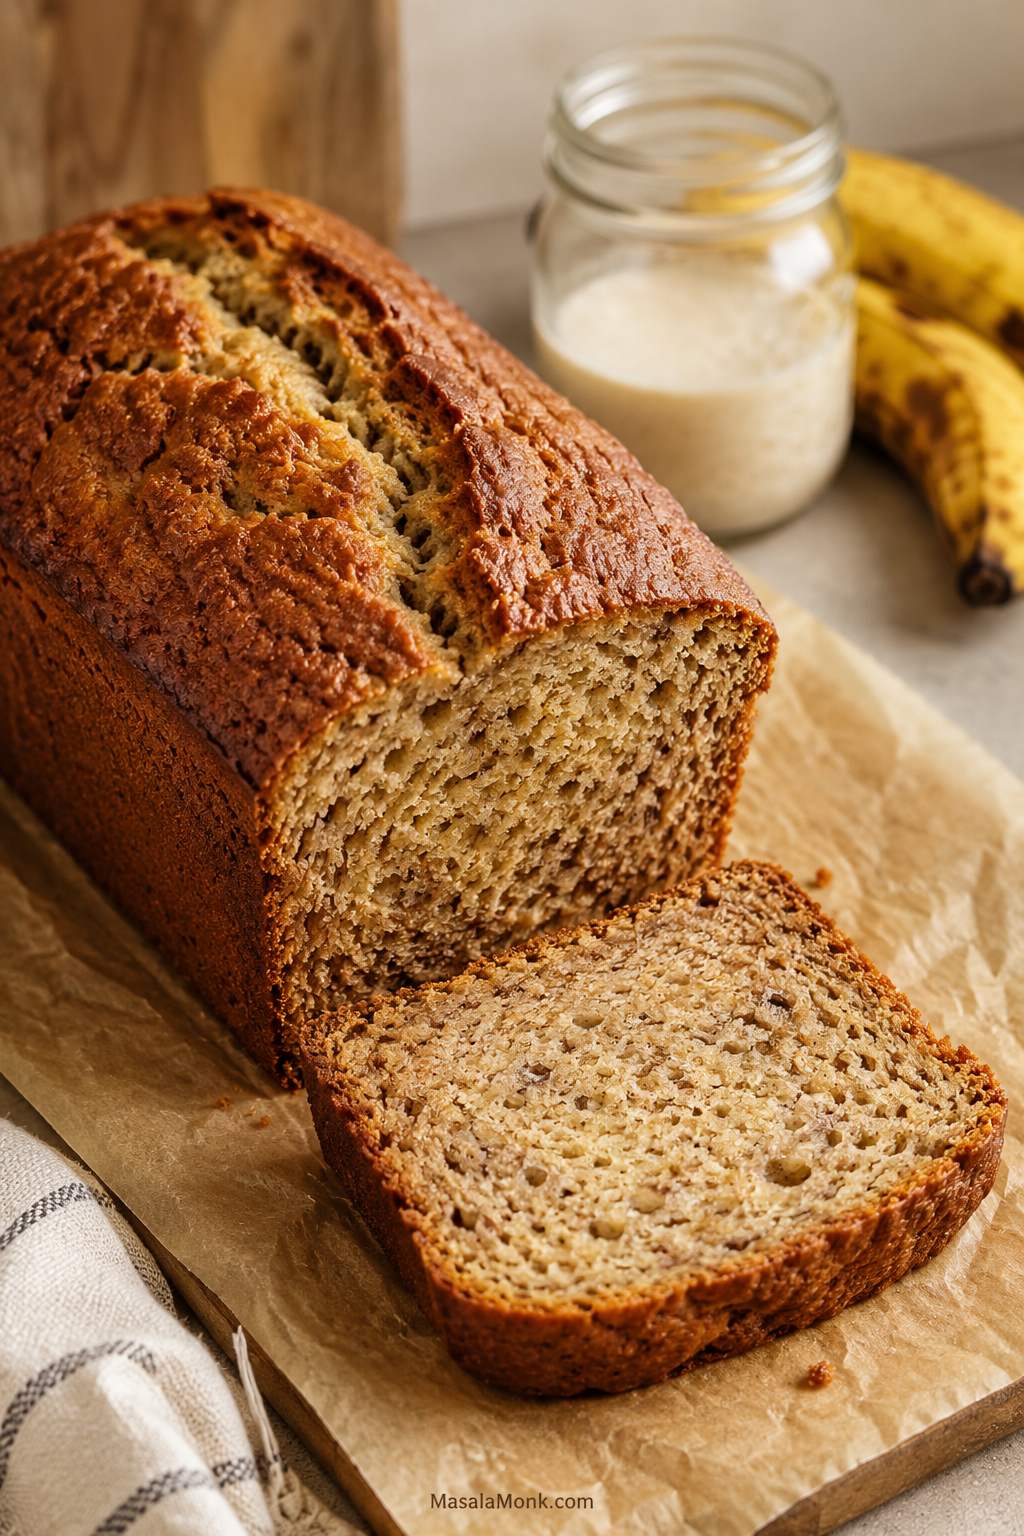
Sliced sourdough banana bread loaf on parchment with a moist crumb, ripe bananas, and a jar of sourdough discard in the background.

This sourdough banana bread recipe is for the two things home bakers hate wasting most: overripe bananas and sourdough discard. The loaf bakes up soft, fragrant, and deeply banana-forward, with brown sugar warmth, a tender crumb, and just enough sourdough tang to make each slice taste more rounded and interesting.

This is the bread you make when the bananas are too far gone for snacking but exactly right for baking. It is the kind of loaf that smells like a good decision before it even leaves the oven, especially if you plan to eat the first slice warm with butter.

Why This Sourdough Banana Bread Is Different

The batter comes together like a regular quick bread: no kneading, no shaping, no rise time, no mixer, and no complicated sourdough schedule. You only need about 15 minutes of hands-on prep, one main mixing bowl, and a standard loaf pan.

Meanwhile, the discard adds flavor, moisture, acidity, and a little tang, while baking soda and baking powder do the lifting. This sourdough banana bread recipe is designed to feel familiar first and sourdough-smart second, so the discard improves the loaf without making it complicated.

What makes this loaf especially reliable is the way it handles moisture. Ripe bananas and sourdough discard both make banana bread taste better, but too much of either can leave the middle gummy. This recipe keeps the banana and discard in a safe range, then gives you clear doneness cues so the loaf bakes up moist, tender, and sliceable.

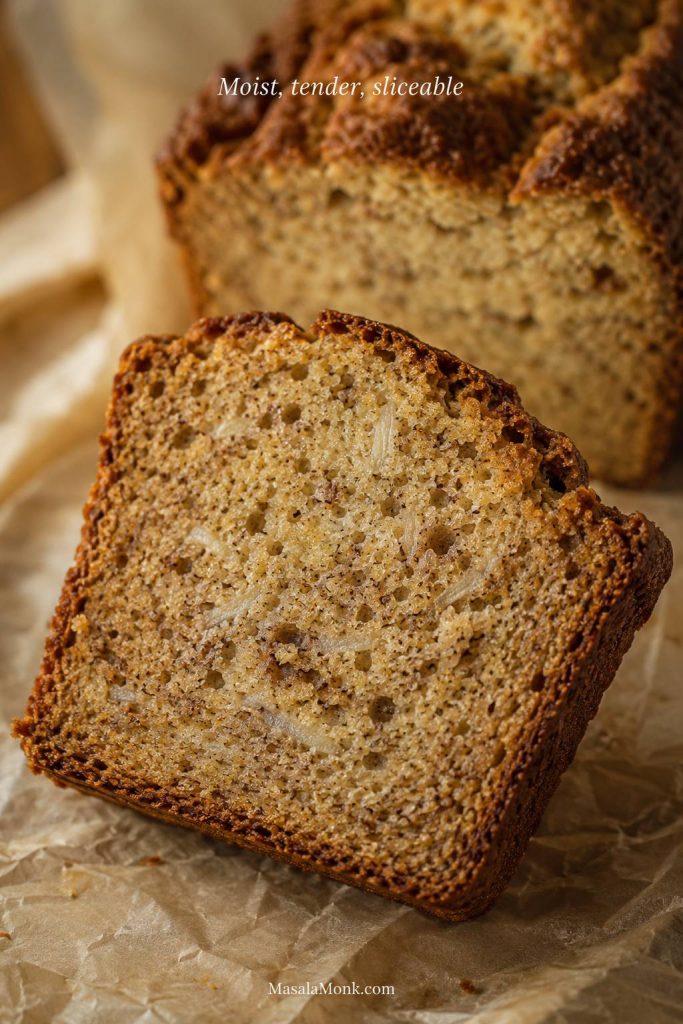
Close-up slice of sourdough discard banana bread with a soft crumb, banana flecks, and the words “Moist, tender, sliceable.”
A good sourdough discard banana bread slice should look tender and slightly plush, while still holding together when you pick it up.

So instead of guessing whether your bananas are “about right” or whether the loaf just needs five more minutes, you get clear amounts, clear texture cues, and a better chance at a loaf that slices the way banana bread should.

If your main worry is a wet center, the doneness cues and troubleshooting guide below are the two sections to keep closest.

Sourdough Banana Bread Recipe: Quick Answer

This sourdough discard banana bread is a same-day quick bread made with ripe bananas and sourdough discard or active starter. The discard gives the loaf a mild tang, deeper flavor, and extra moisture, but baking soda and baking powder do the lifting, so there is no rise time.

In this sourdough banana bread recipe, you can mix the batter and bake it right away. For the best texture, use very ripe bananas, measure the mashed banana instead of guessing, whisk the discard fully into the wet ingredients, and bake until no wet batter remains in the thickest part.

A good slice should feel soft and moist, but still hold together when you pick it up. It should taste like banana bread first, with just enough sourdough depth to make it more interesting than the usual loaf.

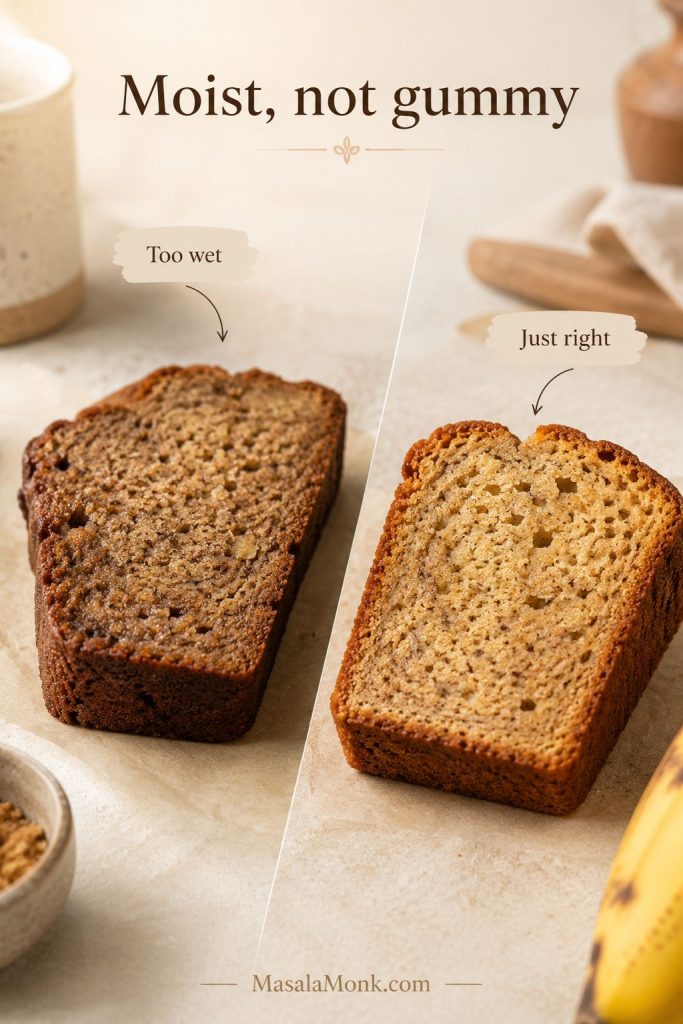
Comparison of two banana bread slices labeled “Too wet” and “Just right” under the heading “Moist, not gummy.”
Because ripe bananas and discard both add moisture, the best loaf needs enough structure and bake time to stay soft without turning heavy.

For exact quantities, pan size, and bake time, you can jump straight to the printable recipe card.

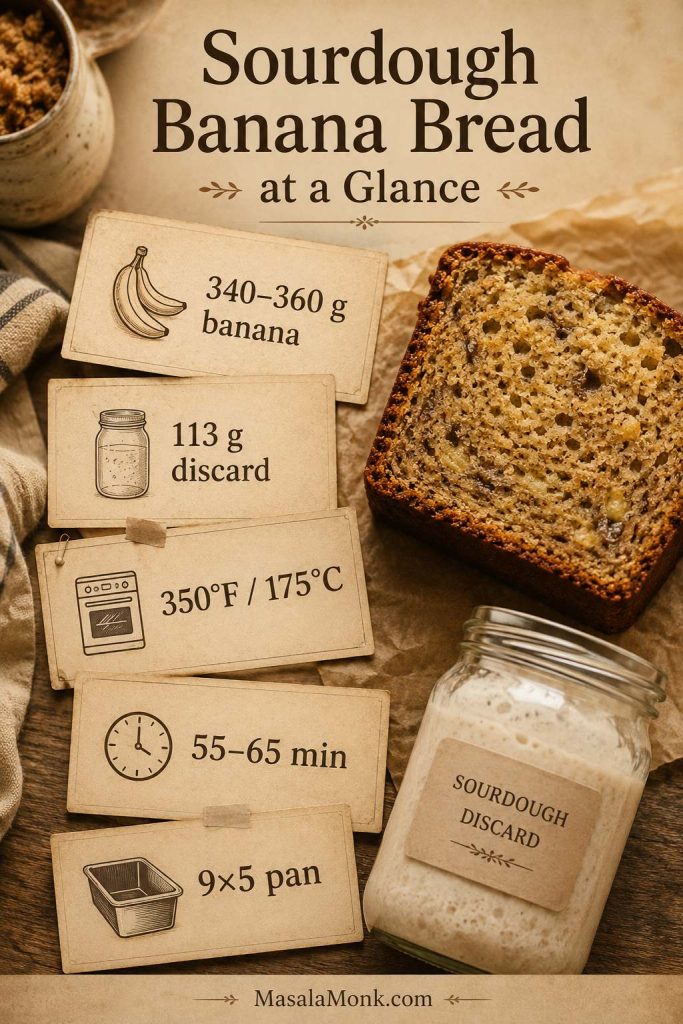
Sourdough Banana Bread Recipe at a Glance

  • Best pan: 9×5-inch light metal loaf pan
  • Oven: 350°F / 175°C
  • Bake time: 55–65 minutes
  • Banana amount: 340–360 g mashed ripe banana
  • Discard amount: 113 g / ½ cup sourdough discard
  • Texture goal: moist, tender, sliceable, and baked cleanly through the center

Those numbers matter most in three places: the ingredient measurements, the pan and bake-time notes, and the doneness test.

Sourdough banana bread at-a-glance card with 340–360 grams banana, 113 grams discard, 350 degrees Fahrenheit, 55–65 minutes, and 9×5 pan.
Keep these core numbers close: measured banana, steady discard, the right pan, and clear bake cues make the recipe easier to repeat.

What This Sourdough Banana Bread Tastes Like

This is not a sharp or sour loaf. Instead, it tastes like classic banana bread with more depth: sweet ripe banana first, then brown sugar, vanilla, butter, and a gentle sourdough note in the background.

The crumb should be moist and tender, not wet or pudding-like. Once cooled, the slices should hold together cleanly, with enough softness to feel cozy and enough structure to toast the next day.

Walnuts make it feel more breakfast-like and nutty. Chocolate chips, on the other hand, push it toward dessert. Either way, the base loaf stays simple enough for a weekday bake.

The Three Things That Make This Loaf Reliable

Measure the mashed banana, whisk the discard fully into the wet ingredients, and bake until the loaf tests clean at its tallest point. Together, those three small steps help it stay tender while still slicing neatly.

Why This Sourdough Banana Bread Recipe Works

You will like this loaf if you want banana bread that still feels familiar, just a little more grown-up. The discard does not take over. Instead, it deepens the flavor, softens the crumb, and gives you one more reason not to waste a jar of starter.

Why Moisture Control Matters

Although banana bread looks simple, the best loaves depend on balance. Too little moisture and the loaf feels dry. Too much banana or discard, however, and the center can take longer to bake through. The sweet spot is enough banana for flavor, enough flour for structure, and enough leavening to lift a dense, moist batter.

The recipe is built around the problem that makes sourdough banana bread tricky: ripe bananas and discard both add moisture, so the loaf needs enough structure, enough lift, and clear doneness cues to finish properly.

The key is moisture control: measure the banana by weight, keep the discard steady at 113 g, and bake by doneness cues instead of the clock alone. That is what gives you a slice that feels soft in the hand instead of fragile or underbaked.

  • Very ripe bananas bring natural sweetness, aroma, and moisture.
  • Sourdough discard adds gentle tang, acidity, and deeper flavor.
  • Brown sugar gives a warmer, caramel-like banana bread flavor.
  • Melted butter keeps the loaf rich and classic.
  • Baking soda plus baking powder gives more reliable lift than baking soda alone.
  • Measured banana helps the loaf bake through cleanly.

The Moisture-Control Rule

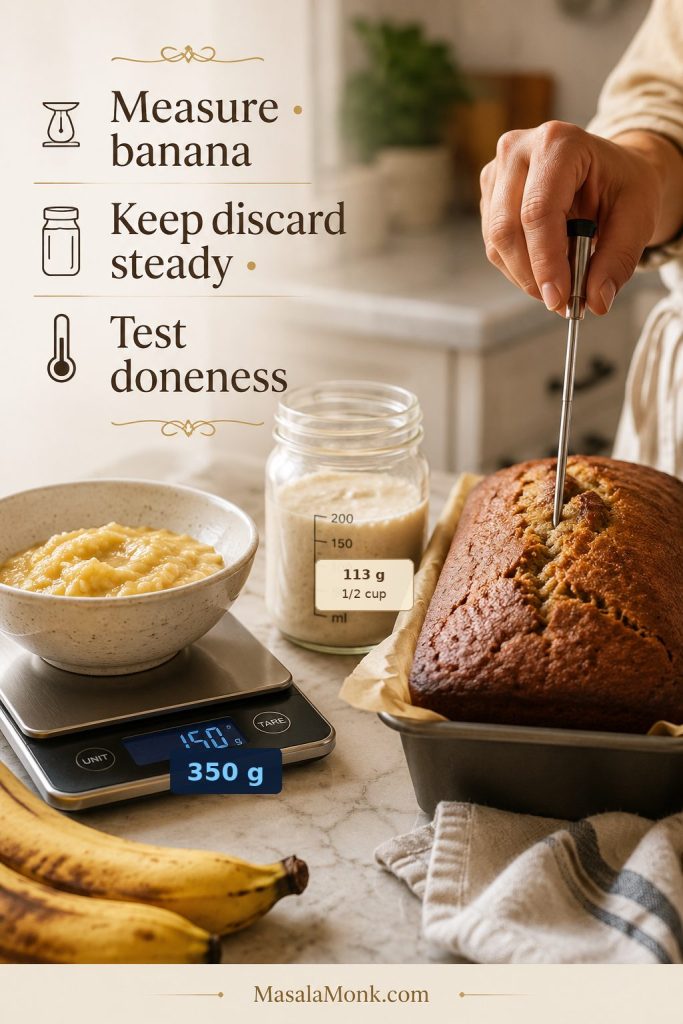
For this loaf, do not measure bananas by count alone. Measure the mashed banana, keep the discard steady, and bake by doneness cues. That is the difference between moist banana bread and a loaf that stays heavy in the middle.

Moisture-control guide with mashed banana on a scale, sourdough discard measured at 113 grams, and a banana bread loaf being tested for doneness.
Instead of guessing by banana count, this recipe controls the main moisture points before the loaf ever goes into the oven.

If you only remember one thing, remember this rule; then use the doneness section to confirm the loaf is fully baked before slicing.

Think of this as classic banana bread with a sourdough-discard upgrade. It is not trying to be chewy sandwich bread, and it is not trying to be aggressively tangy. Rather, it is soft, sliceable, fragrant, and practical.

Before You Start

Mash and measure the bananas first. If you have more than 360 g mashed banana, save the extra for oatmeal, pancakes, or a smoothie instead of adding it all to the loaf. That one step keeps the bread moist while helping the center bake through cleanly.

Ingredients for Sourdough Banana Bread

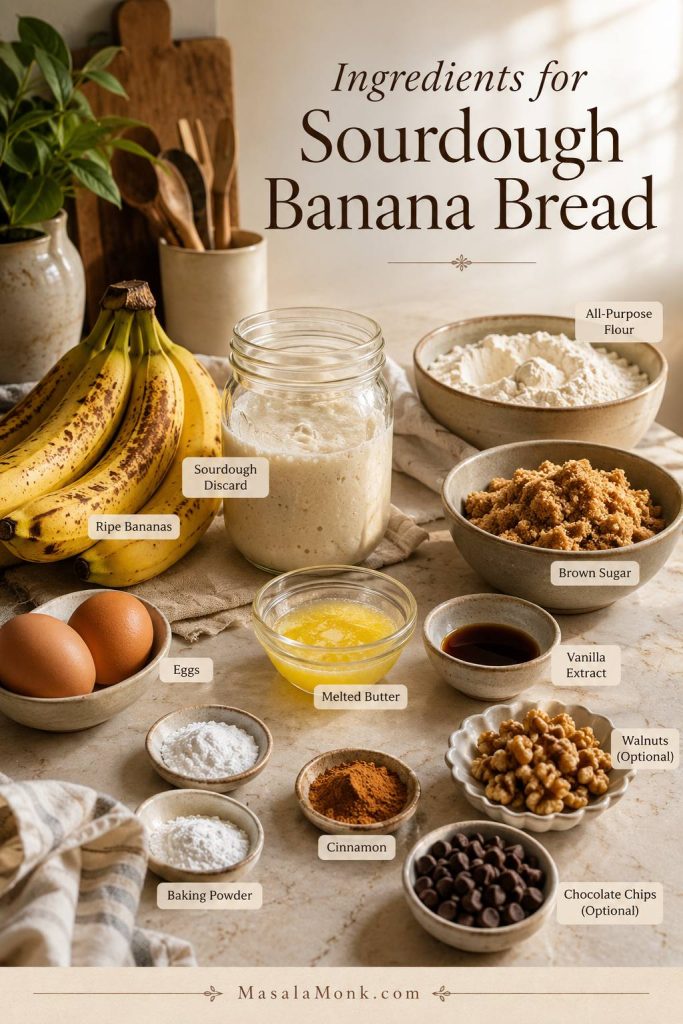
The ingredient list for this sourdough banana bread recipe is familiar, but a few details matter more because sourdough discard adds both moisture and acidity.

Ingredients for sourdough banana bread including ripe bananas, sourdough discard, flour, brown sugar, eggs, butter, vanilla, cinnamon, baking soda, baking powder, walnuts, and chocolate chips.
The ingredients are familiar, yet the balance matters: bananas bring flavor, discard adds depth, and the leaveners support a steady rise.

Very Ripe Bananas

Use bananas with plenty of brown spots, or bananas that are fully soft and deeply fragrant. They should mash easily with a fork.

Banana ripeness guide with yellow, spotted, and very ripe brown bananas labeled as best when spotted to brown.
For the best banana bread flavor, choose bananas that smell sweet and mash easily; however, avoid fruit that smells fermented or spoiled.

Measure the Mashed Banana

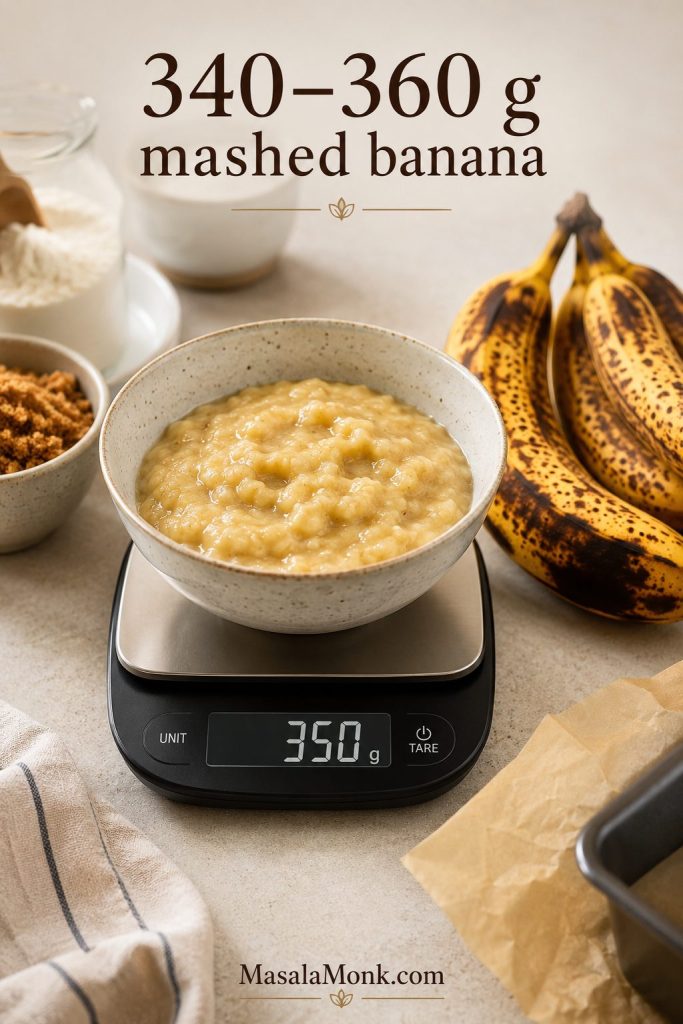
The best range is 340–360 g peeled mashed banana, which is about 1½ cups. That is usually 3 medium-to-large bananas; however, a scale saves you from guessing here, because three bananas can mean very different things depending on their size.

Bowl of mashed banana on a digital scale reading 350 grams with ripe bananas nearby and the text “340–360 g mashed banana.”
Banana size varies a lot, so weighing the mashed fruit is the easiest way to avoid an overly loose banana bread batter.

You do not need perfect-looking bananas for this recipe. You just need ripe, fragrant bananas and a measured amount, so the loaf gets banana flavor without turning heavy.

Banana Bread Texture Tip

Extra banana sounds harmless, but it can make the middle take much longer to set. Therefore, when your bananas are extra large, mash them first and measure the amount instead of adding every banana on the counter.

Can You Use Frozen Bananas?

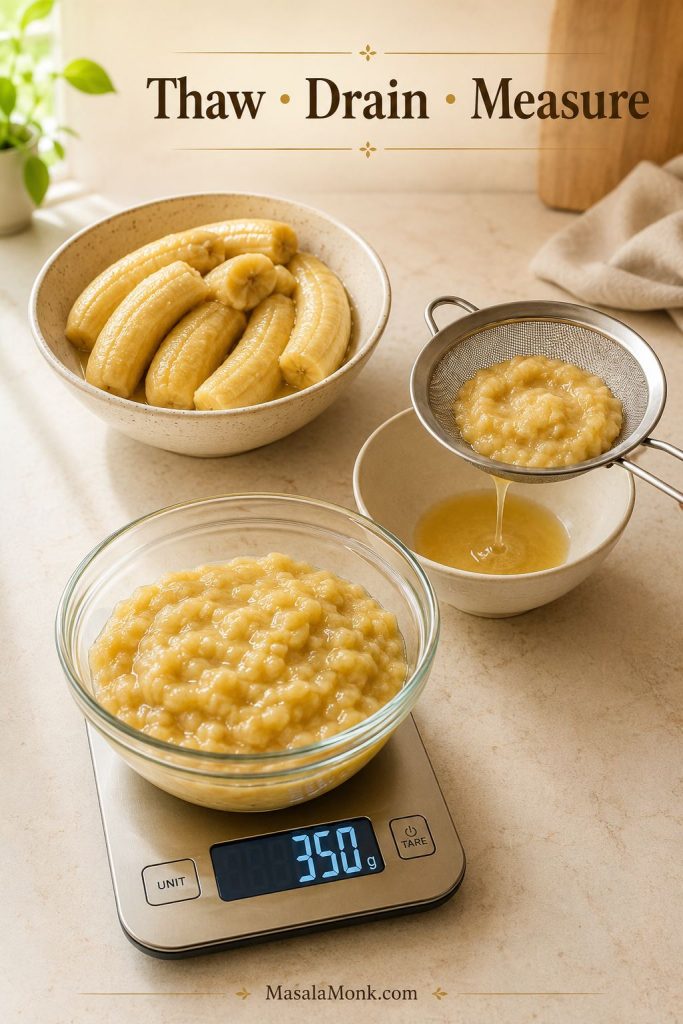
Yes. First, thaw frozen bananas; then drain off any watery liquid before measuring. Frozen bananas release more moisture than fresh ripe bananas, so measure the mashed fruit after thawing and keep it in the 340–360 g range.

Frozen banana process guide showing thawed bananas, liquid being drained, and mashed banana measured on a scale with the text “Thaw, Drain, Measure.”
Frozen bananas work well in sourdough banana bread, but draining the extra liquid first keeps the batter from becoming too wet.

Because thawed bananas release extra liquid, the mashed banana measurement matters even more here.

Sourdough Discard or Active Starter

Use 113 g / ½ cup sourdough discard. A discard from a starter fed with equal weights of flour and water works best here.

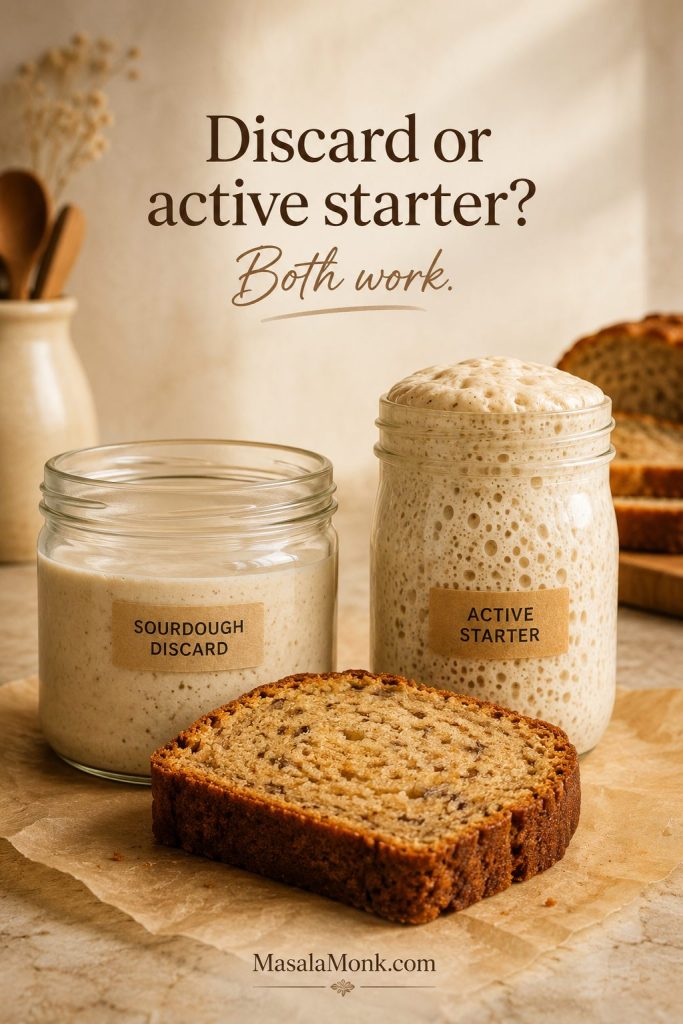
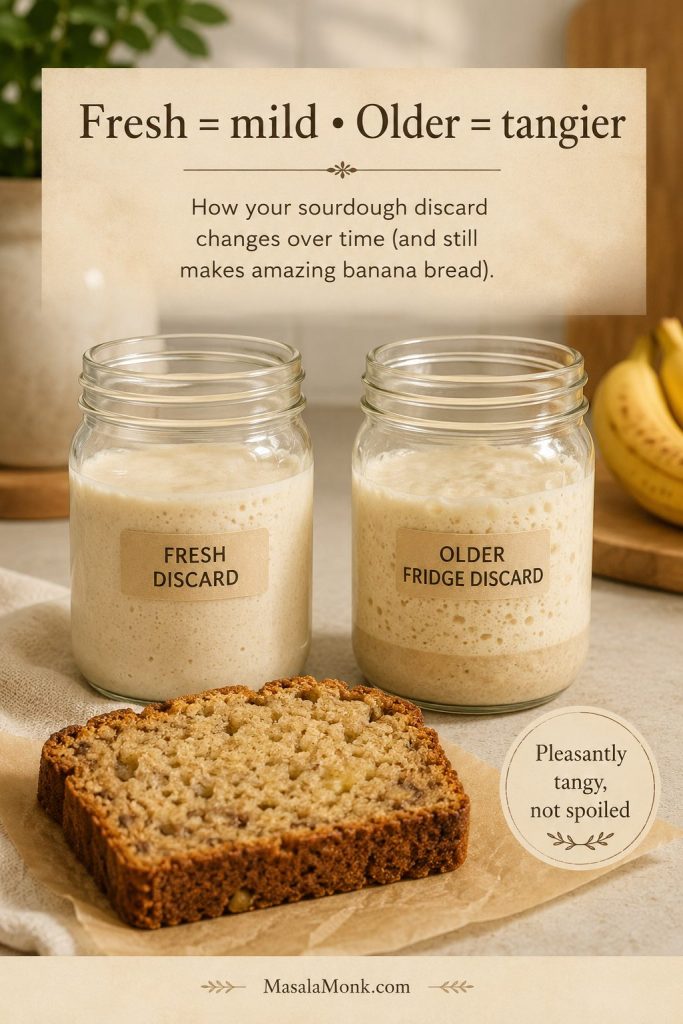
Fresh discard gives a milder loaf. Older fridge discard gives a stronger sourdough note. Active starter also works, and it may make the loaf slightly lighter. However, this recipe does not rely on the starter for rise.

Two jars of sourdough discard and active starter beside a slice of banana bread with the text “Discard or active starter? Both work.”
Discard gives this loaf a deeper tang, while active starter can make the flavor milder and the crumb slightly lighter.

For a clearer comparison, see the full discard vs active starter section before you choose.

For starter basics, feeding schedules, and discard handling, see this guide to how to feed and maintain a sourdough starter.

Flour, Sugar, Fat, and Eggs

All-purpose flour gives the cleanest structure. Brown sugar keeps the loaf moist and gives the flavor a caramel edge. Meanwhile, melted butter makes the loaf rich and familiar, while eggs help bind the batter and support the crumb.

If you measure flour by cups, spoon it into the cup and level it off instead of scooping directly from the bag, because scooped flour packs down easily. Too much packed flour can make the loaf dry, heavy, or dense.

FatBest ForTexture
Melted butterClassic banana bread flavorRich, tender, slightly denser
Neutral oilSoftest crumb and longer moistnessSofter, lighter, less buttery

Use a neutral oil such as avocado, canola, sunflower, or light olive oil if you choose the oil version. Avoid strongly flavored oils unless you already know you like them in sweet bakes.

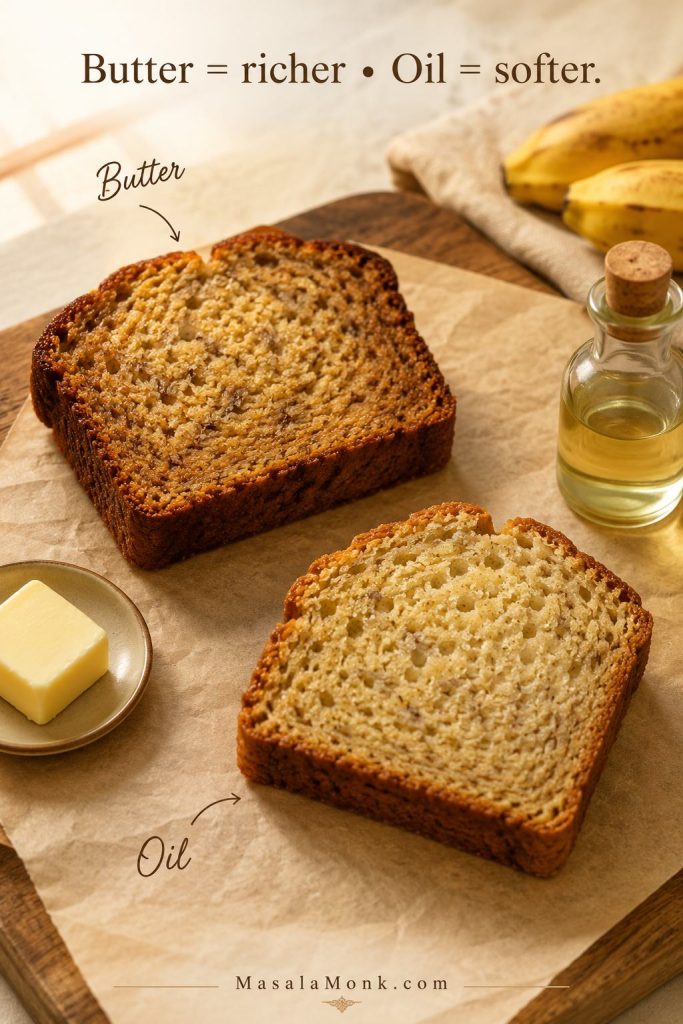
Two banana bread slices comparing butter and oil versions with butter, oil, bananas, and the text “Butter = richer, Oil = softer.”
Butter gives a classic banana bread flavor, whereas oil creates a softer crumb that can stay tender a little longer.

If you are choosing a version before baking, the version guide gives the quickest way to decide between classic, softer, tangier, walnut, or chocolate chip.

Baking Soda and Baking Powder

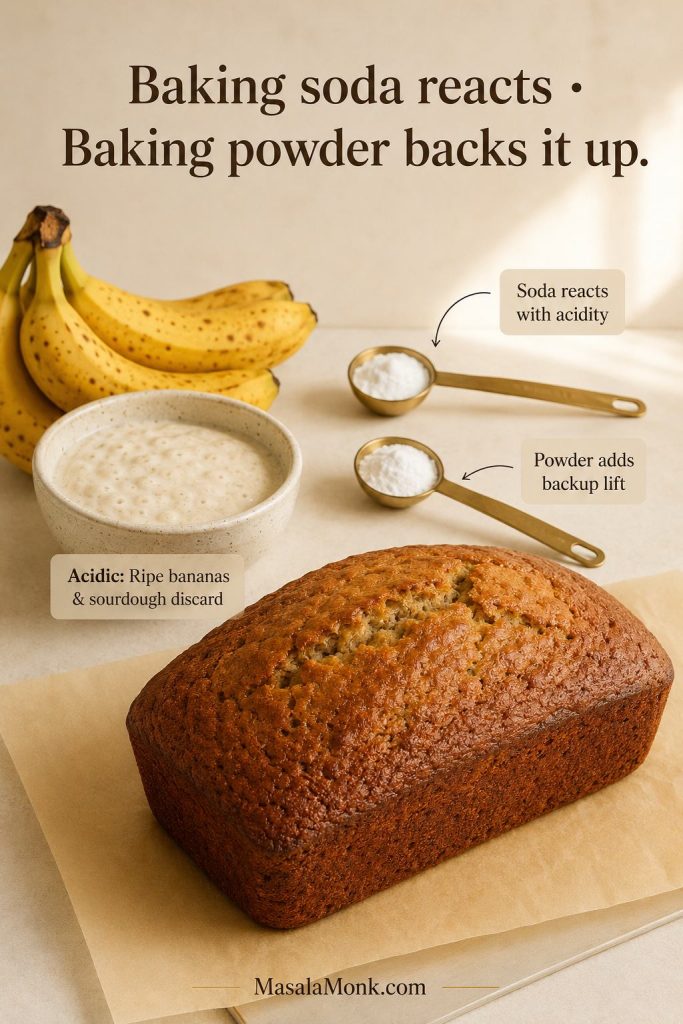
This recipe uses both for a steadier rise. Baking soda reacts with the acidity from the bananas, brown sugar, and sourdough discard, while baking powder adds backup lift so the loaf does not feel heavy for how moist the batter is.

Baking soda and baking powder guide with ripe bananas, sourdough discard, leaveners, and a domed banana bread loaf.
Even though this loaf uses sourdough discard, baking soda and baking powder still do the lifting for a steadier quick bread rise.

Optional Mix-Ins

Walnuts, pecans, and chocolate chips all work well. Keep mix-ins to about 85–115 g so the loaf does not become too heavy.

Blueberries can be added, but they bring extra moisture. For that reason, keep them to about 75–100 g, use them straight from the fridge or freezer, and avoid adding extra banana at the same time.

Sourdough Discard vs Active Starter

This is one of the most common questions when making banana bread with sourdough discard: does the starter need to be active? For this recipe, no. Discard is the easiest default.

In this loaf, discard is mostly a flavor and moisture ingredient. The baking soda and baking powder do the main lifting, so you do not need to wait for the starter to rise the batter.

Fresh and older sourdough discard jars beside banana bread with the text “Fresh = mild, Older = tangier” and “Pleasantly tangy, not spoiled.”
Older discard can add more sourdough character, but it should smell pleasantly tangy rather than harsh, moldy, or unpleasant.
Starter TypeCan You Use It?What to Expect
Fresh discardYes, best defaultMild flavor, easy mixing, classic banana bread taste.
Older fridge discardYes, if it smells pleasantly tangyStronger sourdough note. Good for people who like more tang.
Active starterYesSlightly lighter loaf and usually less sour flavor.
Very runny discardYesBatter may be looser and the loaf may need a few extra minutes.
Very thick discardYesBring closer to room temperature and whisk well into the wet ingredients.
Brand-new starter discardNot idealEarly starter discard can smell harsh or unstable. Use mature discard for better flavor.

For more ways to use starter and discard in baking, keep this page on more sourdough bread recipes handy. It is useful when you want to move from quick discard bakes to focaccia, pizza dough, and simple bread projects.

Which Sourdough Banana Bread Version Should You Make?

Use the base recipe if you want a classic moist loaf. Then adjust only one or two things depending on the flavor or texture you want. Banana bread is forgiving, but the best versions come from changing one thing at a time.

If You Want…Use This Direction
Mild classic banana breadUse fresh discard or active starter.
More sourdough tangUse older but healthy fridge discard.
Softer crumbUse neutral oil instead of melted butter.
Richer flavorUse melted butter and dark brown sugar.
Less sweetnessReduce brown sugar to about 125 g.
Better structureDo not skip the baking powder.
Nutty banana breadAdd 85–115 g walnuts or pecans.
Dessert-style loafAdd 85–115 g chocolate chips.
Eggless loafUse flax eggs and cool the loaf completely before slicing.
Lowest risk of a wet centerWeigh the banana and bake to 200–205°F / 93–96°C.

Choose One Direction First

For a first bake, choose one direction and keep the rest of the loaf simple. Then you will know whether your repeat version is the buttery classic, the softer oil loaf, the walnut breakfast loaf, or the chocolate-chip treat.

What Not to Change the First Time

For your first loaf, do not increase the banana, increase the discard, remove the baking powder, and switch flour types all at once. Make the base version once, then adjust sweetness, fat, mix-ins, or tang after you know how your pan and oven behave.

If you already know your favorite banana bread style — walnut, chocolate chip, less sweet, extra tangy, or warm with butter — choose that direction first. Most people find their house version after two bakes: one classic loaf, then one small adjustment based on what they liked most.

How to Make Sourdough Banana Bread

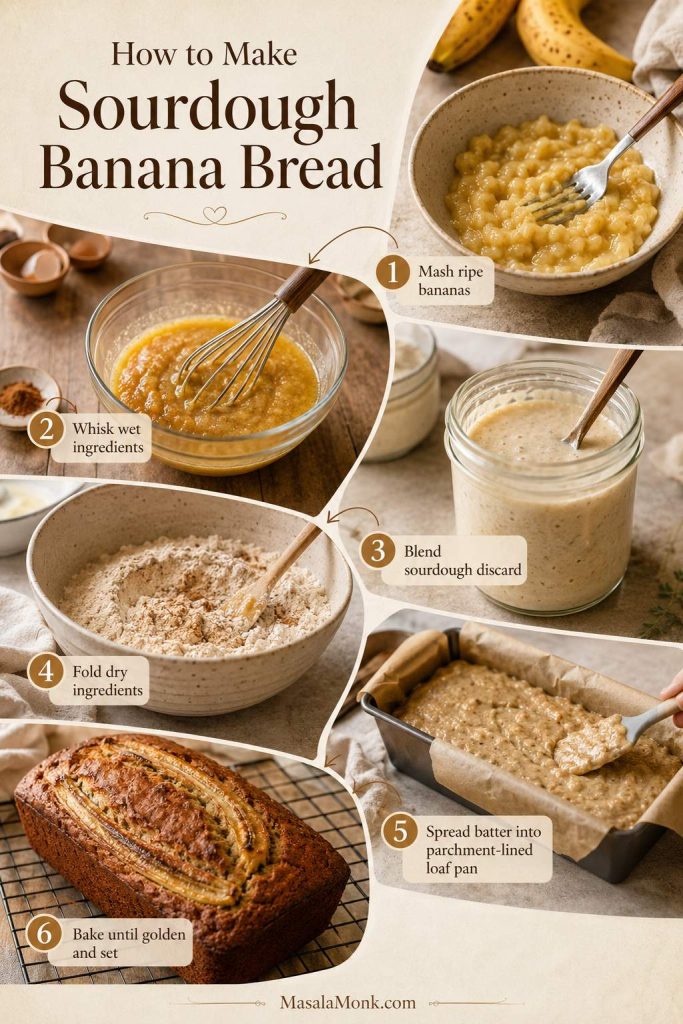
The method for this sourdough banana bread recipe is straightforward, but the order matters. Blend the discard into the wet ingredients before adding flour. That way, you avoid sticky sourdough streaks and get a more even crumb.

Step-by-step sourdough banana bread process showing mashed bananas, wet ingredients, sourdough discard, dry ingredients, loaf pan batter, and baked loaf.
Once the discard is fully blended into the wet mixture, the flour can be folded in gently without leaving sticky starter streaks.

1. Prepare the Pan and Oven

Preheat the oven to 350°F / 175°C. Then line a 9×5-inch / 23×13 cm loaf pan with parchment paper, leaving a little overhang so the baked loaf is easy to lift out.

If your loaf pan looks more than about three-quarters full after adding the batter, set a small amount aside and bake it as 1–2 muffins. An overfilled pan can rise unevenly or stay wet in the center.

2. Mash and Measure the Bananas

Mash the bananas until mostly smooth with a few small lumps. Then measure out 340–360 g. A few soft banana pieces are fine; however, large chunks can create wet pockets in the loaf.

3. Mix the Wet Ingredients

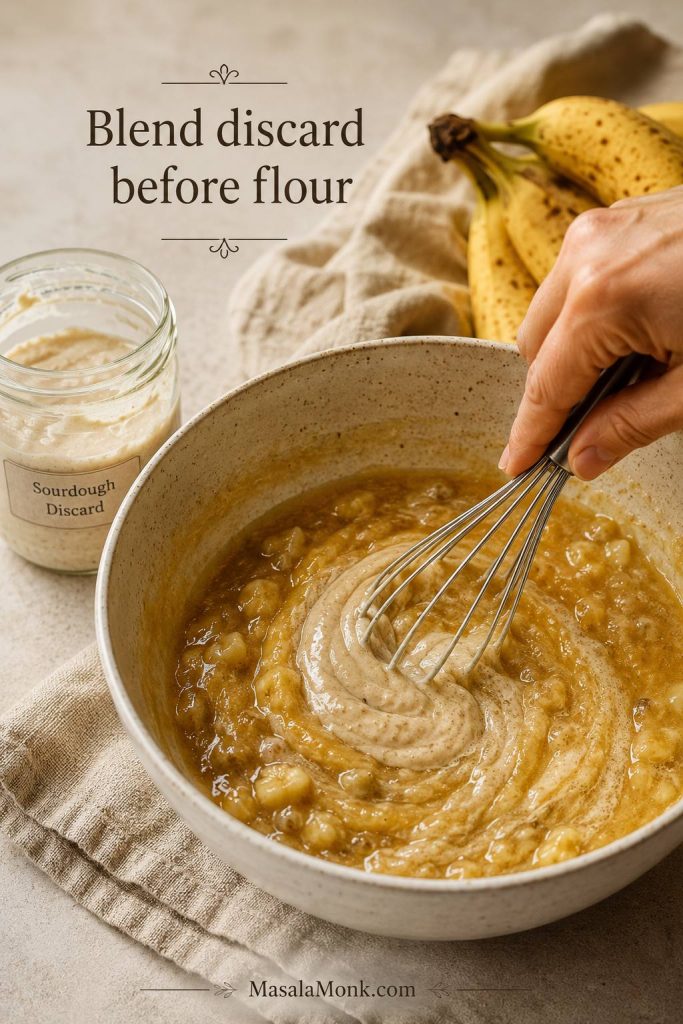
Whisk melted butter and brown sugar until glossy. Next, add the eggs, vanilla, mashed banana, and sourdough discard. Whisk until the discard is fully blended into the mixture.

At this point, the mixture should look glossy and loose, with no visible streaks of discard.

Hand whisking sourdough discard into banana bread wet ingredients in a bowl before flour is added.
At this stage, look for a glossy banana mixture with no visible discard streaks before the dry ingredients go in.

4. Fold in the Dry Ingredients

Add flour, baking soda, baking powder, salt, and cinnamon. Sprinkle the baking soda, baking powder, salt, and cinnamon evenly over the flour before folding so they distribute more evenly. Then fold gently with a spatula until no dry flour remains. Stop as soon as the batter comes together.

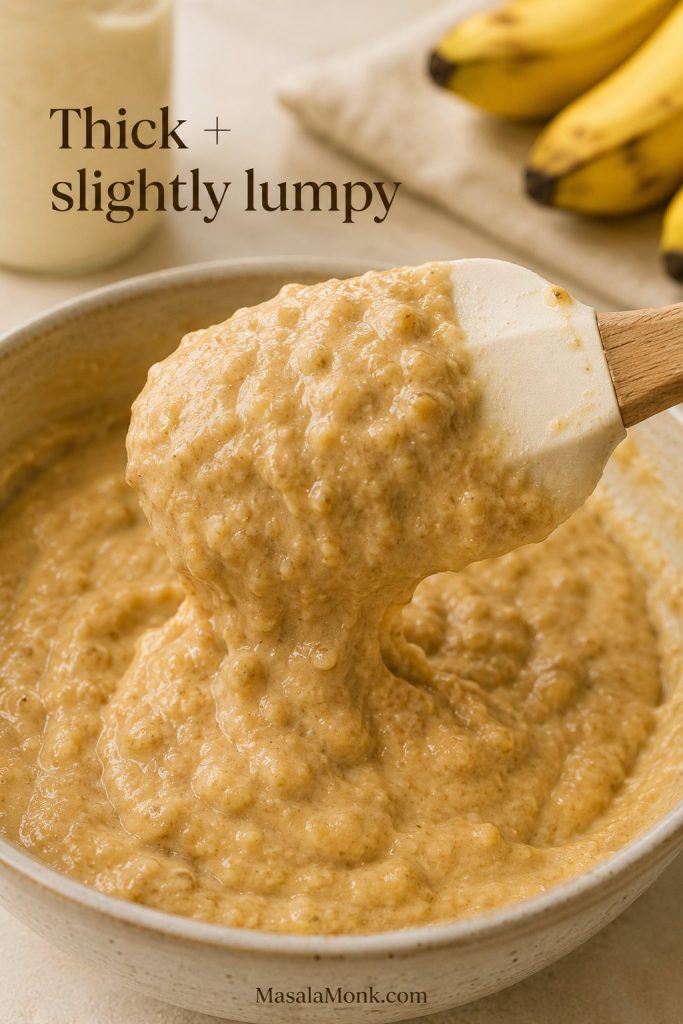
Thick slightly lumpy sourdough banana bread batter lifted with a spatula and the text “Thick + slightly lumpy.”
A thick, slightly lumpy batter is exactly what you want because it means the flour has been mixed in without overworking the loaf.

The batter should look thick and slightly lumpy, not smooth like cake batter. It should mound slightly in the pan; if it pours like pancake batter, the loaf may need longer to bake. A slightly uneven batter is a good sign here. Smooth, overworked batter is more likely to bake up heavy.

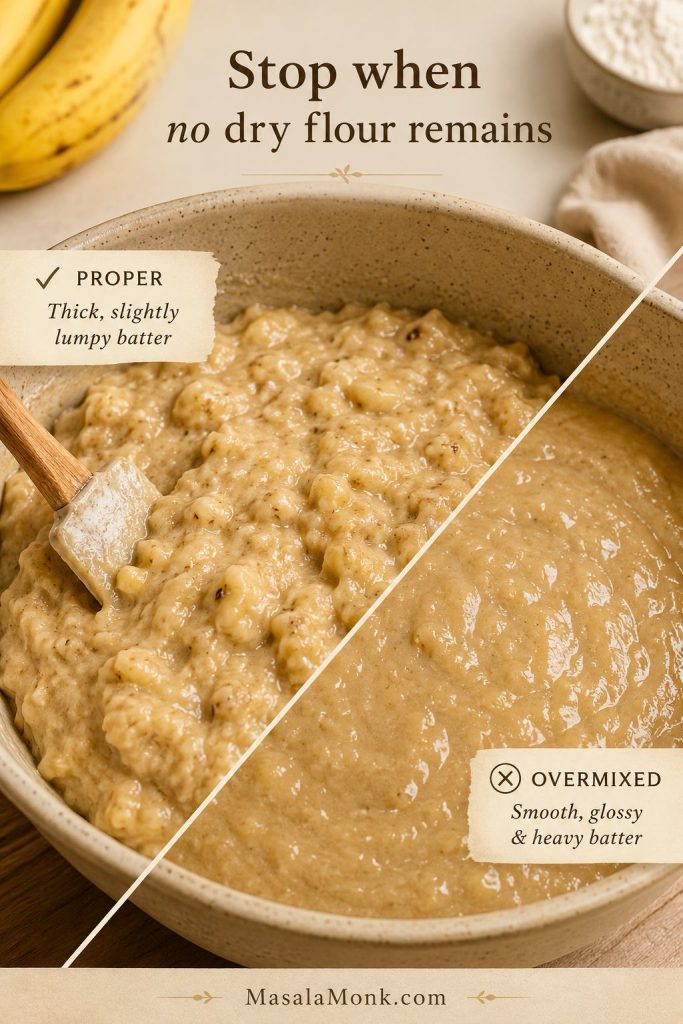
Comparison of properly mixed banana bread batter and overmixed batter with the text “Stop when no dry flour remains.”
A few small lumps are fine because overmixing can make banana bread dense, especially in a moist sourdough discard batter.

In fact, overmixing develops gluten and can make banana bread dense, tough, or heavy. If your past banana bread turned dense or gummy, compare your batter to the troubleshooting section before changing the recipe.

5. Add Mix-Ins

Fold in walnuts, pecans, or chocolate chips, if using. Keep the amount moderate so the loaf still rises and slices cleanly.

6. Bake and Cool

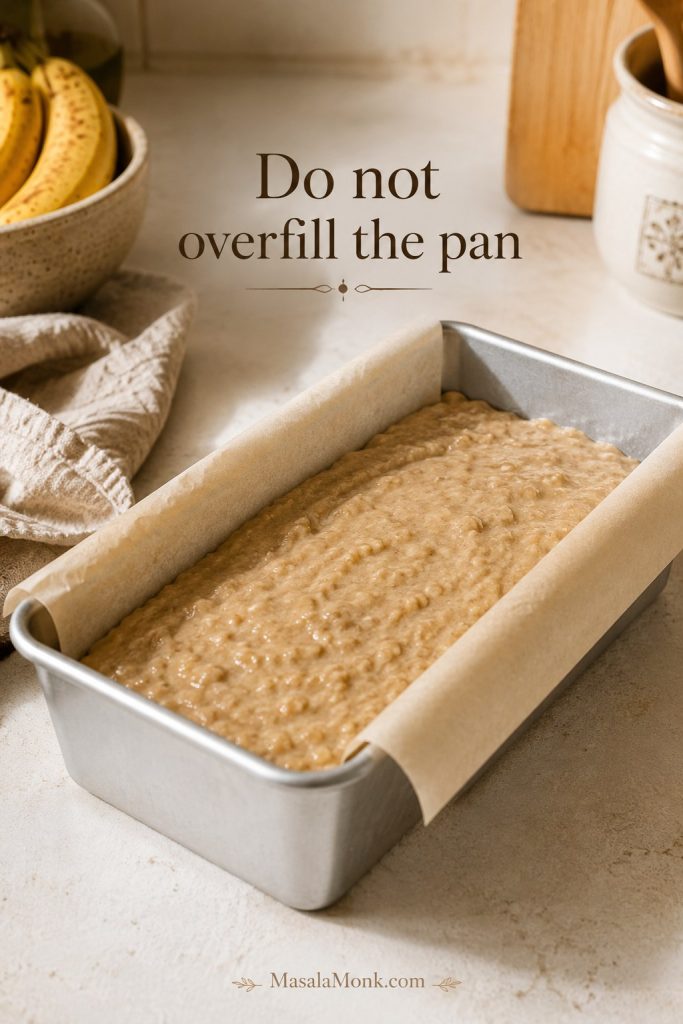
Spread the batter into the prepared pan and smooth the top. The batter should sit below the rim of the pan, with room to rise.

Sourdough banana bread batter spread in a parchment-lined light metal loaf pan with the text “Do not overfill the pan.”
A 9×5 light metal loaf pan gives the batter enough room to rise, while parchment makes the cooled loaf easier to lift out.

Bake for 55–65 minutes, or until the highest part of the loaf feels firm and no wet batter remains. When it is done, the top should look set and gently domed, not jiggly.

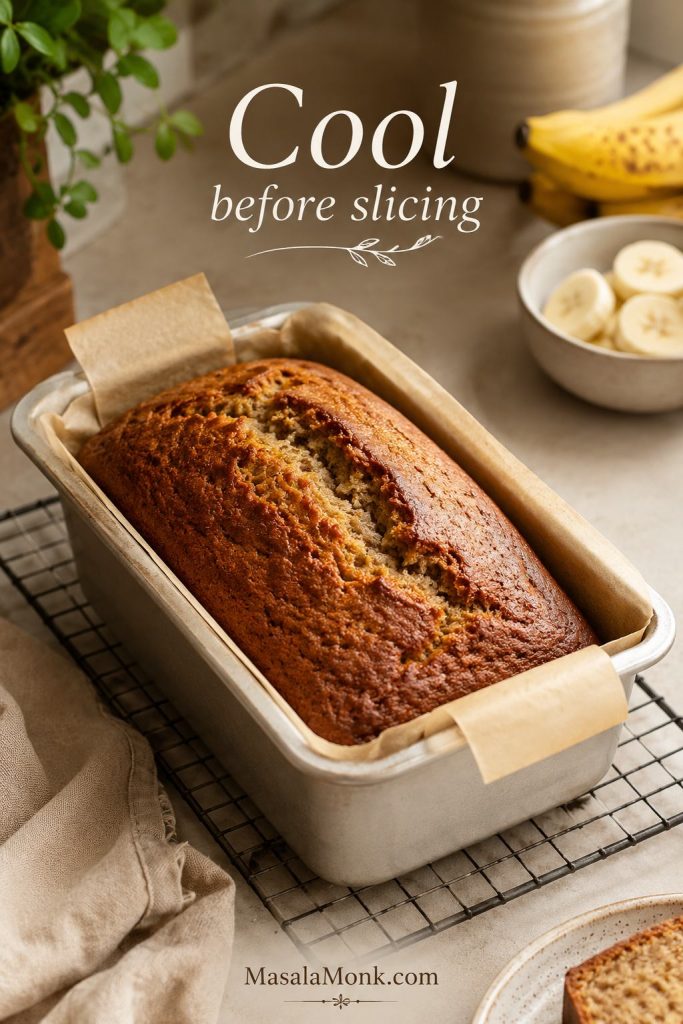
Finally, cool in the pan for 10–20 minutes. After that, lift the loaf onto a rack and let it cool before slicing.

Freshly baked sourdough banana bread cooling in a parchment-lined metal loaf pan on a wire rack with the text “Cool before slicing.”
The loaf keeps firming as it cools, so this resting time is part of the texture — not just a waiting step.

Important Cooling Note

Warm banana bread is tempting, but slicing too early can make the middle seem wetter than it really is. Let it cool until the crumb has time to set.

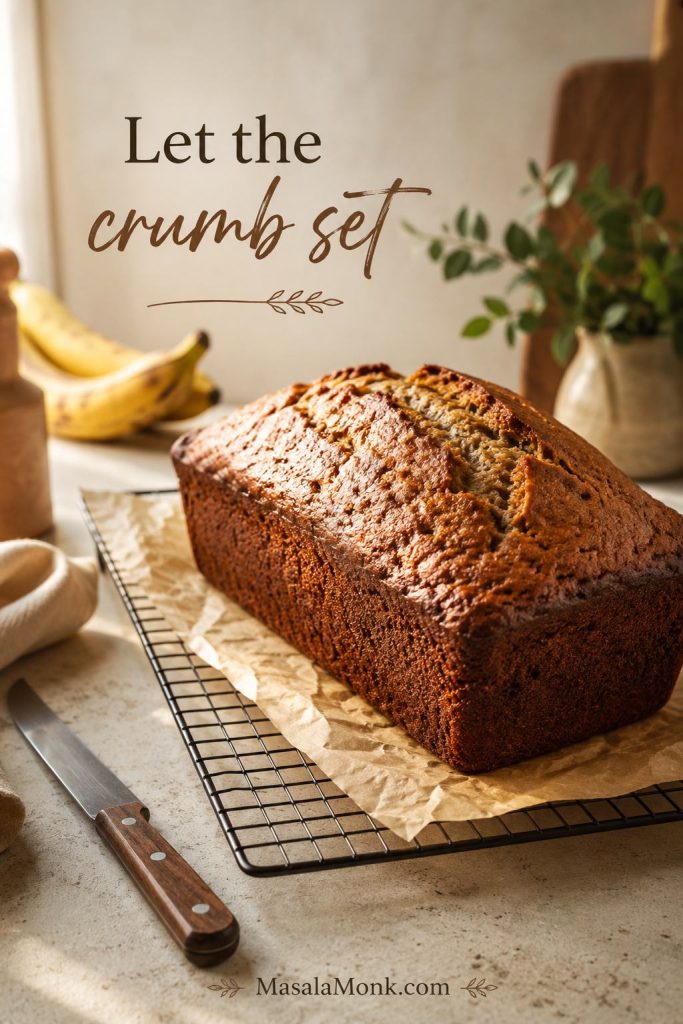
Whole sourdough banana bread loaf cooling on a rack with a knife nearby and the text “Let the crumb set.”
Cutting too soon can make a finished loaf seem underbaked, so give the crumb time to settle before the first slice.

Best Pan, Oven Temperature, and Bake Time for Sourdough Banana Bread

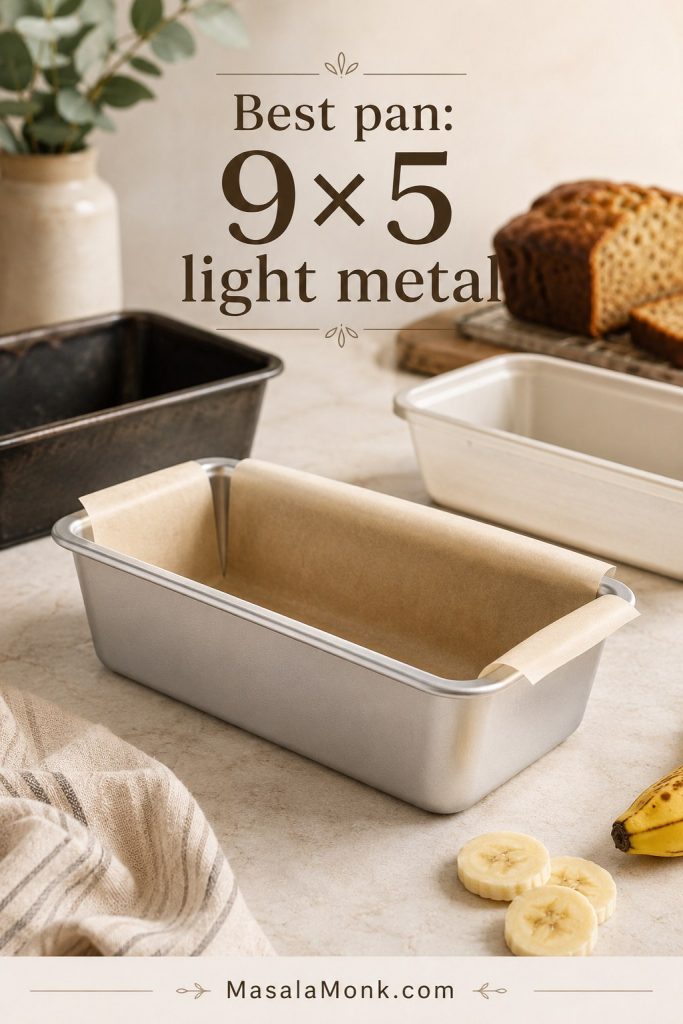
For this sourdough banana bread recipe, the most reliable setup is a 9×5-inch light metal loaf pan at 350°F / 175°C. Light metal helps the loaf bake evenly without the sides darkening too quickly.

Light metal 9×5 loaf pan lined with parchment beside other loaf pans and the text “Best pan: 9×5 light metal.”
Pan choice affects bake time: a light metal 9×5 pan helps the sides and center finish more evenly.

Banana bread is naturally dense and moist, so bake time is only a guide. The real test is whether the loaf is baked through at its tallest point.

That is why the doneness test matters more than the exact minute on the timer.

Pan or Oven SituationWhat to Do
9×5-inch light metal panMost reliable setup for this recipe. Start checking around 55 minutes.
8½×4½-inch panThe loaf will be taller and may need extra time in the middle.
Dark metal panBrowns faster. Tent with foil if the top darkens before the middle is done.
Glass or ceramic panMay bake differently and often needs a few extra minutes. Check the thickest part carefully.
Top browning too fastTent loosely with foil during the last part of baking.
Outside dark but middle wetNext time, bake at 325°F / 163°C for longer so the loaf has more time to bake through.

How to Tell When the Loaf Is Done

If your first worry is a wet middle, you are not alone. Banana bread often looks done on top before the loaf has finished baking through, so test the tallest part instead of trusting the browned crust.

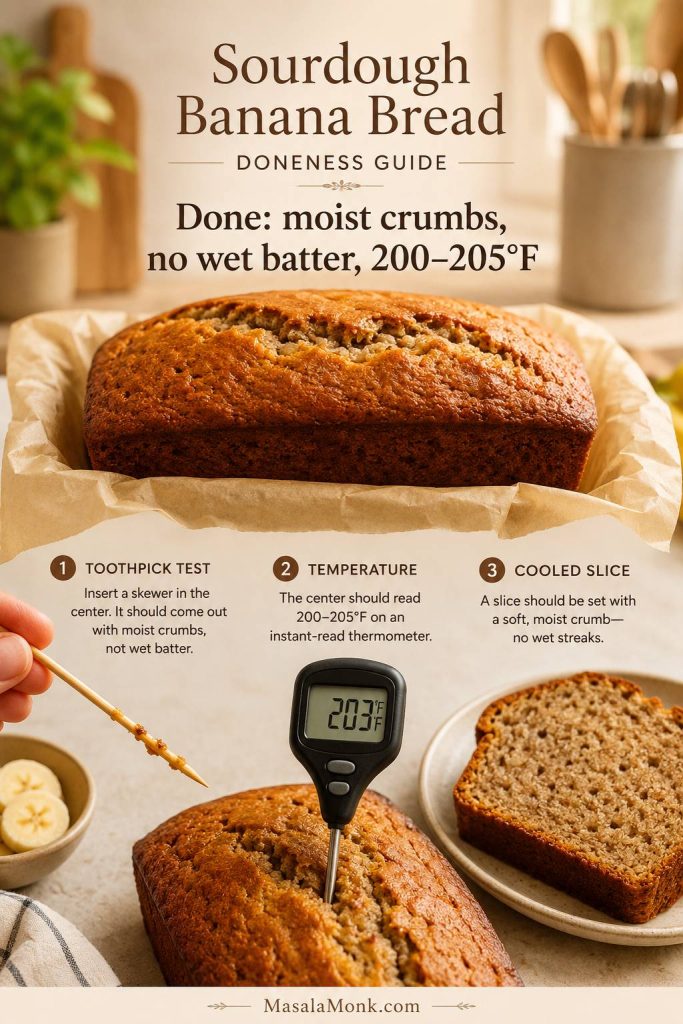
Sourdough banana bread doneness guide with skewer crumbs, thermometer reading 203 degrees Fahrenheit, and a clean slice.
Because banana bread browns before the center always finishes, the thermometer and crumb test are more reliable than color alone.

A browned top is a clue, not a guarantee. The inside still needs time to settle into a soft, sliceable crumb.

  • A skewer inserted into the center should come out without wet batter.
  • A few moist crumbs are fine.
  • The top should spring back lightly when pressed.
  • The thickest part of the loaf should read about 200–205°F / 93–96°C on an instant-read thermometer.

Because banana smears on a skewer can look wet, look for raw batter rather than soft banana. When in doubt, give the loaf a few more minutes, especially if you used a smaller pan, extra banana, or runny discard.

How to Fix Gummy, Dense, or Dry Sourdough Banana Bread

Most texture problems in sourdough discard banana bread come down to moisture, mixing, or bake time. Once you know which one caused the problem, the next loaf is much easier to fix.

If your loaf failed once, do not assume the recipe is hopeless. Sourdough banana bread usually goes wrong for one of four reasons: too much banana, very wet discard, overmixing after flour, or pulling the loaf before the thickest part has finished baking.

Match the Problem Before You Change the Recipe

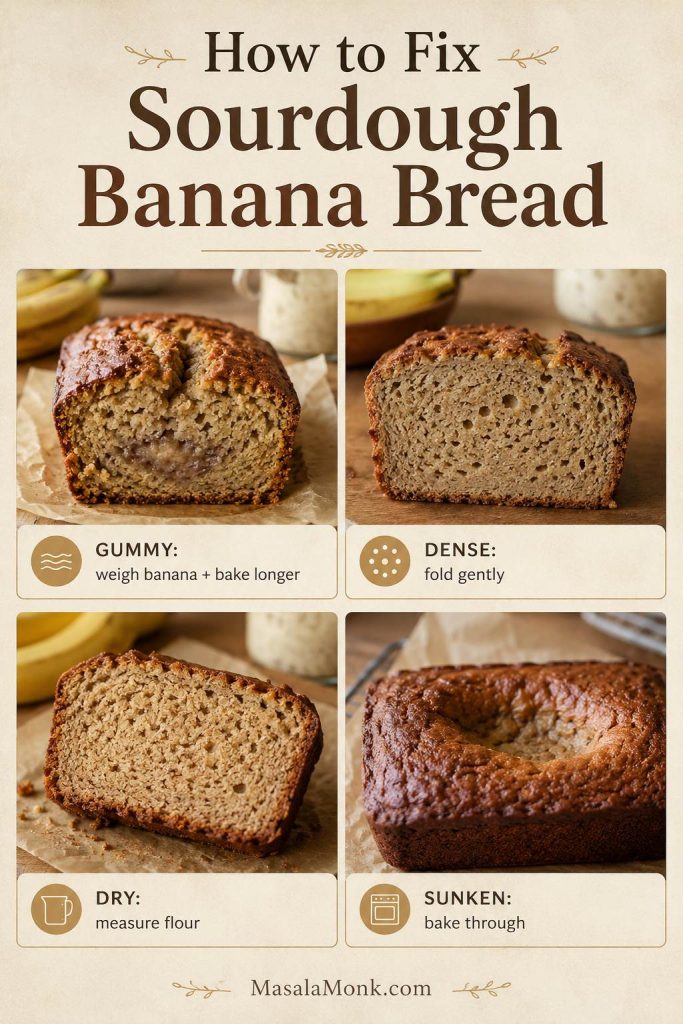
Troubleshooting board for sourdough banana bread with gummy, dense, dry, and sunken examples plus short fixes.
If a loaf fails, the fix is usually practical: adjust banana moisture, mix more gently, measure flour carefully, or bake a little longer.
ProblemLikely CauseFix
Gummy centerToo much banana, underbaking, overmixing, or slicing too soonWeigh the banana, bake longer, fold the flour gently, and cool before slicing.
Dense loafDiscard not blended well or batter overmixed after flourWhisk discard fully into wet ingredients, then fold dry ingredients lightly.
Dry loafToo much flour or overbakingWeigh flour or spoon-and-level it. Check a few minutes earlier next time.
Too sourOlder, very acidic discardUse fresher discard or active starter for a milder loaf.
Sunken middleUnderbaked center or too much moistureBake until the thickest part tests clean and avoid adding extra banana beyond the recipe range.
Dark outside, raw middleOven too hot, pan too dark, or loaf too tallTent with foil, use a lighter pan, or bake lower and longer next time.
Sticky sourdough streaksDiscard not fully mixed into wet ingredientsWhisk the discard with banana, eggs, butter, and sugar before adding flour.

If you only change one thing next time, weigh the mashed banana. It is the small, unglamorous step that solves more banana bread texture problems than almost anything else.

Once you know the cause, go back to the ingredient measurements, mixing method, or doneness cues rather than changing everything at once.

Sourdough Banana Bread Variations and Mix-Ins

Once this sourdough banana bread recipe works for you, the variations are easy. Keep mix-ins moderate and avoid adding extra wet ingredients unless you adjust the bake time.

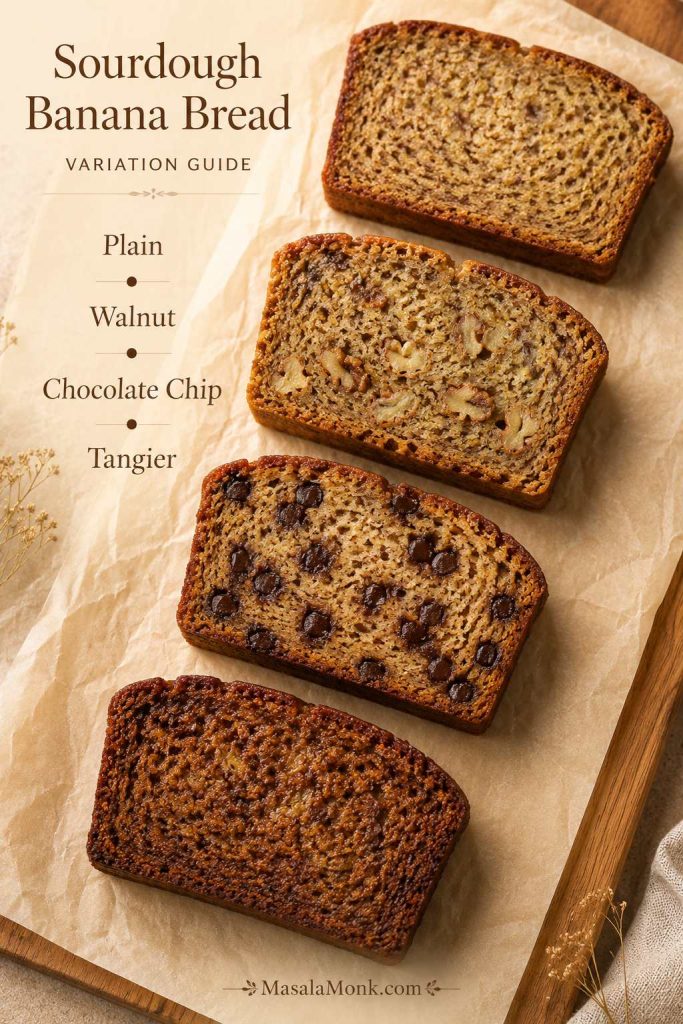
Sourdough banana bread variation guide with plain, walnut, chocolate chip, and tangier slices arranged on parchment.
Start with the base loaf first; then, once you know the texture, choose a walnut, chocolate chip, or tangier discard version.

Walnut Sourdough Banana Bread

Fold in 85–115 g chopped walnuts. Toasting the walnuts first gives a deeper flavor and helps them stay crisp inside the loaf.

Chocolate Chip Sourdough Banana Bread

Fold in 85–115 g chocolate chips. For a more dessert-like loaf, sprinkle a few extra chips on top before baking.

Less-Sweet Version

Reduce the brown sugar to about 125 g. The loaf will be less moist and less caramel-like, but still pleasant if your bananas are very ripe. However, avoid cutting the sugar too aggressively because sugar affects softness, browning, and shelf life.

Eggless Version

For an eggless version, use 2 flax eggs and expect a slightly softer, denser crumb. Let the loaf cool completely before slicing so the structure has time to set. This flax egg for quick breads guide explains the basic ratio and when flax eggs work best.

Healthier Banana Bread Direction

For a more wholesome loaf, replace up to half the all-purpose flour with whole wheat flour, reduce the sugar slightly, or use part Greek yogurt in place of a little butter. For a separate banana-bread style built around oat flour, see this healthy banana bread with oat flour.

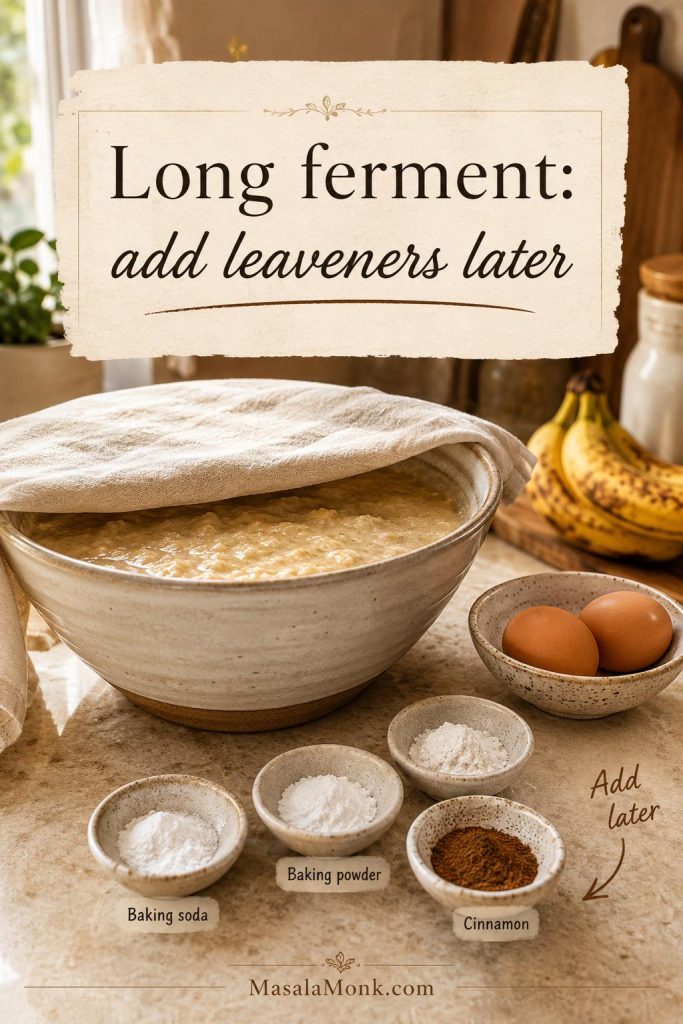
Optional Long-Fermented Version

The same-day version gives the most classic banana bread texture, so start there if this is your first loaf. However, if you want deeper sourdough flavor, you can use a long-fermented method as long as the final leaveners are added close to baking.

For a true long-fermented version, mix the flour, sourdough discard, mashed banana, melted butter, and brown sugar first. Cover and refrigerate overnight. The next day, let the mixture sit at room temperature for 20–30 minutes so it softens slightly. Beat the eggs and vanilla together first, then stir them into the fermented mixture. Sprinkle in the baking soda, baking powder, salt, and cinnamon, then fold until evenly combined and bake right away.

Long-fermented sourdough banana bread setup with covered batter, eggs, baking soda, baking powder, cinnamon, and the text “Long ferment: add leaveners later.”
The overnight rest is for flavor and fermentation, while the eggs, baking soda, and baking powder wait until baking day for better lift.

If the mixture looks very stiff the next day, do not panic. Let it soften at room temperature, then stir gently after adding the beaten eggs and vanilla.

The texture will be tangier and slightly less cake-like than the same-day loaf. Do not add the baking soda or baking powder before the overnight rest, because they give the loaf its best lift when added closer to baking.

Can This Become Muffins?

The flavor works beautifully as muffins, but the pan, fill level, and bake time change. Use this loaf as the flavor base, then bake muffin versions separately rather than treating the loaf timing as a direct swap. For another portioned breakfast-bake idea, these high protein muffins with banana or applesauce are useful when you want something meal-prep friendly.

How to Serve Sourdough Banana Bread

The first day, this loaf is soft enough to eat plain once it has cooled. For a warmer, richer slice, add salted butter, cream cheese, peanut butter, or a little honey.

The next day, toast a slice lightly until the edges crisp and the banana aroma comes back. That is also the best way to revive a frozen slice.

It is humble enough for a weekday breakfast and good enough to wrap up for someone who needs a little comfort. It also disappears slice by slice: breakfast, afternoon tea, lunchbox treat, late-night snack.

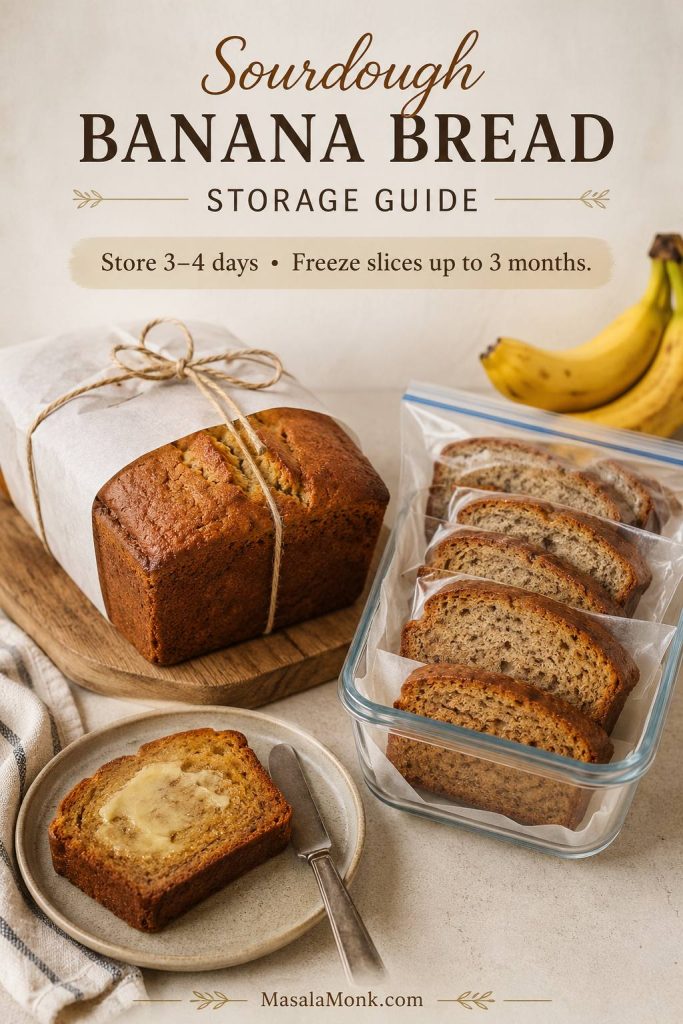
How to Store and Freeze Sourdough Banana Bread

Let the loaf cool completely before wrapping. Otherwise, warm banana bread traps steam, and that can make the crust sticky and the middle feel wetter than it should.

Storage guide for sourdough banana bread with wrapped loaf, sliced bread in a freezer container, and a buttered slice on a plate.
Wrap the loaf once it is fully cool, and freeze slices separately so you can toast one piece whenever you need it.
  • Room temperature: Wrap well and keep for 3–4 days.
  • Refrigerator: Useful in hot or humid weather, but the loaf may dry out faster.
  • Freezer: Freeze slices for up to 3 months for best texture.
  • To reheat: Warm gently, toast lightly, or microwave a slice briefly until soft.

Instead of freezing only the whole loaf, freeze slices so you can warm one piece at a time for breakfast, tea, or a quick sweet snack.

If you are baking ahead, the recipe card has the core times, pan size, and storage note in one place.

For general food-safe freezer guidance, the USDA’s overview of freezing and food safety is a helpful reference.

Printable Sourdough Banana Bread Recipe Card

Sourdough Banana Bread Recipe

This moist sourdough discard banana bread turns ripe bananas and starter discard into a soft, sliceable loaf with brown sugar warmth, gentle tang, and classic banana bread comfort.

Prep Time15 minutes

Cook Time55–65 minutes

Total Time1 hour 10 minutes to 1 hour 20 minutes, plus cooling

Yield1 loaf

Equipment

  • 9×5-inch / 23×13 cm loaf pan
  • Parchment paper
  • Mixing bowl
  • Whisk
  • Rubber spatula
  • Kitchen scale, recommended
  • Cooling rack
  • Instant-read thermometer, optional but helpful

Ingredients

  • 340–360 g very ripe bananas, peeled and mashed, about 1½ cups
  • 113 g sourdough discard, about ½ cup, ideally from a starter fed with equal weights flour and water
  • 240 g all-purpose flour, about 2 cups
  • 150 g packed brown sugar, about ¾ cup
  • 113 g unsalted butter, melted and cooled, about ½ cup
  • 2 large eggs
  • 2 teaspoons vanilla extract
  • 1 teaspoon baking soda
  • 1 teaspoon baking powder
  • ½ teaspoon fine salt
  • 1 teaspoon ground cinnamon, optional
  • 85–115 g chopped walnuts, pecans, or chocolate chips, optional

Instructions

  1. Preheat the oven to 350°F / 175°C. Line a 9×5-inch loaf pan with parchment paper.
  2. Mash the bananas and measure out 340–360 g. Set aside.
  3. In a large bowl, whisk melted butter and brown sugar until glossy.
  4. Add eggs, vanilla, mashed banana, and sourdough discard. Whisk until the discard is fully blended into the wet ingredients.
  5. Add flour, baking soda, baking powder, salt, and cinnamon. Sprinkle the leaveners and salt evenly over the flour, then fold gently with a spatula until no dry flour remains.
  6. Fold in walnuts, pecans, or chocolate chips, if using.
  7. Spread the batter into the prepared loaf pan and smooth the top.
  8. Bake for 55–65 minutes, or until the top is domed, the thickest part feels set, and a skewer inserted into the center shows moist crumbs but no wet batter. If the top browns too quickly, tent loosely with foil.
  9. The loaf is done when the thickest part reads about 200–205°F / 93–96°C.
  10. Cool in the pan for 10–20 minutes, then lift onto a rack and cool before slicing.

Recipe Notes

  • Fresh discard gives a mild flavor. Older discard gives a stronger sourdough note.
  • Active starter can be used in the same amount by weight.
  • Do not add extra banana without expecting a longer bake time.
  • For a less-sweet loaf, reduce brown sugar to about 125 g.
  • For a softer oil-based loaf, replace the melted butter with 100–110 g neutral oil.
  • For blueberries, use 75–100 g and avoid adding extra banana at the same time.
  • For a long-fermented version, use a separate method where the flour, discard, banana, butter, and sugar rest first, then add the eggs and final leaveners closer to baking.
  • Store wrapped at room temperature for 3–4 days, or freeze slices for up to 3 months.
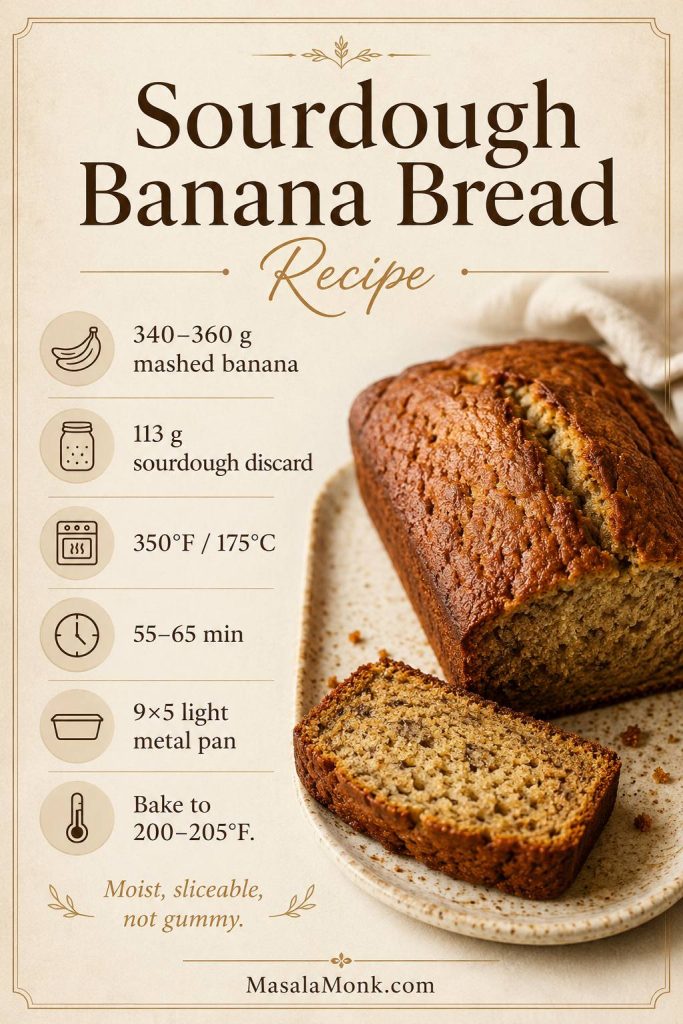
Save these core cues for repeat bakes: measured banana, 113 g discard, a 9×5 pan, and a 200–205°F finish.

Sourdough banana bread recipe card with loaf and slice plus key cues for mashed banana, sourdough discard, oven temperature, bake time, pan size, and doneness temperature.
Save the core cues for later: measured banana, 113 g discard, a 9×5 pan, and a 200–205°F finish make the loaf easier to repeat.

More Ways to Use Ripe Bananas

If you still have bananas on the counter after this loaf, this banoffee pie recipe takes them in a caramel-and-cream dessert direction. For a no-oven breakfast, banana oatmeal pancakes use ripe banana for natural sweetness and moisture.

Once this base loaf works for you, it becomes a reliable discard recipe to return to whenever bananas go brown. After that, the walnut, chocolate chip, oil-based, and extra-tangy versions become easy little adjustments rather than brand-new recipes.
Once you know how your oven bakes this loaf, it becomes one of those quiet kitchen recipes you do not need a special occasion for: brown bananas, a little discard, one bowl, and a loaf that makes the next morning easier.
FAQs

Does sourdough banana bread taste sour?

It should taste like banana bread with a little extra depth, not like sour bread. Fresh discard gives the mildest flavor. Older fridge discard creates a stronger tang, especially if it has been sitting for several days.

Can I use active sourdough starter instead of discard?

Yes. Use the same amount by weight. Active starter usually gives a slightly lighter loaf and a milder sourdough flavor, while older discard gives more tang.

Is this a sourdough starter banana bread?

Yes. You can make it with sourdough discard or active starter. However, it is still a quick bread, so baking soda and baking powder do the main lifting while the starter adds moisture, acidity, tenderness, and flavor.

Why is my loaf gummy in the middle?

The most common causes are too much banana, underbaking, overmixing, or slicing before the loaf has cooled. Use 340–360 g mashed banana, fold the flour gently, and bake until no wet batter remains in the thickest part.

How ripe should bananas be for banana bread?

Use bananas with brown spots or fully brown skins. They should smell sweet and mash easily. Firm yellow bananas do not give the same sweetness, moisture, or banana flavor.

Can I use frozen bananas?

Yes. Thaw them first, drain off the watery liquid, then measure the mashed banana. Frozen bananas release more moisture than fresh ripe bananas, so keeping the amount in the 340–360 g range matters even more.

Should I use baking soda, baking powder, or both?

Both work best in this recipe. Baking soda reacts with the acidity in the bananas, brown sugar, and discard, while baking powder adds backup lift for a more reliable loaf.

What happens when the discard is very old?

Older discard can make the loaf tangier. That can be delicious when the discard smells pleasantly sour, but avoid discard that smells spoiled, moldy, or sharply unpleasant. For a mild loaf, use fresh discard or active starter.

Does the discard make the bread rise?

Not much. In this quick bread, baking soda and baking powder do the main lifting. The discard mostly adds moisture, acidity, tenderness, and flavor.

Can I make this dairy-free?

Yes. Replace the melted butter with 100–110 g neutral oil. The loaf will taste less buttery, but the crumb will stay soft and moist. This makes the loaf dairy-free, but not egg-free unless you also use the flax egg option.

Can I use whole wheat flour?

Yes, but start by replacing only half the all-purpose flour with whole wheat flour. A full whole-wheat loaf can taste heavier and absorb more moisture. If the batter feels unusually stiff, add 1–2 tablespoons of milk, yogurt, or water.

Can this sourdough banana bread recipe be made ahead?

Yes. The loaf keeps well at room temperature for 3–4 days and freezes nicely in slices. In fact, the flavor often tastes even better the next day because the banana, brown sugar, and sourdough notes settle together.

Can I bake this as muffins?

The batter can inspire muffins, but loaf timing does not translate directly. Muffins need a different pan, shorter bake time, and careful fill level. For the cleanest result, treat sourdough banana muffins as their own recipe rather than simply shrinking the loaf.

If you make this sourdough banana bread recipe, leave a comment with three details: fresh discard or older discard, butter or oil, and plain, walnut, or chocolate chip. Those notes help the next baker choose a version — and I would love to know which one becomes your repeat loaf.

Back to top

Posted on 1 Comment

Sourdough Focaccia Recipe

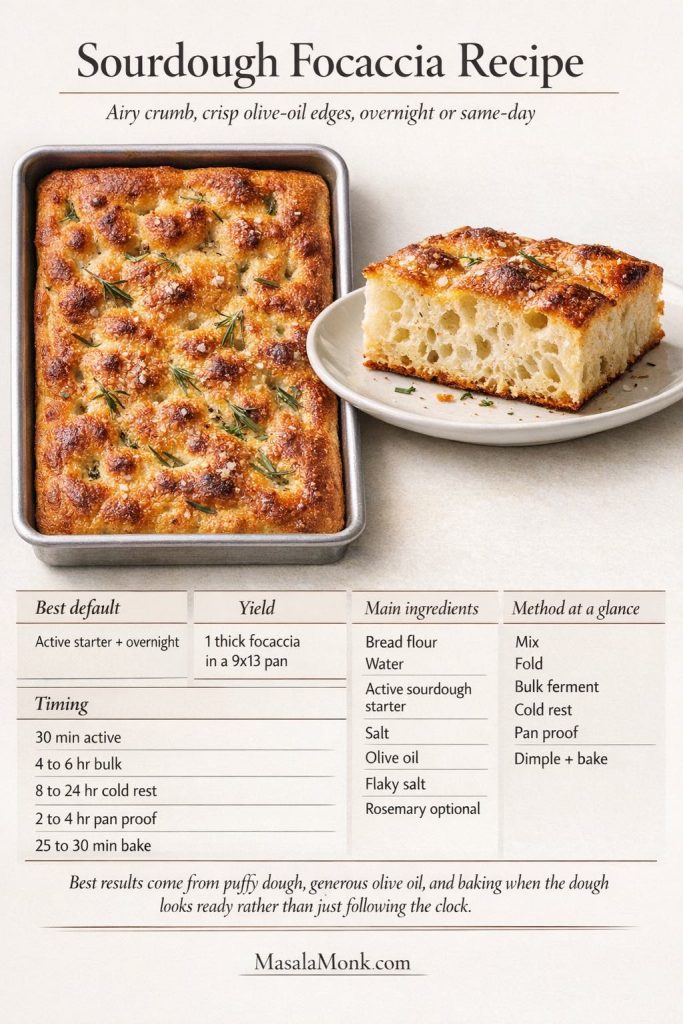
Sourdough focaccia recipe hero image showing thick golden focaccia in a metal pan with airy open crumb, deep dimples, olive oil, flaky salt, and rosemary.

A good sourdough focaccia recipe should give you three things: a light, airy crumb, crisp olive-oil edges, and a method that feels clear before you even start mixing. This version is built around active sourdough starter, an overnight rest, and a 9×13-inch metal pan because that is the easiest way to get the best balance of lift, flavor, structure, and ease at home.

Real baking is rarely that tidy, though. Some days your starter is strong and you want focaccia by dinner. Other days you want to use discard and keep the dough moving without gambling on it. So this guide shows you the main route first, then helps you adjust when real life gets in the way. Just as importantly, it shows you what the dough should look and feel like at each stage, because that matters far more than blindly following the clock.

Quick answers before you bake

Best default route: active starter, overnight rest, 9×13-inch metal pan. This is the safest place to start.

Can you make it the same day? Yes, if your starter is strong and your kitchen is warm. You just need to watch the dough more closely.

Can you use discard? Yes. It usually moves more slowly, though, unless you add a little yeast.

Best pan: a well-oiled 9×13-inch metal pan. It gives the best browning, the best structure, and the fewest surprises.

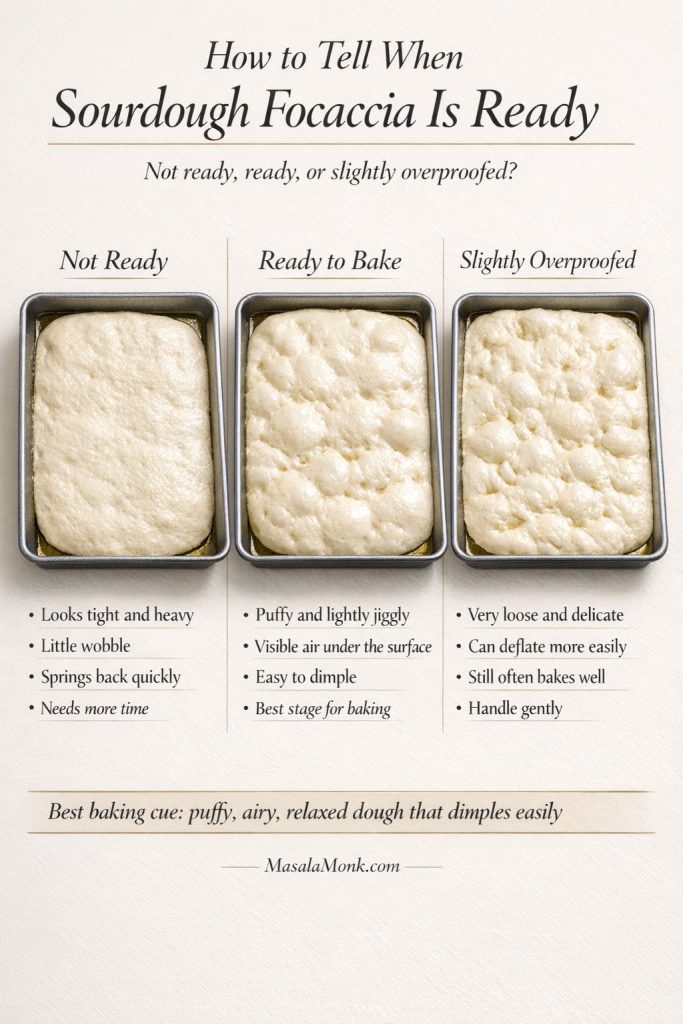
Main success cue: bake when the dough looks puffy and lightly jiggly. If it still looks tight and reluctant, it is not ready yet.

Also Read: Easy English Scone Recipe

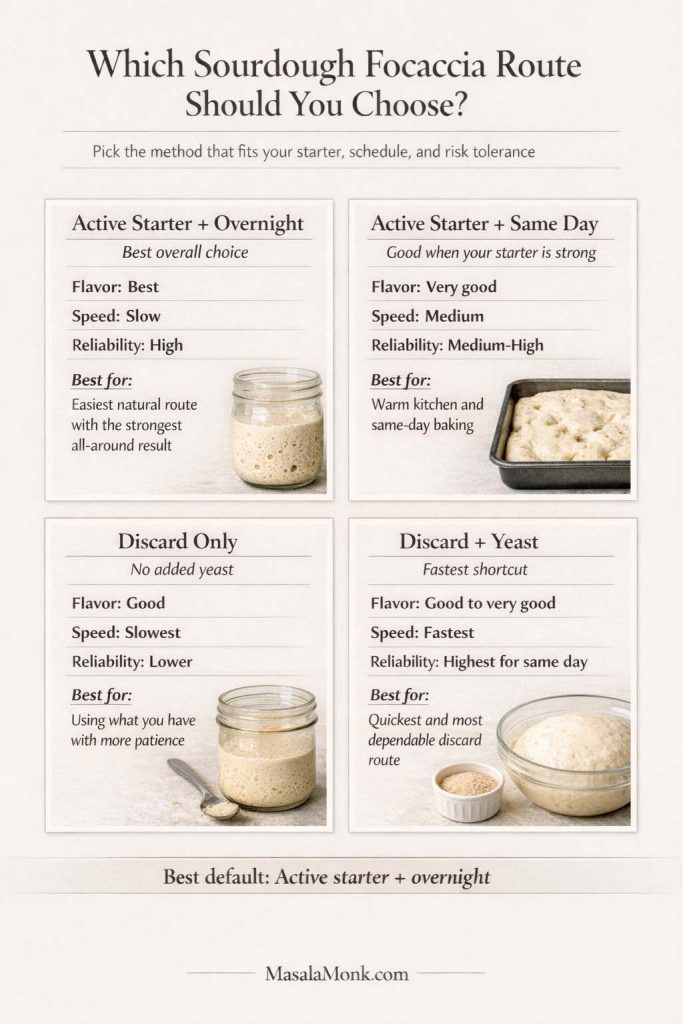
Choose your sourdough focaccia route

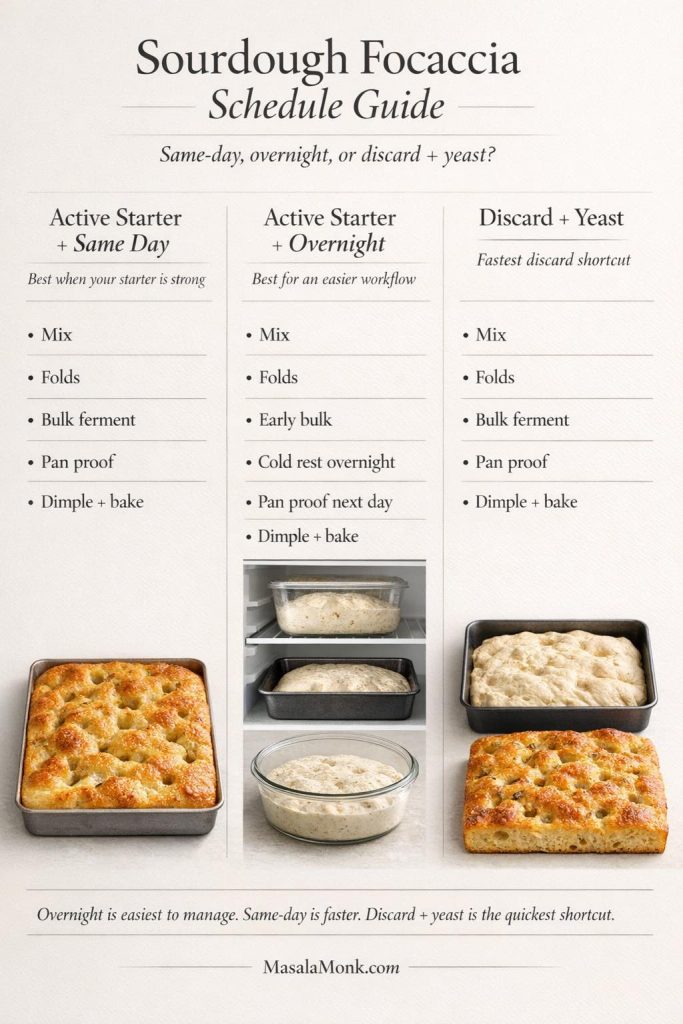
For the best overall result, choose active starter + overnight. This is the route I would hand to most people first. It gives you the best natural lift, the best flavor, and the calmest workflow.

Sourdough focaccia route guide comparing active starter overnight, active starter same day, discard only, and discard plus yeast options.
Start with active starter and an overnight rest when you want the strongest all-around result, move to same-day when your starter is lively, use discard when flexibility matters more than speed, and bring in a little yeast when you want the quickest dependable shortcut.

Choose active starter + same day when your starter is lively, the room is warm, and you want focaccia on the table by dinner. It can turn out beautifully, but you do need to stay more tuned in because the dough can move faster than you expect.

Choose discard only when using what you already have matters more than speed. Focaccia is forgiving enough that this can still work well, especially because the dough is pan-baked, but it usually takes more patience.

Choose discard + yeast when you want the safest shortcut. If you want a fast same-day focaccia and do not want to bet everything on tired discard, this is the smart route.

Why this sourdough focaccia recipe works

High hydration gives the crumb its open, airy texture

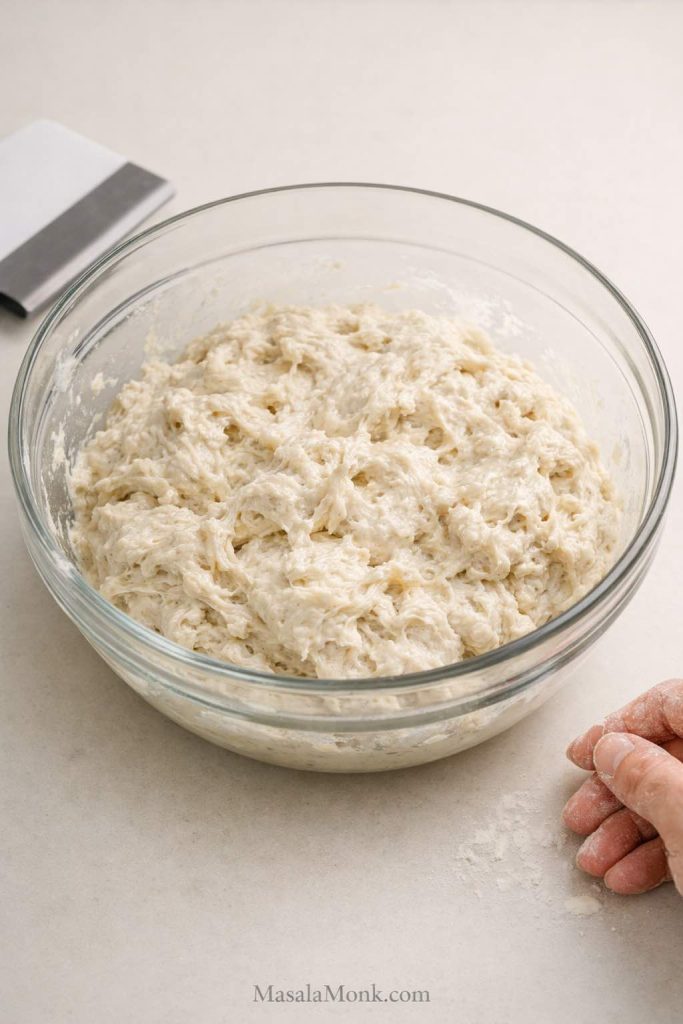
Focaccia dough should feel wetter and looser than many bakers expect at first. That extra water is what helps create the glossy irregular bubbles, soft interior, and lively bite that make focaccia feel worth baking. Add too much extra flour just to make the dough feel tidy and the crumb usually tightens fast.

Olive oil helps create the crisp, deeply golden edges

Focaccia needs enough olive oil under it and over it to bake the way focaccia should. The oil in the pan lightly fries the base as it bakes, while the oil on top helps browning, protects the surface, and gives the crust its rich golden finish. A cautious hand with the oil usually leads to a paler, drier result. Extra-virgin olive oil gives a stronger flavor, while regular olive oil tastes lighter; either one works. For a useful visual benchmark of how generously focaccia can be oiled without becoming greasy, King Arthur Baking’s big and bubbly focaccia is worth studying.

Time matters more than heavy kneading

This dough does not need aggressive kneading. It needs time, a few rounds of folds, and enough fermentation to become visibly airy before it goes into the oven. Put differently, the dough needs gas, softness, and some internal strength. Once it has those, the oven can do the rest.

A pan makes focaccia more forgiving than many sourdough loaves

One reason sourdough focaccia is such a strong beginner bake is that the pan supports the dough from start to finish. There is no shaping a boule, no scoring, and no need to trap oven spring inside a freestanding loaf. The pan also makes a wet dough much easier to handle, which is a big part of why focaccia is such a satisfying place to start.

Also Read: Sourdough English Muffins Recipe

Active starter vs discard: which should you use?

The best result in this article comes from active starter, and that is the route the full recipe follows. This formula assumes a 100% hydration starter, meaning equal weights of flour and water in the starter itself.

Use active starter for the strongest natural rise

Use active starter when it looks like a starter you would trust for a full loaf: domed, expanded, bubbly, and recently peaked or close to it. Ideally, it should have clearly risen after feeding and still look full of life. If it rose hours ago and has already collapsed back down, it is much less likely to give you the same lift here.

Use discard when flexibility matters more than maximum lift

Discard works well in focaccia because the dough is high-hydration and pan-baked. Even so, discard is usually weaker than active starter, so the rise may be slower, especially in a cool kitchen or on a tighter schedule. Serious Eats has a useful sourdough discard explainer if you want a broader look at how discard behaves in baking.

Use a little yeast with discard when you want speed and reliability

A small amount of instant yeast is the smartest shortcut when you want discard focaccia the same day. It does not make the bread less respectable. It simply makes the dough more dependable when the discard itself is not lively enough to do all the work quickly.

Also Read: White Russian Recipe: 7 Variants to Try, From Classic to Frozen

Same-day vs overnight sourdough focaccia

The main recipe below uses an overnight schedule because that route is easier to manage and easier to get right. Same-day focaccia is absolutely possible. Overnight focaccia is simply calmer, more flexible, and usually less stressful.

Choose the same-day method when you want bread by dinner

A same-day focaccia works best when your starter is active, the room is fairly warm, or you are willing to use a little yeast. It is a good route for spontaneous baking, but you do need to stay more attentive because the dough can move faster than you expect once the kitchen warms up.

Choose the overnight method when you want a calmer workflow

Overnight focaccia fits real life more easily. You can mix the dough in the evening, build some early strength, then refrigerate it and finish the pan proof the next day. The whole process feels less rushed, and the dough is usually calmer to handle.

Room temperature changes the timeline more than most recipes admit

At 76 to 78°F, dough can move much faster than it does at 68 to 70°F. That matters whether you are using active starter or discard. A warm kitchen can shorten fermentation by hours, while a cool kitchen can make the same dough seem stubborn. The dough matters more than the clock.

  • Warm kitchen, active starter: bulk fermentation can take around 4 to 5 hours.
  • Cool kitchen, active starter: bulk fermentation can take around 5 to 7 hours.
  • Discard only: expect more time unless the discard is unusually lively.
  • Discard + yeast: expect the fastest same-day route.

Ingredients for sourdough focaccia and what each one does

The main recipe below makes 1 thick focaccia in a 9×13-inch pan, enough for about 8 to 12 servings depending on how you cut it.

Main dough ingredients

  • 500 g bread flour
  • 400 g water
  • 100 g active sourdough starter, ripe and bubbly
  • 12 g fine sea salt
  • 20 g olive oil for the dough
  • 2 to 3 tablespoons olive oil for the pan
  • 1 to 2 tablespoons olive oil for the top
  • flaky salt for finishing
  • rosemary or other toppings as desired

Optional route adjustments

For an all-purpose flour version, replace the bread flour with all-purpose flour. The focaccia will still be very good, though usually a little softer and slightly less chewy.

For a discard-only version, replace the active starter with 100 g sourdough discard and expect a slower rise.

For a discard + yeast same-day version, use 100 g sourdough discard and add 4 g instant yeast when mixing.

Bread flour vs all-purpose flour

Bread flour gives the dough more strength, a little more height, and a chewier bite. For that reason, it is the better choice when you want more dramatic bubbles and better structure. All-purpose flour still works well and produces a slightly softer focaccia. If you are using standard all-purpose flour rather than bread flour, start by reducing the water by about 25 to 40 g and only add more if the dough still feels manageable. Weaker all-purpose flours usually absorb less water.

Why olive oil matters so much in focaccia

Olive oil is part of the structure as much as it is part of the flavor. It helps tenderize the crumb, improves browning, protects the surface, and creates the crisp underside and edges that make good focaccia feel rich rather than plain.

Salt, water, and hydration

Salt sharpens flavor and strengthens the dough. Water gives the dough its loose, airy potential. This is supposed to be a sticky dough. If you keep correcting it with extra flour until it feels tidy, you will lose the texture that makes focaccia worth baking. On humid days or with lower-protein flour, the dough may feel even looser than usual. Resist the urge to dump in a lot of extra flour all at once.

Toppings and when they should be added

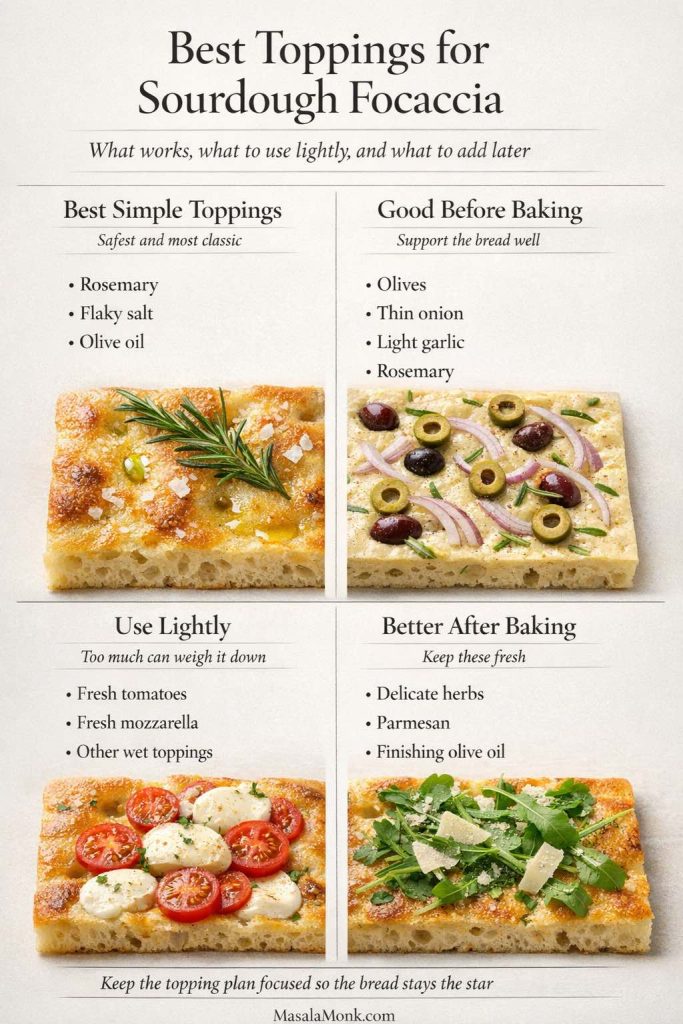
Rosemary and flaky salt are the best place to start. Olives and thin onion slices also work well before baking because they bring strong flavor without flooding the dough. Wetter toppings such as fresh tomatoes or fresh mozzarella need a lighter hand or a later addition so they do not weigh down the surface. More delicate herbs are usually better added after baking, while harder herbs such as rosemary can go on before the bread hits the oven.

Also Read: Mango Sorbet Recipe: Healthy & Plant Based Dessert

Best pan for sourdough focaccia

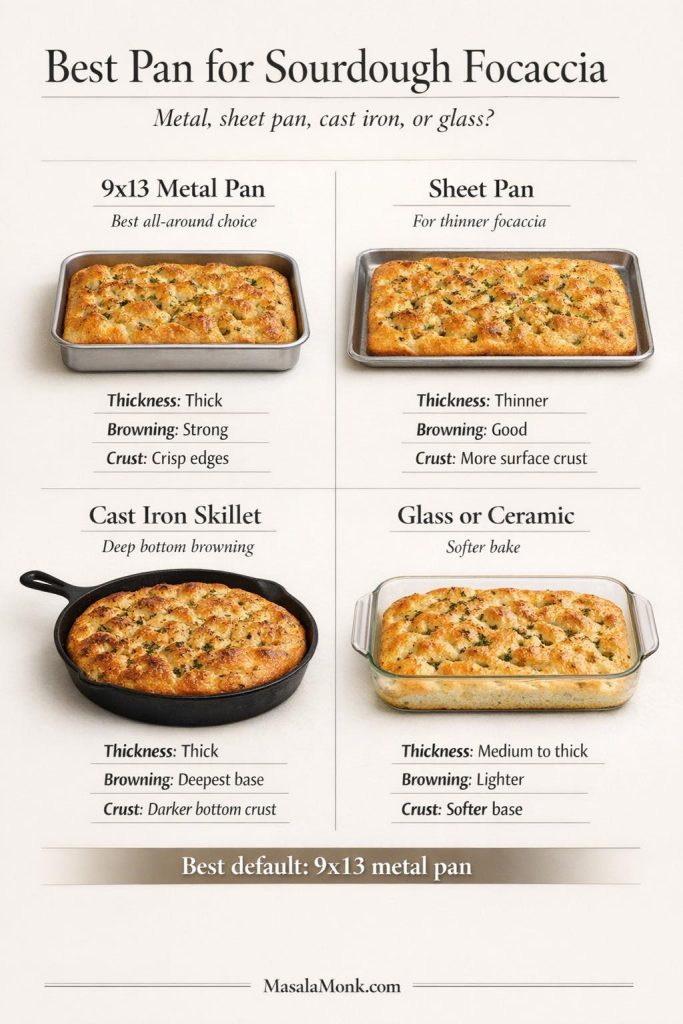
The best pan for most home bakers is a 9×13-inch metal pan. It gives the most predictable thickness, the strongest browning, and the best balance between a soft interior and crisp olive-oil edges.

Best pan for sourdough focaccia guide comparing a 9x13 metal pan, sheet pan, cast iron skillet, and glass or ceramic pan for thickness, browning, and crust.
A 9×13 metal pan is still the safest default, but changing the pan changes the bread too: sheet pans bake thinner, cast iron deepens the bottom crust, and glass or ceramic usually leaves the base a little softer.

9×13-inch metal pan for classic thick focaccia

This is the pan the main recipe is built around. Use it when you want a bakery-style slab with height, chew, and deeply golden edges.

Sheet pan for thinner focaccia

Use a sheet pan when you want a thinner focaccia with more crust and less height. The dough will spread more, bake faster, and feel a little more snackable.

Cast iron skillet for deeper browning

A well-oiled cast iron skillet can give you a darker, more assertive bottom crust. It is a strong choice when deep browning matters more than the classic rectangular shape.

Glass and ceramic pans for a softer base

Glass and ceramic pans can still work, but they usually brown less aggressively than metal. As a result, the bottom tends to stay softer and the bake may need a little longer. If you use glass, grease it more carefully than you think you need to, because sticking can be more annoying there than in a well-oiled metal pan.

Also Read: Protein Ice Cream Recipe: 10 Creamy Homemade Recipes

How to make sourdough focaccia step by step

This is the main method and the one to choose first: active starter + overnight schedule + 9×13-inch metal pan.

Mix the dough

In a large bowl, combine the bread flour, water, active sourdough starter, salt, and 20 g olive oil. Mix until no dry flour remains.

The dough will look rough, sticky, and a little unruly at this stage. That is normal. You are not aiming for a smooth kneaded dough.

Freshly mixed sourdough focaccia dough in a glass bowl showing a rough sticky high-hydration early stage before folds.
At this stage, the dough should look rough, sticky, and looser than many bakers expect; that slightly unruly texture is exactly what sets up a lighter, airier focaccia later on.

Rest and strengthen the dough

Cover the bowl and let the dough rest for 20 minutes.

Then perform one round of stretch-and-folds by pulling one side of the dough up and folding it over itself. Rotate the bowl and repeat on all sides.

Repeat this process 3 more times, resting 20 to 30 minutes between rounds. By the final fold, the dough should still be sticky but noticeably smoother, more elastic, and better able to hold itself.

Hand lifting and folding sticky sourdough focaccia dough in a glass bowl during a stretch-and-fold.
This step is about gentle strength, not hard kneading; the dough should stretch softly, feel sticky, and fold back over itself without needing extra flour to make it behave.

Bulk ferment until the dough looks airy and alive

After the folds, cover the bowl and let the dough ferment at room temperature until it looks visibly fuller, lighter, and more aerated.

At 74 to 78°F, this usually takes about 4 to 6 hours total from mixing with active starter.

Do not chase a perfect doubling. What matters is that the dough looks alive. You want some visible bubbles, a softer feel, and a bowl of dough that no longer looks dense and inactive. If it still looks tight and compact, keep waiting.

Refrigerate for the overnight route

Once the dough has clearly gained strength and activity, cover it well and refrigerate it for 8 to 24 hours.

This rest makes the schedule easier, deepens the flavor, and usually leaves you with a calmer dough the next day. Cover it well so the surface does not dry out in the fridge. Also, do not assume that longer is always better: push the cold rest too far and the dough can get more sour while losing some of its lift.

Oil the pan and transfer the dough

Pour 2 to 3 tablespoons olive oil into a 9×13-inch metal pan and coat the bottom well.

Tip the dough gently into the pan. Turn it once or twice so the outside picks up some oil.

If it does not want to reach the corners yet, do not force it. Let it relax for 15 to 20 minutes, then stretch it gently again. Focaccia usually rewards patience.

Proof in the pan until puffy and jiggly

Let the dough proof in the pan at room temperature until it looks fuller, softer, and lightly inflated. In a warm room, this often takes 2 to 4 hours after the cold dough goes into the pan, but the dough is a better guide than the clock.

Look for a dough that feels easygoing rather than tense. It should wobble lightly when the pan moves, show some air under the surface, and accept dimples without fighting back. The full proofing cues are broken down in the next section.

Proofed sourdough focaccia dough in a 9x13 metal pan showing a puffy airy surface ready to dimple before baking.
By this stage, the dough should look fuller, softer, and lightly airy in the pan, with enough visible puff that dimpling feels easy rather than forced.

Dimple, top, and bake

Set the oven to 450°F.

Drizzle the top with 1 to 2 tablespoons olive oil. Lightly oil your fingertips, then press straight down to dimple the dough all over. Sprinkle with flaky salt and add your toppings.

Bake for 25 to 30 minutes, or until the top is deeply golden and the edges are richly browned. If the top darkens too quickly before the bread feels baked through, lower the oven slightly or move the pan to a lower rack.

Hands dimpling proofed sourdough focaccia dough in a 9x13 metal pan with olive oil before baking.
Once the dough is fully proofed, it should accept dimples easily and hold little pools of olive oil instead of springing back tight, which is one of the clearest signs that it is ready for the oven.

Cool, slice, and serve

Let the focaccia cool in the pan for 5 to 10 minutes, then lift it out and cool it a little more on a rack if possible. That helps the bottom stay crisper.

Slice while still slightly warm or at room temperature.

Close-up of a baked sourdough focaccia slice showing an airy crumb, golden top, olive-oil dimples, and crisp browned bottom edge.
This is the payoff you are aiming for: an airy interior, a bronzed top, and crisp olive-oil edges that feel generous rather than tight or bready.

Also Read: Cookie Pie Recipe: 10 Best Flavors, Fillings and Variations

How to tell when sourdough focaccia is proofed enough

This is the most important judgment call in the whole recipe. If the dough is proofed well, the crumb has a real chance of turning out airy and dramatic. Bake too early and the bread usually comes out flatter and tighter.

Sourdough focaccia proofing guide showing not ready, ready to bake, and slightly overproofed dough in pans before baking.
Tight dough still needs time, puffy dough with a light wobble is ready to bake, and slightly overproofed dough can still turn out well if you handle it gently.

Signs your dough needs more time

The dough looks flat in the pan, feels heavy rather than buoyant, and resists your fingertips. When you press into it, it springs back quickly and does not want to hold the dimple. This is where a lot of bakers go wrong: the dough looks spread out, so they assume it is ready. It is not. It still needs time.

  • tight surface
  • little to no wobble
  • heavy feel
  • resists stretching toward the corners

Signs it is ready to dimple and bake

The dough looks puffy, slightly wobbly, and airy under the surface. Your fingers can press in easily, and the dough feels soft and almost marshmallowy rather than tense. More importantly, it should look like a dough that has actually trapped gas, not one that is merely spreading because it is wet.

  • puffy appearance
  • light wobble when the pan moves
  • visible air pockets under the surface
  • easy dimpling without the dough fighting back

What slightly overproofed focaccia looks like

A slightly overproofed dough can feel extremely loose and fragile, and it may deflate more easily when handled. Even then, focaccia often still bakes reasonably well because the pan supports it. You may lose some height, but you can still get very good bread.

What underproofed focaccia looks like after baking

Underproofed focaccia usually comes out flatter, tighter, and less bubbly. The crumb feels more bread-like than airy, and the dramatic holes never really develop.

Also Read: Cookie Pie Recipe: 10 Best Flavors, Fillings and Variations

Best toppings for sourdough focaccia

The best toppings support the bread instead of burying it. Let the topping plan get too heavy or too wet and the focaccia starts losing the texture that made it worth baking in the first place.

Best toppings for sourdough focaccia guide showing simple toppings, before-baking toppings, wetter toppings to use lightly, and finishing toppings to add after baking.
The best focaccia toppings do not compete with the bread; they support it. Classic toppings such as rosemary, flaky salt, and olive oil keep the bake clean and balanced, while wetter toppings need a lighter hand and fresher finishes are often better added after baking.

The best simple topping: rosemary, olive oil, and flaky salt

This is still the most reliable and satisfying version. It lets the bread stay the star, smells incredible, and avoids the sogginess that comes from piling too much on top.

Toppings that work well before baking

Olives, thin onion slices, rosemary, and a restrained amount of garlic all work well before baking. Garlic, however, can burn if it is sliced too thin or left too exposed, so keep it modest and let the olive oil protect it.

Toppings that need a lighter hand

Fresh tomatoes, fresh mozzarella, and other watery toppings should be used in moderation. Too much moisture softens the surface, interferes with browning, and can weigh down the dough. Once you want a more heavily topped bread, the result starts leaning toward pizza rather than classic focaccia.

What to add after baking

More delicate herbs, a final drizzle of good olive oil, or finishing touches such as parmesan are often better after baking. That way the flavors stay fresh instead of getting dulled in the oven.

Topping combinations that work well together

  • rosemary and flaky salt
  • rosemary and olive
  • onion and olive
  • light cherry tomato and oregano
  • garlic and rosemary

Keep the topping plan focused. Let the bread do most of the talking.

Also Read: Peach Cobbler with Canned Peaches (Dessert Recipe)

Troubleshooting sourdough focaccia

Why is my sourdough focaccia dense instead of airy?

The most common causes are underproofing, weak starter, old discard without enough time, or too much added flour. Usually the fix is more fermentation, not more flour.

Why didn’t it get big bubbles?

Either the dough never built enough gas, or the gas it had was knocked out by rough handling. Good bubbles need both strong fermentation and gentle treatment.

Why is my focaccia gummy in the middle?

It may need a slightly longer bake, especially if it is thick or heavily topped. It can also seem gummier than it really is when sliced too hot. Let it cool briefly before cutting.

Why is it pale instead of deeply golden?

The oven may not be hot enough, the pan may not brown strongly, or there may not be enough olive oil on the dough and in the pan. A metal pan really helps here.

Why did it stick to the pan?

Usually there was not enough oil underneath, or the bread sat too long before being released. Oil the pan generously and loosen the focaccia while it is still warm if needed.

Why did it spread too much?

Either the dough never built enough strength during the folds, or it was proofed before it had enough internal structure. High hydration is good, but the dough still needs some strength.

Why does it taste too sour?

The dough may have fermented too long, the discard may have been especially acidic, or the kitchen may have been warm enough to push fermentation harder than expected. Use fresher discard or shorten the fermentation slightly next time.

Can you save overproofed focaccia?

Often yes. Transfer it gently to a well-oiled pan, dimple carefully, and bake it. You may lose some height, but focaccia is forgiving enough that the result can still be very good.

Also Read: Punjabi Mutton Bhuna – Amritsari Village-Style Gosht Recipe

Same-day and overnight schedules at a glance

These are working timelines, not hard laws. If the dough is moving faster than expected, refrigerate it sooner. If it is lagging, give it warmth or more time.

Sourdough focaccia schedule guide comparing active starter same day, active starter overnight, and discard plus yeast timing options.
The overnight route is easier to fit around real life, same-day focaccia works when your starter is strong and the room is warm, and discard plus yeast is the fastest way to get the dough moving without much drama.

Sample same-day timeline with active starter

Use this when you have strong starter and a warm kitchen.

  • 8:00 a.m. Mix the dough.
  • 8:20 a.m. to 9:30 a.m. Complete 4 rounds of folds.
  • 9:30 a.m. to 1:00 p.m. Let the dough bulk ferment until airy.
  • 1:00 p.m. Transfer to the pan.
  • 1:00 p.m. to 3:00 p.m. Pan proof until puffy and jiggly.
  • 3:00 p.m. Dimple, top, and bake.

Sample overnight timeline with active starter

This is the best default route in the article.

  • 6:00 p.m. Mix the dough.
  • 6:20 p.m. to 7:30 p.m. Complete 4 rounds of folds.
  • 7:30 p.m. to 10:00 p.m. Let the dough gain early strength and activity.
  • 10:00 p.m. Refrigerate overnight.
  • Next day, 10:00 a.m. Transfer to the pan.
  • 10:00 a.m. to 1:00 p.m. Pan proof until puffy.
  • 1:00 p.m. Dimple, top, and bake.

Sample discard + yeast fast timeline

Use this when you want the easiest quick route.

  • 9:00 a.m. Mix discard, flour, water, salt, olive oil, and instant yeast.
  • 9:20 a.m. to 10:30 a.m. Complete 4 rounds of folds.
  • 10:30 a.m. to 1:00 p.m. Bulk ferment until airy.
  • 1:00 p.m. Transfer to the pan.
  • 1:00 p.m. to 2:30 p.m. Pan proof.
  • 2:30 p.m. Dimple, top, and bake.

Also Read: Masterclass in Chai: How to Make the Perfect Masala Chai (Recipe)

Variations

Rosemary sourdough focaccia

Top the dough with rosemary, flaky salt, and olive oil for the cleanest and most classic version.

Whole wheat sourdough focaccia

Replace 100 to 150 g of the bread flour with whole wheat flour for a nuttier flavor and a slightly heartier crumb. Expect a little less loft and a little more chew.

Cast iron sourdough focaccia

Bake the dough in a well-oiled cast iron skillet when you want a darker, more assertive bottom crust and a rounder shape.

Sourdough focaccia pizza-style

Top more heavily after the first bake or split and fill it after baking when you want a pizza-inspired version. If you already like working with sourdough pizza dough, this is another satisfying way to use a soft, high-hydration dough.

Garlic and olive focaccia

Use sliced olives and a restrained amount of garlic so the top becomes aromatic and savory without turning harsh or greasy.

Also Read: Avocado Chocolate Mousse Recipe

How to store, reheat, and freeze sourdough focaccia

Best way to store focaccia for 1 to 2 days

Focaccia is best the day it is baked and still very good on day two. Once it is fully cool, wrap it well and keep it at room temperature. Do not trap it while warm, or the steam will soften the crust you just worked for.

How to reheat for crisp edges again

Reheat the focaccia in a hot oven or toaster oven for a few minutes rather than microwaving it. That is the easiest way to bring the edges back to life.

Can you freeze sourdough focaccia?

Yes. Freeze it once fully cool, either whole or in slices, wrapped well. Reheat from frozen or thaw first and warm it in the oven.

Best leftover uses

Use leftover focaccia for sandwiches, alongside soup, or lightly toasted with eggs. Day-old focaccia still has plenty to offer if you warm it well.

Also Read: Falafel Recipe: Crispy Homemade, Air Fryer and Baked Falafel

Frequently asked questions about sourdough focaccia

Can I use sourdough discard instead of active starter?

Yes. Discard works well in focaccia, but it is usually slower and less forceful than active starter. For the most reliable result, use active starter. For the quickest discard version, add a little yeast.

Do I need yeast for sourdough discard focaccia?

No. You can make it without yeast if you give it enough time. Yeast simply makes the rise faster and more dependable.

Is focaccia easier than sourdough bread?

For most bakers, yes. The pan makes it more forgiving, and there is no shaping or scoring to master. If you want another approachable follow-up bake after this, sourdough English muffins are another useful way to build confidence with fermentation and dough cues.

Can I refrigerate the dough overnight?

Yes. In fact, the overnight route is the main method here because it makes the process easier and more consistent.

What flour is best for sourdough focaccia?

Bread flour is the best all-around choice for height and structure, but all-purpose flour still works very well.

What pan gives the crispiest bottom?

A well-oiled metal pan or cast iron skillet usually gives the best browning and the crispest base.

Sourdough focaccia recipe card showing a baked focaccia in a 9x13 pan, a cut square with airy crumb, and a summary of timing, ingredients, and method.
Once the route is clear, the bake itself becomes straightforward: mix, fold, let the dough gain strength, give it enough time to look puffy and ready, and bake for a focaccia with a light crumb and crisp olive-oil edges.

Also Read: Mango Margarita Recipe (Frozen or On the Rocks)

Recipe card

Sourdough Focaccia Recipe

Yield: 1 focaccia in a 9×13-inch pan
Serves: 8 to 12
Prep time: 30 minutes active time
Bulk fermentation: about 4 to 6 hours with active starter at warm room temperature
Cold rest: 8 to 24 hours
Pan proof: about 2 to 4 hours
Bake time: 25 to 30 minutes

Ingredients

  • 500 g bread flour
  • 400 g water
  • 100 g active sourdough starter
  • 12 g fine sea salt
  • 20 g olive oil for the dough
  • 2 to 3 tablespoons olive oil for the pan
  • 1 to 2 tablespoons olive oil for the top
  • flaky salt
  • rosemary or other toppings as desired

Optional adjustments

  • use 100 g sourdough discard in place of active starter for a slower discard version
  • add 4 g instant yeast when using discard for a faster same-day version

Method

  1. Mix the bread flour, water, starter, salt, and 20 g olive oil until no dry flour remains.
  2. Rest the dough for 20 minutes.
  3. Perform 4 rounds of stretch-and-folds, resting 20 to 30 minutes between rounds.
  4. Let the dough bulk ferment until it looks fuller, lighter, and visibly airy.
  5. Refrigerate the dough for 8 to 24 hours once it has clearly gained activity.
  6. Oil a 9×13-inch metal pan well and transfer the dough.
  7. Let it proof in the pan until puffy, jiggly, and easy to dimple.
  8. Heat the oven to 450°F.
  9. Drizzle the top with olive oil, dimple all over, and add flaky salt and toppings.
  10. Bake for 25 to 30 minutes until deeply golden.
  11. Cool for 5 to 10 minutes in the pan, then lift out and cool a little more before slicing.

Notes

  • The best default route is active starter + overnight.
  • This formula assumes a 100% hydration starter.
  • Use starter that is recently peaked or close to peak for the best lift.
  • If using all-purpose flour, reduce the water slightly to keep the dough manageable.
  • Use discard when convenience matters more than maximum lift.
  • Add instant yeast to discard when you want the fastest and most dependable same-day result.
  • A 9×13-inch metal pan gives the best all-around crust and structure.
  • The dough is ready when it looks puffy, airy, and softly inflated, not flat and tight.

A good focaccia should feel generous, not tense. Once you know which route makes sense, what the dough should look like, and when to wait instead of forcing it, this becomes one of the easiest breads to come back to. For more ideas beyond this one, the site’s broader sourdough bread recipe guide is a useful next stop.

Posted on 1 Comment

Sourdough English Muffins Recipe

Fork-split sourdough English muffin with melted butter showing real nooks and crannies, styled as a dark editorial recipe cover with text overlay.

If you want sourdough English muffins with a chewy bite, deep toastability, and real nooks and crannies, this is the version to make. The dough is built around active starter for dependable natural lift, kept soft enough to open well inside, shaped thick enough to protect the crumb, and cooked slowly enough that the middles set before the outsides darken too fast. Once cooled and split with a fork, they toast the way a good English muffin should: crisp at the edges, rough in the middle, and ready to catch butter in every crevice.

This page does more than hand you one formula. It helps you choose the right route before you begin, whether that means active starter, fresh discard, overnight timing, same-day timing, or a small yeast assist for reliability. It also shows you how to avoid the problems that ruin texture: dense crumb, gummy middles, weak rise, flat rounds, or muffins that brown long before they cook through. If your culture still feels inconsistent, start with this guide on how to build a sourdough starter. If you already like baking with starter, save these sourdough bread recipes for later too.

Why this sourdough English muffins recipe works

A strong sourdough English muffins recipe depends on four things working together:

  • full fermentation
  • a soft but manageable dough
  • enough thickness to create an open interior
  • low pan heat so the middles cook through before the crust browns too fast
Explainer guide showing why sourdough English muffins work, with four key factors: full fermentation, soft dough, thick shaping, and low pan heat, plus a split muffin showing the open interior these choices create.
Great sourdough English muffins do not come from one trick alone. Full fermentation gives the dough enough internal life to rise well, a soft dough helps the crumb open instead of tightening up, thicker shaping protects the interior texture, and low pan heat gives the center time to set before the crust races ahead. When all those pieces line up, the muffins cook more evenly, split rougher after cooling, and deliver the nooks-and-crannies texture the whole recipe is built around.

When those four elements line up, the muffins rise better, cook more evenly, and split more raggedly after cooling. And when one slips, the batch usually shows it. Under-fermented dough stays tight and heavy. Dough rolled too thin cooks easily but loses interior texture. Dough handled too roughly loses gas. Heat that runs even a little too high gives you color before the middle is ready.

Texture is the real payoff. Good sourdough English muffins with nooks and crannies should not split open like soft sandwich bread. They should break into rough, irregular halves that toast crisp and hold butter properly. That open interior is part of what makes the format feel right, which is why King Arthur’s guide to nooks and crannies is worth reading if you want a clearer sense of the target.

Also Read: White Russian Recipe: 7 Variants to Try, From Classic to Frozen

Choose your sourdough English muffins route first

A disappointing batch often starts with the wrong route, not the wrong recipe. Choose the path that matches your starter, your schedule, and your kitchen.

Guide graphic showing which sourdough English muffins route to use, including active starter, fresh discard, overnight, same day, and yeast-assisted options.
Not every batch of sourdough English muffins should start the same way. This route guide helps you choose between active starter, fresh discard, overnight timing, same-day baking, and a yeast-assisted option, so the method fits your starter, your schedule, and the texture you want. Save it for quick reference, then use the full post for the detailed recipe and troubleshooting.

Active-starter sourdough English muffins

Use this route if:

  • your starter rises reliably after feeding
  • you want the best lift
  • you want the best chance of real nooks and crannies
  • you want sourdough English muffins no yeast
  • you want the strongest overall crumb

This is the main route on this page and the best path for sourdough starter English muffins.

Fresh-discard sourdough English muffins

Use this route if:

  • your discard is recent and still smells pleasantly tangy, not sharply harsh
  • you want to use it up instead of feeding again
  • you are willing to allow more fermentation time
  • you understand the rise may be less predictable
  • you are comfortable with a slightly less lofty result if needed

This can still make very good sourdough discard English muffins, especially when the discard comes from a healthy, recently maintained starter.

Overnight sourdough English muffins

Use this route if:

  • you want the easiest schedule
  • you want better flexibility the next morning
  • you prefer deeper flavor
  • you do not want to rush fermentation
  • you like shaping and cooking cooler dough

This is the easiest and most forgiving option for most readers. It is also the route I recommend first for overnight sourdough English muffins.

Same-day sourdough English muffins

Use this route if:

  • your starter is especially lively
  • your kitchen is warm enough to support a full rise
  • you want muffins today
  • you are willing to watch the dough, not just the clock

This can still produce easy sourdough English muffins, but it leaves much less room for a weak starter or a cool kitchen.

Yeast-assisted sourdough English muffins

Use this route if:

  • your discard is older or sluggish
  • your kitchen runs cool
  • you want more predictable rise
  • your schedule is tighter than your starter deserves
  • you still want sourdough flavor without relying on uncertain lift

That is a practical choice, not a compromise to hide. A hybrid route works well, and Serious Eats’ yeast-assisted sourdough English muffins are a useful reference point for that style.

Also Read: Mango Sorbet Recipe: Healthy & Plant Based Dessert

Quick route summary for sourdough English muffins

  • Best overall texture: active starter
  • Best schedule: overnight
  • Best discard use-up option: fresh discard with patience
  • Best safety net for weak discard: small yeast assist
  • Best path for no yeast: active starter with full fermentation

Sourdough English Muffins Recipe

This is the master version on the page: active starter, naturally leavened, overnight-friendly, skillet-cooked, and built for classic fork-split texture.

Sourdough English muffins served split and buttered, with recipe details for an overnight-friendly active starter version.
Use this as your quick-reference anchor for the batch: soft dough, thick rounds, low heat, and a fork-split finish are what give sourdough English muffins their best texture. Save it now, then come back to the full post for the route choices, troubleshooting, and variation details that make the recipe easier to get right.

Yield: 10 to 12 muffins
Prep time: 20 minutes
Rest and folds: 30 to 45 minutes
Bulk fermentation: about 4 to 8 hours at room temperature, depending on starter strength and kitchen temperature
Final proof: about 45 to 90 minutes
Cook time: about 10 to 14 minutes per batch
Total time: 8 to 14 hours, depending on whether you use the overnight route
Best route: active starter, naturally leavened, overnight-friendly

Ingredients for sourdough English muffins

Ingredients guide for sourdough English muffins showing active sourdough starter, water, milk, bread flour, softened butter, honey or sugar, fine salt, and cornmeal or semolina arranged in a labeled baking setup.
The base sourdough English muffins formula is simple, but each ingredient plays a specific role in the final texture. Active starter drives lift, bread flour gives structure and chew, milk and water balance tenderness and handling, butter softens the crumb, and honey or sugar helps with browning. Salt sharpens the flavor, while cornmeal or semolina helps with the classic finish and easier handling during proofing and cooking.
  • 120 g active sourdough starter
  • 180 g lukewarm milk
  • 60 g lukewarm water
  • 20 g honey or sugar
  • 30 g softened butter
  • 360 g bread flour
  • 7 g fine salt
  • cornmeal or semolina, for dusting

Recipe notes before you start

  • The dough should feel soft and slightly tacky, not stiff.
  • Shape to about 3/4 inch thick if you want a better interior.
  • Proof until the rounds look a little fuller and softer, not dramatically doubled.
  • Cook over truly low heat. This is where many batches go wrong.
  • Cool fully, then fork-split, then toast for the best final texture.

Also Read: Protein Ice Cream Recipe: 10 Creamy Homemade Recipes

Ingredient notes for sourdough English muffins

Active sourdough starter
Use starter that has been fed and is clearly lively. It should look airy, expanded, and capable of lifting dough on its own. If you are unsure what ready starter really looks like, go back to this guide on feeding and storing sourdough starter.

Milk and water
Milk softens the crumb and supports browning. Water keeps the dough from becoming too rich. Together they give homemade sourdough English muffins that stay tender without drifting into bun territory.

Honey or sugar
Either works. The amount is modest, so the dough will not taste sweet, but it helps browning and rounds out the flavor.

Butter
Butter adds tenderness. The amount stays moderate, so the dough still behaves like English muffin dough rather than enriched roll dough.

Bread flour
Bread flour gives the dough the strength to rise well and hold shape on the skillet. All-purpose flour can work, but bread flour is the better default for chew and structure.

Cornmeal or semolina
This helps with sticking and gives the classic finish. It does not create the open crumb. Fermentation, thickness, heat, and fork-splitting do that.

Making sourdough English muffins goes more smoothly when you can see the whole sequence before you start. This method guide walks through the full flow from mixing and folding to fermentation, shaping, proofing, skillet cooking, checking the center, and cooling before fork-splitting. Use it as your quick roadmap for the batch, then follow the detailed recipe for the exact dough cues, timing flexibility, and texture checkpoints that make the muffins come out light, cooked through, and ready to toast well.

How to make sourdough English muffins

1. Mix the dough

In a large bowl, stir together the active starter, milk, water, honey, and softened butter until mostly smooth. Add the bread flour and salt, then mix until no dry flour remains.

Do not chase a polished dough here. You only need even mixing, and a rough but cohesive dough is completely fine at this stage.

Step 1 process image for sourdough English muffins showing freshly mixed dough in a large bowl, rough and shaggy but fully combined, with no dry flour remaining and a wooden spoon resting in the dough.
This is what properly mixed sourdough English muffin dough should look like before the first rest: soft, shaggy, cohesive, and fully combined, but not smooth or polished yet. At this stage, you are only bringing the ingredients together until no dry flour remains. If the dough looks rough, that is normal. The goal here is not to knead it into a finished dough, but to set up the rest-and-fold stage that helps it relax, smooth out, and strengthen naturally.

When the dough feels drier than expected, add only a very small splash of liquid. When it feels shaggy and awkward, let it rest before correcting it with more flour. That pause matters. Dough often settles after the first rest, and overcorrecting early makes the final crumb tighter than it needs to be. The same general logic helps with sourdough pizza dough too: pause before you fix.

2. Rest and strengthen the dough

Cover the bowl and let the dough rest for 20 to 30 minutes. Then give it 3 to 4 folds in the bowl or on a lightly damp counter.

Step 2 process image for sourdough English muffins showing rested dough being gently folded in a bowl, with the dough looking softer, smoother, and stronger than after mixing but not fully polished.
After the first rest, sourdough English muffin dough should look calmer and more organized than it did right after mixing. This is the stage where gentle folds begin building strength without turning the dough stiff or overworked. If the dough feels softer, stretches more easily, and already looks less rough, that is exactly what you want before bulk fermentation begins.

You do not need a hard knead. The goal is to help the dough feel smoother, calmer, and stronger than it did right after mixing.

3. Bulk ferment until clearly airy

Cover the bowl again and let the dough rise until it is visibly puffier, lighter in feel, and more aerated. Use the dough, not the clock.

Signs it is ready:

  • it looks expanded rather than flat
  • the surface feels softer
  • the mass feels lighter under your hands
  • it shows visible airiness instead of a dense, heavy look
Step 3 process image for sourdough English muffins showing bulk-fermented dough in a bowl, puffier and more aerated than before, with a soft surface and visible air bubbles that signal the dough is ready for the next stage.
This is the look you want before shaping sourdough English muffins: the dough should feel lighter, look fuller, and show visible airiness across the surface. It should not seem dense, flat, or lifeless at this point. Bulk fermentation is one of the biggest texture drivers in the whole recipe, because dough that has not become properly airy usually bakes into tighter, heavier muffins with fewer nooks and crannies.

If you are making overnight sourdough English muffins, let the dough begin fermenting at room temperature until it shows clear activity, then refrigerate it. For a same-day batch, keep it at room temperature until it reaches those same cues.

4. Refrigerate if using the overnight route

For the overnight route, chill the dough only after it has clearly started fermenting. Do not refrigerate a lifeless dough and expect the fridge to solve it.

Step 4 process image for sourdough English muffins showing lightly active dough in a covered container, ready to be refrigerated for the overnight route after it has already started fermenting.
For overnight sourdough English muffins, the dough should go into the refrigerator only after it already looks active and lightly puffed. This is the stage where cold fermentation helps with flexibility and flavor, but it does not replace early fermentation. If the dough still looks flat and lifeless, it is too soon to chill it. What you want here is a dough that already shows movement before the overnight rest.

The next day, let it sit just long enough that it is no longer stiff and stubborn, then shape.

5. Shape and cut the muffins

Turn the dough onto a lightly floured surface and pat or roll it to about 3/4 inch thick. Keep the thickness as even as possible. A standard English muffin cutter size works well here and usually gives the most familiar result.

That thickness matters. Thinner rounds cook more easily but lose interior character. Thicker rounds create better texture but demand lower heat and more patience.

Step 5 process image for sourdough English muffins showing thick dough patted to about 3/4 inch on a lightly floured surface, with a cutter cutting rounds and several soft cut muffins visible beside the dough.
This is the shaping stage that helps protect the final texture of sourdough English muffins. The dough should be patted or rolled to about 3/4 inch thick before cutting, which gives the interior enough room to open instead of baking up flat and bread-like. The rounds should look soft and alive, not tight, dry, or heavily floured. This is also why repeated rerolling works against the crumb: every extra pass compresses the dough and makes it harder to get the rough fork-split texture you want later.

Cut rounds with a biscuit cutter or glass and transfer them to parchment or a tray dusted with cornmeal or semolina. Re-roll scraps once if needed, but not again and again. Every reroll compresses the dough and makes it harder to get the open interior you want.

If the dough sticks badly, lightly flour the surface and your cutter, but do not bury the dough under excess flour. Too much bench flour works directly against sourdough English muffins with nooks and crannies.

6. Proof the rounds

Let the cut rounds rest until they are slightly puffy and visibly softer. They should not double dramatically. They should simply look less dense and feel a little lighter.

Step 6 process image for sourdough English muffins showing proofed rounds on a parchment-lined tray dusted with cornmeal or semolina, slightly puffier and softer than when first cut but not dramatically doubled.
This is the look to aim for before sourdough English muffins hit the skillet: the rounds should seem a little fuller, softer, and more relaxed than when they were first cut, but they should still hold their shape cleanly. Final proofing here is not about dramatic volume. It is about giving the dough enough time to loosen and lighten so the muffins cook with better lift and a more open interior instead of staying tight and compact.

A round that still looks tight will usually cook tight. A round that looks overblown, fragile, or hard to move cleanly is already beyond ideal and should go straight to the skillet.

7. Cook low and patiently

Heat a heavy skillet or griddle over low heat. Low means low, not medium-low pretending to be low.

Place the muffins on the skillet and cook the first side slowly until evenly browned. Then flip and cook the second side just as gently. On many home stoves, expect roughly 5 to 7 minutes on the first side and 4 to 6 minutes on the second, though thickness, stove strength, and pan material can shift that a little.

Step 7 process image for sourdough English muffins showing thick muffins cooking on a skillet over low heat, with gradual even browning and one muffin lifted on a spatula to show the underside color.
Low skillet heat is what gives sourdough English muffins time to cook through before the outsides darken too fast. The bottoms should brown gradually and evenly, while the sides begin to look less raw and more set. When the pan runs too hot, the crust gets ahead of the center and the texture suffers. A patient cook here is what protects the crumb you built through fermentation, shaping, and proofing.

Watch for these signs before flipping:

  • the bottom is evenly browned
  • the sides are beginning to look more matte than raw
  • the muffin feels lighter when you lift an edge
  • the surface looks more set and less doughy

If the muffins are thick and the crust is coloring before the sides start to look set, cover the pan briefly to help trap enough heat for the center to catch up. If the muffins are well colored but still doubtful in the middle, move them to a low oven to finish gently instead of forcing more stovetop color.

That slow approach matters. Little Spoon Farm’s sourdough English muffins use similar low-heat logic for the same reason: English muffins need time to cook through, not just time to brown.

8. Check for doneness

A done muffin should feel lighter than it looks and set through the center. If you are unsure, pull one, let it rest briefly, then open it. The middle should look tender and cooked through, not shiny, sticky, or pasty.

A properly cooked sourdough English muffin should open to a crumb that looks set, tender, and lightly moist without any gummy or pasty center. What you are checking here is not whether the inside looks dry, but whether it has finished cooking through. If the middle still looks shiny or sticky, the muffins need more gentle heat. If it looks soft yet clearly set, you are ready to move on to cooling and fork-splitting.

A crumb that is fully set but slightly moist is not the same as a raw gummy center. Toasting finishes the texture beautifully. Raw gumminess is the problem, not tenderness.

9. Cool completely, then fork-split

Let the muffins cool all the way before opening them. Then use a fork to work around the sides until they separate.

Fork-splitting is what helps sourdough English muffins keep the rough interior that makes them so good once toasted. A knife gives a cleaner cut, but it smooths away some of the texture you worked for through fermentation, shaping, proofing, and low-heat cooking. Once the muffins have cooled fully, use a fork around the seam to open them and preserve that more jagged, butter-catching crumb.

This is not decorative. It is part of the texture. Fork-splitting preserves the rough interior a knife smooths away, which is why both King Arthur’s sourdough English muffin recipe and their broader English muffin guidance emphasize splitting with a fork.

Also Read: Homemade Mango Ice Cream Recipe

Dough cues that matter more than the clock

Sourdough English muffin dough cues guide showing how the dough should look after mixing, after resting, after folds, at the end of bulk fermentation, and after cutting, with visual cues for softness, strength, airiness, and shape.
Reading the dough correctly matters more than chasing a fixed timeline. This sourdough English muffin dough cues guide shows what to look for at each stage, from a soft shaggy mix to a calmer rested dough, a stronger dough after folds, a puffier and airier dough at the end of bulk fermentation, and cut rounds that hold shape without looking tight. Use it alongside the full recipe so you can judge readiness by feel and appearance, not just the clock.

After mixing

The dough should feel soft and slightly tacky, not dry and tight, and not wet enough to slump like batter. A dough that already feels stiff usually bakes up denser than it should.

After the rest

It should feel calmer and less rough. That is one reason not to add too much flour too early.

After the folds

The dough should feel smoother, more elastic, and more organized. Do not expect it to look perfect. What matters is that it feels stronger than it did at first.

At the end of bulk fermentation

It should look puffier, feel lighter, and show visible airiness. If it still feels heavy and dull, it is not ready.

After cutting

The rounds should hold shape without feeling tight. If they still look compact after proofing, they usually cook compact.

Also Read: Cookie Pie Recipe: 10 Best Flavors, Fillings and Variations

Timing guidance by kitchen temperature

Use these as working expectations, not promises. Starter strength still matters, but room temperature changes the pace more than many bakers expect.

Kitchen temperature guide for sourdough English muffins showing cool, moderate, and warm kitchen ranges with notes on how fermentation timing, bulk rise, and schedule flexibility change in each condition.
Room temperature changes how quickly sourdough English muffin dough moves, which is why timing should always be read through the dough instead of the clock alone. Cool kitchens usually need more patience and often suit the overnight route best, moderate kitchens are the most predictable, and warm kitchens can push fermentation along fast enough that earlier checks and shorter room-temperature stages matter. Use this guide to adjust the pace without losing the soft dough, proper proof, and low-heat cooking that give the muffins their best texture.

Cool kitchen, around 18 to 20°C

The dough will move slowly. Lean toward the overnight route, allow a longer bulk fermentation, and resist shaping too soon just because the clock says you should.

Moderate kitchen, around 21 to 24°C

This is the easiest range for the recipe. Most timing guidance behaves normally here, and same-day batches become more realistic when the starter is strong.

Warm kitchen, around 25 to 28°C

Fermentation can move surprisingly fast. Watch the dough earlier, shorten room-temperature stages where needed, and refrigerate sooner if the dough starts looking more inflated than airy.

Also Read: Punjabi Mutton Bhuna – Amritsari Village-Style Gosht Recipe

Sourdough starter vs discard for English muffins

This is one of the biggest search intents around the topic, so it deserves a direct answer.

Comparison guide for sourdough English muffins showing active starter, fresh discard, and discard with a small yeast assist, with visual differences in starter condition, rise reliability, texture expectations, and best-use recommendations.
Not every sourdough English muffin batch should start the same way. Active starter gives the best rise, the strongest chance of real nooks and crannies, and the clearest path to no-yeast sourdough English muffins. Fresh discard can still work well when it is recent and well kept, but it usually needs more time and may give a slightly less lofty result. If your discard is older, your kitchen runs cool, or you want a steadier rise, a small yeast assist is often the smartest backup.

When active starter is best

Use active starter when you want the best rise, the best crumb, and the cleanest path to sourdough English muffins no yeast. It is the strongest choice for english muffins with sourdough starter because it gives the dough the most dependable lift.

If your starter has been erratic, slow, or weak, go back to why your starter is slow or weak before blaming the recipe itself.

When discard works well

Use discard when it is fairly fresh and you are willing to allow extra time if the dough moves slowly. Sourdough discard English muffins can absolutely be flavorful and satisfying, especially if the discard comes from a healthy routine.

The real distinction is not starter versus discard as a label. It is active leavening power versus variable leavening power.

Can discard work alone?

Yes, but sourdough discard English muffins no yeast depend much more on the condition of the discard. Fresh discard has a much better chance than old, sharply acidic discard that has been sitting cold for too long.

If you go this route, watch the dough honestly. It may need more time than you hoped.

When a little yeast helps

A small yeast assist helps when the discard is older, the kitchen is cool, or the schedule is tight. It does not erase sourdough flavor. It simply makes the rise more dependable.

That is why recipes like Pantry Mama’s sourdough English muffins and other hybrid formulas treat a little commercial yeast as a practical tool rather than something to apologize for.

Also Read: Peach Cobbler with Canned Peaches (Dessert Recipe)

Discard adaptation for sourdough English muffins

If you specifically came here for sourdough discard English muffin recipe intent, this is the simplest way to adapt the master version.

Use fresh discard in place of active starter when possible. Expect bulk fermentation to move more slowly. Do not cut rounds until the dough is genuinely airy. If your discard smells sharply acidic, has been sitting cold for a long time, or your kitchen is cool, a small yeast assist is the smarter choice.

Discard adaptation guide for sourdough English muffins comparing what changes with sourdough discard, such as tangier flavor and slower rise, with what stays the same, including soft dough, thick shaping, low skillet heat, and cooling before fork-splitting.
Fresh sourdough discard can still make very good English muffins, but it changes the pace more than it changes the core method. The dough may rise more slowly, the crumb may come out a little less lofty, and shaping usually rewards more patience. What still matters just as much is keeping the dough soft, shaping thick enough to protect the interior, cooking over low skillet heat, and cooling before fork-splitting. When the discard is older or the kitchen runs cool, a small yeast assist is often the smarter safety net.

What changes with discard:

  • the flavor may be a little tangier
  • the rise may be slower and less predictable
  • the crumb may be slightly less lofty
  • the dough may need more patience before shaping

What does not change:

  • you still want a soft dough
  • you still want thick shaping
  • you still need low skillet heat
  • you still need to cool before fork-splitting

Also Read: Avocado Chocolate Mousse Recipe

Overnight sourdough English muffins vs same-day timing

Comparison guide showing overnight vs same-day sourdough English muffins, with step-by-step timelines for each route, including starter readiness, mixing, fermentation, shaping, proofing, and cooking, plus notes on flexibility, flavor, and when each schedule works best.
Not every batch of sourdough English muffins needs the same schedule. The overnight route is the easier, more forgiving option when you want flexibility and deeper flavor, while the same-day route works best with a very active starter, warmer conditions, and closer attention to dough cues. Use this guide to choose the timing that fits your kitchen and routine, then follow the full post for the detailed recipe, fermentation cues, and troubleshooting.

Overnight route

  • Feed the starter earlier in the day.
  • Mix the dough in the evening.
  • Let it begin fermenting at room temperature.
  • Refrigerate once it shows real activity.
  • Shape, proof, and cook the next day.

This is the calmest and most forgiving route for most bakers.

Same-day route

  • Start with a very lively fed starter.
  • Mix early enough that bulk fermentation has time to finish.
  • Shape only once the dough is clearly airy.
  • Proof the rounds fully before cooking.
  • Stay flexible rather than locking yourself to a rigid clock.

This can still produce easy sourdough English muffins, but it demands stronger conditions and closer attention.

If that make-ahead rhythm suits you, save these other sourdough breakfast bakes for later too.

Also Read: Falafel Recipe: Crispy Homemade, Air Fryer and Baked Falafel

How to get nooks and crannies in sourdough English muffins

This deserves its own section because it is the texture people actually want.

Guide graphic showing how to get nooks and crannies in sourdough English muffins, with a fork-split muffin and callouts for full fermentation, soft dough, 3/4 inch shaping, slight proof, low heat, and cooling before splitting.
If you want sourdough English muffins with real nooks and crannies, focus on the combination that creates them: fully fermented dough, a soft texture that is not over-floured, thick shaping, a gentle final proof, low skillet heat, and fork-splitting only after the muffins have cooled. This is the texture roadmap for getting rough, toastable interiors instead of flat, bread-like middles.

Ferment fully

Underfermented dough is the fastest way to lose the texture you want. If the dough never becomes airy enough, the crumb usually stays tight no matter how careful you are later.

Keep the dough thick enough

If you want to know how to get nooks and crannies in sourdough English muffins, shaping thickness matters. Around 3/4 inch is a strong starting point because it gives the interior enough room to open while still being realistic to cook through.

Keep the dough soft, not stiff

A dough corrected too aggressively with flour often becomes easier to handle and worse to eat. English muffins need enough softness to open well later.

Handle the dough gently

Once the dough has fermented properly, your job is to preserve that structure. Avoid aggressively degassing it. Repeated rerolling also works against you. Do not press all the life out of it in pursuit of perfect-looking rounds.

Do not over-flour the bench

Too much bench flour makes shaping easier and texture worse. Use only enough to prevent sticking.

Use lower heat than you think

High heat gives fast color and weak middles. Low heat gives the interior time to set.

Proof the rounds properly

Too short and they stay tight. Too far and they spread too easily. You want the middle ground where the rounds look fuller and softer, not exhausted.

Fork-split after cooling

This is the final texture-preserving step. Split too early and you tear the crumb badly. Slice with a knife and you smooth away some of what you built.

If you want an external benchmark for the target texture, King Arthur’s English muffin texture guide is still one of the better references.

Also Read: Mango Margarita Recipe (Frozen or On the Rocks)

Common sourdough English muffin mistakes

  • using starter that is not really active
  • turning a soft dough into a stiff one with too much correction flour
  • shaping too thin
  • cutting before bulk fermentation is truly complete
  • overhandling or rerolling too much
  • rushing the final proof
  • cooking over medium heat instead of truly low heat
  • splitting too early or slicing with a knife

Troubleshooting sourdough English muffins

Sourdough English muffin troubleshooting guide showing common problems including dense muffins, gummy middle, no nooks and crannies, dark outside with raw center, weak discard rise, and sticky dough, with quick fixes for each.
When sourdough English muffins go wrong, the problem is usually visible before the batch is beyond saving. Dense muffins point to underfermentation or stiff dough, gummy centers usually mean the heat was too high, and a lack of nooks and crannies often comes from thin shaping or rough handling. Use this troubleshooting guide to diagnose what happened, then adjust fermentation, dough softness, shaping thickness, and skillet heat so the next batch comes out lighter, rougher inside, and easier to toast well.

Why are my sourdough English muffins dense?

Likely cause: underfermentation, dough that is too stiff, or overhandling
What the dough probably looked like earlier: heavy after bulk or cut too soon
What it looks like after cooking: tight crumb, little spring, more like flat bread than English muffin
Can this batch be rescued? Only partly. If the rounds are not cooked yet, proof longer. Once cooked, toasting helps but cannot fully reverse density.
Fix next time: keep the dough softer, ferment more fully, and handle more gently

Why are my sourdough English muffins gummy in the center?

Likely cause: skillet heat too high, rounds too thick for the way they were cooked, or pulling them too early
What the dough probably looked like earlier: often fine, though final proof may have been a bit tight
What it looks like after cooking: browned outside, sticky or damp middle
Can this batch be rescued? Yes. Finish gently in a low oven or toast split halves after cooling.
Fix next time: keep the pan lower from the start and use doneness checks before pulling the batch

Why didn’t my sourdough English muffins get nooks and crannies?

Likely cause: underfermentation, thin shaping, rough handling, too much bench flour, or knife-splitting
What the dough probably looked like earlier: compact after bulk or pressed too flat during shaping
What it looks like after cooking: smoother, tighter interior instead of a rough open crumb
Can this batch be rescued? Not fully. You can still fork-split and toast well, but the core crumb structure is mostly set already.
Fix next time: ferment more fully, keep the dough thicker, preserve more gas, and cool before fork-splitting

Why are the outsides dark before the middles cook?

Likely cause: too much heat
What the dough probably looked like earlier: often completely fine
What it looks like after cooking: good color outside, underdone center
Can this batch be rescued? Usually yes. Lower the heat and finish more gently or move them to a low oven.
Fix next time: preheat gently and stay low from the beginning

Why is my discard batch not rising well?

Likely cause: weak or old discard
What the dough probably looked like earlier: slow bulk fermentation, little real expansion, minimal puff after cutting
What it looks like after cooking: flatter muffins with tighter crumb
Can this batch be rescued? Sometimes. Give it more time if the dough still has life.
Fix next time: use fresher discard, warmer conditions, the overnight route, or a small yeast assist

Why is my sourdough English muffin dough too sticky?

Likely cause: hydration, temperature, or not enough rest
What it looks like during shaping: messy and sticking everywhere
Can this batch be rescued? Usually yes. Rest the dough, cool it slightly, and flour lightly.
Fix next time: resist adding too much flour too early and let the dough organize itself first

What changes in a warm kitchen?

Likely cause: faster fermentation
What it looks like: the dough moves faster than expected and can overproof without much warning
Can this batch be rescued? Usually yes, if you shorten room-temperature stages or refrigerate earlier
Fix next time: trust the dough cues sooner

What do overproofed rounds look like?

They tend to look too inflated, delicate, and hard to move cleanly. They may spread more than they rise on the skillet. If that happens, cook them immediately and shorten the final proof next time.

Also Read: Balti Paneer Gravy (Restaurant-Style, Creamy + Bold Recipe)

How to store, freeze, and reheat sourdough English muffins

Cool the muffins fully before storing them. Keep them wrapped or in an airtight container for short room-temperature storage, then freeze the rest.

Storage guide for sourdough English muffins showing how to cool completely, store short term in an airtight container, freeze split muffins, and toast to reheat for the best texture.
Sourdough English muffins keep their texture best when you handle them in stages. Let them cool completely before storing, keep short-term muffins airtight at room temperature, and freeze extras once split so they are easier to toast later. When you are ready to eat them, toasting is the best way to bring back crisp edges and that rough fork-split interior that makes homemade sourdough English muffins so satisfying.

Yes, you can freeze sourdough English muffins very well. In fact, freezing is often the smartest move because these shine when split and toasted. Splitting them before freezing makes reheating easier later.

To reheat, toast the fork-split halves until the rough interior crisps and the edges color well. That is when the texture really pays off.

Also Read: Mojito Recipe (Classic) + Ratios, Pitcher, Mocktail & Easy Variations

Variations on this sourdough English muffins recipe

Comparison guide for sourdough English muffins showing four variations: whole wheat, vegan and dairy-free, cinnamon raisin, and rye or einkorn, with quick notes on flavor, texture, and which version each one suits best.
Sourdough English muffins do not all need to go in the same direction. Whole wheat makes the batch heartier and nuttier, the vegan version keeps it lighter and plant-based, cinnamon raisin turns it into a sweeter breakfast option, and rye or einkorn pushes the flavor deeper and more grain-forward. Use this guide to choose the variation that matches the kind of crumb, flavor, and overall feel you want before moving into the full standalone recipe card for that version.

Whole wheat sourdough English muffins

Replace part of the bread flour with whole wheat flour rather than switching the full formula at once. Starting with about one-quarter to one-third whole wheat is usually the safest move.

What to expect:

  • nuttier flavor
  • slightly tighter crumb
  • a dough that may need a little more hydration
  • a heartier result overall
Standalone recipe card for whole wheat sourdough English muffins showing heartier skillet-cooked muffins with a split crumb, ingredient list, method, yield, time, and whole wheat notes about texture and hydration.
Whole wheat sourdough English muffins bring a nuttier flavor, a slightly tighter crumb, and a more wholesome chew while still keeping the core character of the original style. This card works as a full quick-reference version on its own, with the ingredient list, core method, timing, and the extra watch-outs that matter most for whole wheat dough. The biggest thing to protect here is softness: once the dough gets over-floured, the variation quickly turns heavier than it should.

What to watch:

  • do not overcorrect with lots of extra flour
  • expect a more wholesome texture and a slightly less open interior

Vegan and dairy-free sourdough English muffins

Replace the milk with unsweetened plant milk or water, and use oil or vegan butter instead of butter.

Standalone recipe card for vegan and dairy-free sourdough English muffins showing skillet-cooked muffins with a split crumb, ingredient list, method, yield, time, and notes about plant milk, browning, and keeping the dough soft.
Vegan and dairy-free sourdough English muffins can still turn out soft, well-risen, and nicely textured when the dough stays supple and fully fermented. Plant milk or water keeps the formula workable, while neutral oil or vegan butter replaces richness without changing the core method too much. Browning can vary depending on the milk you use, so gentle skillet heat matters even more here if you want the centers set before the outsides get ahead.

What to expect:

  • a slightly less rich crumb
  • browning that may vary depending on the milk substitute
  • very workable texture if the dough stays soft and well fermented

What to watch:

  • avoid sweetened plant milk unless you want extra sweetness and quicker browning
  • keep the skillet heat gentle because some milk alternatives color fast

Cinnamon raisin sourdough English muffins

Add raisins and a moderate amount of cinnamon after the first rest so the dough can begin developing before the inclusions go in. This keeps the dough from getting weighed down too early.

Standalone recipe card for cinnamon raisin sourdough English muffins showing skillet-cooked muffins with visible raisins in the crumb, plus ingredient list, method, timing, yield, and notes about adding raisins after the first rest and keeping the skillet heat gentle.
Cinnamon raisin sourdough English muffins work best when the spice stays warm and balanced and the raisins support the crumb instead of overwhelming it. Adding the cinnamon and raisins after the first rest helps protect the dough structure, while gentle skillet heat keeps the sweeter dough from browning too fast. This card gives the full variation in one place, so you can make a breakfast-style batch with soft interiors, light chew, and enough cinnamon-raisin character to feel distinct without turning heavy.

What to expect:

  • a sweeter breakfast-style variation
  • slightly less even shaping
  • faster browning because of added sweetness in the mix-ins

What to watch:

  • do not overload the dough with raisins or the rounds become harder to shape and cook evenly
  • keep the heat especially gentle

Rye or einkorn sourdough English muffins

Use rye or einkorn as partial substitutions rather than full replacements unless you are testing a dedicated formula.

Standalone recipe card for rye or einkorn sourdough English muffins showing darker grain-forward muffins with a split crumb, ingredient list, method, yield, time, and notes about partial substitution, reduced elasticity, and a slightly denser texture.
Rye or einkorn sourdough English muffins work best when the grain adds character without taking over the dough completely. A partial swap keeps the flavor deeper and more distinctive while still giving the muffins enough structure to rise, cook through, and split well later. Expect a slightly denser crumb and less elasticity than the base version, but not a heavy result if the dough stays soft, the substitution stays modest, and the skillet heat remains gentle.

What to expect:

  • more distinctive grain flavor
  • somewhat reduced elasticity
  • a slightly denser and more specialized result

What to watch:

  • keep substitutions modest at first
  • do not expect the same lift as the base recipe

Can you bake them instead of griddling them?

You can, but the result moves away from classic English muffin texture. The skillet is part of what gives them their identity. If a loaf-pan or baked version is what you really want, it is better to treat that as a separate style and point readers toward English muffin bread and other sourdough bakes instead of pretending the two methods produce the same thing.

What to serve with sourdough English muffins

Use them with butter, jam, honey, or nut butter if you want the classic sweet route.

Serving ideas guide for sourdough English muffins showing butter and jam, honey or nut butter, an egg and cheese sandwich, and a savory mushroom, greens, and cheese topping.
Sourdough English muffins are flexible enough to go sweet, savory, or fully meal-worthy once toasted. Butter and jam keep things classic, honey or nut butter makes an easy everyday option, and an egg and cheese sandwich turns them into a strong savory breakfast. For something more brunch-leaning, mushrooms, greens, and melted cheese work especially well because the rough fork-split interior holds toppings better than a smoother bread base.

For savory use, eggs, cheese, mushrooms, spinach, and breakfast meats all work naturally. If you want more serving direction, these breakfast sandwich ideas are the best next stop.

They also work beyond breakfast. A toasted muffin can handle fillings like this chicken salad sandwich recipe or a warm mushroom cheese sandwich recipe, even if breakfast remains their most natural home.

Also Read: Paloma Recipe: 12 Paloma Cocktail Drinks

Related recipes to try next

For more bakes in the same lane, start with the sourdough bread recipe roundup, which is the best next stop when you want to keep working with starter beyond this batch. Starter still giving you trouble? Go back to the sourdough starter guide for a clearer reset on feeding, strength, and consistency. And when you are ready to turn these muffins into something more practical, these easy breakfast sandwiches are the most useful next read.

Final notes before you bake

A good batch of sourdough English muffins does not come from one trick ingredient or one magic time stamp. It comes from choosing the right route, fermenting honestly, keeping the dough soft, shaping thick enough to protect the crumb, cooking low enough to set the center properly, and splitting with a fork after cooling. Those are the choices that turn a decent batch into one with real character.

Fork-split sourdough English muffins toasted until crisp at the edges, with melted butter settling into the rough nooks and crannies of the interior crumb.
This is the homemade sourdough English muffin texture the whole recipe is built around: rough fork-split interiors, crisp toasted edges, and melted butter catching in the nooks and crannies instead of sliding off a smooth cut surface. Soft dough, full fermentation, thick shaping, low skillet heat, and cooling before splitting are what create this kind of crumb, which is exactly why homemade sourdough English muffins feel more alive and toast so much better than the average store-bought version.

That is why this recipe is worth making from scratch. Store-bought English muffins can be fine, but when homemade ones are done well, the texture is rougher, the flavor is deeper, and the toastability is far better. The butter catches differently. The edges crisp differently. The whole thing feels more alive.

If you remember only the essentials, remember these: soft dough, full fermentation, thick shaping, low heat, full cooling, fork split, then toast. That is the path to the kind of English muffin people actually want.

Also Read: Air Fryer Salmon Recipe (Time, Temp, and Tips for Perfect Fillets)

Frequently Asked Questions

1. Can I make sourdough English muffins with discard instead of active starter?

Yes, you can make sourdough English muffins with discard, especially if the discard is fairly fresh and still comes from a healthy starter routine. The main difference is predictability. Active starter gives you the best rise and the strongest chance of a lighter crumb, while discard often moves more slowly and may need extra fermentation time. If your discard is older, sharply acidic, or clearly sluggish, a small yeast assist is usually the smarter choice.

2. Can I make sourdough English muffins without yeast?

Yes. If your starter is active, recently fed, and strong enough to lift dough on its own, you can absolutely make sourdough English muffins without commercial yeast. That is the best route when you want the most traditional naturally leavened result. The key is not just skipping yeast. The key is starting with a lively starter and giving the dough enough time to ferment properly.

3. Why are my sourdough English muffins gummy in the middle?

The most common reason is heat that is too high. The outsides brown quickly, but the center does not get enough time to set. Thick rounds can make that more obvious. If that happens, lower the skillet heat and finish the muffins more gently, or move them briefly to a low oven once they have enough color. A properly cooked muffin should feel lighter than it looks and should not have a shiny or sticky middle when opened.

4. Can I refrigerate the dough overnight?

Yes, and for many bakers that is the easiest route. Let the dough begin fermenting at room temperature first, then refrigerate it once it shows clear activity. That gives you better flexibility the next day and often makes shaping easier because the dough is cooler and calmer. Just do not refrigerate a dough that has barely started moving, because the fridge will not fix a weak fermentation.

5. Can I freeze sourdough English muffins?

Yes, sourdough English muffins freeze very well. Let them cool fully first, then freeze them whole or already split. Splitting before freezing makes them easier to toast straight from storage later. In many cases, freezing is the best option because these muffins are at their best when toasted, not when sitting at room temperature for too long.

6. Should I split sourdough English muffins with a knife or a fork?

Use a fork. That rough split helps preserve the irregular interior texture that makes English muffins toast so well. A knife gives you a much cleaner cut, but it also smooths away some of the nooks and crannies you worked to build. If texture is part of the goal, fork-splitting is the better choice.

7. Why didn’t my sourdough English muffins get nooks and crannies?

That usually comes down to underfermented dough, shaping too thin, too much extra flour during handling, rough degassing, or slicing with a knife instead of splitting with a fork. Good nooks and crannies depend on a soft dough, full fermentation, gentle handling, low heat, and a fork-split finish after cooling. If the dough never got airy enough, the interior usually stays tighter no matter what you do later.

8. Can I bake sourdough English muffins instead of cooking them on a skillet?

You can, but the result moves away from classic English muffin texture. Skillet cooking is part of what gives them their characteristic crust and interior. If you want a baked version, it is usually better to think of that as a separate style rather than a direct substitute. The classic result still comes from shaping, proofing, and cooking them low and slowly on a skillet or griddle.

Posted on 10 Comments

Sourdough Pizza Dough Recipe (Crispy Crust & Easy Pizza Base)

Sourdough pizza dough cover image showing a golden, crispy crust pizza with a cheese-pull slice lifted, plus sauce, basil, and olive oil props.

There’s a particular moment in pizza making that feels like magic: you slide a raw, slightly wobbly round of dough into a hot oven, and within minutes it turns into something alive—edges lifting, bubbles forming, the bottom taking on color, the whole kitchen smelling like toasted wheat and caramelized cheese. When that dough is sourdough pizza dough, the magic gets a little deeper. The crust tastes fuller. The aroma is richer. Even a simple topping combo feels more “finished,” as if the base itself is seasoning the pizza.

At the same time, sourdough pizza dough can feel intimidating if you’ve only made quick yeast dough before. Starter timing, fermentation windows, sticky dough, shaping fears—there are a lot of ways to overthink it. So this post is built for real life: one reliable sourdough pizza dough recipe, clear steps that don’t require fancy equipment, and enough flexibility to handle a same-day bake or a cold ferment when you have time.

Along the way, you’ll also see natural variations—thin and crisp, chewier and thicker, or even a pan-friendly version—because one good sourdough pizza base should carry you through many pizza nights. When you want extra support, you can jump to MasalaMonk’s beginner-friendly sourdough starter recipe to tighten up feeding and starter strength, or browse the broader sourdough lineup in Sourdough Bread Recipes if you’re in the mood to bake beyond pizza.

And because pizza night is never only about the crust, you’ll also find an easy way to expand your topping and sauce options using MasalaMonk’s pizza sauce recipes and pesto recipe guide, plus a few cocktail pairings that make a homemade pie feel like a proper plan.

Let’s get into it.


Why sourdough pizza dough tastes better (and how to keep it easy)

Sourdough pizza has a flavor advantage that’s hard to miss: more depth, more aroma, a little tang, and a longer finish. The reason isn’t mysterious. Fermentation changes the dough. Over time, flour and water become something else—more fragrant, more elastic, and more flavorful.

Still, flavor alone doesn’t guarantee a great crust. A sourdough pizza crust can be pale, tough, or oddly dense if the bake setup is weak or if the dough never develops enough structure. That’s why this method is built around three practical goals:

Sourdough pizza dough gets better when you nail three things: build strength early so it stretches easily, ferment until the dough is puffy (not slack), and bake hot so the crust turns crisp instead of dry.

First, develop strength early so the dough stretches into a pizza base without tearing.

Second, ferment until the dough is lively but not collapsed, so you get lift instead of flatness.

Third, bake with enough heat that the crust sets quickly, which keeps it crisp rather than dry.

Once those three pieces click, sourdough pizza dough becomes repeatable. You’re no longer gambling on vibes—you’re steering the process.

If you want your starter to feel dependable before you begin, the day-by-day routine in MasalaMonk’s sourdough starter recipe is a solid foundation. It’s especially helpful if your starter tends to be sluggish, overly sour, or inconsistent from week to week.

Also Read: Balti Paneer Gravy (Restaurant-Style, Creamy + Bold Recipe)


Ingredients for sourdough pizza dough

A reliable sourdough pizza dough recipe doesn’t need an ingredient parade. In fact, fewer ingredients usually means fewer surprises.

You only need flour, water, salt, and an active starter to make sourdough pizza dough—olive oil is optional, but it helps the dough handle smoothly in a home oven.

What you need

  • Flour: bread flour works beautifully; “00” flour is also excellent; a blend is ideal if you like
  • Water: room temperature for most kitchens
  • Salt: essential for flavor and dough strength
  • Active sourdough starter: bubbly and recently fed
  • Olive oil (optional): helpful for tenderness in a home oven and makes handling easier

That’s it. Everything else—sugar, honey, malt, milk—can come later if you want to experiment. For now, this base method covers the core “pizza dough with sourdough starter” approach and gives you a crust that can go thin and crisp or thicker and chewier depending on how you shape it.

About the flour choice (simple, useful guidance)

If you already have bread flour, use it. Bread flour tends to make shaping easier because it’s naturally stronger. If you have “00” flour, it can produce a beautifully tender yet crisp crust, especially in hotter bakes. If you want the best of both worlds, blend them: part bread flour for strength, part “00” for tenderness.

Meanwhile, if you only have all-purpose flour, you can still make sourdough pizza dough. You may simply need a slightly gentler hand during stretching and a little more attention to dough strength early on.

Also Read: Mojito Recipe (Classic) + Ratios, Pitcher, Mocktail & Easy Variations


Active starter vs discard for sourdough pizza

This matters, and the good news is that it’s not complicated.

Sourdough starter for pizza dough comparison showing active starter versus discard, with active starter rising faster and discard needing longer timing.
For sourdough pizza dough, an active starter gives a quicker, more predictable rise, while discard can still work—but you’ll need a longer, more flexible fermentation window.

Active starter = predictable rise, cleaner timing

For the main sourdough pizza dough recipe below, an active starter is your best friend. A starter that has been fed and is bubbling well will ferment dough in a more predictable window and usually gives better lift.

If you’re unsure whether your starter is “ready,” the quick-read approach is simple: it should look airy, smell pleasantly tangy (not harsh), and show visible activity. If it’s been in the fridge, give it a feed or two at room temperature until it behaves consistently again. The troubleshooting steps in the sourdough starter recipe guide are especially useful for this.

Discard can work too, but it’s a different lane

Sourdough discard pizza can be fantastic, particularly for bolder toppings and deeper flavor. However, discard-based dough behaves differently and often needs adjustments. If you want a dedicated discard approach, King Arthur’s sourdough discard pizza crust recipe is a trustworthy reference and a nice option when your starter is unfed but you still want pizza tonight.

For this post, though, we’ll build the primary dough with active starter, then you can branch out once you’ve nailed the method.

Also Read: Paloma Recipe: 12 Paloma Cocktail Drinks


The sourdough pizza dough recipe (makes 2 large pizzas or 3 medium)

This recipe is designed to be flexible. You can bake the same day, or you can cold ferment for deeper flavor and easier shaping.

Dough formula (grams)

  • 500 g flour (bread flour, “00,” or a blend)
  • 350 g water (70% hydration; adjust slightly if needed)
  • 100 g active sourdough starter (100% hydration starter)
  • 10 g salt
  • 15–20 g olive oil (optional)
Sourdough pizza dough recipe in grams showing flour, water, starter, salt, optional olive oil, and dough ball yield for two large or three medium pizzas.
Save this grams formula as your go-to sourdough pizza dough base—then choose 480g balls for large pizzas or 320g balls for medium pizzas, depending on the crust thickness you want.

This yields about 960 g total dough, which is perfect for:

  • 2 x ~480 g dough balls (two large pies, roughly 12–14 inch depending on thickness)
  • or 3 x ~320 g dough balls (three medium pies)

If you want thinner crust, make smaller dough balls. If you want thicker, go larger. Your dough ball weight has a bigger impact on the final sourdough pizza crust than most people expect.

Also Read: Air Fryer Donuts Recipe (2 Ways): Glazed Homemade Donuts + Biscuit Donuts


How to make sourdough pizza dough step by step

1) Mix the dough (and make it easy on yourself)

In a large bowl, add the water and sourdough starter. Stir until the starter loosens into the water. It doesn’t have to dissolve perfectly—just break it up enough that it’s mostly distributed.

Next, add the flour and mix until you don’t see dry patches. At this stage the dough will look shaggy and uneven, which is exactly right.

Step 1: Mix until there’s no dry flour, then rest 20–30 minutes—shaggy dough is normal, and the rest makes it noticeably smoother with no kneading.

Now pause. Let the dough rest for 20–30 minutes.

That rest matters because it hydrates the flour and starts gluten development without effort. Later on, you’ll find that the dough becomes smoother and stronger with much less work.

After the rest, sprinkle in the salt. If you’re using olive oil, add it now as well. Then mix until the salt is fully incorporated.

At first, the dough may feel slippery or messy. Keep going anyway; it comes together faster than you think.

2) Build dough strength without beating it up

Sourdough pizza dough can be strong without being overworked. Instead of kneading for a long time, use a short sequence of gentle strength-building.

Step 2 of sourdough pizza dough showing stretch-and-folds to build strength, with dough turning smoother and more elastic before bulk fermenting.
Step 2: Do 3–4 gentle folds over 60–90 minutes—this builds strength so your sourdough pizza dough stretches more easily and bakes into a better crust.

Over the next 60–90 minutes, do 3–4 rounds of stretch-and-folds:

  • Wet your hand lightly.
  • Lift one side of the dough, stretch upward, fold it over the center.
  • Rotate the bowl and repeat a few times until the dough tightens into a smoother mound.

Between rounds, cover the bowl and let the dough relax.

With each round, you’ll notice the dough becoming more elastic and cohesive. That’s exactly what you want: a dough that will stretch into a sourdough pizza base without turning into a fragile sheet.

3) Bulk ferment until the dough is airy, not exhausted

After the final fold, cover the dough and let it rise at room temperature until it looks slightly puffed, smoother, and more alive—often 3–5 hours, depending on your kitchen and starter strength.

Step 3: Bulk ferment until the dough looks lightly domed and feels airy—stop before it turns overly slack, then move on to shaping sourdough pizza dough balls.

Instead of chasing a clock, watch for clues:

  • the dough looks more rounded and airy
  • the surface feels slightly domed rather than flat
  • the dough jiggles a little when you move the bowl

If your kitchen runs warm, this stage will move faster. If it’s cooler, it may take longer. Either way, your goal is fermentation that builds flavor and gas, not fermentation that collapses.

When bulk fermentation is done, the dough should feel extensible and lightly airy. If it’s already very bubbly and slack, don’t push it too far—move on to dividing.

4) Divide into sourdough pizza dough balls

Turn the dough onto a lightly floured counter. Divide into your preferred sizes.

For two larger pizzas: 2 dough balls (~480 g each).
For three medium pizzas: 3 dough balls (~320 g each).

Step 4 sourdough pizza dough card showing two dough balls labeled 320g and 480g with guidance to shape tight balls and proof until relaxed before fermenting.
Step 4: Divide and shape tight sourdough pizza dough balls—use 480g for two large pizzas or 320g for three medium, then proof until relaxed so stretching is easy.

Shape each portion into a tight ball:

  • Fold edges into the center until the surface tightens.
  • Turn seam-side down.
  • Cup your hands around the dough and rotate gently to seal.

Set the dough balls into lightly oiled containers (or a covered tray) so they don’t stick.

From here, you choose your schedule: same-day baking or cold fermentation.

Also Read: Tapas Recipe With a Twist: 5 Indian-Inspired Small Plates


Same-day sourdough pizza dough (quick schedule that still works)

Sometimes you want a quick sourdough pizza dough that’s still made with starter, not commercial yeast. While sourdough naturally benefits from time, you can absolutely make a same-day version when your starter is strong and your kitchen is reasonably warm.

Use this same-day sourdough pizza dough rhythm when you want pizza tonight: mix, rest, fold, bulk ferment, shape dough balls, then bake hot for a crisp crust.

Here’s the rhythm:

  • Mix + rest + folds as written
  • Bulk ferment until lightly airy (don’t force huge rise)
  • Divide into dough balls
  • Let the dough balls rest at room temp until relaxed and slightly puffy, usually 1–2 hours

When the dough balls feel soft, supple, and easy to stretch, you’re ready to shape.

This “sourdough pizza dough same day” approach is about practicality. It won’t taste identical to a 24-hour cold ferment, yet it still delivers a flavorful sourdough pizza crust with great texture if you bake hot enough.

If you want more depth, shift to cold fermentation.

Also Read: Air Fryer Salmon Recipe (Time, Temp, and Tips for Perfect Fillets)


Cold ferment sourdough pizza dough (for better flavor and easier shaping)

Cold fermentation is where sourdough pizza dough starts feeling effortless. The dough relaxes. The flavor deepens. Stretching becomes smoother, and the crust often bakes more evenly.

Cold fermenting sourdough pizza dough deepens flavor and makes shaping easier—chill the dough balls 12–48 hours, warm them 60–120 minutes, then stretch into your pizza base.

After you’ve shaped dough balls, cover them and refrigerate.

A common sweet spot is 12–48 hours. King Arthur’s sourdough pizza crust recipe leans into a chilled window for exactly these reasons, and it’s a great confirmation that cold time helps both schedule and results.

When you’re ready to bake:

  • remove dough balls from the fridge
  • let them sit covered at room temperature until they feel relaxed, usually 60–120 minutes

Cold dough tears easily. Warmed dough stretches willingly. So give it time to wake up.

Also Read: Masterclass in Chai: How to Make the Perfect Masala Chai (Recipe)


How to shape a sourdough pizza base without tearing

Shaping is where sourdough pizza dough goes from “maybe” to “yes.” It’s also where most frustration happens—usually because the dough is too cold, too tight, or simply handled too aggressively.

Step-by-step guide showing how to shape a sourdough pizza base: press to leave a 1-inch rim, stretch evenly, and form a 10–12 inch pizza base with the rim intact.
Press from the center outward, stretch gently and evenly, and keep a 1-inch rim—if the dough snaps back, rest it 15–20 minutes so your sourdough pizza base stretches without tearing.

Start with a relaxed dough ball

If the dough snaps back, it’s not a failure. It’s a signal.

Cover it and let it rest another 15–20 minutes. Then try again. Often, that one pause changes everything.

Press, then stretch—don’t yank

Dust the counter lightly with flour. Place the dough ball down and press from the center outward, leaving a thicker rim.

Once you’ve formed a rough disk, lift and stretch gently with your hands. Move around the edge in small steps rather than pulling hard in one spot.

If the center starts thinning too much, set the dough down and let it relax for a minute. Then continue.

Rolling pins: when they help and when they hurt

A rolling pin can be useful if you want a flatter base. However, it also pushes out gases that help the rim puff. If your dream crust includes a lively edge, skip the pin. If you’re aiming for a thinner, crisper sourdough pizza crust, a pin can be acceptable.

Either way, the dough should still feel elastic, not fragile. If it’s fragile, it’s likely under-strengthened or under-rested.

Also Read: 10 Low Carb Chia Pudding Recipes for Weight Loss (Keto, High-Protein, Dairy-Free)


How to bake sourdough pizza for a crisp crust

Your oven setup matters more than your topping choices. Even the best sourdough pizza dough recipe can bake pale and soft if the oven isn’t truly hot.

Underside view of sourdough pizza crust showing a browned, crisp bottom and airy rim on a peel, with text “Bake Hot • Preheat Long.”
Want a crisp sourdough pizza base instead of a soft bottom? Preheat your oven and baking surface longer than you think, then bake hot so the crust sets fast and stays airy at the rim.

Preheat longer than you think

Set your oven as hot as it safely goes—often 260°C / 500°F or higher if possible.

Place a pizza steel or stone inside while preheating. Then preheat for at least 45 minutes.

That long preheat isn’t extra. It’s the difference between:

  • a crust that springs and sets quickly
  • and a crust that dries out slowly while trying to color

Steel vs stone vs tray

  • Steel: strong bottom color, fast baking, excellent for crisp crust
  • Stone: great results, slightly gentler bottom heat
  • Heavy tray: workable if preheated; best for moderate thickness
Comparison guide showing pizza steel vs pizza stone vs baking tray for sourdough pizza, with notes on fast baking, balanced heat, and preheating at least 45 minutes.
A steel gives the strongest crisp bottom, a stone bakes more gently with balanced heat, and a heavy tray still works—just preheat your baking surface for at least 45 minutes.

If you’re baking with a dedicated pizza oven, timing shifts dramatically. For that environment, Ooni’s recipe page is a useful reference because it’s built for higher heat and faster bakes.

Keep toppings balanced so the base stays crisp

This is the quiet secret behind many “why is my pizza soggy?” problems. Even a great sourdough pizza base can suffer under too much sauce, too much cheese, or wet toppings.

Instead:

  • use a thin layer of sauce
  • choose low-moisture cheese when possible
  • pre-cook watery vegetables if needed
  • keep the topping load lighter for thinner crust
Comparison image showing sourdough pizza toppings balance: “too much” versus “just enough” toppings to keep the pizza base crisp, with tips for thin sauce and low-moisture cheese.
A crisp sourdough pizza crust needs breathing room—use a thin sauce layer, choose low-moisture cheese, and keep toppings balanced so the base bakes dry and golden instead of soft.

You can still make a generous pizza. You’re just aiming for balance, so the crust can crisp before the center turns heavy.

Pan-style option when you want a thicker, forgiving crust

If you want a thicker base with crisp edges, pan pizza is a beautiful direction. Even though it’s not sourdough-specific, Serious Eats’ foolproof pan pizza recipe is a great model for pan technique—how oil affects crispness, how the pan bakes the sides, and why thicker dough benefits from that environment.

Pan-style sourdough pizza baked in a cast-iron skillet with a thicker crust and crisp browned edges, labeled “Oil the pan • Bake hot.”
Want a thicker, more forgiving sourdough pizza base? Bake it pan-style—oil the skillet, use slightly thicker dough, and bake hot for crisp edges and a chewy center.

For sourdough, the idea is the same: slightly thicker dough, a well-oiled pan, and a hot bake that crisps the bottom and edges.

Also Read: Keto Hot Chocolate Recipe (Sugar-Free Hot Cocoa) + Best Homemade Mix


Sauce and topping ideas that make sourdough pizza shine

Sourdough pizza already brings flavor, so your toppings don’t need to shout. In fact, simpler combinations often taste more “complete” because the crust contributes so much.

That said, variety is what makes pizza night fun. If you want easy ways to change the mood without reinventing the whole plan, start with sauces.

Three pizza sauce options for sourdough pizza—marinara, white garlic sauce, and pesto—shown in bowls with a slice of sourdough crust.
Swap the sauce to change the whole sourdough pizza: go classic with marinara, creamy with white garlic, or bright and herby with pesto—same dough, totally different vibe.

Sauce ideas (and a way to build options fast)

A sourdough pizza recipe becomes ten recipes when you swap the sauce. That’s why MasalaMonk’s pizza sauce recipes is such a useful read: marinara, white garlic, Alfredo, buffalo, BBQ, vodka, ranch—seven directions from the same base.

Meanwhile, if you want a bright, herby route, MasalaMonk’s pesto recipe guide gives you classic basil pesto plus variations that pair beautifully with mushrooms, roasted vegetables, or even a simple mozzarella-and-tomato topping.

Topping combos that work especially well with sourdough pizza crust

Here are a few combinations that tend to harmonize with the crust rather than compete with it:

Sourdough pizza topping ideas card showing five topping combinations, including marinara and mozzarella, white garlic and mushrooms, pesto and roasted vegetables, vodka sauce with chili flakes, and BBQ chicken.
These five topping combos make sourdough pizza night easy—swap sauces, keep toppings balanced, and let the sourdough crust stay crisp while the flavors shine.
  • Marinara + mozzarella + basil
    Classic, clean, and the sourdough flavor reads clearly.
  • White garlic sauce + mushrooms + mozzarella
    Earthy toppings pair beautifully with tangy crust.
  • Pesto + mozzarella + roasted vegetables
    Bright, herby, and flavorful without heaviness.
  • Vodka sauce + mozzarella + chili flakes
    A richer sauce that still bakes cleanly if used lightly.
  • BBQ sauce + onion + chicken (light topping load)
    Best on a slightly thicker base, especially if your oven isn’t extremely hot.

If you prefer bold toppings, sourdough can take them. Just keep one thing in mind: bold topping choices often taste best when the crust is crisp enough to provide contrast.

Also Read: Dirty Martini Recipe (Classic, Extra Dirty, No Vermouth, Spicy, Blue Cheese, Tequila + Batched)


Troubleshooting sourdough pizza dough and crust (the fixes that matter)

Even with a dependable method, dough will occasionally misbehave. Instead of starting over, it’s more useful to diagnose what’s happening.

If your sourdough pizza dough feels sticky, your crust turns tough, the bottom stays pale, or the dough snaps back—use these quick fixes to get a stronger dough and a crisp, golden crust.

My sourdough pizza dough is sticky—what now?

Sticky dough often comes from one of these:

  • hydration is high for your flour
  • the dough didn’t develop enough strength early
  • the dough got too warm during fermentation
  • shaping started before the dough fully relaxed

Rather than dumping flour into the dough at the end, make two small adjustments next time:

  1. build a little more strength with one extra fold early on
  2. chill dough balls for a short cold ferment, then bring them back to room temp before shaping

In the moment, use light flour on the bench, keep your hands calm, and avoid forcing thinness too quickly.

My sourdough pizza crust is tough

A tough crust is often a bake problem, not a dough problem. It usually happens when:

  • the oven wasn’t hot enough
  • the baking surface wasn’t fully preheated
  • the pizza baked too long trying to brown

A better strategy is higher heat and faster bake. Preheat longer, use steel if you have it, and keep toppings lighter so the crust sets quickly.

The pizza base is pale and soft underneath

This almost always points to insufficient bottom heat.

Try:

  • longer preheat
  • moving the baking surface higher or lower depending on your oven’s heat pattern
  • using a steel if possible
  • par-baking the base briefly if you’re making a thicker pizza base

King Arthur also discusses how sourdough crusts can behave differently in browning and suggests practical fixes for thicker crust styles in their sourdough pizza resources, which can be reassuring when your crust looks lighter than expected but still bakes through.

The dough snaps back while stretching

Snapping back means the dough is tight. Tight dough needs time.

Cover it. Walk away for 15 minutes. Come back and stretch again.

Often, that small rest is the whole solution. If this happens frequently, a longer cold ferment usually improves extensibility dramatically.

Also Read: Fish and Chips Reimagined: 5 Indian Twists (Recipe + Method)


Pizza night pairings: cocktails that actually match sourdough pizza

When pizza is homemade, drinks become part of the atmosphere. You don’t need anything complicated—just something that plays nicely with cheese, tomato, and a toasty crust.

Pizza night pairing image with a sourdough pizza slice and four cocktail options—mule in a copper mug, punch in a tall glass, martini with olives, and an espresso cocktail.
Turn sourdough pizza night into a plan: pair your pie with a bright mule, an easy punch, a savory martini, or an espresso cocktail for dessert—pick one drink and make it feel special.

Here are a few of our blog posts that pair naturally with sourdough pizza night:

  • Fresh, fizzy, and bright: a classic Moscow Mule is hard to beat when your toppings lean spicy or rich.
  • Party-friendly pitcher option: rum punch fits perfectly when you’re feeding a crowd and want something easy to pour.
  • Savory pairing for olive-forward or salty toppings: a briny dirty martini can feel surprisingly right with mushrooms, olives, or deeply savory pizzas.
  • After-dinner move: if pizza night turns into dessert night, an espresso martini is a fun, coffee-forward finish.

You can keep it simple: pick one drink direction, make the pizza, and suddenly the whole evening feels intentional.

Also Read: Ravioli Recipe Reinvented: 5 Indian-Inspired Twists on the Italian Classic


Storing and reheating sourdough pizza (so it still tastes good tomorrow)

Leftover pizza is only disappointing when it’s handled roughly. Sourdough pizza can reheat beautifully—especially because the crust has structure—if you warm it in a way that respects the crust.

Storing leftovers safely

Let the pizza cool, then refrigerate it promptly in a covered container.

For timing and safe handling, FoodSafety.gov’s cold storage chart specifically lists pizza storage guidance, including fridge and freezer windows. It’s a helpful reference when you’re deciding whether a slice is still within a safe range. (Cold Food Storage Chart)

When reheating, the USDA recommends reheating leftovers to 165°F for safety. Their leftovers guidance is straightforward and worth keeping in mind when you’re reheating more than just a slice or two. (Leftovers and Food Safety)

Guide showing how to reheat sourdough pizza using a skillet, oven, or air fryer to restore a crisp crust, with tips for fast crisping and reheating multiple slices.
For the crispiest sourdough pizza crust, reheat in a skillet; for several slices, use the oven; for quick crunch, use an air fryer—stop as soon as it’s hot and revived.

Best ways to reheat sourdough pizza

Skillet method (best for crisp bottom):
Warm a skillet over medium heat, place the slice in, and cover loosely. The bottom crisps, while the cover helps the top warm without drying out.

Oven method (best for multiple slices):
Heat the oven and warm slices on a tray until the cheese softens and the crust crisps again.

Air fryer method (quick and crisp):
A short reheat in the air fryer works well, particularly for restoring texture.

Whichever method you use, aim for “hot and revived,” not “cooked again.” The goal is to bring the crust back to life, not to dry it out.

Guide showing how to freeze sourdough pizza slices in a container and how to freeze sourdough pizza dough balls, with tips to reheat slices crisp and thaw dough balls in the fridge overnight.
Freeze baked sourdough pizza slices for quick meals, or freeze dough balls for future pizza nights—thaw dough in the fridge overnight, then warm before stretching for the best crust.

Freezing pizza and freezing dough balls

If you want future pizza nights to be easier, freezing helps.

  • Freeze baked slices for quick lunches or fast dinners.
  • Freeze dough balls if you want fresh-baked pizza later without starting from scratch.

For dough balls, freeze after fermentation, wrap well, and thaw in the fridge overnight. Then let the dough come back toward room temperature before stretching. Cold dough is tight; warmer dough is cooperative.

Also Read: Croquettes Recipe: One Master Method + 10 Popular Variations


A calm, repeatable workflow for sourdough pizza at home

If sourdough pizza feels like a “special occasion” thing right now, here’s the shift: treat it like a rhythm, not a performance. The more familiar you get with the stages—mix, strengthen, ferment, divide, rest, bake—the less dramatic it becomes.

One week you might do a same-day sourdough pizza dough for a spontaneous dinner. Another week you might plan a cold ferment because you want deeper flavor and a smoother shaping experience. Either way, you’re building the same foundation: a sourdough pizza base that supports whatever toppings you love and bakes into a crust that tastes like you meant it.

Sourdough pizza dough gets easier when you treat it like a rhythm: mix, strengthen, ferment, divide, rest, then bake—repeat weekly and your pizza base and crust improve every time.

And when you want to expand without reinventing the wheel, here are some blog posts that keep pizza night interesting:

From there, it’s simply repetition. Each bake teaches your hands what the dough should feel like. Each pizza shows you how your oven behaves. Before long, “sourdough pizza dough recipe” stops being an intimidating phrase and becomes a reliable plan.

Also Read: How to Make a Flax Egg (Recipe & Ratio for Vegan Baking)

FAQ: Sourdough Pizza Dough, Crust, and Base

1. What is the difference between sourdough pizza dough, sourdough pizza crust, and sourdough pizza base?

They usually refer to different stages of the same thing. Sourdough pizza dough is the raw dough before shaping, sourdough pizza base is the shaped round before toppings, and sourdough pizza crust often means the baked result. Even so, many recipes use the terms interchangeably, so the method is typically the same.

2. Can I make sourdough pizza dough the same day?

Yes, you can make sourdough pizza dough the same day if your starter is active and your kitchen is warm enough. In that case, give the dough enough time to bulk ferment, then let the dough balls rest until they feel soft and easy to stretch. That said, a cold ferment usually improves flavor and handling.

3. How long should I ferment sourdough pizza dough for the best flavor?

For the best balance of flavor and texture, many home bakers ferment sourdough pizza dough overnight in the fridge after dividing it into dough balls. However, a same-day sourdough pizza recipe can still work well. If you have more time, a longer cold ferment often gives a better sourdough pizza crust with easier stretching.

4. Can I use sourdough discard for pizza dough?

Yes, sourdough discard pizza dough is possible, although it behaves differently from dough made with active starter. For example, discard may ferment more slowly and produce a slightly denser result unless the recipe is designed for it. Therefore, if you use discard, expect to adjust timing and texture a little.

5. Why is my sourdough pizza dough sticky?

Most often, sticky sourdough pizza dough comes from high hydration, weak gluten development, or warm dough. In contrast, a dough with enough strength and a short rest between steps feels much easier to shape. To fix it, build more strength early, chill the dough if needed, and use only a light dusting of flour while shaping.

6. Why does my sourdough pizza dough snap back when I stretch it?

Usually, the dough is too tight or not rested enough. Instead of forcing it, let it sit covered for 10 to 20 minutes and try again. Afterward, it should stretch more easily into a sourdough pizza base without tearing.

7. What is the best flour for sourdough pizza dough?

Bread flour is a strong choice because it gives structure and makes shaping easier. Meanwhile, 00 flour can produce a tender, crisp sourdough pizza crust, especially in high-heat baking. Many bakers prefer a blend of both for a balanced result.

8. How do I get a crispy sourdough pizza crust at home?

To get a crispy sourdough pizza crust, preheat your oven longer, use a hot baking surface, and avoid overloading the pizza with sauce or toppings. In addition, a thinner stretch and a well-heated steel or stone help the base set quickly. As a result, the crust crisps before it dries out.

9. Why is my sourdough pizza base soft in the center?

A soft center usually means the dough did not get enough bottom heat or the toppings were too wet. For instance, too much sauce, fresh mozzarella, or watery vegetables can slow down browning. To improve it, preheat longer, use fewer wet toppings, and stretch the dough a little thinner.

10. What size should sourdough pizza dough balls be?

It depends on the pizza style you want. Smaller sourdough pizza dough balls make thinner, crisper pizzas, while larger dough balls create a thicker, chewier crust. As a general guide, medium dough balls work best when you want an easy-to-handle sourdough pizza recipe for a home oven.

11. Can I freeze sourdough pizza dough balls?

Yes, sourdough pizza dough balls freeze well and make future pizza nights much easier. Ideally, freeze them after fermentation, wrap them well, and thaw them in the fridge before using. Then let the dough rest at room temperature so the pizza base stretches without fighting back.

12. Can I freeze baked sourdough pizza?

Yes, baked sourdough pizza freezes well, especially if you cool the slices before storing. Later, reheat the slices in an oven, skillet, or air fryer to bring back some crispness in the crust. This way, leftover sourdough pizza still tastes good instead of turning chewy or dry.

13. Is sourdough pizza healthier than regular pizza?

Sourdough pizza can be easier for some people to digest because of the longer fermentation, and many people also prefer the flavor. Still, the overall nutrition depends on your flour, toppings, cheese, and portion size. In other words, sourdough improves the base, but the full pizza still depends on what you build on top.

14. What is the best hydration for sourdough pizza dough?

A moderate hydration is usually the easiest starting point for home bakers because it balances stretchability and control. Higher hydration can give a more open, airy crust, but it also makes shaping harder. Accordingly, if you are new to sourdough pizza dough, start in the middle and adjust after a few bakes.

15. Can I make a sourdough pizza base without a pizza stone or steel?

Absolutely. You can bake a sourdough pizza base on a preheated tray or pan and still get great results. Although a steel or stone helps with bottom heat, a hot oven and lighter toppings matter just as much. Therefore, don’t wait for perfect equipment before making your sourdough pizza recipe.

16. How do I keep the rim puffy on a sourdough pizza crust?

Leave a border when pressing the dough, and avoid flattening that edge with a rolling pin. Likewise, don’t overload the rim with sauce or cheese. Once baked, that untouched edge has room to puff and brown, which gives you a more attractive sourdough pizza crust.

17. Why does my sourdough pizza crust turn tough after reheating?

Usually, it is being reheated too long or at too high a heat without enough moisture control. Instead, warm it just until hot, then stop. A skillet method often works especially well because it re-crisps the bottom while keeping the rest of the slice from drying out.

18. Can I use this sourdough pizza dough recipe for thin crust and thick crust?

Yes, the same sourdough pizza dough recipe can produce both styles. The difference comes from dough ball size, shaping thickness, and bake method. For thin crust, stretch more and top lightly; for a thicker pizza base, use a larger dough ball and give it a little more structure during shaping.