
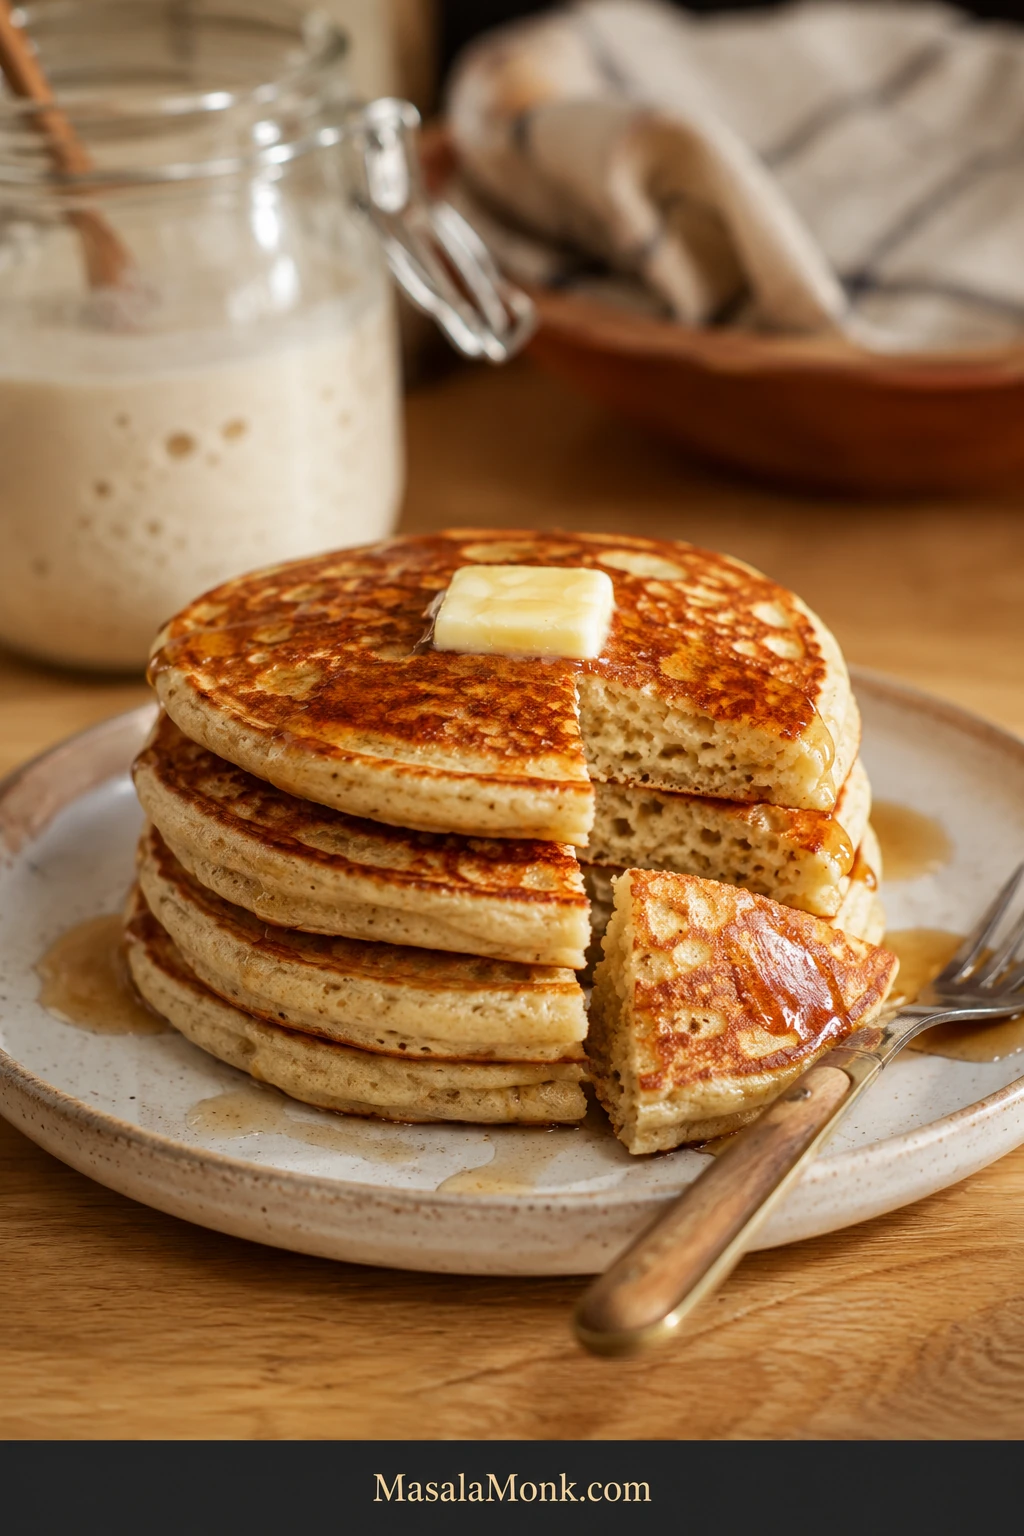
A jar of sourdough discard has a way of turning breakfast into a small negotiation. There is too much of it to feel good about throwing away.
But you also do not want to feed a starter, wait for it to peak, or spend the morning wondering why the first pancake is beautifully brown outside and still wet in the middle.
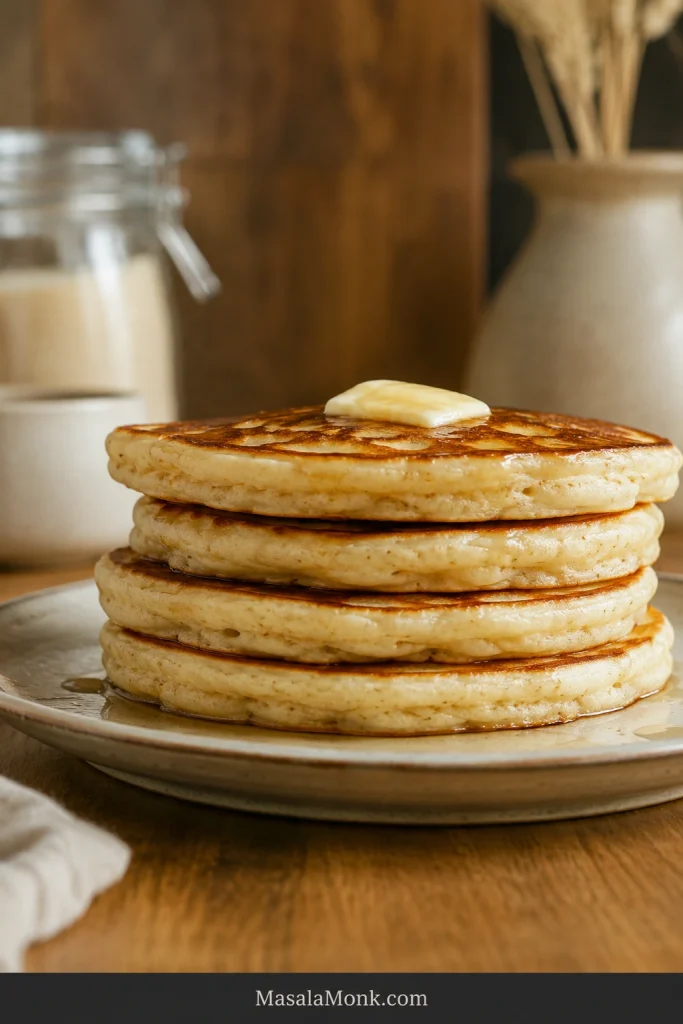
These sourdough discard pancakes are fluffy American-style pancakes with lightly crisped golden edges, a soft, springy center, and a mild sourdough tang that still leaves butter and maple syrup in charge. Refrigerator-cold discard works, and active starter works too. This is a same-day recipe: no feeding first, no overnight fermentation, no waiting for a rise.
Jump to the recipe · Check the batter · Troubleshooting
Discard does change from jar to jar. One pours; another mounds. Fresh discard may be thick and mild, while an older refrigerator jar can become sharper and looser.
So instead of pretending every jar needs exactly the same amount of milk, this recipe gives you a dependable starting point and a clear picture of what ready-to-cook batter looks like.
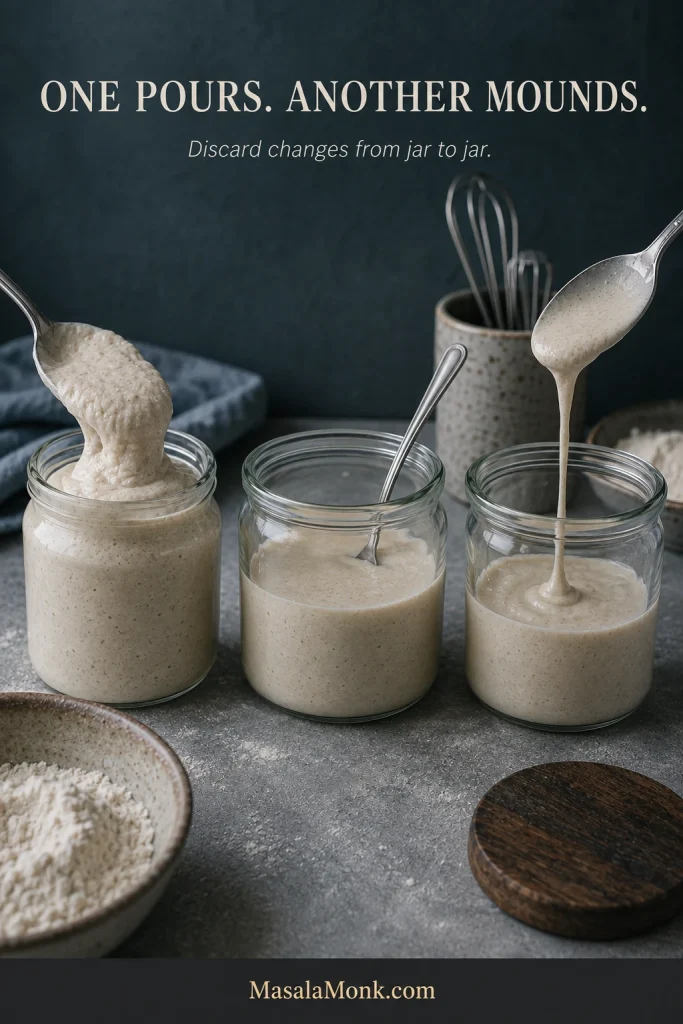
The measurements get you started; the batter and first pancake tell you the rest.
Quick Answer: How Do You Make Fluffy Sourdough Discard Pancakes?
Cold, unfed sourdough discard works. Hands-on prep takes about 10 minutes, with no feeding or overnight wait. Baking powder and baking soda provide the same-day lift.
Use a thick but pourable batter, start the pan around 350°F / 175°C, and cook one tester pancake before filling the griddle. Flip when the edge looks matte, bubbles have formed and begun staying open, and the underside is golden.
Sourdough Discard Pancakes Recipe
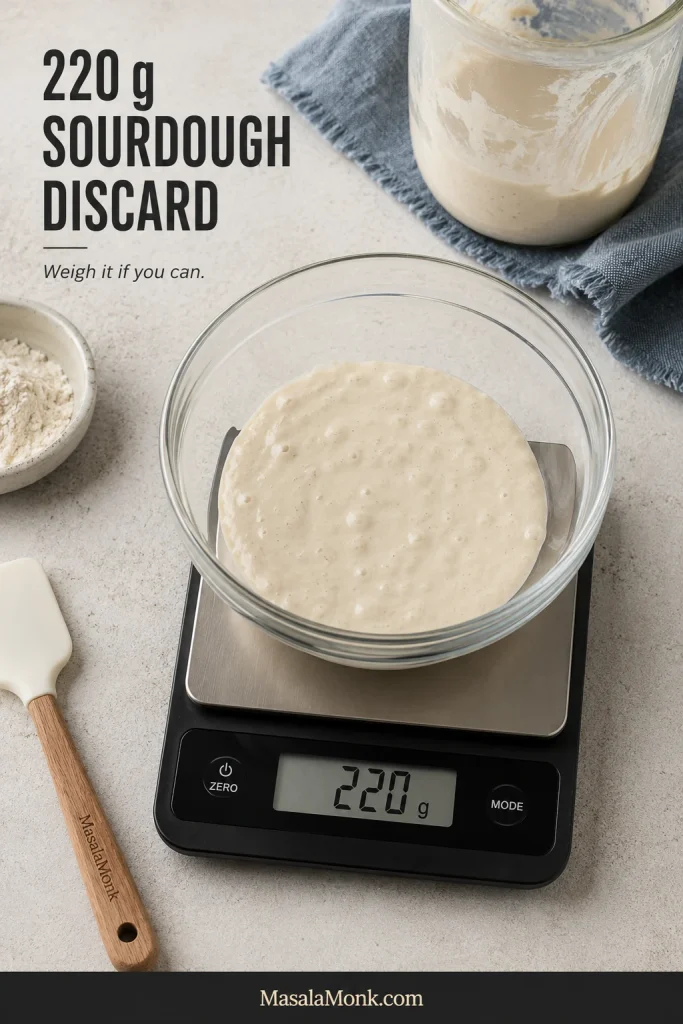
This version uses 220 g discard—enough to make a real dent in the jar—while keeping enough fresh flour for a fluffy American-style crumb. Start with 200 ml milk and keep another 30 ml nearby only if the rested batter needs it.
Recipe at a Glance
| Hands-on prep | About 10 minutes |
| Rest | About 10 minutes |
| Cook | About 15–20 minutes on a roomy griddle |
| Total | About 35–40 minutes; longer with a small skillet |
| Yield | About 12–13 pancakes |
| Serves | 3–4 |
Ingredients
- 220 g sourdough discard, from a 100%-hydration starter
- 180 g all-purpose flour, about 1½ cups spooned and leveled
- 200 ml milk, about ¾ cup + 1½ tablespoons, plus up to 30 ml / 2 tablespoons more as needed
- 2 large eggs, about 100 g without shells
- 35 g unsalted butter, about 2½ tablespoons, melted and cooled until just warm, plus a little for the pan
- 25 g granulated sugar, about 2 tablespoons
- 8 g baking powder, about 2 teaspoons
- 2 g baking soda, about ½ teaspoon
- 4 g fine salt, roughly ⅔–¾ teaspoon
- 1 teaspoon vanilla extract, optional
Weigh the discard if you can. Its cup volume can vary considerably depending on hydration, temperature, and whether the starter is bubbly or collapsed.
Instructions: Prepare the Pan and Batter
- Preheat the pan. Warm a skillet or griddle over medium to medium-low heat while you make the batter. If you can measure the cooking surface, start around 350°F / 175°C. Heavy cast iron needs a gentler, longer preheat than a thin nonstick pan.
Mix and Rest the Batter
- Mix dry and wet separately. In one bowl, whisk together the flour, baking powder, baking soda, and salt. Separately, whisk the discard with 200 ml milk, the eggs, sugar, vanilla, and melted butter. Refrigerator-cold discard can make hot butter firm up, so let the butter cool until just warm first. A few tiny butter flecks are harmless.
- Combine and rest. Add the dry ingredients to the wet and mix gently until the large streaks of flour disappear. Small lumps are fine. Let the batter sit for about 10 minutes so the flour can absorb the liquid.
Leave the little lumps alone. Once the large streaks of flour disappear, the short rest can finish hydrating the batter.
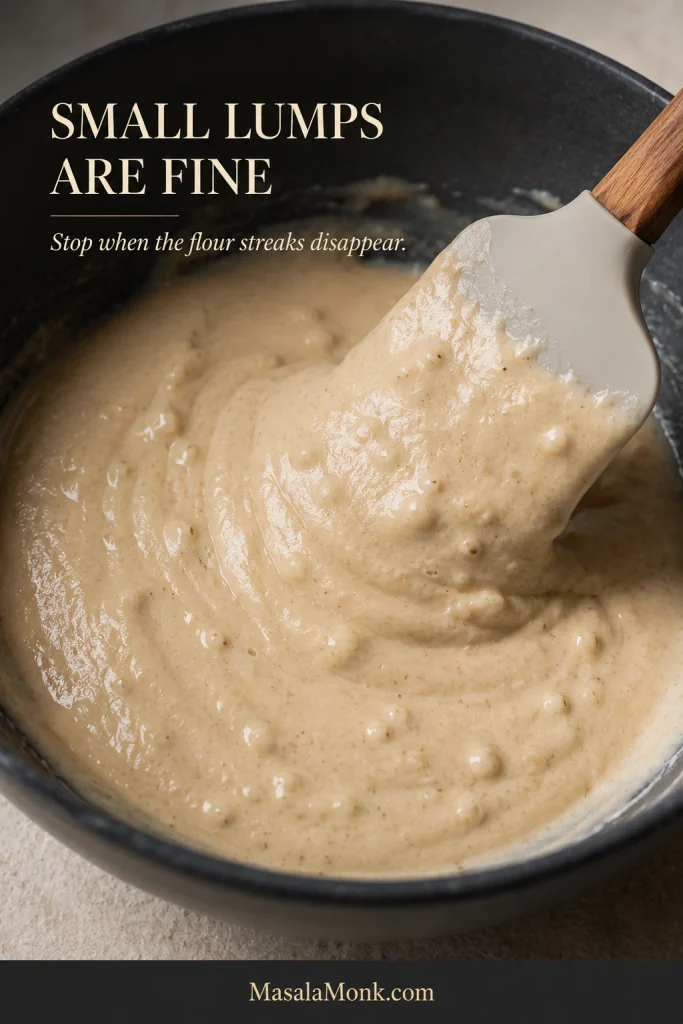
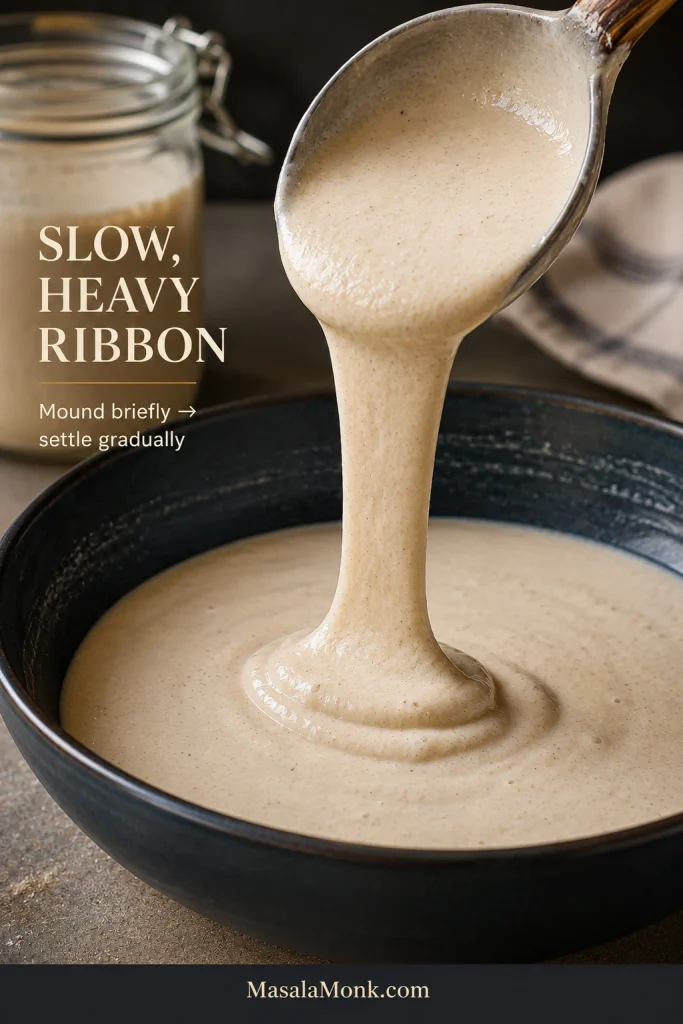
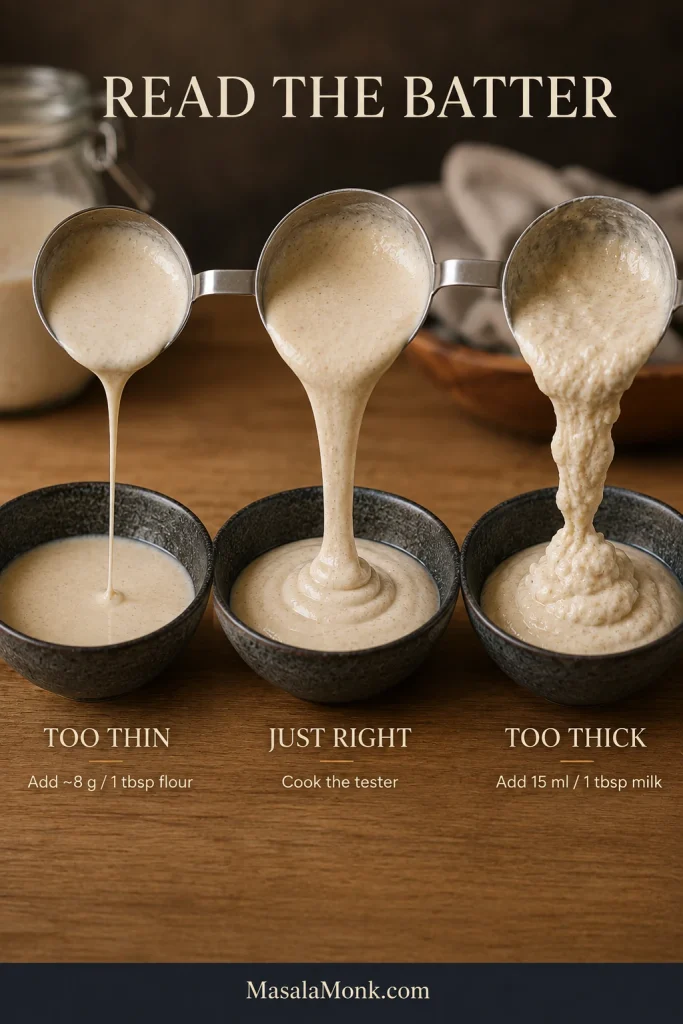
- Check the thickness. After the rest, yours may already be ready to cook. The batter should fall in a slow, heavy ribbon and mound briefly before settling. A stiff batter can take milk 1 tablespoon / 15 ml at a time; a clearly runny batter can take flour about 1 tablespoon / 8 g at a time. If you need much more than the reserved 30 ml milk—or repeated additions of flour—pause and recheck the original measurements.
When the ribbon looks like this, stop adjusting. Let it settle briefly, then move on to the tester pancake.
Cook the Tester, Then Finish the Batch
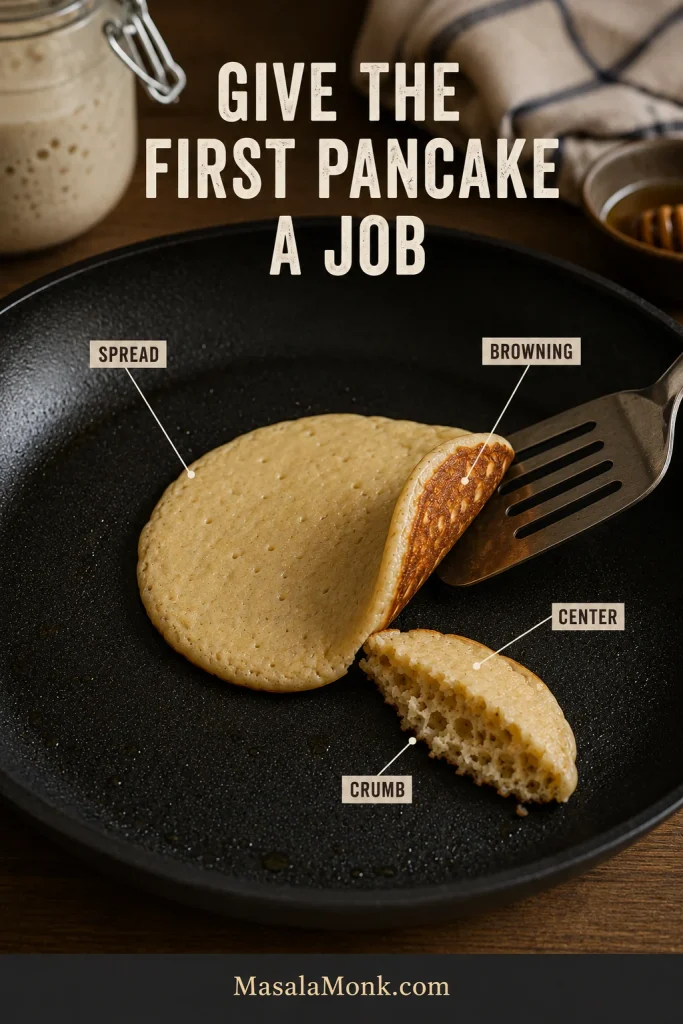
- Grease lightly and cook one tester. Coat the pan with a thin film of butter or neutral oil, then add about 60 g / a scant ¼ cup batter. The first pancake answers four questions: did it spread correctly, did it brown at the right speed, did the center set, and did the crumb stay tender?
Keep the tester close to 60 g / a scant ¼ cup. That keeps its spread and cooking cues aligned with the timings in this recipe.
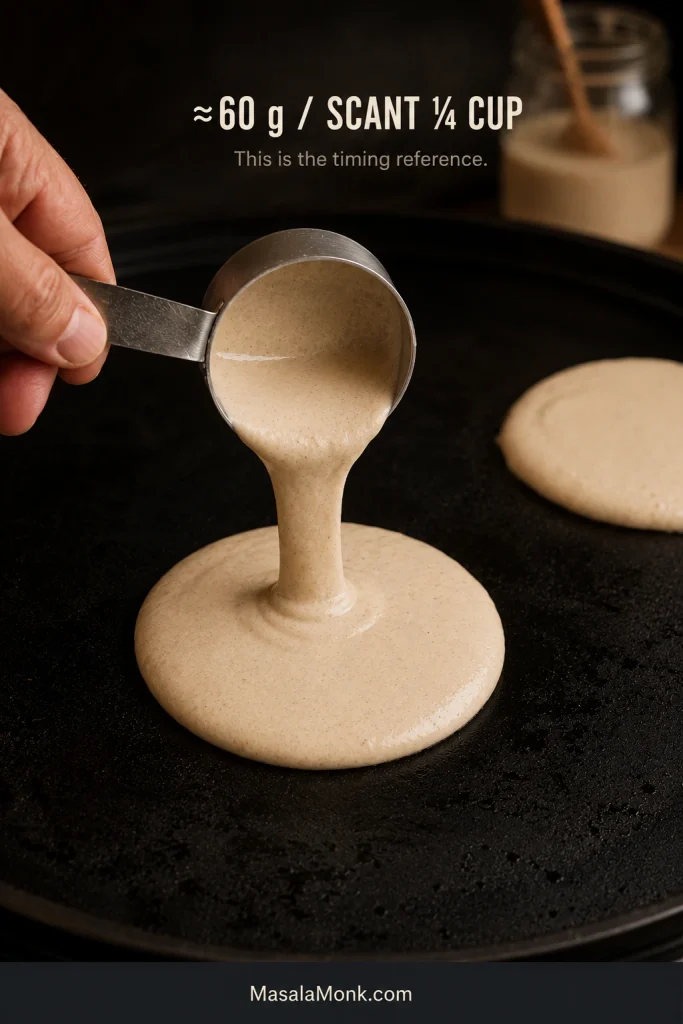
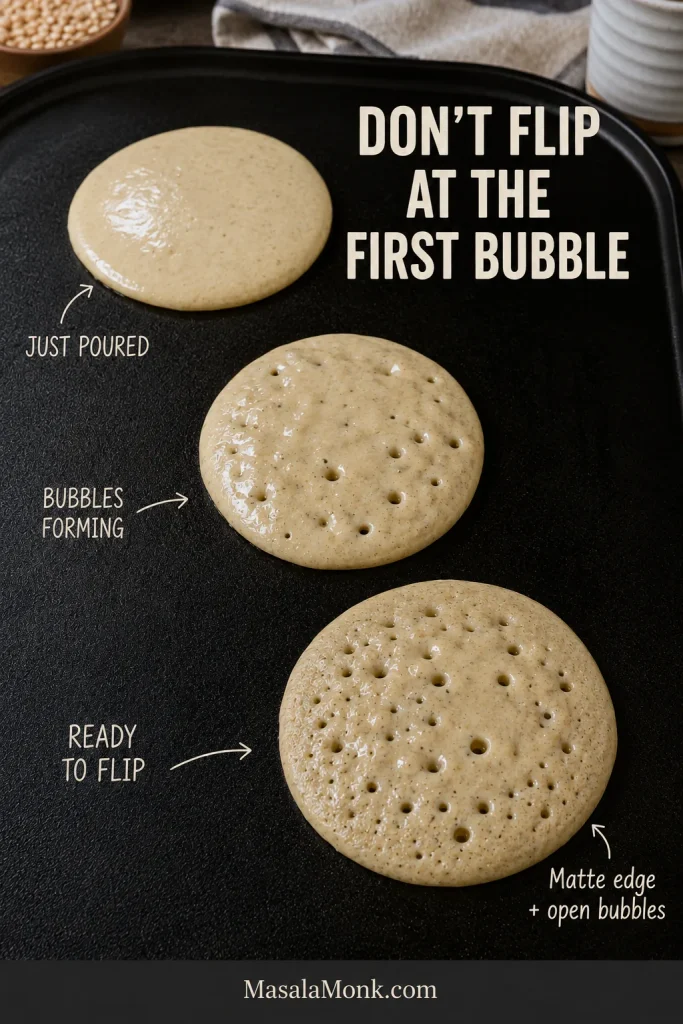
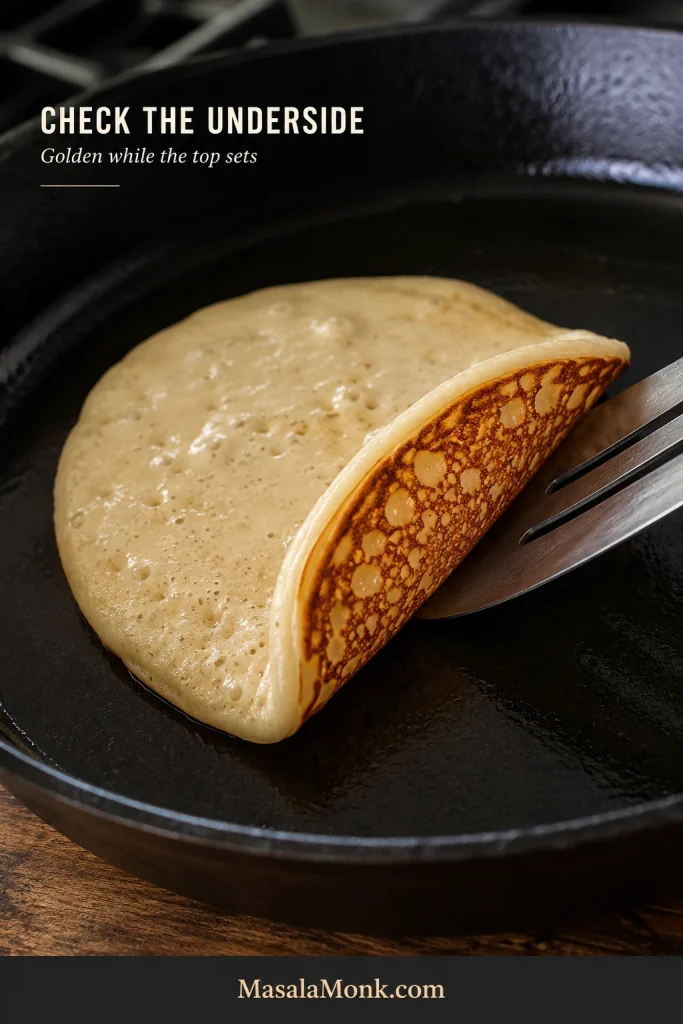
- Flip when the cues line up. For a roughly 60 g pancake, the first side usually takes about 2–3 minutes. Look for a matte outer edge, bubbles across the surface, a few bubbles that have burst and stayed open, and a golden underside. Flip once and cook the second side for roughly 1–2 minutes.
Use the cues together. The surface should look more set, the edge matte, and the underside golden before you turn the pancake.
Finish the Batch
- Adjust the pan, then cook the batch. A dark underside beneath a still-wet top means the pan is running too hot; lower the heat before the next pour. If the tester races outward, the batter needs a little more body. Once the center tears open soft and fully set, cook the remaining pancakes. If butter solids start getting too dark between batches, wipe the pan and grease it lightly again.
- Serve or keep warm. Eat the pancakes as they come off the griddle, or hold them on a wire rack over a sheet pan in a 200°F / 95°C oven while the rest cook.
Can I Use Cold Sourdough Discard or Active Starter?
Yes—cold refrigerator discard and active starter both work, as long as the starter is established and healthy. Cold discard can go straight into this same-day batter.
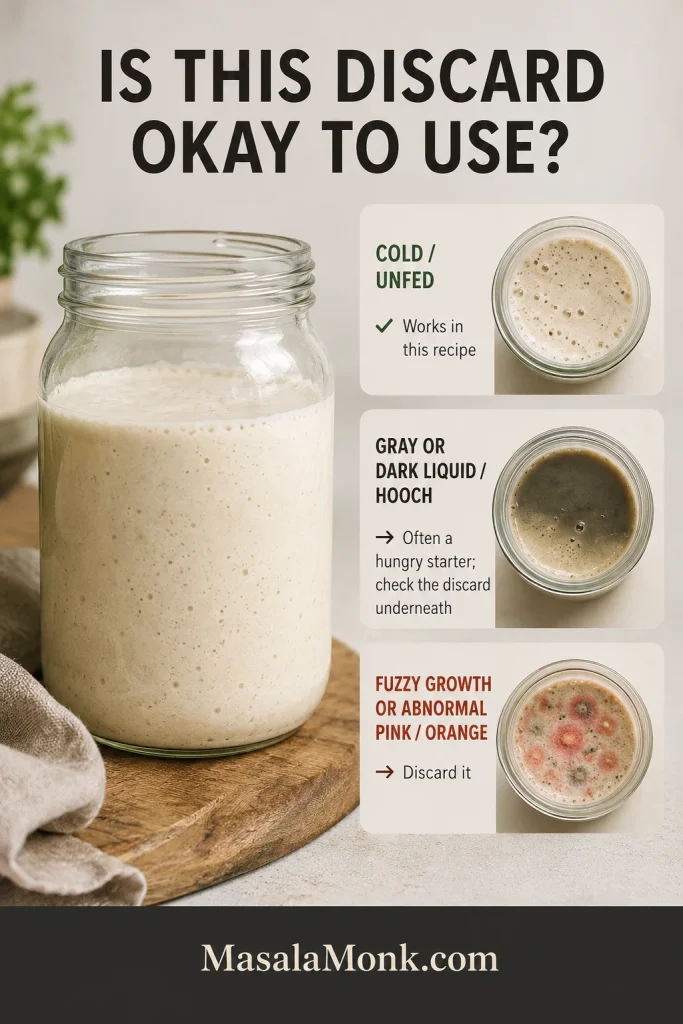
- Cold, unfed refrigerator discard: use it directly.
- Fresh or active starter: use the same weight.
- Gray or dark liquid on top: this is usually hooch from a hungry starter, not mold. Pour it off if you want a milder result, then check the discard underneath as usual.
- Discard from a brand-new starter that is not reliably active yet: wait until the starter is established and behaving consistently before saving its discard for cooking.
- Moldy or abnormally discolored starter: fuzzy growth or unusual pink or orange discoloration means it should not go into breakfast.
How Old Can Sourdough Discard Be for Pancakes?
There is no single day when refrigerated discard suddenly becomes unusable. King Arthur Baking notes that refrigerated discard can keep for several weeks. Older discard usually tastes sharper and may become looser; use the safety checks above rather than age alone to decide whether it belongs in the batter.
If the starter itself is giving you trouble, our sourdough starter recipe for beginners goes deeper into feeding, texture, discard, and keeping a healthy culture.
Discard unusually thick or thin? Go to the batter consistency guide.
Sourdough Pancake Batter: Too Thin, Just Right, or Too Thick?
Get this part right and most of the rest becomes easy. Two people can weigh the same 220 g of discard and still see slightly different batter, especially when one jar is fresh and thick and another is older and looser.
The target is still the same: a slow, heavy ribbon that sits briefly on the surface before easing back into the bowl.
How to Adjust Thin or Thick Pancake Batter
| What you see | What it means | What to do |
|---|---|---|
| Runs quickly from the scoop and spreads immediately | Too thin | Add about 8 g / 1 tbsp flour, mix gently, and check again. |
| Falls in a thick ribbon and gradually relaxes | Just right | Cook the tester pancake. |
| Drops in a mound and barely moves | Too thick | Add 15 ml / 1 tbsp milk, mix gently, and check the flow again. |
A loose batter runs outward before the pancake has much chance to build height. At the other extreme, batter that barely moves can sit too tall, allowing the underside to brown before enough heat reaches the center.
Let the First Pancake Check the Pan
The first pancake has a bad reputation. Give it a job instead.
A bad first pancake is useful information; finding the same problem after the whole bowl has been cooked is much more annoying. Check four things:
What to Check on the Tester
- Spread: does it widen into a neat, fairly thick round?
- Browning: does the underside turn golden at roughly the same pace that the top begins to set?
- Center: does it cook through before the bottom gets too dark?
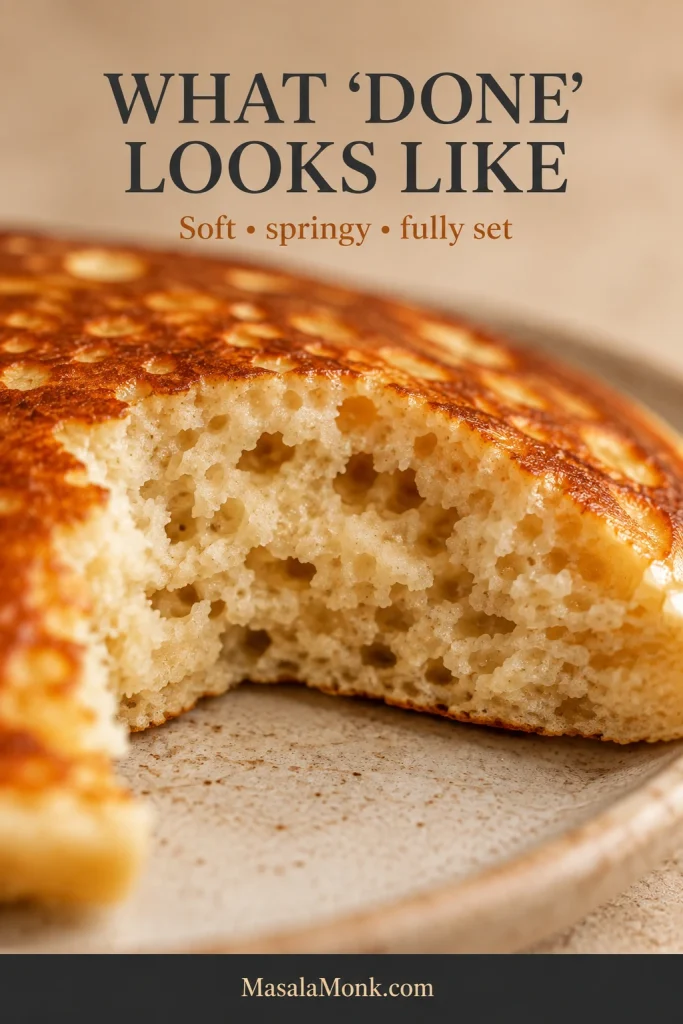
- Crumb: when torn open, is it soft and springy instead of shiny or paste-like?
Let that pancake overrule the temperature dial. Electric griddles, heavy cast iron, and thin skillets can behave very differently even when their settings sound similar.
Read the Crumb
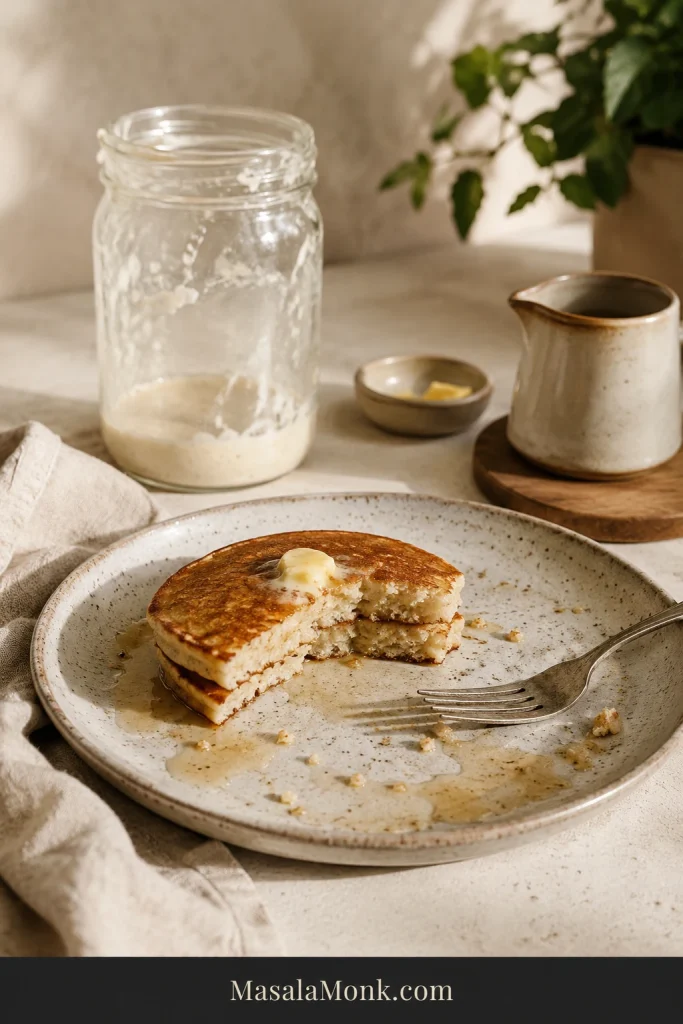
Once the tester tears open fluffy and fully set, breakfast gets much easier. The edges should be lightly browned and delicately crisp, while the warm center springs back instead of smearing against the fork.
Once the tester is right, cook the remaining pancakes with the same portion and steady heat.
Tester still not right? Go straight to troubleshooting.
Sourdough Discard Pancake Troubleshooting
Most pancake problems announce themselves early. The first question is simple: does the pan need adjusting, or does the batter?
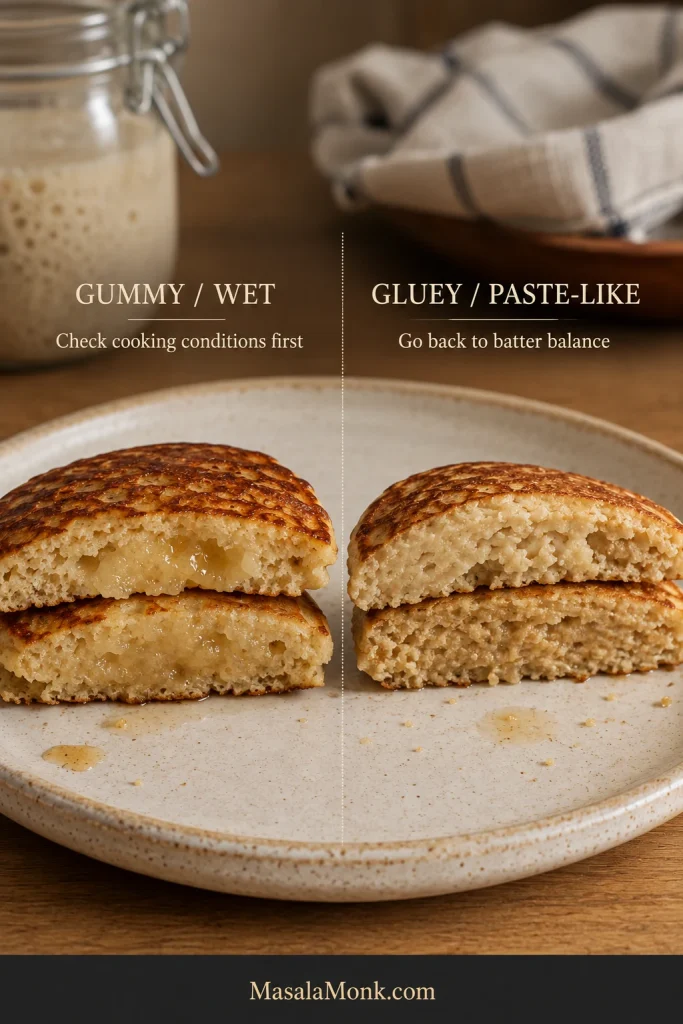
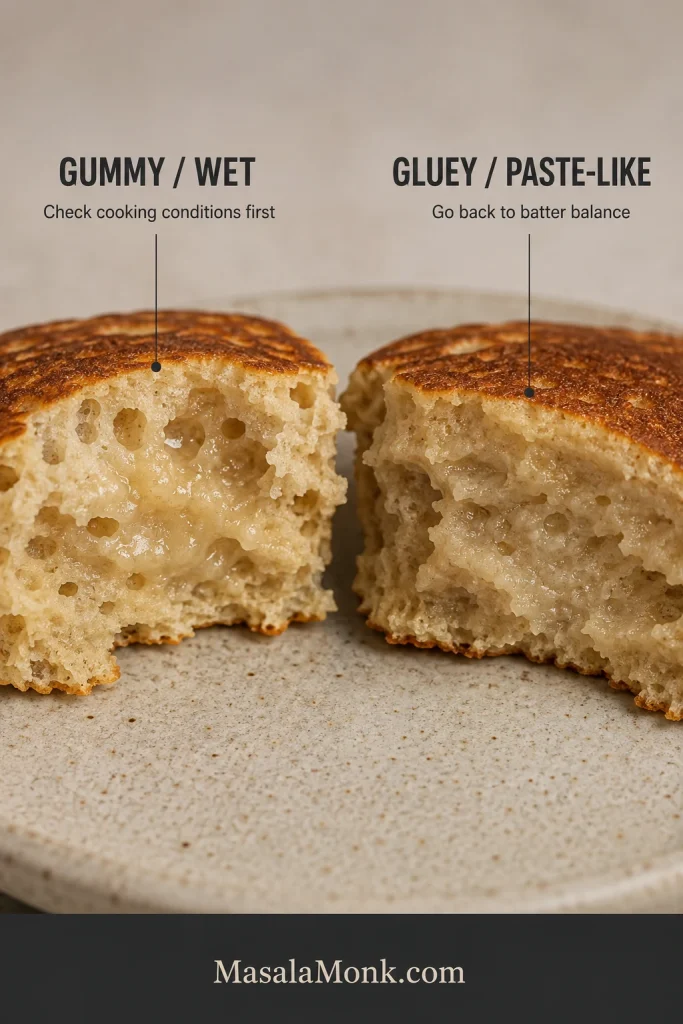
A gummy, wet middle often points to cooking conditions; a persistently gluey, paste-like crumb sends you back to the batter.
Start With the Symptom
| What happened | Check first | What usually helps |
|---|---|---|
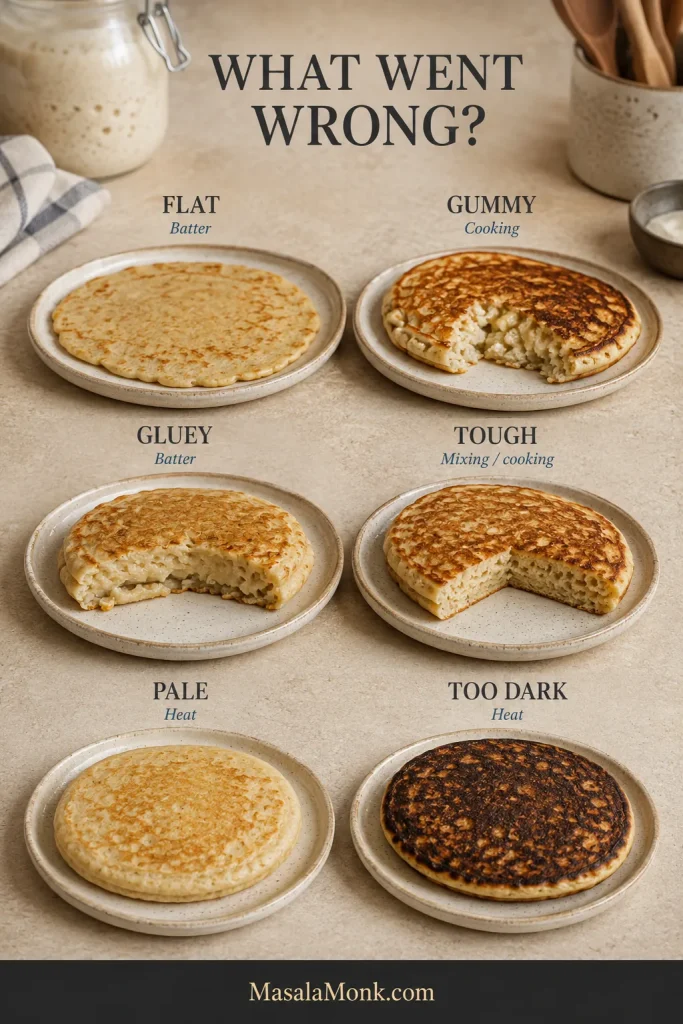
| Flat and spreading | Batter too loose | Thicken slightly; if the consistency already looks right, make sure the baking powder is fresh. |
| Golden outside, wet or gummy inside | Pan too hot, pancake too large, or batter sitting too tall | Lower the heat, make a slightly smaller pancake, or loosen an overly thick batter. |
| Gluey despite longer, gentler cooking | Too much liquid or too little fresh flour | Recheck discard thickness, milk, flour, and major substitutions. |
| Tough or rubbery | Overmixing, too much added flour, or overcooking | Mix less, keep corrections small, and shorten the cook once the center is set. |
| Pale and slow | Pan too cool | Increase the heat slightly. |
| Too sour | Older, more acidic discard | Use fresher discard next time. |
| Soapy or alkaline taste | Too much baking soda | Stick to the measured amount. |
| Bubbly but still dense | Loose batter, tired baking powder, or a pan that’s too cool | Check the batter first, then make sure the baking powder is fresh and the pan is hot enough. |
Golden Outside, Gummy Inside
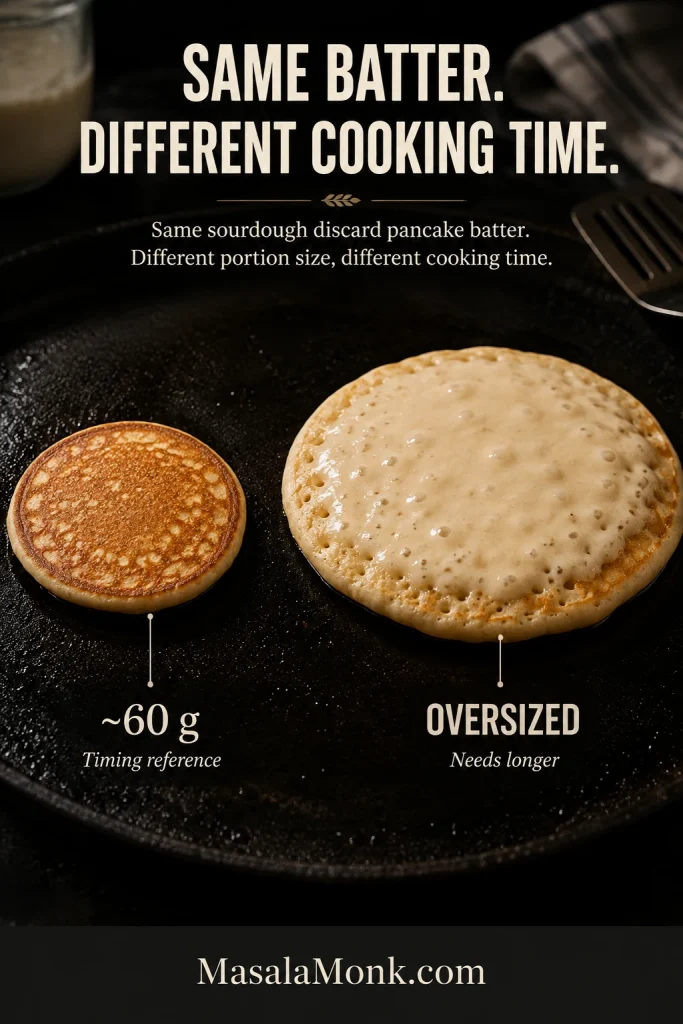
A beautifully browned underside with a wet middle means the surface is cooking faster than the center.
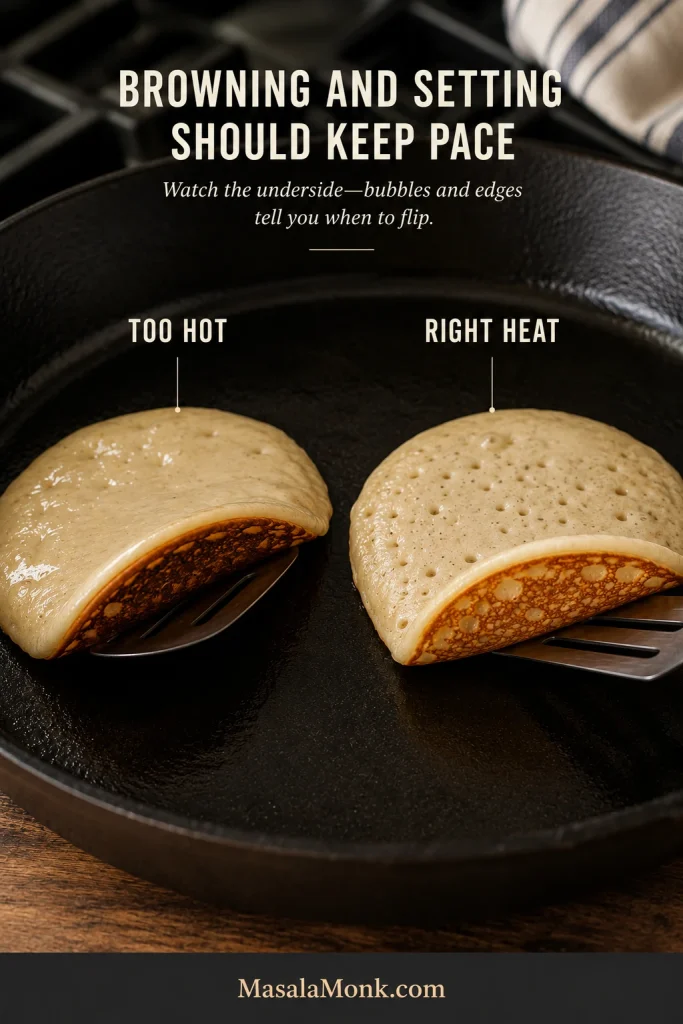
Lower the heat for the next pancake. A very tall mound of batter may need a splash of milk. An oversized pour simply needs more time than the roughly 60 g pancakes used for these timings.
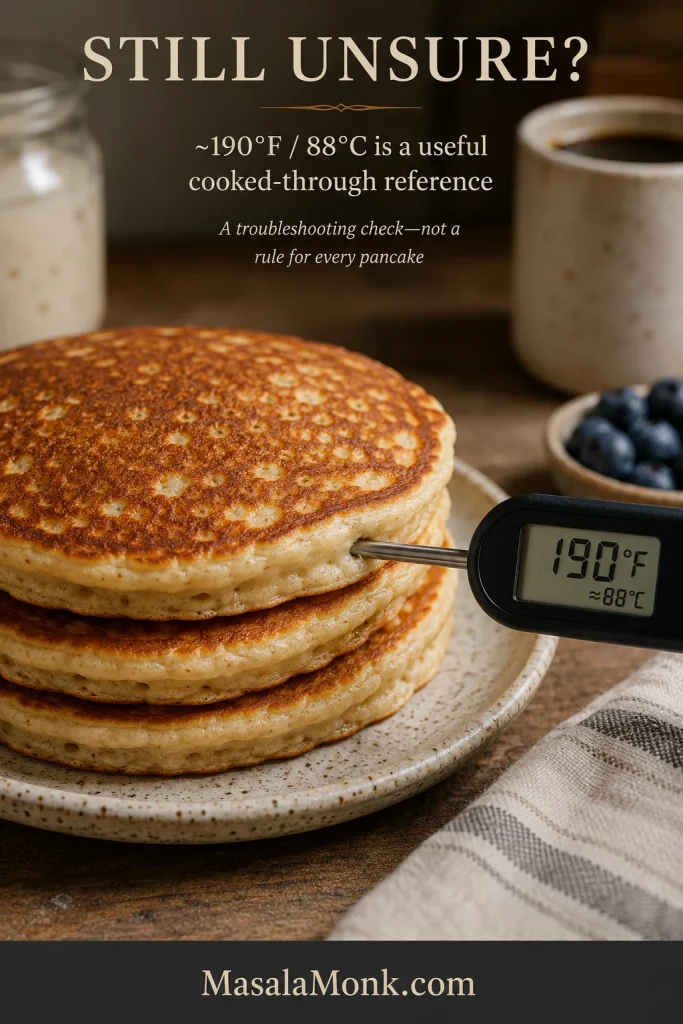
For repeated trouble, an instant-read thermometer can be a temporary learning tool. A center around 190°F / 88°C is a useful cooked-through reference. Once you recognize the correct crumb, there is no reason to measure every pancake.
The Center Stays Gluey Even After Longer Cooking
A persistently gluey center is different from one that simply needed another minute. When lower heat and enough cooking time still leave a paste-like interior, go back to the bowl before sacrificing the outside of another pancake.
Several things can push the crumb in this direction: very loose batter, using all the optional milk with unusually thin discard, too little fresh flour, or major substitutions.
If the batter is badly out of balance, cooking the pancake until the outside becomes leather will not rescue the middle.
Back to recipe · Check batter consistency · Back to top
Why Does Unfed Sourdough Discard Still Work in Pancakes?
Here, the baking powder and baking soda do the lifting. The discard brings flour, water, acidity, and sourdough flavor, but it does not need to raise the pancakes by itself.
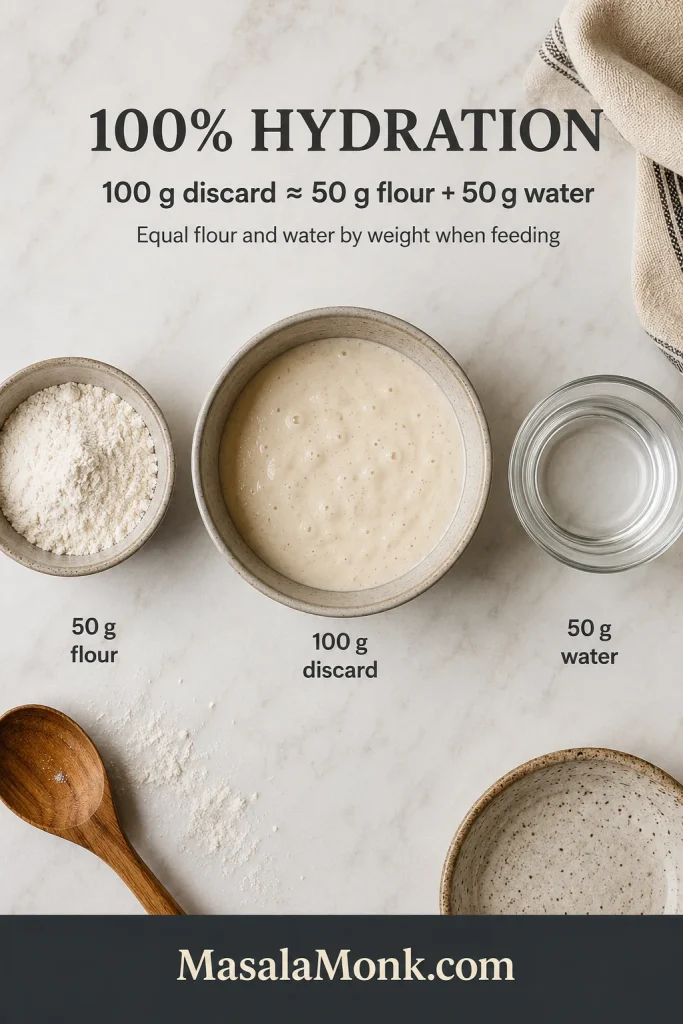
This recipe assumes a 100%-hydration starter, meaning equal weights of flour and water are normally used when feeding it. So 100 g of discard contains roughly 50 g flour and 50 g water.
If your starter is much stiffer or wetter than a 100%-hydration starter, you may need a little more or less milk. That’s fine—after the rest, judge the bowl by the same batter cue.
Fresh flour and eggs give the pancakes enough body to set. Once the rested batter looks right, it can go straight to the griddle; the discard does not have to puff up the bowl the way active starter raises bread dough.
How Discard Age and Thickness Affect the Batter
Most jar-to-jar differences come down to flavor and how much extra milk the batter needs.
| Your discard | Likely effect | What to do |
|---|---|---|
| Fresh or active | Milder flavor; sometimes a more aerated batter | Start with the base recipe. |
| Older refrigerated | Sharper flavor; may be looser | Start with 200 ml milk and add more only if needed. |
| Very thin | Wetter final batter | You may need little or none of the reserved milk. |
| Very thick | Stiffer final batter | Add the reserved milk gradually after the rest. |
If the batter looks right before you use the full extra 30 ml milk, stop there. The extra milk is there for the jars that need it.
Make the Batch Fit the Discard You Actually Have
Sometimes the jar gives you the full 220 g. On other mornings, you scrape out only 60–70 g and breakfast still needs to happen. A discard recipe should not make you feed the starter again just to create enough discard for breakfast.
Choose the batch closest to what is in your jar. The ingredient amounts change, but each version uses the same mixing, resting, batter-checking, and cooking method as the main recipe.
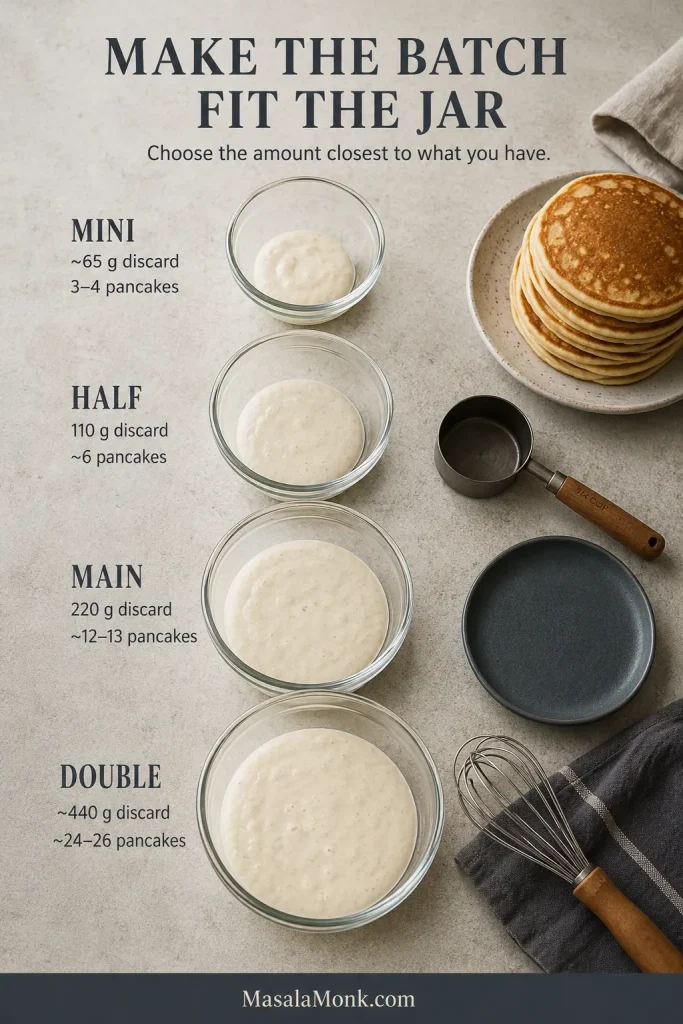
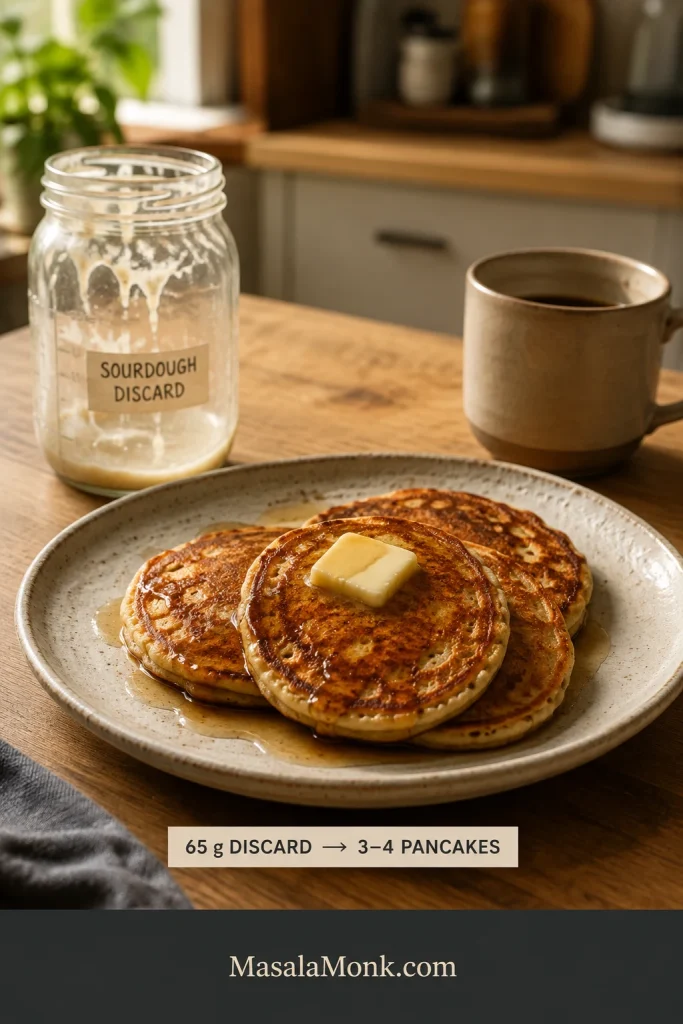
Mini Batch: About 65 g Discard
This is the “there really isn’t much in the jar” batch. It makes about 3–4 pancakes.
- 65 g sourdough discard
- 55 g all-purpose flour
- 60 ml milk, plus up to about 10 ml more if needed; add it 1 teaspoon / 5 ml at a time
- 30 g beaten egg, about 2 tablespoons
- 10 g melted butter, about 2 teaspoons
- 8 g sugar, about 2 teaspoons
- ½ teaspoon + ⅛ teaspoon baking powder
- ⅛ teaspoon baking soda
- Scant ¼ teaspoon fine salt
- A small splash of vanilla, optional
Beat one egg, use 30 g for the batter, and save the rest for scrambled eggs or another breakfast use.
Half Batch: 110 g Discard
This is the neatest smaller batch because one large egg divides the main recipe cleanly in half. It makes about 6 pancakes.
- 110 g sourdough discard
- 90 g all-purpose flour, about ¾ cup
- 100 ml milk, plus up to 15 ml more if needed; add it 1–2 teaspoons / 5–10 ml at a time
- 1 large egg
- 18 g melted butter, about 1 tablespoon + 1 teaspoon
- 12–13 g sugar, about 1 tablespoon
- 1 teaspoon baking powder
- ¼ teaspoon baking soda
- About ⅓ teaspoon fine salt
- ½ teaspoon vanilla, optional
For the full 220 g discard batch, use the main recipe above. At every size, start with the listed milk and adjust only when the rested batter clearly needs it.
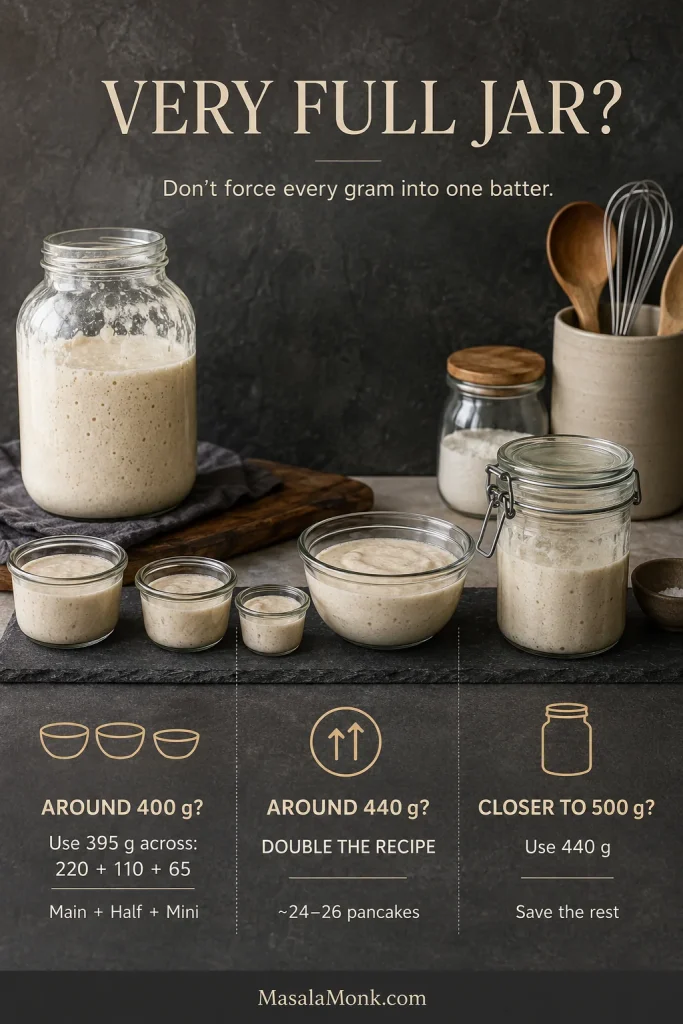
What If You Have 400–500 g of Sourdough Discard?
Have around 440 g? Double the whole recipe. That gives you roughly 24–26 pancakes.
- 440 g sourdough discard
- 360 g all-purpose flour
- 400 ml milk, plus up to 60 ml more if needed
- 4 large eggs
- 70 g melted butter
- 50 g sugar
- 16 g baking powder
- 4 g baking soda
- 8 g fine salt
- 2 teaspoons vanilla, optional
Closer to 400 g? The full, half, and mini batches above use 395 g discard altogether, so you can make those three batches without wrestling with awkward egg fractions.
Closer to 500 g? Weigh out 440 g for the double batch and save the rest for another recipe.
Want to use 400–500 g of discard without ending up with two dozen pancakes? That’s a different recipe. Adding more discard here also adds more fermented flour and water, so the whole batter changes.
If the jar is still looking alarmingly full after breakfast, our sourdough banana bread with discard gives some of it another useful destination.
Can I Make This Sourdough Pancake Batter Overnight?
Not as written. This is a same-day batter, and the baking powder and baking soda go in before the short rest.
Don’t simply put the finished batter in the refrigerator until morning. Overnight sourdough pancakes need the long rest and the leaveners timed differently, so use a method written specifically for an overnight batter.
Easy Substitutions—and the Ones That Need a Different Recipe
Plant milk and neutral oil are straightforward changes. Eggs and gluten do much more work in the pancake, so removing either needs a recipe built for that change.
Substitution and Add-In Guide
| Change | How to handle it | What to expect |
|---|---|---|
| Unsweetened plant milk | Easy swap | Use it in place of the milk and check the rested batter the same way. |
| Neutral oil for butter | Easy swap | The flavor will be less buttery, and the browning may differ slightly. |
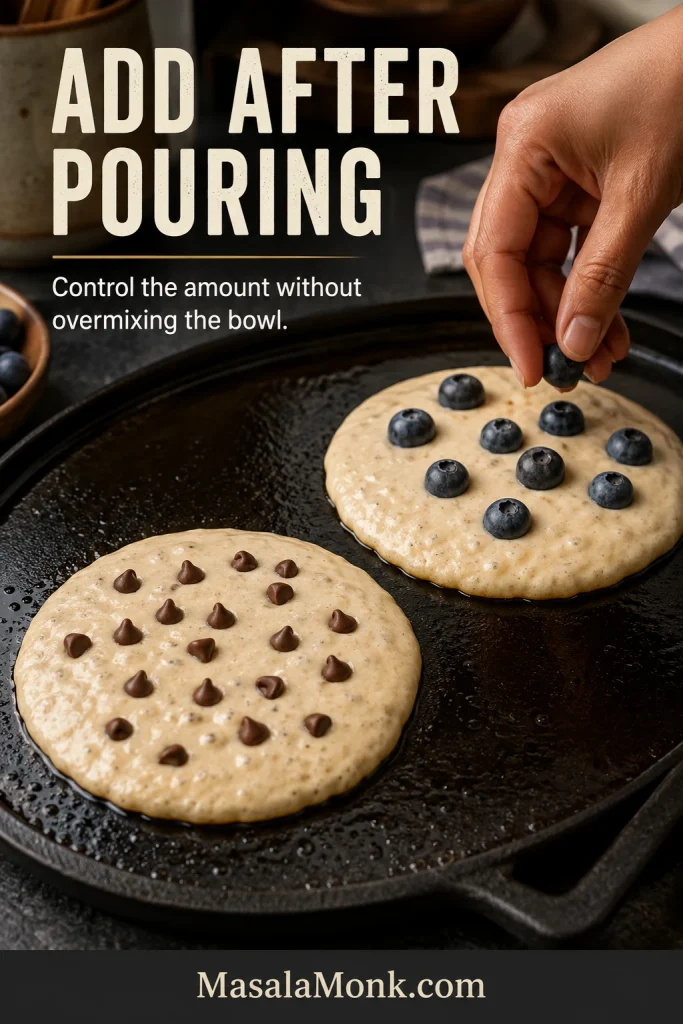
| Blueberries or chocolate chips | Easy add-in | Scatter them over each pancake after pouring so you can control the amount without repeatedly stirring the whole bowl. |
| Buttermilk | Not a straight 1:1 swap | It changes both acidity and batter thickness. |
| Eggless or vegan | Use a recipe designed for it | Removing eggs changes binding, moisture, and crumb. |
| Fully gluten-free | Use a gluten-free recipe | You need a gluten-free starter and a pancake recipe built around gluten-free flour. |
| No-added-flour/high-discard | Use a high-discard recipe | The flour-to-liquid balance and finished texture will be different. |
Buttermilk is a good example of why some swaps deserve their own recipe. If that is the pancake you actually want, our fluffy buttermilk pancakes are built around it from the start.
Thinking about replacing the eggs with flax? Our guide to how to make a flax egg explains what flax contributes and where it behaves differently from a chicken egg. That does not make it an automatic replacement for the two eggs here.
Storing, Freezing, and Reheating Sourdough Pancakes
Keep a Batch Warm
Set a wire rack over a sheet pan and keep cooked pancakes in a 200°F / 95°C oven while the rest cook. The rack lets steam escape instead of trapping it underneath the stack.
Refrigerate
Cool leftovers, refrigerate them promptly in a covered container, and use them within 3–4 days. That matches the USDA guidance for refrigerated cooked leftovers.
Freeze
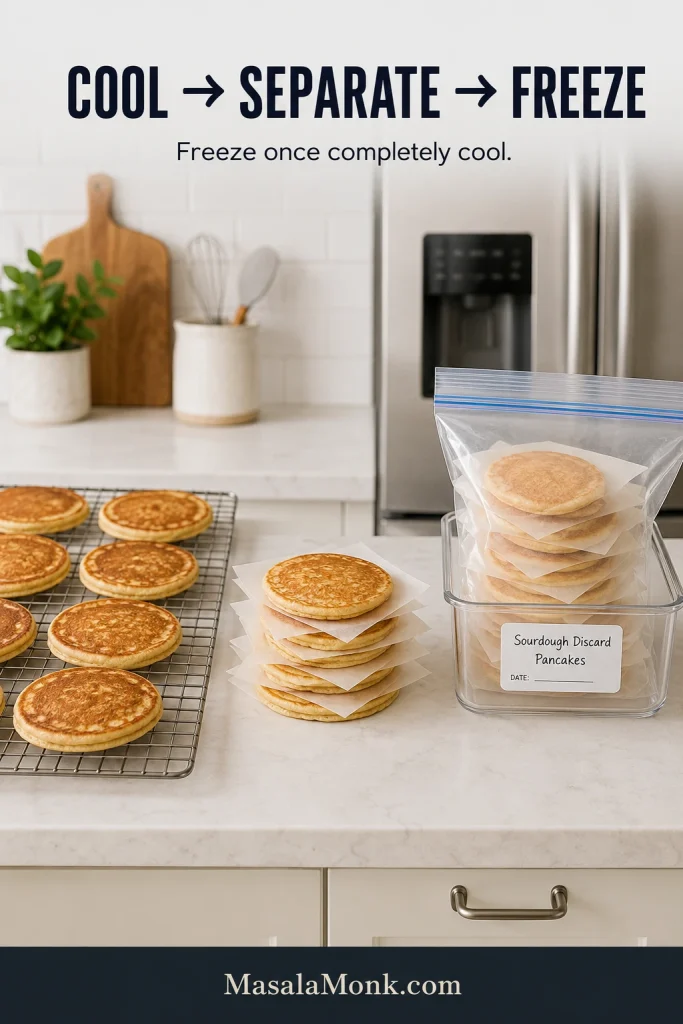
Cool the pancakes completely, then freeze them in a single layer or separate small stacks with parchment. Once firm, transfer them to a freezer-safe bag or container. For the best texture, try to use them within about 1–2 months.
Reheat
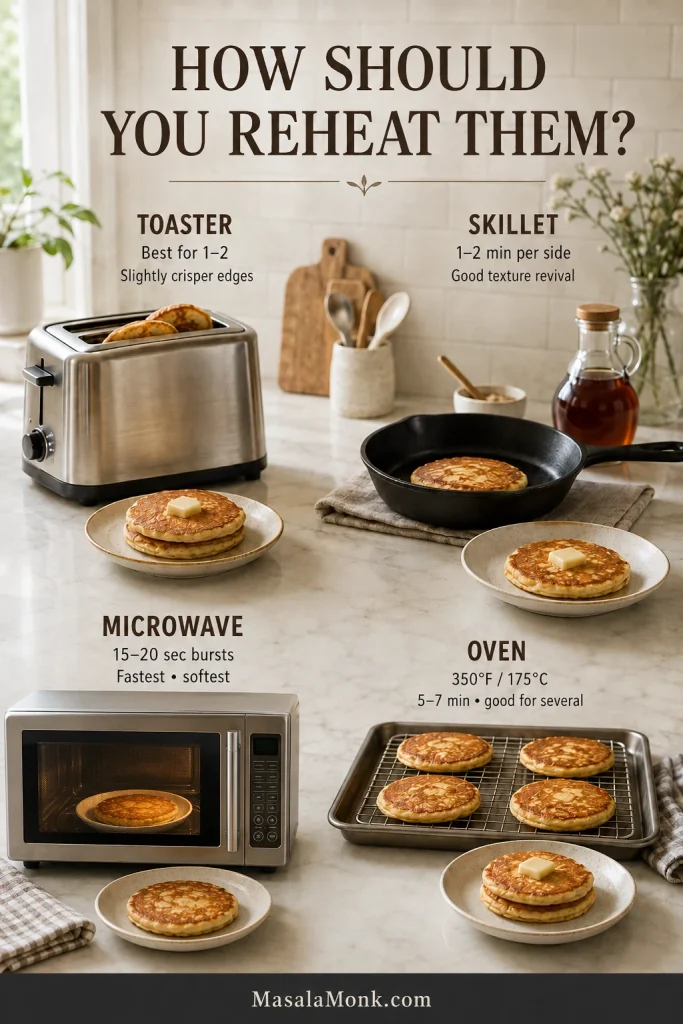
- Toaster: great for one or two pancakes when you want slightly crisper edges.
- Skillet: warm over low to medium-low heat for roughly 1–2 minutes per side.
- Microwave: use short 15–20 second bursts; fastest, but also the softest finish.
- Oven: warm several pancakes around 350°F / 175°C for about 5–7 minutes, adding more time when starting from frozen.
A Better Use for the Jar in the Fridge
The best sourdough discard pancake is not the one made from the most photogenic starter. It is the one that works with the jar you actually have.
Get the batter into that slow, heavy ribbon. Let the first pancake tell you what the pan needs. Then cook the rest while the edges take on color, the centers stay soft and springy, and a little butter starts melting into the warm stack.
When breakfast is finished, the discard jar is a little emptier instead of going into the bin—and the next jar should feel much less mysterious.
If you make these, tell us what kind of discard you used and whether the batter needed any of the reserved milk. Sourdough jars behave differently, and your experience may help the next person staring into theirs.
Explore more sourdough: If sourdough is becoming less of a leftover-management project and more of a hobby, our sourdough bread recipes guide is a natural next step into loaves, rolls, buns, and longer-fermented doughs.








