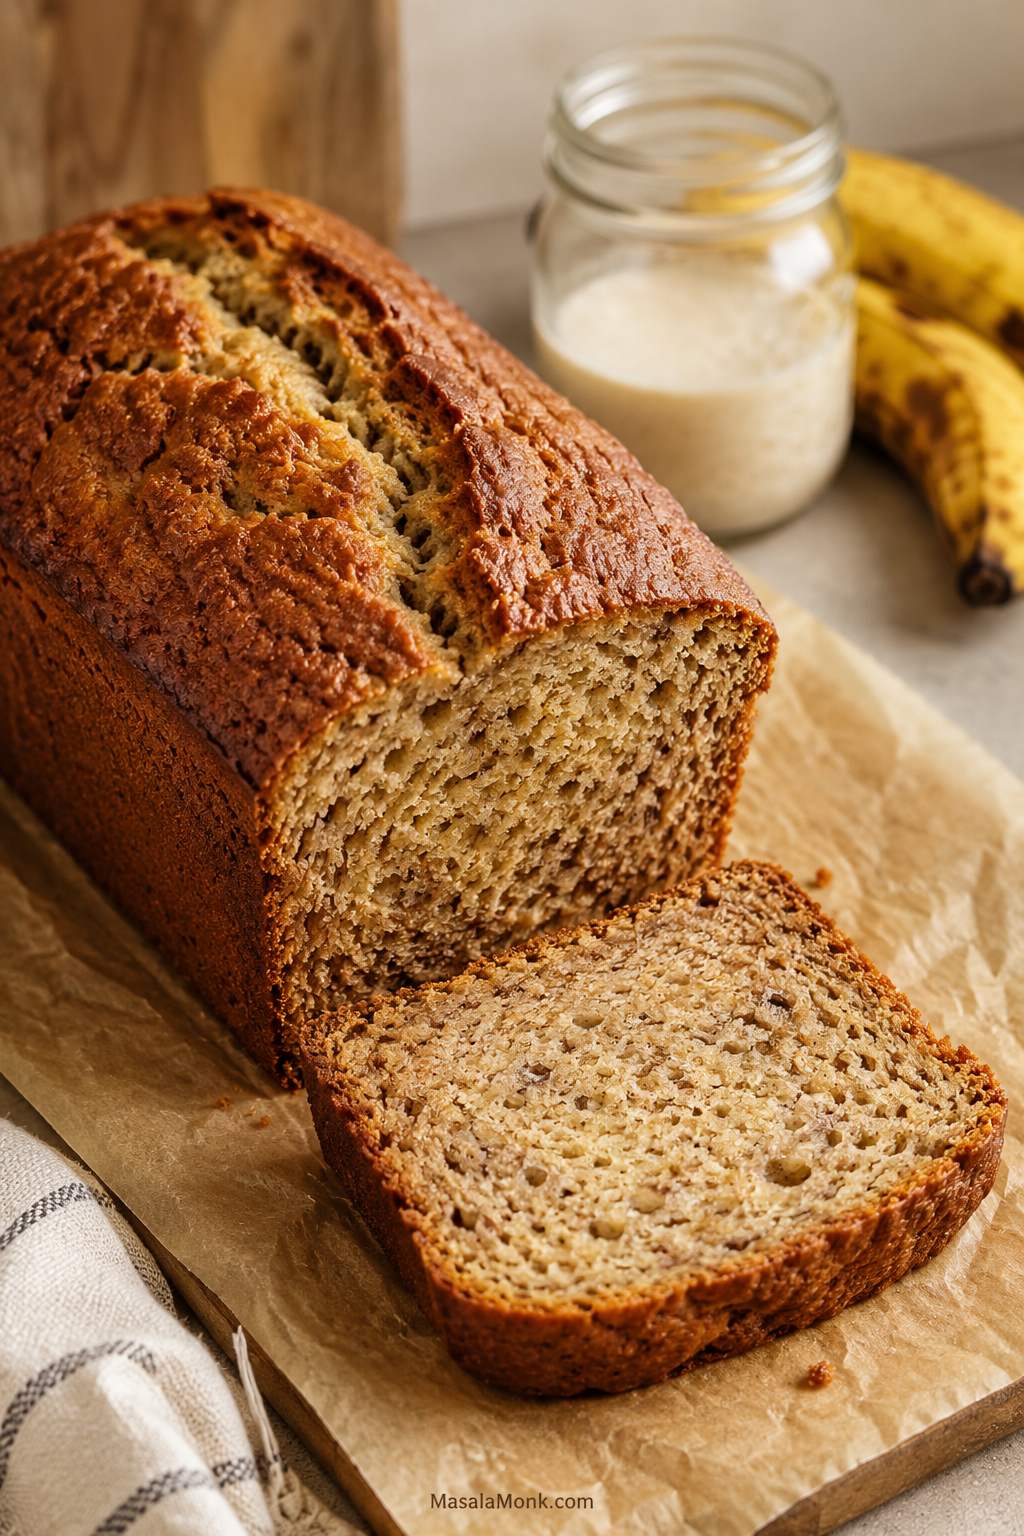
This sourdough banana bread recipe is for the two things home bakers hate wasting most: overripe bananas and sourdough discard. The loaf bakes up soft, fragrant, and deeply banana-forward, with brown sugar warmth, a tender crumb, and just enough sourdough tang to make each slice taste more rounded and interesting.
This is the bread you make when the bananas are too far gone for snacking but exactly right for baking. It is the kind of loaf that smells like a good decision before it even leaves the oven, especially if you plan to eat the first slice warm with butter.
Why This Sourdough Banana Bread Is Different
The batter comes together like a regular quick bread: no kneading, no shaping, no rise time, no mixer, and no complicated sourdough schedule. You only need about 15 minutes of hands-on prep, one main mixing bowl, and a standard loaf pan.
Meanwhile, the discard adds flavor, moisture, acidity, and a little tang, while baking soda and baking powder do the lifting. This sourdough banana bread recipe is designed to feel familiar first and sourdough-smart second, so the discard improves the loaf without making it complicated.
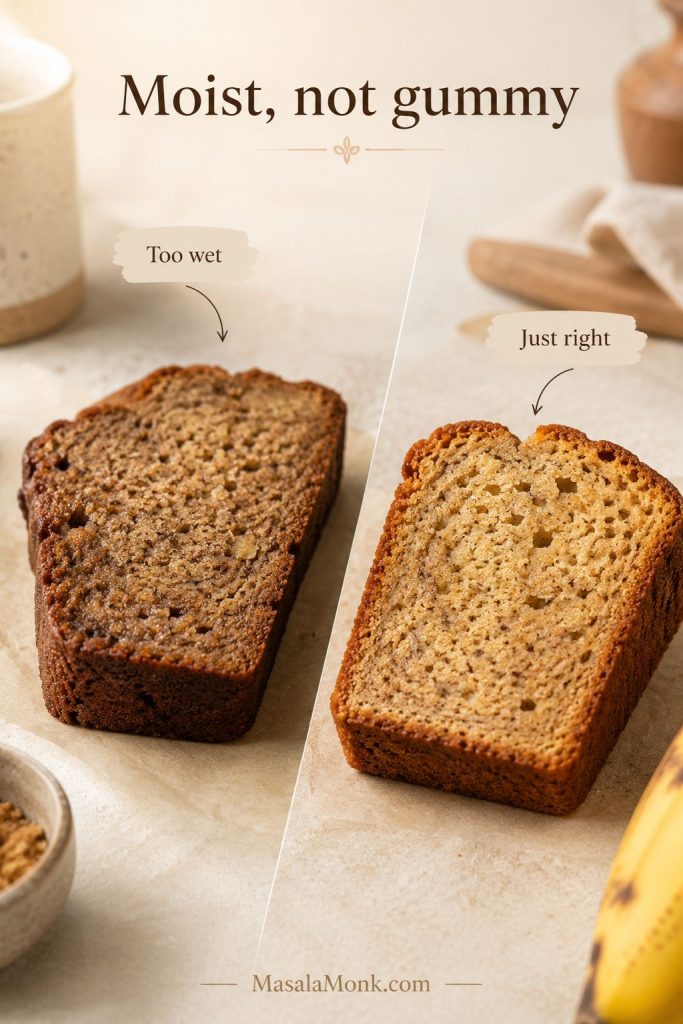
What makes this loaf especially reliable is the way it handles moisture. Ripe bananas and sourdough discard both make banana bread taste better, but too much of either can leave the middle gummy. This recipe keeps the banana and discard in a safe range, then gives you clear doneness cues so the loaf bakes up moist, tender, and sliceable.
So instead of guessing whether your bananas are “about right” or whether the loaf just needs five more minutes, you get clear amounts, clear texture cues, and a better chance at a loaf that slices the way banana bread should.
If your main worry is a wet center, the doneness cues and troubleshooting guide below are the two sections to keep closest.
What’s in This Guide
Make the Loaf
Sourdough Banana Bread Recipe: Quick Answer
This sourdough discard banana bread is a same-day quick bread made with ripe bananas and sourdough discard or active starter. The discard gives the loaf a mild tang, deeper flavor, and extra moisture, but baking soda and baking powder do the lifting, so there is no rise time.
In this sourdough banana bread recipe, you can mix the batter and bake it right away. For the best texture, use very ripe bananas, measure the mashed banana instead of guessing, whisk the discard fully into the wet ingredients, and bake until no wet batter remains in the thickest part.
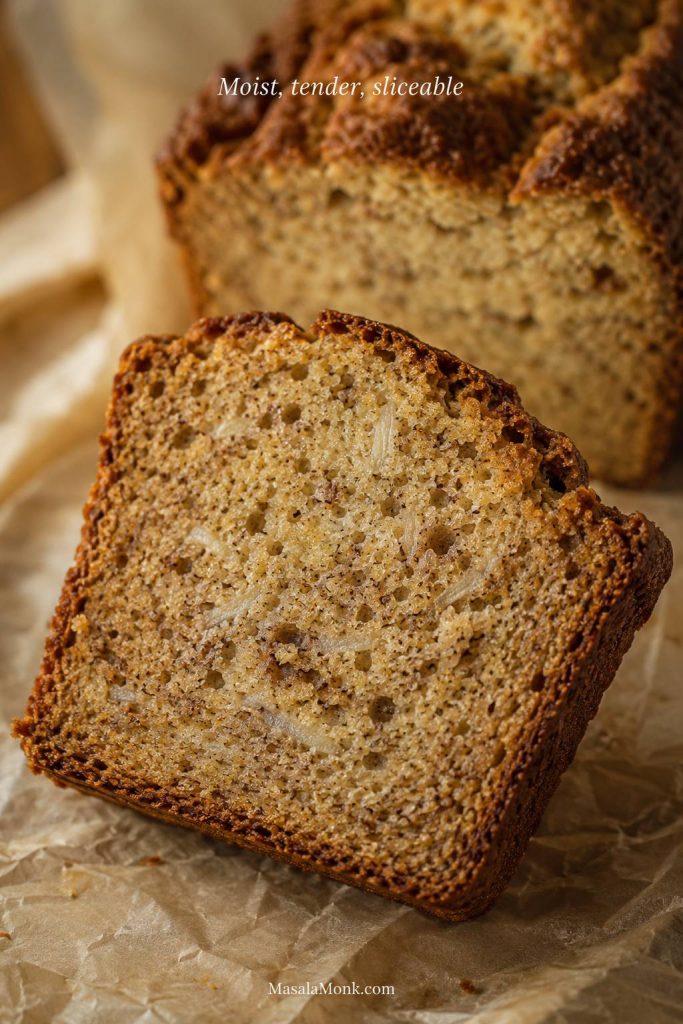
A good slice should feel soft and moist, but still hold together when you pick it up. It should taste like banana bread first, with just enough sourdough depth to make it more interesting than the usual loaf.
For exact quantities, pan size, and bake time, you can jump straight to the printable recipe card.
Sourdough Banana Bread Recipe at a Glance
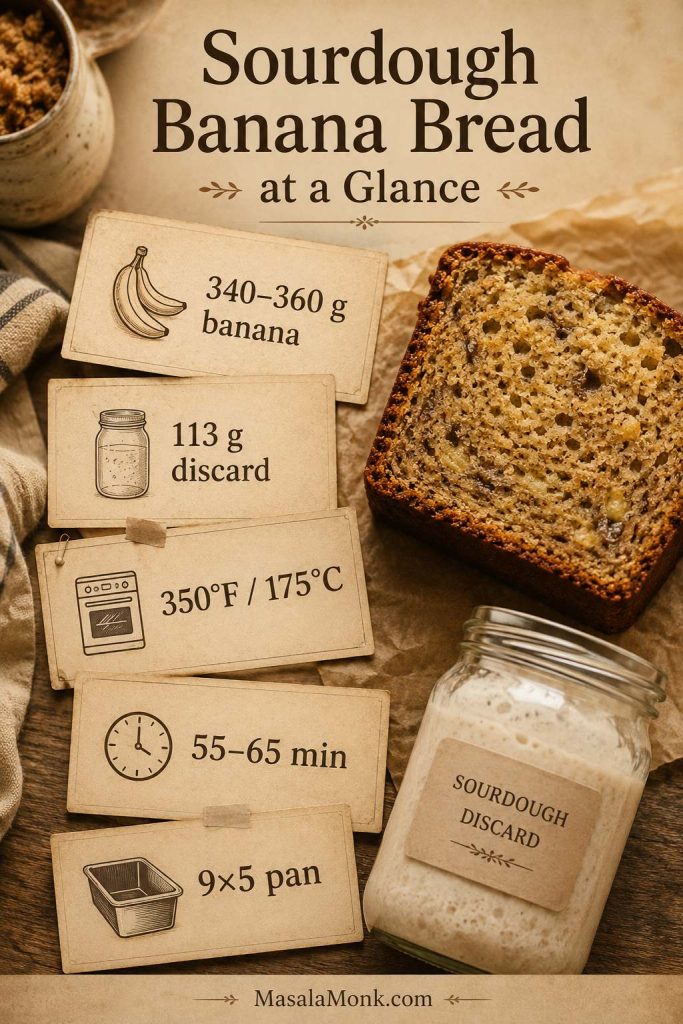
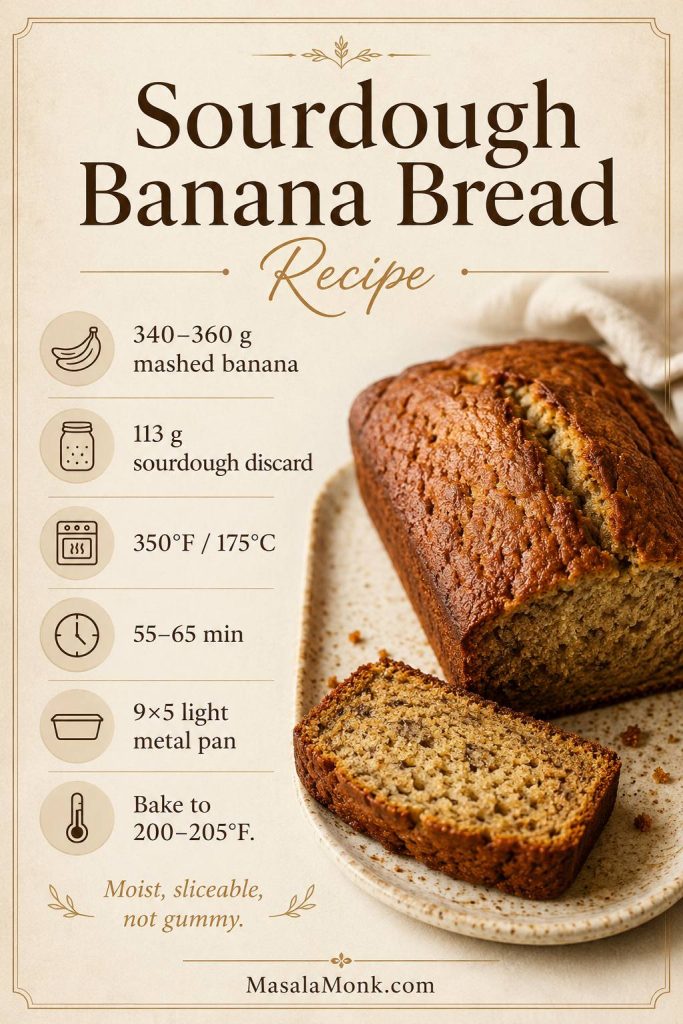
- Best pan: 9×5-inch light metal loaf pan
- Oven: 350°F / 175°C
- Bake time: 55–65 minutes
- Banana amount: 340–360 g mashed ripe banana
- Discard amount: 113 g / ½ cup sourdough discard
- Texture goal: moist, tender, sliceable, and baked cleanly through the center
Those numbers matter most in three places: the ingredient measurements, the pan and bake-time notes, and the doneness test.
What This Sourdough Banana Bread Tastes Like
This is not a sharp or sour loaf. Instead, it tastes like classic banana bread with more depth: sweet ripe banana first, then brown sugar, vanilla, butter, and a gentle sourdough note in the background.
The crumb should be moist and tender, not wet or pudding-like. Once cooled, the slices should hold together cleanly, with enough softness to feel cozy and enough structure to toast the next day.
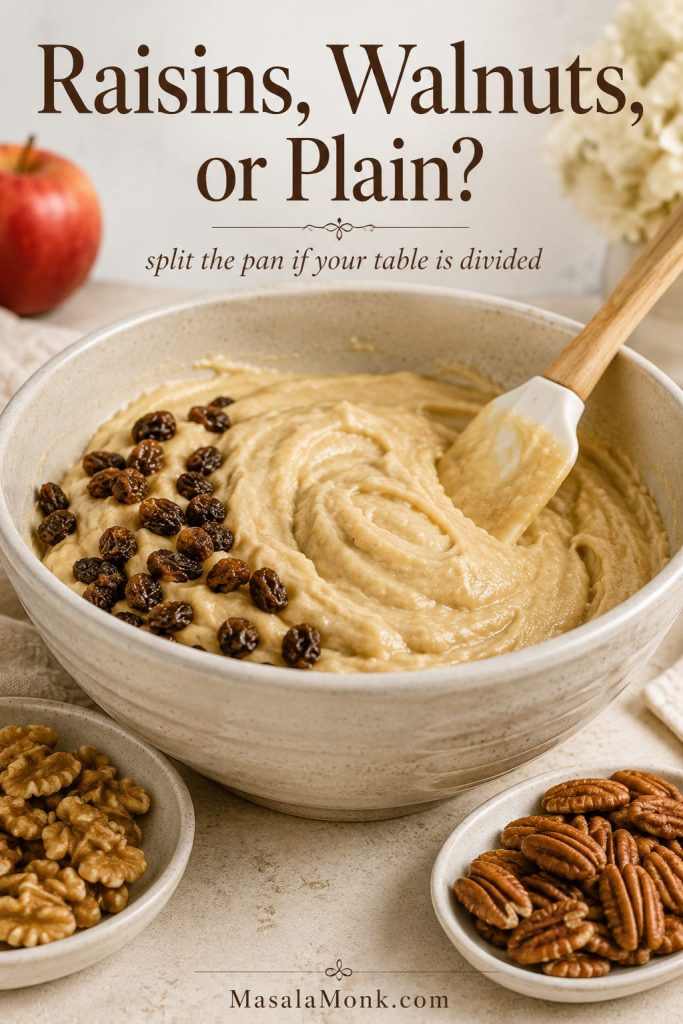
Walnuts make it feel more breakfast-like and nutty. Chocolate chips, on the other hand, push it toward dessert. Either way, the base loaf stays simple enough for a weekday bake.
The Three Things That Make This Loaf Reliable
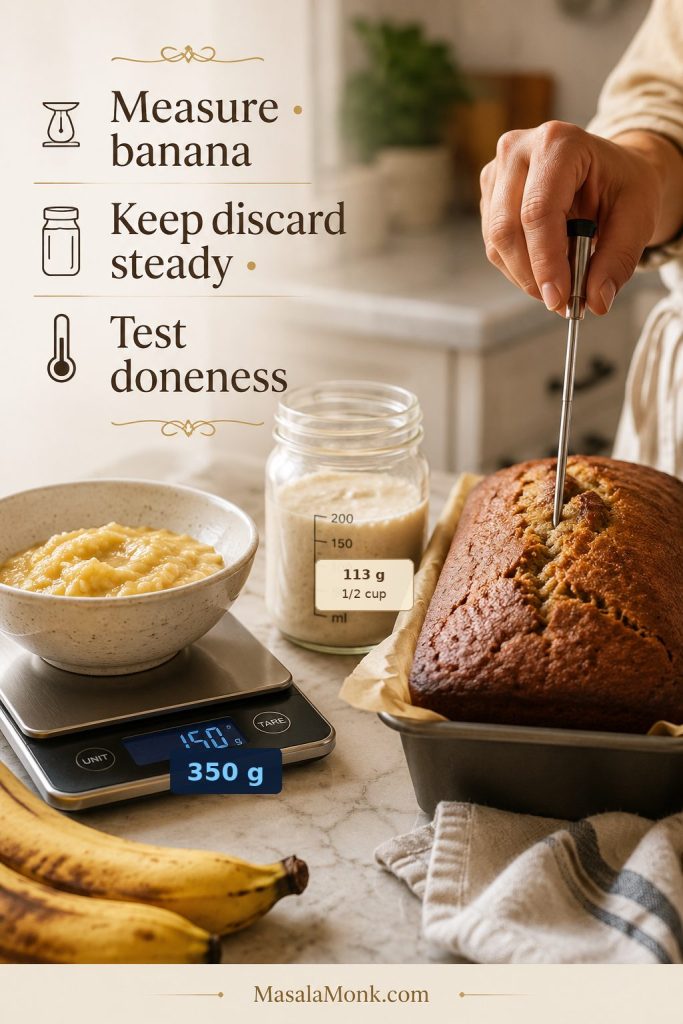
Measure the mashed banana, whisk the discard fully into the wet ingredients, and bake until the loaf tests clean at its tallest point. Together, those three small steps help it stay tender while still slicing neatly.
Why This Sourdough Banana Bread Recipe Works
You will like this loaf if you want banana bread that still feels familiar, just a little more grown-up. The discard does not take over. Instead, it deepens the flavor, softens the crumb, and gives you one more reason not to waste a jar of starter.
Why Moisture Control Matters
Although banana bread looks simple, the best loaves depend on balance. Too little moisture and the loaf feels dry. Too much banana or discard, however, and the center can take longer to bake through. The sweet spot is enough banana for flavor, enough flour for structure, and enough leavening to lift a dense, moist batter.
The recipe is built around the problem that makes sourdough banana bread tricky: ripe bananas and discard both add moisture, so the loaf needs enough structure, enough lift, and clear doneness cues to finish properly.
The key is moisture control: measure the banana by weight, keep the discard steady at 113 g, and bake by doneness cues instead of the clock alone. That is what gives you a slice that feels soft in the hand instead of fragile or underbaked.
- Very ripe bananas bring natural sweetness, aroma, and moisture.
- Sourdough discard adds gentle tang, acidity, and deeper flavor.
- Brown sugar gives a warmer, caramel-like banana bread flavor.
- Melted butter keeps the loaf rich and classic.
- Baking soda plus baking powder gives more reliable lift than baking soda alone.
- Measured banana helps the loaf bake through cleanly.
The Moisture-Control Rule
For this loaf, do not measure bananas by count alone. Measure the mashed banana, keep the discard steady, and bake by doneness cues. That is the difference between moist banana bread and a loaf that stays heavy in the middle.
If you only remember one thing, remember this rule; then use the doneness section to confirm the loaf is fully baked before slicing.
Think of this as classic banana bread with a sourdough-discard upgrade. It is not trying to be chewy sandwich bread, and it is not trying to be aggressively tangy. Rather, it is soft, sliceable, fragrant, and practical.
Before You Start
Mash and measure the bananas first. If you have more than 360 g mashed banana, save the extra for oatmeal, pancakes, or a smoothie instead of adding it all to the loaf. That one step keeps the bread moist while helping the center bake through cleanly.
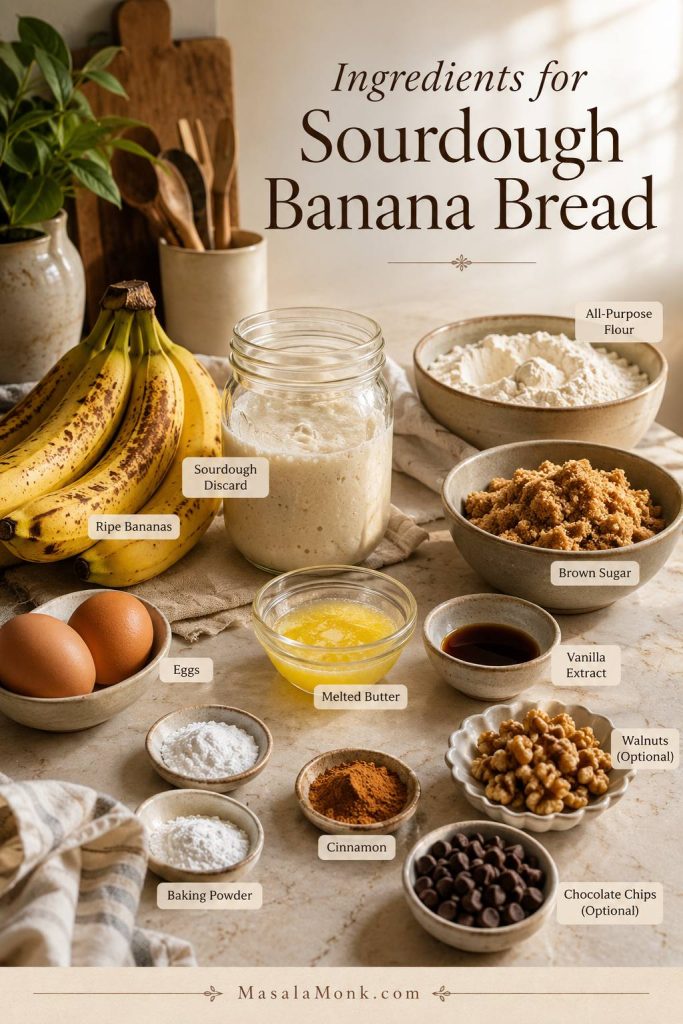
Ingredients for Sourdough Banana Bread
The ingredient list for this sourdough banana bread recipe is familiar, but a few details matter more because sourdough discard adds both moisture and acidity.
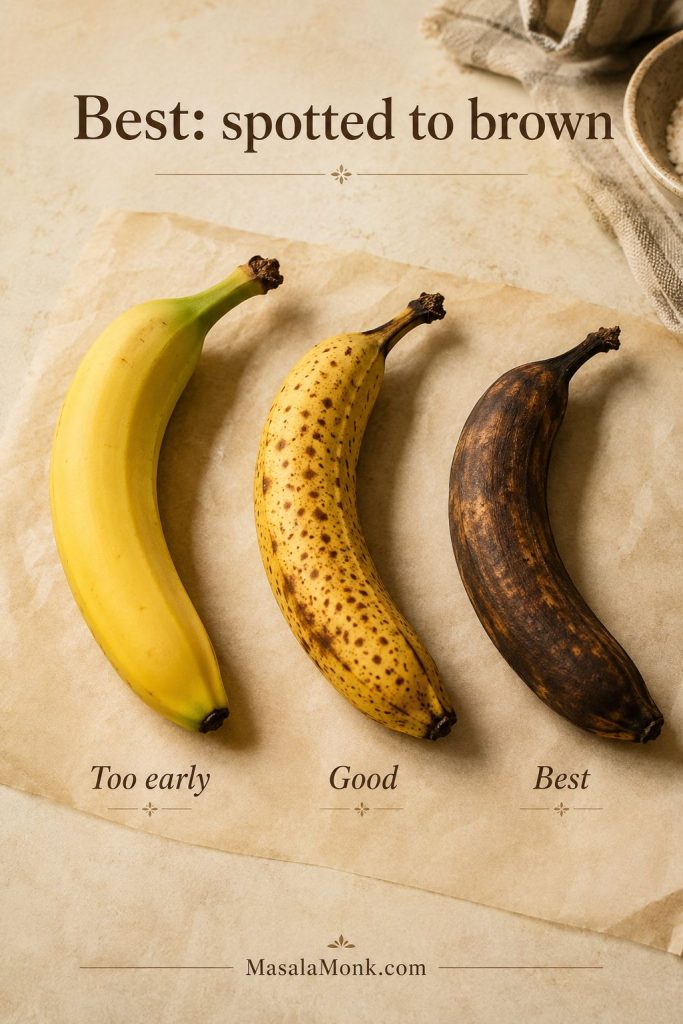
Very Ripe Bananas
Use bananas with plenty of brown spots, or bananas that are fully soft and deeply fragrant. They should mash easily with a fork.
Measure the Mashed Banana
The best range is 340–360 g peeled mashed banana, which is about 1½ cups. That is usually 3 medium-to-large bananas; however, a scale saves you from guessing here, because three bananas can mean very different things depending on their size.
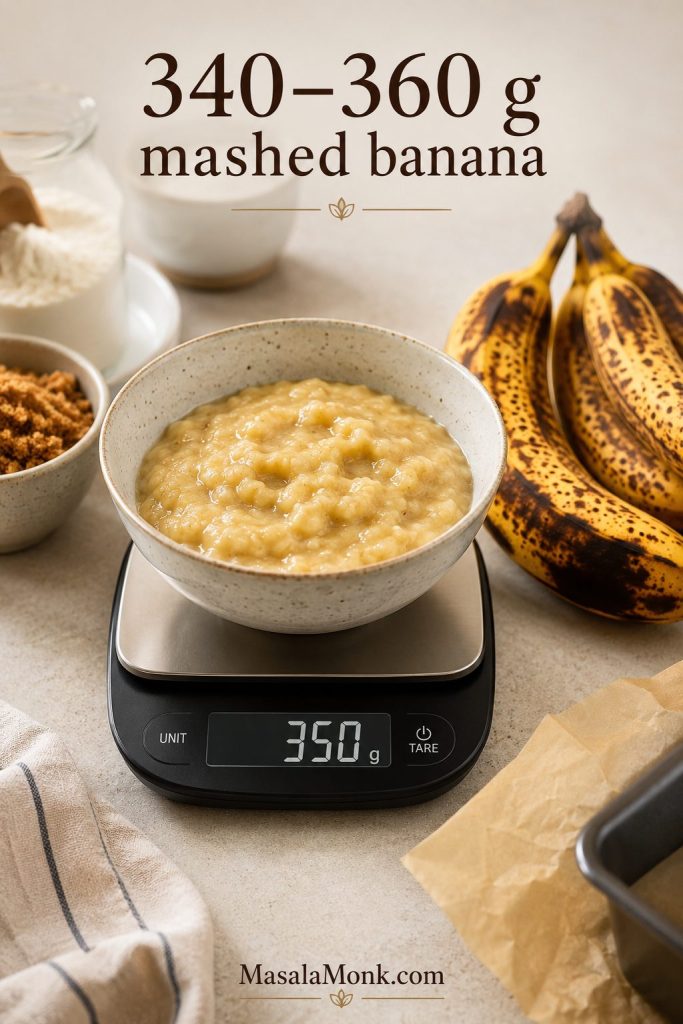
You do not need perfect-looking bananas for this recipe. You just need ripe, fragrant bananas and a measured amount, so the loaf gets banana flavor without turning heavy.
Banana Bread Texture Tip
Extra banana sounds harmless, but it can make the middle take much longer to set. Therefore, when your bananas are extra large, mash them first and measure the amount instead of adding every banana on the counter.
Can You Use Frozen Bananas?
Yes. First, thaw frozen bananas; then drain off any watery liquid before measuring. Frozen bananas release more moisture than fresh ripe bananas, so measure the mashed fruit after thawing and keep it in the 340–360 g range.
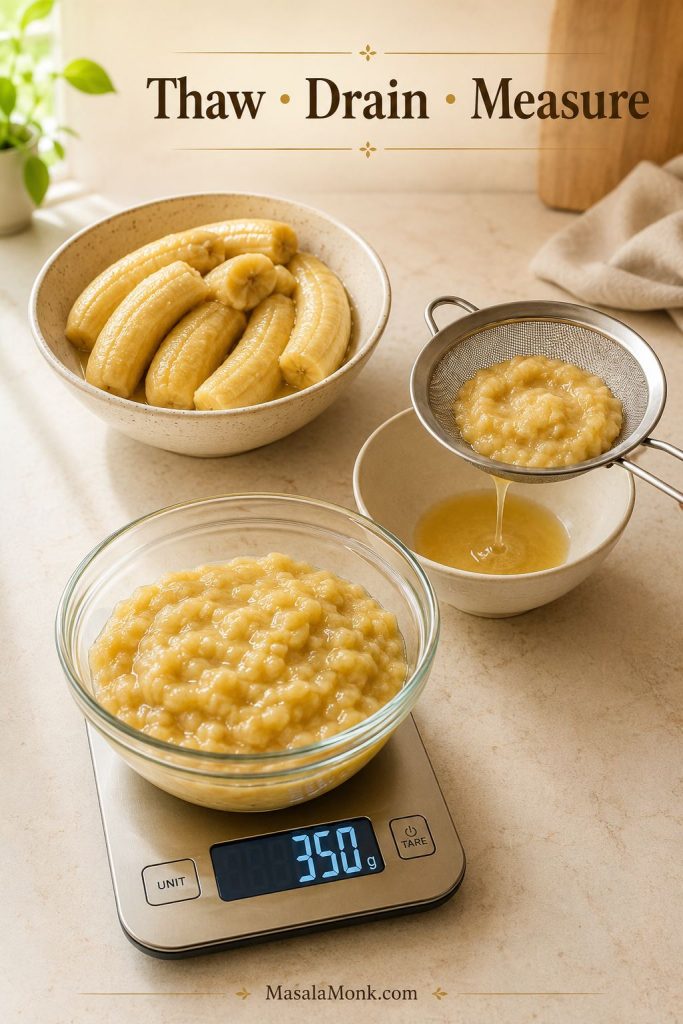
Because thawed bananas release extra liquid, the mashed banana measurement matters even more here.
Sourdough Discard or Active Starter
Use 113 g / ½ cup sourdough discard. A discard from a starter fed with equal weights of flour and water works best here.
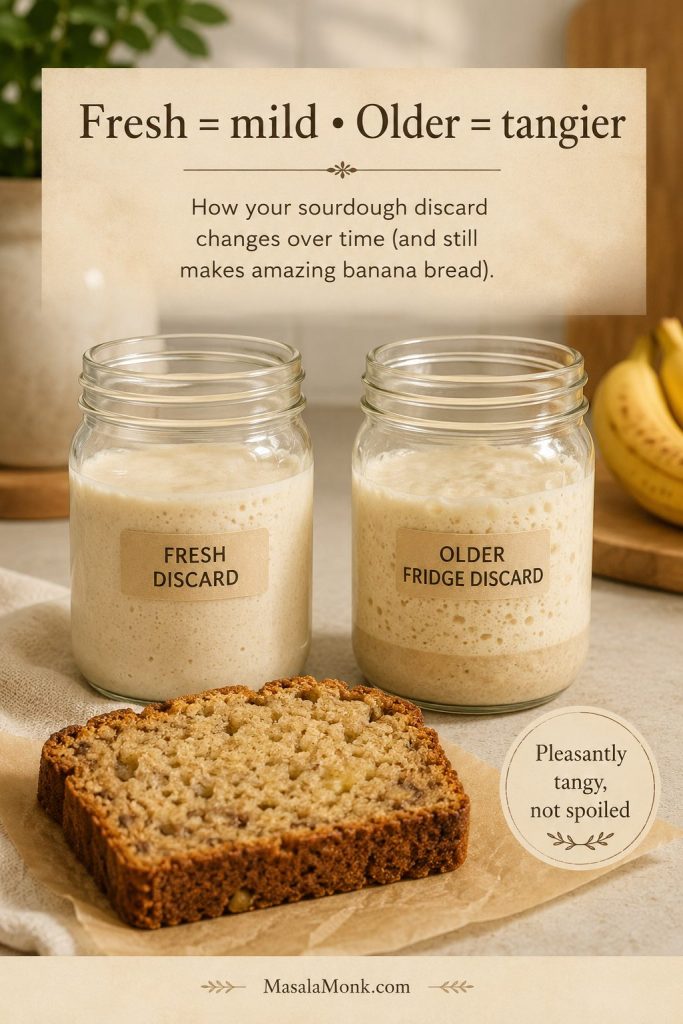
Fresh discard gives a milder loaf. Older fridge discard gives a stronger sourdough note. Active starter also works, and it may make the loaf slightly lighter. However, this recipe does not rely on the starter for rise.
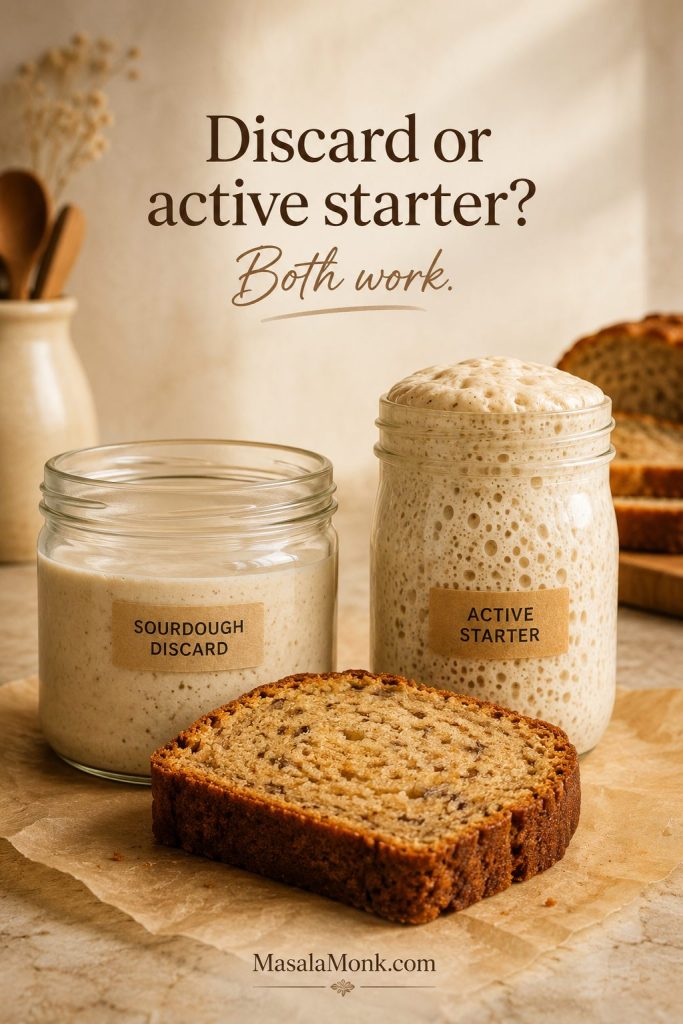
For a clearer comparison, see the full discard vs active starter section before you choose.
For starter basics, feeding schedules, and discard handling, see this guide to how to feed and maintain a sourdough starter.
Flour, Sugar, Fat, and Eggs
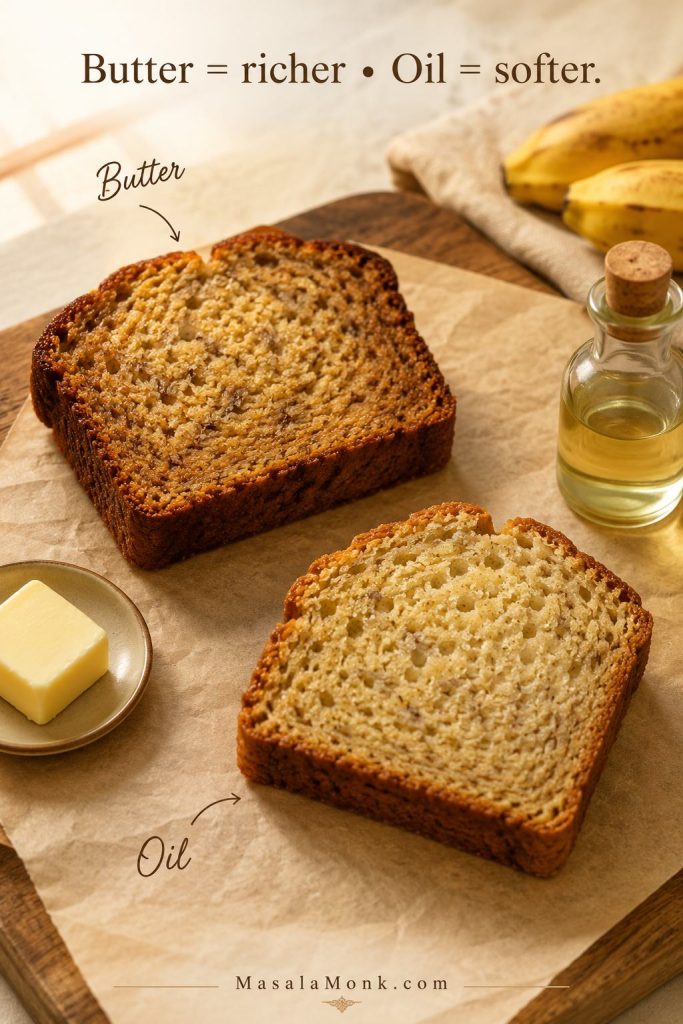
All-purpose flour gives the cleanest structure. Brown sugar keeps the loaf moist and gives the flavor a caramel edge. Meanwhile, melted butter makes the loaf rich and familiar, while eggs help bind the batter and support the crumb.
If you measure flour by cups, spoon it into the cup and level it off instead of scooping directly from the bag, because scooped flour packs down easily. Too much packed flour can make the loaf dry, heavy, or dense.
| Fat | Best For | Texture |
|---|---|---|
| Melted butter | Classic banana bread flavor | Rich, tender, slightly denser |
| Neutral oil | Softest crumb and longer moistness | Softer, lighter, less buttery |
Use a neutral oil such as avocado, canola, sunflower, or light olive oil if you choose the oil version. Avoid strongly flavored oils unless you already know you like them in sweet bakes.
If you are choosing a version before baking, the version guide gives the quickest way to decide between classic, softer, tangier, walnut, or chocolate chip.
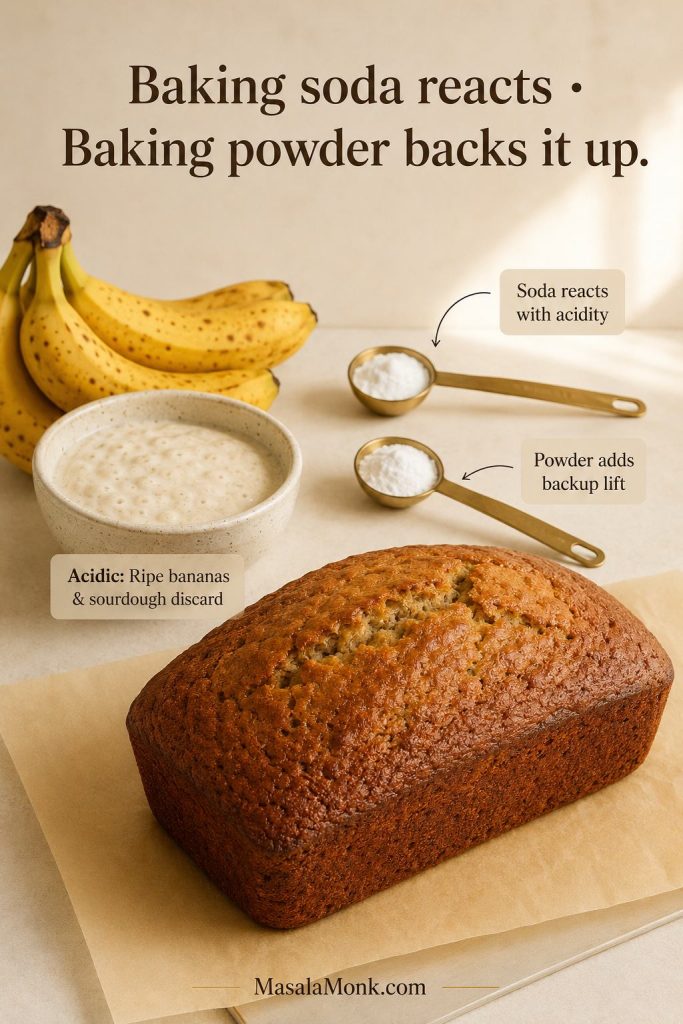
Baking Soda and Baking Powder
This recipe uses both for a steadier rise. Baking soda reacts with the acidity from the bananas, brown sugar, and sourdough discard, while baking powder adds backup lift so the loaf does not feel heavy for how moist the batter is.
Optional Mix-Ins
Walnuts, pecans, and chocolate chips all work well. Keep mix-ins to about 85–115 g so the loaf does not become too heavy.
Blueberries can be added, but they bring extra moisture. For that reason, keep them to about 75–100 g, use them straight from the fridge or freezer, and avoid adding extra banana at the same time.
Sourdough Discard vs Active Starter
This is one of the most common questions when making banana bread with sourdough discard: does the starter need to be active? For this recipe, no. Discard is the easiest default.
In this loaf, discard is mostly a flavor and moisture ingredient. The baking soda and baking powder do the main lifting, so you do not need to wait for the starter to rise the batter.
| Starter Type | Can You Use It? | What to Expect |
|---|---|---|
| Fresh discard | Yes, best default | Mild flavor, easy mixing, classic banana bread taste. |
| Older fridge discard | Yes, if it smells pleasantly tangy | Stronger sourdough note. Good for people who like more tang. |
| Active starter | Yes | Slightly lighter loaf and usually less sour flavor. |
| Very runny discard | Yes | Batter may be looser and the loaf may need a few extra minutes. |
| Very thick discard | Yes | Bring closer to room temperature and whisk well into the wet ingredients. |
| Brand-new starter discard | Not ideal | Early starter discard can smell harsh or unstable. Use mature discard for better flavor. |
For more ways to use starter and discard in baking, keep this page on more sourdough bread recipes handy. It is useful when you want to move from quick discard bakes to focaccia, pizza dough, and simple bread projects.
Which Sourdough Banana Bread Version Should You Make?
Use the base recipe if you want a classic moist loaf. Then adjust only one or two things depending on the flavor or texture you want. Banana bread is forgiving, but the best versions come from changing one thing at a time.
| If You Want… | Use This Direction |
|---|---|
| Mild classic banana bread | Use fresh discard or active starter. |
| More sourdough tang | Use older but healthy fridge discard. |
| Softer crumb | Use neutral oil instead of melted butter. |
| Richer flavor | Use melted butter and dark brown sugar. |
| Less sweetness | Reduce brown sugar to about 125 g. |
| Better structure | Do not skip the baking powder. |
| Nutty banana bread | Add 85–115 g walnuts or pecans. |
| Dessert-style loaf | Add 85–115 g chocolate chips. |
| Eggless loaf | Use flax eggs and cool the loaf completely before slicing. |
| Lowest risk of a wet center | Weigh the banana and bake to 200–205°F / 93–96°C. |
Choose One Direction First
For a first bake, choose one direction and keep the rest of the loaf simple. Then you will know whether your repeat version is the buttery classic, the softer oil loaf, the walnut breakfast loaf, or the chocolate-chip treat.
What Not to Change the First Time
For your first loaf, do not increase the banana, increase the discard, remove the baking powder, and switch flour types all at once. Make the base version once, then adjust sweetness, fat, mix-ins, or tang after you know how your pan and oven behave.
If you already know your favorite banana bread style — walnut, chocolate chip, less sweet, extra tangy, or warm with butter — choose that direction first. Most people find their house version after two bakes: one classic loaf, then one small adjustment based on what they liked most.
How to Make Sourdough Banana Bread
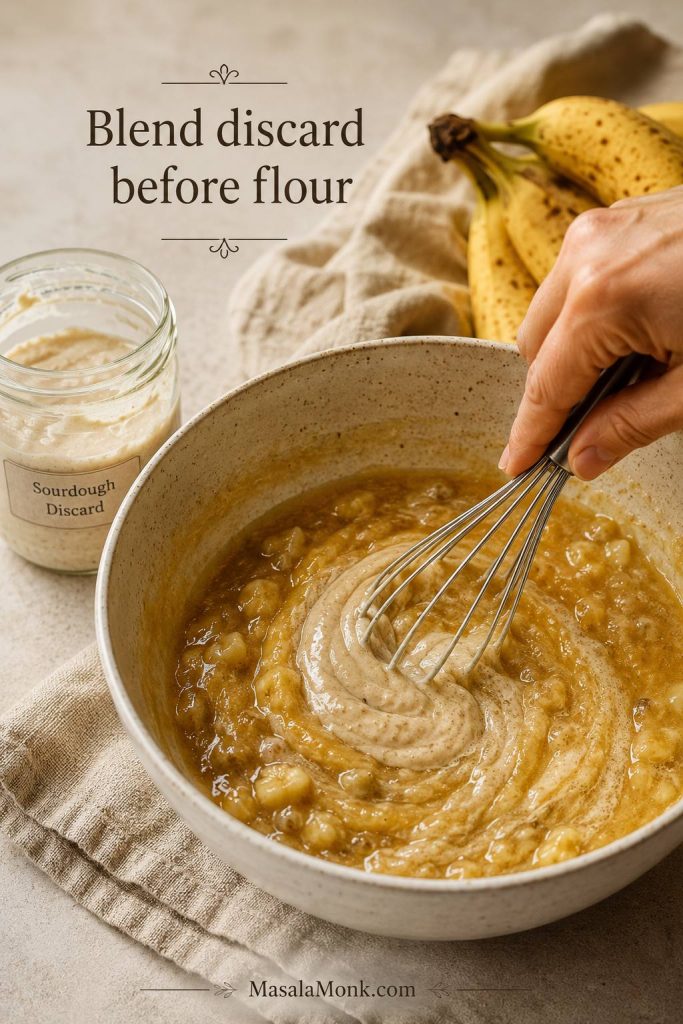
The method for this sourdough banana bread recipe is straightforward, but the order matters. Blend the discard into the wet ingredients before adding flour. That way, you avoid sticky sourdough streaks and get a more even crumb.
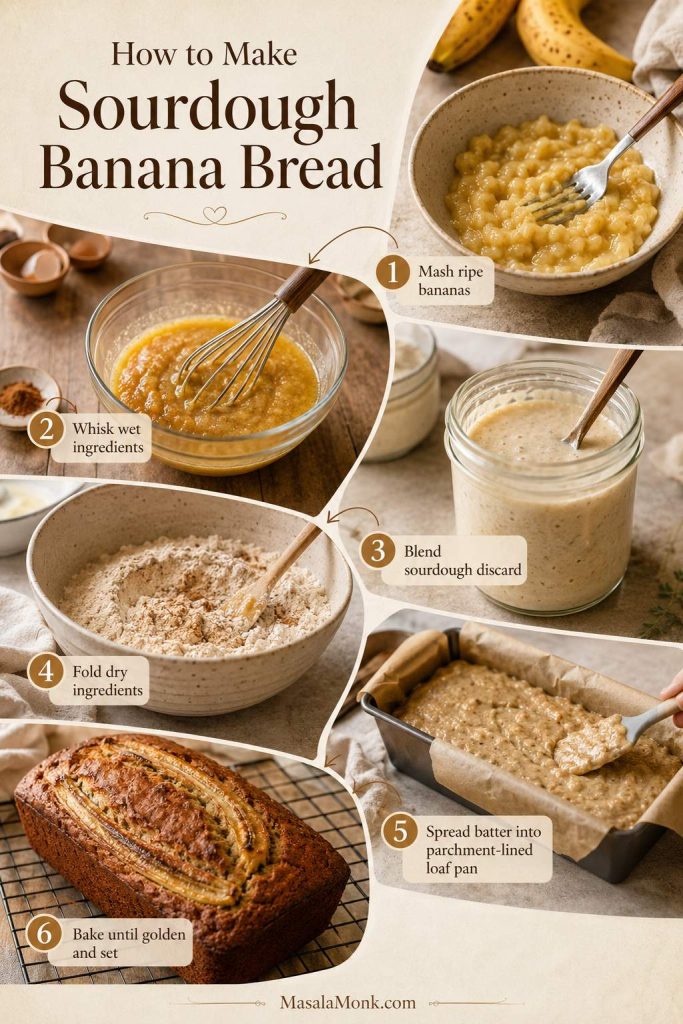
1. Prepare the Pan and Oven
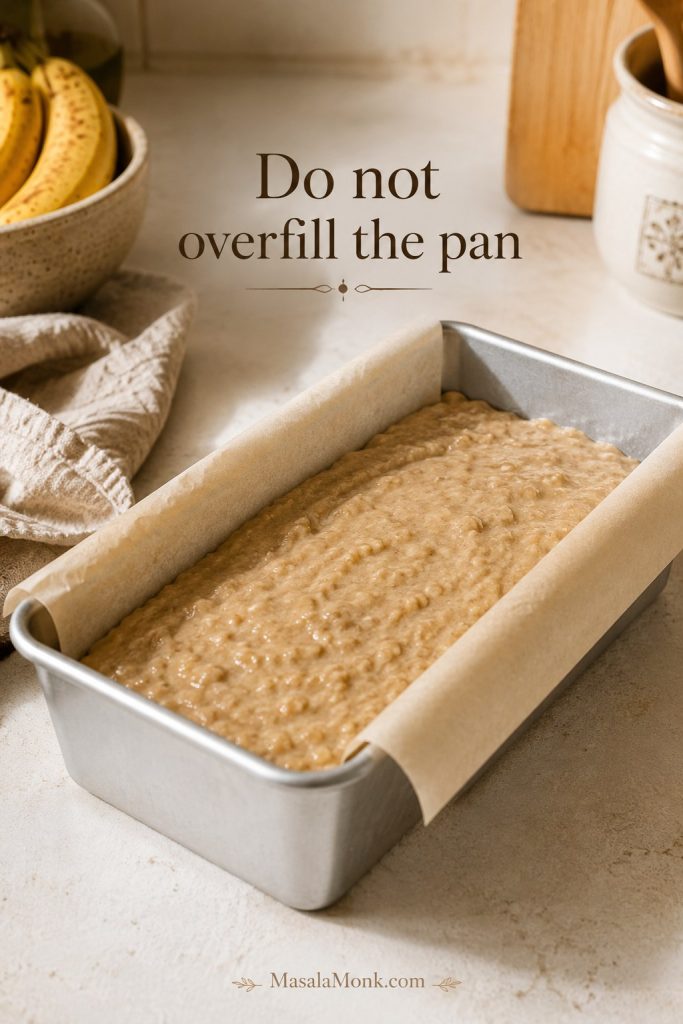
Preheat the oven to 350°F / 175°C. Then line a 9×5-inch / 23×13 cm loaf pan with parchment paper, leaving a little overhang so the baked loaf is easy to lift out.
If your loaf pan looks more than about three-quarters full after adding the batter, set a small amount aside and bake it as 1–2 muffins. An overfilled pan can rise unevenly or stay wet in the center.
2. Mash and Measure the Bananas
Mash the bananas until mostly smooth with a few small lumps. Then measure out 340–360 g. A few soft banana pieces are fine; however, large chunks can create wet pockets in the loaf.
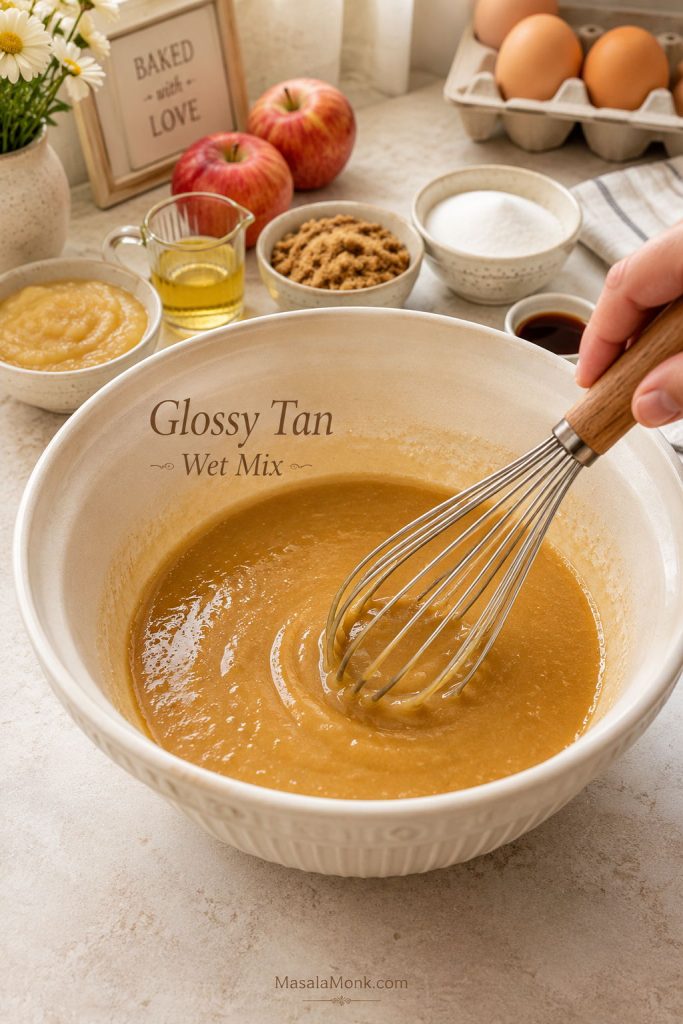
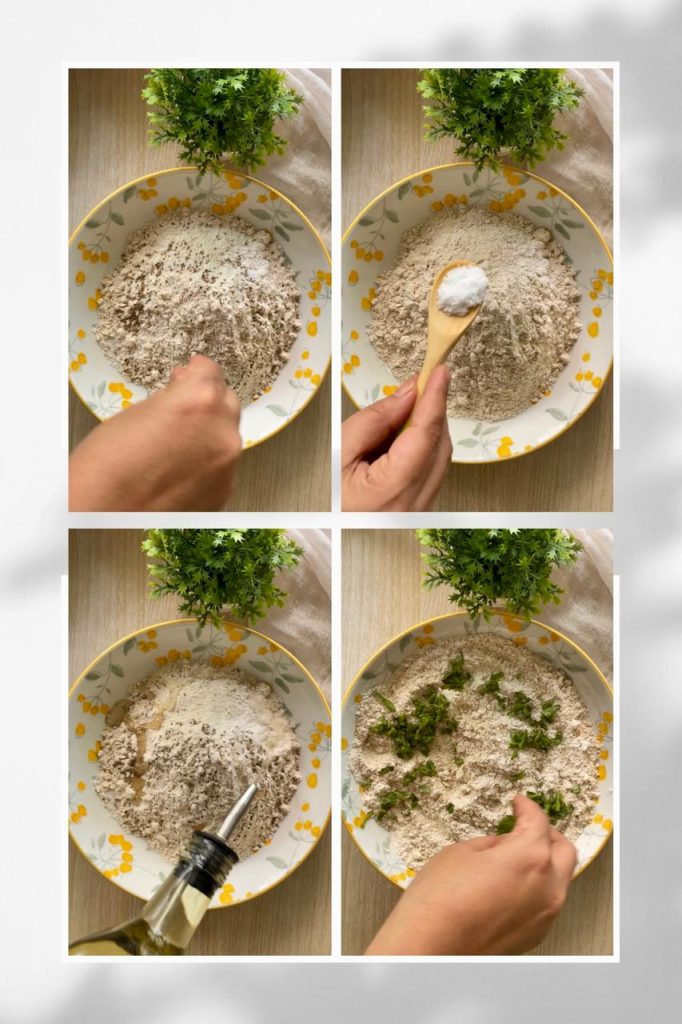
3. Mix the Wet Ingredients
Whisk melted butter and brown sugar until glossy. Next, add the eggs, vanilla, mashed banana, and sourdough discard. Whisk until the discard is fully blended into the mixture.
At this point, the mixture should look glossy and loose, with no visible streaks of discard.
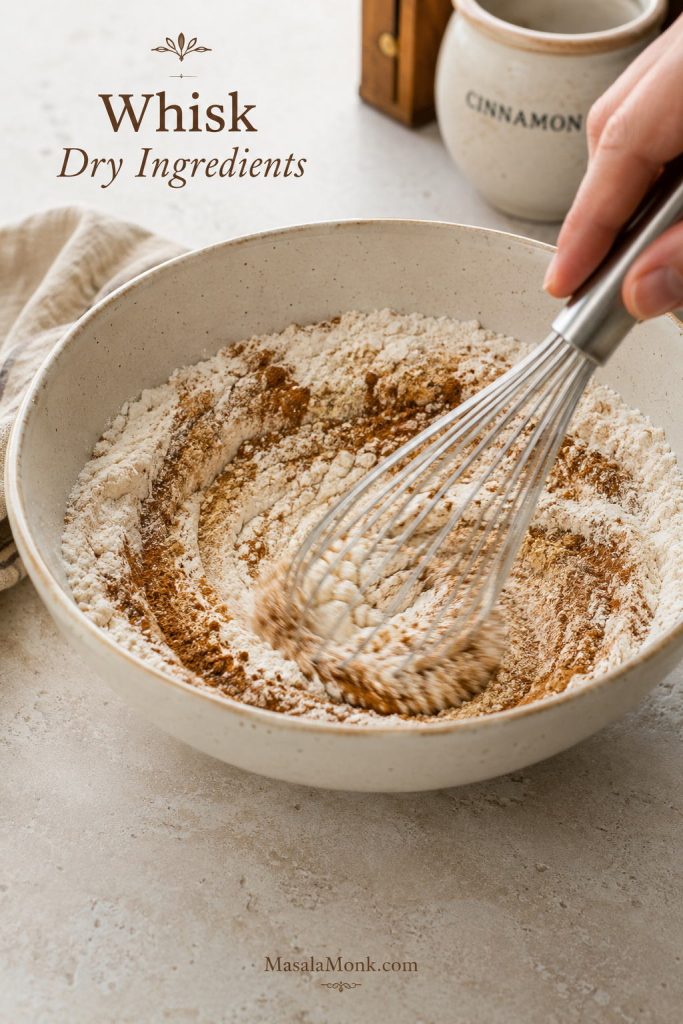
4. Fold in the Dry Ingredients
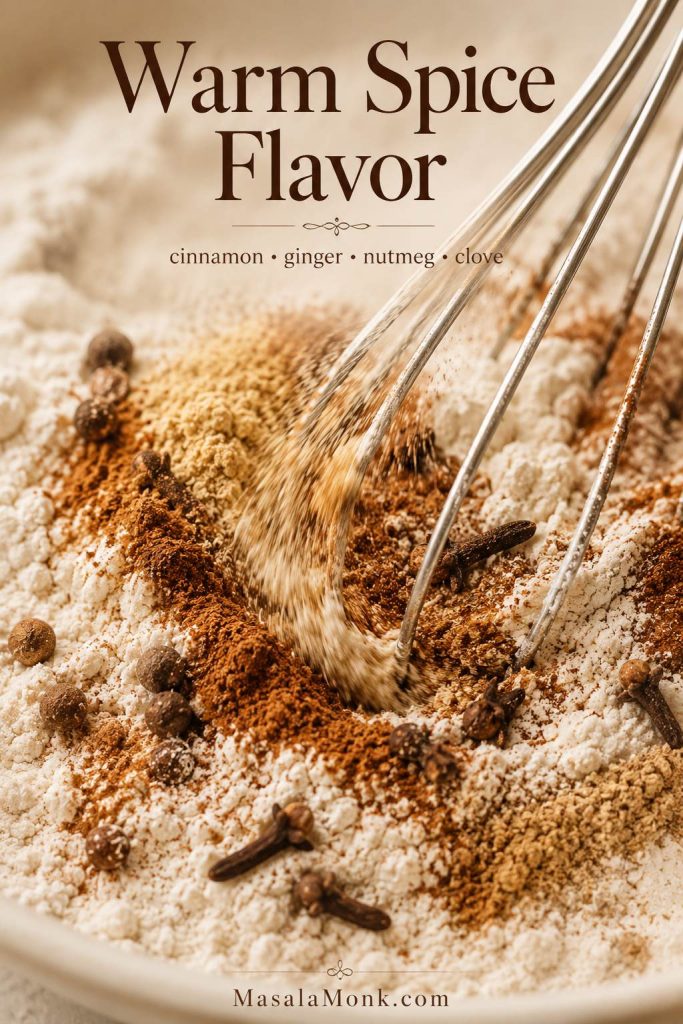
Add flour, baking soda, baking powder, salt, and cinnamon. Sprinkle the baking soda, baking powder, salt, and cinnamon evenly over the flour before folding so they distribute more evenly. Then fold gently with a spatula until no dry flour remains. Stop as soon as the batter comes together.
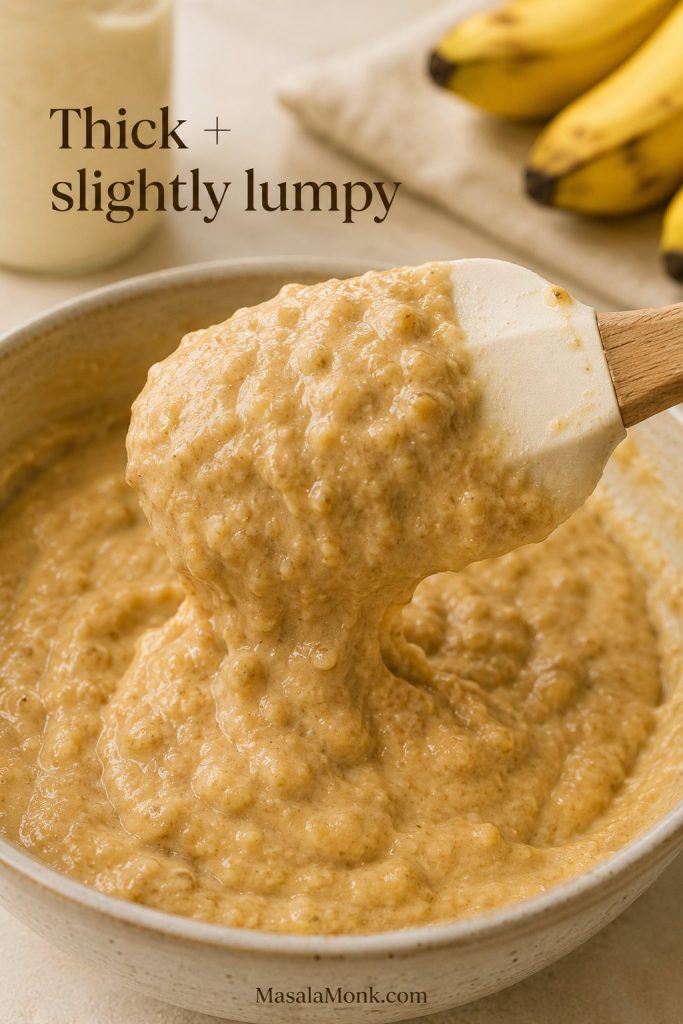
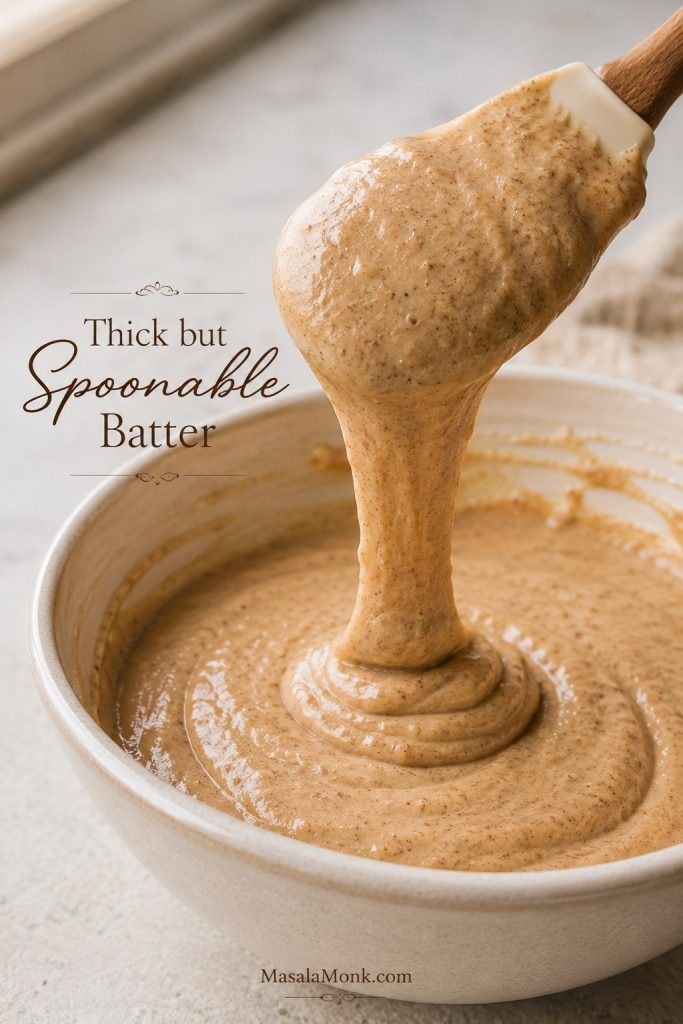
The batter should look thick and slightly lumpy, not smooth like cake batter. It should mound slightly in the pan; if it pours like pancake batter, the loaf may need longer to bake. A slightly uneven batter is a good sign here. Smooth, overworked batter is more likely to bake up heavy.
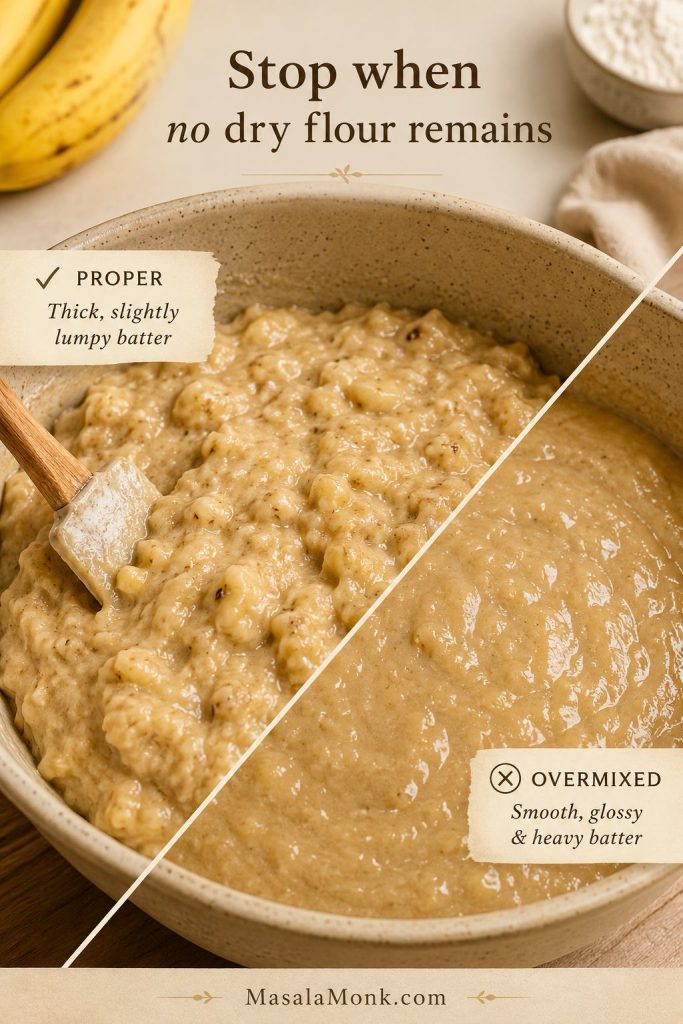
In fact, overmixing develops gluten and can make banana bread dense, tough, or heavy. If your past banana bread turned dense or gummy, compare your batter to the troubleshooting section before changing the recipe.
5. Add Mix-Ins
Fold in walnuts, pecans, or chocolate chips, if using. Keep the amount moderate so the loaf still rises and slices cleanly.
6. Bake and Cool
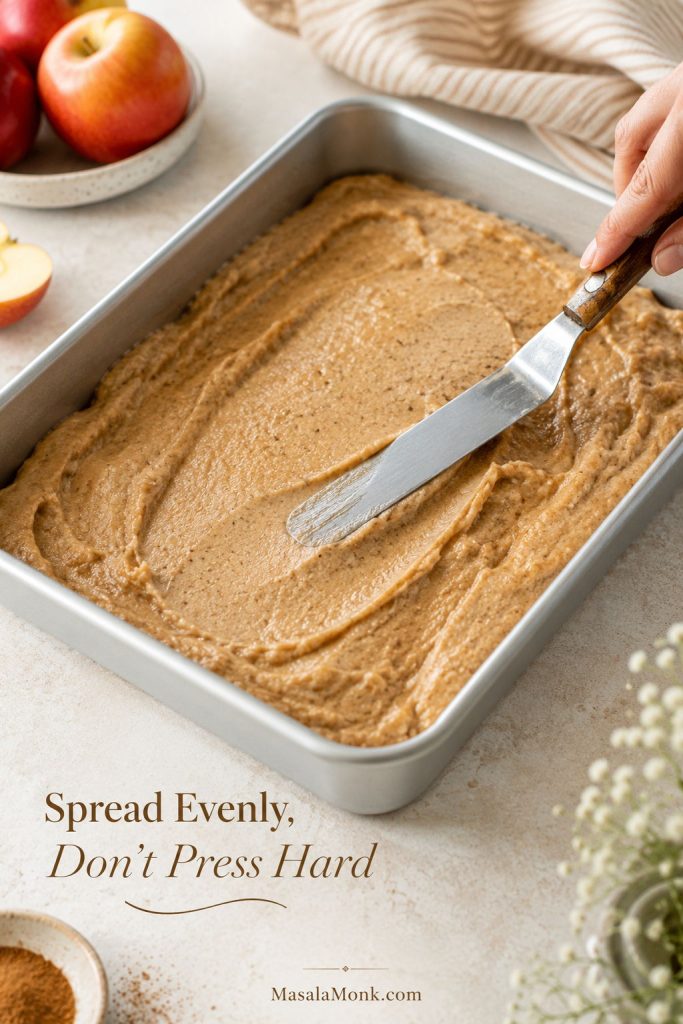
Spread the batter into the prepared pan and smooth the top. The batter should sit below the rim of the pan, with room to rise.
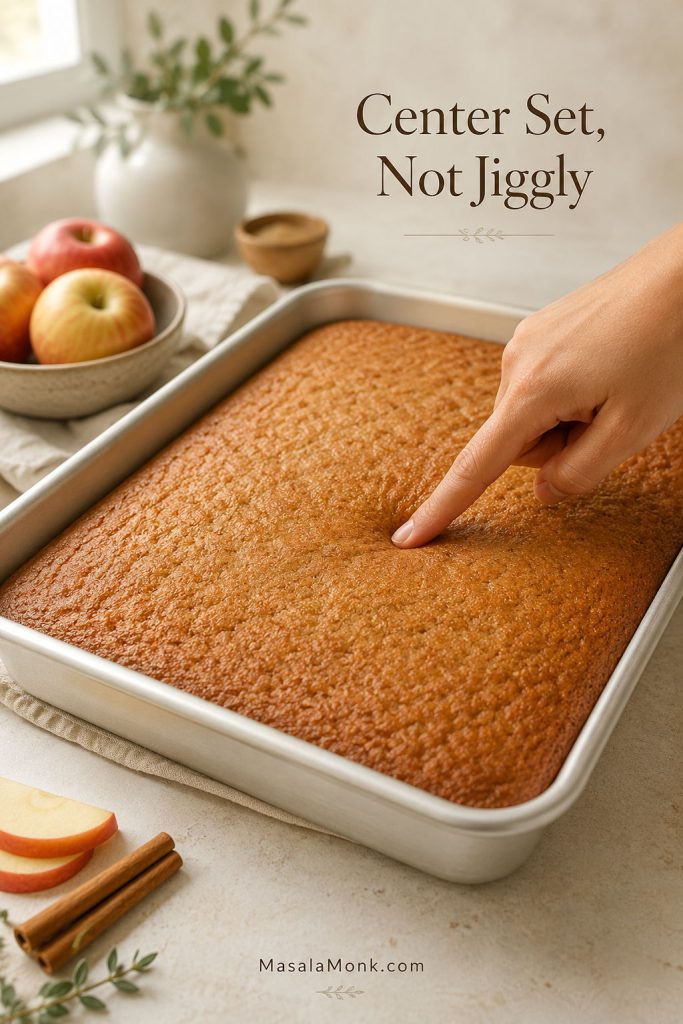
Bake for 55–65 minutes, or until the highest part of the loaf feels firm and no wet batter remains. When it is done, the top should look set and gently domed, not jiggly.
Finally, cool in the pan for 10–20 minutes. After that, lift the loaf onto a rack and let it cool before slicing.

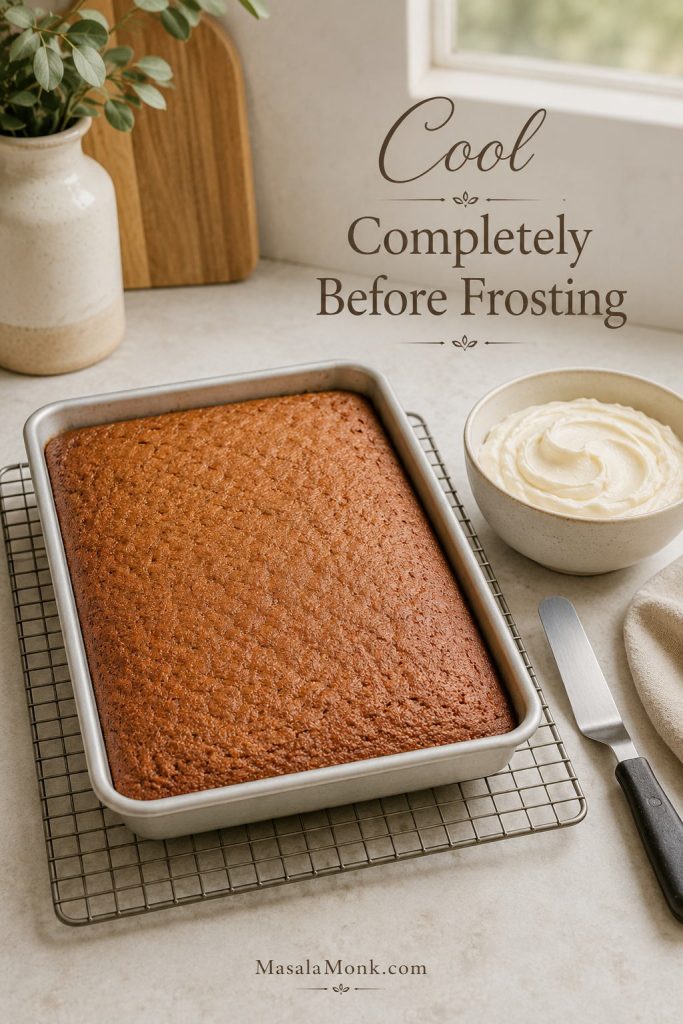
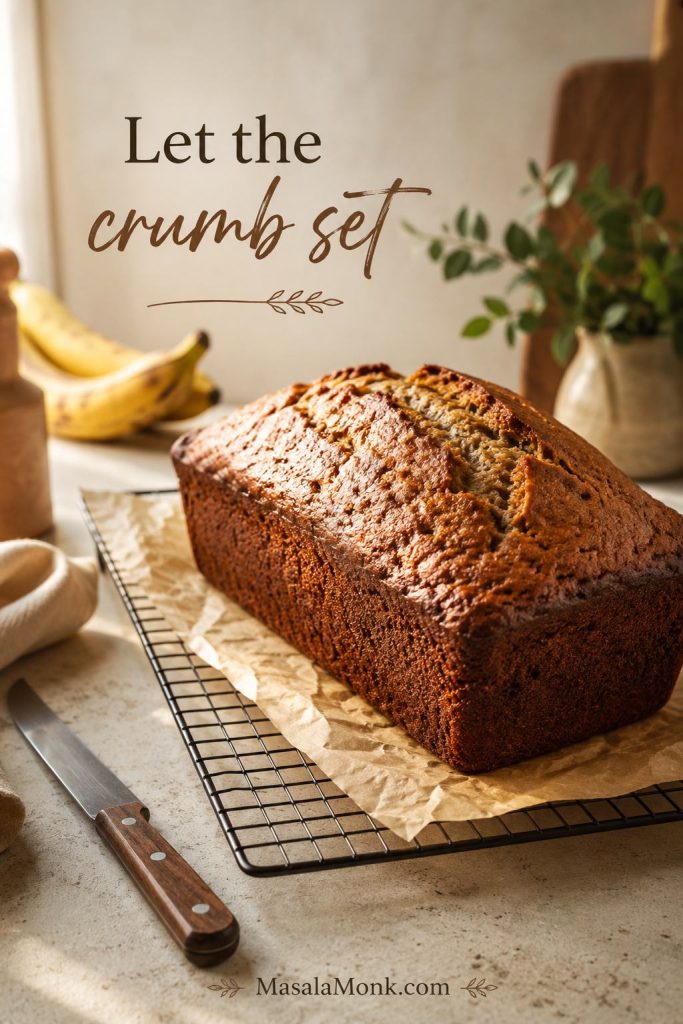
Important Cooling Note
Warm banana bread is tempting, but slicing too early can make the middle seem wetter than it really is. Let it cool until the crumb has time to set.
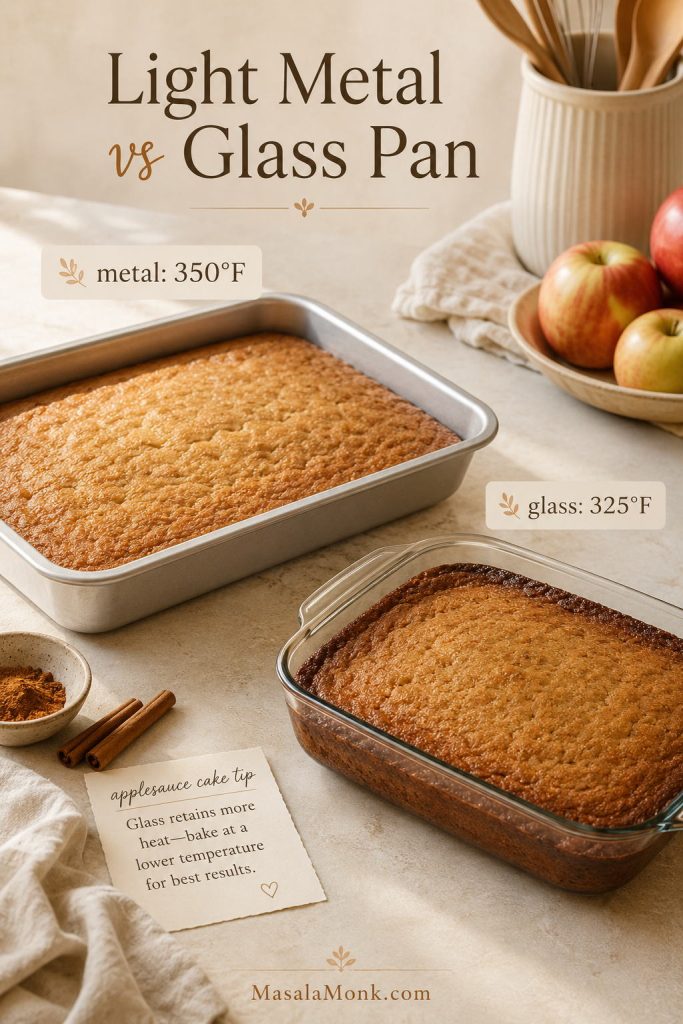
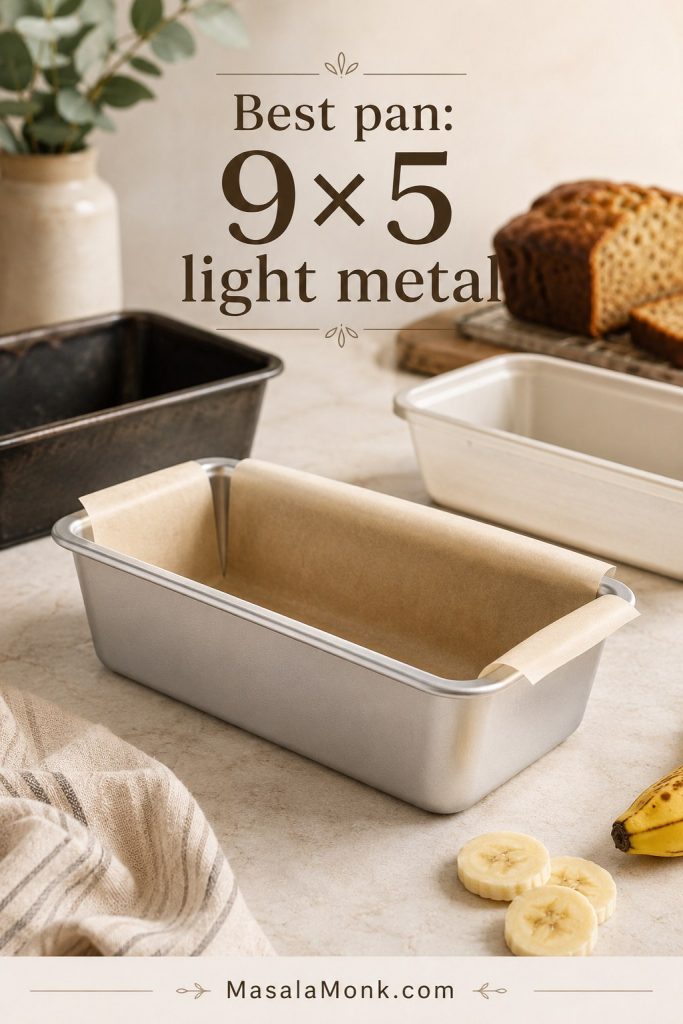
Best Pan, Oven Temperature, and Bake Time for Sourdough Banana Bread
For this sourdough banana bread recipe, the most reliable setup is a 9×5-inch light metal loaf pan at 350°F / 175°C. Light metal helps the loaf bake evenly without the sides darkening too quickly.
Banana bread is naturally dense and moist, so bake time is only a guide. The real test is whether the loaf is baked through at its tallest point.
That is why the doneness test matters more than the exact minute on the timer.
| Pan or Oven Situation | What to Do |
|---|---|
| 9×5-inch light metal pan | Most reliable setup for this recipe. Start checking around 55 minutes. |
| 8½×4½-inch pan | The loaf will be taller and may need extra time in the middle. |
| Dark metal pan | Browns faster. Tent with foil if the top darkens before the middle is done. |
| Glass or ceramic pan | May bake differently and often needs a few extra minutes. Check the thickest part carefully. |
| Top browning too fast | Tent loosely with foil during the last part of baking. |
| Outside dark but middle wet | Next time, bake at 325°F / 163°C for longer so the loaf has more time to bake through. |
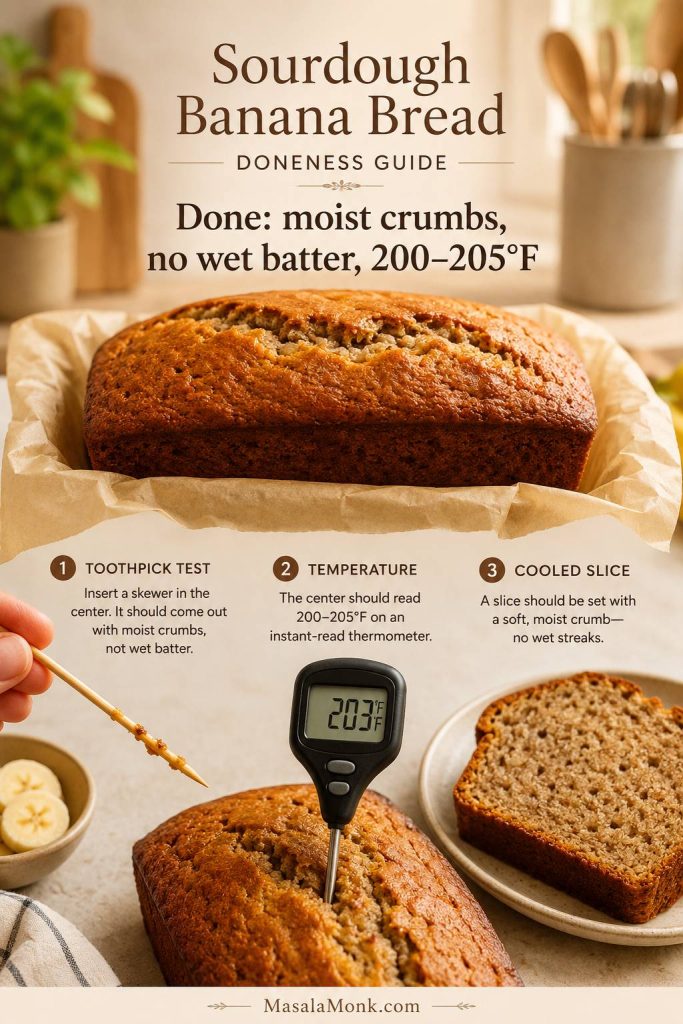
How to Tell When the Loaf Is Done
If your first worry is a wet middle, you are not alone. Banana bread often looks done on top before the loaf has finished baking through, so test the tallest part instead of trusting the browned crust.
A browned top is a clue, not a guarantee. The inside still needs time to settle into a soft, sliceable crumb.
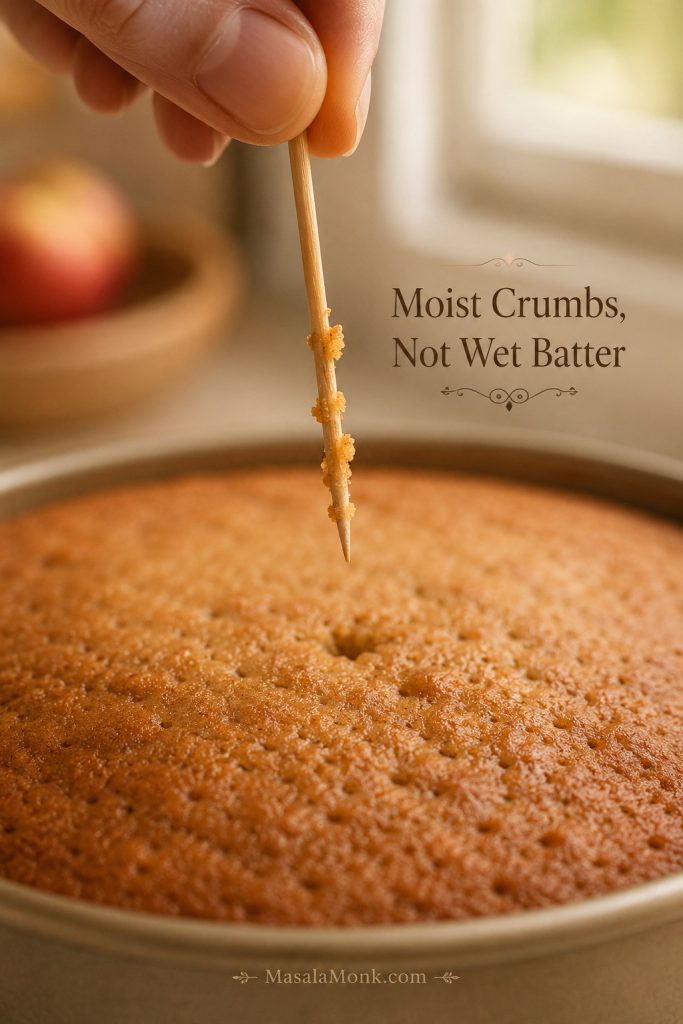
- A skewer inserted into the center should come out without wet batter.
- A few moist crumbs are fine.
- The top should spring back lightly when pressed.
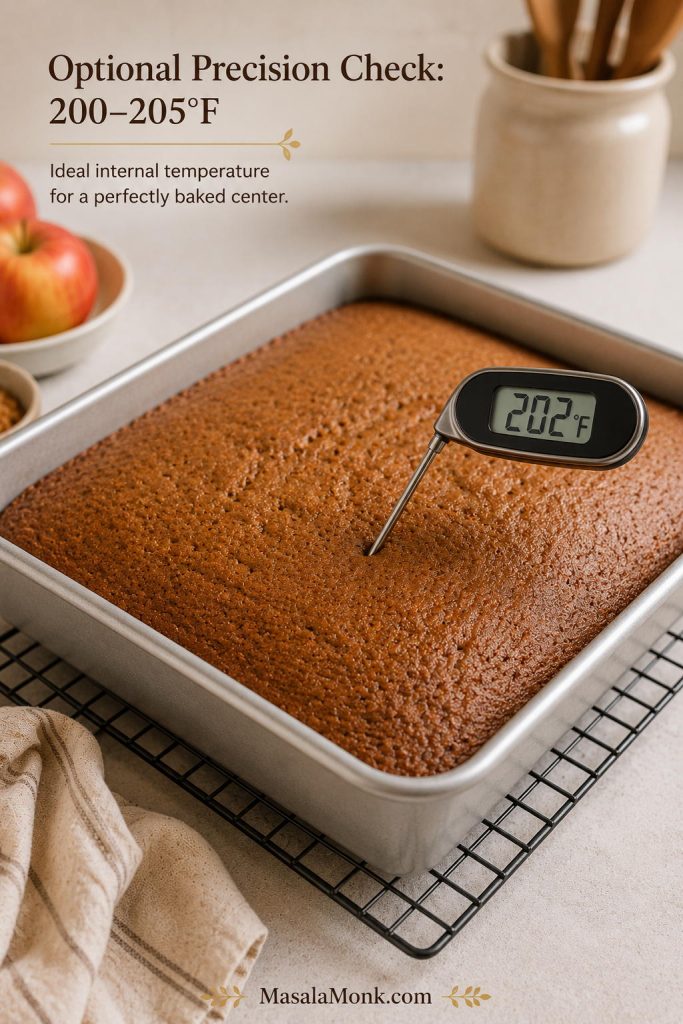
- The thickest part of the loaf should read about 200–205°F / 93–96°C on an instant-read thermometer.
Because banana smears on a skewer can look wet, look for raw batter rather than soft banana. When in doubt, give the loaf a few more minutes, especially if you used a smaller pan, extra banana, or runny discard.
How to Fix Gummy, Dense, or Dry Sourdough Banana Bread
Most texture problems in sourdough discard banana bread come down to moisture, mixing, or bake time. Once you know which one caused the problem, the next loaf is much easier to fix.
If your loaf failed once, do not assume the recipe is hopeless. Sourdough banana bread usually goes wrong for one of four reasons: too much banana, very wet discard, overmixing after flour, or pulling the loaf before the thickest part has finished baking.
Match the Problem Before You Change the Recipe
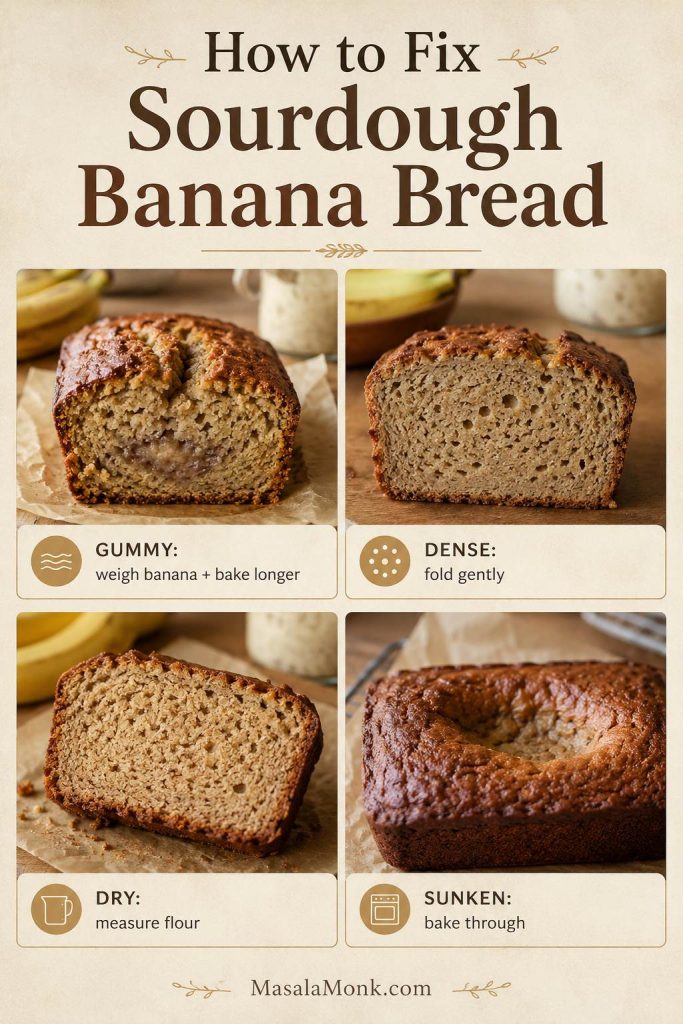
| Problem | Likely Cause | Fix |
|---|---|---|
| Gummy center | Too much banana, underbaking, overmixing, or slicing too soon | Weigh the banana, bake longer, fold the flour gently, and cool before slicing. |
| Dense loaf | Discard not blended well or batter overmixed after flour | Whisk discard fully into wet ingredients, then fold dry ingredients lightly. |
| Dry loaf | Too much flour or overbaking | Weigh flour or spoon-and-level it. Check a few minutes earlier next time. |
| Too sour | Older, very acidic discard | Use fresher discard or active starter for a milder loaf. |
| Sunken middle | Underbaked center or too much moisture | Bake until the thickest part tests clean and avoid adding extra banana beyond the recipe range. |
| Dark outside, raw middle | Oven too hot, pan too dark, or loaf too tall | Tent with foil, use a lighter pan, or bake lower and longer next time. |
| Sticky sourdough streaks | Discard not fully mixed into wet ingredients | Whisk the discard with banana, eggs, butter, and sugar before adding flour. |
If you only change one thing next time, weigh the mashed banana. It is the small, unglamorous step that solves more banana bread texture problems than almost anything else.
Once you know the cause, go back to the ingredient measurements, mixing method, or doneness cues rather than changing everything at once.
Sourdough Banana Bread Variations and Mix-Ins
Once this sourdough banana bread recipe works for you, the variations are easy. Keep mix-ins moderate and avoid adding extra wet ingredients unless you adjust the bake time.
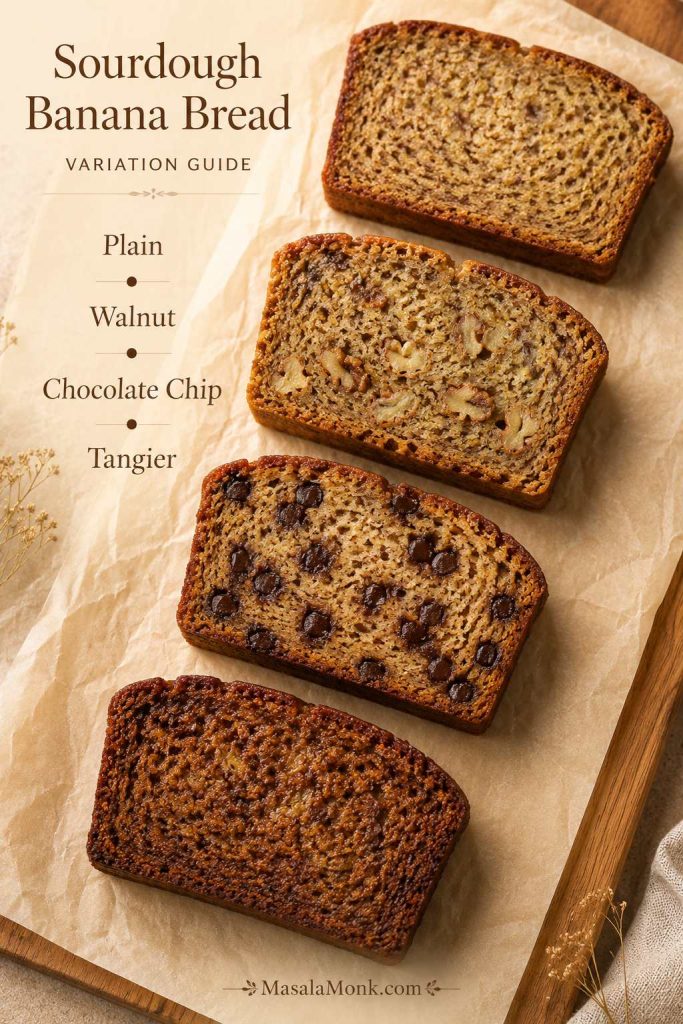
Walnut Sourdough Banana Bread
Fold in 85–115 g chopped walnuts. Toasting the walnuts first gives a deeper flavor and helps them stay crisp inside the loaf.
Chocolate Chip Sourdough Banana Bread
Fold in 85–115 g chocolate chips. For a more dessert-like loaf, sprinkle a few extra chips on top before baking.
Less-Sweet Version
Reduce the brown sugar to about 125 g. The loaf will be less moist and less caramel-like, but still pleasant if your bananas are very ripe. However, avoid cutting the sugar too aggressively because sugar affects softness, browning, and shelf life.
Eggless Version
For an eggless version, use 2 flax eggs and expect a slightly softer, denser crumb. Let the loaf cool completely before slicing so the structure has time to set. This flax egg for quick breads guide explains the basic ratio and when flax eggs work best.
Healthier Banana Bread Direction
For a more wholesome loaf, replace up to half the all-purpose flour with whole wheat flour, reduce the sugar slightly, or use part Greek yogurt in place of a little butter. For a separate banana-bread style built around oat flour, see this healthy banana bread with oat flour.
Optional Long-Fermented Version
The same-day version gives the most classic banana bread texture, so start there if this is your first loaf. However, if you want deeper sourdough flavor, you can use a long-fermented method as long as the final leaveners are added close to baking.
For a true long-fermented version, mix the flour, sourdough discard, mashed banana, melted butter, and brown sugar first. Cover and refrigerate overnight. The next day, let the mixture sit at room temperature for 20–30 minutes so it softens slightly. Beat the eggs and vanilla together first, then stir them into the fermented mixture. Sprinkle in the baking soda, baking powder, salt, and cinnamon, then fold until evenly combined and bake right away.
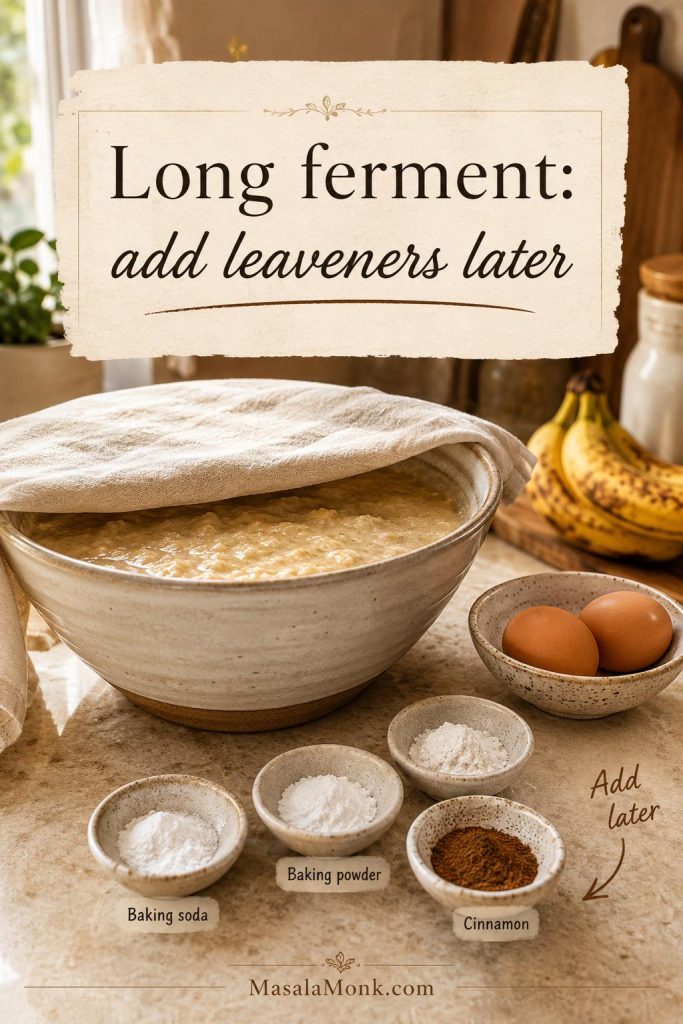
If the mixture looks very stiff the next day, do not panic. Let it soften at room temperature, then stir gently after adding the beaten eggs and vanilla.
The texture will be tangier and slightly less cake-like than the same-day loaf. Do not add the baking soda or baking powder before the overnight rest, because they give the loaf its best lift when added closer to baking.
Can This Become Muffins?
The flavor works beautifully as muffins, but the pan, fill level, and bake time change. Use this loaf as the flavor base, then bake muffin versions separately rather than treating the loaf timing as a direct swap. For another portioned breakfast-bake idea, these high protein muffins with banana or applesauce are useful when you want something meal-prep friendly.
How to Serve Sourdough Banana Bread
The first day, this loaf is soft enough to eat plain once it has cooled. For a warmer, richer slice, add salted butter, cream cheese, peanut butter, or a little honey.
The next day, toast a slice lightly until the edges crisp and the banana aroma comes back. That is also the best way to revive a frozen slice.
It is humble enough for a weekday breakfast and good enough to wrap up for someone who needs a little comfort. It also disappears slice by slice: breakfast, afternoon tea, lunchbox treat, late-night snack.
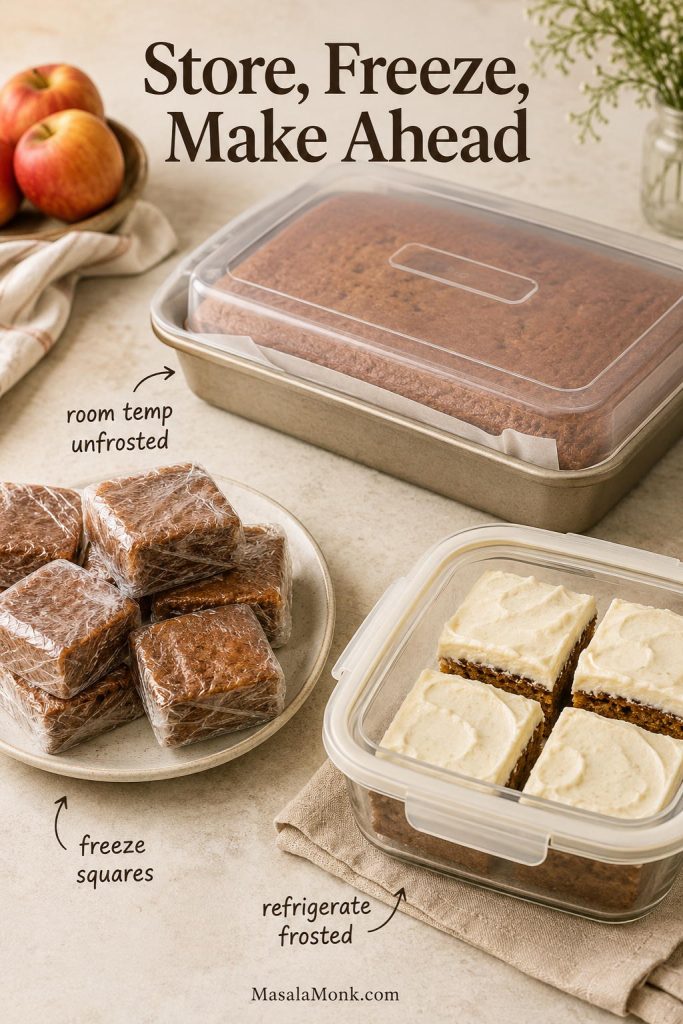
How to Store and Freeze Sourdough Banana Bread
Let the loaf cool completely before wrapping. Otherwise, warm banana bread traps steam, and that can make the crust sticky and the middle feel wetter than it should.
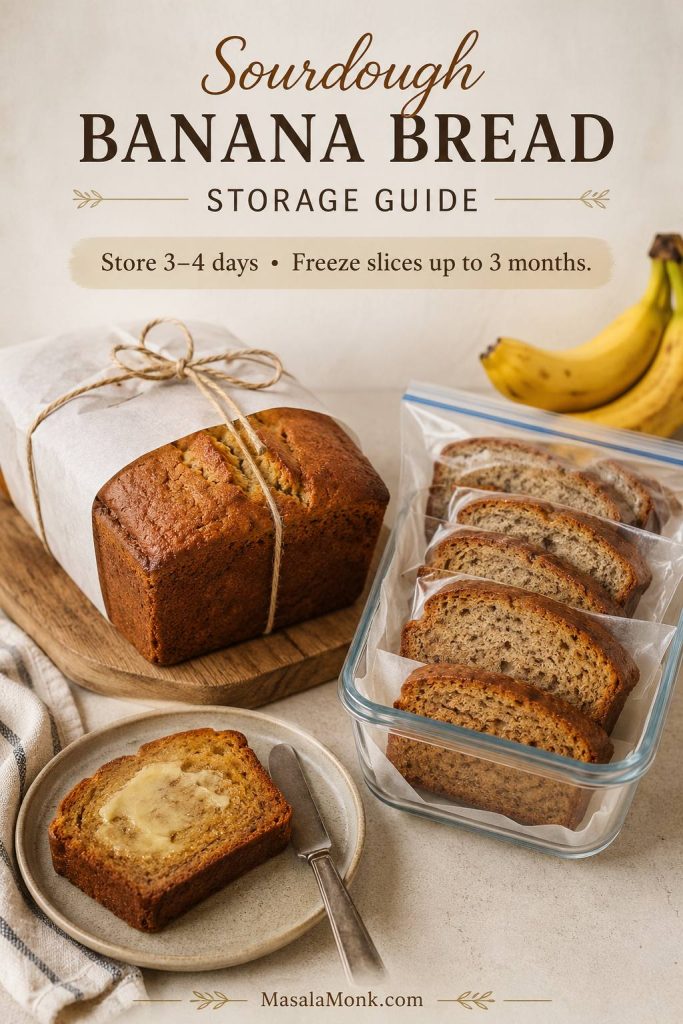
- Room temperature: Wrap well and keep for 3–4 days.
- Refrigerator: Useful in hot or humid weather, but the loaf may dry out faster.
- Freezer: Freeze slices for up to 3 months for best texture.
- To reheat: Warm gently, toast lightly, or microwave a slice briefly until soft.
Instead of freezing only the whole loaf, freeze slices so you can warm one piece at a time for breakfast, tea, or a quick sweet snack.
If you are baking ahead, the recipe card has the core times, pan size, and storage note in one place.
For general food-safe freezer guidance, the USDA’s overview of freezing and food safety is a helpful reference.
Printable Sourdough Banana Bread Recipe Card
Sourdough Banana Bread Recipe
This moist sourdough discard banana bread turns ripe bananas and starter discard into a soft, sliceable loaf with brown sugar warmth, gentle tang, and classic banana bread comfort.
Equipment
- 9×5-inch / 23×13 cm loaf pan
- Parchment paper
- Mixing bowl
- Whisk
- Rubber spatula
- Kitchen scale, recommended
- Cooling rack
- Instant-read thermometer, optional but helpful
Ingredients
- 340–360 g very ripe bananas, peeled and mashed, about 1½ cups
- 113 g sourdough discard, about ½ cup, ideally from a starter fed with equal weights flour and water
- 240 g all-purpose flour, about 2 cups
- 150 g packed brown sugar, about ¾ cup
- 113 g unsalted butter, melted and cooled, about ½ cup
- 2 large eggs
- 2 teaspoons vanilla extract
- 1 teaspoon baking soda
- 1 teaspoon baking powder
- ½ teaspoon fine salt
- 1 teaspoon ground cinnamon, optional
- 85–115 g chopped walnuts, pecans, or chocolate chips, optional
Instructions
- Preheat the oven to 350°F / 175°C. Line a 9×5-inch loaf pan with parchment paper.
- Mash the bananas and measure out 340–360 g. Set aside.
- In a large bowl, whisk melted butter and brown sugar until glossy.
- Add eggs, vanilla, mashed banana, and sourdough discard. Whisk until the discard is fully blended into the wet ingredients.
- Add flour, baking soda, baking powder, salt, and cinnamon. Sprinkle the leaveners and salt evenly over the flour, then fold gently with a spatula until no dry flour remains.
- Fold in walnuts, pecans, or chocolate chips, if using.
- Spread the batter into the prepared loaf pan and smooth the top.
- Bake for 55–65 minutes, or until the top is domed, the thickest part feels set, and a skewer inserted into the center shows moist crumbs but no wet batter. If the top browns too quickly, tent loosely with foil.
- The loaf is done when the thickest part reads about 200–205°F / 93–96°C.
- Cool in the pan for 10–20 minutes, then lift onto a rack and cool before slicing.
Recipe Notes
- Fresh discard gives a mild flavor. Older discard gives a stronger sourdough note.
- Active starter can be used in the same amount by weight.
- Do not add extra banana without expecting a longer bake time.
- For a less-sweet loaf, reduce brown sugar to about 125 g.
- For a softer oil-based loaf, replace the melted butter with 100–110 g neutral oil.
- For blueberries, use 75–100 g and avoid adding extra banana at the same time.
- For a long-fermented version, use a separate method where the flour, discard, banana, butter, and sugar rest first, then add the eggs and final leaveners closer to baking.
- Store wrapped at room temperature for 3–4 days, or freeze slices for up to 3 months.
Save these core cues for repeat bakes: measured banana, 113 g discard, a 9×5 pan, and a 200–205°F finish.
More Ways to Use Ripe Bananas
If you still have bananas on the counter after this loaf, this banoffee pie recipe takes them in a caramel-and-cream dessert direction. For a no-oven breakfast, banana oatmeal pancakes use ripe banana for natural sweetness and moisture.
Once this base loaf works for you, it becomes a reliable discard recipe to return to whenever bananas go brown. After that, the walnut, chocolate chip, oil-based, and extra-tangy versions become easy little adjustments rather than brand-new recipes.
Once you know how your oven bakes this loaf, it becomes one of those quiet kitchen recipes you do not need a special occasion for: brown bananas, a little discard, one bowl, and a loaf that makes the next morning easier.
FAQs
Does sourdough banana bread taste sour?
It should taste like banana bread with a little extra depth, not like sour bread. Fresh discard gives the mildest flavor. Older fridge discard creates a stronger tang, especially if it has been sitting for several days.
Can I use active sourdough starter instead of discard?
Yes. Use the same amount by weight. Active starter usually gives a slightly lighter loaf and a milder sourdough flavor, while older discard gives more tang.
Is this a sourdough starter banana bread?
Yes. You can make it with sourdough discard or active starter. However, it is still a quick bread, so baking soda and baking powder do the main lifting while the starter adds moisture, acidity, tenderness, and flavor.
Why is my loaf gummy in the middle?
The most common causes are too much banana, underbaking, overmixing, or slicing before the loaf has cooled. Use 340–360 g mashed banana, fold the flour gently, and bake until no wet batter remains in the thickest part.
How ripe should bananas be for banana bread?
Use bananas with brown spots or fully brown skins. They should smell sweet and mash easily. Firm yellow bananas do not give the same sweetness, moisture, or banana flavor.
Can I use frozen bananas?
Yes. Thaw them first, drain off the watery liquid, then measure the mashed banana. Frozen bananas release more moisture than fresh ripe bananas, so keeping the amount in the 340–360 g range matters even more.
Should I use baking soda, baking powder, or both?
Both work best in this recipe. Baking soda reacts with the acidity in the bananas, brown sugar, and discard, while baking powder adds backup lift for a more reliable loaf.
What happens when the discard is very old?
Older discard can make the loaf tangier. That can be delicious when the discard smells pleasantly sour, but avoid discard that smells spoiled, moldy, or sharply unpleasant. For a mild loaf, use fresh discard or active starter.
Does the discard make the bread rise?
Not much. In this quick bread, baking soda and baking powder do the main lifting. The discard mostly adds moisture, acidity, tenderness, and flavor.
Can I make this dairy-free?
Yes. Replace the melted butter with 100–110 g neutral oil. The loaf will taste less buttery, but the crumb will stay soft and moist. This makes the loaf dairy-free, but not egg-free unless you also use the flax egg option.
Can I use whole wheat flour?
Yes, but start by replacing only half the all-purpose flour with whole wheat flour. A full whole-wheat loaf can taste heavier and absorb more moisture. If the batter feels unusually stiff, add 1–2 tablespoons of milk, yogurt, or water.
Can this sourdough banana bread recipe be made ahead?
Yes. The loaf keeps well at room temperature for 3–4 days and freezes nicely in slices. In fact, the flavor often tastes even better the next day because the banana, brown sugar, and sourdough notes settle together.
Can I bake this as muffins?
The batter can inspire muffins, but loaf timing does not translate directly. Muffins need a different pan, shorter bake time, and careful fill level. For the cleanest result, treat sourdough banana muffins as their own recipe rather than simply shrinking the loaf.
If you make this sourdough banana bread recipe, leave a comment with three details: fresh discard or older discard, butter or oil, and plain, walnut, or chocolate chip. Those notes help the next baker choose a version — and I would love to know which one becomes your repeat loaf.