Posted on — Leave a comment

Sausage Rolls Recipe: Easy Homemade Puff Pastry Sausage Rolls

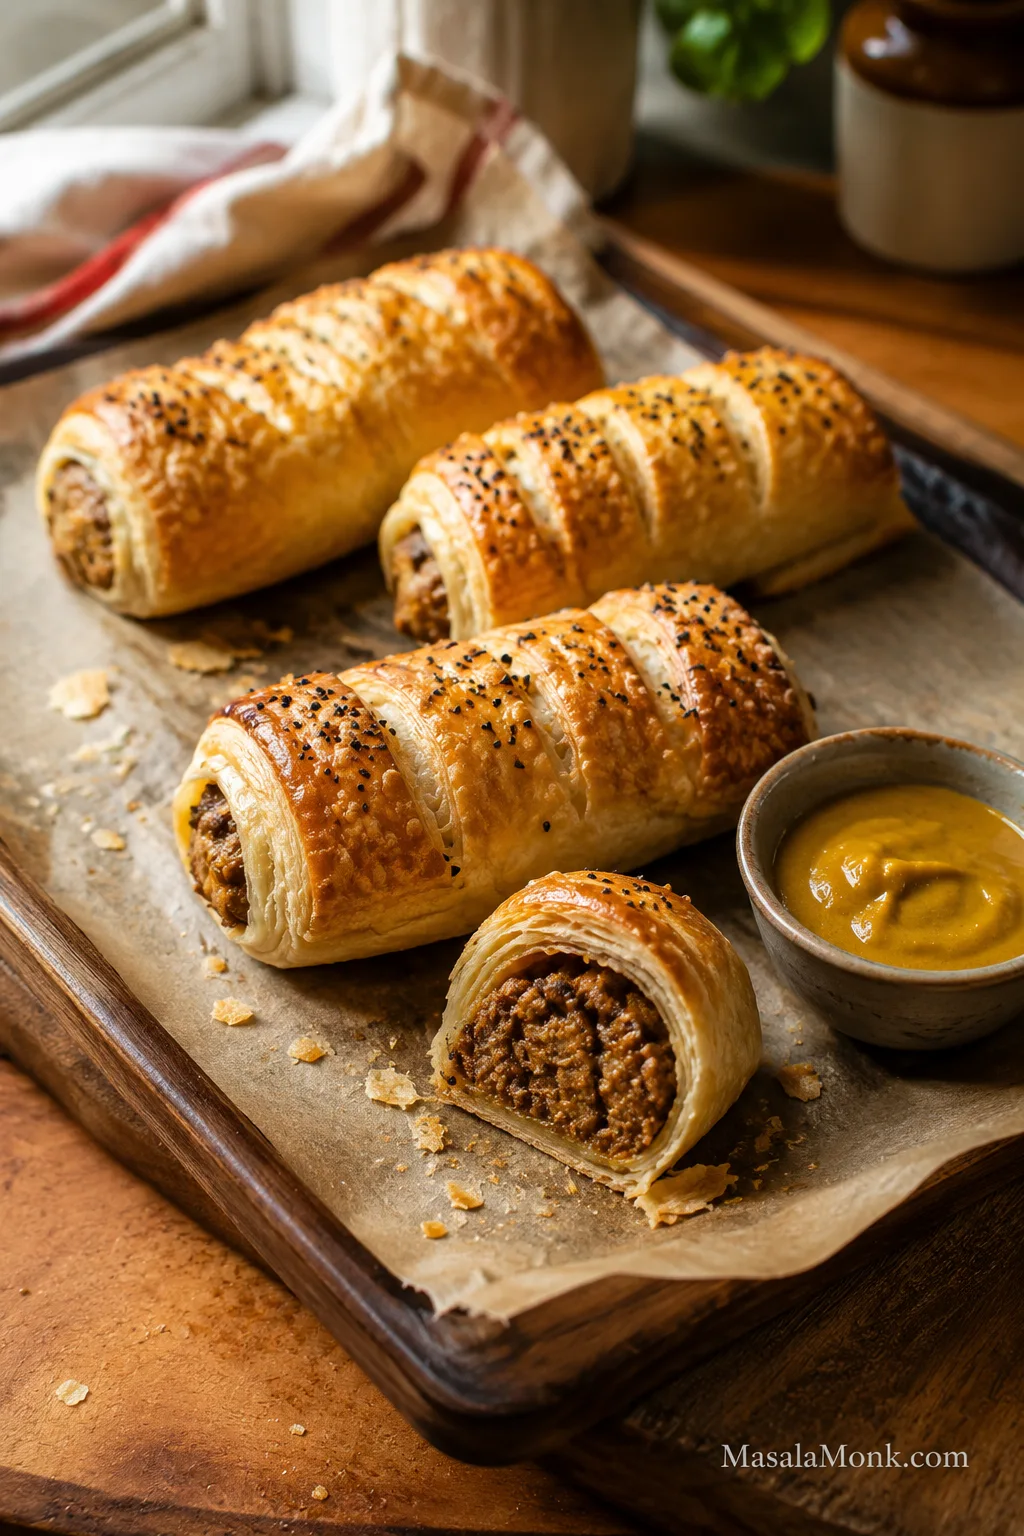
Homemade puff pastry sausage rolls on parchment with one roll cut open beside a small bowl of mustard.

If you have puff pastry and sausages, you are already close to a tray of homemade sausage rolls: buttery layers, savory filling, crisp bottoms, and the kind of warm snack people reach for before you have even moved the tray to the table.

Sausage rolls are savory pastry rolls filled with seasoned sausage meat and baked until flaky, golden, and hot in the center. This version keeps the classic idea but makes it practical for real kitchens: store-bought puff pastry, everyday sausages if that is what you have, clear cutting sizes, and enough small technique to avoid greasy, soft pastry.

The method itself is simple: fill, roll, seal, cut, glaze, and bake. You do not need special sausage meat, you do not need to guess the bake time, and you do not have to settle for soggy bottoms.

Make them large for dinner, small for parties, or freeze them unbaked for later. Once you know the basic shape, the same method works for lunchboxes, snack trays, and the kind of warm batch that disappears faster than expected.

Quick Answer: How to Make Sausage Rolls

To make sausage rolls, fill cool puff pastry with seasoned sausage meat or regular sausages with the skins removed, roll and seal the pastry, brush with egg wash, then bake at 200°C / 400°F, or 180°C fan / convection, until the pastry is puffed and well browned.

Large sausage rolls usually take 25–30 minutes, 16 medium rolls usually take 22–25 minutes, and mini sausage rolls usually take 18–22 minutes.

The easiest version uses puff pastry, sausages, and egg wash. The better version adds softened onion, breadcrumbs, herbs, and a little mustard, so the filling tastes rounder, stays juicy, and does not soak the pastry as it bakes.

For pork or beef sausage rolls, the filling should reach 160°F / 71°C in the center. For chicken or turkey sausage rolls, use 165°F / 74°C. If the pastry browns before the center is done, lower the oven slightly and bake a few minutes longer.

When they come out right, you get the best kind of contrast: flaky pastry on top, a clean, crisp base, and a savory filling that stays juicy without soaking through.
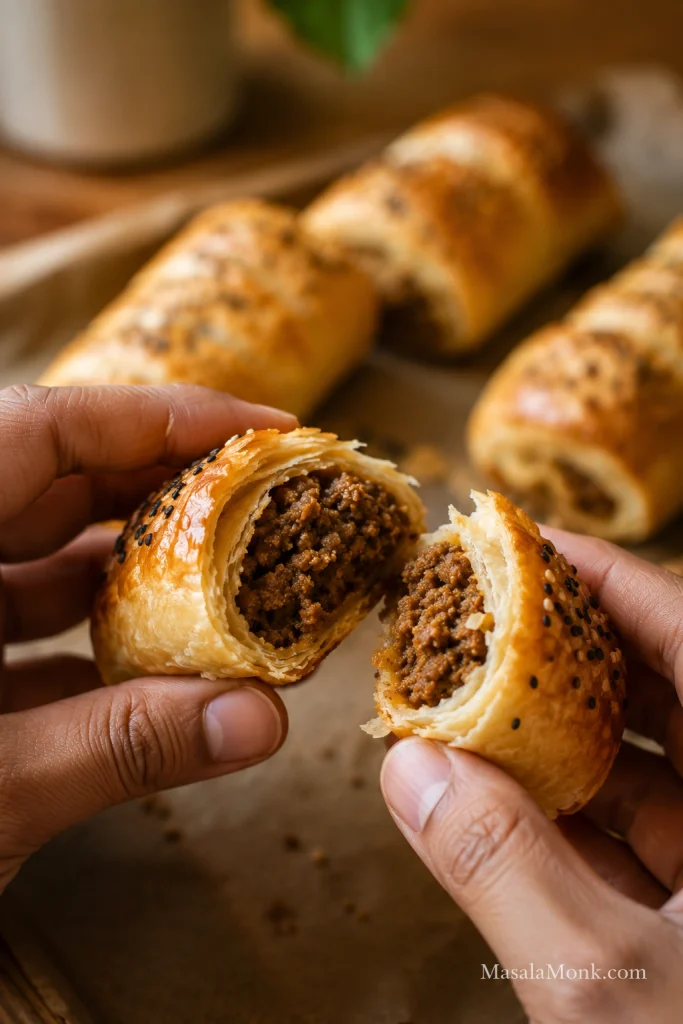
Hands holding a sausage roll broken open to show flaky puff pastry layers and cooked sausage filling.
When the roll breaks open, the pastry should flake instead of collapse, and the filling should look moist, cooked, and evenly packed.

Sausage Rolls Recipe Card

Easy Homemade Puff Pastry Sausage Rolls

This recipe makes flaky homemade sausage rolls with ready-rolled puff pastry and sausage meat, or regular sausages with the skins removed. Make them big enough for lunchboxes, small enough for party trays, or somewhere in the middle for the kind of snack that disappears while it is still warm.

Prep time20 minutes
Optional chill time10–20 minutes
Cook time18–30 minutes, depending on size
Total time40–60 minutes
Yield8 large, 16 medium, or 24–32 mini sausage rolls
Oven200°C / 400°F, or 180°C fan / convection

Equipment: You need a baking sheet, parchment paper, mixing bowl, small pan, sharp knife, pastry brush, and wire rack. An instant-read thermometer is helpful for large rolls or chicken and turkey fillings.

Sausage Roll Ingredients
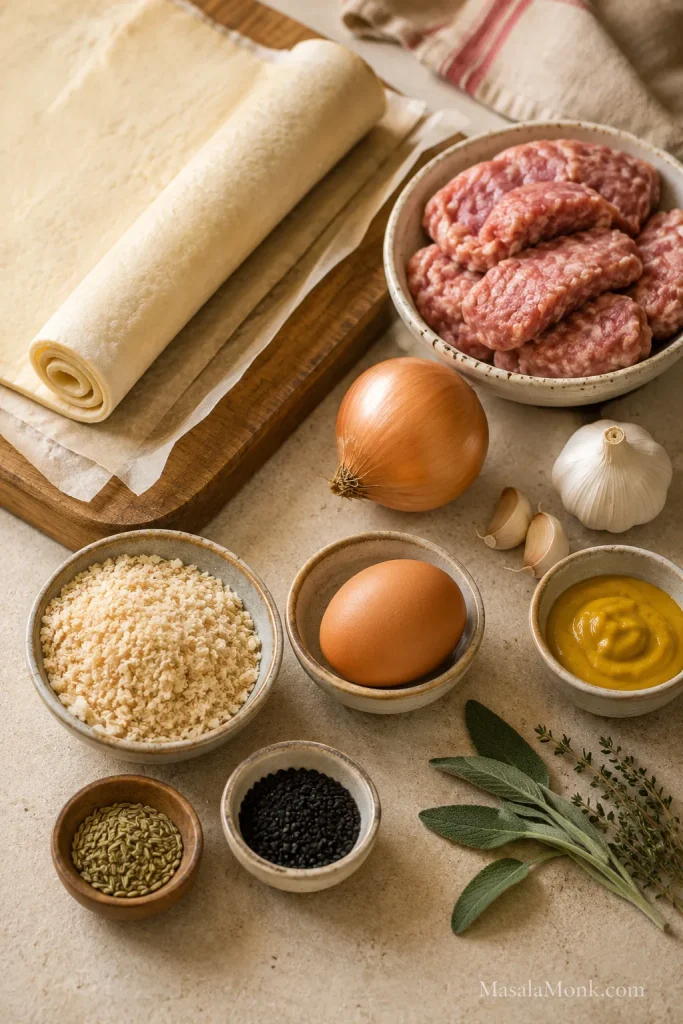
Puff pastry, sausage meat, onion, garlic, breadcrumbs, egg, mustard, herbs, and seeds arranged on a kitchen work surface.
This ingredient mix shows why the full version tastes rounder: breadcrumbs hold moisture, onion adds sweetness, and mustard sharpens the sausage filling.
  • 320–375g / 11–13 oz ready-rolled puff pastry, thawed if frozen but still cool
  • 450–500g / about 1 lb sausage meat, or 6–8 medium sausages with skins removed
  • 1 teaspoon oil or butter, for softening the onion
  • 1 small onion, about 70–90g / ½ cup very finely chopped
  • 1–2 garlic cloves, minced
  • 35–40g / about ½ cup panko breadcrumbs or fresh breadcrumbs, plus more if the filling feels loose
  • 1 egg for the filling
  • 1 egg for egg wash
  • 1 tablespoon / 15ml Dijon mustard or English mustard, optional
  • 1 teaspoon dried sage or thyme, or 1 tablespoon finely chopped fresh herbs
  • ½–1 teaspoon fennel seeds, lightly crushed, optional
  • Black pepper, to taste
  • Salt, only if using plain ground meat instead of seasoned sausage meat or sausages
  • Sesame seeds or nigella seeds, optional topping

If using plain ground pork or beef: start with about ¾ teaspoon fine salt per 500g / 1 lb meat. To check the seasoning safely, cook a tiny pinch of the filling in a pan before shaping the rolls.

Make the Filling and Shape the Rolls

  1. Preheat and line the tray. Preheat the oven to 200°C / 400°F, or 180°C fan / convection. Line a large baking sheet with parchment paper.
  2. Prepare the pastry. If frozen, thaw the puff pastry until flexible but still cool. It should unroll without cracking.
  3. Cook the onion. Warm the oil or butter in a small pan. Soften the onion for a few minutes, then add garlic for 30 seconds. Cool completely.
  4. Prepare the sausage meat. If using regular sausages, slit the skins lengthwise and squeeze the meat into a mixing bowl.
  5. Mix the filling. Combine sausage meat, cooled onion and garlic, breadcrumbs, 1 egg, mustard, herbs, optional fennel, and black pepper. Mix gently.
  6. Check the texture. You want a soft log that holds together without spreading like paste or crumbling apart. Add 1–2 tablespoons more panko if it feels loose, or 1–2 teaspoons cold water or milk if it feels dry.
  7. Cut the pastry. For one 320–375g sheet, cut the pastry in half lengthwise to make 2 long strips. If your pastry sheet is a different size, aim for strips wide enough to wrap around the filling without stretching.
  8. Add the filling. Divide the sausage filling into 2 even logs and place one log down the center of each pastry strip. For mini sausage rolls, shape thinner logs rather than simply cutting overfilled rolls smaller.
  9. Seal. Leave a small border beside the filling. Brush the edge lightly with beaten egg, fold the pastry over, and press just enough to close. Place seam-side down. Too much egg wash can make the edge slippery, and too much pressure can flatten the layers.
  10. Chill if soft. Chill the shaped rolls for 10–20 minutes if the pastry feels sticky, warm, or loose.

Cut, Bake, and Cool

  1. Cut and glaze. Cut each long roll into 4 pieces for 8 large rolls, 8 pieces for 16 medium rolls, or 12–16 pieces for 24–32 mini rolls. Brush tops with egg wash, add seeds if using, and slash lightly.
  2. Bake. Space the rolls at least 2.5cm / 1 inch apart on the baking sheet. Bake large rolls for 25–30 minutes, 16 medium rolls for 22–25 minutes, or mini rolls for 18–22 minutes.
  3. Cool. Rest for a few minutes on the tray, then move to a wire rack so the bottoms stay crisp.

Doneness: Look for well-browned pastry and cooked-through filling. Pork or beef sausage filling should reach 160°F / 71°C. Chicken or turkey filling should reach 165°F / 74°C.

What good looks like: the rolls should feel firm before baking, sit seam-side down, and come out browned on top with crisp bottoms and hot filling.

Freezer note: For best texture, freeze sausage rolls unbaked after shaping and cutting. Bake from frozen at 200°C / 400°F, or 180°C fan / convection, and add extra time. Do not thaw first unless your pastry packet specifically recommends it.

First batch recommendation: make the full version with onion, breadcrumbs, mustard, and herbs. It gives you the best balance of juicy filling and crisp pastry. Once you know how your pastry and sausages behave, use the 3-ingredient shortcut for faster batches.

The 3 Rules for Better Sausage Rolls

Good sausage rolls do not need fancy pastry or special sausage meat. They need three small things done well: filling that tastes good before it goes in, pastry that stays cool enough to puff, and a filling log slim enough for the pastry to close without a fight.
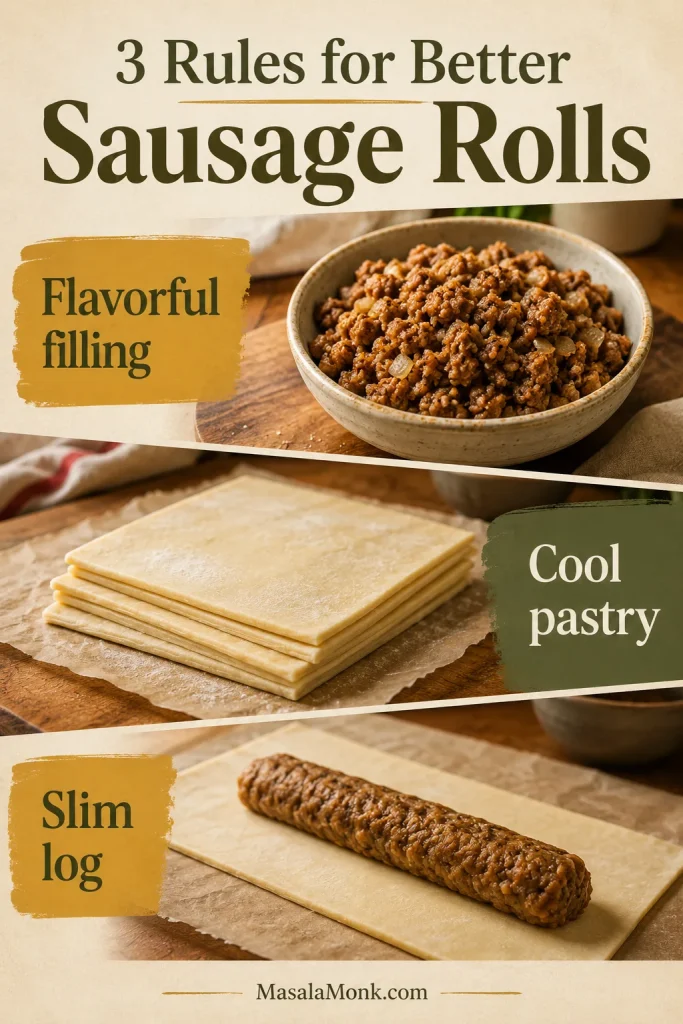
Visual guide showing flavorful filling, cool pastry, and a slim filling log for making sausage rolls.
Think of this as the sausage roll safety net: seasoned filling for flavor, cold pastry for lift, and a slim log for a clean seal.
  • Use filling that tastes good before it goes in. Sausage rolls are simple, so bland sausage has nowhere to hide.
  • Keep the pastry cool. Sticky, greasy, or slack pastry is a sign to pause and chill the tray.
  • Shape thinner than you think. The pastry should close like a wrapper, not stretch like a blanket.

Get those right and the rolls bake neater, crisper, and juicier, with fewer split seams, fewer soggy bottoms, and a center that cooks through before the pastry over-browns. Next, choose the filling, pastry, and size that fit the batch you actually want to make.

Need the exact amounts now? Jump back to the recipe card, or compare options in Choose the Sausage Roll Version You Want.

Choose the Sausage Roll Version You Want

A party tray, lunchbox roll, freezer batch, and fast snack all use the same base method, but the size and filling choices change slightly. Start with the version that fits the moment, then use the rest of the guide to fine-tune it.
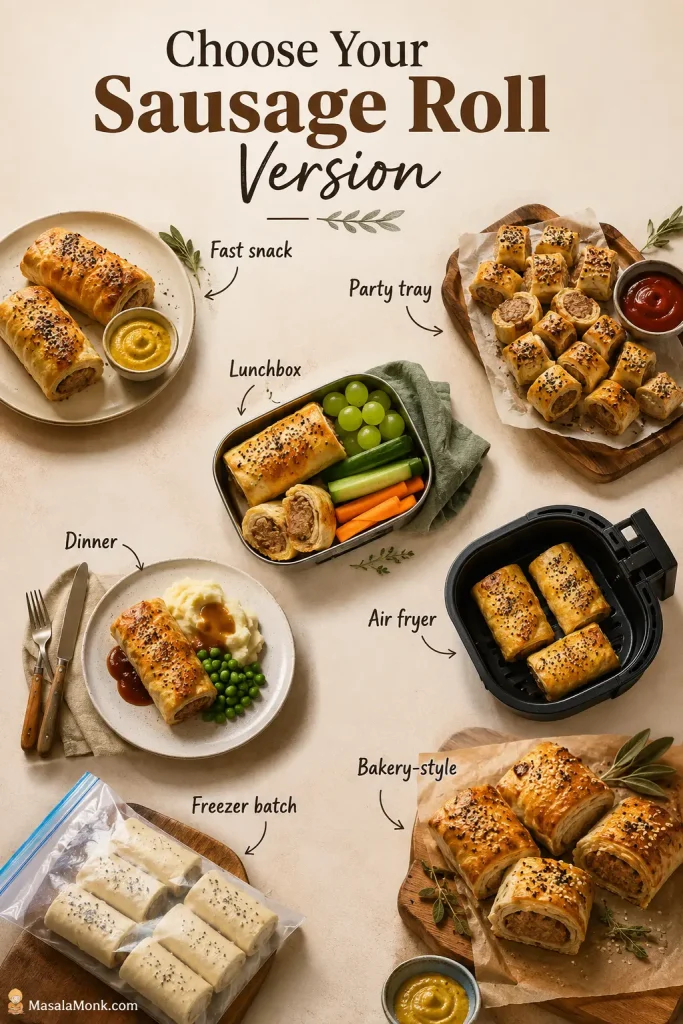
Decision board showing sausage rolls for a fast snack, party tray, lunchbox, dinner, air fryer batch, freezer batch, and bakery-style serving.
Once the base method is clear, the same sausage roll recipe can become a snack, party tray, lunchbox option, air fryer batch, or freezer prep.
SituationBest sausage roll version
Fast snack3-ingredient sausage rolls with puff pastry, sausages, and egg wash
Best flavorMain recipe with onion, breadcrumbs, mustard, herbs, and optional fennel
Party trayMini sausage rolls, shaped thinner and frozen unbaked if making ahead
LunchboxesMedium rolls, cooled completely before packing
DinnerLarger rolls with salad, beans, soup, or potatoes
Air fryer batchMini or medium rolls cooked in one layer
Rich bakery-stylePork sausage, all-butter puff pastry, generous egg wash, and a short chill before baking

Can I Use Regular Sausages?

Yes. Most people do not buy “sausage meat” every week. Regular sausages are usually easier to find, and they work beautifully when the flavor is already good. Slit the skins, squeeze out the meat, and loosen it with a fork so it shapes evenly inside the pastry.
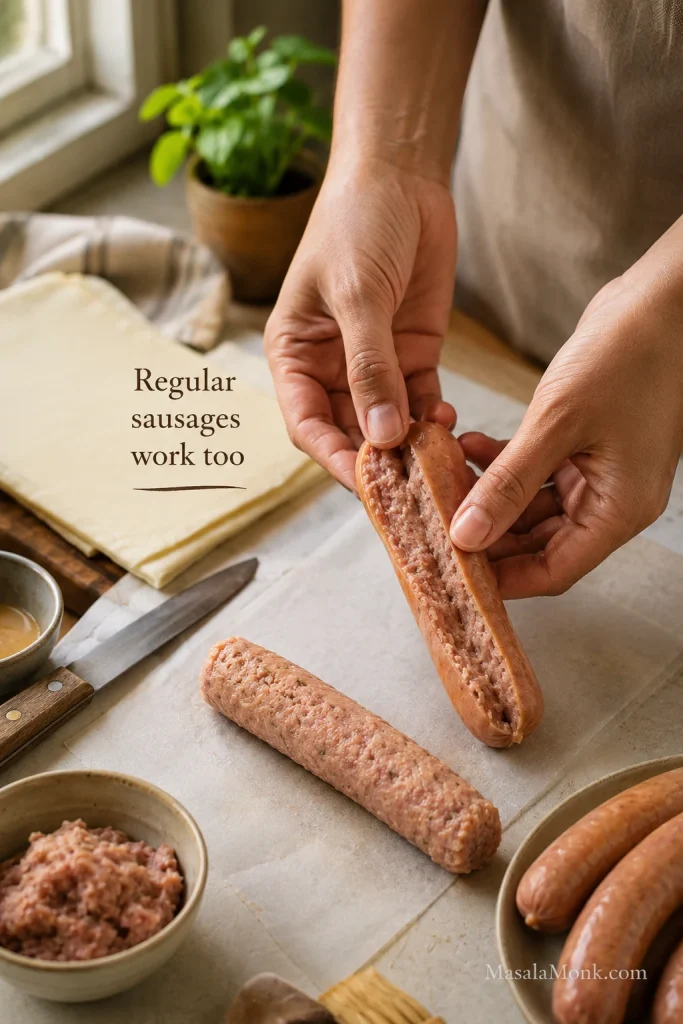
Hands opening regular sausages and shaping the sausage meat into a log on a kitchen counter.
Regular sausages can become sausage roll filling once the skins are removed; after that, shape the meat evenly so the pastry wraps cleanly.

Choose sausages you already like because the filling is the main flavor of the roll. If the sausage tastes bland before it goes in, the pastry cannot fix it.

Ingredient note: In the UK and Australia, “sausage meat” usually means seasoned loose sausage filling. In the US, look for bulk sausage, breakfast sausage meat, or simply remove the meat from sausages. Plain ground pork works too, but it needs proper seasoning.

  • Sausage meat: fastest and most classic, but check salt before adding more.
  • Regular sausages: easiest supermarket shortcut; slit the skins and use the filling.
  • Plain ground pork or beef: works if you season it properly and keep enough fat or moisture for juiciness.
  • Chicken, turkey, or vegetarian sausage: useful alternatives, but watch dryness or excess moisture.

Check the Seasoning Safely

Salt note: most sausages are already seasoned, so cook a tiny test piece before adding more salt. If you are using plain ground pork or beef instead, season it properly and test a small cooked piece before shaping.
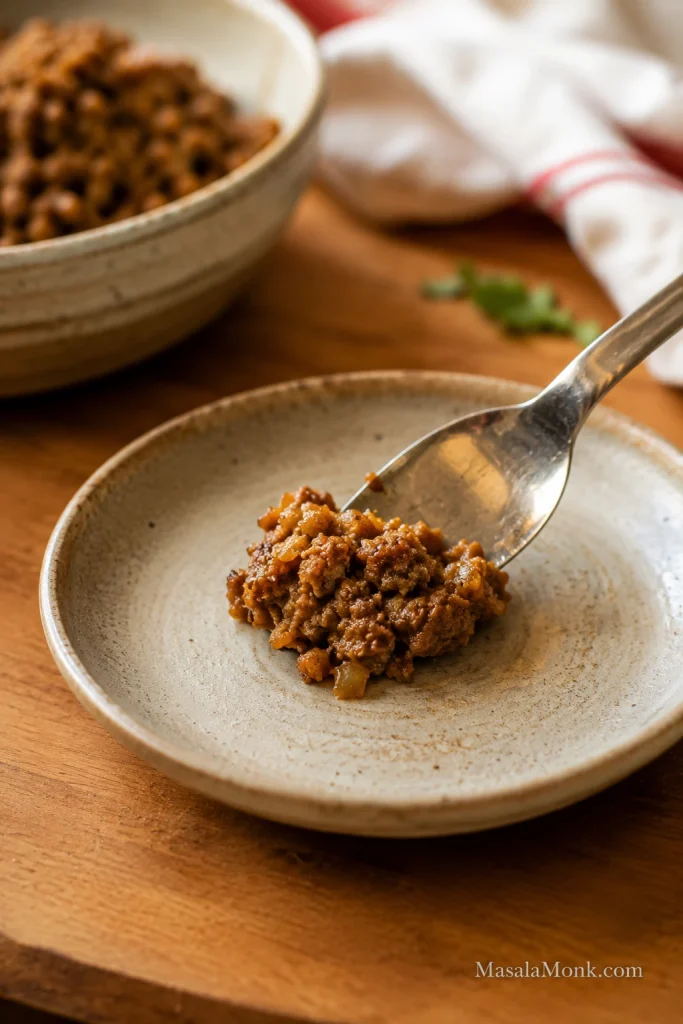
Small cooked spoonful of sausage roll filling on a plate with a bowl of filling in the background.
A tiny cooked test piece lets you adjust seasoning before the pastry is involved, so the final sausage rolls taste balanced from the center out.

Which Sausages Make the Best Filling?

The best sausage rolls start with sausages you would happily eat on their own: savory, well-seasoned, and juicy without flooding the pan. Pork sausages are the classic choice because they usually have enough fat to stay tender. Breakfast sausage, Cumberland-style sausage, mild Italian sausage, chicken, turkey, and vegetarian sausage can all work too, as long as they are not too lean or watery.

For your first batch, avoid sausages that release a lot of liquid in the pan. Extra moisture can soften the pastry before it has time to crisp.

Simple rule: use sausage meat when you want speed, sausages when that is what you already have, and plain ground meat only when you are ready to season the filling properly.

What Pastry Is Best for Sausage Rolls?

Puff pastry is best for classic sausage rolls because it gives them lift, flakes, and crisp edges. Store-bought puff pastry is the right choice here because the point is a reliable homemade roll, not a pastry project.

All-butter puff pastry gives the richest flavor and the cleanest flaky bite: the kind that shatters a little when you bite in. Standard ready-rolled puff pastry still works well, especially if it stays cold and is not stretched around too much filling.
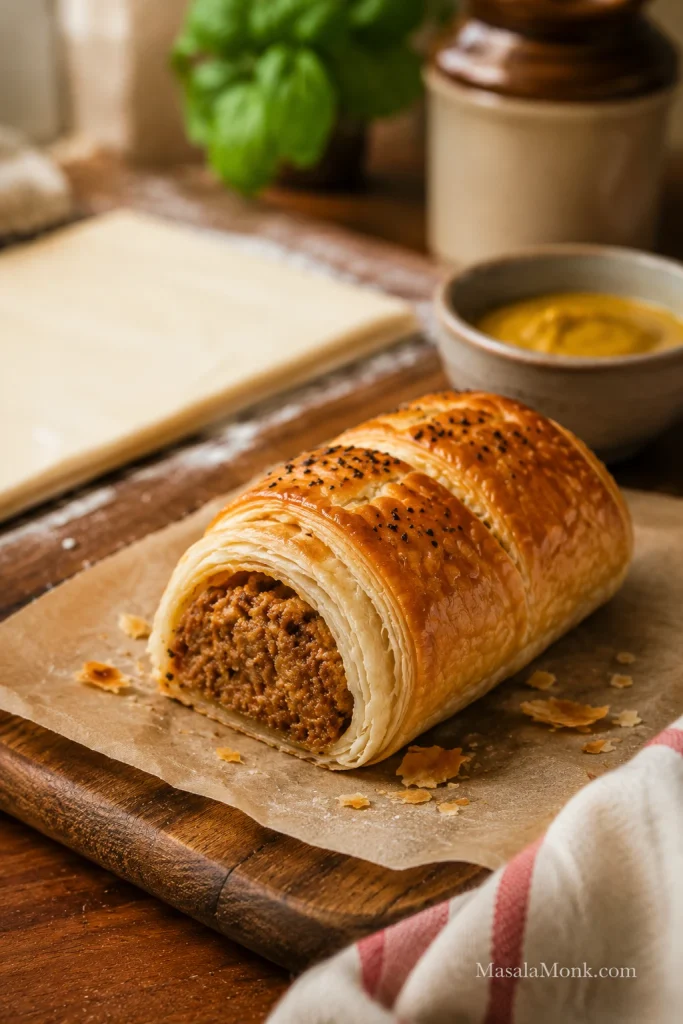
Close-up of a baked sausage roll with flaky puff pastry layers and cooked sausage filling on parchment.
Puff pastry gives sausage rolls their classic lift and crisp edges; keeping it cool helps those layers rise instead of melting flat.

Shortcrust pastry gives a firmer, more crumbly shell. Crescent roll dough makes a softer, breadier shortcut. Both can work, but neither gives the same flaky puff pastry bite.

How Much Filling Fits the Pastry?

Puff pastry sheets vary by country and brand. Use this table to avoid overfilling the pastry.
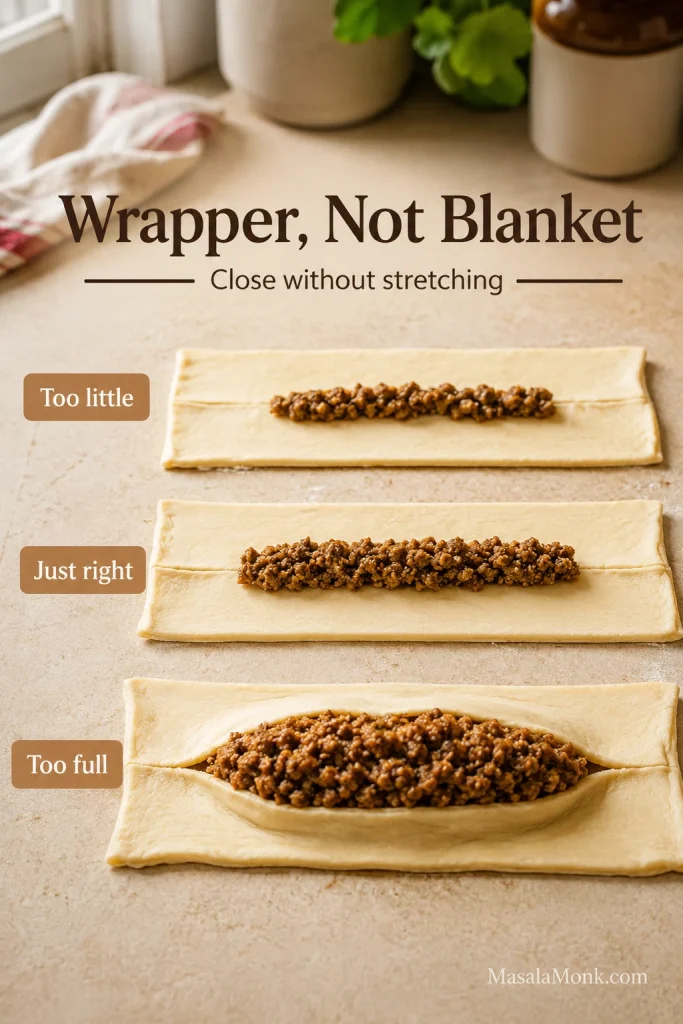
Pastry-to-filling ratio guide showing too little, just right, and too much sausage filling on puff pastry strips.
The best sausage roll ratio leaves a visible pastry border, so the roll seals better, puffs cleaner, and leaks less.
Pastry amountFilling amountBest use
280g / 10 oz puff pastry350–400g / 12–14 oz fillingSmaller batch or mini rolls
320g / 11 oz puff pastry400–450g / 14–16 oz fillingOne ready-rolled sheet
375g / 13 oz puff pastry450–500g / about 1 lb fillingStandard full batch
1 smaller US puff pastry sheet, about 225–250g / 8–9 oz275–350g / 10–12 oz fillingSmall batch
2 US puff pastry sheets, about 450–500g / 16–18 oz450–500g / about 1 lb fillingFull batch

When in doubt, use the visual cue: the filling log should let the pastry wrap around it without stretching. Think slim log, not stuffed tube. A sausage roll that looks slightly modest before baking often comes out neater, flakier, and better balanced after the pastry puffs.

The pastry is a wrapper, not a stretchable blanket. If you have to pull it hard to close, the roll is overfilled.

What Makes the Filling Better?

Cooked onion gives the filling deeper flavor without raw sharpness. Breadcrumbs are not just filler; they catch juices from the sausage so the filling stays tender without soaking the base. Mustard adds lift, sage and thyme bring classic savory flavor, and fennel seeds give pork sausage rolls a more aromatic, bakery-style finish.

Egg wash note: A whole beaten egg gives good shine and color. Egg yolk gives a deeper golden finish. Milk gives a softer, lighter color. For vegan sausage rolls, use plant milk, aquafaba, or a little oil depending on the finish you want.

The 3-Ingredient Sausage Roll Shortcut

Yes, you can make 3-ingredient sausage rolls with puff pastry, sausages, and egg wash. They will be simpler than the full recipe, but still good if the sausages are well seasoned and the pastry stays cool.

Use the full recipe when you want a juicier filling with onion, breadcrumbs, mustard, and herbs.

  • Unroll the pastry and cut it into strips.
  • Remove the sausage skins and shape the meat into logs.
  • Roll, seal, brush with beaten egg, and bake until golden and cooked through.

Step-by-Step Visual Cues for Better Sausage Rolls

The recipe card tells you what to do. This section shows you what to look for, because sausage rolls are much easier when you know how the pastry and filling should feel before they go into the oven.

1. Look for Pastry That Bends Without Grease

The puff pastry needs to unroll without cracking while still feeling cool to the touch. Sticky pastry is a sign to pause, not push through. A few minutes in the fridge gives the butter a cleaner start in the oven.

2. Cook the Onion Until Soft, Not Wet

The onion should be soft and fragrant before it goes into the sausage mixture, but not watery. Cooking it first gives sweetness and keeps raw onion moisture from softening the pastry.
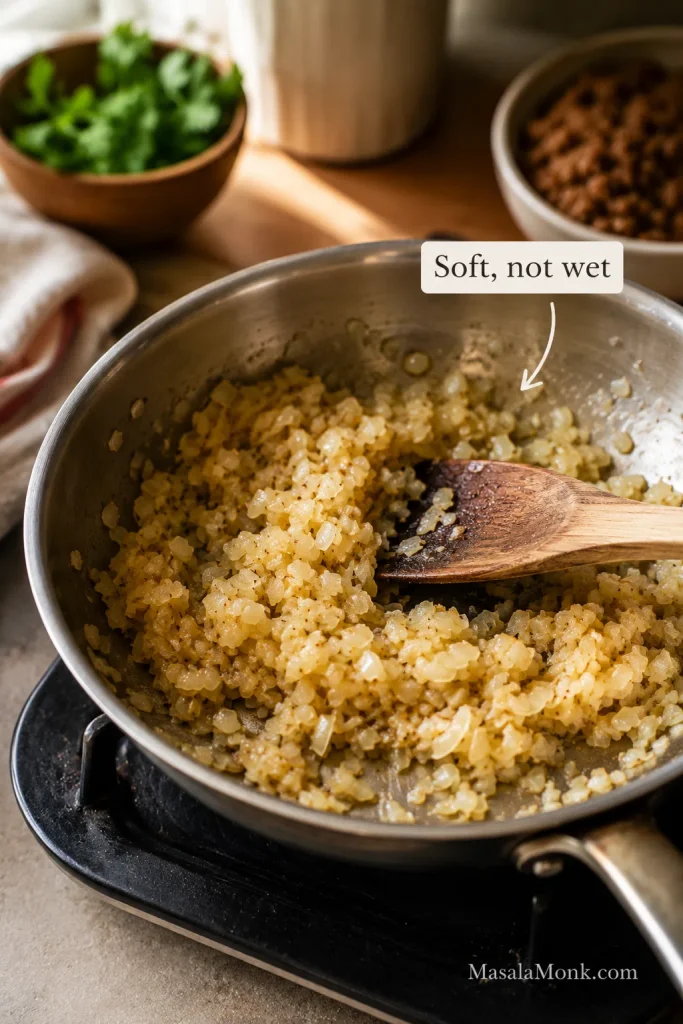
Finely chopped onion softened in a pan with a wooden spoon for sausage roll filling.
Softened onion should look glossy and dry around the edges; that gives the filling sweetness without adding steam inside the pastry.

3. Shape a Filling Log That Holds Together

A good filling log holds its shape without slumping across the pastry. Loose filling needs a little more panko before it reaches the pastry. Dry, crumbly filling can take a teaspoon or two of cold water or milk.
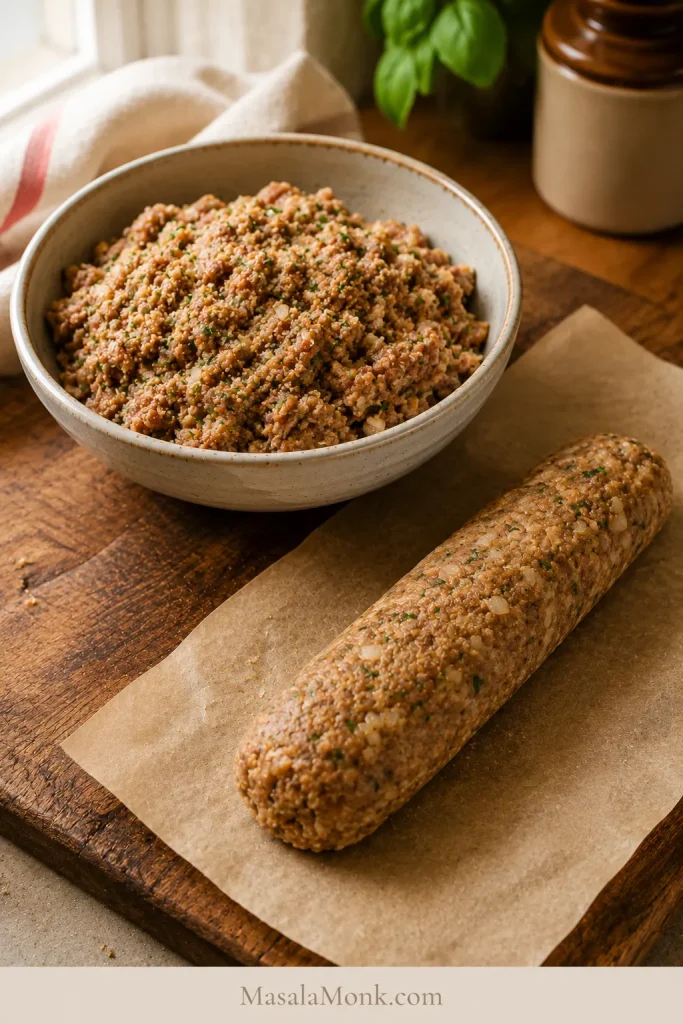
Mixed sausage roll filling in a bowl with a shaped sausage filling log on parchment.
A filling that holds as a soft log is easier to roll, seal, and bake evenly; loose filling is more likely to soften the pastry.

4. Place the Filling on the Pastry

The pastry needs to wrap easily around the filling. If you have to pull hard to close it, the log is too thick. Shape thinner than you think, especially for mini sausage rolls.
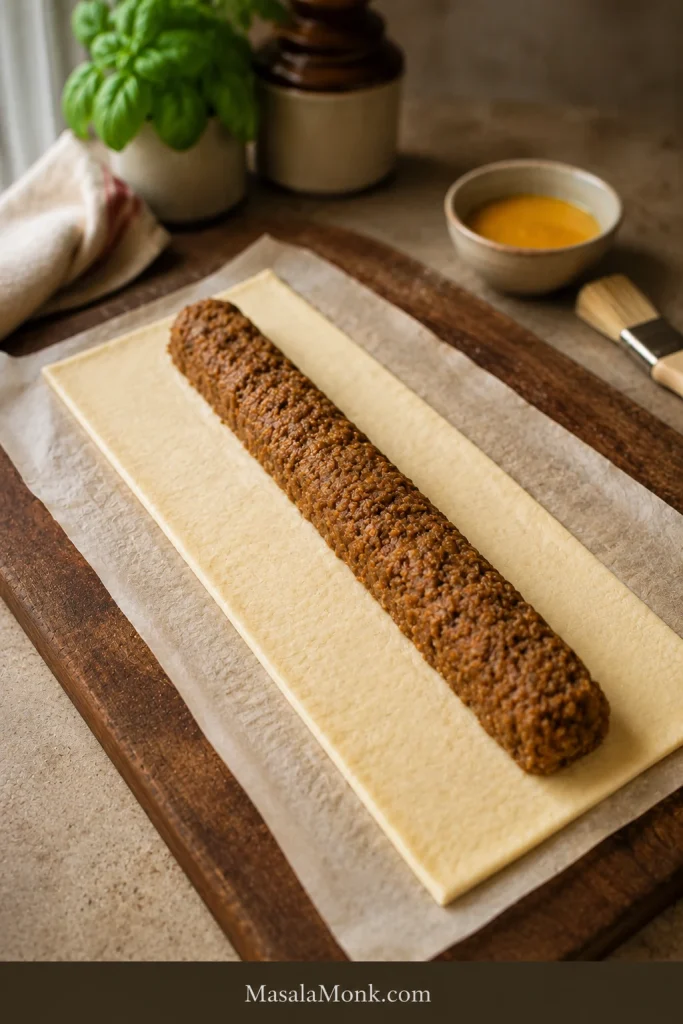
A slim sausage filling log placed down the center of a puff pastry strip with clear pastry borders.
Center the filling like a narrow ridge, not a mound; then the pastry can wrap around it without stretching thin at the seam.

5. Seal with a Light Line of Egg Wash

Brush the edge lightly with egg wash, fold the pastry over, and press just enough to close. The seam needs to hold, but the layers should not be flattened.
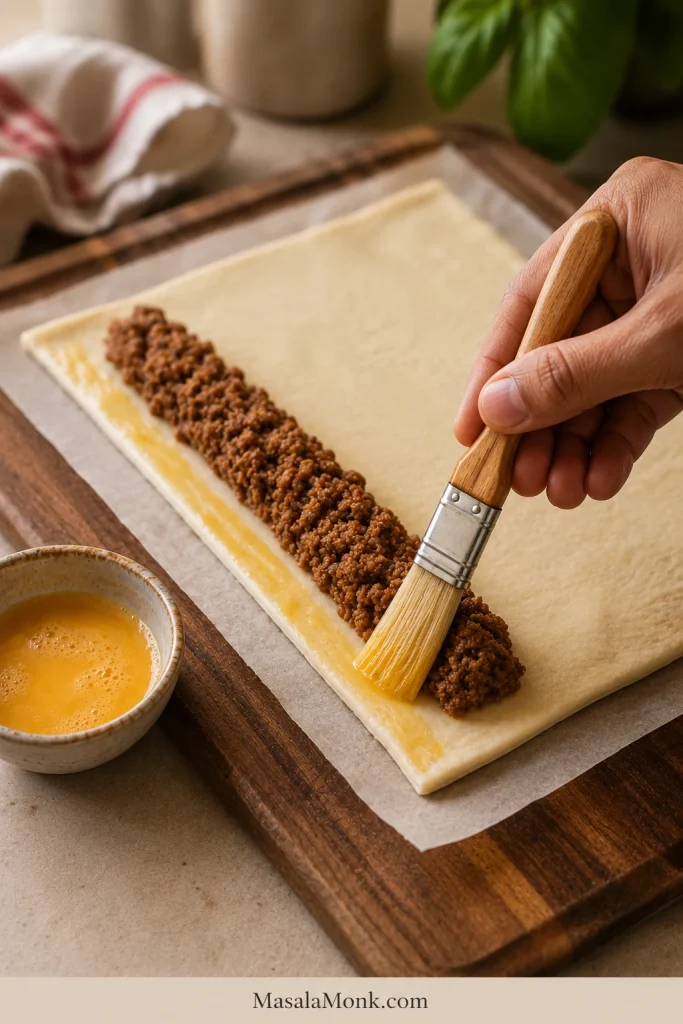
A pastry brush applying egg wash along the edge of puff pastry beside sausage filling.
Egg wash works best as a thin glue line; a heavy brush of liquid can make the pastry edge slide open.

6. Bake Seam-Side Down

The sealed edge should sit against the tray, not face up. That way, the baking sheet supports the roll while the filling heats and the pastry expands.
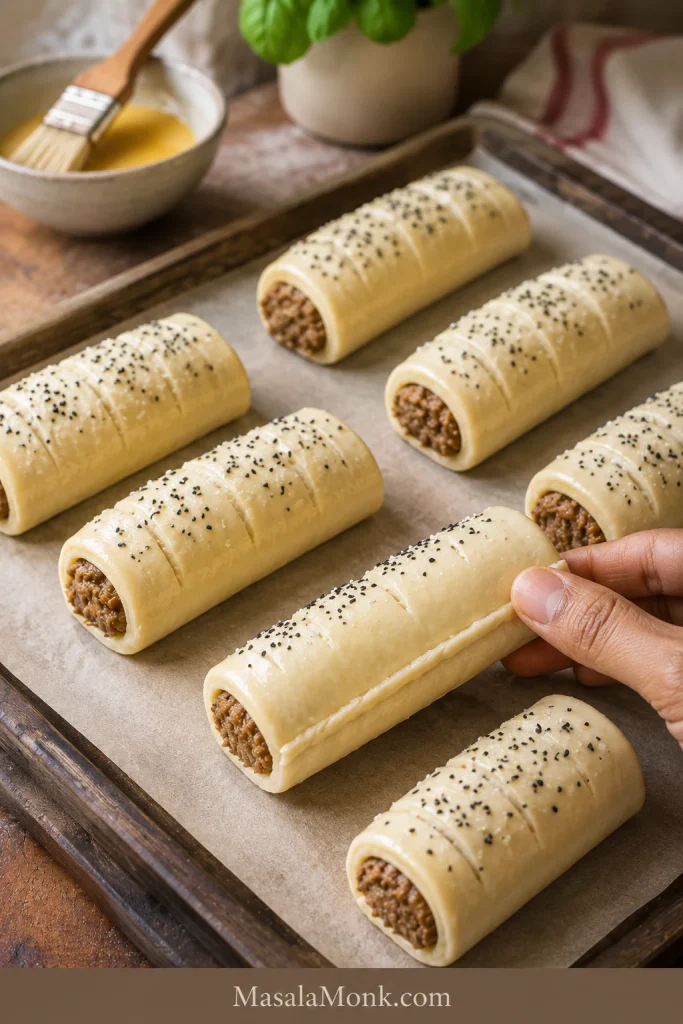
Unbaked sausage rolls brushed with egg wash and arranged seam-side down on a parchment-lined tray.
Seam-side down placement turns the tray into support, so the pastry stays closed while the sausage filling heats and expands.

7. Cut Large, Medium, or Mini Sausage Rolls

Cut larger rolls for dinner or lunchboxes, medium rolls for snacks, and mini rolls for parties. Small rolls need thinner filling logs, not just shorter pieces of an overfilled roll.
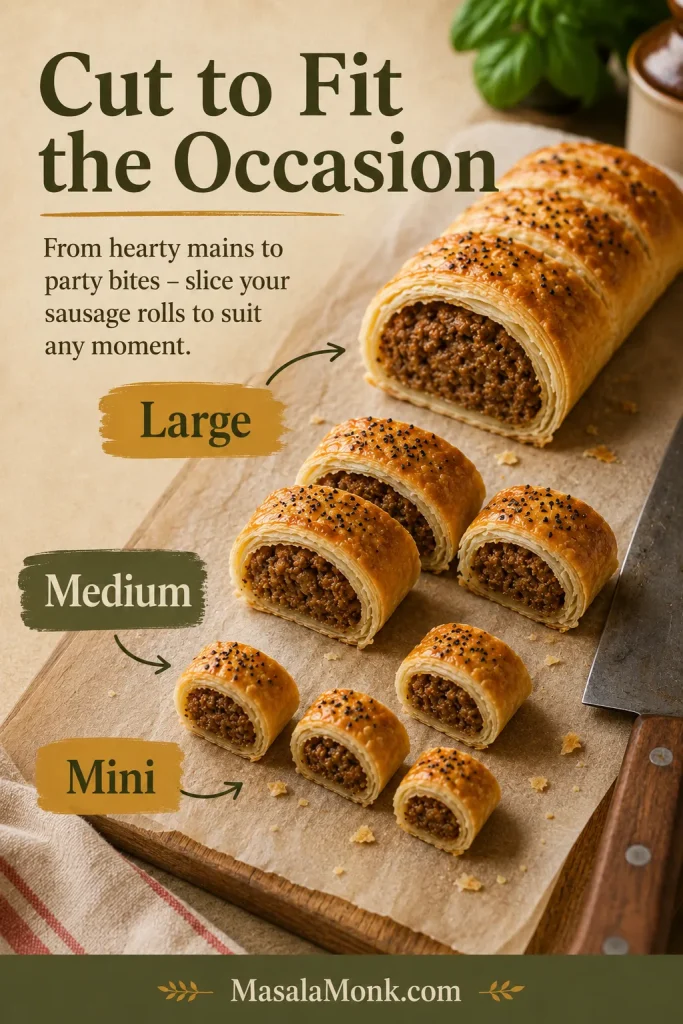
Guide showing large, medium, and mini sausage rolls cut into different sizes.
Size changes the eating moment: large rolls suit dinner, medium rolls suit snacks, and mini sausage rolls suit parties or lunchboxes.

8. What the Tray Should Look Like Before Baking

The final tray should look tidy but not crowded: glossy tops, clear gaps between rolls, and pastry that still holds its shape when moved.
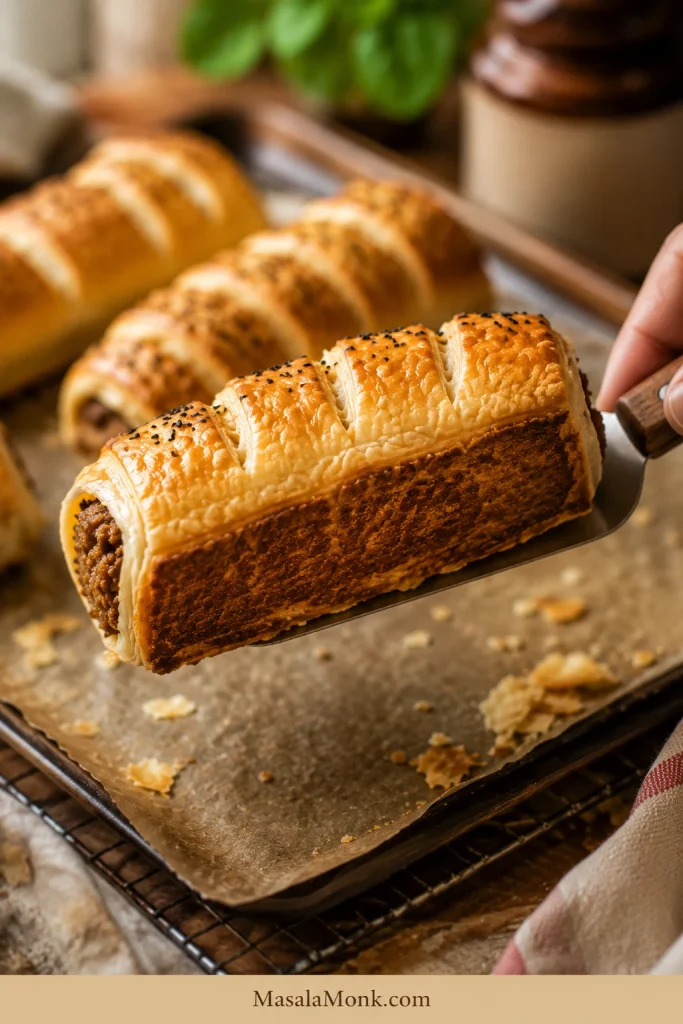
Unbaked sausage rolls brushed with egg wash, topped with seeds, and spaced on a parchment-lined tray.
Before baking, the best tray looks tidy but not crowded: glazed tops, visible gaps, and pastry firm enough to hold its shape.

9. Look for Bronzed Tops and Clean Bottoms

Look for deeply browned tops, set seams, and bottoms that lift cleanly from the paper. If the pastry bends or feels damp underneath, it likely needs more time or better air circulation after baking.

10. Cool on a Rack, Not a Plate

Let the rolls sit briefly on the tray, then move them to a wire rack. A plate traps steam underneath; a rack keeps the base crisp while the filling settles.

Before baking check: the rolls should be easy to lift, not stretched tight, with the seam tucked underneath and small gaps between each piece. If the pastry feels greasy or the filling is bulging through the seam, chill the tray before baking.

Changing the size? Check sausage roll cooking times before baking. If the pastry feels soft or crowded, go to How to Stop Soggy Sausage Rolls.

How Long to Cook Sausage Rolls

Once the rolls pass that before-baking check, size matters more than anything else. A mini party roll and a thick lunchbox roll should not bake for the same amount of time.

Most homemade sausage rolls bake best at 200°C / 400°F, or 180°C fan / convection. That temperature is hot enough to puff and brown the pastry while giving the sausage filling time to cook through.

The goal is not pale pastry with cooked meat, or dark pastry with a doubtful center. The sweet spot is a bronzed top, a clean base, and filling that is hot all the way through.
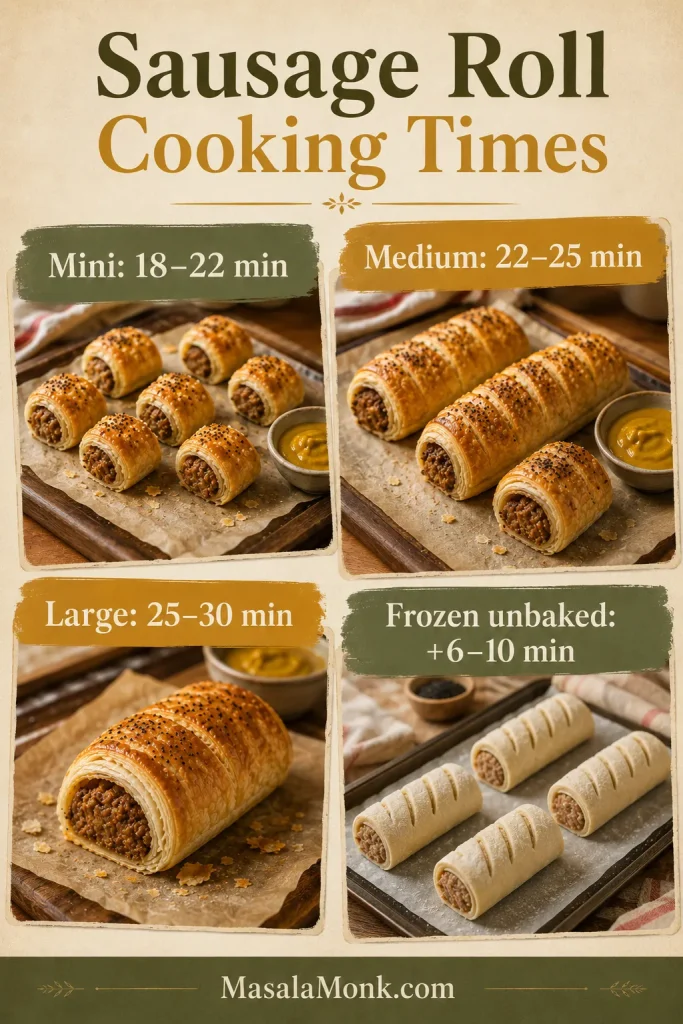
Cooking time guide for mini, medium, large, and frozen unbaked sausage rolls.
Size is the reason one timing never fits all; mini rolls, large rolls, and frozen unbaked rolls each need their own bake cue.
TypeTemperatureApprox. timeDoneness cue
Large fresh sausage rolls, 8 pieces200°C / 400°F, or 180°C fan25–30 minWell browned pastry, hot center
Medium sausage rolls, 16 pieces200°C / 400°F, or 180°C fan22–25 minGolden, crisp, cooked through
Mini sausage rolls, 24–32 pieces200°C / 400°F, or 180°C fan18–22 minPuffed, browned, and crisp
Frozen unbaked sausage rolls200°C / 400°F, or 180°C fanAdd 6–10 min to the fresh time for that sizeGolden pastry with bubbling edges
Reheating baked rolls180°C / 350°F, or 160°C fan8–12 minHot center and crisp pastry

When they are ready, look for bronzed, firm tops, set seams, and bottoms that lift cleanly from the paper instead of bending or feeling damp.

Check the Internal Temperature
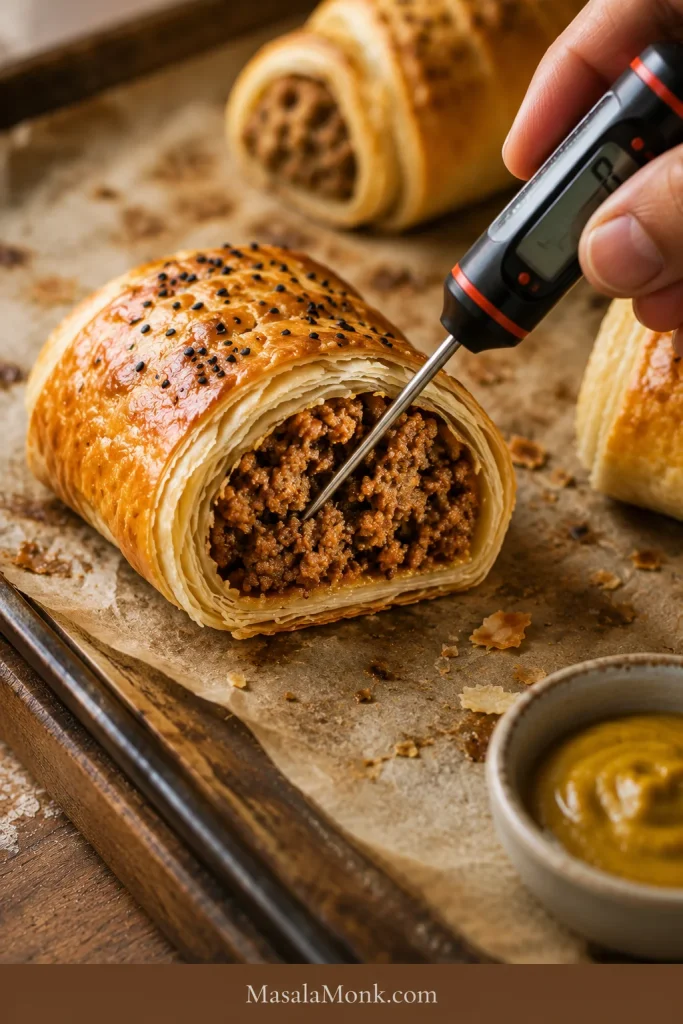
Instant-read thermometer inserted into the cooked filling of a baked sausage roll.
A thermometer checks what pastry color cannot show: whether the center of a thicker sausage roll is cooked through.

Use color as a clue, not the only test. Puff pastry should look well browned, but thick rolls can brown before the center is fully cooked. For a safe check, use an instant-read thermometer in the thickest part of the filling. For the official temperature chart, FoodSafety.gov has a simple safe minimum internal temperatures guide.

Making a batch for later? Go to Freezing, Reheating, and Making Ahead, or jump back to the recipe card.

How to Stop Soggy Sausage Rolls

Soggy sausage rolls are disappointing, but they are rarely mysterious. If the base is soft, the seam opens, or fat leaks around the edges, the problem usually started before the tray went into the oven: wet filling, warm pastry, overfilling, or trapped steam after baking.

The oven can brown pastry, but it cannot fully rescue a filling that went in too wet.
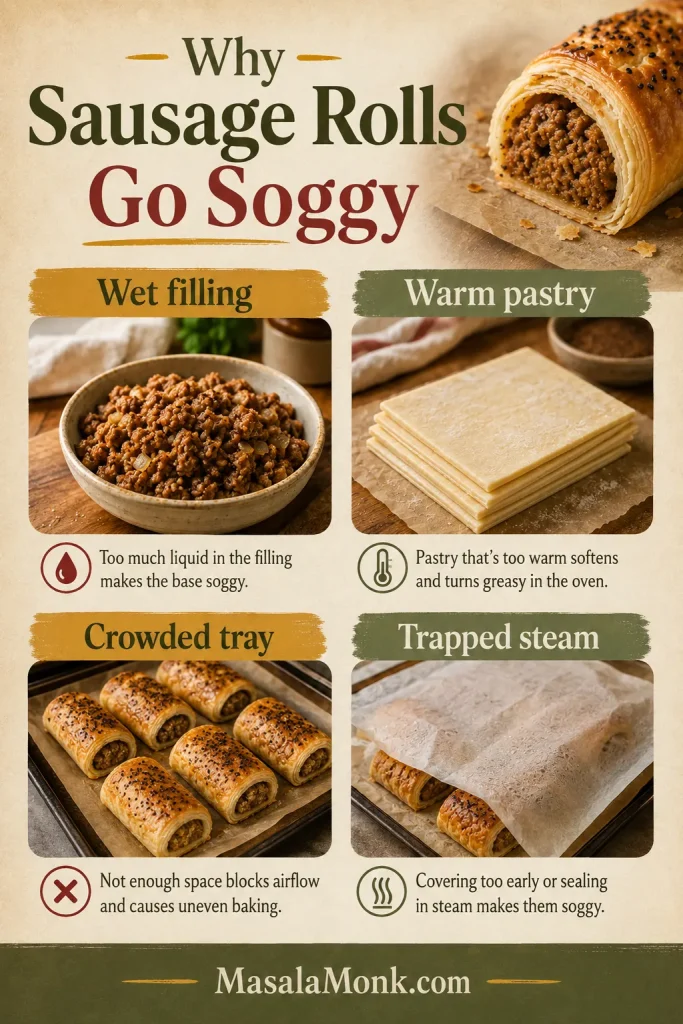
Troubleshooting guide showing wet filling, warm pastry, crowded tray, and trapped steam as causes of soggy sausage rolls.
Soggy sausage rolls usually start before serving, with wet filling, warm pastry, crowding, or trapped steam weakening the crisp base.
ProblemLikely causeFix
Soggy bottomWet filling or pastry sitting in steamUse breadcrumbs, cool cooked onion, avoid watery vegetables, and move baked rolls to a wire rack.
Pastry leaking fatVery fatty filling, warm pastry, or oven too lowChill the shaped rolls if needed, bake at the right heat, and space rolls apart.
Pastry split openOverfilled rolls or weak sealUse egg wash on the edge, press firmly, and bake seam-side down.
Pale pastryWeak egg wash or underbakingBrush well with beaten egg and bake until golden and firm.
Dry fillingMeat too lean or filling overmixedUse sausage with enough fat, mix gently, and do not overbake.
Soft after bakingRolls cooled on a plate or covered too tightlyCool on a wire rack and avoid trapping steam.

A sturdy metal baking sheet also helps. Very thin trays can brown unevenly, and crowded trays trap steam. For extra-crisp bottoms, place the rolls on parchment on a hot tray only if you can transfer them safely.

What a Crisp Bottom Looks Like
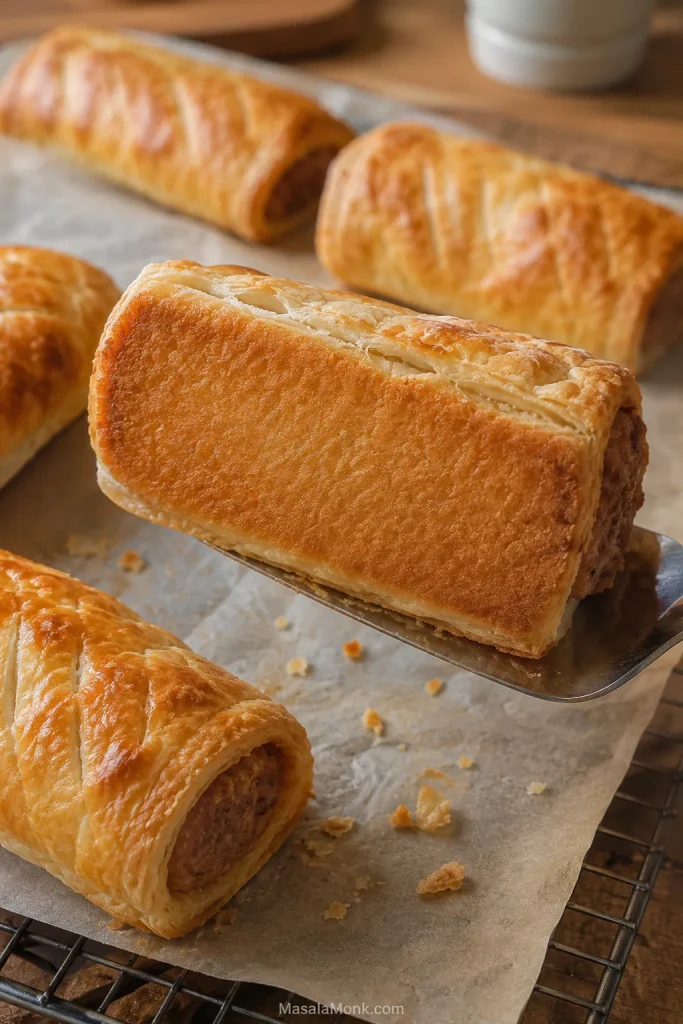
A baked sausage roll lifted with a spatula to show an evenly browned crisp bottom.
A golden underside shows the pastry baked instead of steamed, which is why rack cooling matters as much as oven heat.

Cold pastry, confident bake: if the puff pastry feels greasy, sticky, or slack, pause and chill the tray before it goes into the oven.

Most batches do not need every fix here. If the pastry is cool, the rolls are not overfilled, and the tops are deeply browned, you are already most of the way there.

That is the sweet spot: hot filling, crisp base, and pastry that flakes instead of bending.

Mini Sausage Rolls for Parties, Lunchboxes, and Snacks

Mini sausage rolls are the party version for a reason: they bake faster, serve neatly, and disappear from a platter while people are still deciding what to drink. They are the thing people pick up while talking, then return for before they realize they have already had three.
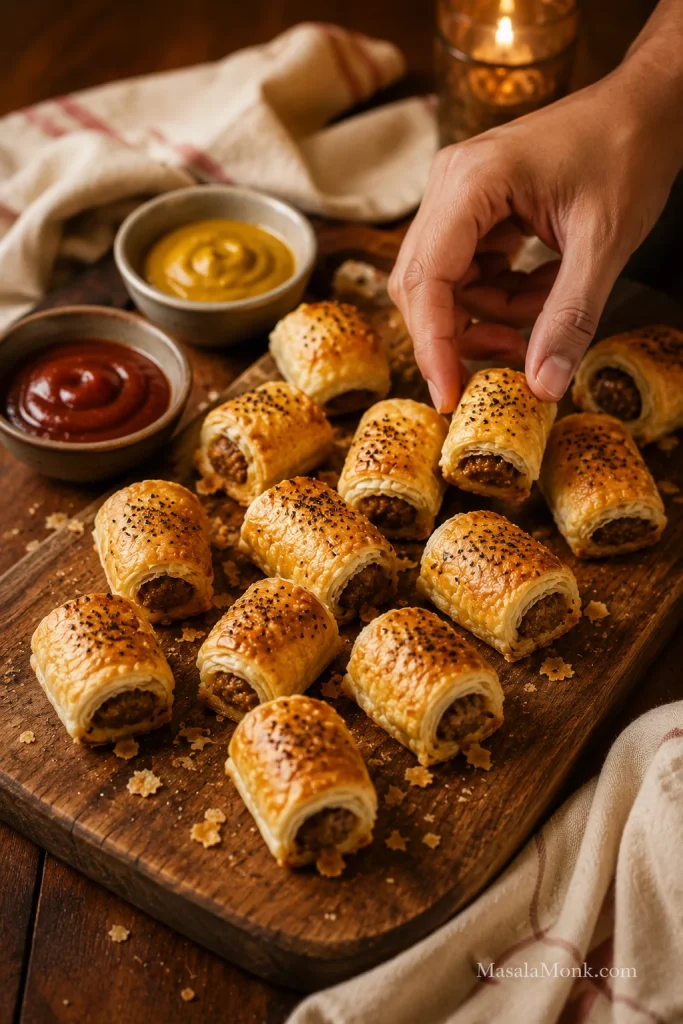
Mini sausage rolls on a wooden party platter with dips and a hand reaching for one roll.
Mini sausage rolls stay easy to grab, dip, and share, which makes them especially useful for appetizers, party boards, and casual snack trays.
  • Cut each long roll into 12–16 small pieces for party-size sausage rolls.
  • Bake mini sausage rolls at 200°C / 400°F, or 180°C fan, for 18–22 minutes.
  • Shape thinner filling logs so each mini roll is balanced, not overstuffed.
  • Leave space between pieces so the pastry can puff.
  • Use sesame or nigella seeds if you want a more finished party-platter look.
  • Cool fully before packing into lunchboxes so steam does not soften the pastry.

Party math is simple: plan on 3–4 mini sausage rolls per person if they are one of several snacks, and more if these are the main warm bite on the table. Think two-bite snacks, not tiny overstuffed parcels.

How to Keep Sausage Rolls Warm for a Party

Keep baked sausage rolls in a low oven, loosely covered, so steam can escape. Wrapping them tightly in foil while hot softens the pastry. Softened rolls come back quickly in the oven or air fryer for a few minutes before serving.

For another easy party appetizer in the same make-ahead lane, these grape jelly meatballs are a useful option beside mini sausage rolls.

If you are baking a full party tray, the oven is still easier. For a handful of mini rolls, leftovers, or a small frozen batch, the air fryer is the faster tool.

Baking only a few? The air fryer section covers small batches. Planning ahead? Go to freezing and reheating.

Air Fryer Sausage Rolls

The air fryer is not the best tool for a full tray, but it is excellent for small batches, leftovers, and frozen mini sausage rolls when you want hot pastry without heating the oven.

It is especially useful for the last few frozen rolls in the bag: enough for a snack, not enough to justify a full oven.
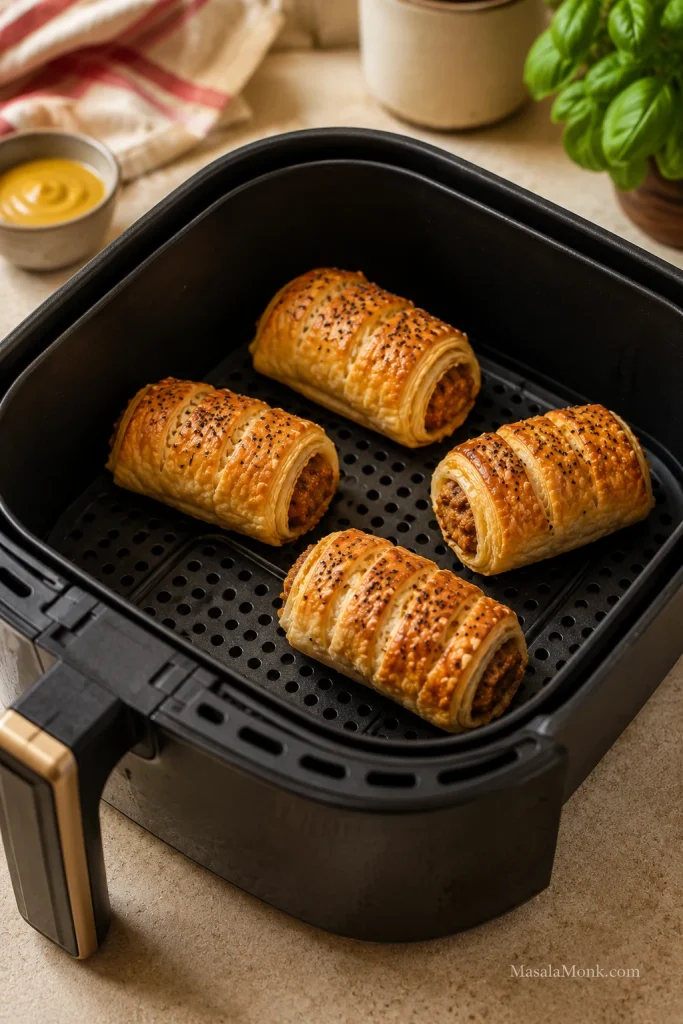
Golden sausage rolls arranged in one layer inside a clean air fryer basket.
Air fryer sausage rolls need breathing room; with one open layer, hot air can reach the pastry instead of steaming it.
Air fryer useTemperatureApprox. time
Fresh mini sausage rolls180–190°C / 350–375°F10–14 min
Fresh medium sausage rolls190°C / 375°F13–16 min
Frozen unbaked sausage rolls180°C / 350°F18–22 min
Reheating cooked sausage rolls180°C / 350°F4–6 min

These air fryer times are for homemade sausage rolls. Store-bought frozen mini sausage rolls can vary by brand, so start checking early and use the package instructions as the first guide.

Air fryer timing is most reliable for mini and medium rolls. Cook in one layer with space for the pastry to expand, and start checking early the first time because machines vary. Large rolls can brown outside before the middle is hot, so lower the heat and cook a little longer if needed.

Freezing, Reheating, and Making Ahead

This is the kind of tray that earns its keep: hot enough for dinner, small enough for a party, and easy enough to freeze before you need it.

Freeze sausage rolls unbaked for the best texture. Shape, cut, freeze on a tray, then bake from frozen with extra time whenever you want a hot batch later.

When the rolls bake for the first time from frozen, the pastry stays fresher than it does after being baked, frozen, and reheated. It is the quiet freezer win: a tray you shaped when you had time, ready to bake when you do not.

That is the freezer version at its best: no flour on the counter, no filling bowl to wash, just a cold tray becoming hot, flaky sausage rolls when you need them.

Freezing Unbaked Sausage Rolls
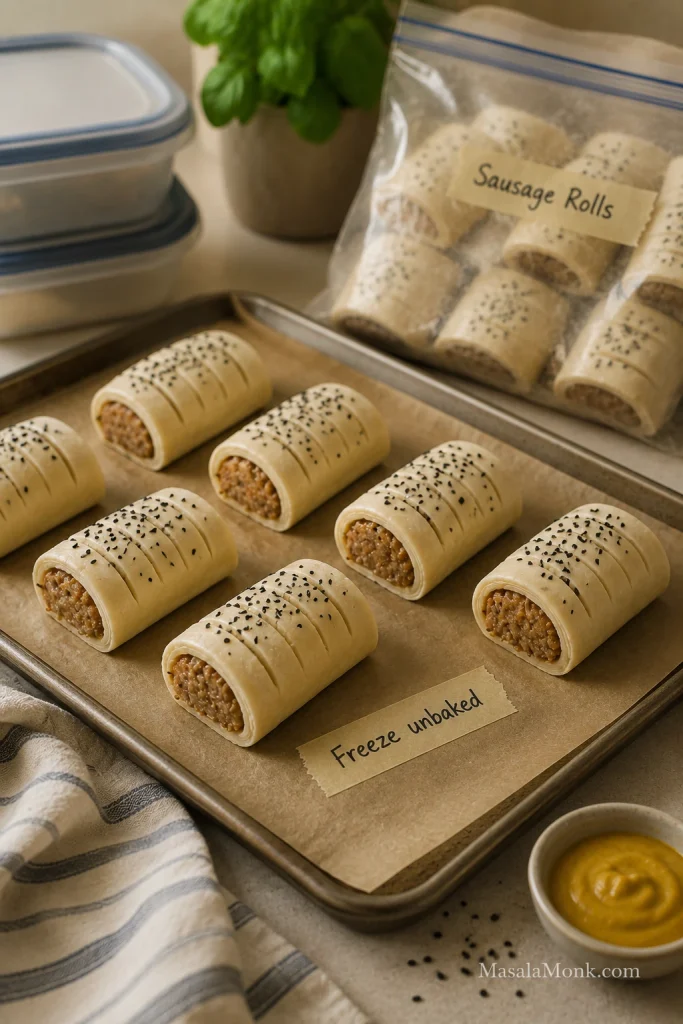
Unbaked sausage rolls on a parchment-lined tray beside a freezer bag labeled for sausage rolls.
Freezing unbaked keeps the pastry from drying out twice; when baking from frozen, use the size of the roll to judge the extra time.
  1. Shape and cut the sausage rolls.
  2. Place them on a parchment-lined tray.
  3. Freeze until firm.
  4. Transfer to a freezer-safe bag or container.
  5. Bake from frozen at 200°C / 400°F, or 180°C fan, adding extra time.

Frozen unbaked sausage rolls usually need 6–10 minutes longer than fresh rolls, depending on size; very large rolls may need a few minutes more. Brush with egg wash before baking if possible. If the egg wash does not stick well to frozen pastry, bake the rolls plain or brush lightly after the first few minutes. Bake unbaked frozen rolls straight from the freezer unless the pastry packet says otherwise.

Simple Party-Day Plan

  • A few hours ahead: shape and cut the sausage rolls, then refrigerate until baking.
  • The day before or earlier: freeze them unbaked for the best texture.
  • Before guests arrive: brush with egg wash and bake until golden and cooked through.
  • To hold briefly: keep warm in a low oven, loosely covered, so steam can escape.
  • To refresh: return softened rolls to the oven or air fryer for a few minutes instead of wrapping them tightly.
  • For the table: serve with mustard or chutney, one creamy dip, and one fresh side so the pastry does not feel too heavy.

Can You Freeze Baked Sausage Rolls?

Yes, baked sausage rolls can be frozen, but the pastry is usually better when the rolls are frozen unbaked. If you freeze baked rolls, cool them completely first, pack airtight, and reheat in the oven or air fryer until hot and crisp again.

Storing Leftovers

Sausage rolls are best the day they are baked, especially while the pastry is crisp. Once cooled, store leftovers in an airtight container in the fridge for up to 3 days. Try to refrigerate them within 2 hours of baking.

Reheating Without Soft Pastry

Reheat baked sausage rolls in the oven at 180°C / 350°F, or 160°C fan, for 8–12 minutes. You can also use the air fryer at 180°C / 350°F for 4–6 minutes. Avoid the microwave when you want crisp pastry. It heats quickly, but it makes puff pastry soft.

Making Them Ahead

You can assemble sausage rolls a few hours ahead and keep them covered in the fridge until baking. For longer storage, freeze them unbaked. If the pastry softens while sitting, give the tray a short fridge rest before baking.

Serving a tray now? See what to serve with sausage rolls, or go back to top.

Sausage Roll Variations

Once the base recipe works, sausage rolls become easy to riff on. Keep the filling savory and not too wet, then change the mood: fennel for bakery-style rolls, apple for sweetness, cheddar for comfort, chili for heat, or cranberry and sage for a holiday tray.

  • Pork and fennel sausage rolls: add ½–1 teaspoon lightly crushed fennel seeds for an aromatic, bakery-style finish.
  • Pork and apple sausage rolls: add a small amount of grated apple, squeezed dry, for gentle sweetness.
  • Beef sausage rolls: use beef sausage meat and stronger seasoning such as mustard, pepper, or Worcestershire-style flavor.
  • Chicken sausage rolls: use chicken sausage or ground chicken and cook to 165°F / 74°C.
  • Cheese and onion sausage rolls: add grated cheddar and softened onion for a richer, more savory filling, but avoid overfilling.
  • Spicy sausage rolls: add chili flakes, smoked paprika, black pepper, or mustard.
  • Christmas sausage rolls: use sage, onion, apple, cranberry, chutney, or a little stuffing-style seasoning.
  • Bakery-style sausage rolls: keep the filling simple, use well-seasoned sausages, chill before baking, and egg wash generously.

When adding vegetables, be careful with moisture. Carrot, zucchini, mushrooms, spinach, and apple can all work, but watery ingredients should be cooked, squeezed, or used sparingly so the pastry does not turn soggy. For a completely different sausage dinner, this smoky kielbasa pasta is better when you want a full meal instead of a pastry snack.

Vegetarian, Vegan, Gluten-Free, and Lighter Sausage Rolls

Vegetarian, vegan, gluten-free, and lighter sausage rolls can all work, but they need the same care as the classic version. The filling needs body, the pastry needs to stay cool, and anything watery needs to be cooked, squeezed, or used sparingly before it is wrapped.

Vegetarian Sausage Rolls

For vegetarian sausage rolls, build savoriness first. Mushrooms, lentils, cheese, paneer, onions, herbs, and plant-based sausage can all work, but the mixture should be thick enough to shape into a log. If it slumps before baking, it will likely soften the pastry.

Vegan Sausage Rolls

For vegan sausage rolls, use vegan puff pastry and a plant-based filling. Replace egg wash with plant milk, aquafaba, or a little oil depending on the finish you want. Check both the pastry and the filling: many puff pastries are accidentally vegan, but not all are.

Gluten-Free Sausage Rolls

For gluten-free sausage rolls, check the pastry, sausage, breadcrumbs, mustard, and sauces. Gluten-free pastry can crack more easily, so let it soften just enough to fold, then chill again before baking if it turns sticky or fragile.

Healthy or Lighter Sausage Rolls

For a lighter version, make smaller rolls, use leaner sausage or chicken/turkey filling, add cooked vegetables, and serve with salad instead of heavier sides. Keep the promise honest: these are lighter sausage rolls, not diet food. Puff pastry and sausage are still rich ingredients.

What to Serve with Sausage Rolls

The best sausage rolls do not need much around them; they just need contrast. Add one sharp thing, one fresh thing, or one dip that cuts through the buttery pastry and makes people reach for another. A crisp wedge salad works especially well because the cold lettuce and creamy dressing balance the hot, flaky pastry.
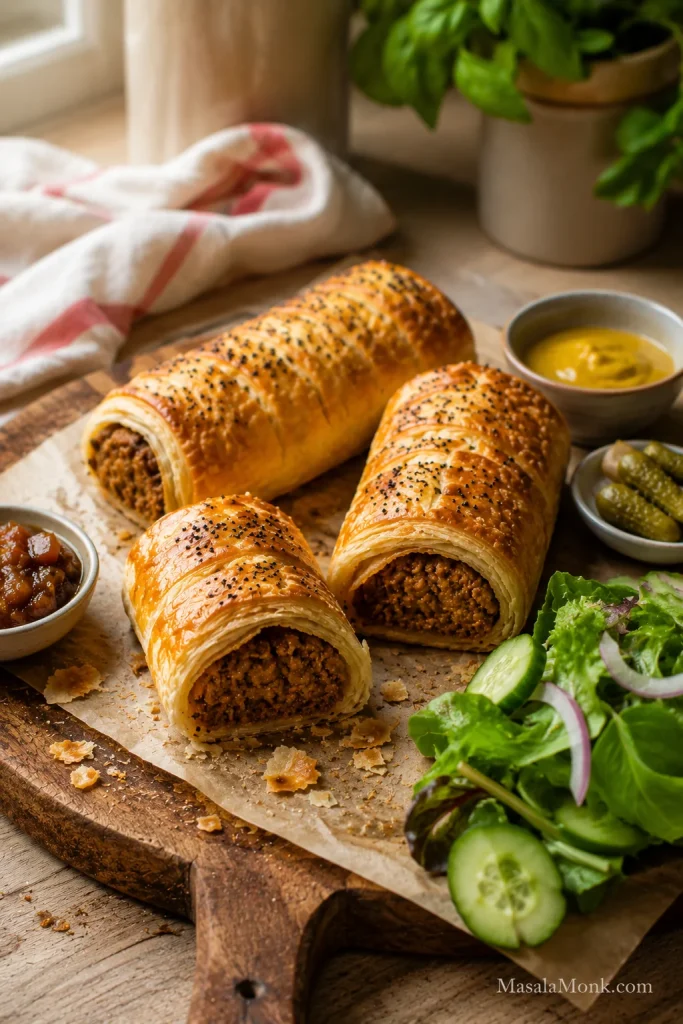
Warm sausage rolls served on a wooden board with mustard, chutney, pickles, and green salad.
Sharp mustard, chutney, pickles, or fresh salad cut through the buttery pastry and make sausage rolls feel complete on the plate.
  • Sharp: English mustard, Dijon mustard, brown sauce, steak sauce, onion chutney, apple chutney, or pickles.
  • Fresh: green salad, wedge salad, slaw, cucumber salad, or a simple tomato salad.
  • Cozy: baked beans, soup, mashed potatoes, potato wedges, or chips.
  • Party-style: ketchup, creamy dips, chutney, mustard, pickles, or a cheese ball.

For a party platter, serve mini sausage rolls with two or three dips rather than too many sides. In lunchboxes, cool the rolls completely before packing so the pastry does not steam itself soft. On another sausage dinner night, this slow cooker sausage casserole gives you the opposite comfort-food mood: soft sausages, beans, vegetables, and a spoonable sauce.

FAQs About Sausage Rolls

Do you need sausage meat for sausage rolls?

No. Sausage meat is convenient, but regular sausages work well. Slit the skins, squeeze out the meat, and loosen the filling before shaping.

Do you cook sausage meat before making sausage rolls?

No. The sausage meat usually goes into the pastry raw and cooks as the pastry bakes. Cook only the onion, garlic, or watery vegetables first, then cool them before mixing. The filling is done at 160°F / 71°C for pork or beef, and 165°F / 74°C for chicken or turkey.

How do you make sausage rolls with regular sausages?

Remove the skins, loosen the meat with a fork, shape it into logs, and roll it inside cool puff pastry. Season only if needed because most sausages are already salted.

What pastry is best for sausage rolls?

Puff pastry is best for classic sausage rolls because it bakes flaky, crisp, and golden. All-butter puff pastry gives the richest flavor, but standard ready-rolled puff pastry works well if you keep it cool.

Can you use crescent dough instead of puff pastry?

Yes, but the result will be softer and breadier. Puff pastry gives the classic flaky sausage roll texture. Crescent dough is better for a quick shortcut than for a bakery-style sausage roll.

How long do sausage rolls take to cook?

Large sausage rolls usually take 25–30 minutes at 200°C / 400°F, or 180°C fan. Medium rolls usually take 22–25 minutes, while mini sausage rolls usually take 18–22 minutes. Frozen unbaked rolls need extra time.

What temperature should sausage rolls be cooked at?

Cook sausage rolls at 200°C / 400°F, or 180°C fan, for the best balance of puffed pastry and cooked filling. For reheating, use a slightly lower temperature such as 180°C / 350°F, or 160°C fan.

How do you know sausage rolls are cooked inside?

Use three checks: browned pastry, a base that lifts cleanly from the paper, and hot filling in the center. For thick rolls, use a thermometer rather than color alone.

Why is my sausage roll filling still pink?

Some sausage fillings stay slightly pink because of seasoning, curing ingredients, or the type of meat used. Use temperature, not color alone, as the final check. Pork or beef filling should reach 160°F / 71°C, and chicken or turkey filling should reach 165°F / 74°C.

Why are my sausage rolls soggy underneath?

Usually, moisture got trapped somewhere: wet filling, warm pastry, underbaking, or cooling on a tray. Breadcrumbs, a hot bake, and a wire rack solve most of it.

Why did my sausage rolls burst open?

Sausage rolls usually burst open when they are overfilled, sealed weakly, or baked seam-side up. Leave a pastry border, seal with a little egg wash, press gently, and bake seam-side down.

Should sausage rolls be frozen before or after baking?

Before baking is best. Shape and cut the rolls, freeze them on a tray, then store them in a freezer-safe bag or container. They bake up fresher because the pastry gets its first full bake from frozen.

Can sausage rolls be served cold?

Yes, sausage rolls can be served cold once they are fully cooked and properly cooled. They are best warm if you want crisp pastry, but cold rolls work well for lunchboxes, picnics, and party platters. Keep leftovers refrigerated.

How do you keep sausage rolls warm for a party?

Keep sausage rolls in a low oven, loosely covered, so steam can escape. Avoid wrapping them tightly while hot. If the pastry softens, refresh the rolls in the oven or air fryer for a few minutes before serving.

How do you reheat sausage rolls without making them soft?

Reheat sausage rolls in the oven at 180°C / 350°F for 8–12 minutes or in the air fryer for 4–6 minutes. Avoid the microwave if you want crisp pastry.

What is the best way to make mini sausage rolls?

Use thinner filling logs, then cut each long roll into small pieces before baking. Mini sausage rolls usually bake in 18–22 minutes at 200°C / 400°F, or 180°C fan.

Final Tip for Better Sausage Rolls

Good sausage rolls come down to three things: filling that tastes good before it goes in, pastry that stays cool and relaxed, and a bake that goes far enough for real color. Once those are right, the same base method works for regular sausages, mini party rolls, freezer batches, and air fryer snacks.

Make the first batch plain and classic. After that, sausage rolls become the kind of recipe you can adapt without overthinking: a warm tray for dinner, a freezer stash for later, lunchbox rolls for the next day, or the party snack people keep circling back to while pretending they are only having one more.
Back to top

Posted on — Leave a comment

Chocolate Cream Cheese Frosting Recipe: Smooth, Pipeable & Not Too Sweet

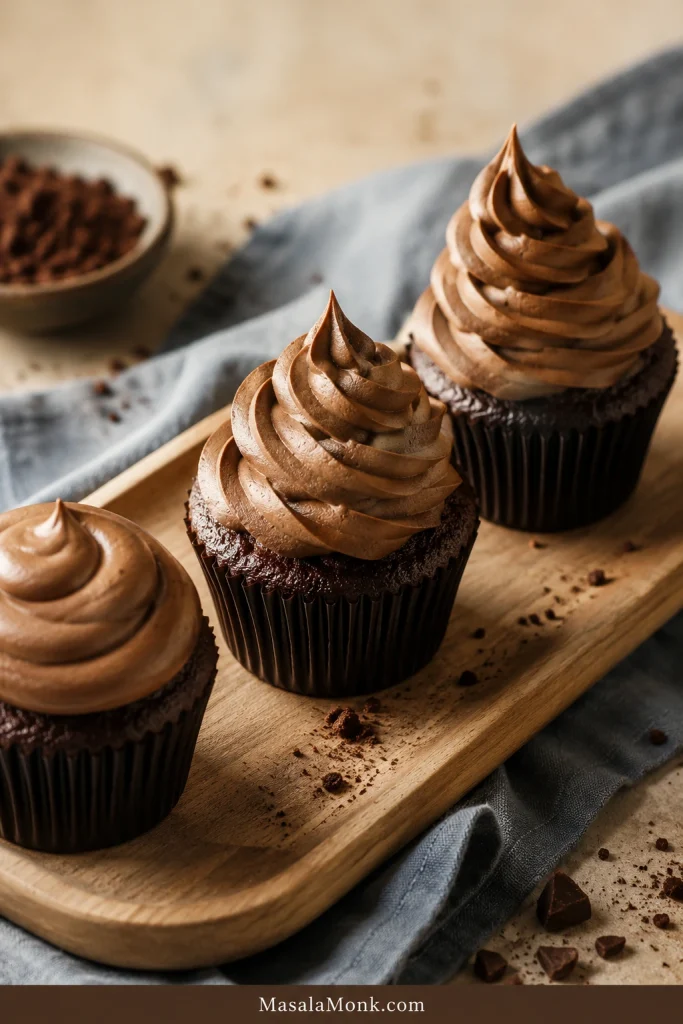
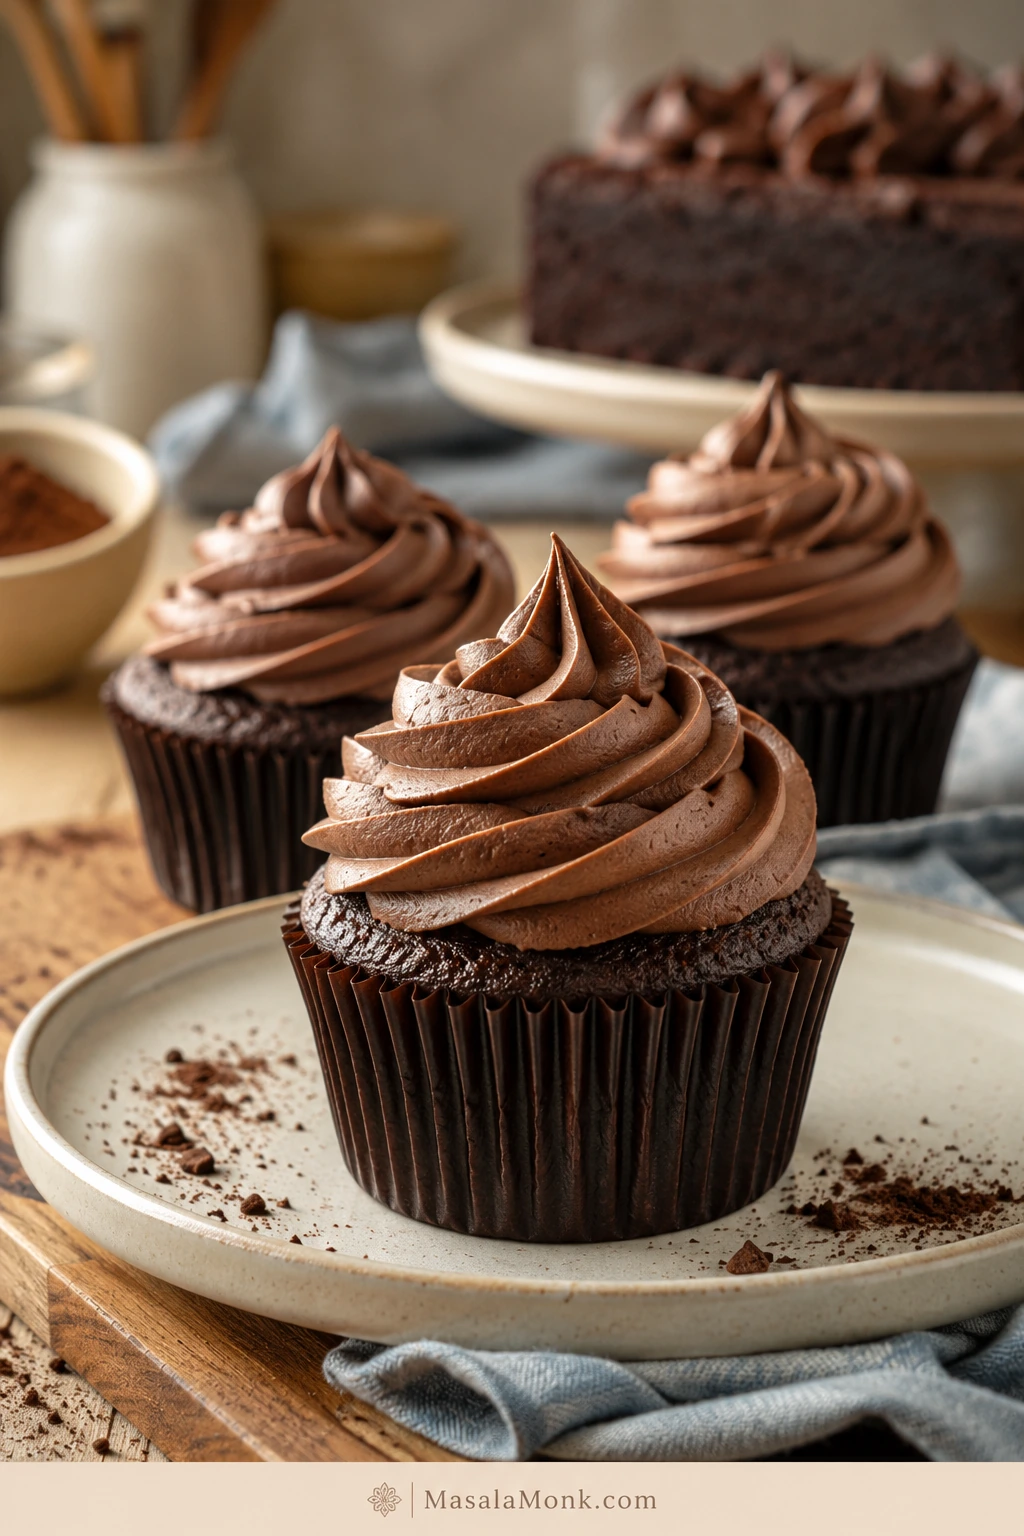
Chocolate cupcakes topped with soft swirls of chocolate cream cheese frosting on a light wooden board.

Frosting is the part everyone sees first, which is why it can make even a simple cake feel a little high-pressure. This chocolate cream cheese frosting keeps that final step calm: smooth enough to spread, thick enough to chill and pipe, and chocolatey without tasting like straight sugar.

The finished topping is thick and creamy, with deep cocoa flavor, a gentle cream cheese tang, and a soft matte finish. At its best, each bite tastes like chocolate first, cream cheese second, and sugar last.

This version is built for the frosting problems people actually run into: cream cheese that turns loose, chocolate that tastes flat, cupcake swirls that slump, and “not-too-sweet” frosting that still needs enough structure to behave.

It is not sugar-free, and it is not trying to be. It is balanced instead of candy-sweet: less sugary than classic chocolate buttercream, with enough powdered sugar to stay smooth, spreadable, and pipeable.

Use it right away when you want a spreadable frosting. A short chill turns the same bowl from creamy and spreadable to swirl-ready. The recipe itself takes about 10 minutes; the extra time is only for cleaner cupcake swirls or a firmer layer-cake finish.

Need the fast path? Jump to the recipe. Trying to fix soft frosting? Start with the Texture Rule.

It is especially useful for birthday cupcakes, simple sheet cakes, bake-sale brownies, red velvet cake, and casual layer cakes where you want chocolate frosting that tastes rich but not candy-sweet.

Contents

Chocolate Cream Cheese Frosting Recipe

This recipe makes a smooth, chocolatey cream cheese frosting for cupcakes, brownies, 9×13 cakes, and simple layer cakes. It spreads as soon as it is mixed and becomes firm enough for soft swirls after 15 to 30 minutes in the refrigerator.

The mixing is quick; the chill is only there when you want cleaner piping. For a generously frosted 9-inch layer cake or bakery-style cupcake swirls, make extra because piping always uses more than it looks like.

PrepChillYieldBest For
10 minutesOptional 15 to 30 minutesAbout 3½ to 4 cupsCupcakes, brownies, 9×13 cakes, casual layer cakes

Choose your texture: 3 cups powdered sugar gives a softer, tangier frosting. 3½ cups gives firmer swirls. Chill before piping, and reach for milk or cream only when the frosting is truly too thick. For visual checkpoints, see the Success Cues.

Recipe Ingredients

  • 8 oz / 226 g full-fat brick cream cheese, softened but still cool
  • ½ cup / 113 g unsalted butter, softened but not melted
  • 3 to 3½ cups / 360 to 420 g powdered sugar / icing sugar, sifted if lumpy
  • ½ cup / about 50 g unsweetened cocoa powder, natural or Dutch-process
  • 1 teaspoon vanilla extract
  • ¼ teaspoon fine salt, plus a tiny pinch more to taste
  • 1 to 4 teaspoons milk or cream, only when the mixture is too thick; many batches need none

Note: Depending on the brand and how tightly it is packed, ½ cup cocoa powder may weigh around 45 to 55 g. About 50 g is a reliable working amount here.

Optional: For a fudgier version, beat in 3 to 4 oz / 85 to 115 g cooled melted dark chocolate after the base is smooth.

Before Mixing Checkpoint

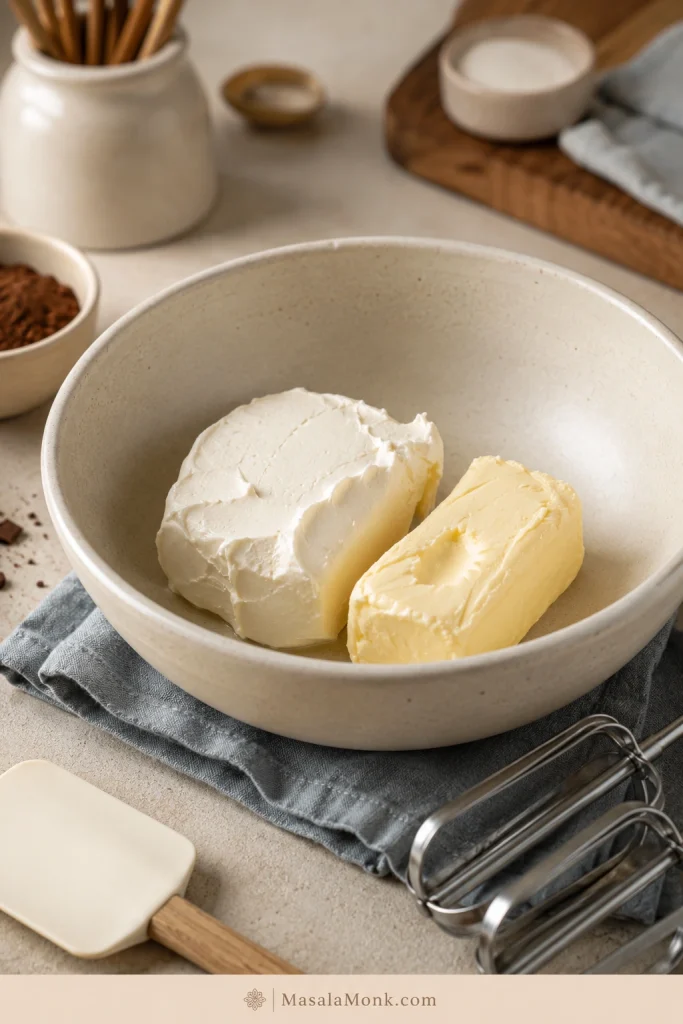
The cream cheese should press in but still hold its block shape. The butter should dent but not shine. If either one looks greasy, chill it briefly before starting.

Cool-soft cream cheese and softened butter holding their shape in a mixing bowl before beating.
Before mixing, the cream cheese should press in but still hold shape, while the butter should dent without looking greasy.

Recipe Instructions

  1. Add the softened cream cheese and softened butter to a large mixing bowl. Beat on medium speed until completely smooth and creamy, about 1 to 2 minutes. Scrape down the sides and bottom of the bowl.
  2. Add the cocoa powder, 3 cups powdered sugar, salt, and vanilla. Mix on low speed until the dry ingredients are mostly absorbed.
  3. Increase to medium-low or medium speed and beat just until smooth. Scrape again so no cocoa, sugar, or cream cheese is hiding at the bottom or sides.
  4. Beat until the cocoa and sugar disappear and the mixture turns creamy. Add milk or cream only when it still feels too thick.
  5. Taste before adding the last ½ cup powdered sugar. Add it only for a sweeter or stiffer texture. When the mixture tastes sweet but flat, add a tiny pinch more salt.
  6. Use it right away when you want a spreadable frosting. To pipe soft swirls, chill it for 15 to 30 minutes before filling the bag.
  7. To make the optional fudgy version, mix in the cooled melted chocolate after the base is smooth. Beat briefly, just until combined.
  8. If the mixture is fridge-firm, let it sit for 10 to 15 minutes so it softens enough to mix smoothly before re-beating.

Recipe Notes

  • Full-fat block-style cream cheese gives the frosting its most reliable structure.
  • Sift cocoa powder and powdered sugar when they look lumpy, especially for piping.
  • Milk or cream should go in slowly. Most batches need little or no added liquid.
  • The mixture is ready when it looks smooth, thick, and holds soft ridges from the beaters.
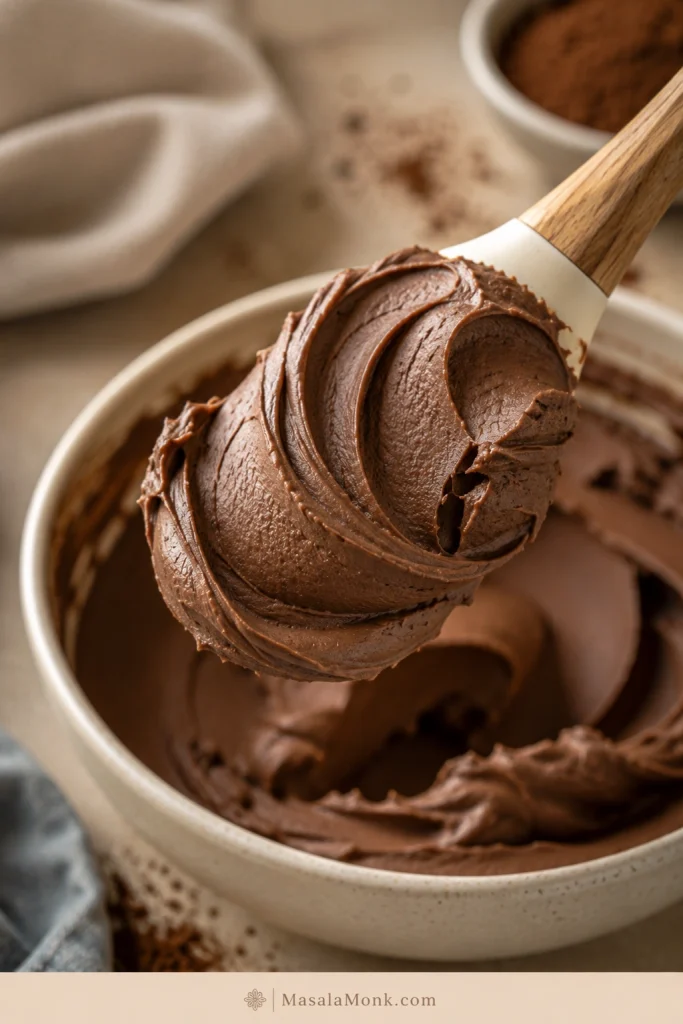
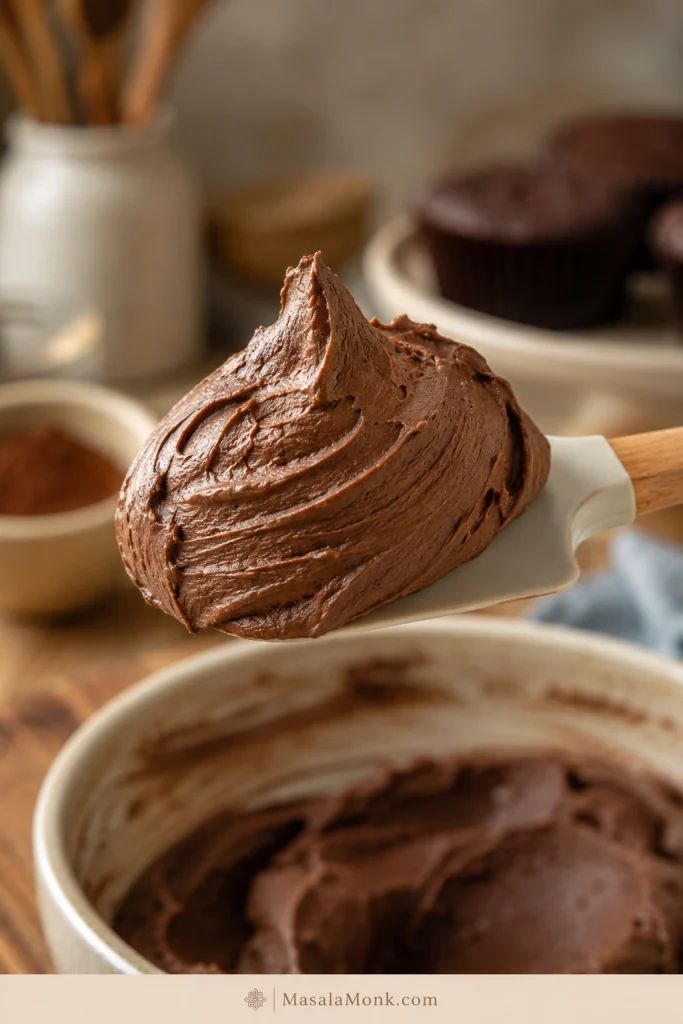
  • On a spatula, it should mound softly instead of running off.
  • Let cakes, cupcakes, and brownies cool completely so the chocolate layer sits on top instead of melting in.

When spread thinner over brownies or sheet cakes, some bakers call this chocolate cream cheese icing. In everyday use, frosting usually means a thicker topping that can be spread or piped, while icing often means something thinner. This recipe sits on the frosting side, but the same creamy, tangy topping may be called icing when it is spread over a pan dessert.

Before You Start

This is a simple recipe, but texture matters. Soft frosting is not a disaster. Most of the time, you are adjusting temperature, not rescuing a ruined batch.

The biggest difference in testing was not the cocoa or the mixer. It was temperature. When the cream cheese and butter were cool-soft, the frosting turned thick and smooth without much help. When either one was warm, the same recipe softened quickly and needed chilling before it behaved again.

The mixture should look thick before you decide it needs liquid. Many batches look too stiff at first and then turn creamy once the sugar and cocoa fully mix in.

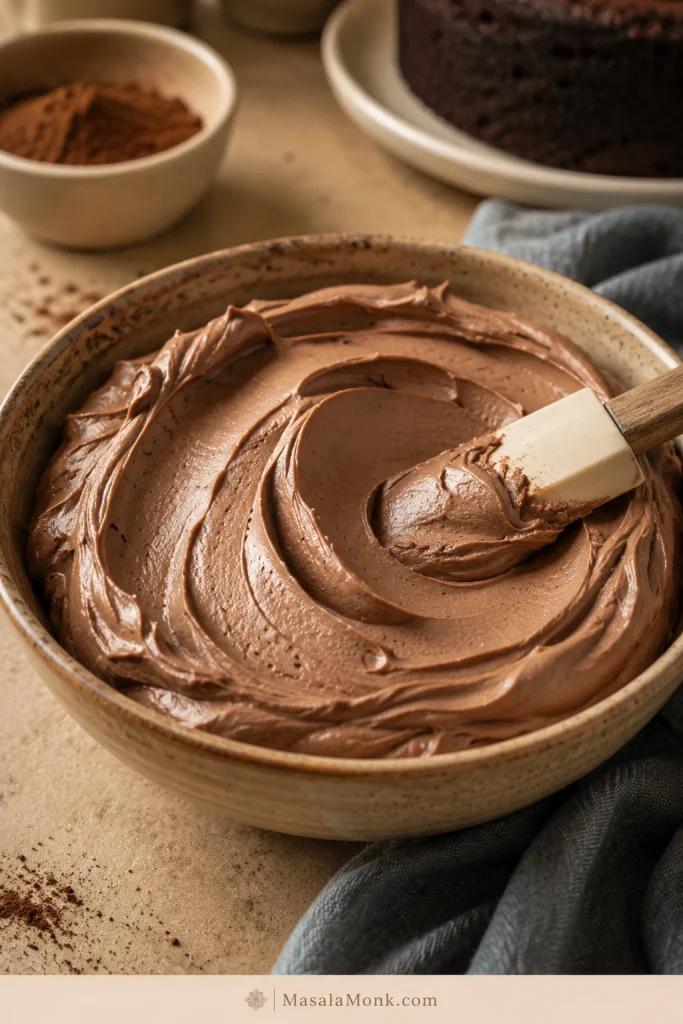
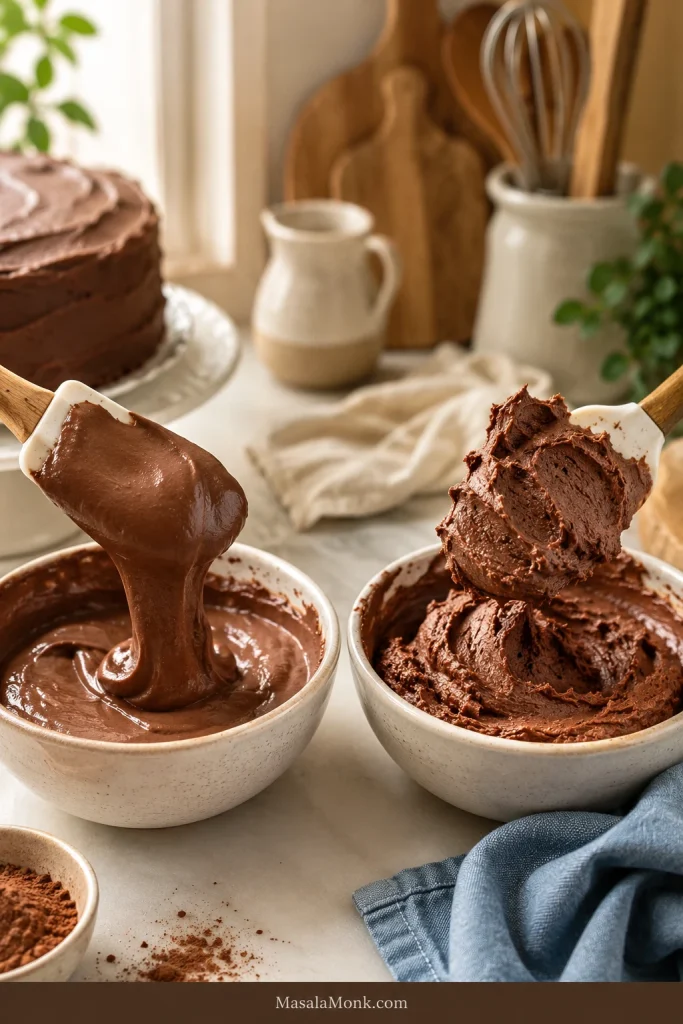
The Thick Swoop Test

Before you decide the frosting needs more sugar or liquid, lift a small amount with a spatula. A good batch should mound softly and hold a clean swoop for a moment.

A spatula lifting a thick swoop of chocolate cream cheese frosting from an ivory mixing bowl.
Before you spread or pipe, look for a thick frosting swoop that lifts cleanly instead of sliding back into the bowl.

The Texture Rule: Spread, Chill, or Fix

Chocolate cream cheese frosting changes with temperature. Before adding more sugar or liquid, look at the bowl and decide what you need it to do next.

Thick chocolate cream cheese frosting mounding on a spatula above a mixing bowl.
When the frosting mounds softly on the spatula, it is usually ready for spreading, filling, or a short chill before piping.
If it looks like thisDo thisWhy it works
Thick, creamy, and mounds on a spatulaUse it for spreadingIt is ready for brownies, sheet cakes, and simple cakes
Smooth but too soft for swirlsChill 15 to 30 minutesCold firms the butter and cream cheese without adding sweetness
Dry or stiff after mixingAdd milk or cream 1 teaspoon at a timeSmall amounts loosen the texture without making it runny
Loose even after chillingAdd powdered sugar or cocoa graduallyOnly adjust after temperature has had a chance to help

The whole recipe comes down to one rhythm: mix until smooth, pause before adding liquid, chill before fixing softness, and stop once it holds its shape.

Is This the Right Frosting for You?

Think of it as the middle ground between chocolate buttercream and cheesecake: richer than whipped cream, tangier than buttercream, and softer than ganache.

It is made for soft swirls, creamy layers, and tangy chocolate balance. For sharp decorative edges, tiny detailed piping, or long room-temperature display cakes, a firmer buttercream or ganache will be easier to manage.

  • Use this frosting for cupcakes, brownies, sheet cakes, yellow cake, chocolate cake, red velvet cake, and casual layer cakes.
  • Choose buttercream frosting when you want a sweeter, firmer, classic birthday-cake topping.
  • Use homemade whipped cream when pies, fruit desserts, hot chocolate, or no-bake desserts need something lighter.
  • Reach for ganache when you need a glossy drip or smooth cake covering.
  • Pick royal icing when cookie icing needs to dry hard for stacking.

Ingredients You Need

Good frosting starts before the mixer turns on. The texture is mostly decided by the cream cheese, butter, and how quickly you add liquid.

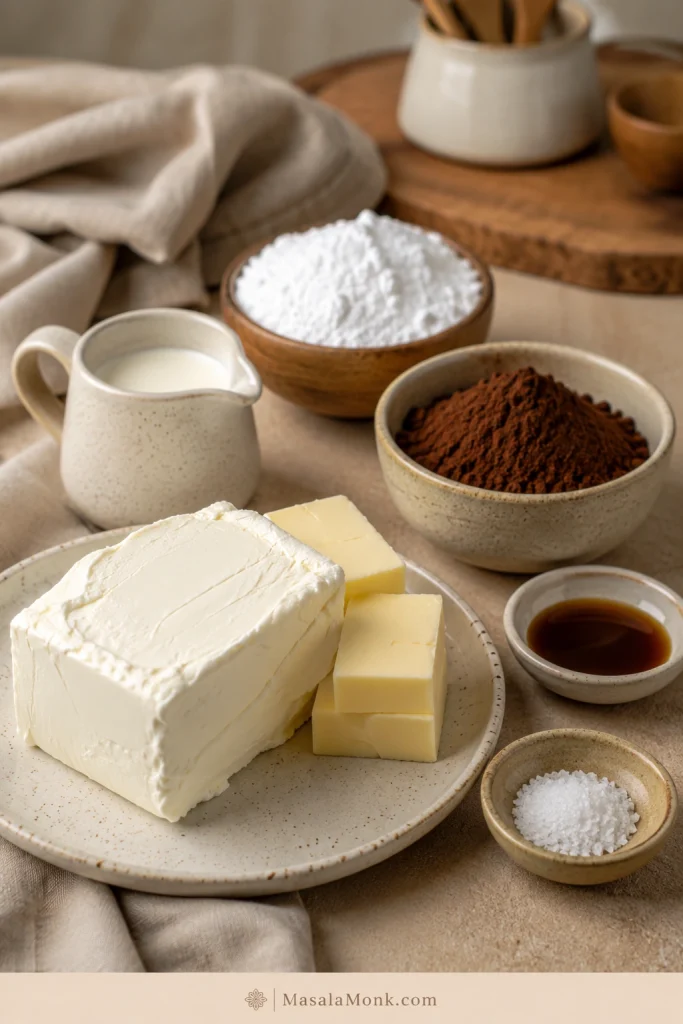
Cream cheese, butter, cocoa powder, powdered sugar, vanilla, salt, and cream arranged on a kitchen counter.
Start with firm cream cheese, cool-soft butter, sifted dry ingredients, and only a small amount of liquid when needed.

Cream Cheese for Frosting

Full-fat brick cream cheese gives the topping body and stability, mixes smoothly with butter and powdered sugar, and helps the finished texture hold after chilling.

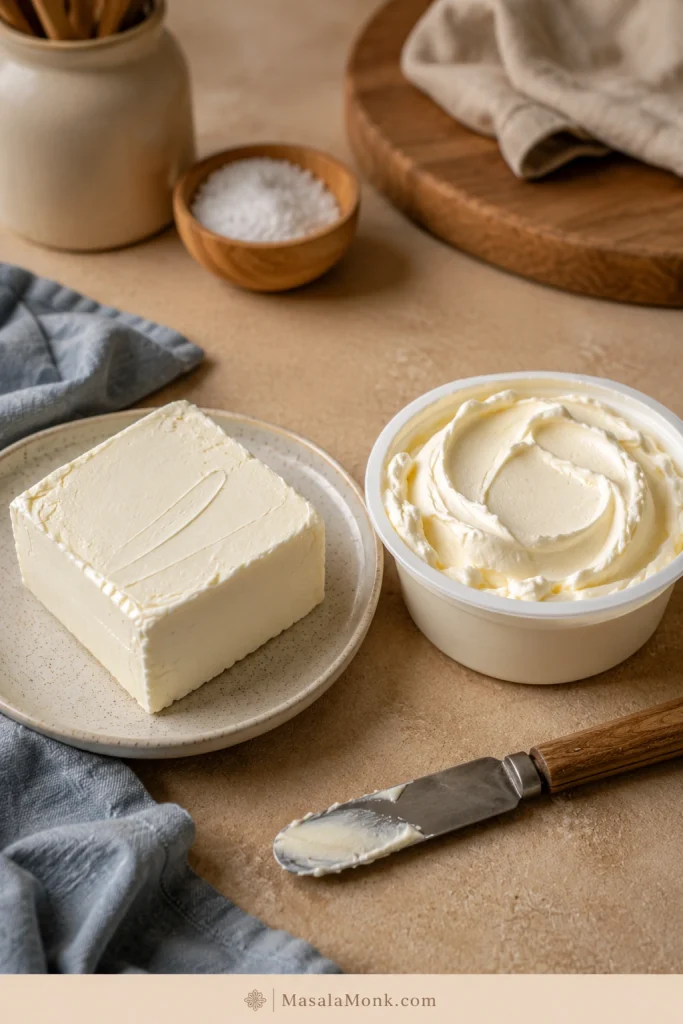
Outside the US, look for full-fat block-style cream cheese or the firmest full-fat cream cheese available. Avoid whipped, spreadable, low-fat, or very soft cream cheese when you want piping.

Firm block-style cream cheese beside softer spreadable tub cream cheese on a warm kitchen counter.
Block-style cream cheese gives better structure; in contrast, softer tub cream cheese can make frosting loosen faster.

If your cream cheese comes in a tub but feels firm and dense rather than airy or spread-like, keep it cold, skip extra liquid, and chill the frosting before piping. The issue is moisture and structure: spreadable cream cheese is usually softer, so the mixture can loosen before it ever gets cold enough to hold a swirl.

If the frosting has already turned loose, jump to the runny frosting fix before adding more sugar.

The same full-fat cream cheese logic shows up in chilled desserts too. This no bake cheesecake recipe is a good example of how cream cheese structure and chilling decide the final texture.

Butter

Butter makes the mixture smoother, richer, and more stable. It should dent when pressed but should not look oily. Overly warm butter makes the bowl soft before you even start.

Unsalted butter gives you the cleanest control over flavor. If using salted butter, reduce the added salt to a small pinch and taste before adding more.

Powdered Sugar / Icing Sugar

Powdered sugar, also called icing sugar in many countries, does more than sweeten here. It helps the cream cheese hold a swirl, gives the chocolate layer body, and keeps the finished texture from sliding.

Three cups gives a tangier, less sweet result. Closer to 3½ cups gives firmer cupcake swirls, borders, or layer-cake decorating. Sift it first when it looks clumpy.

Cocoa Powder

Unsweetened cocoa powder gives the chocolate flavor and helps thicken the texture. Natural cocoa gives a familiar, slightly sharper flavor and a lighter brown color. Dutch-process cocoa tastes smoother, darker, and less sharp.

Both work here because this is frosting, not cake batter. The more important step is sifting the cocoa when it looks lumpy. Cocoa lumps can hide in the bowl and show up later as dry specks.

Vanilla, Salt, and Liquid

Vanilla rounds out the chocolate. Salt makes the chocolate taste stronger and keeps the sweetness from feeling flat. Milk or cream is optional and should be added only after the mixture has fully come together.

Heavy cream gives a richer finish, while milk thins the texture more quickly. Sweetened whipped topping and non-dairy topping belong to a different frosting style.

Equipment You Need

A hand mixer or stand mixer gives the smoothest texture, but you can still make this with a sturdy spatula if the ingredients are properly softened and the dry ingredients are sifted.

  • Electric mixer: Best for the smoothest result.
  • Rubber spatula: Essential for scraping the bowl.
  • Fine-mesh sieve: Helpful for cocoa and powdered sugar.
  • Offset spatula or piping bag: Use for spreading or soft swirls.

When using a stand mixer, choose the paddle attachment over the whisk. It keeps the mixture creamy without whipping in too much extra air.

Why This Frosting Works

This frosting works because it balances water, fat, sugar, and temperature. Cream cheese gives tang, but it also brings softness. Butter adds body. Cocoa thickens while deepening the chocolate flavor. Powdered sugar stabilizes the mixture, but too much can make the taste flat and overly sweet.

That is why this recipe uses enough powdered sugar to hold shape, then relies on cocoa, salt, and chilling for balance. You get a frosting that tastes chocolate-first and cream-cheese-tangy, not one that is dominated by powdered sugar.

The most reliable batches came from controlling temperature before changing ingredients. Cool-soft cream cheese mixed smoothly without turning loose; butter that dented but did not look oily gave the frosting body; and waiting before adding milk kept the mixture from thinning too early.

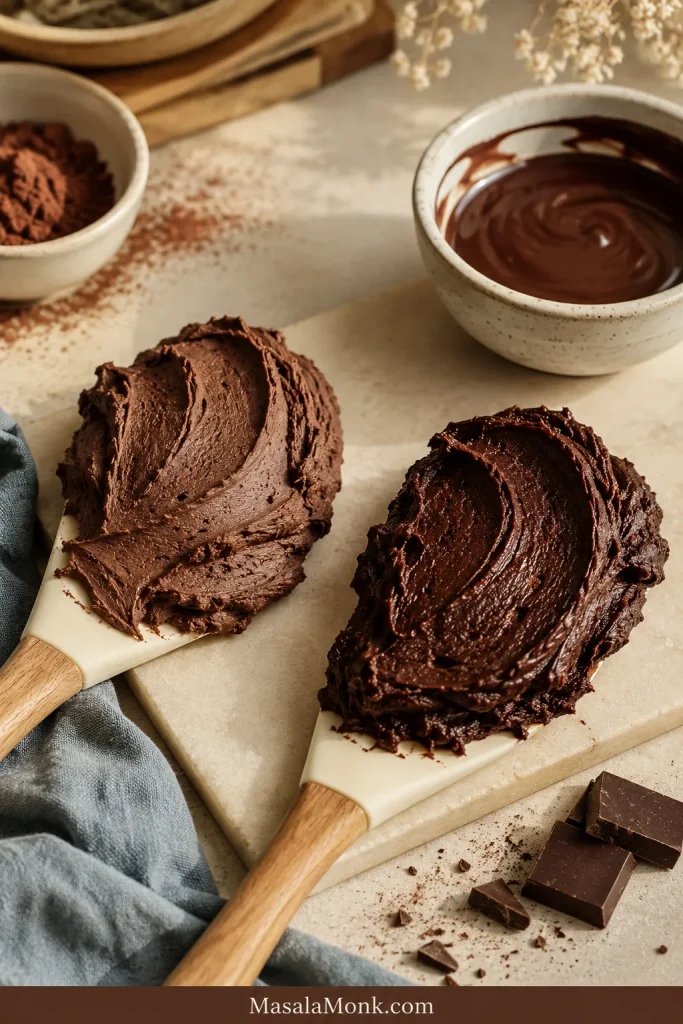
Cocoa Powder vs Melted Chocolate

Use cocoa powder for the easiest, steadiest batch. Add cooled melted chocolate when you want a deeper, fudgier version.

Cocoa powder keeps the base simple, stable, and deeply chocolatey. Melted chocolate makes the topping silkier and richer, but the chocolate needs to be cool enough that it does not melt the butter.

Chocolate OptionResultBest For
Cocoa powder onlyQuick, stable, chocolatey, easy to pipe after chillingEveryday cupcakes, cakes, brownies
Melted chocolate onlySmooth, silky, richer, slightly more delicateBakery-style frosting and fillings
Cocoa powder + melted chocolateDeepest and fudgiest chocolate flavorSpecial cakes, brownies, richer desserts
Two spatulas showing lighter cocoa frosting and darker melted chocolate cream cheese frosting.
Compared with cocoa powder, cooled melted chocolate gives a darker, fudgier frosting, while cocoa keeps the texture steadier.

For the most reliable version, make the cocoa powder base first. For a darker, fudgier finish, add cooled melted dark chocolate at the end. A 55% to 70% dark chocolate works well; very bitter chocolate can taste harsh, while very sweet chocolate can push the frosting closer to buttercream sweetness. Want the richer path? Use the dark chocolate variation below.

Still choosing between cocoa, cacao, and dark chocolate? This cacao vs chocolate vs dark chocolate guide explains how those ingredients differ in everyday cooking.

Need something pourable instead of creamy? This 3-minute homemade chocolate syrup is better for drizzling over cake, ice cream, pancakes, or dessert plates.

How to Make Chocolate Cream Cheese Frosting

For the smoothest frosting, beat the cream cheese and butter first, then mix in the cocoa, powdered sugar, salt, and vanilla before making any texture adjustments.

Not sure whether to chill, thicken, or loosen it? Use the Texture Rule before changing the ingredients.

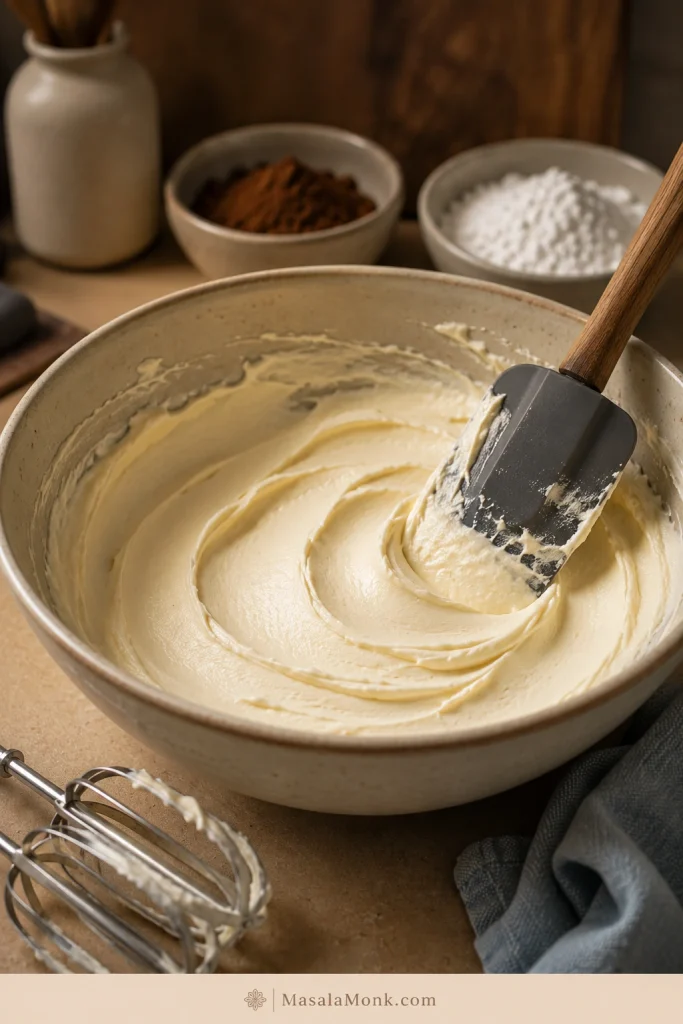
1. Beat the Cream Cheese and Butter First

Add the softened cream cheese and softened butter to a mixing bowl. Beat on medium speed until smooth before adding anything else. Scrape more than you think you need to; cream cheese likes to hide under the paddle and along the sides of the bowl.

The base should look creamy, pale, and smooth before you move on.

Smooth pale cream cheese and butter mixture in a bowl before cocoa powder and powdered sugar are added.
A smooth cream cheese and butter base keeps tiny lumps from hiding once the cocoa and powdered sugar go in.

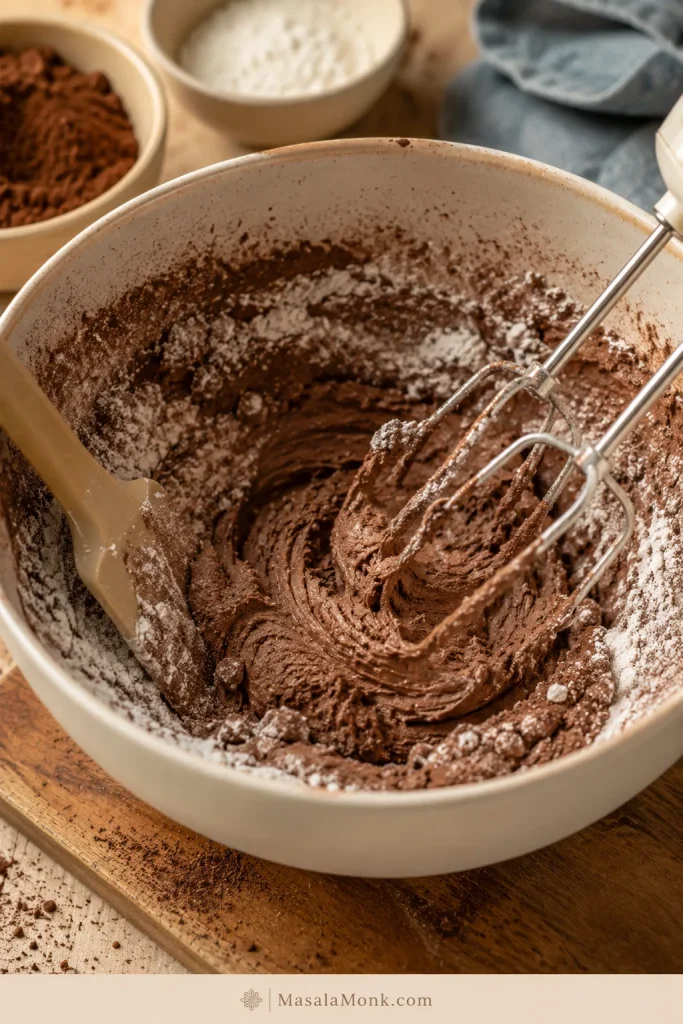
2. Add Cocoa Powder and Powdered Sugar Gradually

Add the cocoa powder, powdered sugar, salt, and vanilla. Start the mixer on low speed so the dry ingredients do not puff out of the bowl.

If it looks dusty for a minute, stay with it. That dry stage is normal before the frosting turns creamy. Keep mixing on low, scrape the bowl, and give it a moment before adding liquid.

Cocoa powder and powdered sugar partly mixed into a cream cheese butter base in a mixing bowl.
At this stage, the mixture can look dry and dusty; keep mixing before deciding it needs milk or cream.

3. Mix Until Smooth

Once the dry ingredients disappear, increase to medium-low or medium speed and beat only until smooth.

Smooth chocolate cream cheese frosting in a bowl with a spatula creating soft ridges.
Once the dry ingredients disappear, look for smooth chocolate frosting with soft ridges and no dusty cocoa streaks.

4. Adjust the Texture Carefully

Once the base is made, the rest is adjustment. Use the Texture Rule above: spread it when it mounds, chill it when it is too soft, loosen it only when it is truly stiff, and thicken it only after temperature has had a chance to help.

  • A soft, spreadable finish works best with 3 cups powdered sugar and little or no chill.
  • Cleaner swirls usually need closer to 3½ cups powdered sugar plus a short chill.
  • Cooled melted dark chocolate makes the texture darker, smoother, and more fudgy.
  • Dutch cocoa, salt, and the lower sugar amount create a more balanced, less sugary result.
  • To thicken the frosting, add powdered sugar 2 tablespoons at a time.
  • To soften the frosting, add milk or cream 1 teaspoon at a time.

At the right texture, the frosting should look like soft chocolate cheesecake filling: creamy, cool, and thick enough to sit in a mound on the spatula.

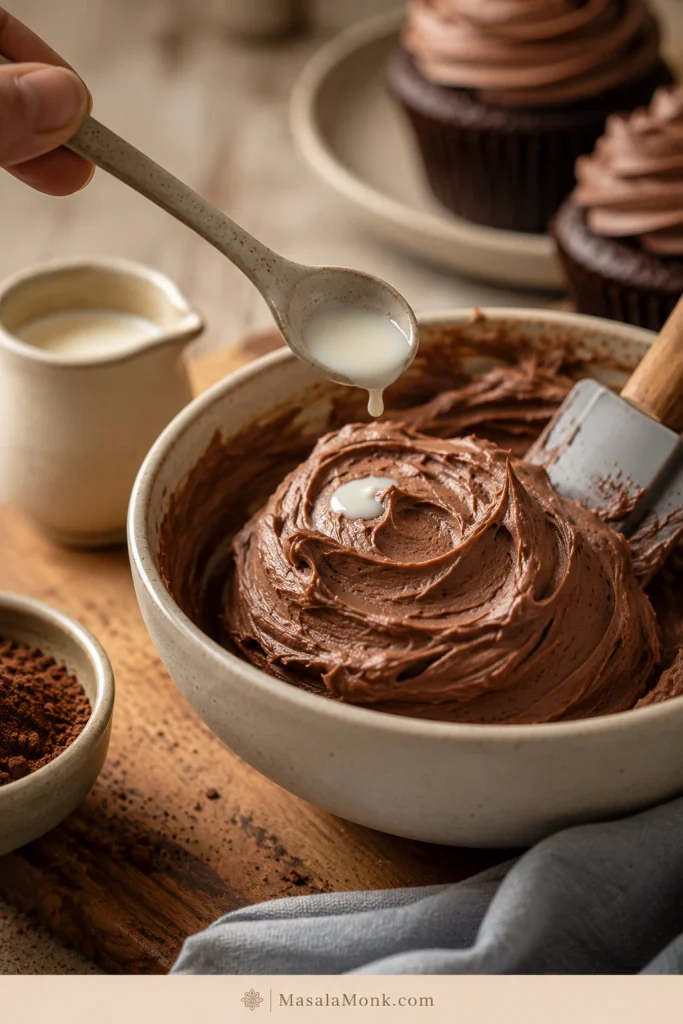
A small spoonful of cream being added to thick chocolate cream cheese frosting in a bowl.
Use teaspoons of milk or cream only after the frosting is fully mixed, because extra liquid softens cream cheese frosting quickly.

Success Cues

This is the section to check when you are staring into the bowl wondering if it looks right.

StageWhat you should see
After beating cream cheese and butterSmooth, pale, creamy, with no visible lumps
After adding cocoa and powdered sugarDry at first, then creamy as it mixes
Ready to spreadThick, smooth, and mounding on a spatula
Ready to pipeCool, firm but squeezable, and holding soft ridges
Too softGlossy, loose, and sliding off the spatula
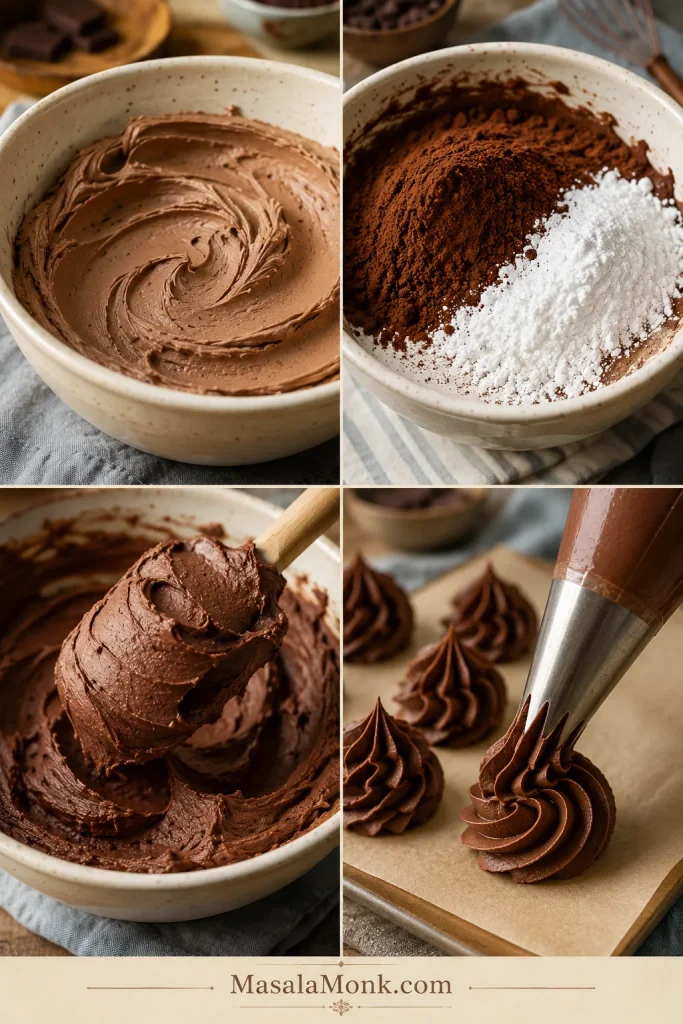
Four visual stages of chocolate cream cheese frosting showing smooth base, dry stage, mounded texture, and piped ridges.
Use these visual cues to decide whether your chocolate cream cheese frosting needs more mixing, chilling, or piping time.

How to Make It Pipeable

For soft, reliable swirls, use full-fat block-style cream cheese, the higher amount of powdered sugar, and chill the frosting for 15 to 30 minutes before piping.

This is a soft-swirl frosting, not a sharp-edge decorating buttercream. After chilling, it works well for cupcake swirls, simple borders, filling a casual layer cake, and generous swoops.

It is not the best choice for flowers, tiny detailed piping, or a cake that has to sit warm for hours. For tall cupcake swirls, sift the cocoa and sugar well, and choose a large star tip, open star tip, or large round tip.

When it is ready to pipe, the bag should feel cool in your hands and the frosting should move with pressure, not pour. A short chill gives you soft matte swirls that look finished without turning stiff or crusty.

If the piping bag starts to feel soft in your hands, use the short chill reset before continuing.

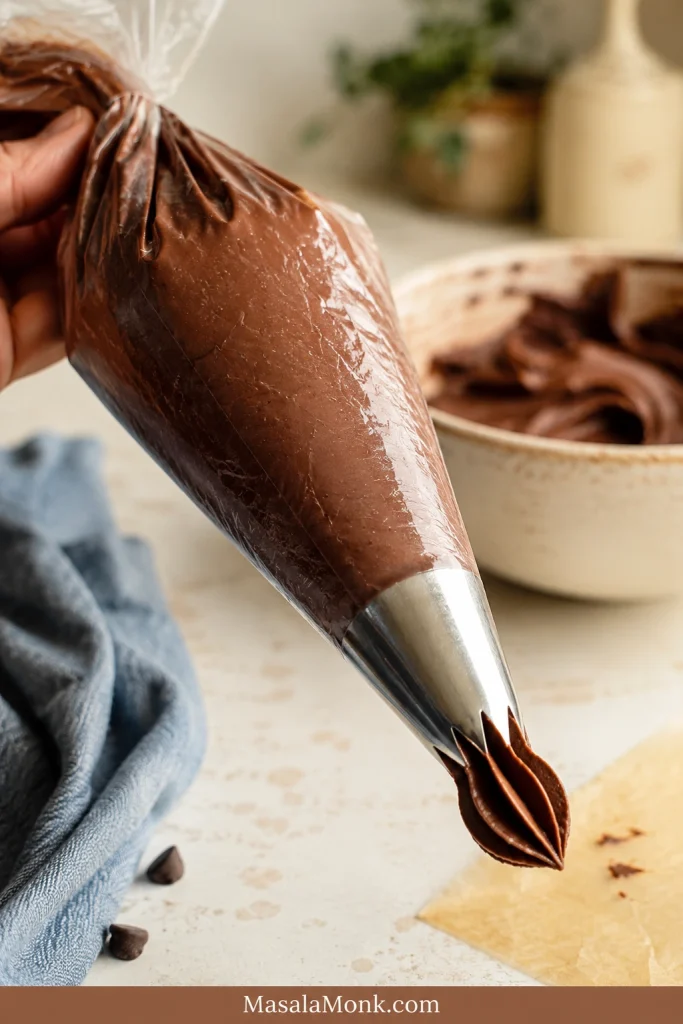
Chocolate cream cheese frosting inside a piping bag with a large star tip on a kitchen counter.
Before piping, the filled bag should feel cool, full, and steady, with frosting that moves under pressure but does not flow.

Once the mixture looks smooth and holds soft ridges, stop mixing. It can look perfect, then loosen if you keep beating.

How the Frosting Should Pipe on Cupcakes

Use a large star tip or large round tip for soft swirls. The frosting should move with steady pressure and keep rounded ridges after you lift the tip.

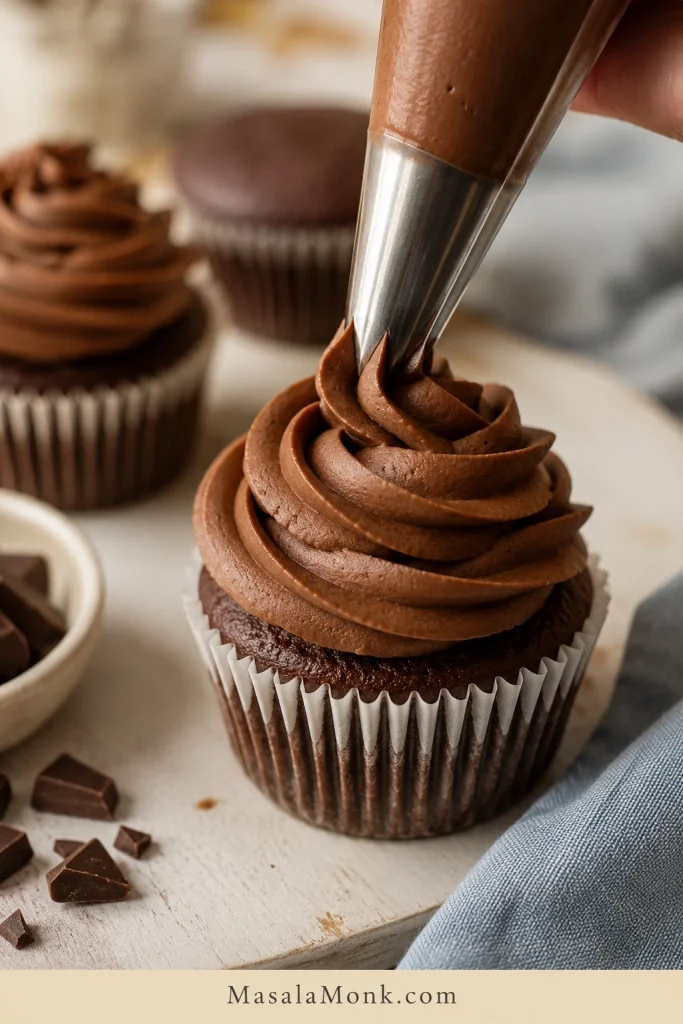
Chocolate cream cheese frosting being piped into a soft swirl on a chocolate cupcake.
After chilling, the frosting pipes into rounded cupcake swirls that look finished without turning stiff, crusty, or overly sweet.

How to Make It Less Sweet

This is not a low-sugar frosting. It is less sugary than classic chocolate buttercream because cream cheese, cocoa, and salt keep the sweetness balanced.

AdjustmentWhat it changes
Add salt firstMakes chocolate taste fuller without changing the texture
Add 1 to 2 tablespoons cocoaDeepens flavor and slightly thickens the mixture
Use Dutch-process cocoaMakes the chocolate taste smoother and darker
Use 3 cups powdered sugarTangier, softer, less sweet
Use 3½ cups powdered sugarFirmer, sweeter, better for tall swirls

For tall cupcake swirls, avoid reducing the powdered sugar too far. Powdered sugar is not only for sweetness; it also gives structure.

How Much Frosting Do You Need?

The right amount depends less on the cake and more on how generous you want the finished dessert to look. If you love big cupcake swirls, make more than you think; piping always eats frosting faster than spreading.

This recipe makes about 3½ to 4 cups of chocolate cream cheese frosting, depending on how much powdered sugar you use and whether you add melted chocolate.

DessertAmount NeededNotes
12 cupcakes with tall swirls3 to 3½ cupsOne batch works well
24 cupcakes with light swirls3½ to 4 cupsPipe modestly
9×13 sheet cakeAbout 3 cupsSpread with an offset spatula
8×8 or 9×9 brownies1½ to 2 cupsHalf batch is usually enough
8-inch 2-layer cake3½ to 4 cupsEnough for filling and outside
9-inch 2-layer cake4 to 5 cupsMake 1.25x when decorating heavily
3-layer cake4½ to 5 cupsMake extra for safety

Use a half batch for brownies, a small cake, or 6 to 8 cupcakes. Use the full batch for 12 tall cupcake swirls, 24 lighter cupcake swirls, or a 9×13 sheet cake. Make 1.25x for a 9-inch two-layer cake with decoration, or 1.5x for a heavily frosted layer cake.

Where This Frosting Tastes Best

Use this frosting when you want chocolate flavor without the heavy sweetness of buttercream. It works especially well on desserts that are already sweet and need a little tang to balance them.

Once you know where you want to use it, check how much frosting you need before you start decorating.

The best matches are soft cakes, fudgy brownies, and cupcakes that need a cool, creamy swoop instead of a stiff sugar crust.

Chocolate Cupcakes

On chocolate cupcakes, the tang keeps the cocoa from feeling heavy. The swirl should taste like a cool chocolate cheesecake cap on top of soft cake, not a pile of powdered sugar.

Three chocolate cupcakes with different heights of chocolate cream cheese frosting swirls.
From modest swirls to taller chilled swirls, this is the realistic range for pipeable cream cheese frosting on cupcakes.

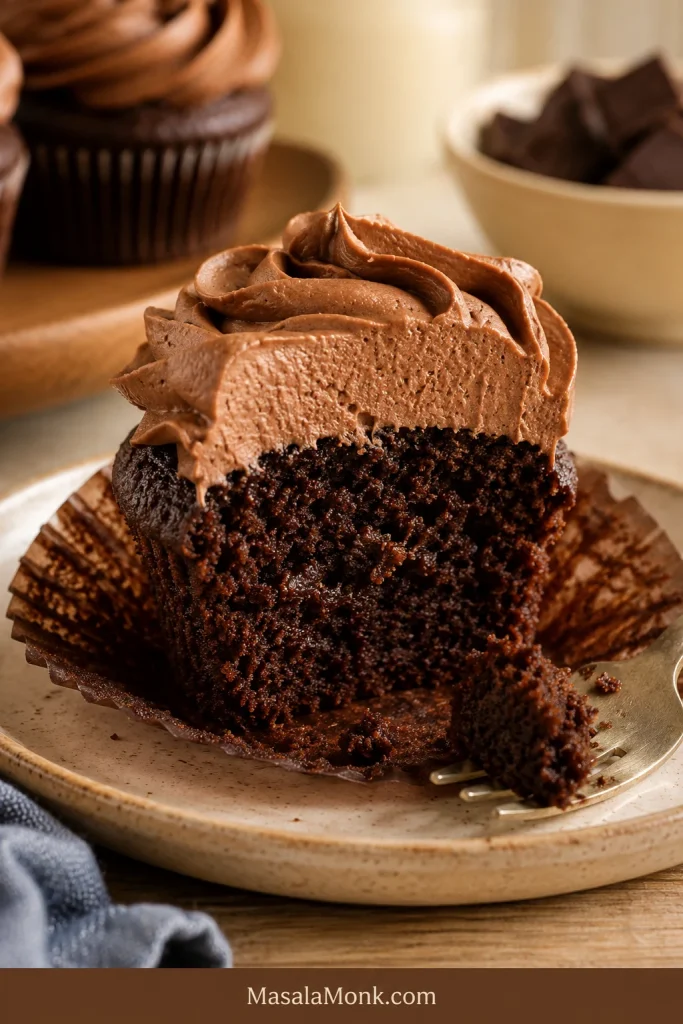
What the Frosting Should Feel Like on a Cupcake

The best bite is cool, creamy, and lightly tangy against the cake. It should feel like a soft cap of chocolate cheesecake, not a hard sugar crust.

Cut chocolate cupcake with a thick creamy cap of chocolate cream cheese frosting on top.
Because cream cheese adds tang, the frosting should taste like a cool chocolate cheesecake cap rather than a hard sugar crust.

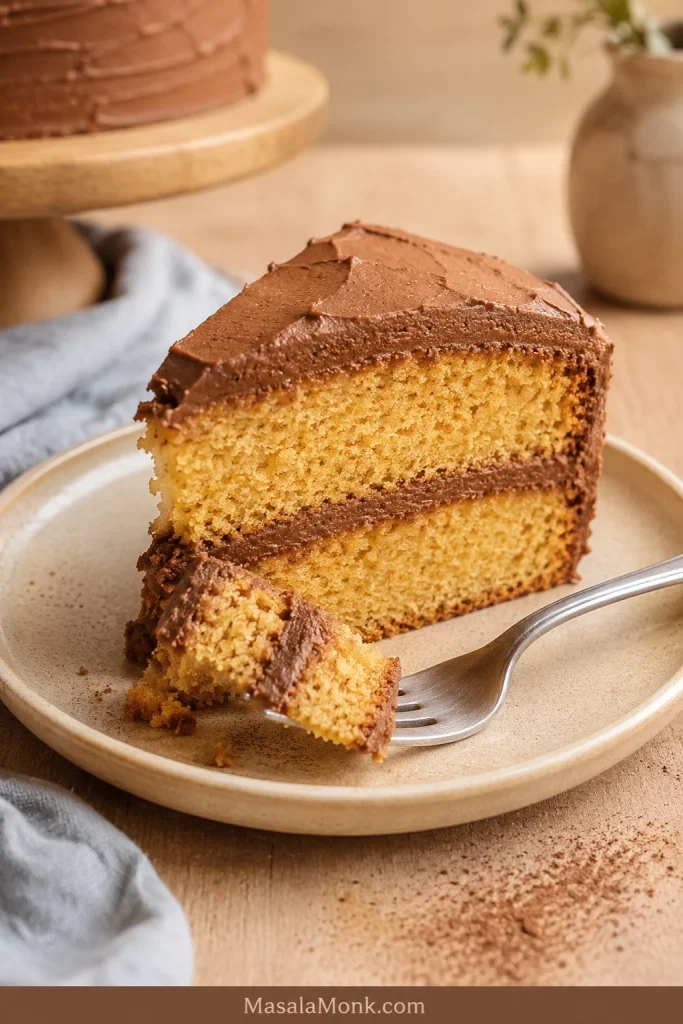
Yellow Cake with Chocolate Cream Cheese Frosting

This is where the frosting really shines: soft yellow cake, cool tangy chocolate, and just enough cocoa bitterness to keep the bite from turning candy-sweet.

Yellow cake slice with chocolate cream cheese frosting between the layers and on top.
Yellow cake works especially well because tangy chocolate cream cheese frosting balances the sweet, buttery crumb.

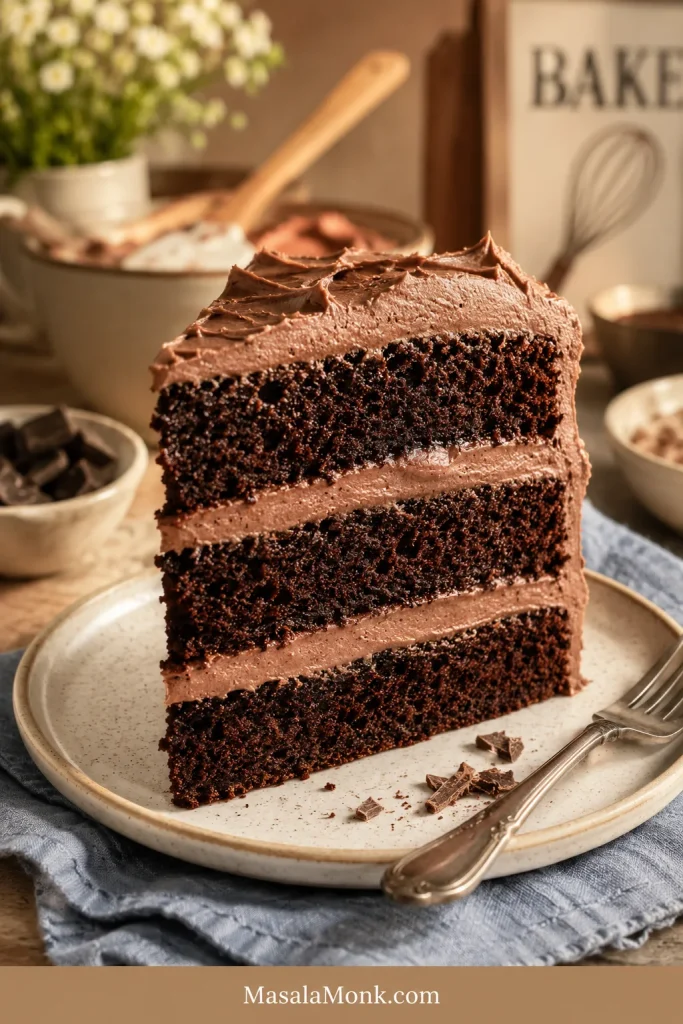
Chocolate Layer Cake with Chocolate Cream Cheese Frosting

Use it on chocolate cake when you want a deeper, less sugary finish than chocolate buttercream. The cream cheese tang keeps the cocoa from feeling too heavy, so the slice still tastes rich without becoming overwhelming.

Chocolate layer cake slice filled and topped with chocolate cream cheese frosting.
A moderate frosting layer keeps chocolate layer cake rich and creamy without making the slice feel heavy.

Red Velvet or Spice Cake

Cream cheese already belongs with red velvet, and cocoa makes it a stronger chocolate version. That same tang works beautifully with warm spices too. This spice cake recipe uses cream cheese frosting to balance brown sugar and baking spices.

Brownies with Chocolate Cream Cheese Frosting

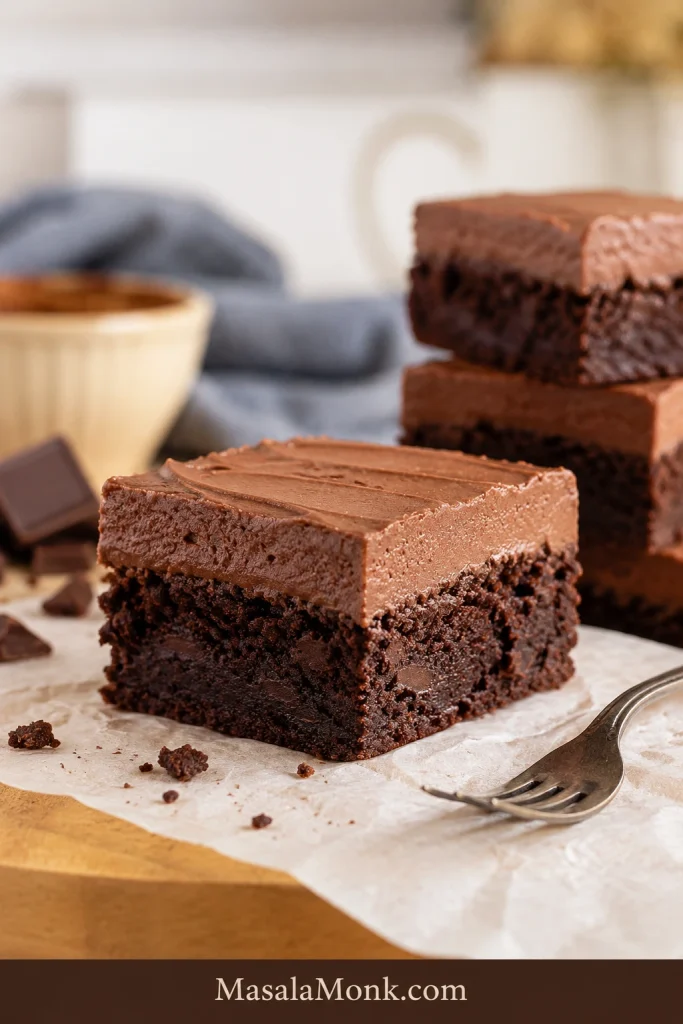
On brownies, it tastes like a thin chocolate cheesecake layer over a fudgy base. Let the pan cool fully before frosting, because brownies hold heat longer than they look.

Fudgy brownie square topped with a smooth layer of chocolate cream cheese frosting.
Here, the frosting sets into a smooth chocolate cheesecake-style layer over the dense fudgy base.

Sheet Cake with Chocolate Cream Cheese Frosting

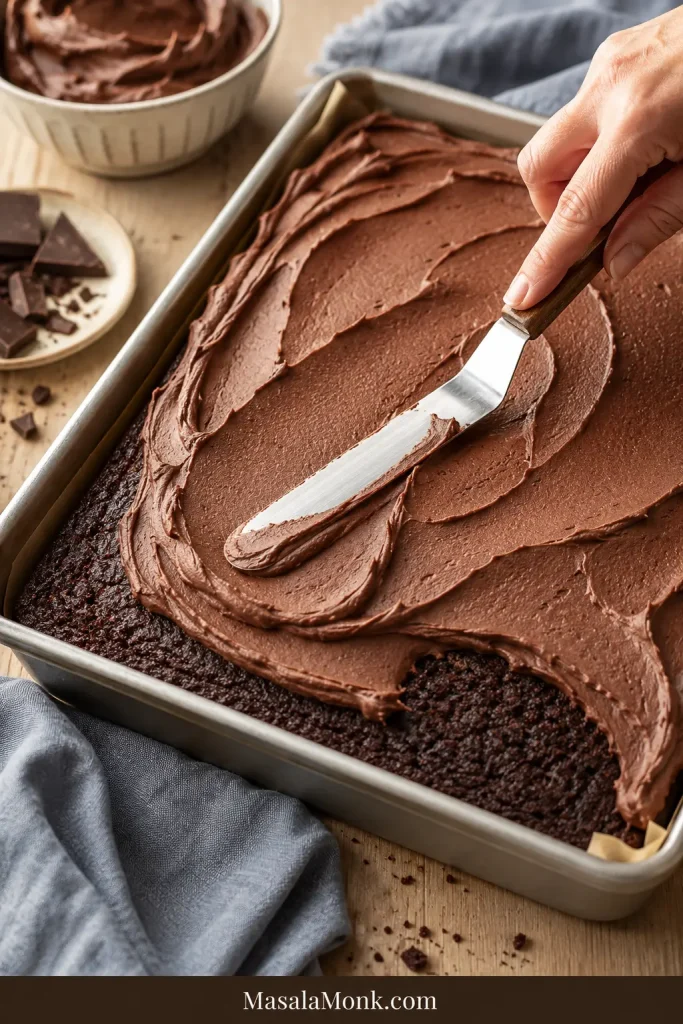
A 9×13 sheet cake is one of the easiest places to use this frosting. It spreads smoothly, chills into clean slices, and gives a simple pan cake enough tang to balance the sweetness. For another soft pan cake that benefits from cream cheese frosting, this applesauce cake recipe is a better match than a delicate sponge.

Chocolate cream cheese frosting being spread over a rectangular sheet cake with an offset spatula.
Spread the frosting into soft swoops, then chill until the top settles into a neat sliceable layer.

How Much Filling to Use in a Layer Cake

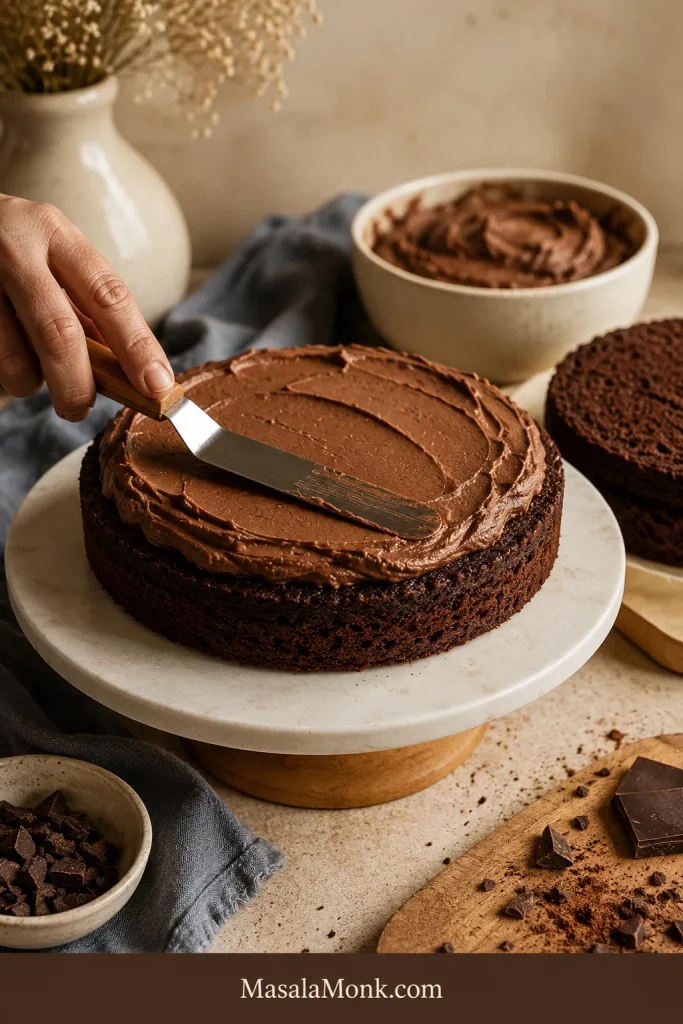
For a casual layer cake, chill the frosting and use a moderate filling. It gives the cake a creamy chocolate layer that cuts through sweetness without making the slice feel heavy.

After assembling the cake, check the storage and serving timing so the frosting is cool but not cold-hard.

Chocolate cream cheese frosting being spread in a moderate layer on a round chocolate cake layer.
Keep the filling moderate and level so the cake stacks cleanly instead of squeezing frosting out the sides.
  1. Make sure the cake layers are completely cool.
  2. Chill the frosting for 15 to 30 minutes before filling if it feels soft.
  3. Add a moderate layer between the cakes. Very thick, soft filling can squeeze out when the top layer goes on.
  4. For a taller cake, pipe a thicker ring around the edge before filling the center.
  5. Apply a thin crumb coat, chill for 20 to 30 minutes, then add the final coat.
  6. Refrigerate the finished cake until closer to serving.

For cleaner slices, chill the finished cake before cutting, then let slices sit briefly before serving so the texture becomes creamy again.

Cookies

This frosting works for soft sandwich cookies or chilled frosted cookies, but it does not dry hard like royal icing. Use it when the cookies will be served chilled or kept in a single layer.

Troubleshooting

If something looks off, start with temperature before assuming the recipe has gone wrong. Cream cheese frosting often looks loose before chilling brings it back.

If you are not sure whether the frosting is actually too soft, compare it with the Success Cues before adding more sugar.

Quick fix: when the texture is too soft, refrigerate the bowl for 20 minutes before changing anything else.

Use this order when the texture feels off: chill first, re-beat briefly, add powdered sugar for structure, add cocoa for thickness and chocolate flavor, and add liquid only when the mixture is too stiff.

ProblemLikely CauseFix
Runny textureTub cream cheese, warm butter, overmixing, too much liquid, or warm melted chocolateChill 20 to 30 minutes, then re-beat briefly. Add powdered sugar only when needed.
LumpsCream cheese was too cold or cocoa/sugar was not siftedBeat cream cheese and butter smooth before adding dry ingredients. Sift cocoa and powdered sugar next time.
Grainy texturePowdered sugar lumps, overmixing, or melted chocolate added badlySift powdered sugar. When using melted chocolate, cool it before adding.
Too thickToo much powdered sugar or cocoaAdd milk or cream 1 teaspoon at a time.
Too sweetToo much powdered sugar or weak cocoa flavorAdd a pinch of salt or a little more cocoa.
Not chocolatey enoughMild cocoa or too little cocoaAdd 1 to 2 tablespoons more cocoa, or add cooled melted dark chocolate.
Will not hold pipingToo warm, too soft, or not enough powdered sugarChill the mixture and piping bag. Add more powdered sugar only when chilling does not help.
Split or loosenedOverbeaten cream cheese or warm melted chocolateChill until firmer, then re-beat gently on low speed.

Why Did My Frosting Turn Runny?

Chocolate cream cheese frosting usually turns runny because the cream cheese or butter was too warm, the cream cheese was too soft, too much liquid was added, or the mixture was overbeaten. Start with chilling before changing the recipe.

Loose chocolate cream cheese frosting beside thicker frosting that holds shape after chilling.
Instead of adding more sugar right away, chill soft frosting first; temperature often fixes the texture without making it too sweet.

How to Thicken It Without Making It Too Sweet

To thicken chocolate cream cheese frosting without making it too sweet, chill it first, then add a little cocoa powder before adding more powdered sugar. Add powdered sugar 2 tablespoons at a time only when the frosting still feels too soft after chilling.

How to Fix Lumps for a Smoother Texture

Lumps usually start at the beginning. Cream cheese that is too cold does not beat smoothly, and once powdered sugar and cocoa are added, the lumps become harder to remove. Beat the cream cheese and butter until completely smooth before adding anything else, and sift dry ingredients when they look clumpy.

6 Small Mistakes That Make Frosting Soft

  1. Using tub cream cheese when you want clean piping.
  2. Letting the butter become oily or melted.
  3. Adding milk or cream before the mixture has fully come together.
  4. Adding warm melted chocolate.
  5. Keeping the mixer running after the texture is smooth.
  6. Frosting warm cakes, cupcakes, or brownies.

Storage, Freezing, and Making Ahead

Because this has cream cheese in it, keep the frosting and frosted desserts refrigerated. It tastes best cool but not cold-hard.

How to Store Chocolate Cream Cheese Frosting

As a practical rule, do not leave it at room temperature for more than about 2 hours, or more than about 1 hour when the room is very warm, such as above 90°F / 32°C. The FDA’s two-hour rule for refrigerated foods is a good safety reference here.

For leftovers, transfer the mixture to an airtight container and refrigerate for up to 5 days. Before using, let it sit at cool room temperature until it softens slightly, then re-beat gently until smooth.

For frosted cakes, cupcakes, or brownies, refrigerate the finished dessert in a covered container. Cover it well so the surface does not dry out or pick up fridge odors.

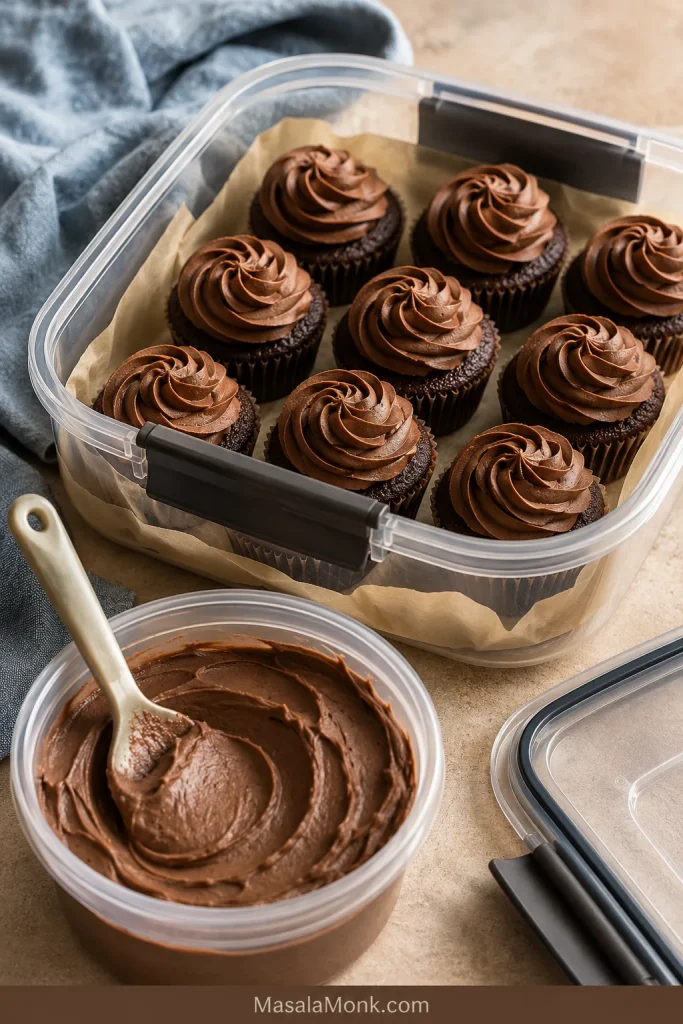
Frosted chocolate cupcakes stored in a covered container beside extra chocolate cream cheese frosting.
Covered cupcakes stay fresher in the refrigerator, but the best bite comes after the frosting loses its hard chill.

Serve cool, not cold-hard. For the best texture, take frosted cupcakes or cake slices out of the refrigerator about 15 to 25 minutes before serving, depending on room temperature.

You can make the frosting 1 to 2 days ahead. On decorating day, let it soften slightly, re-beat gently, and chill again if it feels too soft for piping. The chocolate flavor often tastes a little more rounded after a night in the fridge.

Decorating in a warm kitchen? Use the chill reset whenever the bag or swirls start to soften.

Can You Freeze It?

Yes. Chocolate cream cheese frosting freezes well in an airtight container for up to 2 to 3 months. Thaw overnight in the refrigerator, then let it soften slightly and re-beat gently before spreading or piping.

Warm Weather Chill Reset

Warm hands, warm rooms, and sunny tables soften this frosting faster than the recipe itself does.

  • Start with chilled frosting before piping.
  • Rest the filled piping bag in the refrigerator when it starts feeling soft in your hands.
  • Keep frosted cake or cupcakes cold until closer to serving.
  • Avoid direct sunlight and long outdoor buffet conditions.
  • Transport cakes cold when possible.
  • Choose a firmer chocolate buttercream or ganache when a cake must sit outside for hours.
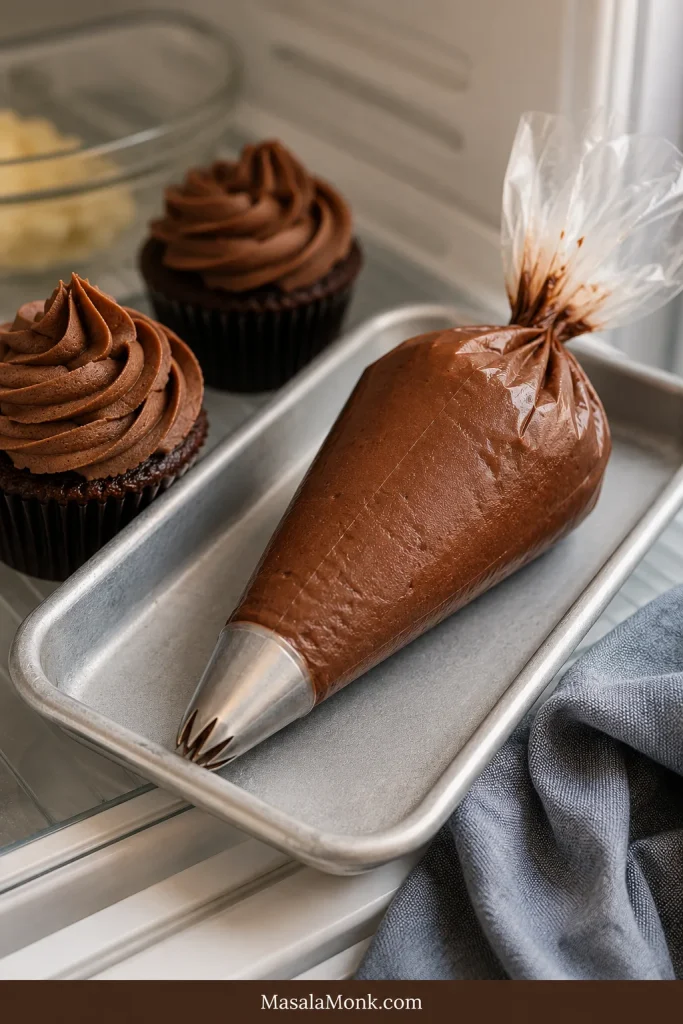
Filled piping bag of chocolate cream cheese frosting resting on a chilled tray with frosted cupcakes nearby.
A short chill helps pipeable chocolate cream cheese frosting hold soft ridges again when hands or the room are warm.

Variations

Dark Chocolate Version for Rich Cakes

Choose this when you want the frosting to taste more like a bakery chocolate layer than a simple cocoa frosting. Add 3 to 4 oz / 85 to 115 g melted dark chocolate, cooled until barely warm.

Chocolate bars usually melt more smoothly than chocolate chips, but chips work when melted gently. Compound chocolate also works in a pinch, though the flavor and texture will be slightly different from real dark chocolate.

Mocha Version for Deeper Chocolate Flavor

Use this when the frosting tastes chocolatey but a little flat. Espresso powder makes the cocoa taste deeper without turning the frosting into coffee frosting. Add ½ to 1 teaspoon instant espresso powder with the cocoa.

Extra Tangy Version for Sweet Cakes

This version works best with yellow cake, vanilla cake, red velvet cake, or very sweet cupcakes that need balance. Use the lower amount of powdered sugar and skip extra liquid.

Stiffer Version for Cupcake Swirls

Choose this when looks matter as much as flavor: birthday cupcakes, party trays, or anything that needs to hold a soft swirl. Use the full 3½ cups powdered sugar, skip extra milk or cream, and chill for 20 to 30 minutes before piping.

Softer Brownie Frosting

Choose this when you want the frosting to eat like a creamy chocolate layer, not a tall decoration. Use 3 cups powdered sugar and add 1 to 2 teaspoons cream only when needed. Make sure the brownies are completely cool before frosting.

A whipped chocolate cream cheese frosting is a different style made with cream. It is lighter and softer. This butter-based version is the one to use when you want a topping that spreads cleanly, chills well, and holds soft swirls. For that softer spreadable style in a natural context, this cinnamon roll recipe shows how cream cheese icing behaves when it is meant to be looser.

Save watery flavorings and fruit purees for another frosting style; they can loosen this one faster than you expect.

FAQs

Can chocolate cream cheese frosting be piped?

Yes. Use full-fat block-style cream cheese, softened butter, enough powdered sugar, and chill for 15 to 30 minutes before piping. A large star tip works especially well for cupcakes.

Why did my frosting turn runny?

Usually, it is too warm, overmixed, made with very soft cream cheese, or loosened with too much liquid. Chill first; add powdered sugar only when it still feels loose after 20 to 30 minutes.

What is the fastest way to thicken it?

Chill it for 20 to 30 minutes first. If it is still soft, beat briefly and add powdered sugar 2 tablespoons at a time. For a less sweet fix, add a little cocoa powder first.

Is tub cream cheese okay?

Tub cream cheese is not ideal when you want piping because it is usually softer. If it is firm and dense, keep it cold, skip extra liquid, and chill before piping.

Can I make it without an electric mixer?

You can, but the texture will be smoother with a mixer. If mixing by hand, use very soft but not warm butter, cool-soft cream cheese, sifted cocoa and powdered sugar, and a sturdy spatula. Beat the cream cheese and butter completely smooth before adding dry ingredients.

Does it need to be refrigerated?

Yes. Because it contains cream cheese, store it in the refrigerator. Let refrigerated cake or cupcakes sit briefly before serving so the topping tastes creamy, not fridge-hard.

How long can frosted cupcakes sit out?

Keep them out for no more than about 2 hours, or about 1 hour in very warm conditions above 90°F / 32°C. Refrigerate covered cupcakes until closer to serving.

When should I add melted chocolate?

Add melted chocolate only after the base is already smooth. Cool it until barely warm first, because warm chocolate can loosen the texture.

What happens if I skip the butter?

You can make a softer spread-style version without butter, but it will not behave like this recipe. Butter is strongly recommended for piping or holding shape.

Can I make it less sweet and still pipe it?

Yes, but do not reduce the powdered sugar too far if you want tall swirls. Use 3 cups powdered sugar for a tangier, less sweet frosting, then rely on Dutch cocoa, salt, and chilling for balance. For the firmest cupcake swirls, use closer to 3½ cups.

What happens without powdered sugar?

Powdered sugar thickens and stabilizes this style of frosting. Granulated sugar can make it gritty; for a no-powdered-sugar chocolate frosting, use a cooked ermine-style frosting instead.

How well does it freeze?

It freezes well in an airtight container for up to 2 to 3 months. Thaw overnight in the refrigerator, then let it soften slightly and re-beat gently before using.

If you make it, I’d love to know where you used it: cupcakes, brownies, a sheet cake, or a layer cake. Also tell me whether you stayed with cocoa only or added melted chocolate for the fudgier version.

The best version of this frosting comes from not rushing the bowl. Let the cream cheese and butter stay cool-soft, let the dry stage turn creamy before adding liquid, and let a short chill do its work before you reach for more sugar.

Once you know that rhythm, chocolate cream cheese frosting becomes easy to trust: creamy, tangy, chocolate-first, and firm enough to sit where you put it.

Posted on — Leave a comment

Portuguese Custard Tarts Recipe with Puff Pastry

Portuguese custard tarts on a metal tray with flaky pastry shells, creamy custard centers, and dark blistered tops.

The best Portuguese custard tart is a contrast machine: cold pastry, fierce heat, a crisp flaky shell, warm creamy custard, and those dark blistered spots on top that look almost burnt but taste like caramel.

A good tart does not ask you to sit down with a fork. You pick it up while it is still warm, the edges flake onto your fingers, and the custard gives way softly under the browned top. The lemon should be more perfume than sharp citrus, the cinnamon should sit quietly in the background, and the dark spots should taste sweet-bitter, not smoky.

Maybe you are here because you ate one warm from a bakery and have been thinking about it ever since. Maybe you have store-bought puff pastry in the freezer and want something that feels far more special than the effort. Or maybe you have tried Portuguese custard tarts before and ended up with pale tops, soggy bottoms, or custard that set too firm.

This recipe is built for that exact home-kitchen reality: the serious shortcut version, with ready-made all-butter puff pastry for ease, real cinnamon-lemon yolk custard for flavor, and enough heat to make the shortcut bake like something special. You do not need a Lisbon bakery oven; you need cold pastry, a thin base, a hot tray, modest filling, and close attention near the end.

Why This Home-Oven Version Works

This version is built for a regular home oven, ready-made all-butter puff pastry, and either shallow metal tart tins or a standard metal muffin tin. Traditional pastéis de nata bake in very hot ovens, often in shallow metal tins that push heat quickly into the pastry. A home oven is slower, and a muffin tin is deeper, so this recipe compensates in four ways.

Muffin Tin Heat Setup

A muffin tin makes this recipe practical at home, but the metal underneath has to help the pastry base crisp before the custard sets.

Metal muffin tin with Portuguese custard tarts on a dark tray beside a jug of custard in a home kitchen.
A regular muffin tin can work for homemade pastéis de nata, but the tray underneath matters because it gives the pastry base direct heat.
  • Cold pastry keeps the shell layered instead of greasy.
  • Thin pastry bases cook faster before the custard turns firm.
  • Preheated metal gives the tin stronger heat from below.
  • Modest filling leaves room for the custard to puff without flooding the pastry.

The goal is not perfection on the first tray. The goal is crisp pastry, creamy custard, and enough dark spots to give the top that sweet-bitter caramel edge. Once you know how your oven behaves, the second tray is usually easier.

Once this system makes sense, the most important hands-on step is shaping the pastry; see the shaping and chilling steps before you fill the shells.

The Home-Oven System in One Frame

Use the setup as a checklist before baking: cold pastry, thin shells, smooth custard, and hot metal underneath.

Puff pastry log, shaped tart shell, custard jug, and dark baking tray arranged on a kitchen counter.
Notice the method in one frame: cold pastry for layers, thin shells for crisping, smooth custard for texture, and hot metal for the base.

Recipe at a Glance

DetailFor a regular kitchen
Yield12 tarts
DifficultyModerate, but forgiving if you keep the pastry cold, base thin, tray hot, and filling modest
Pastry14 ounces / 400 grams all-butter puff pastry
CustardMilk, cream, egg yolks, sugar syrup, starch, cinnamon, lemon
TinShallow metal tart tins or a standard metal muffin tin
Oven500°F / 260°C; hotter only if your oven safely allows it and you can watch closely
Bake time10–15 minutes, depending on tin depth and oven strength
Fill levelAbout three-quarters full, usually 2–3 tablespoons custard per shell
Eat themWarm, after about 10 minutes of cooling

If you are ready to bake, jump straight to the recipe. If this is your first time making Portuguese custard tarts, read the home-oven method first; it explains why the pastry stays cold, the base stays thin, and the filling stays lower than instinct says.

The Home-Oven Method That Works

A good homemade pastel de nata should feel more like crisp pastry wrapped around warm custard than a soft custard cup in pastry. Around the rim, the shell should flake; underneath, the base should be cooked through; in the center, the custard should stay glossy under the browned top.

Timing does most of the work. Pastry needs strong heat before the custard turns firm, which is why the shaped shells are chilled, the base is pressed thin, and the filled tin goes straight onto hot metal.

Texture Target: Flaky Outside, Creamy Inside

The finished tart should give you a crisp rim first, then warm custard underneath the caramelized top.

Close-up of a Portuguese custard tart with flaky pastry layers, glossy yellow custard, and dark caramelized spots.
The close-up shows the contrast that makes Portuguese custard tarts special: crisp flaky edges around glossy, creamy custard.

If the first tray is not perfect, read what happened. Pale tops need more top heat. Soft bases need stronger bottom heat. Firm custard means the tarts baked too long. Small adjustments matter more than changing the whole recipe.

If you have worked with puff pastry before, the same cold-dough, hot-tray logic also matters in our apple tart recipe, where a crisp base depends on keeping the pastry cool and baking it with enough heat underneath.

What Are Portuguese Custard Tarts?

Portuguese custard tarts are small high-heat custard pastries with flaky shells and caramelized tops. They are meant to be a little messy: crisp flakes at the edge, soft custard in the middle, and a browned top that gives the sweetness a slightly bitter caramel edge.

The Portuguese name is pastéis de nata. One tart is a pastel de nata; more than one are pastéis de nata. You may also see the plural written without the accent as pasteis de nata. In English, people often search for the same dessert as Portuguese custard tarts, Portuguese egg tarts, or Portuguese tarts.

This is not the guarded Pastéis de Belém recipe, and it does not ask you to make traditional laminated pastry from scratch. It is an authentic-style home version: cinnamon-lemon yolk custard, strong oven heat, thin pastry, blistered tops, and a crisp shell adapted for ready-made all-butter puff pastry. For background on the famous original, see the official Pastéis de Belém history.

Portuguese Custard Tarts vs Chinese Egg Tarts vs British Custard Tarts

Portuguese custard tarts are often confused with Chinese egg tarts and British custard tarts. They are related, but the texture and baking style are different.

  • Portuguese custard tarts / pastéis de nata: flaky laminated or puff-style pastry, rich yolky custard, cinnamon-lemon aroma, and dark blistered spots.
  • Chinese egg tarts: smoother, lighter custard, often with shortcrust or puff pastry, and a pale yellow to lightly golden top.
  • British custard tarts: shortcrust pastry, gently baked egg custard, often with nutmeg, and a softly set top rather than blistered spots.

None of these tarts is “better” than the others; they simply answer different cravings. This one is for the person who wants flaky pastry, warm custard, and a top shaped by serious heat.

What the Difference Looks Like

The darker top and flaky rim are the quickest visual clues that you are looking at the Portuguese style.

Portuguese custard tart in the foreground with paler Chinese egg tart and British custard tart styles in the background.
Compared with smoother Chinese egg tarts or gentler British custard tarts, Portuguese custard tarts lean darker, flakier, and more caramelized.

Macau-style Portuguese egg tarts sit close to this world too, usually richer and more caramelized than classic Chinese egg tarts. This recipe is the place to start if you want that blistered Portuguese tart experience without turning the pastry into a weekend project.

Back to top ↑

Ingredients That Keep the Custard Creamy

Every ingredient here is simple; the technique is what makes the tarts feel bakery-level. The small details matter: rich yolks, real dairy, enough sugar for browning, and lemon peel without the bitter white pith.

Ingredient Jobs at a Glance

Before you measure, it helps to see what each ingredient contributes to the pastry, custard, aroma, and browning.

Ingredients for Portuguese custard tarts including puff pastry, egg yolks, milk, cream, sugar, cinnamon, lemon peel, and cornstarch.
Before you start, note the jobs: puff pastry builds layers, egg yolks enrich the custard, and cinnamon-lemon syrup gives pastéis de nata their aroma.

For the pastry

  • All-butter puff pastry: The shortcut I would use first. You need about 14 ounces / 400 grams for 12 tarts.
  • Flour for dusting: Use just enough to roll the pastry without sticking. Too much flour can make the pastry dry.
  • Butter or oil for greasing, if needed: If your tin is not reliably nonstick, grease it lightly. Heavy greasing can smoke at this temperature.

For the custard filling

  • Whole milk: Gives the custard body without making it too heavy.
  • Heavy cream: Adds richness. You can replace it with the same amount of whole milk for a lighter tart.
  • Egg yolks: The heart of the filling. They give the custard its golden color, soft richness, and bakery-style texture.
  • Sugar: Sweetens the custard and helps the tops caramelize.
  • Water: Used to make the sugar syrup.
  • Cornstarch or flour: Stabilizes the custard so it can handle aggressive oven heat.
  • Cinnamon stick: Infuses the syrup gently so the spice tastes warm, not dusty.
  • Lemon peel: Adds the quiet floral lift that keeps the custard from tasting flat. Use only the yellow peel; the white pith can taste bitter.
  • Vanilla: Optional. Cinnamon and lemon should still be the main aroma.
  • Salt: A small pinch keeps the custard from tasting flat.

How sweet should the custard be?

Use 150 grams sugar for a balanced home-style custard or 175 grams for a sweeter, more caramelized bakery-style tart. I would not reduce below 150 grams on the first batch because sugar helps the tops brown and keeps the custard glossy.

Why starch matters

Portuguese custard tarts bake hotter than most custards. Without a little starch, the eggs are more likely to curdle before the tops have time to blister. Cornstarch gives a clean, smooth custard; flour gives a slightly more traditional, thicker body.

You are not trying to make the custard thick. A little starch simply gives it enough structure to stay glossy and soft when the oven gets aggressive. Before it reaches the oven, the filling should smell gently of lemon peel and cinnamon.

If you love the silky-custard side of this dessert, our crème brûlée recipe is another place where egg yolks, sugar, and heat need to be handled carefully.

Equipment That Helps the Pastry Crisp

You do not need Portuguese tart tins, but you do need metal. A standard metal muffin tin on a preheated tray works better than silicone because it pushes heat into the pastry base more quickly.

Tart Tins vs Muffin Tin Depth

The deeper the cup, the more discipline you need with a thin base and restrained custard fill.

Shallow metal tart tins beside a deeper metal muffin tin, each holding a shaped puff pastry shell.
Because muffin tins are deeper than traditional tart tins, keep the pastry thinner and the custard fill lower to avoid a heavy base.
  • Shallow metal Portuguese tart tins: Ideal if you have them. They are shallow rather than deep, which helps the pastry and custard finish at the same time.
  • Standard metal muffin tin: Works well, but treat it like a shallow tart mold. Press the pastry up the sides, then keep the custard level modest.
  • Rolling pin: For thinning and shaping the puff pastry.
  • Small and medium saucepans: One for the syrup, one for the milk-starch base.
  • Whisk and fine-mesh sieve: For a smooth, lump-free custard.
  • Measuring jug with a spout: Makes filling cleaner.
  • Thermometer: Helpful for syrup, but not required.
  • Heavy baking sheet, pizza stone, or baking steel: Adds stronger heat from below.

If your muffin tin is deep, do not try to fill the whole depth. A lower fill gives the pastry a better chance to crisp before the custard becomes firm. Using a deeper tin? Pay special attention to the fill-level visual guide, because tin depth changes how quickly the base crisps.

Why the Hot Tray Matters

The hot tray acts like a heat reservoir, giving the pastry base a stronger start than an oven rack alone.

Dark baking steel or heavy metal tray prepared in a home oven for baking Portuguese custard tarts.
The hot tray is not just a baking surface; it gives the bottom crust a head start before the custard weighs the pastry down.

The Best Pastry Shortcut for Home Bakers

Traditional pastéis de nata use laminated dough that creates crisp, spiraled layers. It is beautiful, but it takes time. For this home version, all-butter puff pastry gives the best balance of ease and texture.

The pastry shortcut only works if you treat it seriously: cold, thin, and baked hard. The goal is not a thick pastry cup. You want a thin shell that bakes into layers, with a rim that flakes before the custard gives way.

Closest bakery-style pastry

Homemade laminated pastry or rough puff gives you the most control over the layers, but it takes more rolling, folding, chilling, and butter handling.

The shortcut I would use first

Ready-made all-butter puff pastry is the easiest good option for a first home batch. Keep it cold but flexible, roll thick sheets thinner before shaping, and chill the shells before filling.

Choosing Store-Bought Puff Pastry

Choose all-butter puff pastry when you can, then treat it like a serious ingredient: cold, thin, and handled quickly.

All-butter puff pastry sheet unrolled on a floured counter with a rolling pin nearby.
All-butter puff pastry is the shortcut, but cold handling is the trick; warm pastry loses definition before it reaches the oven.

If your puff pastry sheet is very wide, cut it into two rectangles first, roll each rectangle into a log, and cut 6 pieces from each log. If cutting rounds instead of using the log method, avoid twisting the cutter because that can seal the pastry layers.

Do Portuguese custard tarts need to be blind baked?

No. The custard and pastry bake together. The key is to keep the pastry cold, press the base thin, fill only when the oven is hot, and bake on a preheated metal tray so the bottom gets enough heat.

Fastest option: frozen Portuguese egg tart shells

Frozen tart shells can work when you want the fastest version or already have Portuguese egg tart shells on hand. Keep them cold, fill them lower than you think, bake on a hot tray if allowed, and start checking early. The shell size decides the bake time more than the clock does.

What to avoid

Shortcrust pastry can make a nice custard tart, but it will not give the flaky Portuguese-style shell. Phyllo pastry can make a crisp mini custard pastry, but it is not the same as a pastel de nata.

Back to top ↑

How to Make Portuguese Custard Tarts Without Soggy Bottoms

Think of the recipe in four moves: perfume the syrup, loosen and stabilize the custard, shape cold pastry shells, then bake everything hard and fast.

1. Make the cinnamon-lemon syrup

Combine sugar, water, a cinnamon stick, and strips of lemon peel in a small saucepan. Bring it to a simmer and cook until the syrup reaches about 225°F / 107°C.

If you do not have a thermometer, look for a syrup that is clear, glossy, and slightly thickened. When a drop is cooled for a moment and rubbed between your fingers, it should feel sticky and pull into a thin thread. The syrup should smell like warm lemon peel and cinnamon, not caramel.

Make the Cinnamon-Lemon Syrup

Clear syrup gives the custard aroma and sweetness without pushing it toward burnt sugar before the tarts even bake.

Clear syrup in a saucepan with lemon peel, cinnamon stick, and a spoon lifting a thin syrup thread.
The syrup should look clear, not amber; meanwhile, lemon peel and cinnamon quietly flavor the custard without making it taste heavy.

2. Make the custard filling

Whisk a little cold milk with the cornstarch until smooth. Warm the remaining milk and cream in a saucepan until steaming, then whisk in the starch mixture. Cook only until barely thickened, like thin cream. It should pour easily but no longer look like plain milk. If it looks like pudding before baking, it has gone too far.

If the milk base gets too thick, whisk in 1–2 tablespoons of milk to loosen it before adding the yolks. It should be pourable enough to strain easily.

Cook the Custard to Thin Cream

The custard base should coat the whisk lightly but still run back into the pan in a smooth stream.

Pale custard mixture coating a whisk and flowing back into a saucepan in a thin stream.
Look for a pourable custard base at this stage; if it sits like pudding, the finished center can bake too firm.

Take the pan off the heat before adding the syrup and yolks. Slowly whisk the warm syrup into the milk mixture, then let it cool for a few minutes. Whisk the egg yolks in a separate bowl, then slowly add the warm milk-syrup mixture while whisking constantly. This gentle tempering keeps the eggs from scrambling.

Strain the custard through a fine-mesh sieve into a jug. If it is very foamy after whisking, let it sit for a few minutes and skim the top before filling the shells.

Strain for Smooth Custard

This is the last chance to remove tiny lumps before the filling goes into the fragile pastry shells.

Custard being poured through a fine mesh sieve into a jug on a warm kitchen counter.
Straining is a small step with a big payoff: it catches tiny lumps so the Portuguese egg tart filling bakes silkier.

3. Shape the pastry shells

This is the one step to slow down for. A thin, even pastry base matters more than a perfectly neat rim.

Keep the puff pastry cold but flexible. If it is frozen, thaw it in the refrigerator until it can be rolled without cracking. If the pastry feels greasy or floppy, pause and put it back in the fridge.

Lightly dust the counter with flour and roll the pastry just enough to even it out. If it is thick, roll it to about 2–3 mm. Roll the pastry tightly into a log, then cut the log into 12 equal pieces.

Roll the Puff Pastry Into a Tight Log

The tighter the log, the clearer the spiral pattern will be when each piece is pressed into the tin.

Hands rolling a sheet of puff pastry into a tight log on a lightly floured work surface.
Rolling the pastry into a tight log creates the spiral that later turns into flaky layers around each pastel de nata shell.

Slice the Spiral Pieces

Each cut piece should show visible layers, because those layers become the flaky sides of the tart shell.

Cut puff pastry log pieces with visible spiral layers resting on a floured kitchen counter.
Once sliced, each spiral shows where the layers are; press from that center point so the pastry spreads evenly up the tin.

For a standard muffin tin, each piece will be roughly 30–35 grams. For shallow tart tins, you may need slightly less pastry per shell, or you must press it very thin.

Place one piece into each muffin cup or tart tin, cut side down. Use your thumbs to press the pastry from the center outward and up the sides. Press instead of stretching. The base should look almost too thin; that is what helps it crisp before the custard fully sets.

Press Shells Thin, Not Tall

Pressing outward gives you a thin bottom and steady sides; stretching upward usually makes the pastry shrink back.

Hands pressing puff pastry into a metal muffin tin to shape a thin Portuguese custard tart shell.
Press outward instead of stretching upward; that keeps the base thin while building enough side structure to hold the custard.

Check the Thin Base

Before filling, check the bottom of each shell; this is where most muffin-tin tarts turn soft if the pastry is too thick.

Empty raw puff pastry shell pressed into a metal muffin tin with a thin base and even sides.
This raw shell shows the cue clearly: the base looks very thin now so it can crisp later instead of steaming under the filling.

Chill the shaped shells for 20–30 minutes before filling. If you have had soft pastry bottoms before, also read the soggy-bottom fixes before baking the next tray.

Chill Before Filling

Cold shaped shells hold their layers better when the hot oven starts pushing butter and steam through the pastry.

Chilled empty puff pastry shells in a metal muffin tin with a jug of custard nearby.
At this point, pause and chill the shells; cold pastry holds its shape better when the hot custard and oven heat hit it.

4. Fill and bake until blistered

Preheat the oven to 500°F / 260°C. If your oven safely goes hotter and you know it runs evenly, you can use a higher setting, but start checking early. Place a heavy baking sheet, pizza stone, or baking steel in the oven while it preheats. Use bare metal, stone, or steel under the tin; skip parchment unless it is rated for very high heat.

When the oven is fully hot, place the chilled tin on the preheated baking sheet. Fill each shell about three-quarters full, usually 2–3 tablespoons custard depending on tin size. Save any extra custard for a small ramekin; the tarts bake better with space to puff.

Fill Below the Rim

Leave visible space at the top so the custard can rise without flooding the pastry layers.

Custard being poured into puff pastry tart shells in a metal muffin tin, stopping below the rim.
Stop below the rim. That three-quarter fill gives the custard room to puff while keeping overflow away from the pastry layers.

Avoid the Overfilled Shell

A little extra custard in the jug is better than custard bubbling over and sealing the pastry layers shut.

Two raw Portuguese custard tart shells in a metal tin, one filled lower and one filled close to the rim.
The lower fill is the safer one; once custard spills over the edge, it can glue the layers together and soften the base.

Bake on Hot Metal

Once filled, the tin should go straight onto the hot tray so the pastry base gets immediate heat from below.

Filled Portuguese custard tart shells in a muffin tin being placed onto a hot tray inside a home oven.
After filling, move fast: the tin should land on the hot tray while the pastry is still cold and the oven is fully heated.

Bake until the pastry is deeply golden at the rim, the custard has puffed in small spots, and the tops are blistered with dark caramelized patches. In a very hot oven, this usually takes 10–15 minutes.

Watch the Custard Puff and Brown

Uneven rising is normal during baking; the custard settles as it cools, so judge the tart by the rim, top, and texture together.

Portuguese custard tarts baking in a metal muffin tin inside a warm oven with glossy custard and browning pastry edges.
During baking, the custard may rise unevenly before it settles; early caramel spots and golden rims tell you the heat is working.

Pull the tarts while the centers still look glossy and gently set. If the pastry is baked but the tops are still pale, broil for 20–60 seconds while watching closely. Only broil if your tin is broiler-safe, and do not walk away.

If your tops are more golden than deeply blistered, the tarts can still be delicious. Crisp pastry and creamy custard matter more than perfect bakery markings. If the tops stay pale after the pastry is baked, use the guidance in the blistered-tops section before extending the bake too far.

How to Get Blistered Tops in a Home Oven

The oven is not just cooking these tarts; it is creating the contrast. Too gentle, and you get pale custard and soft pastry. Hot enough, and the edges crisp while the top blisters.

Aim for Glossy Blistered Tops

Dark spots are a doneness cue here, as long as they look caramelized and glossy rather than dry or smoky.

Close-up of Portuguese custard tarts with glossy golden custard, dark blistered spots, and flaky pastry rims.
These dark patches are the signature finish, not a mistake: glossy caramelized blisters over a creamy pastel de nata center.
Oven situationWhat to do
Oven reaches 550°F / 290°CBake fast and watch closely. The tarts can brown quickly.
Oven reaches 500°F / 260°CUse a hot tray or stone. Broil briefly at the end if needed.
Oven maxes around 240°C / 465°FBake a little longer, then use the grill or broiler for color.
Tops brown but bases are softUse a lower rack or stronger preheated tray next time.
Bases crisp but tops are paleMove higher or broil briefly at the end.

Start on the upper-middle rack if your oven browns gently. If your pastry bottoms are soft, move the next batch slightly lower and keep the hot tray underneath.

Your oven, tin, and pastry brand matter more here than they do in many simple bakes. If your first batch is not perfect, adjust the heat and rack before changing the whole recipe.

How to Prevent Soggy Bottoms

Soggy pastry usually comes from warm pastry, a thick base, too much filling, silicone molds, or weak bottom heat. Fill the shells only when the oven is fully hot, so the custard does not sit long enough to soften the pastry.

For a crisp base, press the pastry thin, chill the shaped shells, use metal tins, and bake on a preheated tray or stone.

Read a Pale Underside

A soft or pale bottom is a clue, not a failure; it tells you where to adjust heat, pastry thickness, or rack position.

Hand holding a Portuguese custard tart to show a pale underside beside tarts with golden pastry on a kitchen counter.
A pale underside points to the fix for next time: stronger bottom heat, thinner pastry, or a slightly lower oven rack.

If your first batch tastes good but the bottoms are soft, do not give up. Next time, press the base thinner, chill the shells longer, and bake on stronger bottom heat.

Confirm a Crisp Base

The underside should look dry and layered enough to hold the custard without bending like soft dough.

Portuguese custard tart held sideways to show a crisp golden base, flaky pastry layers, and set custard.
This is the base you want: golden, dry-looking, and layered enough to support the custard without turning doughy.

Why Do Bakery Portuguese Custard Tarts Taste Different?

Bakery tarts often taste different because bakeries have hotter ovens, specialized shallow tins, practiced pastry shaping, carefully laminated dough, and tarts served soon after baking.

At home, the closest path is not to chase a secret ingredient. Focus on thin cold pastry, smooth strained custard, strong oven heat, hot metal underneath, and eating the tarts warm. The best tops look dramatic, but they should taste caramelized, not burnt.

Back to top ↑

Troubleshooting Portuguese Custard Tarts

Use this section after baking, not as a reason to worry before you start. If something goes wrong, read the tart as a clue. A soft base, pale top, or firm custard each points to a different adjustment. Still preparing the tray? Go back to the step-by-step method and follow the visual cues there.

ProblemLikely causeFix
Custard curdledEggs heated too quickly or tarts overbakedTemper slowly, add yolks off heat, use starch, strain, and pull before the filling looks dry
Custard tastes eggyOverbaking or not enough aromaUse lemon peel, cinnamon, optional vanilla, and avoid baking until rubbery
Tops did not blisterOven too cool, tarts too low, filling too deep, or sugar reduced too muchUse a hotter oven, upper-middle rack, enough sugar, or a brief broiler finish
Pastry is soggyWarm pastry, thick base, too much filling, silicone mold, or weak bottom heatChill shells, press the base thin, use metal tins, and bake on a hot tray
Pastry shrankPastry stretched, too warm, or not chilledPress instead of stretching, keep pastry cold, and chill shaped shells before baking
Filling overflowedShells filled too highFill lower next time and leave room for bubbling
Custard is firm or rubberyOverbakedPull the tarts when the centers are just set and still glossy
Butter leaked or smokedVery buttery pastry, too much greasing, unsafe parchment, or overflowUse a bare hot tray underneath, grease lightly, and avoid overfilling

Make Ahead, Storage, Freezing, and Reheating

Can you make Portuguese custard tarts ahead?

Yes, but the best texture comes from baking them close to serving time. You can shape the pastry shells up to 24 hours ahead, cover them, and refrigerate them. You can also make the custard ahead and refrigerate it. Keep pastry and custard separate until baking.

Can you freeze unbaked pastry shells?

Yes. Shape the pastry shells, freeze them until firm, then transfer them to a freezer-safe container. For best control, bake shaped shells from refrigerated-cold rather than rock-hard frozen. If baking from frozen, add a few minutes and watch the pastry base closely.

What if you have extra custard?

If you have a little extra custard, pour it into a small ramekin and bake it separately in a gentler oven, or discard it if it has touched raw pastry or your hands. The shells bake better with room to puff.

How to store and reheat leftovers

Portuguese custard tarts are best warm, within a few hours of baking. If you have leftovers, let them cool completely, then refrigerate them in an airtight container. Reheat at 350°F / 175°C in an oven or air fryer until the pastry crisps. Avoid the microwave because it makes the pastry soft.

They are still good later, but they are never more themselves than when they are warm and the pastry is dry and crisp.

Can you freeze baked tarts?

Yes. Freeze baked, cooled tarts in a single layer, then store in a freezer-safe container. Reheat from frozen in the oven until hot and crisp. The texture will not be quite as perfect as freshly baked, but it is still much better than microwaving.

Shortcut Variations

With ready-made puff pastry

This is the main shortcut used in this recipe. Choose all-butter puff pastry if possible, roll it thin, keep it cold, and bake it hot. Ready-made puff pastry will not be exactly the same as traditional handmade dough, but it can still make a crisp, flaky, satisfying tart.

With frozen tart shells

Frozen Portuguese egg tart shells are useful when you want the fastest version. Follow the package instructions, keep the filling below the rim, and bake hot. A spoonful of leftover custard is better than an overfilled tart.

With ready-made custard

Ready-made custard is useful in the right dessert, but this is not its best job. It is already thickened, usually too soft for high-heat blistering, and will not set like yolk custard. Save it for softer custard desserts, not pastel de nata filling.

As one large tart

You can make one large tart, but it becomes a different dessert. A large tart is closer to a custard pie; individual tarts give you more crisp edges, more caramelized tops, and a better custard-to-pastry balance.

Without whipping cream

You can replace the cream with the same amount of whole milk. The custard will be lighter and slightly less rich, but it will still work. Keep the yolks and starch in place; they give the custard its rich but stable texture.

What to Serve with Portuguese Custard Tarts

Serve them warm and keep the pairing simple. Espresso, black coffee, or a homemade cappuccino gives the sweet custard a bitter edge. A chai latte works if you want to lean into the cinnamon warmth.

Serve Warm with Coffee or Chai

Pair the sweet custard with something gently bitter or spiced so the caramelized top tastes even deeper.

Portuguese custard tarts served on a plate with coffee, chai latte, lemon slices, and cinnamon sticks nearby.
Serve the tarts warm with coffee, espresso, or chai; the gentle bitterness cuts through the sweet custard and caramelized top.

If you are building a dessert table, add fresh berries, orange slices, or another crisp warm dessert like our churros recipe. But the tarts themselves should be the thing people reach for first.

The moment you are chasing is small but unmistakable: the rim crackles when you lift the tart, the custard trembles slightly under the dark spots, and the first bite is hot enough to make you slow down. That is the point of all the chilling, pressing, heating, and watching.

What Success Looks Like

When the center holds softly and the rim flakes, the tart has the contrast this recipe is built around.

Broken open pastel de nata on a plate showing creamy custard filling and flaky pastry layers.
When you break one open, the center should hold softly like cream, while the pastry flakes instead of bending.

Back to top ↑

Portuguese Custard Tarts Recipe

This is the home-oven version to make first: all-butter puff pastry pressed thin, cinnamon-lemon yolk custard strained until smooth, and enough heat to blister the tops before the centers turn firm.

  • Yield: 12 tarts
  • Prep time: 40 minutes
  • Chill time: 25 minutes
  • Cook time: 10–15 minutes
  • Total time: About 1 hour 20 minutes
  • Tin: shallow metal tart tins or a 12-cup metal muffin tin
  • Rack: upper-middle to start; move lower next time if bases are soft
  • Course: Dessert
  • Cuisine: Portuguese

Ingredients

For the pastry

  • 14 ounces / 400 grams all-butter puff pastry, thawed if frozen but still cold
  • 1–2 teaspoons flour, for dusting
  • Butter or neutral oil, for lightly greasing the tin if needed

For the cinnamon-lemon syrup

  • 3/4 cup / 150 grams granulated sugar, or up to 175 grams for a sweeter bakery-style tart
  • 1/3 cup / 80 ml water
  • 1 cinnamon stick
  • 2 wide strips lemon peel, yellow part only

For the custard

  • 1 1/4 cups / 300 ml whole milk, divided
  • 1/2 cup / 120 ml heavy cream, or replace with another 120 ml whole milk
  • 2 1/2 tablespoons / 20 grams cornstarch, preferred for a smooth custard; or 3 tablespoons / 24 grams all-purpose flour
  • 5 large egg yolks
  • 1 teaspoon vanilla extract, optional
  • Pinch of salt
  • Ground cinnamon or powdered sugar, for serving, optional

Instructions

Make the Cinnamon-Lemon Custard

  1. Make the syrup. Add the sugar, water, cinnamon stick, and lemon peel to a small saucepan. Bring to a simmer over medium heat and cook until the syrup reaches about 225°F / 107°C. If you do not have a thermometer, cook until the syrup looks clear, glossy, and slightly thickened. Remove from the heat and let it cool for a few minutes. Remove the cinnamon stick and lemon peel. You want clear syrup, not caramel.
  2. Make the milk base. In a small bowl, whisk 1/4 cup / 60 ml of the milk with the cornstarch until smooth. Add the remaining milk and cream to a medium saucepan and warm until steaming. Whisk in the cornstarch mixture and cook gently, whisking constantly, only until barely thickened, like thin cream. It should pour easily but no longer look like plain milk. If it looks like pudding before baking, it has gone too far. If using flour instead of cornstarch, cook the milk base for an extra minute on low heat while whisking, but keep it pourable.
  3. Add the syrup. Take the pan off the heat. Slowly whisk the warm syrup into the milk mixture. Let the mixture cool for 5–10 minutes so it is warm but not very hot.
  4. Add the egg yolks. Whisk the egg yolks in a separate bowl. Slowly pour in the warm milk-syrup mixture while whisking constantly. Add vanilla and a pinch of salt. Strain the custard through a fine-mesh sieve into a jug. If the custard is very foamy, let it sit for a few minutes and skim the top before filling the shells.

Shape and Chill the Pastry Shells

  1. Shape the pastry. Lightly flour the counter. Roll the puff pastry just enough to even it out. If the pastry is thick, roll it to about 2–3 mm. If the sheet is very wide, cut it into two rectangles first. Roll into one or two tight logs and cut into 12 equal pieces. Place one piece into each muffin cup or tart tin, cut side down. Press from the center outward and up the sides, making the base thin and the sides even. The base should look almost too thin; that is what helps it crisp before the custard fully sets.
  2. Chill the shells. Refrigerate the shaped pastry shells for 20–30 minutes. Meanwhile, preheat the oven to 500°F / 260°C. If your oven safely goes hotter and you know it runs evenly, you can use a higher setting, but start checking early. Place a heavy baking sheet, pizza stone, or baking steel in the oven while it preheats.

Fill, Bake, and Cool the Tarts

  1. Fill the shells. Place the chilled tin on the preheated baking sheet. Pour custard into each pastry shell, filling only about three-quarters full, usually 2–3 tablespoons depending on tin size. When in doubt, fill a little less.
  2. Bake. Bake for 10–15 minutes, watching closely near the end, until the pastry is deeply golden at the rim, the custard has puffed in spots, and the tops are blistered with dark caramelized patches. If the pastry is baked but the tops are still pale, broil for 20–60 seconds while watching closely. Only broil if your tin is broiler-safe, and do not walk away.
  3. Cool briefly. Let the tarts cool for about 10 minutes before eating; the custard will be extremely hot straight from the oven. Serve warm, plain or dusted with cinnamon or powdered sugar.

Cool Briefly Before Serving

A short rest helps the custard settle, but the best texture comes while the pastry is still crisp.

Baked Portuguese custard tarts cooling in a metal muffin tin with blistered tops and flaky edges.
Let the tarts rest briefly in the tin so the custard settles; then lift them out while the pastry is still crisp.

Recipe Notes

  • Keep the pastry cold: If the pastry becomes soft or greasy while shaping, chill it before continuing.
  • Press the base thin: The base should look almost too thin before baking.
  • Use bottom heat: A preheated tray, stone, or steel helps the pastry base crisp.
  • Do not overfill: Three-quarters full is enough. Overfilled shells can bubble over and turn the pastry soggy.
  • Look for doneness: The rim should be deeply golden, the top spotted, and the center glossy rather than dry.
  • Adjust after the first batch: If the tops brown before the bases crisp, bake the next batch slightly lower. If the bases crisp but the tops stay pale, finish briefly under the broiler.
  • Strain the custard: This gives the smoothest filling and removes any tiny cooked egg bits.
  • Best eaten warm: The pastry is crispest shortly after baking.

If you try these, leave a comment with your oven temperature, tin type, pastry type, sugar amount, and bake time. These tarts depend so much on oven heat and tin shape that your notes can genuinely help the next reader get a better batch.

FAQs

Are Portuguese custard tarts the same as pastéis de nata?

Yes. Portuguese custard tarts are commonly called pastéis de nata. One tart is a pastel de nata, and more than one are pastéis de nata.

What is the difference between pastel de nata and pastéis de nata?

Pastel de nata is singular. Pastéis de nata is plural. You may also see the plural written without the accent as pasteis de nata.

Are Portuguese egg tarts the same as Chinese egg tarts?

Not exactly. Portuguese custard tarts usually have flaky laminated pastry, richer custard, and blistered tops. Chinese egg tarts are often smoother, paler, and may use shortcrust or puff pastry.

Can I use ready-made puff pastry?

Yes. Ready-made all-butter puff pastry is the easiest good shortcut for a first home batch. Roll it thin, keep it cold, and bake it hot.

Can I use frozen Portuguese egg tart shells?

Yes. Frozen shells are convenient. Use the package instructions, fill lower than you think, and start checking early because small shells may bake faster than muffin-tin tarts.

Can I make these in a muffin tin?

Yes. A standard metal muffin tin works, but treat it like a shallow tart mold. Press the pastry thinly, especially at the base, and keep the custard level modest.

What oven temperature is best?

Use 500°F / 260°C if your oven allows it. If your oven goes hotter, check early. If it runs cooler, use a hot tray and finish briefly under the broiler if the tops stay pale.

Do Portuguese custard tarts need to be blind baked?

No. The pastry and custard bake together. Keep the pastry cold, fill only when the oven is hot, and bake on a preheated tray so the base gets enough heat.

Why did the tops not blister?

The oven may not have been hot enough, the tarts may have been too low in the oven, the filling may have been too deep, or the sugar may have been reduced too much.

Why is my pastry soggy?

The pastry may have been too warm, too thick at the base, overfilled, or baked without enough heat from below. The next batch usually improves with colder shells, a thinner base, and a hotter tray.

Why did my custard curdle?

The eggs were probably heated too quickly or the tarts were overbaked. Add yolks off heat, strain the custard, and pull the tarts before the centers look dry.

Do I need a thermometer?

A thermometer helps with the syrup, but you can make the recipe without one. Cook the syrup until it is clear, glossy, slightly thickened, and forms a thin thread when cooled between your fingers.

Can I use whole eggs instead of yolks?

Egg yolks give the best rich, silky texture. Whole eggs can make the filling firmer and more eggy, so the custard will feel less luxurious.

How do I reheat Portuguese custard tarts?

Reheat at 350°F / 175°C in an oven or air fryer until the pastry crisps. Avoid the microwave because it makes the pastry soft.

Posted on — Leave a comment

Cinnamon Roll Recipe

Rectangular pan of homemade cinnamon rolls with cream cheese icing melting into the swirls.

These homemade cinnamon rolls are for the exact moment you want warm, pull-apart rolls with gooey cinnamon centers, tender edges, and cream cheese icing melting into the swirls — without the raw-dough gamble in the middle of the pan.

Most cinnamon rolls go wrong in two quiet ways: the dough gets over-floured, or the pan comes out when the tops look done but the center is still underbaked. This recipe keeps both in check with soft elastic dough, a full second rise, and a clear center-roll doneness cue.

You can make them the same day for a cozy baking project, or shape them at night and bake them fresh in the morning. They fit a slow weekend, a holiday morning, a birthday breakfast, or any day when a warm pan of cinnamon rolls is the whole point.

Gooey cinnamon roll pulled apart to show a soft baked center
This is the key promise: gooey cinnamon swirls with a center that looks baked and soft, not wet or raw.

Quick Answer: How to Make Soft Cinnamon Rolls

To make soft homemade cinnamon rolls, mix a rich yeast dough with warm milk, butter, egg, sugar, flour, and yeast. Knead until the dough is smooth and a little tacky, then let it rise until doubled. Roll it out, spread with softened-butter cinnamon sugar filling, cut into 12 rolls, and let the shaped rolls rise again until rounded and puffy.

Bake in a 9×13-inch pan at 350°F / 175°C for 24–28 minutes. Look for lightly golden tops, but use the center roll as the better cue. The best target is about 190°F / 88°C, which means the rolls are baked through while staying tender.

Spread cream cheese icing over the warm rolls after 5–10 minutes. For extra-moist centers, pour ⅓ cup / 80 ml warm heavy cream around the risen rolls just before baking, or use up to ½ cup / 120 ml for a richer, gooier pan.

The promise: soft, gooey cinnamon rolls with tender edges, creamy icing, and a center that bakes through without turning the pan dry.
Avoid the three big mistakes: do not add flour just to make the dough dry, do not melt the filling butter, and do not pull the pan just because the tops look golden.

Cinnamon Roll Recipe Card

Soft, gooey homemade cinnamon rolls that bake through in the center, with plush yeast dough, a brown sugar cinnamon swirl, optional warm cream for extra-moist centers, and cream cheese icing that melts into the rolls while they are still warm. Serve them while the icing is still soft and the centers are warm enough to pull apart in ribbons.

Prep Time35 minutes
Rise Time1 hour 45 minutes to 2 hours 30 minutes
Bake Time24–28 minutes
Total TimeAbout 2 hours 50 minutes to 3 hours 45 minutes
Yield12 rolls

Ingredients

Dough Ingredients

  • 1 cup / 240 ml warm whole milk
  • 2¼ teaspoons / 7 g instant yeast or active dry yeast
  • ⅓ cup / 65–70 g granulated sugar
  • 5 tablespoons / 70 g unsalted butter, melted and slightly cooled
  • 1 large egg
  • 1 large egg yolk
  • 4 cups / about 480 g flour, preferably bread flour for taller rolls or all-purpose flour for a softer homemade texture, plus 1–2 tablespoons only if needed
  • 1 teaspoon / 6 g fine salt
  • Butter or neutral oil, for greasing the bowl and pan

Cinnamon Filling

  • ⅓ cup / 75 g unsalted butter, softened
  • ¾ cup / 150 g packed brown sugar
  • 2 tablespoons / 14–16 g ground cinnamon
  • ¼ teaspoon fine salt
  • Optional: 1 teaspoon flour or cornstarch to help hold the filling together

Cream Cheese Icing

  • 4 oz / 113 g cream cheese, softened
  • 4 tablespoons / 55 g unsalted butter, softened
  • Powdered sugar, 1 cup / 120 g, plus ¼ cup / 30 g more for thicker icing
  • Vanilla extract, 1 teaspoon
  • Milk or cream, 1–3 tablespoons as needed
  • Pinch of salt

Optional Heavy Cream Upgrade

  • ⅓ cup / 80 ml heavy cream for softer rolls, or up to ½ cup / 120 ml for a richer, gooier pan

Instructions

Dough, Filling, and First Rise

  1. Warm the milk. The milk needs to feel comfortably warm, not hot. For active dry yeast, stir the yeast into the warm milk with a pinch of sugar and rest for 5–10 minutes, until foamy. Instant yeast can go directly into the dough.
  2. Make the dough. In a large bowl or stand mixer bowl, combine warm milk, yeast, sugar, melted butter, egg, and egg yolk. Add flour and salt. Mix until a rough dough forms.
  3. Knead. Knead for 8–10 minutes by hand or 5–7 minutes in a stand mixer on low-medium speed, until the dough is smooth, stretchy, and slightly tacky. Add extra flour only 1 tablespoon at a time if the dough is sticking heavily.
  4. First rise. Place the dough in a lightly greased bowl. Cover with plastic wrap, a damp clean towel, or a lid so the surface does not dry out. Let rise for 60–90 minutes, or until doubled. Active dry yeast may rise a little more slowly than instant yeast, so give the dough extra time if needed.

Shape, Bake, and Ice

  1. Make the filling. Mix softened butter, brown sugar, cinnamon, and salt into a thick paste. When the filling is hard to spread, let it sit at room temperature for a few minutes rather than melting it.
  2. Roll and fill. Roll the dough into a rectangle about 12×18 inches. Spread the filling evenly, leaving a small border on one long edge.
  3. Shape. Roll from the long side into a snug log. Cut into 12 even rolls using unflavored dental floss, clean thread, or a sharp knife. Aim for pieces about 1½ inches thick.
  4. Second rise. Place rolls in a greased 9×13-inch pan. Cover and let rise for 45–60 minutes, until puffy and lightly touching.
  5. Add heavy cream, if using. Pour warm heavy cream around the risen rolls. You should see cream around the base, not a flooded pan.
  6. Bake. Bake at 350°F / 175°C for 24–28 minutes, until lightly golden and the center roll reaches about 190°F / 88°C.
  7. Make icing. Beat cream cheese and butter until smooth. Add powdered sugar, vanilla, salt, and enough milk or cream to make a soft, spreadable icing.
  8. Ice and serve. Cool rolls for 5–10 minutes, then spread icing over the warm rolls.

Success Notes

  • Softer rolls: Start with the listed flour and add more only if the dough is sticking heavily.
  • Extra-gooey rolls: Use the warm heavy cream option, but keep it to ½ cup / 120 ml or less.
  • Thicker frosting: Wait 10–15 minutes before icing.
  • Overnight option: Shape, cover, refrigerate, then let the rolls become puffy at room temperature before baking.

This is the finished serving cue: soft dough, a visible cinnamon swirl, and cream cheese icing that still looks creamy rather than dry.

Single homemade cinnamon roll with cream cheese icing and soft cinnamon swirl
A single iced roll shows the serving texture: soft dough, visible cinnamon swirl, and creamy icing.

Cinnamon Rolls at a Glance

Question Answer
Yield 12 cinnamon rolls
Pan size 9×13-inch baking dish
Oven temperature 350°F / 175°C
Bake time 24–28 minutes
Total time About 2 hours 50 minutes to 3 hours 45 minutes, including cooling before icing
Doneness cue Center roll reaches about 190°F / 88°C
Flour choice Bread flour for taller rolls; all-purpose flour for a softer homemade texture
Yeast choice Instant yeast for ease; active dry yeast also works
Filling style Softened-butter brown sugar cinnamon paste
Icing Cream cheese icing, with a no-cream-cheese option below
Make-ahead option Shape and refrigerate overnight before baking

Choose Your Cinnamon Roll Path

Use the same base recipe, then adjust the timing or finish depending on the kind of cinnamon rolls you want today. Pick the path that matches what you care about most: a same-day bake, brunch timing, extra-gooey centers, thicker frosting, or avoiding a doughy middle.

If you want… Do this
Same-day soft cinnamon rolls Start earlier in the day and bake after two complete rises.
Overnight cinnamon rolls for brunch Shape tonight, chill, then bake once puffy in the morning.
Gooey cinnamon rolls with heavy cream Pour warm cream around the risen rolls before baking.
Cinnamon rolls with thick cream cheese frosting Cool the rolls 10–15 minutes before icing.
Cinnamon rolls without a doughy middle Check the center roll; golden tops are not enough.

What This Recipe Is Built Around

Recipe notes: this cinnamon roll recipe is built around a 9×13-inch pan, 12 rolls, a soft enriched dough, and a center-roll doneness cue. Bread flour gives taller rolls; all-purpose flour gives a softer homemade crumb. The heavy cream option is kept moderate so the rolls stay gooey without turning soggy at the bottom.

This is not a no-yeast shortcut roll and not a canned-roll hack. It is a soft yeast cinnamon roll recipe built for a gooey swirl, tender edges, and a center that bakes through properly.

The goal is simple: gooey, not doughy. Look for rolls that smell warm and cinnamon-sweet, pull apart softly, and have a center that feels baked and plush instead of wet or heavy.

Why This Cinnamon Roll Recipe Works

This recipe works because it protects both sides of the cinnamon-roll problem: enough moisture for gooey swirls, but enough structure and bake time for the middle to finish properly.

Enriching the dough with milk, butter, egg, and egg yolk gives you tenderness without turning the bread part heavy. The lightly sweet dough still has enough strength to rise well, hold its shape, and support the cinnamon filling.

Careful flour guidance prevents dry rolls. Starting with the listed amount and adding more only when the dough is truly sticking heavily keeps the dough soft enough to bake into pull-apart rolls instead of dense, dry spirals.

A softened-butter filling helps prevent leaks. When butter, brown sugar, cinnamon, and salt are mixed into a paste, the swirl stays more even. The optional spoonful of flour or cornstarch helps bind the filling so it does not immediately run into the bottom of the pan.

Pan size and oven temperature protect the center. A 9×13-inch pan gives 12 rolls enough room to rise while keeping them close enough to stay tender. Baking at 350°F / 175°C gives the center time to finish before the tops over-brown.

For the heavy cream option, the amount is controlled rather than flooded. A moderate pour adds moisture and a gooey finish while keeping the pan from turning soggy at the bottom.

The center roll is the clearest test. Top color helps, but the middle roll tells you when the pan is truly done. Aim for about 190°F / 88°C in the center.

Ingredients You Need

Every good cinnamon roll comes down to three parts working together: dough that rises soft, filling that stays in the swirl, and icing that melts just enough into the warm rolls.

Ingredients for homemade cinnamon rolls including flour, milk, butter, eggs, yeast, sugar, and cinnamon
The dough, filling, and icing are simple pantry ingredients; the texture comes from how they are handled.

Dough Ingredients

The dough uses flour, milk, yeast, sugar, butter, egg, egg yolk, and salt.

Milk makes the dough softer than water. Butter adds richness. The egg and yolk help the rolls bake up tender, while sugar lightly sweetens the dough and helps the yeast work.

Together, they make the kind of dough that bakes up soft enough to pull apart, but strong enough to hold the cinnamon swirl.

Salt is small but important. It balances the sweetness and makes the cinnamon flavor taste fuller.

Filling Ingredients

The filling uses softened butter, brown sugar, cinnamon, and a pinch of salt.

Softened butter is easier to spread and less likely to leak out. Brown sugar gives the filling a deeper, caramel-like sweetness. Light or dark brown sugar both work, though dark brown sugar gives a stronger molasses flavor.

When the filling is right, it should spread like soft cinnamon butter, not pour like syrup.

Brown sugar cinnamon filling mixed with softened butter for cinnamon rolls
Softened butter makes a spreadable cinnamon-sugar paste that is less likely to leak than melted butter.

Icing Ingredients

Cream cheese icing uses cream cheese, butter, powdered sugar, vanilla, milk or cream, and salt.

It gives the icing its tang, while butter makes it smooth. Powdered sugar thickens it, and milk or cream lets you adjust the texture.

Smooth cream cheese icing for homemade cinnamon rolls
The icing looks right when it is smooth and spreadable, not thin or watery.
Flavor tip: A tiny pinch of salt in both the filling and the icing keeps the rolls from tasting only sweet.

Useful Equipment

You do not need a professional bakery setup for homemade cinnamon rolls, but a few tools make the recipe easier and more reliable.

  • Large mixing bowl or stand mixer: either works; a mixer saves effort, but hand-kneading is fine.
  • 9×13-inch pan: the most reliable size for 12 rolls that bake evenly.
  • Rolling pin: helps roll the dough into an even rectangle.
  • Unflavored dental floss, clean thread, or a sharp knife: gives clean cuts without squashing the spirals.
  • Instant-read thermometer: useful for checking warm milk and the center roll.
  • Foil: helpful if the tops brown before the center is done.
No thermometer? You can still make these. The milk needs to feel warm, not hot. For doneness, gently pull at a seam in the center roll; it should look baked and bread-like, not wet, shiny, or paste-like.

Flour Choice for Cinnamon Rolls

Before you start mixing, flour is the one ingredient worth slowing down for. An over-floured dough is the fastest way to lose that pull-apart cinnamon roll texture.

Bread flour and all-purpose flour both work in this recipe. The choice depends on the texture you like.

Flour Works well for What to expect
Bread flour Taller, bakery-style rolls More structure, slightly chewier texture, good rise
All-purpose flour Plush homemade rolls More tender texture, easy everyday option
Excess flour Dry rolls Heavy dough, dry edges, dense texture
Gluten-free flour Separate gluten-free recipe Not a simple 1:1 swap for this dough

Think of flour as the difference between a roll that tears softly and one that feels heavy. The goal is not a dry, easy-to-handle dough; the goal is a dough that bakes up tender.

Start with the listed amount and give the dough a minute to come together before adding more. If you measure by cups, spoon flour into the cup and level it instead of scooping directly from the bag. A little tackiness is what keeps the finished rolls soft.

Instant Yeast vs Active Dry Yeast

Instant yeast keeps the dough simple because it can be mixed straight in, with no separate proofing step.

Active dry yeast also works. For reliable results, proof it first by stirring it into warm milk with a pinch of sugar. After 5–10 minutes, look for foam on the surface. If it stays flat, the yeast may be old or the milk temperature may be off.

Aim for milk around 105–115°F / 40–46°C. Warm milk helps yeast wake up, while hot milk can damage it and slow or stop the rise. In a cold kitchen, slow movement does not mean failure; the dough just needs more time. Wait for puffiness, not the timer.

How the Dough Feels When It Is Right

Dough texture is one of the biggest clues in this recipe. A soft, elastic dough gives the rolls their pull-apart texture; a dry, over-floured dough makes them heavy.

Soft elastic cinnamon roll dough after kneading
The ideal dough is smooth, elastic, and slightly tacky, not dry or stiff.
Dough cue What it means What to do
Soft, smooth, slightly tacky Ideal dough Keep going with the recipe
Sticking heavily to hands or bowl Slightly wet Add flour 1 tablespoon at a time only after kneading
Dry, stiff, or tearing Excess flour Stop adding flour and give the dough enough rise time
Tight and shrinking while rolling Gluten needs to relax Rest the dough for 5–10 minutes, then continue
Not rising after 90 minutes Cold kitchen, weak yeast, or overheated milk Move to a warmer spot and wait longer; if there is no movement, the yeast may be inactive

A little tackiness is your friend here. If the dough feels slightly messier than expected, that is usually better than a dough that feels dry and stiff.

Once the dough feels soft and elastic, the recipe gets easier. From here, you are not fighting the dough anymore — you are shaping it into the warm, cinnamon-filled pan you actually came for.

How to Make Cinnamon Rolls Step by Step

The method is simple once you know what to look for. The clock is only a guide; risen dough and a properly baked center matter more than exact minutes.

1. Make the Dough

Warm the milk until it feels comfortably warm, not hot. Combine the milk, yeast, sugar, melted butter, egg, and egg yolk. Add the flour and salt, then mix until a rough dough forms.

At first, the dough may look shaggy. As it kneads, it will become smoother and more elastic.

Shaggy cinnamon roll dough before kneading
A rough, shaggy dough is normal before kneading; it smooths out as the gluten develops.

2. Knead Until Smooth

Knead by hand for 8–10 minutes, or use a stand mixer for 5–7 minutes on low-medium speed.

Before adding more flour: keep kneading for another minute or two. Enriched dough often looks sticky before it turns smooth and elastic. Add flour only if it is still smearing heavily on the bowl or hands after kneading.

You are aiming for dough that feels soft, stretchy, and slightly tacky — not dry and stiff. This is the moment many bakers reach for extra flour, so pause before you do. If the dough is soft but manageable, you are probably on the right track.

When the dough is ready, it stretches a little before tearing and feels elastic, responsive, and light rather than stiff.

3. Let the Dough Rise

Place the dough in a lightly greased bowl. Cover the bowl with plastic wrap, a damp clean towel, or a lid so the surface does not dry out. Let it rise until doubled. This usually takes 60–90 minutes, but the dough matters more than the clock.

A cold kitchen slows the rise, while a warm kitchen speeds it up. The dough should look airy, expanded, and relaxed before you move on.

Cinnamon roll dough after the first rise, doubled and airy
After the first rise, the dough looks doubled, airy, and soft.

4. Make the Cinnamon Filling

Mix softened butter, brown sugar, cinnamon, and salt into a spreadable paste.

Softened butter keeps the filling thick enough to stay in place. When the filling is hard to spread, let it sit at room temperature for a few minutes. Avoid melting it, because melted butter is more likely to leak out.

5. Roll Out the Dough

Lightly flour the counter and roll the dough into a rectangle about 12×18 inches.

The rectangle does not need perfect corners. Even thickness matters more. If the dough keeps shrinking back, let it rest for 5–10 minutes, then continue rolling.

6. Fill, Roll, and Cut

Spread the filling evenly over the dough, leaving a small border along one long edge so the log seals cleanly.

Rolled cinnamon roll dough with brown sugar cinnamon filling spread evenly
Spread the filling evenly and leave a small border so the log seals cleanly.

Roll from the opposite long side into a snug log, then turn the seam down before cutting so the rolls hold their shape.

Cinnamon roll dough rolled into a log before cutting
A snug dough log helps the rolls hold their swirl without compressing the centers.

Cut into 12 even rolls. Dental floss or clean thread gives the neatest cuts, but a sharp knife also works. Each roll will be about 1½ inches thick, which helps the batch bake at the same pace.

Cutting cinnamon rolls with floss for clean even slices
Floss or clean thread cuts neat rolls without squashing the spiral.

The spirals do not need to look bakery-perfect before they rise. Even rolls and a little breathing room matter more than perfect swirls.

7. Let the Rolls Rise Again

Place the rolls in a greased 9×13-inch pan. Cover and let them rise until rounded and lightly touching, about 45–60 minutes.

Cinnamon rolls arranged in a 9x13 pan before the second rise
Leave a little space between the cut rolls so they can expand during the second rise.

If the rolls still look tight and small, give them more time. Look for rolls that have relaxed, expanded, and lightly pressed against each other.

Puffy cinnamon rolls after the second rise ready to bake
Before baking, the rolls look puffy, rounded, and lightly touching.

Once the dough has risen, the hard part is mostly over. From here, you are shaping, waiting for puffiness, and protecting the center of the pan.

Before baking, check this: the rolls need to look puffy, rounded, and lightly touching. This is the point where patience pays off; puffy rolls going into the oven become softer rolls coming out. If you are using heavy cream, warm it first rather than pouring it in cold.

8. Bake

Bake at 350°F / 175°C for 24–28 minutes. Look for lightly golden tops and a center roll at about 190°F / 88°C.

A better doneness moment is not just when the tops turn golden. It is when the center roll gives you a soft, steamy pull instead of a wet doughy tear.

If the tops are golden but the center is not done, cover the pan loosely with foil and bake for a few more minutes. A few extra minutes under foil is better than serving rolls that look golden on top but stay underbaked in the middle.

The kitchen will smell warm and cinnamon-sweet before the tops get deeply browned.

Baked cinnamon rolls before icing with lightly golden tops
The baked rolls look lightly golden before icing, not dark or dry-looking.

9. Ice While Warm

Let the rolls cool for 5–10 minutes before icing. The icing softens into the warm spirals, leaving some creamy pockets on top and some melted sweetness in the cinnamon layers.

Pan Size, Bake Time, and Internal Temperature

The pan affects how quickly the edges brown and how long the center needs to bake. For this recipe, a 9×13-inch pan is the safest default.

Pan Result Note
9×13-inch pan Even bake for 12 rolls Recommended for this recipe
9×9-inch pan Taller, gooier rolls Centers may need more time because the pan is crowded
Two 9-inch round pans Good for gifting or freezing Split the batch evenly
Dark metal pan Faster browning Check early and tent with foil if needed
Glass or ceramic dish Softer edges May need a few extra minutes

A reliable internal temperature for homemade cinnamon rolls is about 190°F / 88°C in the center roll. Check the middle of the pan, not an edge roll, because the outside rolls bake faster and can look done while the center still needs a few minutes.

Instant-read thermometer checking the center roll for cinnamon roll doneness
Check the center roll, not an edge roll, when using internal temperature as the doneness cue.

If you do not have a thermometer, check the middle roll by gently pulling at a seam. Look for a baked, bread-like center, not shiny, wet, or paste-like. A gooey cinnamon swirl is good; raw-looking dough in the center is not.

If the tops are browning before the center is done, tent the pan loosely with foil and keep baking for a few more minutes. This lets the middle finish without drying out the top.

Gooey Cinnamon Rolls with Heavy Cream

Warm heavy cream is a popular way to make cinnamon rolls richer and more moist. It helps soften the rolls as they bake and can turn some of the cinnamon sugar into a syrupy bottom layer. The key in this recipe is using a moderate amount so the rolls stay gooey without turning soggy.

After the second rise, warm ⅓ cup / 80 ml heavy cream until just warm. Pour it around the risen rolls before baking. For extra-gooey rolls, you can use up to ½ cup / 120 ml.

Warm heavy cream poured around cinnamon rolls before baking
Pour warm cream around the risen rolls; the pan needs only a modest pour.
Heavy cream question Answer
Cold cream? No. Warm it first so it does not slow the dough or shock the risen rolls.
Milk instead of cream? Yes, but it will be less rich and less gooey than cream.
Where to pour it Pour it around and lightly over the risen rolls. Do not flood the pan.
Skipping the cream The rolls still work; cream is only for a softer, gooier finish.

This works best in the 9×13-inch pan because the cream can spread evenly around the rolls. When it works well, you get a softer center and a little cinnamon-sugar syrup at the bottom without losing the shape of the rolls.

Cream Cheese Icing for Cinnamon Rolls

Cream cheese icing is the classic finish for homemade cinnamon rolls. It is creamy, tangy, and rich enough to balance the sweet cinnamon filling.

Beat the softened cream cheese and butter together first. Once smooth, add powdered sugar, vanilla, salt, and a little milk or cream. Add the liquid slowly so the icing stays spreadable instead of runny.

For that bakery-window look, wait longer. If you want icing that slips into the cinnamon seams and makes the center taste almost custardy, ice earlier. When some of the frosting disappears into the warm rolls, that is not a mistake — that is the part people go back for.

Cream cheese icing spread over warm homemade cinnamon rolls
Spread icing while the rolls are warm so some melts into the cinnamon seams.

When to Ice Cinnamon Rolls

Desired result When to ice What happens
Gooey, melted icing About 5 minutes after baking Icing melts into the spirals
Thick, visible frosting 10–15 minutes after baking Icing stays creamier on top
Gooey with visible frosting Thin layer warm, second layer before serving Gooey center with visible frosting

Cinnamon Roll Icing Without Cream Cheese

For a simple vanilla icing, whisk together:

  • 1 cup / 120 g powdered sugar
  • 2 tablespoons / 28 g melted butter
  • 1 teaspoon vanilla extract
  • 1–2 tablespoons milk or cream
  • Pinch of salt

Add more milk for a thinner drizzle or more powdered sugar for thicker icing. This version is sweeter and lighter than cream cheese icing, and it works well when you want a quick glaze. For a fuller butter-based frosting that can be spread or piped, use this Buttercream Frosting Recipe.

Overnight Cinnamon Rolls

Overnight cinnamon rolls are perfect when you want fresh rolls in the morning without making the dough from scratch at sunrise.

This is the easiest way to make cinnamon rolls feel relaxed for brunch: the messy work is done the night before, and the morning is mostly rise, bake, and ice.

In the morning, your job is mostly patience: let the rolls lose their chill, puff up, and then bake into something that feels fresh instead of rushed.

Overnight cinnamon rolls resting in the morning before baking
Overnight rolls need time to lose their chill and puff before baking if they still look tight.

Make the dough, let it complete the first rise, roll it out, add the filling, cut the rolls, and place them in the pan. Cover tightly and refrigerate for 8–12 hours.

Do Overnight Cinnamon Rolls Need to Come to Room Temperature?

Not always. If the rolls already look puffy, relaxed, and lightly touching when they come out of the refrigerator, let them sit while the oven preheats. When they still look tight, cold, and small, give them 45–90 minutes at room temperature before baking. The goal is puffy rolls, not a fixed clock time.

For reliable overnight results:

  • Do not refrigerate the shaped rolls much longer than 12 hours.
  • Let the cold rolls puff before baking instead of putting tight, cold rolls straight into the oven.
  • Bake at 350°F / 175°C for 24–28 minutes, checking the center before serving.

Very long refrigeration can overproof the rolls, making them weaker or syrupy at the bottom. For the softest texture, bake them the next morning.

How to Store, Freeze, and Reheat Cinnamon Rolls

Need Method
Bake tomorrow morning Shape, cover, and refrigerate overnight after the first rise.
Save leftovers Refrigerate cream-cheese-iced rolls and reheat gently.
Freeze for later Freeze baked rolls for the easiest serving later.
Fresh-baked texture Freeze shaped unbaked rolls before the second rise, then thaw and proof before baking.

Room Temperature

Un-iced rolls or rolls with simple vanilla glaze can sit covered at room temperature for 1–2 days if your kitchen is cool.

Refrigerator

Because cream cheese icing is dairy-based, refrigerate iced rolls within 2 hours of serving. They keep for 3–4 days, though the refrigerator can dry them out a little, so reheat gently before eating.

Food safety note: For general leftover guidance, the USDA recommends refrigerating leftovers for 3–4 days: USDA leftovers and food safety.

Freezer

Freeze baked cinnamon rolls with or without icing. Let them cool completely, wrap tightly, and freeze for up to 2 months.

You can also freeze shaped unbaked rolls before the second rise. Thaw overnight in the refrigerator, then let them sit at room temperature until puffy before baking.

Reheating

Reheat individual rolls in the microwave for 10–15 seconds at a time. For a full pan, cover loosely with foil and warm in a low oven.

If a roll seems dry, add a small spoon of milk or cream near the roll before reheating. It helps soften the bread without making it soggy.

Troubleshooting Cinnamon Rolls

If something looks off, do not panic. Cinnamon rolls usually give you clues before they fail: stiff dough, tight-looking rolls, filling that starts to run, or tops that brown before the middle is done.

Even careful bakers get a batch that rises slowly, leaks filling, or browns early. Use these cues to understand what happened and what to change next time.

Quick Cinnamon Roll Fixes

Problem Likely cause Fix
Cinnamon rolls are dry Excess flour, overbaking, dark pan, or not enough icing while warm Weigh flour, keep dough slightly tacky, bake until the middle is set, and tent if tops brown early
Cinnamon rolls are dense Weak yeast, short rise, under-kneading, or cold kitchen Use fresh yeast, knead until smooth, rise until doubled, and let shaped rolls get puffy
Centers are doughy Crowded pan, thick cuts, short second rise, or underbaking Use a 9×13 pan, cut evenly, finish the second rise, and bake until the center is done
Filling leaked out Melted butter, loose roll, filling spread to edge, or overfilled dough Use softened butter paste, leave a border, roll snugly, and place seam side down
Rolls did not rise Old yeast, hot milk, or cold room Use fresh yeast, keep milk warm not hot, and give dough more time in a warm spot
Icing disappeared Rolls were very hot Wait 10–15 minutes for visible frosting or use a thin warm layer plus a second layer
Centers popped up Tight rolling or a small pan Roll snugly but gently, and use a 9×13 pan
Bottoms are soggy Heavy cream overload, underbaking, or overproofing overnight Use less cream, bake until the center is done, and avoid very long refrigeration

Use the table for a quick diagnosis, then read the notes below for the problems that most often affect texture.

The good news: most of these problems are easy to prevent next time once you know the cue to watch for.

Dry Cinnamon Rolls

Dry rolls usually mean the dough was over-floured or the pan baked too long. Keep the dough soft and slightly tacky after kneading.

A dark pan can also brown the edges quickly. If the tops or edges are browning before the center is done, cover the pan loosely with foil and keep baking.

Cinnamon rolls tented with foil when tops brown before the center is done
Loosely tent the pan with foil if the tops brown before the center finishes baking.

Doughy Middle in Cinnamon Rolls

The center rolls bake last. Crowded rolls, thick cuts, or an early pull from the oven can leave the middle doughy.

Check the center of the pan instead of relying only on the edge rolls. A center temperature of about 190°F / 88°C is the clearest sign that the pan is done.

Cinnamon roll center showing a baked interior with gooey cinnamon swirl
A fully baked center looks bread-like and soft with gooey cinnamon, not wet raw dough.

Filling Leaking Out

The butter may have melted, or the dough may have been rolled loosely. A softened-butter filling paste stays in place better.

Leaving a small border along one long edge also helps seal the log.

Rolls Not Rising

Old yeast, overheated milk, or a cold room can slow the rise. When the dough is slowly expanding, give it more time. No movement at all usually means the yeast was probably inactive.

Cinnamon Roll Variations

These are flavor and format ideas, not full conversion formulas. The base dough is designed for classic soft yeast cinnamon rolls, so bigger changes may need their own tested recipe.

Pumpkin Cinnamon Rolls

Add pumpkin puree and warm spices to the dough or filling, then finish with maple cream cheese icing. Pumpkin adds moisture, so use a tested pumpkin version or adjust flour carefully.

Apple Cinnamon Rolls

Add finely chopped apples or a controlled amount of apple pie filling. A heavy apple layer can make the centers wet, so keep the filling modest. For homemade filling, use this Apple Pie Filling Recipe and keep the amount modest inside the rolls.

Sourdough Cinnamon Rolls

Use active sourdough starter or discard for a tangier dough and longer fermentation. Sourdough timing depends on starter strength and room temperature. If you are still building your starter, start with this Sourdough Starter Recipe.


For more starter-based bakes, this Sourdough Recipe guide covers loaves, rolls, buns, and bagels.

Cinnamon Roll Cookies

For cookies, use cinnamon sugar swirl flavor in a buttery cookie dough. This gives you cinnamon roll flavor without yeast or rise time, but it will not have the soft pull-apart crumb of this recipe.

Puff Pastry Cinnamon Rolls

Puff pastry works when you want fast, flaky cinnamon rolls instead of soft yeast rolls. Bake them spaced apart, not crowded like this dough, because puff pastry needs room to expand.

Vegan Cinnamon Rolls

For vegan cinnamon rolls, use plant-based milk and butter, and replace the egg carefully rather than simply leaving it out. This Flax Egg guide explains the classic flaxseed meal ratio for vegan baking, though a fully vegan cinnamon roll still needs its own dough balance.

Cinnamon Rolls vs Cinnamon Buns vs Cinnamon Scrolls

Whatever you call them — cinnamon rolls, cinnamon buns, or cinnamon scrolls — the craving is usually the same: soft spiral dough, warm cinnamon sugar, and something sweet on top.

In the US, “cinnamon rolls” is the most common term. “Cinnamon buns” may mean the same thing, though some versions include sticky toppings, nuts, or caramel. “Cinnamon scrolls” is common in some regions outside the US.

For this recipe, the method is the same: soft yeast dough, cinnamon sugar filling, spiral shape, and icing or glaze.

Shortcut Cinnamon Roll Questions

Yeast-Free Cinnamon Rolls

You can, but the texture changes. Yeast gives these rolls their fluffy, stretchy, pull-apart crumb. No-yeast cinnamon rolls are faster, but they usually bake up more like soft biscuits or scones.

For these bakery-style rolls, yeast is worth using. If you want something faster, a biscuit-style cinnamon roll is a better direction, but it will not have the same pull-apart crumb.

Using Canned Cinnamon Rolls Instead

Canned cinnamon rolls are great when you want a shortcut brunch or dessert. They will not have the same homemade yeast-dough texture, but they can still be turned into a cozy bake with fruit filling, cream, or extra cinnamon sugar.

For a quick dessert using refrigerated rolls, try this Apple Cinnamon Roll Bake with Apple Pie Filling. It is better for shortcut baking, while this recipe is better when you want homemade cinnamon rolls from scratch.

What to Serve with Cinnamon Rolls

At brunch, cinnamon rolls work well beside something simple and lightly sweet. Serve them with coffee, fruit, eggs, yogurt, or something cool and café-style like an Iced Matcha Latte. With a sweeter spread, keep the sides fresh and light; for a more balanced breakfast, add something savory.

Cinnamon rolls served for brunch with coffee, fruit, and a simple breakfast side
Keep brunch sides simple and fresh so the cinnamon rolls stay the centerpiece.

Frequently Asked Questions

All-Purpose Flour for Cinnamon Rolls

Absolutely. All-purpose flour gives a softer homemade texture and works well when extra flour is kept under control.

Is bread flour better for cinnamon rolls?

Bread flour gives taller, slightly chewier rolls with more structure. Use it if you want a more bakery-style result.

Active Dry Yeast Instead of Instant Yeast

Use the same amount, but proof active dry yeast in warm milk with a little sugar for 5–10 minutes before mixing the dough.

Milk Temperature for Yeast

Aim for milk around 105–115°F / 40–46°C. It should feel warm, not hot.

Using 2% Milk Instead of Whole Milk

Whole milk gives a richer dough, but 2% milk works. Avoid skim milk if you want the softest texture.

Internal Temperature for Cinnamon Rolls

Aim for about 190°F / 88°C in the center roll. This helps confirm the middle is baked through even if the tops already look golden.

How do I tell if cinnamon rolls are done without a thermometer?

Gently pull at a seam in the middle roll. Look for a baked, bread-like center, not wet, shiny, or paste-like.

Dry Cinnamon Rolls

They were likely over-floured, baked too long, or browned quickly in a dark pan. Keep the dough soft and avoid pulling the pan before the middle is done.

Dense Cinnamon Rolls

Dense rolls usually come from weak yeast, short rise time, under-kneading, or excess flour. Let the dough double and let the shaped rolls puff before baking.

Doughy Middle

They may be underbaked, crowded, cut thick, or not risen enough. The center should look set before serving.

Preventing Doughy Centers

Use a 9×13-inch pan for 12 rolls, cut the rolls evenly, let them complete the second rise, and check the center roll before pulling the pan from the oven.

Cinnamon Rolls Popping Up in the Center

The log may have been rolled tightly, the pan may have been crowded, or the rolls may have needed more room to expand.

Adding Heavy Cream Before Baking

You can. Warm heavy cream makes the rolls richer and gooier. Use ⅓ cup / 80 ml for a softer pan or up to ½ cup / 120 ml for extra-gooey rolls.

Overnight Cinnamon Rolls

For overnight cinnamon rolls, make the dough, complete the first rise, shape the rolls, cover the pan tightly, and refrigerate for 8–12 hours. In the morning, let the rolls sit until puffy if they still look tight and cold, then bake.

Freezing Cinnamon Rolls

Freezing works well. Baked rolls can be frozen after cooling, or you can freeze shaped unbaked rolls before the second rise. Thaw and let them get puffy before baking.

Doubling This Recipe

To double the recipe, use two 9×13-inch pans and rotate them if your oven has hot spots.

Choosing Cinnamon Roll Icing

Cream cheese icing is the classic choice because it is creamy, tangy, and rich. A simple vanilla glaze without cream cheese also works.

Icing Without Cream Cheese

For a simple glaze, mix powdered sugar, melted butter, vanilla, milk or cream, and a pinch of salt. Add more milk for a thin glaze or more powdered sugar for thicker icing.

No Stand Mixer Method

A stand mixer helps, but hand kneading works. Mix the dough in a large bowl and knead for 8–10 minutes, until it turns smooth and stretchy.

Final Tips for Soft, Gooey Cinnamon Rolls

Great cinnamon rolls are not about rushing the dough or baking until the tops are dark. Once you understand the cues, homemade cinnamon rolls stop feeling like a gamble. You are not just waiting for a timer; you are watching the dough, the rise, and the center of the pan.

The goal is gooey, not doughy: fluffy edges, cinnamon-rich swirls, creamy icing, and a middle that pulls apart warm instead of feeling heavy, wet, or underbaked.

Did you make these? Leave a comment with the flour you used, whether you baked them same-day or overnight, and whether you added the warm cream. Those details help other readers choose their own cinnamon roll path.
Posted on — Leave a comment

Spice Cake Recipe

9x13 spice cake in a baking pan with cream cheese frosting and one square lifted out to show the brown crumb.

Spice cake should taste like cinnamon in the air, brown sugar in the crumb, and just enough ginger, nutmeg, allspice, and cloves to make the whole kitchen smell like something good is cooling on the counter. A good version is fragrant and tender, not dry, dusty, or vaguely cinnamon-flavored.

This spice cake recipe is a no-fuss 9×13 sheet cake designed around the two things that matter most: a tender brown-sugar crumb and cream cheese frosting that stays where you spread it. It is soft and fragrant the day you bake it, then deeper and more settled once the spices rest overnight.

It is made from scratch, but it does not ask for layer-cake precision. The batter comes together with two bowls, a whisk, and a spatula; the only mixer you need is for the frosting. Bake it in the pan, cool it fully, frost it generously, and cut it into spiced squares for coffee, potlucks, chilly afternoons, or a simple holiday dessert.

When you cut into it, the slice should be warmly brown, soft under the fork, and sturdy enough to hold a generous swipe of frosting. The cake should taste complete before anything goes on top; the cream cheese frosting is there to brighten it, not hide dryness.

Close-up of a frosted spice cake square showing a moist brown crumb and cream cheese frosting on top.
Look for a tender, even crumb like this; a truly moist spice cake should hold together cleanly while still looking soft inside.

Quick Answer: What Is Spice Cake?

Spice cake is a brown-sugar cake flavored with baking spices such as cinnamon, ginger, nutmeg, allspice, and cloves. It is warmly spiced, not chili-hot. The “spice” comes from aromatic baking spices, not heat.

It is softer and sweeter than gingerbread, less fruit-forward than applesauce cake, and less chunky than carrot cake. The usual finish is cream cheese frosting because its tang cuts through the cinnamon-heavy crumb and brown sugar.

For the easiest homemade version, bake spice cake in a 9×13-inch metal pan at 350°F / 177°C. The slice should smell like cinnamon and ginger, cut cleanly, and hold the cream cheese frosting without feeling heavy. For the exact flavor balance, see the spice blend section.

Spice Cake at a Glance

Prep time20–25 minutes
Bake time35–40 minutes in a metal 9×13 pan; glass or ceramic may take longer
Cooling timeAt least 2 hours before frosting
Total timeAbout 3 hours, including cooling
Default pan9×13-inch baking pan
Oven350°F / 177°C
Yield12 large or 16 smaller slices
TextureSliceable, tender, fragrant
FinishCream cheese frosting

Why You’ll Love This 9×13 Spice Cake

  • Old-fashioned flavor comes through clearly. Cinnamon leads, but ginger, nutmeg, allspice, and cloves give every slice deeper fall-bakery flavor.
  • Real-life baking is the point. No stacked layers, no piping, no stand mixer for the cake — just a 9×13 pan and frosted squares you can serve straight from the pan.
  • Soft coffee slices still hold up for potlucks. Each square cuts cleanly, but still feels tender under the fork.
  • The cream cheese frosting makes it feel special. It adds cool tang, keeps the brown sugar in check, and turns a simple sheet cake into something holiday-table friendly.
  • Patience pays off. The same-day slice is soft and fragrant, but the next-day slice tastes deeper once the spices settle. For make-ahead timing, see the storage and freezing tips.

Same-Day Soft, Next-Day Deeper

This is the main make-ahead advantage of spice cake: the crumb stays soft while the cinnamon, ginger, nutmeg, and cloves taste more settled after a night of rest.

Two frosted spice cake squares on a plate labeled same day and next day, showing a lighter fresh slice and a darker settled slice.
Same day, the cake tastes soft and freshly spiced; by the next day, the cinnamon, ginger, nutmeg, and cloves settle into a deeper flavor.

What Is Spice Cake?

Spice cake is a cake where the main flavor comes from a baking-spice blend rather than chocolate, vanilla, fruit, or nuts. The batter usually includes brown sugar, a tenderizing ingredient such as buttermilk or sour cream, and enough fat to keep the cake enjoyable after it cools.

It belongs near gingerbread, carrot cake, pumpkin cake, and applesauce cake, but the point here is simpler: a spice-led crumb, not fruit, vegetables, heavy molasses, or pumpkin.

If you have ever wondered whether spice cake is just gingerbread, carrot cake without carrots, or applesauce cake without apples, this is the quick difference.

Spice cake guide with a frosted slice and smaller comparison sections for gingerbread, carrot cake, pumpkin cake, and applesauce cake.
Unlike carrot cake, pumpkin cake, or gingerbread, spice cake gets its main character from warm baking spices rather than one dominant fruit, vegetable, or molasses note.
CakeMain identityHow it differs from spice cake
Spice cakeBaking spicesSpice-led, usually with brown sugar and tangy frosting.
GingerbreadGinger and molassesDarker, sharper, and usually more molasses-heavy.
Carrot cakeGrated carrot and spiceOften includes carrots, nuts, raisins, pineapple, or coconut.
Applesauce cakeApple moisture and spiceSofter and more apple-led. For that direction, see our applesauce cake recipe.
Pumpkin spice cakePumpkin purée and spiceWetter, denser, and more seasonal because pumpkin changes the batter.
Chai cakeTea, cardamom, and chai spicesBetter baked as a separate chai cake, where the tea and cardamom can lead properly.

The best version does not taste like a spice cabinet. It tastes like brown sugar, warmth, and a soft square you want with coffee.

The Best Spice Blend for This Cake

The best spice cake blend is cinnamon, ginger, nutmeg, allspice, and a small amount of cloves. Cinnamon should lead; cloves should stay in the background.

Cinnamon gives the familiar warmth, but ginger, nutmeg, allspice, and cloves make the flavor deeper and more complete. Without those supporting spices, the cake can smell good in the oven but taste a little flat once sliced.

Spice blend guide with labeled bowls of cinnamon, ginger, nutmeg, allspice, cloves, and cardamom for spice cake.
Cinnamon should lead the spice blend, while ginger, nutmeg, allspice, cloves, and optional cardamom add warmth, depth, and balance.
SpiceWhat it addsHow strong to go
CinnamonThe familiar warm base.Use the most of this.
GingerBrightness and gentle heat.Enough to notice, not enough to become gingerbread.
NutmegRounded bakery-style flavor.Use lightly; too much can taste perfumed.
AllspiceDepth and an old-fashioned note.A little makes the cake taste fuller.
ClovesDeep background warmth.Use sparingly because it is powerful.
Cardamom, optionalFragrance and lift.Use lightly so the cake still tastes familiar.

That balance is what makes the cake smell cozy in the oven but still taste rounded once it cools. Allspice is not a spice blend; it is a single spice with a flavor that hints at cinnamon, clove, and nutmeg, so let it support the blend rather than dominate it.

Can you use pumpkin pie spice? Pumpkin pie spice works as a shortcut, though the flavor depends on the blend. For a homemade blend, see our pumpkin pie spice guide.

Why This Cake Stays Moist

The goal is a cake that still tastes good after it cools — and, ideally, tastes even more settled the next day. This version uses oil for lasting softness, a little butter for flavor, applesauce for moisture, and buttermilk for tenderness.

Why both oil and butter? A butter-only cake has wonderful aroma when warm, but it can firm up more after cooling. An oil-only cake stays softer, but it can taste flatter. Using both gives the cake a round old-fashioned flavor while keeping the inside from turning tight.

Applesauce and buttermilk support that texture without turning the cake into applesauce cake or a tangy yogurt cake. This is also why the base does not use shredded apple: the cake stays spice-led, while the applesauce quietly helps with moisture. Together, the ingredients create brown-sugar depth without gingerbread heaviness, and a slice that stays clean rather than greasy or gummy.

Moisture guide showing a frosted spice cake square with oil, butter, applesauce, and buttermilk callouts around it.
Instead of depending on one “secret” ingredient, this moist spice cake uses oil for softness, butter for flavor, applesauce for moisture, and buttermilk for tenderness.
IngredientWhy it matters
OilKeeps the cake softer after cooling.
ButterAdds old-fashioned flavor and aroma.
ApplesauceSupports moisture without making the cake apple-led.
ButtermilkBalances sweetness and keeps the texture tender.
Brown sugarAdds depth and a mild molasses note.
Cream cheese frostingAdds tang so the cake tastes rich but not cloying.

What Each Ingredient Does in This Spice Cake

The recipe works because the ingredients have different jobs. Keep the measurements steady, especially flour and wet ingredients, and the cake will be much easier to bake well. Once these pieces are balanced, the cake tastes like more than cinnamon — it has brown-sugar depth, spice warmth, and enough softness to still be good after cooling.

Labeled spice cake ingredients including flour, brown sugar, oil, butter, applesauce, buttermilk, eggs, vanilla, molasses, and spices.
The best spice cake ingredients work as a team: brown sugar deepens flavor, warm spices define the cake, and the wet ingredients keep the crumb soft.

For the Cake

All-purpose flour: Measure by weight if possible. Too much flour is one of the fastest ways to make a dry cake, and measuring flour by weight is the most reliable option. If using cups, spoon flour into the cup and level it instead of scooping directly from the bag.

Baking powder and baking soda: They give lift while working with the acidity in the buttermilk, applesauce, and brown sugar. Make sure both are fresh.

Salt, vanilla, and spices: Salt sharpens the brown sugar, vanilla rounds the flavor, and the spice blend gives the cake its identity.

Brown sugar: Light brown sugar keeps the flavor milder. Dark brown sugar gives a deeper molasses note. Either works, but pack it firmly when measuring by cup.

Oil and melted butter: Oil helps after cooling; butter adds flavor. Let the melted butter cool slightly before mixing so it does not warm the eggs.

Applesauce, buttermilk, and eggs: Applesauce helps the cake stay soft, buttermilk keeps it from tasting flat, and eggs help it rise and slice cleanly. Use them close to room temperature when possible so the batter blends smoothly.

Molasses, optional: A tablespoon of molasses makes the cake darker and the flavor deeper. Keep the rest of the wet ingredients as written if you use it.

Batter cue: The batter should be thick but pourable, glossy, and lightly speckled with spices. A few tiny applesauce flecks are fine. Stop when the flour disappears; this batter is meant to stay thick and glossy, not whipped.

For the Cream Cheese Frosting

Block cream cheese: Use full-fat block cream cheese, not spreadable tub cream cheese. Tub cream cheese often makes frosting loose and runny.

Butter and powdered sugar: The butter should be softened but not greasy. Start with the lower amount of powdered sugar for a softer frosting, then add more only if you need it firmer.

Vanilla, salt, and optional lemon juice: Vanilla adds warmth, salt keeps the frosting from tasting flat, and a little lemon juice brightens the cream cheese tang.

How to Bake It Without Drying It Out

The batter is supposed to be thick, not airy. The cake is supposed to come out with moist crumbs, not a bone-dry tester. And the frosting only spreads cleanly if the cake is fully cool.

Do not worry if the batter looks thicker than vanilla cake batter; that is normal here. You do not need a stand mixer for the cake itself. A whisk, a spatula, and two bowls are enough; save the hand mixer for the frosting.

Step-by-step spice cake guide showing dry ingredients, wet ingredients, batter, baked 9x13 cake, and frosting being spread.
Because this is a simple two-bowl spice cake, the biggest wins are mixing gently, spreading the batter evenly, and waiting until the cake is cool before frosting.

1. Prepare the Pan So the Cake Releases Cleanly

Heat the oven to 350°F / 177°C. Grease a 9×13-inch baking pan. A metal pan usually bakes most evenly. For easier lifting and cleaner slices, line the pan with parchment paper, leaving a little overhang on two sides. If you plan to serve the cake directly from the pan, parchment is optional.

2. Whisk the Spices Evenly Into the Flour

In a large bowl, whisk the flour, baking powder, baking soda, salt, cinnamon, ginger, nutmeg, allspice, cloves, and optional cardamom. The dry mix should look evenly tan from the spices. Take a few extra seconds here; evenly mixed spices mean every slice tastes balanced instead of giving you one bland bite and one clove-heavy bite.

3. Mix the Wet Ingredients Until Glossy

In another bowl, whisk the brown sugar, oil, melted butter, applesauce, buttermilk, eggs, vanilla, and optional molasses until smooth. The wet mix should look glossy. The melted butter should be slightly cooled, and the eggs, applesauce, and buttermilk should not be fridge-cold. If the butter forms tiny bits, the cake will usually still bake, but the batter mixes more evenly when the ingredients are closer in temperature.

4. Fold Gently So the Cake Stays Tender

Pour the wet mixture into the dry ingredients. Fold with a spatula or whisk gently until no dry flour pockets remain. The batter should look thick, glossy, and pourable. Once no flour streaks remain, you have done enough; next, use the doneness cues instead of overbaking for a dry tester.

Spice cake batter lifting from a spatula over a mixing bowl, showing a thick glossy pourable texture.
Once the batter looks thick, glossy, and pourable, stop mixing; continuing too long can make the finished spice cake dense.

5. Bake Until the Center Is Set but Still Moist

Spread the batter into the prepared pan and smooth the top. Bake for 35–40 minutes in a metal pan, checking near the 33-minute mark. Glass or ceramic pans may take a little longer. This is the point where the kitchen starts smelling better than the effort you put in, but trust the center of the cake more than the edges.

The cake is done when the center springs back lightly, the edges are just beginning to pull from the pan, and a toothpick inserted into the middle comes out with a few moist crumbs.

Look for moist crumbs, not a dry tester. A few crumbs mean the cake will stay softer once it cools.

Doneness guide comparing underbaked, just-right, and overbaked spice cake pieces with toothpick crumb examples.
A few moist crumbs on the toothpick are ideal; however, waiting for a completely dry tester can push spice cake toward overbaked.

6. Cool Fully Before Frosting

Let the cake cool in the pan. For a 9×13 cake, plan on at least 2 hours of cooling before frosting. The center should feel room temperature, not just the surface. The wait feels annoying, but it keeps the cream cheese frosting smooth instead of melty.

Unfrosted spice cake cooling in a 9x13 pan on a wire rack with a bowl of frosting and spatula nearby.
Before adding cream cheese frosting, let the 9×13 spice cake cool completely so the frosting stays smooth, thick, and spreadable instead of melting into the crumb.

7. Frost and Slice

Spread the frosting over the cooled cake. It should hold soft swoops without running. For clean slices, chill the cake for 20–30 minutes before cutting. For the best eating texture, let refrigerated slices sit briefly at room temperature before serving.

Cream Cheese Frosting for Spice Cake

Cream cheese frosting is the classic finish because it adds tang, not just sweetness. It cuts through the brown sugar and spice so the cake tastes rich without feeling heavy.

Cream cheese frosting being spread with an offset spatula over a cooled spice cake in a rectangular pan.
Cream cheese frosting works especially well here because its cool tang balances brown sugar, cinnamon, ginger, and cloves without making the cake too sweet.

The best bite is warm spice first, then brown sugar, then that cool cream-cheese tang at the end. For a 9×13 cake, you only need a generous spreadable layer. Brown butter cream cheese frosting makes it more special, caramel leans sweeter and richer, maple gives it an old-fashioned fall flavor, and a simple vanilla glaze works better for Bundt or loaf cake. For a tea-cake finish, skip the frosting and dust the top with powdered sugar.

Want the special-occasion version? Brown the butter, cool it until soft but not melted, then use it in the frosting for a deeper, nutty finish.

If you want a non-cream-cheese option for cupcakes or a sweeter celebration-style finish, our buttercream frosting recipe is the better direction.

How to Keep the Frosting Smooth

  • Use full-fat block cream cheese, not tub cream cheese.
  • Soften the cream cheese and butter, but keep them cool enough that they are not shiny or greasy.
  • Beat the cream cheese first until smooth, then add the butter and beat again.
  • Add powdered sugar gradually. Start with 2½ cups for a softer frosting; add more if you need it firmer.
  • Add a pinch of salt and a little lemon juice to balance sweetness.
  • If the frosting becomes too soft, chill it for 15–20 minutes, then beat briefly again.
  • Make sure the cake is fully cool before spreading it on top. If it still turns loose, use the troubleshooting fixes.
Frosting consistency guide with three bowls showing too loose, just right, and too stiff cream cheese frosting textures.
If frosting is too loose, it slides; if it is too stiff, it pulls crumbs, so aim for a creamy texture that holds soft swoops.

Pan Sizes: 9×13, Layers, Bundt, Loaf, and Cupcakes

This recipe is written first as a 9×13 sheet cake; the layer, Bundt, loaf, and cupcake notes are adaptations, not the main promise.

A 9×13 sheet cake is the easiest version, but the same flavor can work in other formats if you watch the fill level and start checking early. If you are baking for a potluck, stay with the 9×13. It is the least fussy version and the one most likely to disappear square by square.

Pan size guide with a large 9x13 spice cake and smaller examples of round layers, Bundt cake, cupcakes, and loaf cake.
The 9×13 pan gives the easiest spice cake slices; however, the batter can also work in layers, Bundt pans, cupcakes, or a loaf when you adjust carefully.

Spice Cake Baking Times by Pan

FormatPanOvenApprox. bake timeNotes
Sheet cake9×13-inch metal pan350°F / 177°C35–40 minEasiest default. Glass or ceramic may take longer.
Layer cakeTwo 9-inch rounds350°F / 177°C26–32 minLine pans with parchment; make extra frosting.
Layer cakeTwo 8-inch rounds350°F / 177°C32–38 minLayers will be deeper, so check centers carefully.
Bundt cake10–12 cup Bundt pan350°F / 177°C50–65 minFill no more than two-thirds to three-quarters full.
CupcakesStandard muffin tin350°F / 177°C18–21 minFill cups about two-thirds full.
Loaf cake9×5-inch loaf pan, filled no more than two-thirds full350°F / 177°C48–55 minThis full recipe makes more batter than one loaf, so bake extra batter as cupcakes or use a second loaf pan.

Use the times as starting points, not promises. The cake is ready when the center springs back and a toothpick shows moist crumbs.

Bundt Cake Release Tip

Bundt cake tip: Use baking spray with flour, or brush the pan with softened butter and dust it with flour. Get into every groove. Let the baked cake rest in the pan for 10–15 minutes before turning it out.

How to Make Boxed Spice Cake Mix Taste Homemade

Boxed spice cake mix can work when time is short. Use milk instead of water, add ½ cup sour cream or applesauce, boost the spices, and finish with homemade cream cheese frosting. For the from-scratch version, jump to the full recipe card.

Boxed spice cake mix upgrade guide with milk, sour cream or applesauce, extra spices, and cream cheese frosting suggestions.
For a shortcut version, boxed spice cake mix tastes more homemade when you use dairy, boost the warm spices, and finish with real cream cheese frosting.
Replace or addHow muchWhy it helps
Milk instead of waterUse the same amount listed on the boxGives richer flavor.
Sour cream, yogurt, or applesauceUp to ½ cupHelps the cake taste less box-mix dry.
Cinnamon + ginger½ tsp cinnamon + ¼ tsp gingerWarms up a mild spice mix.
Homemade cream cheese frostingUse the frosting from this recipeThe biggest upgrade for flavor and texture.

Keep the upgrades modest. Too much extra moisture can make the center heavy, especially if you also add pumpkin or fruit. The from-scratch cake is still the better version when flavor and texture matter; the boxed version is the quick shortcut.

Variations: Apple, Molasses, Nuts, Raisins, Chai, and More

Choose the version based on the slice you want: classic and cozy, deeper with molasses, fruitier with apple, or nutty with a little crunch. The cake stays most reliable when you change one major thing at a time; if you add fruit or extra moisture, keep the gummy-center fixes in mind.

Spice cake variations guide with a plain frosted cake square and optional molasses, apple, nuts, raisins, and cardamom or chai spice cues.
Start with the plain frosted base cake, then choose one variation if you want deeper molasses flavor, fruitier apple notes, optional crunch, raisins, or warmer aroma.
VariationAmountKeep in mind
Molasses1 tablespoonToo much pushes the cake toward gingerbread.
Chopped apple1 cup, finely choppedMore can make the center gummy.
Nuts¾ cupToast and cool first for better flavor.
Raisins½–¾ cupSoak if dry, then drain and pat dry.
Cardamom¼ teaspoonToo much can taste perfume-like.

Molasses gives the deepest old-fashioned version, chopped apple makes the cake softer and fruitier, and toasted nuts are the easiest way to add contrast without changing the batter much. These are small changes, not a second recipe; the safest upgrades are the ones that add flavor without shifting the batter’s moisture too far.

For a chai-style direction, add the cardamom and a tiny pinch of black pepper. If you want tea-forward flavor, that becomes a separate chai cake rather than classic spice cake.

Gluten-Free and Eggless Notes

A good 1:1 gluten-free baking flour may work, especially if it contains xanthan gum, but expect a slightly more fragile cake and let it cool fully before slicing.

I would not make this exact batter eggless by simply removing the eggs. For best results, use an eggless spice cake formula designed around yogurt, vinegar and baking soda balance, or another tested binder.

What to Serve with Spice Cake

For a coffee slice, serve the cake plain with its cream cheese frosting and a hot cup of coffee or black tea. For a holiday dessert, add brown butter frosting, toasted pecans, or a light caramel drizzle. If you are taking it to a potluck, keep it in the 9×13 pan, chill until the top sets, and slice before serving.

Frosted spice cake square on a plate with coffee or chai, whipped cream, vanilla ice cream, and optional toasted nuts nearby.
To make a simple slice feel dessert-ready, serve spice cake with coffee, chai, whipped cream, vanilla ice cream, or optional toasted nuts on the side.

That is the sweet spot of this cake: casual enough for a weekday coffee slice, but dressed up enough once the cream cheese frosting goes on.

For a lighter finish, skip the frosting and serve the cake with homemade whipped cream or powdered sugar. For a fall dinner, a scoop of vanilla ice cream or a spoon of warm apple compote makes it feel more like dessert without much extra work.

Storage, Freezing, and Make-Ahead Tips

This is a good make-ahead dessert because the spices settle and deepen after a few hours. The next-day slice, cold from the fridge for a few minutes and then softened on the plate, is one of the quiet pleasures of this cake.

Cream-cheese-frosted spice cake should be refrigerated within 2 hours and stored covered for 3–4 days. Refrigerate it sooner if your kitchen is hot. For general food-storage safety, see the FDA’s food storage guidance.

Storage guide showing frosted spice cake in a covered pan, slices in an airtight container, and wrapped slices for freezing.
Because the cake has cream cheese frosting, refrigerate frosted slices; for longer storage, wrap individual pieces well before freezing.
SituationBest method
Unfrosted cakeWrap tightly and keep at room temperature for 1–2 days.
Frosted cakeCover tightly or store in an airtight container and refrigerate for 3–4 days.
Make aheadBake one day ahead, cool completely, cover, and frost before serving or the next day.
Freezing unfrosted cakeWrap tightly and freeze for up to 2–3 months.
Freezing frosted slicesFreeze uncovered until firm, then wrap tightly. Thaw in the refrigerator; frosting texture may soften slightly.
Serving from fridgeLet slices sit briefly at room temperature so the cake and frosting soften.

Troubleshooting Dry, Dense, Gummy, or Sunken Cake

Most baking mistakes are not disasters; they are clues. If something went wrong, start with what you can fix now, then adjust the next bake.

Cake Texture Problems

Dry, dense, gummy, oily, or sunken spice cake usually comes back to flour measurement, mixing, bake time, pan choice, or add-ins. Use this table to rescue the current cake and improve the next one.

Troubleshooting guide listing dry cake, dense cake, gummy center, sunken middle, oily texture, and runny frosting with quick fixes.
When spice cake turns dry, dense, gummy, oily, sunken, or messy, the cause usually comes back to baking time, mixing, measuring, or frosting temperature.
ProblemFix nowFix next time
Dry cakeServe with extra frosting, whipped cream, caramel, or warm apple compote.Measure flour by weight and pull the cake when the toothpick has moist crumbs.
Dense or heavy cakeLet slices come to room temperature and serve with coffee, whipped cream, or a lighter topping so the cake feels less heavy.Stop when no flour streaks remain; use room-temperature wet ingredients.
Gummy centerIf unfrosted and still warm, return it to the oven loosely covered.Use a metal 9×13 pan, keep add-ins modest, and check the true center.
Cake tastes oilyChill before slicing and serve with tangy frosting to balance richness.Measure oil in a liquid cup and bake until the center is set.
Sunken middleIf the center is underbaked, avoid serving that part; cut clean squares from the set edges and frost or dust them lightly.Check leavening freshness and avoid opening the oven early.
Bland spice flavorAdd a light cinnamon dusting or serve with brown butter frosting.Use fresh spices and consider the optional molasses.

Cream Cheese Frosting Problems

Frosting issues are usually easier to fix than cake texture problems. Temperature matters most: warm cake melts frosting, while overly soft cream cheese or butter can make the frosting loose.

ProblemFix nowFix next time
Runny frostingChill 15–20 minutes, then beat briefly; add powdered sugar if needed.Use block cream cheese and cooler butter.
Frosting melts on cakeChill the cake until the frosting firms, then smooth it again.Cool the cake completely before frosting.

Before You Bake the Next Spice Cake

Before you bake: measure the flour carefully, use fresh spices, mix gently after adding flour, and let the cake cool completely before frosting. Those four details prevent most spice cake problems.

Once those basics are handled, this is a forgiving cake: mix it gently, bake it until the center is just set, cool it fully, and frost it right in the pan. No layers, no piping, no drama — just spiced squares that taste better than the effort they ask from you.

Moist 9×13 Spice Cake Recipe

This 9×13 spice cake is the easy pan version: warmly spiced, brown-sugary, simple to slice, and finished with a generous cream cheese frosting.

Serve it when you want the comfort of carrot cake or gingerbread, but without shredded vegetables, heavy molasses flavor, or layer-cake fuss.

Recipe card for moist 9x13 spice cake showing a frosted cake square, baking temperature, bake time, yield, and storage reminder.
Use this quick reference before baking so the key details stay clear: 9×13 pan, 350°F oven, 35–40 minutes, 12–16 slices, and cream cheese frosting.
Prep Time
25 minutes
Cook Time
35–40 minutes
Cooling Time
At least 2 hours
Total Time
About 3 hours
Yield
12–16 slices

Timing: Plan on about 25 minutes prep, 35–40 minutes baking, and at least 2 hours cooling; total time is about 3 hours before serving. Bake time is based on a metal 9×13 pan; glass or ceramic pans may need a few extra minutes.

Equipment

  • 9×13-inch baking pan, preferably metal
  • 2 mixing bowls
  • Whisk
  • Spatula
  • Hand mixer or stand mixer for frosting
  • Cooling rack
  • Parchment paper, optional

Ingredients

For the Spice Cake

  • 2½ cups all-purpose flour / 313 g
  • 1½ teaspoons baking powder
  • ½ teaspoon baking soda
  • ¾ teaspoon fine salt
  • 2½ teaspoons ground cinnamon
  • 1 teaspoon ground ginger
  • ¾ teaspoon ground nutmeg
  • ½ teaspoon ground allspice
  • ¼ teaspoon ground cloves
  • ¼ teaspoon ground cardamom, optional
  • 1½ cups packed brown sugar / 300 g
  • ½ cup neutral oil / 120 ml
  • ¼ cup unsalted butter, melted and slightly cooled / 57 g
  • ½ cup unsweetened applesauce, room temperature if possible / 120 g
  • ¾ cup buttermilk, room temperature / 180 ml
  • 3 large eggs, room temperature
  • 2 teaspoons vanilla extract
  • 1 tablespoon molasses, optional / 20 g

For the Cream Cheese Frosting

  • 8 oz block cream cheese, softened / 226 g
  • ½ cup unsalted butter, softened / 113 g
  • 2½–3 cups powdered sugar / 300–360 g, sifted if lumpy
  • 1 teaspoon vanilla extract
  • Pinch of salt
  • 1 teaspoon lemon juice, optional, for extra tang

Instructions

  1. Prepare the oven and pan. Heat the oven to 350°F / 177°C. Grease a 9×13-inch baking pan and line with parchment if you want to lift the cake out for slicing.
  2. Mix the dry ingredients. In a large bowl, whisk the flour, baking powder, baking soda, salt, cinnamon, ginger, nutmeg, allspice, cloves, and optional cardamom until evenly combined.
  3. Mix the wet ingredients. In a separate bowl, whisk the brown sugar, oil, melted butter, applesauce, buttermilk, eggs, vanilla, and optional molasses until smooth. The eggs, applesauce, and buttermilk should not be fridge-cold.
  4. Combine. Pour the wet ingredients into the dry ingredients. Fold gently until no dry flour pockets remain. The batter should be thick but pourable. Stop once no flour streaks remain.
  5. Bake. Spread the batter into the prepared pan. Bake for 35–40 minutes in a metal pan, or until the center springs back lightly and a toothpick inserted into the middle comes out with a few moist crumbs. Glass or ceramic pans may take longer.
  6. Cool. Let the cake cool completely before frosting, at least 2 hours for a 9×13 cake. Warm cake will melt the frosting.
  7. Make the frosting. Beat the cream cheese until smooth. Add the butter and beat again. Add 2½ cups powdered sugar, vanilla, salt, and optional lemon juice. Beat until creamy and spreadable, then stop. Add more powdered sugar if you want a firmer frosting.
  8. Frost and serve. Spread frosting over the cooled cake. Chill briefly for cleaner slices, then serve. Let refrigerated slices sit at room temperature for a softer cake.

Recipe Notes

  • Buttermilk substitute: Add 2 teaspoons lemon juice or vinegar to a measuring cup, then add milk until you reach ¾ cup total. Stir and let stand for 5–10 minutes before using.
  • No applesauce? Replace it with the same weight of plain full-fat yogurt or sour cream.
  • Frosting amount: The frosting quantity is enough for a generous 9×13 sheet cake layer. For a layer cake or piping, make 1½ to 2 times the frosting.
  • Clean slices: Frost only after the cake is fully cool, then chill the frosted cake for 20–30 minutes before cutting.
  • Storage: Because this cake has cream cheese frosting, refrigerate the frosted cake within 2 hours. Store covered in the refrigerator for 3–4 days and let slices sit briefly at room temperature before serving.
  • Layer cake: Divide between two greased and parchment-lined 9-inch round pans and start checking around 26 minutes.
  • Cupcakes: Fill liners two-thirds full and bake for about 18–21 minutes.
  • Bundt cake: Use a 10–12 cup Bundt pan, grease it thoroughly, and do not overfill. Start checking around 50 minutes.
  • Loaf cake: Fill a 9×5-inch loaf pan no more than two-thirds full. This full recipe makes more batter than one loaf, so bake extra batter as cupcakes or use a second loaf pan.
  • Salted butter: You can use salted butter in the cake or frosting; reduce the added salt slightly.

FAQs About Spice Cake

What makes spice cake different from carrot cake?

Spice cake is defined by baking spices. Carrot cake is defined by grated carrot and often includes nuts, raisins, pineapple, or coconut. The two can share cinnamon, ginger, and nutmeg, but carrot cake has a vegetable-based texture and spice cake does not need carrots.

Which spices are best in spice cake?

Cinnamon, ginger, nutmeg, allspice, and cloves are the classic mix. Cinnamon should lead, cloves should stay subtle, and the spices should be fresh.

Is spice cake hot or spicy?

Think cinnamon warmth, not chili heat. The flavor comes from baking spices, not hot pepper.

Is spice cake the same as gingerbread?

No. Gingerbread is usually darker, more ginger-forward, and more molasses-heavy. Spice cake is softer, sweeter, and more balanced across several spices.

What is the difference between spice cake and pumpkin spice cake?

Spice cake is led by the spice blend itself. Pumpkin spice cake includes pumpkin purée, which changes the moisture, density, color, and flavor of the batter.

Can I use pumpkin pie spice instead of individual spices?

Pumpkin pie spice works as a shortcut. Replace the listed spices with a good blend, knowing the final flavor depends on that blend.

Can I make spice cake without applesauce?

Plain full-fat yogurt or sour cream can replace the applesauce in the same amount. The cake will be slightly tangier and a little less apple-soft, but it will still have enough moisture if the rest of the recipe stays unchanged.

Can I make spice cake ahead of time?

This is actually a good make-ahead cake. Bake it one day ahead, cool it completely, cover it well, and frost it the next day or before serving. The spices often taste more settled after the cake rests overnight.

What frosting goes best with spice cake?

Cream cheese frosting is the classic choice because it adds tang, not just sweetness. A vanilla glaze works better for Bundt or loaf cake.

Why did my spice cake turn out dry?

The most common reasons are too much flour, overbaking, or waiting until the toothpick comes out completely dry. Measure flour by weight if possible and remove the cake when the center is set but the toothpick still has a few moist crumbs.

Can spice cake be baked as cupcakes?

It works well as cupcakes. Fill standard liners about two-thirds full and bake at 350°F / 177°C for about 18–21 minutes. Start checking early because cupcakes dry out faster than a sheet cake.

Should cream cheese frosted spice cake be refrigerated?

Cream-cheese-frosted spice cake should be refrigerated within 2 hours and stored covered for 3–4 days. Let slices sit briefly at room temperature before serving.

When the cake is soft, the spices are fresh, and the frosting has that little cream-cheese tang, this is the kind of simple dessert that disappears slice by slice from the pan. It belongs with coffee, on holiday tables, and on ordinary weekends when cake sounds like a perfectly good plan.

If you try it, I would love to know whether your favorite slice was same-day soft or next-day spiced and settled.

Back to top