Posted on Leave a comment

Chocolate Cream Cheese Frosting Recipe: Smooth, Pipeable & Not Too Sweet

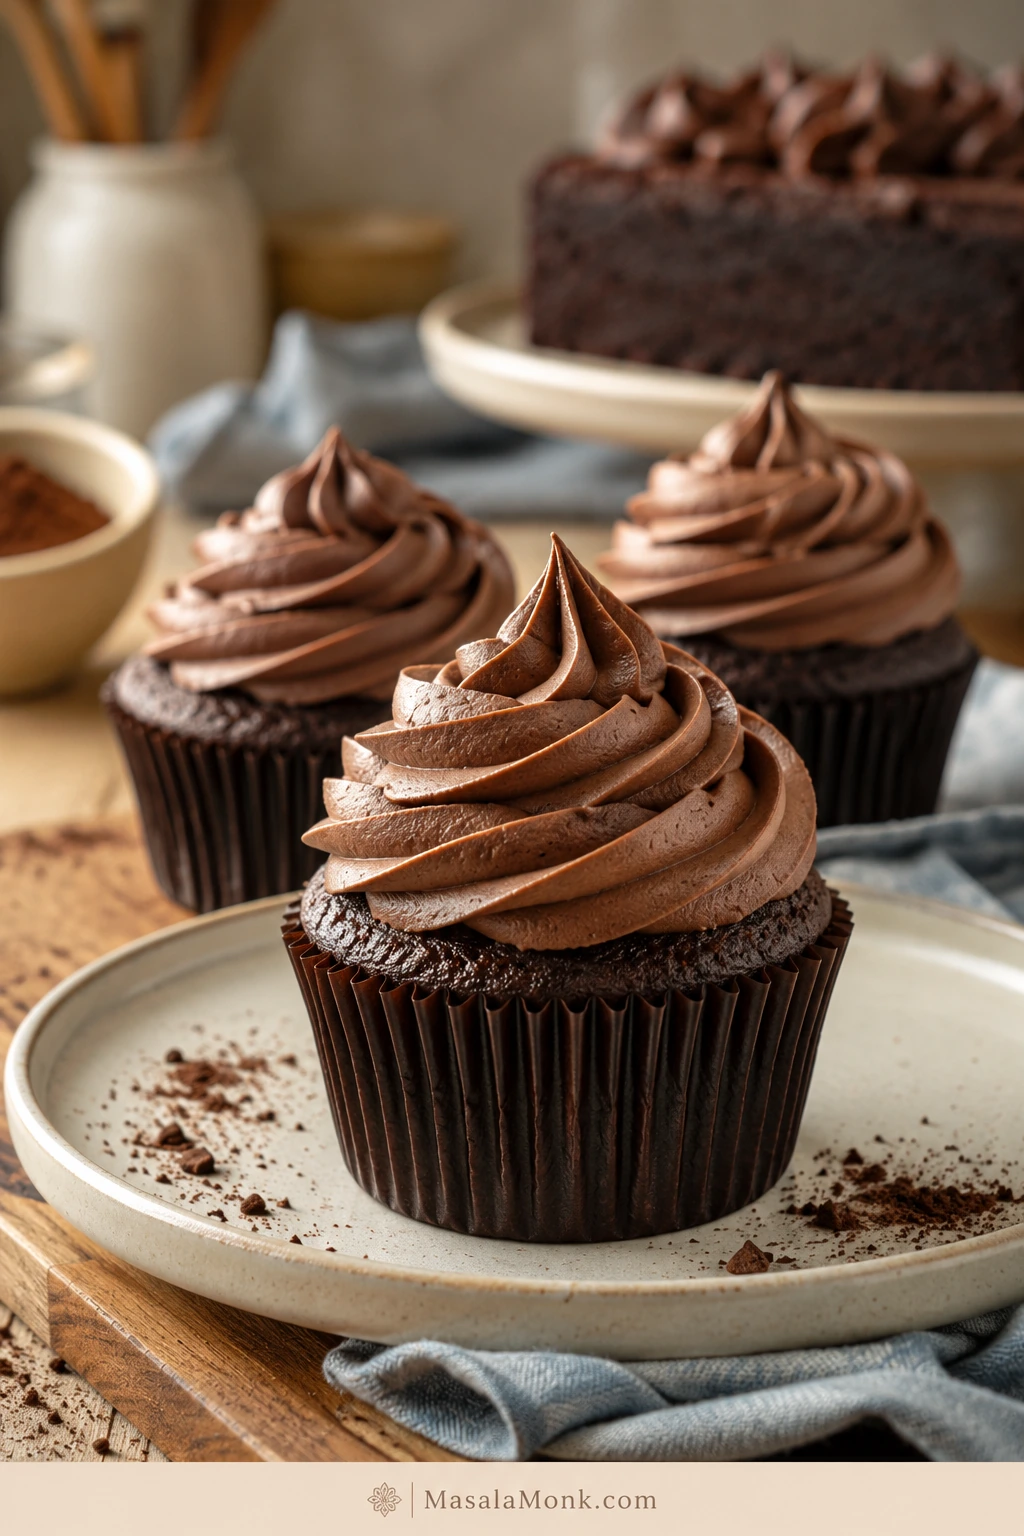
Chocolate cupcakes topped with soft swirls of chocolate cream cheese frosting on a light wooden board.

Frosting is the part everyone sees first, which is why it can make even a simple cake feel a little high-pressure. This chocolate cream cheese frosting keeps that final step calm: smooth enough to spread, thick enough to chill and pipe, and chocolatey without tasting like straight sugar.

The finished topping is thick and creamy, with deep cocoa flavor, a gentle cream cheese tang, and a soft matte finish. At its best, each bite tastes like chocolate first, cream cheese second, and sugar last.

This version is built for the frosting problems people actually run into: cream cheese that turns loose, chocolate that tastes flat, cupcake swirls that slump, and “not-too-sweet” frosting that still needs enough structure to behave.

It is not sugar-free, and it is not trying to be. It is balanced instead of candy-sweet: less sugary than classic chocolate buttercream, with enough powdered sugar to stay smooth, spreadable, and pipeable.

Use it right away when you want a spreadable frosting. A short chill turns the same bowl from creamy and spreadable to swirl-ready. The recipe itself takes about 10 minutes; the extra time is only for cleaner cupcake swirls or a firmer layer-cake finish.

Need the fast path? Jump to the recipe. Trying to fix soft frosting? Start with the Texture Rule.

It is especially useful for birthday cupcakes, simple sheet cakes, bake-sale brownies, red velvet cake, and casual layer cakes where you want chocolate frosting that tastes rich but not candy-sweet.

Contents

Chocolate Cream Cheese Frosting Recipe

This recipe makes a smooth, chocolatey cream cheese frosting for cupcakes, brownies, 9×13 cakes, and simple layer cakes. It spreads as soon as it is mixed and becomes firm enough for soft swirls after 15 to 30 minutes in the refrigerator.

The mixing is quick; the chill is only there when you want cleaner piping. For a generously frosted 9-inch layer cake or bakery-style cupcake swirls, make extra because piping always uses more than it looks like.

PrepChillYieldBest For
10 minutesOptional 15 to 30 minutesAbout 3½ to 4 cupsCupcakes, brownies, 9×13 cakes, casual layer cakes

Choose your texture: 3 cups powdered sugar gives a softer, tangier frosting. 3½ cups gives firmer swirls. Chill before piping, and reach for milk or cream only when the frosting is truly too thick. For visual checkpoints, see the Success Cues.

Recipe Ingredients

  • 8 oz / 226 g full-fat brick cream cheese, softened but still cool
  • ½ cup / 113 g unsalted butter, softened but not melted
  • 3 to 3½ cups / 360 to 420 g powdered sugar / icing sugar, sifted if lumpy
  • ½ cup / about 50 g unsweetened cocoa powder, natural or Dutch-process
  • 1 teaspoon vanilla extract
  • ÂĽ teaspoon fine salt, plus a tiny pinch more to taste
  • 1 to 4 teaspoons milk or cream, only when the mixture is too thick; many batches need none

Note: Depending on the brand and how tightly it is packed, ½ cup cocoa powder may weigh around 45 to 55 g. About 50 g is a reliable working amount here.

Optional: For a fudgier version, beat in 3 to 4 oz / 85 to 115 g cooled melted dark chocolate after the base is smooth.

Before Mixing Checkpoint

The cream cheese should press in but still hold its block shape. The butter should dent but not shine. If either one looks greasy, chill it briefly before starting.
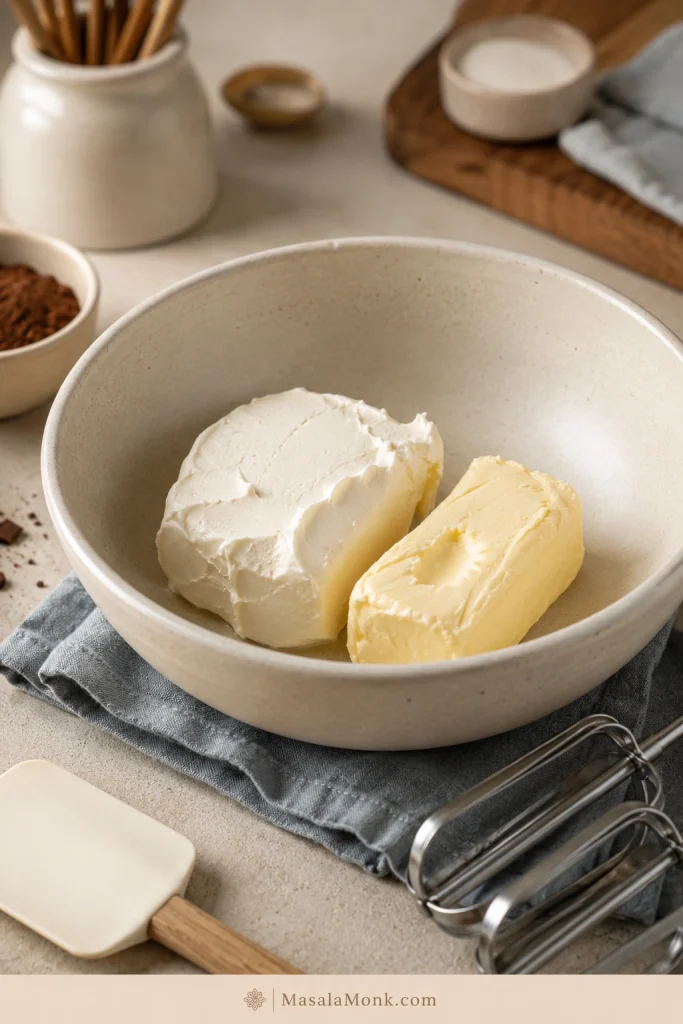
Cool-soft cream cheese and softened butter holding their shape in a mixing bowl before beating.
Before mixing, the cream cheese should press in but still hold shape, while the butter should dent without looking greasy.

Recipe Instructions

  1. Add the softened cream cheese and softened butter to a large mixing bowl. Beat on medium speed until completely smooth and creamy, about 1 to 2 minutes. Scrape down the sides and bottom of the bowl.
  2. Add the cocoa powder, 3 cups powdered sugar, salt, and vanilla. Mix on low speed until the dry ingredients are mostly absorbed.
  3. Increase to medium-low or medium speed and beat just until smooth. Scrape again so no cocoa, sugar, or cream cheese is hiding at the bottom or sides.
  4. Beat until the cocoa and sugar disappear and the mixture turns creamy. Add milk or cream only when it still feels too thick.
  5. Taste before adding the last ½ cup powdered sugar. Add it only for a sweeter or stiffer texture. When the mixture tastes sweet but flat, add a tiny pinch more salt.
  6. Use it right away when you want a spreadable frosting. To pipe soft swirls, chill it for 15 to 30 minutes before filling the bag.
  7. To make the optional fudgy version, mix in the cooled melted chocolate after the base is smooth. Beat briefly, just until combined.
  8. If the mixture is fridge-firm, let it sit for 10 to 15 minutes so it softens enough to mix smoothly before re-beating.

Recipe Notes

  • Full-fat block-style cream cheese gives the frosting its most reliable structure.
  • Sift cocoa powder and powdered sugar when they look lumpy, especially for piping.
  • Milk or cream should go in slowly. Most batches need little or no added liquid.
  • The mixture is ready when it looks smooth, thick, and holds soft ridges from the beaters.
  • On a spatula, it should mound softly instead of running off.
  • Let cakes, cupcakes, and brownies cool completely so the chocolate layer sits on top instead of melting in.

When spread thinner over brownies or sheet cakes, some bakers call this chocolate cream cheese icing. In everyday use, frosting usually means a thicker topping that can be spread or piped, while icing often means something thinner. This recipe sits on the frosting side, but the same creamy, tangy topping may be called icing when it is spread over a pan dessert.

Before You Start

This is a simple recipe, but texture matters. Soft frosting is not a disaster. Most of the time, you are adjusting temperature, not rescuing a ruined batch.

The biggest difference in testing was not the cocoa or the mixer. It was temperature. When the cream cheese and butter were cool-soft, the frosting turned thick and smooth without much help. When either one was warm, the same recipe softened quickly and needed chilling before it behaved again.

The mixture should look thick before you decide it needs liquid. Many batches look too stiff at first and then turn creamy once the sugar and cocoa fully mix in.

The Thick Swoop Test

Before you decide the frosting needs more sugar or liquid, lift a small amount with a spatula. A good batch should mound softly and hold a clean swoop for a moment.
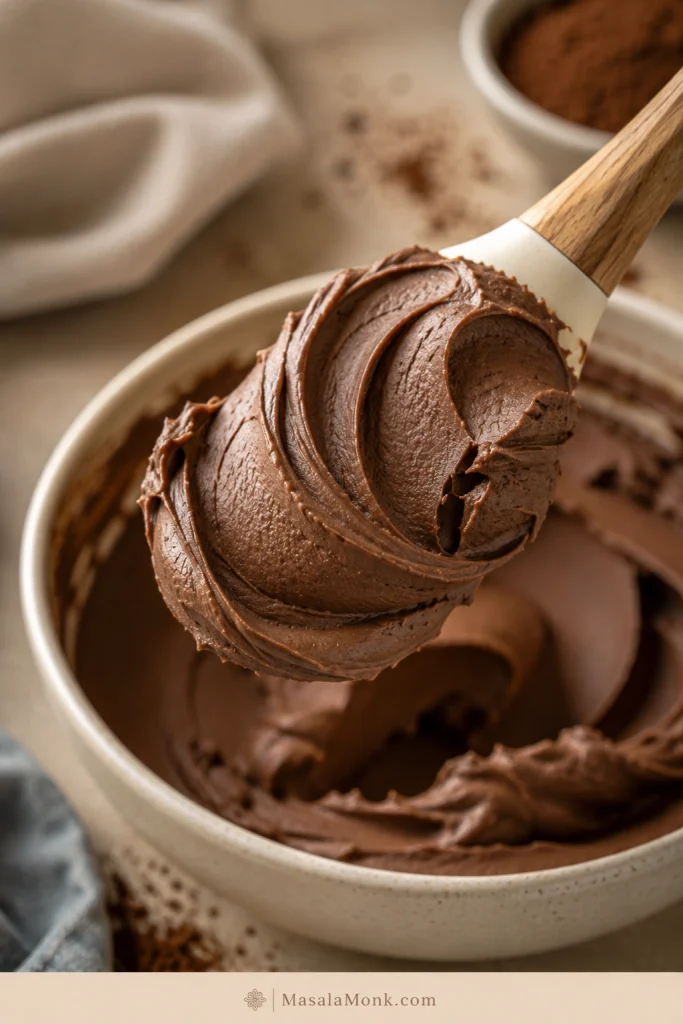
A spatula lifting a thick swoop of chocolate cream cheese frosting from an ivory mixing bowl.
Before you spread or pipe, look for a thick frosting swoop that lifts cleanly instead of sliding back into the bowl.

The Texture Rule: Spread, Chill, or Fix

Chocolate cream cheese frosting changes with temperature. Before adding more sugar or liquid, look at the bowl and decide what you need it to do next.
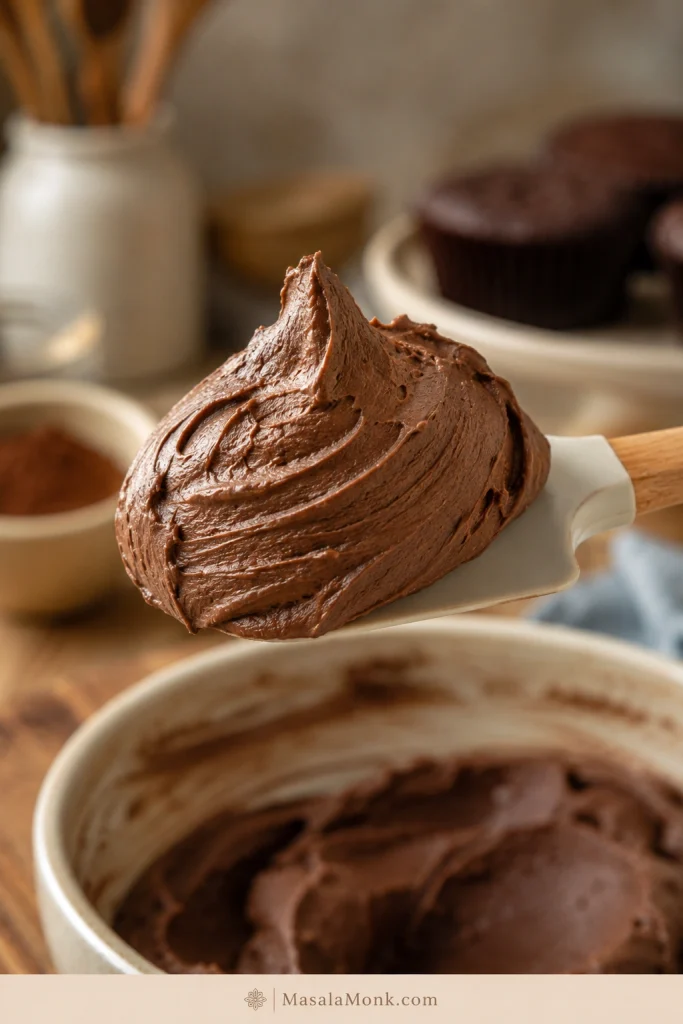
Thick chocolate cream cheese frosting mounding on a spatula above a mixing bowl.
When the frosting mounds softly on the spatula, it is usually ready for spreading, filling, or a short chill before piping.
If it looks like thisDo thisWhy it works
Thick, creamy, and mounds on a spatulaUse it for spreadingIt is ready for brownies, sheet cakes, and simple cakes
Smooth but too soft for swirlsChill 15 to 30 minutesCold firms the butter and cream cheese without adding sweetness
Dry or stiff after mixingAdd milk or cream 1 teaspoon at a timeSmall amounts loosen the texture without making it runny
Loose even after chillingAdd powdered sugar or cocoa graduallyOnly adjust after temperature has had a chance to help

The whole recipe comes down to one rhythm: mix until smooth, pause before adding liquid, chill before fixing softness, and stop once it holds its shape.

Is This the Right Frosting for You?

Think of it as the middle ground between chocolate buttercream and cheesecake: richer than whipped cream, tangier than buttercream, and softer than ganache.

It is made for soft swirls, creamy layers, and tangy chocolate balance. For sharp decorative edges, tiny detailed piping, or long room-temperature display cakes, a firmer buttercream or ganache will be easier to manage.

  • Use this frosting for cupcakes, brownies, sheet cakes, yellow cake, chocolate cake, red velvet cake, and casual layer cakes.
  • Choose buttercream frosting when you want a sweeter, firmer, classic birthday-cake topping.
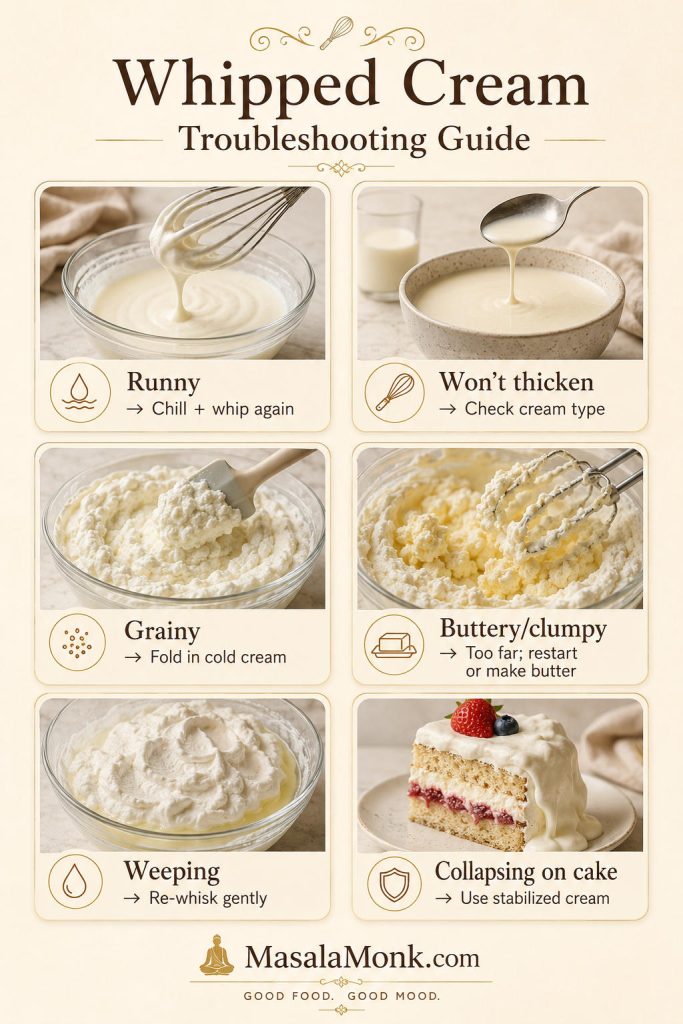
  • Use homemade whipped cream when pies, fruit desserts, hot chocolate, or no-bake desserts need something lighter.
  • Reach for ganache when you need a glossy drip or smooth cake covering.
  • Pick royal icing when cookie icing needs to dry hard for stacking.

Ingredients You Need

Good frosting starts before the mixer turns on. The texture is mostly decided by the cream cheese, butter, and how quickly you add liquid.
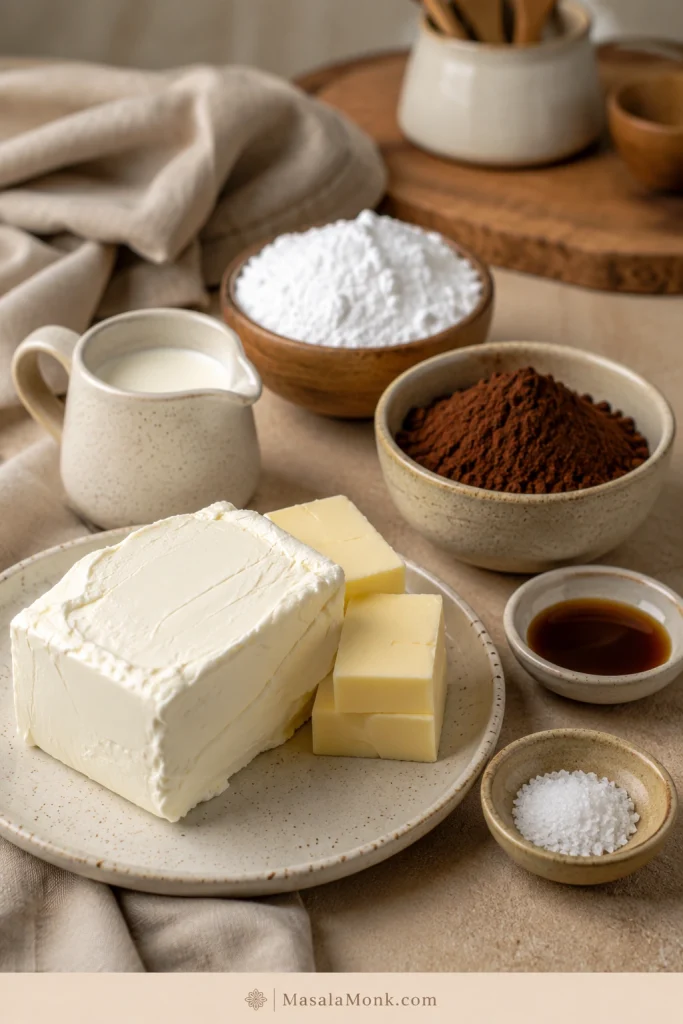
Cream cheese, butter, cocoa powder, powdered sugar, vanilla, salt, and cream arranged on a kitchen counter.
Start with firm cream cheese, cool-soft butter, sifted dry ingredients, and only a small amount of liquid when needed.

Cream Cheese for Frosting

Full-fat brick cream cheese gives the topping body and stability, mixes smoothly with butter and powdered sugar, and helps the finished texture hold after chilling.

Outside the US, look for full-fat block-style cream cheese or the firmest full-fat cream cheese available. Avoid whipped, spreadable, low-fat, or very soft cream cheese when you want piping.
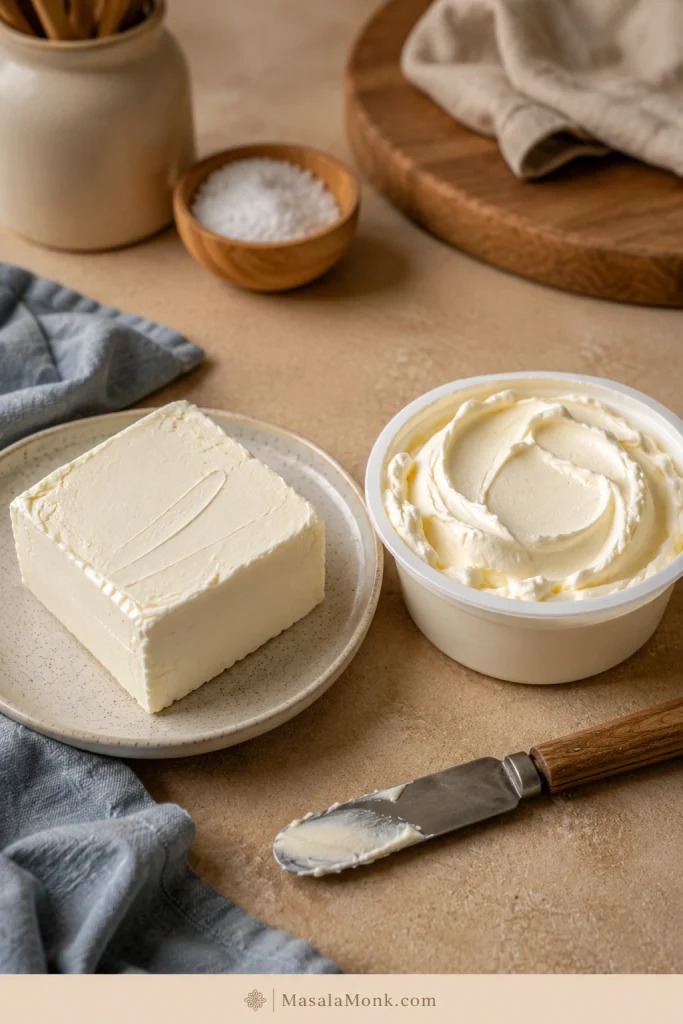
Firm block-style cream cheese beside softer spreadable tub cream cheese on a warm kitchen counter.
Block-style cream cheese gives better structure; in contrast, softer tub cream cheese can make frosting loosen faster.

If your cream cheese comes in a tub but feels firm and dense rather than airy or spread-like, keep it cold, skip extra liquid, and chill the frosting before piping. The issue is moisture and structure: spreadable cream cheese is usually softer, so the mixture can loosen before it ever gets cold enough to hold a swirl.

If the frosting has already turned loose, jump to the runny frosting fix before adding more sugar.

The same full-fat cream cheese logic shows up in chilled desserts too. This no bake cheesecake recipe is a good example of how cream cheese structure and chilling decide the final texture.

Butter

Butter makes the mixture smoother, richer, and more stable. It should dent when pressed but should not look oily. Overly warm butter makes the bowl soft before you even start.

Unsalted butter gives you the cleanest control over flavor. If using salted butter, reduce the added salt to a small pinch and taste before adding more.

Powdered Sugar / Icing Sugar

Powdered sugar, also called icing sugar in many countries, does more than sweeten here. It helps the cream cheese hold a swirl, gives the chocolate layer body, and keeps the finished texture from sliding.

Three cups gives a tangier, less sweet result. Closer to 3½ cups gives firmer cupcake swirls, borders, or layer-cake decorating. Sift it first when it looks clumpy.

Cocoa Powder

Unsweetened cocoa powder gives the chocolate flavor and helps thicken the texture. Natural cocoa gives a familiar, slightly sharper flavor and a lighter brown color. Dutch-process cocoa tastes smoother, darker, and less sharp.

Both work here because this is frosting, not cake batter. The more important step is sifting the cocoa when it looks lumpy. Cocoa lumps can hide in the bowl and show up later as dry specks.

Vanilla, Salt, and Liquid

Vanilla rounds out the chocolate. Salt makes the chocolate taste stronger and keeps the sweetness from feeling flat. Milk or cream is optional and should be added only after the mixture has fully come together.

Heavy cream gives a richer finish, while milk thins the texture more quickly. Sweetened whipped topping and non-dairy topping belong to a different frosting style.

Equipment You Need

A hand mixer or stand mixer gives the smoothest texture, but you can still make this with a sturdy spatula if the ingredients are properly softened and the dry ingredients are sifted.

  • Electric mixer: Best for the smoothest result.
  • Rubber spatula: Essential for scraping the bowl.
  • Fine-mesh sieve: Helpful for cocoa and powdered sugar.
  • Offset spatula or piping bag: Use for spreading or soft swirls.

When using a stand mixer, choose the paddle attachment over the whisk. It keeps the mixture creamy without whipping in too much extra air.

Why This Frosting Works

This frosting works because it balances water, fat, sugar, and temperature. Cream cheese gives tang, but it also brings softness. Butter adds body. Cocoa thickens while deepening the chocolate flavor. Powdered sugar stabilizes the mixture, but too much can make the taste flat and overly sweet.

That is why this recipe uses enough powdered sugar to hold shape, then relies on cocoa, salt, and chilling for balance. You get a frosting that tastes chocolate-first and cream-cheese-tangy, not one that is dominated by powdered sugar.

The most reliable batches came from controlling temperature before changing ingredients. Cool-soft cream cheese mixed smoothly without turning loose; butter that dented but did not look oily gave the frosting body; and waiting before adding milk kept the mixture from thinning too early.

Cocoa Powder vs Melted Chocolate

Use cocoa powder for the easiest, steadiest batch. Add cooled melted chocolate when you want a deeper, fudgier version.

Cocoa powder keeps the base simple, stable, and deeply chocolatey. Melted chocolate makes the topping silkier and richer, but the chocolate needs to be cool enough that it does not melt the butter.

Chocolate OptionResultBest For
Cocoa powder onlyQuick, stable, chocolatey, easy to pipe after chillingEveryday cupcakes, cakes, brownies
Melted chocolate onlySmooth, silky, richer, slightly more delicateBakery-style frosting and fillings
Cocoa powder + melted chocolateDeepest and fudgiest chocolate flavorSpecial cakes, brownies, richer desserts
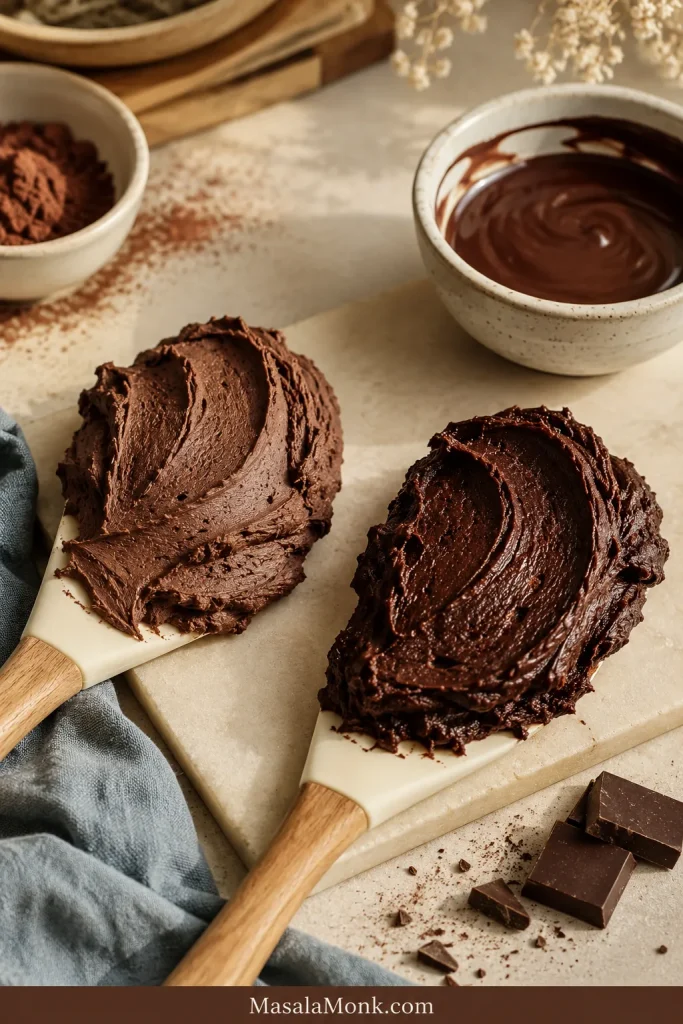
Two spatulas showing lighter cocoa frosting and darker melted chocolate cream cheese frosting.
Compared with cocoa powder, cooled melted chocolate gives a darker, fudgier frosting, while cocoa keeps the texture steadier.

For the most reliable version, make the cocoa powder base first. For a darker, fudgier finish, add cooled melted dark chocolate at the end. A 55% to 70% dark chocolate works well; very bitter chocolate can taste harsh, while very sweet chocolate can push the frosting closer to buttercream sweetness. Want the richer path? Use the dark chocolate variation below.

Still choosing between cocoa, cacao, and dark chocolate? This cacao vs chocolate vs dark chocolate guide explains how those ingredients differ in everyday cooking.

Need something pourable instead of creamy? This 3-minute homemade chocolate syrup is better for drizzling over cake, ice cream, pancakes, or dessert plates.

How to Make Chocolate Cream Cheese Frosting

For the smoothest frosting, beat the cream cheese and butter first, then mix in the cocoa, powdered sugar, salt, and vanilla before making any texture adjustments.

Not sure whether to chill, thicken, or loosen it? Use the Texture Rule before changing the ingredients.

1. Beat the Cream Cheese and Butter First

Add the softened cream cheese and softened butter to a mixing bowl. Beat on medium speed until smooth before adding anything else. Scrape more than you think you need to; cream cheese likes to hide under the paddle and along the sides of the bowl.

The base should look creamy, pale, and smooth before you move on.
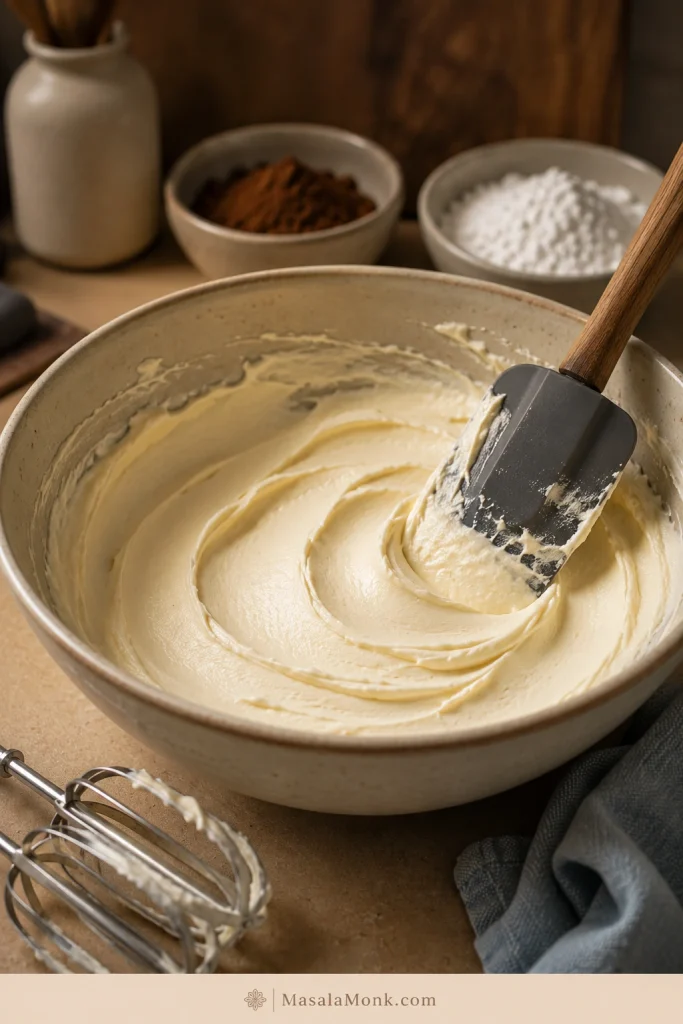
Smooth pale cream cheese and butter mixture in a bowl before cocoa powder and powdered sugar are added.
A smooth cream cheese and butter base keeps tiny lumps from hiding once the cocoa and powdered sugar go in.

2. Add Cocoa Powder and Powdered Sugar Gradually

Add the cocoa powder, powdered sugar, salt, and vanilla. Start the mixer on low speed so the dry ingredients do not puff out of the bowl.

If it looks dusty for a minute, stay with it. That dry stage is normal before the frosting turns creamy. Keep mixing on low, scrape the bowl, and give it a moment before adding liquid.
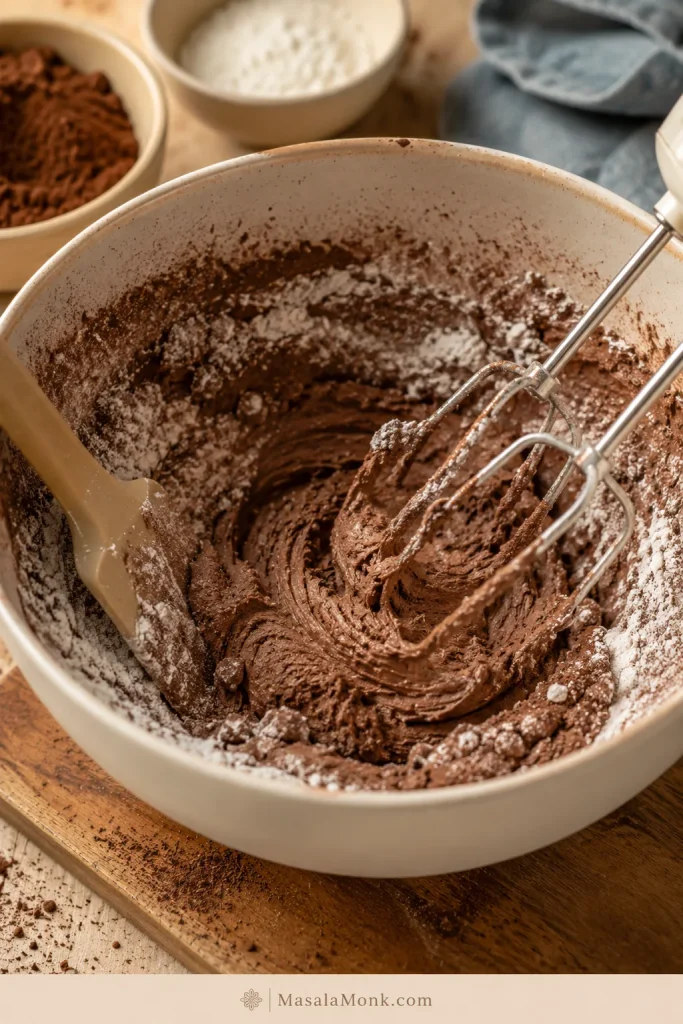
Cocoa powder and powdered sugar partly mixed into a cream cheese butter base in a mixing bowl.
At this stage, the mixture can look dry and dusty; keep mixing before deciding it needs milk or cream.

3. Mix Until Smooth

Once the dry ingredients disappear, increase to medium-low or medium speed and beat only until smooth.
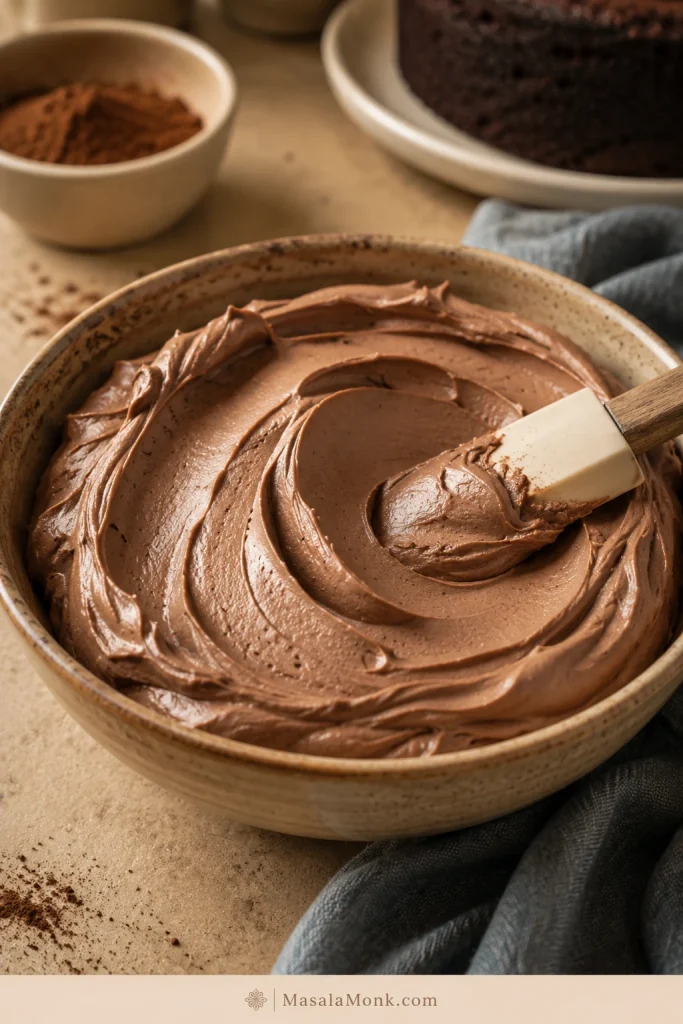
Smooth chocolate cream cheese frosting in a bowl with a spatula creating soft ridges.
Once the dry ingredients disappear, look for smooth chocolate frosting with soft ridges and no dusty cocoa streaks.

4. Adjust the Texture Carefully

Once the base is made, the rest is adjustment. Use the Texture Rule above: spread it when it mounds, chill it when it is too soft, loosen it only when it is truly stiff, and thicken it only after temperature has had a chance to help.

  • A soft, spreadable finish works best with 3 cups powdered sugar and little or no chill.
  • Cleaner swirls usually need closer to 3½ cups powdered sugar plus a short chill.
  • Cooled melted dark chocolate makes the texture darker, smoother, and more fudgy.
  • Dutch cocoa, salt, and the lower sugar amount create a more balanced, less sugary result.
  • To thicken the frosting, add powdered sugar 2 tablespoons at a time.
  • To soften the frosting, add milk or cream 1 teaspoon at a time.

At the right texture, the frosting should look like soft chocolate cheesecake filling: creamy, cool, and thick enough to sit in a mound on the spatula.
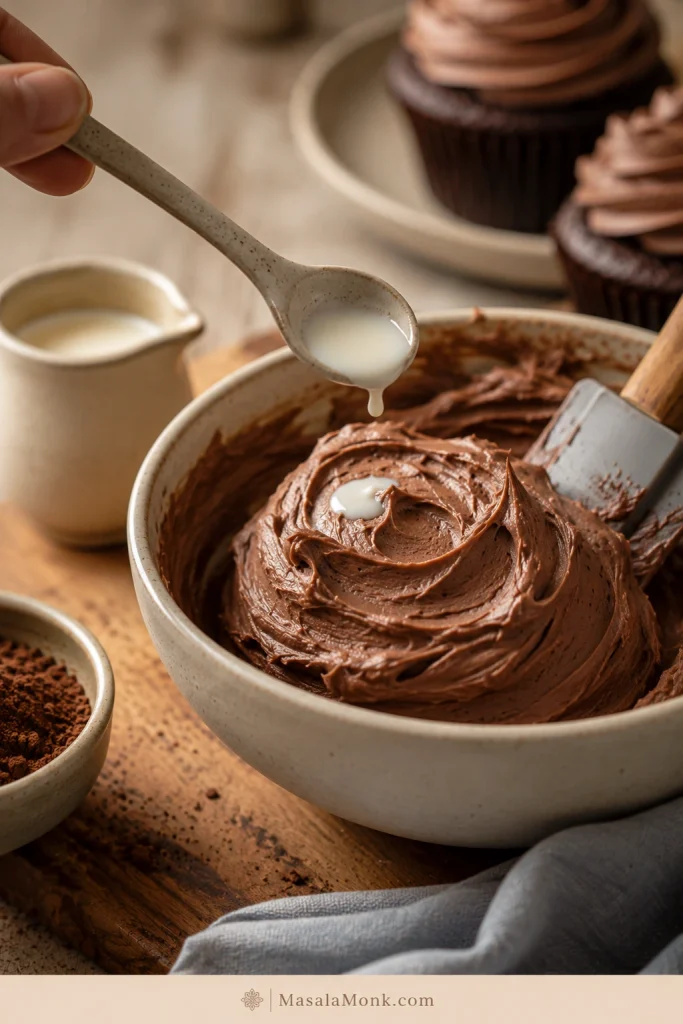
A small spoonful of cream being added to thick chocolate cream cheese frosting in a bowl.
Use teaspoons of milk or cream only after the frosting is fully mixed, because extra liquid softens cream cheese frosting quickly.

Success Cues

This is the section to check when you are staring into the bowl wondering if it looks right.

StageWhat you should see
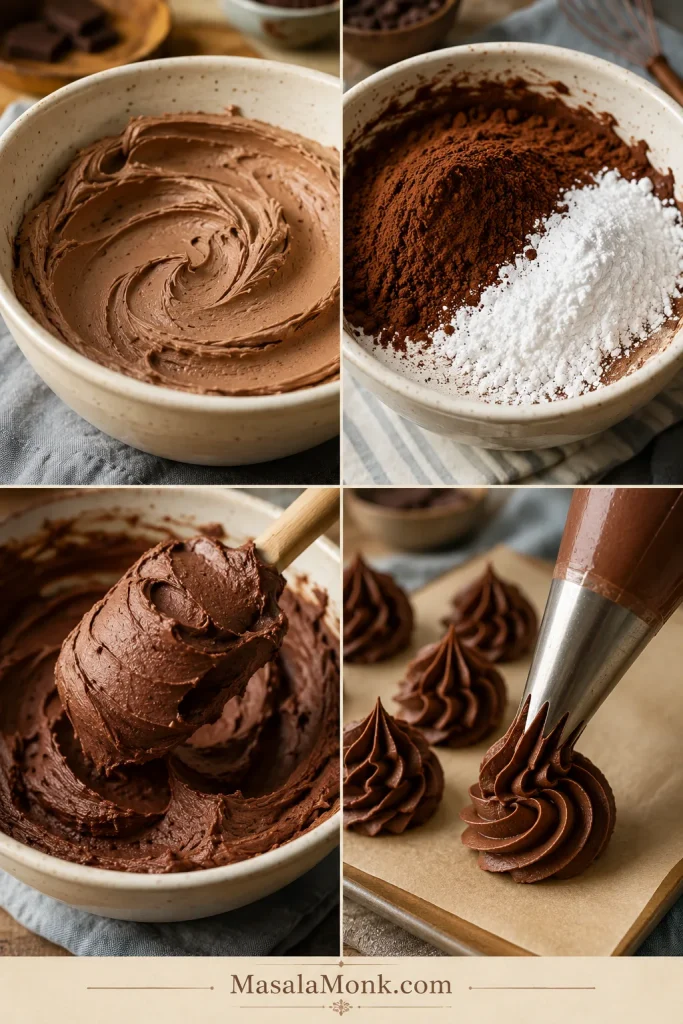
After beating cream cheese and butterSmooth, pale, creamy, with no visible lumps
After adding cocoa and powdered sugarDry at first, then creamy as it mixes
Ready to spreadThick, smooth, and mounding on a spatula
Ready to pipeCool, firm but squeezable, and holding soft ridges
Too softGlossy, loose, and sliding off the spatula
Four visual stages of chocolate cream cheese frosting showing smooth base, dry stage, mounded texture, and piped ridges.
Use these visual cues to decide whether your chocolate cream cheese frosting needs more mixing, chilling, or piping time.

How to Make It Pipeable

For soft, reliable swirls, use full-fat block-style cream cheese, the higher amount of powdered sugar, and chill the frosting for 15 to 30 minutes before piping.

This is a soft-swirl frosting, not a sharp-edge decorating buttercream. After chilling, it works well for cupcake swirls, simple borders, filling a casual layer cake, and generous swoops.

It is not the best choice for flowers, tiny detailed piping, or a cake that has to sit warm for hours. For tall cupcake swirls, sift the cocoa and sugar well, and choose a large star tip, open star tip, or large round tip.

When it is ready to pipe, the bag should feel cool in your hands and the frosting should move with pressure, not pour. A short chill gives you soft matte swirls that look finished without turning stiff or crusty.

If the piping bag starts to feel soft in your hands, use the short chill reset before continuing.
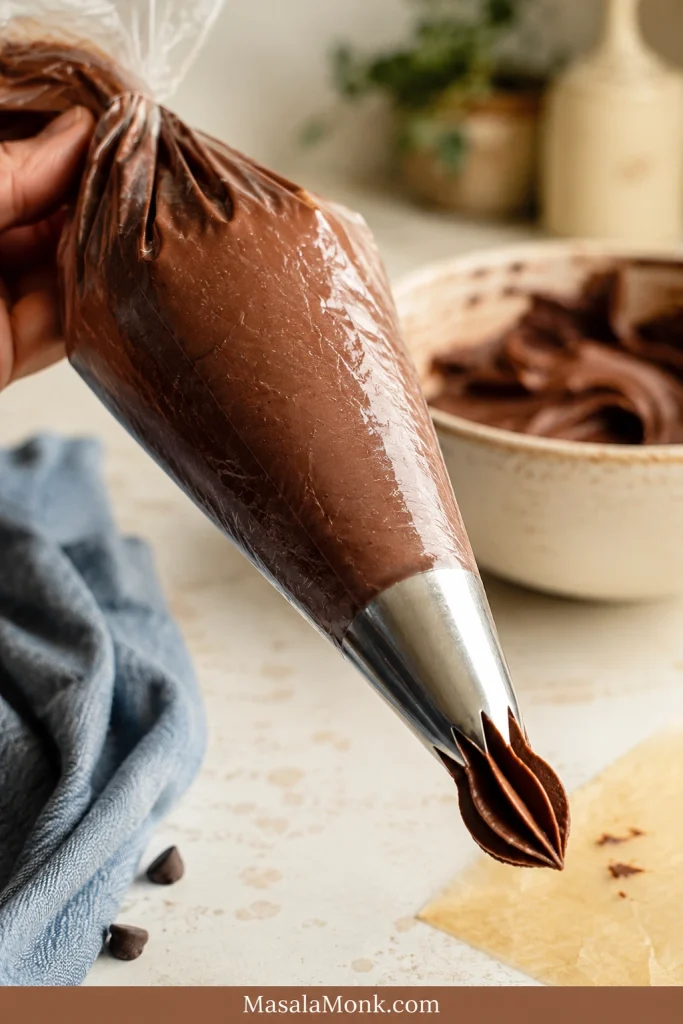
Chocolate cream cheese frosting inside a piping bag with a large star tip on a kitchen counter.
Before piping, the filled bag should feel cool, full, and steady, with frosting that moves under pressure but does not flow.

Once the mixture looks smooth and holds soft ridges, stop mixing. It can look perfect, then loosen if you keep beating.

How the Frosting Should Pipe on Cupcakes

Use a large star tip or large round tip for soft swirls. The frosting should move with steady pressure and keep rounded ridges after you lift the tip.
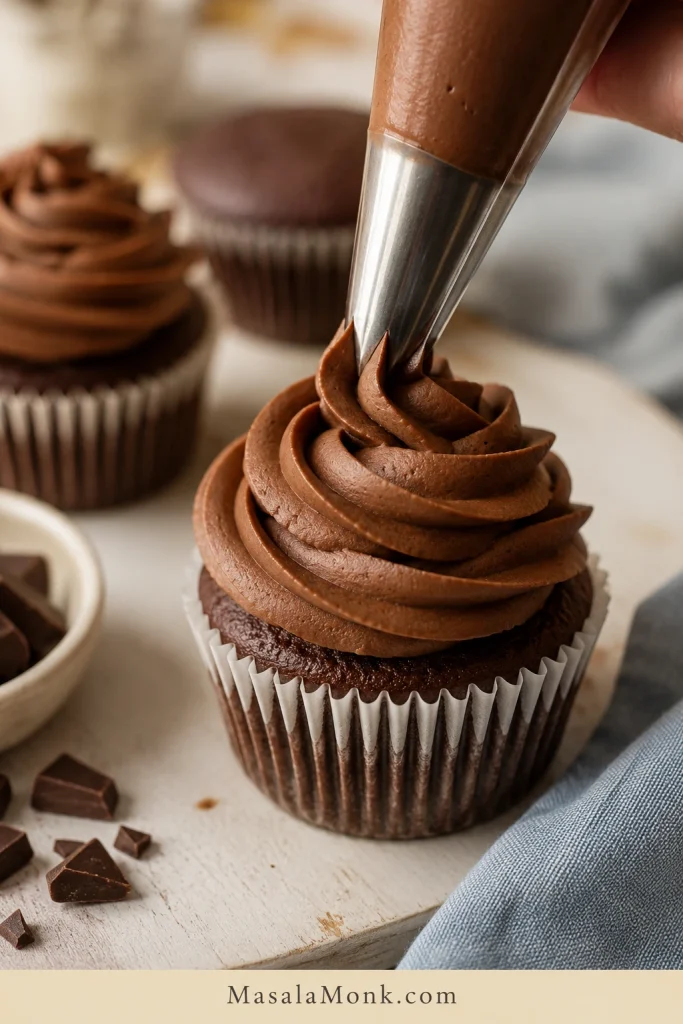
Chocolate cream cheese frosting being piped into a soft swirl on a chocolate cupcake.
After chilling, the frosting pipes into rounded cupcake swirls that look finished without turning stiff, crusty, or overly sweet.

How to Make It Less Sweet

This is not a low-sugar frosting. It is less sugary than classic chocolate buttercream because cream cheese, cocoa, and salt keep the sweetness balanced.

AdjustmentWhat it changes
Add salt firstMakes chocolate taste fuller without changing the texture
Add 1 to 2 tablespoons cocoaDeepens flavor and slightly thickens the mixture
Use Dutch-process cocoaMakes the chocolate taste smoother and darker
Use 3 cups powdered sugarTangier, softer, less sweet
Use 3½ cups powdered sugarFirmer, sweeter, better for tall swirls

For tall cupcake swirls, avoid reducing the powdered sugar too far. Powdered sugar is not only for sweetness; it also gives structure.

How Much Frosting Do You Need?

The right amount depends less on the cake and more on how generous you want the finished dessert to look. If you love big cupcake swirls, make more than you think; piping always eats frosting faster than spreading.

This recipe makes about 3½ to 4 cups of chocolate cream cheese frosting, depending on how much powdered sugar you use and whether you add melted chocolate.

DessertAmount NeededNotes
12 cupcakes with tall swirls3 to 3½ cupsOne batch works well
24 cupcakes with light swirls3½ to 4 cupsPipe modestly
9×13 sheet cakeAbout 3 cupsSpread with an offset spatula
8×8 or 9×9 brownies1½ to 2 cupsHalf batch is usually enough
8-inch 2-layer cake3½ to 4 cupsEnough for filling and outside
9-inch 2-layer cake4 to 5 cupsMake 1.25x when decorating heavily
3-layer cake4½ to 5 cupsMake extra for safety

Use a half batch for brownies, a small cake, or 6 to 8 cupcakes. Use the full batch for 12 tall cupcake swirls, 24 lighter cupcake swirls, or a 9×13 sheet cake. Make 1.25x for a 9-inch two-layer cake with decoration, or 1.5x for a heavily frosted layer cake.

Where This Frosting Tastes Best

Use this frosting when you want chocolate flavor without the heavy sweetness of buttercream. It works especially well on desserts that are already sweet and need a little tang to balance them.

Once you know where you want to use it, check how much frosting you need before you start decorating.

The best matches are soft cakes, fudgy brownies, and cupcakes that need a cool, creamy swoop instead of a stiff sugar crust.

Chocolate Cupcakes

On chocolate cupcakes, the tang keeps the cocoa from feeling heavy. The swirl should taste like a cool chocolate cheesecake cap on top of soft cake, not a pile of powdered sugar.
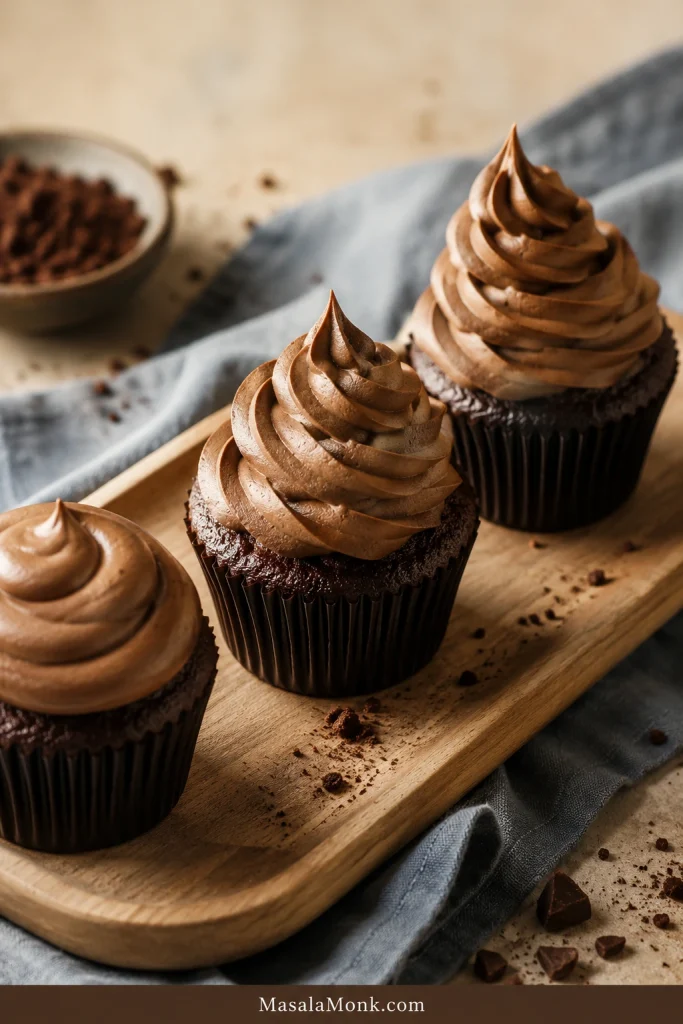
Three chocolate cupcakes with different heights of chocolate cream cheese frosting swirls.
From modest swirls to taller chilled swirls, this is the realistic range for pipeable cream cheese frosting on cupcakes.

What the Frosting Should Feel Like on a Cupcake

The best bite is cool, creamy, and lightly tangy against the cake. It should feel like a soft cap of chocolate cheesecake, not a hard sugar crust.
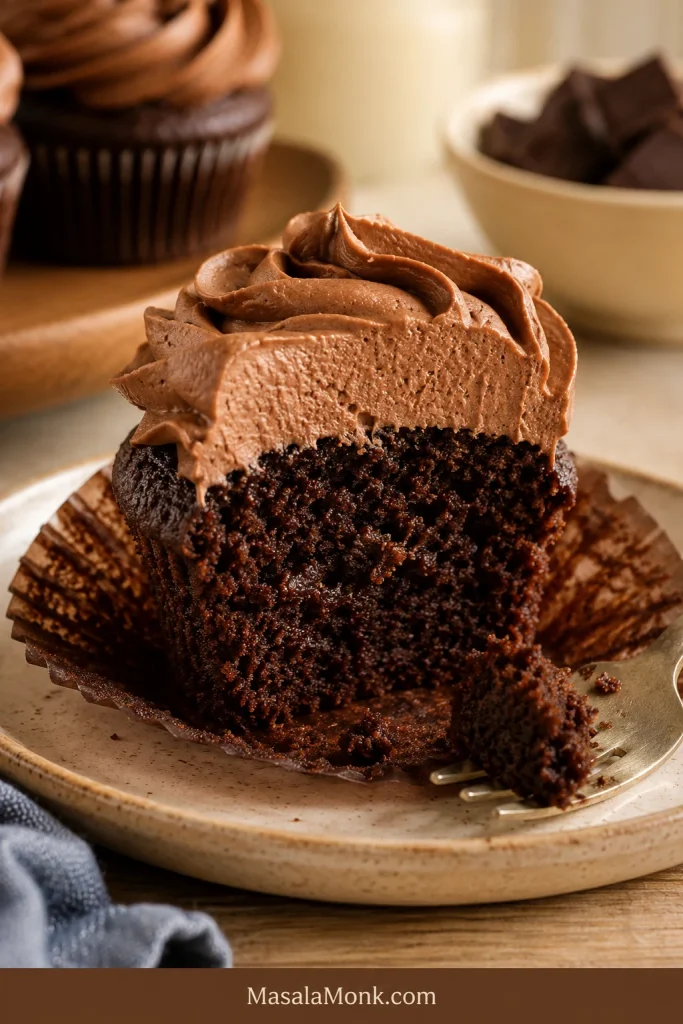
Cut chocolate cupcake with a thick creamy cap of chocolate cream cheese frosting on top.
Because cream cheese adds tang, the frosting should taste like a cool chocolate cheesecake cap rather than a hard sugar crust.

Yellow Cake with Chocolate Cream Cheese Frosting

This is where the frosting really shines: soft yellow cake, cool tangy chocolate, and just enough cocoa bitterness to keep the bite from turning candy-sweet.
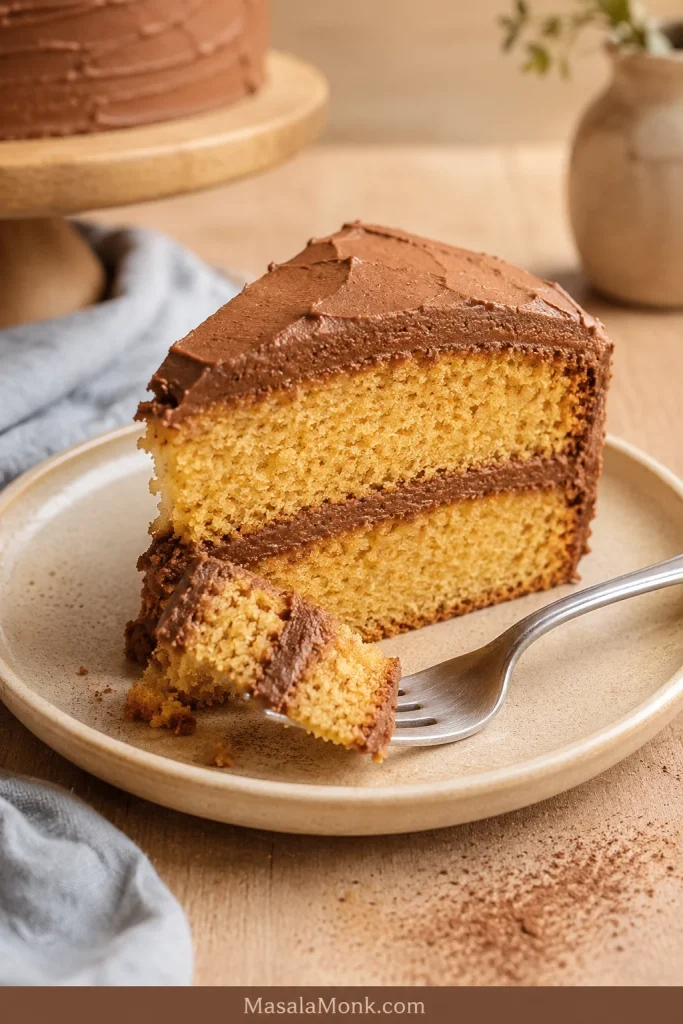
Yellow cake slice with chocolate cream cheese frosting between the layers and on top.
Yellow cake works especially well because tangy chocolate cream cheese frosting balances the sweet, buttery crumb.

Chocolate Layer Cake with Chocolate Cream Cheese Frosting

Use it on chocolate cake when you want a deeper, less sugary finish than chocolate buttercream. The cream cheese tang keeps the cocoa from feeling too heavy, so the slice still tastes rich without becoming overwhelming.
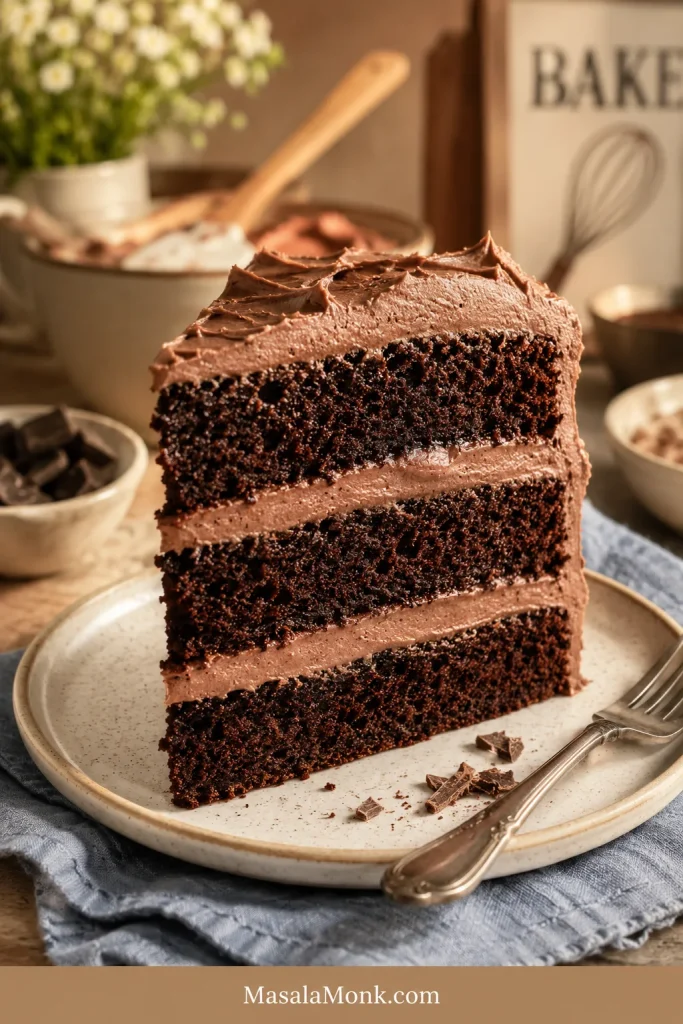
Chocolate layer cake slice filled and topped with chocolate cream cheese frosting.
A moderate frosting layer keeps chocolate layer cake rich and creamy without making the slice feel heavy.

Red Velvet or Spice Cake

Cream cheese already belongs with red velvet, and cocoa makes it a stronger chocolate version. That same tang works beautifully with warm spices too. This spice cake recipe uses cream cheese frosting to balance brown sugar and baking spices.

Brownies with Chocolate Cream Cheese Frosting

On brownies, it tastes like a thin chocolate cheesecake layer over a fudgy base. Let the pan cool fully before frosting, because brownies hold heat longer than they look.
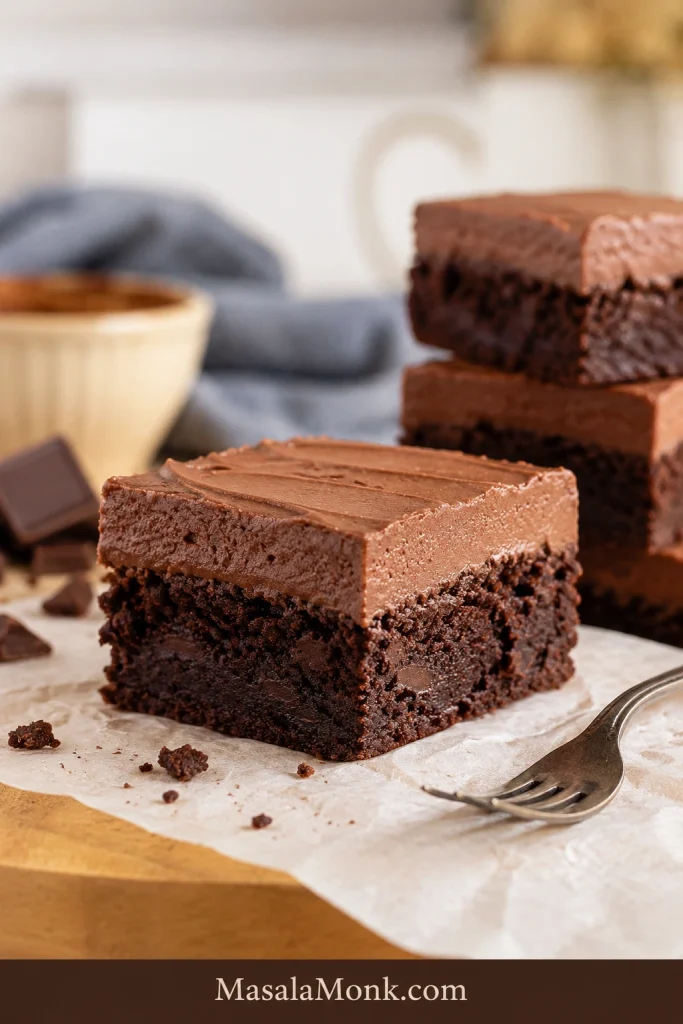
Fudgy brownie square topped with a smooth layer of chocolate cream cheese frosting.
Here, the frosting sets into a smooth chocolate cheesecake-style layer over the dense fudgy base.

Sheet Cake with Chocolate Cream Cheese Frosting

A 9×13 sheet cake is one of the easiest places to use this frosting. It spreads smoothly, chills into clean slices, and gives a simple pan cake enough tang to balance the sweetness. For another soft pan cake that benefits from cream cheese frosting, this applesauce cake recipe is a better match than a delicate sponge.
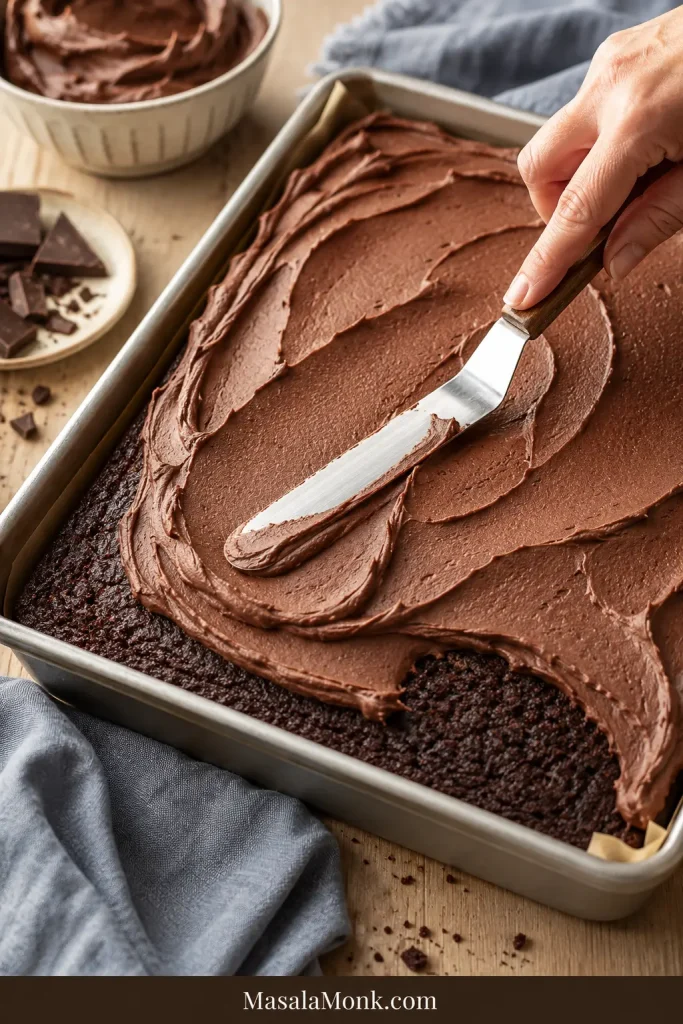
Chocolate cream cheese frosting being spread over a rectangular sheet cake with an offset spatula.
Spread the frosting into soft swoops, then chill until the top settles into a neat sliceable layer.

How Much Filling to Use in a Layer Cake

For a casual layer cake, chill the frosting and use a moderate filling. It gives the cake a creamy chocolate layer that cuts through sweetness without making the slice feel heavy.

After assembling the cake, check the storage and serving timing so the frosting is cool but not cold-hard.
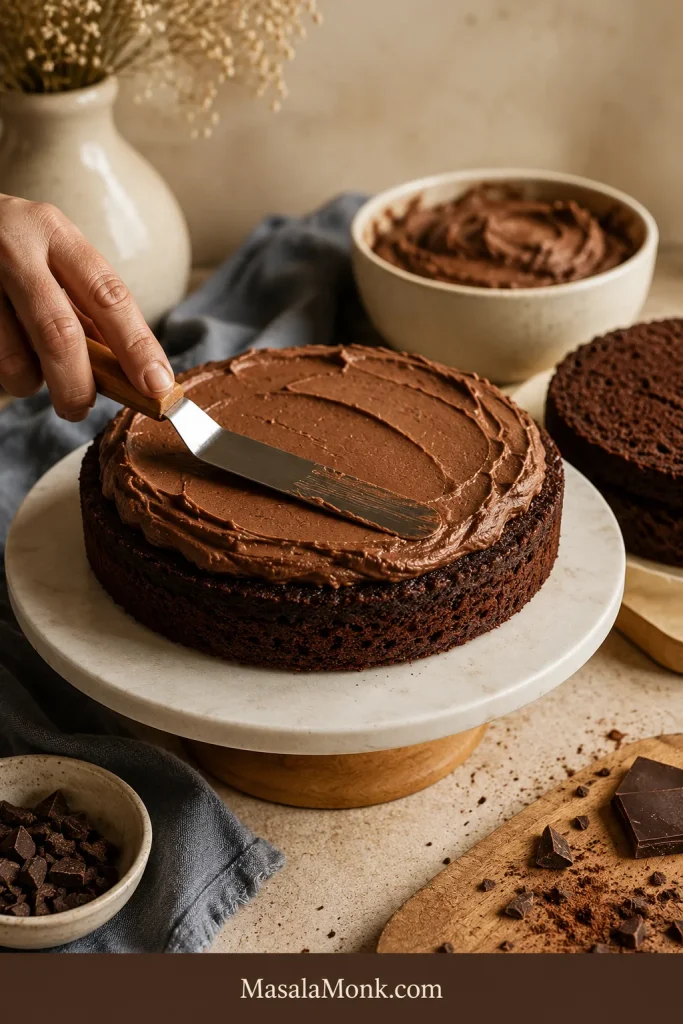
Chocolate cream cheese frosting being spread in a moderate layer on a round chocolate cake layer.
Keep the filling moderate and level so the cake stacks cleanly instead of squeezing frosting out the sides.
  1. Make sure the cake layers are completely cool.
  2. Chill the frosting for 15 to 30 minutes before filling if it feels soft.
  3. Add a moderate layer between the cakes. Very thick, soft filling can squeeze out when the top layer goes on.
  4. For a taller cake, pipe a thicker ring around the edge before filling the center.
  5. Apply a thin crumb coat, chill for 20 to 30 minutes, then add the final coat.
  6. Refrigerate the finished cake until closer to serving.

For cleaner slices, chill the finished cake before cutting, then let slices sit briefly before serving so the texture becomes creamy again.

Cookies

This frosting works for soft sandwich cookies or chilled frosted cookies, but it does not dry hard like royal icing. Use it when the cookies will be served chilled or kept in a single layer.

Troubleshooting

If something looks off, start with temperature before assuming the recipe has gone wrong. Cream cheese frosting often looks loose before chilling brings it back.

If you are not sure whether the frosting is actually too soft, compare it with the Success Cues before adding more sugar.

Quick fix: when the texture is too soft, refrigerate the bowl for 20 minutes before changing anything else.

Use this order when the texture feels off: chill first, re-beat briefly, add powdered sugar for structure, add cocoa for thickness and chocolate flavor, and add liquid only when the mixture is too stiff.

ProblemLikely CauseFix
Runny textureTub cream cheese, warm butter, overmixing, too much liquid, or warm melted chocolateChill 20 to 30 minutes, then re-beat briefly. Add powdered sugar only when needed.
LumpsCream cheese was too cold or cocoa/sugar was not siftedBeat cream cheese and butter smooth before adding dry ingredients. Sift cocoa and powdered sugar next time.
Grainy texturePowdered sugar lumps, overmixing, or melted chocolate added badlySift powdered sugar. When using melted chocolate, cool it before adding.
Too thickToo much powdered sugar or cocoaAdd milk or cream 1 teaspoon at a time.
Too sweetToo much powdered sugar or weak cocoa flavorAdd a pinch of salt or a little more cocoa.
Not chocolatey enoughMild cocoa or too little cocoaAdd 1 to 2 tablespoons more cocoa, or add cooled melted dark chocolate.
Will not hold pipingToo warm, too soft, or not enough powdered sugarChill the mixture and piping bag. Add more powdered sugar only when chilling does not help.
Split or loosenedOverbeaten cream cheese or warm melted chocolateChill until firmer, then re-beat gently on low speed.

Why Did My Frosting Turn Runny?

Chocolate cream cheese frosting usually turns runny because the cream cheese or butter was too warm, the cream cheese was too soft, too much liquid was added, or the mixture was overbeaten. Start with chilling before changing the recipe.
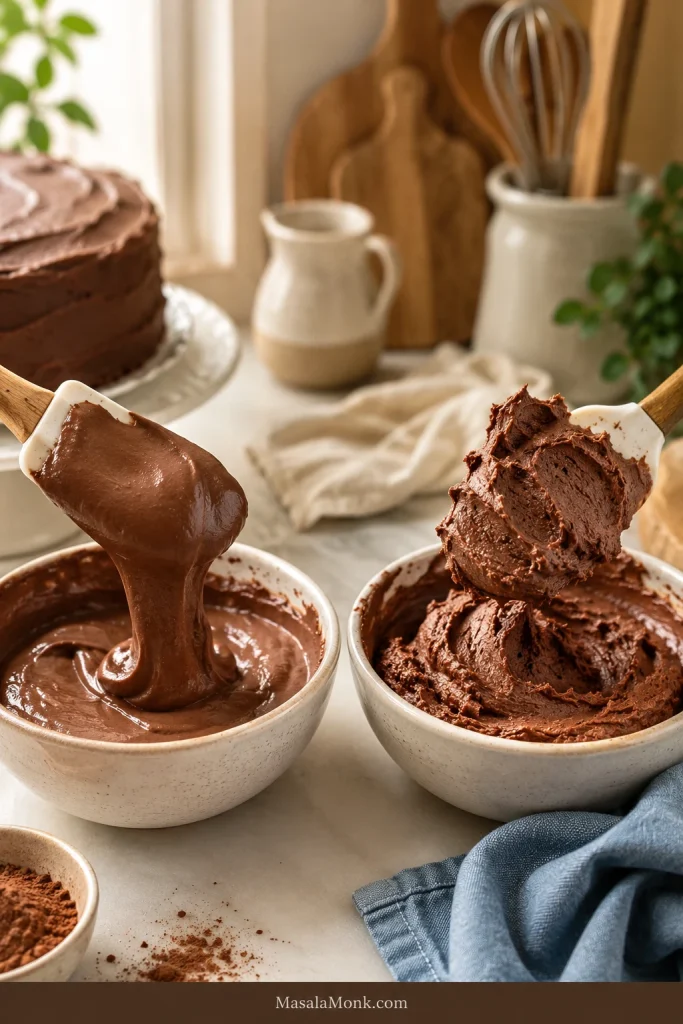
Loose chocolate cream cheese frosting beside thicker frosting that holds shape after chilling.
Instead of adding more sugar right away, chill soft frosting first; temperature often fixes the texture without making it too sweet.

How to Thicken It Without Making It Too Sweet

To thicken chocolate cream cheese frosting without making it too sweet, chill it first, then add a little cocoa powder before adding more powdered sugar. Add powdered sugar 2 tablespoons at a time only when the frosting still feels too soft after chilling.

How to Fix Lumps for a Smoother Texture

Lumps usually start at the beginning. Cream cheese that is too cold does not beat smoothly, and once powdered sugar and cocoa are added, the lumps become harder to remove. Beat the cream cheese and butter until completely smooth before adding anything else, and sift dry ingredients when they look clumpy.

6 Small Mistakes That Make Frosting Soft

  1. Using tub cream cheese when you want clean piping.
  2. Letting the butter become oily or melted.
  3. Adding milk or cream before the mixture has fully come together.
  4. Adding warm melted chocolate.
  5. Keeping the mixer running after the texture is smooth.
  6. Frosting warm cakes, cupcakes, or brownies.

Storage, Freezing, and Making Ahead

Because this has cream cheese in it, keep the frosting and frosted desserts refrigerated. It tastes best cool but not cold-hard.

How to Store Chocolate Cream Cheese Frosting

As a practical rule, do not leave it at room temperature for more than about 2 hours, or more than about 1 hour when the room is very warm, such as above 90°F / 32°C. The FDA’s two-hour rule for refrigerated foods is a good safety reference here.

For leftovers, transfer the mixture to an airtight container and refrigerate for up to 5 days. Before using, let it sit at cool room temperature until it softens slightly, then re-beat gently until smooth.

For frosted cakes, cupcakes, or brownies, refrigerate the finished dessert in a covered container. Cover it well so the surface does not dry out or pick up fridge odors.
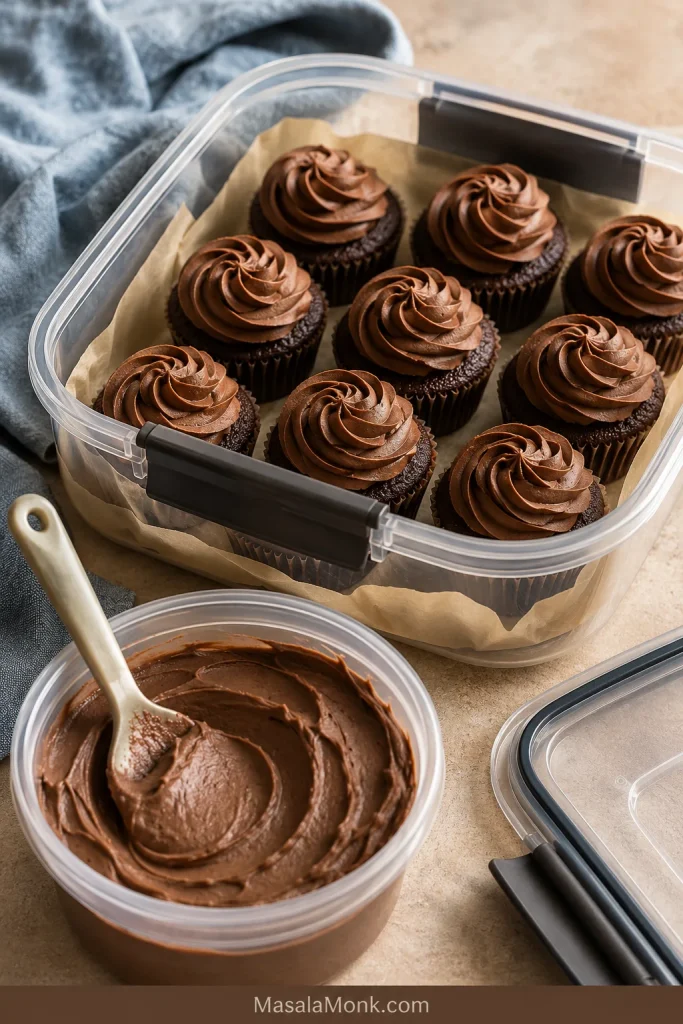
Frosted chocolate cupcakes stored in a covered container beside extra chocolate cream cheese frosting.
Covered cupcakes stay fresher in the refrigerator, but the best bite comes after the frosting loses its hard chill.

Serve cool, not cold-hard. For the best texture, take frosted cupcakes or cake slices out of the refrigerator about 15 to 25 minutes before serving, depending on room temperature.

You can make the frosting 1 to 2 days ahead. On decorating day, let it soften slightly, re-beat gently, and chill again if it feels too soft for piping. The chocolate flavor often tastes a little more rounded after a night in the fridge.

Decorating in a warm kitchen? Use the chill reset whenever the bag or swirls start to soften.

Can You Freeze It?

Yes. Chocolate cream cheese frosting freezes well in an airtight container for up to 2 to 3 months. Thaw overnight in the refrigerator, then let it soften slightly and re-beat gently before spreading or piping.

Warm Weather Chill Reset

Warm hands, warm rooms, and sunny tables soften this frosting faster than the recipe itself does.

  • Start with chilled frosting before piping.
  • Rest the filled piping bag in the refrigerator when it starts feeling soft in your hands.
  • Keep frosted cake or cupcakes cold until closer to serving.
  • Avoid direct sunlight and long outdoor buffet conditions.
  • Transport cakes cold when possible.
  • Choose a firmer chocolate buttercream or ganache when a cake must sit outside for hours.
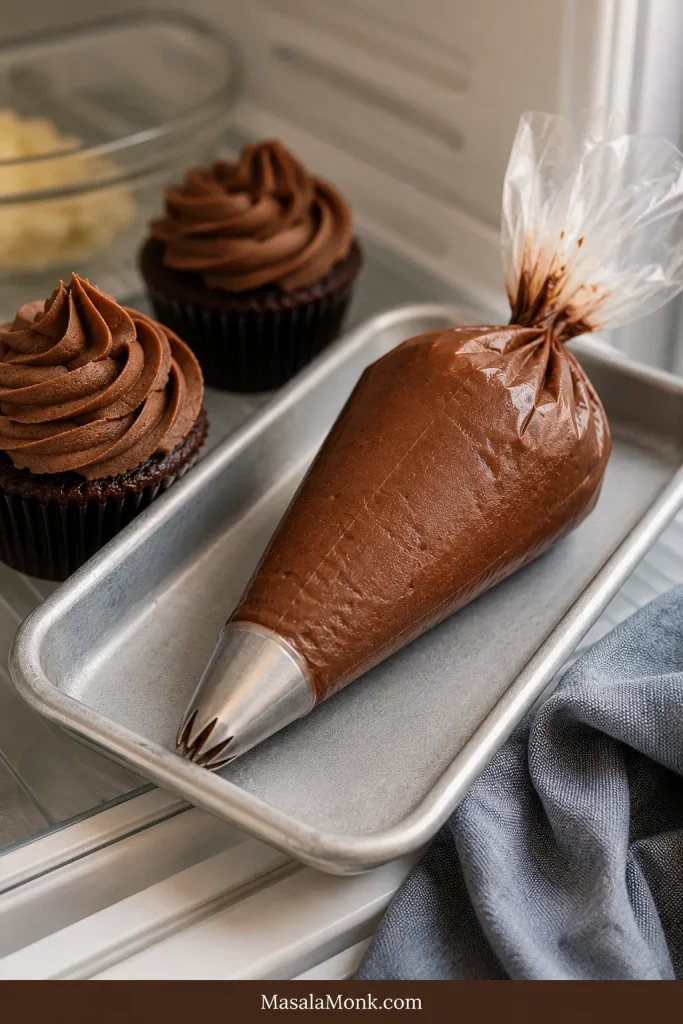
Filled piping bag of chocolate cream cheese frosting resting on a chilled tray with frosted cupcakes nearby.
A short chill helps pipeable chocolate cream cheese frosting hold soft ridges again when hands or the room are warm.

Variations

Dark Chocolate Version for Rich Cakes

Choose this when you want the frosting to taste more like a bakery chocolate layer than a simple cocoa frosting. Add 3 to 4 oz / 85 to 115 g melted dark chocolate, cooled until barely warm.

Chocolate bars usually melt more smoothly than chocolate chips, but chips work when melted gently. Compound chocolate also works in a pinch, though the flavor and texture will be slightly different from real dark chocolate.

Mocha Version for Deeper Chocolate Flavor

Use this when the frosting tastes chocolatey but a little flat. Espresso powder makes the cocoa taste deeper without turning the frosting into coffee frosting. Add ½ to 1 teaspoon instant espresso powder with the cocoa.

Extra Tangy Version for Sweet Cakes

This version works best with yellow cake, vanilla cake, red velvet cake, or very sweet cupcakes that need balance. Use the lower amount of powdered sugar and skip extra liquid.

Stiffer Version for Cupcake Swirls

Choose this when looks matter as much as flavor: birthday cupcakes, party trays, or anything that needs to hold a soft swirl. Use the full 3½ cups powdered sugar, skip extra milk or cream, and chill for 20 to 30 minutes before piping.

Softer Brownie Frosting

Choose this when you want the frosting to eat like a creamy chocolate layer, not a tall decoration. Use 3 cups powdered sugar and add 1 to 2 teaspoons cream only when needed. Make sure the brownies are completely cool before frosting.

A whipped chocolate cream cheese frosting is a different style made with cream. It is lighter and softer. This butter-based version is the one to use when you want a topping that spreads cleanly, chills well, and holds soft swirls. For that softer spreadable style in a natural context, this cinnamon roll recipe shows how cream cheese icing behaves when it is meant to be looser.

Save watery flavorings and fruit purees for another frosting style; they can loosen this one faster than you expect.

FAQs

Can chocolate cream cheese frosting be piped?

Yes. Use full-fat block-style cream cheese, softened butter, enough powdered sugar, and chill for 15 to 30 minutes before piping. A large star tip works especially well for cupcakes.

Why did my frosting turn runny?

Usually, it is too warm, overmixed, made with very soft cream cheese, or loosened with too much liquid. Chill first; add powdered sugar only when it still feels loose after 20 to 30 minutes.

What is the fastest way to thicken it?

Chill it for 20 to 30 minutes first. If it is still soft, beat briefly and add powdered sugar 2 tablespoons at a time. For a less sweet fix, add a little cocoa powder first.

Is tub cream cheese okay?

Tub cream cheese is not ideal when you want piping because it is usually softer. If it is firm and dense, keep it cold, skip extra liquid, and chill before piping.

Can I make it without an electric mixer?

You can, but the texture will be smoother with a mixer. If mixing by hand, use very soft but not warm butter, cool-soft cream cheese, sifted cocoa and powdered sugar, and a sturdy spatula. Beat the cream cheese and butter completely smooth before adding dry ingredients.

Does it need to be refrigerated?

Yes. Because it contains cream cheese, store it in the refrigerator. Let refrigerated cake or cupcakes sit briefly before serving so the topping tastes creamy, not fridge-hard.

How long can frosted cupcakes sit out?

Keep them out for no more than about 2 hours, or about 1 hour in very warm conditions above 90°F / 32°C. Refrigerate covered cupcakes until closer to serving.

When should I add melted chocolate?

Add melted chocolate only after the base is already smooth. Cool it until barely warm first, because warm chocolate can loosen the texture.

What happens if I skip the butter?

You can make a softer spread-style version without butter, but it will not behave like this recipe. Butter is strongly recommended for piping or holding shape.

Can I make it less sweet and still pipe it?

Yes, but do not reduce the powdered sugar too far if you want tall swirls. Use 3 cups powdered sugar for a tangier, less sweet frosting, then rely on Dutch cocoa, salt, and chilling for balance. For the firmest cupcake swirls, use closer to 3½ cups.

What happens without powdered sugar?

Powdered sugar thickens and stabilizes this style of frosting. Granulated sugar can make it gritty; for a no-powdered-sugar chocolate frosting, use a cooked ermine-style frosting instead.

How well does it freeze?

It freezes well in an airtight container for up to 2 to 3 months. Thaw overnight in the refrigerator, then let it soften slightly and re-beat gently before using.

If you make it, I’d love to know where you used it: cupcakes, brownies, a sheet cake, or a layer cake. Also tell me whether you stayed with cocoa only or added melted chocolate for the fudgier version.

The best version of this frosting comes from not rushing the bowl. Let the cream cheese and butter stay cool-soft, let the dry stage turn creamy before adding liquid, and let a short chill do its work before you reach for more sugar.

Once you know that rhythm, chocolate cream cheese frosting becomes easy to trust: creamy, tangy, chocolate-first, and firm enough to sit where you put it.
Posted on Leave a comment

Buttercream Frosting Recipe

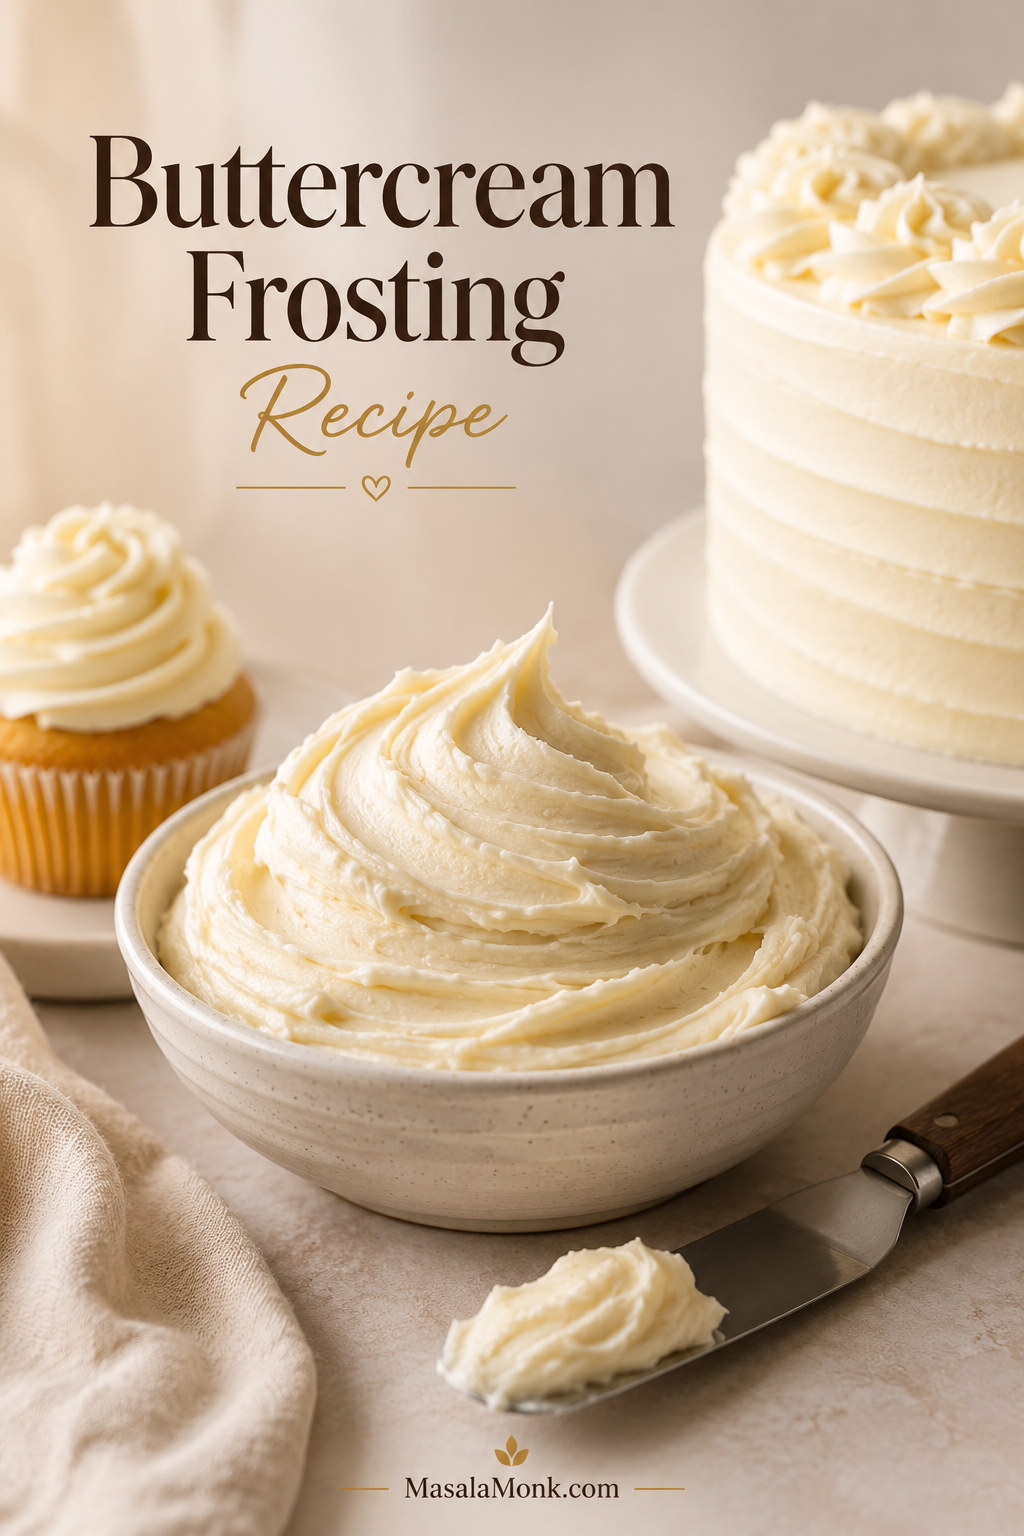
Bowl of fluffy vanilla buttercream frosting with a frosted cupcake, partial cake, and offset spatula in a warm bakery setting.

This buttercream frosting recipe is the one to make when the cake is cooling, the cupcakes are waiting, and you need frosting that will behave. It is classic American vanilla buttercream: fluffy, creamy, sweet, stable enough to pipe, and soft enough to spread.

The ingredients are simple — butter, powdered sugar, vanilla, cream or milk, and a little salt — but the real difference comes from butter temperature, gradual mixing, and knowing what the bowl is telling you.

This guide gives you the base recipe first, then the texture cues, quantity guide, piping help, storage notes, and practical fixes for the moments when the frosting looks too thick, too soft, or not quite right.

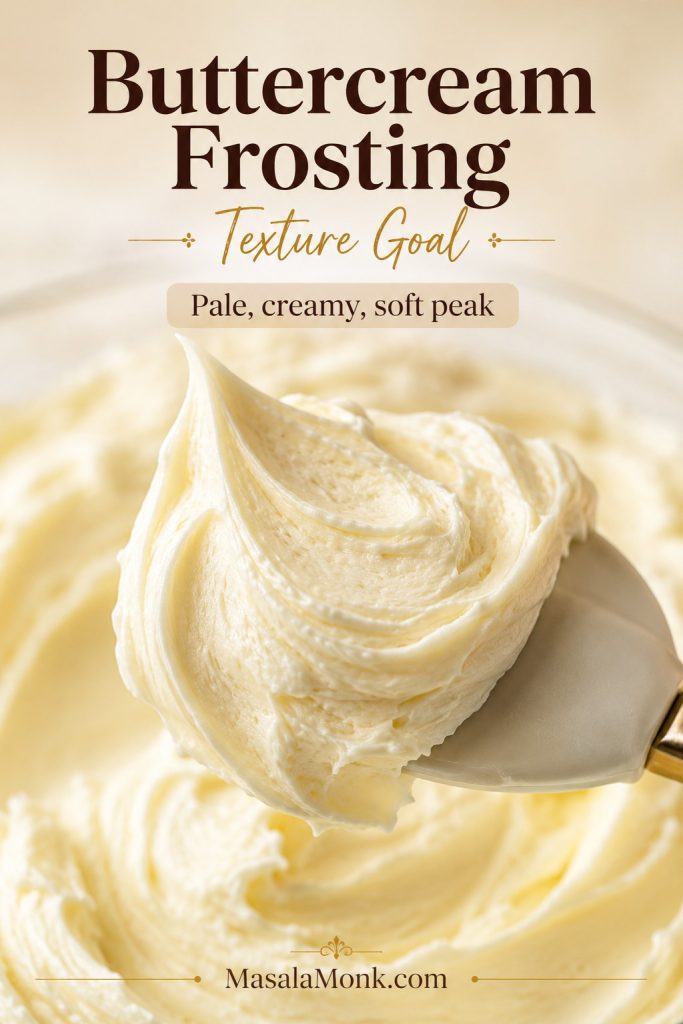
What finished buttercream should look like

Finished buttercream should look pale and creamy, feel soft but not loose, and hold a gentle swirl without slumping. That visual target matters more than the exact minute count on the mixer.

Close-up of pale vanilla buttercream on a spatula with smooth ridges and a soft peak.
Use this soft peak as your visual target; the frosting should look creamy and lifted, not shiny, wet, dry, or jagged.

Quick Answer: The Best Buttercream Frosting Ratio

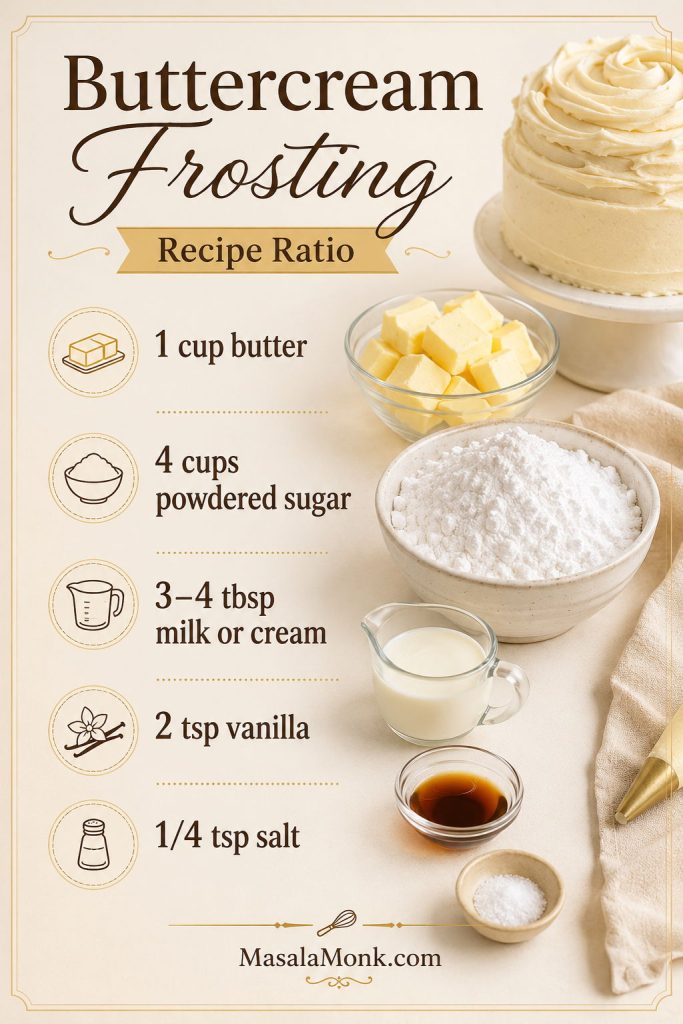
The easiest American buttercream ratio to remember is 1 cup butter to 4 cups powdered sugar, with just enough milk or cream to make it smooth. That gives you a classic homemade buttercream frosting that is fluffy, stable, and strong enough for cakes and cupcakes.

Quick ratio: Beat 1 cup / 226g softened butter with 4 cups / 480g powdered sugar, then add 3–4 tablespoons / 45–60ml milk or heavy cream, 2 teaspoons vanilla extract, and 1/4 teaspoon fine salt. This makes about 2.5–3 cups of fluffy frosting.

The buttercream ratio at a glance

Use this as the base batch, then adjust the final spoonfuls of milk or cream for spreading, piping, or decorating.

Buttercream frosting ratio board with butter, powdered sugar, milk or cream, vanilla, and salt measured for the recipe.
Think of this as the base batch: butter and powdered sugar build structure, while milk or cream turns it into frosting you can actually spread or pipe.

That ratio gives you a frosting that tastes rich, pipes cleanly, and still spreads without tearing soft cake.

Ingredient Amount Why it matters
Unsalted butter 1 cup / 2 sticks / 226g / 8 oz Gives the frosting richness, body, and buttery flavor.
Powdered sugar / icing sugar 4 cups / 480g / about 1 lb Sweetens and thickens the frosting so it can hold shape.
Milk or heavy cream 3–4 tbsp / 45–60ml / 1.5–2 fl oz Loosens the texture so the frosting can spread or pipe smoothly.
Vanilla extract 2 tsp / 10ml Adds the classic vanilla buttercream flavor.
Fine salt 1/4 tsp Balances the sweetness and makes the flavor taste fuller.

One base batch is enough for about 12 cupcakes with generous swirls, 18 cupcakes with a spread finish, or the top of one 9×13 sheet cake. For a full layer cake or heavy piping, check the quantity guide before you start.

Buttercream Frosting at a Glance

Quick recipe overview

Here is the practical snapshot before you start mixing.

StyleAmerican vanilla buttercream
Time10 minutes
YieldAbout 2.5–3 cups
Best forCakes, cupcakes, piping
Main controlCool-soft butter
Texture targetSoft peak, no oily shine
Best fixesLiquid, sugar, or chill time
DifficultyBeginner-friendly

What Is American Buttercream Frosting?

American buttercream is a thick, creamy frosting made by beating butter and powdered sugar together, then loosening the mixture with milk or cream and flavoring it with vanilla and salt. It is the simplest buttercream style because it does not need egg whites, sugar syrup, cooking, a double boiler, or a thermometer.

You may also see similar recipes called buttercream icing, butter icing, butter frosting, vanilla frosting, or cake frosting. The wording changes by region and habit, but home bakers are usually looking for the same thing: a simple, sweet, fluffy frosting that works for cakes and cupcakes.

American buttercream is sweet by design. Powdered sugar does more than sweeten the batch; it also gives the frosting structure, stability, and pipeable body. That sweetness is why a little salt, good vanilla, and a careful layer matter so much.

Good to know: This is not Swiss meringue buttercream, Italian buttercream, ermine frosting, whipped cream frosting, or cream cheese frosting. It is the easiest American-style version made with butter, powdered sugar, vanilla, milk or cream, and salt.

If you actually need a lighter topping for pies, fruit desserts, hot chocolate, pancakes, or no-bake desserts, MasalaMonk’s whipped cream recipe is a better fit than buttercream.

How American buttercream compares to other frostings

Use American buttercream when you need something fast, dependable, and easy to pipe. Choose another frosting family when the main goal is a silkier texture, lower sweetness, or tangy flavor.

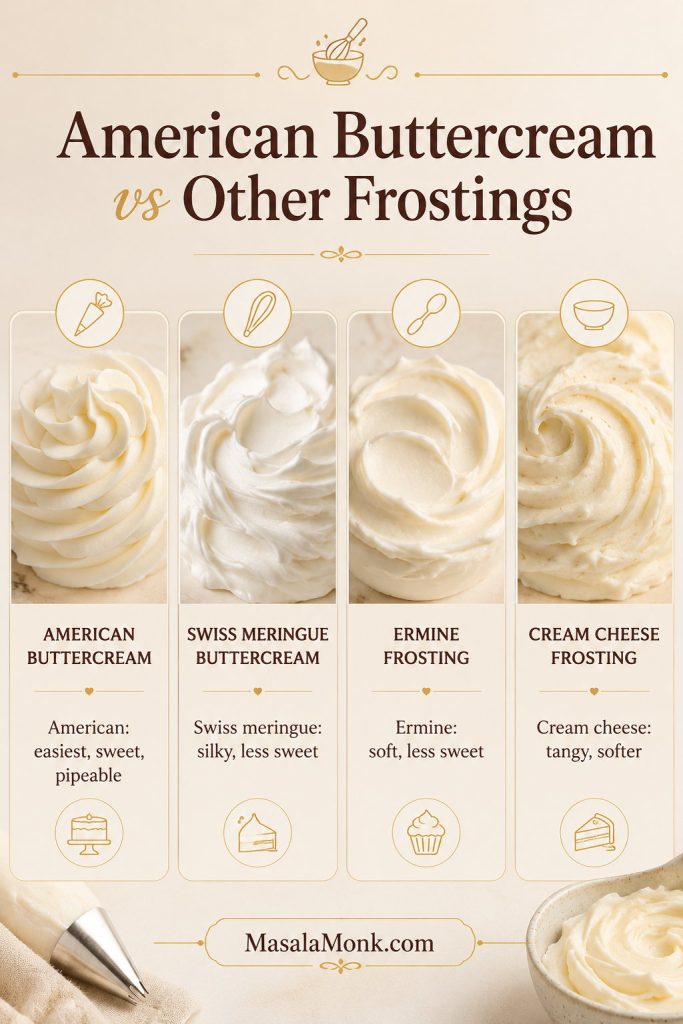
Comparison board of American buttercream, Swiss meringue buttercream, ermine frosting, and cream cheese frosting.
American buttercream is the quick, pipeable choice; however, Swiss meringue or ermine may suit you better when a silkier, less-sweet frosting is the priority.
Frosting style Best for Sweetness Difficulty
American buttercream Quick cakes, cupcakes, piping, sheet cakes High Easy
Swiss meringue buttercream Silky layer cakes, less-sweet finish Medium Medium
Ermine frosting Soft, less-sweet cakes Medium-low Medium
Cream cheese frosting Carrot cake, red velvet, spice cake Medium Easy

Start here when you need something fast and dependable. Choose Swiss meringue buttercream or ermine frosting when you want a silkier, less-sweet finish and do not mind a more involved method.

Before You Start: 4 Things That Matter

Buttercream is forgiving, but a few small choices make the whole process easier.

  • Use cool-soft butter, not greasy butter. The butter should press easily with a finger but still hold its shape.
  • Add powdered sugar gradually. This keeps the frosting smoother and stops sugar from flying around the bowl.
  • Sift only if the sugar is lumpy. Fresh powdered sugar usually mixes in fine, but clumpy icing sugar can leave tiny dry pockets.
  • Do not add all the liquid at once. Start with less milk or cream, then add more only after the frosting has come together.

A calm buttercream is usually a better buttercream: slow sugar, small liquid additions, and short chill breaks beat panic-fixing almost every time.

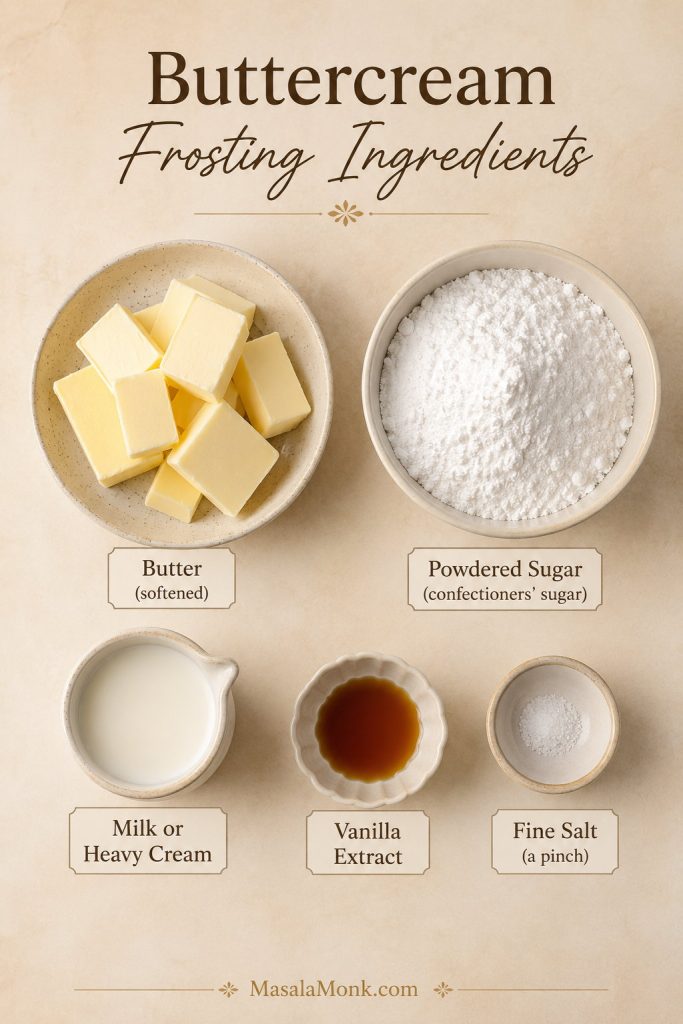
Buttercream Frosting Ingredients

The ingredient list is short, so the recipe has nowhere to hide: butter texture, sugar texture, and liquid control do most of the work.

Overhead board of buttercream frosting ingredients: butter, powdered sugar, milk or heavy cream, vanilla extract, and fine salt.
The ingredient list is short, so each choice matters: soft butter, smooth powdered sugar, good vanilla, and a little salt all shape the final flavor.

Butter

Use unsalted butter if possible. It gives you better control over the final flavor because you can add salt separately. Salted butter can still work, but different brands vary in saltiness, so reduce or skip the added salt if your butter already tastes salty.

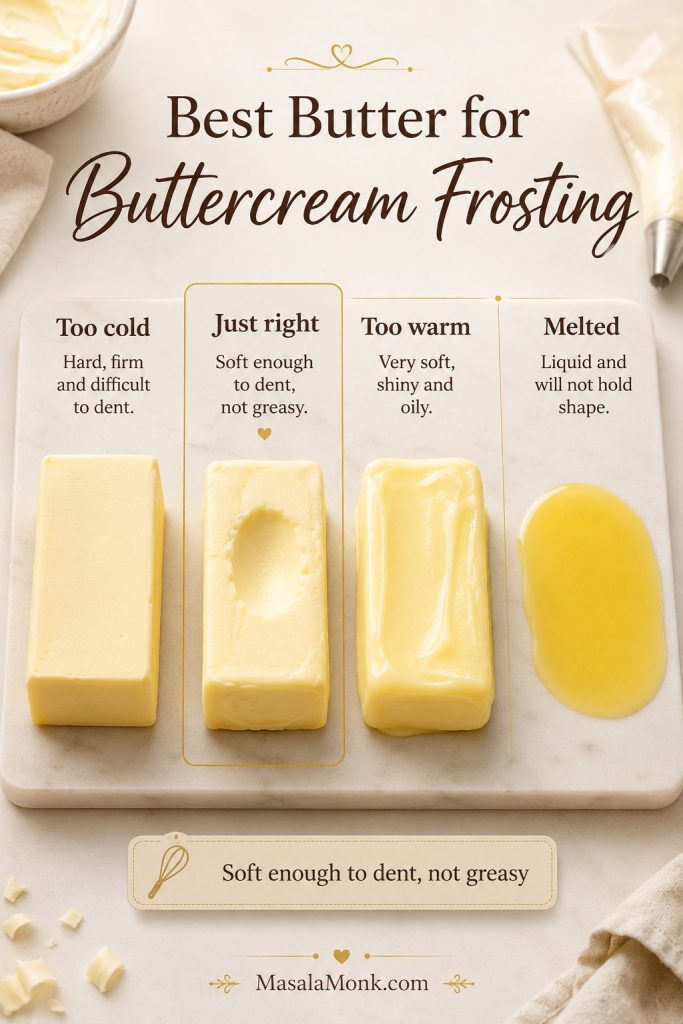
The butter should be softened, not melted. It should press easily when touched, but it should not look shiny, oily, or greasy. Cold butter can leave lumps; overly warm butter can make the frosting loose, greasy, or weak for piping.

Comparison of butter states for buttercream frosting, showing too cold, just right, too warm, and melted butter.
Butter sets the tone for the whole bowl; too cold makes frosting heavy, while too warm makes it loose, greasy, and harder to rescue.

If you are not sure whether your butter has gone too far, use the butter-temperature guide before mixing the batch.

Powdered Sugar / Icing Sugar

Use powdered sugar, confectioners’ sugar, or icing sugar. It gives American buttercream its sweetness and structure. If it looks lumpy, sift it before adding it to the butter.

For the most consistent texture, weigh the powdered sugar if you can. Cups are fine for everyday baking, but packed or very fluffy cups can change how stiff the frosting feels.

Do not use granulated sugar in this recipe. It will not dissolve the same way and can leave the frosting gritty. Frosting without powdered sugar is a different style and needs a different method.

Milk or Heavy Cream

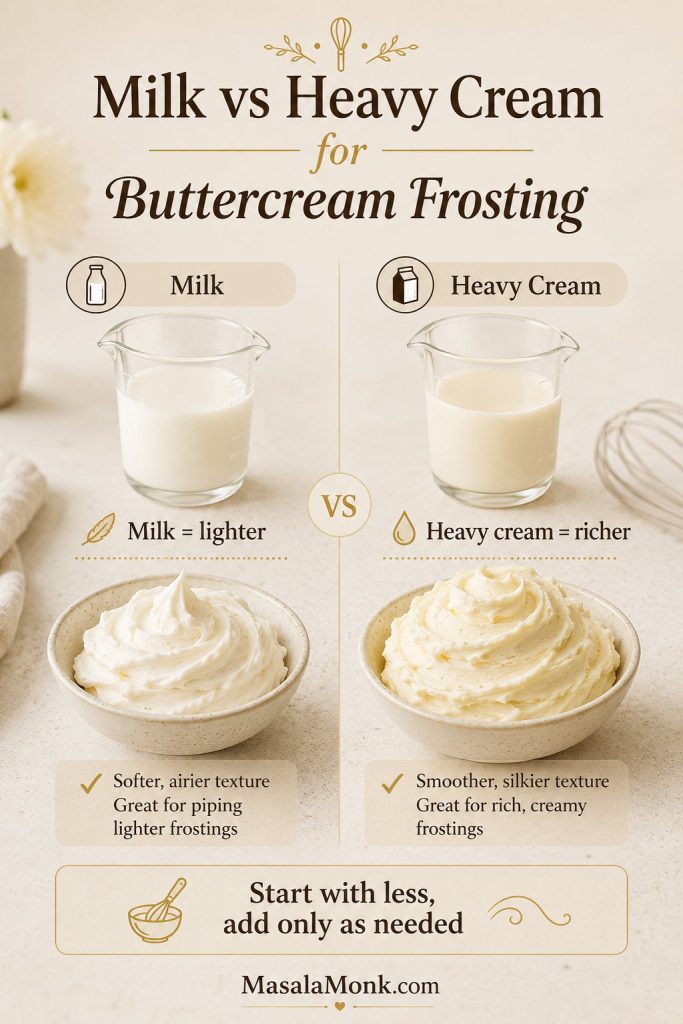
Both milk and heavy cream work. Heavy cream makes the frosting a little richer and fuller. Milk keeps it lighter and is easier if you do not keep cream at home.

Start with 3 tablespoons, then add more only if needed. The mixture loosens quickly, so it is better to add liquid slowly at the end than to pour in too much at the beginning.

Split board comparing milk and heavy cream for buttercream frosting with lighter and richer texture cues.
Milk gives a lighter finish, whereas heavy cream makes buttercream fuller and richer; either way, small additions keep the texture under control.

For spreadable, pipeable, and stiffer uses, use the texture guide before adding more liquid.

Vanilla

Vanilla gives this frosting its classic flavor. Use a good vanilla extract if you can because vanilla is one of the main flavors in a plain buttercream. Vanilla bean paste can also work if you like visible vanilla specks.

If you want a very white frosting, use clear vanilla. Regular vanilla extract often tastes better, but it can add a slightly beige tint.

Salt

Do not skip the salt. A small amount balances the sweetness and makes the butter and vanilla taste more rounded. Without salt, American buttercream can taste flat and sugary.

Equipment You Need

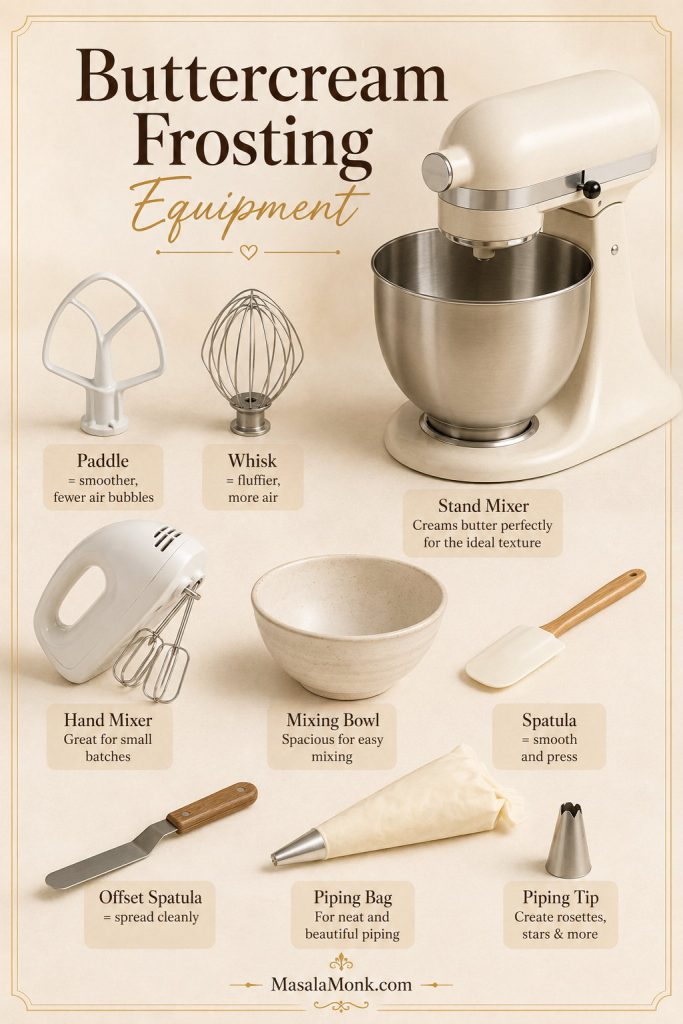
You do not need fancy tools, but the right mixer attachment can make the frosting smoother and less bubbly. A stand mixer with a paddle attachment is easiest, especially for a larger batch. A hand mixer works well for one batch, but you will need to scrape the bowl more often.

Buttercream equipment board with a stand mixer, paddle, whisk, hand mixer, spatulas, piping bag, piping tip, and bowl.
The right tool changes the finish: a paddle helps reduce air bubbles, while a spatula lets you press, fold, and polish the frosting before decorating.
Tool Best use
Stand mixer with paddle attachment Best for smooth, fluffy frosting with fewer air bubbles.
Hand mixer Works well for a single batch; scrape the bowl often.
Large mixing bowl Prevents powdered sugar from flying everywhere.
Rubber spatula Useful for scraping the bowl and pressing out air bubbles.
Piping bag and star tip Optional, but helpful for cupcake swirls, rosettes, and borders.
Offset spatula Helpful for spreading frosting over cakes and sheet cakes.
Paddle or whisk? Use the paddle attachment if you have one. A whisk can make the frosting fluffy, but it also adds more air. The paddle gives better control and usually creates a smoother finish for spreading and piping.

The Butter Temperature That Makes or Breaks Buttercream

If your frosting has ever turned greasy, lumpy, or strangely loose, the butter was probably the reason. “Room temperature” is not always clear because kitchens vary. In a warm kitchen, butter can move from perfectly soft to too greasy faster than expected.

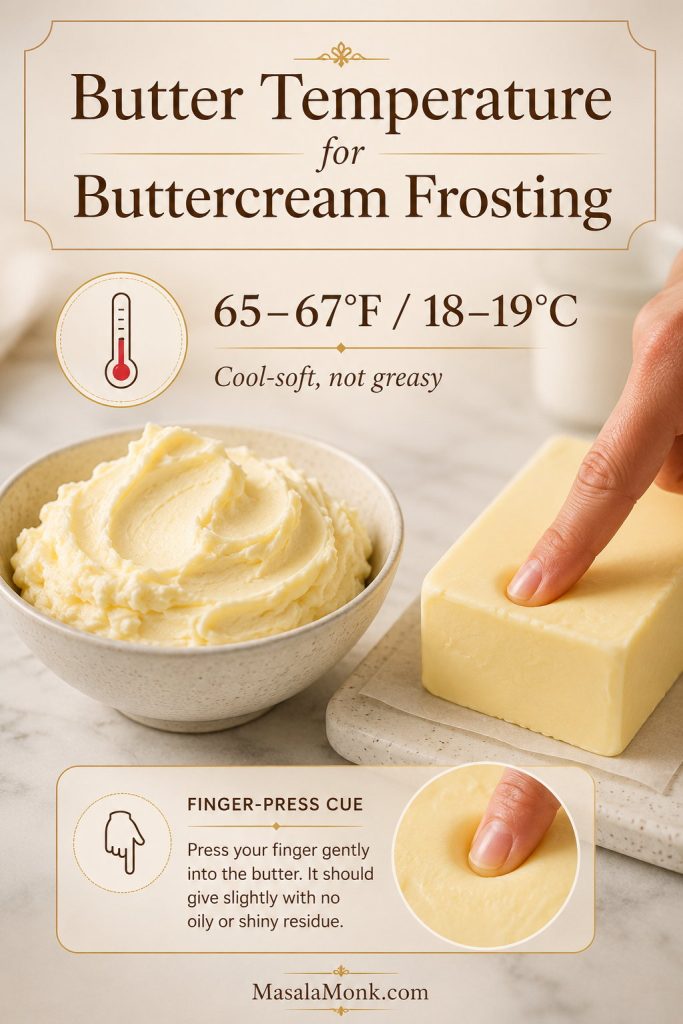
If you like numbers, aim for about 65–67°F / 18–19°C: cool to the touch, easy to dent, but not shiny or greasy. If you remember only one thing from this section, remember this: soft butter is good, greasy butter is not. Buttercream needs butter that bends, not butter that melts.

Butter temperature guide with softened butter, thermometer cue, and finger-press test showing 65 to 67 degrees Fahrenheit.
Cool-soft butter around 65–67°F gives you the best starting point because it blends smoothly without melting into a greasy frosting.

The butter should be soft enough to press with a finger, but not shiny, oily, or melted. It should still hold its shape. If it slumps, looks greasy, or has oily edges, it is too warm.

Butter state What happens What to do
Too cold Frosting can turn lumpy, hard to mix, or grainier. Let the butter sit longer, or cut it into small cubes to soften faster.
Just right Butter blends smoothly and holds enough structure for piping. Use it now.
Too warm The frosting can become greasy, loose, or weak. Cool the butter briefly until it is soft-solid again.
Melted The frosting will not hold properly. Do not use melted butter. Chill until it becomes soft-solid again.

In a warm kitchen, keep an eye on the bowl as you mix. Even a good batch can soften if the mixer, bowl, or your hands warm it too much. When that happens, pause and let the frosting cool before continuing.

How to Make Buttercream Frosting

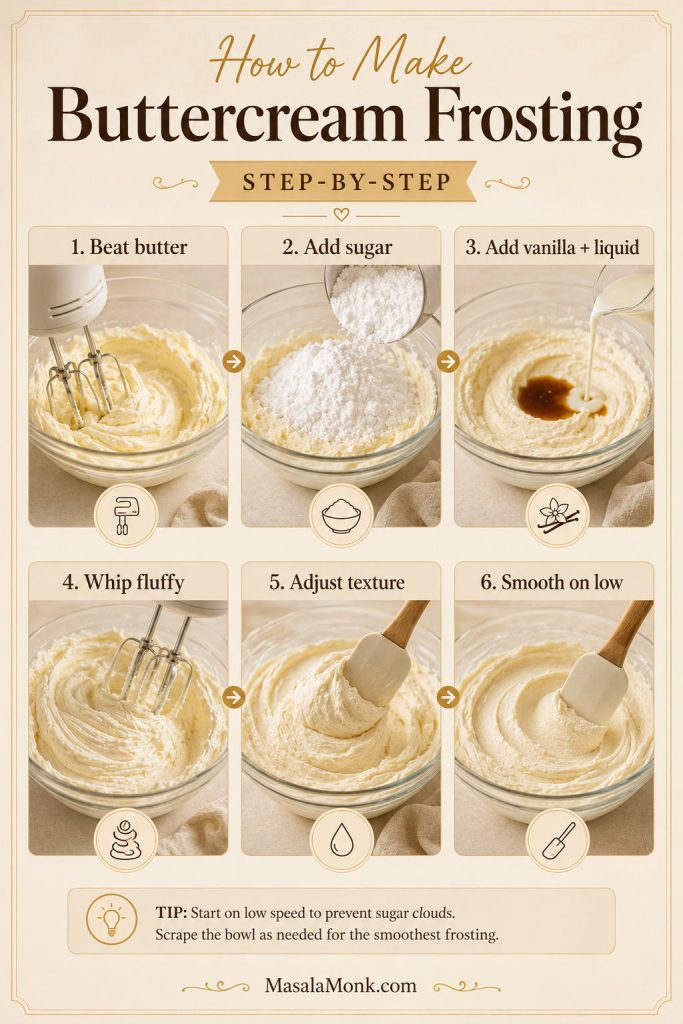
This is the point where buttercream gets easier: once the butter is right, the rest is mostly small adjustments. The method is simple, but the order matters: cream the butter first, add sugar slowly, whip only once the mixture is combined, then smooth it down at the end.

Texture target: Finished buttercream should look pale and creamy, hold a soft peak, spread without tearing cake, and pipe without slumping. It should not look shiny, oily, wet, or stiff and jagged.
Step-by-step buttercream frosting process showing butter being beaten, sugar added, liquid added, frosting whipped, adjusted, and smoothed.
Build the frosting in stages: cream the butter, bring in the sugar, loosen only as needed, then finish gently so the bowl turns smooth instead of bubbly.

Step 1: Beat the Butter

Add the softened butter to a large mixing bowl. Beat for 2–3 minutes until it looks creamy, smooth, and slightly paler. This first step removes lumps and creates a better base.

Step 2: Add Powdered Sugar Gradually

Add the powdered sugar in 3–4 additions, mixing on low speed after each addition. Do not dump it all in at once. Gradual mixing keeps the texture smoother and prevents powdered sugar from flying out of the bowl.

Step 3: Add Vanilla, Salt, and Liquid

Add vanilla, salt, and 3 tablespoons of milk or cream. Mix on low until everything comes together. It may look thick at first; that is normal. Wait until the sugar is fully mixed in before deciding whether it needs more liquid.

Step 4: Whip Until Fluffy

Increase to medium speed and beat for about 2 minutes, or until the frosting looks lighter, creamier, and softer around the edges of the bowl. Scrape the sides and bottom so no butter or sugar pockets are left behind.

Step 5: Adjust the Texture

If the frosting is too thick, add milk or cream a little at a time. If it is too loose, add powdered sugar in small additions. Make one correction, mix, then check the bowl again before adding more. For use-by-use consistency, see the texture guide.

Step 6: Smooth on Low Speed

Mix on low speed for 1–2 minutes at the end. This helps knock out some air bubbles and gives the frosting a smoother finish. For an even cleaner texture, press and fold it with a rubber spatula before spreading or piping. If the bowl still looks wrong, jump to troubleshooting.

Why This Buttercream Frosting Works

The formula works because nothing is there by accident. Butter gives the frosting richness and body. Powdered sugar thickens it, sweetens it, and helps it hold shape for spreading or piping. Milk or cream loosens the texture just enough to make it workable. Vanilla gives the familiar bakery-style flavor, while salt keeps the sweetness from tasting flat.
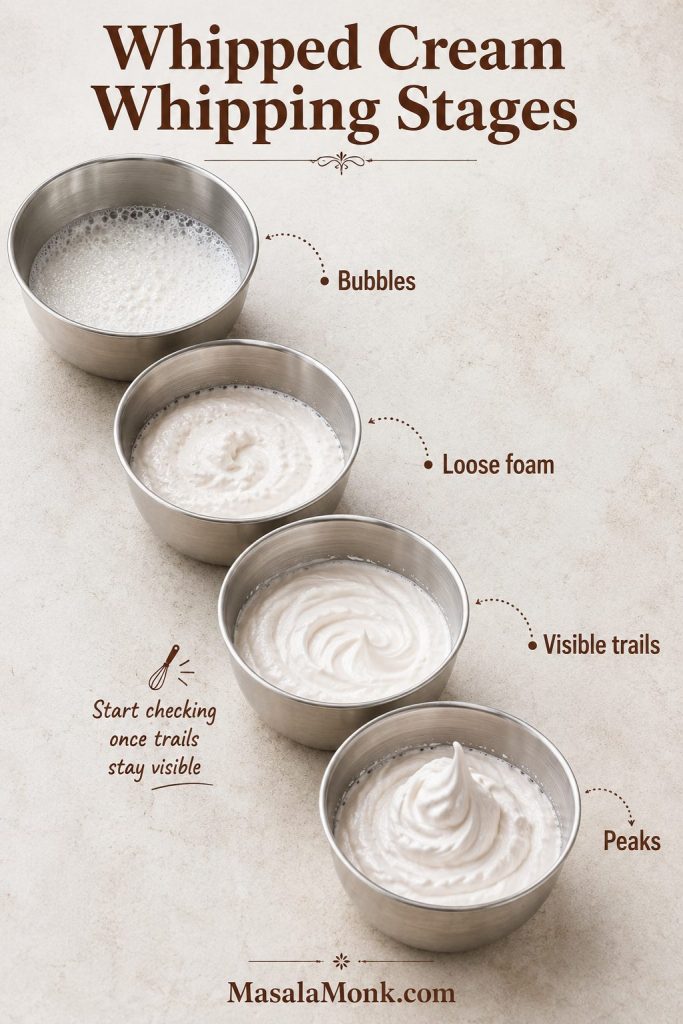
Once you understand those jobs, the recipe stops feeling fragile. You can look at the bowl and know whether it needs more structure, more softness, or just a few minutes to cool down.

The real goal: Do not chase one perfect texture for every use. Make the base frosting first, then adjust it softer for spreading, medium for cupcake swirls, or stiffer for sharper decorating.

Buttercream Texture Guide: Spreadable, Pipeable, and Stiff

This is where buttercream becomes less mysterious: the same bowl can be adjusted for spreading, piping, or sharper decorating. The trick is not to keep fixing everything at once, but to match the texture to the job in front of you.

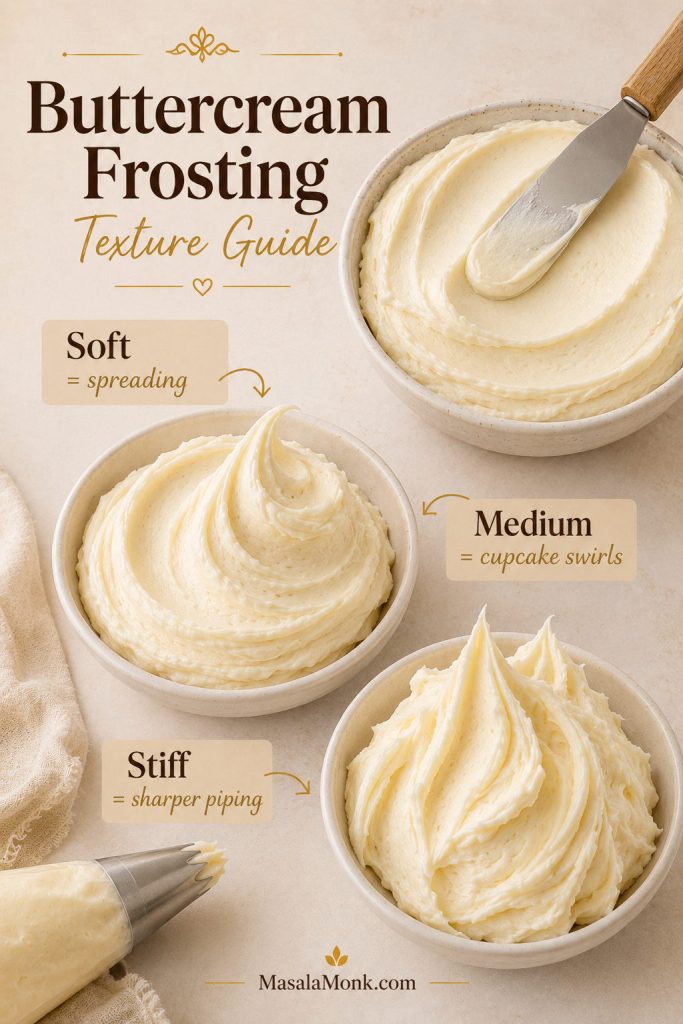
One batch can be made softer for spreading, medium for cupcake swirls, or stiffer for borders and simple decorations. Use this table as a control panel rather than a strict rulebook.

Buttercream texture guide showing soft, medium, and stiff frosting consistencies for spreading, cupcake swirls, and sharper piping.
One buttercream batch can do several jobs once you choose the right consistency: softer for sheet cakes, medium for swirls, and firmer for sharp details.
Texture Best for How to adjust
Soft and spreadable Sheet cakes, simple layer cakes, crumb coats Add milk or cream in tiny amounts.
Medium and pipeable Cupcake swirls, rosettes, borders Use the recipe as written, then test with a spatula.
Stiff Flowers, sharper borders, more defined piping Add powdered sugar in small additions.
Extra smooth Cake sides, clean spreading, polished finish Mix on low with the paddle, then press with a spatula.

Use the spatula test before piping

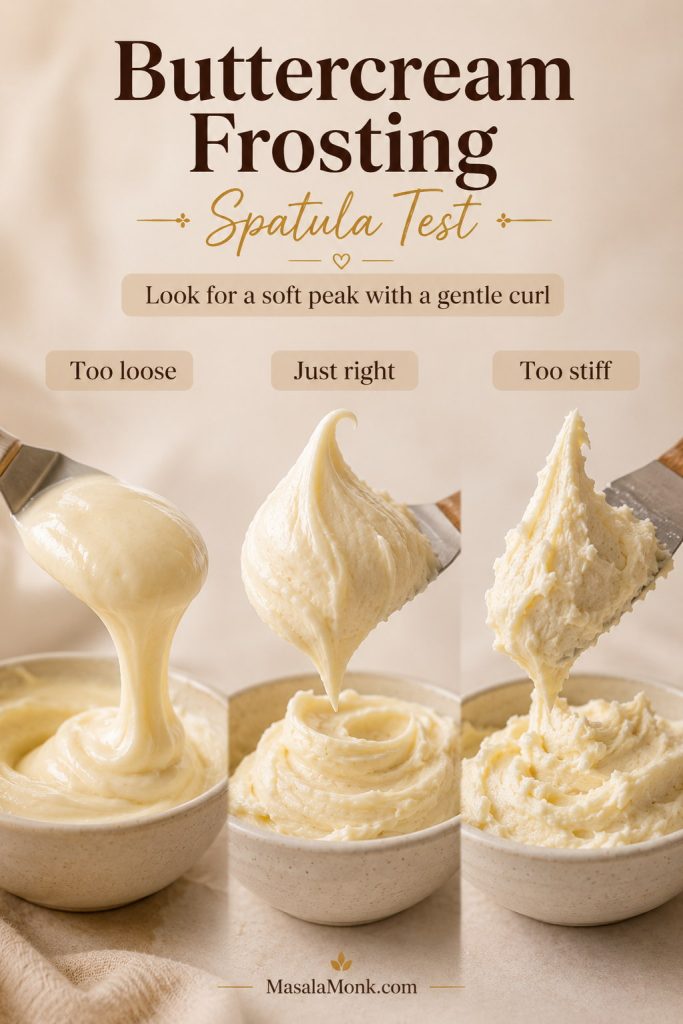
A quick lift from the bowl shows whether the frosting is loose, pipeable, or too stiff before it goes into a piping bag.

Spatula test showing buttercream frosting that is too loose, just right, and too stiff.
A spatula lift is a quick reality check; ideal buttercream holds a gentle curl instead of sliding off or breaking into stiff peaks.
Spatula test: For pipeable buttercream, lift some frosting on a spatula. It should hold a peak with a soft curl. If it collapses, it is too loose. If it stands stiff and jagged, it may be too thick for smooth cupcake swirls.

For cake decorating, do not thin the whole bowl immediately. Set aside a portion and adjust only what you need. A softer texture spreads more easily over a cake, while a slightly stiffer one gives cleaner piping. For exact cake and cupcake amounts, use the quantity guide.

Once you move into borders, rosettes, writing, and thin cake coverage, consistency matters more than the base recipe itself. Wilton’s buttercream frosting guide is useful here because it shows how stiff, medium, and thin frosting behave differently.

How Much Buttercream Frosting Do You Need?

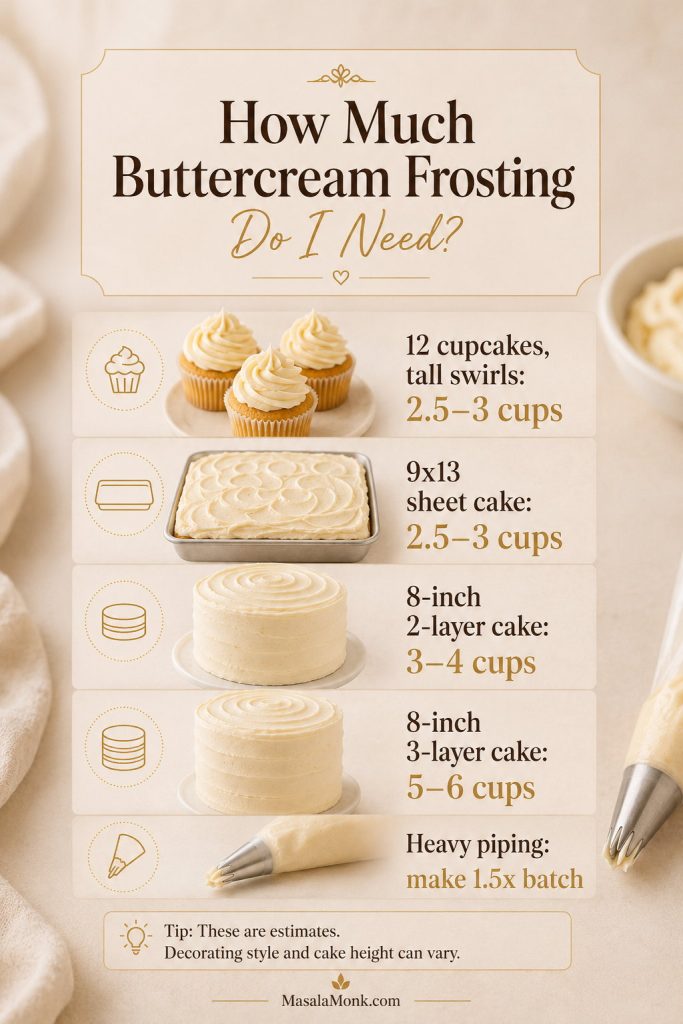
A single batch gives you about 2.5–3 cups, which is plenty for cupcakes or a simple sheet cake but not always enough for a fully decorated layer cake.

Frosting amounts are not a test of precision. They are a planning tool, and it is almost always safer to have a little extra. Tall cupcake swirls, thick cake filling, and decorative borders all use more frosting than a simple spread layer.

Buttercream quantity guide for cupcakes, sheet cakes, two-layer cakes, three-layer cakes, and heavy piping.
Quantity planning saves the cake later; tall cupcake swirls, thick borders, and taller layer cakes all use more frosting than a thin spread.
Use Approximate buttercream needed
12 cupcakes, spread or low swirl 1.5–2 cups
12 cupcakes, tall swirls 2.5–3 cups
18 cupcakes, spread generously About 3 cups
24 cupcakes, modest swirl 3–4 cups
9×13 sheet cake, top only 2.5–3 cups
8-inch 2-layer cake, light filling and outside 3–4 cups
8-inch 2-layer cake with piping 4–5 cups
8-inch 3-layer cake 5–6 cups
Heavy piping or decorating Make 1.5x batch

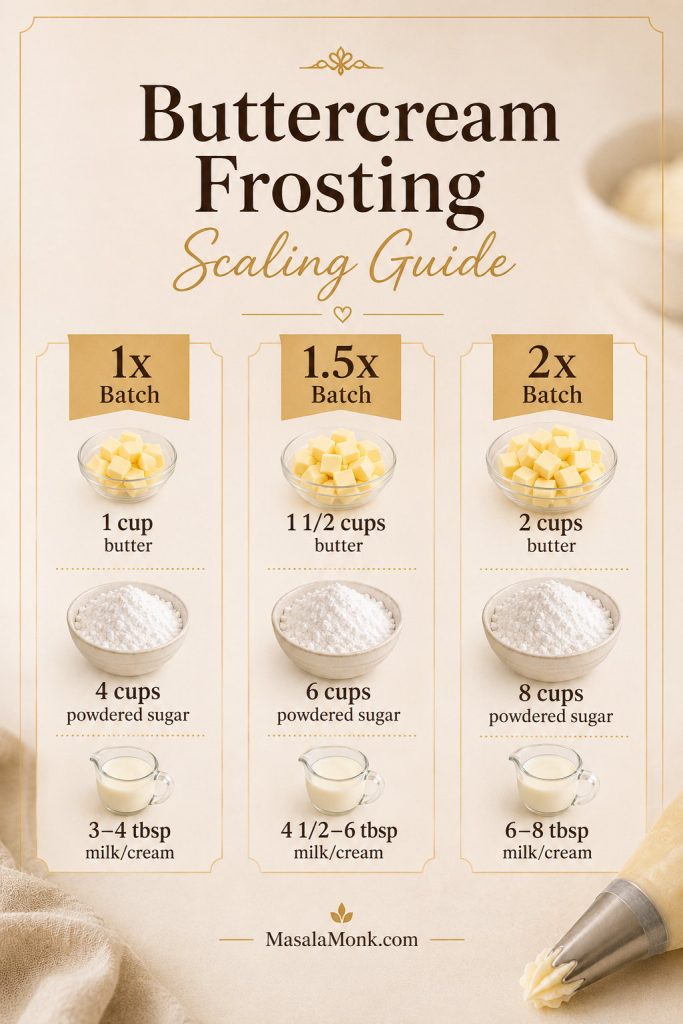
How to Scale This Buttercream Recipe

Scaling is where a lot of frosting stress happens. It is better to make a slightly larger batch than to scrape the bowl halfway through a cake. Half a cup extra feels much better than frosting the final side too thin.

Scaling guide for 1x, 1.5x, and 2x buttercream frosting batches with butter, powdered sugar, and milk or cream amounts.
When scaling buttercream, increase the butter and sugar together first; after that, use the liquid as the final texture adjustment.
Batch size Butter Powdered sugar Milk or cream Best for
1x batch 1 cup / 2 sticks / 226g 4 cups / 480g / about 1 lb 3–4 tbsp / 45–60ml 12 cupcakes with tall swirls or one 9×13 top layer
1.5x batch 1 1/2 cups / 3 sticks / 339g 6 cups / 720g / about 1.5 lb 4 1/2–6 tbsp / 67–90ml Layer cake with some piping
2x batch 2 cups / 4 sticks / 452g 8 cups / 960g / about 2 lb 6–8 tbsp / 90–120ml Tall cakes, extra piping, or make-ahead frosting

If you are unsure, make a little extra. Running out halfway through a cake is more frustrating than having leftover frosting to freeze. Extra buttercream can also be used on cookies, brownies, cinnamon rolls, cupcakes, or a small snack cake.

Using Buttercream Frosting for Cakes and Cupcakes

Cakes and cupcakes do not all need the same buttercream texture. A cupcake swirl needs lift, a sheet cake needs glide, and a layer cake needs enough structure to hold filling, crumb coat, and final coat.

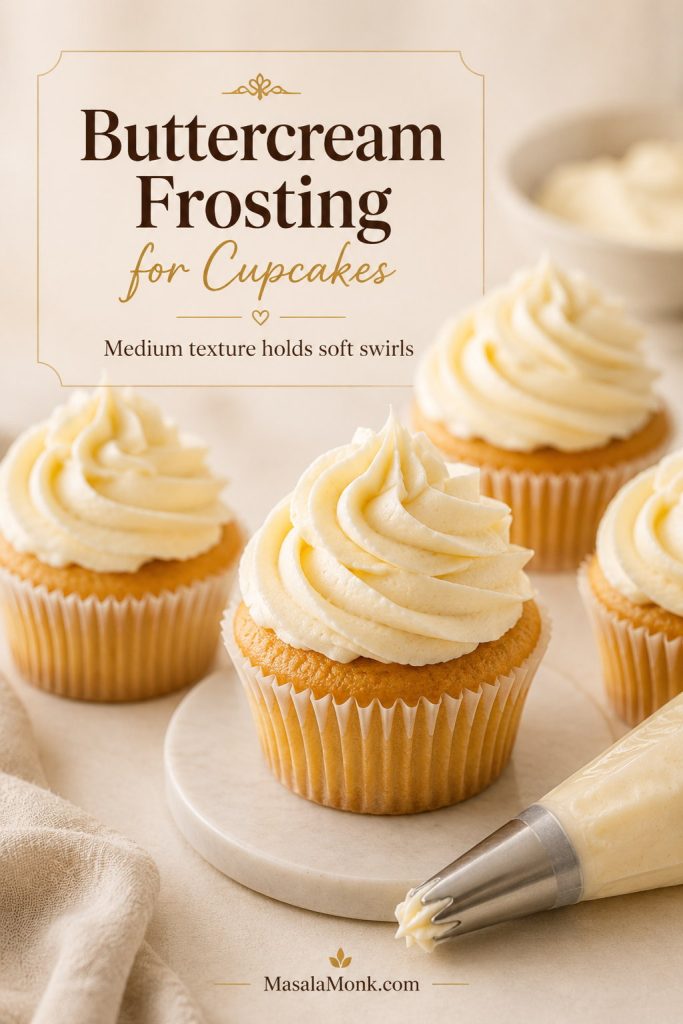
Buttercream for cupcakes

For cupcakes, the goal is a medium buttercream that holds ridges but still looks soft and creamy. If the swirl breaks at the edges, the frosting is probably too stiff. If the ridges melt into each other, it is probably too soft.

Cupcakes topped with pale vanilla buttercream swirls beside a piping bag and piping tip.
Cupcake swirls need a middle-ground texture: loose enough to pipe smoothly, yet firm enough for the ridges to stay defined.

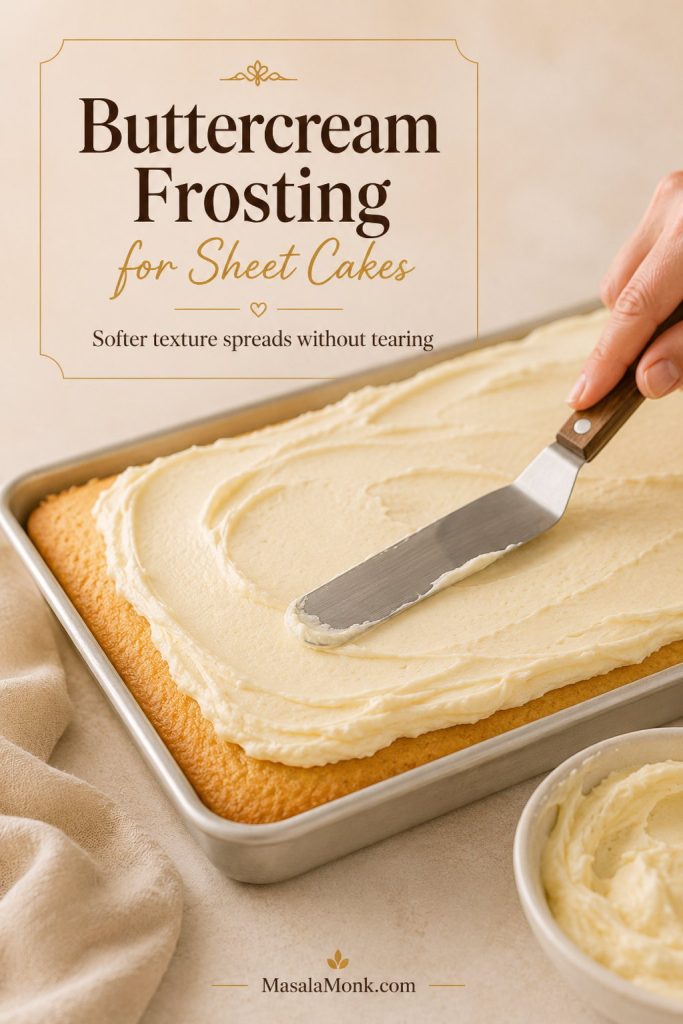
Buttercream for sheet cakes

For sheet cakes, use a slightly softer texture so the frosting glides instead of dragging crumbs across the top. If the cake is tender, stiff frosting can tear the surface before it spreads.

Offset spatula spreading pale buttercream frosting over a rectangular sheet cake.
A sheet cake benefits from slightly softer frosting because it glides over the crumb instead of pulling up bits of tender cake.

Buttercream for layer cakes

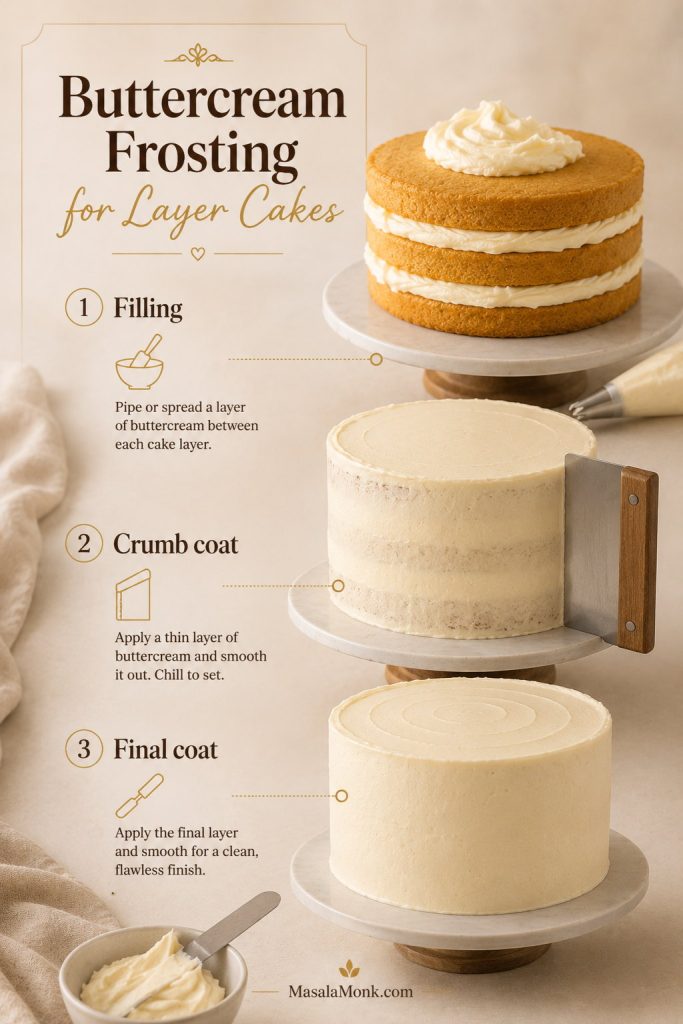
For layer cakes, think in stages: medium frosting for filling, slightly softer frosting for the crumb coat, and medium-smooth frosting for the final coat. A short chill after the crumb coat helps trap loose crumbs and makes the final layer easier to spread.

Layer cake guide showing buttercream filling, crumb coat, and final coat stages with cake-decorating tools.
Layer cakes look cleaner when you work in stages; first fill, then crumb coat, chill briefly, and only then add the final buttercream coat.

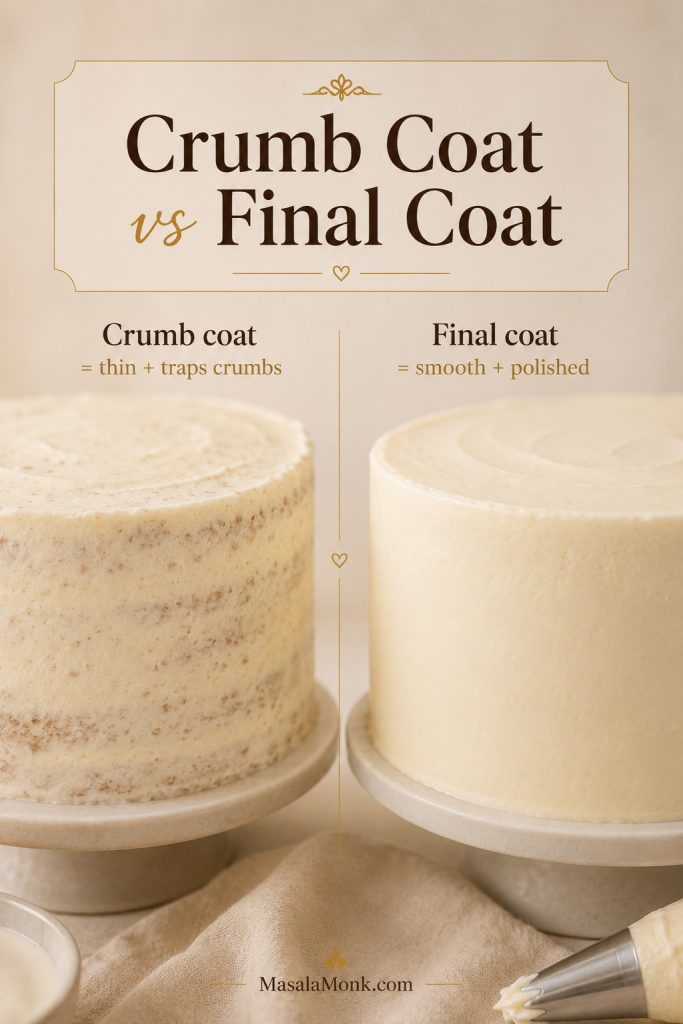
Crumb coat vs final coat

The crumb coat is not meant to be pretty. It is a thin working layer that traps crumbs, so the final coat can look cleaner and smoother.

Side-by-side cake comparison showing a thin crumb coat and a smooth final buttercream coat.
A crumb coat does not need to look perfect; its job is to trap crumbs so the final coat can go on smoother, cleaner, and more polished.

For a fruit-forward cake direction, MasalaMonk’s mango cake guide is useful because mango buttercream shows how fruit puree changes frosting flavor and texture. If you are decorating with swirls or borders, go to the piping section before filling the bag.

The table below is not meant to make frosting feel fussy. It simply helps you choose the texture that matches the job in front of you.

Use Best texture Tip
Cupcake swirls Medium / pipeable The frosting should hold a soft peak without collapsing.
Sheet cake Soft / spreadable Add liquid slowly so it spreads without tearing the cake.
Layer cake filling Medium Do not overfill or the layers may slide.
Crumb coat Slightly soft A softer texture spreads thinly and traps crumbs more easily.
Final cake coat Medium-smooth Mix on low and press with a spatula to reduce air bubbles.

Buttercream Frosting for Piping and Decorating

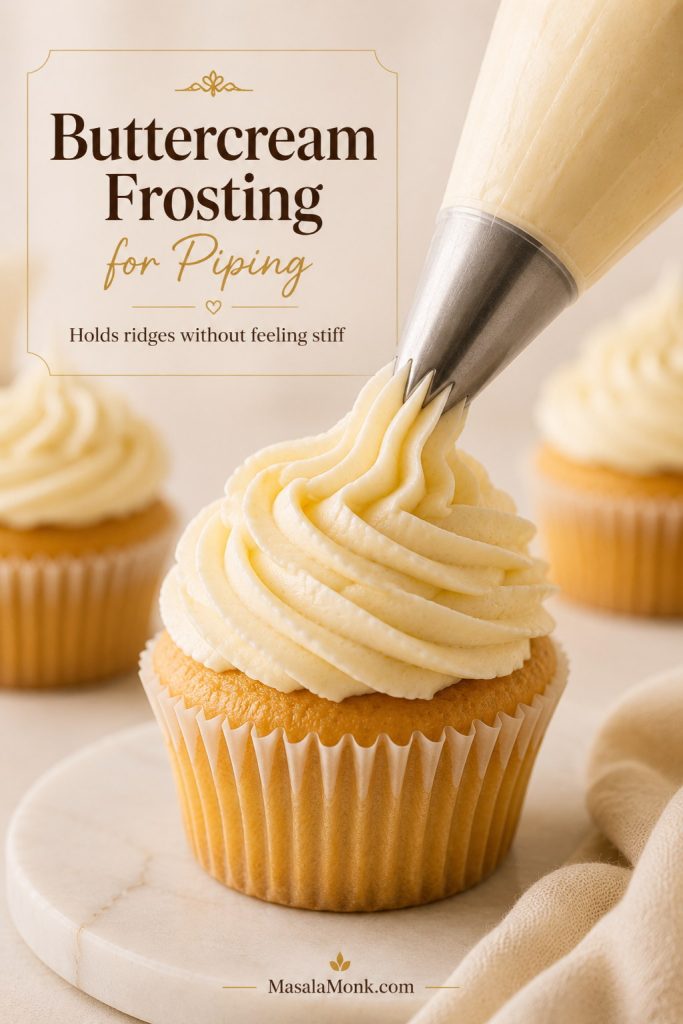
Good piping texture sits in the middle: firm enough to hold shape, but soft enough that you are not fighting the bag. If the frosting breaks at the edges of the swirl, it is usually too stiff. If the ridges melt into each other, it is usually too soft.

Piping bag forming a ridged buttercream swirl with pale frosting that holds its shape.
Good piping texture should feel cooperative, not forceful: the frosting holds ridges, but still moves through the tip without cracking.

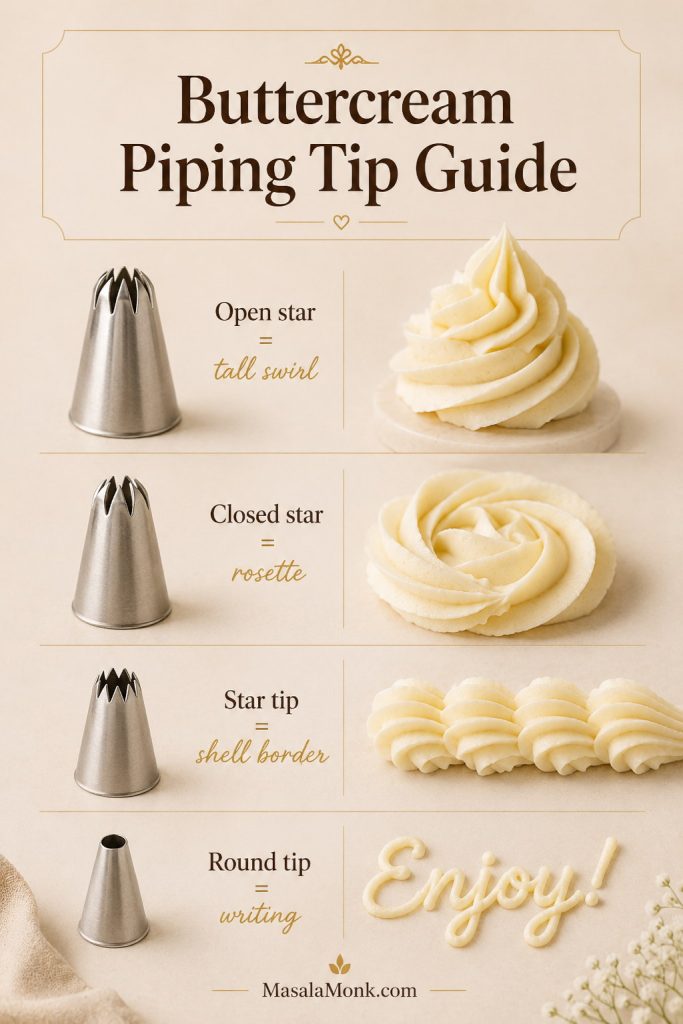
Which piping tip should you use?

The same buttercream can look very different depending on the tip. Use the table and image together to choose a shape before you fill the bag.

Look Piping tip Best consistency
Tall cupcake swirl Open star Medium
Rosettes Closed star Medium
Shell border Star tip Medium-stiff
Writing Small round tip Slightly softer
Piping tip guide showing open star, closed star, star tip, and round tip results in buttercream frosting.
The piping tip changes the design more than the recipe does; stars build swirls and borders, while a round tip gives cleaner writing.
Warm hands and warm rooms: If the frosting softens in the piping bag, place the filled bag in the refrigerator for 5–10 minutes. For very warm kitchens, outdoor parties, or sharp decorating, all-butter buttercream may soften; if the bag already feels too soft, use the troubleshooting guide before adding more sugar. Chill the cake, avoid direct sun, and consider a dedicated crusting or partial-shortening buttercream for heat-heavy decorating.

For smoother piping, mix on low speed before filling the bag. Air bubbles can cause broken lines, uneven swirls, or small holes in piped frosting. Pressing the batch with a spatula before filling the bag also helps.

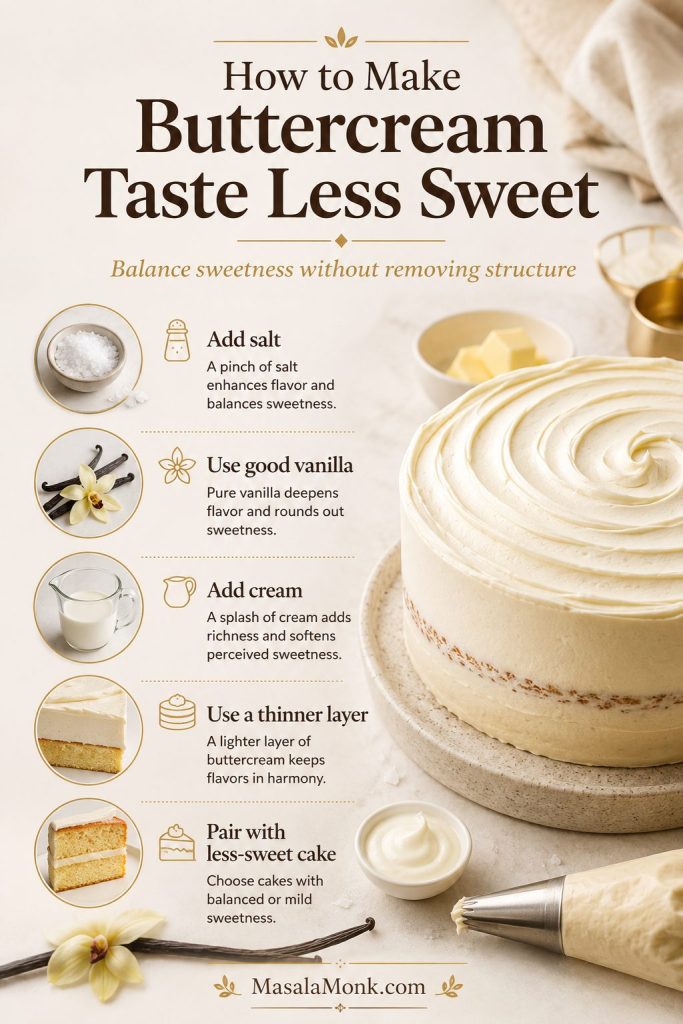
How to Make Buttercream Less Sweet

American buttercream is naturally sweet because powdered sugar is not just there for flavor; it gives the frosting body and helps it hold shape. You can make it taste more balanced, but you cannot remove most of the sugar and expect the same structure.

That said, a few small choices make a big difference:

Board showing salt, vanilla, cream, thinner frosting layers, and cake pairing ideas for making buttercream taste less sweet.
American buttercream needs powdered sugar for structure, but salt, vanilla, cream, thinner layers, and balanced cakes can make it taste less flatly sweet.
  • Add salt. Even 1/4 teaspoon helps reduce the flat sugary taste.
  • Use good vanilla. Better vanilla makes the flavor fuller.
  • Use cream instead of only milk. Cream gives a rounder, richer finish.
  • Whip the butter properly. A fluffy texture tastes lighter than a dense one.
  • Use a thinner layer. A sweet cake plus thick sweet frosting can feel heavy.
  • Pair it with less-sweet cake. Dark chocolate, coffee, citrus, spice, or lightly sweet cakes balance buttercream well.
Honest answer: Balance this version when you need speed, stability, and easy piping. Choose ermine or Swiss meringue buttercream when your real goal is a softer, less-sweet frosting.

If you know you dislike sweet buttercream, it may be kinder to choose a different frosting instead of fighting this one. RecipeTin Eats has a less-sweet fluffy vanilla frosting that shows why some bakers move away from American buttercream when they want a softer, less sugary finish.

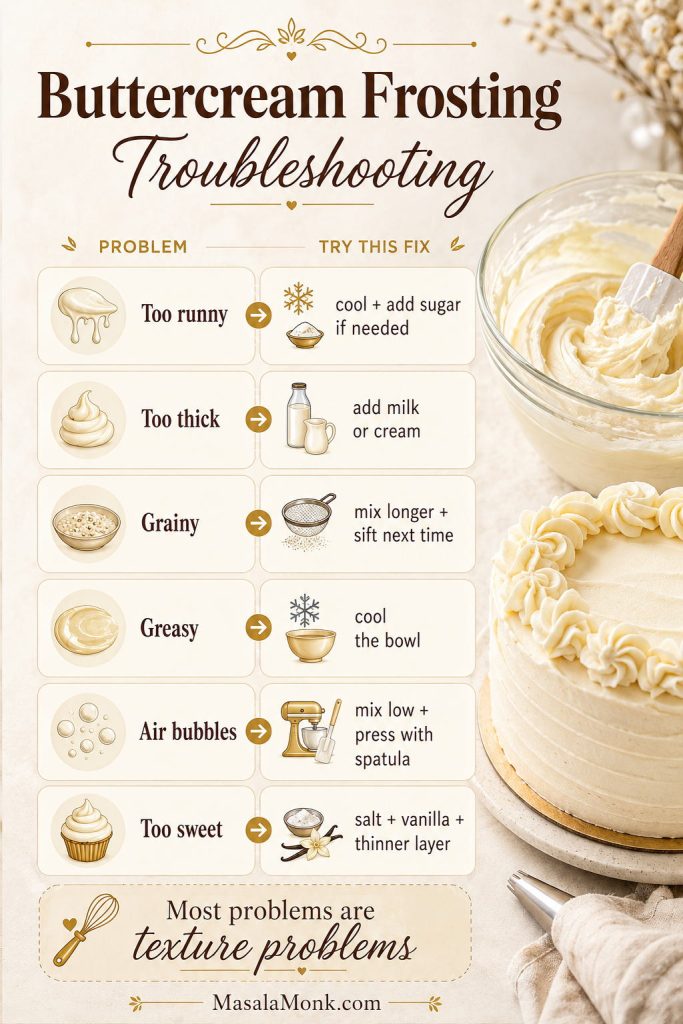
Buttercream Frosting Troubleshooting

A bad-looking bowl is not always a failed bowl. Most buttercream problems are texture problems, and texture can usually be brought back.

Troubleshooting board for runny, thick, grainy, greasy, bubbly, and too-sweet buttercream frosting problems.
Troubleshooting works best when you name the problem first; once you know the texture issue, the fix is usually simple and controlled.

First, check the temperature

Before adding more sugar or liquid, check whether the frosting is simply too warm or too cold. Warm buttercream can look loose, greasy, or weak. Cold buttercream can look stiff, heavy, or slightly rough. If you are unsure, let the bowl sit for a few minutes, then mix again before making a bigger correction. If you are reviving a chilled batch, use the storage and make-ahead section instead.

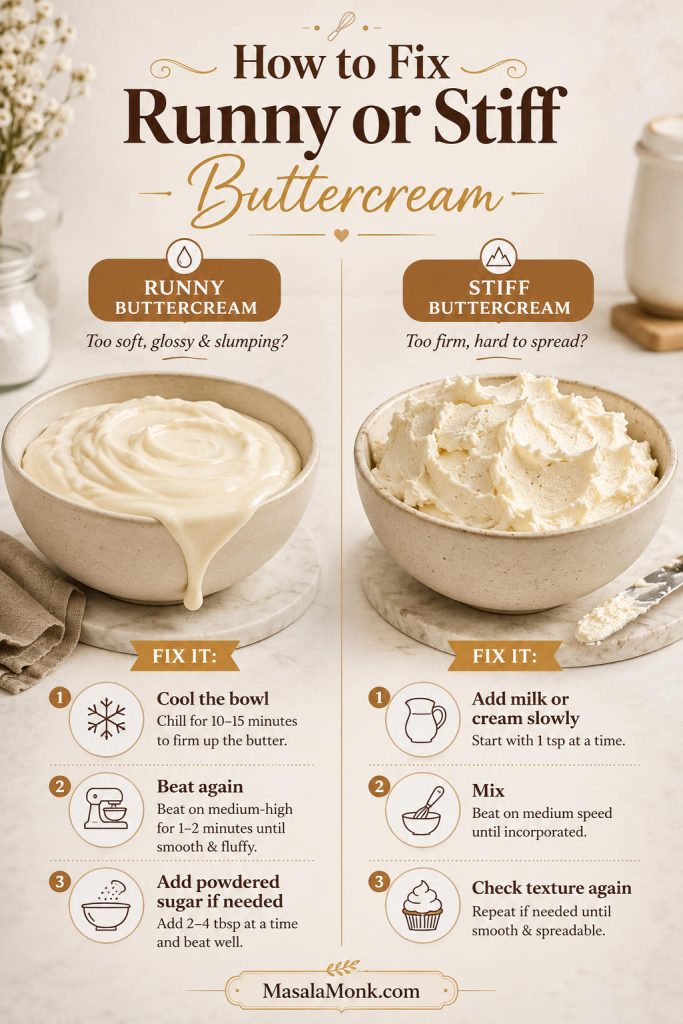
How to fix runny or stiff buttercream

Runny and stiff buttercream are the two most common texture problems, but they need opposite fixes. Check temperature first, then adjust the bowl in small steps.

Two-column guide showing runny buttercream and stiff buttercream with fixes using cooling, powdered sugar, milk, or cream.
Runny frosting often needs cooling before more sugar, while stiff frosting needs tiny splashes of milk or cream before another texture check.

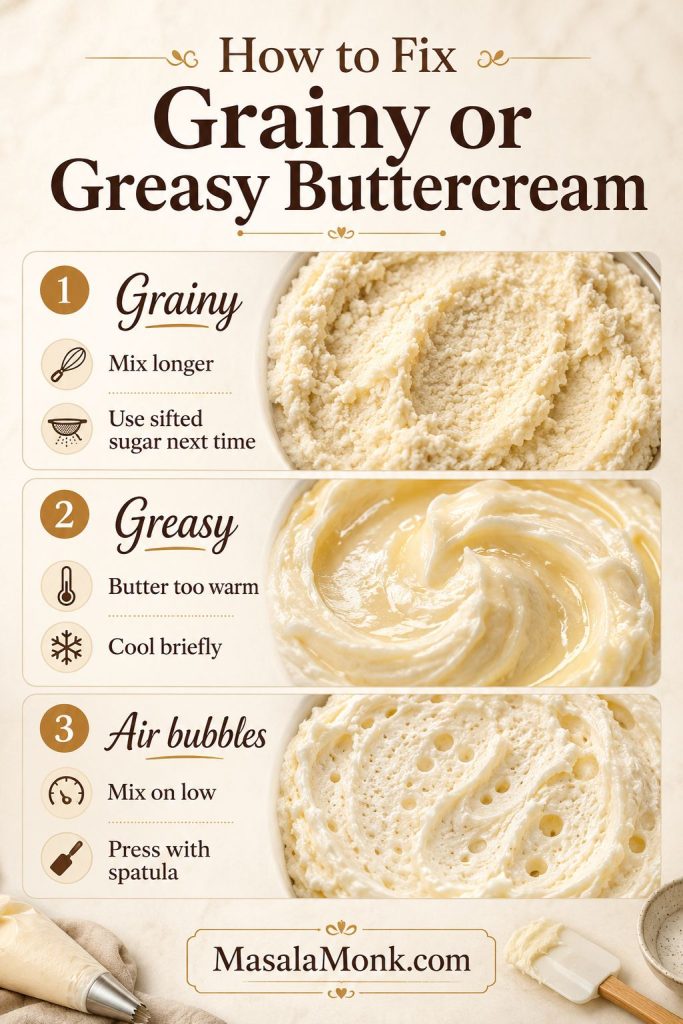
How to fix grainy, greasy, or bubbly buttercream

Grainy, greasy, and bubbly frosting can look dramatic, but they are usually signs of mixing, temperature, or air — not a ruined batch.

Rescue board showing grainy, greasy, and airy buttercream textures with fixes for mixing, cooling, and pressing with a spatula.
Grainy, greasy, and bubbly buttercream are not the same problem; matching the fix to the texture helps you avoid overcorrecting the batch.

Common buttercream problems and fixes

Start with the symptom you see in the bowl, then make one small correction at a time. Big fixes often create a second problem.

ProblemWhy it happensHow to fix it
Too runnyButter is too warm, or too much liquid was added.Cool the bowl briefly and mix again. If needed, add powdered sugar in small additions.
Too thickToo much powdered sugar or not enough liquid.Loosen with milk or cream, adding only a little at a time.
GrainyLumpy sugar, cold liquid, or not enough mixing.Sift powdered sugar next time. For this batch, mix longer on low and add a small splash of room-temperature milk.
GreasyButter is too warm or the kitchen is hot.Cool briefly, then mix again. Avoid adding more liquid.
Air bubblesToo much high-speed mixing or whisk attachment use.Mix on low with the paddle and press/fold with a rubber spatula.
Too sweetAmerican buttercream is powdered-sugar based.Add salt, vanilla, or cream. Use a thinner layer, or choose a less-sweet frosting style.
Yellow colorButter and vanilla both add color.Use pale butter, clear vanilla, and whip longer. A tiny dot of violet gel can neutralize yellow, but add it cautiously.
Will not hold pipingToo soft, too warm, or over-thinned.Add powdered sugar gradually, cool briefly, and avoid holding the piping bag too long.
Split or curdledTemperature mismatch or ingredients too cold/warm.Let it come to cool room temperature and mix again. If it is very cold, wait before mixing more.

After fixing, smooth the frosting

If the frosting still tastes good, it is usually worth saving. Once the texture looks close, mix on low speed for 1–2 minutes and press it with a spatula to remove extra air bubbles. Texture problems often look worse than they are before the batch has been cooled, softened, or smoothed.

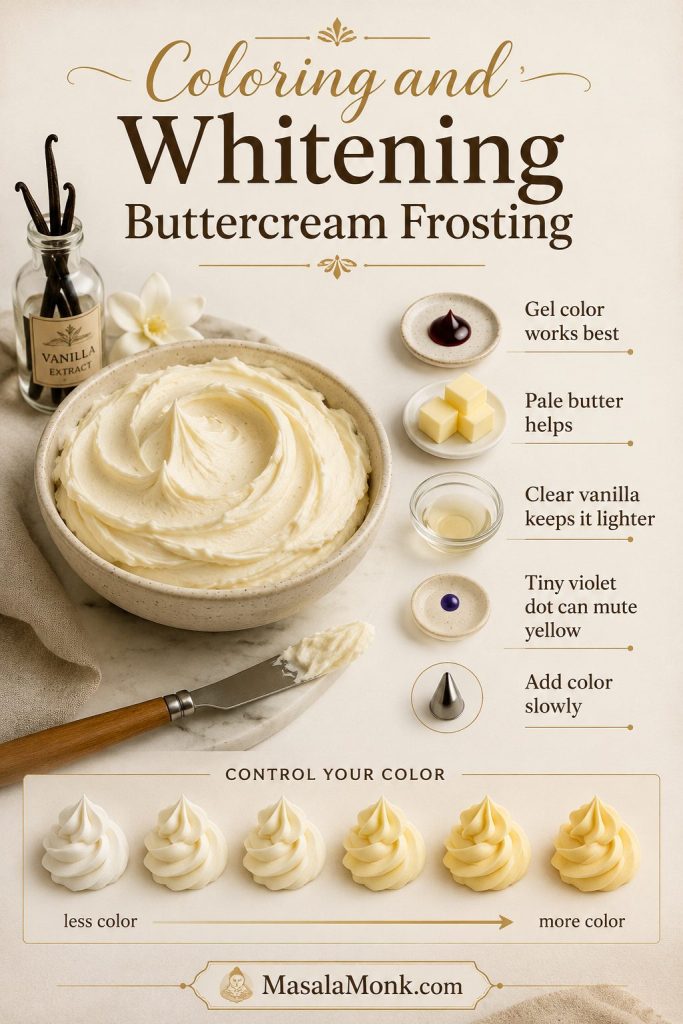
Coloring and whitening buttercream

Color is easiest to control once the texture is right. Use gel color for strong shades, and start with pale butter and clear vanilla when you want the cleanest white base.

Coloring and whitening buttercream guide with pale frosting, gel color, clear vanilla, pale butter, violet correction, and color swatches.
Gel color gives stronger color with less liquid, while pale butter and clear vanilla help when you want a cleaner white buttercream base.

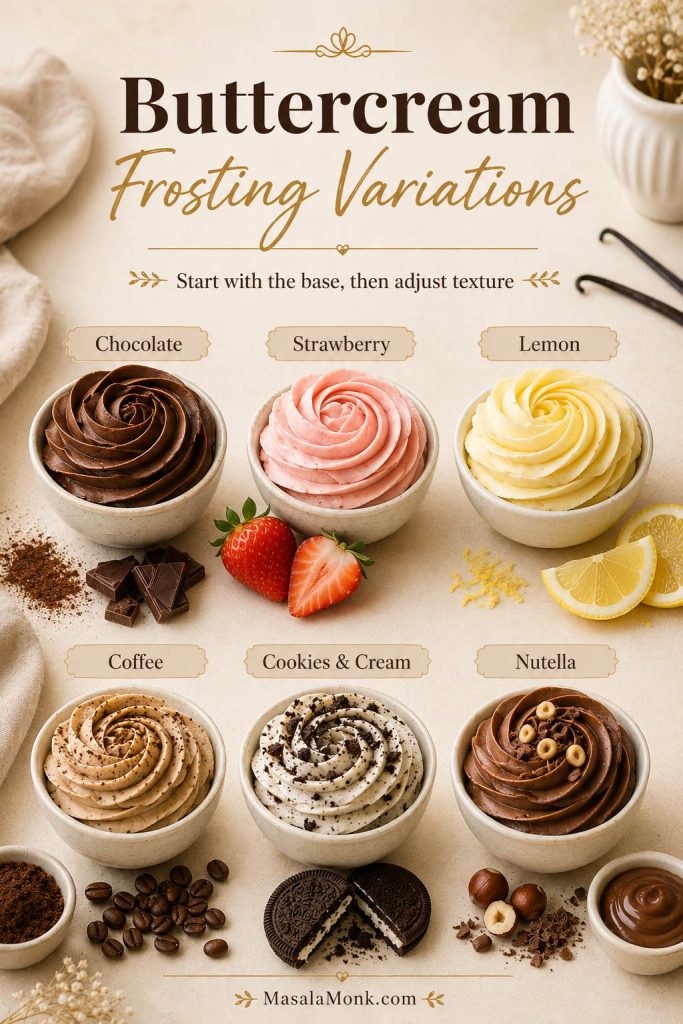
Buttercream Frosting Variations

Once you know the base recipe, you can turn it into many flavors. Think of these as direction changes, not full new recipes. Once you add cocoa, fruit, cookies, or Nutella, the texture may need a little rebalancing.

Six buttercream frosting variations in bowls labeled chocolate, strawberry, lemon, coffee, cookies and cream, and Nutella.
Flavor comes after texture; once the base is right, cocoa, fruit powder, coffee, cookie crumbs, or spreads can be added and adjusted.
Variation What to add Texture note
Chocolate Start with 1/3–1/2 cup unsweetened cocoa powder For a thicker chocolate frosting, add cocoa on top of the base. For a slightly less sweet version, replace part of the powdered sugar with cocoa. Either way, add cream as needed.
Strawberry Freeze-dried strawberry powder or very thick reduced puree Freeze-dried powder is best for piping. Reduced puree gives fruit flavor but can loosen the frosting if it is not thick enough.
Lemon Lemon zest first, then a little lemon juice Zest gives flavor without thinning; juice should be minimal and added slowly.
Coffee Espresso powder dissolved in cream or milk Dissolve espresso before adding it so the frosting tastes smooth instead of gritty.
Cookies & Cream Very finely crushed dark sandwich cookies Crush finely if piping so the tip does not clog.
Nutella Nutella beaten into the butter Adjust sugar and liquid because Nutella adds sweetness and fat.
Vegan Firm vegan butter and dairy-free milk Best treated as its own recipe because vegan butter behaves differently.
Swiss meringue Egg whites, sugar, and butter Silkier and less sweet, but more technical.

If you want a dairy-free chocolate dessert to pair with a future vegan or chocolate frosting, MasalaMonk’s vegan chocolate cake recipes are a natural next stop.

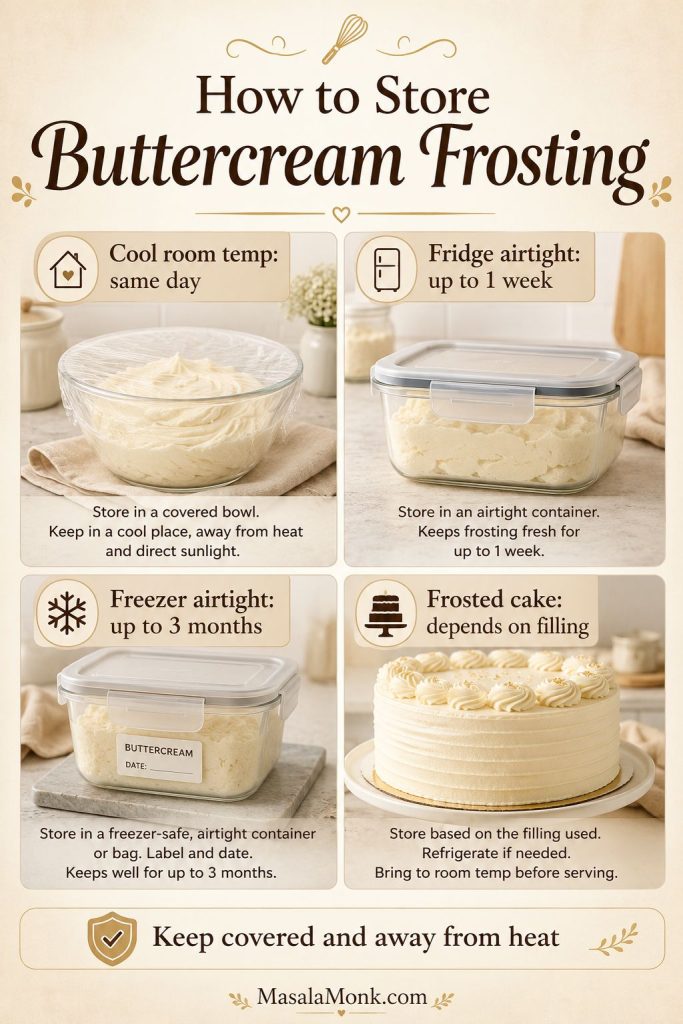
How to Store, Freeze, and Make Buttercream Ahead

Buttercream can be made ahead, which makes it useful for birthdays, parties, cupcakes, and layered cakes. The important thing is to separate storage time from serving texture: cold buttercream is safe and sturdy, but it needs time before it feels creamy again.

Storage guide showing covered buttercream at room temperature, an airtight fridge container, freezer storage, and a frosted cake.
Storage depends on both the frosting and the cake; plain buttercream is flexible, but fillings, heat, and serving time can change the best plan.
Storage situation How long What to do before serving or using
Plain buttercream, covered at cool room temperature Same day Stir smooth if needed. In a warm kitchen, refrigerate instead.
Plain buttercream, refrigerated airtight Up to 1 week Bring to room temperature, then beat again until creamy.
Plain buttercream, frozen airtight Up to 3 months Thaw in the fridge, soften at room temperature, then beat smooth.
Frosted cake in a cool room Same day Keep covered and away from heat. Refrigerate if the filling is perishable.
Chilled frosted cake Depends on the cake and filling Let it sit briefly before serving so the buttercream softens again.

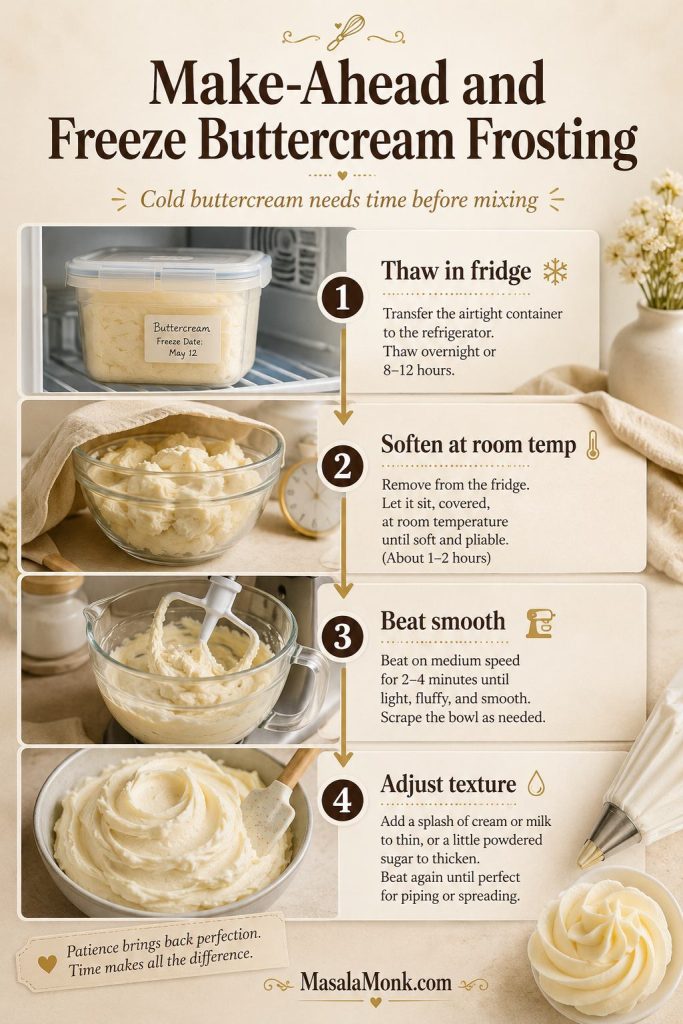
How to revive make-ahead or frozen buttercream

For the easiest make-ahead plan, refrigerate the buttercream airtight, then let it soften before mixing. If it looks firm, rough, or slightly uneven straight from the fridge, wait before judging it; the texture usually comes back once it softens and gets mixed again.

Make-ahead workflow showing buttercream thawing in the fridge, softening at room temperature, beating smooth, and adjusting texture.
Make-ahead buttercream usually comes back beautifully, but only after it thaws, softens, and gets beaten smooth before final adjusting.

For the base batch and exact amounts, return to the recipe card.

Buttercream Frosting Recipe Card

Once you understand the butter temperature, the ratio, and the small fixes, this becomes the kind of frosting you can make without second-guessing every spoonful.

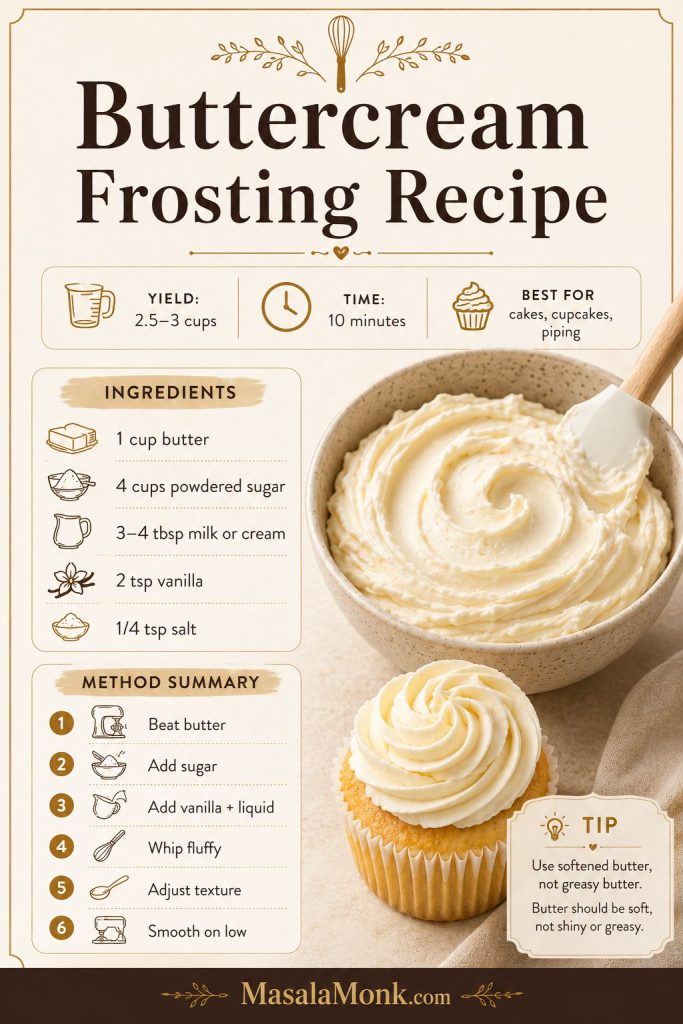
Saveable buttercream frosting recipe card with yield, time, ingredients, method summary, a bowl of frosting, and a frosted cupcake.
Save this base recipe for future cakes and cupcakes; once the butter is soft but not greasy, the frosting is easy to whip, correct, and use.

Buttercream Frosting Recipe

Easy American vanilla buttercream for cakes, cupcakes, piping, and decorating. This frosting is fluffy, stable, spreadable, and easy to adjust softer or stiffer.

Prep Time10 minutes
Cook Time0 minutes
Total Time10 minutes
YieldAbout 2.5–3 cups

Best for: 12 cupcakes with generous swirls, 18 cupcakes with a spread finish, or the top of one 9×13 sheet cake.

Method: Mixing / whipping

Category: Dessert, frosting

Cuisine: American

Ingredients

  • 1 cup / 2 sticks / 226g / 8 oz unsalted butter, softened but not greasy
  • 4 cups / 480g / about 1 lb powdered sugar, sifted if lumpy
  • 3–4 tablespoons / 45–60ml / 1.5–2 fl oz heavy cream or milk
  • 2 teaspoons / 10ml vanilla extract
  • 1/4 teaspoon fine salt

Instructions

  1. Beat the softened butter for 2–3 minutes until creamy, smooth, and slightly paler.
  2. Add the powdered sugar in 3–4 additions, mixing on low speed after each addition.
  3. Add vanilla, salt, and 3 tablespoons milk or cream. Mix on low until combined.
  4. Beat for about 2 minutes on medium speed until fluffy and creamy.
  5. Adjust the texture. Add more milk or cream a little at a time to loosen, or powdered sugar in small additions to thicken.
  6. Mix on low speed for 1–2 minutes to smooth the frosting and reduce air bubbles.
  7. Use immediately, or store airtight and re-whip before using.

Notes

  • Butter should be soft enough to press with a finger, but not oily or melted.
  • If using a thermometer, aim for about 65–67°F / 18–19°C butter.
  • Finished frosting should look pale and creamy, hold a soft peak, and spread smoothly without oily shine.
  • Use heavy cream for richer frosting and milk for a lighter finish.
  • For whiter frosting, use pale butter and clear vanilla.
  • For less-sweet frosting, add salt and good vanilla, but do not remove too much powdered sugar or the frosting will lose structure.
  • For stiffer decorating buttercream, add more powdered sugar gradually.

FAQs

These are the questions that usually come up once the frosting is mixed, the texture is close, and the cake is waiting.

What is the best butter for buttercream frosting?

Unsalted butter gives the best control over flavor and salt. Salted butter can work, but reduce or skip the added salt so the frosting does not become too salty.

How do I make buttercream frosting fluffy?

Start by beating the butter until it looks creamy and slightly paler, then add powdered sugar gradually. Once everything is combined, beat for about 2 minutes on medium speed, then finish on low speed to smooth the frosting after whipping.

How do I make buttercream frosting thicker?

Powdered sugar thickens buttercream. Add it in small amounts until the frosting holds the texture you need. For piping, stop when it holds a peak with a soft curl.

How do I make buttercream frosting softer?

Milk or cream softens the texture. Add only a little at a time because buttercream can loosen quickly.

Why is my buttercream frosting grainy?

Graininess usually comes from lumpy powdered sugar, cold liquid, or not enough mixing. Sift the sugar if needed, use room-temperature milk or cream, and mix on low until the texture becomes smoother.

Can I color buttercream frosting?

Gel food coloring works better than liquid coloring because it gives stronger color without thinning the frosting too much. Start with a small amount, mix well, and let the color deepen for a few minutes before adding more.

How do I make buttercream frosting whiter?

Use pale butter, clear vanilla, and beat the butter well before adding powdered sugar. A tiny dot of violet gel can help neutralize yellow, but add it carefully because too much can tint the frosting.

Can I use milk instead of heavy cream?

Milk works well and gives a slightly lighter finish than heavy cream. Heavy cream makes the frosting richer and fuller. Start with the smaller amount either way, then add more only if the frosting needs loosening.

Does buttercream frosting harden?

American buttercream firms up when chilled and may form a light crust as it sits, but all-butter buttercream does not harden like royal icing. For a firmer crusting finish, use a dedicated crusting buttercream with shortening.

Can I make buttercream frosting with margarine?

Butter gives the best flavor and structure. Margarine can make frosting softer, looser, or less stable because it often contains more water and less fat than butter. If you use it, expect a softer frosting and avoid heavy piping.

Is buttercream frosting good for cupcakes?

Cupcakes are one of the easiest uses for this recipe because the frosting is fluffy enough to pipe but stable enough to hold a swirl.

Is buttercream frosting good for layer cakes?

Layer cakes work well with this buttercream as long as you make enough for filling, crumb coating, and covering. For tall cakes or heavy piping, scale the batch up.

Does buttercream frosting need to be refrigerated?

For same-day use in a cool kitchen, it can usually stay covered at room temperature. For longer storage, warm kitchens, or cakes with perishable fillings, refrigerate it airtight and bring it back to room temperature before using.

Can buttercream frosting be frozen?

Buttercream freezes well in an airtight container for up to 3 months. Thaw it in the refrigerator, bring it to room temperature, and re-whip before spreading or piping.

How do I make buttercream less sweet?

Salt, good vanilla, cream, and a thinner layer can make American buttercream taste more balanced. For a truly less-sweet frosting, compare buttercream styles above and choose Swiss meringue buttercream or ermine frosting instead.

What is the difference between buttercream frosting and icing?

Buttercream frosting is thick, creamy, and spreadable. Icing is usually thinner, glossier, and more likely to set firm. Many home bakers use “buttercream frosting” and “buttercream icing” to mean the same thing.

Back to top

Posted on 2 Comments

Whipped Cream Recipe

A bowl of homemade whipped cream with glossy soft peaks, served with berries, pie, and hot chocolate on a warm ivory surface.

This homemade whipped cream recipe turns heavy cream, powdered sugar, and vanilla into a soft, fluffy topping for pies, cakes, fruit, hot chocolate, pancakes, waffles, and no-bake desserts. Once you know the stopping point, it feels almost unfairly easy: fresher, softer, and cleaner-tasting than anything from a tub or can.

It is also one of the fastest ways to make a simple dessert feel intentional. A bowl of berries, a warm slice of pie, or a mug of hot chocolate suddenly feels finished when there is a spoonful of cool, billowy cream on top.

The method is simple: choose cream that can whip, sweeten it lightly, and stop while the texture is still glossy. The full recipe comes early, followed by the details that help you adjust sweetness, choose the right peak stage, fix mistakes, make it ahead, and use it on cakes or desserts.

What Good Whipped Cream Should Look Like

Before you start whipping, keep the target texture in mind: homemade whipped cream should look glossy, soft, and billowy, not dull, dry, or grainy.

Close-up of glossy homemade whipped cream with soft folds and a spoon lifting a billowy mound.
Look for a surface that still shines. When whipped cream turns dull, clumpy, or dry-looking, it is usually moving past the ideal stage.

Quick Answer: How to Make Whipped Cream

Quick answer: To make whipped cream, beat 1 cup cold heavy cream with 2 tablespoons powdered sugar and 1/2 to 1 teaspoon vanilla until soft, medium, or stiff peaks form. One cup of cream makes about 2 cups whipped cream. For most desserts, aim for medium peaks: glossy, spoonable peaks that bend gently at the tip.

Start the mixer on low so the cream does not splash, then increase the speed once the sugar has blended in. The cream is ready when the beater leaves soft trails in the bowl and the lifted cream forms a peak that holds for a moment before gently bending.

For everyday desserts, do not chase stiff peaks unless you need a firmer topping. Once you see trails from the beaters, stay close — the final stretch happens quickly.

For strawberry shortcake, a gently bending texture is better than stiff peaks because the cream should soften into the berries and cake instead of sitting on top like frosting.

Whipped Cream at a Glance

Use this as the fast reference before making the recipe.

Detail Recommended answer
Prep time 5 minutes
Yield About 2 cups whipped cream, or 8 servings of about 1/4 cup each
Base ratio 1 cup cream + 2 tablespoons powdered sugar + 1/2 to 1 teaspoon vanilla
Best everyday texture Medium peaks: glossy, soft, and gently bending
Storage Best the same day; refrigerate 24–48 hours if needed

Homemade Whipped Cream Recipe Card

This is the full basic recipe. After the card, you’ll find scaling, ingredient notes, cream-type guidance, texture cues, fixes, storage, and variations.

Homemade Whipped Cream Recipe

This whipped cream recipe uses cold heavy cream, powdered sugar, and vanilla for a smooth, fluffy topping that works for pies, cakes, fruit, hot chocolate, pancakes, waffles, and no-bake desserts.

Prep Time
5 minutes
Cook Time
0 minutes
Yield
About 2 cups
Servings
8 servings
Serving Size
About 1/4 cup
Default Texture
Medium peaks
Cream
Heavy cream or heavy whipping cream
Best Used
Same day

Ingredients

  • 1 cup / 240 ml cold heavy cream or heavy whipping cream
  • 2 tablespoons / about 15 g powdered sugar
  • 1/2 to 1 teaspoon vanilla extract
  • Tiny pinch of fine salt, optional

Instructions

  1. Chill a metal mixing bowl for 10–15 minutes if your kitchen is warm.
  2. Add the cold heavy cream, powdered sugar, vanilla, and optional salt.
  3. Beat on low speed for 20–30 seconds to combine without splashing.
  4. Increase to medium or medium-high speed.
  5. Once visible trails form, check every few seconds. For most desserts, stop when the cream holds a soft mound on a spoon, looks glossy, and bends gently at the tip.
  6. Stop earlier for loose toppings, or continue carefully for firmer peaks.
  7. Use immediately, or refrigerate and gently re-whisk before serving if needed.

Notes

  • Do not walk away once beater trails stay visible; the final stage happens quickly.
  • For a less sweet topping, use 1 tablespoon powdered sugar.
  • For a sweeter dessert cream, use 3 tablespoons powdered sugar.
  • For cakes or piping, this fresh version is best served the same day; use a cake-stable version for longer hold.
  • Not sure what medium peaks look like? Use the peak guide before you keep beating.
  • If the cream turns grainy, stop mixing and fold in 1 tablespoon cold cream by hand.
Saveable homemade whipped cream recipe card showing heavy cream, powdered sugar, vanilla, prep time, yield, and medium peak guidance.
The base ratio is easy to remember, but timing matters more than the clock. Once the cream forms visible trails, check the peaks often so you stop before the texture turns grainy.

How to Scale This Whipped Cream Recipe

The recipe scales easily. You can make just enough for two mugs of hot chocolate or enough for a whole pie without changing the method.

Cream Powdered sugar Vanilla Approximate yield Best for
1/4 cup / 60 ml 1–2 teaspoons 1/8–1/4 teaspoon About 1/2 cup whipped cream Coffee, hot chocolate, berries for one or two.
1/2 cup / 120 ml 1 tablespoon / 7–8 g 1/4–1/2 teaspoon About 1 cup whipped cream Fruit, pancakes, waffles, or a small dessert.
1 cup / 240 ml 2 tablespoons / about 15 g 1/2–1 teaspoon About 2 cups whipped cream Pie topping, cake slices, shortcakes, pudding, or family dessert.
2 cups / 480 ml 1/4 cup / about 30 g 1–2 teaspoons About 4 cups whipped cream Dessert table, larger pie, trifle, or crowd serving.
Whipped cream scaling guide showing different cream amounts, powdered sugar, vanilla, approximate yield, and best uses.
Cream expands as it whips, so a small amount goes further than it looks. Make a tiny batch for coffee or berries, then scale up for pie, cake, trifle, or a dessert table.

If you are scaling whipped cream for a cake, cupcakes, or any dessert that needs to sit longer, check the regular vs stabilized whipped cream guide before choosing the final texture.

Why This Whipped Cream Recipe Works

This whipped cream recipe works because it does not ask you to do anything fussy. Cold cream, a smooth sweetener, and the right stopping point give you a topping that feels light, fresh, and homemade without turning stiff or grainy.

  • Cold cream traps air better. When the fat in the cream is cold, the cream whips faster and holds a smoother shape.
  • Powdered sugar dissolves easily. It sweetens the cream without leaving a gritty texture.
  • The right peak stage keeps it soft. The cream should hold a gentle mound but still taste cool, light, and fresh.
  • Stopping early prevents graininess. Once the beater trails stay visible, whipped cream can move from perfect to overworked quickly.

Homemade Whipped Cream Ingredients

With only three main ingredients, quality and balance matter. The cream gives body, the sugar smooths the flavor, and vanilla makes the topping taste like dessert instead of plain whipped dairy.

Ingredients for homemade whipped cream, including cold heavy cream, powdered sugar, vanilla, optional salt, and a whisk.
Each ingredient has a simple job: cream builds body, sugar smooths the flavor, and vanilla makes the topping taste like dessert. Because the list is short, cream quality matters.
Ingredient Amount Why it matters
Cold heavy cream or heavy whipping cream 1 cup / 240 ml The base of the recipe. Use it straight from the fridge.
Powdered sugar 2 tablespoons / about 15 g Sweetens smoothly without gritty crystals.
Vanilla extract 1/2 to 1 teaspoon / 2.5–5 ml Adds the classic dessert flavor.
Fine salt Tiny pinch, optional Balances sweetness, especially with chocolate, caramel, or very sweet desserts.

For a less sweet topping, use only 1 tablespoon powdered sugar per cup of cream. For a sweeter cream closer to Chantilly cream, use 3 tablespoons. The 2-tablespoon version is the easiest middle ground for pies, fruit, hot chocolate, pancakes, and no-bake desserts.

Heavy Cream vs Whipping Cream: Which One Works Best?

For the easiest success, use heavy cream or heavy whipping cream. In U.S. labeling, heavy cream is cream with at least 36% milkfat, which helps it whip into fuller peaks and hold its shape longer.

Outside the U.S., cream names vary. The label matters more than the name, so look for cream meant for whipping and check the fat percentage when it is listed.

Side-by-side comparison of whipped cream made with heavy cream and lighter whipping cream, showing fuller and softer peaks.
Before blaming your mixer, check the carton. Heavy cream usually gives stronger peaks, while lighter whipping cream makes a softer topping that is best served soon.
Cream type Will it whip? Use it for
Heavy cream / heavy whipping cream Yes, most dependable Fuller whipped cream with the best structure.
Whipping cream / light whipping cream Yes, but softer A soft topping for same-day desserts.
Double cream Yes, very rich Rich whipped cream, though it can overwhip quickly.
Fresh cream / regional fresh cream Depends on fat percentage May thicken softly, but may not form firm, lasting peaks.
Lower-fat cream Usually not well Cooking, sauces, coffee, or desserts where whipped peaks are not required.
Milk or half-and-half No They do not have enough fat for classic whipped cream.

If your cream refuses to thicken, check the carton before blaming your technique. Cream meant for cooking, coffee, or sauces may not have enough fat to whip properly. In places where “fresh cream” is common, choose a whipping label or a higher fat percentage when you want lasting peaks.

What Will Whip and What Will Not

If the cream looks loose even after chilling and whipping, use this carton check before adding more sugar. The issue is often the product, not your effort.

Guide showing which dairy products whip into whipped cream, including heavy cream, whipping cream, double cream, fresh cream, Amul fresh cream, milk, and half-and-half.
Not every dairy product can trap enough air to become whipped cream. For reliable peaks, choose cream labeled for whipping; milk, half-and-half, and many lower-fat creams stay too loose.

If your bowl still looks runny after choosing the right cream, jump to the troubleshooting guide before changing the recipe.

Sugar Options for Whipped Cream

Powdered sugar is the easiest sweetener because whipped cream is not heated. Larger sugar crystals can stay slightly gritty if they do not dissolve fully.

Sweetener Works well for Watch-out
Powdered sugar Smooth, classic whipped cream The easiest default for most desserts.
Granulated sugar Lightly sweet cream served soon Can feel grainy if it does not dissolve.
Maple syrup or honey Natural-sweetener variations Adds flavor and can make the cream slightly softer.
Sugar-free sweetener Lower-sugar desserts Use a powdered or very fine sweetener if possible.

Sweetness is flexible. The cream should taste gently sweet, not sugary, because most desserts already bring their own sweetness. For savory dishes or very low-sugar desserts, you can leave the sugar out entirely as long as the cream itself is suitable for whipping.

Sugar options for whipped cream showing powdered sugar, granulated sugar, maple syrup, honey, sugar-free sweetener, and different sweetness levels.
Use less sugar when the dessert is already sweet, and use a little more for a Chantilly-style cream. Powdered sugar stays the easiest default because it blends smoothly into cold cream.

How to Make Whipped Cream Step by Step

Once the cream and sugar are chosen, the actual whipping is quick. The only real skill is knowing when to stop.

If this is your first time making whipped cream, the change can feel slow at first and then sudden. At first it looks like nothing is happening. Then the cream thickens, the beater trails stay visible, and suddenly you are only a few seconds away from the perfect stage.

Step-by-step whipped cream process showing cream, sugar, and vanilla being added, mixed on low, whipped thicker, and stopped at glossy peaks.
Start slowly to avoid splashing, then increase the speed as the cream thickens. Once trails hold in the bowl, the recipe moves quickly from perfect to overdone.

Step 1: Chill the bowl if your kitchen is warm

If your kitchen is hot, chill a metal mixing bowl and beaters for 10–15 minutes. This is optional in a cool kitchen, but it gives you a little more control.

Step 2: Add the ingredients

Add 1 cup cold heavy cream, 2 tablespoons powdered sugar, 1/2 to 1 teaspoon vanilla extract, and a tiny pinch of salt if using.

Step 3: Start on low speed

Beat on low for 20–30 seconds. This keeps the cream from splashing and gives the sugar time to blend in.

Step 4: Increase the speed

Increase to medium or medium-high speed. For 1 cup of cream, a hand mixer usually takes about 2–4 minutes. A stand mixer can be faster, so watch closely.

Step 5: Stop at the right peak stage

First you will see bubbles, then loose foam, then visible trails from the beaters. Once those trails stay in the bowl, start checking every few seconds.

Whipping Stages to Watch For

The visual stages matter more than the exact minute mark. Once the bowl shows lasting trails, move slowly and use the peak guide to choose your final texture.

Whipped cream stages in a bowl showing bubbles, loose foam, visible trails, and formed peaks.
The bowl gives you the best clues: bubbles first, then foam, then trails, then peaks. As soon as those trails stay visible, stop relying on minutes and start checking texture.

Stop at soft peaks for a loose topping, medium peaks for most desserts, or stiff peaks for a firmer finish. Slow down, lift the beaters, and check the peak instead of trying to beat it for a fixed number of minutes.

Texture matters more than time. Different mixers, bowl sizes, cream brands, and kitchen temperatures change the timing. Watch the cream, not just the clock.

Soft Peaks vs Medium Peaks vs Stiff Peaks

The right texture depends on how you plan to use the cream. A soft spoonful for hot chocolate does not need the same structure as whipped cream for a pie topping.

Good whipped cream should feel cool and billowy, with just enough sweetness to make berries, pie, cake, or hot chocolate taste more finished — not buried under a sugary foam.

Comparison of soft peaks, medium peaks, stiff peaks, and overwhipped whipped cream with labeled texture examples.
Soft peaks droop, medium peaks bend gently, and stiff peaks stand tall. For most homemade whipped cream uses, the middle stage gives the best balance of hold and freshness.
Stage What it looks like Use it for
Soft peaks The cream falls back into itself and the peak droops quickly. Hot chocolate, fruit, pancakes, waffles, and folding into desserts.
Medium peaks The cream holds a spoonable mound and the tip bends gently. The most useful everyday texture for pies, cakes, fruit, and no-bake desserts.
Stiff peaks The peak stands upright, but the cream starts looking firmer and less glossy. Pie topping, firmer same-day dessert topping, or very simple piping served soon.
Overwhipped The cream looks grainy, dull, clumpy, or starts separating. Stop immediately and try the cold-cream rescue below.

For most home desserts, the middle stage is the sweet spot: soft enough to melt into warm pie, but structured enough to sit in pretty spoonfuls. Stiff peaks can be useful, but they are closer to overwhipping, so move slowly once the cream looks thick.

The Medium Peaks Spoon Test

When the cream holds a soft mound on a spoon and the tip bends gently, it is usually ready for most desserts.

A spoon lifting whipped cream with a glossy soft mound and a gently bending tip to show medium peaks.
The spoon test makes the stopping point easier to judge. If the cream holds a soft mound without looking dry, it is ready for pies, berries, cakes, and no-bake desserts.

Stiff Peaks vs Overwhipped Cream

Stiff peaks can be useful, but they sit close to the overwhipped stage. If the bowl already looks dull or grainy, skip ahead to the overwhipped cream fix before mixing more.

Side-by-side comparison of stiff whipped cream peaks and overwhipped grainy whipped cream.
Stiff peaks are still usable, but overwhipped cream starts looking dull, grainy, and clumpy. When the shine disappears, stop before the cream separates.

Some chilled desserts need firmer whipped cream for structure. For example, a no-bake cheesecake depends on properly whipped cream, full-fat cream cheese, and enough chill time so the filling sets cleanly.

How to Fix Runny, Grainy, or Overwhipped Cream

Most whipped cream problems come down to temperature, cream type, or whipping too far. If something looks wrong, stop and check the texture before adding more ingredients.

Why Is My Whipped Cream Runny?

If your cream is still loose after a minute or two, do not panic. It may be too warm, underwhipped, or too low in fat. Chill the bowl and cream for 10–15 minutes, then whip again.

Do not try to fix runny whipped cream by dumping in a lot more sugar. Extra sugar may make the cream sweeter, but it will not solve a temperature, fat, or cream-type problem.

How to Fix Overwhipped Cream

If the bowl suddenly looks grainy, stop right there. Add 1 tablespoon cold cream and fold it in gently by hand. Add another small spoonful if needed.

Fold gently instead of beating again; more speed can push grainy cream closer to butter. If it has separated into buttery clumps, it may be too far gone to rescue as whipped cream, but you can keep going and turn it into homemade butter.

Overwhipped cream rescue steps showing grainy cream, cold cream being added, and the mixture being folded until smoother.
Slightly grainy cream can often be rescued if you stop early. Fold in cold cream by hand; beating again can push the mixture closer to butter.

If you want to understand that stage better, this homemade butter guide shows how cream moves from liquid to whipped cream to overwhipped cream and finally separates into butter and buttermilk.

Problem Likely cause Fix
Runny cream Cream too warm, underwhipped, or too low in fat Chill for 10–15 minutes and whip again.
Cream will not thicken Wrong cream or not enough fat Use cream meant for whipping. Avoid milk and half-and-half.
Grainy cream Slightly overwhipped Fold in 1 tablespoon cold cream by hand.
Buttery or clumpy cream Severely overwhipped Restart, or keep going and turn it into homemade butter.
Weeping in the fridge Normal for fresh whipped cream Re-whisk gently before serving.
Collapsing on cake This basic version is too soft for long hold Use cream with extra support.
Whipped cream troubleshooting guide showing runny cream, cream that will not thicken, grainy cream, buttery cream, weeping cream, and cream collapsing on cake.
Runny cream, grainy texture, weeping, and collapsing all have different causes. Instead of adding more sugar, match the problem to temperature, cream type, or overwhipping first.

If the fix does not work, restarting is usually faster than fighting the bowl.

If the cream never thickens at all, the issue may be the carton rather than the clock. Recheck the cream-type guide before trying again.

Can You Make Whipped Cream Without a Mixer?

Yes. A hand mixer is easiest for most home cooks because it gives enough speed without feeling out of control. A stand mixer is useful for larger batches, but it can move quickly, so stay nearby once the cream begins to thicken.

A balloon whisk works well for small batches if the cream and bowl are cold. Use a wide bowl and a large whisk. There is no prize for whipping by hand if you are tired; the goal is smooth cream, not sore wrists.

For a tiny batch, you can shake cold cream in a chilled jar, stopping while it is still soft. A food processor or immersion blender can also work in short bursts, but the texture is usually denser and easier to overdo.

Whipped cream without a mixer guide showing a balloon whisk, jar method, food processor, and immersion blender.
A whisk gives the most control, while jars, food processors, and immersion blenders move faster than you expect. Smaller batches are safer when you are not using a hand mixer.

Make-Ahead, Storage, and Freezing

Homemade whipped cream tastes best the day it is made. For the nicest texture, use it within a few hours. If needed, refrigerate it in an airtight container for 24–48 hours and gently re-whisk before serving.

Make-ahead whipped cream stored in an airtight container with a whisk and labels for same-day use, refrigeration, and re-whisking.
Fresh whipped cream is most delicate after storage. Keep it cold and airtight, then re-whisk gently if it softens before serving.

Keep the cream cold until serving, then leave it out only for a short serving window. If the room is warm, return it to the fridge sooner. A little softening after refrigeration is normal, and a few gentle strokes with a whisk usually brings it back.

A little weeping after a night in the fridge is not a disaster; fresh whipped cream is airy and delicate in a way tub toppings are not.

If you need whipped cream to hold for piping, cupcakes, layer cakes, or overnight serving, read the regular vs stabilized section before making the batch.

Can You Freeze Whipped Cream?

Yes, but freeze it as small dollops rather than one large container. Spoon or pipe dollops onto a parchment-lined tray, freeze until firm, then transfer them to a freezer-safe box. Frozen whipped cream is useful for hot chocolate, coffee, pancakes, waffles, and quick dessert toppings; after thawing, it will not be as silky as freshly whipped cream.

Frozen dollops are especially nice for drinks. Drop one into a mug of keto hot chocolate and it melts slowly into the top while keeping the drink creamy.

Whipped cream dollops on a parchment-lined tray with a storage container and hot chocolate in the background.
Freeze whipped cream in small dollops, not one large mass. Then you can add only what you need to hot chocolate, coffee, pancakes, or waffles.

Regular vs Stabilized Whipped Cream

Regular whipped cream is best when freshness matters: soft cream over pie, a cool topping for cake slices, a light layer on chilled desserts, or something airy to fold into no-bake fillings.

It also works beautifully as a soft cake topping when the cake stays cold and is served within a reasonable window. For example, a chilled tres leches cake is exactly the kind of dessert where regular whipped cream can feel light, creamy, and fresh.

Use stabilized whipped cream when the cream needs to hold its shape for piping, cupcakes, layer-cake filling, trifles, warm-weather serving, or overnight hold. For this basic recipe, keep the goal simple: soft whipped cream that tastes light and creamy, not a frosting replacement.

Comparison of regular whipped cream on a dessert and stabilized whipped cream piped on a cupcake with labels for same-day use and longer hold.
Regular whipped cream is best for fresh, soft toppings. However, stabilized whipped cream is better for piping, cupcakes, layer cakes, trifles, and longer hold.
Use Will this recipe work? Better choice
Spoon over a cake slice Yes Glossy, gently bending peaks
Top a cake served the same day Yes, if kept cold Soft to slightly firmer peaks
Frost a layer cake Not reliably Stabilized whipped cream
Pipe cupcakes Not reliably Stabilized whipped cream
Fill a cake overnight Not reliably Stabilized whipped cream or a cream-cheese whipped version

Ways to Use Homemade Whipped Cream

Homemade whipped cream is one of those small upgrades that makes simple desserts feel finished. Keep it softer for spooning, or whip it a little firmer when it needs to sit on top of a pie or no-bake dessert.

Homemade whipped cream served with pie, berries, pancakes, hot chocolate, cake, and a no-bake dessert.
Fresh whipped cream can finish dessert without making it feel heavy. Use it where contrast helps most: warm pie, tart berries, pancakes, hot chocolate, cake slices, and chilled no-bake desserts.

Warm desserts

Use softly structured peaks on warm pies, cobblers, crisps, and bread pudding. Think warm apple crisp, cinnamon steam, and the first spoonful where cool cream softens into the fruit instead of covering it up. That is why it works so well on desserts like apple crisp.

Homemade whipped cream melting softly over a warm apple crisp with cinnamon and a spoon nearby.
Cool cream against a warm dessert is the whole point. It softens into fruit, crumble, pastry, or bread pudding while keeping each bite lighter.

Fruit, breakfast, and drinks

Use soft to medium peaks for berries, pancakes, waffles, hot chocolate, coffee drinks, and simple spoon desserts. The cream should add softness and light sweetness without turning the whole plate heavy.

Whipped cream served with berries, pancakes with maple syrup, and a mug of hot chocolate.
For fruit, breakfast, and drinks, keep the cream soft rather than stiff. It should add lift to berries, pancakes, waffles, coffee, and hot chocolate instead of weighing them down.

Cold desserts and fillings

When whipped cream becomes part of the structure, follow the dessert’s own peak-stage instructions. In no-bake desserts like banana pudding, the cream is not just a topping — it helps the filling feel light and set properly.

For richer desserts, a lighter spoonful of cream can keep the whole bite from feeling too heavy, especially with something caramel-heavy like banoffee pie.

Once you know where you are serving it, the flavor variations can help match the cream to chocolate, fruit, coffee, citrus, or warm desserts.

Easy Whipped Cream Variations

Once the basic texture feels easy, the variations are where homemade whipped cream starts to feel personal: chocolate for richer desserts, maple for breakfast, cinnamon for apple pie, espresso for coffee drinks, and citrus for fruit. Add flavorings before whipping, then taste and adjust gently near the end.

Whipped cream variations guide showing chocolate, maple, cinnamon, espresso, citrus, and almond flavor ideas with matching ingredients.
Once the base texture feels right, flavor variations become easy. Chocolate, maple, cinnamon, espresso, citrus, and almond can each shift the same cream toward a different dessert mood.
Variation How to make it Best with
Chocolate whipped cream Add 1 tablespoon cocoa powder and 1 extra tablespoon powdered sugar per cup of cream. Chocolate cake, brownies, pudding, hot chocolate.
Maple whipped cream Replace some or all of the powdered sugar with 1 tablespoon maple syrup. Pancakes, waffles, apple crisp, pumpkin desserts.
Cinnamon whipped cream Add 1/4 teaspoon ground cinnamon per cup of cream. Apple pie, apple crisp, hot chocolate, banana desserts.
Espresso whipped cream Add a small pinch of instant espresso powder. Chocolate desserts, tiramisu-style desserts, coffee drinks.
Citrus whipped cream Add finely grated orange or lemon zest. Berries, pound cake, fruit tarts, citrus desserts.
Almond whipped cream Add a tiny splash of almond extract; it is stronger than vanilla, so use less. Cherry desserts, chocolate cake, fruit crisps.

Chocolate Whipped Cream

Chocolate is the strongest variation when you want a deeper dessert topping. Keep the texture light, then use it on brownies, pudding, chocolate cake, hot chocolate, or berries.

A bowl of chocolate whipped cream with cocoa powder, chocolate shavings, a spoonful of cream, and a chocolate cake in the background.
Chocolate whipped cream is the easiest richer variation because cocoa adds depth without changing the method much. Use it on brownies, chocolate cake, pudding, hot chocolate, or berries.

FAQs

What is the best cream for homemade whipped cream?

Heavy cream or heavy whipping cream is the most dependable choice because it has enough fat to hold air well and whip into a smooth, fluffy texture. Whipping cream can also work for a simple same-day topping, but it usually gives a softer result.

Can I make whipped cream with fresh cream?

It depends on the fat percentage and whether the cream is meant for whipping. Some fresh cream cartons may thicken softly when very cold, but they may not make firm, lasting peaks.

Does Amul fresh cream work for whipped cream?

Amul fresh cream is not the same as Amul whipping cream. It can thicken slightly when very cold, but it is not the best choice for firm whipped cream, piping, or frosting.

Is this the same as Chantilly cream?

Vanilla-sweetened whipped cream is often called Chantilly cream. This recipe works as a simple vanilla Chantilly cream for everyday desserts.

Will milk or half-and-half whip into whipped cream?

No. Milk and half-and-half do not have enough fat to trap and hold air like cream does. Use cream meant for whipping instead.

How long should I beat whipped cream?

For 1 cup of cream, a hand mixer usually takes about 2–4 minutes. A stand mixer may be faster, and a hand whisk may take 3–5 minutes. Watch the texture more than the clock.

What peak stage is best for pie or spooning over dessert?

Medium peaks are usually best. The cream should hold a soft mound on a spoon but still look glossy, light, and creamy.

What peak stage is best for folding into desserts?

Soft to medium peaks usually work best for folding. If the cream is too stiff, it can be harder to blend smoothly into puddings, mousses, or no-bake fillings.

Why is my whipped cream runny?

The cream may be too warm, underwhipped, or too low in fat. Chill the cream and bowl for 10–15 minutes, then whip again. If it still will not thicken, the cream may not be suitable for whipping.

Why did my whipped cream turn into butter, and can I fix it?

The cream was whipped too far. If it only looks grainy, stop mixing and fold in 1 tablespoon cold cream by hand. If it has separated into buttery clumps and liquid, it may be too far gone to rescue as whipped cream.

Can I make whipped cream ahead or freeze it?

Yes. It tastes freshest the day it is made, but you can refrigerate it for 24–48 hours and gently re-whisk before serving. For longer storage, freeze small dollops on a parchment-lined tray, then transfer them to a freezer-safe container.

Can I use this for piping or cake frosting?

This regular whipped cream works as a soft topping for cakes served the same day. For piping, layer-cake filling, cupcakes, or overnight hold, use stabilized whipped cream with extra support.

Back to top