
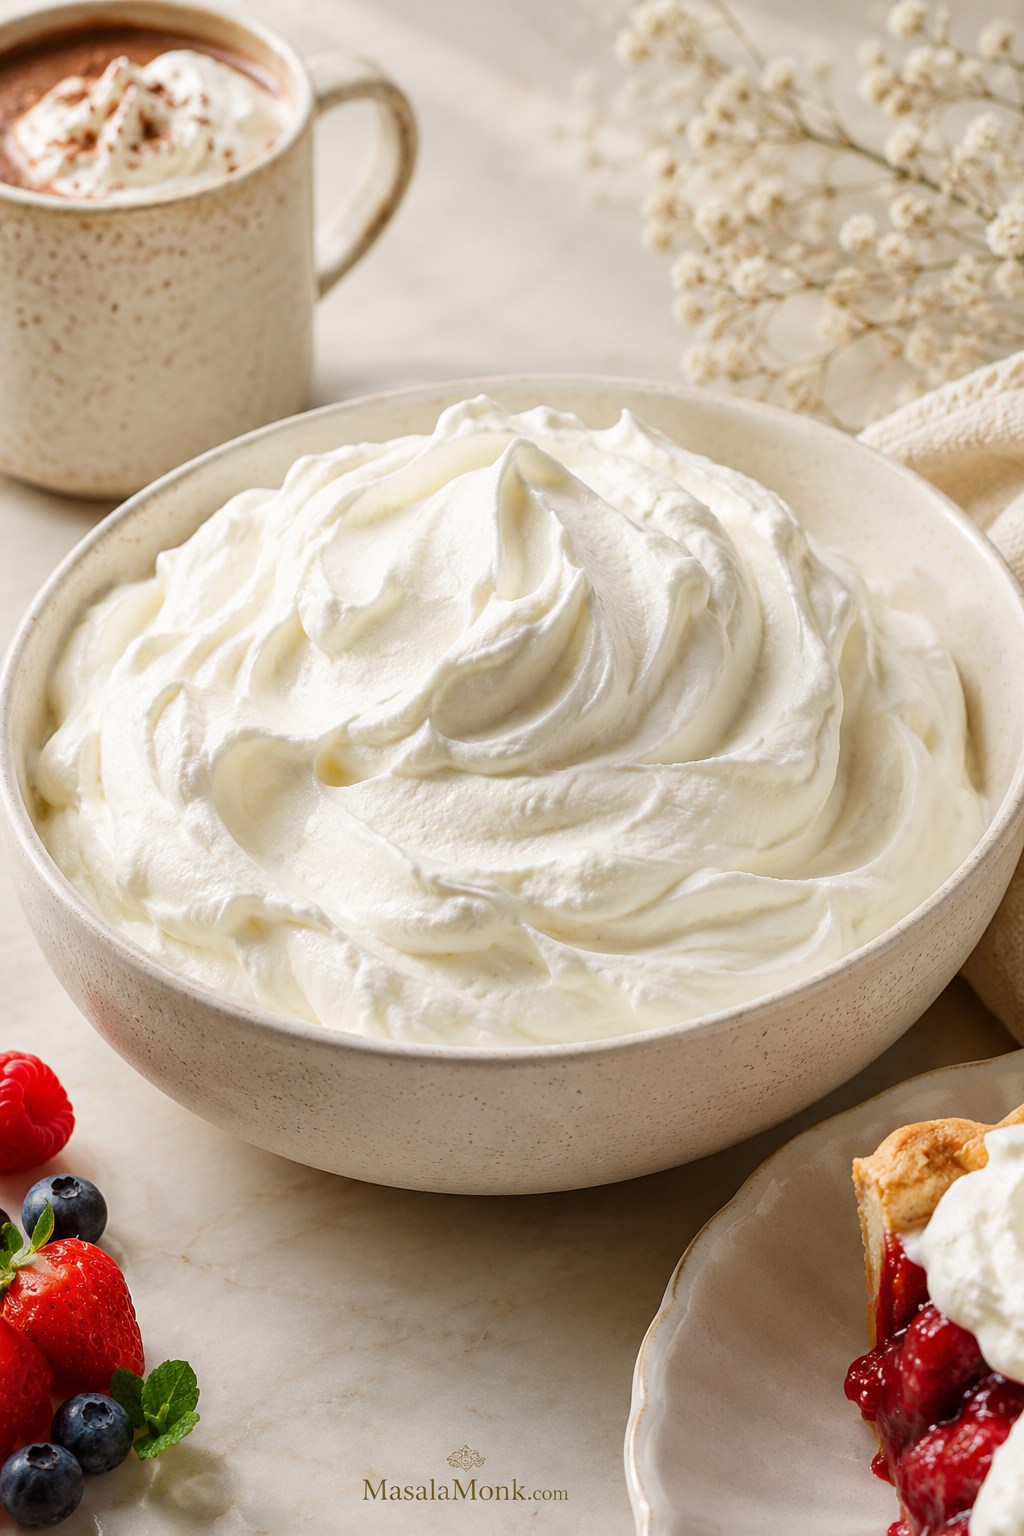
This homemade whipped cream recipe turns heavy cream, powdered sugar, and vanilla into a soft, fluffy topping for pies, cakes, fruit, hot chocolate, pancakes, waffles, and no-bake desserts. Once you know the stopping point, it feels almost unfairly easy: fresher, softer, and cleaner-tasting than anything from a tub or can.
It is also one of the fastest ways to make a simple dessert feel intentional. A bowl of berries, a warm slice of pie, or a mug of hot chocolate suddenly feels finished when there is a spoonful of cool, billowy cream on top.
The method is simple: choose cream that can whip, sweeten it lightly, and stop while the texture is still glossy. The full recipe comes early, followed by the details that help you adjust sweetness, choose the right peak stage, fix mistakes, make it ahead, and use it on cakes or desserts.
What Good Whipped Cream Should Look Like
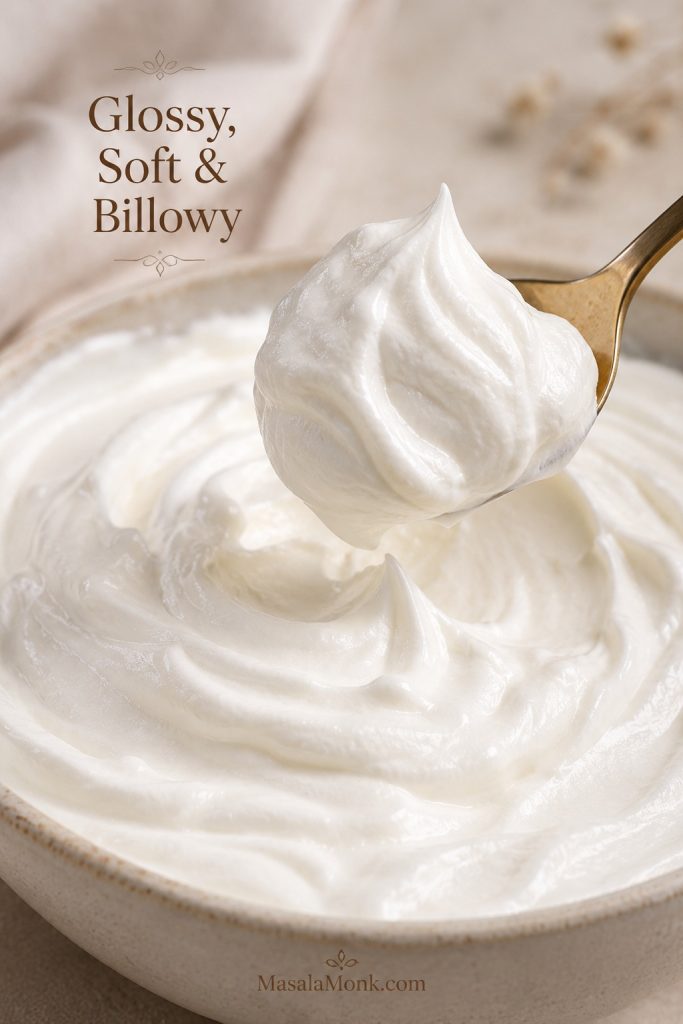
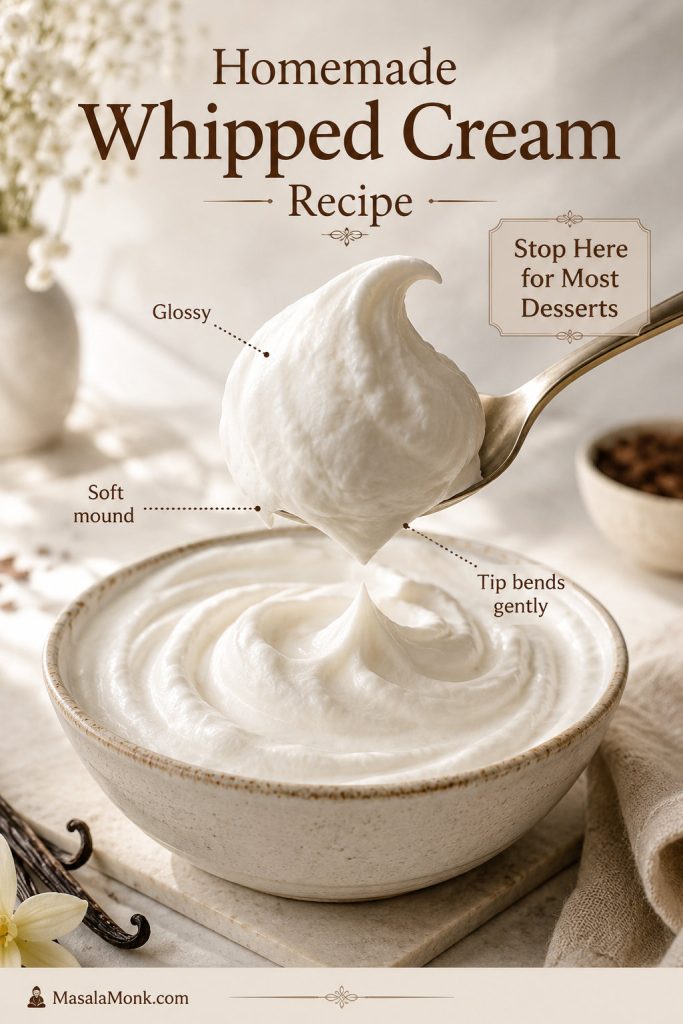
Before you start whipping, keep the target texture in mind: homemade whipped cream should look glossy, soft, and billowy, not dull, dry, or grainy.
In This Guide
Make the Cream
Texture, Fixes, and Serving
Quick Answer: How to Make Whipped Cream
Start the mixer on low so the cream does not splash, then increase the speed once the sugar has blended in. The cream is ready when the beater leaves soft trails in the bowl and the lifted cream forms a peak that holds for a moment before gently bending.
For everyday desserts, do not chase stiff peaks unless you need a firmer topping. Once you see trails from the beaters, stay close — the final stretch happens quickly.
For strawberry shortcake, a gently bending texture is better than stiff peaks because the cream should soften into the berries and cake instead of sitting on top like frosting.
Whipped Cream at a Glance
Use this as the fast reference before making the recipe.
| Detail | Recommended answer |
|---|---|
| Prep time | 5 minutes |
| Yield | About 2 cups whipped cream, or 8 servings of about 1/4 cup each |
| Base ratio | 1 cup cream + 2 tablespoons powdered sugar + 1/2 to 1 teaspoon vanilla |
| Best everyday texture | Medium peaks: glossy, soft, and gently bending |
| Storage | Best the same day; refrigerate 24–48 hours if needed |
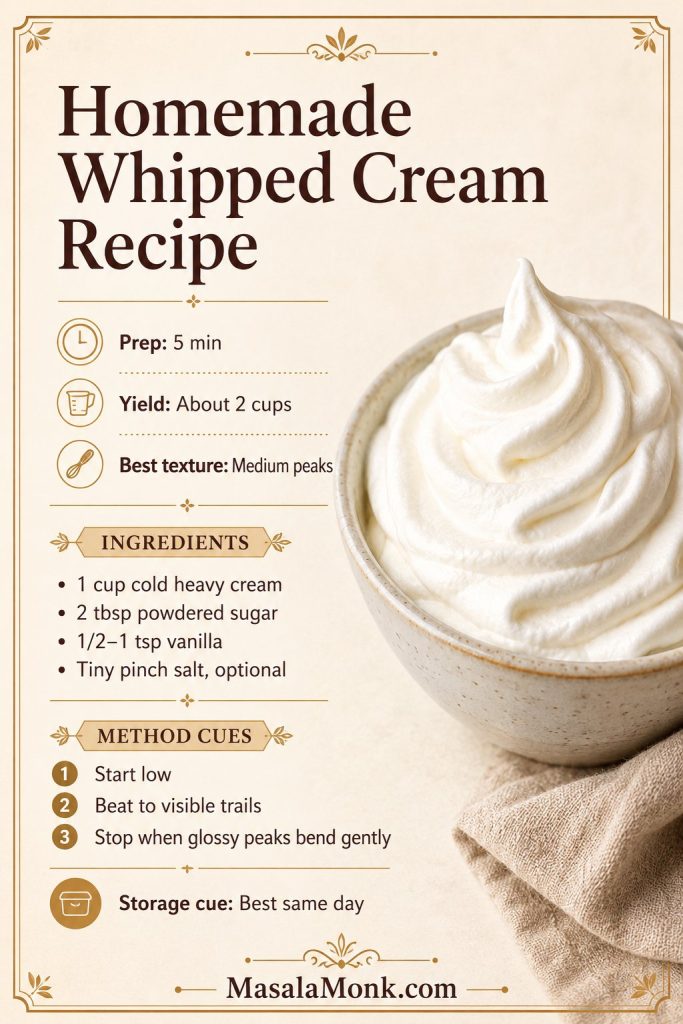
Homemade Whipped Cream Recipe Card
This is the full basic recipe. After the card, you’ll find scaling, ingredient notes, cream-type guidance, texture cues, fixes, storage, and variations.
Homemade Whipped Cream Recipe
This whipped cream recipe uses cold heavy cream, powdered sugar, and vanilla for a smooth, fluffy topping that works for pies, cakes, fruit, hot chocolate, pancakes, waffles, and no-bake desserts.
Ingredients
- 1 cup / 240 ml cold heavy cream or heavy whipping cream
- 2 tablespoons / about 15 g powdered sugar
- 1/2 to 1 teaspoon vanilla extract
- Tiny pinch of fine salt, optional
Instructions
- Chill a metal mixing bowl for 10–15 minutes if your kitchen is warm.
- Add the cold heavy cream, powdered sugar, vanilla, and optional salt.
- Beat on low speed for 20–30 seconds to combine without splashing.
- Increase to medium or medium-high speed.
- Once visible trails form, check every few seconds. For most desserts, stop when the cream holds a soft mound on a spoon, looks glossy, and bends gently at the tip.
- Stop earlier for loose toppings, or continue carefully for firmer peaks.
- Use immediately, or refrigerate and gently re-whisk before serving if needed.
Notes
- Do not walk away once beater trails stay visible; the final stage happens quickly.
- For a less sweet topping, use 1 tablespoon powdered sugar.
- For a sweeter dessert cream, use 3 tablespoons powdered sugar.
- For cakes or piping, this fresh version is best served the same day; use a cake-stable version for longer hold.
- Not sure what medium peaks look like? Use the peak guide before you keep beating.
- If the cream turns grainy, stop mixing and fold in 1 tablespoon cold cream by hand.
How to Scale This Whipped Cream Recipe
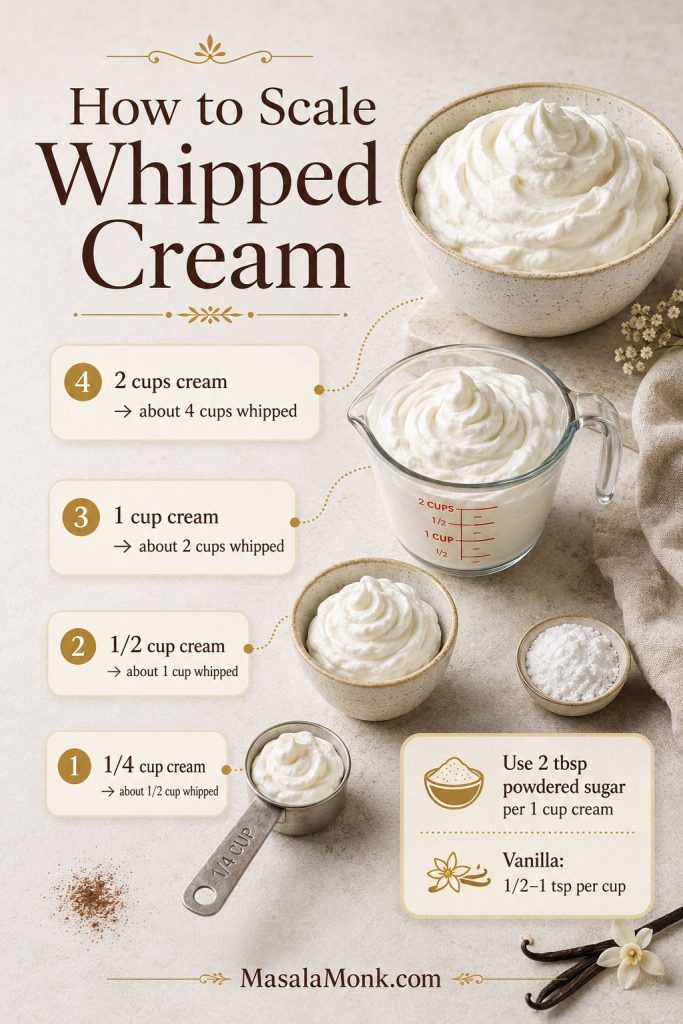
The recipe scales easily. You can make just enough for two mugs of hot chocolate or enough for a whole pie without changing the method.
| Cream | Powdered sugar | Vanilla | Approximate yield | Best for |
|---|---|---|---|---|
| 1/4 cup / 60 ml | 1–2 teaspoons | 1/8–1/4 teaspoon | About 1/2 cup whipped cream | Coffee, hot chocolate, berries for one or two. |
| 1/2 cup / 120 ml | 1 tablespoon / 7–8 g | 1/4–1/2 teaspoon | About 1 cup whipped cream | Fruit, pancakes, waffles, or a small dessert. |
| 1 cup / 240 ml | 2 tablespoons / about 15 g | 1/2–1 teaspoon | About 2 cups whipped cream | Pie topping, cake slices, shortcakes, pudding, or family dessert. |
| 2 cups / 480 ml | 1/4 cup / about 30 g | 1–2 teaspoons | About 4 cups whipped cream | Dessert table, larger pie, trifle, or crowd serving. |
If you are scaling whipped cream for a cake, cupcakes, or any dessert that needs to sit longer, check the regular vs stabilized whipped cream guide before choosing the final texture.
Why This Whipped Cream Recipe Works
This whipped cream recipe works because it does not ask you to do anything fussy. Cold cream, a smooth sweetener, and the right stopping point give you a topping that feels light, fresh, and homemade without turning stiff or grainy.
- Cold cream traps air better. When the fat in the cream is cold, the cream whips faster and holds a smoother shape.
- Powdered sugar dissolves easily. It sweetens the cream without leaving a gritty texture.
- The right peak stage keeps it soft. The cream should hold a gentle mound but still taste cool, light, and fresh.
- Stopping early prevents graininess. Once the beater trails stay visible, whipped cream can move from perfect to overworked quickly.
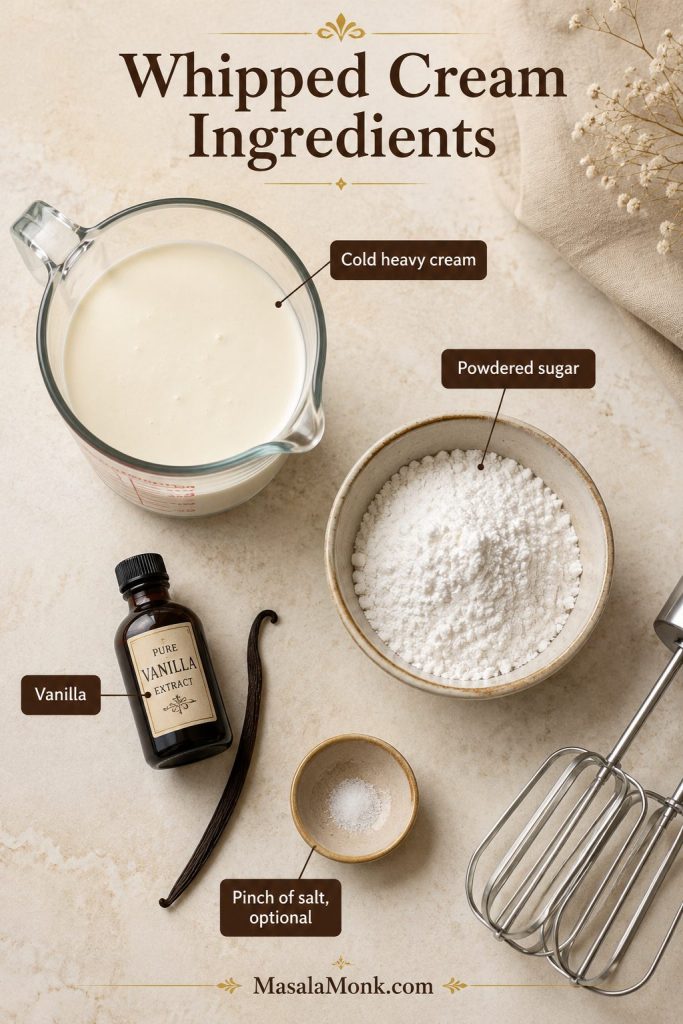
Homemade Whipped Cream Ingredients
With only three main ingredients, quality and balance matter. The cream gives body, the sugar smooths the flavor, and vanilla makes the topping taste like dessert instead of plain whipped dairy.
| Ingredient | Amount | Why it matters |
|---|---|---|
| Cold heavy cream or heavy whipping cream | 1 cup / 240 ml | The base of the recipe. Use it straight from the fridge. |
| Powdered sugar | 2 tablespoons / about 15 g | Sweetens smoothly without gritty crystals. |
| Vanilla extract | 1/2 to 1 teaspoon / 2.5–5 ml | Adds the classic dessert flavor. |
| Fine salt | Tiny pinch, optional | Balances sweetness, especially with chocolate, caramel, or very sweet desserts. |
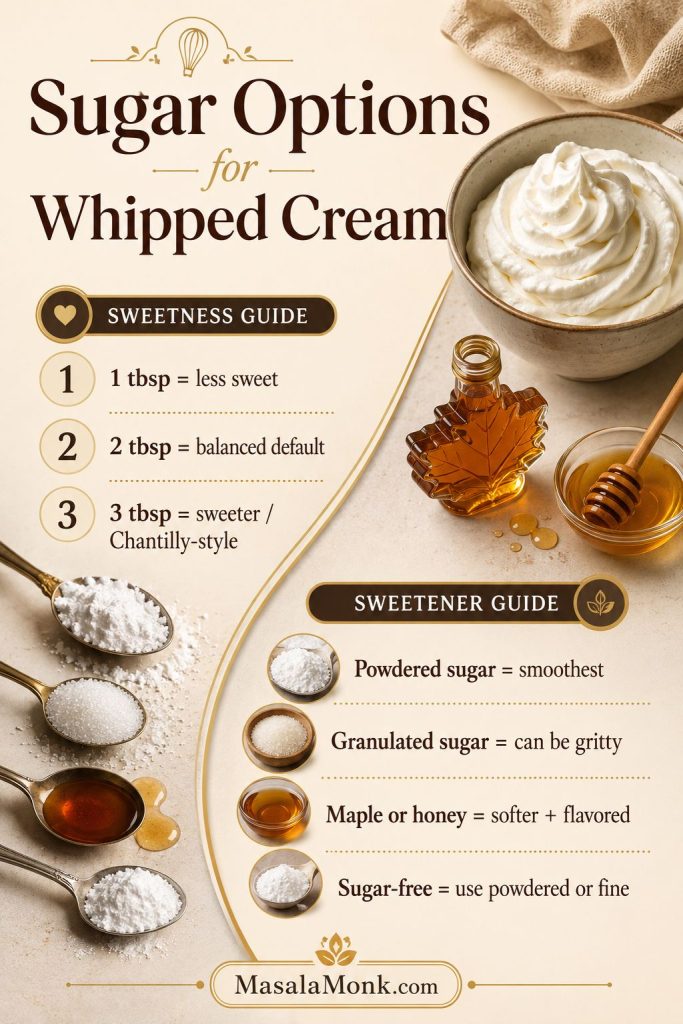
For a less sweet topping, use only 1 tablespoon powdered sugar per cup of cream. For a sweeter cream closer to Chantilly cream, use 3 tablespoons. The 2-tablespoon version is the easiest middle ground for pies, fruit, hot chocolate, pancakes, and no-bake desserts.
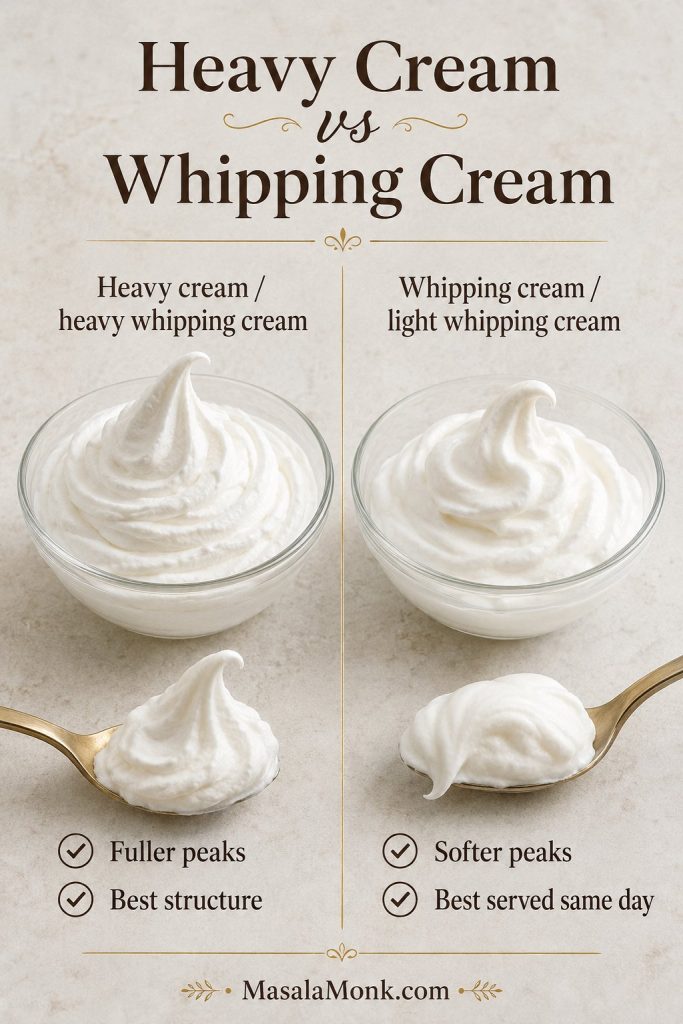
Heavy Cream vs Whipping Cream: Which One Works Best?
For the easiest success, use heavy cream or heavy whipping cream. In U.S. labeling, heavy cream is cream with at least 36% milkfat, which helps it whip into fuller peaks and hold its shape longer.
Outside the U.S., cream names vary. The label matters more than the name, so look for cream meant for whipping and check the fat percentage when it is listed.
| Cream type | Will it whip? | Use it for |
|---|---|---|
| Heavy cream / heavy whipping cream | Yes, most dependable | Fuller whipped cream with the best structure. |
| Whipping cream / light whipping cream | Yes, but softer | A soft topping for same-day desserts. |
| Double cream | Yes, very rich | Rich whipped cream, though it can overwhip quickly. |
| Fresh cream / regional fresh cream | Depends on fat percentage | May thicken softly, but may not form firm, lasting peaks. |
| Lower-fat cream | Usually not well | Cooking, sauces, coffee, or desserts where whipped peaks are not required. |
| Milk or half-and-half | No | They do not have enough fat for classic whipped cream. |
If your cream refuses to thicken, check the carton before blaming your technique. Cream meant for cooking, coffee, or sauces may not have enough fat to whip properly. In places where “fresh cream” is common, choose a whipping label or a higher fat percentage when you want lasting peaks.
What Will Whip and What Will Not
If the cream looks loose even after chilling and whipping, use this carton check before adding more sugar. The issue is often the product, not your effort.
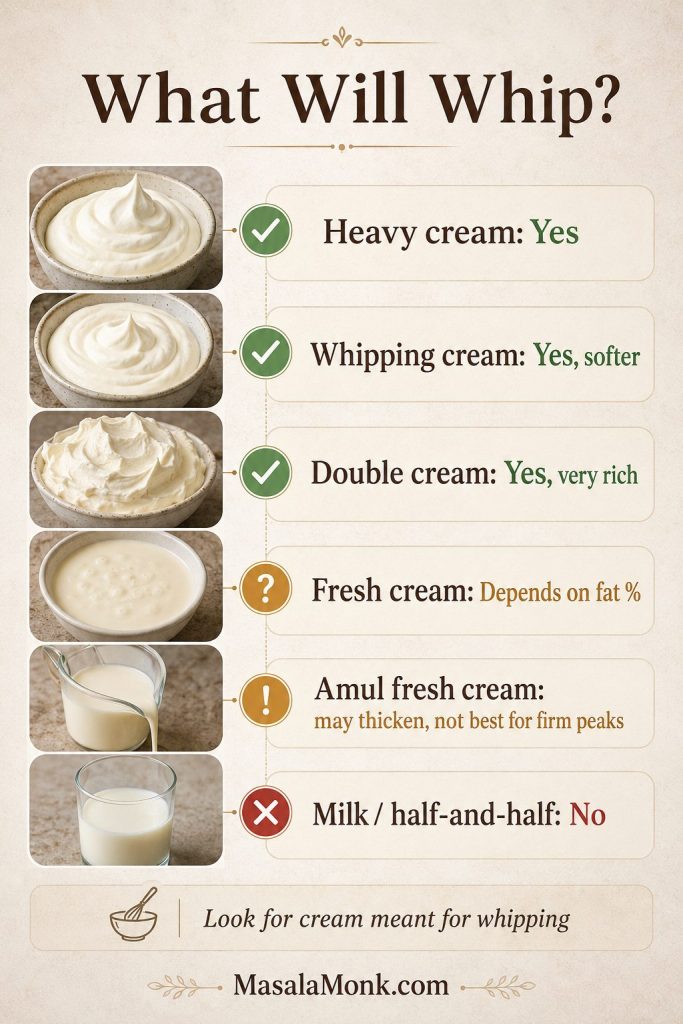
If your bowl still looks runny after choosing the right cream, jump to the troubleshooting guide before changing the recipe.
Sugar Options for Whipped Cream
Powdered sugar is the easiest sweetener because whipped cream is not heated. Larger sugar crystals can stay slightly gritty if they do not dissolve fully.
| Sweetener | Works well for | Watch-out |
|---|---|---|
| Powdered sugar | Smooth, classic whipped cream | The easiest default for most desserts. |
| Granulated sugar | Lightly sweet cream served soon | Can feel grainy if it does not dissolve. |
| Maple syrup or honey | Natural-sweetener variations | Adds flavor and can make the cream slightly softer. |
| Sugar-free sweetener | Lower-sugar desserts | Use a powdered or very fine sweetener if possible. |
Sweetness is flexible. The cream should taste gently sweet, not sugary, because most desserts already bring their own sweetness. For savory dishes or very low-sugar desserts, you can leave the sugar out entirely as long as the cream itself is suitable for whipping.
How to Make Whipped Cream Step by Step
Once the cream and sugar are chosen, the actual whipping is quick. The only real skill is knowing when to stop.
If this is your first time making whipped cream, the change can feel slow at first and then sudden. At first it looks like nothing is happening. Then the cream thickens, the beater trails stay visible, and suddenly you are only a few seconds away from the perfect stage.
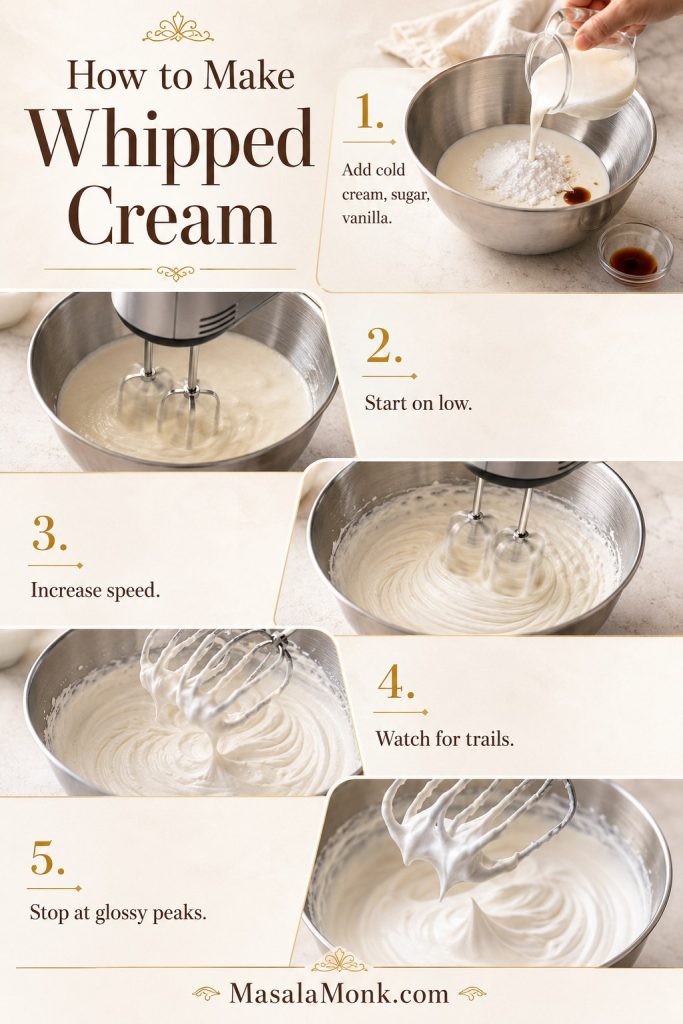
Step 1: Chill the bowl if your kitchen is warm
If your kitchen is hot, chill a metal mixing bowl and beaters for 10–15 minutes. This is optional in a cool kitchen, but it gives you a little more control.
Step 2: Add the ingredients
Add 1 cup cold heavy cream, 2 tablespoons powdered sugar, 1/2 to 1 teaspoon vanilla extract, and a tiny pinch of salt if using.
Step 3: Start on low speed
Beat on low for 20–30 seconds. This keeps the cream from splashing and gives the sugar time to blend in.
Step 4: Increase the speed
Increase to medium or medium-high speed. For 1 cup of cream, a hand mixer usually takes about 2–4 minutes. A stand mixer can be faster, so watch closely.
Step 5: Stop at the right peak stage
First you will see bubbles, then loose foam, then visible trails from the beaters. Once those trails stay in the bowl, start checking every few seconds.
Whipping Stages to Watch For
The visual stages matter more than the exact minute mark. Once the bowl shows lasting trails, move slowly and use the peak guide to choose your final texture.
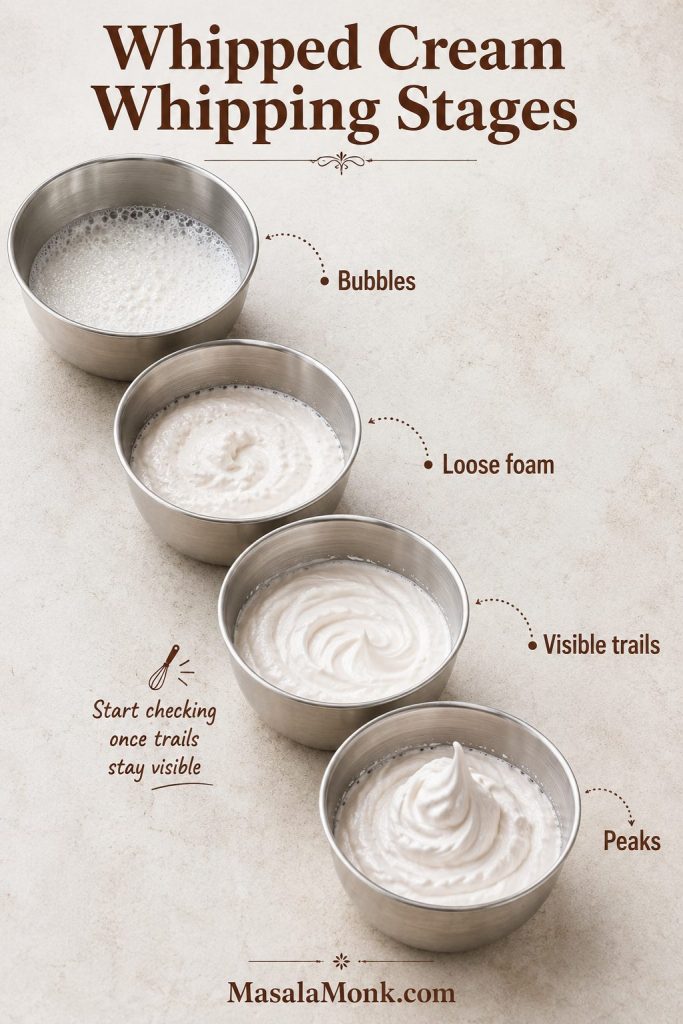
Stop at soft peaks for a loose topping, medium peaks for most desserts, or stiff peaks for a firmer finish. Slow down, lift the beaters, and check the peak instead of trying to beat it for a fixed number of minutes.
Soft Peaks vs Medium Peaks vs Stiff Peaks
The right texture depends on how you plan to use the cream. A soft spoonful for hot chocolate does not need the same structure as whipped cream for a pie topping.
Good whipped cream should feel cool and billowy, with just enough sweetness to make berries, pie, cake, or hot chocolate taste more finished — not buried under a sugary foam.
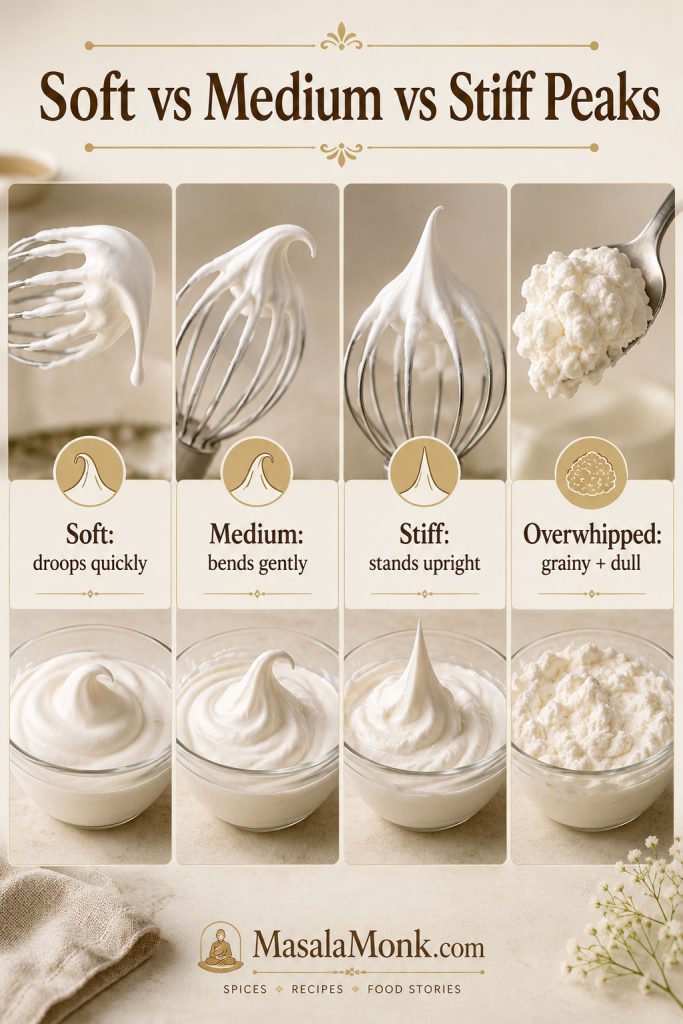
| Stage | What it looks like | Use it for |
|---|---|---|
| Soft peaks | The cream falls back into itself and the peak droops quickly. | Hot chocolate, fruit, pancakes, waffles, and folding into desserts. |
| Medium peaks | The cream holds a spoonable mound and the tip bends gently. | The most useful everyday texture for pies, cakes, fruit, and no-bake desserts. |
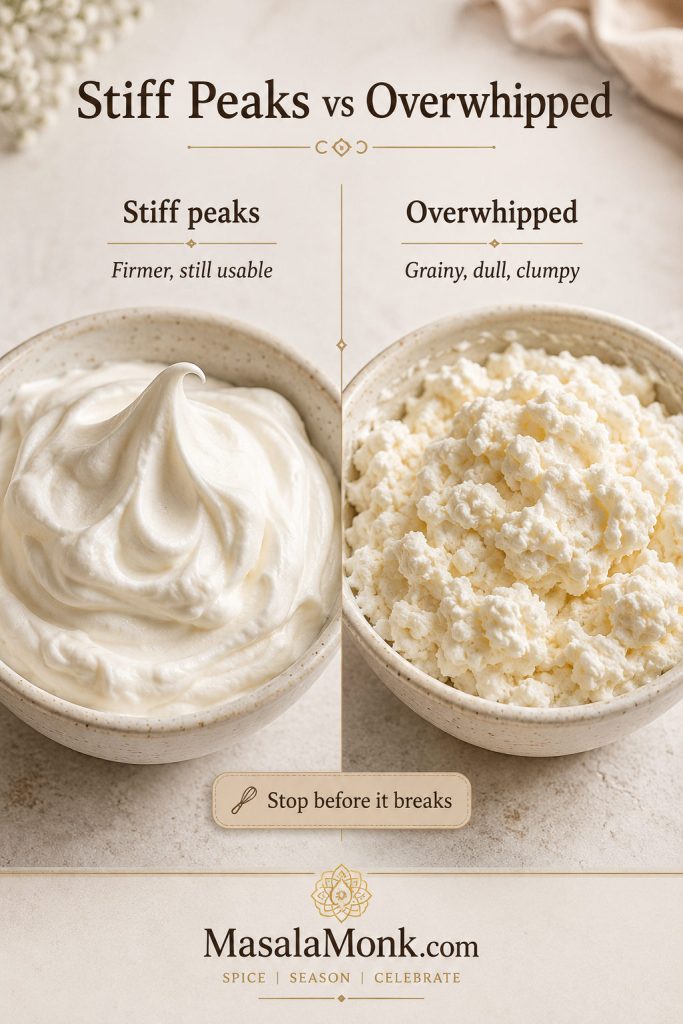
| Stiff peaks | The peak stands upright, but the cream starts looking firmer and less glossy. | Pie topping, firmer same-day dessert topping, or very simple piping served soon. |
| Overwhipped | The cream looks grainy, dull, clumpy, or starts separating. | Stop immediately and try the cold-cream rescue below. |
For most home desserts, the middle stage is the sweet spot: soft enough to melt into warm pie, but structured enough to sit in pretty spoonfuls. Stiff peaks can be useful, but they are closer to overwhipping, so move slowly once the cream looks thick.
The Medium Peaks Spoon Test
When the cream holds a soft mound on a spoon and the tip bends gently, it is usually ready for most desserts.
Stiff Peaks vs Overwhipped Cream
Stiff peaks can be useful, but they sit close to the overwhipped stage. If the bowl already looks dull or grainy, skip ahead to the overwhipped cream fix before mixing more.
Some chilled desserts need firmer whipped cream for structure. For example, a no-bake cheesecake depends on properly whipped cream, full-fat cream cheese, and enough chill time so the filling sets cleanly.
How to Fix Runny, Grainy, or Overwhipped Cream
Most whipped cream problems come down to temperature, cream type, or whipping too far. If something looks wrong, stop and check the texture before adding more ingredients.
Why Is My Whipped Cream Runny?
If your cream is still loose after a minute or two, do not panic. It may be too warm, underwhipped, or too low in fat. Chill the bowl and cream for 10–15 minutes, then whip again.
Do not try to fix runny whipped cream by dumping in a lot more sugar. Extra sugar may make the cream sweeter, but it will not solve a temperature, fat, or cream-type problem.
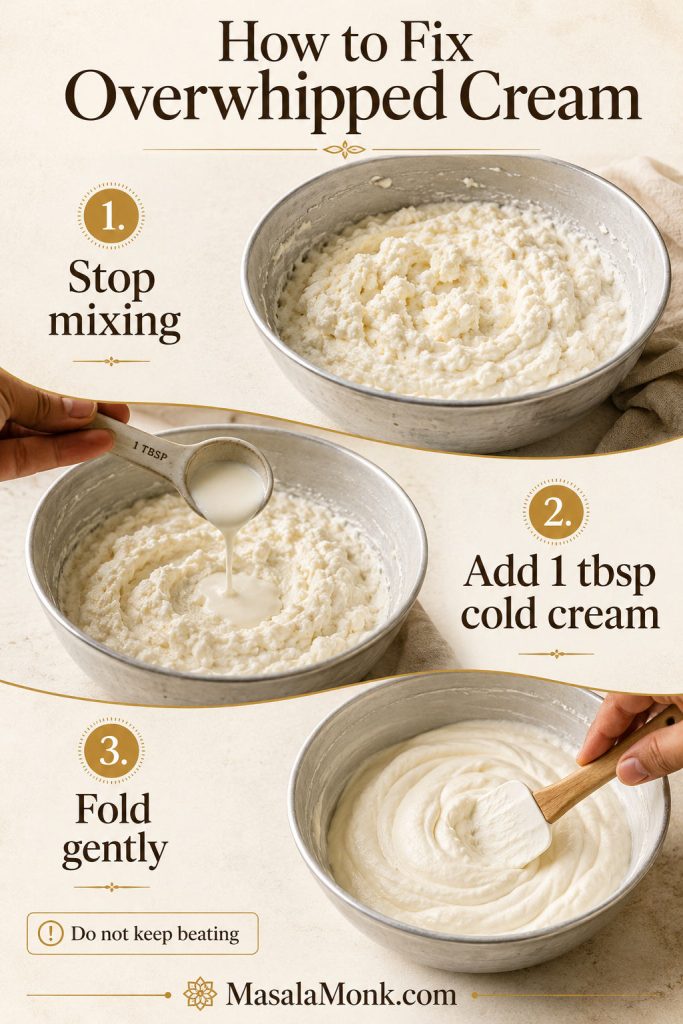
How to Fix Overwhipped Cream
If the bowl suddenly looks grainy, stop right there. Add 1 tablespoon cold cream and fold it in gently by hand. Add another small spoonful if needed.
Fold gently instead of beating again; more speed can push grainy cream closer to butter. If it has separated into buttery clumps, it may be too far gone to rescue as whipped cream, but you can keep going and turn it into homemade butter.
If you want to understand that stage better, this homemade butter guide shows how cream moves from liquid to whipped cream to overwhipped cream and finally separates into butter and buttermilk.
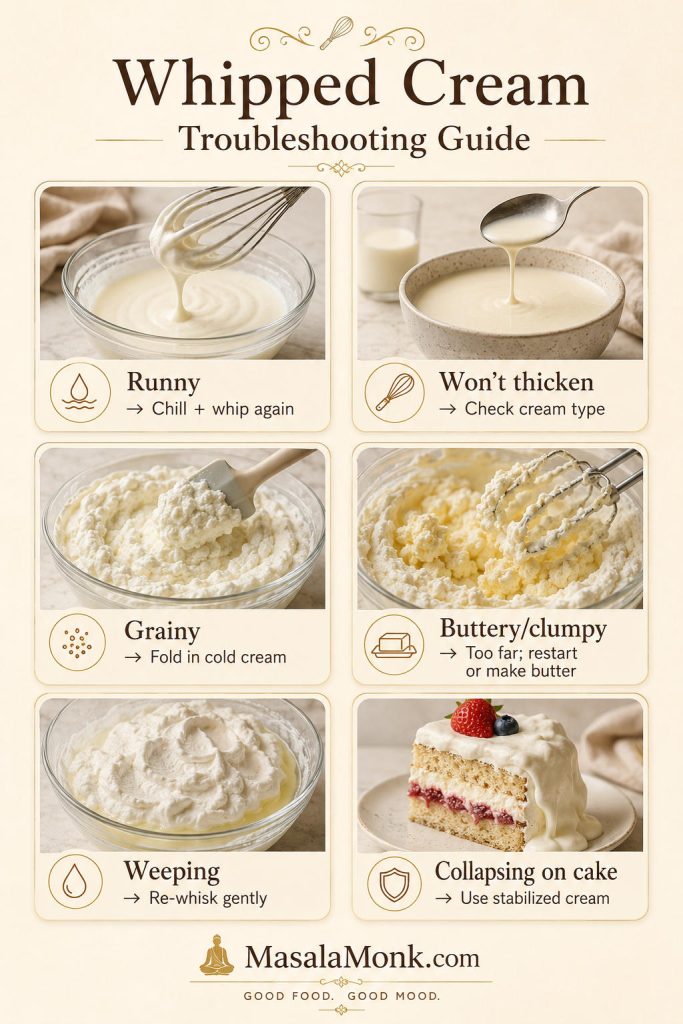
| Problem | Likely cause | Fix |
|---|---|---|
| Runny cream | Cream too warm, underwhipped, or too low in fat | Chill for 10–15 minutes and whip again. |
| Cream will not thicken | Wrong cream or not enough fat | Use cream meant for whipping. Avoid milk and half-and-half. |
| Grainy cream | Slightly overwhipped | Fold in 1 tablespoon cold cream by hand. |
| Buttery or clumpy cream | Severely overwhipped | Restart, or keep going and turn it into homemade butter. |
| Weeping in the fridge | Normal for fresh whipped cream | Re-whisk gently before serving. |
| Collapsing on cake | This basic version is too soft for long hold | Use cream with extra support. |
If the fix does not work, restarting is usually faster than fighting the bowl.
If the cream never thickens at all, the issue may be the carton rather than the clock. Recheck the cream-type guide before trying again.
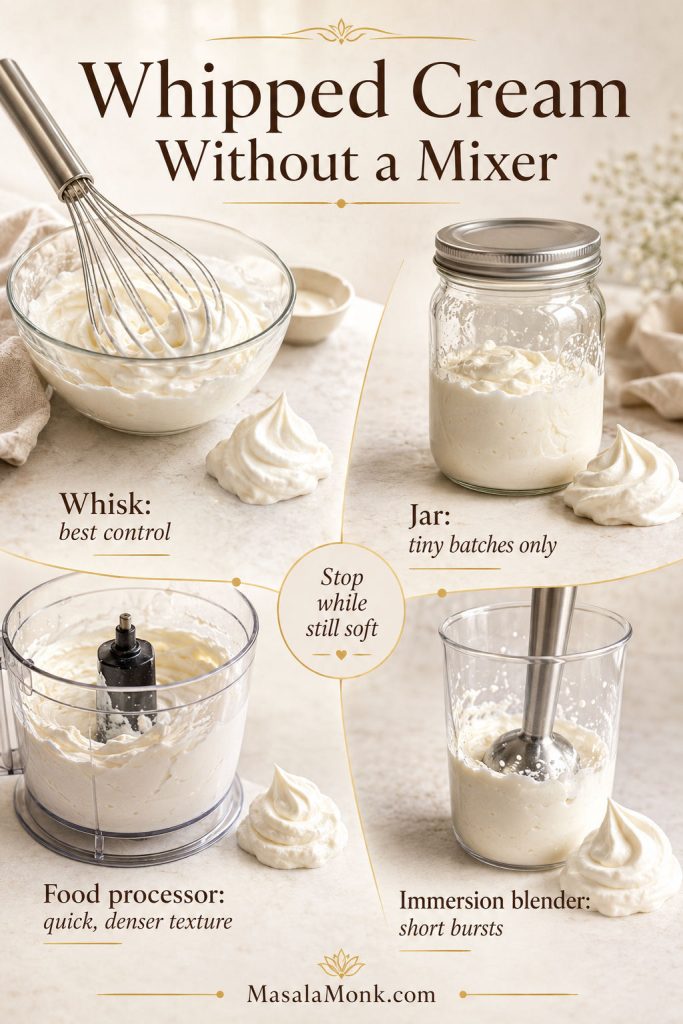
Can You Make Whipped Cream Without a Mixer?
Yes. A hand mixer is easiest for most home cooks because it gives enough speed without feeling out of control. A stand mixer is useful for larger batches, but it can move quickly, so stay nearby once the cream begins to thicken.
A balloon whisk works well for small batches if the cream and bowl are cold. Use a wide bowl and a large whisk. There is no prize for whipping by hand if you are tired; the goal is smooth cream, not sore wrists.
For a tiny batch, you can shake cold cream in a chilled jar, stopping while it is still soft. A food processor or immersion blender can also work in short bursts, but the texture is usually denser and easier to overdo.
Make-Ahead, Storage, and Freezing
Homemade whipped cream tastes best the day it is made. For the nicest texture, use it within a few hours. If needed, refrigerate it in an airtight container for 24–48 hours and gently re-whisk before serving.
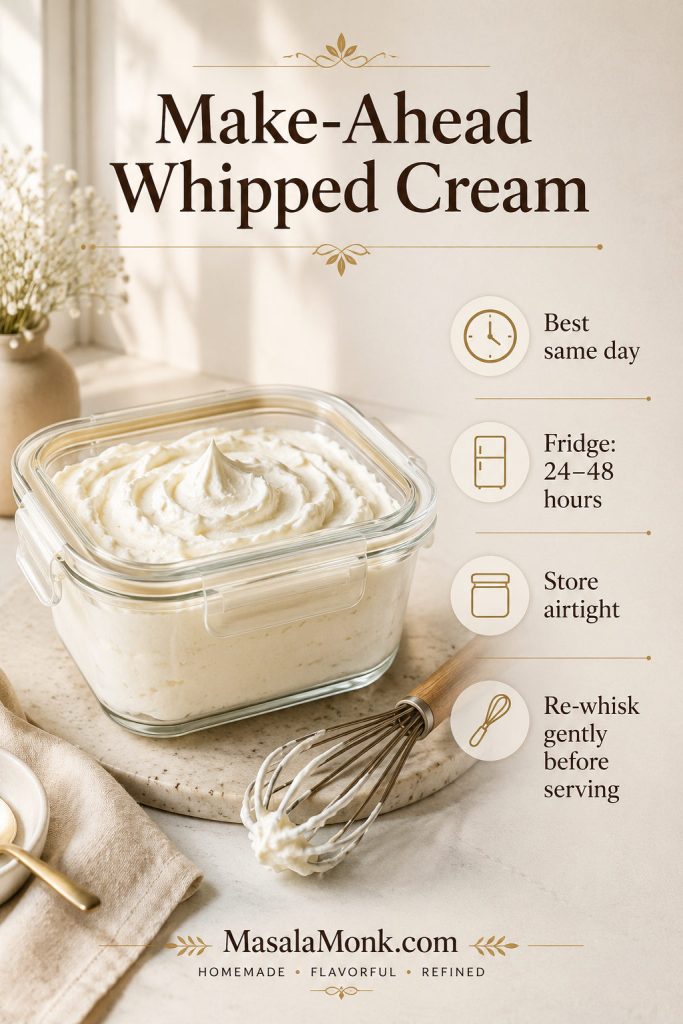
Keep the cream cold until serving, then leave it out only for a short serving window. If the room is warm, return it to the fridge sooner. A little softening after refrigeration is normal, and a few gentle strokes with a whisk usually brings it back.
A little weeping after a night in the fridge is not a disaster; fresh whipped cream is airy and delicate in a way tub toppings are not.
If you need whipped cream to hold for piping, cupcakes, layer cakes, or overnight serving, read the regular vs stabilized section before making the batch.
Can You Freeze Whipped Cream?
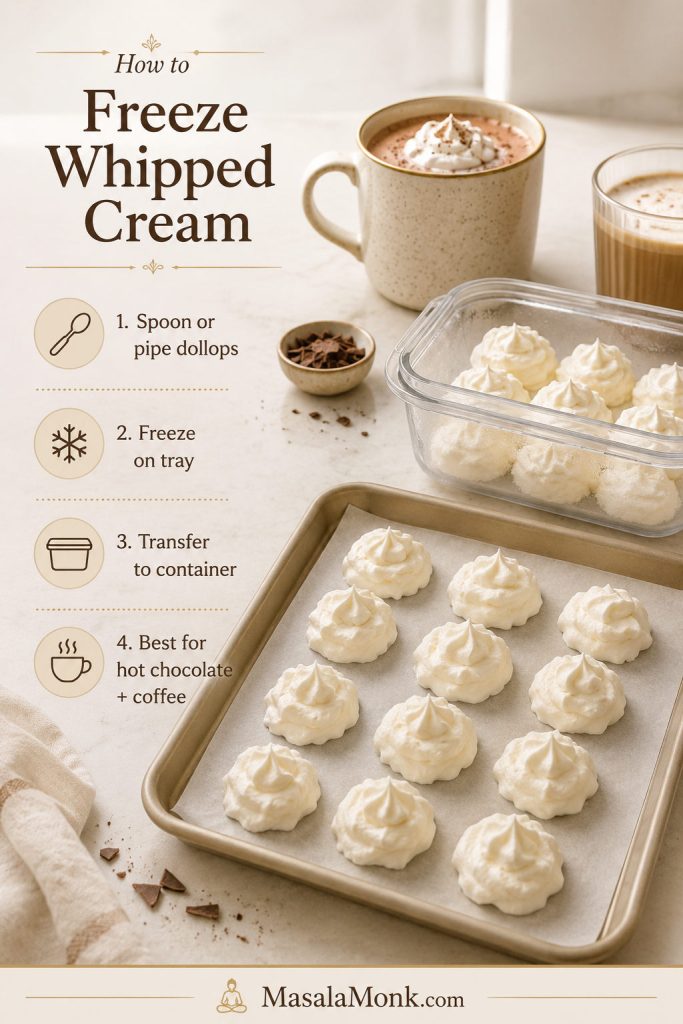
Yes, but freeze it as small dollops rather than one large container. Spoon or pipe dollops onto a parchment-lined tray, freeze until firm, then transfer them to a freezer-safe box. Frozen whipped cream is useful for hot chocolate, coffee, pancakes, waffles, and quick dessert toppings; after thawing, it will not be as silky as freshly whipped cream.
Frozen dollops are especially nice for drinks. Drop one into a mug of keto hot chocolate and it melts slowly into the top while keeping the drink creamy.
Regular vs Stabilized Whipped Cream
Regular whipped cream is best when freshness matters: soft cream over pie, a cool topping for cake slices, a light layer on chilled desserts, or something airy to fold into no-bake fillings.
It also works beautifully as a soft cake topping when the cake stays cold and is served within a reasonable window. For example, a chilled tres leches cake is exactly the kind of dessert where regular whipped cream can feel light, creamy, and fresh.
Use stabilized whipped cream when the cream needs to hold its shape for piping, cupcakes, layer-cake filling, trifles, warm-weather serving, or overnight hold. For this basic recipe, keep the goal simple: soft whipped cream that tastes light and creamy, not a frosting replacement.
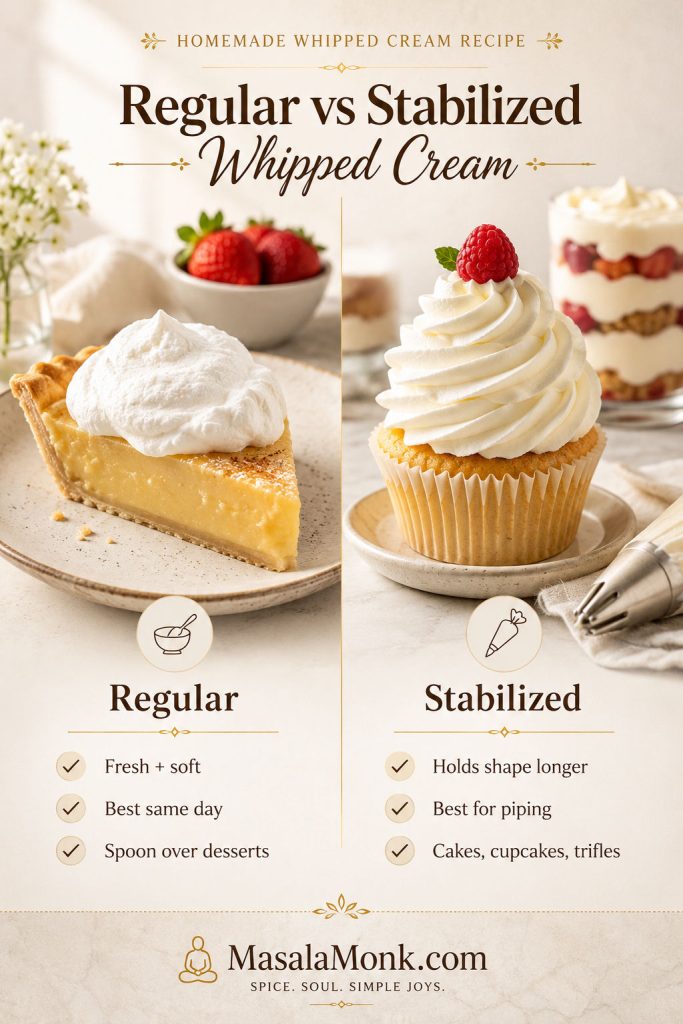
| Use | Will this recipe work? | Better choice |
|---|---|---|
| Spoon over a cake slice | Yes | Glossy, gently bending peaks |
| Top a cake served the same day | Yes, if kept cold | Soft to slightly firmer peaks |
| Frost a layer cake | Not reliably | Stabilized whipped cream |
| Pipe cupcakes | Not reliably | Stabilized whipped cream |
| Fill a cake overnight | Not reliably | Stabilized whipped cream or a cream-cheese whipped version |
Ways to Use Homemade Whipped Cream
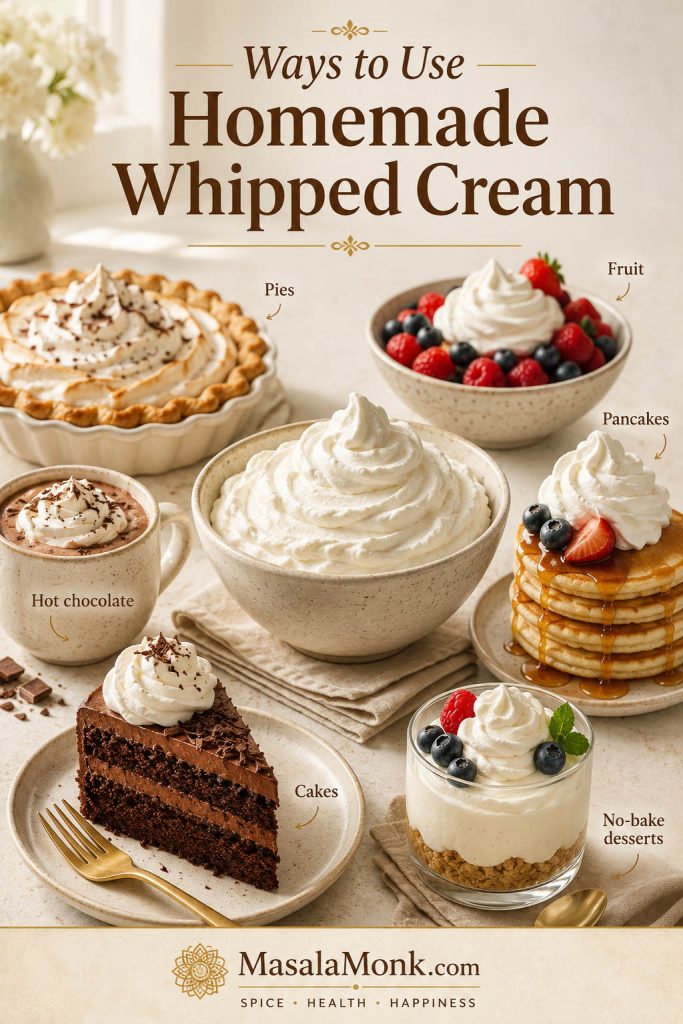
Homemade whipped cream is one of those small upgrades that makes simple desserts feel finished. Keep it softer for spooning, or whip it a little firmer when it needs to sit on top of a pie or no-bake dessert.
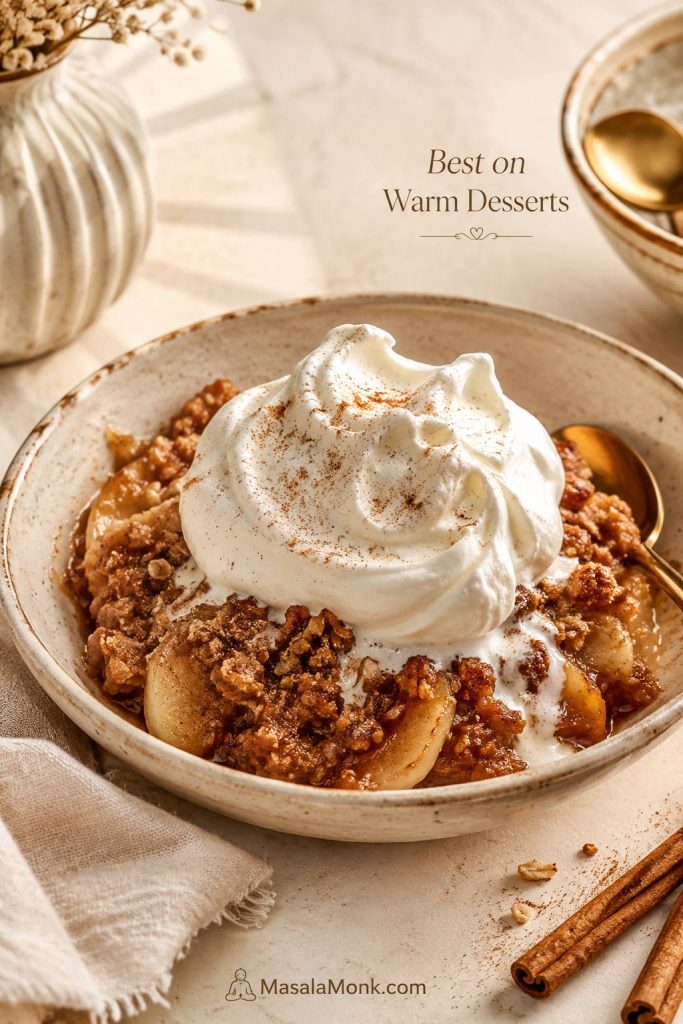
Warm desserts
Use softly structured peaks on warm pies, cobblers, crisps, and bread pudding. Think warm apple crisp, cinnamon steam, and the first spoonful where cool cream softens into the fruit instead of covering it up. That is why it works so well on desserts like apple crisp.
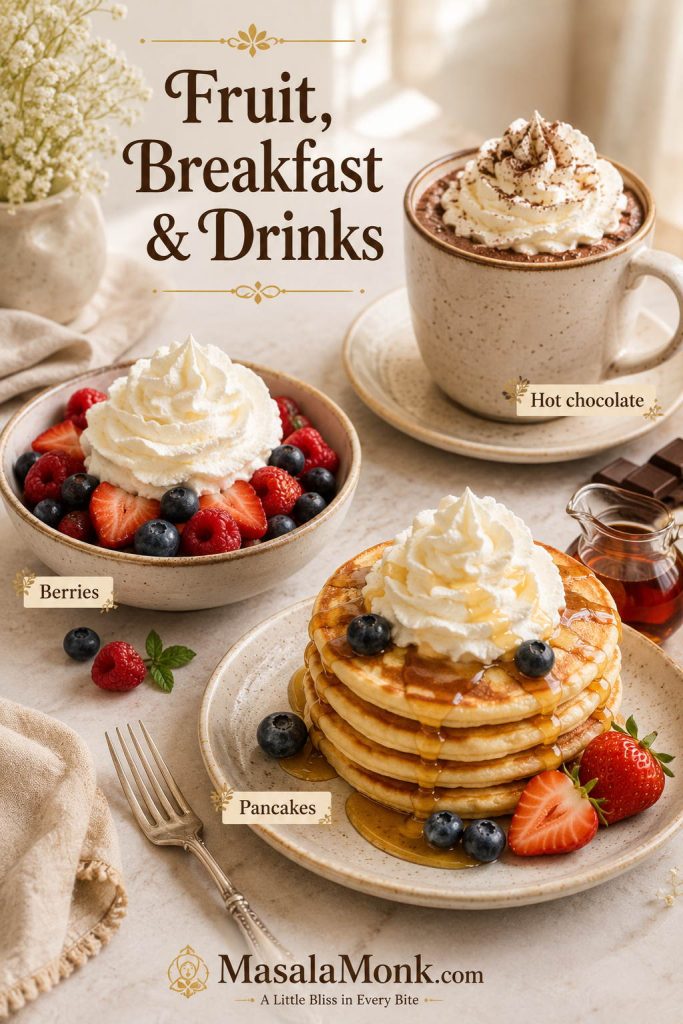
Fruit, breakfast, and drinks
Use soft to medium peaks for berries, pancakes, waffles, hot chocolate, coffee drinks, and simple spoon desserts. The cream should add softness and light sweetness without turning the whole plate heavy.
Cold desserts and fillings
When whipped cream becomes part of the structure, follow the dessert’s own peak-stage instructions. In no-bake desserts like banana pudding, the cream is not just a topping — it helps the filling feel light and set properly.
For richer desserts, a lighter spoonful of cream can keep the whole bite from feeling too heavy, especially with something caramel-heavy like banoffee pie.
Once you know where you are serving it, the flavor variations can help match the cream to chocolate, fruit, coffee, citrus, or warm desserts.
Easy Whipped Cream Variations
Once the basic texture feels easy, the variations are where homemade whipped cream starts to feel personal: chocolate for richer desserts, maple for breakfast, cinnamon for apple pie, espresso for coffee drinks, and citrus for fruit. Add flavorings before whipping, then taste and adjust gently near the end.
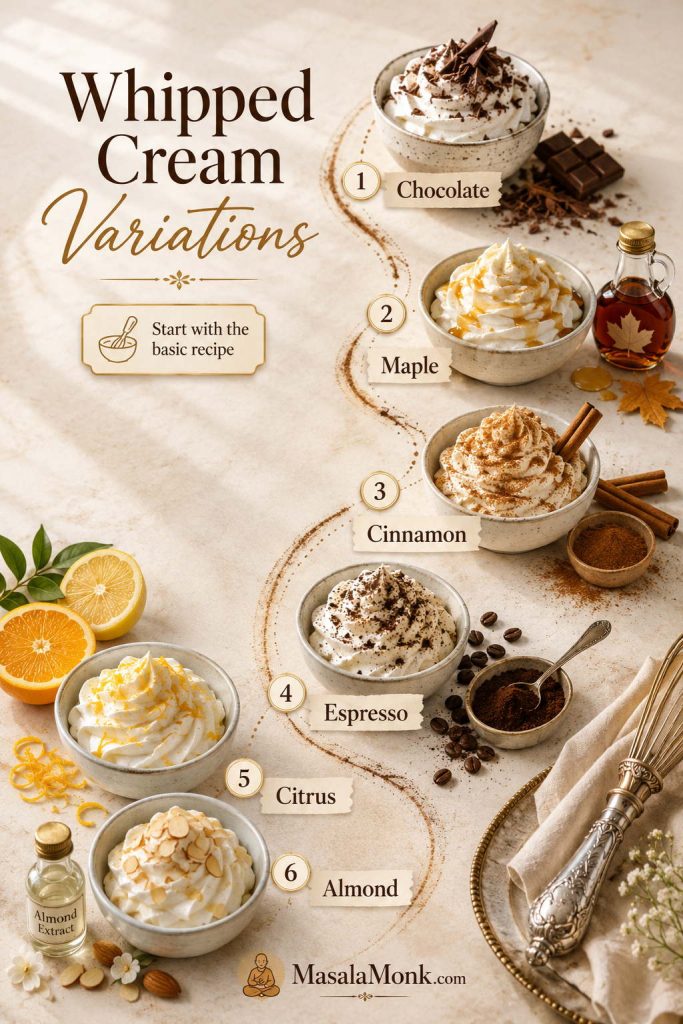
| Variation | How to make it | Best with |
|---|---|---|
| Chocolate whipped cream | Add 1 tablespoon cocoa powder and 1 extra tablespoon powdered sugar per cup of cream. | Chocolate cake, brownies, pudding, hot chocolate. |
| Maple whipped cream | Replace some or all of the powdered sugar with 1 tablespoon maple syrup. | Pancakes, waffles, apple crisp, pumpkin desserts. |
| Cinnamon whipped cream | Add 1/4 teaspoon ground cinnamon per cup of cream. | Apple pie, apple crisp, hot chocolate, banana desserts. |
| Espresso whipped cream | Add a small pinch of instant espresso powder. | Chocolate desserts, tiramisu-style desserts, coffee drinks. |
| Citrus whipped cream | Add finely grated orange or lemon zest. | Berries, pound cake, fruit tarts, citrus desserts. |
| Almond whipped cream | Add a tiny splash of almond extract; it is stronger than vanilla, so use less. | Cherry desserts, chocolate cake, fruit crisps. |
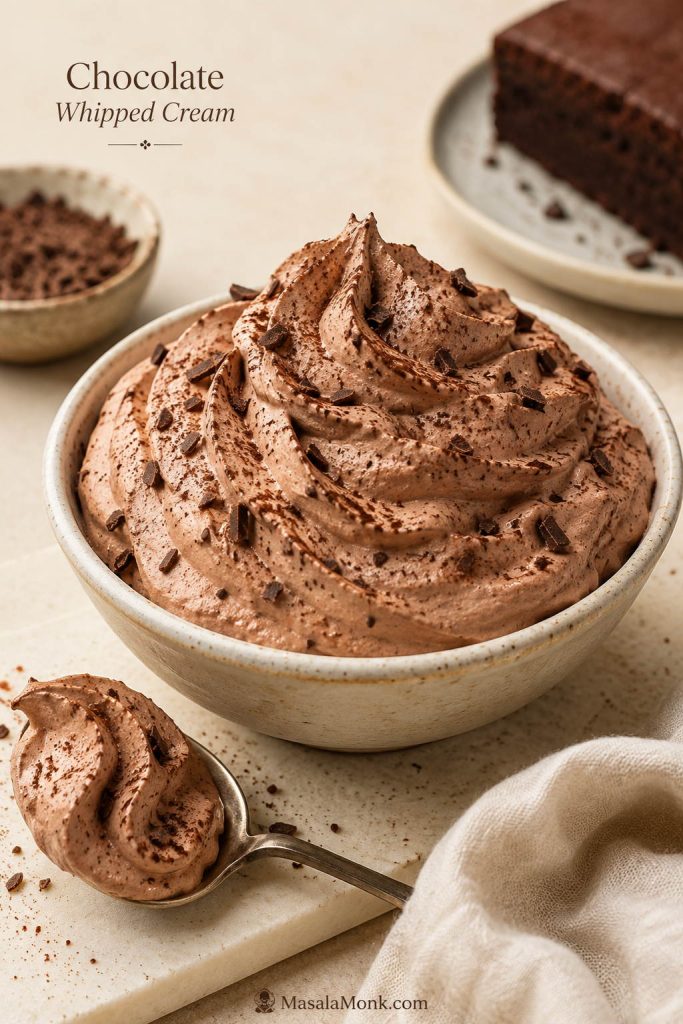
Chocolate Whipped Cream
Chocolate is the strongest variation when you want a deeper dessert topping. Keep the texture light, then use it on brownies, pudding, chocolate cake, hot chocolate, or berries.
FAQs
What is the best cream for homemade whipped cream?
Heavy cream or heavy whipping cream is the most dependable choice because it has enough fat to hold air well and whip into a smooth, fluffy texture. Whipping cream can also work for a simple same-day topping, but it usually gives a softer result.
Can I make whipped cream with fresh cream?
It depends on the fat percentage and whether the cream is meant for whipping. Some fresh cream cartons may thicken softly when very cold, but they may not make firm, lasting peaks.
Does Amul fresh cream work for whipped cream?
Amul fresh cream is not the same as Amul whipping cream. It can thicken slightly when very cold, but it is not the best choice for firm whipped cream, piping, or frosting.
Is this the same as Chantilly cream?
Vanilla-sweetened whipped cream is often called Chantilly cream. This recipe works as a simple vanilla Chantilly cream for everyday desserts.
Will milk or half-and-half whip into whipped cream?
No. Milk and half-and-half do not have enough fat to trap and hold air like cream does. Use cream meant for whipping instead.
How long should I beat whipped cream?
For 1 cup of cream, a hand mixer usually takes about 2–4 minutes. A stand mixer may be faster, and a hand whisk may take 3–5 minutes. Watch the texture more than the clock.
What peak stage is best for pie or spooning over dessert?
Medium peaks are usually best. The cream should hold a soft mound on a spoon but still look glossy, light, and creamy.
What peak stage is best for folding into desserts?
Soft to medium peaks usually work best for folding. If the cream is too stiff, it can be harder to blend smoothly into puddings, mousses, or no-bake fillings.
Why is my whipped cream runny?
The cream may be too warm, underwhipped, or too low in fat. Chill the cream and bowl for 10–15 minutes, then whip again. If it still will not thicken, the cream may not be suitable for whipping.
Why did my whipped cream turn into butter, and can I fix it?
The cream was whipped too far. If it only looks grainy, stop mixing and fold in 1 tablespoon cold cream by hand. If it has separated into buttery clumps and liquid, it may be too far gone to rescue as whipped cream.
Can I make whipped cream ahead or freeze it?
Yes. It tastes freshest the day it is made, but you can refrigerate it for 24–48 hours and gently re-whisk before serving. For longer storage, freeze small dollops on a parchment-lined tray, then transfer them to a freezer-safe container.
Can I use this for piping or cake frosting?
This regular whipped cream works as a soft topping for cakes served the same day. For piping, layer-cake filling, cupcakes, or overnight hold, use stabilized whipped cream with extra support.








