Cream cheese frosting has an annoying trade-off. Add enough powdered sugar to force it stiff and the cream-cheese tang starts disappearing. Use too little, or let the bowl get too warm, and the frosting can soften just when you need it to hold a cupcake swirl.
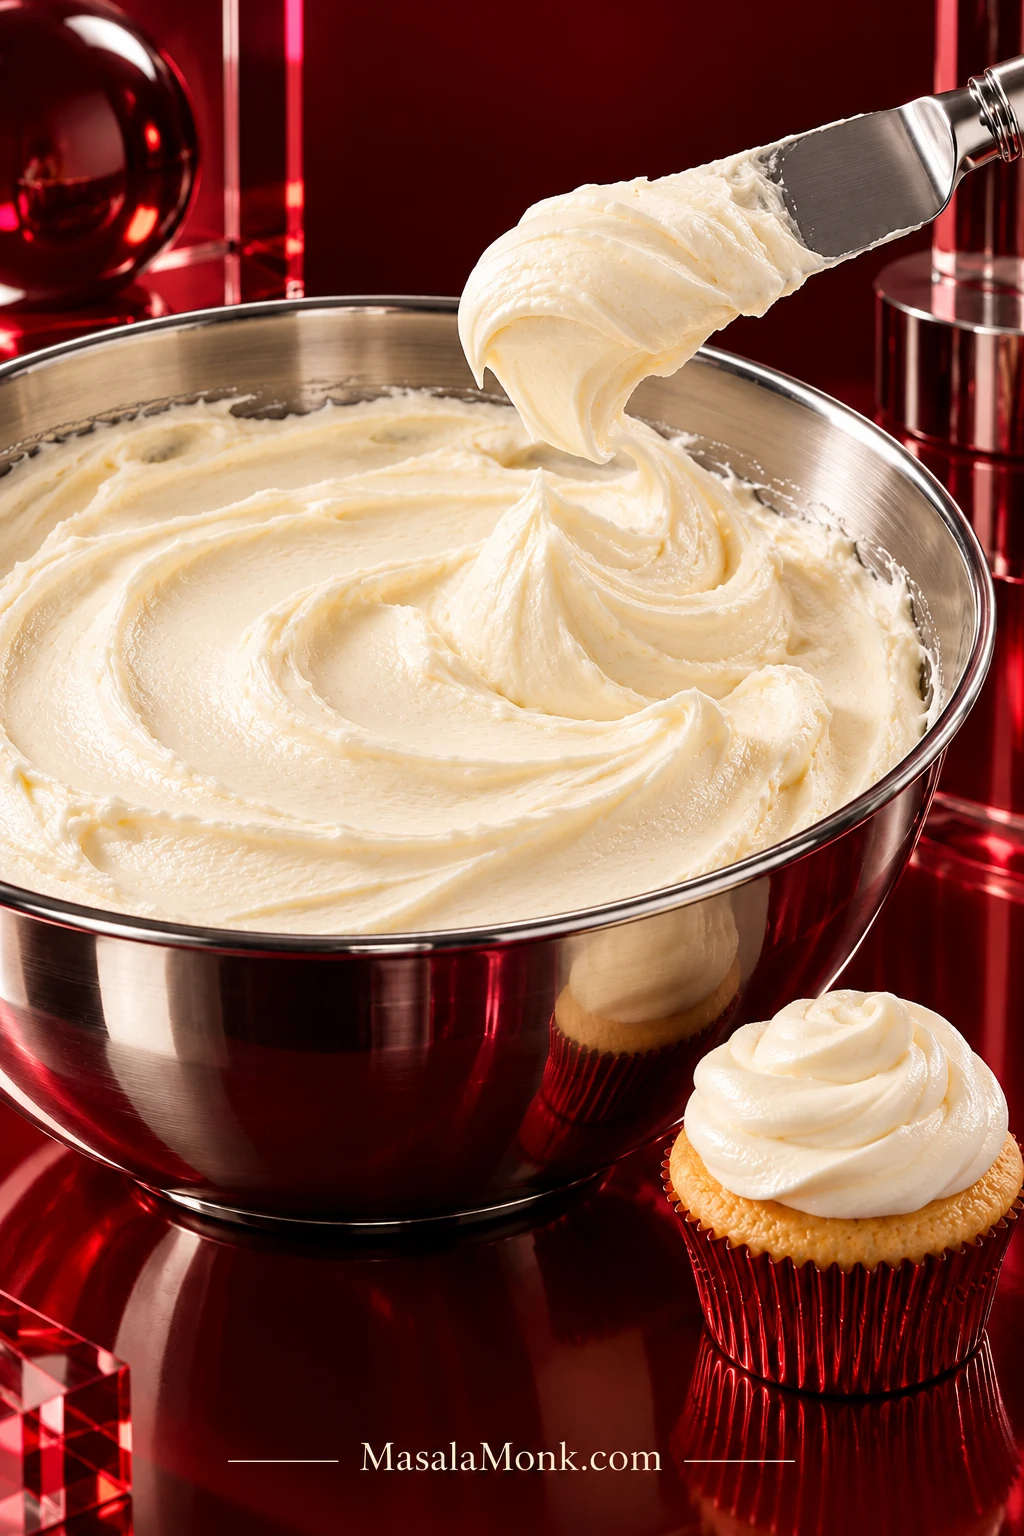
This cream cheese frosting recipe stays noticeably tangy without needing a huge amount of powdered sugar. It spreads easily across a cake, yet when kept cool it will also hold cupcake swirls, stars, soft borders and simple rosettes.
Done well, it should feel silky and creamy on the tongue, with the tang of cream cheese arriving before the sweetness and vanilla sitting quietly in the background.
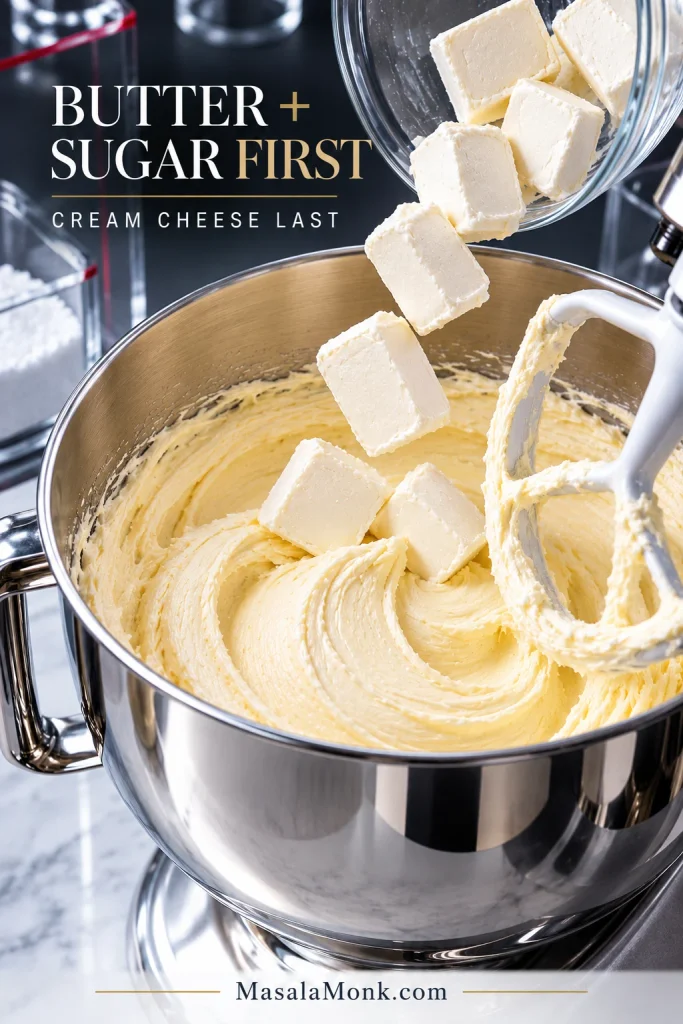
The recipe itself is simple. Most problems come from cream cheese that is too soft, ingredients getting too warm, or mixing too long. This method does most of the work before the cheese enters the bowl: butter and powdered sugar first; cream cheese last.
You may also see cream cheese frosting called cream cheese icing. Here, we are making the thicker style used for cakes, cupcakes and basic decorating.
Smooth, tangy cream cheese frosting with moderate sweetness and enough body for spreading, filling and simple piping.
Prep About 10 minutes
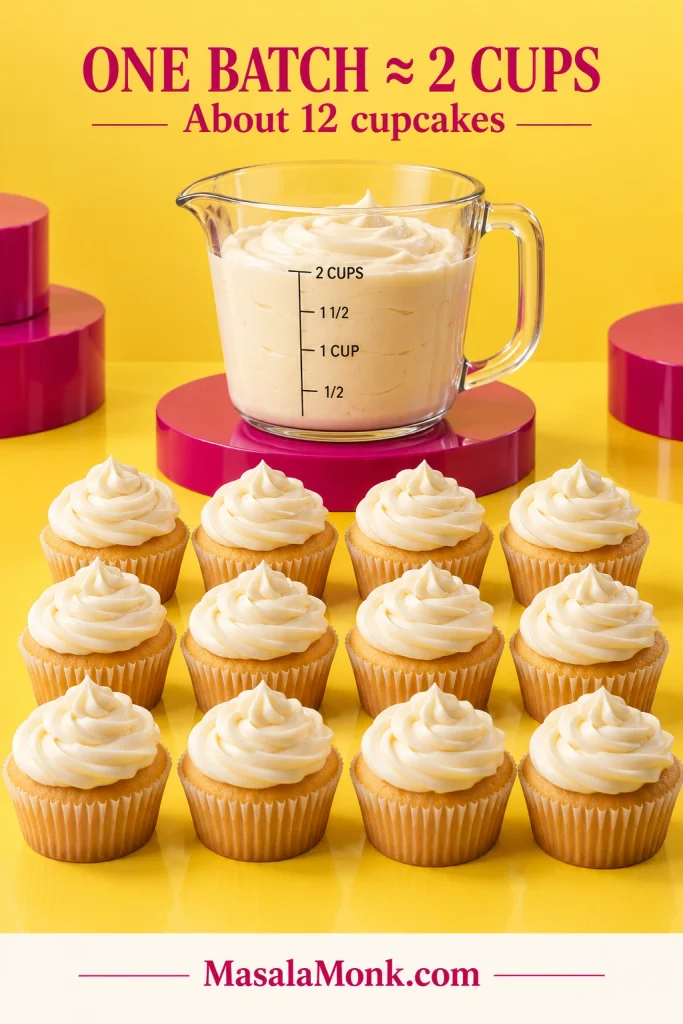
Estimated Yield About 2 cups, depending on how much air is incorporated
Optional Chill 15–30 minutes
Best For Spreading, filling & cupcake swirls
Equipment
Stand mixer with paddle attachment or electric hand mixer
Mixing bowl, if using a hand mixer
Flexible spatula
Digital kitchen scale, recommended
Fine-mesh sieve if the sugar is lumpy
Ingredients
4 oz / 113 g unsalted butter, cool-soft
2 cups / about 240 g powdered sugar (confectioners’ sugar / icing sugar), sifted if clumpy
⅛ teaspoon fine salt
1 teaspoon / 5 mL vanilla extract
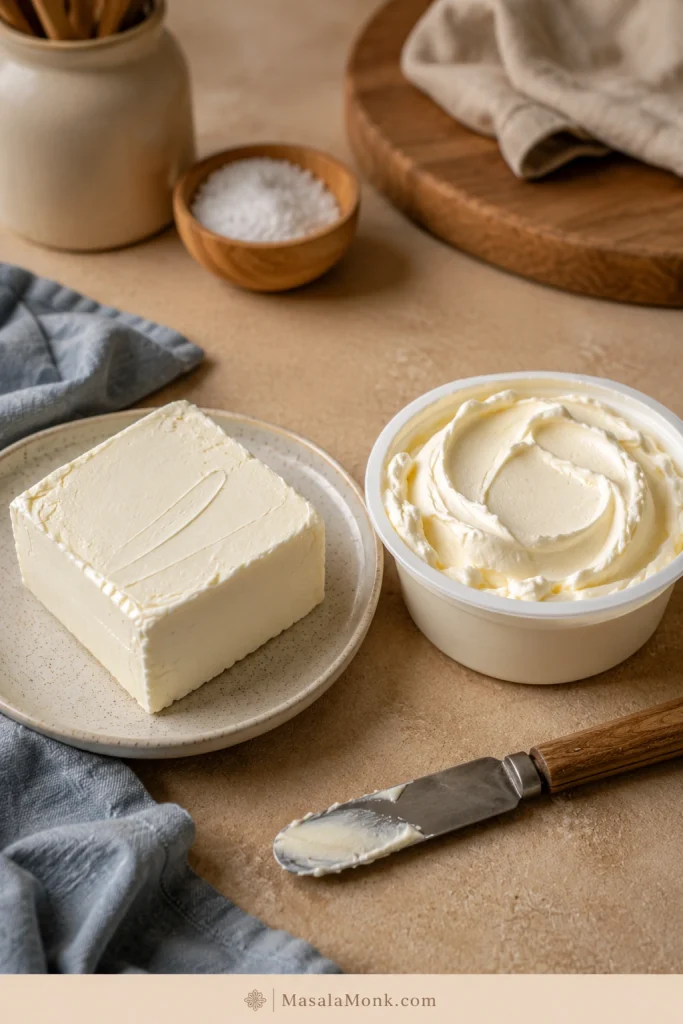
8 oz / 226 g full-fat block-style cream cheese, firm but workable
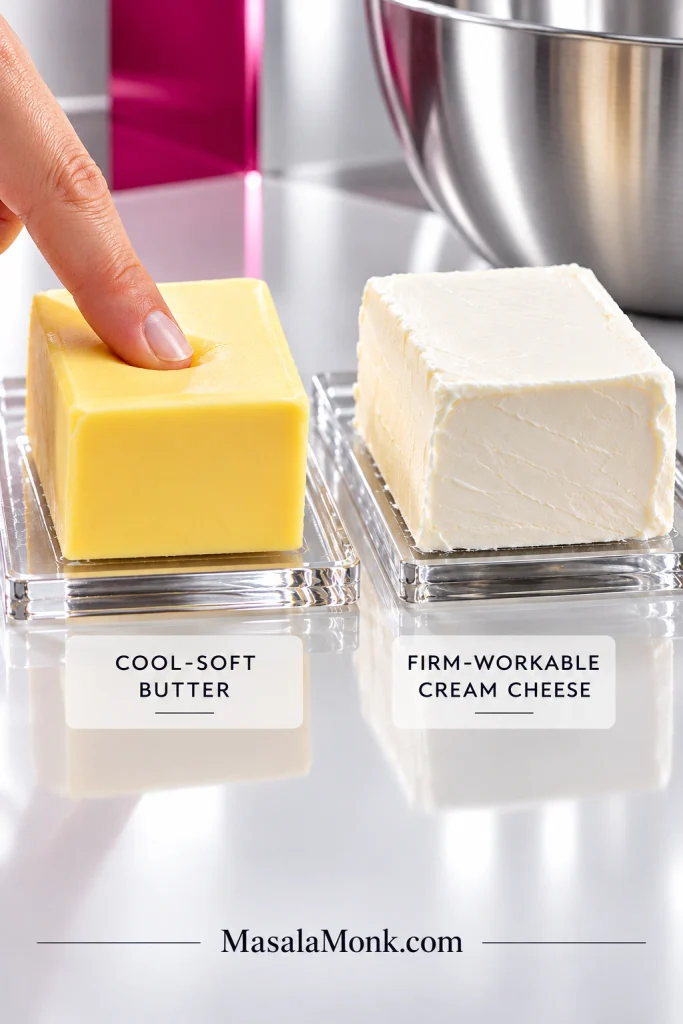
Check the ingredients before mixing: the butter should indent easily under a fingertip without looking oily. The cream cheese should give slightly when pressed but still keep its shape. If either looks shiny, greasy or floppy, refrigerate it first.
Instructions
Smooth the butter. Beat the butter on medium speed until creamy with no firm pieces remaining, usually about 60–90 seconds. Scrape the sides and bottom of the bowl.
Mix in the sugar and salt. Add the powdered sugar in two or three additions, mixing on low after each so it stays in the bowl. Sprinkle in the salt. Once incorporated, beat just until the mixture looks smooth and creamy, usually another 1–2 minutes. Scrape the bowl again.
Add the vanilla. Mix just until evenly distributed. The butter-sugar base should now look thick and smooth.
Add the cream cheese last. Cut the cream cheese into small chunks. Add it in two or three additions with the mixer on low to medium-low, letting each addition mostly disappear before adding the next. Once the final streaks are gone and the frosting is smooth, stop. Depending on your mixer, this stage may take only 30–60 seconds.
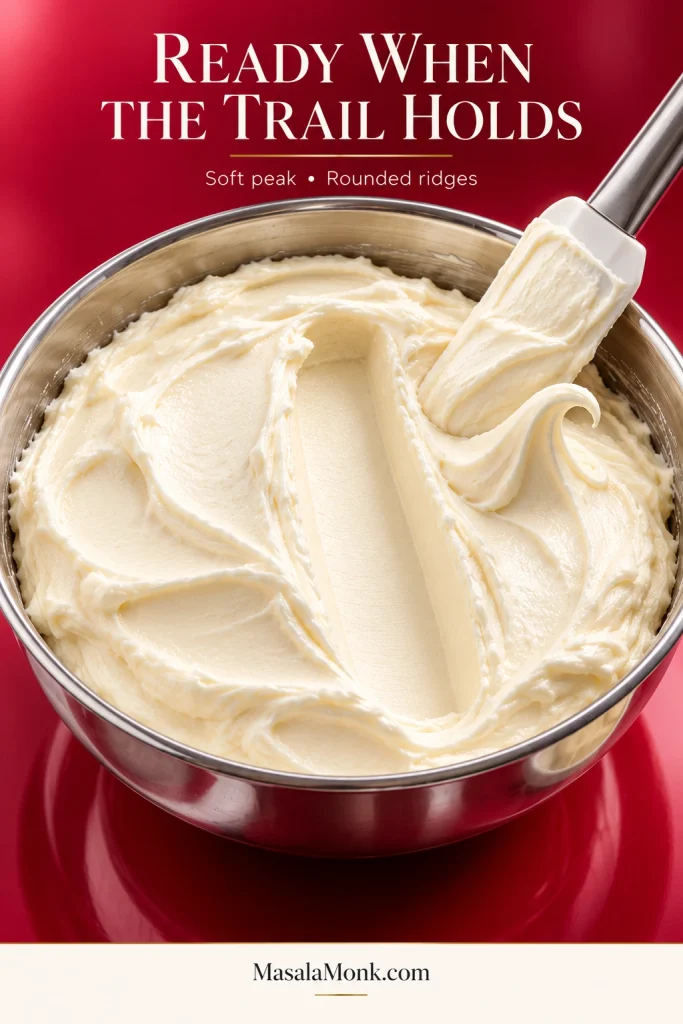
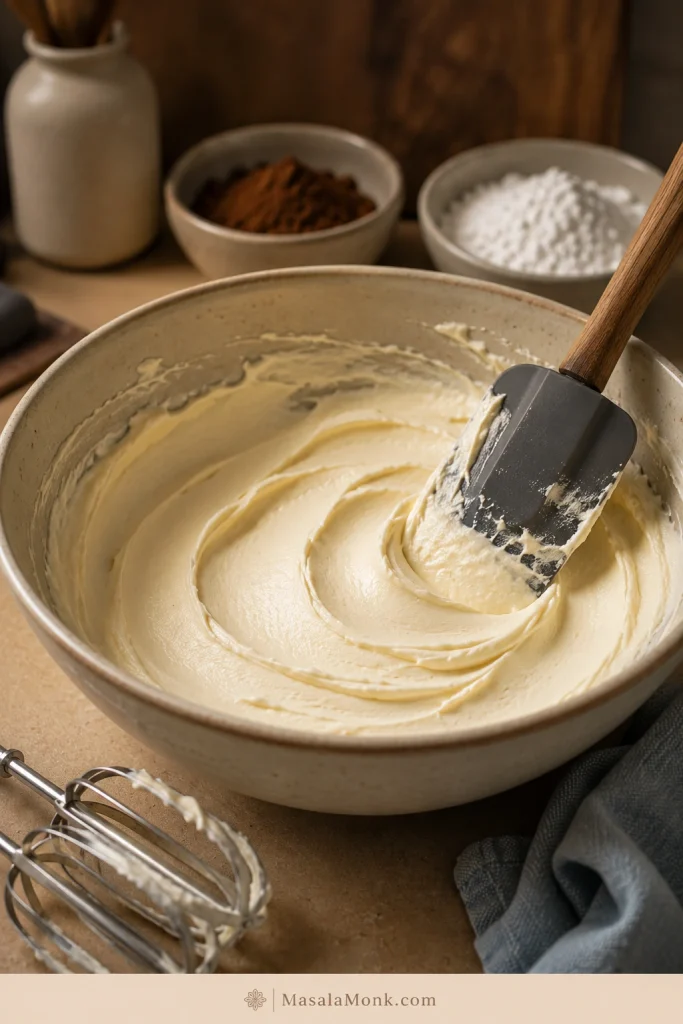
How to know it is ready: drag a spatula through the bowl. The trail should stay visible, and a lifted spoonful should make a soft peak that bends without flowing away. It should feel silky rather than powdery. If it is smooth but softer than you want, refrigerate it for 15–30 minutes and check again.
Recipe Notes
Use full-fat block-style cream cheese when possible. Whipped, spreadable and reduced-fat cream cheese give a softer result.
Skip milk and cream at first. Cream cheese already adds plenty of moisture.
Once the cream cheese is smooth, you are done. Extra whipping can loosen the frosting and make the texture less predictable.
Make sure cakes and cupcakes are completely cool. Even well-made frosting will soften against a warm cake.
Using salted butter? Leave out the added salt at first. Taste the finished frosting before deciding whether it needs another small pinch.
For coloring, concentrated gel or powdered food color is easier to control than liquid food coloring.
Research note: This recipe draws on established published cream cheese frosting methods and troubleshooting guidance, including the butter-and-sugar-first approach used here. MasalaMonk has not independently kitchen-tested this exact batch.
Read the Bowl: Spread, Pipe, Chill or Fix?
Cream cheese frosting is ready to pipe when a spatula trail stays visible and piped ridges hold their shape instead of slowly rounding off. Recipe times can only take you so far; the bowl gives you the answer.
A fresh spatula trail that stays open, followed by a soft bending peak, is a better readiness cue than another fixed mixer time.
What the frosting does
What to do
Mounds softly and keeps a spatula trail
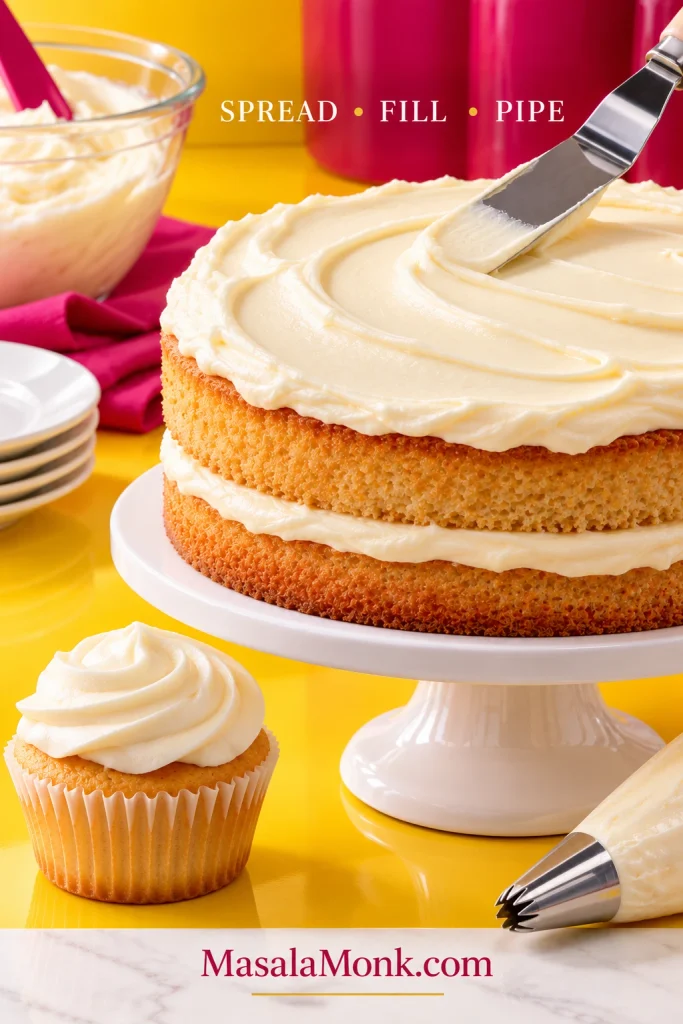
Spread it on cakes, cupcakes or loaf cakes.
Holds rounded ridges from a piping bag
Use it for swirls, stars, borders and simple rosettes.
Looks smooth but slowly levels itself
Refrigerate for 15–30 minutes and look again.
Flows or pours even after chilling
Check the cream cheese, any added liquid and how long it was mixed.
Feels very firm and drags across the cake
Let it soften slightly. If it still drags once workable, add milk or cream only ¼–½ teaspoon at a time.
A little softness is not automatically a problem. For spreading over a sheet cake, you may already be exactly where you need to be. On warm Cinnamon Rolls, a softer cream cheese icing that melts into the spirals is desirable. Tall cupcake swirls need more structure.
If one batch needs to spread, fill and pipe, reserve the piping portion first and keep it cooler while you work with the rest.
More Help With Cream Cheese Frosting
If you already know what your bowl needs, jump straight to the part that will help.
Adding the cream cheese last gives this frosting two advantages. The powdered sugar is already dispersed through the butter before it meets the wetter cream cheese, and the cream cheese needs very little mixer time once it goes into the bowl.
Smaller cream-cheese pieces disappear faster, helping you stop mixing as soon as the final streaks are gone.
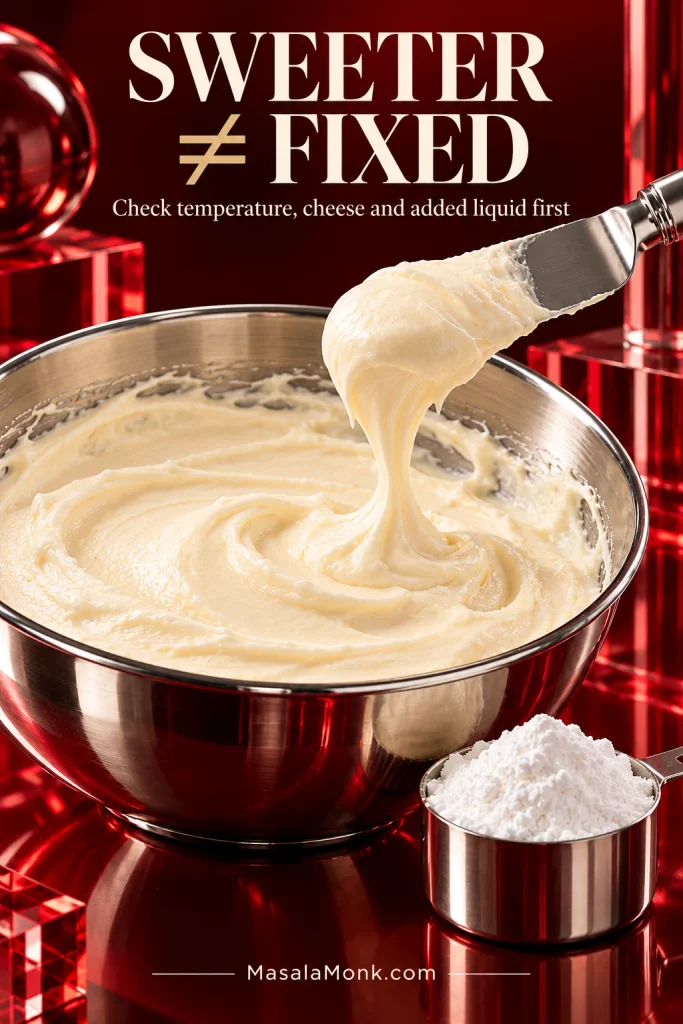
Powdered sugar helps give this frosting body, but adding more is not a dependable rescue once the bowl has already turned wet. It can leave you with a frosting that is much sweeter without solving the underlying problem.
Cream cheese also softens as the bowl warms and mixing continues. Add it in small batches, watch the texture, and stop once the final streaks disappear. The frosting should still mound softly rather than settling flat.
Which Cream Cheese Works Best?
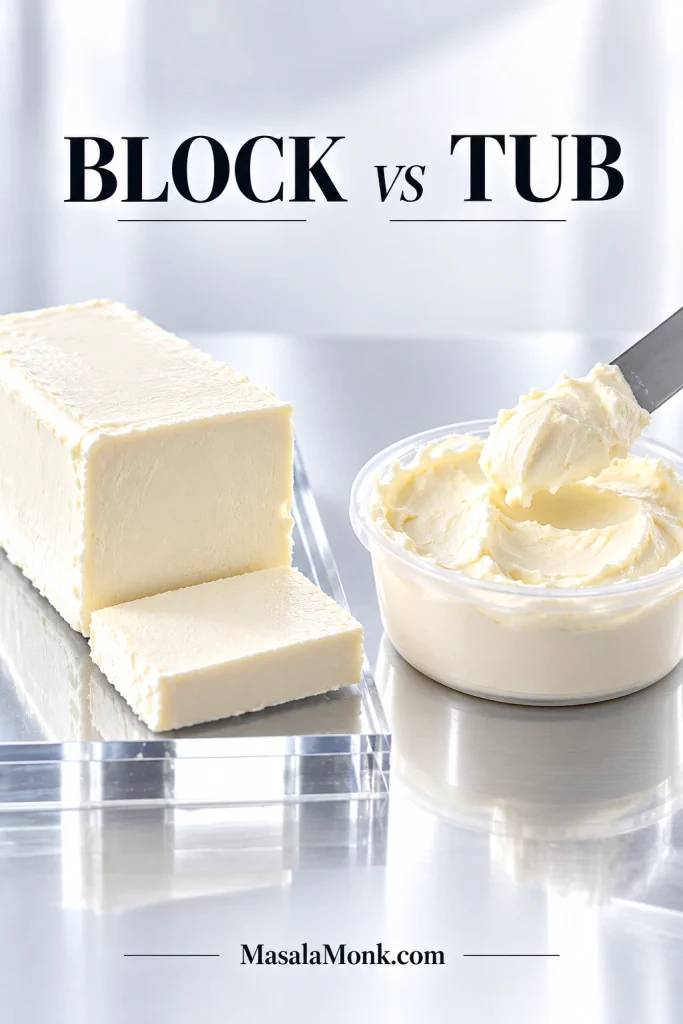
Full-fat block-style cream cheese gives the most dependable result. In the U.S., that usually means the firm 8-ounce / 226-gram block rather than whipped or spreadable cream cheese from a tub. It does not have to be Philadelphia; a reliable full-fat block is what matters.
Whipped and spreadable cream cheeses are designed to stay softer, and reduced-fat versions are softer too. Fine on a bagel, less predictable once sugar and butter enter the picture.
Packaging varies, but texture tells the story: dense cream cheese that cuts cleanly gives the frosting more structural margin than a soft spreadable cheese.
What if cream cheese blocks are not sold where you live?
If you are in the UK, Europe or another market where every American recipe seems to say “use a block,” you are not overlooking something obvious. Many full-fat cream cheeses sold in tubs are softer than the firm U.S.-style blocks these recipes were originally written around.
Use the firmest full-fat cream cheese you can find and keep it on the cool side. If liquid has visibly separated in the container, drain off that free liquid while the cheese is cold before mixing. It will still behave differently from a firm block, so give the finished frosting a chance to cool before assuming it needs more sugar.
How soft should the butter and cream cheese be?
“Room temperature” is not very helpful on its own. A kitchen at 65°F / 18°C and one at 82°F / 28°C produce very different butter.
If you are measuring, butter around 65–67°F / 18–19°C is a useful reference. The easier test is simply to press it: the butter should dent without looking shiny or slumped.
Keep the cream cheese cool and firm but workable. It should cut cleanly into chunks and give slightly when pressed. Refrigerator-hard cream cheese is more likely to leave little lumps, especially with a hand mixer.
The butter can be pliable enough to dent while the cream cheese still cuts cleanly; they do not need to reach the same softness.
The tang is part of the reason to make cream cheese frosting in the first place. Too much powdered sugar can quickly push that flavor into the background.
This recipe uses about 240 g / 2 cups powdered sugar for 226 g / 8 oz cream cheese. At that ratio, the cream-cheese flavor stays clear while the frosting still has enough body for spreading and basic piping.
A little salt makes the cream-cheese tang clearer too. That balance works especially well on rich cakes. In Hummingbird Cake, the tang keeps the banana-and-pineapple crumb from feeling overly sweet.
With this formula, reducing the sugar further gives you a softer frosting. If very low sweetness is the goal, use a version designed to get its body another way.
How Much Frosting Do You Need?
This recipe makes about 2 cups, with some variation depending on how much air is incorporated. Coverage changes with piping style and frosting thickness, so use the table as a planning guide rather than an exact promise.
For fractional batches, scale the ingredient weights rather than dividing cream cheese packages by eye. Finished volume can vary slightly with mixing, but keeping the formula in proportion matters more.
What you are frosting
Amount to plan for
12 cupcakes
About 1½–2 cups for moderate to generous swirls. One batch should be enough.
18–24 cupcakes
About 2½–3 cups for moderate frosting; roughly 1½ batches.
9 × 13-inch cake
About 2½–3 cups for a comfortable top layer; roughly 1½ batches.
Two 8- or 9-inch layers
About 3½–4 cups for filling and exterior frosting; roughly 2 batches.
Three-layer cake
About 5–5½ cups depending on filling and decoration; roughly 2½–3 batches.
A two-layer Carrot Cake can easily use close to two batches once you account for the filling, sides and top, plus enough frosting to finish the cake without scraping the last spoonful across bare spots.
Using Cream Cheese Frosting Between Cake Layers
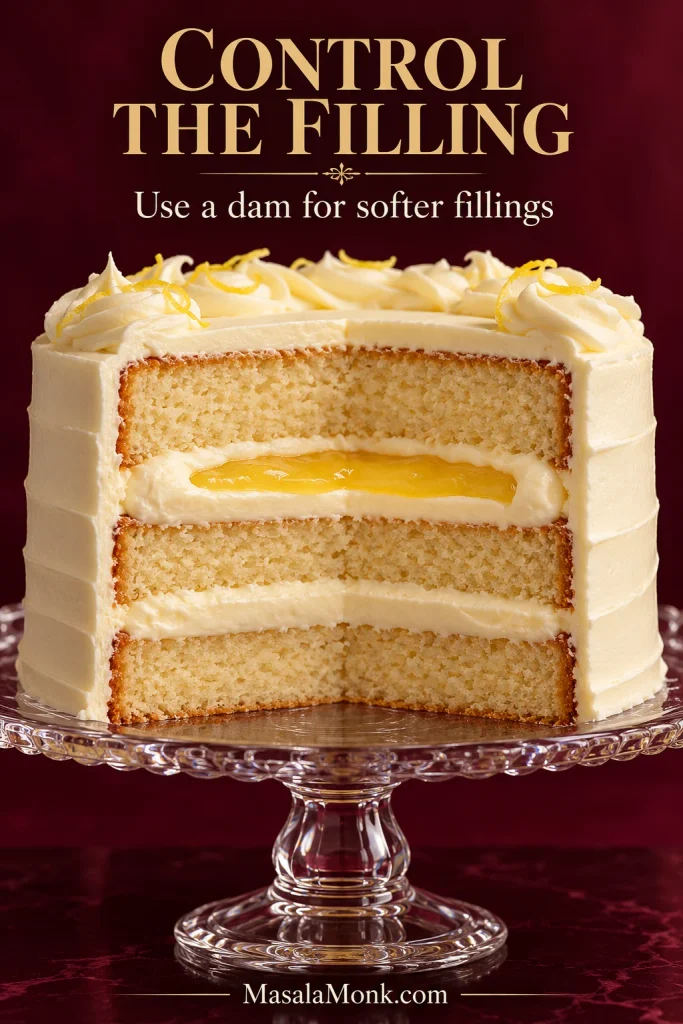
If you’re adding something softer, such as Lemon Curd, pipe a frosting border around the edge to hold it in place. Slightly chilled layers are easier to fill, stack and coat cleanly too.
Keep a softer filling below the height of the frosting dam and away from the cake edge. When the next layer goes on, the pressure meets the frosting border before it can force the lemon curd outward.
Start with the symptom instead of reaching for more sugar. The texture tells you whether the frosting needs cooling, a little softening, a moisture check or no formula change at all.
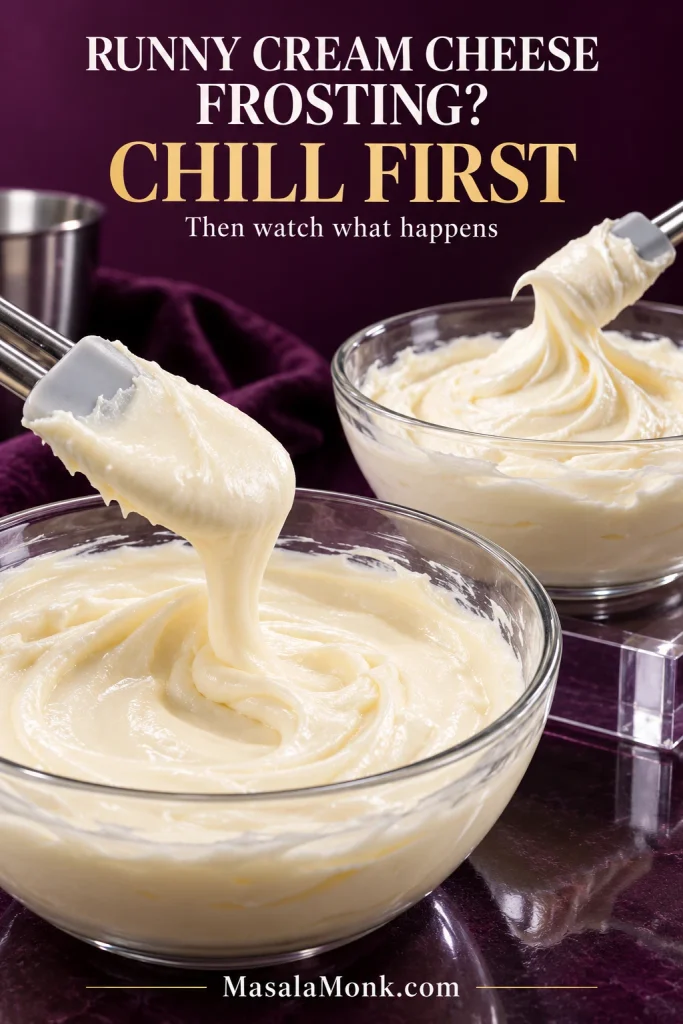
Runny Cream Cheese Frosting: Chill First
Runny cream cheese frosting usually comes from very soft or spreadable cream cheese, too much warmth, added liquid or mixing for too long. Stop mixing and chill the bowl first; then see what problem is actually left.
After chilling, let a small spoonful warm slightly before deciding the problem is solved. Heat-softened frosting should retain useful body; excess moisture is more likely to reveal itself again as the sample warms.
What you see
What to try first
Runny almost immediately
Check for spreadable cream cheese, warm ingredients or extra liquid. Refrigerate before changing anything else.
Gets thinner while you mix
Stop mixing and cool the bowl.
Too sweet but still loose
Stop adding sugar. Check the cheese, temperature and any added liquid.
Firm in the fridge, soft again within minutes
Cold may be masking excess moisture or a very warm room.
Hard pale lumps
Let the cold dairy soften slightly, then mix gently.
Curdled or cottage-cheese look
Temperature mismatch or prolonged mixing are common causes. Feel the bowl before deciding whether to warm or chill it.
Powdery or gritty
Check the amount and condition of the powdered sugar.
Very stiff after softening slightly
Add milk or cream only ¼–½ teaspoon at a time.
Slides out between cake layers
Use less filling and let the frosting firm up before stacking.
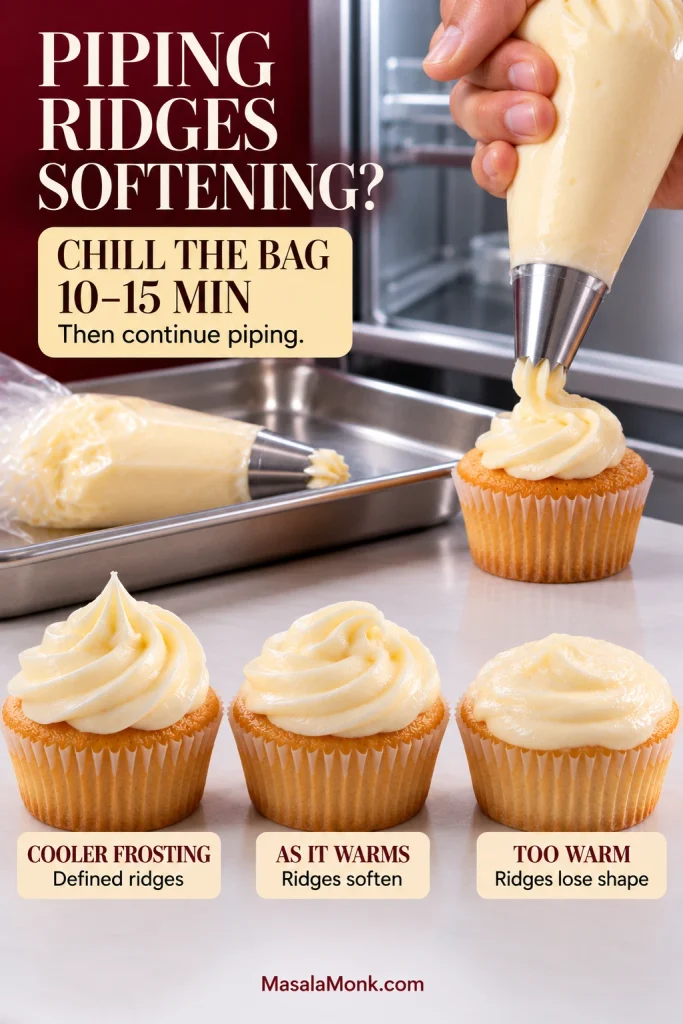
Piped ridges soften in the bag
Refrigerate the filled bag for 10–15 minutes before continuing.
Is It Warm or Actually Too Wet?
The two problems people most often confuse are a temperature-softened frosting and a genuinely wet one. Frosting softened mainly by warmth regains useful structure after chilling. By contrast, a wetter batch may firm while cold, then slump quickly again as it warms.
Too sweet but still runny
If you have already added more sugar and the frosting is somehow sweeter but no more useful, leave the bag of sugar alone.
Did milk, cream, lemon juice or liquid food coloring go into the bowl? Was the cheese unusually soft? Did the frosting look good at first and loosen the longer you mixed it? Those clues tell you more than another scoop of powdered sugar.
More powdered sugar cannot cool an overheated bowl or remove liquid already in the frosting, so diagnose the looseness before changing the ratio.
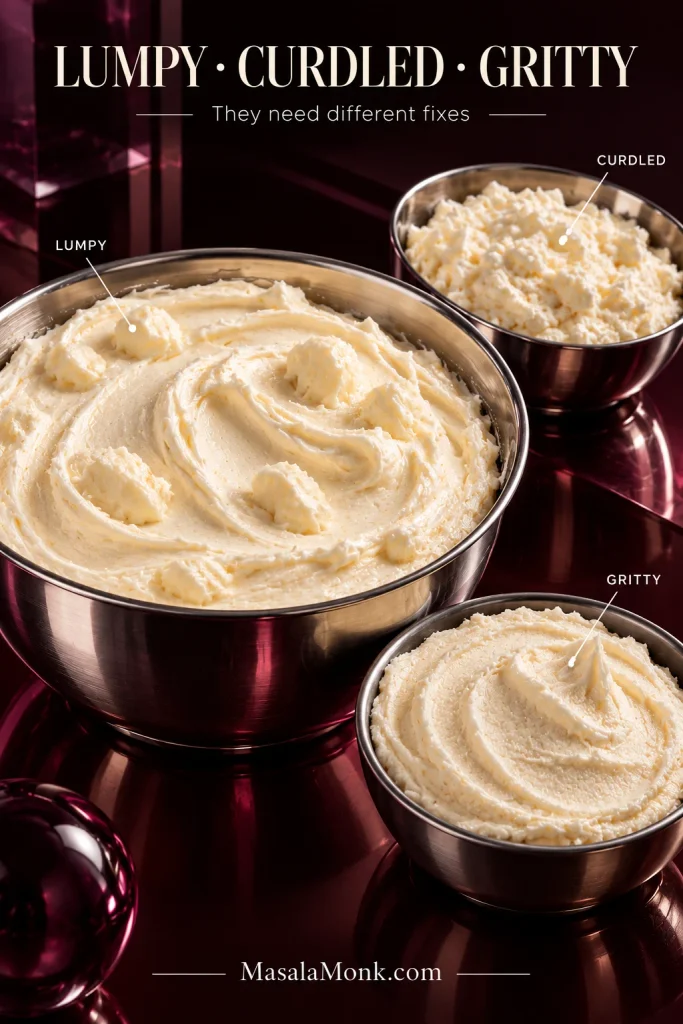
Lumpy, curdled or gritty?
Hard pale flecks and a glossy, loosening bowl are opposite problems, so feel the bowl before correcting it. Firm dairy flecks point to ingredients that were too cold; give them time to soften, then mix briefly on low. A curdled or cottage-cheese texture often points to a temperature problem, though prolonged mixing can also contribute to separation. Warm a cold bowl slightly, but chill one that feels soft or greasy.
Tiny dry specks are more likely clumped powdered sugar. An overall powdery mouthfeel points back to the sugar too—either too much, or sugar that has not incorporated cleanly.
A few smooth pale pieces, all-over broken roughness and fine sandy grit are different failures. Classifying the texture first helps you avoid applying the wrong fix.
Quick way to remember it: a soupy bowl usually needs cooling first; hard dairy lumps usually need a little time to soften.
Frosting squeezes out between cake layers
Use less filling than you think you need, particularly on a heavy or tall cake. Red Velvet Cake is easier to finish cleanly when the cream cheese frosting between the layers stays controlled rather than bulging toward the edge.
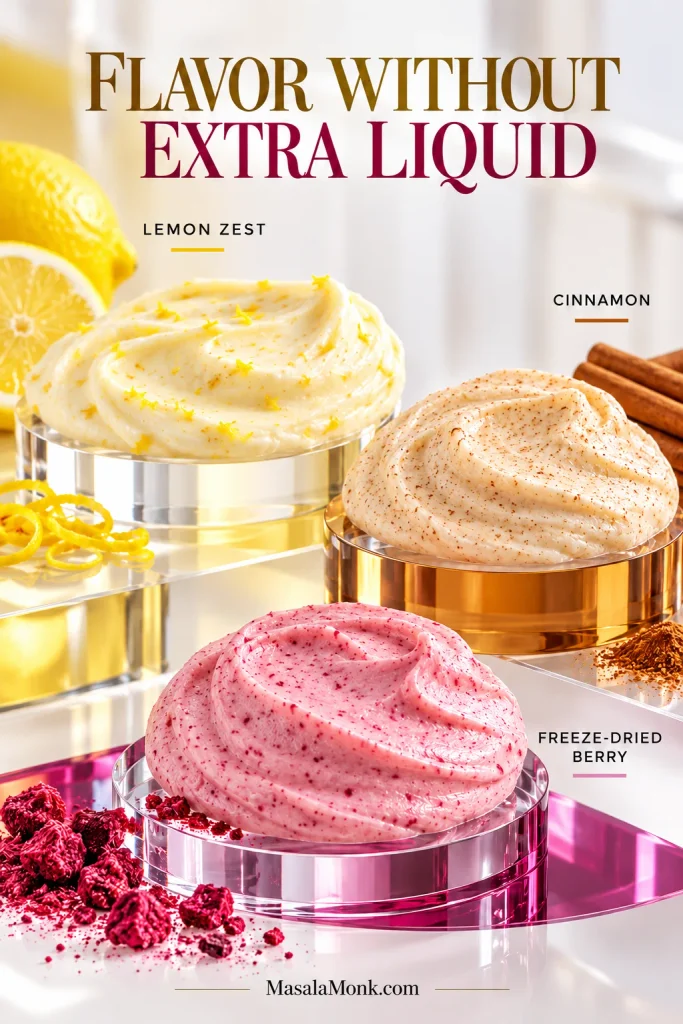
Chocolate, citrus, spices and fruit can all work, but the easiest additions are the ones that bring plenty of flavor without much extra liquid. The amounts below are sensible starting points rather than rigid limits, so taste before adding more.
For cream cheese frosting variations, favor concentrated flavor with little added moisture: zest, spices and freeze-dried fruit are especially easy to control.
Chocolate: use our Chocolate Cream Cheese Frosting Recipe if chocolate is the goal. Cocoa changes the balance enough that it makes sense to use a recipe built for it.
Lemon: start with about 1 teaspoon finely grated lemon zest, then taste. Zest gives plenty of aroma without thinning the frosting; a generous pour of lemon juice changes both the acidity and consistency.
Cinnamon and warm spices: start with about ½ teaspoon ground cinnamon, taste, and add more if you want a stronger spice note. Dry spices are easy to work with, and that warm-spice-and-tang combination is exactly why cream cheese frosting works so well on Spice Cake.
Fruit: start with about 2 tablespoons finely ground freeze-dried fruit powder, then build the flavor from there. It is much easier to control than a generous pour of puree, while fresh fruit and juice can soften the frosting quickly.
Can You Leave Out Butter or Powdered Sugar?
Butter and powdered sugar both help build the texture of this frosting, so neither is a simple one-for-one swap. Versions made without butter or powdered sugar need their own ratios and methods.
Storage, Serving and Transport
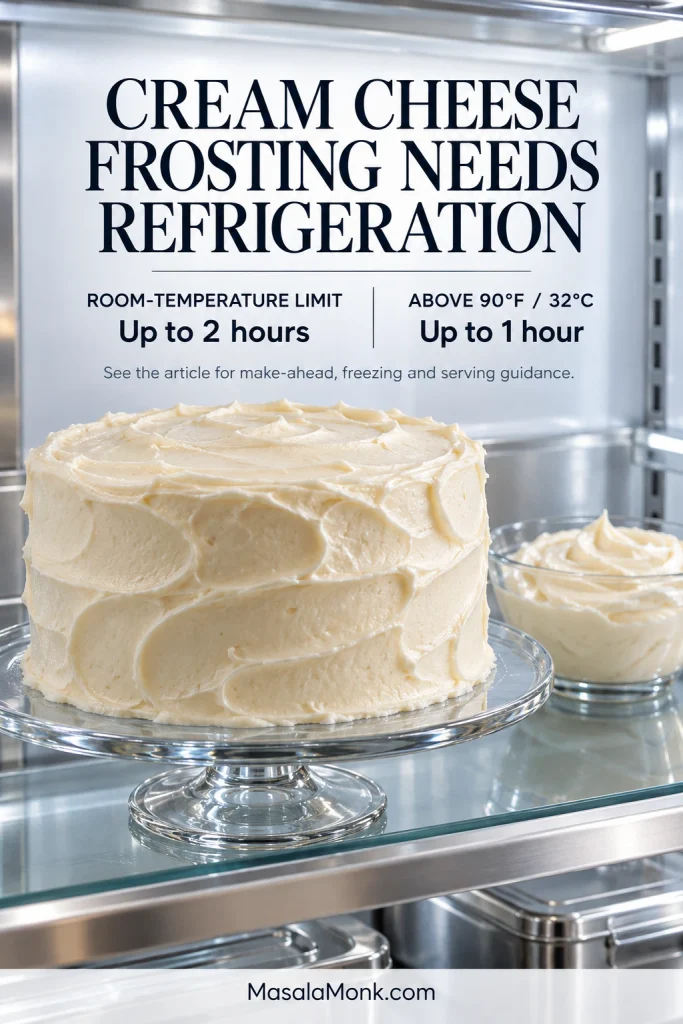
Yes, cream cheese frosting needs to be refrigerated. It contains fresh dairy, so keep the frosting and finished desserts cold when they are not being served.
Make it ahead
For best quality, use homemade cream cheese frosting within about 2–3 days and keep it covered in the refrigerator. It becomes much firmer as it gets cold, but it does not set hard; it softens again as it warms.
Before decorating, let it soften only until workable, then stir or mix on low. You only need to bring back the creamy, spreadable texture.
Serving safely
Follow the USDA two-hour rule for perishable foods: do not leave cream-cheese-frosted desserts unrefrigerated for more than 2 hours, or more than 1 hour when the temperature is above 90°F / 32°C. Refrigerate leftovers promptly.
Chilled cream cheese frosting also slices and travels more cleanly because its structure firms as it cools.
Freezing
Cream cheese frosting can be frozen in an airtight container for about 1 month. Thaw it overnight in the refrigerator, then let it soften just enough to stir or mix gently. It may be a little less silky after freezing, so refrigeration is the better option when appearance matters most.
Warm kitchens and transport
In a warm room, work in shorter sessions. Frosting can look perfect in the bowl and start losing definition halfway through a piping bag because your hands are warming it. If the ridges begin to soften, refrigerate the filled bag for 10–15 minutes before continuing.
Hold and twist the bag from the top, guide near the tip, and avoid wrapping your palm around the frosting-filled section longer than necessary. If the ridges soften, cool the bag instead of changing the whole batch.
For transport, chill the finished cake or cupcakes thoroughly first. Keep the vehicle cool, set the box on a level non-slip surface, and avoid leaving cream-cheese-frosted desserts in a parked car or direct sun.
Cream cheese frosting is still a soft dairy frosting. If a dessert has to sit outdoors in serious heat, choose something better suited to those conditions.
When You Need a Firmer Frosting
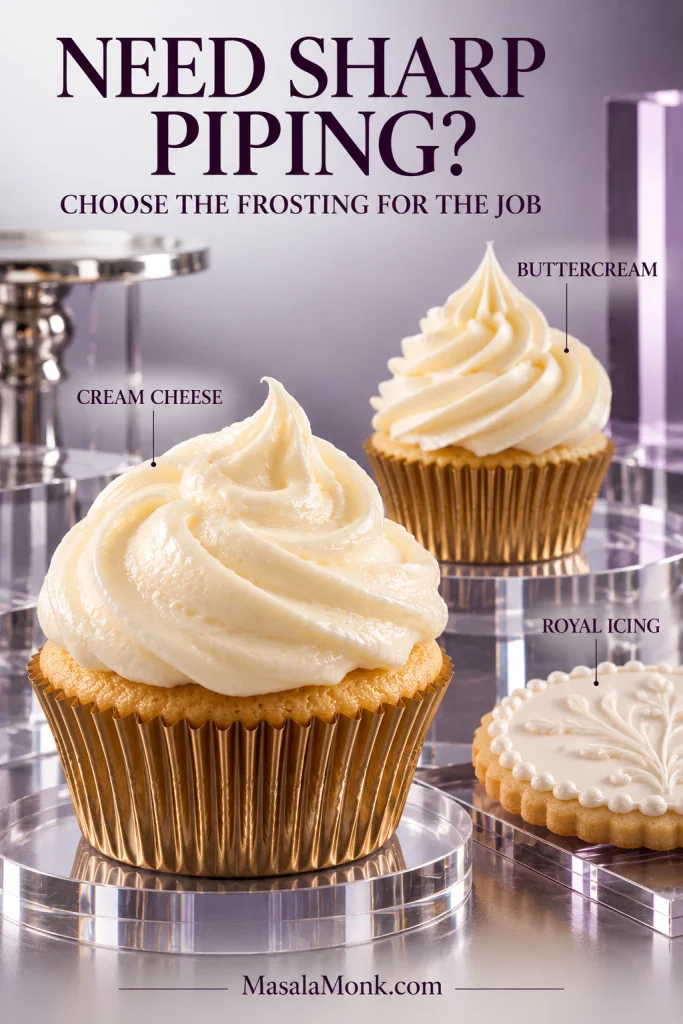
For very sharp piping, you usually need a frosting formulated for that job. Some cream-cheese versions use more butter or another stabilizer, but those formulas behave differently from this simple one.
If sharp cake edges, taller swirls or something that will hold up longer in a warm room matter more than cream-cheese tang, our Buttercream Frosting Recipe is a more forgiving choice.
For fine cookie detail, switch to a frosting built for it. Royal Icing pipes clean outlines, floods smooth surfaces and dries firm.
Match the frosting to the job: cream cheese for tang and softer structure, buttercream for sharper height, and royal icing for details that dry firm.
If U.S.-style cream cheese blocks are not sold where you live, tell us what brand or style you used and how it behaved. That detail can help the next reader staring at a too-soft bowl.
Frosting is the part everyone sees first, which is why it can make even a simple cake feel a little high-pressure. This chocolate cream cheese frosting keeps that final step calm: smooth enough to spread, thick enough to chill and pipe, and chocolatey without tasting like straight sugar.
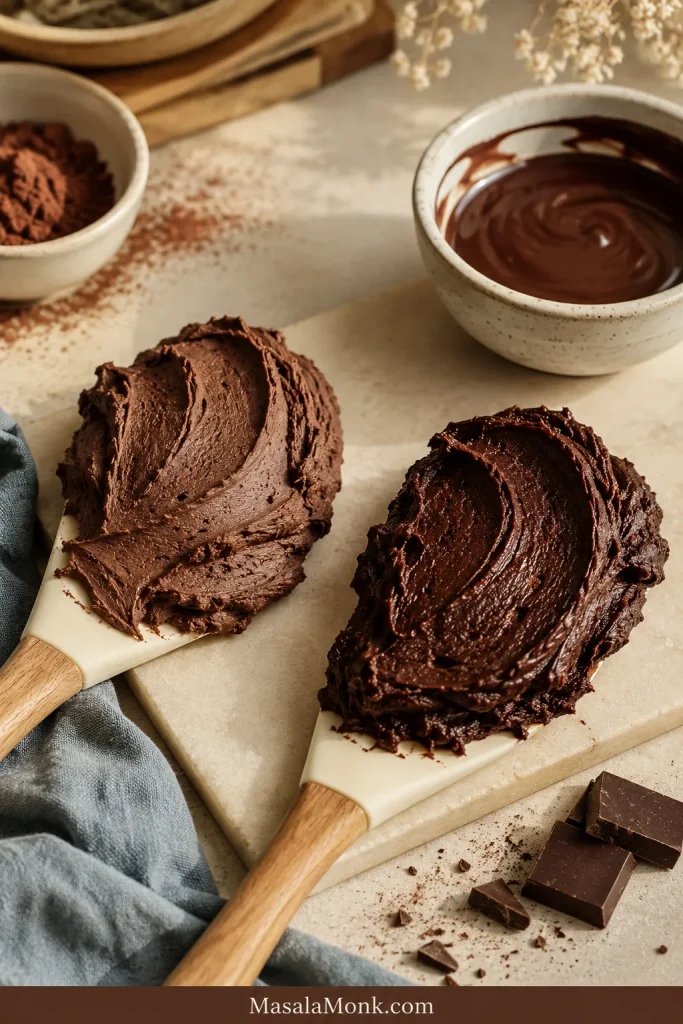
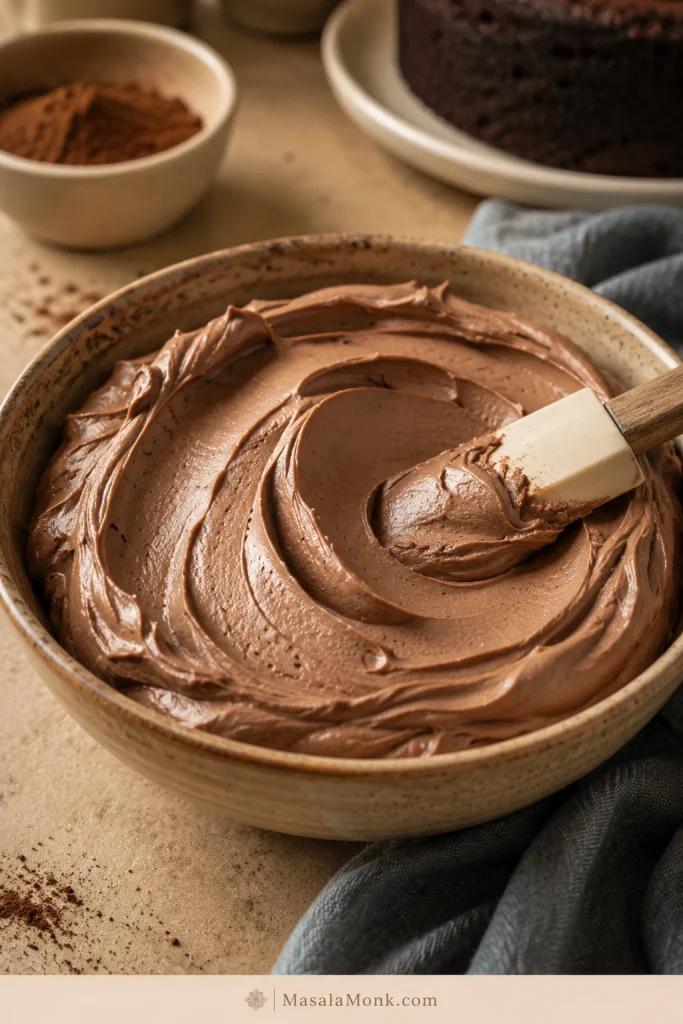
The finished topping is thick and creamy, with deep cocoa flavor, a gentle cream cheese tang, and a soft matte finish. At its best, each bite tastes like chocolate first, cream cheese second, and sugar last.
This version is built for the frosting problems people actually run into: cream cheese that turns loose, chocolate that tastes flat, cupcake swirls that slump, and “not-too-sweet” frosting that still needs enough structure to behave.
It is not sugar-free, and it is not trying to be. It is balanced instead of candy-sweet: less sugary than classic chocolate buttercream, with enough powdered sugar to stay smooth, spreadable, and pipeable.
Use it right away when you want a spreadable frosting. A short chill turns the same bowl from creamy and spreadable to swirl-ready. The recipe itself takes about 10 minutes; the extra time is only for cleaner cupcake swirls or a firmer layer-cake finish.
It is especially useful for birthday cupcakes, simple sheet cakes, bake-sale brownies, red velvet cake, and casual layer cakes where you want chocolate frosting that tastes rich but not candy-sweet.
This recipe makes a smooth, chocolatey cream cheese frosting for cupcakes, brownies, 9×13 cakes, and simple layer cakes. It spreads as soon as it is mixed and becomes firm enough for soft swirls after 15 to 30 minutes in the refrigerator.
The mixing is quick; the chill is only there when you want cleaner piping. For a generously frosted 9-inch layer cake or bakery-style cupcake swirls, make extra because piping always uses more than it looks like.
Choose your texture: 3 cups powdered sugar gives a softer, tangier frosting. 3½ cups gives firmer swirls. Chill before piping, and reach for milk or cream only when the frosting is truly too thick. For visual checkpoints, see the Success Cues.
Recipe Ingredients
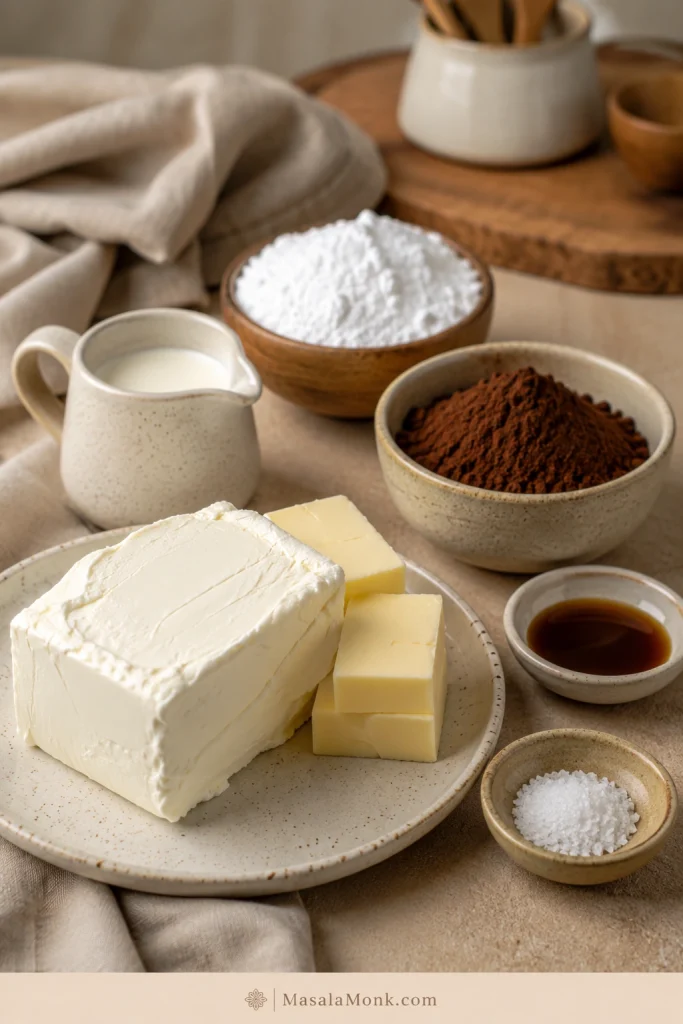
8 oz / 226 g full-fat brick cream cheese, softened but still cool
½ cup / 113 g unsalted butter, softened but not melted
3 to 3½ cups / 360 to 420 g powdered sugar / icing sugar, sifted if lumpy
½ cup / about 50 g unsweetened cocoa powder, natural or Dutch-process
1 teaspoon vanilla extract
¼ teaspoon fine salt, plus a tiny pinch more to taste
1 to 4 teaspoons milk or cream, only when the mixture is too thick; many batches need none
Note: Depending on the brand and how tightly it is packed, ½ cup cocoa powder may weigh around 45 to 55 g. About 50 g is a reliable working amount here.
Optional: For a fudgier version, beat in 3 to 4 oz / 85 to 115 g cooled melted dark chocolate after the base is smooth.
Before Mixing Checkpoint
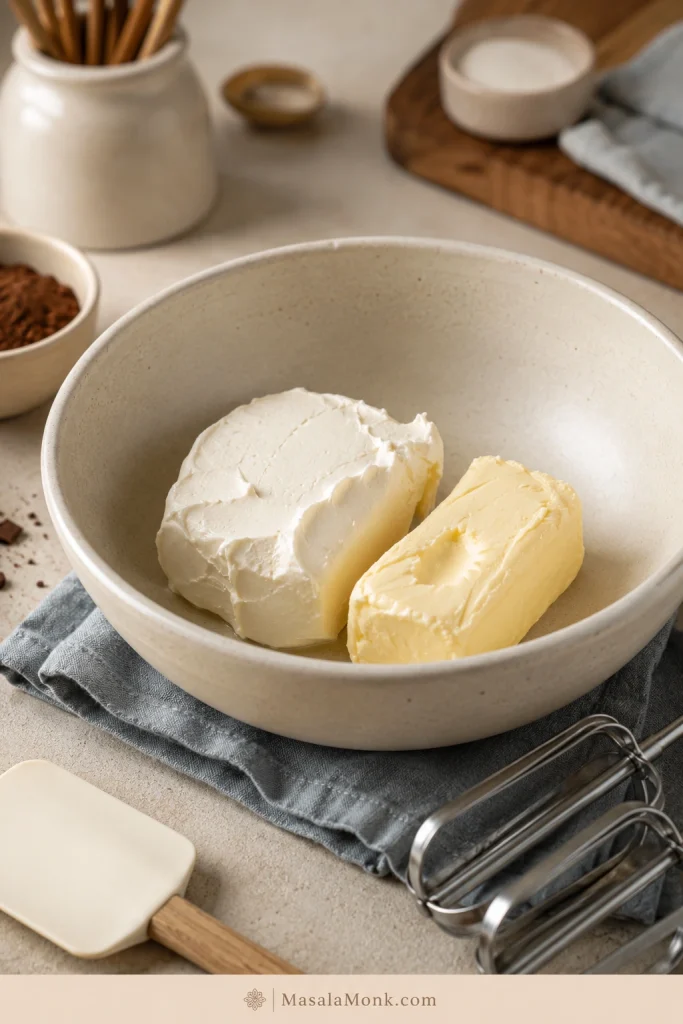
The cream cheese should press in but still hold its block shape. The butter should dent but not shine. If either one looks greasy, chill it briefly before starting.
Before mixing, the cream cheese should press in but still hold shape, while the butter should dent without looking greasy.
Recipe Instructions
Add the softened cream cheese and softened butter to a large mixing bowl. Beat on medium speed until completely smooth and creamy, about 1 to 2 minutes. Scrape down the sides and bottom of the bowl.
Add the cocoa powder, 3 cups powdered sugar, salt, and vanilla. Mix on low speed until the dry ingredients are mostly absorbed.
Increase to medium-low or medium speed and beat just until smooth. Scrape again so no cocoa, sugar, or cream cheese is hiding at the bottom or sides.
Beat until the cocoa and sugar disappear and the mixture turns creamy. Add milk or cream only when it still feels too thick.
Taste before adding the last ½ cup powdered sugar. Add it only for a sweeter or stiffer texture. When the mixture tastes sweet but flat, add a tiny pinch more salt.
Use it right away when you want a spreadable frosting. To pipe soft swirls, chill it for 15 to 30 minutes before filling the bag.
To make the optional fudgy version, mix in the cooled melted chocolate after the base is smooth. Beat briefly, just until combined.
If the mixture is fridge-firm, let it sit for 10 to 15 minutes so it softens enough to mix smoothly before re-beating.
Recipe Notes
Full-fat block-style cream cheese gives the frosting its most reliable structure.
Sift cocoa powder and powdered sugar when they look lumpy, especially for piping.
Milk or cream should go in slowly. Most batches need little or no added liquid.
The mixture is ready when it looks smooth, thick, and holds soft ridges from the beaters.
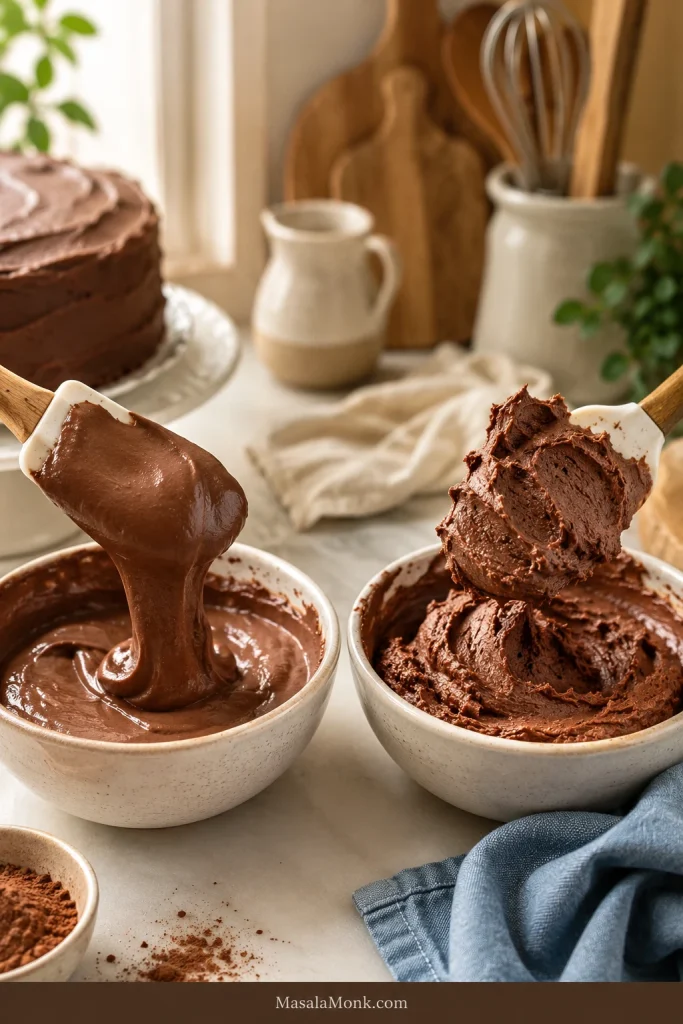
On a spatula, it should mound softly instead of running off.
Let cakes, cupcakes, and brownies cool completely so the chocolate layer sits on top instead of melting in.
When spread thinner over brownies or sheet cakes, some bakers call this chocolate cream cheese icing. In everyday use, frosting usually means a thicker topping that can be spread or piped, while icing often means something thinner. This recipe sits on the frosting side, but the same creamy, tangy topping may be called icing when it is spread over a pan dessert.
Before You Start
This is a simple recipe, but texture matters. Soft frosting is not a disaster. Most of the time, you are adjusting temperature, not rescuing a ruined batch.
The biggest difference in testing was not the cocoa or the mixer. It was temperature. When the cream cheese and butter were cool-soft, the frosting turned thick and smooth without much help. When either one was warm, the same recipe softened quickly and needed chilling before it behaved again.
The mixture should look thick before you decide it needs liquid. Many batches look too stiff at first and then turn creamy once the sugar and cocoa fully mix in.
The Thick Swoop Test
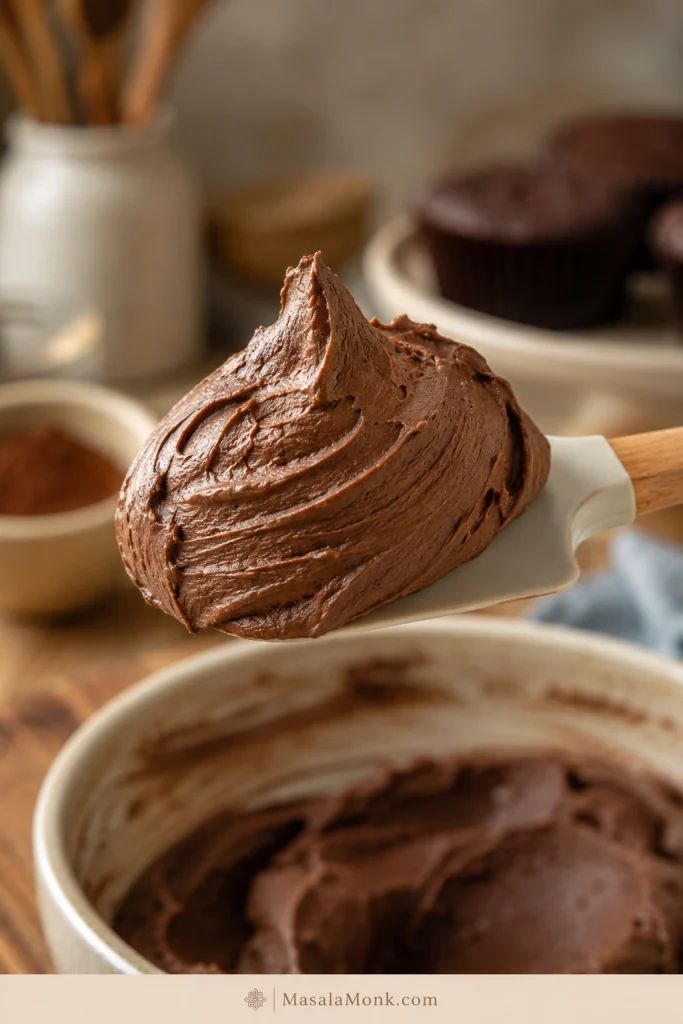
Before you decide the frosting needs more sugar or liquid, lift a small amount with a spatula. A good batch should mound softly and hold a clean swoop for a moment.
Before you spread or pipe, look for a thick frosting swoop that lifts cleanly instead of sliding back into the bowl.
The Texture Rule: Spread, Chill, or Fix
Chocolate cream cheese frosting changes with temperature. Before adding more sugar or liquid, look at the bowl and decide what you need it to do next.
When the frosting mounds softly on the spatula, it is usually ready for spreading, filling, or a short chill before piping.
If it looks like this
Do this
Why it works
Thick, creamy, and mounds on a spatula
Use it for spreading
It is ready for brownies, sheet cakes, and simple cakes
Smooth but too soft for swirls
Chill 15 to 30 minutes
Cold firms the butter and cream cheese without adding sweetness
Dry or stiff after mixing
Add milk or cream 1 teaspoon at a time
Small amounts loosen the texture without making it runny
Loose even after chilling
Add powdered sugar or cocoa gradually
Only adjust after temperature has had a chance to help
The whole recipe comes down to one rhythm: mix until smooth, pause before adding liquid, chill before fixing softness, and stop once it holds its shape.
Is This the Right Frosting for You?
Think of it as the middle ground between chocolate buttercream and cheesecake: richer than whipped cream, tangier than buttercream, and softer than ganache.
It is made for soft swirls, creamy layers, and tangy chocolate balance. For sharp decorative edges, tiny detailed piping, or long room-temperature display cakes, a firmer buttercream or ganache will be easier to manage.
Use this frosting for cupcakes, brownies, sheet cakes, yellow cake, chocolate cake, red velvet cake, and casual layer cakes.
Choose buttercream frosting when you want a sweeter, firmer, classic birthday-cake topping.
Use homemade whipped cream when pies, fruit desserts, hot chocolate, or no-bake desserts need something lighter.
Reach for ganache when you need a glossy drip or smooth cake covering.
Pick royal icing when cookie icing needs to dry hard for stacking.
Ingredients You Need
Good frosting starts before the mixer turns on. The texture is mostly decided by the cream cheese, butter, and how quickly you add liquid.
Start with firm cream cheese, cool-soft butter, sifted dry ingredients, and only a small amount of liquid when needed.
Cream Cheese for Frosting
Full-fat brick cream cheese gives the topping body and stability, mixes smoothly with butter and powdered sugar, and helps the finished texture hold after chilling.
Outside the US, look for full-fat block-style cream cheese or the firmest full-fat cream cheese available. Avoid whipped, spreadable, low-fat, or very soft cream cheese when you want piping.
Block-style cream cheese gives better structure; in contrast, softer tub cream cheese can make frosting loosen faster.
If your cream cheese comes in a tub but feels firm and dense rather than airy or spread-like, keep it cold, skip extra liquid, and chill the frosting before piping. The issue is moisture and structure: spreadable cream cheese is usually softer, so the mixture can loosen before it ever gets cold enough to hold a swirl.
The same full-fat cream cheese logic shows up in chilled desserts too. This no bake cheesecake recipe is a good example of how cream cheese structure and chilling decide the final texture.
Butter
Butter makes the mixture smoother, richer, and more stable. It should dent when pressed but should not look oily. Overly warm butter makes the bowl soft before you even start.
Unsalted butter gives you the cleanest control over flavor. If using salted butter, reduce the added salt to a small pinch and taste before adding more.
Powdered Sugar / Icing Sugar
Powdered sugar, also called icing sugar in many countries, does more than sweeten here. It helps the cream cheese hold a swirl, gives the chocolate layer body, and keeps the finished texture from sliding.
Three cups gives a tangier, less sweet result. Closer to 3½ cups gives firmer cupcake swirls, borders, or layer-cake decorating. Sift it first when it looks clumpy.
Cocoa Powder
Unsweetened cocoa powder gives the chocolate flavor and helps thicken the texture. Natural cocoa gives a familiar, slightly sharper flavor and a lighter brown color. Dutch-process cocoa tastes smoother, darker, and less sharp.
Both work here because this is frosting, not cake batter. The more important step is sifting the cocoa when it looks lumpy. Cocoa lumps can hide in the bowl and show up later as dry specks.
Vanilla, Salt, and Liquid
Vanilla rounds out the chocolate. Salt makes the chocolate taste stronger and keeps the sweetness from feeling flat. Milk or cream is optional and should be added only after the mixture has fully come together.
Heavy cream gives a richer finish, while milk thins the texture more quickly. Sweetened whipped topping and non-dairy topping belong to a different frosting style.
Equipment You Need
A hand mixer or stand mixer gives the smoothest texture, but you can still make this with a sturdy spatula if the ingredients are properly softened and the dry ingredients are sifted.
Electric mixer: Best for the smoothest result.
Rubber spatula: Essential for scraping the bowl.
Fine-mesh sieve: Helpful for cocoa and powdered sugar.
Offset spatula or piping bag: Use for spreading or soft swirls.
When using a stand mixer, choose the paddle attachment over the whisk. It keeps the mixture creamy without whipping in too much extra air.
Why This Frosting Works
This frosting works because it balances water, fat, sugar, and temperature. Cream cheese gives tang, but it also brings softness. Butter adds body. Cocoa thickens while deepening the chocolate flavor. Powdered sugar stabilizes the mixture, but too much can make the taste flat and overly sweet.
That is why this recipe uses enough powdered sugar to hold shape, then relies on cocoa, salt, and chilling for balance. You get a frosting that tastes chocolate-first and cream-cheese-tangy, not one that is dominated by powdered sugar.
The most reliable batches came from controlling temperature before changing ingredients. Cool-soft cream cheese mixed smoothly without turning loose; butter that dented but did not look oily gave the frosting body; and waiting before adding milk kept the mixture from thinning too early.
Cocoa Powder vs Melted Chocolate
Use cocoa powder for the easiest, steadiest batch. Add cooled melted chocolate when you want a deeper, fudgier version.
Cocoa powder keeps the base simple, stable, and deeply chocolatey. Melted chocolate makes the topping silkier and richer, but the chocolate needs to be cool enough that it does not melt the butter.
Chocolate Option
Result
Best For
Cocoa powder only
Quick, stable, chocolatey, easy to pipe after chilling
Everyday cupcakes, cakes, brownies
Melted chocolate only
Smooth, silky, richer, slightly more delicate
Bakery-style frosting and fillings
Cocoa powder + melted chocolate
Deepest and fudgiest chocolate flavor
Special cakes, brownies, richer desserts
Compared with cocoa powder, cooled melted chocolate gives a darker, fudgier frosting, while cocoa keeps the texture steadier.
For the most reliable version, make the cocoa powder base first. For a darker, fudgier finish, add cooled melted dark chocolate at the end. A 55% to 70% dark chocolate works well; very bitter chocolate can taste harsh, while very sweet chocolate can push the frosting closer to buttercream sweetness. Want the richer path? Use the dark chocolate variation below.
Need something pourable instead of creamy? This 3-minute homemade chocolate syrup is better for drizzling over cake, ice cream, pancakes, or dessert plates.
How to Make Chocolate Cream Cheese Frosting
For the smoothest frosting, beat the cream cheese and butter first, then mix in the cocoa, powdered sugar, salt, and vanilla before making any texture adjustments.
Not sure whether to chill, thicken, or loosen it? Use the Texture Rule before changing the ingredients.
1. Beat the Cream Cheese and Butter First
Add the softened cream cheese and softened butter to a mixing bowl. Beat on medium speed until smooth before adding anything else. Scrape more than you think you need to; cream cheese likes to hide under the paddle and along the sides of the bowl.
The base should look creamy, pale, and smooth before you move on.
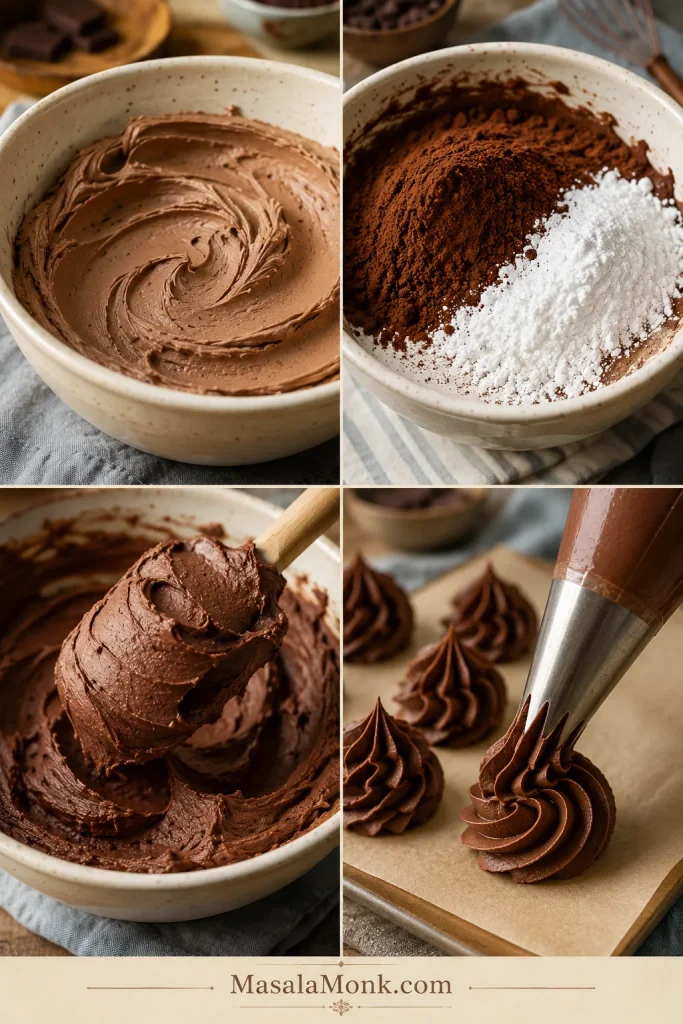
A smooth cream cheese and butter base keeps tiny lumps from hiding once the cocoa and powdered sugar go in.
2. Add Cocoa Powder and Powdered Sugar Gradually
Add the cocoa powder, powdered sugar, salt, and vanilla. Start the mixer on low speed so the dry ingredients do not puff out of the bowl.
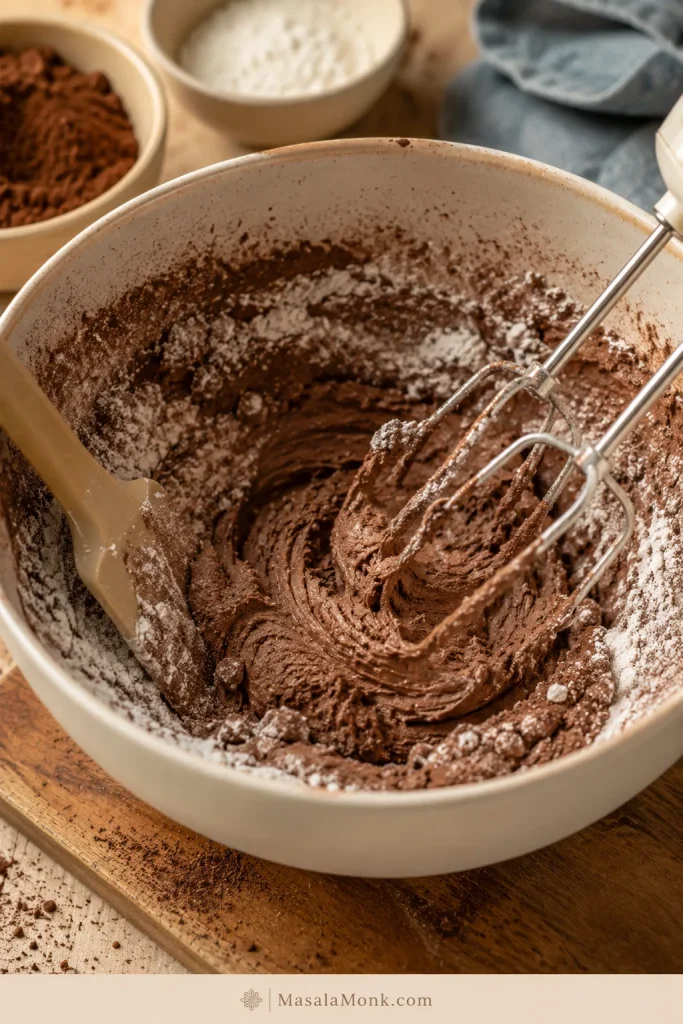
If it looks dusty for a minute, stay with it. That dry stage is normal before the frosting turns creamy. Keep mixing on low, scrape the bowl, and give it a moment before adding liquid.
At this stage, the mixture can look dry and dusty; keep mixing before deciding it needs milk or cream.
3. Mix Until Smooth
Once the dry ingredients disappear, increase to medium-low or medium speed and beat only until smooth.
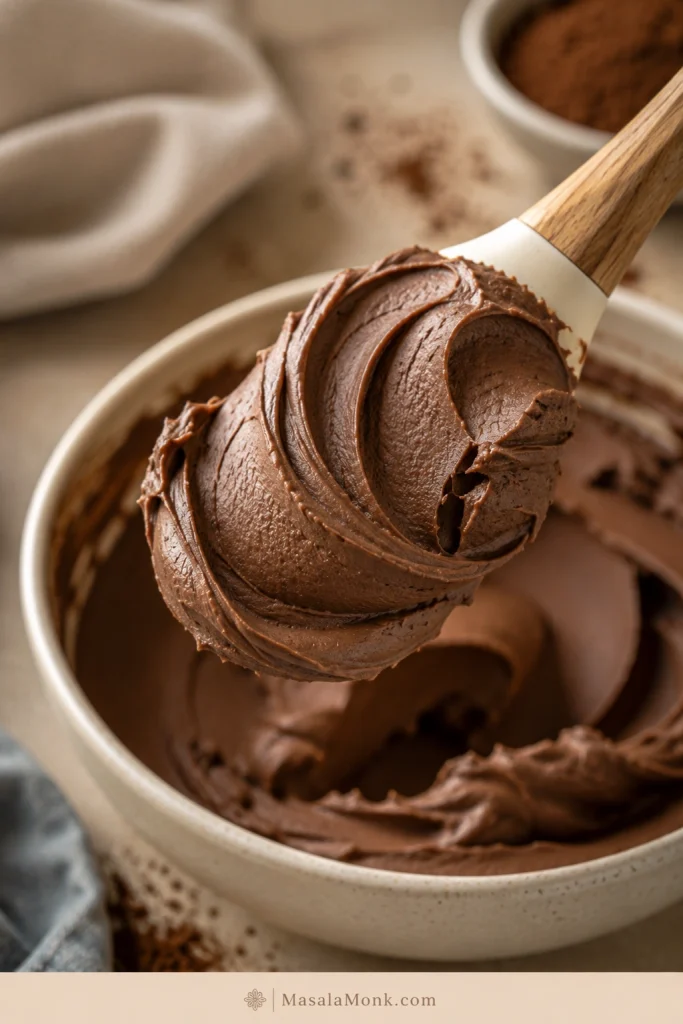
Once the dry ingredients disappear, look for smooth chocolate frosting with soft ridges and no dusty cocoa streaks.
4. Adjust the Texture Carefully
Once the base is made, the rest is adjustment. Use the Texture Rule above: spread it when it mounds, chill it when it is too soft, loosen it only when it is truly stiff, and thicken it only after temperature has had a chance to help.
A soft, spreadable finish works best with 3 cups powdered sugar and little or no chill.
Cleaner swirls usually need closer to 3½ cups powdered sugar plus a short chill.
Cooled melted dark chocolate makes the texture darker, smoother, and more fudgy.
Dutch cocoa, salt, and the lower sugar amount create a more balanced, less sugary result.
To thicken the frosting, add powdered sugar 2 tablespoons at a time.
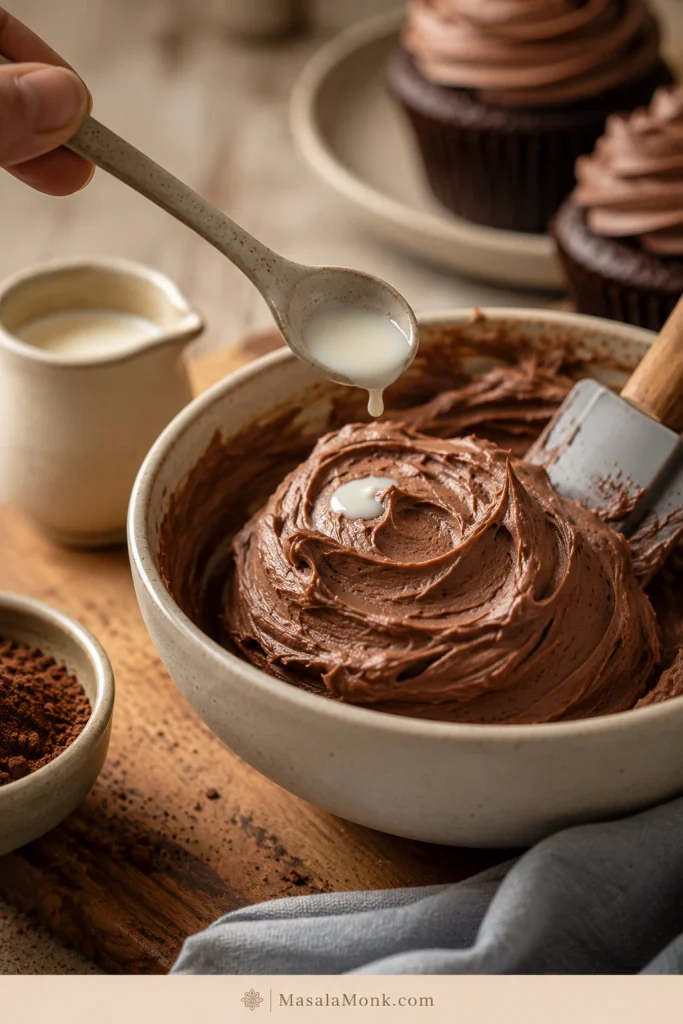
To soften the frosting, add milk or cream 1 teaspoon at a time.
At the right texture, the frosting should look like soft chocolate cheesecake filling: creamy, cool, and thick enough to sit in a mound on the spatula.
Use teaspoons of milk or cream only after the frosting is fully mixed, because extra liquid softens cream cheese frosting quickly.
Success Cues
This is the section to check when you are staring into the bowl wondering if it looks right.
Stage
What you should see
After beating cream cheese and butter
Smooth, pale, creamy, with no visible lumps
After adding cocoa and powdered sugar
Dry at first, then creamy as it mixes
Ready to spread
Thick, smooth, and mounding on a spatula
Ready to pipe
Cool, firm but squeezable, and holding soft ridges
Too soft
Glossy, loose, and sliding off the spatula
Use these visual cues to decide whether your chocolate cream cheese frosting needs more mixing, chilling, or piping time.
How to Make It Pipeable
For soft, reliable swirls, use full-fat block-style cream cheese, the higher amount of powdered sugar, and chill the frosting for 15 to 30 minutes before piping.
This is a soft-swirl frosting, not a sharp-edge decorating buttercream. After chilling, it works well for cupcake swirls, simple borders, filling a casual layer cake, and generous swoops.
It is not the best choice for flowers, tiny detailed piping, or a cake that has to sit warm for hours. For tall cupcake swirls, sift the cocoa and sugar well, and choose a large star tip, open star tip, or large round tip.
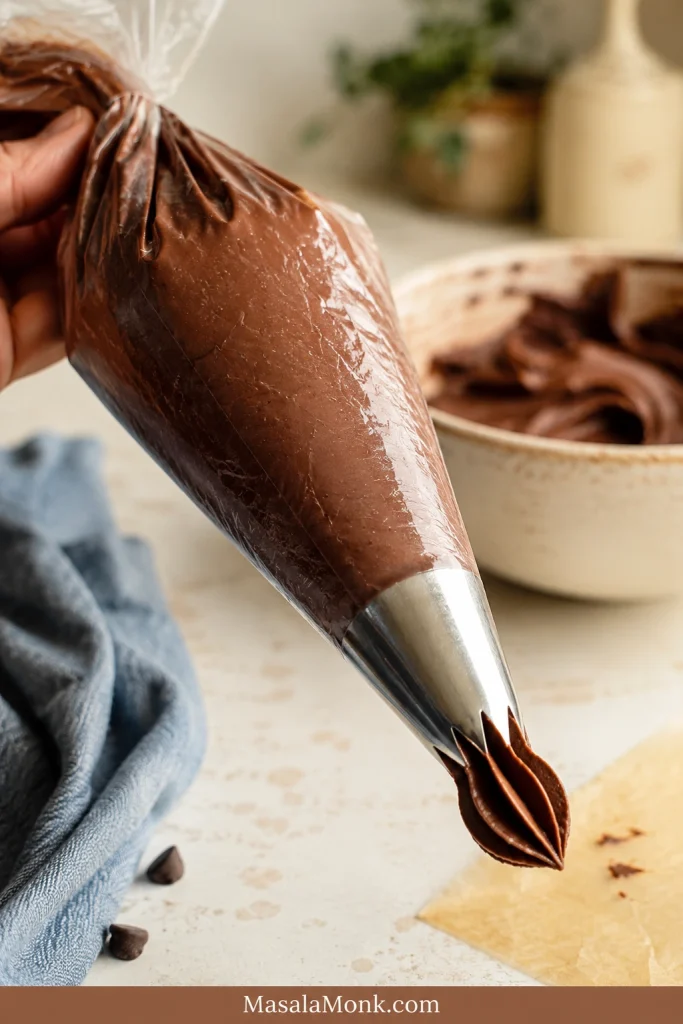
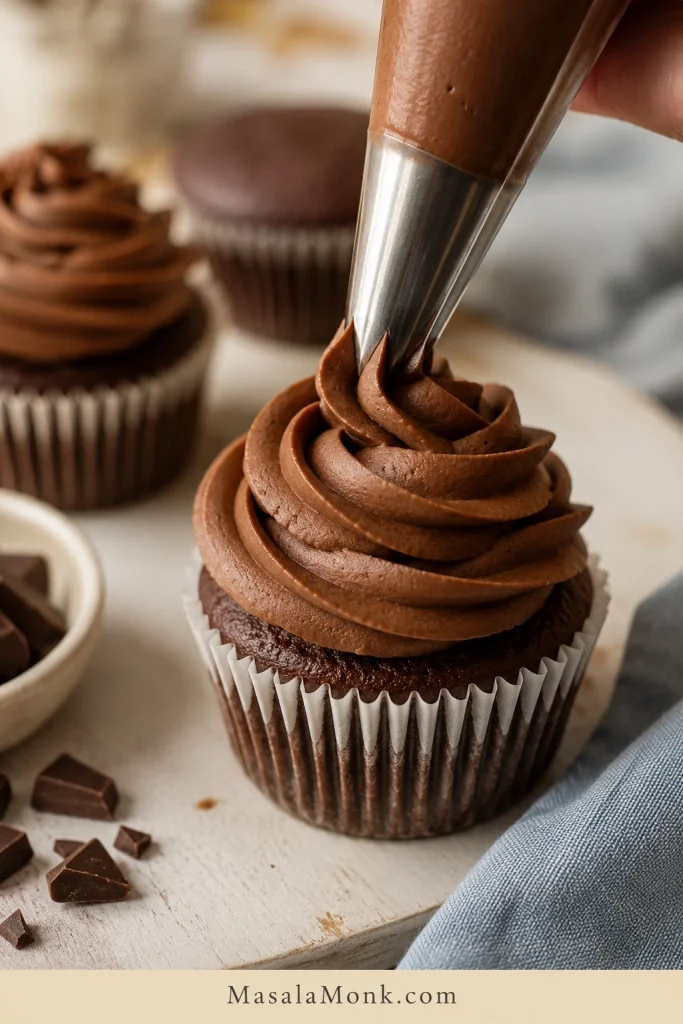
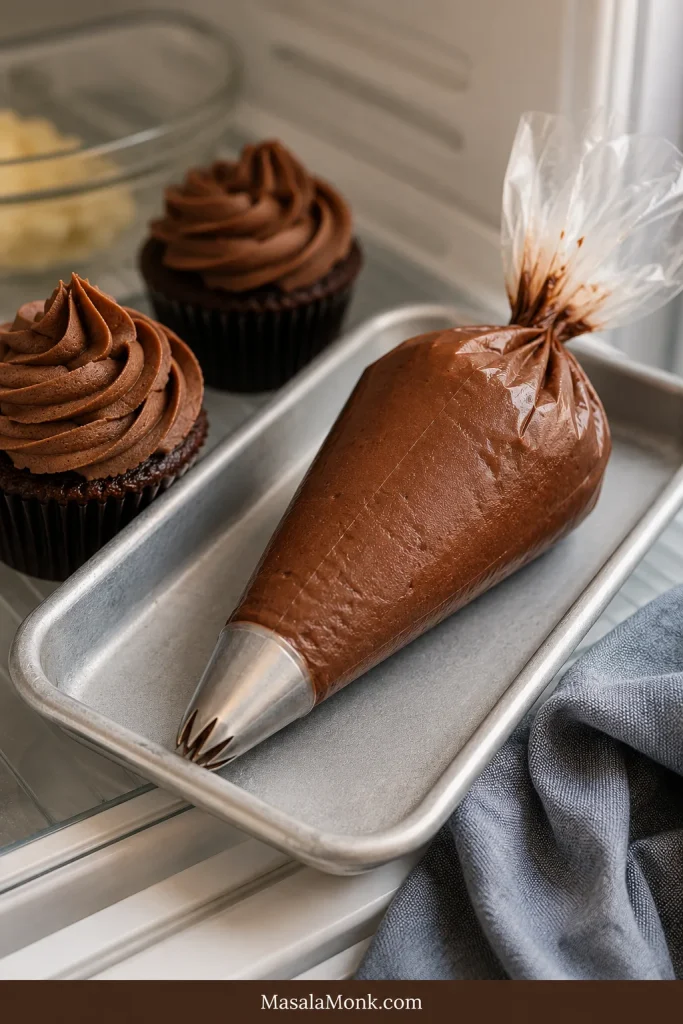
When it is ready to pipe, the bag should feel cool in your hands and the frosting should move with pressure, not pour. A short chill gives you soft matte swirls that look finished without turning stiff or crusty.
Before piping, the filled bag should feel cool, full, and steady, with frosting that moves under pressure but does not flow.
Once the mixture looks smooth and holds soft ridges, stop mixing. It can look perfect, then loosen if you keep beating.
How the Frosting Should Pipe on Cupcakes
Use a large star tip or large round tip for soft swirls. The frosting should move with steady pressure and keep rounded ridges after you lift the tip.
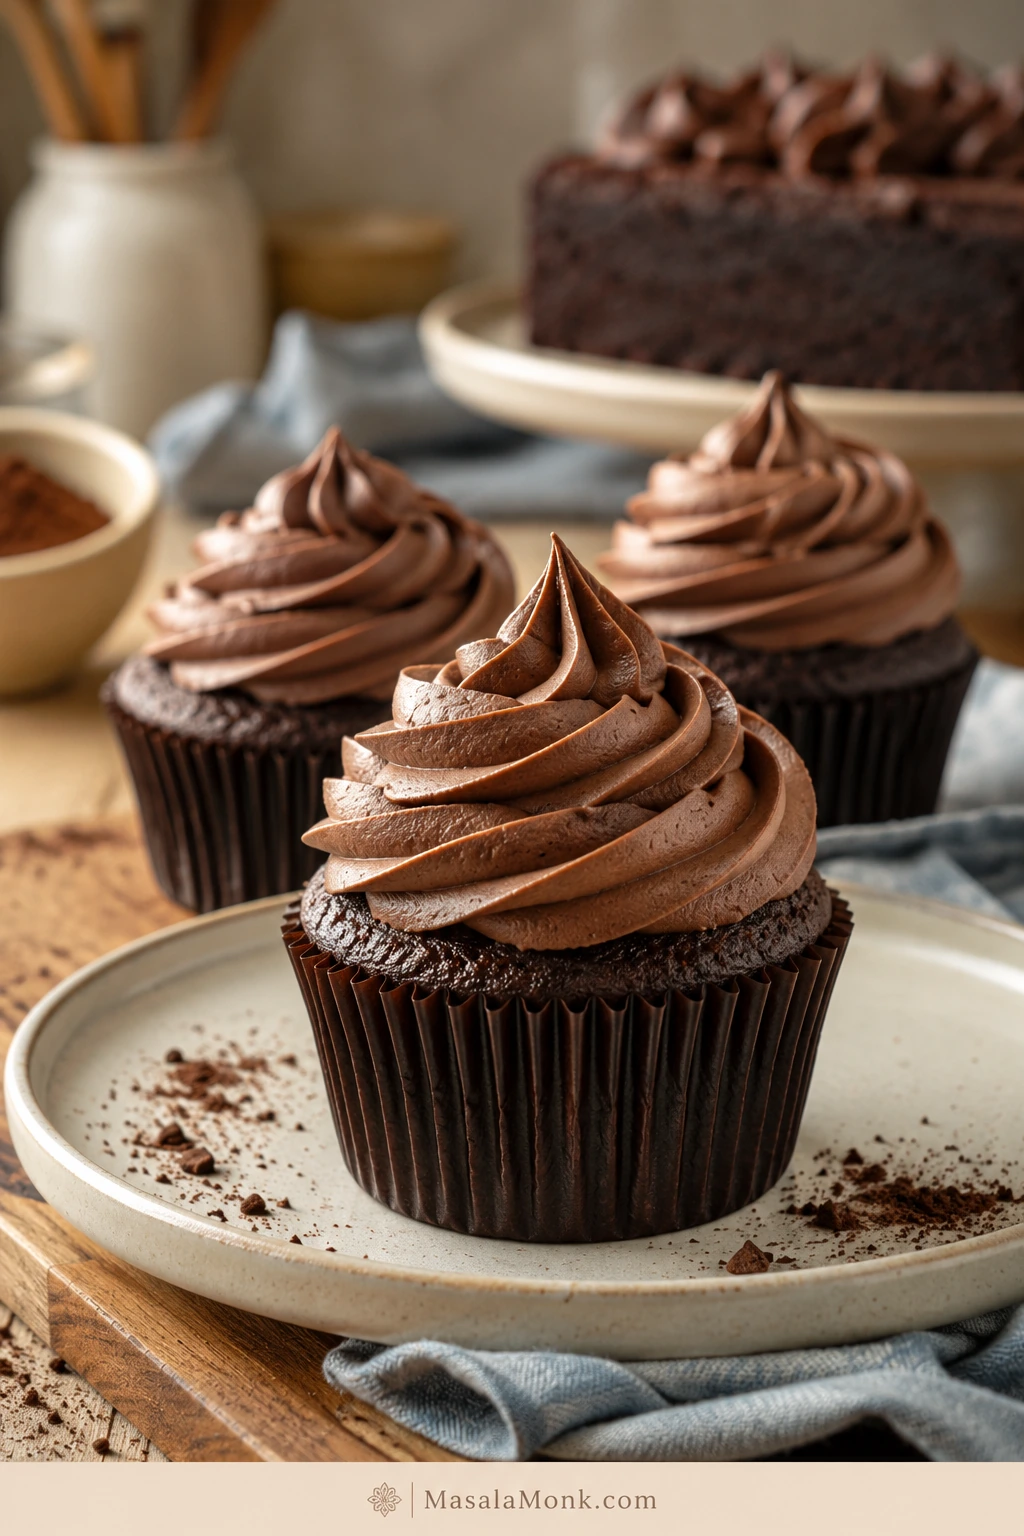
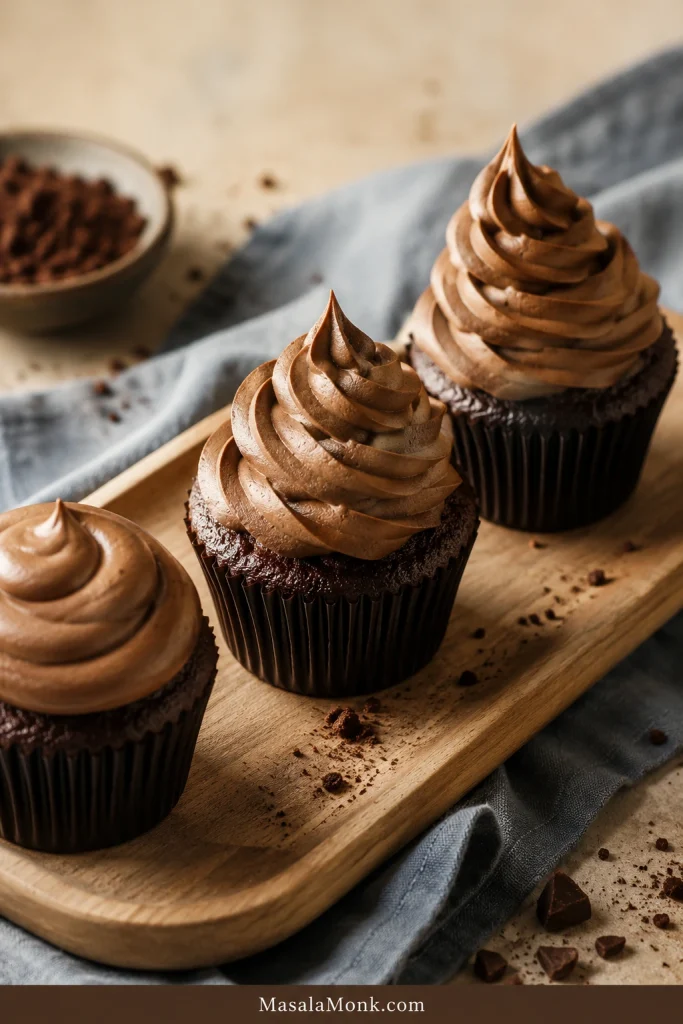
After chilling, the frosting pipes into rounded cupcake swirls that look finished without turning stiff, crusty, or overly sweet.
How to Make It Less Sweet
This is not a low-sugar frosting. It is less sugary than classic chocolate buttercream because cream cheese, cocoa, and salt keep the sweetness balanced.
Adjustment
What it changes
Add salt first
Makes chocolate taste fuller without changing the texture
Add 1 to 2 tablespoons cocoa
Deepens flavor and slightly thickens the mixture
Use Dutch-process cocoa
Makes the chocolate taste smoother and darker
Use 3 cups powdered sugar
Tangier, softer, less sweet
Use 3½ cups powdered sugar
Firmer, sweeter, better for tall swirls
For tall cupcake swirls, avoid reducing the powdered sugar too far. Powdered sugar is not only for sweetness; it also gives structure.
How Much Frosting Do You Need?
The right amount depends less on the cake and more on how generous you want the finished dessert to look. If you love big cupcake swirls, make more than you think; piping always eats frosting faster than spreading.
This recipe makes about 3½ to 4 cups of chocolate cream cheese frosting, depending on how much powdered sugar you use and whether you add melted chocolate.
Dessert
Amount Needed
Notes
12 cupcakes with tall swirls
3 to 3½ cups
One batch works well
24 cupcakes with light swirls
3½ to 4 cups
Pipe modestly
9×13 sheet cake
About 3 cups
Spread with an offset spatula
8×8 or 9×9 brownies
1½ to 2 cups
Half batch is usually enough
8-inch 2-layer cake
3½ to 4 cups
Enough for filling and outside
9-inch 2-layer cake
4 to 5 cups
Make 1.25x when decorating heavily
3-layer cake
4½ to 5 cups
Make extra for safety
Use a half batch for brownies, a small cake, or 6 to 8 cupcakes. Use the full batch for 12 tall cupcake swirls, 24 lighter cupcake swirls, or a 9×13 sheet cake. Make 1.25x for a 9-inch two-layer cake with decoration, or 1.5x for a heavily frosted layer cake.
Where This Frosting Tastes Best
Use this frosting when you want chocolate flavor without the heavy sweetness of buttercream. It works especially well on desserts that are already sweet and need a little tang to balance them.
The best matches are soft cakes, fudgy brownies, and cupcakes that need a cool, creamy swoop instead of a stiff sugar crust.
Chocolate Cupcakes
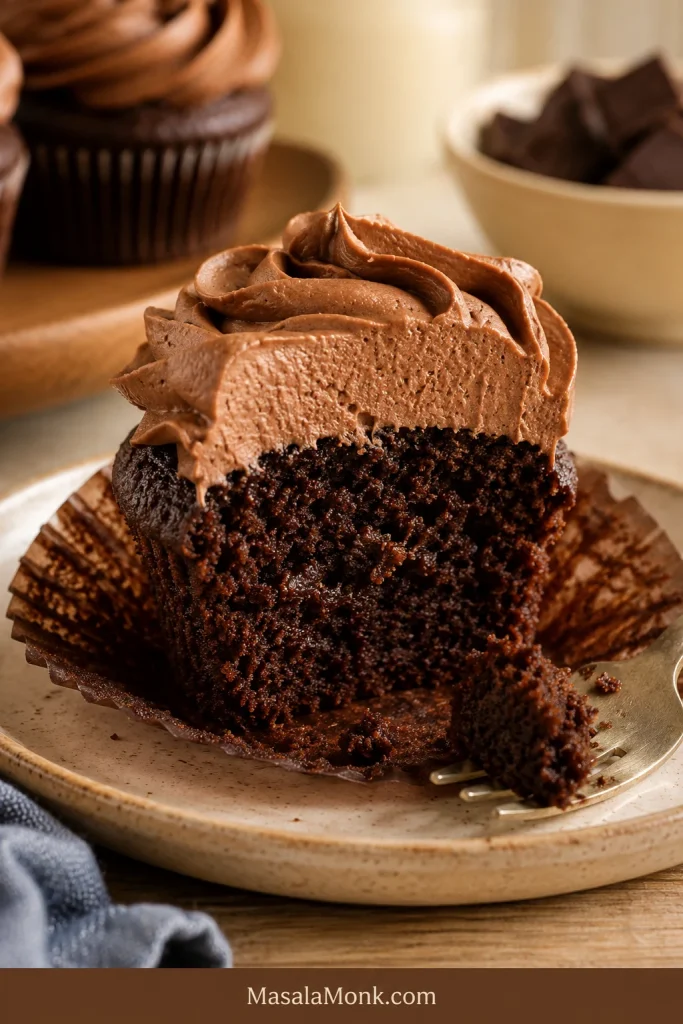
On chocolate cupcakes, the tang keeps the cocoa from feeling heavy. The swirl should taste like a cool chocolate cheesecake cap on top of soft cake, not a pile of powdered sugar.
From modest swirls to taller chilled swirls, this is the realistic range for pipeable cream cheese frosting on cupcakes.
What the Frosting Should Feel Like on a Cupcake
The best bite is cool, creamy, and lightly tangy against the cake. It should feel like a soft cap of chocolate cheesecake, not a hard sugar crust.
Because cream cheese adds tang, the frosting should taste like a cool chocolate cheesecake cap rather than a hard sugar crust.
Yellow Cake with Chocolate Cream Cheese Frosting
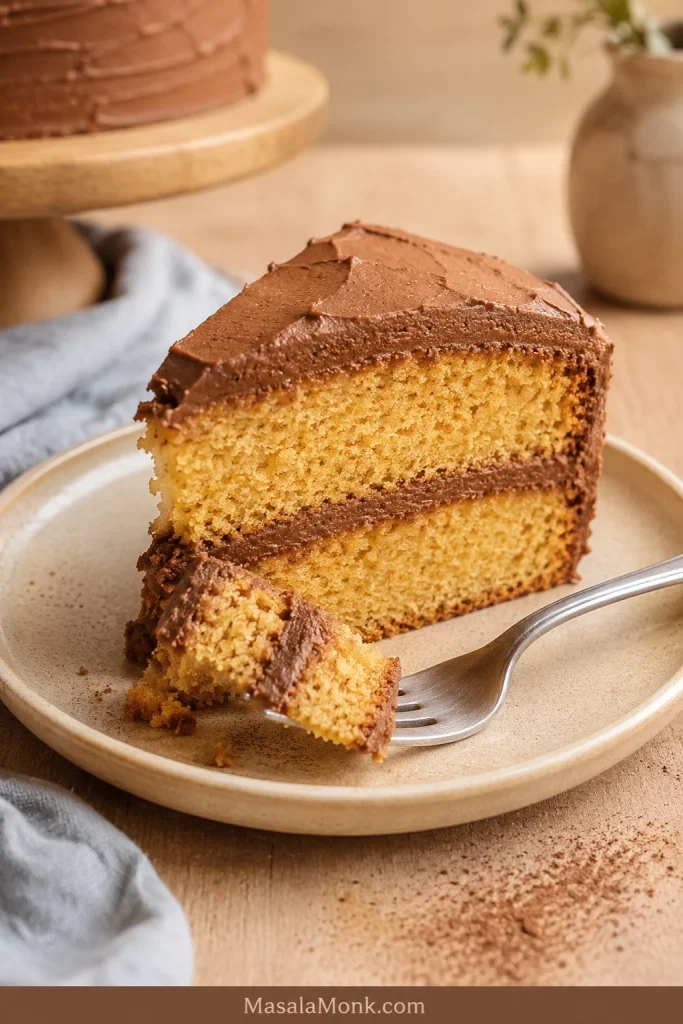
This is where the frosting really shines: soft yellow cake, cool tangy chocolate, and just enough cocoa bitterness to keep the bite from turning candy-sweet.
Yellow cake works especially well because tangy chocolate cream cheese frosting balances the sweet, buttery crumb.
Chocolate Layer Cake with Chocolate Cream Cheese Frosting
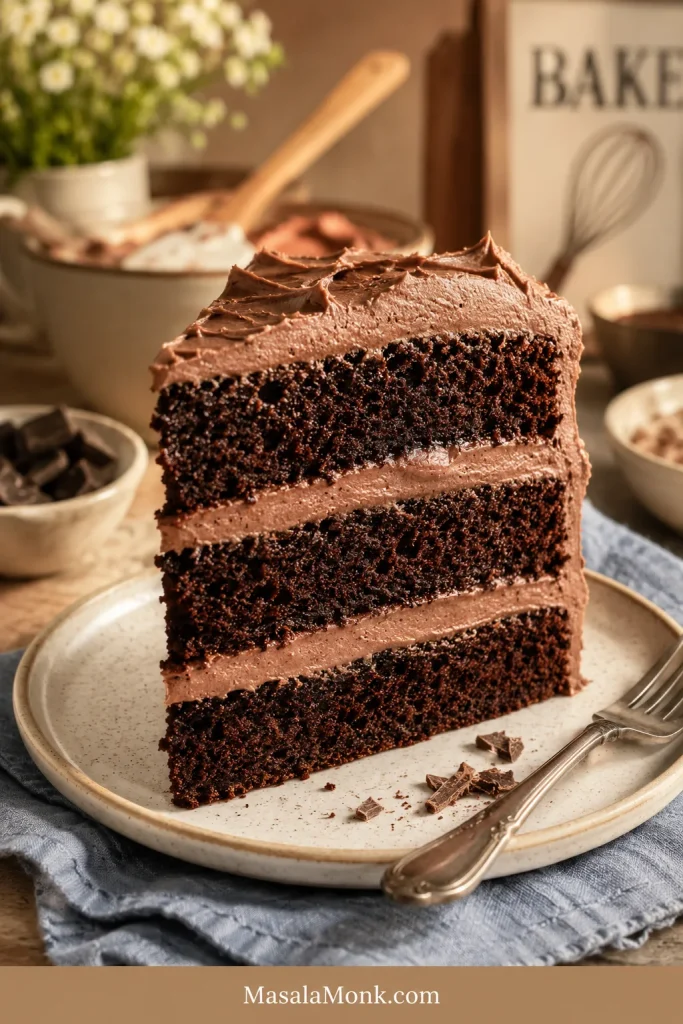
Use it on chocolate cake when you want a deeper, less sugary finish than chocolate buttercream. The cream cheese tang keeps the cocoa from feeling too heavy, so the slice still tastes rich without becoming overwhelming.
A moderate frosting layer keeps chocolate layer cake rich and creamy without making the slice feel heavy.
Red Velvet or Spice Cake
Cream cheese already belongs with red velvet, and cocoa makes it a stronger chocolate version. That same tang works beautifully with warm spices too. This spice cake recipe uses cream cheese frosting to balance brown sugar and baking spices.
Brownies with Chocolate Cream Cheese Frosting
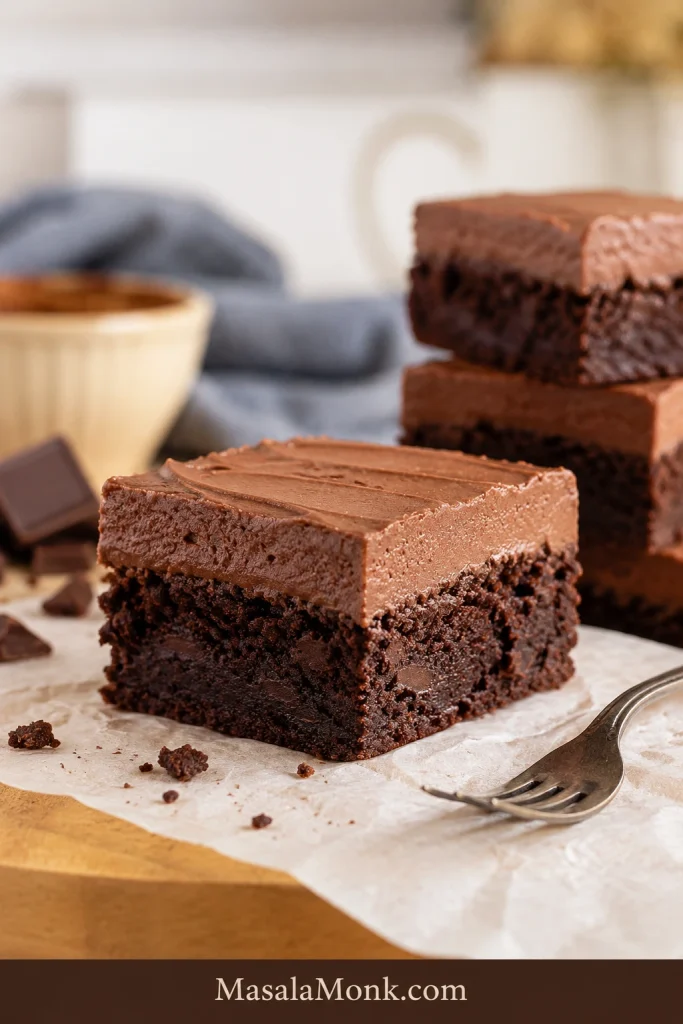
On brownies, it tastes like a thin chocolate cheesecake layer over a fudgy base. Let the pan cool fully before frosting, because brownies hold heat longer than they look.
Here, the frosting sets into a smooth chocolate cheesecake-style layer over the dense fudgy base.
Sheet Cake with Chocolate Cream Cheese Frosting
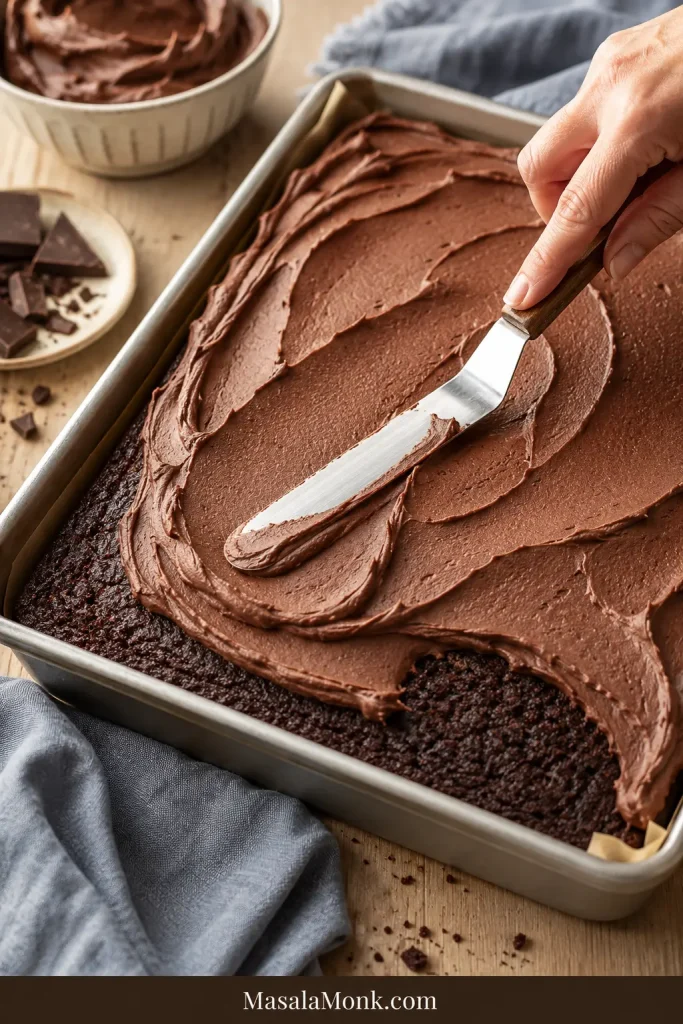
A 9×13 sheet cake is one of the easiest places to use this frosting. It spreads smoothly, chills into clean slices, and gives a simple pan cake enough tang to balance the sweetness. For another soft pan cake that benefits from cream cheese frosting, this applesauce cake recipe is a better match than a delicate sponge.
Spread the frosting into soft swoops, then chill until the top settles into a neat sliceable layer.
How Much Filling to Use in a Layer Cake
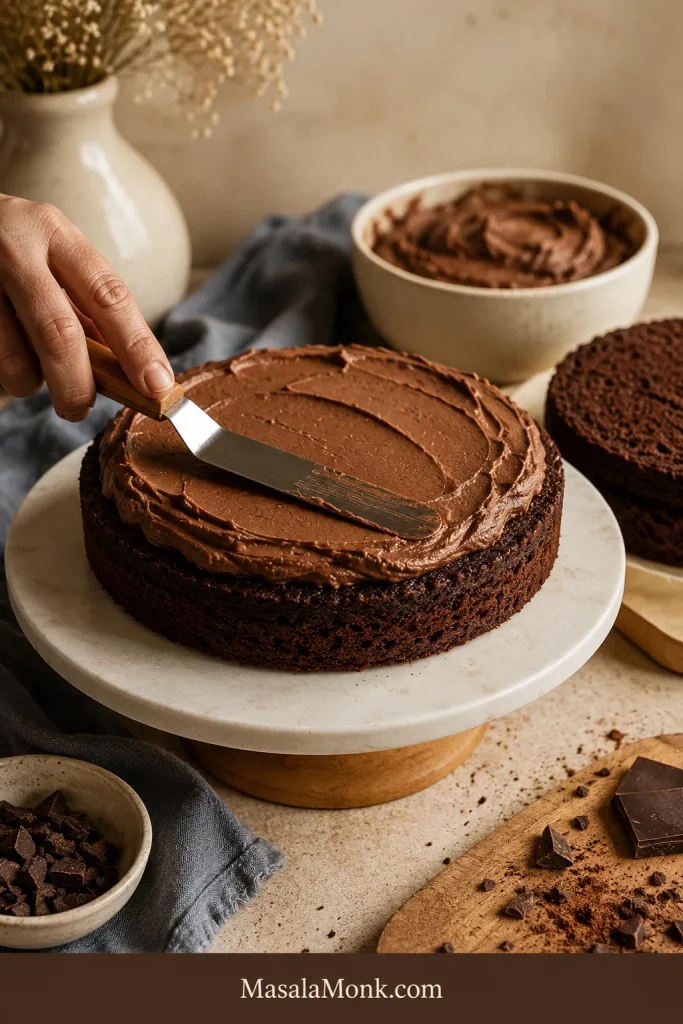
For a casual layer cake, chill the frosting and use a moderate filling. It gives the cake a creamy chocolate layer that cuts through sweetness without making the slice feel heavy.
Keep the filling moderate and level so the cake stacks cleanly instead of squeezing frosting out the sides.
Make sure the cake layers are completely cool.
Chill the frosting for 15 to 30 minutes before filling if it feels soft.
Add a moderate layer between the cakes. Very thick, soft filling can squeeze out when the top layer goes on.
For a taller cake, pipe a thicker ring around the edge before filling the center.
Apply a thin crumb coat, chill for 20 to 30 minutes, then add the final coat.
Refrigerate the finished cake until closer to serving.
For cleaner slices, chill the finished cake before cutting, then let slices sit briefly before serving so the texture becomes creamy again.
Cookies
This frosting works for soft sandwich cookies or chilled frosted cookies, but it does not dry hard like royal icing. Use it when the cookies will be served chilled or kept in a single layer.
Troubleshooting
If something looks off, start with temperature before assuming the recipe has gone wrong. Cream cheese frosting often looks loose before chilling brings it back.
Quick fix: when the texture is too soft, refrigerate the bowl for 20 minutes before changing anything else.
Use this order when the texture feels off: chill first, re-beat briefly, add powdered sugar for structure, add cocoa for thickness and chocolate flavor, and add liquid only when the mixture is too stiff.
Problem
Likely Cause
Fix
Runny texture
Tub cream cheese, warm butter, overmixing, too much liquid, or warm melted chocolate
Chill 20 to 30 minutes, then re-beat briefly. Add powdered sugar only when needed.
Lumps
Cream cheese was too cold or cocoa/sugar was not sifted
Beat cream cheese and butter smooth before adding dry ingredients. Sift cocoa and powdered sugar next time.
Grainy texture
Powdered sugar lumps, overmixing, or melted chocolate added badly
Sift powdered sugar. When using melted chocolate, cool it before adding.
Too thick
Too much powdered sugar or cocoa
Add milk or cream 1 teaspoon at a time.
Too sweet
Too much powdered sugar or weak cocoa flavor
Add a pinch of salt or a little more cocoa.
Not chocolatey enough
Mild cocoa or too little cocoa
Add 1 to 2 tablespoons more cocoa, or add cooled melted dark chocolate.
Will not hold piping
Too warm, too soft, or not enough powdered sugar
Chill the mixture and piping bag. Add more powdered sugar only when chilling does not help.
Split or loosened
Overbeaten cream cheese or warm melted chocolate
Chill until firmer, then re-beat gently on low speed.
Why Did My Frosting Turn Runny?
Chocolate cream cheese frosting usually turns runny because the cream cheese or butter was too warm, the cream cheese was too soft, too much liquid was added, or the mixture was overbeaten. Start with chilling before changing the recipe.
Instead of adding more sugar right away, chill soft frosting first; temperature often fixes the texture without making it too sweet.
How to Thicken It Without Making It Too Sweet
To thicken chocolate cream cheese frosting without making it too sweet, chill it first, then add a little cocoa powder before adding more powdered sugar. Add powdered sugar 2 tablespoons at a time only when the frosting still feels too soft after chilling.
How to Fix Lumps for a Smoother Texture
Lumps usually start at the beginning. Cream cheese that is too cold does not beat smoothly, and once powdered sugar and cocoa are added, the lumps become harder to remove. Beat the cream cheese and butter until completely smooth before adding anything else, and sift dry ingredients when they look clumpy.
6 Small Mistakes That Make Frosting Soft
Using tub cream cheese when you want clean piping.
Letting the butter become oily or melted.
Adding milk or cream before the mixture has fully come together.
Adding warm melted chocolate.
Keeping the mixer running after the texture is smooth.
Frosting warm cakes, cupcakes, or brownies.
Storage, Freezing, and Making Ahead
Because this has cream cheese in it, keep the frosting and frosted desserts refrigerated. It tastes best cool but not cold-hard.
How to Store Chocolate Cream Cheese Frosting
As a practical rule, do not leave it at room temperature for more than about 2 hours, or more than about 1 hour when the room is very warm, such as above 90°F / 32°C. The FDA’s two-hour rule for refrigerated foods is a good safety reference here.
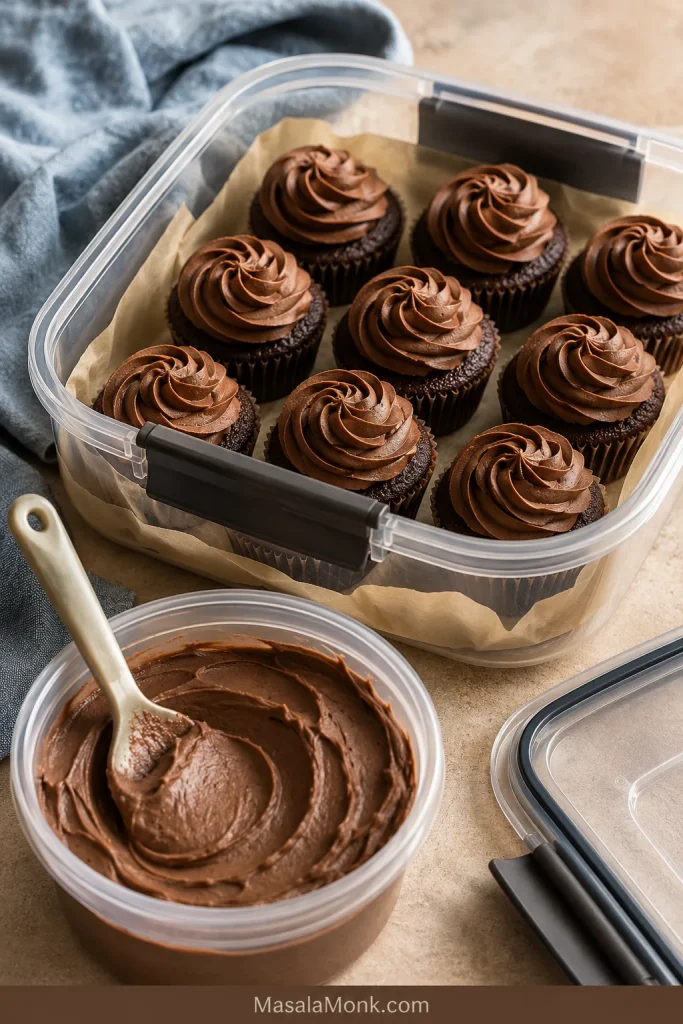
For leftovers, transfer the mixture to an airtight container and refrigerate for up to 5 days. Before using, let it sit at cool room temperature until it softens slightly, then re-beat gently until smooth.
For frosted cakes, cupcakes, or brownies, refrigerate the finished dessert in a covered container. Cover it well so the surface does not dry out or pick up fridge odors.
Covered cupcakes stay fresher in the refrigerator, but the best bite comes after the frosting loses its hard chill.
Serve cool, not cold-hard. For the best texture, take frosted cupcakes or cake slices out of the refrigerator about 15 to 25 minutes before serving, depending on room temperature.
You can make the frosting 1 to 2 days ahead. On decorating day, let it soften slightly, re-beat gently, and chill again if it feels too soft for piping. The chocolate flavor often tastes a little more rounded after a night in the fridge.
Decorating in a warm kitchen? Use the chill reset whenever the bag or swirls start to soften.
Can You Freeze It?
Yes. Chocolate cream cheese frosting freezes well in an airtight container for up to 2 to 3 months. Thaw overnight in the refrigerator, then let it soften slightly and re-beat gently before spreading or piping.
Warm Weather Chill Reset
Warm hands, warm rooms, and sunny tables soften this frosting faster than the recipe itself does.
Start with chilled frosting before piping.
Rest the filled piping bag in the refrigerator when it starts feeling soft in your hands.
Keep frosted cake or cupcakes cold until closer to serving.
Avoid direct sunlight and long outdoor buffet conditions.
Transport cakes cold when possible.
Choose a firmer chocolate buttercream or ganache when a cake must sit outside for hours.
A short chill helps pipeable chocolate cream cheese frosting hold soft ridges again when hands or the room are warm.
Variations
Dark Chocolate Version for Rich Cakes
Choose this when you want the frosting to taste more like a bakery chocolate layer than a simple cocoa frosting. Add 3 to 4 oz / 85 to 115 g melted dark chocolate, cooled until barely warm.
Chocolate bars usually melt more smoothly than chocolate chips, but chips work when melted gently. Compound chocolate also works in a pinch, though the flavor and texture will be slightly different from real dark chocolate.
Mocha Version for Deeper Chocolate Flavor
Use this when the frosting tastes chocolatey but a little flat. Espresso powder makes the cocoa taste deeper without turning the frosting into coffee frosting. Add ½ to 1 teaspoon instant espresso powder with the cocoa.
Extra Tangy Version for Sweet Cakes
This version works best with yellow cake, vanilla cake, red velvet cake, or very sweet cupcakes that need balance. Use the lower amount of powdered sugar and skip extra liquid.
Stiffer Version for Cupcake Swirls
Choose this when looks matter as much as flavor: birthday cupcakes, party trays, or anything that needs to hold a soft swirl. Use the full 3½ cups powdered sugar, skip extra milk or cream, and chill for 20 to 30 minutes before piping.
Softer Brownie Frosting
Choose this when you want the frosting to eat like a creamy chocolate layer, not a tall decoration. Use 3 cups powdered sugar and add 1 to 2 teaspoons cream only when needed. Make sure the brownies are completely cool before frosting.
A whipped chocolate cream cheese frosting is a different style made with cream. It is lighter and softer. This butter-based version is the one to use when you want a topping that spreads cleanly, chills well, and holds soft swirls. For that softer spreadable style in a natural context, this cinnamon roll recipe shows how cream cheese icing behaves when it is meant to be looser.
Save watery flavorings and fruit purees for another frosting style; they can loosen this one faster than you expect.
FAQs
Can chocolate cream cheese frosting be piped?
Yes. Use full-fat block-style cream cheese, softened butter, enough powdered sugar, and chill for 15 to 30 minutes before piping. A large star tip works especially well for cupcakes.
Why did my frosting turn runny?
Usually, it is too warm, overmixed, made with very soft cream cheese, or loosened with too much liquid. Chill first; add powdered sugar only when it still feels loose after 20 to 30 minutes.
What is the fastest way to thicken it?
Chill it for 20 to 30 minutes first. If it is still soft, beat briefly and add powdered sugar 2 tablespoons at a time. For a less sweet fix, add a little cocoa powder first.
Is tub cream cheese okay?
Tub cream cheese is not ideal when you want piping because it is usually softer. If it is firm and dense, keep it cold, skip extra liquid, and chill before piping.
Can I make it without an electric mixer?
You can, but the texture will be smoother with a mixer. If mixing by hand, use very soft but not warm butter, cool-soft cream cheese, sifted cocoa and powdered sugar, and a sturdy spatula. Beat the cream cheese and butter completely smooth before adding dry ingredients.
Does it need to be refrigerated?
Yes. Because it contains cream cheese, store it in the refrigerator. Let refrigerated cake or cupcakes sit briefly before serving so the topping tastes creamy, not fridge-hard.
How long can frosted cupcakes sit out?
Keep them out for no more than about 2 hours, or about 1 hour in very warm conditions above 90°F / 32°C. Refrigerate covered cupcakes until closer to serving.
When should I add melted chocolate?
Add melted chocolate only after the base is already smooth. Cool it until barely warm first, because warm chocolate can loosen the texture.
What happens if I skip the butter?
You can make a softer spread-style version without butter, but it will not behave like this recipe. Butter is strongly recommended for piping or holding shape.
Can I make it less sweet and still pipe it?
Yes, but do not reduce the powdered sugar too far if you want tall swirls. Use 3 cups powdered sugar for a tangier, less sweet frosting, then rely on Dutch cocoa, salt, and chilling for balance. For the firmest cupcake swirls, use closer to 3½ cups.
What happens without powdered sugar?
Powdered sugar thickens and stabilizes this style of frosting. Granulated sugar can make it gritty; for a no-powdered-sugar chocolate frosting, use a cooked ermine-style frosting instead.
How well does it freeze?
It freezes well in an airtight container for up to 2 to 3 months. Thaw overnight in the refrigerator, then let it soften slightly and re-beat gently before using.
If you make it, I’d love to know where you used it: cupcakes, brownies, a sheet cake, or a layer cake. Also tell me whether you stayed with cocoa only or added melted chocolate for the fudgier version.
The best version of this frosting comes from not rushing the bowl. Let the cream cheese and butter stay cool-soft, let the dry stage turn creamy before adding liquid, and let a short chill do its work before you reach for more sugar.
Once you know that rhythm, chocolate cream cheese frosting becomes easy to trust: creamy, tangy, chocolate-first, and firm enough to sit where you put it.