Posted on Leave a comment

Portuguese Custard Tarts Recipe with Puff Pastry

Portuguese custard tarts on a metal tray with flaky pastry shells, creamy custard centers, and dark blistered tops.

The best Portuguese custard tart is a contrast machine: cold pastry, fierce heat, a crisp flaky shell, warm creamy custard, and those dark blistered spots on top that look almost burnt but taste like caramel.

A good tart does not ask you to sit down with a fork. You pick it up while it is still warm, the edges flake onto your fingers, and the custard gives way softly under the browned top. The lemon should be more perfume than sharp citrus, the cinnamon should sit quietly in the background, and the dark spots should taste sweet-bitter, not smoky.

Maybe you are here because you ate one warm from a bakery and have been thinking about it ever since. Maybe you have store-bought puff pastry in the freezer and want something that feels far more special than the effort. Or maybe you have tried Portuguese custard tarts before and ended up with pale tops, soggy bottoms, or custard that set too firm.

This recipe is built for that exact home-kitchen reality: the serious shortcut version, with ready-made all-butter puff pastry for ease, real cinnamon-lemon yolk custard for flavor, and enough heat to make the shortcut bake like something special. You do not need a Lisbon bakery oven; you need cold pastry, a thin base, a hot tray, modest filling, and close attention near the end.

Why This Home-Oven Version Works

This version is built for a regular home oven, ready-made all-butter puff pastry, and either shallow metal tart tins or a standard metal muffin tin. Traditional pastéis de nata bake in very hot ovens, often in shallow metal tins that push heat quickly into the pastry. A home oven is slower, and a muffin tin is deeper, so this recipe compensates in four ways.

Muffin Tin Heat Setup

A muffin tin makes this recipe practical at home, but the metal underneath has to help the pastry base crisp before the custard sets.

Metal muffin tin with Portuguese custard tarts on a dark tray beside a jug of custard in a home kitchen.
A regular muffin tin can work for homemade pastéis de nata, but the tray underneath matters because it gives the pastry base direct heat.
  • Cold pastry keeps the shell layered instead of greasy.
  • Thin pastry bases cook faster before the custard turns firm.
  • Preheated metal gives the tin stronger heat from below.
  • Modest filling leaves room for the custard to puff without flooding the pastry.

The goal is not perfection on the first tray. The goal is crisp pastry, creamy custard, and enough dark spots to give the top that sweet-bitter caramel edge. Once you know how your oven behaves, the second tray is usually easier.

Once this system makes sense, the most important hands-on step is shaping the pastry; see the shaping and chilling steps before you fill the shells.

The Home-Oven System in One Frame

Use the setup as a checklist before baking: cold pastry, thin shells, smooth custard, and hot metal underneath.

Puff pastry log, shaped tart shell, custard jug, and dark baking tray arranged on a kitchen counter.
Notice the method in one frame: cold pastry for layers, thin shells for crisping, smooth custard for texture, and hot metal for the base.

Recipe at a Glance

DetailFor a regular kitchen
Yield12 tarts
DifficultyModerate, but forgiving if you keep the pastry cold, base thin, tray hot, and filling modest
Pastry14 ounces / 400 grams all-butter puff pastry
CustardMilk, cream, egg yolks, sugar syrup, starch, cinnamon, lemon
TinShallow metal tart tins or a standard metal muffin tin
Oven500°F / 260°C; hotter only if your oven safely allows it and you can watch closely
Bake time10–15 minutes, depending on tin depth and oven strength
Fill levelAbout three-quarters full, usually 2–3 tablespoons custard per shell
Eat themWarm, after about 10 minutes of cooling

If you are ready to bake, jump straight to the recipe. If this is your first time making Portuguese custard tarts, read the home-oven method first; it explains why the pastry stays cold, the base stays thin, and the filling stays lower than instinct says.

The Home-Oven Method That Works

A good homemade pastel de nata should feel more like crisp pastry wrapped around warm custard than a soft custard cup in pastry. Around the rim, the shell should flake; underneath, the base should be cooked through; in the center, the custard should stay glossy under the browned top.

Timing does most of the work. Pastry needs strong heat before the custard turns firm, which is why the shaped shells are chilled, the base is pressed thin, and the filled tin goes straight onto hot metal.

Texture Target: Flaky Outside, Creamy Inside

The finished tart should give you a crisp rim first, then warm custard underneath the caramelized top.

Close-up of a Portuguese custard tart with flaky pastry layers, glossy yellow custard, and dark caramelized spots.
The close-up shows the contrast that makes Portuguese custard tarts special: crisp flaky edges around glossy, creamy custard.

If the first tray is not perfect, read what happened. Pale tops need more top heat. Soft bases need stronger bottom heat. Firm custard means the tarts baked too long. Small adjustments matter more than changing the whole recipe.

If you have worked with puff pastry before, the same cold-dough, hot-tray logic also matters in our apple tart recipe, where a crisp base depends on keeping the pastry cool and baking it with enough heat underneath.

What Are Portuguese Custard Tarts?

Portuguese custard tarts are small high-heat custard pastries with flaky shells and caramelized tops. They are meant to be a little messy: crisp flakes at the edge, soft custard in the middle, and a browned top that gives the sweetness a slightly bitter caramel edge.

The Portuguese name is pastéis de nata. One tart is a pastel de nata; more than one are pastéis de nata. You may also see the plural written without the accent as pasteis de nata. In English, people often search for the same dessert as Portuguese custard tarts, Portuguese egg tarts, or Portuguese tarts.

This is not the guarded Pastéis de Belém recipe, and it does not ask you to make traditional laminated pastry from scratch. It is an authentic-style home version: cinnamon-lemon yolk custard, strong oven heat, thin pastry, blistered tops, and a crisp shell adapted for ready-made all-butter puff pastry. For background on the famous original, see the official Pastéis de Belém history.

Portuguese Custard Tarts vs Chinese Egg Tarts vs British Custard Tarts

Portuguese custard tarts are often confused with Chinese egg tarts and British custard tarts. They are related, but the texture and baking style are different.

  • Portuguese custard tarts / pastéis de nata: flaky laminated or puff-style pastry, rich yolky custard, cinnamon-lemon aroma, and dark blistered spots.
  • Chinese egg tarts: smoother, lighter custard, often with shortcrust or puff pastry, and a pale yellow to lightly golden top.
  • British custard tarts: shortcrust pastry, gently baked egg custard, often with nutmeg, and a softly set top rather than blistered spots.

None of these tarts is “better” than the others; they simply answer different cravings. This one is for the person who wants flaky pastry, warm custard, and a top shaped by serious heat.

What the Difference Looks Like

The darker top and flaky rim are the quickest visual clues that you are looking at the Portuguese style.

Portuguese custard tart in the foreground with paler Chinese egg tart and British custard tart styles in the background.
Compared with smoother Chinese egg tarts or gentler British custard tarts, Portuguese custard tarts lean darker, flakier, and more caramelized.

Macau-style Portuguese egg tarts sit close to this world too, usually richer and more caramelized than classic Chinese egg tarts. This recipe is the place to start if you want that blistered Portuguese tart experience without turning the pastry into a weekend project.

Back to top ↑

Ingredients That Keep the Custard Creamy

Every ingredient here is simple; the technique is what makes the tarts feel bakery-level. The small details matter: rich yolks, real dairy, enough sugar for browning, and lemon peel without the bitter white pith.

Ingredient Jobs at a Glance

Before you measure, it helps to see what each ingredient contributes to the pastry, custard, aroma, and browning.

Ingredients for Portuguese custard tarts including puff pastry, egg yolks, milk, cream, sugar, cinnamon, lemon peel, and cornstarch.
Before you start, note the jobs: puff pastry builds layers, egg yolks enrich the custard, and cinnamon-lemon syrup gives pastéis de nata their aroma.

For the pastry

  • All-butter puff pastry: The shortcut I would use first. You need about 14 ounces / 400 grams for 12 tarts.
  • Flour for dusting: Use just enough to roll the pastry without sticking. Too much flour can make the pastry dry.
  • Butter or oil for greasing, if needed: If your tin is not reliably nonstick, grease it lightly. Heavy greasing can smoke at this temperature.

For the custard filling

  • Whole milk: Gives the custard body without making it too heavy.
  • Heavy cream: Adds richness. You can replace it with the same amount of whole milk for a lighter tart.
  • Egg yolks: The heart of the filling. They give the custard its golden color, soft richness, and bakery-style texture.
  • Sugar: Sweetens the custard and helps the tops caramelize.
  • Water: Used to make the sugar syrup.
  • Cornstarch or flour: Stabilizes the custard so it can handle aggressive oven heat.
  • Cinnamon stick: Infuses the syrup gently so the spice tastes warm, not dusty.
  • Lemon peel: Adds the quiet floral lift that keeps the custard from tasting flat. Use only the yellow peel; the white pith can taste bitter.
  • Vanilla: Optional. Cinnamon and lemon should still be the main aroma.
  • Salt: A small pinch keeps the custard from tasting flat.

How sweet should the custard be?

Use 150 grams sugar for a balanced home-style custard or 175 grams for a sweeter, more caramelized bakery-style tart. I would not reduce below 150 grams on the first batch because sugar helps the tops brown and keeps the custard glossy.

Why starch matters

Portuguese custard tarts bake hotter than most custards. Without a little starch, the eggs are more likely to curdle before the tops have time to blister. Cornstarch gives a clean, smooth custard; flour gives a slightly more traditional, thicker body.

You are not trying to make the custard thick. A little starch simply gives it enough structure to stay glossy and soft when the oven gets aggressive. Before it reaches the oven, the filling should smell gently of lemon peel and cinnamon.

If you love the silky-custard side of this dessert, our crème brûlée recipe is another place where egg yolks, sugar, and heat need to be handled carefully.

Equipment That Helps the Pastry Crisp

You do not need Portuguese tart tins, but you do need metal. A standard metal muffin tin on a preheated tray works better than silicone because it pushes heat into the pastry base more quickly.

Tart Tins vs Muffin Tin Depth

The deeper the cup, the more discipline you need with a thin base and restrained custard fill.

Shallow metal tart tins beside a deeper metal muffin tin, each holding a shaped puff pastry shell.
Because muffin tins are deeper than traditional tart tins, keep the pastry thinner and the custard fill lower to avoid a heavy base.
  • Shallow metal Portuguese tart tins: Ideal if you have them. They are shallow rather than deep, which helps the pastry and custard finish at the same time.
  • Standard metal muffin tin: Works well, but treat it like a shallow tart mold. Press the pastry up the sides, then keep the custard level modest.
  • Rolling pin: For thinning and shaping the puff pastry.
  • Small and medium saucepans: One for the syrup, one for the milk-starch base.
  • Whisk and fine-mesh sieve: For a smooth, lump-free custard.
  • Measuring jug with a spout: Makes filling cleaner.
  • Thermometer: Helpful for syrup, but not required.
  • Heavy baking sheet, pizza stone, or baking steel: Adds stronger heat from below.

If your muffin tin is deep, do not try to fill the whole depth. A lower fill gives the pastry a better chance to crisp before the custard becomes firm. Using a deeper tin? Pay special attention to the fill-level visual guide, because tin depth changes how quickly the base crisps.

Why the Hot Tray Matters

The hot tray acts like a heat reservoir, giving the pastry base a stronger start than an oven rack alone.

Dark baking steel or heavy metal tray prepared in a home oven for baking Portuguese custard tarts.
The hot tray is not just a baking surface; it gives the bottom crust a head start before the custard weighs the pastry down.

The Best Pastry Shortcut for Home Bakers

Traditional pastéis de nata use laminated dough that creates crisp, spiraled layers. It is beautiful, but it takes time. For this home version, all-butter puff pastry gives the best balance of ease and texture.

The pastry shortcut only works if you treat it seriously: cold, thin, and baked hard. The goal is not a thick pastry cup. You want a thin shell that bakes into layers, with a rim that flakes before the custard gives way.

Closest bakery-style pastry

Homemade laminated pastry or rough puff gives you the most control over the layers, but it takes more rolling, folding, chilling, and butter handling.

The shortcut I would use first

Ready-made all-butter puff pastry is the easiest good option for a first home batch. Keep it cold but flexible, roll thick sheets thinner before shaping, and chill the shells before filling.

Choosing Store-Bought Puff Pastry

Choose all-butter puff pastry when you can, then treat it like a serious ingredient: cold, thin, and handled quickly.

All-butter puff pastry sheet unrolled on a floured counter with a rolling pin nearby.
All-butter puff pastry is the shortcut, but cold handling is the trick; warm pastry loses definition before it reaches the oven.

If your puff pastry sheet is very wide, cut it into two rectangles first, roll each rectangle into a log, and cut 6 pieces from each log. If cutting rounds instead of using the log method, avoid twisting the cutter because that can seal the pastry layers.

Do Portuguese custard tarts need to be blind baked?

No. The custard and pastry bake together. The key is to keep the pastry cold, press the base thin, fill only when the oven is hot, and bake on a preheated metal tray so the bottom gets enough heat.

Fastest option: frozen Portuguese egg tart shells

Frozen tart shells can work when you want the fastest version or already have Portuguese egg tart shells on hand. Keep them cold, fill them lower than you think, bake on a hot tray if allowed, and start checking early. The shell size decides the bake time more than the clock does.

What to avoid

Shortcrust pastry can make a nice custard tart, but it will not give the flaky Portuguese-style shell. Phyllo pastry can make a crisp mini custard pastry, but it is not the same as a pastel de nata.

Back to top ↑

How to Make Portuguese Custard Tarts Without Soggy Bottoms

Think of the recipe in four moves: perfume the syrup, loosen and stabilize the custard, shape cold pastry shells, then bake everything hard and fast.

1. Make the cinnamon-lemon syrup

Combine sugar, water, a cinnamon stick, and strips of lemon peel in a small saucepan. Bring it to a simmer and cook until the syrup reaches about 225°F / 107°C.

If you do not have a thermometer, look for a syrup that is clear, glossy, and slightly thickened. When a drop is cooled for a moment and rubbed between your fingers, it should feel sticky and pull into a thin thread. The syrup should smell like warm lemon peel and cinnamon, not caramel.

Make the Cinnamon-Lemon Syrup

Clear syrup gives the custard aroma and sweetness without pushing it toward burnt sugar before the tarts even bake.

Clear syrup in a saucepan with lemon peel, cinnamon stick, and a spoon lifting a thin syrup thread.
The syrup should look clear, not amber; meanwhile, lemon peel and cinnamon quietly flavor the custard without making it taste heavy.

2. Make the custard filling

Whisk a little cold milk with the cornstarch until smooth. Warm the remaining milk and cream in a saucepan until steaming, then whisk in the starch mixture. Cook only until barely thickened, like thin cream. It should pour easily but no longer look like plain milk. If it looks like pudding before baking, it has gone too far.

If the milk base gets too thick, whisk in 1–2 tablespoons of milk to loosen it before adding the yolks. It should be pourable enough to strain easily.

Cook the Custard to Thin Cream

The custard base should coat the whisk lightly but still run back into the pan in a smooth stream.

Pale custard mixture coating a whisk and flowing back into a saucepan in a thin stream.
Look for a pourable custard base at this stage; if it sits like pudding, the finished center can bake too firm.

Take the pan off the heat before adding the syrup and yolks. Slowly whisk the warm syrup into the milk mixture, then let it cool for a few minutes. Whisk the egg yolks in a separate bowl, then slowly add the warm milk-syrup mixture while whisking constantly. This gentle tempering keeps the eggs from scrambling.

Strain the custard through a fine-mesh sieve into a jug. If it is very foamy after whisking, let it sit for a few minutes and skim the top before filling the shells.

Strain for Smooth Custard

This is the last chance to remove tiny lumps before the filling goes into the fragile pastry shells.

Custard being poured through a fine mesh sieve into a jug on a warm kitchen counter.
Straining is a small step with a big payoff: it catches tiny lumps so the Portuguese egg tart filling bakes silkier.

3. Shape the pastry shells

This is the one step to slow down for. A thin, even pastry base matters more than a perfectly neat rim.

Keep the puff pastry cold but flexible. If it is frozen, thaw it in the refrigerator until it can be rolled without cracking. If the pastry feels greasy or floppy, pause and put it back in the fridge.

Lightly dust the counter with flour and roll the pastry just enough to even it out. If it is thick, roll it to about 2–3 mm. Roll the pastry tightly into a log, then cut the log into 12 equal pieces.

Roll the Puff Pastry Into a Tight Log

The tighter the log, the clearer the spiral pattern will be when each piece is pressed into the tin.

Hands rolling a sheet of puff pastry into a tight log on a lightly floured work surface.
Rolling the pastry into a tight log creates the spiral that later turns into flaky layers around each pastel de nata shell.

Slice the Spiral Pieces

Each cut piece should show visible layers, because those layers become the flaky sides of the tart shell.

Cut puff pastry log pieces with visible spiral layers resting on a floured kitchen counter.
Once sliced, each spiral shows where the layers are; press from that center point so the pastry spreads evenly up the tin.

For a standard muffin tin, each piece will be roughly 30–35 grams. For shallow tart tins, you may need slightly less pastry per shell, or you must press it very thin.

Place one piece into each muffin cup or tart tin, cut side down. Use your thumbs to press the pastry from the center outward and up the sides. Press instead of stretching. The base should look almost too thin; that is what helps it crisp before the custard fully sets.

Press Shells Thin, Not Tall

Pressing outward gives you a thin bottom and steady sides; stretching upward usually makes the pastry shrink back.

Hands pressing puff pastry into a metal muffin tin to shape a thin Portuguese custard tart shell.
Press outward instead of stretching upward; that keeps the base thin while building enough side structure to hold the custard.

Check the Thin Base

Before filling, check the bottom of each shell; this is where most muffin-tin tarts turn soft if the pastry is too thick.

Empty raw puff pastry shell pressed into a metal muffin tin with a thin base and even sides.
This raw shell shows the cue clearly: the base looks very thin now so it can crisp later instead of steaming under the filling.

Chill the shaped shells for 20–30 minutes before filling. If you have had soft pastry bottoms before, also read the soggy-bottom fixes before baking the next tray.

Chill Before Filling

Cold shaped shells hold their layers better when the hot oven starts pushing butter and steam through the pastry.

Chilled empty puff pastry shells in a metal muffin tin with a jug of custard nearby.
At this point, pause and chill the shells; cold pastry holds its shape better when the hot custard and oven heat hit it.

4. Fill and bake until blistered

Preheat the oven to 500°F / 260°C. If your oven safely goes hotter and you know it runs evenly, you can use a higher setting, but start checking early. Place a heavy baking sheet, pizza stone, or baking steel in the oven while it preheats. Use bare metal, stone, or steel under the tin; skip parchment unless it is rated for very high heat.

When the oven is fully hot, place the chilled tin on the preheated baking sheet. Fill each shell about three-quarters full, usually 2–3 tablespoons custard depending on tin size. Save any extra custard for a small ramekin; the tarts bake better with space to puff.

Fill Below the Rim

Leave visible space at the top so the custard can rise without flooding the pastry layers.

Custard being poured into puff pastry tart shells in a metal muffin tin, stopping below the rim.
Stop below the rim. That three-quarter fill gives the custard room to puff while keeping overflow away from the pastry layers.

Avoid the Overfilled Shell

A little extra custard in the jug is better than custard bubbling over and sealing the pastry layers shut.

Two raw Portuguese custard tart shells in a metal tin, one filled lower and one filled close to the rim.
The lower fill is the safer one; once custard spills over the edge, it can glue the layers together and soften the base.

Bake on Hot Metal

Once filled, the tin should go straight onto the hot tray so the pastry base gets immediate heat from below.

Filled Portuguese custard tart shells in a muffin tin being placed onto a hot tray inside a home oven.
After filling, move fast: the tin should land on the hot tray while the pastry is still cold and the oven is fully heated.

Bake until the pastry is deeply golden at the rim, the custard has puffed in small spots, and the tops are blistered with dark caramelized patches. In a very hot oven, this usually takes 10–15 minutes.

Watch the Custard Puff and Brown

Uneven rising is normal during baking; the custard settles as it cools, so judge the tart by the rim, top, and texture together.

Portuguese custard tarts baking in a metal muffin tin inside a warm oven with glossy custard and browning pastry edges.
During baking, the custard may rise unevenly before it settles; early caramel spots and golden rims tell you the heat is working.

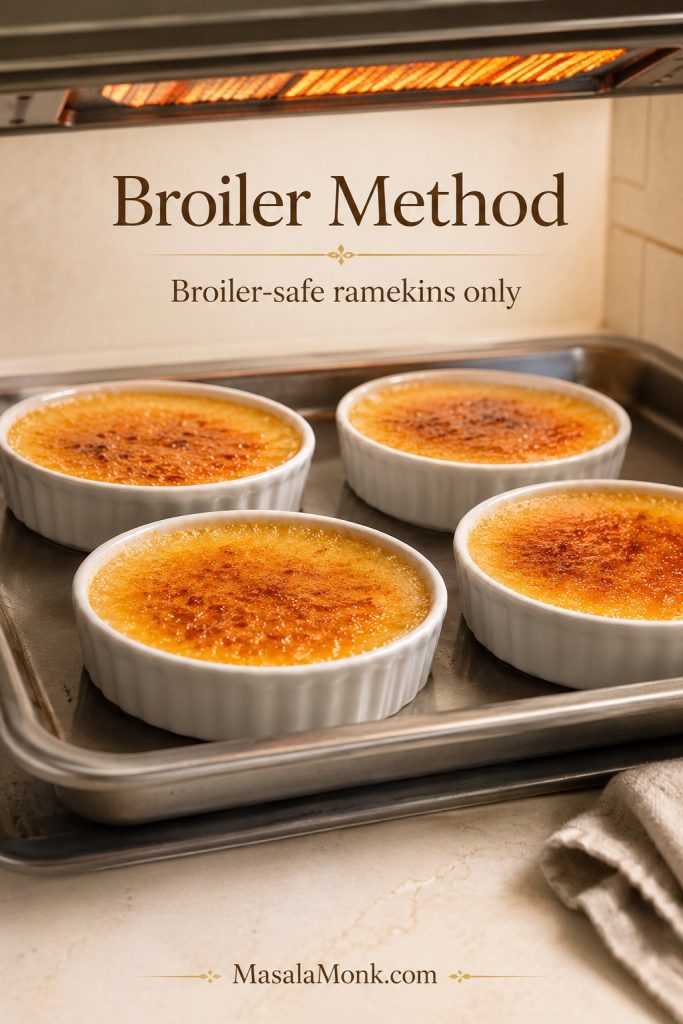
Pull the tarts while the centers still look glossy and gently set. If the pastry is baked but the tops are still pale, broil for 20–60 seconds while watching closely. Only broil if your tin is broiler-safe, and do not walk away.

If your tops are more golden than deeply blistered, the tarts can still be delicious. Crisp pastry and creamy custard matter more than perfect bakery markings. If the tops stay pale after the pastry is baked, use the guidance in the blistered-tops section before extending the bake too far.

How to Get Blistered Tops in a Home Oven

The oven is not just cooking these tarts; it is creating the contrast. Too gentle, and you get pale custard and soft pastry. Hot enough, and the edges crisp while the top blisters.

Aim for Glossy Blistered Tops

Dark spots are a doneness cue here, as long as they look caramelized and glossy rather than dry or smoky.

Close-up of Portuguese custard tarts with glossy golden custard, dark blistered spots, and flaky pastry rims.
These dark patches are the signature finish, not a mistake: glossy caramelized blisters over a creamy pastel de nata center.
Oven situationWhat to do
Oven reaches 550°F / 290°CBake fast and watch closely. The tarts can brown quickly.
Oven reaches 500°F / 260°CUse a hot tray or stone. Broil briefly at the end if needed.
Oven maxes around 240°C / 465°FBake a little longer, then use the grill or broiler for color.
Tops brown but bases are softUse a lower rack or stronger preheated tray next time.
Bases crisp but tops are paleMove higher or broil briefly at the end.

Start on the upper-middle rack if your oven browns gently. If your pastry bottoms are soft, move the next batch slightly lower and keep the hot tray underneath.

Your oven, tin, and pastry brand matter more here than they do in many simple bakes. If your first batch is not perfect, adjust the heat and rack before changing the whole recipe.

How to Prevent Soggy Bottoms

Soggy pastry usually comes from warm pastry, a thick base, too much filling, silicone molds, or weak bottom heat. Fill the shells only when the oven is fully hot, so the custard does not sit long enough to soften the pastry.

For a crisp base, press the pastry thin, chill the shaped shells, use metal tins, and bake on a preheated tray or stone.

Read a Pale Underside

A soft or pale bottom is a clue, not a failure; it tells you where to adjust heat, pastry thickness, or rack position.

Hand holding a Portuguese custard tart to show a pale underside beside tarts with golden pastry on a kitchen counter.
A pale underside points to the fix for next time: stronger bottom heat, thinner pastry, or a slightly lower oven rack.

If your first batch tastes good but the bottoms are soft, do not give up. Next time, press the base thinner, chill the shells longer, and bake on stronger bottom heat.

Confirm a Crisp Base

The underside should look dry and layered enough to hold the custard without bending like soft dough.

Portuguese custard tart held sideways to show a crisp golden base, flaky pastry layers, and set custard.
This is the base you want: golden, dry-looking, and layered enough to support the custard without turning doughy.

Why Do Bakery Portuguese Custard Tarts Taste Different?

Bakery tarts often taste different because bakeries have hotter ovens, specialized shallow tins, practiced pastry shaping, carefully laminated dough, and tarts served soon after baking.

At home, the closest path is not to chase a secret ingredient. Focus on thin cold pastry, smooth strained custard, strong oven heat, hot metal underneath, and eating the tarts warm. The best tops look dramatic, but they should taste caramelized, not burnt.

Back to top ↑

Troubleshooting Portuguese Custard Tarts

Use this section after baking, not as a reason to worry before you start. If something goes wrong, read the tart as a clue. A soft base, pale top, or firm custard each points to a different adjustment. Still preparing the tray? Go back to the step-by-step method and follow the visual cues there.

ProblemLikely causeFix
Custard curdledEggs heated too quickly or tarts overbakedTemper slowly, add yolks off heat, use starch, strain, and pull before the filling looks dry
Custard tastes eggyOverbaking or not enough aromaUse lemon peel, cinnamon, optional vanilla, and avoid baking until rubbery
Tops did not blisterOven too cool, tarts too low, filling too deep, or sugar reduced too muchUse a hotter oven, upper-middle rack, enough sugar, or a brief broiler finish
Pastry is soggyWarm pastry, thick base, too much filling, silicone mold, or weak bottom heatChill shells, press the base thin, use metal tins, and bake on a hot tray
Pastry shrankPastry stretched, too warm, or not chilledPress instead of stretching, keep pastry cold, and chill shaped shells before baking
Filling overflowedShells filled too highFill lower next time and leave room for bubbling
Custard is firm or rubberyOverbakedPull the tarts when the centers are just set and still glossy
Butter leaked or smokedVery buttery pastry, too much greasing, unsafe parchment, or overflowUse a bare hot tray underneath, grease lightly, and avoid overfilling

Make Ahead, Storage, Freezing, and Reheating

Can you make Portuguese custard tarts ahead?

Yes, but the best texture comes from baking them close to serving time. You can shape the pastry shells up to 24 hours ahead, cover them, and refrigerate them. You can also make the custard ahead and refrigerate it. Keep pastry and custard separate until baking.

Can you freeze unbaked pastry shells?

Yes. Shape the pastry shells, freeze them until firm, then transfer them to a freezer-safe container. For best control, bake shaped shells from refrigerated-cold rather than rock-hard frozen. If baking from frozen, add a few minutes and watch the pastry base closely.

What if you have extra custard?

If you have a little extra custard, pour it into a small ramekin and bake it separately in a gentler oven, or discard it if it has touched raw pastry or your hands. The shells bake better with room to puff.

How to store and reheat leftovers

Portuguese custard tarts are best warm, within a few hours of baking. If you have leftovers, let them cool completely, then refrigerate them in an airtight container. Reheat at 350°F / 175°C in an oven or air fryer until the pastry crisps. Avoid the microwave because it makes the pastry soft.

They are still good later, but they are never more themselves than when they are warm and the pastry is dry and crisp.

Can you freeze baked tarts?

Yes. Freeze baked, cooled tarts in a single layer, then store in a freezer-safe container. Reheat from frozen in the oven until hot and crisp. The texture will not be quite as perfect as freshly baked, but it is still much better than microwaving.

Shortcut Variations

With ready-made puff pastry

This is the main shortcut used in this recipe. Choose all-butter puff pastry if possible, roll it thin, keep it cold, and bake it hot. Ready-made puff pastry will not be exactly the same as traditional handmade dough, but it can still make a crisp, flaky, satisfying tart.

With frozen tart shells

Frozen Portuguese egg tart shells are useful when you want the fastest version. Follow the package instructions, keep the filling below the rim, and bake hot. A spoonful of leftover custard is better than an overfilled tart.

With ready-made custard

Ready-made custard is useful in the right dessert, but this is not its best job. It is already thickened, usually too soft for high-heat blistering, and will not set like yolk custard. Save it for softer custard desserts, not pastel de nata filling.

As one large tart

You can make one large tart, but it becomes a different dessert. A large tart is closer to a custard pie; individual tarts give you more crisp edges, more caramelized tops, and a better custard-to-pastry balance.

Without whipping cream

You can replace the cream with the same amount of whole milk. The custard will be lighter and slightly less rich, but it will still work. Keep the yolks and starch in place; they give the custard its rich but stable texture.

What to Serve with Portuguese Custard Tarts

Serve them warm and keep the pairing simple. Espresso, black coffee, or a homemade cappuccino gives the sweet custard a bitter edge. A chai latte works if you want to lean into the cinnamon warmth.

Serve Warm with Coffee or Chai

Pair the sweet custard with something gently bitter or spiced so the caramelized top tastes even deeper.

Portuguese custard tarts served on a plate with coffee, chai latte, lemon slices, and cinnamon sticks nearby.
Serve the tarts warm with coffee, espresso, or chai; the gentle bitterness cuts through the sweet custard and caramelized top.

If you are building a dessert table, add fresh berries, orange slices, or another crisp warm dessert like our churros recipe. But the tarts themselves should be the thing people reach for first.

The moment you are chasing is small but unmistakable: the rim crackles when you lift the tart, the custard trembles slightly under the dark spots, and the first bite is hot enough to make you slow down. That is the point of all the chilling, pressing, heating, and watching.

What Success Looks Like

When the center holds softly and the rim flakes, the tart has the contrast this recipe is built around.

Broken open pastel de nata on a plate showing creamy custard filling and flaky pastry layers.
When you break one open, the center should hold softly like cream, while the pastry flakes instead of bending.

Back to top ↑

Portuguese Custard Tarts Recipe

This is the home-oven version to make first: all-butter puff pastry pressed thin, cinnamon-lemon yolk custard strained until smooth, and enough heat to blister the tops before the centers turn firm.

  • Yield: 12 tarts
  • Prep time: 40 minutes
  • Chill time: 25 minutes
  • Cook time: 10–15 minutes
  • Total time: About 1 hour 20 minutes
  • Tin: shallow metal tart tins or a 12-cup metal muffin tin
  • Rack: upper-middle to start; move lower next time if bases are soft
  • Course: Dessert
  • Cuisine: Portuguese

Ingredients

For the pastry

  • 14 ounces / 400 grams all-butter puff pastry, thawed if frozen but still cold
  • 1–2 teaspoons flour, for dusting
  • Butter or neutral oil, for lightly greasing the tin if needed

For the cinnamon-lemon syrup

  • 3/4 cup / 150 grams granulated sugar, or up to 175 grams for a sweeter bakery-style tart
  • 1/3 cup / 80 ml water
  • 1 cinnamon stick
  • 2 wide strips lemon peel, yellow part only

For the custard

  • 1 1/4 cups / 300 ml whole milk, divided
  • 1/2 cup / 120 ml heavy cream, or replace with another 120 ml whole milk
  • 2 1/2 tablespoons / 20 grams cornstarch, preferred for a smooth custard; or 3 tablespoons / 24 grams all-purpose flour
  • 5 large egg yolks
  • 1 teaspoon vanilla extract, optional
  • Pinch of salt
  • Ground cinnamon or powdered sugar, for serving, optional

Instructions

Make the Cinnamon-Lemon Custard

  1. Make the syrup. Add the sugar, water, cinnamon stick, and lemon peel to a small saucepan. Bring to a simmer over medium heat and cook until the syrup reaches about 225°F / 107°C. If you do not have a thermometer, cook until the syrup looks clear, glossy, and slightly thickened. Remove from the heat and let it cool for a few minutes. Remove the cinnamon stick and lemon peel. You want clear syrup, not caramel.
  2. Make the milk base. In a small bowl, whisk 1/4 cup / 60 ml of the milk with the cornstarch until smooth. Add the remaining milk and cream to a medium saucepan and warm until steaming. Whisk in the cornstarch mixture and cook gently, whisking constantly, only until barely thickened, like thin cream. It should pour easily but no longer look like plain milk. If it looks like pudding before baking, it has gone too far. If using flour instead of cornstarch, cook the milk base for an extra minute on low heat while whisking, but keep it pourable.
  3. Add the syrup. Take the pan off the heat. Slowly whisk the warm syrup into the milk mixture. Let the mixture cool for 5–10 minutes so it is warm but not very hot.
  4. Add the egg yolks. Whisk the egg yolks in a separate bowl. Slowly pour in the warm milk-syrup mixture while whisking constantly. Add vanilla and a pinch of salt. Strain the custard through a fine-mesh sieve into a jug. If the custard is very foamy, let it sit for a few minutes and skim the top before filling the shells.

Shape and Chill the Pastry Shells

  1. Shape the pastry. Lightly flour the counter. Roll the puff pastry just enough to even it out. If the pastry is thick, roll it to about 2–3 mm. If the sheet is very wide, cut it into two rectangles first. Roll into one or two tight logs and cut into 12 equal pieces. Place one piece into each muffin cup or tart tin, cut side down. Press from the center outward and up the sides, making the base thin and the sides even. The base should look almost too thin; that is what helps it crisp before the custard fully sets.
  2. Chill the shells. Refrigerate the shaped pastry shells for 20–30 minutes. Meanwhile, preheat the oven to 500°F / 260°C. If your oven safely goes hotter and you know it runs evenly, you can use a higher setting, but start checking early. Place a heavy baking sheet, pizza stone, or baking steel in the oven while it preheats.

Fill, Bake, and Cool the Tarts

  1. Fill the shells. Place the chilled tin on the preheated baking sheet. Pour custard into each pastry shell, filling only about three-quarters full, usually 2–3 tablespoons depending on tin size. When in doubt, fill a little less.
  2. Bake. Bake for 10–15 minutes, watching closely near the end, until the pastry is deeply golden at the rim, the custard has puffed in spots, and the tops are blistered with dark caramelized patches. If the pastry is baked but the tops are still pale, broil for 20–60 seconds while watching closely. Only broil if your tin is broiler-safe, and do not walk away.
  3. Cool briefly. Let the tarts cool for about 10 minutes before eating; the custard will be extremely hot straight from the oven. Serve warm, plain or dusted with cinnamon or powdered sugar.

Cool Briefly Before Serving

A short rest helps the custard settle, but the best texture comes while the pastry is still crisp.

Baked Portuguese custard tarts cooling in a metal muffin tin with blistered tops and flaky edges.
Let the tarts rest briefly in the tin so the custard settles; then lift them out while the pastry is still crisp.

Recipe Notes

  • Keep the pastry cold: If the pastry becomes soft or greasy while shaping, chill it before continuing.
  • Press the base thin: The base should look almost too thin before baking.
  • Use bottom heat: A preheated tray, stone, or steel helps the pastry base crisp.
  • Do not overfill: Three-quarters full is enough. Overfilled shells can bubble over and turn the pastry soggy.
  • Look for doneness: The rim should be deeply golden, the top spotted, and the center glossy rather than dry.
  • Adjust after the first batch: If the tops brown before the bases crisp, bake the next batch slightly lower. If the bases crisp but the tops stay pale, finish briefly under the broiler.
  • Strain the custard: This gives the smoothest filling and removes any tiny cooked egg bits.
  • Best eaten warm: The pastry is crispest shortly after baking.

If you try these, leave a comment with your oven temperature, tin type, pastry type, sugar amount, and bake time. These tarts depend so much on oven heat and tin shape that your notes can genuinely help the next reader get a better batch.

FAQs

Are Portuguese custard tarts the same as pastéis de nata?

Yes. Portuguese custard tarts are commonly called pastéis de nata. One tart is a pastel de nata, and more than one are pastéis de nata.

What is the difference between pastel de nata and pastéis de nata?

Pastel de nata is singular. Pastéis de nata is plural. You may also see the plural written without the accent as pasteis de nata.

Are Portuguese egg tarts the same as Chinese egg tarts?

Not exactly. Portuguese custard tarts usually have flaky laminated pastry, richer custard, and blistered tops. Chinese egg tarts are often smoother, paler, and may use shortcrust or puff pastry.

Can I use ready-made puff pastry?

Yes. Ready-made all-butter puff pastry is the easiest good shortcut for a first home batch. Roll it thin, keep it cold, and bake it hot.

Can I use frozen Portuguese egg tart shells?

Yes. Frozen shells are convenient. Use the package instructions, fill lower than you think, and start checking early because small shells may bake faster than muffin-tin tarts.

Can I make these in a muffin tin?

Yes. A standard metal muffin tin works, but treat it like a shallow tart mold. Press the pastry thinly, especially at the base, and keep the custard level modest.

What oven temperature is best?

Use 500°F / 260°C if your oven allows it. If your oven goes hotter, check early. If it runs cooler, use a hot tray and finish briefly under the broiler if the tops stay pale.

Do Portuguese custard tarts need to be blind baked?

No. The pastry and custard bake together. Keep the pastry cold, fill only when the oven is hot, and bake on a preheated tray so the base gets enough heat.

Why did the tops not blister?

The oven may not have been hot enough, the tarts may have been too low in the oven, the filling may have been too deep, or the sugar may have been reduced too much.

Why is my pastry soggy?

The pastry may have been too warm, too thick at the base, overfilled, or baked without enough heat from below. The next batch usually improves with colder shells, a thinner base, and a hotter tray.

Why did my custard curdle?

The eggs were probably heated too quickly or the tarts were overbaked. Add yolks off heat, strain the custard, and pull the tarts before the centers look dry.

Do I need a thermometer?

A thermometer helps with the syrup, but you can make the recipe without one. Cook the syrup until it is clear, glossy, slightly thickened, and forms a thin thread when cooled between your fingers.

Can I use whole eggs instead of yolks?

Egg yolks give the best rich, silky texture. Whole eggs can make the filling firmer and more eggy, so the custard will feel less luxurious.

How do I reheat Portuguese custard tarts?

Reheat at 350°F / 175°C in an oven or air fryer until the pastry crisps. Avoid the microwave because it makes the pastry soft.
Posted on Leave a comment

Crème Brûlée Recipe with Silky Custard and Crisp Sugar

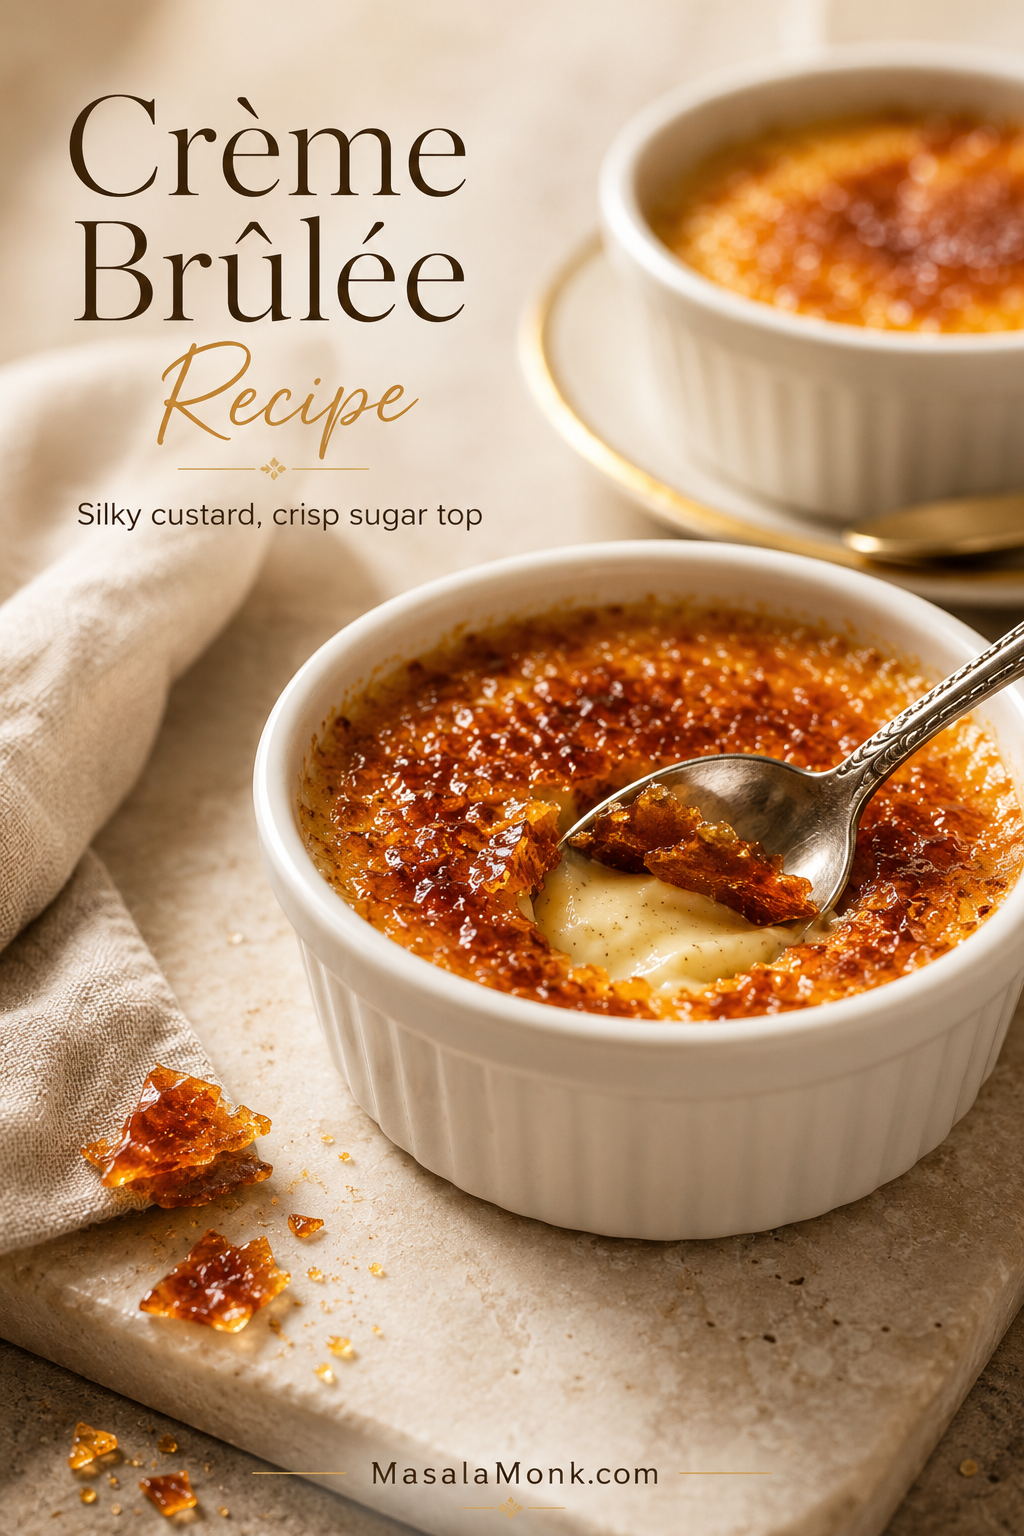
Shallow white ramekin of crème brûlée with a spoon breaking the caramelized sugar crust to reveal smooth vanilla custard underneath.

Crème brûlée looks like restaurant drama in a ramekin: a cold, silky vanilla custard hidden under a thin amber sheet of caramelized sugar. The first spoon tap is the whole point. The top cracks, the custard gives way, and a dessert made from cream, egg yolks, sugar, and vanilla suddenly feels far more luxurious than its ingredient list suggests.

It tastes like a restaurant dessert, but the base is simple: cream, egg yolks, sugar, vanilla, and salt. This is a restaurant-style crème brûlée recipe built around cues, not guesswork: warm the cream, whisk the custard, bake gently, chill fully, then torch.

Whether you spell it crème brûlée or creme brulee, the promise is the same: cold vanilla custard under a crisp caramelized sugar shell. This version keeps that promise clear: rich cream, shallow ramekins, gentle baking, a proper chill, and a sugar top that cracks instead of burns.

Quick Answer: What Is Crème Brûlée?

Crème brûlée is a chilled baked custard finished with a thin caramelized sugar crust. The custard is usually made with heavy cream, egg yolks, sugar, vanilla, and a little salt. After baking and chilling, sugar is sprinkled over the top and melted with a kitchen torch until it forms a crisp amber shell.

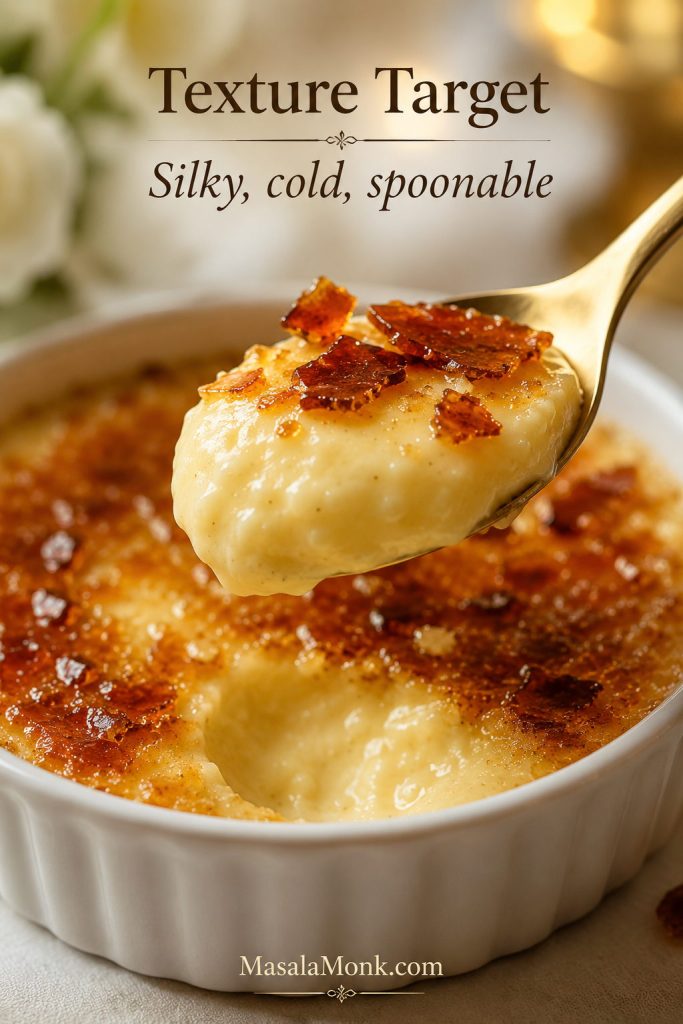
The name means “burnt cream,” but the best versions should not taste harsh or smoky. The sugar top should be caramelized, nutty, and bittersweet. Underneath, the custard should be cold, smooth, and spoonable — rich like vanilla cream, but not firm like flan or loose like pudding.

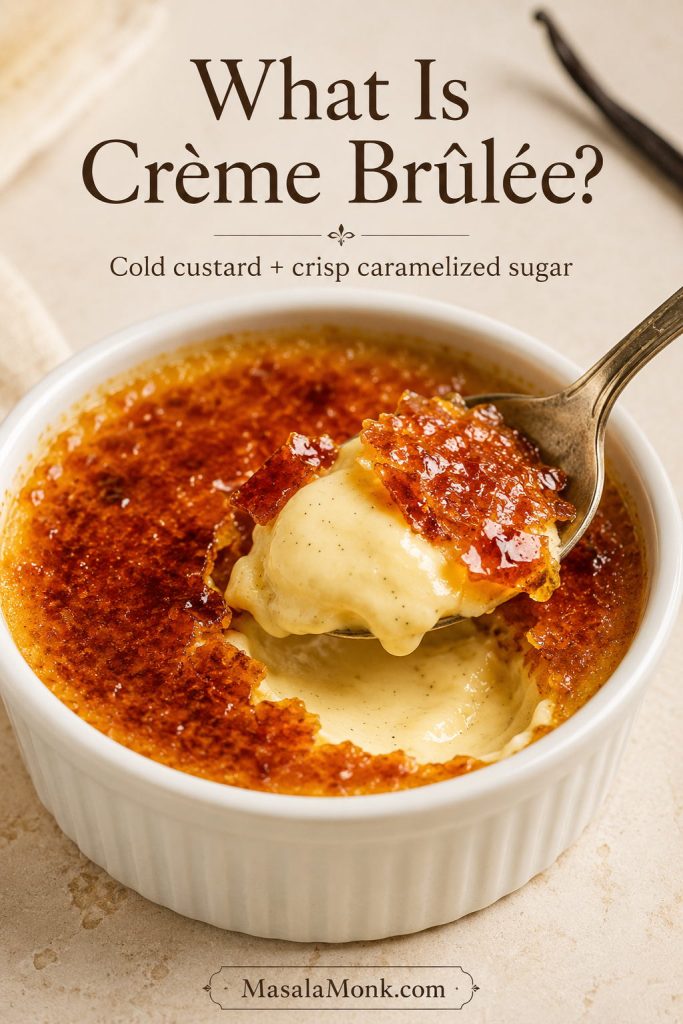
Spoon lifting silky vanilla custard through a broken amber sugar crust in a white crème brûlée ramekin.
The spoon lift shows the dessert’s structure: a thin caramel shell first, then cold vanilla custard underneath. That contrast is what makes crème brûlée feel special.

At a glance: crème brûlée is ready when the edges are set and the center still has a gentle jelly-like tremble. Chill the custards for at least 4 hours, preferably overnight, then caramelize the sugar just before serving. A thermometer is optional, but the center should be about 170–175°F / 77–80°C.

That slight tremble is not a mistake. Once you know the cues — warm cream, slow tempering, shallow dishes, and a full chill — crème brûlée becomes much easier to trust. If you want to compare the doneness cue later, see the bake-time and jiggle test.

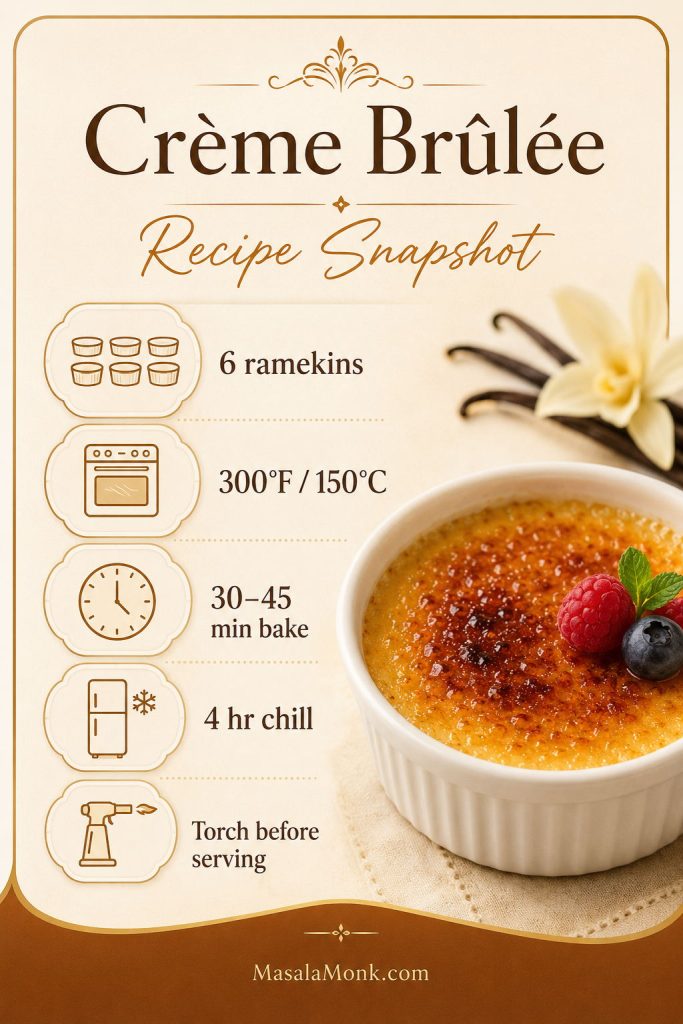
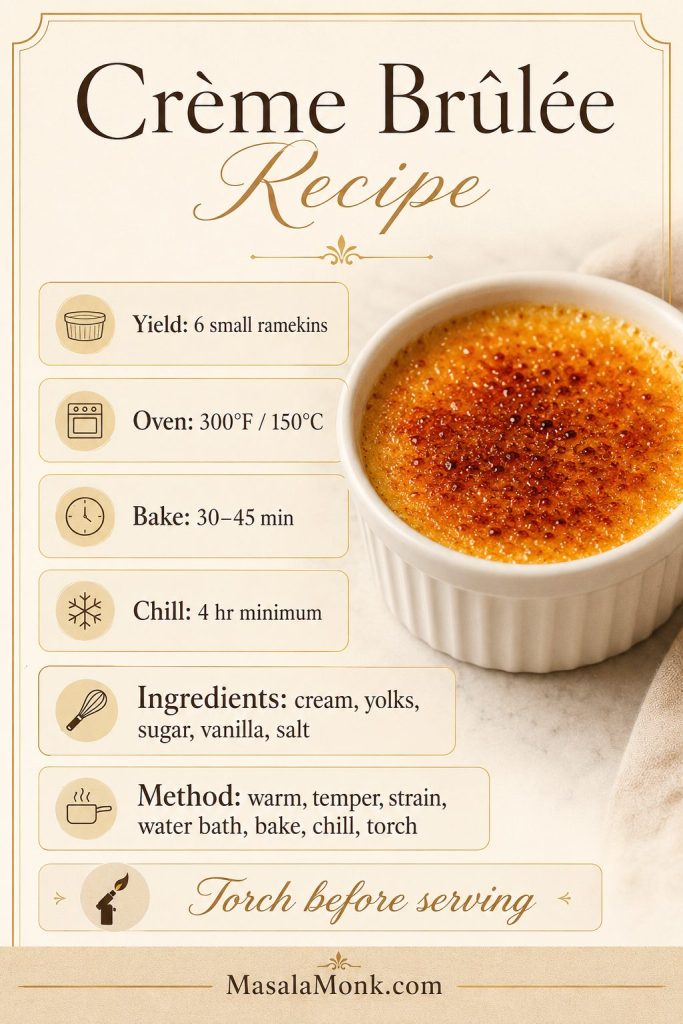
Crème Brûlée Recipe Snapshot

Here is the recipe at a glance before we get into the details. The classic torch method is the cleanest finish. Broiler and caramel-pour backups are included later only for no-torch situations, so check the no-torch options before choosing a backup finish.

Crème brûlée recipe snapshot board showing 6 ramekins, 300°F or 150°C oven temperature, 30 to 45 minute bake time, 4 hour chill time, and torch-before-serving note.
Keep these crème brûlée recipe numbers close: a low oven protects the custard, the full chill finishes the set, and torching at the end keeps the sugar top crisp.
DetailWhat to aim for
Yield6 modest 4 oz / 120 ml servings, filled below the rim
Best dishWide, shallow 4 oz / 120 ml ramekins
Oven temperature300°F / 150°C, middle rack
Bake time30–45 minutes, depending on ramekin depth and oven
Water bathHot water halfway to two-thirds up the ramekins
Doneness cueSet edges with a softly moving center
Internal temperature170–175°F / 77–80°C in the center
Chill time4 hours minimum; overnight is best
Sugar toppingLight, even coating, usually 1½–2 tsp per ramekin
Recommended finishKitchen torch

Choose your finish: use a kitchen torch if you have one. Use the broiler only with broiler-safe ramekins. Use the caramel-pour method only as a last-resort no-torch/no-broiler backup.

Do not panic if: the custard looks slightly soft when it leaves the oven, a few bubbles appear on top, or the vanilla seeds settle near the bottom. Those are manageable. Worry only if the center sloshes like liquid, the surface puffs and cracks, or the custard smells strongly eggy.

The reward is calm timing: most of the dessert is finished before anyone is waiting, and the only last-minute job is the crackly sugar top.

Why This Crème Brûlée Recipe Works

This recipe works because it keeps heat gentle at every stage: warm cream instead of boiled cream, yolks tempered slowly, shallow ramekins in a water bath, and a low oven so the edges do not tighten before the center sets. The custards should leave the oven slightly soft, then finish setting as they cool and chill. The sugar coating stays light so it caramelizes quickly without warming the custard too much.

Gentle heat gives the custard its silk; fast heat gives the sugar its crack.

The key: do not wait for the custards to look fully firm in the oven. A slight center tremble is part of the method.

Close-up spoonful of chilled crème brûlée custard with amber caramel shards, showing a smooth and spoonable texture.
The custard should look softly set, not stiff. Once chilled, crème brûlée should spoon cleanly while still feeling creamy and delicate.

Crème Brûlée Ingredients

Crème brûlée is not a long-ingredient dessert, so the quality and role of each ingredient matter. This is a vanilla custard first. The sugar top is the contrast, not the whole dessert.

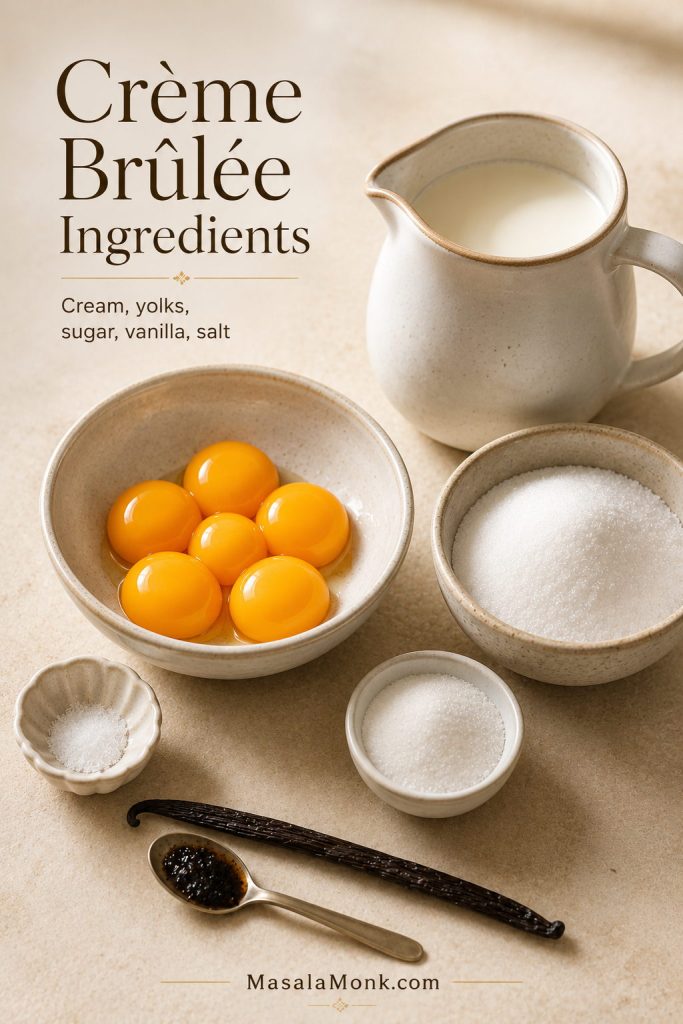
Crème brûlée ingredients arranged on a light surface, including heavy cream, egg yolks, white sugar, vanilla, and fine salt.
Because crème brûlée uses only cream, yolks, sugar, vanilla, and salt, each ingredient has a clear job: richness, structure, sweetness, aroma, and balance.
  • Heavy cream: This is where the custard gets its slow, silky richness. Use the richest plain dairy cream you can find.
  • Egg yolks: Yolks set the custard gently and make it smoother and richer than a whole-egg custard.
  • Granulated sugar: Sugar sweetens the base and softens the set. Too much can make the custard overly sweet and slower to set.
  • Vanilla: Because there are so few ingredients, vanilla is the flavor you notice as soon as the caramel cracks. Vanilla bean gives the deepest aroma and visible specks, vanilla bean paste is excellent, and good vanilla extract also works.
  • Fine salt: A small amount sharpens the vanilla and keeps the custard from tasting flat.
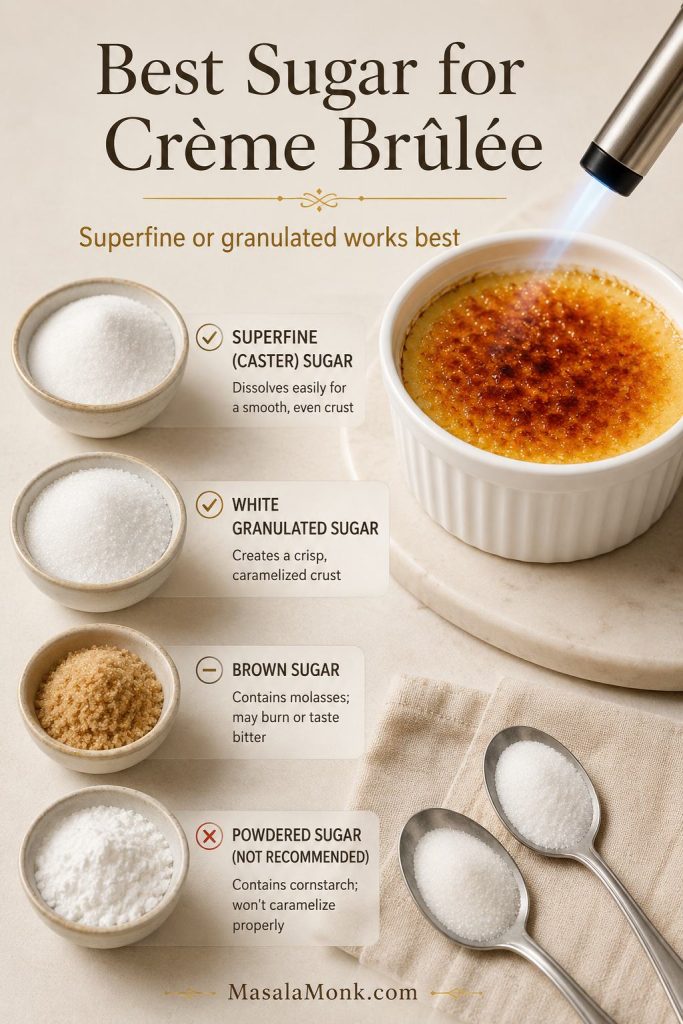
  • Sugar for topping: Superfine/caster sugar or white granulated sugar gives the most reliable crackly crust. For timing and amount, see the sugar-top guide.

Ingredient amounts for 6 small ramekins

  • 2 cups / 480 ml heavy cream
  • 5 large egg yolks
  • 1/3 cup / 65–70 g granulated sugar
  • 1 vanilla bean, or 1 tsp vanilla bean paste, or 1½ tsp vanilla extract
  • 1/8 tsp fine salt
  • 9–12 tsp superfine/caster sugar or white granulated sugar, for topping

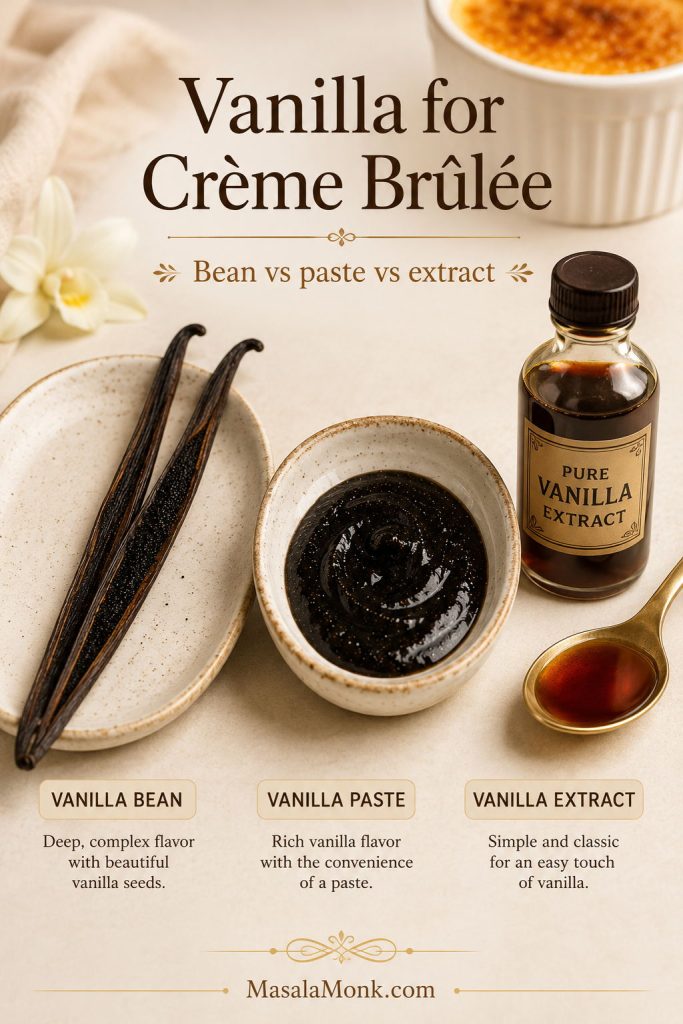
Vanilla options for crème brûlée

Use this cue when choosing vanilla: bean gives the deepest aroma and specks, paste is convenient and strong, and extract works well when it is good quality.

Comparison of vanilla options for crème brûlée, showing vanilla bean, vanilla bean paste, and vanilla extract.
Vanilla bean gives the deepest aroma and visible specks; however, vanilla bean paste or good extract can still make a smooth, fragrant vanilla custard.

Small but important: once you whisk sugar into the egg yolks, temper soon after. If sugared yolks sit for too long, they can tighten and turn clumpy. Warm the cream first, then whisk the yolks and sugar when you are ready to combine. Save the leftover egg whites for meringues, pavlova, macarons, or an egg-white omelet.

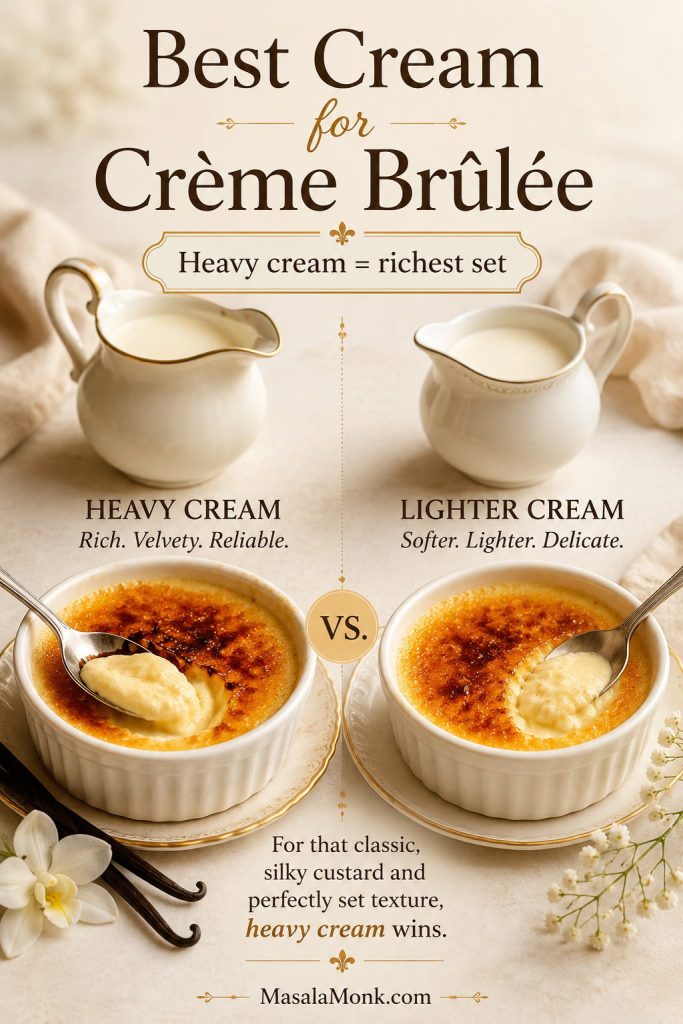
Best Cream for Crème Brûlée

For the smoothest custard, use heavy cream or heavy whipping cream. A fat percentage around 35–36% gives the most reliable set and the most luxurious texture. That extra fat is what makes each spoonful feel rich, creamy, and plush instead of thin.

Cream comparison board for crème brûlée showing heavy cream as the richest option compared with lighter cream.
Heavy cream gives crème brûlée its plush texture and reliable set. Lighter cream can work, but the custard usually finishes softer and less luxurious.

High-fat whipping cream can also work if it has enough fat. Lower-fat cream or light cream can still make a pleasant custard, especially in shallow ramekins with an overnight chill, but it will be softer and lighter than one made with heavy cream. Milk is not a direct swap here; a milk-heavy custard needs a different formula. If your custard turns loose, see the troubleshooting guide before changing the whole recipe.

Buying cream: choose the highest-fat plain dairy cream you can find. Avoid sweetened topping cream, non-dairy whipping topping, and very thin cooking cream. They are designed for different jobs and may not set like plain heavy cream in a baked custard.

Best Ramekins and Equipment for Crème Brûlée

Once the custard formula is right, the next big variable is the dish. The same custard behaves very differently in a shallow ramekin than it does in a deep bowl.

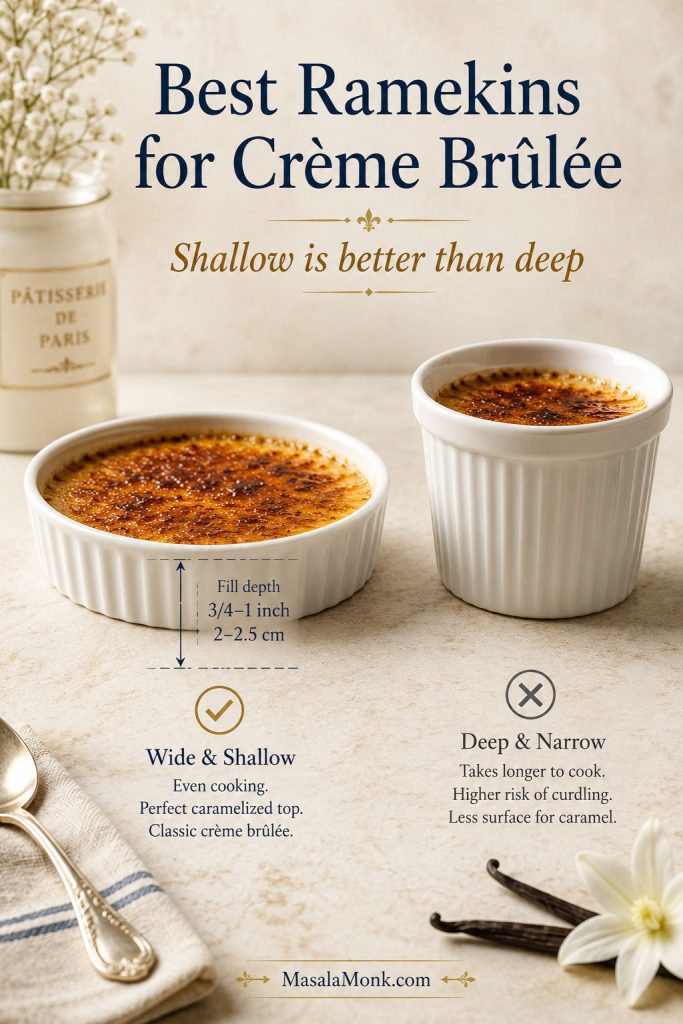
For the most even bake, choose wide, shallow 4 oz / 120 ml ramekins. They are not just traditional; they help the custard set before the edges turn firm and give you more crackly sugar per bite.

Ramekin size and fill depth

As a practical shopping cue, look for ramekins about 4–5 inches / 10–13 cm wide, with a filled custard depth of roughly 3/4–1 inch / 2–2.5 cm. A 5–6 oz dish can still work if you do not fill it deeply.

Side comparison of a shallow wide ramekin and a deeper ramekin for baking crème brûlée evenly.
A shallow 4 oz ramekin keeps the custard layer low, so the center can set before the edges overcook. Deeper dishes need more caution and closer checking.

Narrow, deep bowls are riskier because the edges can overcook before the middle sets. Do not fill any ramekin to the brim; the custard should sit below the rim so you can move, chill, and sugar it cleanly. If you are using deeper dishes, see the bake-time and jiggle test before deciding they are done.

DishWorks?What changes
4 oz / 120 ml shallow ramekinsBestMost even bake; usually 30–40 minutes
5–6 oz ramekinsYesWorks best if filled shallowly
Deep ceramic bowlsPossible but riskyEdges can overcook before center sets; thermometer helps
One large shallow oven-safe dishPossible, not idealLonger bake, less sugar-top ratio, softer scooping
Oven-safe glass dishesPossibleAvoid thermal shock; do not broil unless specifically broiler-safe
Metal cupsNot idealConduct heat aggressively and can overcook the edges

A similar cooling-and-setting idea appears in a baked New York cheesecake recipe, where cooling and chilling protect the final texture as much as the bake itself.

Equipment you need

  • 6 shallow 4 oz / 120 ml ramekins
  • 9×13-inch baking dish or another deep oven-safe pan
  • Medium saucepan
  • Mixing bowl
  • Whisk
  • Fine-mesh sieve
  • Measuring jug with a spout
  • Kettle or saucepan for hot water
  • Thin kitchen towel for the water bath
  • Kitchen torch for the recommended finish
  • Broiler-safe ramekins if using the broiler backup
  • Small saucepan if using the caramel-pour backup
  • Instant-read thermometer, optional but helpful

How to Make Crème Brûlée Step by Step

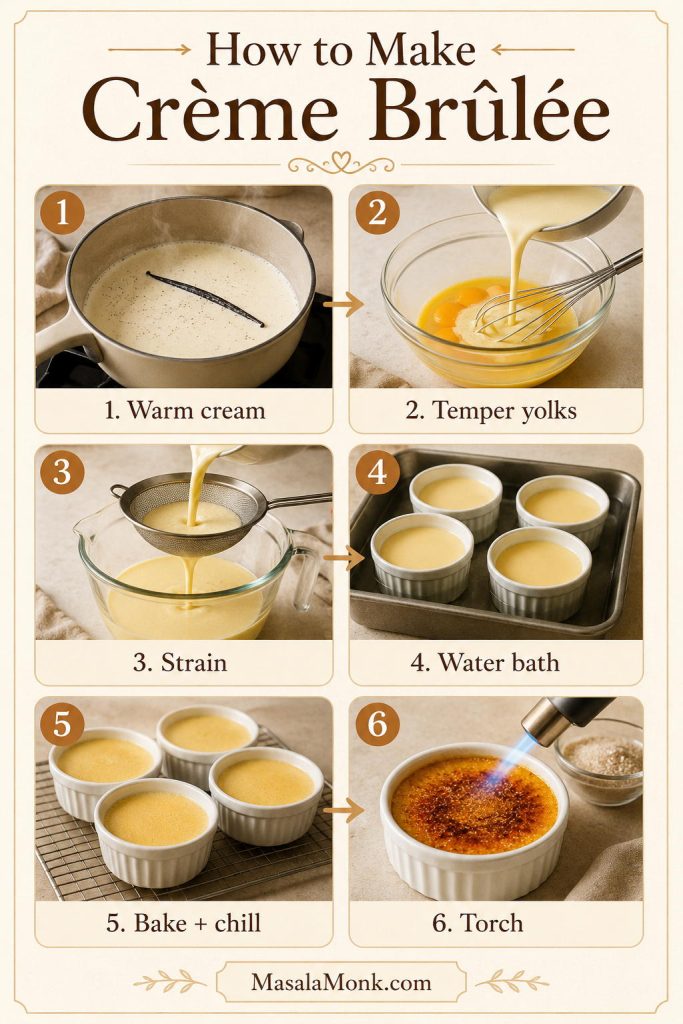
Read through the method once before starting. Crème brûlée feels much easier if everything is ready: ramekins in the pan, cream warming, yolks ready, sieve nearby, and hot water prepared for the water bath.

Step-by-step crème brûlée process board showing warm cream, temper yolks, strain, water bath, bake and chill, and torch.
The two places to slow down are tempering and baking. If the cream is added gradually and the water bath stays gentle, the custard has a much better chance of baking smooth.

1. Preheat the oven

Preheat the oven to 300°F / 150°C with a rack in the middle. Place the ramekins in a 9×13-inch baking dish. If they slide around, lay a folded thin kitchen towel in the bottom of the dish before adding them.

2. Warm the cream

Add the heavy cream to a saucepan. If using a vanilla bean, split it, scrape the seeds into the cream, and add the pod too. If using vanilla bean paste, whisk it into the cream while warming. Warm over medium-low heat until the cream is steaming and small bubbles appear around the edges. Steaming is enough; a hard boil makes tempering riskier.

For deeper vanilla-bean flavor, turn off the heat and let the vanilla steep in the warm cream for 10 minutes. Remove the pod before tempering. If the cream cools too much after steeping, rewarm it gently. If using vanilla extract, stir it in after the cream comes off the heat so the aroma stays cleaner.

3. Whisk yolks, sugar, and salt

In a mixing bowl, whisk the egg yolks, granulated sugar, and salt until smooth. You do not need to whip them until pale and fluffy. Too much air creates bubbles on the custard surface.

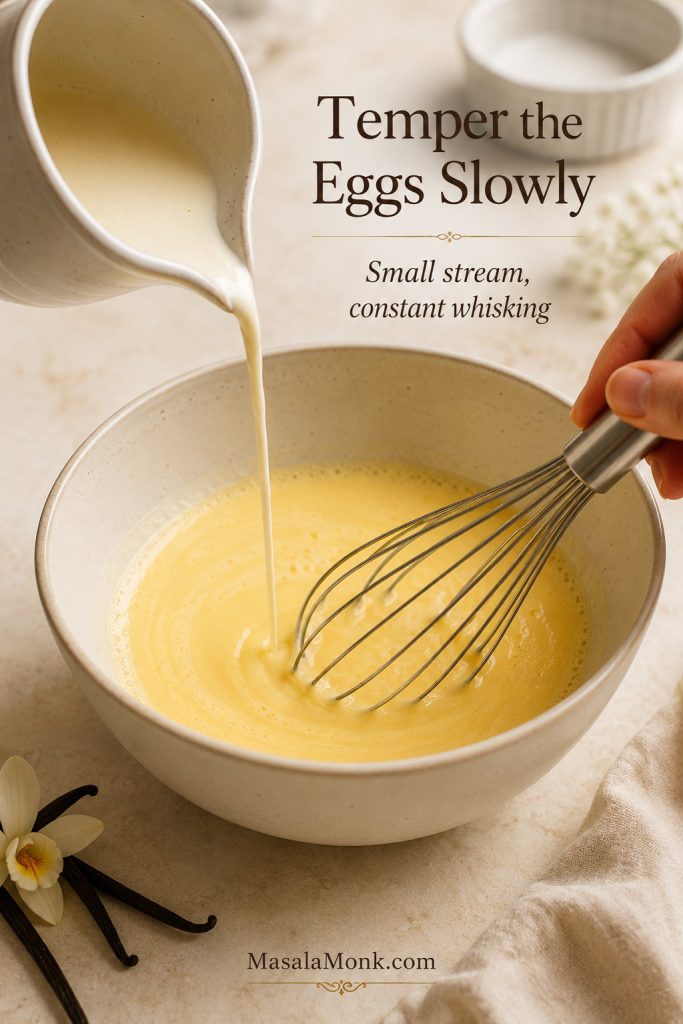
4. Temper the eggs slowly

Slowly pour a small stream of warm cream into the yolks while whisking constantly. Start with just a little cream. Once the bowl feels warm, the riskiest part is mostly over; add the rest more steadily and keep whisking.

Warm cream being poured in a thin stream into egg yolks while a whisk stirs the crème brûlée custard mixture.
Tempering warms the yolks gradually. Start with a small stream of cream and whisk constantly so the custard base stays smooth instead of scrambling.

5. Strain and de-bubble the custard

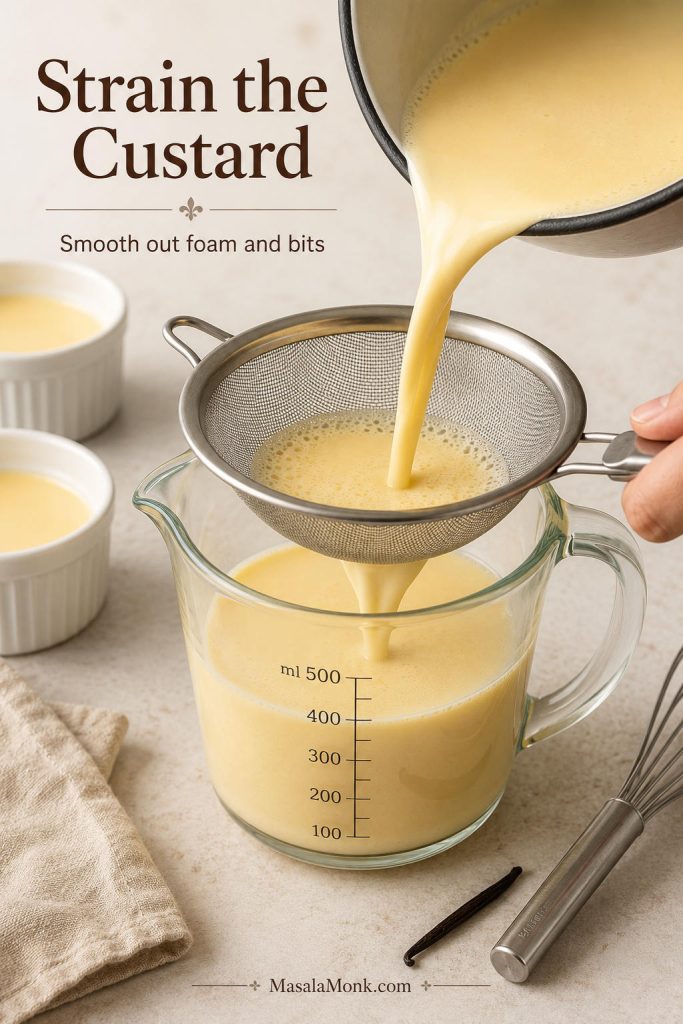
Pour the custard through a fine-mesh sieve into a measuring jug. Straining catches vanilla pod pieces, foam, and any tiny cooked egg bits. If the surface is foamy, let the custard sit for 2 minutes, then skim off the foam with a spoon.

Pale crème brûlée custard being poured through a fine-mesh sieve into a measuring jug.
Straining catches foam, vanilla pod pieces, and tiny egg bits. As a result, the baked crème brûlée has a smoother, more polished texture.

6. Fill the ramekins

Divide the custard evenly among the ramekins. Fill below the rim so you can move the pan safely and later add the sugar topping. At this point, the custard should look thin and pourable. That is right; the oven and fridge do the setting later.

7. Add the hot water bath

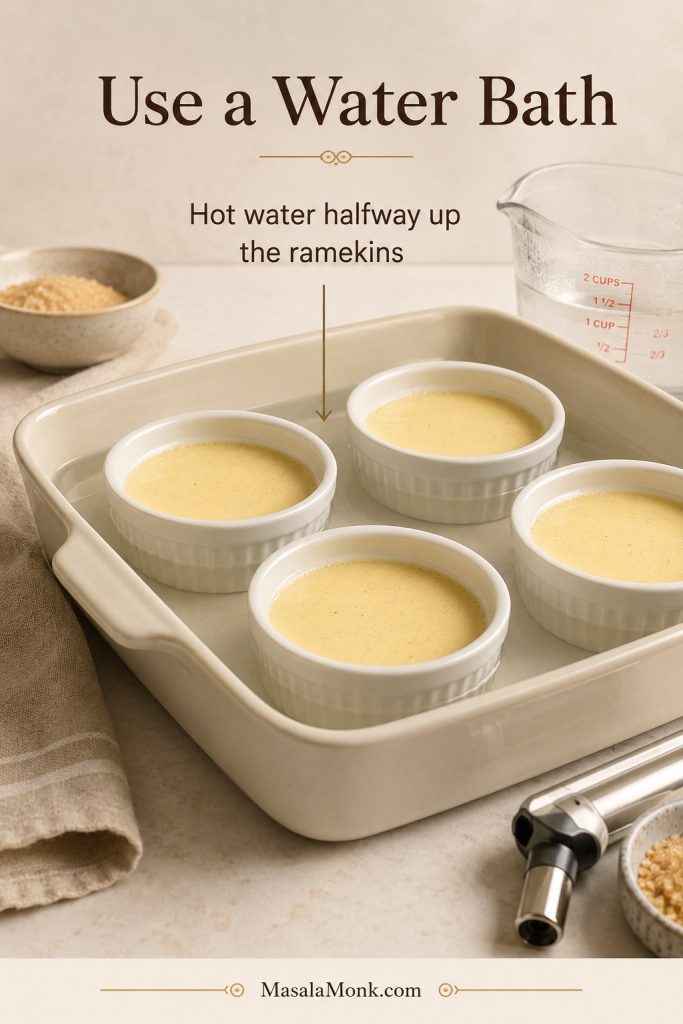
Pour hot water into the baking dish until it reaches halfway to two-thirds up the sides of the ramekins. Pour slowly so water does not splash into the custard. If the pan feels heavy, place it on the oven rack first, then pour in the hot water.

8. Bake until just set

Bake for 30–40 minutes for shallow ramekins, longer for deeper dishes, until the edges are set and the center gives a soft, controlled wobble — not a liquid ripple. If using a thermometer, aim for 170–175°F / 77–80°C in the center without touching the bottom of the ramekin.

9. Remove from the water bath

Lift the ramekins out of the hot water bath after baking. Residual heat can keep cooking the custard, so move them to a rack or towel once they are done. They will firm as they cool and chill.

10. Cool and chill

Cool the custards uncovered just until warm, then cover loosely and refrigerate. Avoid covering hot ramekins tightly because condensation can drip onto the custard surface. Chill for at least 4 hours, preferably overnight.

At this point, the custard is finished; the torch is only there to create the crack.

11. Torch the sugar top

Just before serving, gently blot any surface moisture. Sprinkle each custard with 1½–2 teaspoons sugar in a light, even layer. Torch in small circles until the sugar melts, bubbles, and turns amber. Let it stand 1–2 minutes; the sugar needs that short pause to turn from melted caramel into a crisp shell.

Visual Cues to Check Your Crème Brûlée

Use this table as a check after reading the method. It keeps the texture cues in one place so you do not have to rely only on the clock.

StageWhat you should seeWhat to avoid
Warm creamSteam and tiny bubbles around the edgesA hard rolling boil
Tempered custardSmooth, pale mixture with no large curdsScrambled bits or thick cooked-egg streaks
Before bakingPourable custard with little foam on topA frothy surface full of bubbles
Done bakingSet edges with a soft center trembleLiquid ripples or a fully firm, puffed surface
After chillingCold, spoonable custard that holds its shapeWatery custard or a wet surface before sugaring
After torchingAmber, glassy sugar that hardens after 1–2 minutesBlack patches, grainy sugar, or a sticky refrigerated top

How to Temper Eggs Without Scrambling Them

Tempering simply means warming the egg yolks gradually. Hot cream can cook yolks on contact if it is added too quickly. A slow stream gives the yolks time to warm without curdling.

The first few splashes are the most important. Whisk constantly, add a little warm cream, whisk again, then add more. Once the yolk mixture is warm to the touch, you can pour in the rest more steadily. If you see one or two tiny bits, straining will usually catch them. If the mixture has large curds, the cream was too hot or added too fast.

Why Crème Brûlée Needs a Water Bath

The water bath acts like a heat cushion. The oven heats the water, and the water warms the ramekins gently, so the eggs set slowly instead of tightening too quickly around the edges. It is the simple step that gives you that spoon-smooth texture later.

White crème brûlée ramekins sitting in a baking dish with hot water reaching halfway up the sides.
The water bath should come halfway to two-thirds up the ramekins because gentle surrounding heat helps the custard set smoothly instead of turning grainy at the edges.
  • Start with hot water, not cold.
  • Fill halfway to two-thirds up the ramekins.
  • Pour carefully so water does not splash into the custard.
  • Remove ramekins from the water bath after baking.
  • Use a thin towel under the ramekins if they slide around.

Bake Time, Oven Temperature, and the Jiggle Test

This method uses 300°F / 150°C because a lower oven gives the custard more time to set gently. For shallow 4 oz ramekins, start checking at 30 minutes. Most batches finish between 30 and 40 minutes. Deeper dishes may need 40–45 minutes or more.

This recipe gives you three ways to judge doneness: time, wobble, and temperature. The timer gets you close, the wobble tells you texture, and the thermometer gives extra confidence.

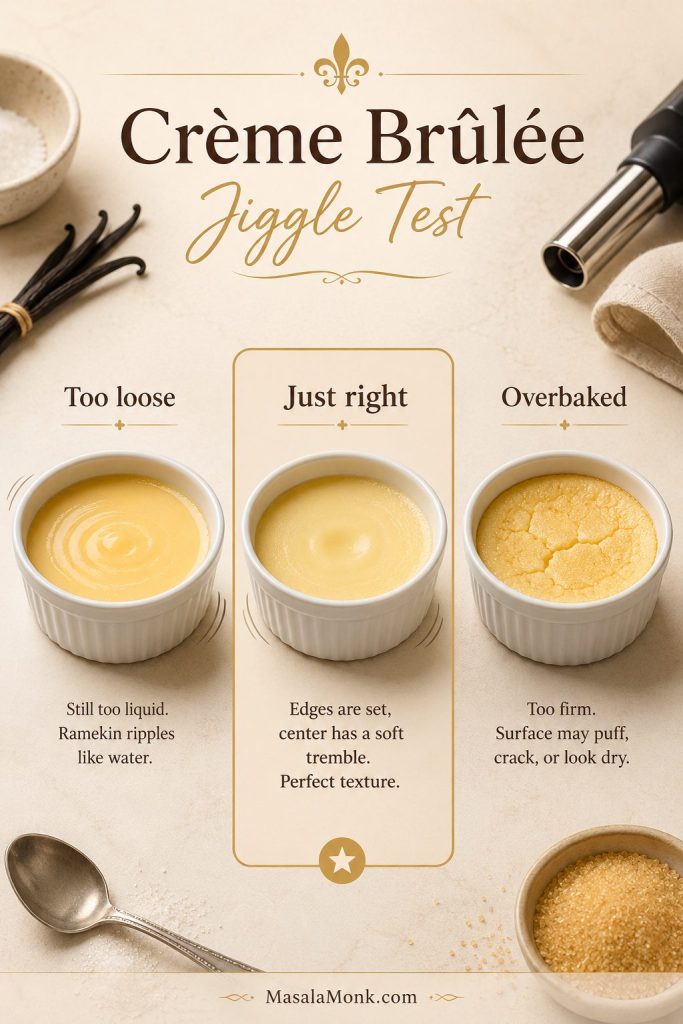
The edges should look set, while the center should move softly, like gentle jelly. It should not ripple like liquid, puff dramatically, or crack. If using a thermometer, the center should read about 170–175°F / 77–80°C. This is the moment to trust softness, not fight it.

Crème brûlée jiggle test board comparing too loose, just right, and overbaked custard before torching.
Look for set edges and a soft center tremble. If the custard ripples like liquid, it needs more time; if it looks firm, it may be overbaked.

Crème brûlée temperature guide

A thermometer is optional, but it is useful if you are learning the custard’s doneness cue for the first time.

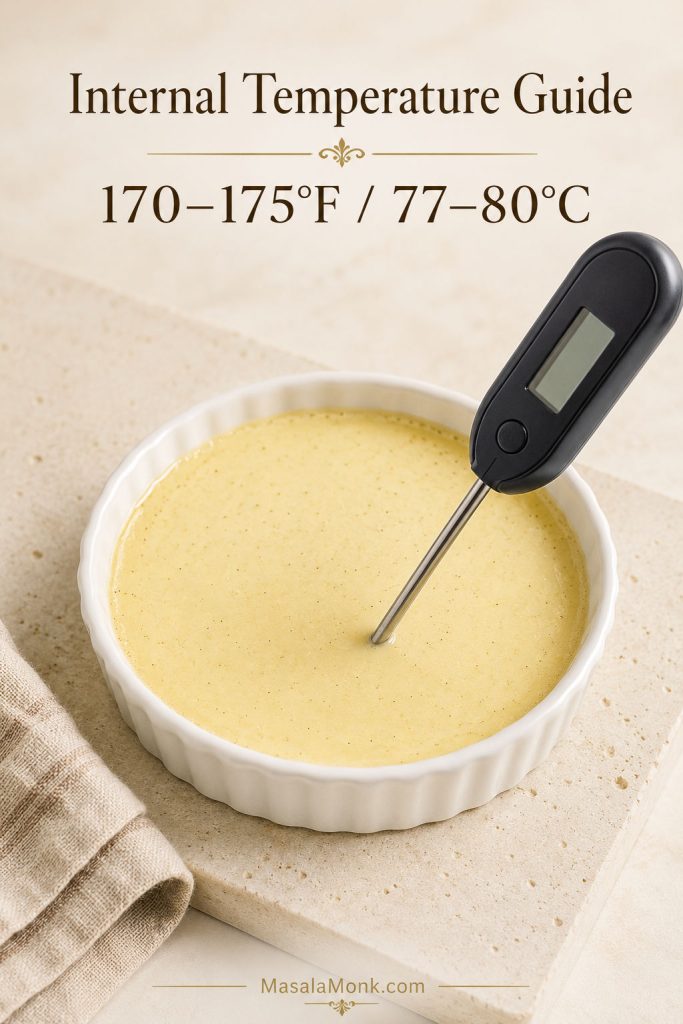
Instant-read thermometer inserted into the center of a pale baked crème brûlée custard with a target temperature of 170 to 175°F or 77 to 80°C.
A thermometer is not required, but it removes guesswork. For silky crème brûlée, the center should reach about 170–175°F / 77–80°C.

How Long to Chill Crème Brûlée

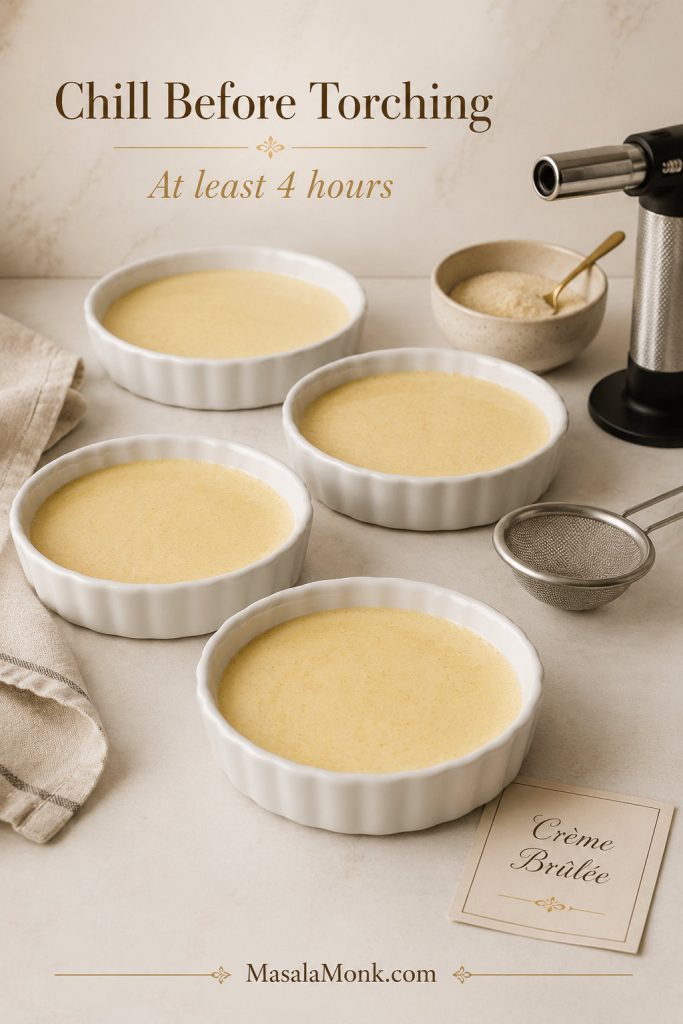
Crème brûlée needs at least 4 hours in the refrigerator after baking. Overnight chilling is better because the chill finishes the custard’s set and gives it the clean spoonable texture you want.

Untorched crème brûlée ramekins with smooth pale custard surfaces, ready to chill before adding sugar and torching.
A fully chilled custard gives you the classic contrast: cold vanilla cream underneath and a freshly caramelized sugar top above. Torch only after the custards are properly cold.

For best texture, bake the custards 1 day ahead. The baked, untorched custards can be refrigerated for 2–3 days, but the sugar top should be caramelized shortly before serving.

Make-ahead rule: bake early, chill fully, and caramelize late. The custard finishes in the fridge; the sugar top should happen close to serving.

The Sugar Top: Best Sugar, Amount, and Timing

The ideal top should crack under a spoon, not chew like thick candy or sink into the custard like syrup. You are looking for amber glass, not dark candy: delicate enough to shatter, caramelized enough to taste nutty.

Use enough sugar to make a light, even coating — usually 1½–2 teaspoons per 4 oz ramekin. A wider dish may need a little more than a narrow one.

Sugar comparison board for crème brûlée showing superfine or caster sugar and white granulated sugar as the best choices.
Superfine sugar melts fastest, while regular white granulated sugar is reliable and easy to find. Either way, use a light layer for the cleanest crack.
  • Superfine or caster sugar: Best if available because it melts quickly and evenly.
  • Regular white granulated sugar: Reliable and easy to find.
  • Raw sugar: Can work, but may need more careful torching.
  • Brown sugar: Less reliable because it can clump and burn unevenly.
  • Powdered sugar: Not recommended for the classic crackly crust.

One even coating is easiest. For a slightly sturdier crack, torch a very light coating until melted, sprinkle on a second light coating, and torch again. Heavy sugar burns before it melts evenly, so keep the layer light and move the flame constantly. If the top burns, sinks, or softens, see sugar-top troubleshooting.

How to Torch Crème Brûlée

A kitchen torch gives the best control because it melts the sugar quickly without warming the whole custard. Keep the flame moving in small circles. The sugar will melt, bubble, and then turn amber and glossy.

Kitchen torch caramelizing a light layer of sugar on top of a white crème brûlée ramekin.
Move the torch in small circles so the sugar melts evenly and turns amber. If the flame stays still, the crust can burn before the whole top caramelizes.

Stop before the sugar turns black or smoky. Let the ramekin sit for 1–2 minutes so the caramel hardens. The best spoonful gives you a brittle tap, a warm caramel aroma, and cold vanilla custard underneath.

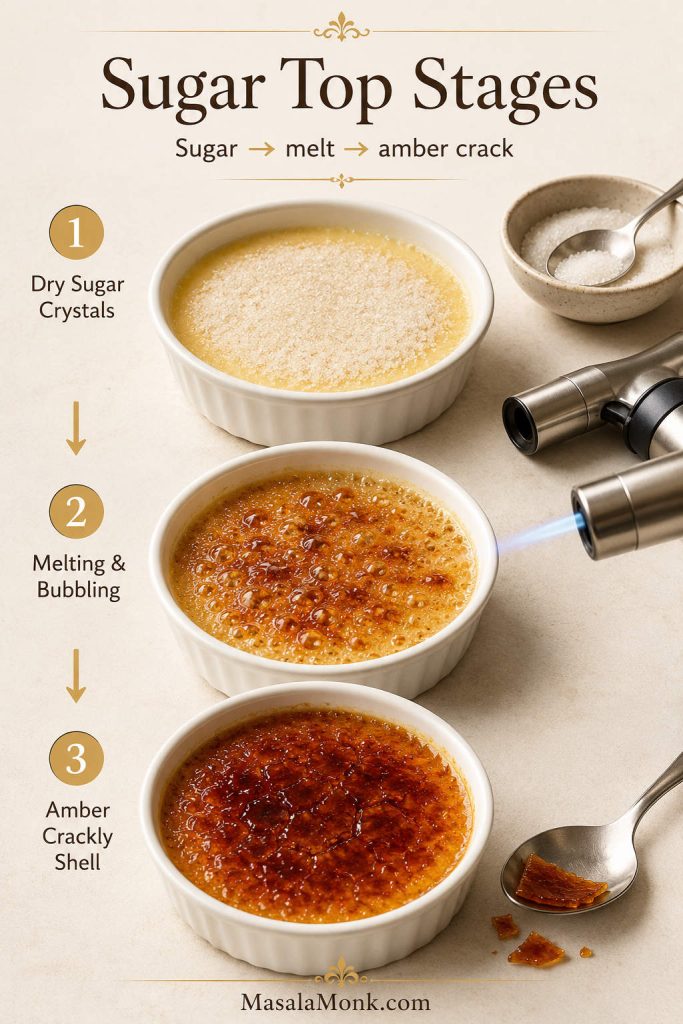
Crème brûlée sugar top stages

Use the stages below as a visual check: stop at amber and glossy, before the sugar turns black or smoky.

Three-stage crème brûlée sugar top board showing dry sugar, melting caramel, and a hardened amber crackly shell.
The sugar top changes quickly: dry crystals melt, bubble into caramel, then harden into a thin amber shell after a short rest.

How to Make Crème Brûlée Without a Torch

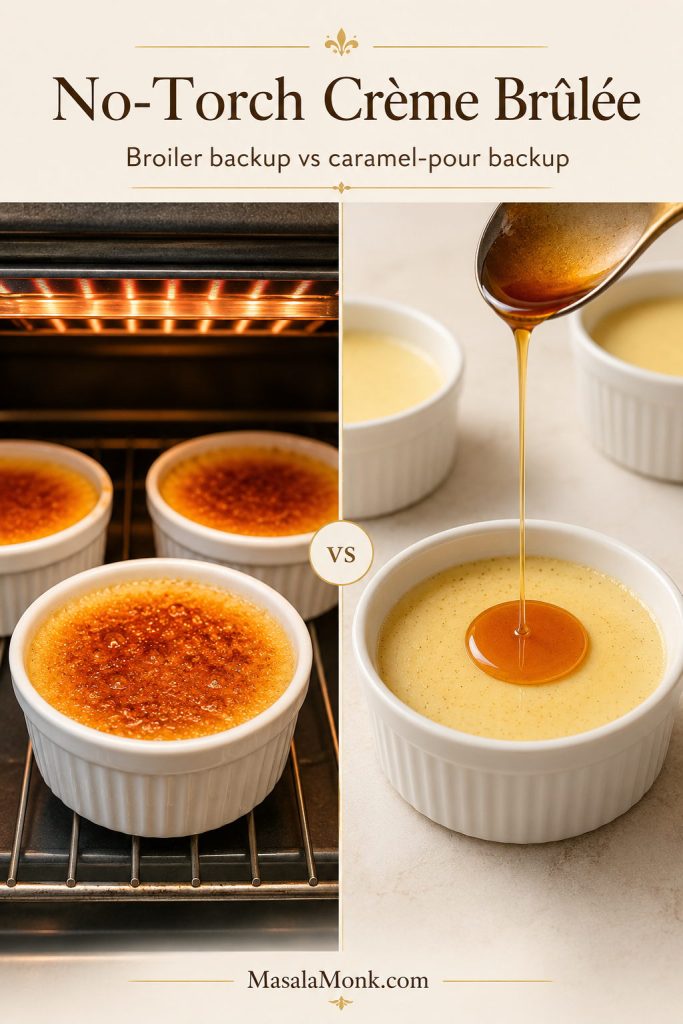
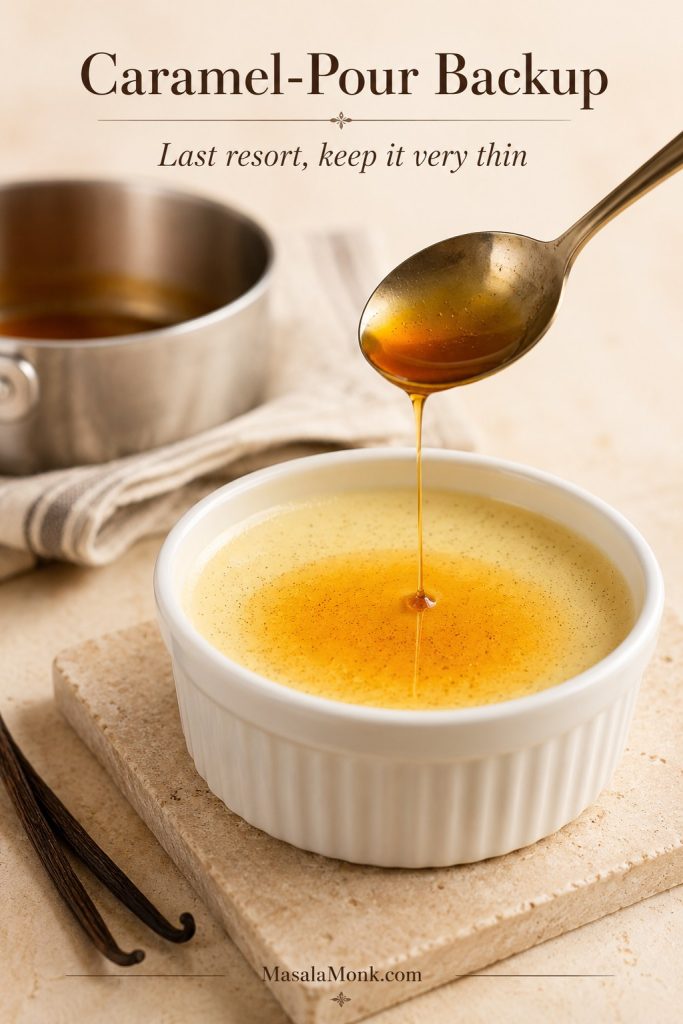
A kitchen torch is the recommended finish. If you do not have one, use the broiler only when your ramekins are broiler-safe. If you have neither a torch nor broiler-safe dishes, the caramel-pour method is a last-resort backup. No torch does not have to end the recipe, but it does change how carefully you need to finish the top.

No-torch crème brûlée decision board comparing the broiler backup method with the caramel-pour backup method.
For no-torch crème brûlée, choose the backup by equipment. Use the broiler only with broiler-safe ramekins, or use a very thin caramel pour as a last resort.
No-torch optionBest forTradeoff
Broiler backupBroiler-safe shallow ramekinsFast, but can warm the custard and brown unevenly
Caramel-pour backupNo torch and no broiler-safe dishesNo broiler needed, but hot sugar is trickier and can set too thick

Broiler backup

Use this path only if the ramekins are specifically broiler-safe. The image below shows the goal: controlled top heat and amber sugar, not a scorched crust or warmed-through custard.

Broiler-safe crème brûlée ramekins on a tray with the sugar tops beginning to caramelize under broiler heat.
The broiler can caramelize sugar, but it heats the whole ramekin more than a torch. Therefore, start with very cold custards and watch closely.
  1. Chill the baked custards thoroughly, preferably overnight.
  2. Use only shallow broiler-safe ramekins.
  3. Blot surface moisture, then add a light sugar coating.
  4. Preheat the broiler fully.
  5. Broil 2–4 inches below the heat for 1–3 minutes, watching constantly.
  6. Rotate the pan if some tops caramelize faster than others.
  7. Remove once amber; chill 10–20 minutes if the custard softens.

Broiler safety: only broil dishes that are specifically labeled broiler-safe. Oven-safe does not always mean broiler-safe, especially with glass or ceramic.

Last-resort caramel-pour backup

This is not a perfect torch replacement. It can give you a crisp caramel layer, but it is more advanced because hot sugar sets quickly and can become thick if you pour too much.

Thin amber caramel being poured from a spoon over cold vanilla custard in a shallow white crème brûlée ramekin.
The caramel-pour method is only a no-torch backup. Keep the caramel layer very thin so it cracks delicately instead of becoming a hard candy lid.

For 6 ramekins, start with about 1/3 cup / 65 g white sugar. You may not use every drop; the goal is the thinnest possible layer.

  1. Use very cold baked custards.
  2. Cook the sugar in a clean saucepan until it turns amber.
  3. Working quickly, pour a very thin layer over each custard.
  4. Tilt the ramekin gently so the caramel spreads before it hardens.
  5. Let the caramel set for 1–2 minutes before serving.

Caramel-pour caution: hot caramel can burn badly. Keep the layer very thin, keep children away from the pan, and do not touch the caramel while it is hot. If the layer is too thick, it will eat more like hard candy than a delicate crème brûlée crust.

When to Serve Crème Brûlée After Torching

Crème brûlée is best served shortly after the sugar is caramelized. Wait 1–2 minutes after torching so the sugar hardens, then serve within about 15–30 minutes for the crispest crack. For planning ahead, see the make-ahead timing.

For guests, this is the dessert you prepare earlier in the day and finish right before serving, when the sugar top becomes part of the moment. Keep the baked custards chilled, then caramelize them near the end of the meal. The custard should be cold, and the top should be freshly crisp.

What to serve with crème brûlée

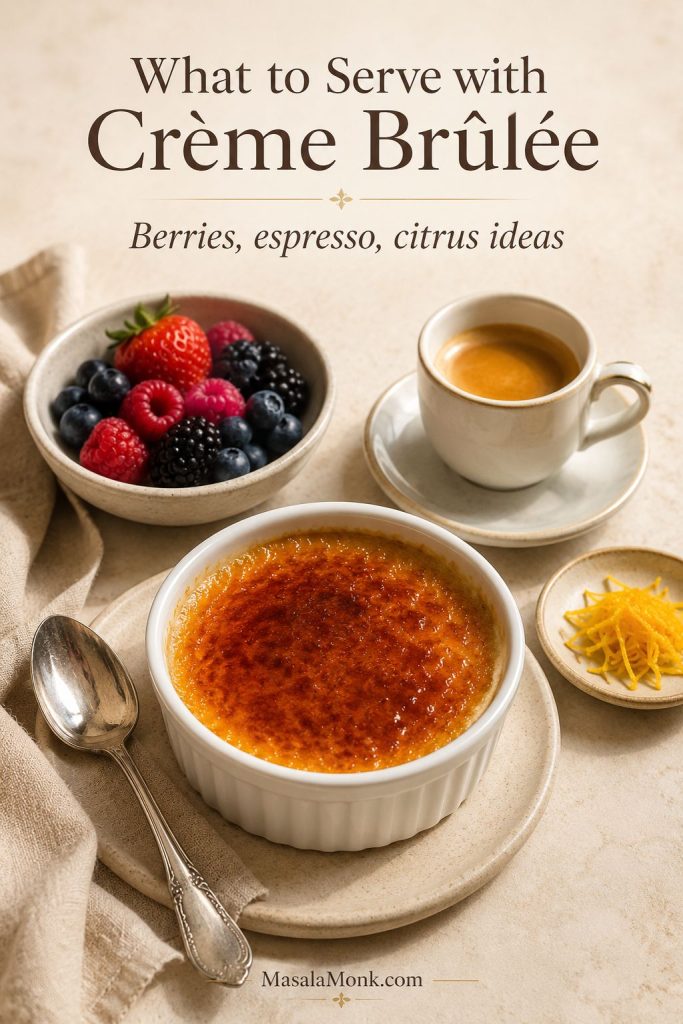
Classic crème brûlée is best served plain so the contrast stays clear: cold vanilla custard, crisp caramel, and that first spoon crack. If you want a little extra, serve berries on the side, add espresso after dinner, or use a citrus variation for a brighter meal. Avoid piling juicy fruit on the sugar top before serving because it softens the crust.

Crème brûlée served with berries on the side, an espresso cup, citrus zest, and a silver spoon.
Keep pairings on the side so the sugar crust stays crisp. Berries, espresso, and citrus brighten crème brûlée without covering the caramelized top.

Quick Guardrails Before You Bake

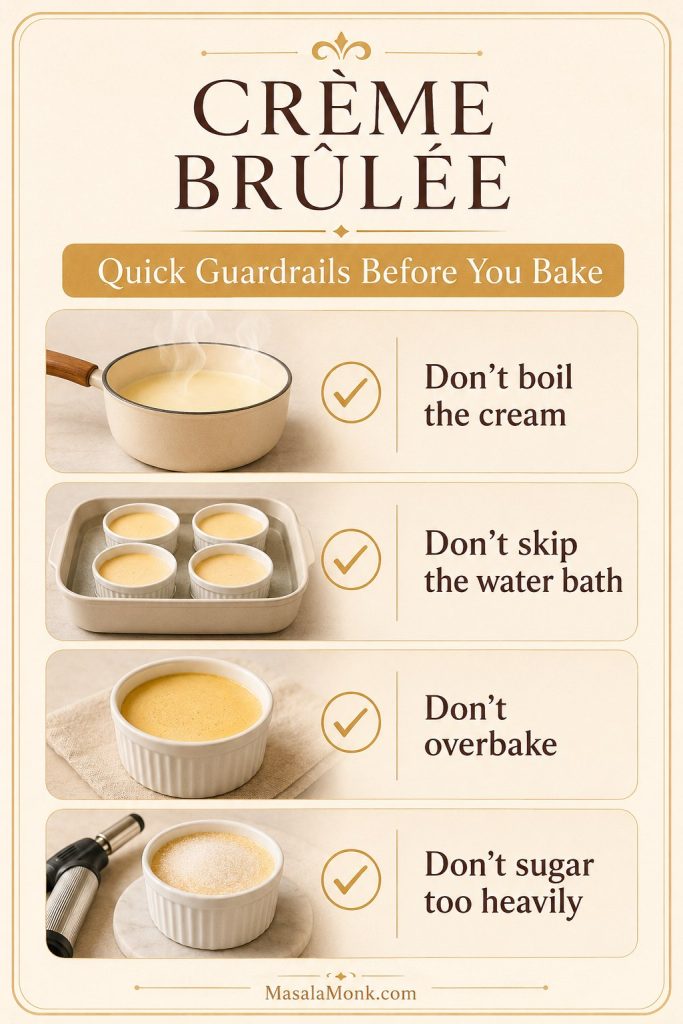
Most crème brûlée mistakes come from rushing heat, timing, or the sugar top. These quick guardrails keep the custard silky and the crust crisp.

Crème brûlée guardrails checklist showing not boiling the cream, not skipping the water bath, not overbaking, and not adding too much sugar.
Most crème brûlée problems start with heat or timing. Gentle cream, a proper water bath, a soft center, and a light sugar layer protect the final texture.
  • Hard-boiling the cream: steaming cream is enough and easier to temper.
  • Adding hot cream too quickly: start with a small stream so the yolks warm gradually.
  • Baking without a water bath: direct heat can make the custard grainy.
  • Waiting for a fully firm center: pull the custards before they look completely set.
  • Using too much sugar on top: a heavy coating burns in patches instead of forming a clean crack.
  • Caramelizing hours ahead: the crisp top softens as it sits.
  • Torching a wet surface: blot gently first so the sugar can melt instead of sinking.

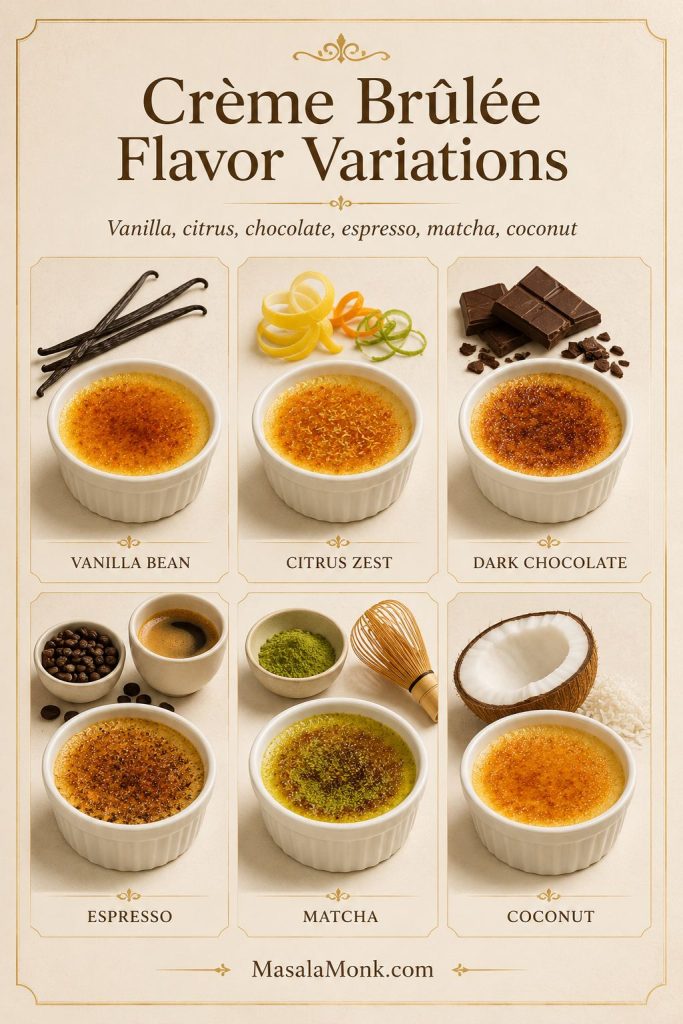
Crème Brûlée Flavor Variations

The safest way to flavor crème brûlée is through the cream, not by adding watery ingredients to the finished custard. These are starting points for the base recipe; keep the mixture smooth, strain when needed, and avoid thinning the custard.

Crème brûlée flavor variation board showing vanilla bean, citrus zest, dark chocolate, espresso, matcha, and coconut options.
Flavor the cream rather than loading the top with extras. This keeps the custard smooth, the sugar crust crisp, and the variation balanced.
VariationHow to add itWhat it brings
Vanilla beanUse 1 vanilla bean or 1 tsp vanilla bean paste.Deeper vanilla flavor and visible specks.
CitrusSteep the zest of 1 lemon or 1 orange in the warm cream, then strain.Brighter, fragrant custard.
ChocolateMelt 2 oz / 55 g finely chopped dark chocolate into the warm cream.Deeper, denser dessert flavor.
EspressoAdd 1–2 tsp instant espresso powder to the warm cream.More bittersweet, after-dinner flavor.
MatchaWhisk 1–2 tsp sifted matcha with a little warm cream first, then add it to the rest.Earthy, slightly bitter balance.
CoconutReplace 1/2 cup / 120 ml cream with thick coconut cream; expect a changed texture.Softer, lightly tropical custard.

Dairy-Free, Vegan, and Milk Substitution Notes

Cream and egg yolks are doing most of the structural work here. Dairy-free and vegan versions are possible, but they need different formulas.

  • Dairy-free but not vegan: use a separate tested coconut-cream-and-yolk formula rather than a direct cream swap.
  • Vegan: use a coconut, cashew, starch, or agar-based formula. Egg-free custard sets differently.
  • Lower-fat custard: use lower-fat cream only if you accept a softer, lighter result.
  • Milk-only custard: use a different baked custard formula. Milk is too lean for this version.

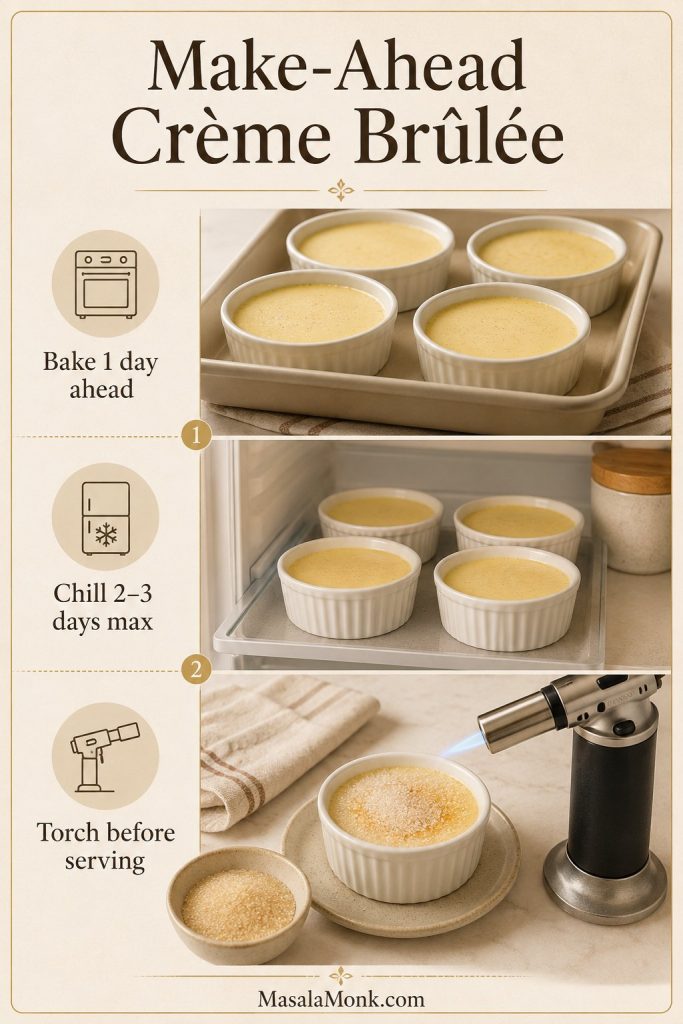
Make-Ahead and Storage

Crème brûlée is one of the best make-ahead desserts because the custards need time to chill. For best texture, bake the custards 1 day ahead. Baked, untorched custards can be refrigerated for 2–3 days, but caramelize the sugar topping shortly before serving.

Make-ahead crème brûlée guide showing baked custards, chilled ramekins, and torching before serving.
For entertaining, bake the custards ahead and save the dramatic step for last. The sugar crust is best when it is caramelized shortly before serving.

Because crème brûlée is an egg-and-dairy custard, refrigerate it promptly once it has cooled enough to cover, following standard two-hour food-safety guidance for perishable foods.

  • Best make-ahead timing: bake 1 day ahead, chill overnight, and torch before serving.
  • Before torching: keep baked custards covered in the fridge for 2–3 days.
  • After torching: serve within 15–30 minutes for the crispest top.
  • Leftovers: refrigerate, but expect the sugar top to soften.
  • Freezing: not recommended for best texture. The custard can become grainy or watery after thawing.
  • Covering: cover only once the custards are no longer hot, so condensation does not drip onto the surface.

Crème Brûlée Troubleshooting

If a batch goes wrong, it is usually not mysterious. Crème brûlée tells you where the problem happened: in the custard, in the water bath, or on the sugar top.

Most mistakes are fixable in the next batch, and many imperfect custards still taste good today. Use the clues below to decide whether to chill longer, serve it differently, or change the method next time. A failed crackly top or a loose center can feel disappointing, but it does not always mean dessert is lost.

Custard problems

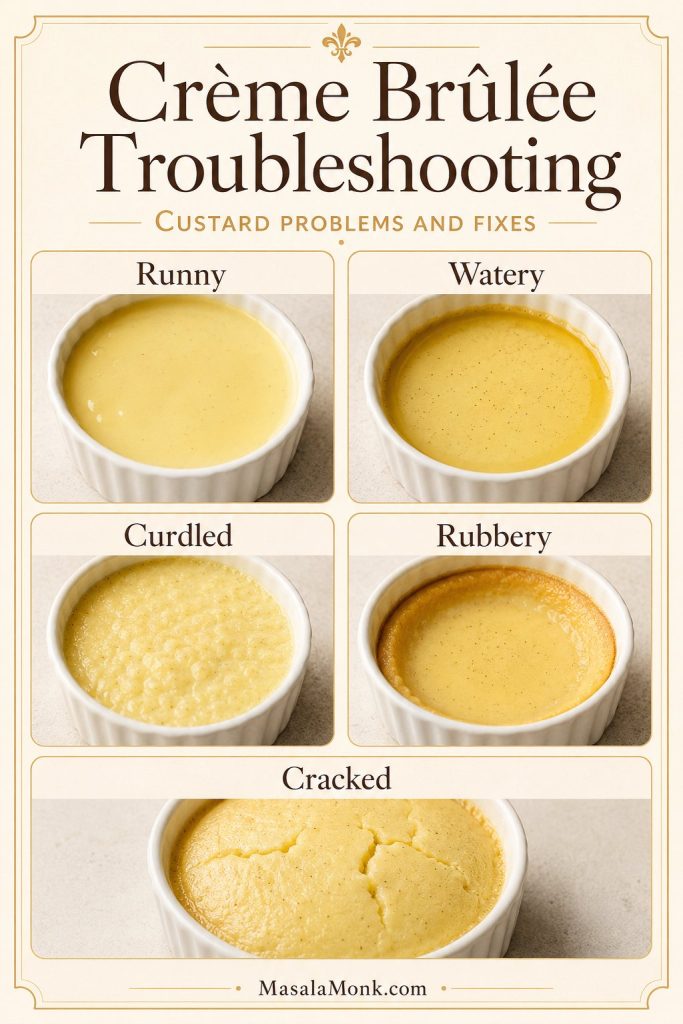
Use this guide to read the custard first, then choose the fix. A loose center, watery surface, curdled texture, or cracked top points to a different part of the process.

Crème brûlée troubleshooting board showing runny, watery, curdled, rubbery, and cracked custard problems.
Custard texture is a clue. Runny usually means underbaked, watery can mean splashed water or low-fat cream, and curdled or rubbery custard points to too much heat.

Runny or watery custard

ProblemLikely causeSave it todayFix next time
Custard is runnyUnderbaked, too deep a ramekin, low-fat cream, or short chillChill longer if slightly loose. If it sloshes, skip the torch and serve it as soft vanilla custard in small cups. It will not be classic crème brûlée, but it can still be dessert.Use shallow ramekins, bake until softly moving, and check 170–175°F / 77–80°C.
Custard is watery after chillingWater splashed in, custard underbaked, or cream too low in fatBlot minor surface water. If watery throughout, serve cold in small glasses with berries or whipped cream.Pour water carefully and use heavy cream for the richest set.

Curdled, eggy, or rubbery custard

ProblemLikely causeSave it todayFix next time
Custard curdledYolks overheated, oven too hot, no water bath, or overbakingChill and serve with berries or whipped cream. The texture will not become silky again, but a mild curdle can still taste good cold.Temper slowly, strain, and bake gently.
Custard tastes eggyOverbaked, overheated yolks, or too little vanilla/salt balanceServe very cold with a fresh caramelized top. Cold temperature and caramel help soften the eggy impression.Use good vanilla, add salt, and avoid overheating the custard.
Edges are rubberyOven too hot, dishes too deep, or custards left in hot waterThe edges may be firm, but the center can still be worth serving.Use shallow ramekins and remove promptly from the water bath.

Surface cracks, bubbles, and vanilla specks

ProblemLikely causeSave it todayFix next time
Surface crackedOverbaked or too much heatThe sugar topping will hide small cracks.Start checking earlier and pull before the custard looks firm.
Custard has bubblesWhisked too aggressively, skipped straining, or left foam on topMostly cosmetic. Once the sugar top is on, small bubbles matter less.Whisk gently, strain, and skim foam before baking.
Vanilla seeds sankCustard was thin or not stirred gently before pouringNo real fix needed; flavor is still fine.Stir gently before dividing into ramekins.

Sugar-top, water-bath, and equipment problems

Use this second troubleshooting guide for problems that happen after the custard is baked, especially the sugar crust, water bath, and no-torch finishing methods.

Crème brûlée sugar-top troubleshooting board showing burnt, grainy, sunken, and soft caramelized sugar problems.
Sugar-top issues usually come from moisture, uneven sugar, or excess heat. Blot the custard, spread a light coating, and caramelize close to serving.

Caramelized sugar-top issues

ProblemLikely causeSave it todayFix next time
Sugar top burnedSugar too thick, flame too close, or broiler too strongScrape off badly burnt patches if needed. A slightly bitter edge is manageable; a black smoky crust is worth removing.Use a lighter coating and keep the flame moving.
Sugar stayed grainyUneven sugar layer or not enough heatTorch pale or grainy patches a little longer.Use superfine or regular white sugar and spread evenly.
Sugar sank into custardSurface was wet or sugar layer was too thinBlot gently, chill uncovered briefly, then add fresh sugar. Do not torch a wet surface.Blot surface moisture before sugaring.
Top turned softTorched too early or refrigerated after torchingRe-torch lightly if the custard is still cold.Caramelize close to serving.

Water-bath and equipment issues

ProblemLikely causeSave it todayFix next time
Water got into ramekinsWater splashed while pouring or moving the panBlot lightly if it is only a little water. If the custard is diluted, serve cold instead of torching.Pour water after the pan is on the oven rack and move slowly.
Broiler melted the custardCustard was not cold enough or stayed too long under heatChill again before serving. The top may not be perfect, but the custard can still recover some firmness.Chill overnight and broil briefly, watching constantly.
No kitchen torchEquipment limitationUse the broiler only with broiler-safe dishes, or use the caramel-pour backup as a last resort.Use a torch for the most controlled finish.

Crème Brûlée FAQs

Crème brûlée basics

Is crème brûlée served cold?

Crème brûlée is meant to be served cold. The freshly caramelized top gives you the warm, crisp contrast.

What sugar is best for crème brûlée?

Superfine or caster sugar melts most evenly. Regular white granulated sugar also works well. Brown sugar and powdered sugar are less reliable for a crisp, even crust.

Why is my crème brûlée runny?

Runny crème brûlée is usually underbaked, under-chilled, baked in dishes that are too deep, or made with cream that is too low in fat. If the custard is only slightly loose, chill it longer. If it sloshes like liquid, serve it as soft custard and bake the next batch longer.

How do I know when crème brûlée is done?

The edges should be set, while the middle should still look delicate rather than firm. If using a thermometer, aim for 170–175°F / 77–80°C in the center without touching the bottom of the ramekin.

Is crème brûlée supposed to be jiggly after baking?

A gentle jiggle is exactly what you want. The center should tremble when hot; it should not slosh like liquid, but it should not look fully firm either. A custard that looks perfectly firm in the oven often becomes too firm after chilling.

How do I halve this crème brûlée recipe?

For 3 ramekins, halve the cream, sugar, salt, and vanilla. Use 2 yolks for a slightly lighter set or 3 yolks for a richer, firmer set. For a true crème brûlée for two, use a dedicated small-batch formula because yolks do not divide perfectly.

Equipment and method questions

No kitchen torch? Use these backups

A broiler can work if your dishes are broiler-safe, and the caramel-pour method can help when they are not. A kitchen torch is still the most controlled method because it caramelizes the sugar without warming the whole custard.

Is a regular lighter safe for the sugar top?

A regular lighter is the wrong tool for this job. It is usually uneven, slow, and not designed for caramelizing food. Use a kitchen torch, the broiler method with broiler-safe dishes, or the caramel-pour backup.

Does this method work without an oven?

This baked version needs an oven because the custard sets gently in a water bath. No-oven or stovetop versions are usually pudding-style shortcuts, so the texture is different.

Do I really need a water bath?

Not for this classic method. The water bath keeps the heat gentle so the edges do not overcook before the center sets. No-water-bath methods exist, but they use different timing, dish depth, or oven technique. For this recipe, the water bath is the safest path to a silky custard.

What changes if I use one large dish?

A large shallow dish can work, but it is less beginner-friendly. It takes longer to bake, is harder to judge, and gives less crisp sugar top per spoonful. Individual shallow ramekins are more reliable.

What about countertop or convection ovens?

A countertop or convection oven can work if it holds a gentle, steady temperature. Start checking early if using convection. Air fryer and sous vide versions need separate methods, so they are not direct swaps.

Substitutions and comparisons

Why use only egg yolks?

Not for this texture. Egg whites make custard firmer and less silky. For classic crème brûlée, use yolks only and save the whites for another recipe.

Why milk is not a direct cream swap

Milk is not a direct swap in this recipe. It creates a lighter, thinner custard and needs a different formula. For rich crème brûlée texture, use heavy cream or heavy whipping cream.

What changes with lighter cream?

Lighter cream can work, but the custard will be softer and less rich. Use shallow ramekins, bake gently, and chill overnight for the best chance of a clean set.

Vanilla extract versus vanilla bean

Vanilla extract works well. Vanilla bean gives the deepest flavor and visible specks, but vanilla bean paste or good vanilla extract is enough for a smooth, fragrant custard. If using extract, stir it into the warm cream after taking the cream off the heat.

What is the difference between crème brûlée, flan, and panna cotta?

Crème brûlée is a baked egg-yolk custard served in its dish with a hard caramelized sugar top. Flan is usually unmolded and served with a softer caramel sauce. Panna cotta is typically cream set with gelatin rather than eggs.

Make-ahead and storage questions

How far ahead can I make crème brûlée?

For a party, bake the custards 1 day ahead and keep them chilled. Add and caramelize the sugar shortly before serving so the top stays crisp.

Should I cover crème brûlée while chilling?

Let the custards cool first, then cover them. Covering hot ramekins tightly can create condensation, which drips onto the custard and makes the surface wet.

Why did my caramel top taste bitter?

Bitter caramel usually means the sugar was taken too far. Stop when the top is amber and glossy, before it turns black or smoky. A thin sugar layer is easier to control than a heavy one.

What happens if water gets into the custard?

A few drops on the surface can usually be blotted away. If water mixes into the custard, the texture may turn loose or watery. Serve it cold if it tastes good, and pour the water bath more slowly next time.

Does crème brûlée freeze well?

Freezing is not recommended for the best texture. The custard can become grainy or watery after thawing. It is better to make the custards ahead and keep them refrigerated for 2–3 days before torching.

Once you know what the wobble should look like, crème brûlée stops feeling like a restaurant secret. The custards wait in the fridge, the sugar cracks at the end, and you can bring the dessert to the table already knowing it worked.

Crème Brûlée Recipe

This crème brûlée recipe makes cold, silky vanilla custard with a crisp caramelized sugar top that cracks under a spoon. The kitchen torch method is the cleanest finish; broiler and caramel-pour backups are included below for no-torch situations.

Yield
6 small ramekins
Prep Time
15 minutes
Bake Time
30–45 minutes
Chill Time
4 hours minimum
Total Time
About 5 hours, including chill
Make Ahead
Bake 1 day ahead; torch before serving

Equipment

  • 6 shallow 4 oz / 120 ml ramekins
  • 9×13-inch baking dish
  • Medium saucepan
  • Mixing bowl
  • Whisk
  • Fine-mesh sieve
  • Measuring jug
  • Thin kitchen towel
  • Kitchen torch for the recommended finish
  • Broiler-safe ramekins if using the broiler backup
  • Small saucepan if using the caramel-pour backup
  • Instant-read thermometer, optional

Ingredients

  • 2 cups / 480 ml heavy cream
  • 5 large egg yolks
  • 1/3 cup / 65–70 g granulated sugar
  • 1 vanilla bean, or 1 tsp vanilla bean paste, or 1½ tsp vanilla extract
  • 1/8 tsp fine salt
  • 9–12 tsp superfine/caster sugar or white granulated sugar, for topping

Instructions

  1. Preheat the oven to 300°F / 150°C with a rack in the middle.
  2. Place 6 shallow ramekins in a 9×13-inch baking dish. Add a folded thin kitchen towel underneath if the ramekins slide around.
  3. Warm the cream over medium-low heat until steaming. If using vanilla bean, scrape in the seeds, add the pod, steep off heat for 10 minutes, then remove the pod. If using vanilla bean paste, whisk it into the warm cream. If using vanilla extract, add it off heat.
  4. In a mixing bowl, whisk egg yolks, granulated sugar, and salt until smooth.
  5. Slowly stream warm cream into the yolks while whisking constantly, starting with a small amount and adding more as the bowl warms.
  6. Strain the custard through a fine-mesh sieve into a measuring jug. Skim off foam if needed.
  7. Divide the custard among the ramekins, filling below the rim.
  8. Pour hot water into the baking dish until it reaches halfway to two-thirds up the ramekins, taking care not to splash the custard.
  9. Bake for 30–45 minutes, or until the edges are set and the centers move softly.
  10. If using a thermometer, aim for 170–175°F / 77–80°C in the center without touching the bottom of the ramekin.
  11. Remove the ramekins from the water bath. Cool uncovered just until warm, then cover loosely and refrigerate for at least 4 hours, preferably overnight.
  12. Just before serving, gently blot any surface moisture. Sprinkle each custard with 1½–2 tsp sugar in a light, even layer.
  13. Torch the sugar in small circles until melted, bubbling, and amber. Let stand 1–2 minutes so the top hardens.

No-Torch Options

  • Broiler backup: Use only broiler-safe ramekins. Broil very cold custards 2–4 inches below the heat for 1–3 minutes, watching constantly. Chill briefly if the custard softens.
  • Caramel-pour backup: Use only as a last resort. Cook about 1/3 cup / 65 g white sugar until amber, then pour a very thin layer over very cold custards. You may not need all of it. Hot caramel burns badly.

Recipe Notes

  • Use shallow ramekins and fill below the rim for the most even bake and cleanest sugar top.
  • Use the timer as a guide, but judge doneness by texture: set edges, soft center movement.
  • Low-fat cream can set softer and may not give the same rich texture.
  • For best make-ahead texture, bake 1 day ahead; untorched custards can be refrigerated for 2–3 days.
  • For the crispest top, torch shortly before serving and serve within 15–30 minutes.
  • A custard that puffs, cracks, or looks fully firm has likely baked too long.
  • Cover ramekins only after they cool so condensation does not drip onto the surface.
  • Save leftover egg whites for meringues, pavlova, macarons, or omelets.
Saveable crème brûlée recipe card showing yield, oven temperature, bake time, chill time, ingredients, method steps, and torch-before-serving note.
Use the recipe card as a final check before baking: shallow ramekins, low heat, full chill, and a sugar layer that is torched only at the end.

Back to top ↑