Tender beef, soft potatoes, sweet carrots, and a Crock Pot gravy that stays rich instead of turning thin.
If you have ever waited all day for beef stew and opened the slow cooker to thin broth instead of rich gravy, this version is built to avoid that disappointment.
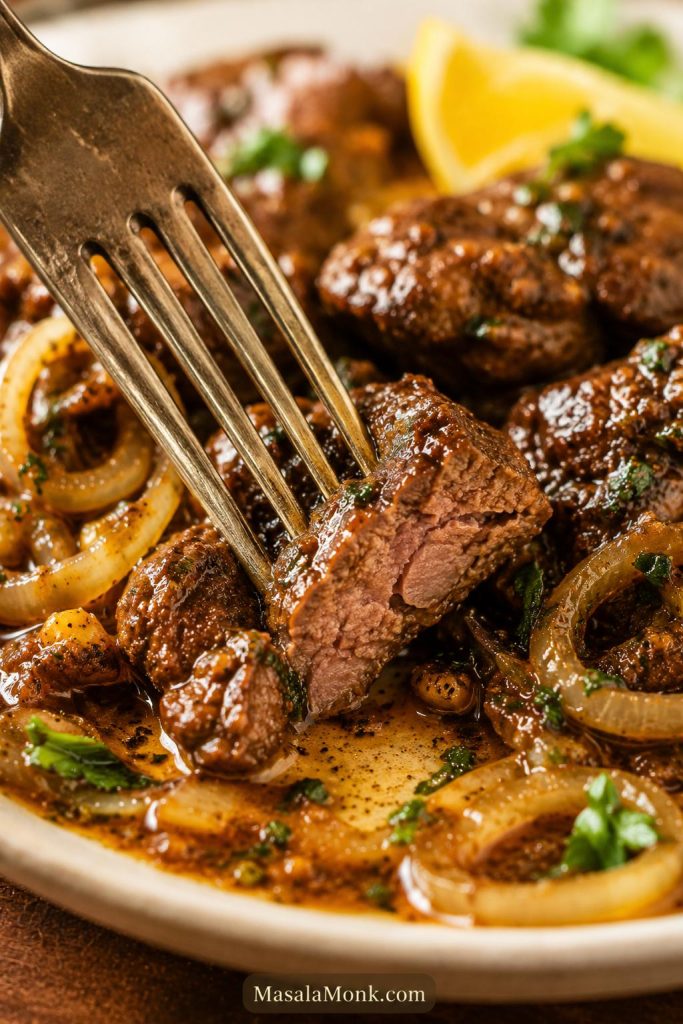
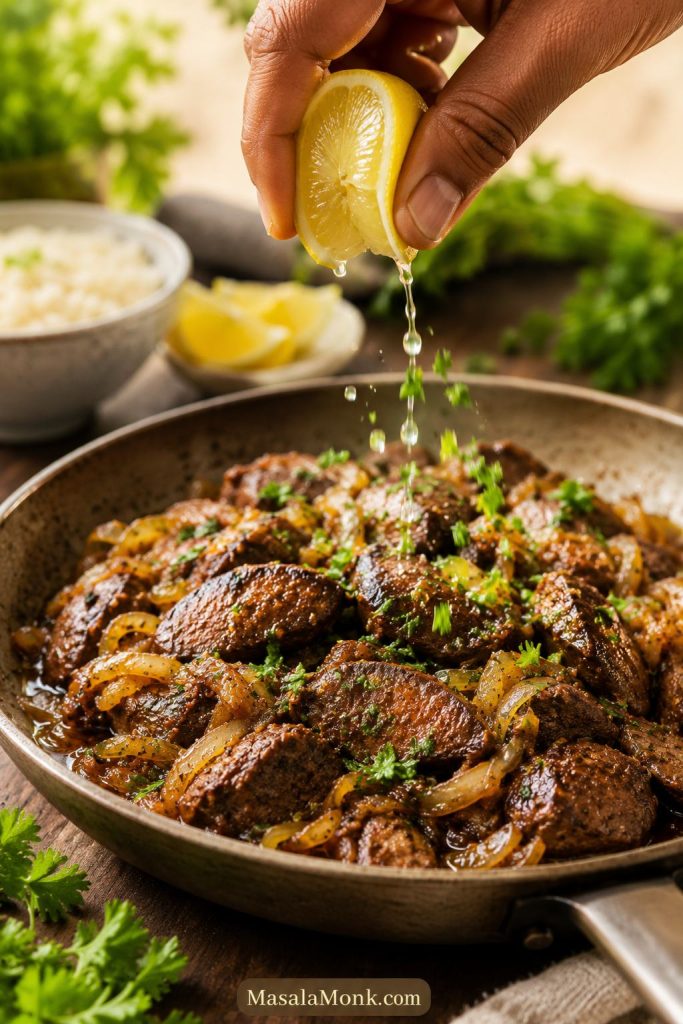
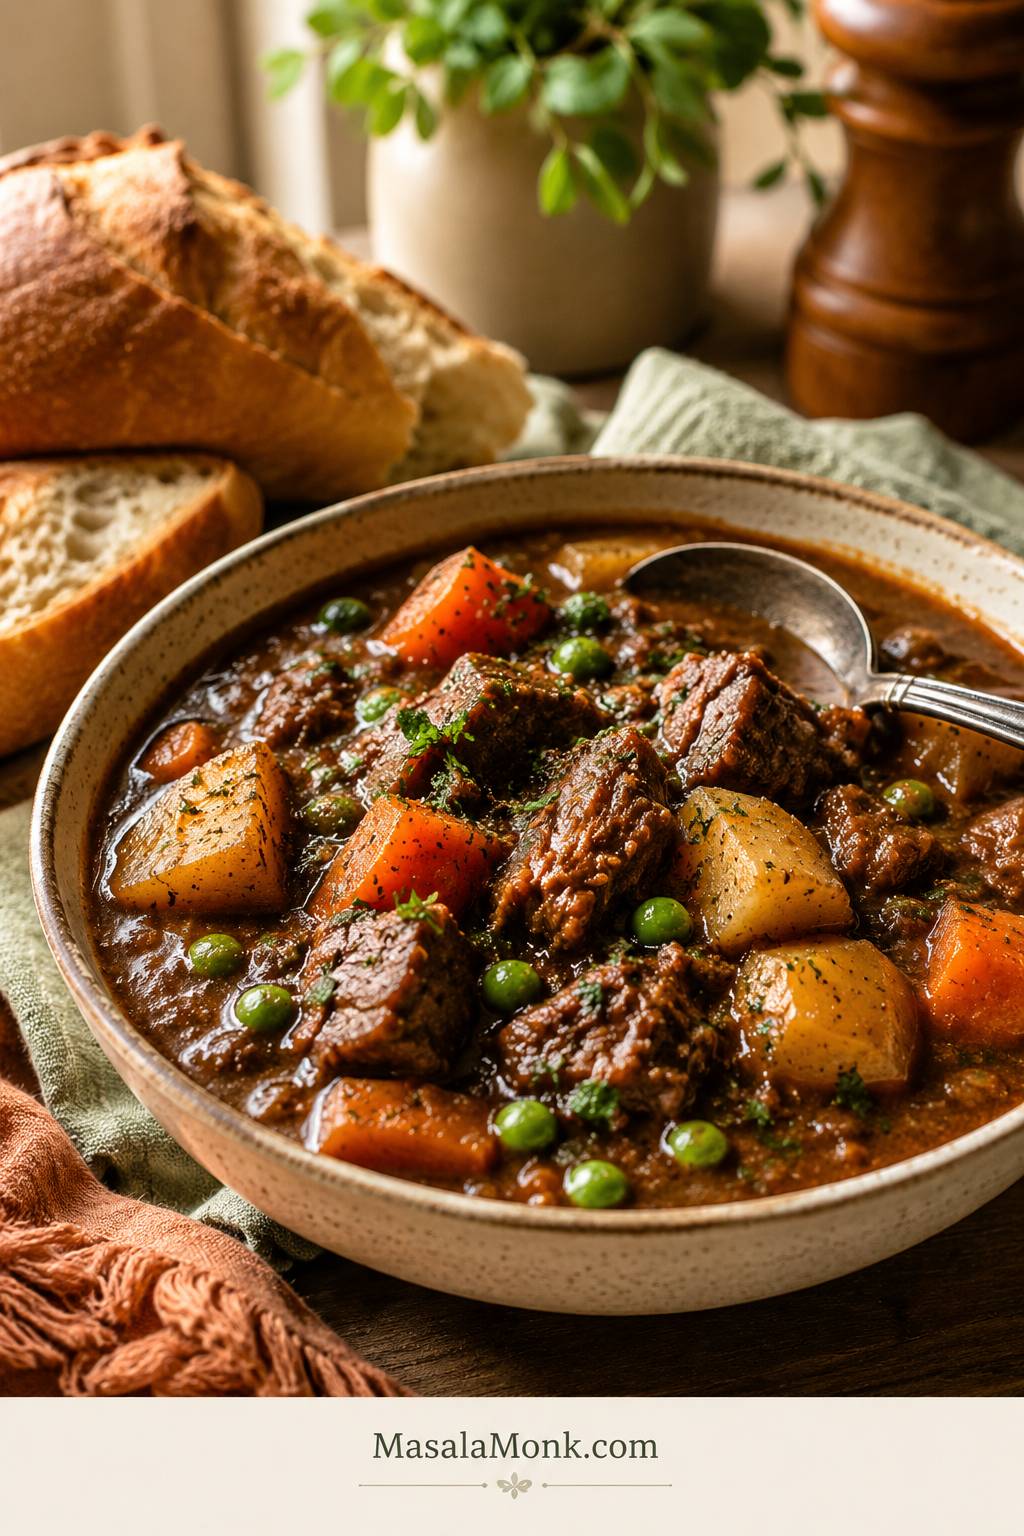
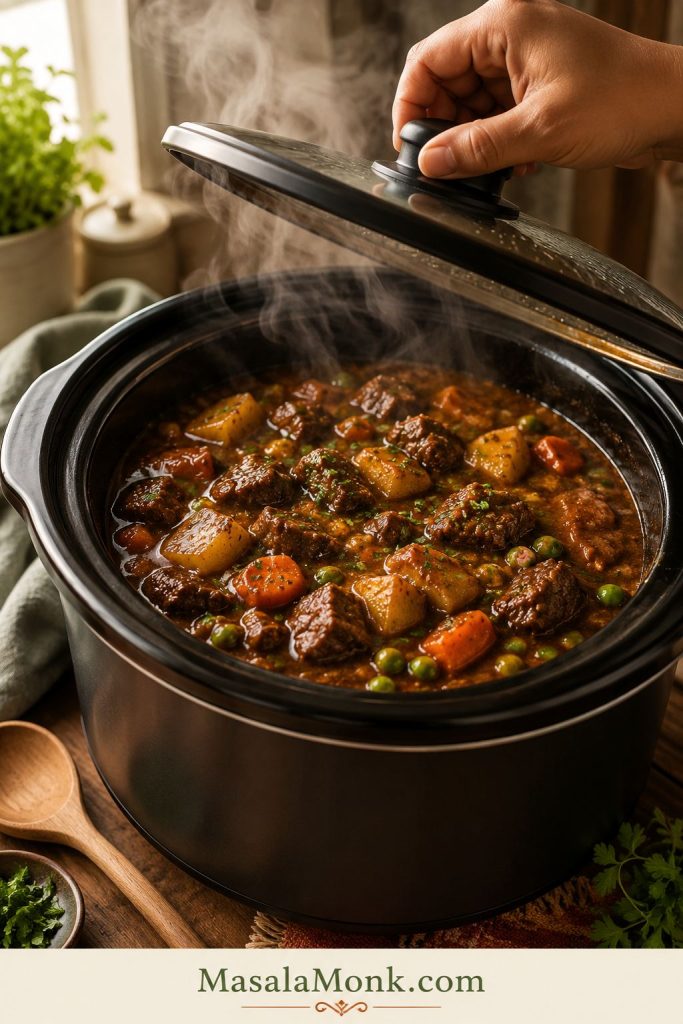
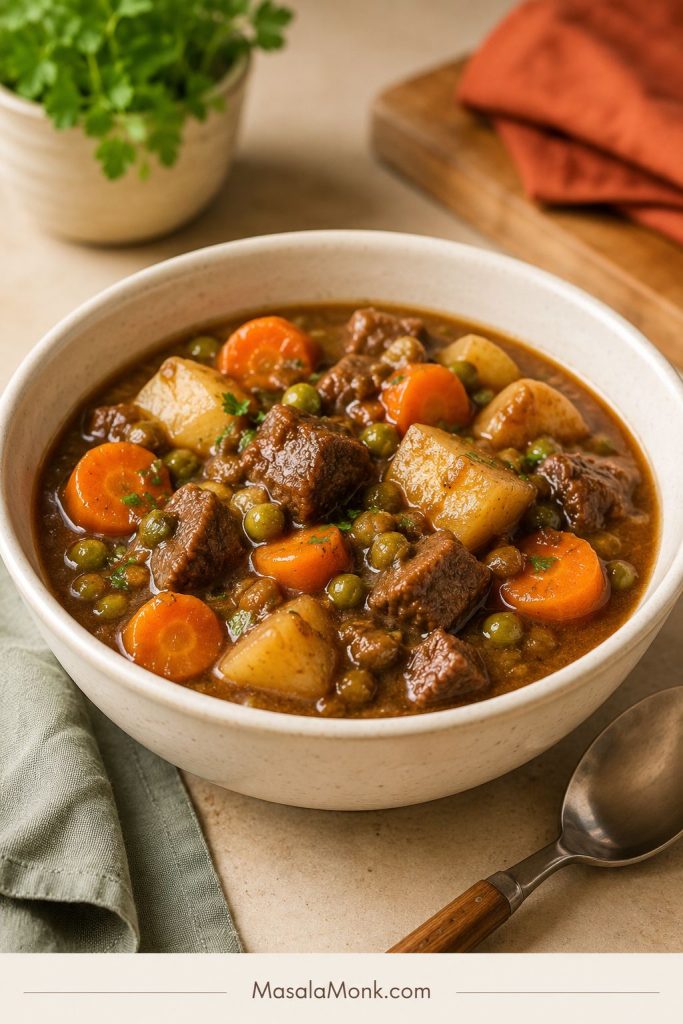
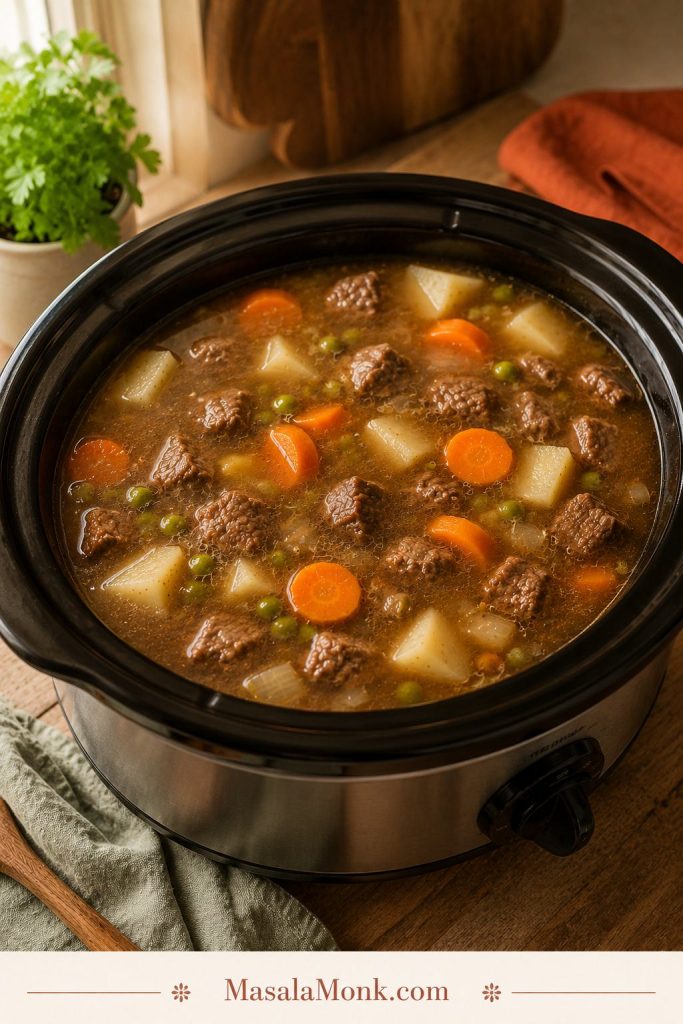
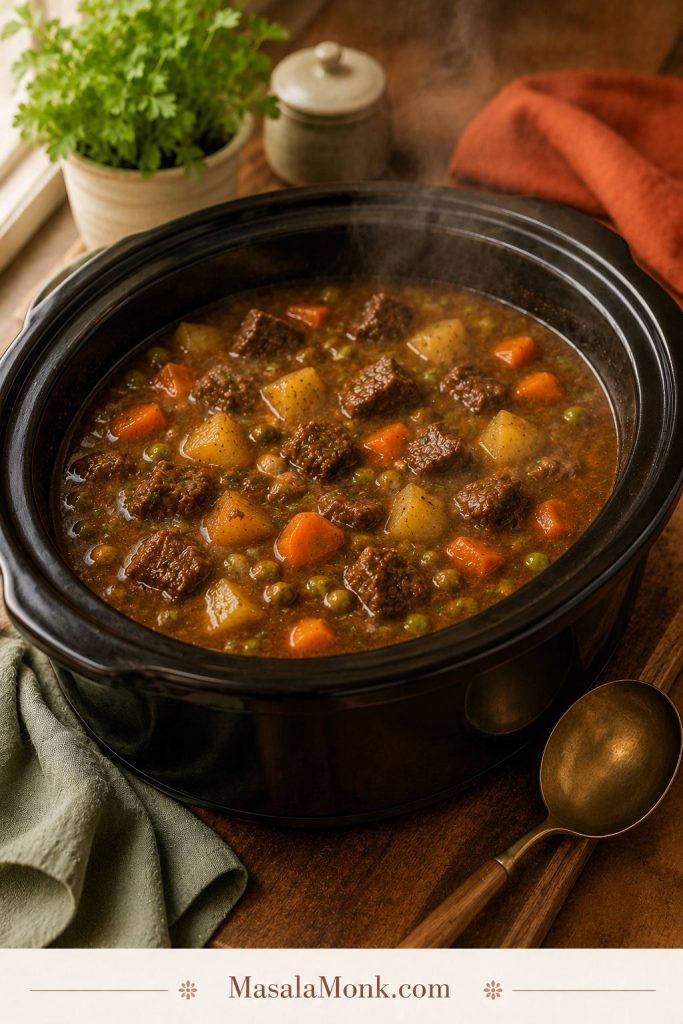
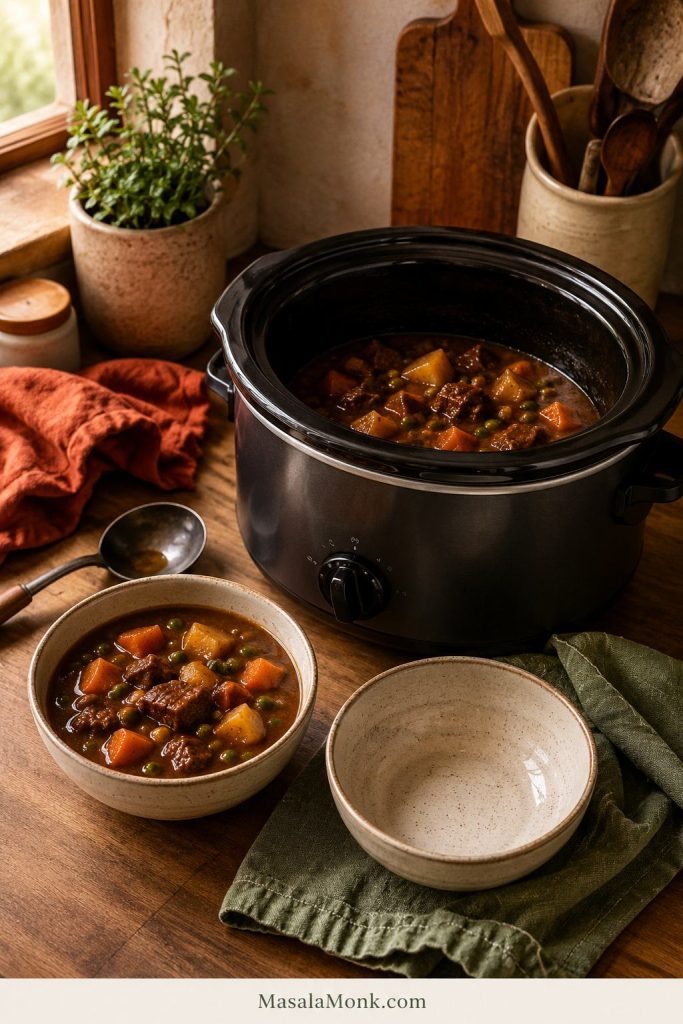
The goal is the moment you lift the lid and see glossy, deep brown gravy settled around tender beef instead of a pot that needs rescuing.
Lid-lift cue: The finished pot should look glossy and settled, with steam rising from gravy rather than beef and vegetables floating in broth.
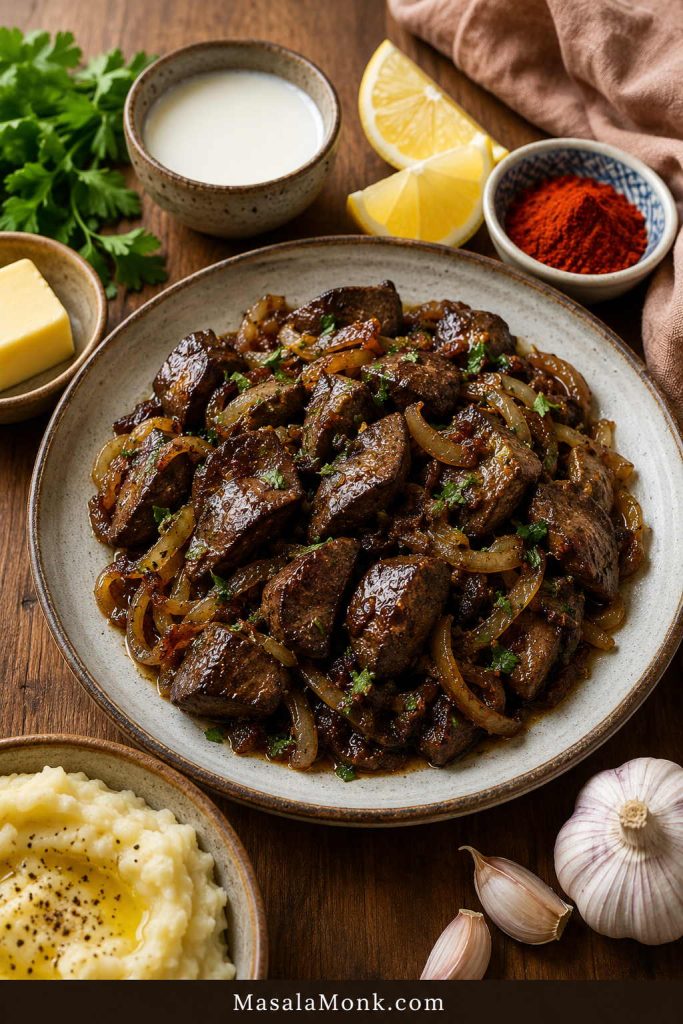
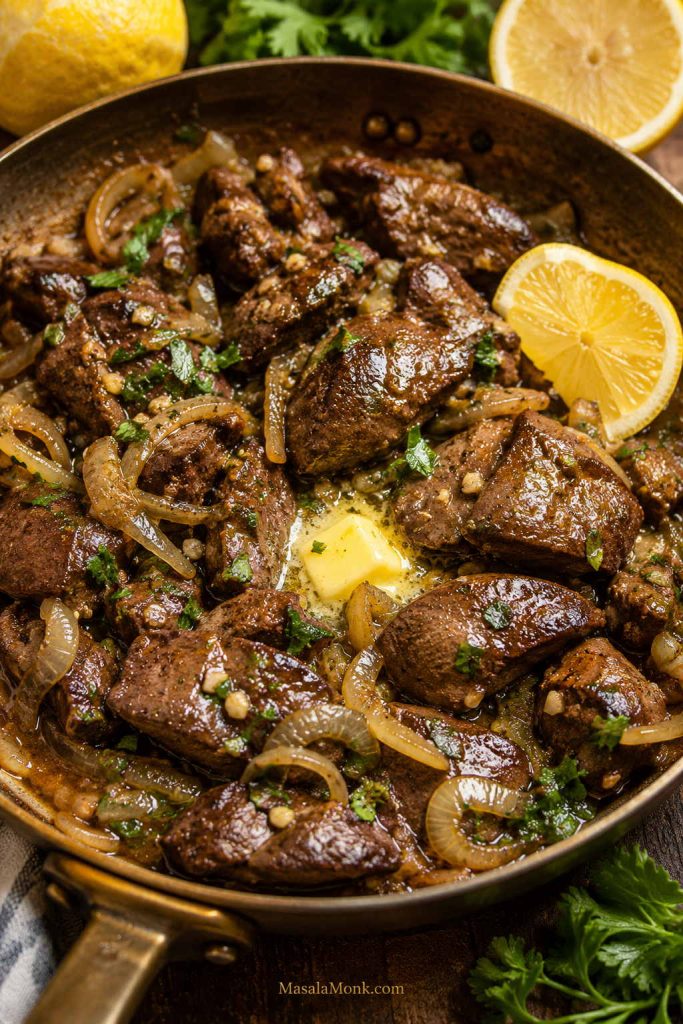
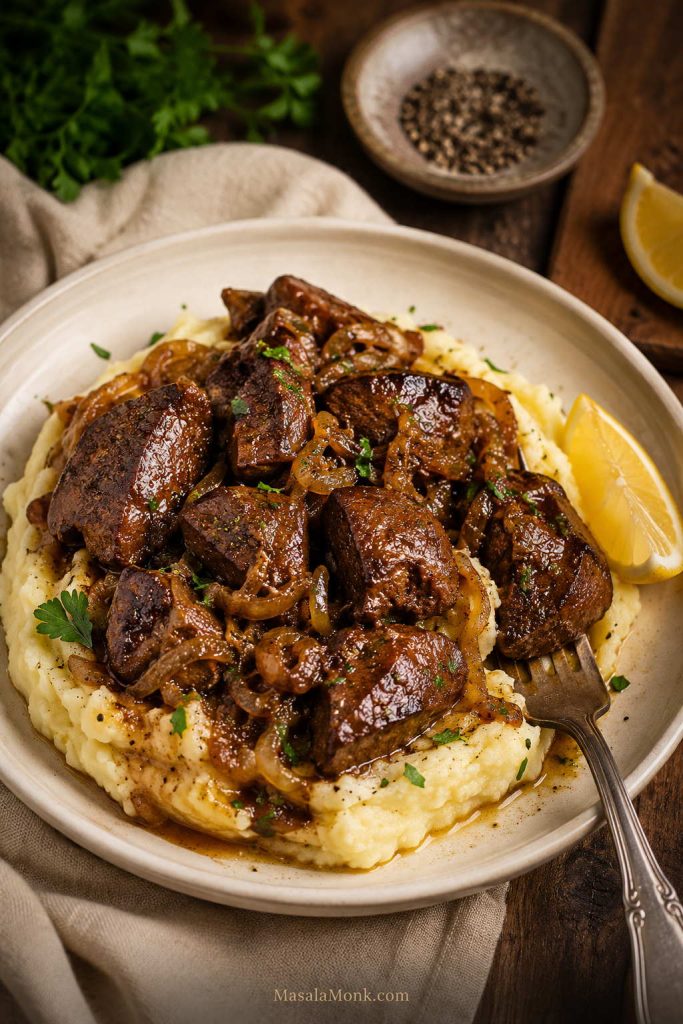
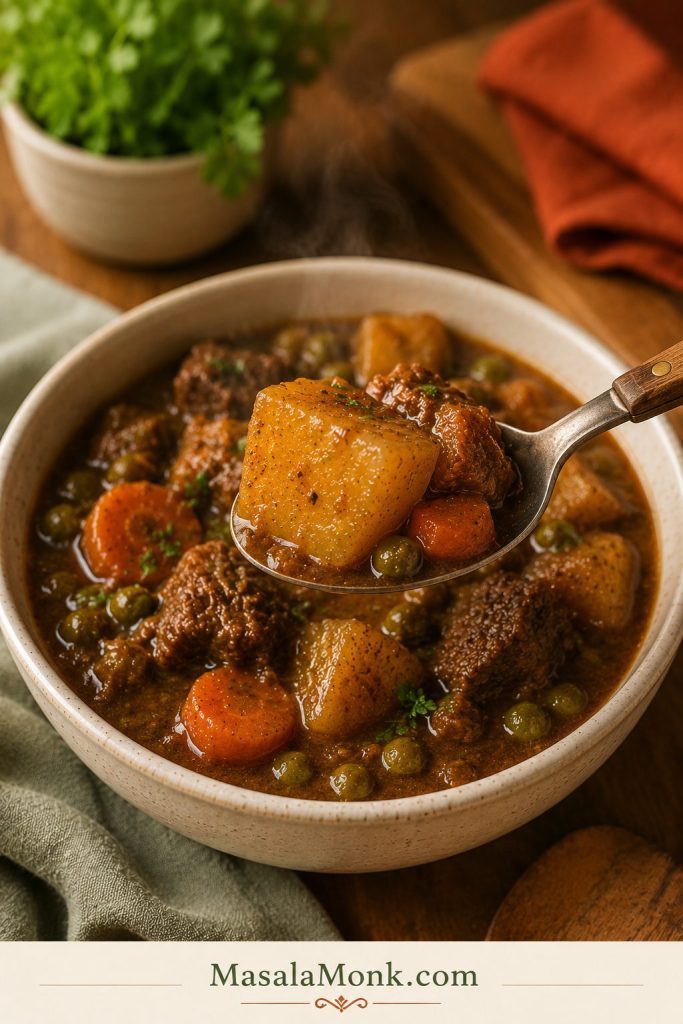
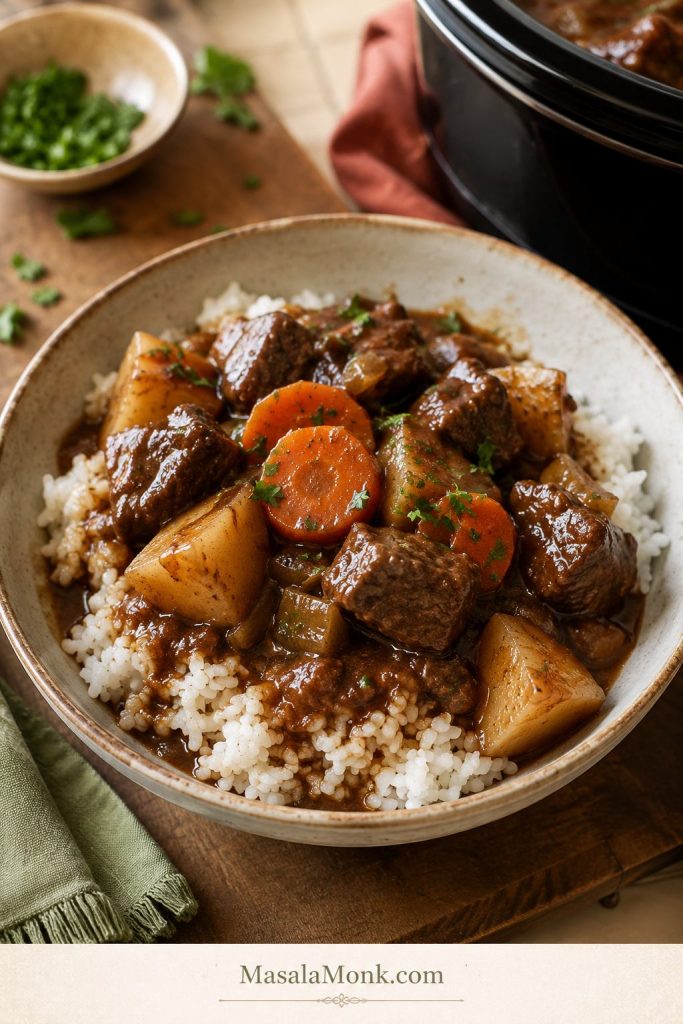
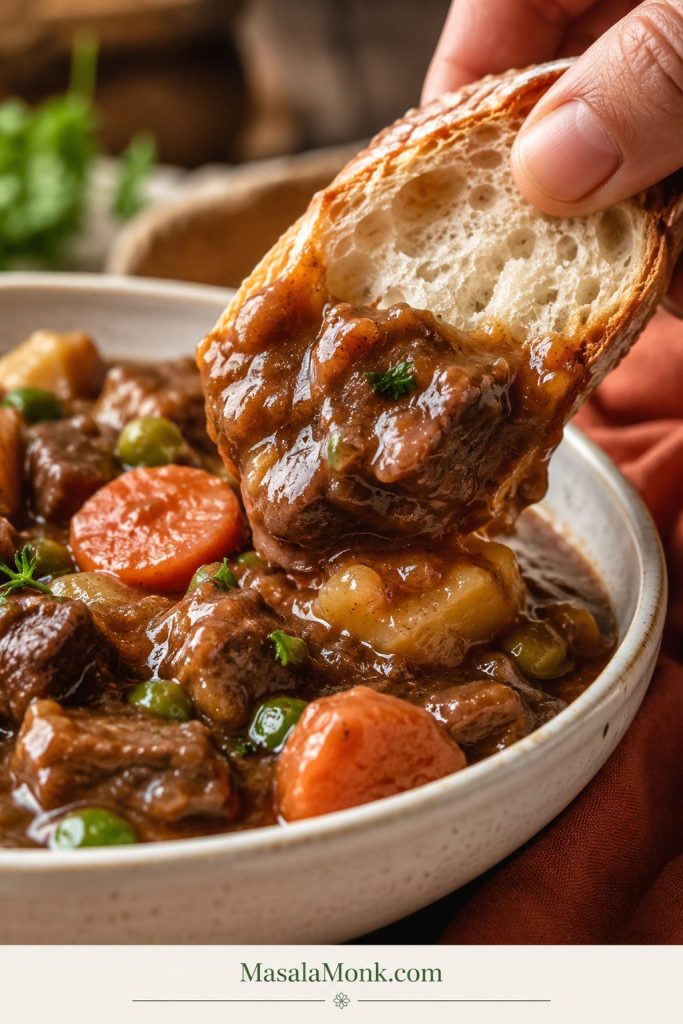
This is the kind of slow cooker beef stew you want waiting at the end of the day: beef soft enough to break with a spoon, carrots that turn sweet in the gravy, potatoes that still hold their shape, and deep brown gravy thick enough to drag bread through.
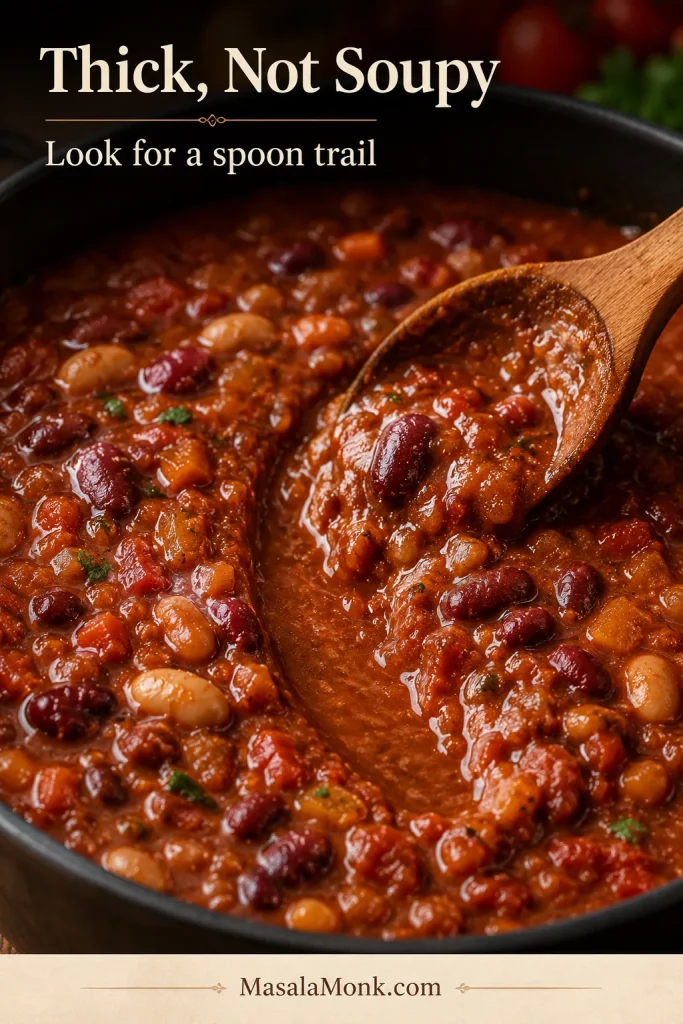
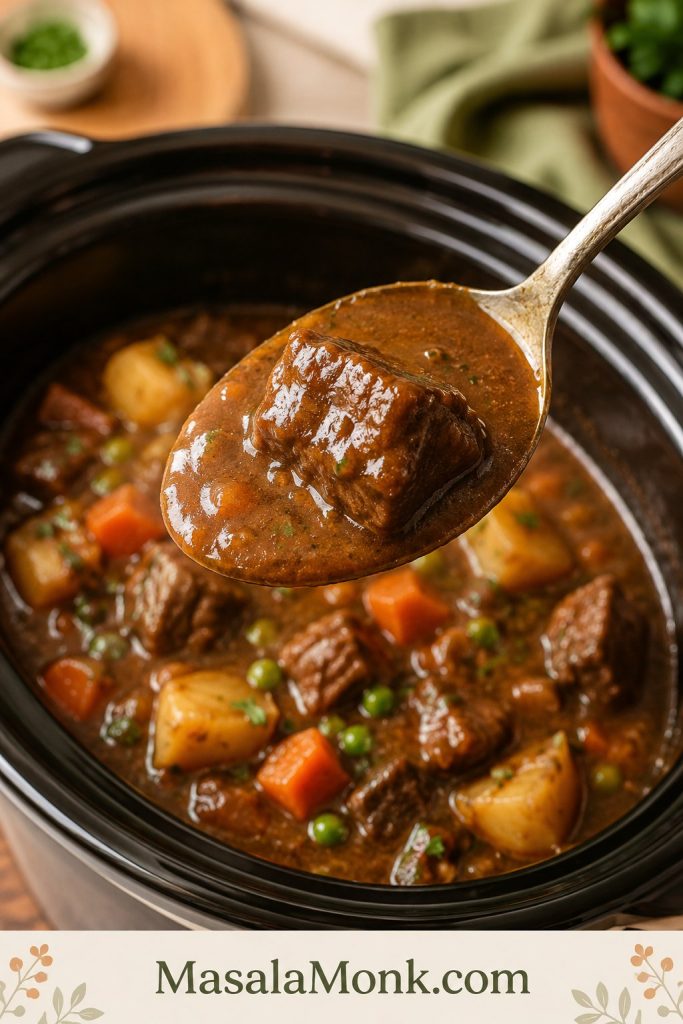
Finished cue: This is the texture we are aiming for: chunky beef, visible vegetables, and gravy thick enough to feel like stew instead of soup.

Why This Slow Cooker Beef Stew Stays Thick
This method works with the slow cooker instead of fighting it. It uses controlled liquid, the right cut of beef, vegetables cut large enough for a long cook, and a simple thickening step once the meat is tender. You still get classic beef stew with potatoes and carrots, but the pot is set up to finish glossy enough to coat a spoon instead of thin and brothy.
You can make it with chuck roast or packaged beef stew meat. Brown the beef for the deepest flavor, or use the dump-and-go version when dinner just needs to get started. Either way, the fork test matters more than the timer, and the slow cooker gives you the kind of dinner that feels finished before you even sit down.
What You’ll Find in This Guide
Make the Stew
Quick Answer: How to Make Slow Cooker Beef Stew That Is Not Watery
For thick, tender slow cooker beef stew, use beef chuck or stew meat cut into 1¼- to 1½-inch chunks. Coat the beef lightly with flour, brown it if you have time, then slow cook it with potatoes, carrots, onion, tomato paste, Worcestershire sauce, herbs, and controlled beef broth.
Cook on low until the beef gives easily with a fork, then stir in a cornstarch slurry during the final 20 to 30 minutes if the gravy needs more body. Start with enough broth to moisten the pot, not enough to fully cover every piece of beef and potato.
- Use chuck roast or stew meat cut into even chunks.
- Add only enough broth to moisten the pot.
- Cook on low until the beef is truly tender.
- Finish with slurry during the final 20 to 30 minutes.
- Rest before serving so the gravy settles.
Ready to cook? Start with the recipe card. If thin gravy is your main worry, jump to how much liquid to use before loading the pot; if you already bought packaged cubes, read the beef stew meat notes first.
Recipe Card
Slow Cooker Beef Stew Recipe
Description: A classic slow cooker beef stew made with chuck roast or beef stew meat, potatoes, carrots, onion, herbs, and a rich gravy-style broth. Includes browned-beef and no-browning methods.
Ingredients
For the beef stew
- 2½ lb / 1.1 kg beef chuck roast or beef stew meat, cut into 1¼- to 1½-inch chunks
- 1 teaspoon salt, plus up to ½ teaspoon more after thickening if needed
- 1 teaspoon black pepper
- 3 tablespoons / 24 g all-purpose flour or plain flour
- 2 tablespoons / 30 ml neutral oil, for browning
- 1 large onion, diced, about 150 g
- 4 garlic cloves, minced
- 3 tablespoons / 45 g tomato paste
- 2½ cups / 600 ml beef broth or beef stock
- ½ cup / 120 ml red wine, or use extra beef broth
- 2 tablespoons / 30 ml Worcestershire sauce
- 1 tablespoon / 15 ml balsamic vinegar, optional but helpful for depth
- 1 beef bouillon cube or 1 teaspoon beef base, optional
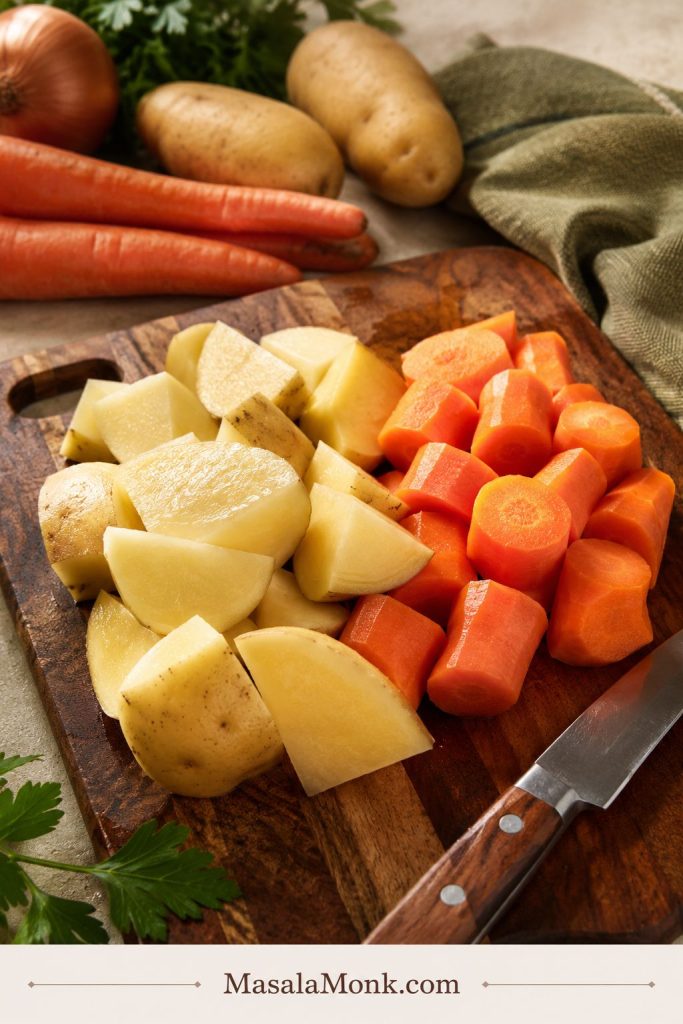
- 4 medium carrots, cut into thick pieces, about 300–350 g
- 1½ lb / 680 g Yukon gold or red potatoes, cut into large chunks
- 2 celery ribs, sliced, about 100–120 g
- 2 bay leaves
- 1 teaspoon dried thyme
- 1 rosemary sprig, or ½ teaspoon dried rosemary
- 1 cup / 130–140 g frozen peas
For thickening near the end
- 2 tablespoons / 16 g cornstarch
- ¼ cup / 60 ml cold water
Instructions
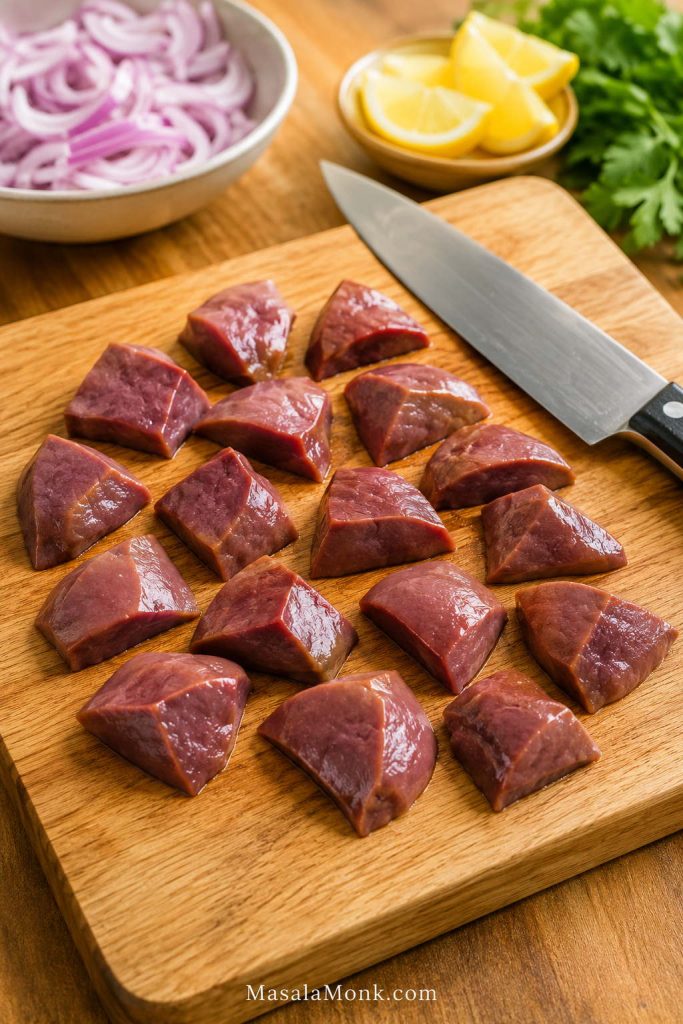
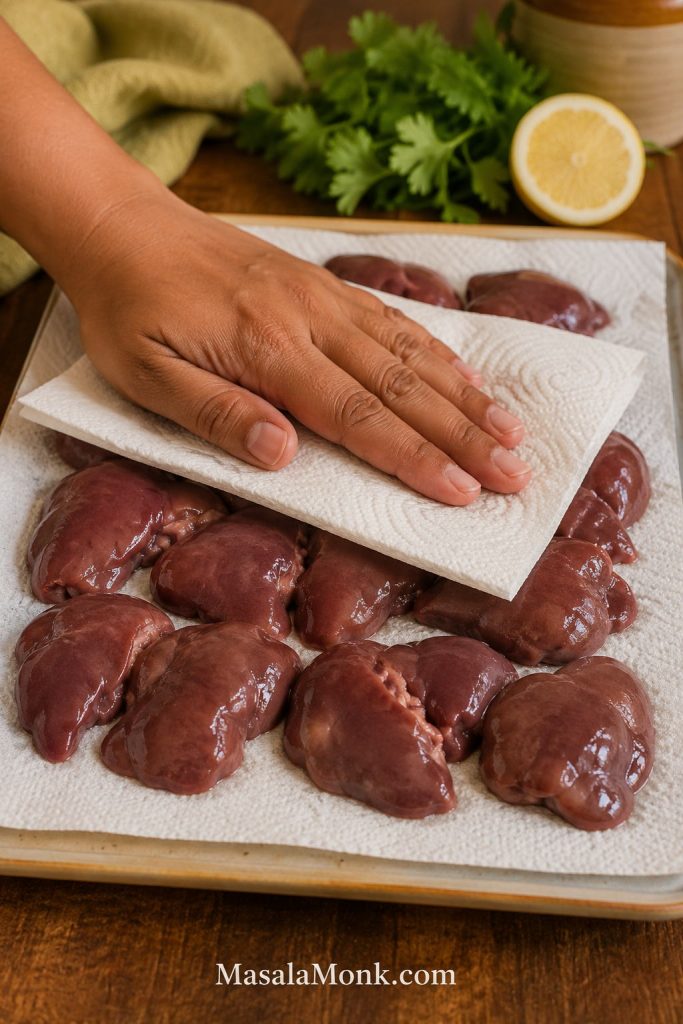
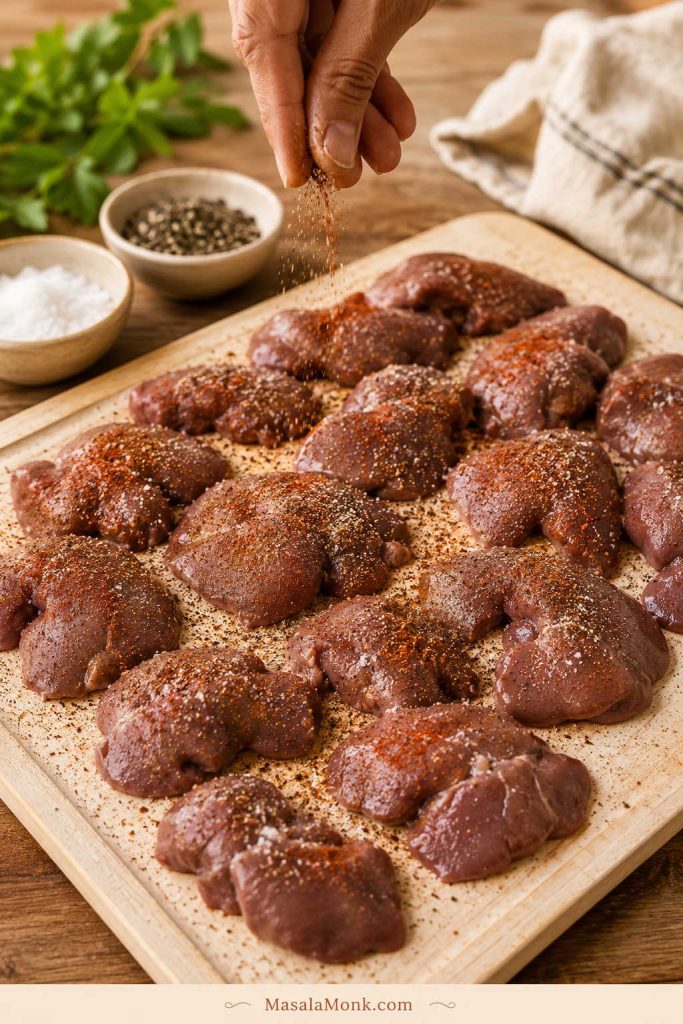
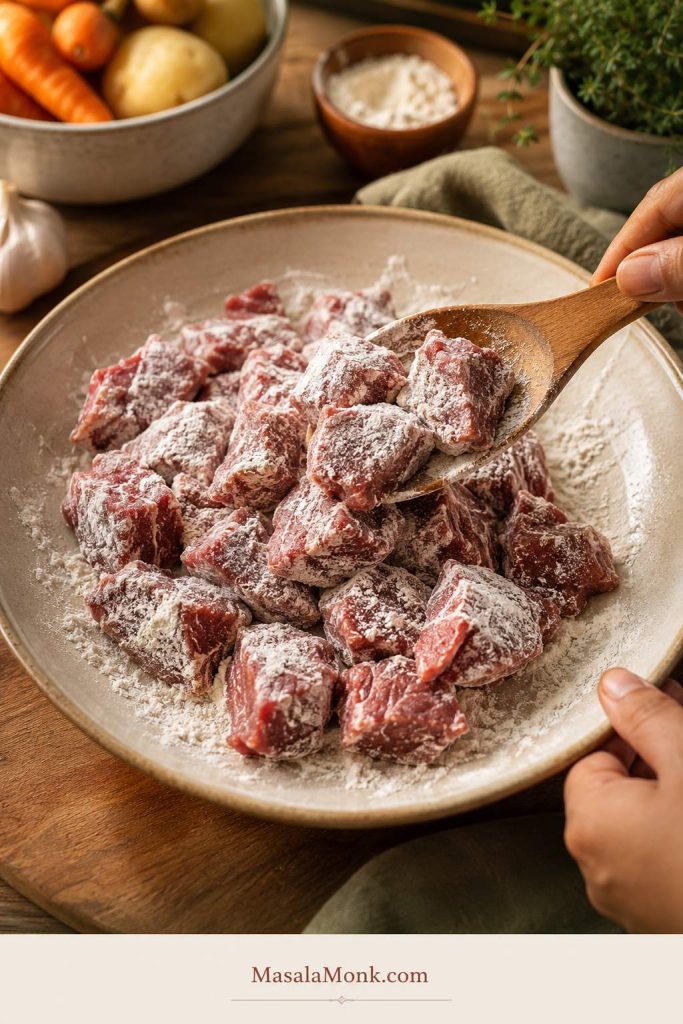
- Cut and season the beef. Pat the beef dry. Cut into 1¼- to 1½-inch chunks if needed. Season with 1 teaspoon salt and the black pepper.
- Coat lightly with flour. Sprinkle flour over the beef and toss until lightly coated. The flour should cling to the beef, not form a thick paste.
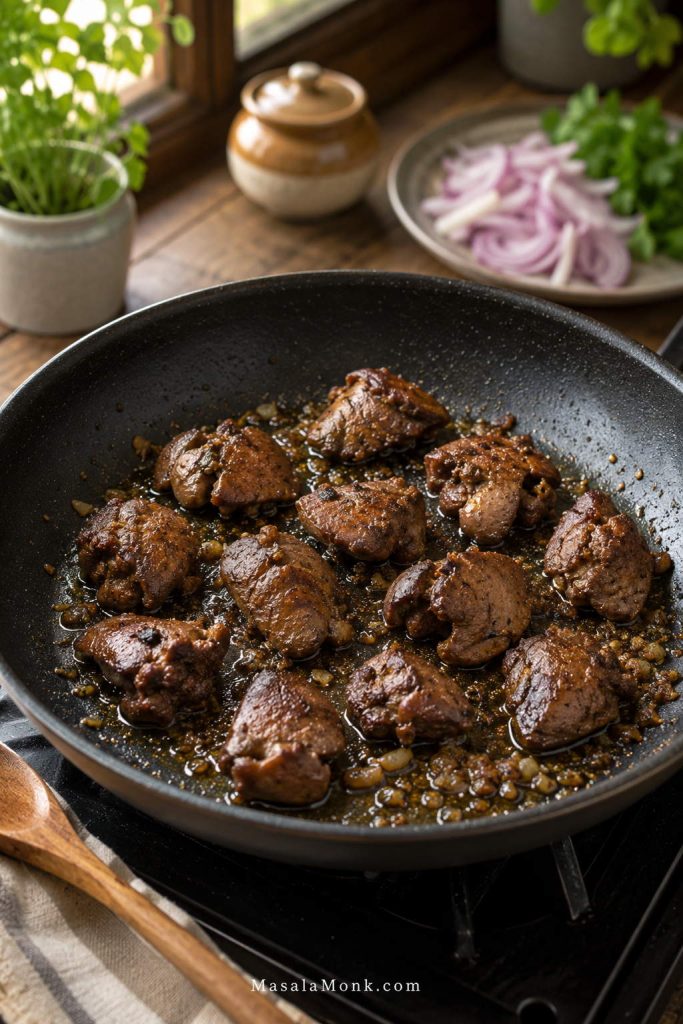
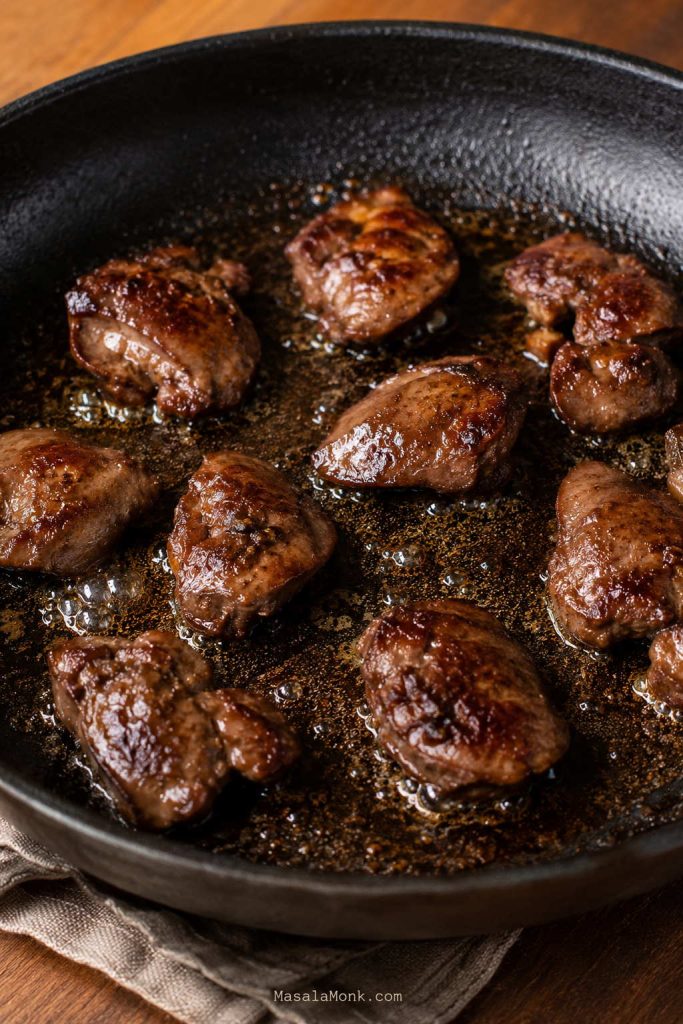
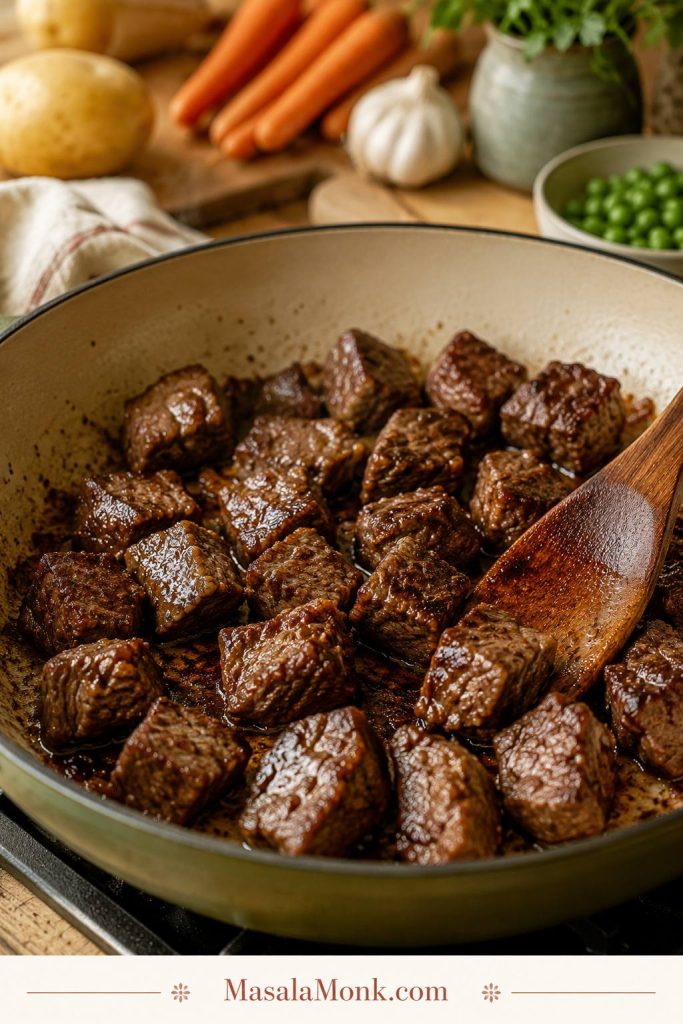
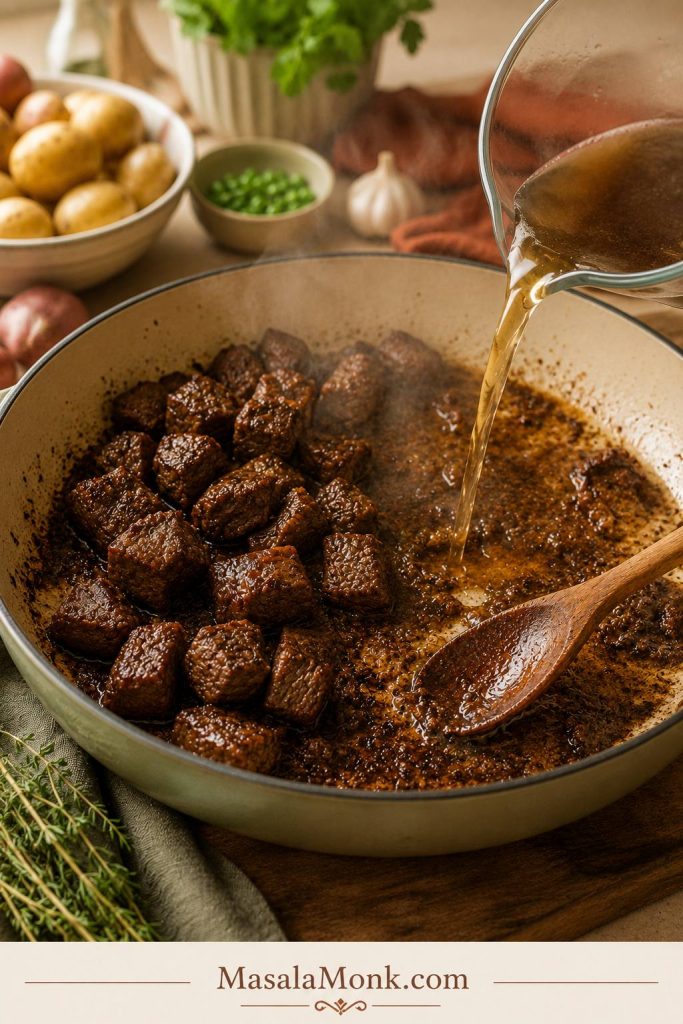
- Brown the beef for best flavor. Heat oil in a large skillet over medium-high heat. Brown beef in batches for 2 to 3 minutes per side, just until the outside is deeply browned. Transfer to the slow cooker.
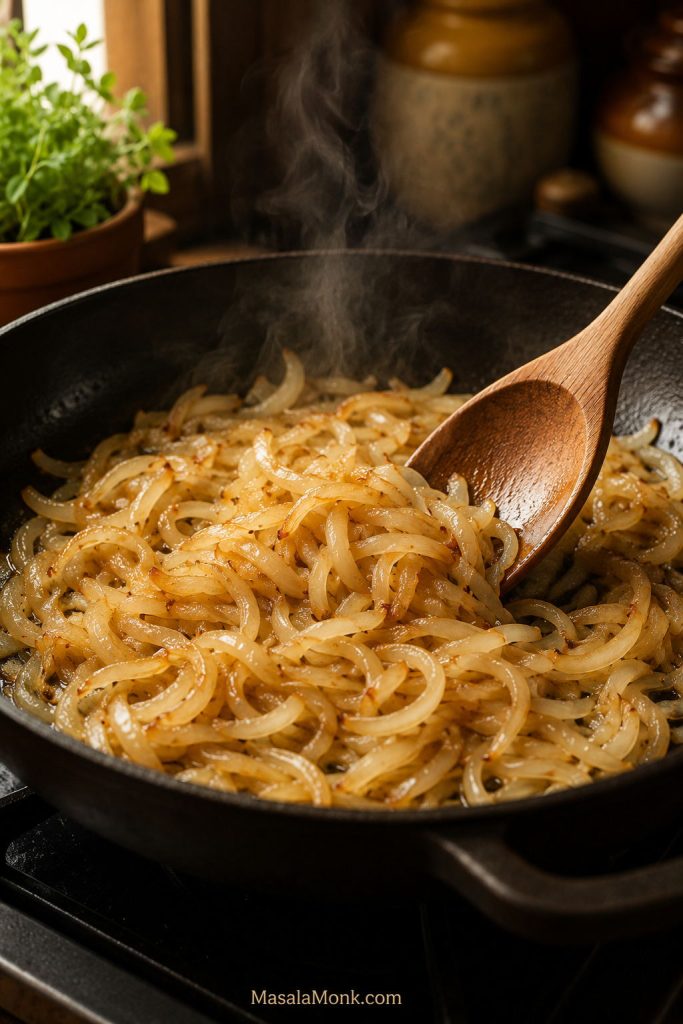
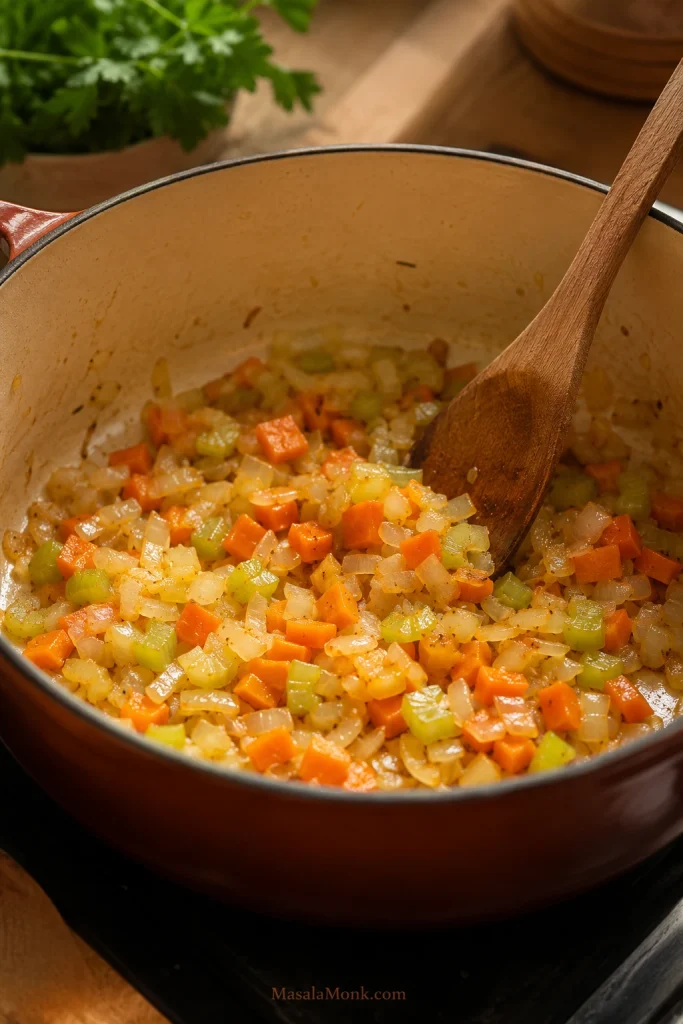
- Build the flavor base. In the same skillet, cook onion for 2 to 3 minutes. Add garlic and tomato paste and cook for about 1 minute. Pour in wine or a splash of broth and scrape the pan. Transfer everything to the slow cooker.
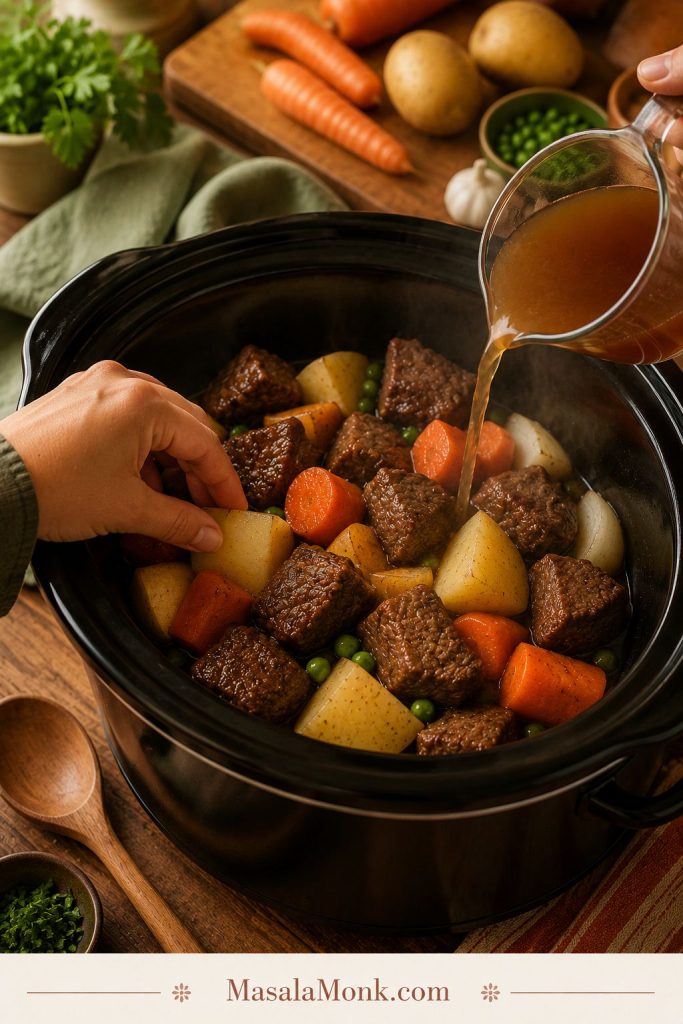
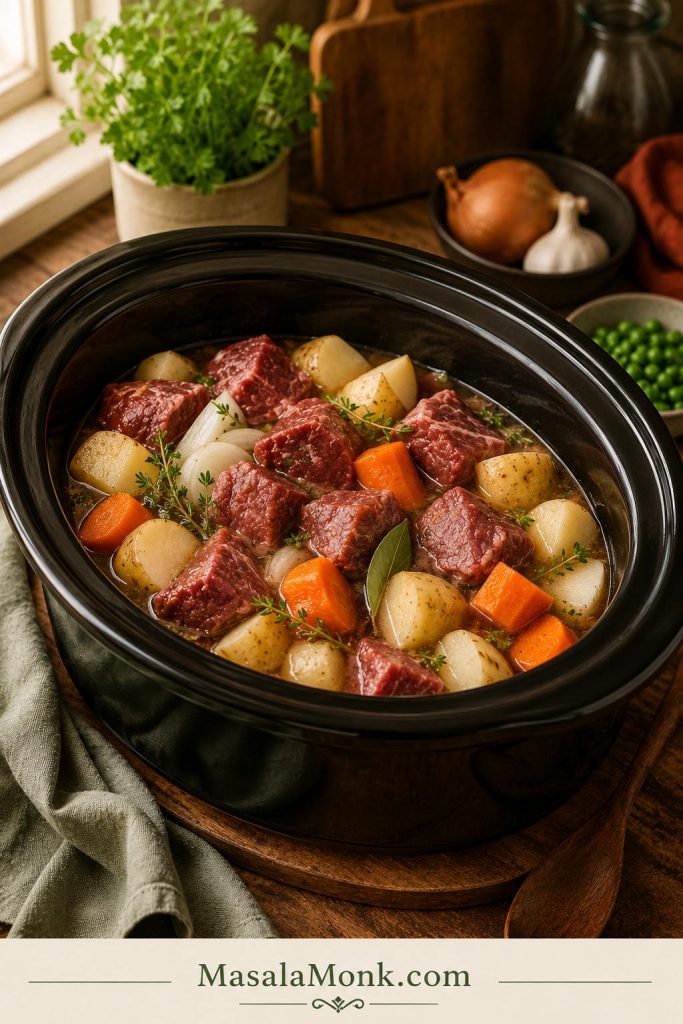
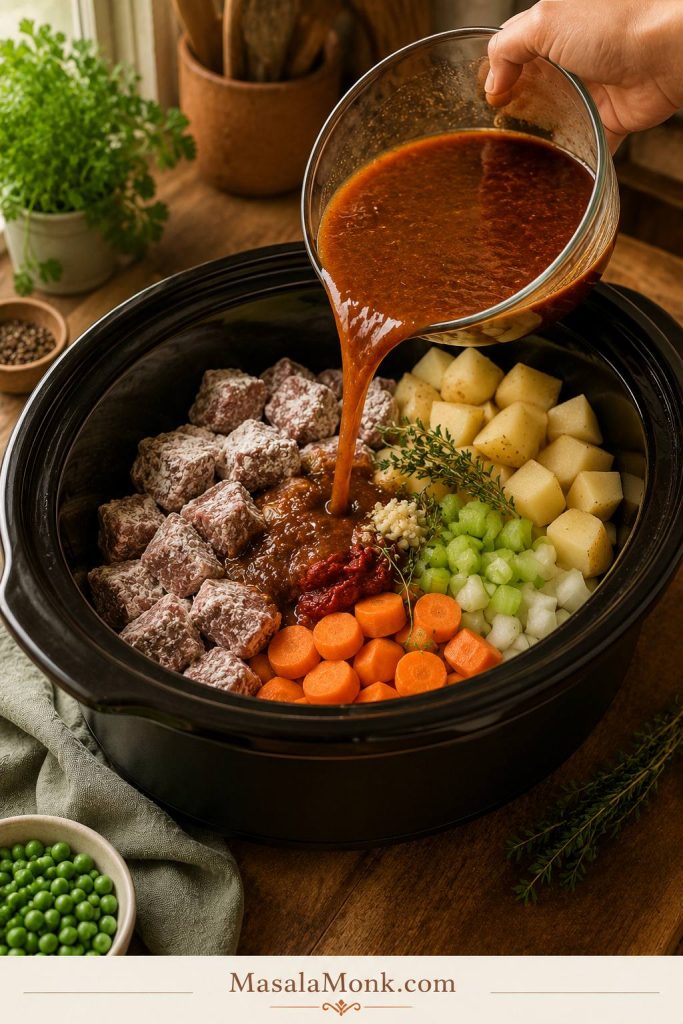
- Load the slow cooker. Add potatoes and carrots toward the bottom and sides, then add the beef, onion mixture, broth, Worcestershire sauce, balsamic if using, bouillon if using, celery, bay leaves, thyme, and rosemary. Stir gently. The liquid does not need to cover everything.
- Cook low and slow. Cover and cook on low for 8 hours, or until the beef is fork-tender. High works in 4 to 5 hours, but low gives better tenderness. Keep the lid on as much as possible.
- Add peas and thicken. Mix cornstarch with cold water until smooth. Stir slurry into the stew, then add frozen peas. Cover and cook on high for 20 to 30 minutes.
- Rest and serve. Turn off the slow cooker and let the stew rest for 10 to 15 minutes. Remove bay leaves and rosemary stem. Taste and adjust salt and pepper.
Notes
- For a no-browning version, toss beef with flour and seasoning, then add everything directly to the slow cooker except peas and slurry.
- If skipping wine, use 3 cups / 720 ml total beef broth.
- Add the extra ½ teaspoon salt only if using low-sodium broth and no salty shortcuts like bouillon, onion soup mix, gravy mix, or a seasoning packet.
- Start with the listed broth amount and adjust the final consistency after the beef is tender.
- If the beef is tough, cook it longer. Tough stew meat usually needs more time, not more heat.
- Thaw beef before adding it to the slow cooker. Frozen peas are fine near the end.
Recipe cue: Use the recipe card for the exact amounts, then use the visual sections below to judge texture, liquid level, and doneness.
The Start Low, Finish Thick Method
The secret to this stew is simple: start with less liquid than you would use for stovetop stew, let the beef and vegetables release their own moisture, then adjust the gravy only after the meat is tender.
The pot may look a little under-liquid at first. That is not a mistake; that is the plan. A stew that looks thin before the final step has not failed; it simply is not finished yet.
The anti-watery stew system: use less broth at the start, cut the vegetables large, cook on low until the beef gives, then thicken only after the slow cooker has created its own liquid.
Method cue: The anti-watery setup starts before cooking, with large chunks and restrained broth instead of a fully submerged pot.
Before You Start: Three Things That Matter Most
- Do not fully cover the stew with liquid. The beef and vegetables should be moistened, not swimming.
- Let tenderness decide the timing. The beef should give when pressed with a fork, not just be “cooked through.”
- Wait to judge the gravy. The final texture should be judged after the beef is tender, the slurry has cooked, and the stew has rested.
Visual Cues for Success
- Before cooking: the ingredients look moistened, not submerged.
- Once cooked: the beef gives easily with a fork.
- When thickened: the gravy looks glossy and lightly coats a spoon.
- After resting: the potatoes hold their shape and the gravy settles around the beef.
This is not a fussy stew. It is a patient one. Set it up well, let it cook gently, and make the final call on texture only when the beef is ready.
You’ll Like This Version If You Want
- A classic potatoes-and-carrots beef stew made in the slow cooker
- Rich, spoon-coating gravy instead of a thin beef broth
- A recipe that works with chuck roast or packaged beef stew meat
- A choice between browning the beef and a no-browning shortcut
- Potatoes that stay in soft, generous chunks
- Clear fixes for thin gravy, tough beef, bland flavor, or mushy vegetables
Prefer a brothy bowl? Add extra warm broth at the end, after the beef is tender and the gravy has been adjusted. This recipe is written as a thick, gravy-style stew.
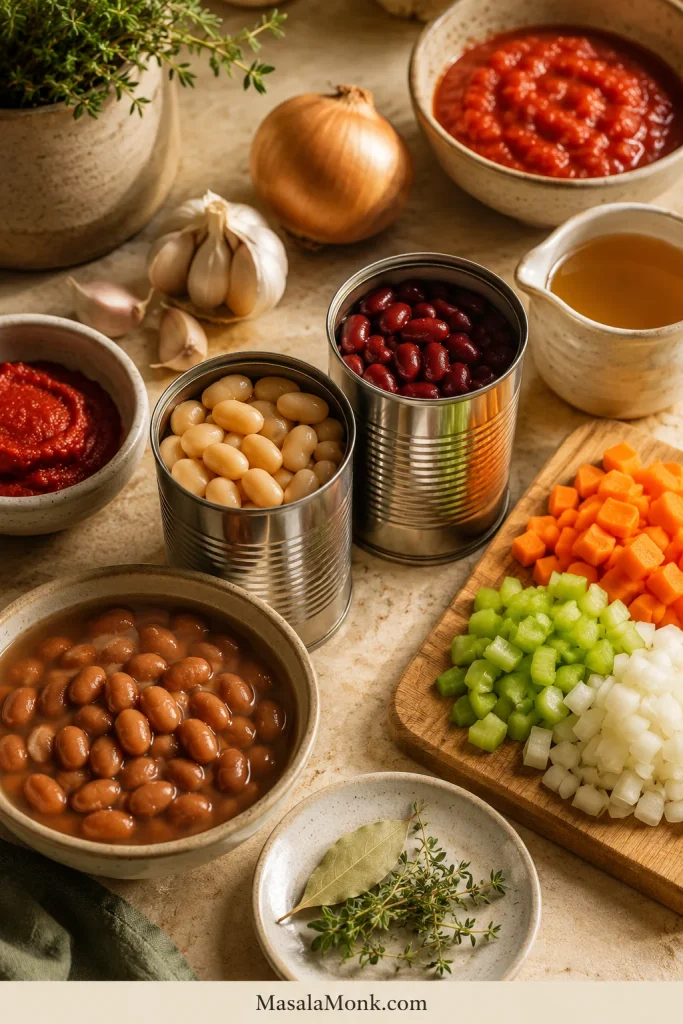
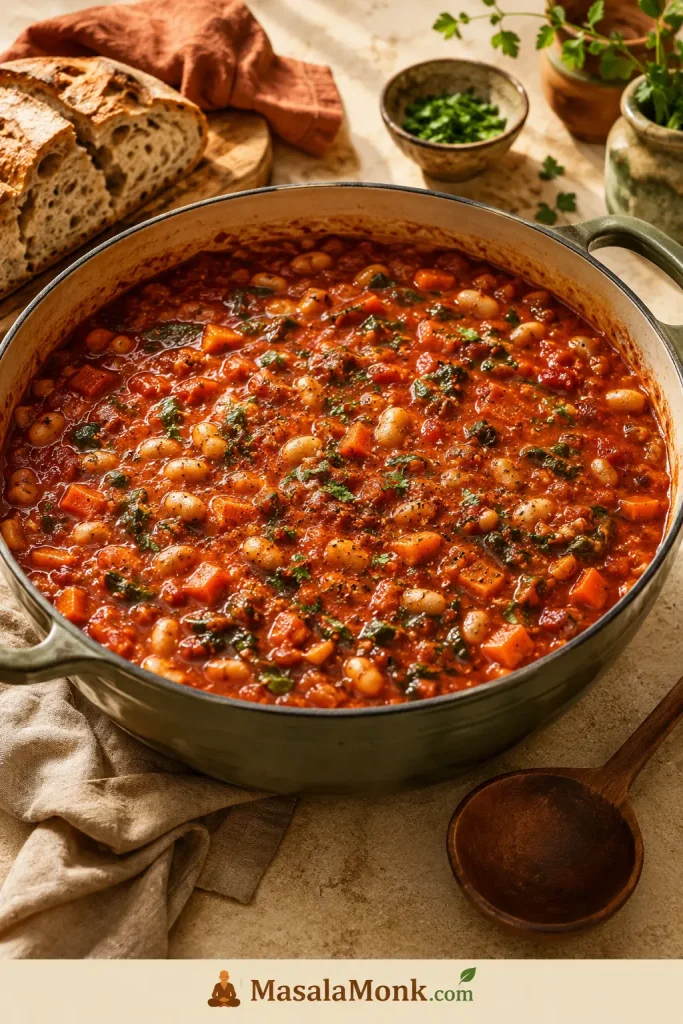
If you want the same thick, cozy feeling without beef, this bean stew recipe is a hearty meatless option with a similar spoonable texture.
Why This Recipe Works
The best slow cooker stews feel effortless at the table, but they are usually won before the lid goes on. This version uses a simple four-part system: less broth at the start, large vegetable pieces, low heat until the beef gives, and slurry only after the pot has shown you how much liquid it created.
Flour gives the beef a little body, tomato paste and Worcestershire build depth, and slow heat gives tougher cuts time to soften. The peas go in late so they stay sweet and green instead of dull.
Wait until the long cook is done before judging the gravy. By then, the beef and vegetables have released their liquid, and you can thicken what is actually in the pot instead of guessing at the start.
Kitchen confidence cue: do not judge the stew too early. A pot that looks a little loose at hour six can still finish beautifully after the slurry and a short rest.
What This Beef Stew Tastes Like
The gravy should taste rounded and savory, with the tomato paste melted into the background instead of tasting sharp or tomato-heavy. Worcestershire sauce and optional balsamic add just enough lift to keep the bowl rich without making it heavy.
The beef should be soft enough to press apart with a spoon, the potatoes should be creamy at the edges, and the carrots should taste sweet from the long cook. Browned beef gives the stew a deeper, roastier finish; the dump-and-go version is gentler, but still cozy and satisfying.
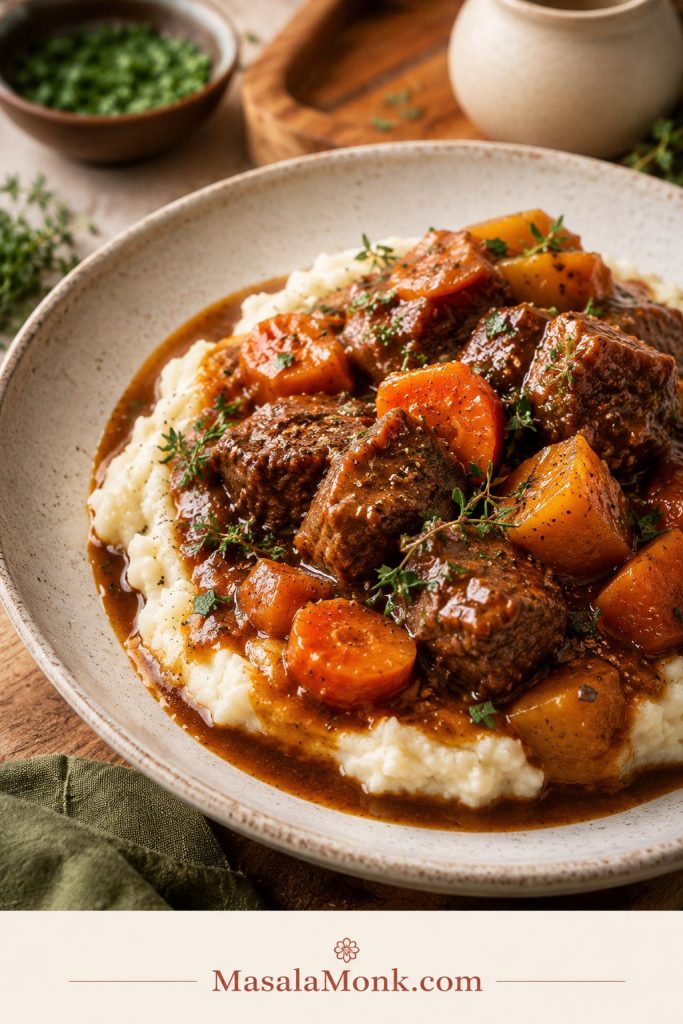
This is the kind of stew that wants bread, rice, mashed potatoes, or noodles nearby — something simple to catch the last spoonfuls of gravy at the bottom of the bowl.
That same cozy beef-and-potato comfort shows up in this slow cooker cottage pie, especially if you like rich gravy-style dinners.
Ingredients You’ll Need
Nothing here is fancy, but each ingredient has a job. The stew tastes best when the basics are doing their work: beef for depth, potatoes for body, carrots for sweetness, and a little acidity to wake up the gravy.
Ingredient cue: Each ingredient has a job, so keep the lineup simple and let beef, vegetables, broth, tomato paste, and herbs do the work.

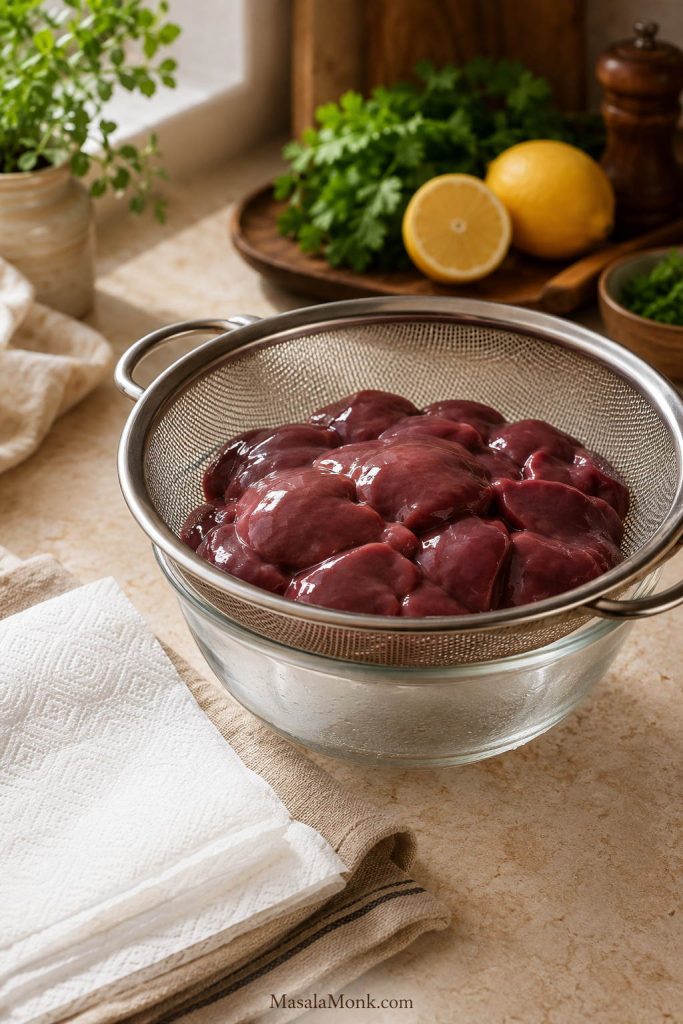
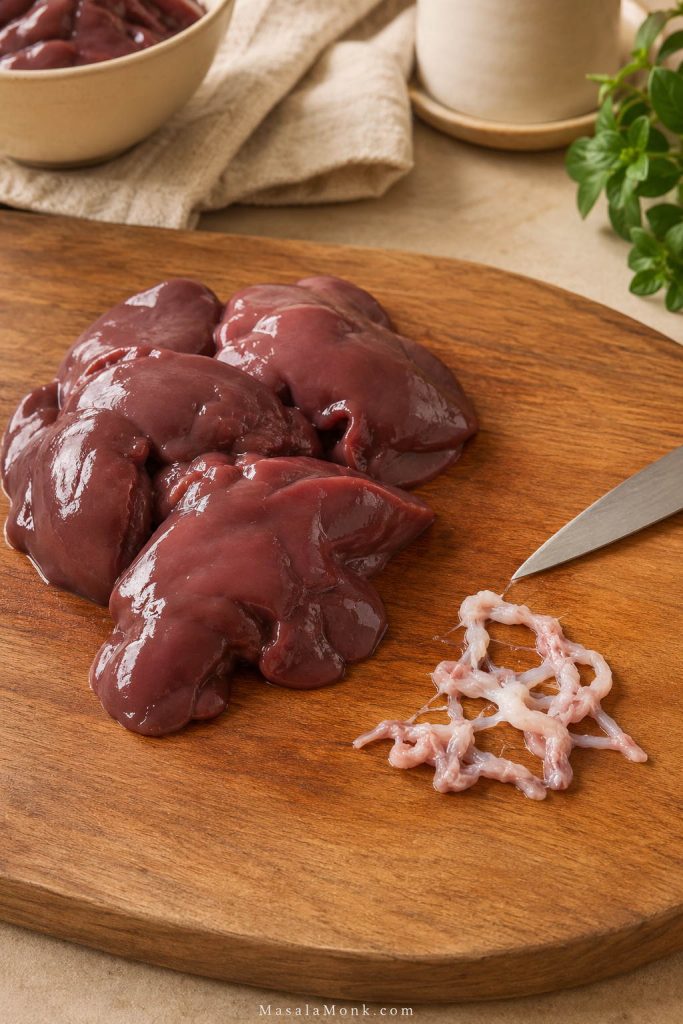
Beef
Chuck roast is the first choice here because it gives the best mix of tenderness and flavor. Packaged beef stew meat is also fine and is often the most convenient option; see the stew meat section if that is what you have.
Cut the beef into even 1¼- to 1½-inch chunks. Pieces that are too small can dry out, while very large chunks may need extra time before they soften.
Flour
Flour helps the beef brown and gives the gravy body. Use a light coating. Too much flour can make the stew feel heavy or pasty.
For a gluten-free version, skip the flour or use a gluten-free all-purpose flour blend. Then finish the stew with cornstarch or arrowroot slurry.
Potatoes
Yukon gold potatoes or red potatoes are best because they hold their shape. The goal is soft edges, not potato collapse.
Russet potatoes can be used, but they soften more and may cloud the gravy. If you use russets, cut them into larger chunks and expect a softer texture.
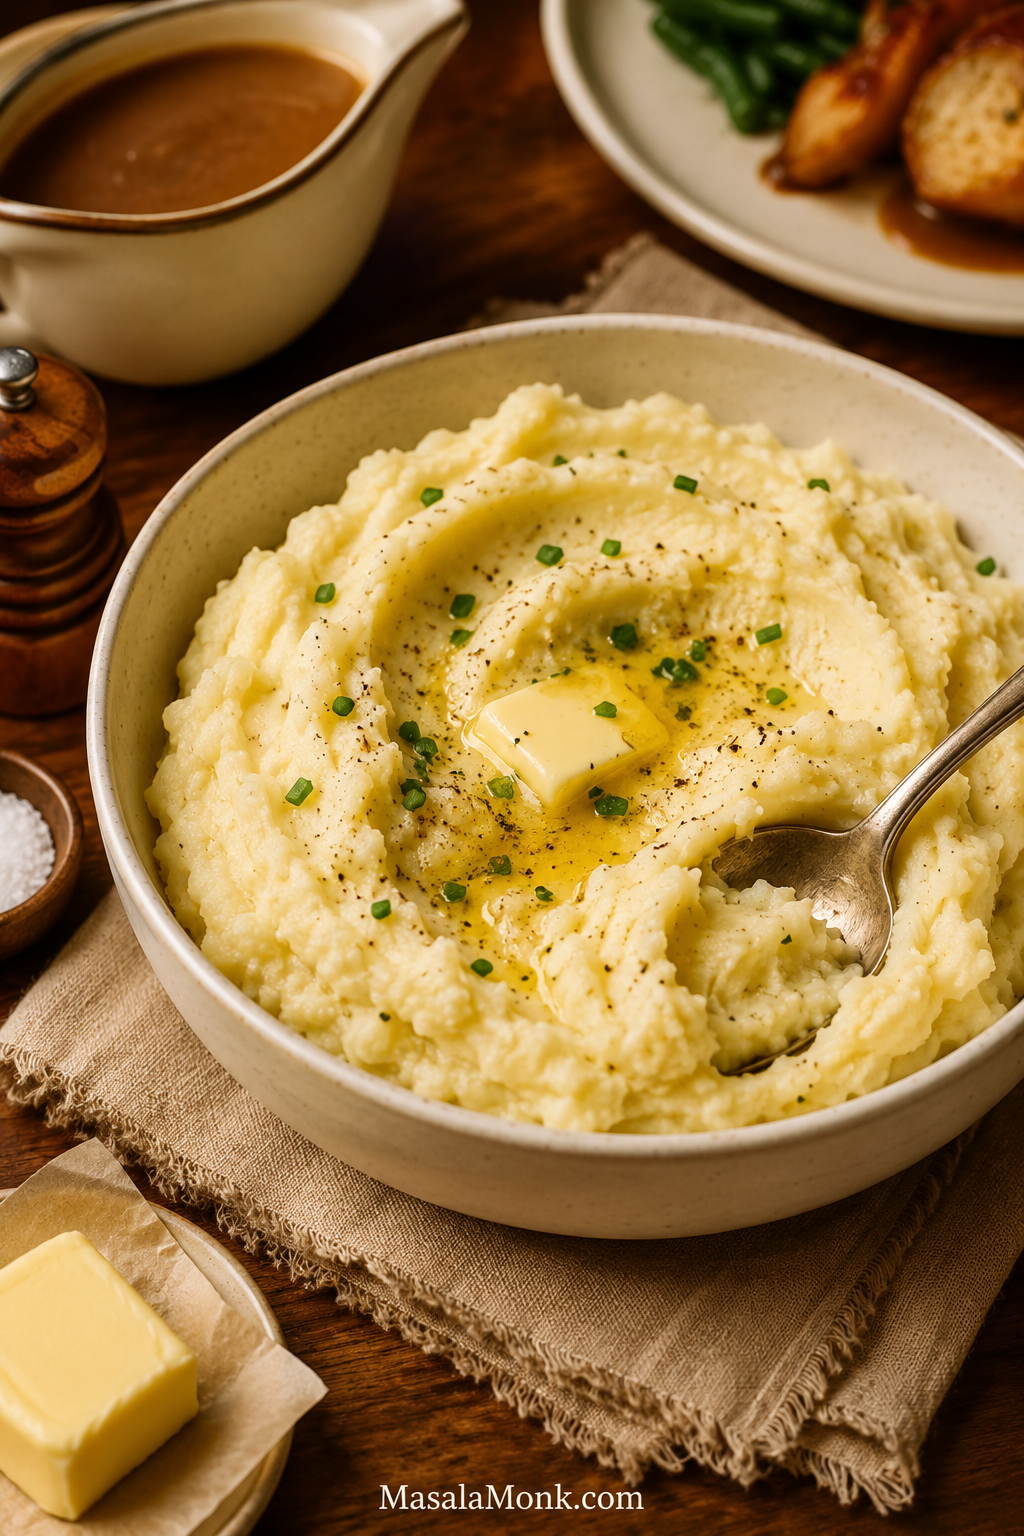
Serving the stew over potatoes instead of cooking potatoes inside it? These garlic mashed potatoes are built to stay creamy instead of gluey under gravy.
Carrots, Celery, and Onion
Carrots bring sweetness, celery adds a classic stew flavor, and onion gives the gravy a savory base. Cut carrots into thick pieces so they hold up during the long cook.
Tomato Paste, Worcestershire, and Broth
Cooked briefly or whisked well into the broth, tomato paste gives the gravy depth without making the stew taste like tomatoes. Worcestershire sauce adds savory depth. Beef broth or beef stock is the main liquid, but the amount is controlled so the pot finishes hearty instead of soupy.
Low-sodium broth gives you more control when bouillon, beef base, onion soup mix, or a seasoning packet is involved. Taste after thickening, not before; salt feels different once the gravy tightens.
Red Wine or No-Wine Option
Red wine adds depth and a richer stew flavor. For a no-wine version, use 3 cups / 720 ml total beef broth and keep the Worcestershire sauce. The optional balsamic becomes more useful without wine because it gives the gravy a small lift.
Herbs and Peas
Bay leaves, thyme, and rosemary are classic with beef stew. Frozen peas go in late because they only need enough time to heat through. Adding peas at the beginning can make them dull and mushy.
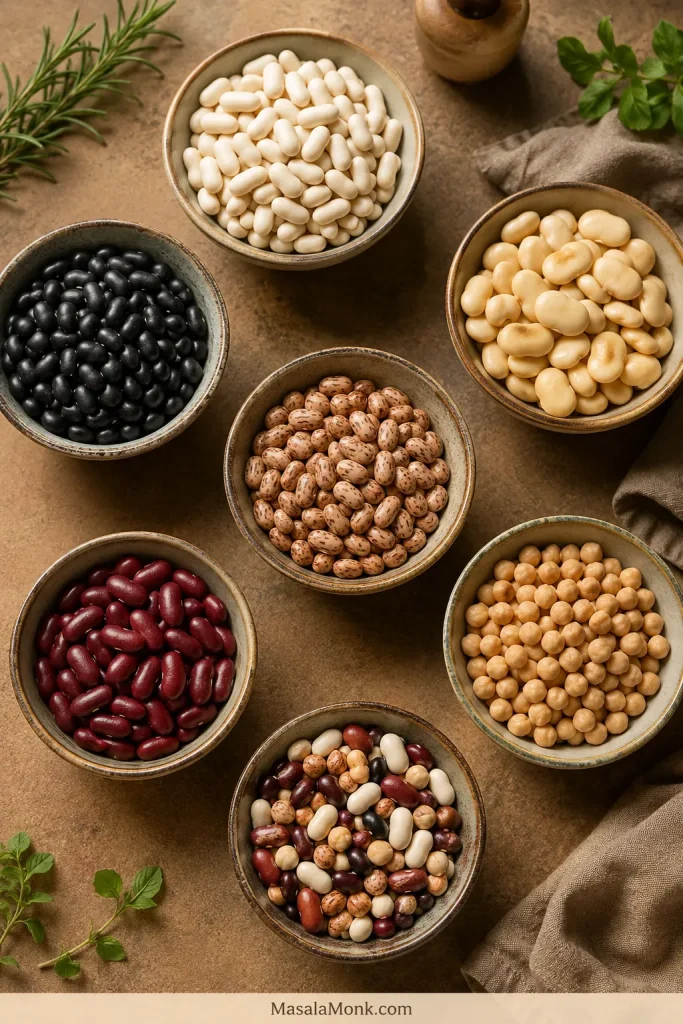
Best Beef to Use
The best beef for stew is not the fanciest beef. It is the cut that has enough time to soften. The slow cooker is not the place for very lean quick-cooking steak cuts; stew is where tougher, flavorful cuts become tender.
Beef cue: Choose a cut that benefits from slow cooking; chuck roast is better here than lean quick-cooking steak.

| Beef Cut | Use It? | Notes |
|---|---|---|
| Chuck roast | Best choice | Cut it yourself into even chunks for the best texture and flavor. |
| Beef stew meat | Yes | Convenient and useful when you want less prep. |
| Stewing beef, braising steak, casserole beef | Yes | Good global equivalents for long-cooked beef dishes. |
| Very lean steak cuts | Not ideal | Can become dry or chewy during long cooking. |
Using Beef Stew Meat in the Slow Cooker
This is the section for the pack of stew meat already sitting in your fridge. You do not need perfect butcher-counter cubes to make a good pot of stew.
Stew meat cue: Spread packaged stew meat out before cooking so you can trim hard fat and even out the largest pieces.
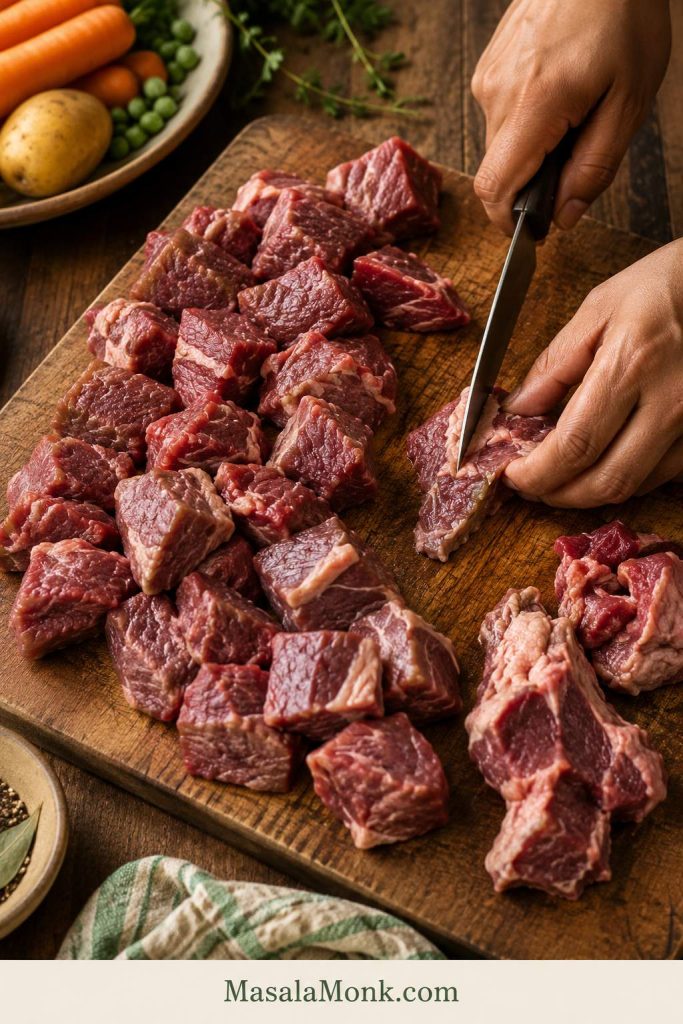
Spread the pieces out on a board before cooking. Cut very large pieces down, trim large hard fat, and aim for pieces around 1¼ to 1½ inches. Even pieces cook more evenly and give you a better chance of tender beef throughout the pot.
Size cue: Cut beef into even 1¼- to 1½-inch chunks so the stew meat stays juicy while it becomes fork-tender.

A light flour coating helps stew meat in two ways: it gives the gravy body and helps the beef brown if you are searing it first. Browning is useful, but not required. For the no-browning method, lean on the tomato paste, Worcestershire sauce, optional balsamic, and beef base for depth; the dump-and-go section shows the shortcut.
If stew meat is chewy after 8 hours, do not assume it is ruined. In most cases, it needs more time on low. Keep cooking until a piece gives easily when pressed with a fork.
Choose Your Method: Browned Beef or Dump-and-Go
There is no single right way to start this stew. Browning gives the deepest flavor, but the dump-and-go method is useful on busy days. The best choice is the one that gets dinner into the slow cooker without making the recipe feel like a project.
| Method | How to Do It | Best For | Tradeoff |
|---|---|---|---|
| Best flavor | Flour and brown the beef, sauté onion/garlic/tomato paste, then deglaze the pan. | Richest gravy, deeper color, weekend-style comfort | Adds 10–15 minutes |
| Dump-and-go | Add floured beef, vegetables, broth, tomato paste, Worcestershire, and herbs directly to the slow cooker. | Busy mornings, low effort, basic weeknight stew | Slightly lighter flavor and color |
| Middle path | Skip browning but whisk tomato paste, Worcestershire, balsamic, and beef base into the broth first. | Good flavor without the skillet step | Not quite as roasted as browned beef |
On busy days, the dump-and-go version still gets a real dinner going. Browning is better, but the stew can still be worth making without it.
How Much Liquid to Use So the Stew Is Not Watery
This is the moment where slow cooker stew asks you to trust the process a little. It is tempting to add more broth at the start, but restraint is what gives you rich gravy instead of soup.
On the stove, steam escapes and the sauce reduces. In a slow cooker, the lid traps that steam while the beef and vegetables release their own moisture. Too much broth at the beginning can leave you with a loose bowl by the end.
The Pot Should Look a Little Low on Liquid
When you first load the slow cooker, the ingredients should look moistened and surrounded by broth, not fully submerged like soup. Potatoes and carrots should still be visible. The beef should sit among the vegetables, not float in a deep pool of liquid. If the pot is already loose, use the thickening guide near the end instead of adding more starch too early.
Liquid cue: Before the lid goes on, the broth should sit around the beef and vegetables, not cover them like soup.
This can feel strange if you are used to stovetop stew, but it is intentional. The liquid level will rise as the beef and vegetables cook. Resist adding extra broth early unless the pot truly looks dry.
Warning cue: If the ingredients are floating before cooking, the slow cooker may finish with thin broth instead of rich gravy.
Texture cue: the liquid should come partway around the beef and vegetables. It should not fully cover everything. A slightly low-looking pot at the start usually becomes a better stew at the end.
If you like oniony gravy-style slow-cooker dinners, this slow cooker French onion chicken uses the same idea of controlled liquid and a cozy sauce.
How Full Should the Slow Cooker Be?
For even cooking, aim for the slow cooker to be about half to three-quarters full. Packed to the very top, the stew may cook unevenly or bubble over. Too empty, and the edges may cook faster while the liquid behaves differently.
A 6-quart / 5.7 L slow cooker is the best size for this full recipe. Use the small-batch version below for a 3-quart cooker.
How to Make It Step by Step
Step 1: Cut the Beef and Vegetables Properly
Cut the beef into 1¼- to 1½-inch pieces. This size is large enough to stay juicy and small enough to tenderize well.
Cut potatoes into large chunks, about 1½ inches. Cut carrots into thick pieces. Small vegetable pieces can become mushy after 8 hours.
Vegetable cue: Cut potatoes and carrots larger than you would for soup because they need to survive the full slow-cooker time.
Step 2: Season and Flour the Beef
Season the beef with salt and pepper, then toss with flour. The coating should be light and even. Shake off any heavy clumps.
That light coating helps the beef brown in the skillet and gives the stew more body later.
Flour cue: The coating should look light and dusty, not thick or clumpy, so the gravy gains body without turning pasty.
Step 3: Brown the Beef, If You Have Time
Heat oil in a large skillet. Brown the beef in batches, leaving space between pieces. Crowding the pan makes the beef steam instead of brown.
You only need to brown the outside. The beef will finish cooking in the slow cooker.
Browning cue: Give the beef room in the skillet so the outside browns deeply before it goes into the slow cooker.
Step 4: Build the Flavor Base
After browning the beef, use the same skillet for onion, garlic, and tomato paste. Then add wine or broth to loosen the browned bits from the pan. Those browned bits bring depth into the stew.
Flavor-base cue: Cook the tomato paste briefly with onion and garlic so the gravy tastes deeper, not raw or sharp.
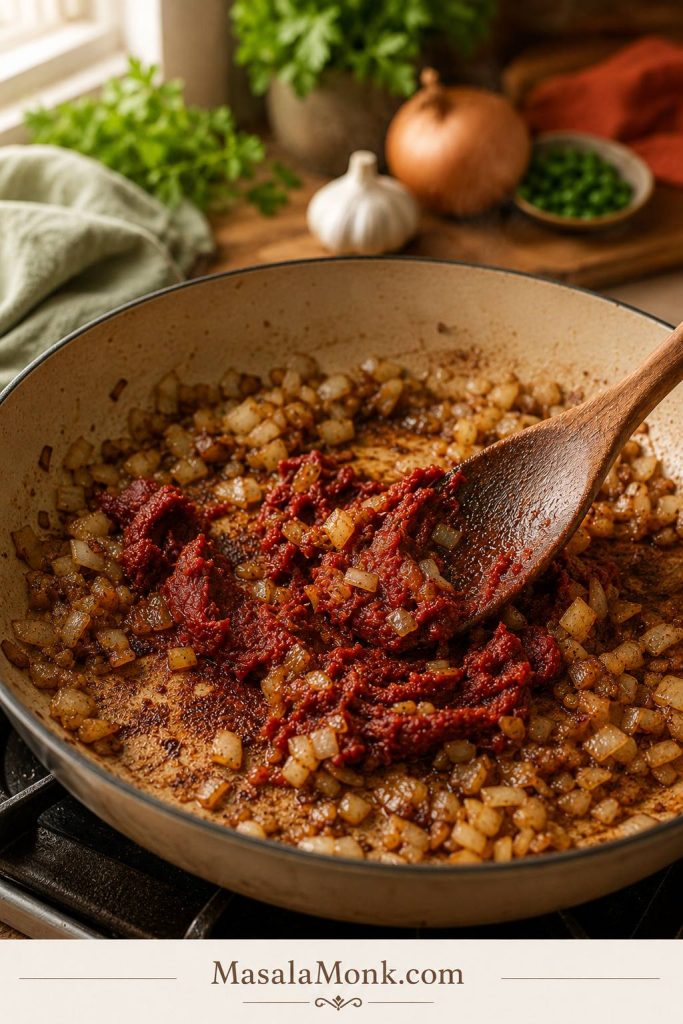
Deglazing cue: Scrape up the browned bits before they are lost; they are concentrated flavor for the slow-cooker gravy.
For the no-browning version, whisk the tomato paste, Worcestershire sauce, balsamic if using, and broth together before pouring them over the beef and vegetables. This helps the tomato paste blend in instead of sitting in clumps.
Step 5: Load the Slow Cooker
Add potatoes and carrots toward the bottom and sides because they can handle the long cook. Add the beef over and among the vegetables, then add the onion mixture, broth, Worcestershire sauce, balsamic if using, celery, herbs, and bouillon or beef base if using.
Stir gently so everything is distributed, but do not worry if the ingredients are not fully submerged. Save the peas and cornstarch slurry for the finish.
Step 6: Cook Until the Beef Gives Easily
Cook on low for about 8 hours. Low is the best setting for tender beef because it gives the meat time to soften gradually.
On high, start checking around 4 hours, then continue until the beef is tender. Chewy beef usually needs more time, not more heat.
Keep the lid on as much as possible. Opening it repeatedly releases heat and makes the timing less predictable.
Doneness cue: Trust the fork more than the timer; the beef should give easily before you call the stew done.

Potato cue: The potato pieces should be tender but still visible, which is why large chunks matter from the beginning.
Step 7: Add Peas and Finish the Gravy
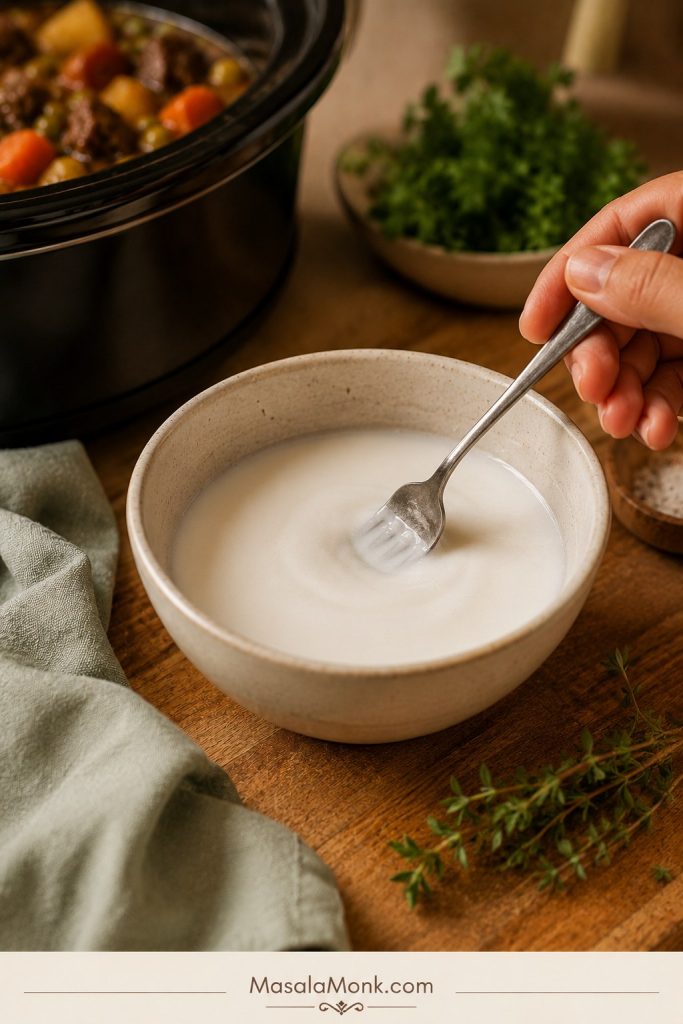
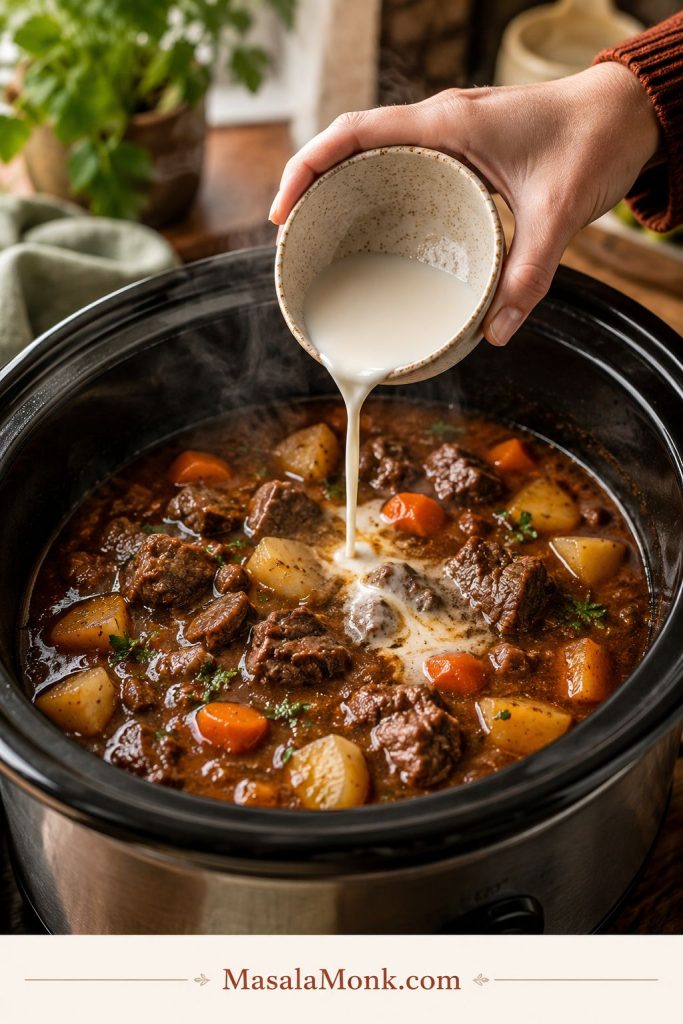
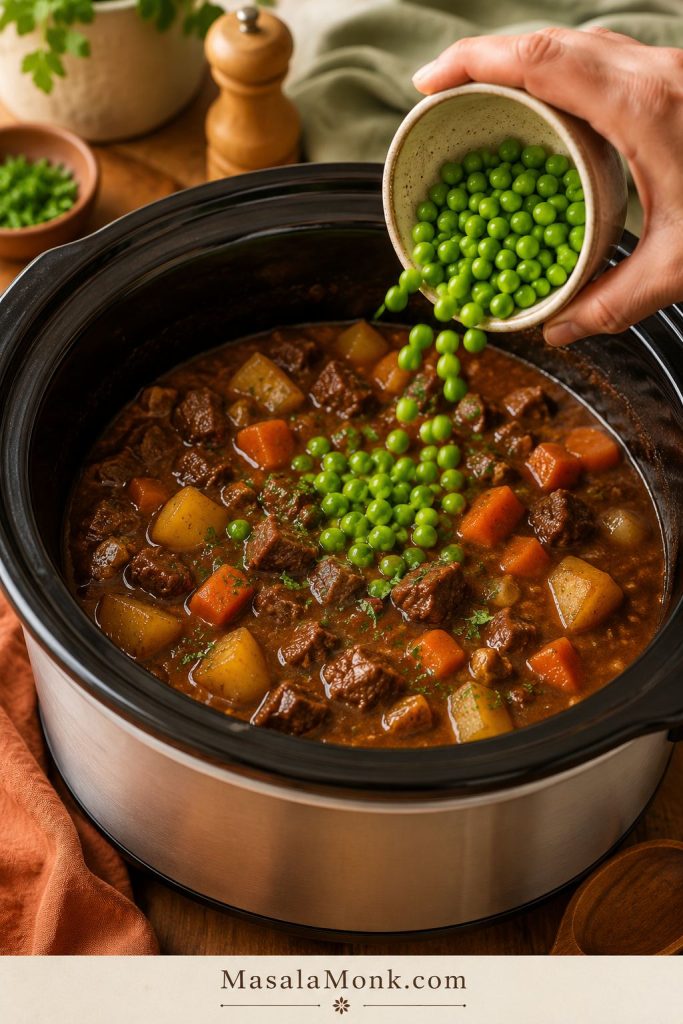
Mix cornstarch with cold water in a small bowl. Stir until smooth, then pour it into the stew. Add frozen peas. Cover and cook on high for 20 to 30 minutes.
Before-thickening cue: Judge the gravy after the long cook, not before, because the beef and vegetables release liquid as they soften.

Slurry cue: Mix starch with cold water first so it disappears smoothly into the hot stew instead of clumping.
Thickening cue: Add slurry near the end, once you can see exactly how much liquid is in the pot.
Pea cue: Frozen peas only need a short finish, so add them late instead of letting them cook all day.
The gravy should turn glossier and begin to coat a spoon. A good stew often looks slightly under-liquid before cooking and glossy after this final step.
Texture cue: The gravy is finished when it looks glossy and clings to a spoon instead of running off like broth.
Step 8: Rest Before Serving
Let the stew rest for 10 to 15 minutes before serving. This gives the gravy time to settle and makes the stew easier to serve without breaking up the potatoes.
Resting cue: A short rest helps the finished gravy settle around the beef and vegetables before you ladle the stew.
How Long to Cook It
Beef stew is done when the beef is soft enough to spoon apart, not just when the timer ends.
| Setting | Time | Best Use |
|---|---|---|
| Low | 8 to 9 hours | Best tenderness and flavor |
| High | 4 to 5 hours | Faster option, but slightly less forgiving |
| Finish on high | 20 to 30 minutes | Thickening after slurry |
Low is the better default for beef stew. High is fine when dinner needs to move faster, but low gives chuck roast and stew meat more time to soften. A perfect gravy around chewy beef is still not done, so let the meat lead the timing.
Slow cookers vary. If yours runs hot, check the stew a little earlier and keep the potato chunks large. If yours runs cool, the beef may need extra time on low.
How to Thicken the Gravy
Do not worry about perfect thickness at the start. Once the beef is tender and the vegetables have released their moisture, the slow cooker will show you what the gravy actually needs.
Body builds in two stages: a light flour coating at the start and a slurry at the finish. Think of the slurry as the final polish, not a rescue for bad stew.
| Thickening Method | Best For | When to Add | How to Use It |
|---|---|---|---|
| Flour on beef | Body from the start | Before cooking | Toss beef lightly with flour before browning or slow cooking. |
| Cornstarch slurry | Quick glossy finish | Last 20–30 minutes | Mix cornstarch with cold water, then stir into hot stew. |
| Arrowroot slurry | Gluten-free or paleo-style thickening | Last 10–20 minutes | Add near the end and stop once the gravy thickens. |
| Mashed potatoes | Natural thickening | After potatoes are soft | Mash a few potato pieces into the gravy. |
| Saucepan reduction | Very loose stew | At the end | Reduce some liquid on the stove, then stir it back in. |
Flour at the Beginning
The flour coating on the beef gives the stew some body as it cooks. If you brown the beef, the flour also helps create a richer surface and better color.
Use only enough flour to coat the beef lightly. Too much flour can make the gravy heavy or pasty.
Why the Slurry Waits Until the End
A cornstarch slurry is the easiest way to control the final texture. Always mix cornstarch with cold water before adding it to the hot stew. Dry cornstarch can clump if it goes straight into the slow cooker.
Do not add the slurry at the beginning. It can thin out or lose thickening power during the long cook. Add it after the long simmer, when you can see how much liquid is actually in the pot.
Use 2 tablespoons cornstarch mixed with ¼ cup cold water for the standard finish. For an extra-thick gravy, increase the cornstarch to 3 tablespoons while keeping the water at ¼ cup.
Emergency Fix for Very Thin Gravy
For very thin gravy, ladle some of the liquid into a saucepan and simmer it on the stove until reduced. Stir the reduced liquid back into the slow cooker. This is the fastest way to rescue a stew that started with too much broth.
Do not dump dry flour or cornstarch directly into the slow cooker. Do not add a large amount of flour at the end, or the stew can taste raw and pasty. Wait to fix the thickness until the beef is tender.
Crock Pot Beef Stew: Is It the Same Recipe?
Yes. Crock Pot is a type of slow cooker, so the same method works either way.
For the full recipe, a 6-quart / 5.7 L slow cooker is ideal. A 5-quart cooker can work if it is not overfilled, while a 7-quart cooker may leave the stew sitting a little shallower depending on the model.
Using a 3-quart cooker? Follow the small-batch version below.
Easy Dump-and-Go Method
This is the basic version for days when you want the stew started fast. Using a packet too? Check the seasoning packet notes so the stew does not become too salty.
Toss the beef with flour, salt, and pepper. Add it to the slow cooker with the potatoes, carrots, celery, and onion. Whisk the broth, tomato paste, Worcestershire sauce, balsamic if using, and beef base if using, then pour it over the top. Add the herbs, cover, and cook on low until the beef is tender.
During the final 20 to 30 minutes, stir in the cornstarch slurry and frozen peas. Browning gives better flavor, but this version still gives you a warm, hearty stew with very little effort.
Dump-and-go cue: Whisk the broth mixture before pouring it in so the tomato paste and seasonings reach the whole pot.
Can I Use Onion Soup Mix or a Beef Stew Seasoning Packet?
Yes, you can use onion soup mix or a beef stew seasoning packet. Shortcuts are not the problem. Stacking salty shortcuts is the problem.
Packets, bouillon, beef base, gravy mix, and store-bought broth can all be salty. Low-sodium broth gives you more room to adjust later.
A packet can add seasoning, but it does not automatically fix a loose gravy. You still need to control the amount of liquid and finish the texture once the stew has cooked. Taste after thickening, because salt can seem stronger once the gravy tightens.
| Shortcut | How to Use It | What to Reduce |
|---|---|---|
| Onion soup mix | Add 1 packet with the broth for a savory onion-style stew. | Reduce salt and skip bouillon or beef base at first. |
| Beef stew seasoning packet | Use as the main seasoning base for an easy family-style version. | Use low-sodium broth and taste before adding more salt. |
| Brown gravy mix | Use only if you want a packet-style thick gravy. | Reduce cornstarch slurry so the stew does not become gummy. |
| Bouillon or beef base | Use a small amount for deeper beef flavor. | Reduce added salt and avoid stacking too many salty shortcuts. |
Shortcut rule: if using a seasoning packet, skip the bouillon or beef base in the main recipe first. You can always add more flavor later, but it is harder to fix an over-salty stew.
Variations
Once the liquid and timing are right, you can change the flavor without throwing off the stew. Keep the liquid ratio steady when adding mushrooms, beer, or extra vegetables, then adjust the texture at the end.
Red Wine Slow Cooker Beef Stew
Use ½ cup red wine along with the beef broth. If browning the beef, use the wine to deglaze the pan before adding everything to the slow cooker. The wine gives the stew a deeper, rounder flavor.
Slow Cooker Beef Stew Without Wine
Replace the wine with extra beef broth, using 3 cups / 720 ml total broth. Keep the Worcestershire sauce and optional balsamic for depth. You can also add a little extra tomato paste or beef base if you want a richer flavor.
Guinness or Beer Beef Stew
Replace the red wine with stout or another dark beer. This gives the stew a darker, slightly malty flavor without changing the basic slow-cooker method.
Mushroom Beef Stew
Add 8 oz / 225 g sliced mushrooms. For best texture, sauté them briefly after browning the beef, then add them to the slow cooker. Mushrooms release liquid, so do not increase the broth.
Gluten-Free Slow Cooker Beef Stew
Use gluten-free flour to coat the beef, or skip the flour and rely on cornstarch or arrowroot slurry at the end. Make sure your Worcestershire sauce, broth, bouillon, and seasoning packets are gluten-free if needed.
Low-Carb or Keto-Style Beef Stew
For a lower-carb version, replace potatoes with turnips, radishes, mushrooms, or extra celery and carrots. Because potatoes and flour do a lot of the thickening here, keep the low-carb version simple and adjust the gravy at the end with a small amount of slurry if needed.
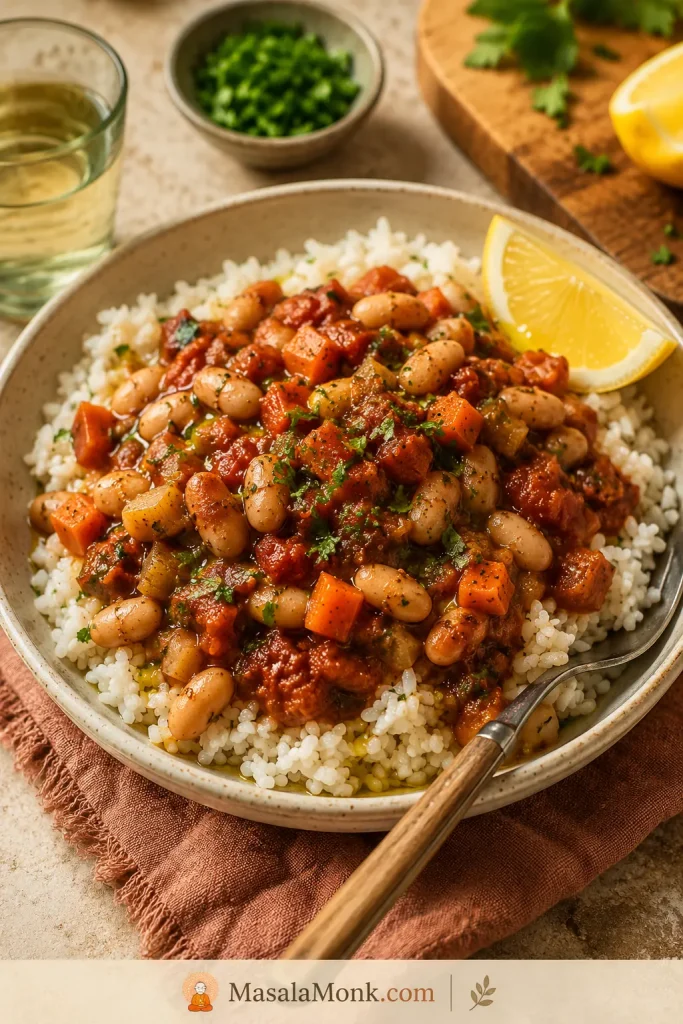
Beef Stew Over Rice
Serve leftovers over rice to stretch the meal. This works especially well if the stew has plenty of gravy. Cooking for two instead of making the full pot? Use the small-batch amounts. For fluffy grains that soak up sauce without turning mushy, use this guide on how to cook perfect rice.
Rice cue: Serve leftovers over rice when you want the gravy to stretch further and make a smaller amount feed more bowls.
Small-Batch Version for Two
For one or two people, a 3-quart slow cooker is the better fit. The method stays the same, but the liquid needs to stay restrained.
| Ingredient or Detail | Small-Batch Amount |
|---|---|
| Beef | ¾ to 1 lb / 340–450 g |
| Potatoes | ½ lb / 225 g |
| Carrots | 2 medium |
| Onion | ½ medium |
| Beef broth and wine combined | 1 to 1½ cups / 240–360 ml |
| Flour | 1 to 1½ tablespoons / 8–12 g |
| Cornstarch | 1 tablespoon / 8 g |
| Cold water for slurry | 2 tablespoons / 30 ml |
| Slow cooker size | 3-quart |
| Cook time | 7 to 8 hours on low |
A small slow cooker does not need much broth. The ingredients should not be swimming at the start. If your 3-quart cooker runs hot, start with the lower end of the liquid range and adjust near the end only if needed.
Small-batch cue: Match the recipe to the cooker size so a smaller amount of stew does not spread too thin.
Troubleshooting: Thin Gravy, Tough Beef, Mushy Potatoes
Stew is more forgiving than it looks. A thin pot, chewy beef, or bland broth does not mean dinner is lost; most fixes happen in the final stretch, once the beef is tender and you can see what the gravy actually needs.
Quick Fixes by Problem
| Problem | Likely Reason | Fix |
|---|---|---|
| Stew is watery | Too much broth, trapped steam, or vegetables releasing moisture | Add slurry, cook uncovered on high, or reduce some liquid in a saucepan. |
| Beef is tough | It has not cooked long enough, or the pieces are uneven | Keep cooking on low until the beef is fork-tender. |
| Potatoes are mushy | Pieces were too small or potatoes were too soft | Use Yukon gold or red potatoes and cut them into larger chunks next time. |
| Carrots or potatoes are still firm | Pieces were very large or the slow cooker runs cool | Keep cooking on high for 20 to 40 minutes. If the beef is already perfect, remove the firm vegetables, simmer or microwave them with a splash of broth until tender, then return them to the stew. |
| Gravy tastes bland | Needs more salt, umami, browning, or acidity | Add Worcestershire, beef base, tomato paste, salt, or a tiny splash of vinegar. |
| Stew is too salty | Packet, broth, or bouillon added too much salt | Add unsalted broth if there is room, or serve over rice, potatoes, or noodles. |
| Stew is too thick | Slurry thickened more than expected or stew rested/chilled | Stir in warm broth a splash at a time until the gravy loosens. |
| Gravy is lumpy | Dry starch was added directly | Always mix cornstarch with cold water before adding it. |
| Stew is greasy | Fatty beef or surface fat was not skimmed | Skim the top before thickening. |
| Peas are dull and mushy | They were added too early | Add frozen peas during the last 10 to 20 minutes. |
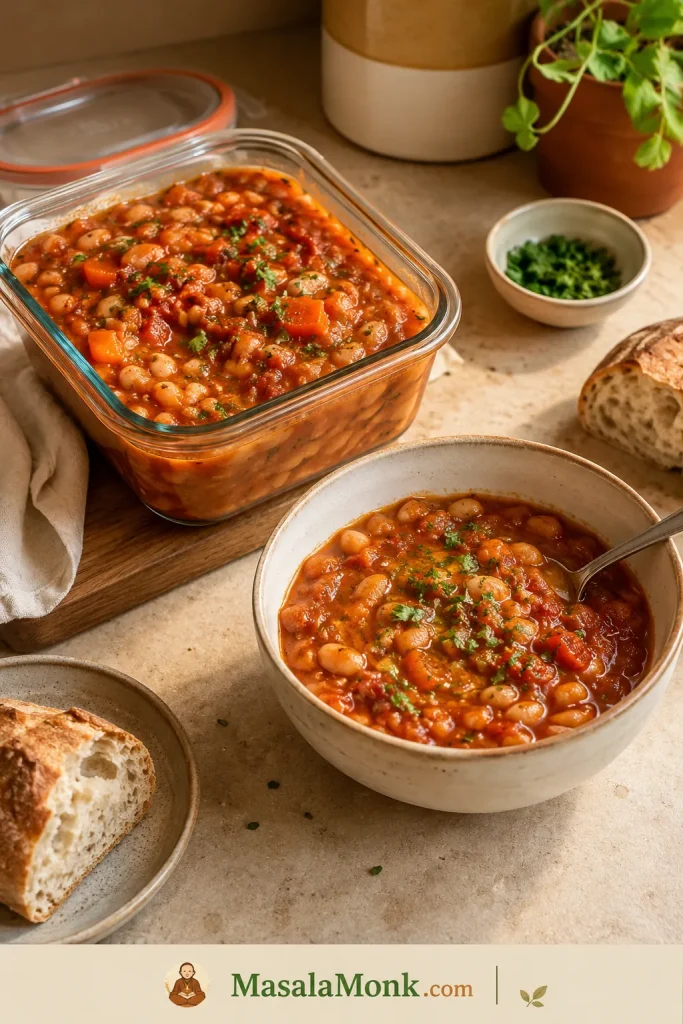
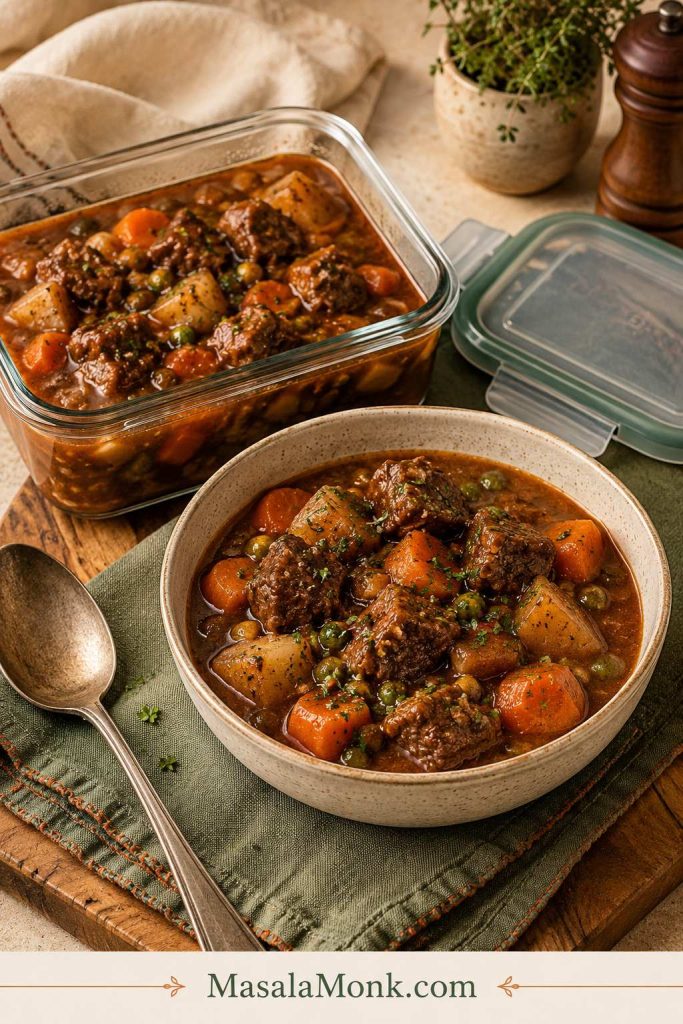
Storage, Freezing, and Reheating
Leftovers are one of the quiet rewards of beef stew. The gravy settles, the flavors round out, and the next bowl often tastes even deeper. For pairing ideas, jump to what to serve with beef stew.
Let the stew cool, then store leftovers in airtight containers. The gravy thickens as it chills, so do not be surprised if it looks firmer the next day.
Storage cue: Expect the gravy to thicken in the fridge, then loosen leftovers gently only if they need it.
| Storage Method | Time | Reheating Note |
|---|---|---|
| Refrigerator | Up to 4 days | Add a splash of broth or water if the gravy is too thick. |
| Freezer | Up to 3 months | Potatoes may soften slightly after thawing, but the flavor stays good. |
| Reheating | Until steaming hot throughout | Reheat gently on the stove or in the microwave, stirring occasionally. |
One safety note: do not put frozen beef directly into the slow cooker. Thaw it first so it heats evenly and safely. The USDA slow cooker safety guide recommends thawing meat or poultry before slow cooking.
Frozen peas or frozen mixed vegetables are fine near the end because they are small and heat quickly.
Can I Prep It the Night Before?
Yes. You can cut the vegetables, trim the beef, and measure the seasonings the night before. Store everything covered in the refrigerator. If you brown the beef ahead, cool it quickly and refrigerate it separately or with the vegetables.
Do not leave the filled slow cooker insert sitting at room temperature for hours before cooking. Add the chilled ingredients to the slow cooker when you are ready to start the recipe, then begin cooking right away.
What to Serve With Beef Stew
A bowl of this can stand on its own, but the gravy almost demands something to catch it.
Serving cue: A good ladleful should bring beef, vegetables, and gravy together, not leave the chunks behind.

For Soaking Up the Gravy
- Homemade garlic bread loaf
- Dinner rolls
- Biscuits
- Cornbread
- Eggless Yorkshire pudding
Bread cue: If the gravy clings to bread, the liquid balance and thickening step did their job.
For Stretching Leftovers
- Mashed potatoes
- Rice
- Buttered noodles
- Toast
- Pot pie crust
Leftover cue: Thick stew over mashed potatoes turns the same pot into a second dinner without making the bowl watery.
For Something Fresh on the Side
- Green salad
- Cabbage slaw
- Roasted green beans
- Steamed peas
- Chickpea salad
Frequently Asked Questions
These are the questions that usually come up once the stew is actually in the pot.
Should beef stew be covered with liquid in the slow cooker?
Not fully. The beef and vegetables should be moistened and surrounded by broth, but they do not need to be completely covered like soup. The ingredients release liquid as they cook, and too much broth at the start can make the stew watery.
Why is my slow cooker beef stew watery?
The usual reason is too much added broth. Vegetables also release moisture, and the covered slow cooker traps steam. Use less liquid at the start and thicken near the end with a cornstarch slurry.
How do I thicken slow cooker beef stew?
Use a slurry made from cornstarch and cold water, then stir it in during the final 20 to 30 minutes. For extra body, mash a few soft potato pieces into the gravy or reduce some liquid in a saucepan and stir it back in.
Why is my beef stew meat chewy after 8 hours?
It usually needs more time. Large pieces, cooler slow cookers, and collagen-rich cuts can take longer to soften. Keep cooking on low until the beef gives easily with a fork.
Can I use beef stew meat?
Yes. Beef stew meat is convenient and fits this recipe well. Check the pieces before cooking, cut very large chunks down, and keep cooking until the beef is tender all the way through.
What is the best beef for slow cooker beef stew?
Chuck roast is the first choice because it becomes tender and flavorful during long cooking. Beef stew meat also works well. Avoid very lean steak cuts because they can become dry or chewy in the slow cooker.
Can I put raw beef in slow cooker beef stew?
Yes. Browning adds flavor, but raw beef can go into the slow cooker. Toss it with seasoning and flour first.
Do I have to brown beef before adding it to the slow cooker?
No. Browning gives deeper color and flavor, but the no-browning version still works if you build flavor with tomato paste, Worcestershire sauce, optional balsamic, and beef base.
Is it better to cook beef stew on low or high?
Low is better for tenderness. High is fine when dinner needs to move faster, but low gives chuck roast and stew meat more time to soften.
How long does beef stew take in a slow cooker?
Most slow cooker beef stew takes about 8 hours on low or 4 to 5 hours on high. The exact time depends on your slow cooker and the size of the beef pieces. The stew is ready when the beef gives easily with a fork.
Can I add potatoes at the beginning?
Yes. Add potatoes at the beginning if they are cut into large chunks and you are using Yukon gold or red potatoes. Small pieces or softer russet potatoes can break down more during the long cook.
What potatoes are best for beef stew?
Yukon gold and red potatoes are best because they hold their shape. Russet potatoes work, but they soften more and can make the gravy cloudier.
Can I make slow cooker beef stew without wine?
Yes. Replace the wine with extra beef broth, using 3 cups / 720 ml total broth. Add Worcestershire sauce, optional balsamic vinegar, tomato paste, or beef base for extra depth.
Can I use onion soup mix?
Yes. Use low-sodium broth and reduce added salt because onion soup mix is salty. Skip bouillon at first.
Can I use gravy mix instead of cornstarch?
Yes, but add it carefully. Gravy mix already contains salt and thickener, so use less slurry and taste before adding more seasoning.
When should I add peas?
Add frozen peas during the last 10 to 20 minutes of cooking. They only need to heat through. Adding them at the beginning can make them mushy and dull.
Can I freeze slow cooker beef stew?
Yes. Freeze cooled stew in airtight containers for up to 3 months. The potatoes may become softer after thawing, but the flavor is still good.
Can I make this in a 3-quart slow cooker?
Yes. Use the small-batch version: ¾ to 1 lb / 340–450 g beef and 1 to 1½ cups / 240–360 ml total liquid. Keep the pot from looking flooded at the start.
Can I start with frozen beef?
No. Thaw the beef first before adding it to the slow cooker. Frozen peas or frozen vegetables are fine near the end because they heat quickly.
Can I prep this the night before?
Yes. Cut the vegetables, trim the beef, and measure seasonings ahead. Keep everything covered in the refrigerator. Start the slow cooker when you are ready to cook, not hours later on a delayed timer.
The Bottom Line: Tender Beef, Rich Gravy, Dinner Done
The best slow cooker beef stew is not complicated, but it does need the right balance. Use beef that benefits from long cooking, keep the liquid controlled, finish the gravy after the meat is tender, and let the stew rest before serving.
Once you know the liquid level your slow cooker likes, this becomes one of those dependable cold-weather dinners you can start early and trust. Keep the beef tender, the vegetables chunky, and the gravy finished at the end, and the whole pot feels calmer.
A good stew should feel generous, not complicated. Brown the beef when you want the deepest flavor. Skip browning when life is busy. Either way, the slow cooker gives you tender beef, soft vegetables, and a rich gravy that makes the kitchen smell like dinner has been taking care of itself all day.