Posted on Leave a comment

Chicken Liver Recipe with Onions: Tender, Rich, and Never Bitter

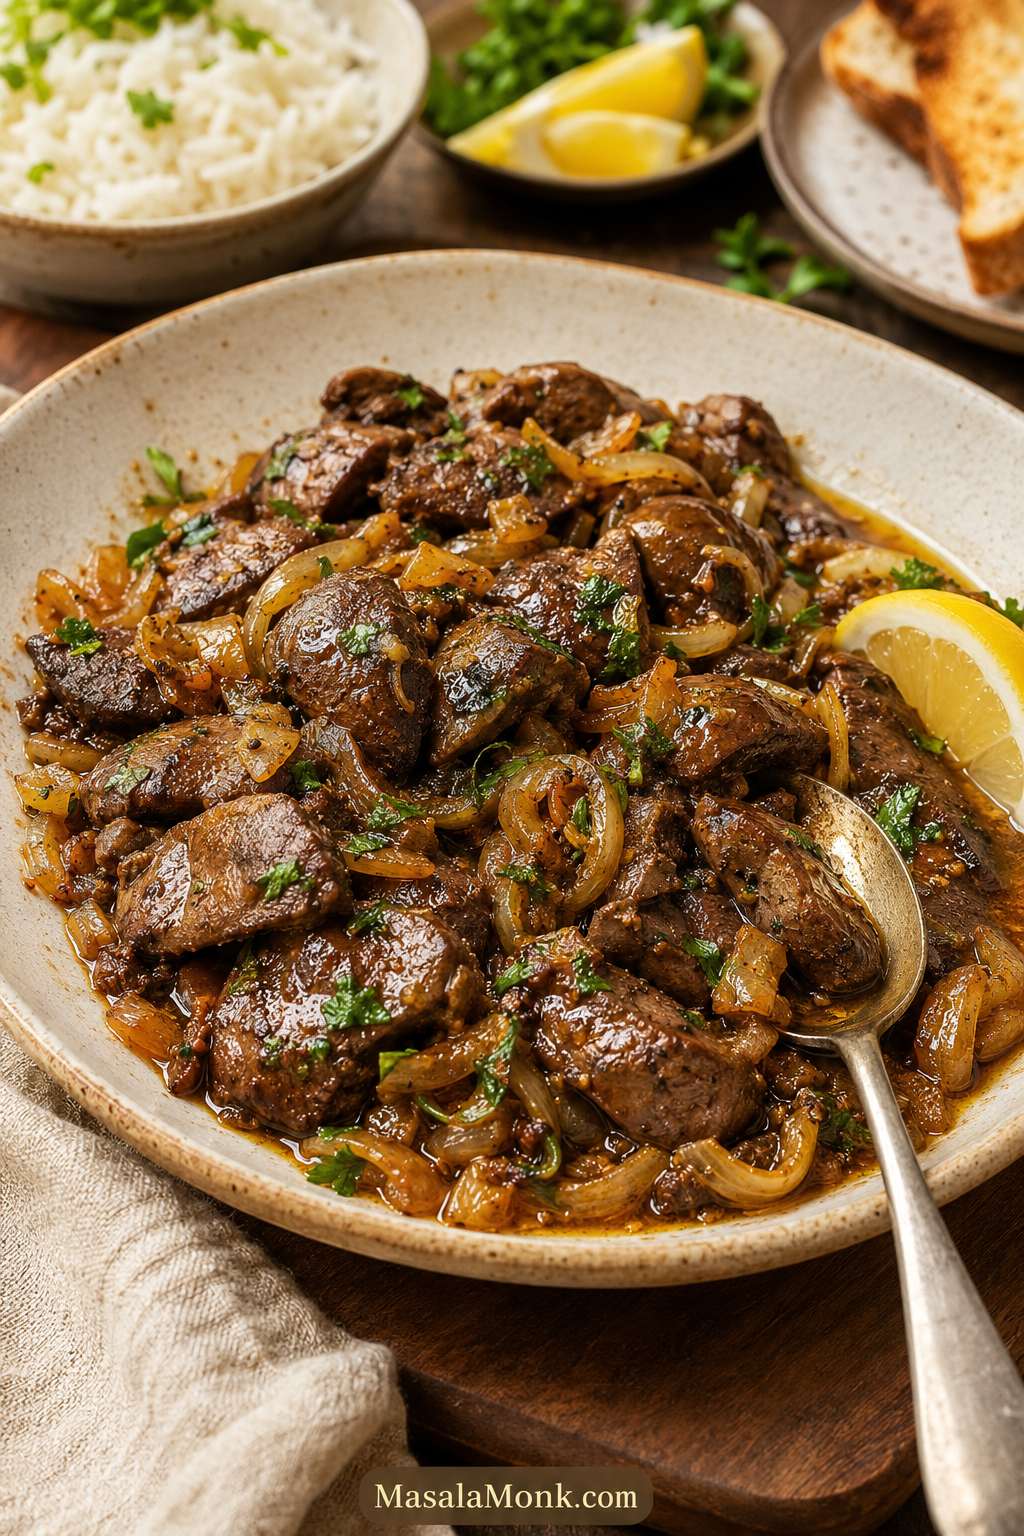
Finished chicken livers with golden onions, lemon wedges, herbs, and glossy pan juices in a warm serving dish.

Chicken liver has a reputation problem. Cooked badly, it can be bitter, dry, and hard to love. Cooked with a little care, it turns soft, savory, and deeply comforting — the kind of simple skillet dish where sweet onions, garlic, lemon, and a little butter do most of the work.

The method is simple: clean the livers, take away the bitter bits, dry them well, cook the onions until sweet, then sear the livers quickly and finish with garlic, lemon, and butter. Nothing fancy — just the few steps that make liver taste good.

This chicken liver recipe is for the nervous first-timer as much as the person who already loves liver. Most of the time is in the onions and prep; once the pan is hot, the livers themselves cook in about 5 to 7 minutes.

Good first plate: Use this section when you want chicken liver to feel milder, softer, and less intimidating.
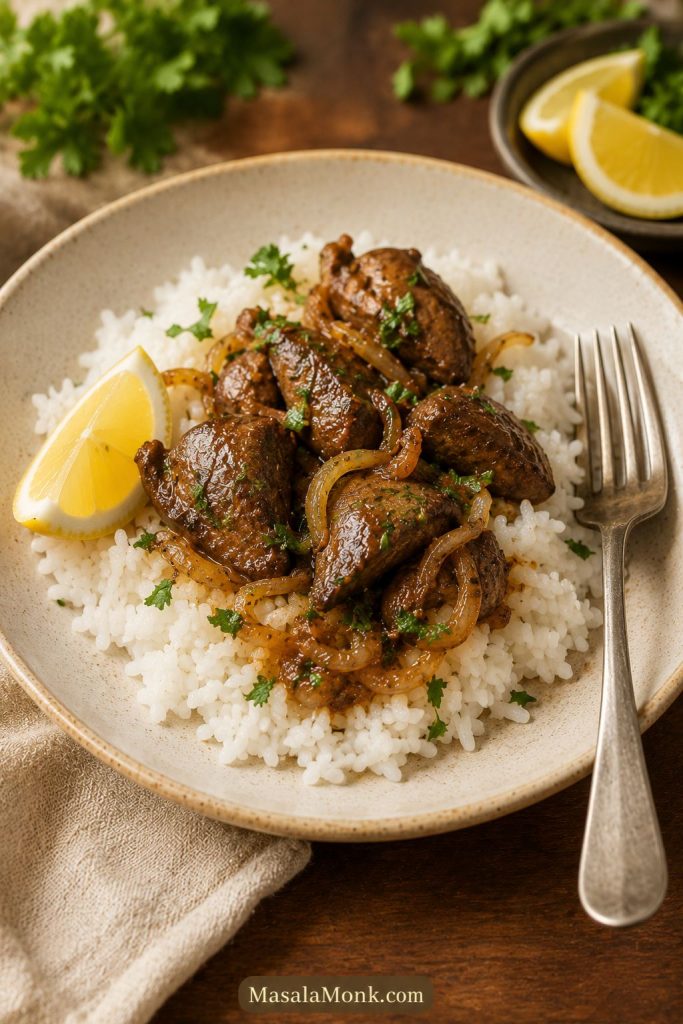
Small serving of chicken liver with onions over rice, with lemon and herbs on a cream plate.
For a first plate, rice makes chicken liver feel softer and less intense, while lemon keeps each bite fresh.

Quick Answer: How to Cook Chicken Liver

Trim away white connective tissue, fatty bits, dark clots, and any green or yellow-stained areas. Soak the livers in milk or lemon water if you want a milder flavor, then drain and pat them very dry.

Cook sliced onions first until soft and lightly golden, move them to a plate, then sear the livers in one layer for about 2 to 3 minutes per side. Use the largest piece as your guide and cook to 165°F / 74°C. Return the onions to the pan, add butter, garlic, lemon juice, herbs, and final seasoning, then serve warm.

Done right, the onions are glossy, the lemon brightens the pan, and the livers stay soft enough to cut with a fork.

The short version: trim carefully, dry well, give the livers space in the pan, and use a thermometer on the largest piece.

Before you cook: if doneness makes you nervous, read the safe temperature rule. If you are ready to start, go straight to the step-by-step method.

Quick setup: Get the livers, onions, garlic, lemon, herbs, and seasoning ready before the skillet starts moving fast.
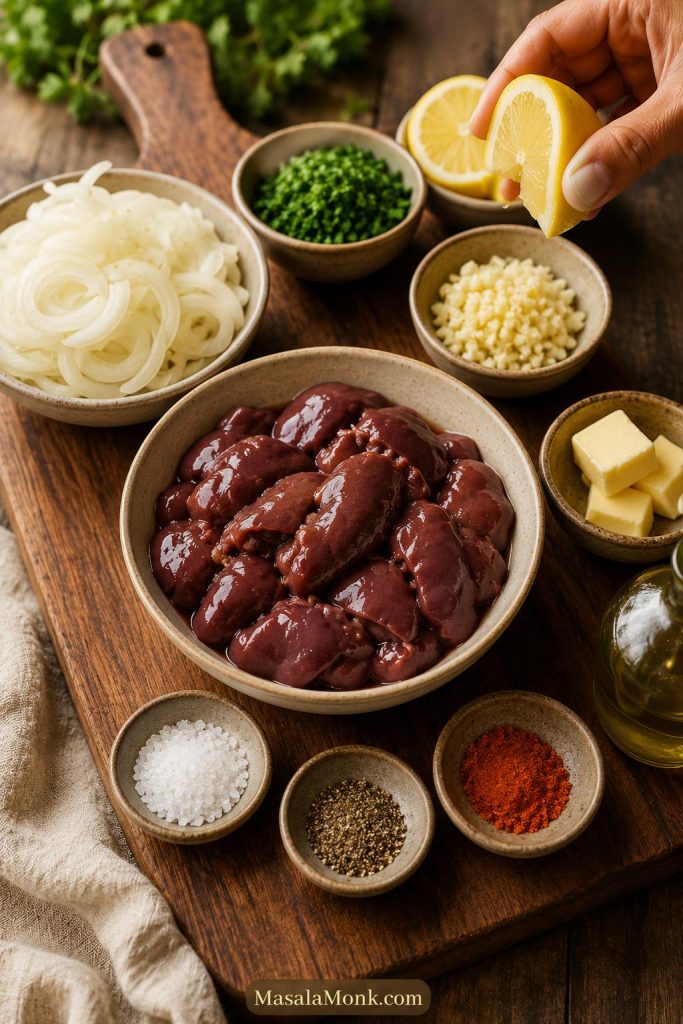
Chicken livers, sliced onions, garlic, lemon, herbs, butter, oil, salt, pepper, and paprika arranged on a wooden prep board.
Before the pan gets hot, set up the flavor base: onions for sweetness, garlic for depth, lemon for lift, and herbs for freshness.

Recipe Card

Tender Chicken Liver with Onions, Garlic, and Lemon

A simple skillet method for tender chicken livers with glossy onions, garlic, lemon, and buttery pan juices. Use the optional soak if you want a milder first bite.

Prep Time
15 minutes
Optional Soak
10 to 30 minutes
Cook Time
15 to 20 minutes, including onions
Total Time
30 to 35 minutes, excluding longer soak
Servings
4 with sides
Safe Temperature
165°F / 74°C

Ingredients

  • 1 lb / 450 to 500 g fresh chicken livers
  • 1 large onion, thinly sliced
  • 2 tbsp / 30 ml olive oil or neutral oil, divided
  • 1 tbsp / 14 g butter, optional
  • 3 garlic cloves, minced
  • ½ tsp fine salt, divided, plus more to taste
  • ¼ to ½ tsp black pepper
  • ½ tsp paprika, optional
  • 2 tsp / 10 ml lemon juice, plus more to taste
  • 2 tbsp chopped parsley or coriander

Optional Soak

  • ½ to 1 cup / 120 to 240 ml milk, just enough to mostly cover
  • Or ½ to 1 cup / 120 to 240 ml water mixed with 1 tbsp lemon juice

Optional Light Crust

  • 2 to 3 tbsp flour or cornstarch, for a very light dusting

Instructions

  1. Trim the livers. Remove white connective tissue, excess fat, stringy bits, dark clots, and any green or yellow-stained areas. Cut large pieces to about 1 to 1½ inches / 2.5 to 4 cm.
  2. Soak if desired. Use milk for 10 to 30 minutes, or lemon water for about 10 minutes. Drain well.
  3. Pat the livers very dry with paper towels.
  4. Heat 1 tbsp oil in a large skillet over medium heat. Add onion and a pinch of salt. Cook for 8 to 12 minutes, until soft, lightly golden, and sweet-smelling. Move to a plate.
  5. Season the livers with the remaining salt, pepper, and paprika if using. Dust very lightly with flour or cornstarch if using.
  6. Add the remaining 1 tbsp oil to the skillet. Increase heat to medium-high. Add livers in one layer; the pan should sizzle, not flood.
  7. Cook for 2 to 3 minutes on the first side. Flip gently and cook for another 2 to 3 minutes.
  8. Check the largest piece with an instant-read thermometer. Cook to 165°F / 74°C.
  9. Lower the heat. Return onions to the pan. Add butter if using and let it melt into the pan juices, then add garlic. Cook for 30 to 45 seconds. Add lemon juice and herbs. Taste and adjust seasoning.
  10. Serve warm with toast, rice, potatoes, roti, salad, or crusty bread.

Notes

  • Soaking is optional. It mellows flavor but does not replace proper trimming.
  • Always remove green or yellow-stained pieces.
  • Cook in batches if the pan is small.
  • Dry the livers thoroughly before cooking.
  • Use a thermometer instead of judging doneness by color alone.
  • If you used lemon water for soaking, start with less lemon juice at the end.
  • Reheat only until warm; extra heat makes the texture firm.

Finished-skillet reference: The livers should look glossy, the onions coated, and the pan juices loose enough to spoon over a side.
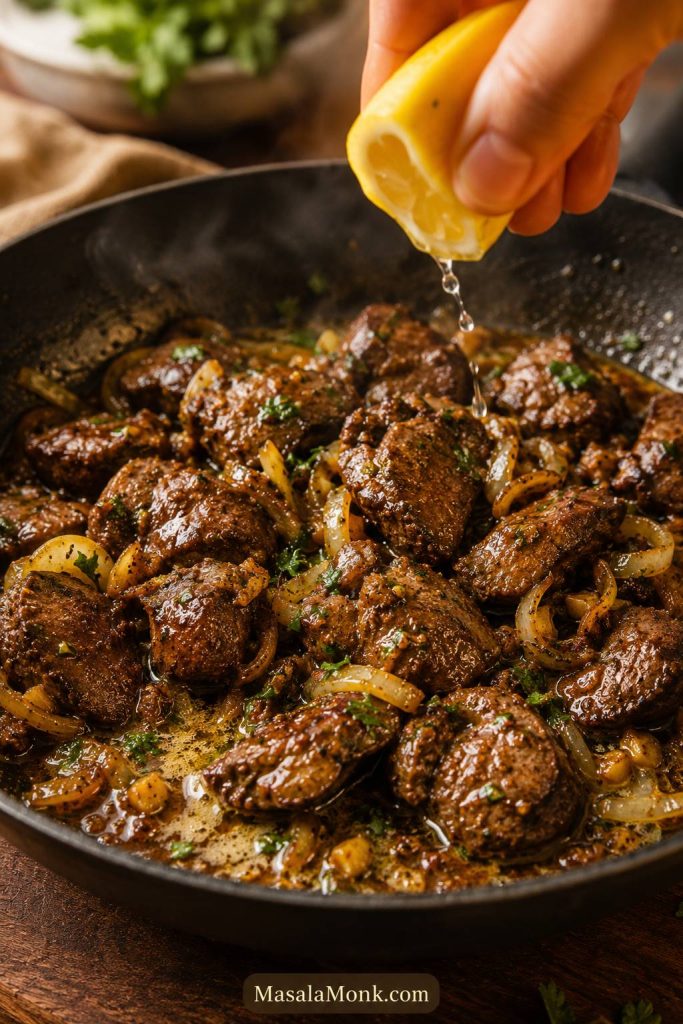
Skillet of cooked chicken livers with onions, garlic, melted butter, lemon, herbs, and pan juices.
Once the livers are done, the final minute matters most: butter softens the edges, and lemon wakes up the whole skillet.

What Chicken Liver Should Taste Like

The flavor is deep, savory, and slightly earthy. It is stronger than regular chicken meat, but usually milder than beef, lamb, mutton, or calf liver. Properly cooked, it is soft and full-flavored, almost like a warm, savory bite of pâté, but served whole instead of blended.

A good batch should be soft, savory, and clean-tasting. The main things that get in the way are poor trimming, too much moisture, a crowded pan, and extra minutes on the heat.

Texture check: This is a visual doneness cue, not a color test.
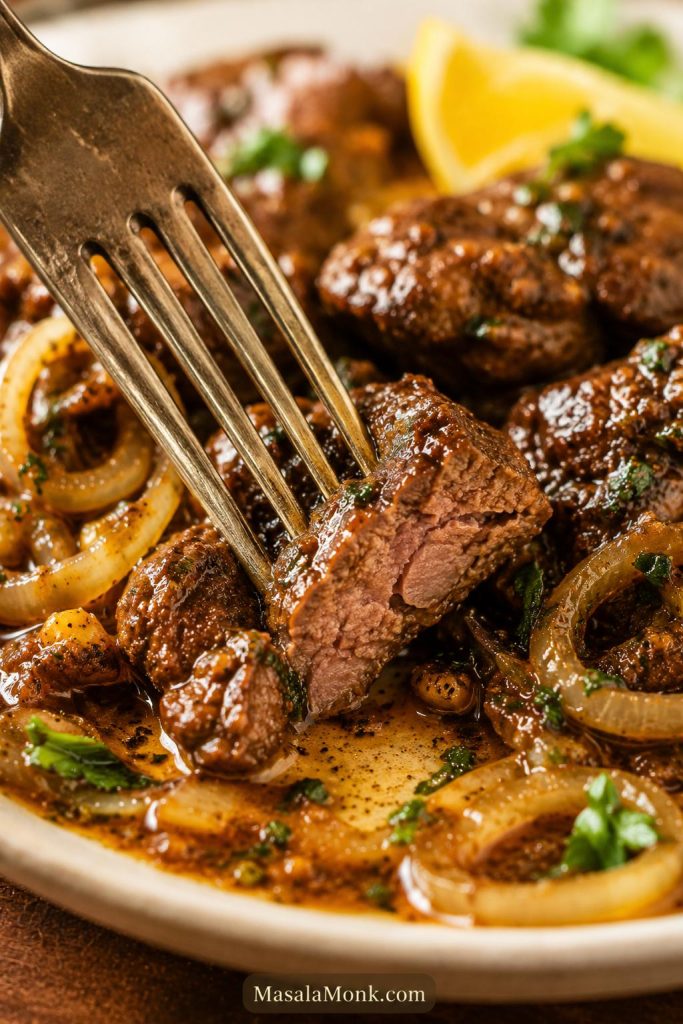
Fork cutting into a tender cooked chicken liver piece with onions and pan juices on a plate.
Look for a soft, fork-tender bite rather than a bouncy one; gentle timing is what keeps chicken liver from turning rubbery.

If you have only had dry, bitter liver before, this version may feel like a different dish. Keep the first batch simple, serve it with something familiar, and let the onions and lemon do some of the heavy lifting.

Onions make the flavor sweeter. Garlic makes it more savory. Lemon makes it brighter. Butter rounds the edges. Black pepper and paprika add warmth without making the dish complicated.

Bright finish: This cue belongs after cooking, when lemon and herbs can lift the dish without turning harsh.
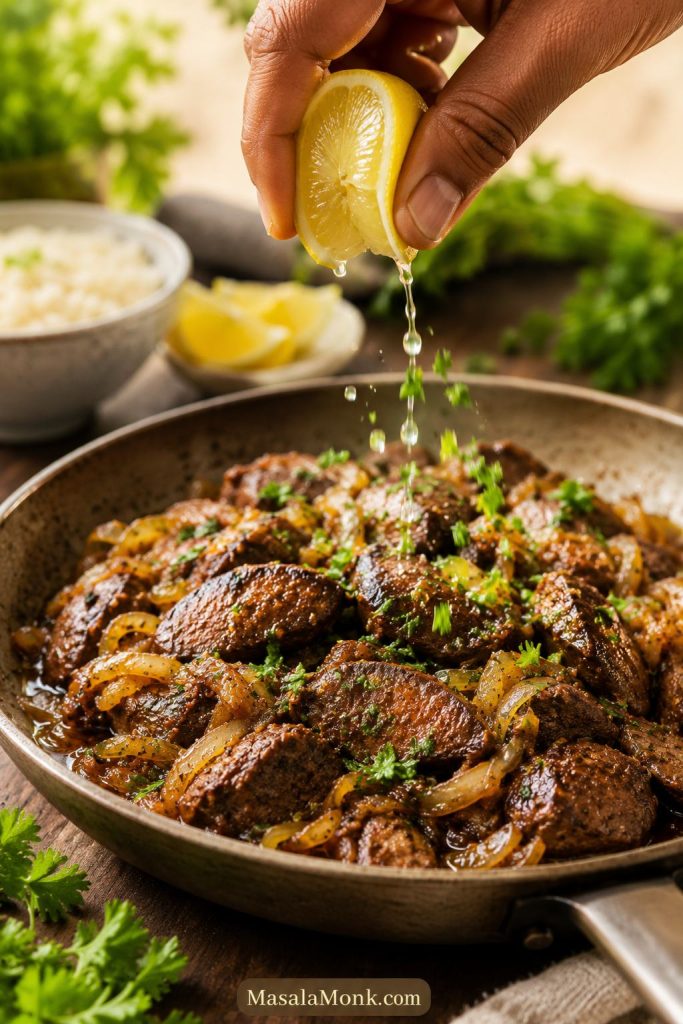
Lemon and fresh herbs being added to cooked chicken livers and onions in a skillet.
Add lemon and herbs at the end, not the beginning, so the finished chicken liver tastes brighter without turning sharp.

Why This Method Works

The method works because it solves the three problems that make liver hard to love: bitter bits, surface moisture, and extra time on the heat.

  • Trim well so the flavor stays clean and the harsh pieces never reach the pan.
  • Dry and spread out so the pieces brown instead of steam.
  • Finish quickly with onions, garlic, lemon, butter, and a thermometer check.

Method memory: Think of this as the whole recipe in one view: prep cleanly, dry well, then finish fast.
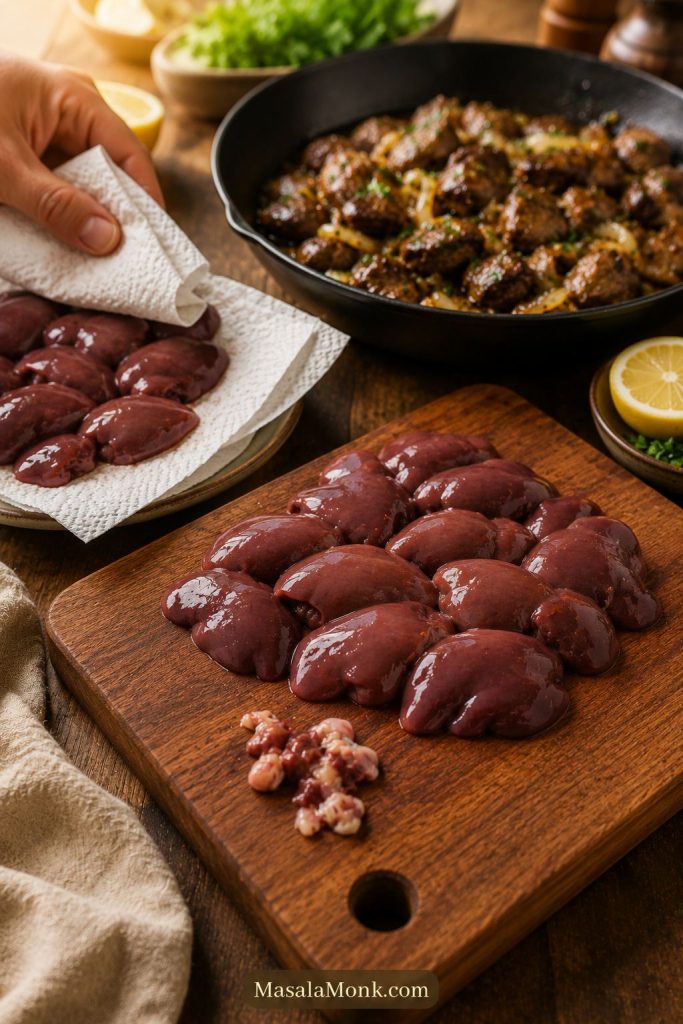
Chicken livers being prepared with paper towels nearby and a finished skillet of cooked livers in the background.
The best chicken liver recipe depends on three quiet steps: clean trimming, thorough drying, and quick cooking.
First time cooking chicken liver? Use the onions, use the optional soak, finish with lemon, and serve it with something familiar like plain rice or jeera rice, toast, potatoes, roti, or a simple salad.

At a Glance: Choose Your Best Path

What you want Best choice
Nervous about the flavor Use the milk soak, cook the onions until sweet, and finish with lemon.
Fastest dinner Skip the soak, dry the livers well, and use the basic skillet method.
Indian-style kaleji Use the masala variation with onion, ginger-garlic, tomato, coriander, cumin, chilli, and garam masala.
Strong liver smell Use fresh livers, trim carefully, dry well, cook with onions, and finish with lemon.
Comfort food Use extra onions, butter, and serve with mashed potatoes, rice, toast, or roti.

Serving path: Choose the side by the mood you want from the meal.
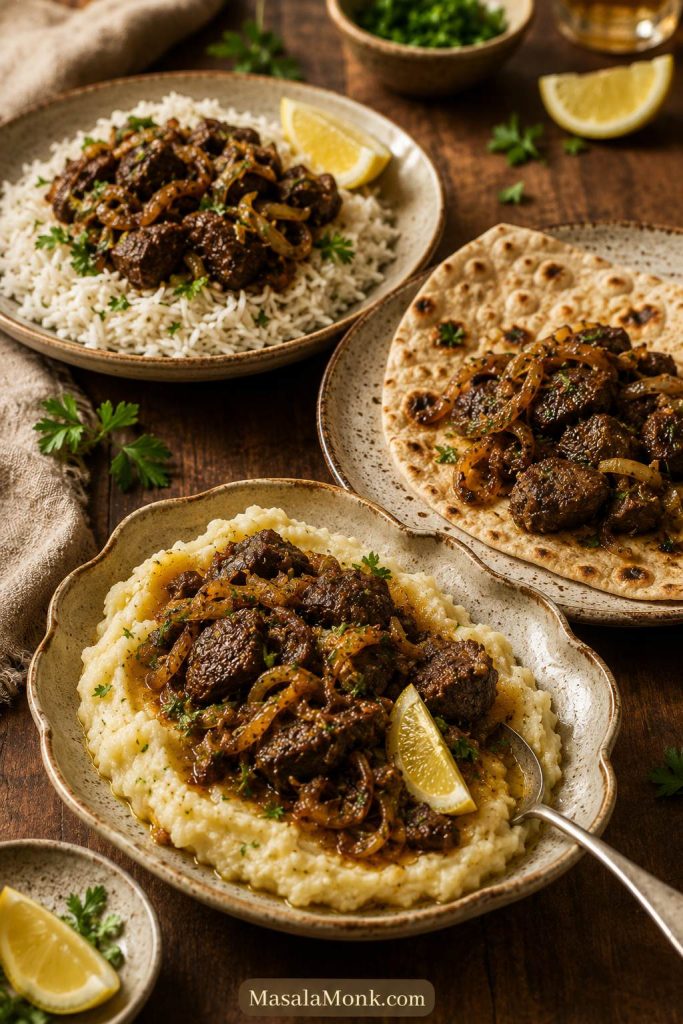
Chicken liver served in different ways with rice, roti, and mashed potatoes on a warm table.
Use the side dish to shape the meal: rice makes it mild, roti makes it spiced, and mashed potatoes make it cozy.

Safe but Tender: The Doneness Rule

Because chicken liver cooks so quickly, safety and tenderness come down to the same habit: check the largest piece and stop at the right time. The goal is not to cook liver forever; it is to cook it accurately.

Chicken liver should be cooked to 165°F / 74°C in the center. Color can fool you here, so let the thermometer make the decision. CDC guidance says the same thing in practice: use a thermometer, because you cannot tell by looking.

A useful rule keeps the section simple: cook it to the safe temperature, then stop. Best texture comes from stopping as soon as the center is done, while the pieces are still soft and delicate. USDA FSIS chicken liver guidance also gives 165°F / 73.9°C as the safe-temperature target for chicken liver dishes.

Good texture comes from timing. Check the largest lobe, then pull the pan off the heat once the livers are done. The butter, garlic, lemon, and herbs go in at the end.

Doneness checkpoint: This is the safety step that protects tenderness too.

Instant-read thermometer inserted into a cooked chicken liver piece in a skillet with onions.
For safe but tender chicken liver, check the largest piece from the side and stop cooking once it reaches 165°F / 74°C.

Ingredients You Need

Before the pan gets hot, the most important work happens on the cutting board. Once the livers are trimmed and dry, the ingredient list is simple.

Main ingredients and why they matter

Ingredient Amount Why it matters
Chicken livers 1 lb / 450 to 500 g The right amount for 4 servings with sides.
Large onion, thinly sliced 1 large / 160 to 200 g Adds sweetness and moisture.
Olive oil or neutral oil 2 tbsp / 30 ml For cooking the onions and searing without burning.
Butter 1 tbsp / 14 g, optional Melts into the onions at the end and makes the pan juices taste rounder.
Garlic 3 cloves / 12 to 15 g, minced Adds savory depth; it burns if added too early.
Fine salt ½ tsp, divided, plus more to taste Use a pinch for the onions and the rest for the livers.
Black pepper ¼ to ½ tsp Balances the deeper flavor.
Paprika ½ tsp, optional Adds color and mild warmth, not much heat.
Lemon juice 2 tsp / 10 ml, plus more to taste Cuts the mineral edge and brightens the finish.
Parsley or coriander 2 tbsp chopped Adds freshness at the end.

Ingredient logic: A short list works when every ingredient has a clear job.
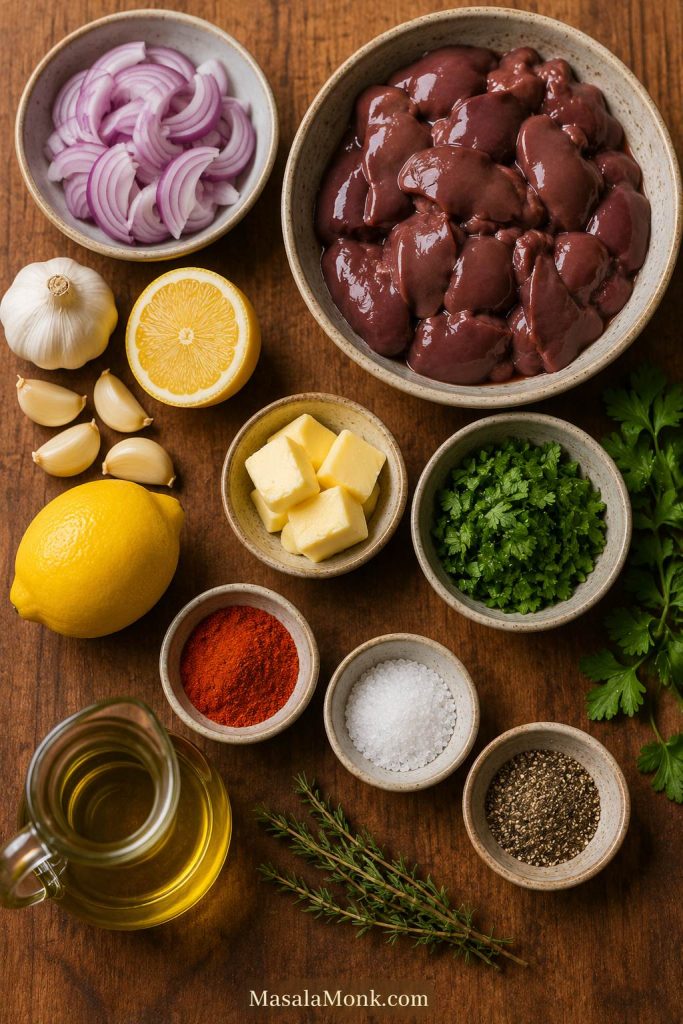
Ingredients for chicken liver with onions, including chicken livers, garlic, lemon, butter, herbs, paprika, salt, pepper, and oil.
This chicken liver recipe stays simple because each ingredient has a job: sweetness, acidity, richness, freshness, or gentle heat.

For an optional soak, use enough milk to mostly cover the trimmed livers, or use water with 1 tbsp lemon juice. The full soak guidance is below.

Ingredients ready? The next choice is whether to soak the chicken livers or move straight to cooking.

A Note on Fresh and Frozen Livers

Fresh chicken livers are easiest to cook well. Frozen livers can work too, but thaw them fully in the refrigerator, drain them well, and dry them thoroughly before cooking. Frozen livers often release more liquid, so give them extra attention before they hit the pan.

Fresh livers can smell lightly mineral or iron-rich, but they should not smell sour, rotten, ammonia-like, or rancid. They should look moist, not slimy, grey, or dried at the edges. If the smell is unpleasant in a spoiled way, discard them.

Frozen-liver checkpoint: Drain first, then trim, season, and sear.
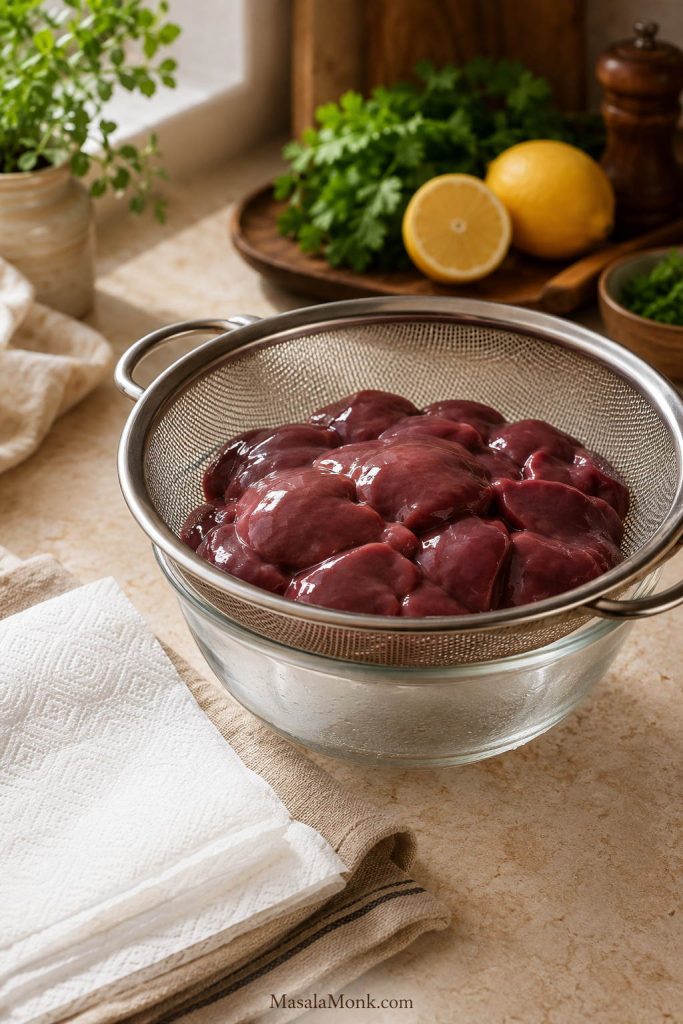
Thawed chicken livers draining in a metal sieve over a bowl with paper towels, lemon, and herbs nearby.
If you start with frozen chicken livers, thaw them fully and drain them well before seasoning; extra moisture is the first cause of steaming.

Best Pan to Use

Cast iron, stainless steel, and nonstick can all work. Cast iron and stainless steel give better browning when the livers are dry and the pan is hot enough. Nonstick is easier for beginners and gentler when flipping delicate pieces.

Choose the pan that lets you stay calm at the stove. The real secret is not the pan brand — it is dry livers, enough space, and a steady sizzle without smoking.

Pan setup: Room and steady heat matter more than the pan brand.
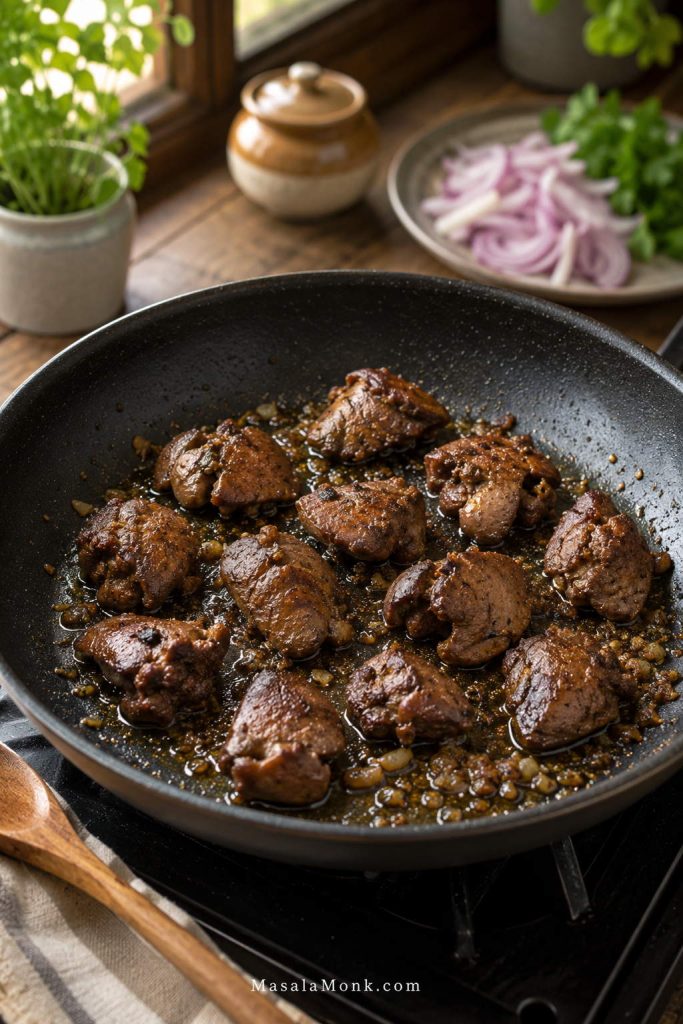
Chicken livers cooking with space between the pieces in a skillet with light oil bubbling.
The right pan setup gives each piece room to brown; crowding turns a quick chicken liver sear into a wet steam.

How to Clean and Trim Chicken Livers

This is the one prep step worth slowing down for. A minute of careful trimming does more for flavor than any spice mix can.

What to remove first

Place the livers on a cutting board or large plate. Separate any large lobes so the pieces are easier to inspect. They often come in uneven pieces, so take a minute to look through them before seasoning.

Trim away white connective tissue, stringy bits, tough membranes, excess fat, dark clots if present, and any green or yellow-stained areas. The stained parts are the most important to remove because they can taste unpleasantly bitter.

Trimming checkpoint: This is where bitterness prevention starts.
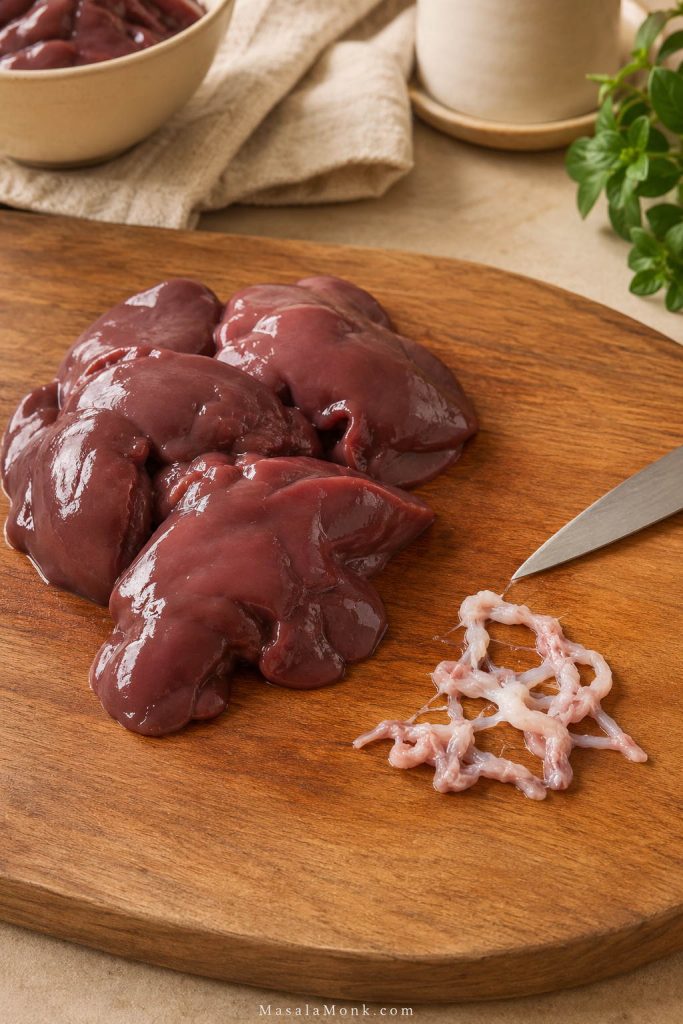
Raw chicken livers on a wooden board with white connective tissue separated beside them and a knife tip pointing toward it.
When cleaning chicken livers, look for white connective tissue and tough stringy bits first; removing them gives a cleaner bite later.

Cut, rinse only if needed, and dry well

Cut very large pieces in half so they are roughly similar in size. Aim for pieces about 1 to 1½ inches / 2.5 to 4 cm. They do not need to be perfect, but they should be close enough that they cook at the same speed.

Cut-size checkpoint: Similar pieces make timing and doneness easier.
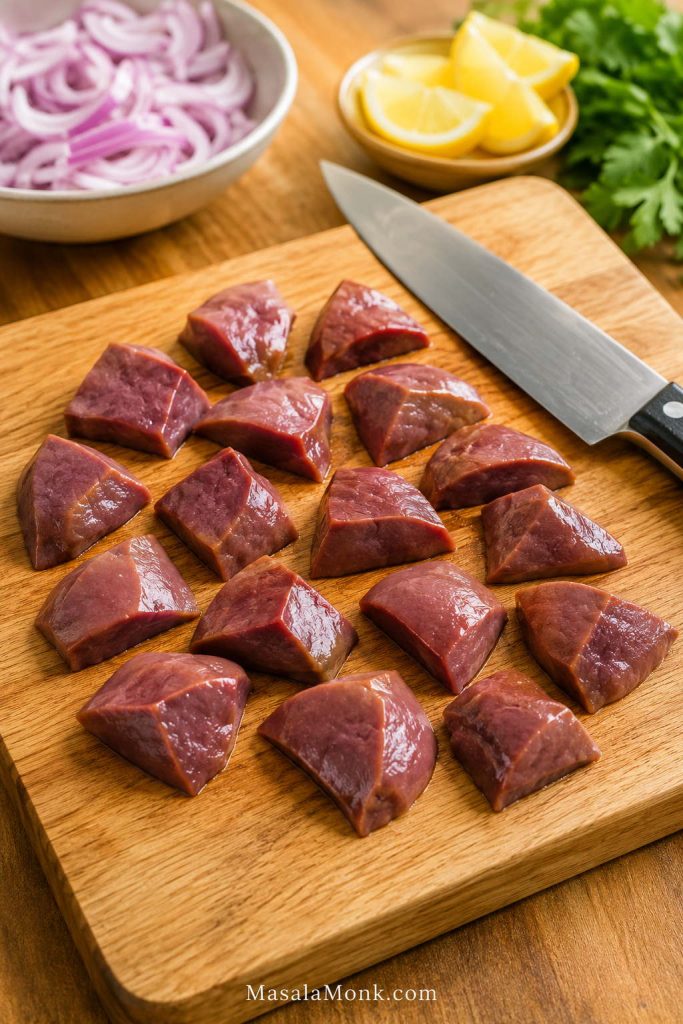
Chicken livers cut into even medium pieces on a wooden board with a knife and sliced onions nearby.
Next, cut large lobes into similar-sized pieces; even pieces cook more predictably and make doneness easier to judge.

Rinsing is optional. If the livers look especially wet or messy, you can rinse them briefly, but dry them very thoroughly afterward.

Drying matters more than it sounds. A dry surface helps the pieces sizzle instead of steam. Pat them well with paper towels before cooking.

Drying checkpoint: This is the bridge between prep and browning.
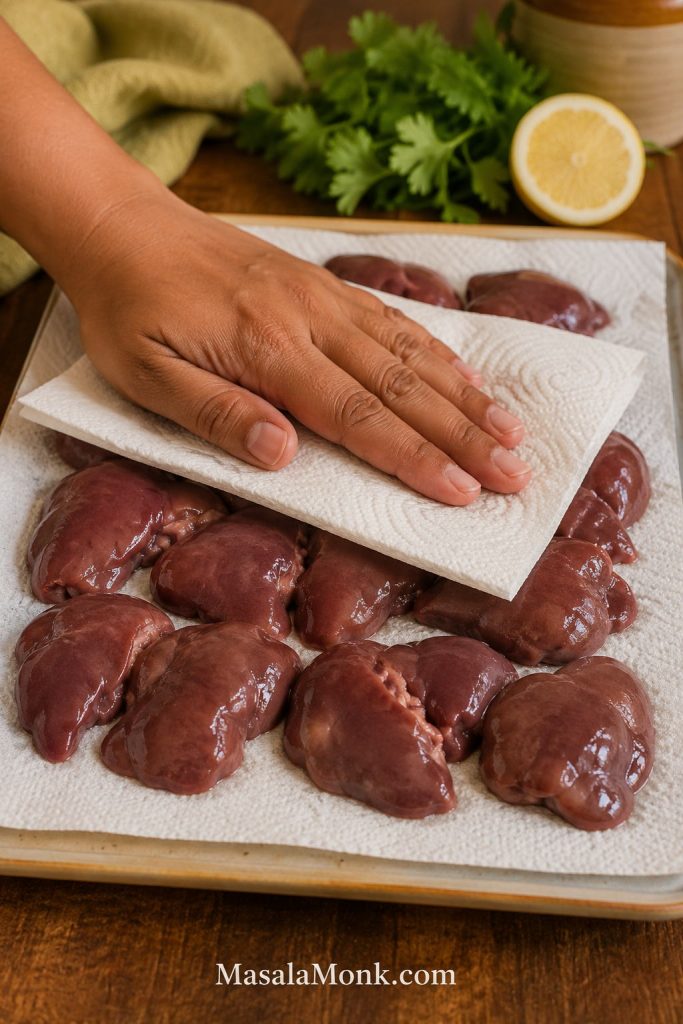
Chicken livers spread on paper towels while a hand presses another towel over them to dry the surface.
After trimming or soaking, dry the surface well; that dry surface is what helps pan-fried chicken livers brown instead of leak water.

Since these are raw poultry livers, treat the prep board like you would for raw chicken: wash your hands, clean the knife and board, and keep salads or cooked sides away from the raw-liver area.

Should You Soak Chicken Liver?

Fresh, well-trimmed livers can go straight to the pan; the soak is there when you want a gentler first bite. Chicken liver is usually milder than beef or mutton liver, so soaking is helpful but not required.

Use a short soak when you want the first bite to feel gentler, especially for someone still deciding whether they like liver. It can mellow the natural flavor and make the dish more approachable without changing the basic method.

Milk soak, lemon-water soak, or no soak

Soak choice Time Use it when
No soak None The livers are fresh and you like a deeper liver flavor.
Milk soak 10 to 30 minutes You want a milder, softer flavor. Use ½ to 1 cup / 120 to 240 ml, just enough to mostly cover.
Lemon-water soak About 10 minutes You want a brighter, cleaner finish. Use ½ to 1 cup / 120 to 240 ml water with 1 tbsp lemon juice.

Milk-soak cue: Use this optional soak when you want the chicken liver flavor to feel milder for hesitant eaters.
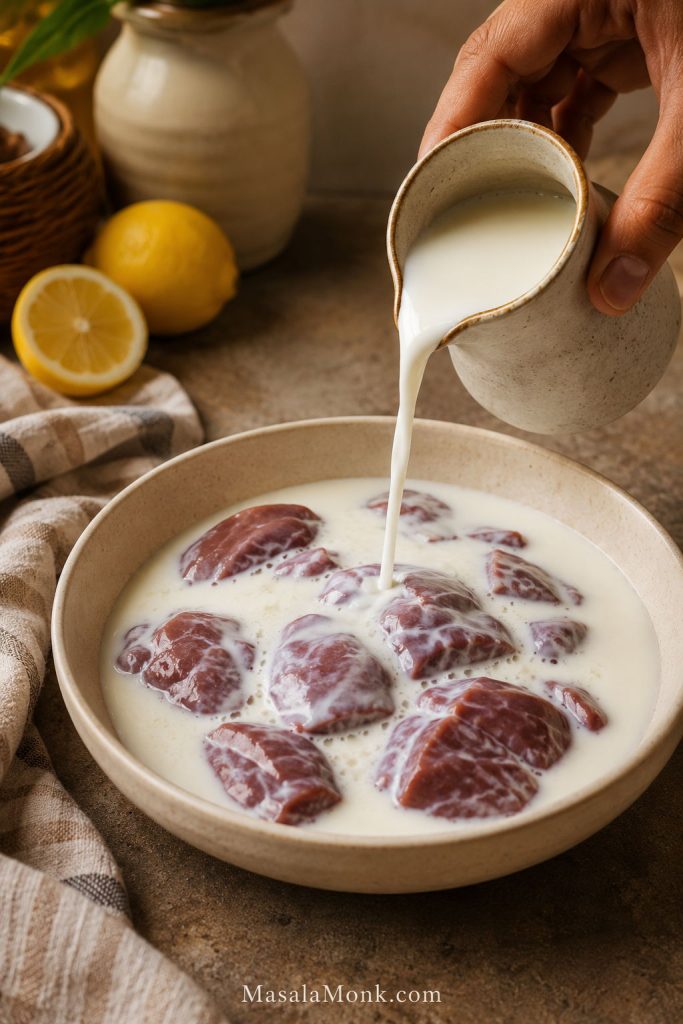
Milk being poured over chicken liver pieces in a shallow bowl with lemon and kitchen cloth nearby.
A milk soak is optional, but it can make chicken liver taste milder when you are cooking for hesitant eaters.

After soaking, dry before cooking

After soaking, drain the livers and pat them very dry. If you used lemon water, start with only 1 tsp lemon juice at the end of cooking, then add more only if the dish needs it.

Lemon-water option: Use this when you want a cleaner, brighter start.
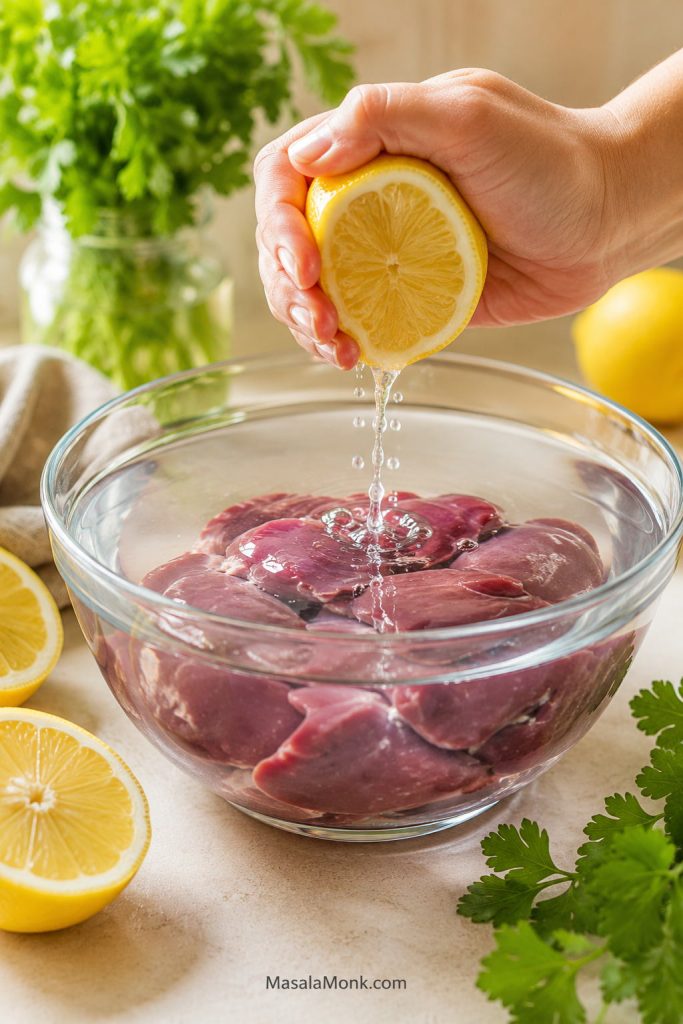
Lemon being squeezed into a clear bowl of water with chicken livers partly submerged.
Alternatively, lemon water gives the livers a brighter start; just drain and dry them well before cooking so they still sear properly.
Soaking helps with normal liver flavor, but trimming is what removes truly bitter pieces. It cannot fix old liver, spoiled liver, poor trimming, or green/yellow-stained pieces.

Choose the version that fits your table

Choose your version:
  • Mildest: milk soak, onions, butter, lemon, and parsley.
  • Brightest: lemon-water soak, garlic, a little extra lemon, and coriander.
  • Boldest: no soak, black pepper, paprika, and the masala-style spice option.
  • Most comforting: extra onions, butter, and mashed potatoes or rice.

Choose-your-version guide: The base method can move mild, bright, bold, or comforting.
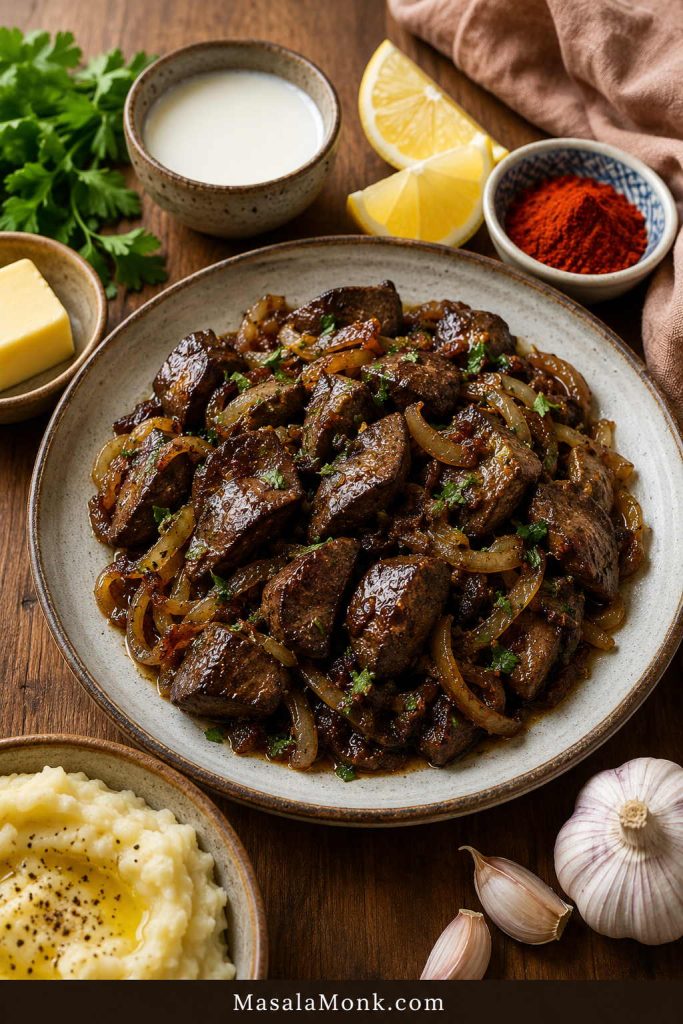
Cooked chicken liver with onions served with milk, lemon wedges, spices, butter, and mashed potatoes nearby.
Adjust the same base recipe to the table: milk for mildness, lemon for freshness, spices for heat, and potatoes or rice for comfort.

After soaking or skipping it, drain and dry the livers well, then move to how to cook them step by step.

Before you start: Have the garlic, lemon, herbs, and serving plate ready. Once the livers hit the pan, the recipe moves fast — and that quick finish is what keeps them tender.

How to Cook It Step by Step

The skillet moves quickly here. Once the livers go in, the small things — dry surface, space, gentle flipping, and a quick finish — show up fast.

1. Cook the onions first

Heat 1 tbsp oil in a large skillet over medium heat. Add the sliced onion and a pinch of the salt. Cook for 8 to 12 minutes, stirring occasionally, until the onion is soft, lightly golden, and sweet-smelling. Move the onions to a plate.

The onions should smell sweet before the liver goes in. If they still smell sharp, give them another minute or two so they can soften properly. If the onions and liver go in together, the onions may stay sharp or the liver may overcook while you wait.

Onion-first step: Build sweetness before the delicate livers enter the pan.
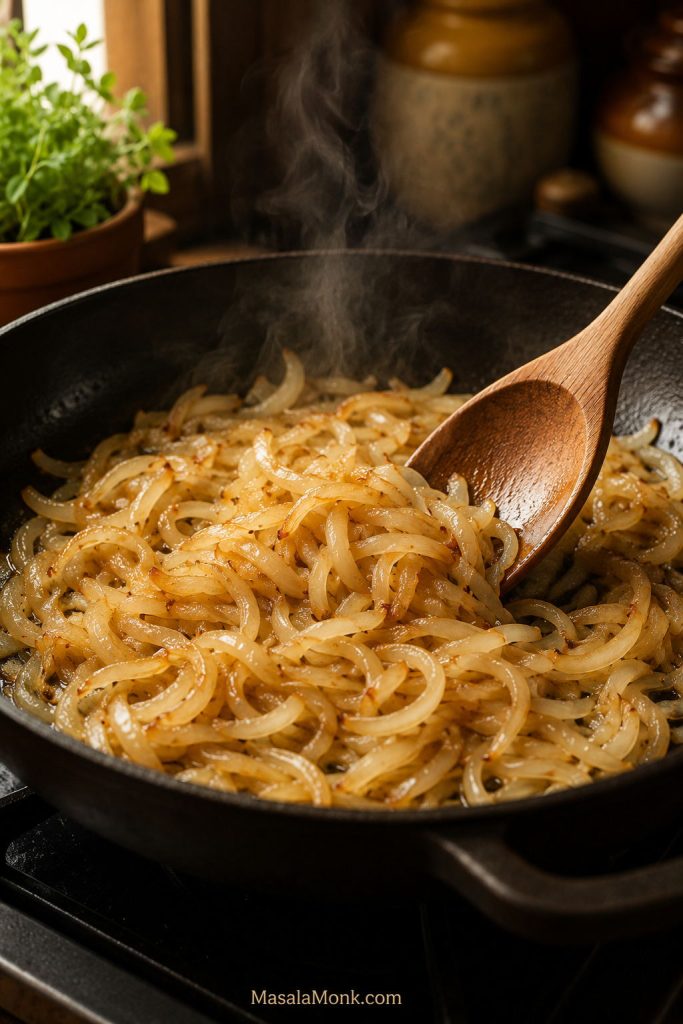
Sliced onions cooking in a skillet with a wooden spoon until soft, glossy, and lightly golden.
First, cook the onions until they soften and smell sweet; then the chicken livers can cook quickly without waiting on the pan.

2. Season the livers

Season the dried livers with the remaining salt, black pepper, and paprika if using. You do not need to bring them fully to room temperature, but avoid cooking them icy-cold or wet from the fridge. Let them sit for a few minutes while the onions cook.

If you want a little more browning, dust them very lightly with 2 to 3 tbsp flour or cornstarch and shake off the excess. Flour gives a softer browned coating; cornstarch gives a slightly lighter edge. Use either one lightly.

Seasoning step: Season after drying, then keep any coating light.
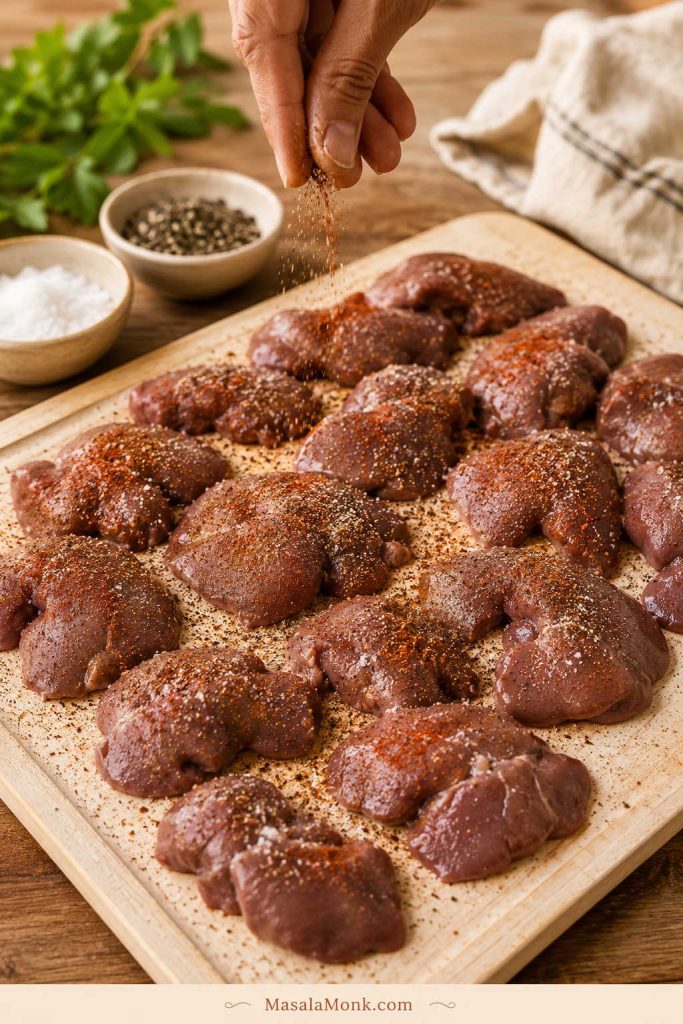
Chicken livers on a tray being seasoned with salt, pepper, paprika, and a light dusting before searing.
Once the livers are dry, season them lightly; salt, pepper, and paprika add warmth without hiding the natural flavor.

3. Sear in one layer

Add the remaining 1 tbsp oil to the skillet and increase the heat to medium-high. Save the butter for the finish so it tastes sweet and rounded instead of browned or burnt. The pan is ready when a piece of liver sizzles immediately, but the oil is not smoking.

Add the livers in one layer. The pan should sizzle, not flood. Cook for 2 to 3 minutes on the first side without moving them too much, then flip gently and cook for another 2 to 3 minutes.

Sizzle check: Look for active bubbling and space, not a pan full of liquid.
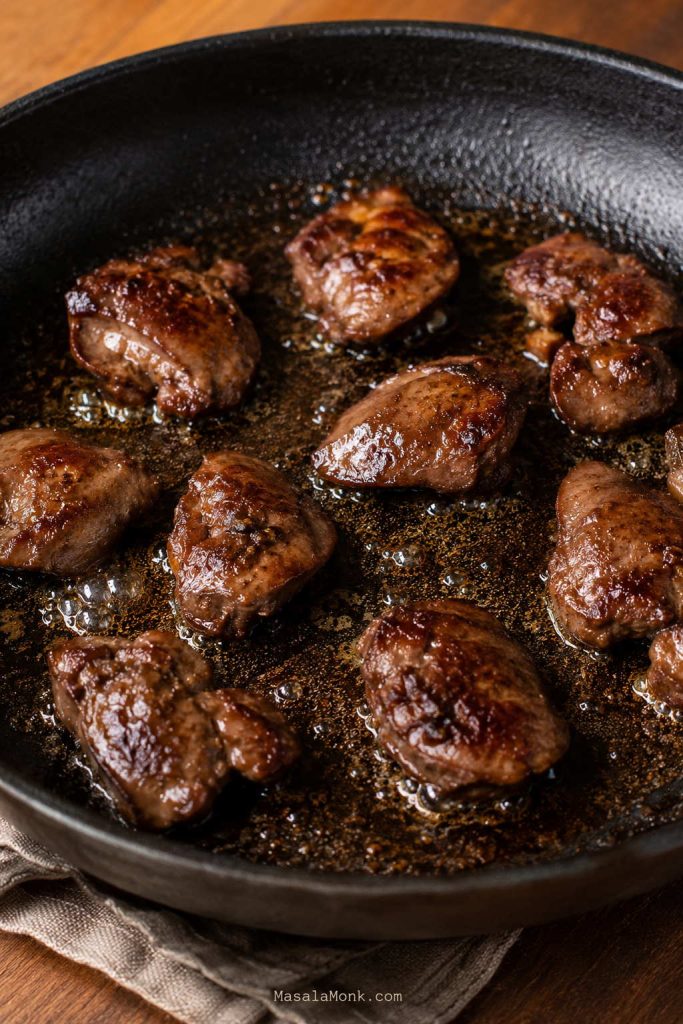
Chicken livers searing in one layer in a skillet with space between the pieces and oil bubbling lightly.
This is the pan cue to look for: a steady sizzle, visible space between pieces, and no liquid flooding the skillet.

Flip step: Turn the pieces carefully once the first side has browned.

Chicken liver pieces and onions in a skillet as a utensil lifts one browned piece during cooking.
Then, flip the livers gently instead of stirring hard; careful turning helps the delicate pieces stay whole.

When liquid appears, let it bubble off. A flooded pan usually means the livers were too wet or crowded; move some liquid out, give the next batch more space, and add a teaspoon more oil if the pan looks dry.

When the pan starts filling with liquid, jump to troubleshooting before the next batch.

4. Check the largest piece

Use an instant-read thermometer to check the largest piece. Insert the thermometer from the side into the center instead of straight down into the pan. Cook to 165°F / 74°C. Smaller pieces may be ready quickly, while larger lobes may need another minute or two.

Once the center reaches temperature, pull the pan off the heat or lower the heat right away. That is how you keep the texture tender.

5. Finish with butter, garlic, lemon, onions, and herbs

Lower the heat. Return the cooked onions to the pan. Add the butter if using and let it melt into the pan juices, then add the minced garlic and stir for 30 to 45 seconds, just until fragrant. Add lemon juice and toss gently so the pan smells brighter and the onions pick up the buttery juices.

Taste after the lemon and onions go back in. Liver often needs its final seasoning after the acidity is added, not before. Adjust salt and pepper, then finish with chopped parsley or coriander.

At the end, the onions should be soft and coated in pan juices, the livers should cut easily, and the finished dish should smell bright from lemon, not heavy or metallic. Serve warm, while the texture is still soft and delicate.

Final finish: Lower heat here so garlic perfumes the pan instead of burning.
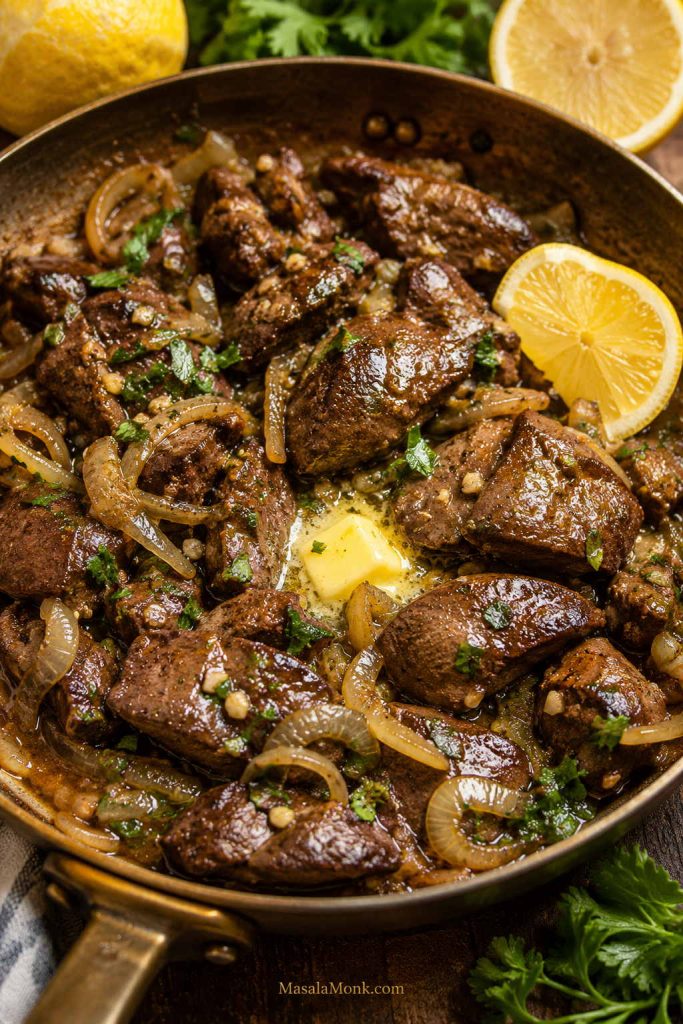
Cooked chicken livers with onions, melted butter, lemon, garlic, herbs, and glossy pan juices in a skillet.
Finish gently here; garlic needs only a short moment, and butter should melt into the onions rather than brown hard.

When it works, the dish feels simple in the best way: soft livers, sweet onions, a little buttery pan juice, and enough lemon to make the whole plate feel lighter.

Now build the plate: see what to serve with chicken liver for rice, toast, roti, mashed potatoes, and salad ideas.

How Long to Cook Chicken Liver

The actual cooking is quick. The exact time depends on the size of the pieces, how wet they are, how crowded the pan is, and how hot your skillet runs.

Step or situation Approximate time What to watch for
Onions first 8 to 12 minutes Soft, lightly golden, sweet-smelling onions.
Medium liver pieces 5 to 7 minutes total Lightly browned outside and safe temperature in the largest piece.
Smaller pieces 4 to 5 minutes total They may finish first, so do not wait for every piece to look identical.
Larger lobes 7 to 9 minutes total Use the biggest piece as your guide.
Lightly flour-dusted pieces Usually about 1 extra minute Coating should brown lightly, not burn.
Oven version 30 to 35 minutes Softer texture; still check the largest pieces.

Time is a guide. The biggest piece gives you the real answer.

Variations

This is the base skillet method. Once you understand it, you can shift the flavor without changing the core rules: trim well, dry well, cook in one layer, and avoid overcooking.

Looking beyond the basic skillet? Try the kaleji direction below, or compare more ways to cook chicken liver.

Chicken Liver with Onions

The main recipe already uses onions, but you can make them more central. Cook the onions a little longer, until deeply golden and jammy. After the liver is done, return the onions to the pan with a small splash of water, stock, or lemon juice to loosen the browned bits. Finish with butter and black pepper, then spoon everything over toast, rice, or creamy garlic mashed potatoes.

Comfort serving: Use this direction when you want chicken liver and onions to feel softer and more filling.
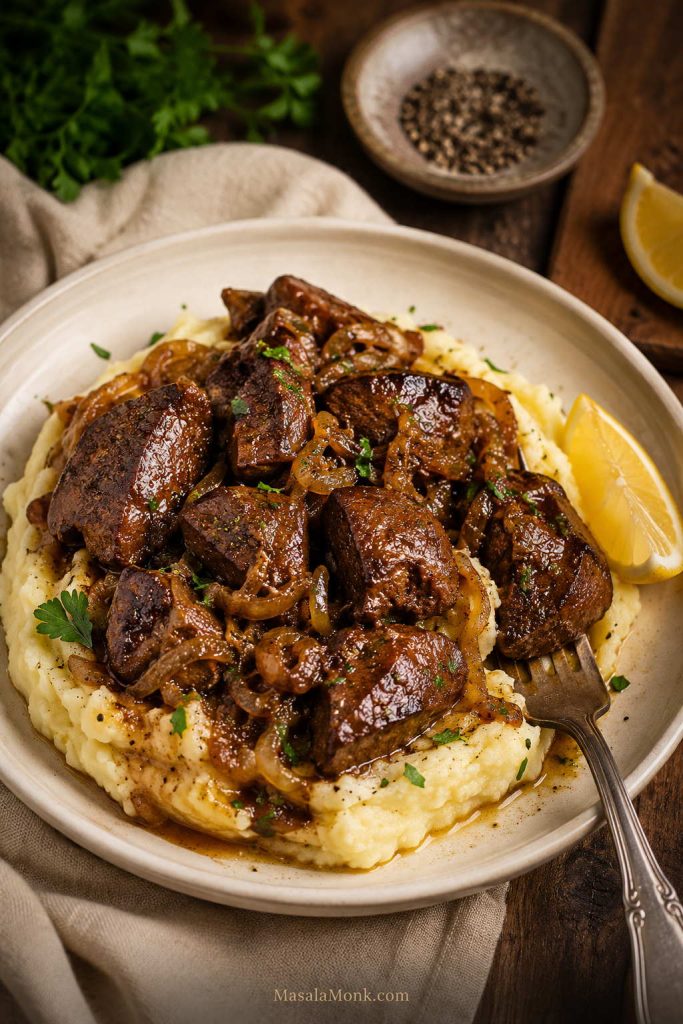
Chicken liver and onions served over creamy mashed potatoes with lemon, herbs, and pan juices.
Chicken liver and onions with mashed potatoes works because the creamy base softens the rich, savory bite.

Garlic Butter Lemon Livers

For a brighter, more rounded version, finish the cooked livers with 1 tbsp butter, extra garlic, 1 tbsp lemon juice, black pepper, and chopped parsley or coriander. Add the garlic only at the end so it stays fragrant.

Quick Chicken Kaleji-Style Masala

For a masala-style variation, season the livers with ½ tsp turmeric, 1 tsp coriander powder, ½ tsp cumin powder, ½ tsp red chilli powder, ½ tsp black pepper, and a little garam masala. Cook the onions as usual, add ginger-garlic paste if you like, then cook the livers in the spiced oil. A small chopped tomato can be added after the onions; cook it down until jammy before adding the livers so the masala does not turn watery. Finish with lemon juice and fresh coriander.

This is a quick masala-style direction, not the only way chicken kaleji is made. Use it when you want the same basic skillet method with warmer spices.

Kaleji direction: This is the spiced path with roti, coriander, onions, and lemon.
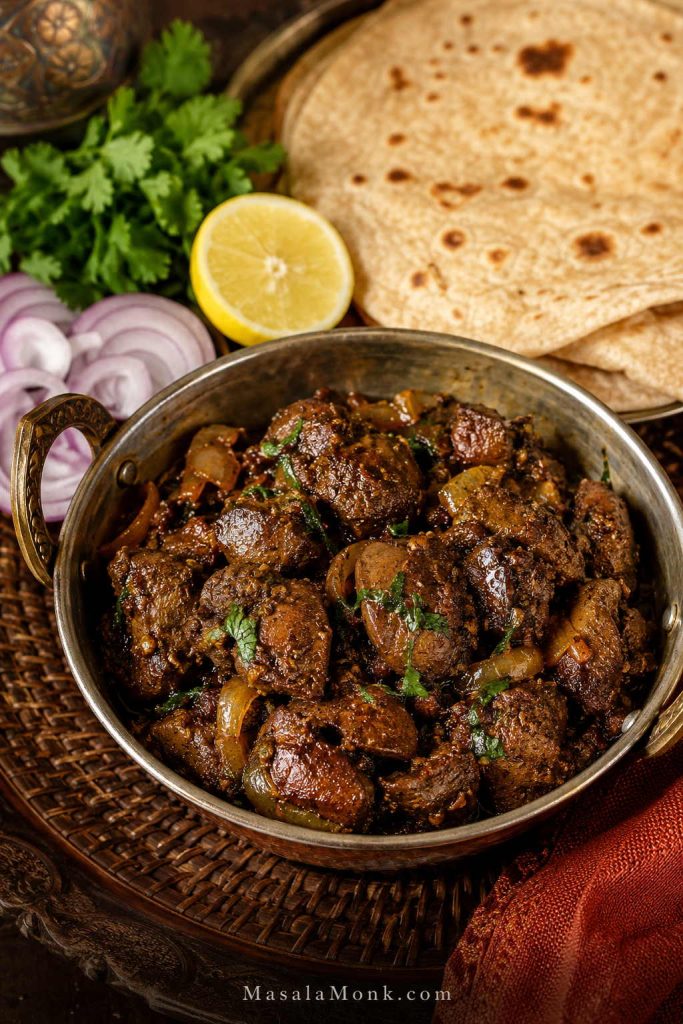
Chicken kaleji-style masala with onions served in a small pan beside roti, lemon, coriander, and sliced onions.
For a spiced version, turn the same base method toward chicken kaleji with onions, coriander, lemon, and roti on the side.

Oven Version

For less splatter, spread trimmed and dried livers in a single layer with sliced onions, about 1 tbsp oil, salt, pepper, garlic powder, and paprika in a baking dish. Garlic powder works better than fresh garlic here because fresh garlic can catch and turn bitter. Cover with foil and bake at 350°F / 175°C for about 20 minutes. Uncover, stir gently, and bake for another 10 to 15 minutes, or until the largest pieces reach 165°F / 74°C.

Baking gives a softer texture than pan-searing, but it is useful when you want a more hands-off method.

When to Use a Different Method

Use this skillet method when you want a quick warm meal. Choose a different method if you want a crisp coating, a smooth pâté, a creamy peri-peri-style sauce, a quick pan gravy, or a saucy adobo-style dish. Those versions use different techniques, so this recipe keeps the focus on the simplest skillet method first.

What to Serve with Chicken Liver

Because the flavor is deep and savory, the plate needs something fresh, starchy, or acidic beside it. You want the sides to balance the liver, not fight it.

Style Serving ideas
Simple dinner Rice, toast, mashed potatoes, roasted potatoes, buttered noodles
Indian-style Jowar bajra roti, paratha, dal-rice, onion salad, lemon wedges
Fresh and light Cucumber salad, sautéed greens, pickled onions, lemony salad
Comfort-food style Mashed potatoes, pan juices, deeply cooked onions, crusty bread
Appetizer-style Toast, small bread slices, pickles, sharp salad, lemon wedges, or a chilled potato salad

Toast catches the buttery juices, rice softens the intensity, and a lemony salad keeps the plate from feeling heavy. If you are serving someone unsure about liver, keep the pieces smaller and serve them with something familiar: rice, toast, potatoes, roti, or a fresh salad with lemon.

Rice dinner: Use this serving when you want the pan juices to become part of the meal.
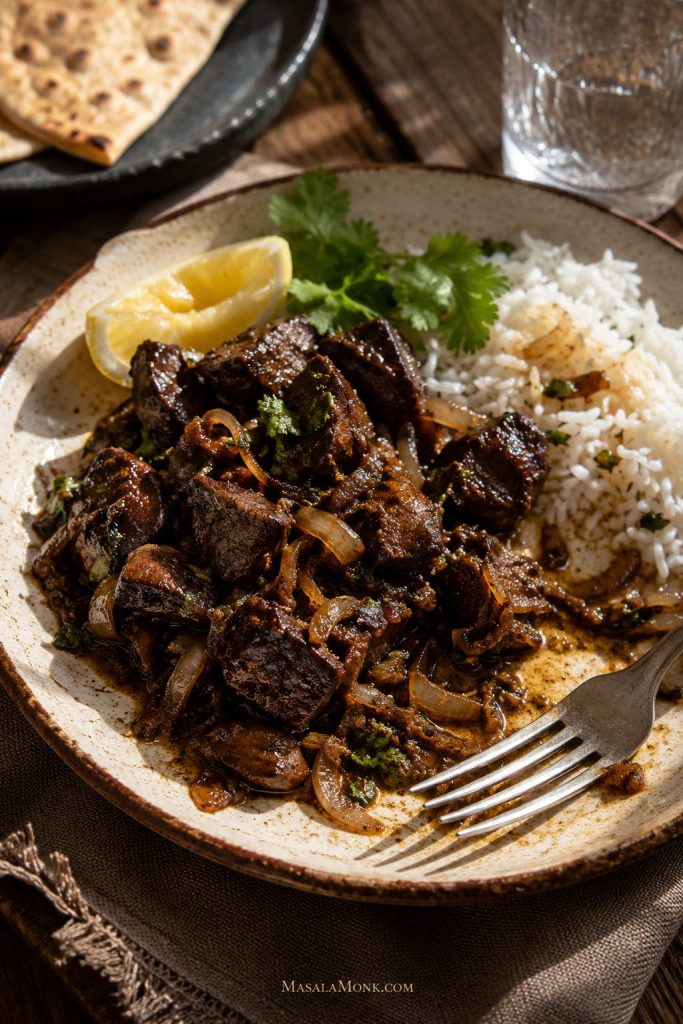
Chicken liver with onions served over rice with lemon, herbs, roti, and salad in the background.
For a fuller dinner, serve chicken liver over rice and spoon the oniony pan juices into the grains.

Toast serving: Use this for a smaller plate with crisp contrast.
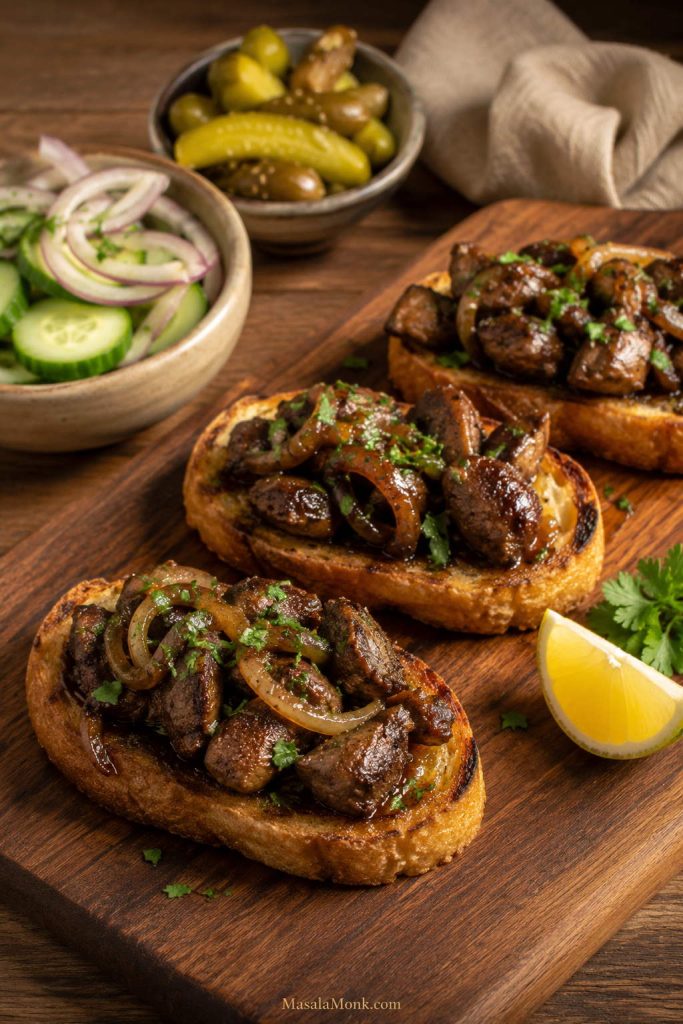
Toasted bread topped with cooked chicken liver pieces, caramelized onions, herbs, and lemon on a wooden board.
For a smaller serving, toast gives contrast: crisp bread underneath, soft chicken liver on top, and onions to tie it together.

Storage and Reheating

This dish is at its best straight from the skillet. The longer it sits, the more that soft texture fades. For leftovers, let the livers stop steaming, then refrigerate them in an airtight container within 2 hours of cooking. Store them with the onions and pan juices if possible; they help the livers reheat more gently. Use within 2 days for the best texture.

To reheat, warm gently in a skillet over low heat with a splash of water, stock, or lemon juice. You can add a small knob of butter to loosen the pan juices. The microwave works in a hurry, but use short bursts and stop as soon as the livers are warm.

Avoid long reheating. Once overcooked, the texture turns rubbery and dry quickly.

Troubleshooting: What Went Wrong?

If your first batch was not perfect, that is normal. Chicken liver gives very clear feedback, and most problems are easy to trace. Start with trimming, moisture, crowding, heat, and timing.

Common problems and the next-batch fix

Problem Likely cause Fix
Bitter liver Green/yellow bits, poor trimming, burnt garlic, or overcooking Trim carefully, add garlic late, use onion and lemon, and avoid extra cooking time.
Metallic taste Strong natural liver flavor or not enough acidity Use an optional soak, garlic, onion, lemon juice, herbs, and black pepper.
Rubbery texture Overcooking Cook in one layer and stop once the largest piece reaches the safe temperature.
Dry or grainy texture Cooked too long after doneness Use medium-high heat for a shorter cook and check earlier.
Steamed instead of browned Wet livers or crowded pan Pat dry thoroughly and cook in batches.
Too much splatter Surface moisture hitting hot oil Dry well, lower heat slightly, and use a splatter screen.
Strong smell Old liver, poor trimming, steaming in a crowded pan, or normal liver aroma that feels too intense Use fresh liver, trim well, cook with onions, garlic, and lemon, and discard anything sour or rancid.
Lots of liquid in the pan Frozen livers, wet livers, or overcrowding Thaw fully, drain well, pat dry, and cook in one layer.
Livers fell apart Pieces were too small, too wet, or stirred too aggressively Keep medium pieces, dry well, and flip gently.
Unsure if done Relying on color or timing only Use a thermometer on the largest piece.

Watery-pan fix: This visual explains why wet or crowded livers steam instead of brown.
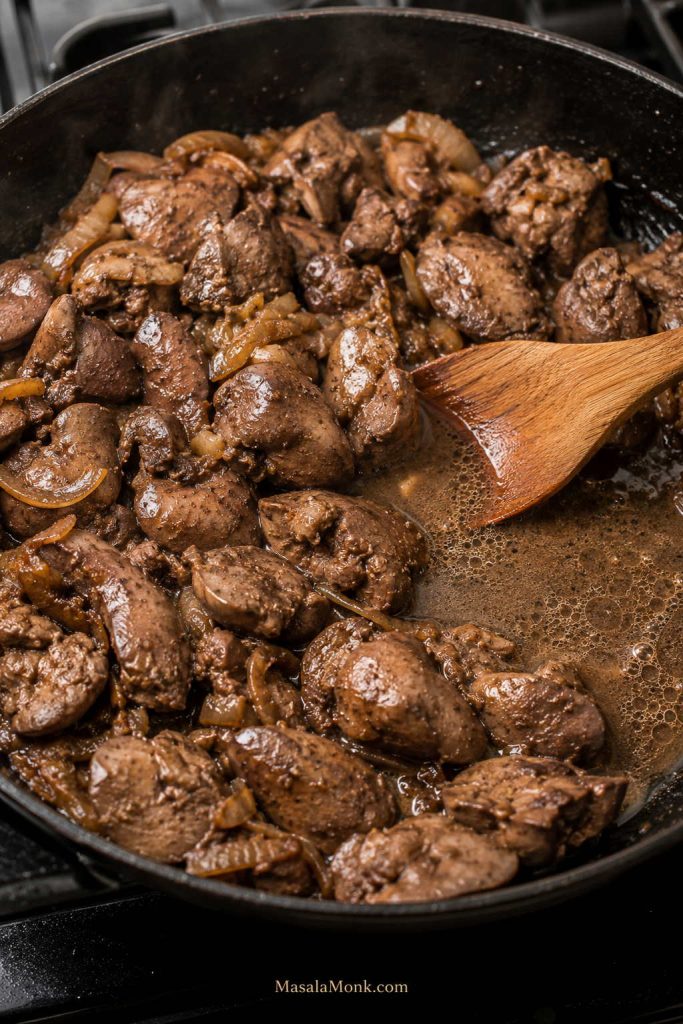
Crowded skillet of chicken livers and onions with visible liquid pooling beside a wooden spoon.
If chicken livers release a lot of liquid, the pan is usually too crowded or the pieces are too wet; cook in batches for better browning.

More Ways to Cook Chicken Liver

Once you know the base skillet method, you can take the same trimming, drying, and doneness skills in a few different directions.

Version Best for Key change
Skillet liver and onions A quick warm dinner Cook the onions first, then sear the livers quickly.
Crispy fried chicken livers Crunchy appetizer-style serving Bread or batter the pieces and fry separately.
Chicken liver pâté Toast, crackers, and make-ahead spreads Cook gently, then blend with butter and aromatics.
Chicken kaleji masala A spiced Indian-style meal Use onion, ginger-garlic, tomato, coriander, cumin, chilli, and garam masala.
Peri-peri chicken livers Saucy, spicy, restaurant-style flavor Add chilli, garlic, lemon or vinegar, and a sauce base.
Chicken liver adobo A tangy, savory Filipino-style dish Simmer briefly with soy, vinegar, garlic, and aromatics.

More methods: After the base skillet technique, these are the next flavor directions.
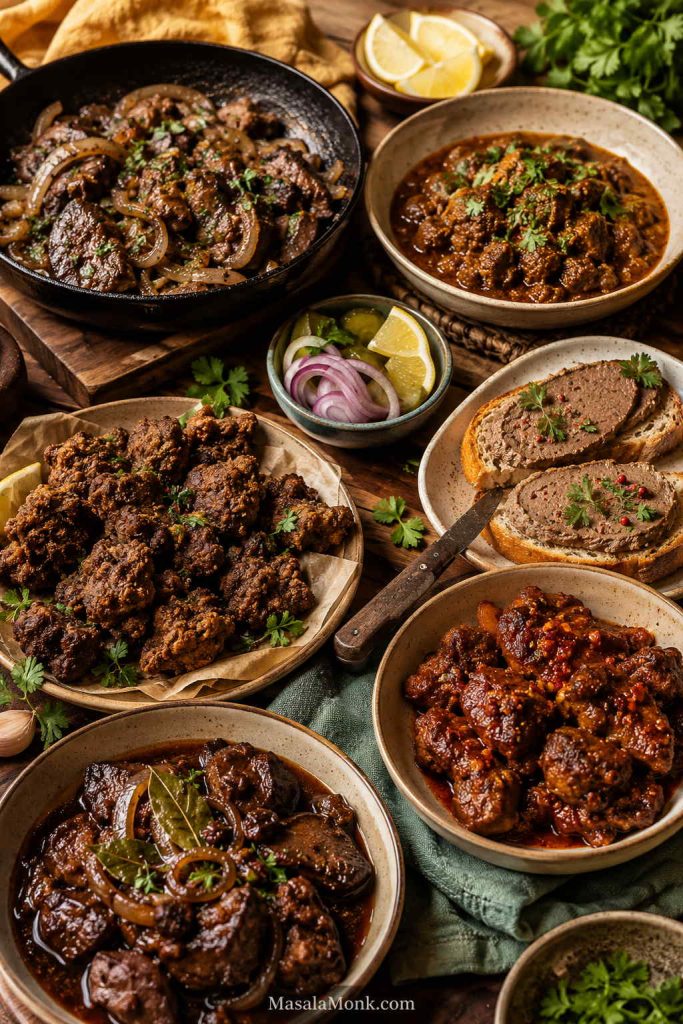
Warm table spread with several chicken liver dishes, including skillet livers, spiced kaleji, fried pieces, pâté on toast, and saucy versions.
Once you understand trimming, drying, and timing, the same chicken liver skills can lead to skillet livers, kaleji, pâté, fried livers, and more.

A Small Note on Nutrition

A small serving goes a long way: the flavor is bold, the texture is dense, and the nutrition is concentrated. Chicken liver is commonly eaten for iron, B vitamins, protein, and its deep savory taste. For a broader food-first look at iron, MasalaMonk’s guide to iron-rich foods explains how animal and plant sources differ.

For B12 context, MasalaMonk’s guide to Vitamin B12 rich foods also covers meat and organ-meat sources. Enjoy chicken liver as food first. For personal medical questions about organ meats, follow professional guidance.

And if you arrived through liver-health or cleanse searches, keep the line clear: this is dinner, not a detox.

FAQs

Do you need to soak chicken liver before cooking?

No. If the livers are fresh and well trimmed, you can go straight to the pan. Use the soak when you want a gentler first bite, especially for someone still deciding whether they like liver.

How do you make chicken liver taste less bitter?

Start with trimming. Remove green or yellow-stained areas, white connective tissue, and tough bits. Then use onions, garlic, lemon juice, butter, black pepper, paprika, or spices to balance the flavor.

How long should chicken liver be cooked?

It usually takes about 5 to 7 minutes in a hot skillet after the onions are cooked. Smaller pieces may cook faster, and larger pieces may need longer. The biggest piece gives you the real answer, so check it with a thermometer.

Can chicken liver be pink inside?

Color can fool you here. Chicken liver should be cooked to 165°F / 74°C in the center. A thermometer is the best way to know it is done safely without cooking it longer than needed.

How do I keep chicken liver from smelling too strong?

Use fresh livers, trim them well, dry them properly, and cook them with onions, garlic, and lemon. Give the pieces space in the pan too; steaming makes the smell stronger. If the raw livers smell sour, rotten, ammonia-like, or rancid, discard them.

Why is my chicken liver rubbery?

It is almost always overcooked. Chicken liver does not forgive extra minutes the way chicken thighs do, so stop as soon as the largest piece is done.

Why did my chicken liver release so much liquid?

The pieces were probably too wet, previously frozen, or crowded in the pan. Thaw fully, drain well, pat dry with paper towels, and cook in batches if needed. You want a steady sizzle, not a pan full of liquid.

Can I use frozen chicken livers?

Yes. Thaw them fully in the refrigerator, drain them well, trim them, and pat them very dry before cooking. Frozen livers often release more liquid, so dryness and pan space matter even more.

How do I know if chicken livers are fresh?

They can smell lightly mineral or iron-rich, but they should not smell sour, rotten, ammonia-like, or rancid. They should look moist, not slimy, grey, or dried at the edges.

Can I make chicken liver spicy?

Yes. Add red chilli powder, cayenne, black pepper, peri-peri seasoning, or the quick kaleji-style spice mix. Add heat gradually because liver has a strong flavor of its own and does not need heavy seasoning to taste good.

Is chicken liver the same as chicken kaleji?

Yes. Kaleji is the Hindi/Urdu word commonly used for liver. Chicken kaleji usually refers to chicken liver cooked with onions, spices, ginger-garlic, and sometimes tomato.

Is chicken liver healthy?

Chicken liver is nutrient-dense and rich in flavor. It is commonly eaten for iron, B vitamins, and protein. Because it is an organ meat and very rich, portion size and personal health context matter.

Can I bake chicken liver?

Yes. Bake trimmed chicken livers with onions and seasoning at 350°F / 175°C until the largest pieces reach 165°F / 74°C. Baking is softer and less browned than skillet cooking, but it reduces splatter.

Can I make crispy fried chicken livers with this recipe?

This recipe is for skillet chicken liver, not Southern-style crispy fried chicken livers. For a light crust, you can dust the livers with flour or cornstarch before searing. Fully crispy fried chicken livers need a separate breading and frying method.

Can I make chicken liver pâté with this recipe?

Chicken liver pâté uses a different method. The livers are cooked gently, then blended with butter and other flavorings until smooth. This skillet recipe is better for serving warm as a meal.

Final Notes

If you remember only four things, remember these: trim the stained bits, dry the livers well, cook them in one layer, and let the biggest piece guide the doneness.

Final plate: This is the warm, finished meal the post is building toward.
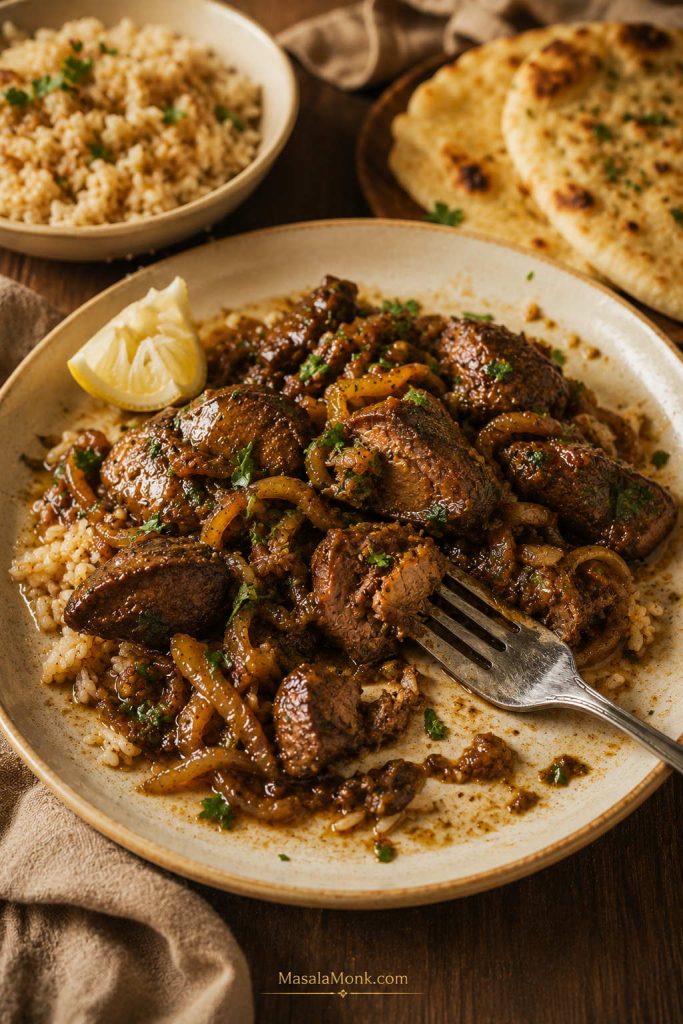
Partly eaten plate of chicken liver with onions, rice, lemon, herbs, pan juices, and roti in the background.
A good final plate should feel simple: tender livers, sweet onions, lemon, a soft side, and enough juices to pull it together.

Do that, and the plate feels warmer and simpler: tender pieces, sweet onions, bright lemon, and enough pan juice for rice or toast. One good batch can change how liver feels at the table. Start with the onion-garlic-lemon version; from there, the same base can go toward masala, extra onions, or a brighter garlic-butter finish.
Posted on 4 Comments

Iron: Mineral for Vitality and Health

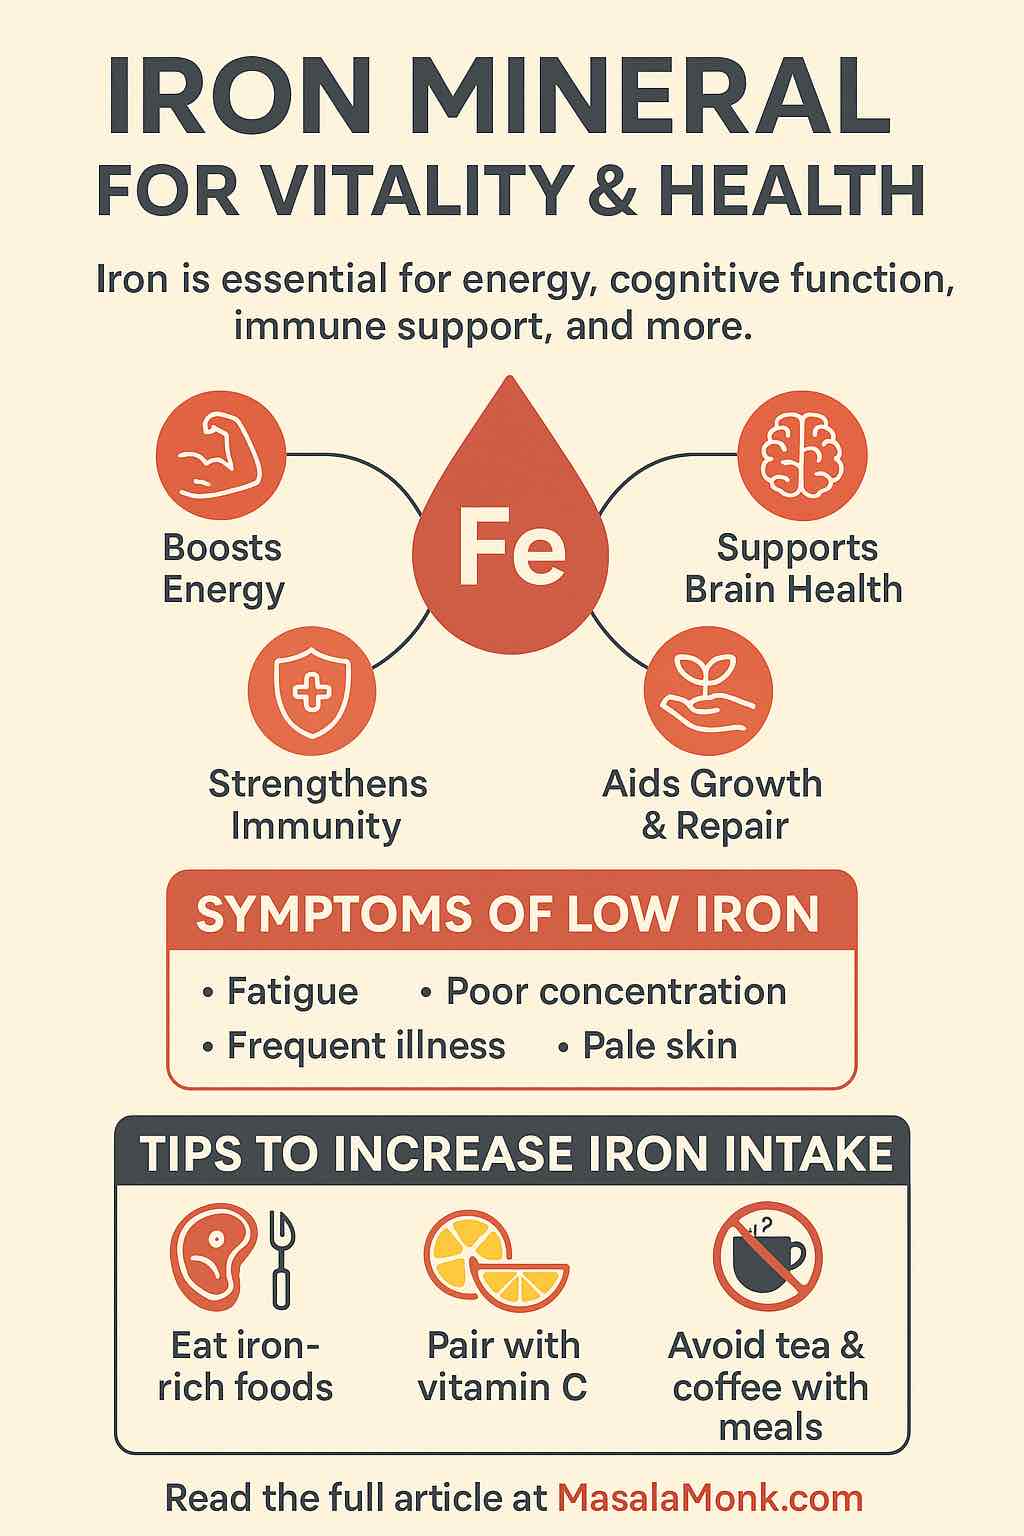
IRON MINERAL FOR VITALITY & HEALTH

Iron: Mineral for Vitality and Health is often described as the spark that keeps the body running, and for good reason. This essential mineral fuels your blood, muscles, brain, and immune system, working quietly behind the scenes to keep you energized and resilient. Without enough iron, the body begins to slow down — fatigue creeps in, concentration weakens, and even simple daily tasks start to feel exhausting.

On the other hand, when your diet consistently supplies adequate iron, the difference is remarkable. You feel more energetic, your focus sharpens, and your body functions at its best. Iron truly makes the difference between dragging through the day and living with strength and vitality.

In this article, we’ll explore why iron matters so much, how much you really need, what happens when levels drop too low, and most importantly, how you can keep your intake balanced through smart food choices and healthy habits.


What Is Iron and Why It Matters for Vitality and Health?

Iron may only be a trace mineral, but its impact on vitality and overall health is enormous. Even though you need it in small amounts compared to other nutrients, it is absolutely essential for survival. About two-thirds of all the iron in your body lives in hemoglobin, the protein inside red blood cells that carries oxygen from your lungs to every organ and tissue. Another significant portion is found in myoglobin, a protein in muscles that stores and delivers oxygen during physical activity. Without these two, your body would simply not have the fuel it needs to function.

However, oxygen transport is only part of iron’s story. This mineral has many other important responsibilities:

  • Powering energy metabolism. Iron helps enzymes convert the food you eat into usable energy. Without it, even a nutrient-rich diet won’t fully translate into vitality.
  • Supporting brain health. Adequate iron allows your brain to function at its peak. It supports memory, concentration, alertness, and even mood stability.
  • Driving growth and repair. Iron plays a central role in DNA synthesis, which means your body needs it for cell renewal, healing, and healthy development.
  • Strengthening immunity. White blood cells rely on iron to fight off infections effectively, making it a cornerstone of your immune defense system.

When your iron levels dip too low, all of these systems begin to slow down. The results often appear as fatigue, weakness, dizziness, and poor performance, whether that’s in the gym, at work, or even in day-to-day life. In short, iron is not just a mineral — it is the foundation that keeps your body strong, energized, and resilient.

Daily Iron Requirements: How Much Iron for Health and Energy?

The amount of iron your body needs isn’t the same for everyone. It changes depending on your age, sex, and stage of life. For example, men typically require less iron than women, while pregnant women need significantly more to support both their own health and the growth of their baby.

Here’s a breakdown of the recommended daily iron intake:

GroupDaily RequirementWhy It Matters
Adult Men~8 mgMeets everyday energy and oxygen needs
Women (19–50)~18 mgReplaces iron lost during menstruation
Pregnant Women~27 mgSupports baby’s development and higher blood volume
Women (50+)~8 mgNeeds decrease after menopause
Children (1–13)7–10 mgCritical for growth, learning, and development

As you can see, women of reproductive age need more than double the iron of men, and pregnancy increases the demand even further. Without careful attention to diet, it’s easy for women in these groups to fall short — which is one reason iron deficiency is so common.

If you are pregnant, have a look at 5 Iron-Enriched Smoothies for Pregnancy with Spinach and Apple.

👉 Vegetarians and vegans also need to pay extra attention. Plant-based foods provide non-heme iron, which isn’t absorbed as efficiently as the heme iron found in animal foods like red meat or poultry. In fact, the body may only absorb 2–20% of non-heme iron, compared to 15–35% of heme iron.

That doesn’t mean plant-based eaters can’t meet their needs — but it does mean they may require nearly double the recommended amounts. A smart strategy is to pair iron-rich plant foods with Vitamin C sources (such as citrus fruits, tomatoes, or bell peppers). This simple combination can dramatically boost absorption and help close the gap.


Benefits of Iron Mineral for Energy, Vitality, and Health

Meeting your daily iron needs is more than just avoiding deficiency — it’s about unlocking a cascade of health benefits. From higher energy and mental clarity to stronger immunity and healthy growth, this mineral is a true foundation of well-being. Let’s explore how iron supports vitality, energy, and long-term health in everyday life.


1. How the Iron Mineral Fuels Energy, Strength, and Vitality

Adequate dietary iron makes sure hemoglobin can carry oxygen efficiently to your cells, muscles, and organs. This constant supply of oxygen keeps you active throughout the day and fuels your stamina during physical activity. Instead of dragging yourself through daily tasks, healthy iron levels allow you to feel energized and resilient.

On the other hand, when iron runs low, even simple chores can feel exhausting. People often blame “just being tired,” but persistent fatigue is one of the most common signs of low iron intake. Iron is the mineral for vitality because it powers oxygen transport, which helps your body recover faster and gives you the strength to enjoy life more fully.


2. Iron and Brain Health: Supporting Mental Performance and Vitality

The brain thrives on oxygen-rich blood, and iron is the mineral that makes this possible. When your iron status is balanced, your memory, concentration, and decision-making all sharpen noticeably.

In contrast, poor iron intake clouds your thinking and slows mental function. Students facing exams, professionals managing demanding workloads, or anyone balancing a busy lifestyle all benefit from iron’s role in mental clarity and cognitive vitality. Balanced iron levels support both physical vitality and mental health.


3. Iron Mineral for Immunity, Healing, and Long-Term Health

A lesser-known but vital benefit of iron is its role in immune defense. White blood cells depend on iron to grow and attack harmful invaders effectively. With enough iron, your immune system responds quickly, helping you resist infections and heal more efficiently.

Without this support, people often notice they catch colds more frequently or struggle with slower recovery times. Keeping your iron intake steady is one of the simplest ways to strengthen immunity and safeguard your health.


4. Visible Benefits of Iron for Healthy Hair, Skin, and Nails

Iron drives cellular renewal, which is why its effects often show up in your outward appearance. Thinning hair, brittle nails, or pale skin are among the first visible signs of deficiency. In fact, dermatologists sometimes link unexplained hair loss directly to low iron levels.

When you nourish your body with iron-rich foods, your skin regains its natural glow, nails grow stronger, and hair looks fuller and healthier. This makes iron not only a nutrient for survival but also a mineral that enhances vitality from the inside out.


5. Why the Iron Mineral Is Essential During Pregnancy and Growth

Iron is especially crucial during periods of growth and development. For expecting mothers, sufficient iron reduces the risk of premature birth and supports healthy fetal brain development. It also helps mothers handle the increased blood volume that pregnancy demands.

Children and teens also rely on iron for their growth spurts, bone strength, and learning capacity. Without it, they may face developmental delays, weakened immunity, or poor school performance. That’s why healthcare providers emphasize iron as a cornerstone of health during pregnancy, childhood, and adolescence.

Read More: Iron Power: Essential Tips for a Healthy Pregnancy


Everyday Benefits of Iron Mineral for Vitality & Health

Iron is much more than a trace mineral — it’s the element that fuels energy, focus, resilience, and growth. Adequate intake means waking up with strength, thinking with clarity, recovering faster, and even looking healthier. In short, iron truly lives up to its reputation as the mineral for vitality and health.


Iron Deficiency: The World’s Most Common Threat to Vitality and Health

Deficiency of iron is not just common — it’s the most prevalent nutrient deficiency on the planet, affecting more than 1.6 billion people. This deficiency robs the body of vitality and health, when the body doesn’t get enough of this essential mineral, everything from your energy to your immunity suffers. It’s not only about feeling tired; it’s about how deeply this shortage impacts learning, productivity, and overall vitality.

Certain groups are more vulnerable than others. Women of reproductive age, due to monthly blood loss, are especially at risk. Infants and children, who need iron for rapid growth, also face higher risk. Vegetarians and vegans may struggle too, since plant-based iron (non-heme iron) is harder for the body to absorb compared to iron from animal foods (heme iron).

Warning Signs of Low Iron: How Deficiency Drains Vitality and Energy

When your iron reserves begin to run low, the body sends signals — though many people mistake them for everyday stress or fatigue. Watch out for:

  • constant tiredness or weakness that doesn’t improve with rest,
  • pale skin or a dull complexion,
  • brittle nails or thinning hair,
  • frequent dizziness or nagging headaches,
  • shortness of breath after minimal activity,
  • irritability or trouble concentrating.

These symptoms often creep in gradually, making them easy to ignore. But if left untreated, deficiency can progress into iron-deficiency anemia — a more serious condition that lowers your immunity, slows children’s growth, and makes pregnancy more complicated and risky.

👉 That’s why understanding iron as the mineral for vitality and health is so critical: spotting these signs early can help you restore balance before your well-being declines further.

Read More: Iron Deficiency Anemia Symptoms: 15 Signs You Are Iron Deficient


Too Much Iron Mineral: Finding the Right Balance for Health

While the iron mineral is essential for vitality and strength — too much iron — can also damage health. This happens most often due to a genetic condition called hemochromatosis, but it can also occur when people take iron supplements for too long without medical guidance. In both cases, excess iron begins to accumulate in vital organs.

Health Risks of Iron Overload

Over time, this overload may cause:

  • liver damage, including cirrhosis or scarring,
  • heart problems, such as arrhythmias or even heart failure,
  • joint pain and stiffness that mimic arthritis,
  • a higher lifetime risk of certain cancers.

The challenge with iron overload is that symptoms often develop slowly, making it easy to miss until real damage has occurred.

Finding the Right Balance with Iron

Because of these risks, iron supplements should never be taken casually. Medical supervision is key to avoid harm, especially since most people can meet their daily needs through a balanced diet rich in iron-containing foods.

In fact, focusing on whole foods not only reduces the risk of overload but also provides other essential nutrients that work hand in hand with iron to support vitality, energy, and resilience.


Best Dietary Sources of Iron Mineral for Vitality and Health

When it comes to nutrition, iron doesn’t come in just one form. It exists in two key types, each with its own characteristics:

  • Heme iron – This form is present in animal-based foods such as red meat, poultry, and seafood. Your body absorbs heme iron more efficiently, making it a powerful way to maintain healthy levels.
  • Non-heme iron – Found in plant-based foods like beans, lentils, tofu, spinach, and seeds. While absorption is lower compared to heme iron, non-heme iron still plays an essential role in overall intake, especially for those following vegetarian or vegan diets.

Iron-Rich Foods: Animal, Plant, and Fortified Sources for Vitality

To truly support vitality and health, it helps to know where to find the best natural sources of iron. Some standout options include:

  • Animal-based sources of iron: beef, chicken liver, lamb, turkey, tuna, clams, and sardines. These foods provide heme iron, which the body absorbs easily.
  • Plant-based sources of iron: lentils, kidney beans, chickpeas, black beans, pumpkin seeds, sunflower seeds, spinach, kale, quinoa, tofu, and fortified soy products. Though absorption is lower, they still make a significant contribution — especially when paired with smart eating habits.
  • Fortified foods: many breakfast cereals, breads, and pastas are enriched with iron to help reduce deficiency risks, making them convenient options for busy lifestyles.

Improving Iron Absorption for Better Energy and Vitality

It’s not just about what you eat, but also how you combine foods. Non-heme iron (from plants) is more difficult for the body to use, but you can improve absorption significantly by pairing it with Vitamin C-rich foods. For example:

  • Squeeze lemon juice over cooked spinach or kale.
  • Add strawberries or orange slices to an iron-rich cereal.
  • Enjoy a bean salad with tomatoes and bell peppers.

At the same time, be mindful that certain substances like coffee, tea, and excess calcium can reduce iron absorption if consumed at the same time as iron-rich meals. A little meal planning goes a long way in ensuring your body gets the most benefit.

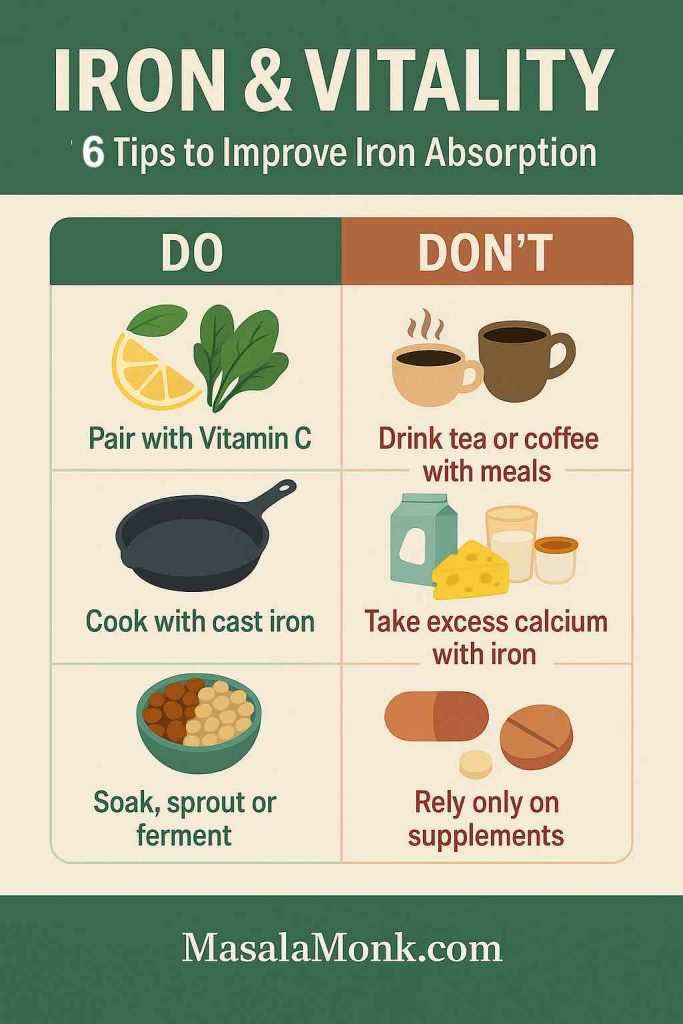
IRON & VITALITY
Tips to Improve mineral's Absorption for health
Tips to Improve Iron mineral’s Absorption for Health & Vitality

Daily Habits to Improve Iron Absorption and Support Vitality

Eating iron-rich foods is only part of the equation — your body also needs to absorb iron effectively to fully benefit from it. Small everyday changes can make a big difference.

Practical Tips to Maximize Iron Intake

  • Pair iron with Vitamin C for better results
    Vitamin C transforms non-heme iron (from plant foods) into a form your body can use more easily. Try squeezing fresh lemon juice over spinach salad, adding bell peppers to bean dishes, or enjoying lentils with tomato-based sauces.
  • Cook with cast iron cookware
    Preparing meals like tomato sauce or curry in a cast-iron pan allows tiny amounts of the mineral to seep into the food, naturally increasing your iron intake without supplements.
  • Be mindful of absorption blockers
    Drinks such as tea and coffee, along with calcium-rich foods like milk, yogurt, or cheese, can reduce how much iron your body absorbs. If you enjoy them, consider having them between meals instead of with your iron-rich foods.
  • Soak, sprout, or ferment grains and legumes
    Whole grains, beans, and seeds contain phytates — natural compounds that can limit iron absorption. Soaking overnight, sprouting, or fermenting reduces phytates, making the iron in these foods more bioavailable.

By adopting these simple habits, you give your body a much better chance of unlocking the full vitality-boosting benefits of iron from your diet.

Might like to read: Buying a Cast Iron Skillet? 5 Warnings Before You Invest


Iron and Public Health: Why This Mineral of Vitality Matters Globally

Iron deficiency isn’t just an individual concern — it’s a widespread public health issue that touches millions. According to the World Health Organization, nearly one-third of women of reproductive age worldwide live with anemia caused by low iron.

This condition does far more than sap energy. It quietly lowers productivity, reduces learning capacity in children, and heightens health risks for mothers and babies. In developing regions, it remains one of the leading causes of preventable illness.

Even in wealthier nations, iron deficiency often goes unnoticed. Many people attribute symptoms such as fatigue, pale skin, or poor focus to busy lifestyles or stress, when the underlying issue is actually low iron. Because the signs can be subtle, regular health check-ups and awareness about diet play a crucial role in prevention.


Conclusion: Iron as the Mineral of Vitality and Health

Iron is not just another nutrient tucked away on a food label — it is the mineral of vitality and health. By carrying oxygen through your blood, fueling energy production, supporting immunity, and sharpening your mind, iron quietly sustains nearly every system in your body.

When your iron stores run low, life feels heavier: fatigue lingers, focus fades, and resilience weakens. But when your levels are balanced, the difference is striking — you move through your day with more energy, greater strength, and a clearer mind.

The good news is that meeting your iron needs doesn’t require complicated changes. With mindful choices — such as including a variety of iron-rich foods in your meals, pairing them with Vitamin C for better absorption, and limiting inhibitors like coffee or excess calcium — you can naturally support your body’s iron balance.

Whether you are pregnant, following a vegetarian lifestyle, or simply striving to boost energy and well-being, understanding and optimizing your iron intake is one of the simplest, yet most powerful, steps toward better health.

In the end, iron truly lives up to its name: it is the steady foundation of vitality, strength, and long-term wellness.

Top 10 FAQs About Iron Mineral for Vitality and Health

1. What is iron and why is it essential for vitality and health?

Iron is often called the mineral of vitality and health because it powers oxygen transport in your body. Most of your iron is stored in hemoglobin (in red blood cells) and myoglobin (in muscles), allowing oxygen to fuel your energy, focus, and strength. Without enough iron, you feel drained, weak, and less resilient.


2. How much iron should I consume daily?

The daily requirement depends on age, sex, and life stage:

  • Adult men: ~8 mg
  • Women (19–50): ~18 mg
  • Pregnant women: ~27 mg
  • Women 50+: ~8 mg
  • Children (1–13): 7–10 mg

👉 Vegetarians and vegans may need almost double, since plant-based iron (non-heme) is harder to absorb.


3. What are the first signs of iron deficiency?

Iron deficiency, the world’s most widespread nutritional gap, often begins subtly. Look out for:

  • constant tiredness,
  • pale skin or dull complexion,
  • brittle nails or thinning hair,
  • frequent dizziness or headaches,
  • shortness of breath,
  • irritability or poor focus.

If untreated, it can progress into iron-deficiency anemia, which harms immunity, growth, and pregnancy outcomes.


4. Can too much iron harm your health?

Yes. While the iron mineral is essential for vitality, excess iron leads to overload. Causes include:

  • genetic conditions like hemochromatosis,
  • long-term supplement misuse.

Over time, this can cause liver damage, heart problems, arthritis-like pain, and even increase cancer risk. Balance is key.


5. What foods are the richest sources of iron?

Iron comes in two main forms:

  • Heme iron (animal foods, easily absorbed): beef, chicken liver, lamb, clams, tuna, turkey, sardines.
  • Non-heme iron (plant foods, less absorbable): lentils, beans, tofu, quinoa, spinach, kale, pumpkin seeds, sunflower seeds.
  • Fortified foods: cereals, breads, and pastas enriched with iron.

Combining plant-based iron with Vitamin C foods enhances absorption.


6. How can I improve iron absorption naturally?

To make the most of iron-rich foods:

  • Pair iron with Vitamin C (e.g., spinach + lemon juice, beans + tomato salsa).
  • Cook with cast iron pans to increase mineral content in food.
  • Avoid coffee, tea, or excess calcium during meals.
  • Soak, sprout, or ferment beans and grains to reduce phytates.

👉 Small tweaks make iron more bioavailable, fueling vitality and energy.


7. Who is most at risk of iron deficiency?

High-risk groups include:

  • Women of reproductive age,
  • Pregnant women,
  • Infants and children,
  • Vegetarians and vegans,
  • People with digestive conditions (like celiac disease or IBD).

These groups should monitor diet closely and get regular check-ups.


8. Should I take an iron supplement?

Supplements help in certain cases, but medical guidance is crucial. Since both low iron and high iron carry risks, testing iron levels first is the safest option. Most people can maintain healthy levels through a balanced diet of iron-rich foods and absorption boosters.


9. Why is iron deficiency a public health concern?

Globally, iron deficiency affects 1.6+ billion people, making it the most common deficiency. It:

  • reduces productivity,
  • weakens immunity,
  • hinders learning in children,
  • increases maternal and child health risks.

Recognizing iron as the mineral for vitality and health is key not only for individuals but also for societies.


10. What is the simplest way to maintain healthy iron levels?

The easiest strategy is a balanced diet supported by smart habits:

  • Eat a mix of heme and non-heme iron foods,
  • Pair with Vitamin C to improve absorption,
  • Avoid absorption blockers during meals,
  • Get tested if you feel symptoms of low or high iron.

In short, mindful eating and awareness help you enjoy the full vitality-boosting benefits of iron.


📚 References & Further Reading on Iron, Vitality, and Health

  1. World Health Organization – Anaemia
    The WHO provides extensive insights into anemia, its causes, and its impact on global health, particularly among women and children.
    👉 Read more on WHO
  2. Iron-Deficiency Anemia – Global Prevalence
    An overview of how iron deficiency remains the most widespread nutritional deficiency worldwide, affecting over 1.6 billion people.
    👉 Read more on Wikipedia
  3. Iron and Human Nutrition
    A deeper look at iron’s role in energy metabolism, brain health, and immunity, with comparisons between heme and non-heme absorption.
    👉 Explore on Wikipedia
  4. The Role of Vitamin C in Iron Absorption
    Research published in the American Journal of Clinical Nutrition confirms that Vitamin C enhances non-heme iron absorption, especially important for vegetarians and vegans.
    👉 Read the AJCN study
  5. The Silent Deficiency in Women’s Health
    Media reports highlight how iron deficiency often goes unnoticed and misdiagnosed, leaving many women fatigued, foggy, and struggling with unexplained symptoms.
    👉 Read the Adelaide Now feature
Posted on 6 Comments

Iron Deficiency Anemia Symptoms: 15 Signs You Are Iron Deficient

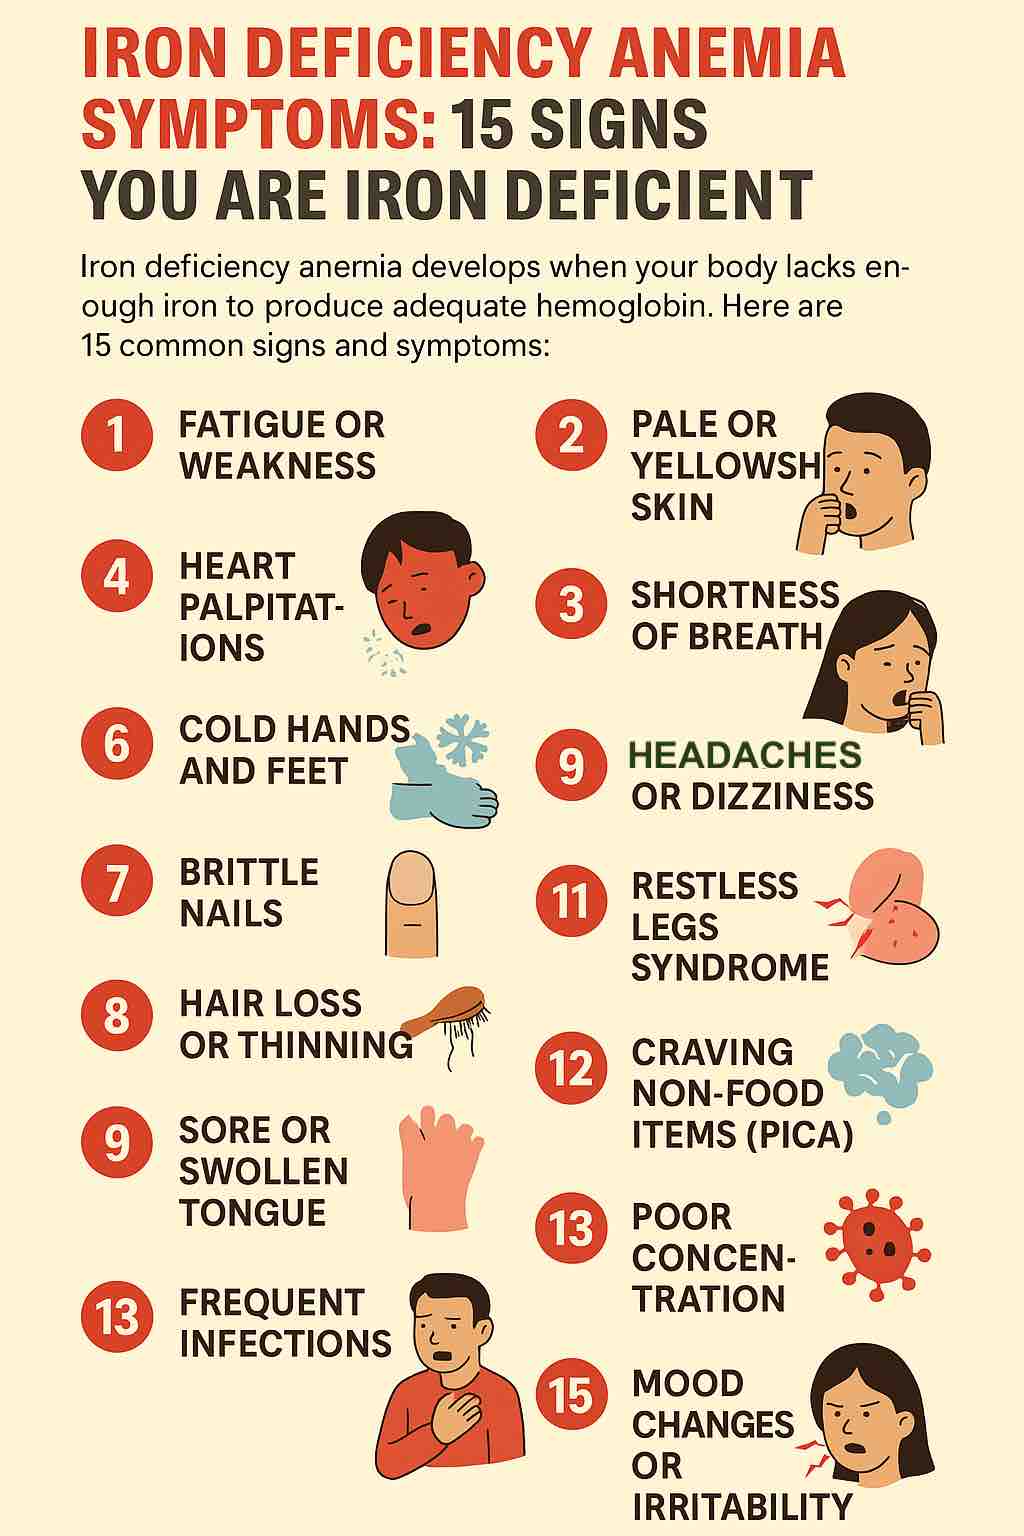
IRON DEFICIENCY ANEMIA SYMPTOMS: 15 SIGNS YOU ARE IRON DEFICIENT

Iron deficiency symptoms are among the most common health complaints worldwide — yet they’re also some of the most overlooked. Iron may be a small trace mineral, but it has a massive role: it helps produce hemoglobin, the protein in red blood cells that delivers oxygen throughout your body. Without enough iron, every cell in your body is deprived of oxygen, and the effects can be felt in your energy, focus, immunity, and even your mood.

At first, low iron symptoms may appear mild — perhaps you feel a bit more tired than usual or notice your nails breaking more easily. But over time, untreated deficiency can lead to Iron Deficiency Anemia (IDA), a condition that affects more than 1.2 billion people worldwide. From unexplained fatigue and hair loss to shortness of breath, chest pain, and brain fog, the signs of anemia can sneak up slowly yet impact nearly every part of daily life.

This guide breaks down the 15 most common iron deficiency symptoms, explores how they can look different in men and women, and shares practical strategies to restore healthy iron levels through diet, supplements, and medical support. If you’ve been wondering whether your tiredness, headaches, or mood changes could be related to low iron, this is your complete evidence-based resource.


🩸 What Is Iron Deficiency Anemia?

Iron Deficiency Anemia (IDA) occurs when your body doesn’t have enough iron to produce adequate hemoglobin — the oxygen-carrying part of red blood cells.

Without sufficient hemoglobin, your body is literally starved of oxygen. The result is a cascade of iron deficiency symptoms that affect everything from your physical energy to your brain function.

Primary Causes of Iron Deficiency Anemia

  • Poor dietary intake (especially common in vegetarians and vegans)
  • Heavy menstrual bleeding
  • Gastrointestinal issues such as ulcers, IBD, or celiac disease
  • Pregnancy (higher iron demands)
  • Chronic blood loss, including internal bleeding or frequent blood donation

Do Read: Iron Power: Essential Tips for a Healthy Pregnancy


🚨 15 Iron Deficiency Symptoms (Anemia Signs You Shouldn’t Ignore)

Iron deficiency anemia often develops slowly, and its signs can be surprisingly easy to dismiss. At first, you may simply feel a little tired or notice subtle changes in your appearance. However, as iron stores drop further, the symptoms intensify and begin to interfere with daily life. Below are the 15 most common anemia symptoms and low iron warning signs to watch for:


1. Persistent Fatigue — The Most Common Iron Deficiency Symptom

Even after a full night’s sleep, you still feel exhausted. This happens because low iron reduces hemoglobin, which means less oxygen reaches your muscles and tissues. The result? Energy levels plummet, leaving you drained all the time.


2. Pale or Yellowish Skin — A Visible Anemia Sign

One of the easiest low iron signs to spot is pallor. When hemoglobin levels drop, your blood loses its healthy red color. This can make your skin, lips, gums, and even the inner eyelids look pale or yellowish.


3. Shortness of Breath — A Classic Low Iron Symptom

Simple activities like walking across the room or climbing stairs suddenly leave you breathless. Since your body isn’t carrying enough oxygen, even small efforts can feel like a workout.


4. Heart Palpitations — Anemia Symptom Linked to Oxygen Shortage

Your heart may race, skip beats, or pound harder than usual. This happens because your cardiovascular system is working overtime to circulate what little oxygen is available. In severe cases, these palpitations can feel alarming.


5. Cold Hands and Feet — Circulatory Symptom of Low Iron

Poor oxygen delivery means your circulation suffers. Many people with iron deficiency anemia notice icy hands and feet, even in warm weather, because their blood flow is compromised.


6. Frequent Headaches or Dizziness — Brain-Related Iron Deficiency Symptoms

When the brain doesn’t get enough oxygen, you may develop pressure headaches, lightheadedness, or even spells of vertigo. This is one of the anemia symptoms most often mistaken for stress or dehydration.


7. Brittle or Spoon-Shaped Nails — Nail Changes from Iron Deficiency

Your nails may become thin, weak, or break easily. In some cases, they curve upward into a spoon-like shape, a condition known as koilonychia — a distinctive sign of chronic low iron.


8. Hair Loss or Thinning — A Low Iron Symptom Affecting Follicles

Iron is essential for healthy hair growth. When your body is deficient, hair follicles weaken, which may cause excessive shedding, thinning, or slower regrowth.


9. Sore or Swollen Tongue — Glossitis as an Anemia Sign

A smooth, inflamed, or painful tongue may point to iron deficiency anemia. Sometimes the tongue appears unusually red or swollen, and mouth sores may also develop.


10. Restless Legs Syndrome — Neurological Symptom of Low Iron

An uncontrollable urge to move your legs, especially at night, is strongly linked to low iron levels in the brain. This symptom can severely disrupt sleep quality.


11. Craving Non-Food Items (Pica) — Severe Iron Deficiency Warning Sign

People with advanced iron deficiency sometimes crave substances like ice, dirt, or chalk. This unusual condition, called pica, is considered a red flag for serious anemia symptoms.


12. Poor Concentration and Brain Fog — Cognitive Low Iron Symptom

Since your brain relies on oxygen for focus and memory, iron deficiency can lead to mental fatigue. Brain fog, poor productivity, and difficulty concentrating are common complaints.


13. Weakened Immunity — A Hidden Iron Deficiency Symptom

Iron plays a vital role in immune defense. Low levels can leave you prone to frequent infections, slow wound healing, and lingering colds or flu.


14. Chest Pain or Tightness — Serious Anemia Symptom

In severe cases, oxygen deprivation forces the heart to work harder, leading to chest pain or tightness. If this symptom appears, medical attention is urgent.


15. Mood Changes — Depression or Irritability from Low Iron

Iron supports neurotransmitters like dopamine and serotonin. When stores run low, mood swings, irritability, and even depression can surface as overlooked iron deficiency symptoms.


👨‍⚕️ Does Iron Deficiency Affect Men Differently?

While more common in women (due to menstruation and pregnancy), men are not immune to iron deficiency. In fact, symptoms in men often go unrecognized or misdiagnosed because they aren’t routinely screened.

Top Causes in Men:

  • Poor diet
  • Hidden GI bleeding (from ulcers, colon polyps, etc.)
  • Long-distance running (foot-strike hemolysis)
  • Regular blood donation

Unique Red Flags in Men:

  • Sudden fatigue or drop in exercise performance
  • Decreased libido or testosterone levels
  • Muscle weakness
  • Brain fog or irritability

If you’re a man experiencing these symptoms — especially if they appear suddenly — don’t ignore them.

Do Read: Iron: Mineral for Vitality and Health


🧪 How Is Iron Deficiency Diagnosed?

Iron deficiency anemia cannot be confirmed just by “feeling tired” — it requires proper blood tests for anemia and iron levels. Doctors usually order a series of lab tests to understand whether you simply have low iron stores or if it has already progressed to anemia. Here’s what to expect:

1. Complete Blood Count (CBC)

This is often the first test for diagnosing iron deficiency anemia. It measures hemoglobin, hematocrit, and red blood cell size. Low values often indicate anemia, but CBC alone cannot reveal how depleted your iron stores are.


2. Serum Ferritin

Ferritin reflects the amount of stored iron in your body. A ferritin level below 45 ng/mL is strongly suggestive of iron deficiency — even if hemoglobin levels are still in the “normal” range. This makes ferritin one of the most reliable early markers of low iron.


3. Serum Iron, TIBC, and Transferrin Saturation

  • Serum Iron measures the iron circulating in your blood at that moment.
  • Total Iron Binding Capacity (TIBC) indicates how much iron your blood could carry if more were available.
  • Transferrin Saturation (TSAT) shows the percentage of transferrin (the transport protein for iron) that is actually loaded with iron.

When combined, these results give a complete picture of iron metabolism and help doctors differentiate between iron deficiency, chronic disease, or other causes of anemia.


🔍 Pro Tip for Patients

If you suspect low iron symptoms like fatigue, hair loss, or brain fog, don’t just settle for a CBC. Always request a serum ferritin test. A normal hemoglobin level does not rule out early iron deficiency — ferritin often drops first, long before anemia is visible on standard blood counts.


🥦 Best Ways to Boost Your Iron Levels Naturally

If you’ve been diagnosed with iron deficiency anemia or you’re simply looking to prevent it, the good news is that there are several effective iron deficiency anemia treatment options. From dietary changes to medical interventions, you can restore healthy iron levels and regain your energy. Let’s walk through the most effective ways to treat iron deficiency step by step.


1. Eat More Iron-Rich Foods

The foundation of any iron deficiency anemia treatment plan starts with nutrition. Both heme iron (from animal foods) and non-heme iron (from plant-based sources) play a vital role in restoring iron levels.

✅ Best iron-rich foods include:

  • Red meat (beef, lamb, liver) – highly absorbable heme iron
  • Poultry and fish – lighter but still excellent sources
  • Dark leafy greens (spinach, kale, Swiss chard) – great for vegetarians
  • Lentils, chickpeas, beans – protein-packed plant-based options
  • Tofu and tempeh – soy-based, iron-dense foods
  • Fortified cereals and grains – quick and convenient
  • Pumpkin seeds and quinoa – nutrient-rich superfoods

👉 Pro tip: Combining both heme and non-heme iron foods in meals makes your iron deficiency treatment more effective.


2. Enhance Iron Absorption

Simply eating iron is not enough — how your body absorbs it matters. This step is crucial in treating iron deficiency anemia naturally.

✅ To improve absorption:

  • Pair meals with Vitamin C-rich foods like citrus, bell peppers, or tomatoes.
  • Try cooking in a cast iron skillet, which can naturally increase iron content in food.
  • Avoid tea, coffee, and milk during meals, as they interfere with absorption.

👉 Pro tip: Think of simple pairings — spinach + lemon juice, or lentils + tomatoes — for maximum absorption.


3. Consider Iron Supplements

When diet alone isn’t enough, iron supplements become an essential part of iron deficiency anemia treatment. They are especially important for those with heavy menstrual cycles, chronic conditions, or very low iron levels.

✅ Most common options:

  • Ferrous sulfate – the standard, cost-effective choice.
  • Iron bisglycinate – easier on the stomach, great for long-term use.

💊 How to use supplements effectively:

  • Take on an empty stomach, ideally with Vitamin C.
  • Avoid taking alongside calcium, tea, or coffee.
  • Start slow if digestive issues occur, then increase as tolerated.

👉 Pro tip: Always consult your doctor before starting supplements to avoid overloading your system.


4. IV Iron Therapy (Advanced Treatment Option)

For people with severe anemia, absorption issues, or urgent medical needs, IV iron therapy is a highly effective treatment for iron deficiency anemia.

  • It bypasses the digestive system and replenishes iron quickly.
  • Works faster than oral supplements.
  • Usually recommended only when other treatments aren’t effective.

👉 Pro tip: This should always be discussed with a healthcare professional, as IV iron therapy is a medical procedure.


Bottom line: The most effective iron deficiency anemia treatment is often a combination of approaches. Start with iron-rich foods, enhance absorption with smart pairings, use iron supplements if necessary, and reserve IV iron for more serious cases. With consistent care, most people notice improved energy, focus, and overall health within just a few weeks.

Do Read: Healthy Iron Rich Pancake- Kid Friendly Recipe


🧾 Final Thoughts

Iron deficiency anemia doesn’t always make a dramatic entrance — instead, it creeps in quietly through signs like persistent fatigue, brain fog, brittle nails, and thinning hair. These subtle changes are easy to dismiss, but over time they can steal your energy, affect your mood, and impact your overall quality of life.

The encouraging news? Iron deficiency is one of the most easily diagnosed and treatable nutritional deficiencies. With the right blood tests, a tailored diet, and — if needed — iron supplements, most people can restore healthy levels within a few months. In other words, this condition is not just manageable, it’s completely reversible when addressed early.

If you’ve recognized yourself in the symptoms of iron deficiency anemia, don’t wait. Taking action now can help you reclaim your focus, boost your energy, and protect your long-term health. Your body — and your mind — will thank you for listening to those early whispers before they become a roar.


📌 Stay Informed. Stay Empowered.

Feeling tired shouldn’t be your normal. Don’t guess — get tested, eat smart, and supplement wisely.

➡️ For more wellness guides and nutrition-backed advice, visit MasalaMonk.com — where we break down ancient wisdom and modern science for better living.

🧠 Frequently Asked Questions (FAQs) About Iron Deficiency Anemia

1. What is the most common symptom of iron deficiency anemia?

The single most common and often first-noticed symptom of iron deficiency anemia is persistent fatigue. This isn’t the normal tiredness you feel after a long day — it’s a deep exhaustion that lingers even after adequate rest or sleep. Because iron plays a crucial role in transporting oxygen to your cells, low iron levels mean your muscles, organs, and brain don’t receive the oxygen they need. As a result, your energy supply runs low, leaving you drained, sluggish, and less productive throughout the day.

2. Can you be iron deficient without being anemic?

Yes — this condition is called iron deficiency without anemia (IDWA). In this case, your ferritin (iron storage) levels may be depleted, yet your hemoglobin remains in the “normal” range. Many people mistakenly believe they are fine because their blood counts appear healthy. However, the body can still show symptoms such as chronic fatigue, poor concentration, hair loss, or restless legs. In other words, even without full-blown anemia, low iron can negatively impact your health and daily performance.

3. How is iron deficiency anemia diagnosed?

Diagnosing iron deficiency anemia typically requires a combination of blood tests rather than relying on one single marker. Doctors often start with a Complete Blood Count (CBC) to check hemoglobin and red blood cell size. Next, serum ferritin is measured to assess iron stores — values below 45 ng/mL strongly suggest deficiency, even if hemoglobin is normal. Additional tests, such as serum iron, Total Iron Binding Capacity (TIBC), and transferrin saturation, provide a complete picture of how your body is using and transporting iron. Together, these tests ensure nothing is missed.

4. What are unusual or hidden symptoms of iron deficiency anemia?

Beyond the “classic” signs like fatigue and pale skin, unusual iron deficiency symptoms can also appear. For example, some people develop pica — a craving for non-food substances like ice, chalk, or even dirt. Others may experience restless legs syndrome, where an uncontrollable urge to move the legs disrupts sleep. Another lesser-known sign is beeturia — reddish-colored urine after eating beets, which may indicate altered iron metabolism. While these symptoms might seem unrelated, together they can be powerful red flags of low iron levels.

5. Is iron deficiency anemia common in men?

While women are more frequently affected due to menstruation and pregnancy, iron deficiency in men is still a significant concern. In fact, when men develop anemia, it’s often linked to hidden causes such as gastrointestinal bleeding from ulcers, colon polyps, or even colorectal cancer. Men may also experience low iron from poor diets, frequent blood donation, or endurance sports like long-distance running. Because routine screening for men is less common, many cases go undiagnosed until symptoms such as fatigue, reduced exercise performance, or low testosterone become noticeable.

6. How long does it take to correct iron deficiency anemia?

The timeline for recovery depends on the severity of your deficiency. Most people notice improvement in symptoms like fatigue and focus within 2 to 4 weeks of treatment. However, restoring iron stores completely can take 3 to 6 months or longer, especially if the underlying cause (like heavy menstrual bleeding or GI bleeding) is not addressed. Consistency with supplements, diet changes, and medical follow-up plays a big role in how quickly you’ll recover.

7. What foods should I avoid when trying to absorb more iron?

When boosting iron intake, it’s just as important to know what blocks iron absorption as it is to eat iron-rich foods. Be cautious with tea and coffee, which contain tannins that bind iron and make it harder to absorb. Similarly, calcium-rich foods (like milk or cheese) and high-fiber cereals (with phytates) can interfere when consumed alongside iron-rich meals. A better strategy is to consume these foods at different times of the day and pair your iron intake with vitamin C sources such as citrus fruits, which enhance absorption.

8. Can iron supplements cause side effects?

Yes. While iron supplements are highly effective, some types can cause side effects. Ferrous sulfate, the most commonly prescribed form, may lead to constipation, nausea, or dark stools. If you experience digestive discomfort, switching to gentler forms like iron bisglycinate or ferrous gluconate can help. Drinking plenty of water, adding fiber to your diet, and starting with a lower dose before building up can also reduce side effects. Always consult your doctor before switching supplements.

9. What’s the best time to take iron supplements?

The most effective way to take iron supplements is on an empty stomach — ideally one hour before meals. Taking them with a small dose of vitamin C (such as orange juice) improves absorption significantly. On the other hand, avoid pairing iron with milk, coffee, or calcium supplements, as these reduce absorption. If taking iron on an empty stomach upsets your stomach, you can take it with a small snack, but avoid blockers during that meal. Consistency is key, so pick a routine you can stick to daily.

10. When should I see a doctor about low iron symptoms?

You should see a healthcare professional if you notice persistent iron deficiency symptoms such as unexplained fatigue, pale skin, shortness of breath, dizziness, or rapid heartbeat. These may indicate anemia or another underlying issue that requires medical evaluation. Because low iron can sometimes signal hidden conditions — like gastrointestinal bleeding or chronic disease — it’s essential not to self-diagnose. A simple blood test can confirm whether you have iron deficiency anemia and help guide safe, effective treatment.

📚 Scientific References

  1. American Family Physician (AAFP). Iron Deficiency Anemia: Guidelines from the American Gastroenterological Association. August 2021. Link
    → Establishes serum ferritin < 45 ng/mL as a reliable threshold for diagnosing iron deficiency anemia.
  2. Medscape. Iron Deficiency Anemia Guidelines Summary. Updated 2023. Link
    → Outlines modern diagnostic strategies, including ferritin, TIBC, and transferrin saturation.
  3. JAMA Network Open (via Health.com). Large Percentage of U.S. Adults Are Iron Deficient, Study Finds. 2024. Link
    → Recent population-based study highlighting prevalence of both absolute and functional iron deficiency.
  4. Medscape. Iron Deficiency Anemia: Overview. Updated 2023. Link
    → Detailed overview of signs, symptoms, and complications — from fatigue and pica to glossitis and cognitive changes.
  5. Xinyu Mei, et al. Iron deficiency anemia in children: A comprehensive review. Journal of Xiangya Medicine (2021). Link
    → Explains the physiological stages of iron depletion and its clinical manifestations.
  6. Wikipedia. Iron-Deficiency Anemia. Link
    → Concise summary of causes, mechanisms, and risk factors, including blood loss, diet, and malabsorption.
  7. P.M.C. (PubMed Central). Iron Deficiency and Oxidative Stress in Red Blood Cells. Link
    → Demonstrates how low iron contributes to oxidative stress and red blood cell damage.
  8. ScienceDirect. Oxidative Stress in Children with Mild Iron Deficiency Anemia. 2023. Link
    → Shows that even mild anemia can impair antioxidant defenses and overall cellular health.
Posted on 3 Comments

Healthy Iron Rich Pancake- Kid Friendly Recipe

Kids have limited appetite. Give your child the best nutrition in that little food that they eat. The biggest struggle for vegetarians or vegans is to fulfill their child’s iron needs. While balanced diet here is the key but we all know how balanced it gets with the children especially the ones who are picky eaters.

So, I am going to share with you a simple recipe which has a great balance of protein and iron.

We all make BESAN CHEELAS at home. Sharing with you a simple way wherein you can make the best out that one Cheela that your child eats. 😊 And trust me it comes out delicious and packed with flavours. Also, this makes a great lunch box recipe too.

This recipe requires no elaborate preparations, so don’t need to plan ahead either. Just stir together the ingredients to make a batter, pour it on a hot griddle & cook up a delicious healthy meal.

What is Cheela?

Cheela is a sweet or savory Indian Pancakes made using lentils, cereal or grain flour. They are often made without any leavening agents, so they are considered to be healthy.

What is Besan?

Besan is a Hindi word which means “gram flour”. It is a pulse flour made using channa dal or chickpea flour. So besan cheela is gram flour pancakes. These pancakes are Gluten Free, vegan and nutritious. Gram flour is a fabulous source of protein, iron, magnesium, potassium, vitamin B6. Just 100 grams of gram flour can give you 22 grams of easy to digest natural protein. You can make these pancakes with basic ingredients as well but when you add green leafy vegetables to it, it not only enhances the taste but also makes it wholesome and an amazing source of iron for your kids.

Also the vegetables I have added are all homegrown. If you don’t have enough space, grow them in small pots. It’s no rocket science. Just get a few pots or grow bags, potting soil and seeds from any nursery near your house. Engage your children while planting it. The satisfaction of eating your homegrown organic vegetables is unmatchable. Try it!

Ingredients

Prep time: 5 minsServing: makes 3 Pancakes
Cook time: 5 mins
  • Besan/Chickpea flour: 1/2 cup
  • Sattu/Roasted Gram flour: 1/4th cup
  • Semolina/Suji: 1/4th cup
  • Cumin seeds/Jeera:  1/8th tsp
  • Bishop seeds/Ajwain: 1/8th tsp
  • Garam Masala: 1/4th tsp
  • Roasted Cumin powder: 1/4th tsp
  • Turmeric: 1/4th tsp
  • Salt & Black pepper to taste
  • Chat Masala to taste (optional)
  • Coriander powder: 1/2 tsp
  • Water as required 
  • Chopped Methi (Fenugreek), Spinach, Radish leaves, Mint leaves, Curry leaves & Coriander leaves: 1 cup
  • Onion: 2 tbsp, finely chopped
  • Ginger: 2” long, grated
  • Ghee or Oil as required 

Method

1 Take Besan/Chickpeas flour, Sattu or Roasted Gram flour (great source of protein) and Semolina/Suji (for crispiness) in a bowl.

2. To this add turmeric, cumin seeds, ajwain/bishop seeds, garam masala, roasted cumin powder, black pepper, salt, chaat masala and coriander powder. Mix it well. Add enough water to make a thin but not a runny batter. Start with 1/4th cup water and the gradually add more as required. Continue whisking until the batter has a smooth, flowing consistency. There shouldn’t be any lumps, so make sure to break those up while mixing the batter.

Tip: Use a wire whisk to whisk the batter. This will ensure that your batter is lump free.

3. Now add chopped methi (fenugreek) leaves, spinach leaves, onion, grated ginger (fabulous food for digestion), curry leaves, coriander & mint leaves. Use the leaves that are in season. All the green leaves are a great source of iron and this is one of the best ways to incorporate this in your child’s and your diet.

4. Keep the batter aside for 10 minutes. Heat a cast iron tawa on a medium to low heat. I have made it on normal tawa in which we make rotis but if you can’t make it on tawa then you can use a non stick pan as well.

5. Brush the tawa with desi ghee or oil. Add generously to avoid dry cheelas because besan tends to soak ghee/oil. Take a ladle or ¼ to ⅓ of a measuring cup full of the batter and pour on the pan. Spread the batter evenly with the back of your ladle to make thin cheelas.

6. Then continue to cook the chilla on a low to medium-low heat until the top begins to set. You can drizzle some more oil or ghee along the edges for a crispy cheela.

7. You can flip the chilla once or twice for even cooking.
Once the base gets golden brown, it’s time to flip the cheela. Cook the other sides till you see golden spots on cheela. You can flip the cheela once or twice for even cooking.

8. Finally, fold it and then serve it mint chutney, homemade ketchup or the way your child likes it.

Enjoy!! 😊

Notes:

  • If some of the spices mentioned above are not available, feel free to skip them.
  • Incase you don’t find sattu or roasted gram flour, feel free to skip it and add more besan or chickpea flour. However, sattu is a great source of protein and iron, so it’ll be great if you can get your hands on it.
Posted on Leave a comment

5 Essential Foods for Fetal Brain Development: Boost Your Baby’s Cognitive Health

Introduction:

Pregnancy is a miraculous journey and a crucial time to think about nutrition. Every meal is an opportunity to nourish both you and your growing baby. The focus of this post is on fetal brain development – a complex and wondrous process that requires specific nutrients. Understanding which foods can foster this development is key to giving your child the best start in life.

1. Omega-3 Fatty Acids: Building a Healthy Brain

Deep Dive into Importance: The brain is about 60% fat, and Omega-3 fatty acids, especially DHA, are its major building blocks. DHA is essential for the growth and functional development of the baby’s brain in the womb and continues to be vital in the first few years of life.

Top Food Sources: Cold-water fatty fish like salmon, mackerel, and sardines are rich in Omega-3s. Vegetarian options include flaxseeds, chia seeds, and walnuts. Algae-based supplements can also be considered.

Recipe Suggestion: Try baking a salmon fillet with a sprinkle of herbs for a delicious, omega-3-packed meal.

2. Iron: Supporting Brain Development and Beyond

In-Depth Look at Benefits: Iron is a crucial component of hemoglobin, which carries oxygen to the fetus, including the developing brain. Adequate iron intake prevents anemia in pregnant women and supports the rapid brain development of the fetus.

Top Food Sources: Lean beef, chicken, tofu, lentils, and fortified cereals are rich in iron. Combining these with vitamin C-rich foods enhances iron absorption.

Recipe Suggestion: Consider a lentil soup with tomatoes – a perfect blend for maximizing iron uptake.

3. Folate: The Essential B Vitamin for Neural Health

Detailed Exploration of Role: Folate is vital for the formation of the neural tube and preventing major birth defects of the baby’s brain and spine. It’s also crucial for DNA synthesis and repair, making it a key player in all-round fetal development.

Top Food Sources: Dark leafy greens, asparagus, broccoli, citrus fruits, and fortified grains are great sources of folate. Folic acid supplements are often recommended during pregnancy.

Recipe Suggestion: A spinach and orange salad is not only refreshing but packed with folate.

4. Choline: A Key Nutrient for Brain Connectivity

Comprehensive Overview: Choline is essential for brain development, particularly for the formation of neurotransmitters that govern memory, mood, muscle control, and other brain and nervous system functions.

Top Food Sources: Eggs are a well-known source, but choline can also be found in lean meats, poultry, fish, dairy products, and cruciferous vegetables like Brussels sprouts and broccoli.

Recipe Suggestion: A morning scramble with eggs and chopped broccoli offers a choline-rich start to your day.

5. Antioxidants: Protecting the Developing Brain

In-Depth Insight: Antioxidants play a vital role in protecting fetal brain tissue from oxidative stress and damage. This is crucial for healthy brain development and has long-term implications for cognitive health.

Top Food Sources: Berries, nuts, whole grains, green leafy vegetables, and beans are excellent sources of antioxidants.

Recipe Suggestion: A mixed berry smoothie with a handful of spinach provides a delicious antioxidant boost.

Incorporating These Foods into Your Daily Diet:

Balance and variety are key. Here are some tips:

  • Plan your meals around these food groups.
  • Try new recipes to keep things interesting.
  • Listen to your body’s cravings and aversions, they are often telling.

Conclusion:

Your dietary choices during pregnancy are your baby’s first environment. The right balance of nutrients can set the stage for a lifetime of health and cognitive well-being. Remember, taking care of yourself is taking care of your baby.

Consult Your Doctor: It’s crucial to consult with your healthcare provider before making significant changes to your diet or taking supplements.

FAQs

  1. Q: Can I get enough Omega-3 from a vegetarian diet? A: Yes, flaxseeds, chia seeds, walnuts, and algae-based supplements are great vegetarian sources of Omega-3.
  2. Q: Is it safe to eat fish during pregnancy due to mercury content? A: Yes, but choose low-mercury fish like salmon and sardines, and limit intake to 2-3 servings per week.
  3. Q: How can I increase iron absorption from plant-based foods? A: Pair plant-based iron sources like spinach or lentils with vitamin C-rich foods like oranges or bell peppers to enhance absorption.
  4. Q: Are prenatal vitamins enough for getting all necessary nutrients? A: Prenatal vitamins are important, but they work best in conjunction with a balanced diet rich in the essential nutrients.
  5. Q: Can I take a DHA supplement instead of eating fish? A: Yes, DHA supplements can be a good alternative if you don’t consume fish. Consult with your healthcare provider for recommended types and dosages.
  6. Q: How much folate should I consume during pregnancy? A: The recommended daily intake of folate during pregnancy is 600 micrograms. This can be achieved through diet and supplementation.
  7. Q: Are there any risks of consuming too much Vitamin A while pregnant? A: Yes, excessive Vitamin A intake can be harmful. Stick to recommended amounts and focus on Vitamin A from plant sources like carrots and sweet potatoes.
  8. Q: What are some easy ways to include choline in my diet? A: Eggs are a great source. You can also include lean meats, poultry, and cruciferous vegetables like broccoli in your meals.
  9. Q: Can a lack of antioxidants affect fetal brain development? A: Antioxidants play a role in protecting the fetal brain from damage, so a balanced diet including berries, nuts, and whole grains is beneficial.
  10. Q: Is it normal to have food aversions and how do I manage my diet then? A: Food aversions are common in pregnancy. Focus on the nutrients rather than specific foods and find alternatives that you can tolerate.