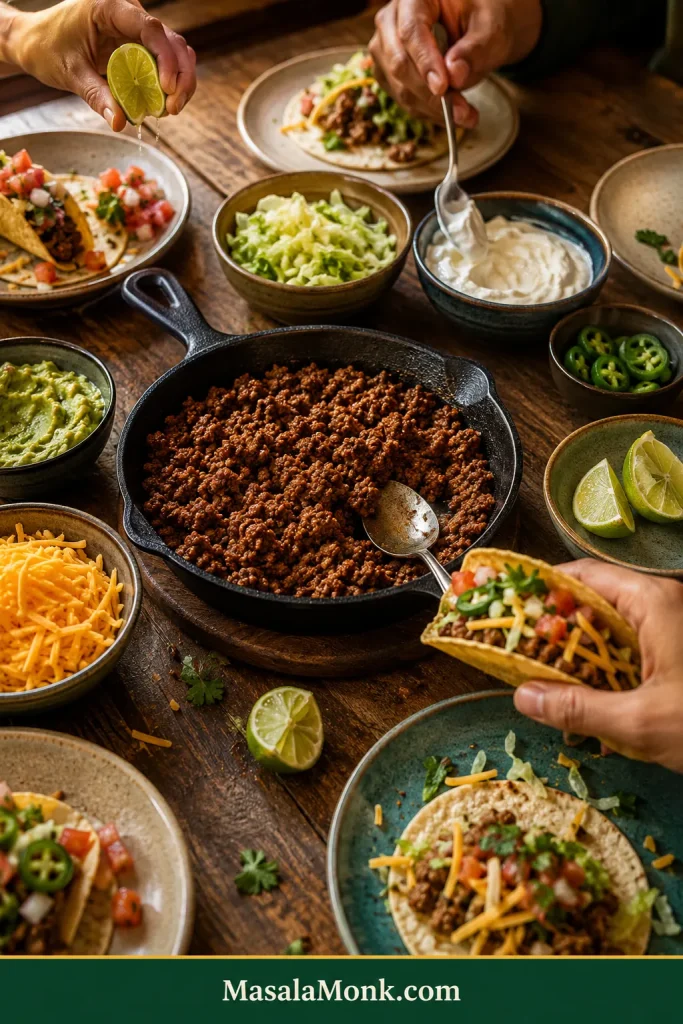
Ground beef tacos are supposed to be the dinner you make when you don’t want dinner to become a project. A hot skillet, a pound of beef, warm tortillas or crunchy shells, a few bowls of toppings—and everyone builds the taco they actually want.
The disappointing versions usually go wrong in small ways. Sometimes the beef steams instead of catching browned color. Other times, the seasoning tastes dusty or flat. Tiny crumbles stay on the heat until they dry out, or loose sauce reaches a crunchy shell before you do.
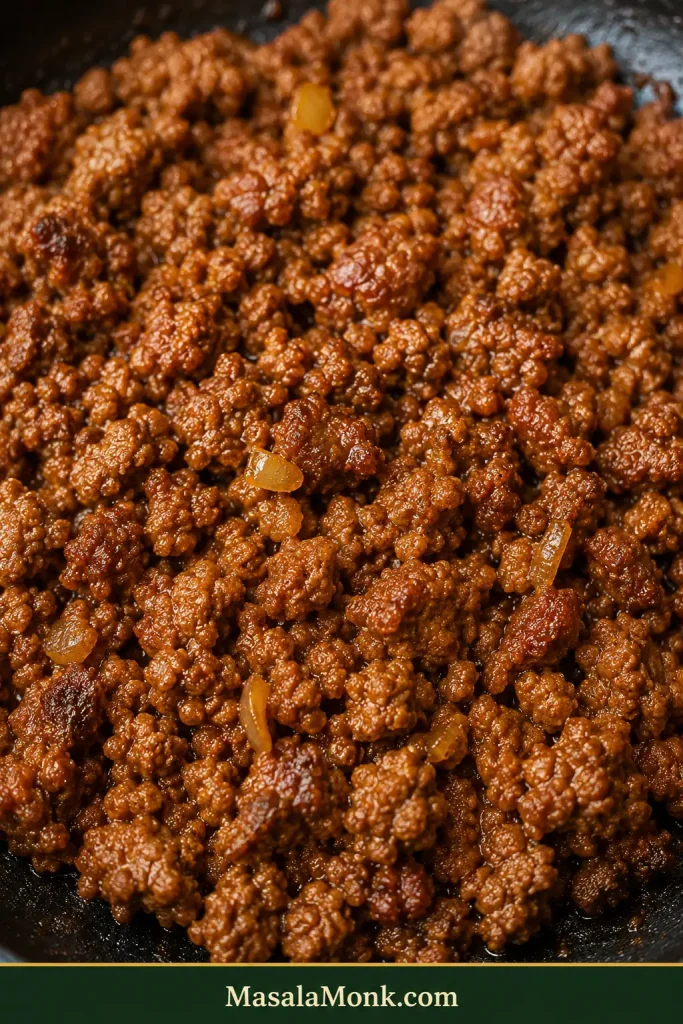
The difference is mostly in the skillet. Give the beef a brief chance to brown before crumbling it, then let the seasoning turn fragrant with the meat. Add tomato paste and just enough liquid to coat the crumbles, then reduce until the sauce clings.
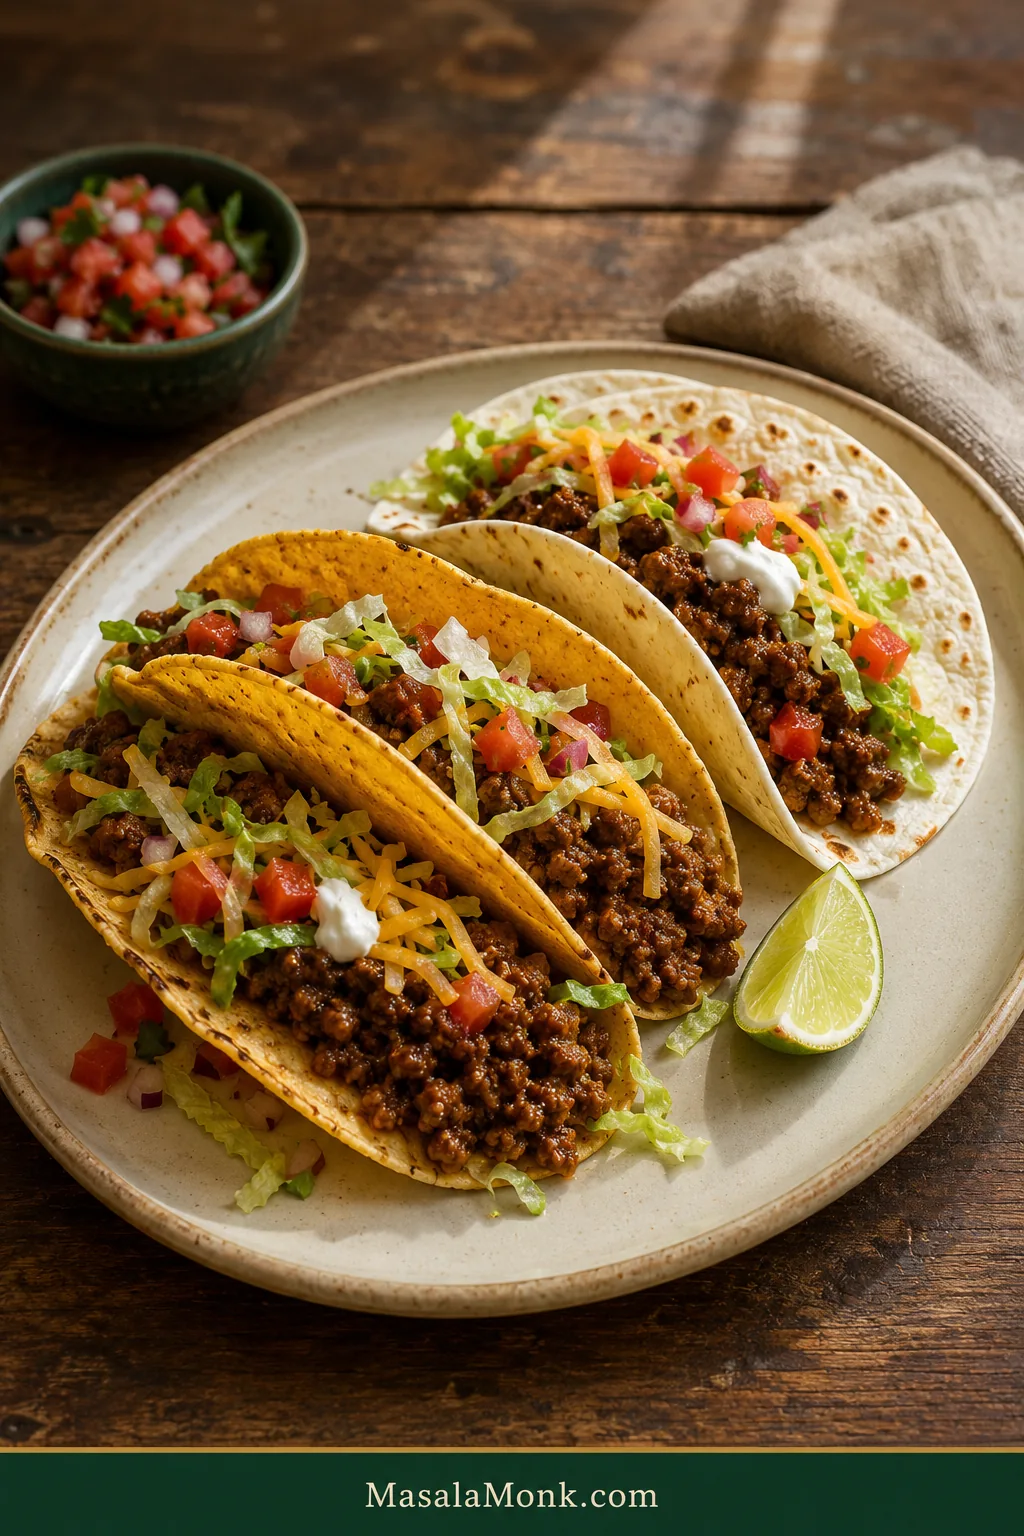
You end up with hot, savory beef with browned edges and juicy crumbles—good inside a crisp shell or a warm tortilla, with as few or as many toppings as you like.
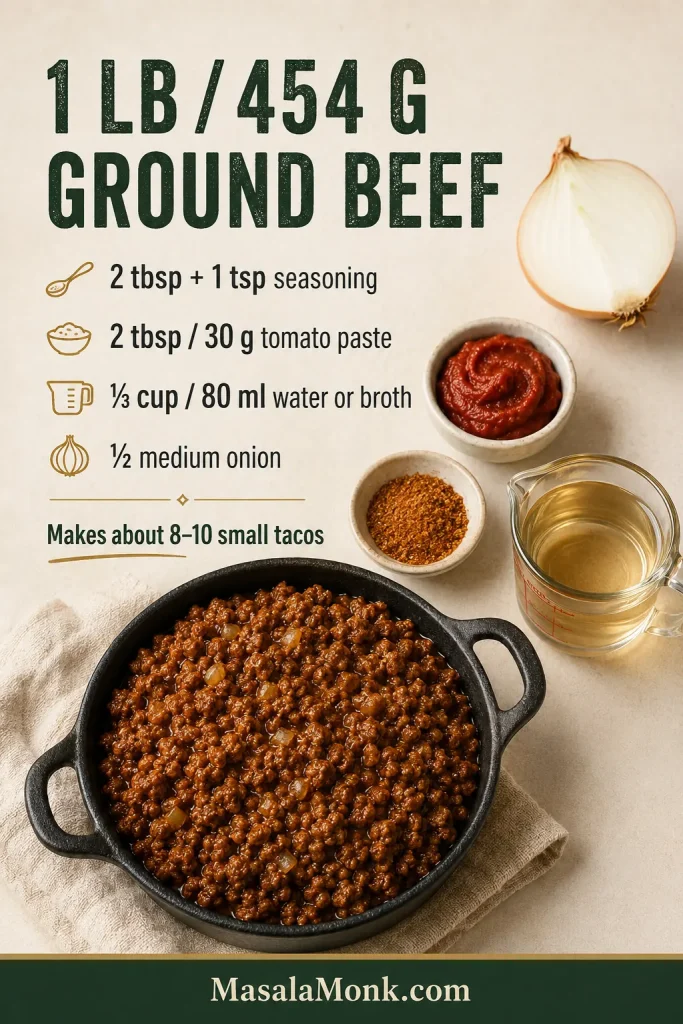
For 1 lb / 454 g ground beef, use 2 tablespoons + 1 teaspoon homemade seasoning and 2 tablespoons / 30 g tomato paste. Add ⅓ cup / 80 ml water or low-sodium broth, plus optional cayenne if you want more heat.
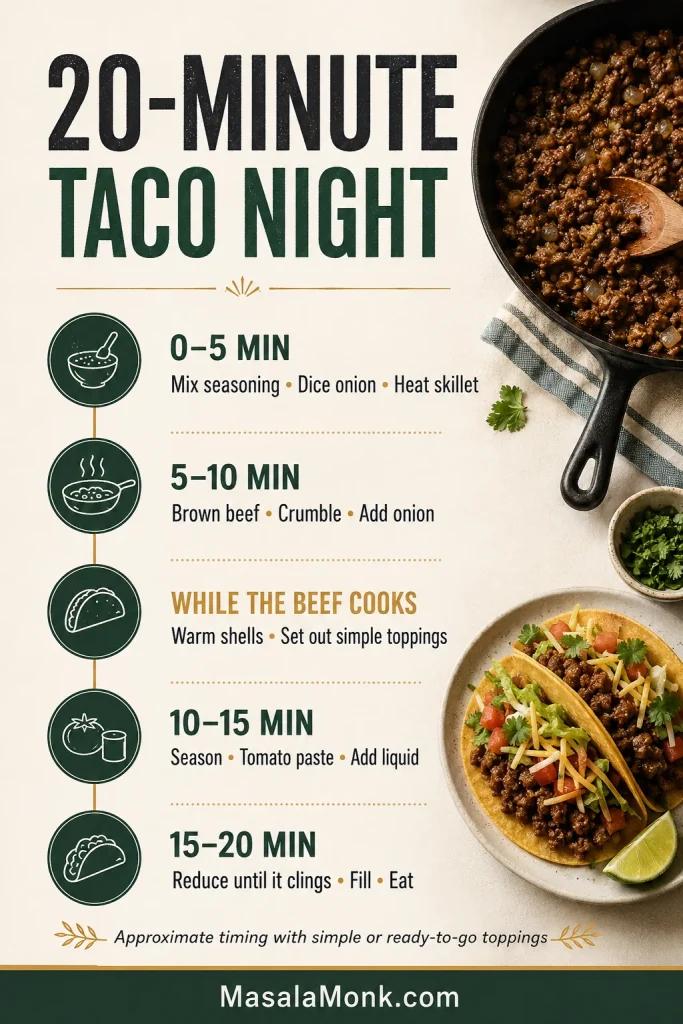
Give the beef a short head start on browning, then add the onion, seasoning and tomato paste. Pour in the liquid and simmer until the sauce clings and a spatula trail no longer floods with thin liquid.
These are familiar American/Tex-Mex-style ground beef tacos with warm tortillas or crunchy shells and build-your-own toppings. Warm the tortillas or shells and set out simple toppings while the beef cooks, and dinner can stay close to 20 minutes.
Tomato paste gives the beef body; the measured liquid spreads seasoning and loosens browned flavor, then cooks back down.
Ground Beef Tacos Recipe
Recipe at a Glance
Prep
5 minutes for the taco meat, plus topping prep as needed
Cook
15 minutes
Total
About 20 minutes with simple or ready-to-go toppings
Skillet
12 inch / 30 cm preferred
Yield
8–10 small tacos; serves about 3–4
Look for
Juicy crumbles with no loose watery liquid underneath
Toppings are the wildcard in a 20-minute taco dinner. Prep fresh salsa or guacamole first; otherwise, keep the lineup simple while the beef cooks.
Equipment
12-inch / 30 cm skillet preferred; a 10-inch / 25 cm skillet works but may need a little longer for moisture to cook away
Sturdy spatula or wooden spoon
Instant-read thermometer, useful for checking the beef
A wide skillet matters more than the material. Stainless steel and cast iron brown especially well, but nonstick is fine too. The extra surface area lets released moisture evaporate instead of pooling around the beef.
Ingredients
For the taco meat
1 lb / 454 g ground beef (also sold as beef mince or minced beef), preferably around 85/15
½ medium yellow or white onion, finely diced, about 2½ oz / 70–75 g
2 tablespoons / about 30 g tomato paste
⅓ cup / 80 ml water or low-sodium beef broth
1 teaspoon neutral oil, only if the beef is very lean or the skillet looks dry
Homemade taco seasoning
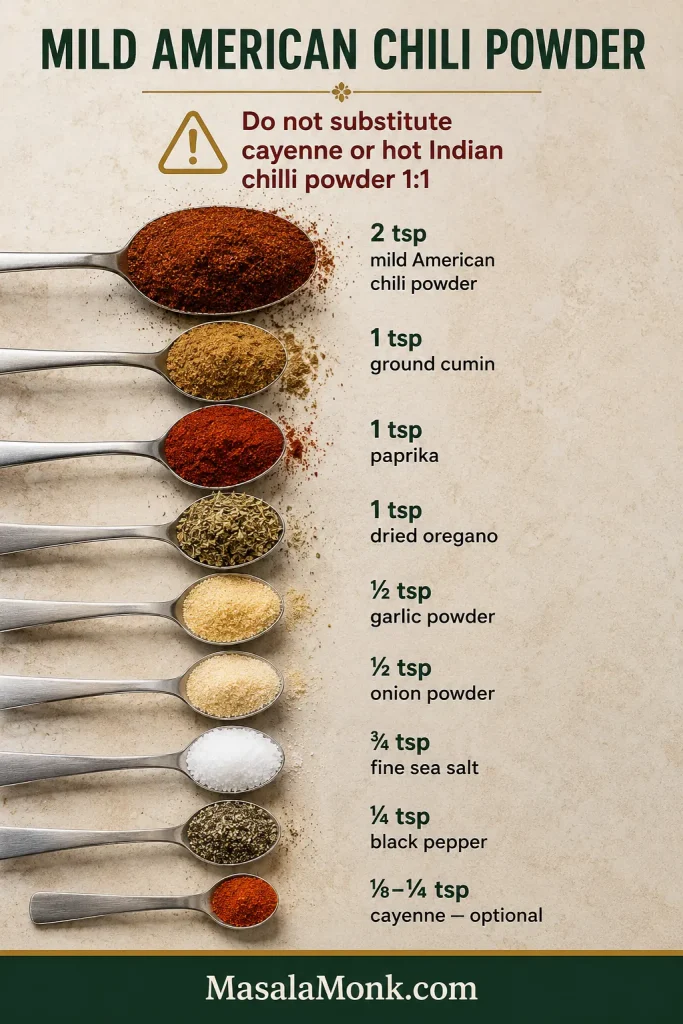
2 teaspoons mild American-style chili powder, about 5 g
1 teaspoon ground cumin, about 2 g
1 teaspoon sweet or regular paprika, about 2 g
½ teaspoon garlic powder, about 1.5 g
½ teaspoon onion powder, about 1 g
1 teaspoon dried oregano, about 1 g
¾ teaspoon fine sea salt, about 4 g, plus more if needed
¼ teaspoon freshly ground black pepper
⅛–¼ teaspoon cayenne, optional
The seasoning blend measures 2 tablespoons + 1 teaspoon before the optional cayenne. Here, “chili powder” means the mild American-style seasoning blend. Cayenne, pure hot ground chile and Indian red chilli powder are much hotter and should not be substituted in the same amount.
Mild chili powder brings broad chile flavor, cumin adds earthiness, and the smaller spices keep the blend balanced rather than simply hotter.
Using a seasoning packet? That’s fine. Packet blends vary in salt, strength and thickeners, so use the packet’s own seasoning and liquid amounts.
For serving
8–10 small flour or corn tortillas, roughly 6 inches / 15 cm, or similar-size crunchy taco shells
1 cup / about 4 oz / 115 g shredded cheddar, Monterey Jack or a Mexican-style cheese blend
2 cups shredded lettuce
1 cup diced tomato or pico de gallo
½ cup / 120 g sour cream
Avocado or fresh guacamole, chopped onion, cilantro, jalapeño, salsa, lime wedges and hot sauce, as desired
You don’t need a full taco bar for this to work. Mix the seasoning ahead if you like, and use pre-shredded lettuce or cheese when that makes dinner easier. Save avocado or guacamole for closer to serving.
If you want a side that can cook alongside dinner, air fryer corn on the cob can run while the taco meat is on the stove.
How to Make Ground Beef Tacos
Start with the Seasoning and Browning
Mix the seasoning. Stir together the chili powder, cumin, paprika, garlic powder, onion powder, oregano, salt, black pepper and optional cayenne.
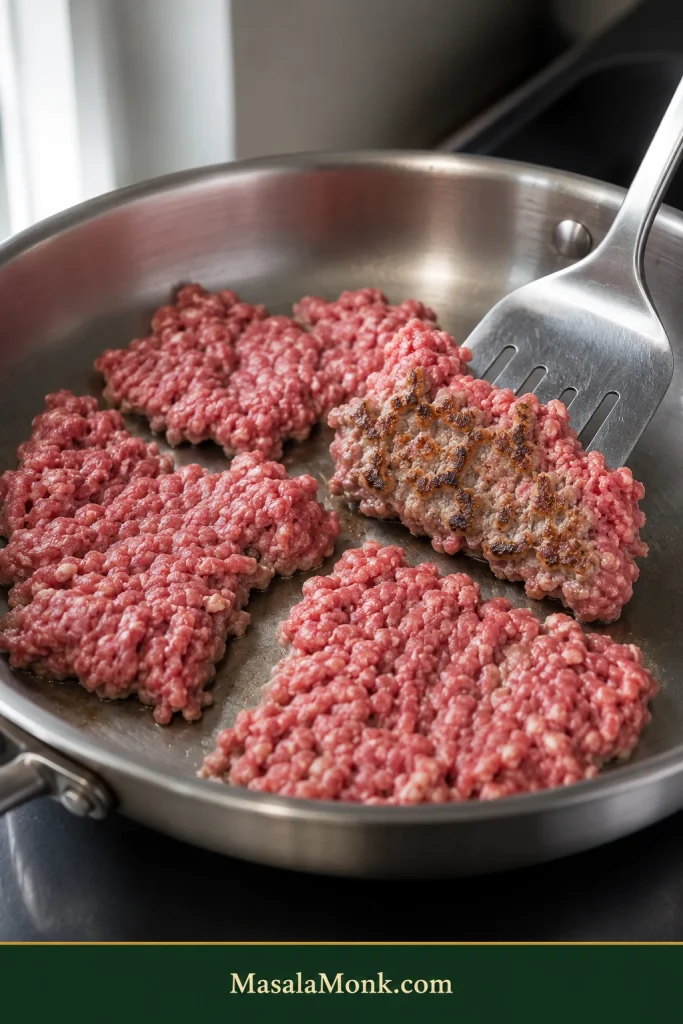
Give the beef a head start on browning. Heat a wide skillet over medium to medium-high heat for 1–2 minutes, adjusting the heat as needed for your pan. Add the oil if the beef is very lean or the skillet looks dry. Add the beef in several large pieces and spread them loosely. Leave it mostly alone for about 2 minutes. You’re only looking for a few browned patches underneath, not a crust on every piece.
Brown patches can form while the top still looks pink. Once you see a few underneath, turn the beef and start crumbling.
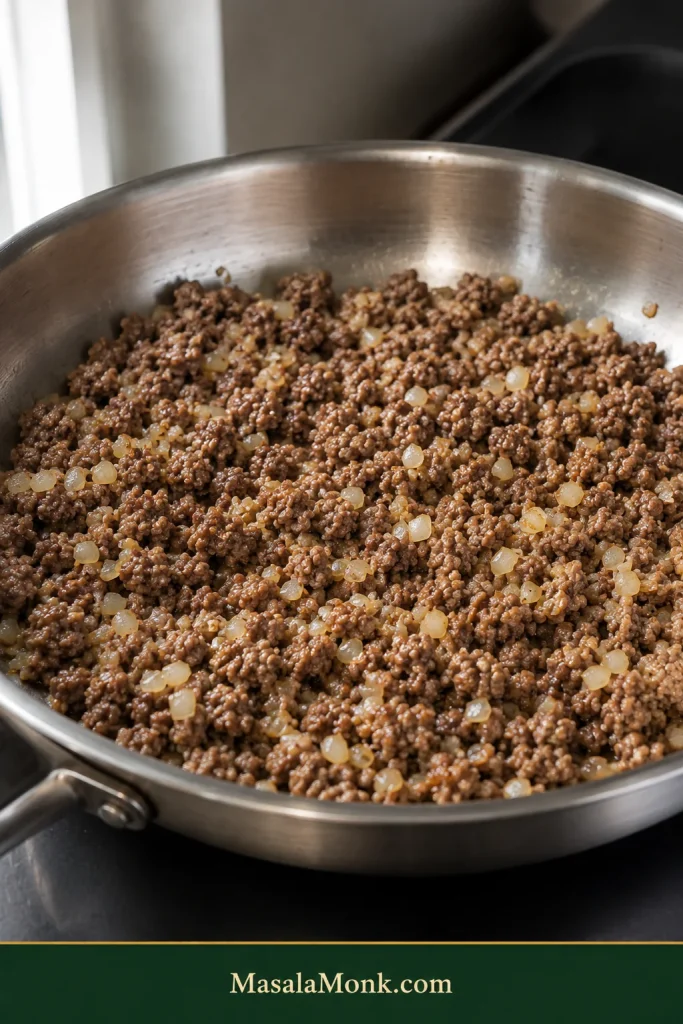
Break it into small crumbles. Turn the beef and break it apart. Add the onion and cook for another 2–3 minutes, stirring occasionally. The onion should start softening around the edges and the beef should be nearly cooked through. Warm the tortillas or shells and get the toppings out while this happens.
Break up the largest pieces, then stop fussing. Irregular crumbles keep more browned texture while still fitting neatly into small tacos.
Drain, Season and Deglaze the Taco Meat
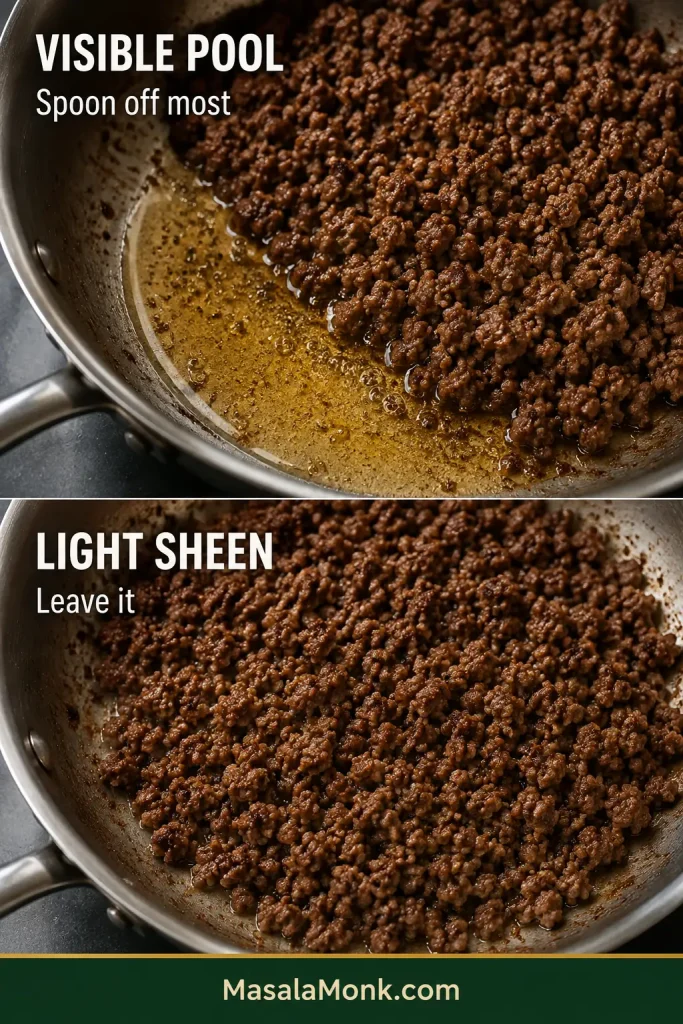
Remove excess fat if needed. Tilt the skillet. If a noticeable pool runs to one side, spoon most of it off. If all you see is a light sheen around the crumbles, leave it alone. Lean meat may need no draining at all.
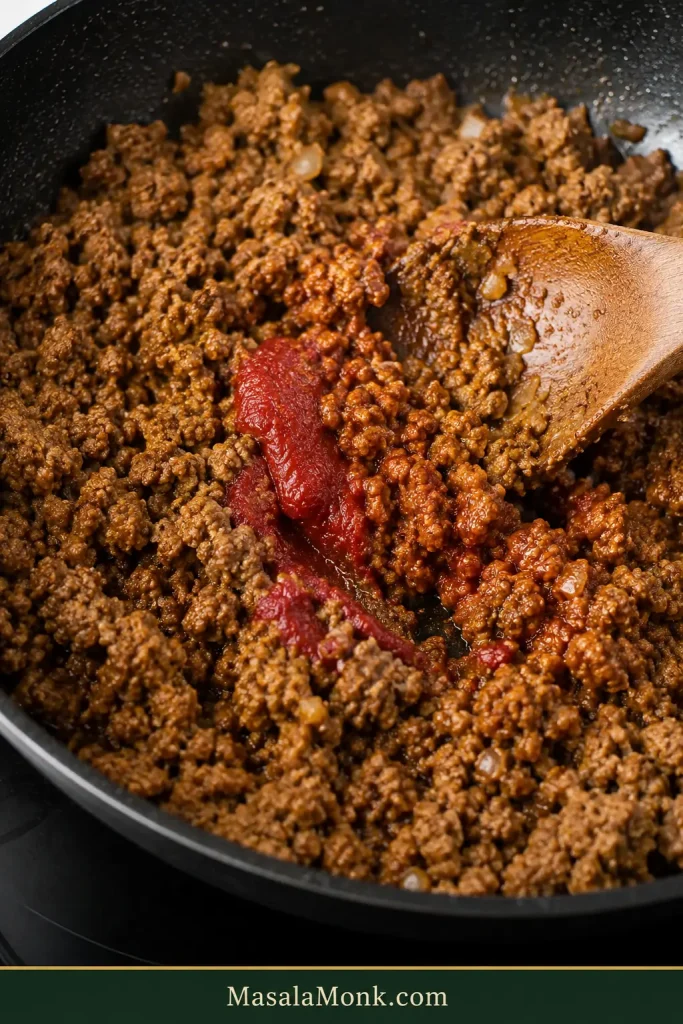
Add the seasoning and tomato paste. Reduce the heat to medium. Stir the seasoning through the lightly coated beef for about 30 seconds, just until fragrant. Add the tomato paste and cook for another 30–60 seconds; its color should deepen slightly and the raw tomato smell should fade.
Move on once bright-red tomato paste darkens toward brick red and stops smelling raw; it does not need to disappear completely.
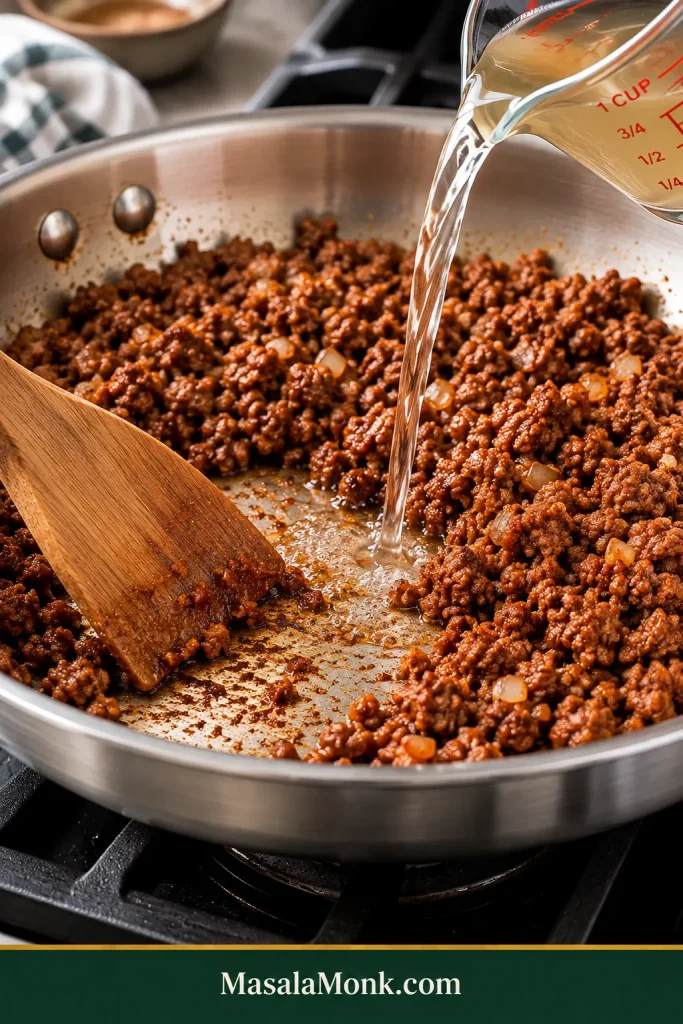
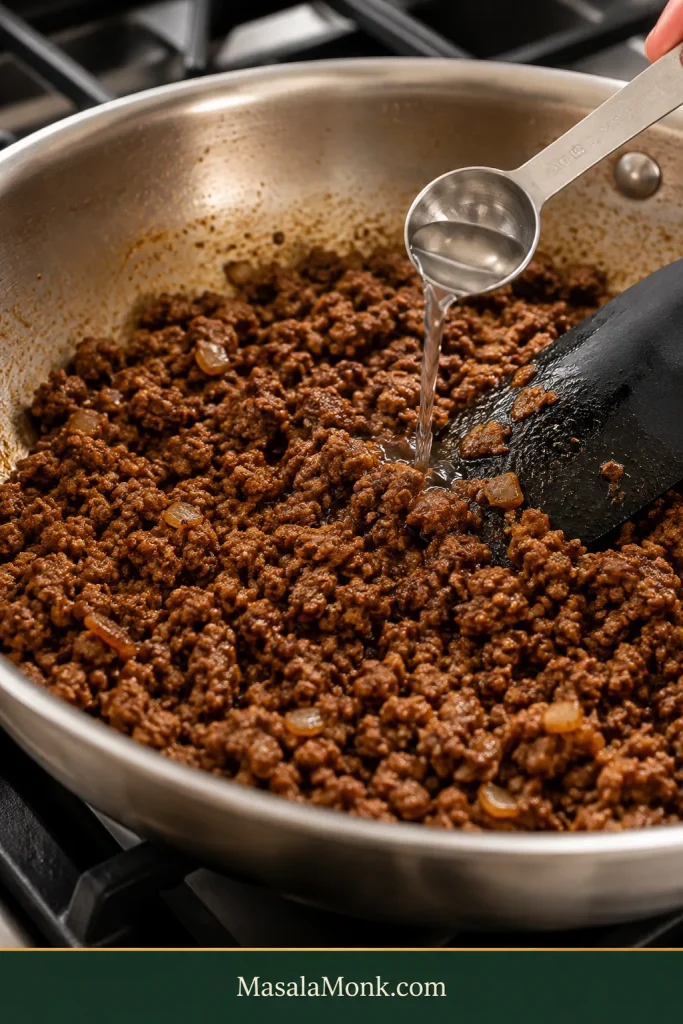
Add the liquid. Pour in the ⅓ cup / 80 ml water or broth and scrape up the browned bits from the skillet. Stir until the seasoning and tomato paste are distributed through the beef.
Scrape the exposed metal as the liquid hits. Those browned bits are concentrated flavor that belongs back on the taco meat.
Reduce the Taco Meat
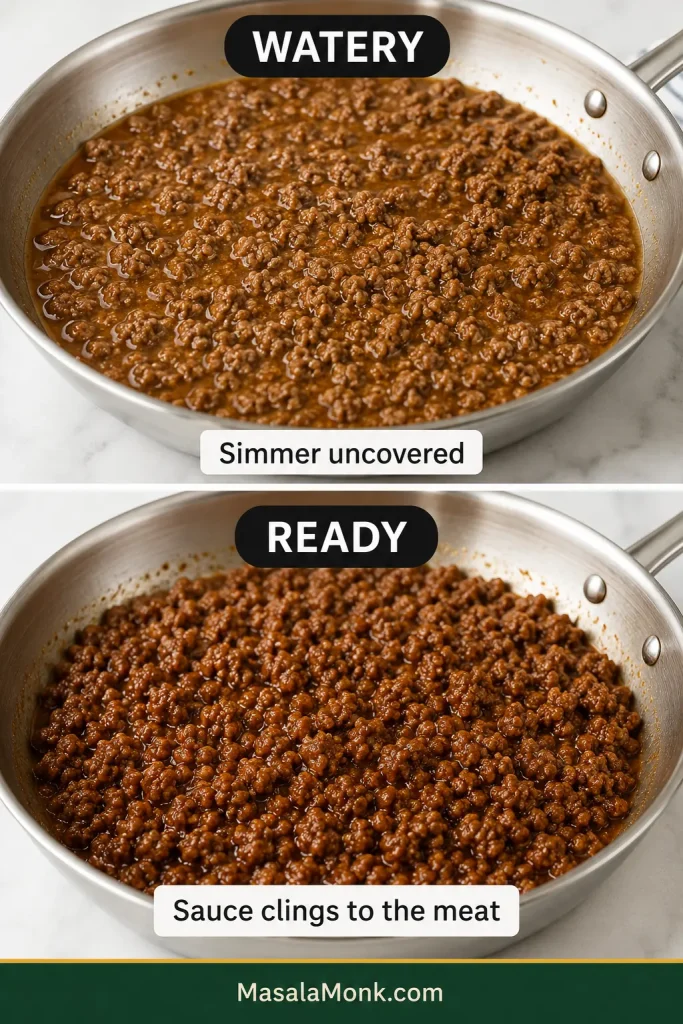
Let the liquid cook down. Simmer uncovered for about 2–4 minutes. Pull a spatula through the center; if watery liquid rushes back into the trail, give it another minute. Stop while the crumbles look juicy and the sauce clings to them.
Finished taco meat should be scoopable, not pourable: moist, glossy crumbles that travel together without leaving loose liquid behind.
Taste and Assemble the Tacos
Check the temperature, then taste. Ground beef should reach 160°F / 71°C. If the cooked meat tastes flat, try a small pinch of salt first. If the salt is right but the taco flavor is weak, add a little more seasoning. For more heat, let everyone add jalapeño or hot sauce at the table.
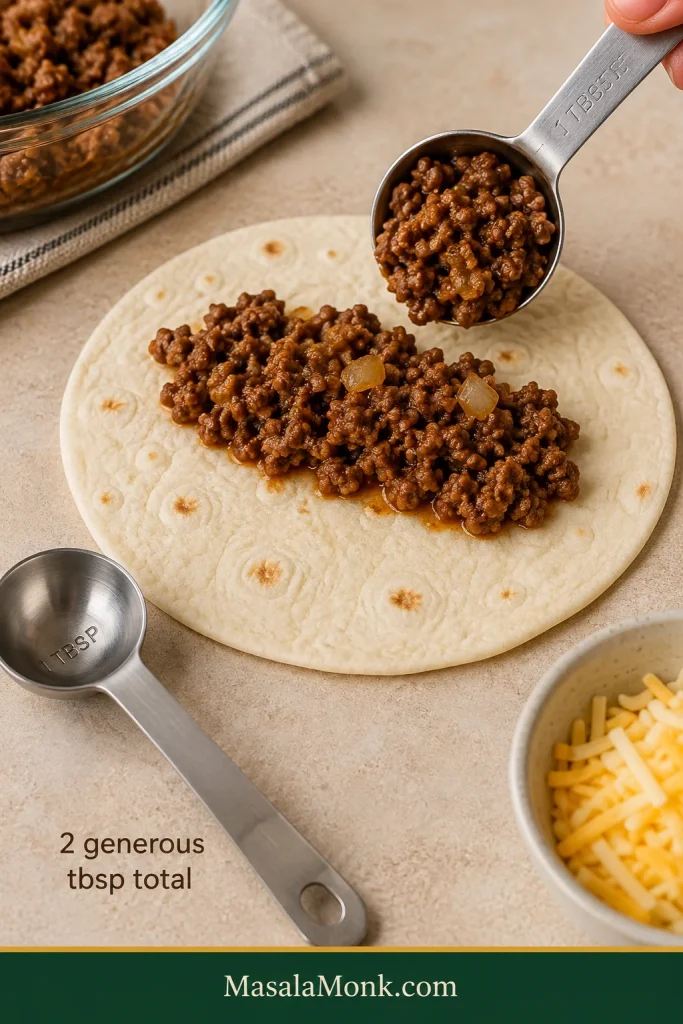
Build the tacos while everything is warm. Spoon about 2 generous tablespoons of beef into each small tortilla or shell. Add the cheese while the beef is hot, then finish with whichever toppings sound good.
Leave bare tortilla around the filling. That space helps soft tortillas fold and keeps crunchy shells from being forced apart.
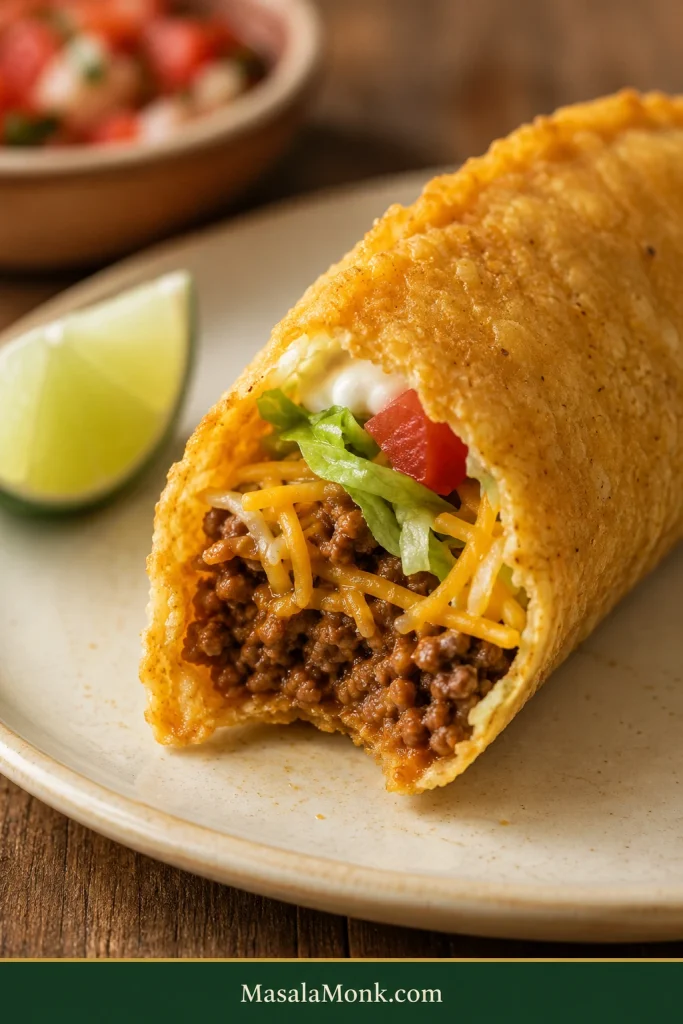
A good taco gets its contrast in a few bites: hot savory beef, cheese softening against it, something crisp, and something fresh or cool. You don’t need a dozen toppings to get there.
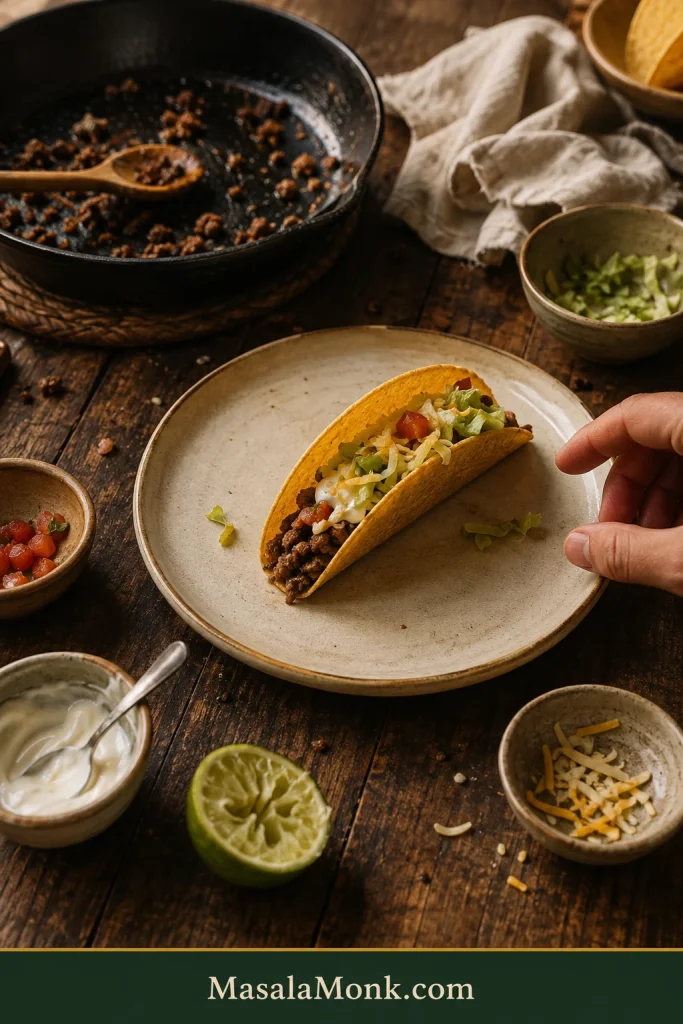
A clean cross-section shows the taco wasn’t overfilled: distinct layers stay put instead of spilling out with the first bite.
Best Ground Beef for Tacos: 80/20 vs 85/15 vs 90/10
85/15 is easy to work with, but 80/20 and 90/10 both make good tacos. Use the beef you already have. The numbers describe the lean-to-fat ratio: 85/15 means roughly 85% lean meat and 15% fat.
Ground Beef
What to Expect
How to Handle It
80/20
Richest and usually the fattiest
Spoon off most of any obvious pool before seasoning
85/15
Beefy and juicy with manageable grease
A straightforward all-around choice; drain only if needed
90/10
Lean with very little fat to remove
Keep the measured liquid and watch the final minutes closely
You don’t need to chase an exact fat percentage. A little rendered fat helps the seasoning coat the meat; a large pool gets in the way.
Should You Drain Ground Beef for Tacos?
Only when a noticeable pool of fat collects. Spoon off most of the excess before adding the seasoning, but leave the light coating around the beef. With leaner ground beef, there may be nothing worth draining.
Tilt the skillet. Excess fat gathers into a moving pool; a light sheen stays attached to the crumbles and can remain.
How Much Taco Seasoning and Water for 1 lb Ground Beef?
For 1 lb / 454 g ground beef, use 2 tablespoons + 1 teaspoon homemade seasoning and ⅓ cup / 80 ml water or broth. Add the optional cayenne separately if you want more heat.
Using a packet? Follow its seasoning and liquid directions instead. Packet blends vary in salt, strength and thickeners, so use the packet’s own amounts.
If the Taco Meat Tastes Flat, Check Salt Before Heat
Chili powder, cumin, paprika, oregano, garlic and onion create the taco flavor, but salt is what often brings it into focus. More cayenne only makes the meat hotter.
If the beef is spicy enough but tastes dull, try a pinch of salt before adding more seasoning. At the table, everyone can use lime, roasted salsa verde, jalapeño or hot sauce to add brightness or heat to their own taco.
How to Scale Taco Meat for ½, 1, 1½ or 2 lb Ground Beef
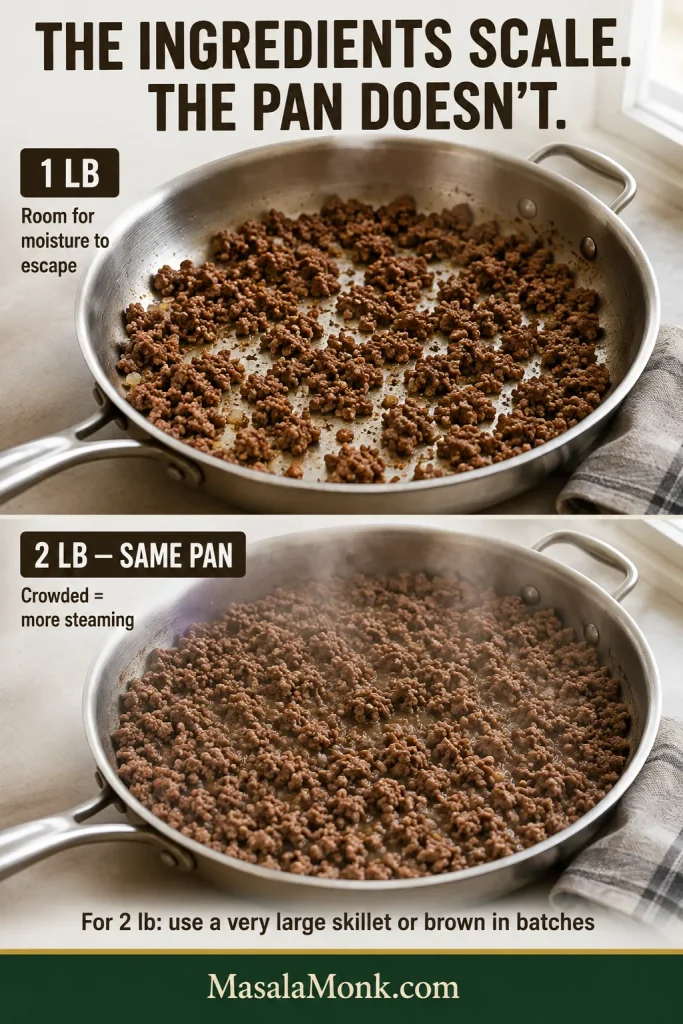
The ingredients scale. The pan doesn’t.
Ground Beef
Homemade Seasoning
Tomato Paste + Liquid
Approx. Tacos
½ lb / 227 g
1 tbsp + ½ tsp
1 tbsp tomato paste 2 tbsp + 2 tsp / 40 ml liquid
4–5
1 lb / 454 g
2 tbsp + 1 tsp
2 tbsp tomato paste ⅓ cup / 80 ml liquid
8–10
1½ lb / 680 g
3 tbsp + 1½ tsp
3 tbsp tomato paste ½ cup / 120 ml liquid
12–15
2 lb / 907 g
4 tbsp + 2 tsp
4 tbsp tomato paste ⅔ cup / 160 ml liquid
16–20
Seasoning amounts in the table refer to the mixed blend before optional cayenne. If you’re mixing each amount from the individual spices, scale every spice by the same ½, 1½ or 2 multiplier.
Scale the onion roughly too: about ¼ medium for ½ lb, ½ medium for 1 lb, ¾ medium for 1½ lb and 1 medium for 2 lb. Oil is different—use only what the beef and skillet need.
Pan Size and Serving Yield for Larger Batches
For 2 lb / 907 g, use a very large skillet or brown the meat in two batches. Crowding twice as much beef into the same small pan traps moisture faster than it can evaporate.
If 2 pounds crowd your skillet, brown the beef in portions, then recombine it before seasoning so the pan still has room to reduce.
For dinner planning, figure on about 2–3 small tacos per adult. One pound of raw ground beef makes roughly 8–10 small tacos and usually feeds 3–4 people, depending on appetite and sides.
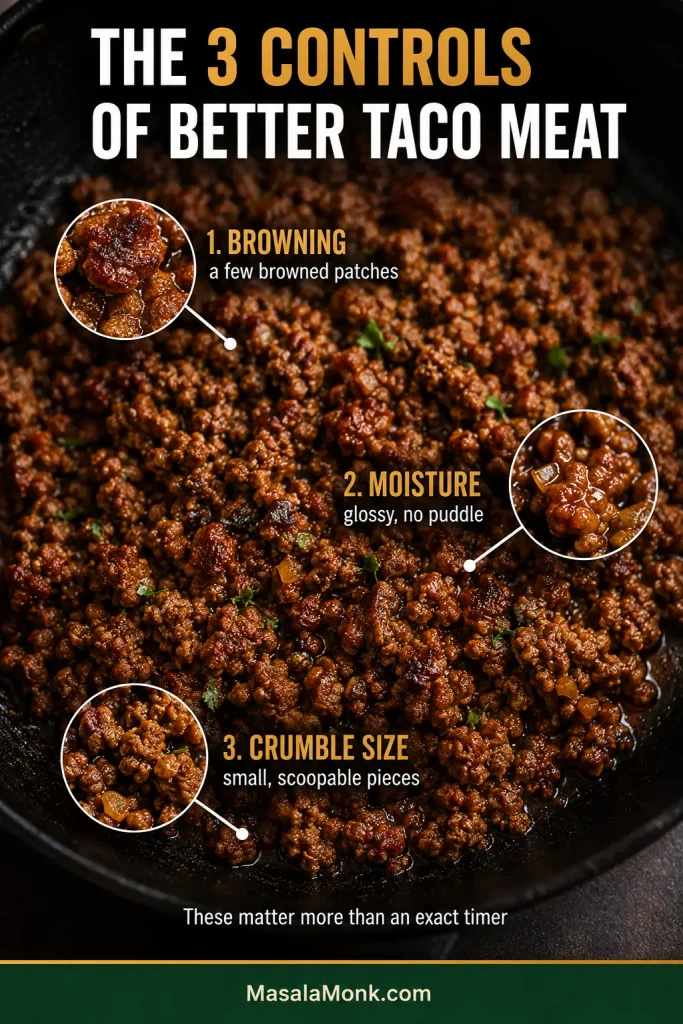
The 3 Controls of Better Taco Meat
Most taco-meat problems come down to browning, moisture and crumble size. Once you can read those three things in the skillet, the exact timer matters a lot less.
Fix the control that’s wrong: give pale beef better pan contact, reduce excess moisture, and stop breaking up crumbles once they’re small enough.
1. Browning: Let the Beef Touch the Pan
The first couple of minutes matter because beef can’t brown well while it is surrounded by its own released moisture. Give it some quiet contact with the hot skillet before breaking it apart.
Once you see browned patches underneath, start crumbling. Small pieces cook quickly, so there is no prize for forcing every crumb to turn dark.
Think browned edges, not browned gravel.
2. Moisture: Reduce Until the Sauce Clings
The biggest difference between juicy taco meat and watery taco meat often happens in the final few minutes. You want enough moisture to keep the crumbles glossy, but not enough to run into the bottom of the shell.
That small amount of liquid loosens the browned bits and helps the seasoning and tomato paste coat the beef before the excess cooks away.
As it reduces, the tomato paste gives the filling enough body that you don’t need cornstarch or another thickener.
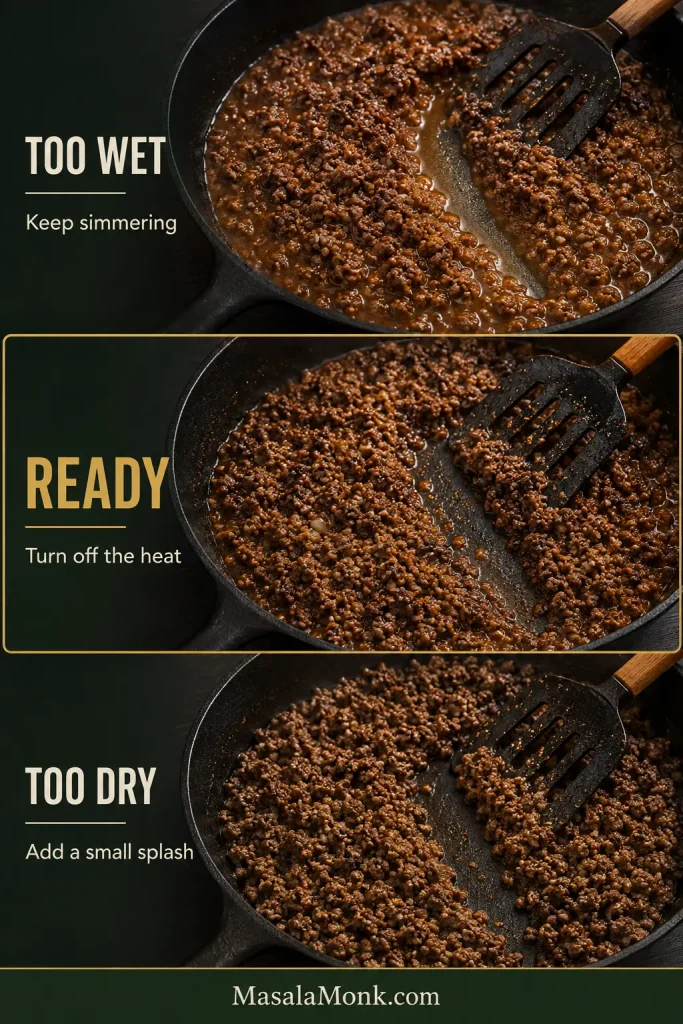
The Spatula Test
Pull a spatula through the middle of the skillet when you think the filling is close.
Watery liquid immediately fills the trail: keep simmering.
The pan is nearly dry and the beef looks matte: you’ve reduced it too far; stir in a small splash of water or broth.
The crumbles have a light sheen and the trail stays mostly clear: turn off the heat.
Reduction speeds up near the finish. Once the trail stops flooding, check often so glossy taco meat doesn’t tip into dry.
After you’ve seen that stage a couple of times, it becomes much easier to trust the pan instead of the timer.
3. Crumble Size: Aim for Small Pieces
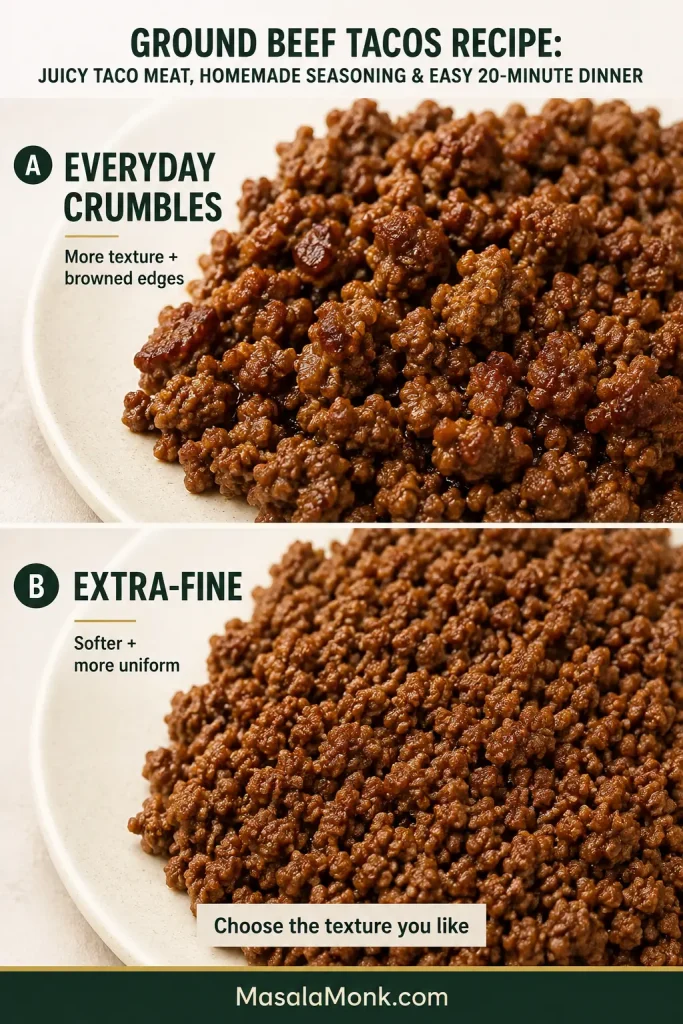
Large chunks tumble out of a small taco on the first bite. Very fine crumbles cook quickly and can dry out before you notice. For this recipe, aim for small pieces that scoop easily but still look and feel like beef.
If you prefer the softer, extra-fine taco-shop texture, break the beef down more aggressively while moisture remains in the pan. A pan-safe meat chopper or potato masher can help. You’ll trade some browned texture for a finer, more uniform filling—and that’s perfectly fine if that is the taco you want.
For extra-fine taco meat, break it down while moisture remains. Waiting until the pan is dry only makes smaller, drier crumbles.
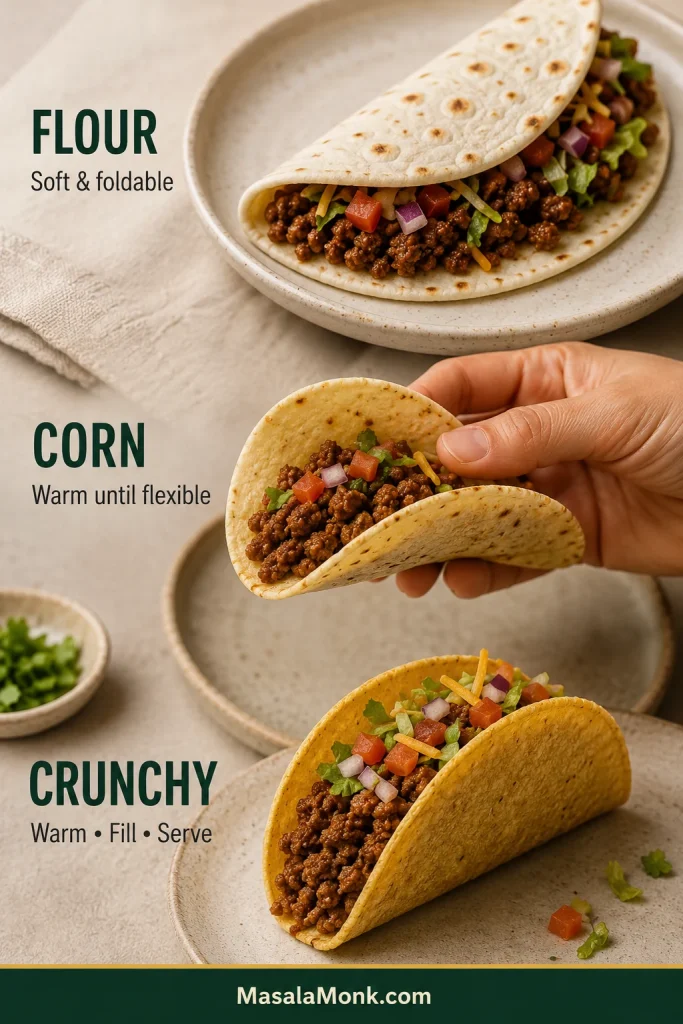
Soft Tortillas or Crunchy Taco Shells?
Use…
How to Warm It
Ready When…
Small flour tortillas
Warm briefly in a dry skillet, turning once
Soft, warm and easy to fold
Small corn tortillas
Warm roughly 20–30 seconds per side in a dry skillet
The center bends without cracking
Boxed crunchy shells
Follow the package directions
Crisp and warmed through
Crunchy-shell thickness varies by brand; you’re simply looking for shells that are crisp and warmed through.
Stack flour or corn tortillas under a clean towel as you warm them. When it’s warm enough, a corn tortilla should bend through the center instead of splitting.
Crunchy shells are less forgiving. Loose liquid softens them and a cold, brittle shell breaks easily, so warm them first and fill them just before serving.
Keep soft tortillas wrapped to hold steam; keep crunchy shells dry and uncovered, then fill them only when people are ready to eat.
What to Put on Ground Beef Tacos
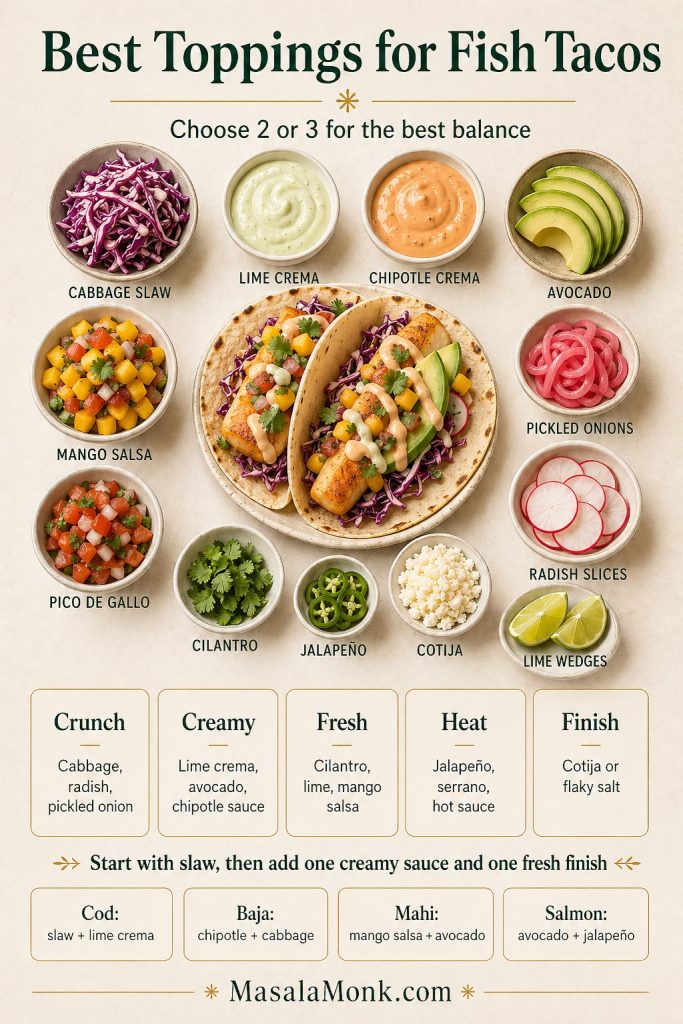
Lettuce or chopped onion adds crunch. Tomato, pico de gallo, salsa or a squeeze of lime brings freshness. Sour cream, avocado or guacamole cools the spice, while jalapeño and hot sauce can stay on the table so everyone controls their own heat.
Keeping hot meat and cold toppings separate preserves contrast and choice. Let everyone build one taco at a time.
Two or three toppings are plenty. If you want something brighter and sweeter, fresh mango salsa works especially well with the savory beef.
Ground Beef Taco Troubleshooting
Most problems show themselves while the skillet is still in front of you, which means dinner usually isn’t lost. Start with what the pan is doing now.
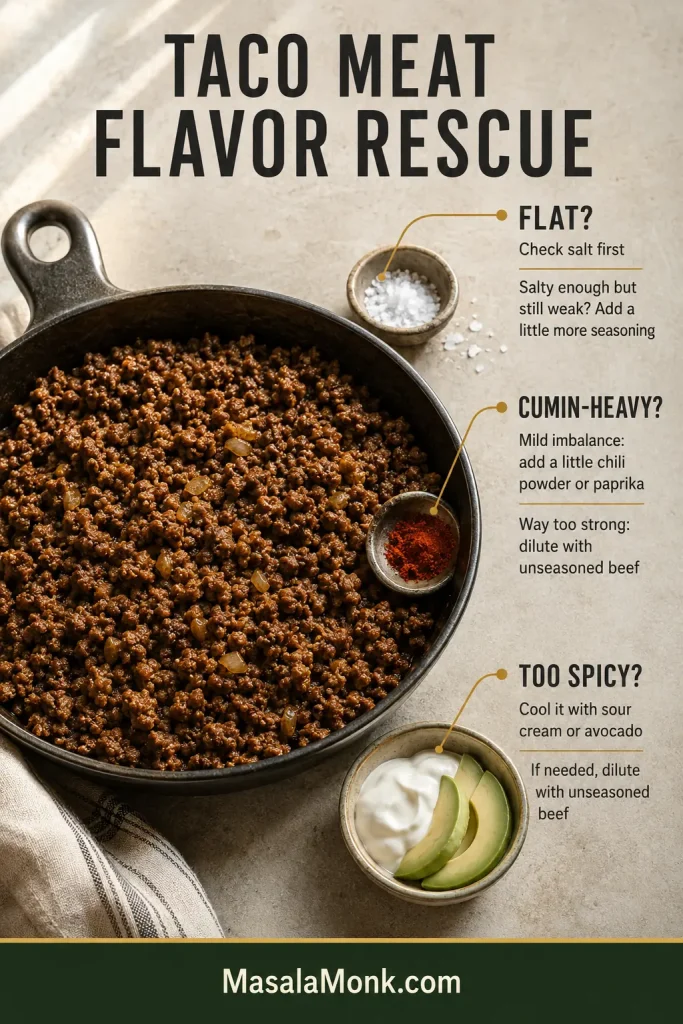
Fix Flavor Problems: Bland, Too Spicy or Cumin-Heavy Taco Meat
Problem
What to Do
Taco meat tastes bland
Once the beef is safely cooked, try a small pinch of salt first. If the salt is right but the taco flavor is weak, add a little more seasoning.
It is far too spicy
If practical, dilute the skillet with more unseasoned beef. Sour cream, avocado and other cooling toppings can soften the heat at the table. If pure hot chile or chilli powder was used in place of mild American chili powder, that may be the cause.
It tastes mostly of cumin
If the imbalance is mild, add a little chili powder or paprika and check the salt. If cumin has completely taken over, diluting the batch with more unseasoned beef is the cleanest rescue.
Salt, taco flavor and chile heat are separate controls. Fix the specific imbalance instead of adding more of everything.
Fix Texture and Moisture Problems in Taco Meat
Check the skillet edges as well as the center. If thin liquid runs when you tilt the pan, the taco meat needs more reduction.
Match What You See to the Fix
Problem
What to Do
The meat is dry
Add 1–2 tablespoons water or broth and warm gently until the crumbles loosen and look moist again. Next time, stop the reduction a little sooner.
The meat is watery
Keep simmering uncovered. Stir only occasionally and let the loose liquid evaporate until it coats the meat instead of collecting underneath it.
The meat is greasy
Tilt the skillet and spoon off the obvious pool of rendered fat. Leave the light coating around the beef.
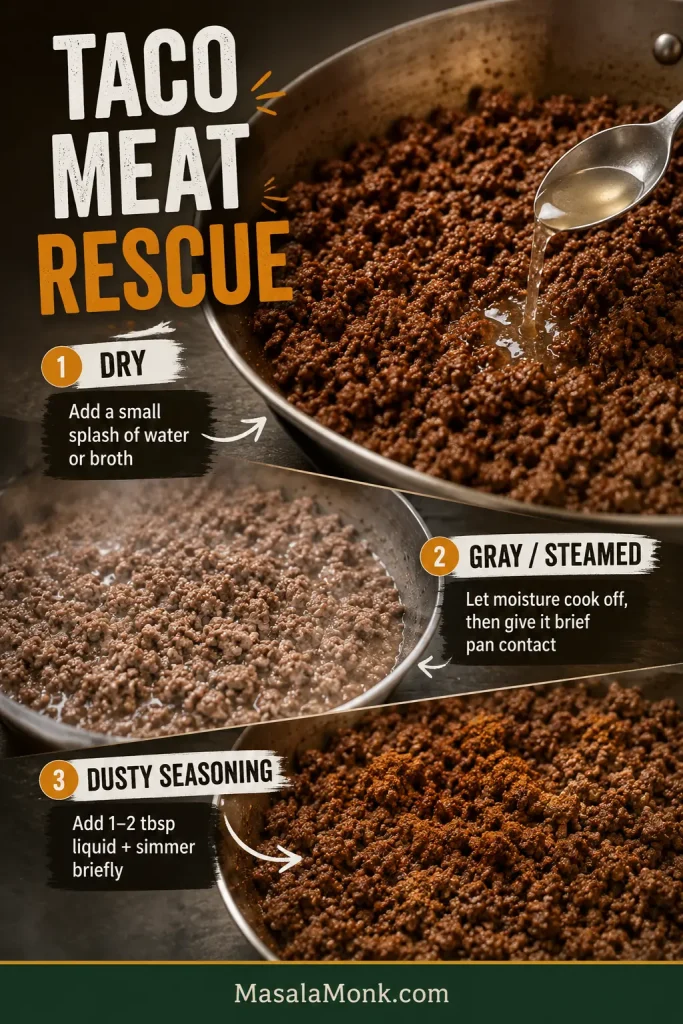
The beef is gray instead of browned
If liquid is pooling, let it cook off before stirring again. Once the pan is drier, give the beef a short stretch of uninterrupted contact with the skillet. Don’t keep cooking indefinitely just to force more color; next time, a wider pan will help.
The crumbles are the wrong size
For pieces that are too large, break them down while a little moisture remains. If the beef is already very fine and drying out, stop breaking it up and take the pan off the heat sooner.
The seasoning tastes dusty
It’s still fixable. Add 1–2 tablespoons water, stir well and simmer briefly so the spices hydrate and spread through the meat. Next time, give the seasoning a short turn in the hot pan before adding the liquid.
Read the surface first: matte means dry, pale meat in liquid means steaming, and visible powder means the seasoning needs hydration.
Fix Soggy Shells and Cracking Tortillas
Problem
What to Do
Crunchy shells turn soggy
Let any loose liquid cook away and fill the shells only when people are ready to eat.
A crunchy shell shatters immediately
Warm the shells before filling and don’t pack them to the rim. Cold, brittle shells break much more easily.
Corn tortillas crack when folded
Warm both sides until the center feels flexible. Stack them under a towel so they stay soft while you finish the batch.
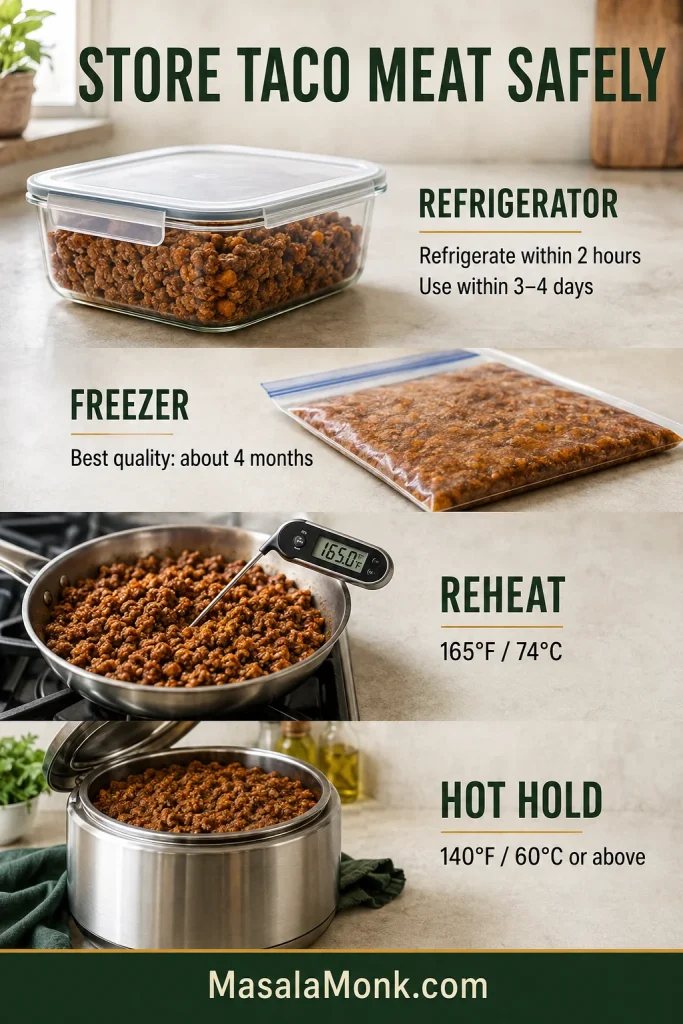
Refrigerator: Refrigerate cooked taco meat within 2 hours, keeping it separate from shells and fresh toppings. Store it covered and use it within about 3–4 days.
Freezer: Freeze cooled taco meat in portions you are likely to use. A flat freezer bag freezes and thaws quickly; for best quality, use it within about 4 months.
Label portions with the date and amount. The storage windows are easier to use when you don’t have to rely on memory.
How to Reheat Ground Beef Taco Meat
Reheating: Warm the beef over medium-low heat with a splash of water or broth—about 1 tablespoon per cup of taco meat is a useful starting point. For an individual microwave portion, add a teaspoon or two of water, cover and heat in short intervals. Reheated leftovers should reach 165°F / 74°C.
Stop adding liquid once the crumbles loosen and regain a light sheen. Pooling liquid means the pan already has enough.
Larger batches: Thaw in the refrigerator when possible, then reheat on the stovetop, in the microwave or in a conventional oven until the meat reaches 165°F / 74°C. Add a little water or broth if the coating has tightened during storage.
Holding for a party: Once the taco meat is already hot, transfer it to a slow cooker and hold it at 140°F / 60°C or above.
Leftover Taco Meat Ideas
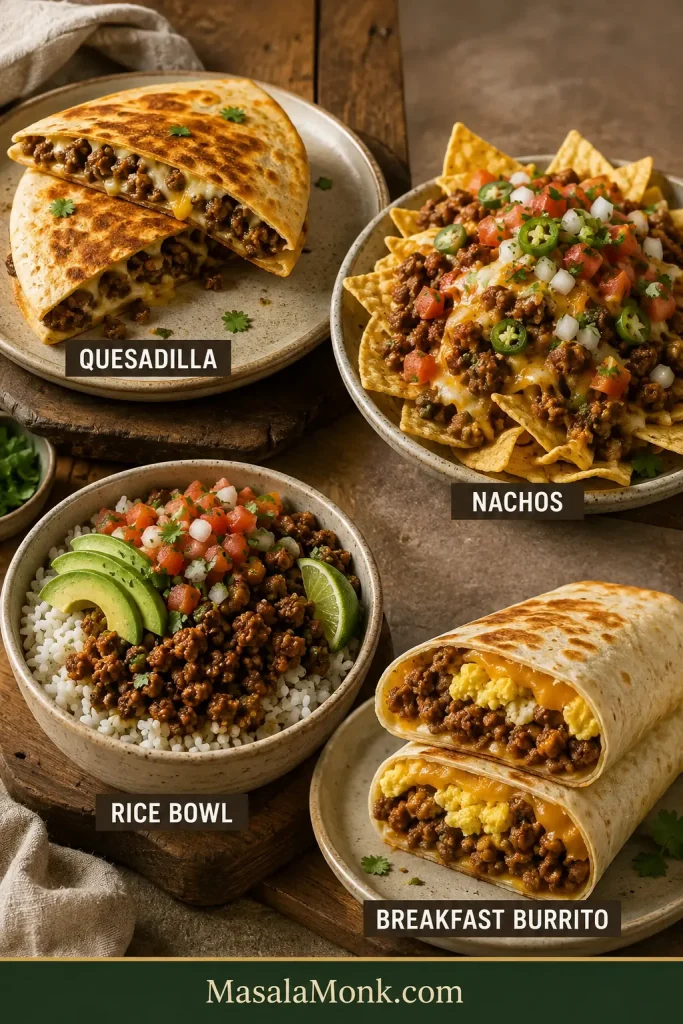
Leftover taco meat is useful well beyond another round of tacos. Spoon it into quesadillas, nachos, taco salad, rice bowls or baked potatoes, or fold it into breakfast burritos the next morning.
Keep reheated meat drier for quesadillas and nachos; rice bowls and breakfast burritos are more forgiving of a small splash.
Taco Night Should Still Feel Easy
You can spend a surprising amount of time thinking about ground beef—fat percentages, pan width, browning, moisture and exactly how small a crumble ought to be.
The reward for understanding those details is that you stop having to think about them very much.
Then the skillet lands in the middle of the table. Cheese starts softening as soon as it touches the hot beef. Lettuce and pico move from bowl to bowl. Someone reaches for lime; somebody else decides their taco needs considerably more hot sauce.
Everyone builds the taco they wanted, dinner gets eaten while it is still warm, and eventually somebody looks into the serving dish and asks the only difficult question left: who gets the last taco?
One taco left, an almost-empty skillet and the toppings picked over. At this point, the recipe has done its job.
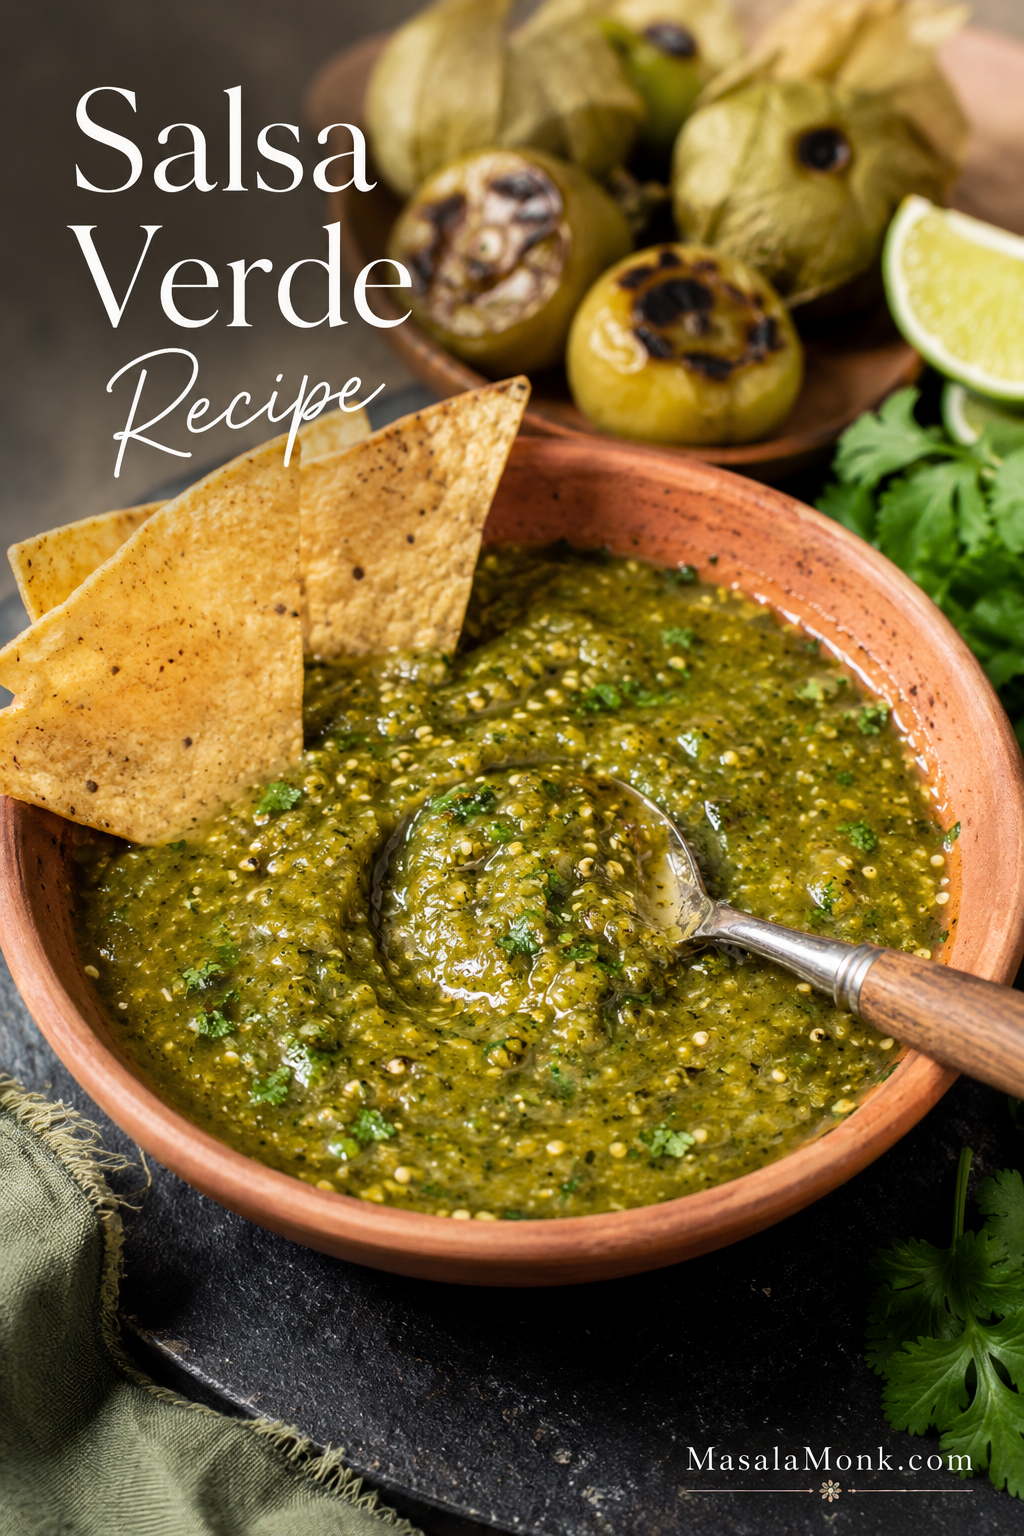
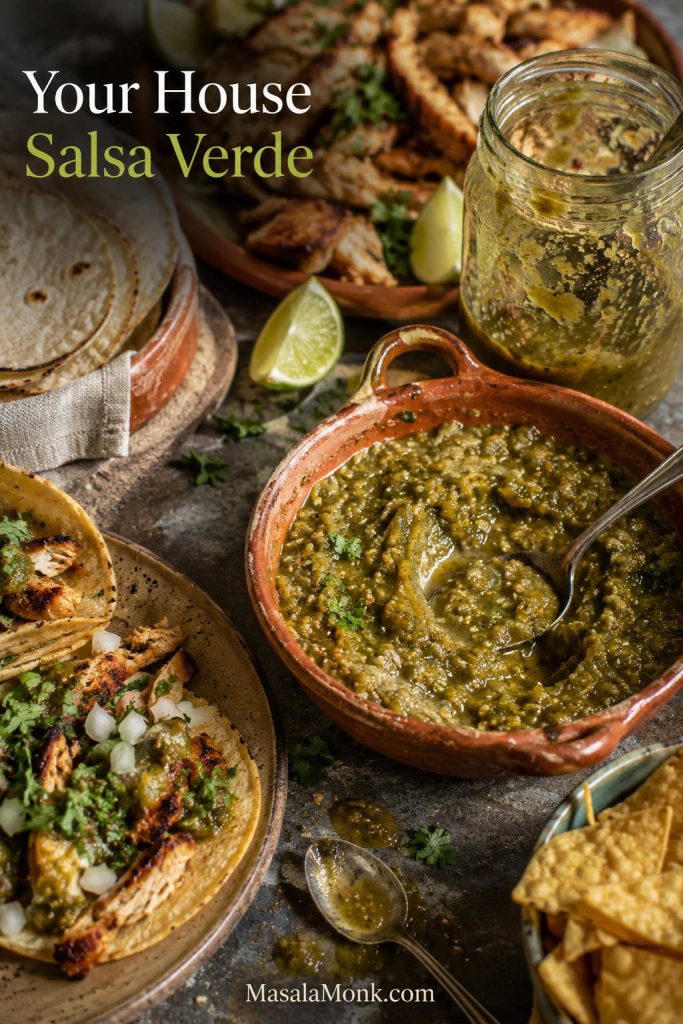
Some sauces sit politely on the side. Salsa verde wakes the plate up. It is bright, green, and alive — the kind of sauce that makes tacos taste fresher, eggs feel less ordinary, grilled chicken more exciting, and tortilla chips almost impossible to leave alone.
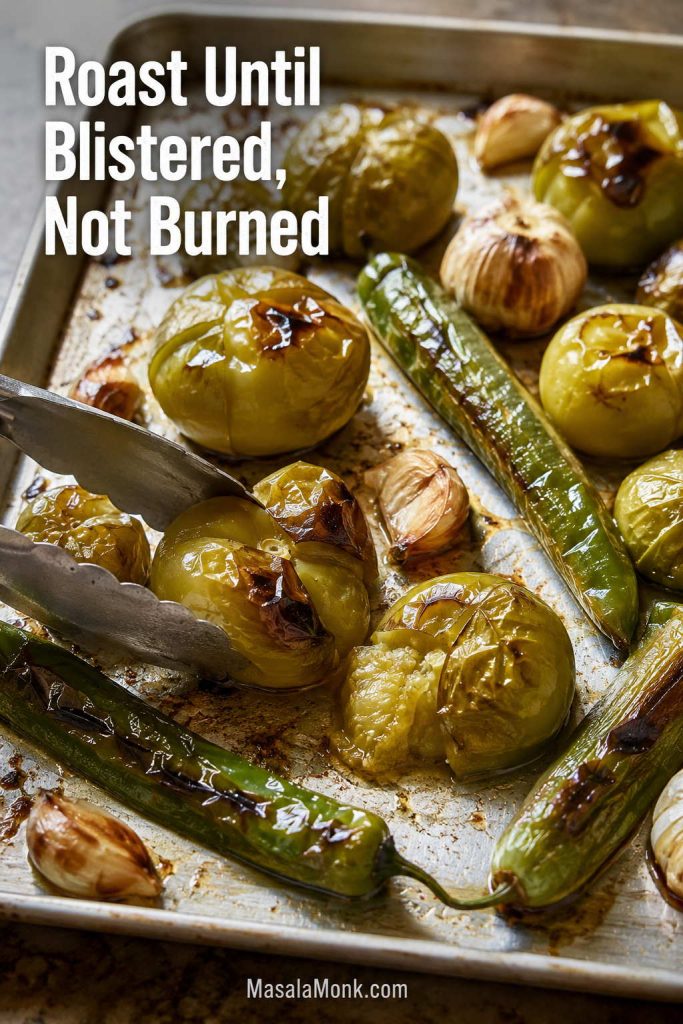
At its simplest, this is a one-pan, one-blender salsa: roast the tomatillos, blend everything together, then taste for salt and lime. It should be bright enough to wake up the plate, salty enough to keep you going back for one more chip, and balanced enough to spoon over dinner without thinking twice.
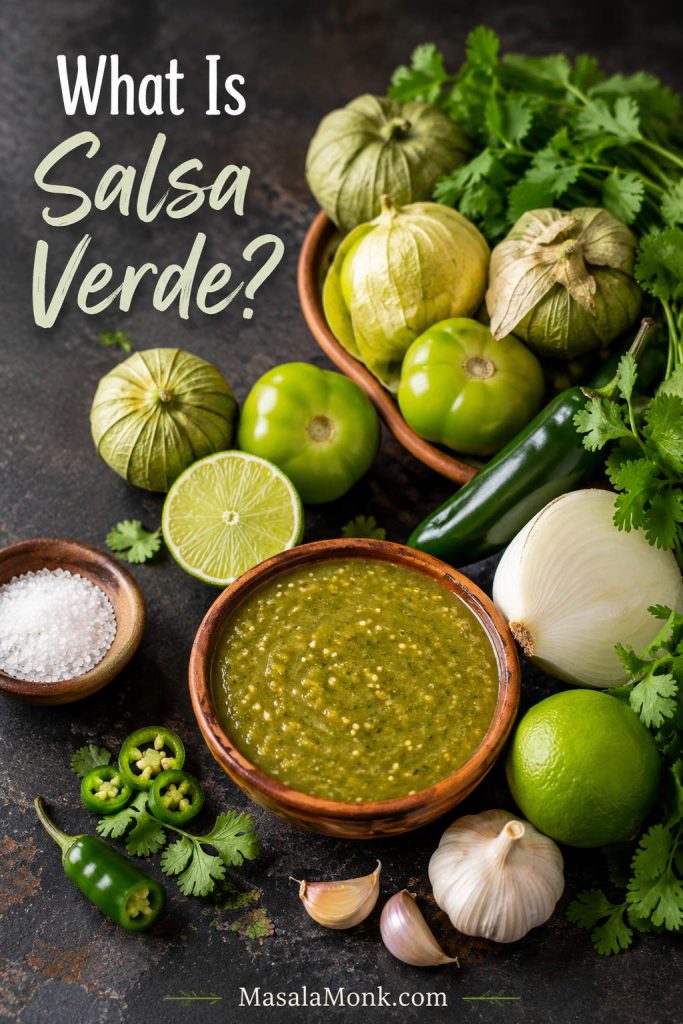
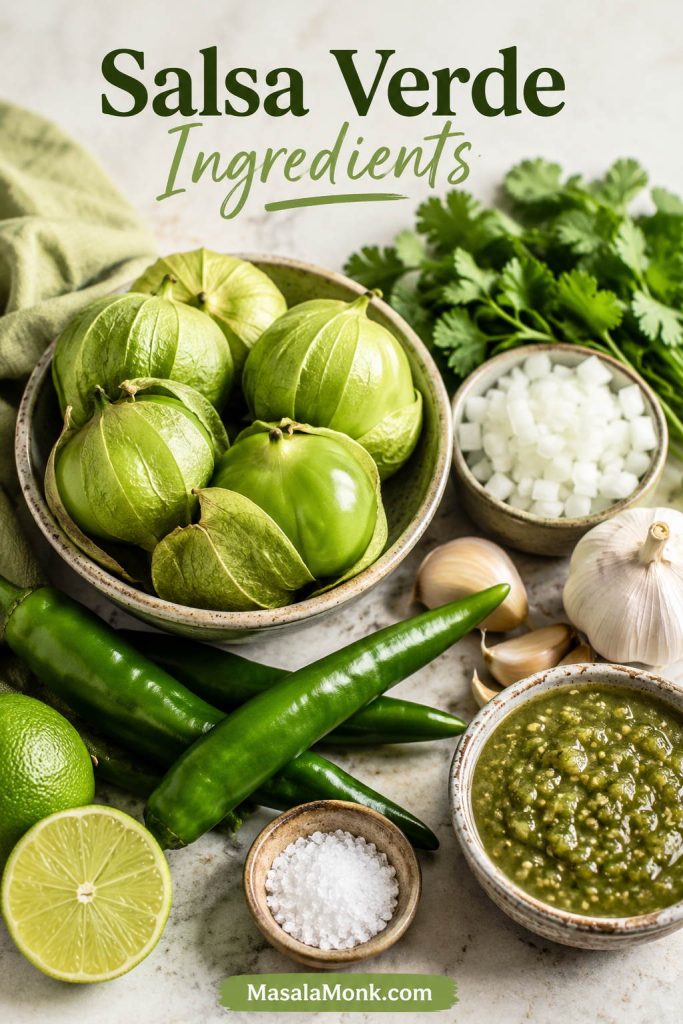
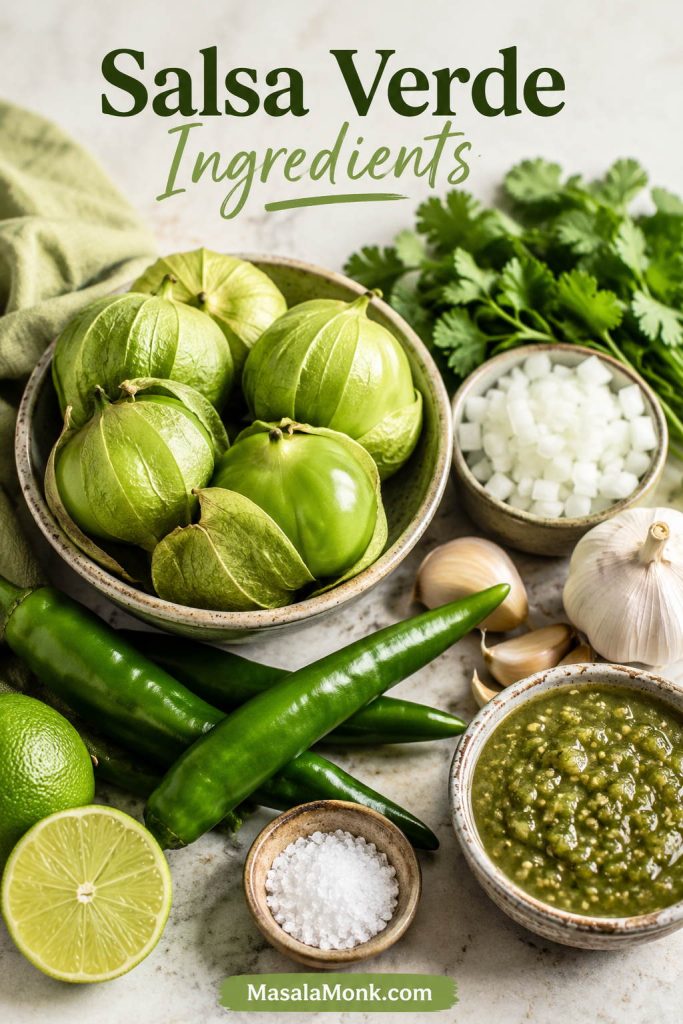
This recipe is made with tomatillos, green chiles, garlic, onion, cilantro, lime, and salt. The roasted version is the one to make first because it softens the tomatillos’ tart edge and gives the salsa a deeper, rounder flavor. Boiled, raw, and charred options are included later, but they are backup help — not homework.
One quick clarification before we start: this is Mexican salsa verde, not Italian salsa verde. Mexican salsa verde is usually made with tomatillos and green chiles. Italian salsa verde is an herb sauce made with parsley, capers, garlic, olive oil, and vinegar or lemon. Both are green sauces, but they are completely different in flavor and use.
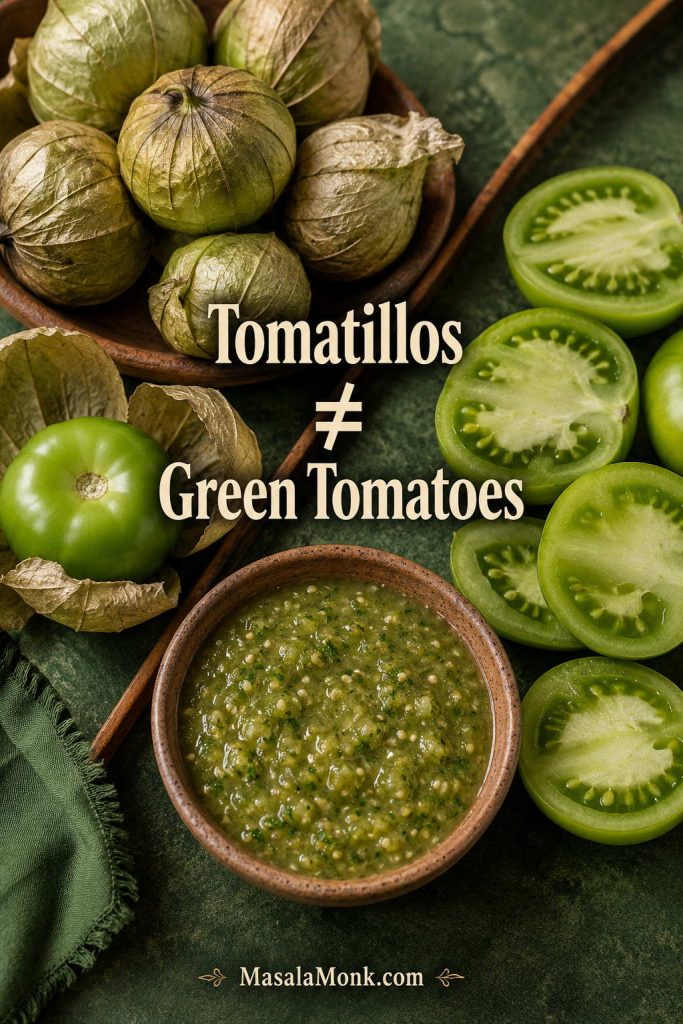
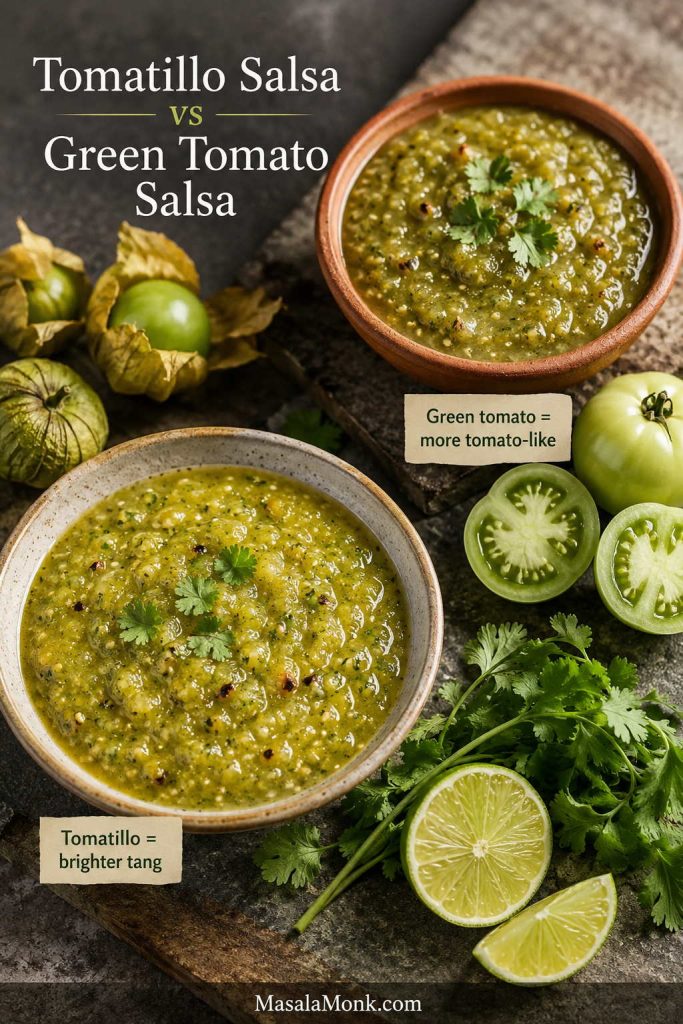
Salsa verde means “green sauce,” but in Mexican cooking it usually refers to a green salsa made with tomatillos, green chiles, onion, garlic, cilantro, salt, and sometimes lime. Tomatillos are not green tomatoes; they have papery husks and a naturally tangy, slightly fruity flavor that makes them perfect for a lively green salsa.
Tomatillos and green chiles give Mexican salsa verde its lively backbone; compared with tomato salsa, the flavor is greener, sharper, and more citrus-friendly.
Start here: If this is your first batch, roast the tomatillos. It is the easiest method to love because it keeps the salsa bright while taking away the harshest raw edge.
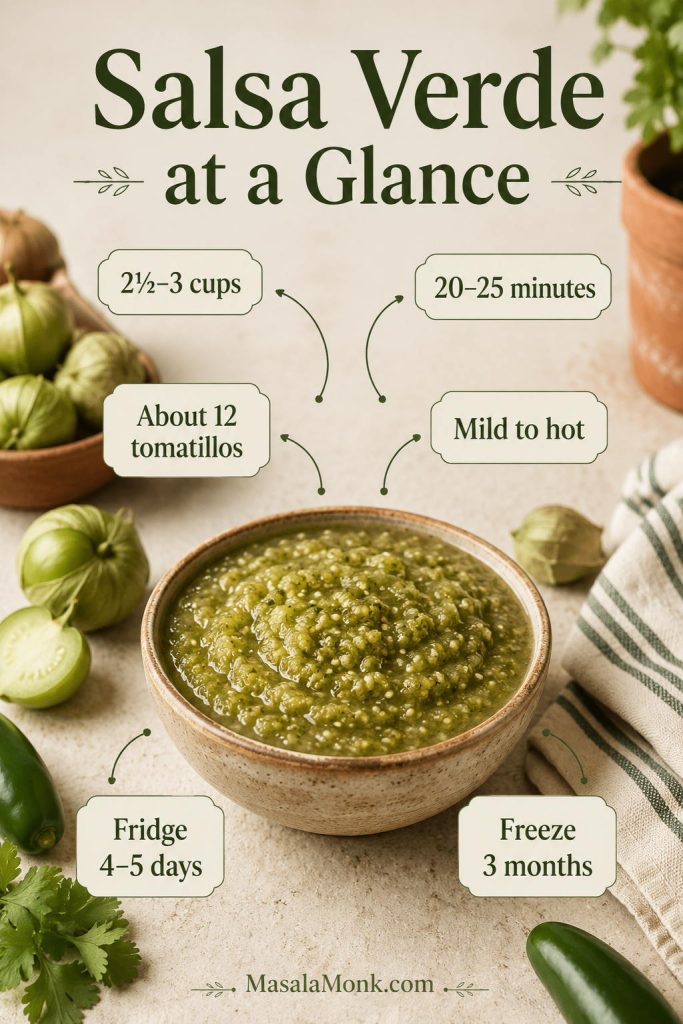
At a Glance
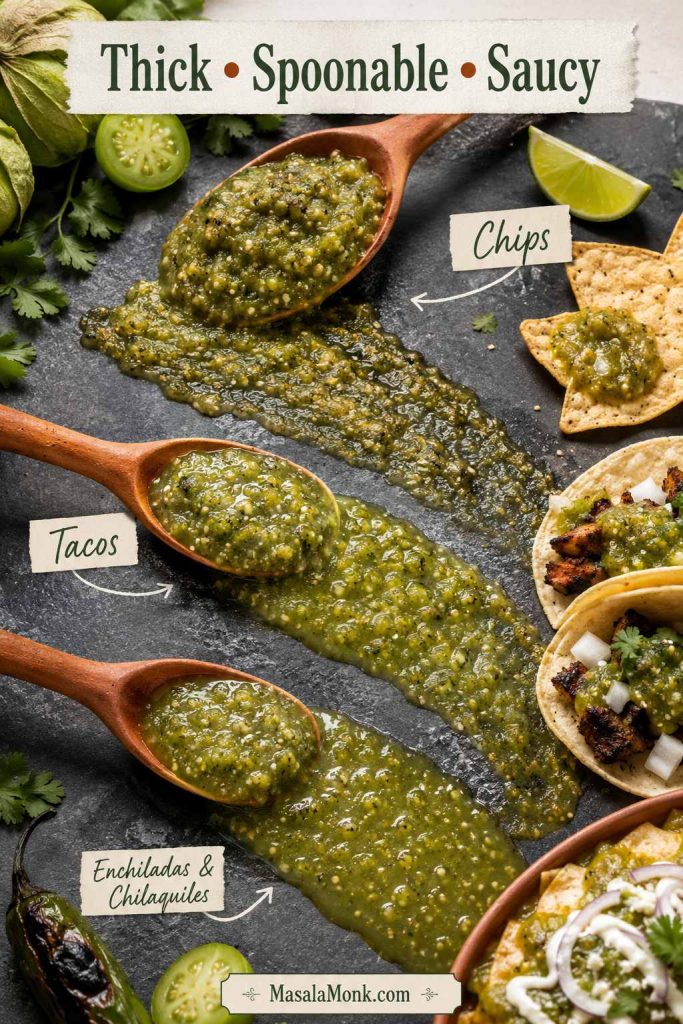
This is the kind of salsa that earns a permanent jar spot in the fridge: thick enough for chips, bright enough for tacos, and easy to loosen into a sauce when dinner needs help.
Start with
Roasted tomatillo salsa verde
Yield
About 2½ to 3 cups
Total time
20 to 25 minutes under the broiler, or about 25 to 30 minutes with the oven-roasted method
Heat level
Mild, medium, or hot depending on jalapeño or serrano amount
4 to 5 days in the fridge, up to 3 months in the freezer
One roasted batch gives about 2½ to 3 cups, so you can serve it with chips now and still have enough left for tacos, eggs, or enchiladas later.
Why This Works
This version is built around the things that usually go wrong: watery texture, harsh garlic, too much tartness, unpredictable heat, and flat flavor. The small details — roasting the garlic, holding back pan juices, tasting before adding extra lime, and resting before the final adjustment — keep the salsa balanced instead of thin, sharp, or dull.
Roasting softens the tomatillos. It keeps their tangy flavor but rounds off the sharpest raw edge.
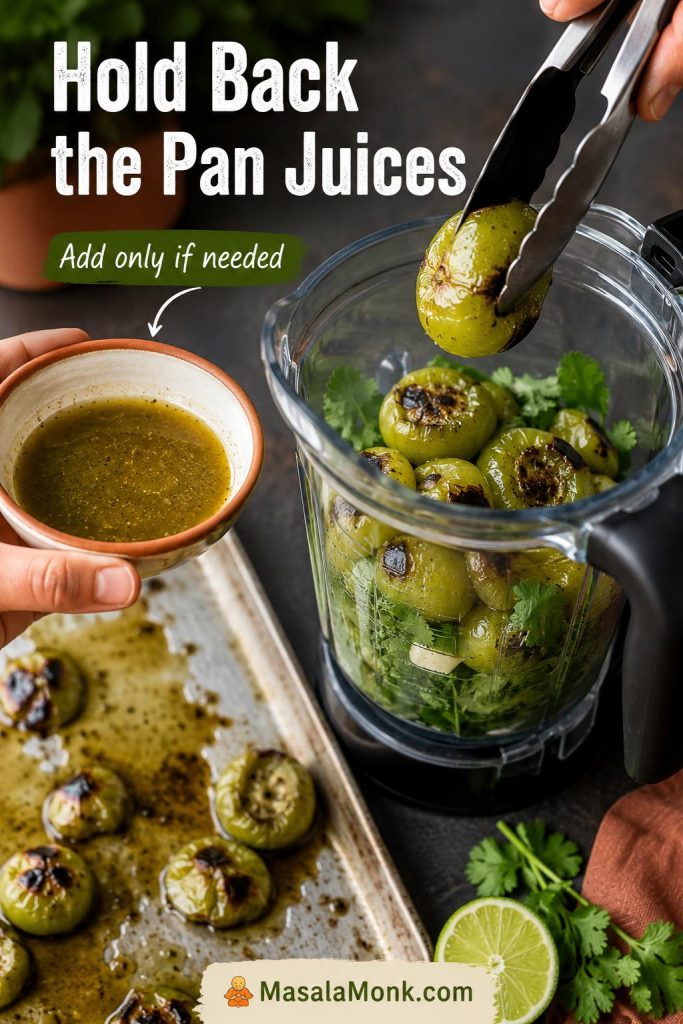
Pan juices are added gradually. Roasted tomatillos can release more liquid than expected, so holding some back keeps the salsa from turning watery.
Salt comes before extra lime. Under-salted salsa tastes flat, while too much lime can make already-tart tomatillos taste harsh.
The method can match the meal. Roasted is the main recipe, but boiled, raw, and charred styles help you make the salsa smoother, brighter, smokier, or more sauce-like.
What You Need
A good batch does not need a long ingredient list. The flavor comes from balancing tangy tomatillos, green chile heat, fresh cilantro, enough salt, and a little lime.
A good salsa verde recipe does not need many ingredients, but each one has a job: tomatillos bring tang, chiles bring heat, and salt wakes everything up.
Tomatillos
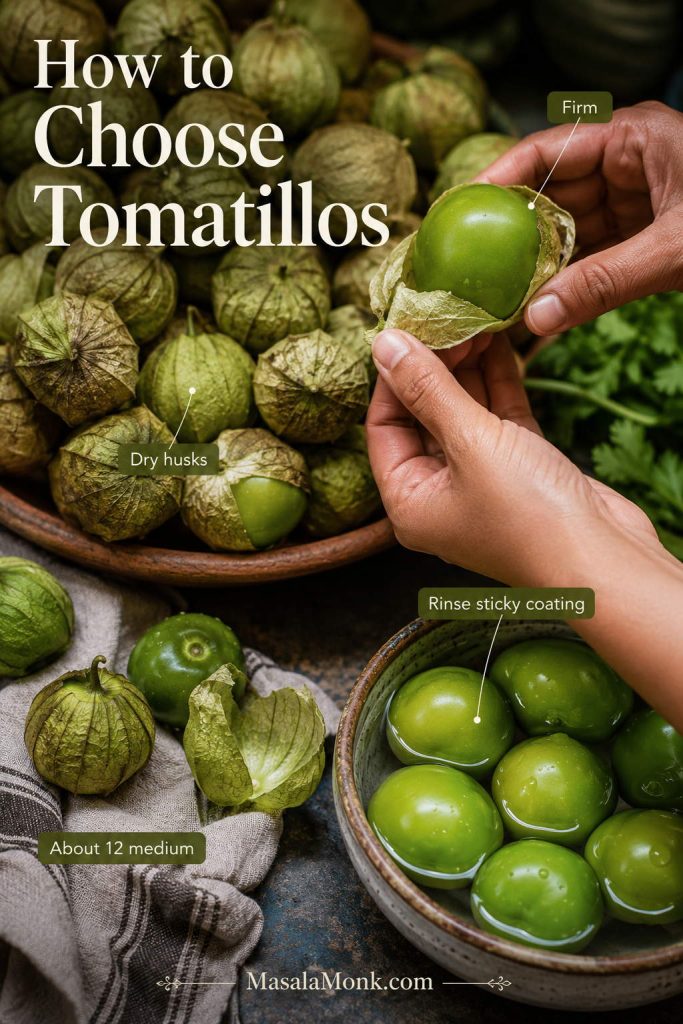
Look for firm tomatillos with dry papery husks. A little stickiness under the husk is normal; rinse it off before cooking or blending. You need 1½ pounds / 680 g tomatillos, usually about 12 medium tomatillos, for about 2½ to 3 cups salsa.
Tomatillos are not green tomatoes; instead, they bring the tart, fruity base that gives classic tomatillo salsa verde its lively flavor.
To prep them, remove the husks, rinse the sticky coating, and trim away any damaged spots. Large tomatillos can be halved before roasting so they soften evenly.
Firm tomatillos with dry husks usually roast best; after peeling, rinse the sticky coating so the finished salsa tastes clean rather than tacky or dull.
Jalapeño or Serrano
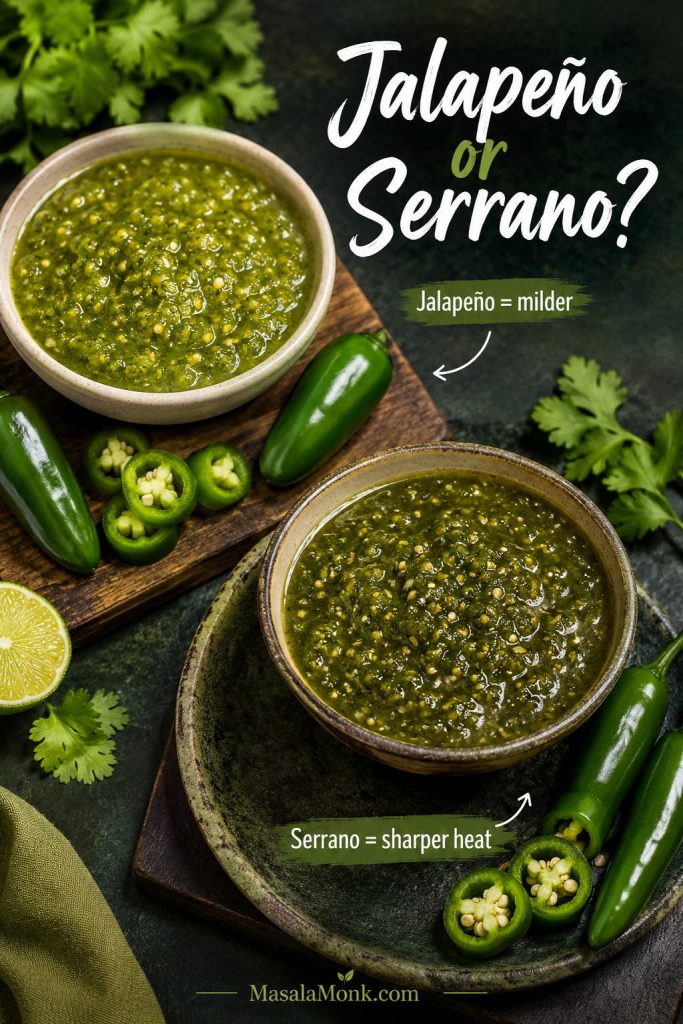
Jalapeño makes a milder, more approachable salsa. Serrano gives a sharper, more intense green-chile heat. Use one pepper for mild to medium, two serranos for hot, or three to four serranos for a very spicy batch.
Remove the seeds and white ribs for gentler heat before blending. Keep some seeds for a sharper salsa, then adjust after tasting.
Need exact mild, medium, and hot options? Use the heat level guide before blending.
Jalapeño makes the sauce milder and rounder, while serrano gives sharper green-chile heat, so choose based on who will be eating it.
Onion, Garlic, Cilantro, Lime, and Salt
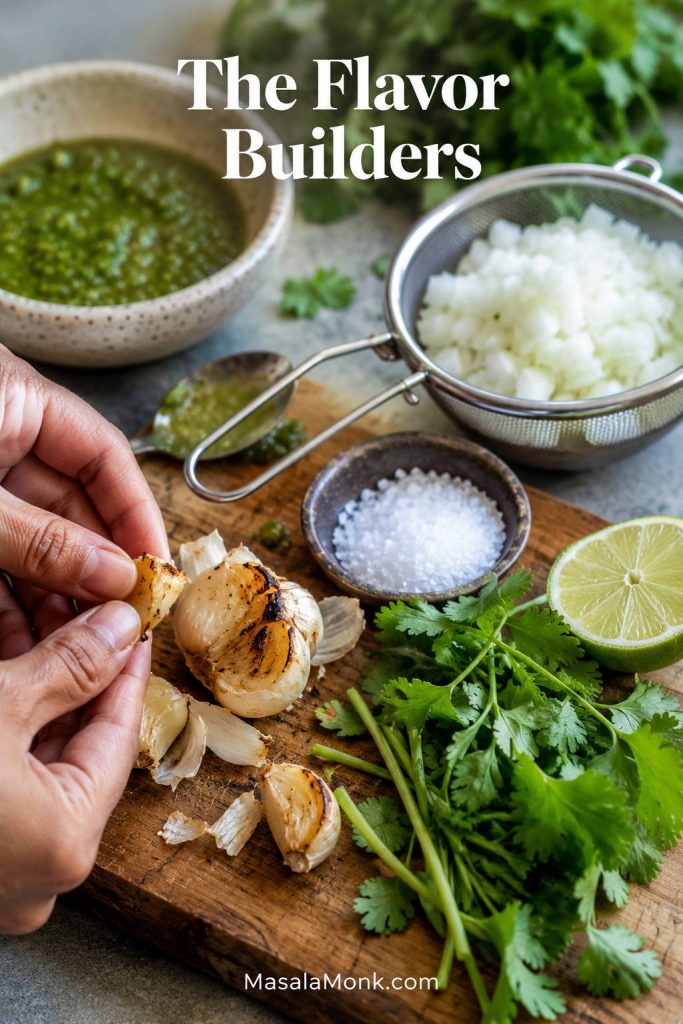
White onion gives the salsa a clean bite. Rinsing chopped onion under cold water softens harsh raw onion flavor without making the sauce dull. Garlic roasts with the tomatillos in the main recipe so it turns mellow instead of sharp.
Cilantro brings the classic fresh green finish, and tender stems are fine because they carry plenty of flavor. Lime brightens the batch, but tomatillos are already tart, so add it with a light hand and adjust after tasting.
Garlic, onion, cilantro, lime, and salt build balance around the tomatillos, so the finished green salsa tastes layered instead of flat.
How to Make It
Roast the tomatillos, chile, and garlic until blistered, then blend them with onion, cilantro, lime, and salt. Keep the texture lightly spoonable and add water only at the end when the salsa is too thick.
This four-step flow keeps the recipe simple: prep clean tomatillos, roast for flavor, blend for texture, and adjust only after the salsa settles.
The one thing to watch is liquid. Roasted tomatillos can release a lot of juice, so add the tomatillos first, pulse, and use the pan juices gradually only if the salsa needs them.
The roasted juices carry flavor, but adding them slowly gives you control over thickness before the salsa turns too loose for chips or tacos.
Do not worry if one batch tastes a little brighter, smokier, or spicier than the last. Tomatillos and chiles vary, so the final taste check is part of making the salsa yours.
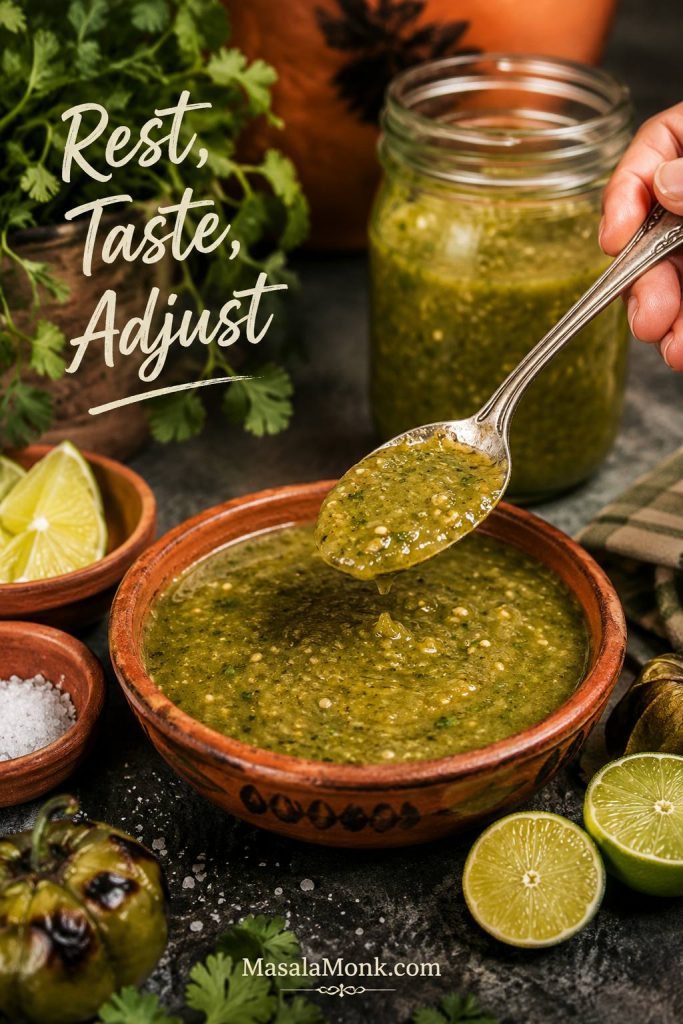
A short rest makes the flavors easier to read, so taste again before adding more lime, salt, or heat.
Roasted Tomatillo Salsa Verde Recipe
Roast the tomatillos until they blister and soften; this rounds off their raw edge while keeping enough acidity for tacos and chips.
Roasted Tomatillo Salsa
This roasted tomatillo salsa is tangy, lightly smoky, and spoonable, with enough body for chips and enough brightness for tacos, eggs, chicken, chilaquiles, bowls, and nachos.
Prep Time
10 minutes
Cook Time
About 10 to 13 minutes
Total Time
20 to 25 minutes under the broiler
Yield
About 2½ to 3 cups
Equipment
Rimmed baking sheet
Foil or a bare baking sheet for broiling
Blender or food processor
Tongs
Fine-mesh strainer, optional, for rinsing onion
Airtight jar or container
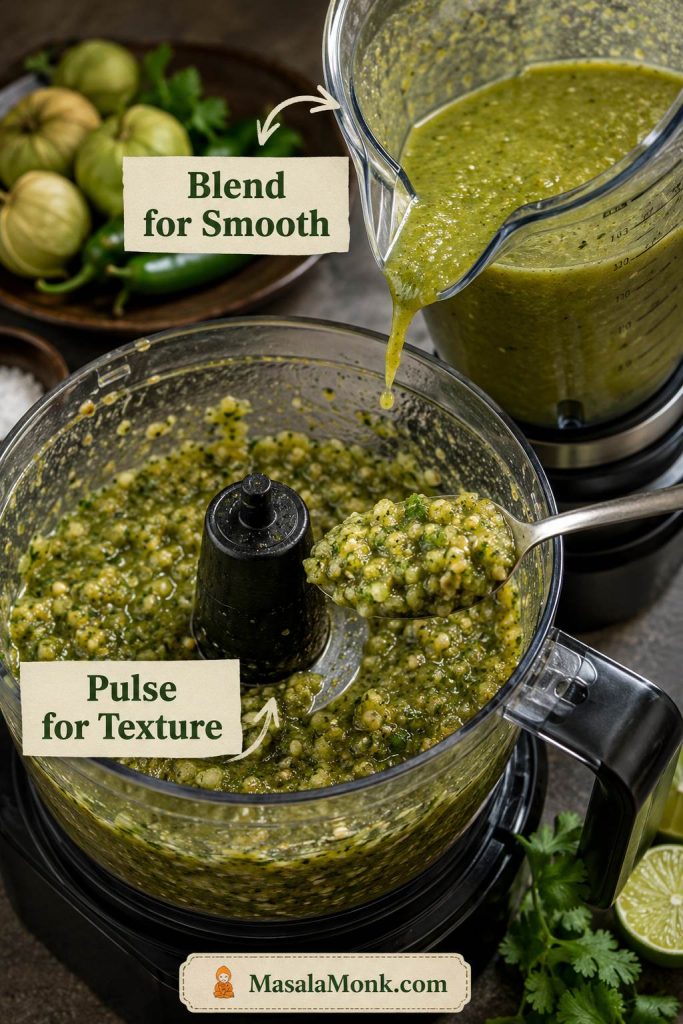
Blender or food processor? Use a food processor for a lightly textured salsa and a blender for a smoother sauce-style salsa.
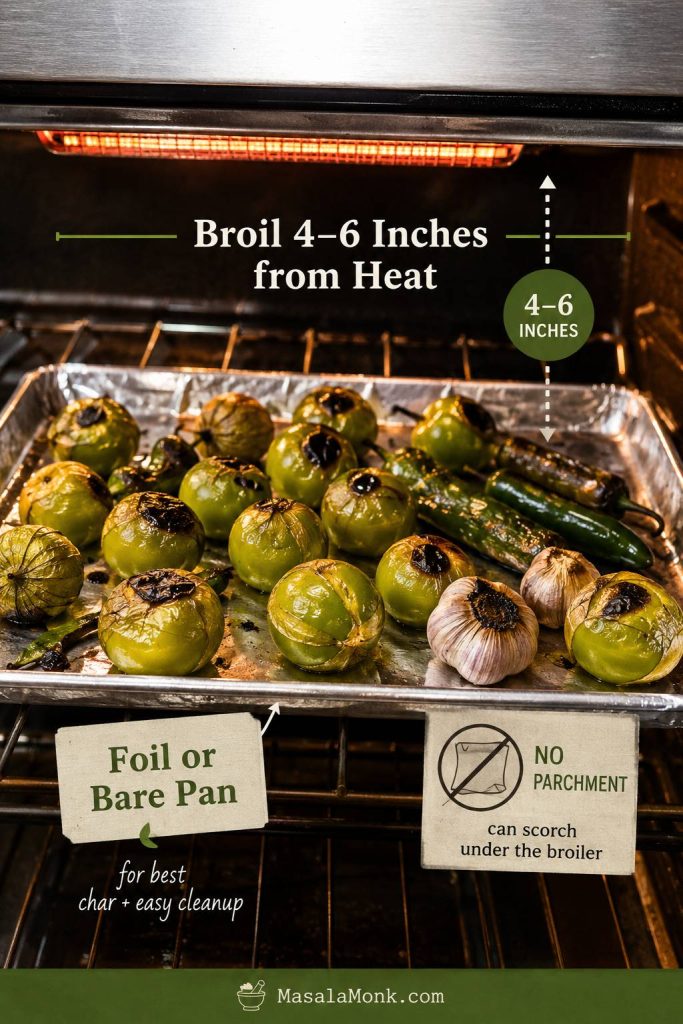
Broiler note: Use foil or a bare rimmed baking sheet under the broiler. Do not place parchment directly under the broiler. Parchment is only for the 450°F oven method when rated for that heat.
Ingredients
1½ pounds tomatillos, husked and rinsed, about 680 g or 12 medium tomatillos
1 to 2 jalapeños or serranos, roughly 15 to 40 g depending on size
2 to 3 garlic cloves, unpeeled for roasting
½ cup chopped white onion, about 70 g
½ cup chopped cilantro leaves and tender stems, about 8 to 12 g
1 to 2 tablespoons fresh lime juice, 15 to 30 ml, to taste
¾ teaspoon fine salt, about 4 g, plus more to taste
1 to 3 tablespoons water, broth, cooking liquid, or pan juices, only as needed
Instructions
Prep the tomatillos. Remove the papery husks and rinse off the sticky coating. Pat dry before roasting.
Set up the pan. Place tomatillos, jalapeño or serrano, and unpeeled garlic cloves on a foil-lined or bare rimmed baking sheet. Halve large tomatillos and place them cut-side down.
Broil the first side. Broil 4 to 6 inches from the heat for 5 to 7 minutes, until the tomatillos begin to blister and soften.
Finish roasting. Use tongs to turn the chile and garlic as needed, then broil another 4 to 6 minutes. The tomatillos may collapse; that is fine. You are looking for browned spots and a tangy-sweet smell instead of a raw, grassy one.
Cool briefly. Let the roasted ingredients cool for a few minutes. Peel the garlic. Stem the chile. Remove seeds for milder salsa.
Rinse the onion, optional. For a cleaner onion flavor, rinse the chopped onion under cold water and drain well.
Blend carefully. Add the roasted tomatillos, chile, garlic, onion, cilantro, 1 tablespoon lime juice, and salt to a blender or food processor. When there is a lot of liquid on the pan, hold some of it back at first.
Set the texture. Pulse until mostly smooth but still lightly textured. Blend longer only for a thinner sauce-style salsa.
Adjust liquid. Add pan juices, water, broth, or cooking liquid 1 tablespoon at a time only when the salsa is too thick.
Taste. Rest 10 to 15 minutes, then taste again. Add salt first when it tastes dull. Add more lime only when it needs brightness.
Serve or store. Serve warm, room temperature, or chilled. Refrigerate leftovers in an airtight jar.
Notes
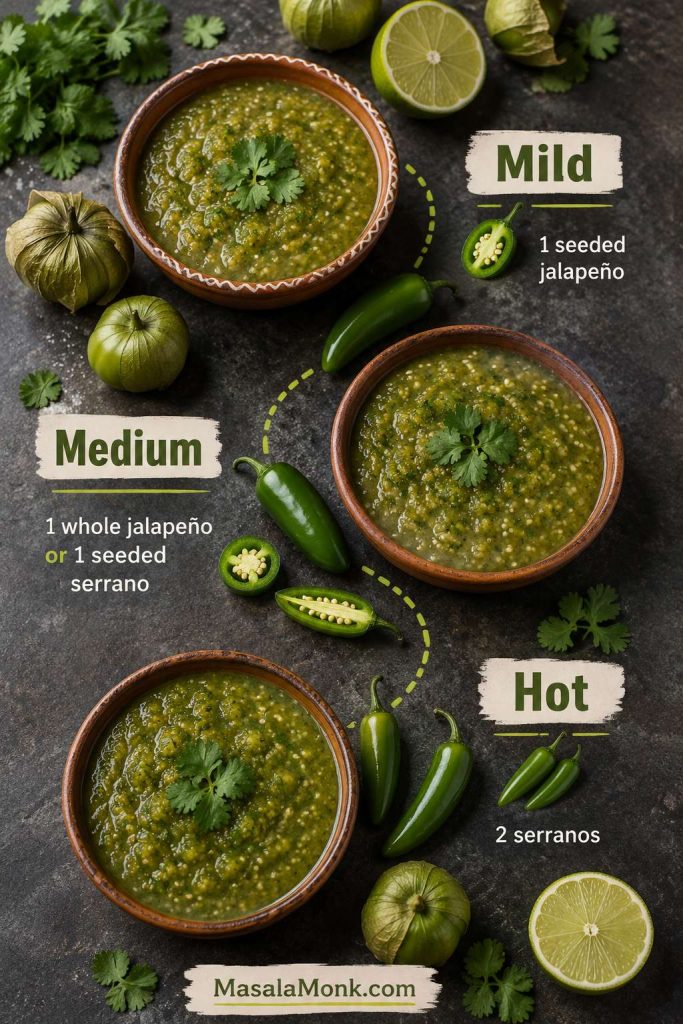
For mild salsa, use 1 seeded jalapeño.
For medium heat, use 1 whole jalapeño or 1 seeded serrano.
For a hot batch, use 2 serranos.
Without a broiler, roast at 450°F / 230°C for 15 to 20 minutes. Total time will be closer to 25 to 30 minutes.
Before broiling, pan setup matters: keep the tomatillos close enough to blister, and use foil or a bare rimmed pan instead of parchment.
Broiling close to the heat helps tomatillos blister quickly; meanwhile, foil or a bare pan is safer under the broiler than parchment.
Texture depends on the tool: a food processor keeps the salsa lightly textured, while a blender makes it smoother and more sauce-like.
Use a food processor for lightly textured tomatillo salsa, but use a blender when you want a smoother sauce-style finish.
You can stop with the roasted recipe above and be happy. Everything after this point is optional help for method, texture, heat, and use cases.
Raw, Boiled, Roasted, or Charred?
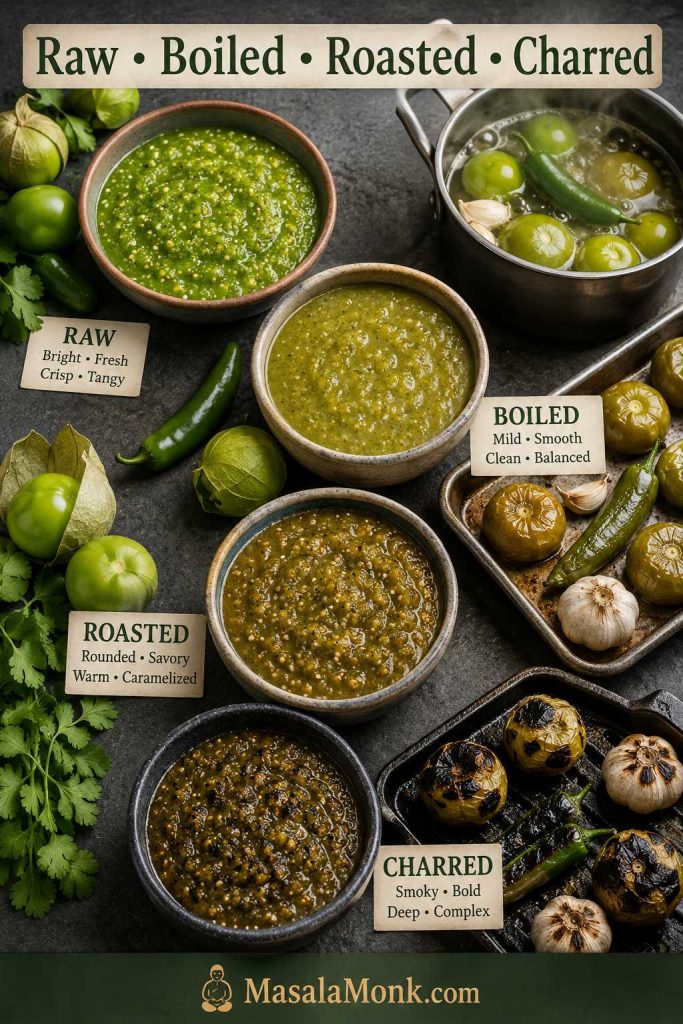
Once you know the base recipe, the method becomes your style choice: raw for sharp and fresh, boiled for smooth, roasted for balanced, and charred for smoky.
Once you know the base recipe, the method becomes a style choice: raw is sharp, boiled is smooth, roasted is balanced, and charred is smoky.
Method
How to Do It
Flavor
Works With
Raw
Blend raw tomatillos, chile, onion, cilantro, lime, and salt.
Sharp, tart, fresh, grassy.
Tacos, grilled meats, rich or fatty fillings.
Boiled
Simmer tomatillos, chile, and garlic for 5 to 12 minutes, then blend.
If you are unsure, choose roasted. It behaves best on a normal weeknight: bright enough for tacos, thick enough for chips, and rounded enough to spoon over dinner.
If the salsa looks too thick or too loose after blending, check the texture guide before adding more liquid.
Boiled Version
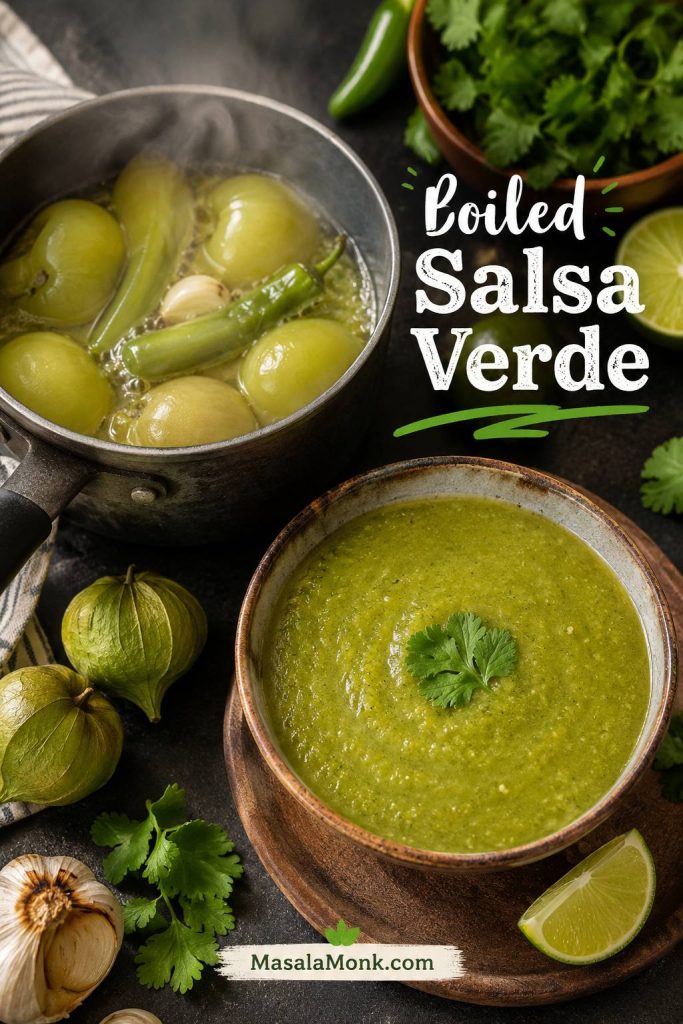
The boiled version is smooth, clean, and useful when you need a green salsa that behaves more like a sauce. Place the tomatillos, chile, and garlic in a saucepan, cover with water, and simmer until the tomatillos turn dull green and soften. This usually takes 5 to 12 minutes depending on size.
Stop when the tomatillos are soft but not completely falling apart. Drain them, save a little cooking liquid, then blend with onion, cilantro, salt, and lime to taste. Add the reserved liquid only as needed. This style is especially good for enchiladas, chilaquiles, simmered chicken, and everyday taco-shop-style salsa.
Boiled salsa verde is smoother and cleaner than roasted salsa, which makes it useful for enchiladas, chilaquiles, simmered chicken, and taqueria-style sauces.
Raw Version
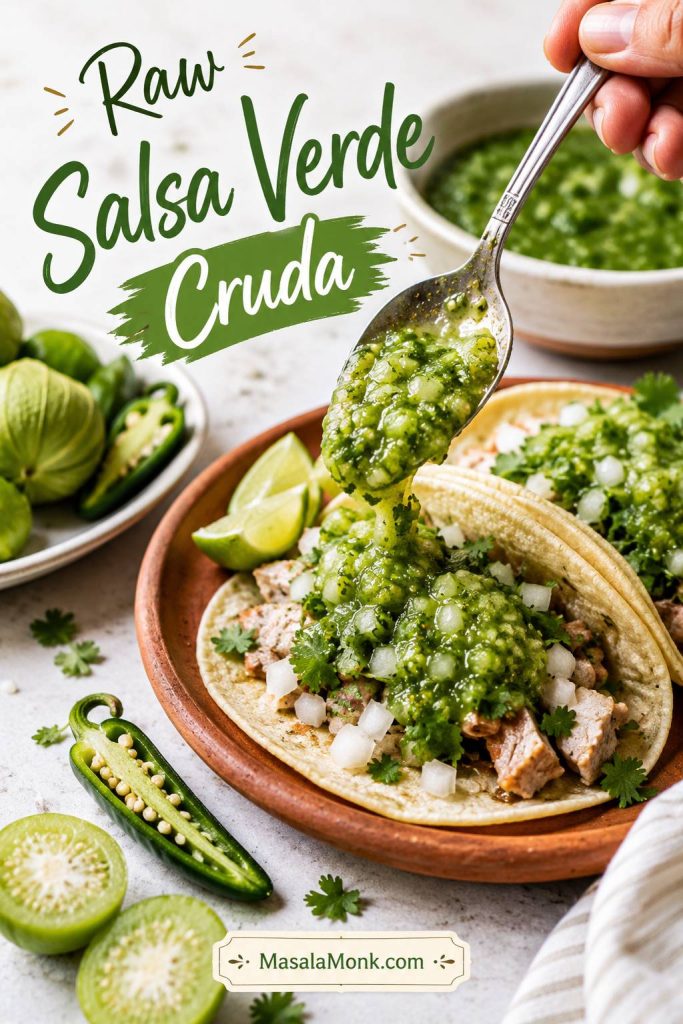
Raw salsa verde, also called salsa verde cruda, is the fastest style. It is bracing and fresh, with a sharper edge than cooked salsa verde. Use it for a fresh taco salsa when a more assertive tomatillo flavor sounds good.
Because raw tomatillos can be quite tangy, taste carefully before adding much lime. Salt is usually more important than extra acid in this version.
Raw salsa verde cruda has the sharpest bite, so it works especially well when rich taco fillings need a clean green finish.
Charred Version
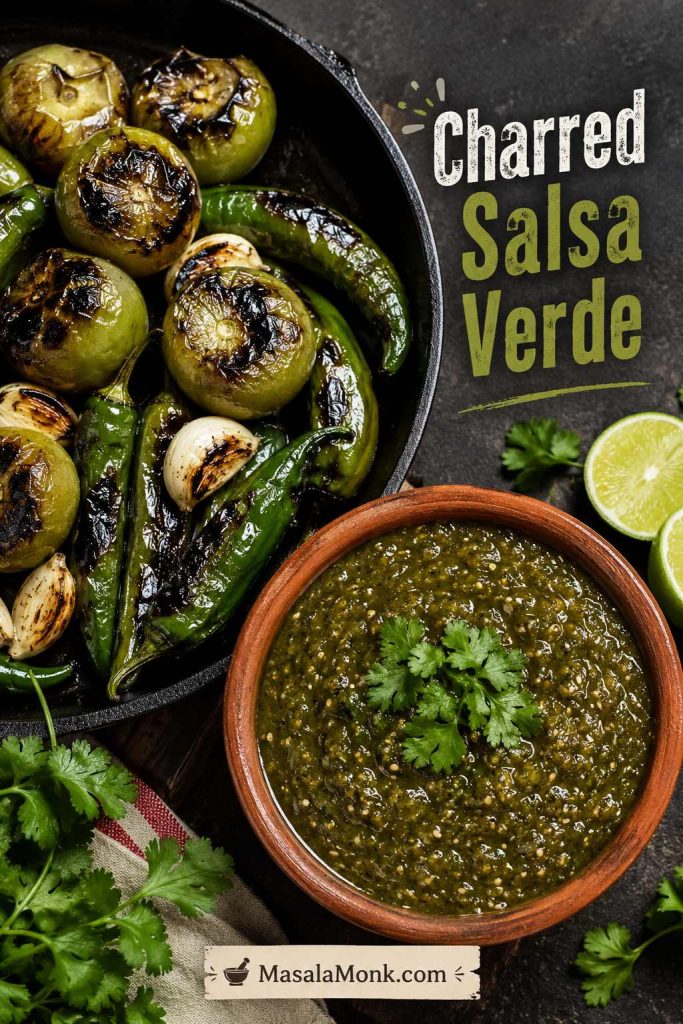
The charred version is for deeper flavor. Let the tomatillos and chiles blister more aggressively under the broiler. After blending, heat 1 tablespoon neutral oil in a saucepan, add the salsa, and simmer it for 2 to 3 minutes. The color will darken slightly and the flavor will become more rounded.
This step is optional, but it is excellent for tacos, grilled meats, chilaquiles, or chicken.
Charring deepens the flavor of tomatillo salsa, but the vegetables should look blistered and smoky rather than burned.
Mild, Medium, or Hot
For a table of mixed heat levels, start gentler than your own taste. You can always make the next batch sharper, but once this batch is too hot, you need extra tomatillos, avocado, or crema to bring it back.
Heat Level
Use This
Works For
Mild
1 seeded jalapeño
Kids, parties, chips, mild tacos.
Medium
1 whole jalapeño or 1 seeded serrano
Everyday salsa with a gentle kick.
Hot
2 serranos
Tacos, grilled meats, spicy bowls.
Very hot
3 to 4 serranos, with some seeds included
Heat lovers and bold taqueria-style salsa.
If the batch is already hotter than you wanted, go straight to the too-spicy fix instead of adding water.
For a crowd-friendly salsa verde, start with jalapeño or a seeded serrano; then move hotter only when you know the table wants it.
If you like building heat with different chiles, MasalaMonk’s pepper sauce guide goes deeper into jalapeño, habanero, chipotle, and other chile-based sauces.
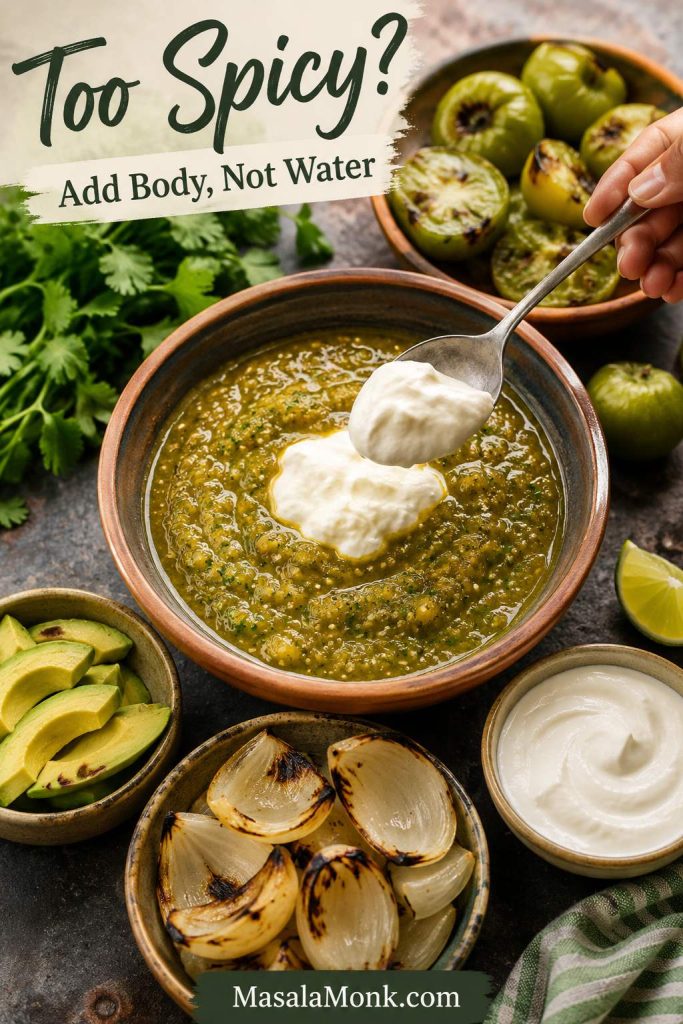
Once the salsa is already blended and too spicy, do not add water first. Water will thin the sauce without softening the burn much. Instead, blend in more cooked tomatillo, avocado, sour cream, Mexican crema, or a little more roasted onion, depending on the flavor you want.
The Right Texture
Good salsa verde should be spoonable, lightly glossy, and a little textured. It should not pour like water, but it should not be stiff like guacamole either.
For chips, keep it medium-thick so it clings. On tacos, it should be spoonable and a little loose, so it runs slightly into the filling. For enchiladas or chilaquiles, thin it with broth, water, or cooking liquid so it coats instead of clumping. Bowls and nachos need a thicker salsa so it does not flood the plate.
Serving temperature changes the way it feels, too. Chilled works best for chips, room temperature is great for tacos, and warm is useful when the salsa acts like a sauce for eggs, chicken, enchiladas, or chilaquiles.
If the texture has already gone wrong, the troubleshooting section covers watery, too thick, bland, bitter, tart, and too-spicy salsa.
A thicker salsa clings to chips, a spoonable one sits better on tacos, and a looser version spreads more evenly through enchiladas or chilaquiles.
How to Fix the Flavor or Texture
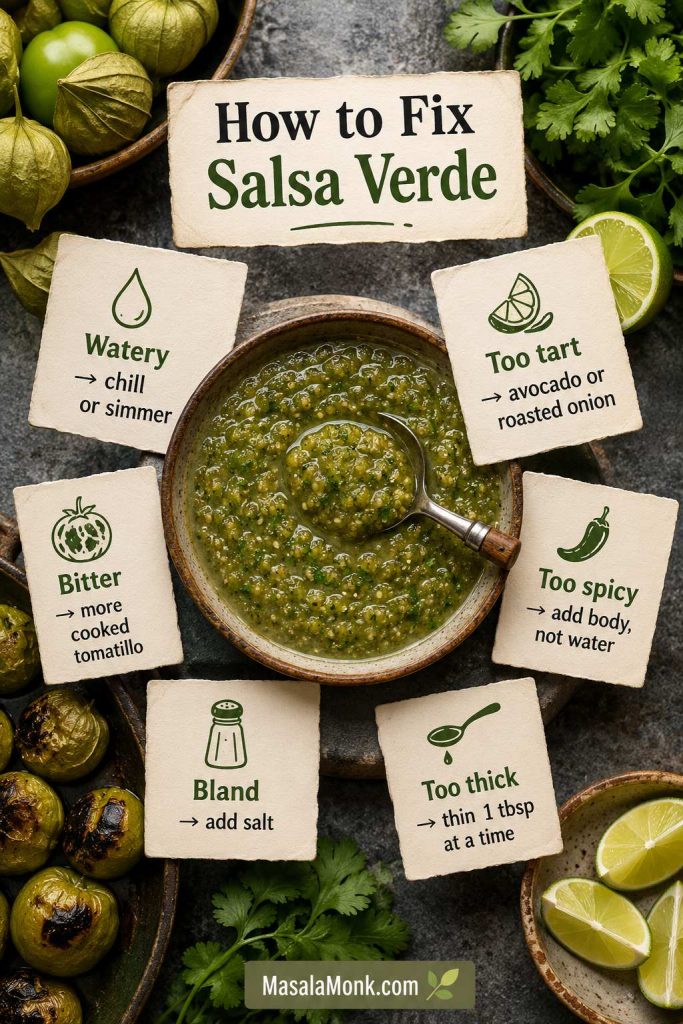
Most salsa problems are not disasters. They are usually small balance issues: too much liquid, not enough salt, too much heat, or tomatillos that were sharper than expected.
Problem
Likely Cause
How to Fix It
Watery salsa
Too much liquid, hot salsa not rested, or over-blending.
Chill first. If still loose, simmer briefly to reduce or blend in avocado for a creamy style.
Too tart
Very sharp tomatillos or too much lime.
Add roasted onion, a tiny pinch of sugar, or avocado.
Bitter
Old tomatillos, over-charred skins, or harsh raw garlic.
Add more cooked tomatillo, cilantro, salt, or a little lime. Next time, roast until blistered, not scorched.
Too spicy
Too many serranos or too many seeds.
Blend in more cooked tomatillo, avocado, crema, sour cream, or roasted onion.
Bland
Usually not enough salt.
Add salt in small pinches, rest for a few minutes, then taste again.
Too thick
Not enough liquid or salsa chilled very thick.
Add water, broth, cooking liquid, or reserved pan juices 1 tablespoon at a time.
Most salsa verde problems are balance problems, so the fix is usually small: chill, simmer, salt, thin slowly, or add body instead of starting over.
If you only remember one fix: adjust salt before lime. Under-salted salsa tastes flat, but too much lime can make already-tangy tomatillos taste harsh.
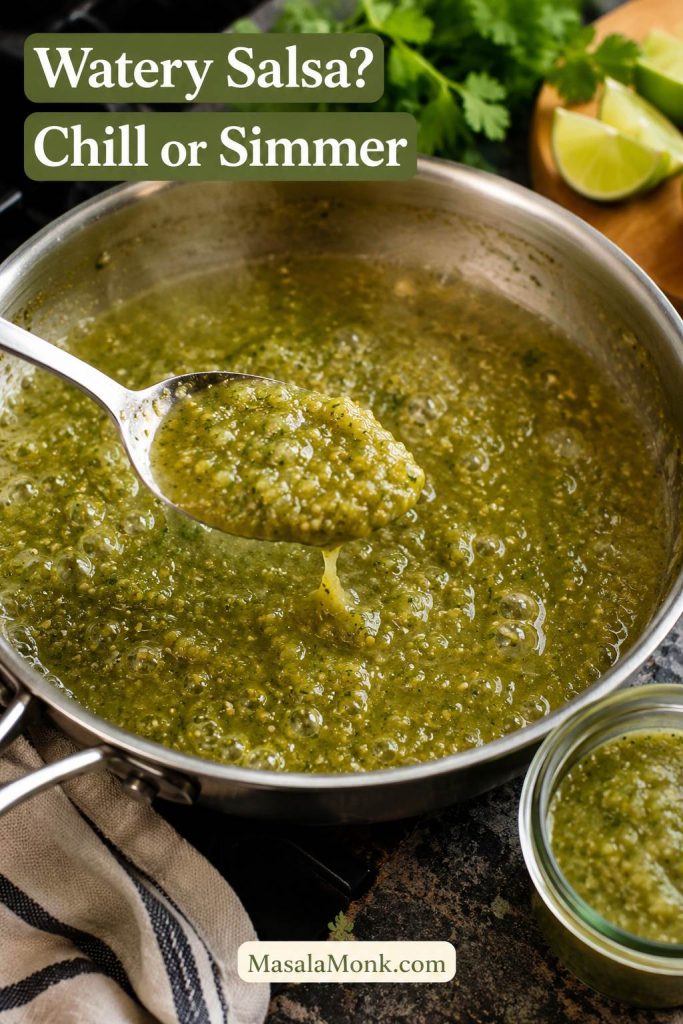
Watery Salsa Verde
Watery salsa verde is usually easy to rescue. Tomatillos release liquid as they cook, and warm salsa can seem thinner than chilled salsa. First, let it cool or refrigerate it for 30 minutes. When it is still too loose, simmer it in a small saucepan for a few minutes until it thickens.
If the salsa looks thin after cooling, a brief simmer concentrates the tomatillo flavor and brings the texture back to spoonable.
For tacos and chips, you want salsa that clings. For enchiladas and chilaquiles, a looser sauce is actually useful.
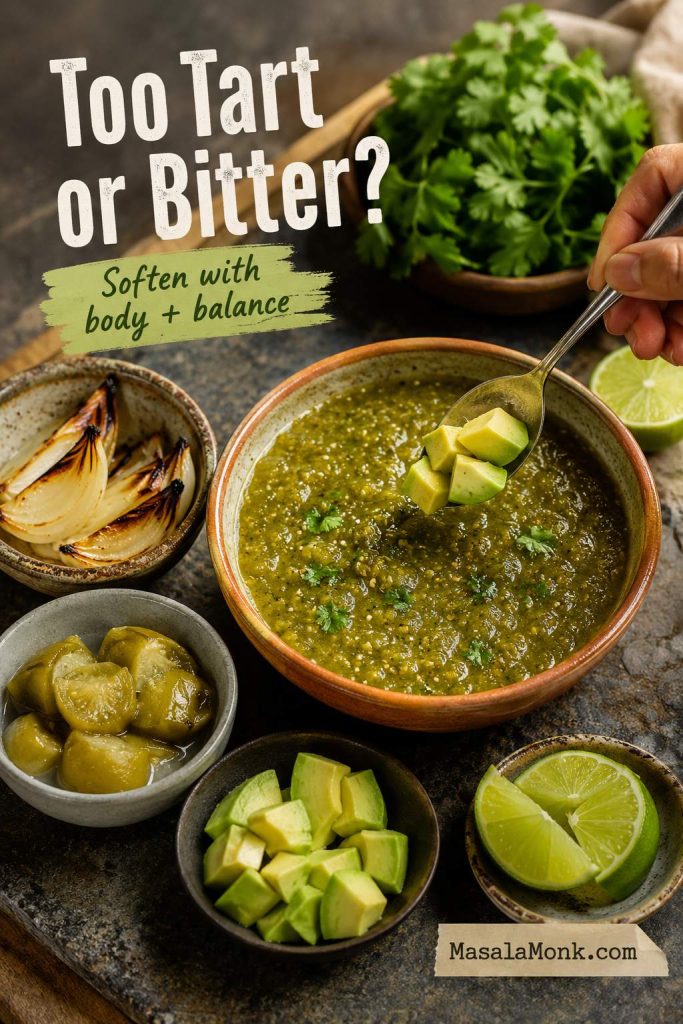
Bitter or Too Tart
Tomatillos are naturally tart, so add lime slowly. When the salsa tastes too sharp, add roasted onion, a tiny pinch of sugar, or avocado. Avocado is especially helpful because it softens both tartness and heat.
If the sauce tastes too tart or bitter, ingredients with body and sweetness, such as avocado, roasted onion, or cooked tomatillo, can soften the edge.
Bitterness usually comes from old tomatillos, over-charred skins, or too much raw garlic. Next time, use firm fresh tomatillos and roast until blistered and browned in spots, not blackened all over.
Too Spicy
The easiest way to cool down heat is to add body, not water. Cooked tomatillos, avocado, sour cream, Mexican crema, or roasted onion will calm the burn while keeping the sauce useful.
When the salsa is too spicy, add body with avocado, crema, roasted onion, or more tomatillo instead of thinning the sauce with water.
Served with rich foods like pork, fried eggs, cheese, or grilled chicken, a slightly spicy batch may taste more balanced once it is on the food.
Bland or Flat
When the salsa tastes dull, add salt in small pinches, stir, and wait a minute before tasting again. Once the tomatillo and chile flavor wakes up, you can decide whether it needs more brightness.
Ways to Use It Beyond Chips
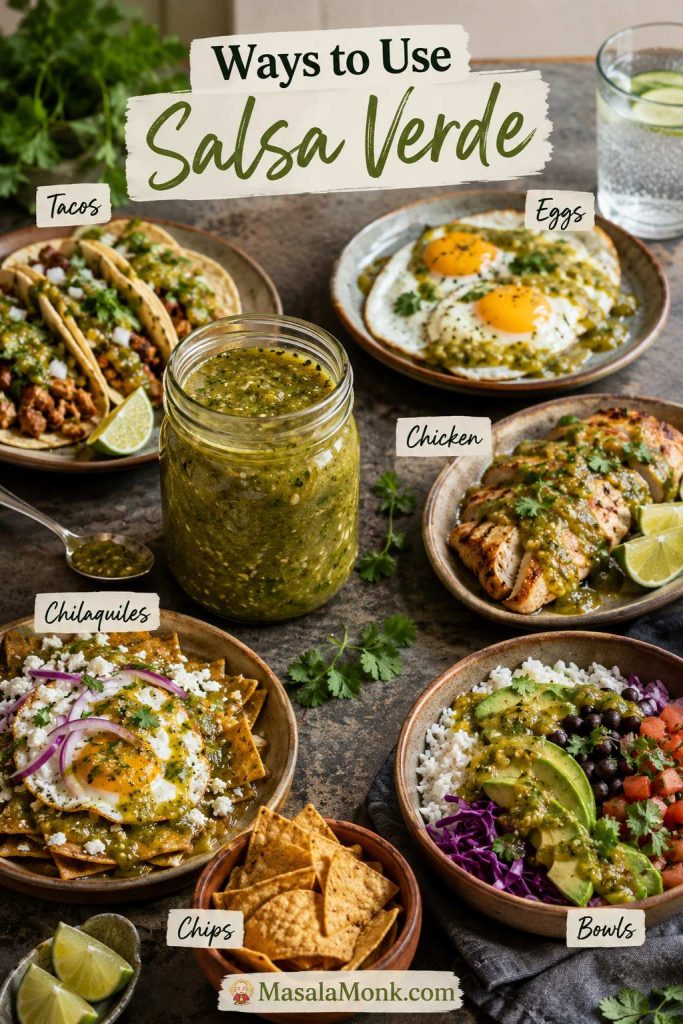
Chips may be the first thing that comes to mind, but this is where the jar starts earning its space in the fridge. It can wake up eggs, rescue leftover chicken, make plain rice or tortillas feel intentional, and turn a simple plate into dinner.
Once there is a jar in the fridge, salsa verde becomes the green shortcut for tacos, eggs, chicken, chilaquiles, bowls, nachos, and chips.
Use
Practical Guide
Texture to Aim For
Chips
Serve chilled or room temperature with tortilla chips or vegetables.
Medium-thick and scoopable.
Tacos
Use 1 to 2 tablespoons per taco.
Spoonable, bright, salty.
Enchiladas
Use about 2 cups for a small 8-inch pan, or 2½ to 3 cups for a 9×13-inch pan.
Looser, simmered, saucy.
Chicken
Use 1½ to 2 cups salsa for about 1½ pounds boneless chicken.
Thicker for spooning, looser for simmering.
Chilaquiles
Warm 2 cups salsa with ½ to 1 cup broth or water.
Loose enough to coat chips.
Eggs
Use about ¼ cup warm salsa per serving.
Spoonable and warm or room temperature.
Bowls and nachos
Spoon over at the end, not too early.
Thicker so it does not flood the plate.
That is the real value of a good batch: it starts as salsa, then quietly becomes the sauce that helps you finish the week’s tacos, eggs, bowls, and chicken.
Tacos
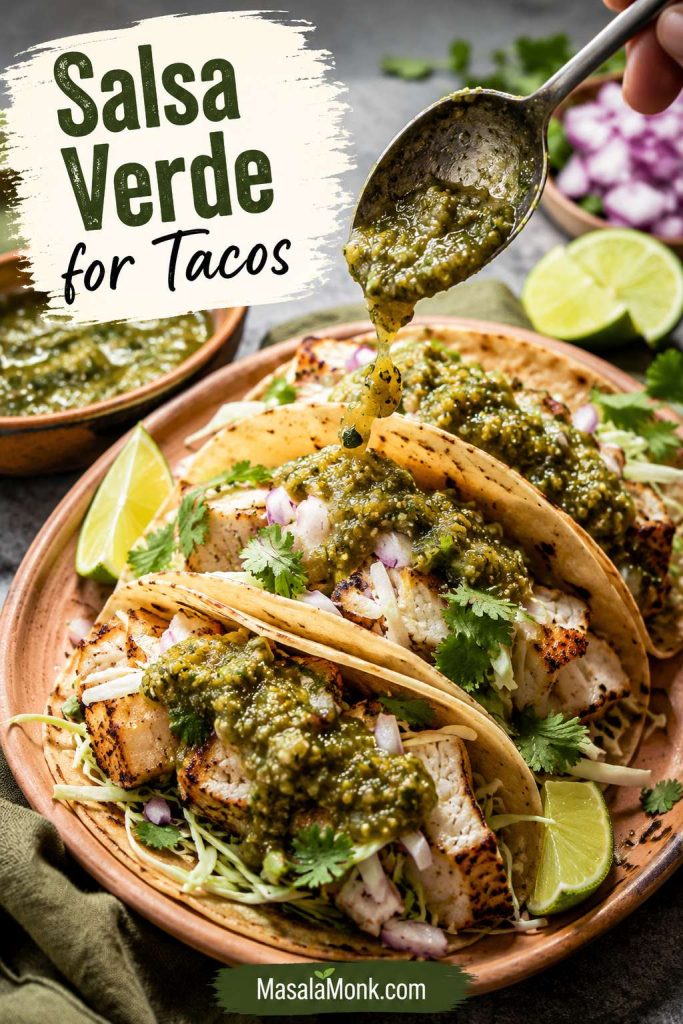
On tacos, the salsa should be bold enough to cut through rich fillings. Raw salsa is sharp and fresh. Roasted is more rounded. Charred is excellent with grilled meats, crispy potatoes, mushrooms, chicken, pork, or eggs. It works beautifully on fish tacos when you want a clean, bright topping.
For tacos, the sauce should be bold enough to cut through the filling while still tasting fresh, tangy, and spoonable.
Enchiladas
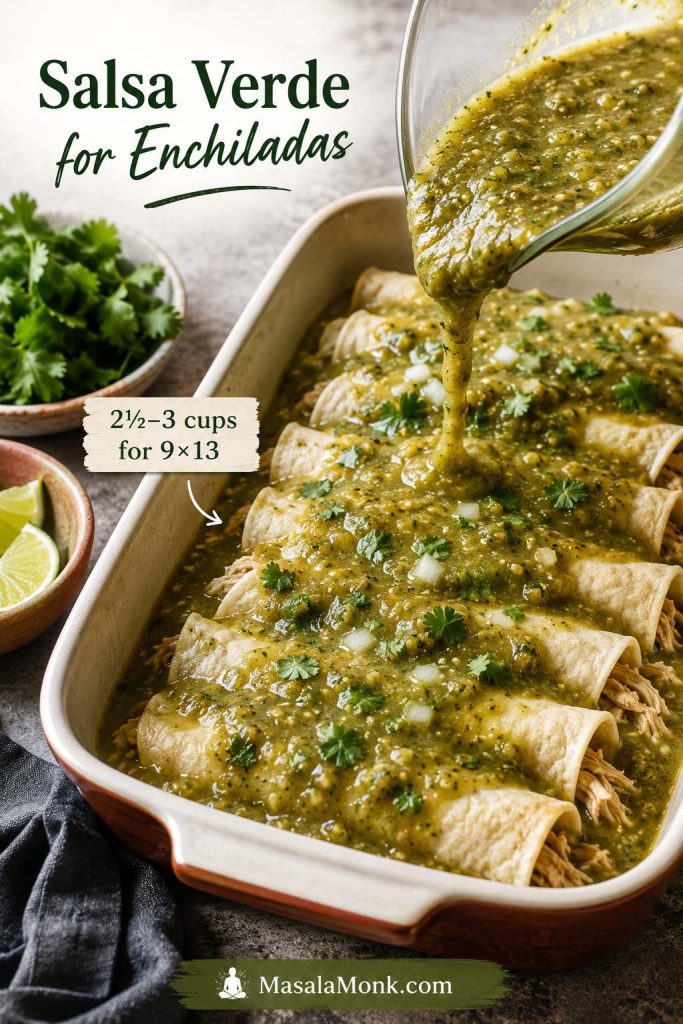
For enchiladas, make the salsa looser than you would for chips. Simmer it briefly in a little oil or broth, then use enough to coat the tortillas well. Use about 2 cups for a small 8-inch pan, or 2½ to 3 cups for a 9×13-inch pan, depending on how saucy you like your enchiladas.
For enchiladas, make salsa verde looser than a dip so it can coat the tortillas evenly instead of sitting in thick clumps.
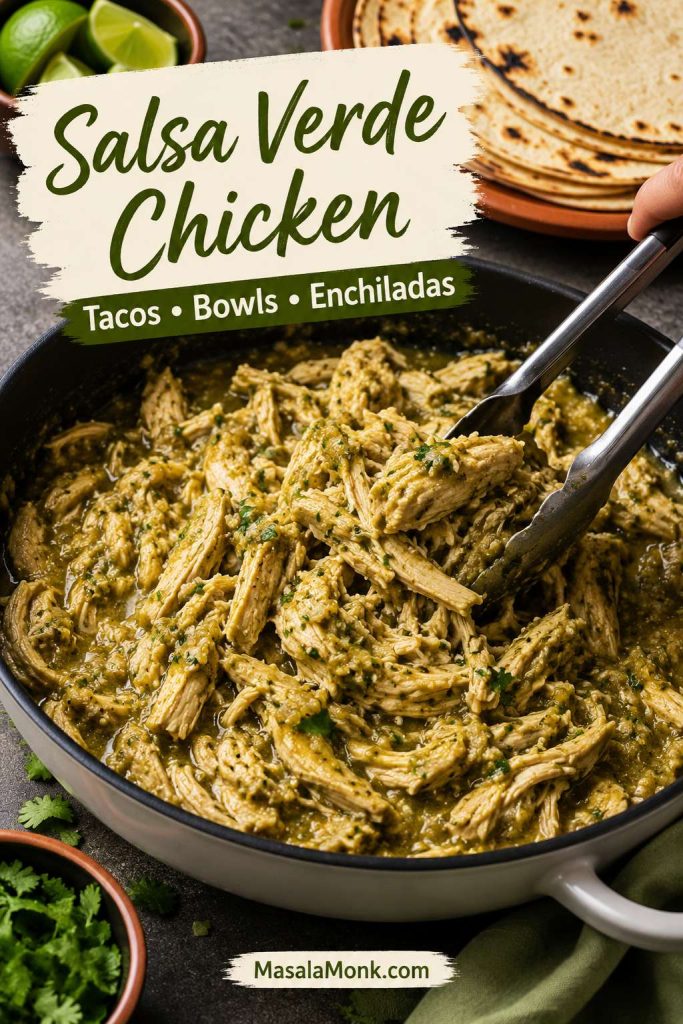
Salsa Verde Chicken
Salsa verde chicken is one of the easiest ways to turn this sauce into dinner. Use 1½ to 2 cups for about 1½ pounds boneless chicken, whether you simmer raw chicken until cooked through or spoon the sauce over sliced baked chicken breast.
Once shredded, the chicken works in tacos, bowls, nachos, quesadillas, or enchilada filling.
Salsa verde chicken is an easy dinner shortcut because the sauce seasons shredded chicken and turns it into filling for tacos, bowls, nachos, or enchiladas.
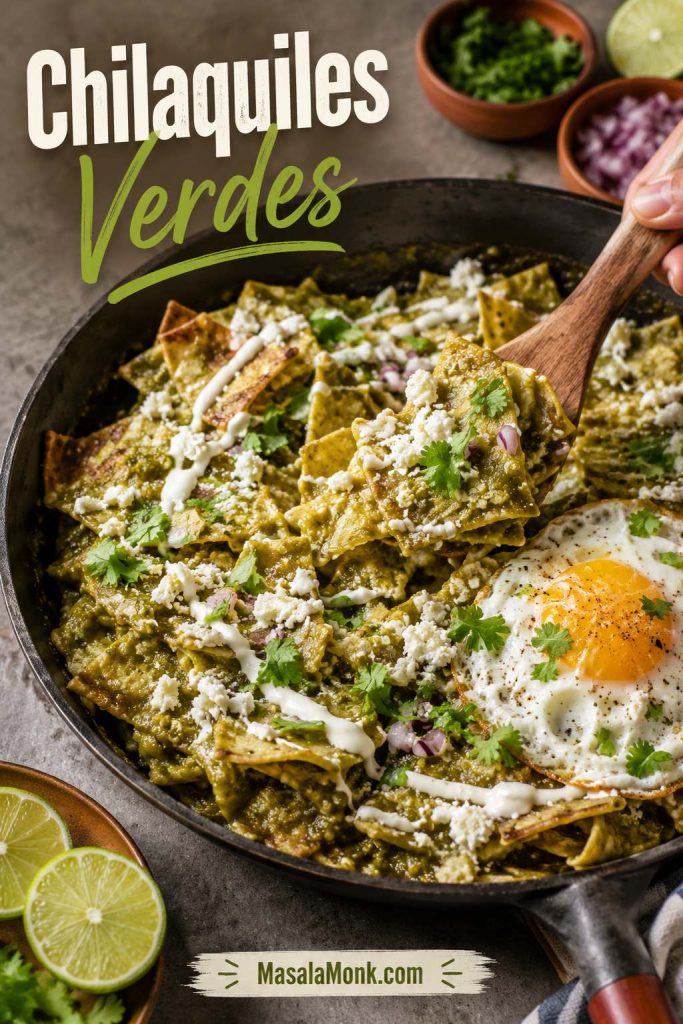
Chilaquiles Verdes
Chilaquiles verdes need a looser sauce than tacos. Warm 2 cups salsa with ½ to 1 cup broth or water, then add tortilla chips just long enough to coat them. Keep the chips slightly tender but not completely mushy. Finish with eggs, crema, onion, cilantro, and cheese if you like.
For chilaquiles verdes, warm the sauce first so the chips get coated quickly without soaking until they collapse.
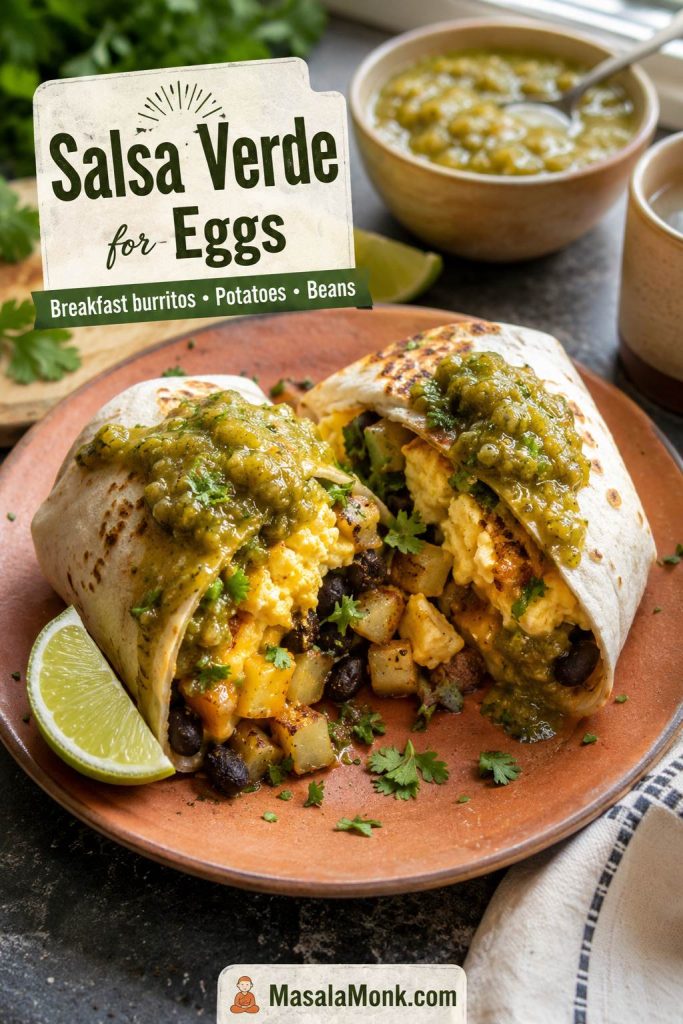
Eggs, Bowls, and Nachos
With eggs, this salsa tastes best slightly warm or at room temperature. It is also a strong add-on for breakfast burritos, especially with eggs, potatoes, cheese, beans, or chorizo. For bowls and nachos, keep it thicker so it acts like a topping instead of a puddle.
Salsa verde wakes up eggs, potatoes, beans, and breakfast burritos, especially when the sauce is served slightly warm or at room temperature.
Creamy, Avocado, Green Tomato, and Hatch Chile Versions
Once the base salsa tastes balanced, the variations become easy. You are not starting over — you are simply changing the richness, heat, or chile character.
Because creamy and avocado versions store differently, check the storage notes before making a large batch.
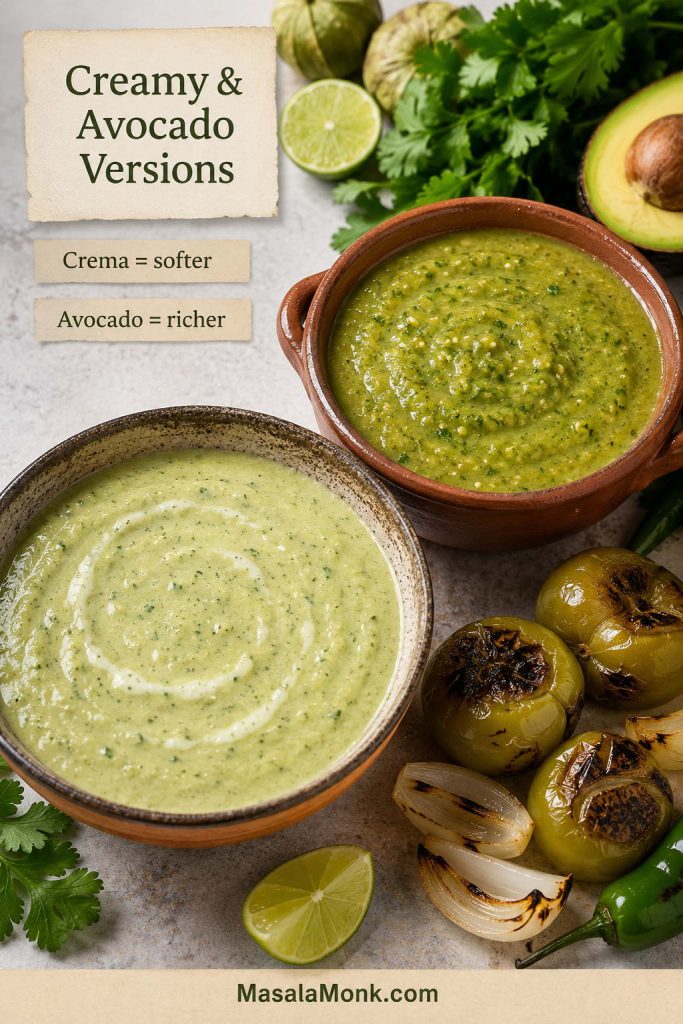
Creamy Version
To make it creamy, blend ½ cup sour cream or Mexican crema into 1½ to 2 cups cooled salsa. This makes a softer taco sauce that is especially good with grilled chicken, fish tacos, potatoes, roasted vegetables, and breakfast burritos.
Do not can creamy salsa verde. Dairy changes the safety and storage rules. Keep it refrigerated and use it within 2 to 3 days.
Avocado Version
Avocado turns the sauce richer and softer. Blend 1 ripe avocado into 1½ to 2 cups cooled salsa, then thin it one tablespoon at a time only when needed. This is a good fix for a batch that tastes too sharp or too spicy.
Avocado salsa verde is best eaten the same day or within 1 to 2 days. Press plastic wrap directly against the surface before refrigerating to slow browning.
Creamy salsa verde tastes softer and tangier with crema, while avocado salsa verde becomes richer and helps tame sharpness or heat.
Green Tomato Version
Tomatillos are best for classic Mexican salsa verde. Green tomatoes can make a tangy green salsa, but the flavor is different: more tomato-like, less fruity, and often less naturally bright. Use green tomatoes as a variation when you have them, not as the first choice for this recipe.
When using green tomatoes, roast them well and taste carefully. They may need more lime, salt, or chile to get the same lively balance.
Green tomato salsa can work as a variation, but tomatillos give classic salsa verde its brighter, fruitier tang.
Hatch Green Chile Version
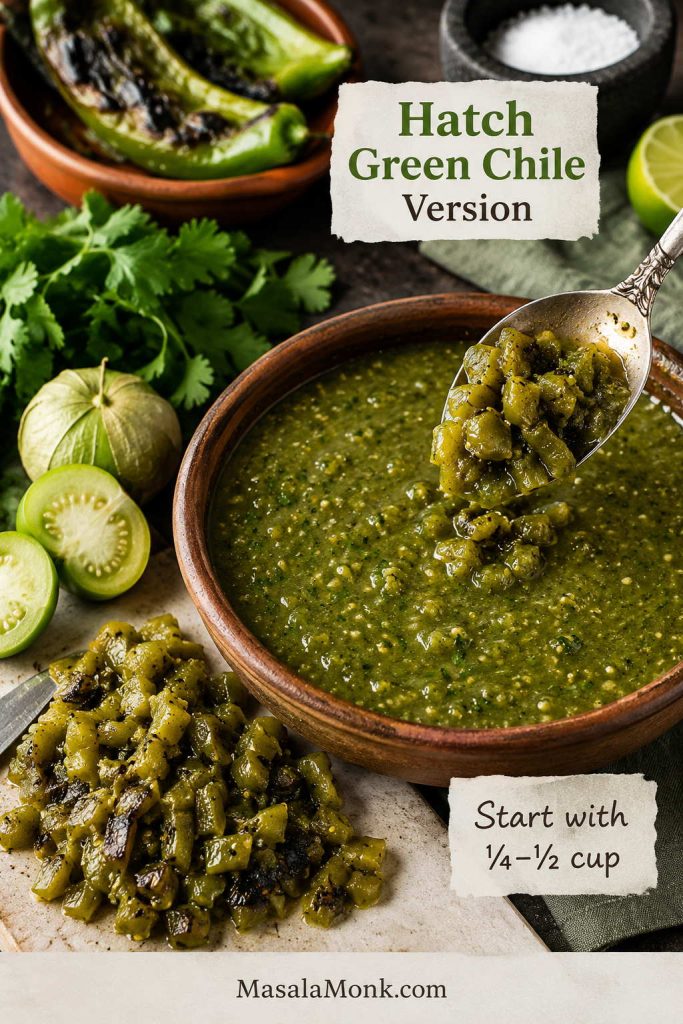
Roasted Hatch green chiles give the salsa a deeper green-chile flavor. Start with ¼ to ½ cup chopped roasted green chile for this batch, then adjust to taste. Hatch chiles can vary widely in heat, so taste before adding extra serrano or jalapeño.
Hatch green chiles add deeper roasted chile flavor, so start with a small amount and taste before adding more heat.
For a sweeter, fruitier salsa for tacos, fish, shrimp, or grilled chicken, MasalaMonk’s mango salsa recipe is the better direction. This salsa is tangy and green; mango salsa is juicy, chunky, and fruit-forward.
Salsa Verde and Other Green Sauces
“Salsa verde” simply means green sauce, so different cuisines use the name for different things. The table below is not saying these sauces are interchangeable. It is here to help you recognize which green sauce a recipe or restaurant menu might mean.
Sauce
Main Ingredients
Works With
Mexican salsa verde
Tomatillos, green chiles, onion, garlic, cilantro, salt, sometimes lime.
Parsley, capers, garlic, olive oil, vinegar or lemon, sometimes anchovy.
Fish, steak, roasted vegetables, boiled meats.
Peruvian aji verde
Cilantro, green chile or aji amarillo-style heat, lime, mayo or cheese-style creaminess.
Roast chicken, fries, grilled meats, rice bowls.
Chile verde
Usually pork or meat cooked with green chiles and tomatillo-style sauce.
A stew or main dish, not just a table salsa.
How to Store and Freeze It
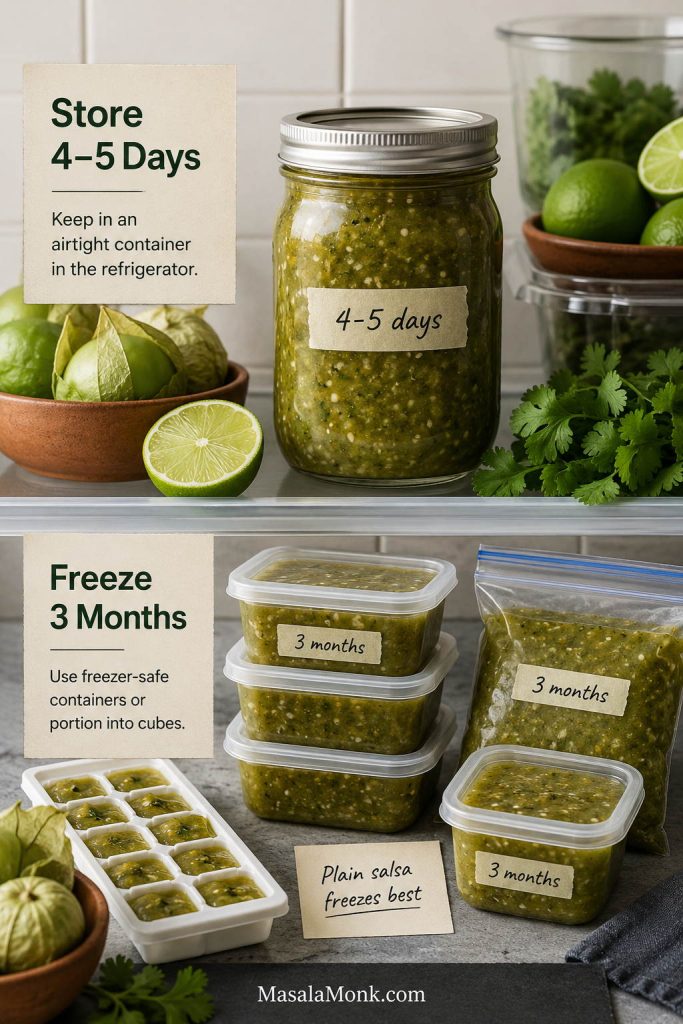
Store the salsa in an airtight jar or container in the refrigerator. Plain salsa verde is often even better after 30 minutes to a few hours because the salt, chile, cilantro, and tomatillo flavors settle together.
If you want shelf-stable jars instead of refrigerator salsa, read the canning safety section before changing the ingredients or acid.
Storage Method
How Long
Storage Tip
Refrigerator
4 to 5 days
Keep it in a clean airtight jar and stir before serving.
Freezer
Up to 3 months
Freeze in small portions so you can thaw only what you need.
Avocado or creamy version
1 to 2 days for avocado, 2 to 3 days for creamy
Keep refrigerated and do not freeze if texture matters.
Plain salsa verde stores well in the refrigerator and freezer, but add avocado, sour cream, or crema only after thawing for the best texture.
Freeze the plain version before adding avocado, sour cream, or crema. Dairy and avocado versions do not freeze as cleanly and can turn grainy or dull after thawing. When the salsa smells off, looks fizzy, shows mold, or changes in a way that makes you unsure, throw it out.
Can You Can Salsa Verde?
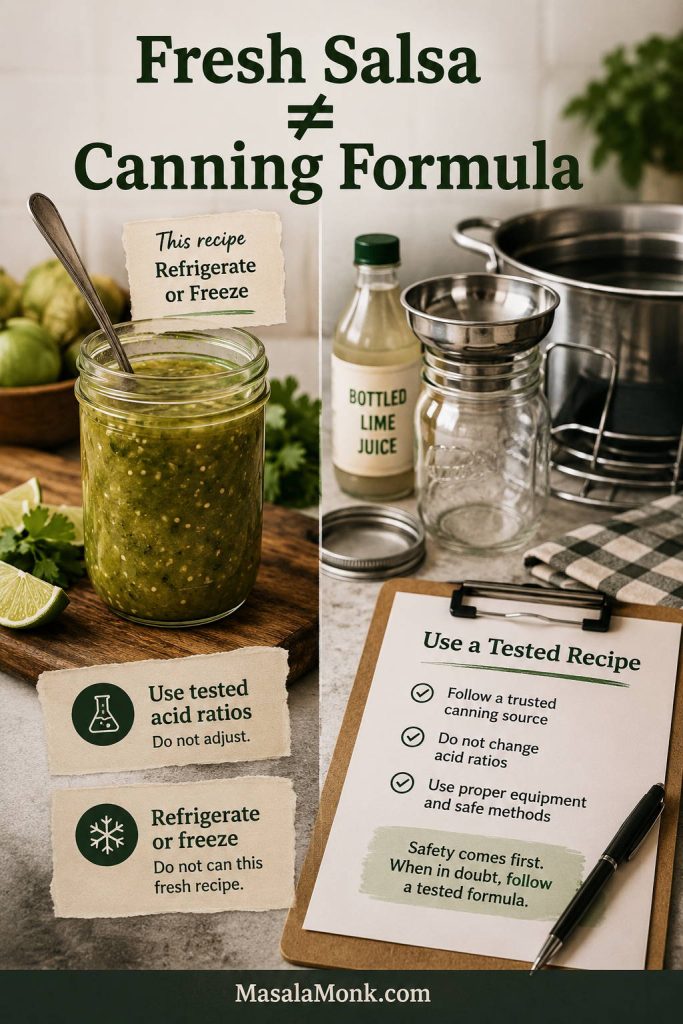
Important: This fresh salsa verde recipe is for the refrigerator or freezer. Do not water-bath can this exact recipe unless you are following a tested canning formula with the correct acid level, jar size, headspace, and processing time.
Fresh salsa verde belongs in the refrigerator or freezer unless you are using a tested canning recipe with verified acid, jar, and processing guidance.
Shelf-stable salsa is different from fresh salsa. Tomatillos are acidic, but salsa also contains low-acid ingredients like onions, garlic, and chiles. Safe canning recipes use tested ratios and added acid. The National Center for Home Food Preservation provides a tested tomatillo green salsa formula with measured tomatillos, chiles, onions, and bottled lemon or lime juice. New Mexico State University also publishes salsa canning guidance with tested processing information.
For shelf-stable salsa verde, use a tested canning recipe from a university extension, NCHFP, USDA-style source, or another reputable canning authority. Do not simply add vinegar or lemon juice to this fresh recipe and assume it is safe. Do not change the tomatillo, onion, chile, or acid ratios in a tested canning recipe unless the source specifically says that change is safe.
FAQs
Is salsa verde the same as green salsa?
In Mexican cooking, salsa verde usually means green salsa made with tomatillos and green chiles. The phrase can mean different green sauces in other cuisines, so “Mexican salsa verde” or “tomatillo salsa verde” is the clearer name.
Are tomatillos the same as green tomatoes?
Tomatillos and green tomatoes are different ingredients. Tomatillos have papery husks and a tart, fruity flavor, while green tomatoes are unripe tomatoes. You can make a green tomato salsa, but it will not taste exactly like classic tomatillo salsa verde.
Do you have to cook tomatillos?
You do not have to cook them. Raw salsa verde is sharp and fresh, boiled salsa verde is smooth and clean, roasted salsa verde is rounder, and charred salsa verde tastes deeper and smokier. When in doubt, roast them first; it is the easiest method to love.
Is roasted or boiled better?
Roasted is usually the most flexible homemade version because it tastes rounder and lightly smoky. Boiled is smoother and cleaner, which makes it excellent for taqueria-style salsa, enchiladas, chilaquiles, and simmered chicken.
Is it spicy?
The heat depends on the chile. Start with one seeded jalapeño for a gentle batch, especially when serving a crowd. You can always add more heat next time.
How do I make it less spicy?
The easiest way to cool down the heat is to add body, not water. Blend in more cooked tomatillo, avocado, sour cream, Mexican crema, or roasted onion. Plain water will thin the salsa without balancing the burn very much.
Can I use it as enchilada sauce?
For enchiladas, make the salsa looser than you would for chips. Simmer it briefly, then use enough to coat the tortillas well: about 2 cups for a small 8-inch pan, or 2½ to 3 cups for a 9×13-inch pan.
Why is my salsa verde watery?
Watery salsa usually has too much added liquid or has not cooled yet. Chill it first. If it is still loose, simmer it briefly to reduce. For a creamy fix, blend in avocado instead.
Why is my salsa verde bitter?
Bitterness can come from old tomatillos, over-charred skins, or too much harsh raw garlic. Add more cooked tomatillo, cilantro, salt, or a little lime. Next time, roast until blistered and browned in spots, not blackened all over.
Can I make it without cilantro?
You can leave cilantro out if it is not your thing. The flavor will be less classic, but the salsa can still work with enough chile, onion, lime, and salt. Flat-leaf parsley gives a green herb note, but it will not taste the same.
Can I use canned tomatillos?
Fresh tomatillos are best, but canned tomatillos can help when that is what you have. Drain them well, then blend with chile, onion, garlic, cilantro, lime, and salt. The flavor is usually softer, so taste carefully before serving.
Can I freeze it?
Plain salsa freezes well in small portions for up to 3 months. Thaw it in the refrigerator and stir before serving. Add avocado, sour cream, or crema after thawing, not before freezing.
Can I can this recipe?
This is a fresh refrigerator/freezer recipe, not a canning formula. For shelf-stable canning, use a tested recipe with the correct acid, jar size, headspace, and processing time from a reputable canning authority.
What is the difference between salsa verde and chile verde?
Salsa verde is a green salsa or sauce. Chile verde usually refers to a cooked dish, often pork or another meat simmered with green chiles and tomatillo-style sauce. They are related, but they are not the same thing.
Once you make salsa verde this way, you will start noticing how many meals need it. Keep it thick for chips and tacos, loosen it for enchiladas or chilaquiles, or blend in avocado when you want something softer and creamy. After a few batches, you will know your house style: raw and sharp, boiled and smooth, roasted and round, or charred and smoky. The best version is the one your table keeps reaching for first.
After a few batches, salsa verde becomes a house sauce: keep it chunky for tacos, loosen it for saucy meals, or adjust the method until it fits your table.
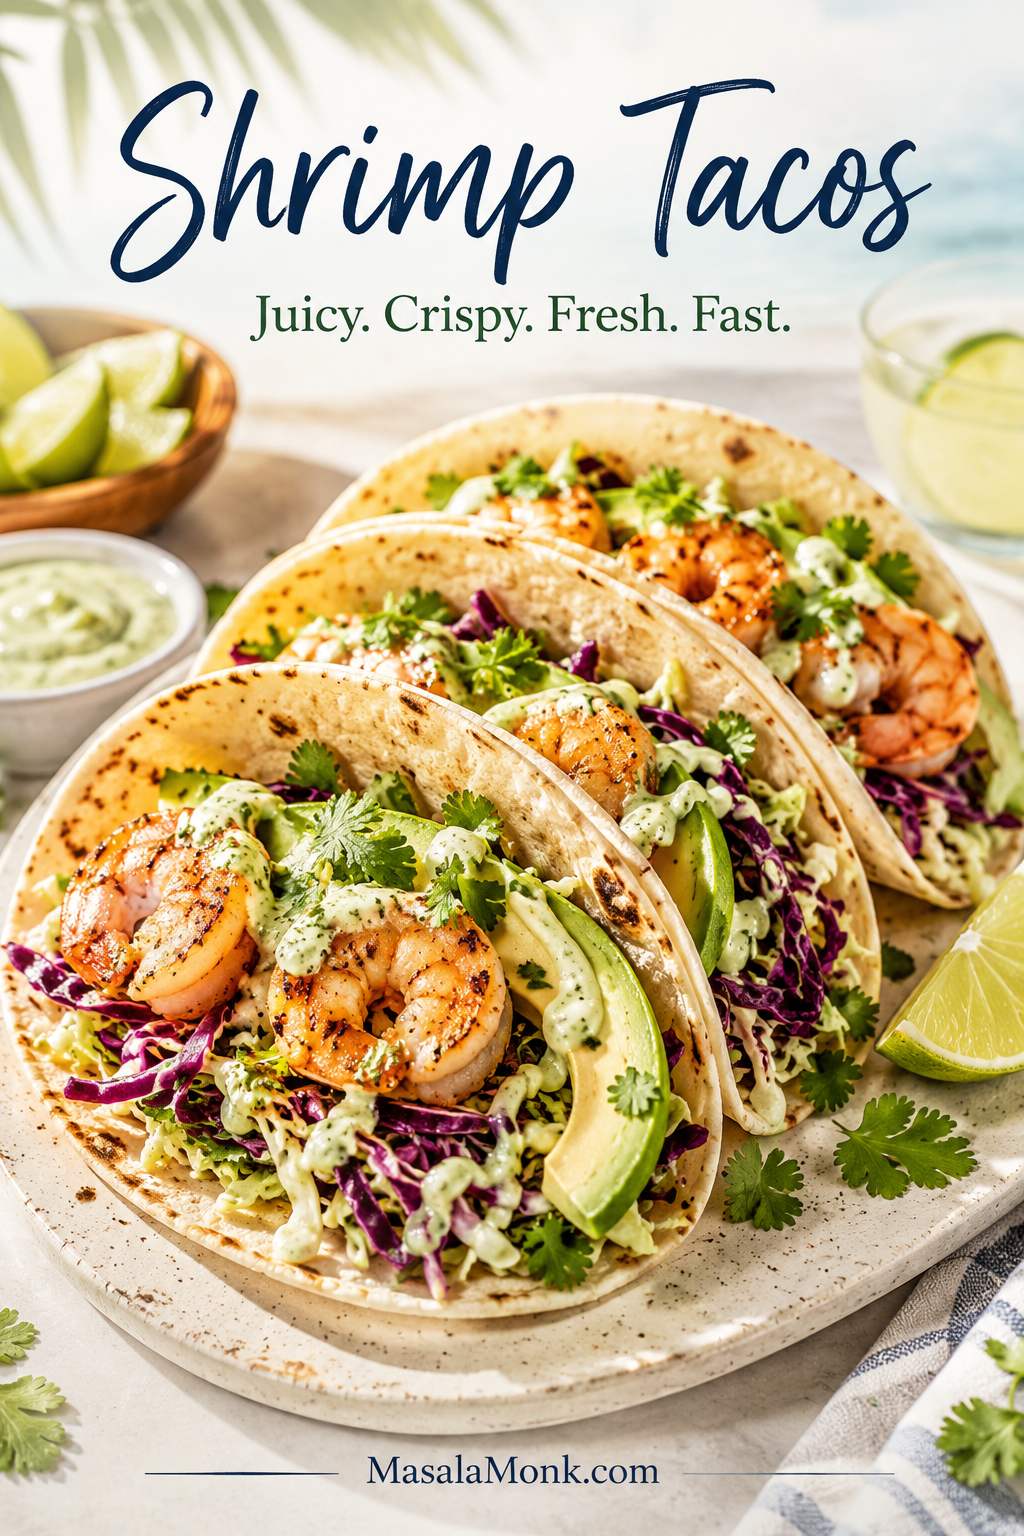
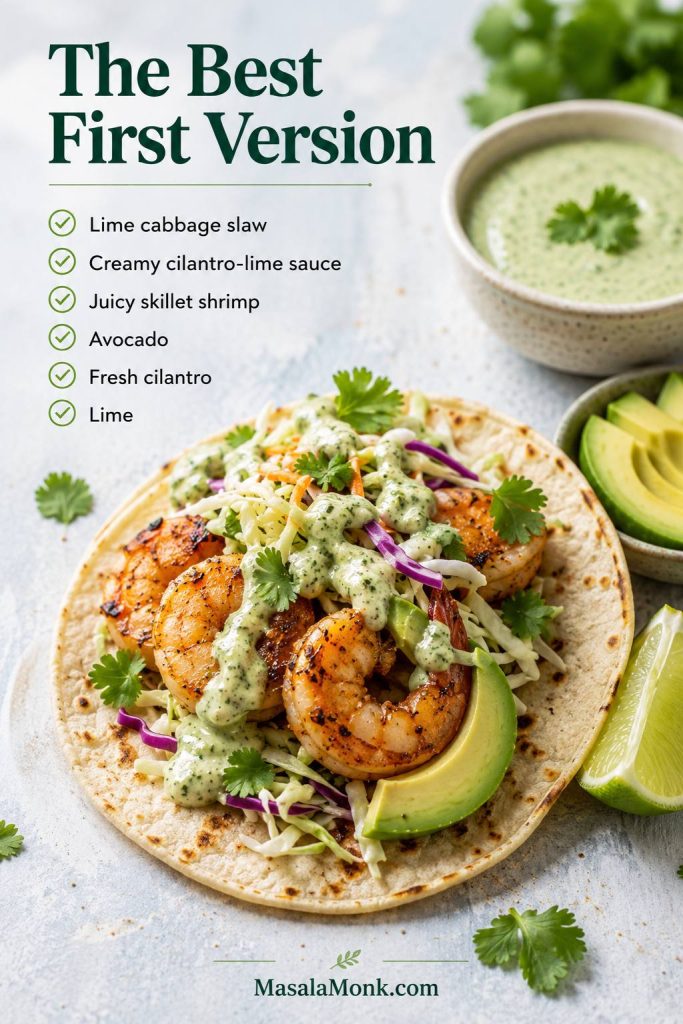
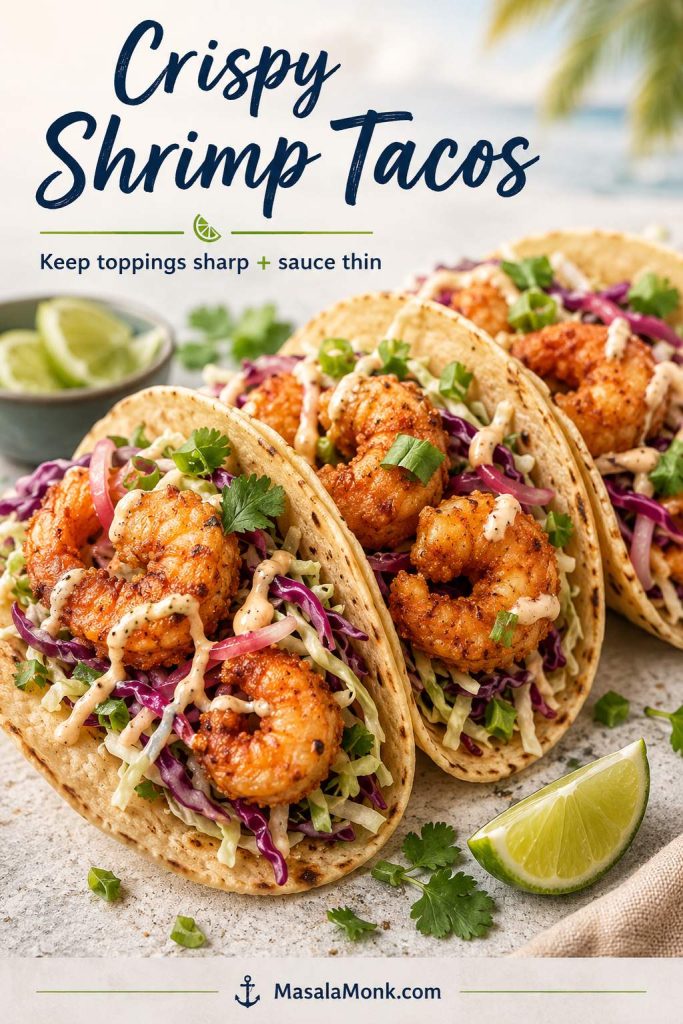
This shrimp tacos recipe is what you make when dinner needs to be quick, but you still want it to feel like taco night instead of just another weeknight meal. The shrimp hit the hot skillet with smoky seasoning, the cabbage stays cold and crunchy, the creamy cilantro-lime sauce gets drizzled over everything, and that last squeeze of lime makes the whole taco taste awake.
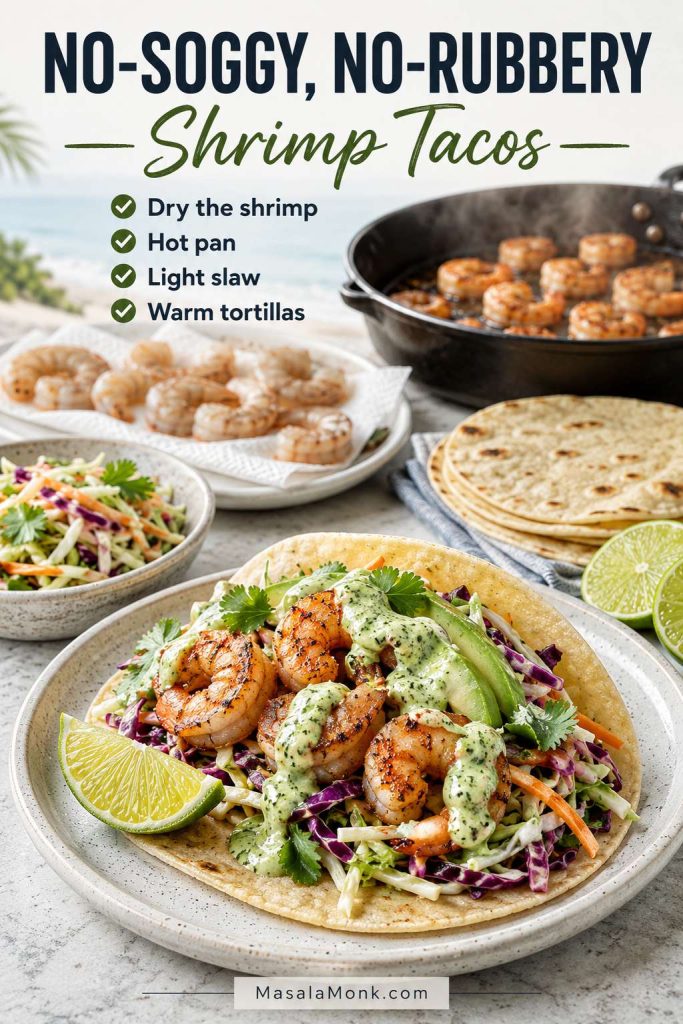
Think of this as the no-soggy, no-rubbery shrimp tacos recipe: smoky skillet shrimp, cold lime slaw, drizzleable sauce, and tortillas warm enough to fold around everything. Shrimp tacos go wrong quickly because every part is delicate, so this version keeps the shrimp dry, the pan hot, the slaw crisp, and the lime at the end where it belongs.
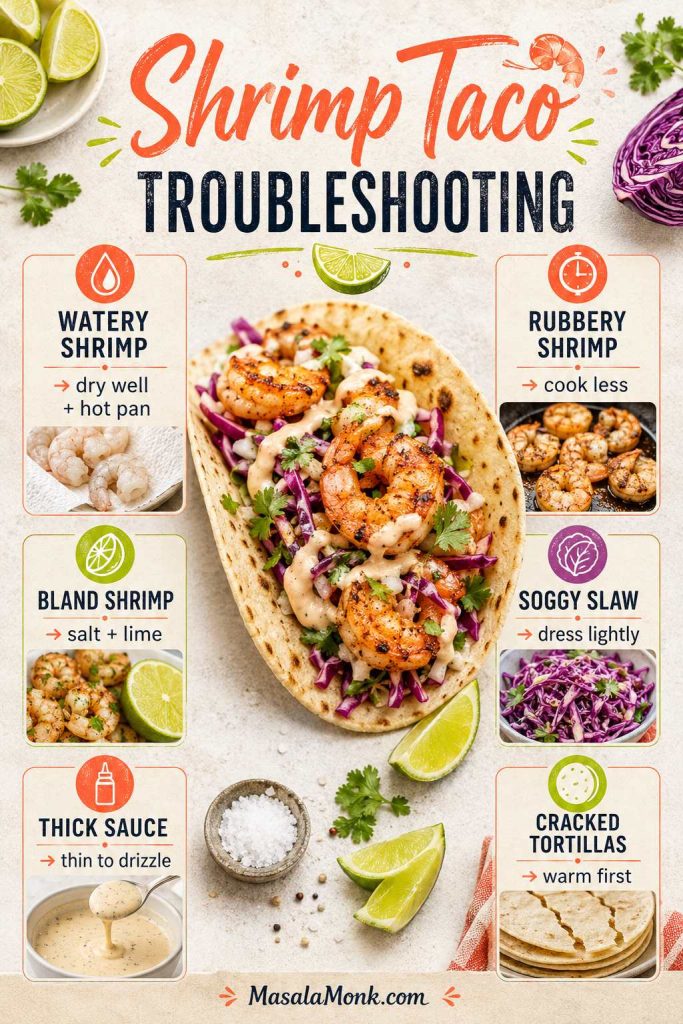
Shrimp tacos usually fail from moisture, timing, or texture; therefore, this version starts with dry shrimp, warm tortillas, lightly dressed slaw, and lime added at the end.
The whole thing comes together in about 25 minutes, but it does not taste rushed. You get juicy skillet shrimp, crisp cabbage slaw, warm tortillas, avocado, cilantro, and a sauce that can work as both a drizzle and a quick creamy slaw binder. Use fresh or frozen shrimp, corn or flour tortillas, and keep the heat mild or spicy depending on your table.
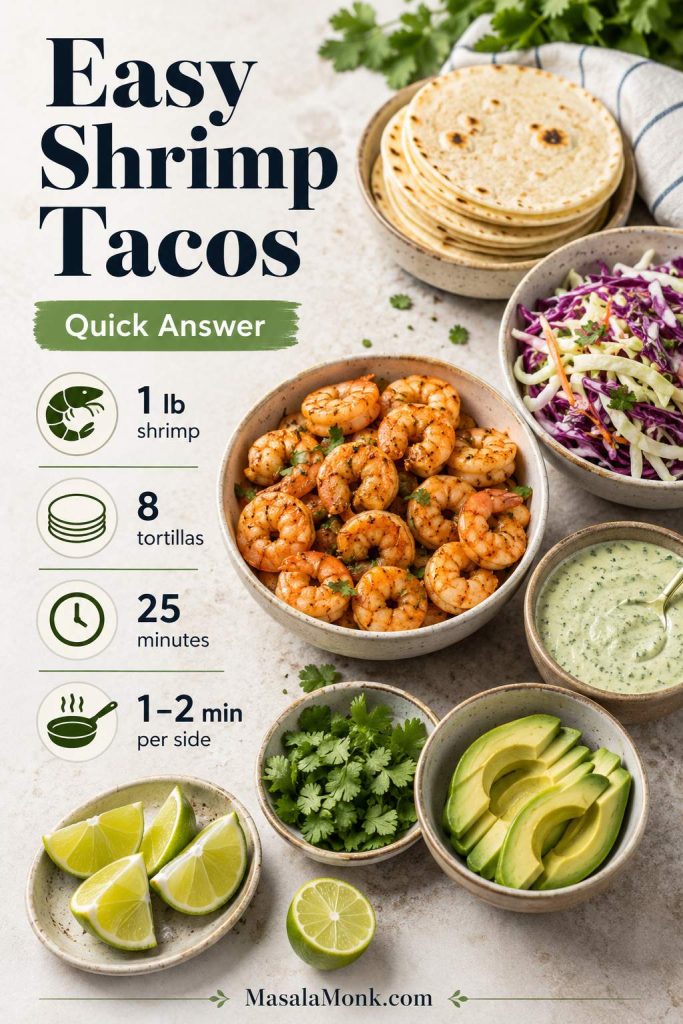
For this easy shrimp tacos recipe, use 1 lb / 454 g peeled and deveined shrimp, pat the shrimp very dry, season with chili powder, cumin, smoked paprika, garlic, onion powder, salt, and pepper, then cook in a hot skillet for 1–2 minutes per side. Serve the shrimp in warm tortillas with cabbage slaw, creamy cilantro-lime sauce, avocado, cilantro, and fresh lime.
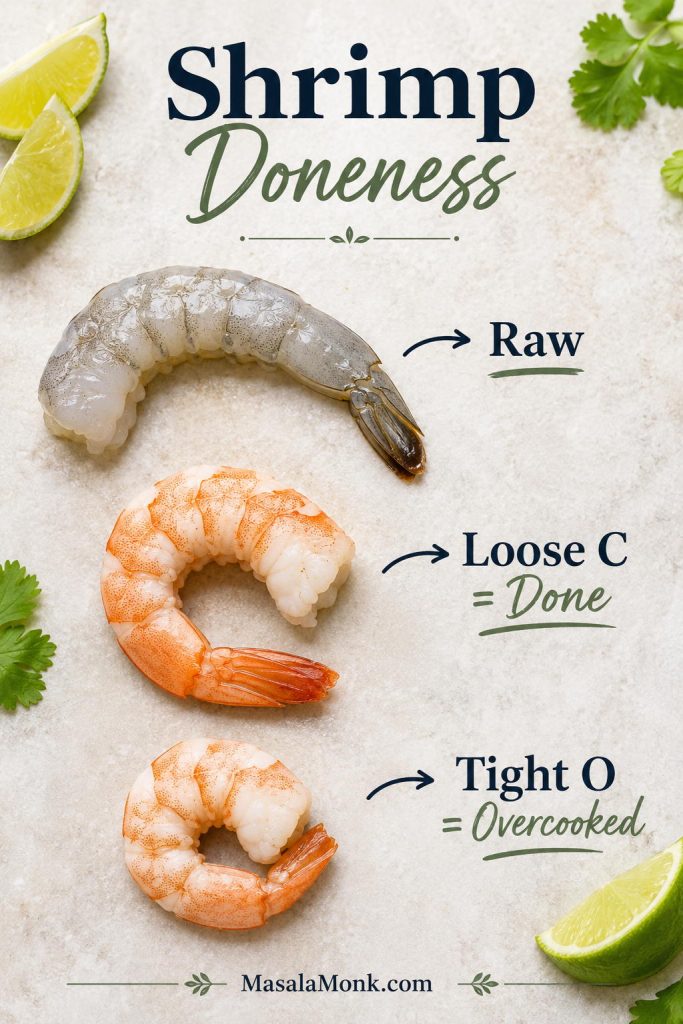
The most important details are simple: avoid excess moisture, do not crowd the pan, and stop cooking once the shrimp are opaque and curled into a loose C shape. When shrimp tighten into a firm O shape, they are usually overcooked.
If shrimp tacos have ever turned out watery, bland, or a little rubbery, this version fixes the usual problems before they happen. The shrimp are dried before they hit the pan, the lime goes in after cooking, the sauce is thinned until it drizzles, and the slaw is kept crisp instead of drowned.
If you already make tacos often, this recipe will feel familiar. However, shrimp move fast in the pan, so small details matter. A hot skillet, a light slaw, a sauce that actually drizzles, and tortillas that bend without cracking can make the whole meal feel livelier and more complete.
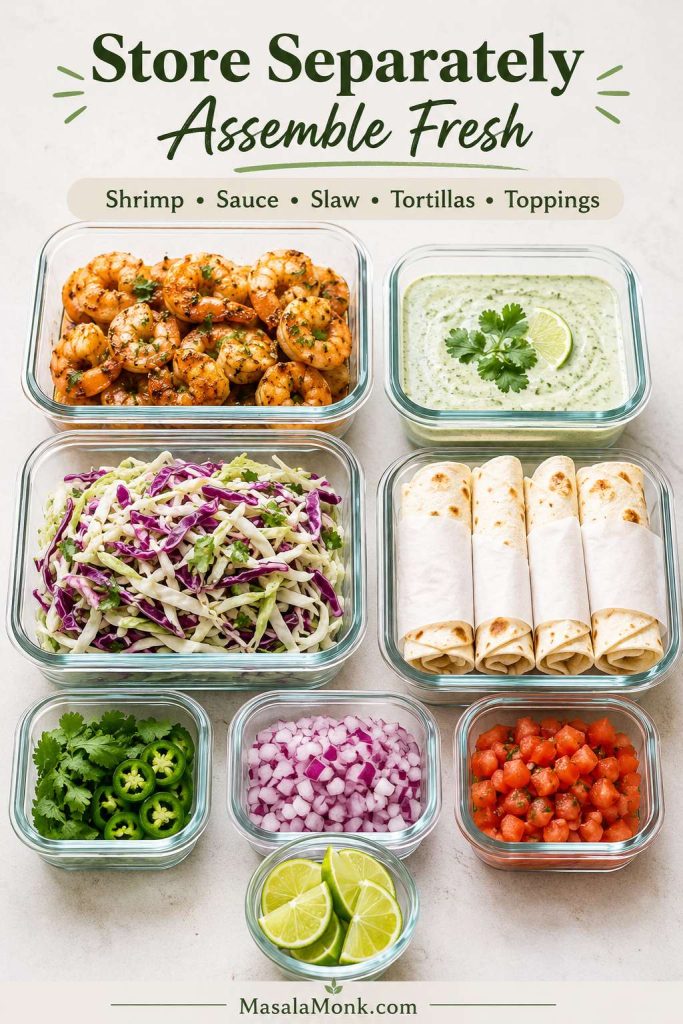
Once the shrimp, slaw, sauce, tortillas, and toppings are ready, dinner moves quickly; prep the cool parts first so the shrimp can be served hot.
Before you start, keep the plan simple: one pound of shrimp, eight small tortillas, a quick slaw, a creamy lime sauce, and a hot pan. Once the sauce and slaw are ready, the shrimp cook fast.
Shrimp
Medium or large peeled, deveined shrimp, tails removed
Creamy cilantro-lime sauce, with chipotle and avocado options
Slaw
Cabbage lime slaw, lightly dressed
Total time
About 25 minutes
Biggest mistakes
Watery shrimp, cold tortillas, overcooked shrimp, or too much sauce too early
Make this simple version first; then, once the shrimp timing feels right, adjust the next batch with mango, chipotle, crispier shrimp, or extra lime.
Why This Shrimp Tacos Recipe Works
This recipe works because it protects the two things shrimp tacos lose fastest: texture and brightness. The shrimp stay dry before cooking, the pan stays hot, the cabbage stays lightly dressed, and the lime goes in at the end instead of sitting on the shrimp too long.
Moisture control matters: shrimp brown and taste more seasoned when excess surface water is removed first.
Lime goes in at the end: finishing with lime keeps the shrimp zesty without turning the texture mushy.
Sauce does double duty: use it as a drizzle and as a creamy slaw binder.
Slaw protects the taco: putting slaw under the shrimp catches juices and keeps the tortilla from softening too quickly.
Let the shrimp lead: the toppings should support the smoky shrimp, not hide it under a heavy pile of sauce, cheese, and salsa.
Simple rule: Cook the shrimp last, dress the slaw lightly, and finish with lime after the heat. Those three choices prevent most shrimp taco problems.
The best bite is a little messy in the right way: warm tortilla, smoky shrimp, cold cabbage, sauce running into the slaw, and lime cutting through before the next bite.
The goal is not to load every tortilla with everything in the kitchen. Instead, the shrimp should still be the reason you want the next taco; the slaw, sauce, avocado, and lime simply make the bite cooler, sharper, and more satisfying.
Ingredients for Shrimp Tacos
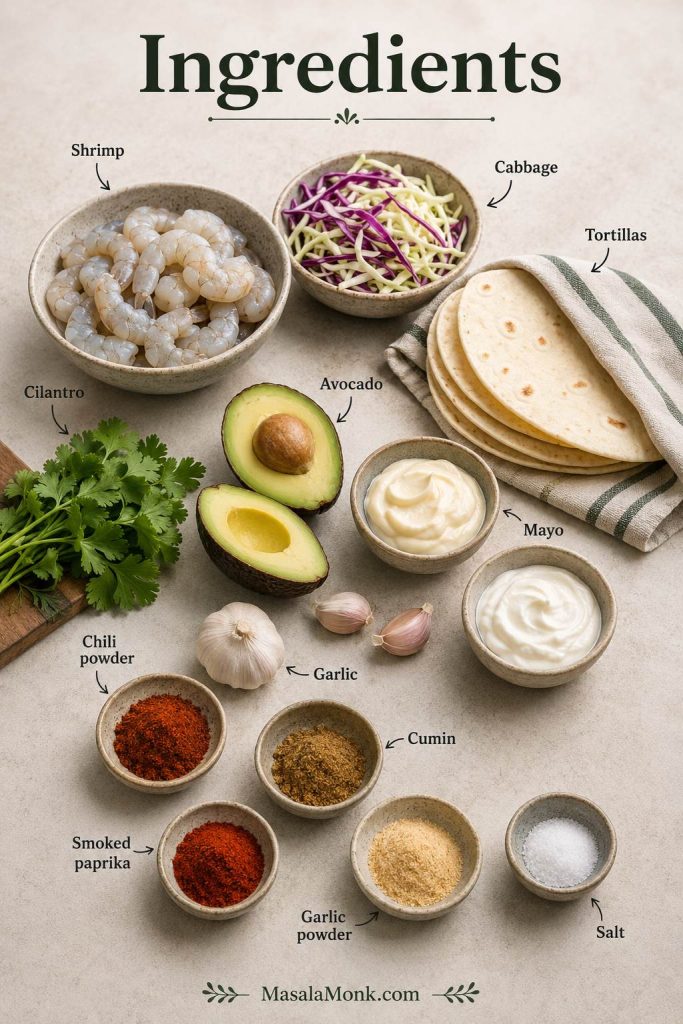
The ingredient list for this shrimp tacos recipe is simple: raw shrimp, quick seasoning, cabbage slaw, creamy cilantro-lime sauce, warm tortillas, and a few fresh toppings. The details below show where each ingredient matters most.
These shrimp taco ingredients are simple on purpose: raw shrimp for texture, cabbage for crunch, sauce for creaminess, tortillas for structure, and lime for lift.
Ingredient Amounts at a Glance
Part
Amount
What it does
Shrimp
1 lb / 454 g
Makes 8 small tacos / 4 servings
Shredded cabbage
3 cups / about 210 g
Adds crunch and freshness
Yogurt or sour cream
½ cup / 120 g
Creates the creamy sauce base
Mayonnaise
2 tbsp / 30 g
Rounds out the sauce
Lime juice
About 3½ tbsp / 52 ml total, plus lime wedges for serving
Brightens the shrimp, sauce, and slaw
Tortillas
8 small tortillas
Use corn for flavor or flour for softness
If you are still choosing shrimp, the shrimp size guide will help you decide between medium, large, and jumbo shrimp before you start cooking.
Shrimp
Use raw shrimp, not pre-cooked shrimp, for the juiciest result. Peeled and deveined shrimp save time, and tails-off shrimp are much easier to eat in tacos. Frozen shrimp work well too, as long as they are thawed and dried before seasoning.
Shrimp: 1 lb / 454 g raw shrimp, peeled, deveined, tails removed.
Oil: olive oil or avocado oil helps the spices coat the shrimp and prevents sticking.
Seasoning: chili powder, cumin, smoked paprika, garlic powder, onion powder, salt, pepper, and optional cayenne or chipotle.
Lime: fresh lime juice goes on after cooking for brightness without softening the shrimp too much.
Creamy Cilantro-Lime Sauce
The sauce should be tangy, creamy, herby, and thin enough to drizzle. Greek yogurt or sour cream gives it brightness, mayonnaise rounds out the sharpness, lime lifts it up, and cilantro makes it taste fresh. Use 2 tablespoons cilantro for a mild, creamy lime sauce, or 4 tablespoons if you want the cilantro-lime flavor to lead. Add hot sauce, chipotle, or sriracha if you want a spicier shrimp taco sauce.
If cilantro is not your thing, make it a creamy lime sauce instead. Use scallions, parsley, extra lime zest, or a little chipotle for flavor without the cilantro.
Cabbage Slaw
Cabbage slaw keeps the tacos from feeling soft and one-note. Use green cabbage, red cabbage, or a bagged slaw mix. Lime, cilantro, onion, and salt are enough for a crisp version, but a few spoonfuls of the sauce can turn it creamy.
Tortillas and Toppings
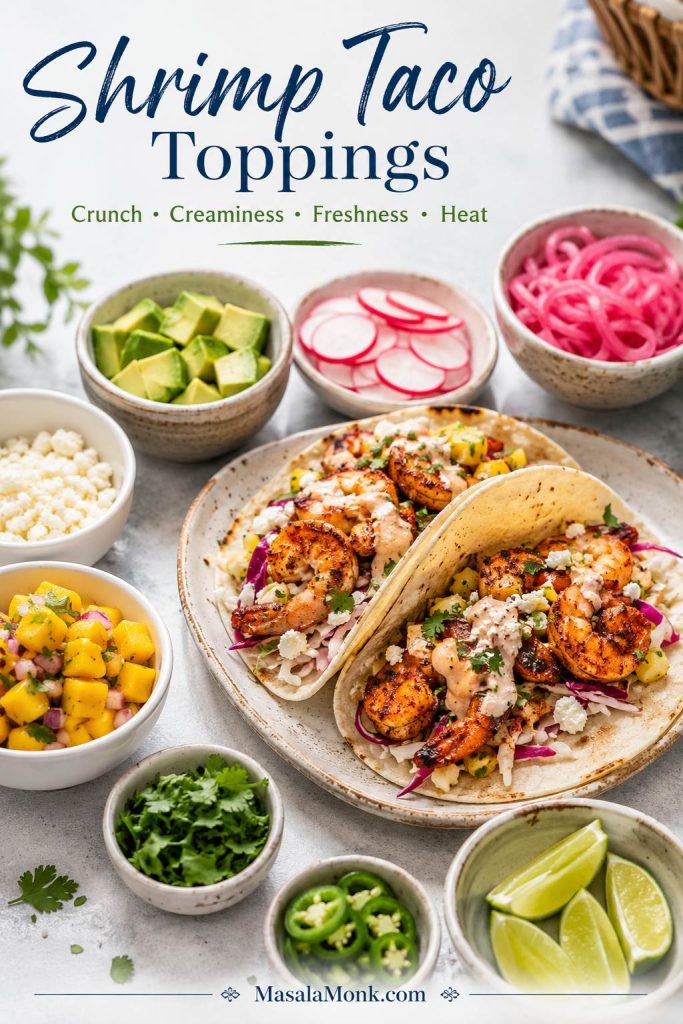
Use small corn or flour tortillas, then finish the tacos with avocado, radishes, pickled onions, cilantro, cotija or queso fresco, and lime wedges. Keep the toppings light enough that the shrimp still feels like the main event.
Equipment You’ll Need
You do not need special equipment for these tacos, although a few simple tools make the process easier and cleaner.
Large skillet: stainless steel, cast iron, or nonstick all work.
Mixing bowls: one for the shrimp, one for the slaw, and one for the sauce.
Paper towels: useful for drying thawed shrimp before seasoning.
Tongs or spatula: helpful for turning shrimp quickly.
Small whisk or spoon: for making the sauce smooth.
Knife and cutting board: for cabbage, cilantro, onion, avocado, and lime.
Optional blender or food processor: use this if you want a smoother cilantro-lime sauce.
How to Make Shrimp Tacos
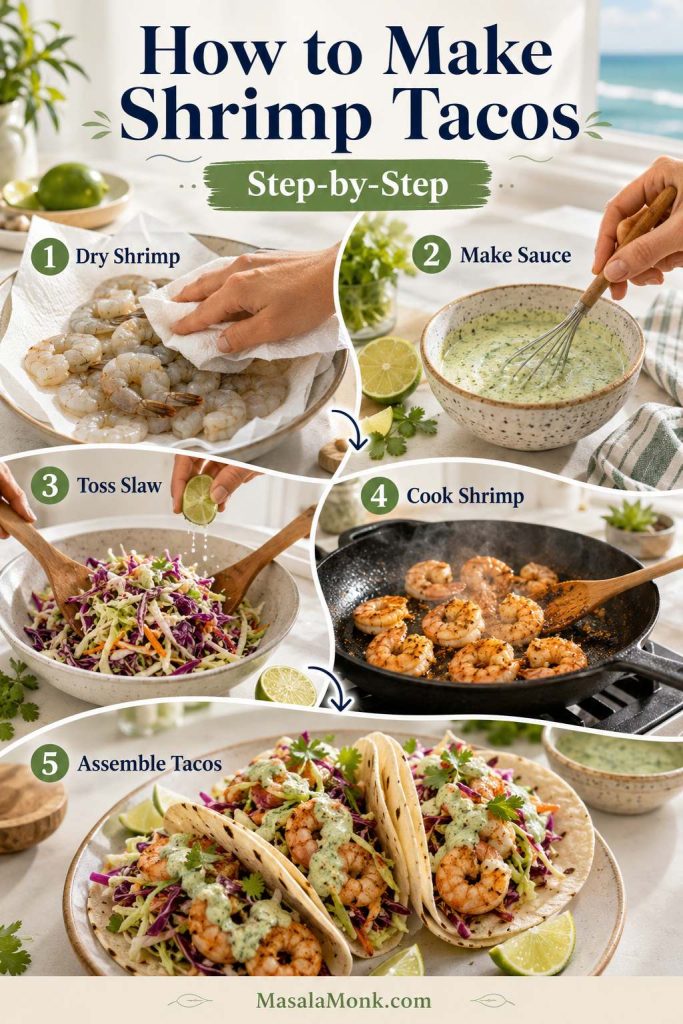
The recipe moves quickly once the shrimp hit the pan, so make the sauce, toss the slaw, slice the avocado, cut the lime wedges, and warm the tortillas first. Cook the shrimp last, then assemble while they are still hot.
The smartest order is sauce, slaw, tortillas, shrimp, then assembly; that way the shrimp land in the taco while still hot and juicy.
1. Thaw and Dry the Shrimp
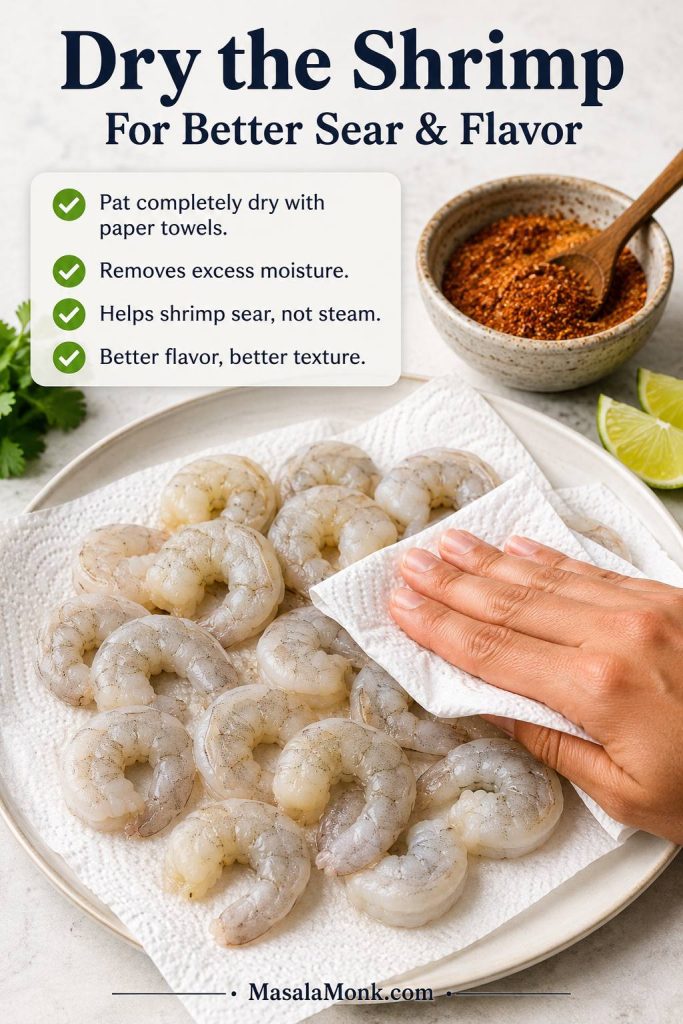
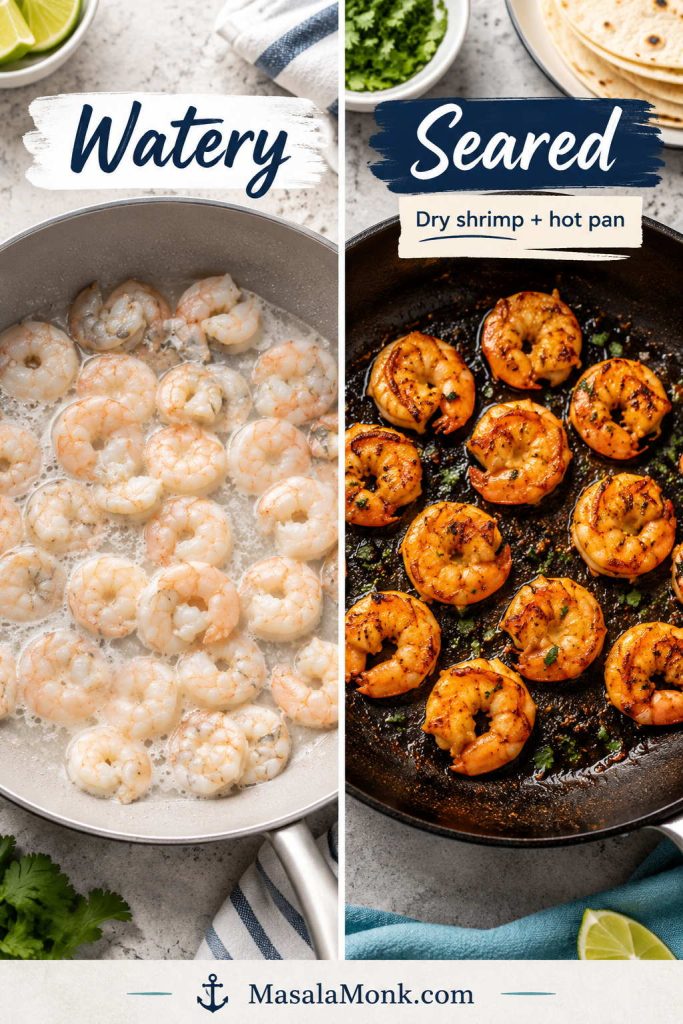
If your shrimp are frozen, thaw them fully before cooking. Drain off any liquid, then pat the shrimp dry with paper towels. This small step helps the seasoning cling and keeps the shrimp from releasing too much water in the skillet.
Patting shrimp dry is one of the easiest ways to avoid watery shrimp tacos, because the seasoning clings better and the skillet can sear instead of steam.
2. Make the Sauce
Stir together the yogurt or sour cream, mayonnaise, lime juice, lime zest, garlic, cilantro, cumin, salt, and optional hot sauce. Add water 1 teaspoon at a time until the sauce is creamy but easy to drizzle.
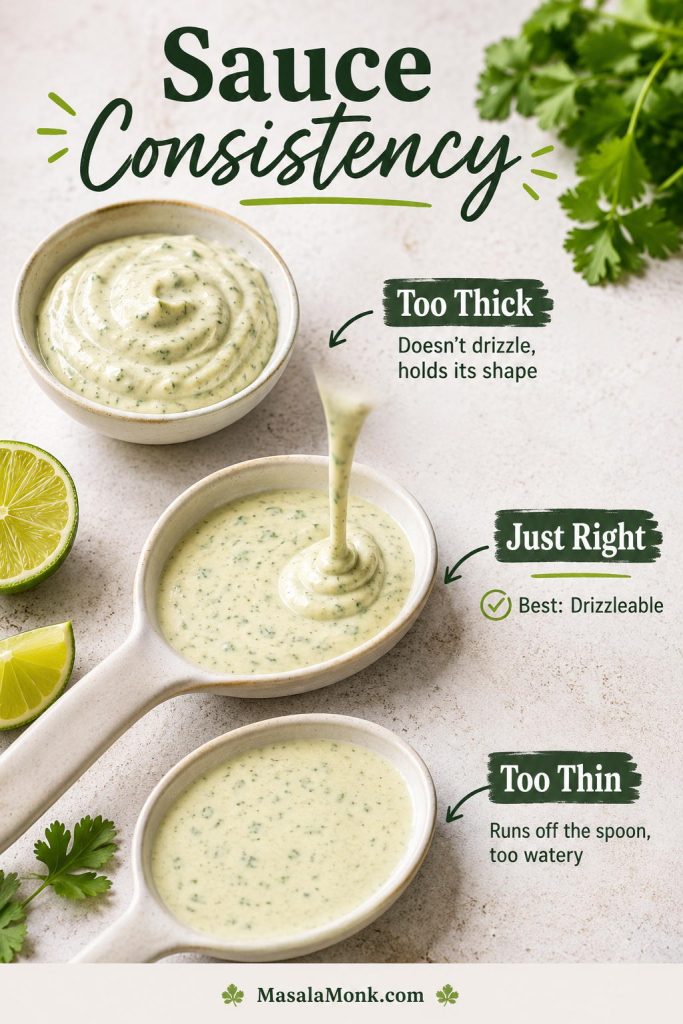
If your sauce feels too thick or too runny, use the sauce consistency guide before drizzling it over the tacos.
Before you drizzle the sauce, taste it like a dip. If it tastes flat, add salt first. When it feels heavy, add lime. For a sauce that tastes too sharp, add a spoon of mayo or yogurt. When it tastes creamy but quiet, add hot sauce, chipotle, or more cilantro. A good shrimp taco sauce should taste bright enough to cut through the shrimp, not just creamy. Ideally, it should make you want one more spoonful.
3. Toss the Slaw
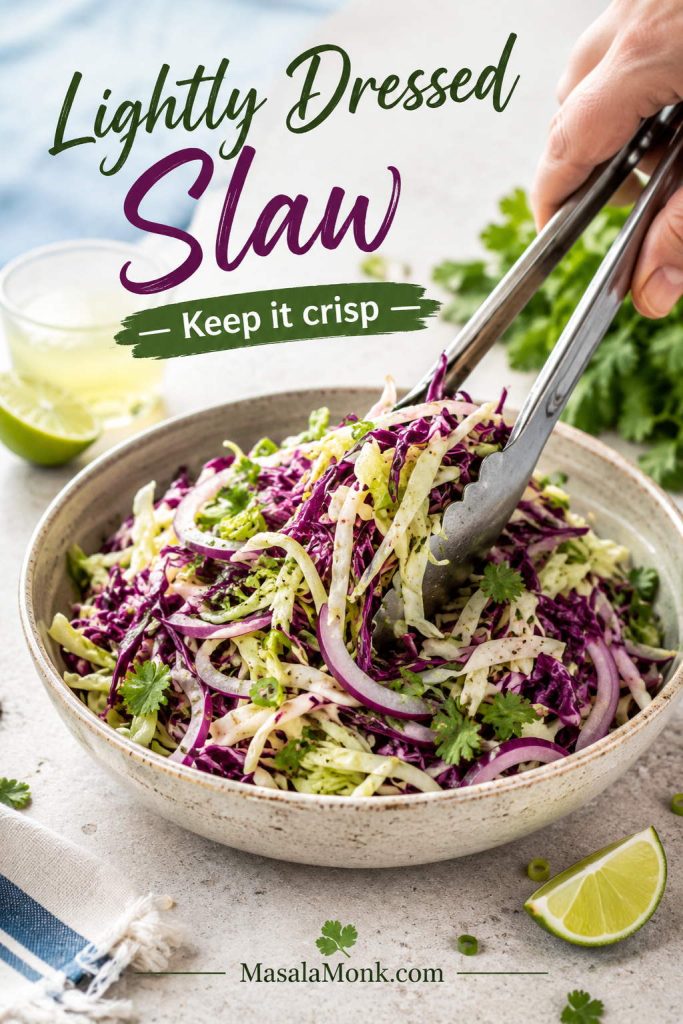
In a bowl, toss the cabbage with lime juice, cilantro, onion or scallions, jalapeño if using, salt, and a tiny bit of honey or sugar if you want to soften the sharpness. Add a few spoonfuls of sauce if you want creamy slaw, but keep it light.
4. Season the Shrimp
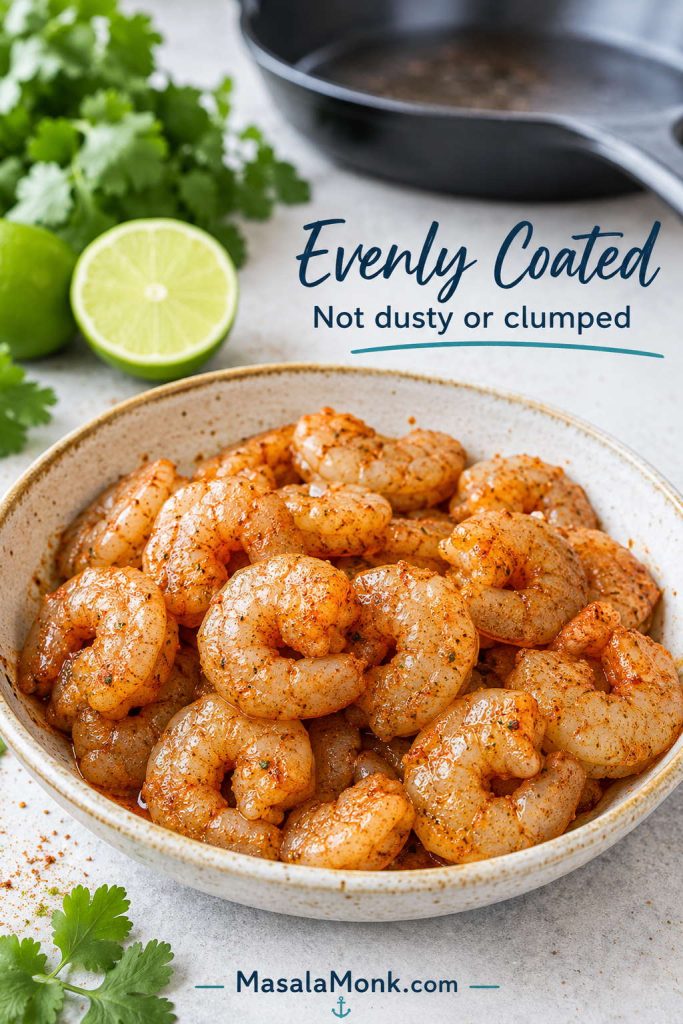
Toss the shrimp with oil, chili powder, smoked paprika, cumin, garlic powder, onion powder, salt, pepper, and optional cayenne or chipotle. The shrimp should look evenly coated, not dusty or clumped with spice.
The shrimp are ready for the pan when the spices cling with a light sheen, not when dry seasoning sits in dusty patches.
5. Cook the Shrimp
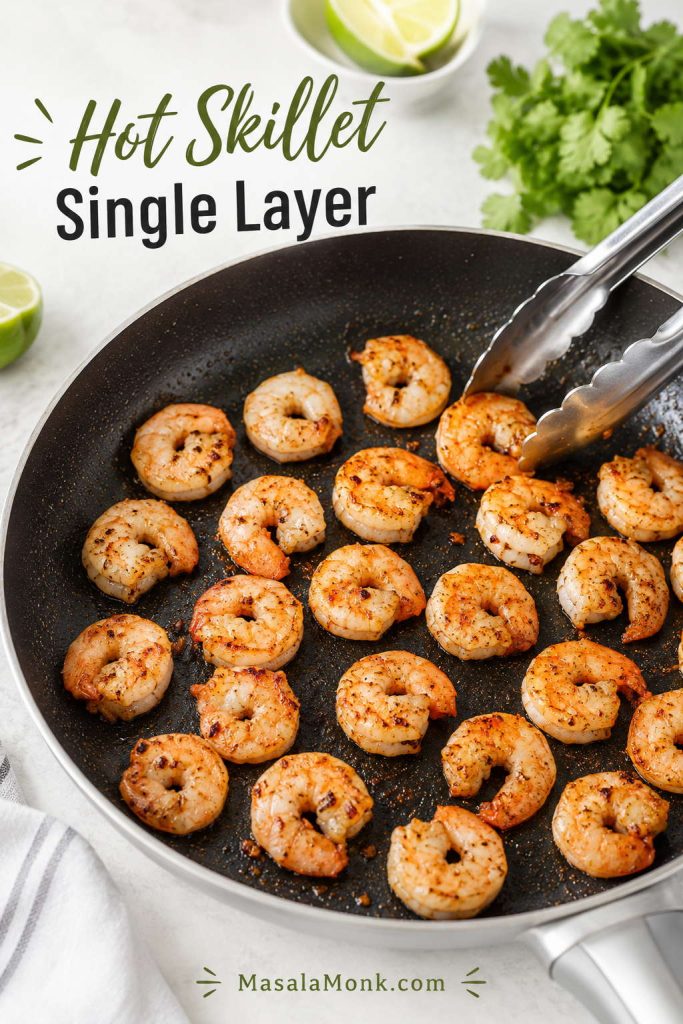
Heat a large skillet over medium-high heat. The pan is ready when the shrimp sizzle as soon as they touch it. Add the shrimp in a single layer and cook for 1–2 minutes per side, depending on size. Work in batches if needed. The shrimp are ready when they are pink, opaque, and curled into a loose C shape. Squeeze lime juice over the hot shrimp after cooking.
Cook shrimp in a single layer so they sear instead of steam; if the skillet looks crowded, work in two quick batches.
If the shrimp release a lot of liquid right away, the pan may be too cool or the shrimp may still be too wet. Let the pan heat properly and avoid crowding the next batch.
Watery shrimp usually come from excess moisture, low heat, or crowding; instead, dry them well and give them space in a hot pan.
6. Warm the Tortillas
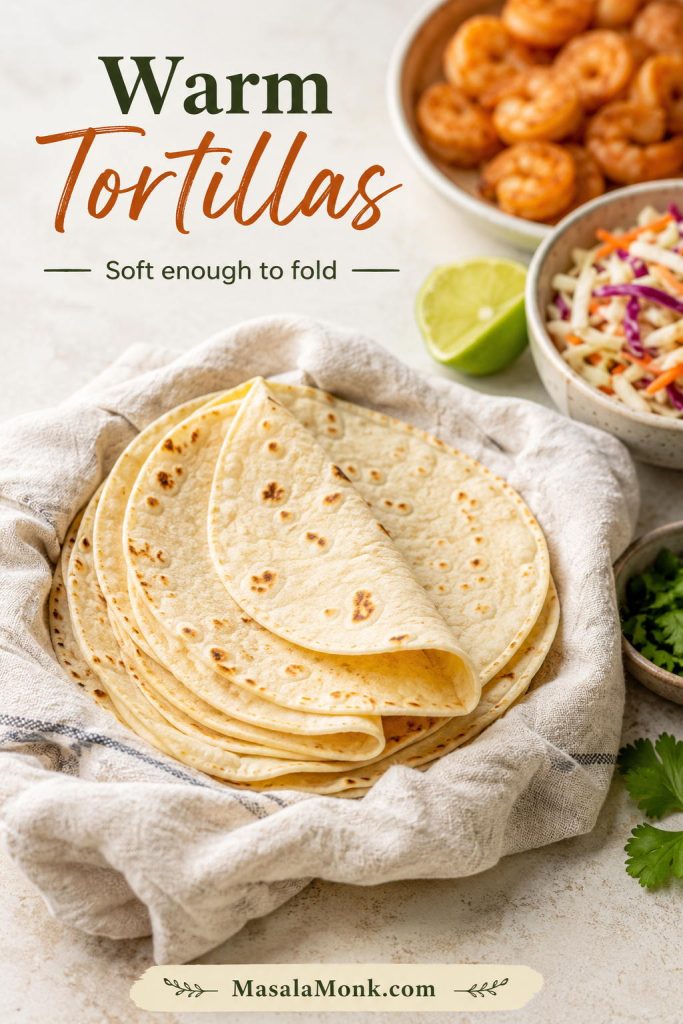
Warm tortillas in a dry skillet, over a gas flame, in foil in a low oven, or wrapped in a damp towel in the microwave. Keep them covered so they stay soft and flexible. If your corn tortillas are fragile, double-stack them or warm them a little longer before filling.
Warm tortillas before filling so they bend without cracking and taste like part of the taco, not just a wrapper around it.
If you are deciding between tortilla styles, jump to corn vs flour tortillas before assembling the batch.
7. Assemble the Tacos
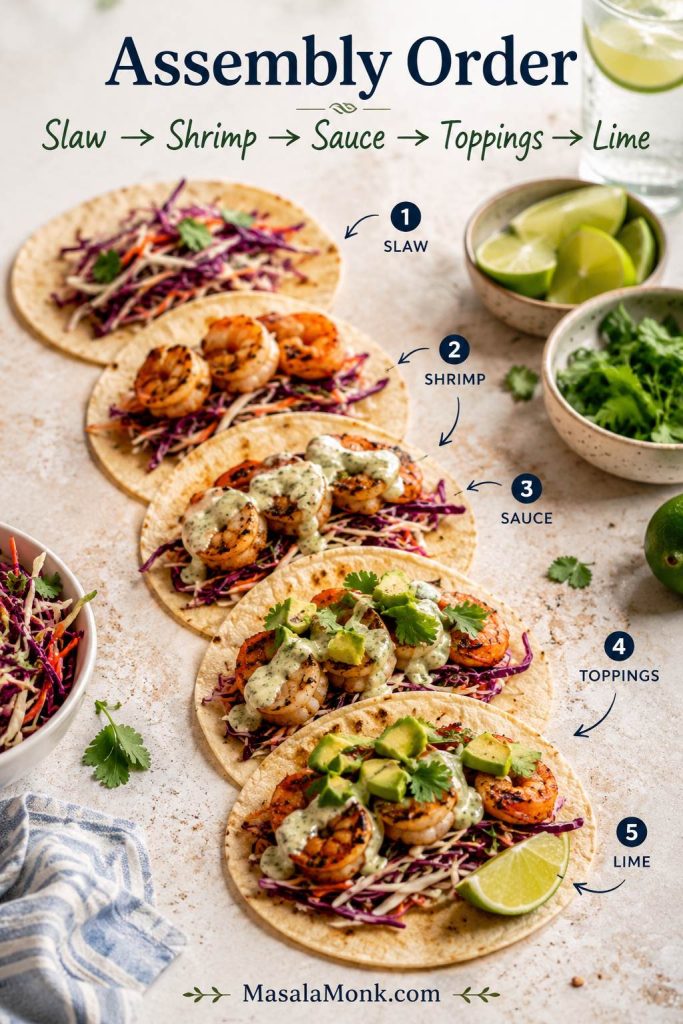
For clean, balanced tacos, layer slaw first, shrimp second, sauce third, toppings fourth, and lime at the end. Slaw underneath the shrimp helps catch the juices and keeps the tortilla from getting too wet too quickly.
Layer slaw first, shrimp second, sauce third, toppings fourth, and lime last so each taco stays structured, juicy, and bright.
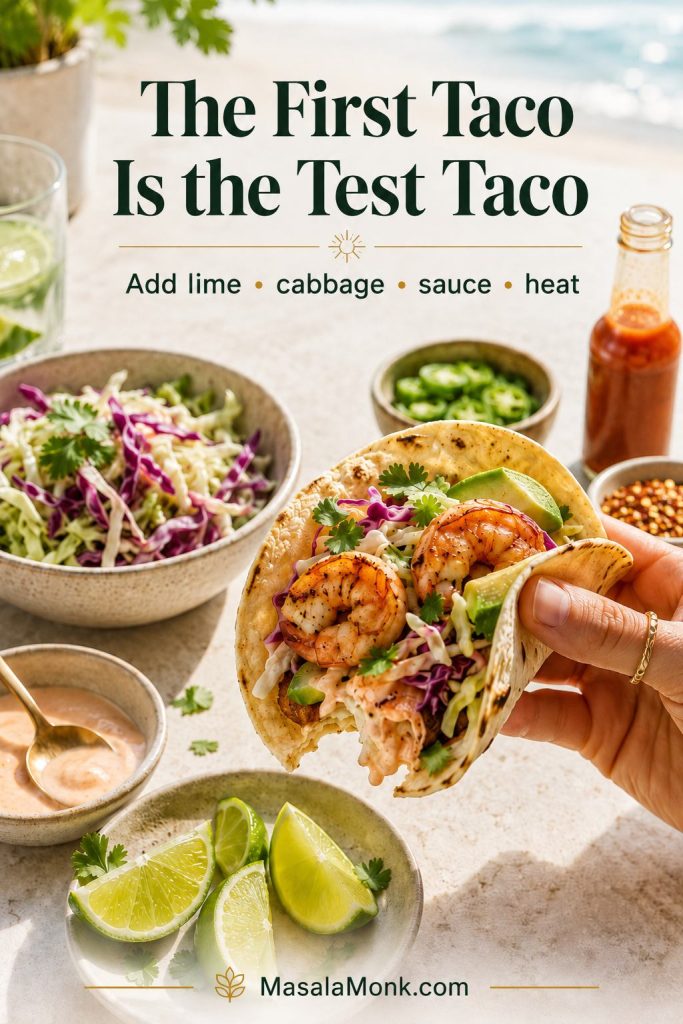
Before serving the full batch, taste one taco or one bite of shrimp with slaw and sauce. If it tastes dull, add lime and salt. When it feels heavy, bring in more cabbage. For a bite that tastes too sharp, add avocado or a little more sauce.
The first taco is the test taco. Take one bite before you build the whole batch, then adjust like you would at the table: more lime if it tastes flat, more cabbage if it feels heavy, more sauce if the shrimp need softness, or more heat if the taco tastes too polite.
The first taco is the test taco: one bite tells you whether the batch needs more lime, more crunch, more sauce, salt, or heat.
How Long to Cook Shrimp for Tacos
Shrimp tacos are forgiving in flavor, but not in timing. Because shrimp cook fast, a minute too long in the pan can take them from juicy to rubbery. In a hot skillet, most medium or large shrimp need only 1–2 minutes per side.
Use the Loose C Doneness Cue
The shrimp are done when they turn pink, opaque, and curl into a loose C shape. If they curl into a tight O shape and feel firm or rubbery, they are probably overcooked. Official seafood guidance uses 145°F / 63°C as the food-safety benchmark, but shrimp are often easier to judge visually because they are small and fast-cooking. The FDA’s seafood guidance describes cooked shrimp as firm, pearly, and opaque.
The loose C shape is the easiest shrimp doneness cue: once shrimp curl into a tight O, they are usually moving from juicy to rubbery.
Shrimp look
What it means
Gray and translucent
Raw
Pink, pearly, opaque, loose C shape
Done
Tight O shape, firm, rubbery
Overcooked
If you are nervous about timing, pull the shrimp from the pan as soon as the thickest part turns opaque. The residual heat will finish the last few seconds of cooking while you warm or assemble the tortillas.
Optional extra-juicy shrimp trick: For a slightly snappier, more restaurant-style texture, toss 1 lb shrimp with ½ tsp kosher salt and 1/16 tsp baking soda for 15 minutes before seasoning. If you do this, reduce the salt in the main seasoning so the tacos do not taste too salty.
Skillet, Air Fryer, or Grill?
The skillet gives you the most control, which is why it is the default method here. However, the same seasoned shrimp can also go into an air fryer or onto the grill.
Method
When to use it
Timing
Skillet
Everyday tacos with the most control
1–2 minutes per side over medium-high heat
Air fryer
Hands-off cooking and easy cleanup
About 5–6 minutes at 360°F / 182°C, shaking halfway
Grill
Smokier summer shrimp tacos
About 1–2 minutes per side over medium-high heat
For the air fryer or grill, keep the shrimp in a single layer and check early. Shrimp size varies, so the visual cue matters more than the clock.
Sauce and Slaw for Shrimp Tacos
In this shrimp tacos recipe, sauce and slaw are what make the tacos feel finished. The sauce should not sit on top like plain sour cream; it should loosen enough to run into the cabbage and season the whole bite.
Creamy Cilantro-Lime Shrimp Taco Sauce
For the easiest sauce, stir together Greek yogurt or sour cream, a little mayonnaise, lime juice, garlic, cilantro, cumin, salt, and a splash of hot sauce if you want heat. The yogurt or sour cream keeps it tangy, while the mayonnaise rounds it out so the sauce tastes creamy instead of sharp.
If you like a smoother sauce, blend it. If you like a more casual taco-night sauce, stir it by hand and let the chopped cilantro stay visible. Either way, thin it until it drizzles easily from a spoon.
This creamy cilantro-lime sauce should taste bright before it reaches the taco, because it has to season the shrimp, cabbage, and tortilla in one drizzle.
Check the Sauce Consistency Before You Drizzle
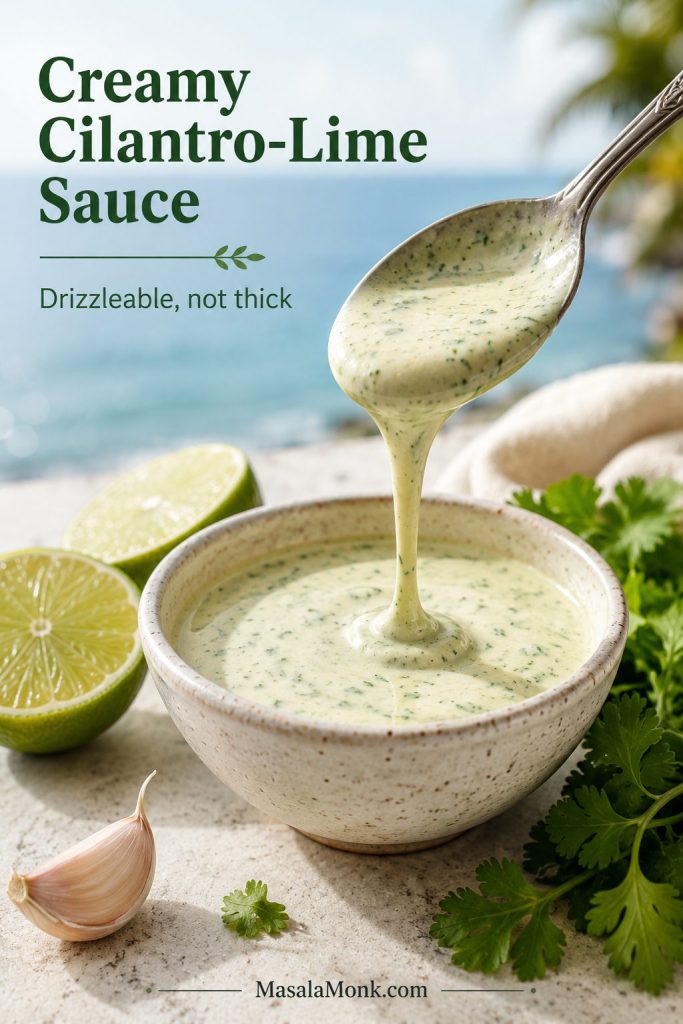
The sauce should be loose enough to drizzle into the cabbage and shrimp, not sit on top like a heavy dollop. If it holds its shape, thin it slowly with lime juice or water.
If the sauce falls in a slow ribbon from the spoon, it is ready for tacos; if it sits in a lump, thin it one teaspoon at a time.
Shrimp Taco Sauce Options
Sauce
Use it when you want
How to make it
Creamy cilantro-lime sauce
A zesty, balanced taco
Yogurt or sour cream, mayo, lime, garlic, cilantro, cumin, salt
Extra-herby cilantro lime sauce
A fresher, greener finish
Add extra cilantro and blend until mostly smooth
Chipotle sauce
Smoky heat
Add chipotle in adobo or chipotle powder
Avocado crema
A richer, softer taco
Blend avocado with lime, yogurt or sour cream, salt, and water
Spicy mayo
Crispy or bang bang-style tacos
Mix mayo with lime and hot sauce or sriracha
For a fruitier heat, a small drizzle of mango habanero sauce works especially well with grilled shrimp tacos, mango shrimp tacos, or any version where you want sweetness and heat in the same bite.
Cabbage Slaw for Shrimp Tacos
Use shredded cabbage, lime juice, cilantro, salt, and thinly sliced onion or scallions. Keep the slaw lightly dressed so it stays crisp. For creamy slaw, toss in 2–3 tablespoons of the sauce right before serving.
Toss cabbage lightly and close to serving, because crisp slaw helps protect the tortilla while wet slaw makes shrimp tacos soften fast.
Do not drown the slaw early. Cabbage releases water as it sits, and too much dressing can make the tacos soggy. If you want to prep ahead, shred the cabbage and mix the sauce in advance, but combine them closer to serving.
Slaw Options for Shrimp Tacos
Slaw
Use it when you want
Tip
Lime cabbage slaw
A fresh, all-purpose taco
Use cabbage, lime, cilantro, onion, and salt
Creamy slaw
A richer, restaurant-style taco
Toss cabbage with 2–3 tbsp creamy sauce right before serving
Red cabbage slaw
More color and crunch
Slice thinly so it does not feel tough
Bagged slaw shortcut
A faster weeknight dinner
Skip heavy bottled dressing and use lime plus a little sauce
Mango slaw
A sweet-spicy version
Add diced mango and jalapeño close to serving
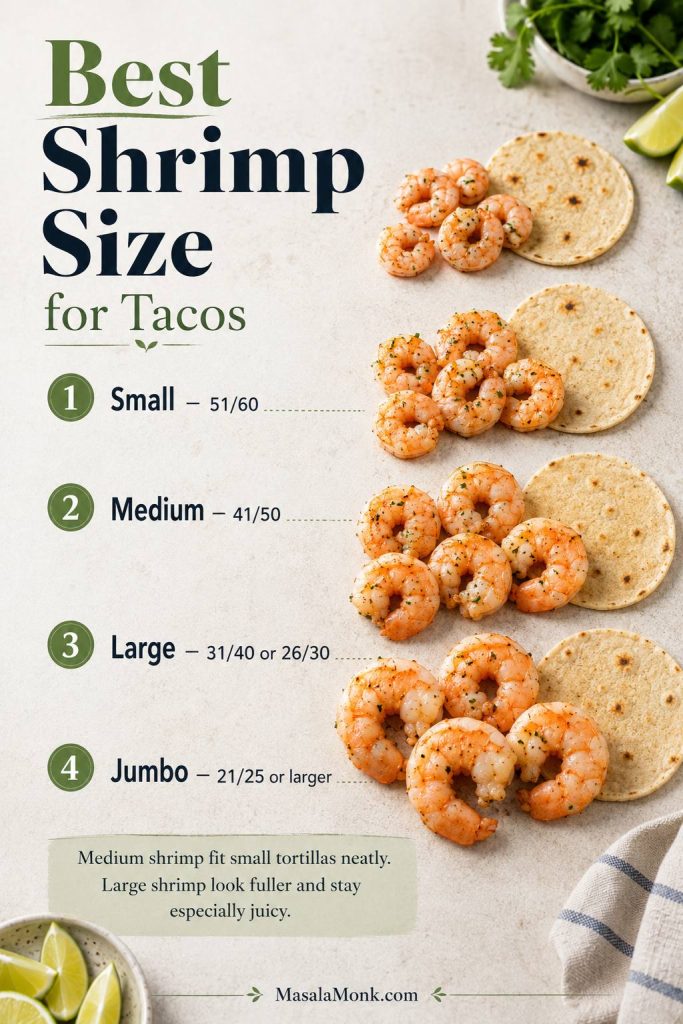
Choosing Shrimp for Tacos
Medium shrimp are easiest for neat tacos, while large shrimp look fuller and stay especially juicy. Avoid very small shrimp if you are nervous about overcooking, and chop jumbo shrimp after cooking if they feel too large for the tortilla.
Medium shrimp fit small tortillas neatly, while large shrimp give a fuller bite and stay a little more forgiving in a hot pan.
Shrimp size
Typical count
How it works in tacos
Small
51/60
Budget-friendly, but easy to overcook
Medium
41/50
Great fit for small tortillas
Large
31/40 or 26/30
Juicier, fuller-looking tacos
Jumbo
21/25 or larger
Use 2–3 per taco or chop after cooking
If you are using frozen shrimp, thaw them in the refrigerator overnight or place the sealed bag in cold water until thawed. After thawing, drain well and press the shrimp dry with paper towels.
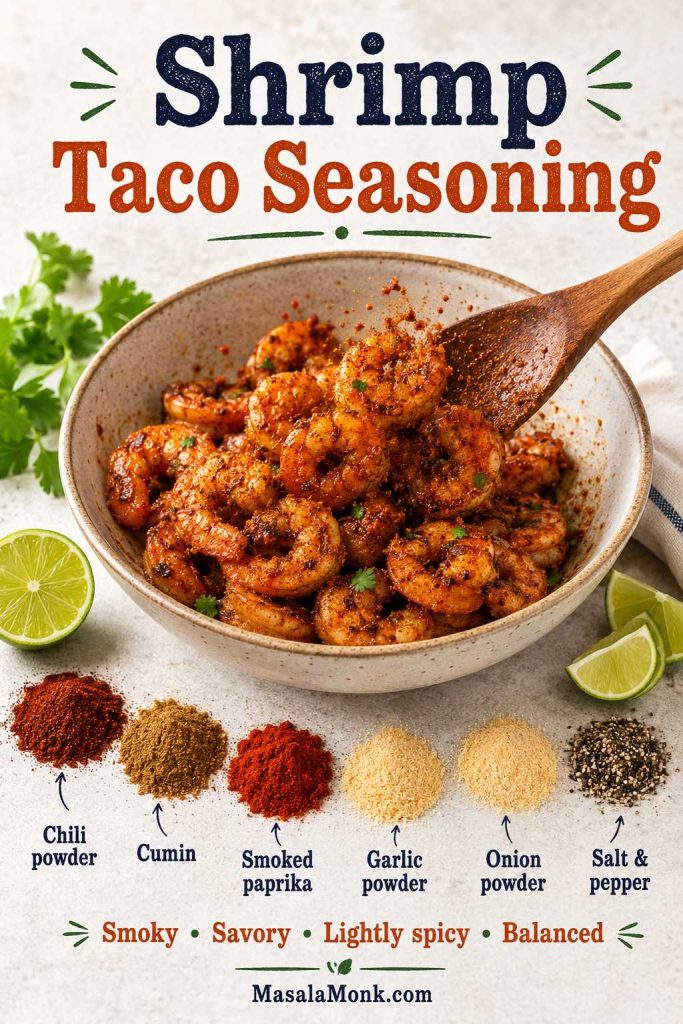
Shrimp Taco Seasoning
A good shrimp taco seasoning should be smoky, savory, lightly spicy, and salty enough to stand up to the slaw and sauce. Chili powder gives the base, cumin adds warmth, smoked paprika adds depth, and garlic and onion powder make the shrimp taste fuller.
Even seasoning matters because shrimp cook too quickly for bland spots to fix themselves later under sauce, slaw, and toppings.
Mild tacos: skip the cayenne and use sweet paprika instead of extra chili.
Smokier tacos: add chipotle powder or extra smoked paprika.
More heat: add cayenne, hot sauce, or sliced jalapeño at assembly.
Extra zest: finish the cooked shrimp with lime juice instead of marinating them too long.
Shrimp are delicate, so avoid soaking them in lime-heavy marinades for a long time. A short 10–15 minute rest with oil and dry spices is fine, but the cleanest texture comes from seasoning the shrimp first and squeezing lime over them after cooking. Also, do not skip the salt; under-seasoned shrimp are one of the fastest ways to make tacos taste flat.
Shrimp Taco Toppings That Balance Each Bite
Shrimp are soft and juicy, so the toppings should bring crunch, acidity, creaminess, heat, and freshness rather than simply piling on more ingredients.
Topping job
Good choices
Crunch
Cabbage slaw, radishes, pickled onions
Creaminess
Avocado, crema, sour cream, the cilantro-lime sauce
Freshness
Cilantro, lime, scallions, pico de gallo
Sweetness
Mango salsa, pineapple salsa, corn salsa
Saltiness
Cotija, queso fresco, feta
Heat
Jalapeño, chipotle sauce, hot sauce, chili crisp
Good shrimp taco toppings add contrast without hiding the shrimp; think crunch, creaminess, freshness, salt, sweetness, or heat, not everything at once.
For a clean first version, use cabbage slaw, the creamy sauce, avocado, cilantro, and lime. If you want a richer taco, add avocado or a spoonful of guacamole. To make the taco sharper, use pickled onions and radishes. Meanwhile, for a warmer-weather version, save the mango salsa idea for the variation below.
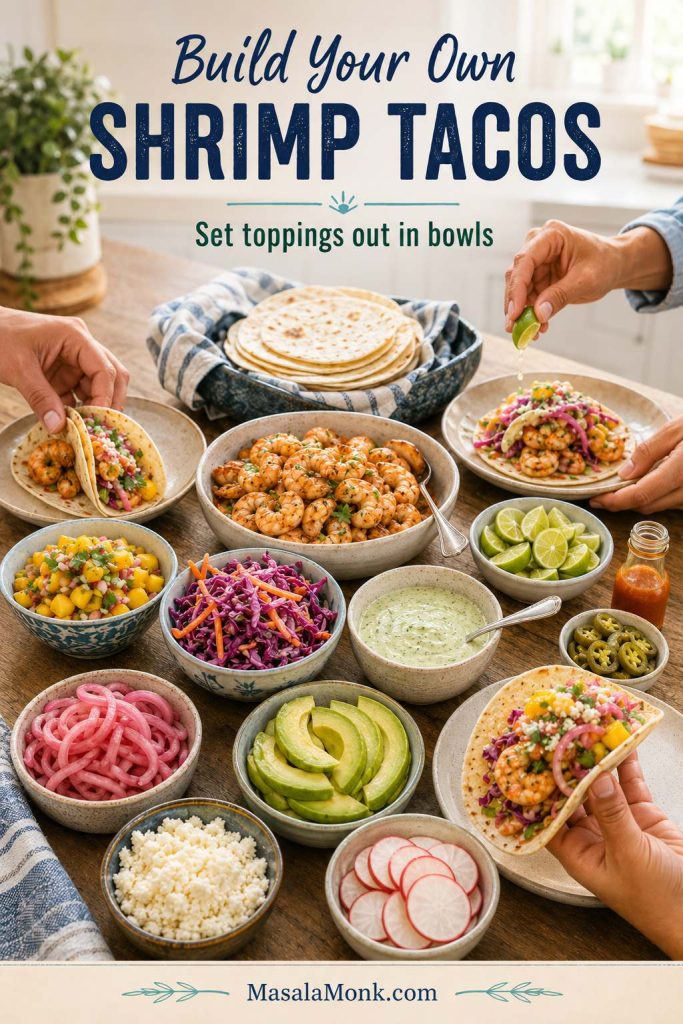
This is where shrimp tacos become personal: some tables want mango and avocado, some want chipotle and jalapeño, and some want nothing but extra cabbage, cotija, and lime. If you are serving a group, set out the toppings in small bowls and let people build their own version instead of trying to make every taco identical.
For a group, topping bowls beat prebuilt tacos because every person can choose extra lime, avocado, mango, pickled onions, or heat.
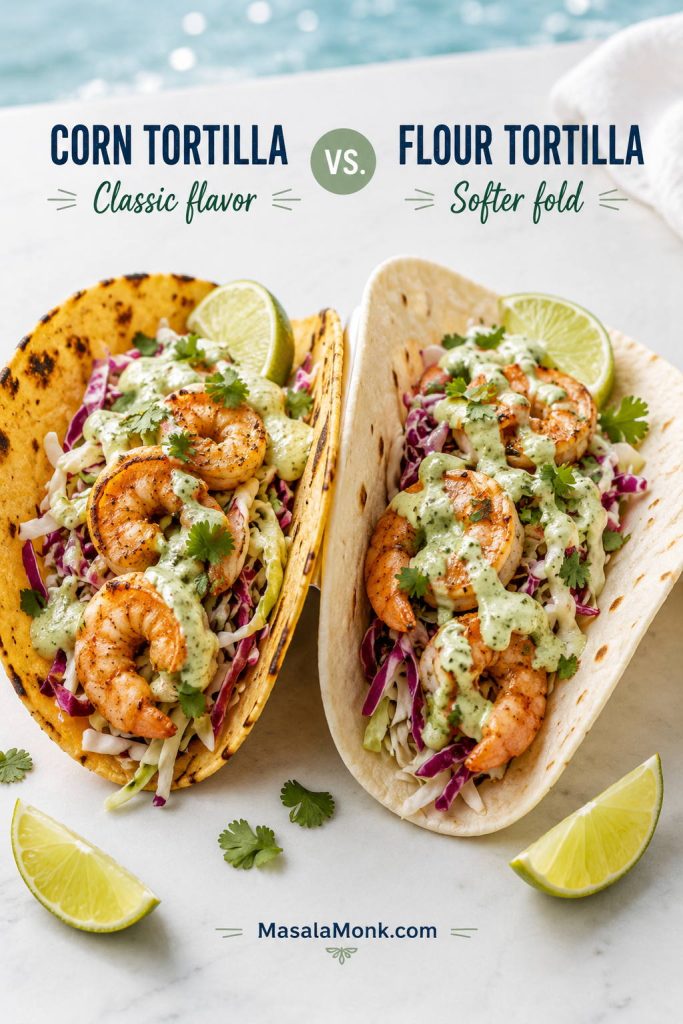
Corn or Flour Tortillas for Shrimp Tacos?
Corn tortillas give shrimp tacos a more classic taco flavor, while flour tortillas are softer and easier to fold. If your corn tortillas crack, warm them first in a dry skillet or wrap them in a damp towel and microwave briefly.
Corn tortillas bring deeper taco flavor, while flour tortillas fold more softly; therefore, choose based on flavor, flexibility, or your table’s preference.
If you are serving a group, warm the tortillas in batches and keep them wrapped in a clean towel. For small street-taco-style tortillas, plan on 2 tacos per person. For larger tortillas with more filling, one very full taco may be enough for lighter eaters, but 2 per person is still the safer dinner estimate.
Substitutions and Shortcuts
These tacos are flexible, so use what makes dinner easier. Just protect the important parts: dry shrimp, warm tortillas, fresh crunch, and enough lime or sauce to keep the filling lively.
No Greek yogurt? Use sour cream.
No mayonnaise? Use more yogurt or sour cream, but add a small drizzle of olive oil for roundness.
No cilantro? Use scallions, parsley, extra lime zest, or a little chipotle.
No cotija? Use queso fresco, feta, or skip the cheese.
Need it faster? Use peeled and deveined shrimp, bagged slaw mix, and store-bought tortillas.
Want it dairy-free? Use dairy-free yogurt, all-mayo sauce, or avocado crema.
Want it less spicy? Skip cayenne and hot sauce, then serve hot sauce on the side.
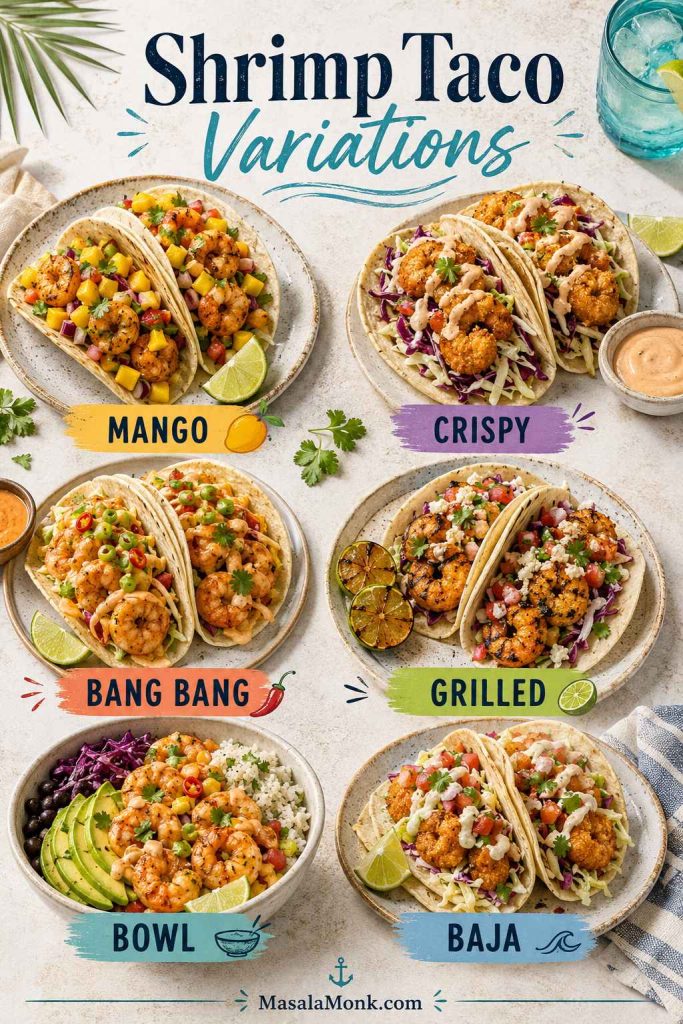
Shrimp Taco Variations
Once the base version works, the recipe becomes a taco-night template. Keep the shrimp quick-cooked and the slaw fresh, then change the mood: sweet with mango, smoky with chipotle, crisp with fried shrimp, or summery on the grill.
If your table is split, make the base shrimp once and set out two sauces: cilantro-lime for the mild side and chipotle or spicy mayo for the heat lovers.
Once the base method works, the same shrimp taco formula can turn sweet with mango, crisp with fried shrimp, smoky on the grill, or bowl-style over rice.
If you want a crunchier version, start with crispy shrimp tacos. If you want the base recipe first, use the recipe card and change the toppings later.
Mango Shrimp Tacos
Add mango salsa, avocado, cilantro, and extra lime. The sweetness of mango works especially well with smoky shrimp seasoning and creamy sauce. This is one of the easiest warm-weather versions of the recipe.
Crispy Shrimp Tacos
For crispy shrimp tacos, toss dry shrimp with a light coating of cornstarch, flour, or panko depending on how crisp you want them, then pan-fry or air-fry until just cooked. Keep the toppings sharp and fresh: cabbage, lime, pickled onions, and a thinner sauce work better than heavy toppings.
Crispy shrimp tacos need sharp toppings and a thinner sauce, because too much creaminess can soften the coating before the first bite.
Bang Bang Shrimp Tacos
For bang bang shrimp tacos, use crispy shrimp and a creamy sweet-spicy sauce made with mayonnaise, sweet chili sauce, sriracha or hot sauce, and lime. Add cabbage underneath so the taco does not turn too rich, then finish with scallions, cilantro, and extra lime.
Grilled Shrimp Tacos
For grilled shrimp tacos, thread shrimp onto skewers or use a grill basket so they do not fall through the grates. Keep the seasoning smoky, grill quickly, and serve with lime slaw, avocado, and chipotle sauce.
Shrimp Taco Bowls
Turn the same components into bowls by serving the shrimp, slaw, sauce, avocado, and toppings over rice, greens, or beans. If rice is your base, this guide to cooking perfect rice can help keep the bowl fluffy instead of heavy. This is also the easiest way to use leftover shrimp without trying to store assembled tacos.
Baja-Style Shrimp Tacos
For a Baja-inspired version, use crispy shrimp, cabbage, creamy chipotle or lime sauce, pico de gallo, and warm corn tortillas. Keep the slaw crunchy and the sauce bold.
What to Serve with Shrimp Tacos
Shrimp tacos are already full of flavor, so the best sides are fresh, lively, and easy. For a simple table, serve them with chips and salsa, cucumber salad, or extra slaw. For a fuller dinner, add black beans, Mexican rice, or grilled corn.
If you are building a bigger taco-night spread, pair these shrimp tacos with fish tacos so guests can choose between two seafood styles. Set out mango salsa, extra sauce, lime wedges, and sliced avocado so each person can build the taco they want without doubling the prep.
Troubleshooting Shrimp Tacos
If the tacos taste fine but not exciting, do not add five more toppings. Fix the missing piece. Flat shrimp need salt. Heavy tacos need lime. Soft tacos need cabbage or radishes. A sauce that tastes dull needs heat, garlic, or more citrus.
Most shrimp taco problems have a clear fix: dry wet shrimp, cook rubbery shrimp less, add salt or lime to bland shrimp, and warm tortillas before filling.
Problem
What to do
Shrimp taste bland
Add salt, lime, and a little extra seasoning after cooking.
Shrimp are rubbery
Cook less next time and remove them as soon as they turn opaque.
Shrimp are watery
Dry them well and use a hotter pan.
Spices burn in the pan
Lower the heat slightly and make sure the shrimp are coated with oil.
Slaw is soggy
Dress it lightly and close to serving.
Sauce is too thick
Thin it with lime juice or water, 1 teaspoon at a time.
Sauce is too sharp
Add a spoon of mayo, yogurt, or sour cream.
Tortillas crack
Warm them before filling. If needed, double-stack small corn tortillas.
Tacos feel heavy
Use more slaw, less sauce, and extra lime.
Make-Ahead, Storage, and Reheating
Shrimp tacos are a little like salad: the parts can be prepped ahead, but the final assembly is best fresh. Store the shrimp, sauce, slaw, tortillas, and toppings separately so the tortillas do not soften before serving.
Store the shrimp taco components separately, then rebuild fresh; assembled leftover tacos lose the crisp, warm, creamy contrast that makes the recipe work.
Component
Make-ahead/storage advice
Sauce
Make 2–3 days ahead and refrigerate in an airtight container.
Slaw vegetables
Shred 1 day ahead, but dress close to serving.
Dressed slaw
Best the same day; it softens as it sits.
Cooked shrimp
Refrigerate for 2–3 days and reheat gently.
Tortillas
Warm right before serving.
Assembled tacos
Not ideal for storage because the slaw and sauce soften the tortillas.
To reheat shrimp, use low to medium-low heat with a tiny splash of water or oil. Warm only until heated through. Avoid blasting leftover shrimp over high heat, because they can turn rubbery fast.
For leftovers, treat the shrimp gently and rebuild the taco with fresh cold toppings. Reheated shrimp can still be good, but leftover assembled tacos almost always lose the texture that makes this recipe work.
Shrimp Tacos Recipe Card
Shrimp Tacos with Slaw and Creamy Cilantro-Lime Sauce
Juicy skillet shrimp tacos with cabbage slaw, creamy cilantro-lime sauce, avocado, cilantro, and fresh lime. This easy shrimp tacos recipe is ready in about 25 minutes and built to avoid watery, rubbery, or bland shrimp.
Prep Time15 minutes
Cook Time8–10 minutes
Total TimeAbout 25 minutes
Yield8 small tacos / 4 servings
Best result: Cook the shrimp last, warm the tortillas before filling, and toss creamy slaw only right before serving.
Quick notes: Plan on about 2 tacos per person. Medium or large peeled shrimp work well, and small 6-inch corn or flour tortillas are easiest to fill. The heat level is mild-medium as written; however, the sauce can be made hotter, smokier, or more herby. The sauce can be made ahead, but assembled tacos are best fresh.
Garlic: 1 small clove, grated, or ¼ tsp garlic powder
Chopped cilantro: 2–4 tbsp, depending on how herby you want the sauce
Ground cumin: ½ tsp
Kosher salt: ¼ tsp
Hot sauce, chipotle in adobo, or sriracha: 1–2 tsp, optional
Water: 1–2 tsp to thin, if needed
For the Slaw
Shredded cabbage: 3 cups / about 210 g, green, red, or mixed
Red onion or scallions: ¼ cup / 25 g, thinly sliced
Chopped cilantro: ¼ cup
Jalapeño: 1 small, thinly sliced, optional
Fresh lime juice: 1½ tbsp / 22 ml
Kosher salt: ½ tsp
Honey or sugar: 1 tsp, optional
Creamy cilantro-lime sauce: 2–3 tbsp, optional for creamy slaw
For Assembly
Corn or flour tortillas: 8 small tortillas
Avocado: 1, sliced or diced
Cheese: cotija, queso fresco, feta, or no cheese
Crunchy toppings: radishes or pickled onions
Fresh herbs: extra cilantro
Lime wedges: for serving
Instructions
Dry the shrimp: If using frozen shrimp, thaw completely. Drain well and pat dry with paper towels.
Make the sauce: Stir together yogurt or sour cream, mayonnaise, lime juice, lime zest, garlic, cilantro, cumin, salt, and optional hot sauce. Thin with water 1 teaspoon at a time until drizzleable. Taste and adjust with more salt, lime, cilantro, or heat as needed.
Make the slaw: Toss cabbage, onion or scallions, cilantro, jalapeño if using, lime juice, salt, and optional honey or sugar. For creamy slaw, add 2–3 tablespoons of the sauce just before serving.
Season the shrimp: Toss shrimp with oil, chili powder, smoked paprika, cumin, garlic powder, onion powder, salt, pepper, and optional cayenne or chipotle.
Cook the shrimp: Heat a large skillet over medium-high heat. Add shrimp in a single layer and cook for 1–2 minutes per side, until pink, opaque, and curled into a loose C shape. Cook in batches if needed.
Finish with lime: Remove the shrimp from the heat and squeeze fresh lime juice over the top.
Warm the tortillas: Warm tortillas in a dry skillet, over a gas flame, in a low oven, or in the microwave wrapped in a damp towel.
Assemble: Fill each tortilla with slaw, shrimp, creamy cilantro-lime sauce, avocado, cheese if using, extra cilantro, and lime.
Notes
Texture tip: cook the shrimp in a hot skillet in a single layer. Wet or crowded shrimp steam instead of searing.
Mild version: skip the cayenne or chipotle and use a mild hot sauce on the side.
Want more heat? Add chipotle powder to the shrimp seasoning and hot sauce or chipotle in adobo to the sauce.
Creamy slaw note: toss the cabbage with a few spoonfuls of sauce right before serving, not far in advance.
Storage: store shrimp, sauce, slaw, tortillas, and toppings separately. Cooked shrimp keep for 2–3 days in the refrigerator.
FAQs About Shrimp Tacos
What shrimp is best for shrimp tacos?
Medium or large peeled, deveined shrimp are the easiest choice. Medium shrimp fit small tortillas neatly, while large shrimp stay juicy and look generous. Tails-off shrimp are easiest to eat.
Is frozen shrimp okay for shrimp tacos?
Frozen shrimp are completely fine here. The important step is drying them well after thawing so they sear instead of steaming.
Can I use cooked shrimp for shrimp tacos?
You can use cooked shrimp, but raw shrimp gives better texture and flavor because it cooks with the seasoning. If using cooked shrimp, warm it gently with a little oil and seasoning just until hot, then stop before it turns rubbery.
How many shrimp do I need per taco?
For small tortillas, plan on about 3–5 shrimp per taco, depending on shrimp size. Jumbo shrimp may need only 2–3 per taco, while medium shrimp usually need a few more.
How do you keep shrimp from getting rubbery?
Cook shrimp quickly over medium-high heat and remove them as soon as they turn opaque and curl into a loose C shape. A tight O shape usually means the shrimp stayed in the pan too long.
Which sauce works best with shrimp tacos?
For most taco nights, creamy cilantro-lime sauce is the easiest choice because it cools the seasoning and gives the slaw something to cling to. Chipotle sauce, avocado crema, and spicy mayo also work well.
Which slaw should I use?
Cabbage lime slaw is the easiest default because it is crunchy, fresh, and sturdy. For a richer taco, toss the cabbage with a few spoonfuls of creamy sauce right before serving.
Are corn or flour tortillas better for shrimp tacos?
Corn tortillas give a more classic taco flavor, while flour tortillas are softer and easier to fold. Both work. The main thing is to warm them before filling.
What toppings go with shrimp tacos?
Good shrimp taco toppings include cabbage slaw, avocado, cilantro, lime, radishes, pickled onions, cotija, queso fresco, jalapeño, mango salsa, and creamy cilantro-lime sauce.
Can I make shrimp tacos ahead of time?
You can make the sauce ahead and prep the slaw vegetables ahead, but shrimp tacos are best assembled fresh. Keep each component separate until serving.
How should I reheat shrimp for tacos?
Reheat shrimp gently in a skillet over low to medium-low heat with a tiny splash of water or oil. Stop as soon as they are warm. High heat can overcook leftover shrimp quickly.
Start with the base version once, then let the second batch become your house version: chipotle sauce for heat, mango salsa for sweetness, crispy shrimp for crunch, or grilled shrimp for a smokier taco-night feel. Once you know whether your table wants extra lime, extra sauce, or extra heat, this recipe gets easier every time.
What makes a shrimp taco perfect for you: extra crunch, lots of sauce, more lime, mango salsa, avocado, crispy shrimp, or serious heat? I’d love to know which version your table would choose first — and whether you’re team corn tortilla or team flour tortilla.
A good fish tacos recipe should answer more than one question. Yes, you need tender fish, warm tortillas, crunchy slaw, and a creamy sauce. However, the real decision usually starts before you cook: what is the best fish for fish tacos, and should you pan-sear, grill, fry, bake, or air fry it?
This recipe for fish tacos starts with the most useful default: pan-seared cod fish tacos with lime crema and cabbage slaw. Cod is mild, flaky, easy to find, and flexible enough for weeknight tacos, Baja-style fried tacos, baked fish tacos, and air fryer fish tacos. When you have mahi mahi, tilapia, halibut, snapper, haddock, salmon, or frozen fish, this guide also shows you how to adjust.
The goal is simple: make fish tacos that taste fresh, bright, and balanced instead of soggy, bland, dry, or overloaded. Use this fish tacos recipe when you need easy fish tacos for dinner, then use the fish guide, sauce options, slaw tips, toppings, and method variations to make the tacos fit what you have.
Quick Answer: Best Fish for This Fish Tacos Recipe
The best fish for fish tacos is a firm, mild white fish such as cod, mahi mahi, halibut, snapper, haddock, or tilapia. Cod is the easiest all-purpose choice because it is mild, flaky, widely available, and works pan-seared, baked, air fried, or beer-battered. Meanwhile, mahi mahi is best for grilled fish tacos, tilapia is the best budget choice, halibut and snapper feel more premium, and salmon works best when blackened or boldly seasoned.
For the easiest fish tacos, season cod or another white fish with chili powder, cumin, smoked paprika, garlic, salt, lime, and a little oil. Then, cook it quickly until just flaky and serve it in warm corn tortillas with cabbage slaw, creamy lime sauce, cilantro, jalapeño, avocado, and fresh lime. For Baja-style fish tacos, use beer-battered cod with chipotle crema and crunchy slaw.
Wet fish, cold tortillas, too much sauce, or assembling too early
Which Fish Tacos Should I Make?
Choose the fish taco style based on the texture and cooking method you need. The pan-seared cod version is the easiest default, while Baja-style tacos are best when crispy fried fish is the main goal.
Not sure which version to make first? Start with cod for the easiest weeknight fish tacos, choose Baja when you want crispy fried fish, use mahi mahi for grilled tacos, and go with salmon when you want a bolder blackened version. Air fryer cod and fish stick tacos are the fastest shortcut paths when convenience matters.
When You Need
Make This Version
Best Fish
Best Topping
Easiest weeknight tacos
Pan-seared fish tacos
Cod or tilapia
Cabbage slaw + lime crema
Crispy restaurant-style tacos
Baja fish tacos
Cod or haddock
Chipotle crema + slaw
Grilled tacos
Grilled fish tacos
Mahi mahi or halibut
Mango salsa + avocado
Bold spicy tacos
Blackened fish tacos
Salmon, cod, or mahi mahi
Avocado + lime crema
Lighter crispy tacos
Air fryer fish tacos
Cod or tilapia
Slaw + lime crema
Shortcut tacos
Fish stick tacos
Frozen breaded fish
Fresh slaw + lime
The Simple Fish Taco Formula
The easiest way to build a good recipe for fish tacos is to use one fish, one crunchy topping, one creamy sauce, one fresh finish, and warm tortillas. This keeps the taco balanced instead of overloaded.
Cilantro, lime, mango salsa, pico de gallo, jalapeño
Tortilla
Corn for classic flavor, flour for softer tacos
Use this formula to keep fish tacos balanced instead of overloaded: start with one fish, add one crunchy element, choose one creamy sauce, finish with something fresh, and serve it all in warm tortillas. It is the easiest way to build tacos that taste bright, layered, and clean without turning soggy or heavy.
Why This Fish Tacos Recipe Works
This fish tacos recipe works because every part has a job. The cod stays mild and flaky, the spice mix gives the fish enough flavor without hiding it, the cabbage slaw adds crunch, the lime crema adds fat and acidity, and the warm tortillas hold everything together.
Cod is easy to control: it cooks quickly, flakes cleanly, and works with most toppings.
The slaw is lightly dressed: it stays crisp instead of turning wet and heavy.
The sauce is tangy, not just creamy: lime keeps the taco bright.
The toppings are flexible: you can keep the tacos simple or build toward Baja, grilled, blackened, air fryer, or mango salsa versions.
The assembly happens last: warm tortillas, hot fish, crisp slaw, and fresh toppings keep the tacos from getting soggy.
Fish Taco Ingredients
This fish tacos recipe is built in parts: seasoned fish, warm tortillas, crunchy slaw, creamy sauce, and fresh toppings. Because each part has a job, the tacos taste clean instead of heavy when you keep the pieces simple.
Great fish tacos are built in parts: mild flaky fish, warm tortillas, crisp slaw, creamy sauce, and fresh toppings. Keep each part simple and balanced so the tacos taste bright and fresh instead of heavy, soggy, or overloaded.
Fish
Use 1 pound of cod for the default recipe. You can also use mahi mahi, tilapia, haddock, halibut, snapper, grouper, bass, or another firm white fish. When using salmon, season it more boldly because it has a richer flavor than mild white fish.
Seasoning
The fish seasoning uses chili powder, smoked paprika, cumin, garlic powder, onion powder, salt, black pepper, lime juice, and oil. As a result, the fish tastes warm, bright, and lightly smoky without becoming aggressively spicy.
Fish Taco Seasoning
The easiest fish taco seasoning is chili powder, smoked paprika, cumin, garlic powder, onion powder, salt, black pepper, and a little lime. For a smokier flavor, add chipotle powder. For blackened fish tacos, increase the paprika, black pepper, and cayenne.
Flaky white fish needs enough seasoning to avoid tasting flat, but not so much that the fish disappears. Tilapia needs a slightly bolder hand, while salmon works best with a blackened-style spice blend.
Seasoning is what keeps fish tacos from tasting flat. Use chili powder, cumin, garlic, smoked paprika, lime, and salt for the base blend, then adjust the heat with cayenne or jalapeño. Mild white fish needs enough seasoning to taste bright, while salmon and tilapia benefit from a bolder hand.
Tortillas
Corn tortillas give fish tacos the most classic flavor. However, flour tortillas are softer and less likely to crack, so they are useful for bigger tacos. Whichever you use, warm them before filling so they bend instead of breaking.
Corn vs Flour Tortillas for Fish Tacos
Use corn tortillas for the most classic fish taco flavor. They taste more toasty and earthy, which works especially well with Baja fish tacos, cod fish tacos, and chipotle crema. Use flour tortillas for a softer, more flexible taco that is less likely to crack.
When corn tortillas break, warm them longer and keep them covered. For saucier tacos or heavy fillings, double up small corn tortillas.
Slaw
Cabbage is better than lettuce here because it stays crunchy under warm fish and sauce. Use green cabbage, red cabbage, or a bagged slaw mix. Then, add lime, cilantro, salt, and jalapeño to keep it fresh.
Sauce
A good fish taco recipe with cabbage slaw needs a creamy, tangy sauce to tie the fish, tortilla, and toppings together. The default sauce uses sour cream or Greek yogurt, a little mayonnaise, lime juice, garlic powder, salt, and hot sauce or chipotle.
Toppings
Good fish taco toppings add contrast. Use cilantro, jalapeño, avocado, pico de gallo, mango salsa, pickled onions, radish, cotija, hot sauce, or extra lime. However, avoid piling on too many wet toppings at once or the tortillas can turn soggy.
Best Fish for Fish Tacos
The best fish for this fish tacos recipe depends on the style of taco you want. In most cases, mild white fish is the safest choice because it cooks quickly, flakes easily, and lets the sauce, slaw, lime, and toppings shine.
Fish
Best Use
Texture
Best Method
Cod
Best all-purpose fish tacos
Mild, flaky, clean
Pan-seared, baked, air fryer, Baja-style
Mahi mahi
Grilled fish tacos and mango salsa tacos
Firm, meaty, mild
Grilled, blackened, skillet
Tilapia
Budget-friendly easy fish tacos
Soft, mild, thin
Skillet, baked, air fryer
Halibut
Premium fish tacos
Firm, clean, meaty
Grilled, pan-seared
Snapper
Restaurant-style fish tacos
Delicate, sweet, fresh
Grilled, pan-seared
Haddock
Cod substitute
Flaky, mild
Baked, pan-seared, fried
Salmon
Bold fish tacos
Rich, stronger flavor
Blackened, grilled, air fryer
Catfish
Fried fish tacos
Sturdy, earthy, moist
Fried, cornmeal-crusted, blackened
Best overall fish: cod. Best fish for grilling: mahi mahi or halibut. Best budget fish: tilapia. Best fish for Baja tacos: cod. Best premium fish: halibut or snapper. Best bold fish taco: salmon with blackened seasoning.
The best fish for fish tacos depends on the style you want. Use cod when you want the easiest all-purpose taco, mahi mahi when you want grilled fish, tilapia when you need a budget-friendly option, salmon when you want bold blackened flavor, and catfish when crispy fried tacos are the goal.
Buying tip: choose fish that looks moist, smells clean rather than strongly fishy, and fits your budget. For the easiest result, choose a firm, mild fish that will hold together when cooked and still taste clean with lime, slaw, and sauce.
Can You Use Frozen Fish for Fish Tacos?
Yes, frozen fish works well for this fish tacos recipe as long as you thaw it completely and pat it very dry before seasoning. Otherwise, extra surface moisture makes fish steam instead of sear, which can make the tacos taste watery. Frozen cod, tilapia, haddock, mahi mahi, and halibut are all useful choices.
For best texture, thaw frozen fish overnight in the refrigerator. When the fish releases a lot of liquid after thawing, drain it and dry the surface again before adding oil, lime, and spices. The FDA seafood safety guidance also recommends thawing frozen seafood gradually in the refrigerator overnight when possible.
Frozen fish can make excellent fish tacos, but moisture is the part to control. Thaw it fully, drain any released liquid, pat the fish very dry, and season right before cooking so it sears instead of steaming and keeps the tacos fresh rather than watery.
Fish to Avoid for Fish Tacos
Avoid very delicate fillets that fall apart before they reach the tortilla, such as very thin sole or flounder, unless you are comfortable handling them. Also be careful with very lean, steak-like fish such as tuna or swordfish because they can turn dry in tacos when overcooked. When in doubt, choose cod, mahi mahi, tilapia, haddock, halibut, snapper, or another mild white fish.
The sauce for these fish tacos ties everything together. Since the fish is lean, the cabbage is crunchy, and the tortilla is soft, a creamy, tangy sauce gives every bite balance.
Easy Lime Crema
1/3 cup sour cream or Greek yogurt
2 tablespoons mayonnaise
1 tablespoon fresh lime juice
1/2 teaspoon garlic powder
1 teaspoon hot sauce or finely chopped chipotle in adobo
Pinch of salt
Stir until smooth. Then, taste and adjust with more lime for brightness, more hot sauce for heat, or a tiny pinch of sugar or honey when the sauce tastes too sharp.
Fish Taco Sauce Variations
Chipotle crema: add chopped chipotle in adobo or chipotle powder.
Avocado crema: blend the sauce with half a ripe avocado.
No-mayo sauce: use all Greek yogurt or sour cream.
Spicy sriracha sauce: use sriracha instead of chipotle.
Extra-lime crema: add more lime zest and lime juice for a sharper finish.
Dairy-free sauce: use thick plant-based mayo and season it with lime, garlic, and chipotle.
For a smokier or richer sauce, use this lime crema as the base and borrow the spicy mayo direction from our homemade mayo recipe.
Choose the sauce based on the taco style: lime crema is the easiest default, chipotle crema is best with crispy Baja fish tacos, avocado crema works well with grilled fish, and chutney crema adds a bright MasalaMonk-style twist when you want something fresher and more herb-forward.
MasalaMonk-Style Chutney Crema
For a brighter Indian-inspired fish taco sauce, stir 1 to 2 teaspoons of green chutney into Greek yogurt or sour cream with a squeeze of lime. It works especially well with crispy fish, grilled fish, or a lightly spiced cod filling.
Fish Taco Slaw
The slaw for this fish taco recipe with cabbage slaw should be crisp, bright, and lightly dressed. It should not taste like heavy coleslaw. Instead, the cabbage should add crunch and help protect the tortilla from the warm fish and sauce.
Simple Cabbage Slaw Formula
2 cups shredded cabbage or slaw mix
1 tablespoon fresh lime juice
2 tablespoons chopped cilantro
1 tablespoon thinly sliced jalapeño, optional
Pinch of salt
Toss the slaw 10 to 15 minutes before serving. That gives the cabbage enough time to soften slightly without collapsing or turning watery.
When making the tacos ahead, shred the cabbage early but wait to add lime and salt until closer to serving. That way, the slaw stays crisp instead of limp.
Cabbage slaw keeps fish tacos crisp, bright, and balanced, but timing matters. Add lime and salt close to serving so the cabbage softens slightly without turning watery, then use cilantro and jalapeño for freshness and gentle heat.
How to Make Fish Tacos
This fish tacos recipe works best when you control the timing. First, make the sauce. Next, toss the slaw. Then, cook the fish quickly, warm the tortillas, and assemble right before eating.
Fish tacos turn out best when the timing is right: make the sauce and slaw first, season and cook the fish quickly, keep the tortillas warm, and assemble everything at the end. That order keeps the fish tender, the slaw crisp, and the tacos fresh instead of soggy.
1. Make the Sauce
Stir together the sour cream or Greek yogurt, mayonnaise, lime juice, garlic powder, hot sauce or chipotle, and salt. Then, refrigerate the sauce while you prepare the rest of the recipe.
2. Toss the Slaw
Combine the shredded cabbage, lime juice, cilantro, jalapeño, and salt. Keep it lightly dressed. When liquid collects at the bottom of the bowl, leave it behind while assembling the tacos.
3. Season the Fish
Pat the fish dry, then coat it with oil, lime juice, chili powder, smoked paprika, cumin, garlic powder, onion powder, salt, and black pepper. However, do not leave the fish sitting in lime juice for a long time because the acid can change the texture.
4. Cook the Fish
Heat a skillet over medium-high heat. Cook the fish until lightly browned and just flaky, usually 2 to 4 minutes per side depending on thickness. Fish is safely cooked when it reaches 145°F / 63°C, or when the flesh is no longer translucent and separates easily with a fork, according to FoodSafety.gov.
5. Warm the Tortillas
Warm the tortillas in a dry skillet, over a gas flame, or wrapped in a damp towel in the microwave. Then, keep them covered so they stay soft.
6. Assemble the Tacos
Add slaw to each tortilla, then fish, sauce, cilantro, avocado, jalapeño, and lime. Serve immediately. Fish tacos are best when the fish is hot, the tortilla is warm, and the slaw is still crisp.
For the best texture, do not overfill each tortilla. A small layer of slaw, a few pieces of fish, a drizzle of sauce, and one or two fresh toppings usually taste better than a taco packed with everything at once.
How Much Fish Do You Need for Fish Tacos?
Plan on about 4 ounces of raw fish per person, or 1 pound of fish for 4 people. That usually makes about 8 small tacos if each person gets 2 tacos. For bigger appetites, parties, or taco-bar serving, plan closer to 5 to 6 ounces of fish per person.
Fish Taco Cooking Times by Thickness
Fish cooks quickly, so thickness matters more than the exact species. Use these times as a guide, then check that the fish is opaque, flakes easily, and reaches 145°F / 63°C.
Fish Thickness
Skillet Time
Best Use
Thin fillets
1 to 2 minutes per side
Tilapia, thin cod, small snapper fillets
Medium fillets
2 to 4 minutes per side
Cod, haddock, mahi mahi pieces
Thick fillets
4 to 5 minutes per side, or finish covered briefly
Halibut, thick cod, salmon
Fish cooks quickly, so thickness matters more than the exact type of fish. Thin fillets like tilapia need only a minute or two per side, while thicker cod, halibut, or salmon may need longer. Stop when the fish is opaque, flakes easily, and reaches 145°F / 63°C.
Fish Tacos Recipe Card
Pan-Seared Cod Fish Tacos with Lime Crema and Cabbage Slaw
This easy fish tacos recipe uses mild cod, warm tortillas, crunchy cabbage slaw, and a creamy lime sauce. Use cod as the default, or swap in mahi mahi, tilapia, haddock, halibut, snapper, or another firm white fish.
Yield: 4 servings / 8 small tacos
Prep time: 20 minutes
Cook time: 10 minutes
Total time: 30 minutes
Equipment
Large skillet
Mixing bowls
Tongs or fish spatula
Instant-read thermometer, optional
Ingredients
For the fish
1 pound cod or firm white fish, cut into large pieces
1 tablespoon olive oil, plus more for the pan if needed
1 tablespoon fresh lime juice
1 teaspoon chili powder
1 teaspoon smoked paprika
1/2 teaspoon ground cumin
1/2 teaspoon garlic powder
1/4 teaspoon onion powder
3/4 teaspoon kosher salt, or to taste
1/4 teaspoon black pepper
Pinch of cayenne, optional
For the lime crema
1/3 cup sour cream or Greek yogurt
2 tablespoons mayonnaise
1 tablespoon fresh lime juice
1/2 teaspoon garlic powder
1 teaspoon hot sauce or finely chopped chipotle in adobo
Pinch of salt
For the slaw
2 cups shredded cabbage or slaw mix
1 tablespoon fresh lime juice
2 tablespoons chopped cilantro
1 tablespoon thinly sliced jalapeño, optional
Pinch of salt
For serving
8 small corn tortillas or flour tortillas
Fresh cilantro
Lime wedges
Avocado slices, optional
Mango salsa or pico de gallo, optional
Crumbled cotija, optional
Hot sauce, optional
Method
Make the sauce. Stir together the sour cream or Greek yogurt, mayonnaise, lime juice, garlic powder, hot sauce or chipotle, and salt. Refrigerate until needed.
Make the slaw. Toss cabbage with lime juice, cilantro, jalapeño, and salt. Set aside for 10 to 15 minutes while you cook the fish.
Season the fish. Pat the fish dry. Toss with olive oil, lime juice, chili powder, smoked paprika, cumin, garlic powder, onion powder, salt, black pepper, and cayenne if using.
Cook the fish. Heat a large skillet over medium-high heat. Add a little oil if needed. Cook the fish for 2 to 4 minutes per side, depending on thickness, until browned in spots and just flaky.
Warm the tortillas. Warm tortillas in a dry skillet, over a flame, or wrapped in a damp towel in the microwave.
Assemble. Add slaw to each tortilla, then fish, lime crema, cilantro, avocado, lime, and any extra toppings. Serve immediately.
Notes
Best fish swap: mahi mahi, tilapia, haddock, halibut, snapper, or another firm white fish.
For salmon tacos: use a stronger blackened-style seasoning and cook until just done.
For mild tacos: skip cayenne, use plain lime crema, and serve hot sauce on the side.
For spicy tacos: add cayenne to the fish, chipotle to the crema, and jalapeño or serrano to the toppings.
For crispier fish: dust the seasoned fish lightly with cornstarch or use the air fryer/panko method below.
Save this base version when you want easy fish tacos without overthinking the choices. Cod gives you mild, flaky fish, cabbage slaw keeps the tacos crisp, lime crema adds brightness, and a quick 2–4 minute skillet cook keeps the fish tender instead of dry.
The best way to cook fish for tacos depends on the texture you need. Pan-searing is the easiest everyday method, Baja-style frying gives the crispiest fish, grilling adds smoky flavor, baking is hands-off, and the air fryer gives a lighter crispy shortcut.
Method
Best Fish
Best For
Reader Tip
Pan-seared
Cod, tilapia, haddock, snapper
Easy weeknight fish tacos
Pat fish dry and cook hot and fast.
Baja-style fried
Cod, haddock, halibut
Crispy fish tacos
Keep fried fish uncovered briefly so steam does not soften the coating.
Grilled
Mahi mahi, halibut, salmon, snapper
Smoky fish tacos
Use firmer fish that can handle flipping.
Baked
Cod, haddock, tilapia, halibut
Hands-off cooking
Add crunchy slaw and bright sauce because baked fish is softer.
Air fryer
Cod, tilapia, haddock, salmon
Lighter crispy tacos
Do not overcrowd the basket.
Blackened
Cod, mahi mahi, salmon, snapper
Bold spicy fish tacos
Use high heat, but do not burn the spices.
Choose the cooking method based on the texture you want. Pan-seared fish is the easiest weeknight option, Baja fried fish gives the crispiest tacos, grilled fish adds smoky flavor, baked fish is hands-off, air fryer fish is lighter and crisp, and blackened fish brings the boldest spice.
For a Baja-style recipe for fish tacos, focus on crisp texture: beer-battered white fish, cabbage slaw, chipotle crema, lime, and warm corn tortillas. Cod is the easiest choice because it is mild, flaky, and sturdy enough for batter.
What Makes Fish Tacos Baja Style?
Crispy battered fish, usually cod or another white fish
Cabbage or slaw for crunch
Chipotle crema or a creamy white sauce
Warm corn tortillas
Fresh lime
Quick Baja-Style Beer Batter Formula
For 1 pound of cod, whisk 1 cup all-purpose flour, 2 tablespoons cornstarch, 1 teaspoon baking powder, 1 teaspoon chili powder, 3/4 teaspoon salt, black pepper, and about 1 cup cold beer until just combined. Dip dry fish strips into the batter, fry until golden and crisp, then serve immediately with cabbage slaw, chipotle crema, lime, and warm corn tortillas.
Keep the fried fish uncovered for a few minutes before assembling so steam does not soften the coating. Also, assemble Baja fish tacos right before serving because fried fish loses crunch once it sits under sauce and slaw.
Baja fish tacos work because every part adds contrast: crisp beer-battered cod, crunchy cabbage, smoky chipotle crema, warm corn tortillas, and fresh lime. Assemble them right before serving so the coating stays crisp instead of softening under the slaw and sauce.
Fried Fish Tacos
For a fried fish taco recipe that is not fully beer-battered, coat cod, haddock, halibut, or catfish in seasoned flour, egg, and panko or cornmeal. Fry until crisp, drain briefly on a rack, then serve with cabbage slaw, chipotle crema, lime, and warm tortillas. This gives you crunchy fish tacos without making a wet batter.
No-Beer Baja Fish Tacos
When beer is not an option, make a simple batter with flour, cornstarch, baking powder, salt, spices, and cold sparkling water or club soda. The bubbles help keep the coating lighter. For the best texture, fry the fish right after dipping so the batter stays airy instead of heavy.
Crispy Fish Tacos Without Deep-Frying
For a crispy fried fish taco recipe without deep-frying, dust the seasoned fish lightly with cornstarch before pan-searing, use the panko air fryer method below, or bake panko-coated fish on a rack so air can circulate around the pieces. Frozen breaded fish or fish sticks can also work as a shortcut when fresh slaw, lime, and sauce keep the tacos bright.
Crispy fish tacos do not always need deep-frying. A cornstarch skillet method gives quick light crisp, panko works well in the air fryer, a rack helps baked fish stay crunchy, and frozen breaded fish can become a better shortcut when you finish it with fresh slaw, lime, and sauce. Assemble right before serving so the coating stays crisp.
When the crispy battered fish is your favorite part, our fish and chips with Indian twists goes deeper into crisp coating logic, battered fish, spice-forward coatings, and chutney-style dips.
Air Fryer Fish Tacos
An air fryer recipe for fish tacos is useful when you need crispier fish without deep-frying. Cod, tilapia, mahi mahi, haddock, and halibut all work.
Unbreaded Air Fryer Fish Tacos
Season the fish as written in the main recipe. Then, lightly spray the fish and air fryer basket with oil. Cook in a single layer at 400°F for about 7 to 10 minutes for most cod or white fish pieces, checking early for thin fillets. The fish is done when it is opaque and flakes easily.
Panko Air Fryer Fish Tacos
For crispy air fryer fish tacos, coat seasoned cod pieces in flour, egg, and panko. Then, spray lightly with oil and air fry in a single layer at 400°F until golden and crisp, usually about 8 to 10 minutes depending on thickness. Serve immediately with slaw and lime crema.
The biggest air fryer mistake is overcrowding. When the pieces touch too much, the coating steams instead of crisping.
Air fryer fish tacos can go two ways: use seasoned fish for a lighter taco or panko-coated fish when you want more crunch. Either way, cook the pieces in a single layer at 400°F so they crisp instead of steaming, then serve with cabbage slaw, lime crema, and fresh lime.
Baked Fish Tacos
For a baked fish taco recipe with flaky white fish, use cod, haddock, tilapia, halibut, or another mild white fish. Pat the fish dry, season it as written in the main recipe, place it on a lightly oiled baking sheet, and bake at 400°F for about 10 to 14 minutes, depending on thickness, until the fish is opaque, flakes easily, and reaches 145°F / 63°C.
Baked fish will not brown as deeply as skillet fish or turn as crisp as Baja-style fried fish. Therefore, finish the tacos with crunchy slaw, lime crema, fresh lime, cilantro, and a bright topping like mango salsa or pico de gallo.
Grilled Fish Tacos
For a grilled fish taco recipe with mahi mahi, halibut, snapper, salmon, or thick cod, choose firm fish that can handle being flipped. Very delicate or thin fillets are easier to cook in a skillet.
Pat the fish dry before seasoning.
Oil the fish and the grill grates.
Use medium-high heat.
Wait until the fish releases naturally before flipping.
Pair grilled fish with mango salsa, avocado, cabbage slaw, lime, or chipotle crema.
Most firm fish fillets need about 3 to 4 minutes per side on a hot grill, depending on thickness. When the fish sticks, wait a little longer before flipping; properly seared fish usually releases more easily from the grate.
Mahi mahi is especially good for grilled fish tacos because it is firm and meaty without tasting heavy.
Blackened Fish Tacos
For a bold salmon fish taco recipe or blackened taco recipe with cod, mahi mahi, tilapia, halibut, or snapper, use extra smoked paprika, chili powder, garlic, black pepper, and a little cayenne. This is the best option when you need a spicier taco without frying.
Blackened does not mean burnt. Instead, the goal is a dark, spice-coated surface with juicy fish underneath. Balance the heat with cabbage slaw, lime crema, avocado, mango salsa, or extra lime.
Use this comparison when you want fish tacos without frying. Baked fish tacos are the easiest hands-off option, grilled fish tacos work best with firmer fish like mahi mahi or halibut, and blackened fish tacos are best when you want bold spice balanced by slaw, lime crema, and fresh lime.
Fish Taco Recipe Variations
Once you know the base recipe, you can change the fish, cooking method, sauce, or topping without rebuilding the whole meal. Use this table when you need a different fish taco recipe from the same basic formula.
Use the base recipe as your starting point, then change the fish, cooking method, sauce, and toppings to match the taco style you want. Cod is the easiest default, Baja and fried fish tacos bring the crunch, mahi mahi works well grilled with mango salsa, salmon is best blackened, and air fryer fish tacos give you a lighter crispy option.
Variation
Use This Fish
Cooking Method
Best Sauce or Topping
Cod fish taco recipe
Cod
Pan-seared, baked, air fryer, or fried
Lime crema + cabbage slaw
Baja fish taco recipe
Cod or haddock
Beer-battered and fried
Chipotle crema + slaw
Mahi mahi taco recipe
Mahi mahi
Grilled or blackened
Mango salsa + avocado
Salmon fish taco recipe
Salmon
Blackened, grilled, or air fried
Avocado + lime crema
Air fryer fish taco recipe
Cod, tilapia, or haddock
Air fried, plain or panko-coated
Cabbage slaw + lime
Fried fish taco recipe
Cod, haddock, halibut, or catfish
Battered, panko-coated, or cornmeal-crusted
Chipotle sauce + crunchy slaw
Fish Taco Variations by Fish Type
Different fish change the whole taco. Cod is the easiest mild and flaky choice, mahi mahi works best when grilled, tilapia needs brighter toppings, halibut and snapper are best kept simple, salmon needs bold seasoning, and catfish is strongest when fried and paired with slaw.
Cod Fish Tacos
Cod is the best default for this page because it is mild, flaky, and flexible. Therefore, you can use it for pan-seared fish tacos, baked fish tacos, air fryer fish tacos, or Baja-style beer-battered fish tacos.
For a simple recipe for cod fish tacos, keep the toppings clean: cabbage slaw, lime crema, cilantro, lime, and avocado. For crispy cod tacos, dust the fish lightly with cornstarch before cooking or use the Baja-style beer batter.
Cod is the safest fish to start with because it is mild, flaky, and easy to pair with almost any fish taco topping. Keep the build simple with cabbage slaw, lime crema, warm tortillas, cilantro, avocado, and fresh lime, then use the same cod filling for pan-seared, baked, air fryer, or Baja-style tacos.
Mahi Mahi Tacos
Mahi mahi is best grilled, blackened, or cooked in a hot skillet. For a grilled fish taco recipe with mahi mahi, season the fish with the same spice blend, grill it for about 3 to 4 minutes per side, and serve it with mango salsa, avocado, cilantro, and lime.
Mahi mahi is firm enough to hold together on the grill, so it is one of the best choices when you need smoky tacos with fish that does not fall apart. Keep the salsa chunky and not too wet when the tacos already have sauce.
Mahi mahi is one of the best fish for grilled fish tacos because it is firm enough to hold its shape and meaty enough to carry smoky grill marks. Pair it with chunky mango salsa, avocado, cabbage slaw, cilantro, and fresh lime for a taco that tastes bright without becoming watery.
Tilapia Fish Tacos
Tilapia is budget-friendly and mild. For budget-friendly tilapia fish tacos, season the fillets well, cook them gently in a skillet or air fryer, and use bold toppings like chipotle crema, pickled onions, mango salsa, or extra lime.
Because tilapia is delicate, handle it gently and avoid overcooking it. The seasoning and toppings do more of the flavor work, so do not skip the lime and slaw.
Tilapia is a great budget-friendly fish for tacos, but it needs help from seasoning and bright toppings. Use chipotle crema, pickled onions, cabbage slaw, cilantro, jalapeño, and fresh lime so the mild fish tastes lively instead of flat.
Halibut Fish Tacos
Halibut is a premium choice for fish tacos. Since it is firm, clean, and meaty, keep the toppings simple. Slaw, lime crema, cilantro, avocado, and lime are enough.
For a premium taco recipe with fish that feels restaurant-style, pan-sear or grill halibut until just flaky, then avoid burying it under too many wet toppings.
Snapper Fish Tacos
Snapper tastes fresh and slightly sweet. It works well grilled or pan-seared. Because the flavor is delicate, use light toppings so the fish stays the focus.
Snapper fish tacos are especially good with lime crema, cilantro, avocado, and a small amount of pico de gallo or mango salsa.
Salmon Tacos
Salmon is not the most traditional fish taco fish, but it works when the seasoning is bold. For a salmon fish taco recipe, use blackened seasoning instead of the milder cod seasoning. Salmon has a richer flavor, so it works best with avocado, lime crema, cabbage, jalapeño, and a bright salsa rather than very delicate toppings.
When making air fryer salmon tacos, use the seasoning direction here and follow the timing logic in our air fryer salmon recipe so the salmon stays juicy instead of dry.
Salmon works best in fish tacos when the seasoning is bold enough to balance its richness. Use a blackened spice crust, then add cabbage slaw for crunch, avocado for creaminess, lime crema to cool the heat, and fresh lime to keep the tacos bright.
Fish Stick Tacos or Frozen Breaded Fish Tacos
Fish stick tacos are the shortcut version. First, bake or air fry the fish sticks or frozen breaded fish until very crisp. Then, use the same slaw, lime crema, cilantro, and lime. The fresh toppings matter here because they make frozen fish taste more like real fish tacos.
For the best texture, do not assemble the tacos until the fish is fully crisp and the tortillas are warm. When the frozen fish is already salty, keep the sauce bright and the slaw lightly seasoned so the taco does not taste heavy.
Fish stick tacos can taste fresh when the frozen breaded fish is cooked until crisp and balanced with bright toppings. Use warm tortillas, crunchy slaw, lime crema, cilantro, and fresh lime, then assemble the tacos right before serving so the coating stays crisp instead of softening under the sauce.
Best Toppings for Fish Tacos
The best toppings for this fish tacos recipe add crunch, creaminess, freshness, heat, or a salty finish. However, you do not need all of them. Choose two or three that balance the fish.
When choosing one essential fish taco topping, start with cabbage slaw. It adds crunch, protects the tortilla, and balances creamy sauce and flaky fish.
The best toppings for fish tacos add balance instead of bulk. Start with cabbage slaw for crunch, add one creamy sauce like lime crema or chipotle crema, then finish with something fresh such as cilantro, lime, mango salsa, pico de gallo, jalapeño, pickled onions, avocado, or cotija.
Purpose
Best Toppings
Crunch
Cabbage, radish, red onion, pickled onions
Creamy
Lime crema, chipotle sauce, avocado, guacamole
Fresh
Cilantro, lime, pico de gallo, mango salsa, pineapple salsa
Heat
Jalapeño, serrano, hot sauce, chipotle
Salty finish
Cotija, flaky salt, salted avocado
For an even better match, choose toppings based on the fish and cooking method.
Fish Taco Style
Best Toppings
Why It Works
Cod fish tacos
Cabbage slaw, lime crema, cilantro, lime
Simple toppings let mild cod stay clean and flaky.
Baja fish tacos
Chipotle crema, cabbage slaw, pico de gallo, lime
Creamy, crunchy, and bright toppings balance fried fish.
Mahi mahi tacos
Mango salsa, avocado, cilantro, lime
Firm grilled fish works well with fruit and creaminess.
Salmon tacos
Avocado, jalapeño, cabbage, lime crema
Rich salmon needs acid, crunch, and heat.
Tilapia fish tacos
Chipotle crema, mango salsa, pickled onions
Mild tilapia benefits from bolder toppings.
Fish stick tacos
Fresh slaw, lime crema, cilantro, hot sauce
Fresh toppings make frozen breaded fish taste brighter.
How to Keep Fish Tacos from Getting Soggy
This fish tacos recipe stays fresh when you control moisture. Soggy fish tacos usually come from wet fish, watery salsa, overdressed slaw, cold tortillas, or too much sauce. Once you fix those parts, the tacos stay much better.
Keep fish tacos from getting soggy by controlling moisture before you assemble. Pat the fish dry, dress the slaw close to serving, drain watery salsa, warm the tortillas, use sauce lightly, and build the tacos right before eating so the fish stays crisp, the slaw stays fresh, and the tortillas do not turn wet.
Pat the fish dry before seasoning so it sears instead of steaming.
Do not over-marinate fish in lime juice.
Cook hot and fast so the outside gets flavor before the fish dries out.
Drain salsa before adding it to tacos.
Use cabbage slaw instead of watery lettuce.
Warm tortillas so they bend without cracking.
Use sauce lightly and serve extra sauce on the side.
Assemble right before serving instead of letting filled tacos sit.
Keep fried fish uncovered briefly so steam does not soften the coating.
If the Fish Tastes Bland
Add more salt, lime, chili powder, or hot sauce. Usually, bland fish tacos need either more seasoning on the fish or more acidity at the end.
If the Fish Is Dry
Cook it for less time next round and use a slightly thicker fillet. However, dry fish can still be saved with lime crema, avocado, slaw, and a squeeze of fresh lime.
If the Tortillas Break
Warm them properly and keep them covered. When corn tortillas still crack, double them up or switch to flour tortillas.
If the Slaw Gets Watery
Dress the slaw closer to serving and use less salt at the beginning. When liquid collects in the bowl, lift the cabbage out with tongs instead of pouring the liquid into the tacos.
Fish tacos work best with fresh, bright sides rather than heavy ones. Try chips and salsa, mango salsa, guacamole, cilantro lime rice, black beans, corn salad, cabbage slaw, pickled onions, or a simple cucumber salad.
For drinks, a citrusy mango margarita is a natural fit with grilled fish tacos, mahi mahi tacos, or any version topped with mango salsa.
Serve fish tacos with fresh, bright sides instead of heavy ones. Mango salsa, guacamole, cilantro lime rice, black beans, corn salad, tortilla chips, pickled onions, cucumber salad, lime wedges, and a citrusy mango margarita all help turn fish tacos into a complete taco-night meal.
How to Build a Fish Taco Bar
This fish tacos recipe also works well as a fish taco bar. For the best texture, keep every part separate: cooked fish, warm tortillas, slaw, sauce, lime wedges, cilantro, jalapeño, avocado, mango salsa, and any cheese or hot sauce. As a result, the tortillas stay fresher and everyone can build their own taco.
Set up a fish taco bar by keeping every part separate until serving. Cook the fish last, keep the tortillas warm, serve slaw in its own bowl, keep sauces on the side, and add wet toppings like salsa, lime, crema, and pickled onions at the table so everyone can build fresh tacos without soggy tortillas.
Cook the fish last: fish tastes best hot and freshly cooked.
Prep sauce ahead: lime crema and chipotle crema can be made earlier.
Prep cabbage ahead: shred it early, but dress it closer to serving.
Keep tortillas warm: wrap them in a clean towel after heating.
Serve wet toppings separately: salsa, crema, and lime should go on at the table.
For seafood safety at parties, do not leave cooked seafood out for more than 2 hours, or more than 1 hour when temperatures are above 90°F.
Storage and Make-Ahead Tips
Fish tacos are best fresh, but you can prep the parts ahead. That way, dinner comes together quickly without making the tortillas soggy.
Fish tacos are easiest to prep when you keep every part separate. Make the sauce ahead, shred the cabbage early but dress it later, cook the fish close to serving, warm the tortillas right before eating, and store leftovers separately. For the next day, turn leftover fish into a bowl instead of trying to save assembled tacos.
Sauce: make 2 to 3 days ahead and refrigerate.
Cabbage: shred ahead, but add lime and salt closer to serving.
Fish: season right before cooking for the best texture.
Tortillas: warm right before serving.
Leftovers: store fish, slaw, sauce, and tortillas separately.
Do not store assembled fish tacos. Otherwise, the tortillas will absorb moisture from the fish, sauce, and slaw.
For raw seafood, the FDA recommends storing seafood in the refrigerator at 40°F or below if you plan to use it within 2 days; otherwise, wrap it tightly and freeze it.
Leftover Fish Taco Bowls
When you have leftover fish, slaw, sauce, or toppings, turn them into a bowl instead of trying to rebuild tacos the next day. Add rice, beans, cabbage, avocado, mango salsa, lime crema, and the leftover fish. Bowls are more forgiving than reheated tortillas and help use the parts without making the meal soggy.
Are Fish Tacos Healthy?
A healthy fish taco recipe usually starts with pan-seared, grilled, baked, or air-fried fish instead of deep-fried fish. Then, cabbage slaw, lime, avocado, and a moderate amount of sauce keep the tacos balanced.
For a lighter version, use grilled or pan-seared cod, Greek yogurt lime crema, cabbage slaw, corn tortillas, and avocado or mango salsa instead of extra cheese.
Healthy fish tacos should still taste fresh and satisfying. Use pan-seared, grilled, baked, or air-fried fish, then build the tacos with cabbage slaw, Greek yogurt lime crema, avocado, mango salsa, cilantro, and fresh lime so they stay lighter without losing flavor.
Final Tips for the Best Fish Tacos
Use this fish tacos recipe as the base, then choose the fish that matches your style. Start with cod for the easiest version. Use mahi mahi for grilled fish tacos, tilapia for a budget-friendly version, halibut or snapper for something more premium, and salmon for a bolder taco. Finally, keep the slaw crisp, the sauce bright, the tortillas warm, and the toppings fresh.
The best fish tacos are not complicated. They just need the right fish, enough seasoning, a crunchy slaw, a creamy sauce, and careful assembly so every bite tastes fresh instead of wet or heavy.
Fish Tacos FAQs
What is the best fish for fish tacos?
Cod is the best all-purpose fish for fish tacos because it is mild, flaky, easy to find, and works with pan-seared, baked, air fryer, or Baja-style methods. However, mahi mahi, tilapia, halibut, snapper, haddock, and salmon also work.
Is cod good for fish tacos?
Yes. Cod is one of the best fish for fish tacos. It has a mild flavor, flakes easily, and works with lime crema, cabbage slaw, chipotle sauce, mango salsa, and Baja-style batter.
Is mahi mahi good for fish tacos?
Yes. Mahi mahi is excellent for grilled fish tacos because it is firm and meaty. It also works well blackened or pan-seared with mango salsa, avocado, cabbage, and lime.
Can you use salmon for fish tacos?
Yes, but salmon needs stronger seasoning than mild white fish. Therefore, use blackened seasoning, grilled salmon, or air fryer salmon with cabbage, avocado, lime, and a fresh salsa.
Are fish tacos better with corn or flour tortillas?
Corn tortillas give fish tacos a more classic flavor. However, flour tortillas are softer and less likely to break. Use corn for a more traditional taco and flour when you need a softer, easier wrap.
What sauce goes on fish tacos?
A creamy lime sauce is the easiest choice. Mix sour cream or Greek yogurt with a little mayonnaise, lime juice, garlic, salt, and hot sauce or chipotle. Chipotle crema, avocado crema, chutney crema, and no-mayo yogurt sauce also work.
What toppings go best with fish tacos?
The best toppings are cabbage slaw, lime crema, cilantro, jalapeño, avocado, pico de gallo, mango salsa, pickled onions, cotija, hot sauce, and fresh lime.
What makes Baja fish tacos different?
Baja fish tacos usually use crispy beer-battered white fish, cabbage slaw, creamy chipotle sauce, lime, and corn tortillas. As a result, they are crunchier and more fried-focused than simple pan-seared fish tacos.
Can I make fish tacos in the air fryer?
Yes. Air fryer fish tacos work well with cod, tilapia, mahi mahi, haddock, or halibut. Use seasoned fish for a lighter version or panko-coated fish for a crispier version.
Can I bake fish for fish tacos?
Yes. Baked fish tacos are useful when you need a hands-off method. Season cod, haddock, tilapia, or another white fish, bake at 400°F until opaque and flaky, then serve with slaw, sauce, and fresh lime.
Can I use frozen fish for fish tacos?
Yes. Thaw frozen fish completely, then pat it very dry before seasoning. Otherwise, the fish can steam instead of sear.
Can I use fish sticks for fish tacos?
Yes. Bake or air fry fish sticks until very crisp, then serve them in warm tortillas with cabbage slaw, lime crema, cilantro, and lime. Fresh toppings help frozen fish stick tacos taste brighter and more balanced.
How much fish do I need per person for fish tacos?
Plan on about 4 ounces of raw fish per person for a normal serving. One pound of fish usually makes about 8 small tacos, enough for 4 people if you serve 2 tacos each.
How do I keep fish tacos from getting soggy?
Pat the fish dry, do not over-marinate it, drain wet salsa, use lightly dressed cabbage slaw, warm the tortillas, go easy on sauce, and assemble the tacos right before serving.
Are fish tacos healthy?
Fish tacos can be healthy, especially when the fish is pan-seared, grilled, baked, or air fried instead of deep-fried. For a lighter version, use cabbage slaw, Greek yogurt sauce, avocado, lime, and corn tortillas.