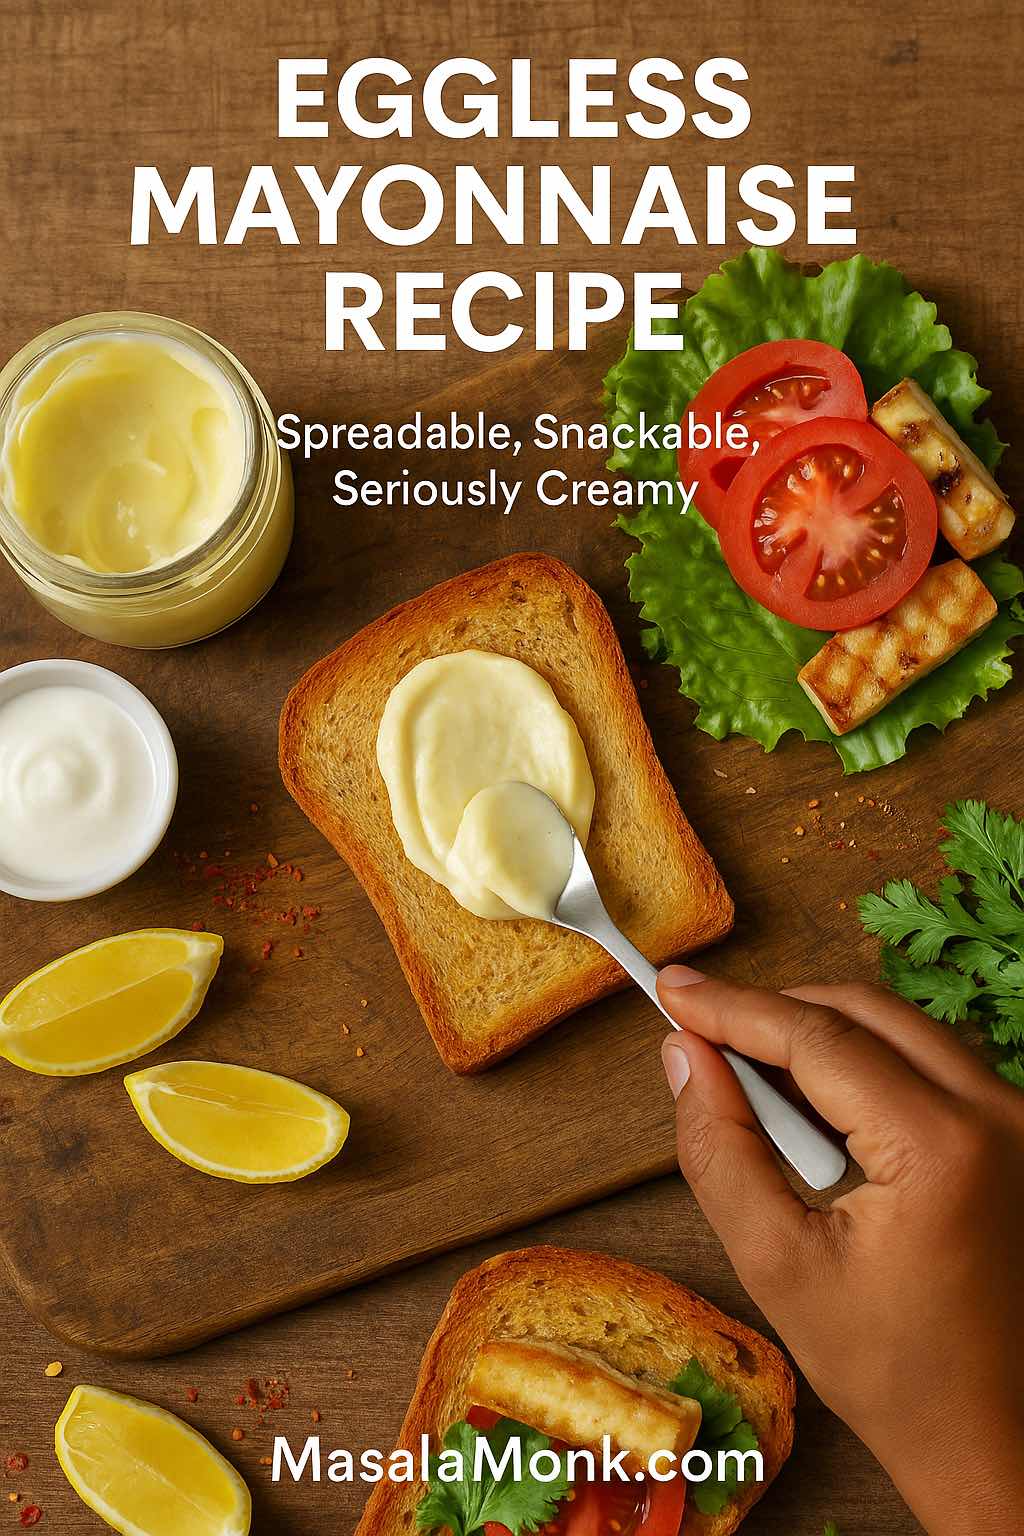
There’s a particular kind of satisfaction in dipping a spoon into a thick, glossy eggless mayonnaise you’ve just made yourself. When that eggless mayonnaise recipe is completely free from eggs, it suddenly becomes something you can share with almost everyone around the table – people with egg allergies, those who are pregnant and cautious about raw eggs, folks who simply don’t enjoy eggy flavours, and anyone who wants a little more control over what goes into their food.
In this guide, we’re going to explore mayonnaise without eggs from every angle. You’ll get a clear, step-by-step eggless mayonnaise recipe you can rely on every time, plus smart variations: egg free mayo, no egg mayo, and even fully vegan mayonnaise made without egg or dairy. We’ll also answer those “how to make mayonnaise without egg at home?” questions and show you how to use this eggless mayo in everyday meals without overthinking it.
As you read on, you’ll see how to put together a dependable base egg free mayo at home, how to switch between different types of mayonnaise without eggs (whether you prefer milk-based, yogurt-based or fully vegan), and how to build flavoured versions like garlic, peri-peri, herby, cheesy and more. Along the way, we’ll also look at lighter options that fit into gut-friendly, high-fibre, meal-prep-style eating, so you can figure out exactly where this simple eggless mayo belongs in your sandwiches, salads, and snack life.
What Is Eggless Mayonnaise and Why This Eggless Mayonnaise Recipe Works
If you strip mayonnaise down to its basics, it’s an emulsion: fat, water, and flavourings held together by an emulsifier (traditionally egg yolk). When you remove eggs from the equation, you still need:
- Fat – usually a neutral oil
- Water-based liquid – milk, curd, plant milk, aquafaba, or even a cashew base
- Acid – lemon juice or vinegar
- Seasoning – salt, mustard, maybe a pinch of sugar
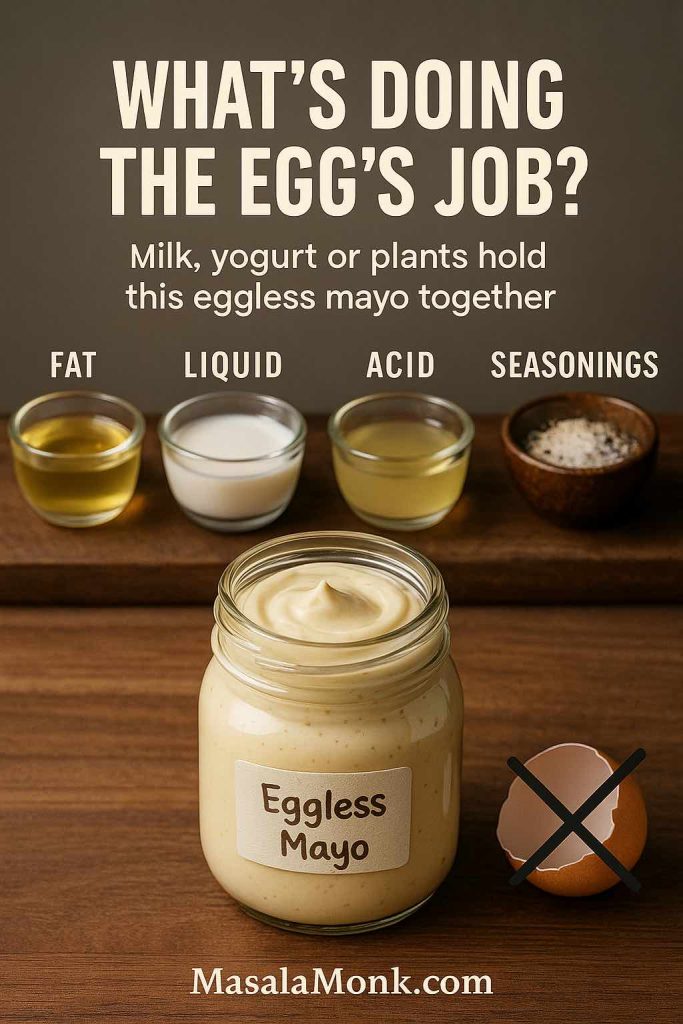
So an eggless mayo or egg free mayonnaise is simply a version where the emulsifier comes from something other than egg yolk. Milk proteins, yogurt, cashew cream, soy milk, or chickpea brine can all step in to do the job.
This is why you’ll often notice people use mayo without eggs or mayonnaise without eggs interchangeably with “veg mayo” or “eggless mayo recipe”. The core idea is the same: you still get that rich, spreadable, creamy texture, but without whole eggs.
Eggless vs Vegan: Not Always the Same
It helps to clear up one common confusion early on:
- Eggless mayonnaise – contains no egg, but might still use milk, cream, or yogurt.
- Vegan mayonnaise – no egg and no dairy; usually built on plant milks, plant cream or aquafaba.
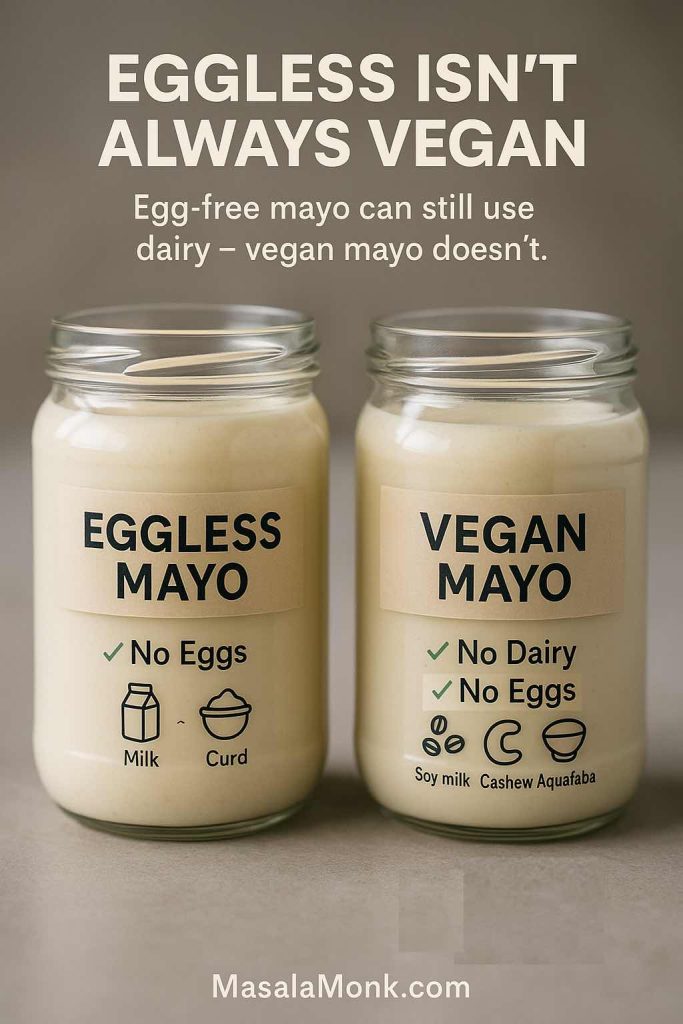
A milk-based mayonnaise recipe without egg is perfect for non-veg eaters who just want to skip eggs; a cashew or soy-based version works better for vegans.
If you’re curious about nut-based versions, for instance, blogs like Veg Recipes of India share a cashew-based veg mayo that’s fully eggless. It’s a very different flavour and texture, but it proves how flexible the idea of eggless mayo can be.
Also Read: Crispy Homemade French Fries From Fresh Potatoes (Recipe Plus Variations)
Why So Many People look for Eggless Mayonnaise Recipe
When you start exploring ways to make mayo at home, it doesn’t take long before an eggless mayonnaise recipe feels essential. Maybe you want to know how to make eggless mayo for someone with an egg allergy, perhaps you’re hunting for an egg free mayo recipe that feels lighter, or you simply prefer a mayo recipe without egg because it fits your lifestyle better. Whatever the reason, the goal is the same: all the creaminess and versatility of classic mayonnaise, just without the eggs.

1. Egg Allergies and Sensitivities
Eggs are among the most common food allergens in children, and they affect adults as well. Medical sources such as Mayo Clinic’s egg allergy overview explain that egg allergy can trigger symptoms ranging from hives and stomach upset to, in severe cases, anaphylaxis.
For families dealing with this, having a no egg mayonnaise recipe means:
- Sandwiches and wraps stay in rotation
- Party snacks like dips and potato salad become more inclusive
- You’re in control of every ingredient going into the jar
2. Pregnancy and Raw Eggs
Traditional homemade mayo uses raw or barely cooked egg yolks. Food safety guidance for pregnant women consistently warns against raw-egg preparations because of the small but serious risk of salmonella. Agencies like the FDA’s “Food Safety for Moms-to-Be” specifically list homemade mayonnaise as something to avoid, while noting that commercial mayo is pasteurised and considered safe.
If that makes you nervous, using an egg free mayonnaise at home takes that particular worry off the table.
3. Taste, Texture and Convenience
There’s also the straight-up flavour and convenience factor:
- Some people dislike the distinct taste or smell of eggs.
- Others don’t want to crack a raw egg every time they fancy a sandwich.
- A quick blender-based eggless mayonnaise recipe can be assembled from pantry ingredients in just a few minutes.
And because eggless mayo starts from a neutral base, it’s a gorgeous canvas for flavours like garlic, peri-peri, herbs, mustard or cheese.
Also Read: Katsu Curry Rice (Japanese Recipe, with Chicken Cutlet)
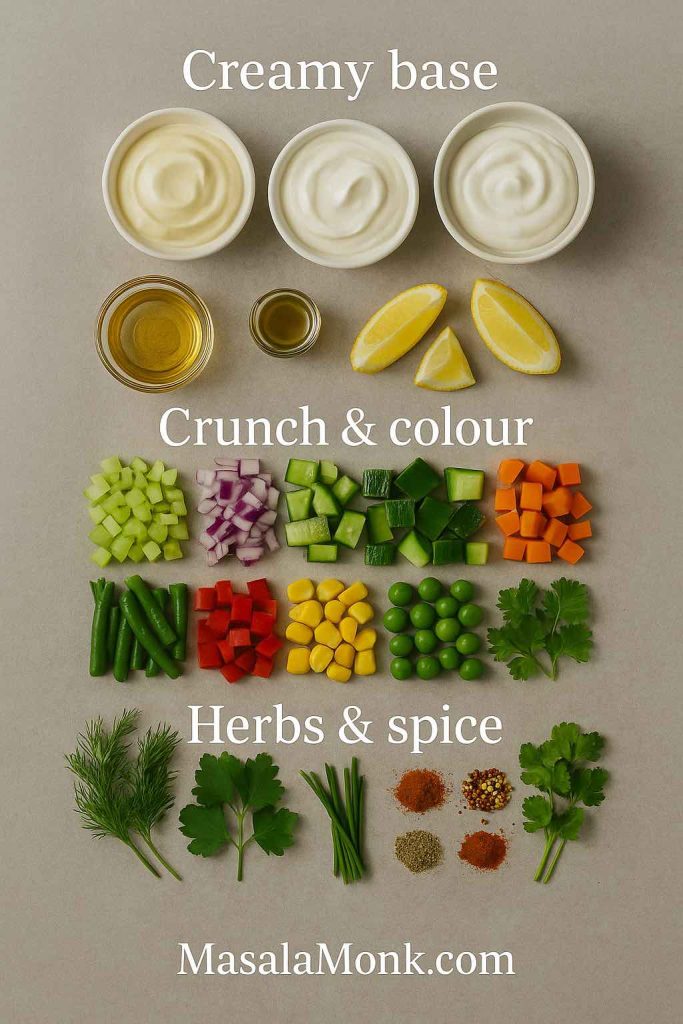
Ingredients That Make an Eggless Mayonnaise Recipe Work
You can think of eggless mayo as a simple formula:
Fat + Liquid base + Acid + Seasoning = Emulsified, creamy spread
Once that clicks, every egg free mayo recipe you see will suddenly make more sense.
The Oil: Your Main Fat
Oil is the backbone of any mayonnaise recipe without egg. Choosing the right one makes a huge difference.
- Neutral oils like sunflower, rice bran, canola or light olive oil work best.
- Very strong oils (unrefined mustard oil, very peppery extra-virgin olive oil) can make the mayo taste bitter or overpowering.
Nutrition-focused guides, such as Verywell Fit’s article on whether mayonnaise is healthy, point out that mayo is mostly fat and can be calorie-dense, but when it’s made with good-quality unsaturated oils, it also carries vitamin E, vitamin K and potentially some omega-3 fatty acids.
So, for a healthy eggless mayonnaise recipe, lean towards oils that are:
- High in monounsaturated or polyunsaturated fats
- Fresh (not repeatedly heated or reused)
The Liquid Base and Emulsifier in Eggless Mayonnaise Recipe
This is where eggless recipes get interesting. Instead of egg yolk, you use:
- Milk – full-fat or toned; common in Indian-style eggless mayo
- Curd or yogurt – Greek yogurt or thick hung curd for a tangy, high-protein base
- Plant milks – soy milk, almond milk or oat milk for dairy-free versions
- Cashew cream – soaked, blended cashews plus water for a rich vegan mayonnaise without eggs
- Aquafaba – chickpea brine that whips and emulsifies like egg white
Milk-based eggless mayonnaise recipes are popular in Indian kitchens because you often have milk on hand, and it emulsifies beautifully with oil and acid. Yogurt bases are excellent if you also want lightness and probiotics, similar in spirit to the yogurt-based spreads in MasalaMonk’s healthy hung curd spinach cheese sandwich.
Nut and plant-based versions, on the other hand, are the go-to for vegans. A cashew-based eggless veg mayo is a great example of how cashew cream can replace both egg and dairy in a single stroke.
Acid, Salt and Extras for Eggless Mayonnaise Recipe
Finally, the flavour and balance:
- Acid – lemon juice, lime, white vinegar or apple cider vinegar
- Salt – brings everything to life rather than just tasting “oily”
- Mustard – adds flavour and helps stabilise the emulsion
- Pinch of sugar – rounds off sharpness, especially with extra lemon
You don’t have to add sugar, but a small pinch in your egg free mayonnaise recipe often makes it taste more “professional”, especially if you’re used to store-bought brands.
Also Read: Authentic Louisiana Red Beans and Rice Recipe (Best Ever)
Base Eggless Mayonnaise Recipe (Milk or Curd Based Mayo)
Let’s walk through a practical base recipe for eggless mayonnaise, using ingredients you probably already have in the fridge. This method answers questions like:
- “How to make mayonnaise without egg at home?”
- “How do you make mayonnaise without eggs with a blender?”
- “How is eggless mayonnaise made in Indian-style recipes?”
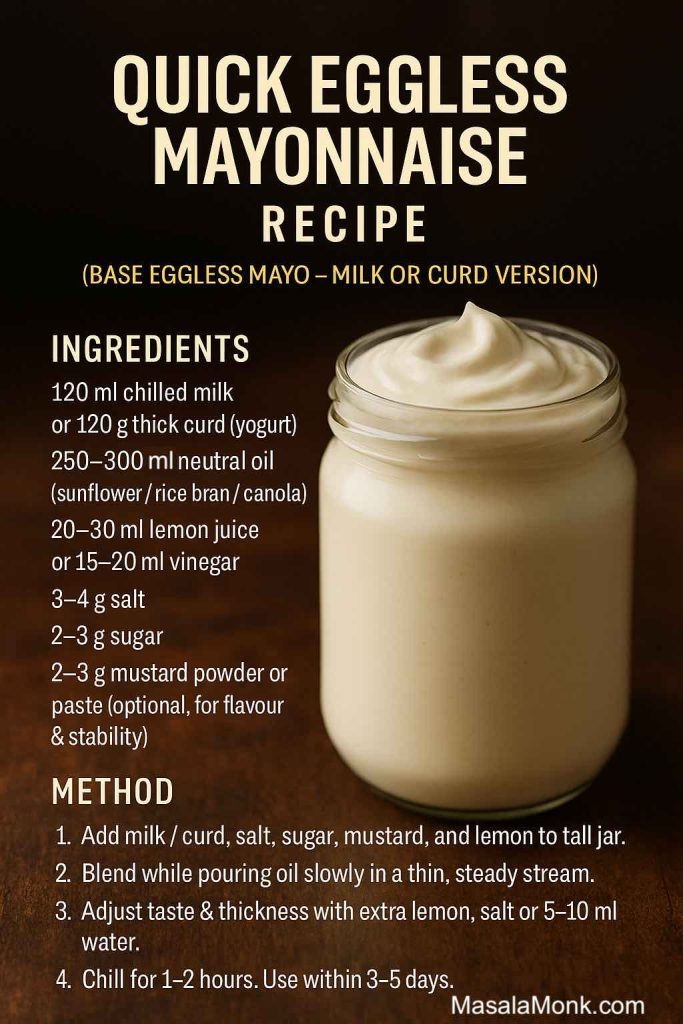
Ingredients You Need for an Eggless Mayonnaise Recipe
- ½ cup chilled full-fat milk
– or – ½ cup very thick curd / hung curd - 1 to 1¼ cups neutral oil (sunflower, rice bran, or light olive oil)
- 1½–2 tablespoons lemon juice or white vinegar
- ½–¾ teaspoon salt (adjust to taste)
- ½ teaspoon mustard (paste or powder) – optional but helpful
- ½ teaspoon sugar – optional, but recommended
- A pinch of black pepper
This gives you about 1½–2 cups of eggless mayo, enough for sandwiches, salads and a couple of flavour variations.
Method: Step-by-Step Recipe & How to Make Eggless Mayonnaise
This step-by-step process is the heart of any good mayonnaise recipe without egg. The quantities will vary between recipes, but the technique stays surprisingly consistent.
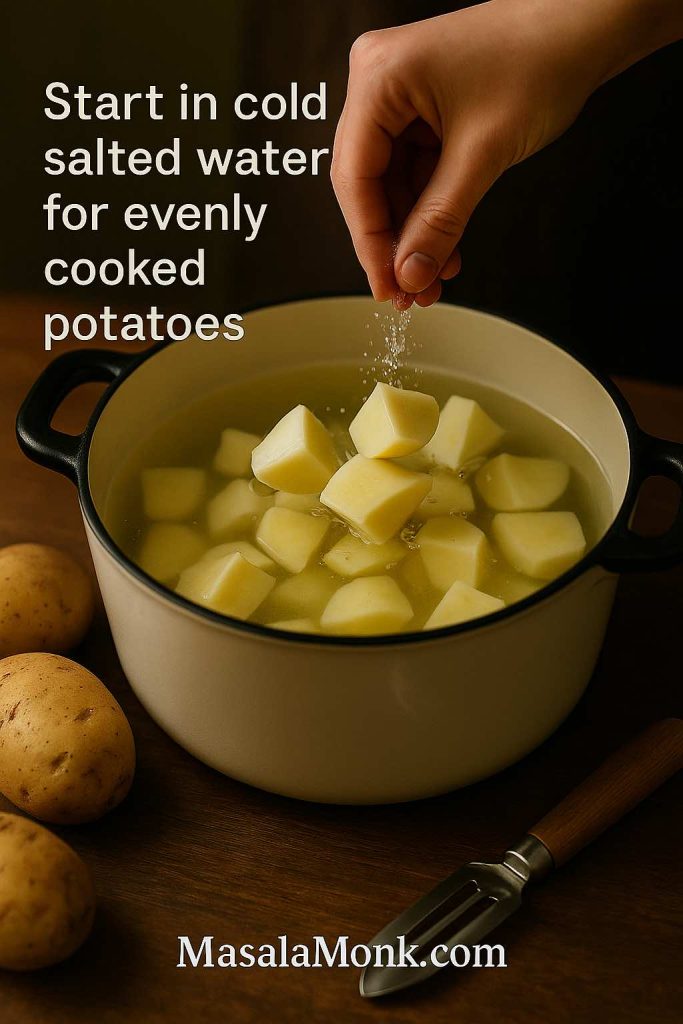
1. Prepare the Jar
Choose a narrow, tall jar or jug that fits your immersion blender head. The narrower the container, the easier it is for the mixture to emulsify quickly.
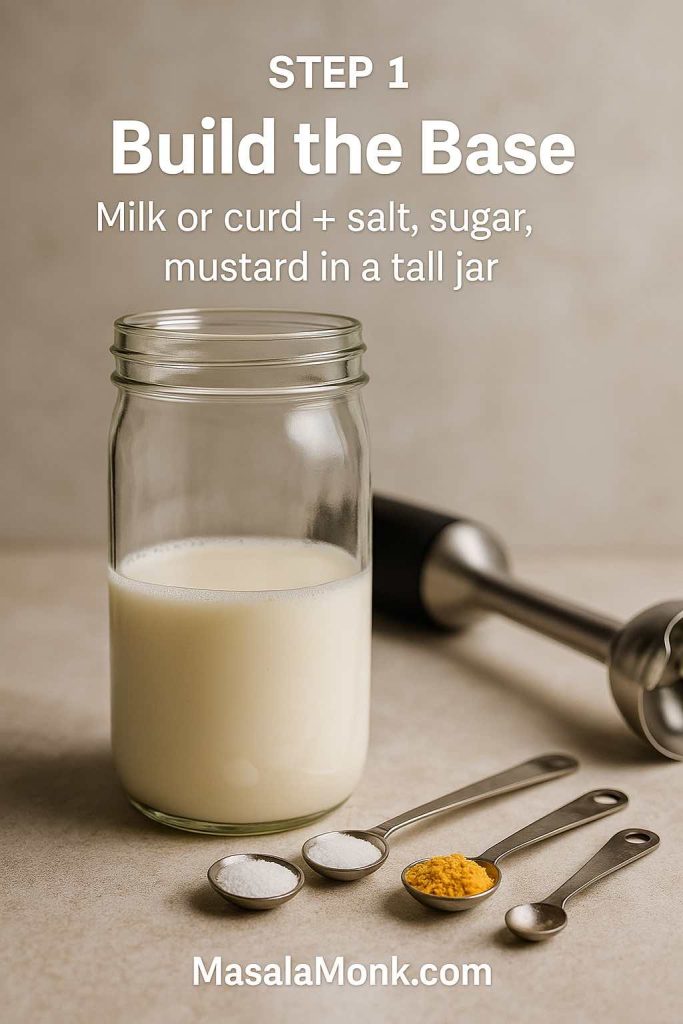
Add:
- Milk (or thick curd)
- Salt
- Sugar
- Mustard
- Half of the lemon juice/vinegar
Give it a quick stir with a spoon.
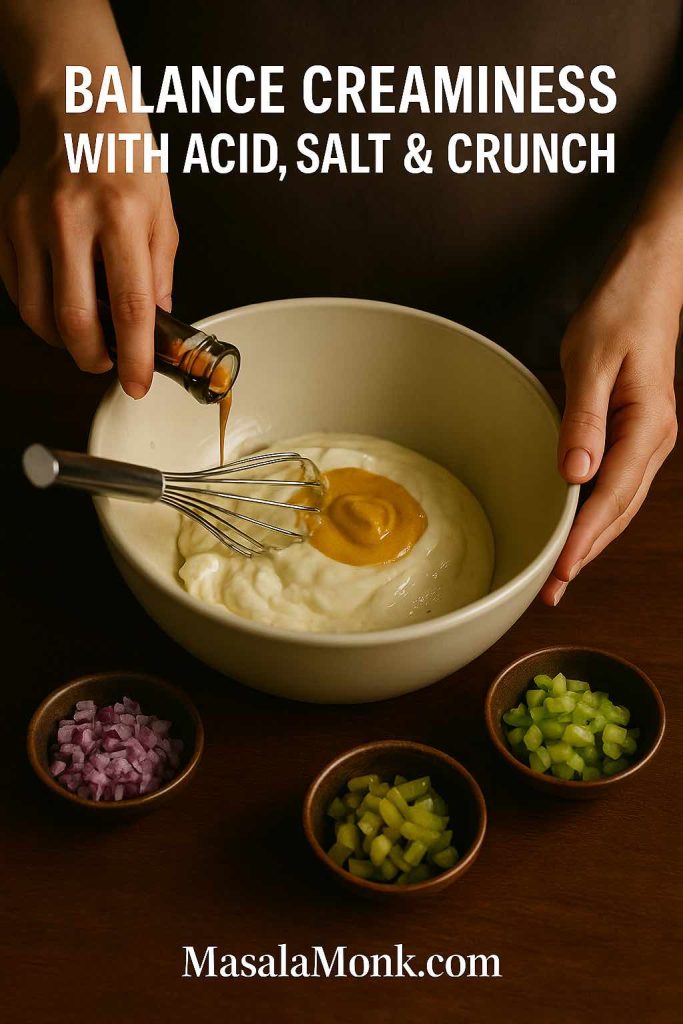
2. Blend and Stream in the Oil
Place the immersion blender at the bottom of the jar. Start blending on low speed. While the blades run, slowly pour in the oil in a thin, steady stream.
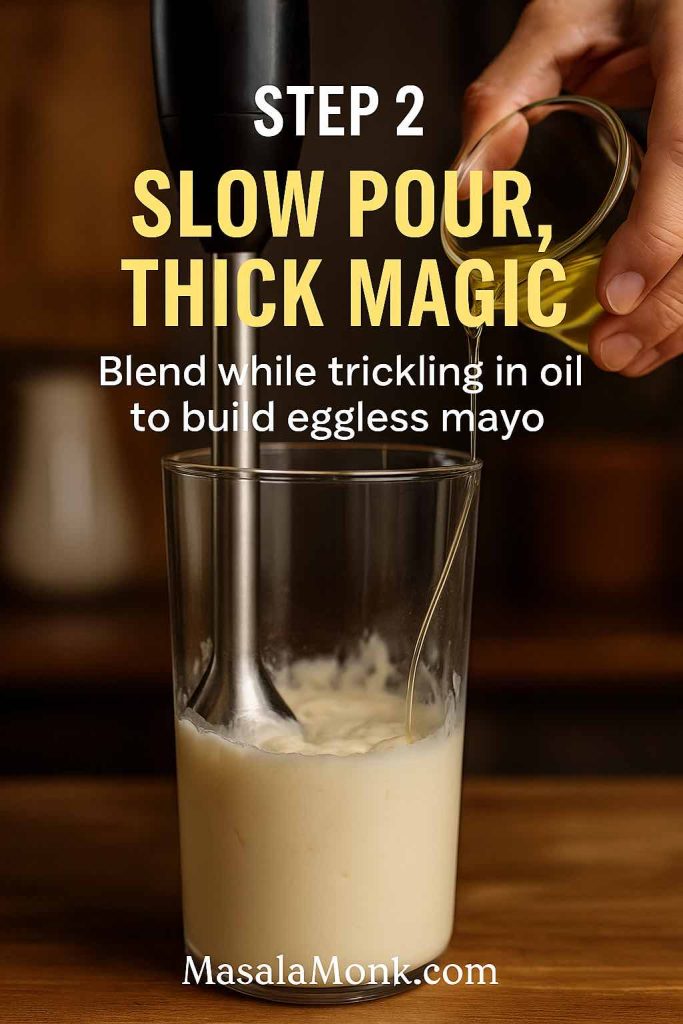
This is the crucial moment for any mayo recipe without egg: you’re encouraging the fat droplets to disperse and stay hanging in the water phase. Pour too fast, and it may split.
You’ll notice:
- At first, the mixture looks thin and milky
- Within a minute or so, it begins to thicken
- By the time most of the oil has gone in, it should look glossy and spoon-coating
If you’re curious about other methods, you can compare your technique with the stepwise photos on Eggless Cooking’s easy homemade eggless mayonnaise, which follows a similar emulsion logic.
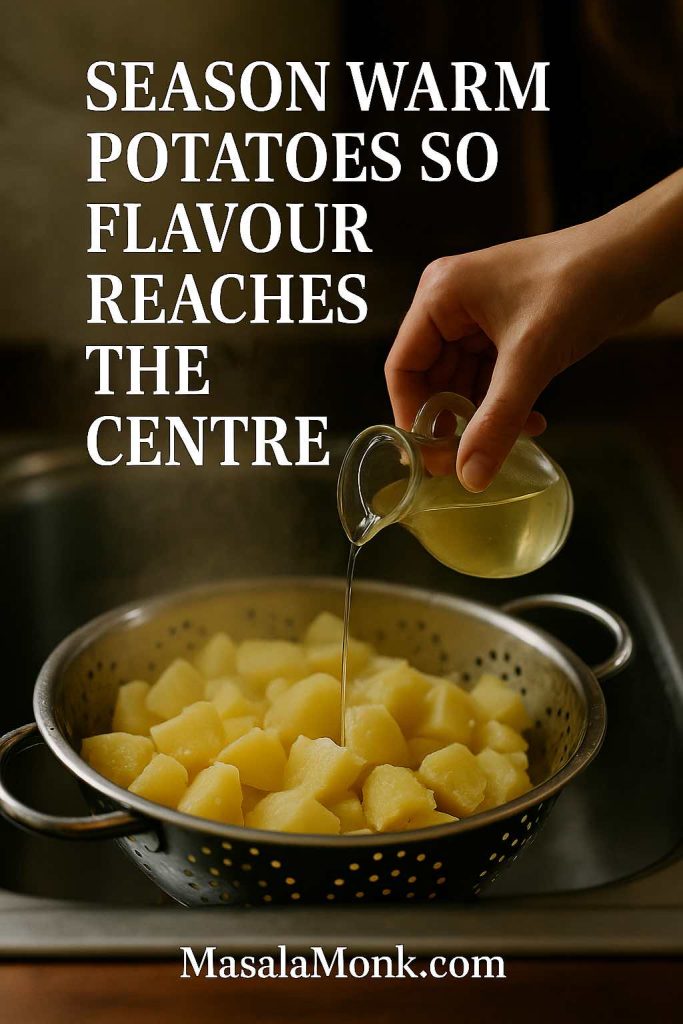
3. Adjust Thickness and Flavour
Now taste:
- Add more lemon juice or vinegar if you like it sharper
- Add a little more salt if you feel it’s flat
- If it’s too thick, whisk in a teaspoon or two of cold water
- If it’s too thin, blend in a bit more oil, very slowly
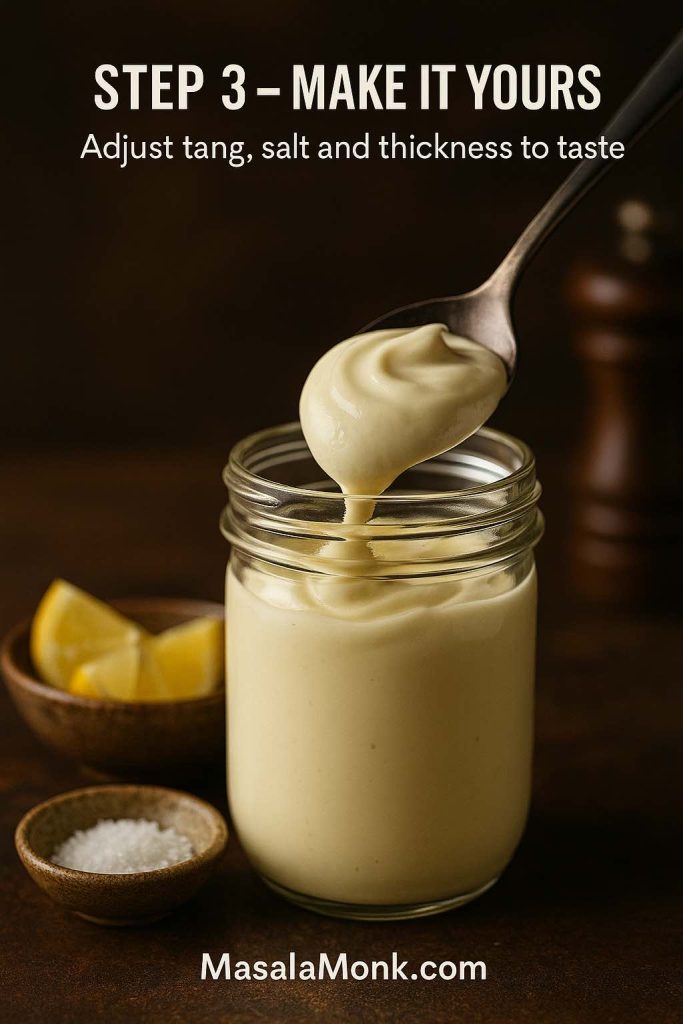
This is the part that really answers “how to make eggless mayonnaise at home”: you keep tasting and tweaking until the texture feels right to you, not just to a recipe card.
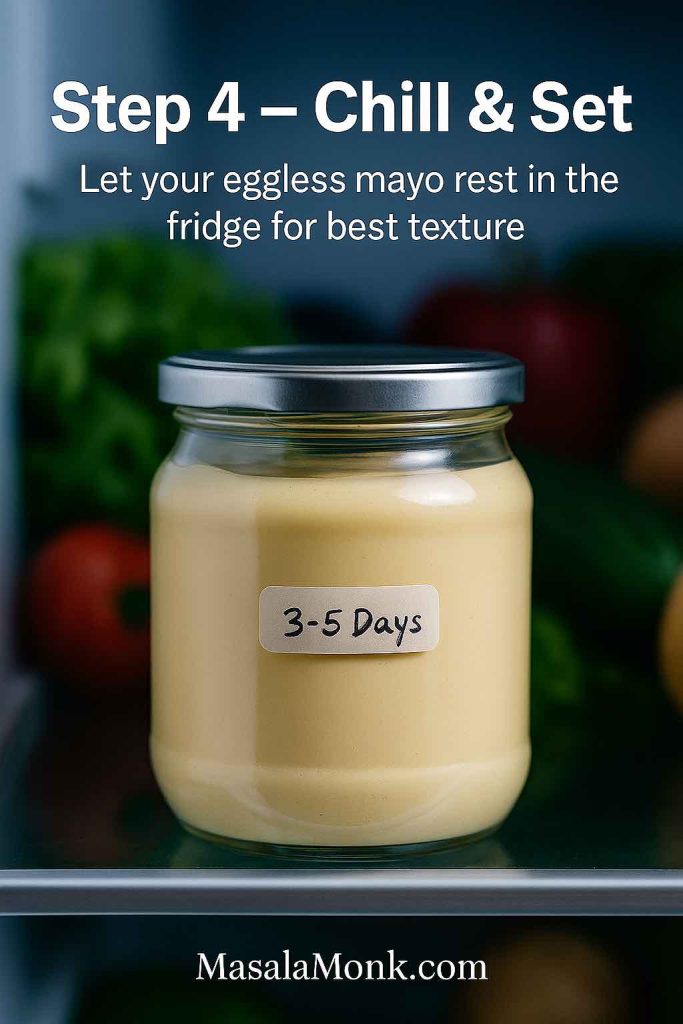
4. Chill to Set
Transfer your finished eggless mayo into a clean glass jar, cover and refrigerate. After an hour or two, it usually thickens slightly more and the flavours settle.
At this point, you’ve made a simple, classic no egg mayo that can be spread, whisked into dressings, or turned into flavoured versions.
Also Read: High Protein Overnight Oats | 5 Recipes (Low Calorie, Vegan, Bulking & More)
Different Types of Eggless Mayo (By Base)
One of the joys of mastering a base egg free mayo recipe is that you can shift the base to suit your diet and mood.
Milk-Based Eggless Mayo
This version is ideal if you’re searching for a milk-based eggless mayonnaise recipe that tastes like café mayo.
- Tastes the closest to commercial mayo
- Has a smooth, lightly creamy flavour
- Works brilliantly for burgers, wraps and grilled toasties
If you like the idea of multiple flavours from a single batch, it’s worth browsing Hebbars Kitchen’s eggless mayonnaise recipe – 4 flavours, which uses milk as the base and spins off different variants like garlic and herb mayo.
Curd or Yogurt-Based Eggless Mayonnaise
Curd-based no egg mayo works well for people who want a slightly lighter spread. Using hung curd or Greek yogurt gives you:
- A thicker, tangier eggless mayo recipe
- Bonus protein and beneficial cultures
- A lower fat profile compared to pure oil-based versions
This style is ideal for people who already like yogurt-based spreads. It slots effortlessly into sandwiches similar to MasalaMonk’s hung curd spinach cheese sandwich, where you might blend a spoon or two of egg free mayo into the curd filling for extra creaminess without losing the protein punch.
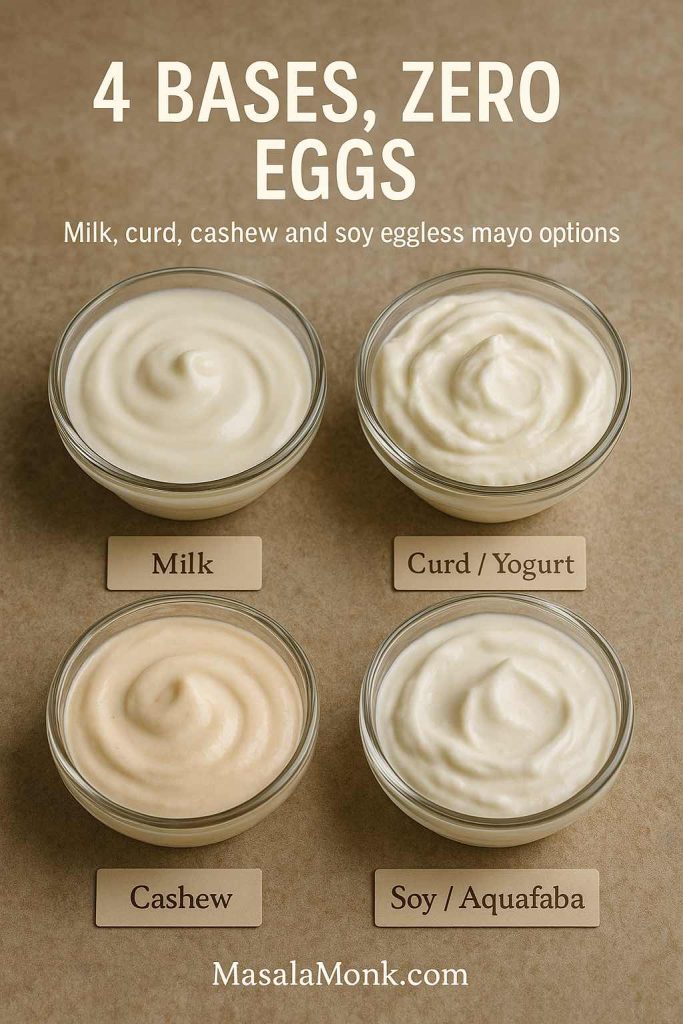
Cashew or Nut-Based Vegan Mayo
For vegan readers or anyone who is both egg- and dairy-free, a cashew base works beautifully:
- Soak cashews, blend with water and oil, then season
- The texture is rich, slightly sweet and very spreadable
- It’s great with roasted vegetables, wraps, and grain bowls
You’ll see this approach in cashew-based veg mayonnaise recipes like those on Veg Recipes of India mentioned earlier.
Soy Milk and Aquafaba Egg Free Mayonnaise
Finally, there are the classic plant-based emulsifiers:
- Soy milk – often used in blender mayo recipes; when combined with oil and acid, it emulsifies very much like egg yolk
- Aquafaba – chickpea brine that whips up like egg white and can form the base for a very light, airy no egg mayonnaise
These versions are especially attractive to vegans and to those who love experimenting. They also double as a nice party trick: most people won’t guess chickpea water was involved.
Also Read: Béchamel Sauce for Lasagna: Classic, Vegan & Ricotta Sauce Recipe
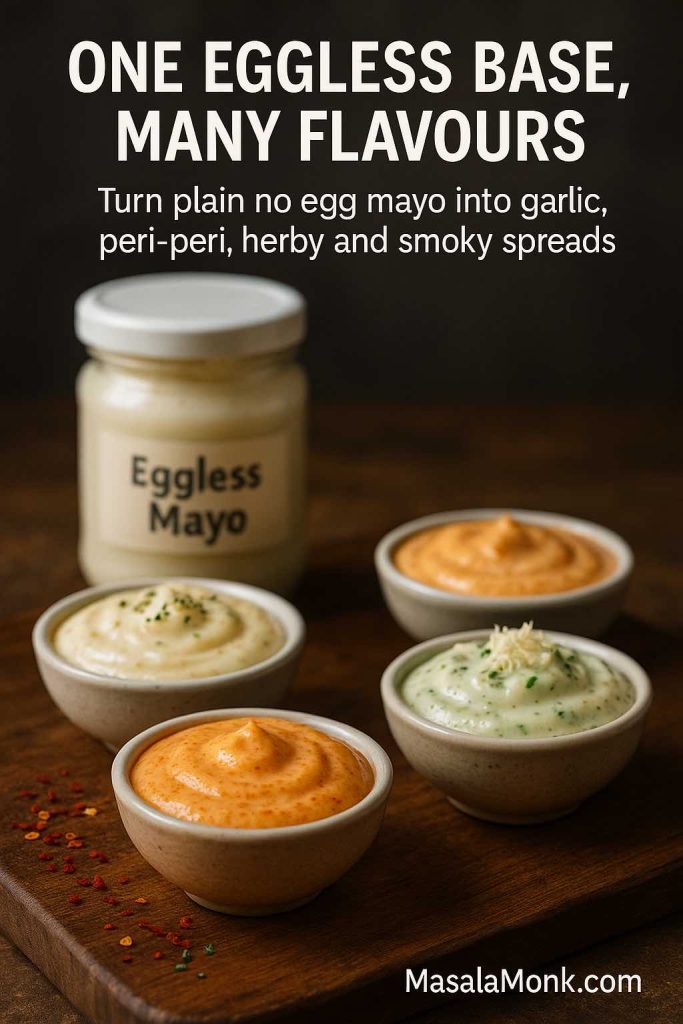
Flavoured Egg Free Mayo Variations (Garlic, Peri-Peri, Herby & More)
Once you have your base egg free mayonnaise recipe, it’s time to play. Instead of making four separate batches, you can:
- Prepare one large jar of plain eggless mayo
- Divide it into smaller bowls
- Stir in flavourings to create several variants at once
This is exactly the approach in many “4 flavours from 1 mayo” tutorials such as Hebbars Kitchen’s recipe referred earlier.
Here are some ideas you can easily replicate at home.
Garlic Eggless Mayonnaise Recipe
For garlic lovers, this variation is a staple.
Stir into ½ cup of base eggless mayo:
- 1–2 cloves of finely minced or roasted garlic
- A squeeze of lemon
- Freshly ground black pepper
Use this garlic mayo without eggs on:
- Grilled sandwiches
- Potato wedges
- Veggie wraps
It pairs nicely with Mediterranean-style fillings: for example, you can drizzle a bit over a hummus veggie sandwich for an extra creamy, garlicky layer alongside the chickpea spread.
Recipe of Spicy or Peri-Peri Eggless Mayonnaise
For something with a kick:
- ½ cup eggless mayo
- ½–1 teaspoon peri-peri spice blend or chilli flakes
- ½ teaspoon smoked paprika
- A pinch of sugar to balance the heat
Use this spicy egg free mayo with:
- Burgers and sliders
- Roasted potatoes
- Grilled corn or veggie skewers
It’s also a clever way to serve mayo in places where raw-egg-based mayonnaise has been considered a high-risk food and gradually replaced with safer alternatives.
Herb and Cheese Eggless Recipe of Mayonnaise
If you love café-style sandwiches, this version is for you.
Mix into ½ cup of base mayo:
- 1–2 tablespoons grated cheese
- ½ teaspoon Italian mixed herbs or fresh coriander
- A little extra pepper
Spread this herby, cheesy no egg mayo inside grilled vegetable sandwiches, baked casseroles, or as a base layer in snacky toasts.
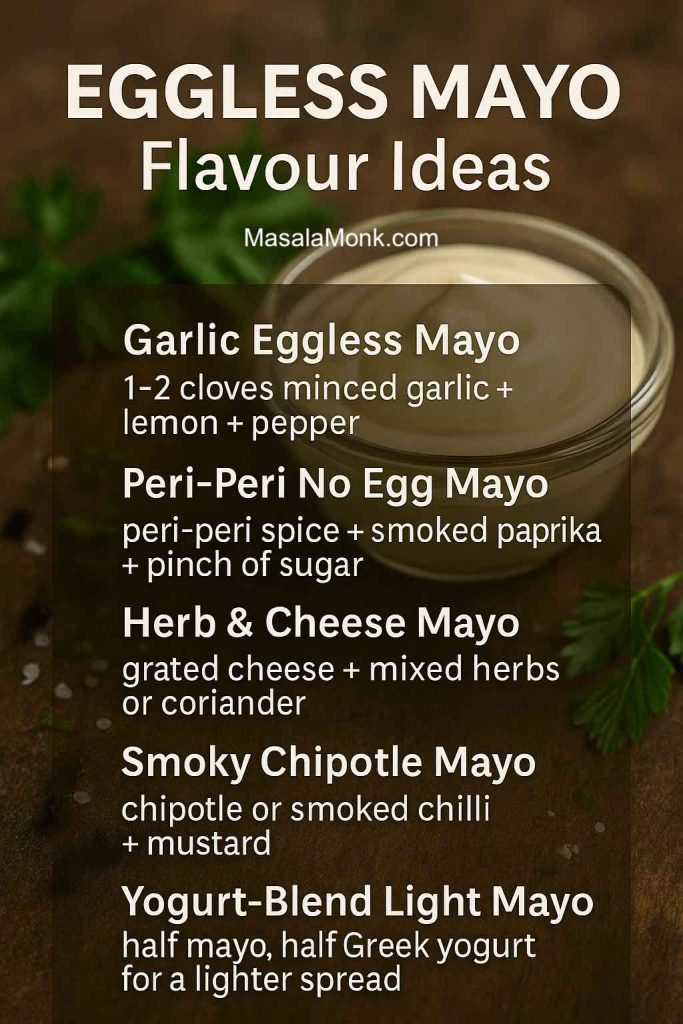
Smoky Mustard or Chipotle Style
If you lean towards smoky flavours:
- ½ cup eggless mayo
- 1 teaspoon mustard (Dijon or grainy)
- ½ teaspoon smoked paprika or chipotle powder
- Optional: a few drops of liquid smoke
It’s excellent with potato wedges, grilled chicken, or veggie burgers.
Also Read: Vegan French Toast: 6 Easy Recipes (Pan, Air Fryer, GF & High-Protein)
Is Eggless Mayo Actually Healthy?
Whether you’re swirling a classic egg-based mayo or an eggless mayonnaise recipe, the big picture is similar: it’s mostly oil, so it’s calorie-dense, but can still fit into a balanced way of eating.
According to nutrition analysis like Verywell Fit’s breakdown of mayonnaise, one tablespoon of mayo typically contains around 90–100 calories, most of it from fat.
On the other hand, mayo can bring some nutritional positives:
- It often contains vitamin E, which supports heart health
- It provides vitamin K, involved in blood clotting
- When made with good oils, it can offer unsaturated fats that support brain and heart function
Indian-focused resources, such as Netmeds’ article on whether mayonnaise is good or bad for health, highlight many of the same themes: mayo isn’t “poison”, but it’s easy to overuse.
So how do you keep your healthy eggless mayonnaise recipe genuinely “healthy” in day-to-day life?
Smarter Ways to Use Eggless Mayo
- Prioritise good oils
Use oils that are high in unsaturated fats and avoid repeatedly reheated or rancid oils. - Watch portion size
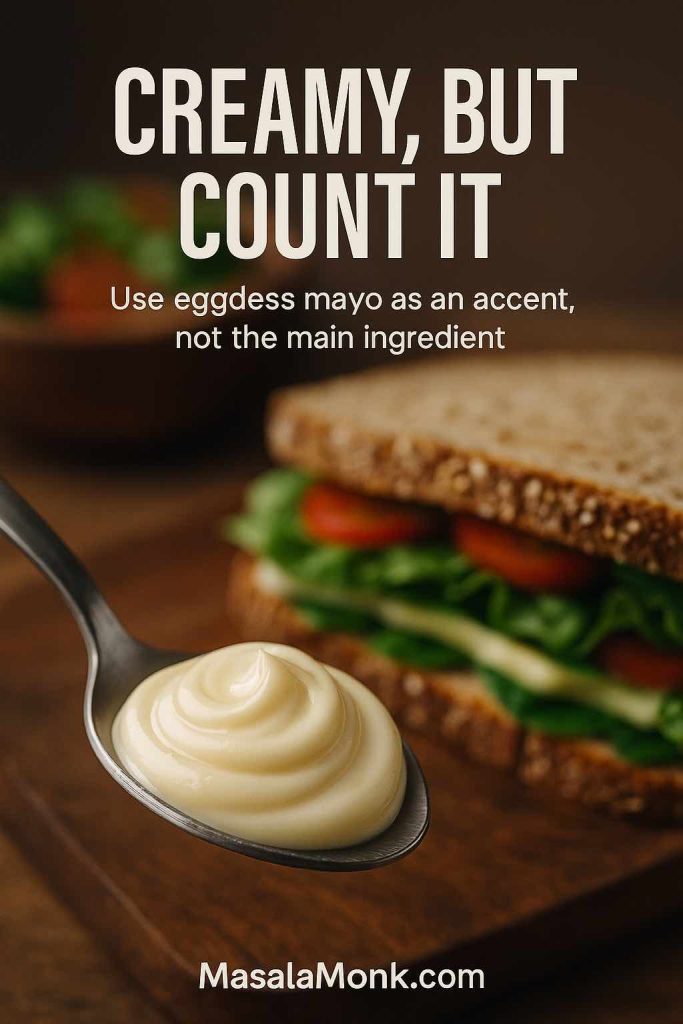
Spread a thin layer on sandwiches rather than piling it on. A tablespoon or two can be plenty. - Pair with fibre and protein
Combine mayo-heavy spreads with high-fibre breads and fillings – an approach you can see in MasalaMonk’s high-fibre sandwich ideas for gut health, where the focus is on whole grains, legumes and vegetables. - Mix with yogurt or hummus
In fillings like tuna salad or chickpea mash, you can combine a little egg free mayo with Greek yogurt or hummus for a lighter, tangier blend. MasalaMonk’s healthy tuna salad guide leans into this kind of balance with yogurt + a spoon of mayo instead of all-mayo bowls.
Used thoughtfully, eggless mayonnaise can sit comfortably alongside salads, sandwiches and wraps instead of overwhelming them.
Also Read: Strawberry Mojito Mocktails – 10 Easy Variations
Eggless Mayonnaise in Pregnancy and for Egg Allergies
Because so many people want to know how to make mayonnaise without egg, in relation to pregnancy and allergies, it’s worth pulling those strands together clearly.
Pregnancy
Most mainstream guidance comes down to this:
- Homemade mayo made with raw eggs is considered higher risk in pregnancy due to salmonella.
- Commercial mayonnaise is generally safe because it’s made with pasteurised eggs and processed under controlled conditions.
An egg free mayonnaise removes eggs from the recipe entirely, which can be especially reassuring for:
- Home cooks who make mayo in small batches regularly
- People hosting pregnant guests and wanting a safe default
- Those living in regions where raw-egg mayonnaise has been officially flagged as high-risk in food safety inspections
If there are any specific concerns, it’s always best to talk to a healthcare professional, but from a cooking perspective, eggless mayo gives you a comfortable, practical option.

Egg Allergy
For families dealing with egg allergies, eggless mayo can be more than just a taste preference; it’s a way to make everyday food feel normal and inclusive.
Trusted sources such as Mayo Clinic and Cleveland Clinic describe egg allergy as an immune reaction to proteins in egg white and yolk, with symptoms ranging from hives and stomach upset to, in rare cases, anaphylaxis.
In that context, having a reliable no egg mayonnaise recipe allows you to:
- Pack egg-free sandwiches that still feel “creamy and indulgent”
- Make potato salads, coleslaw and creamy dips without relying on eggs
- Avoid the anxiety of wondering whether a store-bought jar is truly egg-free
Eggless mayo isn’t a substitute for medical advice, of course, but it’s a useful everyday tool for making food feel less restrictive.
Also Read: Egg Intolerance Symptoms
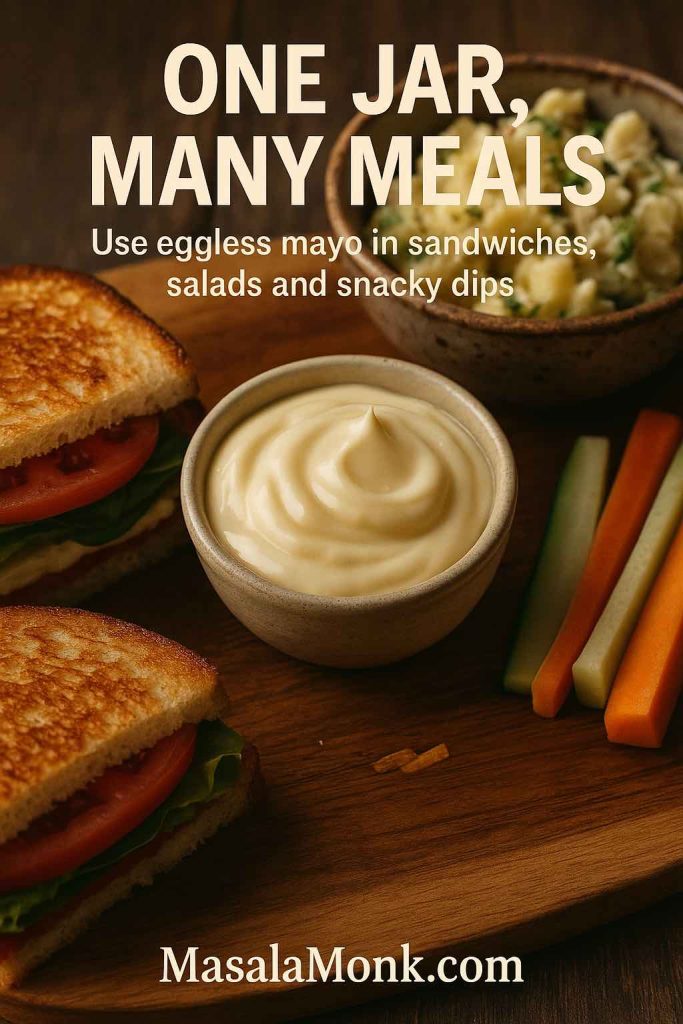
How to Use Eggless Mayo in Everyday Food
Once you’ve mastered a base eggless mayonnaise recipe, the big question is: what now? Luckily, eggless mayo behaves almost exactly like regular mayo in most dishes. Anywhere you’d normally use regular mayo in sandwiches, you can comfortably swap in egg free mayonnaise.
Sandwiches and Toasties
This is where eggless mayo shines.
- Spread a thin layer inside an authentic grilled Bombay sandwich before adding chutney, vegetables and masala. The mayo cushions the fillings and adds richness under the classic green chutney.
- Swap the burger mayo in MasalaMonk’s mushroom cheese sandwich for your egg free mayonnaise; the layers of mushroom, cheese and mayo are an ideal playground for an eggless spread.
- Combine a spoonful of eggless mayo with the hung curd filling in the healthy spinach cheese sandwich to make the texture slightly richer without losing the high-protein yogurt base.
- For brunch, pair a swipe of mayo with the avocado topping in MasalaMonk’s avocado, basil and grilled tomato sandwich, especially if you like a café-style breakfast toast with a bit more indulgence.
- On leftover nights, bind the stuffing inside the paneer sabji sandwich with a spoon of no egg mayonnaise so the filling holds together when grilled.
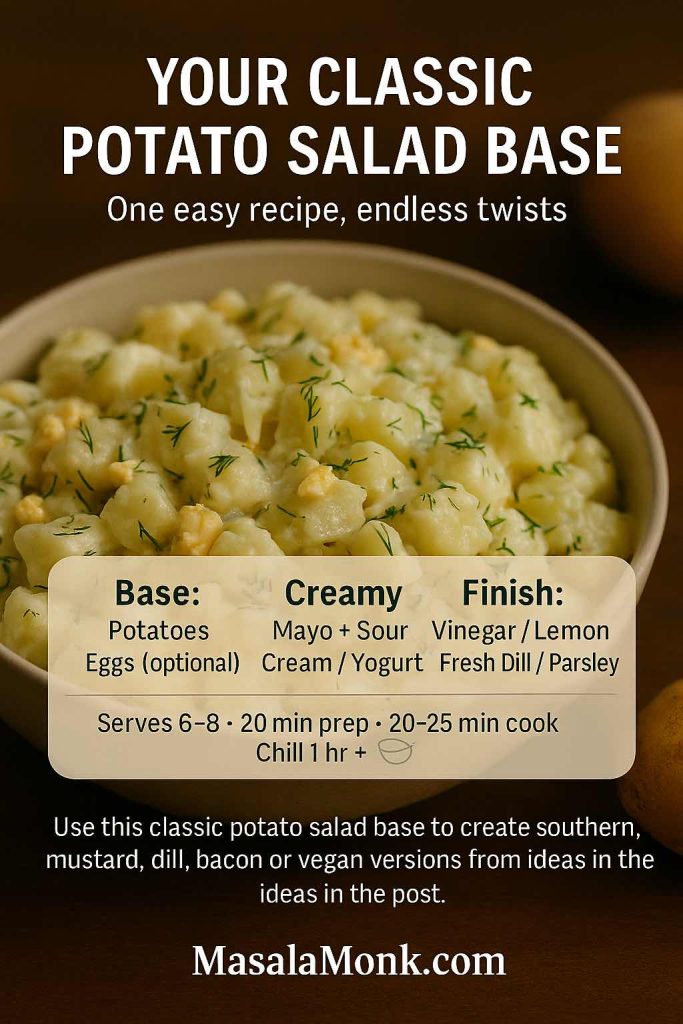
Because your mayo is eggless, you can serve these sandwiches confidently at mixed gatherings where not everyone eats eggs. This mayonnaise without eggs behaves almost exactly like classic mayo in potato salad, coleslaw and creamy dips.
Salads and Bowls
Creamy salads get upgraded immediately with a homemade egg free mayo recipe.
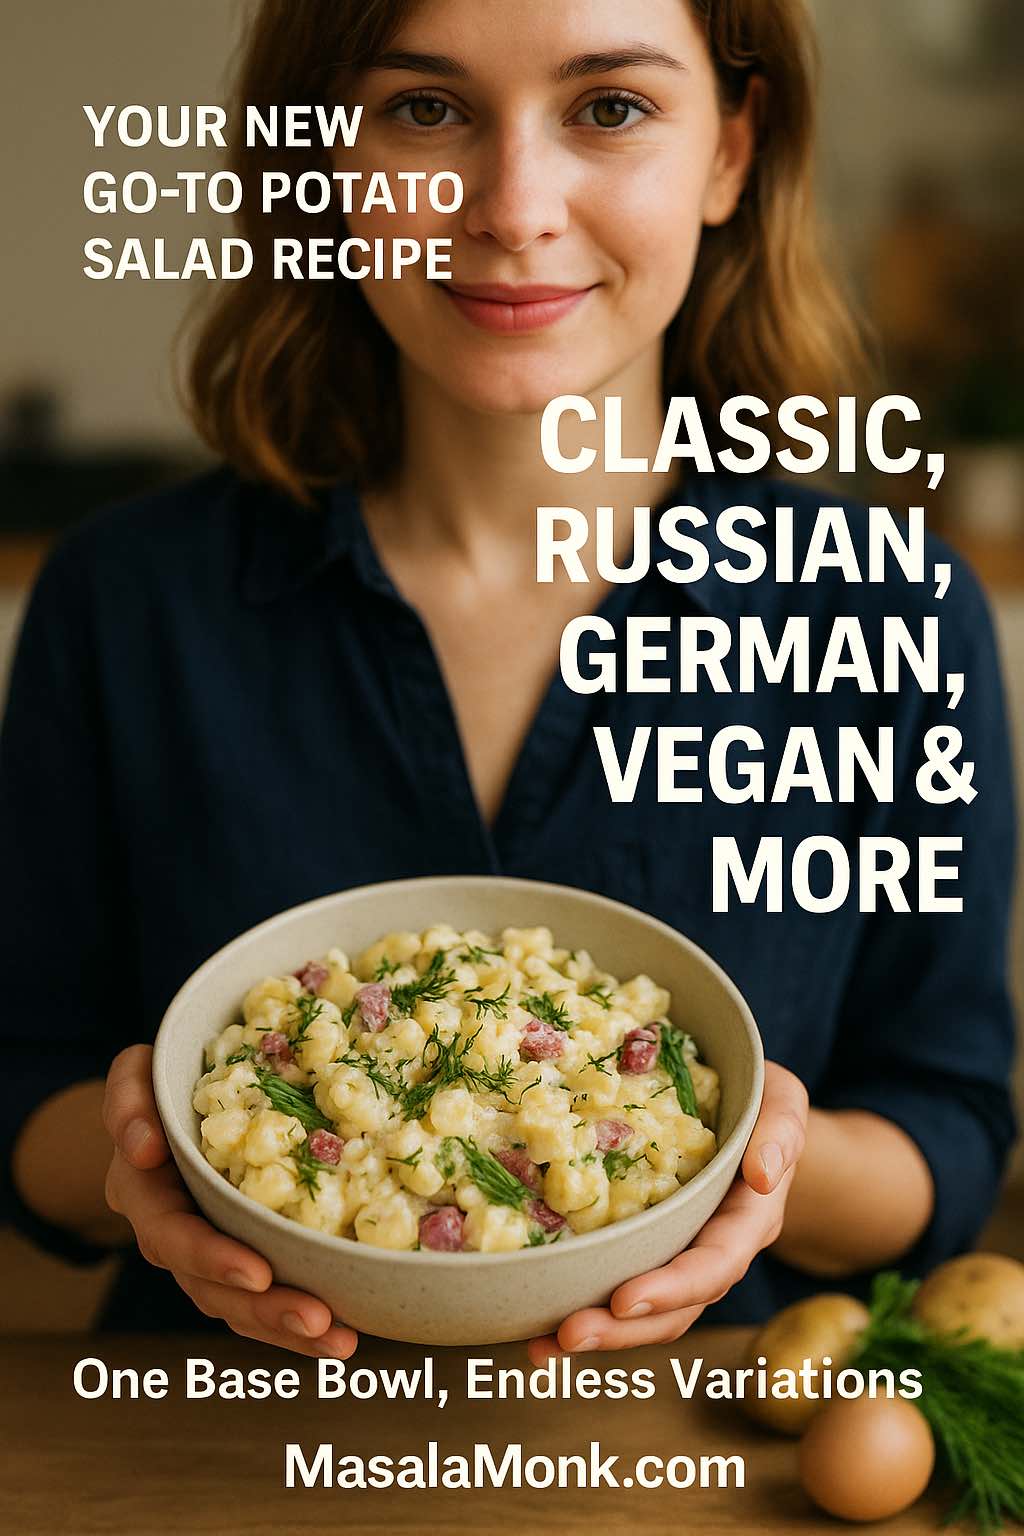
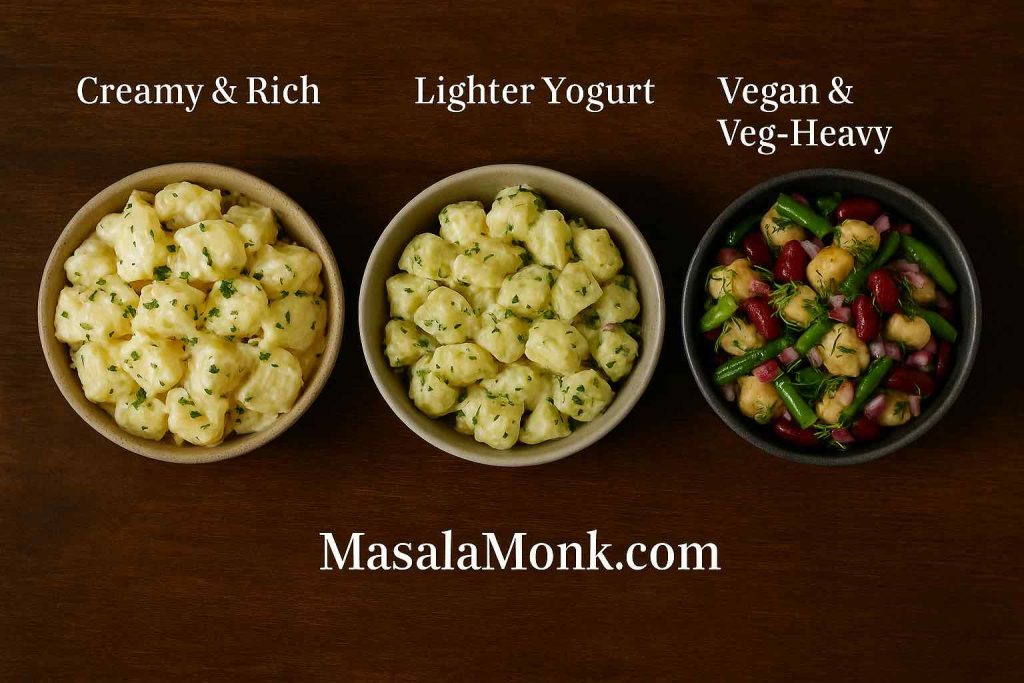
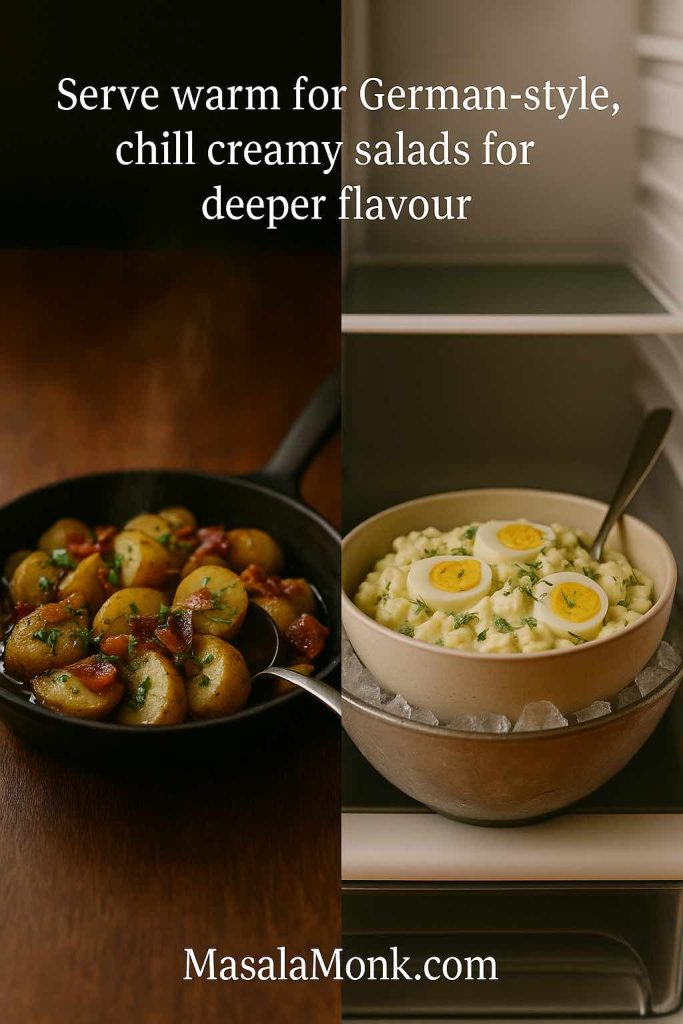
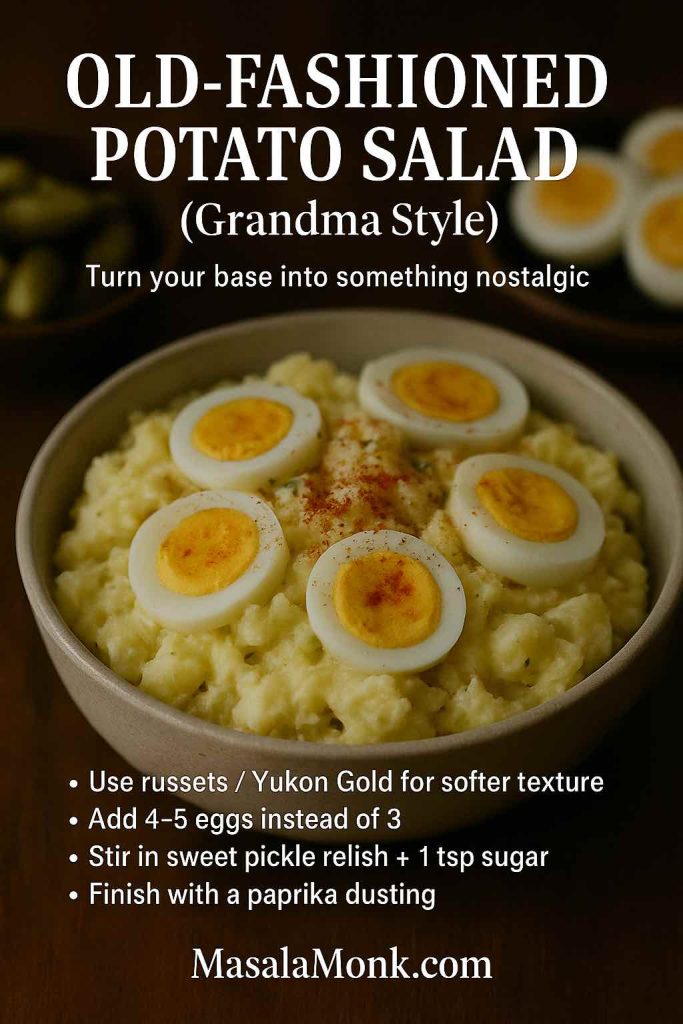
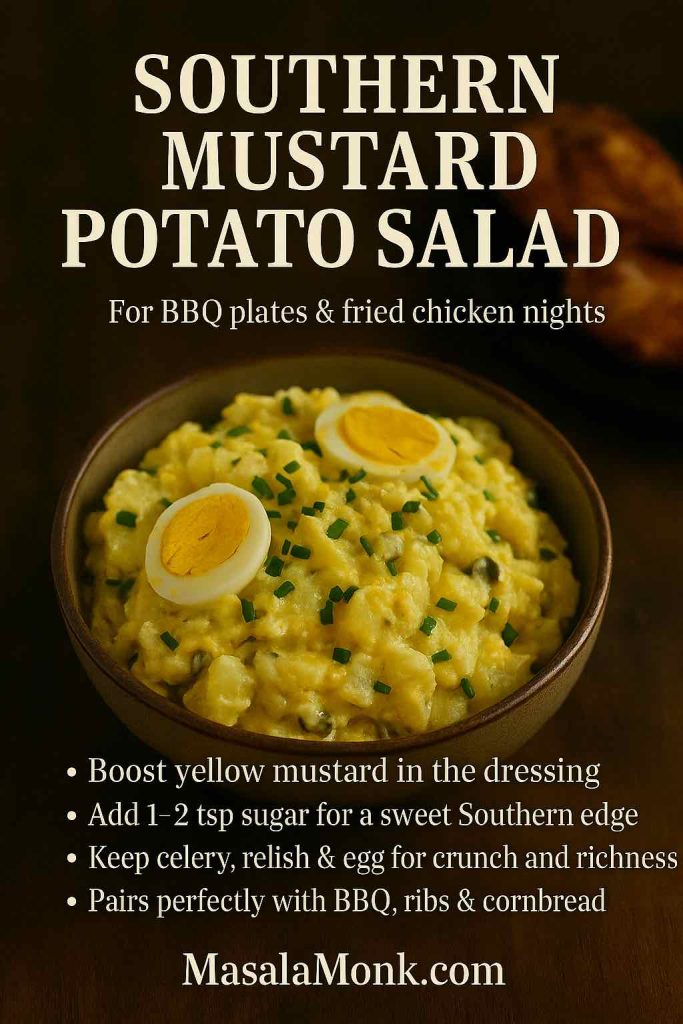
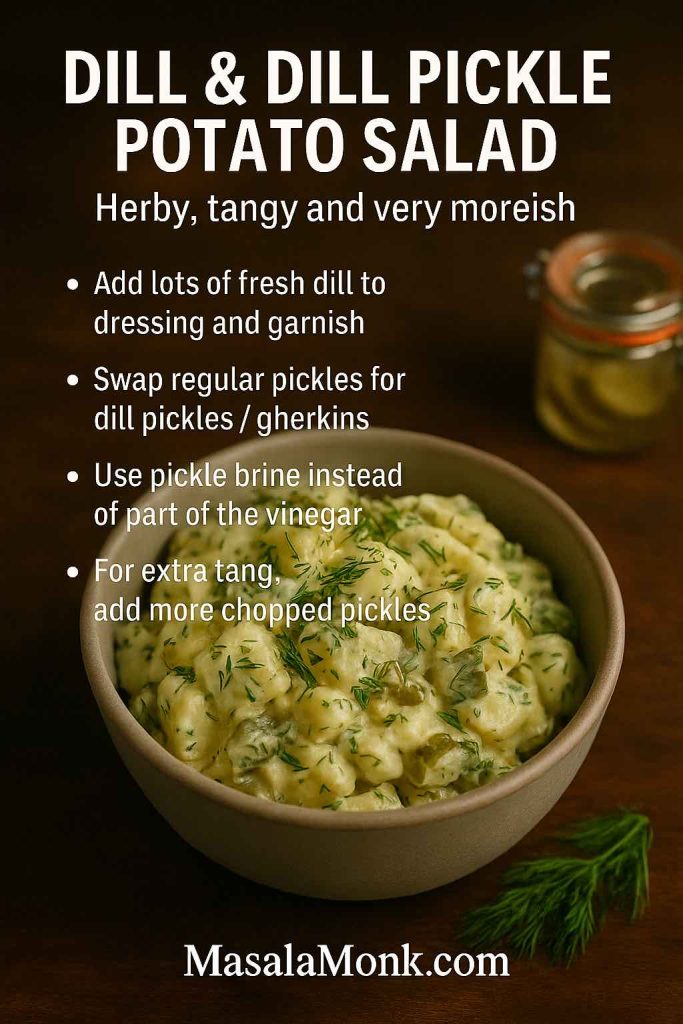
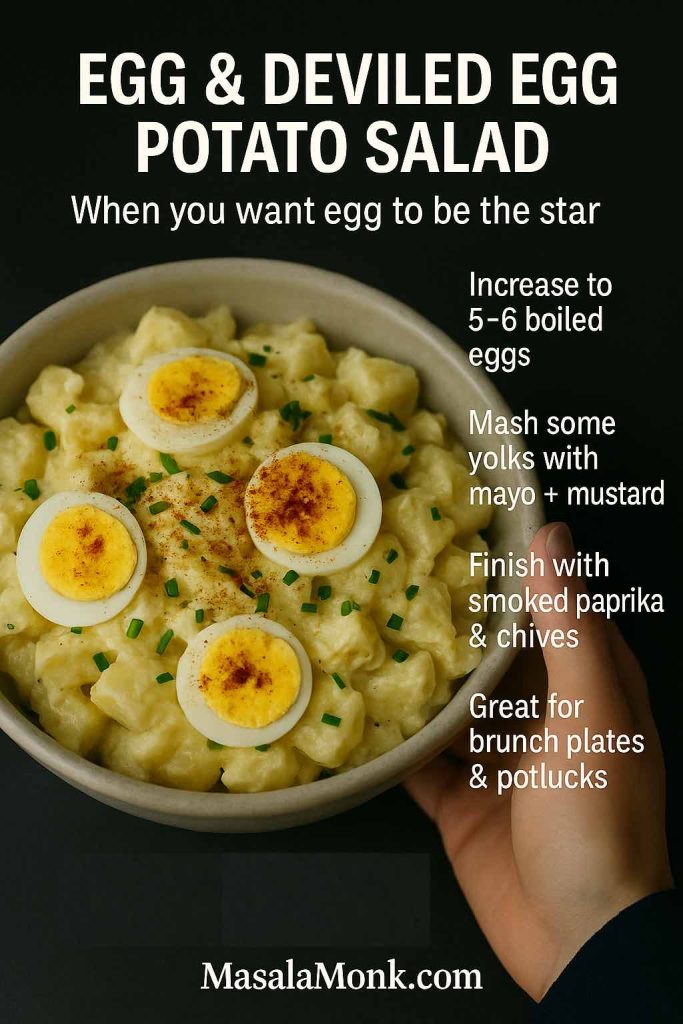
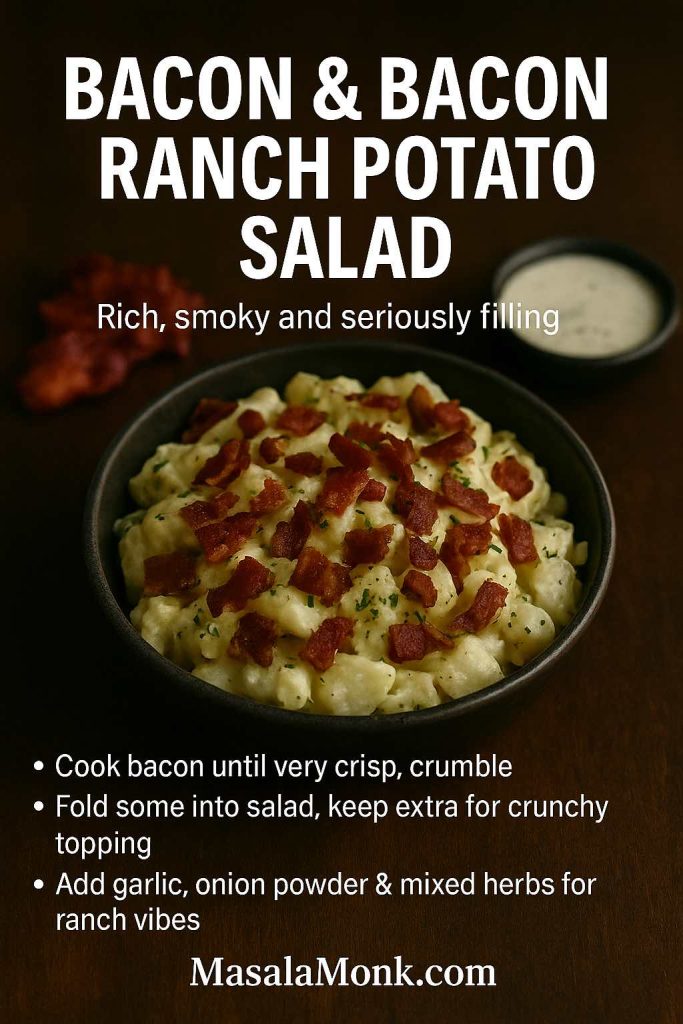
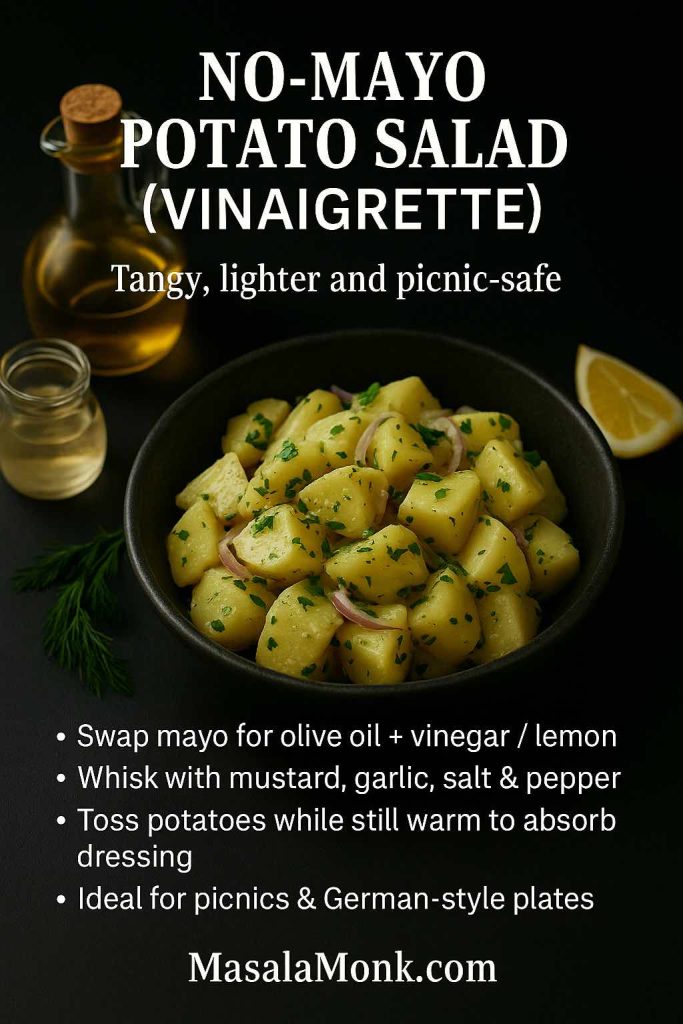
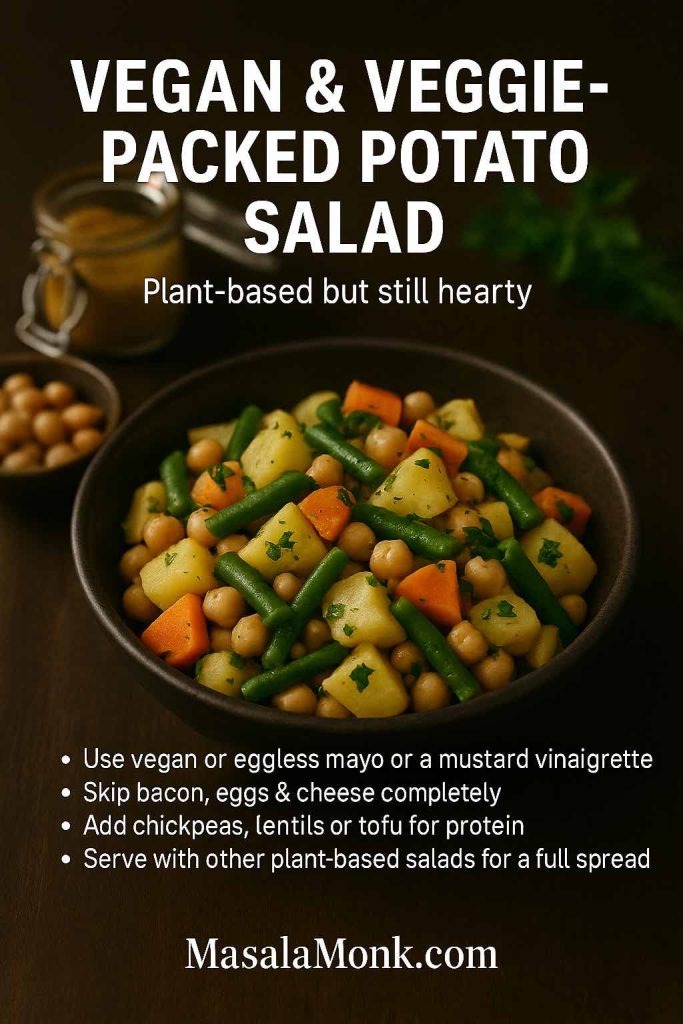
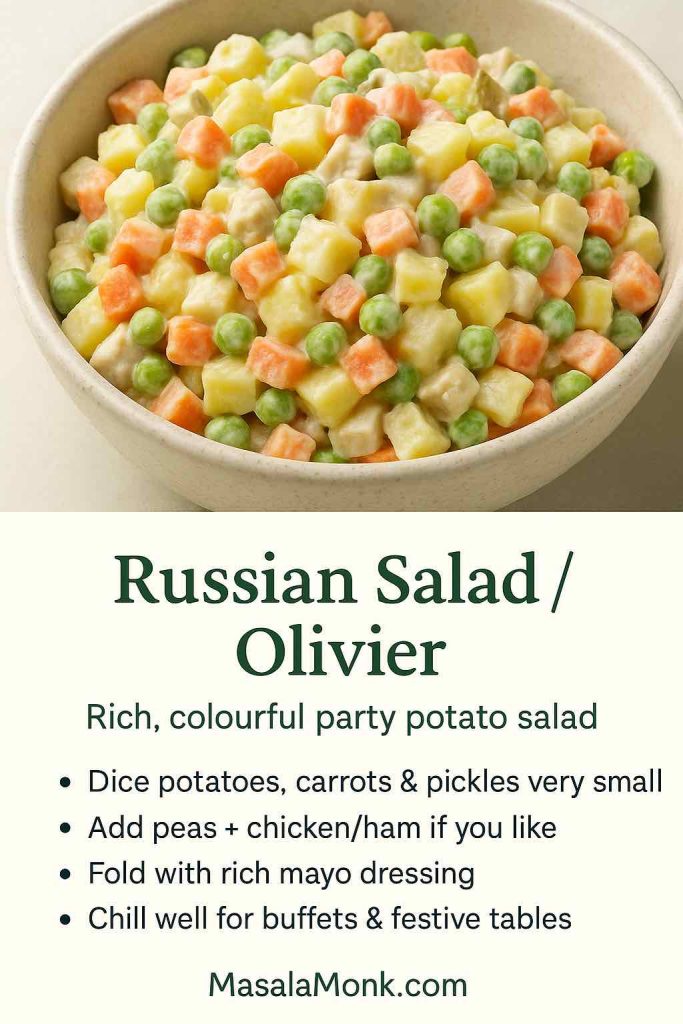
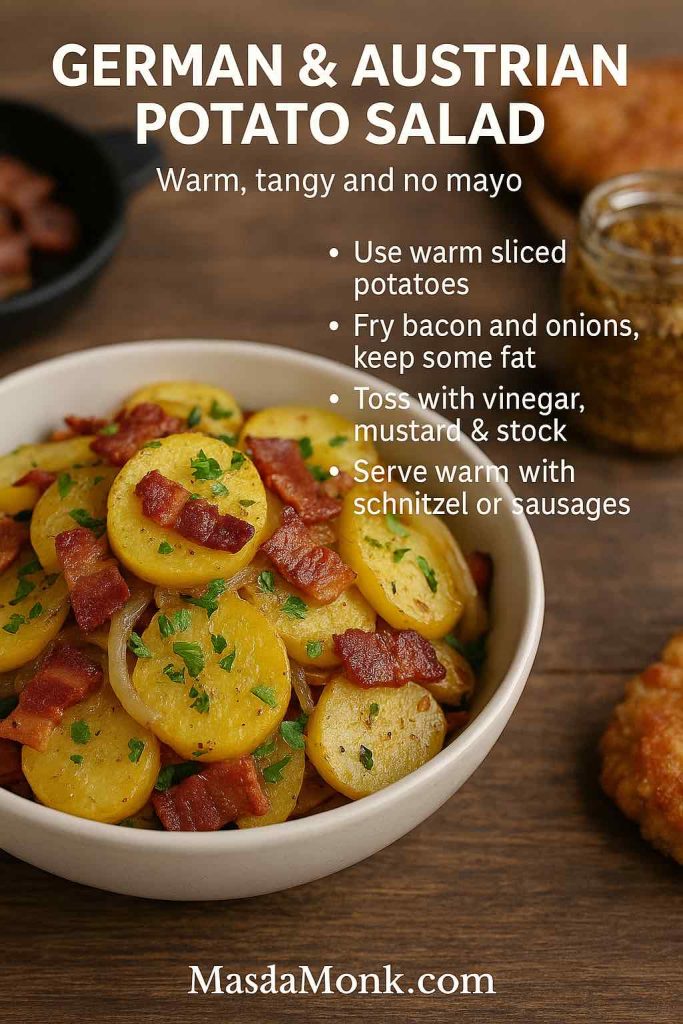
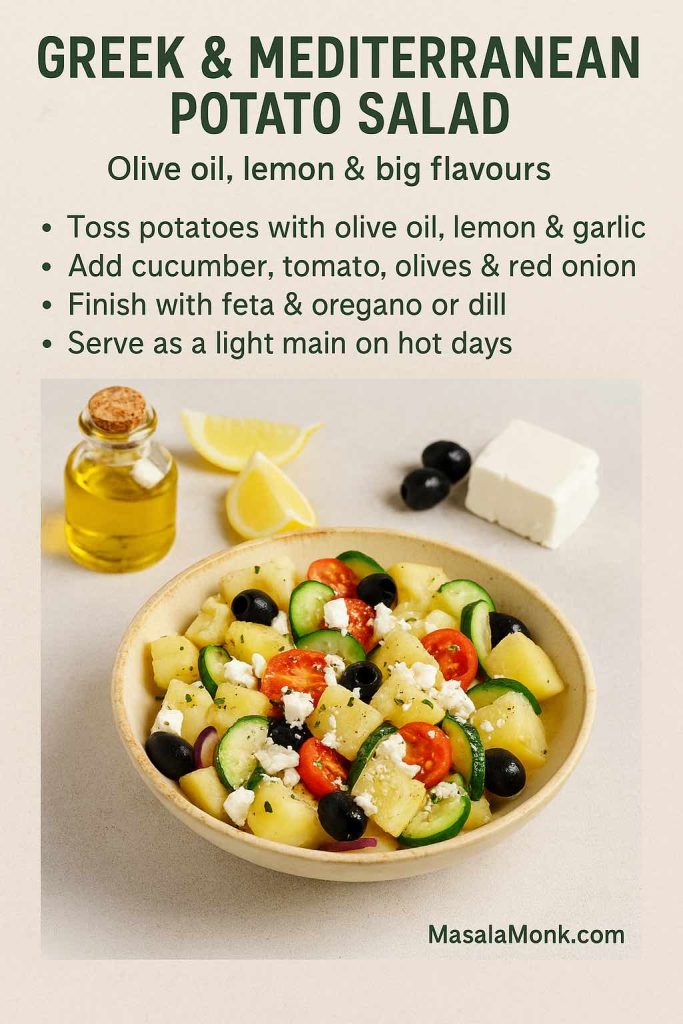
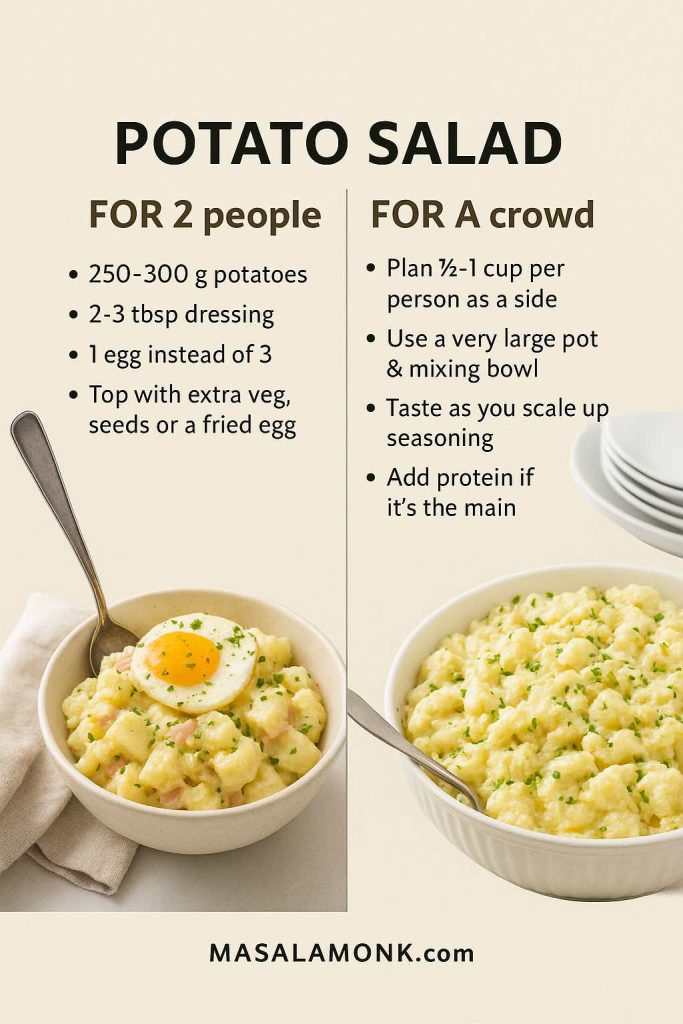
- Use it to dress boiled potatoes, herbs and crunchy vegetables in a potato salad inspired by MasalaMonk’s potato salad guide, which covers classic, Russian, German and vegan-leaning combinations. Just swap in your mayonnaise without eggs wherever regular mayo is called for.
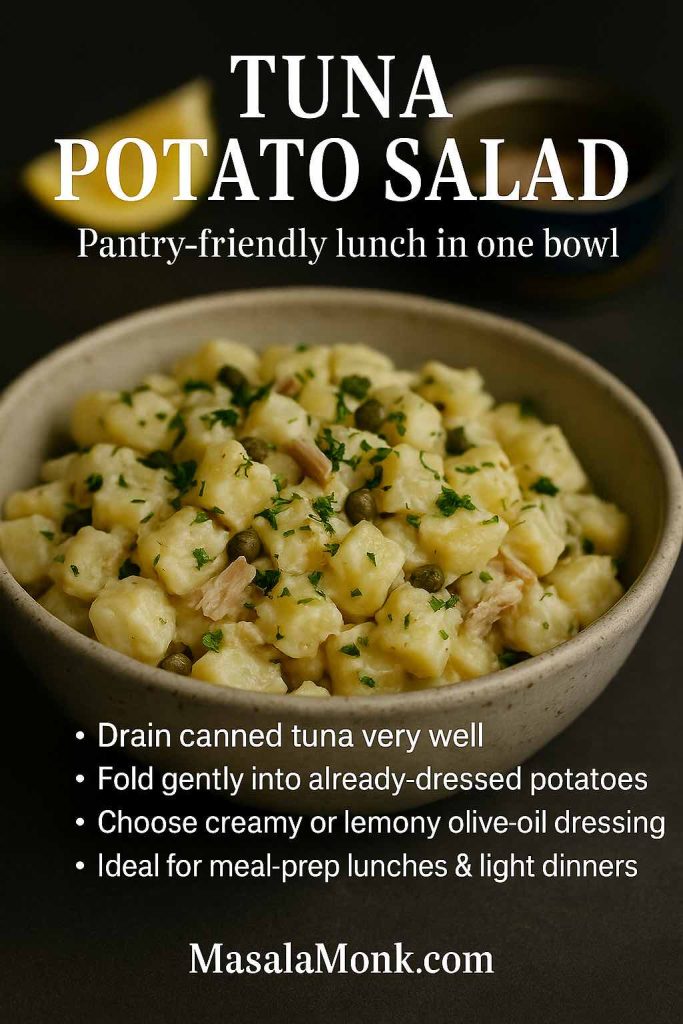
- Stir a spoon or two into one of the builds in the healthy tuna salad collection if you’re not strictly no-mayo, but still want the focus to be on lean protein and yogurt.
- Mix eggless mayo with a splash of water or lemon juice and whisk it into shredded cabbage and carrots for a quick slaw to serve alongside grilled food.
If you’re building high-fibre, gut-friendly plates using ideas from MasalaMonk’s high-fibre sandwich article or our probiotic-rich sandwich guide, a thin layer of eggless mayo can complement the fermented and fibre-rich ingredients rather than overwhelm them.
Dips and Dressings
Eggless mayo also transforms easily into dips and dressings:
- Whisk together mayo, lemon juice, chopped herbs and a bit of garlic for a quick dip for raw vegetables or roasted potatoes.
- Blend a spoonful of mayo into fruity dressings – for instance, you could adapt MasalaMonk’s sweet and spicy mango salad dressing by adding a little egg free mayonnaise when you want it to cling more luxuriously to salad leaves.
Because your base is neutral, you can go in whichever direction your pantry and mood suggest—Mediterranean, desi, smoky, tangy, spicy or even a mix.
Troubleshooting Recipe of Eggless Mayonnaise
Even if you follow every step, a mayonnaise recipe without egg can occasionally misbehave. Fortunately, most issues are fixable.
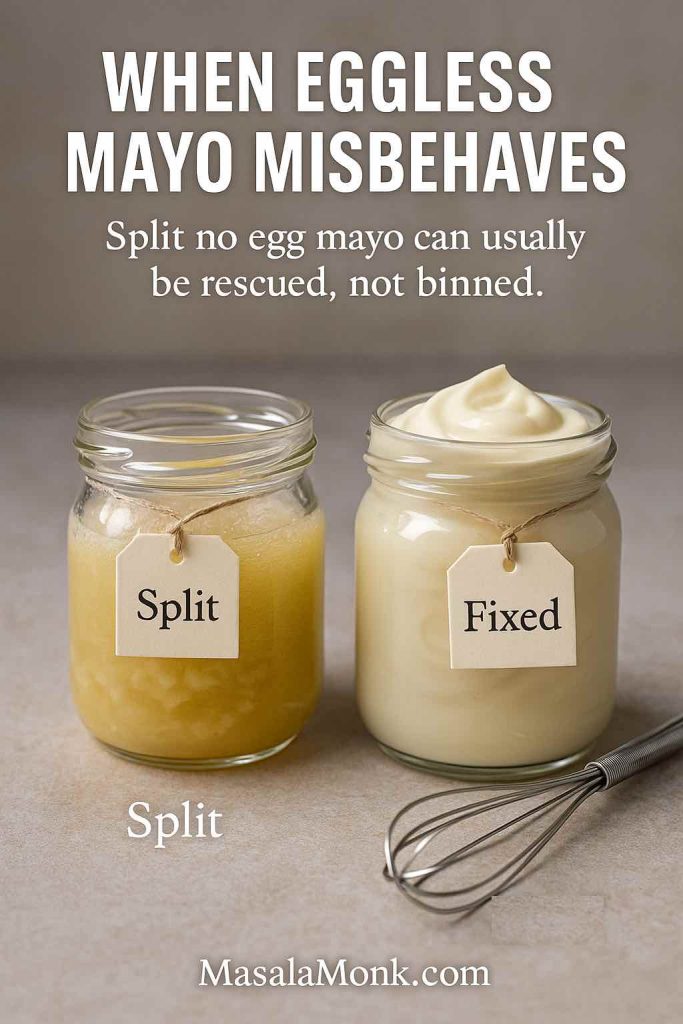
Why Did My Eggless Mayo Split?
A split mayo looks grainy or watery, with oil separating from the base. Common culprits:
- Oil poured too quickly
- Base and oil at very different temperatures
- Not enough emulsifier (milk/curd/aquafaba) for the amount of oil
To rescue it:
- Start with a fresh 2–3 tablespoons of milk or curd in a clean jar.
- Blend on low speed, then slowly trickle in the split mayo as if it were the oil.
- The mixture often comes together into a smoother emulsion.
My Egg Free Mayonnaise Is Too Thin
If your eggless mayo looks more like salad dressing than spread, try:
- Blending in a little more oil, just a teaspoon at a time, until it thickens
- Using slightly thicker curd or chilling the batch to help it firm up
- Checking that you didn’t add too much acid or water up front
Eggless Mayonnaise Recipe is Too Thick and Won’t Spread
This one is easy to fix:
- Whisk in a teaspoon of cold water or extra lemon juice at a time
- Stop as soon as it becomes spreadable again
Remember, it’s perfectly normal for home-style eggless mayonnaise to be thicker when chilled and looser when left out at room temperature for a few minutes.
Also Read: Double Chocolate Chip Cookies – Easy Recipe with 7 Variations
Storage and Food Safety for Eggless Mayonnaise / Egg Free Mayo
Even though a no egg mayonnaise recipe avoids raw eggs, you still need to treat it as a fresh, perishable food.
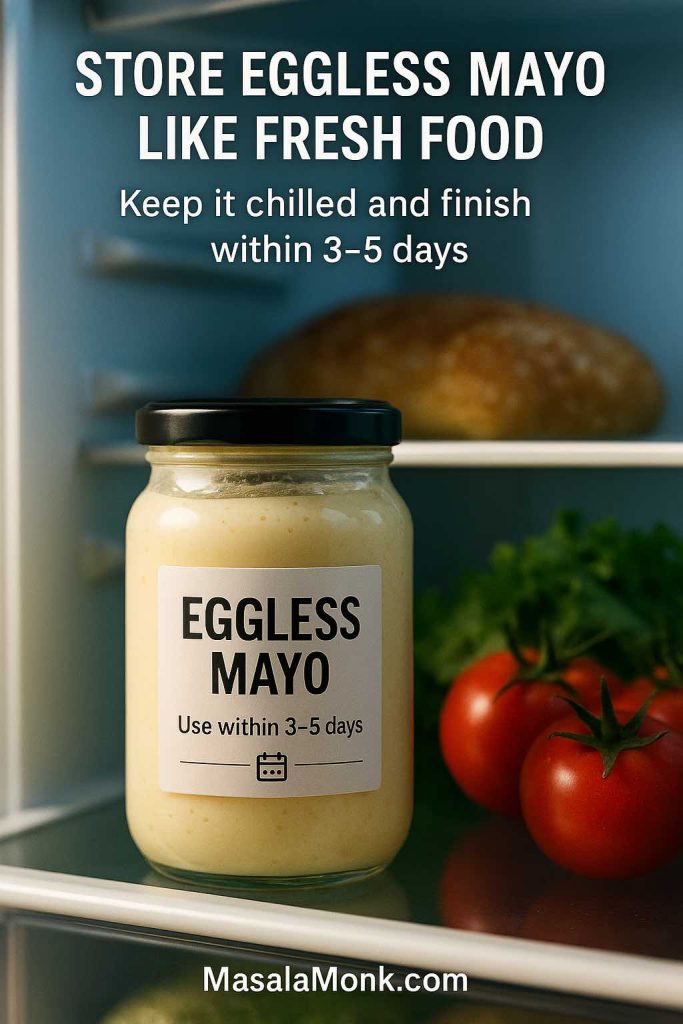
- Always refrigerate eggless mayo in a clean, airtight jar.
- Use a clean spoon each time to avoid contamination.
- As a rule of thumb, most homemade egg free mayo is best within 3–5 days, especially if it contains dairy.
- Discard it if you notice an off smell, mould, or severe separation that doesn’t fix with whisking.
The same principles that apply to any creamy, oil-rich condiment apply here as well: keep it cold, keep it clean, and don’t stretch it for weeks “just because it looks okay”.
Pulling It All Together
Making your own eggless mayonnaise is one of those small kitchen skills that pay off in many directions at once. Once you’ve mastered a base eggless mayonnaise recipe, you can:
- Answer those “how to make mayonnaise without egg” and “how do you make mayonnaise without eggs” questions with confidence
- Whip up flexible, flavourful spreads and dips in minutes
- Create lighter or dairy-free versions when you want a healthy eggless mayonnaise recipe
- Make sandwiches, salads and snacks friendlier for people who avoid eggs because of allergies, preferences or pregnancy
From veggie-stuffed toasties to high-fibre, gut-friendly lunches and creamy picnic salads, a good egg free mayo quietly unlocks a lot of meals. Once a jar is sitting in your fridge, it becomes as natural to reach for as chutney or yogurt – and that’s exactly the kind of everyday usefulness that makes a recipe worth learning by heart.
Also Read: Peanut Butter Cookies (Classic Recipe & 3 Variations)

FAQs about Eggless Mayonnaise Recipe
1. What is eggless mayonnaise and how is it different from regular mayo?
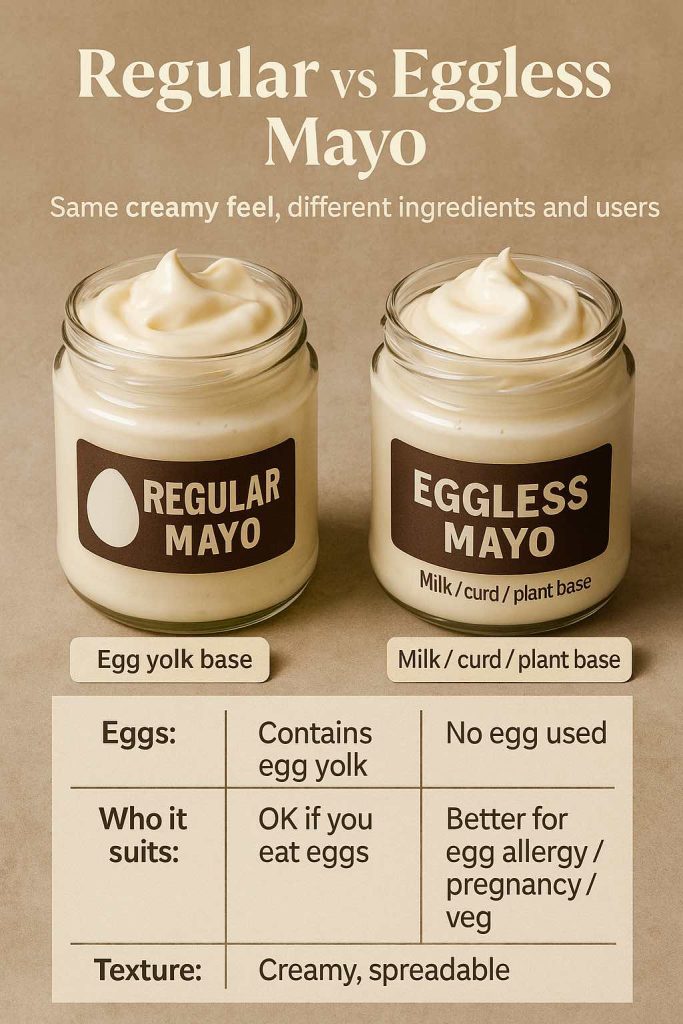
Eggless mayonnaise is a creamy spread made without eggs, usually using milk, yogurt, cashew cream or plant milk as the emulsifier instead of egg yolks. Regular mayo relies on raw or lightly cooked eggs to hold the oil and water together. As a result, an eggless mayonnaise recipe is often more inclusive for people with egg allergies, pregnancy concerns or those who simply don’t eat eggs, while still giving that familiar rich, smooth texture.
2. How do you make mayonnaise without eggs at home?
To make mayonnaise without eggs at home, you blend a liquid base like chilled milk, thick curd or soy milk with lemon juice or vinegar, salt and a bit of mustard, then slowly drizzle in neutral oil while blending until it thickens. The gradual addition of oil is crucial, because that’s what creates the emulsion in any mayonnaise recipe without egg. Once it looks glossy and spoon-coating, you can chill it to set and season it further if you like.
3. What is the basic eggless mayonnaise recipe?
A simple eggless mayonnaise recipe usually starts with about half a cup of chilled milk or thick yogurt, one to two tablespoons of lemon juice or vinegar, salt, a pinch of sugar and a teaspoon of mustard. While blending that mixture, you gradually add around one to one-and-a-quarter cups of neutral oil until the texture becomes thick and creamy. After that, you taste and adjust the seasoning, then refrigerate the eggless mayo so the flavours and consistency stabilise.
4. Can I make eggless mayo without a blender?
You can make eggless mayo without a blender, although it takes more patience. In that case, you whisk the liquid base, acid and seasoning together in a bowl, then pour in the oil drop by drop at first, whisking constantly until you see it start to thicken. Once the emulsion forms, you can add the oil a little faster; however, the result may be slightly less fluffy than a blender-based egg free mayo recipe.
5. Is eggless mayonnaise vegan?
Not always. Many eggless mayonnaise recipes still use milk, cream or yogurt, which makes them vegetarian but not vegan. If you want vegan egg free mayonnaise, choose a base like cashew cream, soy milk or aquafaba and skip any dairy, using only plant-based ingredients from start to finish.
6. What is the best oil to use for egg free mayo?
Generally, neutral-tasting oils are best for egg free mayo, because they let the tangy, savoury flavours shine without bitterness. Sunflower, rice bran, canola and light olive oil are all popular options in an egg free mayo recipe. Stronger oils like raw mustard oil or very peppery extra-virgin olive oil can overpower the taste and sometimes make the mayonnaise without eggs taste harsh.
7. Why did my eggless mayo split or become watery?
When eggless mayo splits, it usually means the emulsion didn’t form properly. This can happen if you poured the oil in too quickly, used very warm ingredients or didn’t have enough emulsifier in the base. To rescue it, start with a small amount of fresh milk or curd in a clean jar and slowly blend the broken mixture into it, essentially treating the split mayo like you would treat the oil in a new no egg mayonnaise recipe.
8. How can I thicken a runny egg free mayonnaise recipe?
If your egg free mayonnaise is too thin, there are a few things you can try. First, blend in a bit more oil, but do this gradually so the emulsion has time to strengthen. Alternatively, you can whisk in a spoonful of thick yogurt or hung curd if you’re not aiming for a vegan version; this changes the flavour slightly, yet often saves an otherwise runny eggless mayo recipe.
9. How can I make my eggless mayonnaise recipe lighter and healthier?
To create a healthier eggless mayonnaise recipe, you can use oils higher in unsaturated fats, such as sunflower or rice bran, and then replace part of the oil with Greek yogurt or hung curd. On top of that, you can keep portions modest and pair the spread with whole grains, vegetables and lean proteins. In this way, eggless mayo becomes a flavourful accent instead of the main source of calories in a meal.
10. Is it safe to eat egg free mayonnaise during pregnancy?
Yes, egg free mayonnaise is generally safe in pregnancy because it contains no raw eggs at all. That said, it still needs to be made and stored hygienically, kept chilled and consumed within a few days. Because food safety in pregnancy can be more sensitive, many people find an egg free mayo recipe reassuring compared to homemade raw-egg mayo.
11. Is eggless mayo good for people with egg allergies?
Eggless mayo is often a helpful option for people with egg allergies, since it removes egg proteins from the recipe entirely. However, someone with severe allergies should still check every ingredient on the label or recipe, as cross-contamination is always a possibility. For families dealing with allergy issues, learning a dependable eggless mayonnaise recipe can make everyday sandwiches and salads feel much more inclusive.
12. What is the difference between eggless mayo and egg free mayonnaise?
In everyday use, eggless mayo and egg free mayonnaise usually mean the same thing: mayonnaise without eggs. Some brands or recipes might use “eggless” to signal a vegetarian-friendly product, while “egg free” highlights the absence of egg due to allergies or dietary preferences. In practice, both phrases point to a mayonnaise recipe without egg yolks or whites.
13. How long does homemade mayonnaise without eggs last in the fridge?
Homemade mayonnaise without eggs generally keeps well for about three to five days in the refrigerator, assuming you store it in a clean, airtight container. Because many eggless mayo recipes still use dairy or fresh plant ingredients, they can spoil if kept too long. Therefore, it’s better to make smaller batches regularly rather than one huge jar that sits for weeks.
14. Can I freeze eggless mayonnaise?
Freezing eggless mayonnaise is not usually recommended. Once thawed, the emulsion often breaks, turning grainy or watery, and it can be difficult to bring it back to the original texture. Rather than freezing, it’s more practical to prepare a modest quantity of eggless mayo recipe that you know you’ll finish within a few days.
15. How can I make a spicy egg free mayo at home?
To make spicy egg free mayo, you start with a plain eggless mayonnaise base and stir in spices like chilli flakes, peri-peri powder, smoked paprika or finely chopped green chillies. A touch of lemon juice and a pinch of sugar help balance the heat. This approach lets you customise the spice level while still relying on the same basic egg free mayonnaise recipe.
16. Can I make garlic eggless mayo from the same base recipe?
Absolutely. Once you’ve prepared a batch of plain mayo without eggs, you can take a portion and mix in finely minced garlic or roasted garlic, plus extra lemon juice and black pepper. This turns your original eggless mayo recipe into a robust garlic spread that works beautifully in sandwiches, wraps and as a dip for fries or roasted vegetables.
17. How do I prepare mayonnaise without egg that is also dairy-free?
To prepare mayonnaise without egg that is also free from dairy, you can use a plant-based base like soy milk, almond milk or aquafaba, then blend it with oil, acid and seasoning. Cashew cream is another popular choice: you soak cashews, blend them smooth with water, and then emulsify that mixture with oil and lemon or vinegar. With these methods, your no egg mayo becomes fully vegan as well.
18. Can I use olive oil in an eggless mayo recipe?
You can use olive oil in an eggless mayo recipe, but it’s better to choose a light or refined olive oil, or mix a small amount of extra-virgin with a more neutral oil. Strong, peppery olive oil can make the flavour quite intense, which some people enjoy and others find overwhelming. Starting with a half-and-half blend is a reasonable way to gauge your own taste.
19. Why does my egg free mayonnaise taste bitter?
Bitterness in egg free mayonnaise usually comes from the oil, the mustard, or from blending too aggressively with a very strong oil. Extra-virgin olive oil and some mustard oils can turn bitter when overprocessed, even in a no egg mayonnaise recipe. Switching to a milder oil, reducing mustard, and blending only as long as necessary to emulsify often solves this problem.
20. Can I make an eggless mayo recipe with curd or yogurt?
Yes, curd or yogurt works extremely well in an eggless mayo recipe. Thick curd or hung curd acts as both the liquid base and part of the emulsifier, giving you a tangy, creamy texture. You still add oil slowly while whisking or blending, along with lemon juice, salt and other seasonings, but the result is slightly lighter and more refreshing than a purely milk-and-oil version.
21. How do I make a healthy eggless mayonnaise recipe for weight-conscious eating?
For a healthier eggless mayonnaise recipe, you can reduce the oil and mix in more Greek yogurt or hung curd, then focus on using heart-friendly oils like sunflower or rice bran. In addition, you can treat the mayo as a condiment rather than a main ingredient—so you use a thin layer on high-fibre sandwiches or dilute it into dressings for large salad bowls. This way, you still enjoy the flavour of eggless mayo without letting it dominate the calorie count.
22. Can I make eggless mayo without mustard?
Yes, you can leave out mustard in an eggless mayo recipe, although it does slightly help with emulsification and adds a subtle sharpness. If you omit it, you may need to blend a bit longer and rely more on the acid and salt to keep the flavour interesting. You might also experiment with alternatives like a pinch of hing or finely grated garlic for a different kind of kick.
23. What is the difference between eggless mayo and no egg mayo?
In practical terms, “eggless mayo” and “no egg mayo” are just two ways of saying the same thing: a mayonnaise recipe without egg. Some people lean toward “eggless” in vegetarian contexts, while “no egg mayo” often shows up in allergy or food-safety conversations. Regardless of wording, both refer to an egg free mayo recipe that uses some other emulsifier instead of egg yolk.
24. How can I use eggless mayonnaise in salads?
Eggless mayonnaise is excellent in salads because it coats ingredients smoothly and brings a creamy richness. You can toss it with boiled potatoes, peas and herbs for a potato salad, mix it into chickpeas and veggies for a protein-rich bowl, or thin it slightly with lemon juice to create a dressing for crunchy slaw. When you base your salads on whole grains and vegetables, egg free mayonnaise becomes a flavour accent rather than the main component.
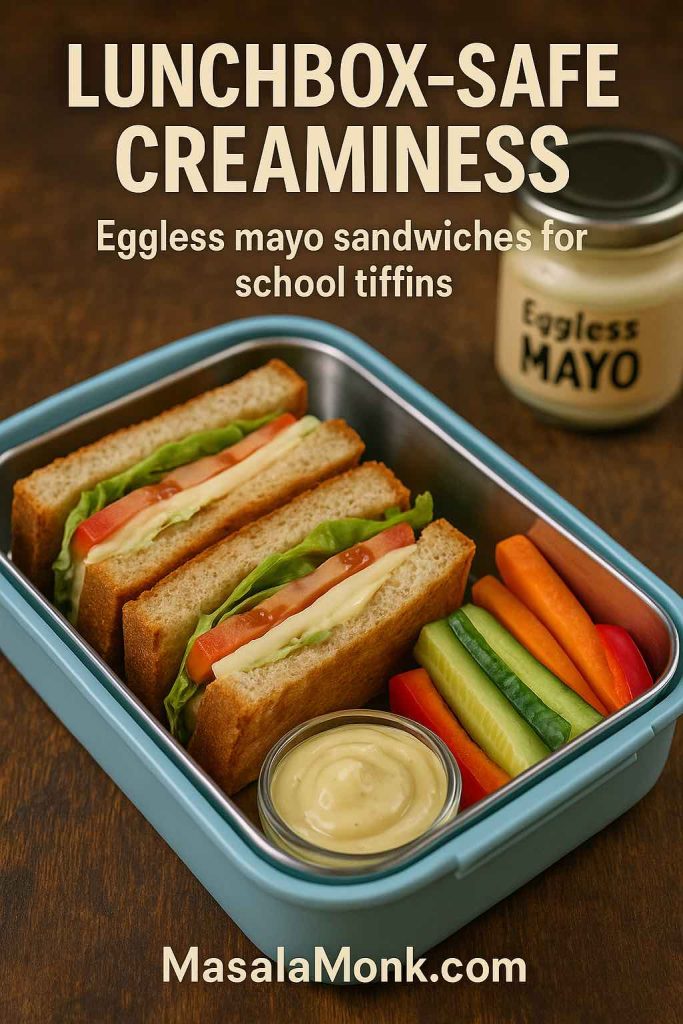
25. How do I make an eggless mayo recipe suitable for kids’ lunchboxes?
To make an eggless mayo recipe child-friendly, keep the flavours mild and the texture smooth. You can skip strong garlic or very spicy ingredients, focus on gentle seasonings like a little pepper and lemon, and then combine the mayonnaise without eggs with familiar fillings such as paneer, potatoes or grated carrots. Because there are no eggs, it may also feel more comfortable for school days in warm weather, provided the lunchbox is insulated and the time gap isn’t too long.
26. Can I turn my egg free mayonnaise into a dip for snacks?
Very easily. Once you have a batch of egg free mayonnaise, you can stir in chopped herbs, garlic, spring onions, chilli flakes or even a spoon of ketchup or hot sauce to create customised dips. Adjust the thickness with a few drops of water or lemon juice so it clings nicely to chips, wedges or vegetable sticks. In doing so, one basic eggless mayo recipe becomes the base for several different party-style snacks.
27. How do I make eggless mayonnaise without vinegar?
If you don’t want to use vinegar, you can rely on lemon or lime juice as the acidic component in your eggless mayonnaise recipe. The process stays the same: blend the milk or yogurt with lemon juice, salt and other seasonings, then drizzle in oil slowly while blending. Lemon provides a fresher, more citrusy tang, which many people find especially suitable for sandwiches and salads.
28. Can I use eggless mayo in baked dishes?
Yes, eggless mayo can be used in baked dishes as a creamy layer or mix-in. You can spread a thin coat over bread before topping it with vegetables and cheese for baked open sandwiches, or combine it with boiled potatoes and veggies for a gratin-style bake. Since an eggless mayonnaise recipe doesn’t rely on egg for structure, it behaves more like a rich sauce than a binding agent in the oven.
29. How can I flavour a basic eggless mayo recipe with herbs and spices?
Once your basic eggless mayo is ready, you can divide it into smaller bowls and flavour each one differently. For instance, stir dried Italian herbs into one portion, coriander and green chilli into another, and smoked paprika into a third. By doing that, a single mayonnaise recipe without egg transforms into an assortment of herby, spicy and smoky spreads, all tailored to whatever you plan to cook that week.
30. Which is better, eggless mayo or regular mayonnaise?
Whether eggless mayo or regular mayonnaise is “better” depends entirely on what you need. If you have no issues with eggs and love the classic flavour, regular mayo is perfectly fine in moderation. On the other hand, if you’re dealing with allergies, pregnancy, or simply want a vegetarian or vegan-friendly condiment, an eggless mayonnaise recipe offers the same creamy satisfaction with ingredients that match your situation. In the end, the best choice is the one that fits your health, ethics and taste buds.