Posted on Leave a comment

Sweet Potato Casserole Recipe

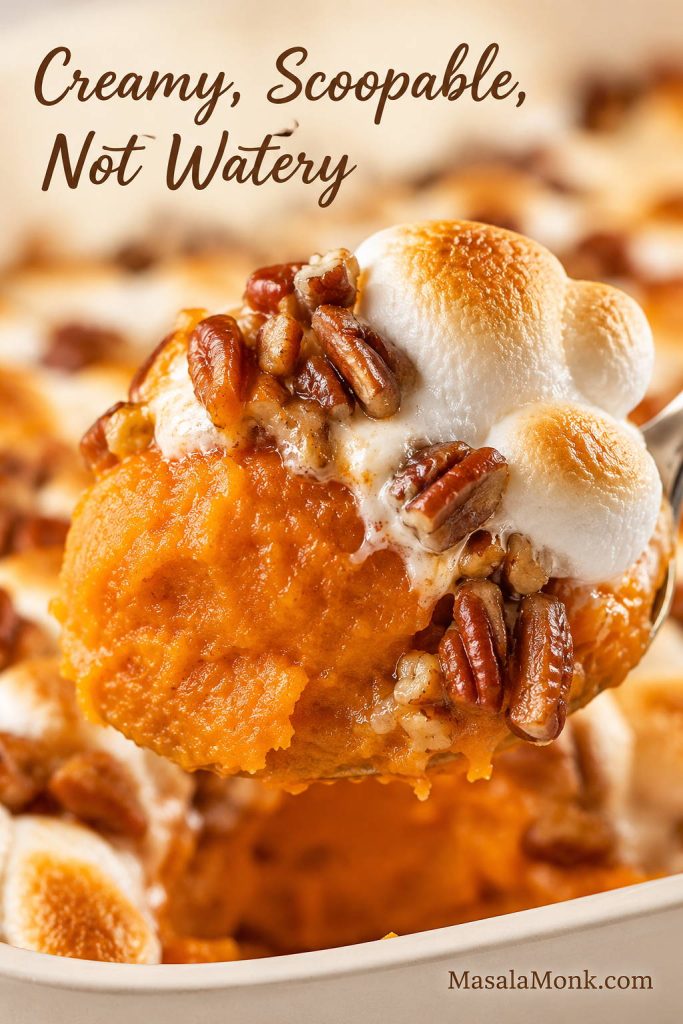
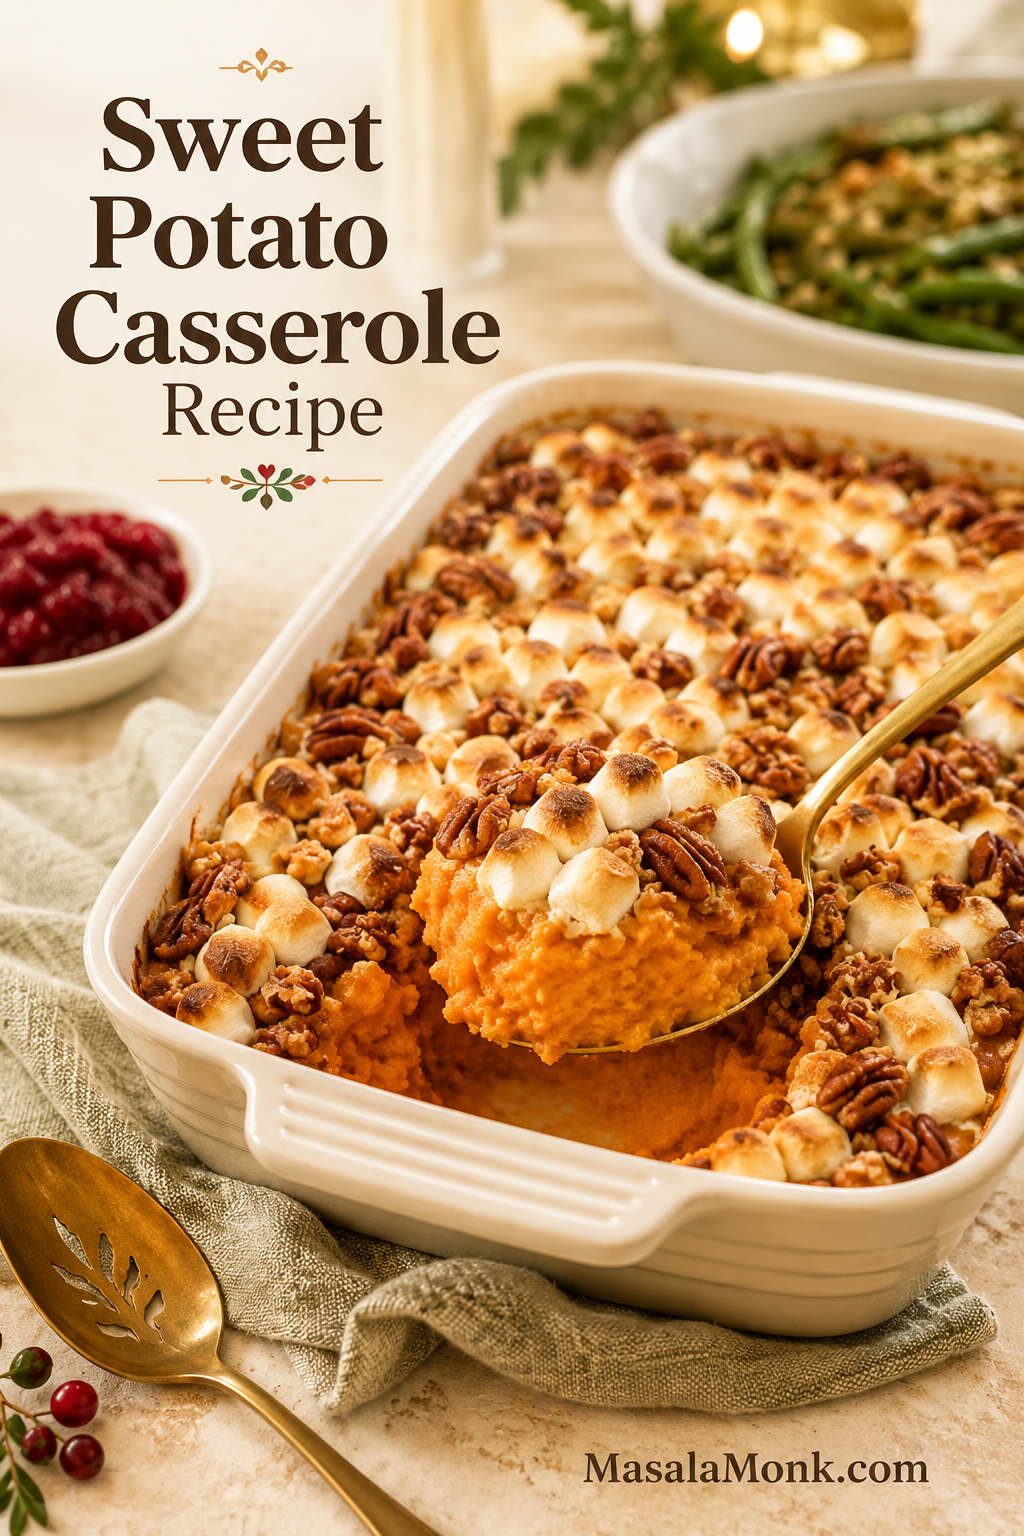
Sweet potato casserole in a cream baking dish with toasted marshmallows, pecan streusel, and a spoon lifting a creamy orange scoop.

A good sweet potato casserole has to do more than taste sweet. It needs to be creamy without turning watery, rich without feeling heavy, golden on top without burning, and easy enough to fit into a busy oven schedule that already has too much going on.

This sweet potato casserole recipe is built for that exact moment, especially when Thanksgiving or a big holiday meal has several dishes competing for the oven. You can make it with fresh sweet potatoes or drained canned yams, finish it with marshmallows, pecan streusel, or both, and prep most of it ahead so the final bake feels calm instead of chaotic.

The filling is smooth, spoonable, lightly set, and warmly seasoned with butter, brown sugar, vanilla, cinnamon, and just enough salt to keep the sweetness balanced. It should feel like a satiny orange mash under a golden, buttery topping — sweet, but not candy-sweet.

Think of this as one dependable base for a table full of opinions: the marshmallow crowd, the pecan-streusel crowd, the canned-yam shortcut cook, and the person who wants the dish to stay more side than dessert.

Quick Answer: How to Make Sweet Potato Casserole

For a full sweet potato casserole, use 3 lb / 1.36 kg fresh sweet potatoes, which gives about 5–6 cups cooked mashed sweet potato. Mix the mash with melted butter, ⅓ cup brown sugar for a balanced version, milk or cream, eggs, vanilla, cinnamon, nutmeg, and salt, then spread it in a 9×13-inch / 3-quart baking dish.

Bake at 350°F / 175°C until the casserole is hot and lightly set. Because the filling contains eggs, the center should reach 165°F / 74°C if you check with an instant-read thermometer.

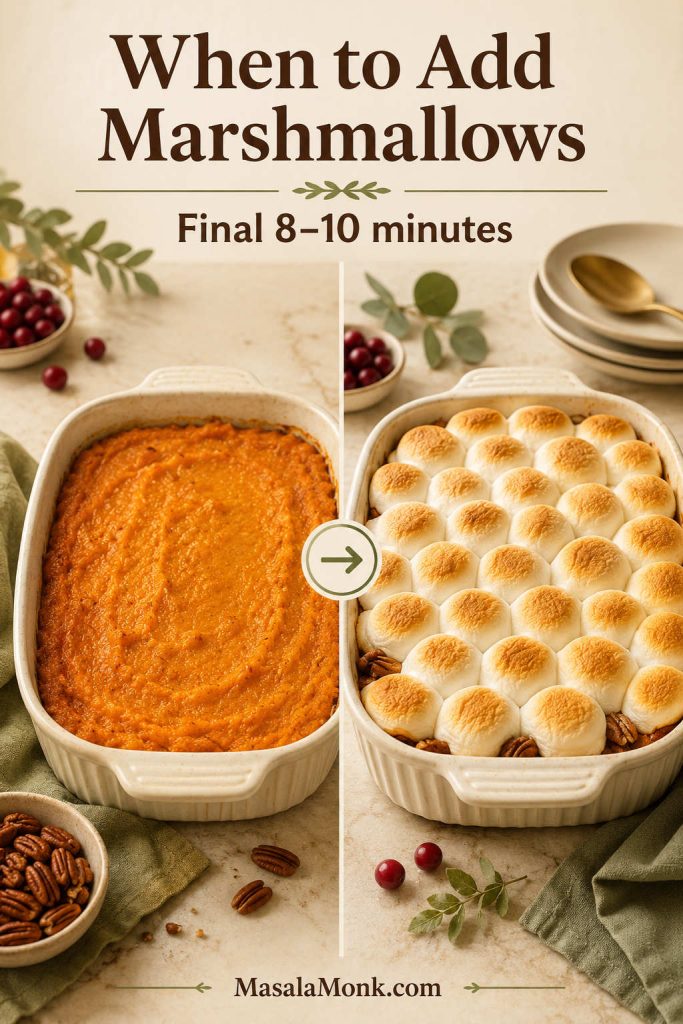
Pecan streusel goes on before baking. Save marshmallows for the final 8–10 minutes so they puff and brown instead of melting away.

For canned yams, use 2 x 29 oz cans, drained, for a 9×13 casserole, or 1 x 40 oz can, drained, for an 8×8 or 9×9 dish. If the cans are syrup-packed, start with less sugar.
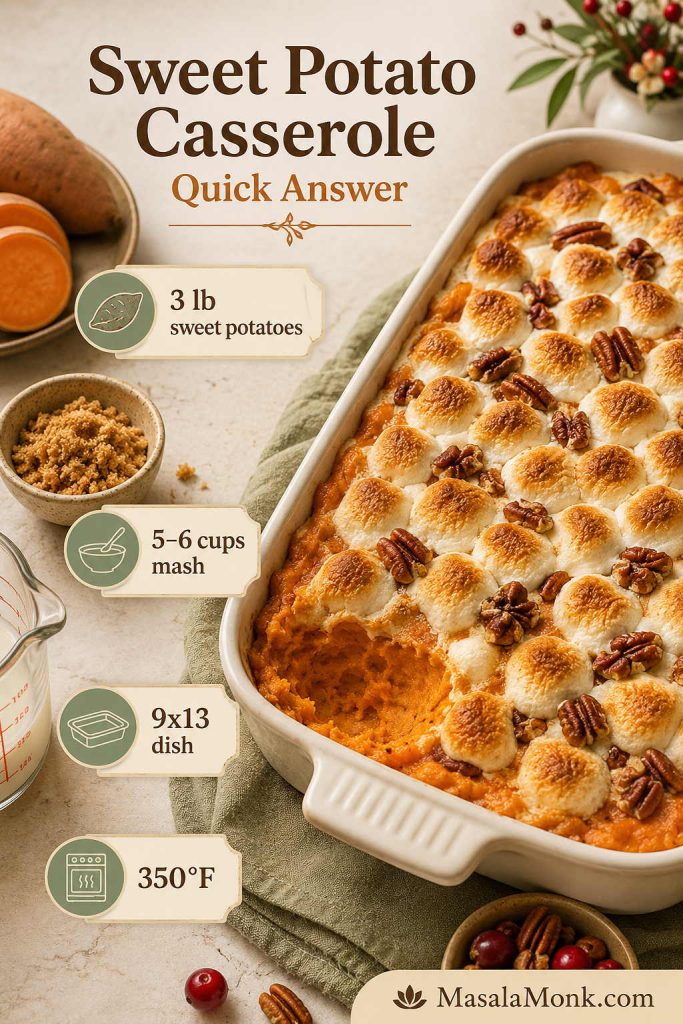
Quick answer guide for sweet potato casserole showing a finished casserole with callouts for 3 pounds sweet potatoes, 5 to 6 cups mash, a 9x13 dish, and 350°F baking temperature
Use this quick formula as the anchor, then adjust the casserole for canned yams, pecan streusel, marshmallows, or a less-sweet holiday table.

If you are using canned yams, the fresh vs canned guide and canned-yam texture tips will help you adjust sugar and liquid before mixing.

Best crowd version: Use the balanced filling with pecan streusel for structure, then add mini marshmallows at the end if your table expects them. You get buttery crunch, soft toasted pockets, and a casserole that still eats like a side dish.

For a closer look at the final layer, see the topping options and the marshmallows vs pecans comparison before choosing your version.

Sweet Potato Casserole at a Glance

DetailStarting point
Sweet potatoes3 lb / 1.36 kg fresh sweet potatoes
Cooked mash yieldAbout 5–6 cups
Baking dish9×13-inch / 3-quart dish
Oven temperature350°F / 175°C
Potato cooking time12–20 minutes for boiling, or 40–50 minutes for roasting
Bake time30–35 minutes, or 40–50 minutes if chilled
Servings10–12 side-dish servings
TextureCreamy, scoopable, lightly set, not watery
Best topping pathsPecan streusel, marshmallows, or both
Make-aheadBase can be made 1–2 days ahead; topping stays better when added later
Canned-yam optionYes, drain well, measure the mash, and reduce sugar/liquid as needed
Close-up spoonful of sweet potato casserole showing creamy orange filling with pecan topping and toasted marshmallow pieces
The spoon test matters because a good casserole should lift in a creamy scoop, not slide apart like loose mashed sweet potatoes.

Why This Sweet Potato Casserole Works

The whole recipe depends on one idea: build a thick, balanced sweet potato base first, then treat the topping as a separate timing decision. The sweet potato mixture needs to be thick, seasoned, and creamy before it goes into the oven. The top needs enough heat to turn golden, but not so much time that it burns, sinks, or goes sticky.

  • Three pounds of sweet potatoes gives enough mash for a proper 9×13 casserole without making the filling too thin.
  • Butter and milk or cream make the mash rich, while controlled liquid keeps it from turning soupy.
  • Eggs help the filling set just enough to scoop neatly. Leave them out for a softer, spoonier casserole.
  • Brown sugar stays flexible. Use ⅓ cup when you want a side-dish sweet casserole, or ½ cup when your table expects the sweeter classic version.
  • Pecan streusel bakes from the start. Marshmallows wait until the casserole is hot or nearly hot.
  • The canned version needs a lighter hand because it is already tender and often sweeter or wetter than fresh cooked sweet potatoes.
  • Resting time matters. A 10–15 minute rest helps the casserole scoop cleanly and lets the streusel settle into a buttery crunch.

That is the difference between a casserole that simply tastes sweet and one that earns its space on the holiday plate: a hot, creamy center, a topping with texture, and a first scoop that holds together instead of sliding apart.

Not Sure Which Version to Make?

Sweet potato casserole is one of those dishes people remember before they even taste it. One person wants the marshmallows from childhood. Another wants pecans and less sweetness. Sometimes the main goal is simply getting the dish to come out hot while the oven is full.

Your table wants…Make this version
Classic nostalgiaMini marshmallow topping
Crunch and balancePecan streusel topping
Everyone happyPecan streusel plus marshmallows added near the end
Less sweetness¼–⅓ cup brown sugar with pecan, oat, cornflake, or savory crumb topping
Fastest shortcutDrained canned yams, less sugar, and milk added slowly
Make-ahead calmFilling made ahead, topping stored separately, marshmallows added late

The best version is the one your table will actually reach for twice. Choose the topping that matches the people you are feeding, then keep the base creamy, hot, and well rested.
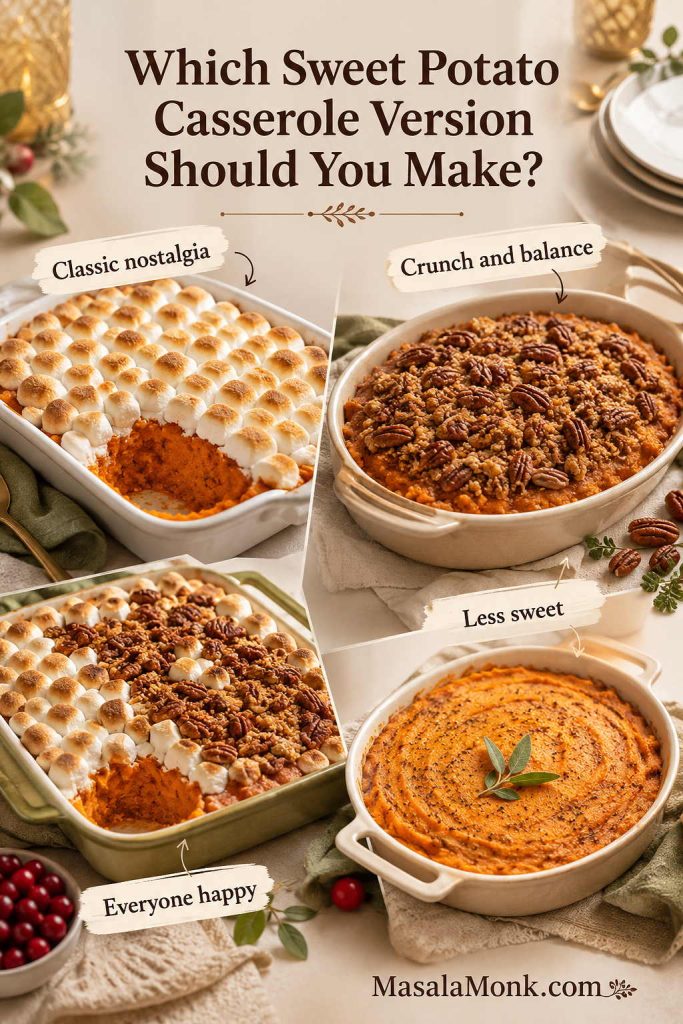
Decision guide showing four sweet potato casserole versions: marshmallow topping, pecan streusel, both toppings, and a less-sweet no-marshmallow option
Choose the version before you bake so the topping matches your table: nostalgic marshmallows, crunchy pecans, both together, or a quieter less-sweet finish.

Ingredients and What Each One Does

The ingredient list is simple, but small choices matter. The goal is a casserole that tastes warm and generous, not thin, sugary, or heavy.
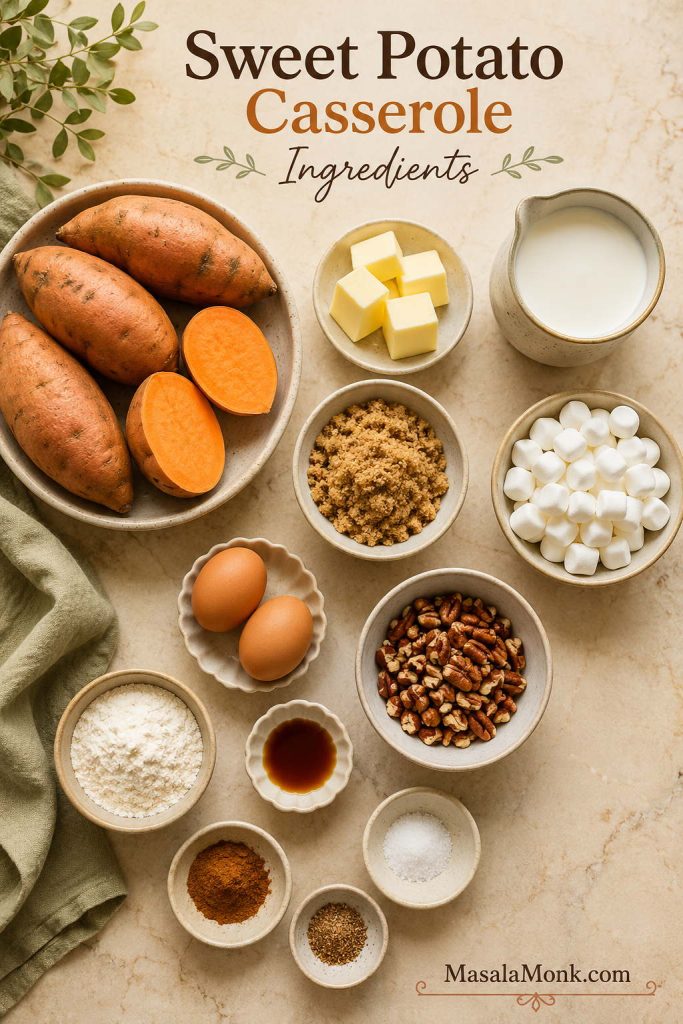
Overhead ingredient spread for sweet potato casserole with sweet potatoes, butter, brown sugar, milk, eggs, vanilla, spices, pecans, flour, and mini marshmallows
These simple ingredients work best when each one has a job: butter rounds the flavor, eggs help structure, liquid softens, and salt balances the sweetness.

For the Sweet Potato Filling

  • Sweet potatoes: Use 3 lb / 1.36 kg fresh sweet potatoes for a full 9×13 casserole. Orange-fleshed sweet potatoes give the classic color, sweetness, and creamy texture. For a separate look at calories, carbs, fiber, and portions, see MasalaMonk’s sweet potato nutrition facts.
  • Butter: Melted butter adds richness and helps the mash taste rounded instead of flat.
  • Brown sugar: Use ⅓ cup / about 65–70 g for a side-dish sweet casserole, or ½ cup / 100 g for the sweeter classic version. Start lower if your cans are syrup-packed.
  • Milk, half-and-half, cream, or evaporated milk: This loosens the mash and makes it creamy. Evaporated milk gives a slightly old-fashioned richness without using heavy cream.
  • Eggs: Eggs help the casserole set and scoop neatly. If you skip them, the dish will be softer and more spoonable.
  • Vanilla: A little vanilla belongs in the background here. You want warmth, not a filling that tastes like dessert pudding.
  • Cinnamon and nutmeg: Cinnamon gives the main warmth. Nutmeg is optional but helpful in small amounts. You can also use 1–1½ teaspoons pumpkin pie spice instead.
  • Salt: Salt keeps the sweetness from going flat. It is especially important when marshmallows or a brown sugar topping are involved.
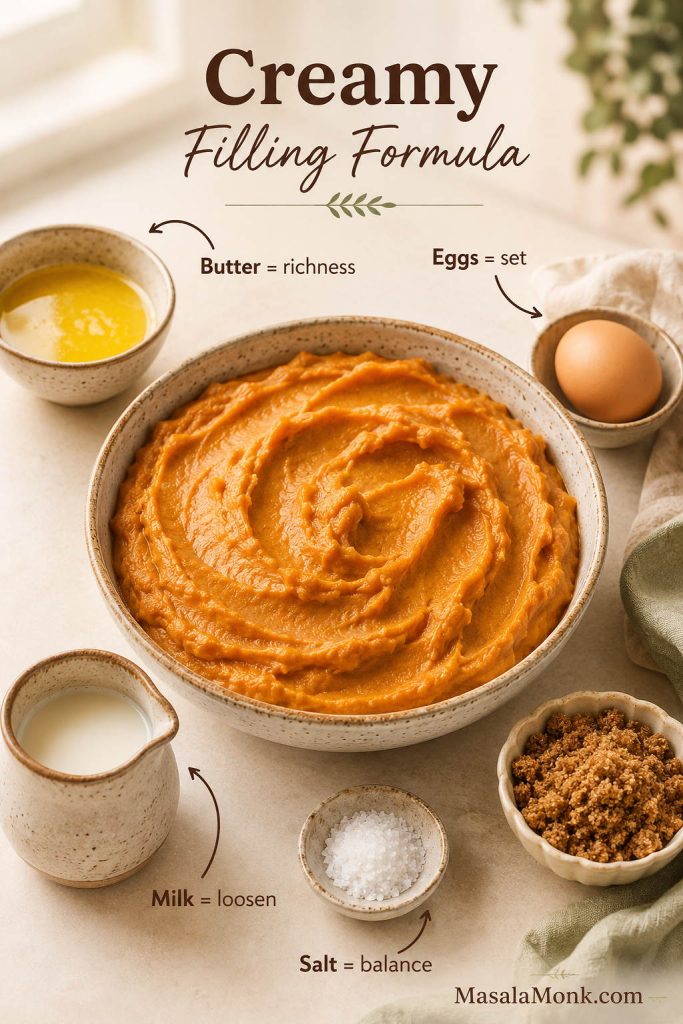
Sweet potato casserole filling formula with mashed sweet potatoes, butter for richness, eggs for set, milk to loosen, and salt for balance
Before the topping goes on, the filling needs balance: rich enough from butter, lightly set from eggs, loosened carefully with milk, and sharpened with salt.

For the Pecan Streusel Topping

  • Pecans: Pecans bring crunch and a buttery flavor that balances the soft filling. Toast them for 3–5 minutes in a dry skillet if you want a deeper nutty edge.
  • Brown sugar: Helps the topping caramelize and gives the crumble a classic flavor.
  • Flour: Holds the topping together so it bakes into crumbs instead of a sugary butter puddle.
  • Butter: Melted butter binds the topping. Start with 5 tablespoons and add the 6th only if the mixture still looks dry.
  • Cinnamon and salt: These keep the topping warm and balanced.

If the streusel clumps lightly when squeezed, it has enough butter. If it looks sandy and dry, add the remaining tablespoon before scattering it over the casserole.

Nut-free option: Replace pecans with crushed cornflakes, oat crumble, or plain brown sugar crumble.

For the Marshmallow Topping

Mini marshmallows are easiest to distribute and brown more evenly than large ones. Use 2–3 cups for a 9×13 casserole, depending on whether you want a light scattered top or a full classic layer.

If you only have large marshmallows, cut them into smaller pieces before adding them. Whole large marshmallows brown unevenly and can make the top patchy.

MasalaMonk note: When using both pecans and marshmallows, bake the pecan layer first and add marshmallows at the end. That gives you buttery crunch underneath and soft toasted pockets on top.

Fresh Sweet Potatoes or Canned Yams: Which Should You Use?

Fresh sweet potatoes give the deepest flavor and the most control over texture. Shortcut cans are faster and completely useful when you are cooking a big meal and need one less thing to peel, chop, boil, or roast.

The goal is not to prove anything; it is to get a creamy, well-balanced casserole on the table. A canned version can still taste intentional when the pieces are drained, mashed gently, seasoned well, and kept thick enough before baking.
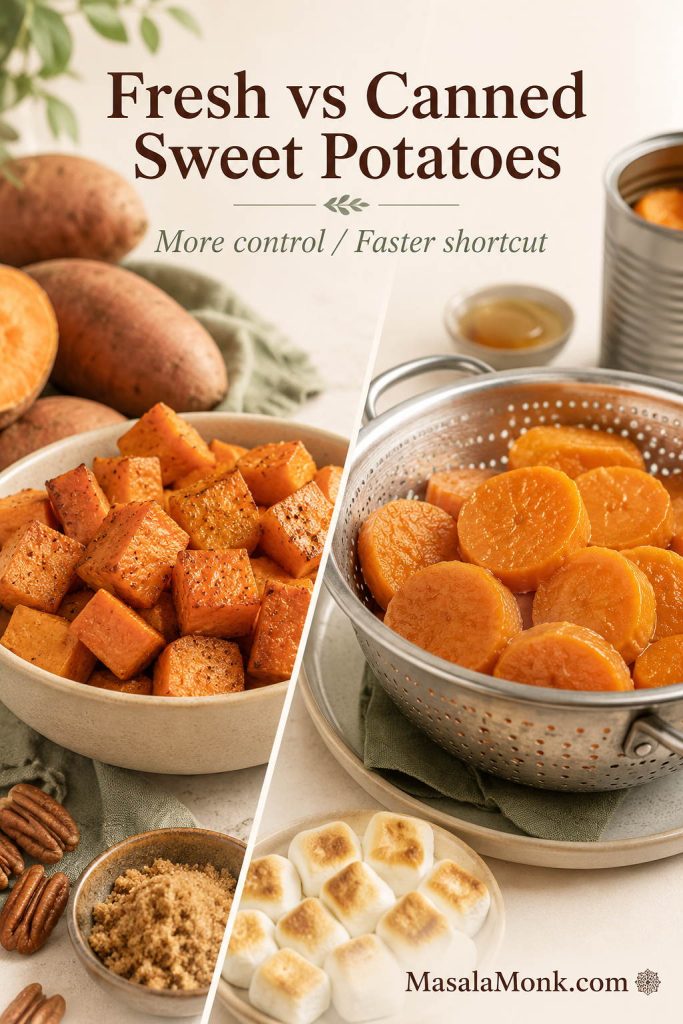
Fresh sweet potatoes compared with drained canned yams for making sweet potato casserole, with a note that fresh gives more control and canned is faster
Fresh sweet potatoes give the most control, but canned yams are still a smart shortcut when they are drained well and sweetened with a lighter hand.

Canned-yam shortcut: Can sizes are only a starting point. Drain first, then measure the mash. Aim for 5–6 cups for a full 9×13 casserole or 3–4 cups for a smaller one.

In many U.S. grocery stores, “canned yams” are usually canned sweet potatoes. True yams are a different root vegetable, but for this style of casserole, most U.S. canned “yams” are the orange sweet potatoes readers expect.

The main difference is moisture and sweetness. Fresh cooked sweet potatoes can be steam-dried or roasted until sturdy. Canned pieces are already tender and may be packed in syrup, so taste before adding the full sugar amount and add milk gradually.

How Many Cans of Yams Do You Need?

For shortcut batches, think in mashed yield rather than can labels alone. Once you know your amount, use the watery-casserole prevention tips before adding milk.
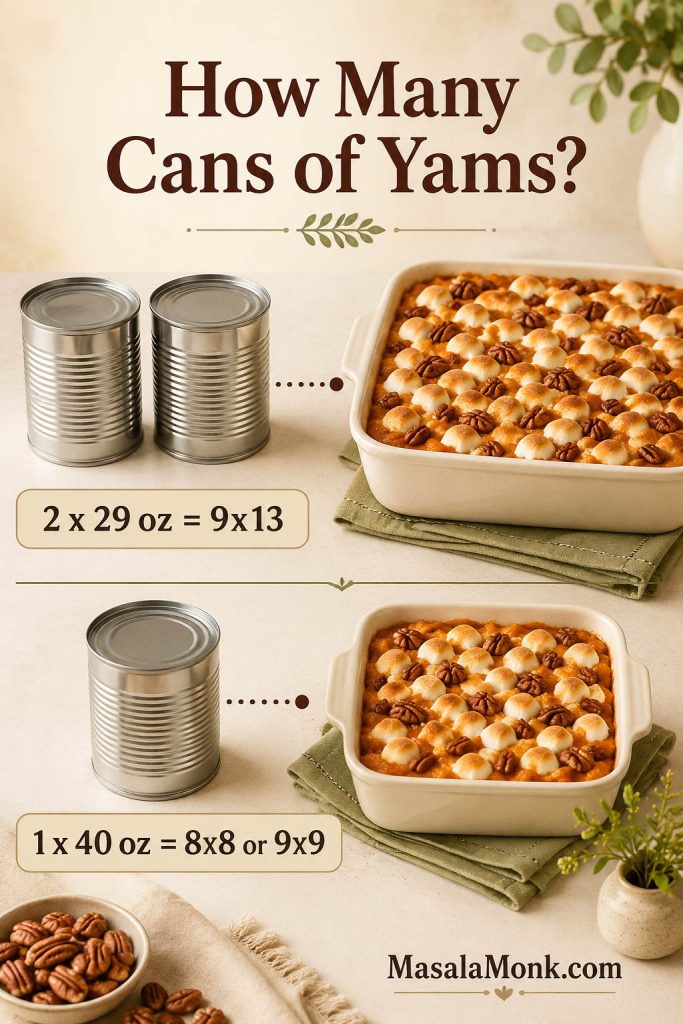
Guide showing that 2 cans of 29 ounce yams fit a 9x13 sweet potato casserole and 1 can of 40 ounce yams fits an 8x8 or 9x9 dish
Instead of guessing from can size alone, aim for the right amount of mashed sweet potato for your pan: 5–6 cups for a full 9×13 casserole.
Starting pointAmount to useWhere it fits
Fresh sweet potatoes3 lb / 1.36 kgFull 9×13 casserole
Cooked mashed sweet potato5–6 cupsSame as the main full batch
Canned yams or canned sweet potatoes2 x 29 oz cans, drainedFull 9×13 canned shortcut
Canned yams or canned sweet potatoes1 x 40 oz can, drainedSmaller 8×8, 9×9, or 2-quart casserole
Small batch mash3–4 cups6–8 servings

How to Use Canned Yams Without Making the Casserole Watery

  • Let excess syrup run off. A few minutes in a colander helps more than rushing straight to the bowl.
  • Start lower on sugar. Syrup-packed cans often need only ¼–⅓ cup brown sugar in the filling.
  • Add milk slowly. Stop when the mash looks creamy but still holds soft ridges.
  • Mash by hand. A potato masher gives better control than a blender or food processor.
  • Taste before topping. The filling should taste pleasantly sweet and slightly salty before the final layer goes on.
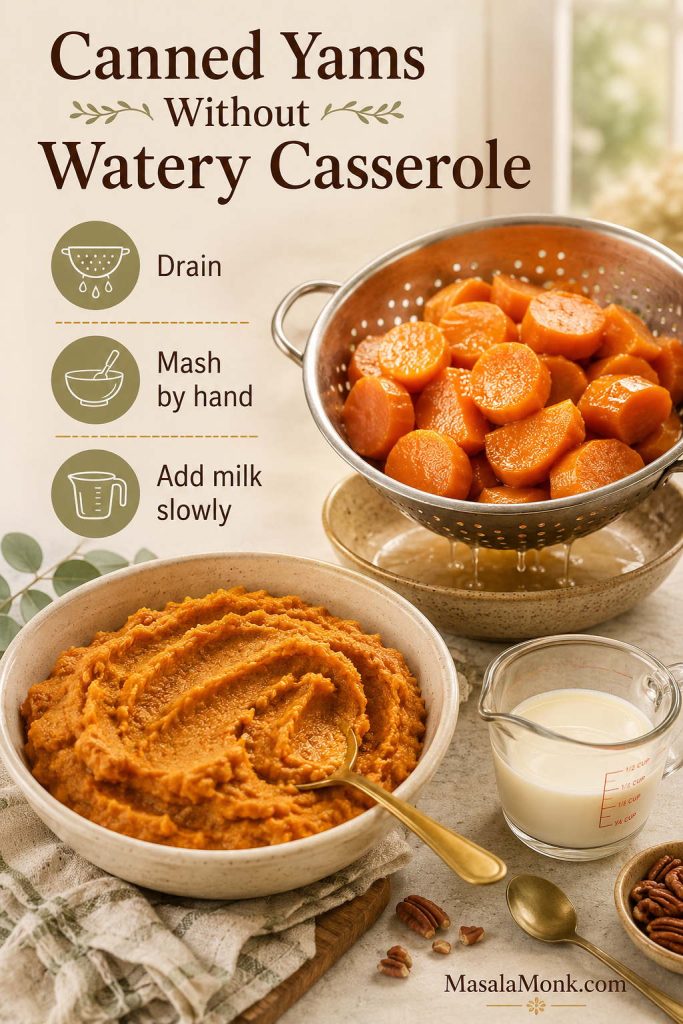
Drained canned yams in a colander with mashed sweet potatoes and tips to drain, mash by hand, and add milk slowly
For canned-yam sweet potato casserole, draining comes first; after that, add milk slowly so the mash turns creamy instead of watery.

Handled this way, the shortcut does not feel like a compromise. It feels like the calm choice on a crowded cooking day.

What Pan Size Should You Use?

Pan size matters because sweet potato casserole should be deep enough to stay creamy, but not so deep that the center stays cold while the top browns. A too-deep pan is one of the quiet reasons casseroles come out cold in the middle.

Do not overthink the dish, but do respect the depth. A shallow casserole heats faster and gives you more topping in every scoop; a deeper one stays creamier but needs more time.

Dish sizeSweet potato mash amountWorks well forApprox. servings
8×8-inch or 9×9-inch dish3–4 cupsSmall batch, canned-yam version, smaller gathering6–8
2-quart baking dish3–4 cupsClassic smaller casserole6–8
9×13-inch / 3-quart dish5–6 cupsFull side-dish batch10–12
Half batch2½–3 cupsSmall family side5–6
Mini batch1½–2 cupsTwo to four people2–4
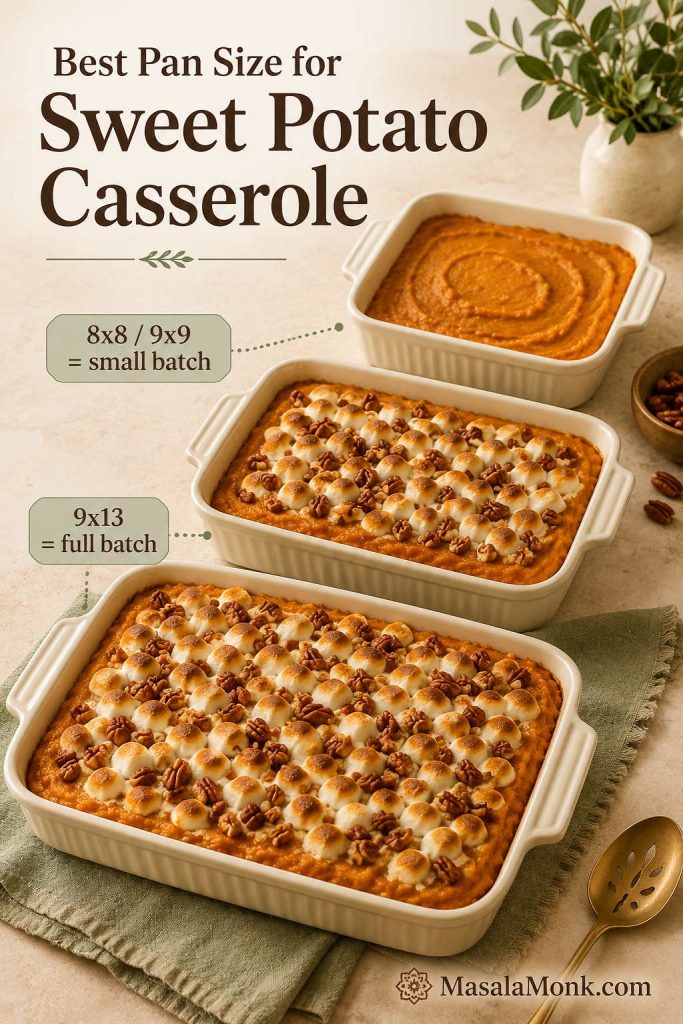
Pan size guide for sweet potato casserole showing small 8x8 or 9x9 dishes and a larger 9x13 dish for a full batch
Match the pan to the amount of mash: a full 9×13 casserole feeds a crowd, while smaller dishes give a thicker, cozier bake.

If you are using a deeper dish or baking from cold, the fridge-to-oven timing guide will help you avoid a cold center.

For most families, the 9×13 version is the most practical full batch. For a smaller dinner, the 8×8 version feels more generous because every scoop gets topping.

If your casserole is in a deeper dish, expect it to take longer to heat through. If it is in a wider, shallower dish, the topping may brown faster. Either way, the center should be hot before you call it done.

If you like this kind of full-pan side, MasalaMonk’s hashbrown casserole follows a similar 9×13 comfort-food logic, but moves in a savory, cheesy potato direction instead of a sweet one.

Roast, Boil, Steam, or Open a Can?

There is no single correct way to prepare the sweet potatoes. The right method depends on the kind of cooking day you are having: slow and flavor-focused, or busy and shortcut-friendly.

MethodTimingChoose this ifWatch for
Roasting425°F / 220°C for 40–50 minutes, depending sizeYou want a more concentrated flavor and a sturdier mashTakes longer; cool slightly before scooping and mashing
Boiling12–20 minutes for peeled chunksYou want the fastest fresh methodDrain very well and steam-dry 3–5 minutes before mashing
Steaming15–25 minutes, depending chunk sizeYou want good texture with less water absorption than boilingNeeds a steamer basket or enough pot space
Drained canned sweet potatoes or yamsNo cooking before mixing, just drain and mashYou want the fastest shortcutReduce sugar and add liquid gradually
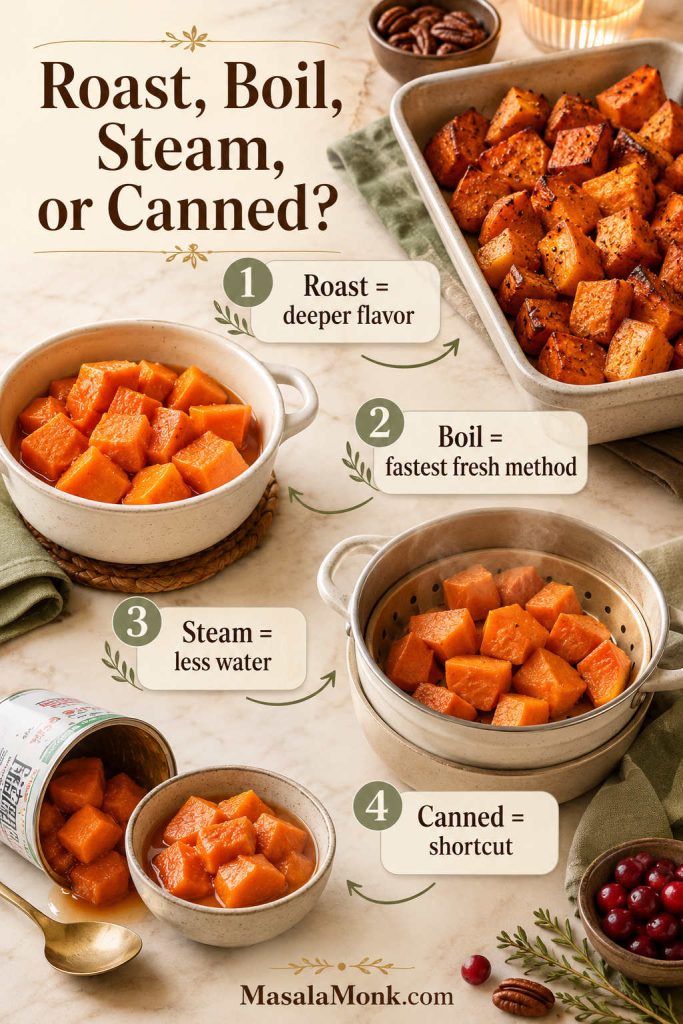
Cooking method guide for sweet potatoes showing roasted chunks, boiled chunks, steamed pieces, and canned yams for casserole
Pick the method around your schedule: roast for deeper flavor, boil for speed, steam for moisture control, or use canned yams when time is tight.

If you have time, roasting gives a more concentrated flavor because the sweet potatoes lose some moisture and become naturally sweeter. If you need the practical version, boiling peeled cubes is faster and still works well as long as you let them steam-dry before mixing.

You do not need to heavily salt the cooking water because the filling is seasoned after mashing.

Marshmallows, Pecans, or Both?

This is where family opinions usually show up. Some people want the marshmallows they grew up with; others want pecans, crunch, and less sweetness. The base recipe is flexible enough to satisfy both camps without making two casseroles.

ToppingChoose this ifWhat it brings
Mini marshmallowsYou want the classic nostalgic versionSoft, sweet, toasted pockets
Pecan streuselYou want crunch and less dessert-heavy sweetnessButtery texture and a sweet-salty edge
Pecans + marshmallowsYou want a reliable crowd compromiseCrunch underneath, golden marshmallows on top
No marshmallowsYou want a more savory-table-friendly casseroleA less dessert-like finish
Nut-free toppingYou are serving a table with nut allergiesCrunch from cornflakes or oats, or softness from marshmallows
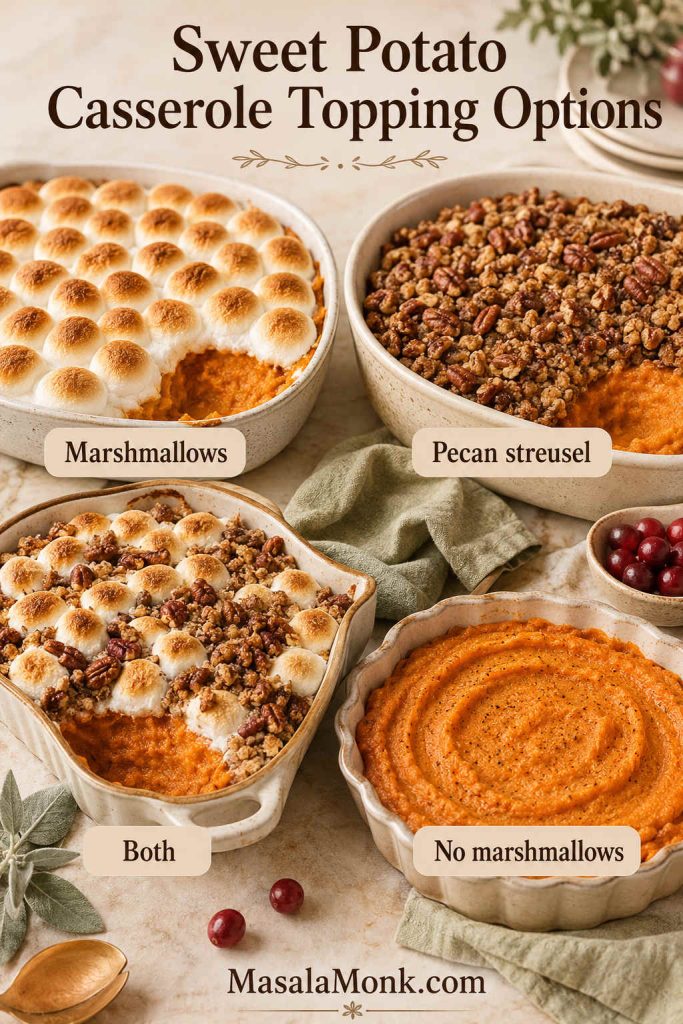
Sweet potato casserole topping options showing marshmallows, pecan streusel, both toppings, and a no-marshmallow version
The topping sets the mood of the whole dish, from soft marshmallow nostalgia to pecan-streusel crunch or a simpler side-dish-style finish.

Marshmallows vs Pecans: Which Topping Fits Your Table?
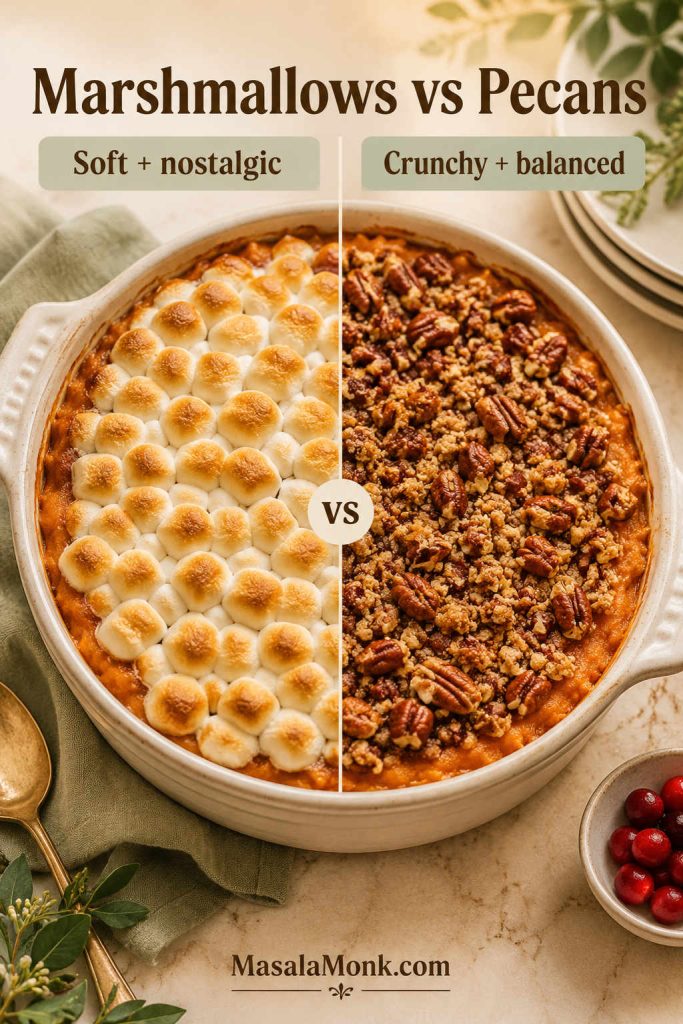
One sweet potato casserole split between toasted mini marshmallows on one side and pecan streusel on the other side
Marshmallows make the casserole softer and sweeter, while pecan streusel adds crunch that helps it sit comfortably beside savory holiday sides.

Once you choose the topping, check the pecan streusel texture cue or when to add marshmallows so the top bakes correctly.

If you are unsure, the pecan-plus-marshmallow version keeps both camps happy: buttery crumble for the people who want texture, and toasted marshmallows for the people who would miss them.

Marshmallow Topping

Marshmallows are the classic choice for many tables. Let the casserole get hot first, then give the marshmallows just enough oven time to puff, brown, and stay visible on the surface.

Pecan Streusel Topping

Pecan streusel turns the casserole into something more textured and less dessert-heavy. The best spoonfuls have creamy sweet potato underneath and a little buttery crunch on top.

If You Do Not Want Marshmallows

Skip them and use pecan streusel, oat crumble, cornflake crumble, or a savory breadcrumb topping. This is the path for a table that wants sweet potatoes to stay firmly beside the savory food.

Broiler warning: If you use the broiler to brown marshmallows, stay at the oven. They can go from golden to scorched in seconds. Broil for 30–90 seconds only, watching constantly.

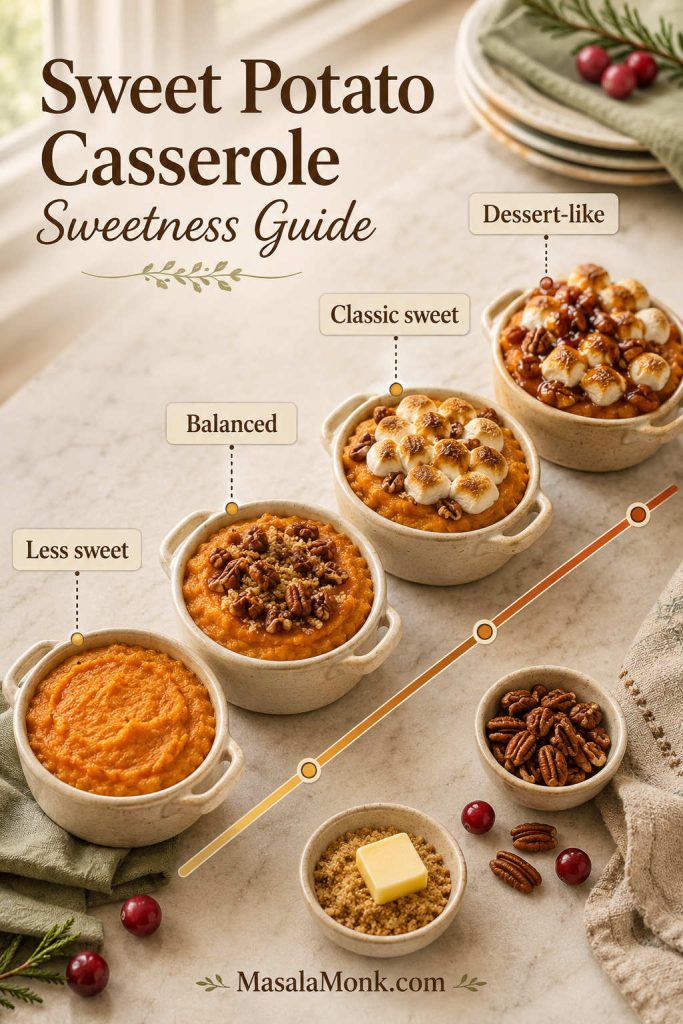
How Sweet Should It Be?

Sweet potato casserole sits in a funny place: it is a side dish, but it often shares ingredients with dessert. This is where a lot of casseroles go wrong: the filling is sweetened like dessert, then covered with an even sweeter topping.

Start with the kind of dish you want, then choose the sugar level. If you are using marshmallows or syrup-packed cans, the filling usually needs less sugar than you think.

StyleBrown sugar in fillingTopping ideaResult
Less sweet¼–⅓ cup / 50–65 gPecan, oat, cornflake, or savory crumbMore like a side dish
Balanced⅓ cup / about 65–70 gPecans, marshmallows, or bothSweet but not candy-like
Classic sweet½ cup / 100 gMarshmallows or pecan streuselTraditional sweetness
Dessert-like½ cup or moreMarshmallows plus sweeter streuselVery sweet, closer to pie filling
Sweetness guide for sweet potato casserole showing less sweet, balanced, classic sweet, and dessert-like options
Decide the sweetness before adding the topping, because marshmallows and syrup-packed canned yams can quickly push the recipe toward dessert.

If you are starting with syrup-packed cans, revisit the canned-yam notes before adding the full sugar amount.

For most tables, ⅓ cup brown sugar in the filling is the safest starting point. It leaves room for a sweet topping without making the whole dish feel heavy. If you are nervous about sweetness, start lower. You can always make the topping sweeter, but you cannot easily pull sugar back once the filling is mixed.

Texture Target Before You Bake

Look for this: The mash should be thick, creamy, and able to hold soft ridges when you drag a spoon through it. It should not pour like soup. After baking, the edges should look hot and slightly puffed, the center should be hot, and the casserole should rest 10–15 minutes before serving.
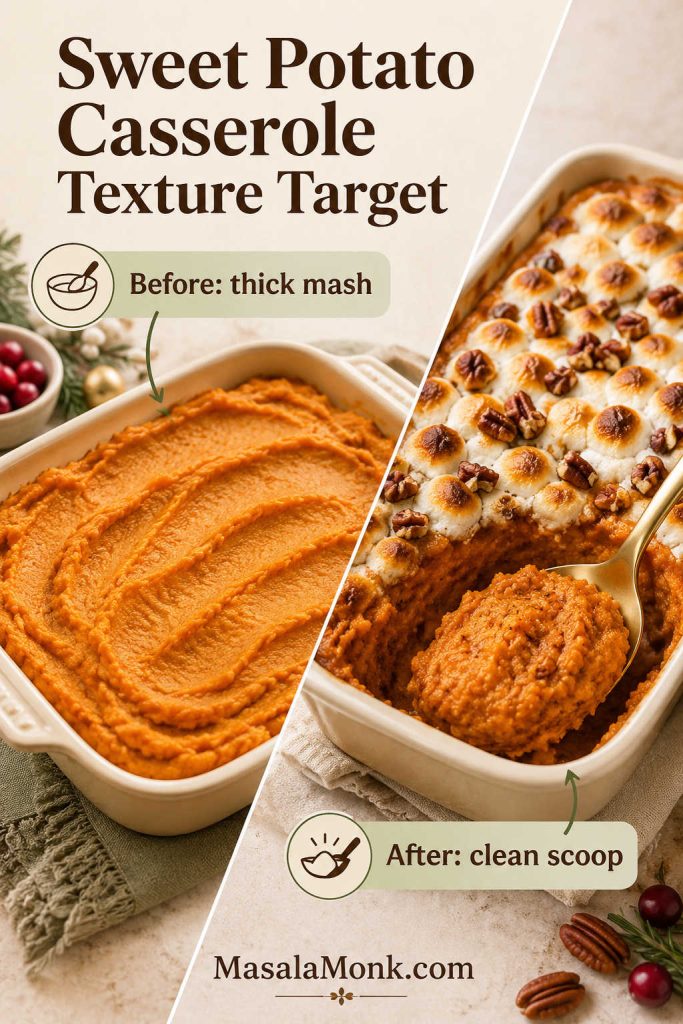
Before and after texture guide showing thick sweet potato mash before baking and a clean scoop of baked casserole after baking
A thick mash that holds spoon ridges is your best early clue that the baked casserole will scoop neatly after it rests.

This is the quiet moment where the casserole is either set up for success or headed toward watery. When the base is thick before baking and fully hot before serving, the first scoop feels generous: soft, creamy, and steady enough to hold its place on the plate.

How to Make Sweet Potato Casserole

This is the main fresh-sweet-potato method. Use the canned-yam notes above if you are starting with canned sweet potatoes.
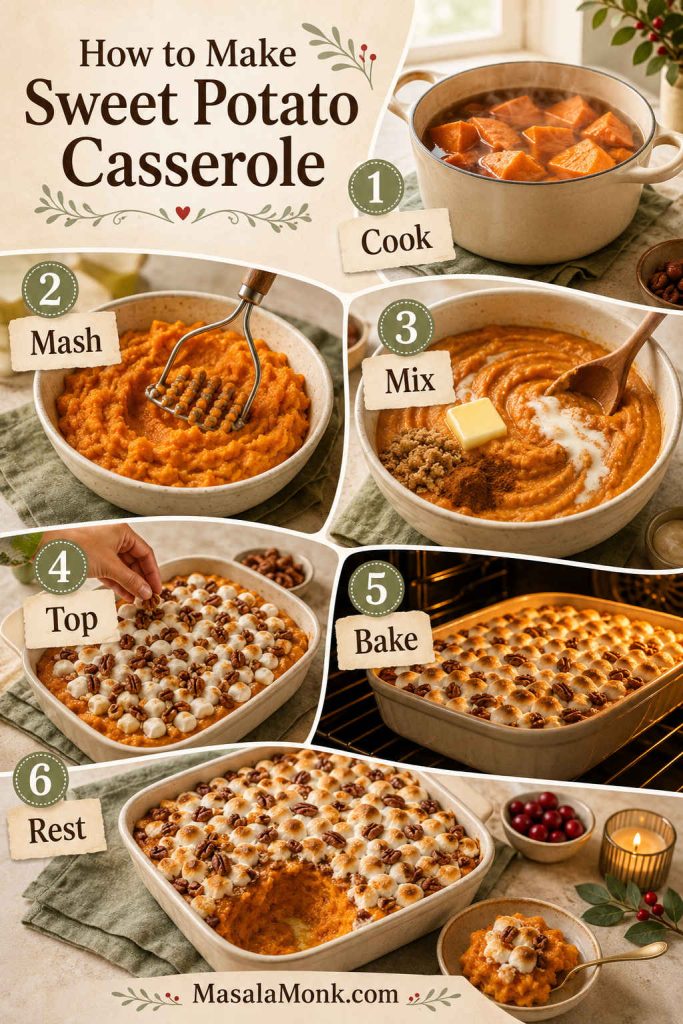
Step-by-step sweet potato casserole guide showing the sequence cook, mash, mix, top, bake, and rest
The process stays simple when you follow the order: cook, mash, mix, top, bake, and let the casserole rest before the first scoop.

Step 1: Cook the Sweet Potatoes

Peel the sweet potatoes and cut them into even chunks. Add them to a large pot, cover with water, and simmer until fork-tender, usually 12–20 minutes depending on the size of the pieces. Drain very well, then let them sit in the hot pot for 3–5 minutes so extra steam can escape.

If roasting, halve the sweet potatoes or roast them whole at 425°F / 220°C until completely tender, usually 40–50 minutes depending on size. Let them cool slightly, then scoop out the flesh. Roasting takes longer, but it gives a thicker, more flavorful mash.

Step 2: Mash Until Thick and Mostly Smooth

Mash the cooked sweet potatoes with a potato masher until mostly smooth. A few small soft pieces are fine. Avoid over-processing in a food processor, especially if your potatoes are very moist, because the filling can become too loose.

Stop when the mash looks creamy and holds soft ridges. If it levels out immediately, wait before adding more milk.
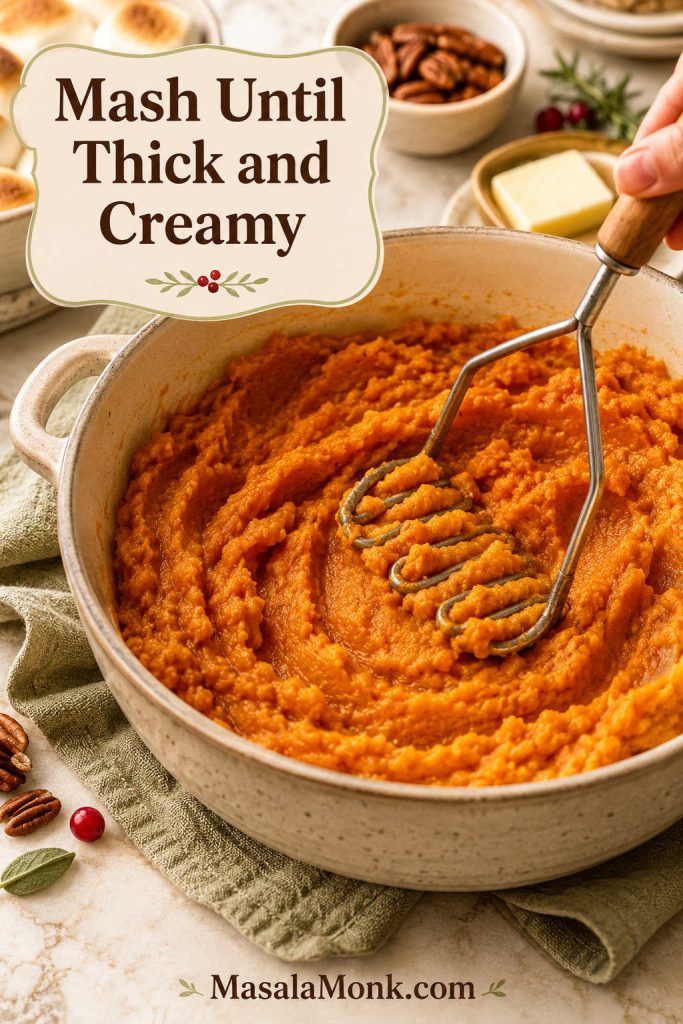
Cooked sweet potatoes being mashed in a bowl with a potato masher until thick and creamy
After boiling, let the sweet potatoes steam-dry before mashing; otherwise, extra water can weaken the base before the filling is even mixed.

Step 3: Add Butter, Sugar, Milk, Vanilla, Spices, and Salt

Stir in melted butter, brown sugar, milk or cream, vanilla, cinnamon, nutmeg, and salt. Start with the lower sugar amount if you prefer a less-sweet casserole, if you plan to use marshmallows, or if your shortcut yams were packed in syrup.

Taste the filling before adding the eggs. Once the eggs go in, it is better not to keep tasting the raw mixture.

Step 4: Cool Slightly, Then Add Eggs

Let the mash cool for a few minutes before stirring in the eggs. The potatoes can be warm, but they should not be steaming hot. This prevents the eggs from scrambling and helps them blend smoothly into the filling.

If you are making the casserole without eggs, skip this step and use a little less milk so the filling stays sturdy.
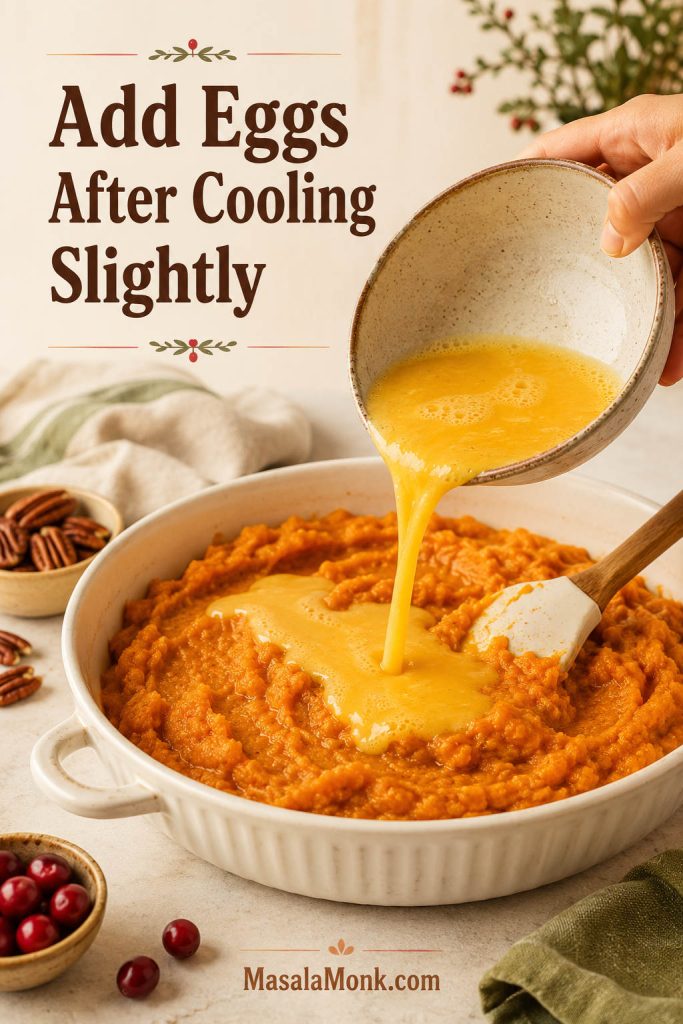
Beaten eggs being added to slightly cooled sweet potato mash in a mixing bowl
Let the mash cool slightly before adding eggs so they blend into the filling instead of tightening into uneven bits.

Step 5: Spread in the Baking Dish

Grease a 9×13-inch / 3-quart baking dish and spread the filling evenly. Smooth the top, but do not pack it down too firmly. This is a scoopable casserole, not a sliceable cake.

If using a smaller 8×8, 9×9, or 2-quart dish, use 3–4 cups mashed sweet potato instead of the full 5–6 cups.

Step 6: Add the Topping

Sprinkle pecan streusel evenly over the casserole before baking. If using marshmallows only, bake the filling until nearly hot first. With both toppings, start with the pecan layer and finish with marshmallows.

Pecan Streusel Texture Cue
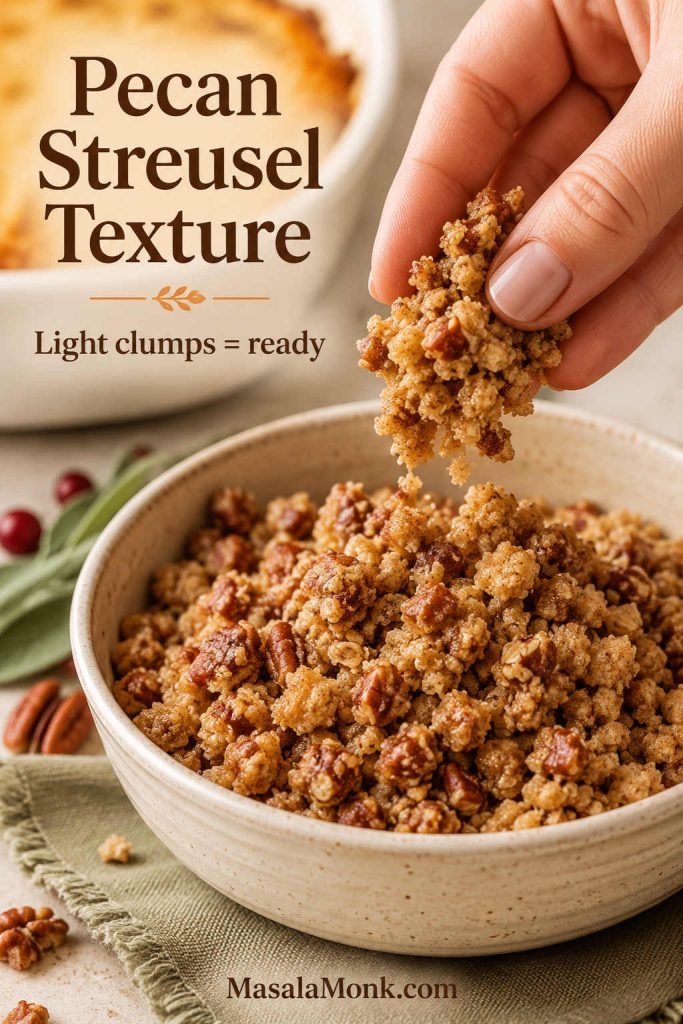
Close-up of pecan streusel being pinched above a bowl to show light clumps and crumbly texture
The pecan topping should look crumbly but moist enough to gather in small pieces, which helps it bake into buttery crunch.

When to Add Marshmallows

Before and after guide showing plain hot sweet potato casserole before marshmallows and toasted marshmallows after the final 8 to 10 minutes
Wait until the casserole is hot before adding marshmallows; then they toast on top instead of disappearing into the filling.

Step 7: Bake Until Hot and Lightly Set

Bake at 350°F / 175°C until the filling is hot in the center and the topping looks golden. A room-temperature casserole usually takes 30–35 minutes. A chilled make-ahead casserole may need 40–50 minutes, especially if it goes into the oven straight from the fridge.

Because this filling contains eggs, you can check the center with an instant-read thermometer if you want precision: it should reach 165°F / 74°C. If the topping is ready but the center is not, cover the top loosely with foil and keep baking.

Step 8: Rest Before Serving

Let the casserole rest for 10–15 minutes before serving. This helps the filling settle, makes it easier to scoop, and lets the streusel firm up slightly. The first spoonful should look creamy and generous, not watery or collapsed.

At the table, the best scoop should feel soft underneath, with just enough golden crunch or toasted marshmallow on top to remind everyone why this dish always disappears.

Sweet Potato Casserole Recipe

This sweet potato casserole is creamy, lightly set, and flexible enough for marshmallows, pecan streusel, or both. For the most crowd-friendly version, use pecan streusel with marshmallows added near the end, but either topping works on its own.

Prep Time
20 minutes
Potato Cook Time
12–20 minutes
Bake Time
30–35 minutes, or 40–50 if chilled
Total Time
About 1 hour 10–15 minutes, plus resting

Servings: 10–12   |   Oven: 350°F / 175°C   |   Dish: 9×13-inch / 3-quart baking dish

Total time is based on boiling the sweet potatoes and baking the casserole right away. If roasting, add about 25–30 minutes. If baking from chilled, allow 40–50 minutes of bake time. Let the casserole rest 10–15 minutes before serving.

Equipment

  • 9×13-inch / 3-quart baking dish
  • Large pot or sheet pan
  • Potato masher
  • Mixing bowls
  • Measuring cups and spoons
  • Foil, if making ahead or reheating
  • Instant-read thermometer, optional

Ingredients

For the Sweet Potato Filling

  • 3 lb / 1.36 kg fresh sweet potatoes, peeled and cut into chunks, or 2 x 29 oz cans of canned yams, drained, aiming for 5–6 cups mashed
  • 4 tbsp / 57 g butter, melted
  • ⅓–½ cup / 65–100 g brown sugar, depending on sweetness preference
  • ⅓ cup / 80 ml milk, half-and-half, cream, or evaporated milk
  • 2 large eggs, lightly beaten
  • 1 tsp / 5 ml vanilla extract
  • 1 tsp ground cinnamon
  • ⅛–¼ tsp ground nutmeg, optional
  • ¾ tsp fine salt, or to taste

For the Pecan Streusel Topping

  • 1 cup / 100–115 g chopped pecans
  • ½ cup / 100 g brown sugar
  • ⅓ cup / 42 g all-purpose flour
  • 5–6 tbsp / 70–85 g butter, melted
  • ½ tsp ground cinnamon
  • Pinch of salt

Nut-free option: Replace pecans with crushed cornflakes, oat crumble, or plain brown sugar crumble.

For the Marshmallow Topping

  • 2–3 cups mini marshmallows / about 100–150 g

Instructions

Cook and Mix the Filling

  1. Cook the sweet potatoes. Add the peeled sweet potato chunks to a large pot and cover with water. Bring to a boil, then simmer until fork-tender, about 12–20 minutes. Drain very well and let the potatoes steam-dry in the hot pot for 3–5 minutes. If using canned yams, drain them very well and skip to mashing.
  2. Preheat the oven. Heat the oven to 350°F / 175°C. Grease a 9×13-inch / 3-quart baking dish.
  3. Mash the sweet potatoes. Mash until mostly smooth. A few small soft pieces are fine, but avoid leaving large chunks.
  4. Mix the filling. Stir in melted butter, brown sugar, milk or cream, vanilla, cinnamon, nutmeg, and salt. Taste and adjust sweetness or salt before adding eggs.
  5. Add the eggs. Let the mash cool slightly, then stir in the beaten eggs until evenly mixed. Do not add eggs to steaming-hot potatoes.
  6. Fill the dish. Spread the sweet potato filling evenly in the prepared baking dish.

Top, Bake, and Rest

  1. Make the pecan topping, if using. In a bowl, mix pecans, brown sugar, flour, 5 tablespoons melted butter, cinnamon, and salt until crumbly. Add the 6th tablespoon of butter only if the mixture still looks dry. Sprinkle over the sweet potato filling.
  2. Bake the casserole. Bake with the streusel on top if using pecan topping. For marshmallows only, bake the filling for about 20–25 minutes first, until nearly hot. A refrigerated casserole may need about 40–50 minutes total bake time, covered loosely if the top browns too quickly. For egg-based doneness, the center should reach 165°F / 74°C.
  3. Add marshmallows near the end. Scatter marshmallows over the hot or nearly hot casserole during the last 8–10 minutes of baking. If using both pecans and marshmallows, add them over the baked streusel. Bake until puffed and golden.
  4. Rest and serve. Let the casserole rest for 10–15 minutes before serving.

Recipe Notes

  • Shortcut canned version: Use 2 x 29 oz cans for a full 9×13 batch, or 1 x 40 oz can for a smaller 8×8 or 9×9 batch. Drain well and aim for 5–6 cups mashed.
  • Roasted sweet potatoes: Roast whole or halved sweet potatoes at 425°F / 220°C for 40–50 minutes, then scoop and mash.
  • Less sweet: Start with ¼–⅓ cup brown sugar, especially if using syrup-packed cans or marshmallows.
  • Nut-free: Use marshmallows, oat crumble, cornflake crumble, or plain brown sugar crumble instead of pecans.
  • No egg: Omit the eggs and reduce the milk slightly. The casserole will be softer and more spoonable.
  • Make-ahead: Prepare the filling 1–2 days ahead and refrigerate covered without topping. Add topping before baking.
  • Storage: Refrigerate leftovers for 3–4 days. Freeze the base without topping for up to 3 months.

Make-Ahead Timeline

Sweet potato casserole is one of the easier big-meal sides to make ahead because the filling holds well in the fridge. The most reliable make-ahead version is not the one where everything is assembled as early as possible. It is the one where the filling waits calmly and the topping stays fresh until the final bake.

Holiday timing plan: Make the filling 1–2 days ahead, mix the topping the morning of serving, bake the chilled casserole 60–75 minutes before dinner, add marshmallows near the end if using them, then rest before serving.
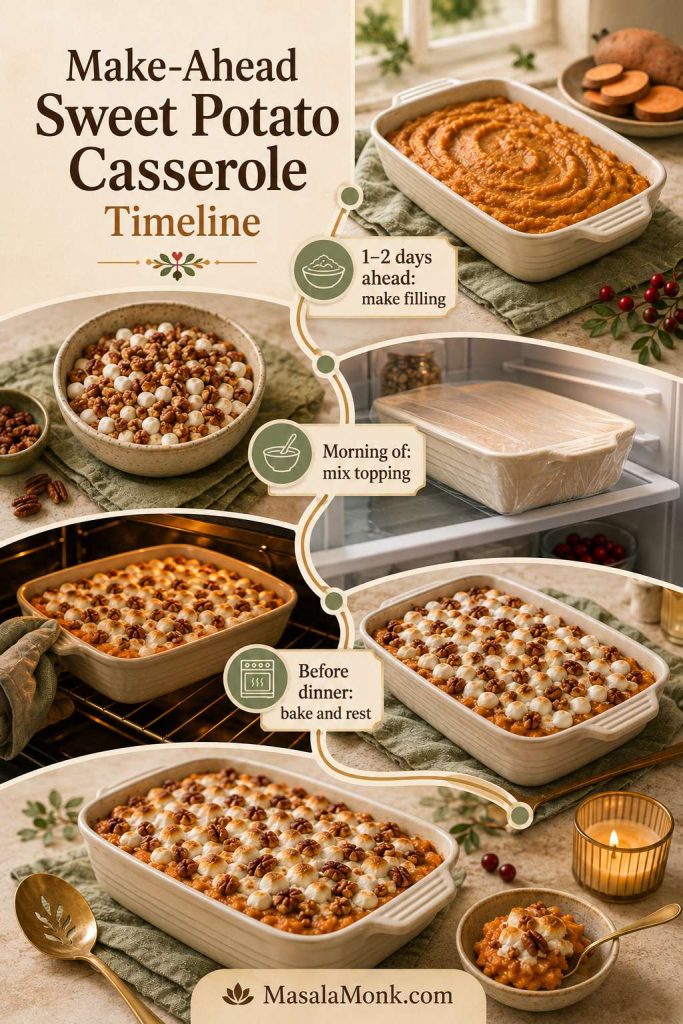
Make-ahead timeline for sweet potato casserole showing filling made 1 to 2 days ahead, topping mixed the morning of serving, and casserole baked and rested before dinner
For a make-ahead sweet potato casserole that still tastes fresh, prepare the filling early but save the topping for baking day.
WhenWhat to do
2 days beforeCook, drain, and mash the sweet potatoes. Refrigerate the mash in an airtight container.
1 day beforeMix the filling and spread it in the baking dish. Cover and refrigerate without topping.
Morning of servingMix the pecan streusel separately if using. Keep marshmallows in the bag until needed.
60–75 minutes before servingBake the chilled casserole until hot through, allowing extra time for topping and resting.
Near the end of bakingFinish any marshmallow topping until puffed and golden.
Before servingRest 10–15 minutes so the filling settles and the topping has a moment to firm up.

If the assembled casserole is going straight from the refrigerator to the oven, use the baking-from-the-fridge guide before planning your final topping.

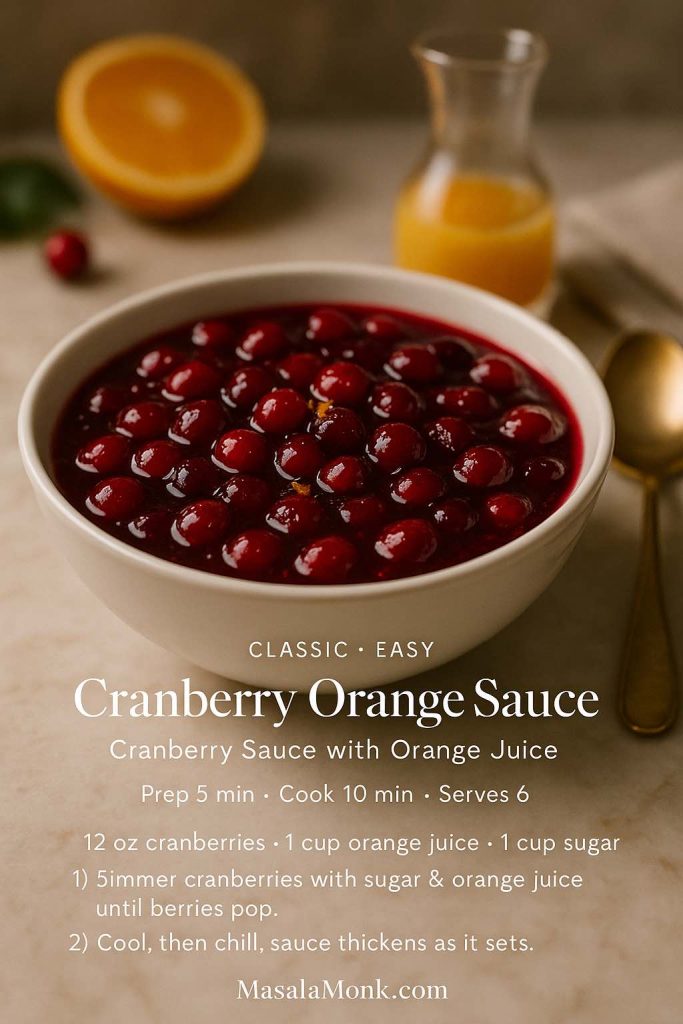
This is also a good moment to handle other make-ahead sides. A bright cranberry sauce with orange juice can be made ahead and chilled, which helps keep the final cooking window focused on dishes that need the oven.

That small separation — filling ready, topping fresh — keeps the casserole from tasting like leftovers before dinner even starts.

Should You Add Marshmallows Before Refrigerating?

No. Marshmallows should be added right before the final part of baking. If they sit on the casserole overnight, they can absorb moisture, collapse, or melt unevenly in the oven.

Can You Add Pecan Topping Ahead?

You can, but the texture is better if you store the topping separately and sprinkle it on before baking. If the topping sits on the filling overnight, it may absorb moisture and bake up softer.

Can You Bake It Straight from the Fridge?

Yes, but allow 40–50 minutes of bake time if the casserole is cold from the fridge. If your baking dish is not safe for sudden temperature changes, let it sit at room temperature for about 30 minutes before baking.
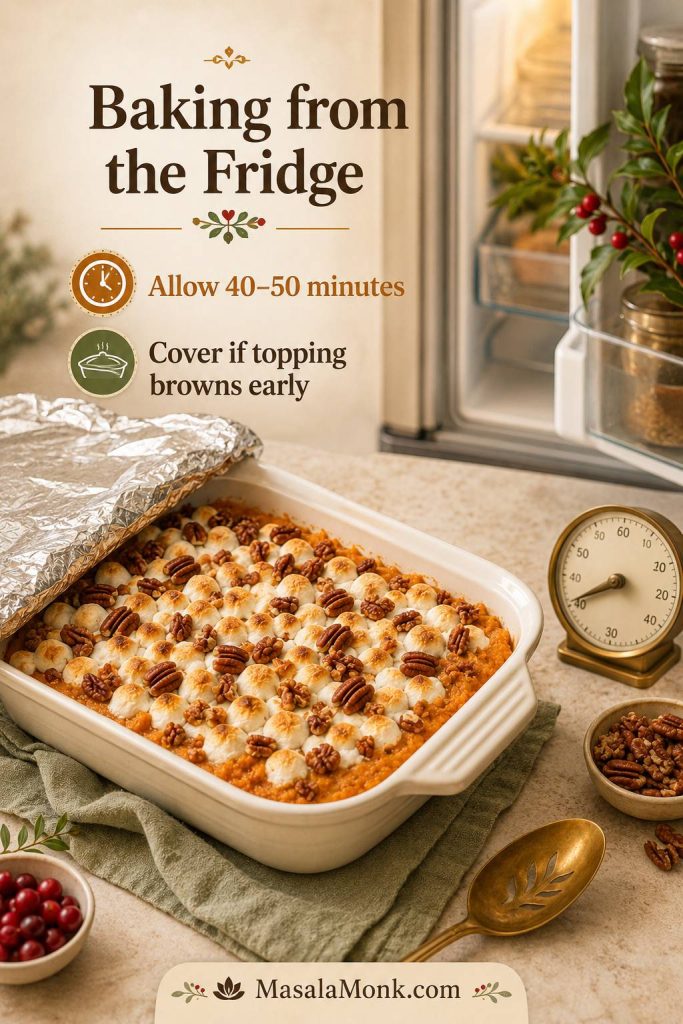
Sweet potato casserole with foil near an open refrigerator, showing guidance to bake from the fridge for 40 to 50 minutes and cover if topping browns early
When baking from the fridge, plan for a longer oven window and use foil as backup if the top finishes before the middle.

How to Fit It Into a Busy Oven

Sweet potato casserole is usually not the only thing fighting for oven space. The good news is that it is flexible. It can bake at 350°F / 175°C with many other sides, sit for a short rest before serving, or be baked earlier and reheated gently.

If you are also baking green bean casserole, keep both dishes on the same 350°F / 175°C schedule when possible. The sweet potato casserole can rest while another side finishes, and marshmallows can still go on at the very end.

Best Timing Paths for a Crowded Oven

  • At 350°F / 175°C: Bake as written. This is the most forgiving temperature for the casserole.
  • For a hotter oven: Check early and cover loosely if the topping browns before the center is hot.
  • Already baked: Reheat covered at 325–350°F until hot, then uncover briefly to refresh the topping.
  • Using marshmallows: Add them only after the filling is hot or nearly hot, especially when reheating.
  • When oven space is tight: Use the slow cooker to warm or hold the filling, then broil marshmallows in a baking dish if you want a toasted top.
  • When dinner is delayed: Keep the casserole loosely covered in a warm spot, but avoid sealing it tightly while hot because trapped steam softens the topping.

How to Finish the Topping Before Serving
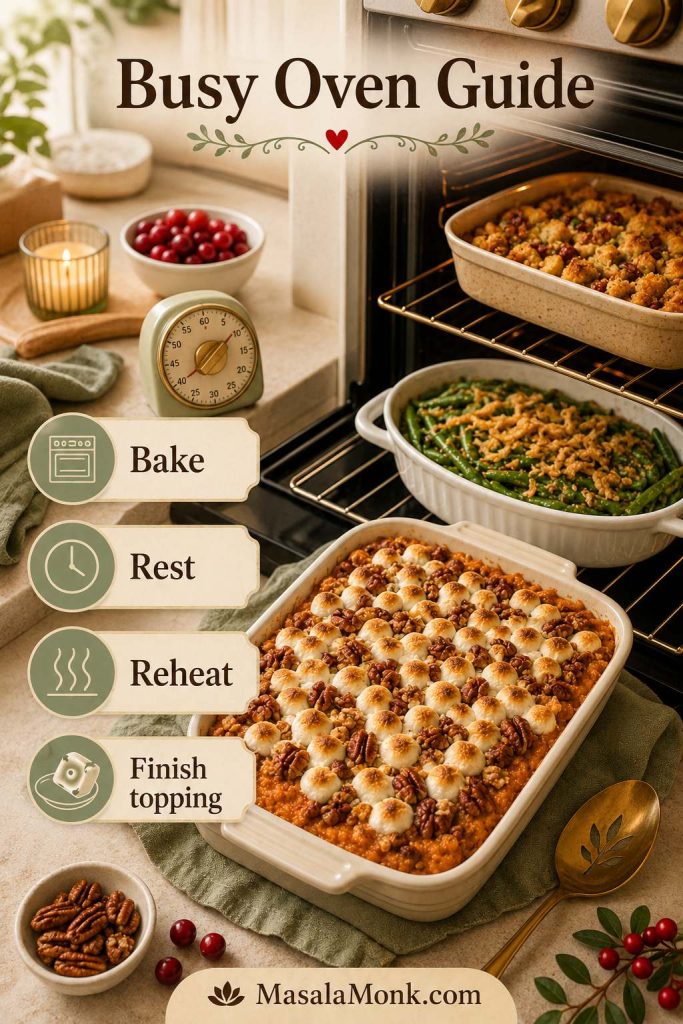
Busy oven guide showing sweet potato casserole with other holiday side dishes and steps to bake, rest, reheat, and finish the topping
During a crowded holiday oven schedule, this casserole can bake early, rest safely, reheat gently, and still get a fresh final topping.

If oven space is the main problem, the slow cooker option can hold the base while other sides finish.

Think of the casserole as a side that can wait a little. Bake it before the final rush, rest it while other dishes finish, and add marshmallows late enough that they still look fresh when it reaches the table.

If the casserole is running late, do not rush the marshmallows. Get the filling hot first. A pale marshmallow topping can be browned in a minute, but a cold center cannot be fixed at the table.

Slow Cooker Sweet Potato Casserole Option

The slow cooker is useful when the oven is full, but it changes the topping. Think of it as a warming tool here, not the place to create a crisp top. It keeps the sweet potato base warm and soft, but pecan streusel will not crisp the way it does in the oven, and marshmallows will become gooey rather than deeply toasted.

Use this route when oven space matters more than a perfect topping. Then, if you want the golden holiday look, transfer the hot filling to a baking dish and finish it under the broiler.
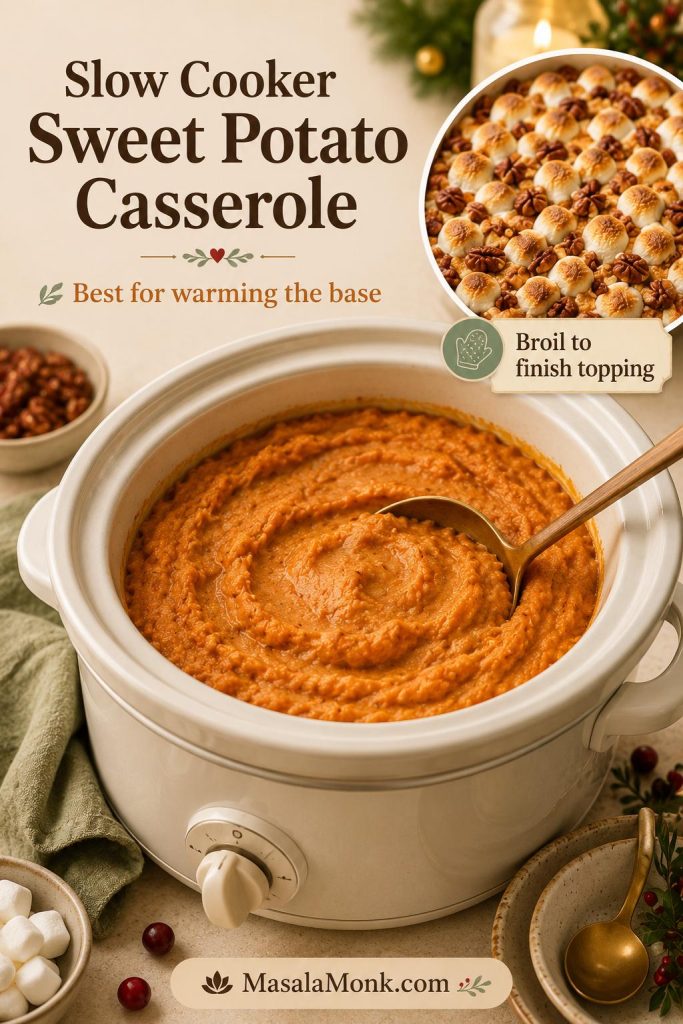
Slow cooker filled with creamy sweet potato casserole base and a small broiled topping inset with marshmallows and pecans
A slow cooker solves the oven-space problem, but a quick broiler finish is what gives marshmallows and pecans their best texture.
Slow cooker situationTimingWhat to know
Prepared filling, already cooked sweet potatoesLow for 2–3 hours, or high for 1–1½ hoursGood for warming and holding the casserole base
Marshmallows in slow cookerLast 10–15 minutes onlyThey soften and melt; they will not toast like oven marshmallows
Pecan topping in slow cookerAdd near the end or finish in ovenExpect a softer topping unless broiled or baked briefly

For the most practical slow cooker version, prepare the sweet potato filling and spread it in a greased slow cooker. Warm until hot through. If condensation is dripping onto the topping, place a clean kitchen towel under the lid, making sure it does not touch the heating element.

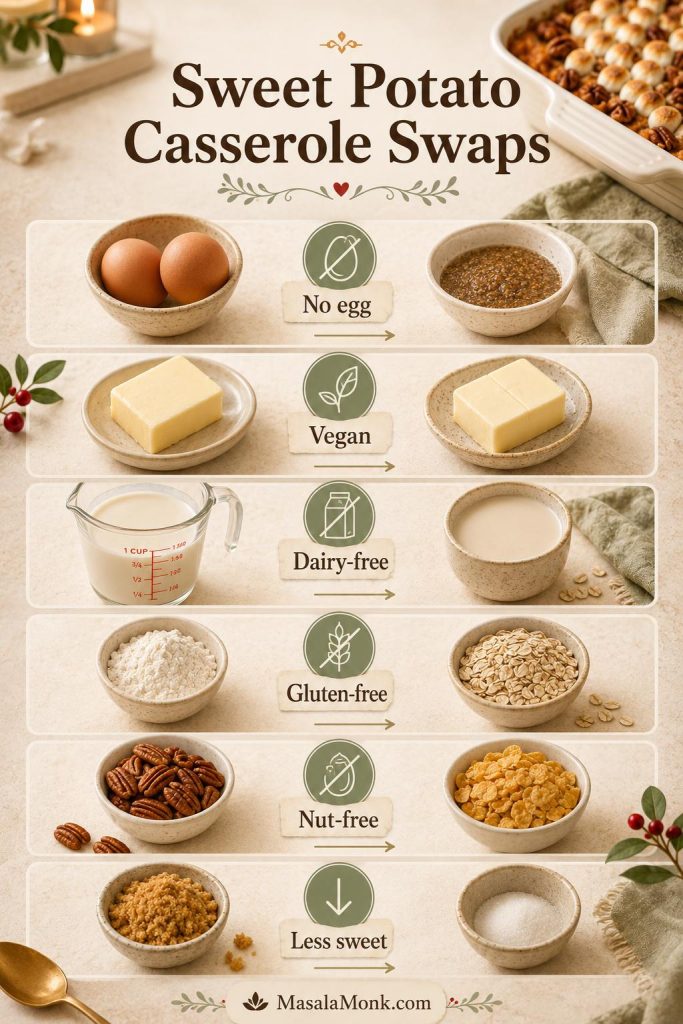
No Egg, Vegan, Dairy-Free, and Other Easy Swaps

The base recipe is classic, but it is easy to adapt. Keep the sweet potato mash thick, add liquids gradually, and choose a topping that fits the version you need.

NeedHow to adjustTexture note
No eggOmit the eggs and reduce the milk slightlySofter and more spoonable, less set
VeganUse vegan butter, non-dairy milk, no eggs, and vegan marshmallows if usingKeep the mash thick so the filling does not loosen
Dairy-freeUse dairy-free butter and oat milk, almond milk, coconut milk, or another non-dairy milkCoconut milk gives richer flavor; oat milk is more neutral
Gluten-freeUse gluten-free flour, oat flour, or certified gluten-free oats in the toppingCheck all topping ingredients if serving someone with a strict allergy or intolerance
Nut-freeUse marshmallows, oat crumble, cornflake topping, or plain brown sugar crumbleCornflakes give the most crisp, sweet-salty crunch without pecans
Less sweetUse ¼–⅓ cup brown sugar, skip marshmallows, and use pecan or oat toppingAdd enough salt, cinnamon, and vanilla so the flavor still feels full
No marshmallowsUse pecan streusel, oat crumble, cornflake topping, or savory crumb toppingGood when you want a side dish, not a dessert-like casserole
Ingredient swap guide for sweet potato casserole showing no egg, vegan, dairy-free, gluten-free, nut-free, and less sweet options
Whether the casserole is no-egg, vegan, dairy-free, gluten-free, nut-free, or less sweet, the key is keeping the mash thick before baking.

Regular marshmallows often contain gelatin, so check the label if the dish needs to be vegetarian or vegan. For gluten-free guests, use certified gluten-free oats if you choose an oat topping, and check packaged ingredients carefully.

Flavor Variations

  • Brighter: Add orange zest or fold in a few small pieces of tart apple. Use orange juice sparingly because too much can thin the filling.
  • Maple-sweet: Replace part of the brown sugar with maple syrup, then reduce the milk slightly if the filling loosens.
  • Fruitier: Add well-drained crushed pineapple for a sweeter, old-fashioned variation.
  • More savory: Skip the sugar and marshmallows. Use butter, herbs, black pepper, and a savory breadcrumb or pecan topping.
  • Praline-style: Increase the pecans and brown sugar for a sweeter, more dessert-like topping.

Sweet Potato Casserole vs Sweet Potato Souffle

Sweet potato casserole and sweet potato souffle are closely related, and you will see the names used loosely, especially in holiday recipes. In general, sweet potato casserole is denser, more spoonable, and more flexible with toppings like marshmallows, pecans, or both.

Sweet potato souffle is usually smoother, lighter, and more egg-based. It often has a pecan topping and a more custardy interior. This recipe sits firmly in classic casserole territory: creamy and lightly set, but not so airy or eggy that it becomes a true souffle.

Troubleshooting Sweet Potato Casserole

If the casserole does not look perfect halfway through, do not panic. This is a forgiving dish, and most problems come from the same few places: too much moisture, topping added at the wrong time, or sweetness that was not balanced before baking.
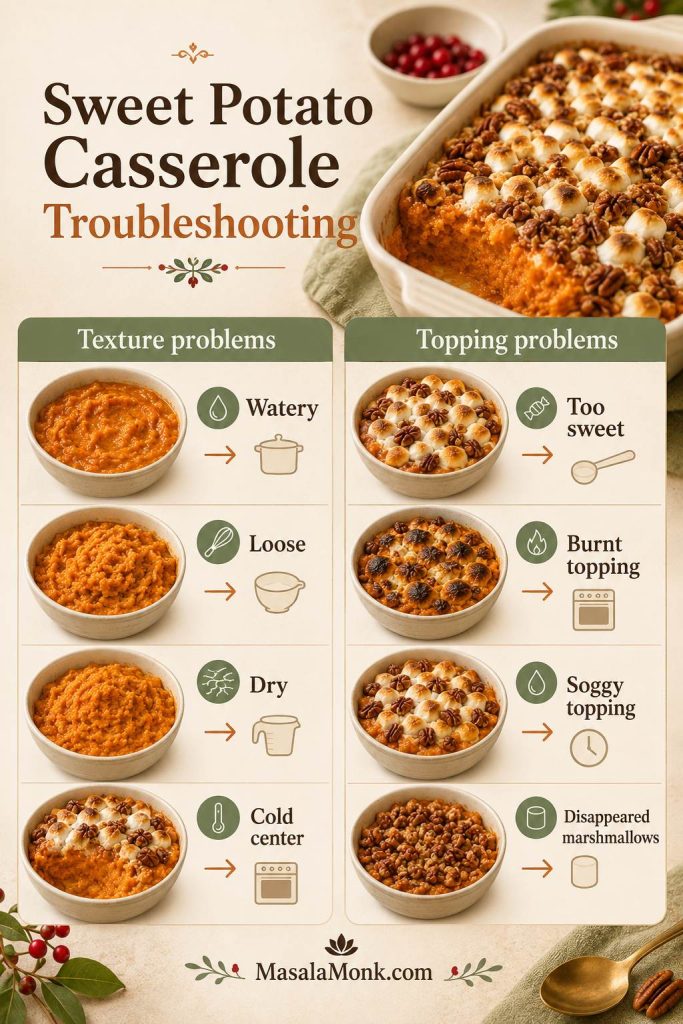
Troubleshooting guide for sweet potato casserole with texture problems such as watery, loose, dry, and cold center, plus topping problems such as too sweet, burnt topping, soggy topping, and disappeared marshmallows
Most sweet potato casserole problems trace back to moisture, sweetness, heat, or topping timing, so spotting the cause makes the fix much easier.

If the problem starts before baking, compare your mash with the texture target; if it starts after chilling, check the fridge-to-oven timing.

Texture and Moisture Problems

ProblemWhy it happenedFix nowFix next time
Watery casserolePotatoes absorbed too much water, the cans were not drained well, or too much milk was addedBake uncovered a little longer; if the topping is browning, cover only the top loosely with foilDrain and steam-dry potatoes; drain shortcut yams very well; add liquid gradually
Filling is too looseNo eggs, too much liquid, or underbakingBake longer and rest before servingUse eggs or reduce milk slightly for egg-free versions
Dry fillingToo little liquid or overbakingAdd a splash of warm milk or melted butter when reheatingMeasure liquid carefully and avoid baking long after the center is hot
Stringy textureFibrous sweet potatoes or not enough mashingMash more thoroughly if still possibleChoose good orange-fleshed sweet potatoes and remove tough fibers before mixing
Cold centerCasserole went into the oven chilled and did not bake long enoughCover loosely and continue baking until hot in the centerAdd 10–15 minutes when baking from cold
Topping browns before filling is hotDish was too deep, oven was too hot, or casserole was coldCover loosely with foil and keep bakingLet chilled casserole sit out briefly and use the right dish size

Topping and Sweetness Problems

ProblemWhy it happenedFix nowFix next time
Too sweetToo much sugar, syrup-packed cans, or marshmallow toppingAdd a small pinch of salt, then serve small scoops with tart cranberry sauce, green beans, salty ham, or other savory sidesUse ¼–⅓ cup sugar and choose pecan topping instead of marshmallows
Burnt marshmallowsMarshmallows were added too early or broiled too longRemove the darkest pieces if neededAdd marshmallows only during the last 8–10 minutes and watch closely
Marshmallows disappearedThey were added too early or the filling was too wetAdd a fresh layer and bake brieflyAdd marshmallows near the end and make sure the filling is thick
Soggy pecan toppingTopping sat on the filling too long or absorbed refrigerator moistureReturn to the oven uncovered for a few minutes, or broil briefly while watching closelyStore topping separately and add before baking

Storage, Freezing, and Reheating

Leftover sweet potato casserole stores well, but the topping changes texture over time. The leftovers will still taste good after reheating, but the topping will never be quite as crisp or fluffy as it was on the first day. That is normal.

Marshmallows soften, pecan streusel loses some crunch, and any crumb topping will absorb moisture in the fridge. For general food-safety timing, the USDA’s leftovers and food safety guidance is a useful reference.

  • Refrigerator: Store covered for 3–4 days.
  • Freezer: Freeze the sweet potato base without topping for up to 3 months.
  • Thawing: Thaw the base overnight in the refrigerator before baking or reheating, then add topping fresh.
  • Marshmallow topping: Add fresh for the cleanest texture. Marshmallows do not freeze or reheat as cleanly as the filling.
  • Pecan topping: Can be frozen separately, but it is crispiest when mixed and baked fresh.
  • Oven reheating: Cover and reheat at 325–350°F until steaming hot throughout, then uncover briefly to refresh the topping.
  • Microwave reheating: Works for single servings, but the topping will soften.
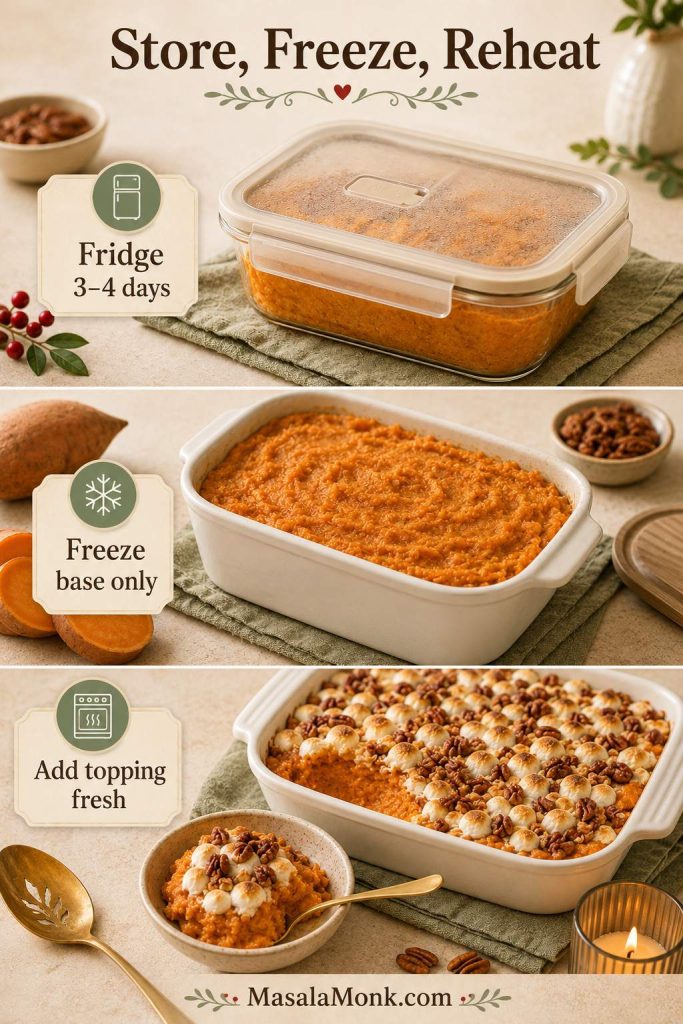
Storage guide for sweet potato casserole showing fridge storage for 3 to 4 days, freezing the base only, and adding fresh topping after reheating
The filling handles storage better than the topping, so freeze the base plain and add fresh marshmallows or crumble after reheating.

For broader sweet potato freezing guidance, the National Center for Home Food Preservation has a helpful reference on freezing sweet potatoes, including mashed sweet potatoes.

What to Serve With Sweet Potato Casserole

Sweet potato casserole is sweet, rich, and soft, so the rest of the plate should bring contrast. Think savory, tart, crunchy, green, or herb-heavy rather than more soft sweetness.

MealGood plate balance
Thanksgiving plateTurkey, stuffing, green beans, tart cranberry sauce, and a scoop of sweet potato casserole
Ham dinnerSalty ham, roasted Brussels sprouts or green beans, sharp mustard or cranberry sauce, and the casserole on the side
Vegetarian holiday tableMushroom gravy, roasted vegetables, green bean casserole, salad, and pecan-topped sweet potato casserole
Potluck plateA small scoop of casserole beside something savory, something crisp, and something acidic so the sweetness does not take over

For a classic side-dish table, serve it with green vegetables, stuffing, roasted vegetables, a simple savory main, and creamy garlic mashed potatoes. The casserole brings softness and sweetness; the rest of the plate should make it feel complete.

FAQs About Sweet Potato Casserole

Do canned yams work here?

Yes. The canned version works well when you want a faster casserole. Drain the pieces thoroughly, reduce the sugar if they were packed in syrup, and add milk gradually because they are already tender and more delicate than fresh cooked sweet potatoes.

How many cans of yams do I need?

For a full 9×13 casserole, use 2 x 29 oz cans, drained. For a smaller 8×8 or 9×9 casserole, use 1 x 40 oz can, drained. Because drained yield varies, aim for about 5–6 cups mashed sweet potato for a full batch or 3–4 cups for a smaller batch.

When should marshmallows go on top?

Add marshmallows during the last 8–10 minutes of baking, once the filling is hot or nearly hot. This gives them time to puff and brown without melting completely or burning before the center is ready.

How do I keep it from getting watery?

Drain the sweet potatoes well, let boiled potatoes steam-dry before mashing, drain canned yams thoroughly, and add milk gradually. The mash should be creamy but thick before it goes into the baking dish.

How far ahead can I make it?

You can make the filling 1–2 days ahead. Spread it in the baking dish, cover, and refrigerate without topping. Add pecan topping before baking and marshmallows near the end.

Does it freeze well?

The sweet potato base freezes well without topping for up to 3 months. Marshmallows and crumb toppings are best added fresh after thawing.

Do you have to put eggs in sweet potato casserole?

No. Eggs help the filling set and scoop neatly, but you can leave them out for a softer casserole. If skipping eggs, reduce the milk slightly so the mash stays thick.

Can I make it without marshmallows?

Yes. Use pecan streusel, oat crumble, cornflake topping, or a savory breadcrumb topping instead. Without marshmallows, the casserole tastes less candy-like and works better as a true side dish.

Can I make it in a slow cooker?

Yes, especially if you need to save oven space. The slow cooker is best for warming or holding the sweet potato base. Marshmallows will soften rather than toast, so transfer to a baking dish and broil briefly if you want a browned top.

What is the difference between casserole and souffle?

Sweet potato casserole is usually denser and more spoonable. Sweet potato souffle is usually smoother, lighter, and more egg-based. Many recipes blur the line, but this recipe is written as a classic casserole.

How much do I need for 10 people?

A 9×13-inch casserole made with about 5–6 cups mashed sweet potato serves 10–12 people as a side dish. If it is one of many sides, portions can be smaller.

Once the mash is thick, the sweetness tastes right, and the topping goes on at the right moment, you can stop worrying about this dish. It goes to the table hot, creamy, golden, and ready for the first generous scoop.
Back to top

Posted on Leave a comment

Ranch Oyster Crackers Recipe

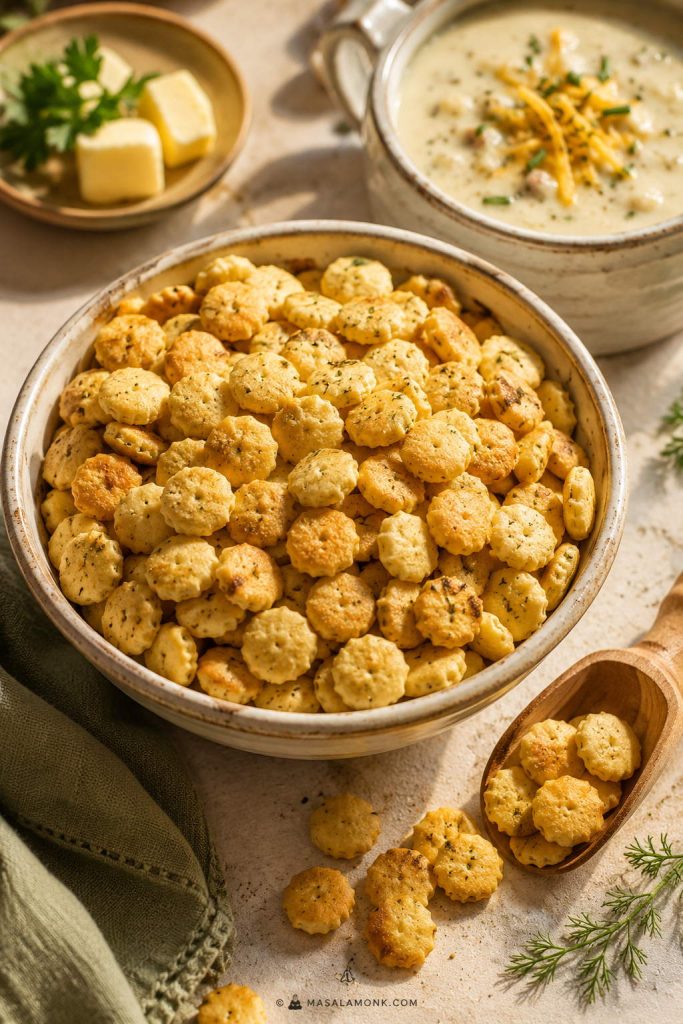
Bowl of golden ranch oyster crackers with herb flecks, scoop, and cozy snack-table sides.

Ranch oyster crackers are the kind of snack that disappears quietly. You set out a bowl before the game starts, beside a pot of soup, or on a holiday snack table, and somehow everyone keeps drifting back for another salty, herby handful. They are crisp, tiny, ranch-seasoned, and just rich enough to feel like a treat without asking much from you.

The recipe itself is easy. The confusing part is everything around it: whether “ranch dressing” means bottled dressing or the dry ranch packet, how much seasoning to use for a 9 oz, 12 oz, or 16 oz bag, whether oil or butter gives a better crunch, whether the crackers really need to be baked, and what to do if they turn out greasy, salty, or soft.

Once those little decisions are clear, the batch is easy to get right. The baked method gives the snappiest result, and the ratio table helps you adjust for whatever bag you have. From there, choose oil or butter, dill or no dill, a gentle ranch coating or a bolder party-snack bowl. The result should be bold but not harsh, coated but not oily, and crunchy enough that people keep reaching back into the bowl.

Quick Answer: The Best Ranch Oyster Crackers Formula

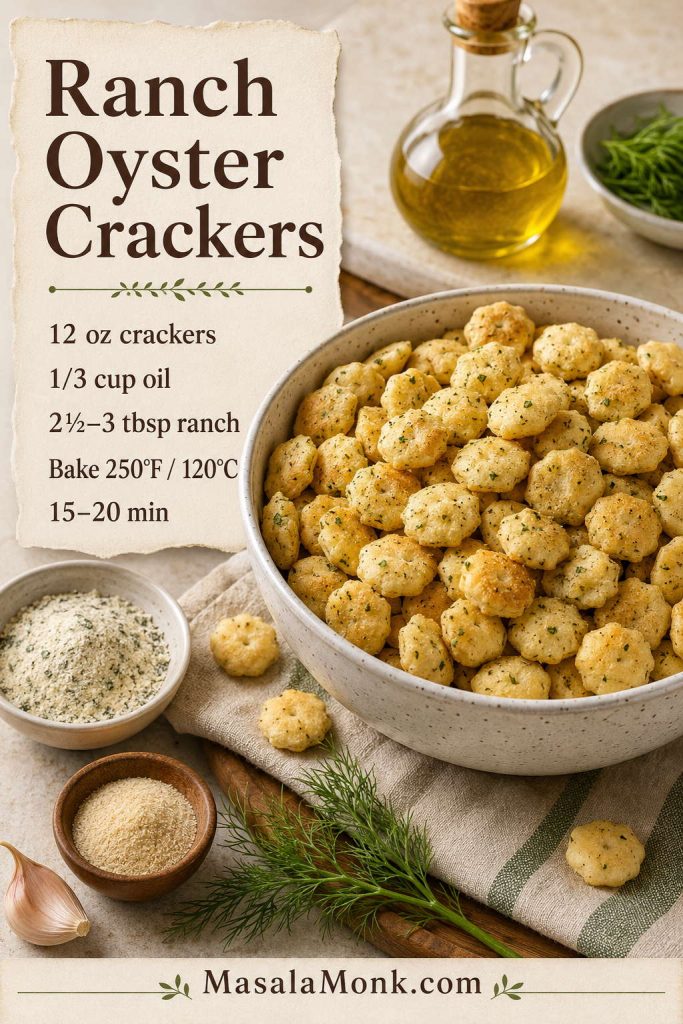
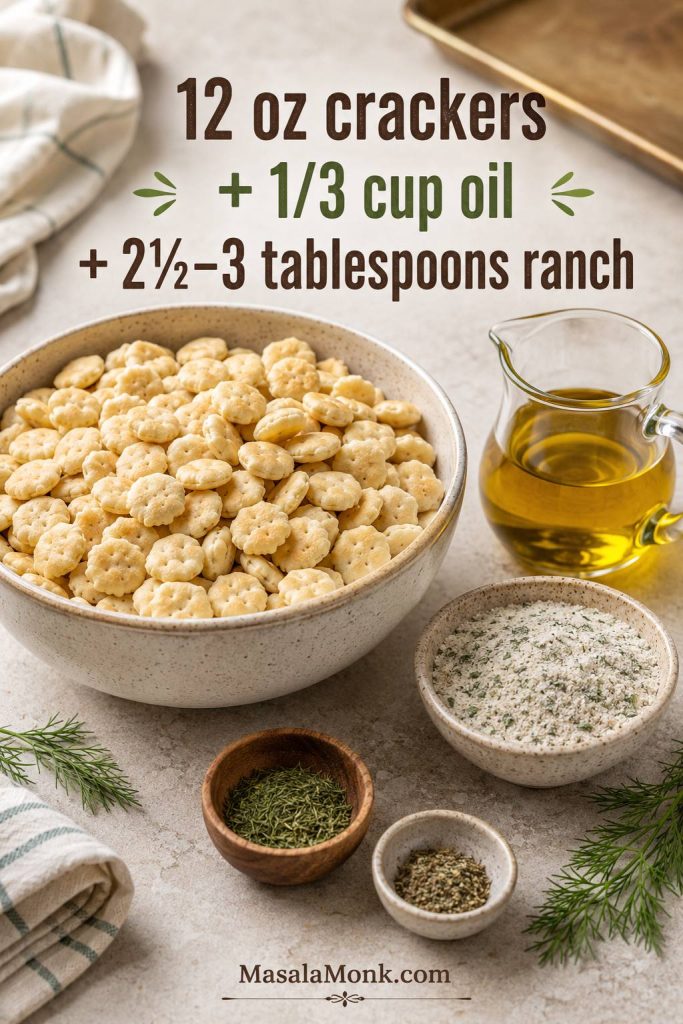
For 12 oz / 340 g oyster crackers, use ⅓ cup / 80 ml neutral oil, 2½ tablespoons dry ranch seasoning for a balanced batch or up to 3 tablespoons for a bolder batch, 1 teaspoon dried dill, ½ teaspoon garlic powder, and ½ to 1 teaspoon lemon pepper.

Toss well, spread on a rimmed baking sheet, bake at 250°F / 120°C for 18–22 minutes, stir once halfway, and cool fully before storing. The first handful should taste salty, herby, crisp, and evenly coated — never dusty in one bite and oily in the next.

Quick pick: Use neutral oil for the best crunch, melted butter for the richest flavor, the air fryer for the fastest small batch, the no-bake method when you want to skip the oven, and a 16 oz batch for parties, gifting, game day, or bigger soup nights.

If you are using a full 1 oz / 28 g ranch packet with a 12 oz bag, expect a bold, salty party-snack flavor. For a safer first batch, start with 2½ tablespoons, bake, taste, and dust the crackers with a little more seasoning while they are still warm on the tray.

Using a 9 oz or 16 oz bag? Check the ranch seasoning ratios before mixing the coating.

Prep scene with oyster crackers, oil, dry ranch seasoning, dill, garlic powder, lemon pepper, and sheet pan.
Start with this 12-ounce ranch oyster crackers formula, then adjust the next batch toward bolder seasoning, richer butter, or more heat.

Why This Recipe Works

The best batches come out lightly toasted, evenly seasoned, and crisp after cooling. That does not happen by dumping ranch powder over crackers; it comes from the order, the ratio, and a little low-heat baking time.

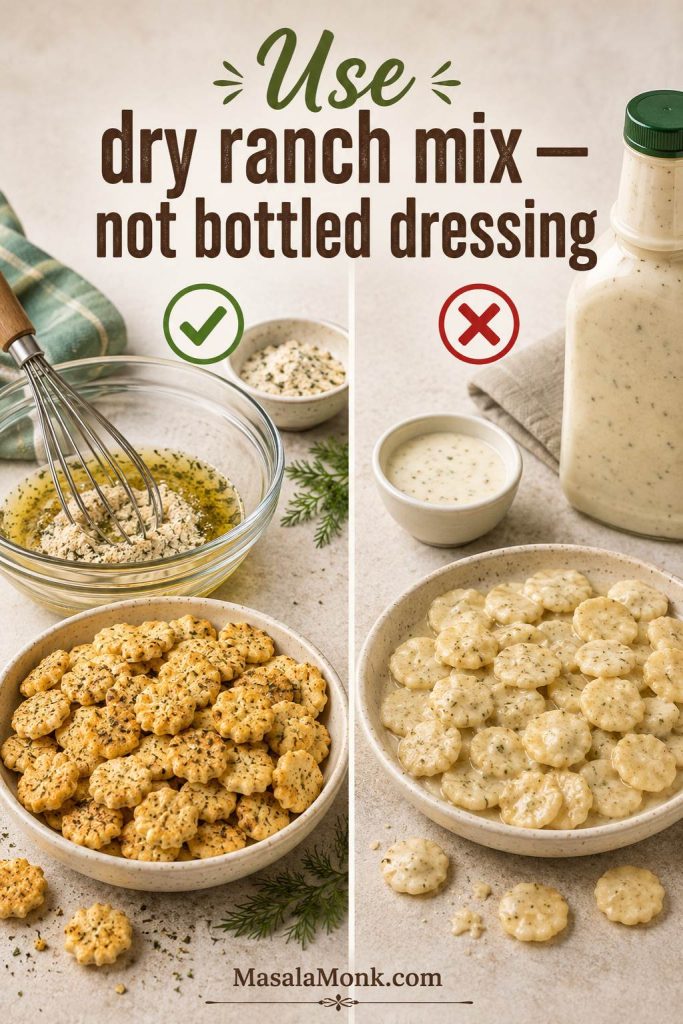
  • Dry ranch seasoning keeps the crackers crisp. Bottled dressing adds moisture, while dry mix gives flavor without making the crackers soggy.
  • Whisking the seasoning into the oil first prevents clumps. The ranch powder, dill, garlic, and lemon pepper spread more evenly when they are suspended in oil before they touch the crackers.
  • A low oven sets the coating instead of scorching it. At 250°F / 120°C, the crackers have time to toast gently while the oil or butter settles into a clean, savory finish.
  • The ratio table protects the batch. Oyster cracker bags vary, and using the same seasoning amount for every bag can make one batch bland and another too salty.
  • Cooling on the tray finishes the texture. The crackers firm up as the seasoning settles into the surface.

The goal is simple: every handful should taste seasoned, not dusty in some bites and oily in others. Mix the coating first, bake low, and let the crackers cool on the pan, and the bowl lands crisp, salty, herby, and clean.

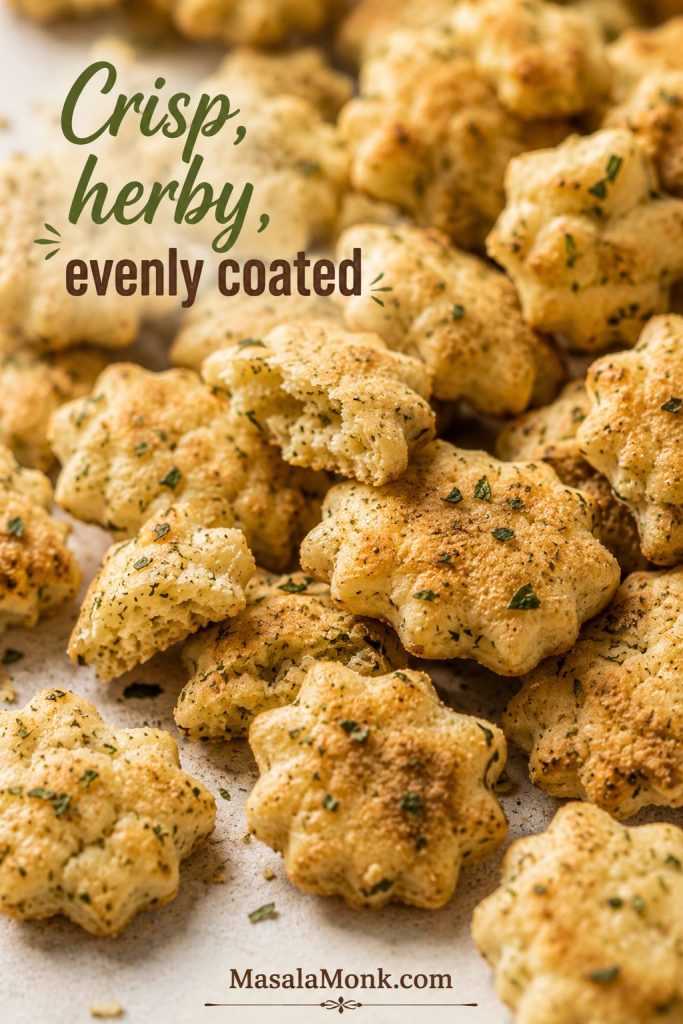
Close-up of crisp ranch oyster crackers with toasted edges, broken pieces, and green herb flecks.
Look for a matte, herby surface with lightly toasted edges; that finish tells you the seasoning has settled instead of sitting on the crackers as oil.

What Are Ranch Oyster Crackers?

Ranch oyster crackers are small oyster crackers tossed with dry ranch seasoning, oil or melted butter, and simple seasonings like dill, garlic powder, lemon pepper, and onion powder. They are usually baked at a low temperature until the seasoning clings and the crackers become crunchy again.

They are one of the most common versions of seasoned oyster crackers: the ranch packet gives the base flavor, while dill, garlic, lemon pepper, Parmesan, or heat can push the batch in different directions.

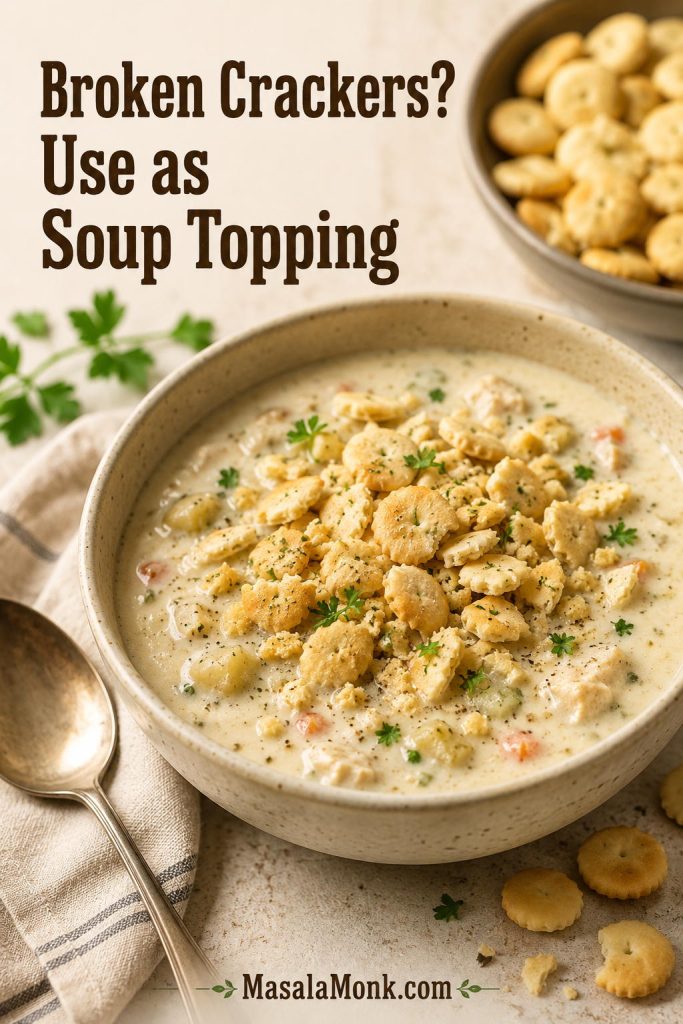
Despite the name, oyster crackers usually do not contain oysters. They are small soup crackers traditionally served with oyster stew, chowder, chili, and other soups. That soup-and-stew background is also why they make so much sense with creamy bowls and chili today. For a little more history, this history of oyster crackers explains where the name comes from.

Think of them as a snack mix shortcut. They are easier than Chex mix, less fussy than homemade crackers, and more interesting than plain soup crackers. Once baked and cooled on the pan, they are sturdy enough for snacking but still small enough to scatter over tomato soup, chili, chowder, salad, or a dip board.

Dry Ranch Seasoning vs Bottled Ranch Dressing

Use dry ranch seasoning here. It gives concentrated ranch flavor without the moisture that comes from bottled dressing. Creamy ranch dressing may sound tempting, but it can turn the crackers soft instead of snappy.

Split comparison of dry ranch seasoning mixed with oil and bottled ranch dressing with softer crackers.
Dry ranch mix seasons the crackers without adding water or cream, which is why it gives a cleaner crunch than bottled dressing.
Ranch productCan you use it?What to know
Dry ranch seasoning packetYes, best choiceClassic, easy, and bold. Use the packet weight and taste for saltiness.
Ranch seasoning shakerYesMeasure by tablespoons. Start with less if the blend is salty.
Dry ranch dip mixUsually yesCan be saltier or stronger than dressing mix. Start with a little less.
Bottled ranch dressingNot recommendedAdds moisture and can make the crackers soft.
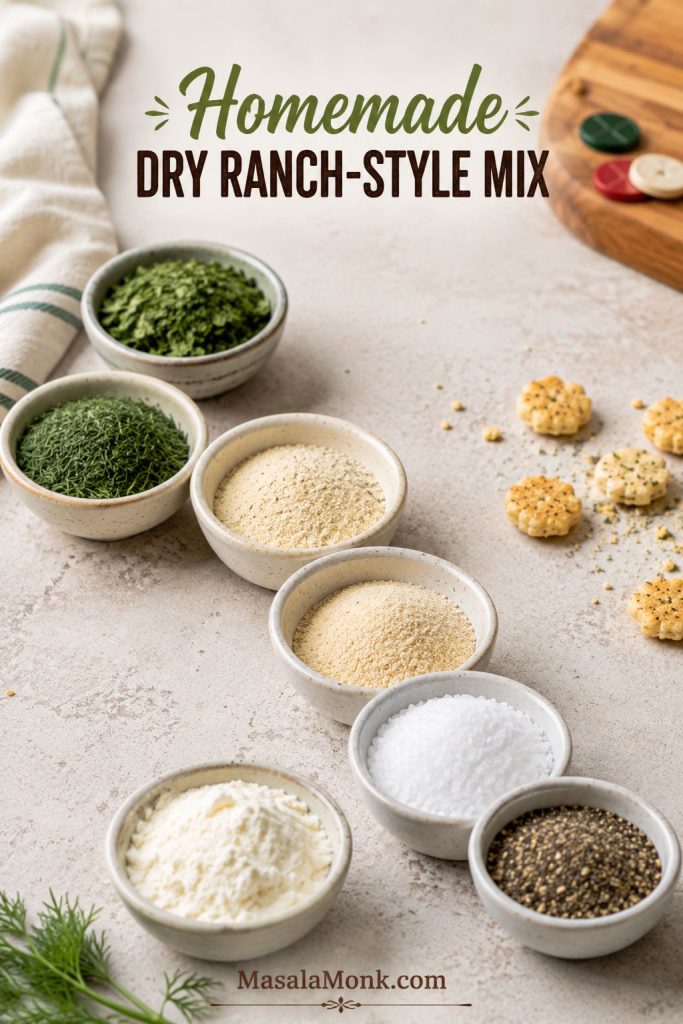
Homemade ranch-style dry mixYesGood if you want more control over salt, dill, garlic, onion, and herbs.

Helpful rule: When people say “ranch dressing crackers,” they often mean crackers made with dry ranch dressing mix, not creamy dressing from a bottle.

Homemade Dry Ranch-Style Mix

A homemade ranch-style dry mix can work too, especially if it includes parsley, dill, garlic powder, onion powder, salt, pepper, and optional buttermilk powder. Without buttermilk powder, the flavor will be more herby-garlicky than creamy-ranch, but it can still make a good seasoned cracker batch.

Small bowls of parsley, dill, garlic powder, onion powder, salt, pepper, and buttermilk powder for dry ranch mix.
A homemade dry ranch-style mix lets you control salt, herbs, and garlic, which is helpful when serving kids, low-salt guests, or lighter soup-night batches.

Ingredients and What Each One Does

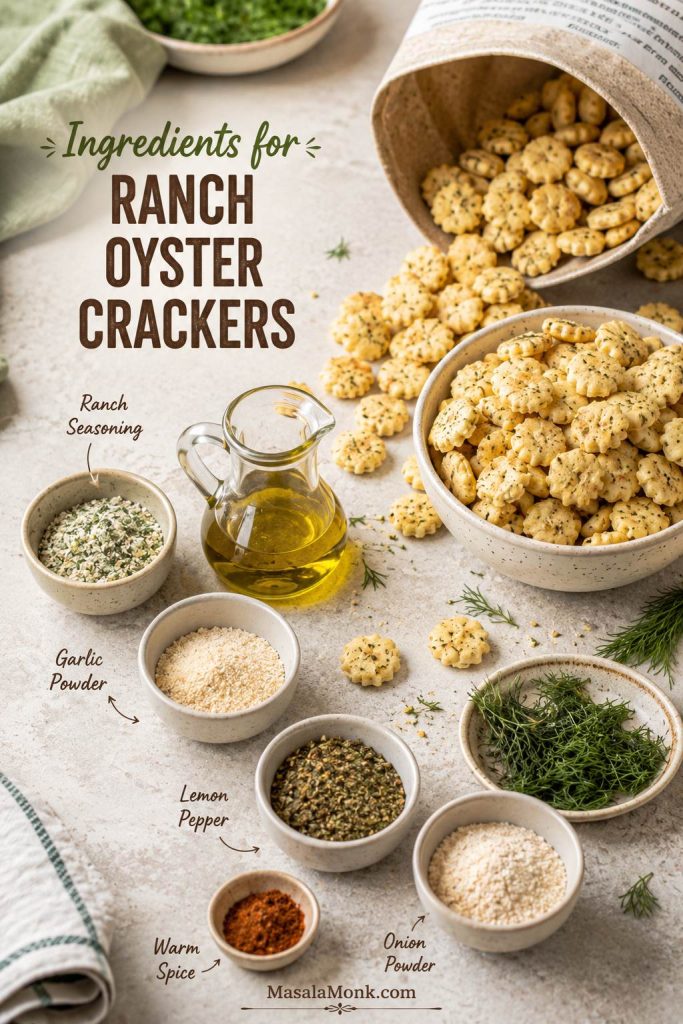
If you have oyster crackers, dry ranch mix, and a neutral oil, you are most of the way there. The crackers bring the crunch, the ranch mix brings the salty-herby flavor, and the oil or butter decides how light or rich the final batch feels.

Oyster crackers with oil, dry ranch seasoning, dill, garlic powder, lemon pepper, and onion powder in small bowls.
Every flavoring in this mix is dry, so the crackers can pick up ranch, dill, garlic, and lemon pepper while still baking into a snackable texture.

Oyster crackers

Use plain oyster crackers. Common bags are 9 oz / 255 g, 12 oz / 340 g, and 16 oz / 454 g. Cup counts vary by brand, but 9 oz is usually about 4–5 cups, 12 oz about 5½–6 cups, and 16 oz about 7–8 cups. Weight is more reliable than cups, so use the ratio table if your bag size is different.

Dry ranch seasoning

A standard dry ranch packet gives the classic flavor most people expect: tangy, salty, herby, garlicky, and slightly creamy-tasting even though there is no bottled dressing in the recipe. Store-brand ranch seasoning also works. The familiar green-label style packets are common, but the brand matters less than the salt level and packet size.

Dry ranch mix is useful beyond snack crackers too; it brings the same shortcut flavor to easy dinners like one-pot chicken bacon ranch pasta. Here, though, the seasoning needs to stay dry enough to cling to crackers instead of turning into a sauce.

Unsure how much of the packet to use? Jump to the ranch packet adjustment notes before you season the crackers.

Neutral oil or melted butter

Neutral oil gives the lightest, snappiest batch. Canola, vegetable, avocado, or another mild oil works well. Melted butter gives richer flavor and makes the kitchen smell more like party mix. Use unsalted butter if your ranch mix is already salty; if you only have salted butter, start with less seasoning.

Dried dill and other seasonings

Dill gives the crackers that old-school ranch snack-mix flavor. Garlic powder deepens the ranch flavor, lemon pepper adds lift, and onion powder rounds everything out. Cayenne, red pepper flakes, smoked paprika, Parmesan, parsley, taco seasoning, or Italian seasoning can all work too; add salty extras carefully because ranch packets already bring plenty of salt.

How Much Ranch Seasoning to Use for Oyster Crackers

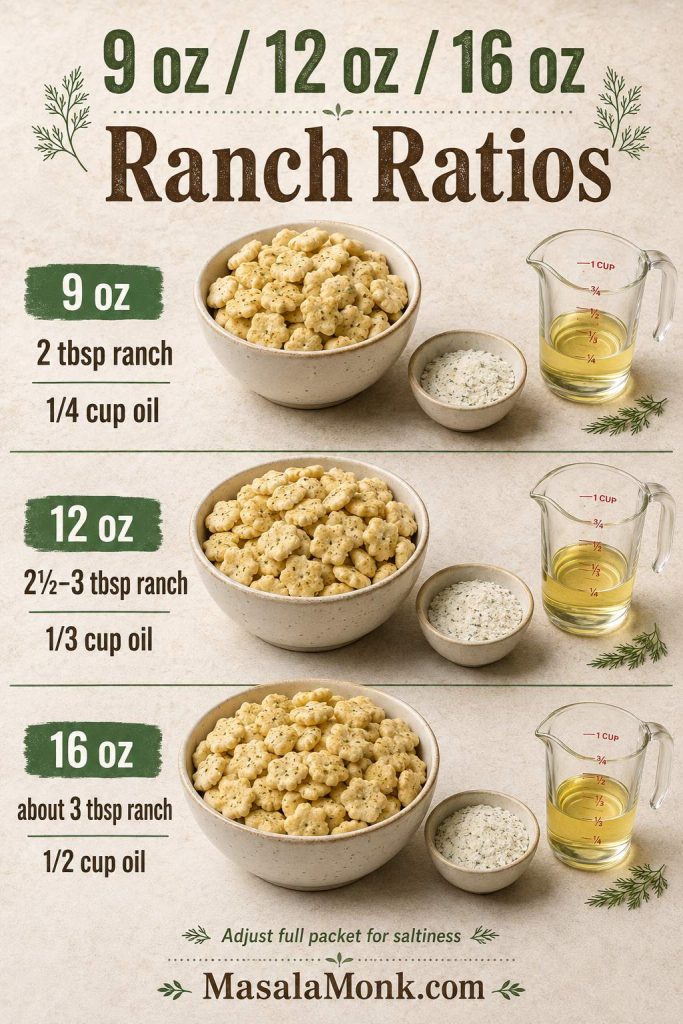
The seasoning gets easier once you match it to the bag size. Some recipes use cups, some use ounces, some say one packet, and ranch packet sizes are not always identical. Use this table as the practical guide.

Ranch Ratios by Bag Size

Oyster crackersMetricRanch seasoningOil or butterBake time at 250°F / 120°C
9 oz255 g2 tbsp mild
2½–3 tbsp bold
¼ cup oil for lighter coating
⅓ cup oil or 5 tbsp butter for richer coating
15–20 min
12 oz340 g2½ tbsp balanced
3 tbsp bold
⅓ cup oil
up to ½ cup butter for richer coating
18–22 min
16 oz454 gAbout 3 tbsp
or most/all of a standard 1 oz / 28 g packet, adjusted for saltiness
½ cup oil or ½ cup melted butter20–25 min
2 × 16 oz908 gAbout 6 tbsp
or 2 standard 1 oz / 28 g packets, adjusted for saltiness
1 cup oilUse 2 sheet pans
Three ranch oyster cracker ratio sections for 9 ounce, 12 ounce, and 16 ounce batches with ranch and oil measurements.
Bag size matters: the same ranch packet can taste bold in a 12-ounce batch but more balanced in a larger 16-ounce party batch.

How to Adjust the Ranch Packet

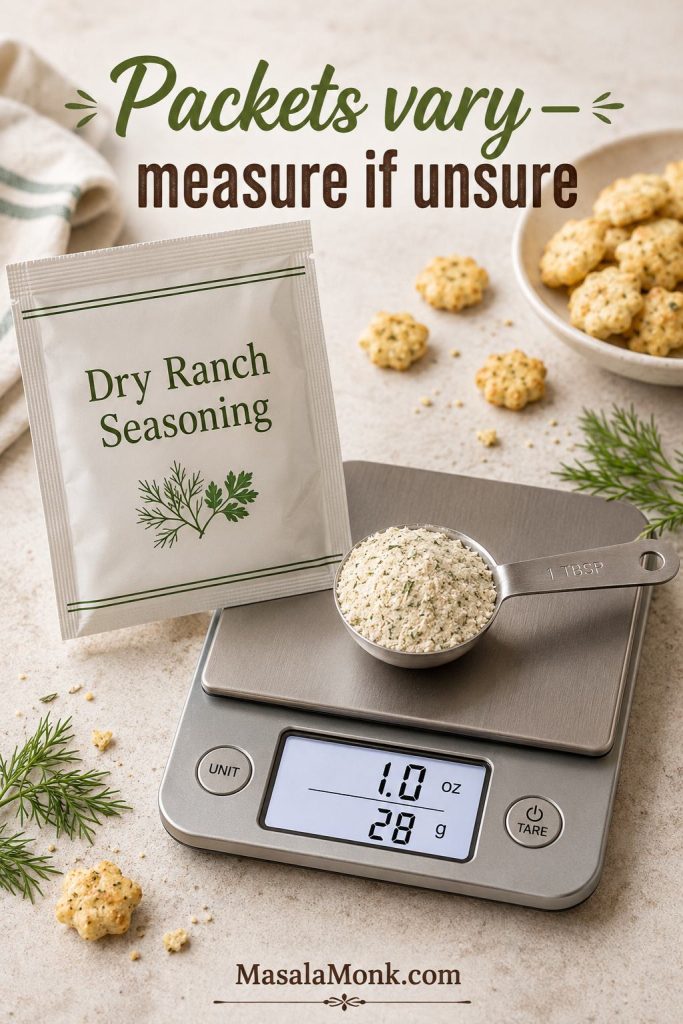
A ranch packet is sold by weight, not by tablespoons, and brands vary. The same 1 oz / 28 g packet can make a bold 12 oz batch or a more moderate 16 oz batch; it depends on how salty and intense you want the bowl.

Dry ranch seasoning packet, tablespoon measure, kitchen scale, and oyster crackers for checking packet weight.
Since ranch packets are sold by weight, measuring once helps you match the recipe instead of guessing from packet to packet.

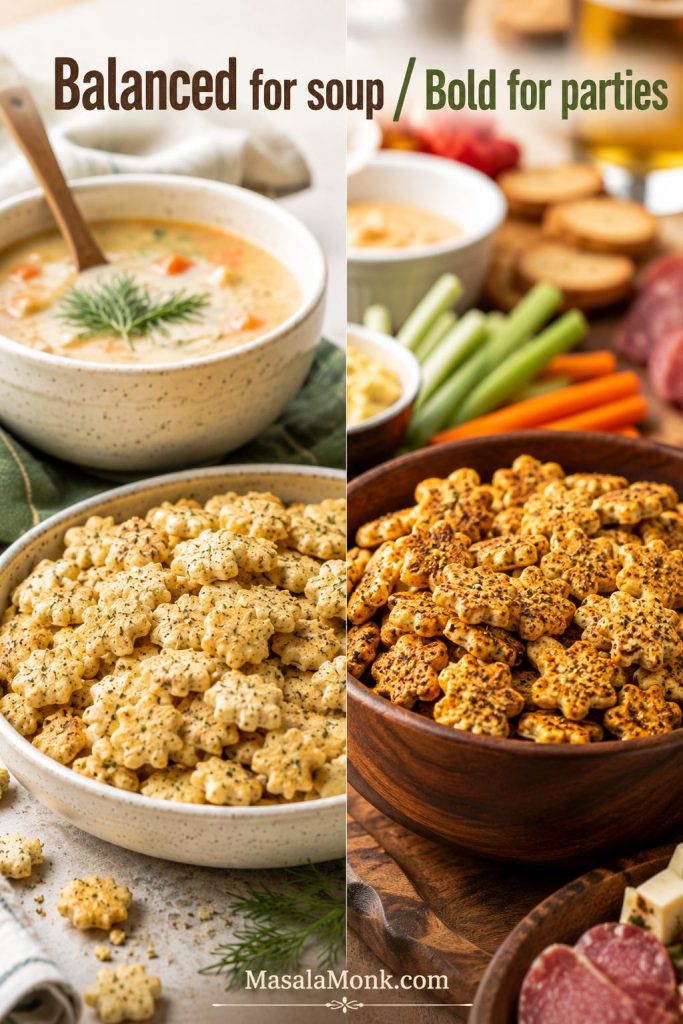
Balanced for Soup, Bold for Parties

Making these for soup? Stay closer to the balanced ranch amount so the crackers add crunch without taking over the bowl. Making them for a party snack? Go bolder, especially if the crackers will sit beside dips, wings, cheese, or other strong flavors.

Lighter ranch oyster crackers for soup beside a bolder seasoned batch for parties.
Keep the seasoning lighter for soup so it does not overpower the bowl; go bolder when the crackers need to stand beside dips, wings, and cheese.

Best starting point: For a 12 oz / 340 g bag, use ⅓ cup oil and 2½ tablespoons ranch seasoning. After that, adjust toward extra dill, more butter, or a bolder packet-style coating depending on how your house likes them.

For batch size, think of 9 oz as a small test batch, 12 oz as the one-pan standard, and 16 oz as the party or gifting size. If you double a 16 oz batch, use two sheet pans so the crackers have room to toast evenly.

Once the bag size and seasoning amount are clear, move to the baked method and mix the coating.

Oil vs Butter for Ranch Oyster Crackers

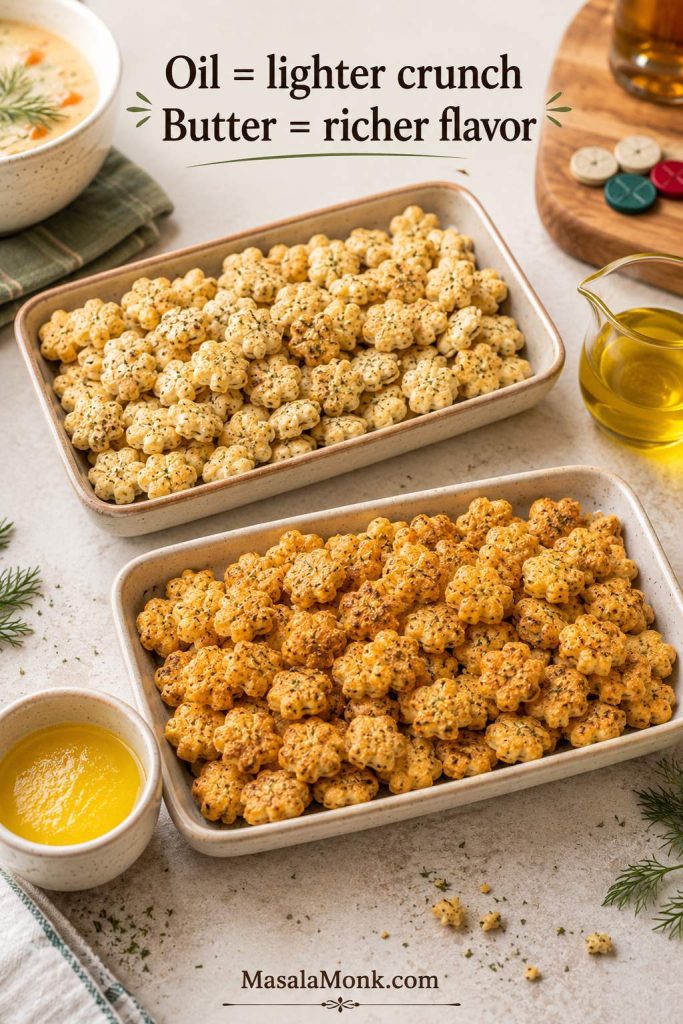
Neither oil nor butter is wrong; they just make different snack bowls. Oil gives you the light, crunchy version people keep grabbing from between sips of soup. Butter gives you the richer bowl that smells like party mix coming out of the oven.

Two ranch oyster cracker batches comparing a lighter oil-coated version with a richer butter-coated version.
Oil keeps the bite lighter and drier, whereas melted butter gives a deeper, party-mix flavor that feels richer while still warm.
ChoiceResultBest forWatch out for
Neutral oilSnappy, light, evenly coatedMain recipe, make-ahead snacks, soup toppingUse a measured amount so the crackers do not feel greasy
Melted butterRicher, more savory, slightly heavierParty bowls, warm snacking, buttery flavorUse unsalted if your ranch mix is salty
Half oil, half butterBalanced flavor and crunchBest compromiseGive it enough baking time for the coating to settle
Olive oilMore noticeable flavorSmall batches or herby versionsUse a mild one so it does not fight the ranch flavor
Popcorn oilOld-school snack flavorHeavier party mixTaste first because some brands are extra salty

For the main recipe, use oil if you want the cleanest crunch. Use melted butter for a richer snack, then give the crackers enough space and baking time so the coating settles instead of feeling heavy.

How to Make Ranch Oyster Crackers

Once you choose the fat, the method is simple: whisk the seasoning into the oil or butter first, toss the crackers gently, spread them in one layer, bake low, stir once, and let them sit on the tray. This is snack food, not pastry; the goal is seasoned, easy, and good by the handful.

If the coating looks a little uneven or the first batch tastes slightly light, you can usually fix it with a few more minutes in the oven or a small dusting of seasoning while the crackers are warm.

Step 1: Heat the oven

Heat the oven to 250°F / 120°C. This low temperature gives the seasoning time to settle onto the crackers without burning the ranch powder, dill, garlic, or lemon pepper.

Step 2: Mix the seasoning oil

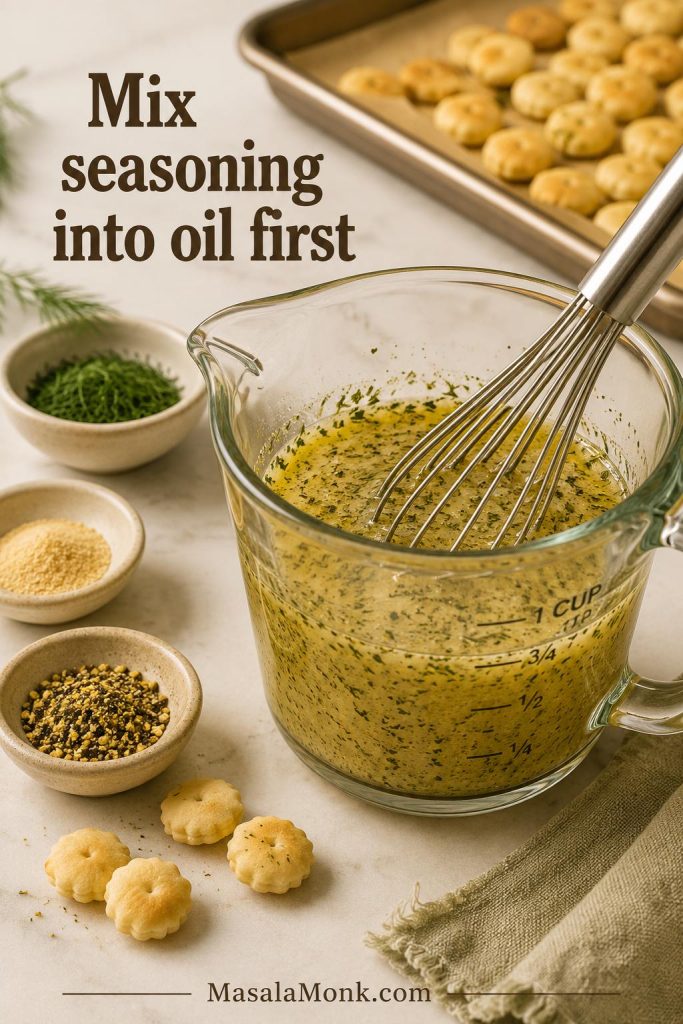
In a small bowl or measuring cup, whisk together the oil, dry ranch seasoning, dried dill, garlic powder, lemon pepper, and any optional onion powder, smoked paprika, or cayenne. Mixing the seasonings into the oil first helps prevent salty clumps and bare patches.

Dry ranch seasoning, dill, garlic powder, and lemon pepper being whisked into oil in a glass bowl.
Mixing the ranch seasoning into the oil first helps the herbs and powders move evenly through the batch instead of clinging in salty clumps.

Step 3: Coat the crackers gently

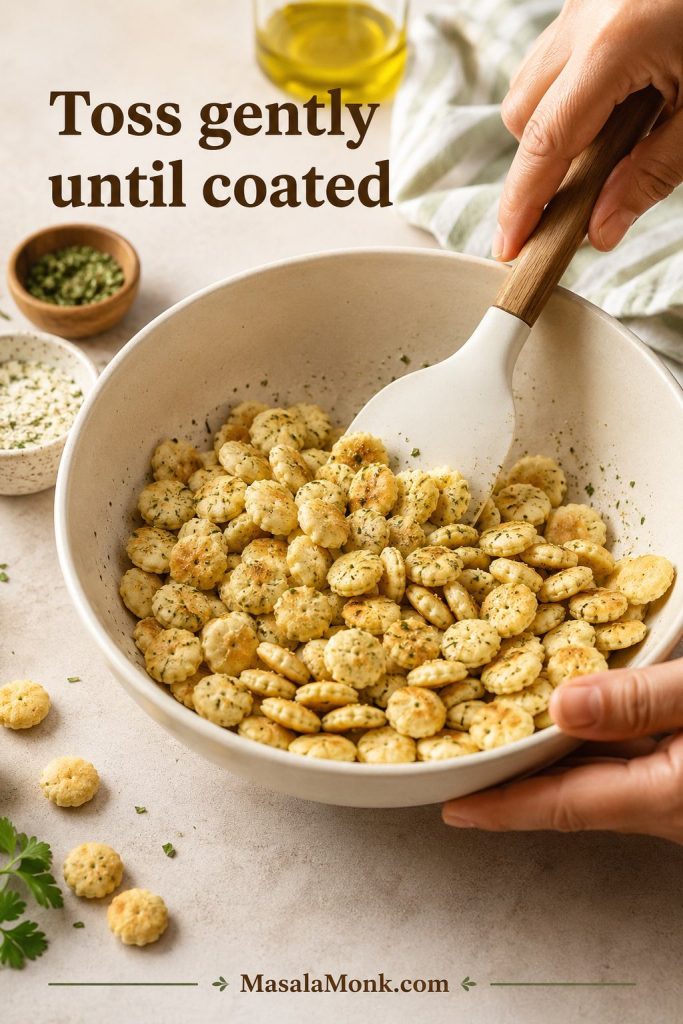
Add the oyster crackers to a large mixing bowl or a gallon zip-top bag. Pour the seasoning oil over them and toss gently until the crackers look evenly coated. A bowl is gentler and reduces breakage. A zip-top bag is faster and less messy, but shake softly rather than crushing the crackers.

Hands gently tossing oyster crackers with ranch seasoning oil in a large cream mixing bowl.
Use a wide bowl and gentle folds so the oyster crackers pick up seasoning without breaking into too many crumbs.

Step 4: Spread on a rimmed baking sheet

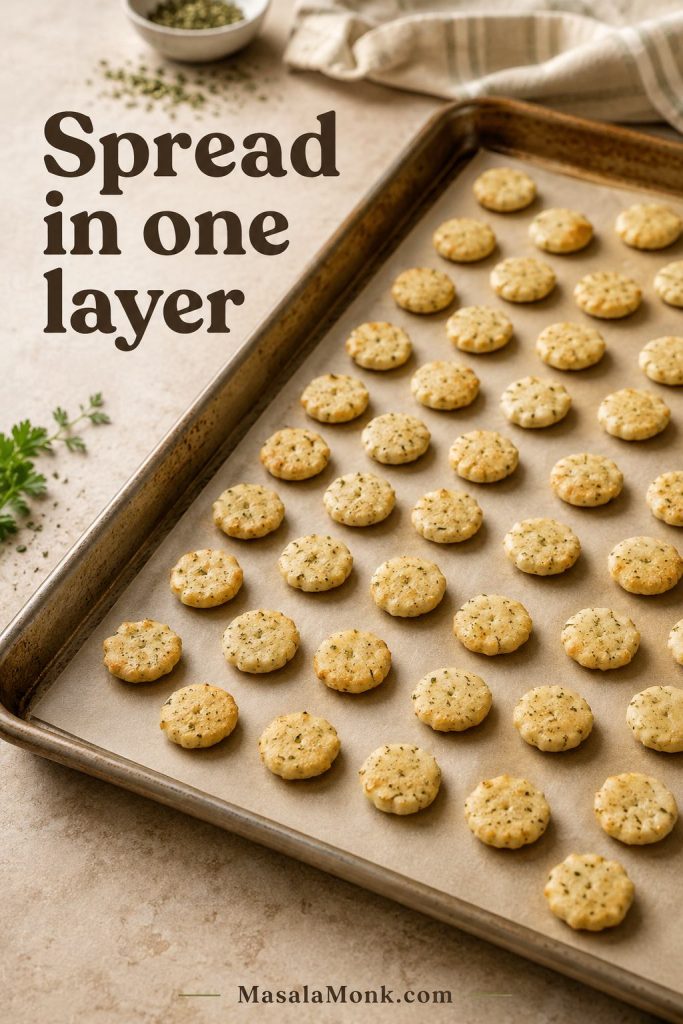
Spread the crackers on a rimmed baking sheet in as even a layer as possible. Parchment makes cleanup easier, and space on the pan helps the coating set evenly.

Ranch oyster crackers spread in a single layer on a parchment-lined rimmed baking sheet.
A single layer gives each cracker space to dry and toast, while crowded spots can stay heavy even after baking.

Step 5: Bake low and stir once

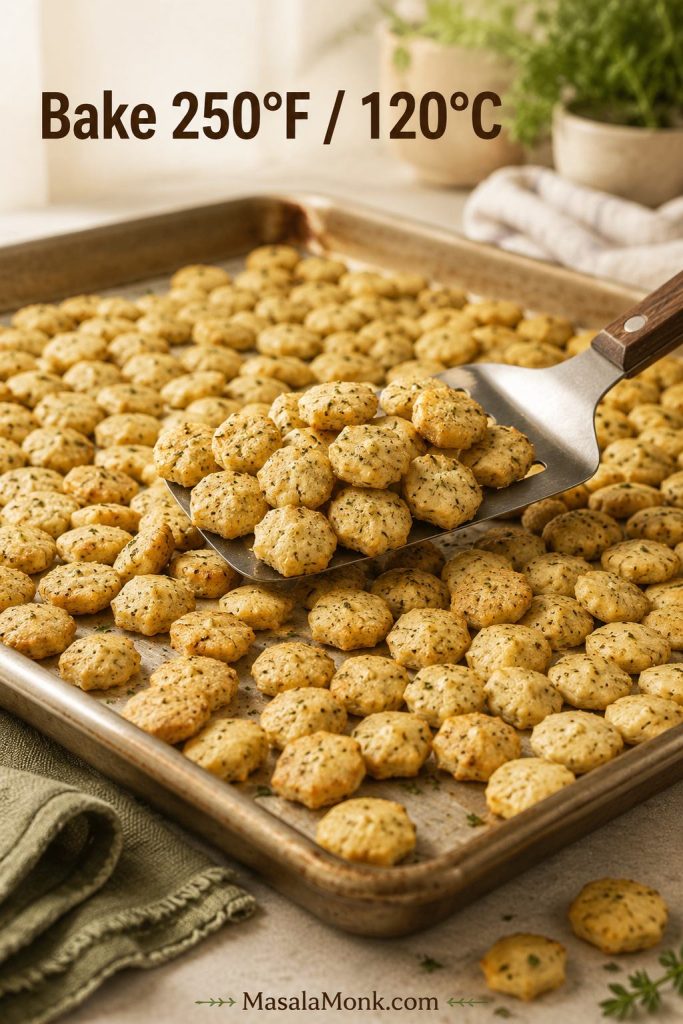
Bake for 18–22 minutes, stirring after about 10 minutes. A smaller or lightly coated batch may be ready closer to 15–18 minutes. A butter-heavy or 16 oz batch may need 20–25 minutes. The crackers should smell toasted and look set rather than wet or shiny.

Baked ranch oyster crackers on a sheet pan with toasted edges, herb flecks, and a spatula lifting some crackers.
The best doneness cue is not deep browning; instead, the crackers should smell toasted and look set, dry, and evenly speckled.

Step 6: Let the crackers cool on the pan

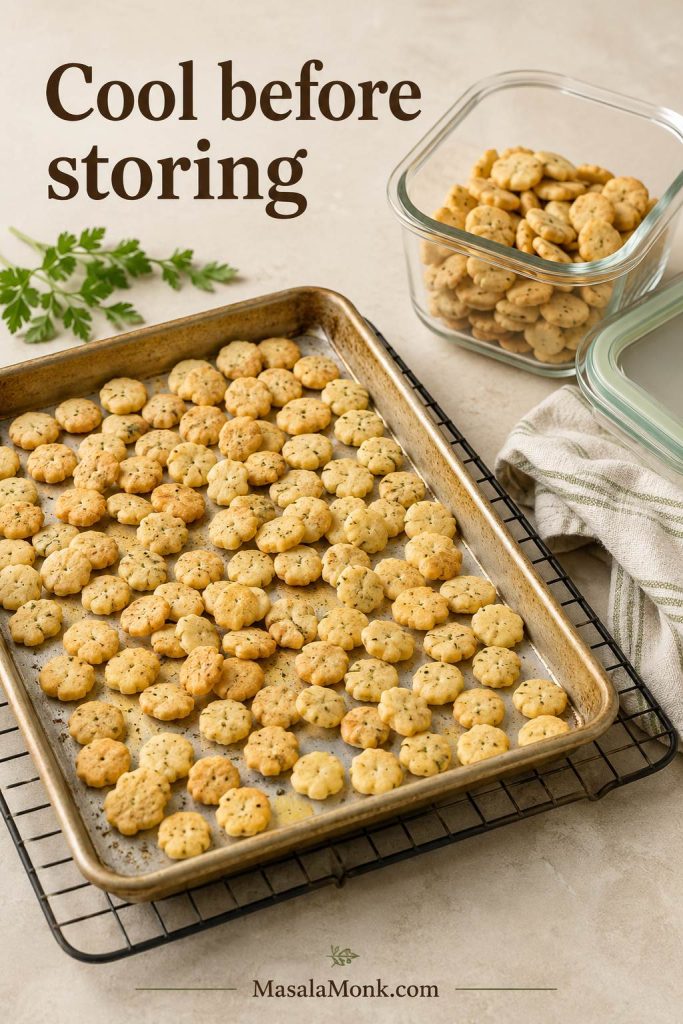
Leave the crackers on the pan until they are no longer warm. Once cooled, they should be evenly seasoned and ready to store.

Ranch oyster crackers cooling on a sheet pan beside an open glass storage container and lid.
Leave the crackers on the pan until the warmth fades, then move them into storage so the finished texture stays clean.

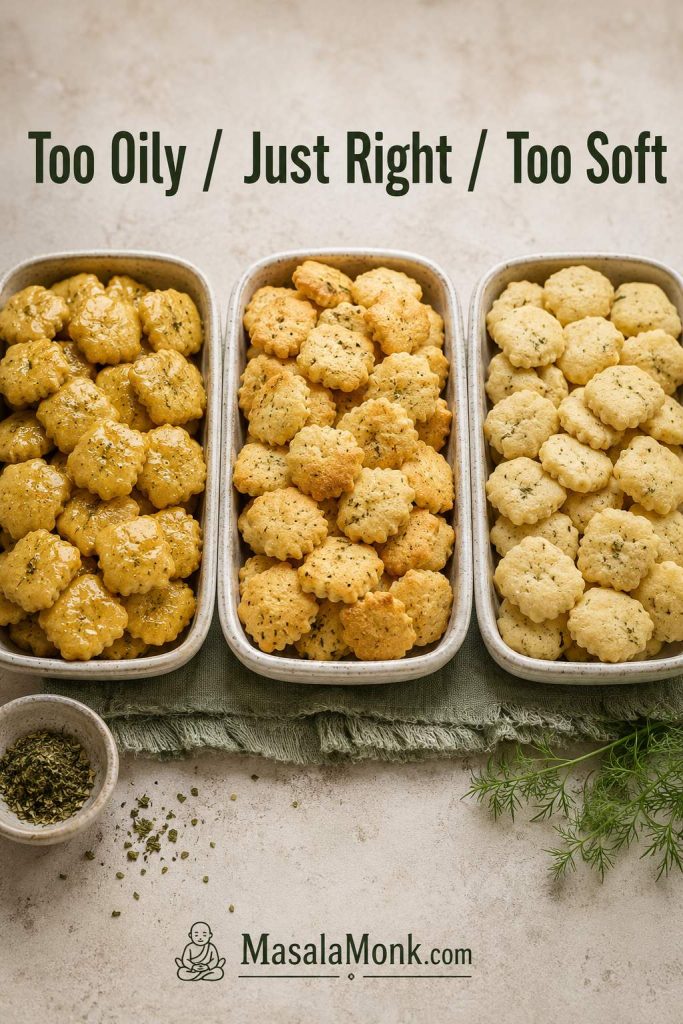
Texture cue: If the crackers still look glossy after baking, give them another 3–5 minutes at the same low temperature. They should look coated, not shiny with oil.

Equipment note: A large bowl is gentler, a zip-top bag coats faster, a rimmed baking sheet keeps the crackers contained, parchment helps cleanup, and a thin spatula makes stirring easier.

Want to skip the oven or use the air fryer instead? Compare the baked, no-bake, and air fryer methods before choosing.

Baked, No-Bake, and Air Fryer Methods

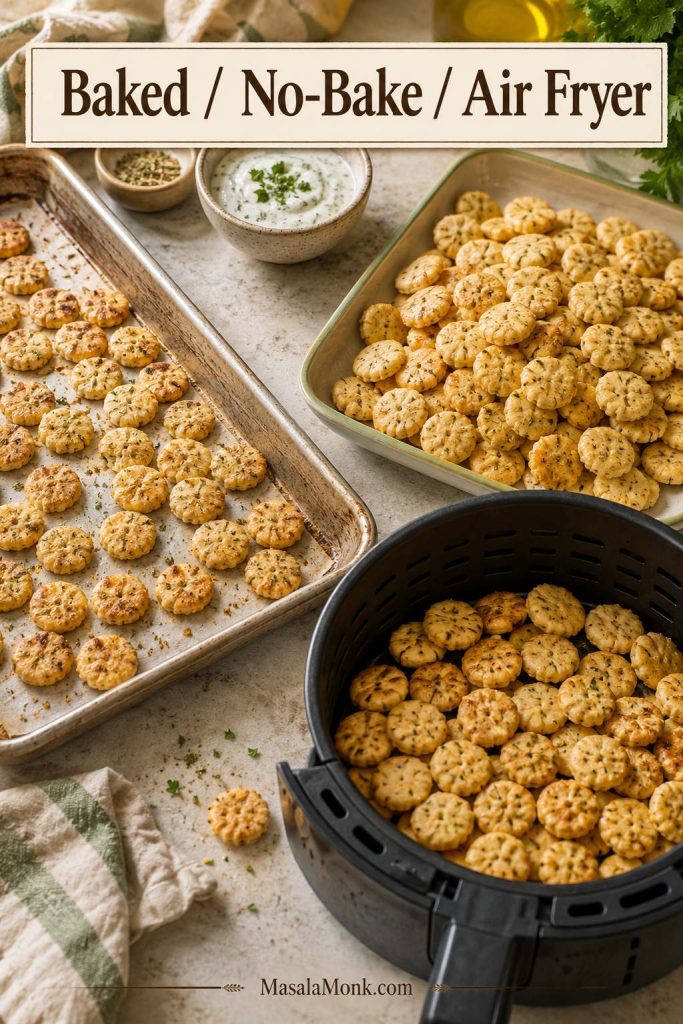
If you want the most reliable crunch, use the oven. No-bake and air-fryer versions are useful when you are short on time, avoiding the oven, or making a small batch. The microwave is included only as a backup.

Baked, no-bake, and air fryer ranch oyster crackers shown with a sheet pan, resting tray, and air fryer basket.
Pick the oven for an even full batch, the air fryer for speed, or the no-bake method when make-ahead ease matters more than maximum crunch.
MethodTimeTextureBest for
Baked18–22 minMost even and snappyMost reliable crunch
No-bake2–4 hours sitting timeGood, but slightly softerNo oven, prep-ahead snack
Air fryer7–10 minVery crisp, small batchesQuick small batch
Microwave backup2–3 minFast but less evenOnly when speed matters most

No-bake version

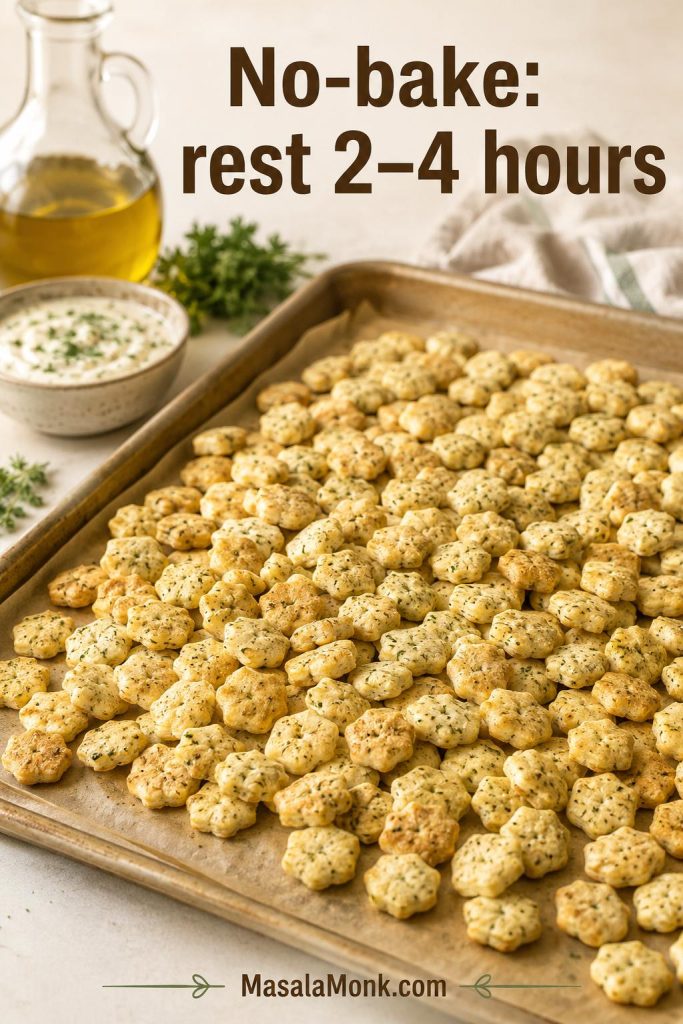
Choose this when you need the snack made ahead and do not mind a slightly softer crunch. Toss the oyster crackers with the seasoned oil, spread them on a sheet pan, and let them sit for 2–4 hours, stirring occasionally. They are ready when the surface no longer feels slick. Oil works better than butter here because it coats without setting up heavy as it cools.

No-bake ranch oyster crackers resting on a sheet pan with oil and seasoning nearby.
The no-bake method needs patience: spreading the crackers out gives the seasoned oil time to settle before serving.

Air fryer version

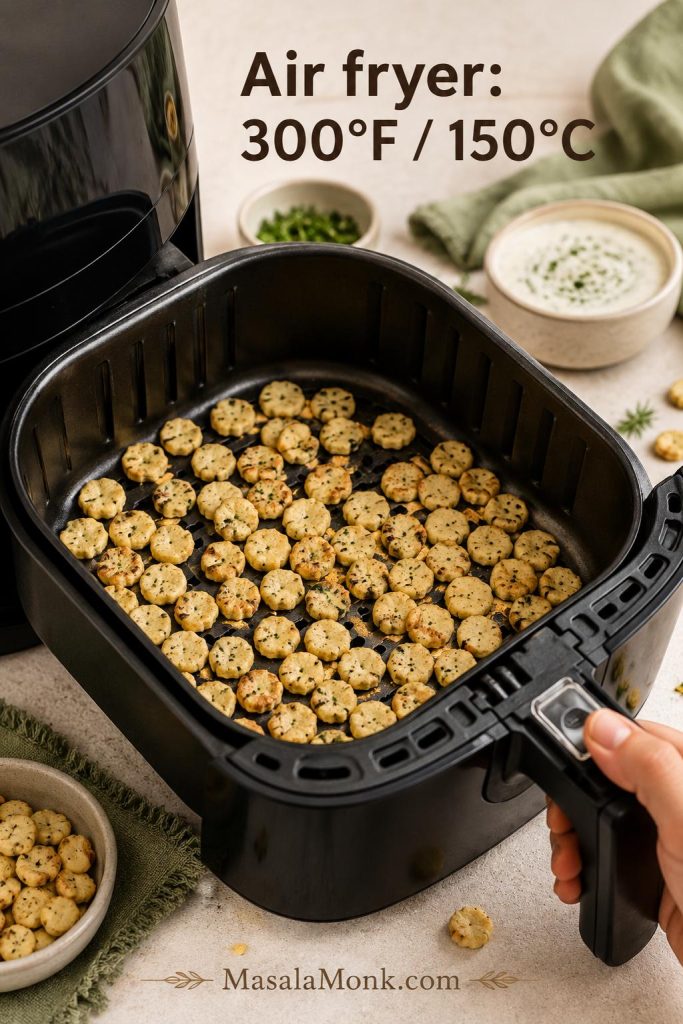
For the air fryer, cook small batches at 300°F / 150°C for 5 minutes, shake the basket, then cook another 2–5 minutes until set and lightly toasted. Air fry only 3–4 cups at a time unless you have a large basket. A little less oil usually works better in smaller baskets.

Ranch oyster crackers cooked in a thin layer inside an air fryer basket.
Keep air fryer batches shallow, because the crackers need moving air around them to toast rather than simply warm through.

If the air fryer is already out, you can keep the same snack-table rhythm going with air fryer chicken wings while the crackers cool.

Microwave backup

The microwave is the fastest backup, not the best texture method. Work in short bursts, then spread the crackers out afterward so steam does not soften them.

Dill or No Dill?

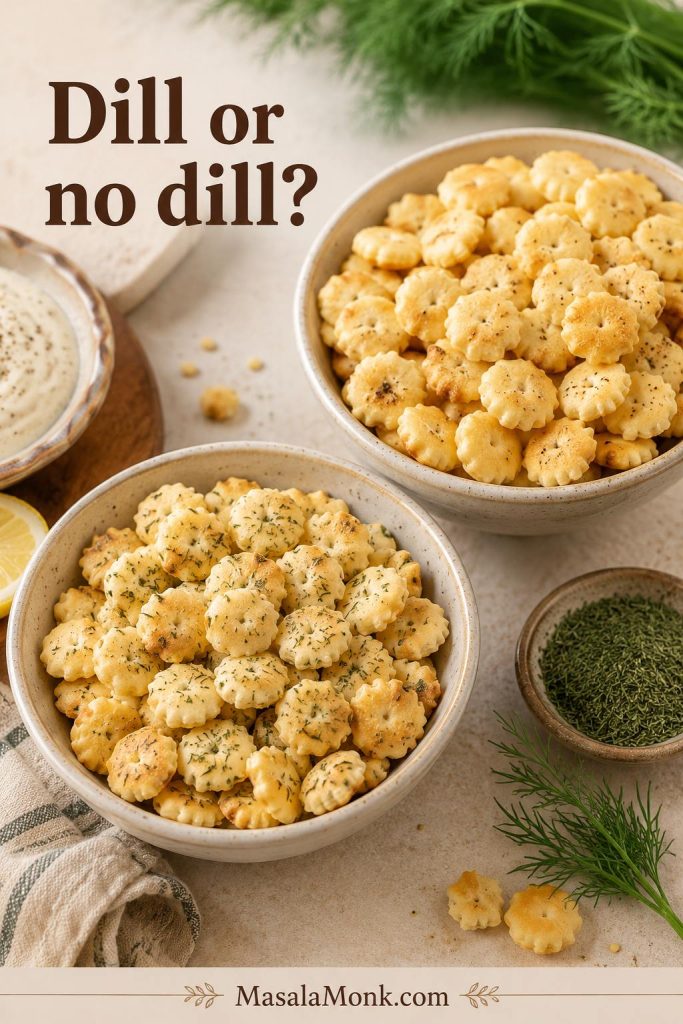
Dill is the old-school choice here. It gives these crackers their classic ranch snack-mix flavor, although the batch still works without it. For 9 oz / 255 g, use about ¾–1 teaspoon; for 12 oz / 340 g, use 1 teaspoon; for 16 oz / 454 g, use 1½–2 teaspoons. If you skip dill, replace it with dried parsley, chives, extra onion powder, or a little more lemon pepper.

Two bowls of ranch oyster crackers comparing a dill-speckled batch with a cleaner no-dill batch.
Dill gives the classic old-school ranch snack flavor, though parsley, chives, onion powder, or extra lemon pepper can still round out the batch.

Flavor Variations

Treat the base recipe like a blank snack mix. Keep the crackers, fat, and low oven steady; change the personality with the seasonings. This is where the batch starts to feel like yours.

Need the base formula first? Jump to the ranch oyster crackers recipe card, then come back and choose a variation.

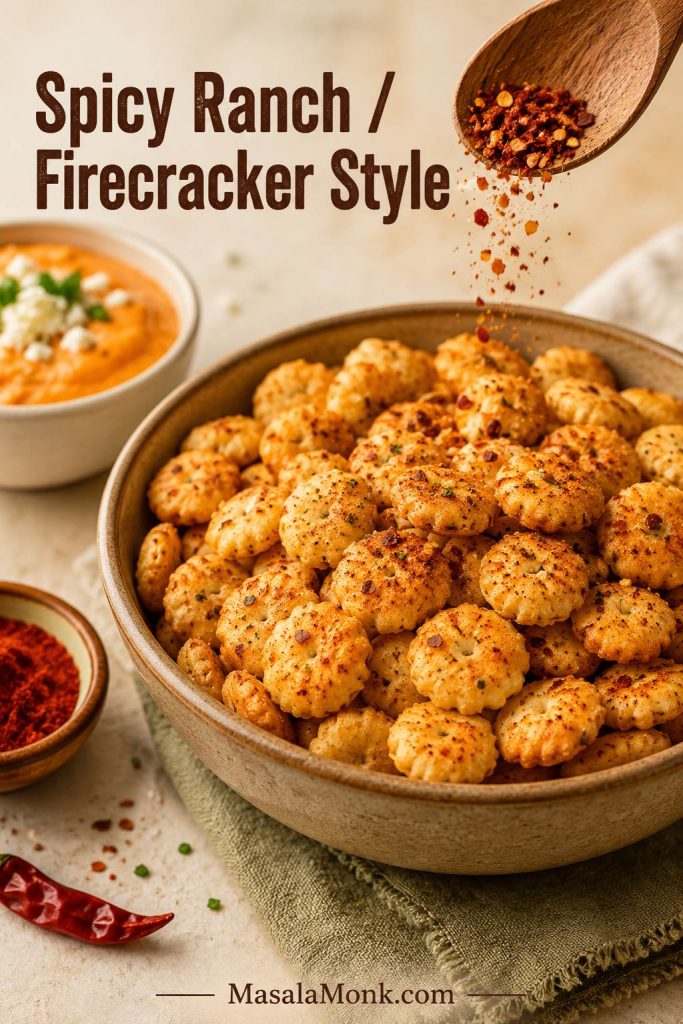
Spicy Ranch Oyster Crackers, or Firecracker Style

Add ¼ teaspoon cayenne for mild heat, ½ teaspoon cayenne for a stronger kick, or 1 tablespoon red pepper flakes for a more obvious spicy snack. Classic firecracker oyster crackers are usually hotter, red-pepper-forward, and more heavily seasoned than regular ranch crackers, so keep them milder here unless you know your crowd wants heat.

For a hotter game-day table, pair the spicy crackers with a scoopable dish like buffalo chicken dip. The crackers are better for topping and nibbling, while sturdier chips or bread can handle the heaviest scoops.

Dry heat is easier than wet hot sauce. Cayenne, smoked paprika, chili powder, and red pepper flakes keep the batch punchy without adding extra moisture.

Spicy ranch firecracker oyster crackers with red pepper flakes, cayenne, and a buffalo-style dip nearby.
For firecracker-style oyster crackers, dry heat such as cayenne and red pepper flakes adds punch without softening the snack.

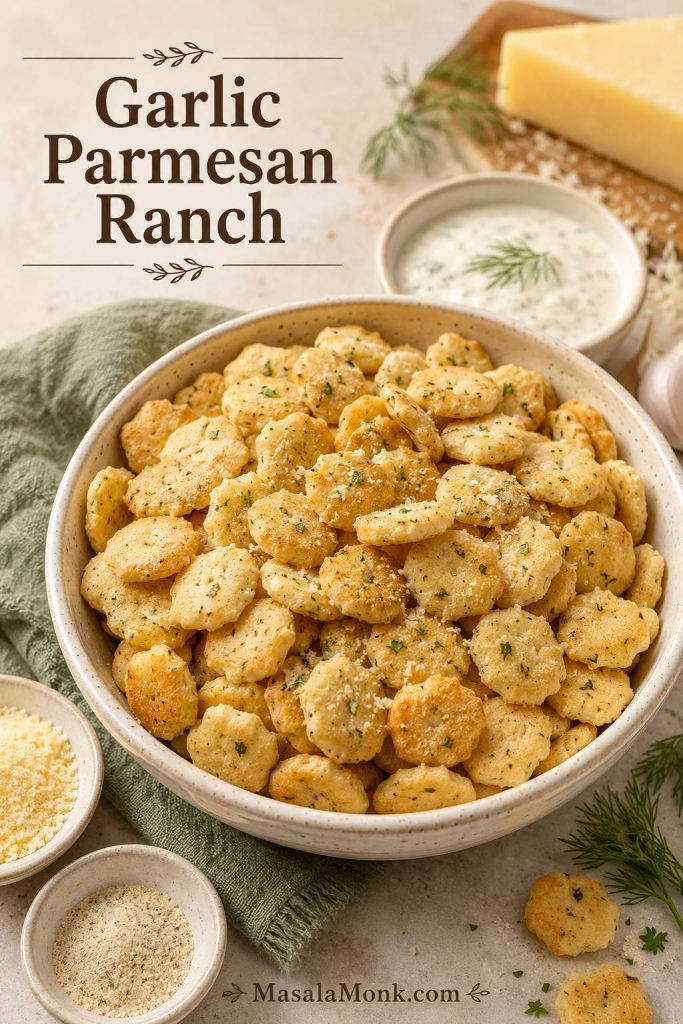
Garlic Parmesan ranch oyster crackers

Add a little extra garlic powder to the seasoning oil. After baking, while the crackers are still warm, toss with finely grated Parmesan and dried parsley. Adding Parmesan after baking keeps the cheese from scorching and gives the crackers a salty, savory finish.

Garlic Parmesan ranch oyster crackers in a bowl with grated Parmesan, garlic powder, parsley, and Parmesan wedge.
Add Parmesan after baking so the cheese stays savory and delicate instead of scorching on the sheet pan.

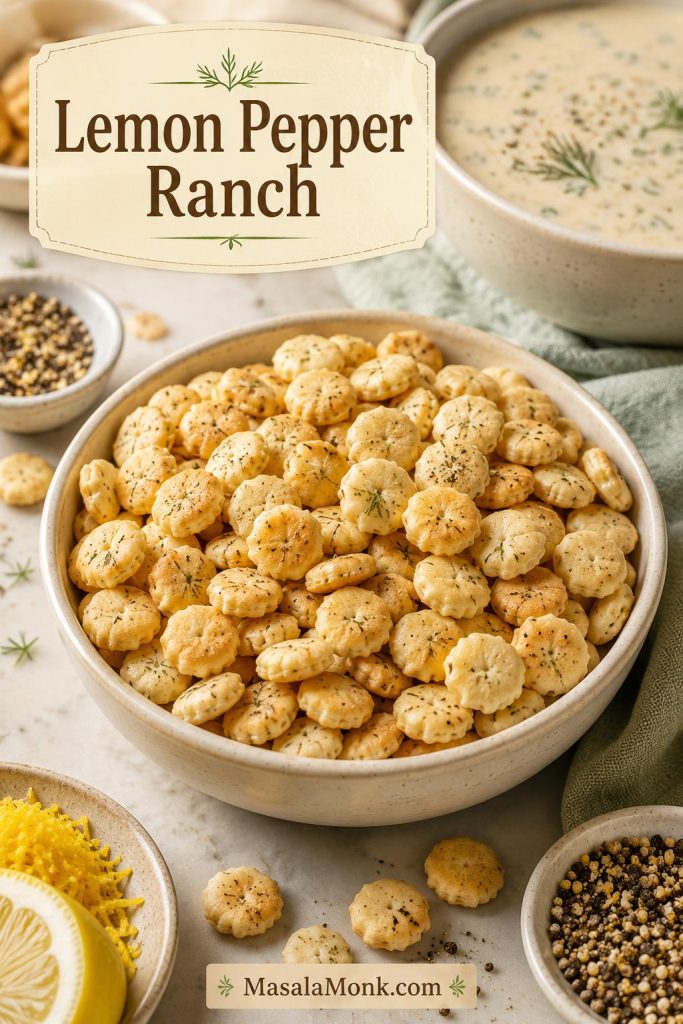
Lemon pepper ranch oyster crackers

Increase the lemon pepper to 1½ teaspoons for a 12 oz batch. This version is especially good as a soup topping because the citrusy pepper flavor cuts through creamy soups, chowder, and chili. If you like that bright, peppery flavor, it also makes a natural game-day pairing with lemon pepper chicken wings.

Lemon pepper ranch oyster crackers with lemon zest, lemon slice, pepper seasoning, and creamy soup in the background.
Lemon pepper lifts the ranch flavor, making this variation especially useful with creamy soups, chowders, and richer dips.

Taco ranch oyster crackers

Use ranch seasoning plus a small amount of taco seasoning, smoked paprika, and cayenne. Start lightly because taco seasoning can be salty. This version works well for movie-night bowls, game-day spreads, pretzels, corn chips, and roasted nuts.

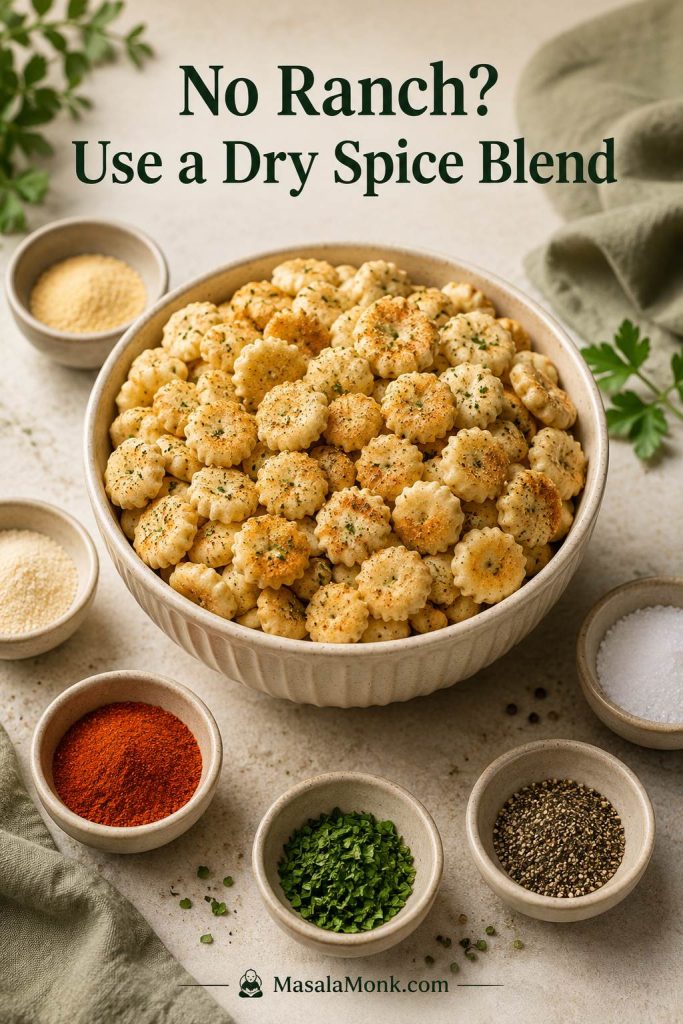
No-ranch seasoned oyster crackers

If you want a ranch-free seasoned oyster cracker batch, keep the same method and use a dry homemade seasoning blend. For 12 oz / 340 g oyster crackers, whisk together:

  • ⅓ cup / 80 ml neutral oil or melted butter
  • 1 teaspoon garlic powder
  • 1 teaspoon onion powder
  • 1 teaspoon dried parsley or Italian seasoning
  • ½ teaspoon dried dill, optional
  • ½ teaspoon smoked paprika or sweet paprika
  • ¼–½ teaspoon fine salt, depending on how salty your crackers are
  • ¼ teaspoon black pepper

Toss with the crackers and bake the same way. If you want a Parmesan version, add finely grated Parmesan after baking while the crackers are still warm.

Seasoned oyster crackers with bowls of paprika, parsley, black pepper, salt, garlic powder, and onion powder.
A ranch-free dry spice blend keeps the same easy method while giving readers a packet-free way to season oyster crackers.

Cinnamon sugar oyster crackers are a separate sweet snack direction. They usually use butter, sugar, cinnamon, and a slightly different baking rhythm, so treat that as its own snack bowl rather than folding it into this ranch version.

How to Serve Ranch Oyster Crackers

Ranch oyster crackers are easy to snack on straight from a bowl, but they are more useful than that. They can act like tiny croutons, party mix, soup crackers, or the salty crunch on a larger appetizer table.

Making them ahead for a party or snack table? Read the storage tips before you seal the batch.

Best Ways to Serve Them

UseHow to serve them
Soup toppingScatter over tomato soup, chowder, potato soup, chicken soup, or a cozy bowl like crock pot lasagna soup. Add them right before eating so the first spoonful is still crunchy.
Chili crunchUse instead of plain crackers for a salty ranch finish.
Party bowlServe in a big bowl with a small scoop or spoon so people can grab handfuls easily.
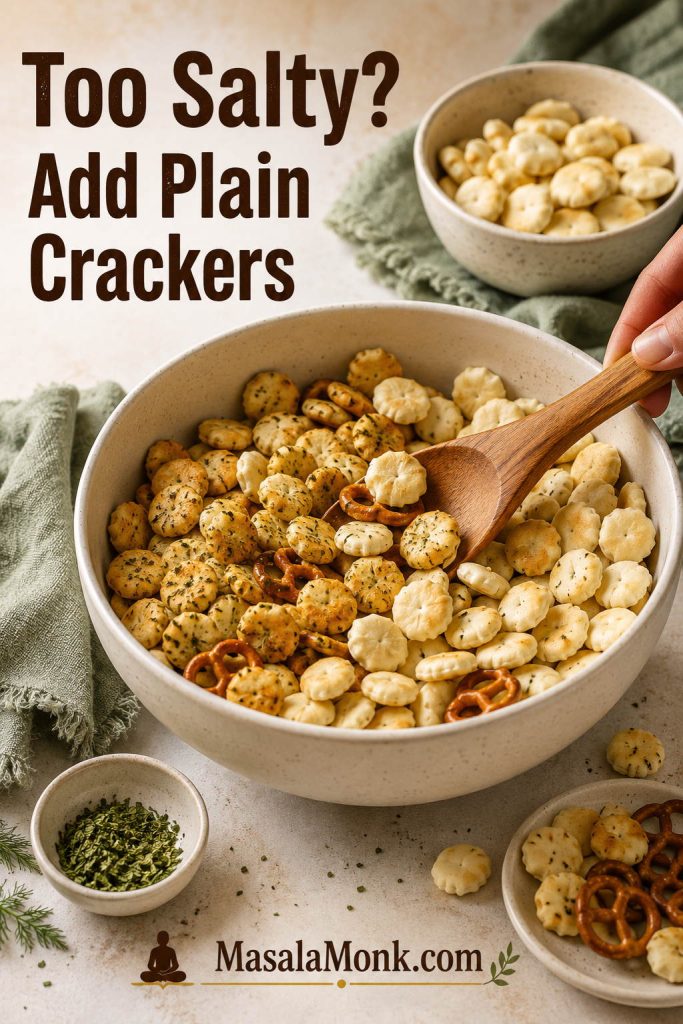
Snack mixCombine with pretzels, Chex, Goldfish-style crackers, roasted nuts, or mini saltines.
Dip boardUse as one crunchy element beside chips, vegetables, and bread pieces.
Cheese boardPair with a make-ahead cheese ball, cheddar cubes, soft cheese, pickles, and sliced vegetables.
Lunchbox snackPack only once the crackers are dry and no longer warm.
Road-trip snackStore in a zip-top bag or airtight snack container.
Holiday snack jarFill small jars or tins once the crackers have cooled and feel dry to the touch.

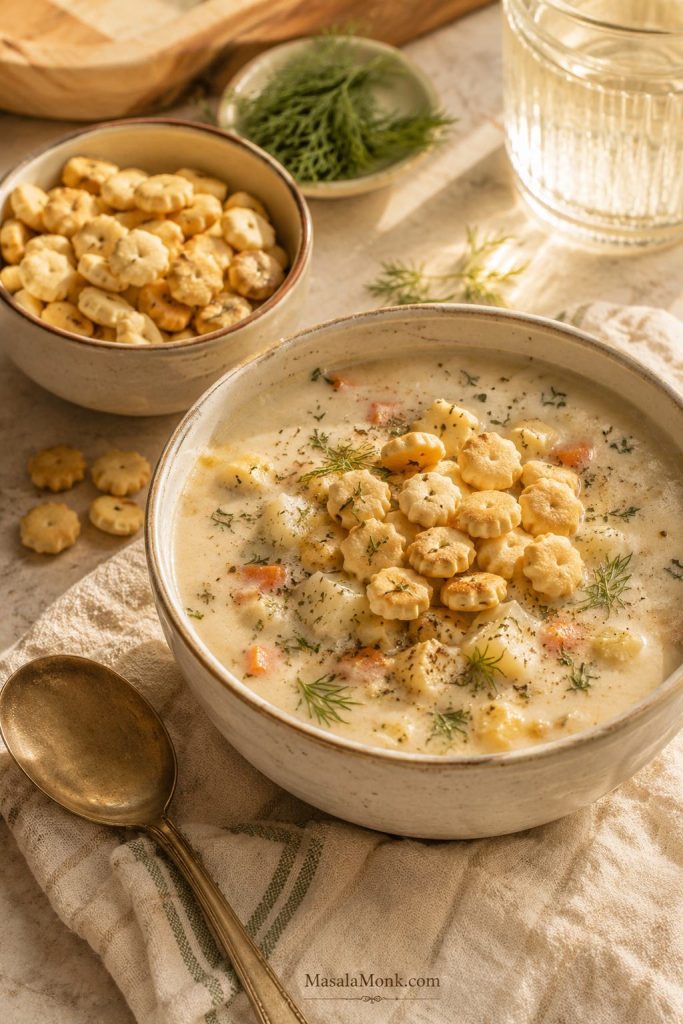
Use Ranch Oyster Crackers as a Soup Topping

For soup, add the crackers right before eating rather than letting them sit in the bowl. That keeps the first spoonful creamy underneath and crunchy on top.
Creamy soup topped with ranch oyster crackers, with extra crackers in a small bowl nearby.
Think of these as tiny ranch croutons: they work especially well on creamy soups where plain crackers can taste flat.

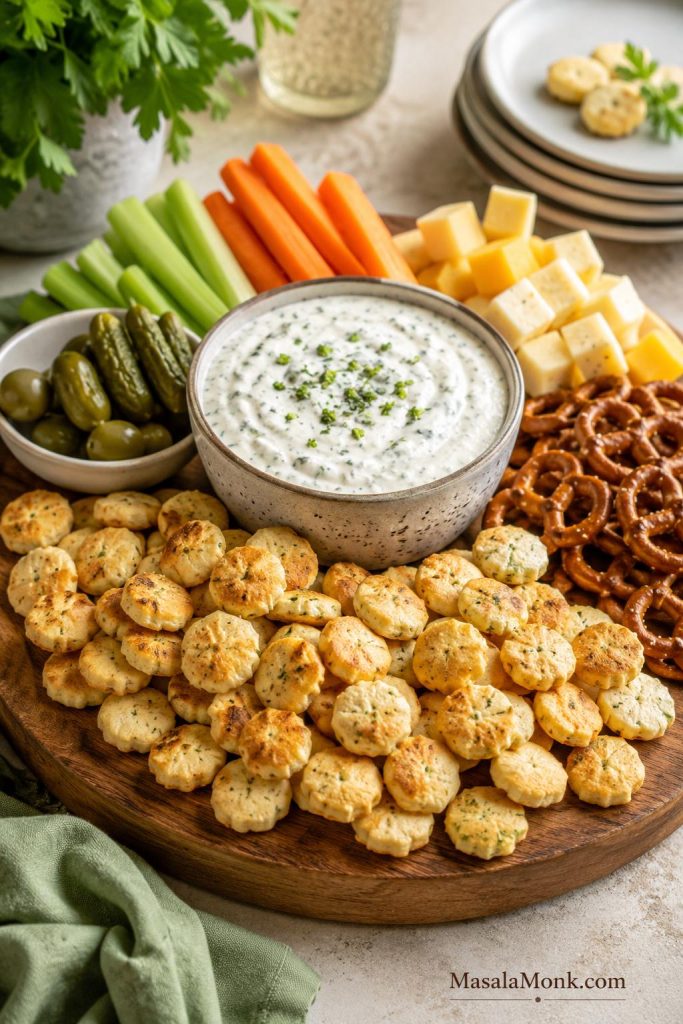
Dip Boards and Appetizer Tables

For a hot appetizer table, set a bowl of these crackers near a bubbling spinach artichoke dip. They are best for nibbling alongside it or sprinkling over individual scoops, while sturdier chips, bread, or vegetables can handle the heaviest dips.
Ranch oyster crackers served on an appetizer board with creamy dip, cheese cubes, carrots, celery, pretzels, pickles, and olives.
On an appetizer board, ranch oyster crackers shine as a nibble or topping, while sturdier chips, bread, and vegetables can handle heavy dips.

They also fit neatly into a larger snack board or casual charcuterie board, especially when you want one seasoned, crunchy element beside cheeses, pickles, fruit, nuts, and plain crackers.

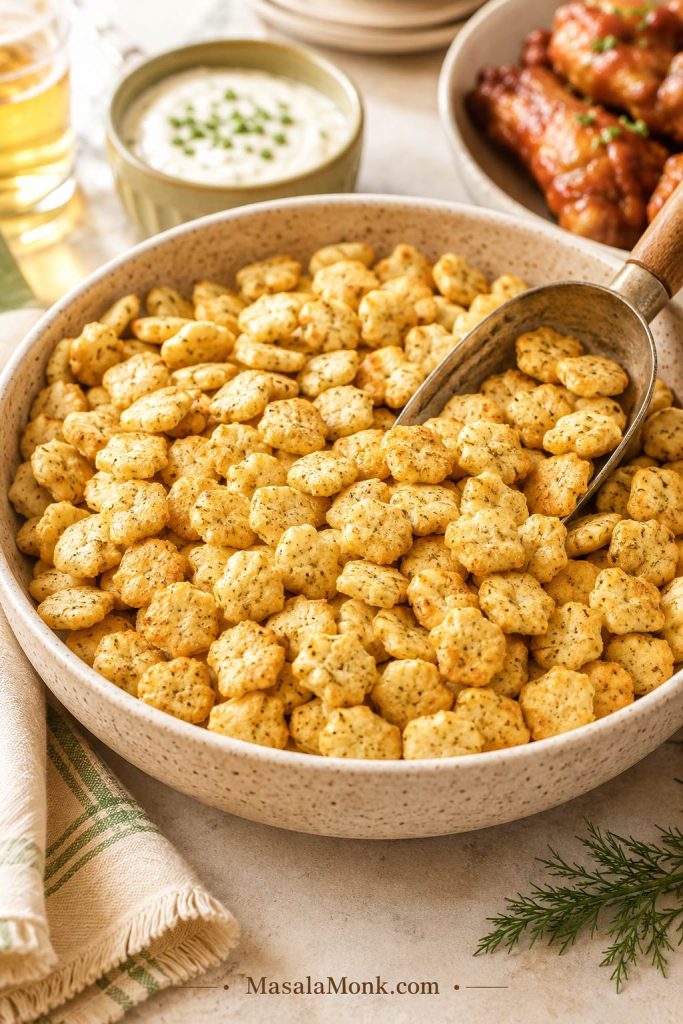
Party Bowl for Game Day and Snack Tables

If you are building a bigger game-day spread, serve them near wings, deviled eggs, cheese cubes, crunchy vegetables, and a few stronger crackers for heavier dips. Oyster crackers are excellent for sprinkling, topping, and casual snacking, but they are not always sturdy enough for very thick dips.

Large bowl of ranch oyster crackers with a scoop, dip, drinks, and party snacks in the background.
A small scoop keeps the party bowl cleaner and makes the crackers easier to serve beside dips, wings, and snack-board extras.

Storage and Make-Ahead Tips

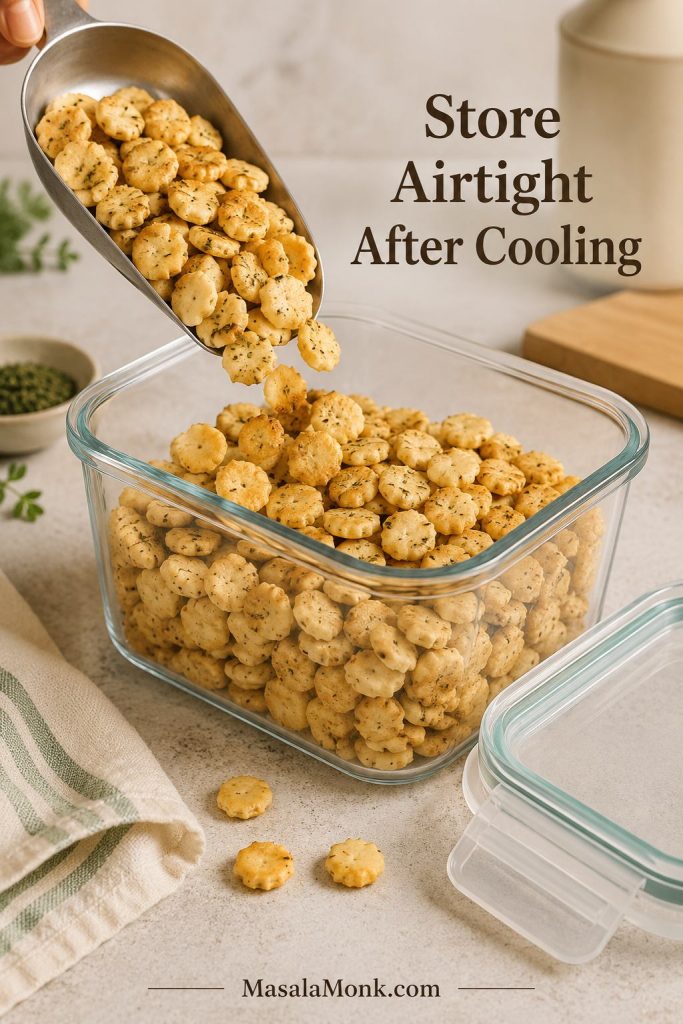
Ranch oyster crackers are a good make-ahead snack as long as they are cool before they go into a container. Once cooled, store them airtight at room temperature and use them within the first several days for the cleanest crunch.

Ranch oyster crackers being poured into an open airtight glass container with the lid nearby.
A wide, airtight container protects the seasoning better than a loose bag when you are making the snack a day ahead.
  • Best storage: Use a sealed container, jar, tin, or zip-top bag.
  • Room temperature only: The fridge can make crackers stale faster.
  • Longer storage: If baked dry and stored airtight, they usually keep about 1 week, depending on humidity and coating.
  • Gift jars: Use only crackers that feel dry to the touch, and never seal them warm.
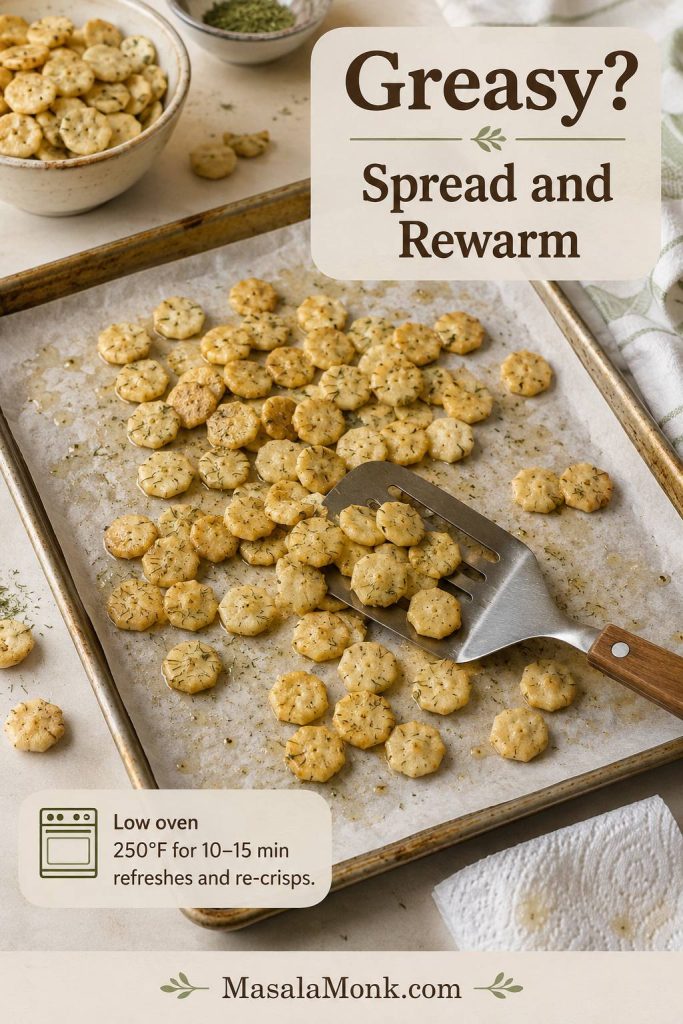
  • Refresh if needed: Bake at 250°F / 120°C for 5–8 minutes, then cool on the pan again.
  • Freshness check: If they smell stale, taste flat, or feel soft even after refreshing, make a fresh batch.

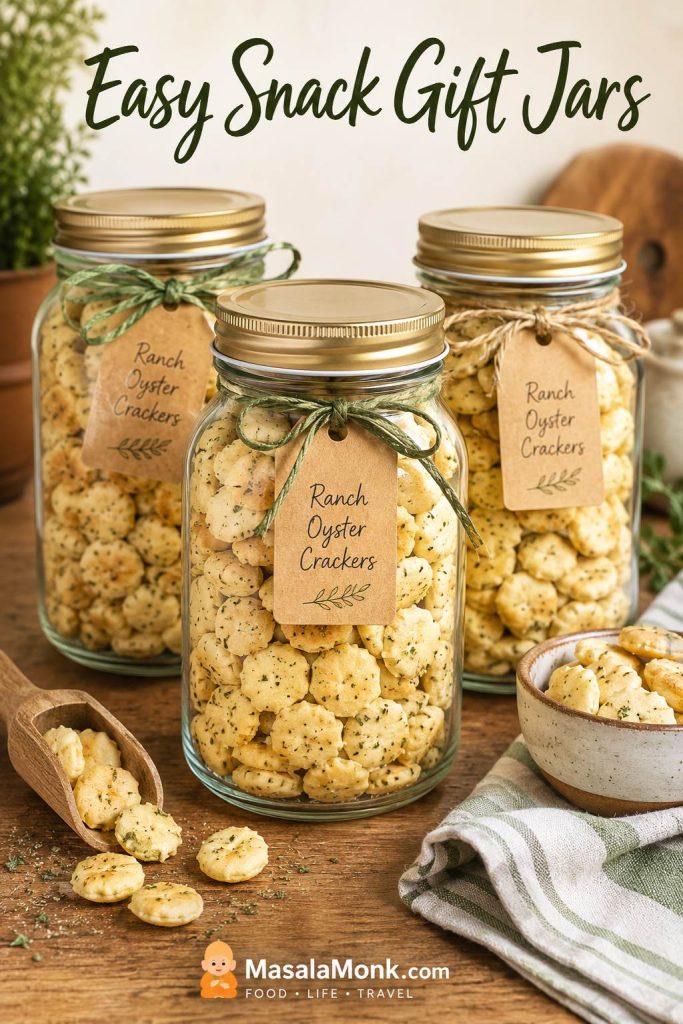
Gift Jars

For gifting, pack only fully cooled crackers into clean jars or tins. A simple label and tight seal matter more than fancy packaging because the texture is the real gift.

Glass jars filled with ranch oyster crackers, kraft tags, ribbons, scoop, and small bowl of crackers.
For gift jars, leave a little headspace and use a tight lid so the crackers stay neat, crisp, and easy to pour.

They are especially useful because you can make them before people arrive, then put out a bowl when the table still feels like it needs one more salty, crunchy thing.

If you are making these for a party, prep one or two other make-ahead bites too. A tray of classic deviled eggs gives the table something creamy and tidy while the crackers bring the crunch.

Freezing is not worth it for most batches. The crackers can pick up moisture and lose their clean crunch, so make them a few days before the party and store them well instead.

If a stored batch turns soft or oily, use the troubleshooting guide before deciding it is a loss.

Troubleshooting the Batch

If a batch does not come out quite right, it is usually one of four things: too much fat, too much salt, not enough baking time, or uneven coating. The good news is that many batches can be saved, especially if the flavor is right but the texture is off.

Three trays of ranch oyster crackers showing too oily, just right, and too soft textures.
Use the texture as your guide: shiny crackers need more drying time, pale crackers may need better mixing, and the ideal batch looks evenly coated.

Common Problems and Fixes

ProblemWhy it happenedFix nowFix next time
Greasy crackersToo much oil or butter, or not baked long enoughSpread on a pan and bake 5–8 minutes more at 250°F / 120°CUse less fat and spread in one layer
Soggy crackersBottled ranch dressing, too much fat, or stored while warmBake low until dry, then let the tray coolUse dry ranch mix only and wait until the crackers are no longer warm before storing
Too saltyFull packet plus salty crackers, ranch dip mix, or salty add-insAdd more plain crackers and toss; if you do not have extra crackers, mix the batch into unsalted pretzels or plain cerealStart with ¾ packet or fewer salty extras
BlandToo many crackers or too little seasoningDust while warm on the tray, then let cool before storingUse the ratio table and taste your seasoning mix
Seasoning clumpedDry powder hit oily crackers unevenlyToss longer, break up clumps gently, and add a handful of plain crackers if some bites are too saltyWhisk seasoning into oil before adding to crackers
Burnt edgesOven too hot, thin pan, or not stirredRemove dark pieces before they flavor the batchUse 250°F / 120°C and stir halfway
Crackers brokeBag shaken too hard or crackers were fragileUse broken pieces as soup toppingToss in a bowl with a spatula instead of shaking hard
Soft after storageStored warm, humid room, or container not airtightRe-crisp at 250°F / 120°C for 5–8 minutesCool on the pan and store airtight

Fix Greasy Crackers

If the flavor is good but the crackers feel slick, spread them back onto a pan and warm them gently. This gives the extra coating a chance to settle instead of sitting on the surface.

Greasy ranch oyster crackers spread on a parchment-lined baking sheet with a spatula and paper towel nearby.
Use low heat for a greasy batch; the goal is to dry the surface gently, not brown the crackers further.

Too Salty? Stretch the Batch

If the seasoning tastes too strong, stretch the batch with plain crackers, pretzels, or unsalted cereal. Diluting the coating is usually better than trying to scrape seasoning off.

Seasoned ranch oyster crackers mixed with plain crackers and pretzels in a bowl to reduce saltiness.
When ranch oyster crackers taste too salty, stretch the seasoning with plain crackers, pretzels, or cereal instead of tossing the batch.

Use Broken Crackers as Soup Topping

The most reassuring part: even imperfect batches rarely go to waste. If the flavor is good, the broken, softer, or extra-seasoned crackers can still become excellent soup toppers.

Broken ranch oyster crackers sprinkled over creamy soup with whole crackers and a spoon nearby.
Broken pieces still bring crunch and ranch flavor, so save them for soup instead of reserving only the perfect whole crackers.

Ranch Oyster Crackers Recipe

These baked ranch oyster crackers make about 5½–6 cups of crisp, savory snack crackers for soup, parties, road trips, and make-ahead appetizer bowls.

Saveable recipe card with ranch oyster crackers, oil, dry ranch seasoning, garlic powder, dill, and bake time.
Use this base formula as your starting point, then adjust future batches with more dill, butter, heat, Parmesan, or a ranch-free spice blend.
Prep Time5 minutes
Cook Time18–22 minutes
Total Time25–30 minutes
YieldAbout 5½–6 cups / 8–10 snack servings

Equipment: Large bowl or gallon zip-top bag, small bowl or measuring cup, rimmed baking sheet, parchment paper, and a spatula.

Ingredients

  • 12 oz / 340 g oyster crackers, about 5½–6 cups depending on brand
  • ⅓ cup / 80 ml neutral oil, such as canola, vegetable, or avocado oil
  • 2½ tablespoons dry ranch seasoning for balanced flavor, or up to 3 tablespoons for a bolder batch
  • 1 teaspoon dried dill
  • ½ teaspoon garlic powder
  • ½–1 teaspoon lemon pepper
  • ½ teaspoon onion powder, optional
  • ¼ teaspoon smoked paprika or cayenne, optional

Instructions

  1. Heat the oven to 250°F / 120°C. Line a rimmed baking sheet with parchment if you want easier cleanup.
  2. In a small bowl or measuring cup, whisk together the oil, ranch seasoning, dried dill, garlic powder, lemon pepper, and any optional onion powder, smoked paprika, or cayenne.
  3. Add the oyster crackers to a large mixing bowl or gallon zip-top bag. Pour the seasoning oil over the crackers.
  4. Toss gently until the crackers are evenly coated.
  5. Spread the crackers in a single layer on the prepared baking sheet.
  6. Bake for 18–22 minutes, stirring after about 10 minutes, until the crackers smell toasted and look dry rather than glossy.
  7. Let the crackers cool on the pan before serving or storing.

Notes

  • For a 9 oz / 255 g bag, use 2 tablespoons ranch seasoning for mild flavor or 2½–3 tablespoons for bold flavor. Use ¼ cup oil for a lighter coating, or ⅓ cup oil / 5 tablespoons melted butter for a richer snack.
  • For a 16 oz / 454 g bag, use ½ cup oil and about 3 tablespoons ranch seasoning, or most/all of a standard 1 oz / 28 g packet adjusted for saltiness.
  • For a butter version, use up to ½ cup / 113 g melted unsalted butter instead of oil.
  • Dry ranch mix gives the crispest coating; bottled dressing softens the crackers.
  • If the crackers need more flavor, dust them while warm on the tray.

Ranch Oyster Crackers FAQs

Can I use bottled ranch dressing instead of dry ranch mix?

Skip bottled ranch for this recipe. Dry ranch mix gives you the ranch flavor without adding the moisture that makes crackers soften.

How much ranch seasoning is in one packet?

Many packets are about 1 oz / 28 g, but the tablespoon amount can vary. For a 12 oz bag, 2½ tablespoons is balanced and 3 tablespoons gives a bolder snack-bowl flavor.

Can I use ranch dip mix instead of ranch dressing mix?

Yes, with a light hand. Dip mix can taste saltier or stronger, so start with a little less and add more after baking if the crackers need it.

Do I have to use a specific brand?

No. Store-brand ranch seasoning, shaker seasoning, classic packets, or homemade dry ranch-style seasoning can all work. The salt level matters more than the label.

Do they have to be baked?

Not always. Baking gives the snappiest batch, but the no-bake method works when you have time to let the crackers sit for a few hours.

Can I skip the dill?

Yes. Dill gives the old-school ranch-snack flavor, but parsley, chives, onion powder, or extra lemon pepper can take its place.

Is butter better than oil?

Choose butter for richer flavor and oil for a lighter crunch. For make-ahead batches, oil is the safer default because it stays cleaner and less heavy.

Why are mine greasy?

They can usually be rescued. Spread them out and bake at 250°F / 120°C for another 5–8 minutes so the coating has time to settle.

How long do they stay fresh?

They are best in the first several days. If baked dry, cooled fully, and stored airtight, they usually keep about a week.

Can I make them in the air fryer?

Yes. Cook a small batch at 300°F / 150°C for 5 minutes, shake, then cook another 2–5 minutes. Give the crackers room in the basket so they toast evenly.

Can I turn them into snack mix?

Absolutely. Once the crackers are baked and cool, fold them into pretzels, Chex-style cereal, cheese crackers, roasted nuts, or mini saltines.

Can I use another cracker?

Yes — just watch the timing. Mini saltines, small pretzels, Chex-style cereal, cheese crackers, and Goldfish-style crackers can all brown or dry at different speeds.

Are oyster crackers made with oysters?

Usually, no. They are small soup crackers traditionally served with oyster stew and chowder. Always check the package if you have allergy concerns.

Can I make them ahead?

Yes. Make them a day or two ahead, cool them fully, and store airtight at room temperature. Re-crisp at 250°F / 120°C for 5–8 minutes if needed.

Final Bite

Once the ratio makes sense, this becomes one of those repeat snacks you barely need to think about. It can sit beside soup on a quiet night, fill the extra bowl on an appetizer table, travel in a road-trip bag, or turn into a holiday jar without much work.

Make them once as written, then adjust the next batch to fit your table: extra dill for the old-school version, cayenne for the spicy bowl, Parmesan for a savory finish, or a no-ranch blend when you want something more homemade. However you season them, the job is the same: give soup a little crunch, give the snack table one more reason to linger, and make sure the bowl empties before anyone quite notices.

Final serving bowl of ranch oyster crackers with a wooden scoop, creamy soup, butter, herbs, and soft green linen.
Serve the finished bowl near something creamy or soft, and the tiny crackers bring the salty crunch that makes the table feel complete.

Back to top

Posted on Leave a comment

Coleslaw Recipe

Creamy coleslaw in a bowl with shredded green cabbage, red cabbage, carrots, and a spoon lifting a serving.

This coleslaw recipe is the cold, crunchy side that makes a cookout plate feel complete. It is creamy without being heavy, lightly sweet without tasting sugary, and tangy enough to cut through BBQ, burgers, fried chicken, fried fish, hot dogs, tacos, and pulled pork sandwiches.

The best version gives you that cold snap of cabbage, a creamy-tangy coating, and just enough sweetness to make smoky, salty, fried, or saucy food taste even better.

Easy creamy coleslaw recipe served as a cold crunchy BBQ side with cabbage, carrots, and creamy dressing.
Because coleslaw brings cold crunch to smoky, fried, and saucy foods, it works especially well with BBQ plates, burgers, fried chicken, and pulled pork.

The recipe is simple — shredded cabbage, carrot, and a creamy dressing — but the little choices matter. Shred the cabbage fine enough, mix the dressing separately, chill the bowl, and hold back some dressing until the end. That is how you get homemade coleslaw that tastes fresh, not watery — and the full watery coleslaw fix is below if that is the problem you are trying to avoid.

You can make it with fresh cabbage when you want the strongest crunch, or with bagged coleslaw mix when you need a fast weeknight side. Either way, this is everyday creamy coleslaw: cool, crisp, bright, and sturdy enough to work as a side dish or a sandwich topping.

Coleslaw at a Glance

  • Best for: BBQ plates, burgers, fried chicken, fried fish, hot dogs, tacos, and pulled pork sandwiches
  • Texture: cold, crunchy, creamy, lightly sweet, and tangy
  • Prep time: 15 minutes
  • Chill time: 30–60 minutes
  • Servings: 8 side servings
  • Yield: about 8–9 cups
  • Shortcut: use bagged coleslaw mix; one 14–16 oz bag makes a smaller batch, while 20–24 oz gives the full recipe yield
  • Most important tip: start with part of the dressing, chill, toss again, then add more only if the slaw needs it

What You’ll Find in This Coleslaw Guide

This guide helps you make classic creamy coleslaw that tastes balanced, stays crisp, and works whether you are serving it in a bowl, beside grilled food, or inside a sandwich.

Quick Answer: The Best Easy Coleslaw Recipe

The best easy coleslaw recipe starts with finely shredded cabbage, grated carrot, and a creamy dressing made with mayonnaise, apple cider vinegar, a little lemon juice or mustard, sugar or honey, salt, pepper, and optional celery seed. The simple trick is to dress the cabbage lightly at first, let it chill, then add more dressing only if it needs it.

For a reliable balance, use about 8 cups of shredded cabbage and carrot mixture for every ⅔ cup of mayonnaise-based dressing. That gives you coleslaw that is glossy and lightly coated, not soupy at the bottom of the bowl. It should taste cool, crunchy, tangy, and just sweet enough. For the exact creamy-tangy balance, see the coleslaw dressing section before you adjust the mayo, vinegar, lemon, or mustard.

Close-up spoonful of creamy coleslaw with glossy dressing coating shredded cabbage and carrots.
The best easy coleslaw should show contrast in one bite: creamy dressing on the outside, crisp cabbage underneath, and no thin liquid collecting below.
Using bagged coleslaw mix? One 14–16 oz / 400–450 g bag makes a smaller batch than this full recipe. For one bag, start with about half to two-thirds of the dressing. If you are in a hurry, you can serve the slaw after 10–15 minutes, though the texture and flavor are better after 30–60 minutes in the fridge. For the full bagged-mix math, see the bagged coleslaw mix conversion below.

Coleslaw Recipe Card

Coleslaw Recipe

This easy coleslaw recipe is made with crisp cabbage, grated carrot, and a sweet-tangy dressing. It is the kind of cold, crunchy side that works on a cookout plate, inside a sandwich, or beside fried food.

Prep Time
15 minutes
Chill Time
30–60 minutes
Total Time
45–75 minutes
Servings
8 side servings
Yield
about 8–9 cups

Equipment

  • Large mixing bowl
  • Medium bowl
  • Whisk
  • Tongs
  • Sharp knife or mandoline
  • Box grater
  • Airtight container
  • Optional: colander or salad spinner for make-ahead cabbage

Ingredients

For the slaw:

  • 6 loosely packed cups finely shredded green cabbage, about 420–450 g
  • 2 loosely packed cups finely shredded red cabbage or more green cabbage, about 140–150 g
  • 1 large carrot, grated, about 75–100 g
  • 2–4 tablespoons thinly sliced scallion or red onion, optional

For the creamy coleslaw dressing:

  • ⅔ cup mayonnaise, about 150 g
  • 2 tablespoons apple cider vinegar, 30 ml
  • 1 tablespoon lemon juice, 15 ml, or 2 teaspoons Dijon mustard, 10 ml
  • 1 tablespoon sugar, about 12 g, or honey, about 20 g
  • ½ teaspoon celery seed, optional
  • ½ teaspoon fine salt, plus more to taste
  • ¼ teaspoon black pepper

Instructions

  1. Shred the cabbage. Slice the cabbage finely with a sharp knife or mandoline. Grate the carrot and add it to a large mixing bowl with the cabbage and optional scallion or red onion.
  2. Mix the dressing. In a medium bowl, whisk together the mayonnaise, apple cider vinegar, lemon juice or Dijon mustard, sugar or honey, celery seed, salt, and black pepper until smooth.
  3. Dress lightly first. Pour about two-thirds of the dressing over the cabbage mixture. Toss well until the cabbage is lightly coated.
  4. Chill. Cover and refrigerate for 30 to 60 minutes so the cabbage relaxes slightly and the flavors blend.
  5. Finish before serving. Toss again. If the slaw looks dry, add more dressing a spoonful at a time. A little salt will wake it up if the flavor feels flat. When it tastes too sweet or heavy, sharpen it with vinegar or lemon juice. If the cabbage tastes bitter or the dressing feels too sharp, balance it with a tiny pinch of sugar.

Notes

  • One 14–16 oz / 400–450 g bag of coleslaw mix makes a smaller batch. For the full 8–9 cup yield, use about 20–24 oz / 560–680 g mix, or add extra shredded cabbage and carrot.
  • If using one 14–16 oz bag, start with about half to two-thirds of the dressing. Chill, toss, then add more only if needed.
  • Do not add all the dressing at once. Cabbage releases moisture as it sits, so the slaw becomes creamier after chilling; the two-thirds dressing rule explains how to control that texture.
  • For make-ahead coleslaw, store the dressing and vegetables separately until a few hours before serving; see the make-ahead and storage tips for timing.
  • If you salt the cabbage first, reduce the dressing salt to ¼ teaspoon or leave it out until the final taste adjustment.
  • Serve cold or well chilled. Toss again and drain any excess liquid before serving if the slaw has been refrigerated for several hours.

If you make it, try it once as written, then adjust it sweeter, tangier, creamier, or crunchier for your table. Coleslaw is one of those recipes where small preferences matter.

Are you team creamy coleslaw or vinegar slaw? Share how you serve it — as a BBQ side, on pulled pork, with fried chicken, or piled onto hot dogs.

Why This Coleslaw Recipe Works

Good coleslaw is all about contrast. The cabbage should still crunch, the dressing should cling instead of pooling at the bottom, and the flavor should wake up the rest of the plate. When coleslaw is too wet, too sweet, or too mayo-heavy, it stops doing its job.

This is the version to make when you want classic creamy coleslaw that still tastes fresh after chilling. It is not overloaded with dressing, not sugary, and not watery at the bottom of the bowl.

Although this coleslaw recipe keeps the ingredient list classic, the method gives you more control. The cabbage is shredded finely enough to soften as it chills, but not so finely that it turns limp. The dressing has enough vinegar and lemon or mustard to balance the mayonnaise. Finally, the dressing is added in stages because cabbage changes as it sits.

That last part matters most. A bowl that looks slightly underdressed right after mixing can become perfectly creamy after 30 minutes in the fridge. Hold back some dressing at the beginning, let the slaw settle, then finish it right before serving.

The texture goal

The dressing should cling to the cabbage in a light, glossy coat. You want crunch in every bite, not a puddle of thin dressing at the bottom of the bowl.

Coleslaw Recipe Ingredients

A good bowl of coleslaw does not ask for much: crisp cabbage, sweet carrot, a creamy dressing, enough acidity to brighten it, and enough salt to make the vegetables taste like themselves. Once those pieces are balanced, the bowl tastes crisp and fresh instead of heavy.

Coleslaw ingredients including cabbage, carrot, mayonnaise, vinegar, lemon, mustard, sugar, celery seed, salt, and pepper.
Classic coleslaw ingredients are simple, yet the balance matters: cabbage gives crunch, carrot adds sweetness, and vinegar or lemon keeps the creamy dressing bright.

Best Cabbage for Coleslaw

Green cabbage is the most reliable everyday cabbage for coleslaw. It is crisp, sturdy, mild, and strong enough to hold a creamy dressing without collapsing. Red cabbage adds color and extra crunch, but it can tint the dressing pink as the slaw sits.

Green cabbage, red cabbage, carrots, and creamy dressing arranged for making coleslaw.
Green cabbage is the best base for classic creamy coleslaw because it stays crisp, while red cabbage adds color and a slightly sharper bite.

A classic bowl can be made with only green cabbage and carrot. If you want more color, use mostly green cabbage with a smaller amount of red cabbage. The flavor will still be familiar, and the bowl will look brighter on the table.

Ingredient What It Does Notes
Green cabbage Gives the slaw its main crunch Mild, classic, sturdy, and easy to dress.
Red cabbage Adds color and a peppery bite Use less than green cabbage if you want a pale creamy dressing.
Carrot Brings sweetness and color Grate it finely so it spreads through the bowl.
Scallion or red onion Adds optional sharpness Use a light hand because raw onion can take over quickly.

Fresh Cabbage vs Bagged Coleslaw Mix

For this coleslaw recipe, fresh cabbage gives you the strongest crunch and the most control over shred size. It is the better choice when coleslaw is one of the main sides at a cookout or when you want it to hold up on sandwiches.

Fresh cabbage being sliced next to bagged coleslaw mix poured into a bowl.
Fresh cabbage lets you choose the crunch and cut, while bagged coleslaw mix saves time as long as the dressing is added with a lighter hand.

However, bagged coleslaw mix is still worth using. It is fast and weeknight-friendly, though the cut and moisture level can vary from bag to bag. Because pre-cut cabbage can range from dry and sturdy to very fine and soft, dress it lightly first and give it a few minutes before deciding whether it needs more. If you are using a bag, the bagged coleslaw mix conversion will help you scale the dressing and yield correctly.

Bagged mix conversion: One 14–16 oz / 400–450 g bag of coleslaw mix makes a smaller batch, about 5–6 side servings. For the full 8–9 cup yield, use about 20–24 oz / 560–680 g coleslaw mix, or add extra shredded cabbage and carrot.
Two bowls showing a smaller batch from one bag of coleslaw mix and a larger full-yield batch.
One 14–16 oz bag of coleslaw mix makes a smaller batch, so use 20–24 oz or add extra cabbage and carrot when you want the full recipe yield.

Shredded vs Chopped Coleslaw

Thinly shredded cabbage gives you the classic creamy coleslaw texture: long, crisp strands that hold dressing and still crunch. This is the best cut when you are serving coleslaw as a side dish.

Long shredded coleslaw beside finer chopped coleslaw for comparing side-dish and sandwich textures.
Shredded coleslaw gives side dishes that classic forkful texture, while chopped slaw stays neater on burgers, hot dogs, and pulled pork sandwiches.

Burgers, hot dogs, pulled pork sandwiches, and slaw dogs need a neater slaw. A finer chop keeps the cabbage from sliding out of the bun. Grated cabbage is softer and wetter, so use it only if you want a very fine deli-style texture.

Cut Works Well With Texture Goal
Thin shreds Classic side dish coleslaw Crisp, creamy, and traditional
Fine chop Burgers, hot dogs, pulled pork sandwiches Compact and bun-friendly
Thicker shreds Crunchier slaw bowls and BBQ plates More bite, needs more chilling time
Grated cabbage Very soft deli-style slaw Softens quickly and releases more liquid

Carrots, Onion, and Optional Add-Ins

Carrot is almost always worth adding because it brings sweetness and color. Grate it on the large holes of a box grater or use the shredding blade on a food processor.

Onion is optional. Scallions are gentler and fresher. Red onion is sharper and works best when sliced very thinly. If you are making coleslaw for kids, a mixed crowd, or a long cookout table, keep the onion light or leave it out.

Parsley, celery seed, chopped apple, or a little extra mustard can be useful, but the main recipe should stay clean. Too many extras turn classic coleslaw into a different salad.

Creamy Coleslaw Dressing

The dressing should make the cabbage taste brighter, not bury it. Mayonnaise gives the slaw its creamy body, vinegar brings the snap, lemon juice or mustard sharpens the edges, and a little sugar or honey rounds out the raw cabbage bite.

Creamy coleslaw dressing being whisked with lemon, vinegar, mustard, pepper, and cabbage nearby.
A creamy coleslaw dressing should taste slightly bold before mixing because the cabbage will mellow the vinegar, lemon, salt, and sweetness.

If you make your own mayonnaise, this is a good place to use it. A thick homemade mayo gives the dressing a richer texture and a cleaner flavor. You can use this homemade mayonnaise recipe as the creamy base.

The Sweet-Tangy Dressing Ratio

For this coleslaw recipe, about 8 cups of shredded cabbage and carrot works well with ⅔ cup mayonnaise, 2 tablespoons apple cider vinegar, 1 tablespoon lemon juice or 2 teaspoons Dijon mustard, and 1 tablespoon sugar or honey. For example, use lemon juice when you want a brighter dressing, or Dijon mustard when you want a sharper, more savory one.

Ingredients for creamy coleslaw dressing arranged with mayonnaise, vinegar, lemon, Dijon mustard, sugar, celery seed, and pepper.
This coleslaw dressing ratio gives enough creaminess to coat the cabbage, while vinegar, lemon, or Dijon keeps the finished slaw from tasting flat.

This gives you a dressing that is creamy but not bland, tangy but not harsh, and sweet enough to taste classic without turning sugary. If your family likes a sweeter cookout-style slaw, use the sugar or honey. If you want something sharper for pulled pork, fried fish, or tacos, lean a little harder on vinegar and lemon.

Flavor Goal Adjustment Works Well With
More tangy Add 1–2 teaspoons extra vinegar or lemon juice Fried chicken, fish, BBQ, pulled pork
Sweeter Add 1–2 teaspoons sugar or honey Classic cookout slaw, hot dogs, kids’ plates
Creamier Add 1–2 tablespoons mayo Potlucks, side dish bowls, BBQ plates
Lighter Replace part of the mayo with Greek yogurt or buttermilk Weeknight sides, lighter sandwiches

The Two-Thirds Dressing Rule

Do not drown the cabbage right away. Start with about two-thirds of the dressing, toss well, chill, then add more only if the slaw still looks dry. Cabbage relaxes and releases moisture as it sits, so a bowl that seems slightly underdressed at first often becomes just right after a short rest.

Creamy dressing being poured over shredded cabbage with extra reserved dressing in a small bowl beside it.
The reserved dressing is the safety net: once the cabbage relaxes in the fridge, you can finish the bowl without making it soupy.

As a result, this one habit prevents the two most common coleslaw problems: dry cabbage right after mixing and watery coleslaw later.

How Much Dressing to Use

The right amount of dressing depends on how finely the cabbage is cut and how long the bowl will sit. Thin shreds need less dressing because they soften quickly. Thicker shreds need a little more time and may need a touch more dressing after chilling. If your bowl often turns loose after chilling, the watery coleslaw section explains when to drain, salt, or hold back dressing.

After that, toss thoroughly, let the bowl settle, then taste again. If the slaw looks glossy and lightly coated, stop there. If it still looks dry after chilling, add the remaining dressing a spoonful at a time.

Spoonful of creamy coleslaw showing glossy dressing coating cabbage without liquid pooling in the bowl.
A glossy coating is the goal; if liquid is pooling underneath, the slaw will taste heavier and lose its crunch faster.
Taste after chilling, not only before. Cold cabbage dulls flavor slightly, and the dressing loosens as the slaw rests.

Mayo, Buttermilk, Sour Cream, or Greek Yogurt?

Mayonnaise is the classic choice because it gives coleslaw body and a smooth coating. Buttermilk makes the dressing looser and tangier. Sour cream adds richness with a gentle tang. Greek yogurt makes the dressing lighter and sharper, although it can taste more tart than classic mayo-based slaw.

Four bowls of creamy dressing bases for coleslaw: mayonnaise, buttermilk, sour cream, and Greek yogurt.
Mayonnaise gives the most classic coleslaw texture, while buttermilk, sour cream, or Greek yogurt can make the dressing tangier, lighter, or richer.

The safest first version is mayonnaise. Once you understand the texture, you can replace 2–4 tablespoons of the mayo with buttermilk, sour cream, or Greek yogurt depending on the kind of slaw you want.

Need an egg-free version? Use a thick eggless mayo and keep the rest of the recipe the same. This eggless mayonnaise recipe works well when you want the same creamy texture without eggs.

How to Make Coleslaw

Coleslaw is easy, but the order helps. Shred the vegetables first, whisk the dressing separately, dress lightly, chill, then finish the bowl after it has had time to settle.

Step-by-step coleslaw process showing cabbage shredding, dressing whisking, tossing, and chilling.
Once the cabbage is shredded and the dressing is mixed separately, the key is to toss lightly, chill, and finish the coleslaw after the vegetables settle.

Shred the Cabbage

Cut the cabbage into quarters, remove the hard core, then slice it thinly with a sharp knife. A mandoline gives you very fine, even shreds. A food processor with a slicing blade is the fastest method when you are making a bigger batch.

Hands slicing green cabbage into thin shreds on a cutting board for homemade coleslaw.
Thin, even cabbage shreds soften evenly in the dressing, which helps homemade coleslaw stay creamy while keeping its crunch.

Side-dish coleslaw can handle longer shreds. Sandwich slaw should be finer or lightly chopped so it stays where you put it.

Mix the Dressing

Whisk the mayonnaise, apple cider vinegar, lemon juice or Dijon mustard, sugar or honey, celery seed, salt, and black pepper in a separate bowl. This gives you a smoother dressing and keeps one part of the slaw from getting too salty, too sweet, or too sharp.

Creamy coleslaw dressing being whisked in a bowl before it is added to shredded cabbage.
Mixing the coleslaw dressing separately prevents uneven flavor, so one bite does not taste too salty, too sweet, or too sharp.

Taste the dressing before adding it to the cabbage. It should taste a little stronger than you want the finished coleslaw to taste because the cabbage will soften and mellow it.

Toss, Chill, and Adjust

Add about two-thirds of the dressing to the cabbage and carrot mixture. Toss with tongs or clean hands until the vegetables are evenly coated. Cover and chill for 30 to 60 minutes.

Tongs lifting lightly dressed coleslaw from a bowl with extra dressing set aside.
Light tossing gives the cabbage room to settle; after resting, you can add more dressing only where the bowl actually needs it.

Before serving, toss again and taste. If the slaw looks dry, add more dressing a spoonful at a time. A little salt will wake it up if the flavor feels flat. When it tastes too sweet or heavy, sharpen it with vinegar or lemon juice. If the cabbage tastes bitter or the dressing feels too sharp, balance it with a tiny pinch of sugar.

Best flavor window: Coleslaw tastes best after 30 minutes to 2 hours in the fridge. It is still good the next day, but the cabbage will be softer and the dressing thinner.
Bowl of creamy coleslaw chilling before serving with a note about resting for 30 to 60 minutes.
After 30–60 minutes in the fridge, the dressing clings better and the cabbage softens slightly without losing the cold crunch that makes coleslaw refreshing.

How to Keep Coleslaw from Getting Watery

Watery coleslaw usually comes from cabbage releasing moisture after it is dressed. The bowl may look good when you mix it, then an hour later the dressing has thinned out and liquid has collected at the bottom. That does not mean you ruined it. It just means the cabbage did what cabbage does.

Two bowls comparing watery coleslaw with properly dressed coleslaw that is creamy and not soupy.
Watery coleslaw is usually a timing problem, not a ruined batch; draining, reserved dressing, and final seasoning can bring the bowl back.

Fortunately, the fix is not always “less dressing.” It is better timing. Start with part of the dressing, chill, toss again, then decide whether the bowl needs more dressing, more acid, a pinch of salt, or a quick drain.

Should You Salt the Cabbage?

Salting is optional, not mandatory. Skip it for quick same-day coleslaw. Use it when you need the slaw to hold longer, sit neatly on buns, or avoid watering down the dressing at a cookout.

Hand sprinkling salt over shredded cabbage in a colander set over a bowl to drain moisture.
Salting cabbage is optional for same-day coleslaw, but it helps make-ahead slaw stay crisper by drawing out extra moisture before dressing.

To salt cabbage for make-ahead coleslaw, toss the shredded cabbage with 1 teaspoon fine salt, or up to 1½ teaspoons if the cabbage is especially wet or you are using a larger head. Let it sit in a colander for 20 to 30 minutes. Rinse lightly if it tastes too salty, then dry it very well with a clean towel or salad spinner before adding the dressing. If you are prepping for tomorrow, pair this with the make-ahead storage method so the cabbage stays crisp.

If you salt the cabbage first, reduce the salt in the dressing to ¼ teaspoon or leave it out until the final taste adjustment.

Important: Dry the cabbage well after salting. Wet cabbage plus creamy dressing will still make watery coleslaw.
Shredded cabbage being dried with a clean towel before creamy dressing is added.
After salting or rinsing cabbage, dry it well before adding dressing; otherwise, even a thick creamy coleslaw dressing can turn watery.

Same-Day vs Make-Ahead Coleslaw

The best method depends on whether the slaw is for tonight’s dinner, tomorrow’s cookout, or a sandwich tray. A quick weeknight bowl does not need the same prep as a tray of sandwich slaw for a crowd.

Dressed coleslaw for same-day serving beside separate containers of cabbage and dressing for make-ahead prep.
Same-day slaw can be dressed early enough to relax, while tomorrow’s slaw stays crisper when the cabbage and dressing wait apart.
Situation Should You Salt? Best Move
Serving within 30–60 minutes No Dress lightly, chill, toss, and adjust
Making it tomorrow Yes, or store dressing separately Salt, drain, dry well, then dress later
Using bagged coleslaw mix Usually no Start with part of the dressing because bagged mix varies
Putting it on pulled pork, burgers, or hot dogs Optional Use a lighter hand with dressing and drain before adding to buns
Taking it to a cookout Optional, but helpful Salt only if prepping early; otherwise keep cold and dress close to serving

Coleslaw Troubleshooting

If the bowl tastes a little off, do not start over. Coleslaw is forgiving. Most problems need one small adjustment: a splash of vinegar, a pinch of salt, a spoonful of dressing, a few minutes of chilling, or a handful of fresh cabbage.

Four bowls showing watery, dry, flat, and too-sweet coleslaw with vinegar, salt, lemon, and dressing nearby.
Most coleslaw problems need a small correction, not a new batch; drain watery slaw, add dressing gradually to dry slaw, and use salt or acid for flat flavor.

Quick Fixes for Common Coleslaw Problems

Use the table below to fix the most common coleslaw texture and flavor problems without starting over.

Problem Likely Cause Quick Fix
Coleslaw is watery Too much dressing, cabbage released liquid, or cabbage was not dried Drain excess liquid, toss, and refresh with a small spoonful of mayo if needed
Coleslaw is dry Not enough dressing or very thick cabbage shreds Add more dressing 1 tablespoon at a time after chilling
Coleslaw tastes flat Not enough salt or acid Add a pinch of salt and a splash of vinegar or lemon juice
Coleslaw is too sweet Too much sugar, honey, or sweet mayo Add vinegar, lemon juice, or mustard to sharpen it
Coleslaw is too sharp Too much vinegar, lemon, or mustard Add a small spoonful of mayo or a pinch of sugar
Coleslaw tastes too much like mayo Dressing needs acid, salt, or sweetness Add vinegar or lemon juice first, then a small pinch of sugar if needed
Cabbage is too stiff Shreds are thick or slaw has not rested long enough Chill 30–60 minutes longer, or slice thinner next time
Cabbage is too soft Overdressed, over-salted, or stored too long Drain well and fold in a handful of fresh shredded cabbage
Red cabbage turned the dressing pink Red cabbage released color as it sat Use mostly green cabbage, or add red cabbage close to serving
Bagged mix tastes flat Pre-cut cabbage can taste dry or dull Add extra vinegar, lemon, salt, or a handful of fresh herbs

Make-Ahead and Storage Tips for Coleslaw

This coleslaw recipe can be made ahead, but there is a tradeoff. In general, a short chill makes it taste better because the dressing has time to settle into the cabbage. A long chill makes it softer. The trick is deciding whether you want maximum crunch or maximum convenience.

Shredded cabbage and carrots stored in a container with creamy dressing stored separately in a jar.
Separate containers protect the crunch; once the dressing touches the cabbage, the countdown to softer, wetter slaw begins.

Best Flavor Window

The sweet spot is 30 minutes to 2 hours before serving. The cabbage softens just enough, the dressing clings better, and the bowl still tastes fresh.

A fully dressed bowl can still taste good the next day, but it will be softer and the dressing will be thinner. When crunch matters, store the vegetables and dressing separately.

How Far Ahead to Make Coleslaw

Use this table as a practical planning guide, especially if the slaw is going to a party, sitting beside grilled food, or going inside sandwiches.

When You Need It Best Method Why
Serving in 30–60 minutes Dress now, chill, toss again Best balance of flavor and crunch
Serving in 2–3 hours Dress with two-thirds first, hold cold, adjust before serving Prevents watery slaw
Serving tomorrow Store vegetables and dressing separately Keeps cabbage crisper
Serving on sandwiches Use a lighter hand with dressing and drain before serving Prevents soggy buns
Taking to a cookout Chill well and keep over ice Protects texture and food safety

A Simple Make-Ahead Plan

  • 1 day ahead: shred cabbage and carrots; make the dressing separately.
  • 2–3 hours before serving: toss with two-thirds of the dressing.
  • Right before serving: toss again and adjust with more dressing, salt, or vinegar.

How Long Coleslaw Lasts in the Fridge

Dressed coleslaw is best within 2 to 3 days. Keep it refrigerated in an airtight container, and discard it if it smells off, has changed texture noticeably, or has been left out too long.

If liquid collects at the bottom, drain it before serving leftovers. A small spoonful of mayo or a splash of vinegar can refresh the texture and flavor.

Do not freeze creamy coleslaw. The cabbage turns watery after thawing, and mayonnaise-based dressing can split.

Cookout and Potluck Safety

Because creamy coleslaw is served cold, keep it chilled until serving. For outdoor cookouts, place the serving bowl inside a larger bowl filled with ice if it will sit out for a while.

As a general food-safety rule, cold perishable foods should not sit out for more than 2 hours, or more than 1 hour when the outdoor temperature is above 90°F / 32°C. You can read more about the cold food safety window from the USDA food safety guidance.

How Much Coleslaw Per Person?

Coleslaw is one of those sides that disappears fast when sandwiches are involved, but sits longer when the table is full of other BBQ sides. If you are planning a full menu, the serving ideas section shows where coleslaw works best.

Coleslaw portions shown as a side dish, a sandwich topping, and a taco topping with serving amounts.
Plan more coleslaw for sides and less for toppings; a sandwich usually needs about ⅓–½ cup, while tacos only need a few tablespoons.

For a side dish, plan on about ¾ to 1 cup per person. If coleslaw is one of several sides, ½ to ¾ cup per person is usually enough. For sandwiches, burgers, hot dogs, or pulled pork, plan on ⅓ to ½ cup per sandwich.

As written, this recipe makes about 8–9 cups, so it serves 8 people generously as a side dish or more if you are using it as a topping. These amounts are approximate because finely chopped slaw packs more tightly than long shredded cabbage.

Use Amount to Plan Texture Goal
Side dish ¾–1 cup per person Creamy, chilled, and lightly coated
Large BBQ spread ½–¾ cup per person Tangy and not too heavy
Pulled pork sandwich ⅓–½ cup per sandwich Finely shredded and not too wet
Burgers or hot dogs ¼–⅓ cup per bun Finely chopped or thinly shredded
Tacos or wraps 2–3 tablespoons per piece Lightly dressed and crunchy

What to Serve with Coleslaw

Coleslaw earns its place because it makes the rest of the meal easier to enjoy. A spoonful of cold crunch beside smoky meat, a bright layer inside a pulled pork sandwich, or a creamy bite next to fried fish can change the whole plate. For larger BBQ plates or sandwich trays, check the coleslaw per person guide before scaling the batch.

Bowl of creamy coleslaw served with pulled pork, fried chicken, tacos, and a hot dog.
Coleslaw earns its place on cookout plates because cold crunch and tangy creaminess balance rich foods like pulled pork, fried chicken, tacos, and hot dogs.

Coleslaw for BBQ Plates

On a BBQ plate, coleslaw should cool the palate between bites of smoky, saucy, or grilled food. Keep it creamy, crisp, and slightly tangy. A little extra vinegar or lemon juice helps the slaw cut through ribs, grilled chicken, brisket, pulled pork, sausages, or other cookout mains.

If the rest of the plate is already sweet or saucy, avoid making the slaw too sweet. A balanced sweet-tangy dressing tastes fresher.

Coleslaw for Pulled Pork Sandwiches

For pulled pork sandwiches, the slaw has one job: add crunch and brightness without soaking the bun. Keep it finely shredded, lightly dressed, and a little tangier than you would for a side dish.

Pulled pork sandwich topped with lightly dressed coleslaw on a soft bun.
For pulled pork sandwiches, keep the coleslaw finely shredded and lightly dressed so it adds crunch without making the bun soggy.

Long cabbage strands can pull out of the sandwich, and watery dressing can make the bread soggy. Chill the slaw, drain off any extra liquid, and add it right before serving.

This same logic works for chicken sandwiches too. A creamy, tangy slaw is especially good with BBQ chicken, crispy chicken, and grilled chicken sandwiches. For more sandwich ideas, see these chicken sandwich recipes.

Coleslaw for Burgers and Hot Dogs

For burgers and hot dogs, chop the slaw a little finer so it stays inside the bun and gives every bite some crunch. Hot dogs can handle a slightly sweeter dressing, while richer burgers usually taste better with a sharper, tangier slaw. Either way, drain off extra liquid before adding it to bread.

Coleslaw for Fried Chicken, Fish, Tacos, and Wraps

Fried chicken and fried fish need coleslaw that is bright and cold. If the main dish is already rich and crisp, the slaw should bring freshness. Add a little extra vinegar or lemon juice before serving.

Taco slaw should be lighter than a classic creamy BBQ side. Use this recipe as a starting point, then thin the dressing with extra lime or vinegar and use less mayo if you want a taco-style slaw.

For a lighter taco-style slaw, see the cabbage slaw approach in these fish tacos. The shrimp tacos use a similar fresher direction with creamy sauce and crunch.

Coleslaw also works beside fried fish and chips because the cool cabbage balances the hot, crisp batter. For that style of plate, keep the slaw cold and a little more acidic. You can pair it with this fish and chips recipe.

Easy Coleslaw Variations

Once the classic creamy version is working, you can adjust the dressing and vegetables to match the meal. Choose the version that fits the plate instead of loading one bowl with too many ideas.

No-Mayo Coleslaw

A no-mayo version works best when the dressing is sharp, glossy, and well-seasoned. Use apple cider vinegar, olive oil, a little Dijon mustard, honey or sugar, salt, pepper, and optional celery seed. This style is lighter, brighter, and especially good with pulled pork, tacos, fried food, and picnic plates where you want crunch more than creaminess. For a quick comparison, see the mayo vs vinegar coleslaw answer in the FAQs.

Two bowls comparing creamy mayo coleslaw with a brighter vinegar-style no-mayo coleslaw.
Choose mayo slaw when you want creamy comfort, and choose vinegar slaw when the plate needs a sharper, lighter bite.

Greek Yogurt Coleslaw

To make the dressing lighter, replace part of the mayonnaise with thick Greek yogurt. Start by replacing ¼ cup of the mayo, then taste before swapping more. Greek yogurt is tangier than mayo, so you may need a little more honey or sugar to balance it.

This version is useful for weeknight dinners, meal prep bowls, wraps, and lighter sandwiches.

Sweeter or Tangier Coleslaw

If you like a sweeter cookout-style slaw, add sugar or honey 1 teaspoon at a time. If you want it sharper, add apple cider vinegar, lemon juice, or mustard in small amounts.

Always adjust after the slaw has chilled. The flavor changes as the cabbage softens and the dressing loosens. If the bowl tastes bland, do not automatically add more mayo. Add a pinch of salt first, then a little acid.

Other Slaw Styles to Try Later

Apple slaw, broccoli slaw, red cabbage slaw, vegan coleslaw, keto coleslaw, and Asian slaw are all useful variations, but they each need their own balance. Apple needs enough acid so the bowl does not taste too sweet. Broccoli slaw needs a dressing that can soften firmer shreds. Red cabbage slaw often works better with a brighter vinaigrette. Asian slaw usually moves away from classic mayo dressing and toward sesame, ginger, soy, rice vinegar, lime, or herbs.

Keep this classic coleslaw recipe as the creamy base, then use those ideas when you want a different style of slaw.

Vegan or Egg-Free Coleslaw

Vegan coleslaw needs a thick vegan mayo and enough vinegar or lemon juice to keep the dressing bright. The dressing should taste slightly bold before it hits the cabbage because the vegetables will mellow it.

This vegan mayo recipe is a useful base for a plant-based version. For egg-free but not necessarily vegan coleslaw, use eggless mayo and keep the rest of the recipe the same.

How did you adjust it?

If you made this coleslaw sweeter, tangier, creamier, sharper, or more sandwich-friendly, share your version in the comments so other readers can try it too.

Once you understand the dressing balance, coleslaw becomes easy to adjust. Keep it creamier for cookouts, sharper for pulled pork, lighter for tacos, and colder than you think before serving. That is the difference between a bowl people ignore and a bowl that disappears.

Coleslaw FAQs

What is coleslaw made of?

Classic coleslaw is made with shredded cabbage, grated carrot, and a creamy or vinegar-based dressing. A creamy coleslaw dressing usually includes mayonnaise, vinegar, sugar or honey, salt, pepper, and sometimes mustard or celery seed.

What is the best cabbage for coleslaw?

Green cabbage is the most reliable choice because it is crisp, mild, and sturdy. Red cabbage adds color and crunch, but it can tint the dressing pink as it sits. Green cabbage alone is enough for a classic creamy slaw; red cabbage is mainly for color and extra crunch.

Can I use bagged coleslaw mix?

Bagged coleslaw mix works well, especially for weeknights. One 14–16 oz / 400–450 g bag makes a slightly smaller batch, so start with about half to two-thirds of the dressing. For the full 8–9 cup yield, use about 20–24 oz / 560–680 g mix or add extra shredded cabbage and carrot.

What is the difference between slaw and coleslaw?

Coleslaw usually means a cabbage-based slaw, often with carrots and a creamy or vinegar dressing. Slaw is broader and can include other shredded vegetables such as broccoli, Brussels sprouts, kale, apple, or red cabbage.

How do you keep coleslaw from getting watery?

Watery coleslaw usually happens when cabbage releases moisture after dressing. Start with part of the dressing, chill, toss again, and then decide whether the bowl needs more dressing, a quick drain, or a little extra seasoning. For make-ahead coleslaw, lightly salt the shredded cabbage, let it drain, dry it very well, and then dress it.

Should I salt cabbage before making coleslaw?

Quick same-day coleslaw does not need salted cabbage. Salting helps when you are making the slaw ahead, serving it outdoors, or using it on sandwiches where extra liquid can make the bread soggy. If you salt the cabbage, reduce the salt in the dressing and adjust at the end.

How long should coleslaw chill before serving?

For this coleslaw recipe, a 30 to 60 minute chill gives the cabbage time to soften slightly and lets the dressing flavor the vegetables. If you are in a hurry, even 10 to 15 minutes helps, but the texture is better with a longer rest.

Can I make coleslaw the night before?

You can, but the texture will be softer. For the best crunch, store the shredded vegetables and dressing separately, then combine them a few hours before serving.

How far ahead can I make coleslaw?

The freshest window is 30 minutes to 2 hours before serving. For parties, shred the vegetables and mix the dressing one day ahead, store them separately, and combine them on the day you plan to serve.

How long does coleslaw last in the fridge?

Dressed coleslaw is best within 2 to 3 days. It softens and releases liquid as it sits, so drain off excess liquid before serving leftovers.

Can you freeze coleslaw?

Creamy coleslaw does not freeze well. The cabbage turns watery after thawing, and mayonnaise-based dressing can separate. If you need to prep ahead, keep the shredded vegetables and dressing separate in the refrigerator.

Why does my coleslaw taste bland?

Bland coleslaw usually needs salt or acid, not more mayo. Add a pinch of salt and a small splash of vinegar or lemon juice, toss, and taste again.

Why did my red cabbage turn the dressing pink?

Red cabbage naturally releases color into creamy dressing as it sits. Use mostly green cabbage with a smaller amount of red cabbage if you want a classic pale dressing.

Is coleslaw better with mayo or vinegar?

Mayo coleslaw gives you the classic creamy cookout bowl. Vinegar slaw is sharper, lighter, and better when the main dish is rich, smoky, fried, or piled into a sandwich.

Is coleslaw gluten-free?

Most homemade coleslaw is naturally gluten-free if the mayonnaise, mustard, vinegar, and seasonings are gluten-free. Always check labels if you are cooking for someone with celiac disease or strict gluten sensitivity.

How much coleslaw do I need for pulled pork sandwiches?

Plan on ⅓ to ½ cup coleslaw per sandwich. Keep it finely shredded, lightly dressed, and well drained so it adds crunch without making the bun soggy.

What goes well with coleslaw?

Coleslaw goes well with BBQ, ribs, burgers, hot dogs, fried chicken, fried fish, fish tacos, shrimp tacos, wraps, and pulled pork sandwiches. It works especially well anywhere you want a cold, crunchy contrast to something smoky, sauy, fried, or spicy.

Posted on 6 Comments

Cranberry Sauce with Orange Juice (7 Easy Recipes & Variations)

Luxe magazine-style portrait image of a hand spooning homemade cranberry sauce with orange juice into a ceramic bowl, surrounded by fresh cranberries, orange halves, orange zest and cinnamon sticks on a dark wooden table, MasalaMonk food photography.

Cranberry sauce is one of those dishes that looks fancy, but once you strip it down, it’s just cranberries, sugar, and liquid. Swap in orange juice for plain water and you suddenly have a bright, zesty homemade cranberry sauce with orange juice that tastes like pure holiday cheer.

This post is built around that idea: one reliable recipe for cranberry sauce with orange juice, plus a whole family of twists you can spin from the same pot. You’ll find:

  • A classic, easy cranberry sauce with orange juice that feels familiar and comforting
  • A brown-butter and vanilla twist that turns into a cosy gourmet cranberry sauce recipe
  • Naturally sweetened maple or honey versions
  • Low sugar, sugar-free and keto-style options
  • A boozy orange liqueur or whiskey version
  • A fresh, no-cook cranberry orange relish
  • A tangy apple cranberry chutney that leans savoury

Along the way, we’ll talk about texture and cooking science, how to make your cranberry and orange juice sauce in the slow cooker, how far ahead you can prep for cranberry sauce Thanksgiving dinners, and plenty of ideas for using leftovers so nothing quietly dies in the back of the fridge.

If you’d like to get deeper into what cranberries do for your body—antioxidants, vitamin C, and more—you can follow up later with this cranberry nutrition and benefits breakdown.


Easy Homemade Cranberry Sauce with Orange Juice

Let’s start with the base. This is a simple cranberry sauce recipe with orange juice that you can make on autopilot once you’ve done it once or twice. It works whether you’re cooking for a small dinner or a full Thanksgiving crowd.

Classic homemade cranberry orange sauce in a ceramic bowl, garnished with a curl of orange zest and a cinnamon stick, ready to serve as a side dish.
The classic batch of cranberry–orange sauce: glossy, tangy and just sweet enough to serve straight from the bowl beside turkey, chicken or a nut roast.

Ingredients for the Classic Version

  • 12 oz (340 g) fresh or frozen cranberries, rinsed and picked over
  • 1 cup (200 g) granulated sugar
  • 1 cup (240 ml) orange juice (freshly squeezed if possible)
  • 1–2 teaspoons finely grated orange zest
  • Pinch of fine salt
  • 2–3 tablespoons water, if needed
Overhead photo of ingredients for cranberry orange sauce on a linen cloth, with fresh cranberries, orange juice, sugar, orange zest, cinnamon sticks, vanilla, salt and pepper arranged in small bowls.
What you need for this cranberry–orange sauce at a glance: fresh cranberries, citrus, sugar and a few warm pantry spices, measured and ready to cook.

Optional flavour boosters:

  • 1 teaspoon vanilla extract
  • 1 small cinnamon stick or ¼ teaspoon ground cinnamon

This is a fairly classic recipe cranberry sauce formula; the twist is that orange juice replaces water, bringing sweetness and citrusy perfume. It’s in the same family as well-loved minimalist recipes such as Bon Appétit’s easiest cranberry sauce, but the orange plays a bigger role here.

Cranberry orange sauce simmering in a saucepan, with cranberries bursting and a hand stirring the glossy, jammy mixture with a wooden spoon.
When the cranberries burst and the orange-spiked syrup turns glossy and jammy, your homemade cranberry sauce is just a minute away from perfect.

How to Cook Cranberry Sauce with Orange Juice (Step-by-Step)

  1. Set up the base.
    Tip the cranberries into a medium saucepan. Add sugar, orange juice, orange zest, salt, and the cinnamon stick if you’re using one. Give everything a stir so the cranberries are coated.
  2. Dissolve the sugar gently.
    Place the pan over medium heat. Stir every minute or so until the sugar dissolves and the liquid turns glossy. This usually takes 3–5 minutes. If things look very thick and the berries aren’t relaxing into the liquid, add a couple of tablespoons of water.
  3. Bring it to a gentle boil.
    Increase the heat slightly until the surface starts to bubble. You don’t want a wild, splattering boil—just a steady simmer that lets the cranberries soften.
  4. Simmer until the berries burst.
    Cook for 8–10 minutes, stirring occasionally. You’ll hear and see the cranberries pop. The sauce will start to thicken and look jammy. When you’re making cranberry sauce, the most important thing to remember is that it continues to thicken as it cools, so don’t wait for it to look like jelly in the pan.
  5. Finish with flavour.
    Take the pan off the heat. Pull out the cinnamon stick, if you added it. Stir in the vanilla extract. Taste carefully (it will be very hot) and decide whether you want more sugar for sweetness or a squeeze of extra orange juice for a sharper finish.
  6. Cool and chill.
    Let the homemade cranberry sauce cool to room temperature in the pan. It will look looser at this stage. Once it’s no longer steaming, transfer it to a glass or ceramic container and refrigerate for at least 2 hours, preferably overnight. Cold time is when the texture settles into that glossy, spoonable consistency everyone expects.

If you just want a basic cranberry sauce, you can skip the vanilla and cinnamon and stick to cranberries, sugar, and orange juice.

Glossy cranberry orange sauce in a white bowl, styled with orange juice and gold spoon on a marble surface, with an elegant text overlay mini recipe card for classic cranberry sauce with orange juice from MasalaMonk.com.
Save this mini recipe card for later: a classic cranberry orange sauce made with fresh cranberries, orange juice and sugar, ready in about 15 minutes and perfect to prepare ahead for Thanksgiving.

What This Classic Cranberry Sauce Tastes Like

This base cranberry sauce made with orange juice is bright and tangy, but not painfully sharp. The sugar balances the natural acidity of cranberries, while orange juice and zest add sweet citrus flavour and a gentle bitterness from the peel. Cinnamon and vanilla stay in the background; they shouldn’t make it taste like a full-on dessert, just a little warmer and more rounded.
Serve it straight from the fridge as a cranberry side dish next to turkey, chicken, duck, nut roasts, or even a rich main like macaroni and cheese. A spoonful on the plate does a lot of work cutting through fat and salt.


Understanding Cranberries: Fresh, Frozen & Dried

Before we layer on variations, it helps to know what’s happening in the pot.

Fresh vs Frozen Cranberries

For this cranberry sauce recipe fresh cranberries are ideal when they’re in season (usually October through December). They’re firm, shiny, and snap when you bite one. If you’re using frozen cranberries, there’s no need to thaw. Add them straight to the pan; you may need an extra minute or two of simmering.

Frozen berries are picked at peak ripeness and frozen quickly, so they behave very similarly to fresh. If anything, they sometimes release water more readily, which can help the sauce set nicely.

Three small bowls showing fresh cranberries, frozen cranberries and dried cranberries side by side on a linen cloth with a halved orange, illustrating which type works best for cranberry sauce.
For classic cranberry sauce, fresh or frozen berries give the best set and flavour; dried cranberries need soaking and are better for a softer, chutney-style mix.

What About Dried Cranberries?

Dried cranberries are great for salads and baking, but they’re not a straight swap in a standard cranberry sauce recipe using orange juice. They’ve already been sweetened and dehydrated, so they won’t burst and gel in the same way.

If you really want to use dried cranberries:

  • Soak them first in warm orange juice and water for at least 30 minutes
  • Use more liquid than the fresh recipe calls for
  • Expect a softer, chutney-like texture rather than a classic sauce

That kind of approach can work in a cranberry sauce recipe from dried cranberries, but for a traditional Thanksgiving-style sauce, fresh or frozen is the way to go.

Why Cranberry Sauce Thickens on Its Own

Cranberries are naturally high in pectin, a type of soluble fibre that gels when combined with acid and sugar. Orange juice adds acidity and sugar, so when you simmer everything together, you’re quietly making a soft, homemade jelly.

Close-up of a spoon lifting thick, gelled cranberry orange sauce from a bowl, with text reading “Natural Pectin = Soft Cranberry Jelly,” showing how the sauce sets without added gelatin.
Cranberries are naturally rich in pectin, so a simple cranberry sauce with orange juice thickens into a soft jelly as it cools—no gelatin or cornstarch needed.

This is why:

  • A basic cranberry sauce recipe doesn’t need gelatin or cornstarch
  • The sauce looks runnier in the pan than it does once chilled
  • High-sugar versions often set more firmly than low-sugar or sugar-free ones

Once you understand that, it’s easier to trust the process. When in doubt, err on the side of stopping the simmer a little early. You can always thicken slightly later, but rescuing an over-thick, sticky sauce is more tricky.

Also Read: Pesto Recipe: Classic Basil Pesto Sauce & 10 Variations


Texture, Taste, and Tweaks for the Classic Sauce

A simple easy cranberry sauce can feel completely different depending on how long you cook it and how much you mash it.

Choosing Your Texture

Think about your crowd:

  • For people who like whole berries and a bit of bite, aim for a chunky cranberry and orange juice sauce. Simmer just until most berries pop and stop there.
  • If you prefer a jammy, spreadable texture that sits neatly on turkey or bread, cook it a couple of minutes longer until the liquid coats the back of a spoon. This makes a rich cranberry orange juice sauce that doubles as a spread.
  • For kids or anyone who dislikes “bits”, use a potato masher to break everything down once it’s off the heat. For an extra-smooth finish, give it a brief whizz with an immersion blender.
Overhead photo of three ceramic spoons filled with chunky, jammy and smooth cranberry orange sauce on a wooden table with fresh cranberries and orange zest.
One master cranberry–orange sauce, three textures: leave the berries whole and chunky, cook it down until jammy, or blend it silky smooth depending on how you like it on the plate.

You can even split a batch: half left chunky, half blended, so your homemade cranberry sauce recipe covers both preferences without extra effort.

Adjusting Sweetness and Tartness of Cranberry Sauce with Orange Juice

Taste before chilling, but keep in mind flavours soften in the fridge. If you know your family likes sweeter sauces (maybe they’re used to canned), add a touch more sugar while it’s still warm. If you prefer a sharper profile, hold back on the sugar and add extra orange zest instead of more juice.

You can also:

  • Add a spoonful of brown sugar for a caramel note
  • Stir in a little maple syrup at the end for a healthy cranberry sauce feel with more nuanced sweet notes
  • Balance too much sweetness with a splash of extra orange juice or a squeeze of lemon

Balancing Spices in Cranberry Sauce with Orange Juice

Cranberries can handle quite a bit of spice, but for a classic cranberry sauce Thanksgiving vibe, it’s best not to go too wild in the base recipe. A cinnamon stick or pinch of ground cinnamon is usually enough. Save bolder flavours like cloves, star anise, or cardamom for one of the twists below, so your main pot stays broadly appealing.

Also Read: Katsu Curry Rice (Japanese Recipe, with Chicken Cutlet)


Flavor Variations on Cranberry Sauce with Orange Juice

Once your base is sorted, you can treat it like a master sauce and spin it several ways. Think of the following as mini recipes that sit on top of the same core idea: a cranberry sauce with orange juice that you understand and trust.

Brown Butter & Vanilla Cranberry Sauce (Gourmet Twist)

When you want something that feels restaurant-level without extra stress, this brown butter version is your best friend. It’s still recognisably cranberry sauce, just with deeper, nutty notes.

Bowl of brown butter and vanilla cranberry orange sauce on a linen cloth, with a gold spoon, cinnamon stick and vanilla bean, styled as a rich gourmet version of classic cranberry sauce.
Brown butter and vanilla swirl through this cranberry–orange sauce, turning the same simple base into a dessert-level, gourmet side dish for holiday dinners.

You’ll need:

  • Classic batch of cranberry sauce with orange juice
  • 2 tablespoons unsalted butter
  • Extra ½ teaspoon vanilla extract

How to make it:

  1. In a small light-coloured pan, melt the butter over medium heat.
  2. Continue cooking, swirling the pan, until the butter foams and the milk solids at the bottom turn golden and smell nutty. Take off the heat; this is brown butter.
  3. Prepare the base cranberry sauce recipe using orange juice as usual.
  4. Once the sauce is off the heat, fish out the cinnamon stick if you used one, then stir in the brown butter and extra vanilla.
  5. Taste and adjust; brown butter adds richness but not sweetness, so you may want a teaspoon of extra sugar or maple if you like a softer edge.
  6. Cool and chill.
Brown butter cranberry sauce in a cream bowl with a split vanilla bean on top, styled on a dark table with candlelight, featuring an elegant text overlay recipe card for vanilla cranberry orange sauce from MasalaMonk.com.
Brown butter and real vanilla turn classic cranberry orange sauce into a rich, restaurant-style side. Save this gourmet cranberry sauce recipe card for holiday dinners when you want something a little extra.

The result is a cosy gourmet cranberry sauce recipe that works for Thanksgiving, Christmas dinners, or even alongside duck breast, pork fillet, or a rich vegetarian main. If you like building “one master sauce + many ways to use it”, this approach is very similar in spirit to how we handle yogurt sauces in our Greek tzatziki guide.


Naturally Sweetened Cranberry Sauce with Orange Juice (Maple or Honey)

For guests who like slightly “cleaner” flavours, a naturally sweetened version hits the spot. This variation keeps the orange but swaps white sugar for maple syrup or honey, so it fits neatly into the healthy cranberry sauce and low sugar cranberry sauce camp.

Close-up of a rustic bowl filled with cranberry orange sauce while a hand pours maple or honey syrup over the top, with orange wedges and fresh cranberries in the background.
Naturally sweetened cranberry–orange sauce, finished with maple or honey for a gentler, refined-sugar-free twist on the classic recipe.

Ingredients (Maple Version):

  • 12 oz (340 g) cranberries
  • ½–¾ cup (120–180 ml) pure maple syrup
  • ¾ cup (180 ml) orange juice
  • ¼ cup (60 ml) water
  • 1–2 teaspoons orange zest
  • Pinch of salt
  • Optional: cinnamon stick, 1 teaspoon vanilla

Method:

  1. Combine cranberries, maple syrup, orange juice, water, zest, salt and optional cinnamon in a saucepan.
  2. Bring to a gentle boil over medium heat.
  3. Simmer 10–12 minutes until most berries burst and the sauce thickens.
  4. Remove from the heat, stir in vanilla if using, and taste. Add more maple syrup if you’d like a sweeter cranberry sauce less sugar style.
  5. Cool and chill.
Naturally sweetened maple honey cranberry sauce in a rustic ceramic bowl, surrounded by a honey dipper, maple syrup jug, orange slice and fresh cranberries, with a text overlay mini recipe card for naturally sweetened cranberry orange sauce from MasalaMonk.com.
This naturally sweetened cranberry orange sauce swaps refined sugar for maple syrup or honey. Save this recipe card if you’re after a brighter, “healthier” cranberry sauce that still feels cosy and festive.

Honey works similarly, though it tastes sweeter than sugar or maple. Start with ½ cup, taste towards the end of cooking, and add more gradually if needed.

For more inspiration, Ambitious Kitchen has a lovely naturally sweetened orange cranberry sauce using orange juice, maple or honey, and vanilla. Cookie and Kate’s naturally sweetened cranberry sauce is another strong example of a cranberry sauce recipe healthy that skips refined sugar.


Low Sugar, Sugar-Free & Keto Cranberry Sauce with Orange Juice

Sometimes you need a sugar free cranberry sauce that still feels festive: maybe you’re cooking for someone watching their blood sugar, or for guests who prefer low-carb options. This variation stays tart and bright, with orange notes, but uses sugar-free sweetener instead of sugar.

Bowl of sugar-free, keto-friendly cranberry orange sauce on a wooden table with citrus zest, lemon wedge and a small dish of granular sweetener, styled with “Sugar-Free” label text on the image.
A sugar-free, keto-friendly cranberry–orange sauce made with low-carb sweetener instead of sugar, keeping the bright flavour while cutting the carbs for guests who prefer a lighter option.

Ingredients:

  • 12 oz (340 g) cranberries
  • ¾ cup (180 ml) orange juice
  • ½ cup (120 ml) water
  • ½–⅔ cup granular sugar-free sweetener (such as a monkfruit–erythritol blend)
  • 1–2 teaspoons orange zest
  • Pinch of salt
  • Optional: cinnamon stick, vanilla extract

Steps:

  1. Combine cranberries, orange juice, water, sweetener, zest, and salt in a saucepan.
  2. Bring to a gentle boil over medium heat.
  3. Simmer for 10–12 minutes, stirring often, until the sauce thickens and most berries have popped.
  4. Remove from heat and stir in vanilla if you like.
  5. Taste while still warm. Sugar-free sweeteners can taste slightly less sweet once chilled, so make it just a touch sweeter than you think you want.
  6. Cool, then refrigerate to let it set.
Sugar-free cranberry sauce in a white bowl on a marble surface, styled with fresh cranberries, an orange wedge and a spoonful of granular sweetener, with a clean text overlay mini recipe card for keto cranberry orange sauce from MasalaMonk.com.
This keto-friendly cranberry orange sauce skips regular sugar and uses a granular low-carb sweetener instead. Save this sugar-free cranberry sauce recipe card if you need a lighter option that still looks and tastes festive.

This style fits well with requirements of keto cranberry sauce, no sugar added cranberry sauce, and low carb cranberry sauce. For a different take, Wholesome Yum’s low-carb cranberry sauce leans on allulose and orange zest for a very low net-carb result.

Quick note: if anyone at your table has diabetes or other health concerns, remind them to chat with their doctor before relying on “diabetic cranberry sauce” or juice drinks as part of treatment. For a broader look at how cranberry juice fits into weight management, there’s a helpful summary here on cranberry juice and weight loss.


Boozy Holiday Cranberry and Orange Juice Sauce

For adults-only dinners, adding a splash of alcohol turns your basic cranberry and orange juice sauce into something that tastes like it fell off a restaurant dessert menu.

Bowl of boozy cranberry orange sauce on a wooden table with a glass of whiskey in the background and fresh cranberries scattered around, styled as a grown-up holiday version of classic cranberry sauce.
Boozy cranberry–orange sauce finished with whiskey or orange liqueur for grown-up holiday plates, perfect with roast duck, glazed ham or rich beef roasts.

You’ll need:

  • One batch of classic cranberry sauce with orange juice
  • 2–4 tablespoons orange liqueur (like Cointreau or Grand Marnier) or whiskey/bourbon

How to build it:

  1. Make the base easy cranberry sauce recipe as usual, but reduce the orange juice by 2–4 tablespoons to make room for the alcohol.
  2. Once you’ve turned off the heat, stir in the liqueur or whiskey.
  3. Taste and adjust. Alcohol can slightly amplify bitterness, so an extra teaspoon of sugar or maple can round things out if desired.
  4. Cool and chill; the boozy edge softens overnight.
Boozy cranberry orange sauce in a dark bowl on a wooden table, garnished with an orange twist and fresh cranberries, with a glass of bourbon and a text overlay mini recipe card for cranberry sauce with orange liqueur or bourbon from MasalaMonk.com.
When you stir in a splash of bourbon or orange liqueur, classic cranberry orange sauce turns into this moody, grown-up side. Save this boozy cranberry sauce recipe card for dinner parties where you want the cranberry to feel a little bit cocktail-bar chic.

This twist is wonderful with roast duck, glazed ham, and beef roasts. Leftover boozy cranberry sauce can double as a quick pan sauce: deglaze a roasting pan with a splash of stock, whisk in a spoonful of cranberry sauce, and simmer briefly.

If you like playing with citrusy cocktails, a spoonful of this sauce blends beautifully into a whiskey sour or adds flavour and colour to the sugar rim on a lemon drop martini.


Fresh Cranberry Orange Relish (No Cook)

For some people, the ultimate cranberry orange relish isn’t cooked at all. Instead of simmering, you blitz everything raw in a food processor and let time in the fridge meld the flavours.

This no-cook cranberry relish recipe with orange juice is bright, crunchy, and a little sharp.

Bowl of fresh no-cook cranberry orange relish with a spoon, surrounded by whole cranberries and orange halves on a wooden table.
Fresh, no-cook cranberry–orange relish: finely chopped cranberries and whole orange peel for a crunchy, zippy alternative to classic cooked cranberry sauce.

Ingredients:

  • 12 oz (340 g) fresh cranberries
  • 1 thin-skinned orange, scrubbed (remove seeds, keep peel)
  • ½–¾ cup (100–150 g) sugar, or more to taste
  • Splash of orange juice if needed
  • Pinch of salt

Method:

  1. Roughly chop the orange, removing any seeds.
  2. Add the cranberries and orange pieces to a food processor.
  3. Pulse until everything is finely chopped but not pureed; scrape down the sides as needed.
  4. Sprinkle over ½ cup sugar and the salt. Pulse again to combine.
  5. Taste and add more sugar if you’d like a sweeter fresh cranberry orange relish. If the mixture seems very dry, add a spoonful of orange juice.
  6. Transfer to a container and chill for at least 2 hours, preferably overnight.
Fresh cranberry orange relish in a white bowl on a bright white surface, with chopped cranberries and orange peel visible, surrounded by fresh cranberries and half an orange, plus a text overlay mini recipe card for raw cranberry relish with orange from MasalaMonk.com.
This no-cook cranberry orange relish stays bright, crunchy and a little bit sharp. Save this recipe card if you like a raw cranberry relish for Thanksgiving, cheese boards and leftover turkey sandwiches.

The texture is closer to a chutney than to a smooth sauce, which makes it fantastic with cold turkey sandwiches, cheese boards, and rich mains. It’s also lovely spooned on top of savoury breakfast dishes like upma and other wholesome brunch bowls.

Because it’s raw, this variation particularly benefits from good-quality fruit. It’s a great way to use cranberries for Thanksgiving dinner when you want something sharper and fresher than cooked sauce.


Apple Cranberry Chutney with Orange

Finally, if you want something that bridges the gap between jammy sauce and savoury chutney, this apple-forward variation is a keeper. It leans into vinegar, onion and ginger, making it a brilliant cranberry side dish for roasted meats, charcuterie, and cheese.

Rustic bowl of chunky apple cranberry chutney with orange, showing visible pieces of apple and cranberries, styled with apple slices, cranberries and a small bottle of vinegar on a wooden table.
Apple cranberry chutney with orange: chunky, tangy and lightly spiced, perfect alongside roast meats, nut roasts or a holiday cheese and cracker board.

Ingredients:

  • 8 oz (225 g) cranberries
  • 1 medium apple, peeled and finely diced
  • ½ cup (100 g) sugar (or ¼ cup white, ¼ cup brown)
  • ½ cup (120 ml) orange juice
  • ¼ cup (60 ml) apple cider vinegar
  • ¼ cup (40 g) finely chopped onion
  • ¼ teaspoon ground ginger or 1 teaspoon freshly grated ginger
  • Pinch of salt
  • Pinch of ground cinnamon

How to make it:

  1. Add cranberries, apple, sugar, orange juice, vinegar, onion, ginger, salt, and cinnamon to a saucepan.
  2. Bring to a gentle simmer over medium heat.
  3. Cook 15–20 minutes, stirring from time to time, until the cranberries burst, the apples soften, and the chutney is thick and glossy.
  4. Taste and adjust balance: more sugar for sweetness, more vinegar for tang, or a little extra salt for savouriness.
  5. Cool and chill.
Rustic apple cranberry chutney with orange in a brown ceramic bowl on a wooden board, with cheese, crackers and apple slices around it, plus a text overlay mini recipe card for savoury cranberry, apple and orange chutney from MasalaMonk.com.
This apple cranberry chutney leans savoury thanks to onion, ginger and cider vinegar, so it works as well with cheese boards and ham as it does with roast turkey. Save this recipe card if you like something chunkier and more chutney-style than classic cranberry sauce.

This apple cranberry chutney sits nicely next to roast pork, ham, or a vegetarian roast, and it pairs beautifully with a platter of cheeses and crackers. It also doesn’t feel limited to November; you can happily serve it any time you’re craving something fruity and savoury.

Also Read: Peanut Butter Cookies (Classic Recipe & 3 Variations)


Slow Cooker, Make-Ahead & Freezer Tips

Cranberry sauce is one of the easiest dishes to prepare ahead for a big holiday meal. Whether you’re going traditional stove-top or want a cranberry sauce crock pot method, it’s extremely forgiving.

Slow Cooker Cranberry Sauce

The slow cooker version is ideal if all your burners are busy or if you want a cranberry sauce in slow cooker approach that gently simmers away in the background.

Basic method:

  1. Add all the ingredients for any of the cooked variations (classic, maple, sugar-free, or boozy) into a small slow cooker.
  2. Stir to combine.
  3. Cook on LOW for 3–4 hours or HIGH for about 2 hours, stirring once or twice if convenient.
  4. Once the cranberries have burst and the sauce looks thick around the edges, switch the slow cooker off.
  5. Let it cool slightly, then transfer to a container and refrigerate.

Because the slow cooker retains moisture, sauces from this method sometimes look a tiny bit looser. If needed, you can move the sauce to a saucepan and simmer for a couple of minutes to tighten it up.

How Far in Advance Can You Make Cranberry Sauce with Orange Juice?

For stress-free cranberry recipes for Thanksgiving, aim to make your sauce at least one day ahead; three days is even better. The flavours deepen, and it’s one less thing on your day-of list.

Rough guidelines:

  • Fridge life: about 7 days, tightly covered
  • Freezer life: up to 2 months in an airtight container, leaving a little headroom for expansion

To serve from frozen, thaw overnight in the fridge, stir well, and warm gently in a saucepan or let it come to room temperature.

A smooth, properly set cranberry sauce recipe homemade will thicken slightly in the cold. If it’s too stiff, stir in a splash of water or orange juice over low heat until you like the consistency.

Also Read: Tres Leches – Mexican 3 Milk Cake Recipe


Serving Suggestions & Menu Pairings

Once you have a reliable best cranberry sauce for Thanksgiving in your back pocket, it’s fun to think beyond the turkey.

Classic Holiday Plates

Your sauce is an obvious match for:

  • Roast turkey (whole or breast)
  • Roast chicken or Cornish hens
  • Baked ham
  • Nut roasts or lentil loaves

On the side, consider a mix of creamy, crunchy, and green elements. A spoonful of cranberry sauce with orange juice feels right at home with:

All together, they build the kind of plate people dream about when they search for the best cranberry sauce recipe for Thanksgiving.

Holiday dinner plate with roast turkey, mashed potatoes, green beans and a generous spoonful of cranberry orange sauce, with extra sauce in a small bowl on a wooden table.
Serve cranberry–orange sauce alongside roast turkey, creamy potatoes and green vegetables for a balanced holiday plate that feels rich yet bright.

Casual Comfort Dinners

Cranberry sauce isn’t limited to one Thursday in November. The same bright-tart spoonful can cut through:

You don’t have to serve it in a huge mound; even a small dish on the table lets everyone add that burst of colour and acidity where they like.

Brunch & Grazing Boards

On more relaxed days, your cranberry orange sauce also belongs on brunch spreads:

  • Dolloped next to cheeses, nuts, and crackers
  • Served with buttery scones or biscuits
  • Paired with savoury egg dishes and fresh fruit

It sits nicely next to a jug of mimosa variations or a tray of strawberry mojito mocktails that you can also adapt with cranberry and orange.


Using Leftover Cranberry Sauce with Orange Juice

One of the hidden strengths of a good cranberry sauce with orange juice is how flexible the leftovers are. A cup or two in the fridge can quietly upgrade meals all week. All of these recipes with cranberry sauce turn leftovers into easy meals and snacks.

Cranberry Meatball Sauce

Turn your sauce into a sticky, tangy glaze for meatballs:

  1. Mix equal parts cranberry sauce and your favourite BBQ or chili sauce.
  2. Add a splash of soy sauce or Worcestershire for savouriness.
  3. Warm in a pan until smooth.
  4. Add cooked meatballs and simmer a few minutes so they’re coated and hot.

This simple trick gives you a cranberry meatball sauce that works as a party appetizer or a quick dinner over rice or mashed potatoes.

Skillet of meatballs glazed in glossy cranberry sauce, garnished with parsley and surrounded by fresh cranberries, with text reading “Cranberry Meatball Sauce for Easy Party Appetizers.”
Mix leftover cranberry sauce with BBQ or chili sauce to make this glossy cranberry meatball sauce—an easy, crowd-pleasing party appetizer or weeknight dinner.

Cranberry Mayo for Sandwiches

A spoonful of cranberry sauce goes a long way in sandwich spreads:

  1. Stir 1 tablespoon cranberry sauce into 2 tablespoons mayonnaise.
  2. Taste and add more mayo if you want it milder.
  3. Spread on bread for turkey or chicken sandwiches.

The result is a tangy, creamy cranberry sauce for sandwiches that plays nicely with roasted poultry, cheese, and salad leaves. For more ideas, you can look at flavour combos from this collection of chicken sandwich recipes.

Turkey sandwich on rustic toasted bread with cranberry mayo and lettuce, served beside a small bowl of pink cranberry mayonnaise and fresh cranberries on a wooden board.
Leftover cranberry sauce whipped into mayo makes a tangy cranberry spread that instantly upgrades next-day turkey or chicken sandwiches.

Baked Brie with Cranberry Topping

If you love grazing boards, baked brie topped with cranberry orange relish is a near-perfect snack:

  1. Place a small wheel of brie in an oven-safe dish.
  2. Spoon cranberry sauce on top—classic, brown butter, or even apple cranberry chutney all work.
  3. Bake at 180°C / 350°F for 10–15 minutes until the cheese is soft and oozing.
  4. Serve with crackers or sliced baguette.

If you’re pregnant or feeding pregnant guests, it’s worth checking which soft cheeses are safe before you plan the board; this guide to soft cheese and pregnancy is a handy starting point.

Baked Brie wheel topped with glossy cranberry orange sauce, oozing onto a ceramic dish and surrounded by crackers, baguette slices and fresh cranberries on a wooden board.
Warm baked Brie crowned with leftover cranberry–orange sauce makes an instant grazing-board centrepiece that looks fancy but takes only minutes in the oven.

Breakfast Bowls and Oats

Cranberry sauce can also brighten breakfast:

  • Swirl into Greek yogurt with granola
  • Spoon over overnight oats
  • Stir into warm porridge

A solid base like this protein oatmeal formula turns leftover sauce into a colourful topping that adds both flavour and a bit of natural sweetness, especially if you’ve made a low sugar cranberry sauce or naturally sweetened cranberry sauce.

Breakfast bowl of creamy yogurt or oatmeal topped with a swirl of cranberry sauce, orange slices and granola, with a second bowl of cranberry sauce in the background.
Swirl leftover cranberry sauce into oats or yogurt for a colourful breakfast bowl that’s tangy, slightly sweet and far more exciting than plain porridge.

Dessert Ideas

Cranberry’s tartness pairs beautifully with chocolate and cream:

  • Warm lightly and drizzle over vanilla ice cream or cheesecake
  • Use as a filling for thumbprint cookies or sandwich cookies
  • Layer into parfaits with whipped cream and crushed biscuits

A plate of cranberry thumbprints goes especially well alongside something rich like these double chocolate chip cookies. For cosy nights in, stir a spoonful of cranberry orange sauce into a mug of homemade hot chocolate for a wintery twist.

Bowl of vanilla ice cream drizzled with cranberry sauce and a plate of thumbprint cookies filled with cranberry jam, styled together on a wooden table as easy desserts made from leftover cranberry sauce.
Leftover cranberry sauce turns into dessert in minutes—drizzle it over vanilla ice cream or spoon it into thumbprint cookies for an easy sweet finish after a holiday meal.

Drinks & Mocktails

Leftover sauce also loves a glass:

  • Shake a spoonful with lemon juice, simple syrup, and whiskey for a cranberry take on a sour
  • Stir into sparkling water with extra orange juice for a quick mocktail
  • Use as a flavour base in mocktails similar to those in our ACV & cranberry mocktail ideas
Two cranberry drinks on a wooden table, one a whiskey sour–style cocktail with foam and orange slice and one a sparkling mocktail with cranberries and citrus, with a small bowl of cranberry sauce in front and text about turning leftover cranberry sauce into drinks and mocktails.
A spoonful of leftover cranberry sauce can be shaken into a cranberry sour or stirred into sparkling water with citrus for easy cocktails and mocktails that use up every last bit.

All of these are small, low-effort ways to make sure your recipes using cranberry sauce don’t stop at the main meal.


A Little More on Cranberries & Health

Even though most versions of cranberry sauce with orange juice are treats rather than health foods, it’s still nice to know what’s inside those jewel-coloured berries.

Cranberries offer:

  • Vitamin C
  • Manganese
  • Dietary fibre
  • Various polyphenol antioxidants

Healthline’s overview of cranberry nutrition and health benefits explains how cranberries may help support urinary tract health, reduce oxidative stress, and influence some heart-health markers. The Cranberry Institute collects research summaries on cranberry bioactives, particularly around proanthocyanidins (PACs), the compounds thought to help prevent certain bacteria from sticking to urinary tract walls.

On the flip side, most holiday sauces also contain a decent amount of sugar, so they’re still in the “enjoy in moderation” category. If you’re looking for something lighter, lean on your naturally sweetened cranberry sauce or no sugar added cranberry sauce variation, and perhaps save the biggest spoonfuls for big meals rather than everyday snacks.

For those balancing rich holiday food with lighter days, homemade hydration and detox-style drinks featuring cranberry and apple cider vinegar can feel like a reset; you’ll find several precise formulas in this guide to cranberry-ACV detox drinks and these homemade electrolyte recipes for fasting.


Conclusion

With this one post, you’ve got:

  • A reliable, classic cranberry sauce with orange juice
  • A set of seven easy recipes and variations (from cranberry orange relish to apple cranberry chutney)
  • Options that cover classic, gourmet, low-sugar, sugar-free, and boozy moods
  • Plenty of ideas for recipes using cranberry sauce the next day and beyond

From here, you can keep things as simple as a single pot of sauce—or build a whole cranberry “universe” across your Thanksgiving, Christmas and everyday menus.

FAQs about Cranberry Sauce with Orange Juice

1. Can I make cranberry sauce with orange juice instead of water?

Yes, absolutely. A cranberry sauce with orange juice is simply a classic cranberry sauce recipe where orange juice replaces some or all of the water. This gives you a brighter flavour, gentle sweetness, and a more “holiday” feel. Any basic cranberry sauce recipe using orange juice can follow the same ratios as a water-based sauce; just watch the simmer time so it doesn’t reduce too much and turn too thick.


2. What’s the difference between cranberry sauce and cranberry orange relish?

Cranberry sauce is cooked: the berries burst over heat and the mixture thickens into a glossy, jammy side dish. A cranberry orange relish is usually raw, often made in a food processor with whole orange, sugar, and fresh cranberries. So, a cranberry relish recipe with orange juice or whole orange has more crunch, brighter acidity, and a slightly bitter edge from the peel. In short, sauce is smooth and spoonable; relish is chopped and zippy.


3. How do I fix cranberry sauce that’s too runny or too thick?

If your cranberry sauce made with orange juice is too runny after chilling, return it to the pan and simmer for a few minutes until it reduces and coats the back of a spoon. Conversely, if it ends up too thick, stir in extra orange juice or a little water, a tablespoon at a time, over low heat until it loosens. Always remember: a cranberry orange juice sauce thickens as it cools, so judge consistency after it’s chilled, not just while it’s hot.


4. Can I make cranberry sauce ahead of time or freeze it?

Yes, homemade cranberry sauce is perfect for making in advance. It keeps in the fridge for about a week, so you can prepare your cranberry sauce with orange juice several days before Thanksgiving or Christmas. It also freezes well for up to a couple of months; just thaw in the fridge and stir before serving. This make-ahead option frees up time and stove space on busy days.


5. Can I use frozen cranberries instead of fresh?

Frozen cranberries work just as well in a cranberry sauce recipe using orange juice. There’s no need to thaw them; simply add straight from the freezer and extend the simmer time by a minute or two. The texture and flavour will be very close to fresh, and your homemade cranberry sauce recipe will still set thanks to the natural pectin in the berries.


6. How can I make a low sugar or sugar free cranberry sauce?

To create a low sugar cranberry sauce, reduce the sugar and balance with more orange zest rather than extra juice, keeping the flavour bright without over-sweetening. For a sugar free cranberry sauce, swap sugar for a granular sweetener such as a monkfruit–erythritol blend and follow the same method. This style fits low-carb, keto and “diabetic-friendly” needs, although individual health conditions may still require personal adjustments. Expect the set to be slightly softer than a traditional full-sugar sauce.


7. Is cranberry sauce vegan and gluten free?

Most homemade cranberry sauce recipes are naturally vegan and gluten free, especially a simple cranberry sauce with orange juice made from fruit, sugar, and spices. Just avoid butter-based variations if you’re cooking for vegans, or use plant-based butter in gourmet versions like brown-butter-style twists. Likewise, check labels on alternative sweeteners if you’re making keto cranberry sauce or sugar-free versions.


8. Can I make cranberry sauce without orange juice?

Certainly. If you don’t want citrus, you can make a basic cranberry sauce recipe with water and sugar, then add a little lemon zest, apple juice, or even pomegranate juice for complexity. On the other hand, if you enjoy fruitier flavours but have no oranges, apple juice gives a softer, sweeter profile than a sharp cranberry sauce with orange juice. Just keep the overall liquid-to-cranberry ratio similar so the sauce still sets properly.


9. How much cranberry sauce do I need per person?

As a general guide, plan about ¼ to ⅓ cup of cranberry sauce per person. If you know your crowd loves it—especially if you’re also serving cranberry orange relish or chutney—lean towards the higher end. Leftovers are incredibly versatile, so making a bit extra rarely goes to waste. They can be used in recipes with cranberry sauce like meatball glaze, sandwich spread, or dessert toppings.


10. What can I do with leftover cranberry sauce?

Leftovers are gold. You can turn them into cranberry sauce for sandwiches, whisk them into a quick pan sauce for pork or chicken, or use them as a glaze for meatballs. Additionally, leftover cranberry and orange juice sauce works in baking—think thumbprint cookies, bars, or swirled cheesecakes—and even in breakfast bowls with yogurt and oats. In other words, recipes using cranberry sauce don’t have to stop at the holiday table.


11. How do I make my cranberry sauce more “gourmet”?

To transform a simple easy cranberry sauce into something special, add brown butter, vanilla, warm spices, or a splash of orange liqueur or bourbon at the end of cooking. These small tweaks create a richer, more complex gourmet cranberry sauce recipe without complicating the method. You can also fold in toasted nuts or dried fruit for extra texture, keeping the core cranberry sauce with orange juice base as your foundation.


12. What’s the best way to serve cranberry sauce for Thanksgiving?

For cranberry recipes for Thanksgiving, serve the sauce chilled or at cool room temperature so it holds its shape on the plate. Place it in a small bowl or shallow dish so the colour is visible, and pair it with classic sides like stuffing, mashed potatoes, green bean casserole, and roasted vegetables. A well-balanced cranberry sauce Thanksgiving spread often includes a smooth sauce plus a chunky relish or chutney, giving guests a choice of textures and flavours.

Posted on 17 Comments

10 Spinach Dip Recipes: Cold, Baked, Artichoke & More

Woman dipping bread into a creamy spinach dip recipe surrounded by colorful veggie sticks, bread cubes, and small bowls of dip on a wooden table.

Some recipes feel trendy for a season and then vanish. A really good spinach dip recipe is the opposite. It shows up at potlucks, game nights, Diwali parties, Christmas dinners, and casual Friday evenings, and somehow the bowl is always scraped clean.

This long, cozy guide gathers several kinds of spinach dip recipes into one place: classic cold party dip, ranch-style, vegetable soup mix in a bread bowl, two versions of spinach artichoke dip (cold and baked), a lighter yogurt-based dip, a cheesy queso-style dip, plus a few ultra-simple three- and five-ingredient options. Along the way, you’ll find ideas for what to serve with them, how to handle fresh versus frozen spinach, and a little bit of context about spinach itself.

If you’d like to nerd out on the health side later, you can always read more about spinach nutrition and weight loss benefits on MasalaMonk or check the nutrient breakdown on Healthline’s spinach nutrition page. For now, though, let’s get straight into creamy bowls and warm bread.


Why spinach makes such a good dip base

Before diving into the first spinach dip recipe, it helps to quickly appreciate why spinach works so well in dips.

Spinach has a fairly mild, earthy flavor that doesn’t overpower other ingredients, yet it adds a lovely deep green color and just enough personality. Because it shrinks dramatically when cooked or thawed, a small amount of raw spinach turns into a concentrated, almost buttery pile of greens that blends beautifully into sour cream, yogurt, mayonnaise, and cheese.

Nutritionally, spinach is one of those leafy greens that keeps turning up in research. It’s naturally low in calories yet high in vitamins A, C, K, several B vitamins including folate, and minerals such as iron and potassium. If you want to dig into the numbers, the USDA’s FoodData Central database lists exact values for fresh and cooked spinach. Spinach also contains plant compounds like carotenoids and nitrates, which are frequently associated with heart and eye health in studies cited by major nutrition sources.

Of course, the creamy parts of a spinach dip recipe still make this more of a treat than a salad. However, it’s a treat with at least some leafy-green goodness baked in, which is a nice bonus.

Also Read: How to Cook Bacon in the Oven (Crispy, No-Mess, Crowd-Ready Recipe)


Fresh, frozen, or canned spinach: choosing the right one

A question that comes up surprisingly often is whether fresh, frozen, or canned spinach is “best” for a spinach dip recipe. The honest answer is that all three can work, as long as you handle them properly.

Frozen spinach

Frozen chopped spinach is usually the easiest option for dips. It’s already blanched and chopped, so the main task is thawing and squeezing.

  • Thaw overnight in the fridge or quickly in the microwave.
  • Squeeze out as much water as possible.
  • For most recipes here, one 10 oz / 280 g packet of frozen spinach is perfect.

Because it’s blanched soon after harvest, frozen spinach keeps much of its nutritional value. If you like numbers, both Healthline and similar sources note that cooked or frozen spinach often contains more concentrated amounts of certain vitamins and minerals per serving than raw spinach, simply because the volume shrinks.

Fresh spinach

Fresh spinach is fantastic when you already have a big bag in the fridge.

  • Rinse and dry the leaves.
  • Wilt them in a pan with a splash of water or a tiny amount of oil.
  • Once cool, squeeze out the liquid and chop.

You’ll need more fresh spinach by weight than frozen, because it shrinks significantly. Roughly 300–350 g of raw leaves will give you a similar amount of cooked spinach to one frozen packet.

Canned spinach

Canned spinach is less common, yet it can absolutely stand in when that’s what you have.

  • Pour it into a sieve and rinse briefly.
  • Press firmly with the back of a spoon or your hands to remove excess liquid.
  • Measure out about 1½ cups of firmly packed, drained spinach for one batch of dip.

As long as you treat any of these options like a sponge that needs wringing out, your spinach dip recipe will be thick and creamy instead of runny.

Also Read: How to Make Churros (Authentic + Easy Recipe)


Classic cold spinach dip recipe (your party-style base)

This is the backbone of everything that follows. Once you can make this classic cold spinach dip recipe with your eyes closed, you can riff on it endlessly.

Ingredients (about 3 cups)

  • 1 packet (10 oz / 280 g) frozen chopped spinach, thawed
  • 1 cup (240 ml) sour cream
  • 1 cup (240 ml) mayonnaise
  • ½ cup (about 50 g) finely grated hard cheese (parmesan or similar, optional but delicious)
  • 2–3 tablespoons finely minced onion or 2 teaspoons dried minced onion
  • 1–2 cloves garlic, finely minced or ½ teaspoon garlic powder
  • ½–1 teaspoon salt, to taste
  • ¼–½ teaspoon black pepper
  • Optional mix-ins
    • ½ cup finely chopped water chestnuts for crunch
    • ¼–½ cup sliced green onions
    • ¼ cup finely diced bell pepper or pimentos
Classic spinach dip in a ceramic bowl with a hand dipping crusty bread, surrounded by carrot and cucumber sticks on a wooden board, with mini recipe text overlay.
Classic cold spinach dip recipe – a creamy party favorite made with frozen spinach, sour cream and mayo, served with crusty bread and fresh veggie sticks.

Step-by-step Recipe – How to make a Spinach Dip

1. Thaw and squeeze the spinach

Start by thawing the frozen chopped spinach. You can do this overnight in the fridge, in a bowl of cold water, or quickly in the microwave. Once thawed, gather the spinach in your hands or in a clean kitchen towel and squeeze firmly over the sink. Quite a lot of liquid will come out; keep going until it feels as dry as you can manage.

This part might seem fussy, yet it makes all the difference between a thick, scoopable spinach dip recipe and a watery one.

Step 1 of classic spinach dip recipe showing hands squeezing thawed chopped spinach in a towel over a sieve, with green liquid dripping into a bowl.
Step 1 – Thaw and squeeze the spinach: thaw frozen chopped spinach, then squeeze out as much water as possible so your spinach dip stays thick and creamy.

2. Build the creamy base

In a medium mixing bowl, whisk together the sour cream and mayonnaise until smooth. Add the onion, garlic, salt, and pepper. Give it another good stir so the seasonings are nicely dispersed.

If you’re one of those people who likes a mild onion flavor, start with the lower end of the onion amount and adjust later. It will intensify as the dip rests.

Step 2 of classic spinach dip recipe showing a hand whisking sour cream and mayonnaise in a glass bowl with small bowls of onion, garlic, salt and pepper on a wooden surface.
Step 2 – Build the creamy base: whisk sour cream and mayonnaise together, then add onion, garlic, salt and pepper to create the smooth foundation for your spinach dip.

3. Fold in the spinach

Next, add the squeezed spinach to the bowl. Use a spoon or spatula to fold it into the creamy base, breaking up any clumps so the greens are evenly moved through the mixture. At this stage you can also sprinkle in parmesan (or another hard cheese) if you’re using it, along with optional water chestnuts, green onions, or bell peppers.

Step 3 of classic spinach dip recipe showing a hand using a spatula to fold a mound of squeezed spinach into a creamy dip base in a glass bowl, with grated cheese and green onions in small bowls nearby.
Step 3 – Fold in the spinach: stir the squeezed spinach into the creamy base until evenly green, then add parmesan and any crunchy mix-ins like water chestnuts or green onions.

4. Chill to develop flavor

Cover the bowl and refrigerate for at least 1–2 hours. If you can, prepare this spinach dip recipe the day before and let it rest overnight. The onion softens, the garlic mellows, and the spinach flavor infuses into the creamy base in a way that simply doesn’t happen if you eat it right away.

Step 4 of classic spinach dip recipe showing a hand pressing plastic wrap over a bowl of creamy spinach dip on a wooden surface before refrigerating.
Step 4 – Chill the dip: cover the bowl and refrigerate, letting the spinach dip rest for 1–2 hours or overnight so the flavors deepen and the texture thickens.

5. Taste and serve

Just before serving, give the dip a stir, then taste it. Adjust the salt and pepper if needed. If it feels a little too thick, you can loosen it with a tablespoon or two of milk, cream, or yogurt.

Step 5 of classic spinach dip recipe showing a hand dipping toasted bread into a bowl of creamy spinach dip, surrounded by carrot sticks, celery sticks, spinach leaves and bread cubes.
Step 5 – Taste and serve: give the spinach dip a final stir, adjust the salt and pepper, then serve it with bread, crackers and fresh veggies for dipping.

Spoon into a serving bowl and surround it with sliced bread, vegetables, or any dippers you like. Later in this post we’ll get into detailed serving ideas; for now, you’ve just made a classic cold spinach dip recipe that can stand on its own at any gathering.

If this made you fall in love with the creamy-spinach combo, you might also enjoy the Indian-inspired spinach raita (palak raita), which takes similar flavors in a lighter, yogurt-based direction.


Ranch spinach dip recipe variation

Once you’ve mastered the base, the next easy twist is a ranch spinach dip recipe. Ranch seasoning brings herbs, garlic, onion, and a slight tang, turning the classic dip into something just a little more familiar and “snacky”.

What you’ll need

  • 1 batch classic cold spinach dip base
  • 1 packet ranch-style seasoning mix (about 1 oz)
    or 3–4 tablespoons thick ranch dressing
  • A splash or two of milk or yogurt if the dip ends up too thick
Top-down view of a bowl of ranch spinach dip with a hand holding a spoon, surrounded by spinach leaves, crackers, and ranch seasoning on a teal background with mini recipe text overlay.
Ranch spinach dip recipe – a herby, tangy twist on classic spinach dip made with sour cream, mayo, ranch seasoning, and plenty of spinach, perfect with crisp crackers or veggies.

How to make ranch spinach dip

To keep things simple, start by mixing the ranch with the creamy ingredients before adding spinach:

  1. In a clean bowl, whisk together the sour cream and mayonnaise from the base recipe with the ranch seasoning mix until it’s completely blended.
  2. Add the squeezed, chopped spinach and fold it through.
  3. Taste before adding extra salt; most ranch mixes bring plenty of salt on their own.
  4. Chill the ranch spinach dip recipe for at least an hour, then adjust the seasoning once more if needed.

This version is excellent with crunchy vegetable sticks, but it really shines next to potatoes. For a full party-snack spread, you can pair it with some of these easy potato appetizers, which range from crispy bites to cheesy loaded options.


Vegetable soup mix spinach dip recipe in a bread bowl

For many people, the most nostalgic spinach dip recipe involves a packet of vegetable soup mix and a big round loaf of bread. It’s the kind of thing that appears on buffet tables surrounded by chunks of bread and vanishes within an hour.

Ingredients

  • 1 batch classic spinach dip recipe base, without onion and garlic added yet
  • 1 packet dry vegetable soup and dip mix
  • ½ cup finely chopped water chestnuts
  • ½ cup chopped green onions or sautéed leeks
  • 1 large round loaf of bread (sourdough, rye, or pumpernickel all work)
Bread bowl filled with creamy spinach dip made with vegetable soup mix, surrounded by carrot and celery sticks and torn bread pieces, with mini recipe text overlay.
Bread bowl spinach dip – a crowd-pleasing veggie soup mix spinach dip recipe served in a hollowed loaf with crunchy vegetables and rustic bread for dipping.

Method

1. Stir the soup mix into the base

Whisk together sour cream and mayonnaise in a large bowl. Sprinkle in the dry vegetable soup mix and stir well. Let this sit for 5–10 minutes so the dehydrated vegetables can soften slightly.

2. Add spinach and mix-ins

Fold in the drained, chopped spinach. Stir through the water chestnuts for crunch and the green onions or leeks for a sweet onion note.

3. Chill thoroughly

Because the soup mix needs a little time to hydrate, this version benefits from at least 2 hours in the fridge, and overnight is even better.

4. Turn it into a bread bowl

While the dip chills, prepare your bread:

  1. Slice off the top of the loaf like a lid.
  2. Hollow out the center with your hands, leaving a good 2–3 cm wall so the dip bowl is sturdy.
  3. Cut the removed bread into rough bite-sized cubes.

Just before serving, spoon the dip into the hollowed loaf and arrange the bread cubes around it on a platter. Add some fresh vegetables for color and extra crunch.

If you’d like an even more indulgent bread pairing another time, consider baking a homemade garlic bread loaf and cutting it into chunks for dipping. On days when you want something heartier but still relatively wholesome, slices of quick and healthy oatmeal bread also make a great base for spinach dip.

To turn the whole setup into a full grazing platter, you can borrow some ideas from the guide on assembling charcuterie boards using the 3-3-3-3 rule, then tuck this bread-bowl dip right into the center.


Spinach artichoke dip recipes: cold and baked

Whenever people talk about restaurant-style spinach dip, they’re usually imagining spinach artichoke dip. The artichokes add a tangy, tender bite that cuts through the richness. It’s worth having both a cold version and a baked one in your personal spinach dip recipe collection.

Cold spinach artichoke dip

This version is brilliant when you need something make-ahead that can sit on a buffet.

Ingredients

  • 1 batch classic cold spinach dip recipe
  • 1 cup chopped marinated artichoke hearts, drained
  • ½ cup shredded mozzarella or mild cheese blend (optional)
  • 2–3 tablespoons lemon juice
Cold spinach artichoke dip in a light ceramic bowl with a hand holding a crostini scoop, surrounded by lemon wedges, spinach leaves, artichoke hearts, and toasted baguette slices on a pale stone surface, with mini recipe text overlay.
Cold spinach artichoke dip – a make-ahead spinach dip recipe with sour cream, mayo, cheese, lemon and plenty of artichoke hearts, perfect for serving with crisp crostini or vegetables.

Directions

  1. Prepare the classic spinach dip base and let it chill for at least an hour.
  2. Stir in the chopped artichoke hearts and shredded cheese, if using.
  3. Add lemon juice a tablespoon at a time, tasting as you go, until it feels bright but not sour.
  4. Chill for another hour so the flavors mingle.

Serve with crackers, toasted bread slices, or vegetable sticks. The artichokes make this spinach dip recipe feel more complex, even though the method stays very simple.

Baked spinach artichoke dip (hot and bubbly)

For a cozier option, especially in cooler months, a baked spinach artichoke dip recipe gives you that golden top and stretchy cheese pull.

Ingredients

  • 1 block (8 oz / 225 g) cream cheese, softened
  • ½ cup sour cream
  • ½ cup mayonnaise
  • 1 cup shredded mozzarella
  • ½ cup grated parmesan or similar hard cheese
  • 1½ cups cooked, chopped spinach (frozen and thawed, or sautéed fresh)
  • 1 cup chopped artichoke hearts
  • 2 cloves garlic, minced
  • Salt and pepper, to taste
Baked spinach artichoke dip in a cast-iron skillet with a hand lifting a cheesy scoop on toasted bread, the golden bubbling top surrounded by extra crostini, with mini recipe text overlay.
Baked spinach artichoke dip – a hot, cheesy spinach dip recipe made with cream cheese, sour cream, spinach and artichokes, baked until golden and bubbling and served straight from the skillet with crisp toasted bread.

Instructions

  1. Preheat your oven to 180°C / 350°F. Lightly grease a small baking dish.
  2. Beat the cream cheese in a mixing bowl until smooth. Add the sour cream and mayonnaise and blend again.
  3. Stir in mozzarella, parmesan, garlic, spinach, and artichokes. Season with a small pinch of salt and pepper; the cheeses are salty, so it’s easy to overdo it.
  4. Spread the mixture into the baking dish in an even layer.
  5. Bake for 20–25 minutes, until hot and bubbling at the edges.
  6. For a browned top, switch to the broiler for 2–3 minutes at the end, watching carefully to avoid burning.

Place the hot dish on a board surrounded by baguette slices, breadsticks, and roasted vegetables. If you’re planning a fuller meal, this cheesy, comforting bowl sits nicely beside cozier dishes like cottage cheese lasagna with spinach or green bean casserole recipe ideas for holiday or Sunday dinners.


Lighter spinach and yogurt spinach dip recipe

Sometimes you want the flavor of a spinach dip recipe without quite so much heaviness. A yogurt-forward version keeps everything creamy but brings in more protein and a pleasant tang.

Ingredients

  • 1 cup thick Greek yogurt or hung curd
  • ½ cup light mayonnaise or additional yogurt
  • 1 packet (10 oz) frozen chopped spinach, thawed and squeezed dry
  • 2 cloves garlic, minced
  • 2–3 tablespoons lemon juice
  • 2–3 tablespoons chopped fresh herbs (dill, parsley, coriander – choose your favorite)
  • Salt and pepper, to taste
Spinach and yogurt dip in a white bowl with a hand dipping a carrot stick, surrounded by fresh veggie sticks, lemon wedges, herbs and small bowls of Greek yogurt, with mini recipe text overlay.
Spinach & yogurt dip – a lighter, protein-rich spinach dip recipe made with Greek yogurt, spinach, garlic, lemon and fresh herbs, served with crunchy vegetable sticks.

Directions

  1. In a bowl, whisk together the yogurt and mayonnaise until smooth.
  2. Add garlic, lemon juice, salt, and pepper, and whisk again.
  3. Fold in the spinach and chopped herbs.
  4. Chill for at least 1 hour so the garlic and herbs soften and flavor the yogurt.
  5. Taste, then adjust salt, pepper, and lemon juice.

This lighter spinach dip recipe pairs wonderfully with fresh vegetables and seeded crackers. Because yogurt plays the starring role, it feels especially at home next to Indian-leaning dishes. If you enjoy this style, you might also like the creamy spinach raita mentioned earlier or the hung curd spinach cheese sandwich, which uses strained yogurt in a protein-rich filling.

For a completely different spin, check out the idea of lentil-and-green dips like the lentil and spinach hummus. It’s another clever way to bring spinach into snack time, this time with extra fiber and plant protein from pulses.


Simple 3-ingredient and 5-ingredient spinach dip recipes

On some days, there’s time to shop and prep; on others, you want a spinach dip recipe that works almost like a magic trick. That’s where minimalist versions come in handy.

3-ingredient spinach dip

For a basic three-ingredient bowl:

  • 1 cup sour cream or thick Greek yogurt
  • 1 cup mayonnaise or softened cream cheese
  • 1 packet (10 oz) frozen chopped spinach, thawed and squeezed dry
Top-down view of a 3-ingredient spinach dip in a bowl surrounded by small bowls of sour cream, mayonnaise or cream cheese, and spinach on a light surface, with mini recipe text overlay.
3-ingredient spinach dip – a fast and simple spinach dip recipe made with sour cream, mayo or cream cheese, and spinach, just mix until creamy and chill before serving.

Stir everything together, season lightly with salt and pepper, and chill. If you’d like more flavor without technically adding a “fourth ingredient”, you can use a seasoned cream cheese or a flavored mayonnaise to sneak in herbs and spices.

5-ingredient baked spinach artichoke dip

Another shortcut version keeps the ingredient list short but still gives you an impressive baked dish:

  • 1 block (8 oz) cream cheese
  • 1 cup shredded cheese (mozzarella or a blend)
  • ½ cup sour cream or yogurt
  • 1 cup chopped spinach
  • 1 cup chopped artichoke hearts
5-ingredient spinach artichoke dip baked in a white dish with a spoon, surrounded by small bowls of cream cheese, shredded cheese, sour cream, spinach and artichokes, with mini recipe text overlay.
5-ingredient spinach artichoke dip – a quick baked spinach dip recipe using just cream cheese, shredded cheese, sour cream, spinach and artichokes, baked at 180°C / 350°F until hot and melty.

Beat the cream cheese until smooth, then stir in sour cream, cheese, spinach, and artichokes. Spread into a small baking dish and bake at 180°C / 350°F for 20 minutes or so, until everything is hot and melty.

These versions are especially useful when you already have something like baked jalapeño poppers or cheese balls with Indian-inspired flavors in the oven and just want one more dish without adding much work.


Warm cheesy spinach queso dip

If you’re hosting game night or movie night, a spinach dip recipe with a queso twist always gets attention. It’s stretchy, melty, and perfect with crunchy sides.

Ingredients

  • 250 g processed melting cheese or cheese loaf, cubed
  • ½ cup milk or cream
  • 1 cup cooked, chopped spinach
  • Optional:
    • ½ cup diced tomatoes with green chilies, drained
    • 1 jalapeño, finely chopped
    • ½ teaspoon onion powder or garlic powder
Spinach queso dip in a cast-iron skillet with a tortilla chip lifting a stretchy cheesy scoop, surrounded by tortilla chips, salsa, jalapeños and shredded cheese, with mini recipe text overlay.
Spinach queso dip – a warm, cheesy spinach dip recipe made by melting cheese with milk, stirring in spinach and chilies, and serving hot with crunchy tortilla chips and hearty dippers.

Method

  1. Add the cheese cubes and milk to a small saucepan or deep skillet.
  2. Warm over low heat, stirring often, until the cheese melts into a smooth sauce.
  3. Stir in spinach and any optional add-ins.
  4. Keep over very low heat, just enough to keep the queso fluid, not boiling.

Serve this warm spinach dip recipe in a heat-safe bowl. Although tortilla chips are a classic pairing, it’s also fun with toasted bread fingers, roasted potato wedges, and even vegetable sticks for contrast.

Also Read: Air Fryer Chicken Wings (Super Crispy, No Baking Powder)


What to serve with your favorite spinach dip recipe

Once you’ve chosen which spinach dip recipe to make, the next question is what to put around the bowl. The possibilities are genuinely endless, but a few categories cover most occasions.

Breads and crackers

Bread and spinach dip are such a natural pairing that it’s easy to build a whole platter around them.

  • Cubes of crusty bread or baguette
  • Slices of homemade garlic bread loaf for extra flavor
  • Toasted slices of oatmeal bread when you want something a little heartier
  • Pita chips, breadsticks, or crispbread
  • Seeded crackers for crunch

If you enjoy assembling boards, you can place the dip as the centerpiece of a small grazing board. Surround it with breads, crackers, nuts, and fruit, taking cues from the charcuterie tips in the 3-3-3-3 rule guide.

Vegetables

Creamy dips always benefit from fresh, crisp vegetables as dippers. They add color, crunch, and a lighter option for guests who don’t want too much bread.

Try:

  • Carrot and cucumber sticks
  • Bell pepper strips
  • Cherry tomatoes
  • Blanched broccoli or cauliflower florets
  • Snap peas or green beans

Spinach is already part of the leafy-greens family that many nutrition experts say we should eat more of; adding assorted vegetables around the bowl brings you even closer to that goal. If you ever want to zoom out and read more about the role of vegetables and fruits in healthy eating patterns, Harvard’s Nutrition Source has an accessible overview.

Other appetizers for a full spread

For a larger gathering, it’s nice to add a few more bite-sized dishes so your spinach dip recipe shares the table with other flavors and textures.

Some options that work beautifully alongside dip include:

Together with one or two spinach dips, these give you an appetizer table that feels far more elaborate than the actual work involved.


Drinks that pair well with spinach dips

Because most spinach dip recipes are rich and creamy, they pair best with drinks that either cut through that richness or wrap around it in a cozy way.

For a sparkling, citrusy option, a French 75 cocktail is a classic choice. The combination of gin, lemon, a touch of sugar, and sparkling wine feels bright and celebratory, and the bubbles help refresh the palate between bites of dip.

If you prefer something on the slightly bitter side, you might like the balance of a Negroni with variations, while fans of shaken sour cocktails can explore the classic whiskey sour recipe with its sharp lemon edge. On evenings when you’d rather keep things non-alcoholic or cozy, mugs of homemade hot chocolate with cocoa powder feel surprisingly right next to hot spinach artichoke dip and roasted potatoes.

If you’re in the mood to experiment further, a roundup of creative gin cocktail recipes or playful ideas like the green tea shot with Jameson can help you match your drinks to the energy of the evening.


Storing spinach dips safely

Finally, because most versions of a spinach dip recipe are built on sour cream, yogurt, mayonnaise, and cheese, it’s worth paying attention to storage.

A few simple guidelines go a long way:

  • Keep spinach dips refrigerated in a covered container.
  • Try to eat them within 3–4 days for the best quality and safety.
  • During gatherings, avoid letting the dip sit out at room temperature for more than 2 hours. If the weather is very hot, aim for 1 hour. After that point, it’s safer to discard leftovers that have been sitting out.

If you’d like specific, broader advice beyond dips, the general recommendations on FoodSafety.gov are a useful reference for how long different chilled foods can safely stay out and how long they should be stored in the fridge.

For long parties, a good strategy is to serve half the dip at a time and keep the rest chilled. When the bowl runs low, swap in fresh, cold dip rather than topping up what’s been sitting out for hours.

Also Read: 6 Wellness Shot Recipes to Boost Your Immune System

Overhead view of four leftover spinach dip ideas including creamy spinach pasta, a skillet of baked dip, stuffed mushrooms and a stuffed baked potato, with text suggesting ways to use leftover spinach dip.
Leftover spinach dip ideas – turn extra dip into creamy pasta sauce, a cheesy pizza or toast topping, or use it to stuff mushrooms, baked potatoes and sandwiches so every last spoonful gets enjoyed.

Bringing it all together

By now, you’ve walked through a whole mini-universe of spinach dip recipes: the classic cold party version, ranch and vegetable soup mix twists, spinach artichoke variations (both cold and baked), lighter yogurt-based dips, shortcut three- and five-ingredient bowls, and a cheesy queso option for game day. You’ve also seen how to adapt fresh, frozen, or canned spinach, how to build a simple but impressive appetizer table around your dip, and how to think about drinks and storage.

You don’t have to make all of them at once. Instead, treat this as your personal spinach dip recipe toolbox. Pick one for a quiet evening with toasted bread and a movie, another for a big holiday meal with green bean casserole and lasagna, and keep the quickest versions in mind for those nights when someone messages, “We’re stopping by in 20 minutes,” and you still want to put something homemade on the table.

Also Read: What to Eat with Hummus for Weight Loss 🏋️‍♀️

FAQs

1. Can I make a spinach dip recipe ahead of time?

Yes, a spinach dip recipe actually tastes better when made ahead. Firstly, mixing everything together and letting it sit in the fridge for a few hours allows the onion, garlic, herbs, and spinach to fully flavor the creamy base. Secondly, the texture improves as the dip thickens slightly while it chills. Ideally, make your spinach dip 8–24 hours in advance, then give it a good stir and a quick taste before serving. If it feels too thick after chilling, you can gently loosen it with a tablespoon or two of milk, cream, or yogurt. In short, “make ahead” is not just okay; it is one of the secrets to a truly delicious spinach dip recipe.


2. Should I use fresh, frozen, or canned spinach for spinach dip?

All three can work in a spinach dip recipe; they simply need slightly different handling. Frozen chopped spinach is the most convenient option because it is already blanched and finely cut. After thawing, you only have to squeeze out as much water as possible. Fresh spinach is lovely when you already have it at home; just wilt it in a pan, cool it down, squeeze well, and chop. Canned spinach is the least common, yet it is still usable if you drain it thoroughly and press out the extra liquid. Overall, the most important step—no matter which kind you choose—is removing excess moisture, so the spinach dip stays thick and creamy instead of watery.


3. How do I stop my spinach dip recipe from being watery?

Excess water in the spinach is almost always the culprit. Therefore, the first step is to squeeze the spinach very well, whether it is frozen, fresh, or canned. Additionally, avoid adding watery ingredients like tomatoes or cucumbers directly into the dip; serve them on the side as dippers instead. If you accidentally end up with a loose spinach dip, you can stir in a bit of extra cream cheese, sour cream, or grated hard cheese to help thicken it. Another simple trick is to chill the dip for a longer time, since it tends to firm up as it rests in the refrigerator. Ultimately, good draining plus proper chilling are the best defenses against a runny spinach dip recipe.


4. What is the best base for a cold spinach dip recipe—sour cream, mayo, or cream cheese?

Each base creates a slightly different personality for your spinach dip recipe. Sour cream gives a tangy, smooth texture and classic “party dip” flavor. Mayonnaise adds richness and a glossy mouthfeel, making the dip feel more luxurious. Cream cheese, on the other hand, produces a thicker, spreadable consistency that is excellent for bread and crackers. Very often, the tastiest dips use a combination of these: for example, half sour cream and half mayonnaise, or sour cream with a portion of cream cheese for extra body. As a general guideline, use more sour cream and yogurt if you want a lighter dip, and more mayonnaise or cream cheese if you prefer something richer and denser.


5. Can I make a healthier spinach dip recipe with yogurt?

Absolutely, you can create a lighter spinach dip recipe by replacing part or even all of the sour cream and mayonnaise with thick yogurt or hung curd. To begin, choose a full-bodied yogurt like Greek yogurt so the dip does not become too runny. Then mix it with a smaller amount of mayonnaise or olive oil for smoothness and flavor. Moreover, you can lean on garlic, lemon juice, herbs, and black pepper to make the dip exciting without needing loads of fat. Over time, you can adjust the ratio in favor of yogurt as your taste buds get used to a tangier, fresher flavor. This kind of spinach and yogurt dip works wonderfully with raw vegetables and whole-grain crackers, and it still feels indulgent even though it is a bit kinder to your daily calories.


6. How can I turn a basic spinach dip recipe into a spinach artichoke dip?

Transforming a classic spinach dip recipe into a spinach artichoke dip is surprisingly straightforward. Simply fold in chopped artichoke hearts—marinated or canned both work—after you have mixed the base. As a starting point, add about one cup of chopped artichokes to a standard batch of dip. Additionally, consider including shredded mozzarella and a little extra parmesan if you are aiming for that familiar restaurant-style flavor. If you want a cold dip, you can serve it immediately after chilling. Conversely, for a baked spin on the same idea, spread the mixture into an oven-safe dish, sprinkle more cheese on top, and bake until it is hot and bubbling. In either case, the artichokes add a lovely tang and texture that makes the spinach dip feel even more special.


7. What is the difference between a cold spinach dip recipe and a baked one?

A cold spinach dip recipe is usually based on sour cream, mayonnaise, and sometimes yogurt, and it relies on chilling time to thicken and develop flavor. It stays soft and scoopable straight from the refrigerator and is perfect for bread, chips, and raw vegetables. A baked spinach dip, in contrast, features more cheese—especially mozzarella, parmesan, and cream cheese—and is heated in the oven until hot and gooey. As a result, it has a stretchy, melty texture and a lightly browned top. Because of that, baked versions feel cozier and more suited to winter dinners, holiday parties, and game nights. Cold dips, meanwhile, are especially refreshing for warm-weather gatherings but also hold their own at any buffet table.


8. Can I make a spinach dip recipe without mayonnaise?

Yes, you can absolutely create a spinach dip recipe without mayonnaise. One straightforward option is to replace mayonnaise entirely with sour cream, Greek yogurt, or a blend of both. Cream cheese also works well as a base; it produces a thick, spreadable dip when combined with sour cream or yogurt. Furthermore, seasonings like garlic, onion, lemon juice, pepper, and herbs will provide plenty of flavor so you do not miss the mayonnaise at all. If you want even more richness without mayo, you can add a small splash of olive oil or a bit of grated cheese to round out the taste. In the end, the structure of the dip comes from something creamy plus the spinach, while the flavor comes mainly from aromatics and spices, so you have lots of freedom.


9. How can I make a gluten-free spinach dip recipe?

A spinach dip recipe is often naturally close to gluten-free, but there are a few details to check. Firstly, the core ingredients—spinach, sour cream, yogurt, mayonnaise, cream cheese, and most cheeses—do not contain gluten. The potential issues usually come from packets of soup mix, seasoning blends, and certain processed cheeses. Therefore, you need to read the labels on any mixes or flavored ingredients to ensure they are certified gluten-free. Instead of using packaged vegetable or onion soup mix, you can season your dip with plain dried herbs, garlic powder, onion powder, smoked paprika, and salt. As for serving, choose gluten-free dippers such as rice crackers, corn chips labeled gluten-free, sliced vegetables, or gluten-free bread. Once you take these simple steps, your spinach dip recipe can be enjoyed safely by guests who avoid gluten.


10. Can a spinach dip recipe be made vegan or dairy-free?

Yes, with a few strategic swaps you can create a dairy-free or even fully vegan spinach dip recipe. To begin, replace sour cream and yogurt with plant-based alternatives made from coconut, soy, or almonds. Next, swap out cream cheese and other cheeses for vegan cream cheese or shredded plant-based cheese. In addition, use a vegan mayonnaise made from vegetable oils instead of eggs. As you adjust these ingredients, you might need to rely more heavily on garlic, lemon juice, nutritional yeast, and herbs to build up a satisfying savory flavor. For a thicker texture, you can blend in a small amount of soaked cashews or silken tofu. When everything is combined and chilled, you will have a creamy, scoopable spinach dip that fits into a dairy-free or vegan lifestyle while still feeling indulgent.


11. How long does a homemade spinach dip recipe last in the fridge?

As a general guideline, a homemade spinach dip recipe keeps well in the refrigerator for about three to four days. The ingredients—especially sour cream, yogurt, mayonnaise, and cheeses—are all perishable, so they need to be stored in a covered container at a consistently cold temperature. Try not to leave the dip out at room temperature for more than two hours during parties; if it has been sitting out for longer than that, it is safer to discard the remainder. One practical approach is to serve part of the dip in a bowl and keep the rest chilled, refilling as needed. In this way, the majority of your spinach dip remains at a safe temperature while guests are enjoying the portion on the table.


12. Can I freeze leftover spinach dip?

Freezing a spinach dip recipe is possible, although the results depend on the ingredients. Dips that are mostly cream cheese and shredded cheese tend to freeze and thaw better, because they have less water. On the other hand, dips with a high proportion of sour cream or yogurt can sometimes become grainy or separated after freezing. If you choose to freeze spinach dip, place it in an airtight container, leaving a little room for expansion. When you want to use it again, thaw it slowly in the refrigerator, then stir it thoroughly. If the texture feels slightly broken, you can try whisking in a spoonful of fresh cream cheese or yogurt to smooth it out. Even so, for the very best texture and flavor, it is usually preferable to enjoy a spinach dip recipe freshly made or only chilled in the fridge.


13. What can I do with leftover spinach dip besides serving it with bread or crackers?

Leftover spinach dip is surprisingly versatile, so you do not have to keep eating it in exactly the same way. Firstly, you can transform it into a pasta sauce by thinning it with a little milk or pasta cooking water, then tossing it with hot pasta and extra parmesan. Secondly, you can spread it over pizza dough as a “white” sauce base for a spinach dip pizza topped with mozzarella and vegetables. Additionally, it works well as a filling in stuffed mushrooms or as a layer inside baked sandwiches and wraps. You can even spoon a thicker spinach dip recipe into baked potatoes or use it as a topping for grilled chicken or fish. With just a bit of imagination, the leftovers become an ingredient rather than a problem.


14. How can I add more flavor to a basic spinach dip recipe?

If your basic spinach dip recipe tastes a little flat, you have lots of options for boosting flavor. Garlic and onion are the first and most obvious helpers; you can use them fresh, sautéed, or in powdered form. Beyond that, herbs like dill, parsley, coriander, basil, and chives add freshness. Spices such as smoked paprika, cayenne, black pepper, and mustard powder introduce warmth and complexity. A squeeze of lemon juice or a splash of vinegar brightens everything, especially in richer dips. Grated parmesan or another sharp cheese can also deepen the savory notes. Finally, a pinch of salt added after chilling can tighten the flavors, since cold food often needs slightly more seasoning than warm dishes. Bit by bit, these small additions turn a simple spinach dip recipe into something truly memorable.